# Squared Ai
> ## Documentation Index
---
# Source: https://docs.squared.ai/release-notes/2024.md
> ## Documentation Index
> Fetch the complete documentation index at: https://docs.squared.ai/llms.txt
> Use this file to discover all available pages before exploring further.
# 2024 releases
Version: v0.5.0 to v0.8.0
Version: v0.12.0 to v0.13.0
Version: v0.14.0 to v0.19.0
Version: v0.20.0 to v0.22.0
Version: v0.23.0 to v0.24.0
Version: v0.25.0 to v0.30.0
Version: v0.31.0 to v0.35.0
Version: v0.36.0 to v0.38.0
---
# Source: https://docs.squared.ai/release-notes/2025.md
> ## Documentation Index
> Fetch the complete documentation index at: https://docs.squared.ai/llms.txt
> Use this file to discover all available pages before exploring further.
# 2025 Releases
> Release updates for the year 2025
Version: v0.39.0 to v0.41.0
Version: v0.41.0 to v0.41.0
Version: v0.42.0 to v0.46.0
Version: v0.47.0 to v0.50.0
Version: v0.51.0 to v0.54.0
Version: v0.55.0 to v0.59.0
Version: v0.60.0 to v0.63.0
Version: v0.64.0 to v0.67.0
Version: v0.68.0 to v0.72.0
Version: v0.73.0 to v0.77.0
Version: v0.78.0 to v0.81.0
Version: v0.82.0 to v0.85.0
---
# Source: https://docs.squared.ai/release-notes/2026.md
> ## Documentation Index
> Fetch the complete documentation index at: https://docs.squared.ai/llms.txt
> Use this file to discover all available pages before exploring further.
# 2026 Releases
> Release updates for the year 2026
Version: v0.86.0 to v0.90.0
---
# Source: https://docs.squared.ai/release-notes/2025/April-2025.md
> ## Documentation Index
> Fetch the complete documentation index at: https://docs.squared.ai/llms.txt
> Use this file to discover all available pages before exploring further.
# April 2025 Releases
> Release updates for the month of April
## 🚀 Features
* **Assistant UI**\
Introduced a new Assistant interface with UI improvements for enhanced user interaction and workflow automation.
* **EULA Management**\
Added End User License Agreement (EULA) controller and management capabilities, including database storage, permissions, and acceptance tracking.
* **WatsonX.Data Source Connector**\
Added IBM WatsonX.Data as a new source connector for data integration workflows.
* **Generic Connector Edit Component**\
Introduced a reusable generic connector edit component for improved maintainability and consistent editing experience.
* **Unstructured File Support in S3 Connector**\
Added support for unstructured files in the S3 connector, expanding data ingestion capabilities.
* **Chatbot Data App Reports Enhancements**\
Improved reporting capabilities for chatbot data applications with new overview pages and dedicated routes.
* **Databricks Timeout Configuration**\
Added timeout configuration options for the Databricks source connector to handle long-running queries.
* **QA Verification Workflow**\
Enforced qa-verified label requirement for PRs with needs-qa label, improving quality assurance processes.
* **CI/CD Improvements**\
Updated workflows with GHA Docker cache, latest versions, and improved trigger event types for faster builds.
* **Snyk Security Scanning**\
Enhanced Snyk scanning to focus on manifests and lockfiles for more efficient vulnerability detection.
## 🐛 Bug Fixes
* **Top Bar Name Rendering**\
Fixed proper rendering of names in the top bar and added truncation for long names with tooltips.
* **Confirm Email Template**\
Corrected issues with the email confirmation template.
* **Test Connection Flow**\
Removed separate test connection step and combined it with the save changes button for streamlined UX.
* **Connector Deletion**\
Fixed connector deletion to use connectorID as the parameter.
* **Query Handling with Multiple FROMs**\
Applied different gsub handling when queries contain multiple FROM clauses.
* **Catalog Refresh Indicator**\
Added visual indicator for catalog refresh and fixed duplicate API calls.
* **EULA Enable Fix**\
Resolved issues with EULA enable functionality and added skip option for invite sign-up flow.
* **Add Models Button**\
Fixed redirect issues with the Add Models button from the syncs page.
* **SSO Documentation**\
Updated notes to clarify support for Okta and Azure in SSO configuration.
* **Assistant UI Bugs**\
Fixed various bugs in the Assistant UI including duplicate field entity components.
* **SFTP Connection Query**\
Fixed inner query replacement for SFTP connections.
* **Data App Message Feedbacks**\
Ensured selected data apps only display their own message feedbacks.
* **Breadcrumb Navigation**\
Fixed navigation issues in breadcrumb components.
* **Chatbot Keys**\
Corrected key usage for chatbot components.
* **AI/ML Source State Persistence**\
Fixed state persistence when creating AI/ML sources and prevented resubmission when navigating back.
* **Company Name Display**\
Fixed display to show company name instead of workspace name in invitations and org settings.
* **EULA Popup Flash**\
Fixed EULA popup briefly appearing when updating documents.
## 🚜 Refactor
* **Destination Name in Syncs**\
Changed destination name display in Syncs from Connector Name to Name for clarity.
* **Image to SVG Conversion**\
Converted images to SVGs for better scalability and performance.
* **Custom Select Widget for RJSF**\
Added custom widget for select components in React JSON Schema Forms.
* **Reports UI/UX Audit**\
Completed Reports UI/UX audit fixes for improved user experience.
* **Data Apps Audit**\
Addressed medium priority items from the Data Apps audit.
* **Error Logs Modal**\
Refactored error logs modal for better usability.
* **Catalog Fetching Hook**\
Created dedicated hook for fetching catalog data.
* **Reports Overview Page**\
Added new Overview page with RBAC for Reports route and dedicated data apps reports route.
* **User Invite Company Name**\
Updated user invites to send company name instead of workspace name.
* **Data App Reports Tags**\
Changed tag and empty copy for data app reports.
* **Feature Flag Arrays**\
Changed feature flags to use arrays for enabling across multiple workspaces.
## ⚙️ Miscellaneous Tasks
* **EULA Database Setup**\
Added EULA to database, factory, and model with proper permissions and role groups.
* **Okta SSO Support**\
Added Okta support to Single Sign-On configuration.
* **Assistant Resources**\
Added assistant rendering type, resource permissions, and role group configuration.
* **Server Gem Updates**\
Updated server gem through versions 0.22.0, 0.22.1, 0.22.3, 0.22.5, and integrations gem to 0.22.6.
* **Visual Component Model Update**\
Updated the Visual Component model with improvements.
* **Chat Report Implementation**\
Added Chat Report implementation to Data App functionality.
* **Template Mapping Tests**\
Added comprehensive tests for template mapping options and static template options.
* **EULA Application Check**\
Added EULA check to Application controller for compliance enforcement.
* **Dependency Updates**\
Bumped dependency versions for security and compatibility improvements.
* **Legacy File Cleanup**\
Removed old and unused files from the codebase.
---
# Source: https://docs.squared.ai/release-notes/2024/August-2024.md
> ## Documentation Index
> Fetch the complete documentation index at: https://docs.squared.ai/llms.txt
> Use this file to discover all available pages before exploring further.
# August 2024 releases
> Release updates for the month of August
## 🚀 **New Features**
### 🔄 **Enable/Disable Sync**
We’ve introduced the ability to enable or disable a sync. When a sync is disabled, it won’t execute according to its schedule, allowing you to effectively pause it without the need to delete it. This feature provides greater control and flexibility in managing your sync operations.
### 🧠 **Source: Databricks AI Model Connector**
Multiwoven now integrates seamlessly with [Databricks AI models](https://docs.squared.ai/guides/data-integration/sources/databricks-model) in the source connectors. This connection allows users to activate AI models directly through Multiwoven, enhancing your data processing and analytical capabilities with cutting-edge AI tools.
### 📊 **Destination: Microsoft Excel**
You can now use [Microsoft Excel](https://docs.squared.ai/guides/data-integration/destinations/productivity-tools/microsoft-excel) as a destination connector. Deliver your modeled data directly to Excel sheets for in-depth analysis or reporting. This addition simplifies workflows for those who rely on Excel for their data presentation and analysis needs.
### ✅ **Triggering Test Sync**
Before running a full sync, users can now initiate a test sync to verify that everything is functioning as expected. This feature ensures that potential issues are caught early, saving time and resources.
### 🏷️ **Sync Run Type**
Sync types are now clearly labeled as either "General" or "Test" in the Syncs Tab. This enhancement provides clearer context for each sync operation, making it easier to distinguish between different sync runs.
### 🛢️ **Oracle DB as a Destination Connector**
[Oracle DB](https://docs.squared.ai/guides/data-integration/destinations/database/oracle) is now available as a destination connector. Users can navigate to **Add Destination**, select **Oracle**, and input the necessary database details to route data directly to Oracle databases.
### 🗄️ **Oracle DB as a Source Connector**
[Oracle DB](https://docs.squared.ai/guides/data-integration/sources/oracle) has also been added as a source connector. Users can pull data from Oracle databases by navigating to **Add Source**, selecting **Oracle**, and entering the database details.
***
## 🔧 **Improvements**
### **Memory Bloat Issue in Sync**
Resolved an issue where memory bloat was affecting sync performance over time, ensuring more stable and efficient sync operations.
### **Discover and Table URL Fix**
Fixed issues with discovering and accessing table URLs, enhancing the reliability and accuracy of data retrieval processes.
### **Disable to Fields**
Added the option to disable fields where necessary, giving users more customization options to fit their specific needs.
### **Query Source Response Update**
Updated the query source response mechanism, improving data handling and accuracy in data query operations.
### **OCI8 Version Fix**
Resolved issues related to the OCI8 version, ensuring better compatibility and smoother database interactions.
### **User Read Permission Update**
Updated user read permissions to enhance security and provide more granular control over data access.
### **Connector Name Update**
Updated connector names across the platform to ensure better clarity and consistency, making it easier to manage and understand your integrations.
### **Account Verification Route Removal**
Streamlined the user signup process by removing the account verification route, reducing friction for new users.
### **Connector Creation Process**
Refined the connector creation process, making it more intuitive and user-friendly, thus reducing the learning curve for new users.
### **README Update**
The README file has been updated to reflect the latest changes and enhancements, providing more accurate and helpful guidance.
### **Request/Response Logs Added**
We’ve added request/response logs for multiple connectors, including Klaviyo, HTTP, Airtable, Slack, MariaDB, Google Sheets, Iterable, Zendesk, HubSpot, Stripe, and Salesforce CRM, improving debugging and traceability.
### **Logger Issue in Sync**
Addressed a logging issue within sync operations, ensuring that logs are accurate and provide valuable insights.
### **Main Layout Protected**
Wrapped the main layout with a protector, enhancing security and stability across the platform.
### **User Email Verification**
Implemented email verification during signup using Devise, increasing account security and ensuring that only verified users have access.
### **Databricks Datawarehouse Connector Name Update**
Renamed the Databricks connection to "Databricks Datawarehouse" for improved clarity and better alignment with user expectations.
### **Version Upgrade to 0.9.1**
The platform has been upgraded to version `0.9.1`, incorporating all the above features and improvements, ensuring a more robust and feature-rich experience.
### **Error Message Refactoring**
Refactored error messages to align with agreed-upon standards, resulting in clearer and more consistent communication across the platform.
---
# Source: https://docs.squared.ai/release-notes/2025/August-2025.md
> ## Documentation Index
> Fetch the complete documentation index at: https://docs.squared.ai/llms.txt
> Use this file to discover all available pages before exploring further.
# August 2025 Releases
> Release updates for the month of August
## 🚀 Features
* **Google Drive Source Connector**\
Added Google Drive as a new source connector for integrating cloud storage documents and files.
* **Headless Extension Support**\
Introduced headless browser extension support for enhanced automation capabilities.
* **Agent Templates**\
Added agent template modal and functionality for creating workflows from pre-built templates.
* **Assistant PDF Export**\
Added ability to export assistant messages as PDF documents.
* **Chat History Persistence**\
Implemented persistent chat history storage for maintaining conversation context across sessions.
* **Bar Chart Enhancements**\
Added color coding and X/Y axes labels to bar charts for improved data visualization.
* **Data App Workflow Integration**\
Integrated workflows with data apps, enabling workflow execution through chatbot and assistant interfaces.
* **Lead Capture for HubSpot and Slack**\
Added lead capture functionality for HubSpot and Slack integrations.
* **Chatbot Expand Toggle**\
Added toggle functionality to expand and collapse the chatbot interface.
* **Assistant List View**\
Added list view for displaying available assistants with breadcrumb navigation.
* **GitHub Bot Release Workflows**\
Updated release workflows with GitHub bot integration for automated releases.
## 🐛 Bug Fixes
* **Overview Card Heights**\
Fixed inconsistent height rendering for overview cards.
* **Connection Edges**\
Resolved issues with connection edges in workflow canvas.
* **File Name Assignment**\
Fixed file name incorrectly being assigned file ID in Google Drive connector.
* **Workflow Name Assignment**\
Corrected workflow name assignment during updates.
* **Chatbot Error Responses**\
Fixed error response handling in chatbot interactions.
* **LLM Field Label**\
Corrected label for LLM configuration field.
* **Google Drive Vendor Name**\
Fixed missing vendor name in field list for Google Drive connector.
* **Exception Data Handling**\
Fixed missing exception from returned data.
* **Workflow Failure**\
Resolved workflow execution failure issues.
* **One2Many Type Parsing**\
Fixed parsing of one2many type as JSON array.
* **Signup Form Copy**\
Updated copy changes for signup form.
* **Assistant Component Properties**\
Fixed component properties rendering in assistant.
* **Base URL Configuration**\
Corrected base URL for published links and API calls.
* **Chatbot Dimensions**\
Fixed chatbot dimensions when in expanded state.
* **Model Configuration Key**\
Changed model to configurable key for flexibility.
* **Data Apps Pagination**\
Fixed pagination for data apps and assistants lists.
* **Chatbot Cross Icon**\
Fixed chatbot cross icon visibility in expanded state.
* **No Access Rendering**\
Fixed rendering of No Access state on page reload.
## 🚜 Refactor
* **Feedback Metric Calculation**\
Updated and reverted feedback metric calculation changes.
* **Workflow Create & Update Logic**\
Changed logic for workflow creation and update operations.
* **Table Styling**\
Updated styling and copy in table components.
* **Node Selection**\
Prevented multiple node selection in workflow builder.
* **Attribution Removal**\
Removed attribution from components.
* **JSON Form Font Size**\
Changed font size in JSON Form for better readability.
* **Data App Deletion**\
Added automatic data app deletion during workflow deletion.
* **Configurable Type Default**\
Added configurable\_type as model as default value.
* **Filter Updates**\
Changed filters for improved data filtering.
## ⚙️ Miscellaneous Tasks
* **Server Gem Updates**\
Updated server gem through versions 0.32.3 and 0.33.0.
* **Integrations Gem Updates**\
Upgraded integrations gem through versions 0.33.3 and 0.33.4.
* **Error Message Handling**\
Updated error message handling in detail field for APIs.
* **AI Workflow Description**\
Updated AI Workflow description text.
* **Workflow Log Database**\
Added Workflow Log storage in database.
* **Direct Database Template**\
Changed the Direct Database Template configuration.
* **Embedding Provider Service**\
Added support for embedding provider service.
* **Chat Messages Title**\
Added Title field to Chat Messages database table.
* **Sync Run Logger**\
Added logger for sync run status updates.
* **Data App Session Title**\
Moved title field to Data App Session database.
* **Workflow Logger**\
Added workflow execution logger for debugging.
* **Data App Session API**\
Added destroy API endpoint to data app session controller.
* **Template Null Fix**\
Added template fix for handling null values.
* **Data App Token**\
Send data app token on workflow run request.
* **Chat History Search**\
Added search bar for chat history.
---
# Source: https://docs.squared.ai/release-notes/August_2024.md
# August 2024 releases
> Release updates for the month of August
## 🚀 **New Features**
### 🔄 **Enable/Disable Sync**
We’ve introduced the ability to enable or disable a sync. When a sync is disabled, it won’t execute according to its schedule, allowing you to effectively pause it without the need to delete it. This feature provides greater control and flexibility in managing your sync operations.
### 🧠 **Source: Databricks AI Model Connector**
Multiwoven now integrates seamlessly with [Databricks AI models](https://docs.squared.ai/guides/data-integration/sources/databricks-model) in the source connectors. This connection allows users to activate AI models directly through Multiwoven, enhancing your data processing and analytical capabilities with cutting-edge AI tools.
### 📊 **Destination: Microsoft Excel**
You can now use [Microsoft Excel](https://docs.squared.ai/guides/data-integration/destinations/productivity-tools/microsoft-excel) as a destination connector. Deliver your modeled data directly to Excel sheets for in-depth analysis or reporting. This addition simplifies workflows for those who rely on Excel for their data presentation and analysis needs.
### ✅ **Triggering Test Sync**
Before running a full sync, users can now initiate a test sync to verify that everything is functioning as expected. This feature ensures that potential issues are caught early, saving time and resources.
### 🏷️ **Sync Run Type**
Sync types are now clearly labeled as either "General" or "Test" in the Syncs Tab. This enhancement provides clearer context for each sync operation, making it easier to distinguish between different sync runs.
### 🛢️ **Oracle DB as a Destination Connector**
[Oracle DB](https://docs.squared.ai/guides/data-integration/destinations/database/oracle) is now available as a destination connector. Users can navigate to **Add Destination**, select **Oracle**, and input the necessary database details to route data directly to Oracle databases.
### 🗄️ **Oracle DB as a Source Connector**
[Oracle DB](https://docs.squared.ai/guides/data-integration/sources/oracle) has also been added as a source connector. Users can pull data from Oracle databases by navigating to **Add Source**, selecting **Oracle**, and entering the database details.
***
## 🔧 **Improvements**
### **Memory Bloat Issue in Sync**
Resolved an issue where memory bloat was affecting sync performance over time, ensuring more stable and efficient sync operations.
### **Discover and Table URL Fix**
Fixed issues with discovering and accessing table URLs, enhancing the reliability and accuracy of data retrieval processes.
### **Disable to Fields**
Added the option to disable fields where necessary, giving users more customization options to fit their specific needs.
### **Query Source Response Update**
Updated the query source response mechanism, improving data handling and accuracy in data query operations.
### **OCI8 Version Fix**
Resolved issues related to the OCI8 version, ensuring better compatibility and smoother database interactions.
### **User Read Permission Update**
Updated user read permissions to enhance security and provide more granular control over data access.
### **Connector Name Update**
Updated connector names across the platform to ensure better clarity and consistency, making it easier to manage and understand your integrations.
### **Account Verification Route Removal**
Streamlined the user signup process by removing the account verification route, reducing friction for new users.
### **Connector Creation Process**
Refined the connector creation process, making it more intuitive and user-friendly, thus reducing the learning curve for new users.
### **README Update**
The README file has been updated to reflect the latest changes and enhancements, providing more accurate and helpful guidance.
### **Request/Response Logs Added**
We’ve added request/response logs for multiple connectors, including Klaviyo, HTTP, Airtable, Slack, MariaDB, Google Sheets, Iterable, Zendesk, HubSpot, Stripe, and Salesforce CRM, improving debugging and traceability.
### **Logger Issue in Sync**
Addressed a logging issue within sync operations, ensuring that logs are accurate and provide valuable insights.
### **Main Layout Protected**
Wrapped the main layout with a protector, enhancing security and stability across the platform.
### **User Email Verification**
Implemented email verification during signup using Devise, increasing account security and ensuring that only verified users have access.
### **Databricks Datawarehouse Connector Name Update**
Renamed the Databricks connection to "Databricks Datawarehouse" for improved clarity and better alignment with user expectations.
### **Version Upgrade to 0.9.1**
The platform has been upgraded to version `0.9.1`, incorporating all the above features and improvements, ensuring a more robust and feature-rich experience.
### **Error Message Refactoring**
Refactored error messages to align with agreed-upon standards, resulting in clearer and more consistent communication across the platform.
---
# Source: https://docs.squared.ai/release-notes/2024/December-2024.md
> ## Documentation Index
> Fetch the complete documentation index at: https://docs.squared.ai/llms.txt
> Use this file to discover all available pages before exploring further.
# December 2024 releases
> Release updates for the month of December
# 🚀 Features and Improvements
## **Features**
### **Audit Logs UI**
Streamline the monitoring of user activities with a new, intuitive interface for audit logs.
### **Custom Visual Components**
Create tailored visual elements for unique data representation and insights.
### **Dynamic Query Data Models**
Enhance query flexibility with support for dynamic data models.
### **Stream Support in HTTP Model**
Enable efficient data streaming directly in HTTP models.
### **Pagination for Connectors, Models, and Sync Pages**
Improve navigation and usability with added pagination support.
### **Multiple Choice Feedback**
Collect more detailed user feedback with multiple-choice options.
### **Rendering Type Filter for Data Apps**
Filter data apps effectively with the new rendering type filter.
### **Improved User Login**
Fixes for invited user logins and prevention of duplicate invitations for already verified users.
### **Context-Aware Titles**
Titles dynamically change based on the current route for better navigation.
## **Improvements**
### **Bug Fixes**
* Fixed audit log filter badge calculation.
* Corrected timestamp formatting in utilities.
* Limited file size for custom visual components to 2MB.
* Resolved BigQuery test sync failures.
* Improved UI for audit log views.
* Addressed sidebar design inconsistencies with Figma.
* Ensured correct settings tab highlights.
* Adjusted visual component height for tables and custom visual types.
* Fixed issues with HTTP request method retrieval.
### **Enhancements**
* Added support for exporting audit logs without filters.
* Updated query type handling during model fetching.
* Improved exception handling in resource builder.
* Introduced catalog and schedule sync resources.
* Refined action names across multiple controllers for consistency.
* Reordered deployment steps, removing unnecessary commands.
### **Resource Links and Controllers**
* Added resource links to:
* Audit Logs
* Catalogs
* Connectors
* Models
* Syncs
* Schedule Syncs
* Enterprise components (Users, Profiles, Feedbacks, Data Apps)
* Updated audit logs for comprehensive coverage across controllers.
### **UI and Usability**
* Improved design consistency in audit logs and data apps.
* Updated export features for audit logs.
***
---
# Source: https://docs.squared.ai/release-notes/2025/December-2025.md
> ## Documentation Index
> Fetch the complete documentation index at: https://docs.squared.ai/llms.txt
> Use this file to discover all available pages before exploring further.
# December 2025 Releases
> Release updates for the month of December
## 🚀 Features
* **Workflow RBAC**\
Added Role-Based Access Control for workflows with governance UI for managing permissions.
* **AIS Hosted Vector Store**\
Introduced AIS Hosted Vector Store setup for managed vector database storage.
* **Guardrails Workflow Component**\
Added guardrails component support for implementing safety constraints in workflows.
* **Connector Form State Persistence**\
Added form state persistence for connectors to maintain user input across sessions.
* **SQL Schema for Vector Store Tables**\
Added SQL schema option during vector store table creation for customized data structures.
* **Workflow Auditability**\
Implemented workflow auditability features for tracking changes and compliance.
* **Custom Compliance Support**\
Added custom compliance support with custom list input capabilities.
* **Chatbot Chat Sessions**\
Implemented chatbot chat sessions support for persistent conversations.
* **User Uploadable Chat Avatar**\
Added ability for users to upload custom chat avatars.
* **Scatterplot Visualization**\
Introduced scatterplot visualization type for data analysis.
* **Stepped Form Persistent State**\
Implemented persistent state for stepped forms to preserve progress.
* **Coverage Report Prefix**\
Added prefix to coverage report in UI-CI workflow for better organization.
## 🐛 Bug Fixes
* **Workflow Run ID in Error**\
Fixed workflow run ID display in error messages.
* **Unit Test Coverage CI**\
Reverted unit test coverage display in CI.
* **See More Endpoint Payload**\
Corrected payload for see more endpoint.
* **File Download Error Handling**\
Fixed error string handling in handle\_file\_download\_error.
* **Chat Assistant Date Display**\
Fixed date display alongside time in chat assistant with proper formatting.
* **Cursor Assertion Error**\
Fixed missing cursor assertion error.
* **Coverage File Collection**\
Fixed coverage collection from all files.
* **Delete Data App Session Policy**\
Updated delete data app session policy.
* **Workflow Name During Setup**\
Fixed showing the name of the workflow during setup process.
* **Odoo Abstract Field**\
Fixed abstract field not available in model in some Odoo versions.
## 🚜 Refactor
* **Model Provider Selection**\
Changed to allow model selection only after provider is selected.
* **Fallback Value Formatting**\
Changed fallback and formatted value handling.
## ⚙️ Miscellaneous Tasks
* **Workflow Error Handling**\
Added raise error in await workflow result for better error propagation.
* **Server Gem Update**\
Updated Server Gem to version 0.34.12.
* **Vector DB Connector Filters**\
Added filter changes for vector DB connectors and storage components.
* **Parsing Flag Removal**\
Removed need parsing flag from workflow processing.
* **Auth Failure Logging**\
Added logs for authentication failures.
* **Workflows Page Title**\
Added page title for Workflows section.
* **Chatbot Interface Tests**\
Improved tests for chatbot interface and helpers.
* **Prompt Input Sample**\
Added sample input to prompt input component.
* **Unit Test Coverage**\
Added comprehensive unit tests for workflow builder.
* **Assistant Workspace IDs**\
Removed ASSISTANT\_ENABLED\_WORKSPACE\_IDS constant.
* **CI Naming Updates**\
Updated CI name and job titles for clarity.
* **Integrations Gem Update**\
Upgraded integrations gem to version 0.34.13.
* **Knowledge Base Database**\
Added Knowledge Base and Knowledge Base File to database.
* **Dynamic SQL Payload**\
Updated DynamicSql in Payload Generator.
* **Tool Model**\
Added Tool model for workflow tooling support.
* **Knowledge Base Create API**\
Added Knowledge Base Create API endpoint.
---
# Source: https://docs.squared.ai/release-notes/December_2024.md
# December 2024 releases
> Release updates for the month of December
# 🚀 Features and Improvements
## **Features**
### **Audit Logs UI**
Streamline the monitoring of user activities with a new, intuitive interface for audit logs.
### **Custom Visual Components**
Create tailored visual elements for unique data representation and insights.
### **Dynamic Query Data Models**
Enhance query flexibility with support for dynamic data models.
### **Stream Support in HTTP Model**
Enable efficient data streaming directly in HTTP models.
### **Pagination for Connectors, Models, and Sync Pages**
Improve navigation and usability with added pagination support.
### **Multiple Choice Feedback**
Collect more detailed user feedback with multiple-choice options.
### **Rendering Type Filter for Data Apps**
Filter data apps effectively with the new rendering type filter.
### **Improved User Login**
Fixes for invited user logins and prevention of duplicate invitations for already verified users.
### **Context-Aware Titles**
Titles dynamically change based on the current route for better navigation.
## **Improvements**
### **Bug Fixes**
* Fixed audit log filter badge calculation.
* Corrected timestamp formatting in utilities.
* Limited file size for custom visual components to 2MB.
* Resolved BigQuery test sync failures.
* Improved UI for audit log views.
* Addressed sidebar design inconsistencies with Figma.
* Ensured correct settings tab highlights.
* Adjusted visual component height for tables and custom visual types.
* Fixed issues with HTTP request method retrieval.
### **Enhancements**
* Added support for exporting audit logs without filters.
* Updated query type handling during model fetching.
* Improved exception handling in resource builder.
* Introduced catalog and schedule sync resources.
* Refined action names across multiple controllers for consistency.
* Reordered deployment steps, removing unnecessary commands.
### **Resource Links and Controllers**
* Added resource links to:
* Audit Logs
* Catalogs
* Connectors
* Models
* Syncs
* Schedule Syncs
* Enterprise components (Users, Profiles, Feedbacks, Data Apps)
* Updated audit logs for comprehensive coverage across controllers.
### **UI and Usability**
* Improved design consistency in audit logs and data apps.
* Updated export features for audit logs.
***
---
# Source: https://docs.squared.ai/release-notes/2025/Feb-2025.md
> ## Documentation Index
> Fetch the complete documentation index at: https://docs.squared.ai/llms.txt
> Use this file to discover all available pages before exploring further.
# February 2025 Releases
> Release updates for the month of February
## 🚀 Features
* **PG vector as source changes**\
Made changes to the PostgreSQL connector to support PG Vector.
## 🐛 Bug Fixes
* **Vulnerable integration gem versions update**\
Upgraded Server Gems to the new versions, fixing vulnerabilities found in previous versions of the Gems.
## ⚙️ Miscellaneous Tasks
* **Sync alert bug fixes**\
Fixed certain issues in the Sync Alert mailers.
---
# Source: https://docs.squared.ai/release-notes/2025/January-2025.md
> ## Documentation Index
> Fetch the complete documentation index at: https://docs.squared.ai/llms.txt
> Use this file to discover all available pages before exploring further.
# January 2025 Releases
> Release updates for the month of January
## 🚀 Features
* **Added Empty State for Feedback Overview Table**\
Introduces a default view when no feedback data is available, ensuring clearer guidance and intuitive messaging for end users.
* **Custom Visual Component for Writing Data to Destination Connectors**\
Simplifies the process of sending or mapping data to various destination connectors within the platform’s interface.
* **Azure Blob Storage Integration**\
Adds support for storing and retrieving data from Azure Blob, expanding available cloud storage options.
* **Update Workflows to Deploy Solid Worker**\
Automates deployment of a dedicated worker process, improving back-end task management and system scalability.
* **Chatbot Visual Type**\
Adds a dedicated visualization type designed for chatbot creation and management, enabling more intuitive configuration of conversational experiences.
* **Trigger Sync Alerts / Sync Alerts**\
Implements a notification system to inform teams about the success or failure of data synchronization events in real time.
* **Runner Script Enhancements for Chatbot**\
Improves the runner script’s capability to handle chatbot logic, ensuring smoother automated operations.
* **Add S3 Destination Connector**\
Enables direct export of transformed or collected data to Amazon S3, broadening deployment possibilities for cloud-based workflows.
* **Add SFTP Source Connector**\
Permits data ingestion from SFTP servers, streamlining workflows where secure file transfers are a primary data source.
## 🐛 Bug Fixes
* **Handle Chatbot Response When Streaming Is Off**\
Resolves an issue causing chatbot responses to fail when streaming mode was disabled, improving overall reliability.
* **Sync Alert Issues**\
Fixes various edge cases where alerts either triggered incorrectly or failed to trigger for certain data sync events.
* **UI Enhancements and Fixes**\
Addresses multiple interface inconsistencies, refining the user experience for navigation and data presentation.
* **Validation for “Continue” CTA During Chatbot Creation**\
Ensures that all mandatory fields are properly completed before users can progress through chatbot setup.
* **Refetch Data Model After Update**\
Corrects a scenario where updated data models were not automatically reloaded, preventing stale information in certain views.
* **OpenAI Connector Failure Handling**\
Improves error handling and retry mechanisms for OpenAI-related requests, reducing the impact of transient network issues.
* **Stream Fetch Fix for Salesforce**\
Patches a problem causing occasional timeouts or failed data streams when retrieving records from Salesforce.
* **Radio Button Inconsistencies**\
Unifies radio button behavior across the platform’s interface, preventing unexpected selection or styling errors.
* **Keep Reports Link Highlight**\
Ensures the “Reports” link remains visibly highlighted in the navigation menu, maintaining consistent visual cues.
## ⚙️ Miscellaneous Tasks
* **Add Default Request and Response in Connection Configuration for OpenAI**\
Provides pre-populated request/response templates for OpenAI connectors, simplifying initial setup for users.
* **Add Alert Policy to Roles**\
Integrates alert policies into user role management, allowing fine-grained control over who can create or modify data alerts.
---
# Source: https://docs.squared.ai/release-notes/2026/January-2026.md
> ## Documentation Index
> Fetch the complete documentation index at: https://docs.squared.ai/llms.txt
> Use this file to discover all available pages before exploring further.
# January 2026 Releases
> Release updates for the month of January 2026
## 🚀 Features
* **Custom Roles Edit Support**
Added *Edit Details* button for Custom Roles to allow User-defined Roles to be modified.
* **Knowledge Base**
Introduced Knowledge Base for use with Workflows.
* **Hugging Face Embedding Models**
Added support for Hugging Face embedding models.
* **Agent Tools**
Introduced Agent Tools.
* **Knowledge Base Component**
Added Knowledge Base component in Workflows.
## 🐛 Bug Fixes
* **Collapsed Chat Overflow**
Fixed overflow issue in collapsed chat.
* **Template Temperatures**
Fixed temperature handling in templates.
* **Text Feedback Submission**
Allowed text feedback submission even when additional remarks are required.
* **Prompt Template Variable Handling**
Fixed handling when no variables are found in prompt templates.
* **Workflow Edge Updates**
Fixed edge updates when deleting nodes in workflows.
* **React Optimization**
Removed unnecessary useCallback and useMemo usage.
* **Vector Store UI**
Fixed UI issues while creating vector stores in Knowledge Base.
* **Token Handling**
Ensured different tokens per data app.
## 🚜 Refactor
* **Custom Component Layout**
Allowed fit-content for Custom Components for better-fitting layouts.
## ⚙️ Miscellaneous Tasks
* **Anthropic Ruby Gem**
Added Ruby Anthropic gem support.
* **Testing & Linting**
Improved tests, linting, and overall code quality.
---
# Source: https://docs.squared.ai/release-notes/January_2025.md
# January 2025 Releases
> Release updates for the month of January
## 🚀 Features
* **Added Empty State for Feedback Overview Table**\
Introduces a default view when no feedback data is available, ensuring clearer guidance and intuitive messaging for end users.
* **Custom Visual Component for Writing Data to Destination Connectors**\
Simplifies the process of sending or mapping data to various destination connectors within the platform’s interface.
* **Azure Blob Storage Integration**\
Adds support for storing and retrieving data from Azure Blob, expanding available cloud storage options.
* **Update Workflows to Deploy Solid Worker**\
Automates deployment of a dedicated worker process, improving back-end task management and system scalability.
* **Chatbot Visual Type**\
Adds a dedicated visualization type designed for chatbot creation and management, enabling more intuitive configuration of conversational experiences.
* **Trigger Sync Alerts / Sync Alerts**\
Implements a notification system to inform teams about the success or failure of data synchronization events in real time.
* **Runner Script Enhancements for Chatbot**\
Improves the runner script’s capability to handle chatbot logic, ensuring smoother automated operations.
* **Add S3 Destination Connector**\
Enables direct export of transformed or collected data to Amazon S3, broadening deployment possibilities for cloud-based workflows.
* **Add SFTP Source Connector**\
Permits data ingestion from SFTP servers, streamlining workflows where secure file transfers are a primary data source.
## 🐛 Bug Fixes
* **Handle Chatbot Response When Streaming Is Off**\
Resolves an issue causing chatbot responses to fail when streaming mode was disabled, improving overall reliability.
* **Sync Alert Issues**\
Fixes various edge cases where alerts either triggered incorrectly or failed to trigger for certain data sync events.
* **UI Enhancements and Fixes**\
Addresses multiple interface inconsistencies, refining the user experience for navigation and data presentation.
* **Validation for “Continue” CTA During Chatbot Creation**\
Ensures that all mandatory fields are properly completed before users can progress through chatbot setup.
* **Refetch Data Model After Update**\
Corrects a scenario where updated data models were not automatically reloaded, preventing stale information in certain views.
* **OpenAI Connector Failure Handling**\
Improves error handling and retry mechanisms for OpenAI-related requests, reducing the impact of transient network issues.
* **Stream Fetch Fix for Salesforce**\
Patches a problem causing occasional timeouts or failed data streams when retrieving records from Salesforce.
* **Radio Button Inconsistencies**\
Unifies radio button behavior across the platform’s interface, preventing unexpected selection or styling errors.
* **Keep Reports Link Highlight**\
Ensures the “Reports” link remains visibly highlighted in the navigation menu, maintaining consistent visual cues.
## ⚙️ Miscellaneous Tasks
* **Add Default Request and Response in Connection Configuration for OpenAI**\
Provides pre-populated request/response templates for OpenAI connectors, simplifying initial setup for users.
* **Add Alert Policy to Roles**\
Integrates alert policies into user role management, allowing fine-grained control over who can create or modify data alerts.
---
# Source: https://docs.squared.ai/release-notes/2024/July-2024.md
> ## Documentation Index
> Fetch the complete documentation index at: https://docs.squared.ai/llms.txt
> Use this file to discover all available pages before exploring further.
# July 2024 releases
> Release updates for the month of July
## ✨ **New Features**
### 🔍 **Search Filter in Table Selector**
The table selector method now includes a powerful search filter. This feature enhances your workflow by allowing you to swiftly locate and select the exact tables you need, even in large datasets. It’s all about saving time and boosting productivity.
### 🏠 **Databricks Lakehouse Destination**
We're excited to introduce Databricks Lakehouse as a new destination connector. Seamlessly integrate your data pipelines with Databricks Lakehouse, harnessing its advanced analytics capabilities for data processing and AI-driven insights. This feature empowers your data strategies with greater flexibility and power.
### 📅 **Manual Sync Schedule Controller**
Take control of your data syncs with the new Manual Sync Schedule controller. This feature gives you the freedom to define when and how often syncs occur, ensuring they align perfectly with your business needs while optimizing resource usage.
### 🛢️ **MariaDB Destination Connector**
MariaDB is now available as a destination connector! You can now channel your processed data directly into MariaDB databases, enabling robust data storage and processing workflows. This integration is perfect for users operating in MariaDB environments.
### 🎛️ **Table Selector and Layout Enhancements**
We’ve made significant improvements to the table selector and layout. The interface is now more intuitive, making it easier than ever to navigate and manage your tables, especially in complex data scenarios.
### 🔄 **Catalog Refresh**
Introducing on-demand catalog refresh! Keep your data sources up-to-date with a simple refresh, ensuring you always have the latest data structure available. Say goodbye to outdated data and hello to consistency and accuracy.
### 🛡️ **S3 Connector ARN Support for Authentication**
Enhance your security with ARN (Amazon Resource Name) support for Amazon S3 connectors. This update provides a more secure and scalable approach to managing access to your S3 resources, particularly beneficial for large-scale environments.
### 📊 **Integration Changes for Sync Record Log**
We’ve optimized the integration logic for sync record logs. These changes ensure more reliable logging, making it easier to track sync operations and diagnose issues effectively.
### 🗄️ **Server Changes for Log Storage in Sync Record Table**
Logs are now stored directly in the sync record table, centralizing your data and improving log accessibility. This update ensures that all relevant sync information is easily retrievable for analysis.
### ✅ **Select Row Support in Data Table**
Interact with your data tables like never before! We've added row selection support, allowing for targeted actions such as editing or deleting entries directly from the table interface.
### 🛢️ **MariaDB Source Connector**
The MariaDB source connector is here! Pull data directly from MariaDB databases into Multiwoven for seamless integration into your data workflows.
### 🛠️ **Sync Records Error Log**
A detailed error log feature has been added to sync records, providing granular visibility into issues that occur during sync operations. Troubleshooting just got a whole lot easier!
### 🛠️ **Model Query Type - Table Selector**
The table selector is now available as a model query type, offering enhanced flexibility in defining queries and working with your data models.
### 🔄 **Force Catalog Refresh**
Set the refresh flag to true, and the catalog will be forcefully refreshed. This ensures you're always working with the latest data, reducing the chances of outdated information impacting your operations.
## 🔧 **Improvements**
* **Manual Sync Delete API Call**: Enhanced the API call for deleting manual syncs for smoother operations.
* **Server Error Handling**: Improved error handling to better display server errors when data fetches return empty results.
* **Heartbeat Timeout in Extractor**: Introduced new actions to handle heartbeat timeouts in extractors for improved reliability.
* **Sync Run Type Column**: Added a `sync_run_type` column in sync logs for better tracking and operational clarity.
* **Refactor Discover Stream**: Refined the discover stream process, leading to better efficiency and reliability.
* **DuckDB HTTPFS Extension**: Introduced server installation steps for the DuckDB `httpfs` extension.
* **Temporal Initialization**: Temporal processes are now initialized in all registered namespaces, improving system stability.
* **Password Reset Email**: Updated the reset password email template and validation for a smoother user experience.
* **Organization Model Changes**: Applied structural changes to the organization model, enhancing functionality.
* **Log Response Validation**: Added validation to log response bodies, improving error detection.
* **Missing DuckDB Dependencies**: Resolved missing dependencies for DuckDB, ensuring smoother operations.
* **STS Client Initialization**: Removed unnecessary credential parameters from STS client initialization, boosting security.
* **Main Layout Error Handling**: Added error screens for the main layout to improve user experience when data is missing or errors occur.
* **Server Gem Updates**: Upgraded server gems to the latest versions, enhancing performance and security.
* **AppSignal Logging**: Enhanced AppSignal logging by including app request and response logs for better monitoring.
* **Sync Records Table**: Added a dedicated table for sync records to improve data management and retrieval.
* **AWS S3 Connector**: Improved handling of S3 credentials and added support for STS credentials in AWS S3 connectors.
* **Sync Interval Dropdown Fix**: Fixed an issue where the sync interval dropdown text was hidden on smaller screens.
* **Form Data Processing**: Added a pre-check process for form data before checking connections, improving validation and accuracy.
* **S3 Connector ARN Support**: Updated the gem to support ARN-based authentication for S3 connectors, enhancing security.
* **Role Descriptions**: Updated role descriptions for clearer understanding and easier management.
* **JWT Secret Configuration**: JWT secret is now configurable from environment variables, boosting security practices.
* **MariaDB README Update**: Updated the README file to include the latest information on MariaDB connectors.
* **Logout Authorization**: Streamlined the logout process by skipping unnecessary authorization checks.
* **Sync Record JSON Error**: Added a JSON error field in sync records to enhance error tracking and debugging.
* **MariaDB DockerFile Update**: Added `mariadb-dev` to the DockerFile to better support MariaDB integrations.
* **Signup Error Response**: Improved the clarity and detail of signup error responses.
* **Role Policies Update**: Refined role policies for enhanced access control and security.
* **Pundit Policy Enhancements**: Applied Pundit policies at the role permission level, ensuring robust authorization management.
---
# Source: https://docs.squared.ai/release-notes/2025/July-2025.md
> ## Documentation Index
> Fetch the complete documentation index at: https://docs.squared.ai/llms.txt
> Use this file to discover all available pages before exploring further.
# July 2025 Releases
> Release updates for the month of July
## 🚀 Features
* **Workflow Builder**\
Introduced a comprehensive visual workflow builder with React Flow canvas, drag-and-drop components, sidebar navigation, and node configuration. Includes auto-save functionality, workflow publishing, and interface testing capabilities.
* **Odoo Source Connector**\
Added Odoo as a new source connector for ERP data integration.
* **Odoo Destination Connector**\
Introduced Odoo as a destination connector for writing data to Odoo systems.
* **Workflow Run Feature API**\
Added API endpoints for executing and managing workflow runs.
* **Retrieval Flow Components**\
Implemented retrieval flow with configurable components for building AI-powered data retrieval workflows.
* **Agent Routes Setup**\
Set up routing infrastructure for agent-based workflow interactions.
* **Workflow Interface**\
Added chatbot/assistant interface for testing workflows with pagination support and list view.
* **Workflow Component Descriptions**\
Added descriptions for workflow components to improve user understanding.
* **Code Quality Migration**\
Migrated code climate and code coverage tools to qlty.sh with updated badges.
* **GitHub Workflow Timeout**\
Added timeout configuration for server-ci GitHub Actions workflow.
## 🐛 Bug Fixes
* **Global Namespace Violation**\
Fixed global namespace violation in runner script.
* **JSON Schema Validation**\
Removed invalid field from JSON schema and fixed various schema issues.
* **Batched Query Processing**\
Added batched\_query call and improved SQL parsing capabilities.
* **Workflow Builder UI Fixes**\
Fixed numerous workflow builder issues including drop position calculation, component selection, node duplication, edge deletion, and fit view functionality.
* **LLM Model Temperature**\
Fixed missing temperature field for LLM model configuration.
* **Component Rendering**\
Fixed component icon rendering from URLs and dynamic component loading from API.
* **Interface State Persistence**\
Resolved issues with interface state not persisting correctly.
* **Auto-Save Status**\
Fixed auto-save to correctly update status to draft and trigger after 1 second delay.
* **Chatbot Messages**\
Fixed assistant chat JSON messages, loading states, and message responder issues.
* **Prompt Input Modal**\
Resolved issues with prompt input modal and variable values.
* **Chart Rendering**\
Fixed chart rendering issues in workflow interfaces.
* **RBAC Policy**\
Corrected RBAC policy implementation for workflows.
* **Sidebar Styling**\
Fixed sidebar collapsed state, styling, and component sizes.
* **Async Dropdown**\
Fixed async dropdown scrolling and sizing to window dimensions.
* **Workflow Template JSON**\
Corrected workflow template JSON structure.
* **Workflow Execution Errors**\
Added user feedback on workflow execution errors.
## 🚜 Refactor
* **AIS Data Store Discover**\
Fixed AIS Data Store discover method implementation.
* **Workflow Templates**\
Refactored workflow templates for better maintainability.
## ⚙️ Miscellaneous Tasks
* **Sub-Category Support**\
Added sub\_category to connector model and fixed postgres sub-category handling.
* **Connector Instance Protocol**\
Added connector\_instance to protocol for better connector management.
* **Server Gem Updates**\
Updated server gem through versions 0.30.4, 0.31.3, 0.32.0, and 0.32.1.
* **Vector Search Enhancements**\
Added execute\_search to connector for vector operations and vector search support for PostgreSQL.
* **Firecrawl Updates**\
Added markdown\_hash to Firecrawl and updated web\_scraping extractors for VectorDB integration.
* **Workflow Components**\
Updated workflow components with filters, JSON updates, and schema improvements.
* **Chatbot Default State**\
Changed chatbot to render closed by default.
* **Workflow Run Model**\
Added workflow run model changes and scope for updated\_at descending.
* **Security Enhancements**\
Added rack attack for rate limiting, secured cross-domain access, and added clickjacking prevention.
* **Credential Masking**\
Implemented connector credentials masking for improved security.
* **PG Vector Migration**\
Migrated existing PostgreSQL vector connectors to vector sub\_category.
* **NASA Workspace**\
Added NASA workspace to production environment.
* **Workflow Role Group**\
Added Workflows role group for permission management.
* **Workflow Template Database**\
Added and reverted template field for workflow in database.
* **Workflow Builder Validations**\
Implemented agent workflow builder validations.
* **Async Dropdown Filtering**\
Added async dropdown service support with filters and connector sub\_category filtering.
* **BigQuery Private Key**\
Reformatted private\_key in BigQuery client for connection handling.
* **Pinecone Metadata**\
Updated metadata handling in Pinecone DB destination connector.
---
# Source: https://docs.squared.ai/release-notes/July_2024.md
# July 2024 releases
> Release updates for the month of July
## ✨ **New Features**
### 🔍 **Search Filter in Table Selector**
The table selector method now includes a powerful search filter. This feature enhances your workflow by allowing you to swiftly locate and select the exact tables you need, even in large datasets. It’s all about saving time and boosting productivity.
### 🏠 **Databricks Lakehouse Destination**
We're excited to introduce Databricks Lakehouse as a new destination connector. Seamlessly integrate your data pipelines with Databricks Lakehouse, harnessing its advanced analytics capabilities for data processing and AI-driven insights. This feature empowers your data strategies with greater flexibility and power.
### 📅 **Manual Sync Schedule Controller**
Take control of your data syncs with the new Manual Sync Schedule controller. This feature gives you the freedom to define when and how often syncs occur, ensuring they align perfectly with your business needs while optimizing resource usage.
### 🛢️ **MariaDB Destination Connector**
MariaDB is now available as a destination connector! You can now channel your processed data directly into MariaDB databases, enabling robust data storage and processing workflows. This integration is perfect for users operating in MariaDB environments.
### 🎛️ **Table Selector and Layout Enhancements**
We’ve made significant improvements to the table selector and layout. The interface is now more intuitive, making it easier than ever to navigate and manage your tables, especially in complex data scenarios.
### 🔄 **Catalog Refresh**
Introducing on-demand catalog refresh! Keep your data sources up-to-date with a simple refresh, ensuring you always have the latest data structure available. Say goodbye to outdated data and hello to consistency and accuracy.
### 🛡️ **S3 Connector ARN Support for Authentication**
Enhance your security with ARN (Amazon Resource Name) support for Amazon S3 connectors. This update provides a more secure and scalable approach to managing access to your S3 resources, particularly beneficial for large-scale environments.
### 📊 **Integration Changes for Sync Record Log**
We’ve optimized the integration logic for sync record logs. These changes ensure more reliable logging, making it easier to track sync operations and diagnose issues effectively.
### 🗄️ **Server Changes for Log Storage in Sync Record Table**
Logs are now stored directly in the sync record table, centralizing your data and improving log accessibility. This update ensures that all relevant sync information is easily retrievable for analysis.
### ✅ **Select Row Support in Data Table**
Interact with your data tables like never before! We've added row selection support, allowing for targeted actions such as editing or deleting entries directly from the table interface.
### 🛢️ **MariaDB Source Connector**
The MariaDB source connector is here! Pull data directly from MariaDB databases into Multiwoven for seamless integration into your data workflows.
### 🛠️ **Sync Records Error Log**
A detailed error log feature has been added to sync records, providing granular visibility into issues that occur during sync operations. Troubleshooting just got a whole lot easier!
### 🛠️ **Model Query Type - Table Selector**
The table selector is now available as a model query type, offering enhanced flexibility in defining queries and working with your data models.
### 🔄 **Force Catalog Refresh**
Set the refresh flag to true, and the catalog will be forcefully refreshed. This ensures you're always working with the latest data, reducing the chances of outdated information impacting your operations.
## 🔧 **Improvements**
* **Manual Sync Delete API Call**: Enhanced the API call for deleting manual syncs for smoother operations.
* **Server Error Handling**: Improved error handling to better display server errors when data fetches return empty results.
* **Heartbeat Timeout in Extractor**: Introduced new actions to handle heartbeat timeouts in extractors for improved reliability.
* **Sync Run Type Column**: Added a `sync_run_type` column in sync logs for better tracking and operational clarity.
* **Refactor Discover Stream**: Refined the discover stream process, leading to better efficiency and reliability.
* **DuckDB HTTPFS Extension**: Introduced server installation steps for the DuckDB `httpfs` extension.
* **Temporal Initialization**: Temporal processes are now initialized in all registered namespaces, improving system stability.
* **Password Reset Email**: Updated the reset password email template and validation for a smoother user experience.
* **Organization Model Changes**: Applied structural changes to the organization model, enhancing functionality.
* **Log Response Validation**: Added validation to log response bodies, improving error detection.
* **Missing DuckDB Dependencies**: Resolved missing dependencies for DuckDB, ensuring smoother operations.
* **STS Client Initialization**: Removed unnecessary credential parameters from STS client initialization, boosting security.
* **Main Layout Error Handling**: Added error screens for the main layout to improve user experience when data is missing or errors occur.
* **Server Gem Updates**: Upgraded server gems to the latest versions, enhancing performance and security.
* **AppSignal Logging**: Enhanced AppSignal logging by including app request and response logs for better monitoring.
* **Sync Records Table**: Added a dedicated table for sync records to improve data management and retrieval.
* **AWS S3 Connector**: Improved handling of S3 credentials and added support for STS credentials in AWS S3 connectors.
* **Sync Interval Dropdown Fix**: Fixed an issue where the sync interval dropdown text was hidden on smaller screens.
* **Form Data Processing**: Added a pre-check process for form data before checking connections, improving validation and accuracy.
* **S3 Connector ARN Support**: Updated the gem to support ARN-based authentication for S3 connectors, enhancing security.
* **Role Descriptions**: Updated role descriptions for clearer understanding and easier management.
* **JWT Secret Configuration**: JWT secret is now configurable from environment variables, boosting security practices.
* **MariaDB README Update**: Updated the README file to include the latest information on MariaDB connectors.
* **Logout Authorization**: Streamlined the logout process by skipping unnecessary authorization checks.
* **Sync Record JSON Error**: Added a JSON error field in sync records to enhance error tracking and debugging.
* **MariaDB DockerFile Update**: Added `mariadb-dev` to the DockerFile to better support MariaDB integrations.
* **Signup Error Response**: Improved the clarity and detail of signup error responses.
* **Role Policies Update**: Refined role policies for enhanced access control and security.
* **Pundit Policy Enhancements**: Applied Pundit policies at the role permission level, ensuring robust authorization management.
---
# Source: https://docs.squared.ai/release-notes/2024/June-2024.md
> ## Documentation Index
> Fetch the complete documentation index at: https://docs.squared.ai/llms.txt
> Use this file to discover all available pages before exploring further.
# June 2024 releases
> Release updates for the month of June
# 🚀 New Features
* **Iterable Destination Connector**\
Integrate with Iterable, allowing seamless data flow to this popular marketing automation platform.
* **Workspace Settings and useQueryWrapper**\
New enhancements to workspace settings and the introduction of `useQueryWrapper` for improved data handling.
* **Amazon S3 Source Connector**\
Added support for Amazon S3 as a source connector, enabling data ingestion directly from your S3 buckets.
# 🛠️ Improvements
* **GitHub URL Issues**\
Addressed inconsistencies with GitHub URLs in the application.
* **Change GitHub PAT to SSH Private Key**\
Updated authentication method from GitHub PAT to SSH Private Key for enhanced security.
* **UI Maintainability and Workspace ID on Page Refresh**\
Improved UI maintainability and ensured that the workspace ID persists after page refresh.
* **CE Sync Commit for Multiple Commits**\
Fixed the issue where CE sync commits were not functioning correctly for multiple commits.
* **Add Role in User Info API Response**\
Enhanced the user info API to include role details in the response.
* **Sync Write Update Action for Destination**\
Synchronized the write update action across various destinations for consistency.
* **Fix Sync Name Validation Error**\
Resolved validation errors in sync names due to contract issues.
* **Update Commit Message Regex**\
Updated the regular expression for commit messages to follow git conventions.
* **Update Insert and Update Actions**\
Renamed `insert` and `update` actions to `destination_insert` and `destination_update` for clarity.
* **Comment Contract Valid Rule in Update Sync Action**\
Adjusted the contract validation rule in the update sync action to prevent failures.
* **Fix for Primary Key in `destination_update`**\
Resolved the issue where `destination_update` was not correctly picking up the primary key.
* **Add Limit and Offset Query Validator**\
Introduced validation for limit and offset queries to improve API reliability.
* **Ignore RBAC for Get Workspaces API**\
Modified the API to bypass Role-Based Access Control (RBAC) for fetching workspaces.
* **Heartbeat Timeout Update for Loader**\
Updated the heartbeat timeout for the loader to ensure smoother operations.
* **Add Strong Migration Gem**\
Integrated the Strong Migration gem to help with safe database migrations.
Stay tuned for more exciting updates in the upcoming releases!
---
# Source: https://docs.squared.ai/release-notes/2025/June-2025.md
> ## Documentation Index
> Fetch the complete documentation index at: https://docs.squared.ai/llms.txt
> Use this file to discover all available pages before exploring further.
# June 2025 Releases
> Release updates for the month of June
## 🚀 Features
* **Intuit QuickBooks Source Connector**\
Added Intuit QuickBooks as a new source connector for integrating accounting and financial data.
* **Pinecone DB Source Connector**\
Added Pinecone DB as a source connector for reading from vector databases.
* **Qdrant Source Connector**\
Introduced Qdrant as a source connector for vector search data retrieval.
* **Firecrawl Source Connector**\
Added Firecrawl as a new source connector for web crawling and scraping capabilities.
* **White-Labelling Support**\
Introduced comprehensive white-labelling capabilities including custom logo uploads for workspaces and organizations.
* **Workflow CRUD APIs**\
Added complete Create, Read, Update, Delete APIs for workflow management.
* **Components Schema API**\
Introduced components schema API for better component management and configuration.
* **File-Based Assistant**\
Added file-based assistant functionality for Space Cadet workspace.
* **Email Verification Redirect**\
Implemented redirect to login page when email verification is disabled for streamlined user experience.
* **Empty Graph Text**\
Added descriptive text for empty graph states to improve user guidance.
* **Deploy to Staging and QA Workflows**\
Created new deployment workflows for staging and QA environments with failure handling and environment visibility.
## 🐛 Bug Fixes
* **Continue Button State**\
Fixed continue button being incorrectly disabled in forms.
* **Searchbar Double Border**\
Resolved double border styling issue on search bars.
* **Long Title Truncation**\
Added truncation for long titles to prevent layout issues.
* **Double Toast Notifications**\
Fixed duplicate toast notifications appearing.
* **Workflow Component Schema**\
Corrected workflow component schema configuration issues.
* **Qdrant and Pinecone Spec**\
Quick fix for Qdrant and Pinecone connector specifications.
* **Read User Permission**\
Removed read user permission from non-admin roles for better security.
## 🚜 Refactor
* **Chatbot Metrics Data App Reports**\
Added support for chatbot metrics in data app reports.
* **Models Audit Changes**\
Implemented audit-related improvements for models.
* **SignUp Email Verification**\
Updated SignUp flow to handle email verification configuration.
* **Searchbar Width Prop**\
Added width prop to searchbar component for flexible sizing.
* **Vector Search Protocol**\
Updated protocol handling for Vector\_Search type.
* **Logo Management**\
Refactored logo imports, API responses, and added sidebar logo component with max file size validation.
* **API Host Configuration**\
Changed API host configuration for better environment management.
* **Error Toast Handling**\
Added consistent error toast notifications across the application.
## ⚙️ Miscellaneous Tasks
* **Logo Upload Infrastructure**\
Added database changes and serializer updates for logo upload functionality.
* **Data App Reports Enhancement**\
Updated Data App reports to show messages and feedback responses.
* **Monthly API Response**\
Updated API to return 'monthly' instead of 'month' for consistency.
* **Enterprise Controller Updates**\
Updated Enterprise Workspace and Organization controllers for logo upload support.
* **Workflow Model Changes**\
Added workflow model associations and unique index for workflow names.
* **Component URL Icons**\
Updated component URL icons for better visual consistency.
* **Server Gem Updates**\
Updated server gem through versions 0.27.0, 0.29.0, 0.30.0, and 0.30.3.
* **S3 Bucket Storage**\
Enabled S3 bucket for storage capabilities.
* **Connector Sub-Categories**\
Added sub\_category field to connector meta for better organization.
* **Firecrawl Optimizations**\
Optimized Firecrawl client and added query support.
* **Demo Stage Workspace**\
Added demo stage workspace ID to assistant enabled workspace IDs.
* **Component Model Updates**\
Updated component model with improvements.
* **BCLL Cleanup**\
Removed hardcoded BCLL logo and custom height configurations.
---
# Source: https://docs.squared.ai/release-notes/June_2024.md
# June 2024 releases
> Release updates for the month of June
# 🚀 New Features
* **Iterable Destination Connector**\
Integrate with Iterable, allowing seamless data flow to this popular marketing automation platform.
* **Workspace Settings and useQueryWrapper**\
New enhancements to workspace settings and the introduction of `useQueryWrapper` for improved data handling.
* **Amazon S3 Source Connector**\
Added support for Amazon S3 as a source connector, enabling data ingestion directly from your S3 buckets.
# 🛠️ Improvements
* **GitHub URL Issues**\
Addressed inconsistencies with GitHub URLs in the application.
* **Change GitHub PAT to SSH Private Key**\
Updated authentication method from GitHub PAT to SSH Private Key for enhanced security.
* **UI Maintainability and Workspace ID on Page Refresh**\
Improved UI maintainability and ensured that the workspace ID persists after page refresh.
* **CE Sync Commit for Multiple Commits**\
Fixed the issue where CE sync commits were not functioning correctly for multiple commits.
* **Add Role in User Info API Response**\
Enhanced the user info API to include role details in the response.
* **Sync Write Update Action for Destination**\
Synchronized the write update action across various destinations for consistency.
* **Fix Sync Name Validation Error**\
Resolved validation errors in sync names due to contract issues.
* **Update Commit Message Regex**\
Updated the regular expression for commit messages to follow git conventions.
* **Update Insert and Update Actions**\
Renamed `insert` and `update` actions to `destination_insert` and `destination_update` for clarity.
* **Comment Contract Valid Rule in Update Sync Action**\
Adjusted the contract validation rule in the update sync action to prevent failures.
* **Fix for Primary Key in `destination_update`**\
Resolved the issue where `destination_update` was not correctly picking up the primary key.
* **Add Limit and Offset Query Validator**\
Introduced validation for limit and offset queries to improve API reliability.
* **Ignore RBAC for Get Workspaces API**\
Modified the API to bypass Role-Based Access Control (RBAC) for fetching workspaces.
* **Heartbeat Timeout Update for Loader**\
Updated the heartbeat timeout for the loader to ensure smoother operations.
* **Add Strong Migration Gem**\
Integrated the Strong Migration gem to help with safe database migrations.
Stay tuned for more exciting updates in the upcoming releases!
---
# Source: https://docs.squared.ai/release-notes/2025/March-2025.md
> ## Documentation Index
> Fetch the complete documentation index at: https://docs.squared.ai/llms.txt
> Use this file to discover all available pages before exploring further.
# March 2025 Releases
> Release updates for the month of March
## 🚀 Features
* **Custom RBAC UI**\
Introduced a comprehensive Role-Based Access Control interface, allowing administrators to create, edit, and manage custom roles with granular permissions across the platform.
* **SSO Integration**\
Added complete Single Sign-On support including SSO Configuration Controller, SSO Login, ACS Callback, and organization settings for seamless enterprise authentication.
* **WatsonX.AI Connector**\
Added IBM WatsonX.AI as a new AI/ML source connector, expanding the available AI model integrations.
* **Anthropic AI/ML Source Connector**\
Introduced Anthropic as a new AI/ML source connector for leveraging Claude models in data workflows.
* **Chatbot Enhancements**\
Added feedback display on chatbot preview and history context for user prompts, improving conversational AI experiences.
* **Sync Export API**\
New API endpoints for exporting sync configurations and sync records, enabling better data portability and backup options.
* **Environment Variables for Connection Config**\
Support for using environment variables in connection configurations, improving security and deployment flexibility.
* **Enhanced Search Functionality**\
Added search bars to model selection, destination section, and data source views for easier navigation in large datasets.
* **Delete Confirmation Modals**\
Added confirmation dialogs when deleting sources and workspace members to prevent accidental data loss.
* **Docker Hub Integration**\
Updated workflow to automatically push images to Docker Hub when new releases are created.
* **Snyk Security Testing**\
Integrated Snyk tests for server, UI, and integrations to enhance security vulnerability detection.
* **Primary Key Helper Text**\
Added helper text and tooltips for Primary Key fields to improve user understanding during data modeling.
## 🐛 Bug Fixes
* **Pagination in Empty State**\
Fixed pagination controls incorrectly showing when there are no results to display.
* **Content Layout**\
Corrected content centering at maximum width for better visual consistency.
* **User Login with Email Confirmation**\
Resolved issues with user login flow when email confirmation is required.
* **Role Permission Count**\
Fixed incorrect permission count display for roles and updated to group permission count.
* **SSO Entity ID**\
Corrected entity ID handling in SSO configuration.
* **Missing Logo Icons**\
Fixed missing logo icons appearing in various authentication views.
* **Invite User Workflow**\
Addressed issues in the user invitation workflow for better reliability.
* **Solid Worker Migrations**\
Fixed migration issues affecting the Solid Worker background job processor.
* **Anthropic Connector**\
Fixed spelling error and quick fixes for the Anthropic AI/ML connector.
* **Template Value Persistence**\
Resolved issues where template values were not persisting correctly in AI/ML models.
* **Auth UI/UX Improvements**\
Fixed password validation design, forgot password positioning, sign-in/sign-up UI audit issues, and checkbox styling on RJSF forms.
## 🚜 Refactor
* **Data Apps Audits**\
Completed high-priority audit items for Data Apps, improving overall code quality and user experience.
* **Template Mapping Components**\
Refactored template options into generic, reusable components for better maintainability.
* **Model Page Improvements**\
Applied audit fixes to model pages including navigation, timestamp formatting, and empty state handling.
* **Settings Page Audit**\
Completed comprehensive audit of settings pages for consistency and usability.
* **Authentication UI**\
Improved copy for invalid credentials, placeholders, terms and privacy policy messages, and password instructions.
* **Stepped Form Exit**\
Removed unnecessary exit warnings when leaving stepped forms for smoother user experience.
## ⚙️ Miscellaneous Tasks
* **ChatMessage Model**\
Added ChatMessage model and ChatMessageTransformer for enhanced chat prompt message handling.
* **Ruby SAML Gem**\
Added ruby-saml gem to support SAML-based SSO authentication.
* **Playwright E2E Tests**\
Set up Playwright framework for end-to-end testing automation.
* **SSO Configuration Permissions**\
Added permissions for SSO Configuration management at organization and workspace levels.
* **Signing Certificate Verification**\
Implemented signing certificate verification for enhanced security.
* **Audit Log Enhancements**\
Added audit logging to Roles Controller and updated audit usage across multiple controllers for better traceability.
* **Export Improvements**\
Refactored date handling in Audit Log and Feedback exports, and added Additional Remarks field to message feedback exports.
* **Server Gem Updates**\
Updated Server gem to versions 0.20.0, 0.21.1, and 0.21.2 with various improvements and fixes.
* **System Role Descriptions**\
Updated descriptions for system roles to provide clearer guidance.
* **Security Updates**\
Updated gems to address Snyk security vulnerabilities.
---
# Source: https://docs.squared.ai/release-notes/2024/May-2024.md
> ## Documentation Index
> Fetch the complete documentation index at: https://docs.squared.ai/llms.txt
> Use this file to discover all available pages before exploring further.
# May 2024 releases
> Release updates for the month of May
# 🚀 New Features
* **Role and Resource Migration**\
Introduced migration capabilities for roles and resources, enhancing data management and security.
* **Zendesk Destination Connector**\
Added support for Zendesk as a destination connector, enabling seamless integration with Zendesk for data flow.
* **Athena Connector**\
Integrated the Athena Connector, allowing users to connect to and query Athena directly from the platform.
* **Support for Temporal Cloud**\
Enabled support for Temporal Cloud, facilitating advanced workflow orchestration in the cloud.
* **Workspace APIs for CE**\
Added Workspace APIs for the Community Edition, expanding workspace management capabilities.
* **HTTP Destination Connector**\
Introduced the HTTP Destination Connector, allowing data to be sent to any HTTP endpoint.
* **Separate Routes for Main Application**\
Organized and separated routes for the main application, improving modularity and maintainability.
* **Compression Support for SFTP**\
Added compression support for SFTP, enabling faster and more efficient data transfers.
* **Password Field Toggle**\
Introduced a toggle to view or hide password field values, enhancing user experience and security.
* **Dynamic UI Schema Generation**\
Added dynamic generation of UI schemas, streamlining the user interface customization process.
* **Health Check Endpoint for Worker**\
Added a health check endpoint for worker services, ensuring better monitoring and reliability.
* **Skip Rows in Sync Runs Table**\
Implemented functionality to skip rows in the sync runs table, providing more control over data synchronization.
* **Cron Expression as Schedule Type**\
Added support for using cron expressions as a schedule type, offering more flexibility in task scheduling.
* **SQL Autocomplete**\
Introduced SQL autocomplete functionality, improving query writing efficiency.
# 🛠️ Improvements
* **Text Update in Finalize Source Form**\
Changed and improved the text in the Finalize Source Form for clarity.
* **Rate Limiter Spec Failure**\
Fixed a failure issue in the rate limiter specifications, ensuring better performance and stability.
* **Check for Null Record Data**\
Added a condition to check if record data is null, preventing errors during data processing.
* **Cursor Field Mandatory Check**\
Ensured that the cursor field is mandatory, improving data integrity during synchronization.
* **Docker Build for ARM64 Release**\
Fixed the Docker build process for ARM64 releases, ensuring compatibility across architectures.
* **UI Auto Deploy**\
Improved the UI auto-deployment process for more efficient updates.
* **Cursor Query for SOQL**\
Added support for cursor queries in SOQL, enhancing Salesforce data operations.
* **Skip Cursor Query for Empty Cursor Field**\
Implemented a check to skip cursor queries when the cursor field is empty, avoiding unnecessary processing.
* **Updated Integration Gem Version**\
Updated the integration gem to version 0.1.67, including support for Athena source, Zendesk, and HTTP destinations.
* **Removed Stale User Management APIs**\
Deleted outdated user management APIs and made changes to role ID handling for better security.
* **Color and Logo Theme Update**\
Changed colors and logos to align with the new theme, providing a refreshed UI appearance.
* **Refactored Modeling Method Screen**\
Refactored the modeling method screen for better usability and code maintainability.
* **Removed Hardcoded UI Schema**\
Removed hardcoded UI schema elements, making the UI more dynamic and adaptable.
* **Heartbeat Timeout for Loader**\
Updated the heartbeat timeout for the loader, improving the reliability of the loading process.
* **Integration Gem to 1.63**\
Bumped the integration gem version to 1.63, including various improvements and bug fixes.
* **Core Chakra Config Update**\
Updated the core Chakra UI configuration to support new branding requirements.
* **Branding Support in Config**\
Modified the configuration to support custom branding, allowing for more personalized user experiences.
* **Strong Migration Gem Addition**\
Integrated the Strong Migration gem to ensure safer and more efficient database migrations.
Stay tuned for more exciting updates in future releases!
---
# Source: https://docs.squared.ai/release-notes/2025/May-2025.md
> ## Documentation Index
> Fetch the complete documentation index at: https://docs.squared.ai/llms.txt
> Use this file to discover all available pages before exploring further.
# May 2025 Releases
> Release updates for the month of May
## 🚀 Features
* **Amazon Bedrock Source Connector**\
Added Amazon Bedrock as a new AI/ML source connector for integrating AWS foundation models into data workflows.
* **Pinecone Vector DB Destination Connector**\
Introduced Pinecone as a destination connector for vector database storage and retrieval.
* **Qdrant Destination Connector**\
Added Qdrant as a new vector database destination connector for similarity search workloads.
* **Generic OpenAI Spec Connector**\
Added a generic OpenAI specification connector for flexible integration with OpenAI-compatible endpoints.
* **Unstructured Data Support**\
Comprehensive support for unstructured data including LangChain Ruby integration, chunking configuration, and embedding config screens.
* **Assistant UI Enhancements**\
Added Bar and Pie Chart support, feedback collection, table data rendering, CSV download capability, and dynamic title changes based on conversation.
* **Vector Search Model Support**\
Added unstructured and vector\_search types to ModelQueryType with embedding configuration for vector-based models.
* **Sync Alerts Workflow**\
Added workflow middleware for sync alerts to improve notification handling.
* **Solid Worker in Docker Compose**\
Added solid worker service to docker-compose.yml for improved background job processing.
* **Prometheus Client**\
Added prometheus client gem for metrics collection and monitoring.
* **Update Feedback and Message Feedback**\
Implemented update capabilities for feedback and message feedback records.
* **Demo Workspace for Assistant**\
Added Demo Workspace to Assistant Enabled Workspaces for easier onboarding and testing.
* **Custom Workspace Branding**\
Added support for logo and name customization for specific workspaces (e.g., BCLL Workspace).
## 🐛 Bug Fixes
* **Bedrock Inference Profile**\
Removed inference profile from Bedrock connector configuration.
* **Sync Run Email Notifications**\
Disabled sync run send\_status\_email and fixed sync run mailer issues.
* **CVE Corrections**\
Corrected CVEs for BAH using Trivy security scanning.
* **Failed Sync Alerts Email Format**\
Fixed email format for failed sync alerts and added end\_time to sync failure emails.
* **Pagination Issues**\
Fixed broken pagination across various views.
* **Logo URL Updates**\
Updated the logo URL for Slack and Email Alerts.
* **Email Taken Error Message**\
Improved error message when email is already taken during signup.
* **Unstructured Model Handling**\
Fixed model updates for vector type, catalog data usage, and API updates for unstructured models.
* **Duplicate API Calls**\
Removed duplicate GET call during connector updates.
* **Pinecone Spec**\
Removed model and namespace from Pinecone specification.
* **Connector Edit Navigation**\
Fixed opening connector edit screen after creation.
* **Stepped Form Issues**\
Fixed multiple issues with stepped form including browser back restriction, query params in URL, and infinite loop problems.
* **Configure Sync Screen**\
Resolved issues with the configure sync screen for unstructured models.
* **Embedding Validation**\
Disabled continue button if embedding configuration is not completed.
* **Chat History Display**\
Show chat history only when messages exist.
* **Unstructured Model Steps**\
Fixed dynamic step addition for unstructured models and preserved base steps for reset.
## 🚜 Refactor
* **Button Styling Updates**\
Changed button styling across the application for consistency.
* **Datalist Icon Removal**\
Removed icons from datalist components for cleaner UI.
* **Error Toast Improvements**\
Removed titleCase from error toasts and added support to hide success toasts when not needed.
* **Schema Validation**\
Removed input and output schema validation for improved flexibility.
* **Pagination Logic**\
Changed logic to show pagination only when rows equal 10 or more.
* **Assistant Deployment Option**\
Changed deploy to assistant option to only be visible in Assistant Enabled Workspaces.
* **Embedding Config Component**\
Extracted embedding config fields into a standalone reusable component.
* **Chart Export Utilities**\
Added chart download and copy functionality with export function moved to utilities.
* **Data Apps Empty State**\
Improved copy for empty state in data apps.
* **Slack Sync Button**\
Updated View Sync Run button styling for Slack notifications.
* **Stepped Form Store**\
Refactored stepped form state management for better maintainability.
## ⚙️ Miscellaneous Tasks
* **EULA Role Updates**\
Made read permission in EULA true for Custom Role.
* **Model Query Type Updates**\
Added unstructured and vector\_search types to ModelQueryType.
* **Data App Querying**\
Enabled Data App querying capabilities.
* **Redis Removal**\
Removed Redis dependency from the application stack.
* **Data Format Type Names**\
Updated title names for Data Format Types.
* **Server Gem Updates**\
Updated server gem through versions 0.23.2, 0.24.0, 0.24.1, 0.24.2, 0.25.0, and 0.26.0.
* **Connector Documentation URLs**\
Updated connector documentation URLs in spec and meta files.
* **Counter Culture for Messages**\
Added count\_culture for chat\_messages and message\_feedbacks for efficient counting.
---
# Source: https://docs.squared.ai/release-notes/May_2024.md
# May 2024 releases
> Release updates for the month of May
# 🚀 New Features
* **Role and Resource Migration**\
Introduced migration capabilities for roles and resources, enhancing data management and security.
* **Zendesk Destination Connector**\
Added support for Zendesk as a destination connector, enabling seamless integration with Zendesk for data flow.
* **Athena Connector**\
Integrated the Athena Connector, allowing users to connect to and query Athena directly from the platform.
* **Support for Temporal Cloud**\
Enabled support for Temporal Cloud, facilitating advanced workflow orchestration in the cloud.
* **Workspace APIs for CE**\
Added Workspace APIs for the Community Edition, expanding workspace management capabilities.
* **HTTP Destination Connector**\
Introduced the HTTP Destination Connector, allowing data to be sent to any HTTP endpoint.
* **Separate Routes for Main Application**\
Organized and separated routes for the main application, improving modularity and maintainability.
* **Compression Support for SFTP**\
Added compression support for SFTP, enabling faster and more efficient data transfers.
* **Password Field Toggle**\
Introduced a toggle to view or hide password field values, enhancing user experience and security.
* **Dynamic UI Schema Generation**\
Added dynamic generation of UI schemas, streamlining the user interface customization process.
* **Health Check Endpoint for Worker**\
Added a health check endpoint for worker services, ensuring better monitoring and reliability.
* **Skip Rows in Sync Runs Table**\
Implemented functionality to skip rows in the sync runs table, providing more control over data synchronization.
* **Cron Expression as Schedule Type**\
Added support for using cron expressions as a schedule type, offering more flexibility in task scheduling.
* **SQL Autocomplete**\
Introduced SQL autocomplete functionality, improving query writing efficiency.
# 🛠️ Improvements
* **Text Update in Finalize Source Form**\
Changed and improved the text in the Finalize Source Form for clarity.
* **Rate Limiter Spec Failure**\
Fixed a failure issue in the rate limiter specifications, ensuring better performance and stability.
* **Check for Null Record Data**\
Added a condition to check if record data is null, preventing errors during data processing.
* **Cursor Field Mandatory Check**\
Ensured that the cursor field is mandatory, improving data integrity during synchronization.
* **Docker Build for ARM64 Release**\
Fixed the Docker build process for ARM64 releases, ensuring compatibility across architectures.
* **UI Auto Deploy**\
Improved the UI auto-deployment process for more efficient updates.
* **Cursor Query for SOQL**\
Added support for cursor queries in SOQL, enhancing Salesforce data operations.
* **Skip Cursor Query for Empty Cursor Field**\
Implemented a check to skip cursor queries when the cursor field is empty, avoiding unnecessary processing.
* **Updated Integration Gem Version**\
Updated the integration gem to version 0.1.67, including support for Athena source, Zendesk, and HTTP destinations.
* **Removed Stale User Management APIs**\
Deleted outdated user management APIs and made changes to role ID handling for better security.
* **Color and Logo Theme Update**\
Changed colors and logos to align with the new theme, providing a refreshed UI appearance.
* **Refactored Modeling Method Screen**\
Refactored the modeling method screen for better usability and code maintainability.
* **Removed Hardcoded UI Schema**\
Removed hardcoded UI schema elements, making the UI more dynamic and adaptable.
* **Heartbeat Timeout for Loader**\
Updated the heartbeat timeout for the loader, improving the reliability of the loading process.
* **Integration Gem to 1.63**\
Bumped the integration gem version to 1.63, including various improvements and bug fixes.
* **Core Chakra Config Update**\
Updated the core Chakra UI configuration to support new branding requirements.
* **Branding Support in Config**\
Modified the configuration to support custom branding, allowing for more personalized user experiences.
* **Strong Migration Gem Addition**\
Integrated the Strong Migration gem to ensure safer and more efficient database migrations.
Stay tuned for more exciting updates in future releases!
---
# Source: https://docs.squared.ai/release-notes/2024/November-2024.md
> ## Documentation Index
> Fetch the complete documentation index at: https://docs.squared.ai/llms.txt
> Use this file to discover all available pages before exploring further.
# November 2024 releases
> Release updates for the month of November
# 🚀 New Features
### **Add HTTP Model Source Connector**
Enables seamless integration with HTTP-based model sources, allowing users to fetch and manage data directly from APIs with greater flexibility.
### **Paginate and Delete Data App**
Introduces functionality to paginate data within apps and delete them as needed, improving data app lifecycle management.
### **Data App Report Export**
Enables exporting comprehensive reports from data apps, making it easier to share insights with stakeholders.
### **Fetch JSON Schema from Model**
Adds support to fetch the JSON schema for models, aiding in better structure and schema validation.
### **Custom Preview of Data Apps**
Offers a customizable preview experience for data apps, allowing users to tailor the visualization to their needs.
### **Bar Chart Visual Type**
Introduces bar charts as a new visual type, complete with a color picker for enhanced customization.
### **Support Multiple Data in a Single Chart**
Allows users to combine multiple datasets into a single chart, providing a consolidated view of insights.
### **Mailchimp Destination Connector**
Adds a connector for Mailchimp, enabling direct data integration with email marketing campaigns.
### **Session Management During Rendering**
Improves session handling for rendering data apps, ensuring smoother and more secure experiences.
### **Update iFrame URL for Multiple Components**
Supports multiple visual components within a single iFrame, streamlining complex data app designs.
***
# 🔧 Improvements
### **Error Handling Enhancements**
Improved logging for duplicated primary keys and other edge cases to ensure smoother operations.
### **Borderless iFrame Rendering**
Removed borders from iFrame elements for a cleaner, more modern design.
### **Audit Logging Across Controllers**
Audit logs are now available for sync, report, user, role, and feedback controllers to improve traceability and compliance.
### **Improved Session Management**
Fixed session management bugs to enhance user experience during data app rendering.
### **Responsive Data App Rendering**
Improved rendering for smaller elements to ensure better usability on various screen sizes.
### **Improved Token Expiry**
Increased token expiry duration for extended session stability.
***
# ⚙️ Miscellaneous Updates
* Added icons for HTTP Model for better visual representation.
* Refactored code to remove hardcoded elements and improve maintainability.
* Updated dependencies to resolve build and compatibility issues.
* Enhanced feedback submission with component-specific IDs for more precise data collection.
***
---
# Source: https://docs.squared.ai/release-notes/2025/November-2025.md
> ## Documentation Index
> Fetch the complete documentation index at: https://docs.squared.ai/llms.txt
> Use this file to discover all available pages before exploring further.
# November 2025 Releases
> Release updates for the month of November
## 🚀 Features
* **Workflow Builder Control Panel**\
Added control panel for workflow builder with enhanced management capabilities.
* **Export Workflows as Slack App**\
Enabled exporting workflows as Slack applications for seamless team integration.
* **Embeddable Chat Assistants**\
Introduced embeddable assistant support with script updates for embedding chatbots in external applications.
* **Hosted Data Store**\
Added Hosted Database and Hosted Table support with complete CRUD APIs for managed data storage.
* **Semistructured Data Support**\
Added semistructured model query type with configuration support for handling partially structured data formats.
* **Primary Key Disabled Callout**\
Added callout notification when primary key is disabled to improve user awareness.
* **Google Drive Connector Refactor**\
Refactored Google Drive source connector for improved performance and reliability.
* **Larger CI Runner**\
Added support for new larger runner in CI pipeline for faster builds.
## 🐛 Bug Fixes
* **Spec Fix**\
Resolved specification test issues.
* **AWS Bedrock Sub-Category**\
Changed AWS Bedrock sub-category for proper classification.
* **Embeddable Assistant Variable**\
Fixed variable handling in embeddable assistant configuration.
* **Message Content Fallback**\
Assign message to content at fallback for proper error handling.
* **Chat Messages Overflow**\
Added overflow handling to chat messages for long content.
* **Interface Toggle Condition**\
Fixed condition handling for interface toggle state.
* **Google Drive File Download**\
Fixed errors when downloading files from Drive with backslashes and next\_page\_token clearing issues.
* **Duplicate Submissions**\
Handled duplicate form submissions to prevent data duplication.
* **Semistructure Column Mapping**\
Fixed missing columns for mapping in semistructure models.
* **Lightning Request Timeout**\
Increased lightning request timeout and removed explicit DPI settings.
* **Enterprise Config Fetch**\
Updated MW fetch to use enterprise configuration.
* **Store ID in Connector List**\
Fixed returning store ID in connector list API.
* **File Upload for Assistants**\
Fixed file upload functionality for assistant interactions.
* **File Prompt and Response**\
Fixed file prompt and response handling in chat.
* **Unit Test Coverage CI**\
Fixed unit test coverage reporting in CI pipeline.
## 🚜 Refactor
* **Welcome Message Rename**\
Changed introduction\_message to welcome\_message in channel\_join for consistency.
* **Chatbot Unified Component**\
Refactored chatbot into unified component for better maintainability.
* **Hosted Data Store Creation**\
Refactored hosted data store creation workflow.
* **Data Store Delete API**\
Removed enable check for Data Store delete API.
* **Hosted Data Stores Validation**\
Added raise for existing hosted data stores validation.
* **Connector Host Addition**\
Added host field to connector configuration.
* **Axios Config Unification**\
Updated axios config to be common for enterprise and CE APIs.
* **SQL Script Table Rename**\
Allowed update SQL script to rename tables.
## ⚙️ Miscellaneous Tasks
* **LLM Component Enhancement**\
Enhanced LLM Component to handle Generic OpenAI endpoints.
* **PostHog Feature Flags**\
Implemented PostHog feature flag integration for controlled rollouts.
* **Slack Bot Chat History**\
Added chat history support to Slack Bot.
* **Template ID for Hosted Data Store**\
Added template ID to Hosted Data Store model.
* **Vector Store Template API**\
Added Template API for Vector Store configuration.
* **Data App Auth for List API**\
Added data\_app\_auth support for list API endpoints.
* **Server Gem Update**\
Updated Server Gem to version 0.34.7.
* **Hosted DB APIs**\
Added Create, Index, Update, Destroy, Enable, and Delete APIs for Hosted Data Store and Tables.
* **Component Failure Scenarios**\
Added failure scenarios handling for workflow components.
* **PGUtils Addition**\
Added PGUtils utility for PostgreSQL operations.
* **Embed Login Header**\
Added login support with X-App-Context header for embed scenarios.
* **Workflow Model RBAC**\
Added RBAC changes for workflow model permissions.
* **Data Store Template Refactor**\
Refactored Data Store template configuration.
* **Integrations Gem Updates**\
Upgraded multiwoven-integrations gem through versions 0.34.11.
* **Hosted DB Connectors**\
Added connectors for hosted database integration.
* **Connector Model Configuration**\
Added empty configuration support for Connector model.
* **Sync-Based Table Updates**\
Updated data store table based on sync creation.
* **Hosted Data Store Connector Definition**\
Added hosted data store to connector definition.
* **PostgreSQL Destination Refactor**\
Refactored PostgreSQL Destination Connector for improved performance.
---
# Source: https://docs.squared.ai/release-notes/November_2024.md
# November 2024 releases
> Release updates for the month of November
# 🚀 New Features
### **Add HTTP Model Source Connector**
Enables seamless integration with HTTP-based model sources, allowing users to fetch and manage data directly from APIs with greater flexibility.
### **Paginate and Delete Data App**
Introduces functionality to paginate data within apps and delete them as needed, improving data app lifecycle management.
### **Data App Report Export**
Enables exporting comprehensive reports from data apps, making it easier to share insights with stakeholders.
### **Fetch JSON Schema from Model**
Adds support to fetch the JSON schema for models, aiding in better structure and schema validation.
### **Custom Preview of Data Apps**
Offers a customizable preview experience for data apps, allowing users to tailor the visualization to their needs.
### **Bar Chart Visual Type**
Introduces bar charts as a new visual type, complete with a color picker for enhanced customization.
### **Support Multiple Data in a Single Chart**
Allows users to combine multiple datasets into a single chart, providing a consolidated view of insights.
### **Mailchimp Destination Connector**
Adds a connector for Mailchimp, enabling direct data integration with email marketing campaigns.
### **Session Management During Rendering**
Improves session handling for rendering data apps, ensuring smoother and more secure experiences.
### **Update iFrame URL for Multiple Components**
Supports multiple visual components within a single iFrame, streamlining complex data app designs.
***
# 🔧 Improvements
### **Error Handling Enhancements**
Improved logging for duplicated primary keys and other edge cases to ensure smoother operations.
### **Borderless iFrame Rendering**
Removed borders from iFrame elements for a cleaner, more modern design.
### **Audit Logging Across Controllers**
Audit logs are now available for sync, report, user, role, and feedback controllers to improve traceability and compliance.
### **Improved Session Management**
Fixed session management bugs to enhance user experience during data app rendering.
### **Responsive Data App Rendering**
Improved rendering for smaller elements to ensure better usability on various screen sizes.
### **Improved Token Expiry**
Increased token expiry duration for extended session stability.
***
# ⚙️ Miscellaneous Updates
* Added icons for HTTP Model for better visual representation.
* Refactored code to remove hardcoded elements and improve maintainability.
* Updated dependencies to resolve build and compatibility issues.
* Enhanced feedback submission with component-specific IDs for more precise data collection.
***
---
# Source: https://docs.squared.ai/release-notes/2024/October-2024.md
> ## Documentation Index
> Fetch the complete documentation index at: https://docs.squared.ai/llms.txt
> Use this file to discover all available pages before exploring further.
# October 2024 releases
> Release updates for the month of October
# 🚀 New Features
* **Data Apps Configurations and Rendering**\
Provides robust configurations and rendering capabilities for data apps, enhancing customization.
* **Scale and Text Input Feedback Methods**\
Introduces new feedback options with scale and text inputs to capture user insights effectively.
* **Support for Multiple Visual Components**\
Expands visualization options by supporting multiple visual components, enriching data presentation.
* **Audit Log Filter**\
Adds a filter feature in the Audit Log, simplifying the process of finding specific entries.
***
# 🛠 Improvements
* **Disable Mixpanel Tracking**\
Disabled Mixpanel tracking for enhanced data privacy and user control.
* **Data App Runner Script URL Fix**\
Resolved an issue with the UI host URL in the data app runner script for smoother operation.
* **Text Input Bugs**\
Fixed bugs affecting text input functionality, improving stability and responsiveness.
* **Dynamic Variables in Naming and Filters**\
Adjusted naming conventions and filters to rely exclusively on dynamic variables, increasing flexibility and reducing redundancy.
* **Sort Data Apps List in Descending Order**\
The data apps list is now sorted in descending order by default for easier access to recent entries.
* **Data App Response Enhancements**\
Updated responses for data app creation and update APIs, improving clarity and usability.
***
> For further details on any feature or update, check the detailed documentation or contact our support team. We’re here to help make your experience seamless!
***
---
# Source: https://docs.squared.ai/release-notes/2025/October-2025.md
> ## Documentation Index
> Fetch the complete documentation index at: https://docs.squared.ai/llms.txt
> Use this file to discover all available pages before exploring further.
# October 2025 Releases
> Release updates for the month of October
## 🚀 Features
* **Conditional Component**\
Added conditional component functionality for enhanced workflow control.
* **Conditional Workflow Component**\
Implemented conditional workflow component for enterprise workflows.
* **S3 Storage Encryption Options**\
Added encryption options to S3 storage configuration for enhanced data security.
* **Pipeline Appsignal Revision Variable**\
Updated pipelines to fix Appsignal revision variable handling.
* **Deploy Pipeline Cleanup**\
Cleaned up deploy pipelines for improved maintainability.
* **Deploy Pipeline Updates**\
Updated deploy pipeline configuration and processes.
* **License Links Update**\
Updated license links in Readme files for UI and server components.
* **Workflow Job Timeout**\
Added timeout configuration at job level for all workflows.
* **Full Screen Chart Modal**\
Added modal functionality to view charts in full screen mode.
* **Custom Date Range for Reports**\
Implemented custom date range filter for data app reports.
## 🐛 Bug Fixes
* **Preview Image Display**\
Fixed preview image being pushed down in the interface.
* **CI/CD Spec Failure**\
Resolved CI/CD specification test failures.
* **Chatbot White Background**\
Fixed white background issue in chatbot data app.
* **Workflow Integration Folder**\
Renamed integration folder for Workflow Integration consistency.
* **Agent Selection Reset**\
Fixed issue where selectedAgent was not set to null when creating new Agent.
## 🚜 Refactor
* **Google Drive Textract Environment Variable**\
Renamed environment variable for Textract in Google Drive connector.
## ⚙️ Miscellaneous Tasks
* **Slack App Database Integration**\
Added Slack App to database schema.
* **Branding Update**\
Updated multiwoven references to AI Squared across the codebase.
* **Integrations Gem Upgrade**\
Upgraded integrations gem to version 0.34.5.
* **Reports Tab Date Range**\
Added custom date range functionality for reports tab in data apps.
* **Security Gem Updates**\
Upgraded git and rexml gems per security findings.
---
# Source: https://docs.squared.ai/release-notes/October_2024.md
# October 2024 releases
> Release updates for the month of October
# 🚀 New Features
* **Data Apps Configurations and Rendering**\
Provides robust configurations and rendering capabilities for data apps, enhancing customization.
* **Scale and Text Input Feedback Methods**\
Introduces new feedback options with scale and text inputs to capture user insights effectively.
* **Support for Multiple Visual Components**\
Expands visualization options by supporting multiple visual components, enriching data presentation.
* **Audit Log Filter**\
Adds a filter feature in the Audit Log, simplifying the process of finding specific entries.
***
# 🛠 Improvements
* **Disable Mixpanel Tracking**\
Disabled Mixpanel tracking for enhanced data privacy and user control.
* **Data App Runner Script URL Fix**\
Resolved an issue with the UI host URL in the data app runner script for smoother operation.
* **Text Input Bugs**\
Fixed bugs affecting text input functionality, improving stability and responsiveness.
* **Dynamic Variables in Naming and Filters**\
Adjusted naming conventions and filters to rely exclusively on dynamic variables, increasing flexibility and reducing redundancy.
* **Sort Data Apps List in Descending Order**\
The data apps list is now sorted in descending order by default for easier access to recent entries.
* **Data App Response Enhancements**\
Updated responses for data app creation and update APIs, improving clarity and usability.
***
> For further details on any feature or update, check the detailed documentation or contact our support team. We’re here to help make your experience seamless!
***
---
# Source: https://docs.squared.ai/release-notes/2024/September-2024.md
> ## Documentation Index
> Fetch the complete documentation index at: https://docs.squared.ai/llms.txt
> Use this file to discover all available pages before exploring further.
# September 2024 releases
> Release updates for the month of September
# 🚀 New Features
* **AI/ML Sources**\
Introduces support for a range of AI/ML sources, broadening model integration capabilities.
* **Added AI/ML Models Support**\
Comprehensive support for integrating and managing AI and ML models across various workflows.
* **Data App Update API**\
This API endpoint allows users to update existing data apps without needing to recreate them from scratch. By enabling seamless updates with the latest configurations and features, users can Save time, Improve accuracy and Ensure consistency
* **Donut Chart Component**
The donut chart component enhances data visualization by providing a clear, concise way to represent proportions or percentages within a dataset.
* **Google Vertex Model Source Connector**\
Enables connection to Google Vertex AI, expanding options for model sourcing and integration.
***
# 🛠️ Improvements
* **Verify User After Signup**\
A new verification step ensures all users are authenticated right after signing up, enhancing security.
* **Enable and Disable Sync via UI**\
Users can now control sync processes directly from the UI, giving flexibility to manage syncs as needed.
* **Disable Catalog Validation for Data Models**\
Catalog validation is now disabled for non-AI data models, improving compatibility and accuracy.
* **Model Query Preview API Error Handling**\
Added try-catch blocks to the model query preview API call, providing better error management and debugging.
* **Fixed Sync Mapping for Model Column Values**\
Corrected an issue in sync mapping to ensure accurate model column value assignments.
* **Test Connection Text**\
Fixed display issues with the "Test Connection" text, making it clearer and more user-friendly.
* **Enable Catalog Validation Only for AI Models**\
Ensures that catalog validation is applied exclusively to AI models, maintaining model integrity.
* **Disable Catalog Validation for Data Models**\
Disables catalog validation for non-AI data models to improve compatibility.
* **AIML Source Schema Components**\
Refined AI/ML source schema components, enhancing performance and readability in configurations.
* **Setup Charting Library and Tailwind CSS**\
Tailwind CSS integration and charting library setup provide better styling and data visualization tools.
* **Add Model Name in Data App Response**\
Model names are now included in data app responses, offering better clarity for users.
* **Add Connector Icon in Data App Response**\
Connector icons are displayed within data app responses, making it easier to identify connections visually.
* **Add Catalog Presence Validation for Models**\
Ensures that a catalog is present and validated for all applicable models.
* **Validate Catalog for Query Source**\
Introduces validation for query source catalogs, enhancing data accuracy.
* **Add Filtering Scope to Connectors**\
Allows for targeted filtering within connectors, simplifying the search for relevant connections.
* **Common Elements for Sign Up & Sign In**\
Moved shared components for sign-up and sign-in into separate views to improve code organization.
* **Updated Sync Records UX**\
Enhanced the user experience for sync records, providing a more intuitive interface.
* **Setup Models Renamed to Define Setup**\
Updated terminology from "setup models" to "define setup" for clearer, more precise language.
***
> For further details on any feature or update, check the detailed documentation or contact our support team. We’re here to help make your experience seamless!
***
---
# Source: https://docs.squared.ai/release-notes/2025/September-2025.md
> ## Documentation Index
> Fetch the complete documentation index at: https://docs.squared.ai/llms.txt
> Use this file to discover all available pages before exploring further.
# September 2025 Releases
> Release updates for the month of September
## 🚀 Features
* **Workflow Playground Testing**\
Added playground environment for testing workflows before deployment.
* **HTTP Source Connector**\
Introduced HTTP as a new source connector for fetching data from REST APIs and web endpoints.
* **Chat Assistant Session History**\
Implemented session history for chat assistants to maintain conversation context.
* **Animated Thinking Text**\
Added animated thinking text in chat responses for better user feedback during processing.
* **Custom Code Component**\
Added Custom Code Component in Workflow Builder with Python support for advanced customizations.
* **Workflow Export**\
Implemented workflow export functionality for sharing and backup purposes.
* **Custom Component Platform**\
Added platform changes to support custom component development and integration.
* **Dynamic Schema for PGVector**\
Added dynamic schema change capability for PGVector Vector Store.
* **Multi-Page PDF Support**\
Added support for processing multi-page PDF documents.
* **Full Screen Chart Modal**\
Added modal to view charts in full screen mode for better data analysis.
* **Custom Date Range Filter**\
Implemented custom date range filter for data app report filtering.
* **Remote Code Executions Model**\
Added remote code executions model changes for extended processing capabilities.
* **Invoice Catalog Results**\
Added full results to invoices catalog for comprehensive data access.
* **Deploy Workflow Updates**\
Updated deploy to staging and QA workflows for improved CI/CD.
## 🐛 Bug Fixes
* **Chat Title Trim**\
Fixed trimming of chat title during delete session modal.
* **Session Token in Workflow Run**\
Corrected session token handling in workflow run execution.
* **Chat Response Parsing**\
Fixed parsing of chat responses to handle data correctly.
* **Middleware Fix**\
Resolved middleware issues affecting request processing.
* **Python Component Logo**\
Fixed Python component logo display in workflow builder.
* **HTTP Client Increment Strategy**\
Added increment\_strategy check to HTTP Client for proper pagination.
* **Visual Component ID**\
Fixed passing visual component ID during workflow update.
* **Pinecone Namespace**\
Fixed Pinecone default namespaces and write operations.
* **Selected Agent Reset**\
Set selectedAgent to null when creating new Agent to prevent state issues.
## 🚜 Refactor
* **Sync Enhancements**\
Added source, models, and destinations to Sync for comprehensive data mapping.
* **Textract Environment Variable**\
Renamed environment variable for Textract in Google Drive connector.
## ⚙️ Miscellaneous Tasks
* **Session ID Serializer**\
Added Session ID to Data App Serializer.
* **Server Gem Updates**\
Updated server gem through versions 0.33.5 and 0.34.4.
* **Integrations Gem Update**\
Updated multiwoven integrations gem to 0.34.3.
* **PGVector Support**\
Modified vector component to support PGVector integration.
* **Workflow Chat History**\
Added chat history support for workflows.
* **HTTP Client Update**\
Updated HTTP Client with improvements and added HTTP extractor.
* **Vector Store JSON**\
Updated vector store JSON configuration.
* **SOC2 Agreement Checkboxes**\
Added agreement checkboxes for SOC2 compliance.
* **Chat Message Serializer**\
Added chat message serializer for API responses.
* **User Prompt Query Fix**\
Temporary fix for user prompt query modification.
* **Workflow Feedback**\
Added workflow feedback support for collecting user input.
* **Custom Date Range Reports**\
Added custom date range support for reports tab in data apps.
* **Security Gem Updates**\
Upgraded git and rexml gems per security findings.
---
# Source: https://docs.squared.ai/release-notes/September_2024.md
# September 2024 releases
> Release updates for the month of September
# 🚀 New Features
* **AI/ML Sources**\
Introduces support for a range of AI/ML sources, broadening model integration capabilities.
* **Added AI/ML Models Support**\
Comprehensive support for integrating and managing AI and ML models across various workflows.
* **Data App Update API**\
This API endpoint allows users to update existing data apps without needing to recreate them from scratch. By enabling seamless updates with the latest configurations and features, users can Save time, Improve accuracy and Ensure consistency
* **Donut Chart Component**
The donut chart component enhances data visualization by providing a clear, concise way to represent proportions or percentages within a dataset.
* **Google Vertex Model Source Connector**\
Enables connection to Google Vertex AI, expanding options for model sourcing and integration.
***
# 🛠️ Improvements
* **Verify User After Signup**\
A new verification step ensures all users are authenticated right after signing up, enhancing security.
* **Enable and Disable Sync via UI**\
Users can now control sync processes directly from the UI, giving flexibility to manage syncs as needed.
* **Disable Catalog Validation for Data Models**\
Catalog validation is now disabled for non-AI data models, improving compatibility and accuracy.
* **Model Query Preview API Error Handling**\
Added try-catch blocks to the model query preview API call, providing better error management and debugging.
* **Fixed Sync Mapping for Model Column Values**\
Corrected an issue in sync mapping to ensure accurate model column value assignments.
* **Test Connection Text**\
Fixed display issues with the "Test Connection" text, making it clearer and more user-friendly.
* **Enable Catalog Validation Only for AI Models**\
Ensures that catalog validation is applied exclusively to AI models, maintaining model integrity.
* **Disable Catalog Validation for Data Models**\
Disables catalog validation for non-AI data models to improve compatibility.
* **AIML Source Schema Components**\
Refined AI/ML source schema components, enhancing performance and readability in configurations.
* **Setup Charting Library and Tailwind CSS**\
Tailwind CSS integration and charting library setup provide better styling and data visualization tools.
* **Add Model Name in Data App Response**\
Model names are now included in data app responses, offering better clarity for users.
* **Add Connector Icon in Data App Response**\
Connector icons are displayed within data app responses, making it easier to identify connections visually.
* **Add Catalog Presence Validation for Models**\
Ensures that a catalog is present and validated for all applicable models.
* **Validate Catalog for Query Source**\
Introduces validation for query source catalogs, enhancing data accuracy.
* **Add Filtering Scope to Connectors**\
Allows for targeted filtering within connectors, simplifying the search for relevant connections.
* **Common Elements for Sign Up & Sign In**\
Moved shared components for sign-up and sign-in into separate views to improve code organization.
* **Updated Sync Records UX**\
Enhanced the user experience for sync records, providing a more intuitive interface.
* **Setup Models Renamed to Define Setup**\
Updated terminology from "setup models" to "define setup" for clearer, more precise language.
***
> For further details on any feature or update, check the detailed documentation or contact our support team. We’re here to help make your experience seamless!
***
---
# Source: https://docs.squared.ai/activation/add-ai-source.md
> ## Documentation Index
> Fetch the complete documentation index at: https://docs.squared.ai/llms.txt
> Use this file to discover all available pages before exploring further.
# Adding an AI/ML Source
> How to connect and configure a hosted AI/ML model source in AI Squared.
You can connect your hosted AI/ML model endpoints to AI Squared in just a few steps. This allows your models to power real-time insights across business applications.
***
## Step 1: Select Your AI/ML Source
1. Navigate to **Sources** → **AI/ML Sources** in the sidebar.
2. Click **“Add Source”**.
3. Select the AI/ML source connector from the list.
> 📸 *Add screenshot of “Add AI/ML Source” UI*
***
## Step 2: Define and Connect the Endpoint
Fill in the required connection details:
* **Endpoint Name** – A descriptive name for easy identification.
* **Endpoint URL** – The hosted URL of your AI/ML model.
* **Authentication Method** – Choose between `OAuth`, `API Key`, etc.
* **Authorization Header** – Format of the header (if applicable).
* **Secret Key** – For secure access.
* **Request Format** – Define the input structure (e.g., JSON).
* **Response Format** – Define how the model returns predictions.
> 📸 *Add screenshot of endpoint configuration UI*
***
## Step 3: Test the Source
Before saving, click **“Test Connection”** to verify that the endpoint is reachable and properly configured.
> ⚠️ If the test fails, check for errors in the endpoint URL, headers, or authentication values.
> 📸 *Add screenshot of test results with success/failure examples*
***
## Step 4: Save the Source
Once the test passes:
* Provide a name and optional description.
* Click **“Save”** to finalize setup.
* Your model source will now appear under **AI/ML Sources**.
> 📸 *Add screenshot showing saved model in the source list*
***
## Step 5: Define Input Schema
The **Input Schema** tells AI Squared how to format data before sending it to the model.
Each input field requires:
* **Name** – Matches the key in your model’s input payload.
* **Type** – `String`, `Integer`, `Float`, or `Boolean`.
* **Value Type** – `Dynamic` (from data/apps) or `Static` (fixed value).
> 📸 *Add screenshot of input schema editor*
***
## Step 6: Define Output Schema
The **Output Schema** tells AI Squared how to interpret the model's response.
Each output field requires:
* **Field Name** – The key returned by the model.
* **Type** – Define the type: `String`, `Integer`, `Float`, `Boolean`.
This ensures downstream systems or visualizations can consume the output consistently.
> 📸 *Add screenshot of output schema editor*
***
## ✅ You’re Done!
You’ve successfully added and configured your hosted AI/ML model as a source in AI Squared. Your model can now be used in **Data Apps**, **Chatbots**, and other workflow automations.
---
# Source: https://docs.squared.ai/guides/add-data-source.md
> ## Documentation Index
> Fetch the complete documentation index at: https://docs.squared.ai/llms.txt
> Use this file to discover all available pages before exploring further.
# Adding a Data Source
> How to connect and configure a business data source in AI Squared.
AI Squared allows you to integrate data from databases, warehouses, and storage systems to power downstream AI insights and business workflows.
Follow the steps below to connect your first data source.
***
## Step 1: Navigate to Data Sources
1. Go to **Sources** → **Data Sources** in the left sidebar.
2. Click **“Add Source”**.
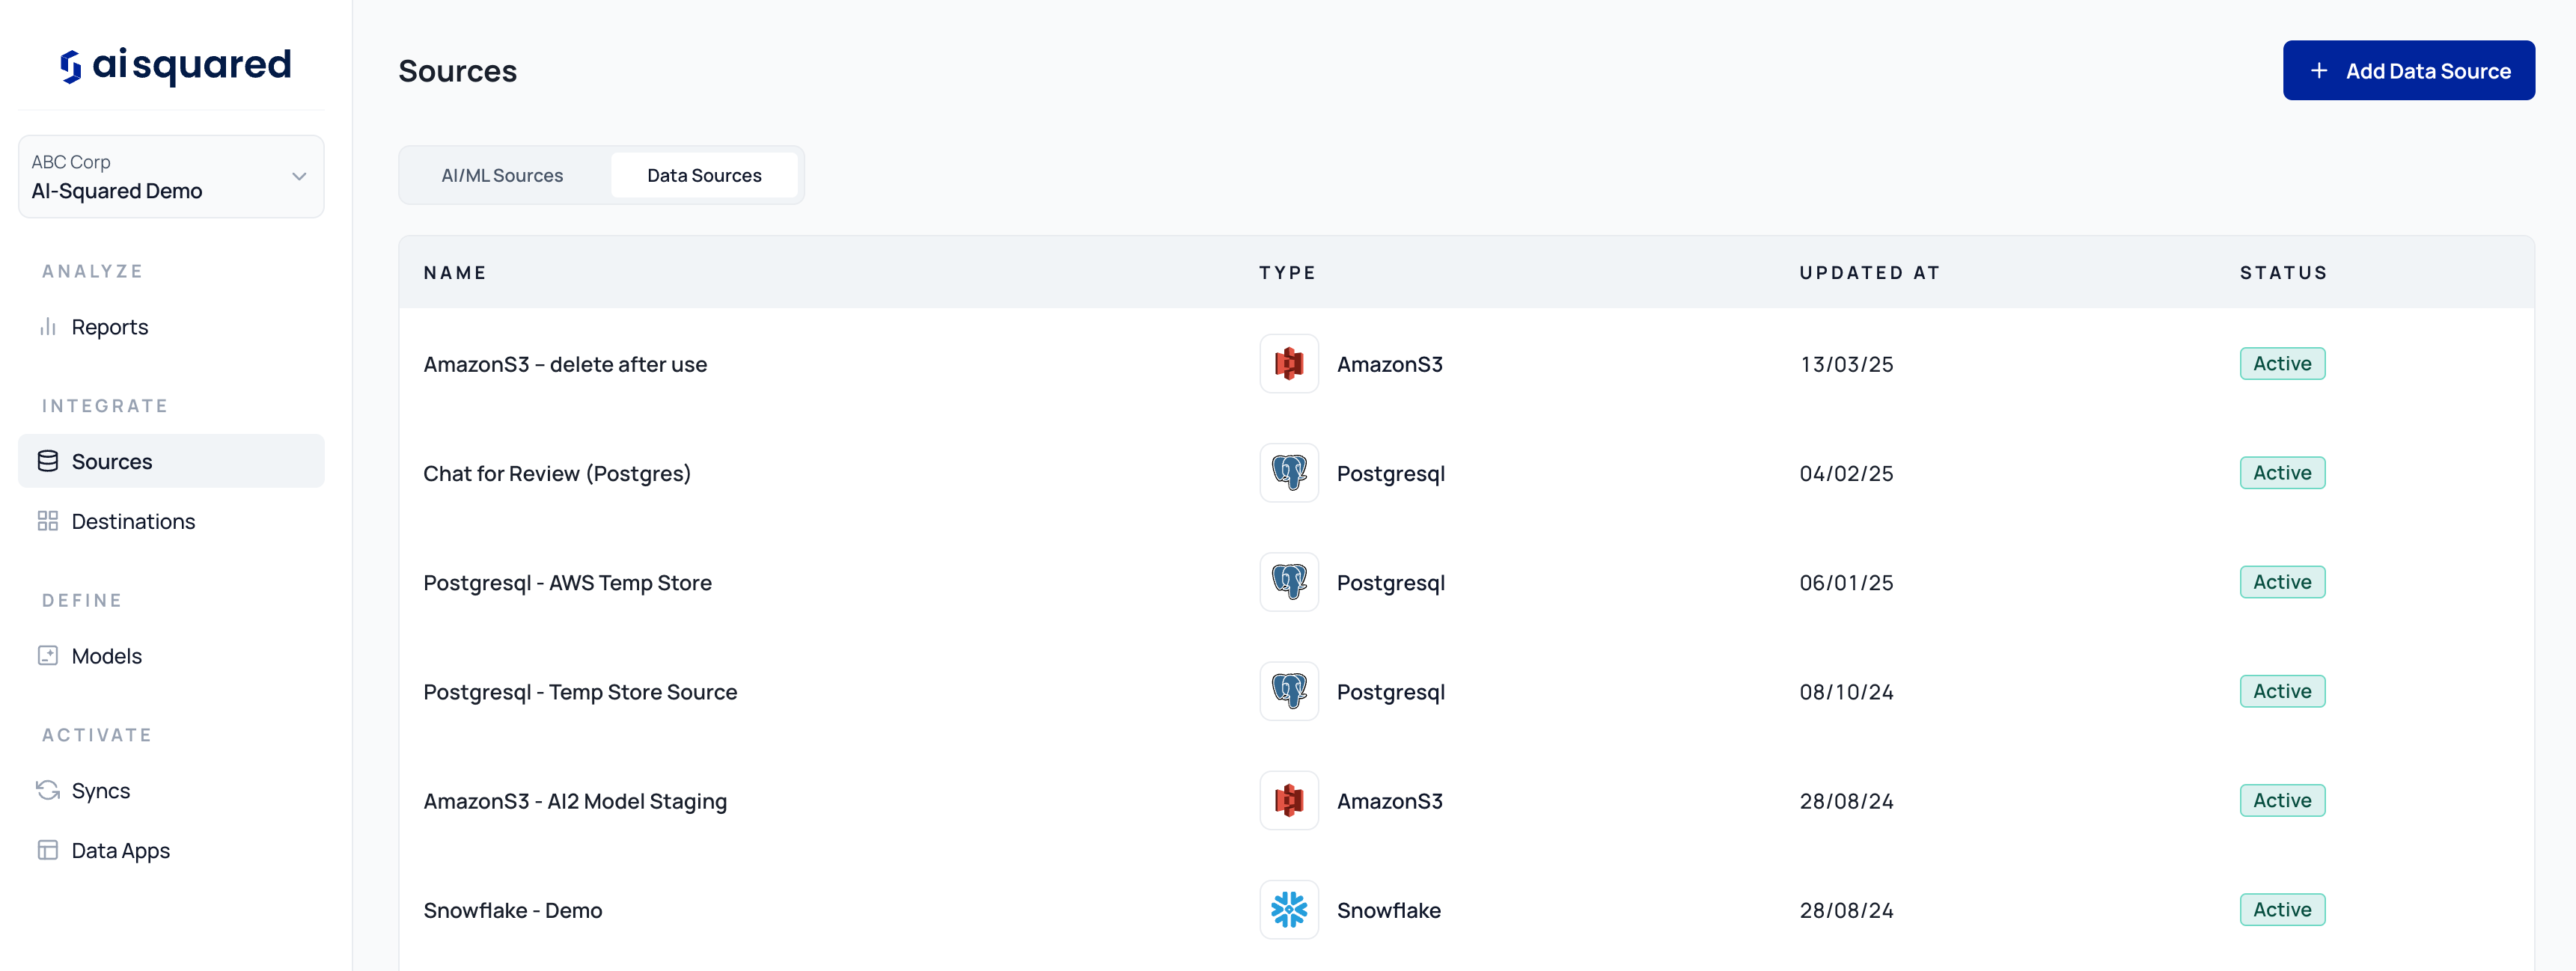 3. Select your connector from the available list (e.g., Snowflake, BigQuery, PostgreSQL, etc.).
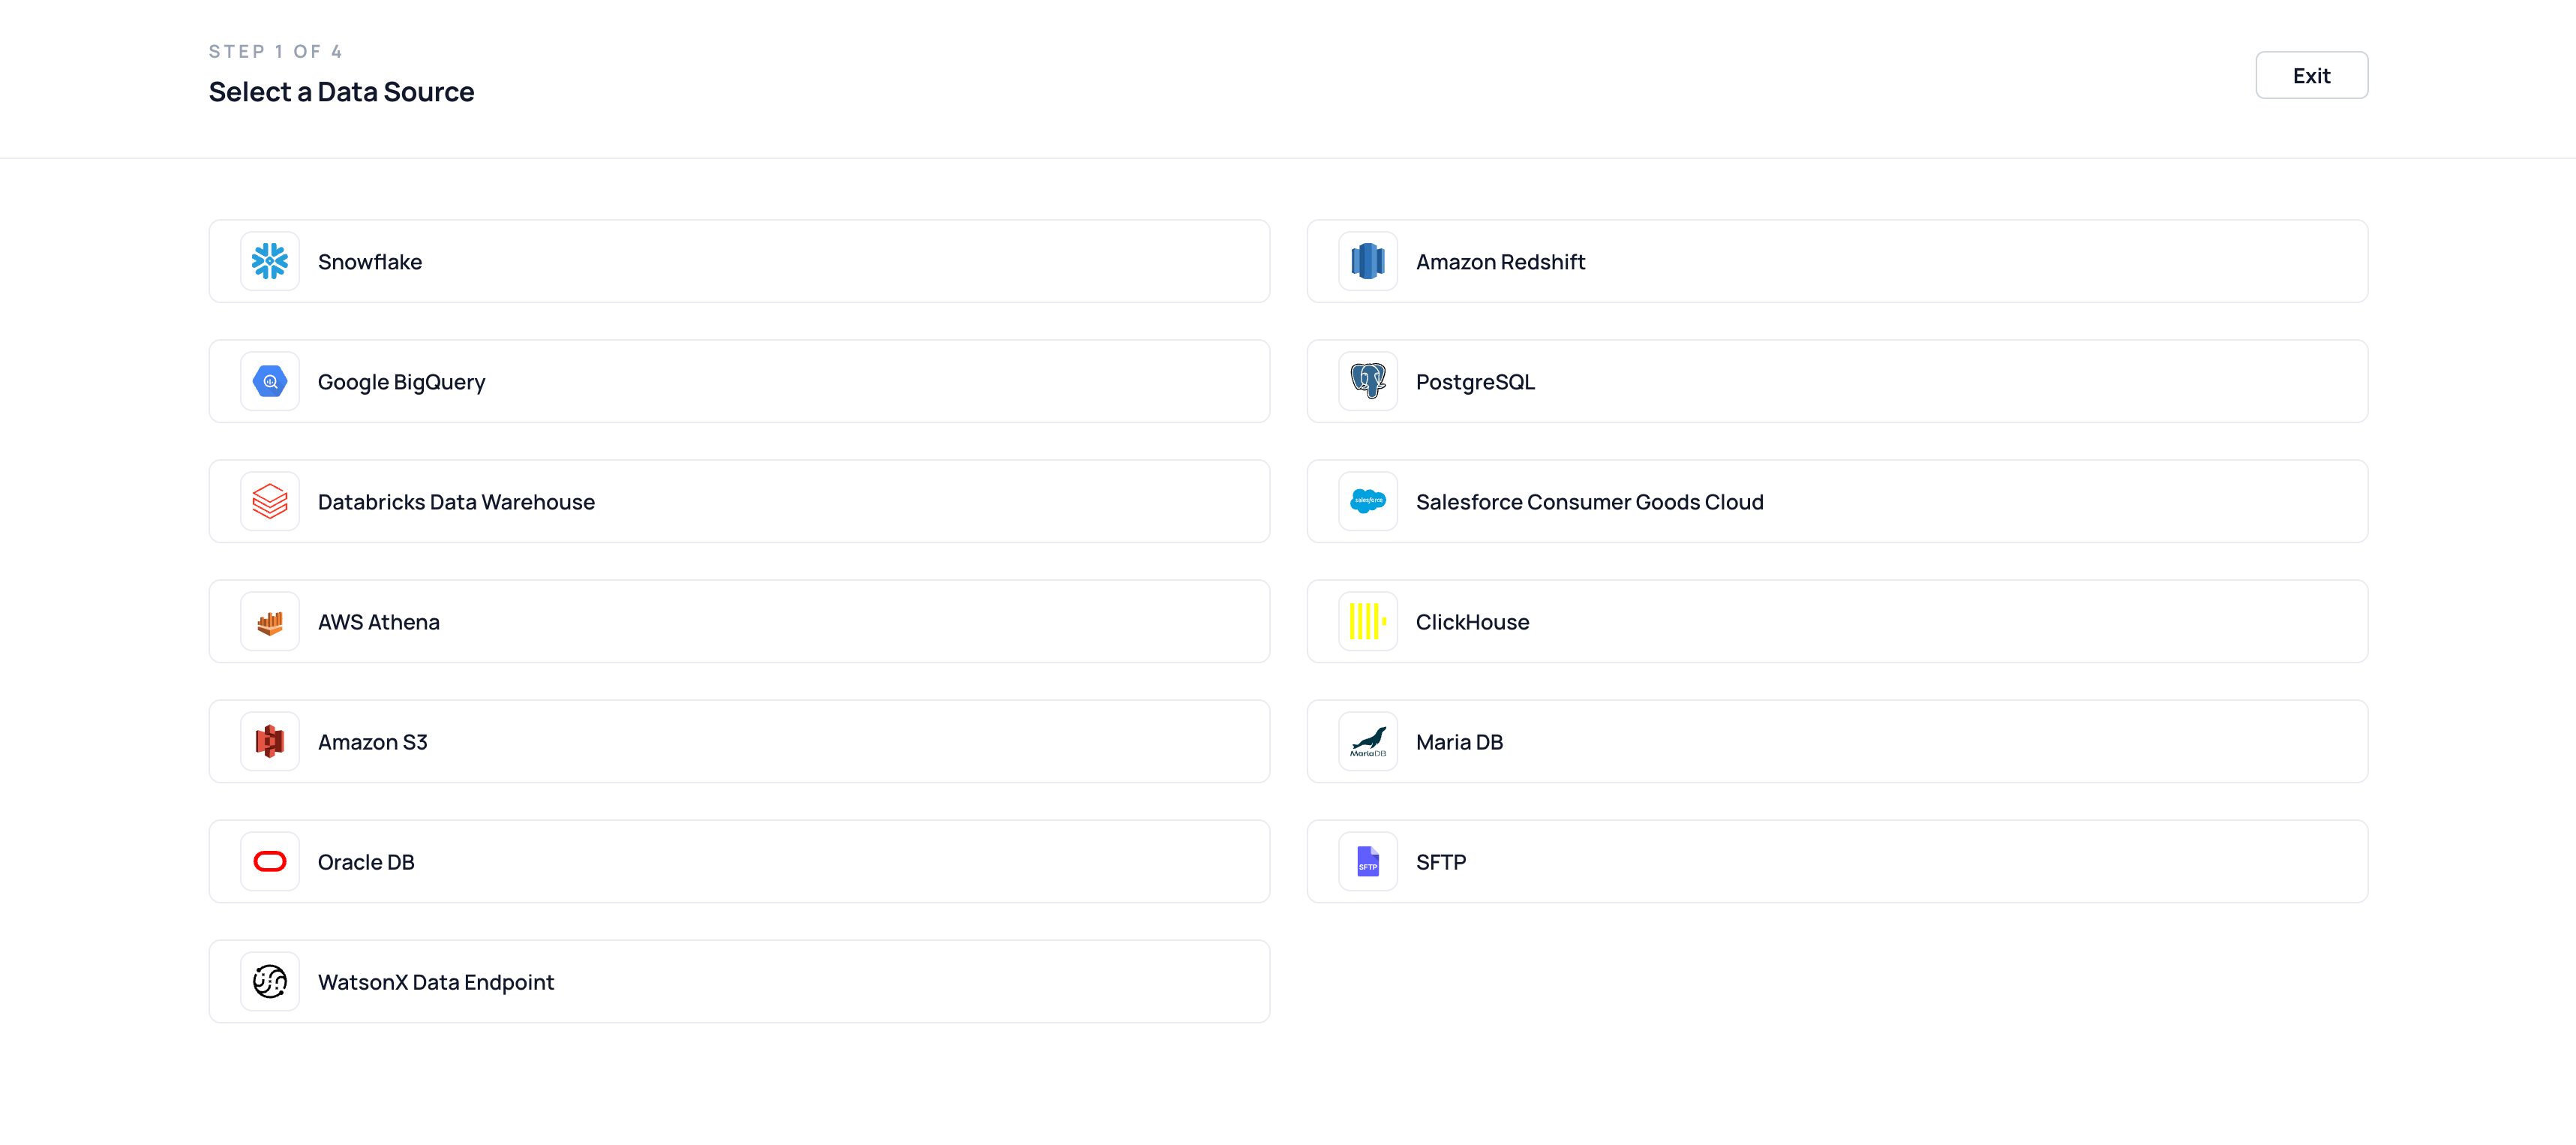 ***
## Step 2: Provide Connection Details
Each data source requires standard connection credentials. These typically include:
* **Source Name** – A descriptive label for your reference.
* **Host / Server URL** – Address of the database or data warehouse.
* **Port Number** – Default or custom port for the connection.
* **Database Name** – The name of the DB you want to access.
* **Authentication Type** – Options like password-based, token, or OAuth.
* **Username & Password / Token** – Credentials for access.
* **Schema (if applicable)** – Filter down to the relevant DB schema.
***
## Step 2: Provide Connection Details
Each data source requires standard connection credentials. These typically include:
* **Source Name** – A descriptive label for your reference.
* **Host / Server URL** – Address of the database or data warehouse.
* **Port Number** – Default or custom port for the connection.
* **Database Name** – The name of the DB you want to access.
* **Authentication Type** – Options like password-based, token, or OAuth.
* **Username & Password / Token** – Credentials for access.
* **Schema (if applicable)** – Filter down to the relevant DB schema.
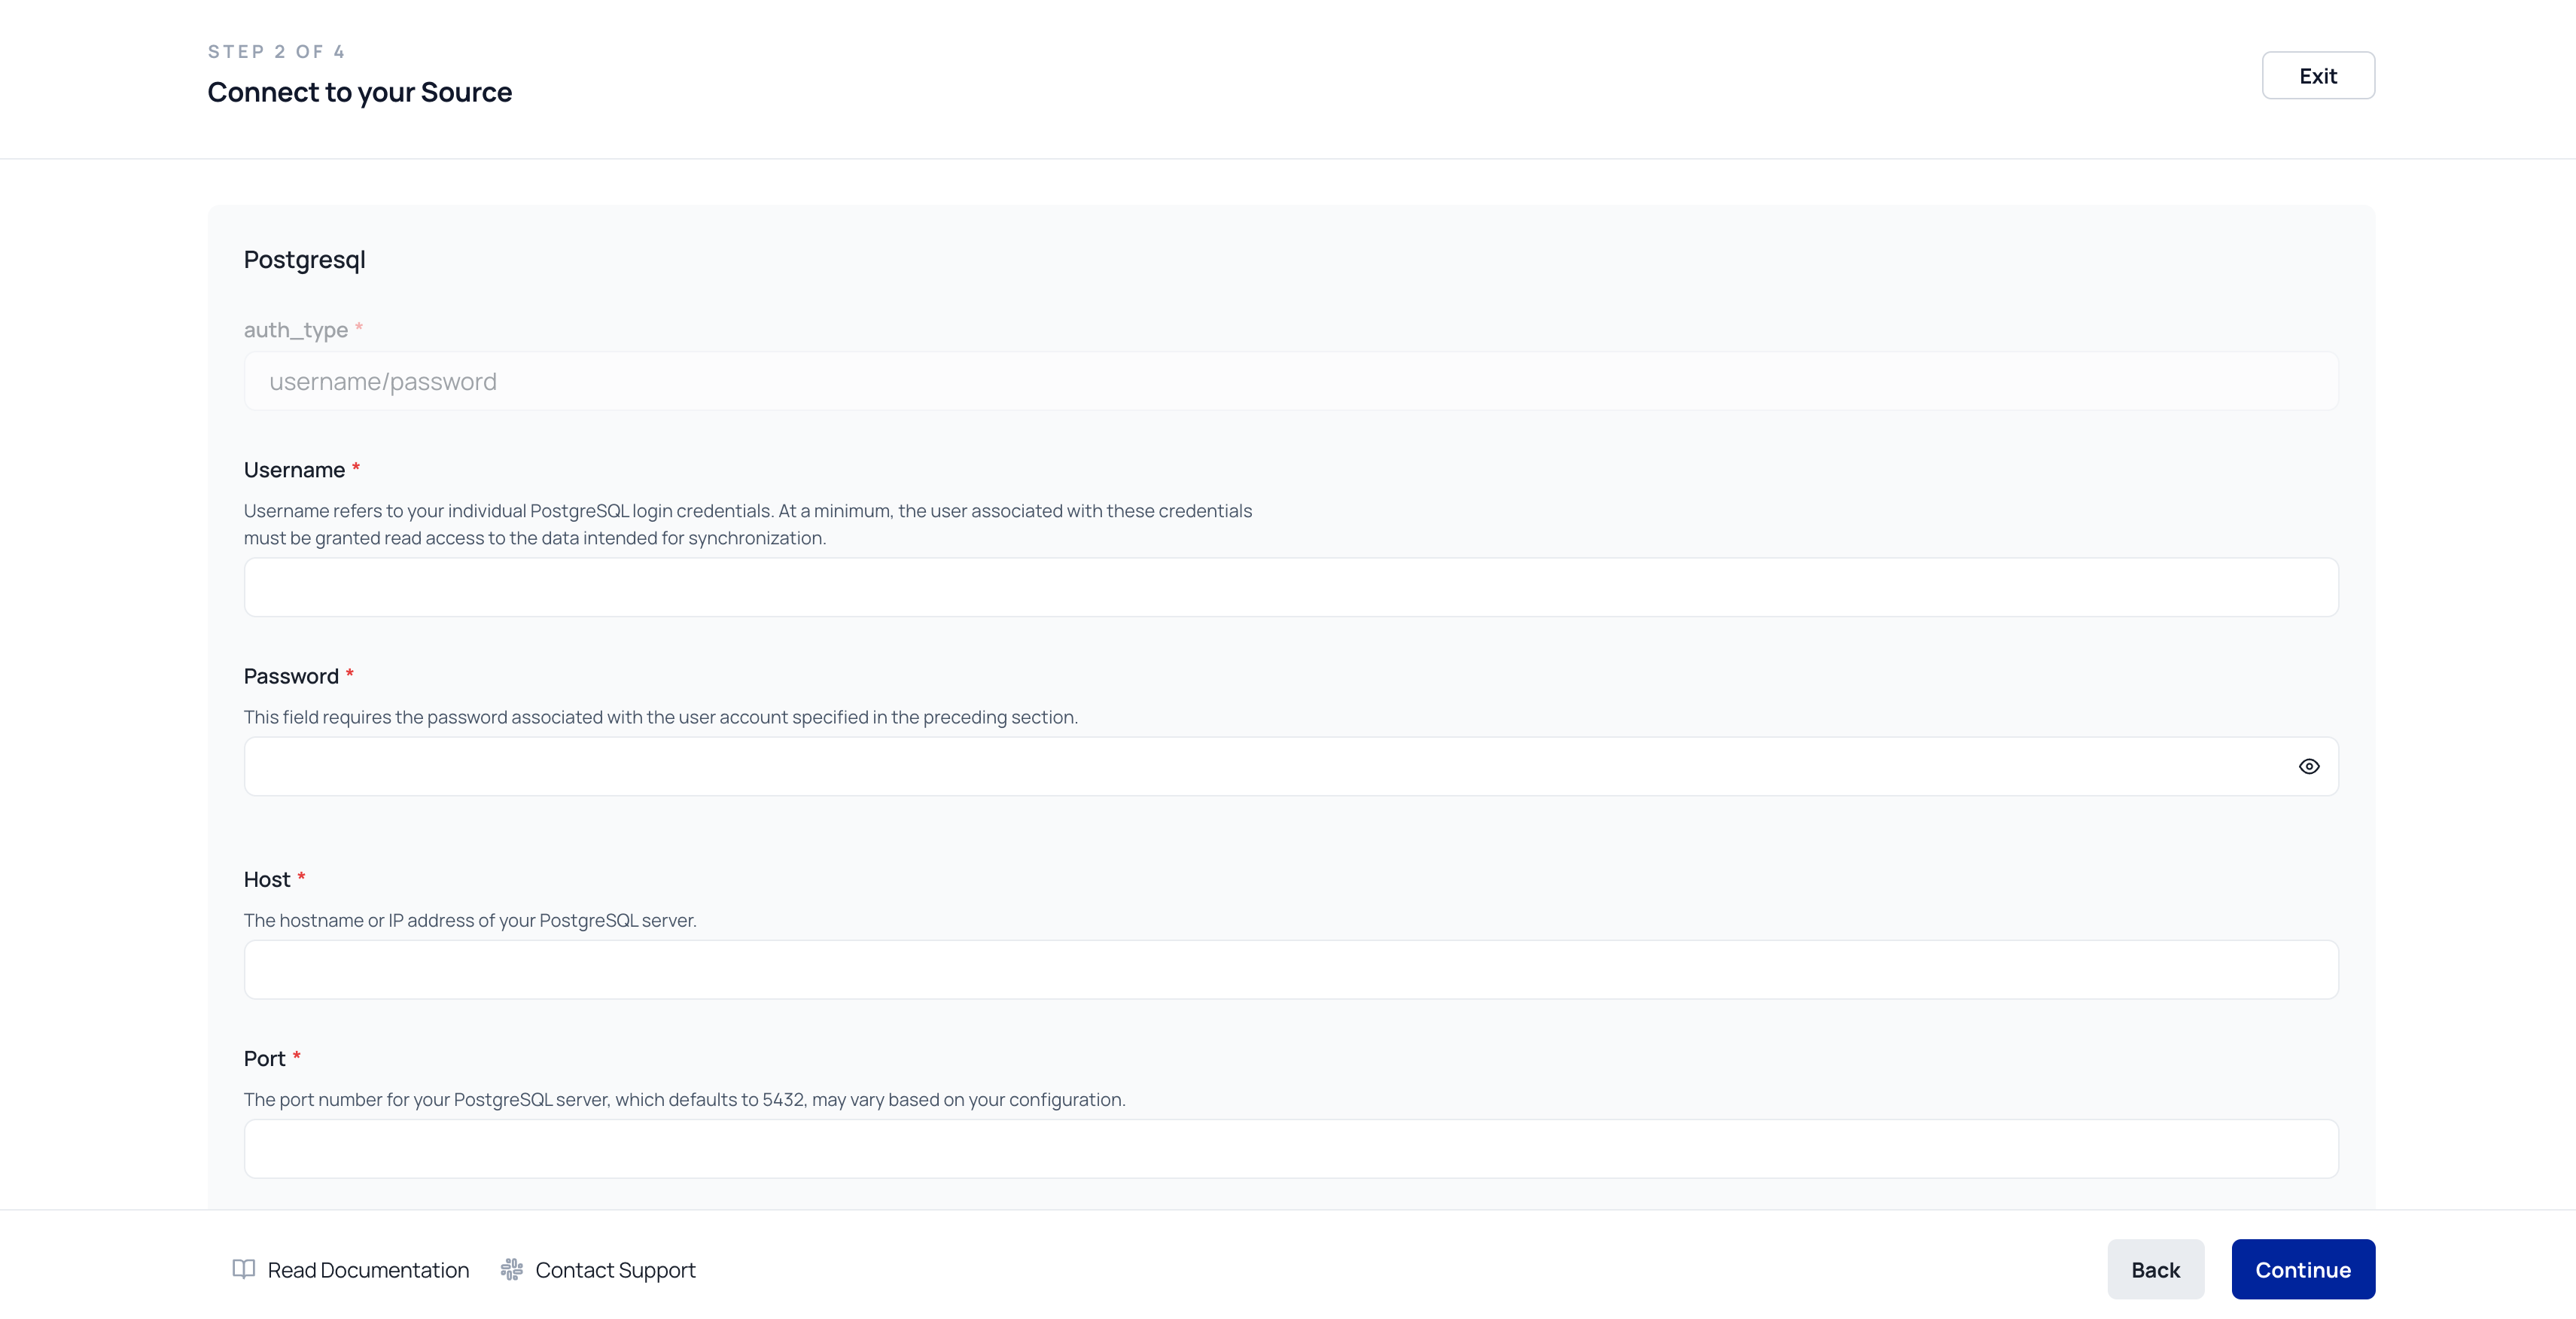 ***
## Step 3: Test the Connection
Click **“Test Connection”** to validate that your source credentials are correct and the system can access the data.
> ⚠️ Common issues include invalid credentials, incorrect hostnames, or firewall rules blocking access.
***
## Step 3: Test the Connection
Click **“Test Connection”** to validate that your source credentials are correct and the system can access the data.
> ⚠️ Common issues include invalid credentials, incorrect hostnames, or firewall rules blocking access.
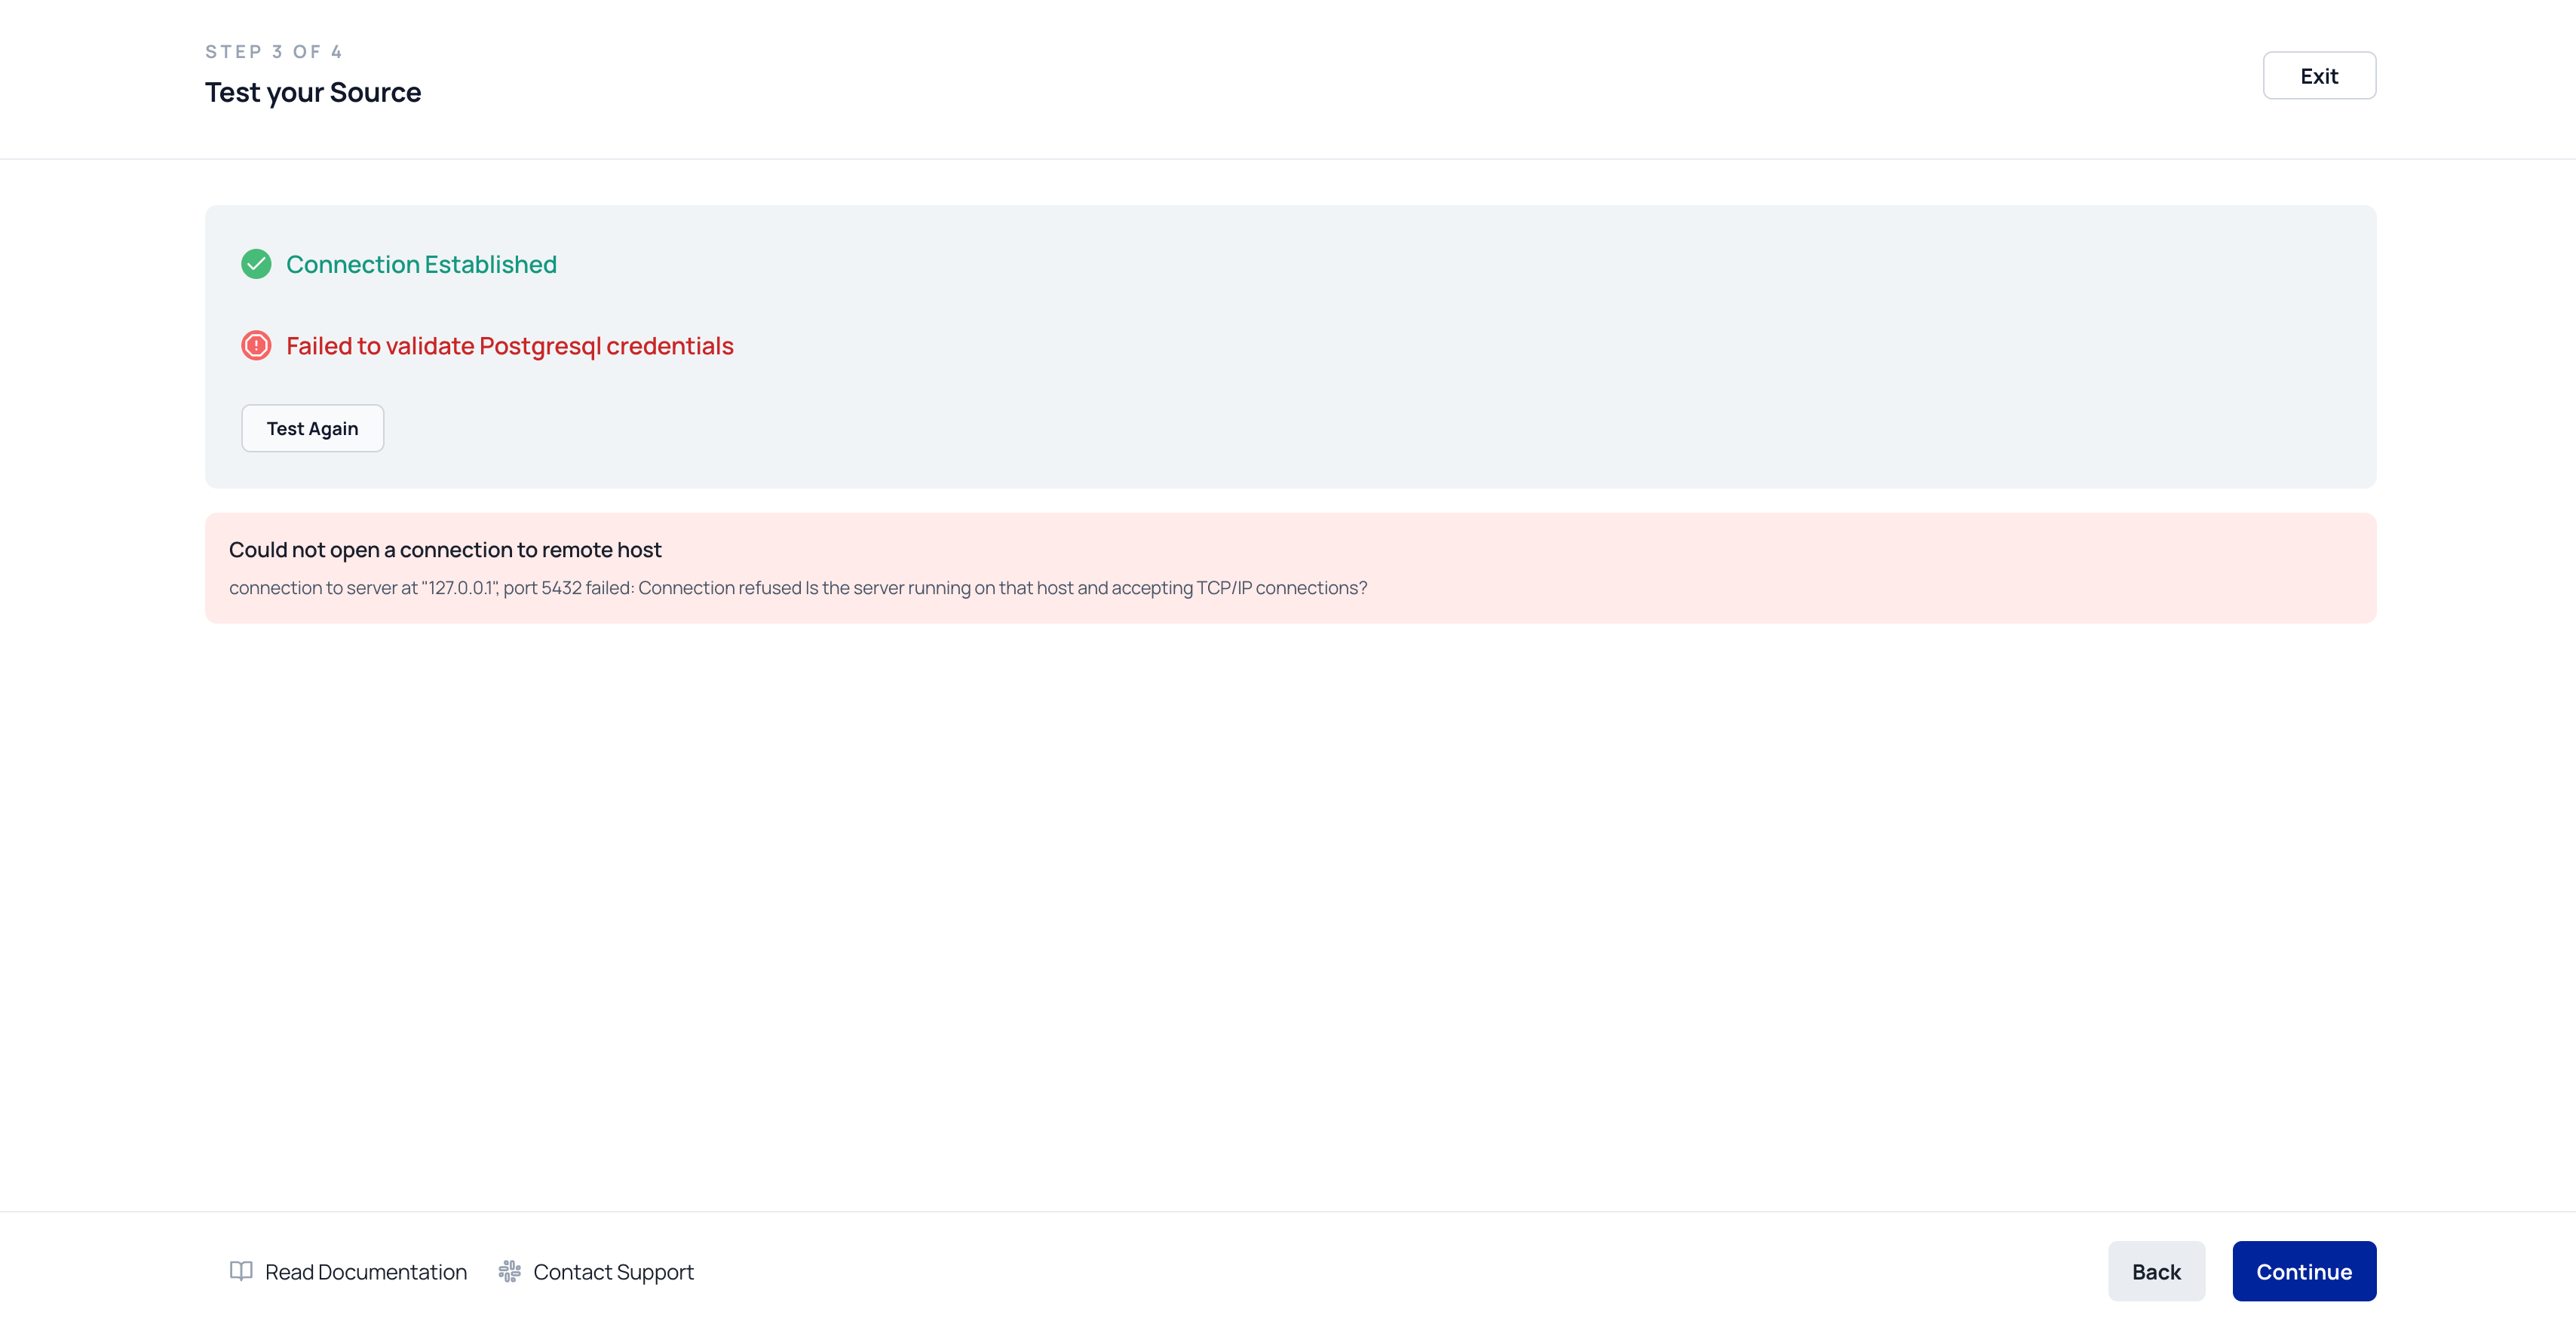 ***
## Step 4: Save the Source
After successful testing:
* Click **Finish** to finalize the connection.
* The source will now appear under **Data Sources** in your account.
***
## Step 4: Save the Source
After successful testing:
* Click **Finish** to finalize the connection.
* The source will now appear under **Data Sources** in your account.
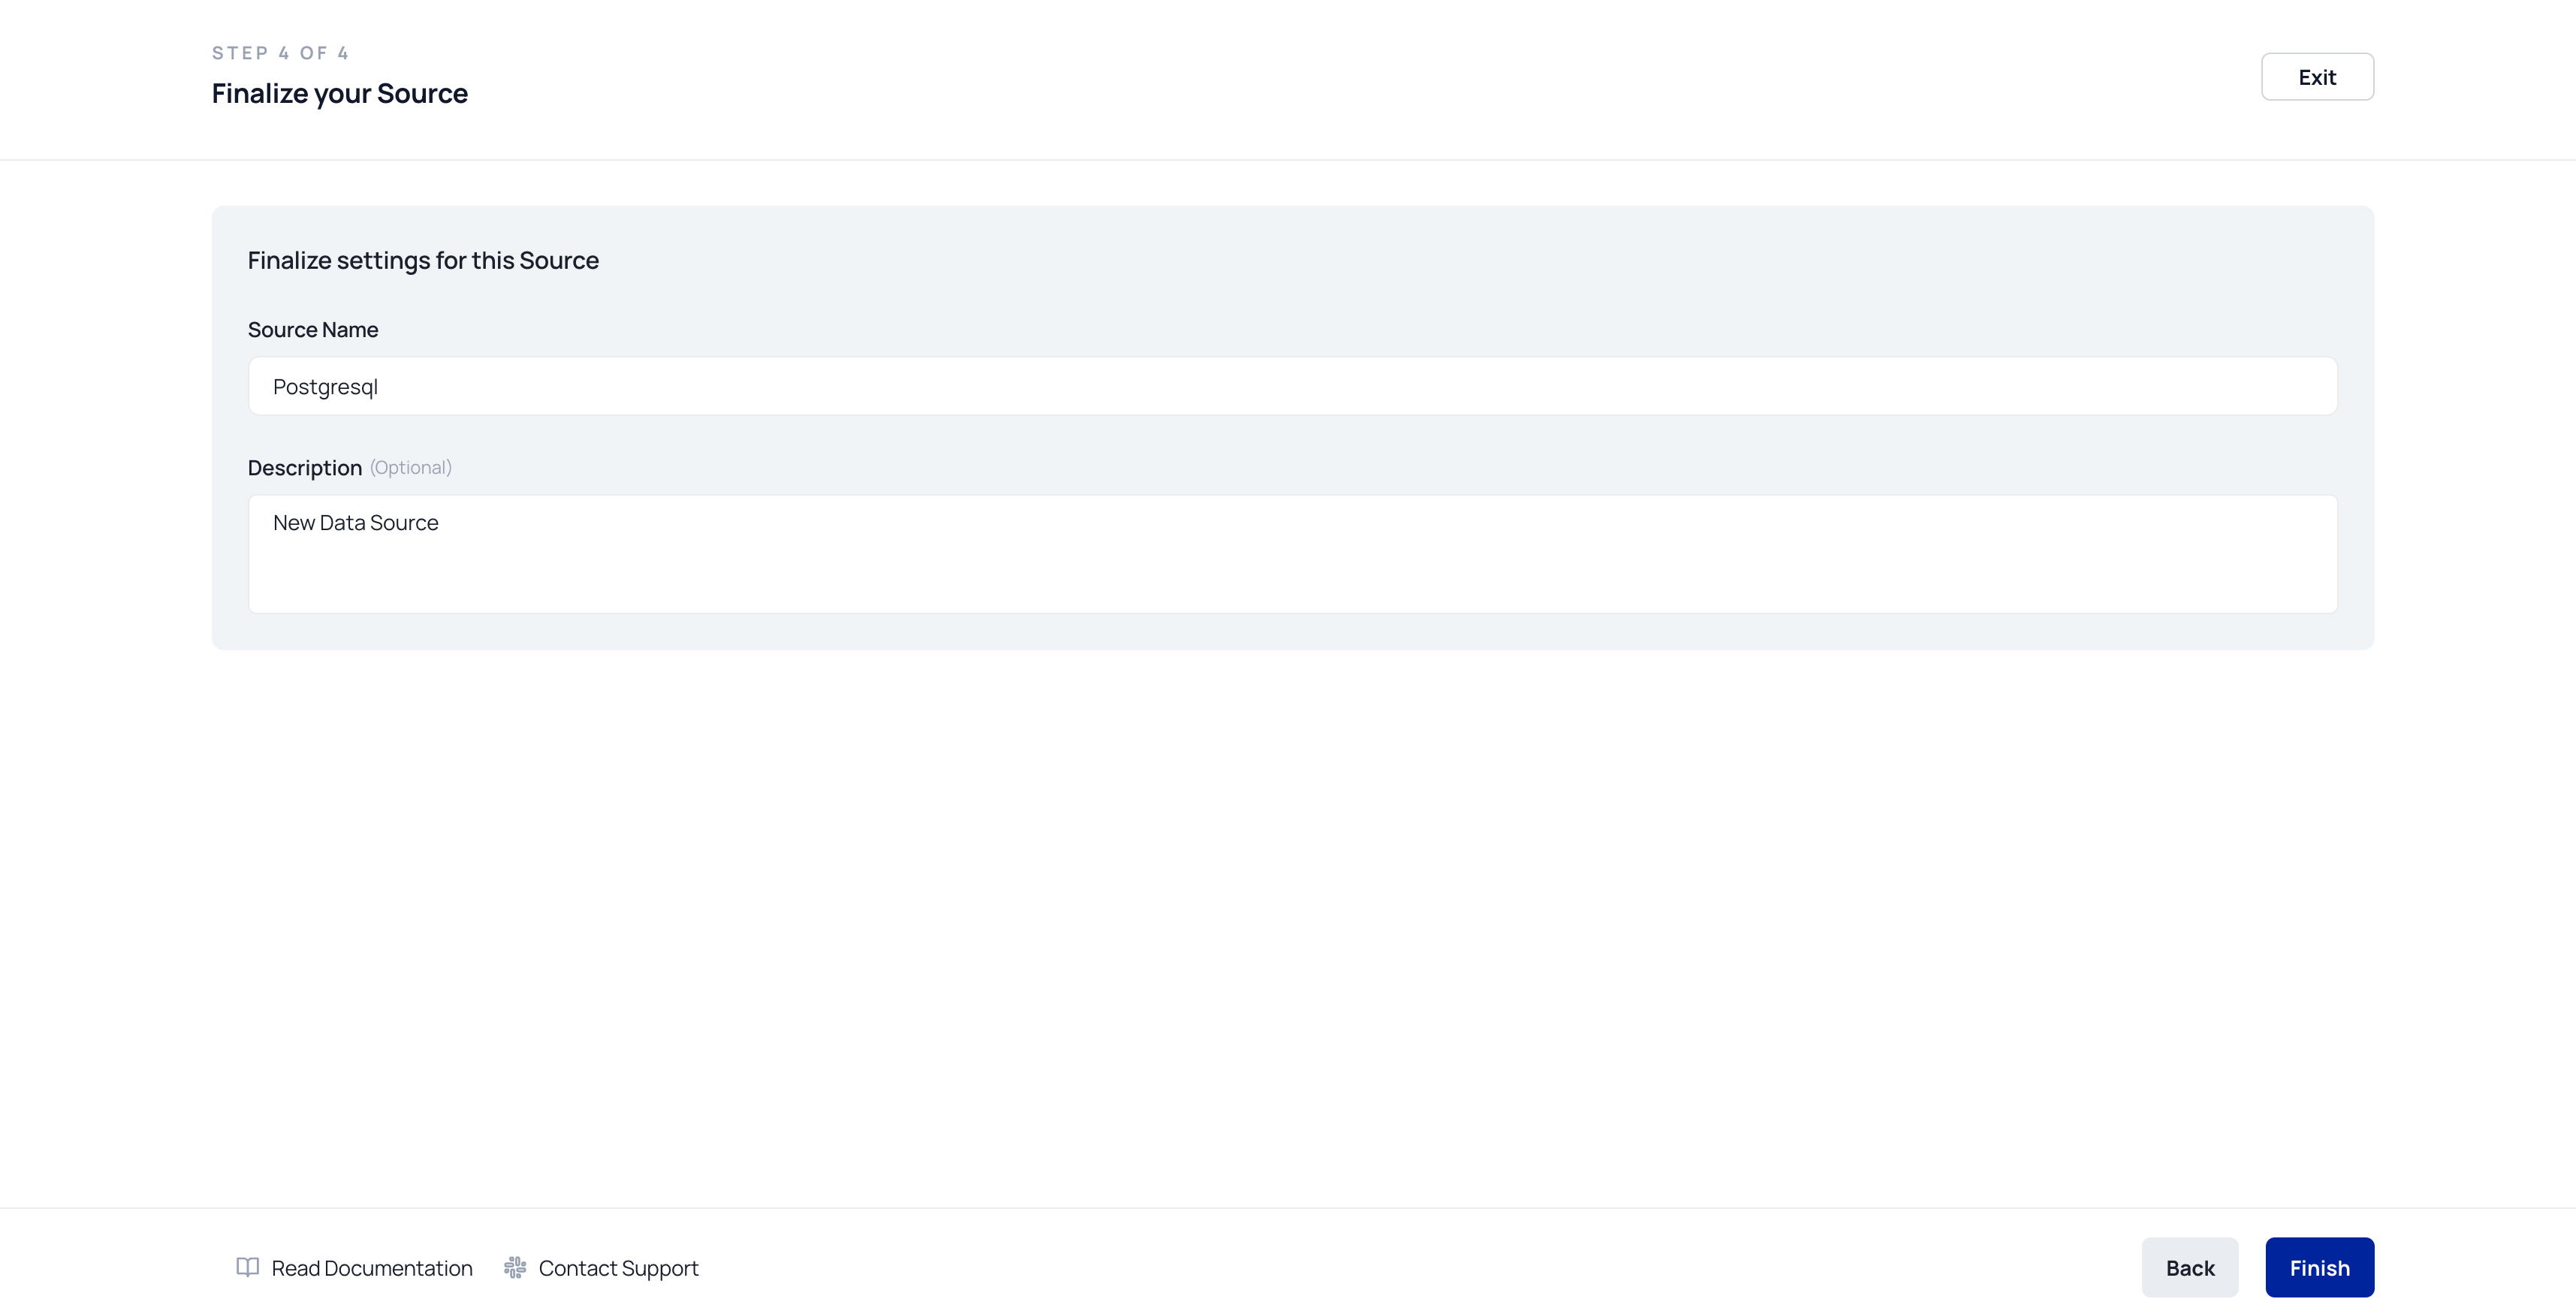 ***
## Step 5: Next Steps — Use the Source
Once added, your data source can be used to:
* Create **Data Models** (via SQL editor, dbt, or table selector)
* Build **Syncs** to move transformed data into downstream destinations
* Enable AI apps to reference live or transformed business data
> 📘 Refer to the [Data Modeling](../data-activation/data-modelling) section to begin querying your connected source.
***
## ✅ You're All Set!
Your data source is now ready for activation. Use it to power AI pipelines, syncs, and application-level insights.
---
# Source: https://docs.squared.ai/guides/destinations/retl-destinations/productivity-tools/airtable.md
> ## Documentation Index
> Fetch the complete documentation index at: https://docs.squared.ai/llms.txt
> Use this file to discover all available pages before exploring further.
# Airtable
# Destination/Airtable
### Overview
Airtable combines the simplicity of a spreadsheet with the complexity of a database. This cloud-based platform enables users to organize work, manage projects, and automate workflows in a customizable and collaborative environment.
### Prerequisite Requirements
Ensure you have created an Airtable account before you begin. Sign up [here](https://airtable.com/signup) if you haven't already.
### Setup
1. **Generate a Personal Access Token**
Start by generating a personal access token. Follow the guide [here](https://airtable.com/developers/web/guides/personal-access-tokens) for instructions.
***
## Step 5: Next Steps — Use the Source
Once added, your data source can be used to:
* Create **Data Models** (via SQL editor, dbt, or table selector)
* Build **Syncs** to move transformed data into downstream destinations
* Enable AI apps to reference live or transformed business data
> 📘 Refer to the [Data Modeling](../data-activation/data-modelling) section to begin querying your connected source.
***
## ✅ You're All Set!
Your data source is now ready for activation. Use it to power AI pipelines, syncs, and application-level insights.
---
# Source: https://docs.squared.ai/guides/destinations/retl-destinations/productivity-tools/airtable.md
> ## Documentation Index
> Fetch the complete documentation index at: https://docs.squared.ai/llms.txt
> Use this file to discover all available pages before exploring further.
# Airtable
# Destination/Airtable
### Overview
Airtable combines the simplicity of a spreadsheet with the complexity of a database. This cloud-based platform enables users to organize work, manage projects, and automate workflows in a customizable and collaborative environment.
### Prerequisite Requirements
Ensure you have created an Airtable account before you begin. Sign up [here](https://airtable.com/signup) if you haven't already.
### Setup
1. **Generate a Personal Access Token**
Start by generating a personal access token. Follow the guide [here](https://airtable.com/developers/web/guides/personal-access-tokens) for instructions.
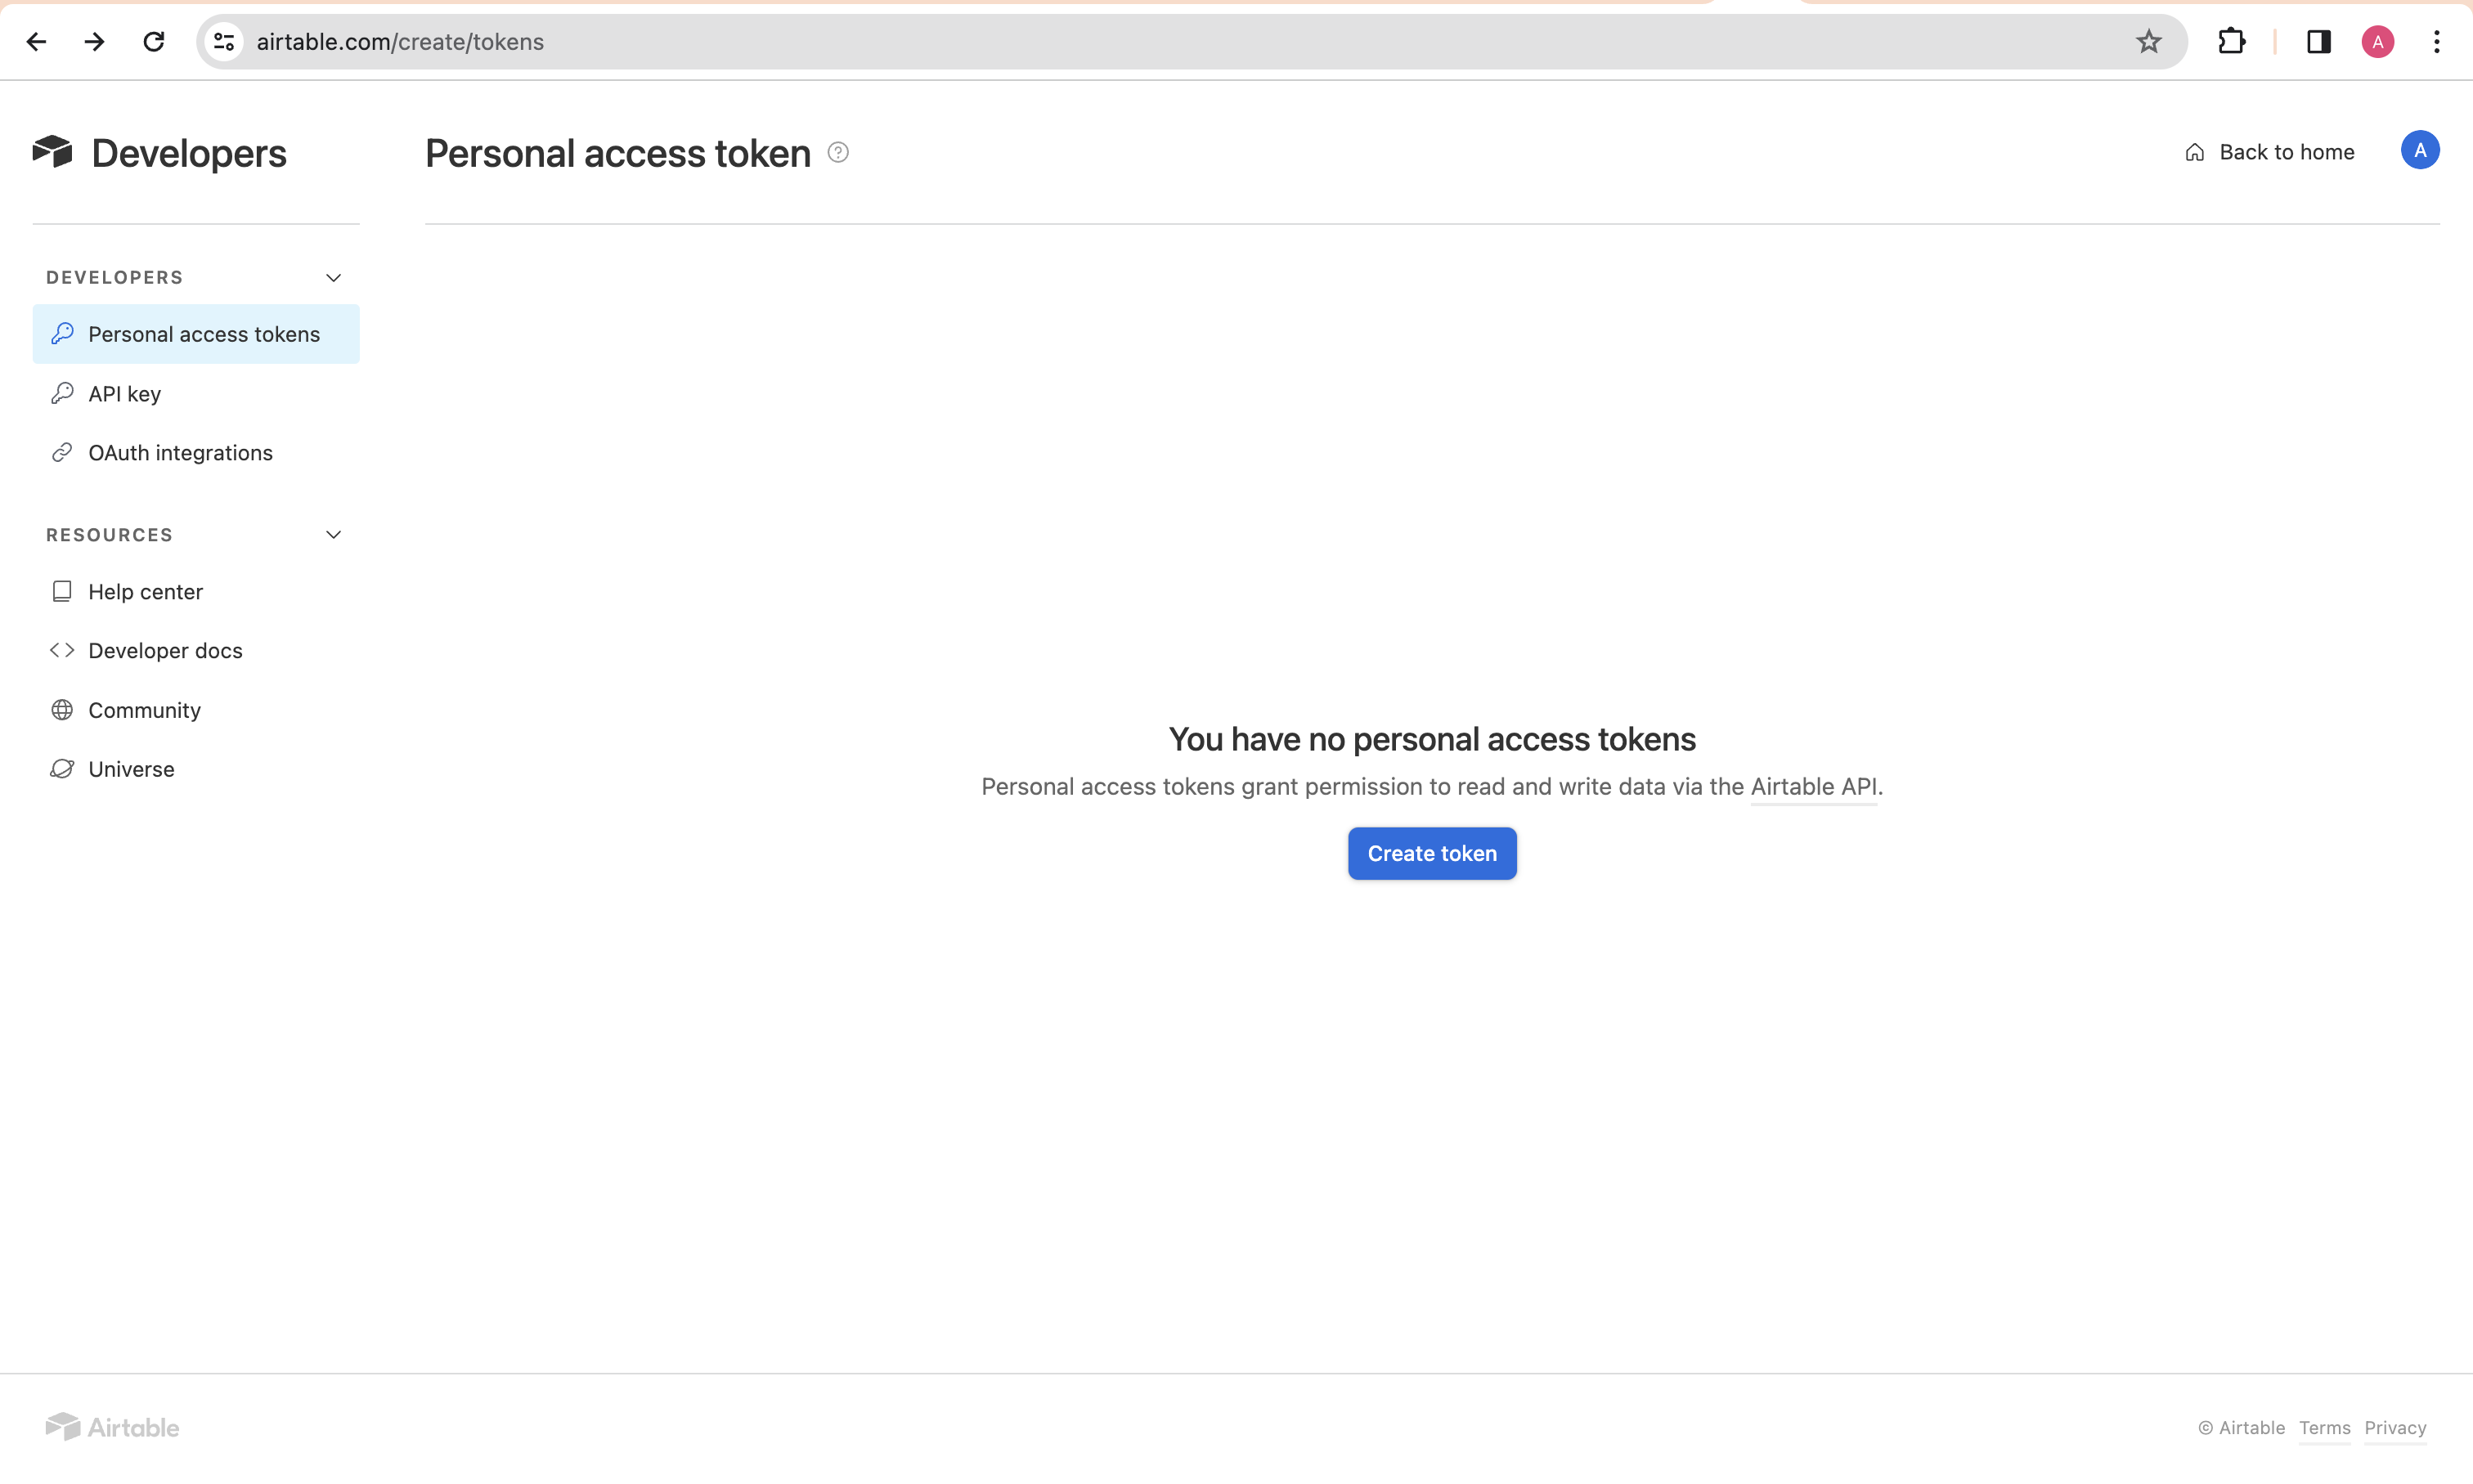 2. **Grant Required Scopes**
Assign the following scopes to your token for the necessary permissions:
* `data.records:read`
* `data.records:write`
* `schema.bases:read`
* `schema.bases:write`
2. **Grant Required Scopes**
Assign the following scopes to your token for the necessary permissions:
* `data.records:read`
* `data.records:write`
* `schema.bases:read`
* `schema.bases:write`
 ---
# Source: https://docs.squared.ai/deployment-and-security/setup/aks.md
> ## Documentation Index
> Fetch the complete documentation index at: https://docs.squared.ai/llms.txt
> Use this file to discover all available pages before exploring further.
# Azure AKS (Kubernetes)
## Deploying Multiwoven on Azure Kubernetes Service (AKS)
This guide will walk you through setting up Multiwoven on AKS. We'll cover configuring and deploying an AKS cluster after which, you can refer to the Helm Charts section of our guide to install Multiwoven into it.
**Prerequisites**
* An active Azure subscription
* Basic knowledge of Kuberenetes and Helm
**Note:** AKS clusters are not free. Please refer to [https://azure.microsoft.com/en-us/pricing/details/kubernetes-service/#pricing](https://azure.microsoft.com/en-us/pricing/details/kubernetes-service/#pricing) for current pricing information.
**1. AKS Cluster Deployment:**
1. **Select a Resource Group for your deployment:**
* Navigate to your Azure subscription and select a Resource Group or, if necessary, start by creating a new Resource Group.
---
# Source: https://docs.squared.ai/deployment-and-security/setup/aks.md
> ## Documentation Index
> Fetch the complete documentation index at: https://docs.squared.ai/llms.txt
> Use this file to discover all available pages before exploring further.
# Azure AKS (Kubernetes)
## Deploying Multiwoven on Azure Kubernetes Service (AKS)
This guide will walk you through setting up Multiwoven on AKS. We'll cover configuring and deploying an AKS cluster after which, you can refer to the Helm Charts section of our guide to install Multiwoven into it.
**Prerequisites**
* An active Azure subscription
* Basic knowledge of Kuberenetes and Helm
**Note:** AKS clusters are not free. Please refer to [https://azure.microsoft.com/en-us/pricing/details/kubernetes-service/#pricing](https://azure.microsoft.com/en-us/pricing/details/kubernetes-service/#pricing) for current pricing information.
**1. AKS Cluster Deployment:**
1. **Select a Resource Group for your deployment:**
* Navigate to your Azure subscription and select a Resource Group or, if necessary, start by creating a new Resource Group.


 2. **Initiate AKS Deployment**
* Select the **Create +** button at the top of the overview section of your Resource Group which will take you to the Azure Marketplace.
* In the Azure Marketplace, type **aks** into the search field at the top. Select **Azure Kuberenetes Service (AKS)** and create.
2. **Initiate AKS Deployment**
* Select the **Create +** button at the top of the overview section of your Resource Group which will take you to the Azure Marketplace.
* In the Azure Marketplace, type **aks** into the search field at the top. Select **Azure Kuberenetes Service (AKS)** and create.
 3. **Configure your AKS Cluster**
* **Basics**
* For **Cluster Preset Configuration**, we recommend **Dev/Test** for Development deployments.
* For **Resource Group**, select your Resource Group.
* For **AKS Pricing Tier**, we recommend **Standard**.
* For **Kubernetes version**, we recommend sticking with the current **default**.
* For **Authentication and Authorization**, we recommend **Local accounts with Kubernetes RBAC** for simplicity.
3. **Configure your AKS Cluster**
* **Basics**
* For **Cluster Preset Configuration**, we recommend **Dev/Test** for Development deployments.
* For **Resource Group**, select your Resource Group.
* For **AKS Pricing Tier**, we recommend **Standard**.
* For **Kubernetes version**, we recommend sticking with the current **default**.
* For **Authentication and Authorization**, we recommend **Local accounts with Kubernetes RBAC** for simplicity.


 * **Node Pools**
* Leave defaults
* **Node Pools**
* Leave defaults

 * **Networking**
* For **Network Configuration**, we recommend the **Azure CNI** network configuration for simplicity.
* For **Network Policy**, we recommend **Azure**.
* **Networking**
* For **Network Configuration**, we recommend the **Azure CNI** network configuration for simplicity.
* For **Network Policy**, we recommend **Azure**.

 * **Integrations**
* Leave defaults
* **Integrations**
* Leave defaults
 * **Monitoring**
* Leave defaults, however, to reduce costs, you can uncheck **Managed Prometheus** which will automatically uncheck **Managed Grafana**.
* **Monitoring**
* Leave defaults, however, to reduce costs, you can uncheck **Managed Prometheus** which will automatically uncheck **Managed Grafana**.

 * **Advanced**
* Leave defaults
* **Advanced**
* Leave defaults
 * **Tags**
* Add tags if necessary, otherwise, leave defaults.
* **Tags**
* Add tags if necessary, otherwise, leave defaults.
 * **Review + Create**
* If there are validation errors that arise during the review, like a missed mandatory field, address the errors and create. If there are no validation errors, proceed to create.
* Wait for your deployment to complete before proceeding.
4. **Connecting to your AKS Cluster**
* In the **Overview** section of your AKS cluster, there is a **Connect** button at the top. Choose whichever method suits you best and follow the on-screen instructions. Make sure to run at least one of the test commands to verify that your kubectl commands are being run against your new AKS cluster.
* **Review + Create**
* If there are validation errors that arise during the review, like a missed mandatory field, address the errors and create. If there are no validation errors, proceed to create.
* Wait for your deployment to complete before proceeding.
4. **Connecting to your AKS Cluster**
* In the **Overview** section of your AKS cluster, there is a **Connect** button at the top. Choose whichever method suits you best and follow the on-screen instructions. Make sure to run at least one of the test commands to verify that your kubectl commands are being run against your new AKS cluster.

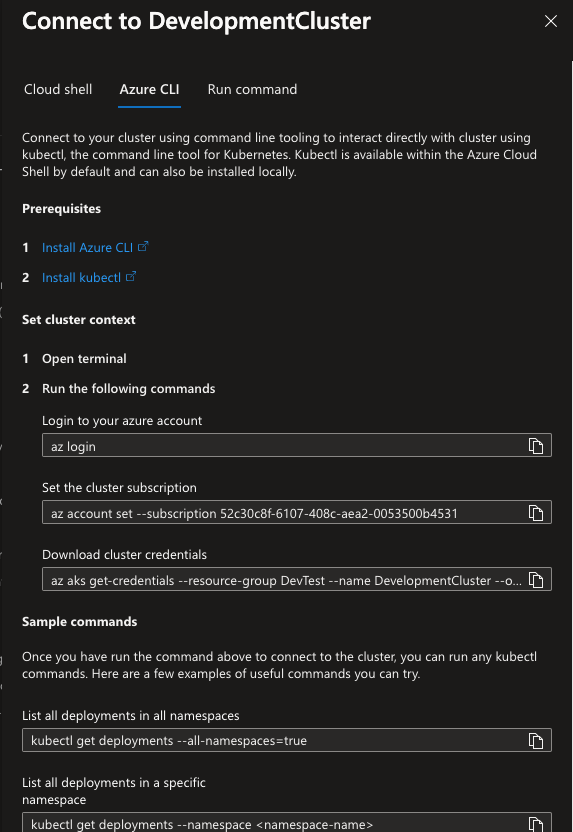 5. **Deploying Multiwoven**
* Please refer to the **Helm Charts** section of our guide to proceed with your installation of Multiwoven!\
[Helm Chart Deployment Guide](https://docs.squared.ai/open-source/guides/setup/helm)
---
# Source: https://docs.squared.ai/guides/sources/data-sources/amazon_s3.md
# Source: https://docs.squared.ai/guides/destinations/retl-destinations/file-storage/amazon_s3.md
> ## Documentation Index
> Fetch the complete documentation index at: https://docs.squared.ai/llms.txt
> Use this file to discover all available pages before exploring further.
# Amazon S3
## Connect AI Squared to Amazon S3
This guide will help you configure the Amazon S3 Connector in AI Squared to access and transfer data to your S3 bucket.
### Prerequisites
Before proceeding, ensure you have the necessary personal access key, secret access key, region, bucket name, and file path from your S3 account.
## Step-by-Step Guide to Connect to Amazon S3
## Step 1: Navigate to AWS Console
Start by logging into your AWS Management Console.
1. Sign in to your AWS account at [AWS Management Console](https://aws.amazon.com/console/).
## Step 2: Locate AWS Configuration Details
Once you're in the AWS console, you'll find the necessary configuration details:
1. **Access Key and Secret Access Key:**
* Click on your username at the top right corner of the AWS Management Console.
* Choose "Security Credentials" from the dropdown menu.
* In the "Access keys" section, you can create or view your access keys.
* If you haven't created an access key pair before, click on "Create access key" to generate a new one. Make sure to copy the Access Key ID and Secret Access Key as they are shown only once.
5. **Deploying Multiwoven**
* Please refer to the **Helm Charts** section of our guide to proceed with your installation of Multiwoven!\
[Helm Chart Deployment Guide](https://docs.squared.ai/open-source/guides/setup/helm)
---
# Source: https://docs.squared.ai/guides/sources/data-sources/amazon_s3.md
# Source: https://docs.squared.ai/guides/destinations/retl-destinations/file-storage/amazon_s3.md
> ## Documentation Index
> Fetch the complete documentation index at: https://docs.squared.ai/llms.txt
> Use this file to discover all available pages before exploring further.
# Amazon S3
## Connect AI Squared to Amazon S3
This guide will help you configure the Amazon S3 Connector in AI Squared to access and transfer data to your S3 bucket.
### Prerequisites
Before proceeding, ensure you have the necessary personal access key, secret access key, region, bucket name, and file path from your S3 account.
## Step-by-Step Guide to Connect to Amazon S3
## Step 1: Navigate to AWS Console
Start by logging into your AWS Management Console.
1. Sign in to your AWS account at [AWS Management Console](https://aws.amazon.com/console/).
## Step 2: Locate AWS Configuration Details
Once you're in the AWS console, you'll find the necessary configuration details:
1. **Access Key and Secret Access Key:**
* Click on your username at the top right corner of the AWS Management Console.
* Choose "Security Credentials" from the dropdown menu.
* In the "Access keys" section, you can create or view your access keys.
* If you haven't created an access key pair before, click on "Create access key" to generate a new one. Make sure to copy the Access Key ID and Secret Access Key as they are shown only once.
 2. **Region:**
* The AWS region can be selected from the top right corner of the AWS Management Console. Choose the region where your AWS Sagemaker resources is located and note down the region.
2. **Region:**
* The AWS region can be selected from the top right corner of the AWS Management Console. Choose the region where your AWS Sagemaker resources is located and note down the region.
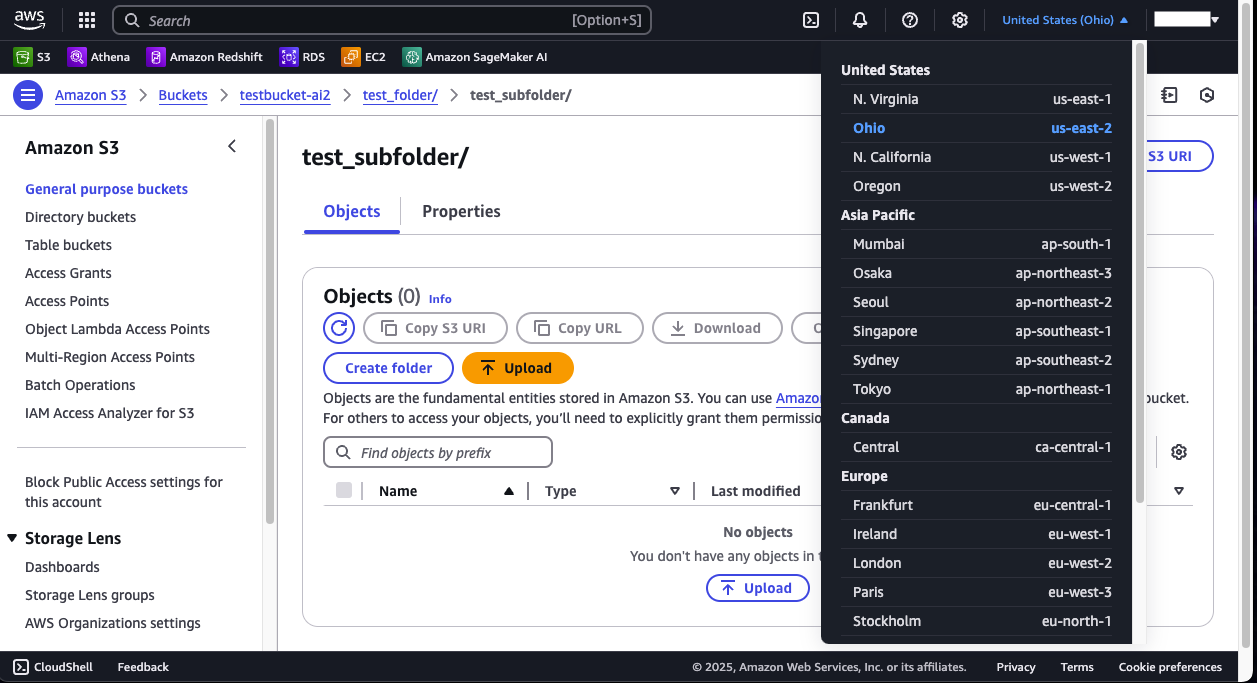 3. **Bucket Name:**
* The S3 Bucket name can be found by selecting "General purpose buckets" on the left hand corner of the S3 Console. From there select the bucket you want to use and note down its name.
3. **Bucket Name:**
* The S3 Bucket name can be found by selecting "General purpose buckets" on the left hand corner of the S3 Console. From there select the bucket you want to use and note down its name.
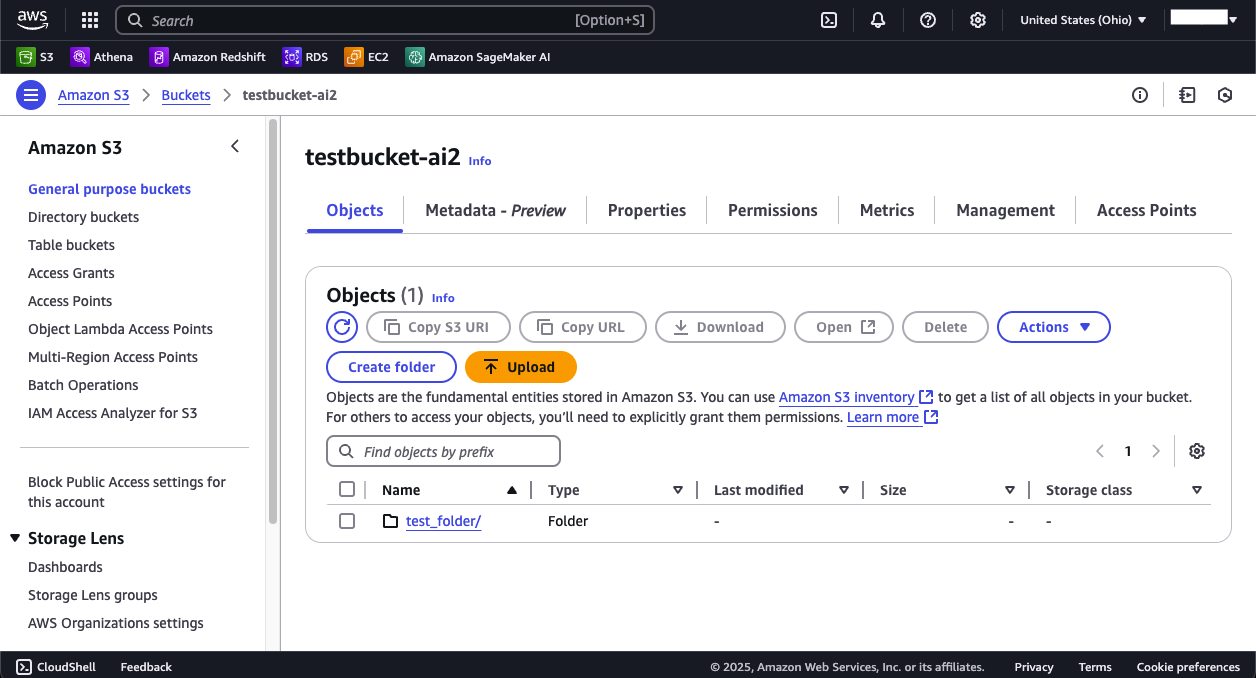 4. **File Path**
* After select your S3 bucket you can create a folder where you want your file to be stored or use an exist one.
4. **File Path**
* After select your S3 bucket you can create a folder where you want your file to be stored or use an exist one.
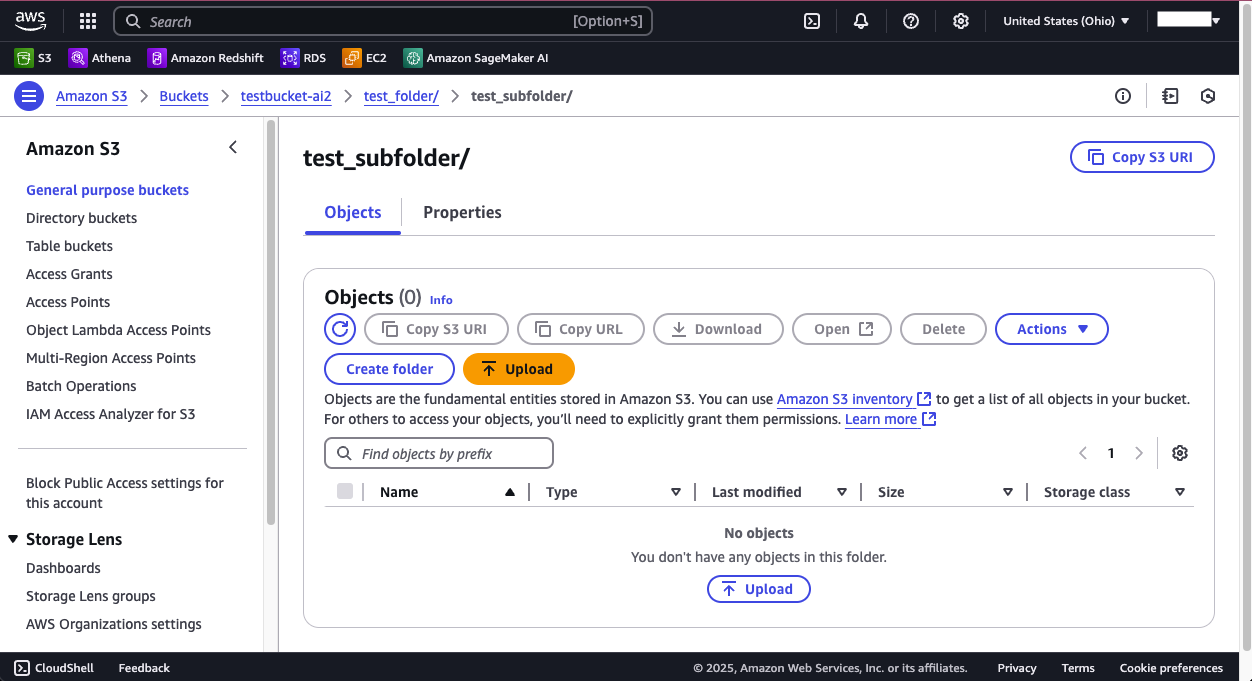 ## Step 3: Configure Amazon S3 Connector in Your Application
Now that you have gathered all the necessary details, enter the following information in your application:
* **Personal Access Key:** Your AWS IAM user's Access Key ID.
* **Secret Access Key:** The corresponding Secret Access Key.
* **Region:** The AWS region where your Sagemaker resources are located.
* **Bucket Name:** The Amazon S3 Bucket you want to access.
* **File Path:** The Path to the directory where files will be written.
* **File Name:** The Name of the file to be written.
## Step 4: Test the Amazon S3 Connection
After configuring the connector in your application:
1. Save the configuration settings.
2. Test the connection to Amazon S3 from your application to ensure everything is set up correctly.
By following these steps, you’ve successfully set up an Amazon S3 destination connector in AI Squared. You can now efficiently transfer data to your Amazon S3 endpoint for storage or further distribution within AI Squared.
### Supported sync modes
| Mode | Supported (Yes/No/Coming soon) |
| ---------------- | ------------------------------ |
| Incremental sync | YES |
| Full refresh | Coming soon |
This guide will help you seamlessly connect your AI Squared application to MariaDB, enabling you to leverage your database's full potential.
---
# Source: https://docs.squared.ai/guides/destinations/retl-destinations/analytics/amplitude.md
> ## Documentation Index
> Fetch the complete documentation index at: https://docs.squared.ai/llms.txt
> Use this file to discover all available pages before exploring further.
# Amplitude
---
# Source: https://docs.squared.ai/activation/ai-ml-sources/anthropic-model.md
> ## Documentation Index
> Fetch the complete documentation index at: https://docs.squared.ai/llms.txt
> Use this file to discover all available pages before exploring further.
# Anthropic Model
## Connect AI Squared to Anthropic Model
This guide will help you configure the Anthropic Model Connector in AI Squared to access your Anthropic Model Endpoint.
### Prerequisites
Before proceeding, ensure you have the necessary API key from Anthropic.
## Step-by-Step Guide to Connect to an Anthropic Model Endpoint
## Step 1: Navigate to Anthropic Console
Start by logging into your Anthropic Console.
1. Sign in to your Anthropic account at [Anthropic](https://console.anthropic.com/dashboard).
## Step 3: Configure Amazon S3 Connector in Your Application
Now that you have gathered all the necessary details, enter the following information in your application:
* **Personal Access Key:** Your AWS IAM user's Access Key ID.
* **Secret Access Key:** The corresponding Secret Access Key.
* **Region:** The AWS region where your Sagemaker resources are located.
* **Bucket Name:** The Amazon S3 Bucket you want to access.
* **File Path:** The Path to the directory where files will be written.
* **File Name:** The Name of the file to be written.
## Step 4: Test the Amazon S3 Connection
After configuring the connector in your application:
1. Save the configuration settings.
2. Test the connection to Amazon S3 from your application to ensure everything is set up correctly.
By following these steps, you’ve successfully set up an Amazon S3 destination connector in AI Squared. You can now efficiently transfer data to your Amazon S3 endpoint for storage or further distribution within AI Squared.
### Supported sync modes
| Mode | Supported (Yes/No/Coming soon) |
| ---------------- | ------------------------------ |
| Incremental sync | YES |
| Full refresh | Coming soon |
This guide will help you seamlessly connect your AI Squared application to MariaDB, enabling you to leverage your database's full potential.
---
# Source: https://docs.squared.ai/guides/destinations/retl-destinations/analytics/amplitude.md
> ## Documentation Index
> Fetch the complete documentation index at: https://docs.squared.ai/llms.txt
> Use this file to discover all available pages before exploring further.
# Amplitude
---
# Source: https://docs.squared.ai/activation/ai-ml-sources/anthropic-model.md
> ## Documentation Index
> Fetch the complete documentation index at: https://docs.squared.ai/llms.txt
> Use this file to discover all available pages before exploring further.
# Anthropic Model
## Connect AI Squared to Anthropic Model
This guide will help you configure the Anthropic Model Connector in AI Squared to access your Anthropic Model Endpoint.
### Prerequisites
Before proceeding, ensure you have the necessary API key from Anthropic.
## Step-by-Step Guide to Connect to an Anthropic Model Endpoint
## Step 1: Navigate to Anthropic Console
Start by logging into your Anthropic Console.
1. Sign in to your Anthropic account at [Anthropic](https://console.anthropic.com/dashboard).
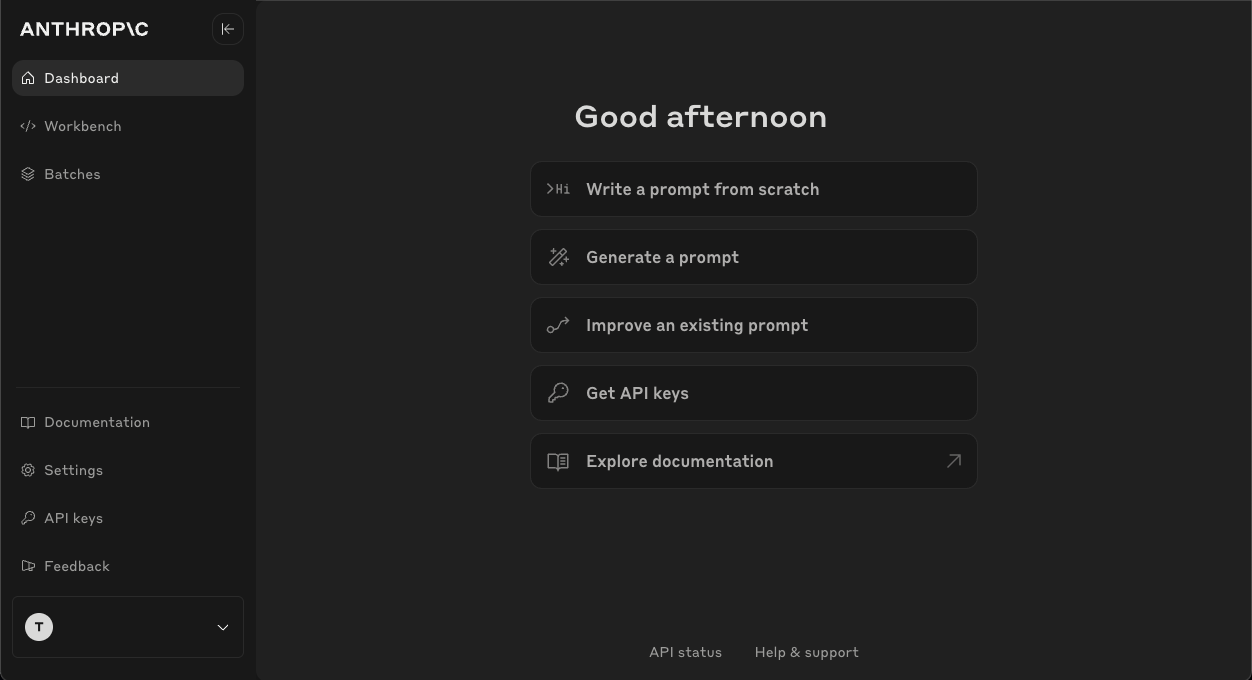 ## Step 2: Locate API keys
Once you're in the Anthropic, you'll find the necessary configuration details:
1. **API Key:**
* Click on "API keys" to view your API keys.
* If you haven't created an API Key before, click on "Create API key" to generate a new one. Make sure to copy the API Key as they are shown only once.
## Step 2: Locate API keys
Once you're in the Anthropic, you'll find the necessary configuration details:
1. **API Key:**
* Click on "API keys" to view your API keys.
* If you haven't created an API Key before, click on "Create API key" to generate a new one. Make sure to copy the API Key as they are shown only once.
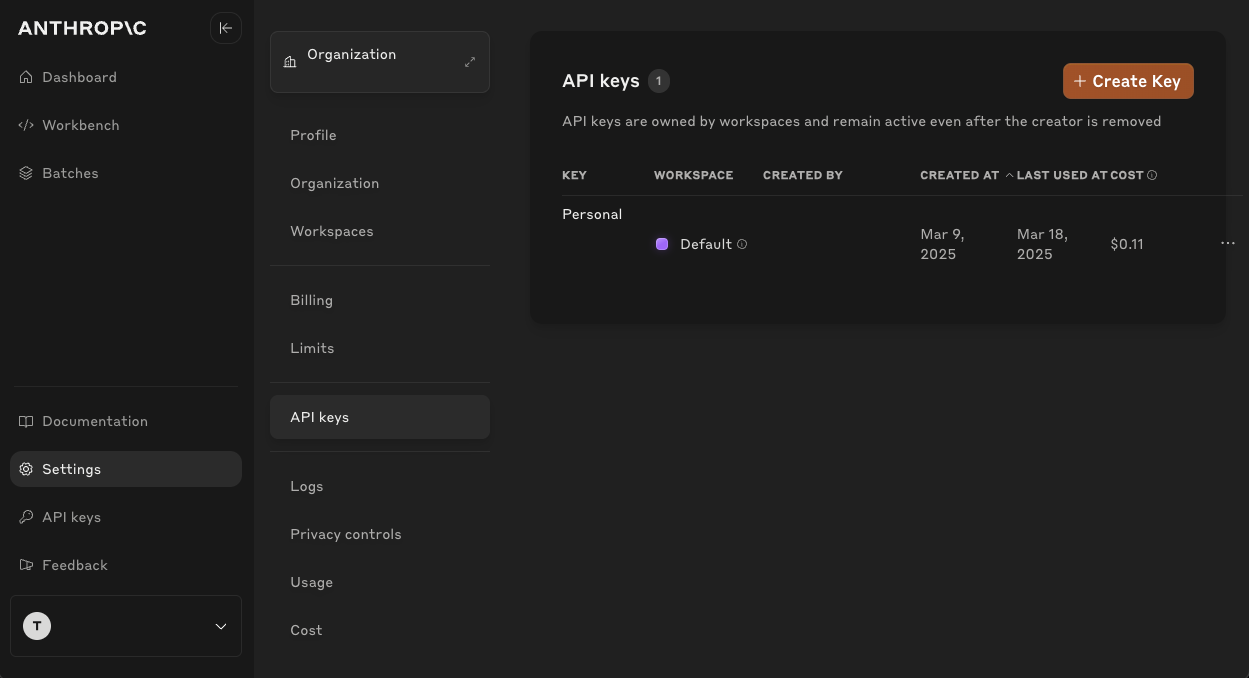 ## Step 3: Configure Anthropic Model Connector in Your Application
Now that you have gathered all the necessary details enter the following information:
* **API Key:** Your Anthropic API key.
## Sample Request and Response
**Request:**
```json theme={null}
{
"model": "claude-3-7-sonnet-20250219",
"max_tokens": 256,
"messages": [{"role": "user", "content": "Hi."}],
"stream": false
}
```
**Response:**
```json theme={null}
{
"id": "msg_0123ABC",
"type": "message",
"role": "assistant",
"model": "claude-3-7-sonnet-20250219",
"content": [
{
"type": "text",
"text": "Hello there! How can I assist you today? Whether you have a question, need some information, or just want to chat, I'm here to help. What's on your mind?"
}
],
"stop_reason": "end_turn",
"stop_sequence": null,
"usage": {
"input_tokens": 10,
"cache_creation_input_tokens": 0,
"cache_read_input_tokens": 0,
"output_tokens": 41
}
}
```
**Request:**
```json theme={null}
{
"model": "claude-3-7-sonnet-20250219",
"max_tokens": 1024,
"messages": [{"role": "user", "content": "Hi"}],
"stream": true
}
```
**Response:**
```json theme={null}
{
"type": "content_block_delta",
"index": 0,
"delta": {
"type": "text_delta",
"text": "Hello!"
}
}
```
---
# Source: https://docs.squared.ai/sparx/architecture.md
> ## Documentation Index
> Fetch the complete documentation index at: https://docs.squared.ai/llms.txt
> Use this file to discover all available pages before exploring further.
# How Sparx Works
> System architecture and technical components
## System Architecture
### Data Connectors Layer
* Pre-built connectors for ERP, CRM, HRIS, databases, APIs, and file systems.
* Examples: Quickbooks, Google Workspace, Office 365, Salesforce, SAP, Microsoft Dynamics, Snowflake, SharePoint, AWS S3.
### Unified Data Layer (UDL)
* Harmonizes structured, semi-structured, and unstructured data.
* Built on AI Squared's **Secure Data Fabric** technology.
### Processing & AI Models
* Pre-trained LLMs (Claude, OpenAI, Bedrock) and custom model support.
* Real-time inferencing with vector database indexing.
### Application Layer
* **Sparx Chatbot** – Conversational interface for querying data and triggering workflows.
* **Insight Dashboard** – Visual analytics with drill-down capabilities.
* **Automation Engine** – Triggers workflows based on rules or AI-detected events.
### Security & Compliance Layer
* End-to-end AES-256 encryption.
* Role-Based Access Control with SSO (Okta, Azure AD).
* Audit logging and compliance templates (HIPAA, GDPR, CCPA, FISMA).
---
# Source: https://docs.squared.ai/deployment-and-security/setup/avm.md
> ## Documentation Index
> Fetch the complete documentation index at: https://docs.squared.ai/llms.txt
> Use this file to discover all available pages before exploring further.
# Azure VMs
## Deploying Multiwoven on Azure VMs
This guide will walk you through setting up Multiwoven on an Azure VM. We'll cover launching the VM, installing Docker, running Multiwoven with its dependencies, and finally, accessing the Multiwoven UI.
**Prerequisites:**
* An Azure account with an active VM (Ubuntu recommended).
* Basic knowledge of Docker, Azure, and command-line tools.
* Docker Compose installed on your local machine.
**Note:** This guide uses environment variables for sensitive information. Replace the placeholders with your own values before proceeding.
**1. Azure VM Setup:**
1. **Launch an Azure VM:** Choose an Ubuntu VM with suitable specifications for your workload.
**Network Security Group Configuration:**
* Open port 22 (SSH) for inbound traffic from your IP address.
* Open port 8000 (Multiwoven UI) for inbound traffic from your IP address (optional).
**SSH Key Pair:** Create a new key pair or use an existing one to connect to your VM.
2. **Connect to your VM:** Use SSH to connect to your Azure VM.
**Example:**
```
ssh -i /path/to/your-key-pair.pem azureuser@
```
Replace `/path/to/your-key-pair.pem` with the path to your key pair file and `` with your VM's public IP address.
3. **Update and upgrade:** Run `sudo apt update && sudo apt upgrade -y` to ensure your system is up-to-date.
**2. Docker and Docker Compose Installation:**
1. **Install Docker:** Follow the official Docker installation instructions for Ubuntu: [https://docs.docker.com/engine/install/](https://docs.docker.com/engine/install/)
2. **Install Docker Compose:** Download the latest version from the Docker Compose releases page and place it in a suitable directory (e.g., `/usr/local/bin/docker-compose`). Make the file executable: `sudo chmod +x /usr/local/bin/docker-compose`.
3. **Start and enable Docker:** Run `sudo systemctl start docker` and `sudo systemctl enable docker` to start Docker and configure it to start automatically on boot.
**3. Download Multiwoven `docker-compose.yml` file and Configure Environment:**
1. **Download the file:**
```
curl -LO https://multiwoven-deployments.s3.amazonaws.com/docker/docker-compose/docker-compose.yaml
```
2. **Download the `.env` file:**
```
curl -LO https://multiwoven-deployments.s3.amazonaws.com/docker/docker-compose/.env.production
```
3. Rename the file .env.production to .env and update the environment variables if required.
```bash theme={null}
mv .env.production .env
```
4. \*\*Configure `.env`, This file holds environment variables for various services. Replace the placeholders with your own values, including:
* `DB_PASSWORD` and `DB_USERNAME` for your PostgreSQL database
* `REDIS_PASSWORD` for your Redis server
* (Optional) Additional environment variables specific to your Multiwoven configuration
**Example `.env` file:**
```
DB_PASSWORD=your_db_password
DB_USERNAME=your_db_username
REDIS_PASSWORD=your_redis_password
# Modify your Multiwoven-specific environment variables here
```
**4. Run Multiwoven with Docker Compose:**
1. **Start Multiwoven:** Navigate to the `multiwoven` directory and run `docker-compose up -d`. This will start all Multiwoven services in the background, including the Multiwoven UI.
**5. Accessing Multiwoven UI:**
Open your web browser and navigate to `http://:8000` (replace `` with your VM's public IP address). You should now see the Multiwoven UI.
**6. Stopping Multiwoven:**
To stop Multiwoven, navigate to the `multiwoven` directory and run.
```bash theme={null}
docker-compose down
```
**7. Upgrading Multiwoven:**
When a new version of Multiwoven is released, you can upgrade the Multiwoven using the following command.
```bash theme={null}
docker-compose pull && docker-compose up -d
```
Make sure to run the above command from the same directory where the `docker-compose.yml` file is present.
**Additional Notes:**
**Note**: the frontend and backend services run on port 8000 and 3000, respectively. Make sure you update the **VITE\_API\_HOST** environment variable in the **.env** file to the desired backend service URL running on port 3000.
* Depending on your network security group configuration, you might need to open port 8000 (Multiwoven UI) for inbound traffic.
* For production deployments, consider using a reverse proxy (e.g., Nginx) and a domain name with SSL/TLS certificates for secure access to the Multiwoven UI.
---
# Source: https://docs.squared.ai/guides/sources/data-sources/aws_athena.md
> ## Documentation Index
> Fetch the complete documentation index at: https://docs.squared.ai/llms.txt
> Use this file to discover all available pages before exploring further.
# AWS Athena
## Connect AI Squared to AWS Athena
This guide will help you configure the AWS Athena Connector in AI Squared to access and use your AWS Athena data.
### Prerequisites
Before proceeding, ensure you have the necessary access key, secret access key, region, workgroup, catalog, and output location from AWS Athena.
## Step-by-Step Guide to Connect to AWS Athena
## Step 1: Navigate to AWS Athena Console
Start by logging into your AWS Management Console and navigating to the AWS Athena service.
1. Sign in to your AWS account at [AWS Management Console](https://aws.amazon.com/console/).
2. In the AWS services search bar, type "Athena" and select it from the dropdown.
## Step 2: Locate AWS Athena Configuration Details
Once you're in the AWS Athena console, you'll find the necessary configuration details:
1. **Access Key and Secret Access Key:**
* Click on your username at the top right corner of the AWS Management Console.
* Choose "Security Credentials" from the dropdown menu.
* In the "Access keys" section, you can create or view your access keys.
* If you haven't created an access key pair before, click on "Create access key" to generate a new one. Make sure to copy the Access Key ID and Secret Access Key as they are shown only once.
2. **Region:**
* The AWS region can be selected from the top right corner of the AWS Management Console. Choose the region where your AWS Athena resources are located or where you want to perform queries.
3. **Workgroup:**
* In the AWS Athena console, navigate to the "Workgroups" section in the left sidebar.
* Here, you can view the existing workgroups or create a new one if needed. Note down the name of the workgroup you want to use.
4. **Catalog and Database:**
* Go to the "Data Source" section in the in the left sidebar.
* Select the catalog that contains the databases and tables you want to query. Note down the name of the catalog and database.
5. **Output Location:**
* In the AWS Athena console, click on "Settings".
* Under "Query result location," you can see the default output location for query results. You can also set a custom output location if needed. Note down the output location URL.
## Step 3: Configure AWS Athena Connector in Your Application
Now that you have gathered all the necessary details enter the following information:
* **Access Key ID:** Your AWS IAM user's Access Key ID.
* **Secret Access Key:** The corresponding Secret Access Key.
* **Region:** The AWS region where your Athena resources are located.
* **Workgroup:** The name of the workgroup you want to use.
* **Catalog:** The name of the catalog containing your data.
* **Schema:** The name of the database containing your data.
* **Output Location:** The URL of the output location for query results.
## Step 4: Test the AWS Athena Connection
After configuring the connector in your application:
1. Save the configuration settings.
2. Test the connection to AWS Athena from your application to ensure everything is set up correctly.
3. Run a test query or check the connection status to verify successful connectivity.
Your AWS Athena connector is now configured and ready to query data from your AWS Athena data catalog.
### Supported sync modes
| Mode | Supported (Yes/No/Coming soon) |
| ---------------- | ------------------------------ |
| Incremental sync | YES |
| Full refresh | Coming soon |
---
# Source: https://docs.squared.ai/activation/ai-ml-sources/aws_bedrock-model.md
> ## Documentation Index
> Fetch the complete documentation index at: https://docs.squared.ai/llms.txt
> Use this file to discover all available pages before exploring further.
# AWS Bedrock Model
## Connect AI Squared to AWS Bedrock Model
This guide will help you configure the AWS Bedrock Model Connector in AI Squared to access your AWS Bedrock Model Endpoint.
### Prerequisites
Before proceeding, ensure you have the necessary access key, secret access key, and region from AWS.
## Step-by-Step Guide to Connect to an AWS Bedrock Model Endpoint
## Step 1: Navigate to AWS Console
Start by logging into your AWS Management Console.
1. Sign in to your AWS account at [AWS Management Console](https://aws.amazon.com/console/).
## Step 2: Locate AWS Configuration Details
Once you're in the AWS console, you'll find the necessary configuration details:
1. **Access Key and Secret Access Key:**
* Click on your username at the top right corner of the AWS Management Console.
* Choose "Security Credentials" from the dropdown menu.
* In the "Access keys" section, you can create or view your access keys.
* If you haven't created an access key pair before, click on "Create access key" to generate a new one. Make sure to copy the Access Key ID and Secret Access Key as they are shown only once.
2. **Region:**
* The AWS region can be selected from the top right corner of the AWS Management Console. Choose the region where your AWS Bedrock resources is located and note down the region.
## Step 3: Configure Anthropic Model Connector in Your Application
Now that you have gathered all the necessary details enter the following information:
* **API Key:** Your Anthropic API key.
## Sample Request and Response
**Request:**
```json theme={null}
{
"model": "claude-3-7-sonnet-20250219",
"max_tokens": 256,
"messages": [{"role": "user", "content": "Hi."}],
"stream": false
}
```
**Response:**
```json theme={null}
{
"id": "msg_0123ABC",
"type": "message",
"role": "assistant",
"model": "claude-3-7-sonnet-20250219",
"content": [
{
"type": "text",
"text": "Hello there! How can I assist you today? Whether you have a question, need some information, or just want to chat, I'm here to help. What's on your mind?"
}
],
"stop_reason": "end_turn",
"stop_sequence": null,
"usage": {
"input_tokens": 10,
"cache_creation_input_tokens": 0,
"cache_read_input_tokens": 0,
"output_tokens": 41
}
}
```
**Request:**
```json theme={null}
{
"model": "claude-3-7-sonnet-20250219",
"max_tokens": 1024,
"messages": [{"role": "user", "content": "Hi"}],
"stream": true
}
```
**Response:**
```json theme={null}
{
"type": "content_block_delta",
"index": 0,
"delta": {
"type": "text_delta",
"text": "Hello!"
}
}
```
---
# Source: https://docs.squared.ai/sparx/architecture.md
> ## Documentation Index
> Fetch the complete documentation index at: https://docs.squared.ai/llms.txt
> Use this file to discover all available pages before exploring further.
# How Sparx Works
> System architecture and technical components
## System Architecture
### Data Connectors Layer
* Pre-built connectors for ERP, CRM, HRIS, databases, APIs, and file systems.
* Examples: Quickbooks, Google Workspace, Office 365, Salesforce, SAP, Microsoft Dynamics, Snowflake, SharePoint, AWS S3.
### Unified Data Layer (UDL)
* Harmonizes structured, semi-structured, and unstructured data.
* Built on AI Squared's **Secure Data Fabric** technology.
### Processing & AI Models
* Pre-trained LLMs (Claude, OpenAI, Bedrock) and custom model support.
* Real-time inferencing with vector database indexing.
### Application Layer
* **Sparx Chatbot** – Conversational interface for querying data and triggering workflows.
* **Insight Dashboard** – Visual analytics with drill-down capabilities.
* **Automation Engine** – Triggers workflows based on rules or AI-detected events.
### Security & Compliance Layer
* End-to-end AES-256 encryption.
* Role-Based Access Control with SSO (Okta, Azure AD).
* Audit logging and compliance templates (HIPAA, GDPR, CCPA, FISMA).
---
# Source: https://docs.squared.ai/deployment-and-security/setup/avm.md
> ## Documentation Index
> Fetch the complete documentation index at: https://docs.squared.ai/llms.txt
> Use this file to discover all available pages before exploring further.
# Azure VMs
## Deploying Multiwoven on Azure VMs
This guide will walk you through setting up Multiwoven on an Azure VM. We'll cover launching the VM, installing Docker, running Multiwoven with its dependencies, and finally, accessing the Multiwoven UI.
**Prerequisites:**
* An Azure account with an active VM (Ubuntu recommended).
* Basic knowledge of Docker, Azure, and command-line tools.
* Docker Compose installed on your local machine.
**Note:** This guide uses environment variables for sensitive information. Replace the placeholders with your own values before proceeding.
**1. Azure VM Setup:**
1. **Launch an Azure VM:** Choose an Ubuntu VM with suitable specifications for your workload.
**Network Security Group Configuration:**
* Open port 22 (SSH) for inbound traffic from your IP address.
* Open port 8000 (Multiwoven UI) for inbound traffic from your IP address (optional).
**SSH Key Pair:** Create a new key pair or use an existing one to connect to your VM.
2. **Connect to your VM:** Use SSH to connect to your Azure VM.
**Example:**
```
ssh -i /path/to/your-key-pair.pem azureuser@
```
Replace `/path/to/your-key-pair.pem` with the path to your key pair file and `` with your VM's public IP address.
3. **Update and upgrade:** Run `sudo apt update && sudo apt upgrade -y` to ensure your system is up-to-date.
**2. Docker and Docker Compose Installation:**
1. **Install Docker:** Follow the official Docker installation instructions for Ubuntu: [https://docs.docker.com/engine/install/](https://docs.docker.com/engine/install/)
2. **Install Docker Compose:** Download the latest version from the Docker Compose releases page and place it in a suitable directory (e.g., `/usr/local/bin/docker-compose`). Make the file executable: `sudo chmod +x /usr/local/bin/docker-compose`.
3. **Start and enable Docker:** Run `sudo systemctl start docker` and `sudo systemctl enable docker` to start Docker and configure it to start automatically on boot.
**3. Download Multiwoven `docker-compose.yml` file and Configure Environment:**
1. **Download the file:**
```
curl -LO https://multiwoven-deployments.s3.amazonaws.com/docker/docker-compose/docker-compose.yaml
```
2. **Download the `.env` file:**
```
curl -LO https://multiwoven-deployments.s3.amazonaws.com/docker/docker-compose/.env.production
```
3. Rename the file .env.production to .env and update the environment variables if required.
```bash theme={null}
mv .env.production .env
```
4. \*\*Configure `.env`, This file holds environment variables for various services. Replace the placeholders with your own values, including:
* `DB_PASSWORD` and `DB_USERNAME` for your PostgreSQL database
* `REDIS_PASSWORD` for your Redis server
* (Optional) Additional environment variables specific to your Multiwoven configuration
**Example `.env` file:**
```
DB_PASSWORD=your_db_password
DB_USERNAME=your_db_username
REDIS_PASSWORD=your_redis_password
# Modify your Multiwoven-specific environment variables here
```
**4. Run Multiwoven with Docker Compose:**
1. **Start Multiwoven:** Navigate to the `multiwoven` directory and run `docker-compose up -d`. This will start all Multiwoven services in the background, including the Multiwoven UI.
**5. Accessing Multiwoven UI:**
Open your web browser and navigate to `http://:8000` (replace `` with your VM's public IP address). You should now see the Multiwoven UI.
**6. Stopping Multiwoven:**
To stop Multiwoven, navigate to the `multiwoven` directory and run.
```bash theme={null}
docker-compose down
```
**7. Upgrading Multiwoven:**
When a new version of Multiwoven is released, you can upgrade the Multiwoven using the following command.
```bash theme={null}
docker-compose pull && docker-compose up -d
```
Make sure to run the above command from the same directory where the `docker-compose.yml` file is present.
**Additional Notes:**
**Note**: the frontend and backend services run on port 8000 and 3000, respectively. Make sure you update the **VITE\_API\_HOST** environment variable in the **.env** file to the desired backend service URL running on port 3000.
* Depending on your network security group configuration, you might need to open port 8000 (Multiwoven UI) for inbound traffic.
* For production deployments, consider using a reverse proxy (e.g., Nginx) and a domain name with SSL/TLS certificates for secure access to the Multiwoven UI.
---
# Source: https://docs.squared.ai/guides/sources/data-sources/aws_athena.md
> ## Documentation Index
> Fetch the complete documentation index at: https://docs.squared.ai/llms.txt
> Use this file to discover all available pages before exploring further.
# AWS Athena
## Connect AI Squared to AWS Athena
This guide will help you configure the AWS Athena Connector in AI Squared to access and use your AWS Athena data.
### Prerequisites
Before proceeding, ensure you have the necessary access key, secret access key, region, workgroup, catalog, and output location from AWS Athena.
## Step-by-Step Guide to Connect to AWS Athena
## Step 1: Navigate to AWS Athena Console
Start by logging into your AWS Management Console and navigating to the AWS Athena service.
1. Sign in to your AWS account at [AWS Management Console](https://aws.amazon.com/console/).
2. In the AWS services search bar, type "Athena" and select it from the dropdown.
## Step 2: Locate AWS Athena Configuration Details
Once you're in the AWS Athena console, you'll find the necessary configuration details:
1. **Access Key and Secret Access Key:**
* Click on your username at the top right corner of the AWS Management Console.
* Choose "Security Credentials" from the dropdown menu.
* In the "Access keys" section, you can create or view your access keys.
* If you haven't created an access key pair before, click on "Create access key" to generate a new one. Make sure to copy the Access Key ID and Secret Access Key as they are shown only once.
2. **Region:**
* The AWS region can be selected from the top right corner of the AWS Management Console. Choose the region where your AWS Athena resources are located or where you want to perform queries.
3. **Workgroup:**
* In the AWS Athena console, navigate to the "Workgroups" section in the left sidebar.
* Here, you can view the existing workgroups or create a new one if needed. Note down the name of the workgroup you want to use.
4. **Catalog and Database:**
* Go to the "Data Source" section in the in the left sidebar.
* Select the catalog that contains the databases and tables you want to query. Note down the name of the catalog and database.
5. **Output Location:**
* In the AWS Athena console, click on "Settings".
* Under "Query result location," you can see the default output location for query results. You can also set a custom output location if needed. Note down the output location URL.
## Step 3: Configure AWS Athena Connector in Your Application
Now that you have gathered all the necessary details enter the following information:
* **Access Key ID:** Your AWS IAM user's Access Key ID.
* **Secret Access Key:** The corresponding Secret Access Key.
* **Region:** The AWS region where your Athena resources are located.
* **Workgroup:** The name of the workgroup you want to use.
* **Catalog:** The name of the catalog containing your data.
* **Schema:** The name of the database containing your data.
* **Output Location:** The URL of the output location for query results.
## Step 4: Test the AWS Athena Connection
After configuring the connector in your application:
1. Save the configuration settings.
2. Test the connection to AWS Athena from your application to ensure everything is set up correctly.
3. Run a test query or check the connection status to verify successful connectivity.
Your AWS Athena connector is now configured and ready to query data from your AWS Athena data catalog.
### Supported sync modes
| Mode | Supported (Yes/No/Coming soon) |
| ---------------- | ------------------------------ |
| Incremental sync | YES |
| Full refresh | Coming soon |
---
# Source: https://docs.squared.ai/activation/ai-ml-sources/aws_bedrock-model.md
> ## Documentation Index
> Fetch the complete documentation index at: https://docs.squared.ai/llms.txt
> Use this file to discover all available pages before exploring further.
# AWS Bedrock Model
## Connect AI Squared to AWS Bedrock Model
This guide will help you configure the AWS Bedrock Model Connector in AI Squared to access your AWS Bedrock Model Endpoint.
### Prerequisites
Before proceeding, ensure you have the necessary access key, secret access key, and region from AWS.
## Step-by-Step Guide to Connect to an AWS Bedrock Model Endpoint
## Step 1: Navigate to AWS Console
Start by logging into your AWS Management Console.
1. Sign in to your AWS account at [AWS Management Console](https://aws.amazon.com/console/).
## Step 2: Locate AWS Configuration Details
Once you're in the AWS console, you'll find the necessary configuration details:
1. **Access Key and Secret Access Key:**
* Click on your username at the top right corner of the AWS Management Console.
* Choose "Security Credentials" from the dropdown menu.
* In the "Access keys" section, you can create or view your access keys.
* If you haven't created an access key pair before, click on "Create access key" to generate a new one. Make sure to copy the Access Key ID and Secret Access Key as they are shown only once.
2. **Region:**
* The AWS region can be selected from the top right corner of the AWS Management Console. Choose the region where your AWS Bedrock resources is located and note down the region.
 3. **Inference Profile ARN:**
* The Inference Profile ARN is in the Cross-region inference page and can be found in your selected model.
3. **Inference Profile ARN:**
* The Inference Profile ARN is in the Cross-region inference page and can be found in your selected model.
 4. **Model ID:**
* The AWS Model Id can be found in your selected models catalog.
4. **Model ID:**
* The AWS Model Id can be found in your selected models catalog.
 ## Step 3: Configure AWS Bedrock Model Connector in Your Application
Now that you have gathered all the necessary details enter the following information:
* **Access Key ID:** Your AWS IAM user's Access Key ID.
* **Secret Access Key:** The corresponding Secret Access Key.
* **Region:** The AWS region where your Bedrock model are located.
* **Inference Profile ARN:** Inference Profile ARN for Model in AWS Bedrock.
* **Model ID:** The Model ID.
## Sample Request and Response
**Request:**
```json theme={null}
{
"messages": [
{
"role": "user",
"content": "hello"
}
],
"max_tokens": 100
}
```
**Response:**
```json theme={null}
{
"id": "chatcmpl",
"choices": [
{
"index": 0,
"message": {
"role": "assistant",
"content": " Hello!",
"tool_calls": null
},
"finish_reason": "stop"
}
],
"usage": {
"prompt_tokens": 12,
"completion_tokens": 10,
"total_tokens": 22
},
"meta": {
"requestDurationMillis": 113
},
"model": "jamba-1.5-large"
}
```
**Request:**
```json theme={null}
{
"messages": [
{
"role": "user",
"content": "hello"
}
],
"max_tokens": 100
}
```
**Response:**
```json theme={null}
{
"id": "chatcmpl",
"choices": [
{
"index": 0,
"message": {
"role": "assistant",
"content": " Hello!",
"tool_calls": null
},
"finish_reason": "stop"
}
],
"usage": {
"prompt_tokens": 12,
"completion_tokens": 10,
"total_tokens": 22
},
"meta": {
"requestDurationMillis": 113
},
"model": "jamba-1.5-mini"
}
```
**Request:**
```json theme={null}
{
"inferenceConfig": {
"max_new_tokens": 100
},
"messages": [
{
"role": "user",
"content": [
{
"text": "hello"
}
]
}
]
}
```
**Response:**
```json theme={null}
{
"output": {
"message": {
"content": [
{
"text": "Hello!"
}
],
"role": "assistant"
}
},
"stopReason": "end_turn",
"usage": {
"inputTokens": 1,
"outputTokens": 51,
"totalTokens": 52,
"cacheReadInputTokenCount": 0,
"cacheWriteInputTokenCount": 0
}
}
```
**Request:**
```json theme={null}
{
"inputText": "hello",
"textGenerationConfig": {
"maxTokenCount": 100,
"stopSequences": []
}
}
```
**Response:**
```json theme={null}
{
"inputTextTokenCount": 3,
"results": [
{
"tokenCount": 13,
"outputText": "\nBot: Hi there! How can I help you?",
"completionReason": "FINISH"
}
]
}
```
**Request:**
```json theme={null}
{
"anthropic_version": "bedrock-2023-05-31",
"max_tokens": 100,
"messages": [
{
"role": "user",
"content": [
{
"type": "text",
"text": "hello"
}
]
}
]
}
```
**Response:**
```json theme={null}
{
"id": "msg_01XFDUDYJgAACzvnptvVoYEL",
"type": "message",
"role": "assistant",
"content": [
{
"type": "text",
"text": "Hello!"
}
],
"model": "claude-3-7-sonnet-20250219",
"stop_reason": "end_turn",
"stop_sequence": null,
"usage": {
"input_tokens": 12,
"output_tokens": 6
}
}
```
**Request:**
```json theme={null}
{
"anthropic_version": "bedrock-2023-05-31",
"max_tokens": 100,
"messages": [
{
"role": "user",
"content": [
{
"type": "text",
"text": "hello"
}
]
}
]
}
```
**Response:**
```json theme={null}
{
"id": "msg_02ABC1234",
"type": "message",
"role": "assistant",
"content": [
{
"type": "text",
"text": "Hi there!"
}
],
"model": "claude-3-5-haiku-20240305",
"stop_reason": "end_turn",
"usage": {
"input_tokens": 9,
"output_tokens": 5
}
}
```
**Request:**
```json theme={null}
{
"anthropic_version": "bedrock-2023-05-31",
"max_tokens": 100,
"messages": [
{
"role": "user",
"content": [
{
"type": "text",
"text": "hello"
}
]
}
]
}
```
**Response:**
```json theme={null}
{
"id": "msg_03XYZ5678",
"type": "message",
"role": "assistant",
"content": [
{
"type": "text",
"text": "Hello, friend!"
}
],
"model": "claude-3-5-sonnet-20240315-v2",
"stop_reason": "end_turn",
"usage": {
"input_tokens": 9,
"output_tokens": 6
}
}
```
**Request:**
```json theme={null}
{
"anthropic_version": "bedrock-2023-05-31",
"max_tokens": 100,
"messages": [
{
"role": "user",
"content": [
{
"type": "text",
"text": "hello"
}
]
}
]
}
```
**Response:**
```json theme={null}
{
"id": "msg_bdrk",
"type": "message",
"role": "assistant",
"model": "claude-3-5-sonnet-20240307",
"content": [
{
"type": "text",
"text": "Hello!"
}
],
"stop_reason": "end_turn",
"stop_sequence": null,
"usage": {
"input_tokens": 8,
"output_tokens": 12
}
}
```
**Request:**
```json theme={null}
{
"anthropic_version": "bedrock-2023-05-31",
"max_tokens": 100,
"messages": [
{
"role": "user",
"content": [
{
"type": "text",
"text": "hello"
}
]
}
]
}
```
**Response:**
```json theme={null}
{
"id": "msg_05OPQ2345",
"type": "message",
"role": "assistant",
"content": [
{
"type": "text",
"text": "Hey there!"
}
],
"model": "claude-3-opus-20240229",
"stop_reason": "end_turn",
"usage": {
"input_tokens": 9,
"output_tokens": 6
}
}
```
**Request:**
```json theme={null}
{
"anthropic_version": "bedrock-2023-05-31",
"max_tokens": 100,
"messages": [
{
"role": "user",
"content": [
{
"type": "text",
"text": "hello"
}
]
}
]
}
```
**Response:**
```json theme={null}
{
"id": "msg_06RST6789",
"type": "message",
"role": "assistant",
"content": [
{
"type": "text",
"text": "Hello, world!"
}
],
"model": "claude-3-haiku-20240305",
"stop_reason": "end_turn",
"usage": {
"input_tokens": 9,
"output_tokens": 6
}
}
```
**Request:**
```json theme={null}
{
"message": "Hi"
}
```
**Response:**
```json theme={null}
{
"response_id": "123D7",
"text": "Hi there!",
"generation_id": "e70d12",
"chat_history": [
{
"role": "USER",
"message": "Hi"
},
{
"role": "CHATBOT",
"message": "Hi there!"
}
],
"finish_reason": "COMPLETE"
}
```
**Request:**
```json theme={null}
{
"prompt": "hello",
"max_tokens": 100
}
```
**Response:**
```json theme={null}
{
"id": "5e820f61f54d",
"generations": [
{
"id": "5e820f61f54d",
"text": " Hello!",
"finish_reason": "COMPLETE"
}
],
"prompt": "hello"
}
```
**Request:**
```json theme={null}
{
"prompt": "hello",
"max_tokens": 100
}
```
**Response:**
```json theme={null}
{
"id": "5e820f61f54d",
"generations": [
{
"id": "5e820f61f54d",
"text": " Hello!",
"finish_reason": "COMPLETE"
}
],
"prompt": "hello"
}
```
**Request:**
```json theme={null}
{
"prompt": "Hello",
"max_tokens": 100
}
```
**Response:**
```json theme={null}
{
"choices": [
{
"text": "Hi!",
"stop_reason": "length"
}
]
}
```
**Request:**
```json theme={null}
{
"prompt": "hello",
"max_gen_len": 100
}
```
**Response:**
```json theme={null}
{
"generation": "Hi!",
"prompt_token_count": 1,
"generation_token_count": 100,
"stop_reason": "length"
}
```
**Request:**
```json theme={null}
{
"prompt": "hello",
"max_gen_len": 100
}
```
**Response:**
```json theme={null}
{
"generation": "Hi",
"prompt_token_count": 1,
"generation_token_count": 100,
"stop_reason": "length"
}
```
**Request:**
```json theme={null}
{
"prompt": "hello",
"max_gen_len": 100
}
```
**Response:**
```json theme={null}
{
"generation": "Hi!",
"prompt_token_count": 1,
"generation_token_count": 480,
"stop_reason": "stop"
}
```
**Request:**
```json theme={null}
{
"prompt": "hello",
"max_gen_len": 100
}
```
**Response:**
```json theme={null}
{
"generation": "Hi!",
"prompt_token_count": 1,
"generation_token_count": 480,
"stop_reason": "stop"
}
```
**Request:**
```json theme={null}
{
"prompt": "hello",
"max_gen_len": 100
}
```
**Response:**
```json theme={null}
{
"generation": "Hi!",
"prompt_token_count": 1,
"generation_token_count": 100,
"stop_reason": "length"
}
```
**Request:**
```json theme={null}
{
"prompt": "hello",
"max_gen_len": 100
}
```
**Response:**
```json theme={null}
{
"generation": "Hi!",
"prompt_token_count": 1,
"generation_token_count": 445,
"stop_reason": "length"
}
```
**Request:**
```json theme={null}
{
"prompt": "hello",
"max_gen_len": 100
}
```
**Response:**
```json theme={null}
{
"generation": "Hi!",
"prompt_token_count": 1,
"generation_token_count": 445,
"stop_reason": "length"
}
```
**Request:**
```json theme={null}
{
"prompt": "hello",
"max_gen_len": 100
}
```
**Response:**
```json theme={null}
{
"generation": "Hi!",
"prompt_token_count": 1,
"generation_token_count": 445,
"stop_reason": "stop"
}
```
**Request:**
```json theme={null}
{
"prompt": "hello",
"max_gen_len": 100
}
```
**Response:**
```json theme={null}
{
"generation": "Hi!",
"prompt_token_count": 1,
"generation_token_count": 445,
"stop_reason": "stop"
}
```
**Request:**
```json theme={null}
{
"messages": [
{
"role": "user",
"content": [
{
"type": "text",
"text": "hello"
}
]
}
]
}
```
**Response:**
```json theme={null}
{
"id": "model_id",
"object": "chat.completion",
"created": 1745858024,
"model": "pixtral-large-2502",
"choices": [
{
"index": 0,
"message": {
"role": "assistant",
"content": "Hello!"
},
"finish_reason": "stop"
}
],
"usage": {
"prompt_tokens": 5,
"completion_tokens": 33,
"total_tokens": 38
}
}
```
**Request:**
```json theme={null}
{
"prompt": "
## Step 3: Configure AWS Bedrock Model Connector in Your Application
Now that you have gathered all the necessary details enter the following information:
* **Access Key ID:** Your AWS IAM user's Access Key ID.
* **Secret Access Key:** The corresponding Secret Access Key.
* **Region:** The AWS region where your Bedrock model are located.
* **Inference Profile ARN:** Inference Profile ARN for Model in AWS Bedrock.
* **Model ID:** The Model ID.
## Sample Request and Response
**Request:**
```json theme={null}
{
"messages": [
{
"role": "user",
"content": "hello"
}
],
"max_tokens": 100
}
```
**Response:**
```json theme={null}
{
"id": "chatcmpl",
"choices": [
{
"index": 0,
"message": {
"role": "assistant",
"content": " Hello!",
"tool_calls": null
},
"finish_reason": "stop"
}
],
"usage": {
"prompt_tokens": 12,
"completion_tokens": 10,
"total_tokens": 22
},
"meta": {
"requestDurationMillis": 113
},
"model": "jamba-1.5-large"
}
```
**Request:**
```json theme={null}
{
"messages": [
{
"role": "user",
"content": "hello"
}
],
"max_tokens": 100
}
```
**Response:**
```json theme={null}
{
"id": "chatcmpl",
"choices": [
{
"index": 0,
"message": {
"role": "assistant",
"content": " Hello!",
"tool_calls": null
},
"finish_reason": "stop"
}
],
"usage": {
"prompt_tokens": 12,
"completion_tokens": 10,
"total_tokens": 22
},
"meta": {
"requestDurationMillis": 113
},
"model": "jamba-1.5-mini"
}
```
**Request:**
```json theme={null}
{
"inferenceConfig": {
"max_new_tokens": 100
},
"messages": [
{
"role": "user",
"content": [
{
"text": "hello"
}
]
}
]
}
```
**Response:**
```json theme={null}
{
"output": {
"message": {
"content": [
{
"text": "Hello!"
}
],
"role": "assistant"
}
},
"stopReason": "end_turn",
"usage": {
"inputTokens": 1,
"outputTokens": 51,
"totalTokens": 52,
"cacheReadInputTokenCount": 0,
"cacheWriteInputTokenCount": 0
}
}
```
**Request:**
```json theme={null}
{
"inferenceConfig": {
"max_new_tokens": 100
},
"messages": [
{
"role": "user",
"content": [
{
"text": "hello"
}
]
}
]
}
```
**Response:**
```json theme={null}
{
"output": {
"message": {
"content": [
{
"text": "Hello!"
}
],
"role": "assistant"
}
},
"stopReason": "end_turn",
"usage": {
"inputTokens": 1,
"outputTokens": 51,
"totalTokens": 52,
"cacheReadInputTokenCount": 0,
"cacheWriteInputTokenCount": 0
}
}
```
**Request:**
```json theme={null}
{
"inferenceConfig": {
"max_new_tokens": 100
},
"messages": [
{
"role": "user",
"content": [
{
"text": "hello"
}
]
}
]
}
```
**Response:**
```json theme={null}
{
"output": {
"message": {
"content": [
{
"text": "Hello!"
}
],
"role": "assistant"
}
},
"stopReason": "end_turn",
"usage": {
"inputTokens": 1,
"outputTokens": 51,
"totalTokens": 52,
"cacheReadInputTokenCount": 0,
"cacheWriteInputTokenCount": 0
}
}
```
**Request:**
```json theme={null}
{
"inputText": "hello",
"textGenerationConfig": {
"maxTokenCount": 100,
"stopSequences": []
}
}
```
**Response:**
```json theme={null}
{
"inputTextTokenCount": 3,
"results": [
{
"tokenCount": 13,
"outputText": "\nBot: Hi there! How can I help you?",
"completionReason": "FINISH"
}
]
}
```
**Request:**
```json theme={null}
{
"inputText": "hello",
"textGenerationConfig": {
"maxTokenCount": 100,
"stopSequences": []
}
}
```
**Response:**
```json theme={null}
{
"inputTextTokenCount": 3,
"results": [
{
"tokenCount": 13,
"outputText": "\nBot: Hi there! How can I help you?",
"completionReason": "FINISH"
}
]
}
```
**Request:**
```json theme={null}
{
"inputText": "hello",
"textGenerationConfig": {
"maxTokenCount": 100,
"stopSequences": []
}
}
```
**Response:**
```json theme={null}
{
"inputTextTokenCount": 3,
"results": [
{
"tokenCount": 13,
"outputText": "\nBot: Hi there! How can I help you?",
"completionReason": "FINISH"
}
]
}
```
**Request:**
```json theme={null}
{
"anthropic_version": "bedrock-2023-05-31",
"max_tokens": 100,
"messages": [
{
"role": "user",
"content": [
{
"type": "text",
"text": "hello"
}
]
}
]
}
```
**Response:**
```json theme={null}
{
"id": "msg_01XFDUDYJgAACzvnptvVoYEL",
"type": "message",
"role": "assistant",
"content": [
{
"type": "text",
"text": "Hello!"
}
],
"model": "claude-3-7-sonnet-20250219",
"stop_reason": "end_turn",
"stop_sequence": null,
"usage": {
"input_tokens": 12,
"output_tokens": 6
}
}
```
**Request:**
```json theme={null}
{
"anthropic_version": "bedrock-2023-05-31",
"max_tokens": 100,
"messages": [
{
"role": "user",
"content": [
{
"type": "text",
"text": "hello"
}
]
}
]
}
```
**Response:**
```json theme={null}
{
"id": "msg_02ABC1234",
"type": "message",
"role": "assistant",
"content": [
{
"type": "text",
"text": "Hi there!"
}
],
"model": "claude-3-5-haiku-20240305",
"stop_reason": "end_turn",
"usage": {
"input_tokens": 9,
"output_tokens": 5
}
}
```
**Request:**
```json theme={null}
{
"anthropic_version": "bedrock-2023-05-31",
"max_tokens": 100,
"messages": [
{
"role": "user",
"content": [
{
"type": "text",
"text": "hello"
}
]
}
]
}
```
**Response:**
```json theme={null}
{
"id": "msg_03XYZ5678",
"type": "message",
"role": "assistant",
"content": [
{
"type": "text",
"text": "Hello, friend!"
}
],
"model": "claude-3-5-sonnet-20240315-v2",
"stop_reason": "end_turn",
"usage": {
"input_tokens": 9,
"output_tokens": 6
}
}
```
**Request:**
```json theme={null}
{
"anthropic_version": "bedrock-2023-05-31",
"max_tokens": 100,
"messages": [
{
"role": "user",
"content": [
{
"type": "text",
"text": "hello"
}
]
}
]
}
```
**Response:**
```json theme={null}
{
"id": "msg_bdrk",
"type": "message",
"role": "assistant",
"model": "claude-3-5-sonnet-20240307",
"content": [
{
"type": "text",
"text": "Hello!"
}
],
"stop_reason": "end_turn",
"stop_sequence": null,
"usage": {
"input_tokens": 8,
"output_tokens": 12
}
}
```
**Request:**
```json theme={null}
{
"anthropic_version": "bedrock-2023-05-31",
"max_tokens": 100,
"messages": [
{
"role": "user",
"content": [
{
"type": "text",
"text": "hello"
}
]
}
]
}
```
**Response:**
```json theme={null}
{
"id": "msg_05OPQ2345",
"type": "message",
"role": "assistant",
"content": [
{
"type": "text",
"text": "Hey there!"
}
],
"model": "claude-3-opus-20240229",
"stop_reason": "end_turn",
"usage": {
"input_tokens": 9,
"output_tokens": 6
}
}
```
**Request:**
```json theme={null}
{
"anthropic_version": "bedrock-2023-05-31",
"max_tokens": 100,
"messages": [
{
"role": "user",
"content": [
{
"type": "text",
"text": "hello"
}
]
}
]
}
```
**Response:**
```json theme={null}
{
"id": "msg_06RST6789",
"type": "message",
"role": "assistant",
"content": [
{
"type": "text",
"text": "Hello, world!"
}
],
"model": "claude-3-haiku-20240305",
"stop_reason": "end_turn",
"usage": {
"input_tokens": 9,
"output_tokens": 6
}
}
```
**Request:**
```json theme={null}
{
"message": "Hi"
}
```
**Response:**
```json theme={null}
{
"response_id": "123D7",
"text": "Hi there!",
"generation_id": "e70d12",
"chat_history": [
{
"role": "USER",
"message": "Hi"
},
{
"role": "CHATBOT",
"message": "Hi there!"
}
],
"finish_reason": "COMPLETE"
}
```
**Request:**
```json theme={null}
{
"message": "Hi"
}
```
**Response:**
```json theme={null}
{
"response_id": "123D7",
"text": "Hi there!",
"generation_id": "e70d12",
"chat_history": [
{
"role": "USER",
"message": "Hi"
},
{
"role": "CHATBOT",
"message": "Hi there!"
}
],
"finish_reason": "COMPLETE"
}
```
**Request:**
```json theme={null}
{
"prompt": "hello",
"max_tokens": 100
}
```
**Response:**
```json theme={null}
{
"id": "5e820f61f54d",
"generations": [
{
"id": "5e820f61f54d",
"text": " Hello!",
"finish_reason": "COMPLETE"
}
],
"prompt": "hello"
}
```
**Request:**
```json theme={null}
{
"prompt": "hello",
"max_tokens": 100
}
```
**Response:**
```json theme={null}
{
"id": "5e820f61f54d",
"generations": [
{
"id": "5e820f61f54d",
"text": " Hello!",
"finish_reason": "COMPLETE"
}
],
"prompt": "hello"
}
```
**Request:**
```json theme={null}
{
"prompt": "Hello",
"max_tokens": 100
}
```
**Response:**
```json theme={null}
{
"choices": [
{
"text": "Hi!",
"stop_reason": "length"
}
]
}
```
**Request:**
```json theme={null}
{
"prompt": "hello",
"max_gen_len": 100
}
```
**Response:**
```json theme={null}
{
"generation": "Hi!",
"prompt_token_count": 1,
"generation_token_count": 100,
"stop_reason": "length"
}
```
**Request:**
```json theme={null}
{
"prompt": "hello",
"max_gen_len": 100
}
```
**Response:**
```json theme={null}
{
"generation": "Hi",
"prompt_token_count": 1,
"generation_token_count": 100,
"stop_reason": "length"
}
```
**Request:**
```json theme={null}
{
"prompt": "hello",
"max_gen_len": 100
}
```
**Response:**
```json theme={null}
{
"generation": "Hi!",
"prompt_token_count": 1,
"generation_token_count": 480,
"stop_reason": "stop"
}
```
**Request:**
```json theme={null}
{
"prompt": "hello",
"max_gen_len": 100
}
```
**Response:**
```json theme={null}
{
"generation": "Hi!",
"prompt_token_count": 1,
"generation_token_count": 480,
"stop_reason": "stop"
}
```
**Request:**
```json theme={null}
{
"prompt": "hello",
"max_gen_len": 100
}
```
**Response:**
```json theme={null}
{
"generation": "Hi!",
"prompt_token_count": 1,
"generation_token_count": 100,
"stop_reason": "length"
}
```
**Request:**
```json theme={null}
{
"prompt": "hello",
"max_gen_len": 100
}
```
**Response:**
```json theme={null}
{
"generation": "Hi!",
"prompt_token_count": 1,
"generation_token_count": 445,
"stop_reason": "length"
}
```
**Request:**
```json theme={null}
{
"prompt": "hello",
"max_gen_len": 100
}
```
**Response:**
```json theme={null}
{
"generation": "Hi!",
"prompt_token_count": 1,
"generation_token_count": 445,
"stop_reason": "length"
}
```
**Request:**
```json theme={null}
{
"prompt": "hello",
"max_gen_len": 100
}
```
**Response:**
```json theme={null}
{
"generation": "Hi!",
"prompt_token_count": 1,
"generation_token_count": 445,
"stop_reason": "stop"
}
```
**Request:**
```json theme={null}
{
"prompt": "hello",
"max_gen_len": 100
}
```
**Response:**
```json theme={null}
{
"generation": "Hi!",
"prompt_token_count": 1,
"generation_token_count": 445,
"stop_reason": "stop"
}
```
**Request:**
```json theme={null}
{
"messages": [
{
"role": "user",
"content": [
{
"type": "text",
"text": "hello"
}
]
}
]
}
```
**Response:**
```json theme={null}
{
"id": "model_id",
"object": "chat.completion",
"created": 1745858024,
"model": "pixtral-large-2502",
"choices": [
{
"index": 0,
"message": {
"role": "assistant",
"content": "Hello!"
},
"finish_reason": "stop"
}
],
"usage": {
"prompt_tokens": 5,
"completion_tokens": 33,
"total_tokens": 38
}
}
```
**Request:**
```json theme={null}
{
"prompt": "[INST] hello [/INST]",
"max_tokens": 100
}
```
**Response:**
```json theme={null}
{
"outputs": [
{
"text": " Hello!",
"stop_reason": "stop"
}
]
}
```
**Request:**
```json theme={null}
{
"prompt": "[INST] hello [/INST]",
"max_tokens": 100
}
```
**Response:**
```json theme={null}
{
"outputs": [
{
"text": " Hello!",
"stop_reason": "stop"
}
]
}
```
**Request:**
```json theme={null}
{
"prompt": "[INST] hello [/INST]",
"max_tokens": 100
}
```
**Response:**
```json theme={null}
{
"outputs": [
{
"text": " Hello!",
"stop_reason": "stop"
}
]
}
```
**Request:**
```json theme={null}
{
"prompt": "[INST] hello [/INST]",
"max_tokens": 100
}
```
**Response:**
```json theme={null}
{
"outputs": [
{
"text": " Hello!",
"stop_reason": "stop"
}
]
}
```
---
# Source: https://docs.squared.ai/guides/sources/data-sources/aws_sagemaker-model.md
> ## Documentation Index
> Fetch the complete documentation index at: https://docs.squared.ai/llms.txt
> Use this file to discover all available pages before exploring further.
# AWS Sagemaker Model
## Connect AI Squared to AWS Sagemaker Model
This guide will help you configure the AWS Sagemaker Model Connector in AI Squared to access your AWS Sagemaker Model Endpoint.
### Prerequisites
Before proceeding, ensure you have the necessary access key, secret access key, and region from AWS.
## Step-by-Step Guide to Connect to an AWS Sagemaker Model Endpoint
## Step 1: Navigate to AWS Console
Start by logging into your AWS Management Console.
1. Sign in to your AWS account at [AWS Management Console](https://aws.amazon.com/console/).
## Step 2: Locate AWS Configuration Details
Once you're in the AWS console, you'll find the necessary configuration details:
1. **Access Key and Secret Access Key:**
* Click on your username at the top right corner of the AWS Management Console.
* Choose "Security Credentials" from the dropdown menu.
* In the "Access keys" section, you can create or view your access keys.
* If you haven't created an access key pair before, click on "Create access key" to generate a new one. Make sure to copy the Access Key ID and Secret Access Key as they are shown only once.
2. **Region:**
* The AWS region can be selected from the top right corner of the AWS Management Console. Choose the region where your AWS Sagemaker resources is located and note down the region.
## Step 3: Configure AWS Sagemaker Model Connector in Your Application
Now that you have gathered all the necessary details enter the following information:
* **Access Key ID:** Your AWS IAM user's Access Key ID.
* **Secret Access Key:** The corresponding Secret Access Key.
* **Region:** The AWS region where your Sagemaker resources are located.
---
# Source: https://docs.squared.ai/faqs/billing-and-account.md
> ## Documentation Index
> Fetch the complete documentation index at: https://docs.squared.ai/llms.txt
> Use this file to discover all available pages before exploring further.
# Billing & Account
---
# Source: https://docs.squared.ai/guides/sources/data-sources/bquery.md
> ## Documentation Index
> Fetch the complete documentation index at: https://docs.squared.ai/llms.txt
> Use this file to discover all available pages before exploring further.
# Google Big Query
## Connect AI Squared to BigQuery
This guide will help you configure the BigQuery Connector in AI Squared to access and use your BigQuery data.
### Prerequisites
Before you begin, you'll need to:
1. **Enable BigQuery API and Locate Dataset(s):**
* Log in to the [Google Developers Console](https://console.cloud.google.com/apis/dashboard).
* If you don't have a project, create one.
* Enable the [BigQuery API for your project](https://console.cloud.google.com/flows/enableapi?apiid=bigquery&_ga=2.71379221.724057513.1673650275-1611021579.1664923822&_gac=1.213641504.1673650813.EAIaIQobChMIt9GagtPF_AIVkgB9Ch331QRREAAYASAAEgJfrfD_BwE).
* Copy your Project ID.
* Find the Project ID and Dataset ID of your BigQuery datasets. You can find this by querying the `INFORMATION_SCHEMA.SCHEMATA` view or by visiting the Google Cloud web console.
2. **Create a Service Account:**
* Follow the instructions in our [Google Cloud Provider (GCP) documentation](https://cloud.google.com/iam/docs/service-accounts-create) to create a service account.
3. **Grant Access:**
* In the Google Cloud web console, navigate to the [IAM](https://console.cloud.google.com/iam-admin/iam?supportedpurview=project,folder,organizationId) & Admin section and select IAM.
* Find your service account and click on edit.
* Go to the "Assign Roles" tab and click "Add another role".
* Search and select the "BigQuery User" and "BigQuery Data Viewer" roles.
* Click "Save".
4. **Download JSON Key File:**
* In the Google Cloud web console, navigate to the [IAM](https://console.cloud.google.com/iam-admin/iam?supportedpurview=project,folder,organizationId) & Admin section and select IAM.
* Find your service account and click on it.
* Go to the "Keys" tab and click "Add Key".
* Select "Create new key" and choose JSON format.
* Click "Download".
### Steps
### Authentication
Authentication is supported via the following:
* **Dataset ID and JSON Key File**
* **[Dataset ID](https://cloud.google.com/bigquery/docs/datasets):** The ID of the dataset within Google BigQuery that you want to access. This can be found in Step 1.
* **[JSON Key File](https://cloud.google.com/iam/docs/keys-create-delete):** The JSON key file containing the authentication credentials for your service account.
### Supported sync modes
| Mode | Supported (Yes/No/Coming soon) |
| ---------------- | ------------------------------ |
| Incremental sync | YES |
| Full refresh | Coming soon |
---
# Source: https://docs.squared.ai/guides/destinations/retl-destinations/marketing-automation/braze.md
> ## Documentation Index
> Fetch the complete documentation index at: https://docs.squared.ai/llms.txt
> Use this file to discover all available pages before exploring further.
# Braze
---
# Source: https://docs.squared.ai/api-reference/connector_definitions/check_connection.md
> ## Documentation Index
> Fetch the complete documentation index at: https://docs.squared.ai/llms.txt
> Use this file to discover all available pages before exploring further.
# Check Connection
## OpenAPI
````yaml POST /api/v1/connector_definitions/check_connection
openapi: 3.0.1
info:
title: AI Squared API
version: 1.0.0
servers:
- url: https://api.squared.ai
security: []
paths:
/api/v1/connector_definitions/check_connection:
post:
tags:
- Connector Definitions
summary: Checks the connection for a specified connector definition
requestBody:
required: true
content:
application/json:
schema:
type: object
properties:
type:
type: string
enum:
- source
- destination
name:
type: string
connection_spec:
type: object
description: >-
Generic connection specification structure. Specifics depend
on the connector type.
additionalProperties: true
responses:
'200':
description: Connection check successful
content:
application/json:
schema:
type: object
properties:
result:
type: string
enum:
- success
- failure
details:
type: string
additionalProperties: false
security:
- bearerAuth: []
components:
securitySchemes:
bearerAuth:
type: http
scheme: bearer
bearerFormat: JWT
````
---
# Source: https://docs.squared.ai/guides/destinations/retl-destinations/marketing-automation/clevertap.md
> ## Documentation Index
> Fetch the complete documentation index at: https://docs.squared.ai/llms.txt
> Use this file to discover all available pages before exploring further.
# CleverTap
---
# Source: https://docs.squared.ai/guides/sources/data-sources/clickhouse.md
> ## Documentation Index
> Fetch the complete documentation index at: https://docs.squared.ai/llms.txt
> Use this file to discover all available pages before exploring further.
# ClickHouse
## Connect AI Squared to ClickHouse
This guide will help you configure the ClickHouse Connector in AI Squared to access and use your ClickHouse data.
### Prerequisites
Before proceeding, ensure you have the necessary URL, username, and password from ClickHouse.
## Step-by-Step Guide to Connect to ClickHouse
## Step 1: Navigate to ClickHouse Console
Start by logging into your ClickHouse Management Console and navigating to the ClickHouse service.
1. Sign in to your ClickHouse account at [ClickHouse](https://clickhouse.com/).
2. In the ClickHouse console, select the service you want to connect to.
## Step 2: Locate ClickHouse Configuration Details
Once you're in the ClickHouse console, you'll find the necessary configuration details:
1. **HTTP Interface URL:**
* Click on the "Connect" button in your ClickHouse service.
* In "Connect with" select HTTPS.
* Find the HTTP interface URL, which typically looks like `http://:8443`. Note down this URL as it will be used to connect to your ClickHouse service.
2. **Username and Password:**
* Click on the "Connect" button in your ClickHouse service.
* Here, you will see the credentials needed to connect, including the username and password.
* Note down the username and password as they are required for the HTTP connection.
## Step 3: Configure ClickHouse Connector in Your Application
Now that you have gathered all the necessary details, enter the following information in your application:
* **HTTP Interface URL:** The URL of your ClickHouse service HTTP interface.
* **Username:** Your ClickHouse service username.
* **Password:** The corresponding password for the username.
## Step 4: Test the ClickHouse Connection
After configuring the connector in your application:
1. Save the configuration settings.
2. Test the connection to ClickHouse from your application to ensure everything is set up correctly.
3. Run a test query or check the connection status to verify successful connectivity.
Your ClickHouse connector is now configured and ready to query data from your ClickHouse service.
### Supported sync modes
| Mode | Supported (Yes/No/Coming soon) |
| ---------------- | ------------------------------ |
| Incremental sync | YES |
| Full refresh | Coming soon |
---
# Source: https://docs.squared.ai/deployment-and-security/cloud.md
> ## Documentation Index
> Fetch the complete documentation index at: https://docs.squared.ai/llms.txt
> Use this file to discover all available pages before exploring further.
# Cloud (Managed by AI Squared)
> Learn how to access and use AI Squared's fully managed cloud deployment.
The cloud-hosted version of AI Squared offers a fully managed environment, ideal for teams that want fast onboarding, minimal infrastructure overhead, and secure access to all platform capabilities.
***
## Accessing the Platform
To access the managed cloud environment:
1. Visit [app.squared.ai](https://app.squared.ai) to log in to your workspace.
2. If you don’t have an account yet, go to [squared.ai](https://squared.ai) and submit the **Contact Us** form. Our team will provision your workspace and guide you through onboarding.
***
## What’s Included
When deployed in the cloud, AI Squared provides:
* A dedicated workspace per team or business unit
* Preconfigured connectors for supported data sources and AI/ML model endpoints
* Secure role-based access control
* Managed infrastructure, updates, and scaling
***
## Use Cases
* Scaling across departments without IT dependencies
* Centralized AI insights delivery into enterprise tools
***
## Next Steps
Once your workspace is provisioned and you're logged in:
* Set up your **data sources** and **AI/ML model endpoints**
* Build **data models** and configure **syncs**
* Create and deploy **data apps** into business applications
Refer to the [Getting Started](/getting-started/introduction) section for first-time user guidance.
---
# Source: https://docs.squared.ai/open-source/community-support/commit-message-guidelines.md
> ## Documentation Index
> Fetch the complete documentation index at: https://docs.squared.ai/llms.txt
> Use this file to discover all available pages before exploring further.
# Commit Message Guidelines
Multiwoven follows the following format for all commit messages.
Format: `([]) : `
## Example
```
feat(CE): add source/snowflake connector
^--^ ^--^ ^------------^
| | |
| | +-> Summary in present tense.
| |
| +-------> Edition: CE for Community Edition or EE for Enterprise Edition.
|
+-------------> Type: chore, docs, feat, fix, refactor, style, or test.
```
Supported Types:
* `feat`: (new feature for the user, not a new feature for build script)
* `fix`: (bug fix for the user, not a fix to a build script)
* `docs`: (changes to the documentation)
* `style`: (formatting, missing semi colons, etc; no production code change)
* `refactor`: (refactoring production code, eg. renaming a variable)
* `test`: (adding missing tests, refactoring tests; no production code change)
* `chore`: (updating grunt tasks etc; no production code change)
Sample messages:
* feat(CE): add source/snowflake connector
* feat(EE): add google sso
References:
* [https://gist.github.com/joshbuchea/6f47e86d2510bce28f8e7f42ae84c716](https://gist.github.com/joshbuchea/6f47e86d2510bce28f8e7f42ae84c716)
* [https://www.conventionalcommits.org/](https://www.conventionalcommits.org/)
* [https://seesparkbox.com/foundry/semantic\_commit\_messages](https://seesparkbox.com/foundry/semantic_commit_messages)
* [http://karma-runner.github.io/1.0/dev/git-commit-msg.html](http://karma-runner.github.io/1.0/dev/git-commit-msg.html)
---
# Source: https://docs.squared.ai/activation/ai-modelling/connect-source.md
> ## Documentation Index
> Fetch the complete documentation index at: https://docs.squared.ai/llms.txt
> Use this file to discover all available pages before exploring further.
# Connect Source
> Learn how to connect and configure an AI/ML model as a source for use within the AI Squared platform.
Connecting an AI/ML source is the first step in activating AI within your business workflows. AI Squared allows you to seamlessly integrate your deployed model endpoints—from providers like SageMaker, Vertex AI, Databricks, or custom HTTP APIs.
This guide walks you through connecting a new model source.
***
## Step 1: Select an AI/ML Source
1. Navigate to **AI Activation → AI Modeling → Connect Source**
2. Click on **Add Source**
3. Choose your desired connector from the list:
* AWS SageMaker
* Google Vertex AI
* Databricks Model
* OpenAI Model Endpoint
* HTTP Model Source (Generic)
📸 *Placeholder for: Screenshot of “Add Source” screen*
***
## Step 2: Enter Endpoint Details
Each connector requires some basic configuration for successful integration.
### Required Fields
* **Endpoint Name** – A meaningful name for this model source
* **Endpoint URL** – The endpoint where the model is hosted
* **Authentication Method** – e.g., OAuth, API Key, Bearer Token
* **Auth Header / Secret Key** – If applicable
* **Request Format** – Structure expected by the model (e.g., JSON payload)
* **Response Format** – Format returned by the model (e.g., structured JSON with keys)
📸 *Placeholder for: Screenshot of endpoint input form*
***
## Step 3: Test Connection
Click **Test Connection** to validate that the model endpoint is reachable and returns a valid response.
* Ensure all fields are correct
* The system will validate the endpoint and return a success or error message
📸 *Placeholder for: Screenshot of test success/failure*
***
## Step 4: Define Input Schema
The input schema specifies the fields your model expects during inference.
| Field | Description |
| --------- | ------------------------------------------ |
| **Name** | Key name expected by the model |
| **Type** | Data type: String, Integer, Float, Boolean |
| **Value** | Static or dynamic input value |
📸 *Placeholder for: Input schema editor screenshot*
***
## Step 5: Define Output Schema
The output schema ensures consistent mapping of the model’s response.
| Field | Description |
| -------------- | ------------------------------------------ |
| **Field Name** | Key name from the model response |
| **Type** | Data type: String, Integer, Float, Boolean |
📸 *Placeholder for: Output schema editor screenshot*
***
## Step 6: Save the Source
Click **Save** once configuration is complete. Your model source will now appear in the **AI Modeling** tab and can be used in downstream workflows such as Data Apps or visualizations.
📸 *Placeholder for: Final save and confirmation screen*
***
Need help? Head over to our [Support & FAQs](/support) section for troubleshooting tips or reach out via the in-app help widget.
---
# Source: https://docs.squared.ai/api-reference/connector_definitions/connector_definition.md
> ## Documentation Index
> Fetch the complete documentation index at: https://docs.squared.ai/llms.txt
> Use this file to discover all available pages before exploring further.
# Connector Definition
## OpenAPI
````yaml GET /api/v1/connector_definitions/{connector_name}
openapi: 3.0.1
info:
title: AI Squared API
version: 1.0.0
servers:
- url: https://api.squared.ai
security: []
paths:
/api/v1/connector_definitions/{connector_name}:
get:
tags:
- Connector Definitions
summary: Retrieve specific connector definition based on its name
parameters:
- name: connector_name
in: path
required: true
schema:
type: string
description: Name of the connector
- name: type
in: query
required: true
schema:
type: string
enum:
- source
- destination
description: Type of the connector (source or destination)
responses:
'200':
description: Successful response
content:
application/json:
schema:
type: object
properties:
name:
type: string
connector_type:
type: string
connector_subtype:
type: string
documentation_url:
type: string
github_issue_label:
type: string
icon:
type: string
license:
type: string
release_stage:
type: string
support_level:
type: string
tags:
type: array
items:
type: string
connector_spec:
type: object
properties:
documentation_url:
type: string
connection_specification:
type: object
additionalProperties: true
supports_normalization:
type: boolean
supports_dbt:
type: boolean
stream_type:
type: string
additionalProperties: true
security:
- bearerAuth: []
components:
securitySchemes:
bearerAuth:
type: http
scheme: bearer
bearerFormat: JWT
````
---
# Source: https://docs.squared.ai/api-reference/connector_definitions/connector_definitions.md
> ## Documentation Index
> Fetch the complete documentation index at: https://docs.squared.ai/llms.txt
> Use this file to discover all available pages before exploring further.
# Connector Definitions
## OpenAPI
````yaml GET /api/v1/connector_definitions
openapi: 3.0.1
info:
title: AI Squared API
version: 1.0.0
servers:
- url: https://api.squared.ai
security: []
paths:
/api/v1/connector_definitions:
get:
tags:
- Connector Definitions
summary: Retrieve connector definitions based on type
parameters:
- name: type
in: query
required: true
schema:
type: string
enum:
- source
- destination
description: Type of the connector (source or destination)
- name: category
in: query
required: true
schema:
type: string
enum:
- data
- ai_ml
description: Category of the connector
responses:
'200':
description: Successful response
content:
application/json:
schema:
type: array
items:
type: object
properties:
name:
type: string
connector_type:
type: string
connector_subtype:
type: string
documentation_url:
type: string
github_issue_label:
type: string
icon:
type: string
license:
type: string
release_stage:
type: string
support_level:
type: string
tags:
type: array
items:
type: string
connector_spec:
type: object
properties:
documentation_url:
type: string
connection_specification:
type: object
additionalProperties: true
security:
- bearerAuth: []
components:
securitySchemes:
bearerAuth:
type: http
scheme: bearer
bearerFormat: JWT
````
---
# Source: https://docs.squared.ai/open-source/community-support/contribution.md
> ## Documentation Index
> Fetch the complete documentation index at: https://docs.squared.ai/llms.txt
> Use this file to discover all available pages before exploring further.
# Contributor Code of Conduct
> Contributor Covenant Code of Conduct
## Our Pledge
In the interest of fostering an open and welcoming environment, we as contributors and maintainers pledge to make participation in our project and our community a harassment-free experience for everyone, regardless of age, body size, disability, ethnicity, gender identity and expression, level of experience, nationality, personal appearance, race, religion, or sexual identity and orientation.
## Our Standards
Examples of behavior that contributes to creating a positive environment include:
* Using welcoming and inclusive language
* Being respectful of differing viewpoints and experiences
* Gracefully accepting constructive criticism
* Focusing on what is best for the community
* Showing empathy towards other community members
Examples of unacceptable behavior by participants include:
* The use of sexualized language or imagery and unwelcome sexual attention or advances
* Trolling, insulting/derogatory comments, and personal or political attacks
* Public or private harassment
* Publishing others' private information, such as a physical or electronic address, without explicit permission
* Other conduct which could reasonably be considered inappropriate in a professional setting
## Our Responsibilities
Project maintainers are responsible for clarifying the standards of acceptable behavior and are expected to take appropriate and fair corrective action in response to any instances of unacceptable behavior.
Maintainers have the right and responsibility to remove, edit, or reject comments, commits, code, wiki edits, issues, and other contributions that are not aligned to this Code of Conduct, or to ban temporarily or permanently any contributor for other behaviors that they deem inappropriate, threatening, offensive, or harmful.
## Scope
This Code of Conduct applies both within project spaces and in public spaces when an individual is representing the project or its community.
## Enforcement
Instances of abusive, harassing, or otherwise unacceptable behavior may be reported by contacting the project team at \[your email]. All complaints will be reviewed and investigated and will result in a response that is deemed necessary and appropriate to the circumstances.
## Attribution
This Code of Conduct is adapted from the [Contributor Covenant](https://www.contributor-covenant.org/) , version 1.4, available at [https://www.contributor-covenant.org/version/1/4/code-of-conduct.html]()
For answers to common questions about this code of conduct, see [https://www.contributor-covenant.org/faq]()
---
# Source: https://docs.squared.ai/guides/core-concepts.md
> ## Documentation Index
> Fetch the complete documentation index at: https://docs.squared.ai/llms.txt
> Use this file to discover all available pages before exploring further.
# Introduction
The core concepts of data movement in AI Squared are the foundation of your data journey. They include Sources, Destinations, Models, and Syncs. Understanding these concepts is crucial to building a robust data pipeline.
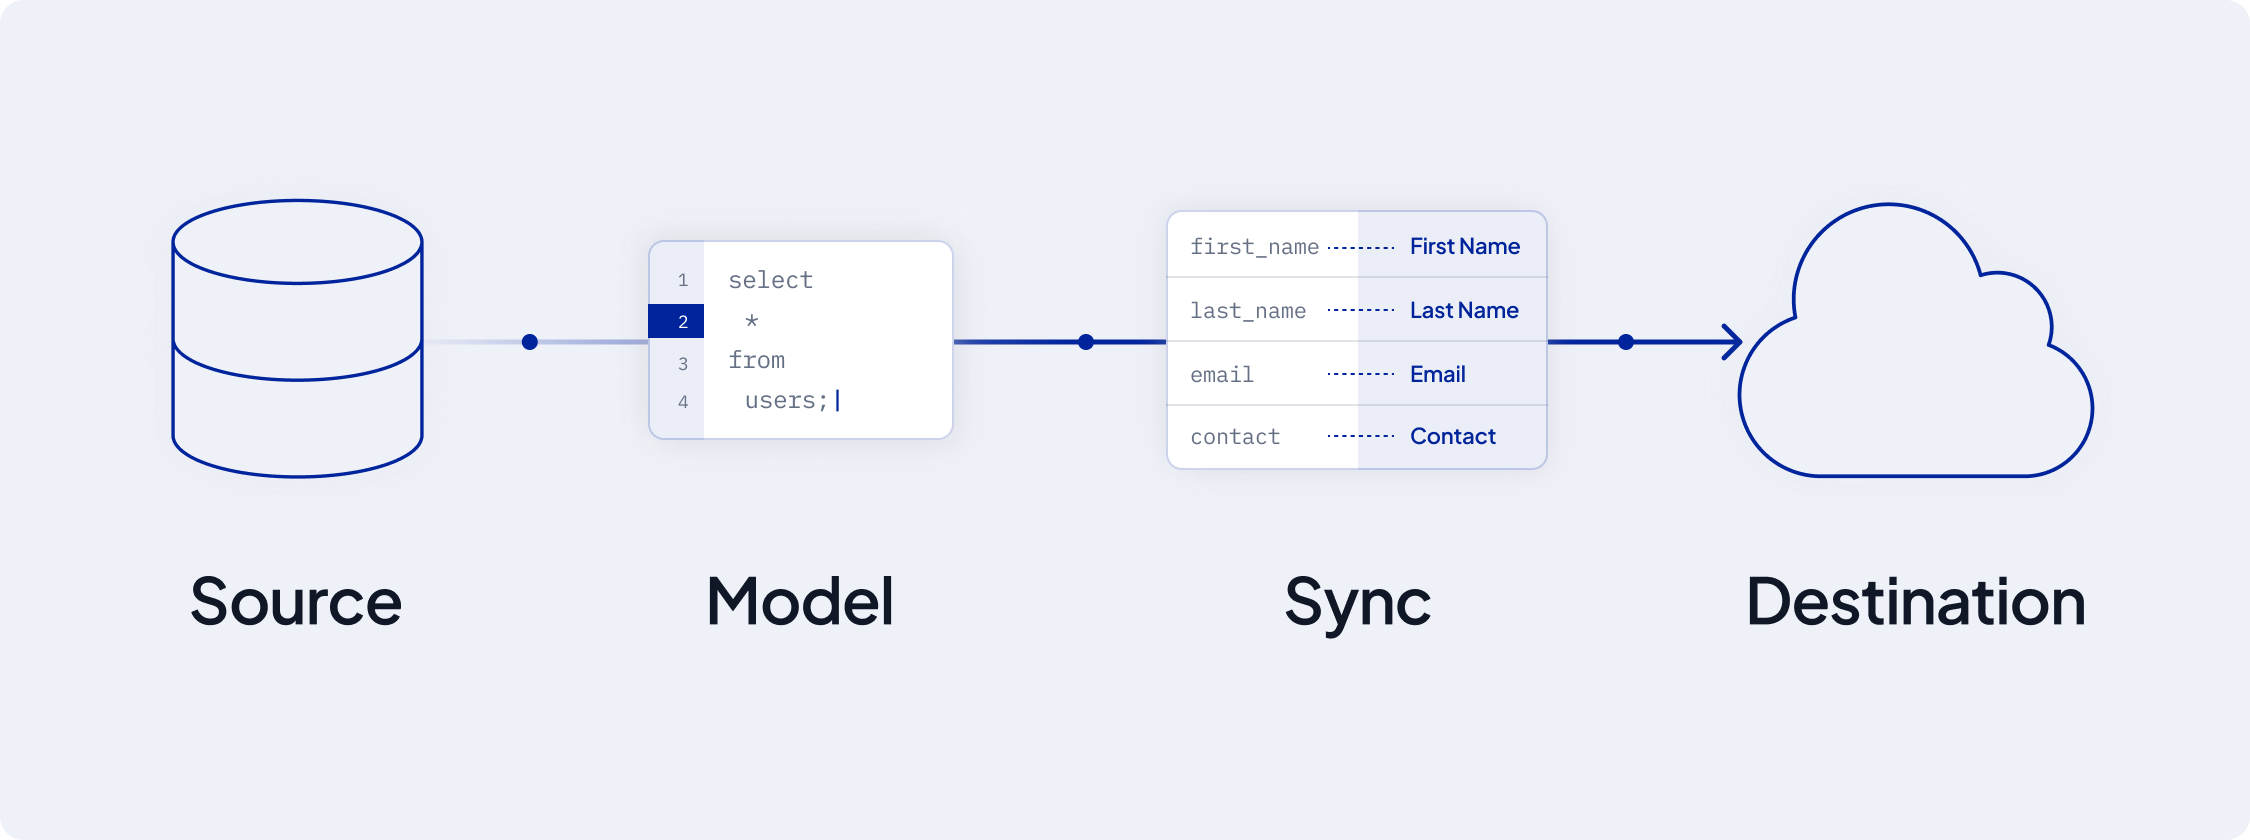 ## Sources: The Foundation of Data
### Overview
Sources are the starting points of your data journey. It's where all your data is stored and where AI Squared pulls data from.
## Sources: The Foundation of Data
### Overview
Sources are the starting points of your data journey. It's where all your data is stored and where AI Squared pulls data from.
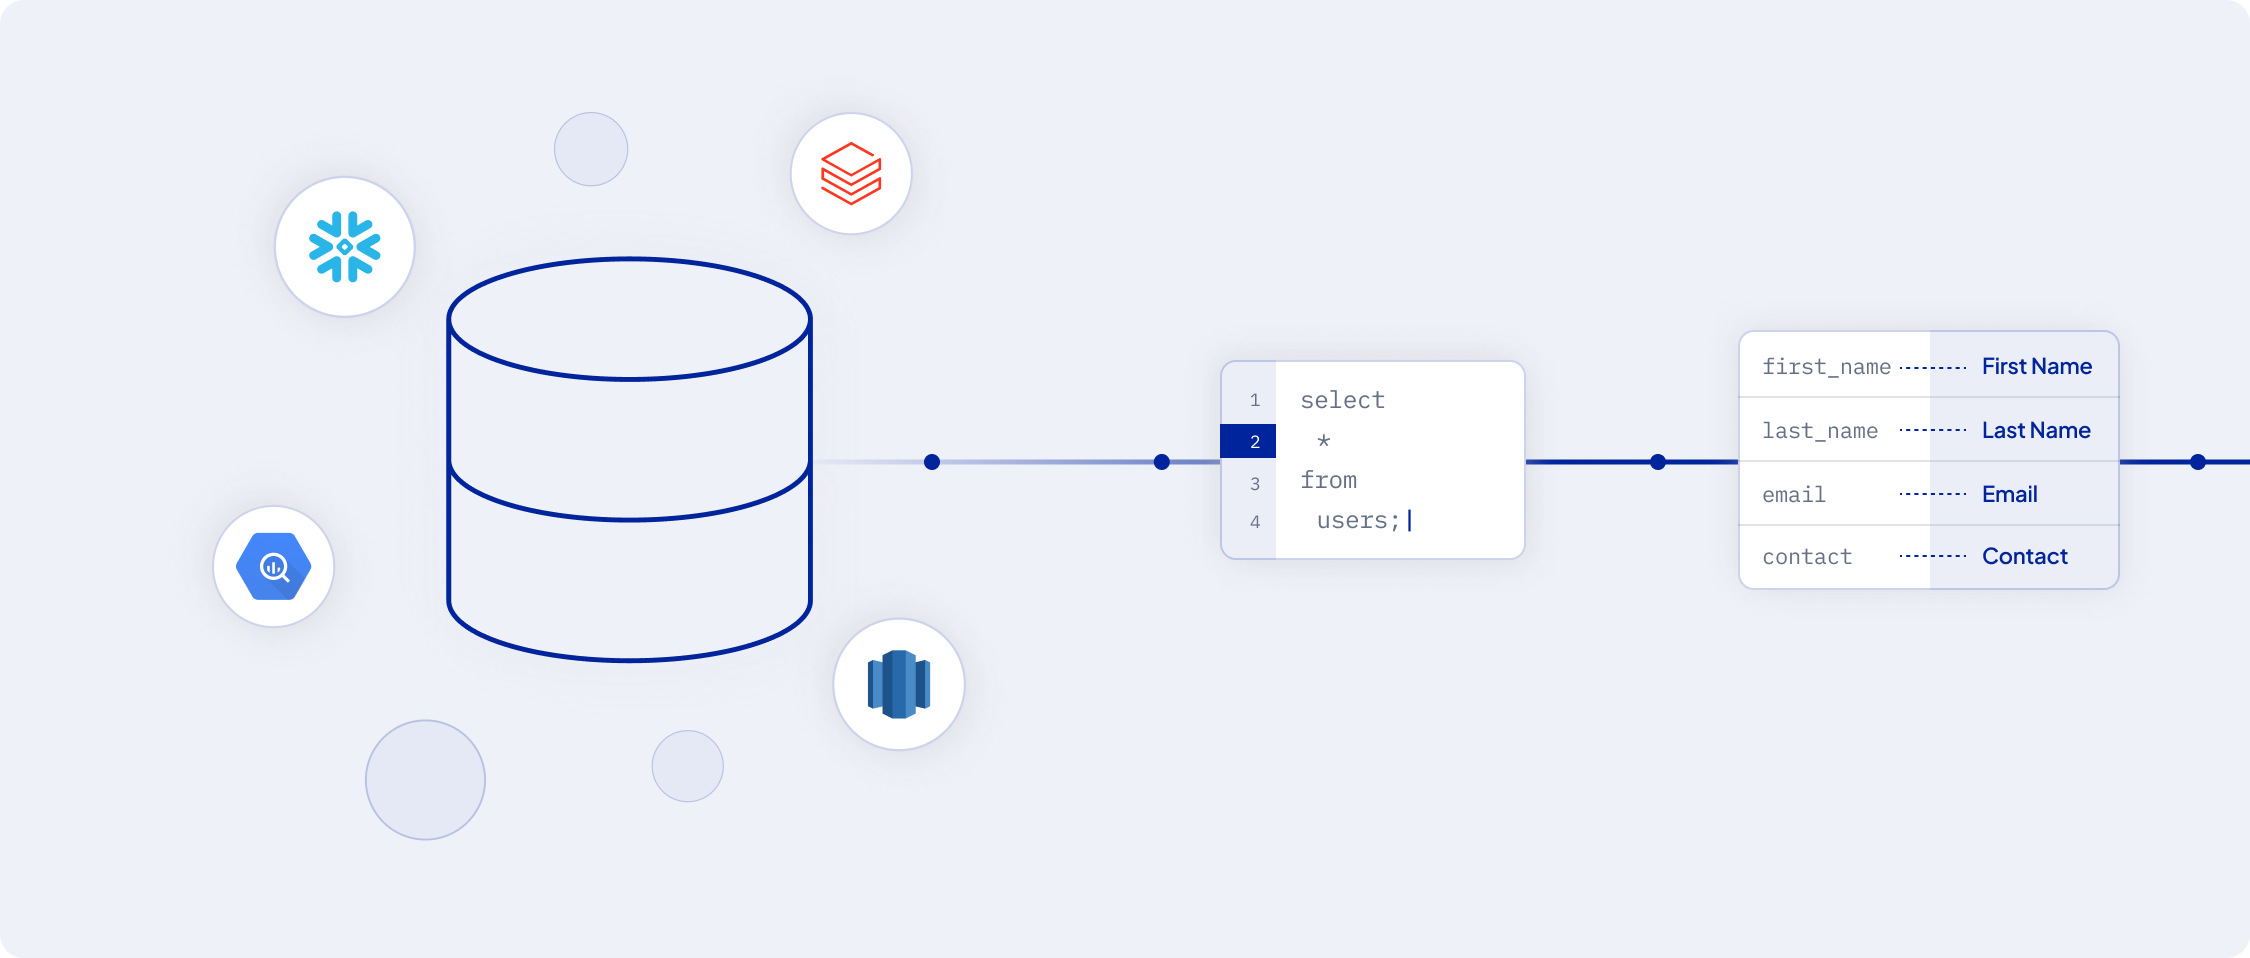 These can be:
* **Data Warehouses**: For example, `Snowflake` `Google BigQuery` and `Amazon Redshift`
* **Databases and Files**: Including traditional databases, `CSV files`, `SFTP`
### Adding a Source
To integrate a source with AI Squared, navigate to the Sources overview page and select 'Add source'.
## Destinations: Where Data Finds Value
### Overview
'Destinations' in AI Squared are business tools where you want to send your data stored in sources.
These can be:
* **Data Warehouses**: For example, `Snowflake` `Google BigQuery` and `Amazon Redshift`
* **Databases and Files**: Including traditional databases, `CSV files`, `SFTP`
### Adding a Source
To integrate a source with AI Squared, navigate to the Sources overview page and select 'Add source'.
## Destinations: Where Data Finds Value
### Overview
'Destinations' in AI Squared are business tools where you want to send your data stored in sources.
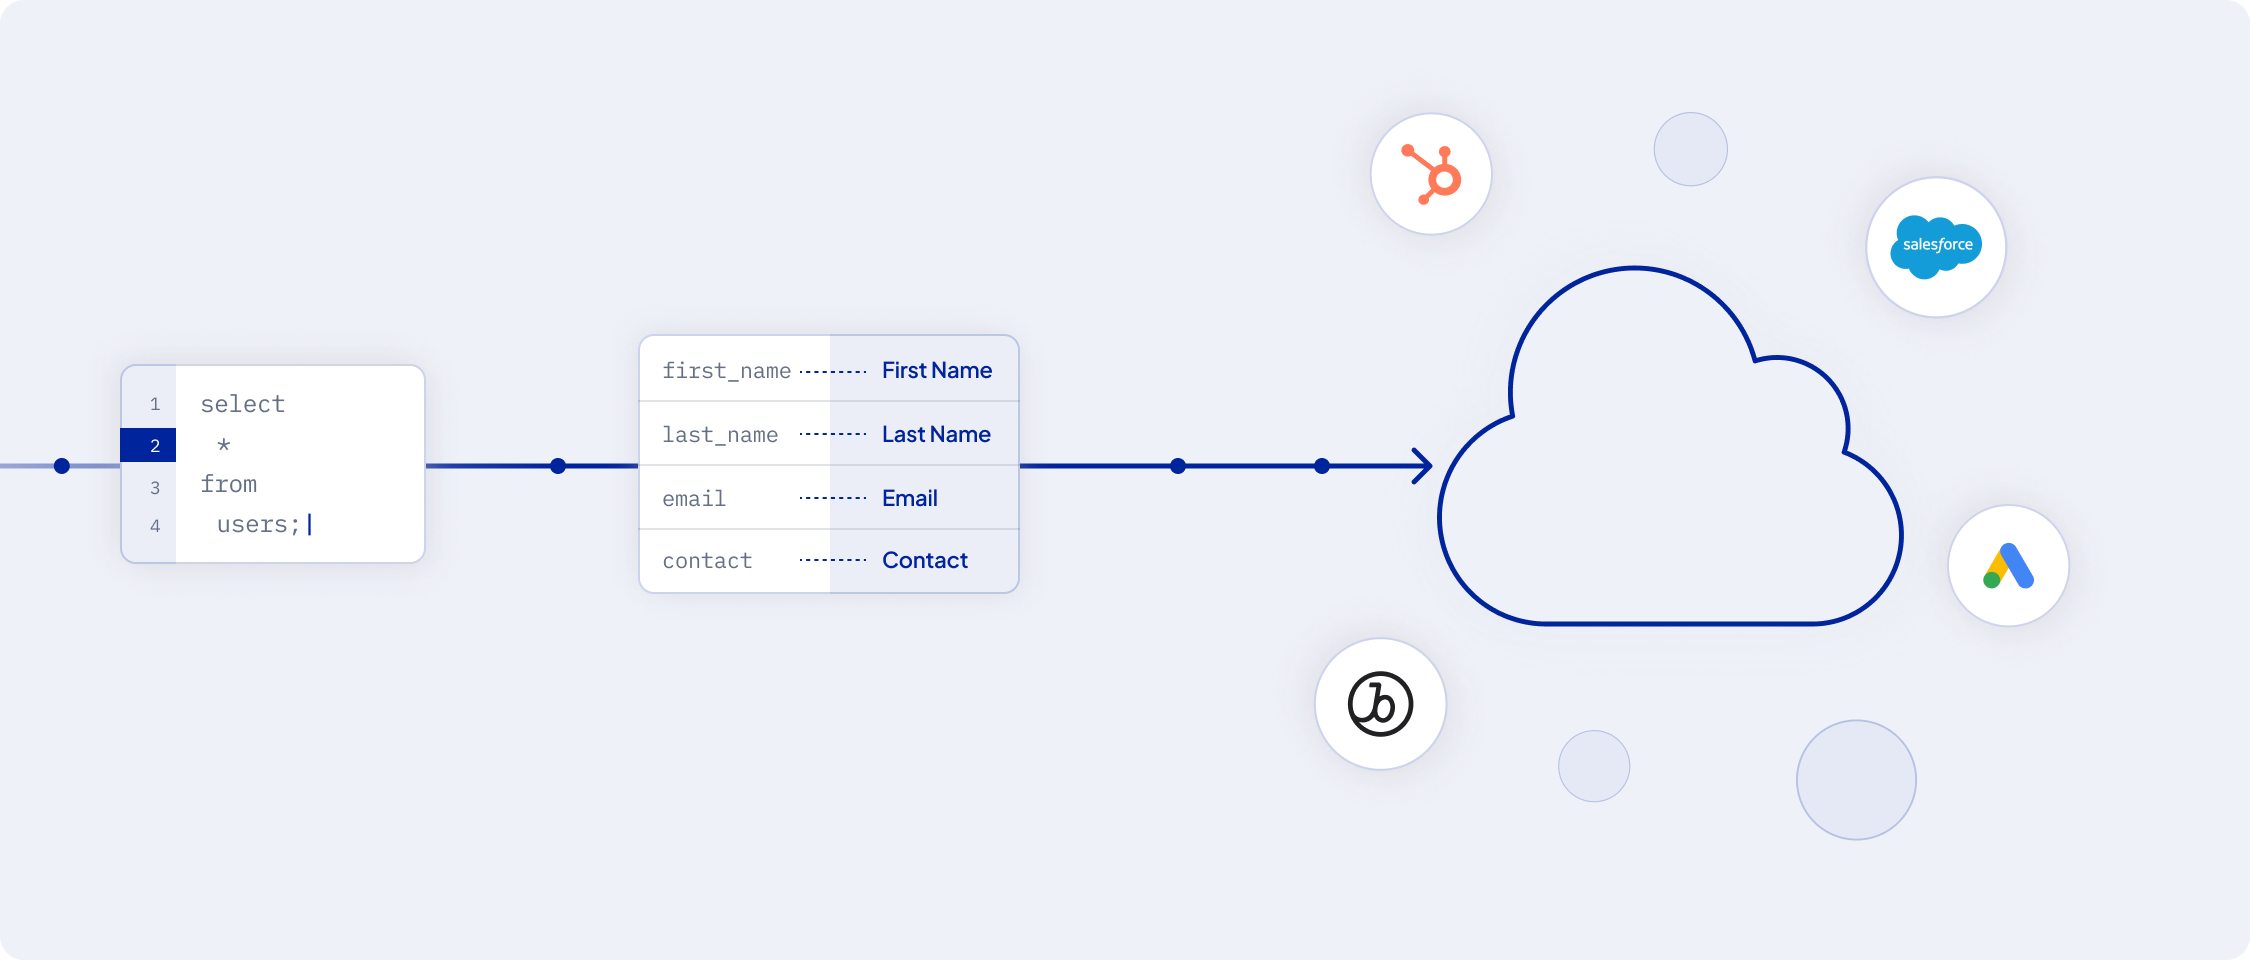 These can be:
* **CRM Systems**: Like Salesforce, HubSpot, etc.
* **Advertising Platforms**: Such as Google Ads, Facebook Ads, etc.
* **Marketing Tools**: Braze and Klaviyo, for example
### Integrating a Destination
Add a destination by going to the Destinations page and clicking 'Add destination'.
## Models: Shaping Your Data
### Overview
'Models' in AI Squared determine the data you wish to sync from a source to a destination. They are the building blocks of your data pipeline.
These can be:
* **CRM Systems**: Like Salesforce, HubSpot, etc.
* **Advertising Platforms**: Such as Google Ads, Facebook Ads, etc.
* **Marketing Tools**: Braze and Klaviyo, for example
### Integrating a Destination
Add a destination by going to the Destinations page and clicking 'Add destination'.
## Models: Shaping Your Data
### Overview
'Models' in AI Squared determine the data you wish to sync from a source to a destination. They are the building blocks of your data pipeline.
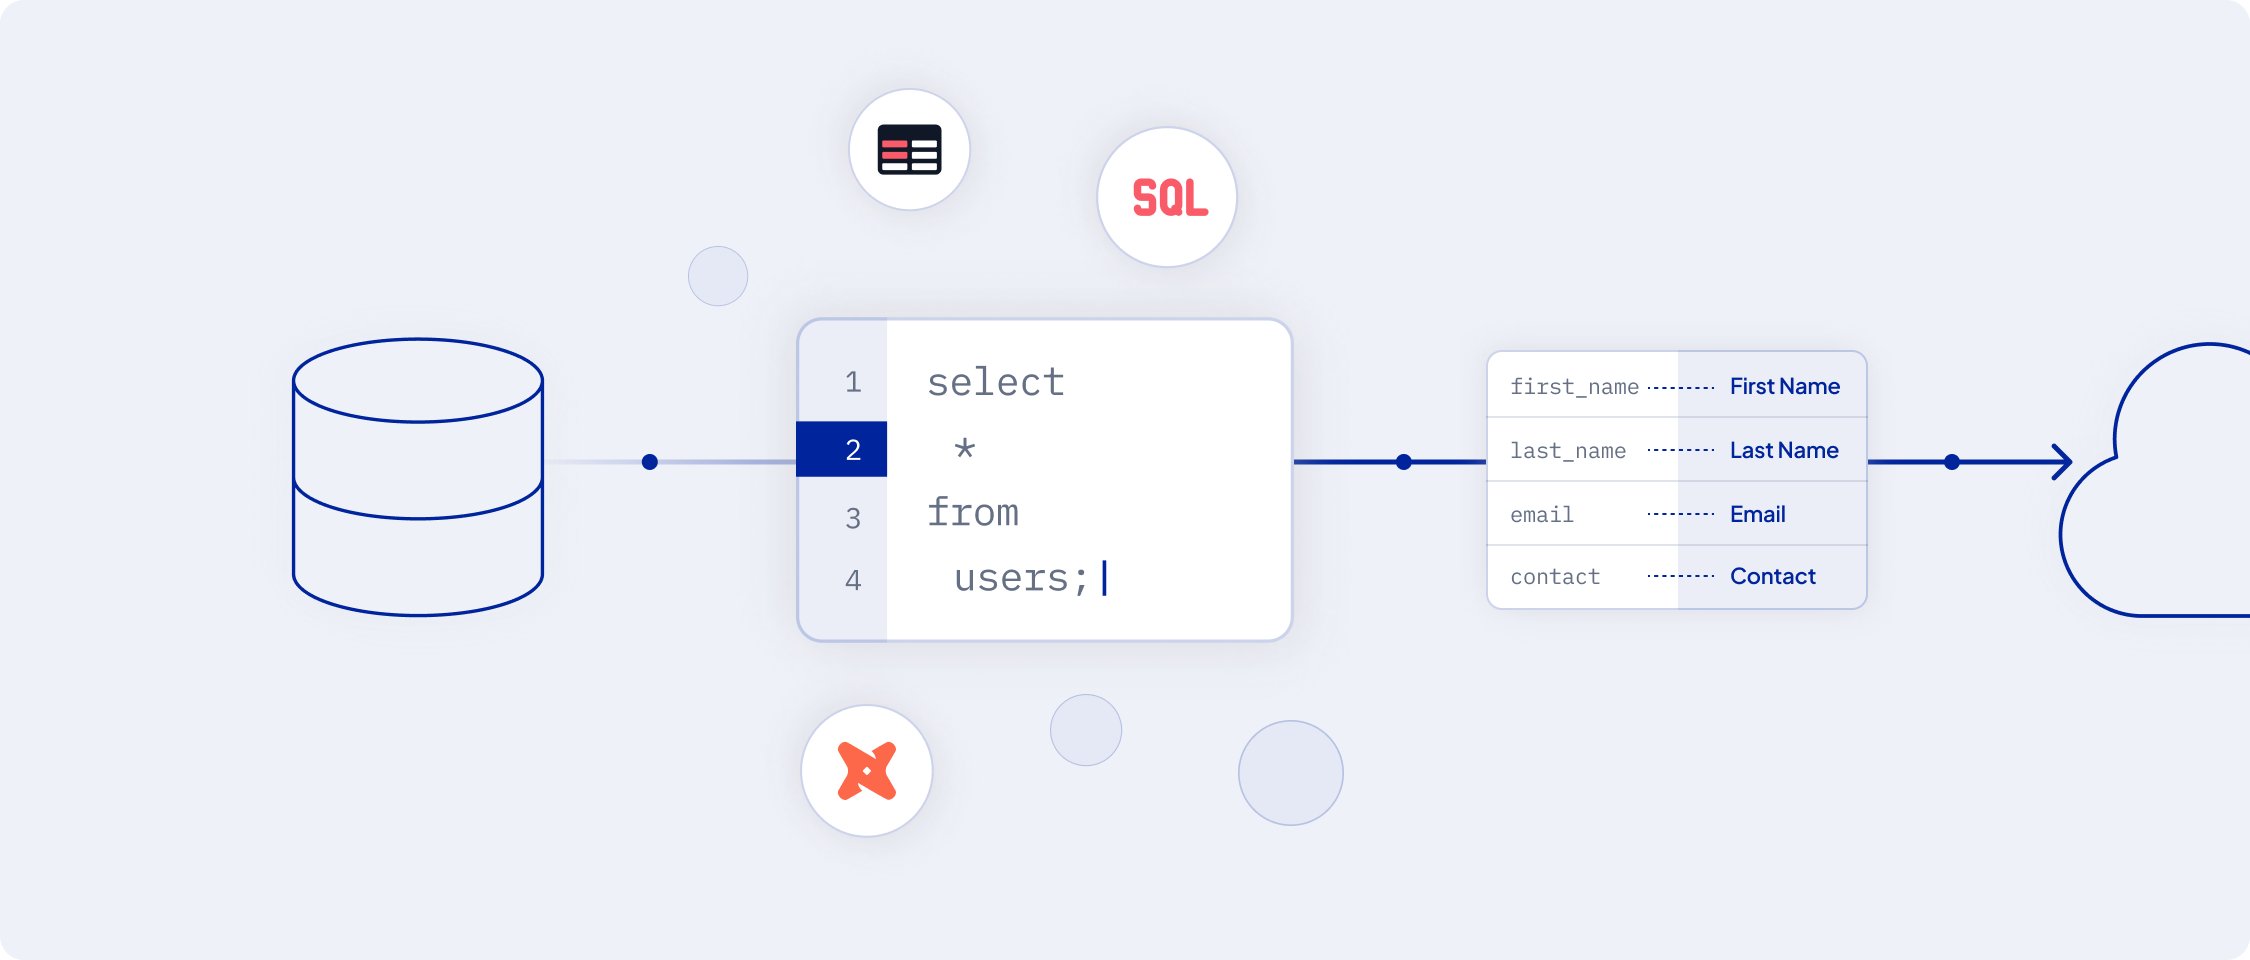 They can be defined through:
* **SQL Editor**: For customized queries
* **Visual Table Selector**: For intuitive interface
* **Existing dbt Models or Looker Looks**: Leveraging pre-built models
### Importance of a Unique Primary Key
Every model must have a unique primary key to ensure each data entry is distinct, crucial for data tracking and updating.
## Syncs: Customizing Data Flow
### Overview
'Syncs' in AI Squared helps you move data from sources to destinations. They help you in mapping the data from your models to the destination.
They can be defined through:
* **SQL Editor**: For customized queries
* **Visual Table Selector**: For intuitive interface
* **Existing dbt Models or Looker Looks**: Leveraging pre-built models
### Importance of a Unique Primary Key
Every model must have a unique primary key to ensure each data entry is distinct, crucial for data tracking and updating.
## Syncs: Customizing Data Flow
### Overview
'Syncs' in AI Squared helps you move data from sources to destinations. They help you in mapping the data from your models to the destination.
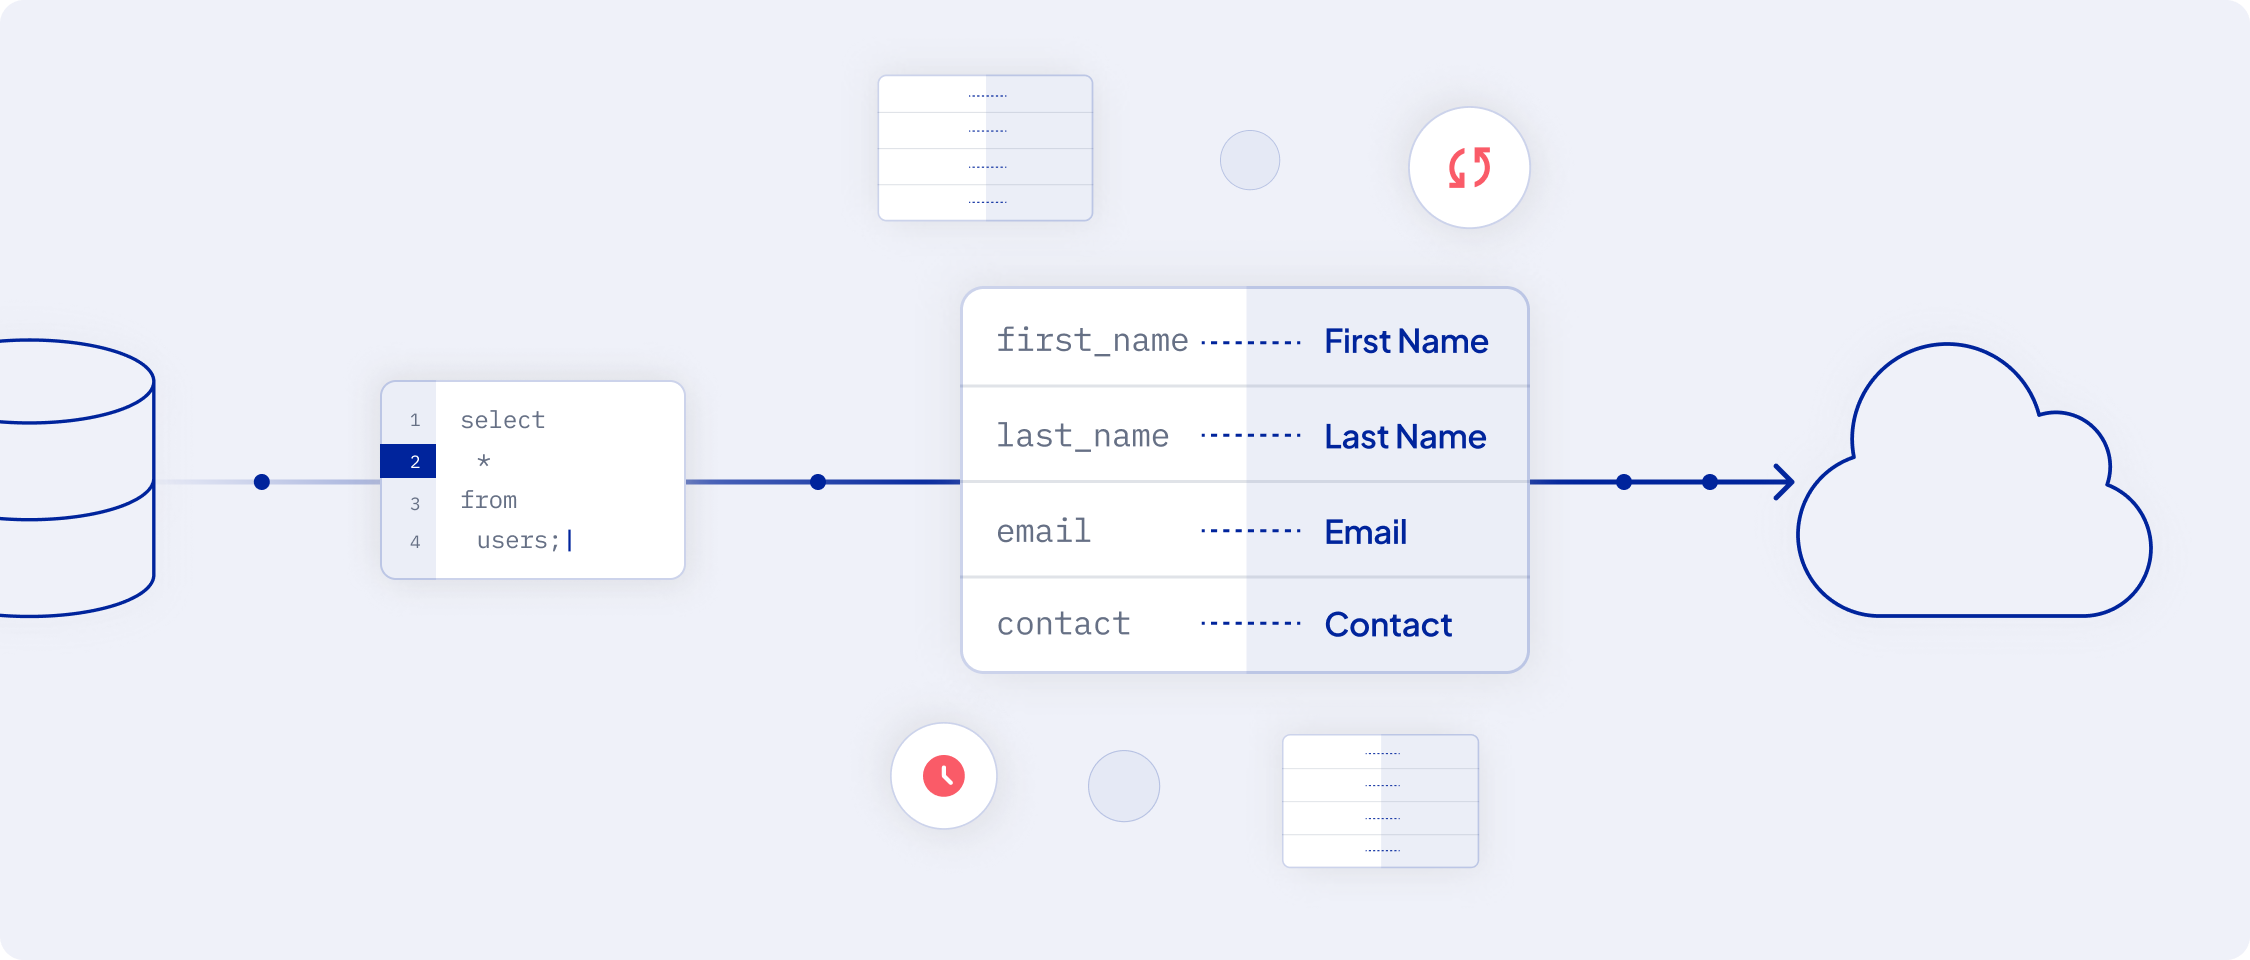 There are two types of syncs:
* **Full Refresh Sync**: All data is synced from the source to the destination.
* **Incremental Sync**: Only the new or updated data is synced.
---
# Source: https://docs.squared.ai/activation/data-apps/visualizations/create-data-app.md
> ## Documentation Index
> Fetch the complete documentation index at: https://docs.squared.ai/llms.txt
> Use this file to discover all available pages before exploring further.
# Create a Data App
> Step-by-step guide to building and configuring a Data App in AI Squared.
A **Data App** allows you to visualize and embed AI model predictions into business applications. This guide walks through the setup steps to publish your first Data App using a connected AI/ML model.
***
## Step 1: Select a Model
1. Navigate to **Data Apps** from the sidebar.
2. Click **Create New Data App**.
3. Select the AI model you want to connect from the dropdown list.
* Only models with input and output schemas defined will appear here.
***
## Step 2: Choose Display Type
Choose how the AI output will be displayed:
* **Table**: For listing multiple rows of output
* **Bar Chart** / **Pie Chart**: For aggregate or category-based insights
* **Text Card**: For single prediction or summary output
Each display type supports basic customization (e.g., column order, labels, units).
***
## Step 3: Customize Appearance
You can optionally style the Data App to match your brand:
* Modify font styles, background colors, and borders
* Add custom labels or tooltips
* Choose dark/light mode compatibility
> 📌 Custom CSS is not supported; visual changes are made through the built-in configuration options.
***
## Step 4: Configure Feedback (Optional)
Enable in-app feedback collection for business users interacting with the app:
* **Thumbs Up / Down**
* **Rating Scale (1–5, configurable)**
* **Text Comments**
* **Predefined Options (Multi-select)**
Feedback will be collected and visible under **Reports > Data Apps Reports**.
***
## Step 5: Save & Preview
1. Click **Save** to create the Data App.
2. Use the **Preview** mode to validate how the results and layout look.
3. If needed, go back to edit layout or display type.
***
## Next Steps
* 👉 [Embed in Business Apps](../embed-in-business-apps): Learn how to add the Data App to CRMs or other tools.
* 👉 [Feedback & Ratings](../feedback-and-ratings): Set up capture options and monitor usage.
---
# Source: https://docs.squared.ai/api-reference/models/create-model.md
> ## Documentation Index
> Fetch the complete documentation index at: https://docs.squared.ai/llms.txt
> Use this file to discover all available pages before exploring further.
# Create Model
## OpenAPI
````yaml POST /api/v1/models
openapi: 3.0.1
info:
title: AI Squared API
version: 1.0.0
servers:
- url: https://api.squared.ai
security: []
paths:
/api/v1/models:
post:
tags:
- Models
summary: Creates a model
parameters: []
requestBody:
content:
application/json:
schema:
type: object
properties:
model:
type: object
properties:
name:
type: string
description:
type: string
query:
type: string
query_type:
type: string
configuration:
type: object
primary_key:
type: string
connector_id:
type: integer
required:
- connector_id
- name
- query_type
responses:
'201':
description: Model created
content:
application/json:
schema:
type: object
properties:
data:
type: object
properties:
id:
type: string
type:
type: string
attributes:
type: object
properties:
name:
type: string
description:
type: string
query:
type: string
query_type:
type: string
configuration:
type: object
primary_key:
type: string
connector_id:
type: integer
created_at:
type: string
format: date-time
updated_at:
type: string
format: date-time
security:
- bearerAuth: []
components:
securitySchemes:
bearerAuth:
type: http
scheme: bearer
bearerFormat: JWT
````
---
# Source: https://docs.squared.ai/api-reference/catalogs/create_catalog.md
> ## Documentation Index
> Fetch the complete documentation index at: https://docs.squared.ai/llms.txt
> Use this file to discover all available pages before exploring further.
# Create Catalog
## OpenAPI
````yaml POST /api/v1/catalogs
openapi: 3.0.1
info:
title: AI Squared API
version: 1.0.0
servers:
- url: https://api.squared.ai
security: []
paths:
/api/v1/catalogs:
post:
tags:
- Catalogs
summary: Create catalog
operationId: createCatalog
requestBody:
required: true
content:
application/json:
schema:
type: object
properties:
connector_id:
type: integer
example: 6
catalog:
type: object
properties:
json_schema:
type: object
example:
key: value
responses:
'200':
description: Successful response
content:
application/json:
schema:
type: object
properties:
id:
type: integer
example: 123
connector_id:
type: integer
example: 6
workspace_id:
type: integer
example: 2
catalog:
type: object
properties:
json_schema:
type: object
example:
key: value
created_at:
type: string
format: date-time
example: '2023-08-20T15:28:00Z'
updated_at:
type: string
format: date-time
example: '2023-08-20T15:28:00Z'
'400':
description: Bad Request
'401':
description: Unauthorized
'500':
description: Internal Server Error
security:
- bearerAuth: []
components:
securitySchemes:
bearerAuth:
type: http
scheme: bearer
bearerFormat: JWT
````
---
# Source: https://docs.squared.ai/api-reference/connectors/create_connector.md
> ## Documentation Index
> Fetch the complete documentation index at: https://docs.squared.ai/llms.txt
> Use this file to discover all available pages before exploring further.
# Create Connector
## OpenAPI
````yaml POST /api/v1/connectors
openapi: 3.0.1
info:
title: AI Squared API
version: 1.0.0
servers:
- url: https://api.squared.ai
security: []
paths:
/api/v1/connectors:
post:
tags:
- Connectors
summary: Creates a connector
requestBody:
required: true
content:
application/json:
schema:
type: object
properties:
connector:
type: object
properties:
name:
type: string
connector_type:
type: string
enum:
- source
- destination
connector_name:
type: string
configuration:
type: object
description: >-
Configuration details for the connector. Structure
depends on the connector definition.
additionalProperties: true
required:
- name
- connector_type
- connector_name
- configuration
responses:
'201':
description: Connector created
content:
application/json:
schema:
type: object
properties:
data:
type: object
properties:
id:
type: string
type:
type: string
attributes:
type: object
properties:
name:
type: string
connector_type:
type: string
workspace_id:
type: integer
created_at:
type: string
format: date-time
updated_at:
type: string
format: date-time
configuration:
type: object
description: Specific configuration of the created connector.
additionalProperties: true
connector_name:
type: string
icon:
type: string
security:
- bearerAuth: []
components:
securitySchemes:
bearerAuth:
type: http
scheme: bearer
bearerFormat: JWT
````
---
# Source: https://docs.squared.ai/api-reference/syncs/create_sync.md
> ## Documentation Index
> Fetch the complete documentation index at: https://docs.squared.ai/llms.txt
> Use this file to discover all available pages before exploring further.
# Create Sync
## OpenAPI
````yaml POST /api/v1/syncs
openapi: 3.0.1
info:
title: AI Squared API
version: 1.0.0
servers:
- url: https://api.squared.ai
security: []
paths:
/api/v1/syncs:
post:
tags:
- Syncs
summary: Create a new sync operation
operationId: createSync
requestBody:
required: true
content:
application/json:
schema:
type: object
properties:
sync:
type: object
properties:
source_id:
type: integer
destination_id:
type: integer
model_id:
type: integer
schedule_type:
type: string
enum:
- automated
configuration:
type: object
additionalProperties: true
stream_name:
type: string
sync_mode:
type: string
enum:
- full_refresh
sync_interval:
type: integer
sync_interval_unit:
type: string
enum:
- minutes
cron_expression:
type: string
cursor_field:
type: string
required:
- source_id
- destination_id
- model_id
- schedule_type
- configuration
- stream_name
- sync_mode
- sync_interval
- sync_interval_unit
responses:
'200':
description: Sync operation created successfully
content:
application/json:
schema:
type: object
properties:
id:
type: string
type:
type: string
enum:
- syncs
attributes:
type: object
properties:
source_id:
type: integer
destination_id:
type: integer
model_id:
type: integer
configuration:
type: object
additionalProperties: true
schedule_type:
type: string
enum:
- automated
sync_mode:
type: string
enum:
- full_refresh
sync_interval:
type: integer
sync_interval_unit:
type: string
enum:
- minutes
cron_expression:
type: string
cursor_field:
type: string
stream_name:
type: string
status:
type: string
security:
- bearerAuth: []
components:
securitySchemes:
bearerAuth:
type: http
scheme: bearer
bearerFormat: JWT
````
---
# Source: https://docs.squared.ai/guides/data-modelling/sync-modes/cursor-incremental.md
> ## Documentation Index
> Fetch the complete documentation index at: https://docs.squared.ai/llms.txt
> Use this file to discover all available pages before exploring further.
# Incremental - Cursor Field
> Incremental Cursor Field sync transfers only new or updated data, minimizing data transfer using a cursor field.
### Overview
Default Incremental Sync fetches all records from the source system and transfers only the new or updated ones to the destination. However, to optimize data transfer and reduce the number of duplicate fetches from the source, we implemented Incremental Sync with Cursor Field for those sources that support cursor fields
#### Cursor Field
A Cursor Field must be clearly defined within the dataset schema. It is identified based on its suitability for comparison and tracking changes over time.
* It serves as a marker to identify modified or added records since the previous sync.
* It facilitates efficient data retrieval by enabling the source to resume from where it left off during the last sync.
Note: Currently, only date fields are supported as Cursor Fields.
####
#### Sync Run 1
During the first sync run with the cursor field 'UpdatedAt', suppose we have the following data:
cursor field UpdatedAt value is 2024-04-20 10:00:00
| Name | Plan | Updated At |
| ---------------- | ---- | ------------------- |
| Charles Beaumont | free | 2024-04-20 10:00:00 |
| Eleanor Villiers | free | 2024-04-20 11:00:00 |
During this sync run, both Charles Beaumont's and Eleanor Villiers' records would meet the criteria since they both have an 'UpdatedAt' timestamp equal to '2024-04-20 10:00:00' or later. So, during the first sync run, both records would indeed be considered and fetched.
##### Query
```sql theme={null}
SELECT * FROM source_table
WHERE updated_at >= '2024-04-20 10:00:00';
```
#### Sync Run 2
Now cursor field UpdatedAt value is 2024-04-20 11:00:00
Suppose after some time, there are further updates in the source data:
| Name | Plan | Updated At |
| ---------------- | ---- | ------------------- |
| Charles Beaumont | free | 2024-04-20 10:00:00 |
| Eleanor Villiers | paid | 2024-04-21 10:00:00 |
During the second sync run with the same cursor field, only the records for Eleanor Villiers with 'Updated At' timestamp after the last sync would be fetched, ensuring minimal data transfer.
##### Query
```sql theme={null}
SELECT * FROM source_table
WHERE updated_at >= '2024-04-20 11:00:00';
```
#### Sync Run 3
If there are additional updates in the source data:
Now cursor field UpdatedAt value is 2024-04-21 10:00:00
| Name | Plan | Updated At |
| ---------------- | ---- | ------------------- |
| Charles Beaumont | paid | 2024-04-22 08:00:00 |
| Eleanor Villiers | pro | 2024-04-22 09:00:00 |
During the third sync run with the same cursor field, only the records for Charles Beaumont and Eleanor Villiers with 'Updated At' timestamp after the last sync would be fetched, continuing the process of minimal data transfer.
##### Query
```sql theme={null}
SELECT * FROM source_table
WHERE updated_at >= '2024-04-21 10:00:00 ';
```
### Handling Ambiguity and Inclusive Cursors
When syncing data incrementally, we ensure at least one delivery. Limited cursor field granularity may cause sources to resend previously sent data. For example, if a cursor only tracks dates, distinguishing new from old data on the same day becomes unclear.
#### Scenario
Imagine sales transactions with a cursor field `transaction_date`. If we sync on April 1st and later sync on the same day, distinguishing new transactions becomes ambiguous. To mitigate this, we guarantee at least one delivery, allowing sources to resend data as needed.
### Known Limitations
Modifications to underlying records without updating the cursor field may result in updated records not being picked up by the Incremental sync as expected.
Edit or remove of cursor field can mess up tracking data changes, causing issues and data loss. So Don't change or remove the cursor field to keep sync smooth and reliable.
---
# Source: https://docs.squared.ai/faqs/data-and-ai-integration.md
> ## Documentation Index
> Fetch the complete documentation index at: https://docs.squared.ai/llms.txt
> Use this file to discover all available pages before exploring further.
# Data & AI Integration
This section addresses frequently asked questions when connecting data sources, setting up AI/ML model endpoints, or troubleshooting integration issues within AI Squared.
***
## Data Source Integration
### Why is my data source connection failing?
* Verify that the connection credentials (e.g., host, port, username, password) are correct.
* Ensure that the network/firewall rules allow connections to AI Squared’s IPs (for on-prem data).
* Check if the database is online and reachable.
### What formats are supported for ingesting data?
* AI Squared supports connections to major databases like Snowflake, BigQuery, PostgreSQL, Oracle, and more.
* Files such as CSV, Excel, and JSON can be ingested via SFTP or cloud storage (e.g., S3).
***
## AI/ML Model Integration
### How do I connect my hosted model?
* Use the [Add AI/ML Source](/activation/ai-modelling/connect-source) guide to define your model endpoint.
* Provide input/output schema details so the platform can handle data mapping effectively.
### What types of model endpoints are supported?
* REST-based hosted models with JSON payloads
* Hosted services like AWS SageMaker, Vertex AI, and custom HTTP endpoints
***
## Sync & Schema Issues
### Why is my sync failing?
* Confirm that your data model and sync mapping are valid
* Check that input types in your model schema match your data source fields
* Review logs for any missing fields or payload mismatches
### How can I test if my connection is working?
* Use the “Test Connection” button when setting up a new source or sync.
* If testing fails, examine error messages and retry with updated configs.
***
---
# Source: https://docs.squared.ai/faqs/data-apps.md
> ## Documentation Index
> Fetch the complete documentation index at: https://docs.squared.ai/llms.txt
> Use this file to discover all available pages before exploring further.
# Data Apps
---
# Source: https://docs.squared.ai/guides/sources/data-sources/databricks-model.md
> ## Documentation Index
> Fetch the complete documentation index at: https://docs.squared.ai/llms.txt
> Use this file to discover all available pages before exploring further.
# Databricks Model
### Overview
AI Squared enables you to transfer data from a Databricks Model to various destinations or data apps. This guide explains how to obtain your Databricks Model URL and connect to AI Squared using your credentials.
### Setup
Go to the Serving tab in Databricks, select the endpoint you want to
configure, and locate the Databricks host and endpoint as shown below.
There are two types of syncs:
* **Full Refresh Sync**: All data is synced from the source to the destination.
* **Incremental Sync**: Only the new or updated data is synced.
---
# Source: https://docs.squared.ai/activation/data-apps/visualizations/create-data-app.md
> ## Documentation Index
> Fetch the complete documentation index at: https://docs.squared.ai/llms.txt
> Use this file to discover all available pages before exploring further.
# Create a Data App
> Step-by-step guide to building and configuring a Data App in AI Squared.
A **Data App** allows you to visualize and embed AI model predictions into business applications. This guide walks through the setup steps to publish your first Data App using a connected AI/ML model.
***
## Step 1: Select a Model
1. Navigate to **Data Apps** from the sidebar.
2. Click **Create New Data App**.
3. Select the AI model you want to connect from the dropdown list.
* Only models with input and output schemas defined will appear here.
***
## Step 2: Choose Display Type
Choose how the AI output will be displayed:
* **Table**: For listing multiple rows of output
* **Bar Chart** / **Pie Chart**: For aggregate or category-based insights
* **Text Card**: For single prediction or summary output
Each display type supports basic customization (e.g., column order, labels, units).
***
## Step 3: Customize Appearance
You can optionally style the Data App to match your brand:
* Modify font styles, background colors, and borders
* Add custom labels or tooltips
* Choose dark/light mode compatibility
> 📌 Custom CSS is not supported; visual changes are made through the built-in configuration options.
***
## Step 4: Configure Feedback (Optional)
Enable in-app feedback collection for business users interacting with the app:
* **Thumbs Up / Down**
* **Rating Scale (1–5, configurable)**
* **Text Comments**
* **Predefined Options (Multi-select)**
Feedback will be collected and visible under **Reports > Data Apps Reports**.
***
## Step 5: Save & Preview
1. Click **Save** to create the Data App.
2. Use the **Preview** mode to validate how the results and layout look.
3. If needed, go back to edit layout or display type.
***
## Next Steps
* 👉 [Embed in Business Apps](../embed-in-business-apps): Learn how to add the Data App to CRMs or other tools.
* 👉 [Feedback & Ratings](../feedback-and-ratings): Set up capture options and monitor usage.
---
# Source: https://docs.squared.ai/api-reference/models/create-model.md
> ## Documentation Index
> Fetch the complete documentation index at: https://docs.squared.ai/llms.txt
> Use this file to discover all available pages before exploring further.
# Create Model
## OpenAPI
````yaml POST /api/v1/models
openapi: 3.0.1
info:
title: AI Squared API
version: 1.0.0
servers:
- url: https://api.squared.ai
security: []
paths:
/api/v1/models:
post:
tags:
- Models
summary: Creates a model
parameters: []
requestBody:
content:
application/json:
schema:
type: object
properties:
model:
type: object
properties:
name:
type: string
description:
type: string
query:
type: string
query_type:
type: string
configuration:
type: object
primary_key:
type: string
connector_id:
type: integer
required:
- connector_id
- name
- query_type
responses:
'201':
description: Model created
content:
application/json:
schema:
type: object
properties:
data:
type: object
properties:
id:
type: string
type:
type: string
attributes:
type: object
properties:
name:
type: string
description:
type: string
query:
type: string
query_type:
type: string
configuration:
type: object
primary_key:
type: string
connector_id:
type: integer
created_at:
type: string
format: date-time
updated_at:
type: string
format: date-time
security:
- bearerAuth: []
components:
securitySchemes:
bearerAuth:
type: http
scheme: bearer
bearerFormat: JWT
````
---
# Source: https://docs.squared.ai/api-reference/catalogs/create_catalog.md
> ## Documentation Index
> Fetch the complete documentation index at: https://docs.squared.ai/llms.txt
> Use this file to discover all available pages before exploring further.
# Create Catalog
## OpenAPI
````yaml POST /api/v1/catalogs
openapi: 3.0.1
info:
title: AI Squared API
version: 1.0.0
servers:
- url: https://api.squared.ai
security: []
paths:
/api/v1/catalogs:
post:
tags:
- Catalogs
summary: Create catalog
operationId: createCatalog
requestBody:
required: true
content:
application/json:
schema:
type: object
properties:
connector_id:
type: integer
example: 6
catalog:
type: object
properties:
json_schema:
type: object
example:
key: value
responses:
'200':
description: Successful response
content:
application/json:
schema:
type: object
properties:
id:
type: integer
example: 123
connector_id:
type: integer
example: 6
workspace_id:
type: integer
example: 2
catalog:
type: object
properties:
json_schema:
type: object
example:
key: value
created_at:
type: string
format: date-time
example: '2023-08-20T15:28:00Z'
updated_at:
type: string
format: date-time
example: '2023-08-20T15:28:00Z'
'400':
description: Bad Request
'401':
description: Unauthorized
'500':
description: Internal Server Error
security:
- bearerAuth: []
components:
securitySchemes:
bearerAuth:
type: http
scheme: bearer
bearerFormat: JWT
````
---
# Source: https://docs.squared.ai/api-reference/connectors/create_connector.md
> ## Documentation Index
> Fetch the complete documentation index at: https://docs.squared.ai/llms.txt
> Use this file to discover all available pages before exploring further.
# Create Connector
## OpenAPI
````yaml POST /api/v1/connectors
openapi: 3.0.1
info:
title: AI Squared API
version: 1.0.0
servers:
- url: https://api.squared.ai
security: []
paths:
/api/v1/connectors:
post:
tags:
- Connectors
summary: Creates a connector
requestBody:
required: true
content:
application/json:
schema:
type: object
properties:
connector:
type: object
properties:
name:
type: string
connector_type:
type: string
enum:
- source
- destination
connector_name:
type: string
configuration:
type: object
description: >-
Configuration details for the connector. Structure
depends on the connector definition.
additionalProperties: true
required:
- name
- connector_type
- connector_name
- configuration
responses:
'201':
description: Connector created
content:
application/json:
schema:
type: object
properties:
data:
type: object
properties:
id:
type: string
type:
type: string
attributes:
type: object
properties:
name:
type: string
connector_type:
type: string
workspace_id:
type: integer
created_at:
type: string
format: date-time
updated_at:
type: string
format: date-time
configuration:
type: object
description: Specific configuration of the created connector.
additionalProperties: true
connector_name:
type: string
icon:
type: string
security:
- bearerAuth: []
components:
securitySchemes:
bearerAuth:
type: http
scheme: bearer
bearerFormat: JWT
````
---
# Source: https://docs.squared.ai/api-reference/syncs/create_sync.md
> ## Documentation Index
> Fetch the complete documentation index at: https://docs.squared.ai/llms.txt
> Use this file to discover all available pages before exploring further.
# Create Sync
## OpenAPI
````yaml POST /api/v1/syncs
openapi: 3.0.1
info:
title: AI Squared API
version: 1.0.0
servers:
- url: https://api.squared.ai
security: []
paths:
/api/v1/syncs:
post:
tags:
- Syncs
summary: Create a new sync operation
operationId: createSync
requestBody:
required: true
content:
application/json:
schema:
type: object
properties:
sync:
type: object
properties:
source_id:
type: integer
destination_id:
type: integer
model_id:
type: integer
schedule_type:
type: string
enum:
- automated
configuration:
type: object
additionalProperties: true
stream_name:
type: string
sync_mode:
type: string
enum:
- full_refresh
sync_interval:
type: integer
sync_interval_unit:
type: string
enum:
- minutes
cron_expression:
type: string
cursor_field:
type: string
required:
- source_id
- destination_id
- model_id
- schedule_type
- configuration
- stream_name
- sync_mode
- sync_interval
- sync_interval_unit
responses:
'200':
description: Sync operation created successfully
content:
application/json:
schema:
type: object
properties:
id:
type: string
type:
type: string
enum:
- syncs
attributes:
type: object
properties:
source_id:
type: integer
destination_id:
type: integer
model_id:
type: integer
configuration:
type: object
additionalProperties: true
schedule_type:
type: string
enum:
- automated
sync_mode:
type: string
enum:
- full_refresh
sync_interval:
type: integer
sync_interval_unit:
type: string
enum:
- minutes
cron_expression:
type: string
cursor_field:
type: string
stream_name:
type: string
status:
type: string
security:
- bearerAuth: []
components:
securitySchemes:
bearerAuth:
type: http
scheme: bearer
bearerFormat: JWT
````
---
# Source: https://docs.squared.ai/guides/data-modelling/sync-modes/cursor-incremental.md
> ## Documentation Index
> Fetch the complete documentation index at: https://docs.squared.ai/llms.txt
> Use this file to discover all available pages before exploring further.
# Incremental - Cursor Field
> Incremental Cursor Field sync transfers only new or updated data, minimizing data transfer using a cursor field.
### Overview
Default Incremental Sync fetches all records from the source system and transfers only the new or updated ones to the destination. However, to optimize data transfer and reduce the number of duplicate fetches from the source, we implemented Incremental Sync with Cursor Field for those sources that support cursor fields
#### Cursor Field
A Cursor Field must be clearly defined within the dataset schema. It is identified based on its suitability for comparison and tracking changes over time.
* It serves as a marker to identify modified or added records since the previous sync.
* It facilitates efficient data retrieval by enabling the source to resume from where it left off during the last sync.
Note: Currently, only date fields are supported as Cursor Fields.
####
#### Sync Run 1
During the first sync run with the cursor field 'UpdatedAt', suppose we have the following data:
cursor field UpdatedAt value is 2024-04-20 10:00:00
| Name | Plan | Updated At |
| ---------------- | ---- | ------------------- |
| Charles Beaumont | free | 2024-04-20 10:00:00 |
| Eleanor Villiers | free | 2024-04-20 11:00:00 |
During this sync run, both Charles Beaumont's and Eleanor Villiers' records would meet the criteria since they both have an 'UpdatedAt' timestamp equal to '2024-04-20 10:00:00' or later. So, during the first sync run, both records would indeed be considered and fetched.
##### Query
```sql theme={null}
SELECT * FROM source_table
WHERE updated_at >= '2024-04-20 10:00:00';
```
#### Sync Run 2
Now cursor field UpdatedAt value is 2024-04-20 11:00:00
Suppose after some time, there are further updates in the source data:
| Name | Plan | Updated At |
| ---------------- | ---- | ------------------- |
| Charles Beaumont | free | 2024-04-20 10:00:00 |
| Eleanor Villiers | paid | 2024-04-21 10:00:00 |
During the second sync run with the same cursor field, only the records for Eleanor Villiers with 'Updated At' timestamp after the last sync would be fetched, ensuring minimal data transfer.
##### Query
```sql theme={null}
SELECT * FROM source_table
WHERE updated_at >= '2024-04-20 11:00:00';
```
#### Sync Run 3
If there are additional updates in the source data:
Now cursor field UpdatedAt value is 2024-04-21 10:00:00
| Name | Plan | Updated At |
| ---------------- | ---- | ------------------- |
| Charles Beaumont | paid | 2024-04-22 08:00:00 |
| Eleanor Villiers | pro | 2024-04-22 09:00:00 |
During the third sync run with the same cursor field, only the records for Charles Beaumont and Eleanor Villiers with 'Updated At' timestamp after the last sync would be fetched, continuing the process of minimal data transfer.
##### Query
```sql theme={null}
SELECT * FROM source_table
WHERE updated_at >= '2024-04-21 10:00:00 ';
```
### Handling Ambiguity and Inclusive Cursors
When syncing data incrementally, we ensure at least one delivery. Limited cursor field granularity may cause sources to resend previously sent data. For example, if a cursor only tracks dates, distinguishing new from old data on the same day becomes unclear.
#### Scenario
Imagine sales transactions with a cursor field `transaction_date`. If we sync on April 1st and later sync on the same day, distinguishing new transactions becomes ambiguous. To mitigate this, we guarantee at least one delivery, allowing sources to resend data as needed.
### Known Limitations
Modifications to underlying records without updating the cursor field may result in updated records not being picked up by the Incremental sync as expected.
Edit or remove of cursor field can mess up tracking data changes, causing issues and data loss. So Don't change or remove the cursor field to keep sync smooth and reliable.
---
# Source: https://docs.squared.ai/faqs/data-and-ai-integration.md
> ## Documentation Index
> Fetch the complete documentation index at: https://docs.squared.ai/llms.txt
> Use this file to discover all available pages before exploring further.
# Data & AI Integration
This section addresses frequently asked questions when connecting data sources, setting up AI/ML model endpoints, or troubleshooting integration issues within AI Squared.
***
## Data Source Integration
### Why is my data source connection failing?
* Verify that the connection credentials (e.g., host, port, username, password) are correct.
* Ensure that the network/firewall rules allow connections to AI Squared’s IPs (for on-prem data).
* Check if the database is online and reachable.
### What formats are supported for ingesting data?
* AI Squared supports connections to major databases like Snowflake, BigQuery, PostgreSQL, Oracle, and more.
* Files such as CSV, Excel, and JSON can be ingested via SFTP or cloud storage (e.g., S3).
***
## AI/ML Model Integration
### How do I connect my hosted model?
* Use the [Add AI/ML Source](/activation/ai-modelling/connect-source) guide to define your model endpoint.
* Provide input/output schema details so the platform can handle data mapping effectively.
### What types of model endpoints are supported?
* REST-based hosted models with JSON payloads
* Hosted services like AWS SageMaker, Vertex AI, and custom HTTP endpoints
***
## Sync & Schema Issues
### Why is my sync failing?
* Confirm that your data model and sync mapping are valid
* Check that input types in your model schema match your data source fields
* Review logs for any missing fields or payload mismatches
### How can I test if my connection is working?
* Use the “Test Connection” button when setting up a new source or sync.
* If testing fails, examine error messages and retry with updated configs.
***
---
# Source: https://docs.squared.ai/faqs/data-apps.md
> ## Documentation Index
> Fetch the complete documentation index at: https://docs.squared.ai/llms.txt
> Use this file to discover all available pages before exploring further.
# Data Apps
---
# Source: https://docs.squared.ai/guides/sources/data-sources/databricks-model.md
> ## Documentation Index
> Fetch the complete documentation index at: https://docs.squared.ai/llms.txt
> Use this file to discover all available pages before exploring further.
# Databricks Model
### Overview
AI Squared enables you to transfer data from a Databricks Model to various destinations or data apps. This guide explains how to obtain your Databricks Model URL and connect to AI Squared using your credentials.
### Setup
Go to the Serving tab in Databricks, select the endpoint you want to
configure, and locate the Databricks host and endpoint as shown below.
 Generate a personal access token by following the steps in the [Databricks
documentation](https://docs.databricks.com/en/dev-tools/auth/pat.html).
Generate a personal access token by following the steps in the [Databricks
documentation](https://docs.databricks.com/en/dev-tools/auth/pat.html).
 ### Configuration
| Field | Description |
| -------------------- | ---------------------------------------------- |
| **databricks\_host** | The databricks-instance url |
| **token** | Bearer token to connect with Databricks Model. |
| **endpoint** | Name of the serving endpoint |
---
# Source: https://docs.squared.ai/guides/sources/data-sources/databricks.md
> ## Documentation Index
> Fetch the complete documentation index at: https://docs.squared.ai/llms.txt
> Use this file to discover all available pages before exploring further.
# Databricks
### Overview
AI Squared enables you to transfer data from Databricks to various destinations by using Open Database Connectivity (ODBC). This guide explains how to obtain your Databricks cluster's ODBC URL and connect to AI Squared using your credentials. Follow the instructions to efficiently link your Databricks data with downstream platforms.
### Setup
In your Databricks account, navigate to the "Workspaces" page, choose the desired workspace, and click Open workspace
### Configuration
| Field | Description |
| -------------------- | ---------------------------------------------- |
| **databricks\_host** | The databricks-instance url |
| **token** | Bearer token to connect with Databricks Model. |
| **endpoint** | Name of the serving endpoint |
---
# Source: https://docs.squared.ai/guides/sources/data-sources/databricks.md
> ## Documentation Index
> Fetch the complete documentation index at: https://docs.squared.ai/llms.txt
> Use this file to discover all available pages before exploring further.
# Databricks
### Overview
AI Squared enables you to transfer data from Databricks to various destinations by using Open Database Connectivity (ODBC). This guide explains how to obtain your Databricks cluster's ODBC URL and connect to AI Squared using your credentials. Follow the instructions to efficiently link your Databricks data with downstream platforms.
### Setup
In your Databricks account, navigate to the "Workspaces" page, choose the desired workspace, and click Open workspace
 In your workspace, go the SQL warehouses and click on the relevant warehouse
 Go to the Connection details section.This tab shows your cluster's Server Hostname, Port, and HTTP Path, essential for connecting to AI Squared
 Then click on the create a personal token link to generate the personal access token
### Configuration
| Field | Description |
| ------------------- | -------------------------------------------------------------------------------------------------------------------------------------------- |
| **Server Hostname** | Visit the Databricks web console, locate your cluster, click for Advanced options, and go to the JDBC/ODBC tab to find your server hostname. |
| **Port** | The default port is 443, although it might vary. |
| **HTTP Path** | For the HTTP Path, repeat the steps for Server Hostname and Port. |
| **Catalog** | Database catalog |
| **Schema** | The initial schema to use when connecting. |
---
# Source: https://docs.squared.ai/guides/destinations/retl-destinations/analytics/databricks_lakehouse.md
> ## Documentation Index
> Fetch the complete documentation index at: https://docs.squared.ai/llms.txt
> Use this file to discover all available pages before exploring further.
# Databricks
## Connect AI Squared to Databricks
This guide will help you configure the Databricks Connector in AI Squared to access and use your Databricks data.
### Prerequisites
Before proceeding, ensure you have the necessary Host URL and API Token from Databricks.
## Step-by-Step Guide to Connect to Databricks
## Step 1: Navigate to Databricks
Start by logging into your Databricks account and navigating to the Databricks workspace.
1. Sign in to your Databricks account at [Databricks Login](https://accounts.cloud.databricks.com/login).
2. Once logged in, you will be directed to the Databricks workspace dashboard.
## Step 2: Locate Databricks Host URL and API Token
Once you're logged into Databricks, you'll find the necessary configuration details:
1. **Host URL:**
* The Host URL is the first part of the URL when you log into your Databricks. It will look something like `https://.databricks.com`.
2. **API Token:**
* Click on your user icon in the upper right corner and select "Settings" from the dropdown menu.
* In the Settings page, navigate to the "Developer" tab.
* Here, you can create a new Access Token by clicking on Manage then "Generate New Token." Give it a name and set the expiration duration.
* Once the token is generated, copy it as it will be required for configuring the connector. **Note:** This token will only be shown once, so make sure to store it securely.
## Step 3: Test the Databricks Connection
After configuring the connector in your application:
1. Save the configuration settings.
2. Test the connection to Databricks from the AI Squared platform to ensure a connection is made.
By following these steps, you’ve successfully set up a Databricks destination connector in AI Squared. You can now efficiently transfer data to your Databricks endpoint for storage or further distribution within AI Squared.
### Supported sync modes
| Mode | Supported (Yes/No/Coming soon) |
| ---------------- | ------------------------------ |
| Incremental sync | YES |
| Full refresh | Coming soon |
Follow these steps to configure and test your Databricks connector successfully.
---
# Source: https://docs.squared.ai/api-reference/models/delete-model.md
> ## Documentation Index
> Fetch the complete documentation index at: https://docs.squared.ai/llms.txt
> Use this file to discover all available pages before exploring further.
# Delete Model
## OpenAPI
````yaml DELETE /api/v1/models/{id}
openapi: 3.0.1
info:
title: AI Squared API
version: 1.0.0
servers:
- url: https://api.squared.ai
security: []
paths:
/api/v1/models/{id}:
delete:
tags:
- Models
summary: Deletes a model
parameters:
- name: id
in: path
required: true
schema:
type: integer
responses:
'204':
description: Model deleted
security:
- bearerAuth: []
components:
securitySchemes:
bearerAuth:
type: http
scheme: bearer
bearerFormat: JWT
````
---
# Source: https://docs.squared.ai/api-reference/connectors/delete_connector.md
> ## Documentation Index
> Fetch the complete documentation index at: https://docs.squared.ai/llms.txt
> Use this file to discover all available pages before exploring further.
# Delete Connector
## OpenAPI
````yaml DELETE /api/v1/connectors/{id}
openapi: 3.0.1
info:
title: AI Squared API
version: 1.0.0
servers:
- url: https://api.squared.ai
security: []
paths:
/api/v1/connectors/{id}:
delete:
tags:
- Connectors
summary: Deletes a specific connector by ID
parameters:
- name: id
in: path
required: true
schema:
type: string
description: Unique ID of the connector
responses:
'204':
description: No content, indicating successful deletion
security:
- bearerAuth: []
components:
securitySchemes:
bearerAuth:
type: http
scheme: bearer
bearerFormat: JWT
````
---
# Source: https://docs.squared.ai/api-reference/syncs/delete_sync.md
> ## Documentation Index
> Fetch the complete documentation index at: https://docs.squared.ai/llms.txt
> Use this file to discover all available pages before exploring further.
# Delete Sync
## OpenAPI
````yaml DELETE /api/v1/syncs/{id}
openapi: 3.0.1
info:
title: AI Squared API
version: 1.0.0
servers:
- url: https://api.squared.ai
security: []
paths:
/api/v1/syncs/{id}:
delete:
tags:
- Syncs
summary: Delete a specific sync operation
operationId: deleteSync
parameters:
- name: id
in: path
required: true
schema:
type: string
description: The ID of the sync operation to delete
responses:
'204':
description: No content, indicating the sync operation was successfully deleted
security:
- bearerAuth: []
components:
securitySchemes:
bearerAuth:
type: http
scheme: bearer
bearerFormat: JWT
````
---
# Source: https://docs.squared.ai/faqs/deployment-and-security.md
> ## Documentation Index
> Fetch the complete documentation index at: https://docs.squared.ai/llms.txt
> Use this file to discover all available pages before exploring further.
# Deployment & Security
---
# Source: https://docs.squared.ai/api-reference/connectors/discover.md
> ## Documentation Index
> Fetch the complete documentation index at: https://docs.squared.ai/llms.txt
> Use this file to discover all available pages before exploring further.
# Connector Catalog
## OpenAPI
````yaml GET /api/v1/connectors/{id}/discover
openapi: 3.0.1
info:
title: AI Squared API
version: 1.0.0
servers:
- url: https://api.squared.ai
security: []
paths:
/api/v1/connectors/{id}/discover:
get:
tags:
- Connectors
summary: Discovers catalog information for a specified connector
parameters:
- name: id
in: path
required: true
schema:
type: string
description: Unique ID of the connector
- name: refresh
in: query
required: false
schema:
type: boolean
description: Set to true to force refresh the catalog
responses:
'200':
description: Catalog information for the connector
content:
application/json:
schema:
type: object
properties:
data:
type: object
properties:
id:
type: string
type:
type: string
attributes:
type: object
properties:
connector_id:
type: integer
workspace_id:
type: integer
catalog:
type: object
properties:
streams:
type: array
description: >-
Array of stream objects, varying based on
connector ID.
items:
type: object
properties:
name:
type: string
action:
type: string
json_schema:
type: object
additionalProperties: true
url:
type: string
request_method:
type: string
catalog_hash:
type: string
additionalProperties: false
security:
- bearerAuth: []
components:
securitySchemes:
bearerAuth:
type: http
scheme: bearer
bearerFormat: JWT
````
---
# Source: https://docs.squared.ai/deployment-and-security/setup/docker-compose-dev.md
> ## Documentation Index
> Fetch the complete documentation index at: https://docs.squared.ai/llms.txt
> Use this file to discover all available pages before exploring further.
# Docker
**WARNING** The following guide is intended for developers to set-up Multiwoven locally. If you are a user, please refer to the [Self-Hosted](/guides/setup/docker-compose) guide.
## Prerequisites
* [Docker](https://docs.docker.com/get-docker/)
* [Docker Compose](https://docs.docker.com/compose/install/)
**Note**: if you are using Mac or Windows, you will need to install [Docker Desktop](https://www.docker.com/products/docker-desktop) instead of just docker. Docker Desktop includes both docker and docker-compose.
Verify that you have the correct versions installed:
```bash theme={null}
docker --version
docker-compose --version
```
## Installation
1. Clone the repository
```bash theme={null}
git clone git@github.com:Multiwoven/multiwoven.git
```
2. Navigate to the `multiwoven` directory
```bash theme={null}
cd multiwoven
```
3. Initialize .env file
```bash theme={null}
cp .env.example .env
```
**Note**: Refer to the [Environment Variables](/guides/setup/environment-variables) section for details on the ENV variables used in the Docker environment.
4. Build docker images
```bash theme={null}
docker-compose build
```
Note: The default build architecture is for **x86\_64**. If you are using **arm64** architecture, you will need to run the below command to build the images for arm64.
```bash theme={null}
TARGETARCH=arm64 docker-compose
```
5. Start the containers
```bash theme={null}
docker-compose up
```
6. Stop the containers
```bash theme={null}
docker-compose down
```
## Usage
Once the containers are running, you can access the `Multiwoven UI` at [http://localhost:8000](http://localhost:8000).
The `multiwoven API` is available at [http://localhost:3000/api/v1](http://localhost:3000/api/v1).
## Running Tests
1. Running the complete test suite on the multiwoven server
```bash theme={null}
docker-compose exec multiwoven-server bundle exec rspec
```
## Troubleshooting
To cleanup all images and containers, run the following commands:
```bash theme={null}
docker rmi -f $(docker images -q)
docker rm -f $(docker ps -a -q)
```
prune all unused images, containers, networks and volumes
**Danger:** This will remove all unused images, containers, networks and volumes.
```bash theme={null}
docker system prune -a
```
Please open a new issue at [https://github.com/Multiwoven/multiwoven/issues](https://github.com/Multiwoven/multiwoven/issues) if you run into any issues or join our [Slack]() to chat with us.
---
# Source: https://docs.squared.ai/deployment-and-security/setup/docker-compose.md
> ## Documentation Index
> Fetch the complete documentation index at: https://docs.squared.ai/llms.txt
> Use this file to discover all available pages before exploring further.
# Docker
> Deploying Multiwoven using Docker
Below steps will guide you through deploying Multiwoven on a server using Docker Compose. We require PostgreSQL database to store meta data for Multiwoven. We will use Docker Compose to deploy Multiwoven and PostgreSQL.
**Important Note:** TLS is mandatory for deployment. To successfully deploy the Platform via docker-compose, you must have access to a DNS record and obtain a valid TLS certificate from a Certificate Authority. You can acquire a free TLS certificate using tools like CertBot, Let's Encrypt, or other ACME-based solutions. If using a reverse proxy (e.g., Nginx or Traefik), consider integrating an automated certificate management tool such as letsencrypt-nginx-proxy-companion or Traefik's built-in Let's Encrypt support.
Note: If you are setting up Multiwoven on your local machine, you can skip this section and refer to [Local Setup](/guides/setup/docker-compose-dev) section.
## Prerequisites
* [Docker](https://docs.docker.com/get-docker/)
* [Docker Compose](https://docs.docker.com/compose/install/)
All our Docker images are available in x86\_64 architecture, make sure your server supports x86\_64 architecture.
## Deployment options
Multiwoven can be deployed using two different options for PostgreSQL database.
1. Create a new directory for Multiwoven and navigate to it.
```bash theme={null}
mkdir multiwoven
cd multiwoven
```
2. Download the production `docker-compose.yml` file from the following link.
```bash theme={null}
curl -LO https://multiwoven-deployments.s3.amazonaws.com/docker/docker-compose/docker-compose.yaml
```
3. Download the `.env.production` file from the following link.
```bash theme={null}
curl -LO https://multiwoven-deployments.s3.amazonaws.com/docker/docker-compose/.env.production
```
4. Rename the file .env.production to .env and update the environment variables if required.
```bash theme={null}
mv .env.production .env
```
5. Start the Multiwoven using the following command.
```bash theme={null}
docker-compose up -d
```
6. Stopping Multiwoven
To stop the Multiwoven, use the following command.
```bash theme={null}
docker-compose down
```
7. Upgrading Multiwoven
When a new version of Multiwoven is released, you can upgrade the Multiwoven using the following command.
```bash theme={null}
docker-compose pull && docker-compose up -d
```
Make sure to run the above command from the same directory where the `docker-compose.yml` file is present.
1. Create a new directory for Multiwoven and navigate to it.
```bash theme={null}
mkdir multiwoven
cd multiwoven
```
2. Download the production `docker-compose.yml` file from the following link.
```bash theme={null}
curl -LO https://multiwoven-deployments.s3.amazonaws.com/docker/docker-compose/docker-compose-cloud-postgres.yaml
```
3. Rename the file .env.production to .env and update the **PostgreSQL** environment variables.
`DB_HOST` - Database Host
`DB_USERNAME` - Database Username
`DB_PASSWORD` - Database Password
The default port for PostgreSQL is 5432. If you are using a different port, update the `DB_PORT` environment variable.
```bash theme={null}
mv .env.production .env
```
4. Start the Multiwoven using the following command.
```bash theme={null}
docker-compose up -d
```
## Accessing Multiwoven
Once the Multiwoven is up and running, you can access it using the following URL and port.
Multiwoven Server URL:
```http theme={null}
http://:3000
```
Multiwoven UI Service:
```http theme={null}
http://:8000
```
If you are using a custom domain you can update the `API_HOST` and `UI_HOST` environment variable in the `.env` file.
### Important considerations
* Make sure to update the environment variables in the `.env` file before starting the Multiwoven.
* Make sure to take regular **backups** of the PostgreSQL database.
To restore the backup, you can use the following command.
```bash theme={null}
cat dump.sql | docker exec -i --user postgres psql -U postgres
```
* If you are using a custom domain, make sure to update the `API_HOST` and `UI_HOST` environment variables in the `.env` file.
---
# Source: https://docs.squared.ai/deployment-and-security/setup/dod.md
> ## Documentation Index
> Fetch the complete documentation index at: https://docs.squared.ai/llms.txt
> Use this file to discover all available pages before exploring further.
# Digital Ocean Droplets
> Coming soon...
---
# Source: https://docs.squared.ai/deployment-and-security/setup/dok.md
> ## Documentation Index
> Fetch the complete documentation index at: https://docs.squared.ai/llms.txt
> Use this file to discover all available pages before exploring further.
# Digital Ocean Kubernetes
> Coming soon...
---
# Source: https://docs.squared.ai/deployment-and-security/setup/ec2.md
> ## Documentation Index
> Fetch the complete documentation index at: https://docs.squared.ai/llms.txt
> Use this file to discover all available pages before exploring further.
# AWS EC2
## Deploying Multiwoven on AWS EC2 Using Docker Compose
This guide walks you through setting up Multiwoven, on an AWS EC2 instance using Docker Compose. We'll cover launching the instance, installing Docker, running Multiwoven with its dependencies, and finally, accessing the Multiwoven UI.
**Important Note:** At present, TLS is required. This means that to successfully deploy the Platform via docker-compose, you will need access to a DNS record set as well as the ability to obtain a valid TLS certificate from a Certificate Authority. You can obtain a free TLS certificates via tools like CertBot, Amazon Certificate Manager (if using an AWS Application Load Balancer to front an EC2 instance), letsencrypt-nginx-proxy-companion (if you add an nginx proxy to the docker-compose file to front the other services), etc.
**Prerequisites:**
* An active AWS account
* Basic knowledge of AWS and Docker
* A private repository access key (please contact your AIS point of contact if you have not received one)
**Notes:**
* This guide uses environment variables for sensitive information. Replace the placeholders with your own values before proceeding.
* This guide uses an Application Load Balancer (ALB) to front the EC2 instance for ease of enabling secure TLS communication with the backend using an Amazon Certificate Manager (ACM) TLS certificate. These certificates are free of charge and ACM automatically rotates them every 90 days. While the ACM certificate is free, the ALB is not. You can refer to the following document for current ALB pricing: [ALB Pricing Page](https://aws.amazon.com/elasticloadbalancing/pricing/?nc=sn\&loc=3).
**1. Obtain TLS Certificate (Requires access to DNS Record Set)**
**1.1** In the AWS Management Console, navigate to Amazon Certificate Manager and request a new certificate.
Then click on the create a personal token link to generate the personal access token
### Configuration
| Field | Description |
| ------------------- | -------------------------------------------------------------------------------------------------------------------------------------------- |
| **Server Hostname** | Visit the Databricks web console, locate your cluster, click for Advanced options, and go to the JDBC/ODBC tab to find your server hostname. |
| **Port** | The default port is 443, although it might vary. |
| **HTTP Path** | For the HTTP Path, repeat the steps for Server Hostname and Port. |
| **Catalog** | Database catalog |
| **Schema** | The initial schema to use when connecting. |
---
# Source: https://docs.squared.ai/guides/destinations/retl-destinations/analytics/databricks_lakehouse.md
> ## Documentation Index
> Fetch the complete documentation index at: https://docs.squared.ai/llms.txt
> Use this file to discover all available pages before exploring further.
# Databricks
## Connect AI Squared to Databricks
This guide will help you configure the Databricks Connector in AI Squared to access and use your Databricks data.
### Prerequisites
Before proceeding, ensure you have the necessary Host URL and API Token from Databricks.
## Step-by-Step Guide to Connect to Databricks
## Step 1: Navigate to Databricks
Start by logging into your Databricks account and navigating to the Databricks workspace.
1. Sign in to your Databricks account at [Databricks Login](https://accounts.cloud.databricks.com/login).
2. Once logged in, you will be directed to the Databricks workspace dashboard.
## Step 2: Locate Databricks Host URL and API Token
Once you're logged into Databricks, you'll find the necessary configuration details:
1. **Host URL:**
* The Host URL is the first part of the URL when you log into your Databricks. It will look something like `https://.databricks.com`.
2. **API Token:**
* Click on your user icon in the upper right corner and select "Settings" from the dropdown menu.
* In the Settings page, navigate to the "Developer" tab.
* Here, you can create a new Access Token by clicking on Manage then "Generate New Token." Give it a name and set the expiration duration.
* Once the token is generated, copy it as it will be required for configuring the connector. **Note:** This token will only be shown once, so make sure to store it securely.
## Step 3: Test the Databricks Connection
After configuring the connector in your application:
1. Save the configuration settings.
2. Test the connection to Databricks from the AI Squared platform to ensure a connection is made.
By following these steps, you’ve successfully set up a Databricks destination connector in AI Squared. You can now efficiently transfer data to your Databricks endpoint for storage or further distribution within AI Squared.
### Supported sync modes
| Mode | Supported (Yes/No/Coming soon) |
| ---------------- | ------------------------------ |
| Incremental sync | YES |
| Full refresh | Coming soon |
Follow these steps to configure and test your Databricks connector successfully.
---
# Source: https://docs.squared.ai/api-reference/models/delete-model.md
> ## Documentation Index
> Fetch the complete documentation index at: https://docs.squared.ai/llms.txt
> Use this file to discover all available pages before exploring further.
# Delete Model
## OpenAPI
````yaml DELETE /api/v1/models/{id}
openapi: 3.0.1
info:
title: AI Squared API
version: 1.0.0
servers:
- url: https://api.squared.ai
security: []
paths:
/api/v1/models/{id}:
delete:
tags:
- Models
summary: Deletes a model
parameters:
- name: id
in: path
required: true
schema:
type: integer
responses:
'204':
description: Model deleted
security:
- bearerAuth: []
components:
securitySchemes:
bearerAuth:
type: http
scheme: bearer
bearerFormat: JWT
````
---
# Source: https://docs.squared.ai/api-reference/connectors/delete_connector.md
> ## Documentation Index
> Fetch the complete documentation index at: https://docs.squared.ai/llms.txt
> Use this file to discover all available pages before exploring further.
# Delete Connector
## OpenAPI
````yaml DELETE /api/v1/connectors/{id}
openapi: 3.0.1
info:
title: AI Squared API
version: 1.0.0
servers:
- url: https://api.squared.ai
security: []
paths:
/api/v1/connectors/{id}:
delete:
tags:
- Connectors
summary: Deletes a specific connector by ID
parameters:
- name: id
in: path
required: true
schema:
type: string
description: Unique ID of the connector
responses:
'204':
description: No content, indicating successful deletion
security:
- bearerAuth: []
components:
securitySchemes:
bearerAuth:
type: http
scheme: bearer
bearerFormat: JWT
````
---
# Source: https://docs.squared.ai/api-reference/syncs/delete_sync.md
> ## Documentation Index
> Fetch the complete documentation index at: https://docs.squared.ai/llms.txt
> Use this file to discover all available pages before exploring further.
# Delete Sync
## OpenAPI
````yaml DELETE /api/v1/syncs/{id}
openapi: 3.0.1
info:
title: AI Squared API
version: 1.0.0
servers:
- url: https://api.squared.ai
security: []
paths:
/api/v1/syncs/{id}:
delete:
tags:
- Syncs
summary: Delete a specific sync operation
operationId: deleteSync
parameters:
- name: id
in: path
required: true
schema:
type: string
description: The ID of the sync operation to delete
responses:
'204':
description: No content, indicating the sync operation was successfully deleted
security:
- bearerAuth: []
components:
securitySchemes:
bearerAuth:
type: http
scheme: bearer
bearerFormat: JWT
````
---
# Source: https://docs.squared.ai/faqs/deployment-and-security.md
> ## Documentation Index
> Fetch the complete documentation index at: https://docs.squared.ai/llms.txt
> Use this file to discover all available pages before exploring further.
# Deployment & Security
---
# Source: https://docs.squared.ai/api-reference/connectors/discover.md
> ## Documentation Index
> Fetch the complete documentation index at: https://docs.squared.ai/llms.txt
> Use this file to discover all available pages before exploring further.
# Connector Catalog
## OpenAPI
````yaml GET /api/v1/connectors/{id}/discover
openapi: 3.0.1
info:
title: AI Squared API
version: 1.0.0
servers:
- url: https://api.squared.ai
security: []
paths:
/api/v1/connectors/{id}/discover:
get:
tags:
- Connectors
summary: Discovers catalog information for a specified connector
parameters:
- name: id
in: path
required: true
schema:
type: string
description: Unique ID of the connector
- name: refresh
in: query
required: false
schema:
type: boolean
description: Set to true to force refresh the catalog
responses:
'200':
description: Catalog information for the connector
content:
application/json:
schema:
type: object
properties:
data:
type: object
properties:
id:
type: string
type:
type: string
attributes:
type: object
properties:
connector_id:
type: integer
workspace_id:
type: integer
catalog:
type: object
properties:
streams:
type: array
description: >-
Array of stream objects, varying based on
connector ID.
items:
type: object
properties:
name:
type: string
action:
type: string
json_schema:
type: object
additionalProperties: true
url:
type: string
request_method:
type: string
catalog_hash:
type: string
additionalProperties: false
security:
- bearerAuth: []
components:
securitySchemes:
bearerAuth:
type: http
scheme: bearer
bearerFormat: JWT
````
---
# Source: https://docs.squared.ai/deployment-and-security/setup/docker-compose-dev.md
> ## Documentation Index
> Fetch the complete documentation index at: https://docs.squared.ai/llms.txt
> Use this file to discover all available pages before exploring further.
# Docker
**WARNING** The following guide is intended for developers to set-up Multiwoven locally. If you are a user, please refer to the [Self-Hosted](/guides/setup/docker-compose) guide.
## Prerequisites
* [Docker](https://docs.docker.com/get-docker/)
* [Docker Compose](https://docs.docker.com/compose/install/)
**Note**: if you are using Mac or Windows, you will need to install [Docker Desktop](https://www.docker.com/products/docker-desktop) instead of just docker. Docker Desktop includes both docker and docker-compose.
Verify that you have the correct versions installed:
```bash theme={null}
docker --version
docker-compose --version
```
## Installation
1. Clone the repository
```bash theme={null}
git clone git@github.com:Multiwoven/multiwoven.git
```
2. Navigate to the `multiwoven` directory
```bash theme={null}
cd multiwoven
```
3. Initialize .env file
```bash theme={null}
cp .env.example .env
```
**Note**: Refer to the [Environment Variables](/guides/setup/environment-variables) section for details on the ENV variables used in the Docker environment.
4. Build docker images
```bash theme={null}
docker-compose build
```
Note: The default build architecture is for **x86\_64**. If you are using **arm64** architecture, you will need to run the below command to build the images for arm64.
```bash theme={null}
TARGETARCH=arm64 docker-compose
```
5. Start the containers
```bash theme={null}
docker-compose up
```
6. Stop the containers
```bash theme={null}
docker-compose down
```
## Usage
Once the containers are running, you can access the `Multiwoven UI` at [http://localhost:8000](http://localhost:8000).
The `multiwoven API` is available at [http://localhost:3000/api/v1](http://localhost:3000/api/v1).
## Running Tests
1. Running the complete test suite on the multiwoven server
```bash theme={null}
docker-compose exec multiwoven-server bundle exec rspec
```
## Troubleshooting
To cleanup all images and containers, run the following commands:
```bash theme={null}
docker rmi -f $(docker images -q)
docker rm -f $(docker ps -a -q)
```
prune all unused images, containers, networks and volumes
**Danger:** This will remove all unused images, containers, networks and volumes.
```bash theme={null}
docker system prune -a
```
Please open a new issue at [https://github.com/Multiwoven/multiwoven/issues](https://github.com/Multiwoven/multiwoven/issues) if you run into any issues or join our [Slack]() to chat with us.
---
# Source: https://docs.squared.ai/deployment-and-security/setup/docker-compose.md
> ## Documentation Index
> Fetch the complete documentation index at: https://docs.squared.ai/llms.txt
> Use this file to discover all available pages before exploring further.
# Docker
> Deploying Multiwoven using Docker
Below steps will guide you through deploying Multiwoven on a server using Docker Compose. We require PostgreSQL database to store meta data for Multiwoven. We will use Docker Compose to deploy Multiwoven and PostgreSQL.
**Important Note:** TLS is mandatory for deployment. To successfully deploy the Platform via docker-compose, you must have access to a DNS record and obtain a valid TLS certificate from a Certificate Authority. You can acquire a free TLS certificate using tools like CertBot, Let's Encrypt, or other ACME-based solutions. If using a reverse proxy (e.g., Nginx or Traefik), consider integrating an automated certificate management tool such as letsencrypt-nginx-proxy-companion or Traefik's built-in Let's Encrypt support.
Note: If you are setting up Multiwoven on your local machine, you can skip this section and refer to [Local Setup](/guides/setup/docker-compose-dev) section.
## Prerequisites
* [Docker](https://docs.docker.com/get-docker/)
* [Docker Compose](https://docs.docker.com/compose/install/)
All our Docker images are available in x86\_64 architecture, make sure your server supports x86\_64 architecture.
## Deployment options
Multiwoven can be deployed using two different options for PostgreSQL database.
1. Create a new directory for Multiwoven and navigate to it.
```bash theme={null}
mkdir multiwoven
cd multiwoven
```
2. Download the production `docker-compose.yml` file from the following link.
```bash theme={null}
curl -LO https://multiwoven-deployments.s3.amazonaws.com/docker/docker-compose/docker-compose.yaml
```
3. Download the `.env.production` file from the following link.
```bash theme={null}
curl -LO https://multiwoven-deployments.s3.amazonaws.com/docker/docker-compose/.env.production
```
4. Rename the file .env.production to .env and update the environment variables if required.
```bash theme={null}
mv .env.production .env
```
5. Start the Multiwoven using the following command.
```bash theme={null}
docker-compose up -d
```
6. Stopping Multiwoven
To stop the Multiwoven, use the following command.
```bash theme={null}
docker-compose down
```
7. Upgrading Multiwoven
When a new version of Multiwoven is released, you can upgrade the Multiwoven using the following command.
```bash theme={null}
docker-compose pull && docker-compose up -d
```
Make sure to run the above command from the same directory where the `docker-compose.yml` file is present.
1. Create a new directory for Multiwoven and navigate to it.
```bash theme={null}
mkdir multiwoven
cd multiwoven
```
2. Download the production `docker-compose.yml` file from the following link.
```bash theme={null}
curl -LO https://multiwoven-deployments.s3.amazonaws.com/docker/docker-compose/docker-compose-cloud-postgres.yaml
```
3. Rename the file .env.production to .env and update the **PostgreSQL** environment variables.
`DB_HOST` - Database Host
`DB_USERNAME` - Database Username
`DB_PASSWORD` - Database Password
The default port for PostgreSQL is 5432. If you are using a different port, update the `DB_PORT` environment variable.
```bash theme={null}
mv .env.production .env
```
4. Start the Multiwoven using the following command.
```bash theme={null}
docker-compose up -d
```
## Accessing Multiwoven
Once the Multiwoven is up and running, you can access it using the following URL and port.
Multiwoven Server URL:
```http theme={null}
http://:3000
```
Multiwoven UI Service:
```http theme={null}
http://:8000
```
If you are using a custom domain you can update the `API_HOST` and `UI_HOST` environment variable in the `.env` file.
### Important considerations
* Make sure to update the environment variables in the `.env` file before starting the Multiwoven.
* Make sure to take regular **backups** of the PostgreSQL database.
To restore the backup, you can use the following command.
```bash theme={null}
cat dump.sql | docker exec -i --user postgres psql -U postgres
```
* If you are using a custom domain, make sure to update the `API_HOST` and `UI_HOST` environment variables in the `.env` file.
---
# Source: https://docs.squared.ai/deployment-and-security/setup/dod.md
> ## Documentation Index
> Fetch the complete documentation index at: https://docs.squared.ai/llms.txt
> Use this file to discover all available pages before exploring further.
# Digital Ocean Droplets
> Coming soon...
---
# Source: https://docs.squared.ai/deployment-and-security/setup/dok.md
> ## Documentation Index
> Fetch the complete documentation index at: https://docs.squared.ai/llms.txt
> Use this file to discover all available pages before exploring further.
# Digital Ocean Kubernetes
> Coming soon...
---
# Source: https://docs.squared.ai/deployment-and-security/setup/ec2.md
> ## Documentation Index
> Fetch the complete documentation index at: https://docs.squared.ai/llms.txt
> Use this file to discover all available pages before exploring further.
# AWS EC2
## Deploying Multiwoven on AWS EC2 Using Docker Compose
This guide walks you through setting up Multiwoven, on an AWS EC2 instance using Docker Compose. We'll cover launching the instance, installing Docker, running Multiwoven with its dependencies, and finally, accessing the Multiwoven UI.
**Important Note:** At present, TLS is required. This means that to successfully deploy the Platform via docker-compose, you will need access to a DNS record set as well as the ability to obtain a valid TLS certificate from a Certificate Authority. You can obtain a free TLS certificates via tools like CertBot, Amazon Certificate Manager (if using an AWS Application Load Balancer to front an EC2 instance), letsencrypt-nginx-proxy-companion (if you add an nginx proxy to the docker-compose file to front the other services), etc.
**Prerequisites:**
* An active AWS account
* Basic knowledge of AWS and Docker
* A private repository access key (please contact your AIS point of contact if you have not received one)
**Notes:**
* This guide uses environment variables for sensitive information. Replace the placeholders with your own values before proceeding.
* This guide uses an Application Load Balancer (ALB) to front the EC2 instance for ease of enabling secure TLS communication with the backend using an Amazon Certificate Manager (ACM) TLS certificate. These certificates are free of charge and ACM automatically rotates them every 90 days. While the ACM certificate is free, the ALB is not. You can refer to the following document for current ALB pricing: [ALB Pricing Page](https://aws.amazon.com/elasticloadbalancing/pricing/?nc=sn\&loc=3).
**1. Obtain TLS Certificate (Requires access to DNS Record Set)**
**1.1** In the AWS Management Console, navigate to Amazon Certificate Manager and request a new certificate.
 1.2 Unless your organization has created a Private CA (Certificate Authority), we recommend requesting a public certificate.
1.3 Request a single ACM certificate that can verify all three of your chosen subdomains for this deployment. DNS validation is recommended for automatic rotation of your certificate but this method requires access to your domain's DNS record set.
1.2 Unless your organization has created a Private CA (Certificate Authority), we recommend requesting a public certificate.
1.3 Request a single ACM certificate that can verify all three of your chosen subdomains for this deployment. DNS validation is recommended for automatic rotation of your certificate but this method requires access to your domain's DNS record set.
 1.4 Once you have added your selected sub-domains, scroll down and click **Request**.
5. Once your request has been made, you will be taken to a page that will describe your certificate request and its current status. Scroll down a bit and you will see a section labeled **Domains** with 3 subdomains and 1 CNAME validation record for each. These records need to be added to your DNS record set. Please refer to your organization's internal documentation or the documentation of your DNS service for further instruction on how to add DNS records to your domain's record set.
1.4 Once you have added your selected sub-domains, scroll down and click **Request**.
5. Once your request has been made, you will be taken to a page that will describe your certificate request and its current status. Scroll down a bit and you will see a section labeled **Domains** with 3 subdomains and 1 CNAME validation record for each. These records need to be added to your DNS record set. Please refer to your organization's internal documentation or the documentation of your DNS service for further instruction on how to add DNS records to your domain's record set.
 **Note:** For automatic certificate rotation, you need to leave these records
in your record set. If they are removed, automatic rotation will fail.
6. Once your ACM certificate has been issued, note the ARN of your certificate and proceed.
**2. Create and Configure Application Load Balancer and Target Groups**
1. In the AWS Management Console, navigate to the EC2 Dashboard and select **Load Balancers**.
{" "}
**Note:** For automatic certificate rotation, you need to leave these records
in your record set. If they are removed, automatic rotation will fail.
6. Once your ACM certificate has been issued, note the ARN of your certificate and proceed.
**2. Create and Configure Application Load Balancer and Target Groups**
1. In the AWS Management Console, navigate to the EC2 Dashboard and select **Load Balancers**.
{" "}
 2. On the next screen select **Create** under **Application Load Balancer**.
{" "}
2. On the next screen select **Create** under **Application Load Balancer**.
{" "}
 3. Under **Basic configuration** name your load balancer. If you are deploying this application within a private network, select **Internal**. Otherwise, select **Internet-facing**. Consult with your internal Networking team if you are unsure as this setting can not be changed post-deployment and you will need to create an entirely new load balancer to correct this.
{" "}
3. Under **Basic configuration** name your load balancer. If you are deploying this application within a private network, select **Internal**. Otherwise, select **Internet-facing**. Consult with your internal Networking team if you are unsure as this setting can not be changed post-deployment and you will need to create an entirely new load balancer to correct this.
{" "}
 4. Under **Network mapping**, select a VPC and write it down somewhere for later use. Also, select 2 subnets (2 are **required** for an Application Load Balancer) and write them down too for later use.
**Note:** If you are using the **internal** configuration, select only **private** subnets. If you are using the **internet-facing** configuration, you must select **public** subnets and they must have routes to an **Internet Gateway**.
 5. Under **Security groups**, select the link to **create a new security group** and a new tab will open.
 6. Under **Basic details**, name your security group and provide a description. Be sure to pick the same VPC that you selected for your load balancer configuration.
 7. Under **Inbound rules**, create rules for HTTP and HTTPS and set the source for both rules to **Anywhere**. This will expose inbound ports 80 and 443 on the load balancer. Leave the default **Outbound rules** allowing for all outbound traffic for simplicity. Scroll down and select **Create security group**.
 8. Once the security group has been created, close the security group tab and return to the load balancer tab. On the load balancer tab, in the **Security groups** section, hit the refresh icon and select your newly created security group. If the VPC's **default security group** gets appended automatically, be sure to remove it before proceeding.
 9. Under **Listeners and routing** in the card for **Listener HTTP:80**, select **Create target group**. A new tab will open.
 10. Under **Basic configuration**, select **Instances**.
 11. Scroll down and name your target group. This first one will be for the Platform's web app so you should name it accordingly. Leave the protocol set to HTTP **but** change the port value to 8000. Also, make sure that the pre-selected VPC matches the VPC that you selected for the load balancer. Scroll down and click **Next**.
 12. Leave all defaults on the next screen, scroll down and select **Create target group**. Repeat this process 2 more times, once for the **Platform API** on **port 3000** and again for **Temporal UI** on **port 8080**. You should now have 3 target groups.
 13. Navigate back to the load balancer configuration screen and hit the refresh button in the card for **Listener HTTP:80**. Now, in the target group dropdown, you should see your 3 new target groups. For now, select any one of them. There will be some further configuration needed after the creation of the load balancer.
 14. Now, click **Add listener**.
 15. Change the protocol to HTTPS and in the target group dropdown, again, select any one of the target groups that you previously created.
 16. Scroll down to the **Secure listener settings**. Under **Default SSL/TLS server certificate**, select **From ACM** and in the **Select a certificate** dropdown, select the certificate that you created in Step 1. In the dropdown, your certificate will only show the first subdomain that you listed when you created the certificate request. This is expected behavior.
**Note:** If you do not see your certificate in the dropdown list, the most likely issues are:
16. Scroll down to the **Secure listener settings**. Under **Default SSL/TLS server certificate**, select **From ACM** and in the **Select a certificate** dropdown, select the certificate that you created in Step 1. In the dropdown, your certificate will only show the first subdomain that you listed when you created the certificate request. This is expected behavior.
**Note:** If you do not see your certificate in the dropdown list, the most likely issues are:
(1) your certificate has not yet been successfully issued. Navigate back to ACM and verify that your certificate has a status of **Issued**.
(2) you created your certificate in a different region and will need to either recreate your load balancer in the same region as your certificate OR recreate your certificate in the region in which you are creating your load balancer.
 17. Scroll down to the bottom of the page and click **Create load balancer**. Load balancers take a while to create, approximately 10 minutes or more. However, while the load balancer is creating, copy the DNS name of the load balancer and create CNAME records in your DNS record set, pointing all 3 of your chosen subdomains to the DNS name of the load balancer. Until you complete this step, the deployment will not work as expected. You can proceed with the final steps of the deployment but you need to create those CNAME records.
 18. At the bottom of the details page for your load balancer, you will see the section **Listeners and rules**. Click on the listener labeled **HTTP:80**.
 19. Check the box next to the **Default** rule and click the **Actions** dropdown.
 20. Scroll down to **Routing actions** and select **Redirect to URL**. Leave **URI parts** selected. In the **Protocol** dropdown, select **HTTPS** and set the port value to **443**. This configuration step will automatically redirect all insecure requests to the load balancer on port 80 (HTTP) to port 443 (HTTPS). Scroll to the bottom and click **Save**.
 21. Return to the load balancer's configuration page (screenshot in step 18) and scroll back down to the *Listeners and rules* section. This time, click the listener labled **HTTPS:443**.
 22. Click **Add rule**.
 23. On the next page, you can optionally add a name to this new rule. Click **Next**.
24. On the next page, click **Add condition**. In the **Add condition** pop-up, select **Host header** from the dropdown. For the host header, put the subdomain that you selected for the Platform web app and click **Confirm** and then click **Next**.
23. On the next page, you can optionally add a name to this new rule. Click **Next**.
24. On the next page, click **Add condition**. In the **Add condition** pop-up, select **Host header** from the dropdown. For the host header, put the subdomain that you selected for the Platform web app and click **Confirm** and then click **Next**.

 25. One the next page, under **Actions**. Leave the **Routing actions** set to **Forward to target groups**. From the **Target group** dropdown, select the target group that you created for the web app. Click **Next**.
 26. On the next page, you can set the **Priority** to 1 and click **Next**.
 27. On the next page, click **Create**.
28. Repeat steps 24 - 27 for the **api** (priority 2) and **temporal ui** (priority 3).
29. Optionally, you can also edit the default rule so that it **Returns a fixed response**. The default **Response code** of 503 is fine.
27. On the next page, click **Create**.
28. Repeat steps 24 - 27 for the **api** (priority 2) and **temporal ui** (priority 3).
29. Optionally, you can also edit the default rule so that it **Returns a fixed response**. The default **Response code** of 503 is fine.
 **3. Launch EC2 Instance**
1. Navigate to the EC2 Dashboard and click **Launch Instance**.
**3. Launch EC2 Instance**
1. Navigate to the EC2 Dashboard and click **Launch Instance**.
 2. Name your instance and select **Ubuntu 22.04 or later** with **64-bit** architecture.
 3. For instance type, we recommend **t3.large**. You can find EC2 on-demand pricing here: [EC2 Instance On-Demand Pricing](https://aws.amazon.com/ec2/pricing/on-demand). Also, create a **key pair** or select a pre-existing one as you will need it to SSH into the instance later.
 4. Under **Network settings**, click **Edit**.
 5. First, verify that the listed **VPC** is the same one that you selected for the load balancer. Also, verify that the pre-selected subnet is one of the two that you selected earlier for the load balancer as well. If either is incorrect, make the necessary changes. If you are using **private subnets** because your load balancer is **internal**, you do not need to auto-assign a public IP. However, if you chose **internet-facing**, you may need to associate a public IP address with your instance so you can SSH into it from your local machine.
 6. Under **Firewall (security groups)**, we recommend that you name the security group but this is optional. After naming the security security group, click the button \*Add security group rule\*\* 3 times to create 3 additional rules.
 7. In the first new rule (rule 2), set the port to **3000**. Click the **Source** input box and scroll down until you see the security group that you previously created for the load balancer. Doing this will firewall inbound traffic to port 3000 on the EC2 instance, only allowing inbound traffic from the load balancer that you created earlier. Do the same for rules 3 and 4, using ports 8000 and 8080 respectively.

 8. Scroll to the bottom of the screen and click on **Advanced Details**.
 9. In the **User data** box, paste the following to automate the installation of **Docker** and **docker-compose**.
```
Content-Type: multipart/mixed; boundary="//"
MIME-Version: 1.0
--//
Content-Type: text/cloud-config; charset="us-ascii"
MIME-Version: 1.0
Content-Transfer-Encoding: 7bit
Content-Disposition: attachment; filename="cloud-config.txt"
#cloud-config
cloud_final_modules:
- [scripts-user, always]
--//
Content-Type: text/x-shellscript; charset="us-ascii"
MIME-Version: 1.0
Content-Transfer-Encoding: 7bit
Content-Disposition: attachment; filename="userdata.txt"
#!/bin/bash
sudo mkdir ais
cd ais
# install docker
sudo apt-get update
yes Y | sudo apt-get install apt-transport-https ca-certificates curl software-properties-common
sudo curl -fsSL https://download.docker.com/linux/ubuntu/gpg | sudo apt-key add -
echo | sudo add-apt-repository "deb [arch=amd64] https://download.docker.com/linux/ubuntu $(lsb_release -cs) stable"
sudo apt-get update
yes Y | sudo apt-get install docker-ce
sudo systemctl status docker --no-pager && echo "Docker status checked"
# install docker-compose
sudo apt-get install -y jq
VERSION=$(curl -s https://api.github.com/repos/docker/compose/releases/latest | jq -r .tag_name)
sudo curl -L "https://github.com/docker/compose/releases/download/${VERSION}/docker-compose-$(uname -s)-$(uname -m)" -o /usr/local/bin/docker-compose
sudo chmod +x /usr/local/bin/docker-compose
docker-compose --version
sudo systemctl enable docker
```
9. In the **User data** box, paste the following to automate the installation of **Docker** and **docker-compose**.
```
Content-Type: multipart/mixed; boundary="//"
MIME-Version: 1.0
--//
Content-Type: text/cloud-config; charset="us-ascii"
MIME-Version: 1.0
Content-Transfer-Encoding: 7bit
Content-Disposition: attachment; filename="cloud-config.txt"
#cloud-config
cloud_final_modules:
- [scripts-user, always]
--//
Content-Type: text/x-shellscript; charset="us-ascii"
MIME-Version: 1.0
Content-Transfer-Encoding: 7bit
Content-Disposition: attachment; filename="userdata.txt"
#!/bin/bash
sudo mkdir ais
cd ais
# install docker
sudo apt-get update
yes Y | sudo apt-get install apt-transport-https ca-certificates curl software-properties-common
sudo curl -fsSL https://download.docker.com/linux/ubuntu/gpg | sudo apt-key add -
echo | sudo add-apt-repository "deb [arch=amd64] https://download.docker.com/linux/ubuntu $(lsb_release -cs) stable"
sudo apt-get update
yes Y | sudo apt-get install docker-ce
sudo systemctl status docker --no-pager && echo "Docker status checked"
# install docker-compose
sudo apt-get install -y jq
VERSION=$(curl -s https://api.github.com/repos/docker/compose/releases/latest | jq -r .tag_name)
sudo curl -L "https://github.com/docker/compose/releases/download/${VERSION}/docker-compose-$(uname -s)-$(uname -m)" -o /usr/local/bin/docker-compose
sudo chmod +x /usr/local/bin/docker-compose
docker-compose --version
sudo systemctl enable docker
```
 10. In the right-hand panel, click **Launch instance**.
 **4. Register EC2 Instance in Target Groups**
1. Navigate back to the EC2 Dashboard and in the left panel, scroll down to **Target groups**.
**4. Register EC2 Instance in Target Groups**
1. Navigate back to the EC2 Dashboard and in the left panel, scroll down to **Target groups**.
 2. Click on the name of the first listed target group.
 3. Under **Registered targets**, click **Register targets**.
 4. Under **Available instances**, you should see the instance that you just created. Check the tick-box next to the instance and click **Include as pending below**. Once the instance shows in **Review targets**, click **Register pending targets**.

 5. **Repeat steps 2 - 4 for the remaining 2 target groups.**
**5. Deploy AIS Platform**
1. SSH into the EC2 instance that you created earlier. For assistance, you can navigate to your EC2 instance in the EC2 dashboard and click the **Connect** button. In the **Connect to instance** screen, click on **SSH client** and follow the instructions on the screen.
5. **Repeat steps 2 - 4 for the remaining 2 target groups.**
**5. Deploy AIS Platform**
1. SSH into the EC2 instance that you created earlier. For assistance, you can navigate to your EC2 instance in the EC2 dashboard and click the **Connect** button. In the **Connect to instance** screen, click on **SSH client** and follow the instructions on the screen.
 2. Verify that **Docker** and **docker-compose** were successfully installed by running the following commands
```
sudo docker --version
sudo docker-compose --version
```
You should see something similar to
2. Verify that **Docker** and **docker-compose** were successfully installed by running the following commands
```
sudo docker --version
sudo docker-compose --version
```
You should see something similar to
 3. Change directory to the **ais** directory and download the AIS Platform docker-compose file and the corresponding .env file.
```
cd \ais
sudo curl -LO https://multiwoven-deployments.s3.amazonaws.com/docker/docker-compose/docker-compose.yaml
sudo curl -LO https://multiwoven-deployments.s3.amazonaws.com/docker/docker-compose/.env.production && sudo mv /ais/.env.production /ais/.env
```
Verify the downloads
```
ls -a
```
You should see the following
3. Change directory to the **ais** directory and download the AIS Platform docker-compose file and the corresponding .env file.
```
cd \ais
sudo curl -LO https://multiwoven-deployments.s3.amazonaws.com/docker/docker-compose/docker-compose.yaml
sudo curl -LO https://multiwoven-deployments.s3.amazonaws.com/docker/docker-compose/.env.production && sudo mv /ais/.env.production /ais/.env
```
Verify the downloads
```
ls -a
```
You should see the following
 4. You will need to edit both files a little before deploying. First open the .env file.
```
sudo nano .env
```
**There are 3 required changes.**
4. You will need to edit both files a little before deploying. First open the .env file.
```
sudo nano .env
```
**There are 3 required changes.**
**(1)** Set the variable **VITE\_API\_HOST** so the UI knows to send requests to your **API subdomain**.
**(2)** If not present already, add a variable **Track** and set its value to **no**.
**(3)** If not present already, add a variable **ALLOWED\_HOST**. The value for this is dependent on how you selected your subdomains earlier. This variable only allows for a single step down in subdomain so if, for instance, you selected ***app.mydomain.com***, ***api.mydomain.com*** and ***temporal.mydomain.com*** you would set the value to **.mydomain.com**.
If you selected ***app.c1.mydomain.com***, ***api.c1.mydomain.com*** and ***temporal.c1.mydomain.com*** you would set the value to **.c1.mydomain.com**.
For simplicity, the remaining defaults are fine.

 Commands to save and exit **nano**.
**Mac users:**
```
- to save your changes: Control + S
- to exit: Control + X
```
**Windows users:**
```
- to save your changes: Ctrl + O
- to exit: Ctrl + X
```
5. Next, open the **docker-compose** file.
```
sudo nano docker-compose.yaml
```
The only changes that you should make here are to the AIS Platform image repositories. After opening the docker-compose file, scroll down to the Multiwoven Services and append **-ee** to the end of each repostiory and change the tag for each to **edge**.
Before changes
 After changes
 6. Deploy the AIS Platform. This step requires a private repository access key that you should have received from your AIS point of contact. If you do not have one, please reach out to AIS.
```
DOCKERHUB_USERNAME="multiwoven"
DOCKERHUB_PASSWORD="YOUR_PRIVATE_ACCESS_TOKEN"
sudo docker login --username $DOCKERHUB_USERNAME --password $DOCKERHUB_PASSWORD
sudo docker-compose up -d
```
You can use the following command to ensure that none of the containers have exited
```
sudo docker ps -a
```
7. Return to your browser and navigate back to the EC2 dashboard. In the left panel, scroll back down to **Target groups**. Click through each target group and verify that each has the registered instance showing as **healthy**. This may take a minute or two after starting the containers.
8. Once all target groups are showing your instance as healthy, you can navigate to your browser and enter the subdomain that you selected for the AIS Platform web app to get started!
---
# Source: https://docs.squared.ai/deployment-and-security/setup/ecs.md
> ## Documentation Index
> Fetch the complete documentation index at: https://docs.squared.ai/llms.txt
> Use this file to discover all available pages before exploring further.
# AWS ECS
> Coming soon...
---
# Source: https://docs.squared.ai/deployment-and-security/setup/eks.md
> ## Documentation Index
> Fetch the complete documentation index at: https://docs.squared.ai/llms.txt
> Use this file to discover all available pages before exploring further.
# AWS EKS (Kubernetes)
> Coming soon...
---
# Source: https://docs.squared.ai/activation/data-apps/visualizations/embed.md
> ## Documentation Index
> Fetch the complete documentation index at: https://docs.squared.ai/llms.txt
> Use this file to discover all available pages before exploring further.
# Embed in Business Apps
> Learn how to embed Data Apps into tools like CRMs, support platforms, or internal web apps.
Once your Data App is configured and saved, you can embed it within internal or third-party business tools where your users work—such as CRMs, support platforms, or internal dashboards.
AI Squared supports multiple embedding options for flexibility across environments.
***
## Option 1: Embed via IFrame
1. Go to **Data Apps**.
2. Select the Data App you want to embed.
3. Click on **Embed Options** > **IFrame**.
4. Copy the generated `
6. Deploy the AIS Platform. This step requires a private repository access key that you should have received from your AIS point of contact. If you do not have one, please reach out to AIS.
```
DOCKERHUB_USERNAME="multiwoven"
DOCKERHUB_PASSWORD="YOUR_PRIVATE_ACCESS_TOKEN"
sudo docker login --username $DOCKERHUB_USERNAME --password $DOCKERHUB_PASSWORD
sudo docker-compose up -d
```
You can use the following command to ensure that none of the containers have exited
```
sudo docker ps -a
```
7. Return to your browser and navigate back to the EC2 dashboard. In the left panel, scroll back down to **Target groups**. Click through each target group and verify that each has the registered instance showing as **healthy**. This may take a minute or two after starting the containers.
8. Once all target groups are showing your instance as healthy, you can navigate to your browser and enter the subdomain that you selected for the AIS Platform web app to get started!
---
# Source: https://docs.squared.ai/deployment-and-security/setup/ecs.md
> ## Documentation Index
> Fetch the complete documentation index at: https://docs.squared.ai/llms.txt
> Use this file to discover all available pages before exploring further.
# AWS ECS
> Coming soon...
---
# Source: https://docs.squared.ai/deployment-and-security/setup/eks.md
> ## Documentation Index
> Fetch the complete documentation index at: https://docs.squared.ai/llms.txt
> Use this file to discover all available pages before exploring further.
# AWS EKS (Kubernetes)
> Coming soon...
---
# Source: https://docs.squared.ai/activation/data-apps/visualizations/embed.md
> ## Documentation Index
> Fetch the complete documentation index at: https://docs.squared.ai/llms.txt
> Use this file to discover all available pages before exploring further.
# Embed in Business Apps
> Learn how to embed Data Apps into tools like CRMs, support platforms, or internal web apps.
Once your Data App is configured and saved, you can embed it within internal or third-party business tools where your users work—such as CRMs, support platforms, or internal dashboards.
AI Squared supports multiple embedding options for flexibility across environments.
***
## Option 1: Embed via IFrame
1. Go to **Data Apps**.
2. Select the Data App you want to embed.
3. Click on **Embed Options** > **IFrame**.
4. Copy the generated `