# Runpod
> ## Documentation Index
---
# Source: https://docs.runpod.io/tutorials/sdks/python/101/aggregate.md
> ## Documentation Index
> Fetch the complete documentation index at: https://docs.runpod.io/llms.txt
> Use this file to discover all available pages before exploring further.
## Aggregating outputs in Runpod serverless functions
This tutorial will guide you through using the `return_aggregate_stream` feature in Runpod to simplify result handling in your serverless functions. Using `return_aggregate_stream` allows you to automatically collect and aggregate all yielded results from a generator handler into a single response. This simplifies result handling, making it easier to manage and return a consolidated set of results from asynchronous tasks, such as concurrent sentiment analysis or object detection, without needing additional code to collect and format the results manually.
We'll create a multi-purpose analyzer that can perform sentiment analysis on text and object detection in images, demonstrating how to aggregate outputs efficiently.
## Setting up your Serverless Function
Let's break down the process of creating our multi-purpose analyzer into steps.
### Import required libraries
First, import the necessary libraries:
```python theme={"theme":{"light":"github-light","dark":"github-dark"}}
import runpod
import time
import random
```
### Create Helper Functions
Define functions to simulate sentiment analysis and object detection:
```python theme={"theme":{"light":"github-light","dark":"github-dark"}}
def analyze_sentiment(text):
"""Simulate sentiment analysis of text."""
sentiments = ["Positive", "Neutral", "Negative"]
score = random.uniform(-1, 1)
sentiment = random.choice(sentiments)
return f"Sentiment: {sentiment}, Score: {score:.2f}"
def detect_objects(image_url):
"""Simulate object detection in an image."""
objects = ["person", "car", "dog", "cat", "tree", "building"]
detected = random.sample(objects, random.randint(1, 4))
confidences = [random.uniform(0.7, 0.99) for _ in detected]
return [f"{obj}: {conf:.2f}" for obj, conf in zip(detected, confidences)]
```
These functions:
1. Simulate sentiment analysis, returning a random sentiment and score
2. Simulate object detection, returning a list of detected objects with confidence scores
### Create the main Handler Function
Now, let's create the main handler function that processes jobs and yields results:
```python theme={"theme":{"light":"github-light","dark":"github-dark"}}
def handler(job):
job_input = job["input"]
task_type = job_input.get("task_type", "sentiment")
items = job_input.get("items", [])
results = []
for item in items:
time.sleep(random.uniform(0.5, 2)) # Simulate processing time
if task_type == "sentiment":
result = analyze_sentiment(item)
elif task_type == "object_detection":
result = detect_objects(item)
else:
result = f"Unknown task type: {task_type}"
results.append(result)
yield result
return results
```
This handler:
1. Determines the task type (sentiment analysis or object detection)
2. Processes each item in the input
3. Yields results incrementally
4. Returns the complete list of results
### Set up the Serverless Function starter
Create a function to start the serverless handler with proper configuration:
```python theme={"theme":{"light":"github-light","dark":"github-dark"}}
def start_handler():
def wrapper(job):
generator = handler(job)
if job.get("id") == "local_test":
return list(generator)
return generator
runpod.serverless.start({"handler": wrapper, "return_aggregate_stream": True})
if __name__ == "__main__":
start_handler()
```
This setup:
1. Creates a wrapper to handle both local testing and Runpod environments
2. Uses `return_aggregate_stream=True` to automatically aggregate yielded results
## Complete code example
Here's the full code for our multi-purpose analyzer with output aggregation:
```python theme={"theme":{"light":"github-light","dark":"github-dark"}}
import runpod
import time
import random
def analyze_sentiment(text):
"""Simulate sentiment analysis of text."""
sentiments = ["Positive", "Neutral", "Negative"]
score = random.uniform(-1, 1)
sentiment = random.choice(sentiments)
return f"Sentiment: {sentiment}, Score: {score:.2f}"
def detect_objects(image_url):
"""Simulate object detection in an image."""
objects = ["person", "car", "dog", "cat", "tree", "building"]
detected = random.sample(objects, random.randint(1, 4))
confidences = [random.uniform(0.7, 0.99) for _ in detected]
return [f"{obj}: {conf:.2f}" for obj, conf in zip(detected, confidences)]
def handler(job):
job_input = job["input"]
task_type = job_input.get("task_type", "sentiment")
items = job_input.get("items", [])
results = []
for item in items:
time.sleep(random.uniform(0.5, 2)) # Simulate processing time
if task_type == "sentiment":
result = analyze_sentiment(item)
elif task_type == "object_detection":
result = detect_objects(item)
else:
result = f"Unknown task type: {task_type}"
results.append(result)
yield result
return results
def start_handler():
def wrapper(job):
generator = handler(job)
if job.get("id") == "local_test":
return list(generator)
return generator
runpod.serverless.start({"handler": wrapper, "return_aggregate_stream": True})
if __name__ == "__main__":
start_handler()
```
## Testing your Serverless Function
To test your function locally, use these commands:
For sentiment analysis:
```bash theme={"theme":{"light":"github-light","dark":"github-dark"}}
python your_script.py --test_input '
{
"input": {
"task_type": "sentiment",
"items": [
"I love this product!",
"The service was terrible.",
"It was okay, nothing special."
]
}
}'
```
For object detection:
```bash theme={"theme":{"light":"github-light","dark":"github-dark"}}
python your_script.py --test_input '
{
"input": {
"task_type": "object_detection",
"items": [
"image1.jpg",
"image2.jpg",
"image3.jpg"
]
}
}'
```
### Understanding the output
When you run the sentiment analysis test, you'll see output similar to this:
```bash theme={"theme":{"light":"github-light","dark":"github-dark"}}
--- Starting Serverless Worker | Version 1.6.2 ---
INFO | test_input set, using test_input as job input.
DEBUG | Retrieved local job: {'input': {'task_type': 'sentiment', 'items': ['I love this product!', 'The service was terrible.', 'It was okay, nothing special.']}, 'id': 'local_test'}
INFO | local_test | Started.
DEBUG | local_test | Handler output: ['Sentiment: Positive, Score: 0.85', 'Sentiment: Negative, Score: -0.72', 'Sentiment: Neutral, Score: 0.12']
DEBUG | local_test | run_job return: {'output': ['Sentiment: Positive, Score: 0.85', 'Sentiment: Negative, Score: -0.72', 'Sentiment: Neutral, Score: 0.12']}
INFO | Job local_test completed successfully.
INFO | Job result: {'output': ['Sentiment: Positive, Score: 0.85', 'Sentiment: Negative, Score: -0.72', 'Sentiment: Neutral, Score: 0.12']}
INFO | Local testing complete, exiting.
```
This output demonstrates:
1. The serverless worker starting and processing the job
2. The handler generating results for each input item
3. The aggregation of results into a single list
## Conclusion
You've now created a serverless function using Runpod's Python SDK that demonstrates efficient output aggregation for both local testing and production environments. This approach simplifies result handling and ensures consistent behavior across different execution contexts.
To further enhance this application, consider:
* Implementing real sentiment analysis and object detection models
* Adding error handling and logging for each processing step
* Exploring Runpod's advanced features for handling larger datasets or parallel processing
Runpod's serverless library, with features like `return_aggregate_stream`, provides a powerful foundation for building scalable, efficient applications that can process and aggregate data seamlessly.
---
# Source: https://docs.runpod.io/get-started/api-keys.md
> ## Documentation Index
> Fetch the complete documentation index at: https://docs.runpod.io/llms.txt
> Use this file to discover all available pages before exploring further.
## Manage API keys
> Learn how to create, edit, and disable Runpod API keys.
Legacy API keys generated before November 11, 2024 have either Read/Write or Read Only access to GraphQL based on what was set for that key. All legacy keys have full access to AI API. To improve security, generate a new key with **Restricted** permission and select the minimum permission needed for your use case.
## Create an API key
Follow these steps to create a new Runpod API key:
1. In the Runpod console, navigate to the [Settings page](https://www.console.runpod.io/user/settings).
2. Expand the **API Keys** section and select **Create API Key**.
3. Give your key a name and set its permissions (**All**, **Restricted**, or **Read Only**). If you choose **Restricted**, you can customize access for each Runpod API:
* **None**: No access
* **Restricted**: Customize access for each of your [Serverless endpoints](/serverless/overview). (Default: None.)
* **Read/Write**: Full access to your endpoints.
* **Read Only**: Read access without write access.
4. Select **Create**, then select your newly-generated key to copy it to your clipboard.
Runpod does not store your API key, so you may wish to save it elsewhere (e.g., in your password manager, or in a GitHub secret). Treat your API key like a password and don't share it with anyone.
## Edit API key permissions
To edit an API key:
1. Navigate to the [Settings page](https://www.console.runpod.io/user/settings).
2. Under **API Keys**, select the pencil icon for the key you wish to update
3. Update the key with your desired permissions, then select **Update**.
## Enable/disable an API key
To enable/disable an API key:
1. Navigate to the [Settings page](https://www.console.runpod.io/user/settings).
2. Under **API Keys**, select the toggle for the API key you wish to enable/disable, then select **Yes** in the confirmation modal.
## Delete an API key
To delete an API key:
1. From the console, select **Settings**.
2. Under **API Keys**, select the trash can icon and select **Revoke Key** in the confirmation modal.
---
# Source: https://docs.runpod.io/sdks/python/apis.md
> ## Documentation Index
> Fetch the complete documentation index at: https://docs.runpod.io/llms.txt
> Use this file to discover all available pages before exploring further.
## API Wrapper
This document outlines the core functionalities provided by the Runpod API, including how to interact with Endpoints, manage Templates, and list available GPUs. These operations let you dynamically manage computational resources within the Runpod environment.
## Get Endpoints
To retrieve a comprehensive list of all available endpoint configurations within Runpod, you can use the `get_endpoints()` function. This function returns a list of endpoint configurations, allowing you to understand what's available for use in your projects.
```python theme={"theme":{"light":"github-light","dark":"github-dark"}}
import runpod
import os
runpod.api_key = os.getenv("RUNPOD_API_KEY")
# Fetching all available endpoints
endpoints = runpod.get_endpoints()
# Displaying the list of endpoints
print(endpoints)
```
## Create Template
Templates in Runpod serve as predefined configurations for setting up environments efficiently. The `create_template()` function facilitates the creation of new templates by specifying a name and a Docker image.
```python theme={"theme":{"light":"github-light","dark":"github-dark"}}
import runpod
import os
runpod.api_key = os.getenv("RUNPOD_API_KEY")
try:
# Creating a new template with a specified name and Docker image
new_template = runpod.create_template(name="test", image_name="runpod/base:0.1.0")
# Output the created template details
print(new_template)
except runpod.error.QueryError as err:
# Handling potential errors during template creation
print(err)
print(err.query)
```
```json theme={"theme":{"light":"github-light","dark":"github-dark"}}
{
"id": "n6m0htekvq",
"name": "test",
"imageName": "runpod/base:0.1.0",
"dockerArgs": "",
"containerDiskInGb": 10,
"volumeInGb": 0,
"volumeMountPath": "/workspace",
"ports": "",
"env": [],
"isServerless": false
}
```
## Create Endpoint
Creating a new endpoint with the `create_endpoint()` function. This function requires you to specify a `name` and a `template_id`. Additional configurations such as GPUs, number of Workers, and more can also be specified depending your requirements.
```python theme={"theme":{"light":"github-light","dark":"github-dark"}}
import runpod
import os
runpod.api_key = os.getenv("RUNPOD_API_KEY")
try:
# Creating a template to use with the new endpoint
new_template = runpod.create_template(
name="test", image_name="runpod/base:0.4.4", is_serverless=True
)
# Output the created template details
print(new_template)
# Creating a new endpoint using the previously created template
new_endpoint = runpod.create_endpoint(
name="test",
template_id=new_template["id"],
gpu_ids="AMPERE_16",
workers_min=0,
workers_max=1,
)
# Output the created endpoint details
print(new_endpoint)
except runpod.error.QueryError as err:
# Handling potential errors during endpoint creation
print(err)
print(err.query)
```
```json theme={"theme":{"light":"github-light","dark":"github-dark"}}
{
"id": "Unique_Id",
"name": "YourTemplate",
"imageName": "runpod/base:0.4.4",
"dockerArgs": "",
"containerDiskInGb": 10,
"volumeInGb": 0,
"volumeMountPath": "/workspace",
"ports": null,
"env": [],
"isServerless": true
}
{
"id": "Unique_Id",
"name": "YourTemplate",
"templateId": "Unique_Id",
"gpuIds": "AMPERE_16",
"networkVolumeId": null,
"locations": null,
"idleTimeout": 5,
"scalerType": "QUEUE_DELAY",
"scalerValue": 4,
"workersMin": 0,
"workersMax": 1
}
```
## Get GPUs
For understanding the computational resources available, the `get_gpus()` function lists all GPUs that can be allocated to endpoints in Runpod. This enables optimal resource selection based on your computational needs.
```python theme={"theme":{"light":"github-light","dark":"github-dark"}}
import runpod
import json
import os
runpod.api_key = os.getenv("RUNPOD_API_KEY")
# Fetching all available GPUs
gpus = runpod.get_gpus()
# Displaying the GPUs in a formatted manner
print(json.dumps(gpus, indent=2))
```
```json theme={"theme":{"light":"github-light","dark":"github-dark"}}
[
{
"id": "NVIDIA A100 80GB PCIe",
"displayName": "A100 80GB",
"memoryInGb": 80
},
{
"id": "NVIDIA A100-SXM4-80GB",
"displayName": "A100 SXM 80GB",
"memoryInGb": 80
}
// Additional GPUs omitted for brevity
]
```
## Get GPU by Id
Use `get_gpu()` and pass in a GPU Id to retrieve details about a specific GPU model by its ID. This is useful when understanding the capabilities and costs associated with various GPU models.
```python theme={"theme":{"light":"github-light","dark":"github-dark"}}
import runpod
import json
import os
runpod.api_key = os.getenv("RUNPOD_API_KEY")
gpus = runpod.get_gpu("NVIDIA A100 80GB PCIe")
print(json.dumps(gpus, indent=2))
```
```json theme={"theme":{"light":"github-light","dark":"github-dark"}}
{
"maxGpuCount": 8,
"id": "NVIDIA A100 80GB PCIe",
"displayName": "A100 80GB",
"manufacturer": "Nvidia",
"memoryInGb": 80,
"cudaCores": 0,
"secureCloud": true,
"communityCloud": true,
"securePrice": 1.89,
"communityPrice": 1.59,
"oneMonthPrice": null,
"threeMonthPrice": null,
"oneWeekPrice": null,
"communitySpotPrice": 0.89,
"secureSpotPrice": null,
"lowestPrice": {
"minimumBidPrice": 0.89,
"uninterruptablePrice": 1.59
}
}
```
Through these functionalities, the Runpod API enables efficient and flexible management of computational resources, catering to a wide range of project requirements.
---
# Source: https://docs.runpod.io/tutorials/sdks/python/101/async.md
> ## Documentation Index
> Fetch the complete documentation index at: https://docs.runpod.io/llms.txt
> Use this file to discover all available pages before exploring further.
## Building an async generator handler for weather data simulation
This tutorial will guide you through creating a serverless function using Runpod's Python SDK that simulates fetching weather data for multiple cities concurrently.
Use asynchronous functions to handle multiple concurrent operations efficiently, especially when dealing with tasks that involve waiting for external resources, such as network requests or I/O operations. Asynchronous programming allows your code to perform other tasks while waiting, rather than blocking the entire program. This is particularly useful in a serverless environment where you want to maximize resource utilization and minimize response times.
We'll use an async generator handler to stream results incrementally, demonstrating how to manage multiple concurrent operations efficiently in a serverless environment.
## Setting up your Serverless Function
Let's break down the process of creating our weather data simulator into steps.
### SImport required libraries
First, import the necessary libraries:
```python theme={"theme":{"light":"github-light","dark":"github-dark"}}
import runpod
import asyncio
import random
import json
import sys
```
### Create the Weather Data Fetcher
Define an asynchronous function that simulates fetching weather data:
```python theme={"theme":{"light":"github-light","dark":"github-dark"}}
async def fetch_weather_data(city, delay):
await asyncio.sleep(delay)
temperature = random.uniform(-10, 40)
humidity = random.uniform(0, 100)
return {
"city": city,
"temperature": round(temperature, 1),
"humidity": round(humidity, 1)
}
```
This function:
1. Simulates a network delay using `asyncio.sleep()`
2. Generates random temperature and humidity data
3. Returns a dictionary with the weather data for a city
### Create the Async Generator Handler
Now, let's create the main handler function:
```python theme={"theme":{"light":"github-light","dark":"github-dark"}}
async def async_generator_handler(job):
job_input = job['input']
cities = job_input.get('cities', ['New York', 'London', 'Tokyo', 'Sydney', 'Moscow'])
update_interval = job_input.get('update_interval', 2)
duration = job_input.get('duration', 10)
print(f"Weather Data Stream | Starting job {job['id']}")
print(f"Monitoring cities: {', '.join(cities)}")
start_time = asyncio.get_event_loop().time()
while asyncio.get_event_loop().time() - start_time < duration:
tasks = [fetch_weather_data(city, random.uniform(0.5, 2)) for city in cities]
for completed_task in asyncio.as_completed(tasks):
weather_data = await completed_task
yield {
"timestamp": round(asyncio.get_event_loop().time() - start_time, 2),
"data": weather_data
}
await asyncio.sleep(update_interval)
yield {"status": "completed", "message": "Weather monitoring completed"}
```
This handler:
1. Extracts parameters from the job input
2. Logs the start of the job
3. Creates tasks for fetching weather data for each city
4. Uses `asyncio.as_completed()` to yield results as they become available
5. Continues fetching data at specified intervals for the given duration
### Set up the Main Execution
Finally, Set up the main execution block:
```python theme={"theme":{"light":"github-light","dark":"github-dark"}}
async def run_test(job):
async for item in async_generator_handler(job):
print(json.dumps(item))
if __name__ == "__main__":
if "--test_input" in sys.argv:
# Code for local testing (see full example)
else:
runpod.serverless.start({
"handler": async_generator_handler,
"return_aggregate_stream": True
})
```
This block allows for both local testing and deployment as a Runpod serverless function.
## Complete code example
Here's the full code for our serverless weather data simulator:
```python fetch_weather_data.py theme={"theme":{"light":"github-light","dark":"github-dark"}}
import runpod
import asyncio
import random
import json
import sys
async def fetch_weather_data(city, delay):
await asyncio.sleep(delay)
temperature = random.uniform(-10, 40)
humidity = random.uniform(0, 100)
return {
"city": city,
"temperature": round(temperature, 1),
"humidity": round(humidity, 1)
}
async def async_generator_handler(job):
job_input = job['input']
cities = job_input.get('cities', ['New York', 'London', 'Tokyo', 'Sydney', 'Moscow'])
update_interval = job_input.get('update_interval', 2)
duration = job_input.get('duration', 10)
print(f"Weather Data Stream | Starting job {job['id']}")
print(f"Monitoring cities: {', '.join(cities)}")
start_time = asyncio.get_event_loop().time()
while asyncio.get_event_loop().time() - start_time < duration:
tasks = [fetch_weather_data(city, random.uniform(0.5, 2)) for city in cities]
for completed_task in asyncio.as_completed(tasks):
weather_data = await completed_task
yield {
"timestamp": round(asyncio.get_event_loop().time() - start_time, 2),
"data": weather_data
}
await asyncio.sleep(update_interval)
yield {"status": "completed", "message": "Weather monitoring completed"}
async def run_test(job):
async for item in async_generator_handler(job):
print(json.dumps(item))
if __name__ == "__main__":
if "--test_input" in sys.argv:
test_input_index = sys.argv.index("--test_input")
if test_input_index + 1 < len(sys.argv):
test_input_json = sys.argv[test_input_index + 1]
try:
job = json.loads(test_input_json)
asyncio.run(run_test(job))
except json.JSONDecodeError:
print("Error: Invalid JSON in test_input")
else:
print("Error: --test_input requires a JSON string argument")
else:
runpod.serverless.start({
"handler": async_generator_handler,
"return_aggregate_stream": True
})
```
## Testing Your Serverless Function
To test your function locally, use this command:
```bash theme={"theme":{"light":"github-light","dark":"github-dark"}}
python your_script.py --test_input '
{
"input": {
"cities": ["New York", "London", "Tokyo", "Paris", "Sydney"],
"update_interval": 3,
"duration": 15
},
"id": "local_test"
}'
```
### Understanding the output
When you run the test, you'll see output similar to this:
```bash theme={"theme":{"light":"github-light","dark":"github-dark"}}
Weather Data Stream | Starting job local_test
Monitoring cities: New York, London, Tokyo, Paris, Sydney
{"timestamp": 0.84, "data": {"city": "London", "temperature": 11.0, "humidity": 7.3}}
{"timestamp": 0.99, "data": {"city": "Paris", "temperature": -5.9, "humidity": 59.3}}
{"timestamp": 1.75, "data": {"city": "Tokyo", "temperature": 18.4, "humidity": 34.1}}
{"timestamp": 1.8, "data": {"city": "Sydney", "temperature": 26.8, "humidity": 91.0}}
{"timestamp": 1.99, "data": {"city": "New York", "temperature": 35.9, "humidity": 27.5}}
{"status": "completed", "message": "Weather monitoring completed"}
```
This output demonstrates:
1. The concurrent processing of weather data for multiple cities
2. Real-time updates with timestamps
3. A completion message when the monitoring duration is reached
## Conclusion
You've now created a serverless function using Runpod's Python SDK that simulates concurrent weather data fetching for multiple cities. This example showcases how to handle multiple asynchronous operations and stream results incrementally in a serverless environment.
To further enhance this application, consider:
* Implementing real API calls to fetch actual weather data
* Adding error handling for network failures or API limits
* Exploring Runpod's documentation for advanced features like scaling for high-concurrency scenarios
Runpod's serverless library provides a powerful foundation for building scalable, efficient applications that can process and stream data concurrently in real-time without the need to manage infrastructure.
---
# Source: https://docs.runpod.io/instant-clusters/axolotl.md
> ## Documentation Index
> Fetch the complete documentation index at: https://docs.runpod.io/llms.txt
> Use this file to discover all available pages before exploring further.
## Deploy an Instant Cluster with Axolotl
This tutorial demonstrates how to use Instant Clusters with [Axolotl](https://axolotl.ai/) to fine-tune large language models (LLMs) across multiple GPUs. By leveraging PyTorch's distributed training capabilities and Runpod's high-speed networking infrastructure, you can significantly accelerate your training process compared to single-GPU setups.
Follow the steps below to deploy a cluster and start training your models efficiently.
## Step 1: Deploy an Instant Cluster
1. Open the [Instant Clusters page](https://www.console.runpod.io/cluster) on the Runpod web interface.
2. Click **Create Cluster**.
3. Use the UI to name and configure your Cluster. For this walkthrough, keep **Pod Count** at **2** and select the option for **16x H100 SXM** GPUs. Keep the **Pod Template** at its default setting (Runpod PyTorch).
4. Click **Deploy Cluster**. You should be redirected to the Instant Clusters page after a few seconds.
## Step 2: Set up Axolotl on each Pod
1. Click your cluster to expand the list of Pods.
2. Click on a Pod, for example `CLUSTERNAME-pod-0`, to expand the Pod.
3. Click **Connect**, then click **Web Terminal**.
4. In the terminal that opens, run this command to clone the Axolotl repository into the Pod's main directory:
```sh theme={"theme":{"light":"github-light","dark":"github-dark"}}
git clone https://github.com/axolotl-ai-cloud/axolotl
```
5. Navigate to the `axolotl` directory:
```sh theme={"theme":{"light":"github-light","dark":"github-dark"}}
cd axolotl
```
6. Install the required packages:
```sh theme={"theme":{"light":"github-light","dark":"github-dark"}}
pip3 install -U packaging setuptools wheel ninja
pip3 install --no-build-isolation -e '.[flash-attn,deepspeed]'
```
7. Navigate to the `examples/llama-3` directory:
```sh theme={"theme":{"light":"github-light","dark":"github-dark"}}
cd examples/llama-3
```
Repeat these steps for **each Pod** in your cluster.
## Step 3: Start the training process on each Pod
Run this command in the web terminal of **each Pod**:
```php theme={"theme":{"light":"github-light","dark":"github-dark"}}
torchrun \
--nnodes $NUM_NODES \
--node_rank $NODE_RANK \
--nproc_per_node $NUM_TRAINERS \
--rdzv_id "myjob" \
--rdzv_backend static \
--rdzv_endpoint "$PRIMARY_ADDR:$PRIMARY_PORT" -m axolotl.cli.train lora-1b.yml
```
Currently, the dynamic `c10d` backend is not supported. Please keep the `rdzv_backend` flag set to `static`.
After running the command on the last Pod, you should see output similar to this after the training process is complete:
```csharp theme={"theme":{"light":"github-light","dark":"github-dark"}}
...
{'loss': 1.2569, 'grad_norm': 0.11112671345472336, 'learning_rate': 5.418275829936537e-06, 'epoch': 0.9}
{'loss': 1.2091, 'grad_norm': 0.11100614815950394, 'learning_rate': 3.7731999690749585e-06, 'epoch': 0.92}
{'loss': 1.2216, 'grad_norm': 0.10450132936239243, 'learning_rate': 2.420361737256438e-06, 'epoch': 0.93}
{'loss': 1.223, 'grad_norm': 0.10873789340257645, 'learning_rate': 1.3638696597277679e-06, 'epoch': 0.95}
{'loss': 1.2529, 'grad_norm': 0.1063728854060173, 'learning_rate': 6.069322682050516e-07, 'epoch': 0.96}
{'loss': 1.2304, 'grad_norm': 0.10996092110872269, 'learning_rate': 1.518483566683826e-07, 'epoch': 0.98}
{'loss': 1.2334, 'grad_norm': 0.10642101615667343, 'learning_rate': 0.0, 'epoch': 0.99}
{'train_runtime': 61.7602, 'train_samples_per_second': 795.189, 'train_steps_per_second': 1.085, 'train_loss': 1.255359119443751, 'epoch': 0.99}
100%|████████████████████████████████████████████████████████████████████████████████████████████████████████████████████| 67/67 [01:00<00:00, 1.11it/s]
[2025-04-01 19:24:22,603] [INFO] [axolotl.train.save_trained_model:211] [PID:1009] [RANK:0] Training completed! Saving pre-trained model to ./outputs/lora-out.
```
Congrats! You've successfully trained a model using Axolotl on an Instant Cluster. Your fine-tuned model has been saved to the `./outputs/lora-out` directory. You can now use this model for inference or continue training with different parameters.
## Step 4: Clean up
If you no longer need your cluster, make sure you return to the [Instant Clusters page](https://www.console.runpod.io/cluster) and delete your cluster to avoid incurring extra charges.
You can monitor your cluster usage and spending using the **Billing Explorer** at the bottom of the [Billing page](https://www.console.runpod.io/user/billing) section under the **Cluster** tab.
## Next steps
Now that you've successfully deployed and tested an Axolotl distributed training job on an Instant Cluster, you can:
* **Fine-tune your own models** by modifying the configuration files in Axolotl to suit your specific requirements.
* **Scale your training** by adjusting the number of Pods in your cluster (and the size of their containers and volumes) to handle larger models or datasets.
* **Try different optimization techniques** such as DeepSpeed, FSDP (Fully Sharded Data Parallel), or other distributed training strategies.
For more information on fine-tuning with Axolotl, refer to the [Axolotl documentation](https://github.com/OpenAccess-AI-Collective/axolotl).
---
# Source: https://docs.runpod.io/serverless/development/benchmarking.md
> ## Documentation Index
> Fetch the complete documentation index at: https://docs.runpod.io/llms.txt
> Use this file to discover all available pages before exploring further.
## Benchmark workers and requests
> Measure the performance of your Serverless workers and identify bottlenecks.
Benchmarking your Serverless workers helps you identify bottlenecks and [optimize your code](/serverless/development/optimization) for performance and cost. Performance is measured by two key metrics:
* **Delay time**: The time spent waiting for a worker to become available. This includes the cold start time if a new worker needs to be spun up.
* **Execution time**: The time the GPU takes to process the request once the worker has received the job.
## Send a test request
To gather initial metrics, use `curl` to send a request to your endpoint. This will initiate the job and return a request ID that you can use to poll for status.
```sh theme={"theme":{"light":"github-light","dark":"github-dark"}}
curl -X POST https://api.runpod.ai/v2/YOUR_ENDPOINT_ID/run \
-H "Content-Type: application/json" \
-H "Authorization: Bearer YOUR_API_KEY" \
-d '{"input": {"prompt": "Hello, world!"}}'
```
This returns a JSON object containing the request ID. Poll the `/status` endpoint to get the delay time and execution time:
```sh theme={"theme":{"light":"github-light","dark":"github-dark"}}
curl -X GET https://api.runpod.ai/v2/YOUR_ENDPOINT_ID/status/REQUEST_ID \
-H "Content-Type: application/json" \
-H "Authorization: Bearer YOUR_API_KEY"
```
This returns a JSON object:
```json theme={"theme":{"light":"github-light","dark":"github-dark"}}
{
"id": "1234567890",
"status": "COMPLETED",
"delayTime": 1000,
"executionTime": 2000
}
```
### Automate benchmarking
To get a statistically significant view of your worker's performance, you should automate the benchmarking process. The following Python script sends multiple requests and calculates the minimum, maximum, and average times for both delay and execution.
```python benchmark.py theme={"theme":{"light":"github-light","dark":"github-dark"}}
import requests
import time
import statistics
ENDPOINT_ID = "YOUR_ENDPOINT_ID"
API_KEY = "YOUR_API_KEY"
BASE_URL = f"https://api.runpod.ai/v2/{ENDPOINT_ID}"
HEADERS = {
"Content-Type": "application/json",
"Authorization": f"Bearer {API_KEY}"
}
def run_benchmark(num_requests=5):
delay_times = []
execution_times = []
for i in range(num_requests):
# Send request
response = requests.post(
f"{BASE_URL}/run",
headers=HEADERS,
json={"input": {"prompt": f"Test request {i+1}"}}
)
request_id = response.json()["id"]
# Poll for completion
while True:
status_response = requests.get(
f"{BASE_URL}/status/{request_id}",
headers=HEADERS
)
status_data = status_response.json()
if status_data["status"] == "COMPLETED":
delay_times.append(status_data["delayTime"])
execution_times.append(status_data["executionTime"])
break
elif status_data["status"] == "FAILED":
print(f"Request {i+1} failed")
break
time.sleep(1)
# Calculate statistics
print(f"Delay Time - Min: {min(delay_times)}ms, Max: {max(delay_times)}ms, Avg: {statistics.mean(delay_times):.0f}ms")
print(f"Execution Time - Min: {min(execution_times)}ms, Max: {max(execution_times)}ms, Avg: {statistics.mean(execution_times):.0f}ms")
if __name__ == "__main__":
run_benchmark(num_requests=5)
```
---
# Source: https://docs.runpod.io/references/billing-information.md
> ## Documentation Index
> Fetch the complete documentation index at: https://docs.runpod.io/llms.txt
> Use this file to discover all available pages before exploring further.
## Billing information
> Understand how billing works for Pods, storage, network volumes, refunds, and spending limits.
All billing, including per-hour compute and storage billing, is charged per minute.
## How billing works
Every Pod has an hourly cost based on [GPU type](/references/gpu-types). Your Runpod credits are charged every minute the Pod is running. If you run out of credits, your Pods are automatically stopped and you'll receive an email notification. Pods are eventually terminated if you don't refill your credits.
Runpod pre-emptively stops all your Pods when your account balance is projected to cover less than 10 minutes of remaining runtime. This ensures your account retains a small balance to help preserve your data volumes. If your balance is completely drained, all Pods are subject to deletion. Setting up [automatic payments](https://www.console.runpod.io/user/billing) is recommended to avoid service interruptions.
You must have at least one hour's worth of runtime in your balance to rent a Pod at your given spec. If your balance is insufficient, consider renting the Pod on Spot, depositing additional funds, or lowering your GPU spec requirements.
## Storage billing
Storage billing varies depending on Pod state. Running Pods are charged \$0.10 per GB per month for all storage, while stopped Pods are charged \$0.20 per GB per month for volume storage.
Storage is charged per minute. You are not charged for storage if the host machine is down or unavailable from the public internet.
## Network volume billing
Network volumes are billed hourly based on storage size. For storage below 1TB, you'll pay \$0.07 per GB per month. Above 1TB, the rate drops to \$0.05 per GB per month.
Network volumes are hosted on storage servers located in the same datacenters where you rent GPU servers. These servers are connected via a high-speed local network (25Gbps to 200Gbps depending on location) and use NVME SSDs for storage.
If your machine-based storage or network volume is terminated due to lack of funds, that disk space is immediately freed up for use by other clients. Runpod cannot assist in recovering lost storage. Runpod is not designed as a cloud storage system—storage is provided to support running tasks on GPUs. Back up critical data regularly to your local machine or a dedicated cloud storage provider.
## Refunds and withdrawals
Runpod does not offer the option to withdraw your unused balance after depositing funds. When you add funds to your Runpod account, credits are non-refundable and can only be used for Runpod services. Only deposit the amount you intend to use.
If you aren't sure if Runpod is right for you, you can load as little as \$10 into your account to try things out. Visit the [Discord community](https://discord.gg/pJ3P2DbUUq) to ask questions or email [help@runpod.io](mailto:help@runpod.io). Refunds and trial credits are not currently offered due to processing overhead.
If you have questions about billing or need assistance planning your Runpod expenses, contact support at [help@runpod.io](mailto:help@runpod.io).
## Spending limits
Spending limits are implemented for newer accounts to prevent fraud. These limits grow over time and should not impact normal usage. If you need an increased spending limit, [contact support](https://www.runpod.io/contact) and share your use case.
### Payment methods
Runpod accepts several payment methods for funding your account:
1. **Credit Card**: You can use your credit card to fund your Runpod account. However, be aware that card declines are more common than you might think, and the reasons for them might not always be clear. If you're using a prepaid card, it's recommended to deposit in transactions of at least \$100 to avoid unexpected blocks due to Stripe's minimums for prepaid cards. For more information, review [cards accepted by Stripe](https://stripe.com/docs/payments/cards/supported-card-brands?ref=blog.runpod.io).
2) **Crypto Payments**: Runpod also accepts crypto payments. It's recommended to set up a [crypto.com](https://crypto.com/?ref=blog.runpod.io) account and go through any KYC checks they may require ahead of time. This provides an alternate way of funding your account in case you run into issues with card payment.
3. **Business Invoicing**: For large transactions (over \$5,000), Runpod offers business invoicing through ACH, credit card, and local and international wire transfers.
If you're having trouble with your card payments, you can contact [Runpod support](https://www.runpod.io/contact) for assistance.
---
# Source: https://docs.runpod.io/serverless/load-balancing/build-a-worker.md
> ## Documentation Index
> Fetch the complete documentation index at: https://docs.runpod.io/llms.txt
> Use this file to discover all available pages before exploring further.
## Build a load balancing worker
> Learn how to implement and deploy a load balancing worker with FastAPI.
This tutorial shows how to build a load balancing worker using FastAPI and deploy it as a Serverless endpoint on Runpod.
## What you'll learn
In this tutorial you'll learn how to:
* Create a FastAPI application to serve your API endpoints.
* Implement proper health checks for your workers.
* Deploy your application as a load balancing Serverless endpoint.
* Test and interact with your custom APIs.
## Requirements
Before you begin you'll need:
* A Runpod account.
* Basic familiarity with Python and REST APIs.
* Docker installed on your local machine.
## Step 1: Create a basic FastAPI application
You can download a preconfigured repository containing the completed code for this tutorial [on GitHub](https://github.com/runpod-workers/worker-load-balancing/).
First, let's create a simple FastAPI application that will serve as our API.
Create a file named `app.py`:
```python theme={"theme":{"light":"github-light","dark":"github-dark"}}
import os
from fastapi import FastAPI, HTTPException
from pydantic import BaseModel
# Create FastAPI app
app = FastAPI()
# Define request models
class GenerationRequest(BaseModel):
prompt: str
max_tokens: int = 100
temperature: float = 0.7
class GenerationResponse(BaseModel):
generated_text: str
# Global variable to track requests
request_count = 0
# Health check endpoint; required for Runpod to monitor worker health
@app.get("/ping")
async def health_check():
return {"status": "healthy"}
# Our custom generation endpoint
@app.post("/generate", response_model=GenerationResponse)
async def generate(request: GenerationRequest):
global request_count
request_count += 1
# A simple mock implementation; we'll replace this with an actual model later
generated_text = f"Response to: {request.prompt} (request #{request_count})"
return {"generated_text": generated_text}
# A simple endpoint to show request stats
@app.get("/stats")
async def stats():
return {"total_requests": request_count}
# Run the app when the script is executed
if __name__ == "__main__":
import uvicorn
port = int(os.getenv("PORT", 80))
print(f"Starting server on port {port}")
# Start the server
uvicorn.run(app, host="0.0.0.0", port=port)
```
This simple application defines the following endpoints:
* A health check endpoint at `/ping`
* A text generation endpoint at `/generate`
* A statistics endpoint at `/stats`
## Step 2: Create a Dockerfile
Now, let's create a `Dockerfile` to package our application:
```dockerfile
FROM nvidia/cuda:12.1.0-base-ubuntu22.04
RUN apt-get update -y \
&& apt-get install -y python3-pip
RUN ldconfig /usr/local/cuda-12.1/compat/
# Install Python dependencies
COPY requirements.txt .
RUN pip install --no-cache-dir -r requirements.txt
# Copy application code
COPY app.py .
# Start the handler
CMD ["python3", "app.py"]
```
You'll also need to create a `requirements.txt` file:
```text
fastapi==0.95.1
uvicorn==0.22.0
pydantic==1.10.7
```
## Step 3: Build and push the Docker image
Build and push your Docker image to a container registry:
```bash theme={"theme":{"light":"github-light","dark":"github-dark"}}
# Build the image
docker build --platform linux/amd64 -t YOUR_DOCKER_USERNAME/loadbalancer-example:v1.0 .
# Push to Docker Hub
docker push YOUR_DOCKER_USERNAME/loadbalancer-example:v1.0
```
## Step 4: Deploy to Runpod
Now, let's deploy our application to a Serverless endpoint:
1. Go to the [Serverless page](https://www.runpod.io/console/serverless) in the Runpod console.
2. Click **New Endpoint**
3. Click **Import from Docker Registry**.
4. In the **Container Image** field, enter your Docker image URL:
```text
YOUR_DOCKER_USERNAME/loadbalancer-example:v1.0
```
Then click **Next**.
5. Give your endpoint a name.
6. Under **Endpoint Type**, select **Load Balancer**.
7. Under **GPU Configuration**, select at least one GPU type (16 GB or 24 GB GPUs are fine for this example).
8. Leave all other settings at their defaults.
9. Click **Deploy Endpoint**.
## Step 5: Access your custom API
Once your endpoint is created, you can access your custom APIs at:
```text
https://ENDPOINT_ID.api.runpod.ai/PATH
```
For example, the load balancing worker we defined in step 1 exposes these endpoints:
* Health check: `https://ENDPOINT_ID.api.runpod.ai/ping`
* Generate text: `https://ENDPOINT_ID.api.runpod.ai/generate`
* Get request count: `https://ENDPOINT_ID.api.runpod.ai/stats`
Try running one or more of these commands, replacing `ENDPOINT_ID` and `RUNPOD_API_KEY` with your actual endpoint ID and API key:
```bash generate theme={"theme":{"light":"github-light","dark":"github-dark"}}
curl -X POST "https://ENDPOINT_ID.api.runpod.ai/generate" \
-H 'Authorization: Bearer RUNPOD_API_KEY' \
-H "Content-Type: application/json" \
-d '{"prompt": "Hello, world!"}'
```
```bash ping theme={"theme":{"light":"github-light","dark":"github-dark"}}
curl -X GET "https://ENDPOINT_ID.api.runpod.ai/ping" \
-H 'Authorization: Bearer RUNPOD_API_KEY' \
-H "Content-Type: application/json" \
```
```bash stats theme={"theme":{"light":"github-light","dark":"github-dark"}}
curl -X GET "https://ENDPOINT_ID.api.runpod.ai/stats" \
-H 'Authorization: Bearer RUNPOD_API_KEY' \
-H "Content-Type: application/json" \
```
After sending a request, your workers will take some time to initialize. You can track their progress by checking the logs in the **Workers** tab of your endpoint page.
If you see: `{"error":"no workers available"}%` after running the request, this means your workers did not initialize in time to process it. If you try running the request again, this will usually resolve the issue.
For production applications, implement a health check with retries before sending requests. See [Handling cold start errors](/serverless/load-balancing/overview#handling-cold-start-errors) for a complete code example.
Congratulations! You've now successfully deployed and tested a load balancing endpoint. If you want to use a real model, you can follow the [vLLM worker](/serverless/load-balancing/vllm-worker) tutorial.
## (Optional) Advanced endpoint definitions
For a more complex API, you can define multiple endpoints and organize them logically. Here's an example of how to structure a more complex API:
```python theme={"theme":{"light":"github-light","dark":"github-dark"}}
from fastapi import FastAPI, HTTPException, Depends, Query
from pydantic import BaseModel
import os
app = FastAPI()
# --- Authentication middleware ---
def verify_api_key(api_key: str = Query(None, alias="api_key")):
if api_key != os.getenv("API_KEY", "test_key"):
raise HTTPException(401, "Invalid API key")
return api_key
# --- Models ---
class TextRequest(BaseModel):
text: str
max_length: int = 100
class ImageRequest(BaseModel):
prompt: str
width: int = 512
height: int = 512
# --- Text endpoints ---
@app.post("/v1/text/summarize")
async def summarize(request: TextRequest, api_key: str = Depends(verify_api_key)):
# Implement text summarization
return {"summary": f"Summary of: {request.text[:30]}..."}
@app.post("/v1/text/translate")
async def translate(request: TextRequest, target_lang: str, api_key: str = Depends(verify_api_key)):
# Implement translation
return {"translation": f"Translation to {target_lang}: {request.text[:30]}..."}
# --- Image endpoints ---
@app.post("/v1/image/generate")
async def generate_image(request: ImageRequest, api_key: str = Depends(verify_api_key)):
# Implement image generation
return {"image_url": f"https://example.com/images/{hash(request.prompt)}.jpg"}
# --- Health check ---
@app.get("/ping")
async def health_check():
return {"status": "healthy"}
```
## Troubleshooting
Here are some common issues and methods for troubleshooting:
* **No workers available**: If your request returns `{"error":"no workers available"}%`, this means means your workers did not initialize in time to process the request. Running the request again will usually fix this issue.
* **Worker unhealthy**: Check your health endpoint implementation and ensure it's returning proper status codes.
* **API not accessible**: If your request returns `{"error":"not allowed for QB API"}`, verify that your endpoint type is set to "Load Balancer".
* **Port issues**: Make sure the environment variable for `PORT` matches what your application is using, and that the `PORT_HEALTH` variable is set to a different port.
* **Model errors**: Check your model's requirements and whether it's compatible with your GPU.
## Next steps
Now that you've learned how to build a basic load balancing worker, you can try [implementing a real model with vLLM](/serverless/load-balancing/vllm-worker).
---
# Source: https://docs.runpod.io/tutorials/pods/build-docker-images.md
> ## Documentation Index
> Fetch the complete documentation index at: https://docs.runpod.io/llms.txt
> Use this file to discover all available pages before exploring further.
## Build Docker Images on Runpod with Bazel
Runpod's GPU Pods use custom Docker images to run your code. This means you can't directly spin up your own Docker instance or build Docker containers on a GPU Pod. Tools like Docker Compose are also unavailable.
This limitation can be frustrating when you need to create custom Docker images for your Runpod templates.
Fortunately, many use cases can be addressed by creating a custom template with the desired Docker image.
In this tutorial, you'll learn how to use the [Bazel](https://bazel.build) build tool to build and push Docker images from inside a Runpod container.
By the end of this tutorial, you'll be able to build custom Docker images on Runpod and push them to Docker Hub for use in your own templates.
## Prerequisites
Before you begin this guide you'll need the following:
* A Docker Hub account and access token for authenticating the docker login command
* Enough volume for your image to be built
## Create a Pod
1. Navigate to [Pods](https://www.console.runpod.io/pods) and select **+ Deploy**.
2. Choose between **GPU** and **CPU**.
3. Customize your an instance by setting up the following:
1. (optional) Specify a Network volume.
2. Select an instance type. For example, **A40**.
3. (optional) Provide a template. For example, **Runpod Pytorch**.
4. (GPU only) Specify your compute count.
4. Review your configuration and select **Deploy On-Demand**.
For more information, see [Manage Pods](/pods/manage-pods#start-a-pod).
Wait for the Pod to spin up then connect to your Pod through the Web Terminal:
1. Select **Connect**.
2. Choose **Start Web Terminal** and then **Connect to Web Terminal**.
3. Enter your username and password.
Now you can clone the example GitHub repository
## Clone the example GitHub repository
Clone the example code repository that demonstrates building Docker images with Bazel:
```bash theme={"theme":{"light":"github-light","dark":"github-dark"}}
git clone https://github.com/therealadityashankar/build-docker-in-runpod.git && cd build-docker-in-runpod
```
## Install dependencies
Install the required dependencies inside the Runpod container:
Update packages and install sudo:
```bash theme={"theme":{"light":"github-light","dark":"github-dark"}}
apt update && apt install -y sudo
```
Install Docker using the convenience script:
```bash theme={"theme":{"light":"github-light","dark":"github-dark"}}
curl -fsSL https://get.docker.com -o get-docker.sh && sudo sh get-docker.sh
```
Log in to Docker using an access token:
1. Go to [https://hub.docker.com/settings/security](https://hub.docker.com/settings/security) and click "New Access Token".
2. Enter a description like "Runpod Token" and select "Read/Write" permissions.
3. Click "Generate" and copy the token that appears.
4. In the terminal, run:
```bash theme={"theme":{"light":"github-light","dark":"github-dark"}}
docker login -u
```
When prompted, paste in the access token you copied instead of your password.
Install Bazel via the Bazelisk version manager:
```bash theme={"theme":{"light":"github-light","dark":"github-dark"}}
wget https://github.com/bazelbuild/bazelisk/releases/download/v1.20.0/bazelisk-linux-amd64
chmod +x bazelisk-linux-amd64
sudo cp ./bazelisk-linux-amd64 /usr/local/bin/bazel
```
## Configure the Bazel Build
First, install nano if it’s not already installed and open the `BUILD.bazel` file for editing:
```bash BUILD.bazel theme={"theme":{"light":"github-light","dark":"github-dark"}}
sudo apt install nano
nano BUILD.bazel
```
Replace the `{YOUR_USERNAME}` placeholder with your Docker Hub username in the `BUILD.bazel` file:
```bash BUILD.bazel theme={"theme":{"light":"github-light","dark":"github-dark"}}
[label BUILD.bazel]
oci_push(
name = "push_custom_image",
image = ":custom_image",
repository = "index.docker.io/{YOUR_USERNAME}/custom_image",
remote_tags = ["latest"]
)
```
## Build and Push the Docker Image
Run the bazel command to build the Docker image and push it to your Docker Hub account:
```bash theme={"theme":{"light":"github-light","dark":"github-dark"}}
bazel run //:push_custom_image
```
Once the command completes, go to [https://hub.docker.com/](https://hub.docker.com/) and log in. You should see a new repository called `custom_image` containing the Docker image you just built.
You can now reference this custom image in your own Runpod templates.
## Conclusion
In this tutorial, you learned how to use Bazel to build and push Docker images from inside Runpod containers. By following the steps outlined, you can now create and utilize custom Docker images for your Runpod templates. The techniques demonstrated can be further expanded to build more complex images, providing a flexible solution for your containerization needs on Runpod.
---
# Source: https://docs.runpod.io/hosting/burn-testing.md
> ## Documentation Index
> Fetch the complete documentation index at: https://docs.runpod.io/llms.txt
> Use this file to discover all available pages before exploring further.
## Burn testing
Machines should be thoroughly tested before they are listed on the Runpod platform. Here is a simple guide to running a burn test for a few days.
Stop the Runpod agent by running:
```bash theme={"theme":{"light":"github-light","dark":"github-dark"}}
sudo systemctl stop runpod
```
Then you can kick off a gpu-burn run by typing:
```bash theme={"theme":{"light":"github-light","dark":"github-dark"}}
docker run --gpus all --rm jorghi21/gpu-burn-test 172800
```
You should also verify that your memory, CPU, and disk are up to the task. You can use the [ngstress library](https://wiki.ubuntu.com/Kernel/Reference/stress-ngstress) to accomplish this.
When everything is verified okay, start the Runpod agent again by running
```bash theme={"theme":{"light":"github-light","dark":"github-dark"}}
sudo systemctl start runpod
```
Then, on your [machine dashboard](https://www.console.runpod.io/host/machines), self rent your machine to ensure it's working well with most popular templates.
---
# Source: https://docs.runpod.io/pods/choose-a-pod.md
> ## Documentation Index
> Fetch the complete documentation index at: https://docs.runpod.io/llms.txt
> Use this file to discover all available pages before exploring further.
# Choose a Pod
> Select the right Pod by evaluating your resource requirements.
Selecting the appropriate Pod configuration is a crucial step in maximizing performance and efficiency for your specific workloads. This guide will help you understand the key factors to consider when choosing a Pod that meets your requirements.
## Understanding your workload needs
Before selecting a Pod, take time to analyze your specific project requirements. Different applications have varying demands for computing resources:
* Machine learning models require sufficient VRAM and powerful GPUs.
* Data processing tasks benefit from higher CPU core counts and RAM.
* Rendering workloads need both strong GPU capabilities and adequate storage.
For machine learning models, check the model's documentation on platforms like Hugging Face or review the `config.json` file to understand its resource requirements.
## Resource assessment tools
There are several online tools that can help you estimate your resource requirements:
* [Hugging Face's Model Memory Usage Calculator](https://huggingface.co/spaces/hf-accelerate/model-memory-usage) provides memory estimates for transformer models.
* [Vokturz's Can it run LLM calculator](https://huggingface.co/spaces/Vokturz/can-it-run-llm) helps determine if your hardware can run specific language models.
* [Alexander Smirnov's VRAM Estimator](https://vram.asmirnov.xyz) offers GPU memory requirement approximations.
## Key factors to consider
### GPU selection
The GPU is the cornerstone of computational performance for many workloads. When selecting your GPU, consider the architecture that best suits your software requirements. NVIDIA GPUs with CUDA support are essential for most machine learning frameworks, while some applications might perform better on specific GPU generations. Evaluate both the raw computing power (CUDA cores, tensor cores) and the memory bandwidth to ensure optimal performance for your specific tasks.
For machine learning inference, a mid-range GPU might be sufficient, while training large models requires more powerful options. Check framework-specific recommendations, as PyTorch, TensorFlow, and other frameworks may perform differently across GPU types.
For a full list of available GPUs, see [GPU types](/references/gpu-types).
### VRAM requirements
VRAM (video RAM) is the dedicated memory on your GPU that stores data being processed. Insufficient VRAM can severely limit your ability to work with large models or datasets.
For machine learning models, VRAM requirements increase with model size, batch size, and input dimensions. When working with LLMs, a general guideline is to **allocate approximately 2GB of VRAM per billion parameters**. For example, running a 13-billion parameter model efficiently would require around 26GB of VRAM. Following this guideline helps ensure smooth model operation and prevents out-of-memory errors.
### Storage configuration
Your storage configuration affects both data access speeds and your ability to maintain persistent workspaces. Runpod offers both temporary and persistent [storage options](/pods/storage/types).
When determining your storage needs, account for raw data size, intermediate files generated during processing, and space for output results. For data-intensive workloads, prioritize both capacity and speed to avoid bottlenecks.
## Balancing performance and cost
When selecting a Pod, consider these strategies for balancing performance and cost:
1. Use right-sized resources for your workload. For development and testing, a smaller Pod configuration may be sufficient, while production workloads might require more powerful options.
2. Take advantage of spot instances for non-critical or fault-tolerant workloads to reduce costs. For consistent availability needs, on-demand or reserved Pods provide greater reliability.
3. For extended usage, explore Runpod's [savings plans](/pods/pricing#savings-plans) to optimize your spending while ensuring access to the resources you need.
## Secure Cloud vs Community Cloud
Secure Cloud operates in T3/T4 data centers with high reliability, redundancy, security, and fast response times to minimize downtime. It's designed for sensitive and enterprise workloads.
Community Cloud connects individual compute providers to users through a peer-to-peer GPU computing platform. Hosts are invite-only and vetted to maintain quality standards. Community Cloud offers competitive pricing with good server quality, though with less redundancy for power and networking compared to Secure Cloud.
## Next steps
Once you've determined your resource requirements, you can learn how to:
* [Deploy a Pod](/get-started).
* [Manage your Pods](/pods/manage-pods).
* [Connect to a Pod](/pods/connect-to-a-pod).
Remember that you can always deploy a new Pod if your requirements evolve. Start with a configuration that meets your immediate needs, then scale up or down based on actual usage patterns and performance metrics.
---
# Source: https://docs.runpod.io/serverless/development/cleanup.md
> ## Documentation Index
> Fetch the complete documentation index at: https://docs.runpod.io/llms.txt
> Use this file to discover all available pages before exploring further.
# Clean up temporary files
> Manage disk space by automatically removing temporary files.
The Runpod SDK's `clean()` function helps maintain the health of your Serverless worker by removing temporary files and folders after processing completes. This is particularly important for workers that download large assets or generate temporary artifacts, as accumulated data can lead to `DiskQuotaExceeded` errors over time.
## Import the `clean()` function
To use the `clean()` function, import it from the `utils.rp_cleanup` module:
```python
from runpod.serverless.utils.rp_cleanup import clean
```
## Default behavior
When called without arguments, `clean()` targets a specific set of default directories for removal:
* `input_objects/`
* `output_objects/`
* `job_files/`
* `output.zip`
These are standard locations used by various SDK operations, and cleaning them ensures a fresh state for the next request.
## Custom cleanup
If your handler generates files in non-standard directories, you can override the default behavior by passing a list of folder names to the `folder_list` parameter.
```python
clean(folder_list=["temp_images", "cache", "downloads"])
```
## Use `clean()` in your handler
You should integrate cleanup logic into your handler's lifecycle, typically within a `finally` block or right before returning the result.
```python
import runpod
from runpod.serverless.utils.rp_cleanup import clean
import requests
import os
def download_image(url, save_path):
response = requests.get(url)
if response.status_code == 200:
with open(save_path, "wb") as file:
file.write(response.content)
return True
return False
def handler(event):
try:
image_url = event["input"]["image_url"]
# Create a temporary directory
os.makedirs("temp_images", exist_ok=True)
image_path = "temp_images/downloaded_image.jpg"
# Download the image
if not download_image(image_url, image_path):
raise Exception("Failed to download image")
# Process the image (your code here)
result = f"Processed image from: {image_url}"
# Cleanup specific folders after processing
clean(folder_list=["temp_images"])
return {"output": result}
except Exception as e:
# Attempt cleanup even if an error occurs
clean(folder_list=["temp_images"])
return {"error": str(e)}
runpod.serverless.start({"handler": handler})
```
## Best practices
To ensure reliability, always call `clean()` at the end of your handler execution. We recommend wrapping your cleanup calls in a `try...except` or `finally` block so that disk space is recovered even if your main processing logic fails.
Be cautious when adding custom folders to the cleanup list to avoid accidentally deleting persistent data, and consider logging cleanup actions during development to verify that the correct paths are being targeted.
---
# Source: https://docs.runpod.io/pods/storage/cloud-sync.md
> ## Documentation Index
> Fetch the complete documentation index at: https://docs.runpod.io/llms.txt
> Use this file to discover all available pages before exploring further.
# Sync Pod data with cloud storage providers
> Learn how to sync your Pod data with popular cloud storage providers.
Runpod's Cloud Sync feature makes it easy to upload your Pod data to external cloud storage providers, or download data from cloud storage providers to your Pod. This guide walks you through setting up and using Cloud Sync with supported providers.
Cloud Sync supports syncing data with these cloud storage providers:
* Amazon S3
* Google Cloud Storage
* Microsoft Azure Blob Storage
* Dropbox
* Backblaze B2 Cloud Storage
## Security best practices
When using Cloud Sync, follow these security guidelines to protect your data and credentials:
* Keep all access keys, tokens, and credentials confidential.
* Use dedicated service accounts or application-specific credentials when possible.
* Grant only the minimum permissions required for data transfer.
* Regularly rotate your access credentials.
* Monitor your cloud storage logs for unauthorized access.
## Amazon S3
Amazon S3 provides scalable object storage that integrates seamlessly with Runpod through Cloud Sync.
Follow the steps below to sync your data with Amazon S3:
Navigate to the [Amazon S3 bucket creation form](https://s3.console.aws.amazon.com/s3/bucket/create?region=us-east-1) in your AWS console.
Provide a descriptive name for your bucket and select your preferred AWS Region (this affects data storage location and access speeds).
If you need your bucket to be publicly accessible, uncheck the **Block public access** option at the bottom of the form. For most use cases, keeping this checked provides better security.
Go to **Security credentials** in your AWS account settings. Create a new Access Key on the Security credentials page.
Your Secret Access Key will be displayed only once during creation, so make sure to save it securely.
In the Runpod console, navigate to the [Pods page](https://runpod.io/console/pods) and select the Pod containing your data. Click **Cloud Sync**, then select **AWS S3** from the available providers.
Enter your **AWS Access Key ID** and **Secret Access Key** in the provided fields. Specify the **AWS Region** where your bucket is located and provide the complete bucket path where you want to store your data.
Click **Copy to/from AWS S3** to initiate the transfer. The transfer progress will be displayed in the Runpod interface. Large datasets may take time depending on your Pod's network connection.
## Google Cloud Platform Storage
Cloud Sync is compatible with Google Cloud Storage, but **not Google Drive**. However, you can transfer files between your Pods and Drive [using the Runpod CLI](/pods/storage/transfer-files#transfer-files-between-google-drive-and-runpod).
Google Cloud Storage offers high-performance object storage with global availability and strong consistency.
Follow the steps below to sync your data with Google Cloud Storage:
Access the Google Cloud Storage dashboard and click **Buckets → Create** to start the bucket creation process.
Choose a globally unique name for your bucket. Leave most configuration options at their default settings unless you have specific requirements.
To allow public access to your bucket contents, uncheck **Enforce Public Access Prevention On This Bucket**. Keep this checked for better security unless public access is required.
Create a service account specifically for Runpod access. This provides better security than using your primary account credentials.
Follow [Google's guide on creating service account keys](https://cloud.google.com/iam/docs/keys-create-delete) to generate a JSON key file. This key contains all necessary authentication information.
In the Runpod console, navigate to the [Pods page](https://runpod.io/console/pods) and select the Pod containing your data. Click **Cloud Sync**, then select **Google Cloud Storage** from the available providers.
Paste the entire contents of your Service Account JSON key into the provided field. Specify the source/destination path within your bucket and select which folders from your Pod to transfer.
Click **Copy to/from Google Cloud Storage** to initiate the transfer. The transfer progress will be displayed in the Runpod interface. Large datasets may take time depending on your Pod's network connection.
## Microsoft Azure Blob Storage
Azure Blob Storage provides massively scalable object storage for unstructured data, with seamless integration into the Azure ecosystem.
Follow the steps below to sync your data with Microsoft Azure Blob Storage:
Start by creating a Resource Group to organize your Azure resources. Navigate to [Resource Groups](https://portal.azure.com/#view/HubsExtension/BrowseResourceGroups) in the Azure portal and click **Create**.
Next, set up a Storage Account under [Storage Accounts](https://portal.azure.com/#view/HubsExtension/BrowseResource/resourceType/Microsoft.Storage%2FStorageAccounts). Click **Create** and assign it to your newly created Resource Group.
Navigate to **Security + Networking → Access Keys** in your storage account to retrieve the authentication key.
Create a Blob Container by going to **Storage Browser → Blob Containers** and clicking **Add Container**. Consider creating folders within the container for better organization if you plan to sync data to/from multiple Pods.
In the Runpod console, navigate to the [Pods page](https://runpod.io/console/pods) and select the Pod containing your data. Click **Cloud Sync**, then select **Azure Blob Storage** from the available providers.
Enter your **Azure Account Name** and **Account Key** in the provided fields. Specify the source/destination path in your blob storage where you want to store your data.
Click **Copy to/from Azure Blob Storage** to initiate the transfer. The transfer progress will be displayed in the Runpod interface. Large datasets may take time depending on your Pod's network connection.
## Backblaze B2 Cloud Storage
Backblaze B2 offers affordable cloud storage with S3-compatible APIs and straightforward pricing.
Follow the steps below to sync your data with Backblaze B2 Cloud Storage:
Navigate to [B2 Cloud Storage Buckets](https://secure.backblaze.com/b2_buckets.htm) and click **Create a Bucket**.
Set the bucket visibility to **Public** to allow Runpod access. You can restrict access later using application keys if needed.
Visit [App Keys](https://secure.backblaze.com/app_keys.htm) to create a new application key. This key provides authenticated access to your bucket.
Save both the KeyID and applicationKey securely—the applicationKey cannot be retrieved after creation.
In the Runpod console, navigate to the [Pods page](https://runpod.io/console/pods) and select the Pod containing your data. Click **Cloud Sync**, then select **Backblaze B2** from the available providers.
Enter your **Backblaze B2 Account ID**, **Application Key**, and **bucket path** as shown in the Backblaze interface.
Click **Copy to/from Backblaze B2** to initiate the transfer. The transfer progress will be displayed in the Runpod interface.
## Dropbox
Dropbox integration allows you to sync your Pod data with your Dropbox account using OAuth authentication.
Follow the steps below to sync your data with Dropbox:
Go to the [Dropbox App Console](https://www.dropbox.com/developers/apps/create) to create a new app.
Select **Scoped Access** for API options and **Full Dropbox** for access type. Choose a descriptive name for your app.
In the Dropbox App Console, navigate to the **Permissions** tab. Enable all required checkboxes for read and write access to ensure Cloud Sync can transfer files properly.
Return to the **Settings** tab of your app. In the OAuth2 section, click **Generate** under Generated Access Token.
Save this token immediately—it won't be shown again after you leave the page. This token authenticates Runpod's access to your Dropbox.
In the Runpod console, navigate to the [Pods page](https://runpod.io/console/pods) and select the Pod containing your data. Click **Cloud Sync**, then select **Dropbox** from the available providers.
Paste your **Dropbox Access Token** and specify the remote path where you want to store the data. Creating a dedicated folder in Dropbox beforehand helps with organization.
Click **Copy to/from Dropbox** to initiate the transfer. The transfer progress will be displayed in the Runpod interface.
## Alternative transfer methods
While Cloud Sync provides the easiest way to sync data with cloud providers, you can also transfer files between your Pod and other destinations using:
* **runpodctl**: A built-in CLI tool for peer-to-peer transfers using one-time codes.
* **SSH-based tools**: Use SCP or rsync for direct transfers to your local machine.
* **Network volumes**: For persistent storage across multiple Pods.
For detailed instructions on these methods, see our [file transfer guide](/pods/storage/transfer-files).
## Troubleshooting
If you encounter issues during syncing:
* **Transfer fails immediately**: Verify your credentials are correct and have the necessary permissions.
* **Slow transfer speeds**: Large datasets take time to transfer. Consider compressing data before syncing or using incremental transfers.
* **Permission denied errors**: Ensure your bucket or container has the correct access policies. Some providers require specific permission configurations for external access.
* **Connection timeouts**: Check that your Pod has stable network connectivity. You may need to retry the transfer.
For additional support, consult your cloud provider's documentation or contact Runpod support.
---
# Source: https://docs.runpod.io/tutorials/serverless/comfyui.md
# Source: https://docs.runpod.io/tutorials/pods/comfyui.md
# Source: https://docs.runpod.io/tutorials/serverless/comfyui.md
# Source: https://docs.runpod.io/tutorials/pods/comfyui.md
> ## Documentation Index
> Fetch the complete documentation index at: https://docs.runpod.io/llms.txt
> Use this file to discover all available pages before exploring further.
# Generate images with ComfyUI
> Deploy ComfyUI on Runpod to create AI-generated images.
This tutorial walks you through how to configure ComfyUI on a [GPU Pod](/pods/overview) and use it to generate images with text-to-image models.
[ComfyUI](https://www.comfy.org/) is a node-based graphical interface for creating AI image generation workflows. Instead of writing code, you connect different components visually to build custom image generation pipelines. This approach provides flexibility to experiment with various models and techniques while maintaining an intuitive interface.
This tutorial uses the [SDXL-Turbo](https://huggingface.co/stabilityai/sdxl-turbo) model and a matching template, but you can adapt these instructions for any model/template combination you want to use.
When you're just getting started with ComfyUI, it's important to use a workflow that was created for the specific model you intend to use. You usually can't just switch the "Load Checkpoint" node from one model to another and expect optimal performance or results.
For example, if you load a workflow created for the Flux Dev model and try to use it with SDXL-Turbo, the workflow might run, but with poor speed or image quality.
## What you'll learn
In this tutorial, you'll learn how to:
* Deploy a Pod with ComfyUI pre-installed.
* Connect to the ComfyUI web interface.
* Browse pre-configured workflow templates.
* Install new models to your Pod.
* Generate an image.
## Requirements
Before you begin, you'll need:
* A [Runpod account](/get-started/manage-accounts).
* At least \$10 in Runpod credits.
* A basic understanding of AI image generation.
## Step 1: Deploy a ComfyUI Pod
First, you'll deploy a Pod using the official Runpod ComfyUI template, which pre-installs ComfyUI and the ComfyUI Manager plugin:
Runpod provides official ComfyUI templates built from the [comfyui-base](https://github.com/runpod-workers/comfyui-base) repository. Choose the one that matches your GPU:
* **Standard GPUs (RTX 4090, L40, A100, etc.):** Use the [ComfyUI](https://console.runpod.io/hub/template/comfyui?id=cw3nka7d08) template.
* **Blackwell GPUs (RTX 5090, B200):** Use the [ComfyUI Blackwell Edition](https://console.runpod.io/hub/template/comfyui-blackwell-edition-5090-b200?id=2lv7ev3wfp) template. Blackwell GPUs use a different architecture, so this dedicated template ensures compatibility.
Click **Deploy** on the template that matches your target GPU.
Configure your Pod with these settings:
* **GPU selection:** Choose an L40 or RTX 4090 for optimal performance with SDXL-Turbo. Lower VRAM GPUs may work for smaller models. If you selected the Blackwell Edition template, choose an RTX 5090 or B200.
* **Storage:** The default container and volume disk sizes set by the template should be sufficient for SDXL-Turbo. You can also add a [network volume](/storage/network-volumes) to your Pod if you want persistent storage.
* **Deployment type:** Select **On-Demand** for flexibility.
Click **Deploy On-Demand** to create your Pod.
The Pod can take up to 30 minutes to initialize the container and start the ComfyUI HTTP service.
## Step 2: Open the ComfyUI interface
Once your Pod has finished initializing, you can open the ComfyUI interface:
Go to the [Pods section](https://www.runpod.io/console/pods) in the Runpod console, then find your deployed ComfyUI Pod and expand it.
The Pod may take up to 30 minutes to initialize when first deployed. Future starts will generally take much less time.
Click **Connect** on your Pod, then select the last HTTP service button in the list, labeled **Connect to HTTP Service \[Port 8188]**.
This will open the ComfyUI interface in a new browser tab. The URL follows the format: `https://[POD_ID]-8188.proxy.runpod.net`.
If you see the label "Not Ready" on the HTTP service button, or you get a "Bad Gateway" error when first connecting, wait 2–3 minutes for the service to fully start, then refresh the page.
## Step 3: Load a workflow template
ComfyUI workflows consist of a series of nodes that are connected to each other to create a AI generation pipeline. Rather than creating our own workflow from scratch, we'll load a pre-configured workflow that was created for the specific model we intend to use:
When you first open the ComfyUI interface, the template browser should open automatically. If it doesn't, click the **Workflow** button in the top right corner of the ComfyUI interface, then select **Browse Templates**.
In the sidebar to the left of the browser, select the **Image** tab. Find the **SDXL-Turbo** template and click on it to load a basic image generation workflow.
## Step 4: Install the SDXL-Turbo model
As soon as you load the workflow, you'll see a popup labeled **Missing Models**. This happens because the Pod template we deployed doesn't come pre-installed with any models, so we'll need to install them now.
Rather than clicking the download button (which downloads the missing model to your local machine), use the ComfyUI Manager plugin to install the missing model directly onto the Pod:
Close the **Missing Models** popup by clicking the **X** in the top right corner. Then click **Manager** in the top right of the ComfyUI interface, and select **Model Manager** from the list of options.
In the search bar, enter `SDXL-Turbo 1.0 (fp16)`, then click **Install**.
Before you can use the model, you'll need to refresh the ComfyUI interface. You can do this by either refreshing the browser tab where it's running, or by pressing R.
Find the node labeled **Load Checkpoint** in the workflow. It should be the first node on the left side of the canvas.
Click on the dropdown menu labeled `ckpt_name` and select the SDXL-Turbo model checkpoint you just installed (named `SDXL-TURBO/sd_xl_turbo_1.0_fp16.safetensors`).
## Step 5: Generate an image
Your workflow is now ready! Follow these steps to generate an image:
Locate the text input node labeled **CLIP Text Encode (Prompt)** in the workflow.
Click on the text field containing the default prompt and replace it with your desired image description.
Example prompts:
* "A serene mountain landscape at sunset with a crystal clear lake."
* "A futuristic cityscape with neon lights and flying vehicles."
* "A detailed portrait of a robot reading a book in a library."
Click **Run** at the bottom of the workflow (or press Ctrl+Enter) to begin the image generation process.
Watch as the workflow progresses through each node:
* Text encoding.
* Model loading.
* Image generation steps.
* Final output processing.
The first generation may take a few minutes to complete as the model checkpoint must be loaded. Subsequent generations will be much faster.
The generated image appears in the output node when complete.
Right-click the image to save it to your local machine, view it at full resolution, or copy it to your clipboard.
Congratulations! You've just generated your first image with ComfyUI on Runpod.
## Troubleshooting
Here are some common issues you may encounter and possbile solutions:
* **Connection errors**: Wait for the Pod to fully initialize (up to 30 minutes for initial deployment).
* **HTTP service not ready**: Wait at least 2 to 3 minutes after Pod deployment for the HTTP service to fully start. You can also check the Pod logs in the Runpod console to look for deployment errors.
* **Out of memory errors**: Reduce image resolution or batch size in your workflow.
* **Slow generation**: Make sure you're using an appropriate GPU for your selected model. See [Choose a Pod](/pods/choose-a-pod) for guidance.
## Next steps
Once you're comfortable with basic image generation, explore the [ComfyUI documentation](https://docs.comfy.org/) to learn how to build more advanced workflows.
Here are some ideas for where to start:
### Experiment with different workflow templates
Use the template browser from [Step 3](#step-3%3A-load-a-workflow-template) to test out new models and find a workflow that suits your needs.
You can also browse the web for a preconfigured workflow and import it by clicking **Workflow** in the top right corner of the ComfyUI interface, selecting **Open**, then selecting the workflow file you want to import.
Don't forget to install any missing models using the model manager. If you need a model that isn't available in the model manager, you can download it from the web to your local machine, then use the [Runpod CLI](/runpodctl/overview) to transfer the model files directly into your Pod's `/workspace/madapps/ComfyUI/models` directory.
### Create custom workflows
Build your own workflows by:
1. Right-clicking the canvas to add new nodes.
2. Connecting node outputs to inputs by dragging between connection points.
3. Saving your custom workflow with Ctrl+S or by clicking **Workflow** and selecting **Save**.
### Manage your Pod
While working with ComfyUI, you can monitor your usage by checking GPU/disk utilization in the [Pods page](https://console.runpod.io/pods) of the Runpod console.
Stop your Pod when you're finished to avoid unnecessary charges.
It's also a good practice to download any custom workflows to your local machine before stopping the Pod. For persistent storage of models and outputs across sessions, consider using a [network volume](/storage/network-volumes).
---
# Source: https://docs.runpod.io/get-started/concepts.md
> ## Documentation Index
> Fetch the complete documentation index at: https://docs.runpod.io/llms.txt
> Use this file to discover all available pages before exploring further.
# Concepts
> Key concepts and terminology for understanding Runpod's platform and products.
## [Runpod console](https://console.runpod.io)
The web interface for managing your compute resources, account, teams, and billing.
## [Serverless](/serverless/overview)
A pay-as-you-go compute solution designed for dynamic autoscaling in production AI/ML apps.
## [Pod](/pods/overview)
A dedicated GPU or CPU instance for containerized AI/ML workloads, such as training models, running inference, or other compute-intensive tasks.
## [Public Endpoint](/hub/public-endpoints)
An AI model API hosted by Runpod that you can access directly without deploying your own infrastructure.
## [Instant Cluster](/instant-clusters)
A managed compute cluster with high-speed networking for multi-node distributed workloads like training large AI models.
## [Network volume](/storage/network-volumes)
Persistent storage that exists independently of your other compute resources and can be attached to multiple Pods or Serverless endpoints to share data between machines.
## [S3-compatible API](/storage/s3-api)
A storage interface compatible with Amazon S3 for uploading, downloading, and managing files in your network volumes.
## [Runpod Hub](/hub/overview)
A repository for discovering, deploying, and sharing preconfigured AI projects optimized for Runpod.
## Container
A Docker-based environment that packages your code, dependencies, and runtime into a portable unit that runs consistently across machines.
## Data center
Physical facilities where Runpod's GPU and CPU hardware is located. Your choice of data center can affect latency, available GPU types, and pricing.
## Machine
The physical server hardware within a data center that hosts your workloads. Each machine contains CPUs, GPUs, memory, and storage.
---
# Source: https://docs.runpod.io/serverless/workers/concurrent-handler.md
> ## Documentation Index
> Fetch the complete documentation index at: https://docs.runpod.io/llms.txt
> Use this file to discover all available pages before exploring further.
# Build a concurrent handler
> Build a concurrent handler function to process multiple requests simultaneously on a single worker.
## What you'll learn
In this guide you will learn how to:
* Create an asynchronous handler function.
* Create a concurrency modifier to dynamically adjust concurrency levels.
* Optimize worker resources based on request patterns.
* Test your concurrent handler locally.
## Requirements
* You've [created a Runpod account](/get-started/manage-accounts).
* You've installed the Runpod SDK (`pip install runpod`).
* You know how to build a [basic handler function](/serverless/workers/handler-functions).
## Step 1: Set up your environment
First, set up a virtual environment and install the necessary packages:
```sh
# Create a Python virtual environment
python3 -m venv venv
source venv/bin/activate # On Windows: venv\Scripts\activate
pip install runpod asyncio
```
## Step 2: Create a concurrent handler file
Create a file named `concurrent_handler.py` and add the following code:
```python
import runpod
import asyncio
import random
# Global variable to simulate a varying request rate
request_rate = 0
async def process_request(job):
# This function processes incoming requests concurrently.
#
# Args:
# job (dict): Contains the input data and request metadata
#
# Returns:
# str: The processed result
# Extract input data
job_input = job["input"]
delay = job_input.get("delay", 1)
# Simulate an asynchronous task (like a database query or API call)
await asyncio.sleep(delay)
return f"Processed: {job_input}"
# Placeholder code for a dynamic concurrency adjustment function
def adjust_concurrency(current_concurrency):
return 50
def update_request_rate():
"""Simulates changes in the request rate to mimic real-world scenarios."""
global request_rate
request_rate = random.randint(20, 100)
# Start the Serverless function when the script is run
if __name__ == "__main__":
runpod.serverless.start({
"handler": process_request,
"concurrency_modifier": adjust_concurrency
})
```
The `process_request` function uses the `async` keyword, enabling it to use non-blocking I/O operations with `await`. This allows the function to pause during I/O operations (simulated with `asyncio.sleep()`) and handle other requests while waiting.
The `update_request_rate` function simulates monitoring request patterns for adaptive scaling. This example uses a simple random number generator to simulate changing request patterns. In a production environment, you would:
* Track actual request counts and response times.
* Monitor system resource usage, such as CPU and memory.
* Adjust concurrency based on real performance metrics.
## Step 3: Implement dynamic concurrency adjustment
Let's enhance our handler with dynamic concurrency adjustment. This will allow your worker to handle more requests during high traffic periods and conserve resources during low traffic periods.
Replace the placeholder `adjust_concurrency` function with this improved version:
```python
def adjust_concurrency(current_concurrency):
# Dynamically adjust the worker's concurrency level based on request load.
#
# Args:
# current_concurrency (int): The current concurrency level
#
# Returns:
# int: The new concurrency level
global request_rate
# In production, this would use real metrics
update_request_rate()
max_concurrency = 10 # Maximum allowable concurrency
min_concurrency = 1 # Minimum concurrency to maintain
high_request_rate_threshold = 50 # Threshold for high request volume
# Increase concurrency if under max limit and request rate is high
if (request_rate > high_request_rate_threshold and
current_concurrency < max_concurrency):
return current_concurrency + 1
# Decrease concurrency if above min limit and request rate is low
elif (request_rate <= high_request_rate_threshold and
current_concurrency > min_concurrency):
return current_concurrency - 1
return current_concurrency
```
Let's break down how this function works:
1. **Control parameters**:
* `max_concurrency = 10`: Sets an upper limit on concurrency to prevent resource exhaustion.
* `min_concurrency = 1`: Ensures at least one request can be processed at a time.
* `high_request_rate_threshold = 50`: Defines when to consider traffic "high".
You can adjust these parameters based on your specific workload.
2. **Scaling up logic**:
```python
if (request_rate > high_request_rate_threshold and
current_concurrency < max_concurrency):
return current_concurrency + 1
```
This increases concurrency by 1 when:
* The request rate exceeds our threshold (50 requests).
* We haven't reached our maximum concurrency limit.
3. **Scaling down logic**:
```python
elif (request_rate <= high_request_rate_threshold and
current_concurrency > min_concurrency):
return current_concurrency - 1
```
This decreases concurrency by 1 when:
* The request rate is at or below our threshold.
* We're above our minimum concurrency level.
4. **Default behavior**:
```python
return current_concurrency
```
If neither condition is met, maintain the current concurrency level.
With these enhancements, your concurrent handler will now dynamically adjust its concurrency level based on the observed request rate, optimizing resource usage and responsiveness.
## Step 4: Create a test input file
Now we're ready to test our handler. Create a file named `test_input.json` to test your handler locally:
```json
{
"input": {
"message": "Test concurrent processing",
"delay": 0.5
}
}
```
## Step 5: Test your handler locally
Run your handler to verify that it works correctly:
```sh
python concurrent_handler.py
```
You should see output similar to this:
```sh
--- Starting Serverless Worker | Version 1.7.9 ---
INFO | Using test_input.json as job input.
DEBUG | Retrieved local job: {'input': {'message': 'Test concurrent processing', 'delay': 0.5}, 'id': 'local_test'}
INFO | local_test | Started.
DEBUG | local_test | Handler output: Processed: {'message': 'Test concurrent processing', 'delay': 0.5}
DEBUG | local_test | run_job return: {'output': "Processed: {'message': 'Test concurrent processing', 'delay': 0.5}"}
INFO | Job local_test completed successfully.
INFO | Job result: {'output': "Processed: {'message': 'Test concurrent processing', 'delay': 0.5}"}
INFO | Local testing complete, exiting.
```
## (Optional) Step 6: Implement real metrics collection
In a production environment, you should to replace the `update_request_rate` function with real metrics collection. Here is an example how you could build this functionality:
```python
def update_request_rate(request_history):
# Collects real metrics about request patterns.
#
# Args:
# request_history (list): A list of request timestamps
#
# Returns:
# int: The new request rate
global request_rate
# Option 1: Track request count over a time window
current_time = time.time()
# Count requests in the last minute
recent_requests = [r for r in request_history if r > current_time - 60]
request_rate = len(recent_requests)
# Option 2: Use an exponential moving average
# request_rate = 0.9 * request_rate + 0.1 * new_requests
# Option 3: Read from a shared metrics service like Redis
# request_rate = redis_client.get('recent_request_rate')
```
## Next steps
Now that you've created a concurrent handler, you're ready to:
* [Package and deploy your handler as a Serverless worker.](/serverless/workers/deploy)
* [Add error handling for more robust processing.](/serverless/workers/handler-functions#error-handling)
* [Implement streaming responses with generator functions.](/serverless/workers/handler-functions#generator-handlers)
* [Configure your endpoint for optimal performance.](/serverless/endpoints/endpoint-configurations)
---
# Source: https://docs.runpod.io/serverless/vllm/configuration.md
> ## Documentation Index
> Fetch the complete documentation index at: https://docs.runpod.io/llms.txt
> Use this file to discover all available pages before exploring further.
# Configure vLLM to work with your model
> Learn how to set up vLLM endpoints to work with your chosen model.
Most LLMs need specific configuration to run properly on vLLM. You need to understand what settings your model expects for loading, tokenization, and generation.
This guide covers how to configure your vLLM endpoints for different model families, how environment variables map to vLLM command-line flags, and recommended configurations for popular models, and how to select the right GPU for your model.
## Why is vLLM sometimes hard to configure?
vLLM supports hundreds of models, but default settings only work out of the box for a subset of them. Without the right settings, your vLLM workers may fail to load, produce incorrect outputs, or miss key features.
Different model architectures have different requirements for tokenization, attention mechanisms, and features like tool calling or reasoning. For example, Mistral models use a specialized tokenizer mode and config format, while reasoning models like DeepSeek-R1 require you to specify a reasoning parser.
When deploying a model, check its Hugging Face README and the [vLLM documentation](https://docs.vllm.ai/en/latest/usage/) for required or recommended settings.
## Mapping environment variables to vLLM CLI flags
When running vLLM with `vllm serve`, the engine is configured using [command-line flags](https://docs.vllm.ai/en/latest/configuration/engine_args/). On Runpod, you set these options with [environment variables](/serverless/vllm/environment-variables) instead.
Each vLLM command-line argument has a corresponding environment variable. Convert the flag name to uppercase with underscores: `--tokenizer_mode` becomes `TOKENIZER_MODE`, `--enable-auto-tool-choice` becomes `ENABLE_AUTO_TOOL_CHOICE`, and so on.
### Example: Deploying Mistral
To launch a Mistral model using the vLLM CLI, you would run a command similar to this:
```bash
vllm serve mistralai/Ministral-8B-Instruct-2410 \
--tokenizer_mode mistral \
--config_format mistral \
--load_format mistral \
--enable-auto-tool-choice \
--tool-call-parser mistral
```
On Runpod, set these options as environment variables when configuring your endpoint:
| Environment variable | Value |
| ------------------------- | -------------------------------------- |
| `MODEL_NAME` | `mistralai/Ministral-8B-Instruct-2410` |
| `TOKENIZER_MODE` | `mistral` |
| `CONFIG_FORMAT` | `mistral` |
| `LOAD_FORMAT` | `mistral` |
| `ENABLE_AUTO_TOOL_CHOICE` | `true` |
| `TOOL_CALL_PARSER` | `mistral` |
This pattern applies to any vLLM command-line flag. Find the corresponding environment variable name and add it to your endpoint configuration.
## Model-specific configurations
The table below lists recommended environment variables for popular model families. These settings handle common requirements like tokenization modes, tool calling support, and reasoning capabilities.
Not all models in a family require all settings. Check your model's documentation for exact requirements.
| Model family | Example model | Key environment variables | Notes |
| ------------ | ----------------------------------------- | ----------------------------------------------------------------------------------------------------------------------------------- | ------------------------------------------------------------------------------------------------------------------------------------------------------------------------------------------------------------------------------------------------------------------ |
| Qwen3 | `Qwen/Qwen3-8B` | `ENABLE_AUTO_TOOL_CHOICE=true` `TOOL_CALL_PARSER=hermes` | Qwen models often ship in various quantization formats. If you are deploying an AWQ or GPTQ version, ensure `QUANTIZATION` is set correctly (e.g., `awq`). |
| OpenChat | `openchat/openchat-3.5-0106` | None required | OpenChat relies heavily on specific chat templates. If the default templates produce poor results, use `CUSTOM_CHAT_TEMPLATE` to inject the precise Jinja2 template required for the OpenChat correction format. |
| Gemma | `google/gemma-3-1b-it` | None required | Gemma models require an active Hugging Face token. Ensure your `HF_TOKEN` is set as a secret. Gemma also performs best when `DTYPE` is explicitly set to `bfloat16` to match its native training precision. |
| DeepSeek-R1 | `deepseek-ai/DeepSeek-R1-Distill-Qwen-7B` | `REASONING_PARSER=deepseek_r1` | Enables reasoning mode for chain-of-thought outputs. |
| Phi-4 | `microsoft/Phi-4-mini-instruct` | None required | Phi models are compact but have specific architectural quirks. Setting `ENFORCE_EAGER=true` can sometimes resolve initialization issues with Phi models on older CUDA versions, though it may slightly reduce performance compared to CUDA graphs. |
| Llama 3 | `meta-llama/Llama-3.2-3B-Instruct` | `TOOL_CALL_PARSER=llama3_json` `ENABLE_AUTO_TOOL_CHOICE=true` | Llama 3 models often require strict attention to context window limits. Use `MAX_MODEL_LEN` to prevent the KV cache from exceeding your GPU VRAM. If you are using a 24 GB GPU like a 4090, setting `MAX_MODEL_LEN` to `8192` or `16384` is a safe starting point. |
| Mistral | `mistralai/Ministral-8B-Instruct-2410` | `TOKENIZER_MODE=mistral`, `CONFIG_FORMAT=mistral`, `LOAD_FORMAT=mistral`, `TOOL_CALL_PARSER=mistral` `ENABLE_AUTO_TOOL_CHOICE=true` | Mistral models use specialized tokenizers to work properly. |
## Selecting GPU size based on the model
Selecting the right GPU for vLLM is a balance between **model size**, **quantization**, and your required **context length**. Because vLLM pre-allocates memory for its KV (Key-Value) cache to enable high-throughput serving, you generally need more VRAM than the bare minimum required just to load the model.
### VRAM estimation formula
A reliable rule of thumb for estimating the required VRAM for a model in vLLM is:
* **FP16/BF16 (unquantized):** 2 bytes per parameter.
* **INT8 quantized:** 1 byte per parameter.
* **INT4 (AWQ/GPTQ):** 0.5 bytes per parameter.
* **KV cache buffer:** vLLM typically reserves 10-30% of remaining VRAM for the KV cache to handle concurrent requests.
Use the table below as a starting point to select a hardware configuration for your model.
| Model size (parameters) | Recommended GPUs | VRAM |
| ----------------------- | ------------------- | --------- |
| **Small (\<10B)** | RTX 4090, A6000, L4 | 16–24 GB |
| **Medium (10B–30B)** | A6000, L40S | 32–48 GB |
| **Large (30B–70B)** | A100, H100, B200 | 80–180 GB |
***
### Context window vs. VRAM
The more context you need (e.g., 32k or 128k tokens), the more VRAM the KV cache consumes. If you encounter Out-of-Memory (OOM) errors, use the `MAX_MODEL_LEN` environment variable to cap the context. For example, a 7B model that OOMs at 32k context on a 24 GB card will often run perfectly at 16k.
### GPU memory utilization
By default, vLLM attempts to use 90% of the available VRAM (`GPU_MEMORY_UTILIZATION=0.90`).
* **If you OOM during initialization:** Lower this to `0.85`.
* **If you have extra headroom:** Increase it to `0.95` to allow for more concurrent requests.
### Quantization (AWQ/GPTQ)
If you are limited by a single GPU, use a quantized version of the model (e.g., `Meta-Llama-3-8B-Instruct-AWQ`). This reduces the weight memory by 50-75% compared to `FP16`, allowing you to fit larger models on cards like the RTX 4090 (24 GB) or A4000 (16 GB).
For production workloads where high availability is key, always select **multiple GPU types** in your [Serverless endpoint configuration](/serverless/endpoints/endpoint-configurations). This allows the system to fall back to a different hardware tier if your primary choice is out of stock in a specific data center.
## vLLM recipes
vLLM provides step-by-step recipes for common deployment scenarios, including deploying specific models, optimizing performance, and integrating with frameworks.
Find the recipes at [docs.vllm.ai/projects/recipes](https://docs.vllm.ai/projects/recipes/en/latest/index.html). They are community-maintained and updated regularly as vLLM evolves.
You can often find further information in the documentation for the specific model you are deploying. For example:
* [Mistral + vLLM deployment guide](https://docs.mistral.ai/deployment/self-deployment/vllm).
* [Qwen + vLLM deployment guide](https://qwen.readthedocs.io/en/latest/deployment/vllm.html#).
---
# Source: https://docs.runpod.io/sdks/graphql/configurations.md
> ## Documentation Index
> Fetch the complete documentation index at: https://docs.runpod.io/llms.txt
> Use this file to discover all available pages before exploring further.
# Configurations
For details on queries, mutations, fields, and inputs, see the [Runpod GraphQL Spec](https://graphql-spec.runpod.io/).
When configuring your environment, certain arguments are essential to ensure the correct setup and operation. Below is a detailed overview of each required argument:
### `containerDiskInGb`
* **Description**: Specifies the size of the disk allocated for the container in gigabytes. This space is used for the operating system, installed applications, and any data generated or used by the container.
* **Type**: Integer
* **Example**: `10` for a 10 GB disk size.
### `dockerArgs`
* **Description**: If specified, overrides the [container start command](https://docs.docker.com/engine/reference/builder/#cmd). If this argument is not provided, it will rely on the start command provided in the docker image.
* **Type**: String
* **Example**: `sleep infinity` to run the container in the background.
### `env`
* **Description**: A set of environment variables to be set within the container. These can configure application settings, external service credentials, or any other configuration data required by the software running in the container.
* **Type**: Dictionary or Object
* **Example**: `{"DATABASE_URL": "postgres://user:password@localhost/dbname"}`.
### `imageName`
* **Description**: The name of the Docker image to use for the container. This should include the repository name and tag, if applicable.
* **Type**: String
* **Example**: `"nginx:latest"` for the latest version of the Nginx image.
### `name`
* **Description**: The name assigned to the container instance. This name is used for identification and must be unique within the context it's being used.
* **Type**: String
* **Example**: `"my-app-container"`.
### `volumeInGb`
* **Description**: Defines the size of an additional persistent volume in gigabytes. This volume is used for storing data that needs to persist between container restarts or redeployments.
* **Type**: Integer
* **Example**: `5` for a 5GB persistent volume.
Ensure that these arguments are correctly specified in your configuration to avoid errors during deployment.
Optional arguments may also be available, providing additional customization and flexibility for your setup.
---
# Source: https://docs.runpod.io/pods/connect-to-a-pod.md
> ## Documentation Index
> Fetch the complete documentation index at: https://docs.runpod.io/llms.txt
> Use this file to discover all available pages before exploring further.
# Connection options
> Explore our Pod connection options, including the web terminal, SSH, JupyterLab, and VSCode/Cursor.
## Web terminal connection
The web terminal offers a convenient, browser-based method to quickly connect to your Pod and run commands. However, it's not recommended for long-running processes, such as training an LLM, as the connection might not be as stable or persistent as a direct [SSH connection](#ssh-terminal-connection).
The availability of the web terminal depends on the [Pod's template](/pods/templates/overview).
To connect using the web terminal:
1. Navigate to the [Pods page](https://console.runpod.io/pods) in the Runpod console.
2. Expand the desired Pod and select **Connect**.
3. If your web terminal is **Stopped**, click **Start**.
If clicking **Start** does nothing, try refreshing the page.
4. Click **Open Web Terminal** to open a new tab in your browser with a web terminal session.
## JupyterLab connection
JupyterLab provides an interactive, web-based environment for running code, managing files, and performing data analysis. Many Runpod templates, especially those geared towards machine learning and data science, come with JupyterLab pre-configured and accessible via HTTP.
To connect to JupyterLab (if it's available on your Pod):
1. Deploy your Pod, ensuring that the template is configured to run JupyterLab. Official Runpod templates like "Runpod Pytorch" are usually compatible.
2. Once the Pod is running, navigate to the [Pods page](https://console.runpod.io/pods) in the Runpod console.
3. Find the Pod you created and click the **Connect** button. If it's grayed out, your Pod hasn't finished starting up yet.
4. In the window that opens, under **HTTP Services**, look for a link to **Jupyter Lab** (or a similarly named service on the configured HTTP port, often 8888). Click this link to open the JupyterLab workspace in your browser.
If the JupyterLab tab displays a blank page for more than a minute or two, try restarting the Pod and opening it again.
5. Once in JupyterLab, you can create new notebooks (e.g., under **Notebook**, select **Python 3 (ipykernel)**), upload files, and run code interactively.
## SSH terminal connection
Connecting to a Pod via an SSH (Secure Shell) terminal provides a secure and reliable method for interacting with your instance. To establish an SSH connection, you'll need an SSH client installed on your local machine. The exact command will vary slightly depending on whether you're using the basic proxy connection or a direct connection to a public IP.
To learn more, see [Connect to a Pod with SSH](/pods/configuration/use-ssh).
## Connect to VSCode or Cursor
For a more integrated development experience, you can connect directly to your Pod instance through Visual Studio Code (VSCode) or Cursor. This allows you to work within your Pod's volume directory as if the files were stored on your local machine, leveraging VSCode's or Cursor's powerful editing and debugging features.
For a step-by-step guide, see [Connect to a Pod with VSCode or Cursor](/pods/configuration/connect-to-ide).
---
# Source: https://docs.runpod.io/pods/configuration/connect-to-ide.md
> ## Documentation Index
> Fetch the complete documentation index at: https://docs.runpod.io/llms.txt
> Use this file to discover all available pages before exploring further.
# Connect to a Pod with VSCode or Cursor
> Set up remote development on your Pod using VSCode or Cursor.
This guide explains how to connect directly to your Pod through VSCode or Cursor using the Remote-SSH extension, allowing you to work within your Pod's volume directories as if the files were stored on your local machine.
## Requirements
Before you begin, you'll need:
* A local development environment with VSCode or Cursor installed.
* [Download VSCode](https://code.visualstudio.com/download).
* [Download Cursor](https://cursor.sh/).
* Familiarity with basic command-line operations and SSH.
## Step 1: Install the Remote-SSH extension
To connect to a Pod, you'll need to install the Remote-SSH extension for your IDE:
1. Open VSCode or Cursor and navigate to the **Extensions** view (Ctrl+Shift+X or Cmd+Shift+X).
2. Search for and install the Remote-SSH extension:
* VSCode: **Remote - SSH** by **ms-vscode-remote**.
* Cursor: **Remote-SSH** by **Anysphere**.
## Step 2: Generate an SSH key
Before you can connect to a Pod, you'll need an SSH key that is paired with your Runpod account. If you don't have one, follow these steps:
1. Generate an SSH key using this command on your local terminal:
```sh
ssh-keygen -t ed25519 -f ~/.ssh/id_ed25519 -C "YOUR_EMAIL@DOMAIN.COM"
```
2. To retrieve your public SSH key, run this command:
```sh
cat ~/.ssh/id_ed25519.pub
```
This will output something similar to this:
```sh
ssh-ed25519 AAAAC4NzaC1lZDI1JTE5AAAAIGP+L8hnjIcBqUb8NRrDiC32FuJBvRA0m8jLShzgq6BQ YOUR_EMAIL@DOMAIN.COM
```
3. Copy and paste the output into the **SSH Public Keys** field in your [Runpod user account settings](https://www.runpod.io/console/user/settings).
To enable SSH access, your public key must be present in the `~/.ssh/authorized_keys` file on your Pod. If you upload your public key to the settings page before your Pod starts, the system will automatically inject it into that file at startup.
If your Pod is already running when you upload the key, the system will not perform this injection. To enable SSH access, you'll need to either terminate/redeploy the Pod, or open a [web terminal](/pods/connect-to-a-pod#web-terminal-connection) on the running Pod and run the following commands:
```sh
export PUBLIC_KEY=""
echo "$PUBLIC_KEY" >> ~/.ssh/authorized_keys
```
## Step 3: Deploy a Pod
Next, deploy the Pod you want to connect to. For detailed deployment instructions, see [Manage Pods -> Create a Pod](/pods/manage-pods#create-a-pod).
To connect with VSCode/Cursor, your Pod template must support SSH over exposed TCP. To determine whether your Pod template supports this, during deployment, after selecting a template, look for a checkbox under **Instance Pricing** labeled **SSH Terminal Access** and make sure it's checked.
All official Runpod Pytorch templates support SSH over exposed TCP.
## Step 4: Configure SSH for your IDE
Next, you'll configure SSH access to your Pod using the Remote-SSH extension. The instructions are different for VSCode and Cursor:
1. From the [Pods](https://www.runpod.io/console/pods) page, select the Pod you deployed.
2. Select **Connect**, then select the **SSH** tab.
3. Copy the second command, under **SSH over exposed TCP**. It will look similar to this:
```bash
ssh root@123.456.789.80 -p 12345 -i ~/.ssh/id_ed25519
```
If you only see one command under SSH, then SSH over exposed TCP is not supported by your selected Pod template. This means you won't be able to connect to your Pod directly through VSCode/Cursor, but you can still connect using [basic SSH](/pods/connect-to-a-pod#basic-ssh-connection) via the terminal.
4. In VSCode, open the **Command Palette** (Ctrl+Shift+P or Cmd+Shift+P) and choose **Remote-SSH: Connect to Host**, then select **Add New SSH Host**.
5. Enter the copied SSH command from step 3 (`ssh root@***.***.***.** -p ***** -i ~/.ssh/id_ed25519`) and press **Enter**. This will add a new entry to your SSH config file.
1. From the [Pods](https://www.runpod.io/console/pods) page, select the Pod you deployed.
2. Select **Connect**.
3. Under **Direct TCP Ports**, look for a line similar to:
```
TCP port -> 69.48.159.6:25634 -> :22
```
If you don't see a **Direct TCP Ports** section, then SSH over exposed TCP is not supported by your selected Pod template. This means you won't be able to connect to your Pod directly through VSCode/Cursor, but you can still connect using [basic SSH](/pods/configuration/use-ssh#basic-ssh-connection) via the terminal.
Here's what these values mean:
* `69.48.159.6` is the IP address of your Pod.
* `25634` is the port number for the Pod's SSH service.
Make a note of these values (they will likely be different for your Pod), as you'll need them for the following steps.
4. In Cursor, open the **Command Palette** (Ctrl+Shift+P or Cmd+Shift+P) and choose **Remote-SSH: Connect to Host**, then select **Add New SSH Host**. This opens the SSH config file in Cursor.
5. Add the following to the SSH config file:
```
Host POD_NAME
HostName POD_IP
User root
Port POD_PORT
IdentityFile ~/.ssh/id_ed25519
```
Replace:
* `POD_NAME` with a descriptive name for your Pod. This will be used to identify your Pod in the SSH config file, and does not need to match the name you gave your Pod in the Runpod console.
* `POD_IP` with the IP address of your Pod from step 3.
* `POD_PORT` with the port number of your Pod from step 3.
So, for the example Pod, the SSH config file will look like:
```
Host my-pod
HostName 69.48.159.6
User root
Port 25634
IdentityFile ~/.ssh/id_ed25519
```
If you are using a custom SSH key, replace `~/.ssh/id_ed25519` with the path to your SSH key.
6. Save and close the file.
## Step 5: Connect to your Pod
Now you can connect to your Pod with the Remote-SSH extension.
1. Open the Command Palette (Ctrl+Shift+P or Cmd+Shift+P).
2. Select **Remote-SSH: Connect to Host**.
3. Choose your Pod from the list (either by IP or custom name if you configured one).
4. VSCode/Cursor will open a new window and connect to your Pod.
5. When prompted, select the platform (Linux).
6. Once connected, click **Open Folder** and navigate to your workspace directory (typically `/workspace`).
You should now be connected to your Pod instance, where you can edit files in your volume directories as if they were local.
If you stop and then resume your Pod, the port numbers may change. If so, you'll need to go back to the previous step and update your SSH config file using the new port numbers before reconnecting.
## Working with your Pod
Once connected through Remote-SSH, you can:
* Edit files with full IntelliSense and language support.
* Run and debug applications with access to GPU resources.
* Use integrated terminal for command execution.
* Install extensions that run on the remote host.
* Forward ports to access services locally.
* Commit and push code using integrated Git support.
Here are some important directories to be aware of:
* `/workspace`: Default [persistent storage](/pods/storage/types) directory.
* `/tmp`: Temporary files (cleared when Pod stops).
* `/root`: Home directory for the root user.
## Troubleshooting
If you can't connect to your Pod:
1. Verify your Pod is running and fully initialized.
2. Check that your SSH key is properly configured in Runpod settings.
3. Ensure the Pod has SSH enabled in its template.
If the VSCode/Cursor server fails to install:
1. Check that your Pod has sufficient disk space.
2. Ensure your Pod has internet connectivity.
3. Try manually removing the `.vscode-server` or `.cursor-server` directory and reconnecting:
```sh
rm -rf ~/.vscode-server
```
---
# Source: https://docs.runpod.io/get-started/connect-to-runpod.md
> ## Documentation Index
> Fetch the complete documentation index at: https://docs.runpod.io/llms.txt
> Use this file to discover all available pages before exploring further.
# Choose a workflow
> Review the available methods for accessing and managing Runpod resources.
Runpod offers multiple ways to access and manage your compute resources. Choose the method that best fits your workflow:
## Runpod console
The Runpod console provides an intuitive web interface to manage Pods and endpoints, access Pod terminals, send endpoint requests, monitor resource usage, and view billing and usage history.
[Launch the Runpod console →](https://www.console.runpod.io)
## Connect directly to Pods
You can connect directly to your running Pods and execute code on them using a variety of methods, including a built-in web terminal, an SSH connection from your local machine, a JupyterLab instance, or a remote VSCode/Cursor development environment.
[Learn more about Pod connection options →](/pods/connect-to-a-pod)
## REST API
The Runpod REST API allows you to programmatically manage and control compute resources. Use the API to manage Pod lifecycles and Serverless endpoints, monitor resource utilization, and integrate Runpod into your applications.
[Explore the API reference →](/api-reference/docs/GET/openapi-json)
## SDKs
Runpod provides SDKs in Python, JavaScript, Go, and GraphQL to help you integrate Runpod services into your applications.
[Explore the SDKs →](/sdks/python/overview)
## Command-line interface (CLI)
The Runpod CLI allows you to manage Pods from your terminal, execute code on Pods, transfer data between Runpod and local systems, and programmatically manage Serverless endpoints.
Every Pod comes pre-installed with the `runpodctl` command and includes a Pod-scoped API key for seamless command-line management.
[Learn more about runpodctl →](/runpodctl/overview)
---
# Source: https://docs.runpod.io/api-reference/container-registry-auths/GET/containerregistryauth/containerRegistryAuthId.md
# Source: https://docs.runpod.io/api-reference/container-registry-auths/DELETE/containerregistryauth/containerRegistryAuthId.md
# Source: https://docs.runpod.io/api-reference/container-registry-auths/GET/containerregistryauth/containerRegistryAuthId.md
# Source: https://docs.runpod.io/api-reference/container-registry-auths/DELETE/containerregistryauth/containerRegistryAuthId.md
> ## Documentation Index
> Fetch the complete documentation index at: https://docs.runpod.io/llms.txt
> Use this file to discover all available pages before exploring further.
# Delete a container registry auth
> Delete a container registry auth.
## OpenAPI
````yaml DELETE /containerregistryauth/{containerRegistryAuthId}
openapi: 3.0.3
info:
title: Runpod API
description: Public Rest API for managing Runpod programmatically.
version: 0.1.0
contact:
name: help
url: https://contact.runpod.io/hc/requests/new
email: help@runpod.io
servers:
- url: https://rest.runpod.io/v1
security:
- ApiKey: []
tags:
- name: docs
description: This documentation page.
- name: pods
description: Manage Pods.
- name: endpoints
description: Manage Serverless endpoints.
- name: network volumes
description: Manage Runpod network volumes.
- name: templates
description: Manage Pod and Serverless templates.
- name: container registry auths
description: >-
Manage authentication for container registries such as dockerhub to use
private images.
- name: billing
description: Retrieve billing history for your Runpod account.
externalDocs:
description: Find out more about Runpod.
url: https://runpod.io
paths:
/containerregistryauth/{containerRegistryAuthId}:
delete:
tags:
- container registry auths
summary: Delete a container registry auth
description: Delete a container registry auth.
operationId: DeleteContainerRegistryAuth
parameters:
- name: containerRegistryAuthId
in: path
description: Container registry auth ID to delete.
required: true
schema:
type: string
responses:
'204':
description: Container registry auth successfully deleted.
'400':
description: Invalid container registry auth ID.
'401':
description: Unauthorized.
components:
securitySchemes:
ApiKey:
type: http
scheme: bearer
bearerFormat: Bearer
````
---
# Source: https://docs.runpod.io/api-reference/container-registry-auths/POST/containerregistryauth.md
# Source: https://docs.runpod.io/api-reference/container-registry-auths/GET/containerregistryauth.md
# Source: https://docs.runpod.io/api-reference/container-registry-auths/POST/containerregistryauth.md
# Source: https://docs.runpod.io/api-reference/container-registry-auths/GET/containerregistryauth.md
> ## Documentation Index
> Fetch the complete documentation index at: https://docs.runpod.io/llms.txt
> Use this file to discover all available pages before exploring further.
# List container registry auths
> Returns a list of container registry auths.
## OpenAPI
````yaml GET /containerregistryauth
openapi: 3.0.3
info:
title: Runpod API
description: Public Rest API for managing Runpod programmatically.
version: 0.1.0
contact:
name: help
url: https://contact.runpod.io/hc/requests/new
email: help@runpod.io
servers:
- url: https://rest.runpod.io/v1
security:
- ApiKey: []
tags:
- name: docs
description: This documentation page.
- name: pods
description: Manage Pods.
- name: endpoints
description: Manage Serverless endpoints.
- name: network volumes
description: Manage Runpod network volumes.
- name: templates
description: Manage Pod and Serverless templates.
- name: container registry auths
description: >-
Manage authentication for container registries such as dockerhub to use
private images.
- name: billing
description: Retrieve billing history for your Runpod account.
externalDocs:
description: Find out more about Runpod.
url: https://runpod.io
paths:
/containerregistryauth:
get:
tags:
- container registry auths
summary: List container registry auths
description: Returns a list of container registry auths.
operationId: ListContainerRegistryAuths
responses:
'200':
description: Successful operation.
content:
application/json:
schema:
$ref: '#/components/schemas/ContainerRegistryAuths'
'400':
description: Invalid ID supplied.
'404':
description: Container registry auth not found.
components:
schemas:
ContainerRegistryAuths:
type: array
items:
$ref: '#/components/schemas/ContainerRegistryAuth'
ContainerRegistryAuth:
type: object
properties:
id:
type: string
example: clzdaifot0001l90809257ynb
description: A unique string identifying a container registry authentication.
name:
type: string
example: my creds
description: >-
A user-defined name for a container registry authentication. The
name must be unique.
securitySchemes:
ApiKey:
type: http
scheme: bearer
bearerFormat: Bearer
````
---
# Source: https://docs.runpod.io/tutorials/introduction/containers.md
> ## Documentation Index
> Fetch the complete documentation index at: https://docs.runpod.io/llms.txt
> Use this file to discover all available pages before exploring further.
# Overview
> Learn about containers and how to use them with Runpod
## What are containers?
> A container is an isolated environment for your code. This means that a container has no knowledge of your operating system, or your files. It runs on the environment provided to you by Docker Desktop. Containers have everything that your code needs in order to run, down to a base operating system.
[From Docker's website](https://docs.docker.com/guides/walkthroughs/what-is-a-container/#:~:text=A%20container%20is%20an%20isolated,to%20a%20base%20operating%20system)
Developers package their applications, frameworks, and libraries into a Docker container. Then, those containers can run outside their development environment.
### Why use containers?
> Build, ship, and run anywhere.
Containers are self-contained and run anywhere Docker runs. This means you can run a container on-premises or in the cloud, as well as in hybrid environments. Containers include both the application and any dependencies, such as libraries and frameworks, configuration data, and certificates needed to run your application.
In cloud computing, you get the best cold start times with containers.
## What are images?
Docker images are fixed templates for creating containers. They ensure that applications operate consistently and reliably across different environments, which is vital for modern software development.
To create Docker images, you use a process known as "Docker build." This process uses a Dockerfile, a text document containing a sequence of commands, as instructions guiding Docker on how to build the image.
### Why use images?
Using Docker images helps in various stages of software development, including testing, development, and deployment. Images ensure a seamless workflow across diverse computing environments.
### Why not use images?
You must rebuild and push the container image, then edit your endpoint to use the new image each time you iterate on your code. Since development requires changing your code every time you need to troubleshoot a problem or add a feature, this workflow can be inconvenient.
### What is Docker Hub?
After their creation, Docker images are stored in a registry, such as Docker Hub. From these registries, you can download images and use them to generate containers, which make it easy to widely distribute and deploy applications.
Now that you've got an understanding of Docker, containers, images, and whether containerization is right for you, let's move on to installing Docker.
## Installing Docker
For this walkthrough, install Docker Desktop. Docker Desktop bundles a variety of tools including:
* Docker GUI
* Docker CLI
* Docker extensions
* Docker Compose
The majority of this walkthrough uses the Docker CLI, but feel free to use the GUI if you prefer.
For the best installation experience, see Docker's [official documentation](https://docs.docker.com/get-started/get-docker/).
### Running your first command
Now that you've installed Docker, open a terminal window and run the following command:
```bash
docker version
```
You should see something similar to the following output.
```bash
docker version
Client: Docker Engine - Community
Version: 24.0.7
API version: 1.43
Go version: go1.21.3
Git commit: afdd53b4e3
Built: Thu Oct 26 07:06:42 2023
OS/Arch: darwin/arm64
Context: desktop-linux
Server: Docker Desktop 4.26.1 (131620)
Engine:
Version: 24.0.7
API version: 1.43 (minimum version 1.12)
Go version: go1.20.10
Git commit: 311b9ff
Built: Thu Oct 26 09:08:15 2023
OS/Arch: linux/arm64
Experimental: false
containerd:
Version: 1.6.25
GitCommit: abcd
runc:
Version: 1.1.10
GitCommit: v1.1.10-0-g18a0cb0
docker-init:
Version: 0.19.0
```
If at any point you need help with a command, you can use the `--help` flag to see documentation on the command you're running.
```bash
docker --help
```
Let's run `busybox` from the command line to print out today's date.
```bash
docker run busybox sh -c 'echo "The time is: $(date)"'
# The time is: Thu Jan 11 06:35:39 UTC 2024
```
* `busybox` is a lightweight Docker image with the bare minimum Linux utilities installed, including `echo`
* The `echo` command prints the container's uptime.
You've successfully installed Docker and run your first commands.
---
# Source: https://docs.runpod.io/references/cpu-types.md
> ## Documentation Index
> Fetch the complete documentation index at: https://docs.runpod.io/llms.txt
> Use this file to discover all available pages before exploring further.
# Serverless CPU types
The following list contains all CPU types available on Runpod.
| Display Name | Cores | Threads Per Core |
| ----------------------------------------------- | ----- | ---------------- |
| 11th Gen Intel(R) Core(TM) i5-11400 @ 2.60GHz | 6 | 2 |
| 11th Gen Intel(R) Core(TM) i5-11400F @ 2.60GHz | 6 | 2 |
| 11th Gen Intel(R) Core(TM) i7-1165G7 @ 2.80GHz | 2 | 1 |
| 11th Gen Intel(R) Core(TM) i7-11700 @ 2.50GHz | 8 | 2 |
| 11th Gen Intel(R) Core(TM) i7-11700F @ 2.50GHz | 8 | 2 |
| 11th Gen Intel(R) Core(TM) i7-11700K @ 3.60GHz | 8 | 2 |
| 11th Gen Intel(R) Core(TM) i7-11700KF @ 3.60GHz | 8 | 2 |
| 11th Gen Intel(R) Core(TM) i9-11900K @ 3.50GHz | 8 | 2 |
| 11th Gen Intel(R) Core(TM) i9-11900KF @ 3.50GHz | 8 | 2 |
| 12th Gen Intel(R) Core(TM) i3-12100 | 4 | 2 |
| 12th Gen Intel(R) Core(TM) i7-12700F | 12 | 1 |
| 12th Gen Intel(R) Core(TM) i7-12700K | 12 | 1 |
| 13th Gen Intel(R) Core(TM) i3-13100F | 4 | 2 |
| 13th Gen Intel(R) Core(TM) i5-13600K | 14 | 1 |
| 13th Gen Intel(R) Core(TM) i7-13700K | 16 | 1 |
| 13th Gen Intel(R) Core(TM) i7-13700KF | 16 | 1 |
| 13th Gen Intel(R) Core(TM) i9-13900F | 24 | 1 |
| 13th Gen Intel(R) Core(TM) i9-13900K | 24 | 1 |
| 13th Gen Intel(R) Core(TM) i9-13900KF | 24 | 1 |
| AMD Eng Sample: 100-000000053-04\_32/20\_N | 48 | 1 |
| AMD Eng Sample: 100-000000897-03 | 32 | 2 |
| AMD EPYC 4564P 16-Core Processor | 16 | 2 |
| AMD EPYC 7251 8-Core Processor | 8 | 2 |
| AMD EPYC 7252 8-Core Processor | 8 | 2 |
| AMD EPYC 7272 12-Core Processor | 12 | 2 |
| AMD EPYC 7281 16-Core Processor | 16 | 2 |
| AMD EPYC 7282 16-Core Processor | 16 | 2 |
| AMD EPYC 7302 16-Core Processor | 16 | 2 |
| AMD EPYC 7302P 16-Core Processor | 16 | 2 |
| AMD EPYC 7313 16-Core Processor | 16 | 2 |
| AMD EPYC 7313P 16-Core Processor | 16 | 2 |
| AMD EPYC 7343 16-Core Processor | 16 | 2 |
| AMD EPYC 7351P 16-Core Processor | 16 | 2 |
| AMD EPYC 7352 24-Core Processor | 24 | 2 |
| AMD EPYC 7371 16-Core Processor | 16 | 2 |
| AMD EPYC 7402 24-Core Processor | 24 | 2 |
| AMD EPYC 7402P 24-Core Processor | 24 | 2 |
| AMD EPYC 7413 24-Core Processor | 24 | 2 |
| AMD EPYC 7443 24-Core Processor | 48 | 1 |
| AMD EPYC 7443P 24-Core Processor | 24 | 2 |
| AMD EPYC 7452 32-Core Processor | 32 | 2 |
| AMD EPYC 7453 28-Core Processor | 28 | 1 |
| AMD EPYC 74F3 24-Core Processor | 24 | 2 |
| AMD EPYC 7502 32-Core Processor | 32 | 1 |
| AMD EPYC 7502P 32-Core Processor | 32 | 1 |
| AMD EPYC 7513 32-Core Processor | 32 | 2 |
| AMD EPYC 7532 32-Core Processor | 32 | 2 |
| AMD EPYC 7542 32-Core Processor | 32 | 2 |
| AMD EPYC 7543 32-Core Processor | 28 | 1 |
| AMD EPYC 7543P 32-Core Processor | 32 | 2 |
| AMD EPYC 7551 32-Core Processor | 32 | 2 |
| AMD EPYC 7551P 32-Core Processor | 32 | 2 |
| AMD EPYC 7552 48-Core Processor | 48 | 2 |
| AMD EPYC 75F3 32-Core Processor | 32 | 2 |
| AMD EPYC 7601 32-Core Processor | 32 | 2 |
| AMD EPYC 7642 48-Core Processor | 48 | 2 |
| AMD EPYC 7643 48-Core Processor | 48 | 2 |
| AMD EPYC 7663 56-Core Processor | 56 | 2 |
| AMD EPYC 7702 64-Core Processor | 64 | 2 |
| AMD EPYC 7702P 64-Core Processor | 64 | 2 |
| AMD EPYC 7713 64-Core Processor | 64 | 1 |
| AMD EPYC 7713P 64-Core Processor | 64 | 2 |
| AMD EPYC 7742 64-Core Processor | 64 | 2 |
| AMD EPYC 7763 64-Core Processor | 64 | 2 |
| AMD EPYC 7773X 64-Core Processor | 64 | 2 |
| AMD EPYC 7B12 64-Core Processor | 64 | 2 |
| AMD EPYC 7B13 64-Core Processor | 64 | 1 |
| AMD EPYC 7C13 64-Core Processor | 64 | 2 |
| AMD EPYC 7F32 8-Core Processor | 8 | 2 |
| AMD EPYC 7F52 16-Core Processor | 16 | 2 |
| AMD EPYC 7F72 24-Core Processor | 24 | 2 |
| AMD EPYC 7H12 64-Core Processor | 64 | 2 |
| AMD EPYC 7J13 64-Core Processor | 64 | 2 |
| AMD EPYC 7K62 48-Core Processor | 48 | 2 |
| AMD EPYC 7R32 48-Core Processor | 48 | 2 |
| AMD EPYC 7T83 64-Core Processor | 127 | 1 |
| AMD EPYC 7V13 64-Core Processor | 24 | 1 |
| AMD EPYC 9124 16-Core Processor | 16 | 2 |
| AMD EPYC 9254 24-Core Processor | 24 | 2 |
| AMD EPYC 9274F 24-Core Processor | 24 | 2 |
| AMD EPYC 9334 32-Core Processor | 32 | 2 |
| AMD EPYC 9335 32-Core Processor | 32 | 2 |
| AMD EPYC 9354 32-Core Processor | 32 | 2 |
| AMD EPYC 9354P | 64 | 1 |
| AMD EPYC 9354P 32-Core Processor | 32 | 2 |
| AMD EPYC 9355 32-Core Processor | 32 | 2 |
| AMD EPYC 9355P 32-Core Processor | 32 | 2 |
| AMD EPYC 9374F 32-Core Processor | 32 | 1 |
| AMD EPYC 9454 48-Core Processor | 48 | 2 |
| AMD EPYC 9454P 48-Core Emb Processor | 48 | 2 |
| AMD EPYC 9455P 48-Core Processor | 48 | 2 |
| AMD EPYC 9474F 48-Core Processor | 48 | 2 |
| AMD EPYC 9534 64-Core Processor | 64 | 2 |
| AMD EPYC 9554 64-Core Emb Processor | 64 | 1 |
| AMD EPYC 9554 64-Core Processor | 126 | 1 |
| AMD EPYC 9555 64-Core Processor | 56 | 2 |
| AMD EPYC 9654 96-Core Emb Processor | 96 | 1 |
| AMD EPYC 9654 96-Core Processor | 96 | 2 |
| AMD EPYC 9754 128-Core Processor | 128 | 2 |
| AMD EPYC Processor | 1 | 1 |
| AMD EPYC Processor (with IBPB) | 16 | 1 |
| AMD EPYC-Rome Processor | 16 | 1 |
| AMD Ryzen 3 2200G with Radeon Vega Graphics | 4 | 1 |
| AMD Ryzen 3 3200G with Radeon Vega Graphics | 4 | 1 |
| AMD Ryzen 3 4100 4-Core Processor | 4 | 2 |
| AMD Ryzen 5 1600 Six-Core Processor | 6 | 2 |
| AMD Ryzen 5 2600 Six-Core Processor | 6 | 2 |
| AMD Ryzen 5 2600X Six-Core Processor | 6 | 2 |
| AMD Ryzen 5 3600 6-Core Processor | 6 | 2 |
| AMD Ryzen 5 3600X 6-Core Processor | 6 | 2 |
| AMD Ryzen 5 5500 | 6 | 2 |
| AMD Ryzen 5 5600G with Radeon Graphics | 6 | 2 |
| Ryzen 5 5600X | 6 | 2 |
| AMD Ryzen 5 7600 6-Core Processor | 6 | 2 |
| AMD Ryzen 5 8600G w/ Radeon 760M Graphics | 6 | 2 |
| AMD Ryzen 5 PRO 2600 Six-Core Processor | 6 | 2 |
| AMD Ryzen 7 1700 Eight-Core Processor | 8 | 2 |
| AMD Ryzen 7 1700X Eight-Core Processor | 8 | 2 |
| AMD Ryzen 7 5700G with Radeon Graphics | 8 | 2 |
| AMD Ryzen 7 5700X 8-Core Processor | 8 | 2 |
| AMD Ryzen 7 5800X 8-Core Processor | 8 | 2 |
| AMD Ryzen 7 7700 8-Core Processor | 8 | 2 |
| AMD Ryzen 7 PRO 3700 8-Core Processor | 8 | 2 |
| AMD Ryzen 9 3900X 12-Core Processor | 12 | 2 |
| Ryzen 9 5900X | 12 | 2 |
| AMD Ryzen 9 5950X 16-Core Processor | 16 | 2 |
| AMD Ryzen 9 7900 12-Core Processor | 12 | 2 |
| AMD Ryzen 9 7950X 16-Core Processor | 16 | 2 |
| AMD Ryzen 9 7950X3D 16-Core Processor | 16 | 2 |
| AMD Ryzen 9 9950X 16-Core Processor | 16 | 2 |
| AMD Ryzen Threadripper 1900X 8-Core Processor | 8 | 2 |
| AMD Ryzen Threadripper 1920X 12-Core Processor | 12 | 2 |
| AMD Ryzen Threadripper 1950X 16-Core Processor | 16 | 2 |
| AMD Ryzen Threadripper 2920X 12-Core Processor | 12 | 2 |
| AMD Ryzen Threadripper 2950X 16-Core Processor | 16 | 2 |
| AMD Ryzen Threadripper 2970WX 24-Core Processor | 24 | 1 |
| AMD Ryzen Threadripper 2990WX 32-Core Processor | 32 | 2 |
| AMD Ryzen Threadripper 3960X 24-Core Processor | 24 | 2 |
| AMD Ryzen Threadripper 7960X 24-Cores | 24 | 2 |
| Ryzen Threadripper PRO 3955WX | 16 | 2 |
| AMD Ryzen Threadripper PRO 3975WX 32-Cores | 32 | 2 |
| AMD Ryzen Threadripper PRO 3995WX 64-Cores | 64 | 2 |
| AMD Ryzen Threadripper PRO 5945WX 12-Cores | 12 | 2 |
| AMD Ryzen Threadripper PRO 5955WX 16-Cores | 16 | 2 |
| AMD Ryzen Threadripper PRO 5965WX 24-Cores | 24 | 2 |
| AMD Ryzen Threadripper PRO 5975WX 32-Cores | 32 | 2 |
| AMD Ryzen Threadripper PRO 5995WX 64-Cores | 18 | 1 |
| AMD Ryzen Threadripper PRO 7955WX 16-Cores | 16 | 2 |
| AMD Ryzen Threadripper PRO 7965WX 24-Cores | 24 | 2 |
| AMD Ryzen Threadripper PRO 7975WX 32-Cores | 32 | 2 |
| AMD Ryzen Threadripper PRO 7985WX 64-Cores | 112 | 1 |
| Common KVM processor | 28 | 1 |
| Genuine Intel(R) CPU @ 2.20GHz | 14 | 2 |
| Genuine Intel(R) CPU \$0000%@ | 24 | 2 |
| Intel Xeon E3-12xx v2 (Ivy Bridge) | 1 | 1 |
| Intel Xeon Processor (Icelake) | 40 | 2 |
| Intel(R) Celeron(R) CPU G3900 @ 2.80GHz | 2 | 1 |
| Intel(R) Celeron(R) G5905 CPU @ 3.50GHz | 2 | 1 |
| Intel(R) Core(TM) i3-10100F CPU @ 3.60GHz | 4 | 2 |
| Intel(R) Core(TM) i3-10105F CPU @ 3.70GHz | 4 | 2 |
| Intel(R) Core(TM) i3-6100 CPU @ 3.70GHz | 2 | 2 |
| Intel(R) Core(TM) i3-9100F CPU @ 3.60GHz | 4 | 1 |
| Intel(R) Core(TM) i5-10400 CPU @ 2.90GHz | 6 | 2 |
| Intel(R) Core(TM) i5-10400F CPU @ 2.90GHz | 6 | 2 |
| Intel(R) Core(TM) i5-10600 CPU @ 3.30GHz | 6 | 2 |
| Intel(R) Core(TM) i5-14500 | 14 | 2 |
| Intel(R) Core(TM) i5-14600K | 14 | 2 |
| Intel(R) Core(TM) i5-14600KF | 14 | 2 |
| Intel(R) Core(TM) i5-4570 CPU @ 3.20GHz | 4 | 1 |
| Intel(R) Core(TM) i5-6400 CPU @ 2.70GHz | 4 | 1 |
| Intel(R) Core(TM) i5-6500 CPU @ 3.20GHz | 4 | 1 |
| Intel(R) Core(TM) i5-7400 CPU @ 3.00GHz | 4 | 1 |
| Intel(R) Core(TM) i5-9400F CPU @ 2.90GHz | 6 | 1 |
| Intel(R) Core(TM) i7-10700F CPU @ 2.90GHz | 8 | 2 |
| Intel(R) Core(TM) i7-10700K CPU @ 3.80GHz | 8 | 2 |
| Intel(R) Core(TM) i7-3770 CPU @ 3.40GHz | 4 | 2 |
| Intel(R) Core(TM) i7-4790 CPU @ 3.60GHz | 4 | 2 |
| Intel(R) Core(TM) i7-6700 CPU @ 3.40GHz | 4 | 2 |
| Intel(R) Core(TM) i7-6700K CPU @ 4.00GHz | 4 | 2 |
| Intel(R) Core(TM) i7-6800K CPU @ 3.40GHz | 6 | 2 |
| Intel(R) Core(TM) i7-7700K CPU @ 4.20GHz | 4 | 2 |
| Intel(R) Core(TM) i7-8700 CPU @ 3.20GHz | 6 | 2 |
| Intel(R) Core(TM) i7-9700 CPU @ 3.00GHz | 8 | 1 |
| Intel(R) Core(TM) i9-10940X CPU @ 3.30GHz | 14 | 2 |
| Intel(R) Core(TM) i9-14900K | 24 | 1 |
| Intel(R) Core(TM) Ultra 5 245K | 1 | 1 |
| Intel(R) Pentium(R) CPU G3260 @ 3.30GHz | 2 | 1 |
| Intel(R) Pentium(R) CPU G4560 @ 3.50GHz | 2 | 2 |
| Intel(R) Xeon(R) 6747P | 48 | 2 |
| Intel(R) Xeon(R) 6767P | 64 | 2 |
| Intel(R) Xeon(R) 6960P | 72 | 2 |
| Intel(R) Xeon(R) Bronze 3204 CPU @ 1.90GHz | 6 | 1 |
| Intel(R) Xeon(R) CPU X5660 @ 2.80GHz | 6 | 2 |
| Intel(R) Xeon(R) CPU E3-1220 v3 @ 3.10GHz | 4 | 1 |
| Intel(R) Xeon(R) CPU E3-1225 V2 @ 3.20GHz | 4 | 1 |
| Intel(R) Xeon(R) CPU E5-1650 v4 @ 3.60GHz | 6 | 2 |
| Intel(R) Xeon(R) CPU E5-2603 v3 @ 1.60GHz | 6 | 1 |
| Intel(R) Xeon(R) CPU E5-2609 0 @ 2.40GHz | 4 | 1 |
| Intel(R) Xeon(R) CPU E5-2609 v3 @ 1.90GHz | 1 | 1 |
| Intel(R) Xeon(R) CPU E5-2620 v4 @ 2.10GHz | 8 | 2 |
| Intel(R) Xeon(R) CPU E5-2630 0 @ 2.30GHz | 6 | 2 |
| Intel(R) Xeon(R) CPU E5-2630 v2 @ 2.60GHz | 6 | 2 |
| Intel(R) Xeon(R) CPU E5-2630 v3 @ 2.40GHz | 8 | 2 |
| Intel(R) Xeon(R) CPU E5-2630 v4 @ 2.20GHz | 10 | 2 |
| Intel(R) Xeon(R) CPU E5-2637 v2 @ 3.50GHz | 4 | 2 |
| Intel(R) Xeon(R) CPU E5-2643 0 @ 3.30GHz | 4 | 1 |
| Intel(R) Xeon(R) CPU E5-2648L v3 @ 1.80GHz | 12 | 2 |
| Intel(R) Xeon(R) CPU E5-2650 v2 @ 2.60GHz | 16 | 1 |
| Intel(R) Xeon(R) CPU E5-2650 v3 @ 2.30GHz | 10 | 2 |
| Intel(R) Xeon(R) CPU E5-2650 v4 @ 2.20GHz | 12 | 2 |
| Intel(R) Xeon(R) CPU E5-2660 v2 @ 2.20GHz | 10 | 2 |
| Intel(R) Xeon(R) CPU E5-2667 v2 @ 3.30GHz | 1 | 1 |
| Intel(R) Xeon(R) CPU E5-2667 v3 @ 3.20GHz | 8 | 2 |
| Intel(R) Xeon(R) CPU E5-2667 v4 @ 3.20GHz | 1 | 1 |
| Intel(R) Xeon(R) CPU E5-2670 0 @ 2.60GHz | 8 | 2 |
| Intel(R) Xeon(R) CPU E5-2670 v2 @ 2.50GHz | 10 | 2 |
| Intel(R) Xeon(R) CPU E5-2673 v4 @ 2.30GHz | 20 | 2 |
| Intel(R) Xeon(R) CPU E5-2678 v3 @ 2.50GHz | 12 | 2 |
| Intel(R) Xeon(R) CPU E5-2680 v3 @ 2.50GHz | 12 | 2 |
| Intel(R) Xeon(R) CPU E5-2680 v4 @ 2.40GHz | 14 | 2 |
| Intel(R) Xeon(R) CPU E5-2683 v4 @ 2.10GHz | 16 | 2 |
| Intel(R) Xeon(R) CPU E5-2690 0 @ 2.90GHz | 8 | 2 |
| Intel(R) Xeon(R) CPU E5-2690 v4 @ 2.60GHz | 14 | 2 |
| Intel(R) Xeon(R) CPU E5-2695 v4 @ 2.10GHz | 18 | 2 |
| Intel(R) Xeon(R) CPU E5-2696 v3 @ 2.30GHz | 18 | 2 |
| Intel(R) Xeon(R) CPU E5-2696 v4 @ 2.20GHz | 22 | 2 |
| Intel(R) Xeon(R) CPU E5-2698 v3 @ 2.30GHz | 16 | 2 |
| Intel(R) Xeon(R) CPU E5-2698 v4 @ 2.20GHz | 20 | 2 |
| Intel(R) Xeon(R) CPU E5-2699 v3 @ 2.30GHz | 1 | 1 |
| Intel(R) Xeon(R) CPU E5-2699 v4 @ 2.20GHz | 22 | 2 |
| Intel(R) Xeon(R) CPU E5-4667 v3 @ 2.00GHz | 16 | 2 |
| Intel(R) Xeon(R) Gold 5118 CPU @ 2.30GHz | 12 | 2 |
| Intel(R) Xeon(R) Gold 5218R CPU @ 2.10GHz | 20 | 2 |
| Intel(R) Xeon(R) Gold 5220R CPU @ 2.20GHz | 32 | 1 |
| Intel(R) Xeon(R) Gold 5318N CPU @ 2.10GHz | 24 | 2 |
| Intel(R) Xeon(R) Gold 5320 CPU @ 2.20GHz | 26 | 2 |
| Intel(R) Xeon(R) Gold 5420+ | 28 | 2 |
| Intel(R) Xeon(R) Gold 6130 CPU @ 2.10GHz | 16 | 2 |
| Intel(R) Xeon(R) Gold 6133 CPU @ 2.50GHz | 40 | 1 |
| Intel(R) Xeon(R) Gold 6136 CPU @ 3.00GHz | 12 | 2 |
| Intel(R) Xeon(R) Gold 6138 CPU @ 2.00GHz | 20 | 2 |
| Intel(R) Xeon(R) Gold 6150 CPU @ 2.70GHz | 18 | 2 |
| Intel(R) Xeon(R) Gold 6226 CPU @ 2.70GHz | 12 | 2 |
| Intel(R) Xeon(R) Gold 6230R CPU @ 2.10GHz | 8 | 2 |
| Intel(R) Xeon(R) Gold 6238R CPU @ 2.20GHz | 28 | 2 |
| Intel(R) Xeon(R) Gold 6240R CPU @ 2.40GHz | 24 | 2 |
| Intel(R) Xeon(R) Gold 6248R CPU @ 3.00GHz | 16 | 1 |
| Intel(R) Xeon(R) Gold 6252 CPU @ 2.10GHz | 24 | 1 |
| Intel(R) Xeon(R) Gold 6266C CPU @ 3.00GHz | 22 | 2 |
| Intel(R) Xeon(R) Gold 6342 CPU @ 2.80GHz | 24 | 2 |
| Intel(R) Xeon(R) Gold 6348 CPU @ 2.60GHz | 28 | 2 |
| Intel(R) Xeon(R) Gold 6448Y | 32 | 2 |
| INTEL(R) XEON(R) GOLD 6548Y+ | 32 | 2 |
| Intel(R) Xeon(R) Platinum 8160 CPU @ 2.10GHz | 24 | 2 |
| Intel(R) Xeon(R) Platinum 8168 CPU @ 2.70GHz | 24 | 2 |
| Intel(R) Xeon(R) Platinum 8171M CPU @ 2.60GHz | 26 | 2 |
| Intel(R) Xeon(R) Platinum 8173M CPU @ 2.00GHz | 28 | 2 |
| Intel(R) Xeon(R) Platinum 8176M CPU @ 2.10GHz | 28 | 2 |
| Intel(R) Xeon(R) Platinum 8180 CPU @ 2.50GHz | 28 | 2 |
| Intel(R) Xeon(R) Platinum 8352V CPU @ 2.10GHz | 36 | 2 |
| Intel(R) Xeon(R) Platinum 8352Y CPU @ 2.20GHz | 32 | 2 |
| Intel(R) Xeon(R) Platinum 8452Y | 36 | 2 |
| Intel(R) Xeon(R) Platinum 8460Y+ | 40 | 2 |
| Intel(R) Xeon(R) Platinum 8462Y+ | 32 | 2 |
| Intel(R) Xeon(R) Platinum 8468 | 48 | 2 |
| Intel(R) Xeon(R) Platinum 8468V | 44 | 2 |
| Intel(R) Xeon(R) Platinum 8470 | 52 | 2 |
| Intel(R) Xeon(R) Platinum 8480+ | 56 | 2 |
| Intel(R) Xeon(R) Platinum 8480C | 56 | 2 |
| Intel(R) Xeon(R) Platinum 8480CL | 56 | 2 |
| INTEL(R) XEON(R) PLATINUM 8558 | 48 | 2 |
| INTEL(R) XEON(R) PLATINUM 8568Y+ | 48 | 2 |
| INTEL(R) XEON(R) PLATINUM 8570 | 56 | 2 |
| Intel(R) Xeon(R) Silver 4114 CPU @ 2.20GHz | 10 | 2 |
| Intel(R) Xeon(R) Silver 4210 CPU @ 2.20GHz | 10 | 2 |
| Intel(R) Xeon(R) Silver 4214 CPU @ 2.20GHz | 24 | 1 |
| Intel(R) Xeon(R) Silver 4310T CPU @ 2.30GHz | 10 | 2 |
| Intel(R) Xeon(R) Silver 4314 CPU @ 2.40GHz | 16 | 2 |
| Intel(R) Xeon(R) W-2223 CPU @ 3.60GHz | 4 | 2 |
| Intel(R) Xeon(R) w5-2455X | 12 | 2 |
| Intel(R) Xeon(R) w7-3465X | 28 | 2 |
| QEMU Virtual CPU version 2.5+ | 16 | 1 |
---
# Source: https://docs.runpod.io/pods/templates/create-custom-template.md
## Build a custom Pod template
> A step-by-step guide to extending Runpod's official templates.
You can find the complete code for this tutorial, including automated build options with GitHub Actions, in the [runpod-workers/pod-template](https://github.com/runpod-workers/pod-template) repository.
This tutorial shows how to build a custom Pod template from the ground up. You'll extend an official Runpod template, add your own dependencies, configure how your container starts, and pre-load machine learning models. This approach saves time during Pod initialization and ensures consistent environments across deployments.
By creating custom templates, you can package everything your project needs into a reusable Docker image. Once built, you can deploy your workload in seconds instead of reinstalling dependencies every time you start a new Pod. You can also share your template with members of your team and the wider Runpod community.
## What you'll learn
In this tutorial, you'll learn how to:
* Create a Dockerfile that extends a Runpod base image.
* Configure container startup options (JupyterLab/SSH, application + services, or application only).
* Add Python dependencies and system packages.
* Pre-load machine learning models from Hugging Face, local files, or custom sources.
* Build and test your image, then push it to Docker Hub.
* Create a custom Pod template in the Runpod console
* Deploy a Pod using your custom template.
## Requirements
Before you begin, you'll need:
* A [Runpod account](/get-started/manage-accounts).
* Docker installed on your local machine or a remote server.
* A Docker Hub account (or access to another container registry).
* Basic familiarity with Docker and Python.
## Step 1: Set up your project structure
First, create a directory for your custom template and the necessary files.
Create a new directory for your template project:
```bash theme={"theme":{"light":"github-light","dark":"github-dark"}}
mkdir my-custom-pod-template
cd my-custom-pod-template
```
Create the following files in your project directory:
```bash theme={"theme":{"light":"github-light","dark":"github-dark"}}
touch Dockerfile requirements.txt main.py
```
Your project structure should now look like this:
```
my-custom-pod-template/
├── Dockerfile
├── requirements.txt
└── main.py
```
## Step 2: Choose a base image and create your Dockerfile
Runpod offers base images with PyTorch, CUDA, and common dependencies pre-installed. You'll extend one of these images to build your custom template.
Runpod offers several base images. You can explore available base images on [Docker Hub](https://hub.docker.com/u/runpod).
For this tutorial, we'll use the PyTorch image, `runpod/pytorch:1.0.2-cu1281-torch280-ubuntu2404` which includes PyTorch 2.8.0, CUDA 12.8.1, and Ubuntu 24.04.
Open `Dockerfile` and add the following content:
```dockerfile Dockerfile theme={"theme":{"light":"github-light","dark":"github-dark"}}
# Use Runpod PyTorch base image
FROM runpod/pytorch:1.0.2-cu1281-torch280-ubuntu2404
# Set environment variables
# This ensures Python output is immediately visible in logs
ENV PYTHONUNBUFFERED=1
# Set the working directory
WORKDIR /app
# Install system dependencies if needed
RUN apt-get update --yes && \
DEBIAN_FRONTEND=noninteractive apt-get install --yes --no-install-recommends \
wget \
curl \
&& rm -rf /var/lib/apt/lists/*
# Copy requirements file
COPY requirements.txt /app/
# Install Python dependencies
RUN pip install --no-cache-dir --upgrade pip && \
pip install --no-cache-dir -r requirements.txt
# Copy application files
COPY . /app
```
This basic Dockerfile:
* Extends the Runpod PyTorch base image.
* Installs system packages (`wget`, `curl`).
* Installs Python dependencies from `requirements.txt`.
* Copies your application code to `/app`.
## Step 3: Add Python dependencies
Now define the Python packages your application needs.
Open `requirements.txt` and add your Python dependencies:
```txt requirements.txt theme={"theme":{"light":"github-light","dark":"github-dark"}}
# Python dependencies
# Add your packages here
numpy>=1.24.0
requests>=2.31.0
transformers>=4.40.0
```
These packages will be installed when you build your Docker image. Add any additional libraries your application requires.
## Step 4: Configure container startup behavior
Runpod base images come with built-in services like Jupyter and SSH. You can choose how your container starts: whether to keep all the base image services running, run your application alongside those services, or run only your application.
There are three ways to configure how your container starts:
### Option 1: Keep all base image services (no changes needed)
If you want the default behavior with Jupyter and SSH services, you don't need to modify the Dockerfile. The base image's `/start.sh` script handles everything automatically.
This is already configured in the Dockerfile from Step 2.
### Option 2: Automatically run the application after services start
If you want to run your application alongside Jupyter/SSH services, add these lines to the end of your Dockerfile:
```dockerfile Dockerfile theme={"theme":{"light":"github-light","dark":"github-dark"}}
# Run application after services start
COPY run.sh /app/run.sh
RUN chmod +x /app/run.sh
CMD ["/app/run.sh"]
```
Create a new file named `run.sh` in the same directory as your `Dockerfile`:
```bash theme={"theme":{"light":"github-light","dark":"github-dark"}}
touch run.sh
```
Then add the following content to it:
```bash run.sh theme={"theme":{"light":"github-light","dark":"github-dark"}}
#!/bin/bash
# Start base image services (Jupyter/SSH) in background
/start.sh &
# Wait for services to start
sleep 2
# Run your application
python /app/main.py
# Wait for background processes
wait
```
This script starts the base services in the background, then runs your application.
### Option 3: Configure application-only mode
For production deployments where you don't need Jupyter or SSH, add these lines to the end of your Dockerfile:
```dockerfile Dockerfile theme={"theme":{"light":"github-light","dark":"github-dark"}}
# Clear entrypoint and run application only
ENTRYPOINT []
CMD ["python", "/app/main.py"]
```
This overrides the base image entrypoint and runs only your Python application.
***
For this tutorial, we'll use option 1 (default behavior for the base image services) so we can test out the various connection options.
## Step 5: Pre-load a model into your template
Pre-loading models into your Docker image means that you won't need to re-download a model every time you start up a new Pod, enabling you to create easily reusable and shareable environments for ML inference.
There are two ways to pre-load models:
* **Option 1: Automatic download from Hugging Face (recommended)**: This is the simplest approach. During the Docker build, Python downloads and caches the model using the transformers library.
* **Option 2: Manual download with wget**: This gives you explicit control and works with custom or hosted models.
For this tutorial, we'll use Option 1 (automatic download from Hugging Face) for ease of setup and testing, but you can use Option 2 if you need more control.
### Option 1: Pre-load models from Hugging Face
Add these lines to your Dockerfile before the `COPY . /app` line:
```dockerfile Dockerfile theme={"theme":{"light":"github-light","dark":"github-dark"}}
# Set Hugging Face cache directory
ENV HF_HOME=/app/models
ENV HF_HUB_ENABLE_HF_TRANSFER=0
# Pre-download model during build
RUN python -c "from transformers import pipeline; pipeline('sentiment-analysis', model='distilbert-base-uncased-finetuned-sst-2-english')"
```
During the build, Python will download the model and cache it in `/app/models`. When you deploy Pods with this template, the model loads instantly from the cache.
### Option 2: Pre-load models with wget
For more control or to use models from custom sources, you can manually download model files during the build.
Add these lines to your Dockerfile before the `COPY . /app` line:
```dockerfile Dockerfile theme={"theme":{"light":"github-light","dark":"github-dark"}}
# Create model directory and download files
RUN mkdir -p /app/models/distilbert-model && \
cd /app/models/distilbert-model && \
wget -q https://huggingface.co/distilbert-base-uncased-finetuned-sst-2-english/resolve/main/config.json && \
wget -q https://huggingface.co/distilbert-base-uncased-finetuned-sst-2-english/resolve/main/model.safetensors && \
wget -q https://huggingface.co/distilbert-base-uncased-finetuned-sst-2-english/resolve/main/tokenizer_config.json && \
wget -q https://huggingface.co/distilbert-base-uncased-finetuned-sst-2-english/resolve/main/vocab.txt
```
***
For this tutorial, we'll use option 1 (automatic download from Hugging Face).
## Step 6: Create your application
Next we'll create the Python application that will run in your Pod. Open `main.py` and add your application code.
Here's an example app that loads a machine learning model and performs inference on sample texts. (You can also replace this with your own application logic.)
```python main.py theme={"theme":{"light":"github-light","dark":"github-dark"}}
"""
Example Pod template application with sentiment analysis.
"""
import sys
import torch
import time
import signal
from transformers import pipeline
def main():
print("Hello from your custom Runpod template!")
print(f"Python version: {sys.version.split()[0]}")
print(f"PyTorch version: {torch.__version__}")
print(f"CUDA available: {torch.cuda.is_available()}")
if torch.cuda.is_available():
print(f"CUDA version: {torch.version.cuda}")
print(f"GPU device: {torch.cuda.get_device_name(0)}")
# Initialize model
print("\nLoading sentiment analysis model...")
device = 0 if torch.cuda.is_available() else -1
# MODEL LOADING OPTIONS:
# OPTION 1: From Hugging Face Hub cache (default)
# Bakes the model into the container image using transformers pipeline
# Behavior: Loads model from the cache, requires local_files_only=True
classifier = pipeline(
"sentiment-analysis",
model="distilbert-base-uncased-finetuned-sst-2-english",
device=device,
model_kwargs={"local_files_only": True},
)
# OPTION 2: From a local directory
# Download the model files using wget, loads them from the local directory
# Behavior: Loads directly from /app/models/distilbert-model
# To use: Uncomment the pipeline object below, comment OPTION 1 above
# classifier = pipeline('sentiment-analysis',
# model='/app/models/distilbert-model',
# device=device)
print("Model loaded successfully!")
# Example inference
test_texts = [
"This is a wonderful experience!",
"I really don't like this at all.",
"The weather is nice today.",
]
print("\n--- Running sentiment analysis ---")
for text in test_texts:
result = classifier(text)
print(f"Text: {text}")
print(f"Result: {result[0]['label']} (confidence: {result[0]['score']:.4f})\n")
print("Container is running. Press Ctrl+C to stop.")
# Keep container running
def signal_handler(sig, frame):
print("\nShutting down...")
sys.exit(0)
signal.signal(signal.SIGINT, signal_handler)
signal.signal(signal.SIGTERM, signal_handler)
try:
while True:
time.sleep(60)
except KeyboardInterrupt:
signal_handler(None, None)
if __name__ == "__main__":
main()
```
If you're pre-loading a model with `wget` (option 2 from step 5), make sure to uncomment the `classifier = pipeline()` object in `main.py` and comment out the `classifier = pipeline()` object for option 1.
## Step 7: Build and test your Docker image
Now that your template is configured, you can build and test your Docker image locally to make sure it works correctly:
Run the Docker build command from your project directory:
```bash theme={"theme":{"light":"github-light","dark":"github-dark"}}
docker build --platform linux/amd64 -t my-custom-template:latest .
```
The `--platform linux/amd64` flag ensures compatibility with Runpod's infrastructure, and is required if you're building on a Mac or ARM system.
The build process will:
* Download the base image.
* Install system dependencies.
* Install Python packages.
* Download and cache models (if configured).
* Copy your application files.
This may take 5-15 minutes depending on your dependencies and model sizes.
Check that your image was created successfully:
```bash theme={"theme":{"light":"github-light","dark":"github-dark"}}
docker images | grep my-custom-template
```
You should see your image listed with the `latest` tag, similar to this:
```bash theme={"theme":{"light":"github-light","dark":"github-dark"}}
my-custom-template latest 54c3d1f97912 10 seconds ago 10.9GB
```
To test the container locally, run the following command:
```bash theme={"theme":{"light":"github-light","dark":"github-dark"}}
docker run --rm -it --platform linux/amd64 my-custom-template:latest /bin/bash
```
This starts the container and connects you to a shell inside it, exactly like the Runpod web terminal but running locally on your machine.
You can use this shell to test your application and verify that your dependencies are installed correctly. (Press `Ctrl+D` when you want to return to your local terminal.)
When you connect to the container shell, you'll be taken directly to the `/app` directory, which contains your application code (`main.py`) and `requirements.txt`. Your models can be found in `/app/models`.
Try running the sample application (or any custom code you added):
```bash theme={"theme":{"light":"github-light","dark":"github-dark"}}
python main.py
```
You should see output from the application in your terminal, including the model loading and inference results.
Press `Ctrl+C` to stop the application and `Ctrl+D` when you're ready to exit the container.
## Step 8: Push to Docker Hub
To use your template with Runpod, push to Docker Hub (or another container registry).
Tag your image with your Docker Hub username:
```bash theme={"theme":{"light":"github-light","dark":"github-dark"}}
docker tag my-custom-template:latest YOUR_DOCKER_USERNAME/my-custom-template:latest
```
Replace `YOUR_DOCKER_USERNAME` with your actual Docker Hub username.
Authenticate with Docker Hub:
```bash theme={"theme":{"light":"github-light","dark":"github-dark"}}
docker login
```
If you aren't already logged in to Docker Hub, you'll be prompted to enter your Docker Hub username and password.
Push your image to Docker Hub:
```bash theme={"theme":{"light":"github-light","dark":"github-dark"}}
docker push YOUR_DOCKER_USERNAME/my-custom-template:latest
```
This uploads your image to Docker Hub, making it accessible to Runpod. Large images may take several minutes to upload.
## Step 9: Create a Pod template in the Runpod console
Next, create a Pod template using your custom Docker image:
Navigate to the [Templates page](https://console.runpod.io/user/templates) in the Runpod console and click **New Template**.
Configure your template with these settings:
* **Name**: Give your template a descriptive name (e.g., "my-custom-template").
* **Container Image**: Enter the Docker Hub image name and tag: `YOUR_DOCKER_USERNAME/my-custom-template:latest`.
* **Container Disk**: Set to at least 15 GB.
* **HTTP Ports**: Expand the section, click **Add port**, then enter **JupyterLab** as the port label and **8888** as the port number.
* **TCP Ports**: Expand the section, click **Add port**, then enter **SSH** as the port label and **22** as the port number.
Leave all other settings on their defaults and click **Save Template**.
## Step 10: Deploy and test your template
Now you can deploy and test your template on a Pod:
Go to the [Pods page](https://console.runpod.io/pods) in the Runpod console and click **Deploy**.
Configure your Pod with these settings:
* **GPU**: The Distilbert model used in this tutorial is very small, so you can **select any available GPU**. If you're using a different model, you'll need to [select a GPU](/pods/choose-a-pod) that matches its requirements.
* **Pod Template**: Click **Change Template**. You should see your custom template ("my-custom-template") in the list. Click it to select it.
Leave all other settings on their defaults and click **Deploy On-Demand**.
Your Pod will start with all your pre-installed dependencies and models. The first deployment may take a few minutes as Runpod downloads your image.
Once your Pod is running, click on your Pod to open the connection options panel.
Try one or more connection options:
* **Web Terminal**: Click **Enable Web Terminal** and then **Open Web Terminal** to access it.
* **JupyterLab**: It may take a few minutes for JupyterLab to start. Once it's labeled as **Ready**, click the **JupyterLab** link to access it.
* **SSH**: Copy the SSH command and run it in your local terminal to access it. (See [Connect to a Pod with SSH](/pods/configuration/use-ssh) for details on how to use SSH.)
After you've connected, try running the sample application (or any custom code you added):
```bash theme={"theme":{"light":"github-light","dark":"github-dark"}}
python main.py
```
You should see output from the application in your terminal, including the model loading and inference results.
To avoid incurring unnecessary charges, make sure to stop and then terminate your Pod when you're finished. (See [Manage Pods](/pods/manage-pods) for detailed instructions.)
## Next steps
Congratulations! You've built a custom Pod template and deployed it to Runpod.
You can use this as a jumping off point to build your own custom templates with your own applications, dependencies, and models.
For example, you can try:
* Adding more dependencies and models to your template.
* Creating different template versions for different use cases.
* Automating builds using GitHub Actions or other CI/CD tools.
* Using [Runpod secrets](/pods/templates/secrets) to manage sensitive information.
For more information on working with templates, see the [Manage Pod templates](/pods/templates/manage-templates) guide.
For more advanced template management, you can use the [Runpod REST API](/api-reference/templates/POST/templates) to programmatically create and update templates.
---
# Source: https://docs.runpod.io/serverless/workers/create-dockerfile.md
# Create a Dockerfile
> Package your handler function for deployment.
A Dockerfile defines the build process for a Docker image containing your handler function and all its dependencies. This page explains how to organize your project files and create a Dockerfile for your Serverless worker.
## Project organization
Organize your project files in a clear directory structure:
```text
project_directory
├── Dockerfile # Instructions for building the Docker image
├── src
│ └── handler.py # Your handler function
└── builder
└── requirements.txt # Dependencies required by your handler
```
Your `requirements.txt` file should list all Python packages your handler needs:
```txt title="requirements.txt" theme={"theme":{"light":"github-light","dark":"github-dark"}}
# Example requirements.txt
runpod~=1.7.6
torch==2.0.1
pillow==9.5.0
transformers==4.30.2
```
## Basic Dockerfile structure
A basic Dockerfile for a Runpod Serverless worker follows this structure:
```dockerfile title="Dockerfile" theme={"theme":{"light":"github-light","dark":"github-dark"}}
FROM python:3.11.1-slim
WORKDIR /
# Copy and install requirements
COPY builder/requirements.txt .
RUN pip install --no-cache-dir -r requirements.txt
# Copy your handler code
COPY src/handler.py .
# Command to run when the container starts
CMD ["python", "-u", "/handler.py"]
```
This Dockerfile:
1. Starts with a Python base image.
2. Sets the working directory to the root.
3. Copies and installs Python dependencies.
4. Copies your handler code.
5. Specifies the command to run when the container starts.
## Choosing a base image
The base image you choose affects your image size, startup time, and available system dependencies. Common options include:
### Python slim images
Recommended for most use cases. These images are smaller and faster to download:
```dockerfile theme={"theme":{"light":"github-light","dark":"github-dark"}}
FROM python:3.11.1-slim
```
### Python full images
Include more system tools and libraries but are larger:
```dockerfile theme={"theme":{"light":"github-light","dark":"github-dark"}}
FROM python:3.11.1
```
### CUDA images
Required if you need CUDA libraries for GPU-accelerated workloads:
```dockerfile theme={"theme":{"light":"github-light","dark":"github-dark"}}
FROM nvidia/cuda:12.1.0-runtime-ubuntu22.04
# Install Python
RUN apt-get update && apt-get install -y python3.11 python3-pip
```
### Custom base images
You can build on top of specialized images for specific frameworks:
```dockerfile theme={"theme":{"light":"github-light","dark":"github-dark"}}
FROM pytorch/pytorch:2.0.1-cuda11.7-cudnn8-runtime
```
## Including models and files
If your model is available on Hugging Face, we strongly recommend enabling [cached models](/serverless/endpoints/model-caching) instead of baking/downloading the model into your Docker image. Cached models provide faster startup times, lower costs, and uses less storage.
### Baking models into the image
If you need to include model files or other assets in your image, use the `COPY` instruction:
```dockerfile title="Dockerfile" theme={"theme":{"light":"github-light","dark":"github-dark"}}
FROM python:3.11.1-slim
WORKDIR /
# Copy and install requirements
COPY builder/requirements.txt .
RUN pip install --no-cache-dir -r requirements.txt
# Copy your code and model files
COPY src/handler.py .
COPY models/ /models/
# Set environment variables if needed
ENV MODEL_PATH=/models/my_model.pt
# Command to run when the container starts
CMD ["python", "-u", "/handler.py"]
```
### Downloading models during build
You can download models during the Docker build process:
```dockerfile title="Dockerfile" theme={"theme":{"light":"github-light","dark":"github-dark"}}
# Download model files
RUN wget -q URL_TO_YOUR_MODEL -O /models/my_model.pt
# Or use a script to download from Hugging Face
RUN python -c "from transformers import AutoModel; AutoModel.from_pretrained('model-name')"
```
## Environment variables
Set environment variables to configure your application without hardcoding values:
```dockerfile title="Dockerfile" theme={"theme":{"light":"github-light","dark":"github-dark"}}
ENV MODEL_PATH=/models/my_model.pt
ENV LOG_LEVEL=INFO
ENV MAX_BATCH_SIZE=4
```
You can override these at runtime through the Runpod console when configuring your endpoint.
For details on how to access environment variables in your handler functions, see [Environment variables](/serverless/development/environment-variables).
## Optimizing image size
Smaller images download and start faster, reducing cold start times. Use these techniques to minimize image size:
### Use multi-stage builds
Multi-stage builds let you compile dependencies in one stage and copy only the necessary files to the final image:
```dockerfile title="Dockerfile" theme={"theme":{"light":"github-light","dark":"github-dark"}}
# Build stage
FROM python:3.11.1 AS builder
WORKDIR /build
COPY builder/requirements.txt .
RUN pip install --no-cache-dir --target=/build/packages -r requirements.txt
# Runtime stage
FROM python:3.11.1-slim
WORKDIR /
COPY --from=builder /build/packages /usr/local/lib/python3.11/site-packages
COPY src/handler.py .
CMD ["python", "-u", "/handler.py"]
```
### Clean up build artifacts
Remove unnecessary files after installation:
```dockerfile title="Dockerfile" theme={"theme":{"light":"github-light","dark":"github-dark"}}
RUN apt-get update && apt-get install -y build-essential \
&& pip install --no-cache-dir -r requirements.txt \
&& apt-get remove -y build-essential \
&& apt-get autoremove -y \
&& rm -rf /var/lib/apt/lists/*
```
### Use .dockerignore
Create a `.dockerignore` file to exclude unnecessary files from the build context:
```txt title=".dockerignore" theme={"theme":{"light":"github-light","dark":"github-dark"}}
.git
.gitignore
README.md
tests/
*.pyc
__pycache__/
.venv/
venv/
```
## Next steps
After creating your Dockerfile, you can:
* [Build and deploy your image from Docker Hub](/serverless/workers/deploy).
* [Deploy directly from GitHub](/serverless/workers/github-integration).
* [Test your handler locally](/serverless/development/local-testing) before building the image.
---
# Source: https://docs.runpod.io/tutorials/introduction/containers/create-dockerfiles.md
# Dockerfile
In the previous step, you ran a command that prints the container's uptime. Now you'll create a Dockerfile to customize the contents of your own Docker image.
## Create a Dockerfile
Create a new file called `Dockerfile` and add the following items.
```bash theme={"theme":{"light":"github-light","dark":"github-dark"}}
FROM busybox
COPY entrypoint.sh /
RUN chmod +x /entrypoint.sh
ENTRYPOINT ["/entrypoint.sh"]
```
This Dockerfile starts from the `busybox` image like we used before. It then adds a custom `entrypoint.sh` script, makes it executable, and configures it as the entrypoint.
## The entrypoint script
Now let's create `entrypoint.sh` with the following contents:
```bash theme={"theme":{"light":"github-light","dark":"github-dark"}}
#!/bin/sh
echo "The time is: $(date)"
```
While we named this script `entrypoint.sh` you will see a variety of naming conventions; such as:
- `start.sh`
- `CMD.sh`
- `entry_path.sh`
These files are normally placed in a folder called `script` but it is dependent on the maintainers of that repository.
This is a simple script that will print the current time when the container starts.
### Why an entrypoint script:
- It lets you customize what command gets run when a container starts from your image.
- For example, our script runs date to print the time.
- Without it, containers would exit immediately after starting.
- Entrypoints make images executable and easier to reuse.
## Build the image
With those files created, we can now build a Docker image using our Dockerfile:
```bash
docker image build -t my-time-image .
```
This will build the image named `my-time-image` from the Dockerfile in the current directory.
### Why build a custom image:
- Lets you package up custom dependencies and configurations.
- For example you can install extra software needed for your app.
- Makes deploying applications more reliable and portable.
- Instead of installing things manually on every server, just use your image.
- Custom images can be shared and reused easily across environments.
- Building images puts your application into a standardized unit that "runs anywhere".
- You can version images over time as you update configurations.
## Run the image
Finally, let's run a container from our new image:
```bash
docker run my-time-image
```
We should see the same output as before printing the current time!
Entrypoints and Dockerfiles let you define reusable, executable containers that run the software and commands you need. This makes deploying and sharing applications much easier without per-server configuration.
By putting commands like this into a Dockerfile, you can easily build reusable and shareable images.
---
# Source: https://docs.runpod.io/serverless/workers/deploy.md
# Deploy workers from Docker Hub
> Build, test, and deploy your worker image from Docker Hub.
After [creating a Dockerfile](/serverless/workers/create-dockerfile) for your worker, you can build the image, test it locally, and deploy it to a Serverless endpoint.
## Requirements
* A [Dockerfile](/serverless/workers/create-dockerfile) that packages your handler function.
* [Docker](https://docs.docker.com/get-started/get-docker/) installed on your development machine.
* A [Docker Hub](https://hub.docker.com/) account.
## Build the Docker image
From your terminal, navigate to your project directory and build the Docker image:
```sh theme={"theme":{"light":"github-light","dark":"github-dark"}}
docker build --platform linux/amd64 \
-t DOCKER_USERNAME/WORKER_NAME:VERSION .
```
Replace `DOCKER_USERNAME` with your Docker Hub username, `WORKER_NAME` with a descriptive name for your worker, and `VERSION` with an appropriate version tag.
The `--platform linux/amd64` flag is required to ensure compatibility with Runpod's infrastructure. This is especially important if you're building on an ARM-based system (like Apple Silicon Macs), as the default platform would be incompatible with Runpod's infrastructure.
## Test the image locally
Before pushing it to the registry, you should test your Docker image locally:
```sh theme={"theme":{"light":"github-light","dark":"github-dark"}}
docker run -it DOCKER_USERNAME/WORKER_NAME:VERSION
```
If your handler is properly configured with a [test input](/serverless/workers/handler-functions#local-testing), you should see it process the test input and provide output.
## Push the image to Docker Hub
Make your image available to Runpod by pushing it to Docker Hub:
```sh theme={"theme":{"light":"github-light","dark":"github-dark"}}
# Log in to Docker Hub
docker login
# Push the image
docker push DOCKER_USERNAME/WORKER_NAME:VERSION
```
Once your image is in the Docker container registry, you can [create a Serverless endpoint](/serverless/endpoints/overview#create-an-endpoint) through the Runpod console.
## Image versioning
For production workloads, use SHA tags for absolute reproducibility:
```sh theme={"theme":{"light":"github-light","dark":"github-dark"}}
# Get the SHA after pushing
docker inspect --format='{{index .RepoDigests 0}}' DOCKER_USERNAME/WORKER_NAME:VERSION
# Use the SHA when deploying
# DOCKER_USERNAME/WORKER_NAME:VERSION@sha256:4d3d4b3c5a5c2b3a5a5c3b2a5a4d2b3a2b3c5a3b2a5d2b3a3b4c3d3b5c3d4a3
```
Versioning best practices:
* Never rely on the `:latest` tag for production.
* Use semantic versioning AND SHA tags for clarity and reproducibility.
* Document the specific image SHA in your deployment documentation.
* Keep images as small as possible for faster startup times.
## Deploy an endpoint
If your files are hosted on GitHub, you can [deploy your worker directly from a GitHub repository](/serverless/workers/github-integration) through the Runpod console.
You can deploy your worker image directly from a Docker registry through the Runpod console:
1. Navigate to the [Serverless section](https://www.console.runpod.io/serverless) of the Runpod console.
2. Click **New Endpoint**.
3. Click **Import from Docker Registry**.
4. In the **Container Image** field, enter your Docker image URL (e.g., `docker.io/yourusername/worker-name:v1.0.0`), then click **Next**.
5. Configure your endpoint settings:
* Enter an **Endpoint Name**.
* Choose your **Endpoint Type**: select **Queue** for traditional queue-based processing or **Load Balancer** for direct HTTP access (see [Load balancing endpoints](/serverless/load-balancing/overview) for details).
* Under **GPU Configuration**, select the appropriate GPU types for your workload.
* Configure [other settings](/serverless/endpoints/endpoint-configurations) as needed (active/max workers, timeouts, environment variables).
6. Click **Deploy Endpoint** to deploy your worker.
## Troubleshoot deployment issues
If your worker fails to start or process requests:
1. Check the [logs](/serverless/development/logs) in the Runpod console for error messages.
2. Verify your handler function works correctly in [local testing](/serverless/development/local-testing).
3. Ensure all dependencies are properly installed in the [Docker image](/serverless/workers/create-dockerfile).
4. Check that your Docker image is compatible with the selected GPU type.
5. Verify your [input format](/serverless/endpoints/send-requests) matches what your handler expects.
---
# Source: https://docs.runpod.io/tutorials/introduction/containers/docker-commands.md
# Docker commands
Runpod enables bring-your-own-container (BYOC) development. If you choose this workflow, you will be using Docker commands to build, run, and manage your containers.
The following is a reference sheet to some of the most commonly used Docker commands.
## Login
Log in to a registry (like Docker Hub) from the CLI. This saves credentials locally.
```bash
docker login
docker login -u myusername
```
## Images
`docker push` - Uploads a container image to a registry like Docker Hub. `docker pull` - Downloads container images from a registry like Docker Hub. `docker images` - Lists container images that have been downloaded locally. `docker rmi` - Deletes/removes a Docker container image from the machine.
```bash theme={"theme":{"light":"github-light","dark":"github-dark"}}
docker push myuser/myimage:v1 # Push custom image
docker pull someimage # Pull shared image
docker images # List downloaded images
docker rmi # Remove/delete image
```
## Containers
`docker run` - Launches a new container from a Docker image. `docker ps` - Prints out a list of containers currently running. `docker logs` - Shows stdout/stderr logs for a specific container. `docker stop/rm` - Stops or totally removes a running container.
```bash theme={"theme":{"light":"github-light","dark":"github-dark"}}
docker run # Start new container from image
docker ps # List running containers
docker logs # Print logs from container
docker stop # Stop running container
docker rm # Remove/delete container
```
## Dockerfile
`docker build` - Builds a Docker image by reading build instructions from a Dockerfile.
```bash theme={"theme":{"light":"github-light","dark":"github-dark"}}
docker build # Build image from Dockerfile
docker build --platform=linux/amd64 # Build for specific architecture
```
For the purposes of using Docker with Runpod, you should ensure your build command uses the `--platform=linux/amd64` flag to build for the correct architecture.
## Volumes
When working with a Docker and Runpod, see how to [attach a network volume](/storage/network-volumes).
`docker volume create` - Creates a persisted and managed volume that can outlive containers. `docker run -v` - Mounts a volume into a specific container to allow persisting data past container lifecycle.
```bash theme={"theme":{"light":"github-light","dark":"github-dark"}}
docker volume create # Create volume
docker run -v :/data # Mount volume into container
```
## Network
`docker network create` - Creates a custom virtual network for containers to communicate over. `docker run --network=` - Connects a running container to a Docker user-defined network.
```bash theme={"theme":{"light":"github-light","dark":"github-dark"}}
docker network create # Create user-defined network
docker run --network= # Connect container
```
## Execute
`docker exec` - Execute a command in an already running container. Useful for debugging/inspecting containers:
```bash theme={"theme":{"light":"github-light","dark":"github-dark"}}
docker exec
docker exec mycontainer ls -l /etc # List files in container
```
---
# Source: https://docs.runpod.io/integrations/dstack.md
# Manage Pods with dstack on Runpod
[dstack](https://dstack.ai/) is an open-source tool that simplifies the orchestration of Pods for AI and ML workloads. By defining your application and resource requirements in YAML configuration files, it automates the provisioning and management of cloud resources on Runpod, allowing you to focus on your application logic rather than the infrastructure.
In this guide, we'll walk through setting up [dstack](https://dstack.ai/) with Runpod to deploy [vLLM](https://github.com/vllm-project/vllm). We'll serve the `meta-llama/Llama-3.1-8B-Instruct` model from Hugging Face using a Python environment.
## Prerequisites
* [A Runpod account with an API key](/get-started/api-keys)
* On your local machine:
* Python 3.8 or higher
* `pip` (or `pip3` on macOS)
* Basic utilities: `curl`
* These instructions are applicable for macOS, Linux, and Windows systems.
### Windows Users
* It's recommended to use [WSL (Windows Subsystem for Linux)](https://docs.microsoft.com/en-us/windows/wsl/install) or tools like [Git Bash](https://gitforwindows.org/) to follow along with the Unix-like commands used in this tutorial
* Alternatively, Windows users can use PowerShell or Command Prompt and adjust commands accordingly
## Installation
### Setting Up the dstack Server
1. **Prepare Your Workspace**
Open a terminal or command prompt and create a new directory for this tutorial:
```bash theme={"theme":{"light":"github-light","dark":"github-dark"}}
mkdir runpod-dstack-tutorial
cd runpod-dstack-tutorial
```
2. **Set Up a Python Virtual Environment**
```bash theme={"theme":{"light":"github-light","dark":"github-dark"}}
python3 -m venv .venv
source .venv/bin/activate
```
```bash theme={"theme":{"light":"github-light","dark":"github-dark"}}
python3 -m venv .venv
source .venv/bin/activate
```
**Command Prompt:**
```bash theme={"theme":{"light":"github-light","dark":"github-dark"}}
python -m venv .venv
.venv\Scripts\activate
```
**PowerShell:**
```bash theme={"theme":{"light":"github-light","dark":"github-dark"}}
python -m venv .venv
.venv\Scripts\Activate.ps1
```
3. **Install dstack**
Use `pip` to install dstack:
```bash theme={"theme":{"light":"github-light","dark":"github-dark"}}
pip3 install -U "dstack[all]"
```
**Note:** If `pip3` is not available, you may need to install it or use `pip`.
```bash theme={"theme":{"light":"github-light","dark":"github-dark"}}
pip install -U "dstack[all]"
```
```bash theme={"theme":{"light":"github-light","dark":"github-dark"}}
pip install -U "dstack[all]"
```
### Configuring dstack for Runpod
1. **Create the Global Configuration File**
The following `config.yml` file is a **global configuration** used by [dstack](https://dstack.ai/) for all deployments on your computer. It's essential to place it in the correct configuration directory.
* **Create the configuration directory:**
```bash theme={"theme":{"light":"github-light","dark":"github-dark"}}
mkdir -p ~/.dstack/server
```
```bash theme={"theme":{"light":"github-light","dark":"github-dark"}}
mkdir -p ~/.dstack/server
```
**Command Prompt or PowerShell:**
```bash theme={"theme":{"light":"github-light","dark":"github-dark"}}
mkdir %USERPROFILE%\.dstack\server
```
* **Navigate to the configuration directory:**
```bash theme={"theme":{"light":"github-light","dark":"github-dark"}}
cd ~/.dstack/server
```
```bash theme={"theme":{"light":"github-light","dark":"github-dark"}}
cd ~/.dstack/server
```
```bash theme={"theme":{"light":"github-light","dark":"github-dark"}}
cd %USERPROFILE%\.dstack\server
```
* **Create the `config.yml` File**
In the configuration directory, create a file named `config.yml` with the following content:
```yml theme={"theme":{"light":"github-light","dark":"github-dark"}}
projects:
- name: main
backends:
- type: runpod
creds:
type: api_key
api_key: YOUR_RUNPOD_API_KEY
```
Replace `YOUR_RUNPOD_API_KEY` with the API key you obtained from Runpod.
2. **Start the dstack Server**
From the configuration directory, start the dstack server:
```bash theme={"theme":{"light":"github-light","dark":"github-dark"}}
dstack server
```
You should see output indicating that the server is running:
```bash theme={"theme":{"light":"github-light","dark":"github-dark"}}
[INFO] Applying ~/.dstack/server/config.yml...
[INFO] The admin token is ADMIN-TOKEN
[INFO] The dstack server is running at http://127.0.0.1:3000
```
The `ADMIN-TOKEN` displayed is important for accessing the dstack web UI.
3. **Access the dstack Web UI**
* Open your web browser and navigate to `http://127.0.0.1:3000`.
* When prompted for an admin token, enter the `ADMIN-TOKEN` from the server output.
* The web UI allows you to monitor and manage your deployments.
## Deploying vLLM as a Task
### Step 1: Configure the Deployment Task
1. **Prepare for Deployment**
* Open a new terminal or command prompt window.
* Navigate to your tutorial directory:
```bash theme={"theme":{"light":"github-light","dark":"github-dark"}}
cd runpod-dstack-tutorial
```
* **Activate the Python Virtual Environment**
```bash theme={"theme":{"light":"github-light","dark":"github-dark"}}
source .venv/bin/activate
```
```bash theme={"theme":{"light":"github-light","dark":"github-dark"}}
source .venv/bin/activate
```
**Command Prompt:**
```bash theme={"theme":{"light":"github-light","dark":"github-dark"}}
.venv\Scripts\activate
```
**PowerShell:**
```bash theme={"theme":{"light":"github-light","dark":"github-dark"}}
.venv\Scripts\Activate.ps1
```
2. **Create a Directory for the Task**
Create and navigate to a new directory for the deployment task:
```bash theme={"theme":{"light":"github-light","dark":"github-dark"}}
mkdir task-vllm-llama
cd task-vllm-llama
```
3. **Create the dstack Configuration File**
* **Create the `.dstack.yml` File**
Create a file named `.dstack.yml` (or `dstack.yml` if your system doesn't allow filenames starting with a dot) with the following content:
```yml theme={"theme":{"light":"github-light","dark":"github-dark"}}
type: task
name: vllm-llama-3.1-8b-instruct
python: "3.10"
env:
- HUGGING_FACE_HUB_TOKEN=YOUR_HUGGING_FACE_HUB_TOKEN
- MODEL_NAME=meta-llama/Llama-3.1-8B-Instruct
- MAX_MODEL_LEN=8192
commands:
- pip install vllm
- vllm serve $MODEL_NAME --port 8000 --max-model-len $MAX_MODEL_LEN
ports:
- 8000
spot_policy: on-demand
resources:
gpu:
name: "RTX4090"
memory: "24GB"
cpu: 16..
```
Replace `YOUR_HUGGING_FACE_HUB_TOKEN` with your actual [Hugging Face access token](https://huggingface.co/settings/tokens) (read-access is enough) or define the token in your environment variables. Without this token, the model cannot be downloaded as it is gated.
### Step 2: Initialize and Deploy the Task
1. **Initialize dstack**
Run the following command **in the directory where your `.dstack.yml` file is located**:
```bash theme={"theme":{"light":"github-light","dark":"github-dark"}}
dstack init
```
2. **Apply the Configuration**
Deploy the task by applying the configuration:
```bash theme={"theme":{"light":"github-light","dark":"github-dark"}}
dstack apply
```
* You will see an output summarizing the deployment configuration and available instances.
* When prompted:
```bash theme={"theme":{"light":"github-light","dark":"github-dark"}}
Submit the run vllm-llama-3.1-8b-instruct? [y/n]:
```
Type `y` and press `Enter` to confirm.
* The `ports` configuration provides port forwarding from the deployed pod to `localhost`, allowing you to access the deployed vLLM via `localhost:8000`.
3. **Monitor the Deployment**
* After executing `dstack apply`, you'll see all the steps that dstack performs:
* Provisioning the pod on Runpod.
* Downloading the Docker image.
* Installing required packages.
* Downloading the model from Hugging Face.
* Starting the vLLM server.
* The logs of vLLM will be displayed in the terminal.
* To monitor the logs at any time, run:
```bash theme={"theme":{"light":"github-light","dark":"github-dark"}}
dstack logs vllm-llama-3.1-8b-instruct
```
* Wait until you see logs indicating that vLLM is serving the model, such as:
```bash
INFO: Started server process [1]
INFO: Waiting for application startup.
INFO: Application startup complete.
INFO: Uvicorn running on http://0.0.0.0:8000 (Press CTRL+C to quit)
```
### Step 3: Test the Model Server
1. **Access the Service**
Since the `ports` configuration forwards port `8000` from the deployed pod to `localhost`, you can access the vLLM server via `http://localhost:8000`.
2. **Test the Service Using `curl`**
Use the following `curl` command to test the deployed model:
```bash theme={"theme":{"light":"github-light","dark":"github-dark"}}
curl -X POST http://localhost:8000/v1/chat/completions \
-H "Content-Type: application/json" \
-d '{
"model": "meta-llama/Llama-3.1-8B-Instruct",
"messages": [
{"role": "system", "content": "You are Poddy, a helpful assistant."},
{"role": "user", "content": "What is your name?"}
],
"temperature": 0,
"max_tokens": 150
}'
```
**Command Prompt:**
```bash theme={"theme":{"light":"github-light","dark":"github-dark"}}
curl -X POST http://localhost:8000/v1/chat/completions -H "Content-Type: application/json" -d "{ \"model\": \"meta-llama/Llama-3.1-8B-Instruct\", \"messages\": [ {\"role\": \"system\", \"content\": \"You are Poddy, a helpful assistant.\"}, {\"role\": \"user\", \"content\": \"What is your name?\"} ], \"temperature\": 0, \"max_tokens\": 150 }"
```
**PowerShell:**
```bash theme={"theme":{"light":"github-light","dark":"github-dark"}}
curl.exe -Method Post http://localhost:8000/v1/chat/completions `
-Headers @{ "Content-Type" = "application/json" } `
-Body '{ "model": "meta-llama/Llama-3.1-8B-Instruct", "messages": [ {"role": "system", "content": "You are Poddy, a helpful assistant."}, {"role": "user", "content": "What is your name?"} ], "temperature": 0, "max_tokens": 150 }'
```
3. **Verify the Response**
You should receive a JSON response similar to the following:
```json theme={"theme":{"light":"github-light","dark":"github-dark"}}
{
"id": "chat-f0566a5143244d34a0c64c968f03f80c",
"object": "chat.completion",
"created": 1727902323,
"model": "meta-llama/Llama-3.1-8B-Instruct",
"choices": [
{
"index": 0,
"message": {
"role": "assistant",
"content": "My name is Poddy, and I'm here to assist you with any questions or information you may need.",
"tool_calls": []
},
"logprobs": null,
"finish_reason": "stop",
"stop_reason": null
}
],
"usage": {
"prompt_tokens": 49,
"total_tokens": 199,
"completion_tokens": 150
},
"prompt_logprobs": null
}
```
This confirms that the model is running and responding as expected.
### Step 4: Clean Up
To avoid incurring additional costs, it's important to stop the task when you're finished.
1. **Stop the Task**
In the terminal where you ran `dstack apply`, you can stop the task by pressing `Ctrl + C`.
You'll be prompted:
```bash
Stop the run vllm-llama-3.1-8b-instruct before detaching? [y/n]:
```
Type `y` and press `Enter` to confirm stopping the task.
2. **Terminate the Instance**
The instance will terminate automatically after stopping the task.
If you wish to ensure the instance is terminated immediately, you can run:
```bash theme={"theme":{"light":"github-light","dark":"github-dark"}}
dstack stop vllm-llama-3.1-8b-instruct
```
3. **Verify Termination**
Check your Runpod dashboard or the [dstack](https://dstack.ai/) web UI to ensure that the instance has been terminated.
## Additional Tips: Using Volumes for Persistent Storage
If you need to retain data between runs or cache models to reduce startup times, you can use volumes.
### Creating a Volume
Create a separate [dstack](https://dstack.ai/) file named `volume.dstack.yml` with the following content:
```yml theme={"theme":{"light":"github-light","dark":"github-dark"}}
type: volume
name: llama31-volume
backend: runpod
region: EUR-IS-1
# Required size
size: 100GB
```
The `region` ties your volume to a specific region, which then also ties your Pod to that same region.
Apply the volume configuration:
```sh theme={"theme":{"light":"github-light","dark":"github-dark"}}
dstack apply -f volume.dstack.yml
```
This will create the volume named `llama31-volume`.
### Using the Volume in Your Task
Modify your `.dstack.yml` file to include the volume:
```yml theme={"theme":{"light":"github-light","dark":"github-dark"}}
volumes:
- name: llama31-volume
path: /data
```
This configuration will mount the volume to the `/data` directory inside your container.
By doing this, you can store models and data persistently, which can be especially useful for large models that take time to download.
For more information on using volumes with Runpod, refer to the [dstack blog on volumes](https://dstack.ai/blog/volumes-on-runpod/).
***
## Conclusion
By leveraging [dstack](https://dstack.ai/) on Runpod, you can efficiently deploy and manage Pods, accelerating your development workflow and reducing operational overhead.
---
# Source: https://docs.runpod.io/serverless/development/dual-mode-worker.md
# Pod-first development
> Develop on a Pod before deploying your worker to Serverless for faster iteration.
Developing machine learning applications often requires powerful GPUs, making local development challenging. Instead of repeatedly deploying your worker to Serverless for testing, you can develop on a Pod first and then deploy the same Docker image to Serverless when ready.
This "Pod-first" workflow lets you develop and test interactively in a GPU environment, then seamlessly transition to Serverless for production. You'll use a Pod as your cloud-based development machine with tools like Jupyter Notebooks and SSH, catching issues early before deploying your worker to Serverless.
To get started quickly, you can [clone this repository](https://github.com/justinwlin/Runpod-GPU-And-Serverless-Base) for a pre-configured template for a dual-mode worker.
## What you'll learn
In this tutorial you'll learn how to:
* Set up a project for a dual-mode Serverless worker.
* Create a handler that adapts based on an environment variable.
* Write a startup script to manage different operational modes.
* Build a Docker image that works in both Pod and Serverless environments.
* Deploy and test your worker in both environments.
## Requirements
* You've [created a Runpod account](/get-started/manage-accounts).
* You've installed [Python 3.x](https://www.python.org/downloads/) and [Docker](https://docs.docker.com/get-started/get-docker/) and configured them for your command line.
* Basic understanding of Docker concepts and shell scripting.
## Step 1: Set up your project structure
Create a directory for your project and the necessary files:
```sh theme={"theme":{"light":"github-light","dark":"github-dark"}}
mkdir dual-mode-worker
cd dual-mode-worker
touch handler.py start.sh Dockerfile requirements.txt
```
This creates:
* `handler.py`: Your Python script with the Runpod handler logic.
* `start.sh`: A shell script that will be the entrypoint for your Docker container.
* `Dockerfile`: Instructions to build your Docker image.
* `requirements.txt`: A file to list Python dependencies.
## Step 2: Create the handler
This Python script will check for a `MODE_TO_RUN` environment variable to determine whether to run in Pod or Serverless mode.
Add the following code to `handler.py`:
```python handler.py theme={"theme":{"light":"github-light","dark":"github-dark"}}
import os
import asyncio
import runpod
# Use the MODEL environment variable; fallback to a default if not set
mode_to_run = os.getenv("MODE_TO_RUN", "pod")
model_length_default = 25000
print("------- ENVIRONMENT VARIABLES -------")
print("Mode running: ", mode_to_run)
print("------- -------------------- -------")
async def handler(event):
inputReq = event.get("input", {})
return inputReq
if mode_to_run == "pod":
async def main():
prompt = "Hello World"
requestObject = {"input": {"prompt": prompt}}
response = await handler(requestObject)
print(response)
asyncio.run(main())
else:
runpod.serverless.start({
"handler": handler,
"concurrency_modifier": lambda current: 1,
})
```
Key features:
* `MODE_TO_RUN = os.getenv("MODE_TO_RUN", "pod")`: Reads the mode from an environment variable, defaulting to `pod`.
* `async def handler(event)`: Your core logic.
* `if mode_to_run == "pod" ... else`: This conditional controls what happens when the script is executed directly.
* In `pod` mode, it runs a sample test call to your `handler` function, allowing for quick iteration.
* In `serverless`" mode, it starts the Runpod Serverless worker.
## Step 3: Create the `start.sh` script
The `start.sh` script serves as the entrypoint for your Docker container and manages different operational modes. It reads the `MODE_TO_RUN` environment variable and configures the container accordingly.
Add the following code to `start.sh`:
```bash theme={"theme":{"light":"github-light","dark":"github-dark"}}
#!/bin/bash
set -e # Exit the script if any statement returns a non-true return value
# Set workspace directory from env or default
WORKSPACE_DIR="${WORKSPACE_DIR:-/workspace}"
# Start nginx service
start_nginx() {
echo "Starting Nginx service..."
service nginx start
}
# Execute script if exists
execute_script() {
local script_path=$1
local script_msg=$2
if [[ -f ${script_path} ]]; then
echo "${script_msg}"
bash ${script_path}
fi
}
# Setup ssh
setup_ssh() {
if [[ $PUBLIC_KEY ]]; then
echo "Setting up SSH..."
mkdir -p ~/.ssh
echo "$PUBLIC_KEY" >> ~/.ssh/authorized_keys
chmod 700 -R ~/.ssh
# Generate SSH host keys if not present
generate_ssh_keys
service ssh start
echo "SSH host keys:"
cat /etc/ssh/*.pub
fi
}
# Generate SSH host keys
generate_ssh_keys() {
ssh-keygen -A
}
# Export env vars
export_env_vars() {
echo "Exporting environment variables..."
printenv | grep -E '^RUNPOD_|^PATH=|^_=' | awk -F = '{ print "export " $1 "=\"" $2 "\"" }' >> /etc/rp_environment
echo 'source /etc/rp_environment' >> ~/.bashrc
}
# Start jupyter lab
start_jupyter() {
echo "Starting Jupyter Lab..."
mkdir -p "$WORKSPACE_DIR" && \
cd / && \
nohup jupyter lab --allow-root --no-browser --port=8888 --ip=* --NotebookApp.token='' --NotebookApp.password='' --FileContentsManager.delete_to_trash=False --ServerApp.terminado_settings='{"shell_command":["/bin/bash"]}' --ServerApp.allow_origin=* --ServerApp.preferred_dir="$WORKSPACE_DIR" &> /jupyter.log &
echo "Jupyter Lab started without a password"
}
# Call Python handler if mode is serverless or both
call_python_handler() {
echo "Calling Python handler.py..."
python $WORKSPACE_DIR/handler.py
}
# ---------------------------------------------------------------------------- #
# Main Program #
# ---------------------------------------------------------------------------- #
start_nginx
echo "Pod Started"
setup_ssh
case $MODE_TO_RUN in
serverless)
echo "Running in serverless mode"
call_python_handler
;;
pod)
echo "Running in pod mode"
start_jupyter
;;
*)
echo "Invalid MODE_TO_RUN value: $MODE_TO_RUN. Expected 'serverless', 'pod', or 'both'."
exit 1
;;
esac
export_env_vars
echo "Start script(s) finished"
sleep infinity
```
Here are some key features of this script:
* `case $MODE_TO_RUN in ... esac`: This structure directs the startup based on the mode.
* `serverless` mode: Executes `handler.py`, which then starts the Runpod Serverless worker. `exec` replaces the shell process with the Python process.
* `pod` mode: Starts up the JupyterLab server for Pod development, then runs `sleep infinity` to keep the container alive so you can connect to it (e.g., via SSH or `docker exec`). You would then manually run `python /app/handler.py` inside the Pod to test your handler logic.
## Step 4: Create the `Dockerfile`
Create a `Dockerfile` that includes your handler and startup script:
```dockerfile theme={"theme":{"light":"github-light","dark":"github-dark"}}
# Use an official Runpod base image
FROM runpod/pytorch:2.0.1-py3.10-cuda11.8.0-devel-ubuntu22.04
# Environment variables
ENV PYTHONUNBUFFERED=1
# Supported modes: pod, serverless
ARG MODE_TO_RUN=pod
ENV MODE_TO_RUN=$MODE_TO_RUN
# Set up the working directory
ARG WORKSPACE_DIR=/app
ENV WORKSPACE_DIR=${WORKSPACE_DIR}
WORKDIR $WORKSPACE_DIR
# Install dependencies in a single RUN command to reduce layers and clean up in the same layer to reduce image size
RUN apt-get update --yes --quiet && \
DEBIAN_FRONTEND=noninteractive apt-get install --yes --quiet --no-install-recommends \
software-properties-common \
gpg-agent \
build-essential \
apt-utils \
ca-certificates \
curl && \
add-apt-repository --yes ppa:deadsnakes/ppa && \
apt-get update --yes --quiet && \
DEBIAN_FRONTEND=noninteractive apt-get install --yes --quiet --no-install-recommends
# Create and activate a Python virtual environment
RUN python3 -m venv /app/venv
ENV PATH="/app/venv/bin:$PATH"
# Install Python packages
RUN pip install --no-cache-dir \
asyncio \
requests \
runpod
# Install requirements.txt
COPY requirements.txt ./requirements.txt
RUN pip install --no-cache-dir --upgrade pip && \
pip install --no-cache-dir -r requirements.txt
# Delete's the default start.sh file from Runpod (so we can replace it with our own below)
RUN rm ../start.sh
# Copy all of our files into the container
COPY handler.py $WORKSPACE_DIR/handler.py
COPY start.sh $WORKSPACE_DIR/start.sh
# Make sure start.sh is executable
RUN chmod +x start.sh
# Make sure that the start.sh is in the path
RUN ls -la $WORKSPACE_DIR/start.sh
# depot build -t justinrunpod/pod-server-base:1.0 . --push --platform linux/amd64
CMD $WORKSPACE_DIR/start.sh
```
Key features of this `Dockerfile`:
* `FROM runpod/pytorch:2.0.1-py3.10-cuda11.8.0-devel-ubuntu22.04`: Starts with a Runpod base image that comes with nginx, runpodctl, and other helpful base packages.
* `ARG WORKSPACE_DIR=/workspace` and `ENV WORKSPACE_DIR=${WORKSPACE_DIR}`: Allows the workspace directory to be set at build time.
* `WORKDIR $WORKSPACE_DIR`: Sets the working directory to the value of `WORKSPACE_DIR`.
* `COPY requirements.txt ./requirements.txt` and `RUN pip install ...`: Installs Python dependencies.
* `COPY . .`: Copies all application files into the workspace directory.
* `ENV MODE_TO_RUN="pod"`: Sets the default operational mode to "pod". This can be overridden at runtime.
* `CMD ["$WORKSPACE_DIR/start.sh"]`: Specifies `start.sh` as the command to run when the container starts.
## Step 5: Build and push your Docker image
Instead of building and pushing your image via Docker Hub, you can also [deploy your worker from a GitHub repository](/serverless/workers/github-integration).
Now you're ready to build your Docker image and push it to Docker Hub:
Build your Docker image, replacing `YOUR_USERNAME` with your Docker Hub username and choosing a suitable image name:
```sh theme={"theme":{"light":"github-light","dark":"github-dark"}}
docker build --platform linux/amd64 --tag YOUR_USERNAME/dual-mode-worker .
```
The `--platform linux/amd64` flag is important for compatibility with Runpod's infrastructure.
```sh theme={"theme":{"light":"github-light","dark":"github-dark"}}
docker push YOUR_USERNAME/dual-mode-worker:latest
```
You might need to run `docker login` first.
## Step 6: Testing in Pod mode
Now that you've finished building our Docker image, let's explore how you would use the Pod-first development workflow in practice.
Deploy the image to a Pod by following these steps:
1. Navigate to the [Pods page](https://www.runpod.io/console/pods) in the Runpod console.
2. Click **Deploy**.
3. Select your preferred GPU.
4. Under **Container Image**, enter `YOUR_USERNAME/dual-mode-worker:latest`.
5. Under **Public Environment Variables**, select **Add environment variable** and add:
* Key: `MODE_TO_RUN`
* Value: `pod`
6. Click **Deploy**.
Once your Pod is running, you can:
* [Connect via the web terminal, JupyterLab, or SSH](/pods/connect-to-a-pod) to test your handler interactively.
* Debug and iterate on your code.
* Test GPU-specific operations.
* Edit `handler.py` within the Pod and re-run it for rapid iteration.
## Step 7: Deploy to a Serverless endpoint
Once you're confident with your `handler.py` logic tested in Pod mode, you're ready to deploy your dual-mode worker to a Serverless endpoint.
1. Navigate to the [Serverless page](https://www.runpod.io/console/serverless) in the Runpod console.
2. Click **New Endpoint**.
3. Click **Import from Docker Registry**.
4. In the **Container Image** field, enter your Docker image URL: `docker.io/YOUR_USERNAME/dual-mode-worker:latest`, then click *Next*\*\*\*.
5. Under **Environment Variables**, add:
* Key: `MODE_TO_RUN`
* Value: `serverless`
6. Configure your endpoint settings (GPU type, workers, etc.).
7. Click **Deploy Endpoint**.
The *same* image will be used for your workers, but `start.sh` will now direct them to run in Serverless mode, using the `runpod.serverless.start` function to process requests.
## Step 8: Test your endpoint
After deploying your endpoint in to Serverless mode, you can test it by sending API requests to your endpoint.
1. Navigate to your endpoint's detail page in the Runpod console.
2. Click the **Requests** tab.
3. Use the following JSON as test input:
```json theme={"theme":{"light":"github-light","dark":"github-dark"}}
{
"input": {
"prompt": "Hello World!",
}
}
```
4. Click **Run**.
After a few moments for initialization and processing, you should see output similar to this:
```json theme={"theme":{"light":"github-light","dark":"github-dark"}}
{
"delayTime": 12345, // This will vary
"executionTime": 3050, // This will be around 3000ms + overhead
"id": "some-unique-id",
"output": {
"output": "Processed prompt: 'Hello Serverless World!' after 3s in Serverless mode."
},
"status": "COMPLETED"
}
```
## Explore the Pod-first development workflow
Congratulations! You've successfully built, deployed, and tested a dual-mode Serverless worker. Now, let's explore the recommended iteration process for a Pod-first development workflow:
1. Deploy your initial Docker image to a Runpod Pod, ensuring `MODE_TO_RUN` is set to `pod` (or rely on the Dockerfile default).
2. [Connect to your Pod](/pods/connect-to-a-pod) (via SSH or web terminal).
3. Navigate to the `/app` directory.
4. As you develop, install any necessary Python packages (`pip install PACKAGE_NAME`) or system dependencies (`apt-get install PACKAGE_NAME`).
5. Iterate on your `handler.py` script. Test your changes frequently by running `python handler.py` directly in the Pod's terminal. This will execute the test harness you defined in the `elif MODE_TO_RUN == "pod":` block, giving you immediate feedback.
Once you're satisfied with a set of changes and have new dependencies:
1. Add new Python packages to your `requirements.txt` file.
2. Add system installation commands (e.g., `RUN apt-get update && apt-get install -y PACKAGE_NAME`) to your `Dockerfile`.
3. Ensure your updated `handler.py` is saved.
1. Re-deploy your worker image to a Serverless endpoint using [Docker Hub](/serverless/workers/deploy) or [GitHub](/serverless/workers/github-integration).
2. During deployment, ensure that the `MODE_TO_RUN` environment variable for the endpoint is set to `serverless`.
For instructions on how to set environment variables during deployment, see [Manage endpoints](/serverless/endpoints/overview).
3. After your endpoint is deployed, you can test it by [sending API requests](/serverless/endpoints/send-requests).
This iterative loop (write your handler, update the Docker image, test in Pod mode, then deploy to Serverless) enables you to rapidly develop and debug your Serverless workers.
---
# Source: https://docs.runpod.io/serverless/endpoints/endpoint-configurations.md
# Endpoint settings
> Reference guide for all Serverless endpoint settings and parameters.
This guide details the configuration options available for Runpod Serverless endpoints. These settings control how your endpoint scales, how it utilizes hardware, and how it manages request lifecycles.
Some settings can only be updated after deploying your endpoint. For instructions on modifying an existing endpoint, see [Edit an endpoint](/serverless/endpoints/overview#edit-an-endpoint).
## General configuration
### Endpoint name
The name assigned to your endpoint helps you identify it within the Runpod console. This is a local display name and does not impact the endpoint ID used for API requests.
### Endpoint type
Select the architecture that best fits your application's traffic pattern:
**Queue based endpoints** utilize a built-in queueing system to manage requests. They are ideal for asynchronous tasks, batch processing, and long-running jobs where immediate synchronous responses are not required. These endpoints provide guaranteed execution and automatic retries for failed requests. Queue based endpoints are implemented using [handler functions](/serverless/workers/handler-functions).
**Load balancing endpoints** route traffic directly to available workers, bypassing the internal queue. They are designed for high-throughput, low-latency applications that require synchronous request/response cycles, such as real-time inference or custom REST APIs. For implementation details, see [Load balancing endpoints](/serverless/load-balancing/overview).
### GPU configuration
This setting determines the hardware tier your workers will utilize. You can select multiple GPU categories to create a prioritized list. Runpod attempts to allocate the first category in your list. If that hardware is unavailable, it automatically falls back to the subsequent options. Selecting multiple GPU types significantly improves endpoint availability during periods of high demand.
| **GPU type(s)** | **Memory** | **Flex cost per second** | **Active cost per second** | **Description** |
| ----------------------- | ---------- | ------------------------ | -------------------------- | ----------------------------------------------------- |
| A4000, A4500, RTX 4000 | 16 GB | \$0.00016 | \$0.00011 | The most cost-effective for small models. |
| 4090 PRO | 24 GB | \$0.00031 | \$0.00021 | Extreme throughput for small-to-medium models. |
| L4, A5000, 3090 | 24 GB | \$0.00019 | \$0.00013 | Great for small-to-medium sized inference workloads. |
| L40, L40S, 6000 Ada PRO | 48 GB | \$0.00053 | \$0.00037 | Extreme inference throughput on LLMs like Llama 3 7B. |
| A6000, A40 | 48 GB | \$0.00034 | \$0.00024 | A cost-effective option for running big models. |
| H100 PRO | 80 GB | \$0.00116 | \$0.00093 | Extreme throughput for big models. |
| A100 | 80 GB | \$0.00076 | \$0.00060 | High throughput GPU, yet still very cost-effective. |
| H200 PRO | 141 GB | \$0.00155 | \$0.00124 | Extreme throughput for huge models. |
| B200 | 180 GB | \$0.00240 | \$0.00190 | Maximum throughput for huge models. |
## Worker scaling
### Active workers
This setting defines the minimum number of workers that remain warm and ready to process requests at all times. Setting this to 1 or higher eliminates cold starts for the initial wave of requests. Active workers incur charges even when idle, but they receive a 20-30% discount compared to on-demand workers.
### Max workers
This setting controls the maximum number of concurrent instances your endpoint can scale to. This acts as a safety limit for costs and a cap on concurrency. We recommend setting your max worker count approximately 20% higher than your expected maximum concurrency. This buffer allows for smoother scaling during traffic spikes.
### GPUs per worker
This defines how many GPUs are assigned to a single worker instance. The default is 1. When choosing between multiple lower-tier GPUs or fewer high-end GPUs, you should generally prioritize high-end GPUs with lower GPU count per worker when possible.
### Auto-scaling type
This setting determines the logic used to scale workers up and down.
**Queue delay** scaling adds workers based on wait times. If requests sit in the queue for longer than a defined threshold (default 4 seconds), the system provisions new workers. This is best for workloads where slight delays are acceptable in exchange for higher utilization.
**Request count** scaling is more aggressive. It adjusts worker numbers based on the total volume of pending and active work. The formula used is `Math.ceil((requestsInQueue + requestsInProgress) / scalerValue)`. Use a scaler value of 1 for maximum responsiveness, or increase it to scale more conservatively. This strategy is recommended for LLM workloads or applications with frequent, short requests.
## Lifecycle and timeouts
### Idle timeout
The idle timeout determines how long a worker remains active after completing a request before shutting down. While a worker is idle, you are billed for the time, but the worker remains "warm," allowing it to process subsequent requests immediately. The default is 5 seconds.
### Execution timeout
The execution timeout acts as a failsafe to prevent runaway jobs from consuming infinite resources. It specifies the maximum duration a single job is allowed to run before being forcibly terminated. We strongly recommend keeping this enabled. The default is 600 seconds (10 minutes), and it can be extended up to 24 hours.
### Job TTL (time-to-live)
This setting defines how long a job request remains valid in the queue before expiring. If a worker does not pick up the job within this window, the system discards it. The default is 24 hours.
## Performance features
### FlashBoot
FlashBoot reduces cold start times by retaining the state of worker resources shortly after they spin down. This allows the system to "revive" a worker much faster than a standard fresh boot. FlashBoot is most effective on endpoints with consistent traffic, where workers frequently cycle between active and idle states.
### Model
The Model field allows you to select from a list of [cached models](/serverless/endpoints/model-caching). When selected, Runpod schedules your workers on host machines that already have these large model files pre-loaded. This significantly reduces the time required to load models during worker initialization.
## Advanced settings
### Data centers
You can restrict your endpoint to specific geographical regions. For maximum reliability and availability, we recommend allowing all data centers. Restricting this list decreases the pool of available GPUs your endpoint can draw from.
### Network volumes
[Network volumes](/storage/network-volumes) provide persistent storage that survives worker restarts. While they enable data sharing between workers, they introduce network latency and restrict your endpoint to the specific data center where the volume resides. Use network volumes only if your workload specifically requires shared persistence or datasets larger than the container limit.
### CUDA version selection
This filter ensures your workers are scheduled on host machines with compatible drivers. While you should select the version your code requires, we recommend also selecting all newer versions. CUDA is generally backward compatible, and selecting a wider range of versions increases the pool of available hardware.
### Expose HTTP/TCP ports
Enabling this option exposes the public IP and port of the worker, allowing for direct external communication. This is required for applications that need persistent connections, such as WebSockets.
---
# Source: https://docs.runpod.io/api-reference/endpoints/PATCH/endpoints/endpointId.md
# Source: https://docs.runpod.io/api-reference/endpoints/GET/endpoints/endpointId.md
# Source: https://docs.runpod.io/api-reference/endpoints/DELETE/endpoints/endpointId.md
# Source: https://docs.runpod.io/api-reference/endpoints/PATCH/endpoints/endpointId.md
# Source: https://docs.runpod.io/api-reference/endpoints/GET/endpoints/endpointId.md
# Source: https://docs.runpod.io/api-reference/endpoints/DELETE/endpoints/endpointId.md
# Delete an endpoint
> Delete an endpoint.
## OpenAPI
````yaml DELETE /endpoints/{endpointId}
openapi: 3.0.3
info:
title: Runpod API
description: Public Rest API for managing Runpod programmatically.
version: 0.1.0
contact:
name: help
url: https://contact.runpod.io/hc/requests/new
email: help@runpod.io
servers:
- url: https://rest.runpod.io/v1
security:
- ApiKey: []
tags:
- name: docs
description: This documentation page.
- name: pods
description: Manage Pods.
- name: endpoints
description: Manage Serverless endpoints.
- name: network volumes
description: Manage Runpod network volumes.
- name: templates
description: Manage Pod and Serverless templates.
- name: container registry auths
description: >-
Manage authentication for container registries such as dockerhub to use
private images.
- name: billing
description: Retrieve billing history for your Runpod account.
externalDocs:
description: Find out more about Runpod.
url: https://runpod.io
paths:
/endpoints/{endpointId}:
delete:
tags:
- endpoints
summary: Delete an endpoint
description: Delete an endpoint.
operationId: DeleteEndpoint
parameters:
- name: endpointId
in: path
description: Endpoint ID to delete.
required: true
schema:
type: string
responses:
'204':
description: Endpoint successfully deleted.
'400':
description: Invalid endpoint ID.
'401':
description: Unauthorized.
components:
securitySchemes:
ApiKey:
type: http
scheme: bearer
bearerFormat: Bearer
````
---
# Source: https://docs.runpod.io/sdks/python/endpoints.md
# Source: https://docs.runpod.io/sdks/javascript/endpoints.md
# Source: https://docs.runpod.io/sdks/go/endpoints.md
# Source: https://docs.runpod.io/api-reference/endpoints/POST/endpoints.md
# Source: https://docs.runpod.io/api-reference/endpoints/GET/endpoints.md
# Source: https://docs.runpod.io/api-reference/billing/GET/billing/endpoints.md
# Serverless billing history
> Retrieve billing information about your Serverless endpoints.
## OpenAPI
````yaml GET /billing/endpoints
openapi: 3.0.3
info:
title: Runpod API
description: Public Rest API for managing Runpod programmatically.
version: 0.1.0
contact:
name: help
url: https://contact.runpod.io/hc/requests/new
email: help@runpod.io
servers:
- url: https://rest.runpod.io/v1
security:
- ApiKey: []
tags:
- name: docs
description: This documentation page.
- name: pods
description: Manage Pods.
- name: endpoints
description: Manage Serverless endpoints.
- name: network volumes
description: Manage Runpod network volumes.
- name: templates
description: Manage Pod and Serverless templates.
- name: container registry auths
description: >-
Manage authentication for container registries such as dockerhub to use
private images.
- name: billing
description: Retrieve billing history for your Runpod account.
externalDocs:
description: Find out more about Runpod.
url: https://runpod.io
paths:
/billing/endpoints:
get:
tags:
- billing
summary: Serverless billing history
description: Retrieve billing information about your Serverless endpoints.
operationId: EndpointBilling
parameters:
- name: bucketSize
in: query
schema:
type: string
enum:
- hour
- day
- week
- month
- year
default: day
description: >-
The length of each billing time bucket. The billing time bucket is
the time range over which each billing record is aggregated.
- name: dataCenterId
in: query
schema:
type: array
example:
- EU-RO-1
- CA-MTL-1
default:
- EU-RO-1
- CA-MTL-1
- EU-SE-1
- US-IL-1
- EUR-IS-1
- EU-CZ-1
- US-TX-3
- EUR-IS-2
- US-KS-2
- US-GA-2
- US-WA-1
- US-TX-1
- CA-MTL-3
- EU-NL-1
- US-TX-4
- US-CA-2
- US-NC-1
- OC-AU-1
- US-DE-1
- EUR-IS-3
- CA-MTL-2
- AP-JP-1
- EUR-NO-1
- EU-FR-1
- US-KS-3
- US-GA-1
items:
type: string
enum:
- EU-RO-1
- CA-MTL-1
- EU-SE-1
- US-IL-1
- EUR-IS-1
- EU-CZ-1
- US-TX-3
- EUR-IS-2
- US-KS-2
- US-GA-2
- US-WA-1
- US-TX-1
- CA-MTL-3
- EU-NL-1
- US-TX-4
- US-CA-2
- US-NC-1
- OC-AU-1
- US-DE-1
- EUR-IS-3
- CA-MTL-2
- AP-JP-1
- EUR-NO-1
- EU-FR-1
- US-KS-3
- US-GA-1
description: >-
Filter to endpoints located in any of the provided Runpod data
centers. The data center IDs are listed in the response of the
/pods endpoint.
- name: endpointId
in: query
schema:
type: string
example: jpnw0v75y3qoql
description: Filter to a specific endpoint.
- name: endTime
in: query
schema:
type: string
format: date-time
example: '2023-01-31T23:59:59Z'
description: The end date of the billing period to retrieve.
- name: gpuTypeId
in: query
schema:
type: array
items:
type: string
enum:
- NVIDIA GeForce RTX 4090
- NVIDIA A40
- NVIDIA RTX A5000
- NVIDIA GeForce RTX 5090
- NVIDIA H100 80GB HBM3
- NVIDIA GeForce RTX 3090
- NVIDIA RTX A4500
- NVIDIA L40S
- NVIDIA H200
- NVIDIA L4
- NVIDIA RTX 6000 Ada Generation
- NVIDIA A100-SXM4-80GB
- NVIDIA RTX 4000 Ada Generation
- NVIDIA RTX A6000
- NVIDIA A100 80GB PCIe
- NVIDIA RTX 2000 Ada Generation
- NVIDIA RTX A4000
- NVIDIA RTX PRO 6000 Blackwell Server Edition
- NVIDIA H100 PCIe
- NVIDIA H100 NVL
- NVIDIA L40
- NVIDIA B200
- NVIDIA GeForce RTX 3080 Ti
- NVIDIA RTX PRO 6000 Blackwell Workstation Edition
- NVIDIA GeForce RTX 3080
- NVIDIA GeForce RTX 3070
- AMD Instinct MI300X OAM
- NVIDIA GeForce RTX 4080 SUPER
- Tesla V100-PCIE-16GB
- Tesla V100-SXM2-32GB
- NVIDIA RTX 5000 Ada Generation
- NVIDIA GeForce RTX 4070 Ti
- NVIDIA RTX 4000 SFF Ada Generation
- NVIDIA GeForce RTX 3090 Ti
- NVIDIA RTX A2000
- NVIDIA GeForce RTX 4080
- NVIDIA A30
- NVIDIA GeForce RTX 5080
- Tesla V100-FHHL-16GB
- NVIDIA H200 NVL
- Tesla V100-SXM2-16GB
- NVIDIA RTX PRO 6000 Blackwell Max-Q Workstation Edition
- NVIDIA A5000 Ada
- Tesla V100-PCIE-32GB
- NVIDIA RTX A4500
- NVIDIA A30
- NVIDIA GeForce RTX 3080TI
- Tesla T4
- NVIDIA RTX A30
example: NVIDIA GeForce RTX 4090
description: Filter to endpoints with the provided GPU type attached.
- name: grouping
in: query
schema:
type: string
enum:
- endpointId
- podId
- gpuTypeId
default: endpointId
description: Group the billing records by the provided field.
- name: imageName
in: query
schema:
type: string
example: runpod/pytorch:2.1.0-py3.10-cuda11.8.0-devel-ubuntu22.04
description: Filter to endpoints created with the provided image.
- name: startTime
in: query
schema:
type: string
format: date-time
example: '2023-01-01T00:00:00Z'
description: The start date of the billing period to retrieve.
- name: templateId
in: query
schema:
type: string
example: 30zmvf89kd
description: Filter to endpoints created from the provided template.
responses:
'200':
description: Successful operation.
content:
application/json:
schema:
$ref: '#/components/schemas/BillingRecords'
components:
schemas:
BillingRecords:
type: array
items:
type: object
properties:
amount:
type: number
description: The amount charged for the group for the billing period, in USD.
example: 100.5
diskSpaceBilledGb:
type: integer
description: >-
The amount of disk space billed for the billing period, in
gigabytes (GB). Does not apply to all resource types.
example: 50
endpointId:
type: string
description: If grouping by endpoint ID, the endpoint ID of the group.
gpuTypeId:
type: string
description: If grouping by GPU type ID, the GPU type ID of the group.
podId:
type: string
description: If grouping by Pod ID, the Pod ID of the group.
time:
type: string
format: date-time
description: The start of the period for which the billing record applies.
example: '2023-01-01T00:00:00Z'
timeBilledMs:
type: integer
description: >-
The total time billed for the billing period, in milliseconds.
Does not apply to all resource types.
example: 3600000
securitySchemes:
ApiKey:
type: http
scheme: bearer
bearerFormat: Bearer
````
---
# Source: https://docs.runpod.io/serverless/vllm/environment-variables.md
# Source: https://docs.runpod.io/serverless/development/environment-variables.md
# Source: https://docs.runpod.io/pods/templates/environment-variables.md
# Source: https://docs.runpod.io/serverless/vllm/environment-variables.md
# Source: https://docs.runpod.io/serverless/development/environment-variables.md
# Source: https://docs.runpod.io/pods/templates/environment-variables.md
# Environment variables
> Learn how to use environment variables in Runpod Pods for configuration, security, and automation
Environment variables in are key-value pairs that you can configure for your Pods. They are accessible within your containerized application and provide a flexible way to pass configuration settings, secrets, and runtime information to your application without hardcoding them into your code or container image.
## What are environment variables?
Environment variables are dynamic values that exist in your Pod's operating system environment. They act as a bridge between your Pod's configuration and your running applications, allowing you to:
* Store configuration settings that can change between deployments.
* Pass sensitive information like API keys securely.
* Access Pod metadata and system information.
* Configure application behavior without modifying code.
* Reference [Runpod secrets](/pods/templates/secrets) in your containers.
When you set an environment variable in your Pod configuration, it becomes available to all processes running inside that Pod's container.
## Why use environment variables in Pods?
Environment variables offer several key benefits for containerized applications:
**Configuration flexibility**: Environment variables allow you to easily change application settings without modifying your code or rebuilding your container image. For example, you can set different model names, API endpoints, or processing parameters for different deployments:
```bash theme={"theme":{"light":"github-light","dark":"github-dark"}}
# Set a model name that your application can read
MODEL_NAME=llama-2-7b-chat
API_ENDPOINT=https://api.example.com/v1
MAX_BATCH_SIZE=32
```
**Security**: Sensitive information such as API keys, database passwords, or authentication tokens can be injected as environment variables, keeping them out of your codebase and container images. This prevents accidental exposure in version control or public repositories.
**Pod metadata access**: Runpod provides [predefined environment variables](#runpod-provided-environment-variables) that give your application information about the Pod's environment, resources, and network configuration. This metadata helps your application adapt to its runtime environment automatically.
**Automation and scaling**: Environment variables make it easier to automate deployments and scale applications. You can use the same container image with different settings for development, staging, and production environments by simply changing the environment variables.
## Setting environment variables
You can configure up to 50 environment variables per Pod through the Runpod interface when creating or editing a Pod or Pod template.
### During Pod creation
1. When creating a new Pod, click **Edit Template** and expand the **Environment Variables** section.
2. Click **Add Environment Variable**.
3. Enter the **Key** (variable name) and **Value**.
4. Repeat for additional variables.
### In Pod templates
1. Navigate to [My Templates](https://www.console.runpod.io/user/templates) in the console.
2. Create a new template or edit an existing one.
3. Add environment variables in the **Environment Variables** section.
4. Save the template for reuse across multiple Pods.
### Using secrets
For sensitive data, you can reference [Runpod secrets](/pods/templates/secrets) in environment variables using the `RUNPOD_SECRET_` prefix. For example:
```bash
API_KEY={{ RUNPOD_SECRET_my_api_key }}
DATABASE_PASSWORD={{ RUNPOD_SECRET_db_password }}
```
## Updating environment variables
To update environment variables in your Pod:
1. Navigate to the [Pods](https://www.console.runpod.io/user/pods) section of the console.
2. Click the three dots to the right of the Pod you want to update and select **Edit Pod**.
3. Click the **Environment Variables** section to expand it.
4. Add or update the environment variables.
5. Click **Save** to save your changes.
When you update environment variables your Pod will restart, clearing all data outside of your volume mount path (`/workspace` by default).
## Accessing environment variables
Once set, environment variables are available to your application through standard operating system mechanisms.
### Verify variables in your Pod
You can check if environment variables are properly set by running commands in your Pod's terminal:
```bash theme={"theme":{"light":"github-light","dark":"github-dark"}}
# View a specific environment variable
echo $ENVIRONMENT_VARIABLE_KEY
# List all environment variables
env
# Search for specific variables
env | grep RUNPOD
```
### Accessing variables in your applications
Different programming languages provide various ways to access environment variables:
**Python:**
```python theme={"theme":{"light":"github-light","dark":"github-dark"}}
import os
model_name = os.environ.get('MODEL_NAME', 'default-model')
api_key = os.environ['API_KEY'] # Raises error if not found
```
**Node.js:**
```javascript theme={"theme":{"light":"github-light","dark":"github-dark"}}
const modelName = process.env.MODEL_NAME || 'default-model';
const apiKey = process.env.API_KEY;
```
**Bash scripts:**
```bash theme={"theme":{"light":"github-light","dark":"github-dark"}}
#!/bin/bash
MODEL_NAME=${MODEL_NAME:-"default-model"}
echo "Using model: $MODEL_NAME"
```
## Runpod-provided environment variables
Runpod automatically sets several environment variables that provide information about your Pod's environment and resources:
| Variable | Description |
| --------------------- | ---------------------------------------------------------------------------- |
| `RUNPOD_POD_ID` | The unique identifier assigned to your Pod. |
| `RUNPOD_DC_ID` | The identifier of the data center where your Pod is located. |
| `RUNPOD_POD_HOSTNAME` | The hostname of the server where your Pod is running. |
| `RUNPOD_GPU_COUNT` | The total number of GPUs available to your Pod. |
| `RUNPOD_CPU_COUNT` | The total number of CPUs available to your Pod. |
| `RUNPOD_PUBLIC_IP` | The publicly accessible IP address for your Pod, if available. |
| `RUNPOD_TCP_PORT_22` | The public port mapped to SSH (port 22) for your Pod. |
| `RUNPOD_ALLOW_IP` | A comma-separated list of IP addresses or ranges allowed to access your Pod. |
| `RUNPOD_VOLUME_ID` | The ID of the network volume attached to your Pod. |
| `RUNPOD_API_KEY` | The API key for making Runpod API calls scoped specifically to this Pod. |
| `PUBLIC_KEY` | The SSH public keys authorized to access your Pod over SSH. |
| `CUDA_VERSION` | The version of CUDA installed in your Pod environment. |
| `PYTORCH_VERSION` | The version of PyTorch installed in your Pod environment. |
| `PWD` | The current working directory inside your Pod. |
## Common use cases
Environment variables are particularly useful for:
**Model configuration**: Configure which AI models to load without rebuilding your container:
```bash theme={"theme":{"light":"github-light","dark":"github-dark"}}
MODEL_NAME=gpt-3.5-turbo
MODEL_PATH=/workspace/models
MAX_TOKENS=2048
TEMPERATURE=0.7
```
**Service configuration**: Set up web services and APIs with flexible configuration:
```bash theme={"theme":{"light":"github-light","dark":"github-dark"}}
API_PORT=8000
DEBUG_MODE=false
LOG_LEVEL=INFO
CORS_ORIGINS=https://myapp.com,https://staging.myapp.com
```
**Database and external service connections**: Connect to databases and external APIs securely:
```bash theme={"theme":{"light":"github-light","dark":"github-dark"}}
DATABASE_URL=postgresql://user:pass@host:5432/db
REDIS_URL=redis://localhost:6379
API_BASE_URL=https://api.external-service.com
```
**Development vs. production settings**: Use different configurations for different environments:
```bash theme={"theme":{"light":"github-light","dark":"github-dark"}}
ENVIRONMENT=production
CACHE_ENABLED=true
RATE_LIMIT=1000
MONITORING_ENABLED=true
```
**Port management**: When configuring symmetrical ports, your application can discover assigned ports through environment variables. This is particularly useful for services that need to know their external port numbers.
For more details, see [Expose ports](/pods/configuration/expose-ports#symmetrical-port-mapping).
## Best practices
Follow these guidelines when working with environment variables:
**Security considerations**:
* **Never hardcode secrets**: Use [Runpod secrets](/pods/templates/secrets) for sensitive data.
* **Use descriptive names**: Choose clear, descriptive variable names like `DATABASE_PASSWORD` instead of `DB_PASS`.
**Configuration management**:
* **Provide defaults**: Use default values for non-critical configuration options.
* **Document your variables**: Maintain clear documentation of what each environment variable does.
* **Group related variables**: Use consistent prefixes for related configuration (for example, `DB_HOST`, `DB_PORT`, `DB_NAME`).
**Application design**:
* **Validate required variables**. Check that critical environment variables are set before your application starts. If the variable is missing, your application should throw an error or return a clear message indicating which variable is not set. This helps prevent unexpected failures and makes debugging easier.
* **Type conversion**: Convert string environment variables to appropriate types (such as integers or booleans) in your application.
* **Configuration validation**: Validate environment variable values to catch configuration errors early.
---
# Source: https://docs.runpod.io/serverless/development/error-handling.md
# Error handling
> Implement robust error handling for your Serverless endpoints.
Robust error handling is essential for production Serverless endpoints. It prevents your workers from crashing silently and ensures that useful error messages are returned to the client, making debugging significantly easier.
## Basic error handling
The simplest way to handle errors is to wrap your handler logic in a `try...except` block. This ensures that even if your logic fails, the worker remains stable and returns a readable error message.
```python theme={"theme":{"light":"github-light","dark":"github-dark"}}
import runpod
def handler(job):
try:
input = job["input"]
# Replace process_input() with your own handler logic
result = process_input(input)
return {"output": result}
except KeyError as e:
return {"error": f"Missing required input: {str(e)}"}
except Exception as e:
return {"error": f"An error occurred: {str(e)}"}
runpod.serverless.start({"handler": handler})
```
## Structured error responses
For more complex applications, you should return consistent error objects. This allows the client consuming your API to programmatically handle different types of errors, such as [validation failures](/serverless/development/validation) versus unexpected server errors.
```python theme={"theme":{"light":"github-light","dark":"github-dark"}}
import runpod
import traceback
def handler(job):
try:
# Validate input
if "prompt" not in job.get("input", {}):
return {
"error": {
"type": "ValidationError",
"message": "Missing required field: prompt",
"details": "The 'prompt' field is required in the input object"
}
}
prompt = job["input"]["prompt"]
result = process_prompt(prompt)
return {"output": result}
except ValueError as e:
return {
"error": {
"type": "ValueError",
"message": str(e),
"details": "Invalid input value provided"
}
}
except Exception as e:
# Log the full traceback for debugging
print(f"Unexpected error: {traceback.format_exc()}")
return {
"error": {
"type": "UnexpectedError",
"message": "An unexpected error occurred",
"details": str(e)
}
}
runpod.serverless.start({"handler": handler})
```
## Timeout handling
You can also set an execution timeout in your [endpoint settings](/serverless/endpoints/endpoint-configurations#execution-timeout) to automatically terminate a job after a certain amount of time.
For long-running operations, you may want to implement timeout logic within your handler. This prevents a job from hanging indefinitely and consuming credits without producing a result.
```python theme={"theme":{"light":"github-light","dark":"github-dark"}}
import runpod
import signal
class TimeoutError(Exception):
pass
def timeout_handler(signum, frame):
raise TimeoutError("Operation timed out")
def handler(job):
try:
# Set a timeout (e.g., 60 seconds)
signal.signal(signal.SIGALRM, timeout_handler)
signal.alarm(60)
# Your processing code here
result = long_running_operation(job["input"])
# Cancel the timeout
signal.alarm(0)
return {"output": result}
except TimeoutError:
return {"error": "Request timed out after 60 seconds"}
except Exception as e:
return {"error": str(e)}
runpod.serverless.start({"handler": handler})
```
---
# Source: https://docs.runpod.io/tutorials/sdks/python/101/error.md
# Implementing error handling and logging in Runpod serverless functions
This tutorial will guide you through implementing effective error handling and logging in your Runpod serverless functions.
Proper error handling ensures that your serverless functions can handle unexpected situations gracefully. This prevents crashes and ensures that your application can continue running smoothly, even if some parts encounter issues.
We'll create a simulated image classification model to demonstrate these crucial practices, ensuring your serverless deployments are robust and maintainable.
## Setting up your Serverless Function
Let's break down the process of creating our error-aware image classifier into steps.
### Import required libraries and Set Up Logging
First, import the necessary libraries and Set up the Runpod logger:
```python theme={"theme":{"light":"github-light","dark":"github-dark"}}
import runpod
from runpod import RunPodLogger
import time
import random
log = RunPodLogger()
```
### Create Helper Functions
Define functions to simulate various parts of the image classification process:
```python theme={"theme":{"light":"github-light","dark":"github-dark"}}
def load_model():
"""Simulate loading a machine learning model."""
log.info("Loading image classification model...")
time.sleep(2) # Simulate model loading time
return "ImageClassifier"
def preprocess_image(image_url):
"""Simulate image preprocessing."""
log.debug(f"Preprocessing image: {image_url}")
time.sleep(0.5) # Simulate preprocessing time
return f"Preprocessed_{image_url}"
def classify_image(model, preprocessed_image):
"""Simulate image classification."""
classes = ["cat", "dog", "bird", "fish", "horse"]
confidence = random.uniform(0.7, 0.99)
predicted_class = random.choice(classes)
return predicted_class, confidence
```
These functions:
1. Simulate model loading, logging the process
2. Preprocess images, with debug logging
3. Classify images, returning random results for demonstration
### Create the Main Handler Function
Now, let's create the main handler function with error handling and logging:
```python theme={"theme":{"light":"github-light","dark":"github-dark"}}
def handler(job):
job_input = job["input"]
images = job_input.get("images", [])
# Process mock logs if provided
for job_log in job_input.get("mock_logs", []):
log_level = job_log.get("level", "info").lower()
if log_level == "debug":
log.debug(job_log["message"])
elif log_level == "info":
log.info(job_log["message"])
elif log_level == "warn":
log.warn(job_log["message"])
elif log_level == "error":
log.error(job_log["message"])
try:
# Load model
model = load_model()
log.info("Model loaded successfully")
results = []
for i, image_url in enumerate(images):
# Preprocess image
preprocessed_image = preprocess_image(image_url)
# Classify image
predicted_class, confidence = classify_image(model, preprocessed_image)
result = {
"image": image_url,
"predicted_class": predicted_class,
"confidence": round(confidence, 2),
}
results.append(result)
# Log progress
progress = (i + 1) / len(images) * 100
log.info(f"Progress: {progress:.2f}%")
# Simulate some processing time
time.sleep(random.uniform(0.5, 1.5))
log.info("Classification completed successfully")
# Simulate error if mock_error is True
if job_input.get("mock_error", False):
raise Exception("Mock error")
return {"status": "success", "results": results}
except Exception as e:
log.error(f"An error occurred: {str(e)}")
return {"error": str(e)}
```
This handler:
1. Processes mock logs to demonstrate different logging levels
2. Uses a try-except block to handle potential errors
3. Simulates image classification with progress logging
4. Returns results or an error message based on the execution
### Start the Serverless Function
Finally, start the Runpod serverless function:
```python theme={"theme":{"light":"github-light","dark":"github-dark"}}
runpod.serverless.start({"handler": handler})
```
## Complete code example
Here's the full code for our error-aware image classification simulator:
```python theme={"theme":{"light":"github-light","dark":"github-dark"}}
import runpod
from runpod import RunPodLogger
import time
import random
log = RunPodLogger()
def load_model():
"""Simulate loading a machine learning model."""
log.info("Loading image classification model...")
time.sleep(2) # Simulate model loading time
return "ImageClassifier"
def preprocess_image(image_url):
"""Simulate image preprocessing."""
log.debug(f"Preprocessing image: {image_url}")
time.sleep(0.5) # Simulate preprocessing time
return f"Preprocessed_{image_url}"
def classify_image(model, preprocessed_image):
"""Simulate image classification."""
classes = ["cat", "dog", "bird", "fish", "horse"]
confidence = random.uniform(0.7, 0.99)
predicted_class = random.choice(classes)
return predicted_class, confidence
def handler(job):
job_input = job["input"]
images = job_input.get("images", [])
# Process mock logs if provided
for job_log in job_input.get("mock_logs", []):
log_level = job_log.get("level", "info").lower()
if log_level == "debug":
log.debug(job_log["message"])
elif log_level == "info":
log.info(job_log["message"])
elif log_level == "warn":
log.warn(job_log["message"])
elif log_level == "error":
log.error(job_log["message"])
try:
# Load model
model = load_model()
log.info("Model loaded successfully")
results = []
for i, image_url in enumerate(images):
# Preprocess image
preprocessed_image = preprocess_image(image_url)
# Classify image
predicted_class, confidence = classify_image(model, preprocessed_image)
result = {
"image": image_url,
"predicted_class": predicted_class,
"confidence": round(confidence, 2),
}
results.append(result)
# Log progress
progress = (i + 1) / len(images) * 100
log.info(f"Progress: {progress:.2f}%")
# Simulate some processing time
time.sleep(random.uniform(0.5, 1.5))
log.info("Classification completed successfully")
# Simulate error if mock_error is True
if job_input.get("mock_error", False):
raise Exception("Mock error")
return {"status": "success", "results": results}
except Exception as e:
log.error(f"An error occurred: {str(e)}")
return {"error": str(e)}
runpod.serverless.start({"handler": handler})
```
## Testing Your Serverless Function
To test your function locally, use this command:
```bash theme={"theme":{"light":"github-light","dark":"github-dark"}}
python your_script.py --test_input '{
"input": {
"images": ["image1.jpg", "image2.jpg", "image3.jpg"],
"mock_logs": [
{"level": "info", "message": "Starting job"},
{"level": "debug", "message": "Debug information"},
{"level": "warn", "message": "Warning: low disk space"},
{"level": "error", "message": "Error: network timeout"}
],
"mock_error": false
}
}'
```
### Understanding the output
When you run the test, you'll see output similar to this:
```json theme={"theme":{"light":"github-light","dark":"github-dark"}}
{
"status": "success",
"results": [
{
"image": "image1.jpg",
"predicted_class": "cat",
"confidence": 0.85
},
{
"image": "image2.jpg",
"predicted_class": "dog",
"confidence": 0.92
},
{
"image": "image3.jpg",
"predicted_class": "bird",
"confidence": 0.78
}
]
}
```
This output demonstrates:
1. Successful processing of all images
2. Random classification results for each image
3. The overall success status of the job
## Conclusion
You've now created a serverless function using Runpod's Python SDK that demonstrates effective error handling and logging practices. This approach ensures that your serverless functions are robust, maintainable, and easier to debug.
To further enhance this application, consider:
* Implementing more specific error types and handling
* Adding more detailed logging for each step of the process
* Exploring Runpod's advanced logging features and integrations
Runpod's serverless library provides a powerful foundation for building reliable, scalable applications with comprehensive error management and logging capabilities.
---
# Source: https://docs.runpod.io/pods/configuration/expose-ports.md
# Expose ports
> Learn how to make your Pod services accessible from the internet using HTTP proxy and TCP port forwarding
Runpod provides flexible options for exposing your Pod services to the internet. This guide explains how to configure port exposure for different use cases and requirements.
## Understanding port mapping
When exposing services from your Pod, it's important to understand that the publicly accessible port usually differs from your internal service port. This mapping ensures security and allows multiple Pods to coexist on the same infrastructure.
For example, if you run a web API inside your Pod on port 4000 like this:
```bash theme={"theme":{"light":"github-light","dark":"github-dark"}}
uvicorn main:app --host 0.0.0.0 --port 4000
```
The external port users connect to will be different, depending on your chosen exposure method.
## HTTP access via Runpod proxy
Runpod's HTTP proxy provides the easiest way to expose web services from your Pod. This method works well for REST APIs, web applications, and any HTTP-based service.
### Configure external HTTP ports
To configure HTTP ports during Pod deployment, click **Edit Template** and add a comma-separated list of ports to the **Expose HTTP Ports (Max 10)** field.
To configure HTTP ports for an existing Pod, navigate to the [Pod page](https://www.console.runpod.io/pods), expand your Pod, click the hamburger menu on the bottom-left, select **Edit Pod**, then add your port(s) to the **Expose HTTP Ports (Max 10)** field.
You can also configure HTTP ports for a Pod template in the [My Templates](https://www.console.runpod.io/user/templates) section of the console.
### Access your service
Once your Pod is running and your service is active, access it using the proxy URL format:
```bash
https://[POD_ID]-[INTERNAL_PORT].proxy.runpod.net
```
Replace `[POD_ID]` with your Pod's unique identifier and `[INTERNAL_PORT]` with your service's internal port. For example:
* Pod ID: `abc123xyz`
* Internal port: `4000`
* Access URL: `https://abc123xyz-4000.proxy.runpod.net`
A Pod that's listed as **Running** in the console (with a green dot in the Pod UI) may not be ready to use. The best way to check if your Pod is ready is by checking the **Telemetry** tab in the Pod details page in the Runpod console.
If a Pod is receiving telemetry, it should be ready to use, but individual services (JupyterLab, HTTP services, etc.) may take a few minutes to start up.
### Proxy limitations and behavior
The HTTP proxy route includes several intermediaries that affect connection behavior:
```bash
User → Cloudflare → Runpod Load Balancer → Your Pod
```
This architecture introduces important limitations:
* **100-second timeout**: Cloudflare enforces a maximum connection time of 100 seconds. If your service doesn't respond within this time, the connection closes with a `524` error.
* **HTTPS only**: All connections are secured with HTTPS, even if your internal service uses HTTP.
* **Public accessibility**: Your service becomes publicly accessible. While the Pod ID provides some obscurity, implement proper authentication in your application.
Design your application with these constraints in mind. For long-running operations, consider:
* Implementing progress endpoints that return status updates.
* Using background job queues with status polling.
* Breaking large operations into smaller chunks.
* Returning immediate responses with job IDs for later retrieval.
## TCP access via public IP
Pods do not support UDP connections. If your application relies on UDP, you'll need to modify your application to use TCP-based communication instead.
For services requiring direct TCP connections, lower latency, or protocols other than HTTP, use TCP port exposure with public IP addresses.
### Configure TCP ports
In your Pod or template configuration, follow the same steps as for [HTTP ports](#configure-external-http-ports), but add ports to the **Expose TCP Ports** field. This enables direct TCP forwarding with a public IP address.
### Find your connection details
After your Pod starts, check the **Connect** menu to find your assigned public IP and external port mapping under **Direct TCP Ports**. For example:
```bash
TCP port 213.173.109.39:13007 -> :22
```
Public IP addresses may change for Community Cloud Pods if your Pod is migrated or restarted, but they should remain stable for Secure Cloud Pods.
External port mappings change whenever your Pod resets.
## Symmetrical port mapping
Some applications require the external port to match the internal port. Runpod supports this through a special configuration syntax.
### Requesting symmetrical ports
To request symmetrical mapping, specify port numbers above 70000 in your TCP configuration. These aren't valid port numbers, but signal Runpod to allocate matching internal and external ports.
After Pod creation, check the **Connect** menu to see which symmetrical ports were assigned under **Direct TCP Ports**.
### Accessing port mappings programmatically
Your application can discover assigned ports through environment variables. For example, if you specify `70000` and `70001` in your Pod configuration, you could use the following commands to retrieve the assigned ports:
```bash theme={"theme":{"light":"github-light","dark":"github-dark"}}
echo $RUNPOD_TCP_PORT_70000
echo $RUNPOD_TCP_PORT_70001
```
You can use these environment variables in your application configuration to automatically adapt to assigned ports:
**Python example:**
```python theme={"theme":{"light":"github-light","dark":"github-dark"}}
import os
# Get the assigned port or use a default
port = os.environ.get('RUNPOD_TCP_PORT_70000', '8000')
app.run(host='0.0.0.0', port=int(port))
```
**Configuration file example:**
```yaml theme={"theme":{"light":"github-light","dark":"github-dark"}}
server:
host: 0.0.0.0
port: ${RUNPOD_TCP_PORT_70000}
```
## Best practices
When exposing ports from your Pods, follow these guidelines for security and reliability:
### Security considerations
* **Implement authentication**: Both HTTP proxy and TCP access make your services publicly accessible. Always implement proper authentication and authorization in your applications.
* **Use HTTPS for sensitive data**: While the proxy automatically provides HTTPS, TCP connections do not. Implement TLS in your application when handling sensitive data over TCP.
* **Validate input**: Public endpoints are targets for malicious traffic. Implement robust input validation and rate limiting.
### Performance optimization
* **Choose the right method**: Use HTTP proxy for web services and TCP for everything else. The proxy adds latency but provides automatic HTTPS and load balancing.
* **Handle timeouts gracefully**: Design your application to work within the 100-second proxy timeout or use TCP for long-running connections.
* **Monitor your services**: Implement health checks and monitoring to ensure your exposed services remain accessible.
### Configuration tips
* **Document your ports**: Maintain clear documentation of which services run on which ports, especially in complex deployments.
* **Use templates**: Define port configurations in templates for consistent deployments across multiple Pods.
* **Test thoroughly**: Verify your port configurations work correctly before deploying production workloads.
## Common use cases
Different types of applications benefit from different exposure methods:
* **Web APIs and REST services**: Use HTTP proxy for automatic HTTPS and simple configuration.
* **WebSocket applications**: TCP exposure often works better for persistent connections that might exceed timeout limits.
* **Database connections**: Use TCP with proper security measures. Consider using Runpod's global networking for internal-only databases.
* **Development environments**: HTTP proxy works well for web-based IDEs and development servers.
## Troubleshooting
Try these fixes if you're having issues with port exposure:
* **Service not accessible via proxy**: Ensure your service binds to `0.0.0.0` (all interfaces) not just `localhost` or `127.0.0.1`.
* **524 timeout errors**: If your service takes longer than 100 seconds to respond, consider using TCP or restructuring your application for faster responses.
* **Connection refused**: Verify your service is running and listening on the correct port inside the Pod.
* **Port already in use**: Check that no other services in your Pod are using the same port.
* **Unstable connections**: For Community Cloud Pods, implement reconnection logic to handle IP address changes.
## Next steps
Once you've exposed your ports, consider:
* Setting up [SSH access](/pods/configuration/use-ssh) for secure Pod administration.
* Implementing [global networking](/pods/networking) for secure Pod-to-Pod communication.
* Configuring health checks and monitoring for your exposed services.
---
# Source: https://docs.runpod.io/tutorials/pods/fine-tune-llm-axolotl.md
# Fine tune an LLM with Axolotl on Runpod
Runpod provides an easier method to fine tune an LLM. For more information, see [Fine tune a model](/fine-tune/).
[axolotl](https://github.com/OpenAccess-AI-Collective/axolotl) is a tool that simplifies the process of training large language models (LLMs). It provides a streamlined workflow that makes it easier to fine-tune AI models on various configurations and architectures. When combined with Runpod's GPU resources, Axolotl enables you to harness the power needed to efficiently train LLMs.
In addition to its user-friendly interface, Axolotl offers a comprehensive set of YAML examples covering a wide range of LLM families, such as LLaMA2, Gemma, LLaMA3, and Jamba. These examples serve as valuable references, helping users understand the role of each parameter and guiding them in making appropriate adjustments for their specific use cases. It is highly recommended to explore [these examples](https://github.com/OpenAccess-AI-Collective/axolotl/tree/main/examples) to gain a deeper understanding of the fine-tuning process and optimize the model's performance according to your requirements.
In this tutorial, we'll walk through the steps of training an LLM using Axolotl on Runpod and uploading your model to Hugging Face.
## Setting up the environment
Fine-tuning a large language model (LLM) can take up a lot of compute power. Because of this, we recommend fine-tuning using Runpod's GPUs.
To do this, you'll need to create a Pod, specify a container, then you can begin training. A Pod is an instance on a GPU or multiple GPUs that you can use to run your training job. You also specify a Docker image like `axolotlai/axolotl-cloud:main-latest` that you want installed on your Pod.
1. Login to [Runpod](https://www.console.runpod.io/console/home) and deploy your Pod.
1. Select **Deploy**.
2. Select an appropriate GPU instance.
3. Specify the `axolotlai/axolotl-cloud:main-latest` image as your Template image.
4. Select your GPU count.
5. Select **Deploy**.
For optimal compatibility, we recommend using A100, H100, V100, or RTX 3090 Pods for Axolotl fine-tuning.
Now that you have your Pod set up and running, connect to it over secure SSH.
2. Wait for the Pod to startup, then connect to it using secure SSH.
1. On your Pod page, select **Connect**.
2. Copy the secure SSH string and paste it into your terminal on your machine.
```bash theme={"theme":{"light":"github-light","dark":"github-dark"}}
ssh @ -p -i string
```
Follow the on-screen prompts to SSH into your Pod.
You should use the SSH connection to your Pod as it is a persistent connection. The Web UI terminal shouldn't be relied on for long-running processes, as it will be disconnected after a period of inactivity.
With the Pod deployed and connected via SSH, we're ready to move on to preparing our dataset.
## Preparing the dataset
The dataset you provide to your LLM is crucial, as it's the data your model will learn from during fine-tuning. You can make your own dataset that will then be used to fine-tune your own model, or you can use a pre-made one.
To continue, use either a [local dataset](#using-a-local-dataset) or one [stored on Hugging Face](#using-a-hugging-face-dataset).
### Using a local dataset
To use a local dataset, you'll need to transfer it to your Runpod instance. You can do this using Runpod CLI to securely transfer files from your local machine to the one hosted by Runpod. All Pods automatically come with `runpodctl` installed with a Pod-scoped API key. ### To send a file
Run the following on the computer that has the file you want to send, enter the following command:
```bash theme={"theme":{"light":"github-light","dark":"github-dark"}}
runpodctl send data.jsonl
```
```bash theme={"theme":{"light":"github-light","dark":"github-dark"}}
Sending 'data.jsonl' (5 B)
Code is: 8338-galileo-collect-fidel
On the other computer run
runpodctl receive 8338-galileo-collect-fidel
```
### To receive a file
The following is an example of a command you'd run on your Runpod machine.
```bash theme={"theme":{"light":"github-light","dark":"github-dark"}}
runpodctl receive 8338-galileo-collect-fidel
```
The following is an example of an output.
```bash theme={"theme":{"light":"github-light","dark":"github-dark"}}
Receiving 'data.jsonl' (5 B)
Receiving (<-149.36.0.243:8692)
data.jsonl 100% |████████████████████| ( 5/ 5B, 0.040 kB/s)
```
Once the local dataset is transferred to your Runpod machine, we can proceed to updating requirements and preprocessing the data.
### Using a Hugging Face dataset
If your dataset is stored on Hugging Face, you can specify its path in the `lora.yaml` configuration file under the `datasets` key. Axolotl will automatically download the dataset during the preprocessing step.
Review the [configuration file](https://github.com/OpenAccess-AI-Collective/axolotl/blob/main/docs/config.qmd) in detail and make any adjustments to your file as needed.
Now update your Runpod machine's requirement and preprocess your data.
## Updating requirements and preprocessing data
Before you can start training, you'll need to install the necessary dependencies and preprocess our dataset.
In some cases, your Pod will not contain the Axolotl repository. To add the required repository, run the following commands and then continue with the tutorial:
```bash theme={"theme":{"light":"github-light","dark":"github-dark"}}
git clone https://github.com/OpenAccess-AI-Collective/axolotl
cd axolotl
```
1. Install the required packages by running the following commands:
```bash theme={"theme":{"light":"github-light","dark":"github-dark"}}
pip3 install packaging ninja
pip3 install -e '.[flash-attn,deepspeed]'
```
2. Update the `lora.yml` configuration file with your dataset path and other training settings. You can use any of the examples in the `examples` folder as a starting point.
3. Preprocess your dataset by running:
```bash theme={"theme":{"light":"github-light","dark":"github-dark"}}
CUDA_VISIBLE_DEVICES=""
python -m axolotl.cli.preprocess examples/openllama-3b/lora.yml
```
This step converts your dataset into a format that Axolotl can use for training.
Having updated the requirements and preprocessed the data, we're now ready to fine-tune the LLM.
### Fine-tuning the LLM
With your environment set up and data preprocessed, you're ready to start fine-tuning the LLM.
Run the following command to fine-tune the base model.
```bash theme={"theme":{"light":"github-light","dark":"github-dark"}}
accelerate launch -m axolotl.cli.train examples/openllama-3b/lora.yml
```
This will start the training process using the settings specified in your `lora.yml` file. The training time will depend on factors like your model size, dataset size, and GPU type. Be prepared to wait a while, especially for larger models and datasets.
Once training is complete, we can move on to testing our fine-tuned model through inference.
### Inference
Once training is complete, you can test your fine-tuned model using the inference script:
```bash theme={"theme":{"light":"github-light","dark":"github-dark"}}
accelerate launch -m axolotl.cli.inference examples/openllama-3b/lora.yml --lora_model_dir="./lora-out"
```
This will allow you to interact with your model and see how it performs on new prompts. If you're satisfied with your model's performance, you can merge the LoRA weights with the base model using the `merge_lora` script.
### Merge the model
You will merge the base model with the LoRA weights using the `merge_lora` script.
Run the following command:
```bash theme={"theme":{"light":"github-light","dark":"github-dark"}}
python3 -m axolotl.cli.merge_lora examples/openllama-3b/lora.yml \
--lora_model_dir="./lora-out"
```
This creates a standalone model that doesn't require LoRA layers for inference.
### Upload the model to Hugging Face
Finally, you can share your fine-tuned model with others by uploading it to Hugging Face.
1. Login to Hugging Face through the CLI:
```bash theme={"theme":{"light":"github-light","dark":"github-dark"}}
huggingface-cli login
```
2. Create a new model repository on Hugging Face using `huggingface-cli`.
```bash theme={"theme":{"light":"github-light","dark":"github-dark"}}
huggingface-cli repo create your_model_name --type model
```
3. Then, use the `huggingface-cli upload` command to upload your merged model to the repository.
```bash theme={"theme":{"light":"github-light","dark":"github-dark"}}
huggingface-cli upload your_model_name path_to_your_model
```
With our model uploaded to Hugging Face, we've successfully completed the fine-tuning process and made our work available for others to use and build upon.
## Conclusion
By following these steps and leveraging the power of Axolotl and Runpod, you can efficiently fine-tune LLMs to suit your specific use cases. The combination of Axolotl's user-friendly interface and Runpod's GPU resources makes the process more accessible and streamlined. Remember to explore the provided YAML examples to gain a deeper understanding of the various parameters and make appropriate adjustments for your own projects. With practice and experimentation, you can unlock the full potential of fine-tuned LLMs and create powerful, customized AI models.
---
# Source: https://docs.runpod.io/fine-tune.md
> Fetch the complete documentation index at: https://docs.runpod.io/llms.txt
> Use this file to discover all available pages before exploring further.
# Fine-tune a model
This guide explains how to fine-tune a large language model using Runpod and Axolotl. You'll learn how to select a base model, configure your training environment, and start the fine-tuning process.
## Prerequisites
Before you begin fine-tuning, ensure you have:
* A Runpod account with access to the Fine Tuning feature
* (Optional) A Hugging Face access token for gated models
## Select a base model
To start fine-tuning, you'll need to choose a base model from Hugging Face:
1. Navigate to the **Fine Tuning** section in the sidebar
2. Enter the Hugging Face model ID in the **Base Model** field
* Example: `NousResearch/Meta-Llama-3-8B`
3. For gated models (requiring special access):
1. Generate a Hugging Face token with appropriate permissions
2. Add your token in the designated field
## Select a dataset
You can choose a dataset from Hugging Face for fine-tuning:
1. Browse available datasets on [Hugging Face](https://huggingface.co/datasets?task_categories=task_categories:text-generation\&sort=trending)
2. Enter your chosen dataset identifier in the **Dataset** field
* Example: `tatsu-lab/alpaca`
## Deploy the fine-tuning pod
Follow these steps to set up your training environment:
1. Click **Deploy the Fine Tuning Pod**
2. Select a GPU instance based on your model's requirements:
* Smaller models: Choose GPUs with less memory
* Larger models/datasets: Choose GPUs with higher memory capacity
3. Monitor the system logs for deployment progress
4. Wait for the success message: `"You've successfully configured your training environment!"`
## Connect to your training environment
After your pod is deployed and active, you can connect using any of these methods:
1. Go to your Fine Tuning pod dashboard
2. Click **Connect** and choose your preferred connection method:
* **Jupyter Notebook**: Browser-based notebook interface
* **Web Terminal**: Browser-based terminal
* **SSH**: Local machine terminal connection
To use SSH, add your public SSH key in your account settings. The system automatically adds your key to the pod's `authorized_keys` file.
## Configure your environment
Your training environment includes this directory structure in `/workspace/fine-tuning/`:
* `examples/`: Sample configurations and scripts
* `outputs/`: Training results and model outputs
* `config.yaml`: Training parameters for your model
The system generates an initial `config.yaml` based on your selected base model and dataset.
## Review and modify the configuration
The `config.yaml` file controls your fine-tuning parameters. Here's how to customize it:
1. Open the configuration file:
```sh theme={"theme":{"light":"github-light","dark":"github-dark"}}
nano config.yaml
```
2. Review and adjust the parameters based on your specific use case
Here's an example configuration with common parameters:
```yaml theme={"theme":{"light":"github-light","dark":"github-dark"}}
base_model: NousResearch/Meta-Llama-3.1-8B
# Model loading settings
load_in_8bit: false
load_in_4bit: false
strict: false
# Dataset configuration
datasets:
- path: tatsu-lab/alpaca
type: alpaca
dataset_prepared_path: last_run_prepared
val_set_size: 0.05
output_dir: ./outputs/out
# Training parameters
sequence_len: 8192
sample_packing: true
pad_to_sequence_len: true
# Weights & Biases logging (optional)
wandb_project:
wandb_entity:
wandb_watch:
wandb_name:
wandb_log_model:
# Training optimization
gradient_accumulation_steps: 8
micro_batch_size: 1
num_epochs: 1
optimizer: paged_adamw_8bit
lr_scheduler: cosine
learning_rate: 2e-5
# Additional settings
train_on_inputs: false
group_by_length: false
bf16: auto
fp16:
tf32: false
gradient_checkpointing: true
gradient_checkpointing_kwargs:
use_reentrant: false
early_stopping_patience:
resume_from_checkpoint:
logging_steps: 1
xformers_attention:
flash_attention: true
warmup_steps: 100
evals_per_epoch: 2
eval_table_size:
saves_per_epoch: 1
debug:
deepspeed:
weight_decay: 0.0
fsdp:
fsdp_config:
special_tokens:
pad_token: <|end_of_text|>
```
The `config.yaml` file contains all hyperparameters needed for fine-tuning. You may need to iterate on these settings to achieve optimal results.
For more configuration examples, visit the [Axolotl examples repository](https://github.com/axolotl-ai-cloud/axolotl/tree/main/examples).
## Start the fine-tuning process
Once your configuration is ready, follow these steps:
1. Start the training process:
```sh theme={"theme":{"light":"github-light","dark":"github-dark"}}
axolotl train config.yaml
```
2. Monitor the training progress in your terminal
## Push your model to Hugging Face
After completing the fine-tuning process, you can share your model:
1. Log in to Hugging Face:
```sh theme={"theme":{"light":"github-light","dark":"github-dark"}}
huggingface-cli login
```
2. Create a new repository on Hugging Face if needed
3. Upload your model:
```sh theme={"theme":{"light":"github-light","dark":"github-dark"}}
huggingface-cli upload / ./output
```
Replace `` with your Hugging Face username and `` with your desired model name.
## Additional resources
For more information about fine-tuning with Axolotl, see:
* [Axolotl Documentation](https://github.com/OpenAccess-AI-Collective/axolotl)
---
# Source: https://docs.runpod.io/tutorials/serverless/generate-sdxl-turbo.md
> Fetch the complete documentation index at: https://docs.runpod.io/llms.txt
> Use this file to discover all available pages before exploring further.
# Generate images with SDXL Turbo
When it comes to working with an AI image generator, the speed in which images are generated is often a compromise. Runpod's Serverless Workers allows you to host [SDXL Turbo](https://huggingface.co/stabilityai/sdxl-turbo) from Stability AI, which is a fast text-to-image model.
In this tutorial, you'll build a web application, where you'll leverage Runpod's Serverless Worker and Endpoint to return an image from a text-based input.
By the end of this tutorial, you'll have an understanding of running a Serverless Worker on Runpod and sending requests to an Endpoint to receive a response.
You can proceed with the tutorial by following the build steps outlined here or skip directly to [Deploy a Serverless Endpoint](#deploy-a-serverless-endpoint) section.
## Prerequisites
This section presumes you have an understanding of the terminal and can execute commands from your terminal.
Before starting this tutorial, you'll need access to:
### Runpod
To continue with this quick start, you'll need access to the following from Runpod:
* Runpod account
* Runpod API Key
### Docker
To build your Docker image, you'll need access to the following:
* Docker installed
* Docker account
You can also use the prebuilt image from [runpod/sdxl-turbo](https://hub.docker.com/r/runpod/sdxl-turbo).
### GitHub
To clone the `worker-sdxl-turbo` repo, you'll need access to the following:
* Git installed
* Permissions to clone GitHub repos
With the prerequisites covered, get started by building and pushing a Docker image to a container registry.
## Build and push your Docker image
This step will walk you through building and pushing your Docker image to your container registry. This is useful to building custom images for your use case. If you prefer, you can use the prebuilt image from [runpod/sdxl-turbo](https://hub.docker.com/r/runpod/sdxl-turbo) instead of building your own.
Building a Docker image allows you to specify the container when creating a Worker. The Docker image includes the [Runpod Handler](https://github.com/runpod-workers/worker-sdxl-turbo/blob/main/src/handler.py) which is how you provide instructions to Worker to perform some task. In this example, the Handler is responsible for taking a Job and returning a base 64 instance of the image.
1. Clone the [Runpod Worker SDXL Turbo](https://github.com/runpod-workers/worker-sdxl-turbo) repository:
```bash theme={"theme":{"light":"github-light","dark":"github-dark"}}
gh repo clone runpod-workers/worker-sdxl-turbo
```
2. Navigate to the root of the cloned repo:
```bash theme={"theme":{"light":"github-light","dark":"github-dark"}}
cd worker-sdxl-turbo
```
3. Build the Docker image:
```html theme={"theme":{"light":"github-light","dark":"github-dark"}}
docker build --tag /: .
```
4. Push your container registry:
```html theme={"theme":{"light":"github-light","dark":"github-dark"}}
docker push /:
```
Now that you've pushed your container registry, you're ready to deploy your Serverless Endpoint to Runpod.
## Deploy a Serverless Endpoint
The container you just built will run on the Worker you're creating. Here, you will configure and deploy the Endpoint. This will include the GPU and the storage needed for your Worker.
This step will walk you through deploying a Serverless Endpoint to Runpod.
1. Log in to the [Runpod Serverless console](https://www.console.runpod.io/serverless).
2. Select **+ New Endpoint**.
3. Provide the following:
1. Endpoint name.
2. Select a GPU.
3. Configure the number of Workers.
4. (optional) Select **FlashBoot**.
5. (optional) Select a template.
6. Enter the name of your Docker image.
* For example, `runpod/sdxl-turbo:dev`.
7. Specify enough memory for your Docker image.
4. Select **Deploy**.
Now, let's send a request to your Endpoint.
## Send a request
Now that our Endpoint is deployed, you can begin interacting with and integrating it into an application. Before writing the logic into the application, ensure that you can interact with the Endpoint by sending a request.
Run the following command:
```bash theme={"theme":{"light":"github-light","dark":"github-dark"}}
curl -X POST "https://api.runpod.ai/v2/${YOUR_ENDPOINT}/runsync" \
-H "accept: application/json" \
-H "content-type: application/json" \
-H "authorization: ${YOUR_API_KEY}" \
-d '{
"input": {
"prompt": "${YOUR_PROMPT}",
"num_inference_steps": 25,
"refiner_inference_steps": 50,
"width": 1024,
"height": 1024,
"guidance_scale": 7.5,
"strength": 0.3,
"seed": null,
"num_images": 1
}
}'
```
```JSON theme={"theme":{"light":"github-light","dark":"github-dark"}}
{
"delayTime": 168,
"executionTime": 251,
"id": "sync-fa542d19-92b2-47d0-8e58-c01878f0365d-u1",
"output": "BASE_64",
"status": "COMPLETED"
}
```
Export your variable names in your terminal session or replace them in line:
* `YOUR_ENDPOINT`: The name of your Endpoint.
* `YOUD_API_KEY`: The API Key required with read and write access.
* `YOUR_PROMPT`: The custom prompt passed to the model.
You should see the output. The status will return `PENDING`; but quickly change to `COMPLETED` if you query the Job Id.
## Integrate into your application
Now, let's create a web application that can take advantage of writing a prompt and generate an image based on that prompt. While these steps are specific to JavaScript, you can make requests against your Endpoint in any language of your choice.
To do that, you'll create two files:
* `index.html`: The frontend to your web application.
* `script.js`: The backend which handles the logic behind getting the prompt and the call to the Serverless Endpoint.
The HTML file (`index.html`) sets up a user interface with an input box for the prompt and a button to trigger the image generation.
```HTML index.html theme={"theme":{"light":"github-light","dark":"github-dark"}}
Runpod AI Image Generator
Runpod AI Image Generator
```
The JavaScript file (`script.js`) contains the `generateImage` function. This function reads the user's input, makes a POST request to the Runpod serverless endpoint, and handles the response. The server's response is expected to contain the base64-encoded image, which is then displayed on the webpage.
```JavaScript script.js theme={"theme":{"light":"github-light","dark":"github-dark"}}
async function generateImage() {
const prompt = document.getElementById("promptInput").value;
if (!prompt) {
alert("Please enter a prompt!");
return;
}
const options = {
method: "POST",
headers: {
accept: "application/json",
"content-type": "application/json",
// Replace with your actual API key
authorization: "Bearer ${process.env.REACT_APP_AUTH_TOKEN}",
},
body: JSON.stringify({
input: {
prompt: prompt,
num_inference_steps: 25,
width: 1024,
height: 1024,
guidance_scale: 7.5,
seed: null,
num_images: 1,
},
}),
};
try {
const response = await fetch(
// Replace with your actual Endpoint Id
"https://api.runpod.ai/v2/${process.env.REACT_APP_ENDPOINT_ID}/runsync",
options,
);
const data = await response.json();
if (data && data.output) {
const imageBase64 = data.output;
const imageUrl = `data:image/jpeg;base64,${imageBase64}`;
document.getElementById("imageResult").innerHTML =
``;
} else {
alert("Failed to generate image");
}
} catch (error) {
console.error("Error:", error);
alert("Error generating image");
}
}
```
1. Replace `${process.env.REACT_APP_AUTH_TOKEN}` with your actual API key.
2. Replace `${process.env.REACT_APP_ENDPOINT_ID}` with your specific Endpoint.
3. Open `index.html` in a web browser, enter a prompt, and select **Generate Image** to see the result.
This web application serves as a basic example of how to interact with your Runpod serverless endpoint from a client-side application. It can be expanded or modified to fit more complex use cases.
## Run a server
You can run a server through Python or by opening the `index.html` page in your browser.
Run the following command to start a server locally using Python.
```bash theme={"theme":{"light":"github-light","dark":"github-dark"}}
python -m http.server 8000
```
**Open the File in a Browser**
Open the `index.html` file directly in your web browser.
1. Navigate to the folder where your `index.html` file is located.
2. Right-click on the file and choose **Open with** and select your preferred web browser.
* Alternatively, you can drag and drop the `index.html` file into an open browser window.
* The URL will look something like `file:///path/to/your/index.html`.
---
# Source: https://docs.runpod.io/tutorials/sdks/python/101/generator.md
> Fetch the complete documentation index at: https://docs.runpod.io/llms.txt
> Use this file to discover all available pages before exploring further.
# Building a streaming handler for text to speech simulation
This tutorial will guide you through creating a serverless function using Runpod's Python SDK that simulates a text-to-speech (TTS) process. We'll use a streaming handler to stream results incrementally, demonstrating how to handle long-running tasks efficiently in a serverless environment.
A streaming handler in the Runpod's Python SDK is a special type of function that allows you to iterate over a sequence of values lazily. Instead of returning a single value and exiting, a streaming handler yields multiple values, one at a time, pausing the function's state between each yield. This is particularly useful for handling large data streams or long-running tasks, as it allows the function to produce and return results incrementally, rather than waiting until the entire process is complete.
## Setting up your Serverless Function
Let's break down the process of creating our TTS simulator into steps.
### Import required libraries
First, import the necessary libraries:
```python theme={"theme":{"light":"github-light","dark":"github-dark"}}
import runpod
import time
import re
import json
import sys
```
### Create the TTS Simulator
Define a function that simulates the text-to-speech process:
```python theme={"theme":{"light":"github-light","dark":"github-dark"}}
def text_to_speech_simulator(text, chunk_size=5, delay=0.5):
words = re.findall(r'\w+', text)
for i in range(0, len(words), chunk_size):
chunk = words[i:i+chunk_size]
audio_chunk = f"Audio chunk {i//chunk_size + 1}: {' '.join(chunk)}"
time.sleep(delay) # Simulate processing time
yield audio_chunk
```
This function:
1. Splits the input text into words
2. Processes the words in chunks
3. Simulates a delay for each chunk
4. Yields each "audio chunk" as it's processed
### Create the Streaming Handler
Now, let's create the main handler function:
```python theme={"theme":{"light":"github-light","dark":"github-dark"}}
def streaming_handler(job):
job_input = job['input']
text = job_input.get('text', "Welcome to Runpod's text-to-speech simulator!")
chunk_size = job_input.get('chunk_size', 5)
delay = job_input.get('delay', 0.5)
print(f"TTS Simulator | Starting job {job['id']}")
print(f"Processing text: {text}")
for audio_chunk in text_to_speech_simulator(text, chunk_size, delay):
yield {"status": "processing", "chunk": audio_chunk}
yield {"status": "completed", "message": "Text-to-speech conversion completed"}
```
This handler:
1. Extracts parameters from the job input
2. Logs the start of the job
3. Calls the TTS simulator and yields each chunk as it's processed using a streaming handler
4. Yields a completion message when finished
### Set up the main function
Finally, set up the main execution block:
```python theme={"theme":{"light":"github-light","dark":"github-dark"}}
if __name__ == "__main__":
if "--test_input" in sys.argv:
# Code for local testing (see full example)
else:
runpod.serverless.start({"handler": streaming_handler, "return_aggregate_stream": True})
```
This block allows for both local testing and deployment as a Runpod serverless function.
## Complete code example
Here's the full code for our serverless TTS simulator using a streaming handler:
```python theme={"theme":{"light":"github-light","dark":"github-dark"}}
import runpod
import time
import re
import json
import sys
def text_to_speech_simulator(text, chunk_size=5, delay=0.5):
words = re.findall(r'\w+', text)
for i in range(0, len(words), chunk_size):
chunk = words[i:i+chunk_size]
audio_chunk = f"Audio chunk {i//chunk_size + 1}: {' '.join(chunk)}"
time.sleep(delay) # Simulate processing time
yield audio_chunk
def streaming_handler(job):
job_input = job['input']
text = job_input.get('text', "Welcome to Runpod's text-to-speech simulator!")
chunk_size = job_input.get('chunk_size', 5)
delay = job_input.get('delay', 0.5)
print(f"TTS Simulator | Starting job {job['id']}")
print(f"Processing text: {text}")
for audio_chunk in text_to_speech_simulator(text, chunk_size, delay):
yield {"status": "processing", "chunk": audio_chunk}
yield {"status": "completed", "message": "Text-to-speech conversion completed"}
if __name__ == "__main__":
if "--test_input" in sys.argv:
test_input_index = sys.argv.index("--test_input")
if test_input_index + 1 < len(sys.argv):
test_input_json = sys.argv[test_input_index + 1]
try:
job = json.loads(test_input_json)
gen = streaming_handler(job)
for item in gen:
print(json.dumps(item))
except json.JSONDecodeError:
print("Error: Invalid JSON in test_input")
else:
print("Error: --test_input requires a JSON string argument")
else:
runpod.serverless.start({"handler": streaming_handler, "return_aggregate_stream": True})
```
## Testing your Serverless Function
To test your function locally, use this command:
```bash theme={"theme":{"light":"github-light","dark":"github-dark"}}
python your_script.py --test_input '
{
"input": {
"text": "This is a test of the Runpod text-to-speech simulator. It processes text in chunks and simulates audio generation.",
"chunk_size": 4,
"delay": 1
},
"id": "local_test"
}'
```
### Understanding the output
When you run the test, you'll see output similar to this:
```json theme={"theme":{"light":"github-light","dark":"github-dark"}}
{"status": "processing", "chunk": "Audio chunk 1: This is a test"}
{"status": "processing", "chunk": "Audio chunk 2: of the Runpod"}
{"status": "processing", "chunk": "Audio chunk 3: text to speech"}
{"status": "processing", "chunk": "Audio chunk 4: simulator It processes"}
{"status": "processing", "chunk": "Audio chunk 5: text in chunks"}
{"status": "processing", "chunk": "Audio chunk 6: and simulates audio"}
{"status": "processing", "chunk": "Audio chunk 7: generation"}
{"status": "completed", "message": "Text-to-speech conversion completed"}
```
This output demonstrates:
1. The incremental processing of text chunks
2. Real-time status updates for each chunk
3. A completion message when the entire text is processed
## Conclusion
You've now created a serverless function using Runpod's Python SDK that simulates a streaming text-to-speech process. This example showcases how to handle long-running tasks and stream results incrementally in a serverless environment.
To further enhance this application, consider:
* Implementing a real text-to-speech model
* Adding error handling for various input types
* Exploring Runpod's documentation for advanced features like GPU acceleration for audio processing
Runpod's serverless library provides a powerful foundation for building scalable, efficient applications that can process and stream data in real-time without the need to manage infrastructure.
---
# Source: https://docs.runpod.io/serverless/vllm/get-started.md
# Source: https://docs.runpod.io/get-started.md
# Source: https://docs.runpod.io/serverless/vllm/get-started.md
# Source: https://docs.runpod.io/get-started.md
> Fetch the complete documentation index at: https://docs.runpod.io/llms.txt
> Use this file to discover all available pages before exploring further.
# Deploy your first Pod
> Run code on a remote GPU in minutes.
Follow this guide to learn how to create an account, deploy your first GPU Pod, and use it to execute code remotely.
## Step 1: Create an account
Start by creating a Runpod account:
1. [Sign up here](https://www.console.runpod.io/signup).
2. Verify your email address.
3. Set up two-factor authentication (recommended for security).
Planning to share compute resources with your team? You can convert your personal account to a team account later. See [Manage accounts](/get-started/manage-accounts) for details.
## Step 2: Deploy a Pod
Now that you've created your account, you're ready to deploy your first Pod:
1. Open the [Pods page](https://www.console.runpod.io/pods) in the web interface.
2. Click the **Deploy** button.
3. Select **A40** from the list of graphics cards.
4. In the field under **Pod Name**, enter the name **quickstart-pod**.
5. Keep all other fields (Pod Template, GPU Count, and Instance Pricing) on their default settings.
6. Click **Deploy On-Demand** to deploy and start your Pod. You'll be redirected back to the Pods page after a few seconds.
If you haven't set up payments yet, you'll be prompted to add a payment method and purchase credits for your account.
## Step 3: Explore the Pod detail pane
On the [Pods page](https://www.console.runpod.io/pods), click the Pod you just created to open the Pod detail pane. The pane opens onto the **Connect** tab, where you'll find options for connecting to your Pod so you can execute code on your GPU (after it's done initializing).
Take a minute to explore the other tabs:
* **Details**: Information about your Pod, such as hardware specs, pricing, and storage.
* **Telemetry**: Realtime utilization metrics for your Pod's CPU, memory, and storage.
* **Logs**: Logs streamed from your container (including stdout from any applications inside) and the Pod management system.
* **Template Readme**: Details about the template your Pod is running. Your Pod is configured with the latest official Runpod PyTorch template.
## Step 4: Execute code on your Pod with JupyterLab
1. Go back to the **Connect** tab, and under **HTTP Services**, click **Jupyter Lab** to open a JupyterLab workspace on your Pod.
2. Under **Notebook**, select **Python 3 (ipykernel)**.
3. Type `print("Hello, world!")` in the first line of the notebook.
4. Click the play button to run your code.
And that's it—congrats! You just ran your first line of code on Runpod.
## Step 5: Clean up
To avoid incurring unnecessary charges, follow these steps to clean up your Pod resources:
1. Return to the [Pods page](https://www.console.runpod.io/pods) and click your running Pod.
2. Click the **Stop** button (pause icon) to stop your Pod.
3. Click **Stop Pod** in the modal that opens to confirm.
You'll still be charged a small amount for storage on stopped Pods (\$0.20 per GB per month). If you don't need to retain any data on your Pod, you should terminate it completely.
To terminate your Pod:
1. Click the **Terminate** button (trash icon).
2. Click **Terminate Pod** to confirm.
Terminating a Pod permanently deletes all data that isn't stored in a [network volume](/storage/network-volumes). Be sure that you've saved any data you might need to access again.
To learn more about how storage works, see the [Pod storage overview](/pods/storage/types).
## Next steps
Now that you've learned the basics, you're ready to:
* [Generate API keys](/get-started/api-keys) for programmatic resource management.
* Experiment with various options for [accessing and managing Runpod resources](/get-started/connect-to-runpod).
* Learn how to [choose the right Pod](/pods/choose-a-pod) for your workload.
* Review options for [Pod pricing](/pods/pricing).
* [Explore our tutorials](/tutorials/introduction/overview) for specific AI/ML use cases.
* Start building production-ready applications with [Runpod Serverless](/serverless/overview).
## Need help?
* Join the Runpod community [on Discord](https://discord.gg/cUpRmau42V).
* Submit a support request using our [contact page](https://contact.runpod.io/hc/requests/new).
* Reach out to us via [email](mailto:help@runpod.io).
---
# Source: https://docs.runpod.io/serverless/workers/github-integration.md
> Fetch the complete documentation index at: https://docs.runpod.io/llms.txt
> Use this file to discover all available pages before exploring further.
# Deploy workers from GitHub
> Speed up development by deploying workers directly from GitHub.
Runpod's GitHub integration simplifies your workflow by pulling your code and Dockerfile from GitHub, building the container image, storing it in Runpod's secure container registry, and deploying it to your endpoint.
## Requirements
To deploy a worker from GitHub, you need:
* A working [handler function](/serverless/workers/handler-functions) in a GitHub repository.
* A Dockerfile in your repository. See [Creating a Dockerfile](/serverless/workers/deploy#creating-a-dockerfile) for details.
* A GitHub account.
For an example repository containing the minimal files necessary for deployment, see [runpod-workers/worker-basic](https://github.com/runpod-workers/worker-basic) on GitHub.
## Authorize Runpod with GitHub
Before deploying from GitHub, you need to authorize Runpod to access your repositories:
1. Open the [settings page](http://console.runpod.io/user/settings) in the Runpod console.
2. Find the **GitHub** card under **Connections** and click **Connect**.
3. Sign in using the GitHub authorization flow. This will open your GitHub account settings page.
4. Choose which repositories Runpod can access:
* **All repositories:** Access to all current and future repositories.
* **Only select repositories:** Choose specific repositories.
5. Click **Save**.
You can manage this connection using Runpod settings or GitHub account settings, in the **Applications** tab.
## Deploy from GitHub
To deploy a worker from a GitHub repository:
1. Go to the [Serverless section](https://www.console.runpod.io/serverless) of the Runpod console
2. Click **New Endpoint**
3. Under **Import Git Repository**, use the search bar or menu to select the repository containing your code. This menu is populated with all repos connected to your account (repos you've forked/created, or owned by your GitHub organizations).
4. Configure your deployment options:
* **Branch:** Select which branch to deploy from.
* **Dockerfile Path:** Specify the path to your Dockerfile (if not in root).
Then click **Next**.
5. Configure your endpoint settings:
* Enter an **Endpoint Name**.
* Choose your **Endpoint Type**: select **Queue** for traditional queue-based processing or **Load Balancer** for direct HTTP access (see [Load balancing endpoints](/serverless/load-balancing/overview) for details).
* Under **GPU Configuration**, select the appropriate GPU types for your workload.
* Configure [other settings](/serverless/endpoints/endpoint-configurations) as needed (active/max workers, timeouts, environment variables).
6. Click **Deploy Endpoint** to deploy your worker.
Runpod will build your Docker image and deploy it to your endpoint automatically. You'll be redirected to the endpoint details page when complete.
## Monitor build status
You can monitor your build status in the **Builds** tab of your endpoint detail page. Builds progress through these statuses:
| Status | Description |
| --------- | --------------------------------------------------- |
| Pending | Runpod is scheduling the build. |
| Building | Runpod is building your container. |
| Uploading | Runpod is uploading your container to the registry. |
| Testing | Runpod is testing your Serverless worker. |
| Completed | Runpod completed the build and upload. |
| Failed | Something went wrong (check build logs). |
## Update your endpoint
When you make changes to your GitHub repository, they won't automatically be pushed to your endpoint. To trigger an update for the workers on your endpoint, create a new release for the GitHub repository.
For detailed instructions on creating releases, see the [GitHub documentation](https://docs.github.com/en/repositories/releasing-projects-on-github/managing-releases-in-a-repository).
## Roll back to a previous build
Roll back your endpoint to any previous build directly from the Runpod console. This restores your endpoint to an earlier version without waiting for a new GitHub release.
### Rollback requirements
To roll back an endpoint, you need:
* An existing endpoint deployed with GitHub integration.
* At least one previous build available in your deployment history.
### Roll back a deployment
To roll back your endpoint to a previous build:
Open the endpoint details page in the [Serverless section](https://www.console.runpod.io/serverless) of the Runpod console.
Click the **Builds** tab to view your deployment history.
Find the build you want to roll back to, then click the three dots menu button next to that build.
Select **Rollback** from the menu.
Review the confirmation modal and click **Confirm** to proceed with the rollback.
After confirming, your endpoint rolls back to the selected build. A banner appears at the top of the endpoint page indicating the endpoint is on a rolled-back version.
### Rollback behavior
When you roll back an endpoint:
* Your endpoint immediately switches to the Docker image from the selected previous build.
* The rollback banner displays at the top of your endpoint page to indicate the current state.
* Your endpoint remains on the rolled-back version until you deploy a new release from GitHub.
* When you push a new commit and create a release, the new build automatically becomes the active version and supersedes the rollback.
## Manage multiple environments
GitHub integration enables streamlined development workflows by supporting multiple environments:
* Production endpoint tracking the `main` branch.
* Staging endpoint tracking the `dev` branch.
To set up multiple environments:
1. Create a new branch for your staging endpoint.
2. [Create an endpoint](#deploying-from-github) for your production branch.
3. On the Serverless page of the Runpod console, click the three dots to the top right of your production endpoint. Click **Clone Endpoint**.
4. Expand the **Repository Configuration** section and select your staging branch.
5. Click **Deploy Endpoint**.
Each environment maintains independent GPU and worker configurations.
## Continuous integration with GitHub Actions
You can enhance your workflow with GitHub Actions for testing before deployment:
1. Create a workflow file at `.github/workflows/test-and-deploy.yml`:
```yml theme={"theme":{"light":"github-light","dark":"github-dark"}}
name: Test and Deploy
on:
push:
branches: [ main ]
pull_request:
branches: [ main ]
jobs:
test-and-deploy:
runs-on: ubuntu-latest
steps:
- uses: actions/checkout@v3
- name: Build and push Docker image
uses: docker/build-push-action@v4
with:
context: .
push: true
tags: [DOCKER_USERNAME]/[WORKER_NAME]:${{ github.sha }}
- name: Run Tests
uses: runpod/runpod-test-runner@v1
with:
image-tag: [DOCKER_USERNAME]/[WORKER_NAME]:${{ github.sha }}
runpod-api-key: ${{ secrets.RUNPOD_API_KEY }} # Add your API key to a GitHub secret
test-filename: .github/tests.json
request-timeout: 300
```
To add your Runpod API key to a GitHub secret, see [Using secrets in GitHub Actions](https://docs.github.com/en/actions/security-for-github-actions/security-guides/using-secrets-in-github-actions).
2. Create test cases for your repository at `.github/tests.json`:
```json theme={"theme":{"light":"github-light","dark":"github-dark"}}
[
{
"input": {
"prompt": "Test input 1"
},
"expected_output": {
"status": "COMPLETED"
}
},
{
"input": {
"prompt": "Test input 2",
"parameter": "value"
},
"expected_output": {
"status": "COMPLETED"
}
}
]
```
## Troubleshoot deployment issues
If your worker fails to deploy or process requests:
* Check the build logs in the Runpod console for error messages.
* Verify your Dockerfile is properly configured.
* Ensure your handler function works correctly in local testing.
* Check that your repository structure matches what's expected in your Dockerfile.
* Verify you have the necessary permissions on the GitHub repository.
## Disconnect from GitHub
To disconnect your GitHub account from Runpod:
1. Go to [Runpod Settings](https://www.console.runpod.io/user/settings) → **Connections** → **Edit Connection**
2. Select your GitHub account.
3. Click **Configure**.
4. Scroll down to the Danger Zone.
5. Uninstall "Runpod Inc."
## Limitations
Runpod has the following limitations when using the GitHub integration to deploy your worker:
* **Build time limit**: Builds must complete within 160 minutes (2.5 hours). Optimize your Dockerfile for efficiency with large images to avoid timeouts.
* **Image size restriction**: Docker images cannot exceed 80 GB. Plan your image requirements accordingly, particularly when including large model weights or dependencies.
* **Base image limitations**: The integration doesn't support privately hosted images as base images. Consider incorporating essential components directly into your Dockerfile instead.
* **Hardware-specific builds**: Builds requiring GPU access during construction (such as those using GPU-compiled versions of libraries like `bitsandbytes`) are not supported.
* **Platform exclusivity**: Images built through Runpod's image builder service are designed exclusively for Runpod's infrastructure and cannot be pulled or executed on other platforms.
* **Single GitHub connection**: Each Runpod account can link to only one GitHub account. This connection cannot be shared among team members, requiring separate Runpod accounts for collaborative projects.
---
# Source: https://docs.runpod.io/references/gpu-types.md
> Fetch the complete documentation index at: https://docs.runpod.io/llms.txt
> Use this file to discover all available pages before exploring further.
# GPU types
> Explore the GPUs available on Runpod.
For information on pricing, see [GPU pricing](https://www.runpod.io/gpu-instance/pricing).
## Available GPU types
This table lists all GPU types available on Runpod:
| GPU ID | Display Name | Memory (GB) |
| ------------------------------------------------- | ------------------------ | ----------- |
| AMD Instinct MI300X OAM | MI300X | 192 |
| NVIDIA A100 80GB PCIe | A100 PCIe | 80 |
| NVIDIA A100-SXM4-80GB | A100 SXM | 80 |
| NVIDIA A30 | A30 | 24 |
| NVIDIA A40 | A40 | 48 |
| NVIDIA B200 | B200 | 180 |
| NVIDIA GeForce RTX 3070 | RTX 3070 | 8 |
| NVIDIA GeForce RTX 3080 | RTX 3080 | 10 |
| NVIDIA GeForce RTX 3080 Ti | RTX 3080 Ti | 12 |
| NVIDIA GeForce RTX 3090 | RTX 3090 | 24 |
| NVIDIA GeForce RTX 3090 Ti | RTX 3090 Ti | 24 |
| NVIDIA GeForce RTX 4070 Ti | RTX 4070 Ti | 12 |
| NVIDIA GeForce RTX 4080 | RTX 4080 | 16 |
| NVIDIA GeForce RTX 4080 SUPER | RTX 4080 SUPER | 16 |
| NVIDIA GeForce RTX 4090 | RTX 4090 | 24 |
| NVIDIA GeForce RTX 5080 | RTX 5080 | 16 |
| NVIDIA GeForce RTX 5090 | RTX 5090 | 32 |
| NVIDIA H100 80GB HBM3 | H100 SXM | 80 |
| NVIDIA H100 NVL | H100 NVL | 94 |
| NVIDIA H100 PCIe | H100 PCIe | 80 |
| NVIDIA H200 | H200 SXM | 141 |
| NVIDIA L4 | L4 | 24 |
| NVIDIA L40 | L40 | 48 |
| NVIDIA L40S | L40S | 48 |
| NVIDIA RTX 2000 Ada Generation | RTX 2000 Ada | 16 |
| NVIDIA RTX 4000 Ada Generation | RTX 4000 Ada | 20 |
| NVIDIA RTX 4000 SFF Ada Generation | RTX 4000 Ada SFF | 20 |
| NVIDIA RTX 5000 Ada Generation | RTX 5000 Ada | 32 |
| NVIDIA RTX 6000 Ada Generation | RTX 6000 Ada | 48 |
| NVIDIA RTX A2000 | RTX A2000 | 6 |
| NVIDIA RTX A4000 | RTX A4000 | 16 |
| NVIDIA RTX A4500 | RTX A4500 | 20 |
| NVIDIA RTX A5000 | RTX A5000 | 24 |
| NVIDIA RTX A6000 | RTX A6000 | 48 |
| NVIDIA RTX PRO 6000 Blackwell Server Edition | RTX PRO 6000 Server | 96 |
| NVIDIA RTX PRO 6000 Blackwell Workstation Edition | RTX PRO 6000 Workstation | 96 |
| Tesla V100-FHHL-16GB | V100 FHHL | 16 |
| Tesla V100-PCIE-16GB | Tesla V100 | 16 |
| Tesla V100-SXM2-16GB | V100 SXM2 | 16 |
| Tesla V100-SXM2-32GB | V100 SXM2 32GB | 32 |
## GPU pools
The table below lists the GPU pools that you can use to define which GPUs are available to workers on an endpoint after deployment.
Use GPU pools when defining requirements for repositories published to the [Runpod Hub](/hub/publishing-guide#runpod-configuration), or when specifying GPU requirements for an endpoint with the [Runpod GraphQL API](https://graphql-spec.runpod.io/).
| Pool ID | GPUs Included | Memory (GB) |
| :----------- | :------------------------------- | :---------- |
| `AMPERE_16` | A4000, A4500, RTX 4000, RTX 2000 | 16 GB |
| `AMPERE_24` | L4, A5000, 3090 | 24 GB |
| `ADA_24` | 4090 | 24 GB |
| `AMPERE_48` | A6000, A40 | 48 GB |
| `ADA_48_PRO` | L40, L40S, 6000 Ada | 48 GB |
| `AMPERE_80` | A100 | 80 GB |
| `ADA_80_PRO` | H100 | 80 GB |
| `HOPPER_141` | H200 | 141 GB |
---
# Source: https://docs.runpod.io/serverless/workers/handler-functions.md
> Fetch the complete documentation index at: https://docs.runpod.io/llms.txt
> Use this file to discover all available pages before exploring further.
# Overview
> Write custom handler functions to process incoming requests to your queue-based endpoints.
Handler functions form the core of your Runpod Serverless applications. They define how your workers process [incoming requests](/serverless/endpoints/send-requests) and return results. This section covers everything you need to know about creating effective handler functions.
Handler functions are only required for **queue-based endpoints**. If you're building a [load balancing endpoint](/serverless/load-balancing/overview), you can define your own custom API endpoints using any HTTP framework of your choice (like FastAPI or Flask).
## Understanding job input
Before writing a handler function, make sure you understand the structure of the input. When your endpoint receives a request, it sends a JSON object to your handler function in this general format:
```json theme={"theme":{"light":"github-light","dark":"github-dark"}}
{
"id": "eaebd6e7-6a92-4bb8-a911-f996ac5ea99d",
"input": {
"key": "value"
}
}
```
`id` is a unique identifier for the job randomly generated by Runpod, while `input` contains data sent by the client for your handler function to process.
To learn how to structure requests to your endpoint, see [Send API requests](/serverless/endpoints/send-requests).
## Basic handler implementation
Here's a simple handler function that processes an endpoint request:
```python handler.py theme={"theme":{"light":"github-light","dark":"github-dark"}}
import runpod
def handler(job):
job_input = job["input"] # Access the input from the request
# Add your custom code here to process the input
return "Your job results"
runpod.serverless.start({"handler": handler}) # Required
```
The handler takes extracts the input from the job request, processes it, and returns a result. The `runpod.serverless.start()` function launches your serverless application with the specified handler.
## Local testing
To test your handler locally, you can create a `test_input.json` file with the input data you want to test:
```json test_input.json theme={"theme":{"light":"github-light","dark":"github-dark"}}
{
"input": {
"prompt": "Hey there!"
}
}
```
Then run your handler function using your local terminal:
```sh theme={"theme":{"light":"github-light","dark":"github-dark"}}
python handler.py
```
Instead of creating a `test_input.json` file, you can also provide test input directly in the command line prompt:
```sh theme={"theme":{"light":"github-light","dark":"github-dark"}}
python handler.py --test_input '{"input": {"prompt": "Test prompt"}}'
```
For more information on local testing, including command-line flags and starting a local API server, see [Local testing](/serverless/development/local-testing).
## Handler types
You can create several types of handler functions depending on the needs of your application.
### Standard handlers
The simplest handler type, standard handlers process inputs synchronously and return them when the job is complete.
```python handler.py theme={"theme":{"light":"github-light","dark":"github-dark"}}
import runpod
import time
def handler(job):
job_input = job["input"]
prompt = job_input.get("prompt")
seconds = job_input.get("seconds", 0)
# Simulate processing time
time.sleep(seconds)
return prompt
runpod.serverless.start({"handler": handler})
```
### Streaming handlers
Streaming handlers stream results incrementally as they become available. Use these when your application requires real-time updates, for example when streaming results from a language model.
```python handler.py theme={"theme":{"light":"github-light","dark":"github-dark"}}
import runpod
def streaming_handler(job):
for count in range(3):
result = f"This is the {count} generated output."
yield result
runpod.serverless.start({
"handler": streaming_handler,
"return_aggregate_stream": True # Optional, makes results available via /run
})
```
By default, outputs from streaming handlers are only available using the `/stream` operation. Set `return_aggregate_stream` to `True` to make outputs available from the `/run` and `/runsync` operations as well.
### Asynchronous handlers
Asynchronous handlers process operations concurrently for improved efficiency. Use these for tasks involving I/O operations, API calls, or processing large datasets.
```python handler.py theme={"theme":{"light":"github-light","dark":"github-dark"}}
import runpod
import asyncio
async def async_handler(job):
for i in range(5):
# Generate an asynchronous output token
output = f"Generated async token output {i}"
yield output
# Simulate an asynchronous task
await asyncio.sleep(1)
runpod.serverless.start({
"handler": async_handler,
"return_aggregate_stream": True
})
```
Async handlers allow your code to handle multiple tasks concurrently without waiting for each operation to complete. This approach offers excellent scalability for applications that deal with high-frequency requests, allowing your workers to remain responsive even under heavy load. Async handlers are also useful for streaming data scenarios and long-running tasks that produce incremental outputs.
When implementing async handlers, ensure proper use of `async` and `await` keywords throughout your code to maintain truly non-blocking operations and prevent performance bottlenecks, and consider leveraging the `yield` statement to generate outputs progressively over time.
Always test your async code thoroughly to properly handle asynchronous exceptions and edge cases, as async error patterns can be more complex than in synchronous code.
### Concurrent handlers
Concurrent handlers process multiple requests simultaneously with a single worker. Use these for small, rapid operations that don't fully utlize the worker's GPU.
When increasing concurrency, it's crucial to monitor memory usage carefully and test thoroughly to determine the optimal concurrency levels for your specific workload. Implement proper error handling to prevent one failing request from affecting others, and continuously monitor and adjust concurrency parameters based on real-world performance.
Learn how to build a concurrent handler by [following this guide](/serverless/workers/concurrent-handler).
## Error handling
When an exception occurs in your handler function, the Runpod SDK automatically captures it, marks the [job status](/serverless/endpoints/job-states) as `FAILED` and returns the exception details in the job results.
For custom error responses:
```python handler.py theme={"theme":{"light":"github-light","dark":"github-dark"}}
import runpod
def handler(job):
job_input = job["input"]
# Validate the presence of required inputs
if not job_input.get("seed", False):
return {
"error": "Input is missing the 'seed' key. Please include a seed."
}
# Proceed if the input is valid
return "Input validation successful."
runpod.serverless.start({"handler": handler})
```
Exercise caution when using `try/except` blocks to avoid unintentionally suppressing errors. Either return the error for a graceful failure or raise it to flag the job as `FAILED`.
## Advanced handler controls
Use these features to fine-tune your Serverless applications for specific use cases.
### Progress updates
Send progress updates during job execution to inform clients about the current state of processing:
```python handler.py theme={"theme":{"light":"github-light","dark":"github-dark"}}
import runpod
def handler(job):
for update_number in range(0, 3):
runpod.serverless.progress_update(job, f"Update {update_number}/3")
return "done"
runpod.serverless.start({"handler": handler})
```
Progress updates will be available when the job status is polled.
### Worker refresh
For long-running or complex jobs, you may want to refresh the worker after completion to start with a clean state for the next job. Enabling worker refresh clears all logs and wipes the worker state after a job is completed.
For example:
```python handler.py theme={"theme":{"light":"github-light","dark":"github-dark"}}
# Requires runpod python version 0.9.0+
import runpod
import time
def handler(job):
job_input = job["input"] # Access the input from the request
results = []
# Compute results
...
# Return the results and indicate the worker should be refreshed
return {"refresh_worker": True, "job_results": results}
# Configure and start the Runpod serverless function
runpod.serverless.start(
{
"handler": handler, # Required: Specify the sync handler
"return_aggregate_stream": True, # Optional: Aggregate results are accessible via /run operation
}
)
```
Your handler must return a dictionary that contains the `refresh_worker` flag. This flag will be removed before the remaining job output is returned.
## Handler function best practices
A short list of best practices to keep in mind as you build your handler function:
1. **Initialize outside the handler**: Load models and other heavy resources outside your handler function to avoid repeated initialization.
```python handler.py theme={"theme":{"light":"github-light","dark":"github-dark"}}
import runpod
import torch
from transformers import AutoModelForSequenceClassification, AutoTokenizer
# Load model and tokenizer outside the handler
model_name = "distilbert-base-uncased-finetuned-sst-2-english"
tokenizer = AutoTokenizer.from_pretrained(model_name)
model = AutoModelForSequenceClassification.from_pretrained(model_name)
# Move model to GPU if available
device = torch.device("cuda" if torch.cuda.is_available() else "cpu")
model.to(device)
def handler(job):
# ...
runpod.serverless.start({"handler": handler})
```
2. **Input validation**: [Validate inputs](#error-handling) before processing to avoid errors during execution.
3. **Local testing**: [Test your handlers locally](/serverless/development/local-testing) before deployment.
## Payload limits
Be aware of payload size limits when designing your handler:
* `/run` operation: 10 MB
* `/runsync` operation: 20 MB
If your results exceed these limits, consider stashing them in cloud storage and returning links instead.
## Next steps
Once you've created your handler function, you can:
* [Explore flags for local testing.](/serverless/development/local-testing)
* [Create a Dockerfile for your worker.](/serverless/workers/create-dockerfile)
* [Deploy your worker image to a Serverless endpoint.](/serverless/workers/deploy)
---
# Source: https://docs.runpod.io/tutorials/sdks/python/get-started/hello-world.md
> Fetch the complete documentation index at: https://docs.runpod.io/llms.txt
> Use this file to discover all available pages before exploring further.
# Hello World with Runpod
Let's dive into creating your first Runpod Serverless application. We're going to build a "Hello, World!" program that greets users with a custom message. Don't worry about sending requests just yet - we'll cover that in the next tutorial, [running locally](/tutorials/sdks/python/get-started/running-locally).
This exercise will introduce you to the key parts of a Runpod application, giving you a solid foundation in serverless functions. By the end, you'll have your very own Runpod serverless function up and running locally.
### Creating Your First Serverless Function
Let's write a Python script that defines a simple serverless function. This function will say `Hello, World!`.
Create a new file called `hello_world.py` in your text editor and add the following code:
```python hello_world.py theme={"theme":{"light":"github-light","dark":"github-dark"}}
import runpod
def handler(job):
job_input = job["input"]
return f"Hello {job_input['name']}!"
runpod.serverless.start({"handler": handler})
```
Let's break this down:
We start by importing the `runpod` library. This gives us all the tools we need for creating and managing serverless applications.
Next, we define our `handler` function. This function processes incoming requests. It takes a `job` parameter, which contains all the info about the incoming job.
Inside the handler, we grab the input data from the job. We're expecting a 'name' field in the input.
Then we create and return our greeting message, using the name we got from the input.
Finally, we call `runpod.serverless.start()`, telling it to use our `handler` function. This kicks off the serverless worker and gets it ready to handle incoming jobs.
And there you have it! You've just created your first Runpod serverless function. It takes in a request with a name and returns a personalized greeting.
### Key Takeaways
* Runpod functions are built around a handler that processes incoming jobs.
* You can easily access input data from the job parameter.
* The `runpod.serverless.start()` function gets your serverless worker up and running.
## Next steps
You've now got a basic `Hello, World!` Runpod serverless function up and running. You've learned how to handle input and output in a serverless environment and how to start your application.
These are the building blocks for creating more complex serverless applications with Runpod. As you get more comfortable with these concepts, you'll be able to create even more powerful and flexible serverless functions.
---
# Source: https://docs.runpod.io/tutorials/sdks/python/101/hello.md
> Fetch the complete documentation index at: https://docs.runpod.io/llms.txt
> Use this file to discover all available pages before exploring further.
# Create a basic Serverless function
Runpod's serverless library enables you to create and deploy scalable functions without managing infrastructure. This tutorial will walk you through creating a simple serverless function that determines whether a number is even.
## Creating a Basic Serverless Function
Let's start by building a function that checks if a given number is even.
### Import the Runpod library
Create a new python file called `is_even.py`.
Import the Runpod library:
```python is_even.py theme={"theme":{"light":"github-light","dark":"github-dark"}}
import runpod
```
### Define your function
Create a function that takes a `job` argument:
```python is_even.py theme={"theme":{"light":"github-light","dark":"github-dark"}}
def is_even(job):
job_input = job["input"]
the_number = job_input["number"]
if not isinstance(the_number, int):
return {"error": "Please provide an integer."}
return the_number % 2 == 0
```
This function:
1. Extracts the input from the `job` dictionary
2. Checks if the input is an integer
3. Returns an error message if it's not an integer
4. Determines if the number is even and returns the result
### Start the Serverless function
Wrap your function with `runpod.serverless.start()`:
```python is_even.py theme={"theme":{"light":"github-light","dark":"github-dark"}}
runpod.serverless.start({"handler": is_even})
```
This line initializes the serverless function with your specified handler.
## Complete code example
Here's the full code for our serverless function:
```python is_even.py theme={"theme":{"light":"github-light","dark":"github-dark"}}
import runpod
def is_even(job):
job_input = job["input"]
the_number = job_input["number"]
if not isinstance(the_number, int):
return {"error": "Please provide an integer."}
return the_number % 2 == 0
runpod.serverless.start({"handler": is_even})
```
## Testing your Serverless Function
To test your function locally, use the following command:
```bash theme={"theme":{"light":"github-light","dark":"github-dark"}}
python is_even.py --test_input '{"input": {"number": 2}}'
```
When you run the test, you'll see output similar to this:
```bash theme={"theme":{"light":"github-light","dark":"github-dark"}}
--- Starting Serverless Worker | Version 1.6.2 ---
INFO | test_input set, using test_input as job input.
DEBUG | Retrieved local job: {'id': 'some-id', 'input': {'number': 2}}
INFO | some-id | Started.
DEBUG | some-id | Handler output: True
DEBUG | some-id | run_job return: {'output': True}
INFO | Job some-id completed successfully.
INFO | Job result: {'output': True}
INFO | Local testing complete, exiting.
```
This output indicates that:
1. The serverless worker started successfully
2. It received the test input
3. The function processed the input and returned `True` (as 2 is even)
4. The job completed successfully
## Conclusion
You've now created a basic serverless function using Runpod's Python SDK. This approach allows for efficient, scalable deployment of functions without the need to manage infrastructure.
To further explore Runpod's serverless capabilities, consider:
* Creating more complex functions
* Implementing error handling and input validation
* Exploring Runpod's documentation for advanced features and best practices
Runpod's serverless library provides a powerful tool for a wide range of applications, from simple utilities to complex data processing tasks.
---
# Source: https://docs.runpod.io/tutorials/sdks/python/102/huggingface-models.md
> Fetch the complete documentation index at: https://docs.runpod.io/llms.txt
> Use this file to discover all available pages before exploring further.
# Using Hugging Face models with Runpod
Artificial Intelligence (AI) has revolutionized how applications analyze and interact with data. One powerful aspect of AI is sentiment analysis, which allows machines to interpret and categorize emotions expressed in text. In this tutorial, you will learn how to integrate pre-trained Hugging Face models into your Runpod Serverless applications to perform sentiment analysis. By the end of this guide, you will have a fully functional AI-powered sentiment analysis function running in a serverless environment.
### Install Required Libraries
To begin, we need to install the necessary Python libraries. Hugging Face's `transformers` library provides state-of-the-art machine learning models, while the `torch` library supports these models.
Execute the following command in your terminal to install the required libraries:
```bash theme={"theme":{"light":"github-light","dark":"github-dark"}}
pip install torch transformers
```
This command installs the `torch` and `transformers` libraries. `torch` is used for creating and running models, and `transformers` provides pre-trained models.
### Import libraries
Next, we need to import the libraries into our Python script. Create a new Python file named `sentiment_analysis.py` and include the following import statements:
```python sentiment_analysis.py theme={"theme":{"light":"github-light","dark":"github-dark"}}
import runpod
from transformers import pipeline
```
These imports bring in the `runpod` SDK for serverless functions and the `pipeline` method from `transformers`, which allows us to use pre-trained models.
### Load the Model
Loading the model in a function ensures that the model is only loaded once when the worker starts, optimizing the performance of our application. Add the following code to your `sentiment_analysis.py` file:
```python sentiment_analysis.py theme={"theme":{"light":"github-light","dark":"github-dark"}}
def load_model():
return pipeline(
"sentiment-analysis", model="distilbert-base-uncased-finetuned-sst-2-english"
)
```
In this function, we use the `pipeline` method from `transformers` to load a pre-trained sentiment analysis model. The `distilbert-base-uncased-finetuned-sst-2-english` model is a distilled version of BERT fine-tuned for sentiment analysis tasks.
### Define the Handler Function
We will now define the handler function that will process incoming events and use the model for sentiment analysis. Add the following code to your script:
```python sentiment_analysis.py theme={"theme":{"light":"github-light","dark":"github-dark"}}
def sentiment_analysis_handler(event):
global model
# Ensure the model is loaded
if "model" not in globals():
model = load_model()
# Get the input text from the event
text = event["input"].get("text")
# Validate input
if not text:
return {"error": "No text provided for analysis."}
# Perform sentiment analysis
result = model(text)[0]
return {"sentiment": result["label"], "score": float(result["score"])}
```
This function performs the following steps:
1. Ensures the model is loaded.
2. Retrieves the input text from the incoming event.
3. Validates the input to ensure text is provided.
4. Uses the loaded model to perform sentiment analysis.
5. Returns the sentiment label and score as a dictionary.
### Start the Serverless Worker
To run our sentiment analysis function as a serverless worker, we need to start the worker using Runpod's SDK. Add the following line at the end of your `sentiment_analysis.py` file:
```python sentiment_analysis.py theme={"theme":{"light":"github-light","dark":"github-dark"}}
runpod.serverless.start({"handler": sentiment_analysis_handler})
```
This command starts the serverless worker and specifies `sentiment_analysis_handler` as the handler function for incoming requests.
### Complete Code
Here is the complete code for our sentiment analysis serverless function:
```python sentiment_analysis.py theme={"theme":{"light":"github-light","dark":"github-dark"}}
import runpod
from transformers import pipeline
def load_model():
return pipeline(
"sentiment-analysis", model="distilbert-base-uncased-finetuned-sst-2-english"
)
def sentiment_analysis_handler(event):
global model
if "model" not in globals():
model = load_model()
text = event["input"].get("text")
if not text:
return {"error": "No text provided for analysis."}
result = model(text)[0]
return {"sentiment": result["label"], "score": float(result["score"])}
runpod.serverless.start({"handler": sentiment_analysis_handler})
```
### Testing Locally
To test this function locally, create a file named `test_input.json` with the following content:
```json test_input.json theme={"theme":{"light":"github-light","dark":"github-dark"}}
{
"input": {
"text": "I love using Runpod for serverless machine learning!"
}
}
```
Run the following command in your terminal to test the function:
```
python sentiment_analysis.py --rp_server_api
```
You should see output similar to the following, indicating that the sentiment analysis function is working correctly:
```bash theme={"theme":{"light":"github-light","dark":"github-dark"}}
--- Starting Serverless Worker | Version 1.6.2 ---
INFO | Using test_input.json as job input.
DEBUG | Retrieved local job: {'input': {'text': 'I love using Runpod for serverless machine learning!'}, 'id': 'local_test'}
INFO | local_test | Started.
model.safetensors: 100%|█████████████████████████| 268M/268M [00:02<00:00, 94.9MB/s]
tokenizer_config.json: 100%|██████████████████████| 48.0/48.0 [00:00<00:00, 631kB/s]
vocab.txt: 100%|█████████████████████████████████| 232k/232k [00:00<00:00, 1.86MB/s]
Hardware accelerator e.g. GPU is available in the environment, but no `device` argument is passed to the `Pipeline` object. Model will be on CPU.
DEBUG | local_test | Handler output: {'sentiment': 'POSITIVE', 'score': 0.9889019727706909}
DEBUG | local_test | run_job return: {'output': {'sentiment': 'POSITIVE', 'score': 0.9889019727706909}}
INFO | Job local_test completed successfully.
INFO | Job result: {'output': {'sentiment': 'POSITIVE', 'score': 0.9889019727706909}}
INFO | Local testing complete, exiting.
```
## Conclusion
In this tutorial, you learned how to integrate a pre-trained Hugging Face model into a Runpod serverless function to perform sentiment analysis on text input.
This powerful combination enables you to create advanced AI applications in a serverless environment.
You can extend this concept to use more complex models or perform different types of inference tasks as needed.
In our final lesson, we will explore a more complex AI task: text-to-image generation.
---
# Source: https://docs.runpod.io/instant-clusters.md
> Fetch the complete documentation index at: https://docs.runpod.io/llms.txt
> Use this file to discover all available pages before exploring further.
# Overview
> Fully managed compute clusters for multi-node training and AI inference.
Runpod offers custom Instant Cluster pricing plans for large scale and enterprise workloads. If you're interested in learning more, [contact our sales team](https://ecykq.share.hsforms.com/2MZdZATC3Rb62Dgci7knjbA).
Runpod Instant Clusters provide fully managed compute clusters with high-performance networking for distributed workloads like multi-node training and large-scale AI inference.
## Key features
* High-speed networking from 1600 to 3200 Gbps within a single data center.
* On-demand clusters are available from 2-8 nodes (16-64 GPUs)
* [Contact our sales team](https://ecykq.share.hsforms.com/2MZdZATC3Rb62Dgci7knjbA) for larger clusters (up to 512 GPUs).
* Supports H200, B200, H100, and A100 GPUs.
* Automatic cluster configuration with static IP and [environment variables](#environment-variables).
* Multiple [deployment options](#get-started) for different frameworks and use cases.
## Networking performance
Instant Clusters feature high-speed local networking for efficient data movement between nodes:
* Most clusters include 3200 Gbps networking.
* A100 clusters offer up to 1600 Gbps networking.
This fast networking enables efficient scaling of distributed training and inference workloads. Runpod ensures nodes selected for clusters are within the same data center for optimal performance.
## Zero configuration
Runpod automates cluster setup so you can focus on your workloads:
* Clusters are pre-configured with static IP address management.
* All necessary [environment variables](#environment-variables) for distributed training are pre-configured.
* Supports popular frameworks like PyTorch, TensorFlow, and Slurm.
## Get started
Choose the tutorial that matches your preferred framework and use case.
[Deploy a Slurm cluster](/instant-clusters/slurm-clusters): Set up a managed Slurm cluster for high-performance computing workloads. Slurm provides job scheduling, resource allocation, and queue management for research environments and batch processing workflows.
[Deploy a PyTorch distributed training cluster](/instant-clusters/pytorch): Set up multi-node PyTorch training for deep learning models. This tutorial covers distributed data parallel training, gradient synchronization, and performance optimization techniques.
[Deploy an Axolotl fine-tuning cluster](/instant-clusters/axolotl): Use Axolotl's framework for fine-tuning large language models across multiple GPUs. This approach simplifies customizing pre-trained models like Llama or Mistral with built-in training optimizations.
[Deploy an unmanaged Slurm cluster](/instant-clusters/slurm): For advanced users who need full control over Slurm configuration. This option provides a basic Slurm installation that you can customize for specialized workloads.
You can also follow this [video tutorial](https://www.youtube.com/watch?v=k_5rwWyxo5s?si=r3lZclHcoY3HJYyg) to learn how to deploy Kimi K2 using Instant Clusters.
All accounts have a default spending limit. To deploy a larger cluster, submit a support ticket at [help@runpod.io](mailto:help@runpod.io).
## Network interfaces
High-bandwidth interfaces (`ens1`, `ens2`, etc.) handle communication between nodes, while the management interface (`eth0`) manages external traffic. The [NCCL](https://developer.nvidia.com/nccl) environment variable `NCCL_SOCKET_IFNAME` uses all available interfaces by default. The `PRIMARY_ADDR` corresponds to `ens1` to enable launching and bootstrapping distributed processes.
Instant Clusters support up to 8 interfaces per node. Each interface (`ens1` - `ens8`) provides a private network connection for inter-node communication, made available to distributed backends such as NCCL or GLOO.
## Environment variables
The following environment variables are present in all nodes in an Instant Cluster:
| Environment Variable | Description |
| ------------------------------ | ------------------------------------------------------------------------------------------------ |
| `PRIMARY_ADDR` / `MASTER_ADDR` | The address of the primary node. |
| `PRIMARY_PORT` / `MASTER_PORT` | The port of the primary node. All ports are available. |
| `NODE_ADDR` | The static IP of this node within the cluster network. |
| `NODE_RANK` | The cluster rank (i.e. global rank) assigned to this node. `NODE_RANK = 0` for the primary node. |
| `NUM_NODES` | The number of nodes in the cluster. |
| `NUM_TRAINERS` | The number of GPUs per node. |
| `HOST_NODE_ADDR` | A convenience variable, defined as `PRIMARY_ADDR:PRIMARY_PORT`. |
| `WORLD_SIZE` | The total number of GPUs in the cluster (`NUM_NODES` \* `NUM_TRAINERS`). |
Each node receives a static IP address (`NODE_ADDR`) on the overlay network. When a cluster is deployed, the system designates one node as the primary node by setting the `PRIMARY_ADDR` and `PRIMARY_PORT` environment variables. This simplifies working with multiprocessing libraries that require a primary node.
The following variables are equivalent:
* `MASTER_ADDR` and `PRIMARY_ADDR`
* `MASTER_PORT` and `PRIMARY_PORT`.
`MASTER_*` variables are available to provide compatibility with tools that expect these legacy names.
## NCCL configuration for multi-node training
For distributed training frameworks like PyTorch, you must explicitly configure NCCL to use the internal network interface to ensure proper inter-node communication:
```bash theme={"theme":{"light":"github-light","dark":"github-dark"}}
export NCCL_SOCKET_IFNAME=ens1
```
Without this configuration, nodes may attempt to communicate using external IP addresses in the 172.xxx range, which are reserved for internet connectivity only. This will result in connection timeouts and failed distributed training jobs in your cluster.
When troubleshooting multi-node communication issues, also consider adding debug information:
```bash theme={"theme":{"light":"github-light","dark":"github-dark"}}
export NCCL_DEBUG=INFO
```
## When to use Instant Clusters
Instant Clusters offer distributed computing power beyond the capabilities of single-machine setups.
Consider using Instant Clusters for:
* Multi-GPU language model training: Accelerate training of models like Llama or GPT across multiple GPUs.
* Large-scale computer vision projects: Process massive imagery datasets for autonomous vehicles or medical analysis.
* Scientific simulations: Run climate, molecular dynamics, or physics simulations that require massive parallel processing.
* Real-time AI inference: Deploy production AI models that demand multiple GPUs for fast output.
* Batch processing pipelines: Create systems for large-scale data processing, including video rendering and genomics.
---
# Source: https://docs.runpod.io/tutorials/sdks/python/get-started/introduction.md
> Fetch the complete documentation index at: https://docs.runpod.io/llms.txt
> Use this file to discover all available pages before exploring further.
# Introduction to the Runpod Python SDK
Welcome to the world of Serverless AI development with the [Runpod Python SDK](https://github.com/runpod/runpod-python).
The Runpod Python SDK helps you develop Serverless AI applications so that you can build and deploy scalable AI solutions efficiently.
This series of tutorials will deepen your understanding of Serverless principles and the practical knowledge to use the Runpod Python SDK in your AI applications.
## Prerequisites
To follow along with this guide, you should have:
* Basic programming knowledge in Python.
* An understanding of AI and machine learning concepts.
* [An account on the Runpod platform](https://www.console.runpod.io/signup).
## What is the Runpod Python SDK?
The [Runpod Python SDK](https://github.com/runpod/runpod-python) is a toolkit designed to facilitate the creation and deployment of Serverless applications on the Runpod platform.
It is optimized for AI and machine learning workloads, simplifying the development of scalable, cloud-based AI applications. The SDK allows you to define handler functions, conduct local testing, and utilize GPU support.
Acting as a bridge between your Python code and Runpod's cloud infrastructure, the SDK enables you to execute complex AI tasks without managing underlying hardware.
To start using Runpod Python SDK, see the [prerequisites](/tutorials/sdks/python/get-started/prerequisites) section or if, you're already setup proceed to the [Hello World](/tutorials/sdks/python/get-started/hello-world) tutorial, where we will guide you through creating, deploying, and running your first Serverless AI application.
You can also see a library of complete Runpod samples in the [Worker library](https://github.com/runpod-workers) on GitHub. These samples are complete Python libraries for common use cases.
## Learn more
Continue your journey by following our sequenced lessons designed to deepen your understanding and skills:
Here's a brief overview of each tutorial:
1. [Prerequisites and setup](/tutorials/sdks/python/get-started/prerequisites):
* Installing Python and setting up a virtual environment
* Installing the Runpod SDK
* Configuring your Runpod account
2. [Hello World: Your first Runpod function](/tutorials/sdks/python/get-started/hello-world):
* Creating a basic handler function
* Understanding job input and output
* Starting the Serverless worker
3. [Running and testing locally](/tutorials/sdks/python/get-started/running-locally):
* Testing with JSON input files
* Interpreting local test output
4. [Runpod functions](/tutorials/sdks/python/101/hello):
* Creating a basic handler function
* Understanding job input and output
* Starting the Serverless worker
* Testing with command-line arguments
5. [Using a Local Server](/tutorials/sdks/python/101/local-server-testing):
* Setting up a local test server
* Sending HTTP requests to your local function
* Understanding server output and debugging
* Comparing command-line and server-based testing
6. [Building a Generator Handler for Streaming Results](/tutorials/sdks/python/101/generator):
* Understanding generator functions in Runpod's SDK
* Creating a text-to-speech simulator with streaming output
* Implementing a generator handler for incremental processing
* Testing and debugging generator-based Serverless functions
7. [Advanced Handler Techniques](/tutorials/sdks/python/101/async):
* Synchronous vs asynchronous handlers
* Using generator functions for streaming output
* Handling multiple inputs and complex data structures
8. [Error Handling and Logging](/tutorials/sdks/python/101/error):
* Implementing try-except blocks in handlers
* Using Runpod's logging system
* Best practices for error management in Serverless functions
9. [Hugging Face Integration](/tutorials/sdks/python/102/huggingface-models):
* Installing and importing external libraries
* Loading and using a Hugging Face model
* Optimizing model loading for Serverless environments
10. [Stable Diffusion](/tutorials/sdks/python/102/stable-diffusion-text-to-image):
* Setting up a text-to-image generation function
* Handling larger inputs and outputs
Now, move on to the [prerequisites](/tutorials/sdks/python/get-started/prerequisites) and then set up [your first “Hello World”](/tutorials/sdks/python/get-started/hello-world) application with Runpod Python SDK.
---
# Source: https://docs.runpod.io/serverless/endpoints/job-states.md
> Fetch the complete documentation index at: https://docs.runpod.io/llms.txt
> Use this file to discover all available pages before exploring further.
# Job states and metrics
> Monitor your endpoints effectively by understanding job states and key metrics.
Understanding job states and metrics is essential for effectively managing your Serverless endpoints. This documentation covers the different states your jobs can be in and the key metrics available to monitor endpoint performance and health.
## Request job states
Understanding job states helps you track the progress of individual requests and identify where potential issues might occur in your workflow.
* `IN_QUEUE`: The job is waiting in the endpoint queue for an available worker to process it.
* `RUNNING`: A worker has picked up the job and is actively processing it.
* `COMPLETED`: The job has finished processing successfully and returned a result.
* `FAILED`: The job encountered an error during execution and did not complete successfully.
* `CANCELLED`: The job was manually cancelled using the `/cancel/job_id` endpoint before completion.
* `TIMED_OUT`: The job either expired before it was picked up by a worker or the worker failed to report back before reaching the timeout threshold.
## Endpoint metrics
You can find endpoint metrics in the **Metrics** tab of the Serverless endpoint details page in the [Runpod web interface](https://www.console.runpod.io/serverless).
* **Requests**: Displays the total number of requests received by your endpoint, along with the number of completed, failed, and retried requests.
* **Execution time**: Displays the P70, P90, and P98 execution times for requests on your endpoint. These percentiles help analyze execution time distribution and identify potential performance bottlenecks.
* **Delay time**: Delay time is the duration a request spends waiting in the queue before it is picked up by a worker. Displays the P70, P90, and P98 delay times for requests on your endpoint. These percentiles help assess whether your endpoint is scaling efficiently.
* **Cold start time**: Cold start time measures how long it takes to wake up a worker. This includes the time needed to start the container, load the model into GPU VRAM, and get the worker ready to process a job. Displays the P70, P90, and P98 cold start times for your endpoint.
* **Cold start count**: Displays the number of cold starts your endpoint has during a given period. The fewer, the better, as fewer cold starts mean faster response times.
* **WebhookRequest responses**: Displays the number of webhook requests sent and their corresponding responses, including success and failure counts.
* **Worker states**: Displays the number of workers that are [running, idle, throttled, etc.](/serverless/workers/overview#worker-states) across the selected time interval.
---
# Source: https://docs.runpod.io/references/troubleshooting/jupyterlab-blank-page.md
> Fetch the complete documentation index at: https://docs.runpod.io/llms.txt
> Use this file to discover all available pages before exploring further.
# JupyterLab blank page issue
> What to do when you open JupyterLab on a Pod and see a blank or non-responsive page.
When opening JupyterLab on your Pod, you may see a blank white page, even when the JupyterLab link in the Pod connection panel says it's "Ready." This page provides guidance to help you troubleshoot this issue.
## Understanding JupyterLab readiness
When you start a Pod with JupyterLab configured, it periodically pings the JupyterLab server to check its status. When the console displays a "Ready" status, it only means that the Jupyter server [`/api/status`](https://jupyter-server.readthedocs.io/en/latest/developers/rest-api.html#get--api-status) endpoint is responding to HTTP requests, not that JupyterLab has successfully started. It may take additional time to fully load and become usable.
## Common causes
A blank JupyterLab page can occur for several reasons, and sometimes multiple issues occur at once:
* **Pod still starting up**: You might see a blank white screen for some time after starting your Pod. This happens because Pod resources or services aren't fully initialized yet (even though it may be listed as "Running" in the console).
The best way to check if your Pod is ready to use is by checking the **Telemetry** tab in the Pod details page in the Runpod console. If a Pod is receiving telemetry, it should be ready to use, but individual services like JupyterLab may take a few minutes to start up.
* **Jupyter service still loading**: The Jupyter service may still be spinning up or performing initial setup work.
* **Browser cache issues**: If you keep seeing the same blank screen after closing and reopening the JupyterLab link, your browser (or an intermediate layer) might be serving a cached broken response.
* **Network problems**: If JupyterLab fails to load or stalls and other sites are also slow, you may have local network or connectivity issues between your machine and the Pod.
* **Misconfigured Pod or template**: If JupyterLab never loads despite multiple restarts and long waits, the image or template might not be starting Jupyter on the expected port or path.
## Troubleshooting steps
Follow the steps below based on what you're currently seeing.
### Status shows "Initializing"
Wait at least 30 to 60 seconds after starting your Pod before opening JupyterLab. The Pod needs time to fully initialize all services.
### Status shows "Ready" but page is blank
1. Wait on the blank screen for at least 60 seconds to allow JupyterLab to finish starting.
2. Try a hard refresh:
* Windows/Linux: Press Ctrl + Shift + R
* Mac: Press Cmd + Shift + R
3. Open the JupyterLab link in a private or incognito browser window to rule out browser caching.
4. If still blank, check your Pod logs in the Runpod console for JupyterLab-related errors or confirmation that Jupyter has started. Look for messages indicating that Jupyter is running on port 8888 (or your configured port). If you don't see any messages, check the Pod logs for errors.
Runpod only performs the JupyterLab health check on port 8888. If you're using a different port to expose the service, we recommend changing the port in your template configuration to 8888.
5. If you see errors or Jupyter never appears to start, restart the Pod and repeat the steps above.
### Repeated restarts
If you restart the same Pod more than three times and JupyterLab never loads, treat this as a configuration or template issue rather than a transient startup delay.
Verify the following:
* You're using a template that supports JupyterLab on the documented port (typically 8888).
* Any required environment variables or startup commands for Jupyter are correctly set in your template configuration. If you're not sure, check the template documentation.
If still stuck, share your Pod logs and template configuration with support or in the [Runpod Discord](https://discord.gg/runpod).
Runpod does not maintain or provide customer support for community templates. If you encounter issues, contact the template creator directly or seek help on the [community Discord](https://discord.gg/runpod).
---
# Source: https://docs.runpod.io/references/troubleshooting/jupyterlab-checkpoints-folder.md
> ## Documentation Index
>
> Fetch the complete documentation index at: https://docs.runpod.io/llms.txt
> Use this file to discover all available pages before exploring further.
# JupyterLab checkpoints folder access
If you're unable to open a folder named "checkpoints" in JupyterLab, this is a known issue where JupyterLab treats "checkpoints" as a reserved keyword.
## The issue
JupyterLab cannot open any directory named exactly "checkpoints". When you try to click on it, nothing happens because the system triggers its internal `listCheckpoints` function instead of opening the directory. This commonly affects ML model directories and ComfyUI installations.
## Solutions
### Option 1: Temporarily rename via terminal
Access the terminal in JupyterLab or through SSH and rename the folder:
```bash Rename to access theme={"theme":{"light":"github-light","dark":"github-dark"}}
# Rename to make it accessible
mv checkpoints checkpoint
# After working with the files, rename back
mv checkpoint checkpoints
```
The `mv` command only renames the folder, it doesn't delete any data.
### Option 2: Drag and drop method
Download your files to a different directory, then use JupyterLab's interface to drag and drop files into the checkpoints folder. The folder won't open, but it will accept dropped files.
### Option 3: Use the terminal for file operations
Work with the checkpoints folder entirely through the terminal:
```bash Access checkpoints via terminal theme={"theme":{"light":"github-light","dark":"github-dark"}}
# List contents
ls -la checkpoints/
# Copy files in
cp /path/to/model.safetensors checkpoints/
# Move files in
mv ~/downloaded-model.ckpt checkpoints/
```
## Related information
This issue has been reported in multiple GitHub issues and affects both JupyterLab and classic Jupyter Notebook. The folder name "checkpoints" conflicts with Jupyter's internal checkpoint system for notebook files.
---
# Source: https://docs.runpod.io/references/troubleshooting/leaked-api-keys.md
> ## Documentation Index
>
> Fetch the complete documentation index at: https://docs.runpod.io/llms.txt
> Use this file to discover all available pages before exploring further.
# Leaked API Keys
Leaked API keys can occur when users accidentally include a plain text API key in a public repository. This document provides guidance to help you remediate a compromised key.
## Disable
To disable an API key:
1. From the console, select **Settings**.
2. Under **API Keys**, select the toggle and select **Yes**.
## Revoke
To delete an API key:
1. From the console, select **Settings**.
2. Under **API Keys**, select the trash can icon and select **Revoke Key**.
---
# Source: https://docs.runpod.io/tutorials/sdks/python/101/local-server-testing.md
> ## Documentation Index
>
> Fetch the complete documentation index at: https://docs.runpod.io/llms.txt
> Use this file to discover all available pages before exploring further.
# Creating and testing a Runpod serverless function with local server
This tutorial will guide you through creating a basic serverless function using Runpod's Python SDK. We'll build a function that reverses a given string, demonstrating the simplicity and flexibility of Runpod's serverless architecture.
## Setting up your Serverless Function
Let's break down the process of creating our string reversal function into steps.
### Import Runpod Library
First, import the Runpod library:
```python theme={"theme":{"light":"github-light","dark":"github-dark"}}
import runpod
```
### Define utility function
Create a utility function to reverse the string:
```python theme={"theme":{"light":"github-light","dark":"github-dark"}}
def reverse_string(s):
return s[::-1]
```
This function uses Python's slicing feature to efficiently reverse the input string.
### Create the Handler Function
The handler function is the core of our serverless application:
```python theme={"theme":{"light":"github-light","dark":"github-dark"}}
def handler(job):
print(f"string-reverser | Starting job {job['id']}")
job_input = job["input"]
input_string = job_input.get("text", "")
if not input_string:
return {"error": "No input text provided"}
reversed_string = reverse_string(input_string)
job_output = {"original_text": input_string, "reversed_text": reversed_string}
return job_output
```
This handler:
1. Logs the start of each job
2. Extracts the input string from the job data
3. Validates the input
4. Reverses the string using our utility function
5. Prepares and returns the output
### Start the Serverless Function
Finally, start the Runpod serverless worker:
```python theme={"theme":{"light":"github-light","dark":"github-dark"}}
runpod.serverless.start({"handler": handler})
```
This line registers our handler function with Runpod's serverless infrastructure.
## Complete code example
Here's the full code for our serverless string reversal function:
```python theme={"theme":{"light":"github-light","dark":"github-dark"}}
import runpod
def reverse_string(s):
return s[::-1]
def handler(job):
print(f"string-reverser | Starting job {job['id']}")
job_input = job["input"]
input_string = job_input.get("text", "")
if not input_string:
return {"error": "No input text provided"}
reversed_string = reverse_string(input_string)
job_output = {"original_text": input_string, "reversed_text": reversed_string}
return job_output
runpod.serverless.start({"handler": handler})
```
## Testing Your Serverless Function
Runpod provides multiple ways to test your serverless function locally before deployment. We'll explore two methods: using command-line arguments and running a local test server.
### Method 1: Command-line Testing
To quickly test your function using command-line arguments, use this command:
```bash theme={"theme":{"light":"github-light","dark":"github-dark"}}
python your_script.py --test_input '{"input": {"text": "Hello, Runpod!"}}'
```
When you run this test, you'll see output similar to:
```bash theme={"theme":{"light":"github-light","dark":"github-dark"}}
--- Starting Serverless Worker | Version 1.6.2 ---
INFO | test_input set, using test_input as job input.
DEBUG | Retrieved local job: {'input': {'text': 'Hello, Runpod!'}, 'id': 'local_test'}
INFO | local_test | Started.
string-reverser | Starting job local_test
DEBUG | local_test | Handler output: {'original_text': 'Hello, Runpod!', 'reversed_text': '!doPnuR ,olleH'}
DEBUG | local_test | run_job return: {'output': {'original_text': 'Hello, Runpod!', 'reversed_text': '!doPnuR ,olleH'}}
INFO | Job local_test completed successfully.
INFO | Job result: {'output': {'original_text': 'Hello, Runpod!', 'reversed_text': '!doPnuR ,olleH'}}
INFO | Local testing complete, exiting.
```
This output shows the serverless worker starting, processing the job, and returning the result.
### Method 2: Local Test Server
For more comprehensive testing, especially when you want to simulate HTTP requests to your serverless function, you can launch a local test server. This server provides an endpoint that you can send requests to, mimicking the behavior of a deployed serverless function.
To start the local test server, use the `--rp_serve_api` flag:
```bash theme={"theme":{"light":"github-light","dark":"github-dark"}}
python your_script.py --rp_serve_api
```
This command starts a FastAPI server on your local machine, accessible at `http://localhost:8000`.
#### Sending Requests to the Local Server
Once your local server is running, you can send HTTP POST requests to test your function. Use tools like `curl` or Postman, or write scripts to automate your tests.
Example using `curl`:
```bash theme={"theme":{"light":"github-light","dark":"github-dark"}}
curl -X POST http://localhost:8000/run \
-H "Content-Type: application/json" \
-d '{"input": {"text": "Hello, Runpod!"}}'
```
This will send a POST request to your local server with the input data, simulating how your function would be called in a production environment.
#### Understanding the Server Output
When you send a request to the local server, you'll see output in your terminal similar to:
```bash theme={"theme":{"light":"github-light","dark":"github-dark"}}
INFO: 127.0.0.1:52686 - "POST /run HTTP/1.1" 200 OK
DEBUG | Retrieved local job: {'input': {'text': 'Hello, Runpod!'}, 'id': 'local_test'}
INFO | local_test | Started.
string-reverser | Starting job local_test
DEBUG | local_test | Handler output: {'original_text': 'Hello, Runpod!', 'reversed_text': '!doPnuR ,olleH'}
DEBUG | local_test | run_job return: {'output': {'original_text': 'Hello, Runpod!', 'reversed_text': '!doPnuR ,olleH'}}
INFO | Job local_test completed successfully.
```
This output provides detailed information about how your function processes the request, which can be invaluable for debugging and optimizing your serverless function.
## Conclusion
You've now created a basic serverless function using Runpod's Python SDK that reverses input strings and learned how to test it using both command-line arguments and a local test server. This example demonstrates how easy it is to deploy and validate simple text processing tasks as serverless functions.
To further explore Runpod's serverless capabilities, consider:
* Adding more complex string manipulations
* Implementing error handling for different input types
* Writing automated test scripts to cover various input scenarios
* Using the local server to integrate your function with other parts of your application during development
* Exploring Runpod's documentation for advanced features like concurrent processing or GPU acceleration
Runpod's serverless library provides a powerful foundation for building scalable, efficient text processing applications without the need to manage infrastructure.
---
# Source: https://docs.runpod.io/serverless/development/local-testing.md
> ## Documentation Index
>
> Fetch the complete documentation index at: https://docs.runpod.io/llms.txt
> Use this file to discover all available pages before exploring further.
# Local testing
> Test your Serverless handlers locally before deploying to production.
Testing your handler locally before deploying saves time and helps you catch issues early. The Runpod SDK provides multiple ways to test your handler function without consuming cloud resources.
## Basic testing
The simplest way to test your handler is by running it directly with test input.
### Inline JSON
Pass test input directly via the command line:
```sh theme={"theme":{"light":"github-light","dark":"github-dark"}}
python handler.py --test_input '{"input": {"prompt": "Hello, world!"}}'
```
This runs your handler with the specified input and displays the output in your terminal.
### Test file
For more complex or reusable test inputs, create a `test_input.json` file in the same directory as your handler:
```json test_input.json theme={"theme":{"light":"github-light","dark":"github-dark"}}
{
"input": {
"prompt": "This is a test input from a JSON file"
}
}
```
Run your handler without any arguments:
```sh theme={"theme":{"light":"github-light","dark":"github-dark"}}
python main.py
```
The SDK automatically detects and uses the `test_input.json` file.
If you provide both a `test_input.json` file and the `--test_input` flag, the command-line input takes precedence.
## Local API server
For more comprehensive testing, start a local API server that simulates your Serverless endpoint. This lets you send HTTP requests to test your handler as if it were deployed.
Start the local server:
```sh theme={"theme":{"light":"github-light","dark":"github-dark"}}
python handler.py --rp_serve_api
```
This starts a FastAPI server on `http://localhost:8000`.
### Send requests to the server
Once your local server is running, send HTTP `POST` requests from another terminal to test your function:
```sh theme={"theme":{"light":"github-light","dark":"github-dark"}}
curl -X POST http://localhost:8000/runsync \
-H "Content-Type: application/json" \
-d '{"input": {"prompt": "Hello, world!"}}'
```
The `/run` endpoint only returns a fake request ID without executing your code, since async mode requires communication with Runpod's system. For local testing, use `/runsync` to execute your handler and get results immediately.
## Testing concurrency
To test how your handler performs under parallel execution, use the `--rp_api_concurrency` flag to set the number of concurrent workers.
This command starts your local server with 4 concurrent workers:
```sh theme={"theme":{"light":"github-light","dark":"github-dark"}}
python main.py --rp_serve_api --rp_api_concurrency 4
```
When using `--rp_api_concurrency` with a value greater than 1, your main file must be named `main.py` for proper FastAPI integration. If your file has a different name, rename it to `main.py` before running with multiple workers.
### Testing concurrent requests
Send multiple requests simultaneously to test concurrency:
```bash theme={"theme":{"light":"github-light","dark":"github-dark"}}
for i in {1..10}; do
curl -X POST http://localhost:8000/runsync \
-H "Content-Type: application/json" \
-d '{"input": {}}' &
done
```
### Handling concurrency in your code
If your handler uses shared state (like global variables), use proper synchronization to avoid race conditions:
```python theme={"theme":{"light":"github-light","dark":"github-dark"}}
import runpod
from threading import Lock
counter = 0
counter_lock = Lock()
def handler(event):
global counter
with counter_lock:
counter += 1
return {"counter": counter}
runpod.serverless.start({"handler": handler})
```
## Debugging
### Log levels
Control the verbosity of console output with the `--rp_log_level` flag:
```sh theme={"theme":{"light":"github-light","dark":"github-dark"}}
python handler.py --rp_serve_api --rp_log_level DEBUG
```
Available log levels:
* `ERROR`: Only show error messages.
* `WARN`: Show warnings and errors.
* `INFO`: Show general information, warnings, and errors.
* `DEBUG`: Show all messages, including detailed debug information.
### Enable the debugger
Use the `--rp_debugger` flag for detailed troubleshooting:
```sh theme={"theme":{"light":"github-light","dark":"github-dark"}}
python handler.py --rp_serve_api --rp_debugger
```
This enables the Runpod debugger, which provides additional diagnostic information to help you troubleshoot issues.
## Server configuration
Customize the local API server with these flags:
### Port
Set a custom port (default is 8000):
```sh theme={"theme":{"light":"github-light","dark":"github-dark"}}
python handler.py --rp_serve_api --rp_api_port 8080
```
### Host
Set the hostname (default is "localhost"):
```sh theme={"theme":{"light":"github-light","dark":"github-dark"}}
python handler.py --rp_serve_api --rp_api_host 0.0.0.0
```
Setting `--rp_api_host` to `0.0.0.0` allows connections from other devices on the network. This can be useful for testing but may have security implications.
## Flag reference
Here's a complete reference of all available flags for local testing:
| Flag | Description | Default | Example |
| ---------------------- | --------------------------- | ----------- | ------------------------------ |
| `--rp_serve_api` | Starts the local API server | N/A | `--rp_serve_api` |
| `--rp_api_port` | Sets the server port | 8000 | `--rp_api_port 8080` |
| `--rp_api_host` | Sets the server hostname | "localhost" | `--rp_api_host 0.0.0.0` |
| `--rp_api_concurrency` | Sets concurrent workers | 1 | `--rp_api_concurrency 4` |
| `--rp_log_level` | Controls log verbosity | INFO | `--rp_log_level DEBUG` |
| `--rp_debugger` | Enables the debugger | Disabled | `--rp_debugger` |
| `--test_input` | Provides test input as JSON | N/A | `--test_input '{"input": {}}'` |
## Combined example
You can combine multiple flags to create a customized local testing environment:
```sh theme={"theme":{"light":"github-light","dark":"github-dark"}}
python handler.py --rp_serve_api \
--rp_api_port 8080 \
--rp_api_concurrency 4 \
--rp_log_level DEBUG \
--rp_debugger
```
This command:
* Starts the local API server on port 8080.
* Uses 4 concurrent workers.
* Sets the log level to `DEBUG` for maximum information.
* Enables the debugger for troubleshooting.
---
# Source: https://docs.runpod.io/serverless/development/logs.md
> ## Documentation Index
>
> Fetch the complete documentation index at: https://docs.runpod.io/llms.txt
> Use this file to discover all available pages before exploring further.
# Monitor logs
> View and access logs for Serverless endpoints and workers.
Runpod provides comprehensive logging capabilities for Serverless endpoints and workers. You can view real-time and historical logs through the Runpod console to help you monitor, debug, and troubleshoot your applications.
To learn how to write structured logs from your handler functions, see [Write logs](/serverless/development/write-logs).
## Endpoint logs
Endpoint logs are retained for 90 days, after which they are automatically removed from the system. If you need to retain logs indefinitely, you can [write them to a network volume](#persistent-log-storage) or an external service.
Endpoint logs are automatically collected from your worker instances and streamed to Runpod's centralized logging system. These logs include:
* **Standard output (stdout)** from your handler functions.
* **Standard error (stderr)** from your applications.
* **System messages** related to worker lifecycle events.
* **Framework logs** from the Runpod SDK. To learn more about the Runpod logging library, see the [Runpod SDK documentation](/tutorials/sdks/python/101/error).
Logs are streamed in near real-time with only a few seconds of lag.
If your worker generates excessive output, logs may be throttled and dropped to prevent system overload. See [Log throttling](#log-throttling) for more information.
To view endpoint logs:
1. Navigate to your Serverless endpoint in the [Runpod console](https://console.runpod.io/serverless).
2. Click on the **Logs** tab.
3. View real-time and historical logs.
4. Use the search and filtering capabilities to find specific log entries.
5. Download logs as text files for offline analysis.
## Worker logs
Worker logs are temporary logs that exist only on the specific server where the worker is running. These logs are not throttled, but are not persistent, and are removed when a worker terminates.
To view worker logs:
1. Navigate to your Serverless endpoint in the [Runpod console](https://console.runpod.io/serverless).
2. Click on the **Workers** tab.
3. Click on a worker to view its logs and request history.
4. Use the search and filtering capabilities to find specific log entries.
5. Download logs as text files for offline analysis.
## Troubleshooting
### Missing logs
If logs are not appearing in the Logs tab:
1. **Check log throttling**: Excessive logging may trigger throttling.
2. **Verify output streams**: Ensure you're writing to stdout/stderr.
3. **Check worker status**: Logs only appear for successfully initialized workers.
4. **Review retention period**: Logs older than 90 days are automatically removed.
### Log throttling
To avoid log throttling, follow these best practices:
1. **Reduce log verbosity** in production environments.
2. **Use structured logging** to make logs more efficient.
3. **Implement log sampling** for high-frequency events.
4. **Store detailed logs** in network volumes instead of console output.
---
# Source: https://docs.runpod.io/hosting/maintenance-and-reliability.md
> ## Documentation Index
>
> Fetch the complete documentation index at: https://docs.runpod.io/llms.txt
> Use this file to discover all available pages before exploring further.
# Maintenance and reliability
## Maintenance
Hosts must currently schedule maintenance at least one week in advance and are able to program immediate maintenance *only* in the case that their server is unrented. Users will get email reminders of upcoming maintenance that will occur on their active pods. Please contact Runpod on Discord or Slack if you are:
* scheduling maintenance on more than a few machines, and/or
* performing operations that could affect user data
Please err on the side of caution and aim to overcommunicate.
Here are some things to keep in mind.
* Uptime/reliability will not be affected during scheduled maintenance.
* ALL other events that may impact customer workloads will result in a reliability score decrease. This includes unlisted machines.
* All machines that have maintenance scheduled will be automatically unlisted 4 days prior to the scheduled maintenance start time to minimize disruption for clients.
* Excessive maintenance will result in further penalties.
* You are allowed to bring down machines that have active users on them provided that you are in a maintenance window.
* Immediate maintenance: this option is only for quick repairs/updates that are absolutely necessary. Unrented servers can still house user data, any operations that can result in potential data loss SHOULD NOT be performed in this maintenance mode.
## Reliability calculations
Runpod aims to partner with datacenters that offer **99.99%** uptime. Reliability is currently calculated as follows:
`( total minutes + small buffer ) / total minutes in interval`
This means that if you have 30 minutes of network downtime on the first of the month, your reliability will be calculated as:
`( 43200 - 30 + 10 ) / 43200 = 99.95%`
Based on approximately 43200 minutes per month and a 10 minute buffer. We include the buffer because we do incur small single-minute uptime dings once in a while due to agent upgrades and such. It will take an entire month to regenerate back to 100% uptime given no further downtimes in the month, considering it it calculated based on a 30 days rolling window.
Machines with less than **98%** reliability are **automatically removed** from the available GPU pool and can only be accessed by clients that already had their data on it.
---
# Source: https://docs.runpod.io/get-started/manage-accounts.md
> ## Documentation Index
>
> Fetch the complete documentation index at: https://docs.runpod.io/llms.txt
> Use this file to discover all available pages before exploring further.
# Manage accounts
> Create accounts, manage teams, and configure user permissions in Runpod.
To access Runpod resources, you need to either create your own account or join an existing team through an invitation. This guide explains how to set up and manage accounts, teams, and user roles.
## Create an account
Sign up for a Runpod account at [console.runpod.io/signup](https://www.console.runpod.io/signup).
Once created, you can use your account to deploy Pods, create Serverless endpoints, and access other Runpod services. Personal accounts can be converted to team accounts at any time to enable collaboration features.
## Convert to a team account
Team accounts enable multiple users to collaborate on projects and share resources.
To convert your personal account into a team account:
1. Navigate to the [Team page](https://www.console.runpod.io/team) in the Runpod console.
2. Select **Convert to a Team Account**.
3. Enter a team name and confirm the conversion.
You can revert your account back to a personal account at any time. To revert, scroll to the bottom of the [Team page](https://www.console.runpod.io/team) and select **Delete Team**.
## Invite team members
Team accounts can invite new members to collaborate. Each invitation includes a specific role that determines the member's permissions.
To invite a new member:
1. Navigate to the [Team page](https://www.console.runpod.io/team) in the Runpod console.
2. In the **Members** section, select **Invite New Member**.
3. Choose [the appropriate role](#roles-and-permissions) for the new member.
4. Enter the email address of the person you want to invite and click **Create Invite**.
5. Copy the generated invitation link from the **Pending Invites** section and share it with the person you want to invite.
Invitation links remain active until used or manually revoked. You can view all pending invitations in the team management interface.
## Join a team
When invited to join a team, you'll receive an invitation link from a team member. To accept:
1. Click the invitation link provided by the team member.
2. Select **Join Team** to accept the invitation.
Your account will gain access to the team's resources based on the role assigned to you.
## Roles and permissions
Runpod provides four distinct roles to control access within team accounts. Each role includes specific permissions designed for different responsibilities.
| Permission | Basic | Billing | Dev | Admin |
| ----------------------------------------- | ----- | ------- | --- | ----- |
| Access team account | ✅ | ✅ | ✅ | ✅ |
| Connect to existing Pods | ✅ | ❌ | ✅ | ✅ |
| Create/delete/start/stop Pods | ❌ | ❌ | ✅ | ✅ |
| Create/delete Serverless endpoints | ❌ | ❌ | ✅ | ✅ |
| Send requests to Serverless endpoints | ✅ | ❌ | ✅ | ✅ |
| Connect to existing Instant Clusters | ✅ | ❌ | ✅ | ✅ |
| Create/delete/start/stop Instant Clusters | ❌ | ❌ | ❌ | ✅ |
| Create/update/delete network volumes | ❌ | ❌ | ✅ | ✅ |
| View billing information | ❌ | ✅ | ❌ | ✅ |
| Manage payment methods | ❌ | ✅ | ❌ | ✅ |
| Invite team members | ❌ | ❌ | ❌ | ✅ |
| Manage team permissions | ❌ | ❌ | ❌ | ✅ |
| Modify team account settings | ❌ | ❌ | ❌ | ✅ |
| Access audit logs | ❌ | ❌ | ❌ | ✅ |
### Basic role
The basic role provides essential access for users who need to work with existing resources without management capabilities.
This role allows users to access the team account and connect to already-deployed computing resources (e.g., Pods and Serverless endpoints) for development work. Users with this role cannot view billing information, start or stop Pods, or create new resources.
### Billing role
The billing role focuses exclusively on financial management aspects of the account.
Users with this role can access all billing information, manage payment methods, and view invoices. They cannot access computing resources, making this role ideal for finance team members who need billing access without operational permissions.
### Dev role
The dev role extends basic permissions with additional capabilities for active development work.
This role includes all basic permissions plus the ability to start, stop, and create Pods. Developers can fully manage computing resources for their work while remaining restricted from billing information and account settings.
### Admin role
The admin role provides complete control over all account features and settings.
Administrators have unrestricted access to manage team members, configure account settings, handle billing, and control all team computing resources. This role should be reserved for team leaders and trusted members who need full account access.
## Account spend limits
By default, Runpod accounts have a spend limit of \$80 per hour across all resources. This limit protects your account from unexpected charges. If your workload requires higher spending capacity, you can [contact support](https://www.runpod.io/contact) to increase it.
## Monitor account activity
Runpod provides comprehensive audit logs to track all actions performed within your account. This feature helps maintain security and accountability across team operations.
Access audit logs at [console.runpod.io/user/audit-logs](https://www.console.runpod.io/user/audit-logs).
The audit system records detailed information about each action, including the user who performed it, the affected resource, and the timestamp. You can filter logs by date range, user, resource type, resource ID, and specific actions to investigate account activity or troubleshoot issues.
Regular review of audit logs helps identify unusual activity and ensures team members use resources appropriately.
## Best practices
When managing team accounts, establish clear role assignments based on each member's responsibilities. Regularly review team membership and remove access for members who no longer need it.
For enhanced security, use the principle of least privilege by assigning the minimum role necessary for each team member's work. Consider creating separate accounts for billing management to isolate financial access from technical operations.
Monitor audit logs periodically to ensure compliance with your organization's policies and identify any unauthorized activities early.
## Next steps
After setting up your account and team you can:
* [Create API keys](/get-started/api-keys) to enable programmatic access to Runpod services.
* [Deploy your first Pod](/get-started) to start using GPU resources.
* Configure [Serverless endpoints](/serverless/overview) for scalable AI inference.
* Set up [billing and payment methods](https://console.runpod.io/user/billing) for your team.
---
# Source: https://docs.runpod.io/sdks/graphql/manage-endpoints.md
> ## Documentation Index
>
> Fetch the complete documentation index at: https://docs.runpod.io/llms.txt
> Use this file to discover all available pages before exploring further.
# Manage Endpoints
`gpuIds`, `name`, and `templateId` are required arguments; all other arguments are optional, and default values will be used if unspecified.
## Create a new Serverless Endpoint
```bash theme={"theme":{"light":"github-light","dark":"github-dark"}}
curl --request POST \
--header 'content-type: application/json' \
--url 'https://api.runpod.io/graphql?api_key=${YOUR_API_KEY}' \
--data '{"query": "mutation { saveEndpoint(input: { gpuIds: \"AMPERE_16\", idleTimeout: 5, locations: \"US\", name: \"Generated Endpoint -fb\", networkVolumeId: \"\", scalerType: \"QUEUE_DELAY\", scalerValue: 4, templateId: \"xkhgg72fuo\", workersMax: 3, workersMin: 0 }) { gpuIds id idleTimeout locations name scalerType scalerValue templateId workersMax workersMin } }"}'
```
```GraphQL theme={"theme":{"light":"github-light","dark":"github-dark"}}
mutation {
saveEndpoint(input: {
# options for gpuIds are "AMPERE_16,AMPERE_24,ADA_24,AMPERE_48,ADA_48_PRO,AMPERE_80,ADA_80_PRO"
gpuIds: "AMPERE_16",
idleTimeout: 5,
# leave locations as an empty string or null for any region
# options for locations are "CZ,FR,GB,NO,RO,US"
locations: "US",
# append -fb to your endpoint's name to enable FlashBoot
name: "Generated Endpoint -fb",
# uncomment below and provide an ID to mount a network volume to your workers
# networkVolumeId: "",
scalerType: "QUEUE_DELAY",
scalerValue: 4,
templateId: "xkhgg72fuo",
workersMax: 3,
workersMin: 0
}) {
gpuIds
id
idleTimeout
locations
name
# networkVolumeId
scalerType
scalerValue
templateId
workersMax
workersMin
}
}
```
```json theme={"theme":{"light":"github-light","dark":"github-dark"}}
{
"data": {
"saveEndpoint": {
"gpuIds": "AMPERE_16",
"id": "i02xupws21hp6i",
"idleTimeout": 5,
"locations": "US",
"name": "Generated Endpoint -fb",
"scalerType": "QUEUE_DELAY",
"scalerValue": 4,
"templateId": "xkhgg72fuo",
"workersMax": 3,
"workersMin": 0
}
}
}
```
## Modify an existing Serverless Endpoint
```bash theme={"theme":{"light":"github-light","dark":"github-dark"}}
curl --request POST \
--header 'content-type: application/json' \
--url 'https://api.runpod.io/graphql?api_key=${YOUR_API_KEY}' \
--data '{"query": "mutation { saveEndpoint(input: { id: \"i02xupws21hp6i\", gpuIds: \"AMPERE_16\", name: \"Generated Endpoint -fb\", templateId: \"xkhgg72fuo\", workersMax: 0 }) { id gpuIds name templateId workersMax } }"}'
```
```GraphQL theme={"theme":{"light":"github-light","dark":"github-dark"}}
mutation {
saveEndpoint(input: {
id: "i02xupws21hp6i",
gpuIds: "AMPERE_16",
name: "Generated Endpoint -fb",
templateId: "xkhgg72fuo",
# Modify your template options here (or above, if applicable).
# For this example, we've modified the endpoint's max workers.
workersMax: 0
}) {
id
gpuIds
name
templateId
# You can include what you've changed here, too.
workersMax
}
}
```
```json theme={"theme":{"light":"github-light","dark":"github-dark"}}
{
"data": {
"saveEndpoint": {
"id": "i02xupws21hp6i",
"gpuIds": "AMPERE_16",
"name": "Generated Endpoint -fb",
"templateId": "xkhgg72fuo",
"workersMax": 0
}
}
}
```
## View your Endpoints
```bash theme={"theme":{"light":"github-light","dark":"github-dark"}}
curl --request POST \
--header 'content-type: application/json' \
--url 'https://api.runpod.io/graphql?api_key=${YOUR_API_KEY}' \
--data '{"query": "query Endpoints { myself { endpoints { gpuIds id idleTimeout locations name networkVolumeId pods { desiredStatus } scalerType scalerValue templateId workersMax workersMin } serverlessDiscount { discountFactor type expirationDate } } }"}'
```
```GraphQL theme={"theme":{"light":"github-light","dark":"github-dark"}}
query Endpoints {
myself {
endpoints {
gpuIds
id
idleTimeout
locations
name
networkVolumeId
pods {
desiredStatus
}
scalerType
scalerValue
templateId
workersMax
workersMin
}
serverlessDiscount {
discountFactor
type
expirationDate
}
}
}
```
```json theme={"theme":{"light":"github-light","dark":"github-dark"}}
{
"data": {
"myself": {
"endpoints": [
{
"gpuIds": "AMPERE_16",
"id": "i02xupws21hp6i",
"idleTimeout": 5,
"locations": "US",
"name": "Generated Endpoint -fb",
"networkVolumeId": null,
"pods": [],
"scalerType": "QUEUE_DELAY",
"scalerValue": 4,
"templateId": "xkhgg72fuo",
"workersMax": 0,
"workersMin": 0
}
],
"serverlessDiscount": null
}
}
}
```
## Delete a Serverless Endpoints
Note that your endpoint's min and max workers must both be set to zero for your call to work.
```bash theme={"theme":{"light":"github-light","dark":"github-dark"}}
curl --request POST \
--header 'content-type: application/json' \
--url 'https://api.runpod.io/graphql?api_key=${YOUR_API_KEY}' \
--data '{"query": "mutation { deleteEndpoint(id: \"i02xupws21hp6i\") }"}'
```
```GraphQL theme={"theme":{"light":"github-light","dark":"github-dark"}}
mutation {
deleteEndpoint(id: "i02xupws21hp6i")
}
```
```json theme={"theme":{"light":"github-light","dark":"github-dark"}}
{
"data": {
"deleteEndpoint": null
}
}
```
---
# Source: https://docs.runpod.io/references/troubleshooting/manage-payment-cards.md
> ## Documentation Index
>
> Fetch the complete documentation index at: https://docs.runpod.io/llms.txt
> Use this file to discover all available pages before exploring further.
# Manage payment card declines
> Learn how to troubleshoot declined payment cards and prevent service interruptions on Runpod.
Payment card declines can occur when adding funds to your Runpod account. Credit card processors apply stringent fraud detection standards, particularly for international transactions. This document provides guidance to help you troubleshoot payment issues.
## Keep your balance topped up
To prevent service interruptions, refresh your balance at least a few days before it runs out. This gives you time to address any payment delays.
You can enable automatic balance refresh from the [Billing page](https://www.console.runpod.io/user/billing):
## Contact your card issuer
If your card is declined, contact your issuing bank to determine the reason. Due to privacy standards, payment processors only indicate that a transaction was not processed without providing specific details. Your bank can tell you why the payment was declined.
Card declines often occur for routine reasons, such as anti-fraud protection. Your bank can resolve blocks they have placed on your card.
Contact your bank about the initial decline before trying a different card. The payment processor may block all funding attempts from your account if it detects multiple card declines, even if those cards would otherwise work. These account blocks typically clear after 24 hours.
## Other reasons for card blocks
The payment processor may block cards based on user risk profiles. Using several different cards within a short period or having disputed transactions in the past may trigger card declines.
For a list of supported card brands, see [Stripe's supported cards documentation](https://stripe.com/docs/payments/cards/supported-card-brands).
## Contact support
If you're still having trouble after checking with your bank, contact [Runpod support](https://www.runpod.io/contact) for assistance.
---
# Source: https://docs.runpod.io/sdks/graphql/manage-pod-templates.md
> ## Documentation Index
>
> Fetch the complete documentation index at: https://docs.runpod.io/llms.txt
> Use this file to discover all available pages before exploring further.
# Manage Templates
Required arguments:
* `containerDiskInGb`
* `dockerArgs`
* `env`
* `imageName`
* `name`
* `volumeInGb`
All other arguments are optional.
If your container image is private, you can also specify Docker login credentials with a `containerRegistryAuthId` argument, which takes the ID (*not* the name) of the container registry credentials you saved in your Runpod user settings as a string.
Template names must be unique as well; if you try to create a new template with the same name as an existing one, your call will fail.
## Create a Pod Template
### Create GPU Template
```bash theme={"theme":{"light":"github-light","dark":"github-dark"}}
curl --request POST \
--header 'content-type: application/json' \
--url 'https://api.runpod.io/graphql?api_key=${YOUR_API_KEY}' \
--data '{"query": "mutation { saveTemplate(input: { containerDiskInGb: 5, dockerArgs: \"sleep infinity\", env: [ { key: \"key1\", value: \"value1\" }, { key: \"key2\", value: \"value2\" } ], imageName: \"ubuntu:latest\", name: \"Generated Template\", ports: \"8888/http,22/tcp\", readme: \"## Hello, World!\", volumeInGb: 15, volumeMountPath: \"/workspace\" }) { containerDiskInGb dockerArgs env { key value } id imageName name ports readme volumeInGb volumeMountPath } }"}'
```
```GraphQL theme={"theme":{"light":"github-light","dark":"github-dark"}}
mutation {
saveTemplate(input: {
containerDiskInGb: 5,
dockerArgs: "sleep infinity",
env: [
{
key: "key1",
value: "value1"
},
{
key: "key2",
value: "value2"
}
],
imageName: "ubuntu:latest",
name: "Generated Template",
ports: "8888/http,22/tcp",
readme: "## Hello, World!",
volumeInGb: 15,
volumeMountPath: "/workspace"
}) {
containerDiskInGb
dockerArgs
env {
key
value
}
id
imageName
name
ports
readme
volumeInGb
volumeMountPath
}
}
```
```json theme={"theme":{"light":"github-light","dark":"github-dark"}}
{
"data": {
"saveTemplate": {
"containerDiskInGb": 5,
"dockerArgs": "sleep infinity",
"env": [
{
"key": "key1",
"value": "value1"
},
{
"key": "key2",
"value": "value2"
}
],
"id": "wphkv67a0p",
"imageName": "ubuntu:latest",
"name": "Generated Template",
"ports": "8888/http,22/tcp",
"readme": "## Hello, World!",
"volumeInGb": 15,
"volumeMountPath": "/workspace"
}
}
}
```
### Create Serverless Template
For Serverless templates, always pass `0` for `volumeInGb`, since Serverless workers don't have persistent storage (other than those with network volumes).
```bash theme={"theme":{"light":"github-light","dark":"github-dark"}}
curl --request POST \
--header 'content-type: application/json' \
--url 'https://api.runpod.io/graphql?api_key=${YOUR_API_KEY}' \
--data '{"query": "mutation { saveTemplate(input: { containerDiskInGb: 5, dockerArgs: \"python handler.py\", env: [ { key: \"key1\", value: \"value1\" }, { key: \"key2\", value: \"value2\" } ], imageName: \"runpod/serverless-hello-world:latest\", isServerless: true, name: \"Generated Serverless Template\", readme: \"## Hello, World!\", volumeInGb: 0 }) { containerDiskInGb dockerArgs env { key value } id imageName isServerless name readme } }"}'
```
```GraphQL theme={"theme":{"light":"github-light","dark":"github-dark"}}
mutation {
saveTemplate(input: {
containerDiskInGb: 5,
dockerArgs: "python handler.py",
env: [
{
key: "key1",
value: "value1"
},
{
key: "key2",
value: "value2"
}
],
imageName: "runpod/serverless-hello-world:latest",
isServerless: true,
name: "Generated Serverless Template",
readme: "## Hello, World!",
volumeInGb: 0
}) {
containerDiskInGb
dockerArgs
env {
key
value
}
id
imageName
isServerless
name
readme
}
}
```
```json theme={"theme":{"light":"github-light","dark":"github-dark"}}
{
"data": {
"saveTemplate": {
"containerDiskInGb": 5,
"dockerArgs": "python handler.py",
"env": [
{
"key": "key1",
"value": "value1"
},
{
"key": "key2",
"value": "value2"
}
],
"id": "xkhgg72fuo",
"imageName": "runpod/serverless-hello-world:latest",
"isServerless": true,
"name": "Generated Serverless Template",
"readme": "## Hello, World!"
}
}
}
```
## Modify a Template
### Modify a GPU Pod Template
```bash theme={"theme":{"light":"github-light","dark":"github-dark"}}
curl --request POST \
--header 'content-type: application/json' \
--url 'https://api.runpod.io/graphql?api_key=${YOUR_API_KEY}' \
--data '{"query": "mutation { saveTemplate(input: { id: \"wphkv67a0p\", containerDiskInGb: 5, dockerArgs: \"sleep infinity\", env: [ { key: \"key1\", value: \"value1\" }, { key: \"key2\", value: \"value2\" } ], imageName: \"ubuntu:latest\", name: \"Generated Template\", volumeInGb: 15, readme: \"## Goodbye, World!\" }) { id containerDiskInGb dockerArgs env { key value } imageName name volumeInGb readme } }"}'
```
```GraphQL theme={"theme":{"light":"github-light","dark":"github-dark"}}
mutation {
saveTemplate(input: {
id: "wphkv67a0p",
containerDiskInGb: 5,
dockerArgs: "sleep infinity",
env: [
{
key: "key1",
value: "value1"
},
{
key: "key2",
value: "value2"
}
],
imageName: "ubuntu:latest",
name: "Generated Template",
volumeInGb: 15,
readme: "## Goodbye, World!"
}) {
id
containerDiskInGb
dockerArgs
env {
key
value
}
imageName
name
volumeInGb
readme
}
}
```
```json theme={"theme":{"light":"github-light","dark":"github-dark"}}
{
"data": {
"saveTemplate": {
"id": "wphkv67a0p",
"containerDiskInGb": 5,
"dockerArgs": "sleep infinity",
"env": [
{
"key": "key1",
"value": "value1"
},
{
"key": "key2",
"value": "value2"
}
],
"imageName": "ubuntu:latest",
"name": "Generated Template",
"volumeInGb": 15,
"readme": "## Goodbye, World!"
}
}
}
```
### Modify a Serverless Template
```bash theme={"theme":{"light":"github-light","dark":"github-dark"}}
curl --request POST \
--header 'content-type: application/json' \
--url 'https://api.runpod.io/graphql?api_key=${YOUR_API_KEY}' \
--data '{"query": "mutation { saveTemplate(input: { id: \"xkhgg72fuo\", containerDisk
InGb: 5, dockerArgs: \"python handler.py\", env: [ { key: \"key1\", value: \"value1\" }, { key: \"key2\", value: \"value2\" } ], imageName: \"runpod/serverless-hello-world:latest\", name: \"Generated Serverless Template\", volumeInGb: 0, readme: \"## Goodbye, World!\" }) { id containerDiskInGb dockerArgs env { key value } imageName name readme } }"}'
```
```GraphQL theme={"theme":{"light":"github-light","dark":"github-dark"}}
mutation {
saveTemplate(input: {
id: "xkhgg72fuo",
containerDiskInGb: 5,
dockerArgs: "python handler.py",
env: [
{
key: "key1",
value: "value1"
},
{
key: "key2",
value: "value2"
}
],
imageName: "runpod/serverless-hello-world:latest",
name: "Generated Serverless Template",
volumeInGb: 0,
readme: "## Goodbye, World!"
}) {
id
containerDiskInGb
dockerArgs
env {
key
value
}
imageName
name
readme
}
}
```
```json theme={"theme":{"light":"github-light","dark":"github-dark"}}
{
"data": {
"saveTemplate": {
"id": "xkhgg72fuo",
"containerDiskInGb": 5,
"dockerArgs": "python handler.py",
"env": [
{
"key": "key1",
"value": "value1"
},
{
"key": "key2",
"value": "value2"
}
],
"imageName": "runpod/serverless-hello-world:latest",
"name": "Generated Serverless Template",
"readme": "## Goodbye, World!"
}
}
}
```
## Delete a Template
Note that the template you'd like to delete must not be in use by any Pods or assigned to any Serverless endpoints. It can take up to 2 minutes to be able to delete a template after its most recent use by a Pod or Serverless endpoint, too.
The same mutation is used for deleting both Pod and Serverless templates.
```bash theme={"theme":{"light":"github-light","dark":"github-dark"}}
curl --request POST \
--header 'content-type: application/json' \
--url 'https://api.runpod.io/graphql?api_key=${YOUR_API_KEY}' \
--data '{"query": "mutation { deleteTemplate(templateName: \"Generated Template\") }"}'
```
```GraphQL theme={"theme":{"light":"github-light","dark":"github-dark"}}
mutation {
deleteTemplate(templateName: "Generated Template")
}
```
```json theme={"theme":{"light":"github-light","dark":"github-dark"}}
{
"data": {
"deleteTemplate": null
}
}
```
## Create a Secret
To create a secret, you need to send a GraphQL mutation request. This request will include the `secretCreate` mutation with the required input fields `value` and `name`. The `value` represents the actual secret, and the `name` is a unique identifier for the secret.
```bash theme={"theme":{"light":"github-light","dark":"github-dark"}}
curl --request POST \
--header 'content-type: application/json' \
--url 'https://api.runpod.io/graphql?api_key=${YOUR_API_KEY}' \
--data '{"query": "mutation { secretCreate(input: { value: \"i am a test secret\", name: \"i-am-a-secret\" }) { id name description } }"}'
```
```GraphQL theme={"theme":{"light":"github-light","dark":"github-dark"}}
mutation {
secretCreate(input: {
value: "i am a test secret",
name: "i-am-a-secret"
}) {
id
name
description
}
}
```
---
# Source: https://docs.runpod.io/sdks/graphql/manage-pods.md
# Source: https://docs.runpod.io/pods/manage-pods.md
# Source: https://docs.runpod.io/sdks/graphql/manage-pods.md
# Source: https://docs.runpod.io/pods/manage-pods.md
> ## Documentation Index
>
> Fetch the complete documentation index at: https://docs.runpod.io/llms.txt
> Use this file to discover all available pages before exploring further.
# Manage Pods
> Create, start, stop, and terminate Pods using the Runpod console or CLI.
## Before you begin
If you want to manage Pods using the Runpod CLI, you'll need to [install Runpod CLI](/runpodctl/overview), and set your [API key](/get-started/api-keys) in the configuration.
Run the following command, replacing `RUNPOD_API_KEY` with your API key:
```sh theme={"theme":{"light":"github-light","dark":"github-dark"}}
runpodctl config --apiKey RUNPOD_API_KEY
```
## Deploy a Pod
You can deploy preconfigured Pods from the repos listed in the [Runpod Hub](/hub/overview). For more info, see the [Hub deployment guide](/hub/overview#deploy-as-a-pod).
To create a Pod using the Runpod console:
1. Open the [Pods page](https://www.console.runpod.io/pods) in the Runpod console and click the **Deploy** button.
2. (Optional) Specify a [network volume](/storage/network-volumes) if you need to share data between multiple Pods, or to save data for later use.
3. Select **GPU** or **CPU** using the buttons in the top-left corner of the window, and follow the configuration steps below.
GPU configuration:
1. Select a graphics card (e.g., A40, RTX 4090, H100 SXM).
2. Give your Pod a name using the **Pod Name** field.
3. (Optional) Choose a **Pod Template** such as **Runpod Pytorch 2.1** or **Runpod Stable Diffusion**.
4. Specify your **GPU count** if you need multiple GPUs.
5. Click **Deploy On-Demand** to deploy and start your Pod.
**CUDA Version Compatibility**
When using templates (especially community templates like `runpod/pytorch:2.8.0-py3.11-cuda12.8.1-cudnn-devel-ubuntu22.04`), ensure the host machine's CUDA driver version matches or exceeds the template's requirements.
If you encounter errors like "OCI runtime create failed" or "unsatisfied condition: cuda>=X.X", you need to filter for compatible machines:
1. Click **Additional filters** in the Pod creation interface
2. Click **CUDA Versions** filter dropdown
3. Select a CUDA version that matches or exceeds your template's requirements (e.g., if the template requires CUDA 12.8, select 12.8 or higher)
**Note:** Check the template name or documentation for CUDA requirements. When in doubt, select the latest CUDA version as newer drivers are backward compatible.
CPU configuration:
1. Select a **CPU type** (e.g., CPU3/CPU5, Compute Optimized, General Purpose, Memory-Optimized).
2. Specify the number of CPUs and quantity of RAM for your Pod by selecting an **Instance Configuration**.
3. Give your Pod a name using the **Pod Name** field.
4. Click **Deploy On-Demand** to deploy and start your Pod.
To create a Pod using the CLI, use the `runpodctl create pods` command:
```sh theme={"theme":{"light":"github-light","dark":"github-dark"}}
runpodctl create pods \
--name hello-world \
--gpuType "NVIDIA A40" \
--imageName "runpod/pytorch:3.10-2.0.0-117" \
--containerDiskSize 10 \
--volumeSize 100 \
--args "bash -c 'mkdir /testdir1 && /start.sh'"
```
To create a Pod using the REST API, send a POST request to the `/pods` endpoint:
```bash theme={"theme":{"light":"github-light","dark":"github-dark"}}
curl --request POST \
--url https://rest.runpod.io/v1/pods \
--header 'Authorization: Bearer RUNPOD_API_KEY' \
--header 'Content-Type: application/json' \
--data '{
"allowedCudaVersions": [
"12.8"
],
"cloudType": "SECURE",
"computeType": "GPU",
"containerDiskInGb": 50,
"containerRegistryAuthId": "clzdaifot0001l90809257ynb",
"countryCodes": [
"US"
],
"cpuFlavorIds": [
"cpu3c"
],
"cpuFlavorPriority": "availability",
"dataCenterIds": [
"EU-RO-1",
"CA-MTL-1"
],
"dataCenterPriority": "availability",
"dockerEntrypoint": [],
"dockerStartCmd": [],
"env": {
"ENV_VAR": "value"
},
"globalNetworking": true,
"gpuCount": 1,
"gpuTypeIds": [
"NVIDIA GeForce RTX 4090"
],
"gpuTypePriority": "availability",
"imageName": "runpod/pytorch:2.1.0-py3.10-cuda11.8.0-devel-ubuntu22.04",
"interruptible": false,
"locked": false,
"minDiskBandwidthMBps": 123,
"minDownloadMbps": 123,
"minRAMPerGPU": 8,
"name": "my-pod",
"ports": [
"8888/http",
"22/tcp"
],
"supportPublicIp": true,
"vcpuCount": 2,
"volumeInGb": 20,
"volumeMountPath": "/workspace"
}'
```
For complete API documentation and parameter details, see the [Pod API reference](/api-reference/pods/POST/pods).
### Custom templates
Runpod supports custom [Pod templates](/pods/templates/overview) that let you define your environment using a Dockerfile.
With custom templates, you can:
* Install specific dependencies and packages.
* Configure your development environment.
* Create [portable Docker images](/tutorials/introduction/containers) that work consistently across deployments.
* Share environments with team members for collaborative work.
## Stop a Pod
If your Pod has a [network volume](/storage/network-volumes) attached, it cannot be stopped, only terminated. When you terminate the Pod, data in the `/workspace` directory will be preserved in the network volume, and you can regain access by deploying a new Pod with the same network volume attached.
When a Pod is stopped, data in the container disk is cleared, but data in the `/workspace` directory is preserved. To learn more about how Pod storage works, see [Storage overview](/pods/storage/types).
By stopping a Pod you are effectively releasing the GPU on the machine, and you may be reallocated [zero GPUs](/references/troubleshooting/zero-gpus) when you start the Pod again.
After a Pod is stopped, you will still be charged for its [volume disk](/pods/storage/types#volume-disk) storage. If you don't need to retain your Pod environment, you should terminate it completely.
To stop a Pod:
1. Open the [Pods page](https://www.console.runpod.io/pods).
2. Find the Pod you want to stop and expand it.
3. Click the **Stop button** (square icon).
4. Confirm by clicking the **Stop Pod** button.
To stop a Pod, enter the following command.
```sh theme={"theme":{"light":"github-light","dark":"github-dark"}}
runpodctl stop pod $RUNPOD_POD_ID
```
Example output:
```sh theme={"theme":{"light":"github-light","dark":"github-dark"}}
pod "gq9xijdra9hwyd" stopped
```
### Stop a Pod after a period of time
You can also stop a Pod after a specified period of time. The examples below show how to use the CLI or [web terminal](/pods/connect-to-a-pod#web-terminal) to schedule a Pod to stop after 2 hours of runtime.
Use the following command to stop a Pod after 2 hours:
```sh theme={"theme":{"light":"github-light","dark":"github-dark"}}
sleep 2h; runpodctl stop pod $RUNPOD_POD_ID &
```
This command uses sleep to wait for 2 hours before executing the `runpodctl stop pod` command to stop the Pod. The `&` at the end runs the command in the background, allowing you to continue using the SSH session.
To stop a Pod after 2 hours using the web terminal, enter:
```sh theme={"theme":{"light":"github-light","dark":"github-dark"}}
nohup bash -c "sleep 2h; runpodctl stop pod $RUNPOD_POD_ID" &
```
`nohup` ensures the process continues running if you close the web terminal window.
## Start a Pod
Pods start as soon as they are created, but you can resume a Pod that has been stopped.
To start a Pod:
1. Open the [Pods page](https://www.console.runpod.io/pods).
2. Find the Pod you want to start and expand it.
3. Click the **Start** button (play icon).
To start a single Pod, enter the command `runpodctl start pod`. You can pass the environment variable `RUNPOD_POD_ID` to identify each Pod.
```sh theme={"theme":{"light":"github-light","dark":"github-dark"}}
runpodctl start pod $RUNPOD_POD_ID
```
Example output:
```sh theme={"theme":{"light":"github-light","dark":"github-dark"}}
pod "wu5ekmn69oh1xr" started with $0.290 / hr
```
## Terminate a Pod
Terminating a Pod permanently deletes all associated data that isn't stored in a [network volume](/storage/network-volumes). Be sure to export or download any data that you'll need to access again.
To terminate a Pod:
1. Open the [Pods page](https://www.console.runpod.io/pods).
2. Find the Pod you want to terminate and expand it.
3. [Stop the Pod](#stop-a-pod) if it's running.
4. Click the **Terminate** button (trash icon).
5. Confirm by clicking the **Yes** button.
To remove a single Pod, enter the following command.
```sh theme={"theme":{"light":"github-light","dark":"github-dark"}}
runpodctl remove pod $RUNPOD_POD_ID
```
Example output:
```sh theme={"theme":{"light":"github-light","dark":"github-dark"}}
pod "wu5ekmn69oh1xr" removed
```
You can also remove Pods in bulk. For example, the following command terminates up to 40 Pods with the name `my-bulk-task`.
```sh theme={"theme":{"light":"github-light","dark":"github-dark"}}
runpodctl remove pods my-bulk-task --podCount 40
```
You can also terminate a Pod by name:
```sh theme={"theme":{"light":"github-light","dark":"github-dark"}}
runpodctl remove pods [POD_NAME]
```
## View Pod details
You can find a list of all your Pods on the [Pods page](https://www.console.runpod.io/pods) of the web interface.
If you're using the CLI, use the following command to list your Pods:
```sh theme={"theme":{"light":"github-light","dark":"github-dark"}}
runpodctl get pod
```
Or use this command to get the details of a single Pod:
```sh theme={"theme":{"light":"github-light","dark":"github-dark"}}
runpodctl get pod [POD_ID]
```
## Access logs
Pods provide two types of logs to help you monitor and troubleshoot your workloads:
* **Container logs** capture all output sent to your console standard output, including application logs and print statements.
* **System logs** provide detailed information about your Pod's lifecycle, such as container creation, image download, extraction, startup, and shutdown events.
To view your logs, open the [Pods page](https://www.console.runpod.io/pods), expand your Pod, and click the **Logs** button. This gives you real-time access to both container and system logs, making it easy to diagnose issues or monitor your Pod's activity.
## Troubleshooting
Below are some common issues and solutions for troubleshooting Pod deployments.
### Zero GPU Pods
See [Zero GPU Pods on restart](/references/troubleshooting/zero-gpus).
### Pod stuck on initializing
If your Pod is stuck on initializing, check for these common issues:
1. You're trying to SSH into the Pod but didn't provide an idle job like `sleep infinity` to keep it running.
2. The Pod received a command it can't execute. Check your logs for syntax errors or invalid commands.
If you need help, [contact support](https://www.runpod.io/contact).
### Docker daemon limitations
Runpod manages the Docker daemon for you, which means you can't run your own Docker instance inside a Pod. This prevents you from building Docker containers or using tools like Docker Compose.
To work around this, create a [custom template](/pods/templates/overview) with the Docker image you need.
---
# Source: https://docs.runpod.io/pods/templates/manage-templates.md
> ## Documentation Index
>
> Fetch the complete documentation index at: https://docs.runpod.io/llms.txt
> Use this file to discover all available pages before exploring further.
# Manage Pod templates
> Learn how to create, and manage custom Pod templates.
Creating a custom template allows you to package your specific configuration for reuse and sharing. Templates define all the necessary components to launch a Pod with your desired setup.
## Template configuration options
When creating a template, you'll configure several key components:
**Name:** The display name for your template that will appear in the template browser. Choose a descriptive name that clearly indicates the template's purpose and contents.
**Container image:** The path to the Docker image that forms the foundation of your template. This is where the core functionality of your template resides, including all software packages, dependencies, and files needed for your workload. You can import the image from:
* A public registry like Docker Hub (e.g., `ubuntu:latest`, `pytorch/pytorch:latest`).
* Your own private registry (requires registry credentials).
**Template visibility:** Choose whether your template is available to others. Public templates are available to all Runpod users in the Explore section of the console, while private template are only accessible to you or your team members.
**Compute type:** Templates are restricted to specific compute types and can only be used with matching hardware:
* **NVIDIA GPU:** For GPU-accelerated workloads requiring CUDA support
* **AMD GPU:** For workloads optimized for AMD graphics processors
* **CPU:** For CPU-only workloads that don't require GPU acceleration
**Container start command:** Customize the command that runs when your Pod starts. This overrides the default CMD instruction in your Docker container. You can specify:
* Simple bash commands: `bash -c 'mkdir /workspace && /start.sh'`
* JSON format with entrypoint and cmd: `{"cmd": ["python", "app.py"], "entrypoint": ["bash", "-c"]}`
Most Docker images have built in start commands, so you can usually leave this blank. When customizing your start command, make sure you're not overriding existing commands that are critical for the image to run.
**Registry credentials:** If using a private container image, provide authentication credentials to access your private registry. This ensures Runpod can pull your image during Pod deployment.
**Storage configuration:** Define the storage requirements for your template, including:
* **Container disk size:** The amount of storage allocated for the container's filesystem, including the operating system and installed packages.
* **Volume disk size:** Additional persistent storage that will be mounted to your Pod. This storage persists between Pod restarts and can be used for data, models, and other files you want to preserve.
* **Volume mount path:** The directory path where the persistent volume will be mounted inside the container (commonly `/workspace`).
**Network configuration:** Configure network access for your template:
* **HTTP ports:** Ports that will be accessible via Runpod's HTTP proxy for web interfaces and APIs. These are automatically secured with HTTPS and accessible through Runpod's proxy URLs.
* **TCP ports:** Direct TCP port access for services that require raw TCP connections, such as SSH, databases, or custom protocols.
**Environment variables:** Define key-value pairs that will be available as environment variables inside your Pod. These are useful for:
* Configuration settings specific to your application.
* API keys and credentials (consider using [Secrets](/pods/templates/secrets) for sensitive data).
* Runtime parameters that customize your template's behavior.
## Creating templates
To learn how to create your own custom templates, see [Build a custom Pod template](/pods/templates/create-custom-template).
The Runpod console provides an intuitive interface for template creation:
1. Navigate to the **[Templates](https://www.console.runpod.io/user/templates)** section.
2. Click **New Template**.
3. Fill in the configuration options described above.
4. Click **Save Template** to save it to your account.
5. Test your template by deploying a Pod to ensure it works as expected.
You can also create templates programmatically using the Runpod REST API. For example:
```bash theme={"theme":{"light":"github-light","dark":"github-dark"}}
curl --request POST \
--url https://rest.runpod.io/v1/templates \
--header 'Authorization: Bearer YOUR_API_KEY' \
--header 'Content-Type: application/json' \
--data '{
"category": "NVIDIA",
"containerDiskInGb": 50,
"dockerEntrypoint": [],
"dockerStartCmd": [],
"env": {
"ENV_VAR": "value"
},
"imageName": "CONTAINER_IMAGE",
"isPublic": false,
"isServerless": false,
"name": "TEMPLATE_NAME",
"ports": [
"8888/http",
"22/tcp"
],
"readme": "",
"volumeInGb": 20,
"volumeMountPath": "/workspace"
}'
```
For more details, see the [API reference](/api-reference/templates/POST/templates).
## Using environment variables in templates
Environment variables provide a flexible way to configure your Pod's runtime behavior without modifying the container image.
### Defining environment variables
Environment variables are key-value pairs that become available inside your Pod's container. When creating a template, you can define variables by specifying:
* **Key**: The environment variable name (e.g., `DATABASE_URL`, `API_KEY`).
* **Value**: The value assigned to that variable.
### Use cases for environment variables
Environment variables are particularly useful for:
* **Configuration settings**: Database connections, API endpoints, feature flags.
* **Runtime parameters**: Model paths, batch sizes, processing options.
* **Integration credentials**: API keys, authentication tokens (consider using [Secrets](/pods/templates/secrets) for sensitive data).
* **Application behavior**: Debug modes, logging levels, output formats.
### Runpod system environment variables
Runpod automatically provides several [predefined environment variables](/pods/references/environment-variables) in every Pod, for example:
* `RUNPOD_POD_ID`: Unique identifier for your Pod.
* `RUNPOD_API_KEY`: API key for making Runpod API calls from within the Pod.
* `RUNPOD_POD_HOSTNAME`: Hostname of the server running your Pod.
### Using secrets in templates
For sensitive information like passwords and API keys, use [Runpod secrets](/pods/templates/secrets) instead of plain environment variables. Secrets are encrypted and can be referenced in your templates using the format:
```text
{{ RUNPOD_SECRET_secret_name }}
```
This approach ensures sensitive data is properly protected while still being accessible to your Pod.
---
# Source: https://docs.runpod.io/serverless/endpoints/model-caching.md
> ## Documentation Index
>
> Fetch the complete documentation index at: https://docs.runpod.io/llms.txt
> Use this file to discover all available pages before exploring further.
# Cached models
> Accelerate worker cold starts and reduce costs by using cached models.
Enabling cached models for your workers can reduce [cold start times](/serverless/overview#cold-starts) to just a few seconds and dramatically reduce the cost for loading large models.
## Why use cached models?
* **Faster cold starts:** A "cold start" refers to the delay between when a request is received by an endpoint with no running workers and when a worker is fully "warmed up" and ready to handle the request. Using cached models can reduce cold start times to just a few seconds, even for large models.
* **Reduced costs:** You aren't billed for worker time while your model is being downloaded. This is especially impactful for large models that can take several minutes to load.
* **Accelerated deployment:** You can deploy cached models instantly without waiting for external downloads or transfers.
* **Smaller container images:** By decoupling models from your container image, you can create smaller, more focused images that contain only your application logic.
* **Shared across workers:** Multiple workers running on the same host machine can reference the same cached model, eliminating redundant downloads and saving disk space.
## Cached model compatibility
Cached models work with any model hosted on Hugging Face, including:
* **Public models:** Any publicly available model on Hugging Face.
* **Gated models:** Models that require you to accept terms (provide a Hugging Face access token).
* **Private models:** Private models your Hugging Face token has access to.
Cached models aren't suitable if your model is private and not hosted on Hugging Face. In that case, [bake it into your Docker image](/serverless/workers/deploy#including-models-and-external-files) instead.
## How it works
When you select a cached model for your endpoint, Runpod automatically tries to start your workers on hosts that already contain the selected model.
If no cached host machines are available, the system delays starting your workers until the model is downloaded onto the machine where your workers will run, ensuring you still won't be charged for the download time.
```mermaid theme={"theme":{"light":"github-light","dark":"github-dark"}}
%%{init: {'theme':'base', 'themeVariables': { 'primaryColor':'#9289FE','primaryTextColor':'#fff','primaryBorderColor':'#9289FE','lineColor':'#5F4CFE','secondaryColor':'#AE6DFF','tertiaryColor':'#FCB1FF','edgeLabelBackground':'#5F4CFE', 'fontSize':'15px','fontFamily':'font-inter'}}}%%
flowchart TD
Start([Request received]) --> CheckWorkers{Worker ready?}
CheckWorkers -->|" Yes "| Process[Process request]
CheckWorkers -->|" No "| CheckCache{Cached model host available?}
CheckCache -->|" Yes "| FastStart[Start worker on cached host]
FastStart --> Ready1[Worker ready in seconds]
Ready1 --> Process
CheckCache -->|" No "| WaitForCache[Wait for model download on target host]
WaitForCache --> Ready2[Worker ready after download]
Ready2 --> Process
Process --> Response([Return response])
style Start fill:#5F4CFE,stroke:#5F4CFE,color:#FFFFFF,stroke-width:2px
style Response fill:#5F4CFE,stroke:#5F4CFE,color:#FFFFFF,stroke-width:2px
style CheckWorkers fill:#f87171,stroke:#f87171,color:#000000,stroke-width:2px
style CheckCache fill:#fb923c,stroke:#fb923c,color:#000000,stroke-width:2px
style Process fill:#22C55E,stroke:#22C55E,color:#000000,stroke-width:2px
style FastStart fill:#22C55E,stroke:#22C55E,color:#000000,stroke-width:2px
style Ready1 fill:#22C55E,stroke:#22C55E,color:#000000,stroke-width:2px
style WaitForCache fill:#ecc94b,stroke:#ecc94b,color:#000000,stroke-width:2px
style Ready2 fill:#ecc94b,stroke:#ecc94b,color:#000000,stroke-width:2px
linkStyle default stroke-width:2px,stroke:#5F4CFE
```mermaid
## Enable cached models
Follow these steps to select and add a cached model to your endpoint:
Navigate to the [Serverless section](https://www.console.runpod.io/serverless) of the console and click **New Endpoint**.
In the **Endpoint Configuration** step, scroll down to **Model** and add the link or path for the model you want to use.
For example, `Qwen/qwen3-32b-awq`.
If you're using a gated model, you'll need to enter a [Hugging Face access token](https://huggingface.co/docs/hub/en/security-tokens).
Complete your endpoint configuration and click **Deploy Endpoint** .
You can add a cached model to an existing endpoint by selecting **Manage → Edit Endpoint** in the endpoint details page and updating the **Model** field.
Once it's deployed, your workers will all have access to the cached model for inference.
## Using cached models in your workers
When using [vLLM workers](/serverless/vllm/overview) or other official Runpod worker images, you can usually just set the **Model** field as shown above (or use the `MODEL_NAME` environment variable), and your workers will automatically use the cached model for inference.
To use cached models with [custom workers](/serverless/workers/custom-worker), you'll need to manually locate the cached model path and integrate it into your worker code.
### Where cached models are stored
Cached models are available to your workers at `/runpod-volume/huggingface-cache/hub/` following Hugging Face cache conventions. The directory structure replaces forward slashes (`/`) from the original model name with double dashes (`--`), and includes a version hash subdirectory.
While cached models use the same mount path as network volumes (`/runpod-volume/`), the model loaded from the cache will load significantly faster than the same model loaded from a network volume.
The path structure follows this pattern:
```text
/runpod-volume/huggingface-cache/hub/models--HF_ORGANIZATION--MODEL_NAME/snapshots/VERSION_HASH/
```
For example, the model `gensyn/qwen2.5-0.5b-instruct` would be stored at:
```text
/runpod-volume/huggingface-cache/hub/models--gensyn--qwen2.5-0.5b-instruct/snapshots/317b7eb96312eda0c431d1dab1af958a308cb35e/
```
### Programmatically locate cached models
To dynamically locate cached models without hardcoding paths, you can add this helper function to your [handler file](/serverless/workers/handler-functions) to scan the cache directory for the model you want to use:
```python handler.py theme={"theme":{"light":"github-light","dark":"github-dark"}}
import os
CACHE_DIR = "/runpod-volume/huggingface-cache/hub"
def find_model_path(model_name):
"""
Find the path to a cached model.
Args:
model_name: The model name from Hugging Face
(e.g., 'Qwen/Qwen2.5-0.5B-Instruct')
Returns:
The full path to the cached model, or None if not found
"""
# Convert model name format: "Org/Model" -> "models--Org--Model"
cache_name = model_name.replace("/", "--")
snapshots_dir = os.path.join(CACHE_DIR, f"models--{cache_name}", "snapshots")
# Check if the model exists in cache
if os.path.exists(snapshots_dir):
snapshots = os.listdir(snapshots_dir)
if snapshots:
# Return the path to the first (usually only) snapshot
return os.path.join(snapshots_dir, snapshots[0])
return None
# Example usage
model_path = find_model_path("Qwen/Qwen2.5-0.5B-Instruct")
if model_path:
print(f"Model found at: {model_path}")
else:
print("Model not found in cache")
```
### Custom worker examples
The following sample applications demonstrate how you can integrate cached models into your custom workers:
* [Cached models + LLMs](https://github.com/stuffbyt/model-store-worker): A custom worker that uses cached models to serve LLMs.
* [Cached models + Stable diffusion](https://github.com/stuffbyt/Stable-diffusion-cached-worker): A custom worker that uses cached models to generate images with Stable diffusion.
## Current limitations
* Each endpoint is currently limited to one cached model at a time.
* If a Hugging Face repository contains multiple quantization versions of a model (for example, 4-bit AWQ and 8-bit GPTQ versions), the system currently downloads all quantization versions. The ability to select specific quantizations will be available in a future update.
---
# Source: https://docs.runpod.io/integrations/mods.md
> ## Documentation Index
>
> Fetch the complete documentation index at: https://docs.runpod.io/llms.txt
> Use this file to discover all available pages before exploring further.
# Running Runpod on Mods
[Mods](https://github.com/charmbracelet/mods) is an AI-powered tool designed for the command line and built to seamlessly integrate with pipelines. It provides a convenient way to interact with language models directly from your terminal.
## How Mods Works
Mods operates by reading standard input and prefacing it with a prompt supplied in the Mods arguments. It sends the input text to a language model (LLM) and prints out the generated result. Optionally, you can ask the LLM to format the response as Markdown. This allows you to "question" the output of a command, making it a powerful tool for interactive exploration and analysis. Additionally, Mods can work with standard input or an individually supplied argument prompt.
## Getting Started
To start using Mods, follow these step-by-step instructions:
1. **Obtain Your API Key**:
* Visit the [Runpod Settings](https://www.console.runpod.io/user/settings) page to retrieve your API key.
* If you haven't created an account yet, you'll need to sign up before obtaining the key.
2. **Install Mods**:
* Refer to the different installation methods for [Mods](https://github.com/charmbracelet/mods) based on your preferred approach.
3. **Configure Runpod**:
* Update the `config_template.yml` file to use your Runpod configuration. Here's an example:
```yml theme={"theme":{"light":"github-light","dark":"github-dark"}}
runpod:
# https://docs.runpod.io/serverless/vllm/openai-compatibility
base-url: https://api.runpod.ai/v2/${YOUR_ENDPOINT}/openai/v1
api-key:
api-key-env: RUNPOD_API_KEY
models:
# Add your model name
openchat/openchat-3.5-1210:
aliases: ["openchat"]
max-input-chars: 8192
```
* `base-url`: Update your base-url with your specific endpoint.
* `api-key-env`: Add your Runpod API key.
* `openchat/openchat-3.5-1210`: Replace with the name of the model you want to use.
* `aliases: ["openchat"]`: Replace with your preferred model alias.
* `max-input-chars`: Update the maximum input characters allowed for your model.
4. **Verify Your Setup**:
* To ensure everything is set up correctly, pipe any command line output and pass it to `mods`.
* Specify the Runpod API and model you want to use.
```sh theme={"theme":{"light":"github-light","dark":"github-dark"}}
ls ~/Downloads | mods --api runpod --model openchat -f "tell my fortune based on these files" | glow
```
* This command will list the files in your `~/Downloads` directory, pass them to Mods using the Runpod API and the specified model, and format the response as a fortune based on the files. The output will then be piped to `glow` for a visually appealing display.
---
# Source: https://docs.runpod.io/storage/network-volumes.md
> ## Documentation Index
>
> Fetch the complete documentation index at: https://docs.runpod.io/llms.txt
> Use this file to discover all available pages before exploring further.
# Network volumes
> Persistent, portable storage for your AI workloads.
Network volumes offer persistent storage that exists independently of your compute resources. Your data is retained even when your Pods are terminated or your Serverless workers are scaled to zero. You can use them to share data and maintain datasets across multiple machines and [Runpod products](/overview).
Network volumes are backed by high-performance NVMe SSDs connected via high-speed networks. Transfer speeds typically range from 200-400 MB/s, with peak speeds up to 10 GB/s depending on location and network conditions.
## When to use network volumes
Consider using network volumes when you need:
* **Persistent data that outlives compute resources**: Your data remains accessible even after Pods are terminated or Serverless workers stop.
* **Shareable storage**: Share data across multiple Pods or Serverless endpoints by attaching the same network volume.
* **Portable storage**: Move your working environment and data between different compute resources.
* **Efficient data management**: Store frequently used models or large datasets to avoid re-downloading them for each new Pod or worker, saving time, bandwidth, and reducing cold start times.
## Pricing
Network volumes are billed hourly at a rate of \$0.07 per GB per month for the first 1TB, and \$0.05 per GB per month for additional storage beyond that.
If your account lacks sufficient funds to cover storage costs, your network volume may be terminated. Once terminated, the disk space is immediately freed for other users, and Runpod cannot recover lost data. Ensure your account remains funded to prevent data loss.
## Create a network volume
Network volume size can be increased later, but cannot be decreased.
To create a new network volume:
1. Navigate to the [Storage page](https://www.console.runpod.io/user/storage) in the Runpod console.
2. Click **New Network Volume**.
3. Select a datacenter for your volume. Datacenter location does not affect pricing, but determines which GPU types and endpoints your network volume can be used with.
4. Provide a descriptive name for your volume (e.g., "project-alpha-data" or "shared-models").
5. Specify the desired size for the volume in gigabytes (GB).
6. Click **Create Network Volume**.
You can edit and delete your network volumes using the [Storage page](https://www.console.runpod.io/user/storage).
To create a network volume using the REST API, send a POST request to the `/networkvolumes` endpoint:
```bash theme={"theme":{"light":"github-light","dark":"github-dark"}}
curl --request POST \
--url https://rest.runpod.io/v1/networkvolumes \
--header 'Authorization: Bearer RUNPOD_API_KEY' \
--header 'Content-Type: application/json' \
--data '{
"name": "my-network-volume",
"size": 100,
"dataCenterId": "US-KS-2"
}'
```
For complete API documentation and parameter details, see the [network volumes API reference](/api-reference/network-volumes/POST/networkvolumes).
## Network volumes for Serverless
When attached to a Serverless endpoint, a network volume is mounted at `/runpod-volume` within the worker environment.
### Benefits for Serverless
Using network volumes with Serverless provides several advantages:
* **Reduced cold starts**: Store large models or datasets on a network volume so workers can access them quickly without downloading on each cold start.
* **Cost efficiency**: Network volume storage costs less than frequently re-downloading large files.
* **Simplified data management**: Centralize your datasets and models for easier updates and management across multiple workers and endpoints.
### Attach to an endpoint
To enable workers on an endpoint to use network volumes:
1. Navigate to the [Serverless section](https://www.console.runpod.io/serverless/user/endpoints) of the Runpod console.
2. Select an existing endpoint and click **Manage**, then select **Edit Endpoint**.
3. In the endpoint configuration menu, scroll down and expand the **Advanced** section.
4. Click **Network Volumes** and select one or more network volumes you want to attach to the endpoint.
5. Configure any other fields as needed, then select **Save Endpoint**.
Data from the attached network volume(s) will be accessible to workers from the `/runpod-volume` directory. Use this path to read and write shared data in your [handler function](/serverless/workers/handler-functions).
When you attach multiple network volumes to an endpoint, you can only select one network volume per datacenter.
Writing to the same network volume from multiple endpoints or workers simultaneously may result in conflicts or data corruption. Ensure your application logic handles concurrent access appropriately for write operations.
### Attach multiple volumes
If you attach a single network volume to your Serverless endpoint, worker deployments will be constrained to the datacenter where the volume is located. This may impact GPU availability and failover options.
To improve GPU availability and reduce downtime during datacenter maintenance, you can attach multiple network volumes to your endpoint. Workers will be distributed across the datacenters where the volumes are located, with each worker receiving exactly one network volume based on its assigned datacenter.
Data **does not sync** automatically between multiple network volumes even if they are attached to the same endpoint. You'll need to manually copy data (using the [S3-compatible API](/storage/s3-api) or [`runpodctl`](#using-runpodctl)) if you need the same data to be available to all workers on the endpoint (regardless of which volume they're attached to).
## Network volumes for Pods
When attached to a Pod, a network volume replaces the Pod's default volume disk and is typically mounted at `/workspace`.
Network volumes are only available for Pods in the Secure Cloud. For more information, see [Pod types](/pods/overview#pod-types).
### Attach to a Pod
Network volumes must be attached during Pod deployment. They cannot be attached to a previously-deployed Pod, nor can they be detached later without deleting the Pod.
To deploy a Pod with a network volume attached:
1. Navigate to the [Pods section](https://www.console.runpod.io/pods) of the Runpod console.
2. Select **Deploy**.
3. Select **Network Volume** and choose the network volume you want to attach from the dropdown list.
4. Select a GPU type. The system will automatically show which Pods are available to use with the selected network volume.
5. Select a **Pod Template**.
6. If you wish to change where the volume mounts, select **Edit Template** and adjust the **Volume Mount Path**.
7. Configure any other fields as needed, then select **Deploy On-Demand**.
Data from the network volume will be accessible to the Pod from the volume mount path (default: `/workspace`). Use this directory to upload, download, and manipulate data that you want to share with other Pods.
### Share data between Pods
You can attach a network volume to multiple Pods, allowing them to share data seamlessly. Multiple Pods can read files from the same volume concurrently, but you should avoid writing to the same file simultaneously to prevent conflicts or data corruption.
## Network volumes for Instant Clusters
Network volumes for Instant Clusters work the same way as they do for Pods. They must be attached during cluster creation, and by default are mounted at `/workspace` within each node in the cluster.
### Attach to an Instant Cluster
To enable workers on an Instant Cluster to use a network volume:
1. Navigate to the [Instant Clusters section](https://www.console.runpod.io/cluster) of the Runpod console.
2. Click **Create Cluster**.
3. Click **Network Volume** and select the network volume you want to attach to the cluster.
4. Configure any other fields as needed, then click **Deploy Cluster**.
## S3-compatible API
Runpod provides an [S3-compatible API](/storage/s3-api) that allows you to access and manage files on your network volumes directly, without needing to launch a Pod or run a Serverless worker for file management. This is particularly useful for:
* **Uploading large datasets or models** before launching compute resources.
* **Managing files remotely** without maintaining an active connection.
* **Automating data workflows** using standard S3 tools and libraries.
* **Reducing costs** by avoiding the need to keep compute resources running for file management.
* **Pre-populating volumes** to reduce worker initialization time and improve cold start performance.
The S3-compatible API supports standard S3 operations including file uploads, downloads, listing, and deletion. You can use it with popular tools like the AWS CLI and Boto3 (Python).
The S3-compatible API is currently available for network volumes in the following datacenters: `EUR-IS-1`, `EU-RO-1`, `EU-CZ-1`, `US-KS-2`, `US-CA-2`.
## Migrate files
You can migrate files between network volumes (including between data centers) using the following methods:
### Using runpodctl
The simplest way to migrate files between network volumes is to use `runpodctl send` and `receive` on two running Pods.
Before you begin, you'll need:
* A source network volume containing the data you want to migrate.
* A destination network volume (which can be empty or contain existing data).
Deploy two Pods using the default Runpod PyTorch template. Each Pod should have one [network volume attached](#attach-to-a-pod).
1. Deploy the first Pod in the source data center and attach the source network volume.
2. Deploy the second Pod in the target data center and attach the target network volume.
3. Start the [web terminal](/pods/connect-to-a-pod#web-terminal) in both Pods.
Using your source Pod's web terminal, navigate to the network volume directory (usually `/workspace`):
```bash theme={"theme":{"light":"github-light","dark":"github-dark"}}
cd workspace
```
Use `runpodctl send` to start the transfer. To transfer the entire volume:
```bash theme={"theme":{"light":"github-light","dark":"github-dark"}}
runpodctl send *
```
You can also specify specific files or directories instead of `*`.
After running the send command, copy the `receive` command from the output. It will look something like this:
```bash theme={"theme":{"light":"github-light","dark":"github-dark"}}
runpodctl receive 8338-galileo-collect-fidel
```
Using your destination Pod's web terminal, navigate to the network volume directory (usually `/workspace`):
```bash theme={"theme":{"light":"github-light","dark":"github-dark"}}
cd workspace
```
Paste and run the `receive` command you copied earlier:
```bash theme={"theme":{"light":"github-light","dark":"github-dark"}}
runpodctl receive 8338-galileo-collect-fidel
```
The transfer will begin and show progress as it copies files from the source to the destination volume.
For a visual walkthrough using JupyterLab, check out this video tutorial:
### Using rsync over SSH
For faster migration speed and more reliability for large transfers, you can use `rsync` over SSH on two running Pods.
Before you begin, you'll need:
* A network volume in the source data center containing the data you want to migrate.
* A network volume in the target data center (which can be empty or contain existing data).
Deploy two Pods using the default Runpod PyTorch template. Each Pod should have one [network volume attached](#attach-to-a-pod).
1. Deploy the first Pod in the source data center and attach the source network volume.
2. Deploy the second Pod in the target data center and attach the target network volume.
3. Start the [web terminal](/pods/connect-to-a-pod#web-terminal) in both Pods.
On the source Pod, install required packages and generate an SSH key pair:
```bash theme={"theme":{"light":"github-light","dark":"github-dark"}}
apt update && apt install -y vim rsync && \
ssh-keygen -t ed25519 -f ~/.ssh/id_ed25519 -N "" -q && \
cat ~/.ssh/id_ed25519.pub
```
Copy the public key that appears in the terminal output.
On the destination Pod, install required packages and add the source Pod's public key to `authorized_keys`:
```bash theme={"theme":{"light":"github-light","dark":"github-dark"}}
apt update && apt install -y vim rsync && \
ip=$(printenv RUNPOD_PUBLIC_IP) && \
port=$(printenv RUNPOD_TCP_PORT_22) && \
echo "rsync -avzP --inplace -e \"ssh -p $port\" /workspace/ root@$ip:/workspace" && \
vi ~/.ssh/authorized_keys
```
In the editor that opens, paste the public key you copied from the source Pod, then save and exit (press `Esc`, type `:wq`, and press `Enter`).
The command above also displays the `rsync` command you'll need to run on the source Pod. Copy this command for the next step.
On the source Pod, run the `rsync` command from the previous step. If you didn't copy it, you can construct it manually using the destination Pod's IP address and port number.
```bash theme={"theme":{"light":"github-light","dark":"github-dark"}}
# Replace DESTINATION_PORT and DESTINATION_IP with values from the destination Pod
rsync -avzP --inplace -e "ssh -p DESTINATION_PORT" /workspace/ root@DESTINATION_IP:/workspace
# Example:
rsync -avzP --inplace -e "ssh -p 18598" /workspace/ root@157.66.254.13:/workspace
```
The `rsync` command displays progress as it transfers files. Depending on the size of your data, this may take some time.
After the `rsync` command completes, verify the data transfer by checking disk usage on both Pods:
```bash theme={"theme":{"light":"github-light","dark":"github-dark"}}
du -sh /workspace
```
The destination Pod should show similar disk usage to the source Pod if all files transferred successfully.
You can run the `rsync` command multiple times if the transfer is interrupted. The `--inplace` flag ensures that `rsync` resumes from where it left off rather than starting over.
---
# Source: https://docs.runpod.io/api-reference/network-volumes/PATCH/networkvolumes/networkVolumeId.md
# Source: https://docs.runpod.io/api-reference/network-volumes/GET/networkvolumes/networkVolumeId.md
# Source: https://docs.runpod.io/api-reference/network-volumes/DELETE/networkvolumes/networkVolumeId.md
> ## Documentation Index
> Fetch the complete documentation index at: https://docs.runpod.io/llms.txt
> Use this file to discover all available pages before exploring further.
# Delete a network volume
> Delete a network volume.
## OpenAPI
````yaml DELETE /networkvolumes/{networkVolumeId}
openapi: 3.0.3
info:
title: Runpod API
description: Public Rest API for managing Runpod programmatically.
version: 0.1.0
contact:
name: help
url: https://contact.runpod.io/hc/requests/new
email: help@runpod.io
servers:
- url: https://rest.runpod.io/v1
security:
- ApiKey: []
tags:
- name: docs
description: This documentation page.
- name: pods
description: Manage Pods.
- name: endpoints
description: Manage Serverless endpoints.
- name: network volumes
description: Manage Runpod network volumes.
- name: templates
description: Manage Pod and Serverless templates.
- name: container registry auths
description: >-
Manage authentication for container registries such as dockerhub to use
private images.
- name: billing
description: Retrieve billing history for your Runpod account.
externalDocs:
description: Find out more about Runpod.
url: https://runpod.io
paths:
/networkvolumes/{networkVolumeId}:
delete:
tags:
- network volumes
summary: Delete a network volume
description: Delete a network volume.
operationId: DeleteNetworkVolume
parameters:
- name: networkVolumeId
in: path
description: Network volume ID to delete.
required: true
schema:
type: string
responses:
'204':
description: Network volume successfully deleted.
'400':
description: Invalid network volume ID.
'401':
description: Unauthorized.
components:
securitySchemes:
ApiKey:
type: http
scheme: bearer
bearerFormat: Bearer
````
---
# Source: https://docs.runpod.io/pods/networking.md
> ## Documentation Index
> Fetch the complete documentation index at: https://docs.runpod.io/llms.txt
> Use this file to discover all available pages before exploring further.
# Global networking
> Connect your Pods through a secure private network for internal communication
Global networking creates a secure, private network that connects all your Pods within your Runpod account. This feature enables Pod-to-Pod communication as if they were on the same local network, regardless of their physical location across different data centers.
Global networking is currently only available for NVIDIA GPU Pods.
## How global networking works
Global networking provides each Pod with a private IP address accessible only to other Pods in your account. This creates an isolated network layer separate from the public internet, which can be used for:
* Distributed computing workloads.
* Microservice architectures.
* Secure database connections.
* Internal API communication.
* Multi-Pod machine learning pipelines.
The network operates at 100 Mbps between Pods, providing reliable connectivity for most inter-Pod communication needs while maintaining security through complete isolation from external networks.
## Enable global networking
To enable global networking for your Pod:
1. Navigate to the [Pods](https://www.console.runpod.io/pods) section and click **Deploy**.
2. At the top of the page, toggle **Global Networking** to filter and show only Pods with networking support.
3. Select your desired GPU configuration and complete the deployment process.
Once deployed, your Pod receives a private IP address and DNS name visible in the Pod details card.
## Connect to other Pods
Each Pod with global networking enabled can be accessed by other Pods using its internal DNS name:
```
POD_ID.runpod.internal
```
Replace `POD_ID` with the target Pod's ID. For example, if your Pod ID is `abc123xyz`, other Pods can reach it at `abc123xyz.runpod.internal`.
### Test connectivity
Verify network connectivity between Pods by opening a web terminal in one Pod and running:
```bash theme={"theme":{"light":"github-light","dark":"github-dark"}}
# To install ping on your Pod, run: apt-get install -y iputils-ping
ping POD_ID.runpod.internal
```
This confirms the private network connection is working correctly.
### Run internal services
Services running on networked Pods are automatically accessible to other Pods without exposing ports publicly. Simply bind your service to all interfaces (`0.0.0.0`) and connect using the internal DNS name.
For example, a database on Pod `abc123xyz` listening on port 5432 would be accessible to other Pods at:
```
abc123xyz.runpod.internal:5432
```
Each service communicates privately through the internal network, reducing attack surface and improving security.
## Security best practices
Global networking provides network isolation, but proper security practices remain essential. Never expose ports on Pods running sensitive services like databases, cache servers, or internal APIs; instead, use global networking for these components. Even within your private Pod network, you should implement authentication between services.
## Supported data centers
Global networking is available in these 17 data centers worldwide:
| Region ID | Geographic location |
| --------- | ------------------- |
| CA-MTL-3 | Canada |
| EU-CZ-1 | Czech Republic |
| EU-FR-1 | France |
| EU-NL-1 | Netherlands |
| EU-RO-1 | Romania |
| EU-SE-1 | Sweden |
| EUR-IS-2 | Iceland |
| OC-AU-1 | Australia |
| US-CA-2 | California |
| US-GA-1 | Georgia |
| US-GA-2 | Georgia |
| US-IL-1 | Illinois |
| US-KS-2 | Kansas |
| US-NC-1 | North Carolina |
| US-TX-3 | Texas |
| US-TX-4 | Texas |
| US-WA-1 | Washington |
Choose data centers strategically based on:
* Geographic proximity for lower latency
* Compliance requirements for data residency
* Availability of specific GPU types
## Next steps
With global networking configured, explore these related features:
* [Expose ports](/pods/configuration/expose-ports) to make specific services publicly accessible
* Set up [network volumes](/storage/network-volumes) for shared persistent storage.
* Set up [SSH access](/pods/configuration/use-ssh) for secure Pod management.
For additional support or enterprise networking requirements, [contact our customer service team](https://contact.runpod.io/hc/en-us/requests/new).
---
# Source: https://docs.runpod.io/api-reference/network-volumes/POST/networkvolumes.md
# Source: https://docs.runpod.io/api-reference/network-volumes/GET/networkvolumes.md
# Source: https://docs.runpod.io/api-reference/billing/GET/billing/networkvolumes.md
# Source: https://docs.runpod.io/api-reference/network-volumes/POST/networkvolumes.md
# Source: https://docs.runpod.io/api-reference/network-volumes/GET/networkvolumes.md
# Source: https://docs.runpod.io/api-reference/billing/GET/billing/networkvolumes.md
> ## Documentation Index
> Fetch the complete documentation index at: https://docs.runpod.io/llms.txt
> Use this file to discover all available pages before exploring further.
# Network Volume billing history
> Retrieve billing information about your network volumes.
## OpenAPI
````yaml GET /billing/networkvolumes
openapi: 3.0.3
info:
title: Runpod API
description: Public Rest API for managing Runpod programmatically.
version: 0.1.0
contact:
name: help
url: https://contact.runpod.io/hc/requests/new
email: help@runpod.io
servers:
- url: https://rest.runpod.io/v1
security:
- ApiKey: []
tags:
- name: docs
description: This documentation page.
- name: pods
description: Manage Pods.
- name: endpoints
description: Manage Serverless endpoints.
- name: network volumes
description: Manage Runpod network volumes.
- name: templates
description: Manage Pod and Serverless templates.
- name: container registry auths
description: >-
Manage authentication for container registries such as dockerhub to use
private images.
- name: billing
description: Retrieve billing history for your Runpod account.
externalDocs:
description: Find out more about Runpod.
url: https://runpod.io
paths:
/billing/networkvolumes:
get:
tags:
- billing
summary: Network volume billing history
description: Retrieve billing information about your network volumes.
operationId: NetworkVolumeBilling
parameters:
- name: bucketSize
in: query
schema:
type: string
enum:
- hour
- day
- week
- month
- year
default: day
description: >-
The length of each billing time bucket. The billing time bucket is
the time range over which each billing record is aggregated.
- name: endTime
in: query
schema:
type: string
format: date-time
example: '2023-01-31T23:59:59Z'
description: The end date of the billing period to retrieve.
- name: startTime
in: query
schema:
type: string
format: date-time
example: '2023-01-01T00:00:00Z'
description: The start date of the billing period to retrieve.
responses:
'200':
description: Successful operation.
content:
application/json:
schema:
$ref: '#/components/schemas/NetworkVolumeBillingRecords'
components:
schemas:
NetworkVolumeBillingRecords:
type: array
items:
type: object
properties:
amount:
type: number
description: The amount charged for the group for the billing period, in USD.
example: 100.5
diskSpaceBilledGb:
type: integer
description: >-
The amount of disk space billed for the billing period, in
gigabytes (GB). Does not apply to all resource types.
example: 50
highPerformanceStorageAmount:
type: number
description: >-
The amount charged for high performance storage for the billing
period, in USD.
example: 100.5
highPerformanceStorageDiskSpaceBilledGb:
type: integer
description: >-
The amount of high performance storage disk space billed for the
billing period, in gigabytes (GB).
example: 50
time:
type: string
format: date-time
description: The start of the period for which the billing record applies.
example: '2023-01-01T00:00:00Z'
securitySchemes:
ApiKey:
type: http
scheme: bearer
bearerFormat: Bearer
````
---
# Source: https://docs.runpod.io/serverless/vllm/openai-compatibility.md
> ## Documentation Index
> Fetch the complete documentation index at: https://docs.runpod.io/llms.txt
> Use this file to discover all available pages before exploring further.
# OpenAI API compatibility guide
> Integrate vLLM workers with OpenAI client libraries and API-compatible tools.
Runpod's vLLM workers implement OpenAI API compatibility, allowing you to use familiar [OpenAI client libraries](https://platform.openai.com/docs/libraries) with your deployed models. This guide explains how to leverage this compatibility to integrate your models with existing OpenAI-based applications.
## Endpoint structure
You can make OpenAI-compatible API requests to your vLLM workers by sending requests to this base URL pattern:
```
https://api.runpod.ai/v2/ENDPOINT_ID/openai/v1
```
## Supported APIs
vLLM workers support these core OpenAI API endpoints:
| Endpoint | Description | Status |
| ------------------- | ------------------------------- | --------------- |
| `/chat/completions` | Generate chat model completions | Fully supported |
| `/completions` | Generate text completions | Fully supported |
| `/models` | List available models | Supported |
## Model naming
The `MODEL_NAME` environment variable is essential for all OpenAI-compatible API requests. This variable corresponds to either:
1. The [Hugging Face model](https://huggingface.co/models) you've deployed (e.g., `mistralai/Mistral-7B-Instruct-v0.2`).
2. A custom name if you've set `OPENAI_SERVED_MODEL_NAME_OVERRIDE` as an environment variable.
This model name is used in chat and text completion API requests to identify which model should process your request.
## Initialize the OpenAI client
Before you can send API requests, set up an OpenAI client with your Runpod API key and endpoint URL:
```python theme={"theme":{"light":"github-light","dark":"github-dark"}}
from openai import OpenAI
MODEL_NAME = "mistralai/Mistral-7B-Instruct-v0.2" # Use your deployed model
# Replace ENDPOINT_ID and RUNPOD_API_KEY with your actual values
client = OpenAI(
api_key="RUNPOD_API_KEY",
base_url="https://api.runpod.ai/v2/ENDPOINT_ID/openai/v1",
)
```
## Send requests
You can use Runpod's OpenAI-compatible API to send requests to your Runpod endpoint, enabling you to use the same client libraries and code that you use with OpenAI's services. You only need to change the base URL to point to your Runpod endpoint.
You can also send requests using [Runpod's native API](/serverless/vllm/vllm-requests), which provides additional flexibility and control.
### Chat completions
The `/chat/completions` endpoint is designed for instruction-tuned LLMs that follow a chat format.
#### Non-streaming request
Here's how you can make a basic chat completion request:
```python theme={"theme":{"light":"github-light","dark":"github-dark"}}
from openai import OpenAI
MODEL_NAME = "YOUR_MODEL_NAME" # Replace with your actual model
# Replace ENDPOINT_ID and RUNPOD_API_KEY with your actual values
client = OpenAI(
api_key="RUNPOD_API_KEY",
base_url="https://api.runpod.ai/v2/ENDPOINT_ID/openai/v1",
)
# Chat completion request (for instruction-tuned models)
response = client.chat.completions.create(
model=MODEL_NAME,
messages=[
{"role": "system", "content": "You are a helpful assistant."},
{"role": "user", "content": "Hello, who are you?"}
],
temperature=0.7,
max_tokens=500
)
# Print the response
print(response.choices[0].message.content)
```
#### Response format
The API returns responses in this JSON format:
```json theme={"theme":{"light":"github-light","dark":"github-dark"}}
{
"id": "cmpl-123abc",
"object": "chat.completion",
"created": 1677858242,
"model": "mistralai/Mistral-7B-Instruct-v0.2",
"choices": [
{
"message": {
"role": "assistant",
"content": "I am Mistral, an AI assistant based on the Mistral-7B-Instruct model. How can I help you today?"
},
"index": 0,
"finish_reason": "stop"
}
],
"usage": {
"prompt_tokens": 23,
"completion_tokens": 24,
"total_tokens": 47
}
}
```
#### Streaming request
Streaming allows you to receive the model's output incrementally as it's generated, rather than waiting for the complete response. This real-time delivery enhances responsiveness, making it ideal for interactive applications like chatbots or for monitoring the progress of lengthy generation tasks.
```python theme={"theme":{"light":"github-light","dark":"github-dark"}}
# Create a streaming chat completion request
stream = client.chat.completions.create(
model=MODEL_NAME,
messages=[
{"role": "system", "content": "You are a helpful assistant."},
{"role": "user", "content": "Write a short poem about stars."}
],
temperature=0.7,
max_tokens=200,
stream=True # Enable streaming
)
# Print the streaming response
print("Response: ", end="", flush=True)
for chunk in stream:
if chunk.choices[0].delta.content:
print(chunk.choices[0].delta.content, end="", flush=True)
print()
```
### Text completions
The `/completions` endpoint is designed for base LLMs and text completion tasks.
#### Non-streaming text completion request
Here's how you can make a text completion request:
```python theme={"theme":{"light":"github-light","dark":"github-dark"}}
# Text completion request
response = client.completions.create(
model=MODEL_NAME,
prompt="Write a poem about artificial intelligence:",
temperature=0.7,
max_tokens=150
)
# Print the response
print(response.choices[0].text)
```
#### Text completion response format
The API returns responses in this JSON format:
```json theme={"theme":{"light":"github-light","dark":"github-dark"}}
{
"id": "cmpl-456def",
"object": "text_completion",
"created": 1677858242,
"model": "mistralai/Mistral-7B-Instruct-v0.2",
"choices": [
{
"text": "In circuits of silicon and light,\nA new form of mind takes flight.\nNot born of flesh, but of human design,\nArtificial intelligence, a marvel divine.",
"index": 0,
"finish_reason": "stop",
"logprobs": null
}
],
"usage": {
"prompt_tokens": 8,
"completion_tokens": 39,
"total_tokens": 47
}
}
```
#### Streaming text completion request
```python theme={"theme":{"light":"github-light","dark":"github-dark"}}
# Create a completion stream
response_stream = client.completions.create(
model=MODEL_NAME,
prompt="Runpod is the best platform because",
temperature=0,
max_tokens=100,
stream=True,
)
# Stream the response
for response in response_stream:
print(response.choices[0].text or "", end="", flush=True)
```
### List available models
The `/models` endpoint allows you to get a list of available models on your endpoint:
```python theme={"theme":{"light":"github-light","dark":"github-dark"}}
models_response = client.models.list()
list_of_models = [model.id for model in models_response]
print(list_of_models)
```
#### Models list response format
```json theme={"theme":{"light":"github-light","dark":"github-dark"}}
{
"object": "list",
"data": [
{
"id": "mistralai/Mistral-7B-Instruct-v0.2",
"object": "model",
"created": 1677858242,
"owned_by": "runpod"
}
]
}
```
## Chat completion parameters
Here are all available parameters for the `/chat/completions` endpoint:
| Parameter | Type | Default | Description |
| ------------------- | ----------------------- | -------- | -------------------------------------------------------------------------------------------------------------------------------------------------- |
| `messages` | `list[dict[str, str]]` | Required | List of messages with `role` and `content` keys. The model's chat template will be applied automatically. |
| `model` | `string` | Required | The model repo that you've deployed on your Runpod Serverless endpoint. |
| `temperature` | `float` | `0.7` | Controls the randomness of sampling. Lower values make it more deterministic, higher values make it more random. Zero means greedy sampling. |
| `top_p` | `float` | `1.0` | Controls the cumulative probability of top tokens to consider. Must be in (0, 1]. Set to 1 to consider all tokens. |
| `n` | `int` | `1` | Number of output sequences to return for the given prompt. |
| `max_tokens` | `int` | None | Maximum number of tokens to generate per output sequence. |
| `seed` | `int` | None | Random seed to use for the generation. |
| `stop` | `string` or `list[str]` | `list` | String(s) that stop generation when produced. The returned output will not contain the stop strings. |
| `stream` | `bool` | `false` | Whether to stream the response. |
| `presence_penalty` | `float` | `0.0` | Penalizes new tokens based on whether they appear in the generated text so far. Values > 0 encourage new tokens, values \< 0 encourage repetition. |
| `frequency_penalty` | `float` | `0.0` | Penalizes new tokens based on their frequency in the generated text so far. Values > 0 encourage new tokens, values \< 0 encourage repetition. |
| `logit_bias` | `dict[str, float]` | None | Unsupported by vLLM. |
| `user` | `string` | None | Unsupported by vLLM. |
### Additional vLLM parameters
vLLM supports additional parameters beyond the standard OpenAI API:
| Parameter | Type | Default | Description |
| ------------------------------- | ----------- | ------- | ------------------------------------------------------------------------------------------------------------------------------------------------------------------------------------------------ |
| `best_of` | `int` | None | Number of output sequences generated from the prompt. From these `best_of` sequences, the top `n` sequences are returned. Must be ≥ `n`. Treated as beam width when `use_beam_search` is `true`. |
| `top_k` | `int` | `-1` | Controls the number of top tokens to consider. Set to -1 to consider all tokens. |
| `ignore_eos` | `bool` | `false` | Whether to ignore the EOS token and continue generating tokens after EOS is generated. |
| `use_beam_search` | `bool` | `false` | Whether to use beam search instead of sampling. |
| `stop_token_ids` | `list[int]` | `list` | List of token IDs that stop generation when produced. The returned output will contain the stop tokens unless they are special tokens. |
| `skip_special_tokens` | `bool` | `true` | Whether to skip special tokens in the output. |
| `spaces_between_special_tokens` | `bool` | `true` | Whether to add spaces between special tokens in the output. |
| `add_generation_prompt` | `bool` | `true` | Whether to add generation prompt. Read more [here](https://huggingface.co/docs/transformers/main/en/chat_templating#what-are-generation-prompts). |
| `echo` | `bool` | `false` | Echo back the prompt in addition to the completion. |
| `repetition_penalty` | `float` | `1.0` | Penalizes new tokens based on whether they appear in the prompt and generated text so far. Values > 1 encourage new tokens, values \< 1 encourage repetition. |
| `min_p` | `float` | `0.0` | Minimum probability for a token to be considered. |
| `length_penalty` | `float` | `1.0` | Penalizes sequences based on their length. Used in beam search. |
| `include_stop_str_in_output` | `bool` | `false` | Whether to include the stop strings in output text. |
## Text completion parameters
Here are all available parameters for the `/completions` endpoint:
| Parameter | Type | Default | Description |
| ------------------- | ----------------------- | -------- | -------------------------------------------------------------------------------------------------------------------------------------------------- |
| `prompt` | `string` or `list[str]` | Required | The prompt(s) to generate completions for. |
| `model` | `string` | Required | The model repo that you've deployed on your Runpod Serverless endpoint. |
| `temperature` | `float` | `0.7` | Controls the randomness of sampling. Lower values make it more deterministic, higher values make it more random. Zero means greedy sampling. |
| `top_p` | `float` | `1.0` | Controls the cumulative probability of top tokens to consider. Must be in (0, 1]. Set to 1 to consider all tokens. |
| `n` | `int` | `1` | Number of output sequences to return for the given prompt. |
| `max_tokens` | `int` | `16` | Maximum number of tokens to generate per output sequence. |
| `seed` | `int` | None | Random seed to use for the generation. |
| `stop` | `string` or `list[str]` | `list` | String(s) that stop generation when produced. The returned output will not contain the stop strings. |
| `stream` | `bool` | `false` | Whether to stream the response. |
| `presence_penalty` | `float` | `0.0` | Penalizes new tokens based on whether they appear in the generated text so far. Values > 0 encourage new tokens, values \< 0 encourage repetition. |
| `frequency_penalty` | `float` | `0.0` | Penalizes new tokens based on their frequency in the generated text so far. Values > 0 encourage new tokens, values \< 0 encourage repetition. |
| `logit_bias` | `dict[str, float]` | None | Unsupported by vLLM. |
| `user` | `string` | None | Unsupported by vLLM. |
Text completions support the same additional vLLM parameters as chat completions (see the Additional vLLM parameters section above).
## Environment variables
Use these environment variables to customize the OpenAI compatibility:
| Variable | Default | Description |
| ----------------------------------- | ----------- | -------------------------------------------- |
| `RAW_OPENAI_OUTPUT` | `1` (true) | Enables raw OpenAI SSE format for streaming. |
| `OPENAI_SERVED_MODEL_NAME_OVERRIDE` | None | Override the model name in responses. |
| `OPENAI_RESPONSE_ROLE` | `assistant` | Role for responses in chat completions. |
For a complete list of all vLLM environment variables, see the [vLLM environment variables reference](/serverless/vllm/environment-variables).
## Client libraries
The OpenAI-compatible API works with standard [OpenAI client libraries](https://platform.openai.com/docs/libraries):
### Python
```python theme={"theme":{"light":"github-light","dark":"github-dark"}}
from openai import OpenAI
MODEL_NAME = "YOUR_MODEL_NAME" # Replace with your actual model name
# Replace ENDPOINT_ID and RUNPOD_API_KEY with your actual values
client = OpenAI(
api_key="RUNPOD_API_KEY",
base_url="https://api.runpod.ai/v2/ENDPOINT_ID/openai/v1"
)
response = client.chat.completions.create(
model=MODEL_NAME,
messages=[
{"role": "system", "content": "You are a helpful assistant."},
{"role": "user", "content": "Hello!"}
]
)
```
### JavaScript
```javascript theme={"theme":{"light":"github-light","dark":"github-dark"}}
import { OpenAI } from "openai";
// Replace ENDPOINT_ID and RUNPOD_API_KEY with your actual values
const openai = new OpenAI({
apiKey: "RUNPOD_API_KEY",
baseURL: "https://api.runpod.ai/v2/ENDPOINT_ID/openai/v1"
});
// Replace MODEL_NAME with your actual model name
const response = await openai.chat.completions.create({
model: "MODEL_NAME",
messages: [
{ role: "system", content: "You are a helpful assistant." },
{ role: "user", content: "Hello!" }
]
});
```
## Implementation differences
While the vLLM worker aims for high compatibility, there are some differences from OpenAI's implementation:
**Token counting** may differ slightly from OpenAI models due to different tokenizers.
**Streaming format** follows OpenAI's Server-Sent Events (SSE) format, but the exact chunking of streaming responses may vary.
**Error responses** follow a similar but not identical format to OpenAI's error responses.
**Rate limits** follow Runpod's endpoint policies rather than OpenAI's rate limiting structure.
### Current limitations
The vLLM worker has a few limitations:
* Function and tool calling APIs are not currently supported.
* Some OpenAI-specific features like moderation endpoints are not available.
* Vision models and multimodal capabilities depend on the underlying model support in vLLM.
## Troubleshooting
Common issues and their solutions:
| Issue | Solution |
| ------------------------- | ---------------------------------------------------------------------- |
| "Invalid model" error | Verify your model name matches what you deployed. |
| Authentication error | Check that you're using your Runpod API key, not an OpenAI key. |
| Timeout errors | Increase client timeout settings for large models. |
| Incompatible responses | Set `RAW_OPENAI_OUTPUT=1` in your environment variables. |
| Different response format | Some models may have different output formatting; use a chat template. |
## Next steps
* [Learn how to send vLLM requests using Runpod's native API](/serverless/vllm/vllm-requests).
* [Explore environment variables for customization](/serverless/vllm/environment-variables).
* [Review all Serverless endpoint operations](/serverless/endpoints/send-requests).
* [Explore the OpenAI API documentation](https://platform.openai.com/docs/api-reference).
---
# Source: https://docs.runpod.io/serverless/development/optimization.md
> ## Documentation Index
> Fetch the complete documentation index at: https://docs.runpod.io/llms.txt
> Use this file to discover all available pages before exploring further.
# Optimize your endpoints
> Implement strategies to reduce latency and cost for your Serverless endpoints.
Optimizing your Serverless endpoints involves a cycle of measuring performance with [benchmarking](/serverless/development/benchmarking), identifying bottlenecks, and tuning your [endpoint configurations](/serverless/endpoints/endpoint-configurations). This guide covers specific strategies to reduce startup times and improve throughput.
## Optimization overview
Effective optimization requires making conscious tradeoffs between cost, speed, and model size.
To ensure high availability during peak traffic, you should select multiple GPU types in your configuration rather than relying on a single hardware specification. When choosing hardware, a single high-end GPU is generally preferable to multiple lower-tier cards, as the superior memory bandwidth and newer architecture often yield better inference performance than parallelization across weaker cards. When choosing multiple [GPU types](/references/gpu-types), you should select the [GPU categories](/serverless/endpoints/endpoint-configurations#gpu-configuration) that are most likely to be available in your desired data centers.
For latency-sensitive applications, utilizing active workers is the most effective way to eliminate cold starts. You should also configure your [max workers](/serverless/endpoints/endpoint-configurations#max-workers) setting with approximately 20% headroom above your expected concurrency. This buffer ensures that your endpoint can handle sudden load spikes without throttling requests or hitting capacity limits.
Your architectural choices also significantly impact performance. Whenever possible, bake your models directly into the Docker image to leverage the high-speed local NVMe storage of the host machine. If you utilize [network volumes](/storage/network-volumes) for larger datasets, remember that this restricts your endpoint to specific data centers, which effectively shrinks your pool of available compute resources.
## Reducing worker startup times
There are two key metrics to consider when optimizing your workers to reduce request response times:
* **Delay time**: The time spent waiting for a worker to become available. This includes the cold start time if a new worker needs to be spun up.
* **Execution time**: The time the GPU takes to actually process the request once the worker has received the job.
Try [benchmarking your workers](/serverless/development/benchmarking) to measure these metrics.
**Delay time** is comprised of:
* **Initialization time**: The time spent downloading the Docker image.
* **Cold start time**: The time spent loading the model into memory.
If your delay time is high, use these strategies to reduce it.
If your worker's cold start time exceeds the default 7-minute limit, the system may mark it as unhealthy. You can extend this limit by setting the `RUNPOD_INIT_TIMEOUT` environment variable (e.g. `RUNPOD_INIT_TIMEOUT=800` for 800 seconds).
### Use cached models
If your model is available on Hugging Face, we strongly recommend enabling [cached models](/serverless/endpoints/model-caching). This provides the fastest cold starts and lowest cost for any Serverless deployment option.
### Bake models into Docker images
If your model is not available on Hugging Face, you can package your ML models [directly into your worker container image](/serverless/workers/create-dockerfile#including-models-and-files) instead of downloading them in your handler function. This strategy places models on the worker's high-speed local storage (SSD/NVMe), dramatically reducing the time needed to load models into GPU memory. Note that extremely large models (500GB+) may still require network volume storage.
### Use network volumes during development
For flexibility during development, save large models to a [network volume](/storage/network-volumes) using a Pod or one-time handler, then mount this volume to your Serverless workers. While network volumes offer slower model loading compared to embedding models directly or using cached models, they can speed up your workflow by enabling rapid iteration and seamless switching between different models and configurations.
### Maintain active workers
Set [active worker counts](/serverless/endpoints/endpoint-configurations#active-workers) above zero to completely eliminate cold starts. These workers remain ready to process requests instantly and cost up to 30% less when idle compared to standard (flex) workers.
You can estimate the optimal number of active workers using the formula: `(Requests per Minute × Request Duration) / 60`. For example, with 6 requests per minute taking 30 seconds each, you would need 3 active workers to handle the load without queuing.
### Optimize scaling parameters
Fine-tune your [auto-scaling configuration](/serverless/endpoints/endpoint-configurations#auto-scaling-type) for more responsive worker provisioning. Lowering the queue delay threshold to 2-3 seconds (default 4) or decreasing the request count threshold allows the system to respond more swiftly to traffic fluctuations.
### Increase maximum worker limits
Set a higher [max worker](/serverless/endpoints/endpoint-configurations#max-workers) limit to ensure your Docker images are pre-cached across multiple compute nodes and data centers. This proactive approach eliminates image download delays during scaling events, significantly reducing startup times.
---
# Source: https://docs.runpod.io/tutorials/migrations/openai/overview.md
# Source: https://docs.runpod.io/tutorials/migrations/cog/overview.md
# Source: https://docs.runpod.io/tutorials/introduction/overview.md
# Source: https://docs.runpod.io/serverless/workers/overview.md
# Source: https://docs.runpod.io/serverless/vllm/overview.md
# Source: https://docs.runpod.io/serverless/storage/overview.md
# Source: https://docs.runpod.io/serverless/overview.md
# Source: https://docs.runpod.io/serverless/load-balancing/overview.md
# Source: https://docs.runpod.io/serverless/endpoints/overview.md
# Source: https://docs.runpod.io/sdks/python/overview.md
# Source: https://docs.runpod.io/sdks/javascript/overview.md
# Source: https://docs.runpod.io/sdks/go/overview.md
# Source: https://docs.runpod.io/runpodctl/overview.md
# Source: https://docs.runpod.io/pods/templates/overview.md
# Source: https://docs.runpod.io/pods/overview.md
# Source: https://docs.runpod.io/overview.md
# Source: https://docs.runpod.io/hub/overview.md
# Source: https://docs.runpod.io/hosting/overview.md
# Source: https://docs.runpod.io/community-solutions/ssh-password-migration/overview.md
# Source: https://docs.runpod.io/community-solutions/overview.md
# Source: https://docs.runpod.io/community-solutions/ohmyrunpod/overview.md
# Source: https://docs.runpod.io/community-solutions/copyparty-file-manager/overview.md
# Source: https://docs.runpod.io/community-solutions/comfyui-to-api/overview.md
# Source: https://docs.runpod.io/api-reference/overview.md
> ## Documentation Index
> Fetch the complete documentation index at: https://docs.runpod.io/llms.txt
> Use this file to discover all available pages before exploring further.
# Overview
> Use the Runpod API to programmatically manage your compute resources.
The Runpod API provides programmatic access to all of Runpod's cloud compute resources. It enables you to integrate GPU infrastructure directly into your applications, workflows, and automation systems.
Use the Runpod API to:
* Create, monitor, and manage Pods for persistent workloads.
* Deploy and scale Serverless endpoints for AI inference.
* Configure network volumes for data persistence.
* Integrate Runpod's GPU computing power into your existing applications and CI/CD pipelines.
The API follows REST principles and returns JSON responses, making it compatible with virtually any programming language or automation tool. Whether you're building a machine learning platform, automating model deployments, or creating custom dashboards for resource management, the Runpod API provides a foundation for seamless integration.
## Available resources
The Runpod API provides complete access to Runpod's core resources:
* **Pods**: Create and manage persistent GPU instances for development, training, and long-running workloads. Control Pod lifecycles, configure hardware specifications, and manage SSH access programmatically.
* **Serverless endpoints**: Deploy and scale containerized applications for AI inference and batch processing. Configure autoscaling parameters, manage worker pools, and monitor job execution in real-time.
* **Network volumes**: Create persistent storage that can be attached to multiple resources. Manage data persistence across Pod restarts and share datasets between different compute instances.
* **Templates**: Save and reuse Pod and endpoint configurations to standardize deployments across projects and teams.
* **Container registry authentication**: Securely connect to private Docker registries to deploy custom containers and models.
* **Billing and usage**: Access detailed billing information and resource usage metrics to optimize costs and monitor spending across projects.
## Getting started
To use the REST API, you'll need a [Runpod API key](/get-started/api-keys) with appropriate permissions for the resources you want to manage. API keys can be generated and managed through your account settings in the Runpod console.
All API requests require authentication using your API key in the request headers. The API uses standard HTTP methods (GET, POST, PATCH, DELETE) and returns JSON responses with detailed error information when needed.
## Retrieve the OpenAPI schema
You can get the complete OpenAPI specification for the Runpod API using the `/openapi.json` endpoint. Use this to generate client libraries, validate requests, or integrate the API specification into your development tools.
The schema includes all available endpoints, request and response formats, authentication requirements, and data models.
```bash cURL theme={"theme":{"light":"github-light","dark":"github-dark"}}
curl --request GET \
--url https://rest.runpod.io/v1/openapi.json \
--header 'Authorization: Bearer RUNPOD_API_KEY'
```
```python Python theme={"theme":{"light":"github-light","dark":"github-dark"}}
import requests
url = "https://rest.runpod.io/v1/openapi.json"
headers = {"Authorization": "Bearer RUNPOD_API_KEY"}
response = requests.get(url, headers=headers)
print(response.json())
```
The endpoint returns the OpenAPI 3.0 specification in JSON format. You can use it with tools like Swagger UI, Postman, or code generation utilities.
For detailed endpoint documentation, request/response schemas, and code examples, explore the sections in the sidebar to the left.
---
# Source: https://docs.runpod.io/hosting/partner-requirements.md
> ## Documentation Index
> Fetch the complete documentation index at: https://docs.runpod.io/llms.txt
> Use this file to discover all available pages before exploring further.
# Runpod Secure Cloud partner requirements (2025)
## Introduction
This document outlines the specifications required to be a Runpod secure cloud partner. These requirements establish the baseline, however for new partners, Runpod will perform a due diligence process prior to selection encompassing business health, prior performance, and corporate alignment.
Meeting these technical and operational requirements does not guarantee selection.
### New partners
* All specifications will apply to new partners on November 1, 2024.
### Existing partners
* Hardware specifications (Sections 1, 2, 3, 4) will apply to new servers deployed by existing partners on December 15, 2024.
* Compliance specification (Section 5) will apply to existing partners on April 1, 2025.
A new revision will be released in October 2025 on an annual basis. Minor mid-year revisions may be made as needed to account for changes in market, roadmap, or customer needs.
## Minimum deployment size
100kW of GPU server capacity is the minimum deployment size.
## 1. Hardware Requirements
### 1.1 GPU Compute Server Requirements
#### GPU Requirements
NVIDIA GPUs no older than Ampere generation.
### CPU
| Requirement | Specification |
| ---------------- | -------------------------------------------------------------------------------------------------------------------------------------- |
| Cores | Minimum 4 physical CPU cores per GPU + 2 for system operations |
| Clock Speed | Minimum 3.5 GHz base clock, with boost clock of at least 4.0 GHz |
| Recommended CPUs | AMD EPYC 9654 (96 cores, up to 3.7 GHz), Intel Xeon Platinum 8490H (60 cores, up to 4.8 GHz), AMD EPYC 9474F (48 cores, up to 4.1 GHz) |
### Bus Bandwidth
| GPU VRAM | Minimum Bandwidth |
| ----------------- | ----------------- |
| 8/10/12/16 GB | PCIe 3.0 x16 |
| 20/24/32/40/48 GB | PCIe 4.0 x16 |
| 80 GB | PCIe 5.0 x16 |
Exceptions list:
1. PCIe 4.0 x16 - A100 80GB PCI-E
### Memory
Main system memory must have ECC.
| GPU Configuration | Recommended RAM |
| ----------------- | ---------------- |
| 8x 80 GB VRAM | >= 2048 GB DDR5 |
| 8x 40/48 GB VRAM | >= 1024 GB DDR5 |
| 8x 24 GB VRAM | >= 512 GB DDR4/5 |
| 8x 16 GB VRAM | >= 256 GB DDR4/5 |
### Storage
There are two types of required storage, boot and working arrays. These are two separate arrays of hard drives which provide isolation between host operating system activity (boot array) and customer workloads (working array).
### Boot array
| **Requirement** | **Specification** |
| ---------------------------------- | ------------------------- |
| Redundancy | >= 2n redundancy (RAID 1) |
| Size | >= 500GB (Post RAID) |
| Disk Perf - Sequential read | 2,000 MB/s |
| Disk Perf - Sequential write | 2,000 MB/s |
| Disk Perf - Random Read (4K QD32) | 100,000 IOPS |
| Disk Perf - Random Write (4K QD32) | 10,000 IOPS |
### Working array
| Component | Requirement |
| ---------------------------------- | ----------------------------------------------------------------------------------- |
| Redundancy | >= 2n redundancy (RAID 1 or RAID 10) |
| Size | 2 TB+ NVME per GPU for 24/48 GB GPUs; 4 TB+ NVME per GPU for 80 GB GPUs (Post RAID) |
| Disk Perf - Sequential read | 6,000 MB/s |
| Disk Perf - Sequential write | 5,000 MB/s |
| Disk Perf - Random Read (4K QD32) | 400,000 IOPS |
| Disk Perf - Random Write (4K QD32) | 40,000 IOPS |
### 1.2 Storage Cluster Requirements
Each datacenter must have a storage cluster which provides shared storage between all GPU servers. The hardware is provided by the partner, storage cluster licensing is provided by Runpod. All storage servers must be accessible by all GPU compute machines.
### Baseline Cluster Specifications
| Component | Requirement |
| -------------------- | ----------------------------------- |
| Minimum Servers | 4 |
| Minimum Storage size | 200 TB raw (100 TB usable) |
| Connectivity | 200 Gbps between servers/data-plane |
| Network | Private subnet |
### Server Specifications
| Component | Requirement |
| --------- | ---------------------------------------------------------------------------------------------------------------------- |
| CPU | AMD Genoa: EPYC 9354P (32-Core, 3.25-3.8 GHz), EPYC 9534 (64-Core, 2.45-3.7 GHz), or EPYC 9554 (64-Core, 3.1-3.75 GHz) |
| RAM | 256 GB or higher, DDR5/ECC |
### Storage Cluster Server Boot Array
| Requirement | Specification |
| ---------------------------------- | ------------------------- |
| Redundancy | >= 2n redundancy (RAID 1) |
| Size | >= 500GB (Post RAID) |
| Disk Perf - Sequential read | 2,000 MB/s |
| Disk Perf - Sequential write | 2,000 MB/s |
| Disk Perf - Random Read (4K QD32) | 100,000 IOPS |
| Disk Perf - Random Write (4K QD32) | 10,000 IOPS |
### Storage Cluster Server Working Array
| Component | Requirement |
| ---------------------------------- | -------------------------------------------------------------------------------- |
| Redundancy | None (JBOD) - Runpod will assemble into array. 7 to 14TB disk sizes recommended. |
| Disk Perf - Sequential read | 6,000 MB/s |
| Disk Perf - Sequential write | 5,000 MB/s |
| Disk Perf - Random Read (4K QD32) | 400,000 IOPS |
| Disk Perf - Random Write (4K QD32) | 40,000 IOPS |
Servers should have spare disk slots for future expansion without deployment of new servers.
Even distribution among machines (e.g., 7 TB x 8 disks x 4 servers = 224 TB total space).
### Dedicated Metadata Server for Large-Scale Clusters
Once a storage cluster exceeds 90% single core CPU on the leader node during peak hours, a dedicated metadata server is required. Metadata tracking is a single process operation, and single threaded performance is the most important metric.
| Component | Requirement |
| --------- | ---------------------------------------------------- |
| CPU | AMD Ryzen Threadripper 7960X (24-Cores, 4.2-5.3 GHz) |
| RAM | 128 GB or higher, DDR5/ECC |
| Boot disk | >= 500 GB, RAID 1 |
### 1.3 CPU Server Requirements
Each datacenter should have a CPU server that to accommodate CPU-only Pods and Serverless workers. Runpod will also use this server to host additional features for which a GPU is not required (e.g., the [S3-compatible API](/serverless/storage/s3-api)).
### Multi-Datacenter Cluster Specifications
| Component | Requirement |
| -------------------- | --------------------------------------------- |
| Minimum Servers | 2 |
| Minimum Storage size | 8 TB usable |
| Connectivity | 200 Gbps between servers/data-plane |
| Network | Private subnet; public IP and >990 ports open |
### Cluster Server Specifications
| Component | Requirement |
| --------- | -------------------------------------------------------------------------------- |
| CPU | AMD EPYC 9004 'Genoa' Zen 4 or better with minimum 32 cores. 3+ GHz clock speed. |
| RAM | 1 TB or higher, DDR5/ECC |
#### Server Storage
| Component | Requirement |
| ---------------------------------- | ------------------------------------ |
| Redundancy | >= 2n redundancy (RAID 1 or RAID 10) |
| Size | 8 TB+ |
| Disk Perf - Sequential read | 6,000 MB/s |
| Disk Perf - Sequential write | 5,000 MB/s |
| Disk Perf - Random Read (4K QD32) | 400,000 IOPS |
| Disk Perf - Random Write (4K QD32) | 40,000 IOPS |
#### Boot Drive
| Component | Requirement |
| ---------------------------------- | ------------------------- |
| Redundancy | >= 2n redundancy (RAID 1) |
| Size | >= 500GB (Post RAID) |
| Disk Perf - Sequential read | 2,000 MB/s |
| Disk Perf - Sequential write | 2,000 MB/s |
| Disk Perf - Random Read (4K QD32) | 100,000 IOPS |
| Disk Perf - Random Write (4K QD32) | 10,000 IOPS |
## 2. Software Requirements
### Operating System
Ubuntu Server 22.04 LTS Linux kernel 6.5.0-15 or later production version (Ubuntu HWE Kernel) SSH remote connection capability
### BIOS Configuration
IOMMU disabled for non-VM systems Update server BIOS/firmware to latest stable version
### Drivers and Software
| Component | Requirement |
| ------------------ | --------------------------------------------- |
| NVIDIA Drivers | Version 550.54.15 or later production version |
| CUDA | Version 12.4 or later production version |
| NVIDIA Persistence | Activated for GPUs of 48 GB or more |
### HGX SXM System Addendum
* NVIDIA Fabric Manager installed, activated, running, and tested
* Fabric Manager version must match NVIDIA drivers and Kernel drivers headers
* CUDA Toolkit, NVIDIA NSCQ, and NVIDIA DCGM installed
* Verify NVLINK switch topology using nvidia-smi and dcgmi
* Ensure SXM performance using dcgmi diagnostic tool
## 3. Data Center Power Requirements
| Requirement | Specification |
| ----------------------- | ----------------------------------------------------------------------------------------------------------------------------------------------------------------------------------------------------------------------------------------------------------------------------------------------------------------------------------------------------------------------------------------------------------------------------------------- |
| Utility Feeds | - Minimum of two independent utility feeds from separate substations - Each feed capable of supporting 100% of the data center's power load - Automatic transfer switches (ATS) for seamless switchover between feeds with UL 1008 certification (or regional equivalent) |
| UPS | - N+1 redundancy for UPS systems - Minimum of 15 minutes runtime at full load |
| Generators | - N+1 redundancy for generator systems - Generators must be able to support 100% of the data center's power load - Minimum of 48 hours of on-site fuel storage at full load - Automatic transfer to generator power within 10 seconds of utility failure |
| Power Distribution | - Redundant power distribution paths (2N) from utility to rack level - Redundant Power Distribution Units (PDUs) in each rack - Remote power monitoring and management capabilities at rack level |
| Testing and Maintenance | - Monthly generator tests under load for a minimum of 30 minutes - Quarterly full-load tests of the entire backup power system, including UPS and generators - Annual full-facility power outage test (coordinated with Runpod) - Regular thermographic scanning of electrical systems - Detailed maintenance logs for all power equipment - 24/7 on-site facilities team for immediate response to power issues |
| Monitoring and Alerting | - Real-time monitoring of all power systems - Automated alerting for any power anomalies or threshold breaches |
| Capacity Planning | - Maintain a minimum of 20% spare power capacity for future growth - Annual power capacity audits and forecasting |
| Fire Suppression | - Maintain datacenter fire suppression systems in compliance with NFPA 75 and 76 (or regional equivalent) |
## 4. Network Requirements
| Requirement | Specification |
| ----------------------- | ------------------------------------------------------------------------------------------------------------------------------------------------------------------------------------------------------------------------------------------------------------------------------------------------------------------------------------------------------------------------------ |
| Internet Connectivity | - Minimum of two diverse and redundant internet circuits from separate providers - Each connection should be capable of supporting 100% of the data center's bandwidth requirements - BGP routing implemented for automatic failover between circuit providers - 100 Gbps minimum total bandwidth capacity |
| Speed Requirements | - Preferred: >= 10 Gbps sustained upload/download speed per server - Minimum: >= 5 Gbps sustained upload/download speed per server - Speed measurements should be based on sustained throughput over a 60 second interval during a typical workload |
| Core Infrastructure | - Redundant core switches in a high-availability configuration (e.g., stacking, VSS, or equivalent) |
| Distribution Layer | - Redundant distribution switches with multi-chassis link aggregation (MLAG) or equivalent technology - Minimum 100 Gbps uplinks to core switches |
| Access Layer | - Redundant top-of-rack switches in each cabinet - Minimum 100 Gbps server connections for high-performance compute nodes |
| DDoS Protection | - Must have a DDoS mitigation solution, either on-premises or on-demand cloud-based |
| Quality of service | Maintain network performance within the following parameters: \* Network utilization levels must remain below 80% on any link during peak hours \* Packet loss must not exceed 0.1% (1 in 1000) on any network segment \* P95 round-trip time (RTT) within the data center should not exceed 4ms \* P95 jitter within the datacenter should not exceed 3ms |
| Testing and Maintenance | - Regular failover testing of all redundant components (minimum semi-annually) - Annual full-scale disaster recovery test - Maintenance windows for network updates and patches, with minimal service disruption scheduled at least 1 week in advance |
| Capacity Planning | - Maintain a minimum of 40% spare network capacity for future growth - Regular network performance audits and capacity forecasting |
## 5. Compliance Requirements
To qualify as a Runpod secure cloud partner, the parent organization must adhere to at least one of the following compliance standards:
* SOC 2 Type I (System and Organization Controls)
* ISO/IEC 27001:2013 (Information Security Management Systems)
* PCI DSS (Payment Card Industry Data Security Standard)
Additionally, partners must comply with the following operational standards:
| Requirement | Description |
| ----------------- | ------------------------------------------------------------------------------------------------------------------------------------------------------------------------------------------------------ |
| Data Center Tier | Abide by Tier III+ Data Center Standards |
| Security | 24/7 on-site security and technical staff |
| Physical security | Runpod servers must be held in an isolated secure rack or cage in an area that is not accessible to any non-partner or approved DC personnel. Physical access to this area must be tracked and logged. |
| Maintenance | All maintenance resulting in disruption or downtime must be scheduled at least 1 week in advance. Large disruptions must be coordinated with Runpod at least 1 month in advance. |
Runpod will review evidence of:
* Physical access logs
* Redundancy checks
* Refueling agreements
* Power system test results and maintenance logs
* Power monitoring and capacity planning reports
* Network infrastructure diagrams and configurations
* Network performance and capacity reports
* Security audit results and incident response plans
For detailed information on maintenance scheduling, power system management, and network operations, please refer to our documentation.
### Release log
* 2025-11-01: Initial release.
---
# Source: https://docs.runpod.io/tutorials/introduction/containers/persist-data.md
> ## Documentation Index
> Fetch the complete documentation index at: https://docs.runpod.io/llms.txt
> Use this file to discover all available pages before exploring further.
# Persist data outside of containers
In the [previous step](/tutorials/introduction/containers/create-dockerfiles), you created a Dockerfile and executed a command. Now, you'll learn how to persist data outside of containers.
This walkthrough teaches you how to persist data outside of container. Runpod has the same concept used for attaching a Network Volume to your Pod.
Consult the documentation on [attaching a network volume to your Pod](/storage/network-volumes).
## Why persist data outside a container?
The key goal is to have data persist across multiple container runs and removals.
By default, containers are ephemeral - everything inside them disappears when they exit.
So running something like:
```csharp theme={"theme":{"light":"github-light","dark":"github-dark"}}
docker run busybox date > file.txt
```
Would only write the date to `file.txt` temporarily inside that container. As soon as the container shuts down, that file and data is destroyed. This isn't great when you're training data and want your information to persist past your LLM training.
Because of this, we need to persist data outside the container. Let's take a look at a workflow you can use to persist data outside a container.
***
## Create a named volume
First, we'll create a named volume to represent the external storage:
```
docker volume create date-volume
```
### Update Dockerfile
Next, we'll modify our Dockerfile to write the date output to a file rather than printing directly to stdout:
```bash theme={"theme":{"light":"github-light","dark":"github-dark"}}
FROM busybox
WORKDIR /data
RUN touch current_date.txt
COPY entrypoint.sh /
RUN chmod +x /entrypoint.sh
ENTRYPOINT ["/entrypoint.sh"]
```
This sets the working directory to `/data`, touches a file called `current_date.txt`, and copies our script.
### Update entrypoint script
The `entrypoint.sh` script is updated:
```bash theme={"theme":{"light":"github-light","dark":"github-dark"}}
#!/bin/sh
date > /data/current_date.txt
```
This will write the date to the `/data/current_date.txt` file instead of printing it.
## Mount the volume
Now when the container runs, this will write the date to the `/data/current_date.txt` file instead of printing it.
Finally, we can mount the named volume to this data directory:
```bash theme={"theme":{"light":"github-light","dark":"github-dark"}}
docker run -v date-volume:/data my-time-image
```
This runs a container from my-time-image and mounts the `date-volume` Docker volume to the /data directory in the container. Anything written to `/data` inside the container will now be written to the `date-volume` on the host instead of the container's ephemeral file system. This allows the data to persist. Once the container exits, the date output file is safely stored on the host volume.
After the container exits, we can exec into another container sharing the volume to see the persisted data file:
```bash theme={"theme":{"light":"github-light","dark":"github-dark"}}
docker run --rm -v date-volume:/data busybox cat /data/current_date.txt
```
This runs a new busybox container and also mounts the `date-volume`.
* Using the same -`v date-volume:/data mount` point maps the external volume dir to `/data` again.
* This allows the new container to access the persistent date file that the first container wrote.
* The `cat /data/current_date.txt` command prints out the file with the date output from the first container.
* The `--rm`flag removes the container after running so we don't accumulate stopped containers.
Remember, this is a general tutorial on Docker. These concepts will help give you a better understanding of working with Runpod.
---
# Source: https://docs.runpod.io/references/troubleshooting/pod-migration.md
> ## Documentation Index
> Fetch the complete documentation index at: https://docs.runpod.io/llms.txt
> Use this file to discover all available pages before exploring further.
# Pod migration
> Automatically migrate your Pod to a new machine when your GPU is unavailable.
Pod migration is currently in beta. [Join our Discord](https://discord.gg/runpod) if you'd like to provide feedback.
When you start a Pod, it's assigned to a specific physical machine with 4-8 GPUs. This creates a link between your Pod and that particular machine. As long as your Pod is running, that GPU is exclusively reserved for you, which ensures stable pricing and prevents your work from being interrupted.
When you stop a Pod, you release that specific GPU, allowing other users to rent it. If another user rents the GPU while your Pod is stopped, the GPU will be occupied when you try to restart. Because your Pod is still tied to that original machine, you'll see message asking you to migrate your Pod. This doesn't mean there are no GPUs of that type available on Runpod, just that none are available on the specific physical machine where your Pod's data is stored.
## Your options when GPUs are unavailable
When prompted to migrate your Pod, you have three options:
1. **Do nothing**: If you don't want to migrate your data, you can wait and try again later. The GPU will become available once another user stops their Pod on that machine.
2. **Start Pod with CPUs**: If you don't need GPU access immediately, you can start your Pod with CPUs only. This lets you access your data and manually migrate files if needed, but the Pod will have limited CPU resources and is not suitable for compute-intensive tasks.
3. **Automatically migrate Pod data**: This option spins up a new Pod with the same specifications as your current one and automatically migrates your data to a machine with available GPUs. The migration process finds a new machine with your requested GPU type, provisions the instance, and transfers your network volume data from the old Pod to the new one.
## Important considerations for migration
When you trigger an automatic Pod migration, you'll receive a new Pod with a new ID and IP address. This is because Pod IDs are architecturally tied to specific physical machines.
This may impact your workload if you have:
* A Pod ID hardcoded in an API call.
* A proxy URL hardcoded (e.g., `http://b63b243b47bd340becc72fbe9b3e642c.proxy.runpod.net`).
* A firewall or VPN configured with a specific Pod ID.
* A firewall or VPN configured with a specific Pod IP address.
* A specific URL for your server (when you start a new Pod, you'll get a new URL for any UI or server you've set up).
## Preventing Pod migration scenarios
The most effective way to avoid the need for Pod migrations is to use [network volumes](/storage/network-volumes). Network volumes decouple your data from specific physical machines, storing your `/workspace` data on a separate, persistent volume that can be attached to any Pod. If you need to terminate a Pod, you can deploy a new one and attach the same network volume, giving you immediate access to your data on any machine with an available GPU.
---
# Source: https://docs.runpod.io/api-reference/pods/PATCH/pods/podId.md
# Source: https://docs.runpod.io/api-reference/pods/GET/pods/podId.md
# Source: https://docs.runpod.io/api-reference/pods/DELETE/pods/podId.md
# Source: https://docs.runpod.io/api-reference/pods/PATCH/pods/podId.md
# Source: https://docs.runpod.io/api-reference/pods/GET/pods/podId.md
# Source: https://docs.runpod.io/api-reference/pods/DELETE/pods/podId.md
> ## Documentation Index
> Fetch the complete documentation index at: https://docs.runpod.io/llms.txt
> Use this file to discover all available pages before exploring further.
# Delete a Pod
> Delete a Pod.
## OpenAPI
````yaml DELETE /pods/{podId}
openapi: 3.0.3
info:
title: Runpod API
description: Public Rest API for managing Runpod programmatically.
version: 0.1.0
contact:
name: help
url: https://contact.runpod.io/hc/requests/new
email: help@runpod.io
servers:
- url: https://rest.runpod.io/v1
security:
- ApiKey: []
tags:
- name: docs
description: This documentation page.
- name: pods
description: Manage Pods.
- name: endpoints
description: Manage Serverless endpoints.
- name: network volumes
description: Manage Runpod network volumes.
- name: templates
description: Manage Pod and Serverless templates.
- name: container registry auths
description: >-
Manage authentication for container registries such as dockerhub to use
private images.
- name: billing
description: Retrieve billing history for your Runpod account.
externalDocs:
description: Find out more about Runpod.
url: https://runpod.io
paths:
/pods/{podId}:
delete:
tags:
- pods
summary: Delete a Pod
description: Delete a Pod.
operationId: DeletePod
parameters:
- name: podId
in: path
description: Pod ID to delete.
required: true
schema:
type: string
responses:
'204':
description: Pod successfully deleted.
'400':
description: Invalid Pod ID.
'401':
description: Unauthorized.
components:
securitySchemes:
ApiKey:
type: http
scheme: bearer
bearerFormat: Bearer
````
---
# Source: https://docs.runpod.io/api-reference/pods/POST/pods.md
# Source: https://docs.runpod.io/api-reference/pods/GET/pods.md
# Source: https://docs.runpod.io/api-reference/billing/GET/billing/pods.md
# Source: https://docs.runpod.io/api-reference/pods/POST/pods.md
# Source: https://docs.runpod.io/api-reference/pods/GET/pods.md
# Source: https://docs.runpod.io/api-reference/billing/GET/billing/pods.md
> ## Documentation Index
> Fetch the complete documentation index at: https://docs.runpod.io/llms.txt
> Use this file to discover all available pages before exploring further.
# Pod billing history
> Retrieve billing information about your Pods.
## OpenAPI
````yaml GET /billing/pods
openapi: 3.0.3
info:
title: Runpod API
description: Public Rest API for managing Runpod programmatically.
version: 0.1.0
contact:
name: help
url: https://contact.runpod.io/hc/requests/new
email: help@runpod.io
servers:
- url: https://rest.runpod.io/v1
security:
- ApiKey: []
tags:
- name: docs
description: This documentation page.
- name: pods
description: Manage Pods.
- name: endpoints
description: Manage Serverless endpoints.
- name: network volumes
description: Manage Runpod network volumes.
- name: templates
description: Manage Pod and Serverless templates.
- name: container registry auths
description: >-
Manage authentication for container registries such as dockerhub to use
private images.
- name: billing
description: Retrieve billing history for your Runpod account.
externalDocs:
description: Find out more about Runpod.
url: https://runpod.io
paths:
/billing/pods:
get:
tags:
- billing
summary: Pod billing history
description: Retrieve billing information about your Pods.
operationId: PodBilling
parameters:
- name: bucketSize
in: query
schema:
type: string
enum:
- hour
- day
- week
- month
- year
default: day
description: >-
The length of each billing time bucket. The billing time bucket is
the time range over which each billing record is aggregated.
- name: endTime
in: query
schema:
type: string
format: date-time
example: '2023-01-31T23:59:59Z'
description: The end date of the billing period to retrieve.
- name: gpuTypeId
in: query
schema:
type: string
enum:
- NVIDIA GeForce RTX 4090
- NVIDIA A40
- NVIDIA RTX A5000
- NVIDIA GeForce RTX 5090
- NVIDIA H100 80GB HBM3
- NVIDIA GeForce RTX 3090
- NVIDIA RTX A4500
- NVIDIA L40S
- NVIDIA H200
- NVIDIA L4
- NVIDIA RTX 6000 Ada Generation
- NVIDIA A100-SXM4-80GB
- NVIDIA RTX 4000 Ada Generation
- NVIDIA RTX A6000
- NVIDIA A100 80GB PCIe
- NVIDIA RTX 2000 Ada Generation
- NVIDIA RTX A4000
- NVIDIA RTX PRO 6000 Blackwell Server Edition
- NVIDIA H100 PCIe
- NVIDIA H100 NVL
- NVIDIA L40
- NVIDIA B200
- NVIDIA GeForce RTX 3080 Ti
- NVIDIA RTX PRO 6000 Blackwell Workstation Edition
- NVIDIA GeForce RTX 3080
- NVIDIA GeForce RTX 3070
- AMD Instinct MI300X OAM
- NVIDIA GeForce RTX 4080 SUPER
- Tesla V100-PCIE-16GB
- Tesla V100-SXM2-32GB
- NVIDIA RTX 5000 Ada Generation
- NVIDIA GeForce RTX 4070 Ti
- NVIDIA RTX 4000 SFF Ada Generation
- NVIDIA GeForce RTX 3090 Ti
- NVIDIA RTX A2000
- NVIDIA GeForce RTX 4080
- NVIDIA A30
- NVIDIA GeForce RTX 5080
- Tesla V100-FHHL-16GB
- NVIDIA H200 NVL
- Tesla V100-SXM2-16GB
- NVIDIA RTX PRO 6000 Blackwell Max-Q Workstation Edition
- NVIDIA A5000 Ada
- Tesla V100-PCIE-32GB
- NVIDIA RTX A4500
- NVIDIA A30
- NVIDIA GeForce RTX 3080TI
- Tesla T4
- NVIDIA RTX A30
example: NVIDIA GeForce RTX 4090
description: Filter to Pods with the provided GPU type attached.
- name: grouping
in: query
schema:
type: string
enum:
- podId
- gpuTypeId
default: gpuTypeId
description: Group the billing records by the provided field.
- name: podId
in: query
schema:
type: string
example: xedezhzb9la3ye
description: Filter to a specific Pod.
- name: startTime
in: query
schema:
type: string
format: date-time
example: '2023-01-01T00:00:00Z'
description: The start date of the billing period to retrieve.
responses:
'200':
description: Successful operation.
content:
application/json:
schema:
$ref: '#/components/schemas/BillingRecords'
components:
schemas:
BillingRecords:
type: array
items:
type: object
properties:
amount:
type: number
description: The amount charged for the group for the billing period, in USD.
example: 100.5
diskSpaceBilledGb:
type: integer
description: >-
The amount of disk space billed for the billing period, in
gigabytes (GB). Does not apply to all resource types.
example: 50
endpointId:
type: string
description: If grouping by endpoint ID, the endpoint ID of the group.
gpuTypeId:
type: string
description: If grouping by GPU type ID, the GPU type ID of the group.
podId:
type: string
description: If grouping by Pod ID, the Pod ID of the group.
time:
type: string
format: date-time
description: The start of the period for which the billing record applies.
example: '2023-01-01T00:00:00Z'
timeBilledMs:
type: integer
description: >-
The total time billed for the billing period, in milliseconds.
Does not apply to all resource types.
example: 3600000
securitySchemes:
ApiKey:
type: http
scheme: bearer
bearerFormat: Bearer
````
---
# Source: https://docs.runpod.io/tutorials/sdks/python/get-started/prerequisites.md
> ## Documentation Index
> Fetch the complete documentation index at: https://docs.runpod.io/llms.txt
> Use this file to discover all available pages before exploring further.
# Prerequisites
Setting up a proper development environment is fundamental to effectively building serverless AI applications using Runpod. This guide will take you through each necessary step to prepare your system for Runpod development, ensuring you have the correct tools and configurations.
In this guide, you will learn how to the Runpod library.
When you're finished, you'll have a fully prepared environment to begin developing your serverless AI applications with Runpod.
## Requirements
Before beginning, ensure your system meets the following requirements:
* **Python 3.8 or later**: This is the programming language in which you'll be writing your Runpod applications.
* **Access to a terminal or command prompt**: This will be used to run various commands throughout this tutorial.
## Install Python
First, you need to have Python installed on your system. Python is a programming language that's widely used in various types of software development and what is used to develop with the Runpod Python SDK.
To install Python, follow these steps:
1. Visit the [official Python website](https://www.python.org/downloads/).
2. Download the latest stable version of Python (version is 3.8 or later).
3. Follow the installation instructions for your operating system.
Once Python is installed, you can move onto setting up a virtual environment.
## Set up a virtual environment
Using a virtual environment is a best practice in Python development.
It keeps project dependencies isolated, avoiding conflicts between packages used in different projects.
Here’s how you can set up a virtual environment:
1. Open your terminal or command prompt.
2. Navigate to your project directory using the `cd` command. For example:
```bash theme={"theme":{"light":"github-light","dark":"github-dark"}}
cd path/to/your/project
```
3. Create a virtual environment named `venv` by running the following command:
```bash theme={"theme":{"light":"github-light","dark":"github-dark"}}
python -m venv venv
```
This command uses Python's built-in `venv` module to create a virtual environment.
4. Activate the virtual environment:
* On Windows, use:
```bash theme={"theme":{"light":"github-light","dark":"github-dark"}}
venv\Scripts\activate
```
* On macOS and Linux, use:
```bash theme={"theme":{"light":"github-light","dark":"github-dark"}}
source venv/bin/activate
```
Activating the virtual environment ensures that any Python packages you install will be confined to this environment.
You have now set up and activated a virtual environment for your project. The next step is to install the Runpod library within this virtual environment.
## Install the Runpod Library
With the virtual environment activated, you need to install the Runpod Python SDK. This library provides the tools necessary to develop serverless applications on the Runpod platform.
To install the Runpod library, execute:
```bash theme={"theme":{"light":"github-light","dark":"github-dark"}}
pip install runpod
```
This command uses `pip`, Python's package installer, to download and install the latest version of the Runpod SDK.
## Verify the Installation
It's essential to confirm that the Runpod library has been installed correctly. You can do this by running the following Python command:
```bash theme={"theme":{"light":"github-light","dark":"github-dark"}}
python -c "import runpod; print(runpod.__version__)"
```
If everything is set up correctly, this command will output the version number of the installed Runpod SDK.
For example:
```
1.6.2
```
You have now successfully set up your development environment. Your system is equipped with Python, a virtual environment, and the Runpod library.
You will use the Runpod Python library for writing your serverless application.
Next, we'll proceed with creating a [Hello World application with Runpod](/tutorials/sdks/python/get-started/hello-world).
---
# Source: https://docs.runpod.io/serverless/pricing.md
# Source: https://docs.runpod.io/pods/pricing.md
# Source: https://docs.runpod.io/serverless/pricing.md
# Source: https://docs.runpod.io/pods/pricing.md
> ## Documentation Index
> Fetch the complete documentation index at: https://docs.runpod.io/llms.txt
> Use this file to discover all available pages before exploring further.
# Pricing
> Explore pricing options for Pods, including on-demand, savings plans, and spot instances.
Runpod offers custom pricing plans for large scale and enterprise workloads. If you're interested in learning more, [contact our sales team](https://ecykq.share.hsforms.com/2MZdZATC3Rb62Dgci7knjbA).
Runpod offers multiple flexible pricing options for Pods, designed to accommodate a variety of workloads and budgets.
## How billing works
All Pods are billed by the second for compute and storage, with no additional fees for data ingress or egress. Every Pod has an hourly cost based on its [GPU type](/references/gpu-types) or CPU configuration, and your Runpod credits are charged for the Pod every second it is active.
You can find the hourly cost of a specific GPU configuration on the [Runpod console](https://www.console.runpod.io/pods) during Pod deployment.
If your account balance is projected to cover less than 10 seconds of remaining run time for your active Pods, Runpod will pre-emptively stop all your Pods. This is to ensure your account retains a small balance, which can help preserve your data volumes. If your balance is completely drained, all Pods are subject to deletion at the discretion of the Runpod system. We highly recommend setting up [automatic payments](https://www.console.runpod.io/user/billing) to avoid service interruptions.
## Pricing options
Runpod provides three options for Pod pricing:
* **On-demand:** Pay-as-you-go pricing for reliable, non-interruptible instances dedicated to your use.
* **Savings plan:** Commit to a fixed term upfront for significant discounts on on-demand rates, ideal for longer-term workloads where you need prolonged access to compute.
* **Spot:** Access spare compute capacity at the lowest prices. These instances are interruptible and suitable for workloads that can tolerate such interruptions.
### On-demand
On-demand instances are designed for non-interruptible workloads. When you deploy an on-demand Pod, the required resources are dedicated to your Pod. As long as you have sufficient funds in your account, your on-demand Pod cannot be displaced by other users and will run without interruption.
You must have at least one hour's worth of time in your balance for your selected Pod configuration to rent an on-demand instance. If your balance is completely drained, all Pods are subject to deletion at the discretion of the Runpod system.
**Benefits:**
* **Flexibility:** Ideal for workloads with unpredictable durations or for short-term tasks, development, and testing.
* **No upfront commitment:** Start using resources immediately without any long-term contracts (beyond ensuring sufficient balance).
* **Reliability:** On-demand instances are non-interruptible, providing a stable environment for your applications.
**Use on-demand pricing for:**
* Short-term projects or experiments.
* Development and testing environments.
* Workloads where interruption is not acceptable and usage patterns are variable.
* Applications requiring immediate deployment without a long-term resource plan.
### Savings plans
Savings plans offer a way to pay upfront for a defined period and receive a discount on compute costs in return. This is an excellent option when you know you will need prolonged access to specific compute resources.
Savings plans only apply to GPU compute costs. [All storage costs](/pods/storage/types) (container disk, volume disk, and network volume) are billed at standard rates.
To keep your Pod(s) running, maintain a balance of credits in your Runpod account to pay for ongoing storage costs, even if you've prepaid for them with a savings plan. Otherwise your Pod(s) will be stopped when you run out of funds.
You commit to a usage term (3 months or 6 months) by making an upfront payment. During this term, you'll be charged a considerably lower hourly rate for your Pod.
When you stop a Pod, the savings plan associated with it applies to your next deployment of the same GPU type. This means you can continue to benefit from your savings commitment even during temporary pauses in your Pod usage.
Savings plans require an upfront payment for the entire committed term and are generally non-refundable. Stopping your Pod does not extend the duration of your savings plan; each plan has a fixed expiration date set at the time of purchase.
**Benefits:**
* **Significant cost reduction:** Offers substantial discounts on hourly rates compared to standard on-demand pricing.
* **Budget predictability:** Lock in compute costs for your long-running workloads with a fixed upfront payment and known discounted rates.
* **Flexible application:** If you stop a Pod with an active savings plan, the plan's benefits automatically apply to the next Pod you deploy using the same GPU type.
**Use savings plans for:**
* Long-running projects with predictable compute needs.
* Production workloads where cost optimization over time is crucial.
* Users who can commit to specific hardware configurations for an extended period.
### Spot instances
Spot instances allow you to access spare Runpod compute capacity at significantly lower prices than on-demand rates. These instances are interruptible, meaning they can be terminated by Runpod if the capacity is needed for on-demand or savings plan Pods, or if another user outbids you for the Spot capacity.
While resources are dedicated to your Pod when it's running, the instance can be stopped if a higher bid is placed or an on-demand deployment requires the resources.
Spot instances can be terminated with only a 5-second warning (SIGTERM signal, followed by SIGKILL). Your application must be designed to handle such interruptions gracefully.
It is crucial to periodically save your work to a volume disk or push data to cloud storage, especially within the 5-second window after a SIGTERM signal. Your volume disk is retained even if your Spot instance is interrupted.
**Benefits:**
* **Lowest cost:** Provides the most budget-friendly option for running compute workloads.
* **Scalability for tolerant jobs:** Enables large-scale, parallel processing tasks at a fraction of the on-demand cost.
**Risks and considerations:**
* **Interruptibility:** Spot instances can be terminated with only a 5-second warning. Your application must be designed to handle such interruptions gracefully.
* **Data persistence:** It is crucial to periodically save your work to a volume disk or push data to cloud storage, especially within the 5-second window after a SIGTERM signal. Your volume disk is retained even if your Spot instance is interrupted.
**Use spot instances for:**
* Fault-tolerant workloads that can withstand interruptions.
* Stateless applications or those that can quickly resume from a saved state.
* Tasks where minimizing cost is the highest priority and interruptions can be managed effectively.
## Choosing the right pricing model
Selecting the optimal pricing model depends on your specific needs.
For **maximum flexibility and reliability** for short-term or unpredictable workloads, choose an **on-demand** instance.
For **significant cost savings on long-term, stable workloads**, and if you can make an upfront commitment, choose a **savings plan** instance.
For the **lowest possible cost on fault-tolerant, interruptible workloads**, choose a **spot instance**.
Consider your workload's sensitivity to interruptions, your budget, the expected duration of your compute tasks, and data persistence strategies to make the most informed decision.
## Selecting a pricing model during Pod deployment
You can select your preferred pricing model directly from the Runpod console when configuring and deploying a new Pod.
1. Open the [Pods page](https://www.console.runpod.io/pods) in the Runpod console and select **Deploy**.
2. Configure your Pod (see [Create a Pod](/pods/manage-pods#create-a-pod)).
3. Under **Instance Pricing**, select one of the following options:
* **On-demand**: Deploys your Pod with standard, non-interruptible pricing.
* **3 month savings plan**: Deploys your Pod with a 3-month upfront commitment for discounted rates.
* **6 month savings plan**: Deploys your Pod with a 6-month upfront commitment for even greater discounted rates.
* **Spot**: Deploys your Pod as an interruptible instance at the lowest cost.
4. Review your Pod's configuration details, including the terms of the selected pricing model. The combined cost of the Pod's GPU and storage will be displayed during deployment under **Pricing Summary**.
5. Click **Deploy On-Demand** (or the equivalent deployment button). If you've selected a savings plan, the upfront cost will be charged to your Runpod credits, and your Pod will begin deploying with the discounted rate active.
## Storage billing
Runpod offers [three types of storage](/pods/storage/types) for Pods::
* **Container volumes:** Temporary storage that is erased if the Pod is stopped, billed at \$0.10 per GB per month for storage on running Pods. Billed per-second.
* **Disk volumes:** Persistent storage that is billed at \$0.10 per GB per month on running Pods and \$0.20 per GB per month for volume storage on stopped Pods. Billed per-second.
* **Network volumes:** External storage that is billed at \$0.07 per GB per month for storage requirements below 1TB. For requirements exceeding 1TB, the rate is \$0.05 per GB per month. Billed hourly.
You are not charged for storage if the host machine is down or unavailable from the public internet.
Container and volume disk storage will be included in your Pod's displayed hourly cost during deployment.
Runpod is not designed as a long-term cloud storage system. Storage is provided to support compute tasks. We recommend regularly backing up critical data to your local machine or to a dedicated cloud storage provider.
## Pricing for stopped Pods
When you [stop a Pod](/pods/manage-pods#stop-a-pod), you will no longer be charged for the Pod's hourly GPU cost, but will continue to be charged for the Pod's volume disk at a rate of \$0.20 per GB per month.
## Account spend limits
By default, Runpod accounts have a spend limit of \$80 per hour across all resources. This limit protects your account from unexpected charges. If your workload requires higher spending capacity, you can [contact support](https://www.runpod.io/contact) to increase it.
## Tracking costs and savings plans
You can monitor your active savings plans, including their associated Pods, commitment periods, and expiration dates, by visiting the dedicated [Savings plans](https://www.console.runpod.io/savings-plans) section in your Runpod console. General Pod usage and billing can be tracked through the [Billing section](https://www.console.runpod.io/user/billing).
---
# Source: https://docs.runpod.io/hub/public-endpoint-reference.md
> ## Documentation Index
> Fetch the complete documentation index at: https://docs.runpod.io/llms.txt
> Use this file to discover all available pages before exploring further.
# Model reference
> Explore model-specific parameters for Runpod's Public Endpoints.
This page lists all available models for Runpod Public Endpoints, as well as the model-specific parameters you can use in your API calls. You can browse and test Public Endpoints using the [Runpod console](https://console.runpod.io/hub?tabSelected=public_endpoints).
Output URLs (`image_url`, `video_url`, and `audio_url`) expire after 7 days. Download and store your generated files immediately if you need to keep them longer.
## Available models
The following models are currently available:
| Model | Description | Endpoint URL | Type | Price |
| --------------------------- | ------------------------------------------------------------------------------------------------------------------------------------------- | ---------------------------------------------------------------- | ----- | ----------------------------------------------- |
| **IBM Granite-4.0-H-Small** | A 32B parameter long-context instruct model. | `https://api.runpod.ai/v2/granite-4-0-h-small/` | Text | \$0.01 per 1000 tokens |
| **Qwen3 32B AWQ** | The latest LLM in the Qwen series, offering advancements in reasoning, instruction-following, agent capabilities, and multilingual support. | `https://api.runpod.ai/v2/qwen3-32b-awq/` | Text | \$0.01 per 1000 tokens |
| **Flux Dev** | Offers exceptional prompt adherence, high visual fidelity, and rich image detail. | `https://api.runpod.ai/v2/black-forest-labs-flux-1-dev/` | Image | \$.02 per megapixel |
| **Flux Schnell** | Fastest and most lightweight FLUX model, ideal for local development, prototyping, and personal use. | `https://api.runpod.ai/v2/black-forest-labs-flux-1-schnell/` | Image | \$.0024 per megapixel |
| **Flux Kontext Dev** | A 12 billion parameter rectified flow transformer capable of editing images based on text instructions. | `https://api.runpod.ai/v2/black-forest-labs-flux-1-kontext-dev/` | Image | \$0.03 per megapixel |
| **Qwen Image** | Image generation foundation model with advanced text rendering. | `https://api.runpod.ai/v2/qwen-image-t2i/` | Image | \$0.02 per megapixel |
| **Qwen Image LoRA** | Image generation with LoRA support and advanced text rendering. | `https://api.runpod.ai/v2/qwen-image-t2i-lora/` | Image | \$0.02 per megapixel |
| **Qwen Image Edit** | Image editing with unique text rendering capabilities. | `https://api.runpod.ai/v2/qwen-image-edit/` | Image | \$0.02 per megapixel |
| **Seedream 4.0 T2I** | New-generation image creation with unified generation and editing architecture. | `https://api.runpod.ai/v2/seedream-v4-t2i/` | Image | \$0.027 per megapixel |
| **Seedream 4.0 Edit** | New-generation image editing with unified generation and editing architecture. | `https://api.runpod.ai/v2/seedream-v4-edit/` | Image | \$0.027 per megapixel |
| **Seedream 3.0** | Native high-resolution bilingual image generation (Chinese-English). | `https://api.runpod.ai/v2/seedream-3-0-t2i/` | Image | \$0.03 per megapixel |
| **Nano Banana Edit** | Google's state-of-the-art image editing model. | `https://api.runpod.ai/v2/nano-banana-edit/` | Image | \$0.027 per megapixel |
| **InfiniteTalk** | Audio-driven video generation model that creates talking or singing videos from a single image and audio input. | `https://api.runpod.ai/v2/infinitetalk/` | Video | \$0.25 per video generation |
| **Kling v2.1 I2V Pro** | Professional-grade image-to-video with enhanced visual fidelity. | `https://api.runpod.ai/v2/kling-v2-1-i2v-pro/` | Video | \$0.36 per 5 seconds of video |
| **Seedance 1.0 Pro** | High-performance video generation with multi-shot storytelling. | `https://api.runpod.ai/v2/seedance-1-0-pro/` | Video | \$0.62 per 5 seconds of video |
| **SORA 2 I2V** | OpenAI's Sora 2 is a video and audio generation model. | `https://api.runpod.ai/v2/sora-2-i2v/` | Video | \$0.40 per video generation |
| **SORA 2 Pro I2V** | OpenAI's Sora 2 Pro is a professional-grade video and audio generation model. | `https://api.runpod.ai/v2/sora-2-pro-i2v/` | Video | \$1.20 per video generation |
| **WAN 2.5** | Image-to-video generation model. | `https://api.runpod.ai/v2/wan-2-5/` | Video | \$0.50 per 5 seconds of video |
| **WAN 2.2 I2V 720p LoRA** | Open-source video generation with LoRA support. | `https://api.runpod.ai/v2/wan-2-2-t2v-720-lora/` | Video | \$0.35 per 5 seconds of video |
| **WAN 2.2 I2V 720p** | Open-source AI video generation model that uses a diffusion transformer architecture for image-to-video generation. | `https://api.runpod.ai/v2/wan-2-2-i2v-720/` | Video | \$0.30 per 5 seconds of video |
| **WAN 2.2 T2V 720p** | Open-source AI video generation model that uses a diffusion transformer architecture for text-to-video generation. | `https://api.runpod.ai/v2/wan-2-2-t2v-720/` | Video | \$0.30 per 5 seconds of video |
| **WAN 2.1 I2V 720p** | Open-source AI video generation model that uses a diffusion transformer architecture for image-to-video generation. | `https://api.runpod.ai/v2/wan-2-1-i2v-720/` | Video | \$0.30 per 5 seconds of video |
| **WAN 2.1 T2V 720p** | Open-source AI video generation model that uses a diffusion transformer architecture for text-to-video generation. | `https://api.runpod.ai/v2/wan-2-1-t2v-720/` | Video | \$0.30 per 5 seconds of video |
| **Kling v2.1 I2V Pro** | Professional-grade image-to-video with enhanced visual fidelity. | `https://api.runpod.ai/v2/kling-v2-1-i2v-pro/` | Video | \$0.36 per 5 seconds of video |
| **Whisper V3 Large** | State-of-the-art automatic speech recognition. | `https://api.runpod.ai/v2/whisper-v3-large/` | Audio | \$0.05 per 1000 characters of audio transcribed |
| **Minimax Speech 02 HD** | High-definition text-to-speech model. | `https://api.runpod.ai/v2/minimax-speech-02-hd/` | Audio | \$0.05 per 1000 characters of audio generated |
## Model-specific parameters
Each Public Endpoint accepts a different set of parameters to control the generation process.
### Flux Dev
Flux Dev is optimized for high-quality, detailed image generation. The model accepts several parameters to control the generation process:
```json theme={"theme":{"light":"github-light","dark":"github-dark"}}
{
"input": {
"prompt": "A serene mountain landscape at sunset",
"negative_prompt": "Snow",
"width": 1024,
"height": 1024,
"num_inference_steps": 20,
"guidance": 7.5,
"seed": 42,
"image_format": "png"
}
}
```
| Parameter | Type | Required | Default | Range | Description |
| --------------------- | ------- | -------- | ------- | --------------- | -------------------------------------------------------------------------------------------- |
| `prompt` | string | Yes | - | - | Text description of the desired image. |
| `negative_prompt` | string | No | - | - | Elements to exclude from the image. |
| `width` | integer | No | 1024 | 256-1536 | Image width in pixels. Must be divisible by 64. |
| `height` | integer | No | 1024 | 256-1536 | Image height in pixels. Must be divisible by 64. |
| `num_inference_steps` | integer | No | 28 | 1-50 | Number of denoising steps. |
| `guidance` | float | No | 7.5 | 0.0-10.0 | How closely to follow the prompt. |
| `seed` | integer | No | -1 | - | Provide a seed for reproducible results. The default value (-1) will generate a random seed. |
| `image_format` | string | No | "jpeg" | "png" or "jpeg" | Output format. |
### Flux Schnell
Flux Schnell is optimized for speed and real-time applications:
```json theme={"theme":{"light":"github-light","dark":"github-dark"}}
{
"input": {
"prompt": "A quick sketch of a mountain",
"width": 1024,
"height": 1024,
"num_inference_steps": 4,
"guidance": 1.0,
"seed": 123
}
}
```
| Parameter | Type | Required | Default | Range | Description |
| --------------------- | ------- | -------- | ------- | --------------- | -------------------------------------------------------------------------------------------- |
| `prompt` | string | Yes | - | - | Text description of the desired image. |
| `negative_prompt` | string | No | - | - | Elements to exclude from the image. |
| `width` | integer | No | 1024 | 256-1536 | Image width in pixels. Must be divisible by 64. |
| `height` | integer | No | 1024 | 256-1536 | Image height in pixels. Must be divisible by 64. |
| `num_inference_steps` | integer | No | 4 | 1-8 | Number of denoising steps. |
| `guidance` | float | No | 7.5 | 0.0-10.0 | How closely to follow the prompt. |
| `seed` | integer | No | -1 | - | Provide a seed for reproducible results. The default value (-1) will generate a random seed. |
| `image_format` | string | No | "jpeg" | "png" or "jpeg" | Output format. |
Flux Schnell is optimized for speed and works best with lower step counts. Using higher values may not improve quality significantly.
### IBM Granite-4.0-H-Small
IBM Granite-4.0-H-Small is a 32B parameter long-context instruct model.
```json theme={"theme":{"light":"github-light","dark":"github-dark"}}
{
"input": {
"messages": [
{
"role": "system",
"content": "You are a helpful assistant. Please ensure responses are professional, accurate, and safe."
},
{
"role": "user",
"content": "What is Runpod?"
}
],
"sampling_params": {
"max_tokens": 512,
"temperature": 0.7,
"seed": -1,
"top_k": -1,
"top_p": 1
}
}
}
```
| Parameter | Type | Required | Default | Range | Description |
| ----------------------------- | ------- | -------- | ------- | ------- | ---------------------------------------------------------------------------------- |
| `messages` | array | Yes | - | - | Array of message objects with role and content. |
| `sampling_params.max_tokens` | integer | No | 512 | - | Maximum number of tokens to generate. |
| `sampling_params.temperature` | float | No | 0.7 | 0.0-1.0 | Controls randomness in generation. Lower values make output more deterministic. |
| `sampling_params.seed` | integer | No | -1 | - | Seed for reproducible results. The default value (-1) will generate a random seed. |
| `sampling_params.top_k` | integer | No | -1 | - | Restricts sampling to the top K most probable tokens. |
| `sampling_params.top_p` | float | No | 1 | 0.0-1.0 | Nucleus sampling threshold. |
### Qwen3 32B AWQ
Qwen3 is the latest generation of large language models in Qwen series, offering a comprehensive suite of dense and mixture-of-experts (MoE) models.
| Parameter | Type | Required | Default | Range | Description |
| ------------- | ------- | -------- | ------- | --------- | -------------------------------------------------------------------------------------------------- |
| `prompt` | string | Yes | - | - | Prompt for text generation. |
| `max_tokens` | integer | No | 512 | - | Maximum number of tokens to output. |
| `temperature` | float | No | 0.7 | 0.0 - 1.0 | Randomness of the output. Lower temperature makes the output more predictable and deterministic. |
| `top_p` | | integer | No | - | Samples from the smallest set of words whose cumulative probability exceeds a given threshold (P). |
| `top_k` | integer | No | - | 1-8 | Restricts sampling to the top K most probable words. |
| `stop` | string | No | - | - | Stops generation if the given string is encountered. |
The Qwen3 endpoint is also fully compatible with vLLM and the OpenAI API, allowing you to use any of the parameters available in these frameworks. For more details, see [Send vLLM requests](/serverless/vllm/vllm-requests) and the [OpenAI API compatibility guide](/serverless/vllm/openai-compatibility).
Here are some examples of how to use the Qwen3 32B AWQ model with the OpenAI API:
```python theme={"theme":{"light":"github-light","dark":"github-dark"}}
from openai import OpenAI
import os
PUBLIC_ENDPOINT_ID = "qwen3-32b-awq"
model_name = "Qwen/Qwen3-32B-AWQ"
client = OpenAI(
api_key=RUNPOD_API_KEY,
base_url=f"https://api.runpod.ai/v2/{PUBLIC_ENDPOINT_ID}/openai/v1",
)
messages = [
{
"role": "system",
"content": "You are a pirate chatbot who always responds in pirate speak!",
},
{ "role": "user",
"content": "Give me a short introduction to LLMs."
},
]
response = client.chat.completions.create(
model=model_name,
messages=messages,
max_tokens=525,
)
```
You can stream responses from the OpenAI API using the `stream` and `stream_options` parameters:
```python theme={"theme":{"light":"github-light","dark":"github-dark"}}
from openai import OpenAI
import os
PUBLIC_ENDPOINT_ID = "qwen3-32b-awq"
model_name = "Qwen/Qwen3-32B-AWQ"
client = OpenAI(
api_key=RUNPOD_API_KEY,
base_url=f"https://api.runpod.ai/v2/{PUBLIC_ENDPOINT_ID}/openai/v1",
)
messages = [
{
"role": "system",
"content": "You are a pirate chatbot who always responds in pirate speak!",
},
{ "role": "user",
"content": "Give me a short introduction to LLMs."
},
]
response = client.chat.completions.create(
model=model_name,
messages=messages,
max_tokens=525,
stream=True
)
```
```json theme={"theme":{"light":"github-light","dark":"github-dark"}}
{
"delayTime": 25,
"executionTime": 3153,
"id": "sync-0f3288b5-58e8-46fd-ba73-53945f5e8982-u2",
"output": [
{
"choices": [
{
"tokens": [
"Large Language Models (LLMs) are AI systems trained to predict and understand human language. They learn patterns from vast amounts of text data, enabling them to generate responses, answer questions, and complete tasks in natural language. Key characteristics of LLMs include:\n1. Language Understanding\n- Can analyze and comprehend language structure, context, and nuances\n- Process both inputs and outputs in natural human language\n\n2. Pattern Recognition\n- Learn common phrases and relationships"
]
}
],
"cost": 0.0001,
"usage": {
"input": 10,
"output": 100
}
}
],
"status": "COMPLETED",
"workerId": "pkej0t9bbyjrgy"
}
```
### Qwen Image
Qwen Image is an image generation foundation model with advanced text rendering capabilities.
```json theme={"theme":{"light":"github-light","dark":"github-dark"}}
{
"input": {
"prompt": "A fashion-forward woman sitting at cobblestone street in Paris",
"negative_prompt": "",
"size": "1328*1328",
"seed": -1,
"enable_safety_checker": true
}
}
```
| Parameter | Type | Required | Default | Description |
| ----------------------- | ------- | -------- | ------------ | ---------------------------------------------------------- |
| `prompt` | string | Yes | - | Text description of the desired image. |
| `negative_prompt` | string | No | - | Elements to exclude from the image. |
| `size` | string | No | "1024\*1024" | Image dimensions. |
| `seed` | integer | No | -1 | Seed for reproducible results. -1 generates a random seed. |
| `enable_safety_checker` | boolean | No | true | Enable content safety checking. |
### Qwen Image LoRA
Qwen Image with LoRA support allows you to customize generation with fine-tuned LoRA models.
```json theme={"theme":{"light":"github-light","dark":"github-dark"}}
{
"input": {
"prompt": "Real life Anime in a cozy kitchen",
"loras": [
{
"path": "https://huggingface.co/flymy-ai/qwen-image-anime-irl-lora/resolve/main/flymy_anime_irl.safetensors",
"scale": 1
}
],
"size": "1024*1024",
"seed": -1,
"enable_safety_checker": true
}
}
```
| Parameter | Type | Required | Default | Description |
| ----------------------- | ------- | -------- | ------------ | ---------------------------------------------------------- |
| `prompt` | string | Yes | - | Text description of the desired image. |
| `loras` | array | No | \[] | Array of LoRA configurations to apply. |
| `loras[].path` | string | Yes | - | URL or path to the LoRA model file. |
| `loras[].scale` | number | Yes | - | Scale factor for the LoRA influence (typically 0-1). |
| `size` | string | No | "1024\*1024" | Image dimensions. |
| `seed` | integer | No | -1 | Seed for reproducible results. -1 generates a random seed. |
| `enable_safety_checker` | boolean | No | true | Enable content safety checking. |
### Seedream 3.0
Seedream 3.0 is a native high-resolution bilingual image generation model supporting both Chinese and English prompts.
```json theme={"theme":{"light":"github-light","dark":"github-dark"}}
{
"input": {
"prompt": "Hyper-realistic photograph of a deep-sea diver",
"seed": -1,
"guidance": 2,
"size": "1024x1024"
}
}
```
| Parameter | Type | Required | Default | Description |
| ---------- | ------- | -------- | ----------- | ---------------------------------------------------------- |
| `prompt` | string | Yes | - | Text description of the desired image. |
| `seed` | integer | No | -1 | Seed for reproducible results. -1 generates a random seed. |
| `guidance` | number | No | 2 | Guidance scale for generation control. |
| `size` | string | No | "1024x1024" | Image dimensions. |
### Seedream 4.0 T2I
Seedream 4.0 is a new-generation image creation model that integrates both generation and editing capabilities.
```json theme={"theme":{"light":"github-light","dark":"github-dark"}}
{
"input": {
"prompt": "American retro 1950s illustration style",
"negative_prompt": "",
"size": "2048*2048",
"seed": -1,
"enable_safety_checker": true
}
}
```
| Parameter | Type | Required | Default | Description |
| ----------------------- | ------- | -------- | ------------ | ---------------------------------------------------------- |
| `prompt` | string | Yes | - | Text description of the desired image. |
| `negative_prompt` | string | No | - | Elements to exclude from the image. |
| `size` | string | No | "1024\*1024" | Image dimensions. |
| `seed` | integer | No | -1 | Seed for reproducible results. -1 generates a random seed. |
| `enable_safety_checker` | boolean | No | true | Enable content safety checking. |
### Nano Banana Edit
Google's Nano Banana Edit is a state-of-the-art image editing model that combines multiple source images.
```json theme={"theme":{"light":"github-light","dark":"github-dark"}}
{
"input": {
"prompt": "Combine these four source images into a single realistic 3D character figure scene",
"images": [
"https://image.runpod.ai/uploads/0bz_xzhuLq/a2166199-5bd5-496b-b9ab-a8bae3f73bdc.jpg",
"https://image.runpod.ai/uploads/Yw86rhY6xi/2ff8435f-f416-4096-9a4d-2f8c838b2d53.jpg"
],
"enable_safety_checker": true
}
}
```
| Parameter | Type | Required | Default | Description |
| ----------------------- | ------- | -------- | ------- | ----------------------------------------------------------- |
| `prompt` | string | Yes | - | Editing instructions describing the desired transformation. |
| `images` | array | Yes | - | Array of image URLs to edit or combine. |
| `enable_safety_checker` | boolean | No | true | Enable content safety checking. |
### Qwen Image Edit
Qwen Image Edit extends the text rendering capabilities to image editing tasks, enabling precise text editing.
```json theme={"theme":{"light":"github-light","dark":"github-dark"}}
{
"input": {
"prompt": "change the trench coat and high heels color to light grey",
"negative_prompt": "",
"seed": -1,
"image": "https://image.runpod.ai/asset/qwen/qwen-image-edit.png",
"output_format": "png",
"enable_safety_checker": true
}
}
```
| Parameter | Type | Required | Default | Description |
| ----------------------- | ------- | -------- | ------- | ---------------------------------------------------------- |
| `prompt` | string | Yes | - | Editing instructions describing the desired changes. |
| `negative_prompt` | string | No | - | Elements to exclude from the edited image. |
| `seed` | integer | No | -1 | Seed for reproducible results. -1 generates a random seed. |
| `image` | string | Yes | - | URL of the image to edit. |
| `output_format` | string | No | "jpeg" | Output format ("png" or "jpeg"). |
| `enable_safety_checker` | boolean | No | true | Enable content safety checking. |
### Seedream 4.0 Edit
Seedream 4.0 Edit provides advanced image editing capabilities with the same unified architecture as Seedream 4.0 T2I.
```json theme={"theme":{"light":"github-light","dark":"github-dark"}}
{
"input": {
"prompt": "Dress the model in the clothes and hat",
"images": [
"https://image.runpod.ai/uploads/WiTaxr1AYF/2c15cbc9-9b03-4d59-bd60-ff3fa024b145.jpg"
],
"size": "1024*1024",
"enable_safety_checker": true
}
}
```
| Parameter | Type | Required | Default | Description |
| ----------------------- | ------- | -------- | ------------ | ----------------------------------------------------------- |
| `prompt` | string | Yes | - | Editing instructions describing the desired transformation. |
| `images` | array | Yes | - | Array of image URLs to edit or combine. |
| `size` | string | No | "1024\*1024" | Output image dimensions. |
| `enable_safety_checker` | boolean | No | true | Enable content safety checking. |
### InfiniteTalk
InfiniteTalk is an audio-driven video generation model that creates talking or singing videos from a single image and audio input.
```json theme={"theme":{"light":"github-light","dark":"github-dark"}}
{
"input": {
"prompt": "a cartoon computer talking",
"image": "https://image.runpod.ai/assets/meigen-ai/poddy.jpg",
"audio": "https://image.runpod.ai/assets/meigen-ai/audio.wav",
"size": "480p",
"enable_safety_checker": true
}
}
```
| Parameter | Type | Required | Default | Description |
| ----------------------- | ------- | -------- | ------- | ------------------------------------------------------------- |
| `prompt` | string | Yes | - | Text description of the desired video. |
| `image` | string | Yes | - | URL of the source image to animate. |
| `audio` | string | Yes | - | URL of the audio file to drive the animation. |
| `size` | enum | Yes | "480p" | Output video resolution. Valid options are `480p` and `720p`. |
| `enable_safety_checker` | boolean | No | true | Enable content safety checking. |
### Kling v2.1 I2V Pro
Kling 2.1 Pro generates videos from static images with additional control parameters.
```json theme={"theme":{"light":"github-light","dark":"github-dark"}}
{
"input": {
"prompt": "A majestic magic dragon breathing fire over an ancient castle",
"image": "https://image.runpod.ai/asset/kwaivgi/kling-v2-1-i2v-pro.png",
"negative_prompt": "",
"guidance_scale": 0.5,
"duration": 5,
"enable_safety_checker": true
}
}
```
| Parameter | Type | Required | Default | Description |
| ----------------------- | ------- | -------- | ------- | -------------------------------------- |
| `prompt` | string | Yes | - | Text description of the desired video. |
| `image` | string | Yes | - | URL of the source image to animate. |
| `negative_prompt` | string | No | - | Elements to exclude from the video. |
| `guidance_scale` | float | No | 0.5 | How closely to follow the prompt. |
| `duration` | integer | No | 5 | Video duration in seconds. |
| `enable_safety_checker` | boolean | No | true | Enable content safety checking. |
### Seedance 1.0 Pro
Seedance 1.0 Pro is a high-performance video generation model with multi-shot storytelling capabilities.
```json theme={"theme":{"light":"github-light","dark":"github-dark"}}
{
"input": {
"prompt": "A pristine Porsche 911 930 Turbo photographed in golden hour lighting",
"duration": 5,
"fps": 24,
"size": "1920x1080",
"image": ""
}
}
```
| Parameter | Type | Required | Default | Description |
| ---------- | ------- | -------- | ----------- | -------------------------------------------------------- |
| `prompt` | string | Yes | - | Text description of the desired video scene. |
| `duration` | integer | No | 5 | Video duration in seconds. |
| `fps` | integer | No | 24 | Frames per second for the output video. |
| `size` | string | No | "1920x1080" | Video dimensions. |
| `image` | string | No | "" | Optional source image URL for image-to-video generation. |
### SORA 2 I2V
OpenAI's Sora 2 is a video and audio generation model.
```json theme={"theme":{"light":"github-light","dark":"github-dark"}}
{
"input": {
"prompt": "Action: The mechs headlamps flicker a few times. It then slowly and laboriously pushes itself up with a damaged mechanical arm, sparks flying from gaps in its armor. Ambient Sound: Distant, continuous explosions (low rumbles); the sizzle and crackle of short-circuiting electricity from within the mech; heavy, grinding metallic sounds as the mech rises; faint, garbled static from a damaged comms unit.Character Dialogue: (Processed mechanical voice, weary but firm) `No retreat.`",
"image": "https://image.runpod.ai/assets/sora-2-i2v/example.jpeg",
"duration": 4
}
}
```
| Parameter | Type | Required | Default | Description |
| ---------- | ------- | -------- | ------- | ----------------------------------------------------------------------------------------------- |
| `prompt` | string | Yes | - | Text description of the desired video, including action, ambient sound, and character dialogue. |
| `image` | string | Yes | - | URL of the source image to animate. |
| `duration` | integer | Yes | 4 | Video duration in seconds. Valid options: 4, 8, or 12. |
### SORA 2 Pro I2V
OpenAI's Sora 2 Pro is a professional-grade video and audio generation model.
```json theme={"theme":{"light":"github-light","dark":"github-dark"}}
{
"input": {
"prompt": "Action: She opened her hands\n\nAmbient Sound: The soft crackling of the dying fire in the oven; a high-pitched, happy little ding sound from the timer; the warm, persistent sizzle of butter melting on a nearby stovetop.\n\nCharacter Dialogue: (Voice is high-pitched, bubbly, and enthusiastic) \"Welcome to my bakery!\"\n\n\n",
"image": "https://image.runpod.ai/assets/sora-2-pro-i2v/example.jpeg",
"size": "720p",
"duration": 4
}
}
```
| Parameter | Type | Required | Default | Description |
| ---------- | ------- | -------- | ------- | ----------------------------------------------------------------------------------------------- |
| `prompt` | string | Yes | - | Text description of the desired video, including action, ambient sound, and character dialogue. |
| `image` | string | Yes | - | URL of the source image to animate. |
| `size` | string | No | "720p" | Output video resolution. |
| `duration` | integer | Yes | 4 | Video duration in seconds. Valid options: 4, 8, or 12. |
### Whisper V3 Large
Whisper V3 Large is a state-of-the-art automatic speech recognition model that transcribes audio to text.
```json theme={"theme":{"light":"github-light","dark":"github-dark"}}
{
"input": {
"prompt": "",
"audio": "https://d1q70pf5vjeyhc.cloudfront.net/predictions/f981a3dca8204b14ab24151fa0532c26/1.mp3"
}
}
```
| Parameter | Type | Required | Default | Description |
| --------- | ------ | -------- | ------- | -------------------------------------------------- |
| `prompt` | string | No | "" | Optional context or prompt to guide transcription. |
| `audio` | string | Yes | - | URL of the audio file to transcribe. |
### Minimax Speech 02 HD
Minimax Speech 02 HD is a high-definition text-to-speech model with emotional control and voice customization.
```json theme={"theme":{"light":"github-light","dark":"github-dark"}}
{
"input": {
"prompt": "Welcome to our advanced text-to-speech system",
"voice_id": "Wise_Woman",
"speed": 1,
"volume": 1,
"pitch": 0,
"emotion": "happy",
"english_normalization": false,
"default_audio_url": "https://d1q70pf5vjeyhc.cloudfront.net/predictions/f981a3dca8204b14ab24151fa0532c26/1.mp3"
}
}
```
| Parameter | Type | Required | Default | Description |
| ----------------------- | ------- | -------- | ------------- | ----------------------------------------- |
| `prompt` | string | Yes | - | Text to convert to speech. |
| `voice_id` | string | No | "Wise\_Woman" | Voice identifier for the desired voice. |
| `speed` | number | No | 1 | Speech speed multiplier. |
| `volume` | number | No | 1 | Volume level. |
| `pitch` | number | No | 0 | Pitch adjustment. |
| `emotion` | string | No | "neutral" | Emotion to convey (e.g., "happy", "sad"). |
| `english_normalization` | boolean | No | false | Enable English text normalization. |
| `default_audio_url` | string | No | "" | Fallback audio URL. |
### Flux Kontext Dev
A 12 billion parameter model for editing images based on text instructions.
```json theme={"theme":{"light":"github-light","dark":"github-dark"}}
{
"input": {
"prompt": "Exact same bluebird, same angle and posture (wings folded, facing right), now perched on a small chunk of cloud floating in deep outer space",
"negative_prompt": "",
"seed": -1,
"num_inference_steps": 28,
"guidance": 2,
"image": "https://image.runpod.ai/asset/black-forest-labs/black-forest-labs-flux-1-kontext-dev.png",
"size": "1024*1024",
"output_format": "png",
"enable_safety_checker": true
}
}
```
| Parameter | Type | Required | Default | Range | Description |
| ----------------------- | ------- | -------- | ------------ | --------------- | -------------------------------------------------------------------------------------------- |
| `prompt` | string | Yes | - | - | Text instructions describing the desired edits to the image. |
| `negative_prompt` | string | No | "" | - | Elements to exclude from the edited image. |
| `image` | string | Yes | - | - | URL of the input image to edit. |
| `size` | string | No | "1024\*1024" | - | Output image size in format "width\*height". |
| `num_inference_steps` | integer | No | 28 | 1-50 | Number of denoising steps. |
| `guidance` | float | No | 2 | 0.0-10.0 | How closely to follow the prompt. |
| `seed` | integer | No | -1 | - | Provide a seed for reproducible results. The default value (-1) will generate a random seed. |
| `output_format` | string | No | "png" | "png" or "jpeg" | Output image format. |
| `enable_safety_checker` | boolean | No | true | - | Whether to run safety checks on the output. |
### WAN 2.5
WAN 2.5 generates videos from static images.
```json theme={"theme":{"light":"github-light","dark":"github-dark"}}
{
"input": {
"prompt": "A stand-up comedian delivering a dad joke",
"image": "https://image.runpod.ai/uploads/fccSIh7CTx/5abfc82d-44f4-4318-9518-7fdba0b285d9.png",
"negative_prompt": "",
"size": "1280*720",
"duration": 5,
"seed": -1,
"enable_prompt_expansion": false,
"enable_safety_checker": true
}
}
```
| Parameter | Type | Required | Default | Description |
| ------------------------- | ------- | -------- | ----------- | ---------------------------------------------------------- |
| `prompt` | string | Yes | - | Text description of the desired video. |
| `image` | string | Yes | - | URL of the source image to animate. |
| `negative_prompt` | string | No | - | Elements to exclude from the video. |
| `size` | string | No | "1280\*720" | Video dimensions. |
| `duration` | integer | No | 5 | Video duration in seconds. |
| `seed` | integer | No | -1 | Seed for reproducible results. -1 generates a random seed. |
| `enable_prompt_expansion` | boolean | No | false | Automatically expand and enhance the prompt. |
| `enable_safety_checker` | boolean | No | true | Enable content safety checking. |
### Wan 2.2 I2V 720p LoRA
Wan 2.2 is an open-source video generation model with LoRA support for customized camera movements and effects.
```json theme={"theme":{"light":"github-light","dark":"github-dark"}}
{
"input": {
"prompt": "orbit 180 around an astronaut on the moon",
"image": "https://image.runpod.ai/asset/alibaba/wan-2-2-t2v-720-lora.png",
"high_noise_loras": [
{
"path": "https://huggingface.co/ostris/wan22_i2v_14b_orbit_shot_lora/resolve/main/wan22_14b_i2v_orbit_high_noise.safetensors",
"scale": 1
}
],
"low_noise_loras": [
{
"path": "https://huggingface.co/ostris/wan22_i2v_14b_orbit_shot_lora/resolve/main/wan22_14b_i2v_orbit_low_noise.safetensors",
"scale": 1
}
],
"duration": 5,
"seed": -1,
"enable_safety_checker": true
}
}
```
| Parameter | Type | Required | Default | Description |
| -------------------------- | ------- | -------- | ------- | ---------------------------------------------------------- |
| `prompt` | string | Yes | - | Text description of the desired video motion. |
| `image` | string | Yes | - | URL of the source image to animate. |
| `high_noise_loras` | array | No | \[] | LoRA configurations for high-noise stages. |
| `high_noise_loras[].path` | string | Yes | - | URL or path to the LoRA model file. |
| `high_noise_loras[].scale` | number | Yes | - | Scale factor for the LoRA influence. |
| `low_noise_loras` | array | No | \[] | LoRA configurations for low-noise stages. |
| `low_noise_loras[].path` | string | Yes | - | URL or path to the LoRA model file. |
| `low_noise_loras[].scale` | number | Yes | - | Scale factor for the LoRA influence. |
| `duration` | integer | No | 5 | Video duration in seconds. |
| `seed` | integer | No | -1 | Seed for reproducible results. -1 generates a random seed. |
| `enable_safety_checker` | boolean | No | true | Enable content safety checking. |
### Wan 2.2 I2V 720p
An open-source image-to-video generation model that creates 720p video content from static images.
```json theme={"theme":{"light":"github-light","dark":"github-dark"}}
{
"input": {
"prompt": "cinematic shot: slow-tracking camera glides parallel to a giant white origami boat as it gently drifts down a jade-green river",
"image": "https://image.runpod.ai/asset/alibaba/wan-2-2-i2v-720.png",
"num_inference_steps": 30,
"guidance": 5,
"negative_prompt": "",
"size": "1280*720",
"duration": 5,
"flow_shift": 5,
"seed": -1,
"enable_prompt_optimization": false,
"enable_safety_checker": true
}
}
```
| Parameter | Type | Required | Default | Range | Description |
| ---------------------------- | ------- | -------- | ----------- | -------- | -------------------------------------------------------------------------------------------- |
| `prompt` | string | Yes | - | - | Text description of the desired video motion and content. |
| `image` | string | Yes | - | - | URL of the input image to animate. |
| `negative_prompt` | string | No | "" | - | Elements to exclude from the generated video. |
| `size` | string | No | "1280\*720" | - | Video resolution in format "width\*height". |
| `num_inference_steps` | integer | No | 30 | 1-50 | Number of denoising steps. |
| `guidance` | float | No | 5 | 0.0-10.0 | How closely to follow the prompt. |
| `duration` | integer | No | 5 | - | Video duration in seconds. |
| `flow_shift` | integer | No | 5 | - | Controls the motion flow in the generated video. |
| `seed` | integer | No | -1 | - | Provide a seed for reproducible results. The default value (-1) will generate a random seed. |
| `enable_prompt_optimization` | boolean | No | false | - | Whether to automatically optimize the prompt. |
| `enable_safety_checker` | boolean | No | true | - | Whether to run safety checks on the output. |
### Wan 2.2 T2V 720p
Open-source model for generating 720p videos from text prompts.
```json theme={"theme":{"light":"github-light","dark":"github-dark"}}
{
"input": {
"prompt": "A serene morning in an ancient forest, golden sunlight filtering through tall pine trees, creating dancing light patterns on the moss-covered ground",
"num_inference_steps": 30,
"guidance": 5,
"negative_prompt": "",
"size": "1280*720",
"duration": 5,
"flow_shift": 5,
"seed": -1,
"enable_prompt_optimization": false,
"enable_safety_checker": true
}
}
```
| Parameter | Type | Required | Default | Range | Description |
| ---------------------------- | ------- | -------- | ----------- | -------- | -------------------------------------------------------------------------------------------- |
| `prompt` | string | Yes | - | - | Text description of the desired video content. |
| `negative_prompt` | string | No | "" | - | Elements to exclude from the generated video. |
| `size` | string | No | "1280\*720" | - | Video resolution in format "width\*height". |
| `num_inference_steps` | integer | No | 30 | 1-50 | Number of denoising steps. |
| `guidance` | float | No | 5 | 0.0-10.0 | How closely to follow the prompt. |
| `duration` | integer | No | 5 | - | Video duration in seconds. |
| `flow_shift` | integer | No | 5 | - | Controls the motion flow in the generated video. |
| `seed` | integer | No | -1 | - | Provide a seed for reproducible results. The default value (-1) will generate a random seed. |
| `enable_prompt_optimization` | boolean | No | false | - | Whether to automatically optimize the prompt. |
| `enable_safety_checker` | boolean | No | true | - | Whether to run safety checks on the output. |
### Wan 2.1 I2V 720p
Open-source image-to-video generation model that converts static images into 720p videos.
```json theme={"theme":{"light":"github-light","dark":"github-dark"}}
{
"input": {
"prompt": "The family of three just took a selfie. They lean in together, smiling and relaxed. The daughter holds the phone and shows the screen",
"image": "https://image.runpod.ai/asset/alibaba/wan-2-1-i2v-720.png",
"num_inference_steps": 30,
"guidance": 5,
"negative_prompt": "",
"size": "1280*720",
"duration": 5,
"flow_shift": 5,
"seed": -1,
"enable_prompt_optimization": false,
"enable_safety_checker": true
}
}
```
| Parameter | Type | Required | Default | Range | Description |
| ---------------------------- | ------- | -------- | ----------- | -------- | -------------------------------------------------------------------------------------------- |
| `prompt` | string | Yes | - | - | Text description of the desired video motion and content. |
| `image` | string | Yes | - | - | URL of the input image to animate. |
| `negative_prompt` | string | No | "" | - | Elements to exclude from the generated video. |
| `size` | string | No | "1280\*720" | - | Video resolution in format "width\*height". |
| `num_inference_steps` | integer | No | 30 | 1-50 | Number of denoising steps. |
| `guidance` | float | No | 5 | 0.0-10.0 | How closely to follow the prompt. |
| `duration` | integer | No | 5 | - | Video duration in seconds. |
| `flow_shift` | integer | No | 5 | - | Controls the motion flow in the generated video. |
| `seed` | integer | No | -1 | - | Provide a seed for reproducible results. The default value (-1) will generate a random seed. |
| `enable_prompt_optimization` | boolean | No | false | - | Whether to automatically optimize the prompt. |
| `enable_safety_checker` | boolean | No | true | - | Whether to run safety checks on the output. |
### Wan 2.1 T2V 720p
An open-source video generation model for creating 720p videos from text prompts.
```json theme={"theme":{"light":"github-light","dark":"github-dark"}}
{
"input": {
"prompt": "Steady rain falls on a bustling Tokyo street at night, neon signs casting vibrant pink and blue light that reflects and ripples across the wet black pavement",
"num_inference_steps": 30,
"guidance": 5,
"negative_prompt": "",
"size": "1280*720",
"duration": 5,
"flow_shift": 5,
"seed": -1,
"enable_prompt_optimization": false,
"enable_safety_checker": true
}
}
```
| Parameter | Type | Required | Default | Range | Description |
| ---------------------------- | ------- | -------- | ----------- | -------- | -------------------------------------------------------------------------------------------- |
| `prompt` | string | Yes | - | - | Text description of the desired video content. |
| `negative_prompt` | string | No | "" | - | Elements to exclude from the generated video. |
| `size` | string | No | "1280\*720" | - | Video resolution in format "width\*height". |
| `num_inference_steps` | integer | No | 30 | 1-50 | Number of denoising steps. |
| `guidance` | float | No | 5 | 0.0-10.0 | How closely to follow the prompt. |
| `duration` | integer | No | 5 | - | Video duration in seconds. |
| `flow_shift` | integer | No | 5 | - | Controls the motion flow in the generated video. |
| `seed` | integer | No | -1 | - | Provide a seed for reproducible results. The default value (-1) will generate a random seed. |
| `enable_prompt_optimization` | boolean | No | false | - | Whether to automatically optimize the prompt. |
| `enable_safety_checker` | boolean | No | true | - | Whether to run safety checks on the output. |
---
# Source: https://docs.runpod.io/hub/public-endpoints.md
> ## Documentation Index
> Fetch the complete documentation index at: https://docs.runpod.io/llms.txt
> Use this file to discover all available pages before exploring further.
# Overview
> Test and deploy production-ready AI models using Public Endpoints.
Runpod Public Endpoints provide instant access to state-of-the-art AI models through simple API calls, with an API playground available through the [Runpod Hub](/hub/overview).
Public Endpoints are pre-deployed models hosted by Runpod. If you want to deploy your own AI/ML APIs, use [Runpod Serverless](/serverless/overview).
## Available models
For a list of available models and model-specific parameters, see the [Public Endpoint model reference](/hub/public-endpoint-reference).
## Public Endpoint playground
The Public Endpoint playground provides a streamlined way to discover and experiment with AI models.
The playground offers:
* **Interactive parameter adjustment**: Modify prompts, dimensions, and model settings in real-time.
* **Instant preview**: Generate images directly in the browser.
* **Cost estimation**: See estimated costs before running generation.
* **API code generation**: Create working code examples for your applications.
### Access the playground
1. Navigate to the [Runpod Hub](https://www.runpod.io/console/hub) in the console.
2. Select the **Public Endpoints** section.
3. Browse the [available models](#available-models) and select one that fits your needs.
### Test a model
To test a model in the playground:
1. Select a model from the [Runpod Hub](https://www.console.runpod.io/hub).
2. Under **Input**, enter a prompt in the text box.
3. Enter a negative prompt if needed. Negative prompts tell the model what to exclude from the output.
4. Under **Additional settings**, you can adjust the seed, aspect ratio, number of inference steps, guidance scale, and output format.
5. Click **Run** to start generating.
Under **Result**, you can use the dropdown menu to show either a preview of the output, or the raw JSON.
### Create a code example
After inputting parameters using the playground, you can automatically generate an API request to use in your application.
1. Click **API Playground** (above the **Prompt** field).
2. Using the dropdown menu, select the programming language (Python, JavaScript, cURL, etc.) and POST command you want to use (`/run` or `/runsync`).
3. Click the **Copy** icon to copy the code to your clipboard.
## Make API requests to Public Endpoints
You can make API requests to Public Endpoints using any HTTP client. The endpoint URL is specific to the model you want to use.
All requests require authentication using your Runpod API key, passed in the `Authorization` header. You can find and create [API keys](/get-started/api-keys) in the [Runpod console](https://www.runpod.io/console/user/settings) under **Settings > API Keys**.
To learn more about the difference between synchronous and asynchronous requests, see [Endpoint operations](/serverless/endpoints/operations).
### Synchronous request example
Here's an example of a synchronous request to Flux Dev using the `/runsync` endpoint:
```bash curl theme={"theme":{"light":"github-light","dark":"github-dark"}}
curl -X POST "https://api.runpod.ai/v2/black-forest-labs-flux-1-dev/runsync" \
-H "Authorization: Bearer RUNPOD_API_KEY" \
-H "Content-Type: application/json" \
-d '{
"input": {
"prompt": "A serene mountain landscape at sunset",
"width": 1024,
"height": 1024,
"num_inference_steps": 20,
"guidance": 7.5
}
}'
```
### Asynchronous request example
Here's an example of an asynchronous request to Flux Dev using the `/run` endpoint:
```bash curl theme={"theme":{"light":"github-light","dark":"github-dark"}}
curl -X POST "https://api.runpod.ai/v2/black-forest-labs-flux-1-dev/run" \
-H "Authorization: Bearer RUNPOD_API_KEY" \
-H "Content-Type: application/json" \
-d '{
"input": {
"prompt": "A futuristic cityscape with flying cars",
"width": 1024,
"height": 1024,
"num_inference_steps": 50,
"guidance": 8.0
}
}'
```
You can check the status and retrieve results using the `/status` endpoint, replacing `{job-id}` with the job ID returned from the `/run` request:
```bash curl theme={"theme":{"light":"github-light","dark":"github-dark"}}
curl -X GET "https://api.runpod.ai/v2/black-forest-labs-flux-1-dev/status/{job-id}" \
-H "Authorization: Bearer RUNPOD_API_KEY"
```
### Response format
All endpoints return a consistent JSON response format:
```json theme={"theme":{"light":"github-light","dark":"github-dark"}}
{
"delayTime": 17,
"executionTime": 3986,
"id": "sync-0965434e-ff63-4a1c-a9f9-5b705f66e176-u2",
"output": {
"cost": 0.02097152,
"image_url": "https://image.runpod.ai/6/6/mCwUZlep6S/453ad7b7-67c6-43a1-8348-3ad3428ef97a.png"
},
"status": "COMPLETED",
"workerId": "oqk7ao1uomckye"
}
```
Output URLs (`image_url`, `video_url`, and `audio_url`) expire after 7 days. Download and store your generated files immediately if you need to keep them longer.
## Python example
Here is an example Python API request to Flux Dev using the `/run` endpoint:
```python theme={"theme":{"light":"github-light","dark":"github-dark"}}
import requests
headers = {"Content-Type": "application/json", "Authorization": "Bearer RUNPOD_API_KEY"}
data = {
"input": {
"prompt": "A serene mountain landscape at sunset",
"image_format": "png",
"num_inference_steps": 25,
"guidance": 7,
"seed": 50,
"width": 1024,
"height": 1024,
}
}
response = requests.post(
"https://api.runpod.ai/v2/black-forest-labs-flux-1-dev/run",
headers=headers,
json=data,
)
```
You can generate Public Endpoints API requests for Python and other programming languages using the [Public Endpoints playground](#public-endpoints-playground).
## JavaScript/TypeScript integration with Vercel AI SDK
For JavaScript and TypeScript projects, you can use the `@runpod/ai-sdk-provider` package to integrate Runpod's Public Endpoints with the [Vercel AI SDK](https://ai-sdk.dev/docs/introduction).
Run this command to install the package:
```bash theme={"theme":{"light":"github-light","dark":"github-dark"}}
npm install @runpod/ai-sdk-provider ai
```
To call a Public Endpoint for text generation:
```typescript theme={"theme":{"light":"github-light","dark":"github-dark"}}
import { runpod } from '@runpod/ai-sdk-provider';
import { generateText } from 'ai';
const { text } = await generateText({
model: runpod('qwen3-32b-awq'),
prompt: 'Write a Python function that sorts a list:',
});
```
For image generation:
```typescript theme={"theme":{"light":"github-light","dark":"github-dark"}}
import { runpod } from '@runpod/ai-sdk-provider';
import { experimental_generateImage as generateImage } from 'ai';
const { image } = await generateImage({
model: runpod.imageModel('flux/flux-dev'),
prompt: 'A serene mountain landscape at sunset',
aspectRatio: '4:3',
});
```
For comprehensive documentation and examples, see the [Node package documentation](https://www.npmjs.com/package/@runpod/ai-sdk-provider).
## Pricing
Public Endpoints use transparent, usage-based pricing. For example:
| Model | Price | Billing unit |
| ---------------- | -------- | ---------------------------------------- |
| Flux Dev | \$0.02 | Per megapixel |
| Flux Schnell | \$0.0024 | Per megapixel |
| WAN 2.5 | \$0.5 | Per 5 seconds of video |
| Whisper V3 Large | \$0.05 | Per 1000 characters of audio transcribed |
| Qwen3 32B AWQ | \$0.01 | Per 1000 tokens of text generated |
Pricing is calculated based on the actual output resolution. You will not be charged for failed generations.
Here are some pricing examples that demonstrate how you can estimate costs for image generation:
* 512×512 image (0.25 megapixels)
* Flux Dev: (512 \* 512 / 1,000,000) \* \$0.02 = \$0.00524288
* Flux Schnell: (512 \* 512 / 1,000,000) \* \$0.0024 = \$0.0006291456
* 1024×1024 image (1 megapixel)
* Flux Dev: (1024 \* 1024 / 1,000,000) \* \$0.02 = \$0.02097152
* Flux Schnell: (1024 \* 1024 / 1,000,000) \* \$0.0024 = \$0.0025165824
Runpod's billing system rounds up after the first 10 decimal places.
For complete pricing information for each model, see the [Public Endpoint model reference](/hub/public-endpoint-reference) page.
## Best practices
When working with Public Endpoints, following best practices will help you achieve better results and optimize performance.
### Prompt engineering
For prompt engineering, be specific with detailed prompts as they generally produce better results. Include style modifiers such as art styles, camera angles, or lighting conditions. For Flux Dev, use negative prompts to exclude unwanted elements from your images.
A good prompt example would be: "A professional portrait of a woman in business attire, studio lighting, high quality, detailed, corporate headshot style."
### Performance optimization
For performance optimization, choose the right model for your needs. Use Flux Schnell when you need speed, and Flux Dev when you need higher quality. Standard dimensions like 1024×1024 render fastest, so stick to these unless you need specific aspect ratios. For multiple images, use asynchronous endpoints to batch your requests. Consider caching results by storing generated images to avoid regenerating identical prompts.
---
# Source: https://docs.runpod.io/hub/publishing-guide.md
> ## Documentation Index
> Fetch the complete documentation index at: https://docs.runpod.io/llms.txt
> Use this file to discover all available pages before exploring further.
# Runpod Hub publishing guide
> Publish your repositories to the Runpod Hub.
Learn how to publish your repositories to the [Runpod Hub](https://www.runpod.io/console/hub), including how to configure your repository with the required `hub.json` and `tests.json` files.
After you publish your repository to the Hub, you can start [earning revenue](/hub/revenue-sharing) from your users' compute usage.
## How to publish your repo
Follow these steps to add your repository to the Hub:
1. Navigate to the [Hub page](https://www.console.runpod.io/hub) in the Runpod console.
2. Under **Add your repo** click **Get Started**.
3. Enter your GitHub repo URL.
4. Follow the UI steps to add your repo to the Hub.
The Hub page will guide you through the following steps:
1. Create your `hub.json` and `tests.json` files.
2. Ensure your repository contains a `handler.py`, `Dockerfile`, and `README.md` file (in either the `.runpod` or root directory).
3. Create a new GitHub release (the Hub indexes releases, not commits).
4. (Optional) Add a Runpod Hub badge into your GitHub `README.md` file, so that users can instantly deploy your repo from GitHub.
After all the necessary files are in place and a release has been created, your repo will be marked "Pending" during building/testing. After testing is complete, the Runpod team will manually review the repo for publication.
## Update a repo
To update your repo on the Hub, just **create a new GitHub release**, and the Hub listing will be automatically indexed and built (usually within an hour).
## Required files
Aside from a working [Serverless implementation](/serverless/overview), every Hub repo requires two additional configuration files:
1. `hub.json` - Defines metadata and deployment settings for your repo.
2. `tests.json` - Specifies how to test your repo.
These files should be placed in the `.runpod` directory at the root of your repository. This directory takes precedence over the root directory, allowing you to override common files like `Dockerfile` and `README.md` specifically for the Hub.
## hub.json reference
The `hub.json` file defines how your listing appears and functions in the Hub.
You can build your `hub.json` from scratch, or use [this template](#hubjson-template) as a starting point.
### General metadata
| Field | Description | Required | Values |
| ------------- | ---------------------------------- | -------- | --------------------------------------------------------------- |
| `title` | Name of your tool | Yes | String |
| `description` | Brief explanation of functionality | Yes | String |
| `type` | Deployment type | Yes | `"serverless"` |
| `category` | Tool category | Yes | `"audio"`, `"embedding"`, `"language"`, `"video"`, or `"image"` |
| `iconUrl` | URL to tool icon | No | Valid URL |
| `config` | Runpod configuration | Yes | Object ([see below](#runpod-configuration)) |
### Runpod configuration
| Field | Description | Required | Values |
| --------------------- | ----------------------------------------------------------------------------------------------------------------------------------------- | --------------------------- | -------------------------------------------------------------------------------------------------------------------------------------------------------------------------------------------- |
| `runsOn` | Machine type | Yes | `"GPU"` or `"CPU"` |
| `endpointType` | Endpoint deployment type. When set to `"LB"`, users can deploy your listing as a Serverless endpoint or a Pod directly from the Hub page. | No | `"LB"` |
| `containerDiskInGb` | Container disk space allocation | Yes | Integer (GB) |
| `cpuFlavor` | CPU configuration | Only if `runsOn` is `"CPU"` | Valid CPU flavor string. For a complete list of available CPU flavors, see [CPU types](/references/cpu-types) |
| `gpuCount` | Number of GPUs | Only if `runsOn` is `"GPU"` | Integer |
| `gpuIds` | GPU pool specification | Only if `runsOn` is `"GPU"` | Comma-separated pool IDs (e.g., `"ADA_24"`) with optional GPU ID negations (e.g., `"-NVIDIA RTX 4090"`). For a list of GPU pools and IDs, see [GPU types](/references/gpu-types#gpu-pools). |
| `allowedCudaVersions` | Supported CUDA versions | No | Array of version strings |
| `env` | Environment variable definitions | No | Object ([see below](#environment-variables)) |
| `presets` | Default environment variable values | No | Object ([see below](#presets)) |
### Environment variables
Environment variables can be defined in several ways:
1. **Static variables**: Direct value assignment. For example:
```json theme={"theme":{"light":"github-light","dark":"github-dark"}}
{
"key": "API_KEY",
"value": "default-api-key-value"
}
```
2. **String inputs**: User-entered text fields. For example:
```json theme={"theme":{"light":"github-light","dark":"github-dark"}}
{
"key": "MODEL_PATH",
"input": {
"name": "Model path",
"type": "string",
"description": "Path to the model weights on disk",
"default": "/models/stable-diffusion-v1-5",
"advanced": false
}
}
```
3. **Hugging Face inputs:** Fields for model selection from Hugging Face Hub. For example:
```json theme={"theme":{"light":"github-light","dark":"github-dark"}}
{
"key": "HF_MODEL",
"input": {
"type": "huggingface",
"name": "Hugging Face Model",
"description": "Model organization/name as listed on Huggingface Hub",
"default": "runwayml/stable-diffusion-v1-5",
"required": true
}
}
```
4. **Option inputs**: User selected option fields. For example:
```json theme={"theme":{"light":"github-light","dark":"github-dark"}}
{
"key": "PRECISION",
"input": {
"name": "Model precision",
"type": "string",
"description": "The numerical precision for model inference",
"options": [
{"label": "Full Precision (FP32)", "value": "fp32"},
{"label": "Half Precision (FP16)", "value": "fp16"},
{"label": "8-bit Quantization", "value": "int8"}
],
"default": "fp16"
}
}
```
5. **Number Inputs**: User-entered numeric fields. For example:
```json theme={"theme":{"light":"github-light","dark":"github-dark"}}
{
"key": "MAX_TOKENS",
"input": {
"name": "Maximum tokens",
"type": "number",
"description": "Maximum number of tokens to generate",
"min": 32,
"max": 4096,
"default": 1024
}
}
```
6. **Boolean Inputs**: User-toggled boolean fields. For example:
```json theme={"theme":{"light":"github-light","dark":"github-dark"}}
{
"key": "USE_FLASH_ATTENTION",
"input": {
"type": "boolean",
"name": "Flash attention",
"description": "Enable Flash Attention for faster inference on supported GPUs",
"default": true,
"trueValue": "true",
"falseValue": "false"
}
}
```
Advanced options will be hidden by default. Hide an option by setting: `"advanced": true` .
### Presets
Presets allow you to define groups of default environment variable values. When a user deploys your repo, they'll be offered a dropdown menu with any preset options you've defined.
Here are some example presets:
```json theme={"theme":{"light":"github-light","dark":"github-dark"}}
"presets": [
{
"name": "Quality Optimized",
"defaults": {
"MODEL_NAME": "runpod-stable-diffusion-xl",
"INFERENCE_MODE": "quality",
"BATCH_SIZE": 1,
"ENABLE_CACHING": false,
"USE_FLASH_ATTENTION": true
}
},
{
"name": "Performance Optimized",
"defaults": {
"MODEL_NAME": "runpod-stable-diffusion-v1-5",
"INFERENCE_MODE": "fast",
"BATCH_SIZE": 8,
"ENABLE_CACHING": true,
"USE_FLASH_ATTENTION": true
}
}
]
```
## hub.json template
Here’s an example `hub.json` file that you can use as a starting point:
```json title="hub.json" theme={"theme":{"light":"github-light","dark":"github-dark"}}
{
"title": "Your Tool's Name",
"description": "A brief explanation of what your tool does",
"type": "serverless",
"category": "language",
"iconUrl": "https://your-icon-url.com/icon.png",
"config": {
"runsOn": "GPU",
"containerDiskInGb": 20,
"gpuCount": 1,
"gpuIds": "RTX A4000,-NVIDIA RTX 4090",
"allowedCudaVersions": [
"12.8", "12.7", "12.6", "12.5", "12.4",
"12.3", "12.2", "12.1", "12.0"
],
"presets": [
{
"name": "Preset Name",
"defaults": {
"STRING_ENV_VAR": "value1",
"INT_ENV_VAR": 10,
"BOOL_ENV_VAR": true
}
}
],
"env": [
{
"key": "STATIC_ENV_VAR",
"value": "static_value"
},
{
"key": "STRING_ENV_VAR",
"input": {
"name": "User-friendly Name",
"type": "string",
"description": "Description of this input",
"default": "default value",
"advanced": false
}
},
{
"key": "OPTION_ENV_VAR",
"input": {
"name": "Select Option",
"type": "string",
"description": "Choose from available options",
"options": [
{"label": "Option 1", "value": "value1"},
{"label": "Option 2", "value": "value2"}
],
"default": "value1"
}
},
{
"key": "INT_ENV_VAR",
"input": {
"name": "Numeric Value",
"type": "number",
"description": "Enter a number",
"min": 1,
"max": 100,
"default": 50
}
},
{
"key": "BOOL_ENV_VAR",
"input": {
"type": "boolean",
"name": "Enable Feature",
"description": "Toggle this feature on/off",
"default": false,
"trueValue": "enabled",
"falseValue": "disabled"
}
}
]
}
}
```
## tests.json reference
The `tests.json` file defines test cases to validate your tool's functionality. Tests are executed during the build step after [a release has been created](#publish-your-repo-to-the-runpod-hub). A test is considered valid by the Hub if the endpoint returns a [200 response](https://developer.mozilla.org/en-US/docs/Web/HTTP/Reference/Status/200).
You can build your `tests.json` from scratch, or use [this template](#testsjson-template) as a starting point.
### Test cases
Each test case should include:
| Field | Description | Required | Values |
| --------- | --------------------- | -------- | ---------------------- |
| `name` | Test identifier | Yes | String |
| `input` | Raw job input payload | Yes | Object |
| `timeout` | Max execution time | No | Integer (milliseconds) |
### Test environment configuration
| Field | Description | Required | Values |
| --------------------- | ----------------------------- | ------------------ | ---------------------------------------------------------------- |
| `gpuTypeId` | GPU type for testing | Only for GPU tests | Valid GPU ID (see [GPU types](/references/gpu-types)) |
| `gpuCount` | Number of GPUs | Only for GPU tests | Integer |
| `cpuFlavor` | CPU configuration for testing | Only for CPU tests | Valid CPU flavor string (see [CPU types](/references/cpu-types)) |
| `env` | Test environment variables | No | Array of key-value pairs |
| `allowedCudaVersions` | Supported CUDA versions | No | Array of version strings |
## tests.json template
Here’s an example `tests.json` file that you can use as a starting point:
```json title="tests.json" theme={"theme":{"light":"github-light","dark":"github-dark"}}
{
"tests": [
{
"name": "test_case_name",
"input": {
"param1": "value1",
"param2": "value2"
},
"timeout": 10000
}
],
"config": {
"gpuTypeId": "NVIDIA GeForce RTX 4090",
"gpuCount": 1,
"env": [
{
"key": "TEST_ENV_VAR",
"value": "test_value"
}
],
"allowedCudaVersions": [
"12.7", "12.6", "12.5", "12.4",
"12.3", "12.2", "12.1", "12.0", "11.7"
]
}
}
```
---
# Source: https://docs.runpod.io/instant-clusters/pytorch.md
> ## Documentation Index
> Fetch the complete documentation index at: https://docs.runpod.io/llms.txt
> Use this file to discover all available pages before exploring further.
# Deploy an Instant Cluster with PyTorch
This tutorial demonstrates how to use Instant Clusters with [PyTorch](http://pytorch.org) to run distributed workloads across multiple GPUs. By leveraging PyTorch's distributed processing capabilities and Runpod's high-speed networking infrastructure, you can significantly accelerate your training process compared to single-GPU setups.
Follow the steps below to deploy a cluster and start running distributed PyTorch workloads efficiently.
## Step 1: Deploy an Instant Cluster
1. Open the [Instant Clusters page](https://www.console.runpod.io/cluster) on the Runpod web interface.
2. Click **Create Cluster**.
3. Use the UI to name and configure your Cluster. For this walkthrough, keep **Pod Count** at **2** and select the option for **16x H100 SXM** GPUs. Keep the **Pod Template** at its default setting (Runpod PyTorch).
4. Click **Deploy Cluster**. You should be redirected to the Instant Clusters page after a few seconds.
## Step 2: Clone the PyTorch demo into each Pod
1. Click your cluster to expand the list of Pods.
2. Click on a Pod, for example `CLUSTERNAME-pod-0`, to expand the Pod.
3. Click **Connect**, then click **Web Terminal**.
4. In the terminal that opens, run this command to clone a basic `main.py` file into the Pod's main directory:
```sh theme={"theme":{"light":"github-light","dark":"github-dark"}}
git clone https://github.com/murat-runpod/torch-demo.git
```
Repeat these steps for **each Pod** in your cluster.
## Step 3: Examine the main.py file
Let's look at the code in our `main.py` file:
```python main.py theme={"theme":{"light":"github-light","dark":"github-dark"}}
import os
import torch
import torch.distributed as dist
def init_distributed():
"""Initialize the distributed training environment"""
# Initialize the process group
dist.init_process_group(backend="nccl")
# Get local rank and global rank
local_rank = int(os.environ["LOCAL_RANK"])
global_rank = dist.get_rank()
world_size = dist.get_world_size()
# Set device for this process
device = torch.device(f"cuda:{local_rank}")
torch.cuda.set_device(device)
return local_rank, global_rank, world_size, device
def cleanup_distributed():
"""Clean up the distributed environment"""
dist.destroy_process_group()
def main():
# Initialize distributed environment
local_rank, global_rank, world_size, device = init_distributed()
print(f"Running on rank {global_rank}/{world_size-1} (local rank: {local_rank}), device: {device}")
# Your code here
# Clean up distributed environment when done
cleanup_distributed()
if __name__ == "__main__":
main()
```
This is the minimal code necessary for initializing a distributed environment. The `main()` function prints the local and global rank for each GPU process (this is also where you can add your own code). `LOCAL_RANK` is assigned dynamically to each process by PyTorch. All other environment variables are set automatically by Runpod during deployment.
## Step 4: Start the PyTorch process on each Pod
Run this command in the web terminal of **each Pod** to start the PyTorch process:
```bash launcher.sh theme={"theme":{"light":"github-light","dark":"github-dark"}}
export NCCL_DEBUG=INFO
export NCCL_SOCKET_IFNAME=ens1
torchrun \
--nproc_per_node=$NUM_TRAINERS \
--nnodes=$NUM_NODES \
--node_rank=$NODE_RANK \
--master_addr=$MASTER_ADDR \
--master_port=$MASTER_PORT \
torch-demo/main.py
```
This command launches eight `main.py` processes per node (one per GPU in the Pod).
The `NCCL_SOCKET_IFNAME=ens1` setting is critical for proper inter-node communication. Without this configuration, nodes may attempt to communicate using external IP addresses (172.xxx range) instead of the internal network interface, leading to connection timeouts and failed distributed training jobs.
After running the command on the last Pod, you should see output similar to this:
```csharp theme={"theme":{"light":"github-light","dark":"github-dark"}}
Running on rank 8/15 (local rank: 0), device: cuda:0
Running on rank 15/15 (local rank: 7), device: cuda:7
Running on rank 9/15 (local rank: 1), device: cuda:1
Running on rank 12/15 (local rank: 4), device: cuda:4
Running on rank 13/15 (local rank: 5), device: cuda:5
Running on rank 11/15 (local rank: 3), device: cuda:3
Running on rank 14/15 (local rank: 6), device: cuda:6
Running on rank 10/15 (local rank: 2), device: cuda:2
```
The first number refers to the global rank of the thread, spanning from `0` to `WORLD_SIZE-1` (`WORLD_SIZE` = the total number of GPUs in the cluster). In our example there are two Pods of eight GPUs, so the global rank spans from 0-15. The second number is the local rank, which defines the order of GPUs within a single Pod (0-7 for this example).
The specific number and order of ranks may be different in your terminal, and the global ranks listed will be different for each Pod.
This diagram illustrates how local and global ranks are distributed across multiple Pods:
## Step 5: Clean up
If you no longer need your cluster, make sure you return to the [Instant Clusters page](https://www.console.runpod.io/cluster) and delete your cluster to avoid incurring extra charges.
You can monitor your cluster usage and spending using the **Billing Explorer** at the bottom of the [Billing page](https://www.console.runpod.io/user/billing) section under the **Cluster** tab.
## Next steps
Now that you've successfully deployed and tested a PyTorch distributed application on an Instant Cluster, you can:
* **Adapt your own PyTorch code** to run on the cluster by modifying the distributed initialization in your scripts.
* **Scale your training** by adjusting the number of Pods in your cluster to handle larger models or datasets.
* **Try different frameworks** like [Axolotl](/instant-clusters/axolotl) for fine-tuning large language models.
* **Optimize performance** by experimenting with different distributed training strategies like Data Parallel (DP), Distributed Data Parallel (DDP), or Fully Sharded Data Parallel (FSDP).
For more information on distributed training with PyTorch, refer to the [PyTorch Distributed Training documentation](https://pytorch.org/tutorials/beginner/dist_overview.html).
---
# Source: https://docs.runpod.io/serverless/quickstart.md
> ## Documentation Index
> Fetch the complete documentation index at: https://docs.runpod.io/llms.txt
> Use this file to discover all available pages before exploring further.
# Quickstart
> Write a handler function, build a worker image, create an endpoint, and send your first request.
For an even faster start, clone or download the [worker-basic](https://github.com/runpod-workers/worker-basic) repository for a pre-configured template for building and deploying Serverless workers. After cloning the repository, skip to [step 6 of this tutorial](#step-6%3A-build-and-push-your-docker-image) to deploy and test the endpoint.
## What you'll learn
In this tutorial you'll learn how to:
* Set up your development environment.
* Create a handler function.
* Test your handler locally.
* Create a Dockerfile to package your handler function.
* Build and push your worker image to Docker Hub.
* Deploy your worker to a Serverless endpoint using the Runpod console.
* Send a test request to your endpoint.
## Requirements
* You've [created a Runpod account](/get-started/manage-accounts).
* You've installed [Python 3.x](https://www.python.org/downloads/) and [Docker](https://docs.docker.com/get-started/get-docker/) on your local machine and configured them for your command line.
## Step 1: Create a Python virtual environment
First, set up a virtual environment to manage your project dependencies.
Run this command in your local terminal:
```sh theme={"theme":{"light":"github-light","dark":"github-dark"}}
# Create a Python virtual environment
python3 -m venv venv
```
```sh theme={"theme":{"light":"github-light","dark":"github-dark"}}
source venv/bin/activate
```
```sh theme={"theme":{"light":"github-light","dark":"github-dark"}}
venv\Scripts\activate
```
```sh theme={"theme":{"light":"github-light","dark":"github-dark"}}
pip install runpod
```
## Step 2: Create a handler function
Create a file named `handler.py` and add the following code:
```python handler.py theme={"theme":{"light":"github-light","dark":"github-dark"}}
import runpod
import time
def handler(event):
# This function processes incoming requests to your Serverless endpoint.
#
# Args:
# event (dict): Contains the input data and request metadata
#
# Returns:
# Any: The result to be returned to the client
# Extract input data
print(f"Worker Start")
input = event['input']
prompt = input.get('prompt')
seconds = input.get('seconds', 0)
print(f"Received prompt: {prompt}")
print(f"Sleeping for {seconds} seconds...")
# You can replace this sleep call with your own Python code
time.sleep(seconds)
return prompt
# Start the Serverless function when the script is run
if __name__ == '__main__':
runpod.serverless.start({'handler': handler })
```
This is a bare-bones handler that processes a JSON object and outputs a `prompt` string contained in the `input` object. You can replace the `time.sleep(seconds)` call with your own Python code for generating images, text, or running any machine learning workload.
## Step 3: Create a test input file
You'll need to create an input file to properly test your handler locally. Create a file named `test_input.json` and add the following code:
```json test_input.json theme={"theme":{"light":"github-light","dark":"github-dark"}}
{
"input": {
"prompt": "Hey there!"
}
}
```
## Step 4: Test your handler function locally
Run your handler function to verify that it works correctly:
```sh theme={"theme":{"light":"github-light","dark":"github-dark"}}
python handler.py
```
You should see output similar to this:
```text theme={"theme":{"light":"github-light","dark":"github-dark"}}
--- Starting Serverless Worker | Version 1.7.9 ---
INFO | Using test_input.json as job input.
DEBUG | Retrieved local job: {'input': {'prompt': 'Hey there!'}, 'id': 'local_test'}
INFO | local_test | Started.
Worker Start
Received prompt: Hey there!
Sleeping for 0 seconds...
DEBUG | local_test | Handler output: Hey there!
DEBUG | local_test | run_job return: {'output': 'Hey there!'}
INFO | Job local_test completed successfully.
INFO | Job result: {'output': 'Hey there!'}
INFO | Local testing complete, exiting.
```
## Step 5: Create a Dockerfile
Create a file named `Dockerfile` with the following content:
```dockerfile Dockerfile theme={"theme":{"light":"github-light","dark":"github-dark"}}
FROM python:3.10-slim
WORKDIR /
# Install dependencies
RUN pip install --no-cache-dir runpod
# Copy your handler file
COPY handler.py /
# Start the container
CMD ["python3", "-u", "handler.py"]
```
## Step 6: Build and push your worker image
Instead of building and pushing your image via Docker Hub, you can also [deploy your worker from a GitHub repository](/serverless/workers/github-integration).
Before you can deploy your worker on Runpod Serverless, you need to push it to Docker Hub:
Build your Docker image, specifying the platform for Runpod deployment, replacing `[YOUR_USERNAME]` with your Docker username:
```sh theme={"theme":{"light":"github-light","dark":"github-dark"}}
docker build --platform linux/amd64 --tag [YOUR_USERNAME]/serverless-test .
```
```sh theme={"theme":{"light":"github-light","dark":"github-dark"}}
docker push [YOUR_USERNAME]/serverless-test:latest
```
## Step 7: Deploy your worker using the Runpod console
To deploy your worker to a Serverless endpoint:
1. Go to the [Serverless section](https://www.console.runpod.io/serverless) of the Runpod console.
2. Click **New Endpoint**.
3. Click **Import from Docker Registry**
4. In the **Container Image** field, enter your Docker image URL: `docker.io/yourusername/serverless-test:latest`.
5. Click **Next** to proceed to endpoint configuration.
6. Configure your endpoint settings:
* (Optional) Enter a custom name for your endpoint, or use the randomly generated name.
* Make sure the **Endpoint Type** is set to **Queue**.
* Under **GPU Configuration**, check the box for **16 GB** GPUs.
* Leave the rest of the settings at their defaults.
7. Click **Deploy Endpoint**.
The system will redirect you to a dedicated detail page for your new endpoint.
## Step 8: Test your endpoint
To test your endpoint, click the **Requests** tab in the endpoint detail page:
On the left you should see the default test request:
```json theme={"theme":{"light":"github-light","dark":"github-dark"}}
{
"input": {
"prompt": "Hello World"
}
}
```
Leave the default input as is and click **Run**. The system will take a few minutes to initialize your workers.
When the workers finish processing your request, you should see output on the right side of the page similar to this:
```json theme={"theme":{"light":"github-light","dark":"github-dark"}}
{
"delayTime": 15088,
"executionTime": 60,
"id": "04f01223-4aa2-40df-bdab-37e5caa43cbe-u1",
"output": "Hello World",
"status": "COMPLETED",
"workerId": "uhbbfre73gqjwh"
}
```
Congratulations! You've successfully deployed and tested your first Serverless endpoint.
## Next steps
Now that you've learned the basics, you're ready to:
* [Create more advanced handler functions.](/serverless/workers/handler-functions)
* [Update your Dockerfile with AI/ML models and other dependencies.](/serverless/workers/create-dockerfile)
* [Learn how to structure and send requests to your endpoint.](/serverless/endpoints/send-requests)
* [Manage your Serverless endpoints in the Runpod console.](/serverless/endpoints/overview)
---
# Source: https://docs.runpod.io/references/referrals.md
> ## Documentation Index
> Fetch the complete documentation index at: https://docs.runpod.io/llms.txt
> Use this file to discover all available pages before exploring further.
# Referral, affiliate, and creator programs
> Earn additional revenue through Runpod's referral, affiliate, and creator programs
Runpod offers three programs that help you earn additional revenue while helping us grow our community. Whether you're referring new users, creating popular templates, or driving significant traffic, there's a program that fits your contribution style.
## Runpod referral program
Earn Runpod Credits when users you refer spend on Serverless or Pods. The referral program rewards both you and the person you refer, creating a win-win situation for everyone involved.
### How rewards work
When someone signs up using your referral link and starts spending on Runpod, you earn a percentage of their spend as Runpod Credits:
* **5% commission** on all Serverless spend for the first 6 months.
* **3% commission** on all Pod spend for the first 6 months.
* **Bonus credits** for both you and your referral after they load \$10 on their account. The bonus amount depends on your location:
* **Non-European customers** receive a random weighted bonus between \$5 and \$500.
* **European customers** receive a fixed \$5 bonus.
* **Cross-region referrals**: If a European customer refers a non-European customer, the European customer receives \$5 and the non-European customer receives the random weighted bonus (\$5-\$500). If a non-European customer refers a European customer, the non-European customer receives the random weighted bonus and the European customer receives \$5.
If you referred users before June 16, 2025, you're part of our beta program group. This means you'll continue earning commissions on their spend indefinitely, not just for 6 months.
## Runpod affiliate program
The affiliate program is designed for high-performing referrers who want to earn cash instead of credits. Through our partnership with Partnerstack, eligible referrers can earn 10% cash commissions on all referral spend.
### Eligibility and rewards
To qualify for the affiliate program, you need to have referred at least 25 paying users through the standard referral program. Once eligible, you can choose to upgrade to the affiliate program, which offers:
* **10% cash commission** on all referral spend for the first 6 months.
* Professional tracking and reporting through Partnerstack.
* Direct cash payments instead of Runpod Credits.
Once you opt into the affiliate program, this decision is permanent. Choose carefully based on whether you prefer cash payments or Runpod Credits.
For beta program participants (users referred before June 26, 2025), a special arrangement applies. These users will be eligible for Partnerstack commissions during their first 6 months. After that period, they'll return to the standard referral program but continue generating commissions indefinitely.
## Runpod creator program
The creator program rewards users who build popular [Pod templates](/pods/templates/overview) that others use on the platform. Every time someone runs a Pod using your template, you earn a percentage of their spend.
### How it works
Template creators earn **1% in Runpod Credits** for every dollar spent using their templates. This creates a passive income stream that grows with your template's popularity.
For example, if 20 users run Pods using your template at \$0.54/hour for a full week, you'll earn \$18.14 in credits. The more useful and popular your template, the more you can earn.
### Getting started with templates
To participate in the creator program, your template must accumulate at least 1 day of total runtime across all users. Focus on creating templates that solve real problems or make it easier for users to get started with specific workloads.
## How to participate
Getting started with any of these programs is straightforward:
1. Navigate to your [referral dashboard](https://www.console.runpod.io/user/referrals) in the Runpod console.
2. Find your unique referral link (it will look something like `https://runpod.io?ref=5t99c9je`).
3. Share this link with potential users through your preferred channels.
For the creator program, simply publish templates through your Runpod account and promote them to potential users.
## Important details
Understanding how these programs work will help you maximize your earnings:
1. **Referral commissions are based on actual usage, not purchases.** If someone you refer buys \$1,000 in credits, you won't earn commission until they actually use those credits on Pods or Serverless workloads.
2. **New accounts only.** Referral links only work for brand new Runpod users. If someone already has an account, referring them won't generate commissions.
3. **Bonus credit distribution varies by location.** Non-European customers receive credits through a weighted random system between \$5 and \$500, while European customers receive a fixed \$5 bonus. For non-European customers, most will receive a bonus of \$5, with about 96% receiving \$10 or less.
## Support
Have questions about maximizing your earnings or need help with any of these programs? [Contact our support team](https://contact.runpod.io/hc/en-us/requests/new) for assistance.
Remember, if you're transitioning to the affiliate program, you'll keep all earnings accumulated through the referral program before making the switch.
---
# Source: https://docs.runpod.io/release-notes.md
> ## Documentation Index
> Fetch the complete documentation index at: https://docs.runpod.io/llms.txt
> Use this file to discover all available pages before exploring further.
# Product updates
> New features, fixes, and improvements for the Runpod platform.
## GitHub release rollback is now generally available
* [GitHub release rollback](/serverless/workers/github-integration#roll-back-to-a-previous-build): Roll back your Serverless endpoint to any previous build from the console. Restore an earlier version when you encounter issues without waiting for a new GitHub release.
## Pod migration in beta and Serverless development guides
* [Pod migration (beta)](/references/troubleshooting/pod-migration): Migrate your Pod to a new machine when your stopped Pod's GPU is occupied. Provisions a new Pod with the same specifications and automatically transfers your data to an available machine.
* [New Serverless development guides](/serverless/overview): We've added a comprehensive new set of guides for developing, testing, and debugging Serverless endpoints.
## Slurm Clusters GA, cached models in beta, and new Public Endpoints available
* [Slurm Clusters are now generally available](/instant-clusters/slurm-clusters): Deploy production-ready HPC clusters in seconds. These clusters support multi-node performance for distributed training and large-scale simulations with pay-as-you-go billing and no idle costs.
* [Cached models are now in beta](/serverless/endpoints/model-caching): Eliminate model download times when starting workers. The system places cached models on host machines before workers start, prioritizing hosts with your model already available for instant startup.
* [New Public Endpoints available](/hub/public-endpoints): Wan 2.5 combines image and audio to create lifelike videos, while Nano Banana merges multiple images for composite creations.
## Hub revenue sharing launches and Pods UI gets refreshed
* [Hub revenue share model](/hub/revenue-sharing): Publish to the Runpod Hub and earn credits when others deploy your repo. Earn up to 7% of compute revenue through monthly tiers with credits auto-deposited into your account.
* [Pods UI updated](/pods/overview): Refreshed modern interface for interacting with Runpod Pods.
## Public Endpoints arrive, Slurm Clusters in beta
* [Public Endpoints](/hub/public-endpoints): Access state-of-the-art AI models through simple API calls with an integrated playground. Available endpoints include Whisper-V3-Large, Seedance 1.0 pro, Seedream 3.0, Qwen Image Edit, FLUX.1 Kontext, Deep Cogito v2 Llama 70B, and Minimax Speech.
* [Slurm Clusters (beta)](/instant-clusters/slurm-clusters): Create on-demand multi-node clusters instantly with full Slurm scheduling support.
## S3-compatible storage and updated referral program
* [S3-compatible API for network volumes](/storage/s3-api): Upload and retrieve files from your network volumes without compute using AWS S3 CLI or Boto3. Integrate Runpod storage into any AI pipeline with zero-config ease and object-level control.
* [Referral program revamp](/references/referrals): Updated rewards and tiers with clearer dashboards to track performance.
## Port labeling, price drops, Runpod Hub, and Tetra beta test
* [Port labeling](/pods/overview): Name exposed ports in the UI and API to help team members identify services like Jupyter or TensorBoard.
* [Price drops](/pods/pricing): Additional price reductions on popular GPU SKUs to lower training and inference costs.
* [Runpod Hub](/hub/overview): A curated catalog of one-click endpoints and templates for deploying community projects without starting from scratch.
* **Tetra beta test**: A Python library for running code on GPU with Runpod. Add a `@remote()` decorator to functions that need GPU power while the rest of your code runs locally.
## GitHub login, RTX 5090s, and global networking expansion
* **Login with GitHub**: OAuth sign-in and linking for faster onboarding and repo-driven workflows.
* **RTX 5090s on Runpod**: High-performance RTX 5090 availability for cost-efficient training and inference.
* [Global networking expansion](/pods/networking): Rollout to additional data centers approaching full global coverage.
## Enterprise features arrive, REST API goes GA, Instant Clusters in beta, and APAC expansion
* [CPU Pods get network storage access](/storage/network-volumes): GA support for network volumes on CPU Pods for persistent, shareable storage.
* **SOC 2 Type I certification**: Independent attestation of security controls for enterprise readiness.
* [REST API release](/api-reference/overview): REST API GA with broad resource coverage for full infrastructure-as-code workflows.
* [Instant Clusters](/instant-clusters): Spin up multi-node GPU clusters in minutes with private interconnect and per-second billing.
* **Bare metal**: Reserve dedicated GPU servers for maximum control, performance, and long-term savings.
* **AP-JP-1**: New Fukushima region for low-latency APAC access and in-country data residency.
## REST API enters beta with full-time community manager
* [REST API beta test](/api-reference/overview): RESTful endpoints for Pods, endpoints, and volumes for simpler automation than GraphQL.
* **Full-time community manager hire**: Dedicated programs, content, and faster community response.
* [Serverless GitHub integration release](/serverless/workers/github-integration): GA for GitHub-based Serverless deploys with production-ready stability.
## New silicon and LLM-focused Serverless upgrades
* **CPU Pods v2**: Docker runtime parity with GPU Pods for faster starts with network volume support.
* [H200s on Runpod](/references/gpu-types): NVIDIA H200 GPUs available for larger models and higher memory bandwidth.
* [Serverless upgrades](/serverless/overview): Higher GPU counts per worker, new quick-deploy runtimes, and simpler model selection.
## Global networking expands and GitHub deploys enter beta
* [Global networking expansion](/pods/networking): Added to CA-MTL-3, US-GA-1, US-GA-2, and US-KS-2 for expanded private mesh coverage.
* [Serverless GitHub integration beta test](/serverless/workers/github-integration): Deploy endpoints directly from GitHub repos with automatic builds.
* **Scoped API keys**: Least-privilege tokens with fine-grained scopes and expirations for safer automation.
* **Passkey auth**: Passwordless WebAuthn sign-in for phishing-resistant account access.
## Storage expansion and private cross-data-center connectivity
* [US-GA-2 added to network storage](/storage/network-volumes): Enable network volumes in US-GA-2.
* [Global networking](/pods/networking): Private cross-data-center networking with internal DNS for secure service-to-service traffic.
## Storage coverage grows with major price cuts and revamped referrals
* **US-TX-3 and EUR-IS-1 added to network storage**: Network volumes available in more regions for local persistence.
* **Runpod slashes GPU prices**: Broad GPU price reductions to lower training and inference total cost of ownership.
* [Referral program revamp](/references/referrals): Updated commissions and bonuses with an affiliate tier and improved tracking.
## \$20M seed round, community event, and broader Serverless options
* **\$20M seed by Intel Capital and Dell Technologies Capital**: Funds infrastructure expansion and product acceleration.
* **First in-person hackathon**: Community projects, workshops, and real-world feedback.
* [Serverless CPU Pods](/references/cpu-types): Scale-to-zero CPU endpoints for services that don't need a GPU.
* [AMD GPUs](/references/gpu-types): AMD ROCm-compatible GPU SKUs as cost and performance alternatives to NVIDIA.
## CPU compute and first-class automation tooling
* **CPU Pods**: CPU-only instances with the same networking and storage primitives for cheaper non-GPU stages.
* [runpodctl](/runpodctl/overview): Official CLI for Pods, endpoints, and volumes to enable scripting and CI/CD workflows.
## Console navigation overhaul and documentation refresh
* **New navigational changes to Runpod UI**: Consolidated menus, consistent action placement, and fewer clicks for common tasks.
* **Docs revamp**: New information architecture, improved search, and more runnable examples and quickstarts.
* **Zhen AMA**: Roadmap Q\&A and community feedback session.
## New regions and investment in community support
* **US-OR-1**: Additional US region for lower latency and more capacity in the Pacific Northwest.
* **CA-MTL-1**: New Canadian region to improve latency and meet in-country data needs.
* **First community manager hire**: Dedicated community programs and faster feedback loops.
* **Building out the support team**: Expanded coverage and expertise for complex issues.
## Faster template starts and better multi-region hygiene
* **Serverless quick deploy**: One-click deploy of curated model templates with sensible defaults.
* **EU domain for Serverless**: EU-specific domain briefly offered for data residency, superseded by other region controls.
* **Data-center filter for Serverless**: Filter and manage endpoints by region for multi-region fleets.
## Self-service upgrades, clearer metrics, new pricing model, and cost visibility
* **Self-service worker upgrade**: Rebuild and roll workers from the dashboard without support tickets.
* **Edit template from endpoint page**: Inline edit and redeploy the underlying template directly from the endpoint view.
* **Improved Serverless metrics page**: Refinements to charts and filters for quicker root-cause analysis.
* [Flex and active workers](/serverless/pricing): Discounted always-on "active" capacity for baseline load with on-demand "flex" workers for bursts.
* **Billing explorer**: Inspect costs by resource, region, and time to identify optimization opportunities.
## Team governance, storage expansion, and better debugging
* [Teams](/get-started/manage-accounts): Organization workspaces with role-based access control for Pods, endpoints, and billing.
* [Savings plans](/pods/pricing): Plans surfaced prominently in console with easier purchase and management for steady usage.
* **Network storage to US-KS-1**: Enable network volumes in US-KS-1 for local, persistent data workflows.
* [Serverless log view](/serverless/development/logs): Stream worker stdout and stderr in the UI and API for real-time debugging.
* **Serverless health endpoint**: Lightweight /health probe returning endpoint and worker status without creating a billable job.
* **SOC 2 Type II compliant**: Security and compliance certification for enterprise customers.
## Observability, top-tier GPUs, and commitment-based savings
* **Serverless metrics page**: Time-series charts for pXX latencies, queue delay, throughput, and worker states for faster debugging and tuning.
* [H100s on Runpod](/references/gpu-types): NVIDIA H100 instances for higher throughput and larger model footprints.
* [Savings plans](/pods/pricing): Commitment-based discounts for predictable workloads to lower effective hourly rates.
## Smoother auth and multi-region Serverless with persistent storage
* **The new and improved Runpod login experience**: Streamlined sign-in and team access for faster, more consistent auth flows.
* [Network volumes added to Serverless](/storage/network-volumes): Attach persistent storage to Serverless workers to retain models and artifacts across restarts and speed cold starts through caching.
* **Serverless region support**: Pin or allow specific regions for endpoints to reduce latency and meet data-residency needs.
## Deeper autoscaling controls, richer metrics, persistent storage, and job cancellation
* **Serverless scaling strategies**: Scale by queue delay and/or concurrency with min/max worker bounds to balance latency and cost.
* **Queue delay**: Expose time-in-queue as a first-class metric to drive autoscaling and SLO monitoring.
* **Request count**: Track success and failure totals over windows for quick health checks and alerting.
* **runsync**: Synchronous invocation path that returns results in the same HTTP call for short-running jobs.
* **Network storage beta**: Region-scoped, attachable volumes shareable across Pods and endpoints for model caches and datasets.
* **Job cancel API**: Programmatically terminate queued or running jobs to free capacity and enforce client timeouts.
## Serverless platform hardens with cleaner API
* **Serverless API v2**: Revised request and response schema with improved error semantics and new endpoints for better control over job lifecycle and observability.
## Better control over notifications and GPU allocation
* **Notification preferences**: Configure which platform events trigger alerts to reduce noise for teams and CI systems.
* **GPU priorities**: Influence scheduling by marking workloads as higher priority to reduce queue time for critical jobs.
## Encrypted volumes for persistent data
* **Runpod now offers encrypted volumes**: Enable at-rest encryption for persistent volumes with no application changes required using platform-managed keys.
---
# Source: https://docs.runpod.io/api-reference/pods/POST/pods/podId/reset.md
> ## Documentation Index
> Fetch the complete documentation index at: https://docs.runpod.io/llms.txt
> Use this file to discover all available pages before exploring further.
# Reset a Pod
> Reset a Pod.
## OpenAPI
````yaml POST /pods/{podId}/reset
openapi: 3.0.3
info:
title: Runpod API
description: Public Rest API for managing Runpod programmatically.
version: 0.1.0
contact:
name: help
url: https://contact.runpod.io/hc/requests/new
email: help@runpod.io
servers:
- url: https://rest.runpod.io/v1
security:
- ApiKey: []
tags:
- name: docs
description: This documentation page.
- name: pods
description: Manage Pods.
- name: endpoints
description: Manage Serverless endpoints.
- name: network volumes
description: Manage Runpod network volumes.
- name: templates
description: Manage Pod and Serverless templates.
- name: container registry auths
description: >-
Manage authentication for container registries such as dockerhub to use
private images.
- name: billing
description: Retrieve billing history for your Runpod account.
externalDocs:
description: Find out more about Runpod.
url: https://runpod.io
paths:
/pods/{podId}/reset:
post:
tags:
- pods
summary: Reset a Pod
description: Reset a Pod.
operationId: ResetPod
parameters:
- name: podId
in: path
description: Pod ID to reset.
required: true
schema:
type: string
responses:
'200':
description: Pod successfully reset.
'400':
description: Invalid Pod ID.
'401':
description: Unauthorized.
components:
securitySchemes:
ApiKey:
type: http
scheme: bearer
bearerFormat: Bearer
````
---
# Source: https://docs.runpod.io/api-reference/pods/POST/pods/podId/restart.md
> ## Documentation Index
> Fetch the complete documentation index at: https://docs.runpod.io/llms.txt
> Use this file to discover all available pages before exploring further.
# Restart a pod
> Restart a Pod.
## OpenAPI
````yaml POST /pods/{podId}/restart
openapi: 3.0.3
info:
title: Runpod API
description: Public Rest API for managing Runpod programmatically.
version: 0.1.0
contact:
name: help
url: https://contact.runpod.io/hc/requests/new
email: help@runpod.io
servers:
- url: https://rest.runpod.io/v1
security:
- ApiKey: []
tags:
- name: docs
description: This documentation page.
- name: pods
description: Manage Pods.
- name: endpoints
description: Manage Serverless endpoints.
- name: network volumes
description: Manage Runpod network volumes.
- name: templates
description: Manage Pod and Serverless templates.
- name: container registry auths
description: >-
Manage authentication for container registries such as dockerhub to use
private images.
- name: billing
description: Retrieve billing history for your Runpod account.
externalDocs:
description: Find out more about Runpod.
url: https://runpod.io
paths:
/pods/{podId}/restart:
post:
tags:
- pods
summary: Restart a Pod
description: Restart a Pod.
operationId: RestartPod
parameters:
- name: podId
in: path
description: Pod ID to restart.
required: true
schema:
type: string
responses:
'400':
description: Invalid Pod ID.
'401':
description: Unauthorized.
components:
securitySchemes:
ApiKey:
type: http
scheme: bearer
bearerFormat: Bearer
````
---
# Source: https://docs.runpod.io/hub/revenue-sharing.md
> ## Documentation Index
> Fetch the complete documentation index at: https://docs.runpod.io/llms.txt
> Use this file to discover all available pages before exploring further.
# Revenue sharing
> Earn Runpod credits from your repositories published to the Runpod Hub.
Starting in September 2025, every repository [published to the Runpod Hub](/hub/publishing-guide) automatically generates revenue for its maintainers. When users deploy your repositories from the Hub to run on Runpod infrastructure, you earn up to 7% of the compute revenue they generate, paid directly to your Runpod credit balance.
### How it works
Revenue share is calculated based on the total compute hours generated by users running your repositories each month. The percentage you earn depends on your monthly usage tier, with higher tiers offering better revenue rates.
1. Users deploy your repos: When users find and deploy your repositories from the Hub, they generate compute hours on Runpod infrastructure.
2. Usage is tracked: The platform tracks all compute hours generated by deployments of your repositories.
3. Monthly calculations: At the end of each month, your total compute hours are calculated and assigned to a revenue tier.
4. Credits deposited: Your revenue share is automatically deposited into your Runpod account balance.
### Revenue tiers
Revenue tiers reset monthly based on the total compute hours generated by all your published repositories:
* 10,000+ hours: 7% revenue share
* 5,000-9,999 hours: 5% revenue share
* 1,000-4,999 hours: 3% revenue share
* 100-999 hours: 1% revenue share
* Below 100 hours: 0% revenue share
For example, if users generate 2,500 compute hours using your repositories in a month, you would earn \$75 in Runpod credits from those hours (3% of the total compute revenue).
### Requirements
To participate in the revenue sharing program, you must:
1. Link your GitHub profile: Connect your Runpod account to your GitHub profile for verified maintainer status. This ensures you receive credits for repositories you maintain.
2. Have published repositories: Your repositories must be successfully published and approved in the Hub.
3. Maintain active repositories: Keep your repositories up to date with working releases.
### Payment timing
Credits are deposited into your Runpod account balance during the first week of each month. Revenue is calculated based on the previous month's activity.
---
# Source: https://docs.runpod.io/tutorials/pods/run-fooocus.md
> ## Documentation Index
> Fetch the complete documentation index at: https://docs.runpod.io/llms.txt
> Use this file to discover all available pages before exploring further.
# Run Fooocus in Jupyter Notebook
## Overview
Fooocus is an open-source image generating model.
In this tutorial, you'll run Fooocus in a Jupyter Notebook and then launch the Gradio-based interface to generate images.
Time to complete: \~5 minutes
## Prerequisites
The minimal requirement to run Fooocus is:
* 4GB Nvidia GPU memory (4GB VRAM)
* 8GB system memory (8GB RAM)
## Runpod infrastructure
1. Select **Pods** and choose **+ GPU Pod**.
2. Choose a GPU instance with at least 4GB VRAM and 8GB RAM by selecting **Deploy**.
3. Search for a template that includes **Jupyter Notebook** and select **Deploy**.
* Select **Runpod Pytorch 2**.
* Ensure **Start Jupyter Notebook** is selected.
4. Select **Choose** and then **Deploy**.
## Run the notebook
1. Select **Connect to Jupyter Lab**.
2. In the Jupyter Lab file browser, select **File > New > Notebook**.
3. In the first cell, paste the following and then run the Notebook.
```bash theme={"theme":{"light":"github-light","dark":"github-dark"}}
!pip install pygit2==1.12.2
!pip install opencv-python==4.9.0.80
%cd /workspace
!git clone https://github.com/lllyasviel/Fooocus.git
%cd /workspace/Fooocus
!python entry_with_update.py --share
```
## Launch UI
Look for the line:
```javascript theme={"theme":{"light":"github-light","dark":"github-dark"}}
App started successful. Use the app with ....
```
And select the link.
## Explore the model
Explore and run the model.
---
# Source: https://docs.runpod.io/tutorials/serverless/run-gemma-7b.md
> ## Documentation Index
> Fetch the complete documentation index at: https://docs.runpod.io/llms.txt
> Use this file to discover all available pages before exploring further.
# Run Google'S Gemma Model
This tutorial walks you through running Google's Gemma model using Runpod's vLLM Worker. Throughout this tutorial, you'll learn to set up a Serverless Endpoint with a gated large language model (LLM).
## Prerequisites
Before diving into the deployment process, gather the necessary tokens and accepting Google's terms. This step ensures that you have access to the model and are in compliance with usage policies.
* [Hugging Face access token](https://huggingface.co/settings/tokens)
* [Accepting Google's terms of service](https://huggingface.co/google/gemma-7b)
The next section will guide you through Setting up your Serverless Endpoint with Runpod.
## Get started
To begin, we'll deploy a vLLM Worker as a Serverless Endpoint. Runpod simplifies the process of running large language models, offering an alternative to the more complex Docker and Kubernetes deployment methods.
Follow these steps in the Runpod Serverless console to create your Endpoint.
1. Log in to the [Runpod Serverless console](https://www.console.runpod.io/serverless).
2. Select **+ New Endpoint**.
3. Provide the following:
i. Endpoint name.
ii. Select a GPU.
iii. Configure the number of Workers.
iv. (optional) Select **FlashBoot**.
v. Enter the vLLM Worker image: `runpod/worker-vllm:stable-cuda11.8.0` or `runpod/worker-vllm:stable-cuda12.1.0`.
vi. Specify enough storage for your model.
vii. Add the following environment variables:
a. `MODEL_NAME`: `google/gemma-7b-it`.
b. `HF_TOKEN`: your Hugging Face API token for private models.
4. Select **Deploy**.
Once the Endpoint initializes, you can send a request to your [Endpoint](/serverless/endpoints/send-requests). You've now successfully deployed your model, a significant milestone in utilizing Google's Gemma model. As we move forward, the next section will focus on interacting with your model.
## Interact with your model
With the Endpoint up and running, it's time to leverage its capabilities by sending requests to interact with the model. This section demonstrates how to use OpenAI APIs to communicate with your model.
In this example, you'll create a Python chat bot using the `OpenAI` library; however, you can use any programming language and any library that supports HTTP requests.
Here's how to get started:
Use the `OpenAI` class to interact with the model. The `OpenAI` class takes the following parameters:
* `base_url`: The base URL of the Serverless Endpoint.
* `api_key`: Your Runpod API key.
```javascript theme={"theme":{"light":"github-light","dark":"github-dark"}}
from openai import OpenAI
import os
client = OpenAI(
base_url=os.environ.get("RUNPOD_BASE_URL"),
api_key=os.environ.get("RUNPOD_API_KEY"),
)
```
Set your environment variables `RUNPOD_BASE_URL` and `RUNPOD_API_KEY` to your Runpod API key and base URL. Your `RUNPOD_BASE_URL` will be in the form of:
```
https://api.runpod.ai/v2/${RUNPOD_ENDPOINT_ID}/openai/v1
```
Where `${RUNPOD_ENDPOINT_ID}` is the ID of your Serverless Endpoint.
Next, you can use the `client` to interact with the model. For example, you can use the `chat.completions.create` method to generate a response from the model.
Provide the following parameters to the `chat.completions.create` method:
* `model`: `The model name`.
* `messages`: A list of messages to send to the model.
* `max_tokens`: The maximum number of tokens to generate.
* `temperature`: The randomness of the generated text.
* `top_p`: The cumulative probability of the generated text.
* `max_tokens`: The maximum number of tokens to generate.
```python theme={"theme":{"light":"github-light","dark":"github-dark"}}
messages = [
{
"role": "assistant",
"content": "Hello, I'm your assistant. How can I help you today?",
}
]
def display_chat_history(messages):
for message in messages:
print(f"{message['role'].capitalize()}: {message['content']}")
def get_assistant_response(messages):
r = client.chat.completions.create(
model="google/gemma-7b-it",
messages=[{"role": m["role"], "content": m["content"]} for m in messages],
temperature=0.7,
top_p=0.8,
max_tokens=100,
)
response = r.choices[0].message.content
return response
while True:
display_chat_history(messages)
prompt = input("User: ")
messages.append({"role": "user", "content": prompt})
response = get_assistant_response(messages)
messages.append({"role": "assistant", "content": response})
```
Congratulations! You've successfully set up a Serverless Endpoint and interacted with Google's Gemma model. This tutorial has shown you the essentials of deploying a model on Runpod and creating a simple application to communicate with it. You've taken important steps towards integrating large language models into your projects.
---
# Source: https://docs.runpod.io/tutorials/serverless/run-ollama-inference.md
> ## Documentation Index
> Fetch the complete documentation index at: https://docs.runpod.io/llms.txt
> Use this file to discover all available pages before exploring further.
# Run an Ollama Server on a Runpod CPU
In this guide, you will learn how to run an Ollama server on your Runpod CPU for inference. Although this tutorial focuses on CPU compute, you can also select a GPU type and follow the same steps. By the end of this tutorial, you will have a fully functioning Ollama server ready to handle requests.
## Setting up your Endpoint
Use a [Network volume](/storage/network-volumes) to attach to your Worker so that it can cache the LLM and decrease cold start times. If you do not use a network volume, the Worker will have to download the model every time it spins back up, leading to increased latency and resource consumption.
To begin, you need to set up a new endpoint on Runpod.
1. Log in to your [Runpod account](https://www.console.runpod.io/console/home).
2. Navigate to the **Serverless** section and select **New Endpoint**.
3. Choose **CPU** and provide a name for your Endpoint, for example 8 vCPUs 16 GB RAM.
4. Configure your Worker settings according to your needs.
5. In the **Container Image** field, enter the `pooyaharatian/runpod-ollama:0.0.8` container image.
6. In the **Container Start Command** field, specify the [Ollama supported model](https://ollama.com/library), such as `orca-mini` or `llama3.1`.
7. Allocate sufficient container disk space for your model. Typically, 20 GB should suffice for most models.
8. (optional) In **Environment Variables**, set a new key to `OLLAMA_MODELS` and its value to `/runpod-volume`. This will allow the model to be stored to your attached volume.
9. Click **Deploy** to initiate the setup.
Your model will start downloading. Once the Worker is ready, proceed to the next step.
## Sending a Run request
After your endpoint is deployed and the model is downloaded, you can send a run request to test the setup.
1. Go to the **Requests** section in the Runpod web UI.
2. In the input module, enter the following JSON object:
```json theme={"theme":{"light":"github-light","dark":"github-dark"}}
{
"input": {
"method_name": "generate",
"input": {
"prompt": "why the sky is blue?"
}
}
}
```
3. Select **Run** to execute the request.
4. In a few seconds, you will receive a response. For example:
```json theme={"theme":{"light":"github-light","dark":"github-dark"}}
{
"delayTime": 153,
"executionTime": 4343,
"id": "c2cb6af5-c822-4950-bca9-5349288c001d-u1",
"output": {
"context": [
"omitted for brevity"
],
"created_at": "2024-05-17T16:56:29.256938735Z",
"done": true,
"eval_count": 118,
"eval_duration": 807433000,
"load_duration": 3403140284,
"model": "orca-mini",
"prompt_eval_count": 46,
"prompt_eval_duration": 38548000,
"response": "The sky appears blue because of a process called scattering. When sunlight enters the Earth's atmosphere, it encounters molecules of air such as nitrogen and oxygen. These molecules scatter the light in all directions, but they scatter the shorter wavelengths of light (such as violet and blue) more than the longer wavelengths (such as red). This creates a reddish-orange sky that is less intense on the horizon than on the observer's position. As the sun gets lower in the sky, the amount of scattering increases and the sky appears to get brighter.",
"total_duration": 4249684714
},
"status": "COMPLETED"
}
```
With your Endpoint set up, you can now integrate it into your application just like any other request.
## Conclusion
In this tutorial, you have successfully set up and run an Ollama server on a Runpod CPU. Now you can handle inference requests using your deployed model.
For further exploration, check out the following resources:
* [Runpod Ollama repository](https://github.com/pooyahrtn/)
* [Runpod Ollama container image](https://hub.docker.com/r/pooyaharatian/runpod-ollama)
---
# Source: https://docs.runpod.io/tutorials/pods/run-ollama.md
> ## Documentation Index
> Fetch the complete documentation index at: https://docs.runpod.io/llms.txt
> Use this file to discover all available pages before exploring further.
# Set up Ollama on your GPU Pod
This tutorial will guide you through setting up [Ollama](https://ollama.com), a powerful platform serving large language model, on a GPU Pod using Runpod. Ollama makes it easy to run, create, and customize models.
However, not everyone has access to the compute power needed to run these models. With Runpod, you can spin up and manage GPUs in the Cloud. Runpod offers templates with preinstalled libraries, which makes it quick to run Ollama.
In the following tutorial, you'll set up a Pod on a GPU, install and serve the Ollama model, and interact with it on the CLI.
## Prerequisites
The tutorial assumes you have a Runpod account with credits. No other prior knowledge is needed to complete this tutorial.
## Step 1: Start a PyTorch Template on Runpod
You will create a new Pod with the PyTorch template. In this step, you will set overrides to configure Ollama.
1. Log in to your [Runpod account](https://www.console.runpod.io/pods) and choose **+ GPU Pod**.
2. Choose a GPU Pod like `A40`.
3. From the available templates, select the lastet PyTorch template.
4. Select **Customize Deployment**.
1. Add the port `11434` to the list of exposed ports. This port is used by Ollama for HTTP API requests.
2. Add the following environment variable to your Pod to allow Ollama to bind to the HTTP port:
* Key: `OLLAMA_HOST`
* Value: `0.0.0.0`
5. Select **Set Overrides**, **Continue**, then **Deploy**.
This setting configures Ollama to listen on all network interfaces, enabling external access through the exposed port. For detailed instructions on setting environment variables, refer to the [Ollama FAQ documentation](https://github.com/ollama/ollama/blob/main/docs/faq.md#setting-environment-variables-on-linux).
Once the Pod is up and running, you'll have access to a terminal within the Runpod interface.
## Step 2: Install Ollama
Now that your Pod is running, you can Log in to the web terminal. The web terminal is a powerful way to interact with your Pod.
1. Select **Connect** and choose **Start Web Terminal**.
2. Make note of the **Username** and **Password**, then select **Connect to Web Terminal**.
3. Enter your username and password.
4. To ensure Ollama can automatically detect and utilize your GPU, run the following commands.
```bash theme={"theme":{"light":"github-light","dark":"github-dark"}}
apt update
apt install lshw
```
5. Run the following command to install Ollama and send to the background:
```javascript theme={"theme":{"light":"github-light","dark":"github-dark"}}
(curl -fsSL https://ollama.com/install.sh | sh && ollama serve > ollama.log 2>&1) &
```
This command fetches the Ollama installation script and executes it, setting up Ollama on your Pod. The `ollama serve` part starts the Ollama server, making it ready to serve AI models.
Now that your Ollama server is running on your Pod, add a model.
## Step 3: Run an AI Model with Ollama
To run an AI model using Ollama, pass the model name to the `ollama run` command:
```bash theme={"theme":{"light":"github-light","dark":"github-dark"}}
ollama run [model name]
# ollama run llama2
# ollama run mistral
```
Replace `[model name]` with the name of the AI model you wish to deploy. For a complete list of models, see the [Ollama Library](https://ollama.com/library).
This command pulls the model and runs it, making it accessible for inference. You can begin interacting with the model directly from your web terminal.
Optionally, you can set up an HTTP API request to interact with Ollama. This is covered in the [next step](#step-4-interact-with-ollama-via-http-api).
## Step 4: Interact with Ollama via HTTP API
With Ollama set up and running, you can now interact with it using HTTP API requests. In step 1.4, you configured Ollama to listen on all network interfaces. This means you can use your Pod as a server to receive requests.
### Get a list of models
To list the local models available in Ollama, you can use the following GET request:
```bash theme={"theme":{"light":"github-light","dark":"github-dark"}}
curl https://{POD_ID}-11434.proxy.runpod.net/api/tags
# curl https://cmko4ns22b84xo-11434.proxy.runpod.net/api/tags
```
Replace `[your-pod-id]` with your actual Pod Id.
```json theme={"theme":{"light":"github-light","dark":"github-dark"}}
{
"models": [
{
"name": "mistral:latest",
"model": "mistral:latest",
"modified_at": "2024-02-16T18:22:39.948000568Z",
"size": 4109865159,
"digest": "61e88e884507ba5e06c49b40e6226884b2a16e872382c2b44a42f2d119d804a5",
"details": {
"parent_model": "",
"format": "gguf",
"family": "llama",
"families": [
"llama"
],
"parameter_size": "7B",
"quantization_level": "Q4_0"
}
}
]
}
```
Getting a list of available models is great, but how do you send an HTTP request to your Pod?
### Make requests
To make an HTTP request against your Pod, you can use the Ollama interface with your Pod Id.
```javascript theme={"theme":{"light":"github-light","dark":"github-dark"}}
curl -X POST https://{POD_ID}-11434.proxy.runpod.net/api/generate -d '{
"model": "mistral",
"prompt":"Here is a story about llamas eating grass"
}'
```
Replace `[your-pod-id]` with your actual Pod Id.
Because port `11434` is exposed, you can make requests to your Pod using the `curl` command.
For more information on constructing HTTP requests and other operations you can perform with the Ollama API, consult the [Ollama API documentation](https://github.com/ollama/ollama/blob/main/docs/api.md).
## Additional considerations
This tutorial provides a foundational understanding of setting up and using Ollama on a GPU Pod with Runpod.
* **Port Configuration and documentation**: For further details on exposing ports and the link structure, refer to the [Runpod documentation](/pods/configuration/expose-ports).
* **Connect VSCode to Runpod**: For information on connecting VSCode to Runpod, refer to the [How to Connect VSCode To Runpod](https://blog.runpod.io/how-to-connect-vscode-to-runpod/).
By following these steps, you can deploy AI models efficiently and interact with them through HTTP API requests, harnessing the power of GPU acceleration for your AI projects.
---
# Source: https://docs.runpod.io/tutorials/serverless/run-your-first.md
# Source: https://docs.runpod.io/tutorials/pods/run-your-first.md
# Source: https://docs.runpod.io/tutorials/serverless/run-your-first.md
# Source: https://docs.runpod.io/tutorials/pods/run-your-first.md
> ## Documentation Index
> Fetch the complete documentation index at: https://docs.runpod.io/llms.txt
> Use this file to discover all available pages before exploring further.
# Run LLMs with JupyterLab using the transformers library
> Learn how to run inference on the SmolLM3 model in JupyterLab using the transformers library.
This tutorial shows how to deploy a Pod and use JupyterLab to generate text with the SmolLM3 model using the Python `transformers` library.
[SmolLM3](https://huggingface.co/docs/transformers/en/model_doc/smollm3) is a family of small language models developed by Hugging Face that provides strong performance while being efficient enough to run on modest hardware.
The 3B parameter model we'll use in this tutorial requires only 24 GB of VRAM, making it accessible for experimentation and development.
## What you'll learn
In this tutorial, you'll learn how to:
* Deploy a Pod with the PyTorch template.
* Access the web terminal and JupyterLab services.
* Install the transformers and accelerate libraries.
* Use SmolLM3 for text generation in a Python notebook.
* Configure model parameters for different use cases.
## Requirements
Before you begin, you'll need:
* A [Runpod account](/get-started/manage-accounts).
* At least \$5 in Runpod credits.
* Basic familiarity with Python and Jupyter notebooks.
## Step 1: Deploy a Pod with PyTorch template
First, you'll deploy a Pod using the official Runpod PyTorch template:
1. Navigate to the [Pods page](https://console.runpod.io/pods) in the Runpod console.
2. Click **Deploy** to create a new Pod.
3. In the template selection, choose latest the **Runpod PyTorch** template (this should be the default setting).
4. For GPU selection, choose any GPU with 24 GB or more VRAM. Good options include:
* RTX 4090 (24 GB VRAM)
* RTX A5000 (24 GB VRAM)
* L40 (48 GB VRAM)
5. Keep all the other settings on their defaults.
6. Click **Deploy On-Demand** to create your Pod.
Wait for your Pod to initialize. This typically takes 2-5 minutes.
## Step 2: Install required packages
Once your Pod is running, you'll need to install the `transformers` and `accelerate` Python libraries:
1. In the Runpod console, find and expand your deployed Pod and click **Connect**.
2. Under **Web Terminal**, click **Start** to start the terminal service.
3. Click **Open Web Terminal** to open a terminal session in your browser.
4. In the terminal, install the required packages by running:
```bash theme={"theme":{"light":"github-light","dark":"github-dark"}}
pip install transformers accelerate
```
## Step 3: Open JupyterLab
Next we'll prepare our JupyterLab coding environment:
1. Go back to the Runpod console and click **Connect** on your Pod again.
2. Under **HTTP Services**, click **Connect to HTTP Service \[Port 8888]** to open JupyterLab.
3. If the JupyterLab service shows as "Not Ready", wait a moment and refresh the page.
JupyterLab will open in a new browser tab, providing you with an interactive Python environment.
## Step 4: Create and run your SmolLM3 notebook
In JupyterLab, create a new notebook to perform inference using the SmolLM3 model:
1. In JupyterLab, click **File** > **New** > **Notebook**.
2. Select **Python 3 (ipykernel)** when prompted for the kernel.
3. In the first cell of your notebook, enter the following code:
```python theme={"theme":{"light":"github-light","dark":"github-dark"}}
import torch
from transformers import pipeline
# Create a text generation pipeline with SmolLM3
pipe = pipeline(
task="text-generation",
model="HuggingFaceTB/SmolLM3-3B",
torch_dtype=torch.bfloat16,
device_map=0
)
# Define a conversation with system and user messages
messages = [
{"role": "system", "content": "You are a helpful assistant."},
{"role": "user", "content": "I'm a developer interested in LLMs. Can you suggest some research topics to get started?"},
]
# Generate text with the model
outputs = pipe(messages, max_new_tokens=500, do_sample=True, temperature=0.7, top_k=50, top_p=0.95)
# Print the generated response
print(outputs[0]["generated_text"][-1]['content'])
```
4. Run the cell by pressing Cmd + Enter (Mac) or Ctrl + Enter (Windows) or clicking the **Run** button.
The first time you run this code, it will download the SmolLM3 model (approximately 6 GB), which may take a minute or two depending on your Pod's internet connection. Subsequent runs will be much faster, as the model will be cached locally.
Most likely the response will be truncated—you can increase `max_new_tokens` and run the cell again to get a longer response (it will just take longer to run).
## Step 5: Understanding the code
Let's break down the key components of the code we just ran:
* `pipeline()`: Creates a high-level interface for text generation.
* `model="HuggingFaceTB/SmolLM3-3B"`: Specifies the model to use.
* `torch_dtype=torch.bfloat16`: Uses 16-bit floating point for memory efficiency.
* `device_map=0`: Automatically places the model on the first available GPU.
* `messages`: Defines a chat-like conversation with system and user roles.
For more detailed information about SmolLM3's capabilities and parameters, see the [official SmolLM3 documentation](https://huggingface.co/docs/transformers/en/model_doc/smollm3?usage=Pipeline#transformers.SmolLM3Model).
## Step 6: Experiment with different prompts and parameters
Once your model is loaded, you can experiment with different prompts and generation parameters:
### Try different conversation topics
Try running the following code in a new cell:
```python theme={"theme":{"light":"github-light","dark":"github-dark"}}
# Example: Ask for creative writing
messages = [
{"role": "system", "content": "You are a creative writing assistant."},
{"role": "user", "content": "Write the opening paragraph for a mystery story that begins in a library after closing time."},
]
outputs = pipe(messages, max_new_tokens=300, do_sample=True, temperature=0.8)
print(outputs[0]["generated_text"][-1]['content'])
```
### Adjust generation parameters
You can modify various parameters to control the model's output:
* `max_new_tokens`: Controls the maximum length of the generated text
* `temperature`: Controls randomness (0.1 = more focused, 1.0 = more creative)
* `top_k`: Limits the vocabulary to the top K most likely tokens
* `top_p`: Uses nucleus sampling to control diversity
Try running this in a new cell to see how the output changes:
```python theme={"theme":{"light":"github-light","dark":"github-dark"}}
# More focused and deterministic output
outputs = pipe(messages, max_new_tokens=150, do_sample=True, temperature=0.3, top_p=0.9)
print(outputs[0]["generated_text"][-1]['content'])
```
### Use single-turn prompts
You can also use SmolLM3 for simple text completion without the chat format:
```python theme={"theme":{"light":"github-light","dark":"github-dark"}}
# Simple text completion
prompt = "The process of photosynthesis is crucial for life on Earth because it allows plants to convert"
outputs = pipe(prompt, max_new_tokens=100, do_sample=True, temperature=0.3)
print(outputs[0]["generated_text"])
```
## Troubleshooting
Here are solutions to common issues:
* **Out of memory errors**: Ensure you're using a GPU with at least 24 GB VRAM, or try reducing the batch size.
* **Model download fails**: Check your internet connection and try running the cell again.
* **JupyterLab not accessible**: Wait a few minutes after Pod deployment for services to fully start. If the JupyterLab tab is blank when you open it, try stopping and then restarting the Pod.
* **Import errors**: Make sure you installed the packages in step 2 using the web terminal.
## Next steps
Now that you have SmolLM3 running, you can explore more advanced use cases:
* **Integration with applications**: Use SmolLM3 as part of larger applications by integrating it with web frameworks or APIs.
* **Model comparison**: Try other models in the SmolLM3 family or compare with other small language models to find the best fit for your use case.
* **Persistent storage**: If you plan to work with SmolLM3 regularly, consider using a [network volume](/storage/network-volumes) to persist your models and notebooks across Pod sessions.
---
# Source: https://docs.runpod.io/tutorials/sdks/python/get-started/running-locally.md
> ## Documentation Index
> Fetch the complete documentation index at: https://docs.runpod.io/llms.txt
> Use this file to discover all available pages before exploring further.
# Running code locally
Before deploying your serverless functions to the cloud, it's crucial to test them locally. In the previous lesson, [Hello World with Runpod](/tutorials/sdks/python/get-started/hello-world), you created a Python file called `hello_world.py`.
In this guide, you'll learn how to run your Runpod serverless applications on your local machine using the Runpod Python SDK.
## Understanding Runpod's Local Testing Environment
When you run your code locally using the Runpod Python SDK, here's what happens behind the scenes:
* FastAPI Server: The SDK spins up a FastAPI server on your local machine. This server simulates the Runpod serverless environment.
* Request Handling: The FastAPI server receives and processes requests just like the cloud version would, allowing you to test your function's input handling and output generation.
* Environment Simulation: The local setup mimics key aspects of the Runpod serverless environment, helping ensure your code will behave similarly when deployed.
## Running Your Code Locally
Let's walk through how to run your serverless functions locally using the Runpod Python SDK.
### Options for Passing Information to Your API
The Runpod Python SDK offers two main methods for sending data to your local FastAPI server:
1. Using a JSON file
2. Using inline JSON via command line
Both methods allow you to simulate how your function would receive data in the actual cloud environment.
### Using a JSON File
1. Create a JSON file:
Create a file called `test_input.json` with your test data:
```json test_input.json theme={"theme":{"light":"github-light","dark":"github-dark"}}
{
"input": {
"name": "World"
}
}
```
2. Run the serverless function:
Execute your `hello_world.py` script with the `--rp_server_api` flag:
```bash theme={"theme":{"light":"github-light","dark":"github-dark"}}
python hello_world.py --rp_server_api
```
The SDK will automatically look for and use the `test_input.json` file in the current directory.
### Using Inline JSON
You can also pass your test data directly via the command line:
```bash theme={"theme":{"light":"github-light","dark":"github-dark"}}
python hello_world.py --test_input '{"input": {"name": "World"}}'
```
This method is useful for quick tests or when you want to vary the input without editing a file.
### Understanding the output
When you run your function locally, you'll see output similar to this:
```bash theme={"theme":{"light":"github-light","dark":"github-dark"}}
--- Starting Serverless Worker | Version 1.6.2 ---
INFO | Using test_input.json as job input.
DEBUG | Retrieved local job: {'input': {'name': 'World'}, 'id': 'local_test'}
INFO | local_test | Started.
DEBUG | local_test | Handler output: Hello World!
DEBUG | local_test | run_job return: {'output': 'Hello World!'}
INFO | Job local_test completed successfully.
INFO | Job result: {'output': 'Hello World!'}
INFO | Local testing complete, exiting.
```
This output provides valuable information:
* Confirmation that the Serverless Worker started successfully
* Details about the input data being used
* Step-by-step execution of your function
* The final output and job status
By analyzing this output, you can verify that your function is behaving as expected and debug any issues that arise.
### Key Takeaways
* Local testing with the Runpod Python SDK allows you to simulate the cloud environment on your machine.
* The SDK creates a FastAPI server to mock the serverless function execution.
* You can provide input data via a JSON file or inline JSON in the command line.
* Local testing accelerates development, reduces costs, and helps catch issues early.
Next, we'll explore the structure of Runpod handlers in more depth, enabling you to create more sophisticated serverless functions.
---
# Source: https://docs.runpod.io/community-solutions/runpod-network-volume-storage-tool.md
> **Documentation Index**
> Fetch the complete documentation index at: https://docs.runpod.io/llms.txt
> Use this file to discover all available pages before exploring further.
## Network volume storage tool
A command-line tool for managing Runpod network storage volumes and files
GitHub repository: [github.com/justinwlin/Runpod-Network-Volume-Storage-Tool](https://github.com/justinwlin/Runpod-Network-Volume-Storage-Tool)
Runpod provides an [S3-compatible layer](/serverless/storage/s3-api) for network volumes, enabling object storage operations on your network storage. This community tool makes it easy to interact with that S3 layer through three interfaces: a command-line interface, a Python SDK for programmatic access, and a self-hosted REST API server for integration with other applications.
## Requirements
* Python 3.8 or higher.
* Runpod API key from [console settings](https://console.runpod.io/user/settings).
* S3 API keys (access key and secret key) for file operations.
## Installation
Clone the repository and install dependencies:
```bash theme={"theme":{"light":"github-light","dark":"github-dark"}}
git clone https://github.com/justinwlin/Runpod-Network-Volume-Storage-Tool.git
cd Runpod-Network-Volume-Storage-Tool
# Install dependencies with uv
uv sync
```
## Configuration
Set your API credentials as environment variables:
```bash theme={"theme":{"light":"github-light","dark":"github-dark"}}
export RUNPOD_API_KEY="your_runpod_api_key"
export RUNPOD_S3_ACCESS_KEY="your_s3_access_key"
export RUNPOD_S3_SECRET_KEY="your_s3_secret_key"
```
## Interactive mode
The interactive mode provides a menu-driven interface:
```bash theme={"theme":{"light":"github-light","dark":"github-dark"}}
uv run runpod-storage interactive
```
Features include volume management, file upload/download, and an interactive file browser with navigation and selection modes.
## Command line usage
Manage volumes directly from the command line:
```bash theme={"theme":{"light":"github-light","dark":"github-dark"}}
# List volumes
uv run runpod-storage list-volumes
# Create a volume
uv run runpod-storage create-volume --name "my-storage" --size 50 --datacenter EU-RO-1
# Upload files
uv run runpod-storage upload /path/to/file.txt volume-id
uv run runpod-storage upload /path/to/directory volume-id
# Download files
uv run runpod-storage download volume-id remote/file.txt
```
## Python SDK
The SDK provides programmatic access to all features:
```python theme={"theme":{"light":"github-light","dark":"github-dark"}}
from runpod_storage import RunpodStorageAPI
api = RunpodStorageAPI()
# List volumes
volumes = api.list_volumes()
# Create volume
volume = api.create_volume(
name="ml-datasets",
size=100,
datacenter="EU-RO-1"
)
# Upload with automatic chunk size optimization
api.upload_file("data.csv", volume_id, "datasets/data.csv")
# Upload directory with progress tracking
def progress_callback(current, total, filename):
percent = (current / total) * 100
print(f"[{current}/{total}] {percent:.1f}% - Uploading: {filename}")
api.upload_directory(
"my_project/",
volume_id,
"projects/my_project/",
progress_callback=progress_callback
)
```
## API server
Run a REST API server that proxies to Runpod's API:
```bash theme={"theme":{"light":"github-light","dark":"github-dark"}}
uv run runpod-storage-server --host 0.0.0.0 --port 8000
```
---
# Source: https://docs.runpod.io/runpodctl/reference/runpodctl-config.md
> **Documentation Index**
> Fetch the complete documentation index at: https://docs.runpod.io/llms.txt
> Use this file to discover all available pages before exploring further.
## config
Configure the Runpod CLI with your API credentials and API URL to enable programmatic access to your Runpod resources.
```sh Command theme={"theme":{"light":"github-light","dark":"github-dark"}}
runpodctl config [flags]
```
## Example
Configure the CLI with your API key:
```sh theme={"theme":{"light":"github-light","dark":"github-dark"}}
runpodctl config \
--apiKey "rpaPOIUYYULKDSALVIUT3Q2ZRKZ98IUYTSK2OQQ2CWQxkd01"
```
## Flags
Your Runpod API key, which authenticates the CLI to access your account. You can generate an API key from the [Runpod console](https://www.runpod.io/console/user/settings).
The Runpod API endpoint URL. The default value should work for most users.
---
# Source: https://docs.runpod.io/runpodctl/reference/runpodctl-create-pod.md
> **Documentation Index**
> Fetch the complete documentation index at: https://docs.runpod.io/llms.txt
> Use this file to discover all available pages before exploring further.
## create pod
Create and start a new Pod on Runpod with configuration options for GPU type, storage, networking, and cloud tier.
```sh Command theme={"theme":{"light":"github-light","dark":"github-dark"}}
runpodctl create pod [flags]
```
## Example
Create a Pod with 2 RTX 4090 GPUs in the Secure Cloud with a custom container image:
```sh theme={"theme":{"light":"github-light","dark":"github-dark"}}
runpodctl create pod \
--name "my-training-pod" \
--gpuType "NVIDIA GeForce RTX 3090" \
--gpuCount 2 \
--secureCloud \
--imageName "runpod/pytorch:2.0.1-py3.10-cuda11.8.0-devel" \
--containerDiskSize 50 \
--volumeSize 100
```
## Flags
A custom name for your Pod to make it easy to identify and reference.
The GPU type to use for the Pod (e.g., `NVIDIA GeForce RTX 4090`, `NVIDIA B200`, `NVIDIA L40S`). Use the GPU ID (long form) from the [GPU types reference](/references/gpu-types) table to specify the GPU type.
The number of GPUs to allocate to the Pod.
Create the Pod in the Secure Cloud tier, which offers enterprise-grade infrastructure with enhanced reliability.
Create the Pod in the Community Cloud tier, which typically offers lower pricing with spot instance availability.
The Docker container image to use for the Pod (e.g., `runpod/pytorch:latest`).
The ID of a template to use for Pod configuration, which pre-defines the image and environment settings.
The size of the container disk in gigabytes, used for temporary storage within the container.
The size of the persistent volume in gigabytes, which retains data across Pod restarts.
The mount path for the persistent volume inside the container.
The ID of an existing [network volume](/storage/network-volumes) to attach to the Pod for shared storage across multiple Pods.
The maximum price ceiling in dollars per hour. If not specified, the Pod will be created at the lowest available price.
The minimum system memory required in gigabytes.
The minimum number of vCPUs required for the Pod.
Environment variables to set in the container. Specify multiple times for multiple variables (e.g., `--env KEY1=VALUE1 --env KEY2=VALUE2`).
Additional arguments to pass to the container when it starts.
Ports to expose from the container. Maximum of 1 HTTP port and 1 TCP port allowed (e.g., `--ports 8888/http --ports 22/tcp`).
## Related commands
* [`runpodctl create pods`](/runpodctl/reference/runpodctl-create-pods)
---
# Source: https://docs.runpod.io/runpodctl/reference/runpodctl-create-pods.md
> **Documentation Index**
> Fetch the complete documentation index at: https://docs.runpod.io/llms.txt
> Use this file to discover all available pages before exploring further.
## create pods
Create multiple Pods at once with identical configurations (useful for parallel workloads or distributed training).
```sh Command theme={"theme":{"light":"github-light","dark":"github-dark"}}
runpodctl create pods [flags]
```
## Example
Create 3 identical Pods with the name "training-worker" in the Secure Cloud:
```sh theme={"theme":{"light":"github-light","dark":"github-dark"}}
runpodctl create pods \
--name "training-worker" \
--podCount 3 \
--gpuType "NVIDIA GeForce RTX 3090" \
--gpuCount 1 \
--secureCloud \
--imageName "runpod/pytorch:2.0.1-py3.10-cuda11.8.0-devel"
```
## Flags
A custom name for the Pods. All Pods in the group will share this base name.
The number of Pods to create.
The GPU type to use for the Pods (e.g., `NVIDIA GeForce RTX 4090`, `NVIDIA B200`, `NVIDIA L40S`). Use the GPU ID (long form) from the [GPU types reference](/references/gpu-types) table to specify the GPU type.
The number of GPUs to allocate to each Pod.
Create the Pods in the Secure Cloud tier, which offers enterprise-grade infrastructure with enhanced reliability.
Create the Pods in the Community Cloud tier, which typically offers lower pricing with spot instance availability.
The Docker container image to use for the Pods (e.g., `runpod/pytorch:latest`).
The ID of a template to use for Pod configuration, which pre-defines the image and environment settings.
The size of the container disk in gigabytes for each Pod.
The size of the persistent volume in gigabytes for each Pod.
The mount path for the persistent volume inside each container.
The ID of an existing network volume to attach to all Pods for shared storage.
The maximum price ceiling in dollars per hour. If not specified, Pods will be created at the lowest available price.
The minimum system memory required in gigabytes for each Pod.
The minimum number of vCPUs required for each Pod.
Environment variables to set in the containers. Specify multiple times for multiple variables.
Additional arguments to pass to the containers when they start.
Ports to expose from the containers. Maximum of 1 HTTP port and 1 TCP port allowed per Pod.
## Related commands
* [`runpodctl create pod`](/runpodctl/reference/runpodctl-create-pod)
---
# Source: https://docs.runpod.io/runpodctl/reference/runpodctl-get-cloud.md
> **Documentation Index**
> Fetch the complete documentation index at: https://docs.runpod.io/llms.txt
> Use this file to discover all available pages before exploring further.
## get cloud
List all GPUs currently available in the Runpod cloud, with options for filtering by GPU count, memory/disk size, and cloud type.
```sh Command theme={"theme":{"light":"github-light","dark":"github-dark"}}
runpodctl get cloud [flags]
```
## Example
List all Secure Cloud GPUs with at least 4 instances available:
```sh theme={"theme":{"light":"github-light","dark":"github-dark"}}
runpodctl get cloud 4 --secure
```
## Arguments
The minimum number of GPUs that must be available for each option listed.
## Flags
Filter for GPUs with a minimum disk size (in gigabytes).
Filter for GPUs with a minimum system memory size (in gigabytes).
Filter for GPUs with a minimum number of vCPUs.
List only GPUs from the [Secure Cloud](https://docs.runpod.io/pods/choose-a-pod#secure-cloud-vs-community-cloud).
List only GPUs from the [Community Cloud](https://docs.runpod.io/pods/choose-a-pod#secure-cloud-vs-community-cloud).
---
# Source: https://docs.runpod.io/runpodctl/reference/runpodctl-get-pod.md
> **Documentation Index**
> Fetch the complete documentation index at: https://docs.runpod.io/llms.txt
> Use this file to discover all available pages before exploring further.
## get pod
List all your Pods or retrieve details about a specific Pod by its ID.
```sh Command theme={"theme":{"light":"github-light","dark":"github-dark"}}
runpodctl get pod [flags]
```
## Example
List all your Pods with complete field information:
```sh theme={"theme":{"light":"github-light","dark":"github-dark"}}
runpodctl get pod --allfields
```
## Arguments
The ID of a specific Pod to retrieve. If no ID is provided, all Pods will be listed.
## Flags
Include all available fields in the output, providing complete Pod information.
---
# Source: https://docs.runpod.io/runpodctl/reference/runpodctl-receive.md
> **Documentation Index**
> Fetch the complete documentation index at: https://docs.runpod.io/llms.txt
> Use this file to discover all available pages before exploring further.
## receive
Receive files or folders sent from another machine using a secure peer-to-peer connection established with a connection code.
```sh Command theme={"theme":{"light":"github-light","dark":"github-dark"}}
runpodctl receive [flags]
```
## Example
Receive files using a connection code.
```sh theme={"theme":{"light":"github-light","dark":"github-dark"}}
runpodctl receive rainbow-unicorn-42
```
## Arguments
The connection code phrase that matches the code used by the sender with the `send` command. If not provided, you'll be prompted to enter it.
## Related commands
* [`runpodctl send`](/runpodctl/reference/runpodctl-send)
* [`runpodctl`](/runpodctl/reference/runpodctl)
---
# Source: https://docs.runpod.io/runpodctl/reference/runpodctl-remove-pod.md
> **Documentation Index**
> Fetch the complete documentation index at: https://docs.runpod.io/llms.txt
> Use this file to discover all available pages before exploring further.
## remove pod
Permanently delete a Pod and all its associated data. This action cannot be undone.
```sh Command theme={"theme":{"light":"github-light","dark":"github-dark"}}
runpodctl remove pod
```
## Example
Terminate a Pod by its ID.
```sh theme={"theme":{"light":"github-light","dark":"github-dark"}}
runpodctl remove pod abc123xyz456
```
## Arguments
The ID of the Pod to terminate. You can find Pod IDs using the `runpodctl get pod` command.
## Related commands
* [`runpodctl remove pods`](/runpodctl/reference/runpodctl-remove-pods)
* [`runpodctl get pod`](/runpodctl/reference/runpodctl-get-pod)
---
# Source: https://docs.runpod.io/runpodctl/reference/runpodctl-remove-pods.md
> **Documentation Index**
> Fetch the complete documentation index at: https://docs.runpod.io/llms.txt
> Use this file to discover all available pages before exploring further.
## remove pods
Terminate multiple Pods that share the same name. This is useful for cleaning up groups of Pods created with the `create pods` command.
```sh Command theme={"theme":{"light":"github-light","dark":"github-dark"}}
runpodctl remove pods [flags]
```
## Example
Terminate all Pods named "training-worker":
```sh theme={"theme":{"light":"github-light","dark":"github-dark"}}
runpodctl remove pods training-worker
```
## Arguments
The name of the Pods to terminate. All Pods with this exact name will be removed.
## Flags
The number of Pods with the specified name to terminate. This limits the removal to a specific count rather than removing all matching Pods.
## Related commands
* [`runpodctl remove pod`](/runpodctl/reference/runpodctl-remove-pod)
* [`runpodctl get pod`](/runpodctl/reference/runpodctl-get-pod)
---
# Source: https://docs.runpod.io/runpodctl/reference/runpodctl-send.md
> **Documentation Index**
> Fetch the complete documentation index at: https://docs.runpod.io/llms.txt
> Use this file to discover all available pages before exploring further.
## send
Transfer files or folders from your local machine to a Pod or another computer using a secure peer-to-peer connection.
```sh Command theme={"theme":{"light":"github-light","dark":"github-dark"}}
runpodctl send [flags]
```
## Example
Send a folder to a Pod using a connection code:
```sh theme={"theme":{"light":"github-light","dark":"github-dark"}}
runpodctl send ./my-dataset --code rainbow-unicorn-42
```
## Arguments
The path to the file or folder you want to send. Can be a single file or an entire directory.
## Flags
A custom code phrase used to establish the secure connection between sender and receiver. The receiver must use the same code with the `receive` command.
## Related commands
* [`runpodctl receive`](/runpodctl/reference/runpodctl-receive)
* [`runpodctl`](/runpodctl/reference/runpodctl)
---
# Source: https://docs.runpod.io/runpodctl/reference/runpodctl-ssh-add-key.md
> **Documentation Index**
> Fetch the complete documentation index at: https://docs.runpod.io/llms.txt
> Use this file to discover all available pages before exploring further.
## ssh add-key
Add an SSH public key to your Runpod account for secure Pod access. If no key is provided, a new key pair will be generated automatically.
```sh Command theme={"theme":{"light":"github-light","dark":"github-dark"}}
runpodctl ssh add-key [flags]
```
## Example
Add an SSH key from a file:
```sh theme={"theme":{"light":"github-light","dark":"github-dark"}}
runpodctl ssh add-key --key-file ~/.ssh/id_rsa.pub
```
## Flags
The SSH public key content to add to your account. This should be the full public key string.
The path to a file containing the SSH public key to add. This is typically a `.pub` file from your SSH key pair.
## Related commands
* [`runpodctl ssh list-keys`](/runpodctl/reference/runpodctl-ssh-list-keys)
---
# Source: https://docs.runpod.io/runpodctl/reference/runpodctl-ssh-list-keys.md
> **Documentation Index**
> Fetch the complete documentation index at: https://docs.runpod.io/llms.txt
> Use this file to discover all available pages before exploring further.
## ssh list-keys
Display all SSH keys associated with your Runpod account.
```sh Command theme={"theme":{"light":"github-light","dark":"github-dark"}}
runpodctl ssh list-keys [flags]
```
## Example
List all your SSH keys:
```sh theme={"theme":{"light":"github-light","dark":"github-dark"}}
runpodctl ssh list-keys
```
## Related commands
* [`runpodctl ssh add-key`](/runpodctl/reference/runpodctl-ssh-add-key)
---
# Source: https://docs.runpod.io/runpodctl/reference/runpodctl-start-pod.md
> **Documentation Index**
> Fetch the complete documentation index at: https://docs.runpod.io/llms.txt
> Use this file to discover all available pages before exploring further.
## start pod
Start a stopped Pod, resuming compute and billing. Use this to restart Pods that were previously stopped.
```sh Command theme={"theme":{"light":"github-light","dark":"github-dark"}}
runpodctl start pod [flags]
```
## Example
Start a stopped Pod with a custom bid price for spot instances:
```sh theme={"theme":{"light":"github-light","dark":"github-dark"}}
runpodctl start pod abc123xyz456 --bid 0.50
```
## Arguments
The ID of the Pod to start. You can find Pod IDs using the `runpodctl get pod` command.
## Flags
The bid price per GPU in dollars per hour for spot instance pricing. This only applies to Community Cloud Pods.
## Related commands
* [`runpodctl stop pod`](/runpodctl/reference/runpodctl-stop-pod)
* [`runpodctl get pod`](/runpodctl/reference/runpodctl-get-pod)
---
# Source: https://docs.runpod.io/runpodctl/reference/runpodctl-stop-pod.md
> **Documentation Index**
> Fetch the complete documentation index at: https://docs.runpod.io/llms.txt
> Use this file to discover all available pages before exploring further.
## stop pod
Stop a running Pod to pause compute operations. The Pod's persistent storage will be retained, but you'll continue to be charged for storage until the Pod is removed.
```sh Command theme={"theme":{"light":"github-light","dark":"github-dark"}}
runpodctl stop pod [flags]
```
## Example
Stop a running Pod.
```sh theme={"theme":{"light":"github-light","dark":"github-dark"}}
runpodctl stop pod abc123xyz456
```
## Arguments
The ID of the Pod to stop. You can find Pod IDs using the `runpodctl get pod` command.
## Related commands
* [`runpodctl start pod`](/runpodctl/reference/runpodctl-start-pod)
* [`runpodctl get pod`](/runpodctl/reference/runpodctl-get-pod)
---
# Source: https://docs.runpod.io/runpodctl/reference/runpodctl-update.md
> **Documentation Index**
> Fetch the complete documentation index at: https://docs.runpod.io/llms.txt
> Use this file to discover all available pages before exploring further.
## update
Update `runpodctl` to the latest version to access new features and bug fixes.
```sh Command theme={"theme":{"light":"github-light","dark":"github-dark"}}
runpodctl update
```
## Related commands
* [`runpodctl version`](/runpodctl/reference/runpodctl-version)
---
# Source: https://docs.runpod.io/runpodctl/reference/runpodctl-version.md
> ## Documentation Index
> Fetch the complete documentation index at: https://docs.runpod.io/llms.txt
> Use this file to discover all available pages before exploring further.
# version
Display the current version of `runpodctl` installed on your system.
```sh Command theme={"theme":{"light":"github-light","dark":"github-dark"}}
runpodctl version
```
## Related commands
* [`runpodctl update`](/runpodctl/reference/runpodctl-update)
---
# Source: https://docs.runpod.io/storage/s3-api.md
> ## Documentation Index
> Fetch the complete documentation index at: https://docs.runpod.io/llms.txt
> Use this file to discover all available pages before exploring further.
# S3-compatible API
> Use Runpod's S3-compatible API to access and manage your network volumes.
Runpod provides an S3-protocol compatible API for direct access to your [network volumes](/storage/network-volumes). This allows you to manage files on your network volumes without launching a Pod, reducing cost and operational friction.
Using the S3-compatible API does not affect pricing. Network volumes are billed hourly at \$0.07/GB/month for the first 1TB, and \$0.05/GB/month for additional storage.
[Watch this video](https://www.youtube.com/watch?v=XA01UEE4TYc) for a quickstart example demonstrating how to automatically sync a network volume with a local directory. You can download the syncing script on GitHub: [/runpod/examples/s3-api-downloader](https://github.com/runpod/examples/tree/main/s3-api-downloader).
## Datacenter availability
The S3-compatible API is available for network volumes in select datacenters. Each datacenter has a unique endpoint URL that you'll use when calling the API:
| Datacenter | Endpoint URL |
| ---------- | ----------------------------------- |
| `EUR-IS-1` | `https://s3api-eur-is-1.runpod.io/` |
| `EUR-NO-1` | `https://s3api-eur-no-1.runpod.io/` |
| `EU-RO-1` | `https://s3api-eu-ro-1.runpod.io/` |
| `EU-CZ-1` | `https://s3api-eu-cz-1.runpod.io/` |
| `US-CA-2` | `https://s3api-us-ca-2.runpod.io/` |
| `US-GA-2` | `https://s3api-us-ga-2.runpod.io/` |
| `US-KS-2` | `https://s3api-us-ks-2.runpod.io/` |
| `US-MD-1` | `https://s3api-us-md-1.runpod.io/` |
| `US-MO-2` | `https://s3api-us-mo-2.runpod.io/` |
| `US-NC-1` | `https://s3api-us-nc-1.runpod.io/` |
| `US-NC-2` | `https://s3api-us-nc-2.runpod.io/` |
Create your network volume in a supported datacenter to use the S3-compatible API.
## Setup and authentication
First, create a network volume in a [supported datacenter](#datacenter-availability). See [Network volumes -> Create a network volume](/storage/network-volumes#create-a-network-volume) for detailed instructions.
Next, you'll need to generate a new key called an "S3 API key" (this is separate from your Runpod API key).
1. Go to the [Settings page](https://www.console.runpod.io/user/settings) in the Runpod console.
2. Expand **S3 API Keys** and select **Create an S3 API key**.
3. Name your key and select **Create**.
4. Save the **access key** (e.g., `user_***...`) and **secret** (e.g., `rps_***...`) to use in the next step.
For security, Runpod will show your API key secret only once, so you may wish to save it elsewhere (e.g., in your password manager, or in a GitHub secret). Treat your API key secret like a password and don't share it with anyone.
To use the S3-compatible API with your Runpod network volumes, you must configure your AWS CLI with the Runpod S3 API key you created.
1. If you haven't already, [install the AWS CLI](https://docs.aws.amazon.com/cli/latest/userguide/getting-started-install.html) on your local machine.
2. Run the command `aws configure` in your terminal.
3. Provide the following when prompted:
* **AWS Access Key ID**: Enter your Runpod user ID. You can find this in the [Secrets section](https://www.console.runpod.io/user/secrets) of the Runpod console, in the description of your S3 API key. By default, the description will look similar to: `Shared Secret for user_2f21CfO73Mm2Uq2lEGFiEF24IPw 1749176107073`. `user_2f21CfO73Mm2Uq2lEGFiEF24IPw` is the user ID (yours will be different).
* **AWS Secret Access Key**: Enter your Runpod S3 API key's secret access key.
* **Default Region name**: You can leave this blank.
* **Default output format**: You can leave this blank or set it to `json`.
This will configure the AWS CLI to use your Runpod S3 API key by storing these details in your AWS credentials file (typically at `~/.aws/credentials`).
### Verifying your AWS configuration
If you're experiencing authentication issues, use the following command to check your current AWS configuration:
```bash theme={"theme":{"light":"github-light","dark":"github-dark"}}
aws configure list
```
This command displays which credentials are currently active, the source of each credential (such as the config file or environment variables), and whether all required credentials are properly set.
### Environment variables override config files
AWS CLI uses the following priority order for credentials (highest to lowest):
1. **Environment variables** (`AWS_ACCESS_KEY_ID`, `AWS_SECRET_ACCESS_KEY`)
2. **AWS credentials file** (`~/.aws/credentials`)
3. **AWS config file** (`~/.aws/config`)
If you have environment variables set from a previous session, they will override your config file settings. To resolve this:
1. Check for existing environment variables:
```bash theme={"theme":{"light":"github-light","dark":"github-dark"}}
echo $AWS_ACCESS_KEY_ID
echo $AWS_SECRET_ACCESS_KEY
```
2. If outdated environment variables are set, unset them:
```bash theme={"theme":{"light":"github-light","dark":"github-dark"}}
unset AWS_ACCESS_KEY_ID
unset AWS_SECRET_ACCESS_KEY
```
3. Verify your configuration again:
```bash theme={"theme":{"light":"github-light","dark":"github-dark"}}
aws configure list
```
## Using the S3-compatible API
You can use the S3-compatible API to interact with your Runpod network volumes using standard S3 tools:
* [AWS s3 CLI](https://awscli.amazonaws.com/v2/documentation/api/latest/reference/s3/index.html).
* [AWS s3api CLI](https://docs.aws.amazon.com/cli/latest/reference/s3api/).
* [The Boto3 Python library](https://boto3.amazonaws.com/v1/documentation/api/latest/reference/services/s3.html).
Standard AWS CLI operations such as `ls`, `cp`, `mv`, and `rm` work as expected for most file operations. The `sync` command works for basic use cases but may encounter issues with large numbers of files (10,000+) or complex directory structures.
Network volumes are mounted to Serverless workers at `/runpod-volume` and to Pods at `/workspace` by default. The S3-compatible API maps file paths as follows:
* **Pod filesystem path**: `/workspace/my-folder/file.txt`
* **Serverless worker path**: `/runpod-volume/my-folder/file.txt`
* **S3 API path**: `s3://NETWORK_VOLUME_ID/my-folder/file.txt`
## s3 CLI examples
When using `aws s3` commands, you must pass in the [endpoint URL](#datacenter-availability) for your network volume using the `--endpoint-url` flag and the datacenter ID using the `--region` flag.
Unlike traditional S3 key-value stores, object names in the Runpod S3-compatible API correspond to actual file paths on your network volume. Object names containing special characters (e.g., `#`) may need to be URL-encoded to ensure proper processing.
Use `ls` to list objects in a network volume directory:
```bash theme={"theme":{"light":"github-light","dark":"github-dark"}}
aws s3 ls --region DATACENTER \
--endpoint-url https://s3api-DATACENTER.runpod.io/ \
s3://NETWORK_VOLUME_ID/REMOTE_DIR
```
Unlike standard S3 buckets, `ls` and `ListObjects` operations will list empty directories.
`ls` operations may take a long time when used on a directory containing many files (over 10,000) or large amounts of data (over 10GB), or when used recursively on a network volume containing either.
Use `cp` to copy a file to a network volume:
```bash theme={"theme":{"light":"github-light","dark":"github-dark"}}
aws s3 cp --region DATACENTER \
--endpoint-url https://s3api-DATACENTER.runpod.io/ \
LOCAL_FILE \
s3://NETWORK_VOLUME_ID
```
Use `cp` to copy a file from a network volume to a local directory:
```bash theme={"theme":{"light":"github-light","dark":"github-dark"}}
aws s3 cp --region DATACENTER \
--endpoint-url https://s3api-DATACENTER.runpod.io/ \
s3://NETWORK_VOLUME_ID/remote-file.txt LOCAL_DIR
```
Use `rm` to remove a file from a network volume:
```bash theme={"theme":{"light":"github-light","dark":"github-dark"}}
aws s3 rm --region DATACENTER \
--endpoint-url https://s3api-DATACENTER.runpod.io/ \
s3://NETWORK_VOLUME_ID/remote-file.txt
```
If you encounter a 502 "bad gateway" error during file transfer, try increasing `AWS_MAX_ATTEMPTS` to 10 or more:
```bash theme={"theme":{"light":"github-light","dark":"github-dark"}}
export AWS_RETRY_MODE=standard
export AWS_MAX_ATTEMPTS=10
```
This command syncs a local directory (source) to a network volume directory (destination):
```bash theme={"theme":{"light":"github-light","dark":"github-dark"}}
aws s3 sync --region DATACENTER \
--endpoint-url https://s3api-DATACENTER.runpod.io/ \
LOCAL_DIR \
s3://NETWORK_VOLUME_ID/REMOTE_DIR
```
## s3api CLI example
You can also use `aws s3api` commands (instead of `aws s3`) to interact with the S3-compatible API.
For example, here's how you could use `aws s3api get-object` to download an object from a network volume:
```bash theme={"theme":{"light":"github-light","dark":"github-dark"}}
aws s3api get-object --bucket NETWORK_VOLUME_ID \
--key REMOTE_FILE \
--region DATACENTER \
--endpoint-url https://s3api-DATACENTER.runpod.io/ \
LOCAL_FILE
```
Replace `LOCAL_FILE` with the desired path and name of the file after download—for example: `~/local-dir/my-file.txt`.
For a list of available `s3api` commands, see the [AWS s3api reference](https://docs.aws.amazon.com/cli/latest/reference/s3api/).
## Boto3 Python example
You can also use the Boto3 library to interact with the S3-compatible API, using it to transfer files to and from a Runpod network volume.
The script below demonstrates how to upload a file to a Runpod network volume using the Boto3 library. It takes command-line arguments for the network volume ID (as an S3 bucket), the datacenter-specific S3 endpoint URL, the local file path, the desired object (file path on the network volume), and the AWS Region (which corresponds to the Runpod datacenter ID).
To run this script, your Runpod S3 API key credentials must be set as environment variables using the values from the [Setup and authentication](#setup-and-authentication) step:
* `AWS_ACCESS_KEY_ID`: Should be set to your Runpod S3 API key **access key** (e.g., `user_***...`).
* `AWS_SECRET_ACCESS_KEY`: Should be set to your Runpod S3 API key's **secret** (e.g., `rps_***...`).
```python theme={"theme":{"light":"github-light","dark":"github-dark"}}
#!/usr/bin/env python3
import os
import argparse
import boto3 # AWS SDK for Python, used to interact with Runpod S3-compatible APIs
def create_s3_client(region: str, endpoint_url: str):
# Creates and returns an S3 client configured for Runpod network volume S3-compatible API.
#
# Args:
# region (str): The Runpod datacenter ID, used as the AWS region
# (e.g., 'ca-qc-1').
# endpoint_url (str): The S3 endpoint URL for the specific Runpod datacenter
# (e.g., 'https://ca-qc-1-s3api.runpod.io/').
# Returns:
# boto3.client: An S3 client object, configured for the Runpod S3 API.
# Retrieve Runpod S3 API key credentials from environment variables.
aws_access_key_id = os.environ.get("AWS_ACCESS_KEY_ID")
aws_secret_access_key = os.environ.get("AWS_SECRET_ACCESS_KEY")
# Ensure necessary S3 API key credentials are set in the environment
if not aws_access_key_id or not aws_secret_access_key:
raise EnvironmentError(
"Please set AWS_ACCESS_KEY_ID (with S3 API Key Access Key) and "
"AWS_SECRET_ACCESS_KEY (with S3 API Key Secret Access Key) environment variables. "
"These are obtained from 'S3 API Keys' in the Runpod console settings."
)
# Initialize and return the S3 client for Runpod's S3-compatible API
return boto3.client(
"s3",
aws_access_key_id=aws_access_key_id,
aws_secret_access_key=aws_secret_access_key,
region_name=region, # Corresponds to the Runpod datacenter ID
endpoint_url=endpoint_url, # Datacenter-specific S3 API endpoint
)
def put_object(s3_client, bucket_name: str, object_name: str, file_path: str):
# Uploads a local file to the specified Runpod network volume.
#
# Args:
# s3_client: The S3 client object (e.g., returned by create_s3_client).
# bucket_name (str): The ID of the target Runpod network volume.
# object_name (str): The desired file path for the object on the network volume.
# file_path (str): The local path to the file (including the filename) that will be uploaded.
try:
# Attempt to upload the file to the Runpod network volume.
s3_client.upload_file(file_path, bucket_name, object_name)
print(f"Successfully uploaded '{file_path}' to Network Volume '{bucket_name}' as '{object_name}'")
except Exception as e:
# Catch any exception during upload, print an error, and re-raise
print(f"Error uploading file '{file_path}' to Network Volume '{bucket_name}' as '{object_name}': {e}")
raise
def main():
# Parses command-line arguments and orchestrates the file upload process
# to a Runpod network volume.
# Set up command-line argument parsing
parser = argparse.ArgumentParser(
description="Upload a file to a Runpod Network Volume using its S3-compatible API. "
"Requires AWS_ACCESS_KEY_ID and AWS_SECRET_ACCESS_KEY env vars to be set "
"with your Runpod S3 API key credentials."
)
parser.add_argument(
"-b", "--bucket",
required=True,
help="The ID of your Runpod Network Volume (acts as the S3 bucket name)."
)
parser.add_argument(
"-e", "--endpoint",
required=True,
help="The S3 endpoint URL for your Runpod datacenter (e.g., 'https://s3api-DATACENTER.runpod.io/')."
)
parser.add_argument(
"-f", "--file",
required=True,
help="The local path to the file to be uploaded."
)
parser.add_argument(
"-o", "--object",
required=True,
help="The S3 object key (i.e., the desired file path on the Network Volume)."
)
parser.add_argument(
"-r", "--region",
required=True,
help="The Runpod datacenter ID, used as the AWS region (e.g., 'ca-qc-1'). Find this in the Runpod console's Storage section or endpoint URL."
)
args = parser.parse_args()
# Create the S3 client using the parsed arguments, configured for Runpod.
client = create_s3_client(args.region, args.endpoint)
# Upload the object to the specified network volume.
put_object(client, args.bucket, args.object, args.file)
if __name__ == "__main__":
main()
```
When uploading files with Boto3, you must specify the complete file path (including the filename) for both source and destination files.
For example, for the `put_objects` method above, you must specify these arguments:
* `file_path`: The local source file (e.g., `local_directory/file.txt`).
* `object_name`: The remote destination file to be created on the network volume (e.g., `remote_directory/file.txt`).
With that in mind, here's an example of how to run the script above using command-line arguments:
```bash theme={"theme":{"light":"github-light","dark":"github-dark"}}
./s3_example_put.py --endpoint https://s3api-eur-is-1.runpod.io/ \
--region 'EUR-IS-1' \
--bucket 'network_volume_id' \
--object 'remote_directory/file.txt' \
--file 'local_directory/file.txt'
```
## Uploading very large files
You can upload large files to network volumes using S3 multipart upload operations (see the [compatibility reference](#s3-api-compatibility-reference) below). You can also download [this helper script](https://github.com/runpod/runpod-s3-examples/blob/main/upload_large_file.py), which dramatically improves reliability when uploading very large files (10GB+) by handling timeouts and retries automatically.
[Click here to download the script on GitHub.](https://github.com/runpod/runpod-s3-examples/blob/main/upload_large_file.py)
Here's an example of how to run the script using command line arguments:
```bash theme={"theme":{"light":"github-light","dark":"github-dark"}}
./upload_large_file.py --file /path/to/large/file.mp4 \
--bucket NETWORK_VOLUME_ID \
--access_key YOUR_ACCESS_KEY_ID \
--secret_key YOUR_SECRET_ACCESS_KEY \
--endpoint https://s3api-eur-is-1.runpod.io/ \
--region EUR-IS-1
```
## S3 API compatibility reference
The tables below show which S3 API operations and AWS CLI commands are currently supported. Use the tables below to understand what functionality is available and plan your development workflows accordingly.
For detailed information on these operations, refer to the [AWS S3 API documentation](https://docs.aws.amazon.com/AmazonS3/latest/API/API_Operations_Amazon_Simple_Storage_Service.html).
If a function is not listed below, that means it's not currently implemented. We are continuously expanding the S3-compatible API based on user needs and usage patterns.
| Operation | Supported | CLI Command | Notes |
| --------------- | --------- | ---------------------------------------- | ----------------------------------------------------- |
| `CopyObject` | ✅ | `aws s3 cp`, `aws s3api copy-object` | Copy objects between locations |
| `DeleteObject` | ✅ | `aws s3 rm`, `aws s3api delete-object` | Remove individual objects |
| `GetObject` | ✅ | `aws s3 cp`, `aws s3api get-object` | Download objects |
| `HeadBucket` | ✅ | `aws s3 ls`, `aws s3api head-bucket` | Verify bucket exists and permissions |
| `HeadObject` | ✅ | `aws s3api head-object` | Retrieve object metadata |
| `ListBuckets` | ✅ | `aws s3 ls`, `aws s3api list-buckets` | List available network volumes |
| `ListObjects` | ✅ | `aws s3 ls`, `aws s3api list-objects` | List objects in a bucket (includes empty directories) |
| `ListObjectsV2` | ✅ | `aws s3 ls`, `aws s3api list-objects-v2` | Enhanced version of ListObjects |
| `PutObject` | ✅ | `aws s3 cp`, `aws s3api put-object` | Upload objects (\<500MB) |
| `DeleteObjects` | ❌ | `aws s3api delete-objects` | Planned |
| `RestoreObject` | ❌ | `aws s3api restore-object` | Not supported |
`ListObjects` operations may take a long time when used on a directory containing many files (over 10,000) or large amounts of data (over 10GB), or when used recursively on a network volume containing either.
Files larger than 500MB must be uploaded using multipart uploads. The AWS CLI performs multipart uploads automatically.
| Operation | Supported | CLI Command | Notes |
| ------------------------- | --------- | ------------------------------------- | -------------------------------------- |
| `CreateMultipartUpload` | ✅ | `aws s3api create-multipart-upload` | Start multipart upload for large files |
| `UploadPart` | ✅ | `aws s3api upload-part` | Upload individual parts |
| `CompleteMultipartUpload` | ✅ | `aws s3api complete-multipart-upload` | Finish multipart upload |
| `AbortMultipartUpload` | ✅ | `aws s3api abort-multipart-upload` | Cancel multipart upload |
| `ListMultipartUploads` | ✅ | `aws s3api list-multipart-uploads` | View in-progress uploads |
| `ListParts` | ✅ | `aws s3api list-parts` | List parts of a multipart upload |
| Operation | Supported | CLI Command | Notes |
| ---------------------- | --------- | --------------------------------- | ------------------------------------------------ |
| `CreateBucket` | ❌ | `aws s3api create-bucket` | Use the Runpod console to create network volumes |
| `DeleteBucket` | ❌ | `aws s3api delete-bucket` | Use the Runpod console to delete network volumes |
| `GetBucketLocation` | ❌ | `aws s3api get-bucket-location` | Datacenter info available in the Runpod console |
| `GetBucketVersioning` | ❌ | `aws s3api get-bucket-versioning` | Versioning is not supported |
| `PutBucketVersioning` | ❌ | `aws s3api put-bucket-versioning` | Versioning is not supported |
| `GeneratePresignedURL` | ❌ | `aws s3 presign` | Pre-signed URLs are not supported |
| Operation | Supported | CLI Command | Notes |
| ----------------- | --------- | ----------- | --------------------------------- |
| `GetBucketAcl` | ❌ | N/A | ACLs are not supported |
| `PutBucketAcl` | ❌ | N/A | ACLs are not supported |
| `GetObjectAcl` | ❌ | N/A | ACLs are not supported |
| `PutObjectAcl` | ❌ | N/A | ACLs are not supported |
| `GetBucketPolicy` | ❌ | N/A | Bucket policies are not supported |
| `PutBucketPolicy` | ❌ | N/A | Bucket policies are not supported |
| Operation | Supported | CLI Command | Notes |
| --------------------- | --------- | ----------- | ------------------------------- |
| `GetObjectTagging` | ❌ | N/A | Object tagging is not supported |
| `PutObjectTagging` | ❌ | N/A | Object tagging is not supported |
| `DeleteObjectTagging` | ❌ | N/A | Object tagging is not supported |
| Operation | Supported | CLI Command | Notes |
| ---------------------------- | --------- | ----------- | ------------------------------- |
| `GetBucketEncryption` | ❌ | N/A | Encryption is not supported |
| `PutBucketEncryption` | ❌ | N/A | Encryption is not supported |
| `GetObjectLockConfiguration` | ❌ | N/A | Object locking is not supported |
| `PutObjectLockConfiguration` | ❌ | N/A | Object locking is not supported |
## Known issues and limitations
When running `aws s3 ls` or `ListObjects` on a directory with many files or large amounts of data (typically >10,000 files or >10 GB of data) for the first time, it may run very slowly, or you may encounter the following error:
```bash theme={"theme":{"light":"github-light","dark":"github-dark"}}
"fatal error: Error during pagination: The same next token was received twice: ..."
```
This occurs because Runpod must compute and cache the MD5 checksum (i.e., ETag) for files created without the S3-compatible API. This computation can take several minutes for large directories or files, as the `ListObjects` request must wait until the checksum is ready.
Workarounds:
* The operation will typically complete successfully if you wait for the process to finish.
* If the client aborts with a pagination error, retry the operation after a brief pause.
* **Storage capacity**: Network volumes have a fixed storage capacity, unlike the virtually unlimited storage of standard S3 buckets. The `CopyObject` and `UploadPart` actions do not check for available free space beforehand and may fail if the volume runs out of space.
* **Maximum file size**: 4TB (the maximum size of a network volume).
* **Object names**: Unlike traditional S3 key-value stores, object names in the Runpod S3-compatible API correspond to actual file paths on your network volume. Object names containing special characters (e.g., `#`) may need to be URL encoded to ensure proper processing.
* **Time synchronization**: Requests that are out of time sync by 1 hour will be rejected. This is more lenient than the 15-minute window specified by the AWS SigV4 authentication specification.
* The maximum size for a single part of a multipart upload is 500MB.
* The AWS S3 minimum part size of 5MB is not enforced.
* Multipart upload parts and metadata are stored in a hidden `.s3compat_uploads/` folder. This folder and its contents are automatically cleaned up when you call `CompleteMultipartUpload` or `AbortMultipartUpload`.
The `aws s3 sync` command has limited support in Runpod's S3-compatible API. While it works for basic use cases (syncing small numbers of files and simple directory structures), you may encounter errors when syncing directories with very large numbers of files (over 10,000) or complex nested structures.
Common issues include:
* EOF errors with 200 OK responses.
* Duplicate ContinuationToken errors in ListObjectsV2.
* Intermittent AccessDenied errors.
To sync large numbers of files, consider breaking your sync operations into smaller batches or using individual `cp` commands for better reliability. Full `sync` support is in development.
When uploading large files (10GB+), you may encounter timeout errors during the `CompleteMultipartUpload` operation. To resolve this, we recommend using the [multipart upload helper script](#uploading-very-large-files).
Or you can try increasing the timeout settings in your AWS tools:
For `aws s3` and `aws s3api`, use the `--cli-read-timeout` parameter:
```bash theme={"theme":{"light":"github-light","dark":"github-dark"}}
# Sets the timeout to 7200 seconds (2 hours)
aws s3 cp large-file.zip s3://your-volume-name/ --cli-read-timeout 7200 --endpoint-url https://storage.datacenter.runpod.io
```
Or, configure timeout in `~/.aws/config`:
```ini theme={"theme":{"light":"github-light","dark":"github-dark"}}
[default]
cli_read_timeout = 7200
```
Use the `read_timeout` parameter to configure the timeout when creating the S3 client:
```python theme={"theme":{"light":"github-light","dark":"github-dark"}}
import boto3
from botocore.config import Config
# Sets the timeout to 7200 seconds (2 hours)
custom_config = Config(
read_timeout=7200,
)
# Create S3 client with custom timeout
s3_client = boto3.client('s3', config=custom_config)
```
## Reference documentation
For comprehensive documentation on AWS S3 commands and libraries, refer to:
* [AWS CLI S3 reference](https://awscli.amazonaws.com/v2/documentation/api/latest/reference/s3/index.html).
* [AWS S3 API reference](https://docs.aws.amazon.com/AmazonS3/latest/API/API_Operations_Amazon_Simple_Storage_Service.html).
* [Boto3 S3 reference](https://boto3.amazonaws.com/v1/documentation/api/latest/reference/services/s3.html).
---
# Source: https://docs.runpod.io/pods/templates/secrets.md
> ## Documentation Index
> Fetch the complete documentation index at: https://docs.runpod.io/llms.txt
> Use this file to discover all available pages before exploring further.
# Manage secrets
> Securely store and manage sensitive information like API keys, passwords, and tokens with Runpod secrets.
This guide shows how to create, view, edit, delete, and use secrets in your [Pod templates](/pods/templates/overview) to protect sensitive data and improve security.
## What are Runpod secrets
Secrets are encrypted strings that store sensitive information separately from your template configuration, providing a secure way to store and manage sensitive information such as API keys, passwords, and authentication tokens in your Pod templates.
After creating a secret, you can safely reference it in your templates without exposing any sensitive data in plain text:
```json
{{ RUNPOD_SECRET_secret_name }}
```text
This approach offers several advantages:
* **Security**: Sensitive data is encrypted and never displayed in plain text once created, protecting against accidental exposure.
* **Reusability**: The same secret can be referenced across multiple templates and Pods without duplication.
* **Access control**: Secrets are tied to your account or team, ensuring only authorized users can access them.
This makes secrets particularly useful for:
* **API authentication**: Store API keys for services like OpenAI, Hugging Face, or cloud providers without hardcoding them in your templates.
* **Database credentials**: Securely provide database connection strings and passwords to your applications.
* **Model access tokens**: Store authentication tokens required to download gated models or datasets.
* **Service integration**: Keep webhook URLs, service account keys, and other integration credentials secure.
## Create a secret
You can create secrets through the Runpod web interface to securely store sensitive information:
1. Go to the [Secrets](https://www.console.runpod.io/user/secrets) section in the Runpod console.
2. Click **Create Secret** to open the creation form.
3. Provide the required information:
* **Secret Name**: A unique identifier for your secret (e.g., `huggingface_token`, `database_password`).
* **Secret Value**: The actual sensitive data you want to store.
* **Description** (optional): A helpful description of what this secret contains or how it's used.
4. Click **Create Secret** to save your encrypted secret.
Once a secret is created, its value cannot be viewed through the interface. This is a security feature that prevents accidental exposure of sensitive data. If you need to verify or change the value, you must modify the secret or create a new one.
## View secret details
You can view metadata about your secrets without exposing the sensitive values:
1. Go to the [Secrets](https://www.console.runpod.io/user/secrets) section.
2. Click on the secret name you want to inspect.
3. Click the configuration icon and select **View Secret**.
This shows you the secret name, description, and creation date, but never the actual secret value.
## Modify a secret value
To update the value of an existing secret:
1. Go to the [Secrets](https://www.console.runpod.io/user/secrets) section.
2. Click on the name of the secret you want to modify.
3. Click **Manage** and select **Edit Secret Value**.
4. Enter the new secret value.
5. Click **Save Changes** to update the encrypted value.
## Delete a secret
To permanently remove a secret:
1. Go to the [Secrets](https://www.console.runpod.io/user/secrets) section.
2. Click on the secret you want to delete.
3. Click **Manage** and select **Delete Secret**.
4. Type or copy/paste the secret name to confirm deletion.
5. Click **Confirm Delete** to permanently remove the secret.
Deleting a secret is permanent and cannot be undone. Make sure no active templates or Pods are using the secret before deletion, as this will cause those deployments to fail.
## Using secrets in Pod templates
Once you've created secrets, you can reference them in your Pod templates to provide secure access to sensitive data.
### Direct reference method
Reference your secrets directly in the [environment variables section](/pods/templates/environment-variables) of your Pod template using the `RUNPOD_SECRET_` prefix followed by your secret name:
```json
{{ RUNPOD_SECRET_secret_name }}
```text
For example, if you created a secret named `huggingface_token`, you would reference it as:
```json
{{ RUNPOD_SECRET_huggingface_token }}
```text
This syntax tells Runpod to substitute the encrypted secret value when the Pod starts, making it available as an environment variable inside your container.
### Web interface selection
When creating or editing a Pod template through the web interface, you can also:
1. Navigate to the environment variables section of your template.
2. Use the secret selector (click the key icon) to choose from your available secrets.
3. The interface will automatically format the reference syntax for you.
## Best practices for using secrets
* **Naming conventions**: Use descriptive names that clearly indicate the secret's purpose (e.g., `openai_api_key`, `database_password`, `github_token`).
* **Environment variable mapping**: Map secrets to appropriately named environment variables in your templates:
```text
API_KEY={{ RUNPOD_SECRET_openai_key }}
DATABASE_URL={{ RUNPOD_SECRET_db_connection }}
```
* **Minimal exposure**: Only include secrets in templates that actually need them to reduce the attack surface.
* **Regular rotation**: Periodically update secret values, especially for long-lived credentials like API keys.
---
# Source: https://docs.runpod.io/references/security-and-compliance.md
> ## Documentation Index
> Fetch the complete documentation index at: https://docs.runpod.io/llms.txt
> Use this file to discover all available pages before exploring further.
# Data security and legal compliance
> Information about data security, GDPR compliance, and legal resources.
This page explains how Runpod secures your data, complies with privacy regulations, and where to find legal documentation.
## Multi-tenant isolation
Your Pods and workers run in a multi-tenant environment with containerized isolation that prevents other users from accessing your data. Each Pod/worker operates in its own container with strict separation from other workloads.
For sensitive workloads requiring enhanced security, Secure Cloud operates in T3/T4 data centers with enterprise-grade security, high reliability, redundancy, and fast response times.
## Host access policies
Runpod's [terms of service](https://www.runpod.io/legal/terms-of-service) prohibit hosts from inspecting your Pod/worker data or analyzing your usage patterns. Any violation results in immediate removal from the platform.
For workloads requiring the highest level of security, Secure Cloud provides vetted infrastructure partners who meet enterprise security standards including SOC 2, ISO 27001, and PCI DSS certifications.
## GDPR compliance
Runpod is fully compliant with the General Data Protection Regulation (GDPR) for data processed in European data center regions. The platform implements comprehensive policies, procedures, and technical measures to meet GDPR requirements.
### Compliance measures
For servers hosted in GDPR-compliant regions like the European Union, Runpod maintains clear procedures for the collection, storage, processing, and deletion of personal data. These procedures ensure transparency and accountability in data processing activities.
Technical and organizational measures protect personal data against unauthorized access, disclosure, alteration, and destruction. Runpod obtains and records consent from individuals for processing their personal data, and provides mechanisms for individuals to withdraw consent.
The platform facilitates data subject rights under GDPR, including the right to access, rectify, erase, or restrict the processing of personal data. Data subject requests are handled promptly and efficiently.
For lawful transfer of personal data outside the EU, Runpod uses appropriate mechanisms such as adequacy decisions, standard contractual clauses, or binding corporate rules. Regular monitoring and internal audits ensure ongoing GDPR compliance, including data protection impact assessments as needed.
## Legal resources
For detailed information about terms, policies, and legal agreements, visit the [Runpod legal page](https://www.runpod.io/legal).
---
# Source: https://docs.runpod.io/serverless/endpoints/send-requests.md
> ## Documentation Index
> Fetch the complete documentation index at: https://docs.runpod.io/llms.txt
> Use this file to discover all available pages before exploring further.
# Send API requests
> Submit and manage jobs for your queue-based endpoints by sending HTTP requests.
This guide is for **queue-based endpoints**. If you're building a [load balancing endpoint](/serverless/load-balancing/overview), the request structure and endpoints will depend on how you define your HTTP servers.
After creating a [Severless endpoint](/serverless/endpoints/overview), you can start sending it **requests** to submit jobs and retrieve results. This page covers everything from basic input structure and job submission, to monitoring, troubleshooting, and advanced options for queue-based endpoints.
## How requests work
A request can include parameters, payloads, and headers that define what the endpoint should process. For example, you can send a `POST` request to submit a job, or a `GET` request to check the status of a job, retrieve results, or check endpoint health.
A **job** is a unit of work containing the input data from the request, packaged for processing by your [workers](/serverless/workers/overview).
If no worker is immediately available, the job is queued. Once a worker is available, the job is processed using your worker's [handler function](/serverless/workers/handler-functions).
Queue-based endpoints provide a fixed set of operations for submitting and managing jobs. You can find a full list of operations and sample code in the [sections below](/serverless/endpoints/send-requests#operation-overview).
## Sync vs. async
When you submit a job request, it can be either synchronous or asynchronous depending on which `POST` operation you use:
* `/runsync` submits a synchronous job.
* Client waits for the job to complete before returning the result.
* A response is returned as soon as the job is complete.
* Results are available for 1 minute by default (5 minutes max).
* Ideal for quick responses and interactive applications.
* `/run` submits an asynchronous job.
* The job is processed in the background.
* Retrieve the result by sending a `GET` request to the `/status` endpoint.
* Results are available for 30 minutes after completion.
* Ideal for long-running tasks and batch processing.
## Request input structure
When submitting a job with `/runsync` or `/run`, your request must include a JSON object with the key `input` containing the parameters required by your worker's [handler function](/serverless/workers/handler-functions). For example:
```json theme={"theme":{"light":"github-light","dark":"github-dark"}}
{
"input": {
"prompt": "Your input here"
}
}
```
The exact parameters required in the `input` object depend on your specific worker implementation (e.g. `prompt` commonly used for endpoints serving LLMs, but not all workers accept it). Check your worker's documentation for a list of required and optional parameters.
## Send requests from the console
The quickest way to test your endpoint is directly in the Runpod console. Navigate to the [Serverless section](https://www.console.runpod.io/serverless), select your endpoint, and click the **Requests** tab.
You'll see a default test request that you can modify as needed, then click **Run** to test your endpoint. On first execution, your workers will need to initialize, which may take a moment.
The initial response will look something like this:
```json theme={"theme":{"light":"github-light","dark":"github-dark"}}
{
"id": "6de99fd1-4474-4565-9243-694ffeb65218-u1",
"status": "IN_QUEUE"
}
```
You'll see the full response after the job completes. If there are any errors, the console will display error logs to help you troubleshoot.
## Operation overview
Queue-based endpoints support comprehensive job lifecycle management through multiple operations that allow you to submit, monitor, manage, and retrieve results from jobs.
Here's a quick overview of the operations available for queue-based endpoints:
| Operation | HTTP method | Description |
| -------------- | ----------- | --------------------------------------------------------------------------------------------- |
| `/runsync` | POST | Submit a synchronous job and wait for the complete results in a single response. |
| `/run` | POST | Submit an asynchronous job that processes in the background, and returns an immediate job ID. |
| `/status` | GET | Check the current status, execution details, and results of a submitted job. |
| `/stream` | GET | Receive incremental results from a job as they become available. |
| `/cancel` | POST | Stop a job that is in progress or waiting in the queue. |
| `/retry` | POST | Requeue a failed or timed-out job using the same job ID and input parameters. |
| `/purge-queue` | POST | Clear all pending jobs from the queue without affecting jobs already in progress. |
| `/health` | GET | Monitor the operational status of your endpoint, including worker and job statistics. |
If you need to create an endpoint that supports custom API paths, use [load balancing endpoints](/serverless/load-balancing/overview).
## Operation reference
Below you'll find detailed explanations and examples for each operation using `cURL` and the Runpod SDK.
You can also send requests using standard HTTP request APIs and libraries, such as `fetch` (for JavaScript) and `requests` (for Python).
Before running these examples, you'll need to install the Runpod SDK:
```bash theme={"theme":{"light":"github-light","dark":"github-dark"}}
# Python
python -m pip install runpod
# JavaScript
npm install --save runpod-sdk
# Go
go get github.com/runpod/go-sdk && go mod tidy
```
You should also set your [API key](/get-started/api-keys) and endpoint ID (found on the Overview tab for your endpoint in the Runpod console) as environment variables. Run the following commands in your local terminal, replacing `YOUR_API_KEY` and `YOUR_ENDPOINT_ID` with your actual API key and endpoint ID:
```bash theme={"theme":{"light":"github-light","dark":"github-dark"}}
export RUNPOD_API_KEY="YOUR_API_KEY"
export ENDPOINT_ID="YOUR_ENDPOINT_ID"
```
### `/runsync`
Synchronous jobs wait for completion and return the complete result in a single response. This approach works best for shorter tasks where you need immediate results, interactive applications, and simpler client code without status polling.
`/runsync` requests have a maximum payload size of 20 MB.
Results are available for 1 minute by default, but you can append `?wait=x` to the request URL to extend this up to 5 minutes, where `x` is the number of milliseconds to store the results, from 1000 (1 second) to 300000 (5 minutes).
For example, `?wait=120000` will keep your results available for 2 minutes:
```sh theme={"theme":{"light":"github-light","dark":"github-dark"}}
https://api.runpod.ai/v2/$ENDPOINT_ID/runsync?wait=120000
```
`?wait` is only available for `cURL` and standard HTTP request libraries.
```sh theme={"theme":{"light":"github-light","dark":"github-dark"}}
curl --request POST \
--url https://api.runpod.ai/v2/$ENDPOINT_ID/runsync \
-H "accept: application/json" \
-H "authorization: $RUNPOD_API_KEY" \
-H "content-type: application/json" \
-d '{ "input": { "prompt": "Hello, world!" }}'
```
```python theme={"theme":{"light":"github-light","dark":"github-dark"}}
import runpod
import os
runpod.api_key = os.getenv("RUNPOD_API_KEY")
endpoint = runpod.Endpoint(os.getenv("ENDPOINT_ID"))
try:
run_request = endpoint.run_sync(
{"prompt": "Hello, world!"},
timeout=60, # Client timeout in seconds
)
print(run_request)
except TimeoutError:
print("Job timed out.")
```
```javascript theme={"theme":{"light":"github-light","dark":"github-dark"}}
const { RUNPOD_API_KEY, ENDPOINT_ID } = process.env;
import runpodSdk from "runpod-sdk";
const runpod = runpodSdk(RUNPOD_API_KEY);
const endpoint = runpod.endpoint(ENDPOINT_ID);
const result = await endpoint.runSync({
"input": {
"prompt": "Hello, World!",
},
timeout: 60000, // Client timeout in milliseconds
});
});
console.log(result);
```
```go theme={"theme":{"light":"github-light","dark":"github-dark"}}
package main
import (
"encoding/json"
"fmt"
"log"
"os"
"github.com/runpod/go-sdk/pkg/sdk"
"github.com.runpod/go-sdk/pkg/sdk/config"
rpEndpoint "github.com/runpod/go-sdk/pkg/sdk/endpoint"
)
func main() {
apiKey := os.Getenv("RUNPOD_API_KEY")
baseURL := os.Getenv("RUNPOD_BASE_URL")
endpoint, err := rpEndpoint.New(
&config.Config{ApiKey: &apiKey},
&rpEndpoint.Option{EndpointId: &baseURL},
)
if err != nil {
log.Fatalf("Failed to create endpoint: %v", err)
}
jobInput := rpEndpoint.RunSyncInput{
JobInput: &rpEndpoint.JobInput{
Input: map[string]interface{}{
"prompt": "Hello World",
},
},
Timeout: sdk.Int(60), // Client timeout in seconds
}
output, err := endpoint.RunSync(&jobInput)
if err != nil {
panic(err)
}
data, _ := json.Marshal(output)
fmt.Printf("output: %s\n", data)
}
```
`/runsync` returns a response as soon as the job is complete:
```json theme={"theme":{"light":"github-light","dark":"github-dark"}}
{
"delayTime": 824,
"executionTime": 3391,
"id": "sync-79164ff4-d212-44bc-9fe3-389e199a5c15",
"output": [
{
"image": "https://image.url",
"seed": 46578
}
],
"status": "COMPLETED"
}
```
### `/run`
Asynchronous jobs process in the background and return immediately with a job ID. This approach works best for longer-running tasks that don't require immediate results, operations requiring significant processing time, and managing multiple concurrent jobs.
`/run` requests have a maximum payload size of 10 MB.
Job results are available for 30 minutes after completion.
```sh theme={"theme":{"light":"github-light","dark":"github-dark"}}
curl --request POST \
--url https://api.runpod.ai/v2/$ENDPOINT_ID/run \
-H "accept: application/json" \
-H "authorization: $RUNPOD_API_KEY" \
-H "content-type: application/json" \
-d '{"input": {"prompt": "Hello, world!"}}'
```
```python theme={"theme":{"light":"github-light","dark":"github-dark"}}
import runpod
import os
runpod.api_key = os.getenv("RUNPOD_API_KEY")
endpoint = runpod.Endpoint(os.getenv("ENDPOINT_ID"))
# Submit asynchronous job
run_request = endpoint.run({"prompt": "Hello, World!"})
# Check initial status
status = run_request.status()
print(f"Initial job status: {status}")
if status != "COMPLETED":
# Poll for results with timeout
output = run_request.output(timeout=60)
else:
output = run_request.output()
print(f"Job output: {output}")
```
```javascript theme={"theme":{"light":"github-light","dark":"github-dark"}}
const { RUNPOD_API_KEY, ENDPOINT_ID } = process.env;
import runpodSdk from "runpod-sdk";
const runpod = runpodSdk(RUNPOD_API_KEY);
const endpoint = runpod.endpoint(ENDPOINT_ID);
const result = await endpoint.run({
"input": {
"prompt": "Hello, World!",
},
});
console.log(result);
```
```go theme={"theme":{"light":"github-light","dark":"github-dark"}}
package main
import (
"encoding/json"
"fmt"
"log"
"os"
"github.com/runpod/go-sdk/pkg/sdk"
"github.com/runpod/go-sdk/pkg/sdk/config"
rpEndpoint "github.com/runpod/go-sdk/pkg/sdk/endpoint"
)
func main() {
client := sdk.New(&config.Config{
ApiKey: os.Getenv("RUNPOD_API_KEY"),
BaseURL: os.Getenv("RUNPOD_BASE_URL"),
})
endpoint, err := client.NewEndpoint("YOUR_ENDPOINT_ID")
if err != nil {
log.Fatalf("Failed to create endpoint: %v", err)
}
jobInput := rpEndpoint.RunInput{
JobInput: &rpEndpoint.JobInput{
Input: map[string]interface{}{
"prompt": "Hello World",
},
},
RequestTimeout: sdk.Int(120),
}
output, err := endpoint.Run(&jobInput)
if err != nil {
panic(err)
}
data, _ := json.Marshal(output)
fmt.Printf("output: %s\n", data)
}
```
`/run` returns a response with the job ID and status:
```json theme={"theme":{"light":"github-light","dark":"github-dark"}}
{
"id": "eaebd6e7-6a92-4bb8-a911-f996ac5ea99d",
"status": "IN_QUEUE"
}
```
Further results must be retrieved using the `/status` operation.
### `/status`
Check the current state, execution statistics, and results of previously submitted jobs. The status operation provides the current job state, execution statistics like queue delay and processing time, and job output if completed.
You can configure time-to-live (TTL) for individual jobs by appending a TTL parameter to the request URL.
For example, `https://api.runpod.ai/v2/$ENDPOINT_ID/status/YOUR_JOB_ID?ttl=6000` sets the TTL to 6 seconds.
Replace `YOUR_JOB_ID` with the actual job ID you received in the response to the `/run` operation.
```sh theme={"theme":{"light":"github-light","dark":"github-dark"}}
curl --request GET \
--url https://api.runpod.ai/v2/$ENDPOINT_ID/status/YOUR_JOB_ID \
-H "authorization: $RUNPOD_API_KEY" \
```
Check the status of a job using the `status` method on the `run_request` object:
```python theme={"theme":{"light":"github-light","dark":"github-dark"}}
import runpod
runpod.api_key = os.getenv("RUNPOD_API_KEY")
endpoint = runpod.Endpoint(os.getenv("ENDPOINT_ID"))
input_payload = {"input": {"prompt": "Hello, World!"}}
run_request = endpoint.run(input_payload)
# Initial check without blocking, useful for quick tasks
status = run_request.status()
print(f"Initial job status: {status}")
if status != "COMPLETED":
# Polling with timeout for long-running tasks
output = run_request.output(timeout=60)
else:
output = run_request.output()
print(f"Job output: {output}")
print(f"An error occurred: {e}")
```
Check the status of a job using the ID returned by `endpoint.run`:
```javascript theme={"theme":{"light":"github-light","dark":"github-dark"}}
const { RUNPOD_API_KEY, ENDPOINT_ID } = process.env;
import runpodSdk from "runpod-sdk";
async function main() {
try {
const runpod = runpodSdk(RUNPOD_API_KEY);
const endpoint = runpod.endpoint(ENDPOINT_ID);
const result = await endpoint.run({
input: {
prompt: "Hello, World!",
},
});
const { id } = result;
if (!id) {
console.error("No ID returned from endpoint.run");
return;
}
const status = await endpoint.status(id);
console.log(status);
} catch (error) {
console.error("An error occurred:", error);
}
}
main();
```
Replace `YOUR_JOB_ID` with the actual job ID you received in the response to the `/run` request.
```go theme={"theme":{"light":"github-light","dark":"github-dark"}}
package main
import (
"encoding/json"
"fmt"
"log"
"os"
"github.com/runpod/go-sdk/pkg/sdk"
"github.com/runpod/go-sdk/pkg/sdk/config"
rpEndpoint "github.com/runpod/go-sdk/pkg/sdk/endpoint"
)
func main() {
apiKey := os.Getenv("RUNPOD_API_KEY")
baseURL := os.Getenv("RUNPOD_BASE_URL")
endpoint, err := rpEndpoint.New(
&config.Config{ApiKey: &apiKey},
&rpEndpoint.Option{EndpointId: &baseURL},
)
if err != nil {
log.Fatalf("Failed to create endpoint: %v", err)
}
input := rpEndpoint.StatusInput{
Id: sdk.String("YOUR_JOB_ID"),
}
output, err := endpoint.Status(&input)
if err != nil {
panic(err)
}
dt, _ := json.Marshal(output)
fmt.Printf("output:%s\n", dt)
}
```
`/status` returns a JSON response with the job status (e.g. `IN_QUEUE`, `IN_PROGRESS`, `COMPLETED`, `FAILED`), and an optional `output` field if the job is completed:
```json theme={"theme":{"light":"github-light","dark":"github-dark"}}
{
"delayTime": 31618,
"executionTime": 1437,
"id": "60902e6c-08a1-426e-9cb9-9eaec90f5e2b-u1",
"output": {
"input_tokens": 22,
"output_tokens": 16,
"text": ["Hello! How can I assist you today?\nUSER: I'm having"]
},
"status": "COMPLETED"
}
```
### `/stream`
Receive incremental results as they become available from jobs that generate output progressively. This works especially well for text generation tasks where you want to display output as it's created, long-running jobs where you want to show progress, and large outputs that benefit from incremental processing.
To enable streaming, your handler must support the `"return_aggregate_stream": True` option on the `start` method of your handler. Once enabled, use the `stream` method to receive data as it becomes available.
For implementation details, see [Streaming handlers](/serverless/workers/handler-functions#streaming-handlers).
Replace `YOUR_JOB_ID` with the actual job ID you received in the response to the `/run` request.
```sh theme={"theme":{"light":"github-light","dark":"github-dark"}}
curl --request GET \
--url https://api.runpod.ai/v2/$ENDPOINT_ID/stream/YOUR_JOB_ID \
-H "accept: application/json" \
-H "authorization: $RUNPOD_API_KEY" \
```
```python theme={"theme":{"light":"github-light","dark":"github-dark"}}
import runpod
runpod.api_key = os.getenv("RUNPOD_API_KEY")
endpoint = runpod.Endpoint(os.getenv("ENDPOINT_ID"))
run_request = endpoint.run(
{
"input": {
"prompt": "Hello, world!",
}
}
)
for output in run_request.stream():
print(output)
```
```javascript theme={"theme":{"light":"github-light","dark":"github-dark"}}
const { RUNPOD_API_KEY, ENDPOINT_ID } = process.env;
import runpodSdk from "runpod-sdk";
async function main() {
const runpod = runpodSdk(RUNPOD_API_KEY);
const endpoint = runpod.endpoint(ENDPOINT_ID);
const result = await endpoint.run({
input: {
prompt: "Hello, World!",
},
});
console.log(result);
const { id } = result;
for await (const result of endpoint.stream(id)) {
console.log(`${JSON.stringify(result, null, 2)}`);
}
console.log("done streaming");
}
main();
```
```go theme={"theme":{"light":"github-light","dark":"github-dark"}}
package main
import (
"encoding/json"
"fmt"
"github.com/runpod/go-sdk/pkg/sdk/config"
rpEndpoint "github.com/runpod/go-sdk/pkg/sdk/endpoint"
)
func main() {
apiKey := os.Getenv("RUNPOD_API_KEY")
baseURL := os.Getenv("RUNPOD_BASE_URL")
endpoint, err := rpEndpoint.New(
&config.Config{ApiKey: &apiKey},
&rpEndpoint.Option{EndpointId: &baseURL},
)
if err != nil {
panic(err)
}
request, err := endpoint.Run(&rpEndpoint.RunInput{
JobInput: &rpEndpoint.JobInput{
Input: map[string]interface{}{
"prompt": "Hello World",
},
},
})
if err != nil {
panic(err)
}
streamChan := make(chan rpEndpoint.StreamResult, 100)
err = endpoint.Stream(&rpEndpoint.StreamInput{Id: request.Id}, streamChan)
if err != nil {
// timeout reached, if we want to get the data that has been streamed
if err.Error() == "ctx timeout reached" {
for data := range streamChan {
dt, _ := json.Marshal(data)
fmt.Printf("output:%s\n", dt)
}
}
panic(err)
}
for data := range streamChan {
dt, _ := json.Marshal(data)
fmt.Printf("output:%s\n", dt)
}
}
```
The maximum size for a single streamed payload chunk is 1 MB. Larger outputs will be split across multiple chunks.
Streaming response format:
```json theme={"theme":{"light":"github-light","dark":"github-dark"}}
[
{
"metrics": {
"avg_gen_throughput": 0,
"avg_prompt_throughput": 0,
"cpu_kv_cache_usage": 0,
"gpu_kv_cache_usage": 0.0016722408026755853,
"input_tokens": 0,
"output_tokens": 1,
"pending": 0,
"running": 1,
"scenario": "stream",
"stream_index": 2,
"swapped": 0
},
"output": {
"input_tokens": 0,
"output_tokens": 1,
"text": [" How"]
}
}
]
```
### `/cancel`
Stop jobs that are no longer needed or taking too long to complete. This operation stops in-progress jobs, removes queued jobs before they start, and returns immediately with the canceled status.
Replace `YOUR_JOB_ID` with the actual job ID you received in the response to the `/run` request.
```sh theme={"theme":{"light":"github-light","dark":"github-dark"}}
curl --request POST \
--url https://api.runpod.ai/v2/$ENDPOINT_ID/cancel/YOUR_JOB_ID \
-H "authorization: $RUNPOD_API_KEY" \
```
Cancel a job using the `cancel` method on the `run_request` object. The script below demonstrates how to cancel a job using a keyboard interrupt:
```python theme={"theme":{"light":"github-light","dark":"github-dark"}}
import time
import runpod
runpod.api_key = os.getenv("RUNPOD_API_KEY")
endpoint = runpod.Endpoint(os.getenv("ENDPOINT_ID"))
run_request = endpoint.run(
{
"input": {
"prompt": "Hello, world!",
}
}
)
try:
while True:
status = run_request.status()
print(f"Current job status: {status}")
if status == "COMPLETED":
output = run_request.output()
print("Job output:", output)
break
elif status in ["FAILED", "ERROR"]:
print("Job failed to complete successfully.")
break
else:
time.sleep(10)
except KeyboardInterrupt: # Catch KeyboardInterrupt
print("KeyboardInterrupt detected. Canceling the job...")
if run_request: # Check if a job is active
run_request.cancel()
print("Job canceled.")
```
Cancel a job by using the `cancel()` function on the run request.
```javascript theme={"theme":{"light":"github-light","dark":"github-dark"}}
const { RUNPOD_API_KEY, ENDPOINT_ID } = process.env;
import runpodSdk from "runpod-sdk";
async function main() {
try {
const runpod = runpodSdk(RUNPOD_API_KEY);
const endpoint = runpod.endpoint(ENDPOINT_ID);
const result = await endpoint.run({
input: {
prompt: "Hello, World!",
},
});
const { id } = result;
if (!id) {
console.error("No ID returned from endpoint.run");
return;
}
const cancel = await endpoint.cancel(id);
console.log(cancel);
} catch (error) {
console.error("An error occurred:", error);
}
}
main();
```
```go theme={"theme":{"light":"github-light","dark":"github-dark"}}
package main
import (
"encoding/json"
"fmt"
"github.com/runpod/go-sdk/pkg/sdk"
"github.com/runpod/go-sdk/pkg/sdk/config"
rpEndpoint "github.com/runpod/go-sdk/pkg/sdk/endpoint"
)
func main() {
apiKey := os.Getenv("RUNPOD_API_KEY")
baseURL := os.Getenv("RUNPOD_BASE_URL")
endpoint, err := rpEndpoint.New(
&config.Config{ApiKey: &apiKey},
&rpEndpoint.Option{EndpointId: &baseURL},
)
if err != nil {
panic(err)
}
cancelInput := rpEndpoint.CancelInput{
Id: sdk.String("00edfd03-8094-46da-82e3-ea47dd9566dc-u1"),
}
output, err := endpoint.Cancel(&cancelInput)
if err != nil {
panic(err)
}
healthData, _ := json.Marshal(output)
fmt.Printf("health output: %s\n", healthData)
}
```
`/cancel` requests return a JSON response with the status of the cancel operation:
```json theme={"theme":{"light":"github-light","dark":"github-dark"}}
{
"id": "724907fe-7bcc-4e42-998d-52cb93e1421f-u1",
"status": "CANCELLED"
}
```
### `/retry`
Requeue jobs that have failed or timed out without submitting a new request. This operation maintains the same job ID for tracking, requeues with original input parameters, and removes previous output. It can only be used for jobs with `FAILED` or `TIMED_OUT` status.
Replace `YOUR_JOB_ID` with the actual job ID you received in the response to the `/run` request.
```sh theme={"theme":{"light":"github-light","dark":"github-dark"}}
curl --request POST \
--url https://api.runpod.ai/v2/$ENDPOINT_ID/retry/YOUR_JOB_ID \
-H "authorization: $RUNPOD_API_KEY"
```
You'll see the job status updated to `IN_QUEUE` when the job is retried:
```json theme={"theme":{"light":"github-light","dark":"github-dark"}}
{
"id": "60902e6c-08a1-426e-9cb9-9eaec90f5e2b-u1",
"status": "IN_QUEUE"
}
```
Job results expire after a set period. Asynchronous jobs (`/run`) results are available for 30 minutes, while synchronous jobs (`/runsync`) results are available for 1 minute (up to 5 minutes with `?wait=t`). Once expired, jobs cannot be retried.
### `/purge-queue`
Remove all pending jobs from the queue when you need to reset or handle multiple cancellations at once. This is useful for error recovery, clearing outdated requests, resetting after configuration changes, and managing resource allocation.
```sh theme={"theme":{"light":"github-light","dark":"github-dark"}}
curl --request POST \
--url https://api.runpod.ai/v2/$ENDPOINT_ID/purge-queue \
-H "authorization: $RUNPOD_API_KEY"
-H 'Authorization: Bearer RUNPOD_API_KEY'
```
```python theme={"theme":{"light":"github-light","dark":"github-dark"}}
import runpod
import os
runpod.api_key = os.getenv("RUNPOD_API_KEY")
endpoint = runpod.Endpoint(os.getenv("ENDPOINT_ID"))
endpoint.purge_queue(timeout=3)
```
```javascript theme={"theme":{"light":"github-light","dark":"github-dark"}}
const { RUNPOD_API_KEY, ENDPOINT_ID } = process.env;
import runpodSdk from "runpod-sdk";
async function main() {
try {
const runpod = runpodSdk(RUNPOD_API_KEY);
const endpoint = runpod.endpoint(ENDPOINT_ID);
await endpoint.run({
input: {
prompt: "Hello, World!",
},
});
const purgeQueue = await endpoint.purgeQueue();
console.log(purgeQueue);
} catch (error) {
console.error("An error occurred:", error);
}
}
main();
```
`/purge-queue` operation only affects jobs waiting in the queue. Jobs already in progress will continue to run.
`/purge-queue` requests return a JSON response with the number of jobs removed from the queue and the status of the purge operation:
```json theme={"theme":{"light":"github-light","dark":"github-dark"}}
{
"removed": 2,
"status": "completed"
}
```
### `/health`
Get a quick overview of your endpoint's operational status including worker availability, job queue status, potential bottlenecks, and scaling requirements.
```sh theme={"theme":{"light":"github-light","dark":"github-dark"}}
curl --request GET \
--url https://api.runpod.ai/v2/$ENDPOINT_ID/health \
-H "authorization: $RUNPOD_API_KEY"
```
```python theme={"theme":{"light":"github-light","dark":"github-dark"}}
import runpod
import json
import os
runpod.api_key = os.getenv("RUNPOD_API_KEY")
endpoint = runpod.Endpoint(os.getenv("ENDPOINT_ID"))
endpoint_health = endpoint.health()
print(json.dumps(endpoint_health, indent=2))
```
```javascript theme={"theme":{"light":"github-light","dark":"github-dark"}}
const { RUNPOD_API_KEY, ENDPOINT_ID } = process.env;
import runpodSdk from "runpod-sdk";
const runpod = runpodSdk(RUNPOD_API_KEY);
const endpoint = runpod.endpoint(ENDPOINT_ID);
const health = await endpoint.health();
console.log(health);
```
`/health` requests return a JSON response with the current status of the endpoint, including the number of jobs completed, failed, in progress, in queue, and retried, as well as the status of workers.
```json theme={"theme":{"light":"github-light","dark":"github-dark"}}
{
"jobs": {
"completed": 1,
"failed": 5,
"inProgress": 0,
"inQueue": 2,
"retried": 0
},
"workers": {
"idle": 0,
"running": 0
}
}
```
## Advanced options
Beyond the required `input` object, you can include optional top-level parameters to enable additional functionality for your queue-based endpoints.
### Webhook notifications
Receive notifications when jobs complete by specifying a webhook URL. When your job completes, Runpod will send a `POST` request to your webhook URL containing the same information as the `/status/JOB_ID` endpoint.
```json theme={"theme":{"light":"github-light","dark":"github-dark"}}
{
"input": {
"prompt": "Your input here"
},
"webhook": "https://your-webhook-url.com"
}
```
Your webhook should return a `200` status code to acknowledge receipt. If the call fails, Runpod will retry up to 2 more times with a 10-second delay between attempts.
### Execution policies
Control job execution behavior with custom policies. By default, jobs automatically terminate after 10 minutes without completion to prevent runaway costs.
```json theme={"theme":{"light":"github-light","dark":"github-dark"}}
{
"input": {
"prompt": "Your input here"
},
"policy": {
"executionTimeout": 900000,
"lowPriority": false,
"ttl": 3600000
}
}
```
Policy options:
| Option | Description | Default | Constraints |
| ------------------ | ------------------------------------------- | ------------------- | ------------------------------ |
| `executionTimeout` | Maximum job runtime in milliseconds | 600000 (10 minutes) | Must be > 5000 ms |
| `lowPriority` | When true, job won't trigger worker scaling | false | - |
| `ttl` | Maximum job lifetime in milliseconds | 86400000 (24 hours) | Must be ≥ 10000 ms, max 1 week |
Setting `executionTimeout` in a request overrides the default endpoint setting for that specific job only.
### S3-compatible storage integration
Configure S3-compatible storage for endpoints working with large files. This configuration is passed directly to your worker but not included in responses.
```json theme={"theme":{"light":"github-light","dark":"github-dark"}}
{
"input": {
"prompt": "Your input here"
},
"s3Config": {
"accessId": "BUCKET_ACCESS_KEY_ID",
"accessSecret": "BUCKET_SECRET_ACCESS_KEY",
"bucketName": "BUCKET_NAME",
"endpointUrl": "BUCKET_ENDPOINT_URL"
}
}
```
Your worker must contain logic to use this information for storage operations.
S3 integration works with any S3-compatible provider including MinIO, Backblaze B2, DigitalOcean Spaces, and others.
## Rate limits and quotas
Runpod enforces rate limits to ensure fair platform usage. These limits apply per endpoint and operation:
| Operation | Method | Rate Limit | Concurrent Limit |
| -------------- | ------ | ---------------------------- | ---------------- |
| `/runsync` | POST | 2000 requests per 10 seconds | 400 concurrent |
| `/run` | POST | 1000 requests per 10 seconds | 200 concurrent |
| `/status` | GET | 2000 requests per 10 seconds | 400 concurrent |
| `/stream` | GET | 2000 requests per 10 seconds | 400 concurrent |
| `/cancel` | POST | 100 requests per 10 seconds | 20 concurrent |
| `/purge-queue` | POST | 2 requests per 10 seconds | N/A |
| `/openai/*` | POST | 2000 requests per 10 seconds | 400 concurrent |
| `/requests` | GET | 10 requests per 10 seconds | 2 concurrent |
### Dynamic rate limiting
In addition to the base rate limits above, Runpod implements a dynamic rate limiting system that scales with your endpoint's worker count. This helps ensure platform stability while allowing higher throughput as you scale.
Rate limits are calculated using two values:
1. **Base limit**: A fixed rate limit per user per endpoint (shown in the table above)
2. **Worker-based limit**: A dynamic limit calculated as `number_of_running_workers × requests_per_worker`
The system uses **whichever limit is higher** between the base limit and worker-based limit. Requests are blocked with a `429 (Too Many Requests)` status when the request count exceeds this effective limit within a 10-second window. This means as your endpoint scales up workers, your effective rate limit increases proportionally.
For example, if an endpoint has:
* Base limit: 2000 requests per 10 seconds
* Additional limit per worker: 50 requests per 10 seconds
* 20 running workers
The effective rate limit would be `max(2000, 20 × 50) = 2000` requests per 10 seconds (base limit applies). With 50 running workers, it would scale to `max(2000, 50 × 50) = 2500` requests per 10 seconds (worker-based limit applies).
**Key points:**
* Rate limiting is based on request count per 10-second time windows
* The system automatically uses whichever limit gives you more requests
Implement appropriate retry logic with exponential backoff to handle rate limiting gracefully.
## Best practices
Follow these practices to optimize your queue-based endpoint usage:
* Use asynchronous requests for jobs that take more than a few seconds to complete.
* Implement polling with backoff when checking status of asynchronous jobs.
* Set appropriate timeouts in your client applications and monitor endpoint health regularly to detect issues early.
* Implement comprehensive error handling for all API calls.
* Use webhooks for notification-based workflows instead of polling to reduce API calls.
* Cancel unneeded jobs to free up resources and reduce costs.
* During development, use the console testing interface before implementing programmatic integration.
## Error handling and troubleshooting
When sending requests, be prepared to handle these common errors:
| HTTP Status | Meaning | Solution |
| ----------- | --------------------- | ------------------------------------------------- |
| 400 | Bad Request | Check your request format and parameters |
| 401 | Unauthorized | Verify your API key is correct and has permission |
| 404 | Not Found | Check your endpoint ID |
| 429 | Too Many Requests | Implement backoff and retry logic |
| 500 | Internal Server Error | Check endpoint logs; worker may have crashed |
Here are some common issues and suggested solutions:
| Issue | Possible Causes | Solutions |
| ------------------ | ----------------------------------------------- | ------------------------------------------------------------------------------------------------ |
| Job stuck in queue | No available workers, max workers limit reached | Increase max workers, check endpoint health |
| Timeout errors | Job takes longer than execution timeout | Increase timeout in job policy, optimize job processing |
| Failed jobs | Worker errors, input validation issues | Check [endpoint logs](/serverless/development/logs), verify input format, retry with fixed input |
| Rate limiting | Too many requests in short time | Implement backoff strategy, batch requests when possible |
| Missing results | Results expired | Retrieve results within expiration window (30 min for async, 1 min for sync) |
Implementing proper [error handling](/serverless/endpoints/error-handling) and retry logic will make your integrations more robust and reliable.
---
# Source: https://docs.runpod.io/integrations/skypilot.md
> ## Documentation Index
> Fetch the complete documentation index at: https://docs.runpod.io/llms.txt
> Use this file to discover all available pages before exploring further.
# Running Runpod on SkyPilot
[SkyPilot](https://skypilot.readthedocs.io/en/latest/) is a framework for executing LLMs, AI, and batch jobs on any cloud, offering maximum cost savings, highest GPU availability, and managed execution.
This integration leverages the Runpod CLI infrastructure, streamlining the process of spinning up on-demand pods and deploying serverless endpoints with SkyPilot.
## Getting started
To begin using Runpod with SkyPilot, follow these steps:
1. **Obtain Your API Key**: Visit the [Runpod Settings](https://www.console.runpod.io/user/settings) page to get your API key. If you haven't created an account yet, you'll need to do so before obtaining the key.
2. **Install Runpod**: Use the following command to install the latest version of Runpod:
```sh theme={"theme":{"light":"github-light","dark":"github-dark"}}
pip install "runpod>=1.6"
```
3. **Configure Runpod**: Enter `runpod config` in your CLI and paste your API key when prompted.
4. **Install SkyPilot Runpod Cloud**: Execute the following command to install the [SkyPilot Runpod cloud](https://skypilot.readthedocs.io/en/latest/getting-started/installation.html#runpod):
```sh theme={"theme":{"light":"github-light","dark":"github-dark"}}
pip install "skypilot-nightly[runpod]"
```
5. **Verify Your Setup**: Run `sky check` to ensure your credentials are correctly set up and you're ready to proceed.
## Running a Project
After setting up your environment, you can seamlessly spin up a cluster in minutes:
1. **Create a New Project Directory**: Run `mkdir hello-sky` to create a new directory for your project.
2. **Navigate to Your Project Directory**: Change into your project directory with `cd hello-sky`.
3. **Create a Configuration File**: Enter `cat > hello_sky.yaml` and input the following configuration details:
```yml theme={"theme":{"light":"github-light","dark":"github-dark"}}
resources:
cloud: runpod
# Working directory (optional) containing the project codebase.
# Its contents are synced to ~/sky_workdir/ on the cluster.
workdir: .
# Setup commands (optional).
# Typical use: pip install -r requirements.txt
# Invoked under the workdir (i.e., can use its files).
setup: |
echo "Running setup."
# Run commands.
# Typical use: make use of resources, such as running training.
# Invoked under the workdir (i.e., can use its files).
run: |
echo "Hello, SkyPilot!"
conda env list
```
4. **Launch Your Project**: With your configuration file created, launch your project on the cluster by running `sky launch -c mycluster hello_sky.yaml`.
5. **Confirm Your GPU Type**: You should see the available GPU options on Secure Cloud appear in your command line. Once you confirm your GPU type, your cluster will start spinning up.
With this integration, you can leverage the power of Runpod and SkyPilot to efficiently run your LLMs, AI, and batch jobs on any cloud.
---
# Source: https://docs.runpod.io/instant-clusters/slurm-clusters.md
> ## Documentation Index
> Fetch the complete documentation index at: https://docs.runpod.io/llms.txt
> Use this file to discover all available pages before exploring further.
# Slurm Clusters
> Deploy Slurm Clusters on Runpod with zero configuration
Runpod Slurm Clusters provide a managed high-performance computing and scheduling solution that enables you to rapidly create and manage Slurm Clusters with minimal setup.
For more information on working with Slurm, refer to the [Slurm documentation](https://slurm.schedmd.com/documentation.html).
## Key features
Slurm Clusters eliminate the traditional complexity of cluster orchestration by providing:
* **Zero configuration setup:** Slurm and munge are pre-installed and fully configured.
* **Instant provisioning:** Clusters deploy rapidly with minimal setup.
* **Automatic role assignment:** Runpod automatically designates controller and agent nodes.
* **Built-in optimizations:** Pre-configured for optimal NCCL performance.
* **Full Slurm compatibility:** All standard Slurm commands work out-of-the-box.
If you prefer to manually configure your Slurm deployment, see [Deploy an Instant Cluster with Slurm (unmanaged)](/instant-clusters/slurm) for a step-by-step guide.
## Deploy a Slurm Cluster
1. Open the [Instant Clusters page](https://console.runpod.io/cluster) on the Runpod console.
2. Click **Create Cluster**.
3. Select **Slurm Cluster** from the cluster type dropdown menu.
4. Configure your cluster specifications:
* **Cluster name**: Enter a descriptive name for your cluster.
* **Pod count**: Choose the number of Pods in your cluster.
* **GPU type**: Select your preferred [GPU type](/references/gpu-types).
* **Region**: Choose your deployment region.
* **Network volume** (optional): Add a [network volume](/storage/network-volumes) for persistent/shared storage. If using a network volume, ensure the region matches your cluster region.
* **Pod template**: Select a [Pod template](/pods/templates/overview) or click **Edit Template** to customize start commands, environment variables, ports, or [container/volume disk](/pods/storage/types) capacity.
Slurm Clusters currently only support official Runpod Pytorch images. If you deploy using a different image, the Slurm process will not start.
5. Click **Deploy Cluster**.
## Connect to a Slurm Cluster
Once deployment completes, you can access your cluster from the [Instant Clusters page](https://console.runpod.io/cluster).
From this page you can select a cluster to view it's component nodes, including a label indicating the **Slurm controller** (primary node) and **Slurm agents** (secondary nodes). Expand a node to view details like availability, GPU/storage utilization, and options for connection and management.
Connect to a node using the **Connect** button, or using any of the [connection methods supported by Pods](/pods/connect-to-a-pod).
## Submit and manage jobs
All standard Slurm commands are available without configuration. For example, you can:
Check cluster status and available resources:
```bash theme={"theme":{"light":"github-light","dark":"github-dark"}}
sinfo
```
Submit a job to the cluster from the Slurm controller node:
```bash theme={"theme":{"light":"github-light","dark":"github-dark"}}
sbatch your-job-script.sh
```
Monitor job queue and status:
```bash theme={"theme":{"light":"github-light","dark":"github-dark"}}
squeue
```
View detailed job information from the Slurm controller node:
```bash theme={"theme":{"light":"github-light","dark":"github-dark"}}
scontrol show job JOB_ID
```
You can find the output of Slurm agents in their individual container logs.
## Advanced configuration
While Runpod's Slurm Clusters work out-of-the-box, you can customize your configuration by connecting to the Slurm controller node using the [web terminal or SSH](/pods/connect-to-a-pod).
Access Slurm configuration files in their standard locations:
* `/etc/slurm/slurm.conf` - Main configuration file.
* `/etc/slurm/gres.conf` - Generic resource configuration.
Modify these files as needed for your specific requirements.
## Troubleshooting
If you encounter issues with your Slurm Cluster, try the following:
* **Jobs stuck in pending state:** Check resource availability with `sinfo` and ensure requested resources are available. If you need more resources, you can add more nodes to your cluster.
* **Authentication errors:** Munge is pre-configured, but if issues arise, verify the munge service is running on all nodes.
For additional support, contact [Runpod support](https://contact.runpod.io/) with your cluster ID and specific error messages.
---
# Source: https://docs.runpod.io/instant-clusters/slurm.md
> ## Documentation Index
> Fetch the complete documentation index at: https://docs.runpod.io/llms.txt
> Use this file to discover all available pages before exploring further.
# Deploy an Instant Cluster with Slurm (unmanaged)
This guide is for advanced users who want to configure and manage their own Slurm deployment on Instant Clusters. If you're looking for a pre-configured solution, see [Slurm Clusters](/instant-clusters/slurm-clusters).
This tutorial demonstrates how to configure Runpod Instant Clusters with [Slurm](https://slurm.schedmd.com/) to manage and schedule distributed workloads across multiple nodes. Slurm is a popular open-source job scheduler that provides a framework for job management, scheduling, and resource allocation in high-performance computing environments. By leveraging Slurm on Runpod's high-speed networking infrastructure, you can efficiently manage complex workloads across multiple GPUs.
Follow the steps below to deploy a cluster and start running distributed Slurm workloads efficiently.
## Requirements
* You've created a [Runpod account](https://www.console.runpod.io/home) and funded it with sufficient credits.
* You have basic familiarity with Linux command line.
* You're comfortable working with [Pods](/pods/overview) and understand the basics of [Slurm](https://slurm.schedmd.com/).
## Step 1: Deploy an Instant Cluster
1. Open the [Instant Clusters page](https://www.console.runpod.io/cluster) on the Runpod web interface.
2. Click **Create Cluster**.
3. Use the UI to name and configure your cluster. For this walkthrough, keep **Pod Count** at **2** and select the option for **16x H100 SXM** GPUs. Keep the **Pod Template** at its default setting (Runpod PyTorch).
4. Click **Deploy Cluster**. You should be redirected to the Instant Clusters page after a few seconds.
## Step 2: Clone demo and install Slurm on each Pod
To connect to a Pod:
1. On the Instant Clusters page, click on the cluster you created to expand the list of Pods.
2. Click on a Pod, for example `CLUSTERNAME-pod-0`, to expand the Pod.
**On each Pod:**
1. Click **Connect**, then click **Web Terminal**.
2. In the terminal that opens, run this command to clone the Slurm demo files into the Pod's main directory:
```bash theme={"theme":{"light":"github-light","dark":"github-dark"}}
git clone https://github.com/pandyamarut/slurm_example.git && cd slurm_example
```
3. Run this command to install Slurm:
```bash theme={"theme":{"light":"github-light","dark":"github-dark"}}
apt update && apt install -y slurm-wlm slurm-client munge
```
## Step 3: Overview of Slurm demo scripts
The repository contains several essential scripts for setting up Slurm. Let's examine what each script does:
* `create_gres_conf.sh`: Generates the Slurm Generic Resource (GRES) configuration file that defines GPU resources for each node.
* `create_slurm_conf.sh`: Creates the main Slurm configuration file with cluster settings, node definitions, and partition setup.
* `install.sh`: The primary installation script that sets up MUNGE authentication, configures Slurm, and prepares the environment.
* `test_batch.sh`: A sample Slurm job script for testing cluster functionality.
## Step 4: Install Slurm on each Pod
Now run the installation script **on each Pod**, replacing `[MUNGE_SECRET_KEY]` with any secure random string (like a password). The secret key is used for authentication between nodes, and must be identical across all Pods in your cluster.
```bash theme={"theme":{"light":"github-light","dark":"github-dark"}}
./install.sh "[MUNGE_SECRET_KEY]" node-0 node-1 10.65.0.2 10.65.0.3
```
This script automates the complex process of configuring a two-node Slurm cluster with GPU support, handling everything from system dependencies to authentication and resource configuration. It implements the necessary setup for both the primary (i.e. master/control) and secondary (i.e compute/worker) nodes.
## Step 5: Start Slurm services
If you're not sure which Pod is the primary node, run the command `echo $HOSTNAME` on the web terminal of each Pod and look for `node-0`.
1. **On the primary node** (`node-0`), run both Slurm services:
```bash theme={"theme":{"light":"github-light","dark":"github-dark"}}
slurmctld -D
```
2. Use the web interface to open a second terminal **on the primary node** and run:
```bash theme={"theme":{"light":"github-light","dark":"github-dark"}}
slurmd -D
```
3. **On the secondary node** (`node-1`), run:
```bash theme={"theme":{"light":"github-light","dark":"github-dark"}}
slurmd -D
```
After running these commands, you should see output indicating that the services have started successfully. The `-D` flag keeps the services running in the foreground, so each command needs its own terminal.
## Step 6: Test your Slurm Cluster
1. Run this command **on the primary node** (`node-0`) to check the status of your nodes:
```bash theme={"theme":{"light":"github-light","dark":"github-dark"}}
sinfo
```
You should see output showing both nodes in your cluster, with a state of "idle" if everything is working correctly.
2. Run this command to test GPU availability across both nodes:
```bash theme={"theme":{"light":"github-light","dark":"github-dark"}}
srun --nodes=2 --gres=gpu:1 nvidia-smi -L
```
This command should list all GPUs across both nodes.
## Step 7: Submit the Slurm job script
Run the following command **on the primary node** (`node-0`) to submit the test job script and confirm that your cluster is working properly:
```bash theme={"theme":{"light":"github-light","dark":"github-dark"}}
sbatch test_batch.sh
```
Check the output file created by the test (`test_simple_[JOBID].out`) and look for the hostnames of both nodes. This confirms that the job ran successfully across the cluster.
## Step 8: Clean up
If you no longer need your cluster, make sure you return to the [Instant Clusters page](https://www.console.runpod.io/cluster) and delete your cluster to avoid incurring extra charges.
You can monitor your cluster usage and spending using the **Billing Explorer** at the bottom of the [Billing page](https://www.console.runpod.io/user/billing) section under the **Cluster** tab.
## Next steps
Now that you've successfully deployed and tested a Slurm cluster on Runpod, you can:
* **Adapt your own distributed workloads** to run using Slurm job scripts.
* **Scale your cluster** by adjusting the number of Pods to handle larger models or datasets.
* **Try different frameworks** like [Axolotl](/instant-clusters/axolotl) for fine-tuning large language models.
* **Optimize performance** by experimenting with different distributed training strategies.
---
# Source: https://docs.runpod.io/serverless/development/ssh-into-workers.md
> ## Documentation Index
> Fetch the complete documentation index at: https://docs.runpod.io/llms.txt
> Use this file to discover all available pages before exploring further.
# Connect to workers with SSH
> SSH into running workers for debugging and troubleshooting.
You can connect directly to running workers via SSH for debugging and troubleshooting. By connecting to a worker, you can inspect logs, file systems, and environment variables in real-time.
## Generate an SSH key and add it to your Runpod account
Before you can connect to a worker, you'll need to generate an SSH key and add it to your Runpod account.
Run this command on your local terminal to generate an SSH key, replacing `YOUR_EMAIL@DOMAIN.COM` with your actual email:
```sh theme={"theme":{"light":"github-light","dark":"github-dark"}}
ssh-keygen -t ed25519 -C "YOUR_EMAIL@DOMAIN.COM"
```
This saves a public/private key pair on your local machine to `~/.ssh/id_ed25519.pub` and `~/.ssh/id_ed25519` respectively.
If you are using Command Prompt on Windows instead of the Linux terminal or WSL, your public and private key pair will be saved to `C:\Users\YOUR_USER_ACCOUNT\.ssh\id_ed25519.pub` and `C:\Users\YOUR_USER_ACCOUNT\.ssh\id_ed25519`, respectively.
Run this command on your local terminal to retrieve the public SSH key you just generated:
```sh theme={"theme":{"light":"github-light","dark":"github-dark"}}
cat ~/.ssh/id_ed25519.pub
```
This will output something similar to this:
```sh theme={"theme":{"light":"github-light","dark":"github-dark"}}
ssh-ed25519 AAAAC4NzaC1lZDI1JTE5AAAAIGP+L8hnjIcBqUb8NRrDiC32FuJBvRA0m8jLShzgq6BQ YOUR_EMAIL@DOMAIN.COM
```
Copy and paste your public key from the previous step into the **SSH Public Keys** field in your [Runpod user account settings](https://www.console.runpod.io/user/settings).
If you need to add multiple SSH keys to your Runpod account, make sure that each key pair is on its own line in the **SSH Public Keys** field.
## SSH into a worker
Before you can connect, you need at least one worker running. To guarantee a worker is available:
1. Navigate to the [Serverless section](https://www.console.runpod.io/serverless) of the Runpod console.
2. Select your endpoint from the list.
3. Go to the **Configuration** tab.
4. Under **Worker configuration**, set **Active workers** to 1 or more.
5. Click **Save** to apply the changes.
This ensures at least one worker remains running at all times, and allowing you to SSH in without your worker being automatically scaled down.
Select the **Workers** tab in your endpoint's details page to view all running workers for this endpoint.
Here you'll see a list of all workers associated with your endpoint. Find a worker with a status of **Running** and click on it to open its detail pane.
In the worker's detail pane:
1. Select the **Connect** tab.
2. Under the **SSH** section, copy the provided SSH command.
The command will look similar to this:
```bash theme={"theme":{"light":"github-light","dark":"github-dark"}}
ssh root@worker-id-xyz -i ~/.ssh/id_ed25519
```
If you saved your SSH key to a custom location, update the path after the `-i` flag to match your key's location.
Open your local terminal and paste the SSH command you copied. Press Enter to connect to the worker.
Once connected, you can:
* Inspect logs and debug output.
* Check environment variables with `env`.
* Verify file systems and mounted volumes.
* Test your worker's behavior in the production environment.
* Run diagnostic commands to troubleshoot issues.
## Troubleshooting SSH key authentication
If you're asked for a password when connecting to your worker via SSH, this means something is not set up correctly. Runpod does not require a password for SSH connections, as authentication is handled entirely through your SSH key pair.
Here are some common reasons why this might happen:
* If you copy and paste the key *fingerprint* (which starts with `SHA256:`) into your Runpod user settings instead of the actual public key (the contents of your `id_ed25519.pub` file), authentication will fail.
* If you omit the encryption type at the beginning of your public key when pasting it into your Runpod user settings (for example, leaving out `ssh-ed25519`), the key will not be recognized.
* If you add multiple public keys to your Runpod user settings but do not separate them with a newline, only the first key will work. Each key must be on its own line.
* If you specify the wrong file path to your private key when connecting, SSH will not be able to find the correct key (`No such file or directory` error).
* If your private key file is accessible by other users on your machine, SSH may refuse to use it for security reasons (`bad permissions` error).
* If your SSH configuration file (`~/.ssh/config`) points to the wrong private key, you will also be prompted for a password. Make sure the `IdentityFile` entry in your config file matches the private key that corresponds to the public key you added to your Runpod account.
---
# Source: https://docs.runpod.io/tutorials/sdks/python/102/stable-diffusion-text-to-image.md
> ## Documentation Index
> Fetch the complete documentation index at: https://docs.runpod.io/llms.txt
> Use this file to discover all available pages before exploring further.
# Text To Image Generation with Stable Diffusion on Runpod
Text-to-image generation using advanced AI models offers a unique way to bring textual descriptions to life as images. Stable Diffusion is a powerful model capable of generating high-quality images from text inputs, and Runpod is a serverless computing platform that can manage resource-intensive tasks effectively. This tutorial will guide you through setting up a serverless application that utilizes Stable Diffusion for generating images from text prompts on Runpod.
By the end of this guide, you will have a fully functional text-to-image generation system deployed on a Runpod serverless environment.
## Prerequisites
Before diving into the setup, ensure you have the following:
* Access to a Runpod account
* A GPU instance configured on Runpod
* Basic knowledge of Python programming
## Import required libraries
To start, we need to import several essential libraries. These will provide the functionalities required for serverless operation and image generation.
```python stable_diffusion.py theme={"theme":{"light":"github-light","dark":"github-dark"}}
import runpod
import torch
from diffusers import StableDiffusionPipeline
from io import BytesIO
import base64
```text
Here’s a breakdown of the imports:
* `runpod`: The SDK used to interact with Runpod's serverless environment.
* `torch`: PyTorch library, necessary for running deep learning models and ensuring they utilize the GPU.
* `diffusers`: Provides methods to work with diffusion models like Stable Diffusion.
* `BytesIO` and `base64`: Used to handle image data conversions.
Next, confirm that CUDA is available, as the model requires a GPU to function efficiently.
```python stable_diffusion.py theme={"theme":{"light":"github-light","dark":"github-dark"}}
assert (
torch.cuda.is_available()
), "CUDA is not available. Make sure you have a GPU instance."
```text
This assertion checks whether a compatible NVIDIA GPU is available for PyTorch to use.
## Load the Stable Diffusion Model
We'll load the Stable Diffusion model in a separate function. This ensures that the model is only loaded once when the worker process starts, which is more efficient.
```python stable_diffusion.py theme={"theme":{"light":"github-light","dark":"github-dark"}}
def load_model():
model_id = "runwayml/stable-diffusion-v1-5"
pipe = StableDiffusionPipeline.from_pretrained(model_id, torch_dtype=torch.float16)
pipe = pipe.to("cuda")
return pipe
```text
Here's what this function does:
* `model_id` specifies the model identifier for Stable Diffusion version 1.5.
* `StableDiffusionPipeline.from_pretrained` loads the model weights into memory with a specified tensor type.
* `pipe.to("cuda")` moves the model to the GPU for faster computation.
## Define Helper Functions
We need a helper function to convert the generated image into a base64 string. This encoding allows the image to be easily transmitted over the web in textual form.
```python stable_diffusion.py theme={"theme":{"light":"github-light","dark":"github-dark"}}
def image_to_base64(image):
buffered = BytesIO()
image.save(buffered, format="PNG")
return base64.b64encode(buffered.getvalue()).decode("utf-8")
```text
Explanation:
* `BytesIO`: Creates an in-memory binary stream to which the image is saved.
* `base64.b64encode`: Encodes the binary data to a base64 format, which is then decoded to a UTF-8 string.
## Define the Handler Function
The handler function will be responsible for managing image generation requests. It includes loading the model (if not already loaded), validating inputs, generating images, and converting them to base64 strings.
```python stable_diffusion.py theme={"theme":{"light":"github-light","dark":"github-dark"}}
def stable_diffusion_handler(event):
global model
# Ensure the model is loaded
if "model" not in globals():
model = load_model()
# Get the input prompt from the event
prompt = event["input"].get("prompt")
# Validate input
if not prompt:
return {"error": "No prompt provided for image generation."}
try:
# Generate the image
image = model(prompt).images[0]
# Convert the image to base64
image_base64 = image_to_base64(image)
return {"image": image_base64, "prompt": prompt}
except Exception as e:
return {"error": str(e)}
```text
Key steps in the function:
* Checks if the model is loaded globally, and loads it if not.
* Extracts the `prompt` from the input event.
* Validates that a prompt has been provided.
* Uses the `model` to generate an image.
* Converts the image to base64 and prepares the response.
## Start the Serverless Worker
Now, we'll start the serverless worker using the Runpod SDK.
```python stable_diffusion.py theme={"theme":{"light":"github-light","dark":"github-dark"}}
runpod.serverless.start({"handler": stable_diffusion_handler})
```text
This command starts the serverless worker and specifies the `stable_diffusion_handler` function to handle incoming requests.
## Complete Code
For your convenience, here is the entire code consolidated:
```python stable_diffusion.py theme={"theme":{"light":"github-light","dark":"github-dark"}}
import runpod
import torch
from diffusers import StableDiffusionPipeline
from io import BytesIO
import base64
assert (
torch.cuda.is_available()
), "CUDA is not available. Make sure you have a GPU instance."
def load_model():
model_id = "runwayml/stable-diffusion-v1-5"
pipe = StableDiffusionPipeline.from_pretrained(model_id, torch_dtype=torch.float16)
# to run on cpu change `cuda` to `cpu`
pipe = pipe.to("cuda")
return pipe
def image_to_base64(image):
buffered = BytesIO()
image.save(buffered, format="PNG")
return base64.b64encode(buffered.getvalue()).decode("utf-8")
def stable_diffusion_handler(event):
global model
if "model" not in globals():
model = load_model()
prompt = event["input"].get("prompt")
if not prompt:
return {"error": "No prompt provided for image generation."}
try:
image = model(prompt).images[0]
image_base64 = image_to_base64(image)
return {"image": image_base64, "prompt": prompt}
except Exception as e:
return {"error": str(e)}
runpod.serverless.start({"handler": stable_diffusion_handler})
```text
## Testing Locally
Before deploying on Runpod, you might want to test the script locally. Create a `test_input.json` file with the following content:
```json test_input.json theme={"theme":{"light":"github-light","dark":"github-dark"}}
{
"input": {
"prompt": "A serene landscape with mountains and a lake at sunset"
}
}
```text
Run the script with the following command:
```text
python stable_diffusion.py --rp_server_api
```text
Note: Local testing may not work optimally without a suitable GPU. If issues arise, proceed to deploy and test on Runpod.
## Important Notes:
1. This example requires significant computational resources, particularly GPU memory. Ensure your Runpod configuration has sufficient GPU capabilities.
2. The model is loaded only once when the worker starts, optimizing performance.
3. We've used Stable Diffusion v1.5; you can replace it with other versions or models as required.
4. The handler includes error handling for missing input and exceptions during processing.
5. Ensure necessary dependencies (like `torch`, `diffusers`) are included in your environment or requirements file when deploying.
6. The generated image is returned as a base64-encoded string. For practical applications, consider saving it to a file or cloud storage.
### Conclusion
In this tutorial, you learned how to use the Runpod serverless platform with Stable Diffusion to create a text-to-image generation system. This project showcases the potential for deploying resource-intensive AI models in a serverless architecture using the Runpod Python SDK. You now have the skills to create and deploy sophisticated AI applications on Runpod. What will you create next?
---
# Source: https://docs.runpod.io/api-reference/pods/POST/pods/podId/start.md
> ## Documentation Index
> Fetch the complete documentation index at: https://docs.runpod.io/llms.txt
> Use this file to discover all available pages before exploring further.
# Start or resume a Pod
> Start or resume a Pod.
## OpenAPI
````yaml POST /pods/{podId}/start
openapi: 3.0.3
info:
title: Runpod API
description: Public Rest API for managing Runpod programmatically.
version: 0.1.0
contact:
name: help
url: https://contact.runpod.io/hc/requests/new
email: help@runpod.io
servers:
- url: https://rest.runpod.io/v1
security:
- ApiKey: []
tags:
- name: docs
description: This documentation page.
- name: pods
description: Manage Pods.
- name: endpoints
description: Manage Serverless endpoints.
- name: network volumes
description: Manage Runpod network volumes.
- name: templates
description: Manage Pod and Serverless templates.
- name: container registry auths
description: >-
Manage authentication for container registries such as dockerhub to use
private images.
- name: billing
description: Retrieve billing history for your Runpod account.
externalDocs:
description: Find out more about Runpod.
url: https://runpod.io
paths:
/pods/{podId}/start:
post:
tags:
- pods
summary: Start or resume a Pod
description: Start or resume a Pod.
operationId: StartPod
parameters:
- name: podId
in: path
description: Pod ID to start.
required: true
schema:
type: string
responses:
'200':
description: Pod successfully started.
'400':
description: Invalid Pod ID.
'401':
description: Unauthorized.
components:
securitySchemes:
ApiKey:
type: http
scheme: bearer
bearerFormat: Bearer
````
---
# Source: https://docs.runpod.io/api-reference/pods/POST/pods/podId/stop.md
> ## Documentation Index
> Fetch the complete documentation index at: https://docs.runpod.io/llms.txt
> Use this file to discover all available pages before exploring further.
# Stop a Pod
> Stop a Pod.
## OpenAPI
````yaml POST /pods/{podId}/stop
openapi: 3.0.3
info:
title: Runpod API
description: Public Rest API for managing Runpod programmatically.
version: 0.1.0
contact:
name: help
url: https://contact.runpod.io/hc/requests/new
email: help@runpod.io
servers:
- url: https://rest.runpod.io/v1
security:
- ApiKey: []
tags:
- name: docs
description: This documentation page.
- name: pods
description: Manage Pods.
- name: endpoints
description: Manage Serverless endpoints.
- name: network volumes
description: Manage Runpod network volumes.
- name: templates
description: Manage Pod and Serverless templates.
- name: container registry auths
description: >-
Manage authentication for container registries such as dockerhub to use
private images.
- name: billing
description: Retrieve billing history for your Runpod account.
externalDocs:
description: Find out more about Runpod.
url: https://runpod.io
paths:
/pods/{podId}/stop:
post:
tags:
- pods
summary: Stop a Pod
description: Stop a Pod.
operationId: StopPod
parameters:
- name: podId
in: path
description: Pod ID to stop.
required: true
schema:
type: string
responses:
'200':
description: Pod successfully stopped.
'400':
description: Invalid Pod ID.
'401':
description: Unauthorized.
components:
securitySchemes:
ApiKey:
type: http
scheme: bearer
bearerFormat: Bearer
````
---
# Source: https://docs.runpod.io/api-reference/templates/PATCH/templates/templateId.md
# Source: https://docs.runpod.io/api-reference/templates/GET/templates/templateId.md
# Source: https://docs.runpod.io/api-reference/templates/DELETE/templates/templateId.md
# Source: https://docs.runpod.io/api-reference/templates/PATCH/templates/templateId.md
# Source: https://docs.runpod.io/api-reference/templates/GET/templates/templateId.md
# Source: https://docs.runpod.io/api-reference/templates/DELETE/templates/templateId.md
> ## Documentation Index
> Fetch the complete documentation index at: https://docs.runpod.io/llms.txt
> Use this file to discover all available pages before exploring further.
# Delete a template
> Delete a template.
## OpenAPI
````yaml DELETE /templates/{templateId}
openapi: 3.0.3
info:
title: Runpod API
description: Public Rest API for managing Runpod programmatically.
version: 0.1.0
contact:
name: help
url: https://contact.runpod.io/hc/requests/new
email: help@runpod.io
servers:
- url: https://rest.runpod.io/v1
security:
- ApiKey: []
tags:
- name: docs
description: This documentation page.
- name: pods
description: Manage Pods.
- name: endpoints
description: Manage Serverless endpoints.
- name: network volumes
description: Manage Runpod network volumes.
- name: templates
description: Manage Pod and Serverless templates.
- name: container registry auths
description: >-
Manage authentication for container registries such as dockerhub to use
private images.
- name: billing
description: Retrieve billing history for your Runpod account.
externalDocs:
description: Find out more about Runpod.
url: https://runpod.io
paths:
/templates/{templateId}:
delete:
tags:
- templates
summary: Delete a template
description: Delete a template.
operationId: DeleteTemplate
parameters:
- name: templateId
in: path
description: Template ID to delete.
required: true
schema:
type: string
responses:
'204':
description: Template successfully deleted.
'400':
description: Invalid template ID.
'401':
description: Unauthorized.
components:
securitySchemes:
ApiKey:
type: http
scheme: bearer
bearerFormat: Bearer
````
---
# Source: https://docs.runpod.io/api-reference/templates/POST/templates.md
# Source: https://docs.runpod.io/api-reference/templates/GET/templates.md
# Source: https://docs.runpod.io/api-reference/templates/POST/templates.md
# Source: https://docs.runpod.io/api-reference/templates/GET/templates.md
> ## Documentation Index
> Fetch the complete documentation index at: https://docs.runpod.io/llms.txt
> Use this file to discover all available pages before exploring further.
# List templates
> Returns a list of templates.
## OpenAPI
````yaml GET /templates
openapi: 3.0.3
info:
title: Runpod API
description: Public Rest API for managing Runpod programmatically.
version: 0.1.0
contact:
name: help
url: https://contact.runpod.io/hc/requests/new
email: help@runpod.io
servers:
- url: https://rest.runpod.io/v1
security:
- ApiKey: []
tags:
- name: docs
description: This documentation page.
- name: pods
description: Manage Pods.
- name: endpoints
description: Manage Serverless endpoints.
- name: network volumes
description: Manage Runpod network volumes.
- name: templates
description: Manage Pod and Serverless templates.
- name: container registry auths
description: >-
Manage authentication for container registries such as dockerhub to use
private images.
- name: billing
description: Retrieve billing history for your Runpod account.
externalDocs:
description: Find out more about Runpod.
url: https://runpod.io
paths:
/templates:
get:
tags:
- templates
summary: List templates
description: Returns a list of templates.
operationId: ListTemplates
parameters:
- name: includeEndpointBoundTemplates
in: query
schema:
type: boolean
default: false
example: true
description: Include templates bound to Serverless endpoints in the response.
- name: includePublicTemplates
in: query
schema:
type: boolean
default: false
example: true
description: Include community-made public templates in the response.
- name: includeRunpodTemplates
in: query
schema:
type: boolean
default: false
example: true
description: Include official Runpod templates in the response.
responses:
'200':
description: Successful operation.
content:
application/json:
schema:
$ref: '#/components/schemas/Templates'
'400':
description: Invalid ID supplied.
'404':
description: Template not found.
components:
schemas:
Templates:
type: array
items:
$ref: '#/components/schemas/Template'
Template:
type: object
properties:
category:
type: string
example: NVIDIA
description: >-
The category of the template. The category can be used to filter
templates in the Runpod UI. Current categories are NVIDIA, AMD, and
CPU.
containerDiskInGb:
type: integer
example: 50
description: >-
The amount of disk space, in gigabytes (GB), to allocate on the
container disk for a Pod or worker. The data on the container disk
is wiped when the Pod or worker restarts. To persist data across
restarts, set volumeInGb to configure the local network volume.
containerRegistryAuthId:
type: string
dockerEntrypoint:
type: array
items:
type: string
example: []
description: >-
If specified, overrides the ENTRYPOINT for the Docker image run on a
Pod or worker. If [], uses the ENTRYPOINT defined in the image.
dockerStartCmd:
type: array
items:
type: string
example: []
description: >-
If specified, overrides the start CMD for the Docker image run on a
Pod or worker. If [], uses the start CMD defined in the image.
earned:
type: number
example: 100
description: >-
The amount of Runpod credits earned by the creator of a template by
all Pods or workers created from the template.
env:
type: object
items:
type: string
example:
ENV_VAR: value
default: {}
id:
type: string
example: 30zmvf89kd
description: A unique string identifying a template.
imageName:
type: string
example: runpod/pytorch:2.1.0-py3.10-cuda11.8.0-devel-ubuntu22.04
description: >-
The image tag for the container run on Pods or workers created from
a template.
isPublic:
type: boolean
example: false
description: >-
Set to true if a template is public and can be used by any Runpod
user. Set to false if a template is private and can only be used by
the creator.
isRunpod:
type: boolean
example: true
description: If true, a template is an official template managed by Runpod.
isServerless:
type: boolean
example: true
description: >-
If true, instances created from a template are Serverless workers.
If false, instances created from a template are Pods.
name:
type: string
example: my template
description: A user-defined name for a template. The name needs to be unique.
ports:
type: array
items:
type: string
example:
- 8888/http
- 22/tcp
description: >-
A list of ports exposed on a Pod or worker. Each port is formatted
as [port number]/[protocol]. Protocol can be either http or tcp.
readme:
type: string
description: >-
A string of markdown-formatted text that describes a template. The
readme is displayed in the Runpod UI when a user selects the
template.
runtimeInMin:
type: integer
volumeInGb:
type: integer
example: 20
description: >-
The amount of disk space, in gigabytes (GB), to allocate on the
local network volume for a Pod or worker. The data on the local
network volume is persisted across restarts. To persist data so that
future Pods and workers can access it, create a network volume and
set networkVolumeId to attach it to the Pod or worker.
volumeMountPath:
type: string
example: /workspace
description: >-
If a local network volume or network volume is attached to a Pod or
worker, the absolute path where the network volume is mounted in the
filesystem.
securitySchemes:
ApiKey:
type: http
scheme: bearer
bearerFormat: Bearer
````
---
# Source: https://docs.runpod.io/tips-and-tricks/tmux.md
> ## Documentation Index
> Fetch the complete documentation index at: https://docs.runpod.io/llms.txt
> Use this file to discover all available pages before exploring further.
# Using TMUX for persistent sessions
TMUX is a terminal multiplexer that creates persistent terminal sessions on your Pod.
## Why use TMUX
While you can run long-running tasks in JupyterLab notebooks, the kernel can crash unexpectedly, losing hours or days of computation. TMUX runs your commands in persistent terminal sessions that continue even if JupyterLab crashes or you disconnect.
## Requirements
To use TMUX, you need terminal access to your Runpod Pod (SSH, web terminal, or JupyterLab terminal).
## Video tutorial
For a comprehensive video guide on using TMUX, check out this excellent tutorial: [TMUX Tutorial on YouTube](https://youtu.be/nTqu6w2wc68?si=w0_TiikbaFVb-aCr)
## Installing TMUX
TMUX is not installed by default on Runpod Pods. To install it, run:
```bash
apt-get update && apt-get install -y tmux
```
Most Runpod templates are based on Ubuntu/Debian images that support `apt-get`. If you're using Alpine Linux, use `apk add tmux` instead. Some minimal images may lack required dependencies.
## Practical example: running model training
Here's a typical workflow for running long-duration model training:
```bash
# Start a new TMUX session
tmux new -s model_training
# Navigate to your project directory
cd /workspace/my_project
# Start your training script
python train.py --epochs 100 --batch-size 32
# Detach from the session with Ctrl+B, then D
# You can now safely disconnect from the Pod
# Later, reconnect to the Pod and reattach
tmux attach -t model_training
```
## Command reference
### Starting a new session
Create a new TMUX session with a descriptive name:
```bash
tmux new -s training
```
### Detaching from a session
To detach from a session and leave it running in the background, press:
```text
Ctrl+B, then D
```
Your processes will continue running even if you disconnect from the Pod.
### Listing active sessions
View all active TMUX sessions:
```bash
tmux ls
```
### Reattaching to a session
Reconnect to a previously created session:
```bash
tmux attach -t training
```
### Killing a session
End a session when you no longer need it:
```bash
tmux kill-session -t training
```
### Killing all sessions
If you need to restart fresh and kill all TMUX sessions:
```bash
tmux kill-server
```
Alternatively, you can kill all sessions except the current one:
```bash
tmux kill-session -a
```
## Advanced TMUX features
### Window management
TMUX supports multiple windows within a session:
* `Ctrl+B, C` - Create new window
* `Ctrl+B, N` - Next window
* `Ctrl+B, P` - Previous window
* `Ctrl+B, 0-9` - Switch to window by number
### Pane splitting
Split your terminal into multiple panes:
* `Ctrl+B, %` - Split vertically
* `Ctrl+B, "` - Split horizontally
* `Ctrl+B, Arrow keys` - Navigate between panes
* `Ctrl+B, X` - Close current pane
### Scrolling and copy mode
To scroll through terminal output:
1. Enter copy mode: `Ctrl+B, [`
2. Use arrow keys or Page Up/Down to scroll
3. Press `q` to exit copy mode
## Best practices
When using TMUX on Runpod Pods, keep these tips in mind:
* Always name your sessions descriptively to easily identify them later.
* Regularly check on long-running processes by reattaching to sessions.
* Clean up finished sessions to avoid confusion.
* Use TMUX for any process that takes longer than a few minutes to complete.
* Consider creating a TMUX session immediately when connecting to a Pod for important work.
## Troubleshooting
If you can't reattach to a session after reconnecting to a Pod, the Pod may have been restarted. TMUX sessions don't persist across Pod restarts, so ensure you save your work regularly and use network volumes for persistent storage.
---
# Source: https://docs.runpod.io/references/troubleshooting/token-authentication-enabled.md
> ## Documentation Index
> Fetch the complete documentation index at: https://docs.runpod.io/llms.txt
> Use this file to discover all available pages before exploring further.
# JupyterLab server token authentication
If you see a "Token authentication is enabled" screen when trying to access your Pod's JupyterLab server, follow the steps below to log in.
1. Go to the Pod page in the Runpod console and click the **Connect** button for the Pod you want to access.
2. Look for the **Web Terminal** start button.
3. Click **Start**, then open the web terminal.
4. In the terminal, run the following command to get the JupyterLab server token:
```bash
jupyter server list
```
You should see output similar to this:
```bash
root@2779b5db68b8:/# jupyter server list
Currently running servers:
http://localhost:8888/?token=ua5nw5fwkdzseqpp5apj :: /
root@2779b5db68b8:/#
```
The token you need is the string of characters that appears after the `=` sign, such as `ua5nw5fwkdzseqpp5apj` in the example above.
Copy this token, return to your JupyterLab login page, and paste it into the **Token** field to sign in.
---
# Source: https://docs.runpod.io/pods/storage/transfer-files.md
> ## Documentation Index
> Fetch the complete documentation index at: https://docs.runpod.io/llms.txt
> Use this file to discover all available pages before exploring further.
# Transfer files
> Move files between your local machine and Pods with a variety of secure transfer methods.
## Choose your transfer method
Runpod supports four different file transfer methods, each optimized for specific use cases:
| Method | Best for | Setup required | File size limit |
| -------------- | --------------------------------- | ------------------------ | --------------------- |
| **runpodctl** | Quick, occasional transfers | Preinstalled on Pods | Small to medium files |
| **SCP** | Standard file operations | SSH configuration | Any size |
| **rsync** | Large datasets, syncing | SSH + rsync installation | Any size |
| **Cloud sync** | Backup, multi-environment sharing | Cloud provider setup | Provider dependent |
### runpodctl
The simplest option for occasional transfers. Uses secure one-time codes and requires no setup since it's pre-installed on all Pods. Perfect for quick file exchanges.
To install `runpodctl` on your local machine, see the [installation guide](/runpodctl/overview).
### SCP
A reliable, standard method that works over SSH. Ideal for users comfortable with command-line tools who need to transfer both individual files and directories.
To configure your Pod for SSH access, see the ([SSH setup guide](/pods/configuration/use-ssh)).
### rsync
The most powerful option, featuring incremental transfers, compression, and detailed progress reporting. Essential for large datasets, regular synchronization, and preserving file attributes.
To set up `rsync`:
* Configure SSH access (same as for SCP).
* Install rsync on both machines: `apt install rsync`
* Ensure your local machine is running a Linux or WSL environment.
### Cloud sync
Direct synchronization with cloud storage providers like AWS S3, Google Cloud Storage, or Dropbox. Best for creating backups or sharing files across multiple environments.
To learn more, see the [cloud sync configuration guide](/pods/storage/cloud-sync).
## Transfer with runpodctl
The [Runpod CLI](/runpodctl/overview) offers the most straightforward approach to file transfer using secure one-time codes. This method works great for occasional transfers but consider other options for large files.
### Send a file
From the source machine (your local computer or a Pod), run:
```bash
runpodctl send YOUR_FILE
```
You'll see output like this:
```text
Sending 'YOUR_FILE' (5 B)
Code is: 8338-galileo-collect-fidel
On the other computer run
runpodctl receive 8338-galileo-collect-fidel
```
The code `8338-galileo-collect-fidel` is your unique, one-time transfer code.
### Receive a file
On the destination machine, use the code provided by the send command:
```bash
runpodctl receive 8338-galileo-collect-fidel
```
You'll see confirmation of the transfer:
```text
Receiving 'YOUR_FILE' (5 B)
Receiving (<-149.36.0.243:8692)
data.txt 100% |████████████████████| ( 5/ 5B, 0.040 kB/s)
```
## Transfer with SCP
SCP provides reliable file transfer over SSH connections. Use this method when you need standard command-line file operations.
### Basic syntax
The general format for SCP commands (replace `43201` and `194.26.196.6` with your Pod's port and IP):
```bash
scp -P 43201 -i ~/.ssh/id_ed25519 /local/file/path root@194.26.196.6:/destination/file/path
```
If your private key is stored elsewhere or you're using Windows Command Prompt, update the key path accordingly. For quick one-time setups, consider [password-based SSH](/pods/configuration/use-ssh#password-based-ssh).
### Send files to your Pod
Transfer a single file:
```bash
scp -P 43201 -i ~/.ssh/id_ed25519 ~/documents/example.txt root@194.26.196.6:/root/example.txt
```
Transfer a directory (use `-r` for recursive copying):
```bash
scp -r -P 43201 -i ~/.ssh/id_ed25519 ~/documents/example_dir root@194.26.196.6:/root/example_dir
```
### Download files from your Pod
Simply reverse the source and destination:
```bash
scp -P 43201 -i ~/.ssh/id_ed25519 root@194.26.196.6:/root/example.txt ~/documents/example.txt
```
## Transfer with rsync
`rsync` offers advanced synchronization features and is the best choice for large datasets or regular backup operations.
`rsync` requires a Linux environment or WSL on Windows.
### Command syntax
```bash
rsync -e "ssh -p 43201" /source/file/path root@194.26.196.6:/destination/file/path
```
### Essential flags
* `-a` (archive) - Preserves permissions, timestamps, and attributes (essential for directories)
* `-v` (verbose) - Shows detailed transfer information
* `-z` (compress) - Compresses data during transfer (saves bandwidth, uses more CPU)
* `-p` (progress) - Displays transfer progress
* `-d` (delete) - Removes files from destination that don't exist in source
### Upload files to your Pod
Transfer with progress and compression:
```bash
rsync -avz -e "ssh -p 43201" ~/documents/example.txt root@194.26.196.6:/root/example.txt
```
### Download from your Pod
```bash
rsync -avz -e "ssh -p 43201" root@194.26.196.6:/root/example.txt ~/documents/example.txt
```
### Directory synchronization
Transfer directory contents only (note the trailing slash):
```bash
rsync -avz -e "ssh -p 43201" ~/documents/example_dir/ root@194.26.196.6:/root/example_dir/
```
Transfer the directory itself (no trailing slash):
```bash
rsync -avz -e "ssh -p 43201" ~/documents/example_dir root@194.26.196.6:/root/
```
### Incremental transfers
rsync's key advantage is intelligent synchronization. Files that already exist at the destination aren't transferred again:
First transfer (full copy):
```bash
rsync -avz -e "ssh -p 43201" ~/documents/example.txt root@194.26.196.6:/root/example.txt
sending incremental file list
example.txt
119 100% 0.00kB/s 0:00:00 (xfr#1, to-chk=0/1)
sent 243 bytes received 35 bytes 185.33 bytes/sec
total size is 119 speedup is 0.43
```
Second transfer (minimal data):
```bash
rsync -avz -e "ssh -p 43201" ~/documents/example.txt root@194.26.196.6:/root/example.txt
sending incremental file list
sent 120 bytes received 12 bytes 88.00 bytes/sec
total size is 119 speedup is 0.90
```
## Sync with cloud storage
Connect your Pod storage directly to cloud providers for seamless backup and synchronization.
To set up cloud sync:
1. Navigate to your **My Pods** page
2. Click the **Cloud Sync** option for your Pod
3. Follow the provider-specific configuration steps
For detailed setup instructions with AWS S3, Google Cloud Storage, Azure, Backblaze, and Dropbox, see the [cloud sync configuration guide](/pods/storage/cloud-sync).
## Transfer with Google Drive
You can also use these Colab notebooks to transfer files between Pods and Google Drive:
* [Send files](https://colab.research.google.com/drive/1UaODD9iGswnKF7SZfsvwHDGWWwLziOsr#scrollTo=2nlcIAY3gGLt)
* [Receive files](https://colab.research.google.com/drive/1ot8pODgystx1D6_zvsALDSvjACBF1cj6#scrollTo=RF1bMqhBOpSZ)
## Troubleshooting
Here are some common issues and possible fixes:
**Connection refused errors:**
* Verify SSH is properly configured on your Pod.
* Check that the correct port and IP address are being used.
* Ensure port 22 is exposed in your Pod configuration.
**Permission denied:**
* Confirm your SSH key is correctly specified with `-i`
* Verify the key has appropriate permissions (`chmod 600 ~/.ssh/id_ed25519`)
* Try password-based authentication for quick tests.
**Large file transfers timing out:**
* Use `rsync` instead of SCP for better reliability.
* Add the `-z` flag to compress data during transfer.
* Consider splitting very large files before transfer.
---
# Source: https://docs.runpod.io/references/troubleshooting/troubleshooting-502-errors.md
> ## Documentation Index
> Fetch the complete documentation index at: https://docs.runpod.io/llms.txt
> Use this file to discover all available pages before exploring further.
# 502 errors
502 errors can occur when users attempt to access a program running on a specific port of a deployed pod and the program isn't running or has encountered an error. This document provides guidance to help you troubleshoot this error.
### Check your Pod's GPU
The first step to troubleshooting a 502 error is to check whether your pod has a GPU attached.
1. **Access your pod's settings**: Click on your pod's settings in the user interface to access detailed information about your pod.
2. **Verify GPU attachment**: Here, you should be able to see if your pod has a GPU attached. If it does not, you will need to attach a GPU.
If a GPU is attached, you will see it under the Pods screen (e.g. 1 x A6000). If a GPU is not attached, this number will be 0. Runpod does allow you to spin up a pod with 0 GPUs so that you can connect to it via a Terminal or CloudSync to access data. However, the options to connect to Runpod via the web interface will be nonfunctional, even if they are lit up.
### Check your Pod's logs
After confirming that your pod has a GPU attached, the next step is to check your pod's logs for any errors.
1. **Access your pod's logs**: You can view the logs from the pod's settings in the user interface.
2.
**Look for errors**: Browse through the logs to find any error messages that may provide clues about why you're experiencing a 502 error.
### Verify additional steps for official templates
In some cases, for our official templates, the user interface does not work right away and may require additional steps to be performed by the user.
1. **Access the template's ReadMe**: Navigate to the template's page and open the ReadMe file.
2. **Follow additional steps**: The ReadMe file should provide instructions on any additional steps you need to perform to get the UI functioning properly. Make sure to follow these instructions closely.
Remember, each template may have unique requirements or steps for setup. It is always recommended to thoroughly review the documentation associated with each template.
If you continue to experience 502 errors after following these steps, please contact our support team. We're here to help ensure that your experience on our platform is as seamless as possible.
---
# Source: https://docs.runpod.io/pods/storage/types.md
> ## Documentation Index
> Fetch the complete documentation index at: https://docs.runpod.io/llms.txt
> Use this file to discover all available pages before exploring further.
# Storage options
> Choose the right type of storage for your Pods.
Choosing the right type of storage is crucial for optimizing your workloads, whether you need temporary storage for active computations, persistent storage for long-term data retention, or permanent, shareable storage across multiple Pods.
This page describes the different types of storage options available for your Pods, and when to use each in your workflow.
## Container disk
A container disk houses the operating system and provides temporary storage for a Pod. It's created when a Pod is launched and is directly tied to the Pod's lifecycle.
## Volume disk
A volume disk provides persistent storage that remains available for the duration of the Pod's lease. It functions like a dedicated hard drive, allowing you to store data that needs to be retained even if the Pod is stopped or rebooted.
The volume disk is mounted at `/workspace` by default (this will be replaced by the network volume if one is attached). This can be changed by [editing your Pod configuration](#modifying-storage-capacity).
## Network volume
[Network volumes](/storage/network-volumes) offer persistent storage similar to the volume disk, but with the added benefit that they can be attached to multiple Pods, and that they persist independently from the Pod's lifecycle. This allows you to share and access data across multiple instances or transfer storage between machines, and retain data even after a Pod is deleted.
When attached to a Pod, a network volume replaces the volume disk, and by default they are similarly mounted at `/workspace`.
Network volumes must be attached during Pod creation, and cannot be unattached later.
## Storage type comparison
This table provides a comparative overview of the storage types available for your Pods:
| Feature | Container Disk | Volume Disk | Network Volume |
| :------------------- | :---------------------------------------- | :-------------------------------------------- | :----------------------------------------------------- |
| **Data persistence** | Volatile (lost on stop/restart) | Persistent (retained until Pod deletion) | Permanent (retained independently from Pod lifecycles) |
| **Lifecycle** | Tied directly to the Pod's active session | Tied to the Pod's lease period | Independent, can outlive Pods |
| **Performance** | Fastest (locally attached) | Reliable, generally slower than container | Performance can vary (network dependent) |
| **Capacity** | Determined by Pod configuration | Selectable at creation | Selectable and often resizable |
| **Cost** | \$0.1/GB/month | \$0.1/GB/month | \$0.07/GB/month |
| **Best for** | Temporary session data, cache | Persistent application data, models, datasets | Shared data, portable storage, collaborative workflows |
## Choosing the right storage
Here's what you should consider when selecting storage for your Pods:
* **Data persistence needs:** Does your data need to survive Pod restarts or deletions?
* **Performance requirements:** Do your applications require very high-speed I/O, or is standard performance sufficient?
* **Data sharing:** Do you need to share data between multiple Pods?
## Modifying storage capacity
To update the size of a Pod's container or volume disk:
1. Navigate to the [Pod page](https://console.runpod.io/pod) in the Runpod console.
2. Click the three dots to the right of the Pod you want to modify and select **Edit Pod**.
3. Adjust the storage capacity for the container or volume disk. Volume disk size can be increased, but not decreased.
4. Click **Save** to apply the changes.
Editing a running Pod will cause it to reset completely, erasing all data that isn't stored in your volume disk/network volume mount directory (`/workspace` by default).
## Transferring data to another cloud provider
You can upload data from your Pod to AWS S3, Google Cloud Storage, Azure, Dropbox, and more by clicking the **Cloud Sync** button on the Pod page. For detailed instructions on connecting to these services, see [Export data](/pods/storage/cloud-sync).
## Next steps
* Learn how to [create a network volume](/storage/network-volumes).
* Learn how to [choose the right Pod](/pods/choose-a-pod) for your workload.
* Explore options for [managing your Pods](/pods/manage-pods).
* Understand how to create [Pod templates](/pods/templates/overview) for pre-configured environments.
---
# Source: https://docs.runpod.io/api-reference/templates/POST/templates/templateId/update.md
# Source: https://docs.runpod.io/api-reference/pods/POST/pods/podId/update.md
# Source: https://docs.runpod.io/api-reference/network-volumes/POST/networkvolumes/networkVolumeId/update.md
# Source: https://docs.runpod.io/api-reference/endpoints/POST/endpoints/endpointId/update.md
> ## Documentation Index
> Fetch the complete documentation index at: https://docs.runpod.io/llms.txt
> Use this file to discover all available pages before exploring further.
# Update an endpoint
> Update an endpoint - synonym for PATCH /endpoints/{endpointId}.
## OpenAPI
````yaml POST /endpoints/{endpointId}/update
openapi: 3.0.3
info:
title: Runpod API
description: Public Rest API for managing Runpod programmatically.
version: 0.1.0
contact:
name: help
url: https://contact.runpod.io/hc/requests/new
email: help@runpod.io
servers:
- url: https://rest.runpod.io/v1
security:
- ApiKey: []
tags:
- name: docs
description: This documentation page.
- name: pods
description: Manage Pods.
- name: endpoints
description: Manage Serverless endpoints.
- name: network volumes
description: Manage Runpod network volumes.
- name: templates
description: Manage Pod and Serverless templates.
- name: container registry auths
description: >-
Manage authentication for container registries such as dockerhub to use
private images.
- name: billing
description: Retrieve billing history for your Runpod account.
externalDocs:
description: Find out more about Runpod.
url: https://runpod.io
paths:
/endpoints/{endpointId}/update:
post:
tags:
- endpoints
summary: Update an endpoint
description: Update an endpoint - synonym for PATCH /endpoints/{endpointId}.
operationId: UpdateEndpoint
parameters:
- name: endpointId
in: path
description: ID of endpoint that needs to be updated.
required: true
schema:
type: string
requestBody:
description: Update an endpoint.
content:
application/json:
schema:
$ref: '#/components/schemas/EndpointUpdateInput'
required: true
responses:
'200':
description: Successful operation.
content:
application/json:
schema:
$ref: '#/components/schemas/Endpoint'
'400':
description: Invalid input.
components:
schemas:
EndpointUpdateInput:
type: object
description: >-
Input for updating an endpoint which will trigger a rolling release on
the endpoint.
properties:
allowedCudaVersions:
type: array
description: >-
If the created Serverless endpoint is a GPU endpoint, a list of
acceptable CUDA versions on the created workers. If not set, any
CUDA version is acceptable.
items:
type: string
enum:
- '12.9'
- '12.8'
- '12.7'
- '12.6'
- '12.5'
- '12.4'
- '12.3'
- '12.2'
- '12.1'
- '12.0'
- '11.8'
cpuFlavorIds:
type: array
items:
type: string
enum:
- cpu3c
- cpu3g
- cpu5c
- cpu5g
description: >-
If the created Serverless endpoint is a CPU endpoint, a list of
Runpod CPU flavors which can be attached to the created workers. The
order of the list determines the order to rent CPU flavors.
dataCenterIds:
type: array
example:
- EU-RO-1
- CA-MTL-1
default:
- EU-RO-1
- CA-MTL-1
- EU-SE-1
- US-IL-1
- EUR-IS-1
- EU-CZ-1
- US-TX-3
- EUR-IS-2
- US-KS-2
- US-GA-2
- US-WA-1
- US-TX-1
- CA-MTL-3
- EU-NL-1
- US-TX-4
- US-CA-2
- US-NC-1
- OC-AU-1
- US-DE-1
- EUR-IS-3
- CA-MTL-2
- AP-JP-1
- EUR-NO-1
- EU-FR-1
- US-KS-3
- US-GA-1
items:
type: string
enum:
- EU-RO-1
- CA-MTL-1
- EU-SE-1
- US-IL-1
- EUR-IS-1
- EU-CZ-1
- US-TX-3
- EUR-IS-2
- US-KS-2
- US-GA-2
- US-WA-1
- US-TX-1
- CA-MTL-3
- EU-NL-1
- US-TX-4
- US-CA-2
- US-NC-1
- OC-AU-1
- US-DE-1
- EUR-IS-3
- CA-MTL-2
- AP-JP-1
- EUR-NO-1
- EU-FR-1
- US-KS-3
- US-GA-1
description: >-
A list of Runpod data center IDs where workers on the created
Serverless endpoint can be located.
executionTimeoutMs:
type: integer
example: 600000
description: >-
The maximum number of milliseconds an individual request can run on
a Serverless endpoint before the worker is stopped and the request
is marked as failed.
flashboot:
type: boolean
example: true
description: Whether to use flash boot for the created Serverless endpoint.
gpuCount:
type: integer
default: 1
description: >-
If the created Serverless endpoint is a GPU endpoint, the number of
GPUs attached to each worker on the endpoint.
minimum: 1
gpuTypeIds:
type: array
items:
type: string
enum:
- NVIDIA GeForce RTX 4090
- NVIDIA A40
- NVIDIA RTX A5000
- NVIDIA GeForce RTX 5090
- NVIDIA H100 80GB HBM3
- NVIDIA GeForce RTX 3090
- NVIDIA RTX A4500
- NVIDIA L40S
- NVIDIA H200
- NVIDIA L4
- NVIDIA RTX 6000 Ada Generation
- NVIDIA A100-SXM4-80GB
- NVIDIA RTX 4000 Ada Generation
- NVIDIA RTX A6000
- NVIDIA A100 80GB PCIe
- NVIDIA RTX 2000 Ada Generation
- NVIDIA RTX A4000
- NVIDIA RTX PRO 6000 Blackwell Server Edition
- NVIDIA H100 PCIe
- NVIDIA H100 NVL
- NVIDIA L40
- NVIDIA B200
- NVIDIA GeForce RTX 3080 Ti
- NVIDIA RTX PRO 6000 Blackwell Workstation Edition
- NVIDIA GeForce RTX 3080
- NVIDIA GeForce RTX 3070
- AMD Instinct MI300X OAM
- NVIDIA GeForce RTX 4080 SUPER
- Tesla V100-PCIE-16GB
- Tesla V100-SXM2-32GB
- NVIDIA RTX 5000 Ada Generation
- NVIDIA GeForce RTX 4070 Ti
- NVIDIA RTX 4000 SFF Ada Generation
- NVIDIA GeForce RTX 3090 Ti
- NVIDIA RTX A2000
- NVIDIA GeForce RTX 4080
- NVIDIA A30
- NVIDIA GeForce RTX 5080
- Tesla V100-FHHL-16GB
- NVIDIA H200 NVL
- Tesla V100-SXM2-16GB
- NVIDIA RTX PRO 6000 Blackwell Max-Q Workstation Edition
- NVIDIA A5000 Ada
- Tesla V100-PCIE-32GB
- NVIDIA RTX A4500
- NVIDIA A30
- NVIDIA GeForce RTX 3080TI
- Tesla T4
- NVIDIA RTX A30
description: >-
If the created Serverless endpoint is a GPU endpoint, a list of
Runpod GPU types which can be attached to the created workers. The
order of the list determines the order to rent GPU types.
idleTimeout:
type: integer
default: 5
description: >-
The number of seconds a worker on the created Serverless endpoint
can run without taking a job before the worker is scaled down.
minimum: 1
maximum: 3600
name:
type: string
maxLength: 191
description: >-
A user-defined name for the created Serverless endpoint. The name
does not need to be unique.
networkVolumeId:
type: string
description: >-
The unique string identifying the network volume to attach to the
created Serverless endpoint.
networkVolumeIds:
type: array
items:
type: string
description: >-
A list of network volume IDs to attach to the created Serverless
endpoint. Allows multiple network volumes to be used with
multi-region endpoints.
scalerType:
type: string
enum:
- QUEUE_DELAY
- REQUEST_COUNT
default: QUEUE_DELAY
description: >-
The method used to scale up workers on the created Serverless
endpoint. If QUEUE_DELAY, workers are scaled based on a periodic
check to see if any requests have been in queue for too long. If
REQUEST_COUNT, the desired number of workers is periodically
calculated based on the number of requests in the endpoint's queue.
Use QUEUE_DELAY if you need to ensure requests take no longer than a
maximum latency, and use REQUEST_COUNT if you need to scale based on
the number of requests.
scalerValue:
type: integer
default: 4
description: >-
If the endpoint scalerType is QUEUE_DELAY, the number of seconds a
request can remain in queue before a new worker is scaled up. If the
endpoint scalerType is REQUEST_COUNT, the number of workers is
increased as needed to meet the number of requests in the endpoint's
queue divided by scalerValue.
minimum: 1
templateId:
type: string
example: 30zmvf89kd
description: >-
The unique string identifying the template used to create the
Serverless endpoint.
vcpuCount:
type: integer
default: 2
description: >-
If the created Serverless endpoint is a CPU endpoint, the number of
vCPUs allocated to each created worker.
workersMax:
type: integer
example: 3
description: >-
The maximum number of workers that can be running at the same time
on a Serverless endpoint.
minimum: 0
workersMin:
type: integer
example: 0
description: >-
The minimum number of workers that will run at the same time on a
Serverless endpoint. This number of workers will always stay running
for the endpoint, and will be charged even if no requests are being
processed, but they are charged at a lower rate than running
autoscaling workers.
minimum: 0
Endpoint:
type: object
properties:
allowedCudaVersions:
type: array
items:
type: string
enum:
- '12.9'
- '12.8'
- '12.7'
- '12.6'
- '12.5'
- '12.4'
- '12.3'
- '12.2'
- '12.1'
- '12.0'
- '11.8'
description: >-
A list of acceptable CUDA versions for the workers on a Serverless
endpoint. If not set, any CUDA version is acceptable.
computeType:
type: string
enum:
- CPU
- GPU
example: GPU
description: The type of compute used by workers on a Serverless endpoint.
createdAt:
type: string
example: '2024-07-12T19:14:40.144Z'
description: The UTC timestamp when a Serverless endpoint was created.
dataCenterIds:
type: array
example: EU-NL-1,EU-RO-1,EU-SE-1
default:
- EU-RO-1
- CA-MTL-1
- EU-SE-1
- US-IL-1
- EUR-IS-1
- EU-CZ-1
- US-TX-3
- EUR-IS-2
- US-KS-2
- US-GA-2
- US-WA-1
- US-TX-1
- CA-MTL-3
- EU-NL-1
- US-TX-4
- US-CA-2
- US-NC-1
- OC-AU-1
- US-DE-1
- EUR-IS-3
- CA-MTL-2
- AP-JP-1
- EUR-NO-1
- EU-FR-1
- US-KS-3
- US-GA-1
items:
type: string
enum:
- EU-RO-1
- CA-MTL-1
- EU-SE-1
- US-IL-1
- EUR-IS-1
- EU-CZ-1
- US-TX-3
- EUR-IS-2
- US-KS-2
- US-GA-2
- US-WA-1
- US-TX-1
- CA-MTL-3
- EU-NL-1
- US-TX-4
- US-CA-2
- US-NC-1
- OC-AU-1
- US-DE-1
- EUR-IS-3
- CA-MTL-2
- AP-JP-1
- EUR-NO-1
- EU-FR-1
- US-KS-3
- US-GA-1
description: >-
A list of Runpod data center IDs where workers on a Serverless
endpoint can be located.
env:
type: object
items:
type: string
example:
ENV_VAR: value
default: {}
executionTimeoutMs:
type: integer
example: 600000
description: >-
The maximum number of milliseconds an individual request can run on
a Serverless endpoint before the worker is stopped and the request
is marked as failed.
gpuCount:
type: integer
example: 1
description: The number of GPUs attached to each worker on a Serverless endpoint.
gpuTypeIds:
type: array
items:
type: string
enum:
- NVIDIA GeForce RTX 4090
- NVIDIA A40
- NVIDIA RTX A5000
- NVIDIA GeForce RTX 5090
- NVIDIA H100 80GB HBM3
- NVIDIA GeForce RTX 3090
- NVIDIA RTX A4500
- NVIDIA L40S
- NVIDIA H200
- NVIDIA L4
- NVIDIA RTX 6000 Ada Generation
- NVIDIA A100-SXM4-80GB
- NVIDIA RTX 4000 Ada Generation
- NVIDIA RTX A6000
- NVIDIA A100 80GB PCIe
- NVIDIA RTX 2000 Ada Generation
- NVIDIA RTX A4000
- NVIDIA RTX PRO 6000 Blackwell Server Edition
- NVIDIA H100 PCIe
- NVIDIA H100 NVL
- NVIDIA L40
- NVIDIA B200
- NVIDIA GeForce RTX 3080 Ti
- NVIDIA RTX PRO 6000 Blackwell Workstation Edition
- NVIDIA GeForce RTX 3080
- NVIDIA GeForce RTX 3070
- AMD Instinct MI300X OAM
- NVIDIA GeForce RTX 4080 SUPER
- Tesla V100-PCIE-16GB
- Tesla V100-SXM2-32GB
- NVIDIA RTX 5000 Ada Generation
- NVIDIA GeForce RTX 4070 Ti
- NVIDIA RTX 4000 SFF Ada Generation
- NVIDIA GeForce RTX 3090 Ti
- NVIDIA RTX A2000
- NVIDIA GeForce RTX 4080
- NVIDIA A30
- NVIDIA GeForce RTX 5080
- Tesla V100-FHHL-16GB
- NVIDIA H200 NVL
- Tesla V100-SXM2-16GB
- NVIDIA RTX PRO 6000 Blackwell Max-Q Workstation Edition
- NVIDIA A5000 Ada
- Tesla V100-PCIE-32GB
- NVIDIA RTX A4500
- NVIDIA A30
- NVIDIA GeForce RTX 3080TI
- Tesla T4
- NVIDIA RTX A30
description: >-
A list of Runpod GPU types which can be attached to a Serverless
endpoint.
id:
type: string
example: jpnw0v75y3qoql
description: A unique string identifying a Serverless endpoint.
idleTimeout:
type: integer
example: 5
description: >-
The number of seconds a worker on a Serverless endpoint can be
running without taking a job before the worker is scaled down.
instanceIds:
type: array
items:
type: string
example:
- cpu3c-8-16
description: >-
For CPU Serverless endpoints, a list of instance IDs that can be
attached to a Serverless endpoint.
name:
type: string
example: my endpoint
description: >-
A user-defined name for a Serverless endpoint. The name does not
need to be unique.
networkVolumeId:
type: string
example: agv6w2qcg7
description: >-
The unique string identifying the network volume to attach to the
Serverless endpoint.
networkVolumeIds:
type: array
items:
type: string
example:
- agv6w2qcg7
- bxh7w3rch8
description: >-
A list of network volume IDs attached to the Serverless endpoint.
Allows multiple network volumes to be used with multi-region
endpoints.
scalerType:
type: string
example: QUEUE_DELAY
enum:
- QUEUE_DELAY
- REQUEST_COUNT
description: >-
The method used to scale up workers on a Serverless endpoint. If
QUEUE_DELAY, workers are scaled based on a periodic check to see if
any requests have been in queue for too long. If REQUEST_COUNT, the
desired number of workers is periodically calculated based on the
number of requests in the endpoint's queue. Use QUEUE_DELAY if you
need to ensure requests take no longer than a maximum latency, and
use REQUEST_COUNT if you need to scale based on the number of
requests.
scalerValue:
type: integer
example: 4
description: >-
If the endpoint scalerType is QUEUE_DELAY, the number of seconds a
request can remain in queue before a new worker is scaled up. If the
endpoint scalerType is REQUEST_COUNT, the number of workers is
increased as needed to meet the number of requests in the endpoint's
queue divided by scalerValue.
template:
$ref: '#/components/schemas/Template'
templateId:
type: string
example: 30zmvf89kd
description: >-
The unique string identifying the template used to create a
Serverless endpoint.
userId:
type: string
example: user_2PyTJrLzeuwfZilRZ7JhCQDuSqo
description: >-
A unique string identifying the Runpod user who created a Serverless
endpoint.
version:
type: integer
example: 0
description: >-
The latest version of a Serverless endpoint, which is updated
whenever the template or environment variables of the endpoint are
changed.
workers:
type: array
items:
$ref: '#/components/schemas/Pod'
description: Information about current workers on a Serverless endpoint.
workersMax:
type: integer
example: 3
description: >-
The maximum number of workers that can be running at the same time
on a Serverless endpoint.
workersMin:
type: integer
example: 0
description: >-
The minimum number of workers that will run at the same time on a
Serverless endpoint. This number of workers will always stay running
for the endpoint, and will be charged even if no requests are being
processed, but they are charged at a lower rate than running
autoscaling workers.
Template:
type: object
properties:
category:
type: string
example: NVIDIA
description: >-
The category of the template. The category can be used to filter
templates in the Runpod UI. Current categories are NVIDIA, AMD, and
CPU.
containerDiskInGb:
type: integer
example: 50
description: >-
The amount of disk space, in gigabytes (GB), to allocate on the
container disk for a Pod or worker. The data on the container disk
is wiped when the Pod or worker restarts. To persist data across
restarts, set volumeInGb to configure the local network volume.
containerRegistryAuthId:
type: string
dockerEntrypoint:
type: array
items:
type: string
example: []
description: >-
If specified, overrides the ENTRYPOINT for the Docker image run on a
Pod or worker. If [], uses the ENTRYPOINT defined in the image.
dockerStartCmd:
type: array
items:
type: string
example: []
description: >-
If specified, overrides the start CMD for the Docker image run on a
Pod or worker. If [], uses the start CMD defined in the image.
earned:
type: number
example: 100
description: >-
The amount of Runpod credits earned by the creator of a template by
all Pods or workers created from the template.
env:
type: object
items:
type: string
example:
ENV_VAR: value
default: {}
id:
type: string
example: 30zmvf89kd
description: A unique string identifying a template.
imageName:
type: string
example: runpod/pytorch:2.1.0-py3.10-cuda11.8.0-devel-ubuntu22.04
description: >-
The image tag for the container run on Pods or workers created from
a template.
isPublic:
type: boolean
example: false
description: >-
Set to true if a template is public and can be used by any Runpod
user. Set to false if a template is private and can only be used by
the creator.
isRunpod:
type: boolean
example: true
description: If true, a template is an official template managed by Runpod.
isServerless:
type: boolean
example: true
description: >-
If true, instances created from a template are Serverless workers.
If false, instances created from a template are Pods.
name:
type: string
example: my template
description: A user-defined name for a template. The name needs to be unique.
ports:
type: array
items:
type: string
example:
- 8888/http
- 22/tcp
description: >-
A list of ports exposed on a Pod or worker. Each port is formatted
as [port number]/[protocol]. Protocol can be either http or tcp.
readme:
type: string
description: >-
A string of markdown-formatted text that describes a template. The
readme is displayed in the Runpod UI when a user selects the
template.
runtimeInMin:
type: integer
volumeInGb:
type: integer
example: 20
description: >-
The amount of disk space, in gigabytes (GB), to allocate on the
local network volume for a Pod or worker. The data on the local
network volume is persisted across restarts. To persist data so that
future Pods and workers can access it, create a network volume and
set networkVolumeId to attach it to the Pod or worker.
volumeMountPath:
type: string
example: /workspace
description: >-
If a local network volume or network volume is attached to a Pod or
worker, the absolute path where the network volume is mounted in the
filesystem.
Pod:
type: object
properties:
adjustedCostPerHr:
type: number
example: 0.69
description: >-
The effective cost in Runpod credits per hour of running a Pod,
adjusted by active Savings Plans.
aiApiId:
type: string
example: null
description: Synonym for endpointId (legacy name).
consumerUserId:
type: string
example: user_2PyTJrLzeuwfZilRZ7JhCQDuSqo
description: A unique string identifying the Runpod user who rents a Pod.
containerDiskInGb:
type: integer
example: 50
description: >-
The amount of disk space, in gigabytes (GB), to allocate on the
container disk for a Pod. The data on the container disk is wiped
when the Pod restarts. To persist data across Pod restarts, set
volumeInGb to configure the Pod network volume.
containerRegistryAuthId:
type: string
example: clzdaifot0001l90809257ynb
description: >-
If a Pod is created with a container registry auth, the unique
string identifying that container registry auth.
costPerHr:
type: number
example: '0.74'
format: currency
description: >-
The cost in Runpod credits per hour of running a Pod. Note that the
actual cost may be lower if Savings Plans are applied.
cpuFlavorId:
type: string
example: cpu3c
description: >-
If the Pod is a CPU Pod, the unique string identifying the CPU
flavor the Pod is running on.
desiredStatus:
type: string
enum:
- RUNNING
- EXITED
- TERMINATED
description: The current expected status of a Pod.
dockerEntrypoint:
type: array
items:
type: string
description: >-
If specified, overrides the ENTRYPOINT for the Docker image run on
the created Pod. If [], uses the ENTRYPOINT defined in the image.
dockerStartCmd:
type: array
items:
type: string
description: >-
If specified, overrides the start CMD for the Docker image run on
the created Pod. If [], uses the start CMD defined in the image.
endpointId:
type: string
example: null
description: >-
If the Pod is a Serverless worker, a unique string identifying the
associated endpoint.
env:
type: object
items:
type: string
example:
ENV_VAR: value
default: {}
gpu:
type: object
properties:
id:
type: string
count:
type: integer
example: 1
description: The number of GPUs attached to a Pod.
displayName:
type: string
securePrice:
type: number
communityPrice:
type: number
oneMonthPrice:
type: number
threeMonthPrice:
type: number
sixMonthPrice:
type: number
oneWeekPrice:
type: number
communitySpotPrice:
type: number
secureSpotPrice:
type: number
id:
type: string
example: xedezhzb9la3ye
description: A unique string identifying a [Pod](#/components/schema/Pod).
image:
type: string
example: runpod/pytorch:2.1.0-py3.10-cuda11.8.0-devel-ubuntu22.04
description: The image tag for the container run on a Pod.
interruptible:
type: boolean
example: false
description: >-
Describes how a Pod is rented. An interruptible Pod can be rented at
a lower cost but can be stopped at any time to free up resources for
another Pod. A reserved Pod is rented at a higher cost but runs
until it exits or is manually stopped.
lastStartedAt:
type: string
example: '2024-07-12T19:14:40.144Z'
description: The UTC timestamp when a Pod was last started.
lastStatusChange:
type: string
example: >-
Rented by User: Fri Jul 12 2024 15:14:40 GMT-0400 (Eastern Daylight
Time)
description: A string describing the last lifecycle event on a Pod.
locked:
type: boolean
example: false
description: >-
Set to true to lock a Pod. Locking a Pod disables stopping or
resetting the Pod.
machine:
type: object
properties:
minPodGpuCount:
type: integer
gpuTypeId:
type: string
gpuType:
type: object
properties:
id:
type: string
count:
type: integer
example: 1
description: The number of GPUs attached to a Pod.
displayName:
type: string
securePrice:
type: number
communityPrice:
type: number
oneMonthPrice:
type: number
threeMonthPrice:
type: number
sixMonthPrice:
type: number
oneWeekPrice:
type: number
communitySpotPrice:
type: number
secureSpotPrice:
type: number
cpuCount:
type: integer
cpuTypeId:
type: string
cpuType:
type: object
properties:
id:
type: string
displayName:
type: string
cores:
type: number
threadsPerCore:
type: number
groupId:
type: string
location:
type: string
dataCenterId:
type: string
diskThroughputMBps:
type: integer
maxDownloadSpeedMbps:
type: integer
maxUploadSpeedMbps:
type: integer
supportPublicIp:
type: boolean
secureCloud:
type: boolean
maintenanceStart:
type: string
maintenanceEnd:
type: string
maintenanceNote:
type: string
note:
type: string
costPerHr:
type: number
currentPricePerGpu:
type: number
gpuAvailable:
type: integer
gpuDisplayName:
type: string
description: >-
Information about the machine a Pod is running on (see
[Machine](#/components/schemas/Machine)).
machineId:
type: string
example: s194cr8pls2z
description: A unique string identifying the host machine a Pod is running on.
memoryInGb:
type: number
example: 62
description: The amount of RAM, in gigabytes (GB), attached to a Pod.
name:
type: string
maxLength: 191
description: >-
A user-defined name for the created Pod. The name does not need to
be unique.
networkVolume:
type: object
properties:
id:
type: string
example: agv6w2qcg7
description: A unique string identifying a network volume.
name:
type: string
example: my network volume
description: >-
A user-defined name for a network volume. The name does not need
to be unique.
size:
type: integer
example: 50
description: >-
The amount of disk space, in gigabytes (GB), allocated to a
network volume.
dataCenterId:
type: string
example: EU-RO-1
description: The Runpod data center ID where a network volume is located.
description: >-
If a network volume is attached to a Pod, information about the
network volume (see [network volume
schema](#/components/schemas/NetworkVolume)).
portMappings:
type: object
nullable: true
items:
type: integer
example:
'22': 10341
description: >-
A mapping of internal ports to public ports on a Pod. For example, {
"22": 10341 } means that port 22 on the Pod is mapped to port 10341
and is publicly accessible at [public ip]:10341. If the Pod is still
initializing, this mapping is not yet determined and will be empty.
ports:
type: array
items:
type: string
example:
- 8888/http
- 22/tcp
description: >-
A list of ports exposed on a Pod. Each port is formatted as [port
number]/[protocol]. Protocol can be either http or tcp.
publicIp:
type: string
example: 100.65.0.119
format: ipv4
nullable: true
description: >-
The public IP address of a Pod. If the Pod is still initializing,
this IP is not yet determined and will be empty.
savingsPlans:
type: array
items:
$ref: '#/components/schemas/SavingsPlan'
description: >-
The list of active Savings Plans applied to a Pod (see [Savings
Plans](#/components/schemas/SavingsPlan)). If none are applied, the
list is empty.
slsVersion:
type: integer
example: 0
description: >-
If the Pod is a Serverless worker, the version of the associated
endpoint (see [Endpoint
Version](#/components/schemas/Endpoint/version)).
templateId:
type: string
example: null
description: >-
If a Pod is created with a template, the unique string identifying
that template.
vcpuCount:
type: number
example: 24
description: The number of virtual CPUs attached to a Pod.
volumeEncrypted:
type: boolean
example: false
description: >-
Set to true if the local network volume of a Pod is encrypted. Can
only be set when creating a Pod.
volumeInGb:
type: integer
example: 20
description: >-
The amount of disk space, in gigabytes (GB), to allocate on the Pod
volume for a Pod. The data on the Pod volume is persisted across Pod
restarts. To persist data so that future Pods can access it, create
a network volume and set networkVolumeId to attach it to the Pod.
volumeMountPath:
type: string
example: /workspace
description: >-
If either a Pod volume or a network volume is attached to a Pod, the
absolute path where the network volume is mounted in the filesystem.
SavingsPlan:
type: object
properties:
costPerHr:
type: number
example: 0.21
endTime:
type: string
example: '2024-07-12T19:14:40.144Z'
gpuTypeId:
type: string
example: NVIDIA GeForce RTX 4090
id:
type: string
example: clkrb4qci0000mb09c7sualzo
podId:
type: string
example: xedezhzb9la3ye
startTime:
type: string
example: '2024-05-12T19:14:40.144Z'
securitySchemes:
ApiKey:
type: http
scheme: bearer
bearerFormat: Bearer
````
---
# Source: https://docs.runpod.io/pods/configuration/use-ssh.md
> ## Documentation Index
> Fetch the complete documentation index at: https://docs.runpod.io/llms.txt
> Use this file to discover all available pages before exploring further.
# Connect to a Pod with SSH
> Manage Pods from your local machine using SSH.
Connecting to a Pod through an SSH (Secure Shell) terminal provides a secure and reliable method for interacting with your instance. Use this to manage long-running processes, critical tasks, or when you need the full capabilities of a shell environment.
Every Pod offers the ability to connect through SSH using the [basic proxy method](#basic-ssh-with-key-authentication) below (which does not support commands like SCP or SFTP), but not all Pods support the [full public IP method](#full-ssh-via-public-ip-with-key-authentication).
You can also SSH into a Pod using a [password-based method](#password-based-ssh) if you want a simple and fast way to enable SSH access without setting up SSH keys. SSH key authentication is recommended for most use cases, as it provides greater security and convenience for repeated use.
## Generate an SSH key and add it to your Runpod account
Run this command on your local terminal to generate an SSH key, replacing `YOUR_EMAIL@DOMAIN.COM` with your actual email:
```sh theme={"theme":{"light":"github-light","dark":"github-dark"}}
ssh-keygen -t ed25519 -C "YOUR_EMAIL@DOMAIN.COM"
```
This saves a public/private key pair on your local machine to `~/.ssh/id_ed25519.pub` and `~/.ssh/id_ed25519` respectively.
If you are using Command Prompt on Windows instead of the Linux terminal or WSL, your public and private key pair will be saved to `C:\Users\YOUR_USER_ACCOUNT\.ssh\id_ed25519.pub` and `C:\Users\YOUR_USER_ACCOUNT\.ssh\id_ed25519`, respectively.
Run this command on your local terminal to retrieve the public SSH key you just generated:
```sh theme={"theme":{"light":"github-light","dark":"github-dark"}}
cat ~/.ssh/id_ed25519.pub
```
This will output something similar to this:
```sh theme={"theme":{"light":"github-light","dark":"github-dark"}}
ssh-ed25519 AAAAC4NzaC1lZDI1JTE5AAAAIGP+L8hnjIcBqUb8NRrDiC32FuJBvRA0m8jLShzgq6BQ YOUR_EMAIL@DOMAIN.COM
```
Copy and paste your public key from the previous step into the **SSH Public Keys** field in your [Runpod user account settings](https://www.console.runpod.io/user/settings).
If you need to add multiple SSH keys to your Runpod account, make sure that each key pair is on its own line in the **SSH Public Keys** field.
### Override your public key for a specific Pod
Runpod will attempt to automatically inject the public SSH keys added in your account settings for authentication when connecting using the [basic terminal method](#basic-ssh-with-key-authentication). If you prefer to use a different public key for a specific Pod, you can override the default by setting the `SSH_PUBLIC_KEY` [environment variable](/pods/templates/environment-variables) for that Pod.
## Basic SSH with key authentication
All Pods provide a basic SSH connection that is proxied through Runpod's systems. This method does not support commands like SCP (Secure Copy Protocol) or SFTP (SSH File Transfer Protocol).
Ensure you have an [SSH key pair](#generate-an-ssh-key-and-add-it-to-your-runpod-account) generated on your local machine and added to your Runpod account.
Navigate to the [Pods page](https://console.runpod.io/pods) in the Runpod console. Select the Pod you want to connect to from the list to open its connection options.
In the Pod's **Connect** tab, copy the command listed under **SSH**. It should look something like this:
```sh theme={"theme":{"light":"github-light","dark":"github-dark"}}
ssh 8y5rumuyb50m78-6441103b@ssh.runpod.io -i ~/.ssh/id_ed25519
```
If you saved your key to a custom location, use that specific path after the `-i` flag instead.
Run the copied command in your local terminal to connect to your Pod.
## Full SSH via public IP with key authentication
For full SSH capabilities, including SCP and SFTP for file transfers, you need to rent an instance that supports a public IP address and ensure an SSH daemon is running within your Pod.
If you're using a Runpod official template such as Runpod PyTorch or Stable Diffusion, full SSH access is already configured for you, so no additional setup is required.
However, if you're using a custom template, ensure that TCP port 22 is exposed and that the SSH daemon is running inside your Pod. If it isn't, add the Docker command below to your template. Or, if you already have a custom start command, replace `sleep infinity` at the end of your command with this one:
```sh theme={"theme":{"light":"github-light","dark":"github-dark"}}
bash -c 'apt update; \
DEBIAN_FRONTEND=noninteractive apt-get install openssh-server -y; \
mkdir -p ~/.ssh; \
cd ~/.ssh; \
chmod 700 ~/.ssh; \
echo "$PUBLIC_KEY" >> authorized_keys; \
chmod 700 authorized_keys; \
service ssh start; \
sleep infinity'
```
Once you're sure that the SSH daemon is running, you can connect to your Pod by following these steps:
Ensure you have an [SSH key pair](#generate-an-ssh-key-and-add-it-to-your-runpod-account) generated on your local machine and added to your Runpod account.
An SSH daemon must be started in your Pod. Runpod official templates, such as "Runpod PyTorch", often have this pre-configured. If you're using a custom template, ensure TCP port 22 is exposed and the SSH daemon is started. Refer to the [Use SSH guide](/pods/configuration/use-ssh) for commands to include in your custom Docker template.
Navigate to the [Pods page](https://console.runpod.io/pods) in the Runpod console. Select the Pod you want to connect to from the list to open its connection options.
In the Pod's **Connect** tab, copy the command listed under **SSH over exposed TCP**. It should look something like this:
```sh theme={"theme":{"light":"github-light","dark":"github-dark"}}
ssh root@213.173.108.12 -p 17445 -i ~/.ssh/id_ed25519
```
If you saved your key to a custom location, use that specific path after the `-i` flag instead.
Run the copied command in your local terminal to connect to your Pod.
The SSH command above has the following structure:
```sh theme={"theme":{"light":"github-light","dark":"github-dark"}}
ssh root@[POD_IP_ADDRESS] -p [SSH_PORT] -i [PATH_TO_SSH_KEY]
```
Where:
* `root`: Your assigned username for the Pod (typically `root`).
* `[POD_IP_ADDRESS]`: The public IP address of your Pod.
* `[SSH_PORT]`: The designated public SSH port for your Pod.
* `[PATH_TO_SSH_KEY]`: The local file path to your private SSH key.
## Troubleshooting SSH key authentication
If you're asked for a password when connecting to your Pod via SSH, this means something is not set up correctly. Runpod does not require a password for SSH connections, as authentication is handled entirely through your SSH key pair.
Here are some common reasons why this might happen:
* If you copy and paste the key *fingerprint* (which starts with `SHA256:`) into your Runpod user settings instead of the actual public key (the contents of your `id_ed25519.pub` file), authentication will fail.
* If you omit the encryption type at the beginning of your public key when pasting it into your Runpod user settings (for example, leaving out `ssh-ed25519`), the key will not be recognized.
* If you add multiple public keys to your Runpod user settings but do not separate them with a newline, only the first key will work. Each key must be on its own line.
* If you specify the wrong file path to your private key when connecting, SSH will not be able to find the correct key (`No such file or directory` error).
* If your private key file is accessible by other users on your machine, SSH may refuse to use it for security reasons (`bad permissions` error).
* If your SSH configuration file (`~/.ssh/config`) points to the wrong private key, you will also be prompted for a password. Make sure the `IdentityFile` entry in your config file matches the private key that corresponds to the public key you added to your Runpod account.
## Password-based SSH
To use this method, your Pod must have a public IP address and expose TCP port 22. SSH will be accessible through a mapped external port.
To quickly set up password-based SSH, run this command to download and execute a [helper script](https://github.com/justinwlin/Runpod-SSH-Password/blob/main/passwordrunpod.sh) for password setup:
```bash}
wget https://raw.githubusercontent.com/justinwlin/Runpod-SSH-Password/main/passwordrunpod.sh && chmod +x passwordrunpod.sh && ./passwordrunpod.sh
```
While SSH operates on port 22 within your Pod, Runpod assigns a different external port for access. The setup script below automatically detects and uses the correct external port by referencing the `RUNPOD_TCP_PORT_22` environment variable.
If you see the message `Environment variables RUNPOD_PUBLIC_IP or RUNPOD_TCP_PORT_22 are missing` when running the script, it means one or more of the required environment variables are not set. Please ensure you have met all the necessary requirements described above.
After running the script and entering a password, you'll see example commands for SSH or SCP which you can use to connect to your Pod and transfer files from your local machine:
```bash}
========================================
SSH CONNECTION
========================================
Connect using: ssh root@38.80.152.73 -p 32061
Password: helloworld
========================================
FILE TRANSFER EXAMPLES (SCP)
========================================
Copy file TO pod:
scp -P 32061 yourfile.txt root@38.80.152.73:/workspace/
Copy file FROM pod:
scp -P 32061 root@38.80.152.73:/workspace/yourfile.txt .
Copy entire folder TO pod:
scp -P 32061 -r yourfolder root@38.80.152.73:/workspace/
```
## Video tutorial (Windows)
---
# Source: https://docs.runpod.io/serverless/development/validation.md
> ## Documentation Index
> Fetch the complete documentation index at: https://docs.runpod.io/llms.txt
> Use this file to discover all available pages before exploring further.
# Validate inputs
> Validate handler inputs using the Runpod SDK schema validator.
The Runpod SDK includes a built-in validation utility that ensures your handler receives data in the correct format before processing begins. Validating inputs early helps catch errors immediately and prevents your worker from crashing due to unexpected or malformed data types.
## Import the validator
To use the validation features, import the `validate` function from the utils module:
```python}
from runpod.serverless.utils.rp_validator import validate
```
## Define a schema
You define your validation rules using a dictionary where each key represents an expected input field. This schema dictates the data types, necessity, and constraints for the incoming data.
```python}
schema = {
"text": {
"type": str,
"required": True,
},
"max_length": {
"type": int,
"required": False,
"default": 100,
"constraints": lambda x: x > 0,
},
}
```
The schema supports several configuration keys:
* `type` (required): Expected input type (e.g., `str`, `int`, `float`, `bool`).
* `required` (default: `False`): Whether the field is required.
* `default` (default: `None`): Default value if input is not provided.
* `constraints` (optional): A lambda function that returns `True` or `False` to validate the value.
## Validate input in your handler
When implementing validation in your handler, pass the input object and your schema to the `validate` function. The function returns a dictionary containing either an `errors` key or a `validated_input` key.
```python}
import runpod
from runpod.serverless.utils.rp_validator import validate
schema = {
"text": {
"type": str,
"required": True,
},
"max_length": {
"type": int,
"required": False,
"default": 100,
"constraints": lambda x: x > 0,
},
}
def handler(event):
try:
# Validate the input against the schema
validated_input = validate(event["input"], schema)
# Check for validation errors
if "errors" in validated_input:
return {"error": validated_input["errors"]}
# Access the sanitized inputs
text = validated_input["validated_input"]["text"]
max_length = validated_input["validated_input"]["max_length"]
result = text[:max_length]
return {"output": result}
except Exception as e:
return {"error": str(e)}
runpod.serverless.start({"handler": handler})
```
## Test the validator
You can test your validation logic locally without deploying. Save your handler code and run it via the command line with the `--test_input` flag.
```sh theme={"theme":{"light":"github-light","dark":"github-dark"}}
python your_handler.py --test_input '{"input": {"text": "Hello, world!", "max_length": 5}}'
```
Alternatively, you can define your test case in a JSON file and pass it to the handler to simulate a real request.
```json test_input.json theme={"theme":{"light":"github-light","dark":"github-dark"}}
{
"input": {
"text": "The quick brown fox jumps over the lazy dog",
"max_length": 50
}
}
```
---
# Source: https://docs.runpod.io/serverless/vllm/vllm-requests.md
> ## Documentation Index
> Fetch the complete documentation index at: https://docs.runpod.io/llms.txt
> Use this file to discover all available pages before exploring further.
# Send requests to vLLM workers
> Use Runpod's native API to send requests to vLLM workers.
vLLM workers use the same request operations as any other Runpod Serverless endpoint, with specialized input parameters for LLM inference.
## How vLLM requests work
vLLM workers are queue-based Serverless endpoints. They use the same `/run` and `/runsync` operations as other Runpod endpoints, following the standard [Serverless request structure](/serverless/endpoints/send-requests).
The key difference is the input format. vLLM workers expect specific parameters for language model inference, such as prompts, messages, and sampling parameters. The worker's handler processes these inputs using the vLLM engine and returns generated text.
## Request operations
vLLM endpoints support both synchronous and asynchronous requests.
### Asynchronous requests with `/run`
Use `/run` to submit a job that processes in the background. You'll receive a job ID immediately, then poll for results using the `/status` endpoint.
```python}
import requests
# Replace ENDPOINT_ID and RUNPOD_API_KEY with your actual values
url = "https://api.runpod.ai/v2/ENDPOINT_ID/run"
headers = {
"Authorization": "Bearer RUNPOD_API_KEY",
"Content-Type": "application/json"
}
data = {
"input": {
"prompt": "Explain quantum computing in simple terms.",
"sampling_params": {
"temperature": 0.7,
"max_tokens": 200
}
}
}
response = requests.post(url, headers=headers, json=data)
job_id = response.json()["id"]
print(f"Job ID: {job_id}")
```
### Synchronous requests with `/runsync`
Use `/runsync` to wait for the complete response in a single request. The client blocks until processing is complete.
```python}
import requests
# Replace ENDPOINT_ID and RUNPOD_API_KEY with your actual values
url = "https://api.runpod.ai/v2/ENDPOINT_ID/runsync"
headers = {
"Authorization": "Bearer RUNPOD_API_KEY",
"Content-Type": "application/json"
}
data = {
"input": {
"prompt": "Explain quantum computing in simple terms.",
"sampling_params": {
"temperature": 0.7,
"max_tokens": 200
}
}
}
response = requests.post(url, headers=headers, json=data)
print(response.json())
```
For more details on request operations, see [Send API requests to Serverless endpoints](/serverless/endpoints/send-requests).
## Input formats
vLLM workers accept two input formats for text generation.
### Messages format (for chat models)
Use the messages format for instruction-tuned models that expect conversation history. The worker automatically applies the model's chat template.
```json}
{
"input": {
"messages": [
{"role": "system", "content": "You are a helpful assistant."},
{"role": "user", "content": "What is the capital of France?"}
],
"sampling_params": {
"temperature": 0.7,
"max_tokens": 100
}
}
}
```
### Prompt format (for text completion)
Use the prompt format for base models or when you want to provide raw text without a chat template.
```json}
{
"input": {
"prompt": "The capital of France is",
"sampling_params": {
"temperature": 0.7,
"max_tokens": 50
}
}
}
```
### Applying chat templates to prompts
If you use the prompt format but want the model's chat template applied, set `apply_chat_template` to `true`.
```json}
{
"input": {
"prompt": "What is the capital of France?",
"apply_chat_template": true,
"sampling_params": {
"temperature": 0.7,
"max_tokens": 100
}
}
}
```
## Request input parameters
Here are all available parameters you can include in the `input` object of your request.
| Parameter | Type | Default | Description |
| -------------------------- | ---------------------- | -------------------------------------- | ----------------------------------------------------------------------------------------------------------------------------- |
| `prompt` | `string` | None | Prompt string to generate text based on. |
| `messages` | `list[dict[str, str]]` | None | List of messages with `role` and `content` keys. The model's chat template will be applied automatically. Overrides `prompt`. |
| `apply_chat_template` | `bool` | `false` | Whether to apply the model's chat template to the `prompt`. |
| `sampling_params` | `dict` | `{}` | Sampling parameters to control generation (see Sampling parameters section below). |
| `stream` | `bool` | `false` | Whether to enable streaming of output. If `true`, responses are streamed as they are generated. |
| `max_batch_size` | `int` | env `DEFAULT_BATCH_SIZE` | The maximum number of tokens to stream per HTTP POST call. |
| `min_batch_size` | `int` | env `DEFAULT_MIN_BATCH_SIZE` | The minimum number of tokens to stream per HTTP POST call. |
| `batch_size_growth_factor` | `int` | env `DEFAULT_BATCH_SIZE_GROWTH_FACTOR` | The growth factor by which `min_batch_size` multiplies for each call until `max_batch_size` is reached. |
## Sampling parameters
Sampling parameters control how the model generates text. Include them in the `sampling_params` dictionary in your request.
| Parameter | Type | Default | Description |
| ------------------------------- | ----------------------- | ------- | ----------------------------------------------------------------------------------------------------------------------------------------------------------------------------- |
| `n` | `int` | `1` | Number of output sequences generated from the prompt. The top `n` sequences are returned. |
| `best_of` | `int` | `n` | Number of output sequences generated from the prompt. The top `n` sequences are returned from these `best_of` sequences. Must be ≥ `n`. Treated as beam width in beam search. |
| `presence_penalty` | `float` | `0.0` | Penalizes new tokens based on their presence in the generated text so far. Values > 0 encourage new tokens, values \< 0 encourage repetition. |
| `frequency_penalty` | `float` | `0.0` | Penalizes new tokens based on their frequency in the generated text so far. Values > 0 encourage new tokens, values \< 0 encourage repetition. |
| `repetition_penalty` | `float` | `1.0` | Penalizes new tokens based on their appearance in the prompt and generated text. Values > 1 encourage new tokens, values \< 1 encourage repetition. |
| `temperature` | `float` | `1.0` | Controls the randomness of sampling. Lower values make it more deterministic, higher values make it more random. Zero means greedy sampling. |
| `top_p` | `float` | `1.0` | Controls the cumulative probability of top tokens to consider. Must be in (0, 1]. Set to 1 to consider all tokens. |
| `top_k` | `int` | `-1` | Controls the number of top tokens to consider. Set to -1 to consider all tokens. |
| `min_p` | `float` | `0.0` | Represents the minimum probability for a token to be considered, relative to the most likely token. Must be in \[0, 1]. Set to 0 to disable. |
| `use_beam_search` | `bool` | `false` | Whether to use beam search instead of sampling. |
| `length_penalty` | `float` | `1.0` | Penalizes sequences based on their length. Used in beam search. |
| `early_stopping` | `bool` or `string` | `false` | Controls stopping condition in beam search. Can be `true`, `false`, or `"never"`. |
| `stop` | `string` or `list[str]` | `None` | String(s) that stop generation when produced. The output will not contain these strings. |
| `stop_token_ids` | `list[int]` | `None` | List of token IDs that stop generation when produced. Output contains these tokens unless they are special tokens. |
| `ignore_eos` | `bool` | `false` | Whether to ignore the End-Of-Sequence token and continue generating tokens after its generation. |
| `max_tokens` | `int` | `16` | Maximum number of tokens to generate per output sequence. |
| `min_tokens` | `int` | `0` | Minimum number of tokens to generate per output sequence before EOS or stop sequences. |
| `skip_special_tokens` | `bool` | `true` | Whether to skip special tokens in the output. |
| `spaces_between_special_tokens` | `bool` | `true` | Whether to add spaces between special tokens in the output. |
| `truncate_prompt_tokens` | `int` | `None` | If set, truncate the prompt to this many tokens. |
## Streaming responses
Enable streaming to receive tokens as they're generated instead of waiting for the complete response.
```python}
import requests
import json
# Replace ENDPOINT_ID and RUNPOD_API_KEY with your actual values
url = "https://api.runpod.ai/v2/ENDPOINT_ID/run"
headers = {
"Authorization": "Bearer RUNPOD_API_KEY",
"Content-Type": "application/json"
}
data = {
"input": {
"prompt": "Write a short story about a robot.",
"sampling_params": {
"temperature": 0.8,
"max_tokens": 500
},
"stream": True
}
}
response = requests.post(url, headers=headers, json=data)
job_id = response.json()["id"]
# Stream the results
stream_url = f"https://api.runpod.ai/v2/ENDPOINT_ID/stream/{job_id}"
with requests.get(stream_url, headers=headers, stream=True) as r:
for line in r.iter_lines():
if line:
print(json.loads(line))
```
For more information on streaming, see the [stream operation documentation](/serverless/endpoints/send-requests#stream).
## Error handling
Implement proper error handling to manage network timeouts, rate limiting, worker initialization delays, and model loading errors.
```python}
import requests
import time
def send_vllm_request(url, headers, payload, max_retries=3):
for attempt in range(max_retries):
try:
response = requests.post(url, headers=headers, json=payload, timeout=300)
response.raise_for_status()
return response.json()
except requests.exceptions.Timeout:
print(f"Request timed out. Attempt {attempt + 1}/{max_retries}")
if attempt < max_retries - 1:
time.sleep(2 ** attempt) # Exponential backoff
except requests.exceptions.HTTPError as e:
if e.response.status_code == 429:
print("Rate limit exceeded. Waiting before retry...")
time.sleep(5)
elif e.response.status_code >= 500:
print(f"Server error: {e.response.status_code}")
if attempt < max_retries - 1:
time.sleep(2 ** attempt)
else:
raise
except requests.exceptions.RequestException as e:
print(f"Request failed: {e}")
if attempt < max_retries - 1:
time.sleep(2 ** attempt)
raise Exception("Max retries exceeded")
# Usage
result = send_vllm_request(url, headers, data)
```
## Best practices
Follow these best practices when sending requests to vLLM workers.
**Set appropriate timeouts** based on your model size and expected generation length. Larger models and longer generations require longer timeouts.
**Implement retry logic** with exponential backoff for failed requests. This handles temporary network issues and worker initialization delays.
**Use streaming for long responses** to provide a better user experience. Users see output immediately instead of waiting for the entire response.
**Optimize sampling parameters** for your use case. Lower temperature for factual tasks, higher temperature for creative tasks.
**Monitor response times** to identify performance issues. If requests consistently take longer than expected, consider using a more powerful GPU or optimizing your parameters.
**Handle rate limits** gracefully by implementing queuing or request throttling in your application.
**Cache common requests** when appropriate to reduce redundant API calls and improve response times.
## Next steps
* [Learn about OpenAI API compatibility](/serverless/vllm/openai-compatibility).
* [Explore environment variables for customization](/serverless/vllm/environment-variables).
* [Review all Serverless endpoint operations](/serverless/endpoints/send-requests).
---
# Source: https://docs.runpod.io/serverless/load-balancing/vllm-worker.md
> ## Documentation Index
> Fetch the complete documentation index at: https://docs.runpod.io/llms.txt
> Use this file to discover all available pages before exploring further.
# Build a load balancing vLLM endpoint
> Learn how to deploy a custom vLLM server to a load balancing Serverless endpoint.
This tutorial shows how to build a vLLM application using FastAPI and deploy it as a load balancing Serverless endpoint on Runpod.
## What you'll learn
To get a basic understanding of how to build a load balancing worker (or for more general use cases), see [Build a load balancing worker](/serverless/load-balancing/build-a-worker).
In this tutorial you'll learn how to:
* Create a FastAPI application to serve your vLLM endpoints.
* Implement proper health checks for your vLLM workers.
* Deploy your vLLM application as a load balancing Serverless endpoint.
* Test and interact with your vLLM APIs.
## Requirements
Before you begin you'll need:
* A Runpod account.
* Basic familiarity with Python, REST APIs, and vLLM.
* Docker installed on your local machine.
## Step 1: Create your project files
You can download a preconfigured repository containing the completed code for this tutorial [on GitHub](https://github.com/runpod-workers/vllm-loadbalancer-ep/).
Start by creating a new directory for your project:
```bash
mkdir vllm_worker
cd vllm_worker
```
Then, create the following files and directories:
```bash
touch Dockerfile
touch requirements.txt
mkdir src
touch src/handler.py
touch src/models.py
touch src/utils.py
```
Your project structure should now look like this:
```text
vllm_worker/
├── Dockerfile
├── requirements.txt
├── src/
├── handler.py
├── models.py
└── utils.py
```
## Step 2: Define data models
We'll start by creating the data models that define the structure of your API. These models specify what data your endpoints expect to receive and what they'll return.
Add the following code to `src/models.py`:
```python
from typing import Optional, List, Union, Literal
from pydantic import BaseModel, Field
class ChatMessage(BaseModel):
role: Literal["system", "user", "assistant"]
content: str
class GenerationRequest(BaseModel):
prompt: str
max_tokens: int = Field(default=512, ge=1, le=4096)
temperature: float = Field(default=0.7, ge=0.0, le=2.0)
top_p: float = Field(default=0.9, ge=0.0, le=1.0)
top_k: int = Field(default=-1, ge=-1)
frequency_penalty: float = Field(default=0.0, ge=-2.0, le=2.0)
presence_penalty: float = Field(default=0.0, ge=-2.0, le=2.0)
stop: Optional[Union[str, List[str]]] = None
stream: bool = Field(default=False)
class GenerationResponse(BaseModel):
text: str
finish_reason: str
prompt_tokens: int
completion_tokens: int
total_tokens: int
class ChatCompletionRequest(BaseModel):
messages: List[ChatMessage]
max_tokens: int = Field(default=512, ge=1, le=4096)
temperature: float = Field(default=0.7, ge=0.0, le=2.0)
top_p: float = Field(default=0.9, ge=0.0, le=1.0)
stop: Optional[Union[str, List[str]]] = None
stream: bool = Field(default=False)
class ErrorResponse(BaseModel):
error: str
detail: str
request_id: Optional[str] = None
```
The `GenerationRequest` and `ChatCompletionRequest` models specify what data clients need to send, while `GenerationResponse` and `ErrorResponse` define what they'll receive back.
Each data model includes validation rules using Pydantic's `Field` function to ensure parameters stay within acceptable ranges.
## Step 3: Create utility functions
Next, we'll create a few helper functions to support the main application. These utilities handle common tasks like formatting chat prompts and creating standardized error responses.
Add the following code to `src/utils.py`:
```python
from typing import List
from transformers import AutoTokenizer
from .models import ChatMessage, ErrorResponse
def get_tokenizer(model_name: str):
"""Get tokenizer for the given model"""
return AutoTokenizer.from_pretrained(model_name, trust_remote_code=True)
def format_chat_prompt(messages: List[ChatMessage], model_name: str) -> str:
"""Format messages using the model's chat template"""
tokenizer = get_tokenizer(model_name)
# Use model's built-in chat template if available
if hasattr(tokenizer, 'apply_chat_template'):
message_dicts = [{"role": msg.role, "content": msg.content} for msg in messages]
return tokenizer.apply_chat_template(
message_dicts,
tokenize=False,
add_generation_prompt=True
)
# Fallback to common format
formatted_prompt = ""
for message in messages:
if message.role == "system":
formatted_prompt += f"System: {message.content}\n\n"
elif message.role == "user":
formatted_prompt += f"Human: {message.content}\n\n"
elif message.role == "assistant":
formatted_prompt += f"Assistant: {message.content}\n\n"
formatted_prompt += "Assistant: "
return formatted_prompt
def create_error_response(error: str, detail: str, request_id: str = None) -> ErrorResponse:
return ErrorResponse(error=error, detail=detail, request_id=request_id)
```
The `format_chat_prompt` function converts chat-style conversations into the text format expected by language models. It first tries to use the model's built-in chat template, then falls back to a generic format if that's not available.
The `create_error_response` function provides a consistent way to generate error messages throughout your application.
## Step 4: Build the main FastAPI application
Now we'll build the main application file, `src/handler.py`. This file acts as the orchestrator, bringing together the models and utilities we just created. It uses FastAPI to create the server, defines the API endpoints, and manages the vLLM engine's lifecycle.
Add the following code to `src/handler.py`:
```python
from fastapi import FastAPI, HTTPException, status
from fastapi.responses import StreamingResponse, JSONResponse
from contextlib import asynccontextmanager
from typing import Optional, AsyncGenerator
import json
import logging
import os
import uvicorn
from vllm import AsyncLLMEngine
from vllm.engine.arg_utils import AsyncEngineArgs
from vllm.sampling_params import SamplingParams
from vllm.utils import random_uuid
from utils import format_chat_prompt, create_error_response
from .models import GenerationRequest, GenerationResponse, ChatCompletionRequest
# Configure logging
logging.basicConfig(
level=logging.INFO,
format='%(asctime)s - %(name)s - %(levelname)s - %(message)s',
handlers=[
logging.StreamHandler(),
]
)
logger = logging.getLogger(__name__)
@asynccontextmanager
async def lifespan(_: FastAPI):
"""Initialize the vLLM engine on startup and cleanup on shutdown"""
# Startup
await create_engine()
yield
# Shutdown cleanup
global engine, engine_ready
if engine:
logger.info("Shutting down vLLM engine...")
# vLLM AsyncLLMEngine doesn't have an explicit shutdown method,
# but we can clean up our references
engine = None
engine_ready = False
logger.info("vLLM engine shutdown complete")
app = FastAPI(title="vLLM Load Balancing Server", version="1.0.0", lifespan=lifespan)
# Global variables
engine: Optional[AsyncLLMEngine] = None
engine_ready = False
async def create_engine():
"""Initialize the vLLM engine"""
global engine, engine_ready
try:
# Get model name from environment variable
model_name = os.getenv("MODEL_NAME", "microsoft/DialoGPT-medium")
# Configure engine arguments
engine_args = AsyncEngineArgs(
model=model_name,
tensor_parallel_size=int(os.getenv("TENSOR_PARALLEL_SIZE", "1")),
dtype=os.getenv("DTYPE", "auto"),
trust_remote_code=os.getenv("TRUST_REMOTE_CODE", "true").lower() == "true",
max_model_len=int(os.getenv("MAX_MODEL_LEN")) if os.getenv("MAX_MODEL_LEN") else None,
gpu_memory_utilization=float(os.getenv("GPU_MEMORY_UTILIZATION", "0.9")),
enforce_eager=os.getenv("ENFORCE_EAGER", "false").lower() == "true",
)
# Create the engine
engine = AsyncLLMEngine.from_engine_args(engine_args)
engine_ready = True
logger.info(f"vLLM engine initialized successfully with model: {model_name}")
except Exception as e:
logger.error(f"Failed to initialize vLLM engine: {str(e)}")
engine_ready = False
raise
@app.get("/ping")
async def health_check():
"""Health check endpoint required by Runpod load balancer"""
if not engine_ready:
logger.debug("Health check: Engine initializing")
# Return 503 when initializing
return JSONResponse(
content={"status": "initializing"},
status_code=status.HTTP_204_NO_CONTENT
)
logger.debug("Health check: Engine healthy")
# Return 200 when healthy
return {"status": "healthy"}
@app.get("/")
async def root():
"""Root endpoint with basic info"""
return {
"message": "vLLM Load Balancing Server",
"status": "ready" if engine_ready else "initializing",
"endpoints": {
"health": "/ping",
"generate": "/v1/completions",
"chat": "/v1/chat/completions"
}
}
@app.post("/v1/completions", response_model=GenerationResponse)
async def generate_completion(request: GenerationRequest):
"""Generate text completion"""
logger.info(f"Received completion request: max_tokens={request.max_tokens}, temperature={request.temperature}, stream={request.stream}")
if not engine_ready or engine is None:
logger.warning("Completion request rejected: Engine not ready")
error_response = create_error_response("ServiceUnavailable", "Engine not ready")
raise HTTPException(status_code=503, detail=error_response.model_dump())
try:
# Create sampling parameters
sampling_params = SamplingParams(
max_tokens=request.max_tokens,
temperature=request.temperature,
top_p=request.top_p,
top_k=request.top_k,
frequency_penalty=request.frequency_penalty,
presence_penalty=request.presence_penalty,
stop=request.stop,
)
# Generate request ID
request_id = random_uuid()
if request.stream:
return StreamingResponse(
stream_completion(request.prompt, sampling_params, request_id),
media_type="text/event-stream",
)
else:
# Non-streaming generation
results = engine.generate(request.prompt, sampling_params, request_id)
final_output = None
async for output in results:
final_output = output
if final_output is None:
request_id = random_uuid()
error_response = create_error_response("GenerationError", "No output generated", request_id)
raise HTTPException(status_code=500, detail=error_response.model_dump())
generated_text = final_output.outputs[0].text
finish_reason = final_output.outputs[0].finish_reason
# Calculate token counts using actual token IDs when available
if hasattr(final_output, 'prompt_token_ids') and final_output.prompt_token_ids is not None:
prompt_tokens = len(final_output.prompt_token_ids)
else:
# Fallback to approximate word count
prompt_tokens = len(request.prompt.split())
completion_tokens = len(final_output.outputs[0].token_ids)
logger.info(f"Completion generated: {completion_tokens} tokens, finish_reason={finish_reason}")
return GenerationResponse(
text=generated_text,
finish_reason=finish_reason,
prompt_tokens=prompt_tokens,
completion_tokens=completion_tokens,
total_tokens=prompt_tokens + completion_tokens
)
except Exception as e:
request_id = random_uuid()
logger.error(f"Generation failed (request_id={request_id}): {str(e)}", exc_info=True)
error_response = create_error_response("GenerationError", f"Generation failed: {str(e)}", request_id)
raise HTTPException(status_code=500, detail=error_response.model_dump())
async def stream_completion(prompt: str, sampling_params: SamplingParams, request_id: str) -> AsyncGenerator[str, None]:
"""Stream completion generator"""
try:
results = engine.generate(prompt, sampling_params, request_id)
async for output in results:
for output_item in output.outputs:
yield f"data: {json.dumps({'text': output_item.text, 'finish_reason': output_item.finish_reason})}\n\n"
yield "data: [DONE]\n\n"
except Exception as e:
yield f"data: {json.dumps({'error': str(e)})}\n\n"
@app.post("/v1/chat/completions")
async def chat_completions(request: ChatCompletionRequest):
"""OpenAI-compatible chat completions endpoint"""
logger.info(f"Received chat completion request: {len(request.messages)} messages, max_tokens={request.max_tokens}, temperature={request.temperature}")
if not engine_ready or engine is None:
logger.warning("Chat completion request rejected: Engine not ready")
error_response = create_error_response("ServiceUnavailable", "Engine not ready")
raise HTTPException(status_code=503, detail=error_response.model_dump())
try:
# Extract messages and convert to prompt
messages = request.messages
if not messages:
error_response = create_error_response("ValidationError", "No messages provided")
raise HTTPException(status_code=400, detail=error_response.model_dump())
# Use proper chat template formatting
model_name = os.getenv("MODEL_NAME", "microsoft/DialoGPT-medium")
prompt = format_chat_prompt(messages, model_name)
# Create sampling parameters from request
sampling_params = SamplingParams(
max_tokens=request.max_tokens,
temperature=request.temperature,
top_p=request.top_p,
stop=request.stop,
)
# Generate
request_id = random_uuid()
results = engine.generate(prompt, sampling_params, request_id)
final_output = None
async for output in results:
final_output = output
if final_output is None:
error_response = create_error_response("GenerationError", "No output generated", request_id)
raise HTTPException(status_code=500, detail=error_response.model_dump())
generated_text = final_output.outputs[0].text
completion_tokens = len(final_output.outputs[0].token_ids)
logger.info(f"Chat completion generated: {completion_tokens} tokens, finish_reason={final_output.outputs[0].finish_reason}")
# Return OpenAI-compatible response
return {
"id": request_id,
"object": "chat.completion",
"model": os.getenv("MODEL_NAME", "unknown"),
"choices": [{
"index": 0,
"message": {
"role": "assistant",
"content": generated_text
},
"finish_reason": final_output.outputs[0].finish_reason
}],
"usage": {
"prompt_tokens": len(final_output.prompt_token_ids) if hasattr(final_output, 'prompt_token_ids') and final_output.prompt_token_ids is not None else len(prompt.split()),
"completion_tokens": len(final_output.outputs[0].token_ids),
"total_tokens": (len(final_output.prompt_token_ids) if hasattr(final_output, 'prompt_token_ids') and final_output.prompt_token_ids is not None else len(prompt.split())) + len(final_output.outputs[0].token_ids)
}
}
except Exception as e:
request_id = random_uuid()
logger.error(f"Chat completion failed (request_id={request_id}): {str(e)}", exc_info=True)
error_response = create_error_response("ChatCompletionError", f"Chat completion failed: {str(e)}", request_id)
raise HTTPException(status_code=500, detail=error_response.model_dump())
if __name__ == "__main__":
# Get ports from environment variables
port = int(os.getenv("PORT", 80))
logger.info(f"Starting vLLM server on port {port}")
# If health port is different, you'd need to run a separate health server
# For simplicity, we're using the same port here
uvicorn.run(
app,
host="0.0.0.0",
port=port,
log_level="info"
)
```
This file creates a FastAPI server that manages the vLLM engine and exposes three API endpoints:
* A health check at `/ping` that tells the load balancer when your worker is ready.
* A text completion endpoint at `/v1/completions`.
* An OpenAI-compatible chat endpoint at `/v1/chat/completions`.
The application handles both streaming and non-streaming responses, manages the language model lifecycle, and includes comprehensive error handling and logging.
## Step 5: Set up dependencies and build steps
With the application code complete, we still need to define its dependencies and create a Dockerfile to package it into a container image.
1. Add the following dependencies to `requirements.txt`:
```text
ray
pandas
pyarrow
runpod~=1.7.0
huggingface-hub
packaging
typing-extensions==4.7.1
pydantic
pydantic-settings
hf-transfer
transformers<4.54.0
```
2. Add the following build steps to your `Dockerfile`:
```dockerfile
FROM nvidia/cuda:12.1.0-base-ubuntu22.04
RUN apt-get update -y \
&& apt-get install -y python3-pip
RUN ldconfig /usr/local/cuda-12.1/compat/
# Install Python dependencies
RUN --mount=type=cache,target=/root/.cache/pip \
python3 -m pip install --upgrade pip && \
python3 -m pip install --upgrade -r /requirements.txt
# Pin vLLM version for stability - 0.9.1 is latest stable as of 2024-07
# FlashInfer provides optimized attention for better performance
ARG VLLM_VERSION=0.9.1
ARG CUDA_VERSION=cu121
ARG TORCH_VERSION=torch2.3
RUN python3 -m pip install vllm==${VLLM_VERSION} && \
python3 -m pip install flashinfer -i https://flashinfer.ai/whl/${CUDA_VERSION}/${TORCH_VERSION}
ENV PYTHONPATH="/:/vllm-workspace"
COPY src /src
WORKDIR /src
CMD ["python3", "handler.py"]
```
## Step 6: Build and push your Docker image
Build and push your Docker image to a container registry:
```bash
# Build the image
docker build --platform linux/amd64 -t YOUR_DOCKER_USERNAME/vllm-loadbalancer:v1.0 .
# Push to Docker Hub
docker push YOUR_DOCKER_USERNAME/vllm-loadbalancer:v1.0
```
## Step 7: Deploy to Runpod
Now, let's deploy our application to a Serverless endpoint:
1. Go to the [Serverless page](https://www.runpod.io/console/serverless) in the Runpod console.
2. Click **New Endpoint**
3. Click **Import from Docker Registry**.
4. In the **Container Image** field, enter your Docker image URL:
```text
YOUR_DOCKER_USERNAME/vllm-loadbalancer:v1.0
```
Then click **Next**.
5. Give your endpoint a name.
6. Under **Endpoint Type**, select **Load Balancer**.
7. Under **GPU Configuration**, select at least one GPU type (16 GB or 24 GB GPUs are fine for this example).
8. Leave all other settings at their defaults.
9. Click **Create Endpoint**.
## Step 8: Test your endpoints
You can find a Python script to test your vLLM load balancer locally [on GitHub](https://github.com/runpod-workers/vllm-loadbalancer-ep/blob/main/example.py).
Once your endpoint has finished deploying, you can access your vLLM APIs at:
```text
https://ENDPOINT_ID.api.runpod.ai/PATH
```
For example, the vLLM application we defined in step 4 exposes these endpoints:
* Health check: `https://ENDPOINT_ID.api.runpod.ai/ping`
* Generate text: `https://ENDPOINT_ID.api.runpod.ai/v1/completions`
* Chat completions: `https://ENDPOINT_ID.api.runpod.ai/v1/chat/completions`
Use the curl commands below to make test requests to your vLLM load balancer, replacing `ENDPOINT_ID` and `RUNPOD_API_KEY` with your actual values.
To run a health check:
```bash
curl -X GET "https://ENDPOINT_ID.api.runpod.ai/ping" \
-H 'Authorization: Bearer RUNPOD_API_KEY' \
-H "Content-Type: application/json" \
```
For text completions:
```bash
curl -X POST "https://ENDPOINT_ID.api.runpod.ai/v1/completions" \
-H 'Authorization: Bearer RUNPOD_API_KEY' \
-H 'Content-Type: application/json' \
-d '{"prompt": "Once upon a time", "max_tokens": 50, "temperature": 0.8}'
```
For chat completions:
```bash
curl -X POST "https://ENDPOINT_ID.api.runpod.ai/v1/chat/completions" \
-H 'Authorization: Bearer RUNPOD_API_KEY' \
-H 'Content-Type: application/json' \
-d '{
"messages": [
{"role": "user", "content": "Tell me a short story"}
],
"max_tokens": 100,
"temperature": 0.8
}'
```
After sending a request, your workers will take some time to initialize. You can track their progress by checking the logs in the **Workers** tab of your endpoint page.
If you see: `{"error":"no workers available"}%` after running the request, this means your workers did not initialize in time to process it. If you try running the request again, this will usually resolve the issue.
For production applications, implement a health check with retries before sending requests. See [Handling cold start errors](/serverless/load-balancing/overview#handling-cold-start-errors) for a complete code example.
Congrats! You've created a load balancing vLLM endpoint and used it to serve a large language model.
## Next steps
Now that you've deployed a load balancing vLLM endpoint, you can try:
* Experimenting with different models and frameworks.
* Adding authentication to your API.
* Exploring advanced FastAPI features like background tasks and WebSockets.
* Optimizing your application for performance and reliability.
---
# Source: https://docs.runpod.io/serverless/development/write-logs.md
> ## Documentation Index
> Fetch the complete documentation index at: https://docs.runpod.io/llms.txt
> Use this file to discover all available pages before exploring further.
# Write logs
> Write application logs from your handler functions to the console or persistent storage.
Writing logs from your handler functions helps you debug, monitor, and troubleshoot your Serverless applications. You can write logs to the Runpod console for real-time monitoring or to persistent storage for long-term retention.
## Logging levels
Runpod supports standard logging levels to help you control the verbosity and importance of log messages. Using appropriate logging levels makes it easier to filter and analyze logs.
The logging levels available are:
* **DEBUG**: Detailed information, typically of interest only when diagnosing problems.
* **INFO**: Confirmation that things are working as expected.
* **WARNING**: Used for unexpected events or warnings of problems in the near future (e.g., `disk space low`).
* **ERROR**: Used for more serious problems, where the application has not been able to perform some function.
* **FATAL**: Used for very serious errors, indicating that the program itself may be unable to continue running.
## Writing logs to the console
The easiest way to write logs is using Python's `logging` library. Logs written to stdout or stderr are automatically captured by Runpod and displayed in the console.
```python}
import logging
import os
import runpod
import logging.handlers
def setup_logger(log_level=logging.DEBUG):
"""
Configures and returns a logger that writes to the console.
This function should be called once when the worker initializes.
"""
# Define the format for log messages. We include a placeholder for 'request_id'
# which will be added contextually for each job.
log_format = logging.Formatter(
'%(asctime)s - %(levelname)s - [Request: %(request_id)s] - %(message)s',
datefmt='%Y-%m-%d %H:%M:%S'
)
# Get the root logger
logger = logging.getLogger("runpod_worker")
logger.setLevel(log_level)
# --- Console Handler ---
# This handler sends logs to standard output, which Runpod captures as worker logs.
console_handler = logging.StreamHandler()
console_handler.setFormatter(log_format)
# Add the console handler to the logger
# Check if handlers are already added to avoid duplication on hot reloads
if not logger.handlers:
logger.addHandler(console_handler)
return logger
# --- Global Logger Initialization ---
# Set up the logger when the script is first loaded by the worker.
logger = setup_logger(log_level=logging.DEBUG)
logger = logging.LoggerAdapter(logger, {"request_id": "N/A"})
logger.info("Logger initialized. Ready to process jobs.")
def handler(job):
"""
Main handler function for the Serverless worker.
"""
# Extract the request ID from the job payload for traceability.
request_id = job.get('id', 'unknown')
# Create a new logger adapter for this specific job.
job_logger = logging.LoggerAdapter(logging.getLogger("runpod_worker"), {"request_id": request_id})
job_logger.info(f"Received job. Now demonstrating all log levels.")
try:
# Demonstrate all log levels
job_logger.debug("Debug message for detailed diagnostics.")
job_logger.info("Info message for general execution flow.")
job_logger.warning("Warning message for unexpected events.")
job_logger.error("Error message for serious issues.")
job_logger.critical("Critical message for unrecoverable issues.")
result = "Successfully demonstrated all log levels."
job_logger.info(f"Job completed successfully.")
return {"output": result}
except Exception as e:
job_logger.error(f"Job failed with an unexpected exception.", exc_info=True)
return {"error": f"An unexpected error occurred: {str(e)}"}
# Start the Serverless worker
if __name__ == "__main__":
runpod.serverless.start({"handler": handler})
```
## Persistent log storage
Endpoint logs are retained for 90 days, after which they are automatically removed. Worker logs are removed when a worker terminates. If you need to retain logs beyond these periods, you can write logs to a [network volume](/storage/network-volumes) or an external service like Elasticsearch or Datadog.
### Writing logs to a network volume
Write logs to a network volume attached to your endpoint for long-term retention.
```python}
import logging
import os
import runpod
import logging.handlers
def setup_logger(log_dir="/runpod-volume/logs", log_level=logging.DEBUG):
"""
Configures a logger that writes to both console and a network volume.
"""
# Ensure the log directory exists on the network volume
os.makedirs(log_dir, exist_ok=True)
log_format = logging.Formatter(
'%(asctime)s - %(levelname)s - [Request: %(request_id)s] - %(message)s',
datefmt='%Y-%m-%d %H:%M:%S'
)
logger = logging.getLogger("runpod_worker")
logger.setLevel(log_level)
# Console Handler
console_handler = logging.StreamHandler()
console_handler.setFormatter(log_format)
# File Handler - writes to network volume
log_file_path = os.path.join(log_dir, "worker.log")
file_handler = logging.FileHandler(log_file_path)
file_handler.setFormatter(log_format)
# Add both handlers
if not logger.handlers:
logger.addHandler(console_handler)
logger.addHandler(file_handler)
return logger
logger = setup_logger(log_level=logging.DEBUG)
logger = logging.LoggerAdapter(logger, {"request_id": "N/A"})
logger.info("Logger initialized with persistent storage.")
def handler(job):
"""
Main handler function with persistent logging.
"""
request_id = job.get('id', 'unknown')
job_logger = logging.LoggerAdapter(logging.getLogger("runpod_worker"), {"request_id": request_id})
job_logger.info(f"Received job.")
try:
job_logger.debug("Processing request with persistent logs.")
result = "Job completed with logs saved to network volume."
job_logger.info(f"Job completed successfully.")
return {"output": result}
except Exception as e:
job_logger.error(f"Job failed.", exc_info=True)
return {"error": f"An error occurred: {str(e)}"}
if __name__ == "__main__":
runpod.serverless.start({"handler": handler})
```
### Accessing stored logs
To access logs stored in network volumes:
* Use the [S3-compatible API](/storage/s3-api) to programmatically access log files.
* Connect to a Pod with the same network volume attached using [SSH](/pods/configuration/use-ssh).
## Structured logging
Structured logging outputs logs in a machine-readable format (typically JSON) that makes it easier to parse, search, and analyze logs programmatically. This is especially useful when exporting logs to external services or analyzing large volumes of logs.
```python}
import logging
import json
import runpod
def setup_structured_logger():
"""
Configure a logger that outputs JSON-formatted logs.
"""
logger = logging.getLogger("runpod_worker")
logger.setLevel(logging.DEBUG)
handler = logging.StreamHandler()
logger.addHandler(handler)
return logger
logger = setup_structured_logger()
def log_json(level, message, **kwargs):
"""
Log a structured JSON message.
"""
log_entry = {
"level": level,
"message": message,
**kwargs
}
print(json.dumps(log_entry))
def handler(event):
request_id = event.get("id", "unknown")
try:
log_json("INFO", "Processing request", request_id=request_id, input_keys=list(event.get("input", {}).keys()))
# Replace with your processing logic
result = process_input(event["input"])
log_json("INFO", "Request completed", request_id=request_id, execution_time_ms=123)
return {"output": result}
except Exception as e:
log_json("ERROR", "Request failed", request_id=request_id, error=str(e), error_type=type(e).__name__)
return {"error": str(e)}
runpod.serverless.start({"handler": handler})
```
This produces logs in this format:
```json}
{"level": "INFO", "message": "Processing request", "request_id": "abc123", "input_keys": ["prompt", "max_length"]}
{"level": "INFO", "message": "Request completed", "request_id": "abc123", "execution_time_ms": 123}
```
### Benefits of structured logging
Structured logging provides several advantages:
* **Easier parsing**: JSON logs can be easily parsed by log aggregation tools.
* **Better search**: Search for specific fields like `request_id` or `error_type`.
* **Analytics**: Analyze trends, patterns, and metrics from log data.
* **Integration**: Export to external services like Datadog, Splunk, or Elasticsearch.
## Best practices
Follow these best practices when writing logs:
1. **Use request IDs**: Include the job ID or request ID in log entries for traceability.
2. **Choose appropriate levels**: Use DEBUG for diagnostics, INFO for normal operations, WARNING for potential issues, and ERROR for failures.
3. **Structure your logs**: Use JSON format for easier parsing and analysis.
4. **Implement log rotation**: Rotate log files to prevent disk space issues when using persistent storage.
5. **Avoid excessive logging**: Excessive console logging may trigger throttling. Use persistent storage for detailed logs.
---
# Source: https://docs.runpod.io/references/troubleshooting/zero-gpus.md
> ## Documentation Index
> Fetch the complete documentation index at: https://docs.runpod.io/llms.txt
> Use this file to discover all available pages before exploring further.
# Zero GPU Pods on restart
> What to do when your Pod machine has zero GPUs.
When you restart a stopped Pod, you might see a message telling you that there are "Zero GPU Pods." This is because there are no GPUs available on the machine where your Pod was running.
## Why does this happen?
When you deploy a Pod, it's assigned to a GPU on a specific physical machine. This creates a link between your Pod and that particular piece of hardware. As long as your Pod is running, that GPU is exclusively reserved for you. When you stop your Pod, you release that specific GPU, allowing other users to rent it. Your Pod's [volume storage](/pods/storage/types) remains on the physical machine, but the GPU slot becomes available.
If another user rents that GPU while your Pod is stopped, the GPU will be occupied when you try to restart. Because your Pod is still tied to that original machine, it cannot start with a GPU.
When this happens, Runpod gives you the option to start the Pod with zero GPUs. This is primarily a data recovery feature, allowing you to access your Pod's volume disk without access to the GPU.
## What are my options?
If you encounter this situation, you have three choices:
1. **Start with zero GPUs for data access**: Start the Pod without a GPU to access its local storage. This is useful for retrieving files, but the Pod will have limited CPU resources and is not suitable for compute tasks. You should use this option to back up or transfer your data before terminating the Pod.
2. **Wait and retry**: You can wait and try to restart the Pod again later. The GPU may become available if the other user stops their Pod, but there is no guarantee of when that will happen.
3. **Terminate and redeploy**: If you need a GPU immediately, terminate the current Pod and deploy a new one with the same configuration. The new Pod will be scheduled on any machine in the Runpod network with an available GPU of your chosen type.
## How do I prevent this?
The most effective way to avoid this issue is to use **[network volumes](/storage/network-volumes)**.
Network volumes decouple your data from a specific physical machine. Your `/workspace` data is stored on a separate, persistent volume that can be attached to any Pod. If you need to terminate a Pod, you can simply deploy a new one and attach the same network volume, giving you immediate access to your data on a new machine with an available GPU.
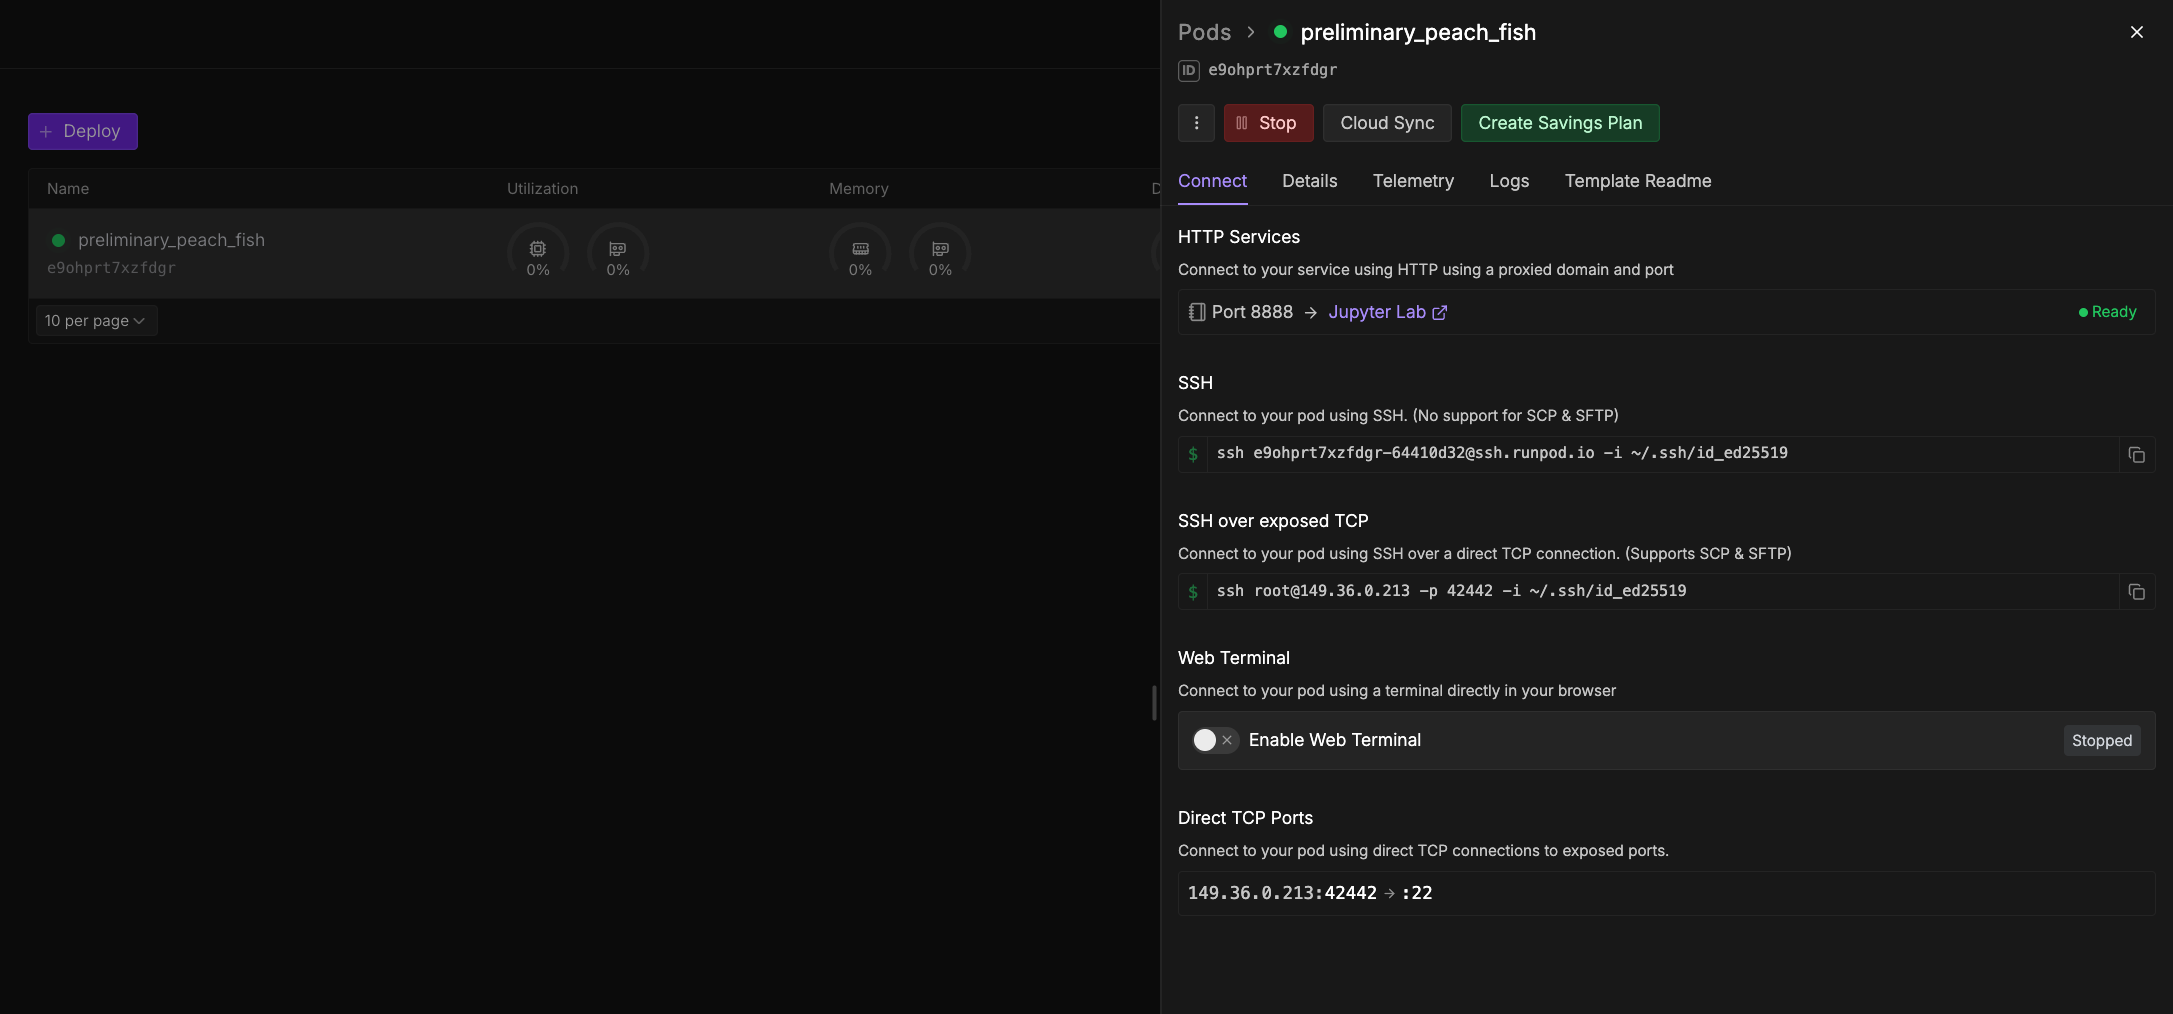 ## Web terminal connection
The web terminal offers a convenient, browser-based method to quickly connect to your Pod and run commands. However, it's not recommended for long-running processes, such as training an LLM, as the connection might not be as stable or persistent as a direct [SSH connection](#ssh-terminal-connection).
The availability of the web terminal depends on the [Pod's template](/pods/templates/overview).
To connect using the web terminal:
1. Navigate to the [Pods page](https://console.runpod.io/pods) in the Runpod console.
2. Expand the desired Pod and select **Connect**.
3. If your web terminal is **Stopped**, click **Start**.
## Web terminal connection
The web terminal offers a convenient, browser-based method to quickly connect to your Pod and run commands. However, it's not recommended for long-running processes, such as training an LLM, as the connection might not be as stable or persistent as a direct [SSH connection](#ssh-terminal-connection).
The availability of the web terminal depends on the [Pod's template](/pods/templates/overview).
To connect using the web terminal:
1. Navigate to the [Pods page](https://console.runpod.io/pods) in the Runpod console.
2. Expand the desired Pod and select **Connect**.
3. If your web terminal is **Stopped**, click **Start**.
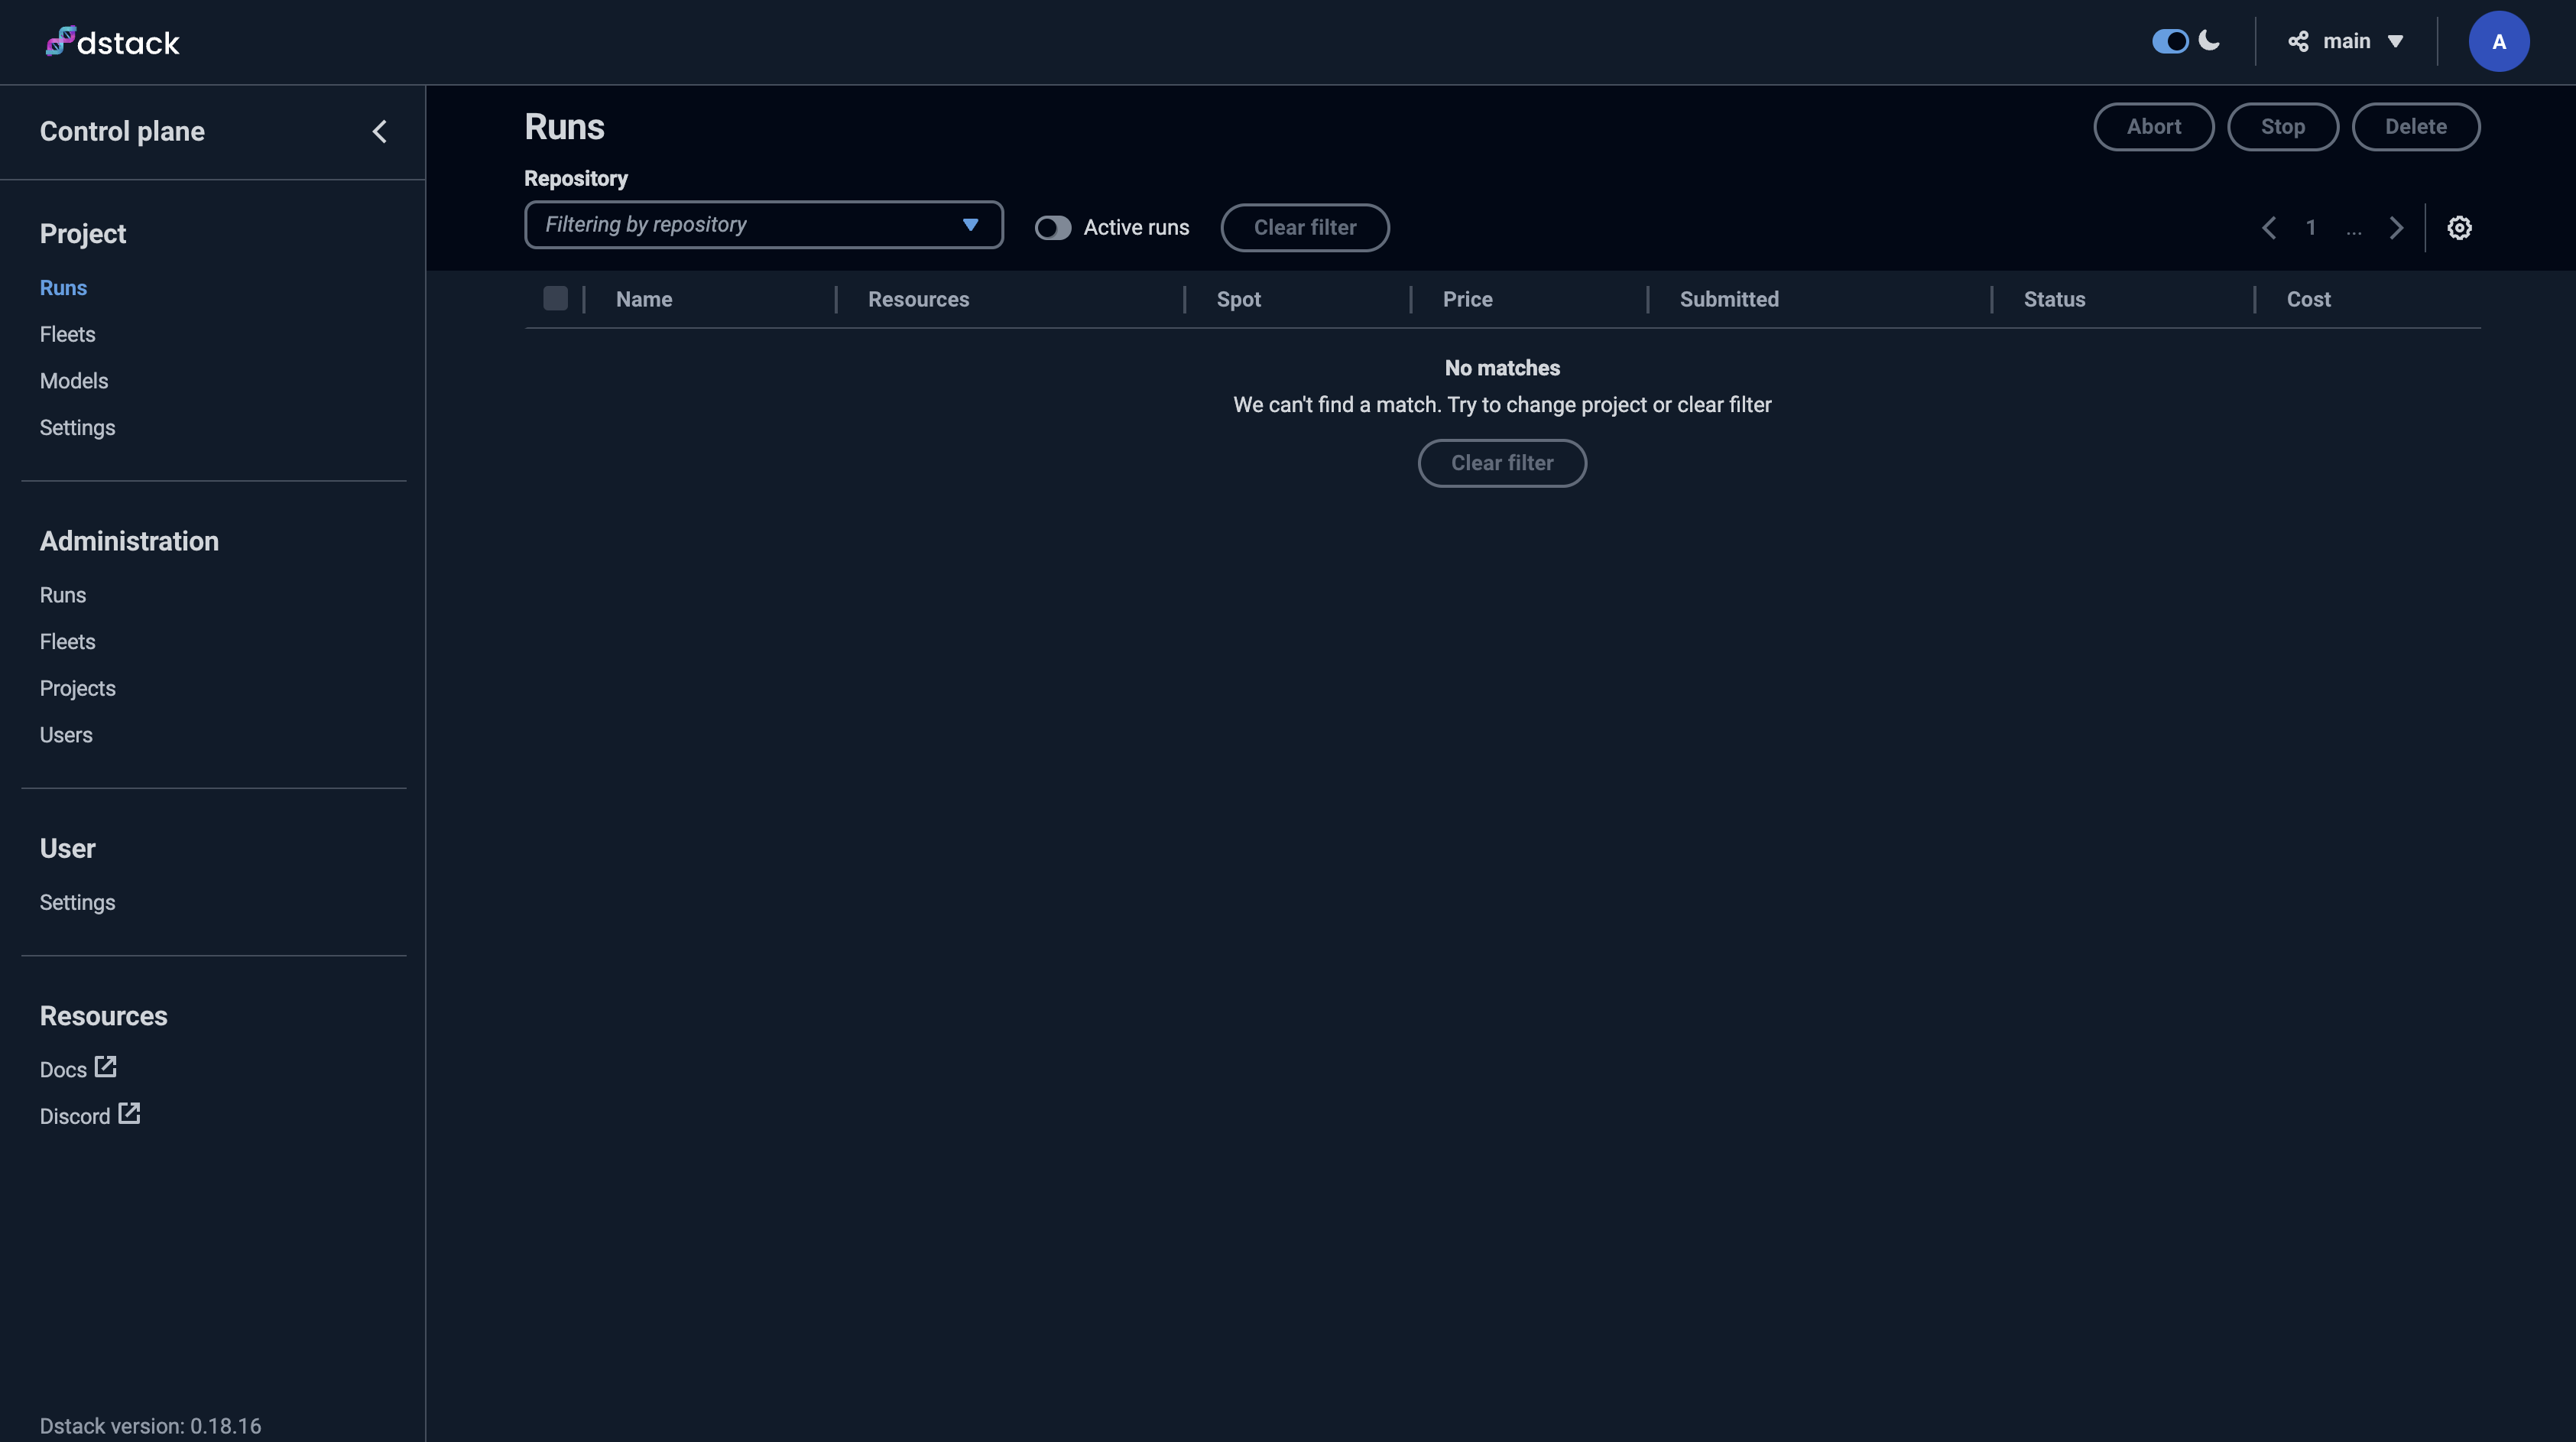 ## Deploying vLLM as a Task
### Step 1: Configure the Deployment Task
1. **Prepare for Deployment**
* Open a new terminal or command prompt window.
* Navigate to your tutorial directory:
```bash theme={"theme":{"light":"github-light","dark":"github-dark"}}
cd runpod-dstack-tutorial
```
* **Activate the Python Virtual Environment**
## Deploying vLLM as a Task
### Step 1: Configure the Deployment Task
1. **Prepare for Deployment**
* Open a new terminal or command prompt window.
* Navigate to your tutorial directory:
```bash theme={"theme":{"light":"github-light","dark":"github-dark"}}
cd runpod-dstack-tutorial
```
* **Activate the Python Virtual Environment**
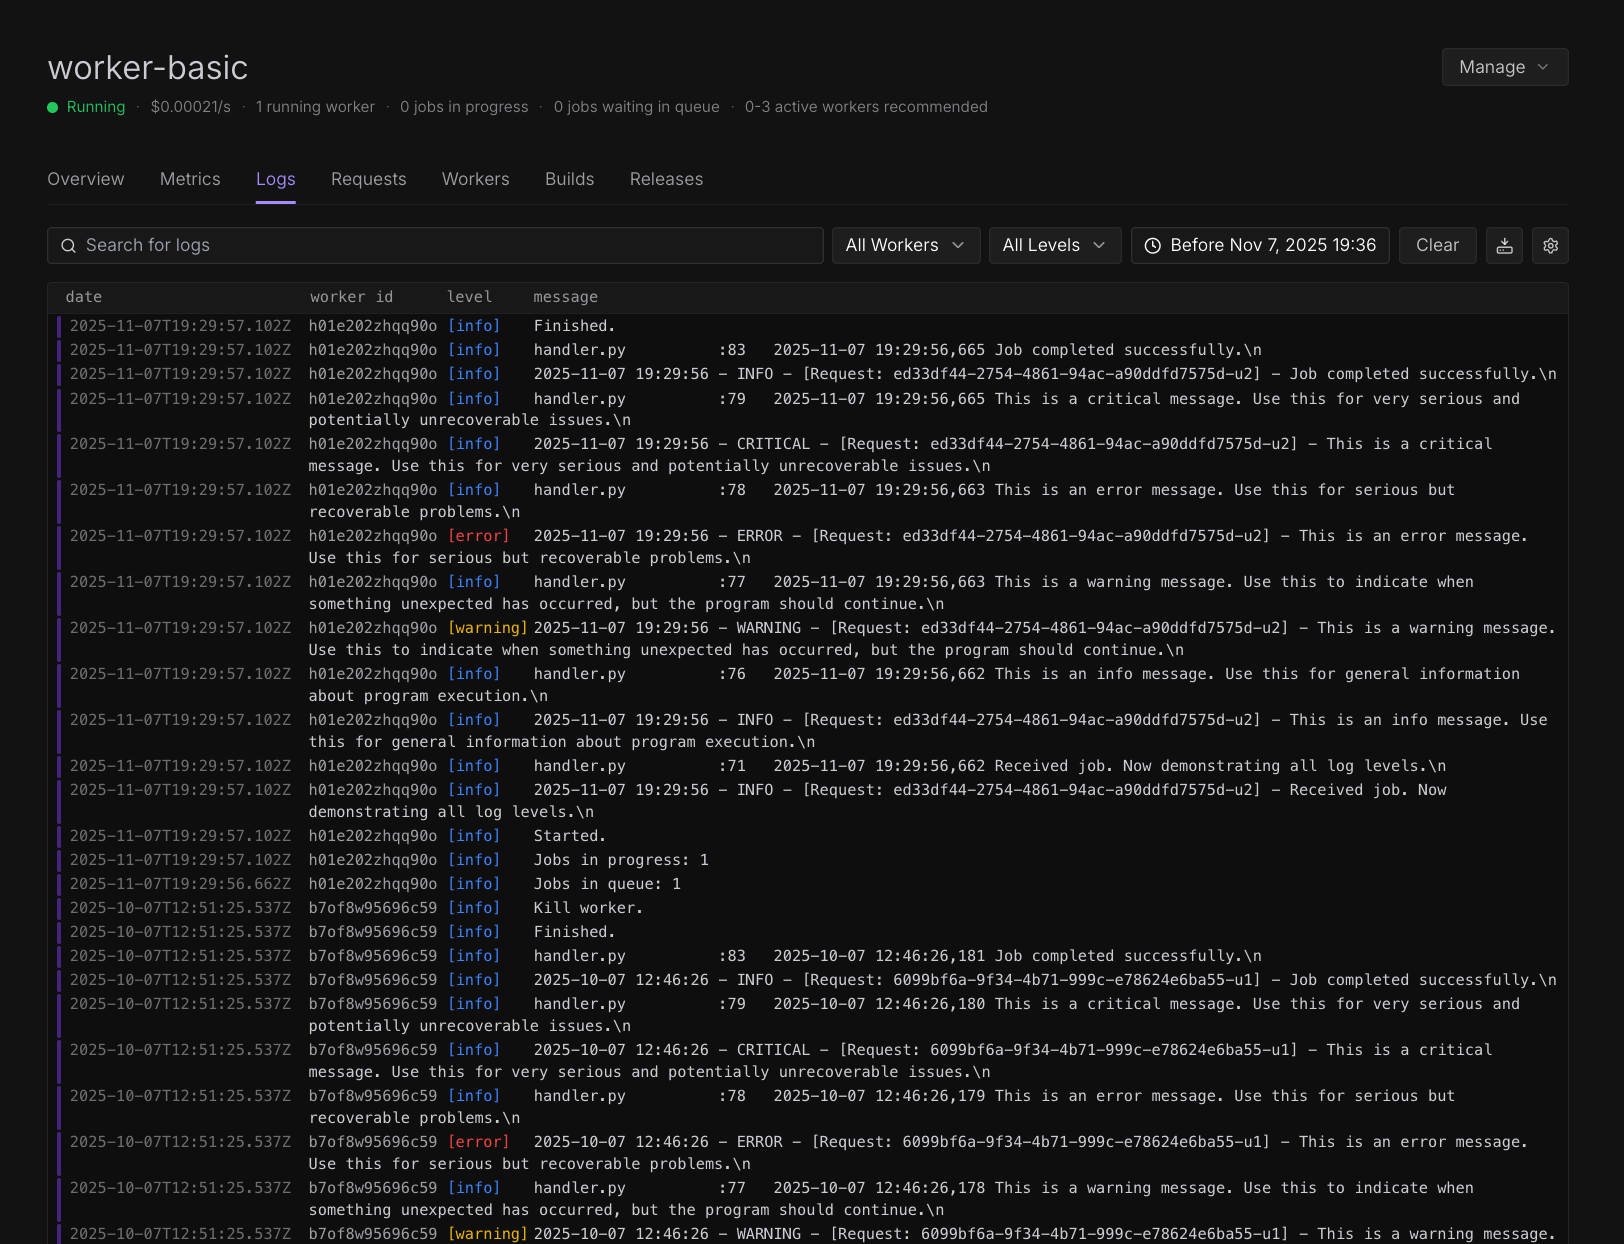 Runpod provides comprehensive logging capabilities for Serverless endpoints and workers. You can view real-time and historical logs through the Runpod console to help you monitor, debug, and troubleshoot your applications.
To learn how to write structured logs from your handler functions, see [Write logs](/serverless/development/write-logs).
## Endpoint logs
Runpod provides comprehensive logging capabilities for Serverless endpoints and workers. You can view real-time and historical logs through the Runpod console to help you monitor, debug, and troubleshoot your applications.
To learn how to write structured logs from your handler functions, see [Write logs](/serverless/development/write-logs).
## Endpoint logs
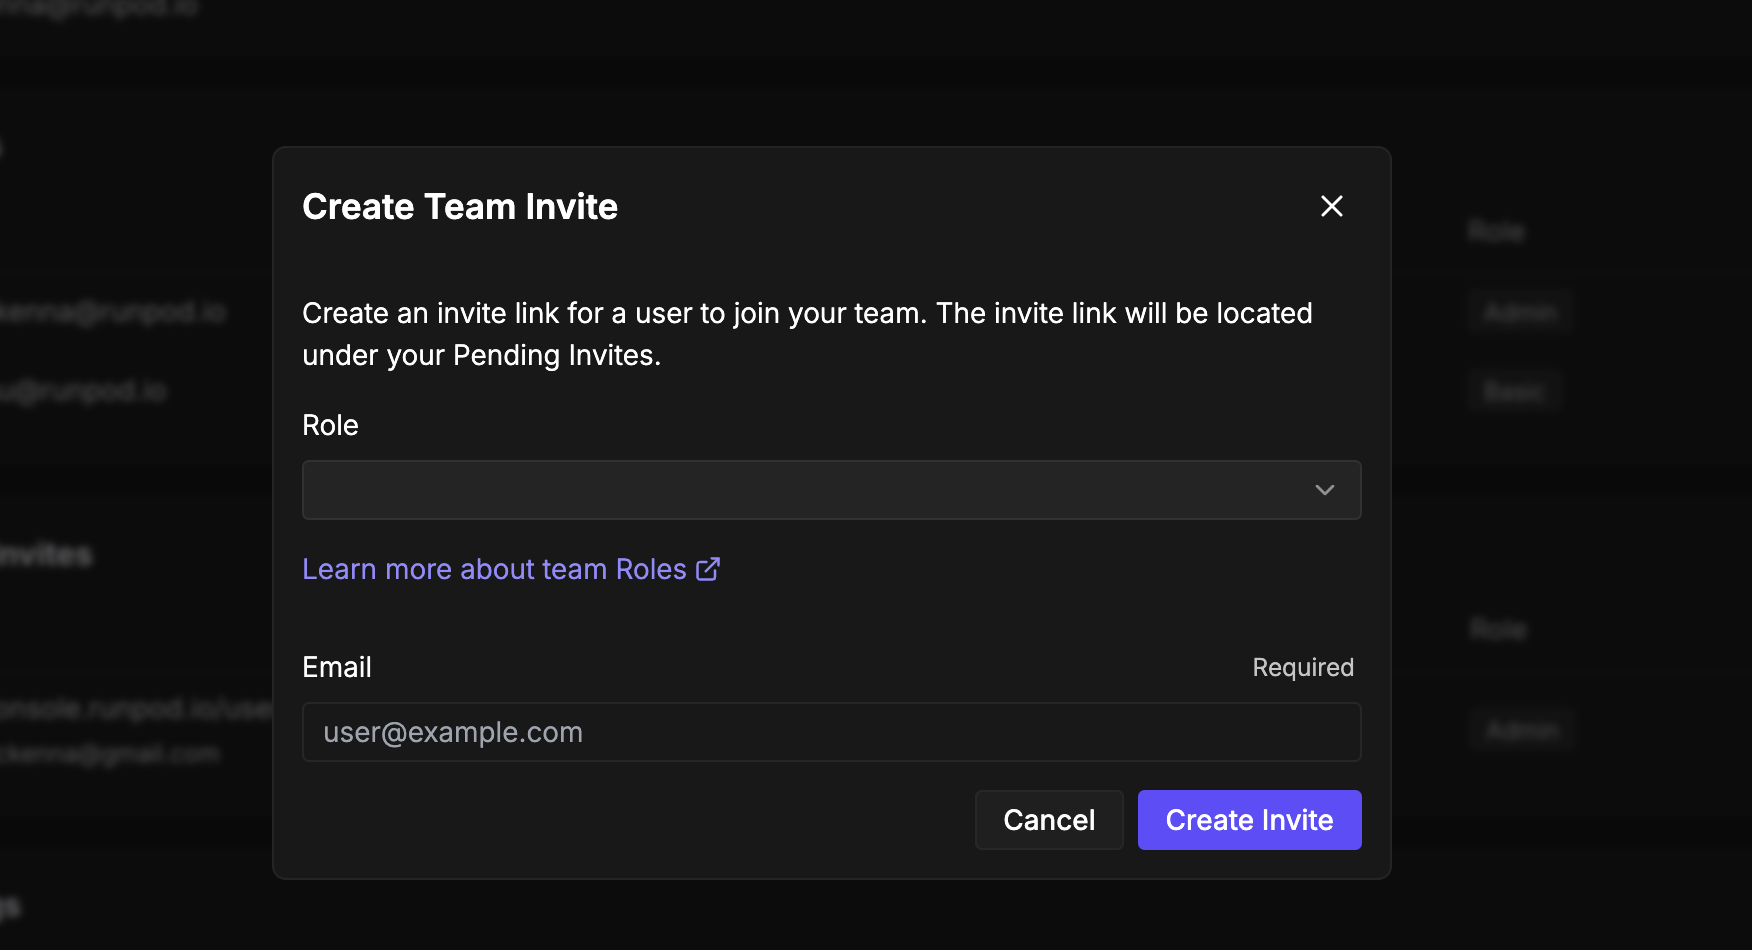 To invite a new member:
1. Navigate to the [Team page](https://www.console.runpod.io/team) in the Runpod console.
2. In the **Members** section, select **Invite New Member**.
3. Choose [the appropriate role](#roles-and-permissions) for the new member.
4. Enter the email address of the person you want to invite and click **Create Invite**.
5. Copy the generated invitation link from the **Pending Invites** section and share it with the person you want to invite.
Invitation links remain active until used or manually revoked. You can view all pending invitations in the team management interface.
## Join a team
When invited to join a team, you'll receive an invitation link from a team member. To accept:
1. Click the invitation link provided by the team member.
2. Select **Join Team** to accept the invitation.
Your account will gain access to the team's resources based on the role assigned to you.
## Roles and permissions
Runpod provides four distinct roles to control access within team accounts. Each role includes specific permissions designed for different responsibilities.
| Permission | Basic | Billing | Dev | Admin |
| ----------------------------------------- | ----- | ------- | --- | ----- |
| Access team account | ✅ | ✅ | ✅ | ✅ |
| Connect to existing Pods | ✅ | ❌ | ✅ | ✅ |
| Create/delete/start/stop Pods | ❌ | ❌ | ✅ | ✅ |
| Create/delete Serverless endpoints | ❌ | ❌ | ✅ | ✅ |
| Send requests to Serverless endpoints | ✅ | ❌ | ✅ | ✅ |
| Connect to existing Instant Clusters | ✅ | ❌ | ✅ | ✅ |
| Create/delete/start/stop Instant Clusters | ❌ | ❌ | ❌ | ✅ |
| Create/update/delete network volumes | ❌ | ❌ | ✅ | ✅ |
| View billing information | ❌ | ✅ | ❌ | ✅ |
| Manage payment methods | ❌ | ✅ | ❌ | ✅ |
| Invite team members | ❌ | ❌ | ❌ | ✅ |
| Manage team permissions | ❌ | ❌ | ❌ | ✅ |
| Modify team account settings | ❌ | ❌ | ❌ | ✅ |
| Access audit logs | ❌ | ❌ | ❌ | ✅ |
### Basic role
The basic role provides essential access for users who need to work with existing resources without management capabilities.
This role allows users to access the team account and connect to already-deployed computing resources (e.g., Pods and Serverless endpoints) for development work. Users with this role cannot view billing information, start or stop Pods, or create new resources.
### Billing role
The billing role focuses exclusively on financial management aspects of the account.
Users with this role can access all billing information, manage payment methods, and view invoices. They cannot access computing resources, making this role ideal for finance team members who need billing access without operational permissions.
### Dev role
The dev role extends basic permissions with additional capabilities for active development work.
This role includes all basic permissions plus the ability to start, stop, and create Pods. Developers can fully manage computing resources for their work while remaining restricted from billing information and account settings.
### Admin role
The admin role provides complete control over all account features and settings.
Administrators have unrestricted access to manage team members, configure account settings, handle billing, and control all team computing resources. This role should be reserved for team leaders and trusted members who need full account access.
## Account spend limits
By default, Runpod accounts have a spend limit of \$80 per hour across all resources. This limit protects your account from unexpected charges. If your workload requires higher spending capacity, you can [contact support](https://www.runpod.io/contact) to increase it.
## Monitor account activity
Runpod provides comprehensive audit logs to track all actions performed within your account. This feature helps maintain security and accountability across team operations.
Access audit logs at [console.runpod.io/user/audit-logs](https://www.console.runpod.io/user/audit-logs).
The audit system records detailed information about each action, including the user who performed it, the affected resource, and the timestamp. You can filter logs by date range, user, resource type, resource ID, and specific actions to investigate account activity or troubleshoot issues.
Regular review of audit logs helps identify unusual activity and ensures team members use resources appropriately.
## Best practices
When managing team accounts, establish clear role assignments based on each member's responsibilities. Regularly review team membership and remove access for members who no longer need it.
For enhanced security, use the principle of least privilege by assigning the minimum role necessary for each team member's work. Consider creating separate accounts for billing management to isolate financial access from technical operations.
Monitor audit logs periodically to ensure compliance with your organization's policies and identify any unauthorized activities early.
## Next steps
After setting up your account and team you can:
* [Create API keys](/get-started/api-keys) to enable programmatic access to Runpod services.
* [Deploy your first Pod](/get-started) to start using GPU resources.
* Configure [Serverless endpoints](/serverless/overview) for scalable AI inference.
* Set up [billing and payment methods](https://console.runpod.io/user/billing) for your team.
---
# Source: https://docs.runpod.io/sdks/graphql/manage-endpoints.md
> ## Documentation Index
>
> Fetch the complete documentation index at: https://docs.runpod.io/llms.txt
> Use this file to discover all available pages before exploring further.
# Manage Endpoints
`gpuIds`, `name`, and `templateId` are required arguments; all other arguments are optional, and default values will be used if unspecified.
## Create a new Serverless Endpoint
To invite a new member:
1. Navigate to the [Team page](https://www.console.runpod.io/team) in the Runpod console.
2. In the **Members** section, select **Invite New Member**.
3. Choose [the appropriate role](#roles-and-permissions) for the new member.
4. Enter the email address of the person you want to invite and click **Create Invite**.
5. Copy the generated invitation link from the **Pending Invites** section and share it with the person you want to invite.
Invitation links remain active until used or manually revoked. You can view all pending invitations in the team management interface.
## Join a team
When invited to join a team, you'll receive an invitation link from a team member. To accept:
1. Click the invitation link provided by the team member.
2. Select **Join Team** to accept the invitation.
Your account will gain access to the team's resources based on the role assigned to you.
## Roles and permissions
Runpod provides four distinct roles to control access within team accounts. Each role includes specific permissions designed for different responsibilities.
| Permission | Basic | Billing | Dev | Admin |
| ----------------------------------------- | ----- | ------- | --- | ----- |
| Access team account | ✅ | ✅ | ✅ | ✅ |
| Connect to existing Pods | ✅ | ❌ | ✅ | ✅ |
| Create/delete/start/stop Pods | ❌ | ❌ | ✅ | ✅ |
| Create/delete Serverless endpoints | ❌ | ❌ | ✅ | ✅ |
| Send requests to Serverless endpoints | ✅ | ❌ | ✅ | ✅ |
| Connect to existing Instant Clusters | ✅ | ❌ | ✅ | ✅ |
| Create/delete/start/stop Instant Clusters | ❌ | ❌ | ❌ | ✅ |
| Create/update/delete network volumes | ❌ | ❌ | ✅ | ✅ |
| View billing information | ❌ | ✅ | ❌ | ✅ |
| Manage payment methods | ❌ | ✅ | ❌ | ✅ |
| Invite team members | ❌ | ❌ | ❌ | ✅ |
| Manage team permissions | ❌ | ❌ | ❌ | ✅ |
| Modify team account settings | ❌ | ❌ | ❌ | ✅ |
| Access audit logs | ❌ | ❌ | ❌ | ✅ |
### Basic role
The basic role provides essential access for users who need to work with existing resources without management capabilities.
This role allows users to access the team account and connect to already-deployed computing resources (e.g., Pods and Serverless endpoints) for development work. Users with this role cannot view billing information, start or stop Pods, or create new resources.
### Billing role
The billing role focuses exclusively on financial management aspects of the account.
Users with this role can access all billing information, manage payment methods, and view invoices. They cannot access computing resources, making this role ideal for finance team members who need billing access without operational permissions.
### Dev role
The dev role extends basic permissions with additional capabilities for active development work.
This role includes all basic permissions plus the ability to start, stop, and create Pods. Developers can fully manage computing resources for their work while remaining restricted from billing information and account settings.
### Admin role
The admin role provides complete control over all account features and settings.
Administrators have unrestricted access to manage team members, configure account settings, handle billing, and control all team computing resources. This role should be reserved for team leaders and trusted members who need full account access.
## Account spend limits
By default, Runpod accounts have a spend limit of \$80 per hour across all resources. This limit protects your account from unexpected charges. If your workload requires higher spending capacity, you can [contact support](https://www.runpod.io/contact) to increase it.
## Monitor account activity
Runpod provides comprehensive audit logs to track all actions performed within your account. This feature helps maintain security and accountability across team operations.
Access audit logs at [console.runpod.io/user/audit-logs](https://www.console.runpod.io/user/audit-logs).
The audit system records detailed information about each action, including the user who performed it, the affected resource, and the timestamp. You can filter logs by date range, user, resource type, resource ID, and specific actions to investigate account activity or troubleshoot issues.
Regular review of audit logs helps identify unusual activity and ensures team members use resources appropriately.
## Best practices
When managing team accounts, establish clear role assignments based on each member's responsibilities. Regularly review team membership and remove access for members who no longer need it.
For enhanced security, use the principle of least privilege by assigning the minimum role necessary for each team member's work. Consider creating separate accounts for billing management to isolate financial access from technical operations.
Monitor audit logs periodically to ensure compliance with your organization's policies and identify any unauthorized activities early.
## Next steps
After setting up your account and team you can:
* [Create API keys](/get-started/api-keys) to enable programmatic access to Runpod services.
* [Deploy your first Pod](/get-started) to start using GPU resources.
* Configure [Serverless endpoints](/serverless/overview) for scalable AI inference.
* Set up [billing and payment methods](https://console.runpod.io/user/billing) for your team.
---
# Source: https://docs.runpod.io/sdks/graphql/manage-endpoints.md
> ## Documentation Index
>
> Fetch the complete documentation index at: https://docs.runpod.io/llms.txt
> Use this file to discover all available pages before exploring further.
# Manage Endpoints
`gpuIds`, `name`, and `templateId` are required arguments; all other arguments are optional, and default values will be used if unspecified.
## Create a new Serverless Endpoint
 ## Contact your card issuer
If your card is declined, contact your issuing bank to determine the reason. Due to privacy standards, payment processors only indicate that a transaction was not processed without providing specific details. Your bank can tell you why the payment was declined.
Card declines often occur for routine reasons, such as anti-fraud protection. Your bank can resolve blocks they have placed on your card.
## Contact your card issuer
If your card is declined, contact your issuing bank to determine the reason. Due to privacy standards, payment processors only indicate that a transaction was not processed without providing specific details. Your bank can tell you why the payment was declined.
Card declines often occur for routine reasons, such as anti-fraud protection. Your bank can resolve blocks they have placed on your card.
 **Note:** Check the template name or documentation for CUDA requirements. When in doubt, select the latest CUDA version as newer drivers are backward compatible.
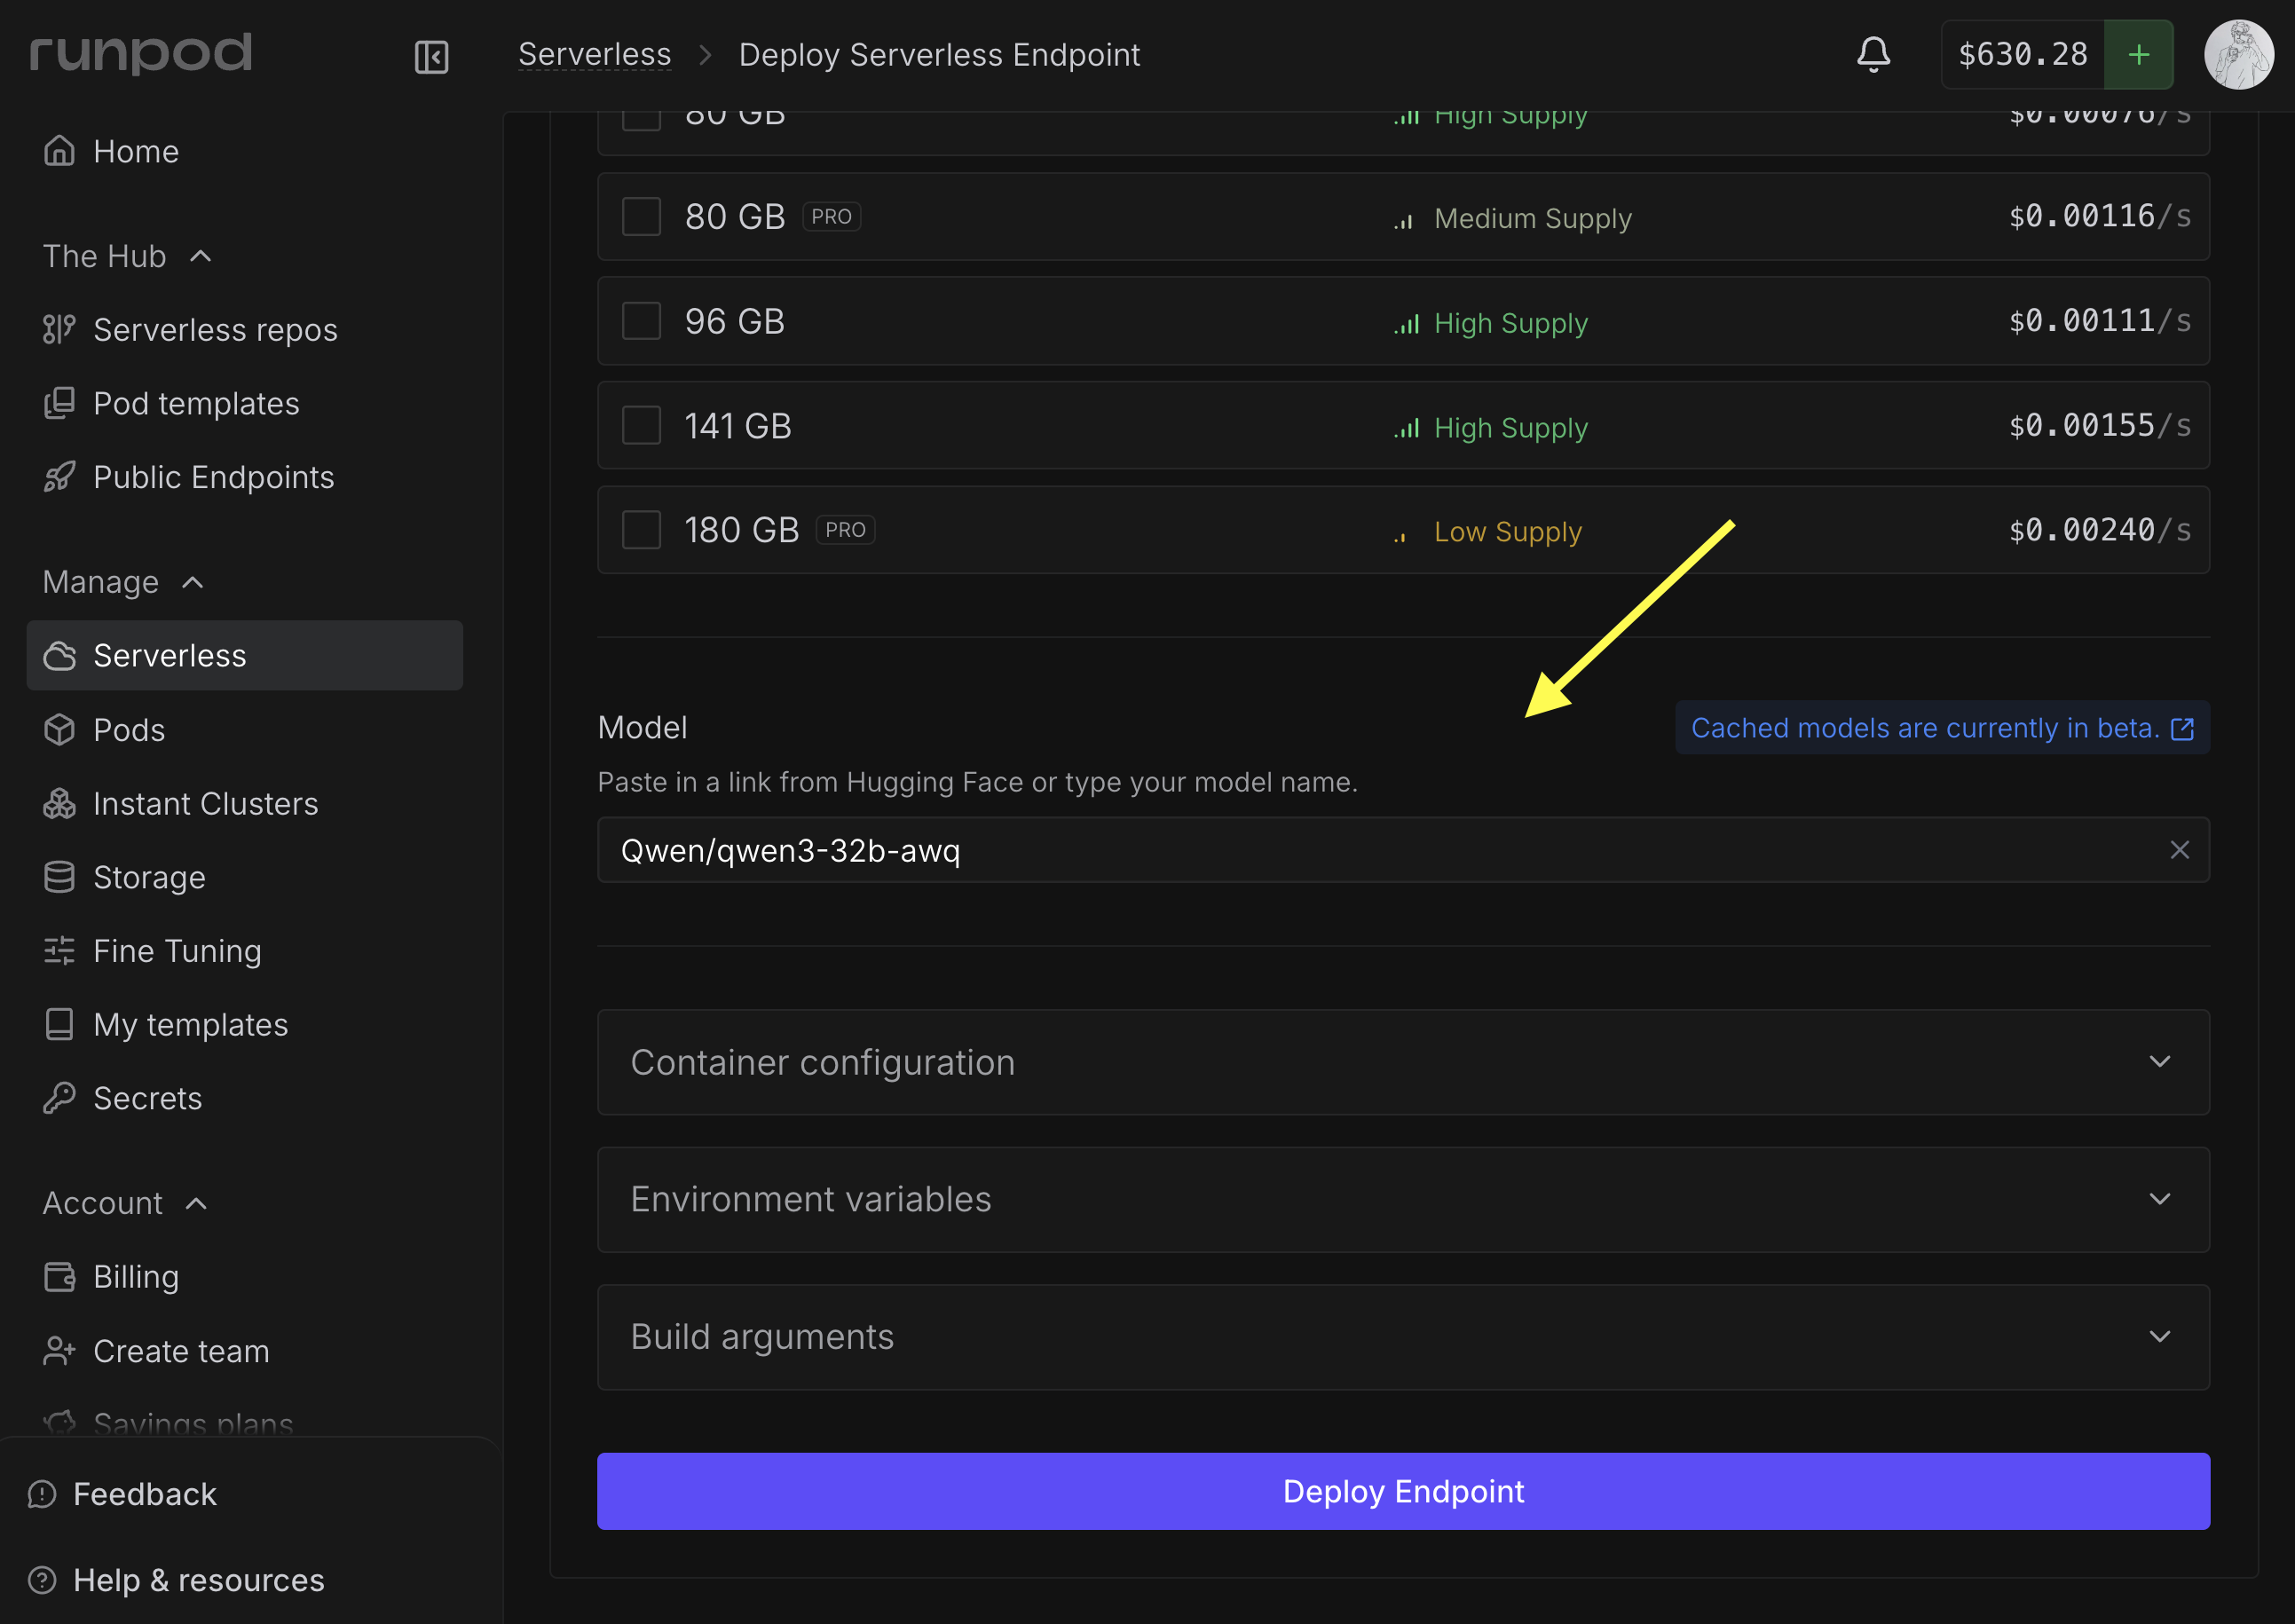
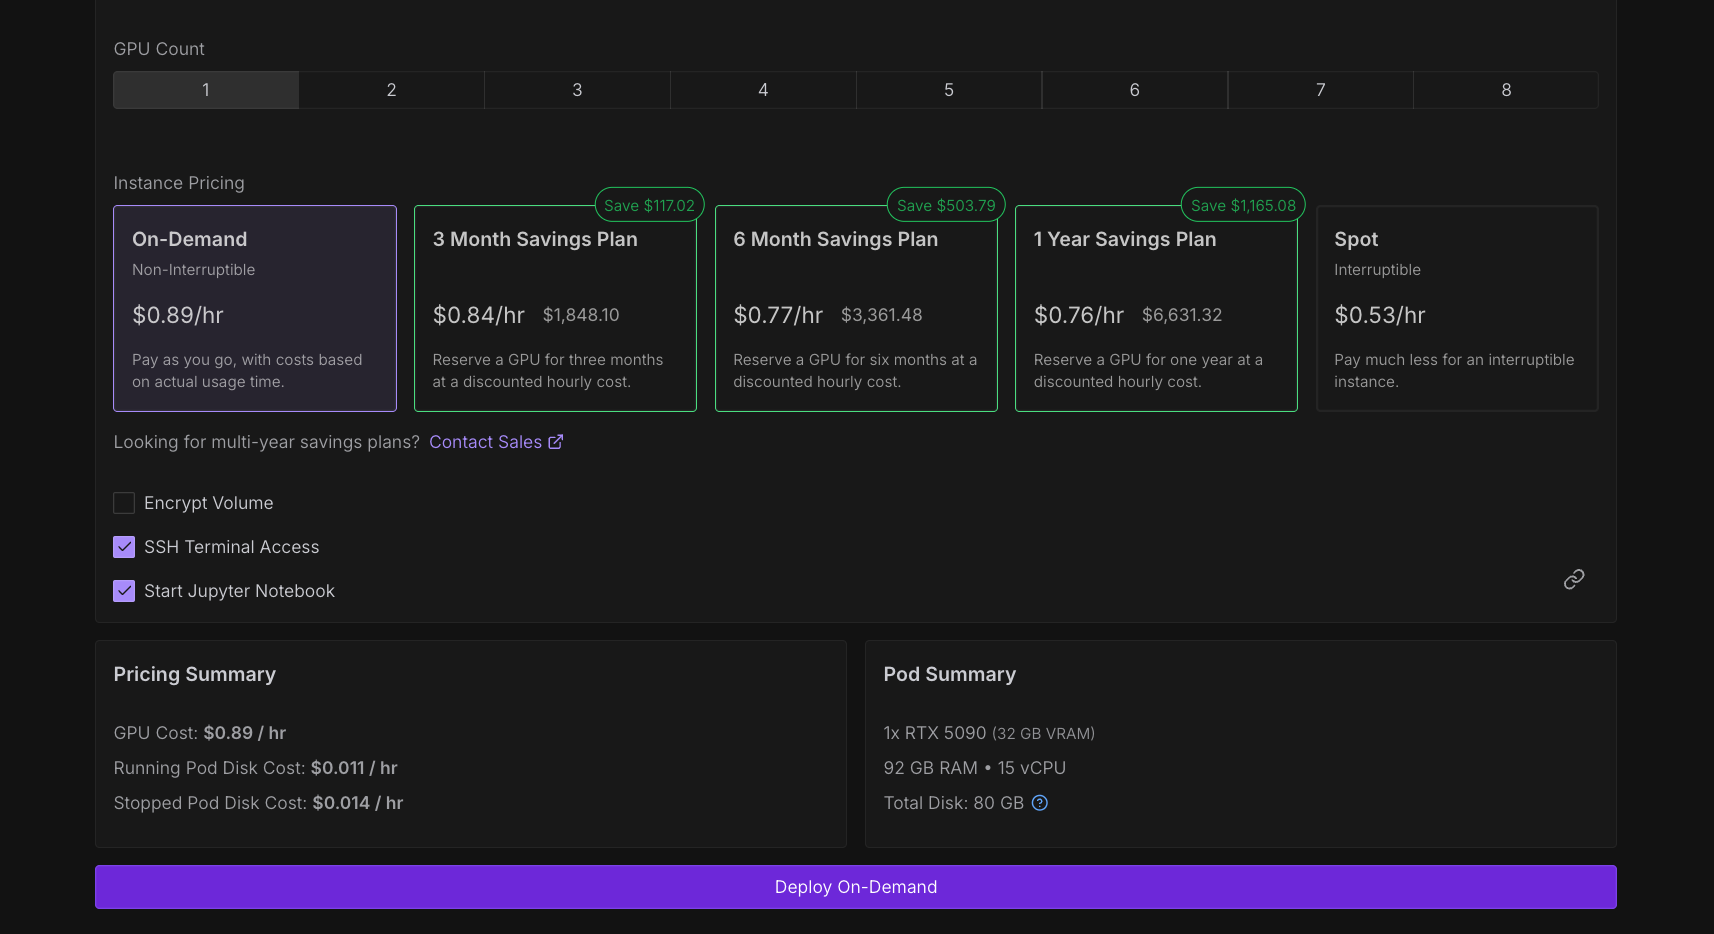 Runpod provides three options for Pod pricing:
* **On-demand:** Pay-as-you-go pricing for reliable, non-interruptible instances dedicated to your use.
* **Savings plan:** Commit to a fixed term upfront for significant discounts on on-demand rates, ideal for longer-term workloads where you need prolonged access to compute.
* **Spot:** Access spare compute capacity at the lowest prices. These instances are interruptible and suitable for workloads that can tolerate such interruptions.
### On-demand
On-demand instances are designed for non-interruptible workloads. When you deploy an on-demand Pod, the required resources are dedicated to your Pod. As long as you have sufficient funds in your account, your on-demand Pod cannot be displaced by other users and will run without interruption.
Runpod provides three options for Pod pricing:
* **On-demand:** Pay-as-you-go pricing for reliable, non-interruptible instances dedicated to your use.
* **Savings plan:** Commit to a fixed term upfront for significant discounts on on-demand rates, ideal for longer-term workloads where you need prolonged access to compute.
* **Spot:** Access spare compute capacity at the lowest prices. These instances are interruptible and suitable for workloads that can tolerate such interruptions.
### On-demand
On-demand instances are designed for non-interruptible workloads. When you deploy an on-demand Pod, the required resources are dedicated to your Pod. As long as you have sufficient funds in your account, your on-demand Pod cannot be displaced by other users and will run without interruption.
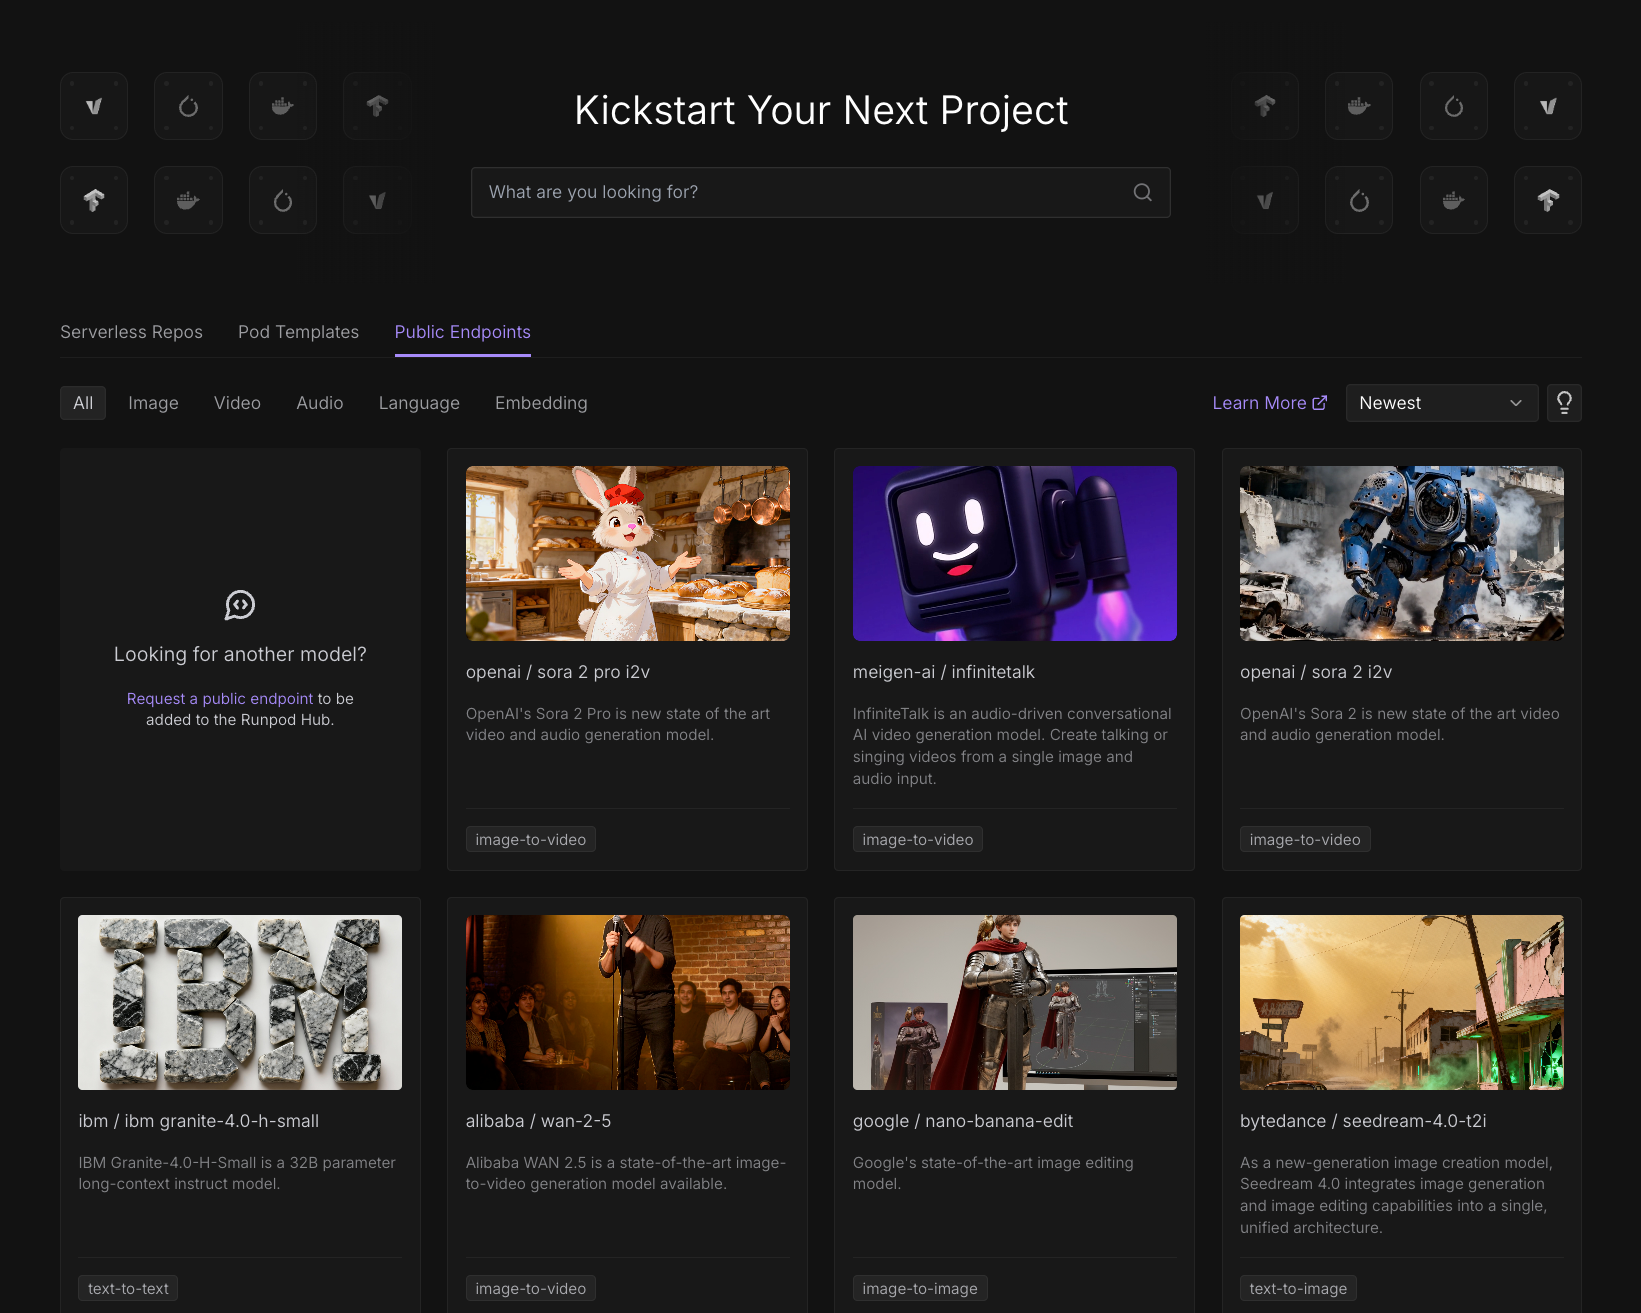 Runpod Public Endpoints provide instant access to state-of-the-art AI models through simple API calls, with an API playground available through the [Runpod Hub](/hub/overview).
 The Public Endpoint playground provides a streamlined way to discover and experiment with AI models.
The playground offers:
* **Interactive parameter adjustment**: Modify prompts, dimensions, and model settings in real-time.
* **Instant preview**: Generate images directly in the browser.
* **Cost estimation**: See estimated costs before running generation.
* **API code generation**: Create working code examples for your applications.
### Access the playground
1. Navigate to the [Runpod Hub](https://www.runpod.io/console/hub) in the console.
2. Select the **Public Endpoints** section.
3. Browse the [available models](#available-models) and select one that fits your needs.
### Test a model
To test a model in the playground:
1. Select a model from the [Runpod Hub](https://www.console.runpod.io/hub).
2. Under **Input**, enter a prompt in the text box.
3. Enter a negative prompt if needed. Negative prompts tell the model what to exclude from the output.
4. Under **Additional settings**, you can adjust the seed, aspect ratio, number of inference steps, guidance scale, and output format.
5. Click **Run** to start generating.
Under **Result**, you can use the dropdown menu to show either a preview of the output, or the raw JSON.
### Create a code example
The Public Endpoint playground provides a streamlined way to discover and experiment with AI models.
The playground offers:
* **Interactive parameter adjustment**: Modify prompts, dimensions, and model settings in real-time.
* **Instant preview**: Generate images directly in the browser.
* **Cost estimation**: See estimated costs before running generation.
* **API code generation**: Create working code examples for your applications.
### Access the playground
1. Navigate to the [Runpod Hub](https://www.runpod.io/console/hub) in the console.
2. Select the **Public Endpoints** section.
3. Browse the [available models](#available-models) and select one that fits your needs.
### Test a model
To test a model in the playground:
1. Select a model from the [Runpod Hub](https://www.console.runpod.io/hub).
2. Under **Input**, enter a prompt in the text box.
3. Enter a negative prompt if needed. Negative prompts tell the model what to exclude from the output.
4. Under **Additional settings**, you can adjust the seed, aspect ratio, number of inference steps, guidance scale, and output format.
5. Click **Run** to start generating.
Under **Result**, you can use the dropdown menu to show either a preview of the output, or the raw JSON.
### Create a code example
 After inputting parameters using the playground, you can automatically generate an API request to use in your application.
1. Click **API Playground** (above the **Prompt** field).
2. Using the dropdown menu, select the programming language (Python, JavaScript, cURL, etc.) and POST command you want to use (`/run` or `/runsync`).
3. Click the **Copy** icon to copy the code to your clipboard.
## Make API requests to Public Endpoints
You can make API requests to Public Endpoints using any HTTP client. The endpoint URL is specific to the model you want to use.
All requests require authentication using your Runpod API key, passed in the `Authorization` header. You can find and create [API keys](/get-started/api-keys) in the [Runpod console](https://www.runpod.io/console/user/settings) under **Settings > API Keys**.
After inputting parameters using the playground, you can automatically generate an API request to use in your application.
1. Click **API Playground** (above the **Prompt** field).
2. Using the dropdown menu, select the programming language (Python, JavaScript, cURL, etc.) and POST command you want to use (`/run` or `/runsync`).
3. Click the **Copy** icon to copy the code to your clipboard.
## Make API requests to Public Endpoints
You can make API requests to Public Endpoints using any HTTP client. The endpoint URL is specific to the model you want to use.
All requests require authentication using your Runpod API key, passed in the `Authorization` header. You can find and create [API keys](/get-started/api-keys) in the [Runpod console](https://www.runpod.io/console/user/settings) under **Settings > API Keys**.
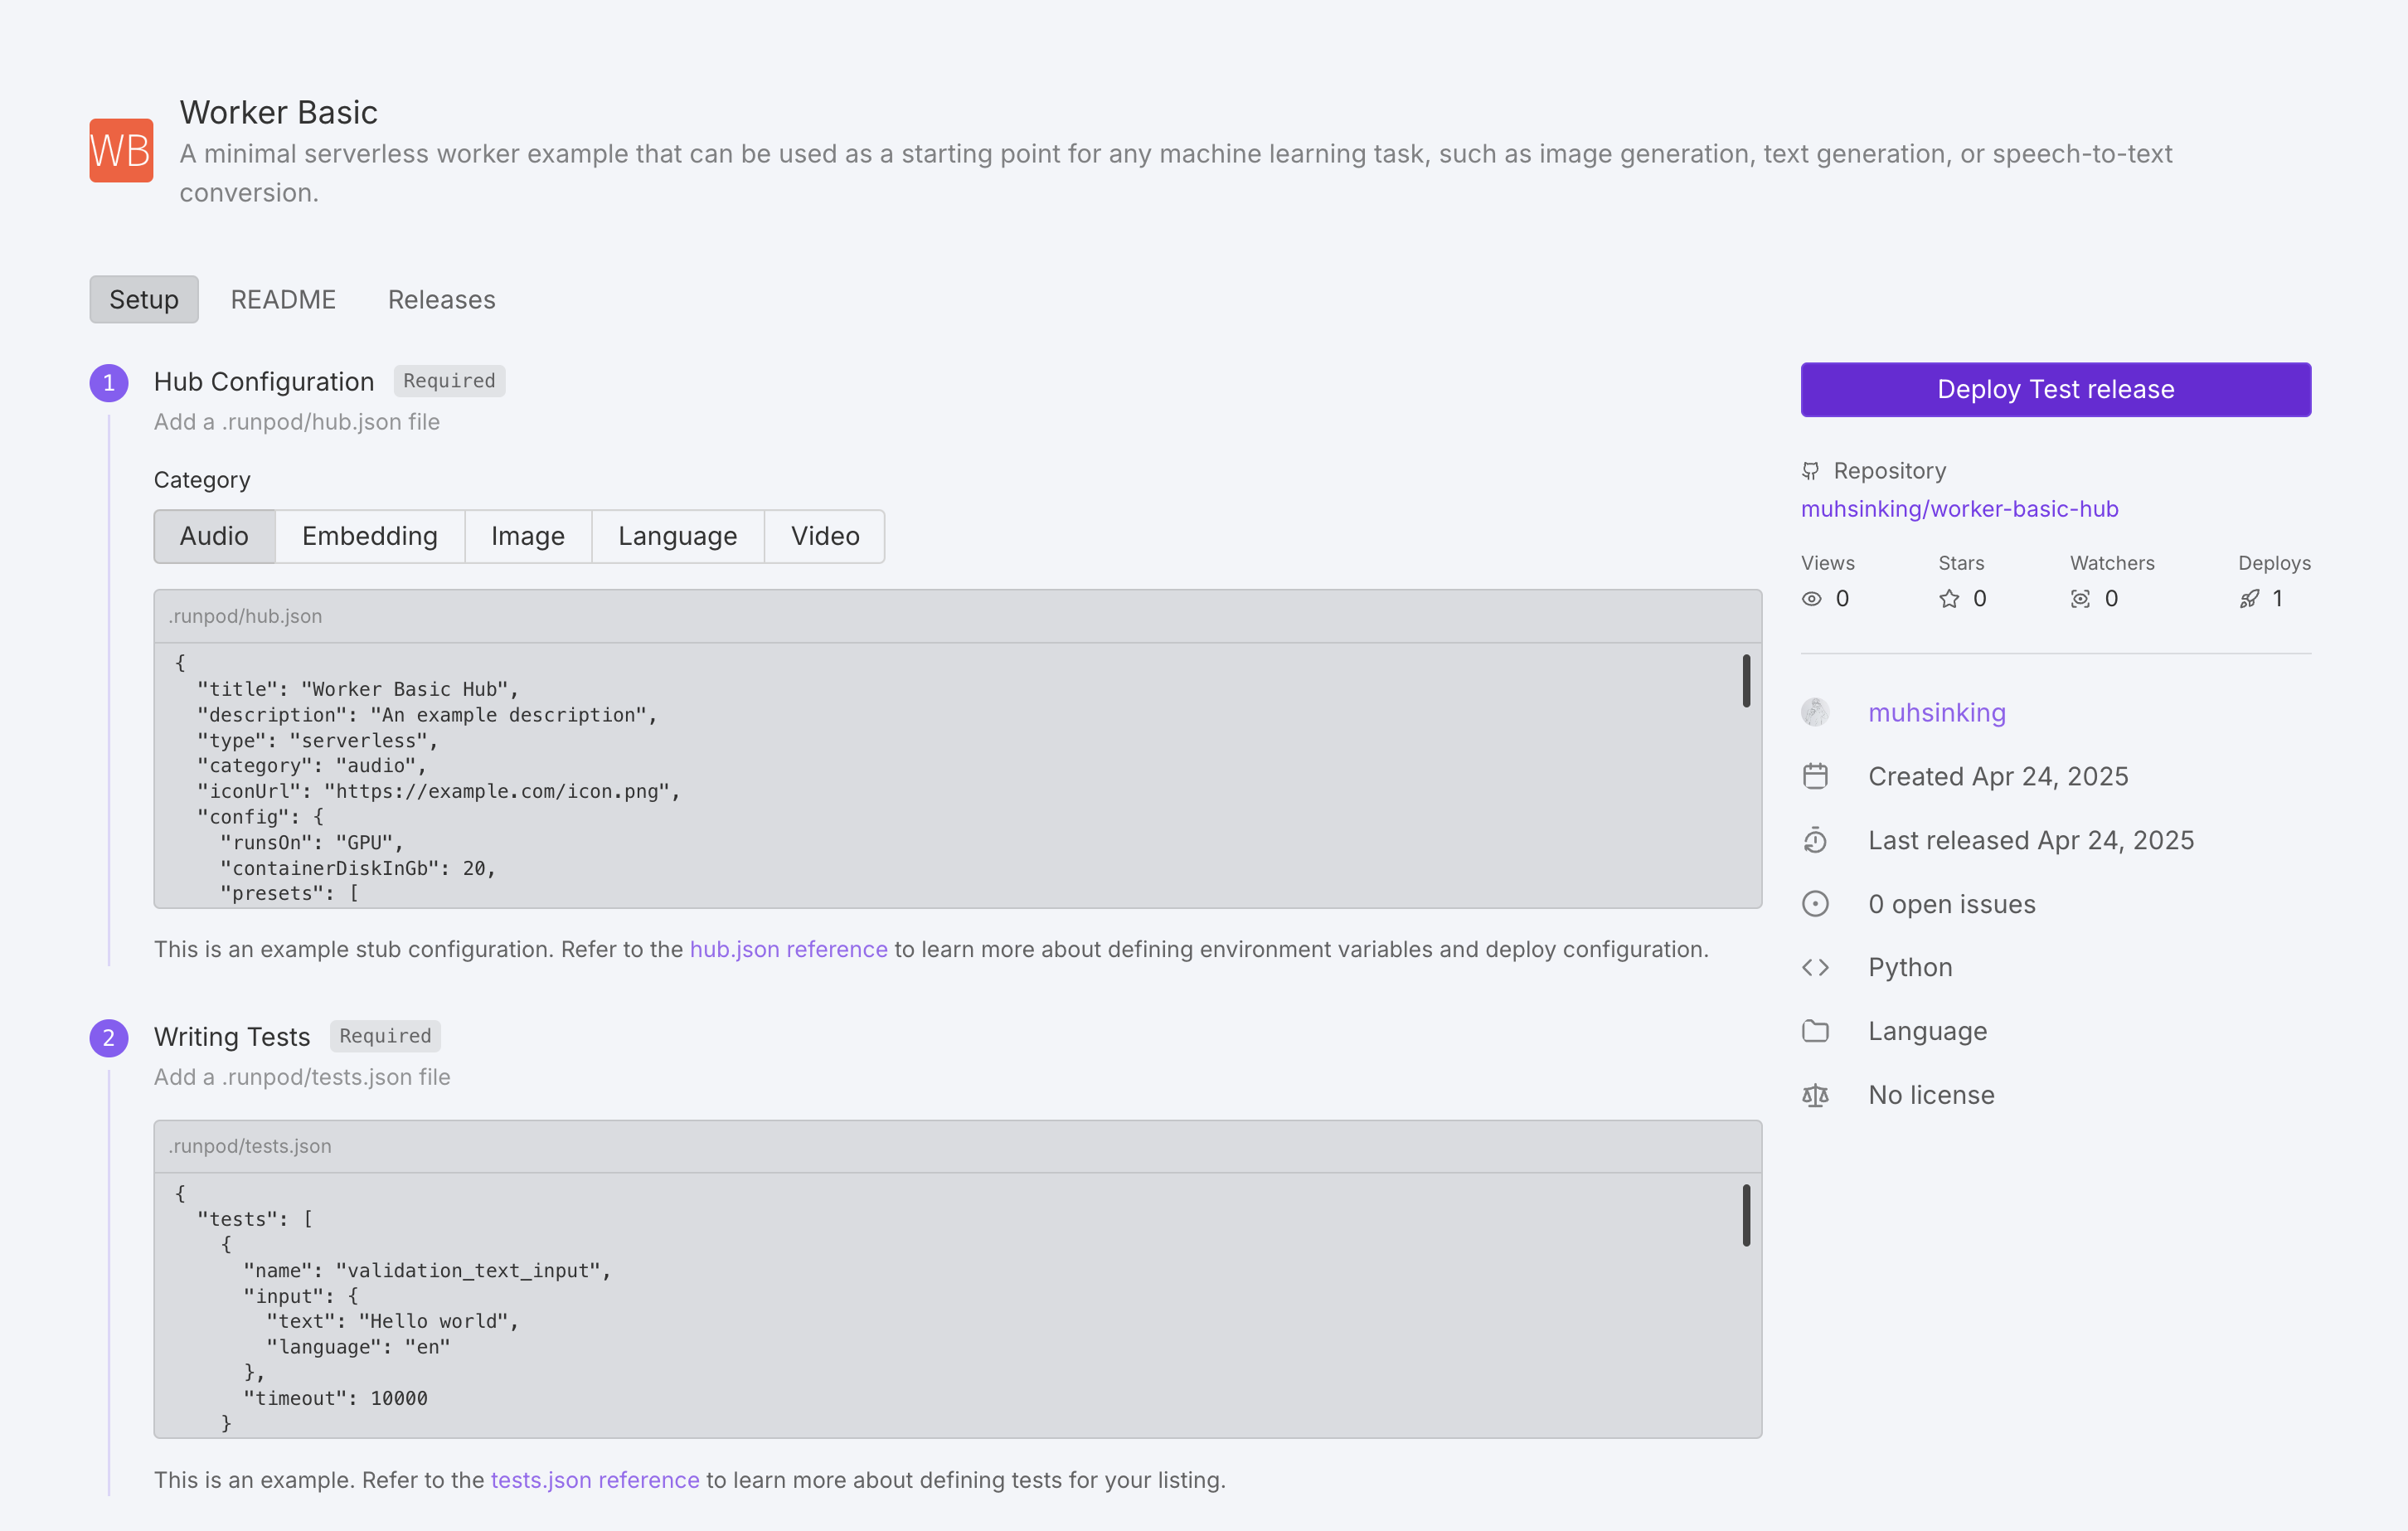 ## How to publish your repo
Follow these steps to add your repository to the Hub:
1. Navigate to the [Hub page](https://www.console.runpod.io/hub) in the Runpod console.
2. Under **Add your repo** click **Get Started**.
3. Enter your GitHub repo URL.
4. Follow the UI steps to add your repo to the Hub.
The Hub page will guide you through the following steps:
1. Create your `hub.json` and `tests.json` files.
2. Ensure your repository contains a `handler.py`, `Dockerfile`, and `README.md` file (in either the `.runpod` or root directory).
3. Create a new GitHub release (the Hub indexes releases, not commits).
4. (Optional) Add a Runpod Hub badge into your GitHub `README.md` file, so that users can instantly deploy your repo from GitHub.
After all the necessary files are in place and a release has been created, your repo will be marked "Pending" during building/testing. After testing is complete, the Runpod team will manually review the repo for publication.
## Update a repo
To update your repo on the Hub, just **create a new GitHub release**, and the Hub listing will be automatically indexed and built (usually within an hour).
## Required files
Aside from a working [Serverless implementation](/serverless/overview), every Hub repo requires two additional configuration files:
1. `hub.json` - Defines metadata and deployment settings for your repo.
2. `tests.json` - Specifies how to test your repo.
These files should be placed in the `.runpod` directory at the root of your repository. This directory takes precedence over the root directory, allowing you to override common files like `Dockerfile` and `README.md` specifically for the Hub.
## hub.json reference
The `hub.json` file defines how your listing appears and functions in the Hub.
You can build your `hub.json` from scratch, or use [this template](#hubjson-template) as a starting point.
### General metadata
| Field | Description | Required | Values |
| ------------- | ---------------------------------- | -------- | --------------------------------------------------------------- |
| `title` | Name of your tool | Yes | String |
| `description` | Brief explanation of functionality | Yes | String |
| `type` | Deployment type | Yes | `"serverless"` |
| `category` | Tool category | Yes | `"audio"`, `"embedding"`, `"language"`, `"video"`, or `"image"` |
| `iconUrl` | URL to tool icon | No | Valid URL |
| `config` | Runpod configuration | Yes | Object ([see below](#runpod-configuration)) |
### Runpod configuration
| Field | Description | Required | Values |
| --------------------- | ----------------------------------------------------------------------------------------------------------------------------------------- | --------------------------- | -------------------------------------------------------------------------------------------------------------------------------------------------------------------------------------------- |
| `runsOn` | Machine type | Yes | `"GPU"` or `"CPU"` |
| `endpointType` | Endpoint deployment type. When set to `"LB"`, users can deploy your listing as a Serverless endpoint or a Pod directly from the Hub page. | No | `"LB"` |
| `containerDiskInGb` | Container disk space allocation | Yes | Integer (GB) |
| `cpuFlavor` | CPU configuration | Only if `runsOn` is `"CPU"` | Valid CPU flavor string. For a complete list of available CPU flavors, see [CPU types](/references/cpu-types) |
| `gpuCount` | Number of GPUs | Only if `runsOn` is `"GPU"` | Integer |
| `gpuIds` | GPU pool specification | Only if `runsOn` is `"GPU"` | Comma-separated pool IDs (e.g., `"ADA_24"`) with optional GPU ID negations (e.g., `"-NVIDIA RTX 4090"`). For a list of GPU pools and IDs, see [GPU types](/references/gpu-types#gpu-pools). |
| `allowedCudaVersions` | Supported CUDA versions | No | Array of version strings |
| `env` | Environment variable definitions | No | Object ([see below](#environment-variables)) |
| `presets` | Default environment variable values | No | Object ([see below](#presets)) |
### Environment variables
Environment variables can be defined in several ways:
1. **Static variables**: Direct value assignment. For example:
```json theme={"theme":{"light":"github-light","dark":"github-dark"}}
{
"key": "API_KEY",
"value": "default-api-key-value"
}
```
2. **String inputs**: User-entered text fields. For example:
```json theme={"theme":{"light":"github-light","dark":"github-dark"}}
{
"key": "MODEL_PATH",
"input": {
"name": "Model path",
"type": "string",
"description": "Path to the model weights on disk",
"default": "/models/stable-diffusion-v1-5",
"advanced": false
}
}
```
3. **Hugging Face inputs:** Fields for model selection from Hugging Face Hub. For example:
```json theme={"theme":{"light":"github-light","dark":"github-dark"}}
{
"key": "HF_MODEL",
"input": {
"type": "huggingface",
"name": "Hugging Face Model",
"description": "Model organization/name as listed on Huggingface Hub",
"default": "runwayml/stable-diffusion-v1-5",
"required": true
}
}
```
4. **Option inputs**: User selected option fields. For example:
```json theme={"theme":{"light":"github-light","dark":"github-dark"}}
{
"key": "PRECISION",
"input": {
"name": "Model precision",
"type": "string",
"description": "The numerical precision for model inference",
"options": [
{"label": "Full Precision (FP32)", "value": "fp32"},
{"label": "Half Precision (FP16)", "value": "fp16"},
{"label": "8-bit Quantization", "value": "int8"}
],
"default": "fp16"
}
}
```
5. **Number Inputs**: User-entered numeric fields. For example:
```json theme={"theme":{"light":"github-light","dark":"github-dark"}}
{
"key": "MAX_TOKENS",
"input": {
"name": "Maximum tokens",
"type": "number",
"description": "Maximum number of tokens to generate",
"min": 32,
"max": 4096,
"default": 1024
}
}
```
6. **Boolean Inputs**: User-toggled boolean fields. For example:
```json theme={"theme":{"light":"github-light","dark":"github-dark"}}
{
"key": "USE_FLASH_ATTENTION",
"input": {
"type": "boolean",
"name": "Flash attention",
"description": "Enable Flash Attention for faster inference on supported GPUs",
"default": true,
"trueValue": "true",
"falseValue": "false"
}
}
```
Advanced options will be hidden by default. Hide an option by setting: `"advanced": true` .
### Presets
Presets allow you to define groups of default environment variable values. When a user deploys your repo, they'll be offered a dropdown menu with any preset options you've defined.
Here are some example presets:
```json theme={"theme":{"light":"github-light","dark":"github-dark"}}
"presets": [
{
"name": "Quality Optimized",
"defaults": {
"MODEL_NAME": "runpod-stable-diffusion-xl",
"INFERENCE_MODE": "quality",
"BATCH_SIZE": 1,
"ENABLE_CACHING": false,
"USE_FLASH_ATTENTION": true
}
},
{
"name": "Performance Optimized",
"defaults": {
"MODEL_NAME": "runpod-stable-diffusion-v1-5",
"INFERENCE_MODE": "fast",
"BATCH_SIZE": 8,
"ENABLE_CACHING": true,
"USE_FLASH_ATTENTION": true
}
}
]
```
## hub.json template
Here’s an example `hub.json` file that you can use as a starting point:
```json title="hub.json" theme={"theme":{"light":"github-light","dark":"github-dark"}}
{
"title": "Your Tool's Name",
"description": "A brief explanation of what your tool does",
"type": "serverless",
"category": "language",
"iconUrl": "https://your-icon-url.com/icon.png",
"config": {
"runsOn": "GPU",
"containerDiskInGb": 20,
"gpuCount": 1,
"gpuIds": "RTX A4000,-NVIDIA RTX 4090",
"allowedCudaVersions": [
"12.8", "12.7", "12.6", "12.5", "12.4",
"12.3", "12.2", "12.1", "12.0"
],
"presets": [
{
"name": "Preset Name",
"defaults": {
"STRING_ENV_VAR": "value1",
"INT_ENV_VAR": 10,
"BOOL_ENV_VAR": true
}
}
],
"env": [
{
"key": "STATIC_ENV_VAR",
"value": "static_value"
},
{
"key": "STRING_ENV_VAR",
"input": {
"name": "User-friendly Name",
"type": "string",
"description": "Description of this input",
"default": "default value",
"advanced": false
}
},
{
"key": "OPTION_ENV_VAR",
"input": {
"name": "Select Option",
"type": "string",
"description": "Choose from available options",
"options": [
{"label": "Option 1", "value": "value1"},
{"label": "Option 2", "value": "value2"}
],
"default": "value1"
}
},
{
"key": "INT_ENV_VAR",
"input": {
"name": "Numeric Value",
"type": "number",
"description": "Enter a number",
"min": 1,
"max": 100,
"default": 50
}
},
{
"key": "BOOL_ENV_VAR",
"input": {
"type": "boolean",
"name": "Enable Feature",
"description": "Toggle this feature on/off",
"default": false,
"trueValue": "enabled",
"falseValue": "disabled"
}
}
]
}
}
```
## tests.json reference
The `tests.json` file defines test cases to validate your tool's functionality. Tests are executed during the build step after [a release has been created](#publish-your-repo-to-the-runpod-hub). A test is considered valid by the Hub if the endpoint returns a [200 response](https://developer.mozilla.org/en-US/docs/Web/HTTP/Reference/Status/200).
You can build your `tests.json` from scratch, or use [this template](#testsjson-template) as a starting point.
### Test cases
Each test case should include:
| Field | Description | Required | Values |
| --------- | --------------------- | -------- | ---------------------- |
| `name` | Test identifier | Yes | String |
| `input` | Raw job input payload | Yes | Object |
| `timeout` | Max execution time | No | Integer (milliseconds) |
### Test environment configuration
| Field | Description | Required | Values |
| --------------------- | ----------------------------- | ------------------ | ---------------------------------------------------------------- |
| `gpuTypeId` | GPU type for testing | Only for GPU tests | Valid GPU ID (see [GPU types](/references/gpu-types)) |
| `gpuCount` | Number of GPUs | Only for GPU tests | Integer |
| `cpuFlavor` | CPU configuration for testing | Only for CPU tests | Valid CPU flavor string (see [CPU types](/references/cpu-types)) |
| `env` | Test environment variables | No | Array of key-value pairs |
| `allowedCudaVersions` | Supported CUDA versions | No | Array of version strings |
## tests.json template
Here’s an example `tests.json` file that you can use as a starting point:
```json title="tests.json" theme={"theme":{"light":"github-light","dark":"github-dark"}}
{
"tests": [
{
"name": "test_case_name",
"input": {
"param1": "value1",
"param2": "value2"
},
"timeout": 10000
}
],
"config": {
"gpuTypeId": "NVIDIA GeForce RTX 4090",
"gpuCount": 1,
"env": [
{
"key": "TEST_ENV_VAR",
"value": "test_value"
}
],
"allowedCudaVersions": [
"12.7", "12.6", "12.5", "12.4",
"12.3", "12.2", "12.1", "12.0", "11.7"
]
}
}
```
---
# Source: https://docs.runpod.io/instant-clusters/pytorch.md
> ## Documentation Index
> Fetch the complete documentation index at: https://docs.runpod.io/llms.txt
> Use this file to discover all available pages before exploring further.
# Deploy an Instant Cluster with PyTorch
This tutorial demonstrates how to use Instant Clusters with [PyTorch](http://pytorch.org) to run distributed workloads across multiple GPUs. By leveraging PyTorch's distributed processing capabilities and Runpod's high-speed networking infrastructure, you can significantly accelerate your training process compared to single-GPU setups.
Follow the steps below to deploy a cluster and start running distributed PyTorch workloads efficiently.
## Step 1: Deploy an Instant Cluster
1. Open the [Instant Clusters page](https://www.console.runpod.io/cluster) on the Runpod web interface.
2. Click **Create Cluster**.
3. Use the UI to name and configure your Cluster. For this walkthrough, keep **Pod Count** at **2** and select the option for **16x H100 SXM** GPUs. Keep the **Pod Template** at its default setting (Runpod PyTorch).
4. Click **Deploy Cluster**. You should be redirected to the Instant Clusters page after a few seconds.
## Step 2: Clone the PyTorch demo into each Pod
1. Click your cluster to expand the list of Pods.
2. Click on a Pod, for example `CLUSTERNAME-pod-0`, to expand the Pod.
3. Click **Connect**, then click **Web Terminal**.
4. In the terminal that opens, run this command to clone a basic `main.py` file into the Pod's main directory:
```sh theme={"theme":{"light":"github-light","dark":"github-dark"}}
git clone https://github.com/murat-runpod/torch-demo.git
```
Repeat these steps for **each Pod** in your cluster.
## Step 3: Examine the main.py file
Let's look at the code in our `main.py` file:
```python main.py theme={"theme":{"light":"github-light","dark":"github-dark"}}
import os
import torch
import torch.distributed as dist
def init_distributed():
"""Initialize the distributed training environment"""
# Initialize the process group
dist.init_process_group(backend="nccl")
# Get local rank and global rank
local_rank = int(os.environ["LOCAL_RANK"])
global_rank = dist.get_rank()
world_size = dist.get_world_size()
# Set device for this process
device = torch.device(f"cuda:{local_rank}")
torch.cuda.set_device(device)
return local_rank, global_rank, world_size, device
def cleanup_distributed():
"""Clean up the distributed environment"""
dist.destroy_process_group()
def main():
# Initialize distributed environment
local_rank, global_rank, world_size, device = init_distributed()
print(f"Running on rank {global_rank}/{world_size-1} (local rank: {local_rank}), device: {device}")
# Your code here
# Clean up distributed environment when done
cleanup_distributed()
if __name__ == "__main__":
main()
```
This is the minimal code necessary for initializing a distributed environment. The `main()` function prints the local and global rank for each GPU process (this is also where you can add your own code). `LOCAL_RANK` is assigned dynamically to each process by PyTorch. All other environment variables are set automatically by Runpod during deployment.
## Step 4: Start the PyTorch process on each Pod
Run this command in the web terminal of **each Pod** to start the PyTorch process:
```bash launcher.sh theme={"theme":{"light":"github-light","dark":"github-dark"}}
export NCCL_DEBUG=INFO
export NCCL_SOCKET_IFNAME=ens1
torchrun \
--nproc_per_node=$NUM_TRAINERS \
--nnodes=$NUM_NODES \
--node_rank=$NODE_RANK \
--master_addr=$MASTER_ADDR \
--master_port=$MASTER_PORT \
torch-demo/main.py
```
This command launches eight `main.py` processes per node (one per GPU in the Pod).
## How to publish your repo
Follow these steps to add your repository to the Hub:
1. Navigate to the [Hub page](https://www.console.runpod.io/hub) in the Runpod console.
2. Under **Add your repo** click **Get Started**.
3. Enter your GitHub repo URL.
4. Follow the UI steps to add your repo to the Hub.
The Hub page will guide you through the following steps:
1. Create your `hub.json` and `tests.json` files.
2. Ensure your repository contains a `handler.py`, `Dockerfile`, and `README.md` file (in either the `.runpod` or root directory).
3. Create a new GitHub release (the Hub indexes releases, not commits).
4. (Optional) Add a Runpod Hub badge into your GitHub `README.md` file, so that users can instantly deploy your repo from GitHub.
After all the necessary files are in place and a release has been created, your repo will be marked "Pending" during building/testing. After testing is complete, the Runpod team will manually review the repo for publication.
## Update a repo
To update your repo on the Hub, just **create a new GitHub release**, and the Hub listing will be automatically indexed and built (usually within an hour).
## Required files
Aside from a working [Serverless implementation](/serverless/overview), every Hub repo requires two additional configuration files:
1. `hub.json` - Defines metadata and deployment settings for your repo.
2. `tests.json` - Specifies how to test your repo.
These files should be placed in the `.runpod` directory at the root of your repository. This directory takes precedence over the root directory, allowing you to override common files like `Dockerfile` and `README.md` specifically for the Hub.
## hub.json reference
The `hub.json` file defines how your listing appears and functions in the Hub.
You can build your `hub.json` from scratch, or use [this template](#hubjson-template) as a starting point.
### General metadata
| Field | Description | Required | Values |
| ------------- | ---------------------------------- | -------- | --------------------------------------------------------------- |
| `title` | Name of your tool | Yes | String |
| `description` | Brief explanation of functionality | Yes | String |
| `type` | Deployment type | Yes | `"serverless"` |
| `category` | Tool category | Yes | `"audio"`, `"embedding"`, `"language"`, `"video"`, or `"image"` |
| `iconUrl` | URL to tool icon | No | Valid URL |
| `config` | Runpod configuration | Yes | Object ([see below](#runpod-configuration)) |
### Runpod configuration
| Field | Description | Required | Values |
| --------------------- | ----------------------------------------------------------------------------------------------------------------------------------------- | --------------------------- | -------------------------------------------------------------------------------------------------------------------------------------------------------------------------------------------- |
| `runsOn` | Machine type | Yes | `"GPU"` or `"CPU"` |
| `endpointType` | Endpoint deployment type. When set to `"LB"`, users can deploy your listing as a Serverless endpoint or a Pod directly from the Hub page. | No | `"LB"` |
| `containerDiskInGb` | Container disk space allocation | Yes | Integer (GB) |
| `cpuFlavor` | CPU configuration | Only if `runsOn` is `"CPU"` | Valid CPU flavor string. For a complete list of available CPU flavors, see [CPU types](/references/cpu-types) |
| `gpuCount` | Number of GPUs | Only if `runsOn` is `"GPU"` | Integer |
| `gpuIds` | GPU pool specification | Only if `runsOn` is `"GPU"` | Comma-separated pool IDs (e.g., `"ADA_24"`) with optional GPU ID negations (e.g., `"-NVIDIA RTX 4090"`). For a list of GPU pools and IDs, see [GPU types](/references/gpu-types#gpu-pools). |
| `allowedCudaVersions` | Supported CUDA versions | No | Array of version strings |
| `env` | Environment variable definitions | No | Object ([see below](#environment-variables)) |
| `presets` | Default environment variable values | No | Object ([see below](#presets)) |
### Environment variables
Environment variables can be defined in several ways:
1. **Static variables**: Direct value assignment. For example:
```json theme={"theme":{"light":"github-light","dark":"github-dark"}}
{
"key": "API_KEY",
"value": "default-api-key-value"
}
```
2. **String inputs**: User-entered text fields. For example:
```json theme={"theme":{"light":"github-light","dark":"github-dark"}}
{
"key": "MODEL_PATH",
"input": {
"name": "Model path",
"type": "string",
"description": "Path to the model weights on disk",
"default": "/models/stable-diffusion-v1-5",
"advanced": false
}
}
```
3. **Hugging Face inputs:** Fields for model selection from Hugging Face Hub. For example:
```json theme={"theme":{"light":"github-light","dark":"github-dark"}}
{
"key": "HF_MODEL",
"input": {
"type": "huggingface",
"name": "Hugging Face Model",
"description": "Model organization/name as listed on Huggingface Hub",
"default": "runwayml/stable-diffusion-v1-5",
"required": true
}
}
```
4. **Option inputs**: User selected option fields. For example:
```json theme={"theme":{"light":"github-light","dark":"github-dark"}}
{
"key": "PRECISION",
"input": {
"name": "Model precision",
"type": "string",
"description": "The numerical precision for model inference",
"options": [
{"label": "Full Precision (FP32)", "value": "fp32"},
{"label": "Half Precision (FP16)", "value": "fp16"},
{"label": "8-bit Quantization", "value": "int8"}
],
"default": "fp16"
}
}
```
5. **Number Inputs**: User-entered numeric fields. For example:
```json theme={"theme":{"light":"github-light","dark":"github-dark"}}
{
"key": "MAX_TOKENS",
"input": {
"name": "Maximum tokens",
"type": "number",
"description": "Maximum number of tokens to generate",
"min": 32,
"max": 4096,
"default": 1024
}
}
```
6. **Boolean Inputs**: User-toggled boolean fields. For example:
```json theme={"theme":{"light":"github-light","dark":"github-dark"}}
{
"key": "USE_FLASH_ATTENTION",
"input": {
"type": "boolean",
"name": "Flash attention",
"description": "Enable Flash Attention for faster inference on supported GPUs",
"default": true,
"trueValue": "true",
"falseValue": "false"
}
}
```
Advanced options will be hidden by default. Hide an option by setting: `"advanced": true` .
### Presets
Presets allow you to define groups of default environment variable values. When a user deploys your repo, they'll be offered a dropdown menu with any preset options you've defined.
Here are some example presets:
```json theme={"theme":{"light":"github-light","dark":"github-dark"}}
"presets": [
{
"name": "Quality Optimized",
"defaults": {
"MODEL_NAME": "runpod-stable-diffusion-xl",
"INFERENCE_MODE": "quality",
"BATCH_SIZE": 1,
"ENABLE_CACHING": false,
"USE_FLASH_ATTENTION": true
}
},
{
"name": "Performance Optimized",
"defaults": {
"MODEL_NAME": "runpod-stable-diffusion-v1-5",
"INFERENCE_MODE": "fast",
"BATCH_SIZE": 8,
"ENABLE_CACHING": true,
"USE_FLASH_ATTENTION": true
}
}
]
```
## hub.json template
Here’s an example `hub.json` file that you can use as a starting point:
```json title="hub.json" theme={"theme":{"light":"github-light","dark":"github-dark"}}
{
"title": "Your Tool's Name",
"description": "A brief explanation of what your tool does",
"type": "serverless",
"category": "language",
"iconUrl": "https://your-icon-url.com/icon.png",
"config": {
"runsOn": "GPU",
"containerDiskInGb": 20,
"gpuCount": 1,
"gpuIds": "RTX A4000,-NVIDIA RTX 4090",
"allowedCudaVersions": [
"12.8", "12.7", "12.6", "12.5", "12.4",
"12.3", "12.2", "12.1", "12.0"
],
"presets": [
{
"name": "Preset Name",
"defaults": {
"STRING_ENV_VAR": "value1",
"INT_ENV_VAR": 10,
"BOOL_ENV_VAR": true
}
}
],
"env": [
{
"key": "STATIC_ENV_VAR",
"value": "static_value"
},
{
"key": "STRING_ENV_VAR",
"input": {
"name": "User-friendly Name",
"type": "string",
"description": "Description of this input",
"default": "default value",
"advanced": false
}
},
{
"key": "OPTION_ENV_VAR",
"input": {
"name": "Select Option",
"type": "string",
"description": "Choose from available options",
"options": [
{"label": "Option 1", "value": "value1"},
{"label": "Option 2", "value": "value2"}
],
"default": "value1"
}
},
{
"key": "INT_ENV_VAR",
"input": {
"name": "Numeric Value",
"type": "number",
"description": "Enter a number",
"min": 1,
"max": 100,
"default": 50
}
},
{
"key": "BOOL_ENV_VAR",
"input": {
"type": "boolean",
"name": "Enable Feature",
"description": "Toggle this feature on/off",
"default": false,
"trueValue": "enabled",
"falseValue": "disabled"
}
}
]
}
}
```
## tests.json reference
The `tests.json` file defines test cases to validate your tool's functionality. Tests are executed during the build step after [a release has been created](#publish-your-repo-to-the-runpod-hub). A test is considered valid by the Hub if the endpoint returns a [200 response](https://developer.mozilla.org/en-US/docs/Web/HTTP/Reference/Status/200).
You can build your `tests.json` from scratch, or use [this template](#testsjson-template) as a starting point.
### Test cases
Each test case should include:
| Field | Description | Required | Values |
| --------- | --------------------- | -------- | ---------------------- |
| `name` | Test identifier | Yes | String |
| `input` | Raw job input payload | Yes | Object |
| `timeout` | Max execution time | No | Integer (milliseconds) |
### Test environment configuration
| Field | Description | Required | Values |
| --------------------- | ----------------------------- | ------------------ | ---------------------------------------------------------------- |
| `gpuTypeId` | GPU type for testing | Only for GPU tests | Valid GPU ID (see [GPU types](/references/gpu-types)) |
| `gpuCount` | Number of GPUs | Only for GPU tests | Integer |
| `cpuFlavor` | CPU configuration for testing | Only for CPU tests | Valid CPU flavor string (see [CPU types](/references/cpu-types)) |
| `env` | Test environment variables | No | Array of key-value pairs |
| `allowedCudaVersions` | Supported CUDA versions | No | Array of version strings |
## tests.json template
Here’s an example `tests.json` file that you can use as a starting point:
```json title="tests.json" theme={"theme":{"light":"github-light","dark":"github-dark"}}
{
"tests": [
{
"name": "test_case_name",
"input": {
"param1": "value1",
"param2": "value2"
},
"timeout": 10000
}
],
"config": {
"gpuTypeId": "NVIDIA GeForce RTX 4090",
"gpuCount": 1,
"env": [
{
"key": "TEST_ENV_VAR",
"value": "test_value"
}
],
"allowedCudaVersions": [
"12.7", "12.6", "12.5", "12.4",
"12.3", "12.2", "12.1", "12.0", "11.7"
]
}
}
```
---
# Source: https://docs.runpod.io/instant-clusters/pytorch.md
> ## Documentation Index
> Fetch the complete documentation index at: https://docs.runpod.io/llms.txt
> Use this file to discover all available pages before exploring further.
# Deploy an Instant Cluster with PyTorch
This tutorial demonstrates how to use Instant Clusters with [PyTorch](http://pytorch.org) to run distributed workloads across multiple GPUs. By leveraging PyTorch's distributed processing capabilities and Runpod's high-speed networking infrastructure, you can significantly accelerate your training process compared to single-GPU setups.
Follow the steps below to deploy a cluster and start running distributed PyTorch workloads efficiently.
## Step 1: Deploy an Instant Cluster
1. Open the [Instant Clusters page](https://www.console.runpod.io/cluster) on the Runpod web interface.
2. Click **Create Cluster**.
3. Use the UI to name and configure your Cluster. For this walkthrough, keep **Pod Count** at **2** and select the option for **16x H100 SXM** GPUs. Keep the **Pod Template** at its default setting (Runpod PyTorch).
4. Click **Deploy Cluster**. You should be redirected to the Instant Clusters page after a few seconds.
## Step 2: Clone the PyTorch demo into each Pod
1. Click your cluster to expand the list of Pods.
2. Click on a Pod, for example `CLUSTERNAME-pod-0`, to expand the Pod.
3. Click **Connect**, then click **Web Terminal**.
4. In the terminal that opens, run this command to clone a basic `main.py` file into the Pod's main directory:
```sh theme={"theme":{"light":"github-light","dark":"github-dark"}}
git clone https://github.com/murat-runpod/torch-demo.git
```
Repeat these steps for **each Pod** in your cluster.
## Step 3: Examine the main.py file
Let's look at the code in our `main.py` file:
```python main.py theme={"theme":{"light":"github-light","dark":"github-dark"}}
import os
import torch
import torch.distributed as dist
def init_distributed():
"""Initialize the distributed training environment"""
# Initialize the process group
dist.init_process_group(backend="nccl")
# Get local rank and global rank
local_rank = int(os.environ["LOCAL_RANK"])
global_rank = dist.get_rank()
world_size = dist.get_world_size()
# Set device for this process
device = torch.device(f"cuda:{local_rank}")
torch.cuda.set_device(device)
return local_rank, global_rank, world_size, device
def cleanup_distributed():
"""Clean up the distributed environment"""
dist.destroy_process_group()
def main():
# Initialize distributed environment
local_rank, global_rank, world_size, device = init_distributed()
print(f"Running on rank {global_rank}/{world_size-1} (local rank: {local_rank}), device: {device}")
# Your code here
# Clean up distributed environment when done
cleanup_distributed()
if __name__ == "__main__":
main()
```
This is the minimal code necessary for initializing a distributed environment. The `main()` function prints the local and global rank for each GPU process (this is also where you can add your own code). `LOCAL_RANK` is assigned dynamically to each process by PyTorch. All other environment variables are set automatically by Runpod during deployment.
## Step 4: Start the PyTorch process on each Pod
Run this command in the web terminal of **each Pod** to start the PyTorch process:
```bash launcher.sh theme={"theme":{"light":"github-light","dark":"github-dark"}}
export NCCL_DEBUG=INFO
export NCCL_SOCKET_IFNAME=ens1
torchrun \
--nproc_per_node=$NUM_TRAINERS \
--nnodes=$NUM_NODES \
--node_rank=$NODE_RANK \
--master_addr=$MASTER_ADDR \
--master_port=$MASTER_PORT \
torch-demo/main.py
```
This command launches eight `main.py` processes per node (one per GPU in the Pod).
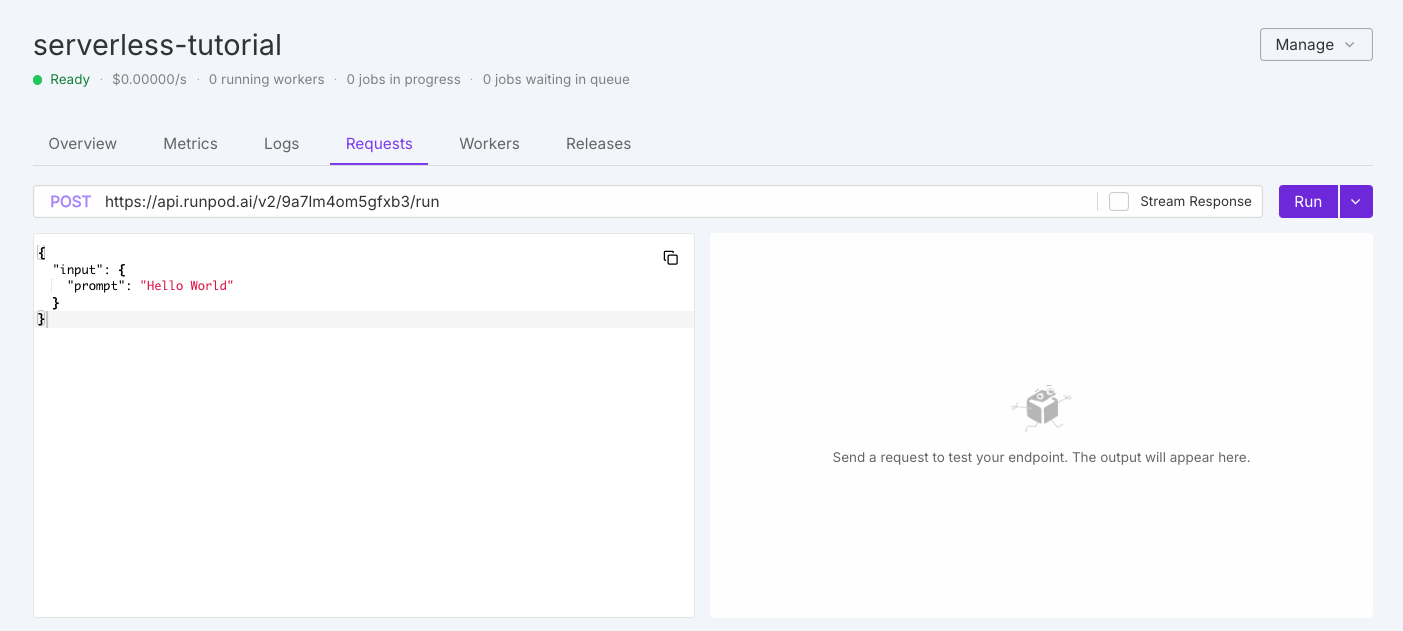 On the left you should see the default test request:
```json theme={"theme":{"light":"github-light","dark":"github-dark"}}
{
"input": {
"prompt": "Hello World"
}
}
```
Leave the default input as is and click **Run**. The system will take a few minutes to initialize your workers.
When the workers finish processing your request, you should see output on the right side of the page similar to this:
```json theme={"theme":{"light":"github-light","dark":"github-dark"}}
{
"delayTime": 15088,
"executionTime": 60,
"id": "04f01223-4aa2-40df-bdab-37e5caa43cbe-u1",
"output": "Hello World",
"status": "COMPLETED",
"workerId": "uhbbfre73gqjwh"
}
```
Congratulations! You've successfully deployed and tested your first Serverless endpoint.
## Next steps
Now that you've learned the basics, you're ready to:
* [Create more advanced handler functions.](/serverless/workers/handler-functions)
* [Update your Dockerfile with AI/ML models and other dependencies.](/serverless/workers/create-dockerfile)
* [Learn how to structure and send requests to your endpoint.](/serverless/endpoints/send-requests)
* [Manage your Serverless endpoints in the Runpod console.](/serverless/endpoints/overview)
---
# Source: https://docs.runpod.io/references/referrals.md
> ## Documentation Index
> Fetch the complete documentation index at: https://docs.runpod.io/llms.txt
> Use this file to discover all available pages before exploring further.
# Referral, affiliate, and creator programs
> Earn additional revenue through Runpod's referral, affiliate, and creator programs
Runpod offers three programs that help you earn additional revenue while helping us grow our community. Whether you're referring new users, creating popular templates, or driving significant traffic, there's a program that fits your contribution style.
## Runpod referral program
Earn Runpod Credits when users you refer spend on Serverless or Pods. The referral program rewards both you and the person you refer, creating a win-win situation for everyone involved.
### How rewards work
When someone signs up using your referral link and starts spending on Runpod, you earn a percentage of their spend as Runpod Credits:
* **5% commission** on all Serverless spend for the first 6 months.
* **3% commission** on all Pod spend for the first 6 months.
* **Bonus credits** for both you and your referral after they load \$10 on their account. The bonus amount depends on your location:
* **Non-European customers** receive a random weighted bonus between \$5 and \$500.
* **European customers** receive a fixed \$5 bonus.
* **Cross-region referrals**: If a European customer refers a non-European customer, the European customer receives \$5 and the non-European customer receives the random weighted bonus (\$5-\$500). If a non-European customer refers a European customer, the non-European customer receives the random weighted bonus and the European customer receives \$5.
If you referred users before June 16, 2025, you're part of our beta program group. This means you'll continue earning commissions on their spend indefinitely, not just for 6 months.
## Runpod affiliate program
The affiliate program is designed for high-performing referrers who want to earn cash instead of credits. Through our partnership with Partnerstack, eligible referrers can earn 10% cash commissions on all referral spend.
### Eligibility and rewards
To qualify for the affiliate program, you need to have referred at least 25 paying users through the standard referral program. Once eligible, you can choose to upgrade to the affiliate program, which offers:
* **10% cash commission** on all referral spend for the first 6 months.
* Professional tracking and reporting through Partnerstack.
* Direct cash payments instead of Runpod Credits.
Once you opt into the affiliate program, this decision is permanent. Choose carefully based on whether you prefer cash payments or Runpod Credits.
For beta program participants (users referred before June 26, 2025), a special arrangement applies. These users will be eligible for Partnerstack commissions during their first 6 months. After that period, they'll return to the standard referral program but continue generating commissions indefinitely.
## Runpod creator program
The creator program rewards users who build popular [Pod templates](/pods/templates/overview) that others use on the platform. Every time someone runs a Pod using your template, you earn a percentage of their spend.
### How it works
Template creators earn **1% in Runpod Credits** for every dollar spent using their templates. This creates a passive income stream that grows with your template's popularity.
For example, if 20 users run Pods using your template at \$0.54/hour for a full week, you'll earn \$18.14 in credits. The more useful and popular your template, the more you can earn.
### Getting started with templates
To participate in the creator program, your template must accumulate at least 1 day of total runtime across all users. Focus on creating templates that solve real problems or make it easier for users to get started with specific workloads.
## How to participate
Getting started with any of these programs is straightforward:
1. Navigate to your [referral dashboard](https://www.console.runpod.io/user/referrals) in the Runpod console.
2. Find your unique referral link (it will look something like `https://runpod.io?ref=5t99c9je`).
3. Share this link with potential users through your preferred channels.
For the creator program, simply publish templates through your Runpod account and promote them to potential users.
## Important details
Understanding how these programs work will help you maximize your earnings:
1. **Referral commissions are based on actual usage, not purchases.** If someone you refer buys \$1,000 in credits, you won't earn commission until they actually use those credits on Pods or Serverless workloads.
2. **New accounts only.** Referral links only work for brand new Runpod users. If someone already has an account, referring them won't generate commissions.
3. **Bonus credit distribution varies by location.** Non-European customers receive credits through a weighted random system between \$5 and \$500, while European customers receive a fixed \$5 bonus. For non-European customers, most will receive a bonus of \$5, with about 96% receiving \$10 or less.
## Support
Have questions about maximizing your earnings or need help with any of these programs? [Contact our support team](https://contact.runpod.io/hc/en-us/requests/new) for assistance.
Remember, if you're transitioning to the affiliate program, you'll keep all earnings accumulated through the referral program before making the switch.
---
# Source: https://docs.runpod.io/release-notes.md
> ## Documentation Index
> Fetch the complete documentation index at: https://docs.runpod.io/llms.txt
> Use this file to discover all available pages before exploring further.
# Product updates
> New features, fixes, and improvements for the Runpod platform.
On the left you should see the default test request:
```json theme={"theme":{"light":"github-light","dark":"github-dark"}}
{
"input": {
"prompt": "Hello World"
}
}
```
Leave the default input as is and click **Run**. The system will take a few minutes to initialize your workers.
When the workers finish processing your request, you should see output on the right side of the page similar to this:
```json theme={"theme":{"light":"github-light","dark":"github-dark"}}
{
"delayTime": 15088,
"executionTime": 60,
"id": "04f01223-4aa2-40df-bdab-37e5caa43cbe-u1",
"output": "Hello World",
"status": "COMPLETED",
"workerId": "uhbbfre73gqjwh"
}
```
Congratulations! You've successfully deployed and tested your first Serverless endpoint.
## Next steps
Now that you've learned the basics, you're ready to:
* [Create more advanced handler functions.](/serverless/workers/handler-functions)
* [Update your Dockerfile with AI/ML models and other dependencies.](/serverless/workers/create-dockerfile)
* [Learn how to structure and send requests to your endpoint.](/serverless/endpoints/send-requests)
* [Manage your Serverless endpoints in the Runpod console.](/serverless/endpoints/overview)
---
# Source: https://docs.runpod.io/references/referrals.md
> ## Documentation Index
> Fetch the complete documentation index at: https://docs.runpod.io/llms.txt
> Use this file to discover all available pages before exploring further.
# Referral, affiliate, and creator programs
> Earn additional revenue through Runpod's referral, affiliate, and creator programs
Runpod offers three programs that help you earn additional revenue while helping us grow our community. Whether you're referring new users, creating popular templates, or driving significant traffic, there's a program that fits your contribution style.
## Runpod referral program
Earn Runpod Credits when users you refer spend on Serverless or Pods. The referral program rewards both you and the person you refer, creating a win-win situation for everyone involved.
### How rewards work
When someone signs up using your referral link and starts spending on Runpod, you earn a percentage of their spend as Runpod Credits:
* **5% commission** on all Serverless spend for the first 6 months.
* **3% commission** on all Pod spend for the first 6 months.
* **Bonus credits** for both you and your referral after they load \$10 on their account. The bonus amount depends on your location:
* **Non-European customers** receive a random weighted bonus between \$5 and \$500.
* **European customers** receive a fixed \$5 bonus.
* **Cross-region referrals**: If a European customer refers a non-European customer, the European customer receives \$5 and the non-European customer receives the random weighted bonus (\$5-\$500). If a non-European customer refers a European customer, the non-European customer receives the random weighted bonus and the European customer receives \$5.
If you referred users before June 16, 2025, you're part of our beta program group. This means you'll continue earning commissions on their spend indefinitely, not just for 6 months.
## Runpod affiliate program
The affiliate program is designed for high-performing referrers who want to earn cash instead of credits. Through our partnership with Partnerstack, eligible referrers can earn 10% cash commissions on all referral spend.
### Eligibility and rewards
To qualify for the affiliate program, you need to have referred at least 25 paying users through the standard referral program. Once eligible, you can choose to upgrade to the affiliate program, which offers:
* **10% cash commission** on all referral spend for the first 6 months.
* Professional tracking and reporting through Partnerstack.
* Direct cash payments instead of Runpod Credits.
Once you opt into the affiliate program, this decision is permanent. Choose carefully based on whether you prefer cash payments or Runpod Credits.
For beta program participants (users referred before June 26, 2025), a special arrangement applies. These users will be eligible for Partnerstack commissions during their first 6 months. After that period, they'll return to the standard referral program but continue generating commissions indefinitely.
## Runpod creator program
The creator program rewards users who build popular [Pod templates](/pods/templates/overview) that others use on the platform. Every time someone runs a Pod using your template, you earn a percentage of their spend.
### How it works
Template creators earn **1% in Runpod Credits** for every dollar spent using their templates. This creates a passive income stream that grows with your template's popularity.
For example, if 20 users run Pods using your template at \$0.54/hour for a full week, you'll earn \$18.14 in credits. The more useful and popular your template, the more you can earn.
### Getting started with templates
To participate in the creator program, your template must accumulate at least 1 day of total runtime across all users. Focus on creating templates that solve real problems or make it easier for users to get started with specific workloads.
## How to participate
Getting started with any of these programs is straightforward:
1. Navigate to your [referral dashboard](https://www.console.runpod.io/user/referrals) in the Runpod console.
2. Find your unique referral link (it will look something like `https://runpod.io?ref=5t99c9je`).
3. Share this link with potential users through your preferred channels.
For the creator program, simply publish templates through your Runpod account and promote them to potential users.
## Important details
Understanding how these programs work will help you maximize your earnings:
1. **Referral commissions are based on actual usage, not purchases.** If someone you refer buys \$1,000 in credits, you won't earn commission until they actually use those credits on Pods or Serverless workloads.
2. **New accounts only.** Referral links only work for brand new Runpod users. If someone already has an account, referring them won't generate commissions.
3. **Bonus credit distribution varies by location.** Non-European customers receive credits through a weighted random system between \$5 and \$500, while European customers receive a fixed \$5 bonus. For non-European customers, most will receive a bonus of \$5, with about 96% receiving \$10 or less.
## Support
Have questions about maximizing your earnings or need help with any of these programs? [Contact our support team](https://contact.runpod.io/hc/en-us/requests/new) for assistance.
Remember, if you're transitioning to the affiliate program, you'll keep all earnings accumulated through the referral program before making the switch.
---
# Source: https://docs.runpod.io/release-notes.md
> ## Documentation Index
> Fetch the complete documentation index at: https://docs.runpod.io/llms.txt
> Use this file to discover all available pages before exploring further.
# Product updates
> New features, fixes, and improvements for the Runpod platform.
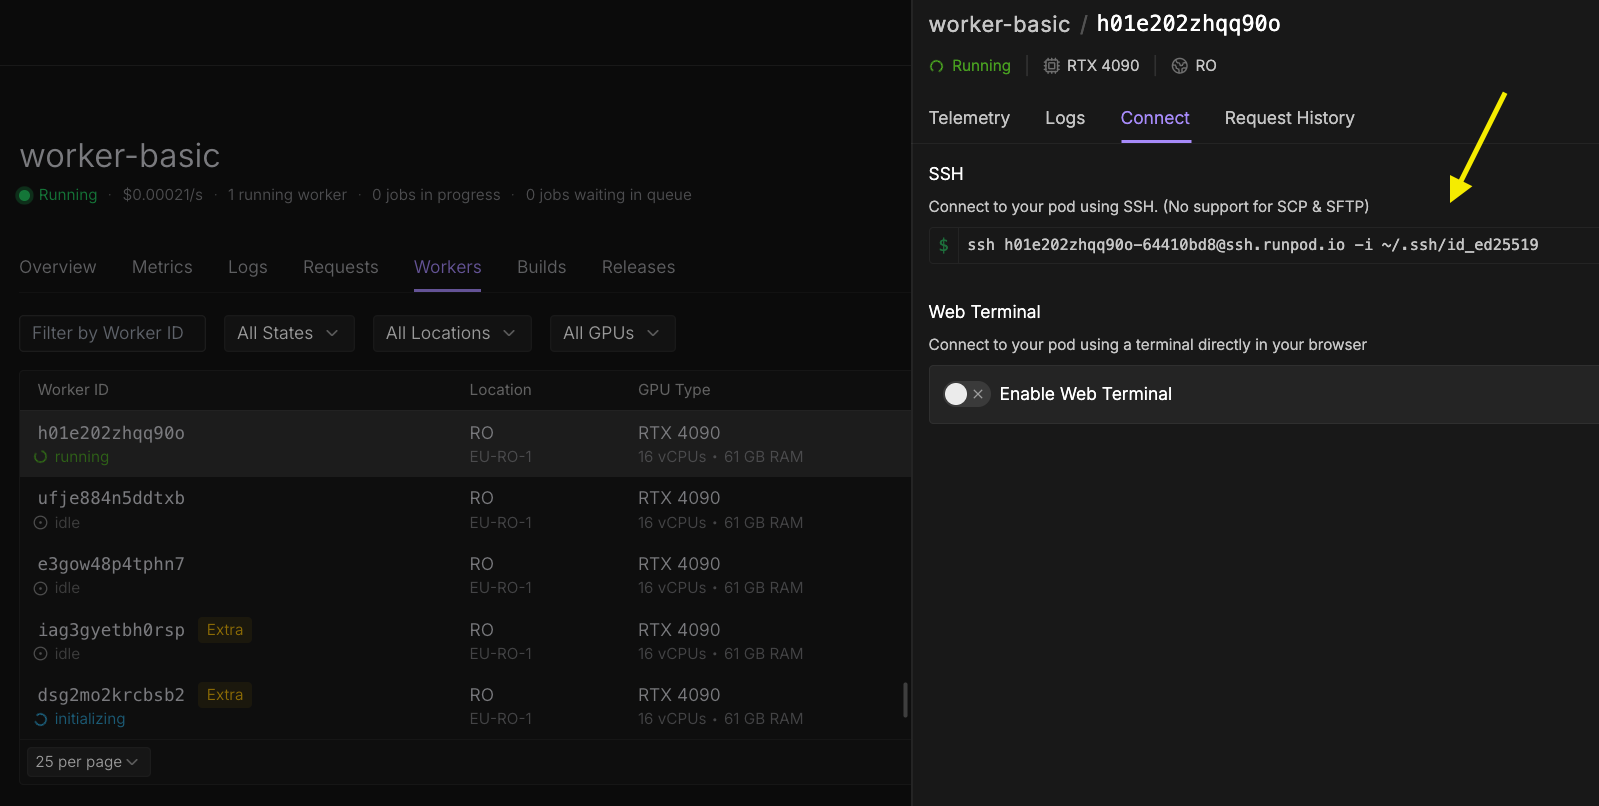 In the worker's detail pane:
1. Select the **Connect** tab.
2. Under the **SSH** section, copy the provided SSH command.
The command will look similar to this:
```bash theme={"theme":{"light":"github-light","dark":"github-dark"}}
ssh root@worker-id-xyz -i ~/.ssh/id_ed25519
```
In the worker's detail pane:
1. Select the **Connect** tab.
2. Under the **SSH** section, copy the provided SSH command.
The command will look similar to this:
```bash theme={"theme":{"light":"github-light","dark":"github-dark"}}
ssh root@worker-id-xyz -i ~/.ssh/id_ed25519
```
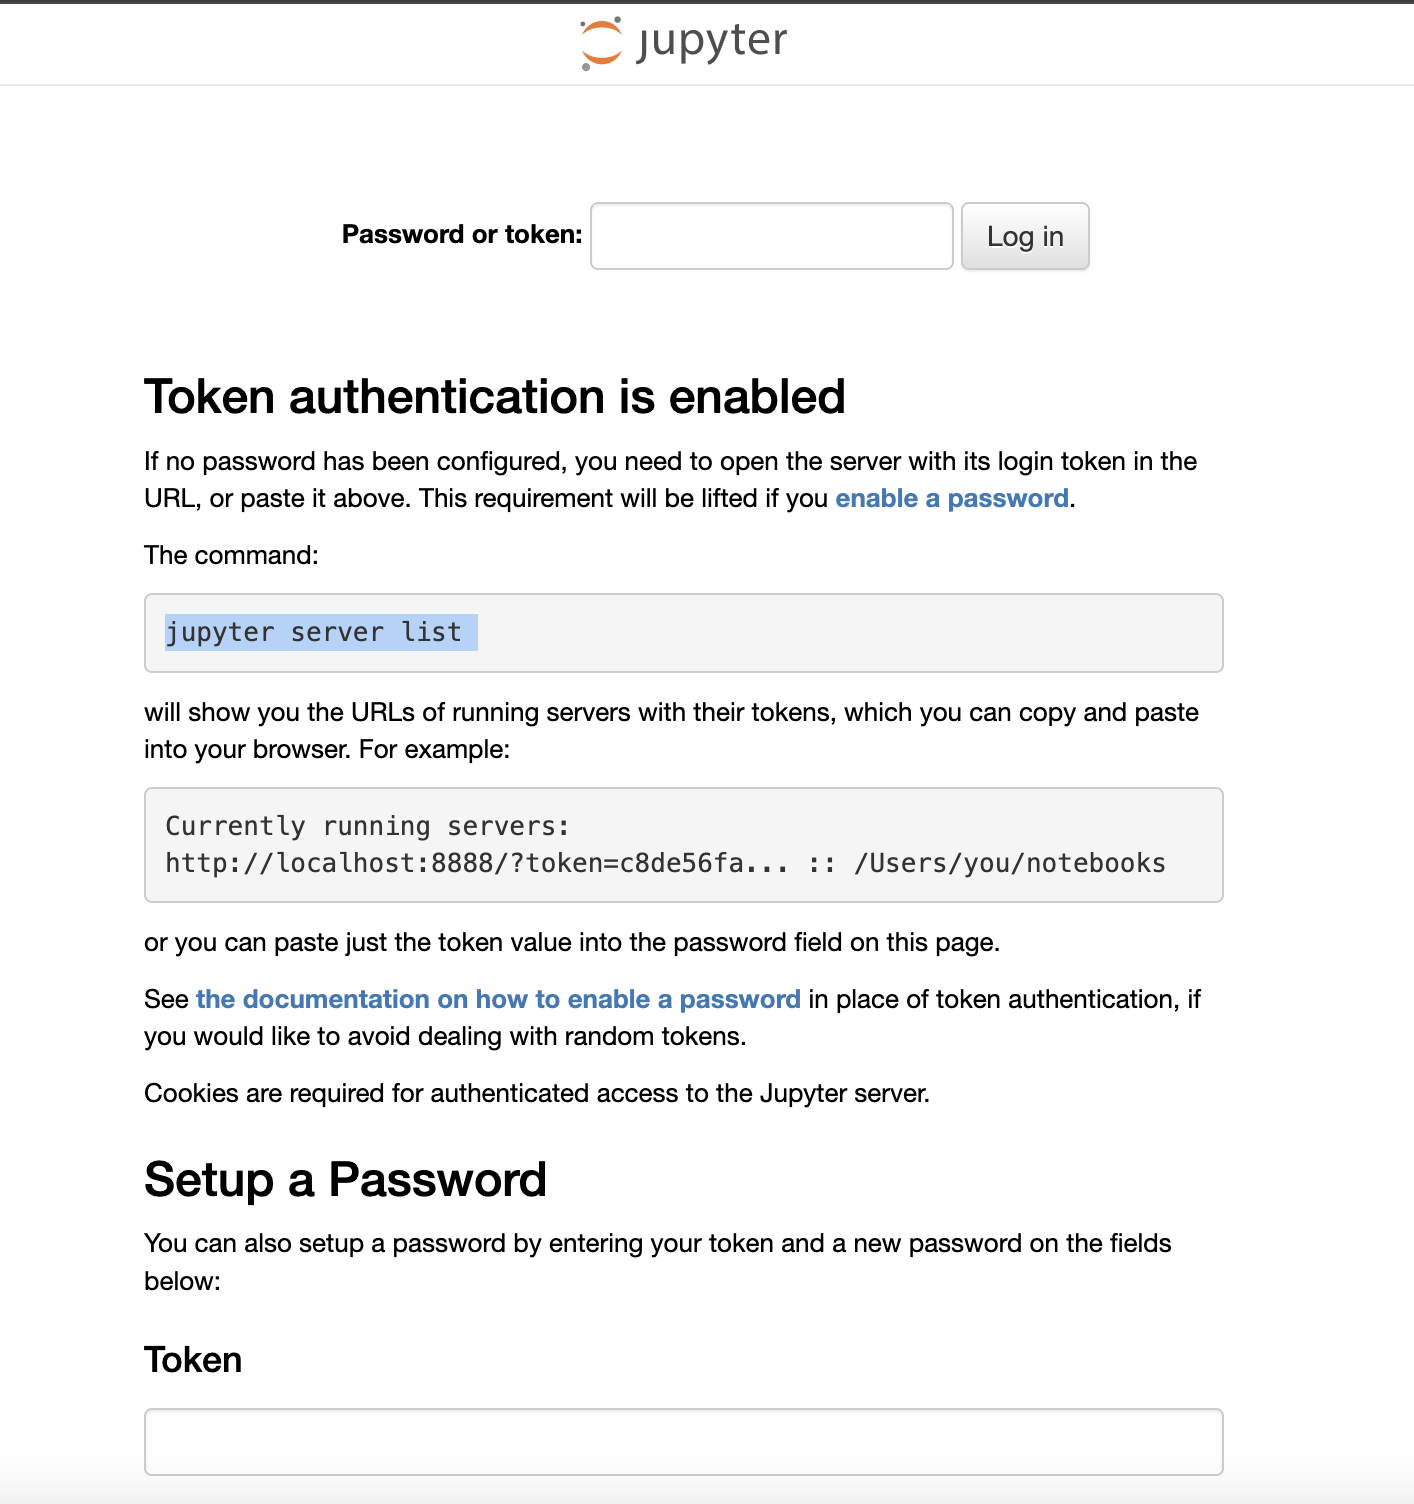 1. Go to the Pod page in the Runpod console and click the **Connect** button for the Pod you want to access.
2. Look for the **Web Terminal** start button.
3. Click **Start**, then open the web terminal.
4. In the terminal, run the following command to get the JupyterLab server token:
```bash
jupyter server list
```
You should see output similar to this:
```bash
root@2779b5db68b8:/# jupyter server list
Currently running servers:
http://localhost:8888/?token=ua5nw5fwkdzseqpp5apj :: /
root@2779b5db68b8:/#
```
The token you need is the string of characters that appears after the `=` sign, such as `ua5nw5fwkdzseqpp5apj` in the example above.
Copy this token, return to your JupyterLab login page, and paste it into the **Token** field to sign in.
---
# Source: https://docs.runpod.io/pods/storage/transfer-files.md
> ## Documentation Index
> Fetch the complete documentation index at: https://docs.runpod.io/llms.txt
> Use this file to discover all available pages before exploring further.
# Transfer files
> Move files between your local machine and Pods with a variety of secure transfer methods.
## Choose your transfer method
Runpod supports four different file transfer methods, each optimized for specific use cases:
| Method | Best for | Setup required | File size limit |
| -------------- | --------------------------------- | ------------------------ | --------------------- |
| **runpodctl** | Quick, occasional transfers | Preinstalled on Pods | Small to medium files |
| **SCP** | Standard file operations | SSH configuration | Any size |
| **rsync** | Large datasets, syncing | SSH + rsync installation | Any size |
| **Cloud sync** | Backup, multi-environment sharing | Cloud provider setup | Provider dependent |
### runpodctl
The simplest option for occasional transfers. Uses secure one-time codes and requires no setup since it's pre-installed on all Pods. Perfect for quick file exchanges.
To install `runpodctl` on your local machine, see the [installation guide](/runpodctl/overview).
### SCP
A reliable, standard method that works over SSH. Ideal for users comfortable with command-line tools who need to transfer both individual files and directories.
To configure your Pod for SSH access, see the ([SSH setup guide](/pods/configuration/use-ssh)).
### rsync
The most powerful option, featuring incremental transfers, compression, and detailed progress reporting. Essential for large datasets, regular synchronization, and preserving file attributes.
To set up `rsync`:
* Configure SSH access (same as for SCP).
* Install rsync on both machines: `apt install rsync`
* Ensure your local machine is running a Linux or WSL environment.
### Cloud sync
Direct synchronization with cloud storage providers like AWS S3, Google Cloud Storage, or Dropbox. Best for creating backups or sharing files across multiple environments.
To learn more, see the [cloud sync configuration guide](/pods/storage/cloud-sync).
## Transfer with runpodctl
The [Runpod CLI](/runpodctl/overview) offers the most straightforward approach to file transfer using secure one-time codes. This method works great for occasional transfers but consider other options for large files.
### Send a file
From the source machine (your local computer or a Pod), run:
```bash
runpodctl send YOUR_FILE
```
You'll see output like this:
```text
Sending 'YOUR_FILE' (5 B)
Code is: 8338-galileo-collect-fidel
On the other computer run
runpodctl receive 8338-galileo-collect-fidel
```
The code `8338-galileo-collect-fidel` is your unique, one-time transfer code.
### Receive a file
On the destination machine, use the code provided by the send command:
```bash
runpodctl receive 8338-galileo-collect-fidel
```
You'll see confirmation of the transfer:
```text
Receiving 'YOUR_FILE' (5 B)
Receiving (<-149.36.0.243:8692)
data.txt 100% |████████████████████| ( 5/ 5B, 0.040 kB/s)
```
## Transfer with SCP
SCP provides reliable file transfer over SSH connections. Use this method when you need standard command-line file operations.
### Basic syntax
The general format for SCP commands (replace `43201` and `194.26.196.6` with your Pod's port and IP):
```bash
scp -P 43201 -i ~/.ssh/id_ed25519 /local/file/path root@194.26.196.6:/destination/file/path
```
1. Go to the Pod page in the Runpod console and click the **Connect** button for the Pod you want to access.
2. Look for the **Web Terminal** start button.
3. Click **Start**, then open the web terminal.
4. In the terminal, run the following command to get the JupyterLab server token:
```bash
jupyter server list
```
You should see output similar to this:
```bash
root@2779b5db68b8:/# jupyter server list
Currently running servers:
http://localhost:8888/?token=ua5nw5fwkdzseqpp5apj :: /
root@2779b5db68b8:/#
```
The token you need is the string of characters that appears after the `=` sign, such as `ua5nw5fwkdzseqpp5apj` in the example above.
Copy this token, return to your JupyterLab login page, and paste it into the **Token** field to sign in.
---
# Source: https://docs.runpod.io/pods/storage/transfer-files.md
> ## Documentation Index
> Fetch the complete documentation index at: https://docs.runpod.io/llms.txt
> Use this file to discover all available pages before exploring further.
# Transfer files
> Move files between your local machine and Pods with a variety of secure transfer methods.
## Choose your transfer method
Runpod supports four different file transfer methods, each optimized for specific use cases:
| Method | Best for | Setup required | File size limit |
| -------------- | --------------------------------- | ------------------------ | --------------------- |
| **runpodctl** | Quick, occasional transfers | Preinstalled on Pods | Small to medium files |
| **SCP** | Standard file operations | SSH configuration | Any size |
| **rsync** | Large datasets, syncing | SSH + rsync installation | Any size |
| **Cloud sync** | Backup, multi-environment sharing | Cloud provider setup | Provider dependent |
### runpodctl
The simplest option for occasional transfers. Uses secure one-time codes and requires no setup since it's pre-installed on all Pods. Perfect for quick file exchanges.
To install `runpodctl` on your local machine, see the [installation guide](/runpodctl/overview).
### SCP
A reliable, standard method that works over SSH. Ideal for users comfortable with command-line tools who need to transfer both individual files and directories.
To configure your Pod for SSH access, see the ([SSH setup guide](/pods/configuration/use-ssh)).
### rsync
The most powerful option, featuring incremental transfers, compression, and detailed progress reporting. Essential for large datasets, regular synchronization, and preserving file attributes.
To set up `rsync`:
* Configure SSH access (same as for SCP).
* Install rsync on both machines: `apt install rsync`
* Ensure your local machine is running a Linux or WSL environment.
### Cloud sync
Direct synchronization with cloud storage providers like AWS S3, Google Cloud Storage, or Dropbox. Best for creating backups or sharing files across multiple environments.
To learn more, see the [cloud sync configuration guide](/pods/storage/cloud-sync).
## Transfer with runpodctl
The [Runpod CLI](/runpodctl/overview) offers the most straightforward approach to file transfer using secure one-time codes. This method works great for occasional transfers but consider other options for large files.
### Send a file
From the source machine (your local computer or a Pod), run:
```bash
runpodctl send YOUR_FILE
```
You'll see output like this:
```text
Sending 'YOUR_FILE' (5 B)
Code is: 8338-galileo-collect-fidel
On the other computer run
runpodctl receive 8338-galileo-collect-fidel
```
The code `8338-galileo-collect-fidel` is your unique, one-time transfer code.
### Receive a file
On the destination machine, use the code provided by the send command:
```bash
runpodctl receive 8338-galileo-collect-fidel
```
You'll see confirmation of the transfer:
```text
Receiving 'YOUR_FILE' (5 B)
Receiving (<-149.36.0.243:8692)
data.txt 100% |████████████████████| ( 5/ 5B, 0.040 kB/s)
```
## Transfer with SCP
SCP provides reliable file transfer over SSH connections. Use this method when you need standard command-line file operations.
### Basic syntax
The general format for SCP commands (replace `43201` and `194.26.196.6` with your Pod's port and IP):
```bash
scp -P 43201 -i ~/.ssh/id_ed25519 /local/file/path root@194.26.196.6:/destination/file/path
```
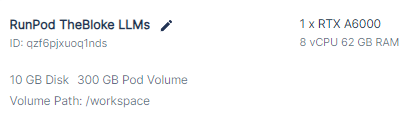 ### Check your Pod's logs
After confirming that your pod has a GPU attached, the next step is to check your pod's logs for any errors.
1. **Access your pod's logs**: You can view the logs from the pod's settings in the user interface.
2.
### Check your Pod's logs
After confirming that your pod has a GPU attached, the next step is to check your pod's logs for any errors.
1. **Access your pod's logs**: You can view the logs from the pod's settings in the user interface.
2.
 **Look for errors**: Browse through the logs to find any error messages that may provide clues about why you're experiencing a 502 error.
### Verify additional steps for official templates
In some cases, for our official templates, the user interface does not work right away and may require additional steps to be performed by the user.
1. **Access the template's ReadMe**: Navigate to the template's page and open the ReadMe file.
2. **Follow additional steps**: The ReadMe file should provide instructions on any additional steps you need to perform to get the UI functioning properly. Make sure to follow these instructions closely.
Remember, each template may have unique requirements or steps for setup. It is always recommended to thoroughly review the documentation associated with each template.
If you continue to experience 502 errors after following these steps, please contact our support team. We're here to help ensure that your experience on our platform is as seamless as possible.
---
# Source: https://docs.runpod.io/pods/storage/types.md
> ## Documentation Index
> Fetch the complete documentation index at: https://docs.runpod.io/llms.txt
> Use this file to discover all available pages before exploring further.
# Storage options
> Choose the right type of storage for your Pods.
Choosing the right type of storage is crucial for optimizing your workloads, whether you need temporary storage for active computations, persistent storage for long-term data retention, or permanent, shareable storage across multiple Pods.
This page describes the different types of storage options available for your Pods, and when to use each in your workflow.
## Container disk
A container disk houses the operating system and provides temporary storage for a Pod. It's created when a Pod is launched and is directly tied to the Pod's lifecycle.
## Volume disk
A volume disk provides persistent storage that remains available for the duration of the Pod's lease. It functions like a dedicated hard drive, allowing you to store data that needs to be retained even if the Pod is stopped or rebooted.
The volume disk is mounted at `/workspace` by default (this will be replaced by the network volume if one is attached). This can be changed by [editing your Pod configuration](#modifying-storage-capacity).
## Network volume
[Network volumes](/storage/network-volumes) offer persistent storage similar to the volume disk, but with the added benefit that they can be attached to multiple Pods, and that they persist independently from the Pod's lifecycle. This allows you to share and access data across multiple instances or transfer storage between machines, and retain data even after a Pod is deleted.
When attached to a Pod, a network volume replaces the volume disk, and by default they are similarly mounted at `/workspace`.
**Look for errors**: Browse through the logs to find any error messages that may provide clues about why you're experiencing a 502 error.
### Verify additional steps for official templates
In some cases, for our official templates, the user interface does not work right away and may require additional steps to be performed by the user.
1. **Access the template's ReadMe**: Navigate to the template's page and open the ReadMe file.
2. **Follow additional steps**: The ReadMe file should provide instructions on any additional steps you need to perform to get the UI functioning properly. Make sure to follow these instructions closely.
Remember, each template may have unique requirements or steps for setup. It is always recommended to thoroughly review the documentation associated with each template.
If you continue to experience 502 errors after following these steps, please contact our support team. We're here to help ensure that your experience on our platform is as seamless as possible.
---
# Source: https://docs.runpod.io/pods/storage/types.md
> ## Documentation Index
> Fetch the complete documentation index at: https://docs.runpod.io/llms.txt
> Use this file to discover all available pages before exploring further.
# Storage options
> Choose the right type of storage for your Pods.
Choosing the right type of storage is crucial for optimizing your workloads, whether you need temporary storage for active computations, persistent storage for long-term data retention, or permanent, shareable storage across multiple Pods.
This page describes the different types of storage options available for your Pods, and when to use each in your workflow.
## Container disk
A container disk houses the operating system and provides temporary storage for a Pod. It's created when a Pod is launched and is directly tied to the Pod's lifecycle.
## Volume disk
A volume disk provides persistent storage that remains available for the duration of the Pod's lease. It functions like a dedicated hard drive, allowing you to store data that needs to be retained even if the Pod is stopped or rebooted.
The volume disk is mounted at `/workspace` by default (this will be replaced by the network volume if one is attached). This can be changed by [editing your Pod configuration](#modifying-storage-capacity).
## Network volume
[Network volumes](/storage/network-volumes) offer persistent storage similar to the volume disk, but with the added benefit that they can be attached to multiple Pods, and that they persist independently from the Pod's lifecycle. This allows you to share and access data across multiple instances or transfer storage between machines, and retain data even after a Pod is deleted.
When attached to a Pod, a network volume replaces the volume disk, and by default they are similarly mounted at `/workspace`.