# Resend
> ## Documentation Index
---
# Source: https://resend.com/docs/knowledge-base/403-error-domain-mismatch.md
> ## Documentation Index
> Fetch the complete documentation index at: https://resend.com/docs/llms.txt
> Use this file to discover all available pages before exploring further.
# 403 Error Using Verified Domain
> Learn how to resolve a 403 error caused by using a domain in your API request that doesn't match your verified domain.
A 403 error can occur when there's a mismatch between the domain you're using in your API request and the domain you've verified in Resend.
## The Problem
You've verified a domain (or subdomain) in Resend, but your API request is using a different domain.
**Example scenario:**
* You verified `sending.domain.com` in Resend
* Your API request is using `domain.com` (i.e., without the `sending` subdomain)
## How to Identify This Issue
1. Check which domain you've verified in your [Resend Domains page](https://resend.com/domains).
2. Compare it with the domain you're using in [your API request's](https://resend.com/logs) `from` field.
## Solution
You have two options to resolve this:
**Option 1: Update your API request** (Recommended)
Update your API call to use the verified domain. For example, if you verified `sending.domain.com`, make sure your `from` field uses that exact domain:
```javascript theme={"theme":{"light":"github-light","dark":"vesper"}}
resend.emails.send({
from: 'onboarding@sending.domain.com', // Use your verified domain
to: 'user@example.com',
subject: 'Hello World',
html: '
Hello World
',
});
```
**Option 2: Delete and re-add the domain**
1. Delete the domain you've added in Resend
2. Add and verify the domain that matches what you're using in your API request
Make sure the domain in your API request exactly matches the domain you've
verified in Resend, including any subdomains.
## Still Having Issues?
If you've verified that your domain matches and you're still getting a 403 error:
1. Verify that your domain is fully verified in the [Resend Domains page](https://resend.com/domains).
2. Double-check that the domain in your API request's `from` field exactly matches your verified domain
3. Ensure your API key has the necessary permissions.
4. [Contact Resend support](https://resend.com/help) with details about your error
---
# Source: https://resend.com/docs/knowledge-base/403-error-resend-dev-domain.md
> ## Documentation Index
> Fetch the complete documentation index at: https://resend.com/docs/llms.txt
> Use this file to discover all available pages before exploring further.
# 403 Error Using resend.dev Domain
> Learn how to resolve a 403 error when using the resend.dev domain to send emails to recipients other than your own.
You may receive a 403 error with the following message when trying to send emails:
```
You can only send testing emails to your own email address (your-email-address@domain.com).
To send emails to other recipients, please verify a domain at resend.com/domains, and change
the `from` address to an email using this domain.
```
## The Problem
You're using the default `resend.dev` domain while sending to email addresses other than your own.
**Example scenario:**
* Your API request uses `from: 'onboarding@resend.dev'`
* You're trying to send to recipients other than your own email address
## Why This Happens
The `resend.dev` domain is only available for testing purposes and can only send emails to the email address associated with your Resend account. This restriction helps protect domain reputation and ensures proper email deliverability.
## Solution
To send emails to recipients other than your own email address, you need to add and verify your own domain in Resend:
1. Go to the [Domains page](https://resend.com/domains) in your Resend dashboard
2. Click **Add Domain**
3. Enter your domain name
4. Follow the verification steps to add the required DNS records
5. Once verified, update your API request to use your verified domain
For detailed instructions on verifying your domain, check out our [domain
verification guide](/dashboard/domains/introduction) or the DNS guide for your
specific provider.
## Still Having Issues?
If you've verified your domain and updated your API request but you're still getting a 403 error:
1. Verify that your domain is fully verified in the [Resend Domains page](https://resend.com/domains).
2. Ensure the domain in your API request's `from` field uses your verified domain (not `resend.dev`).
3. Make sure you're not trying to send to your own email address when using `resend.dev`.
4. [Contact Resend support](https://resend.com/help) with details about your error.
---
# Source: https://resend.com/docs/knowledge-base/account-quotas-and-limits.md
> ## Documentation Index
> Fetch the complete documentation index at: https://resend.com/docs/llms.txt
> Use this file to discover all available pages before exploring further.
# What are Resend account quotas and limits?
> Learn what quotas and limits apply to accounts.
Resend regulates email volume in three ways:
1. email volume (quota) - for [Transactional Email](/knowledge-base/what-sending-feature-to-use#what-is-a-transactional-email)
2. number of contacts - for [Marketing Email](/knowledge-base/what-sending-feature-to-use#what-is-a-marketing-email)
3. sending rate
These limits help improve your deliverability and likelihood of reaching your recipient's inbox.
Both **sent emails** and **received emails** (inbound) count towards your
account's email quota. Each received email counts as 1 email against your
daily and monthly limits, just like sent emails.
## Free Account Quotas and Limits
Free accounts have the following:
* Transactional emails: daily email quota of 100 emails/day and 3,000 emails/month. This quota includes both sent and received emails. Multiple `To`, `CC`, or `BCC` recipients in sent emails count as separate emails towards this quota.
* Marketing emails: unlimited emails to up to 1,000 contacts per month.
## Paid Plan Quota
* Transactional Pro, Scale and Enterprise plans have no daily quota limits, though the plan tier will dictate the monthly email quota. Both sent and received emails count towards this monthly quota. To see your current month usage, view the [**Usage page**](https://resend.com/settings/usage). Multiple `To`, `CC`, or `BCC` recipients in sent emails count as separate emails towards the monthly quota.
* Marketing Pro, Enterprise plans have unlimited emails, though the plan tier will dictate the monthly contacts.
## Overage Limits
Paid plans include pay-as-you-go overages, which allow you to continue sending emails after you've reached your monthly quota. To prevent extreme overages and unexpected costs, we impose a hard limit of 5x your monthly quota.
By default, overage usage is capped at **5x your plan's monthly quota**. Once you reach this limit, sending will be paused until the next billing cycle.
If you need to adjust this limit, please [contact support](https://resend.com/help).
While overages provide flexibility for occasional spikes in email volume, they
can be more expensive per email than upgrading your plan. If you consistently
exceed your quota, consider [upgrading to a higher
tier](https://resend.com/settings/billing) for better value and more
predictable costs.
## Rate Limits
All accounts start with a rate limit of 2 requests per second. The [rate limits](/api-reference/introduction#rate-limit) follow the [IETF standard](https://datatracker.ietf.org/doc/html/draft-ietf-httpapi-ratelimit-headers) for stating the rate limit in the response header. If you have specific requirements, [contact support](https://resend.com/help) to request a rate increase.
## Bounce Rate
All accounts must maintain a bounce rate of under **4%**. The [**Metrics page**](https://resend.com/metrics) within an account and/or [webhooks](https://resend.com/docs/webhooks/event-types#email-bounced) allow you to monitor your account bounce rates.
Maintaining a bounce rate above 4% may result in a temporary pause in sending until the bounce rate is reduced.
Tips to keep a bounce rate low:
* Remove inactive user email addresses from email lists.
* Only send to recipients who have given consent to receive email.
* When testing, avoid sending to fake email addresses. Use Resend's [test email addresses](/dashboard/emails/send-test-emails) instead.
* If you are using open/click tracking, periodically remove recipients who are not engaging with your emails from your email lists.
## Spam Rate
All accounts must have a spam rate of under **0.08%**. The [**Metrics page**](https://resend.com/metrics) within an account and/or [webhooks](https://resend.com/docs/webhooks/event-types#email-complained) allow you to monitor your account spam rates.
Maintaining a spam rate over 0.08% may result in a temporary pause in sending until the spam rate is reduced.
Tips to keep a spam rate low:
* Give recipients an easy way to opt-out of emails.
* Send relevant and timely emails.
* Only send to recipients who have given consent to receive email.
---
# Source: https://resend.com/docs/api-reference/contacts/add-contact-to-segment.md
> ## Documentation Index
> Fetch the complete documentation index at: https://resend.com/docs/llms.txt
> Use this file to discover all available pages before exploring further.
# Add Contact to Segment
> Add an existing contact to a segment.
export const ResendParamField = ({children, body, path, ...props}) => {
const [lang, setLang] = useState(() => {
return localStorage.getItem('code') || '"Node.js"';
});
useEffect(() => {
const onStorage = event => {
const key = event.detail.key;
if (key === 'code') {
setLang(event.detail.value);
}
};
document.addEventListener('mintlify-localstorage', onStorage);
return () => {
document.removeEventListener('mintlify-localstorage', onStorage);
};
}, []);
const toCamelCase = str => typeof str === 'string' ? str.replace(/[_-](\w)/g, (_, c) => c.toUpperCase()) : str;
const resolvedBody = useMemo(() => {
const value = JSON.parse(lang);
return value === 'Node.js' ? toCamelCase(body) : body;
}, [body, lang]);
const resolvedPath = useMemo(() => {
const value = JSON.parse(lang);
return value === 'Node.js' ? toCamelCase(path) : path;
}, [path, lang]);
return
{children}
;
};
## Path Parameters
Either `id` or `email` must be provided.
The Contact ID.
The Contact Email.
The Segment ID.
```ts Node.js theme={"theme":{"light":"github-light","dark":"vesper"}}
import { Resend } from 'resend';
const resend = new Resend('re_xxxxxxxxx');
// Add by contact id
const { data, error } = await resend.contacts.segments.add({
contactId: 'e169aa45-1ecf-4183-9955-b1499d5701d3',
segmentId: '78261eea-8f8b-4381-83c6-79fa7120f1cf',
});
// Add by contact email
const { data, error } = await resend.contacts.segments.add({
email: 'steve.wozniak@gmail.com',
segmentId: '78261eea-8f8b-4381-83c6-79fa7120f1cf',
});
```
```php PHP theme={"theme":{"light":"github-light","dark":"vesper"}}
$resend = Resend::client('re_xxxxxxxxx');
// Add by contact id
$resend->contacts->segments->add(
contact: 'e169aa45-1ecf-4183-9955-b1499d5701d3',
segmentId: '78261eea-8f8b-4381-83c6-79fa7120f1cf'
);
// Add by contact email
$resend->contacts->segments->add(
contact: 'steve.wozniak@gmail.com',
segmentId: '78261eea-8f8b-4381-83c6-79fa7120f1cf'
);
```
```python Python theme={"theme":{"light":"github-light","dark":"vesper"}}
import resend
resend.api_key = 're_xxxxxxxxx'
# Add by contact id
params = {
"segment_id": '78261eea-8f8b-4381-83c6-79fa7120f1cf',
"contact_id": 'e169aa45-1ecf-4183-9955-b1499d5701d3',
}
response = resend.Contacts.Segments.add(params)
```
```ruby Ruby theme={"theme":{"light":"github-light","dark":"vesper"}}
require 'resend'
Resend.api_key = 're_xxxxxxxxx'
# Add by contact id
result = Resend::Contacts::Segments.add(
contact_id: 'e169aa45-1ecf-4183-9955-b1499d5701d3',
segment_id: '78261eea-8f8b-4381-83c6-79fa7120f1cf'
)
# Add by contact email
result = Resend::Contacts::Segments.add(
email: 'steve.wozniak@gmail.com',
segment_id: '78261eea-8f8b-4381-83c6-79fa7120f1cf'
)
```
```go Go theme={"theme":{"light":"github-light","dark":"vesper"}}
package main
import (
"context"
"fmt"
"github.com/resend/resend-go/v3"
)
func main() {
ctx := context.TODO()
client := resend.NewClient("re_xxxxxxxxx")
// Add by contact id
addParams := &resend.AddContactSegmentRequest{
ContactId: "e169aa45-1ecf-4183-9955-b1499d5701d3",
SegmentId: "78261eea-8f8b-4381-83c6-79fa7120f1cf",
}
response, err := client.Contacts.Segments.AddWithContext(ctx, addParams)
if err != nil {
panic(err)
}
fmt.Println(response)
// Add by contact email
addByEmailParams := &resend.AddContactSegmentRequest{
Email: "steve.wozniak@gmail.com",
SegmentId: "78261eea-8f8b-4381-83c6-79fa7120f1cf",
}
response, err = client.Contacts.Segments.AddWithContext(ctx, addByEmailParams)
if err != nil {
panic(err)
}
fmt.Println(response)
}
```
```rust Rust theme={"theme":{"light":"github-light","dark":"vesper"}}
use resend_rs::{Resend, Result};
#[tokio::main]
async fn main() -> Result<()> {
let resend = Resend::new("re_xxxxxxxxx");
// Update by contact id
let _contact = resend
.contacts
.add_contact_segment(
"e169aa45-1ecf-4183-9955-b1499d5701d3",
"78261eea-8f8b-4381-83c6-79fa7120f1cf",
)
.await?;
// // Update by contact email
let _contact = resend
.contacts
.add_contact_segment(
"steve.wozniak@gmail.com",
"78261eea-8f8b-4381-83c6-79fa7120f1cf",
)
.await?;
Ok(())
}
```
```java Java theme={"theme":{"light":"github-light","dark":"vesper"}}
import com.resend.*;
public class Main {
public static void main(String[] args) {
Resend resend = new Resend("re_xxxxxxxxx");
// Add by contact id
AddContactToSegmentOptions optionsById = AddContactToSegmentOptions.builder()
.id("e169aa45-1ecf-4183-9955-b1499d5701d3")
.segmentId("78261eea-8f8b-4381-83c6-79fa7120f1cf")
.build();
resend.contacts().segments().add(optionsById);
// Add by contact email
AddContactToSegmentOptions optionsByEmail = AddContactToSegmentOptions.builder()
.email("steve.wozniak@gmail.com")
.segmentId("78261eea-8f8b-4381-83c6-79fa7120f1cf")
.build();
resend.contacts().segments().add(optionsByEmail);
}
}
```
```csharp .NET theme={"theme":{"light":"github-light","dark":"vesper"}}
using Resend;
IResend resend = ResendClient.Create( "re_xxxxxxxxx" ); // Or from DI
await resend.ContactAddToSegmentAsync(
contactId: new Guid( "e169aa45-1ecf-4183-9955-b1499d5701d3" ),
segmentId: new Guid( "78261eea-8f8b-4381-83c6-79fa7120f1cf" )
);
```
```bash cURL theme={"theme":{"light":"github-light","dark":"vesper"}}
// Update by contact id
curl -X POST 'https://api.resend.com/contacts/e169aa45-1ecf-4183-9955-b1499d5701d3/segments/78261eea-8f8b-4381-83c6-79fa7120f1cf' \
-H 'Authorization: Bearer re_xxxxxxxxx'
// Update by contact email
curl -X POST 'https://api.resend.com/contacts/steve.wozniak@gmail.com/segments/78261eea-8f8b-4381-83c6-79fa7120f1cf' \
-H 'Authorization: Bearer re_xxxxxxxxx' \
-H 'Content-Type: application/json'
```
```json Response theme={"theme":{"light":"github-light","dark":"vesper"}}
{
"id": "78261eea-8f8b-4381-83c6-79fa7120f1cf"
}
```
---
# Source: https://resend.com/docs/dashboard/emails/add-unsubscribe-to-transactional-emails.md
> ## Documentation Index
> Fetch the complete documentation index at: https://resend.com/docs/llms.txt
> Use this file to discover all available pages before exploring further.
# Add an unsubscribe link to transactional emails
> Learn how to give email recipients the ability to unsubscribe without searching for the unsubscribe link.
For contact and unsubscribe management workflows, see the [Audiences
overview](/dashboard/audiences/introduction), where Broadcasts are built for
keeping track of topics, segments, and unsubscribe preferences.
Resend doesn't manage contact lists for transactional emails.
If you manage your own list, you can add the `List-Unsubscribe: https://example.com/unsubscribe` header when sending emails using the Resend API.
As of February 2024, your bulk messages must include a URL version in your list-unsubscribe header, `List-Unsubscribe-Post: List-Unsubscribe=One-Click`, and to allow for a `POST` request from the same URL.
When receiving a `POST`, it should return a blank page with `200 (OK)` or `202 (Accepted)`, and should show the regular unsubscribe page with the `GET` method. Ensure that users stop receiving email within 48 hours of this request.
This header allows email clients to offer an easy “Unsubscribe” option in their UI, enhancing user experience and decreasing spam complaints.
You can read more about this requirement in our [Bulk Sending Requirements blog post.](https://resend.com/blog/gmail-and-yahoo-bulk-sending-requirements-for-2024#one-click-unsubscribe)
```ts Node.js {11} theme={"theme":{"light":"github-light","dark":"vesper"}}
import { Resend } from 'resend';
const resend = new Resend('re_xxxxxxxxx');
await resend.emails.send({
from: 'Acme ',
to: ['delivered@resend.dev'],
subject: 'hello world',
text: 'it works!',
headers: {
'List-Unsubscribe': '',
},
});
```
## Example
See the full source code.
---
# Source: https://resend.com/docs/knowledge-base/anything-integration.md
> ## Documentation Index
> Fetch the complete documentation index at: https://resend.com/docs/llms.txt
> Use this file to discover all available pages before exploring further.
# How to add the Resend integration to your Anything project
> Learn how to add the Resend integration to your Anything project.
export const YouTube = ({id}) => {
return ;
};
[Anything](https://createanything.com) is a platform for building web sites, tools, apps, and projects via chat. With their [Resend integration](https://www.createanything.com/docs/integrations/resend), you can send emails from your Anything project.
If you prefer to watch a video, check out our video walkthrough below.
## 1. Call the Resend integration in Anything
Type `/Resend` in the chat and select the integration, and ask Anything to add email functionality to your project.
## 2. Add your Resend API key
Anything usually prompts you for a Resend API key, which you can add in the [Resend Dashboard](https://resend.com/api-keys). If Anything doesn't prompt you for a Resend API key, click the **More options** button and select **Secrets**.
Click the **Add new secret** button.
* **Name:** `RESEND_API_KEY`
* **Value:** Your Resend API key (e.g., `re_xxxxxxxxx0`)
Learn more about [Secrets in Create](https://www.createanything.com/docs/essentials#project-settings).
## 3. Add a custom domain to your Resend account
By default, you can only send emails to your own email address.
To send emails to other email addresses:
1. Add a [custom domain to your Resend account](https://resend.com/domains).
2. Add the custom domain to the `from` field in the `resend` function in Create.
Learn more about [Functions in Create](https://www.createanything.com/docs/builder/functions).
---
# Source: https://resend.com/docs/dashboard/receiving/attachments.md
# Source: https://resend.com/docs/dashboard/emails/attachments.md
> ## Documentation Index
> Fetch the complete documentation index at: https://resend.com/docs/llms.txt
> Use this file to discover all available pages before exploring further.
# Attachments
> Send emails with attachments.
There are two ways to send attachments:
1. [From a remote file](#send-attachments-from-a-remote-file)
2. [From a local file](#send-attachments-from-a-local-file)
We currently do not support sending attachments [when using our batch
endpoint](/api-reference/emails/send-batch-emails).
## Send attachments from a remote file
Include the `path` parameter to send attachments from a remote file. This parameter accepts a URL to the file you want to attach.
Define the file name that will be attached using the `filename` parameter.
```ts Node.js {12-13} theme={"theme":{"light":"github-light","dark":"vesper"}}
import { Resend } from 'resend';
const resend = new Resend('re_xxxxxxxxx');
await resend.emails.send({
from: 'Acme ',
to: ['delivered@resend.dev'],
subject: 'Receipt for your payment',
html: '
",
Attachments: []*resend.Attachment{attachment},
}
sent, err := client.Emails.SendWithContext(ctx, params)
if err != nil {
panic(err)
}
fmt.Println(sent.Id)
}
```
```rust Rust {12-13} theme={"theme":{"light":"github-light","dark":"vesper"}}
use resend_rs::types::{CreateAttachment, CreateEmailBaseOptions};
use resend_rs::{Resend, Result};
#[tokio::main]
async fn main() -> Result<()> {
let resend = Resend::new("re_xxxxxxxxx");
let from = "Acme ";
let to = ["delivered@resend.dev"];
let subject = "Receipt for your payment";
let path = "https://resend.com/static/sample/invoice.pdf";
let filename = "invoice.pdf";
let email = CreateEmailBaseOptions::new(from, to, subject)
.with_html("
Thanks for the payment
")
.with_attachment(CreateAttachment::from_path(path).with_filename(filename));
let _email = resend.emails.send(email).await?;
Ok(())
}
```
```java Java {8-9} theme={"theme":{"light":"github-light","dark":"vesper"}}
import com.resend.*;
public class Main {
public static void main(String[] args) {
Resend resend = new Resend("re_xxxxxxxxx");
Attachment att = Attachment.builder()
.path("https://resend.com/static/sample/invoice.pdf")
.fileName("invoice.pdf")
.build();
CreateEmailOptions params = CreateEmailOptions.builder()
.from("Acme ")
.to("delivered@resend.dev")
.subject("Receipt for your payment")
.html("
Thanks for the payment
")
.attachments(att)
.build();
CreateEmailResponse data = resend.emails().send(params);
}
}
```
```csharp .NET {14-18} theme={"theme":{"light":"github-light","dark":"vesper"}}
using Resend;
using System.Collections.Generic;
IResend resend = ResendClient.Create( "re_xxxxxxxxx" ); // Or from DI
var message = new EmailMessage()
{
From = "Acme ",
To = "delivered@resend.dev",
Subject = "Receipt for your payment",
HtmlBody = "
",
"attachments": [
{
"path": "https://resend.com/static/sample/invoice.pdf",
"filename": "invoice.pdf"
}
]
}'
```
## Send attachments from a local file
Include the `content` parameter to send attachments from a local file. This parameter accepts the Base64 encoded content of the file you want to attach.
Define the file name that will be attached using the `filename` parameter.
```ts Node.js {16-17} theme={"theme":{"light":"github-light","dark":"vesper"}}
import { Resend } from 'resend';
import fs from 'fs';
const resend = new Resend('re_xxxxxxxxx');
const filepath = `${__dirname}/static/invoice.pdf`;
const attachment = fs.readFileSync(filepath).toString('base64');
await resend.emails.send({
from: 'Acme ',
to: ['delivered@resend.dev'],
subject: 'Receipt for your payment',
text: '
",
Attachments: []*resend.Attachment{attachment},
}
sent, err := client.Emails.SendWithContext(ctx, params)
if err != nil {
panic(err)
}
fmt.Println(sent.Id)
}
```
```rust Rust {22} theme={"theme":{"light":"github-light","dark":"vesper"}}
use std::fs::File;
use std::io::Read;
use resend_rs::types::{CreateAttachment, CreateEmailBaseOptions};
use resend_rs::{Resend, Result};
#[tokio::main]
async fn main() -> Result<()> {
let resend = Resend::new("re_xxxxxxxxx");
let from = "Acme ";
let to = ["delivered@resend.dev"];
let subject = "Receipt for your payment";
let filename = "invoice.pdf";
let mut f = File::open(filename).unwrap();
let mut invoice = Vec::new();
f.read_to_end(&mut invoice).unwrap();
let email = CreateEmailBaseOptions::new(from, to, subject)
.with_html("
Thanks for the payment
")
.with_attachment(CreateAttachment::from_content(invoice).with_filename(filename));
let _email = resend.emails.send(email).await?;
Ok(())
}
```
```java Java {8-9} theme={"theme":{"light":"github-light","dark":"vesper"}}
import com.resend.*;
public class Main {
public static void main(String[] args) {
Resend resend = new Resend("re_xxxxxxxxx");
Attachment att = Attachment.builder()
.fileName("invoice.pdf")
.content("invoiceBuffer")
.build();
CreateEmailOptions params = CreateEmailOptions.builder()
.from("Acme ")
.to("delivered@resend.dev")
.subject("Receipt for your payment")
.html("
Thanks for the payment
")
.attachments(att)
.build();
CreateEmailOptions params = CreateEmailOptions.builder()
}
}
```
```csharp .NET {15-19} theme={"theme":{"light":"github-light","dark":"vesper"}}
using Resend;
using System.Collections.Generic;
using System.IO;
IResend resend = ResendClient.Create( "re_xxxxxxxxx" ); // Or from DI
var message = new EmailMessage()
{
From = "Acme ",
To = "delivered@resend.dev",
Subject = "Receipt for your payment",
HtmlBody = "
",
"attachments": [
{
"content": "UmVzZW5kIGF0dGFjaG1lbnQgZXhhbXBsZS4gTmljZSBqb2Igc2VuZGluZyB0aGUgZW1haWwh%",
"filename": "invoice.txt"
}
]
}'
```
## Embed Images using CID
You can optionally embed an image in the HTML body of the email. Both remote and local attachments are supported. All attachment requirements, options, and limitations apply to embedded inline images as well.
Embedding images requires two steps:
**1. Add the CID in the email HTML.**
Use the prefix `cid:` to reference the ID in the `src` attribute of an image tag in the HTML body of the email.
```html theme={"theme":{"light":"github-light","dark":"vesper"}}
```
**2. Reference the CID in the attachment**
The content id is an arbitrary string set by you, and must be less than 128 characters.
```ts Node.js {9, 14} theme={"theme":{"light":"github-light","dark":"vesper"}}
import { Resend } from 'resend';
const resend = new Resend('re_xxxxxxxxx');
await resend.emails.send({
from: 'Acme ',
to: ['delivered@resend.dev'],
subject: 'Thank you for contacting us',
html: '
",
Attachments: []*resend.Attachment{attachment},
}
sent, err := client.Emails.SendWithContext(ctx, params)
if err != nil {
panic(err)
}
fmt.Println(sent.Id)
}
```
```rust Rust {14, 17} theme={"theme":{"light":"github-light","dark":"vesper"}}
use resend_rs::types::{CreateAttachment, CreateEmailBaseOptions};
use resend_rs::{Resend, Result};
#[tokio::main]
async fn main() -> Result<()> {
let resend = Resend::new("re_xxxxxxxxx");
let from = "Acme ";
let to = ["delivered@resend.dev"];
let subject = "Thank you for contacting us";
let path = "https://resend.com/static/sample/logo.png";
let filename = "logo.png";
let content_id = "logo-image";
let email = CreateEmailBaseOptions::new(from, to, subject)
.with_html("
Here is our inline logo
")
.with_attachment(
CreateAttachment::from_path(path)
.with_filename(filename)
.with_content_id(content_id),
);
let _email = resend.emails.send(email).await?;
Ok(())
}
```
```java Java {10, 17} theme={"theme":{"light":"github-light","dark":"vesper"}}
import com.resend.*;
public class Main {
public static void main(String[] args) {
Resend resend = new Resend("re_xxxxxxxxx");
Attachment att = Attachment.builder()
.path("https://resend.com/static/sample/logo.png")
.fileName("logo.png")
.ContentId("logo-image")
.build();
CreateEmailOptions params = CreateEmailOptions.builder()
.from("Acme ")
.to("delivered@resend.dev")
.subject("Thank you for contacting us")
.html("
Here is our inline logo
")
.attachments(att)
.build();
CreateEmailResponse data = resend.emails().send(params);
}
}
```
```csharp .NET {11, 18} theme={"theme":{"light":"github-light","dark":"vesper"}}
using Resend;
using System.Collections.Generic;
IResend resend = ResendClient.Create( "re_xxxxxxxxx" ); // Or from DI
var message = new EmailMessage()
{
From = "Acme ",
To = "delivered@resend.dev",
Subject = "Thank you for contacting us",
HtmlBody = "
",
"attachments": [
{
"path": "https://resend.com/static/sample/logo.png",
"filename": "logo.png",
"content_id": "logo-image"
}
]
}'
```
Learn more about [embedding images](/dashboard/emails/embed-inline-images).
## View and Download Attachments
You can view and download attachments when viewing a sent email that includes them.
To view and download attachments:
1. Go to [Emails](https://resend.com/emails).
2. Navigate to any email you sent with an attachment.
3. Click on the attachment to download it locally.
Attachments include the filename and an icon to help you identify the type of attachment. We show unique icons for each attachment type:
* Image
* PDF
* Spreadsheet
* Default (for unknown types)
## Attachment Limitations
* Emails can be no larger than 40MB (including attachments after Base64 encoding).
* Not all file types are supported. See the list of [unsupported file types](/knowledge-base/what-attachment-types-are-not-supported).
* Emails with attachments cannot be sent using our [batching endpoint](/api-reference/emails/send-batch-emails).
## Examples
See the full source code.
See the full source code.
---
# Source: https://resend.com/docs/knowledge-base/audience-hygiene.md
> ## Documentation Index
> Fetch the complete documentation index at: https://resend.com/docs/llms.txt
> Use this file to discover all available pages before exploring further.
# Audience Hygiene: How to keep your Audiences in good shape?
> Learn strategies for maintaining good audience hygiene and maximizing email deliverability.
Audience hygiene (*also known as list hygiene*) refers to the practice of keeping your email list clean, valid, and engaged.
Maintaining proper audience hygiene is crucial for ensuring that your emails reach their intended recipients, maximizing your deliverability, and improving your sender reputation.
By removing invalid, outdated, or disengaged contacts, you can improve the effectiveness of your email campaigns and avoid issues like high bounce rates, low engagement, and even being marked as spam.
***
# How to ensure emails are valid?
To keep your list healthy, it's essential to ensure that the email addresses you collect are valid, accurate, and belong to recipients who are truly interested in hearing from you. Here are a few strategies to help you achieve this:
### Prevent undesired or bot signups with CAPTCHA
Bots can easily sign up for your emails, inflating your list with fake or low-quality contacts. To prevent this, implement CAPTCHA systems during your sign-up process. CAPTCHA challenges help ensure that sign-ups are coming from human users and not automated scripts.
Some popular CAPTCHA services include:
* **[Google reCAPTCHA](https://developers.google.com/recaptcha)**: One of the most widely used CAPTCHA services, offering both simple and advanced protection options.
* **[hCaptcha](https://www.hcaptcha.com/)**: An alternative to Google reCAPTCHA, providing similar protection but with a different user experience.
* **[Friendly Captcha](https://friendlycaptcha.com/)**: A privacy-focused CAPTCHA solution that doesn’t require users to click on anything, reducing friction in the sign-up process.
Using these tools will help reduce bot sign-ups and ensure your email list consists of real users.
### Ensure the recipient is consenting with Double Opt-In
Double opt-in is the process of confirming a user's subscription after they’ve signed up for your emails.
When a user submits their email address, you send them a confirmation email with a link they must click to complete the subscription process.
This step ensures that the person who entered the email address is the one who actually wants to receive your communications.
This is important to ensure:
* **Compliance with local regulations**: Double opt-in helps ensure that you comply with email marketing regulations such as the **CAN-SPAM Act** (U.S.) and **CASL** (Canada). Both of these laws require clear consent from subscribers before you can send them marketing emails.
* **Improved deliverability**: Double opt-in helps you maintain a clean list of genuinely interested users. This reduces bounce rates and prevents spam complaints, which in turn helps maintain your sender reputation with ISPs and inbox providers.
* **Verification of accuracy**: Double opt-in ensures the email addresses you collect are valid, accurate, and up to date, reducing the risk of sending to invalid addresses and impacting your deliverability.
### Use a third-party service to verify an address' deliverability
While you can verify that an email address follows the correct syntax (e.g., [user@example.com](mailto:user@example.com)) (also known as RFC 5322), you also need to ensure that the address is deliverable—that is, it’s an active inbox that can receive emails.
Third-party email verification services can help you identify whether an email address is valid, reachable, or likely to result in a bounce.
This reduces the risk of sending to addresses that won’t receive your emails and improves your overall deliverability.
Some email verification services include:
* **[Emailable](https://emailable.com/partners/resend)**
* **ZeroBounce**
* **Kickbox**
By using these services, you can clean up your existing email lists or prevent undeliverable emails to be added to them. This helps prevent unnecessary deliverability issues.
***
# How to proactively remove emails from your Segments
Over time, certain recipients may become disengaged with your content. It's important to manage your segments by removing inactive or unengaged users.
Regularly filtering your segments ensures that you're sending to only those who are actively interested, which in turn boosts engagement and deliverability.
A healthy email list is one that is continuously nurtured with relevant and timely content. Instead of sporadic communication, maintain consistent engagement with your audience to keep them interested.
### Filter on engagement
To keep your email list in top shape, focus on sending to engaged users. Major inbox providers like Gmail and Microsoft expect you to send emails to recipients who have recently opened or clicked on your emails.
As a best practice, you should limit non-transactional email sends to recipients who have opened or clicked an email in the past 6 months.
The exact timeframe may vary depending on your industry, sending frequency,
and audience behavior, but 6 months is a generally accepted standard.
Regularly cleaning your list of disengaged recipients helps maintain a positive sender reputation and boosts your chances of landing in the inbox instead of the spam folder.
### Automatically remove bounced recipients
Using our [Webhooks](/webhooks/introduction), you can be notified when a delivery bounces or gets marked as spam by the recipient.
This is an opportunity to proactively unsubscribe the recipient and prevent further sending. Indeed, while Resend will automatically suppress further deliveries to that email address, we don't automatically unsubscribe it.
### Sunset unengaged recipients
If certain recipients have not engaged with your emails over an extended period (e.g., 6+ months), consider removing them from your Marketing sends.
Continuing to send to these unengaged users can harm your deliverability by increasing bounce rates and decreasing your open rates.
To re-engage these users, you may want to send a re-engagement campaign or offer an incentive for them to stay on your list. If they don't respond, it's often best to remove them to keep your list healthy and avoid wasting resources on inactive contacts.
***
By maintaining strong audience hygiene practices—including validating email addresses, ensuring consent, verifying deliverability, and removing unengaged recipients—you'll improve your email deliverability and foster better relationships with your subscribers.
This will help you achieve better engagement rates and a healthier sender reputation with inbox providers.
---
# Source: https://resend.com/docs/knowledge-base/base44-integration.md
> ## Documentation Index
> Fetch the complete documentation index at: https://resend.com/docs/llms.txt
> Use this file to discover all available pages before exploring further.
# Send emails with Base44 and Resend
> Learn how to add the Resend integration to your Base44 project.
[Base44](https://base44.com/) is a platform for building apps with AI. You can add Resend in a Base44 project by asking the chat to add email sending with Resend.
This integration requires backend functions, a feature available only on
Builder tier and above. Learn more about [Base44
pricing](https://base44.com/pricing).
## 1. Add the Resend integration in Base44
**If starting a new app:**
1. Click **Integration** in the top nav.
2. Search for **Resend**, select it, and choose **Use This Integration**.
**If adding Resend to an existing app:**
1. Enable backend functions.
2. Ask the chat: "Add the Resend email integration to my app. Prompt me to provide the API key and send a welcome email to new users."
See the [Base44
documenation](https://docs.base44.com/Integrations/Resend-integration) for
more information.
## 2. Add your Resend API key
However you add Resend to your project, you'll need to add a Resend API key, which you can create in the [Resend Dashboard](https://resend.com/api-keys). Do not share your API key with others or expose it in the browser or other client-side code.
Copy the API key and paste it into the **RESEND\_API\_KEY** field in Base44.
## 3. Add a custom domain to your Resend account
By default, you can only send emails to your own email address.
To send emails to other email addresses:
1. Add a [custom domain to your Resend account](https://resend.com/domains).
2. Add the custom domain to the `from` field in the `resend` function in the Base44 backend function (or ask the chat to update these fields).
Get more help adding a custom domain in [Resend's documentation](/dashboard/domains/introduction).
---
# Source: https://resend.com/docs/dashboard/emails/batch-sending.md
> ## Documentation Index
> Fetch the complete documentation index at: https://resend.com/docs/llms.txt
> Use this file to discover all available pages before exploring further.
# Batch Sending
> Send up to 100 emails in a single API call.
Batch sending allows you to send multiple emails at once (up to 100) instead of making individual API requests for each email.
## When to use batch sending
Use batch sending when you need to:
* Send multiple transactional emails (e.g., order confirmations, notifications, etc.)
* Trigger emails to different recipients with unique content
* Reduce the number of API calls to improve performance
For marketing campaigns, [use our no-code editor,
Broadcasts](/dashboard/broadcasts/introduction), instead.
## Send batch emails
You can send up to 100 emails in a single API call using the batch endpoint. Each email in the batch can have different recipients, subjects, and content.
```ts Node.js theme={"theme":{"light":"github-light","dark":"vesper"}}
import { Resend } from 'resend';
const resend = new Resend('re_xxxxxxxxx');
const { data, error } = await resend.batch.send([
{
from: 'Acme ',
to: ['delivered@resend.dev'],
subject: 'Welcome to Acme',
html: '
"
}
]'
```
## Response format
The batch endpoint returns an array of email IDs for successfully created emails.
```json theme={"theme":{"light":"github-light","dark":"vesper"}}
{
"data": [
{
"id": "ae2014de-c168-4c61-8267-70d2662a1ce1"
},
{
"id": "faccb7a5-8a28-4e9a-ac64-8da1cc3bc1cb"
}
]
}
```
If the request fails, the response will include an `error` object with a `message` property. You can find more information about the error in the [Errors](/api-reference/errors) section of the API Reference.
## Limitations
When using batch sending, keep in mind:
* Maximum of **100 emails** per batch request
* The `attachments` field is not supported yet
* The `scheduled_at` field is not supported yet
* Each email in the batch is processed independently
* The request will fail and return an error if any email in your payload is invalid (e.g., required fields are missing, fields contain invalid data, etc.).
## View batch emails
All emails sent via the batch endpoint appear in the [Emails](https://resend.com/emails) page of your dashboard, just like individually sent emails. Each email will have a `queued` status initially before being processed.
## API Reference
For complete API documentation, see the [Send Batch Emails API reference](/api-reference/emails/send-batch-emails).
---
# Source: https://resend.com/docs/dashboard/emails/batch-validation-modes.md
# Batch Validation Modes
> Control how batch validation is performed.
The batch validation header controls how emails are validated in batch sending.
`x-batch-validation`
Choose between `strict` and `permissive` mode.
## Strict mode (default)
Strict mode sends the batch only if all emails in the batch request are valid.
* **Atomic behavior**: if any email in the batch fails validation, the entire batch is rejected
* **Error details**: only the validation error causing the failure is returned
If the header is omitted, strict mode applies.
## Permissive mode
Permissive mode processes all emails, allowing for partial success and returns the following two arrays:
* **data**: array of objects for all created emails, each containing an email `id`.
* **errors**: array of objects for emails which could not be created due to validation errors. Each object contains the following properties:
* `index`: index of the email in the batch request
* `message`: error message identifying the validation error
## How to use batch validation modes
```ts Node.js {21} theme={null}
import { Resend } from 'resend';
const resend = new Resend('re_xxxxxxxxx');
const { data, errors } = await resend.batch.send(
[
{
from: 'Acme ',
to: ['foo@gmail.com'],
subject: 'hello world',
html: '
"
}
]'
```
## Example response
```json Response theme={null}
{
"data": [
{
"id": "ae2014de-c168-4c61-8267-70d2662a1ce1"
},
{
"id": "faccb7a5-8a28-4e9a-ac64-8da1cc3bc1cb"
}
],
// the `errors` array is only present in permissive batch validation mode
"errors": [
{
"index": 2, // 0-indexed (first item is index 0)
"message": "The `to` field is missing."
}
]
}
```
## Which errors are returned?
Only `permissive` mode returns an errors array, since the entire batch is rejected if any email fails validation in `strict` mode.
When an email in your payload causes an error, that email cannot be created, so an error object is returned.
Reasons your email may cause an error include:
* Required fields are missing.
* Fields contain invalid data.
* The batch contains more than 100 emails.
Importantly, this means the following:
* The email will not appear in the dashboard, since it could not be created.
* The error object will be included in the `errors` array.
* The only way to understand why the email failed is to inspect the returned error object.
---
# Source: https://resend.com/docs/dashboard/settings/billing.md
> ## Documentation Index
> Fetch the complete documentation index at: https://resend.com/docs/llms.txt
> Use this file to discover all available pages before exploring further.
# Managing Billing
> Manage your account subscription and billing information
The [Billing](https://resend.com/settings/billing) page in the Settings section provides a clear view of your subscription details, billing email, payment method, and account invoices. From here, you can:
* View and manage your subscription - Upgrade, downgrade, or modify your current plan.
* Manage billing contacts - Ensure the right people receive billing-related notifications.
* Update payment information - Add or change your credit card or billing details.
* Access invoices - Download past invoices for your records.
For any other billing inquiries, please [contact support](https://resend.com/help).
## How to cancel your subscription
1. Go to the [Billing](https://resend.com/settings/billing) page.
2. Click on the three dots next to your plan.
3. Select **Cancel Subscription** from the dropdown menu.
---
# Source: https://resend.com/docs/dashboard/domains/bimi.md
> ## Documentation Index
> Fetch the complete documentation index at: https://resend.com/docs/llms.txt
> Use this file to discover all available pages before exploring further.
# Implementing BIMI
> Set up BIMI to gain brand recognition by displaying your logo in the inbox.
## Prerequisites
To get the most out of this guide, you will need to:
* Establish verifiable use of your logo
* Obtain a registered trademark for your logo
* Or, use your logo for over one year
* [Add a DMARC record on your domain](/dashboard/domains/dmarc)
## What is BIMI?
BIMI ([Brand Indicators for Message Identification](https://bimigroup.org/)) is a standard that allows you to specify a logo (and sometimes a checkmark) to display next to your email in the inbox. These indicators can increase brand recognition and trust and improve engagement.
Though this standard is newer, most major mailbox providers now support it. This gives BIMI adoption a competitive edge for brand recognition in the inbox. Most mailbox providers show brand indicators for those who purchase a certificate, of which there are two types: a Common Mark Certificate (CMC) and a Verified Mark Certificate (VMC).
Here's an overview of current email client support:
| Client | BIMI w/a CMC | BIMI w/a VMC | BIMI w/out a VMC or CMC |
| ----------------------------------------------------- | ------------ | ------------ | ----------------------- |
| [Apple Mail](https://support.apple.com/en-us/108340) | X | ✓ | X |
| [Gmail](https://support.google.com/a/answer/10911320) | ✓ | ✓ | X |
| Outlook | X | X | X |
| [Yahoo](https://senders.yahooinc.com/bimi/) | ✓ | ✓ | ✓ |
## Implementing BIMI
### 1. Configure DMARC
If you haven't set up DMARC yet, follow our [DMARC Setup
Guide](/dashboard/domains/dmarc).
BIMI requires a DMARC policy of `p=quarantine;` or `p=reject;`. This policy assures that your emails are properly authenticated and that no one else can spoof your domain and send them with your logo.
Here's an overview of the required parameters:
| Parameter | Purpose | Required Value |
| --------- | ---------- | ------------------------------ |
| `p` | Policy | `p=quarantine;` or `p=reject;` |
| `pct` | Percentage | `pct=100;` |
Here is an example of an adequate DMARC record:
```
"v=DMARC1; p=quarantine; pct=100; rua=mailto:dmarcreports@example.com"
```
For BIMI on a subdomain, the root or APEX domain must also have a DMARC policy
of `p=quarantine` or `p=reject` in addition to the subdomain. If not, the
subdomain will not be compliant to display a BIMI logo.
### 2. Establish verifiable use of your logo
To display your logo in most email clients using BIMI, you need to prove ownership of your logo by obtaining a mark certificate. This process is similar to acquiring an SSL certificate for your website. You can purchase a mark certificate from one of the following [authorized mark verifying authorities](https://bimigroup.org/vmc-issuers/):
* [DigiCert](https://www.digicert.com/tls-ssl/verified-mark-certificates)
* [GlobalSign](https://www.globalsign.com/)
* [SSL.com](https://www.ssl.com/)
There are two possible mark Certificate's to verify the use of your logo:
* **Verified Mark Certificate (VMC)**: A certificate issued by a Certificate Authority (CA) that is used to verify that you are the owner of the logo you are trying to display. A VMC is available if you have a trademark of your logo. With a VMC, Gmail will display a blue checkmark.
* **Common Mark Certificate (CMC)**: A certificate also issued by Certificate Authority (CA) to verify you. A CMC is available to you if you can establish that you’ve used your logo for one year. Currently, only Gmail supports a CMC.
A VMC offers the widest email client support, though the barrier of a trademark means a CMC is an easier path if you have established use of your logo for one year.
Here are a some things to know before starting the certificate purchase process:
* If you don't hold a trademark for your logo or have not used your logo for a year, you will not be able to purchase a certificate.
* The process could take weeks, so start early and respond to their requests quickly.
* You will need to provide a [SVG Tiny P/S formatted logo](https://bimigroup.org/creating-bimi-svg-logo-files/).
* You will need to prove you own the domain by adding a DNS record.
* You will need to prove you are the owner of the trademark or logo by providing identification.
* You will need publicly available proof that your business exists. For newer startups, recommend [Yellow Pages](https://marketing.yellowpages.com/en/) or [Google Business Profiles](https://support.google.com/business/answer/3039617?hl=en) as the easiest method for proving your existence
## 3. Set your BIMI DNS Record
Once you have your VMC, you can set your BIMI DNS record. This TXT record points to the location of your VMC and your logo.
| Name | Type | Value |
| -------------- | ---- | --------------------------------------------------- |
| default.\_bimi | TXT | v=BIMI1; l=link\_to\_logo; a=link\_to\_certificate; |
Here is an example of a BIMI record:
```
v=BIMI1; l=https://vmc.digicert.com/00-00.svg; a=https://vmc.digicert.com/00-00.pem;
```
Ensure your logo uses an HTTPS URL. Mailbox providers will not display the
logo if served from an HTTP URL.
It contains a publicly and programmatically accessible link to your verified logo (.svg) and a link to your VMC (.pem).
To confirm that your BIMI record is published correctly, the [BIMI working group offers a tool](https://bimigroup.org/bimi-generator/) to check it.
It often takes a few days for your logo to display in inboxes after this record propagates. Mailbox providers will also conditionally decide to show the logo based on the domain's sending email volume and reputation. A domain with a high spam or bounce rate may not have their avatar displayed.
## Reference
| Parameter | Purpose | Example |
| --------- | ------------------- | -------------------------------------- |
| `v` | The version of BIMI | `v=BIMI1` |
| `l` | Logo | `l=https://vmc.digicert.com/00-00.svg` |
| `a` | Certificate | `a=https://vmc.digicert.com/00-00.pem` |
| `s` | Selector | `s=springlogo` |
The BIMI standard allows for multiple logos using the [selector
parameter](https://bimigroup.org/how-and-why-to-implement-bimi-selectors/).
Having issues setting up BIMI? [We can help](https://resend.com/help).
---
# Source: https://resend.com/docs/dashboard/webhooks/body-parameters.md
# Body Parameters
> Complete reference for webhook body parameters, their types and meanings.
All webhook payloads follow a consistent top-level structure with event-specific data nested within the `data` object.
| Parameter | Type | Description |
| ------------ | -------- | -------------------------------------------------------------------------------- |
| `type` | `string` | The event type that triggered the webhook (e.g., `email.sent`, `domain.created`) |
| `created_at` | `string` | ISO 8601 timestamp when the webhook event was created |
| `data` | `object` | Event-specific data containing detailed information about the event |
## Email Event Payloads
Email events (`email.sent`, `email.delivered`, `email.opened`, `email.clicked`, `email.bounced`, `email.complained`, `email.failed`, `email.delivery_delayed`) share common parameters in the `data` object.
### Common Email Parameters
| Parameter | Type | Description |
| -------------- | -------- | ------------------------------------------------------------------------------------------------- |
| `broadcast_id` | `string` | Unique identifier for the broadcast campaign (if applicable) |
| `created_at` | `string` | ISO 8601 timestamp when the email was created |
| `email_id` | `string` | Unique identifier for the specific email |
| `from` | `string` | Sender email address and name in the format "Name \<[email@domain.com](mailto:email@domain.com)>" |
| `to` | `array` | Array of impacted recipient email addresses |
| `subject` | `string` | Email subject line |
| `tags` | `array` | Array of tag objects associated with the email |
### Tag Object Structure
| Parameter | Type | Description |
| --------- | -------- | ------------- |
| `name` | `string` | The tag key |
| `value` | `string` | The tag value |
### Event-Specific Parameters
#### Email Bounced (`email.bounced`)
Additional `bounce` object in the `data` payload:
| Parameter | Type | Description |
| ----------------------- | -------- | ------------------------------------------------------------------------------------------------------------------------------------------------------------------------------------------- |
| `bounce.diagnosticCode` | `array` | Array of SMTP diagnostic responses from the receiving server, including the status code and reason for the bounce (e.g., `smtp; 550 5.5.0 Requested action not taken: mailbox unavailable`) |
| `bounce.message` | `string` | Detailed bounce message from the receiving server |
| `bounce.subType` | `string` | Bounce sub-type (e.g., `Suppressed`, `MessageRejected`) |
| `bounce.type` | `string` | Bounce type (e.g., `Permanent`, `Temporary`) |
#### Email Clicked (`email.clicked`)
Additional `click` object in the `data` payload:
| Parameter | Type | Description |
| ----------------- | -------- | ------------------------------------------------------ |
| `click.ipAddress` | `string` | IP address of the user who clicked the link |
| `click.link` | `string` | The URL that was clicked |
| `click.timestamp` | `string` | ISO 8601 timestamp when the click occurred |
| `click.userAgent` | `string` | User agent string of the browser that clicked the link |
#### Email Failed (`email.failed`)
Additional `failed` object in the `data` payload:
| Parameter | Type | Description |
| --------------- | -------- | ---------------------------------------------------------- |
| `failed.reason` | `string` | Reason for the email failure (e.g., `reached_daily_quota`) |
## Domain Event Payloads
Domain events (`domain.created`, `domain.updated`, `domain.deleted`) contain domain configuration and DNS record information.
### Domain Parameters
| Parameter | Type | Description |
| ------------ | -------- | --------------------------------------------------------------------------- |
| `id` | `string` | Unique identifier for the domain |
| `name` | `string` | Domain name (e.g., `example.com`) |
| `status` | `string` | Current verification status of the domain (e.g., `not_started`, `verified`) |
| `created_at` | `string` | ISO 8601 timestamp when the domain was created |
| `region` | `string` | AWS region where the domain is configured (e.g., `us-east-1`) |
| `records` | `array` | Array of DNS record objects required for domain verification |
### DNS Record Object Structure
| Parameter | Type | Description |
| ---------- | -------- | ------------------------------------------- |
| `record` | `string` | Record type purpose (e.g., `SPF`, `DKIM`) |
| `name` | `string` | DNS record name/subdomain |
| `type` | `string` | DNS record type (e.g., `MX`, `TXT`) |
| `value` | `string` | DNS record value to be set |
| `ttl` | `string` | Time to live for the DNS record |
| `status` | `string` | Verification status of this specific record |
| `priority` | `number` | Priority value for MX records (optional) |
## Contact Event Payloads
Contact events (`contact.created`, `contact.updated`, `contact.deleted`) contain information about audience contacts.
### Contact Parameters
| Parameter | Type | Description |
| -------------- | --------- | ---------------------------------------------------------- |
| `id` | `string` | Unique identifier for the contact |
| `audience_id` | `string` | Unique identifier for the audience this contact belongs to |
| `created_at` | `string` | ISO 8601 timestamp when the contact was created |
| `updated_at` | `string` | ISO 8601 timestamp when the contact was last updated |
| `email` | `string` | Contact's email address |
| `first_name` | `string` | Contact's first name |
| `last_name` | `string` | Contact's last name |
| `unsubscribed` | `boolean` | Whether the contact has unsubscribed from the audience |
## Best Practices
* Always validate the `type` field to determine how to process the payload
* Store `email_id` for tracking and correlation with your application data
* Use `created_at` timestamps for proper event ordering and deduplication
* Handle missing optional fields gracefully (not all events include all parameters)
* Check the `status` field in domain events to track verification progress
* Monitor bounce types and reasons to improve deliverability
Looking for request body examples? Check out the [Event Types](/dashboard/webhooks/event-types) page.
---
> To find navigation and other pages in this documentation, fetch the llms.txt file at: https://resend.com/docs/llms.txt
---
# Source: https://resend.com/docs/knowledge-base/bolt-new-integration.md
> ## Documentation Index
> Fetch the complete documentation index at: https://resend.com/docs/llms.txt
> Use this file to discover all available pages before exploring further.
# Send emails with Bolt.new and Resend
> Learn how to add the Resend integration to your Bolt.new project.
[Bolt.new](https://bolt.new) is a platform for building full-stack web and mobile apps via chat. You can add Resend in a Bolt.new project by asking the chat to add email sending with Resend.
## 1. Add your Resend API key
To use Resend with Bolt.new, you'll need to add a Resend API key, which you can create in the [Resend Dashboard](https://resend.com/api-keys). Do not share your API key with others or expose it in the browser or other client-side code.
To safely store your Resend API key, use a `.env` file. You may need to
include this instruction in your prompt to bolt.new. Learn more about
[handling API keys](/knowledge-base/how-to-handle-api-keys).
## 2. Add a custom domain to your Resend account
By default, you can only send emails to your own email address.
To send emails to other email addresses:
1. Add a [custom domain to your Resend account](https://resend.com/domains).
2. Add the custom domain to the `from` field in the `resend` function in Bolt.new (or ask the chat to update these fields).
Get more help adding a custom domain in [Resend's documentation](/dashboard/domains/introduction).
---
# Source: https://resend.com/docs/webhooks/emails/bounced.md
> ## Documentation Index
> Fetch the complete documentation index at: https://resend.com/docs/llms.txt
> Use this file to discover all available pages before exploring further.
# email.bounced
> Received when an email bounces.
export const ResponseBodyParameters = ({type, children}) => {
return
Response Body Parameters
All webhook payloads follow a consistent top-level structure with
event-specific data nested within the data object.
The event type that triggered the webhook (e.g., {type}).
ISO 8601 timestamp when the webhook event was created.
Event-specific data containing detailed information about the event. The
data object for the {type} event contains the following
parameters:
{children}
;
};
Event triggered whenever the recipient's mail server **permanently rejected the email**.
Unique identifier for the broadcast campaign (if applicable)
ISO 8601 timestamp when the email was created
Unique identifier for the specific email
Sender email address and name in the format "Name
\<[email@domain.com](mailto:email@domain.com)>"
Array of impacted recipient email addresses
Email subject line
Unique identifier for the template used (if applicable)
Array of tag objects associated with the email
The tag key
The tag value
Bounce details from the receiving server
Array of SMTP diagnostic responses from the receiving server, including the status code and reason for the bounce (e.g., `smtp; 550 5.5.0 Requested action not taken: mailbox unavailable`)
Detailed bounce message from the receiving server
Bounce sub-type (e.g., `Suppressed`, `MessageRejected`)
Bounce type (e.g., `Permanent`, `Temporary`)
Learn more about [bounce types and subtypes](/dashboard/emails/email-bounces).
```json theme={"theme":{"light":"github-light","dark":"vesper"}}
{
"type": "email.bounced",
"created_at": "2024-11-22T23:41:12.126Z",
"data": {
"broadcast_id": "8b146471-e88e-4322-86af-016cd36fd216",
"created_at": "2024-11-22T23:41:11.894719+00:00",
"email_id": "56761188-7520-42d8-8898-ff6fc54ce618",
"from": "Acme ",
"to": ["delivered@resend.dev"],
"subject": "Sending this example",
"template_id": "43f68331-0622-4e15-8202-246a0388854b",
"bounce": {
"message": "The recipient's email address is on the suppression list because it has a recent history of producing hard bounces.",
"subType": "Suppressed",
"type": "Permanent"
},
"tags": {
"category": "confirm_email"
}
}
}
```
---
# Source: https://resend.com/docs/api-reference/emails/cancel-email.md
> ## Documentation Index
> Fetch the complete documentation index at: https://resend.com/docs/llms.txt
> Use this file to discover all available pages before exploring further.
# Cancel Email
> Cancel a scheduled email.
## Path Parameters
The Email ID.
```ts Node.js theme={"theme":{"light":"github-light","dark":"vesper"}}
import { Resend } from 'resend';
const resend = new Resend('re_xxxxxxxxx');
const { data, error } = await resend.emails.cancel(
'49a3999c-0ce1-4ea6-ab68-afcd6dc2e794',
);
```
```php PHP theme={"theme":{"light":"github-light","dark":"vesper"}}
$resend = Resend::client('re_xxxxxxxxx');
$resend->emails->cancel('49a3999c-0ce1-4ea6-ab68-afcd6dc2e794');
```
```python Python theme={"theme":{"light":"github-light","dark":"vesper"}}
import resend
resend.api_key = "re_xxxxxxxxx"
resend.Emails.cancel(email_id="49a3999c-0ce1-4ea6-ab68-afcd6dc2e794")
```
```ruby Ruby theme={"theme":{"light":"github-light","dark":"vesper"}}
require "resend"
Resend.api_key = "re_xxxxxxxxx"
Resend::Emails.cancel("49a3999c-0ce1-4ea6-ab68-afcd6dc2e794")
```
```go Go theme={"theme":{"light":"github-light","dark":"vesper"}}
package main
import (
"fmt"
"github.com/resend/resend-go/v3"
)
func main() {
client := resend.NewClient("re_xxxxxxxxx")
canceled, err := client.Emails.Cancel("49a3999c-0ce1-4ea6-ab68-afcd6dc2e794")
if err != nil {
panic(err)
}
fmt.Println(canceled.Id)
}
```
```rust Rust theme={"theme":{"light":"github-light","dark":"vesper"}}
use resend_rs::{Resend, Result};
#[tokio::main]
async fn main() -> Result<()> {
let resend = Resend::new("re_xxxxxxxxx");
let _canceled = resend
.emails
.cancel("49a3999c-0ce1-4ea6-ab68-afcd6dc2e794")
.await?;
Ok(())
}
```
```java Java theme={"theme":{"light":"github-light","dark":"vesper"}}
import com.resend.*;
public class Main {
public static void main(String[] args) {
Resend resend = new Resend("re_xxxxxxxxx");
CancelEmailResponse canceled = resend
.emails()
.cancel("49a3999c-0ce1-4ea6-ab68-afcd6dc2e794");
}
}
```
```csharp .NET theme={"theme":{"light":"github-light","dark":"vesper"}}
using Resend;
IResend resend = ResendClient.Create( "re_xxxxxxxxx" ); // Or from DI
await resend.EmailCancelAsync( new Guid( "49a3999c-0ce1-4ea6-ab68-afcd6dc2e794" ) );
```
```bash cURL theme={"theme":{"light":"github-light","dark":"vesper"}}
curl -X POST 'https://api.resend.com/emails/49a3999c-0ce1-4ea6-ab68-afcd6dc2e794/cancel' \
-H 'Authorization: Bearer re_xxxxxxxxx' \
-H 'Content-Type: application/json'
```
```json Response theme={"theme":{"light":"github-light","dark":"vesper"}}
{
"object": "email",
"id": "49a3999c-0ce1-4ea6-ab68-afcd6dc2e794"
}
```
---
# Source: https://resend.com/docs/webhooks/emails/clicked.md
> ## Documentation Index
> Fetch the complete documentation index at: https://resend.com/docs/llms.txt
> Use this file to discover all available pages before exploring further.
# email.clicked
> Received when an email link is clicked.
export const ResponseBodyParameters = ({type, children}) => {
return
Response Body Parameters
All webhook payloads follow a consistent top-level structure with
event-specific data nested within the data object.
The event type that triggered the webhook (e.g., {type}).
ISO 8601 timestamp when the webhook event was created.
Event-specific data containing detailed information about the event. The
data object for the {type} event contains the following
parameters:
{children}
;
};
Event triggered whenever the **recipient clicks on an email link**.
Unique identifier for the broadcast campaign (if applicable)
ISO 8601 timestamp when the email was created
Unique identifier for the specific email
Sender email address and name in the format "Name
\<[email@domain.com](mailto:email@domain.com)>"
Array of impacted recipient email addresses
Email subject line
Unique identifier for the template used (if applicable)
Array of tag objects associated with the email
The tag key
The tag value
Click tracking details
IP address of the user who clicked the link
The URL that was clicked
ISO 8601 timestamp when the click occurred
User agent string of the browser that clicked the link
```json theme={"theme":{"light":"github-light","dark":"vesper"}}
{
"type": "email.clicked",
"created_at": "2024-11-22T23:41:12.126Z",
"data": {
"broadcast_id": "8b146471-e88e-4322-86af-016cd36fd216",
"created_at": "2024-11-22T23:41:11.894719+00:00",
"email_id": "56761188-7520-42d8-8898-ff6fc54ce618",
"from": "Acme ",
"to": ["delivered@resend.dev"],
"click": {
"ipAddress": "122.115.53.11",
"link": "https://resend.com",
"timestamp": "2024-11-24T05:00:57.163Z",
"userAgent": "Mozilla/5.0 (Macintosh; Intel Mac OS X 10_15_7) AppleWebKit/605.1.15 (KHTML, like Gecko) Version/16.1 Safari/605.1.15"
},
"subject": "Sending this example",
"template_id": "43f68331-0622-4e15-8202-246a0388854b",
"tags": {
"category": "confirm_email"
}
}
}
```
---
# Source: https://resend.com/docs/knowledge-base/cloudflare.md
> ## Documentation Index
> Fetch the complete documentation index at: https://resend.com/docs/llms.txt
> Use this file to discover all available pages before exploring further.
# Cloudflare
> Verify your domain on Cloudflare with Resend.
## Add Domain to Resend
First, log in to your [Resend Account](https://resend.com/login) and [add a domain](https://resend.com/domains).
It is [best practice to use a
subdomain](/knowledge-base/is-it-better-to-send-emails-from-a-subdomain-or-the-root-domain)
(updates.example.com) instead of the root domain (example.com). Using a
subdomain allows for proper reputation segmentation based on topics or purpose
(e.g. marketing) and is especially important if receiving emails with Resend.
## Automatic Setup (Recommended)
The fastest way to verify your domain on Cloudflare is using the **Sign in to Cloudflare** button on Resend. This uses Domain Connect to automatically configure your DNS records.
1. Go to your [Domains page](https://resend.com/domains) in Resend.
2. (Optional) If you want to receive emails, select `Manual setup` and toggle the "Receiving" switch on the domain details page. ([Learn more below](#receiving-emails))
3. Click **Sign in to Cloudflare** button.
4. Authorize Resend to access your Cloudflare DNS settings.
5. The DNS records will be added automatically.
That's it. Your domain will be verified within a few minutes.
## Manual Setup
If you prefer to add DNS records manually, follow these steps.
### Log in to Cloudflare
Log in to your [Cloudflare account](https://cloudflare.com) and go to the DNS Records of your domain.
### Add MX SPF Record
Click "Add Record" on Cloudflare:
1. Set the Type to `MX`.
2. Type `send` for the `Name` of the record.
3. Copy the MX Value from Resend into the `Mail Server` field.
4. Use the default `Auto` for `TTL`.
5. Add `10` for the `Priority`.
6. Select `Save`.
Below is a mapping of the record fields from Resend to Cloudflare:
| Cloudflare | Resend | Example Value |
| ----------- | -------- | --------------------------------------- |
| Type | Type | `MX` |
| Name | Name | `send` |
| Mail Server | Value | `feedback-smtp.us-east-1.amazonses.com` |
| Priority | Priority | `10` |
Omit your domain from the record values in Resend when you paste. Instead of
`send.example.com`, paste only `send` (or `send.subdomain` if you're using a
subdomain).
Do not use the same priority for multiple records. If Priority `10` is already
in use, try a higher value `20` or `30`.
### Add TXT SPF Record
Click "Add Record" on Cloudflare:
1. Set the Type to `TXT`.
2. Type `send` for the `Name` of the record.
3. Copy the TXT Value Resend into `Content` field.
4. Use the default `Auto` for `TTL`.
5. Select `Save`.
Below is a mapping of the record fields from Resend to Cloudflare:
| Cloudflare | Resend | Example Value |
| ---------- | ------- | ------------------------------------- |
| Type | Type | `TXT` |
| Name | Name | `send` |
| Content | Content | `"v=spf1 include:amazonses.com ~all"` |
| TTL | - | `Auto` |
Omit your domain from the record values in Resend when you paste. Instead of
`send.example.com`, paste only `send` (or `send.subdomain` if you're using a
subdomain).
### Add TXT DKIM Records
Click "Add Record" on Cloudflare:
1. Set the Type to `TXT`.
2. Type `resend._domainkey` for the `Name` of the record.
3. Copy the TXT Value Resend into `Content` field.
4. Use the default `Auto` for `TTL`.
5. Select `Save`.
Below is a mapping of the record fields from Resend to Cloudflare:
| Cloudflare | Resend | Example Value |
| ------------ | ------ | ---------------------------- |
| Type | Type | `TXT` |
| Name | Name | `resend._domainkey` |
| Target | Value | `p=example_demain_key_value` |
| Proxy Status | - | `DNS Only (disabled)` |
| TTL | - | `Auto` |
Omit your domain from the record values in Resend when you paste. Instead of
`resend._domainkey.example.com`, paste only `resend._domainkey` (or
`resend._domainkey.subdomain` if you're using a subdomain).
### Receiving Emails
If you want to receive emails at your domain, toggle the "Receiving" switch on the domain details page.
When you enable Inbound on a domain, Resend receives *all emails* sent to that
specific domain depending on the priority of the MX record. For this reason,
we strongly recommend verifying a subdomain (`subdomain.example.com`) instead
of the root domain (`example.com`). Learn more about [avoiding conflicts with
your existing MX
records](/knowledge-base/how-do-i-avoid-conflicting-with-my-mx-records).
Click “Add Record” on Cloudflare:
1. Set the Type to `MX`.
2. Type `inbound` (or whatever your subdomain is) for the `Name` of the record.
3. Copy the MX Value from Resend into the `Mail Server` field.
4. Use the default `Auto` for `TTL`.
5. Add `10` for the `Priority`.
6. Select `Save`.
Below is a mapping of the record fields from Resend to Cloudflare:
| Cloudflare | Resend | Example Value |
| ----------- | -------- | -------------------------------------- |
| Type | Type | `MX` |
| Name | Name | `inbound` |
| Mail Server | Content | `inbound-smtp.us-east-1.amazonaws.com` |
| Priority | Priority | `10` |
After verifying your domain, create a webhook to process incoming emails. For help setting up a webhook, how to access email data and attachments, forward emails, and more, see [our guide on receiving emails with Resend](/dashboard/receiving/introduction).
### Complete Verification
Now click [Verify DNS Records](https://resend.com/domains) on your Domain in Resend. It may take up to 72 hours to complete the verification process (often much faster).
## Troubleshooting
If your domain is not successfully verified, these are some common troubleshooting methods.
Confirm your proxy settings are set to `DNS Only` on the record you are adding.
Review the records you added to Cloudflare to rule out copy and paste errors.
[Review our guide on a domain not verifying](/knowledge-base/what-if-my-domain-is-not-verifying).
---
# Source: https://resend.com/docs/webhooks/emails/complained.md
> ## Documentation Index
> Fetch the complete documentation index at: https://resend.com/docs/llms.txt
> Use this file to discover all available pages before exploring further.
# email.complained
> Received when an email is marked as spam.
export const ResponseBodyParameters = ({type, children}) => {
return
Response Body Parameters
All webhook payloads follow a consistent top-level structure with
event-specific data nested within the data object.
The event type that triggered the webhook (e.g., {type}).
ISO 8601 timestamp when the webhook event was created.
Event-specific data containing detailed information about the event. The
data object for the {type} event contains the following
parameters:
{children}
;
};
Event triggered whenever the email was successfully **delivered, but the recipient marked it as spam**.
Unique identifier for the broadcast campaign (if applicable)
ISO 8601 timestamp when the email was created
Unique identifier for the specific email
Sender email address and name in the format "Name
\<[email@domain.com](mailto:email@domain.com)>"
Array of impacted recipient email addresses
Email subject line
Unique identifier for the template used (if applicable)
Array of tag objects associated with the email
The tag key
The tag value
```json theme={"theme":{"light":"github-light","dark":"vesper"}}
{
"type": "email.complained",
"created_at": "2024-02-22T23:41:12.126Z",
"data": {
"broadcast_id": "8b146471-e88e-4322-86af-016cd36fd216",
"created_at": "2024-02-22T23:41:11.894719+00:00",
"email_id": "56761188-7520-42d8-8898-ff6fc54ce618",
"from": "Acme ",
"to": ["delivered@resend.dev"],
"subject": "Sending this example",
"template_id": "43f68331-0622-4e15-8202-246a0388854b",
"tags": {
"category": "confirm_email"
}
}
}
```
---
# Source: https://resend.com/docs/dashboard/audiences/contacts.md
> ## Documentation Index
> Fetch the complete documentation index at: https://resend.com/docs/llms.txt
> Use this file to discover all available pages before exploring further.
# Managing Contacts
> Learn how to work with Contacts with Resend.
Contacts in Resend are global entities linked to a specific email address. After adding Contacts, send [Broadcasts](/dashboard/broadcasts/introduction) to groups of Contacts.
If you previously used our Audience model, learn how to [migrate to the new
Contacts model](/dashboard/segments/migrating-from-audiences-to-segments).
## Add Contacts
You can add a Contact in three different ways: via API, CSV upload, or manually.
### 1. Add Contacts programmatically via API
You can add contacts programmatically using the [contacts](/api-reference/contacts/create-contact) endpoint.
```ts Node.js theme={"theme":{"light":"github-light","dark":"vesper"}}
import { Resend } from 'resend';
const resend = new Resend('re_xxxxxxxxx');
resend.contacts.create({
email: 'steve.wozniak@gmail.com',
firstName: 'Steve',
lastName: 'Wozniak',
});
```
```php PHP theme={"theme":{"light":"github-light","dark":"vesper"}}
$resend = Resend::client('re_xxxxxxxxx');
$resend->contacts->create(
parameters: [
'email' => 'steve.wozniak@gmail.com',
'first_name' => 'Steve',
'last_name' => 'Wozniak',
]
);
```
```python Python theme={"theme":{"light":"github-light","dark":"vesper"}}
import resend
resend.api_key = "re_xxxxxxxxx"
params: resend.Contacts.CreateParams = {
"email": "steve.wozniak@gmail.com",
"first_name": "Steve",
"last_name": "Wozniak",
}
resend.Contacts.create(params)
```
```ruby Ruby theme={"theme":{"light":"github-light","dark":"vesper"}}
require "resend"
Resend.api_key = "re_xxxxxxxxx"
params = {
"email": "steve.wozniak@gmail.com",
"first_name": "Steve",
"last_name": "Wozniak",
}
Resend::Contacts.create(params)
```
```go Go theme={"theme":{"light":"github-light","dark":"vesper"}}
package main
import "github.com/resend/resend-go/v3"
func main() {
client := resend.NewClient("re_xxxxxxxxx")
params := &resend.CreateContactRequest{
Email: "steve.wozniak@gmail.com",
FirstName: "Steve",
LastName: "Wozniak",
Unsubscribed: false,
}
client.Contacts.Create(params)
}
```
```rust Rust theme={"theme":{"light":"github-light","dark":"vesper"}}
use resend_rs::{types::ContactData, Resend, Result};
#[tokio::main]
async fn main() -> Result<()> {
let resend = Resend::new("re_xxxxxxxxx");
let contact = ContactData::new("steve.wozniak@gmail.com")
.with_first_name("Steve")
.with_last_name("Wozniak");
let _contact = resend
.contacts
.create(contact)
.await?;
Ok(())
}
```
```java Java theme={"theme":{"light":"github-light","dark":"vesper"}}
import com.resend.*;
public class Main {
public static void main(String[] args) {
Resend resend = new Resend("re_xxxxxxxxx");
CreateContactOptions params = CreateContactOptions.builder()
.email("steve.wozniak@gmail.com")
.firstName("Steve")
.lastName("Wozniak")
.build();
CreateContactResponseSuccess data = resend.contacts().create(params);
}
}
```
```bash cURL theme={"theme":{"light":"github-light","dark":"vesper"}}
curl -X POST 'https://api.resend.com/contacts' \
-H 'Authorization: Bearer re_xxxxxxxxx' \
-H 'Content-Type: application/json' \
-d $'{
"email": "steve.wozniak@gmail.com",
"first_name": "Steve",
"last_name": "Wozniak"
}'
```
When creating a Contact, you can optionally set the following properties:
* `first_name`: The first name of the contact.
* `last_name`: The last name of the contact.
* `unsubscribed`: Whether the contact is unsubscribed from all Broadcasts.
* `properties`: A map of custom property keys and values to create (learn more about [custom properties](/dashboard/audiences/properties)).
Once a Contact is created, you can update it using the [update contact](/api-reference/contacts/update-contact) endpoint or [add the contact to a Segment](/api-reference/contacts/add-contact-to-segment).
### 2. Add Contacts by uploading a .csv
You can also add Contacts by uploading a .csv file. This is a convenient way to add multiple Contacts at once.
1. Go to the [Contacts](https://resend.com/audience) page, and select **Add Contacts**.
2. Select **Import CSV**.
3. Upload your CSV file from your computer.
4. Map the fields you want to use. You can map the fields to: `email`, `first_name`, `last_name`, and `unsubscribed`, or any Contact properties you've already created.
5. Optionally add the contacts to an existing Segment.
6. Select **Continue**, review the contacts, and finish the upload.
### 3. Add Contacts manually
1. Go to the [Contacts](https://resend.com/audience) page, and select **Add Contacts**.
2. Select **Add Manually**.
3. Add the email address of the contact in the text field (separated by commas or new lines for multiple contacts).
4. Optionally add the contact to an existing Segment.
5. Confirm and click **Add**.
## Contact Properties
Contact Properties can be used to store additional information about your Contacts and then personalize your Broadcasts.
Resend includes a few default properties:
* `first_name`: The first name of the contact.
* `last_name`: The last name of the contact.
* `unsubscribed`: Whether the contact is unsubscribed from all Broadcasts.
* `email`: The email address of the contact.
You can create additional custom Contact Properties for your Contacts to store additional information. These properties can be used to personalize your Broadcasts across all Segments.
Learn more about [Contact Properties](/dashboard/audiences/properties).
## View Contacts
You can view your Contacts in the [Contacts](https://resend.com/audience) page.
1. Go to the [Contacts](https://resend.com/audience) page.
2. Click on the Contact you want to view.
3. View the Contact details.
Each Contact includes the metadata associated with the contact, as well as a full history of all marketing interactions with the Contact.
You can also retrieve a [single Contact](/api-reference/contacts/get-contact) or [list all Contacts](/api-reference/contacts/list-contacts) via the API or SDKs.
## Edit Contacts
1. Go to the [Contacts](https://resend.com/audience) page.
2. Click on the **More options** button and then **Edit Contact**.
3. Edit the Contact details and choose **Save**.
You can edit any Contact property (excluding the email address), assign
the Contact to a [Segment](/dashboard/segments/introduction) or [Topic](/dashboard/topics/introduction), or unsubscribe the Contact from all Broadcasts.
You can also [update a Contact](/api-reference/contacts/update-contact) via the API or SDKs using the `id` or `email` of the Contact.
```ts Node.js theme={"theme":{"light":"github-light","dark":"vesper"}}
import { Resend } from 'resend';
const resend = new Resend('re_xxxxxxxxx');
// Update by contact id
const { data, error } = await resend.contacts.update({
id: 'e169aa45-1ecf-4183-9955-b1499d5701d3',
unsubscribed: true,
});
// Update by contact email
const { data, error } = await resend.contacts.update({
email: 'acme@example.com',
unsubscribed: true,
});
```
```php PHP theme={"theme":{"light":"github-light","dark":"vesper"}}
$resend = Resend::client('re_xxxxxxxxx');
// Update by contact id
$resend->contacts->update(
id: 'e169aa45-1ecf-4183-9955-b1499d5701d3',
parameters: [
'unsubscribed' => true
]
);
// Update by contact email
$resend->contacts->update(
email: 'acme@example.com',
parameters: [
'unsubscribed' => true
]
);
```
```python Python theme={"theme":{"light":"github-light","dark":"vesper"}}
import resend
resend.api_key = "re_xxxxxxxxx"
# Update by contact id
params: resend.Contacts.UpdateParams = {
"id": "e169aa45-1ecf-4183-9955-b1499d5701d3",
"unsubscribed": True,
}
resend.Contacts.update(params)
# Update by contact email
params: resend.Contacts.UpdateParams = {
"email": "acme@example.com",
"unsubscribed": True,
}
resend.Contacts.update(params)
```
```ruby Ruby theme={"theme":{"light":"github-light","dark":"vesper"}}
require "resend"
Resend.api_key = "re_xxxxxxxxx"
# Update by contact id
params = {
"id": "e169aa45-1ecf-4183-9955-b1499d5701d3",
"unsubscribed": true,
}
Resend::Contacts.update(params)
# Update by contact email
params = {
"email": "acme@example.com",
"unsubscribed": true,
}
Resend::Contacts.update(params)
```
```go Go theme={"theme":{"light":"github-light","dark":"vesper"}}
import "github.com/resend/resend-go/v3"
client := resend.NewClient("re_xxxxxxxxx")
// Update by contact id
params := &resend.UpdateContactRequest{
Id: "e169aa45-1ecf-4183-9955-b1499d5701d3",
Unsubscribed: true,
}
params.SetUnsubscribed(true)
contact, err := client.Contacts.Update(params)
// Update by contact email
params = &resend.UpdateContactRequest{
Email: "acme@example.com",
Unsubscribed: true,
}
params.SetUnsubscribed(true)
contact, err := client.Contacts.Update(params)
```
```rust Rust theme={"theme":{"light":"github-light","dark":"vesper"}}
use resend_rs::{types::ContactChanges, Resend, Result};
#[tokio::main]
async fn main() -> Result<()> {
let resend = Resend::new("re_xxxxxxxxx");
let changes = ContactChanges::new().with_unsubscribed(true);
// Update by contact id
let _contact = resend
.contacts
.update("e169aa45-1ecf-4183-9955-b1499d5701d3", changes.clone())
.await?;
// Update by contact email
let _contact = resend
.contacts
.update("acme@example.com", changes)
.await?;
Ok(())
}
```
```java Java theme={"theme":{"light":"github-light","dark":"vesper"}}
import com.resend.*;
public class Main {
public static void main(String[] args) {
Resend resend = new Resend("re_xxxxxxxxx");
// Update by contact id
UpdateContactOptions params = UpdateContactOptions.builder()
.id("e169aa45-1ecf-4183-9955-b1499d5701d3")
.unsubscribed(true)
.build();
// Update by contact email
UpdateContactOptions params = UpdateContactOptions.builder()
.email("acme@example.com")
.unsubscribed(true)
.build();
UpdateContactResponseSuccess data = resend.contacts().update(params);
}
}
```
```csharp .NET theme={"theme":{"light":"github-light","dark":"vesper"}}
using Resend;
IResend resend = ResendClient.Create( "re_xxxxxxxxx" ); // Or from DI
// By Id
await resend.ContactUpdateAsync(
contactId: new Guid( "e169aa45-1ecf-4183-9955-b1499d5701d3" ),
new ContactData()
{
FirstName = "Stevie",
LastName = "Wozniaks",
IsUnsubscribed = true,
}
);
// By Email
await resend.ContactUpdateByEmailAsync(
"acme@example.com",
new ContactData()
{
FirstName = "Stevie",
LastName = "Wozniaks",
IsUnsubscribed = true,
}
);
```
```bash cURL theme={"theme":{"light":"github-light","dark":"vesper"}}
# Update by contact id
curl -X PATCH 'https://api.resend.com/contacts/520784e2-887d-4c25-b53c-4ad46ad38100' \
-H 'Authorization: Bearer re_xxxxxxxxx' \
-H 'Content-Type: application/json' \
-d $'{
"unsubscribed": true
}'
# Update by contact email
curl -X PATCH 'https://api.resend.com/contacts/acme@example.com' \
-H 'Authorization: Bearer re_xxxxxxxxx' \
-H 'Content-Type: application/json' \
-d $'{
"unsubscribed": true
}'
```
## Bulk Actions
You can perform actions on multiple Contacts at once by selecting them from the [Contacts](https://resend.com/audience) page.
1. Go to the [Contacts](https://resend.com/audience) page.
2. Select multiple Contacts by clicking the checkbox next to each Contact.
3. Click the **Edit** button in the bulk actions bar.
4. Choose an action:
* **Add to segments**: Add the selected Contacts to one or more Segments.
* **Subscribe to topics**: Subscribe the selected Contacts to one or more Topics.
You can also delete multiple Contacts at once by clicking the **Delete** button in the bulk actions bar.
## Delete Contacts
1. Go to the [Contacts](https://resend.com/audience) page.
2. Click on the **More options** button and then **Delete Contact**.
3. Confirm the deletion.
You can also [delete a Contact](/api-reference/contacts/delete-contact) via the API or SDKs.
```ts Node.js theme={"theme":{"light":"github-light","dark":"vesper"}}
import { Resend } from 'resend';
const resend = new Resend('re_xxxxxxxxx');
// Delete by contact id
const { data, error } = await resend.contacts.remove({
id: '520784e2-887d-4c25-b53c-4ad46ad38100',
});
// Delete by contact email
const { data, error } = await resend.contacts.remove({
email: 'acme@example.com',
});
```
```php PHP theme={"theme":{"light":"github-light","dark":"vesper"}}
$resend = Resend::client('re_xxxxxxxxx');
// Delete by contact id
$resend->contacts->remove(
id: '520784e2-887d-4c25-b53c-4ad46ad38100'
);
// Delete by contact email
$resend->contacts->remove(
email: 'acme@example.com'
);
```
```python Python theme={"theme":{"light":"github-light","dark":"vesper"}}
import resend
resend.api_key = "re_xxxxxxxxx"
# Delete by contact id
resend.Contacts.remove(
id="520784e2-887d-4c25-b53c-4ad46ad38100"
)
# Delete by contact email
resend.Contacts.remove(
email="acme@example.com"
)
```
```ruby Ruby theme={"theme":{"light":"github-light","dark":"vesper"}}
require "resend"
Resend.api_key = "re_xxxxxxxxx"
# Delete by contact id
Resend::Contacts.remove(
"520784e2-887d-4c25-b53c-4ad46ad38100"
)
# Delete by contact email
Resend::Contacts.remove(
email: "acme@example.com",
)
```
```go Go theme={"theme":{"light":"github-light","dark":"vesper"}}
import "github.com/resend/resend-go/v3"
client := resend.NewClient("re_xxxxxxxxx")
// Delete by contact id
removed, err := client.Contacts.Remove(
"520784e2-887d-4c25-b53c-4ad46ad38100"
)
// Delete by contact email
removed, err := client.Contacts.Remove(
"acme@example.com"
)
```
```rust Rust theme={"theme":{"light":"github-light","dark":"vesper"}}
use resend_rs::{Resend, Result};
#[tokio::main]
async fn main() -> Result<()> {
let resend = Resend::new("re_xxxxxxxxx");
// Delete by contact id
let _deleted = resend
.contacts
.delete("520784e2-887d-4c25-b53c-4ad46ad38100")
.await?;
// Delete by contact email
let _deleted = resend
.contacts
.delete("acme@example.com")
.await?;
Ok(())
}
```
```java Java theme={"theme":{"light":"github-light","dark":"vesper"}}
import com.resend.*;
public class Main {
public static void main(String[] args) {
Resend resend = new Resend("re_xxxxxxxxx");
// Delete by contact id
resend.contacts().remove(ContactRequestOptions.builder()
.id("520784e2-887d-4c25-b53c-4ad46ad38100")
.build());
// Delete by contact email
resend.contacts().remove(ContactRequestOptions.builder()
.email("acme@example.com")
.build());
}
}
```
```csharp .NET theme={"theme":{"light":"github-light","dark":"vesper"}}
using Resend;
IResend resend = ResendClient.Create( "re_xxxxxxxxx" ); // Or from DI
// By Id
await resend.ContactDeleteAsync(
contactId: new Guid( "520784e2-887d-4c25-b53c-4ad46ad38100" )
);
// By Email
await resend.ContactDeleteByEmailAsync(
"acme@example.com"
);
```
```bash cURL theme={"theme":{"light":"github-light","dark":"vesper"}}
# Delete by contact id
curl -X DELETE 'https://api.resend.com/contacts/520784e2-887d-4c25-b53c-4ad46ad38100' \
-H 'Authorization: Bearer re_xxxxxxxxx'
# Deleted by contact email
curl -X DELETE 'https://api.resend.com/contacts/acme@example.com' \
-H 'Authorization: Bearer re_xxxxxxxxx'
```
---
# Source: https://resend.com/docs/api-reference/api-keys/create-api-key.md
> ## Documentation Index
> Fetch the complete documentation index at: https://resend.com/docs/llms.txt
> Use this file to discover all available pages before exploring further.
# Create API key
> Add a new API key to authenticate communications with Resend.
export const ResendParamField = ({children, body, path, ...props}) => {
const [lang, setLang] = useState(() => {
return localStorage.getItem('code') || '"Node.js"';
});
useEffect(() => {
const onStorage = event => {
const key = event.detail.key;
if (key === 'code') {
setLang(event.detail.value);
}
};
document.addEventListener('mintlify-localstorage', onStorage);
return () => {
document.removeEventListener('mintlify-localstorage', onStorage);
};
}, []);
const toCamelCase = str => typeof str === 'string' ? str.replace(/[_-](\w)/g, (_, c) => c.toUpperCase()) : str;
const resolvedBody = useMemo(() => {
const value = JSON.parse(lang);
return value === 'Node.js' ? toCamelCase(body) : body;
}, [body, lang]);
const resolvedPath = useMemo(() => {
const value = JSON.parse(lang);
return value === 'Node.js' ? toCamelCase(path) : path;
}, [path, lang]);
return
{children}
;
};
## Body Parameters
The API key name. Maximum 50 characters.
The API key can have full access to Resend's API or be only restricted to send
emails. \* `full_access`: Can create, delete, get, and update any resource. \*
`sending_access`: Can only send emails.
Restrict an API key to send emails only from a specific domain. This is only
used when the `permission` is set to `sending_access`.
```ts Node.js theme={"theme":{"light":"github-light","dark":"vesper"}}
import { Resend } from 'resend';
const resend = new Resend('re_xxxxxxxxx');
const { data, error } = await resend.apiKeys.create({ name: 'Production' });
```
```php PHP theme={"theme":{"light":"github-light","dark":"vesper"}}
$resend = Resend::client('re_xxxxxxxxx');
$resend->apiKeys->create([
'name' => 'Production'
]);
```
```python Python theme={"theme":{"light":"github-light","dark":"vesper"}}
import resend
resend.api_key = "re_xxxxxxxxx"
params: resend.ApiKeys.CreateParams = {
"name": "Production",
}
resend.ApiKeys.create(params)
```
```ruby Ruby theme={"theme":{"light":"github-light","dark":"vesper"}}
require "resend"
Resend.api_key = "re_xxxxxxxxx"
params = {
name: "Production"
}
Resend::ApiKeys.create(params)
```
```go Go theme={"theme":{"light":"github-light","dark":"vesper"}}
package main
import "github.com/resend/resend-go/v3"
func main() {
client := resend.NewClient("re_xxxxxxxxx")
params := &resend.CreateApiKeyRequest{
Name: "Production",
}
client.ApiKeys.Create(params)
}
```
```rust Rust theme={"theme":{"light":"github-light","dark":"vesper"}}
use resend_rs::{types::CreateApiKeyOptions, Resend, Result};
#[tokio::main]
async fn main() -> Result<()> {
let resend = Resend::new("re_xxxxxxxxx");
let _api_key = resend
.api_keys
.create(CreateApiKeyOptions::new("Production"))
.await?;
Ok(())
}
```
```java Java theme={"theme":{"light":"github-light","dark":"vesper"}}
import com.resend.*;
public class Main {
public static void main(String[] args) {
Resend resend = new Resend("re_xxxxxxxxx");
CreateApiKeyOptions params = CreateApiKeyOptions
.builder()
.name("Production").build();
CreateApiKeyResponse apiKey = resend.apiKeys().create(params);
}
}
```
```csharp .NET theme={"theme":{"light":"github-light","dark":"vesper"}}
using Resend;
IResend resend = ResendClient.Create( "re_xxxxxxxxx" ); // Or from DI
var resp = await resend.ApiKeyCreateAsync( "Production" );
Console.WriteLine( "Token={0}", resp.Content.Token );
```
```bash cURL theme={"theme":{"light":"github-light","dark":"vesper"}}
curl -X POST 'https://api.resend.com/api-keys' \
-H 'Authorization: Bearer re_xxxxxxxxx' \
-H 'Content-Type: application/json' \
-d $'{
"name": "Production"
}'
```
```json Response theme={"theme":{"light":"github-light","dark":"vesper"}}
{
"id": "dacf4072-4119-4d88-932f-6202748ac7c8",
"token": "re_c1tpEyD8_NKFusih9vKVQknRAQfmFcWCv"
}
```
---
# Source: https://resend.com/docs/api-reference/broadcasts/create-broadcast.md
> ## Documentation Index
> Fetch the complete documentation index at: https://resend.com/docs/llms.txt
> Use this file to discover all available pages before exploring further.
# Create Broadcast
> Create a new broadcast to send to your contacts.
export const ResendParamField = ({children, body, path, ...props}) => {
const [lang, setLang] = useState(() => {
return localStorage.getItem('code') || '"Node.js"';
});
useEffect(() => {
const onStorage = event => {
const key = event.detail.key;
if (key === 'code') {
setLang(event.detail.value);
}
};
document.addEventListener('mintlify-localstorage', onStorage);
return () => {
document.removeEventListener('mintlify-localstorage', onStorage);
};
}, []);
const toCamelCase = str => typeof str === 'string' ? str.replace(/[_-](\w)/g, (_, c) => c.toUpperCase()) : str;
const resolvedBody = useMemo(() => {
const value = JSON.parse(lang);
return value === 'Node.js' ? toCamelCase(body) : body;
}, [body, lang]);
const resolvedPath = useMemo(() => {
const value = JSON.parse(lang);
return value === 'Node.js' ? toCamelCase(path) : path;
}, [path, lang]);
return
{children}
;
};
## Body Parameters
The ID of the segment you want to send to.
Audiences are now called Segments. Follow the [Migration
Guide](/dashboard/segments/migrating-from-audiences-to-segments).
Sender email address.
To include a friendly name, use the format `"Your Name "`.
Email subject.
Reply-to email address. For multiple addresses, send as an array of strings.
The HTML version of the message. You can include Contact Properties in the
body of the Broadcast. Learn more about [Contact
Properties](/dashboard/audiences/contacts).
The plain text version of the message. You can include Contact Properties in the body of the Broadcast. Learn more about [Contact Properties](/dashboard/audiences/contacts).
If not provided, the HTML will be used to generate a plain text version. You
can opt out of this behavior by setting value to an empty string.
The React component used to write the message. *Only available in the Node.js
SDK.*
The friendly name of the broadcast. Only used for internal reference.
The topic ID that the broadcast will be scoped to.
```ts Node.js theme={"theme":{"light":"github-light","dark":"vesper"}}
import { Resend } from 'resend';
const resend = new Resend('re_xxxxxxxxx');
const { data, error } = await resend.broadcasts.create({
segmentId: '78261eea-8f8b-4381-83c6-79fa7120f1cf',
from: 'Acme ',
subject: 'hello world',
html: 'Hi {{{FIRST_NAME|there}}}, you can unsubscribe here: {{{RESEND_UNSUBSCRIBE_URL}}}',
});
```
```php PHP theme={"theme":{"light":"github-light","dark":"vesper"}}
$resend = Resend::client('re_xxxxxxxxx');
$resend->broadcasts->create([
'segment_id' => '78261eea-8f8b-4381-83c6-79fa7120f1cf',
'from' => 'Acme ',
'subject' => 'hello world',
'html' => 'Hi {{{FIRST_NAME|there}}}, you can unsubscribe here: {{{RESEND_UNSUBSCRIBE_URL}}}',
]);
```
```py Python theme={"theme":{"light":"github-light","dark":"vesper"}}
import resend
resend.api_key = "re_xxxxxxxxx"
params: resend.Broadcasts.CreateParams = {
"segment_id": "78261eea-8f8b-4381-83c6-79fa7120f1cf",
"from": "Acme ",
"subject": "Hello, world!",
"html": "Hi {{{FIRST_NAME|there}}}, you can unsubscribe here: {{{RESEND_UNSUBSCRIBE_URL}}}",
}
resend.Broadcasts.create(params)
```
```ruby Ruby theme={"theme":{"light":"github-light","dark":"vesper"}}
require "resend"
Resend.api_key = "re_xxxxxxxxx"
params = {
"segment_id": "78261eea-8f8b-4381-83c6-79fa7120f1cf",
"from": "Acme ",
"subject": "hello world",
"html": "Hi {{{FIRST_NAME|there}}}, you can unsubscribe here: {{{RESEND_UNSUBSCRIBE_URL}}}",
}
Resend::Broadcasts.create(params)
```
```go Go theme={"theme":{"light":"github-light","dark":"vesper"}}
package main
import "github.com/resend/resend-go/v3"
func main() {
client := resend.NewClient("re_xxxxxxxxx")
params := &resend.CreateBroadcastRequest{
SegmentId: "78261eea-8f8b-4381-83c6-79fa7120f1cf",
From: "Acme ",
Html: "Hi {{{FIRST_NAME|there}}}, you can unsubscribe here: {{{RESEND_UNSUBSCRIBE_URL}}}",
Subject: "Hello, world!",
}
client.Broadcasts.Create(params)
}
```
```rust Rust theme={"theme":{"light":"github-light","dark":"vesper"}}
use resend_rs::{types::CreateBroadcastOptions, Resend, Result};
#[tokio::main]
async fn main() -> Result<()> {
let resend = Resend::new("re_xxxxxxxxx");
let segment_id = "78261eea-8f8b-4381-83c6-79fa7120f1cf";
let from = "Acme ";
let subject = "hello world";
let html = "Hi {{{FIRST_NAME|there}}}, you can unsubscribe here: {{{RESEND_UNSUBSCRIBE_URL}}}";
let opts = CreateBroadcastOptions::new(segment_id, from, subject).with_html(html);
let _broadcast = resend.broadcasts.create(opts).await?;
Ok(())
}
```
```java Java theme={"theme":{"light":"github-light","dark":"vesper"}}
Resend resend = new Resend("re_xxxxxxxxx");
CreateBroadcastOptions params = CreateBroadcastOptions.builder()
.segmentId("78261eea-8f8b-4381-83c6-79fa7120f1cf")
.from("Acme ")
.subject("hello world")
.html("Hi {{{FIRST_NAME|there}}}, you can unsubscribe here: {{{RESEND_UNSUBSCRIBE_URL}}}")
.build();
CreateBroadcastResponseSuccess data = resend.broadcasts().create(params);
```
```csharp .NET theme={"theme":{"light":"github-light","dark":"vesper"}}
using Resend;
IResend resend = ResendClient.Create( "re_xxxxxxxxx" ); // Or from DI
var resp = await resend.BroadcastAddAsync(
new BroadcastData()
{
DisplayName = "Example Broadcast",
SegmentId = new Guid( "78261eea-8f8b-4381-83c6-79fa7120f1cf" ),
From = "Acme ",
Subject = "Hello, world!",
HtmlBody = "Hi {{{FIRST_NAME|there}}}, you can unsubscribe here: {{{RESEND_UNSUBSCRIBE_URL}}}",
}
);
Console.WriteLine( "Broadcast Id={0}", resp.Content );
```
```bash cURL theme={"theme":{"light":"github-light","dark":"vesper"}}
curl -X POST 'https://api.resend.com/broadcasts' \
-H 'Authorization: Bearer re_xxxxxxxxx' \
-H 'Content-Type: application/json' \
-d $'{
"segment_id": "78261eea-8f8b-4381-83c6-79fa7120f1cf",
"from": "Acme ",
"subject": "hello world",
"html": "Hi {{{FIRST_NAME|there}}}, you can unsubscribe here: {{{RESEND_UNSUBSCRIBE_URL}}}"
}'
```
```json Response theme={"theme":{"light":"github-light","dark":"vesper"}}
{
"id": "49a3999c-0ce1-4ea6-ab68-afcd6dc2e794"
}
```
---
# Source: https://resend.com/docs/api-reference/contact-properties/create-contact-property.md
> ## Documentation Index
> Fetch the complete documentation index at: https://resend.com/docs/llms.txt
> Use this file to discover all available pages before exploring further.
# Create Contact Property
> Create a custom property for your contacts.
export const ResendParamField = ({children, body, path, ...props}) => {
const [lang, setLang] = useState(() => {
return localStorage.getItem('code') || '"Node.js"';
});
useEffect(() => {
const onStorage = event => {
const key = event.detail.key;
if (key === 'code') {
setLang(event.detail.value);
}
};
document.addEventListener('mintlify-localstorage', onStorage);
return () => {
document.removeEventListener('mintlify-localstorage', onStorage);
};
}, []);
const toCamelCase = str => typeof str === 'string' ? str.replace(/[_-](\w)/g, (_, c) => c.toUpperCase()) : str;
const resolvedBody = useMemo(() => {
const value = JSON.parse(lang);
return value === 'Node.js' ? toCamelCase(body) : body;
}, [body, lang]);
const resolvedPath = useMemo(() => {
const value = JSON.parse(lang);
return value === 'Node.js' ? toCamelCase(path) : path;
}, [path, lang]);
return
{children}
;
};
## Body Parameters
The property key. Max length is `50` characters. Only alphanumeric characters
and underscores are allowed.
The property type. Possible values: `string` or `number`.
The default value to use when the property is not set for a contact. Must
match the type specified in the `type` field.
```ts Node.js theme={"theme":{"light":"github-light","dark":"vesper"}}
import { Resend } from 'resend';
const resend = new Resend('re_xxxxxxxxx');
const { data, error } = await resend.contactProperties.create({
key: 'company_name',
type: 'string',
fallbackValue: 'Acme Corp',
});
```
```php PHP theme={"theme":{"light":"github-light","dark":"vesper"}}
$resend = Resend::client('re_xxxxxxxxx');
$resend->contactProperties->create([
'key' => 'company_name',
'type' => 'string',
'fallback_value' => 'Acme Corp',
]);
```
```python Python theme={"theme":{"light":"github-light","dark":"vesper"}}
import resend
resend.api_key = 're_xxxxxxxxx'
params = {
"key": "company_name",
"type": "string",
"fallback_value": "Acme Corp",
}
contact_property = resend.ContactProperties.create(params)
```
```ruby Ruby theme={"theme":{"light":"github-light","dark":"vesper"}}
require "resend"
Resend.api_key = "re_xxxxxxxxx"
property = Resend::ContactProperties.create({
key: "company_name",
type: "string",
fallback_value: "Acme Corp"
})
```
```go Go theme={"theme":{"light":"github-light","dark":"vesper"}}
package main
import (
"context"
"fmt"
"github.com/resend/resend-go/v3"
)
func main() {
ctx := context.TODO()
client := resend.NewClient("re_xxxxxxxxx")
params := &resend.CreateContactPropertyRequest{
Key: "company_name",
Type: "string",
FallbackValue: "Acme Corp",
}
property, err := client.ContactProperties.CreateWithContext(ctx, params)
if err != nil {
panic(err)
}
fmt.Println(property)
}
```
```rust Rust theme={"theme":{"light":"github-light","dark":"vesper"}}
use resend_rs::{
types::{CreateContactPropertyOptions, PropertyType},
Resend, Result,
};
#[tokio::main]
async fn main() -> Result<()> {
let resend = Resend::new("re_xxxxxxxxx");
let contact_property = CreateContactPropertyOptions::new("company_name", PropertyType::String)
.with_fallback("Acme Corp");
let _contact_property = resend.contacts.create_property(contact_property).await?;
Ok(())
}
```
```java Java theme={"theme":{"light":"github-light","dark":"vesper"}}
import com.resend.*;
public class Main {
public static void main(String[] args) {
Resend resend = new Resend("re_xxxxxxxxx");
CreateContactPropertyOptions options = CreateContactPropertyOptions.builder()
.key("company_name")
.type("string")
.fallbackValue("Acme Corp")
.build();
resend.contactProperties().create(options);
}
}
```
```csharp .NET theme={"theme":{"light":"github-light","dark":"vesper"}}
using Resend;
IResend resend = ResendClient.Create( "re_xxxxxxxxx" ); // Or from DI
var resp = await resend.ContactPropCreateAsync( new ContactPropertyData() {
Key = "company_name",
PropertyType = ContactPropertyType.String,
DefaultValue = "Acme Corp",
} );
Console.WriteLine( "Prop Id={0}", resp.Content );
```
```bash cURL theme={"theme":{"light":"github-light","dark":"vesper"}}
curl -X POST 'https://api.resend.com/contact-properties' \
-H 'Authorization: Bearer re_xxxxxxxxx' \
-H 'Content-Type: application/json' \
-d $'{
"key": "company_name",
"type": "string",
"fallback_value": "Acme Corp"
}'
```
```json Response theme={"theme":{"light":"github-light","dark":"vesper"}}
{
"object": "contact_property",
"id": "b6d24b8e-af0b-4c3c-be0c-359bbd97381e"
}
```
---
# Source: https://resend.com/docs/api-reference/contacts/create-contact.md
> ## Documentation Index
> Fetch the complete documentation index at: https://resend.com/docs/llms.txt
> Use this file to discover all available pages before exploring further.
# Create Contact
> Create a contact.
export const ResendParamField = ({children, body, path, ...props}) => {
const [lang, setLang] = useState(() => {
return localStorage.getItem('code') || '"Node.js"';
});
useEffect(() => {
const onStorage = event => {
const key = event.detail.key;
if (key === 'code') {
setLang(event.detail.value);
}
};
document.addEventListener('mintlify-localstorage', onStorage);
return () => {
document.removeEventListener('mintlify-localstorage', onStorage);
};
}, []);
const toCamelCase = str => typeof str === 'string' ? str.replace(/[_-](\w)/g, (_, c) => c.toUpperCase()) : str;
const resolvedBody = useMemo(() => {
const value = JSON.parse(lang);
return value === 'Node.js' ? toCamelCase(body) : body;
}, [body, lang]);
const resolvedPath = useMemo(() => {
const value = JSON.parse(lang);
return value === 'Node.js' ? toCamelCase(path) : path;
}, [path, lang]);
return
{children}
;
};
## Body Parameters
The email address of the contact.
The first name of the contact.
The last name of the contact.
The Contact's global subscription status. If set to `true`, the contact will
be unsubscribed from all Broadcasts.
A map of custom property keys and values to create.
The property key.
The property value.
Array of segment IDs to add the contact to.
The segment ID.
Array of topic subscriptions for the contact.
The topic ID.
The subscription status for this topic.
```ts Node.js theme={"theme":{"light":"github-light","dark":"vesper"}}
import { Resend } from 'resend';
const resend = new Resend('re_xxxxxxxxx');
const { data, error } = await resend.contacts.create({
email: 'steve.wozniak@gmail.com',
firstName: 'Steve',
lastName: 'Wozniak',
unsubscribed: false,
});
```
```php PHP theme={"theme":{"light":"github-light","dark":"vesper"}}
$resend = Resend::client('re_xxxxxxxxx');
$resend->contacts->create(
parameters: [
'email' => 'steve.wozniak@gmail.com',
'first_name' => 'Steve',
'last_name' => 'Wozniak',
'unsubscribed' => false
]
);
```
```python Python theme={"theme":{"light":"github-light","dark":"vesper"}}
import resend
resend.api_key = "re_xxxxxxxxx"
params: resend.Contacts.CreateParams = {
"email": "steve.wozniak@gmail.com",
"first_name": "Steve",
"last_name": "Wozniak",
"unsubscribed": False,
}
resend.Contacts.create(params)
```
```ruby Ruby theme={"theme":{"light":"github-light","dark":"vesper"}}
require "resend"
Resend.api_key = "re_xxxxxxxxx"
params = {
"email": "steve.wozniak@gmail.com",
"first_name": "Steve",
"last_name": "Wozniak",
"unsubscribed": false,
}
Resend::Contacts.create(params)
```
```go Go theme={"theme":{"light":"github-light","dark":"vesper"}}
package main
import "github.com/resend/resend-go/v3"
func main() {
client := resend.NewClient("re_xxxxxxxxx")
params := &resend.CreateContactRequest{
Email: "steve.wozniak@gmail.com",
FirstName: "Steve",
LastName: "Wozniak",
Unsubscribed: false,
}
client.Contacts.Create(params)
}
```
```rust Rust theme={"theme":{"light":"github-light","dark":"vesper"}}
use resend_rs::{types::CreateContactOptions, Resend, Result};
#[tokio::main]
async fn main() -> Result<()> {
let resend = Resend::new("re_xxxxxxxxx");
let contact = CreateContactOptions::new("steve.wozniak@gmail.com")
.with_first_name("Steve")
.with_last_name("Wozniak")
.with_unsubscribed(false);
let _contact = resend.contacts.create(contact).await?;
Ok(())
}
```
```java Java theme={"theme":{"light":"github-light","dark":"vesper"}}
import com.resend.*;
public class Main {
public static void main(String[] args) {
Resend resend = new Resend("re_xxxxxxxxx");
CreateContactOptions params = CreateContactOptions.builder()
.email("steve.wozniak@gmail.com")
.firstName("Steve")
.lastName("Wozniak")
.unsubscribed(false)
.build();
CreateContactResponseSuccess data = resend.contacts().create(params);
}
}
```
```csharp .NET theme={"theme":{"light":"github-light","dark":"vesper"}}
using Resend;
IResend resend = ResendClient.Create( "re_xxxxxxxxx" ); // Or from DI
var resp = await resend.ContactAddAsync(
new ContactData()
{
Email = "steve.wozniak@gmail.com",
FirstName = "Steve",
LastName = "Wozniak",
IsUnsubscribed = false,
}
);
Console.WriteLine( "Contact Id={0}", resp.Content );
```
```bash cURL theme={"theme":{"light":"github-light","dark":"vesper"}}
curl -X POST 'https://api.resend.com/contacts' \
-H 'Authorization: Bearer re_xxxxxxxxx' \
-H 'Content-Type: application/json' \
-d $'{
"email": "steve.wozniak@gmail.com",
"first_name": "Steve",
"last_name": "Wozniak",
"unsubscribed": false
}'
```
```json Response theme={"theme":{"light":"github-light","dark":"vesper"}}
{
"object": "contact",
"id": "479e3145-dd38-476b-932c-529ceb705947"
}
```
---
# Source: https://resend.com/docs/api-reference/domains/create-domain.md
> ## Documentation Index
> Fetch the complete documentation index at: https://resend.com/docs/llms.txt
> Use this file to discover all available pages before exploring further.
# Create Domain
> Create a domain through the Resend Email API.
export const ResendParamField = ({children, body, path, ...props}) => {
const [lang, setLang] = useState(() => {
return localStorage.getItem('code') || '"Node.js"';
});
useEffect(() => {
const onStorage = event => {
const key = event.detail.key;
if (key === 'code') {
setLang(event.detail.value);
}
};
document.addEventListener('mintlify-localstorage', onStorage);
return () => {
document.removeEventListener('mintlify-localstorage', onStorage);
};
}, []);
const toCamelCase = str => typeof str === 'string' ? str.replace(/[_-](\w)/g, (_, c) => c.toUpperCase()) : str;
const resolvedBody = useMemo(() => {
const value = JSON.parse(lang);
return value === 'Node.js' ? toCamelCase(body) : body;
}, [body, lang]);
const resolvedPath = useMemo(() => {
const value = JSON.parse(lang);
return value === 'Node.js' ? toCamelCase(path) : path;
}, [path, lang]);
return
{children}
;
};
## Body Parameters
The name of the domain you want to create.
The region where emails will be sent from. Possible values: `'us-east-1' |
'eu-west-1' | 'sa-east-1' | 'ap-northeast-1'`
For advanced use cases, choose a subdomain for the Return-Path address. The
custom return path is used for SPF authentication, DMARC alignment, and
handling bounced emails. Defaults to `send` (i.e., `send.yourdomain.tld`). Avoid
setting values that could undermine credibility (e.g. `testing`), as they may
be exposed to recipients.
Learn more about [custom return paths](/dashboard/domains/introduction#custom-return-path).
Track the open rate of each email.
Track clicks within the body of each HTML email.
`opportunistic`: Opportunistic TLS means that it always attempts to make a
secure connection to the receiving mail server. If it can't establish a
secure connection, it sends the message unencrypted.
`enforced`: Enforced TLS on the other hand, requires that the email
communication must use TLS no matter what. If the receiving server does
not support TLS, the email will not be sent.
Configure the domain capabilities for sending and receiving emails. At least one capability must be enabled.
Enable or disable sending emails from this domain. Possible values: `'enabled' | 'disabled'`
Enable or disable receiving emails to this domain. Possible values: `'enabled' | 'disabled'`
See all available `status` types in [the Domains
overview](/dashboard/domains/introduction#understand-a-domain-status).
```ts Node.js theme={"theme":{"light":"github-light","dark":"vesper"}}
import { Resend } from 'resend';
const resend = new Resend('re_xxxxxxxxx');
const { data, error } = await resend.domains.create({ name: 'example.com' });
```
```php PHP theme={"theme":{"light":"github-light","dark":"vesper"}}
$resend = Resend::client('re_xxxxxxxxx');
$resend->domains->create([
'name' => 'example.com'
]);
```
```python Python theme={"theme":{"light":"github-light","dark":"vesper"}}
import resend
resend.api_key = "re_xxxxxxxxx"
params: resend.Domains.CreateParams = {
"name": "example.com",
}
resend.Domains.create(params)
```
```ruby Ruby theme={"theme":{"light":"github-light","dark":"vesper"}}
Resend.api_key = ENV["RESEND_API_KEY"]
params = {
name: "example.com",
}
domain = Resend::Domains.create(params)
puts domain
```
```go Go theme={"theme":{"light":"github-light","dark":"vesper"}}
package main
import "github.com/resend/resend-go/v3"
func main() {
client := resend.NewClient("re_xxxxxxxxx")
params := &resend.CreateDomainRequest{
Name: "example.com",
}
client.Domains.Create(params)
}
```
```rust Rust theme={"theme":{"light":"github-light","dark":"vesper"}}
use resend_rs::{types::CreateDomainOptions, Resend, Result};
#[tokio::main]
async fn main() -> Result<()> {
let resend = Resend::new("re_xxxxxxxxx");
let _domain = resend
.domains
.add(CreateDomainOptions::new("example.com"))
.await?;
Ok(())
}
```
```java Java theme={"theme":{"light":"github-light","dark":"vesper"}}
import com.resend.*;
public class Main {
public static void main(String[] args) {
Resend resend = new Resend("re_xxxxxxxxx");
CreateDomainOptions params = CreateDomainOptions
.builder()
.name("example.com").build();
CreateDomainResponse domain = resend.domains().create(params);
}
}
```
```csharp .NET theme={"theme":{"light":"github-light","dark":"vesper"}}
using Resend;
IResend resend = ResendClient.Create( "re_xxxxxxxxx" ); // Or from DI
var resp = await resend.DomainAddAsync( "example.com" );
Console.WriteLine( "Domain Id={0}", resp.Content.Id );
```
```bash cURL theme={"theme":{"light":"github-light","dark":"vesper"}}
curl -X POST 'https://api.resend.com/domains' \
-H 'Authorization: Bearer re_xxxxxxxxx' \
-H 'Content-Type: application/json' \
-d $'{
"name": "example.com"
}'
```
```json Response theme={"theme":{"light":"github-light","dark":"vesper"}}
{
"id": "4dd369bc-aa82-4ff3-97de-514ae3000ee0",
"name": "example.com",
"created_at": "2023-03-28T17:12:02.059593+00:00",
"status": "not_started",
"capabilities": {
"sending": "enabled",
"receiving": "disabled"
},
"records": [
{
"record": "SPF",
"name": "send",
"type": "MX",
"ttl": "Auto",
"status": "not_started",
"value": "feedback-smtp.us-east-1.amazonses.com",
"priority": 10
},
{
"record": "SPF",
"name": "send",
"value": "\"v=spf1 include:amazonses.com ~all\"",
"type": "TXT",
"ttl": "Auto",
"status": "not_started"
},
{
"record": "DKIM",
"name": "nhapbbryle57yxg3fbjytyodgbt2kyyg._domainkey",
"value": "nhapbbryle57yxg3fbjytyodgbt2kyyg.dkim.amazonses.com.",
"type": "CNAME",
"status": "not_started",
"ttl": "Auto"
},
{
"record": "DKIM",
"name": "xbakwbe5fcscrhzshpap6kbxesf6pfgn._domainkey",
"value": "xbakwbe5fcscrhzshpap6kbxesf6pfgn.dkim.amazonses.com.",
"type": "CNAME",
"status": "not_started",
"ttl": "Auto"
},
{
"record": "DKIM",
"name": "txrcreso3dqbvcve45tqyosxwaegvhgn._domainkey",
"value": "txrcreso3dqbvcve45tqyosxwaegvhgn.dkim.amazonses.com.",
"type": "CNAME",
"status": "not_started",
"ttl": "Auto"
}
],
"region": "us-east-1"
}
```
---
# Source: https://resend.com/docs/api-reference/segments/create-segment.md
> ## Documentation Index
> Fetch the complete documentation index at: https://resend.com/docs/llms.txt
> Use this file to discover all available pages before exploring further.
# Create Segment
> Create a new segment for contacts to be added to.
## Body Parameters
The name of the segment you want to create.
```ts Node.js theme={"theme":{"light":"github-light","dark":"vesper"}}
import { Resend } from 'resend';
const resend = new Resend('re_xxxxxxxxx');
const { data, error } = await resend.segments.create({
name: 'Registered Users',
});
```
```php PHP theme={"theme":{"light":"github-light","dark":"vesper"}}
$resend = Resend::client('re_xxxxxxxxx');
$resend->segments->create([
'name' => 'Registered Users',
]);
```
```python Python theme={"theme":{"light":"github-light","dark":"vesper"}}
import resend
resend.api_key = 're_xxxxxxxxx'
params = {
"name": "Registered Users",
}
segment = resend.Segments.create(params)
```
```ruby Ruby theme={"theme":{"light":"github-light","dark":"vesper"}}
require "resend"
Resend.api_key = "re_xxxxxxxxx"
params = {
name: "Registered Users",
}
segment = Resend::Segments.create(params)
```
```go Go theme={"theme":{"light":"github-light","dark":"vesper"}}
package main
import (
"context"
"fmt"
"github.com/resend/resend-go/v3"
)
func main() {
ctx := context.TODO()
client := resend.NewClient("re_xxxxxxxxx")
params := &resend.CreateSegmentRequest{
Name: "Registered Users",
}
segment, err := client.Segments.CreateWithContext(ctx, params)
if err != nil {
panic(err)
}
fmt.Println(segment)
}
```
```rust Rust theme={"theme":{"light":"github-light","dark":"vesper"}}
use resend_rs::{Resend, Result};
#[tokio::main]
async fn main() -> Result<()> {
let resend = Resend::new("re_xxxxxxxxx");
let _segment = resend.segments.create("Registered Users").await?;
Ok(())
}
```
```java Java theme={"theme":{"light":"github-light","dark":"vesper"}}
import com.resend.*;
public class Main {
public static void main(String[] args) {
Resend resend = new Resend("re_xxxxxxxxx");
CreateSegmentOptions options = CreateSegmentOptions.builder()
.name("Registered Users")
.build();
CreateSegmentResponseSuccess response = resend.segments().create(options);
}
}
```
```csharp .NET theme={"theme":{"light":"github-light","dark":"vesper"}}
using Resend;
IResend resend = ResendClient.Create( "re_xxxxxxxxx" ); // Or from DI
var resp = await resend.SegmentCreateAsync( new SegmentData() {
Name = "Registered Users",
} );
Console.WriteLine( "Segment Id={0}", resp.Content );
```
```bash cURL theme={"theme":{"light":"github-light","dark":"vesper"}}
curl -X POST 'https://api.resend.com/segments' \
-H 'Authorization: Bearer re_xxxxxxxxx' \
-H 'Content-Type: application/json' \
-d $'{
"name": "Registered Users"
}'
```
```json Response theme={"theme":{"light":"github-light","dark":"vesper"}}
{
"object": "segment",
"id": "78261eea-8f8b-4381-83c6-79fa7120f1cf",
"name": "Registered Users"
}
```
---
# Source: https://resend.com/docs/api-reference/templates/create-template.md
> ## Documentation Index
> Fetch the complete documentation index at: https://resend.com/docs/llms.txt
> Use this file to discover all available pages before exploring further.
# Create Template
> Create a new template with optional variables.
export const ResendParamField = ({children, body, path, ...props}) => {
const [lang, setLang] = useState(() => {
return localStorage.getItem('code') || '"Node.js"';
});
useEffect(() => {
const onStorage = event => {
const key = event.detail.key;
if (key === 'code') {
setLang(event.detail.value);
}
};
document.addEventListener('mintlify-localstorage', onStorage);
return () => {
document.removeEventListener('mintlify-localstorage', onStorage);
};
}, []);
const toCamelCase = str => typeof str === 'string' ? str.replace(/[_-](\w)/g, (_, c) => c.toUpperCase()) : str;
const resolvedBody = useMemo(() => {
const value = JSON.parse(lang);
return value === 'Node.js' ? toCamelCase(body) : body;
}, [body, lang]);
const resolvedPath = useMemo(() => {
const value = JSON.parse(lang);
return value === 'Node.js' ? toCamelCase(path) : path;
}, [path, lang]);
return
{children}
;
};
## Body Parameters
The name of the template.
The HTML version of the template.
The alias of the template.
Sender email address.
To include a friendly name, use the format `"Your Name "`.
If provided, this value can be overridden when sending an email using the template.
Default email subject.
This value can be overridden when sending an email using the template.
Default Reply-to email address. For multiple addresses, send as an array of strings.
This value can be overridden when sending an email using the template.
The plain text version of the message.
If not provided, the HTML will be used to generate a plain text version. You can opt out of this behavior by setting value to an empty string.
The React component used to write the template. *Only available in the Node.js
SDK.*
The array of variables used in the template. Each template may contain up to 50 variables.
Each variable is an object with the following properties:
The key of the variable. We recommend capitalizing the key (e.g. `PRODUCT_NAME`). The following variable names are reserved and cannot be used:
`FIRST_NAME`, `LAST_NAME`, `EMAIL`, `RESEND_UNSUBSCRIBE_URL`, `contact`, and `this`.
The type of the variable.
Can be `'string'` or `'number'`
The fallback value of the variable. The value must match the type of the variable.
If no fallback value is provided, you must provide a value for the variable when sending an email using the template.
Before you can use a template, you must publish it first. To publish a
template, use the [Templates dashboard](https://resend.com/templates) or
[publish template API](/api-reference/templates/publish-template).
[Learn more about Templates](/dashboard/templates/introduction).
```ts Node.js theme={"theme":{"light":"github-light","dark":"vesper"}}
import { Resend } from 'resend';
const resend = new Resend('re_xxxxxxxxx');
const { data, error } = await resend.templates.create({
name: 'order-confirmation',
html: '
Name: {{{PRODUCT}}}
Total: {{{PRICE}}}
',
variables: [
{
key: 'PRODUCT',
type: 'string',
fallbackValue: 'item',
},
{
key: 'PRICE',
type: 'number',
fallbackValue: 25,
}
],
});
// Or create and publish a template in one step
await resend.templates.create({ ... }).publish();
```
```php PHP theme={"theme":{"light":"github-light","dark":"vesper"}}
$resend = Resend::client('re_xxxxxxxxx');
$resend->templates->create([
'name' => 'order-confirmation',
'html' => '
",
Variables: []*resend.TemplateVariable{
{
Key: "PRODUCT",
Type: resend.VariableTypeString,
FallbackValue: "item",
},
{
Key: "PRICE",
Type: resend.VariableTypeNumber,
FallbackValue: 25,
},
},
})
}
```
```rust Rust theme={"theme":{"light":"github-light","dark":"vesper"}}
use resend_rs::{
types::{CreateTemplateOptions, Variable, VariableType},
Resend, Result,
};
#[tokio::main]
async fn main() -> Result<()> {
let resend = Resend::new("re_xxxxxxxxx");
let name = "order-confirmation";
let html = "
Name: {{{PRODUCT}}}
Total: {{{PRICE}}}
";
let variables = [
Variable::new("PRODUCT", VariableType::String).with_fallback("item"),
Variable::new("PRICE", VariableType::Number).with_fallback(25)
];
let opts = CreateTemplateOptions::new(name, html).with_variables(&variables);
let template = resend.templates.create(opts).await?;
let _published = resend.templates.publish(&template.id).await?;
Ok(())
}
```
```java Java theme={"theme":{"light":"github-light","dark":"vesper"}}
import com.resend.*;
public class Main {
public static void main(String[] args) {
Resend resend = new Resend("re_xxxxxxxxx");
CreateTemplateOptions params = CreateTemplateOptions.builder()
.name("order-confirmation")
.html("
Name: {{{PRODUCT}}}
Total: {{{PRICE}}}
")
.addVariable(new Variable("PRODUCT", VariableType.STRING, "item"))
.addVariable(new Variable("PRICE", VariableType.NUMBER, 25))
.build();
CreateTemplateResponseSuccess data = resend.templates().create(params);
}
}
```
```csharp .NET theme={"theme":{"light":"github-light","dark":"vesper"}}
using Resend;
IResend resend = ResendClient.Create("re_xxxxxxxxx");
var variables = new List()
{
new TemplateVariable() {
Key = "PRODUCT",
Type = TemplateVariableType.String,
Default = "item",
},
new TemplateVariable() {
Key = "PRICE",
Type = TemplateVariableType.Number,
Default = 25,
}
};
var resp = await resend.TemplateCreateAsync(
new TemplateData()
{
Name = "welcome-email",
HtmlBody = "Hey, {{{PRODUCT}}}, you are {{{PRICE}}} years old.",
Variables = variables,
}
);
Console.WriteLine($"Template Id={resp.Content}");
```
```bash cURL theme={"theme":{"light":"github-light","dark":"vesper"}}
curl -X POST 'https://api.resend.com/templates' \
-H 'Authorization: Bearer re_xxxxxxxxx' \
-H 'Content-Type: application/json' \
-d $'{
"name": "order-confirmation",
"html": "
Name: {{{PRODUCT}}}
Total: {{{PRICE}}}
",
"variables": [
{
"key": "PRODUCT",
"type": "string",
"fallback_value": "item"
},
{
"key": "PRICE",
"type": "number",
"fallback_value": 25
}
]
}'
```
```json Response theme={"theme":{"light":"github-light","dark":"vesper"}}
{
"id": "49a3999c-0ce1-4ea6-ab68-afcd6dc2e794",
"object": "template"
}
```
---
# Source: https://resend.com/docs/api-reference/topics/create-topic.md
> ## Documentation Index
> Fetch the complete documentation index at: https://resend.com/docs/llms.txt
> Use this file to discover all available pages before exploring further.
# Create Topic
> Create and email topics to segment your audience.
export const ResendParamField = ({children, body, path, ...props}) => {
const [lang, setLang] = useState(() => {
return localStorage.getItem('code') || '"Node.js"';
});
useEffect(() => {
const onStorage = event => {
const key = event.detail.key;
if (key === 'code') {
setLang(event.detail.value);
}
};
document.addEventListener('mintlify-localstorage', onStorage);
return () => {
document.removeEventListener('mintlify-localstorage', onStorage);
};
}, []);
const toCamelCase = str => typeof str === 'string' ? str.replace(/[_-](\w)/g, (_, c) => c.toUpperCase()) : str;
const resolvedBody = useMemo(() => {
const value = JSON.parse(lang);
return value === 'Node.js' ? toCamelCase(body) : body;
}, [body, lang]);
const resolvedPath = useMemo(() => {
const value = JSON.parse(lang);
return value === 'Node.js' ? toCamelCase(path) : path;
}, [path, lang]);
return
{children}
;
};
## Body Parameters
The topic name. Max length is `50` characters.
The default subscription preference for new contacts. Possible values:
`opt_in` or `opt_out`.
This value cannot be changed later.
The topic description. Max length is `200` characters.
The visibility of the topic on the unsubscribe page. Possible values: `public` or `private`.
* `private`: only contacts who are opted in to the topic can see it on the unsubscribe page.
* `public`: all contacts can see the topic on the unsubscribe page.
If not specified, defaults to `private`.
```ts Node.js theme={"theme":{"light":"github-light","dark":"vesper"}}
import { Resend } from 'resend';
const resend = new Resend('re_xxxxxxxxx');
const { data, error } = await resend.topics.create({
name: 'Weekly Newsletter',
defaultSubscription: 'opt_in',
});
```
```php PHP theme={"theme":{"light":"github-light","dark":"vesper"}}
$resend = Resend::client('re_xxxxxxxxx');
$resend->topics->create([
'name' => 'Weekly Newsletter',
'default_subscription' => 'opt_in',
]);
```
```python Python theme={"theme":{"light":"github-light","dark":"vesper"}}
import resend
resend.api_key = "re_xxxxxxxxx"
resend.Topics.create({
"name": "Weekly Newsletter",
"default_subscription": "opt_in",
"description": "Subscribe to our weekly newsletter for updates",
})
```
```ruby Ruby theme={"theme":{"light":"github-light","dark":"vesper"}}
require "resend"
Resend.api_key = "re_xxxxxxxxx"
Resend::Topics.create(
name: "Weekly Newsletter",
default_subscription: "opt_in"
)
```
```go Go theme={"theme":{"light":"github-light","dark":"vesper"}}
import (
"context"
"github.com/resend/resend-go/v3"
)
func main() {
client := resend.NewClient("re_xxxxxxxxx")
client.Topics.CreateWithContext(context.TODO(), &resend.CreateTopicRequest{
Name: "Weekly Newsletter",
DefaultSubscription: resend.DefaultSubscriptionOptIn,
})
}
```
```rust Rust theme={"theme":{"light":"github-light","dark":"vesper"}}
use resend_rs::{
types::{CreateTopicOptions, SubscriptionType},
Resend, Result,
};
#[tokio::main]
async fn main() -> Result<()> {
let resend = Resend::new("re_xxxxxxxxx");
let opts = CreateTopicOptions::new("Weekly Newsletter", SubscriptionType::OptIn);
let _topic = resend.topics.create(opts).await?;
Ok(())
}
```
```java Java theme={"theme":{"light":"github-light","dark":"vesper"}}
import com.resend.*;
public class Main {
public static void main(String[] args) {
Resend resend = new Resend("re_xxxxxxxxx");
CreateTopicOptions createTopicOptions = CreateTopicOptions.builder()
.name("Weekly Newsletter")
.defaultSubscription("opt_in")
.build();
CreateTopicResponseSuccess response = resend.topics().create(createTopicOptions);
}
}
```
```csharp .NET theme={"theme":{"light":"github-light","dark":"vesper"}}
using Resend;
IResend resend = ResendClient.Create( "re_xxxxxxxxx" ); // Or from DI
var resp = await resend.TopicCreateAsync( new TopicData() {
Name = "Weekly Newsletter",
Description = "Weekly newsletter for our subscribers",
SubscriptionDefault = SubscriptionType.OptIn,
} );
Console.WriteLine( "Topic Id={0}", resp.Content );
```
```bash cURL theme={"theme":{"light":"github-light","dark":"vesper"}}
curl -X POST 'https://api.resend.com/topics' \
-H 'Authorization: Bearer re_xxxxxxxxx' \
-H 'Content-Type: application/json' \
-d $'{
"name": "Weekly Newsletter",
"default_subscription": "opt_in"
}'
```
```json Response theme={"theme":{"light":"github-light","dark":"vesper"}}
{
"object": "topic",
"id": "b6d24b8e-af0b-4c3c-be0c-359bbd97381e"
}
```
---
# Source: https://resend.com/docs/api-reference/webhooks/create-webhook.md
> ## Documentation Index
> Fetch the complete documentation index at: https://resend.com/docs/llms.txt
> Use this file to discover all available pages before exploring further.
# Create Webhook
> Create a webhook to receive real-time notifications about email events.
export const ResendParamField = ({children, body, path, ...props}) => {
const [lang, setLang] = useState(() => {
return localStorage.getItem('code') || '"Node.js"';
});
useEffect(() => {
const onStorage = event => {
const key = event.detail.key;
if (key === 'code') {
setLang(event.detail.value);
}
};
document.addEventListener('mintlify-localstorage', onStorage);
return () => {
document.removeEventListener('mintlify-localstorage', onStorage);
};
}, []);
const toCamelCase = str => typeof str === 'string' ? str.replace(/[_-](\w)/g, (_, c) => c.toUpperCase()) : str;
const resolvedBody = useMemo(() => {
const value = JSON.parse(lang);
return value === 'Node.js' ? toCamelCase(body) : body;
}, [body, lang]);
const resolvedPath = useMemo(() => {
const value = JSON.parse(lang);
return value === 'Node.js' ? toCamelCase(path) : path;
}, [path, lang]);
return
{children}
;
};
## Body Parameters
The URL where webhook events will be sent.
Array of event types to subscribe to.
See [event types](/webhooks/event-types) for available options.
```ts Node.js theme={"theme":{"light":"github-light","dark":"vesper"}}
import { Resend } from 'resend';
const resend = new Resend('re_xxxxxxxxx');
const { data, error } = await resend.webhooks.create({
endpoint: 'https://example.com/handler',
events: ['email.sent'],
});
```
```php PHP theme={"theme":{"light":"github-light","dark":"vesper"}}
$resend = Resend::client('re_xxxxxxxxx');
$resend->webhooks->create([
'endpoint' => 'https://example.com/handler',
'events' => ['email.sent'],
]);
```
```python Python theme={"theme":{"light":"github-light","dark":"vesper"}}
import resend
resend.api_key = 're_xxxxxxxxx'
params: resend.Webhooks.CreateParams = {
"endpoint": "https://example.com/handler",
"events": ["email.sent"],
}
webhook = resend.Webhooks.create(params=params)
```
```ruby Ruby theme={"theme":{"light":"github-light","dark":"vesper"}}
require 'resend'
Resend.api_key = 're_xxxxxxxxx'
params = {
endpoint: 'https://example.com/handler',
events: ['email.sent']
}
webhook = Resend::Webhooks.create(params)
```
```go Go theme={"theme":{"light":"github-light","dark":"vesper"}}
package main
import "github.com/resend/resend-go/v3"
func main() {
client := resend.NewClient("re_xxxxxxxxx")
params := &resend.CreateWebhookRequest{
Endpoint: "https://example.com/handler",
Events: []string{"email.sent"},
}
client.Webhooks.Create(params)
}
```
```rust Rust theme={"theme":{"light":"github-light","dark":"vesper"}}
use resend_rs::{
events::EmailEventType::{EmailSent},
types::CreateWebhookOptions,
Resend, Result,
};
#[tokio::main]
async fn main() -> Result<()> {
let resend = Resend::new("re_xxxxxxxxx");
let events = [EmailSent];
let opts = CreateWebhookOptions::new("https://example.com/handler", events);
let _webhook = resend.webhooks.create(opts).await?;
Ok(())
}
```
```java Java theme={"theme":{"light":"github-light","dark":"vesper"}}
import com.resend.*;
import static com.resend.services.webhooks.model.WebhookEvent.*;
public class Main {
public static void main(String[] args) {
Resend resend = new Resend("re_xxxxxxxxx");
CreateWebhookOptions options = CreateWebhookOptions.builder()
.endpoint("https://example.com/handler")
.events(EMAIL_SENT)
.build();
CreateWebhookResponseSuccess response = resend.webhooks().create(options);
}
}
```
```csharp .NET theme={"theme":{"light":"github-light","dark":"vesper"}}
using Resend;
IResend resend = ResendClient.Create( "re_xxxxxxxxx" ); // Or from DI
var data = new WebhookData()
{
EndpointUrl = "https://example.com/handler",
Events = [ WebhookEventType.EmailSent ],
Status = WebhookStatus.Disabled,
};
var resp = await resend.WebhookCreateAsync( data );
Console.WriteLine( "Webhook Id={0}", resp.Content.Id );
Console.WriteLine( "Signing secret={0}", resp.Content.SigningSecret );
```
```bash cURL theme={"theme":{"light":"github-light","dark":"vesper"}}
curl -X POST 'https://api.resend.com/webhooks' \
-H 'Authorization: Bearer re_xxxxxxxxx' \
-H 'Content-Type: application/json' \
-d '{
"endpoint": "https://example.com/handler",
"events": ["email.sent"]
}'
```
```json Response theme={"theme":{"light":"github-light","dark":"vesper"}}
{
"object": "webhook",
"id": "4dd369bc-aa82-4ff3-97de-514ae3000ee0",
"signing_secret": "whsec_xxxxxxxxxx"
}
```
---
# Source: https://resend.com/docs/webhooks/domains/created.md
# Source: https://resend.com/docs/webhooks/contacts/created.md
> ## Documentation Index
> Fetch the complete documentation index at: https://resend.com/docs/llms.txt
> Use this file to discover all available pages before exploring further.
# contact.created
> Received when a contact is created.
export const ResponseBodyParameters = ({type, children}) => {
return
Response Body Parameters
All webhook payloads follow a consistent top-level structure with
event-specific data nested within the data object.
The event type that triggered the webhook (e.g., {type}).
ISO 8601 timestamp when the webhook event was created.
Event-specific data containing detailed information about the event. The
data object for the {type} event contains the following
parameters:
{children}
;
};
Event triggered whenever a **contact was successfully created**.
*Note: When importing multiple contacts using CSV, these events won't be triggered. [Contact support](https://resend.com/contact) if you have any questions.*
Unique identifier for the contact
Unique identifier for the audience this contact belongs to
Array of segment IDs the contact belongs to
ISO 8601 timestamp when the contact was created
ISO 8601 timestamp when the contact was last updated
Contact's email address
Contact's first name
Contact's last name
Whether the contact has unsubscribed from all emails sent from your team
```json theme={"theme":{"light":"github-light","dark":"vesper"}}
{
"type": "contact.created",
"created_at": "2024-11-17T19:32:22.980Z",
"data": {
"id": "e169aa45-1ecf-4183-9955-b1499d5701d3",
"audience_id": "78261eea-8f8b-4381-83c6-79fa7120f1cf",
"segment_ids": ["78261eea-8f8b-4381-83c6-79fa7120f1cf"],
"created_at": "2024-11-17T19:32:22.980Z",
"updated_at": "2024-11-17T19:32:22.980Z",
"email": "steve.wozniak@gmail.com",
"first_name": "Steve",
"last_name": "Wozniak",
"unsubscribed": false
}
}
```
---
# Source: https://resend.com/docs/dashboard/receiving/custom-domains.md
> ## Documentation Index
> Fetch the complete documentation index at: https://resend.com/docs/llms.txt
> Use this file to discover all available pages before exploring further.
# Custom Receiving Domains
> Receive emails using your own domain.
Besides [using Resend-managed domains](/dashboard/receiving/introduction), you can also receive emails using your own custom domain, such as `yourdomain.tld`.
Here's how to receive emails using a *new* custom domain.
## 1. Add the DNS record
First, [verify your domain](/dashboard/domains/introduction).
Receiving emails requires an extra [MX record](https://resend.com/knowledge-base/how-do-i-avoid-conflicting-with-my-mx-records) to work. You'll need to add this record to your DNS provider.
1. Go to the [Domains](https://resend.com/domains) page
2. Copy the MX record
3. Paste the MX record into your domain's DNS service
If you already have existing MX records for your domain (because you're already
using it for a real inbox, for example), we recommend that you
create a subdomain (e.g. `subdomain.yourdomain.tld`) and add the MX record
there. This way, you can use Resend for receiving emails without affecting
your existing email service. Note that you will *not* receive emails at Resend
if the required `MX` record is not the lowest priority value for the domain.
Alternatively, you can configure your email service to forward emails to an address
that's configured in Resend or forward them directly to the SMTP server address
that appears in the receiving `MX` record.
## 2. Configure webhooks
Next, create a new webhook endpoint to receive email events.
1. Go to the [Webhooks](https://resend.com/webhooks) page
2. Click "Add Webhook"
3. Enter the URL of your webhook endpoint
4. Select the event type `email.received`
5. Click "Add"
## 3. Receive email events
In your application, create a new route that can accept `POST` requests.
For example, here's how you can add an API route in a Next.js application:
```js app/api/events/route.ts theme={"theme":{"light":"github-light","dark":"vesper"}}
import type { NextRequest } from 'next/server';
import { NextResponse } from 'next/server';
export const POST = async (request: NextRequest) => {
const event = await request.json();
if (event.type === 'email.received') {
return NextResponse.json(event);
}
return NextResponse.json({});
};
```
Once you receive the email event, you can process the email body and attachments. We also recommend implementing [webhook request verification](/webhooks/verify-webhooks-requests) to secure your webhook endpoint.
```json theme={"theme":{"light":"github-light","dark":"vesper"}}
{
"type": "email.received",
"created_at": "2024-02-22T23:41:12.126Z",
"data": {
"email_id": "56761188-7520-42d8-8898-ff6fc54ce618",
"created_at": "2024-02-22T23:41:11.894719+00:00",
"from": "Acme ",
"to": ["delivered@resend.dev"],
"bcc": [],
"cc": [],
"message_id": "",
"subject": "Sending this example",
"attachments": [
{
"id": "2a0c9ce0-3112-4728-976e-47ddcd16a318",
"filename": "avatar.png",
"content_type": "image/png",
"content_disposition": "inline",
"content_id": "img001"
}
]
}
}
```
## Enabling receiving for an existing domain
If you already have a verified domain, you can enable receiving by using the toggle in the receiving section of the domain details page.
After enabling receiving, you'll see a modal showing the MX record that you need to add to your DNS provider to start receiving emails.
Once you add the MX record, confirm by clicking the "I've added the record" button and wait for the receiving record to show as "verified".
## FAQ
If you already have existing MX records for your domain, we recommend that you
create a subdomain (e.g. `subdomain.yourdomain.tld`) and add the MX record
there.
That's because emails will usually only be delivered to the MX record with the lowest
priority value. Therefore, if you add Resend's MX record to your root domain alongside existing MX records,
it will either not receive any emails at all (if the existing MX records have a lower priority),
or it will interfere with your existing email service (if Resend's MX record has a lower priority). If you
use the same priority, email delivery will be unpredictable and may hit either Resend or your existing email
service.
If you still want to use the same domain both in for Resend and your day-to-day
email service, you can also set up forwarding rules in your existing email service
to forward emails to an address that's configured in Resend or forward them directly
to the SMTP server address that appears in the receiving `MX` record.
No, you do not need to verify your entire domain again. If you already have a
verified domain for sending, you can simply enable receiving for that domain,
add the required MX record to your DNS provider, and click "I've added the record"
to start verifying *only* the MX record.
---
# Source: https://resend.com/docs/dashboard/emails/custom-headers.md
> ## Documentation Index
> Fetch the complete documentation index at: https://resend.com/docs/llms.txt
> Use this file to discover all available pages before exploring further.
# Custom Headers
> Customize how emails are sent with your own headers.
Email headers are typically hidden from the end user but are crucial for deliverability. They include information about the sender, receiver, timestamp, and more.
Resend already includes all the necessary headers for you, but now you can also add your own custom headers.
This is a fairly advanced feature, but it can be useful for a few things:
* Prevent threading on Gmail with the **`X-Entity-Ref-ID`** header ([Example](https://github.com/resend/resend-examples/tree/main/with-prevent-thread-on-gmail))
* Include a shortcut for users to unsubscribe with the **`List-Unsubscribe`** header ([Example](https://github.com/resend/resend-examples/tree/main/with-unsubscribe-url-header))
Here's how you can add custom headers to your emails:
```ts Node.js {11} theme={"theme":{"light":"github-light","dark":"vesper"}}
import { Resend } from 'resend';
const resend = new Resend('re_xxxxxxxxx');
await resend.emails.send({
from: 'Acme ',
to: ['delivered@resend.dev'],
subject: 'hello world',
html: '
",
"headers": {
"X-Entity-Ref-ID": "xxx_xxxx"
}
}'
```
---
# Source: https://resend.com/docs/api-reference/api-keys/delete-api-key.md
> ## Documentation Index
> Fetch the complete documentation index at: https://resend.com/docs/llms.txt
> Use this file to discover all available pages before exploring further.
# Delete API key
> Remove an existing API key.
export const ResendParamField = ({children, body, path, ...props}) => {
const [lang, setLang] = useState(() => {
return localStorage.getItem('code') || '"Node.js"';
});
useEffect(() => {
const onStorage = event => {
const key = event.detail.key;
if (key === 'code') {
setLang(event.detail.value);
}
};
document.addEventListener('mintlify-localstorage', onStorage);
return () => {
document.removeEventListener('mintlify-localstorage', onStorage);
};
}, []);
const toCamelCase = str => typeof str === 'string' ? str.replace(/[_-](\w)/g, (_, c) => c.toUpperCase()) : str;
const resolvedBody = useMemo(() => {
const value = JSON.parse(lang);
return value === 'Node.js' ? toCamelCase(body) : body;
}, [body, lang]);
const resolvedPath = useMemo(() => {
const value = JSON.parse(lang);
return value === 'Node.js' ? toCamelCase(path) : path;
}, [path, lang]);
return
{children}
;
};
## Path Parameters
The API key ID.
```ts Node.js theme={"theme":{"light":"github-light","dark":"vesper"}}
import { Resend } from 'resend';
const resend = new Resend('re_xxxxxxxxx');
const { data, error } = await resend.apiKeys.remove(
'b6d24b8e-af0b-4c3c-be0c-359bbd97381e',
);
```
```php PHP theme={"theme":{"light":"github-light","dark":"vesper"}}
$resend = Resend::client('re_xxxxxxxxx');
$resend->apiKeys->remove('b6d24b8e-af0b-4c3c-be0c-359bbd97381e');
```
```python Python theme={"theme":{"light":"github-light","dark":"vesper"}}
import resend
resend.api_key = "re_xxxxxxxxx"
resend.ApiKeys.remove(api_key_id="b6d24b8e-af0b-4c3c-be0c-359bbd97381e")
```
```ruby Ruby theme={"theme":{"light":"github-light","dark":"vesper"}}
require "resend"
Resend.api_key = "re_xxxxxxxxx"
Resend::ApiKeys.remove "b6d24b8e-af0b-4c3c-be0c-359bbd97381e"
```
```go Go theme={"theme":{"light":"github-light","dark":"vesper"}}
package main
import "github.com/resend/resend-go/v3"
func main() {
client := resend.NewClient("re_xxxxxxxxx")
client.ApiKeys.Remove("b6d24b8e-af0b-4c3c-be0c-359bbd97381e")
}
```
```rust Rust theme={"theme":{"light":"github-light","dark":"vesper"}}
use resend_rs::{Resend, Result};
#[tokio::main]
async fn main() -> Result<()> {
let resend = Resend::new("re_xxxxxxxxx");
resend
.api_keys
.delete("b6d24b8e-af0b-4c3c-be0c-359bbd97381e")
.await?;
Ok(())
}
```
```java Java theme={"theme":{"light":"github-light","dark":"vesper"}}
import com.resend.*;
public class Main {
public static void main(String[] args) {
Resend resend = new Resend("re_xxxxxxxxx");
resend.apiKeys().remove("b6d24b8e-af0b-4c3c-be0c-359bbd97381e");
}
}
```
```csharp .NET theme={"theme":{"light":"github-light","dark":"vesper"}}
using Resend;
IResend resend = ResendClient.Create( "re_xxxxxxxxx" ); // Or from DI
await resend.ApiKeyDeleteAsync( new Guid( "b6d24b8e-af0b-4c3c-be0c-359bbd97381e" ) );
```
```bash cURL theme={"theme":{"light":"github-light","dark":"vesper"}}
curl -X DELETE 'https://api.resend.com/api-keys/b6d24b8e-af0b-4c3c-be0c-359bbd97381e' \
-H 'Authorization: Bearer re_xxxxxxxxx'
```
```text Response theme={"theme":{"light":"github-light","dark":"vesper"}}
HTTP 200 OK
```
---
# Source: https://resend.com/docs/api-reference/broadcasts/delete-broadcast.md
> ## Documentation Index
> Fetch the complete documentation index at: https://resend.com/docs/llms.txt
> Use this file to discover all available pages before exploring further.
# Delete Broadcast
> Remove an existing broadcast.
export const ResendParamField = ({children, body, path, ...props}) => {
const [lang, setLang] = useState(() => {
return localStorage.getItem('code') || '"Node.js"';
});
useEffect(() => {
const onStorage = event => {
const key = event.detail.key;
if (key === 'code') {
setLang(event.detail.value);
}
};
document.addEventListener('mintlify-localstorage', onStorage);
return () => {
document.removeEventListener('mintlify-localstorage', onStorage);
};
}, []);
const toCamelCase = str => typeof str === 'string' ? str.replace(/[_-](\w)/g, (_, c) => c.toUpperCase()) : str;
const resolvedBody = useMemo(() => {
const value = JSON.parse(lang);
return value === 'Node.js' ? toCamelCase(body) : body;
}, [body, lang]);
const resolvedPath = useMemo(() => {
const value = JSON.parse(lang);
return value === 'Node.js' ? toCamelCase(path) : path;
}, [path, lang]);
return
{children}
;
};
You can only delete broadcasts that are in the `draft` status. In addition, if you delete a broadcast that has already been scheduled to be sent, we will automatically cancel the scheduled delivery and it won't be sent.
## Path Parameters
The broadcast ID.
```ts Node.js theme={"theme":{"light":"github-light","dark":"vesper"}}
import { Resend } from 'resend';
const resend = new Resend('re_xxxxxxxxx');
const { data, error } = await resend.broadcasts.remove(
'559ac32e-9ef5-46fb-82a1-b76b840c0f7b',
);
```
```php PHP theme={"theme":{"light":"github-light","dark":"vesper"}}
$resend = Resend::client('re_xxxxxxxxx');
$resend->broadcasts->remove('559ac32e-9ef5-46fb-82a1-b76b840c0f7b');
```
```py Python theme={"theme":{"light":"github-light","dark":"vesper"}}
import resend
resend.api_key = "re_xxxxxxxxx"
resend.Broadcasts.remove(id="559ac32e-9ef5-46fb-82a1-b76b840c0f7b")
```
```ruby Ruby theme={"theme":{"light":"github-light","dark":"vesper"}}
require "resend"
Resend.api_key = "re_xxxxxxxxx"
Resend::Broadcasts.remove("559ac32e-9ef5-46fb-82a1-b76b840c0f7b")
```
```go Go theme={"theme":{"light":"github-light","dark":"vesper"}}
package main
import "github.com/resend/resend-go/v3"
func main() {
client := resend.NewClient("re_xxxxxxxxx")
client.Broadcasts.Remove("559ac32e-9ef5-46fb-82a1-b76b840c0f7b")
}
```
```rust Rust theme={"theme":{"light":"github-light","dark":"vesper"}}
use resend_rs::{Resend, Result};
#[tokio::main]
async fn main() -> Result<()> {
let resend = Resend::new("re_xxxxxxxxx");
let _deleted = resend
.broadcasts
.delete("559ac32e-9ef5-46fb-82a1-b76b840c0f7b")
.await?;
Ok(())
}
```
```java Java theme={"theme":{"light":"github-light","dark":"vesper"}}
Resend resend = new Resend("re_xxxxxxxxx");
RemoveBroadcastResponseSuccess data = resend.broadcasts().remove("559ac32e-9ef5-46fb-82a1-b76b840c0f7b");
```
```csharp .NET theme={"theme":{"light":"github-light","dark":"vesper"}}
using Resend;
IResend resend = ResendClient.Create( "re_xxxxxxxxx" ); // Or from DI
await resend.BroadcastDeleteAsync( new Guid( "559ac32e-9ef5-46fb-82a1-b76b840c0f7b" ) );
```
```bash cURL theme={"theme":{"light":"github-light","dark":"vesper"}}
curl -X DELETE 'https://api.resend.com/broadcasts/559ac32e-9ef5-46fb-82a1-b76b840c0f7b' \
-H 'Authorization: Bearer re_xxxxxxxxx'
```
```json Response theme={"theme":{"light":"github-light","dark":"vesper"}}
{
"object": "broadcast",
"id": "559ac32e-9ef5-46fb-82a1-b76b840c0f7b",
"deleted": true
}
```
---
# Source: https://resend.com/docs/api-reference/contact-properties/delete-contact-property.md
> ## Documentation Index
> Fetch the complete documentation index at: https://resend.com/docs/llms.txt
> Use this file to discover all available pages before exploring further.
# Delete Contact Property
> Remove an existing contact property.
export const ResendParamField = ({children, body, path, ...props}) => {
const [lang, setLang] = useState(() => {
return localStorage.getItem('code') || '"Node.js"';
});
useEffect(() => {
const onStorage = event => {
const key = event.detail.key;
if (key === 'code') {
setLang(event.detail.value);
}
};
document.addEventListener('mintlify-localstorage', onStorage);
return () => {
document.removeEventListener('mintlify-localstorage', onStorage);
};
}, []);
const toCamelCase = str => typeof str === 'string' ? str.replace(/[_-](\w)/g, (_, c) => c.toUpperCase()) : str;
const resolvedBody = useMemo(() => {
const value = JSON.parse(lang);
return value === 'Node.js' ? toCamelCase(body) : body;
}, [body, lang]);
const resolvedPath = useMemo(() => {
const value = JSON.parse(lang);
return value === 'Node.js' ? toCamelCase(path) : path;
}, [path, lang]);
return
{children}
;
};
## Path Parameters
The Contact Property ID.
```ts Node.js theme={"theme":{"light":"github-light","dark":"vesper"}}
import { Resend } from 'resend';
const resend = new Resend('re_xxxxxxxxx');
const { data, error } = await resend.contactProperties.remove(
'b6d24b8e-af0b-4c3c-be0c-359bbd97381e',
);
```
```php PHP theme={"theme":{"light":"github-light","dark":"vesper"}}
$resend = Resend::client('re_xxxxxxxxx');
$resend->contactProperties->remove('b6d24b8e-af0b-4c3c-be0c-359bbd97381');
```
```python Python theme={"theme":{"light":"github-light","dark":"vesper"}}
import resend
resend.api_key = 're_xxxxxxxxx'
contact_property = resend.ContactProperties.remove('b6d24b8e-af0b-4c3c-be0c-359bbd97381e')
```
```ruby Ruby theme={"theme":{"light":"github-light","dark":"vesper"}}
require "resend"
Resend.api_key = "re_xxxxxxxxx"
Resend::ContactProperties.remove("b6d24b8e-af0b-4c3c-be0c-359bbd97381e")
```
```go Go theme={"theme":{"light":"github-light","dark":"vesper"}}
package main
import (
"context"
"fmt"
"github.com/resend/resend-go/v3"
)
func main() {
ctx := context.TODO()
client := resend.NewClient("re_xxxxxxxxx")
property, err := client.ContactProperties.RemoveWithContext(ctx, "b6d24b8e-af0b-4c3c-be0c-359bbd97381e")
if err != nil {
panic(err)
}
fmt.Println(property)
}
```
```rust Rust theme={"theme":{"light":"github-light","dark":"vesper"}}
use resend_rs::{Resend, Result};
#[tokio::main]
async fn main() -> Result<()> {
let resend = Resend::new("re_xxxxxxxxx");
let _deleted = resend
.contacts
.delete_property("b6d24b8e-af0b-4c3c-be0c-359bbd97381e")
.await?;
Ok(())
}
```
```java Java theme={"theme":{"light":"github-light","dark":"vesper"}}
import com.resend.*;
public class Main {
public static void main(String[] args) {
Resend resend = new Resend("re_xxxxxxxxx");
resend.contactProperties().remove("b6d24b8e-af0b-4c3c-be0c-359bbd97381e");
}
}
```
```csharp .NET theme={"theme":{"light":"github-light","dark":"vesper"}}
using Resend;
IResend resend = ResendClient.Create( "re_xxxxxxxxx" ); // Or from DI
var resp = await resend.ContactPropDeleteAsync( new Guid( "b6d24b8e-af0b-4c3c-be0c-359bbd97381e" ) );
```
```bash cURL theme={"theme":{"light":"github-light","dark":"vesper"}}
curl -X DELETE 'https://api.resend.com/contact-properties/b6d24b8e-af0b-4c3c-be0c-359bbd97381e' \
-H 'Authorization: Bearer re_xxxxxxxxx'
```
```json Response theme={"theme":{"light":"github-light","dark":"vesper"}}
{
"object": "contact_property",
"id": "b6d24b8e-af0b-4c3c-be0c-359bbd97381e",
"deleted": true
}
```
---
# Source: https://resend.com/docs/api-reference/contacts/delete-contact-segment.md
> ## Documentation Index
> Fetch the complete documentation index at: https://resend.com/docs/llms.txt
> Use this file to discover all available pages before exploring further.
# Delete Contact Segment
> Remove an existing contact from a segment.
export const ResendParamField = ({children, body, path, ...props}) => {
const [lang, setLang] = useState(() => {
return localStorage.getItem('code') || '"Node.js"';
});
useEffect(() => {
const onStorage = event => {
const key = event.detail.key;
if (key === 'code') {
setLang(event.detail.value);
}
};
document.addEventListener('mintlify-localstorage', onStorage);
return () => {
document.removeEventListener('mintlify-localstorage', onStorage);
};
}, []);
const toCamelCase = str => typeof str === 'string' ? str.replace(/[_-](\w)/g, (_, c) => c.toUpperCase()) : str;
const resolvedBody = useMemo(() => {
const value = JSON.parse(lang);
return value === 'Node.js' ? toCamelCase(body) : body;
}, [body, lang]);
const resolvedPath = useMemo(() => {
const value = JSON.parse(lang);
return value === 'Node.js' ? toCamelCase(path) : path;
}, [path, lang]);
return
{children}
;
};
## Path Parameters
Either `id` or `email` must be provided.
The Contact ID.
The Contact Email.
The Segment ID.
```ts Node.js theme={"theme":{"light":"github-light","dark":"vesper"}}
import { Resend } from 'resend';
const resend = new Resend('re_xxxxxxxxx');
// Remove by contact id
const { data, error } = await resend.contacts.segments.remove({
id: 'e169aa45-1ecf-4183-9955-b1499d5701d3',
segmentId: '78261eea-8f8b-4381-83c6-79fa7120f1cf',
});
// Remove by contact email
const { data, error } = await resend.contacts.segments.remove({
email: 'steve.wozniak@gmail.com',
segmentId: '78261eea-8f8b-4381-83c6-79fa7120f1cf',
});
```
```php PHP theme={"theme":{"light":"github-light","dark":"vesper"}}
$resend = Resend::client('re_xxxxxxxxx');
// Remove by contact id
$resend->contacts->segments->remove(
contact: 'e169aa45-1ecf-4183-9955-b1499d5701d3',
segmentId: '78261eea-8f8b-4381-83c6-79fa7120f1cf'
);
// Remove by contact email
$resend->contacts->segments->remove(
contact: 'steve.wozniak@gmail.com',
segmentId: '78261eea-8f8b-4381-83c6-79fa7120f1cf'
);
```
```python Python theme={"theme":{"light":"github-light","dark":"vesper"}}
import resend
resend.api_key = 're_xxxxxxxxx'
# Remove by contact id
params = {
"segment_id": '78261eea-8f8b-4381-83c6-79fa7120f1cf',
"contact_id": 'e169aa45-1ecf-4183-9955-b1499d5701d3',
}
response = resend.Contacts.Segments.remove(params)
```
```ruby Ruby theme={"theme":{"light":"github-light","dark":"vesper"}}
require 'resend'
Resend.api_key = 're_xxxxxxxxx'
# Remove by contact id
removed = Resend::Contacts::Segments.remove(
contact_id: 'e169aa45-1ecf-4183-9955-b1499d5701d3',
segment_id: '78261eea-8f8b-4381-83c6-79fa7120f1cf'
)
# Remove by contact email
removed = Resend::Contacts::Segments.remove(
email: 'steve.wozniak@gmail.com',
segment_id: '78261eea-8f8b-4381-83c6-79fa7120f1cf'
)
```
```go Go theme={"theme":{"light":"github-light","dark":"vesper"}}
package main
import (
"context"
"fmt"
"github.com/resend/resend-go/v3"
)
func main() {
ctx := context.TODO()
client := resend.NewClient("re_xxxxxxxxx")
// Remove by contact id
removeParams := &resend.RemoveContactSegmentRequest{
ContactId: "e169aa45-1ecf-4183-9955-b1499d5701d3",
SegmentId: "78261eea-8f8b-4381-83c6-79fa7120f1cf",
}
response, err := client.Contacts.Segments.RemoveWithContext(ctx, removeParams)
if err != nil {
panic(err)
}
fmt.Println(response)
// Remove by contact email
removeByEmailParams := &resend.RemoveContactSegmentRequest{
Email: "steve.wozniak@gmail.com",
SegmentId: "78261eea-8f8b-4381-83c6-79fa7120f1cf",
}
response, err = client.Contacts.Segments.RemoveWithContext(ctx, removeByEmailParams)
if err != nil {
panic(err)
}
fmt.Println(response)
}
```
```rust Rust theme={"theme":{"light":"github-light","dark":"vesper"}}
use resend_rs::{Resend, Result};
#[tokio::main]
async fn main() -> Result<()> {
let resend = Resend::new("re_xxxxxxxxx");
// Update by contact id
let _contact = resend
.contacts
.delete_contact_segment(
"e169aa45-1ecf-4183-9955-b1499d5701d3",
"78261eea-8f8b-4381-83c6-79fa7120f1cf",
)
.await?;
// // Update by contact email
let _contact = resend
.contacts
.delete_contact_segment(
"steve.wozniak@gmail.com",
"78261eea-8f8b-4381-83c6-79fa7120f1cf",
)
.await?;
Ok(())
}
```
```java Java theme={"theme":{"light":"github-light","dark":"vesper"}}
import com.resend.*;
public class Main {
public static void main(String[] args) {
Resend resend = new Resend("re_xxxxxxxxx");
// Remove by contact id
RemoveContactFromSegmentOptions optionsById = RemoveContactFromSegmentOptions.builder()
.id("e169aa45-1ecf-4183-9955-b1499d5701d3")
.segmentId("78261eea-8f8b-4381-83c6-79fa7120f1cf")
.build();
resend.contacts().segments().remove(optionsById);
// Remove by contact email
RemoveContactFromSegmentOptions optionsByEmail = RemoveContactFromSegmentOptions.builder()
.email("steve.wozniak@gmail.com")
.segmentId("78261eea-8f8b-4381-83c6-79fa7120f1cf")
.build();
resend.contacts().segments().remove(optionsByEmail);
}
}
```
```csharp .NET theme={"theme":{"light":"github-light","dark":"vesper"}}
using Resend;
IResend resend = ResendClient.Create( "re_xxxxxxxxx" ); // Or from DI
await resend.ContactRemoveFromSegmentAsync(
contactId: new Guid( "e169aa45-1ecf-4183-9955-b1499d5701d3" ),
segmentId: new Guid( "78261eea-8f8b-4381-83c6-79fa7120f1cf" )
);
```
```bash cURL theme={"theme":{"light":"github-light","dark":"vesper"}}
// Update by contact id
curl -X DELETE 'https://api.resend.com/contacts/e169aa45-1ecf-4183-9955-b1499d5701d3/segments/78261eea-8f8b-4381-83c6-79fa7120f1cf' \
-H 'Authorization: Bearer re_xxxxxxxxx'
// Update by contact email
curl -X DELETE 'https://api.resend.com/contacts/steve.wozniak@gmail.com/segments/78261eea-8f8b-4381-83c6-79fa7120f1cf' \
-H 'Authorization: Bearer re_xxxxxxxxx' \
-H 'Content-Type: application/json'
```
```json Response theme={"theme":{"light":"github-light","dark":"vesper"}}
{
"id": "78261eea-8f8b-4381-83c6-79fa7120f1cf",
"deleted": true
}
```
---
# Source: https://resend.com/docs/api-reference/contacts/delete-contact.md
> ## Documentation Index
> Fetch the complete documentation index at: https://resend.com/docs/llms.txt
> Use this file to discover all available pages before exploring further.
# Delete Contact
> Remove an existing contact.
export const ResendParamField = ({children, body, path, ...props}) => {
const [lang, setLang] = useState(() => {
return localStorage.getItem('code') || '"Node.js"';
});
useEffect(() => {
const onStorage = event => {
const key = event.detail.key;
if (key === 'code') {
setLang(event.detail.value);
}
};
document.addEventListener('mintlify-localstorage', onStorage);
return () => {
document.removeEventListener('mintlify-localstorage', onStorage);
};
}, []);
const toCamelCase = str => typeof str === 'string' ? str.replace(/[_-](\w)/g, (_, c) => c.toUpperCase()) : str;
const resolvedBody = useMemo(() => {
const value = JSON.parse(lang);
return value === 'Node.js' ? toCamelCase(body) : body;
}, [body, lang]);
const resolvedPath = useMemo(() => {
const value = JSON.parse(lang);
return value === 'Node.js' ? toCamelCase(path) : path;
}, [path, lang]);
return
{children}
;
};
## Path Parameters
Either `id` or `email` must be provided.
The Contact ID.
The Contact email.
```ts Node.js theme={"theme":{"light":"github-light","dark":"vesper"}}
import { Resend } from 'resend';
const resend = new Resend('re_xxxxxxxxx');
// Delete by contact id
const { data, error } = await resend.contacts.remove({
id: '520784e2-887d-4c25-b53c-4ad46ad38100',
});
// Delete by contact email
const { data, error } = await resend.contacts.remove({
email: 'acme@example.com',
});
```
```php PHP theme={"theme":{"light":"github-light","dark":"vesper"}}
$resend = Resend::client('re_xxxxxxxxx');
// Delete by contact id
$resend->contacts->remove(
id: '520784e2-887d-4c25-b53c-4ad46ad38100'
);
// Delete by contact email
$resend->contacts->remove(
email: 'acme@example.com'
);
```
```python Python theme={"theme":{"light":"github-light","dark":"vesper"}}
import resend
resend.api_key = "re_xxxxxxxxx"
# Delete by contact id
resend.Contacts.remove(
id="520784e2-887d-4c25-b53c-4ad46ad38100"
)
# Delete by contact email
resend.Contacts.remove(
email="acme@example.com"
)
```
```ruby Ruby theme={"theme":{"light":"github-light","dark":"vesper"}}
require "resend"
Resend.api_key = "re_xxxxxxxxx"
# Delete by contact id
Resend::Contacts.remove(
id: "520784e2-887d-4c25-b53c-4ad46ad38100"
)
# Delete by contact email
Resend::Contacts.remove(
email: "acme@example.com"
)
```
```go Go theme={"theme":{"light":"github-light","dark":"vesper"}}
package main
import "github.com/resend/resend-go/v3"
func main() {
client := resend.NewClient("re_xxxxxxxxx")
// Delete by contact id
client.Contacts.Remove("520784e2-887d-4c25-b53c-4ad46ad38100")
// Delete by contact email
client.Contacts.Remove("acme@example.com")
}
```
```rust Rust theme={"theme":{"light":"github-light","dark":"vesper"}}
use resend_rs::{Resend, Result};
#[tokio::main]
async fn main() -> Result<()> {
let resend = Resend::new("re_xxxxxxxxx");
// Delete by contact id
let _deleted = resend
.contacts
.delete("520784e2-887d-4c25-b53c-4ad46ad38100")
.await?;
// Delete by contact email
let _deleted = resend
.contacts
.delete("acme@example.com")
.await?;
Ok(())
}
```
```java Java theme={"theme":{"light":"github-light","dark":"vesper"}}
import com.resend.*;
public class Main {
public static void main(String[] args) {
Resend resend = new Resend("re_xxxxxxxxx");
// Delete by contact id
resend.contacts().remove(ContactRequestOptions.builder()
.id("520784e2-887d-4c25-b53c-4ad46ad38100")
.build());
// Delete by contact email
resend.contacts().remove(ContactRequestOptions.builder()
.email("acme@example.com")
.build());
}
}
```
```csharp .NET theme={"theme":{"light":"github-light","dark":"vesper"}}
using Resend;
IResend resend = ResendClient.Create( "re_xxxxxxxxx" ); // Or from DI
// By Id
await resend.ContactDeleteAsync(
contactId: new Guid( "520784e2-887d-4c25-b53c-4ad46ad38100" )
);
// By Email
await resend.ContactDeleteByEmailAsync(
"acme@example.com"
);
```
```bash cURL theme={"theme":{"light":"github-light","dark":"vesper"}}
# Delete by contact id
curl -X DELETE 'https://api.resend.com/contacts/520784e2-887d-4c25-b53c-4ad46ad38100' \
-H 'Authorization: Bearer re_xxxxxxxxx'
# Deleted by contact email
curl -X DELETE 'https://api.resend.com/contacts/acme@example.com' \
-H 'Authorization: Bearer re_xxxxxxxxx'
```
```json Response theme={"theme":{"light":"github-light","dark":"vesper"}}
{
"object": "contact",
"contact": "520784e2-887d-4c25-b53c-4ad46ad38100",
"deleted": true
}
```
---
# Source: https://resend.com/docs/api-reference/domains/delete-domain.md
> ## Documentation Index
> Fetch the complete documentation index at: https://resend.com/docs/llms.txt
> Use this file to discover all available pages before exploring further.
# Delete Domain
> Remove an existing domain.
export const ResendParamField = ({children, body, path, ...props}) => {
const [lang, setLang] = useState(() => {
return localStorage.getItem('code') || '"Node.js"';
});
useEffect(() => {
const onStorage = event => {
const key = event.detail.key;
if (key === 'code') {
setLang(event.detail.value);
}
};
document.addEventListener('mintlify-localstorage', onStorage);
return () => {
document.removeEventListener('mintlify-localstorage', onStorage);
};
}, []);
const toCamelCase = str => typeof str === 'string' ? str.replace(/[_-](\w)/g, (_, c) => c.toUpperCase()) : str;
const resolvedBody = useMemo(() => {
const value = JSON.parse(lang);
return value === 'Node.js' ? toCamelCase(body) : body;
}, [body, lang]);
const resolvedPath = useMemo(() => {
const value = JSON.parse(lang);
return value === 'Node.js' ? toCamelCase(path) : path;
}, [path, lang]);
return
{children}
;
};
## Path Parameters
The Domain ID.
```js Node.js theme={"theme":{"light":"github-light","dark":"vesper"}}
import { Resend } from 'resend';
const resend = new Resend('re_xxxxxxxxx');
const { data, error } = await resend.domains.remove(
'd91cd9bd-1176-453e-8fc1-35364d380206',
);
```
```php PHP theme={"theme":{"light":"github-light","dark":"vesper"}}
$resend = Resend::client('re_xxxxxxxxx');
$resend->domains->remove('d91cd9bd-1176-453e-8fc1-35364d380206');
```
```python Python theme={"theme":{"light":"github-light","dark":"vesper"}}
import resend
resend.api_key = "re_xxxxxxxxx"
resend.Domains.remove(domain_id="d91cd9bd-1176-453e-8fc1-35364d380206")
```
```ruby Ruby theme={"theme":{"light":"github-light","dark":"vesper"}}
Resend.api_key = ENV["RESEND_API_KEY"]
Resend::Domains.remove("d91cd9bd-1176-453e-8fc1-35364d380206")
```
```go Go theme={"theme":{"light":"github-light","dark":"vesper"}}
package main
import "github.com/resend/resend-go/v3"
func main() {
client := resend.NewClient("re_xxxxxxxxx")
client.Domains.Remove("d91cd9bd-1176-453e-8fc1-35364d380206")
}
```
```rust Rust theme={"theme":{"light":"github-light","dark":"vesper"}}
use resend_rs::{Resend, Result};
#[tokio::main]
async fn main() -> Result<()> {
let resend = Resend::new("re_xxxxxxxxx");
let _deleted = resend
.domains
.delete("d91cd9bd-1176-453e-8fc1-35364d380206")
.await?;
Ok(())
}
```
```java Java theme={"theme":{"light":"github-light","dark":"vesper"}}
import com.resend.*;
public class Main {
public static void main(String[] args) {
Resend resend = new Resend("re_xxxxxxxxx");
RemoveDomainResponse removed = resend.domains().remove("d91cd9bd-1176-453e-8fc1-35364d380206");
}
}
```
```csharp .NET theme={"theme":{"light":"github-light","dark":"vesper"}}
using Resend;
IResend resend = ResendClient.Create( "re_xxxxxxxxx" ); // Or from DI
await resend.DomainDeleteAsync( new Guid( "d91cd9bd-1176-453e-8fc1-35364d380206" ) );
```
```bash cURL theme={"theme":{"light":"github-light","dark":"vesper"}}
curl -X DELETE 'https://api.resend.com/domains/d91cd9bd-1176-453e-8fc1-35364d380206' \
-H 'Authorization: Bearer re_xxxxxxxxx'
```
```json Response theme={"theme":{"light":"github-light","dark":"vesper"}}
{
"object": "domain",
"id": "d91cd9bd-1176-453e-8fc1-35364d380206",
"deleted": true
}
```
---
# Source: https://resend.com/docs/api-reference/segments/delete-segment.md
> ## Documentation Index
> Fetch the complete documentation index at: https://resend.com/docs/llms.txt
> Use this file to discover all available pages before exploring further.
# Delete Segment
> Remove an existing segment.
export const ResendParamField = ({children, body, path, ...props}) => {
const [lang, setLang] = useState(() => {
return localStorage.getItem('code') || '"Node.js"';
});
useEffect(() => {
const onStorage = event => {
const key = event.detail.key;
if (key === 'code') {
setLang(event.detail.value);
}
};
document.addEventListener('mintlify-localstorage', onStorage);
return () => {
document.removeEventListener('mintlify-localstorage', onStorage);
};
}, []);
const toCamelCase = str => typeof str === 'string' ? str.replace(/[_-](\w)/g, (_, c) => c.toUpperCase()) : str;
const resolvedBody = useMemo(() => {
const value = JSON.parse(lang);
return value === 'Node.js' ? toCamelCase(body) : body;
}, [body, lang]);
const resolvedPath = useMemo(() => {
const value = JSON.parse(lang);
return value === 'Node.js' ? toCamelCase(path) : path;
}, [path, lang]);
return
{children}
;
};
## Path Parameters
The Segment ID.
```ts Node.js theme={"theme":{"light":"github-light","dark":"vesper"}}
import { Resend } from 'resend';
const resend = new Resend('re_xxxxxxxxx');
const { data, error } = await resend.segments.remove(
'78261eea-8f8b-4381-83c6-79fa7120f1cf',
);
```
```php PHP theme={"theme":{"light":"github-light","dark":"vesper"}}
$resend = Resend::client('re_xxxxxxxxx');
$resend->segments->remove('78261eea-8f8b-4381-83c6-79fa7120f1cf');
```
```python Python theme={"theme":{"light":"github-light","dark":"vesper"}}
import resend
resend.api_key = 're_xxxxxxxxx'
segment = resend.Segments.remove(id='78261eea-8f8b-4381-83c6-79fa7120f1cf')
```
```ruby Ruby theme={"theme":{"light":"github-light","dark":"vesper"}}
require "resend"
Resend.api_key = "re_xxxxxxxxx"
Resend::Segments.remove("78261eea-8f8b-4381-83c6-79fa7120f1cf")
```
```go Go theme={"theme":{"light":"github-light","dark":"vesper"}}
package main
import (
"context"
"fmt"
"github.com/resend/resend-go/v3"
)
func main() {
ctx := context.TODO()
client := resend.NewClient("re_xxxxxxxxx")
segment, err := client.Segments.RemoveWithContext(ctx, "78261eea-8f8b-4381-83c6-79fa7120f1cf")
if err != nil {
panic(err)
}
fmt.Println(segment)
}
```
```rust Rust theme={"theme":{"light":"github-light","dark":"vesper"}}
use resend_rs::{Resend, Result};
#[tokio::main]
async fn main() -> Result<()> {
let resend = Resend::new("re_xxxxxxxxx");
let _segment = resend
.segments
.delete("78261eea-8f8b-4381-83c6-79fa7120f1cf")
.await?;
Ok(())
}
```
```java Java theme={"theme":{"light":"github-light","dark":"vesper"}}
import com.resend.*;
public class Main {
public static void main(String[] args) {
Resend resend = new Resend("re_xxxxxxxxx");
RemoveSegmentResponseSuccess response = resend.segments().remove("78261eea-8f8b-4381-83c6-79fa7120f1cf");
}
}
```
```csharp .NET theme={"theme":{"light":"github-light","dark":"vesper"}}
using Resend;
IResend resend = ResendClient.Create( "re_xxxxxxxxx" ); // Or from DI
var resp = await resend.SegmentDeleteAsync( new Guid( "b6d24b8e-af0b-4c3c-be0c-359bbd97381e" ) );
```
```bash cURL theme={"theme":{"light":"github-light","dark":"vesper"}}
curl -X DELETE 'https://api.resend.com/segments/78261eea-8f8b-4381-83c6-79fa7120f1cf' \
-H 'Authorization: Bearer re_xxxxxxxxx'
```
```json Response theme={"theme":{"light":"github-light","dark":"vesper"}}
{
"object": "segment",
"id": "78261eea-8f8b-4381-83c6-79fa7120f1cf",
"deleted": true
}
```
---
# Source: https://resend.com/docs/api-reference/templates/delete-template.md
> ## Documentation Index
> Fetch the complete documentation index at: https://resend.com/docs/llms.txt
> Use this file to discover all available pages before exploring further.
# Delete Template
> Delete a template.
## Path Parameters
The ID or alias of the template to delete.
```ts Node.js theme={"theme":{"light":"github-light","dark":"vesper"}}
import { Resend } from 'resend';
const resend = new Resend('re_xxxxxxxxx');
const { data, error } = await resend.templates.remove(
'34a080c9-b17d-4187-ad80-5af20266e535',
);
```
```php PHP theme={"theme":{"light":"github-light","dark":"vesper"}}
$resend = Resend::client('re_xxxxxxxxx');
$resend->templates->remove('34a080c9-b17d-4187-ad80-5af20266e535');
```
```py Python theme={"theme":{"light":"github-light","dark":"vesper"}}
import resend
resend.api_key = "re_xxxxxxxxx"
resend.Templates.remove("34a080c9-b17d-4187-ad80-5af20266e535")
```
```ruby Ruby theme={"theme":{"light":"github-light","dark":"vesper"}}
require "resend"
Resend.api_key = "re_xxxxxxxxx"
Resend::Templates.remove("34a080c9-b17d-4187-ad80-5af20266e535")
```
```go Go theme={"theme":{"light":"github-light","dark":"vesper"}}
import (
"context"
"github.com/resend/resend-go/v3"
)
func main() {
client := resend.NewClient("re_xxxxxxxxx")
client.Templates.RemoveWithContext(
context.TODO(),
"34a080c9-b17d-4187-ad80-5af20266e535",
)
}
```
```rust Rust theme={"theme":{"light":"github-light","dark":"vesper"}}
use resend_rs::{Resend, Result};
#[tokio::main]
async fn main() -> Result<()> {
let resend = Resend::new("re_xxxxxxxxx");
let _deleted = resend
.templates
.delete("34a080c9-b17d-4187-ad80-5af20266e535")
.await?;
Ok(())
}
```
```java Java theme={"theme":{"light":"github-light","dark":"vesper"}}
import com.resend.*;
public class Main {
public static void main(String[] args) {
Resend resend = new Resend("re_xxxxxxxxx");
DeleteTemplateResponseSuccess data = resend.templates().remove("34a080c9-b17d-4187-ad80-5af20266e535");
}
}
```
```csharp .NET theme={"theme":{"light":"github-light","dark":"vesper"}}
using Resend;
IResend resend = ResendClient.Create( "re_xxxxxxxxx" ); // Or from DI
await resend.TemplateDeleteAsync( new Guid( "34a080c9-b17d-4187-ad80-5af20266e535" ) );
```
```bash cURL theme={"theme":{"light":"github-light","dark":"vesper"}}
curl -X DELETE 'https://api.resend.com/templates/34a080c9-b17d-4187-ad80-5af20266e535' \
-H 'Authorization: Bearer re_xxxxxxxxx' \
-H 'Content-Type: application/json'
```
```json Response theme={"theme":{"light":"github-light","dark":"vesper"}}
{
"object": "template",
"id": "34a080c9-b17d-4187-ad80-5af20266e535",
"deleted": true
}
```
---
# Source: https://resend.com/docs/api-reference/topics/delete-topic.md
> ## Documentation Index
> Fetch the complete documentation index at: https://resend.com/docs/llms.txt
> Use this file to discover all available pages before exploring further.
# Delete Topic
> Remove an existing topic.
export const ResendParamField = ({children, body, path, ...props}) => {
const [lang, setLang] = useState(() => {
return localStorage.getItem('code') || '"Node.js"';
});
useEffect(() => {
const onStorage = event => {
const key = event.detail.key;
if (key === 'code') {
setLang(event.detail.value);
}
};
document.addEventListener('mintlify-localstorage', onStorage);
return () => {
document.removeEventListener('mintlify-localstorage', onStorage);
};
}, []);
const toCamelCase = str => typeof str === 'string' ? str.replace(/[_-](\w)/g, (_, c) => c.toUpperCase()) : str;
const resolvedBody = useMemo(() => {
const value = JSON.parse(lang);
return value === 'Node.js' ? toCamelCase(body) : body;
}, [body, lang]);
const resolvedPath = useMemo(() => {
const value = JSON.parse(lang);
return value === 'Node.js' ? toCamelCase(path) : path;
}, [path, lang]);
return
{children}
;
};
## Path Parameters
The topic ID.
```ts Node.js theme={"theme":{"light":"github-light","dark":"vesper"}}
import { Resend } from 'resend';
const resend = new Resend('re_xxxxxxxxx');
const { data, error } = await resend.topics.remove(
'b6d24b8e-af0b-4c3c-be0c-359bbd97381e',
);
```
```php PHP theme={"theme":{"light":"github-light","dark":"vesper"}}
$resend = Resend::client('re_xxxxxxxxx');
$resend->topics->remove('b6d24b8e-af0b-4c3c-be0c-359bbd97381e');
```
```python Python theme={"theme":{"light":"github-light","dark":"vesper"}}
import resend
resend.api_key = "re_xxxxxxxxx"
resend.Topics.remove(id="b6d24b8e-af0b-4c3c-be0c-359bbd97381e")
```
```ruby Ruby theme={"theme":{"light":"github-light","dark":"vesper"}}
require "resend"
Resend.api_key = "re_xxxxxxxxx"
Resend::Topics.remove("b6d24b8e-af0b-4c3c-be0c-359bbd97381e")
```
```go Go theme={"theme":{"light":"github-light","dark":"vesper"}}
import (
"context"
"github.com/resend/resend-go/v3"
)
func main() {
client := resend.NewClient("re_xxxxxxxxx")
client.Topics.RemoveWithContext(
context.TODO(),
"b6d24b8e-af0b-4c3c-be0c-359bbd97381e",
)
}
```
```rust Rust theme={"theme":{"light":"github-light","dark":"vesper"}}
use resend_rs::{Resend, Result};
#[tokio::main]
async fn main() -> Result<()> {
let resend = Resend::new("re_xxxxxxxxx");
let _deleted = resend.topics.delete("delete").await?;
Ok(())
}
```
```java Java theme={"theme":{"light":"github-light","dark":"vesper"}}
import com.resend.*;
public class Main {
public static void main(String[] args) {
Resend resend = new Resend("re_xxxxxxxxx");
RemoveTopicResponseSuccess response = resend.topics().remove("b6d24b8e-af0b-4c3c-be0c-359bbd97381e");
}
}
```
```csharp .NET theme={"theme":{"light":"github-light","dark":"vesper"}}
using Resend;
IResend resend = ResendClient.Create( "re_xxxxxxxxx" ); // Or from DI
var resp = await resend.TopicDeleteAsync( new Guid( "b6d24b8e-af0b-4c3c-be0c-359bbd97381e" ) );
```
```bash cURL theme={"theme":{"light":"github-light","dark":"vesper"}}
curl -X DELETE 'https://api.resend.com/topics/b6d24b8e-af0b-4c3c-be0c-359bbd97381e' \
-H 'Authorization: Bearer re_xxxxxxxxx'
```
```json Response theme={"theme":{"light":"github-light","dark":"vesper"}}
{
"object": "topic",
"id": "b6d24b8e-af0b-4c3c-be0c-359bbd97381e",
"deleted": true
}
```
---
# Source: https://resend.com/docs/api-reference/webhooks/delete-webhook.md
> ## Documentation Index
> Fetch the complete documentation index at: https://resend.com/docs/llms.txt
> Use this file to discover all available pages before exploring further.
# Delete Webhook
> Remove an existing webhook.
export const ResendParamField = ({children, body, path, ...props}) => {
const [lang, setLang] = useState(() => {
return localStorage.getItem('code') || '"Node.js"';
});
useEffect(() => {
const onStorage = event => {
const key = event.detail.key;
if (key === 'code') {
setLang(event.detail.value);
}
};
document.addEventListener('mintlify-localstorage', onStorage);
return () => {
document.removeEventListener('mintlify-localstorage', onStorage);
};
}, []);
const toCamelCase = str => typeof str === 'string' ? str.replace(/[_-](\w)/g, (_, c) => c.toUpperCase()) : str;
const resolvedBody = useMemo(() => {
const value = JSON.parse(lang);
return value === 'Node.js' ? toCamelCase(body) : body;
}, [body, lang]);
const resolvedPath = useMemo(() => {
const value = JSON.parse(lang);
return value === 'Node.js' ? toCamelCase(path) : path;
}, [path, lang]);
return
{children}
;
};
## Path Parameters
The Webhook ID.
```ts Node.js theme={"theme":{"light":"github-light","dark":"vesper"}}
import { Resend } from 'resend';
const resend = new Resend('re_xxxxxxxxx');
const { data, error } = await resend.webhooks.remove(
'4dd369bc-aa82-4ff3-97de-514ae3000ee0',
);
```
```php PHP theme={"theme":{"light":"github-light","dark":"vesper"}}
$resend = Resend::client('re_xxxxxxxxx');
$resend->webhooks->remove('4dd369bc-aa82-4ff3-97de-514ae3000ee0');
```
```python Python theme={"theme":{"light":"github-light","dark":"vesper"}}
import resend
resend.api_key = 're_xxxxxxxxx'
webhook = resend.Webhooks.remove(webhook_id='4dd369bc-aa82-4ff3-97de-514ae3000ee0')
```
```ruby Ruby theme={"theme":{"light":"github-light","dark":"vesper"}}
require 'resend'
Resend.api_key = 're_xxxxxxxxx'
webhook = Resend::Webhooks.remove('4dd369bc-aa82-4ff3-97de-514ae3000ee0')
```
```go Go theme={"theme":{"light":"github-light","dark":"vesper"}}
package main
import "github.com/resend/resend-go/v3"
func main() {
client := resend.NewClient("re_xxxxxxxxx")
client.Webhooks.Remove("4dd369bc-aa82-4ff3-97de-514ae3000ee0")
}
```
```rust Rust theme={"theme":{"light":"github-light","dark":"vesper"}}
use resend_rs::{Resend, Result};
#[tokio::main]
async fn main() -> Result<()> {
let resend = Resend::new("re_xxxxxxxxx");
let _deleted = resend
.webhooks
.delete("4dd369bc-aa82-4ff3-97de-514ae3000ee0")
.await?;
Ok(())
}
```
```java Java theme={"theme":{"light":"github-light","dark":"vesper"}}
import com.resend.*;
public class Main {
public static void main(String[] args) {
Resend resend = new Resend("re_xxxxxxxxx");
RemoveWebhookResponseSuccess response = resend.webhooks().remove("4dd369bc-aa82-4ff3-97de-514ae3000ee0");
}
}
```
```csharp .NET theme={"theme":{"light":"github-light","dark":"vesper"}}
using Resend;
IResend resend = ResendClient.Create( "re_xxxxxxxxx" ); // Or from DI
await resend.WebhookDeleteAsync( new Guid( "d91cd9bd-1176-453e-8fc1-35364d380206" ) );
```
```bash cURL theme={"theme":{"light":"github-light","dark":"vesper"}}
curl -X DELETE 'https://api.resend.com/webhooks/4dd369bc-aa82-4ff3-97de-514ae3000ee0' \
-H 'Authorization: Bearer re_xxxxxxxxx'
```
```json Response theme={"theme":{"light":"github-light","dark":"vesper"}}
{
"object": "webhook",
"id": "4dd369bc-aa82-4ff3-97de-514ae3000ee0",
"deleted": true
}
```
---
# Source: https://resend.com/docs/webhooks/domains/deleted.md
# Source: https://resend.com/docs/webhooks/contacts/deleted.md
> ## Documentation Index
> Fetch the complete documentation index at: https://resend.com/docs/llms.txt
> Use this file to discover all available pages before exploring further.
# contact.deleted
> Received when a contact is deleted.
export const ResponseBodyParameters = ({type, children}) => {
return
Response Body Parameters
All webhook payloads follow a consistent top-level structure with
event-specific data nested within the data object.
The event type that triggered the webhook (e.g., {type}).
ISO 8601 timestamp when the webhook event was created.
Event-specific data containing detailed information about the event. The
data object for the {type} event contains the following
parameters:
{children}
;
};
Event triggered whenever a **contact was successfully deleted**.
Unique identifier for the contact
Unique identifier for the audience this contact belongs to
Array of segment IDs the contact belongs to
ISO 8601 timestamp when the contact was created
ISO 8601 timestamp when the contact was last updated
Contact's email address
Contact's first name
Contact's last name
Whether the contact has unsubscribed from all emails sent from your team
```json theme={"theme":{"light":"github-light","dark":"vesper"}}
{
"type": "contact.deleted",
"created_at": "2024-11-17T19:32:22.980Z",
"data": {
"id": "e169aa45-1ecf-4183-9955-b1499d5701d3",
"audience_id": "78261eea-8f8b-4381-83c6-79fa7120f1cf",
"segment_ids": ["78261eea-8f8b-4381-83c6-79fa7120f1cf"],
"created_at": "2024-11-10T15:11:94.110Z",
"updated_at": "2024-11-17T19:32:22.980Z",
"email": "steve.wozniak@gmail.com",
"first_name": "Steve",
"last_name": "Wozniak",
"unsubscribed": false
}
}
```
---
# Source: https://resend.com/docs/dashboard/emails/deliverability-insights.md
> ## Documentation Index
> Fetch the complete documentation index at: https://resend.com/docs/llms.txt
> Use this file to discover all available pages before exploring further.
# Deliverability Insights
> Improve your deliverability with tailored insights based on your sending.
When you view your email within Resend, there is a "Insights" option. When selected, this will run eight deliverability best practice checks on your email and recommend possible changes to improve deliverability.
If a check passes, you'll get a nice green check. Resend will provide advice if it fails. We break these into two categories: Attention and Improvements.
## Attention Insights
Changes to your email that can improve deliverability.
#### Link URLs match sending domain
Ensure that the URLs in your email match the sending domain. Mismatched URLs can trigger spam filters.
For example, if your sending domain is `@widgets.com`, ensure links within the message point back to `https://widgets.com`.
#### DMARC Record is Valid
DMARC is a TXT record published in the DNS that specifies how email receivers should handle messages from your domain that don’t pass SPF or DKIM validation. [A valid DMARC record](/dashboard/domains/dmarc) can help improve email deliverability.
Starting in 2024, Gmail and Yahoo require senders to have a DMARC record published. When [viewing your domain](https://resend.com/domains) in Resend, we provide a suggested DMARC record if you’re unsure what to publish.
#### Include Plain Text Version
Including a plain text version of your email ensures that your message is accessible to all recipients, including those who have email clients that do not support HTML.
If you're using Resend's API, [plain text is passed via the `text` parameter](https://resend.com/docs/api-reference/emails/send-email).
This can also generate plain text using [React Email](https://react.email/docs/utilities/render#4-convert-to-plain-text).
#### Don't use "no-reply"
Indicating that this is a one-way communication decreases trust. Some email providers use engagement (email replies) when deciding how to filter your email. A valid email address allows you to communicate with your recipients easily if they have questions.
#### Keep email body size small
Gmail limits the size of each email message to 102 KB. Once that limit is reached, the remaining content is clipped and hidden behind a link to view the entire message. Keep your email body size small to avoid this issue.
This check will show the current size of your email.
## Improvement Insights
If you're diagnosing a deliverability issue, changing your email practices could be helpful.
#### Use a Subdomain
Using a subdomain instead of the root domain helps segment your sending by purpose. This protects different types of sending from impacting the reputation of others and clearly shows the sending purpose.
#### Disable Click Tracking
Click tracking modifies links, sometimes causing spam filters to flag emails as suspicious or phishing attempts. Disabling click tracking can help with email deliverability, especially for sensitive transactional emails like login or email verification.
If on, you can [disable click tracking on your domain in Resend](https://resend.com/domains).
#### Disable Open Tracking
Spam filters are sensitive to tracking pixels, flagging them as potential spam. Without these tracking elements, emails may bypass these filters more effectively, especially for sensitive transactional emails like login or email verification.
If on, you can [disable open tracking on your domain in Resend](https://resend.com/domains).
---
# Source: https://resend.com/docs/webhooks/emails/delivered.md
> ## Documentation Index
> Fetch the complete documentation index at: https://resend.com/docs/llms.txt
> Use this file to discover all available pages before exploring further.
# email.delivered
> Received when an email is delivered.
export const ResponseBodyParameters = ({type, children}) => {
return
Response Body Parameters
All webhook payloads follow a consistent top-level structure with
event-specific data nested within the data object.
The event type that triggered the webhook (e.g., {type}).
ISO 8601 timestamp when the webhook event was created.
Event-specific data containing detailed information about the event. The
data object for the {type} event contains the following
parameters:
{children}
;
};
Event triggered whenever Resend **successfully delivered the email** to the recipient's mail server.
Learn more about what to do [when an email is delivered, but the recipient
does not receive
it](/knowledge-base/what-if-an-email-says-delivered-but-the-recipient-has-not-received-it).
Unique identifier for the broadcast campaign (if applicable)
ISO 8601 timestamp when the email was created
Unique identifier for the specific email
Sender email address and name in the format "Name
\<[email@domain.com](mailto:email@domain.com)>"
Array of impacted recipient email addresses
Email subject line
Unique identifier for the template used (if applicable)
Array of tag objects associated with the email
The tag key
The tag value
```json theme={"theme":{"light":"github-light","dark":"vesper"}}
{
"type": "email.delivered",
"created_at": "2024-02-22T23:41:12.126Z",
"data": {
"broadcast_id": "8b146471-e88e-4322-86af-016cd36fd216",
"created_at": "2024-02-22T23:41:11.894719+00:00",
"email_id": "56761188-7520-42d8-8898-ff6fc54ce618",
"from": "Acme ",
"to": ["delivered@resend.dev"],
"subject": "Sending this example",
"template_id": "43f68331-0622-4e15-8202-246a0388854b",
"tags": {
"category": "confirm_email"
}
}
}
```
---
# Source: https://resend.com/docs/webhooks/emails/delivery-delayed.md
> ## Documentation Index
> Fetch the complete documentation index at: https://resend.com/docs/llms.txt
> Use this file to discover all available pages before exploring further.
# email.delivery_delayed
> Received when an email delivery is delayed.
export const ResponseBodyParameters = ({type, children}) => {
return
Response Body Parameters
All webhook payloads follow a consistent top-level structure with
event-specific data nested within the data object.
The event type that triggered the webhook (e.g., {type}).
ISO 8601 timestamp when the webhook event was created.
Event-specific data containing detailed information about the event. The
data object for the {type} event contains the following
parameters:
{children}
;
};
Event triggered whenever the **email couldn't be delivered due to a temporary issue**.
Delivery delays can occur, for example, when the recipient's inbox is full, or when the receiving email server experiences a transient issue.
Unique identifier for the broadcast campaign (if applicable)
ISO 8601 timestamp when the email was created
Unique identifier for the specific email
Sender email address and name in the format "Name
\<[email@domain.com](mailto:email@domain.com)>"
Array of impacted recipient email addresses
Email subject line
Unique identifier for the template used (if applicable)
Array of tag objects associated with the email
The tag key
The tag value
```json theme={"theme":{"light":"github-light","dark":"vesper"}}
{
"type": "email.delivery_delayed",
"created_at": "2024-02-22T23:41:12.126Z",
"data": {
"broadcast_id": "8b146471-e88e-4322-86af-016cd36fd216",
"created_at": "2024-02-22T23:41:11.894719+00:00",
"email_id": "56761188-7520-42d8-8898-ff6fc54ce618",
"from": "Acme ",
"to": ["delivered@resend.dev"],
"subject": "Sending this example",
"template_id": "43f68331-0622-4e15-8202-246a0388854b",
"tags": {
"category": "confirm_email"
}
}
}
```
---
# Source: https://resend.com/docs/dashboard/domains/dmarc.md
> ## Documentation Index
> Fetch the complete documentation index at: https://resend.com/docs/llms.txt
> Use this file to discover all available pages before exploring further.
# Implementing DMARC
> Implement DMARC to build trust in your domain and protect against email spoofing and unauthorized use of your domain in email messages.
## Prerequisites
Since DMARC relies on DKIM and SPF, first ensure your existing emails are passing SPF and DKIM.
* DKIM verifies the email wasn't altered in transit using cryptographic authentication.
* SPF authorizes IP addresses to send email for a domain.
If you have a [verified](/dashboard/domains/introduction) domain with Resend, it means you are already passing SPF and DKIM
## What is DMARC?
DMARC ([Domain-based Message Authentication, Reporting, and Conformance](https://dmarc.org/overview/)) is an email authentication protocol that instructs mail servers what to do if an email message fails SPF and DKIM, preventing email spoofing (forged headers). DMARC is added to a domain through a TXT record added to the domain at `_dmarc`.
By preventing spoofing, a domain can build trust with mailbox providers, as it allows them to verify that emails are authorized to send on behalf of that domain.
An email must pass either SPF or DKIM checks (but not necessarily both) to achieve DMARC compliance and be considered authenticated. A message fails DMARC if both SPF and DKIM fail on the message.
## Implementing DMARC
### 1. Add a TXT `_dmarc` Record
To start, add a flexible DMARC record to your domain.
| Name | Type | Value |
| ------------------- | ---- | ----------------------------------------------------------- |
| \_dmarc.example.com | TXT | `v=DMARC1; p=none; rua=mailto:dmarcreports@yourdomain.com;` |
This record is specifying a few parameters (see [Reference](#reference) section for more details):
* `v` - Version:
This is the version of DMARC
* `p` - Policy:
This is telling the inbox how to process messages that fail DMARC. Options are `none`, `quarantine`, `reject`. It's a best practice to use `quarantine` or `reject`, but you should only do it once you know your messages are delivering and fully passing DMARC.
* `rua` - Reporting URI of Aggregate:
Provide a **valid address** that can receive email. The address can be a different domain than the one on which you set the DMARC policy. The aggregate report comes as an email with a `.xml` file attached that shares the IP sources of your messages and if they passed SPF or DKIM.
To ensure you don't accidentally introduce breaking changes to your email sending, we suggest starting with a policy of `p=none;` before moving to a stricter policy.
### 2. Test to Confirm Delivery and Passing
To test emails, send an email from all the applications and services your domain uses. Confirm that the messages are delivered to the inbox and that the headers show DMARC passing. Spending a few at this step is a good rule of thumb to ensure you're checking all sources of email from your domain and catch email that is sent at a different cadence than daily.
To confirm DMARC passed, you can inspect the email headers and confirm there is `dmarc=pass`.
Gradually identify email sources using tools like [Google Postmaster
Tools](https://gmail.com/postmaster/), which provides DKIM/SPF feedback.
[DMARC monitoring
services](https://dmarc.org/resources/products-and-services/) can aggregate
your email sources by collecting DMARC reports, helping you discover any
services sending email on your domain's behalf.
### 3. Upgrade Policy
Once you have verified DMARC is passing across all your sending, you should upgrade your Policy to `p=quarantine;`. This policy gives mailbox providers greater confidence in your domain since your domain only allows authenticated email.
| Policy | Value |
| ------------- | ------------------------------------------------ |
| p=none; | Allow all email. Monitoring for DMARC failures. |
| p=quarantine; | Send messages that fail DMARC to the spam folder |
| p=reject; | Bounce delivery of emails that fail DMARC. |
Once your policy is `p=quarantine;` or `p=reject;` you can explore setting up [BIMI](/dashboard/domains/bimi), which can provide established brands even greater sending credibility by displaying a logo as an avatar in an email client.
## Reference
While the DMARC protocol includes both `pct` and `ruf` parameters, they are
not widely followed by mailbox providers. These settings may not be respected
or followed.
| Parameter | Purpose | Example |
| --------- | --------------------------------------------- | --------------------------------- |
| `v` | Protocol version | `v=DMARC1` |
| `pct` | Percentage of messages subjected to filtering | `pct=20` |
| `ruf` | Reporting URI for forensic reports | `ruf=mailto:authfail@example.com` |
| `rua` | Reporting URI of aggregate reports | `rua=mailto:aggrep@example.com` |
| `p` | Policy for organizational domain | `p=quarantine` |
| `sp` | Policy for subdomains of the OD | `sp=reject` |
| `adkim` | Alignment mode for DKIM | `adkim=s` |
| `aspf` | Alignment mode for SPF | `aspf=r` |
Having issues setting up DMARC? [We can help](https://resend.com/help).
---
# Source: https://resend.com/docs/knowledge-base/does-resend-require-production-approval.md
> ## Documentation Index
> Fetch the complete documentation index at: https://resend.com/docs/llms.txt
> Use this file to discover all available pages before exploring further.
# Does Resend require production approval?
> Learn about production access and account limitations on Resend.
No, Resend does **not** require production approval. All accounts, including free accounts, have immediate production access from the moment you sign up.
## Free accounts have production access
Free accounts on Resend have full production access immediately. There is no sandbox mode, no approval process, and no waiting period. You can start sending transactional emails to your customers right away.
Resend does not limit free accounts or require authorization to send
production emails. All accounts have the same production capabilities from day
one.
## Common misconceptions
Some users may think they need production approval if:
* **DNS records aren't generated yet**: If you've added a domain but haven't completed DNS verification, the domain will show as "Pending" until you add the required DNS records. This is not related to account approval—it's simply waiting for domain verification. Once you add and verify your DNS records, you can send from that domain.
* **Coming from other email services**: Some email service providers do require production approval or have sandbox modes. Resend does not have these restrictions.
## Getting started
To start sending emails with Resend:
1. [Sign up for a Resend account](https://resend.com/signup)
2. [Add and verify your domain](https://resend.com/domains)
3. [Create an API key](https://resend.com/api-keys)
4. Start sending emails immediately
If you're having trouble with domain verification or DNS records, see our [domain verification troubleshooting guide](/knowledge-base/what-if-my-domain-is-not-verifying) or check our [DNS setup guides](/knowledge-base/introduction) for your specific DNS provider.
---
# Source: https://resend.com/docs/api-reference/templates/duplicate-template.md
> ## Documentation Index
> Fetch the complete documentation index at: https://resend.com/docs/llms.txt
> Use this file to discover all available pages before exploring further.
# Duplicate Template
> Duplicate a template.
## Path Parameters
The ID or alias of the template to duplicate.
```ts Node.js theme={"theme":{"light":"github-light","dark":"vesper"}}
import { Resend } from 'resend';
const resend = new Resend('re_xxxxxxxxx');
const { data, error } = await resend.templates.duplicate(
'34a080c9-b17d-4187-ad80-5af20266e535',
);
```
```php PHP theme={"theme":{"light":"github-light","dark":"vesper"}}
$resend = Resend::client('re_xxxxxxxxx');
$resend->templates->duplicate('34a080c9-b17d-4187-ad80-5af20266e535');
```
```py Python theme={"theme":{"light":"github-light","dark":"vesper"}}
import resend
resend.api_key = "re_xxxxxxxxx"
resend.Templates.duplicate("34a080c9-b17d-4187-ad80-5af20266e535")
```
```ruby Ruby theme={"theme":{"light":"github-light","dark":"vesper"}}
require "resend"
Resend.api_key = "re_xxxxxxxxx"
Resend::Templates.duplicate("34a080c9-b17d-4187-ad80-5af20266e535")
```
```go Go theme={"theme":{"light":"github-light","dark":"vesper"}}
import (
"context"
"github.com/resend/resend-go/v3"
)
func main() {
client := resend.NewClient("re_xxxxxxxxx")
client.Templates.DuplicateWithContext(
context.TODO(),
"34a080c9-b17d-4187-ad80-5af20266e535",
)
}
```
```rust Rust theme={"theme":{"light":"github-light","dark":"vesper"}}
use resend_rs::{Resend, Result};
#[tokio::main]
async fn main() -> Result<()> {
let resend = Resend::new("re_xxxxxxxxx");
let _duplicated = resend
.templates
.duplicate("34a080c9-b17d-4187-ad80-5af20266e535")
.await?;
Ok(())
}
```
```java Java theme={"theme":{"light":"github-light","dark":"vesper"}}
import com.resend.*;
public class Main {
public static void main(String[] args) {
Resend resend = new Resend("re_xxxxxxxxx");
DuplicateTemplateResponseSuccess data = resend.templates().duplicate("34a080c9-b17d-4187-ad80-5af20266e535");
}
}
```
```csharp .NET theme={"theme":{"light":"github-light","dark":"vesper"}}
using Resend;
IResend resend = ResendClient.Create( "re_xxxxxxxxx" ); // Or from DI
await resend.TemplateDuplicateAsync( new Guid( "34a080c9-b17d-4187-ad80-5af20266e535" ) );
```
```bash cURL theme={"theme":{"light":"github-light","dark":"vesper"}}
curl -X POST 'https://api.resend.com/templates/34a080c9-b17d-4187-ad80-5af20266e535/duplicate' \
-H 'Authorization: Bearer re_xxxxxxxxx' \
-H 'Content-Type: application/json'
```
```json Response theme={"theme":{"light":"github-light","dark":"vesper"}}
{
"object": "template",
"id": "e169aa45-1ecf-4183-9955-b1499d5701d3"
}
```
---
# Source: https://resend.com/docs/knowledge-base/email-best-practices-skill.md
> ## Documentation Index
> Fetch the complete documentation index at: https://resend.com/docs/llms.txt
> Use this file to discover all available pages before exploring further.
# Email Best Practices Skill
> Comprehensive guide for building production-ready email systems with AI agents.
The Email Best Practices skill provides AI agents with comprehensive knowledge for building production-ready email integrations in your applications. It covers authentication, compliance, deliverability, and operational best practices.
## Installation
Install the skill using the following command:
```bash theme={"theme":{"light":"github-light","dark":"vesper"}}
npx skills add resend/email-best-practices
```
## Advantages
* **DNS authentication guidance**: Step-by-step instructions for setting up SPF, DKIM, and DMARC records.
* **Transactional and marketing email design**: Best practices for designing effective transactional and marketing emails.
* **Regional compliance**: Guidelines for CAN-SPAM, GDPR, CASL, and other regional email regulations.
* **Webhook event processing**: Patterns for handling delivery notifications, bounces, and complaints.
* **Suppression list management**: Strategies for maintaining healthy suppression lists and improving deliverability.
## Learn More
See the full source code and documentation.
---
# Source: https://resend.com/docs/dashboard/emails/email-bounces.md
> ## Documentation Index
> Fetch the complete documentation index at: https://resend.com/docs/llms.txt
> Use this file to discover all available pages before exploring further.
# Email Bounces
> Understanding and resolving delivery issues.
## Why does an email bounce?
A bounce happens when an email cannot be delivered to the person it was meant for, and is returned to the sender. It essentially "bounces" back to the person who sent it.
Some reasons include invalid email addresses, full mailboxes, technical issues with email servers, spam filters, message size restrictions, or blacklisting of the sender's email server.
## Bounce Types and Subtypes
When an email bounces, Resend receives a message from the recipient's mail server. The bounce message explains why the delivery failed so the sender can fix the issue.
There are three types of bounces:
1. `Permanent` - also known as "hard bounce,” where the recipient's mail server rejects the email and will never be delivered.
* `General` - The recipient's email provider sent a hard bounce message.
* `NoEmail` - It was not possible to retrieve the recipient email address from the bounce message.
2. `Transient` - also known as "soft bounce,” where the recipient's mail server rejects the email but it could be delivered in the future.
* `General` - The recipient's email provider sent a general bounce message. You might be able to send a message to the same recipient in the future if the issue that caused the message to bounce is resolved.
* `MailboxFull` - The recipient's email provider sent a bounce message because the recipient's inbox was full. You might be able to send to the same recipient in the future when the mailbox is no longer full.
* `MessageTooLarge` - The recipient's email provider sent a bounce message because message you sent was too large. You might be able to send a message to the same recipient if you reduce the size of the message.
* `ContentRejected` - The recipient's email provider sent a bounce message because the message you sent contains content that the provider doesn't allow. You might be able to send a message to the same recipient if you change the content of the message.
* `AttachmentRejected` - The recipient's email provider sent a bounce message because the message contained an unacceptable attachment. For example, some email providers may reject messages with attachments of a certain file type, or messages with very large attachments. You might be able to send a message to the same recipient if you remove or change the content of the attachment.
Sometimes, inboxes use autoresponders to signal a bounce. A `transient` status
could mean it's related to the autoresponder, and it's not a permanent issue.
3. `Undetermined` - where the recipient's email server bounced, but the bounce message didn't contain enough information for Resend to determine the underlying reason.
* `Undetermined` - The recipient's email provider sent a bounce message. The bounce message didn't contain enough information for Resend to determine the reason for the bounce.
## Viewing Bounce Details in Resend
You can see the bounce details by clicking on the email, and hovering over the `Bounced` label.
Once you click **See Details**, the drawer will open on the right side of your screen with the bounce type, subtype, along with suggestions on how to proceed.
If the email is on the suppression list, you can click **Remove from Suppression List** to remove it.
---
# Source: https://resend.com/docs/dashboard/emails/email-suppressions.md
> ## Documentation Index
> Fetch the complete documentation index at: https://resend.com/docs/llms.txt
> Use this file to discover all available pages before exploring further.
# Email Suppressions
> Understanding and resolving delivery issues.
## What does it mean that the email was `suppressed`?
A suppression happens when you try sending an email to a recipient that previously [bounced](/dashboard/emails/email-bounces) or marked your email as spam.
To protect your sender reputation and our sending infrastructure, we proactively stop that delivery from happening.
## What caused the suppression?
The suppression is caused by:
* `Bounced` when the recipient's mail server rejects the email and the response indicates a permanent failure to deliver. There could be [multiple reasons why an email `bounced`](/dashboard/emails/email-bounces#bounce-types-and-subtypes).
* `Complained` when the recipient marked your email as spam.
Not all Inbox Service Providers return a `complained` event. Most notably,
Gmail/Google Workspace doesn't.
## Viewing Suppression Details in Resend
You can see the suppressed details by clicking on the email, and hovering over the `Suppressed` label.
Once you click **See Details**, the drawer will open on the right side of your screen with the suppression reason along with suggestions on how to proceed.
You can also click **Remove from Suppression List** to prevent the address from being suppressed. Do note that if it bounces or is marked as spam again, it'll be suppressed again. Multiple or repeated bounces will negatively impact your sender reputation.
---
# Source: https://resend.com/docs/dashboard/emails/email-templates.md
# Email Templates
> Use high quality, unstyled components for your transactional emails using React and Typescript
While you can generate HTML for your emails using any method, we recommend [React Email](https://react.email/) for React developers. It makes it easy to create email templates with React and TailwindCSS.
* [Getting started quickguide](https://react.email/docs/getting-started/automatic-setup)
* [Email components](https://react.email/components)
* [Email examples](https://react.email/templates)
Each example includes a preview, the React code, the rendered HTML, and the plain text version of the email.
---
# Source: https://resend.com/docs/dashboard/emails/embed-inline-images.md
> ## Documentation Index
> Fetch the complete documentation index at: https://resend.com/docs/llms.txt
> Use this file to discover all available pages before exploring further.
# Embed Inline Images
> Send emails with inline images.
You can optionally embed an image in the HTML body of the email. This allows you to include images without needing to host them in an external server.
We currently do not support sending attachments (including inline images)
[when using our batch endpoint](/api-reference/emails/send-batch-emails).
Use the prefix `cid:` to reference the ID in the `src` attribute of an image tag in the HTML body of the email.
```html theme={"theme":{"light":"github-light","dark":"vesper"}}
```
Include the content id parameter in the attachment object (see below for example implementations). The ID is an arbitrary string set by you, and must be less than 128 characters.
## Implementation details
Both remote and local attachments are supported. All attachment [requirements, options, and limitations](/dashboard/emails/attachments) apply to inline images as well.
As with all our features, inline images are available across all our SDKs.
### Remote image example
```ts Node.js {9, 14} theme={"theme":{"light":"github-light","dark":"vesper"}}
import { Resend } from 'resend';
const resend = new Resend('re_xxxxxxxxx');
await resend.emails.send({
from: 'Acme ',
to: ['delivered@resend.dev'],
subject: 'Thank you for contacting us',
html: '
",
Attachments: []*resend.Attachment{attachment},
}
sent, err := client.Emails.SendWithContext(ctx, params)
if err != nil {
panic(err)
}
fmt.Println(sent.Id)
}
```
```rust Rust {14, 17} theme={"theme":{"light":"github-light","dark":"vesper"}}
use resend_rs::types::{CreateAttachment, CreateEmailBaseOptions};
use resend_rs::{Resend, Result};
#[tokio::main]
async fn main() -> Result<()> {
let resend = Resend::new("re_xxxxxxxxx");
let from = "Acme ";
let to = ["delivered@resend.dev"];
let subject = "Thank you for contacting us";
let path = "https://resend.com/static/sample/logo.png";
let filename = "logo.png";
let content_id = "logo-image";
let email = CreateEmailBaseOptions::new(from, to, subject)
.with_html("
Here is our inline logo
")
.with_attachment(
CreateAttachment::from_path(path)
.with_filename(filename)
.with_content_id(content_id),
);
let _email = resend.emails.send(email).await?;
Ok(())
}
```
```java Java {10, 17} theme={"theme":{"light":"github-light","dark":"vesper"}}
import com.resend.*;
public class Main {
public static void main(String[] args) {
Resend resend = new Resend("re_xxxxxxxxx");
Attachment att = Attachment.builder()
.path("https://resend.com/static/sample/logo.png")
.fileName("logo.png")
.ContentId("logo-image")
.build();
CreateEmailOptions params = CreateEmailOptions.builder()
.from("Acme ")
.to("delivered@resend.dev")
.subject("Thank you for contacting us")
.html("
Here is our inline logo
")
.attachments(att)
.build();
CreateEmailResponse data = resend.emails().send(params);
}
}
```
```csharp .NET {11, 18} theme={"theme":{"light":"github-light","dark":"vesper"}}
using Resend;
using System.Collections.Generic;
IResend resend = ResendClient.Create( "re_xxxxxxxxx" ); // Or from DI
var message = new EmailMessage()
{
From = "Acme ",
To = "delivered@resend.dev",
Subject = "Thank you for contacting us",
HtmlBody = "
",
Attachments: []*resend.Attachment{attachment},
}
sent, err := client.Emails.SendWithContext(ctx, params)
if err != nil {
panic(err)
}
fmt.Println(sent.Id)
}
```
```rust Rust {16,22} theme={"theme":{"light":"github-light","dark":"vesper"}}
use std::fs::File;
use std::io::Read;
use resend_rs::types::{CreateAttachment, CreateEmailBaseOptions};
use resend_rs::{Resend, Result};
#[tokio::main]
async fn main() -> Result<()> {
let resend = Resend::new("re_xxxxxxxxx");
let from = "Acme ";
let to = ["delivered@resend.dev"];
let subject = "Thank you for contacting us";
let filename = "logo.png";
let content_id = "logo-image";
let mut f = File::open(filename).unwrap();
let mut invoice = Vec::new();
f.read_to_end(&mut invoice).unwrap();
let email = CreateEmailBaseOptions::new(from, to, subject)
.with_html("
Here is our inline logo
")
.with_attachment(
CreateAttachment::from_content(invoice)
.with_filename(filename)
.with_content_id(content_id),
);
let _email = resend.emails.send(email).await?;
Ok(())
}
```
```java Java {10, 17} theme={"theme":{"light":"github-light","dark":"vesper"}}
import com.resend.*;
public class Main {
public static void main(String[] args) {
Resend resend = new Resend("re_xxxxxxxxx");
Attachment att = Attachment.builder()
.fileName("logo.png")
.content("invoiceBuffer")
.contentId("logo-image")
.build();
CreateEmailOptions params = CreateEmailOptions.builder()
.from("Acme ")
.to("delivered@resend.dev")
.subject("Thank you for contacting us")
.html("
Here is our inline logo
")
.attachments(att)
.build();
CreateEmailOptions params = CreateEmailOptions.builder()
}
}
```
```csharp .NET {12, 19} theme={"theme":{"light":"github-light","dark":"vesper"}}
using Resend;
using System.Collections.Generic;
using System.IO;
IResend resend = ResendClient.Create( "re_xxxxxxxxx" ); // Or from DI
var message = new EmailMessage()
{
From = "Acme ",
To = "delivered@resend.dev",
Subject = "Thank you for contacting us",
HtmlBody = "
",
"attachments": [
{
"content": "UmVzZW5kIGF0dGFjaG1lbnQgZXhhbXBsZS4gTmljZSBqb2Igc2VuZGluZyB0aGUgZW1haWwh%",
"filename": "invoice.txt",
"content_id": "logo-image"
}
]
}'
```
## Other considerations
Before adding inline images, consider the following.
* As these images are sent as attachments, you need to encode your image as Base64 when sending the raw content via the API. There is no need to do this when passing the path of a remote image (the API handles this for you).
* Inline images increase the size of the email.
* Inline images may be rejected by some clients (especially webmail).
* As with all attachments, we recommend adding a `content_type` (e.g. `image/png`) or `filename` (e.g. `logo.png`) parameter to the attachment object, as this often helps email clients render the attachment correctly.
All attachments (including inline images) do not currently display in the
[emails dashboard](https://resend.com/emails) when previewing email HTML.
---
# Source: https://resend.com/docs/knowledge-base/end-to-end-testing-with-playwright.md
> ## Documentation Index
> Fetch the complete documentation index at: https://resend.com/docs/llms.txt
> Use this file to discover all available pages before exploring further.
# How to set up E2E testing with Playwright
> End to end testing ensures your entire app flow is fully functioning.
export const YouTube = ({id}) => {
return ;
};
Below is a basic guide on setting up E2E testing with NextJS, Resend, and Playwright.
Prefer watching a video? Check out our video walkthrough below.
## 1. Create an endpoint.
For simplicity, we'll create a GET endpoint that sends an email to the testing account, `delivered@resend.dev` on fetch.
```ts app/api/send/route.ts theme={"theme":{"light":"github-light","dark":"vesper"}}
import { Resend } from 'resend';
const resend = new Resend(process.env.RESEND_API_KEY);
export async function GET() {
try {
const { data, error } = await resend.emails.send({
from: 'Acme ',
to: ['delivered@resend.dev'],
subject: 'Hello world',
html: '
Hello world
',
});
if (error) {
return Response.json({ error }, { status: 500 });
}
return Response.json({ data });
} catch (error) {
return Response.json({ error }, { status: 500 });
}
}
```
## 2. Write the test spec file
Create a test spec file at `e2e/app.spec.ts`. You can test in two ways:
### Option 1: Call the Resend API
Calling the Resend API tests the entire API flow, including Resend's API responses, but counts towards your account's sending quota.
```ts e2e/app.spec.ts theme={"theme":{"light":"github-light","dark":"vesper"}}
import { test, expect } from '@playwright/test';
test('does not mock the response and calls the Resend API', async ({
page,
}) => {
// Go to the page
await page.goto('http://localhost:3000/api/send');
// Assert that the response is visible
await expect(page.getByText('id')).toBeVisible();
});
```
### Option 2: Mock a response
Mocking the response lets you test *your* app's flow without calling the Resend API and impacting your account's sending quota.
```ts e2e/app.spec.ts theme={"theme":{"light":"github-light","dark":"vesper"}}
import { test, expect } from '@playwright/test';
test("mocks the response and doesn't call the Resend API", async ({ page }) => {
// Sample response from Resend
const body = JSON.stringify({
data: {
id: '621f3ecf-f4d2-453a-9f82-21332409b4d2',
},
});
// Mock the api call before navigating
await page.route('*/**/api/send', async (route) => {
await route.fulfill({
body,
contentType: 'application/json',
status: 200,
});
});
});
```
However you test, it's important to test using a test email address (e.g.,
[delivered@resend.dev](mailto:delivered@resend.dev)) so your tests don't impact your deliverability. Resend's
[test accounts](/dashboard/emails/send-test-emails) run through the entire API
flow without harming your reputation.
## 3. Create a Playwright config file
Write your config file, paying special attention to a few properties:
* `testDir`: the directory containing your test files
* `outputDir`: the directory to store test results
* `webServer`: provide instructions for Playwright to run your app before starting the tests
* `projects`: an array of the browsers you want to test
```ts playwright.config.ts theme={"theme":{"light":"github-light","dark":"vesper"}}
import { defineConfig, devices } from '@playwright/test';
import path from 'path';
const baseURL = 'http://localhost:3000';
export default defineConfig({
timeout: 30 * 1000,
testDir: path.join(__dirname, 'e2e'),
retries: 2,
outputDir: 'test-results/',
webServer: {
command: 'npm run dev',
url: baseURL,
timeout: 120 * 1000,
reuseExistingServer: !process.env.CI,
},
use: {
baseURL,
// Retry a test if its failing with enabled tracing. This allows you to analyze the DOM, console logs, network traffic etc.
trace: 'retry-with-trace',
},
projects: [
// Test against desktop browsers.
{
name: 'Desktop Chrome',
use: {
...devices['Desktop Chrome'],
},
},
{
name: 'Desktop Firefox',
use: {
...devices['Desktop Firefox'],
},
},
{
name: 'Desktop Safari',
use: {
...devices['Desktop Safari'],
},
},
// Test against mobile viewports.
{
name: 'Mobile Chrome',
use: {
...devices['Pixel 5'],
},
},
{
name: 'Mobile Safari',
use: devices['iPhone 12'],
},
],
});
```
[See the Playwright docs](https://playwright.dev/docs/intro) for more help.
## 4. Run the test
You can run the test by installing Playwright and running the tests.
```bash theme={"theme":{"light":"github-light","dark":"vesper"}}
npx playwright install
npx playwright test
```
Playwright will run the tests in the browsers of your choice and show you the results.
See the full source code.
---
# Source: https://resend.com/docs/api-reference/errors.md
> ## Documentation Index
> Fetch the complete documentation index at: https://resend.com/docs/llms.txt
> Use this file to discover all available pages before exploring further.
# Errors
> Troubleshoot problems with this comprehensive breakdown of all error codes.
## Error schema
We use standard HTTP response codes for success and failure notifications, and our errors are further classified by type.
### `invalid_idempotency_key`
* **Status:** 400
* **Message:** The key must be between 1-256 chars.
* **Suggested action:** Retry with a valid idempotency key.
### `validation_error`
* **Status:** 400
* **Message:** We found an error with one or more fields in the request.
* **Suggested action:** The message will contain more details about what field and error were found.
### `missing_api_key`
* **Status:** 401
* **Message:** Missing API key in the authorization header.
* **Suggested action:** Include the following header in the request: `Authorization: Bearer YOUR_API_KEY`.
### `restricted_api_key`
* **Status:** 401
* **Message:** This API key is restricted to only send emails.
* **Suggested action:** Make sure the API key has `Full access` to perform actions other than sending emails.
### `invalid_api_key`
* **Status:** 403
* **Message:** API key is invalid.
* **Suggested action:** Make sure the API key is correct or generate a new [API key in the dashboard](https://resend.com/api-keys).
### `validation_error`
* **Status:** 403
* **Message:** You can only send testing emails to your own email address (`youremail@domain.com`). To send emails to other recipients, please verify a domain at resend.com/domains, and change the `from` address to an email using this domain.
* **Suggested action:** In [Resend's Domain page](https://resend.com/domains), add and verify a domain for which you have DNS access. This allows you to send emails to addresses beyond your own. [Learn more about resolving this error](/knowledge-base/403-error-resend-dev-domain).
### `validation_error`
* **Status:** 403
* **Message:** The `domain.com` domain is not verified. Please, add and verify your domain.
* **Suggested action:** Make sure the domain in your API request's `from` field matches a domain you've verified in Resend. Update your API request to use your verified domain, or add and verify the domain you're trying to use. [Learn more about resolving this error](/knowledge-base/403-error-domain-mismatch).
### `not_found`
* **Status:** 404
* **Message:** The requested endpoint does not exist.
* **Suggested action:** Change your request URL to match a valid API endpoint.
### `method_not_allowed`
* **Status:** 405
* **Message:** Method is not allowed for the requested path.
* **Suggested action:** Change your API endpoint to use a valid method.
### `invalid_idempotent_request`
* **Status:** 409
* **Message:** Same idempotency key used with a different request payload.
* **Suggested action:** Change your idempotency key or payload.
### `concurrent_idempotent_requests`
* **Status:** 409
* **Message:** Same idempotency key used while original request is still in progress.
* **Suggested action:** Try the request again later.
### `invalid_attachment`
* **Status:** 422
* **Message:** Attachment must have either a `content` or `path`.
* **Suggested action:** Attachments must either have a `content` (strings, Buffer, or Stream contents) or `path` to a remote resource (better for larger attachments).
### `invalid_from_address`
* **Status:** 422
* **Message:** Invalid `from` field.
* **Suggested action:** Make sure the `from` field is valid. The email address needs to follow the `email@example.com` or `Name ` format.
### `invalid_access`
* **Status:** 422
* **Message:** Access must be "full\_access" | "sending\_access".
* **Suggested action:** Make sure the API key has necessary permissions.
### `invalid_parameter`
* **Status:** 422
* **Message:** The `parameter` must be a valid UUID.
* **Suggested action:** Check the value and make sure it's valid.
### `invalid_region`
* **Status:** 422
* **Message:** Region must be "us-east-1" | "eu-west-1" | "sa-east-1".
* **Suggested action:** Make sure the correct region is selected.
### `missing_required_field`
* **Status:** 422
* **Message:** The request body is missing one or more required fields.
* **Suggested action:** Check the error message to see the list of missing fields.
### `monthly_quota_exceeded`
* **Status:** 429
* **Message:** You have reached your monthly email quota.
* **Suggested action:** [Upgrade your plan](https://resend.com/settings/billing) to increase the monthly email quota. Both sent and received emails count towards this quota.
### `daily_quota_exceeded`
* **Status:** 429
* **Message:** You have reached your daily email quota.
* **Suggested action:** [Upgrade your plan](https://resend.com/settings/billing) to remove the daily quota limit or wait until 24 hours have passed. Both sent and received emails count towards this quota.
### `rate_limit_exceeded`
* **Status:** 429
* **Message:** Too many requests. Please limit the number of requests per second. Or [contact support](https://resend.com/contact) to increase rate limit.
* **Suggested action:** You should read the [response headers](./introduction#rate-limit) and reduce the rate at which you request the API. This can be done by introducing a queue mechanism or reducing the number of concurrent requests per second. If you have specific requirements, [contact support](https://resend.com/contact) to request a rate increase.
### `security_error`
* **Status:** 451
* **Message:** We may have found a security issue with the request.
* **Suggested action:** The message will contain more details. [Contact support](https://resend.com/contact) for more information.
### `application_error`
* **Status:** 500
* **Message:** An unexpected error occurred.
* **Suggested action:** Try the request again later. If the error does not resolve, check our [status page](https://resend-status.com) for service updates.
### `internal_server_error`
* **Status:** 500
* **Message:** An unexpected error occurred.
* **Suggested action:** Try the request again later. If the error does not resolve, check our [status page](https://resend-status.com) for service updates.
---
# Source: https://resend.com/docs/webhooks/event-types.md
> ## Documentation Index
> Fetch the complete documentation index at: https://resend.com/docs/llms.txt
> Use this file to discover all available pages before exploring further.
# Event Types
> List of supported event types and their payload.
## Email Events
{' '}
[`email.bounced`](/webhooks/emails/bounced)
Occurs whenever the recipient's mail server **permanently rejected the
email**.
{' '}
[`email.clicked`](/webhooks/emails/clicked)
Occurs whenever the **recipient clicks on an email link**.
Occurs whenever the **email couldn't be delivered due to a temporary
issue**. Delivery delays can occur, for example, when the recipient's
inbox is full, or when the receiving email server experiences a transient
issue.
{' '}
[`email.failed`](/webhooks/emails/failed)
Occurs whenever the **email failed to send due to an error**. This event
is triggered when there are issues such as invalid recipients, API key
problems, domain verification issues, email quota limits, or other sending
failures.
{' '}
[`email.opened`](/webhooks/emails/opened)
Occurs whenever the **recipient opened the email**.
Occurs whenever a **contact was successfully created**.
*Note: When importing multiple contacts using CSV, these events won't be
triggered. [Contact support](https://resend.com/contact) if you have any
questions.*
Occurs whenever a **contact was successfully deleted**.
---
# Source: https://resend.com/docs/examples.md
> ## Documentation Index
> Fetch the complete documentation index at: https://resend.com/docs/llms.txt
> Use this file to discover all available pages before exploring further.
# Examples
> Explore sample apps for different use cases.
Send emails with attachments
Send emails with NextAuth
Send emails with React Email
A Slack app using Resend webhooks
Prevent threading on Gmail
Add a shortcut for users to unsubscribe
---
# Source: https://resend.com/docs/webhooks/emails/failed.md
> ## Documentation Index
> Fetch the complete documentation index at: https://resend.com/docs/llms.txt
> Use this file to discover all available pages before exploring further.
# email.failed
> Received when an email fails to send.
export const ResponseBodyParameters = ({type, children}) => {
return
Response Body Parameters
All webhook payloads follow a consistent top-level structure with
event-specific data nested within the data object.
The event type that triggered the webhook (e.g., {type}).
ISO 8601 timestamp when the webhook event was created.
Event-specific data containing detailed information about the event. The
data object for the {type} event contains the following
parameters:
{children}
;
};
Event triggered whenever the **email failed to send due to an error**.
This event is triggered when there are issues such as invalid recipients, API key problems, domain verification issues, email quota limits, or other sending failures.
Unique identifier for the broadcast campaign (if applicable)
ISO 8601 timestamp when the email was created
Unique identifier for the specific email
Sender email address and name in the format "Name
\<[email@domain.com](mailto:email@domain.com)>"
Array of impacted recipient email addresses
Email subject line
Unique identifier for the template used (if applicable)
Array of tag objects associated with the email
The tag key
The tag value
Failure details
Reason for the email failure (e.g., `reached_daily_quota`)
```json theme={"theme":{"light":"github-light","dark":"vesper"}}
{
"type": "email.failed",
"created_at": "2024-11-22T23:41:12.126Z",
"data": {
"broadcast_id": "8b146471-e88e-4322-86af-016cd36fd216",
"created_at": "2024-11-22T23:41:11.894719+00:00",
"email_id": "56761188-7520-42d8-8898-ff6fc54ce618",
"from": "Acme ",
"to": ["delivered@resend.dev"],
"subject": "Sending this example",
"template_id": "43f68331-0622-4e15-8202-246a0388854b",
"failed": {
"reason": "reached_daily_quota"
},
"tags": {
"category": "confirm_email"
}
}
}
```
---
# Source: https://resend.com/docs/knowledge-base/forward-emails-with-resend-inbound.md
> ## Documentation Index
> Fetch the complete documentation index at: https://resend.com/docs/llms.txt
> Use this file to discover all available pages before exploring further.
# Forward emails with Resend Inbound
> Learn how to forward receiving emails to another email address with Resend Inbound.
Inbound enables you to receive emails with Resend.
This guide demonstrates how to forward received emails using [NextJS](https://nextjs.org/), although you can use any framework you prefer.
[Verify a domain](https://resend.com/domains) and enable receiving emails for that domain. We strongly recommend verifying a subdomain (`subdomain.example.com`) instead of the root domain (`example.com`).
Add the records in your DNS provider and wait for verification to finish in Resend. Learn more about [adding Domains in Resend](/dashboard/domains/introduction).
When you enable Inbound on a domain, Resend receives *all emails* sent to that
specific domain depending on the priority of the MX record. For this reason,
we strongly recommend verifying a subdomain (`subdomain.example.com`) instead
of the root domain (`example.com`). Learn more about [avoiding conflicts with
your existing MX
records](/knowledge-base/how-do-i-avoid-conflicting-with-my-mx-records).
Resend can send a webhook to your application's endpoint every time you receive an email.
Add a new POST route to your application's endpoint.
```ts app/api/inbound-webhook/route.ts theme={"theme":{"light":"github-light","dark":"vesper"}}
import type { NextRequest } from 'next/server';
import { NextResponse } from 'next/server';
export const POST = async (request: NextRequest) => {
try {
const payload = await request.text();
return NextResponse.json(payload);
} catch (error) {
console.error(error);
return new NextResponse(`Error: ${error}`, { status: 500 });
}
};
```
Go to the [Webhooks page](https://resend.com/webhooks) and click **Add Webhook**.
1. Add your publicly accessible HTTPS URL.
2. Select all events you want to observe (e.g., `email.received`).
3. Click **Add**.
For development, you can create a tunnel to your localhost server using a tool like
[ngrok](https://ngrok.com/download) or [VS Code Port Forwarding](https://code.visualstudio.com/docs/debugtest/port-forwarding). These tools serve your local dev environment at a public URL you can use to test your local webhook endpoint.
Example: `https://example123.ngrok.io/api/webhook`
Add the Resend Node.js SDK to your project using your preferred package manager.
```bash npm theme={"theme":{"light":"github-light","dark":"vesper"}}
npm install resend
```
```bash yarn theme={"theme":{"light":"github-light","dark":"vesper"}}
yarn add resend
```
```bash pnpm theme={"theme":{"light":"github-light","dark":"vesper"}}
pnpm add resend
```
```bash bun theme={"theme":{"light":"github-light","dark":"vesper"}}
bun add resend
```
Create an [API key with "Full access" permission](/dashboard/api-keys/introduction) in Resend and add it to your project's .env file.
```env .env theme={"theme":{"light":"github-light","dark":"vesper"}}
RESEND_API_KEY=re_xxxxxxxxx
```
Webhook signing secrets are used to validate the payload data sent to your application from Resend.
Update your POST route to verify the webhook request using the webhook secret. First, copy the webhook secret from the webhook details page.
Then, add it to your project's .env file.
```env .env theme={"theme":{"light":"github-light","dark":"vesper"}}
RESEND_WEBHOOK_SECRET=whsec_xxxxxxxxxx
```
Update the POST route to verify the webhook request using the webhook secret.
Make sure that you’re using the raw request body when verifying webhooks. The cryptographic signature is sensitive to even the slightest change. Some frameworks parse the request as JSON and then stringify it, and this will also break the signature verification.
```ts app/api/inbound-webhook/route.ts {3, 5, 12-32} theme={"theme":{"light":"github-light","dark":"vesper"}}
import type { NextRequest } from 'next/server';
import { NextResponse } from 'next/server';
import { Resend } from 'resend';
const resend = new Resend(process.env.RESEND_API_KEY);
export async function POST(req: NextRequest) {
try {
// we need raw request text to verify the webhook
const payload = await req.text();
const id = req.headers.get('svix-id');
const timestamp = req.headers.get('svix-timestamp');
const signature = req.headers.get('svix-signature');
if (!id || !timestamp || !signature) {
return new NextResponse('Missing headers', { status: 400 });
}
// Throws an error if the webhook is invalid
// Otherwise, returns the parsed payload object
const result = resend.webhooks.verify({
payload,
headers: {
id,
timestamp,
signature,
},
webhookSecret: process.env.RESEND_WEBHOOK_SECRET!,
});
return NextResponse.json(result);
} catch (error) {
console.error(error);
return new NextResponse(`Error: ${error}`, { status: 500 });
}
}
```
Once you verify the webhook, it returns the webhook payload as a JSON object. You can use this payload to forward the email to another email address. Note the following steps:
1. Add a guard clause to ensure the event type is `email.received`.
2. Get the incoming email's content
3. Download and encode any attachments
4. Forward the email (remember to update the `from` and `to` addresses below)
You must call the [received emails
API](/api-reference/emails/retrieve-received-email) to retrieve the email
content and the [attachments
API](/api-reference/emails/list-received-email-attachments) to retrieve the
attachments. This design choice supports large payloads in serverless
environments that have limited request body sizes.
```ts app/api/inbound-webhook/route.ts {29, 34, 42, 67} theme={"theme":{"light":"github-light","dark":"vesper"}}
import type { NextRequest } from 'next/server';
import { NextResponse } from 'next/server';
import { Resend, type ListAttachmentsResponseSuccess } from 'resend';
const resend = new Resend(process.env.RESEND_API_KEY);
export async function POST(req: NextRequest) {
try {
const payload = await req.text();
const id = req.headers.get('svix-id');
const timestamp = req.headers.get('svix-timestamp');
const signature = req.headers.get('svix-signature');
if (!id || !timestamp || !signature) {
return new NextResponse('Missing headers', { status: 400 });
}
const result = resend.webhooks.verify({
payload,
headers: {
id,
timestamp,
signature,
},
webhookSecret: process.env.RESEND_WEBHOOK_SECRET!,
});
// 1. Add a guard clause to ensure the event type is `email.received`.
if (result.type !== 'email.received') {
return NextResponse.json({ message: 'Invalid event' }, { status: 200 });
}
// 2. Get the incoming email's content
const { data: email, error: emailError } =
await resend.emails.receiving.get(result.data.email_id);
if (emailError) {
throw new Error(`Failed to fetch email: ${emailError.message}`);
}
// 3. Download and encode any attachments
const { data: attachmentsData, error: attachmentsError } =
await resend.emails.receiving.attachments.list({
emailId: result.data.email_id,
});
if (attachmentsError) {
throw new Error(
`Failed to fetch attachments: ${attachmentsError.message}`,
);
}
const attachments =
attachmentsData?.data as ListAttachmentsResponseSuccess['data'] &
{ content: string }[];
if (attachments && attachments.length > 0) {
// download the attachments and encode them in base64
for (const attachment of attachments) {
const response = await fetch(attachment.download_url);
const buffer = Buffer.from(await response.arrayBuffer());
attachment.content = buffer.toString('base64');
}
}
// 4. Forward the email
const { data, error: sendError } = await resend.emails.send({
from: 'onboarding@resend.dev', // replace with an email address from your verified domain
to: ['delivered@resend.dev'], // replace with the email address you want to forward the email to
subject: result.data.subject,
html: email.html,
text: email.text,
attachments,
});
if (sendError) {
throw new Error(`Failed to forward email: ${sendError.message}`);
}
return NextResponse.json({ message: 'Email forwarded successfully', data });
} catch (error) {
console.error(error);
return new NextResponse(`Error: ${error}`, { status: 500 });
}
}
```
You can test the endpoint by sending an email to the domain you verified.
For example, if you verified `marketing.example.com`, send an email to `test@marketing.example.com`.
* Try a simple HTML email with a subject and a body.
* Try an email with an attachment or multiple attachments.
You can view the received email in the [Emails page](https://resend.com/emails/receiving) and see the webhook payload in the [Webhooks page](https://resend.com/webhooks).
Once you've tested the endpoint:
1. Publish your application to your production environment.
2. Add your production POST endpoint as a new webhook in Resend.
---
# Source: https://resend.com/docs/dashboard/receiving/forward-emails.md
> ## Documentation Index
> Fetch the complete documentation index at: https://resend.com/docs/llms.txt
> Use this file to discover all available pages before exploring further.
# Forward Received Emails
> Forward Received emails to another email address.
Received emails can also be forwarded to another email address.
Webhooks do not include the actual HTML or Plain Text body of the email. You
must call the [received emails
API](/api-reference/emails/retrieve-received-email) to retrieve them. This
design choice supports large payloads in serverless environments that have
limited request body sizes.
## Using the `forward` helper method
The Node.js SDK provides a `forward()` helper method that simplifies forwarding received emails. This method automatically handles fetching the email content and attachments.
Here's an example of forwarding an email in a Next.js application:
```js app/api/events/route.ts theme={"theme":{"light":"github-light","dark":"vesper"}}
import type { NextRequest } from 'next/server';
import { NextResponse } from 'next/server';
import { Resend } from 'resend';
const resend = new Resend('re_xxxxxxxxx');
export const POST = async (request: NextRequest) => {
const event = await request.json();
if (event.type === 'email.received') {
const { data, error } = await resend.emails.receiving.forward({
emailId: event.data.email_id,
to: 'delivered@resend.dev',
from: 'onboarding@resend.dev',
});
if (error) {
return new NextResponse(`Error: ${error.message}`, { status: 500 });
}
return NextResponse.json(data);
}
return NextResponse.json({});
};
```
By default, the `forward` method forwards the email in a way that preserves the original email content and attachments exactly as received.
Alternatively, you can forward emails as if they had been forwarded through an email client, with the `forwarded message` footer. For that, use `passthrough: false` and provide custom text or HTML content. The original email will be shown after the `forwarded message` footer:
```js app/api/events/route.ts theme={"theme":{"light":"github-light","dark":"vesper"}}
const { data, error } = await resend.emails.receiving.forward({
emailId: event.data.email_id,
to: 'delivered@resend.dev',
from: 'onboarding@resend.dev',
passthrough: false,
text: 'See attached forwarded message.',
html: '
See attached forwarded message.
',
});
```
## Manual forwarding
If you're not using Node.js or prefer not to use the `forward` helper method, you can manually forward received emails using the [Send Email API](/api-reference/emails/send-email).
The recommended approach is to download the raw email and parse it to properly extract content and attachments (especially for inline images). Then, you can send a new email with the extracted content and attachments using the [Send Email API](/api-reference/emails/send-email).
```js app/api/events/route.ts theme={"theme":{"light":"github-light","dark":"vesper"}}
import type { NextRequest } from 'next/server';
import { NextResponse } from 'next/server';
import { Resend } from 'resend';
import { simpleParser } from 'mailparser';
const resend = new Resend('re_xxxxxxxxx');
export const POST = async (request: NextRequest) => {
const event = await request.json();
if (event.type === 'email.received') {
// Get the email metadata
const { data: email } = await resend
.emails
.receiving
.get(event.data.email_id);
// Download the raw email content if available
if (!email?.raw?.download_url) {
return new NextResponse('Raw email not available', { status: 500 });
}
const rawResponse = await fetch(email.raw.download_url);
const rawEmailContent = await rawResponse.text();
// Parse the raw email to extract content and attachments
const parsed = await simpleParser(rawEmailContent, {
skipImageLinks: true,
});
// Extract attachments with content_id for inline images
const attachments = parsed.attachments.map((attachment) => {
// Strip < and > from content IDs for proper inline image handling
const contentId = attachment.contentId
? attachment.contentId.replace(/^<|>$/g, '')
: undefined;
return {
filename: attachment.filename,
content: attachment.content.toString('base64'),
content_type: attachment.contentType,
content_id: contentId || undefined,
};
});
const { data, error } = await resend.emails.send({
from: 'Acme ',
to: ['delivered@resend.dev'],
subject: email.subject || '(no subject)',
html: parsed.html || undefined,
text: parsed.text || undefined,
attachments: attachments.length > 0 ? attachments : undefined,
});
if (error) {
return new NextResponse(`Error: ${error.message}`, { status: 500 });
}
return NextResponse.json(data);
}
return NextResponse.json({});
};
```
This example uses the [`mailparser`](https://www.npmjs.com/package/mailparser)
library (`npm install mailparser`) to parse the raw email. For other
languages/SDKs, you'll need an equivalent email parsing library capable of
processing emails compliant to [RFC
5322](https://datatracker.ietf.org/doc/html/rfc5322).
---
# Source: https://resend.com/docs/knowledge-base/gandi.md
> ## Documentation Index
> Fetch the complete documentation index at: https://resend.com/docs/llms.txt
> Use this file to discover all available pages before exploring further.
# Gandi
> Verify your domain on Gandi with Resend.
## Add Domain to Resend
First, log in to your [Resend Account](https://resend.com/login) and [add a domain](https://resend.com/domains).
It is [best practice to use a
subdomain](/knowledge-base/is-it-better-to-send-emails-from-a-subdomain-or-the-root-domain)
(updates.example.com) instead of the root domain (example.com). Using a
subdomain allows for proper reputation segmentation based on topics or purpose
(e.g. marketing) and is especially important if receiving emails with Resend.
## Log in to Gandi
Log in to your [Gandi account](https://admin.gandi.net/domain/):
1. Choose your Domain from the `Domain` list.
2. Select the `DNS Records` tab to get to the page to manage DNS records.
## Add MX SPF Record
Select “Add record” on Gandi to copy and paste the values MX from Resend.
1. On the `Type` page, choose `MX`.
2. Use the default TTL of `10800`.
3. Type `send` for the `Name` of the record.
4. Use the default `Priority` of `10`.
5. Copy the MX Value from Resend into the `Hostname` field.
6. Select `Create`.
Gandi requires your MX record to have a trailing period when adding. Resend
will include the trailing period when copying. Removing the period will cause
the verification to fail.
Below is a mapping of the record fields from Resend to Gandi:
| Gandi | Resend | Example Value |
| -------- | -------- | ---------------------------------------- |
| Type | Type | `MX Record` |
| Name | Name | `send` |
| Hostname | Value | `feedback-smtp.us-east-1.amazonses.com.` |
| TTL | - | `10800` |
| Priority | Priority | `10` |
Do not use the same priority for multiple records. If Priority `10` is already
in use on another record, try a higher value `20` or `30`.
## Add TXT SPF Record
In the same section, select “Add record” again.
1. On the `Type` page, choose `TXT`.
2. Use the default TTL of `10800`.
3. Type `send` for the `Name` of the record.
4. Copy the TXT Value Resend into the `Text value` field.
5. Select `Create`.
Omit your domain from the record values in Resend when you paste. Instead of
`send.example.com`, paste only `send` (or `send.subdomain` if you're using a
subdomain).
Below is a mapping of the record fields from Resend to Gandi:
| Gandi | Resend | Example Value |
| ---------- | ------ | ------------------------------------- |
| Type | Type | `TXT Record` |
| Name | Name | `send` |
| Text value | Value | `"v=spf1 include:amazonses.com ~all"` |
| TTL | - | `10800` |
## Add TXT DKIM Records
In the same section, select “Add record” again.
1. On the `Type` page, choose `TXT`.
2. Use the default TTL of `10800`.
3. Type `resend._domainkey` for the `Host name` of the record.
4. Copy the record value from Resend into the `TXT value` field.
5. Select `Create`.
Omit your domain from the record values in Resend when you paste. Instead of
`resend._domainkey.example.com`, paste only `resend._domainkey` (or
`resend._domainkey.subdomain` if you're using a subdomain).
Below is a mapping of the record fields from Resend to Gandi:
| Gandi | Resend | Example Value |
| ---------- | ------ | ---------------------------- |
| Type | Type | `TXT Record` |
| Name | Name | `send` |
| Text value | Value | `p=example_demain_key_value` |
| TTL | - | `1 hour` |
## Receiving Emails
If you want to receive emails at your domain, toggle the "Receiving" switch on the domain details page.
When you enable Inbound on a domain, Resend receives *all emails* sent to that
specific domain depending on the priority of the MX record. For this reason,
we strongly recommend verifying a subdomain (`subdomain.example.com`) instead
of the root domain (`example.com`). Learn more about [avoiding conflicts with
your existing MX
records](/knowledge-base/how-do-i-avoid-conflicting-with-my-mx-records).
Select “Add record” on Gandi:
1. On the `Type` page, choose `MX`.
2. Use the default TTL of `10800`.
3. Type `inbound` (or whatever your subdomain is) for the `Name` of the record.
4. Use the default `Priority` of `10`.
5. Copy the MX Value from Resend into the `Hostname` field.
6. Select `Create`.
Below is a mapping of the record fields from Resend to Gandi:
| Gandi | Resend | Example Value |
| -------- | -------- | --------------------------------------- |
| Type | Type | `MX Record` |
| Name | Name | `inbound` |
| Hostname | Content | `inbound-smtp.us-east-1.amazonaws.com.` |
| TTL | - | `10800` |
| Priority | Priority | `10` |
After verifying your domain, create a webhook to process incoming emails. For help setting up a webhook, how to access email data and attachments, forward emails, and more, see [our guide on receiving emails with Resend](/dashboard/receiving/introduction).
## Complete Verification
Now click [Verify DNS Records](https://resend.com/domains) on your Domain in Resend. It may take a few hours to complete the verification process (often much faster).
## Troubleshooting
If your domain is not successfully verified, these are some common troubleshooting methods.
Review the records you added to Gandi to rule out copy and paste errors.
[Review our guide on a domain not verifying](/knowledge-base/what-if-my-domain-is-not-verifying).
---
# Source: https://resend.com/docs/api-reference/broadcasts/get-broadcast.md
> ## Documentation Index
> Fetch the complete documentation index at: https://resend.com/docs/llms.txt
> Use this file to discover all available pages before exploring further.
# Retrieve Broadcast
> Retrieve a single broadcast.
export const ResendParamField = ({children, body, path, ...props}) => {
const [lang, setLang] = useState(() => {
return localStorage.getItem('code') || '"Node.js"';
});
useEffect(() => {
const onStorage = event => {
const key = event.detail.key;
if (key === 'code') {
setLang(event.detail.value);
}
};
document.addEventListener('mintlify-localstorage', onStorage);
return () => {
document.removeEventListener('mintlify-localstorage', onStorage);
};
}, []);
const toCamelCase = str => typeof str === 'string' ? str.replace(/[_-](\w)/g, (_, c) => c.toUpperCase()) : str;
const resolvedBody = useMemo(() => {
const value = JSON.parse(lang);
return value === 'Node.js' ? toCamelCase(body) : body;
}, [body, lang]);
const resolvedPath = useMemo(() => {
const value = JSON.parse(lang);
return value === 'Node.js' ? toCamelCase(path) : path;
}, [path, lang]);
return
{children}
;
};
You can retrieve broadcasts created via both this API and the Resend dashboard.
## Path Parameters
The broadcast ID.
See all available `status` types in [the Broadcasts
overview](/dashboard/broadcasts/introduction#understand-broadcast-statuses).
```ts Node.js theme={"theme":{"light":"github-light","dark":"vesper"}}
import { Resend } from 'resend';
const resend = new Resend('re_xxxxxxxxx');
const { data, error } = await resend.broadcasts.get(
'559ac32e-9ef5-46fb-82a1-b76b840c0f7b',
);
```
```php PHP theme={"theme":{"light":"github-light","dark":"vesper"}}
$resend = Resend::client('re_xxxxxxxxx');
$resend->broadcasts->get('559ac32e-9ef5-46fb-82a1-b76b840c0f7b');
```
```py Python theme={"theme":{"light":"github-light","dark":"vesper"}}
import resend
resend.api_key = "re_xxxxxxxxx"
resend.Broadcasts.get(id="559ac32e-9ef5-46fb-82a1-b76b840c0f7b")
```
```ruby Ruby theme={"theme":{"light":"github-light","dark":"vesper"}}
require "resend"
Resend.api_key = "re_xxxxxxxxx"
Resend::Broadcasts.get("559ac32e-9ef5-46fb-82a1-b76b840c0f7b")
```
```go Go theme={"theme":{"light":"github-light","dark":"vesper"}}
package main
import "github.com/resend/resend-go/v3"
func main() {
client := resend.NewClient("re_xxxxxxxxx")
client.Broadcasts.Get("559ac32e-9ef5-46fb-82a1-b76b840c0f7b")
}
```
```rust Rust theme={"theme":{"light":"github-light","dark":"vesper"}}
use resend_rs::{Resend, Result};
#[tokio::main]
async fn main() -> Result<()> {
let resend = Resend::new("re_xxxxxxxxx");
let _broadcast = resend
.broadcasts
.get("559ac32e-9ef5-46fb-82a1-b76b840c0f7b")
.await?;
Ok(())
}
```
```java Java theme={"theme":{"light":"github-light","dark":"vesper"}}
Resend resend = new Resend("re_xxxxxxxxx");
GetBroadcastResponseSuccess data = resend.broadcasts().get("559ac32e-9ef5-46fb-82a1-b76b840c0f7b");
```
```csharp .NET theme={"theme":{"light":"github-light","dark":"vesper"}}
using Resend;
IResend resend = ResendClient.Create( "re_xxxxxxxxx" ); // Or from DI
var resp = await resend.BroadcastRetrieveAsync( new Guid( "559ac32e-9ef5-46fb-82a1-b76b840c0f7b" ) );
Console.WriteLine( "Broadcast name={0}", resp.Content.DisplayName );
```
```bash cURL theme={"theme":{"light":"github-light","dark":"vesper"}}
curl -X GET 'https://api.resend.com/broadcasts/559ac32e-9ef5-46fb-82a1-b76b840c0f7b' \
-H 'Authorization: Bearer re_xxxxxxxxx'
```
```json Response theme={"theme":{"light":"github-light","dark":"vesper"}}
{
"object": "broadcast",
"id": "559ac32e-9ef5-46fb-82a1-b76b840c0f7b",
"name": "Announcements",
"audience_id": "78261eea-8f8b-4381-83c6-79fa7120f1cf", // now called segment_id
"segment_id": "78261eea-8f8b-4381-83c6-79fa7120f1cf",
"from": "Acme ",
"subject": "hello world",
"reply_to": null,
"preview_text": "Check out our latest announcements",
"html": "
Hello {{{FIRST_NAME|there}}}!
",
"text": "Hello {{{FIRST_NAME|there}}}!",
"status": "draft",
"created_at": "2024-12-01T19:32:22.980Z",
"scheduled_at": null,
"sent_at": null,
"topic_id": "b6d24b8e-af0b-4c3c-be0c-359bbd97381e"
}
```
---
# Source: https://resend.com/docs/api-reference/contact-properties/get-contact-property.md
> ## Documentation Index
> Fetch the complete documentation index at: https://resend.com/docs/llms.txt
> Use this file to discover all available pages before exploring further.
# Retrieve Contact Property
> Retrieve a contact property by its ID.
export const ResendParamField = ({children, body, path, ...props}) => {
const [lang, setLang] = useState(() => {
return localStorage.getItem('code') || '"Node.js"';
});
useEffect(() => {
const onStorage = event => {
const key = event.detail.key;
if (key === 'code') {
setLang(event.detail.value);
}
};
document.addEventListener('mintlify-localstorage', onStorage);
return () => {
document.removeEventListener('mintlify-localstorage', onStorage);
};
}, []);
const toCamelCase = str => typeof str === 'string' ? str.replace(/[_-](\w)/g, (_, c) => c.toUpperCase()) : str;
const resolvedBody = useMemo(() => {
const value = JSON.parse(lang);
return value === 'Node.js' ? toCamelCase(body) : body;
}, [body, lang]);
const resolvedPath = useMemo(() => {
const value = JSON.parse(lang);
return value === 'Node.js' ? toCamelCase(path) : path;
}, [path, lang]);
return
{children}
;
};
## Path Parameters
The Contact Property ID.
```ts Node.js theme={"theme":{"light":"github-light","dark":"vesper"}}
import { Resend } from 'resend';
const resend = new Resend('re_xxxxxxxxx');
const { data, error } = await resend.contactProperties.get(
'b6d24b8e-af0b-4c3c-be0c-359bbd97381e',
);
```
```php PHP theme={"theme":{"light":"github-light","dark":"vesper"}}
$resend = Resend::client('re_xxxxxxxxx');
$resend->contactProperties->get('b6d24b8e-af0b-4c3c-be0c-359bbd97381');
```
```python Python theme={"theme":{"light":"github-light","dark":"vesper"}}
import resend
resend.api_key = 're_xxxxxxxxx'
contact_property = resend.ContactProperties.get('b6d24b8e-af0b-4c3c-be0c-359bbd97381e')
```
```ruby Ruby theme={"theme":{"light":"github-light","dark":"vesper"}}
require "resend"
Resend.api_key = "re_xxxxxxxxx"
property = Resend::ContactProperties.get("b6d24b8e-af0b-4c3c-be0c-359bbd97381e")
```
```go Go theme={"theme":{"light":"github-light","dark":"vesper"}}
package main
import (
"context"
"fmt"
"github.com/resend/resend-go/v3"
)
func main() {
ctx := context.TODO()
client := resend.NewClient("re_xxxxxxxxx")
property, err := client.ContactProperties.GetWithContext(ctx, "b6d24b8e-af0b-4c3c-be0c-359bbd97381e")
if err != nil {
panic(err)
}
fmt.Println(property)
}
```
```rust Rust theme={"theme":{"light":"github-light","dark":"vesper"}}
use resend_rs::{Resend, Result};
#[tokio::main]
async fn main() -> Result<()> {
let resend = Resend::new("re_xxxxxxxxx");
let _property = resend
.contacts
.get_property("b6d24b8e-af0b-4c3c-be0c-359bbd97381e")
.await?;
Ok(())
}
```
```java Java theme={"theme":{"light":"github-light","dark":"vesper"}}
import com.resend.*;
public class Main {
public static void main(String[] args) {
Resend resend = new Resend("re_xxxxxxxxx");
resend.contactProperties().get("b6d24b8e-af0b-4c3c-be0c-359bbd97381e");
}
}
```
```csharp .NET theme={"theme":{"light":"github-light","dark":"vesper"}}
using Resend;
IResend resend = ResendClient.Create( "re_xxxxxxxxx" ); // Or from DI
var resp = await resend.ContactPropRetrieveAsync( new Guid( "b6d24b8e-af0b-4c3c-be0c-359bbd97381e" ) );
Console.WriteLine( "Prop Id={0}", resp.Content.Id );
```
```bash cURL theme={"theme":{"light":"github-light","dark":"vesper"}}
curl -X GET 'https://api.resend.com/contact-properties/b6d24b8e-af0b-4c3c-be0c-359bbd97381e' \
-H 'Authorization: Bearer re_xxxxxxxxx'
```
```json Response theme={"theme":{"light":"github-light","dark":"vesper"}}
{
"object": "contact_property",
"id": "b6d24b8e-af0b-4c3c-be0c-359bbd97381e",
"key": "company_name",
"type": "string",
"fallback_value": "Acme Corp",
"created_at": "2023-04-08T00:11:13.110779+00:00"
}
```
---
# Source: https://resend.com/docs/api-reference/contacts/get-contact-topics.md
> ## Documentation Index
> Fetch the complete documentation index at: https://resend.com/docs/llms.txt
> Use this file to discover all available pages before exploring further.
# Retrieve Contact Topics
> Retrieve a list of topics subscriptions for a contact.
export const QueryParams = ({type, isRequired}) => {
return <>
Query Parameters
{isRequired ?
Number of {type} to retrieve.
Default value: 20
Maximum value: 100
Minimum value: 1
: <>
Note that the limit parameter is optional. If
you do not provide a limit, all {type} will be returned
in a single response.
Number of {type} to retrieve.
Maximum value: 100
Minimum value: 1
}
The ID after which we'll retrieve more {type} (for pagination).
This ID will not be included in the returned list. Cannot be
used with the
before parameter.
The ID before which we'll retrieve more {type} (for
pagination). This ID will not be included in the returned list.
Cannot be used with the after parameter.
You can only use either after or before{' '}
parameter, not both. See our{' '}
pagination guide for more
information.
;
};
## Path Parameters
Either `id` or `email` must be provided.
The Contact ID.
The Contact Email.
```ts Node.js theme={"theme":{"light":"github-light","dark":"vesper"}}
import { Resend } from 'resend';
const resend = new Resend('re_xxxxxxxxx');
// Get by contact id
const { data, error } = await resend.contacts.topics.list({
id: 'e169aa45-1ecf-4183-9955-b1499d5701d3',
});
// Get by contact email
const { data, error } = await resend.contacts.topics.list({
email: 'steve.wozniak@gmail.com',
});
```
```php PHP theme={"theme":{"light":"github-light","dark":"vesper"}}
$resend = Resend::client('re_xxxxxxxxx');
// Get by contact id
$resend->contacts->topics->get('e169aa45-1ecf-4183-9955-b1499d5701d3');
// Get by contact email
$resend->contacts->topics->get('steve.wozniak@gmail.com');
```
```python Python theme={"theme":{"light":"github-light","dark":"vesper"}}
import resend
resend.api_key = 're_xxxxxxxxx'
# Get by contact id
topics = resend.Contacts.Topics.list(contact_id='e169aa45-1ecf-4183-9955-b1499d5701d3')
# Get by contact email
topics = resend.Contacts.Topics.list(email='steve.wozniak@gmail.com')
```
```ruby Ruby theme={"theme":{"light":"github-light","dark":"vesper"}}
require "resend"
Resend.api_key = "re_xxxxxxxxx"
# Get by contact id
contact_topics = Resend::Contacts::Topics.list(id: "e169aa45-1ecf-4183-9955-b1499d5701d3")
# Get by contact email
contact_topics = Resend::Contacts::Topics.list(id: "steve.wozniak@gmail.com")
```
```go Go theme={"theme":{"light":"github-light","dark":"vesper"}}
package main
import (
"context"
"fmt"
"github.com/resend/resend-go/v3"
)
func main() {
ctx := context.TODO()
client := resend.NewClient("re_xxxxxxxxx")
// Get by contact id
topics, err := client.Contacts.Topics.ListWithContext(ctx, &resend.ListContactTopicsRequest{
ContactId: "e169aa45-1ecf-4183-9955-b1499d5701d3",
})
if err != nil {
panic(err)
}
fmt.Println(topics)
// Get by contact email
topics, err = client.Contacts.Topics.ListWithContext(ctx, &resend.ListContactTopicsRequest{
Email: "steve.wozniak@gmail.com",
})
if err != nil {
panic(err)
}
fmt.Println(topics)
}
```
```rust Rust theme={"theme":{"light":"github-light","dark":"vesper"}}
use resend_rs::{list_opts::ListOptions, Resend, Result};
#[tokio::main]
async fn main() -> Result<()> {
let resend = Resend::new("re_xxxxxxxxx");
let _topics = resend
.contacts
.get_contact_topics(
"e169aa45-1ecf-4183-9955-b1499d5701d3",
ListOptions::default(),
)
.await?;
Ok(())
}
```
```java Java theme={"theme":{"light":"github-light","dark":"vesper"}}
import com.resend.*;
public class Main {
public static void main(String[] args) {
Resend resend = new Resend("re_xxxxxxxxx");
// Get by contact id
resend.contacts().topics().list("e169aa45-1ecf-4183-9955-b1499d5701d3");
// Get by contact email
resend.contacts().topics().list("steve.wozniak@gmail.com");
}
}
```
```csharp .NET theme={"theme":{"light":"github-light","dark":"vesper"}}
using Resend;
IResend resend = ResendClient.Create( "re_xxxxxxxxx" ); // Or from DI
var resp = await resend.ContactListTopicsAsync( new Guid( "e169aa45-1ecf-4183-9955-b1499d5701d3" ));
Console.WriteLine( "Nr Topics={0}", resp.Content.Data.Count );
```
```bash cURL theme={"theme":{"light":"github-light","dark":"vesper"}}
// Get by contact id
curl -X GET 'https://api.resend.com/contacts/e169aa45-1ecf-4183-9955-b1499d5701d3/topics' \
-H 'Authorization: Bearer re_xxxxxxxxx'
// Get by contact email
curl -X GET 'https://api.resend.com/contacts/steve.wozniak@gmail.com/topics' \
-H 'Authorization: Bearer re_xxxxxxxxx'
```
```json Response theme={"theme":{"light":"github-light","dark":"vesper"}}
{
"object": "list",
"has_more": false,
"data": [
{
"id": "b6d24b8e-af0b-4c3c-be0c-359bbd97381e",
"name": "Product Updates",
"description": "New features, and latest announcements.",
"subscription": "opt_in"
}
]
}
```
---
# Source: https://resend.com/docs/api-reference/contacts/get-contact.md
> ## Documentation Index
> Fetch the complete documentation index at: https://resend.com/docs/llms.txt
> Use this file to discover all available pages before exploring further.
# Retrieve Contact
> Retrieve a single contact.
export const ResendParamField = ({children, body, path, ...props}) => {
const [lang, setLang] = useState(() => {
return localStorage.getItem('code') || '"Node.js"';
});
useEffect(() => {
const onStorage = event => {
const key = event.detail.key;
if (key === 'code') {
setLang(event.detail.value);
}
};
document.addEventListener('mintlify-localstorage', onStorage);
return () => {
document.removeEventListener('mintlify-localstorage', onStorage);
};
}, []);
const toCamelCase = str => typeof str === 'string' ? str.replace(/[_-](\w)/g, (_, c) => c.toUpperCase()) : str;
const resolvedBody = useMemo(() => {
const value = JSON.parse(lang);
return value === 'Node.js' ? toCamelCase(body) : body;
}, [body, lang]);
const resolvedPath = useMemo(() => {
const value = JSON.parse(lang);
return value === 'Node.js' ? toCamelCase(path) : path;
}, [path, lang]);
return
{children}
;
};
## Path Parameters
Either `id` or `email` must be provided.
The Contact ID.
The Contact Email.
```ts Node.js theme={"theme":{"light":"github-light","dark":"vesper"}}
import { Resend } from 'resend';
const resend = new Resend('re_xxxxxxxxx');
// Get by contact id
const { data, error } = await resend.contacts.get({
id: 'e169aa45-1ecf-4183-9955-b1499d5701d3',
});
// Get by contact email
const { data, error } = await resend.contacts.get({
email: 'steve.wozniak@gmail.com',
});
```
```php PHP theme={"theme":{"light":"github-light","dark":"vesper"}}
$resend = Resend::client('re_xxxxxxxxx');
// Get by contact id
$resend->contacts->get(
id: 'e169aa45-1ecf-4183-9955-b1499d5701d3'
);
// Get by contact email
$resend->contacts->get(
email: 'steve.wozniak@gmail.com'
);
```
```python Python theme={"theme":{"light":"github-light","dark":"vesper"}}
import resend
resend.api_key = "re_xxxxxxxxx"
# Get by contact id
resend.Contacts.get(
id="e169aa45-1ecf-4183-9955-b1499d5701d3",
)
# Get by contact email
resend.Contacts.get(
email="steve.wozniak@gmail.com",
)
```
```ruby Ruby theme={"theme":{"light":"github-light","dark":"vesper"}}
require "resend"
Resend.api_key = "re_xxxxxxxxx"
# Get by contact id
params = {
"id": "e169aa45-1ecf-4183-9955-b1499d5701d3",
}
Resend::Contacts.get(params)
# Get by contact email
params = {
"email": "steve.wozniak@gmail.com",
}
Resend::Contacts.get(params)
```
```go Go theme={"theme":{"light":"github-light","dark":"vesper"}}
package main
import "github.com/resend/resend-go/v3"
func main() {
client := resend.NewClient("re_xxxxxxxxx")
// Get by contact id
client.Contacts.Get("e169aa45-1ecf-4183-9955-b1499d5701d3")
// Get by contact email
client.Contacts.Get("steve.wozniak@gmail.com")
}
```
```rust Rust theme={"theme":{"light":"github-light","dark":"vesper"}}
use resend_rs::{Resend, Result};
#[tokio::main]
async fn main() -> Result<()> {
let resend = Resend::new("re_xxxxxxxxx");
// Get by contact id
let _contact = resend
.contacts
.get("e169aa45-1ecf-4183-9955-b1499d5701d3")
.await?;
// Get by contact email
let _contact = resend
.contacts
.get("steve.wozniak@gmail.com")
.await?;
Ok(())
}
```
```java Java theme={"theme":{"light":"github-light","dark":"vesper"}}
import com.resend.*;
public class Main {
public static void main(String[] args) {
Resend resend = new Resend("re_xxxxxxxxx");
// Get by contact id
GetContactOptions params = GetContactOptions.builder()
.id("e169aa45-1ecf-4183-9955-b1499d5701d3")
.build();
// Get by contact email
GetContactOptions params = GetContactOptions.builder()
.email("steve.wozniak@gmail.com")
.build();
GetContactResponseSuccess data = resend.contacts().get(params);
}
}
```
```csharp .NET theme={"theme":{"light":"github-light","dark":"vesper"}}
using Resend;
IResend resend = ResendClient.Create( "re_xxxxxxxxx" ); // Or from DI
// Get by contact id
var resp1 = await resend.ContactRetrieveAsync(
contactId: new Guid( "e169aa45-1ecf-4183-9955-b1499d5701d3" )
);
// Get by contact email
var resp2 = await resend.ContactRetrieveByEmailAsync(
email: "steve.wozniak@gmail.com"
);
Console.WriteLine( "Contact Email={0}", resp2.Content.Email );
```
```bash cURL theme={"theme":{"light":"github-light","dark":"vesper"}}
# Get by contact id
curl -X GET 'https://api.resend.com/contacts/e169aa45-1ecf-4183-9955-b1499d5701d3' \
-H 'Authorization: Bearer re_xxxxxxxxx'
# Get by contact email
curl -X GET 'https://api.resend.com/contacts/steve.wozniak@gmail.com' \
-H 'Authorization: Bearer re_xxxxxxxxx'
```
```json Response theme={"theme":{"light":"github-light","dark":"vesper"}}
{
"object": "contact",
"id": "e169aa45-1ecf-4183-9955-b1499d5701d3",
"email": "steve.wozniak@gmail.com",
"first_name": "Steve",
"last_name": "Wozniak",
"created_at": "2023-10-06T23:47:56.678Z",
"unsubscribed": false,
"properties": {
"company_name": "Acme Corp",
"department": "Engineering"
}
}
```
---
# Source: https://resend.com/docs/api-reference/domains/get-domain.md
> ## Documentation Index
> Fetch the complete documentation index at: https://resend.com/docs/llms.txt
> Use this file to discover all available pages before exploring further.
# Retrieve Domain
> Retrieve a single domain for the authenticated user.
export const ResendParamField = ({children, body, path, ...props}) => {
const [lang, setLang] = useState(() => {
return localStorage.getItem('code') || '"Node.js"';
});
useEffect(() => {
const onStorage = event => {
const key = event.detail.key;
if (key === 'code') {
setLang(event.detail.value);
}
};
document.addEventListener('mintlify-localstorage', onStorage);
return () => {
document.removeEventListener('mintlify-localstorage', onStorage);
};
}, []);
const toCamelCase = str => typeof str === 'string' ? str.replace(/[_-](\w)/g, (_, c) => c.toUpperCase()) : str;
const resolvedBody = useMemo(() => {
const value = JSON.parse(lang);
return value === 'Node.js' ? toCamelCase(body) : body;
}, [body, lang]);
const resolvedPath = useMemo(() => {
const value = JSON.parse(lang);
return value === 'Node.js' ? toCamelCase(path) : path;
}, [path, lang]);
return
{children}
;
};
## Path Parameters
The Domain ID.
See all available `status` types in [the Domains
overview](/dashboard/domains/introduction#understand-a-domain-status).
```ts Node.js theme={"theme":{"light":"github-light","dark":"vesper"}}
import { Resend } from 'resend';
const resend = new Resend('re_xxxxxxxxx');
const { data, error } = await resend.domains.get(
'd91cd9bd-1176-453e-8fc1-35364d380206',
);
```
```php PHP theme={"theme":{"light":"github-light","dark":"vesper"}}
$resend = Resend::client('re_xxxxxxxxx');
$resend->domains->get('d91cd9bd-1176-453e-8fc1-35364d380206');
```
```python Python theme={"theme":{"light":"github-light","dark":"vesper"}}
import resend
resend.api_key = "re_xxxxxxxxx"
resend.Domains.get(domain_id="d91cd9bd-1176-453e-8fc1-35364d380206")
```
```ruby Ruby theme={"theme":{"light":"github-light","dark":"vesper"}}
require "resend"
Resend.api_key = "re_xxxxxxxxx"
Resend::Domains.get "d91cd9bd-1176-453e-8fc1-35364d380206"
```
```go Go theme={"theme":{"light":"github-light","dark":"vesper"}}
package main
import "github.com/resend/resend-go/v3"
func main() {
client := resend.NewClient("re_xxxxxxxxx")
client.Domains.Get("d91cd9bd-1176-453e-8fc1-35364d380206")
}
```
```rust Rust theme={"theme":{"light":"github-light","dark":"vesper"}}
use resend_rs::{Resend, Result};
#[tokio::main]
async fn main() -> Result<()> {
let resend = Resend::new("re_xxxxxxxxx");
let _domain = resend
.domains
.get("d91cd9bd-1176-453e-8fc1-35364d380206")
.await?;
Ok(())
}
```
```java Java theme={"theme":{"light":"github-light","dark":"vesper"}}
import com.resend.*;
public class Main {
public static void main(String[] args) {
Resend resend = new Resend("re_xxxxxxxxx");
Domain domain = resend.domains().get("d91cd9bd-1176-453e-8fc1-35364d380206");
}
}
```
```csharp .NET theme={"theme":{"light":"github-light","dark":"vesper"}}
using Resend;
IResend resend = ResendClient.Create( "re_xxxxxxxxx" ); // Or from DI
var resp = await resend.DomainRetrieveAsync( new Guid( "d91cd9bd-1176-453e-8fc1-35364d380206" ) );
Console.WriteLine( "Domain Id={0}", resp.Content.Name );
```
```bash cURL theme={"theme":{"light":"github-light","dark":"vesper"}}
curl -X GET 'https://api.resend.com/domains/d91cd9bd-1176-453e-8fc1-35364d380206' \
-H 'Authorization: Bearer re_xxxxxxxxx'
```
```json Response theme={"theme":{"light":"github-light","dark":"vesper"}}
{
"object": "domain",
"id": "d91cd9bd-1176-453e-8fc1-35364d380206",
"name": "example.com",
"status": "not_started",
"created_at": "2023-04-26T20:21:26.347412+00:00",
"region": "us-east-1",
"capabilities": {
"sending": "enabled",
"receiving": "disabled"
},
"records": [
{
"record": "SPF",
"name": "send",
"type": "MX",
"ttl": "Auto",
"status": "not_started",
"value": "feedback-smtp.us-east-1.amazonses.com",
"priority": 10
},
{
"record": "SPF",
"name": "send",
"value": "\"v=spf1 include:amazonses.com ~all\"",
"type": "TXT",
"ttl": "Auto",
"status": "not_started"
},
{
"record": "DKIM",
"name": "resend._domainkey",
"value": "p=MIGfMA0GCSqGSIb3DQEBAQUAA4GNADCBiQKBgQDsc4Lh8xilsngyKEgN2S84+21gn+x6SEXtjWvPiAAmnmggr5FWG42WnqczpzQ/mNblqHz4CDwUum6LtY6SdoOlDmrhvp5khA3cd661W9FlK3yp7+jVACQElS7d9O6jv8VsBbVg4COess3gyLE5RyxqF1vYsrEXqyM8TBz1n5AGkQIDAQA2",
"type": "TXT",
"status": "not_started",
"ttl": "Auto"
}
]
}
```
---
# Source: https://resend.com/docs/dashboard/receiving/get-email-content.md
> ## Documentation Index
> Fetch the complete documentation index at: https://resend.com/docs/llms.txt
> Use this file to discover all available pages before exploring further.
# Get Email Content
> Get the body and headers of a received email.
Receiving emails contain the HTML and Plain Text body of the email, as well as the headers.
Webhooks do not include the actual HTML or Plain Text body of the email. You
must call the [received emails
API](/api-reference/emails/retrieve-received-email) to retrieve them. This
design choice supports large payloads in serverless environments that have
limited request body sizes.
After receiving the webhook event, call the [Receiving API](/api-reference/emails/retrieve-received-email).
Here's an example in a Next.js application:
```js app/api/events/route.ts theme={"theme":{"light":"github-light","dark":"vesper"}}
import type { NextRequest } from 'next/server';
import { NextResponse } from 'next/server';
import { Resend } from 'resend';
const resend = new Resend('re_xxxxxxxxx');
export const POST = async (request: NextRequest) => {
const event = await request.json();
if (event.type === 'email.received') {
const { data: email } = await resend
.emails
.receiving
.get(event.data.email_id);
console.log(email.html);
console.log(email.text);
console.log(email.headers);
return NextResponse.json(email);
}
return NextResponse.json({});
};
```
---
# Source: https://resend.com/docs/api-reference/segments/get-segment.md
> ## Documentation Index
> Fetch the complete documentation index at: https://resend.com/docs/llms.txt
> Use this file to discover all available pages before exploring further.
# Retrieve Segment
> Retrieve a single segment.
export const ResendParamField = ({children, body, path, ...props}) => {
const [lang, setLang] = useState(() => {
return localStorage.getItem('code') || '"Node.js"';
});
useEffect(() => {
const onStorage = event => {
const key = event.detail.key;
if (key === 'code') {
setLang(event.detail.value);
}
};
document.addEventListener('mintlify-localstorage', onStorage);
return () => {
document.removeEventListener('mintlify-localstorage', onStorage);
};
}, []);
const toCamelCase = str => typeof str === 'string' ? str.replace(/[_-](\w)/g, (_, c) => c.toUpperCase()) : str;
const resolvedBody = useMemo(() => {
const value = JSON.parse(lang);
return value === 'Node.js' ? toCamelCase(body) : body;
}, [body, lang]);
const resolvedPath = useMemo(() => {
const value = JSON.parse(lang);
return value === 'Node.js' ? toCamelCase(path) : path;
}, [path, lang]);
return
{children}
;
};
## Path Parameters
The Segment ID.
```ts Node.js theme={"theme":{"light":"github-light","dark":"vesper"}}
import { Resend } from 'resend';
const resend = new Resend('re_xxxxxxxxx');
const { data, error } = await resend.segments.get(
'78261eea-8f8b-4381-83c6-79fa7120f1cf',
);
```
```php PHP theme={"theme":{"light":"github-light","dark":"vesper"}}
$resend = Resend::client('re_xxxxxxxxx');
$resend->segments->get('78261eea-8f8b-4381-83c6-79fa7120f1cf');
```
```python Python theme={"theme":{"light":"github-light","dark":"vesper"}}
import resend
resend.api_key = 're_xxxxxxxxx'
segment = resend.Segments.get('78261eea-8f8b-4381-83c6-79fa7120f1cf')
```
```ruby Ruby theme={"theme":{"light":"github-light","dark":"vesper"}}
require "resend"
Resend.api_key = "re_xxxxxxxxx"
segment = Resend::Segments.get("78261eea-8f8b-4381-83c6-79fa7120f1cf")
```
```go Go theme={"theme":{"light":"github-light","dark":"vesper"}}
package main
import (
"context"
"fmt"
"github.com/resend/resend-go/v3"
)
func main() {
ctx := context.TODO()
client := resend.NewClient("re_xxxxxxxxx")
segment, err := client.Segments.GetWithContext(ctx, "78261eea-8f8b-4381-83c6-79fa7120f1cf")
if err != nil {
panic(err)
}
fmt.Println(segment)
}
```
```rust Rust theme={"theme":{"light":"github-light","dark":"vesper"}}
use resend_rs::{Resend, Result};
#[tokio::main]
async fn main() -> Result<()> {
let resend = Resend::new("re_xxxxxxxxx");
let _segment = resend
.segments
.get("78261eea-8f8b-4381-83c6-79fa7120f1cf")
.await?;
Ok(())
}
```
```java Java theme={"theme":{"light":"github-light","dark":"vesper"}}
import com.resend.*;
public class Main {
public static void main(String[] args) {
Resend resend = new Resend("re_xxxxxxxxx");
GetSegmentResponseSuccess response = resend.segments().get("78261eea-8f8b-4381-83c6-79fa7120f1cf");
}
}
```
```csharp .NET theme={"theme":{"light":"github-light","dark":"vesper"}}
using Resend;
IResend resend = ResendClient.Create( "re_xxxxxxxxx" ); // Or from DI
var resp = await resend.SegmentRetrieveAsync( new Guid( "b6d24b8e-af0b-4c3c-be0c-359bbd97381e" ) );
Console.WriteLine( "Segment Id={0}", resp.Content.Id );
```
```bash cURL theme={"theme":{"light":"github-light","dark":"vesper"}}
curl -X GET 'https://api.resend.com/segments/78261eea-8f8b-4381-83c6-79fa7120f1cf' \
-H 'Authorization: Bearer re_xxxxxxxxx'
```
```json Response theme={"theme":{"light":"github-light","dark":"vesper"}}
{
"object": "segment",
"id": "78261eea-8f8b-4381-83c6-79fa7120f1cf",
"name": "Registered Users",
"created_at": "2023-10-06T22:59:55.977Z"
}
```
---
# Source: https://resend.com/docs/api-reference/templates/get-template.md
> ## Documentation Index
> Fetch the complete documentation index at: https://resend.com/docs/llms.txt
> Use this file to discover all available pages before exploring further.
# Get Template
> Get a template by ID.
## Path Parameters
The ID or alias of the template to get.
```ts Node.js theme={"theme":{"light":"github-light","dark":"vesper"}}
import { Resend } from 'resend';
const resend = new Resend('re_xxxxxxxxx');
const { data, error } = await resend.templates.get(
'34a080c9-b17d-4187-ad80-5af20266e535',
);
```
```php PHP theme={"theme":{"light":"github-light","dark":"vesper"}}
$resend = Resend::client('re_xxxxxxxxx');
$resend->templates->get('34a080c9-b17d-4187-ad80-5af20266e535');
```
```py Python theme={"theme":{"light":"github-light","dark":"vesper"}}
import resend
resend.api_key = "re_xxxxxxxxx"
resend.Templates.get("34a080c9-b17d-4187-ad80-5af20266e535")
```
```ruby Ruby theme={"theme":{"light":"github-light","dark":"vesper"}}
require "resend"
Resend.api_key = "re_xxxxxxxxx"
Resend::Templates.get("34a080c9-b17d-4187-ad80-5af20266e535")
```
```go Go theme={"theme":{"light":"github-light","dark":"vesper"}}
import (
"context"
"github.com/resend/resend-go/v3"
)
func main() {
client := resend.NewClient("re_xxxxxxxxx")
client.Templates.GetWithContext(
context.TODO(),
"34a080c9-b17d-4187-ad80-5af20266e535",
)
}
```
```rust Rust theme={"theme":{"light":"github-light","dark":"vesper"}}
use resend_rs::{Resend, Result};
#[tokio::main]
async fn main() -> Result<()> {
let resend = Resend::new("re_xxxxxxxxx");
let _template = resend
.templates
.get("34a080c9-b17d-4187-ad80-5af20266e535")
.await?;
Ok(())
}
```
```java Java theme={"theme":{"light":"github-light","dark":"vesper"}}
import com.resend.*;
public class Main {
public static void main(String[] args) {
Resend resend = new Resend("re_xxxxxxxxx");
GetTemplateResponseSuccess data = resend.templates().get("34a080c9-b17d-4187-ad80-5af20266e535");
}
}
```
```csharp .NET theme={"theme":{"light":"github-light","dark":"vesper"}}
using Resend;
IResend resend = ResendClient.Create( "re_xxxxxxxxx" ); // Or from DI
var res = await resend.TemplateRetrieveAsync( new Guid( "34a080c9-b17d-4187-ad80-5af20266e535" ) );
Console.WriteLine( "Template Name={0}", res.Content.Name );
```
```bash cURL theme={"theme":{"light":"github-light","dark":"vesper"}}
curl -X GET 'https://api.resend.com/templates/34a080c9-b17d-4187-ad80-5af20266e535' \
-H 'Authorization: Bearer re_xxxxxxxxx' \
-H 'Content-Type: application/json'
```
```json Response theme={"theme":{"light":"github-light","dark":"vesper"}}
{
"object": "template",
"id": "34a080c9-b17d-4187-ad80-5af20266e535",
"current_version_id": "b2693018-7abb-4b4b-b4cb-aadf72dc06bd",
"alias": "reset-password",
"name": "reset-password",
"created_at": "2023-10-06T23:47:56.678Z",
"updated_at": "2023-10-06T23:47:56.678Z",
"status": "published",
"published_at": "2023-10-06T23:47:56.678Z",
"from": "John Doe ",
"subject": "Hello, world!",
"reply_to": null,
"html": "
Hello, world!
",
"text": "Hello, world!",
"variables": [
{
"id": "e169aa45-1ecf-4183-9955-b1499d5701d3",
"key": "user_name",
"type": "string",
"fallback_value": "John Doe",
"created_at": "2023-10-06T23:47:56.678Z",
"updated_at": "2023-10-06T23:47:56.678Z"
}
],
"has_unpublished_versions": true
}
```
---
# Source: https://resend.com/docs/api-reference/topics/get-topic.md
> ## Documentation Index
> Fetch the complete documentation index at: https://resend.com/docs/llms.txt
> Use this file to discover all available pages before exploring further.
# Retrieve Topic
> Retrieve a topic by its ID.
export const ResendParamField = ({children, body, path, ...props}) => {
const [lang, setLang] = useState(() => {
return localStorage.getItem('code') || '"Node.js"';
});
useEffect(() => {
const onStorage = event => {
const key = event.detail.key;
if (key === 'code') {
setLang(event.detail.value);
}
};
document.addEventListener('mintlify-localstorage', onStorage);
return () => {
document.removeEventListener('mintlify-localstorage', onStorage);
};
}, []);
const toCamelCase = str => typeof str === 'string' ? str.replace(/[_-](\w)/g, (_, c) => c.toUpperCase()) : str;
const resolvedBody = useMemo(() => {
const value = JSON.parse(lang);
return value === 'Node.js' ? toCamelCase(body) : body;
}, [body, lang]);
const resolvedPath = useMemo(() => {
const value = JSON.parse(lang);
return value === 'Node.js' ? toCamelCase(path) : path;
}, [path, lang]);
return
{children}
;
};
## Path Parameters
The Topic ID.
```ts Node.js theme={"theme":{"light":"github-light","dark":"vesper"}}
import { Resend } from 'resend';
const resend = new Resend('re_xxxxxxxxx');
const { data, error } = await resend.topics.get(
'b6d24b8e-af0b-4c3c-be0c-359bbd97381e',
);
```
```php PHP theme={"theme":{"light":"github-light","dark":"vesper"}}
$resend = Resend::client('re_xxxxxxxxx');
$resend->topics->get('b6d24b8e-af0b-4c3c-be0c-359bbd97381e');
```
```python Python theme={"theme":{"light":"github-light","dark":"vesper"}}
import resend
resend.api_key = "re_xxxxxxxxx"
resend.Topics.get("b6d24b8e-af0b-4c3c-be0c-359bbd97381e")
```
```ruby Ruby theme={"theme":{"light":"github-light","dark":"vesper"}}
require "resend"
Resend.api_key = "re_xxxxxxxxx"
Resend::Topics.get("b6d24b8e-af0b-4c3c-be0c-359bbd97381e")
```
```go Go theme={"theme":{"light":"github-light","dark":"vesper"}}
import (
"context"
"github.com/resend/resend-go/v3"
)
func main() {
client := resend.NewClient("re_xxxxxxxxx")
client.Topics.GetWithContext(
context.TODO(),
"b6d24b8e-af0b-4c3c-be0c-359bbd97381e",
)
}
```
```rust Rust theme={"theme":{"light":"github-light","dark":"vesper"}}
use resend_rs::{Resend, Result};
#[tokio::main]
async fn main() -> Result<()> {
let resend = Resend::new("re_xxxxxxxxx");
let _topic = resend
.topics
.get("b6d24b8e-af0b-4c3c-be0c-359bbd97381e")
.await?;
Ok(())
}
```
```java Java theme={"theme":{"light":"github-light","dark":"vesper"}}
import com.resend.*;
public class Main {
public static void main(String[] args) {
Resend resend = new Resend("re_xxxxxxxxx");
GetTopicResponseSuccess topic = resend.topics().get("b6d24b8e-af0b-4c3c-be0c-359bbd97381e");
}
}
```
```csharp .NET theme={"theme":{"light":"github-light","dark":"vesper"}}
using Resend;
IResend resend = ResendClient.Create( "re_xxxxxxxxx" ); // Or from DI
var resp = await resend.TopicRetrieveAsync( new Guid( "b6d24b8e-af0b-4c3c-be0c-359bbd97381e" ) );
Console.WriteLine( "Topic Id={0}", resp.Content.Id );
```
```bash cURL theme={"theme":{"light":"github-light","dark":"vesper"}}
curl -X GET 'https://api.resend.com/topics/b6d24b8e-af0b-4c3c-be0c-359bbd97381e' \
-H 'Authorization: Bearer re_xxxxxxxxx'
```
```json Response theme={"theme":{"light":"github-light","dark":"vesper"}}
{
"object": "topic",
"id": "b6d24b8e-af0b-4c3c-be0c-359bbd97381e",
"name": "Weekly Newsletter",
"description": "Weekly newsletter for our subscribers",
"default_subscription": "opt_in",
"visibility": "public",
"created_at": "2023-04-08T00:11:13.110779+00:00"
}
```
---
# Source: https://resend.com/docs/api-reference/webhooks/get-webhook.md
> ## Documentation Index
> Fetch the complete documentation index at: https://resend.com/docs/llms.txt
> Use this file to discover all available pages before exploring further.
# Retrieve Webhook
> Retrieve a single webhook for the authenticated user.
export const ResendParamField = ({children, body, path, ...props}) => {
const [lang, setLang] = useState(() => {
return localStorage.getItem('code') || '"Node.js"';
});
useEffect(() => {
const onStorage = event => {
const key = event.detail.key;
if (key === 'code') {
setLang(event.detail.value);
}
};
document.addEventListener('mintlify-localstorage', onStorage);
return () => {
document.removeEventListener('mintlify-localstorage', onStorage);
};
}, []);
const toCamelCase = str => typeof str === 'string' ? str.replace(/[_-](\w)/g, (_, c) => c.toUpperCase()) : str;
const resolvedBody = useMemo(() => {
const value = JSON.parse(lang);
return value === 'Node.js' ? toCamelCase(body) : body;
}, [body, lang]);
const resolvedPath = useMemo(() => {
const value = JSON.parse(lang);
return value === 'Node.js' ? toCamelCase(path) : path;
}, [path, lang]);
return
{children}
;
};
## Path Parameters
The Webhook ID.
```ts Node.js theme={"theme":{"light":"github-light","dark":"vesper"}}
import { Resend } from 'resend';
const resend = new Resend('re_xxxxxxxxx');
const { data, error } = await resend.webhooks.get(
'4dd369bc-aa82-4ff3-97de-514ae3000ee0',
);
```
```php PHP theme={"theme":{"light":"github-light","dark":"vesper"}}
$resend = Resend::client('re_xxxxxxxxx');
$resend->webhooks->get('4dd369bc-aa82-4ff3-97de-514ae3000ee0');
```
```python Python theme={"theme":{"light":"github-light","dark":"vesper"}}
import resend
resend.api_key = 're_xxxxxxxxx'
webhook = resend.Webhooks.get(webhook_id='4dd369bc-aa82-4ff3-97de-514ae3000ee0')
```
```ruby Ruby theme={"theme":{"light":"github-light","dark":"vesper"}}
require 'resend'
Resend.api_key = 're_xxxxxxxxx'
webhook = Resend::Webhooks.get('4dd369bc-aa82-4ff3-97de-514ae3000ee0')
```
```go Go theme={"theme":{"light":"github-light","dark":"vesper"}}
package main
import "github.com/resend/resend-go/v3"
func main() {
client := resend.NewClient("re_xxxxxxxxx")
client.Webhooks.Get("4dd369bc-aa82-4ff3-97de-514ae3000ee0")
}
```
```rust Rust theme={"theme":{"light":"github-light","dark":"vesper"}}
use resend_rs::{Resend, Result};
#[tokio::main]
async fn main() -> Result<()> {
let resend = Resend::new("re_xxxxxxxxx");
let _webhook = resend
.webhooks
.get("4dd369bc-aa82-4ff3-97de-514ae3000ee0")
.await?;
Ok(())
}
```
```java Java theme={"theme":{"light":"github-light","dark":"vesper"}}
import com.resend.*;
public class Main {
public static void main(String[] args) {
Resend resend = new Resend("re_xxxxxxxxx");
GetWebhookResponseSuccess webhook = resend.webhooks().get("4dd369bc-aa82-4ff3-97de-514ae3000ee0");
}
}
```
```csharp .NET theme={"theme":{"light":"github-light","dark":"vesper"}}
using Resend;
IResend resend = ResendClient.Create( "re_xxxxxxxxx" ); // Or from DI
var resp = await resend.WebhookRetrieveAsync( new Guid( "559ac32e-9ef5-46fb-82a1-b76b840c0f7b" ) );
Console.WriteLine( "Endpoint={0}", resp.Content.EndpointUrl );
```
```bash cURL theme={"theme":{"light":"github-light","dark":"vesper"}}
curl -X GET 'https://api.resend.com/webhooks/4dd369bc-aa82-4ff3-97de-514ae3000ee0' \
-H 'Authorization: Bearer re_xxxxxxxxx'
```
```json Response theme={"theme":{"light":"github-light","dark":"vesper"}}
{
"object": "webhook",
"id": "4dd369bc-aa82-4ff3-97de-514ae3000ee0",
"created_at": "2023-08-22T15:28:00.000Z",
"status": "enabled",
"endpoint": "https://example.com/handler",
"events": ["email.sent"],
"signing_secret": "whsec_xxxxxxxxxx"
}
```
---
# Source: https://resend.com/docs/knowledge-base/getting-started-with-resend-and-supabase.md
> ## Documentation Index
> Fetch the complete documentation index at: https://resend.com/docs/llms.txt
> Use this file to discover all available pages before exploring further.
# Get Started with Resend and Supabase
> A quick jumpstart to using Resend with Supabase.
export const YouTube = ({id}) => {
return ;
};
In this guide, we'll help you get started with Resend by:
* [Setting up Resend](#set-up-resend)
* [Send Auth Emails with Resend](#send-auth-emails-with-resend)
* [Send Emails with Supabase Edge Functions](#send-emails-with-supabase-edge-functions)
## Set up Resend
In order to send emails with your Supabase project, you'll need to first verify it in Resend.
Go to [the Domains page](https://resend.com/domains) and click on **Add Domain**.
1. Add your domain name (we recommend [using a subdomain](/knowledge-base/is-it-better-to-send-emails-from-a-subdomain-or-the-root-domain) like `updates.yourdomain.com`).
2. Add the DNS records to your DNS provider ([learn more about these records](/dashboard/domains/introduction)).
3. Click on **I've added the records** to begin the verification process.
4. Wait for the verification to complete (usually takes 5–10 minutes)
Resend requires you own your domain (i.e., not a shared or public domain).
Adding DNS records gives Resend the authority to send emails on your behalf
and signals to the inbox providers that you're a legitimate sender.
## Send Auth Emails with Resend
If you want to use Resend to send your Supabase Auth Emails, you have three options:
1. [Using the Resend Integration](#1-using-the-resend-integration): simplest, but less customizable email templates.
2. [Custom Auth Functions](#2-custom-auth-functions): more customizable email templates, but requires more setup.
3. [Self-hosted with Custom SMTP](#3-self-hosted-with-custom-smtp): only for those self-hosting Supabase.
### 1. Using the Resend Integration
Resend includes a pre-built integration with Supabase. Connecting Resend as your email provider will allow you to send your Supabase emails (i.e., password resets, email confirmations, etc.) through Resend.
1. Open the [Resend Integrations settings](https://resend.com/settings/integrations).
2. Click **Connect to Supabase** and login to your Supabase account if prompted.
3. Select a project and click **Select Project**, then select your domain and click **Add API Key**. Resend will create an API key for you. Add a sender name and click **Configure SMTP Integration**.
Click on **Supabase Dashboard** to confirm the integration.
Supabase has a rate limit on the number of emails you can send per hour and
requires you to [connect a custom email provider for more than 2
emails/hour](https://supabase.com/docs/guides/auth/rate-limits). Once you set
Resend as your email provider, you can send additional emails (by default, 25
emails/hour, although you can change the rate limit in your project's
[authentication
settings](https://supabase.com/docs/guides/deployment/going-into-prod#rate-limiting-resource-allocation--abuse-prevention)).
### 2. Custom Auth Functions
Benefit of using custom auth functions:
* More control over the email sending process since you control the sending function.
* More control over the email template using React Email or Resend Templates.
Note that this requires enabling [Supabase Auth Hooks](https://supabase.com/docs/guides/auth/auth-hooks).
See the full source code.
### 3. Self-hosted with Custom SMTP
If you're self-hosting Supabase, you can use a custom SMTP server to send your emails. [Learn more here](/send-with-smtp).
## Send Emails with Supabase Edge Functions
If you're using Supabase Edge Functions, you can add email sending to your function by using the Resend Node.js SDK. You can use these functions for Auth Emails ([as shown above](#2-custom-auth-functions)) or for other emails (e.g., app notifications, account activity, etc.).
First, make sure you have the latest version of the [Supabase CLI](https://supabase.com/docs/guides/cli#installation) installed.
### 1. Create Supabase function
Create a new function locally:
```bash theme={"theme":{"light":"github-light","dark":"vesper"}}
supabase functions new resend
```
### 2. Edit the handler function
Paste the following code into the `index.ts` file:
```js index.ts theme={"theme":{"light":"github-light","dark":"vesper"}}
import { serve } from "https://deno.land/std@0.168.0/http/server.ts";
const RESEND_API_KEY = 're_xxxxxxxxx';
const handler = async (_request: Request): Promise => {
const res = await fetch('https://api.resend.com/emails', {
method: 'POST',
headers: {
'Content-Type': 'application/json',
'Authorization': `Bearer ${RESEND_API_KEY}`
},
body: JSON.stringify({
from: 'Acme ',
to: ['delivered@resend.dev'],
subject: 'hello world',
html: 'it works!',
})
});
const data = await res.json();
return new Response(JSON.stringify(data), {
status: 200,
headers: {
'Content-Type': 'application/json',
},
});
};
serve(handler);
```
### 3. Deploy and send email
Run function locally:
```bash theme={"theme":{"light":"github-light","dark":"vesper"}}
supabase functions start
supabase functions serve resend --no-verify-jwt
```
Deploy function to Supabase:
```bash theme={"theme":{"light":"github-light","dark":"vesper"}}
supabase functions deploy resend
```
Open the endpoint URL to send an email:
### 4. Try it yourself
See the full source code.
## Happy sending!
If you have any questions, please let us know at [support@resend.com](mailto:support@resend.com).
---
# Source: https://resend.com/docs/knowledge-base/godaddy.md
> ## Documentation Index
> Fetch the complete documentation index at: https://resend.com/docs/llms.txt
> Use this file to discover all available pages before exploring further.
# GoDaddy
> Verify your domain on GoDaddy with Resend.
export const YouTube = ({id}) => {
return ;
};
Prefer watching a video? Check out our video walkthrough below.
## Add Domain to Resend
First, log in to your [Resend Account](https://resend.com/login) and [add a domain](https://resend.com/domains).
It is [best practice to use a
subdomain](/knowledge-base/is-it-better-to-send-emails-from-a-subdomain-or-the-root-domain)
(updates.example.com) instead of the root domain (example.com). Using a
subdomain allows for proper reputation segmentation based on topics or purpose
(e.g. marketing) and is especially important if receiving emails with Resend.
## Log in to GoDaddy
Log in to your [GoDaddy account](https://sso.godaddy.com):
1. Select `DNS` from the left navigation
2. Find your domain in the list and select the domain
3. This will take you to the DNS management page for the domain
## Add MX SPF Record
Copy and paste the values MX in Resend to GoDaddy.
1. Click `Add New Record` to create a new record
2. Set the Type to `MX`.
3. Type `send` for the `Name` of the record.
4. Copy the MX Value from Resend into the `Value` field.
5. Add `10` for the `Priority`.
6. Set the TTL to `600` (or use the default).
7. Click `Save`.
Omit your domain from the record values in Resend when you paste. Instead of
`send.example.com`, paste only `send` (or `send.subdomain` if you're using a
subdomain).
Below is a mapping of the record fields from Resend to GoDaddy:
| GoDaddy | Resend | Example Value |
| -------- | -------- | --------------------------------------- |
| Type | Type | `MX Record` |
| Name | Name | `send` |
| Value | Value | `feedback-smtp.us-east-1.amazonses.com` |
| TTL | - | `600` (or use default) |
| Priority | Priority | `10` |
Do not use the same priority for multiple records. If Priority `10` is already
in use on another record, try a higher value `20` or `30`.
## Add TXT SPF Record
In the same section, add another record in GoDaddy.
1. Click `Add New Record` to create a new record
2. Set the Type to `TXT`.
3. Type `send` for the `Name` of the record.
4. Copy the TXT Value from Resend into the `Value` field.
5. Set the TTL to `600` (or use the default).
6. Click `Save`.
Omit your domain from the record values in Resend when you paste. Instead of
`send.example.com`, paste only `send` (or `send.subdomain` if you're using a
subdomain).
Below is a mapping of the record fields from Resend to GoDaddy:
| GoDaddy | Resend | Example Value |
| ------- | ------ | ------------------------------------- |
| Type | Type | `TXT Record` |
| Name | Name | `send` |
| Value | Value | `"v=spf1 include:amazonses.com ~all"` |
| TTL | - | `600` (or use default) |
## Add TXT DKIM Records
In the same section, add another record in GoDaddy.
1. Click `Add New Record` to create a new record
2. Set the Type to `TXT`.
3. Type `resend._domainkey` for the `Name` of the record.
4. Copy the record value from Resend into the `Value` field.
5. Set the TTL to `600` (or use the default).
6. Click `Save`.
Omit your domain from the record values in Resend when you paste. Instead of
`resend._domainkey.example.com`, paste only `resend._domainkey` (or
`resend._domainkey.subdomain` if you're using a subdomain).
Below is a mapping of the record fields from Resend to GoDaddy:
| GoDaddy | Resend | Example Value |
| ------- | ------ | ---------------------------- |
| Type | Type | `TXT Record` |
| Name | Name | `resend._domainkey` |
| Value | Value | `p=example_demain_key_value` |
| TTL | - | `600` (or use default) |
## Receiving Emails
If you want to receive emails at your domain, toggle the "Receiving" switch on the domain details page.
When you enable Inbound on a domain, Resend receives *all emails* sent to that
specific domain depending on the priority of the MX record. For this reason,
we strongly recommend verifying a subdomain (`subdomain.example.com`) instead
of the root domain (`example.com`). Learn more about [avoiding conflicts with
your existing MX
records](/knowledge-base/how-do-i-avoid-conflicting-with-my-mx-records).
Click `Add New Record` to create a new record:
1. Set the Type to `MX`.
2. Type `inbound` (or whatever your subdomain is) for the `Name` of the record.
3. Copy the MX Value from Resend into the `Value` field.
4. Add `10` for the `Priority`.
5. Set the TTL to `600` (or use the default).
6. Click `Save`.
Below is a mapping of the record fields from Resend to GoDaddy:
| GoDaddy | Resend | Example Value |
| -------- | -------- | -------------------------------------- |
| Type | Type | `MX Record` |
| Name | Name | `inbound` |
| Value | Content | `inbound-smtp.us-east-1.amazonaws.com` |
| TTL | - | `600` (or use default) |
| Priority | Priority | `10` |
After verifying your domain, create a webhook to process incoming emails. For help setting up a webhook, how to access email data and attachments, forward emails, and more, see [our guide on receiving emails with Resend](/dashboard/receiving/introduction).
## Complete Verification
Now click [Verify DNS Records](https://resend.com/domains) on your Domain in Resend. It may take a few hours to complete the verification process (often much faster).
## Troubleshooting
If your domain is not successfully verified, these are some common troubleshooting methods.
Review the records you added to GoDaddy to rule out copy and paste errors.
[Review our guide on a domain not verifying](/knowledge-base/what-if-my-domain-is-not-verifying).
---
# Source: https://resend.com/docs/knowledge-base/hetzner.md
> ## Documentation Index
> Fetch the complete documentation index at: https://resend.com/docs/llms.txt
> Use this file to discover all available pages before exploring further.
# Hetzner
> Verify your domain on Hetzner with Resend.
## Add Domain to Resend
First, log in to your [Resend Account](https://resend.com/login) and [add a domain](https://resend.com/domains).
It is [best practice to use a
subdomain](/knowledge-base/is-it-better-to-send-emails-from-a-subdomain-or-the-root-domain)
(updates.example.com) instead of the root domain (example.com). Using a
subdomain allows for proper reputation segmentation based on topics or purpose
(e.g. marketing) and is especially important if receiving emails with Resend.
## Log in to Hetzner
Log in to your [Hetzner account](https://dns.hetzner.com):
1. Choose your Domain from the `Your Zones` list.
2. Select the `Records` tab to get to the page to manage DNS records.
## Add MX SPF Record
In the `Create Record` section on Hetzner copy and paste the values MX from Resend:
1. On the `Type` page, choose `MX`.
2. Type `send` for the `Name` of the record.
3. Select the `Value` field.
4. Use the default `Priority` of `10`.
5. Copy the MX Value from Resend into the `Mail server` field.
6. Select the TTL of `1800`.
7. Select `Add Record`.
Hetzner requires your MX record to have a trailing period when adding. Resend
will include the trailing period when copying. Removing the period will cause
the verification to fail.
Below is a mapping of the record fields from Resend to Hetzner:
| Hetzner | Resend | Example Value |
| ----------- | -------- | ---------------------------------------- |
| Type | Type | `MX Record` |
| Name | Name | `send` |
| Mail server | Value | `feedback-smtp.us-east-1.amazonses.com.` |
| TTL | TTL | `1800` |
| Priority | Priority | `10` |
Do not use the same priority for multiple records. If Priority `10` is already
in use on another record, try a higher value `20` or `30`.
## Add TXT SPF Record
On the same `Create Record` section:
1. On the `Type` page, choose `TXT`.
2. Type `send` for the `Name` of the record.
3. Copy the TXT Value Resend into the `Value` field.
4. Select the TTL of `1800`.
5. Select `Add Record`.
Omit your domain from the record values in Resend when you paste. Instead of
`send.example.com`, paste only `send` (or `send.subdomain` if you're using a
subdomain).
Below is a mapping of the record fields from Resend to Hetzner:
| Hetzner | Resend | Example Value |
| ------- | ------ | ------------------------------------- |
| Type | Type | `TXT Record` |
| Name | Name | `send` |
| Value | Value | `"v=spf1 include:amazonses.com ~all"` |
| TTL | TTL | `10800` |
## Add TXT DKIM Records
On the same `Create Record` section:
1. On the `Type` page, choose `TXT`.
2. Type `resend._domainkey` for the `Name` of the record.
3. Copy the TXT Value Resend into the `Value` field.
4. Select the TTL of `1800`.
5. Select `Add Record`.
Omit your domain from the record values in Resend when you paste. Instead of
`resend._domainkey.example.com`, paste only `resend._domainkey` (or
`resend._domainkey.subdomain` if you're using a subdomain).
Below is a mapping of the record fields from Resend to Hetzner:
| Hetzner | Resend | Example Value |
| ------- | ------ | ---------------------------- |
| Type | Type | `TXT Record` |
| Name | Name | `send` |
| Value | Value | `p=example_demain_key_value` |
| TTL | TTL | `1 hour` |
## Receiving Emails
If you want to receive emails at your domain, toggle the "Receiving" switch on the domain details page.
When you enable Inbound on a domain, Resend receives *all emails* sent to that
specific domain depending on the priority of the MX record. For this reason,
we strongly recommend verifying a subdomain (`subdomain.example.com`) instead
of the root domain (`example.com`). Learn more about [avoiding conflicts with
your existing MX
records](/knowledge-base/how-do-i-avoid-conflicting-with-my-mx-records).
In the `Create Record` section on Hetzner:
1. On the `Type` page, choose `MX`.
2. Type `inbound` (or whatever your subdomain is) for the `Name` of the record.
3. Select the `Value` field.
4. Use the default `Priority` of `10`.
5. Copy the MX Value from Resend into the `Mail server` field.
6. Select the TTL of `1800`.
7. Select `Add Record`.
Below is a mapping of the record fields from Resend to Hetzner:
| Hetzner | Resend | Example Value |
| ----------- | -------- | --------------------------------------- |
| Type | Type | `MX Record` |
| Name | Name | `inbound` |
| Mail server | Content | `inbound-smtp.us-east-1.amazonaws.com.` |
| TTL | TTL | `1800` |
| Priority | Priority | `10` |
After verifying your domain, create a webhook to process incoming emails. For help setting up a webhook, how to access email data and attachments, forward emails, and more, see [our guide on receiving emails with Resend](/dashboard/receiving/introduction).
## Complete Verification
Now click [Verify DNS Records](https://resend.com/domains) on your Domain in Resend. It may take a few hours to complete the verification process (often much faster).
## Troubleshooting
If your domain is not successfully verified, these are some common troubleshooting methods.
Review the records you added to Hetzner to rule out copy and paste errors.
[Review our guide on a domain not verifying](/knowledge-base/what-if-my-domain-is-not-verifying).
---
# Source: https://resend.com/docs/knowledge-base/hostinger.md
> ## Documentation Index
> Fetch the complete documentation index at: https://resend.com/docs/llms.txt
> Use this file to discover all available pages before exploring further.
# Hostinger
> Verify your domain on Hostinger with Resend.
## Add Domain to Resend
First, log in to your [Resend Account](https://resend.com/login) and [add a domain](https://resend.com/domains).
It is [best practice to use a
subdomain](/knowledge-base/is-it-better-to-send-emails-from-a-subdomain-or-the-root-domain)
(updates.example.com) instead of the root domain (example.com). Using a
subdomain allows for proper reputation segmentation based on topics or purpose
(e.g. marketing) and is especially important if receiving emails with Resend.
## Log in to Hostinger
Log in to your [Hostinger account](https://auth.hostinger.com/login):
1. Select the `Domains` tab
2. Choose your Domain from the `Domain portfolio` list.
3. Select the `DNS / Nameservers` to get to the page to manage DNS records.
## Add MX SPF Record
Copy and paste the values MX in Resend to Hostinger.
1. Set the Type to `MX`.
2. Type `send` for the `Name` of the record.
3. Copy the MX Value from Resend into the `Mail Server` field.
4. Add `10` for the `Priority`.
5. Set the TTL to `3600`.
6. Select `Add Record`.
Omit your domain from the record values in Resend when you paste. Instead of
`send.example.com`, paste only `send` (or `send.subdomain` if you're using a
subdomain).
Below is a mapping of the record fields from Resend to Hostinger:
| Hostinger | Resend | Example Value |
| ----------- | -------- | --------------------------------------- |
| Type | Type | `MX Record` |
| Name | Name | `send` |
| Mail Server | Value | `feedback-smtp.us-east-1.amazonses.com` |
| TTL | - | `Set to 3660` |
| Priority | Priority | `10` |
Do not use the same priority for multiple records. If Priority `10` is already
in use on another record, try a higher value `20` or `30`.
## Add TXT SPF Record
In the same section, add another record in Hostinger.
1. Set the Type to `TXT`.
2. Type `send` for the `Name` of the record.
3. Copy the TXT Value Resend into the `TXT value` field.
4. Set the TTL to `3600`.
5. Select `Add Record`.
Omit your domain from the record values in Resend when you paste. Instead of
`send.example.com`, paste only `send` (or `send.subdomain` if you're using a
subdomain).
Below is a mapping of the record fields from Resend to Hostinger:
| Hostinger | Resend | Example Value |
| --------- | ------ | ------------------------------------- |
| Type | Type | `TXT Record` |
| Name | Name | `send` |
| TXT value | Value | `"v=spf1 include:amazonses.com ~all"` |
| TTL | - | `Set to 3600` |
## Add TXT DKIM Records
In the same section, add another record in Hostinger.
1. Set the Type to `TXT`.
2. Type `resend._domainkey` for the `Name` of the record.
3. Copy the record value from Resend into the `TXT value` field.
4. Set the TTL to `3600`.
5. Select `Add Record`.
Omit your domain from the record values in Resend when you paste. Instead of
`resend._domainkey.example.com`, paste only `resend._domainkey` (or
`resend._domainkey.subdomain` if you're using a subdomain).
Below is a mapping of the record fields from Resend to Hostinger:
| Hostinger | Resend | Example Value |
| --------- | ------ | ---------------------------- |
| Type | Type | `TXT Record` |
| Name | Name | `send` |
| TXT value | Value | `p=example_demain_key_value` |
| TTL | - | `Set to 3600` |
## Receiving Emails
If you want to receive emails at your domain, toggle the "Receiving" switch on the domain details page.
When you enable Inbound on a domain, Resend receives *all emails* sent to that
specific domain depending on the priority of the MX record. For this reason,
we strongly recommend verifying a subdomain (`subdomain.example.com`) instead
of the root domain (`example.com`). Learn more about [avoiding conflicts with
your existing MX
records](/knowledge-base/how-do-i-avoid-conflicting-with-my-mx-records).
Copy and paste the values MX in Resend to Hostinger:
1. Set the Type to `MX`.
2. Type `inbound` (or whatever your subdomain is) for the `Name` of the record.
3. Copy the MX Value from Resend into the `Mail Server` field.
4. Add `10` for the `Priority`.
5. Set the TTL to `3600`.
6. Select `Add Record`.
Below is a mapping of the record fields from Resend to Hostinger:
| Hostinger | Resend | Example Value |
| ----------- | -------- | -------------------------------------- |
| Type | Type | `MX Record` |
| Name | Name | `inbound` |
| Mail Server | Content | `inbound-smtp.us-east-1.amazonaws.com` |
| TTL | - | `Set to 3660` |
| Priority | Priority | `10` |
After verifying your domain, create a webhook to process incoming emails. For help setting up a webhook, how to access email data and attachments, forward emails, and more, see [our guide on receiving emails with Resend](/dashboard/receiving/introduction).
## Complete Verification
Now click [Verify DNS Records](https://resend.com/domains) on your Domain in Resend. It may take a few hours to complete the verification process (often much faster).
## Troubleshooting
If your domain is not successfully verified, these are some common troubleshooting methods.
Review the records you added to Hostinger to rule out copy and paste errors.
[Review our guide on a domain not verifying](/knowledge-base/what-if-my-domain-is-not-verifying).
---
# Source: https://resend.com/docs/knowledge-base/how-can-i-change-my-email-address.md
> ## Documentation Index
> Fetch the complete documentation index at: https://resend.com/docs/llms.txt
> Use this file to discover all available pages before exploring further.
# How can I change my Resend email address?
> How to change the email address associated with your Resend account.
To change the email address associated with your Resend account:
1. Navigate to your [**Profile**](https://resend.com/profile) page.
2. Under **Your email**, enter your new email address in the **Email address** field.
3. Click the **Update email** button.
After clicking **Update email**, you will be signed out and two confirmation emails will be sent:
* **To your new email address**: An email with the subject "Confirm email change for Resend" asking you to confirm the update.
* **To your current email address**: An email with the subject "Request to change your email" asking you to confirm the request.
Click the confirmation link in **both** emails to complete the email change. Once both confirmations are complete, you can log in with your new email address.
---
# Source: https://resend.com/docs/knowledge-base/how-can-i-delete-my-resend-account.md
> ## Documentation Index
> Fetch the complete documentation index at: https://resend.com/docs/llms.txt
> Use this file to discover all available pages before exploring further.
# How can I delete my Resend account?
> How to request your Resend account and data to be deleted.
To delete your Resend account:
1. [Leave the team](/dashboard/settings/team#leave-your-resend-team) associated with your Resend account.
2. Select the **Delete account** button.
Upon confirmation, Resend will delete your account and all account data.
Please note that this action is not reversible, so please proceed with
caution.
---
# Source: https://resend.com/docs/knowledge-base/how-can-i-delete-my-team.md
> ## Documentation Index
> Fetch the complete documentation index at: https://resend.com/docs/llms.txt
> Use this file to discover all available pages before exploring further.
# How can I delete my Resend team?
> How to request your Resend team and team data to be deleted.
To request your Resend team and team data to be deleted:
1. Navigate to your [**Team Settings**](https://resend.com/settings/team).
2. Select the **Delete Team** button.
Upon confirmation, Resend will delete your team and all your team data.
If you are the last member of a team, you can also delete it by selecting
**Leave Team** instead. The system will automatically delete the team when the
last member leaves.
Please note that this action is not reversible, so please proceed with
caution.
---
# Source: https://resend.com/docs/knowledge-base/how-can-i-receive-emails-with-resend.md
> ## Documentation Index
> Fetch the complete documentation index at: https://resend.com/docs/llms.txt
> Use this file to discover all available pages before exploring further.
# Can I receive emails with Resend?
> Receiving emails is in early access.
We're currently working on inbound email, [sign-up to join our early access waitlist](https://resend.com/inbound). The key components of this feature will include:
* Receive emails using webhooks. Get notified when emails are received.
* Parse content and attachments. Extract and process email data automatically.
* Reply to your users. Respond directly to incoming messages.
While this feature is in early access, you can still [set a Reply To Address](api-reference/emails/send-email) (`reply_to`) on your outbound emails to direct any responses to a different location like an existing inbox, slack channel, etc.
Here are a few current workarounds that could help:
* **Sending to existing inbox**: You could set the `reply_to` as your personal email address. If any recipient replies to your email, it will be sent to the `reply_to` address. This could be a different address on the same domain, or a different domain entirely.
* **Sending to Slack**: You could set the `reply_to` as a [channel email address in Slack](https://slack.com/help/articles/206819278-Send-emails-to-Slack). This will create a new message in slack with the contents of the reply.
---
# Source: https://resend.com/docs/knowledge-base/how-do-I-create-an-email-address-or-sender-in-resend.md
> ## Documentation Index
> Fetch the complete documentation index at: https://resend.com/docs/llms.txt
> Use this file to discover all available pages before exploring further.
# How do I create an email address or sender in Resend?
> Learn how sending from an email address works on Resend.
Resend does **not** require you to “create an email address”, “set up a sender identity”, or “add a from-address” before sending.
Once a domain is verified in your Resend account, you can send from **any** email address at that domain.
The email address you send from does **not** need to exist in another system.
However, we recommend using addresses that can receive replies.
## Common misconceptions
Some platforms require you to create, register, or pre-approve a sending address.\
Resend does **not**. After verifying your domain, you’re free to send from any address **@yourdomain**, with no extra setup, creation, or configuration of that address.
## Getting started
To start sending emails with Resend:
1. [Sign up for a Resend account](https://resend.com/signup)
2. [Add and verify your domain](https://resend.com/domains)
3. [Create an API key](https://resend.com/api-keys)
4. Start sending emails immediately from any address at the domain you verified
If you're having trouble with domain verification or DNS records, see our [domain verification troubleshooting guide](/knowledge-base/what-if-my-domain-is-not-verifying) or check our [DNS setup guides](/knowledge-base/introduction) for your specific DNS provider.
---
# Source: https://resend.com/docs/knowledge-base/how-do-dedicated-ips-work.md
> ## Documentation Index
> Fetch the complete documentation index at: https://resend.com/docs/llms.txt
> Use this file to discover all available pages before exploring further.
# How do Dedicated IPs work?
> When are Dedicated IPs helpful, and how can they be requested.
## What is a Dedicated IP?
In email delivery, the sending IP address serves as a key identifier. Inbox Providers like Gmail track the reputation of these IPs based on the quality and quantity of emails sent from them, factoring this information into filtering and inbox placement decisions.
By default, all Resend users utilize our shared IPs, which are a collection of IPs shared across many senders. Optionally, you can purchase a dedicated IP pool so a range of IPs are exclusively assigned to your sending.
Resend goes one step further and exclusively provisions "Managed Dedicated IP Pools". These managed pools handle multiple delicate and time consuming aspects of dedicated IPs:
* **Automatic warmup**: New IPs have no reputation and are therefore under scrutiny by inbox providers. We carefully migrate your sending over from the shared pool to your dedicated pool.
* **Automatic scaling**: IPs can only send at a certain rate based on the specifications of each inbox provider. We scale your pool dynamically based on the inbox provider feedback, without you lifting a finger.
* **Continuous monitoring**: Resend continuously monitors the reputation and performance of your dedicated IPs.
* **Fully dedicated**: You can segregate your emails from sending on shared pools to reduce risk of "noisy neighbors".
Resend only provisions Managed Dedicated IP Pools, but we will refer to them
as **Dedicated IPs** in this article to be succinct.
## When are Dedicated IPs helpful?
Historically, Dedicated IPs were seen as the primary ingredient to great deliverability. This is not true anymore as Inbox Providers have incorporated dozens of other factors like sending history, domain reputation, and sending feedback (bounces and complaints) more predominantly than IP reputation.
Though Dedicated IPs are not a deliverability silver bullet, they maintain a very helpful benefit: **removing risk of noisy neighbors**.
There is power in numbers, and for many senders it can be very helpful to leverage the positive reputation of other senders in an IP pool. For some senders though, they want to maintain their own IP reputation without any chance of being impacted, positively or negatively, by other senders. For them, Dedicated IPs are a helpful solution.
## When are Dedicated IPs not helpful?
Dedicated IPs can be very helpful, but there are some situations where they can actually hinder your ability to reach the inbox. If any of these situations match your use case, Dedicated IPs may hinder more than help:
* **Low email volume**: Sending less than 30k emails a month may not be enough to keep the IPs warm.
* **Inconsistent sending**: Sudden changes in email volume can hurt your IP reputation.
* **Poor email practices**: A Dedicated IP simply exposes your sending behavior even more.
* **New sender**: If you're just starting out and have no sending history.
* **IP Allowlisting**: Resend does not expose the IPs included in your dedicated pool.
## How does IP warmup work?
With Resend's Managed Dedicated IP Pools, the warmup process is handled automatically:
1. **Automatic scaling**: Add or remove IP addresses based on your sending volume.
2. **Gradual increase**: Gradually increase the volume of emails sent through new IPs over time.
3. **Traffic distribution**: During warmup, traffic is distributed across shared and dedicated IPs.
4. **Reputation monitoring**: Continuously monitor the reputation of your dedicated IPs.
5. **Adaptive warmup**: Adapt the warmup process to your sending patterns.
Often IP warmup is a highly manual process and requires great care if you don't want a deliverability degradation in the process. With this automatic warmup process, we handle that for you so you can simply focus on sending.
Because Managed Dedicated IP Pools are dynamically scaled, **we do not expose
the list of IPs** in your dedicated pool.
## Requirements for a Dedicated IP
Before we can provision a Dedicated IP, **we require** that:
* Your domains are in the same region (Dedicated IPs are provisioned per region).
* Your sending volume exceeds 500 emails sent per day.
* You already have an active Transactional Scale or Marketing Pro subscription.
* All domains you want added to the Dedicated IP are already verified on Resend.
## How to request a Dedicated IP
You can request a Dedicated IP by [chatting with support](https://resend.com/help).
**We will request the following information**:
* What types of emails are you sending?
* How many emails are you sending per day and month on average?
* Is your sending consistent every day, or do you send in bursts?
* Which domains do you want included in your Dedicated IP?
---
# Source: https://resend.com/docs/knowledge-base/how-do-i-avoid-conflicting-with-my-mx-records.md
> ## Documentation Index
> Fetch the complete documentation index at: https://resend.com/docs/llms.txt
> Use this file to discover all available pages before exploring further.
# How do I avoid conflicts with my MX records?
> Learn how to avoid conflicts with your existing MX records when setting up a Resend domain.
## What is an MX record?
MX (Mail Exchanger) records specify where incoming mail should be delivered on behalf of a domain. Every MX value has a unique priority (also known as preference) value. The lower the number, the higher the priority.
Resend requires that you setup a MX record on two occasions:
1. **[Enabling your domain to send emails](https://resend.com/docs/dashboard/emails/introduction)**: You need to setup an MX record on `send.yourdomain.com` to establish a return-path for bounce/complaint reports from Inbox Providers. We set this return path in the email headers of every email you send through Resend.
2. **[Enabling your domain to receive emails](https://resend.com/docs/dashboard/receiving/custom-domains)**: You can setup an MX record on your domain to route all received emails to Resend.
## Won't this conflict with my existing Inbox Provider?
Let's look at an example for each occasion Resend requires you to setup a MX record.
Say you're using G Suite for your email. You'll have an MX record that looks something like this:
```
yourdomain.com MX 10 alt3.aspmx.l.google.com.
```
This records specifies that any incoming mail to `@yourdomain.com` should be delivered to the google servers.
Now, let's say you want to use Resend to send emails from `@yourdomain.com`. You'll need to add an MX record for `send.yourdomain.com` that looks something like this:
```
send.yourdomain.com MX 10 feedback-smtp.us-east-1.amazonses.com
```
This **won't** conflict because the MX record is for `send.yourdomain.com`, not `yourdomain.com`. MX records only impact the subdomain they are associated to, so the Resend MX record will not affect your existing records on the root domain.
Now say you want to start receiving emails through Resend.
Because you already have the MX record `yourdomain.com`, you have two options:
1. **\[Recommended] Create a MX record for a subdomain** (e.g. `subdomain.yourdomain.com`). Now emails sent to `@yourdomain.com` will continue going to G Suite, and emails sent to `@subdomain.domain.com` will go to Resend.
2. **Create a MX record with the lowest priority** among the other MX record for your domain.
Since on our example, you already had a MX record for `yourdomain.com` point to G Suite, you would create:
```
yourdomain.com MX 9 inbound-smtp.us-east-1.amazonaws.com
```
Now this MX record priority has a lower value (higher priority) so it will be prioritized. But keep in mind that:
* This *will* route **all** emails destined to `@yourdomain.com` to Resend, insted of your previous provider(e.g. G Suite)
* If two MX records have the same priority value, this does **not** mean it will send to both servers — instead only one server will be chosen, randomly, per email delivery attempt.
## Solving common conflicts
If you already have a MX record set for `send.yourdomain.com`, you will need to remove it before adding the Resend MX record.
If you need to keep the existing record, you can add a subdomain to your domain (e.g. `sub.yourdomain.com`) which will move the Resend MX location to `send.sub.yourdomain.com`.
Each MX should have a unique priority value. We suggest using 10 for your MX record on `send.yourdomain.com`, but you can use a lower number (higher priority) if 10 is already in use.
The lowest possible value (highest priority) is 0. So if you already have a record with this priority, you'll need to remove it in order to create the MX record for Resend.
---
# Source: https://resend.com/docs/knowledge-base/how-do-i-avoid-gmails-spam-folder.md
> ## Documentation Index
> Fetch the complete documentation index at: https://resend.com/docs/llms.txt
> Use this file to discover all available pages before exploring further.
# How do I avoid Gmail's spam folder?
> Learn how to improve inbox placement in Gmail.
This guide is adapted from Google's article to [Prevent mail from being
blocked or sent to
spam](https://support.google.com/mail/answer/81126?hl=en\&vid=1-635789122382665739-3305764358\&sjid=4594872399309427672-NA#thirdparty)
## Authenticate Your Email
All communication is built on trust, and email is no different. When you send an email, you want to be sure that the recipient (and Gmail) knows who you are and that you are a legitimate sender. Email authentication is a way to prove that an email is really from you. It also helps to prevent your email from being spoofed or forged.
| Authentication | Requires Setup | Purpose |
| --------------------------------- | -------------- | ------------------------------------------------------------ |
| **SPF** | No | Proves you are allowed to send from this domain |
| **DKIM** | No | Proves your email originated from you |
| [DMARC](/dashboard/domains/dmarc) | Yes | Proves you own the domain and instructs how to handle spoofs |
| [BIMI](/dashboard/domains/bimi) | Yes | Proves you are the brand you say you are |
**SPF** and **DKIM** are baseline requirements for all sending which is why both are automatically setup when you verify your domain with Resend. [DMARC](/dashboard/domains/dmarc) and [BIMI](/dashboard/domains/bimi) are both additional authentication methods that can build trust and further improve inbox placement.
**Action Items**
1. [Setup DMARC](/dashboard/domains/dmarc) for your domain
2. [Setup BIMI](/dashboard/domains/bimi) for your domain
## Legitimize Your Domain
Gmail is using many methods to identify who you are as a sender, and one way they do that is by looking at your domain. You should make sure that the domain you send with is the same domain where your website is hosted. If you send from `@example.com` but your website is hosted at `example.net`, Gmail won't be able to use your site to help legitimize you.
You can regularly check if your domain is listed as unsafe with [Google Safe Browsing](https://transparencyreport.google.com/safe-browsing/search?hl=en) to make sure Google isn't classifying your domain as suspicious.
**Action Items**
1. Host your website at the domain that you send from (especially for new domains)
2. Check if your domain is listed as unsafe with [Google Safe Browsing](https://transparencyreport.google.com/safe-browsing/search?hl=en)
## Manage your Mailing List
Gmail monitors your sending across all Gmail inboxes to see if recipients want to receive your emails. This is mainly measured by their engagement with your messages (opens, clicks, replies). If Gmail doesn't see this engagement, they will start to move your inbox placement towards promotional or even spam.
It would seem like adding open and click tracking would be ideal to gather this information, but this has been seen to negatively impact your inbox placement. Instead, focus on sending to recipients who want to receive your emails.
**Prevent sending to recipients who**:
* Didn't ask to be sent to (opt-in)
* Show no signs of engagement with your emails or product
* Requested to be unsubscribed
* Marked your emails as spam (complained)
* Never received your email (bounced)
**Action Items**
1. Make it easy to opt-out to your emails (including the [Unsubscribe Headers](https://resend.com/docs/dashboard/emails/add-unsubscribe-to-transactional-emails))
2. Use [Webhooks](/webhooks/introduction) to remove bounced or complained recipients from your list
3. Use [Gmail's Postmaster Tool](https://support.google.com/mail/answer/9981691?sjid=4594872399309427672-NA\&visit_id=638259770782293948-1913697299\&rd=1) to monitor your spam reports
## Monitor Affiliate Marketers
Affiliate marketing programs offer rewards to companies or individuals that send visitors to your website. However, spammers can take advantage of these programs. If your brand is associated with marketing spam, other messages sent by you might be marked as spam.
We recommend you regularly monitor affiliates, and remove any affiliates that send spam.
**Action Items**
1. Monitor your affiliate marketers for any spam
## Make Content People Want to Read
Trust is not only built with the domain, but also in the message. Sending content that people want to read and that is not misleading will help build trust with Gmail.
A few good rules for content:
* Less is more (keep it simple and to the point)
* Plain text over complex HTML
* Links should be visible and match the sending domain
* No content should be hidden or manipulative
**Action Items**
1. Reduce and simplify your email content
2. Make sure your links are using your sending domain
## Establish Sending Patterns
This is especially true for new domains since Gmail doesn't have any history of trust. Sending a large volume of emails from a new domain will likely result in poor inbox placement. Instead, start small and build up your sending volume over time.
A great way to start is by sending regular person-to-person email with your gmail account. These messages will have high engagement and built trust quickly, which will carry over when you start integrating with a sending service like Resend.
It can also be very helpful to segment your sending by sending address to give Gmail more indication of what type of sending you are doing. This allows Gmail to place your emails in the correct inbox tab (Primary, Promotions, etc.).
Some examples of helpful email addresses:
* **Personal emails** should come from an address with a name like [marissa@domain.com](mailto:marissa@domain.com)
* **Transactional emails** should come from an address like [notifications@domain.com](mailto:notifications@domain.com)
* **Marketing emails** should come from an address like [updates@domain.com](mailto:updates@domain.com).
**Action Items**
1. Send emails from your gmail account before sending transactional
2. Send transactional emails before sending marketing emails
3. Choose dedicated sending addresses for each type of email
## Summary
Email deliverability is overwhelming. One way to simplify it is to think: **what would a phisher do?**
**Then do the opposite!**
Gmail's goal is to only show emails that their users want to see and malicious emails are at the very bottom of the list. Reverse engineer phishing sending habits and consider how you could prove to Gmail at each step that you clearly have no malicious intent.
Anything we missed? [Let us know](https://resend.com/help).
---
# Source: https://resend.com/docs/knowledge-base/how-do-i-avoid-outlooks-spam-folder.md
> ## Documentation Index
> Fetch the complete documentation index at: https://resend.com/docs/llms.txt
> Use this file to discover all available pages before exploring further.
# How do I avoid Outlook's spam folder?
> Learn how to improve inbox placement in Outlook.
This guide is adapted from Microsoft's article to [Improve your spam
reputation](https://support.microsoft.com/en-us/office/sender-support-in-outlook-com-05875e8d-1950-4d89-a5c3-adc355d0d652).
For high-volume senders (5,000+ messages per day), see [Microsoft's bulk
sending requirements for
2025](https://resend.com/blog/microsoft-bulk-sending-requirements-2025).
* **Set up email authentication**. Configure [SPF, DKIM, and DMARC](/dashboard/domains/introduction) for your domain. This is required for bulk senders (5,000+ messages per day) and strongly recommended for all senders.
* **Add your sender name**. Set your `from` like this: `"Name "`.
* **Engage with your own email**. Send an email to yourself, open it, and reply to it.
* **Add yourself as a contact**. See how to add contacts in [Outlook.com](https://support.microsoft.com/en-us/office/create-view-and-edit-contacts-and-contact-lists-in-outlook-com-5b909158-036e-4820-92f7-2a27f57b9f01).
* **Ask your recipients to add you in their contacts**. This can be done in [Outlook](https://support.microsoft.com/en-us/office/add-recipients-of-my-email-messages-to-the-safe-senders-list-be1baea0-beab-4a30-b968-9004332336ce) or [outlook.com](https://support.microsoft.com/en-us/office/safe-senders-in-outlook-com-470d4ee6-e3b6-402b-8cd9-a6f00eda7339).
* **Don't blast to a BCC list**. Send separate emails if you are sending to a large number of recipients.
* **Prevent over sending**. Limits are impacted by historical engagements and sending volumes, but you should be hesitant to send too many emails at once. If you think this is an issue, reduce the frequency or volume.
* **Send to engaged recipients**. Don't keep sending if there is no engagement from your recipients. This is especially true if a recipient has requested to unsubscribe or an address is bouncing. Keep spam complaint rates under 0.3%.
* **Include an unsubscribe option**. For bulk emails, include a clearly visible unsubscribe link. Consider implementing [one-click unsubscribe](/dashboard/emails/add-unsubscribe-to-transactional-emails) for the best user experience.
* **Limit use of HTML**. Keep emails as close to plain text as possible.
---
# Source: https://resend.com/docs/knowledge-base/how-do-i-ensure-sensitive-data-isnt-stored-on-resend.md
> ## Documentation Index
> Fetch the complete documentation index at: https://resend.com/docs/llms.txt
> Use this file to discover all available pages before exploring further.
# How do I ensure sensitive data isn't stored on Resend?
> Information on how we can help you protect your customer's information.
Resend can turn off message content storage for teams with additional compliance requirements. This is available to customers who meet the following criteria:
1. The team has been a Resend Pro or Scale subscriber for at least 1 month.
2. The team is sending from a domain with an active website.
3. The team has sent over 3,000 emails with a \< 5% bounce rate.
This feature requires a \$50/mo add-on. If your account meets these requirements and you would like this turned on, contact our support team for help.
---
# Source: https://resend.com/docs/knowledge-base/how-do-i-fix-cors-issues.md
> ## Documentation Index
> Fetch the complete documentation index at: https://resend.com/docs/llms.txt
> Use this file to discover all available pages before exploring further.
# How do I fix CORS issues?
> Information on recommended options to avoid CORS errors when sending emails.
## Problem
It's common for people to hit CORS (Cross-Origin Resource Sharing) issues when using the Resend API. This error typically shows as:
```
Access to XMLHttpRequest at 'https://api.resend.com/emails'
from origin 'http://localhost:3000' has been blocked by CORS policy:
Response to preflight request doesn't pass access control check:
No 'Access-Control-Allow-Origin' header is present on the requested resource.
```
## Solution
Usually CORS errors happens when you're sending emails from the **client-side**.
We recommend you to send the emails on the **server-side** to not expose your API keys and avoid CORS issues.
---
# Source: https://resend.com/docs/knowledge-base/how-do-i-maximize-deliverability-for-supabase-auth-emails.md
> ## Documentation Index
> Fetch the complete documentation index at: https://resend.com/docs/llms.txt
> Use this file to discover all available pages before exploring further.
# How do I maximize deliverability for Supabase Auth emails?
> Everything you should do before you start sending authentication emails with Resend and Supabase.
export const YouTube = ({id}) => {
return ;
};
If you haven't yet, [configure your own Supabase
integration](https://resend.com/settings/integrations)!
Below are **five steps to improve the deliverability of your authentication emails**.
Prefer watching a video? Check out our video walkthrough below.
## 1. Setup a custom domain on Supabase
By default, Supabase generates a `supabase.co` domain for your project, and uses that domain for the links in your authentication emails (e.g., verify email, reset password).
Once you are ready to go live, though, it is important to setup a custom domain. The key benefit here is to align the domains used in your `from` address and the links in your emails. Especially for something as sensitive as email verification and magic links, **giving confidence to the inbox providers that the origin of the email and the links in the body are the same** can be very impactful.
This changes your links from:
```
https://039357829384.supabase.co/auth/v1/{code}
```
To something like this:
```
https://auth.yourdomain.com/auth/v1/{code}
```
Supabase has a helpful guide for [Setting up a custom domain](https://supabase.com/docs/guides/platform/custom-domains).
## 2. Setup a dedicated subdomain
There are many benefits to using a subdomain vs your root domain for sending, one being that you can isolate the reputation of the subdomain from your root domain.
For authentication emails, using a subdomain is particularly helpful because it is a way to **signal your intention to the inbox provider**. For example, if you use `auth.yourdomain.com` for your authentication emails, you are communicating to the inbox provider that all emails from this subdomain are related to sending authentication emails.
This clarity is essential because it helps the inbox provider understand that this subdomain is not used for sending marketing emails, which are more likely to be marked as spam.
If you don't want a subdomain just for auth, you can also achieve this by
establishing one subdomain for all your transactional emails (e.g.,
`notifications.yourdomain.com`).
To add a subdomain to Resend, you can [add it as a domain on the dashboard](https://resend.com/domains).
## 3. Disable link and open tracking
Link and open tracking can be great for marketing emails but not for transactional emails. This kind of **tracking can actually hurt your deliverability**. Open tracking embeds a 1x1 pixel image in the email, and link tracking rewrites the links in the email to point to Resend's servers first. Both types can be seen as suspicious by the inbox provider and hurt your deliverability.
Also, Supabase has noted that link tracking is [known for corrupting verification links](https://supabase.com/docs/guides/platform/going-into-prod), making them unusable for your users.
You can disable link and open tracking by clicking on your domain and disabling at the bottom.
## 4. Prepare for link scanners
Some inbox providers or enterprise systems have email scanners that run a `GET` request on all links in the body of the email. This type of scan can be problematic since Supabase Auth links are single-use.
To get around this problem, consider altering the email template to replace the original magic link with a link to a domain you control. The domain can present the user with a "Sign-in" button, which redirects the user to the original magic link URL when clicked.
## 5. Setup DMARC
Like our human relationships, email deliverability is built on trust. The more inboxes can trust your emails, your domain, and your sending, the more likely your emails will be delivered to the inbox. This makes [Email Authentication a critical pillar](https://resend.com/blog/email-authentication-a-developers-guide) in the journey to excellent deliverability.
That is where DMARC comes in. As the industry standard for email authentication, **DMARC is a way to tell the inbox provider that you are who you say you are**. It is a way to signal to the inbox provider that you are a legitimate sender and that your emails should be delivered to the inbox.
Following security best practices like DMARC will show your validity and authenticity.
You can use our [DMARC setup guide to get started](/dashboard/domains/dmarc).
---
# Source: https://resend.com/docs/knowledge-base/how-do-i-send-with-an-avatar.md
> ## Documentation Index
> Fetch the complete documentation index at: https://resend.com/docs/llms.txt
> Use this file to discover all available pages before exploring further.
# How do I send with an avatar?
> Learn how to show your avatar in the inbox of your recipients.
[Recent studies](https://www.businesswire.com/news/home/20210720005361/en/Red-Sift-and-Entrust-Survey-Showing-a-Logo-Positively-Affects-Consumer-Interaction-With-Emails-Open-Rates-Buying-Behavior-Brand-Recall-and-Confidence) are showing meaningful benefits of displaying your logo in the inbox:
* Increases brand recall by 18%.
* Improves open rate by 21%.
* Boosts purchase likelihood by 34%.
* Reinforces confidence in email by 90%.
## Gmail
Follow these steps to add an avatar to your Gmail inbox:
1. Go to your [Google Account Settings](https://myaccount.google.com/personal-info)
2. Upload a profile picture
Avatars in Gmail only display in the mobile app (including in push notifications) and inside opened emails on desktop.
## Outlook
Follow these steps to add an avatar to your Outlook inbox:
1. Go to your [Outlook Profile Settings](https://account.microsoft.com/profile/)
2. Upload a profile picture
Avatars in Outlook only display in the mobile app and inside opened emails on desktop.
## Yahoo
Follow these steps to add an avatar to your Yahoo inbox:
1. Go to your [Yahoo Account Setting](https://login.yahoo.com/account/personalinfo)
2. Upload a profile picture
Avatars in Yahoo only display in the mobile app and inside an opened email on desktop.
## Apple Mail
Apple Mail only shows avatars if recipients have added images to contacts. Alternatively, you can set up [Apple Branded Mail](/knowledge-base/how-do-i-set-set-up-apple-branded-mail), a proprietary Apple format introduced with iOS 18.2 that displays your logo as an avatar in the inbox of Apple Mail, or [set up BIMI](/dashboard/domains/bimi#what-is-bimi) with a Verified Mark Certificate.
## Using Gravatar
Some inbox service providers or email clients (e.g. Thunderbird, Airmail, and Postbox) rely on [Gravatar](https://gravatar.com/) to display an image.
You can set up a free Gravatar account, add your avatar, and verify your addresses you're sending from to that account to have your avatar displayed.
## Limitations
Almost every email provider has its own way of adding a profile picture to an inbox.
This means **you can only**:
1. Add your avatar to a real inbox, limiting it only to that provider
2. Send mail from the same address that you set the avatar on
The way around this is [BIMI (Brand Indicators for Message Identification)](/dashboard/domains/bimi). BIMI now supports Common Mark Certificates (CMC) in addition to Verified Mark Certificates (VMC), making it more accessible. It is supported by nearly all major providers and allows you to send from any address on that domain.
Need assistance setting up BIMI? [We can help](https://resend.com/help).
---
# Source: https://resend.com/docs/knowledge-base/how-do-i-set-set-up-apple-branded-mail.md
> ## Documentation Index
> Fetch the complete documentation index at: https://resend.com/docs/llms.txt
> Use this file to discover all available pages before exploring further.
# How do I set up Apple Branded Mail?
> Learn how to implement Apple Branded Mail to display your logo in Apple Mail clients.
export const YouTube = ({id}) => {
return ;
};
## Prerequisites
To get the most out of this guide, you will need to:
* [Create an Apple Business Connect account](https://www.apple.com/business/connect/)
* [Setup DMARC on your domain](/dashboard/domains/dmarc)
* A company identification number for Apple to verify your company
Prefer watching a video? Check out our video walkthrough below.
## What is Apple Branded Mail?
Apple Branded Mail is a proprietary Apple format that displays your logo as an avatar in the inbox of Apple Mail. Displaying your logo can increase brand recognition and trust and improve engagement.
There are a few benefits of Apple Branded mail over BIMI:
* Since it's an Apple format, it does not require a certificate like [BIMI does](/dashboard/domains/bimi).
* The image support is broader, supporting `.png`, `.heif`, and `.jpg` logos.
Since Apple Branded Mail works only with Apple Mail on new iOS, iPadOS, and macOS versions, your logo will not show in other mail clients or older versions of Apple Mail.
For this reason, we recommend following all possible methods for adding your logo to your emails, including Apple Branded Mail, [our general guide](/knowledge-base/how-do-i-send-with-an-avatar), and [BIMI](/dashboard/domains/bimi) if it fits your needs.
## Implementing Apple Branded Mail
### 1. Configure DMARC
If you haven't set up DMARC yet, follow our [DMARC Setup
Guide](/dashboard/domains/dmarc).
To ensure your logo appears with Apple Branded Mail, set your DMARC policy to either `p=quarantine;` or `p=reject;`. This policy guarantees that your emails are authenticated and prevents others from spoofing your domain and sending emails with your logo.
Here's an overview of the required parameters:
| Parameter | Purpose | Required Value |
| --------- | ---------- | ------------------------------ |
| `p` | Policy | `p=quarantine;` or `p=reject;` |
| `pct` | Percentage | `pct=100;` |
Here is an example of an adequate DMARC record:
```
"v=DMARC1; p=quarantine; pct=100; rua=mailto:dmarcreports@example.com"
```
As we mention in our [DMARC Setup Guide](/dashboard/domains/dmarc), be sure to test your emails to make sure they are passing DMARC before changing your DMARC policy to `p=quarantine;` or `p=reject;`.
### 2. Create an Apple Business Connect account
Apple displays the logo you set in your Business Connect account. [Create an account](https://www.apple.com/business/connect/) if your company does not already have one. Make sure to use your company details when signing up.
### 3. Add your company details
Apple will prompt you to provide details like your company address and name.
### 4. Add your brand details
Once your company account is created, in Apple Business Connect, select the **Branded Mail** option in the left sidebar and provide details on your brand. Add details like the brand name and your brand website.
### 5. Add your logo
Once you fill out the brand details, upload your logo. Apple requires the logo to be at least 1024 x 1024 px in a `.png`, `.heif`, or `.jpeg` format.
### 6. Add your domain
Confirm the domains or email addresses where you want your brand logo to appear.
You can register your logo for your root domain or a subdomain. If you don't set a specific logo for a subdomain, the root domain logo will automatically display for any email sent from your subdomains.
### 7. Verify your company
Apple requires details to confirm your company identity.
If you're in the United States, provide a Federal Taxpayer Identification Number. Other countries will use a local equivalent for this step. Apple also asks that you add a DNS record to verify DNS access.
### 8. Verify with Apple
After you submit all your information, Apple will verify your details. This process may take up to seven business days.
Once the logo is verified, Apple will send an email notification and note the verified status in Branded Mail. Your logo will start to display in compatible Apple Mail versions.
See Apple's documentation on [Apple Branded
Mail](https://support.apple.com/en-au/guide/apple-business-connect/abcb761b19d2/web)
for any detailed questions on adding your logo.
---
# Source: https://resend.com/docs/knowledge-base/how-to-handle-api-keys.md
> ## Documentation Index
> Fetch the complete documentation index at: https://resend.com/docs/llms.txt
> Use this file to discover all available pages before exploring further.
# How to Handle API Keys
> Learn our suggested practices for handling API keys.
API Keys are secret tokens used to authenticate your requests. They are unique to your account and should be kept confidential. You can create API keys in two ways:
* [via the Resend Dashboard](/dashboard/api-keys/introduction)
* [via the API](/api-reference/api-keys/create-api-key)
For more help creating, deleting, and managing API keys, see the [API Keys
documentation](/dashboard/api-keys/introduction).
## Best Practices
It's crucial you handle your API keys securely. Do not share your API key with others or expose it in the browser or other client-side code.
Here are some general guidelines:
* Store API keys in environment variables.
* Never commit API keys to version control.
* Never hard-code API keys in your code or share them publicly.
* Rotate API keys regularly. If an API key hasn't been used in the last 30 days, consider deleting it to keep your account secure.
When you create an API key in Resend, you can view the key only once. This
practice helps encourage these best practices.
## Example
Many programming languages have built-in support for environment variables. Here's an example of how to store an API key in an environment variable in a Node.js application.
Once you create the API key, you can store it in an environment variable in a `.env` file.
```ts .env theme={"theme":{"light":"github-light","dark":"vesper"}}
RESEND_API_KEY = 're_xxxxxxxxx';
```
Add the `.env` file to your `.gitignore` file to prevent it from being committed to version control. Many frameworks already add `.env` to the `.gitignore` file by default.
```ts .gitignore theme={"theme":{"light":"github-light","dark":"vesper"}}
.env
```
```ts app.ts theme={"theme":{"light":"github-light","dark":"vesper"}}
const resend = new Resend(process.env.RESEND_API_KEY);
```
The environment variables in your `.env` file will *not* be available automatically. You *must* load them. On Node.js `v20` and later, you can pass your `.env` file's variables to your script using the `--env-file=.env` flag. Alternatively, you can use the `dotenv` package to load the variables.
---
# Source: https://resend.com/docs/dashboard/webhooks/how-to-store-webhooks-data.md
> ## Documentation Index
> Fetch the complete documentation index at: https://resend.com/docs/llms.txt
> Use this file to discover all available pages before exploring further.
# How to Store Webhooks Data
> Storing your email event data matters. Learn how to set up your own data storage.
When you send emails with Resend, you can receive real-time notifications for each message:
* Was it delivered?
* Did the recipient open it?
* Did they click a link?
* Did it bounce?
These events contain valuable data, however, by default webhooks are ephemeral. To make the data persistent, you can store the data in your own datasource.
This guide explains [why you should store your webhook data](#why-store-webhook-data) and [how to get started](#how-to-store-webhook-data).
## Why Store Webhook Data?
Storing your own data offers several benefits.
### 1. Meet Compliance Requirements
Many industries have regulations around data retention and audit trails:
* **GDPR** - You may need to demonstrate what communications were sent to users and when
* **SOC 2** - Audit requirements may include email delivery verification
* **Financial regulations** - Transaction-related emails may need to be retained for years
Storing your own webhook data gives you full control over retention periods and access controls.
### 2. Enable Long-term Retention
Resend retains email data for a limited period. If you need access to historical email data beyond that window, storing events in your own database ensures you never lose important information.
### 3. Power Automated Workflows
With webhook data in your database, you can build powerful automations:
* Automatically suppress bounced addresses from future sends
* Trigger follow-up emails based on open/click behavior
* Alert your team when delivery issues spike
* Re-engage users who haven't opened recent emails
## How to Store Webhook Data
While you can always [build your own webhook handler](/webhooks/introduction), it requires development resources.
To help our customers get started quickly, we've built the [Resend Webhook Ingester](/webhooks/ingester). It's an open-source, ready-to-deploy solution that handles all the complexity for you:
* **One-click deployment** to Vercel, Railway, or Render
* **Signature verification** built-in using Svix
* **Idempotent storage** that handles duplicate deliveries
* **8 database connectors** including PostgreSQL, MySQL, MongoDB, and data warehouses
Deploy a production-ready webhook storage solution in minutes
## Data Storage Considerations
Whether using the Webhook Ingester or your own handler, you'll need to consider the following:
### Choosing a Database
The right database depends on your use case:
| Use Case | Recommended Database |
| -------------------------- | ---------------------------------------------------------------------------------------- |
| Already using Postgres | [PostgreSQL](https://www.postgresql.org/) or [Supabase](https://supabase.com/) |
| Need simple setup | [Supabase](https://supabase.com/) |
| High-volume analytics | [ClickHouse](https://clickhouse.com/) or [BigQuery](https://cloud.google.com/bigquery) |
| Data warehouse integration | [Snowflake](https://www.snowflake.com/) or [BigQuery](https://cloud.google.com/bigquery) |
| Serverless architecture | [PlanetScale](https://planetscale.com/) or [Supabase](https://supabase.com/). |
If you're unsure, start with [Supabase](https://supabase.com/) which has a
generous free tier.
### What Data Should You Store?
At minimum, store these fields for each webhook event:
* **Event ID** - The unique `svix-id` for deduplication
* **Event type** - What happened (delivered, bounced, opened, etc.)
* **Timestamp** - When the event occurred
* **Email ID** - Links the event back to the original send
For deeper analytics, also consider storing:
* **Recipient addresses** - For per-user engagement tracking
* **Subject lines** - To analyze performance by content
* **Tags** - If you use tags to categorize emails
* **Bounce details** - To understand delivery issues
* **Click URLs** - To track which links perform best
The Webhook Ingester stores all available fields automatically, so you don't
have to decide upfront what you might need later.
## Data Retention Considerations
Before storing webhook data, consider your retention requirements:
### How Long to Keep Data
* **Operational use** - 30-90 days is often sufficient for debugging and recent analytics
* **Compliance requirements** - Check your industry regulations (often 1-7 years)
* **Historical analysis** - Consider aggregating old data rather than keeping raw events
### Privacy Considerations
Webhook data may contain personal information (email addresses, IP addresses from opens/clicks). Ensure your storage approach complies with privacy regulations:
* Implement appropriate access controls
* Consider data anonymization for long-term retention
* Have a process for handling data deletion requests
### Storage Costs
High-volume senders can generate significant data. Plan for:
* Database storage costs
* Query performance as data grows
* Archival strategies for old data
Most databases support partitioning by date, making it easy to drop old
partitions when data ages out of your retention window.
## FAQ
Each email can generate multiple events (sent, delivered, opened, clicked).
A rough estimate: if you send 10,000 emails/month with average engagement,
expect 30,000-50,000 events/month. Each event is typically 1-2 KB, so about
50-100 MB/month of raw data.
No. Webhook processing happens asynchronously. Your email sending is not
affected by how you handle webhooks. If you use the Webhook Ingester, it
runs as a separate service.
Resend automatically retries failed webhook deliveries for up to 24 hours.
If your endpoint returns a 5xx error, we'll retry. If you need to recover
older events, check the [Resend Dashboard](https://resend.com/webhooks)
where you can manually replay recent events.
The Webhook Ingester supports one database per deployment. If you need to
store in multiple databases, you can either deploy multiple instances or
build a custom handler that writes to multiple destinations.
## Learn More
Deploy a production-ready webhook storage solution
See all available event types and their payloads
Learn about webhook signature verification
Get started with webhooks in your application
---
# Source: https://resend.com/docs/dashboard/emails/idempotency-keys.md
> ## Documentation Index
> Fetch the complete documentation index at: https://resend.com/docs/llms.txt
> Use this file to discover all available pages before exploring further.
# Idempotency Keys
> Use idempotency keys to ensure that emails are sent only once.
Include an idempotency key in any email requests to ensure that the same email request is processed only once, even if it's sent multiple times.
Idempotency keys are currently supported on the `POST /emails` and the `POST
/emails/batch` endpoints on the Resend API.
## How does it work?
When you send an email with an idempotency key, we check if an email with the same idempotency key has already been sent in the last 24 hours. **This is an optional feature** that simplifies managing retries on your side.
This makes it safe to retry requests that send an email. You don't have to worry about checking if the original request was sent -- you can just make the same request and our API will give the same response, without actually sending the email again.
## How to use idempotency keys?
Idempotency keys can be **up to 256 characters** and should be unique per API request.
We **recommend using a UUID** or other string that uniquely identifies that specific email.
If you have multiple events that trigger emails related to a single entity in your system, you can format your idempotency keys to take advantage of that entity's ID. One idea is to format idempotency keys like `/`, for example `welcome-user/123456789`. The specific format you use is up to you.
Send the key in the `Idempotency-Key` HTTP header in your API requests. Our SDKs also provide a convenient way to set this header. If you're using SMTP, you can set the `Resend-Idempotency-Key` email header instead.
We keep idempotency keys in our system for **24 hours**. This should give you an ample window to retry any failed processes on your end without having to keep track of the sent status.
### `POST /emails` endpoint example
```ts Node.js {9} theme={"theme":{"light":"github-light","dark":"vesper"}}
await resend.emails.send(
{
from: 'Acme ',
to: ['delivered@resend.dev'],
subject: 'hello world',
html: '
"
}'
```
```yaml SMTP {4} theme={"theme":{"light":"github-light","dark":"vesper"}}
From: Acme
To: delivered@resend.dev
Subject: hello world
Resend-Idempotency-Key: welcome-user/123456789
it works!
```
### `POST /emails/batch` endpoint example
Format your idempotency keys to take advantage of that entity's ID (i.e.,
`/`). For batch sends, choose a key that represents the whole batch, like a team, workspace, or project (i.e., `team-quota/123456789`).
```ts Node.js {21} theme={"theme":{"light":"github-light","dark":"vesper"}}
import { Resend } from 'resend';
const resend = new Resend('re_xxxxxxxxx');
await resend.batch.send(
[
{
from: 'Acme ',
to: ['foo@gmail.com'],
subject: 'hello world',
html: '
"
}
]'
```
## Possible responses
After checking if an email with the same idempotency key has already been sent, Resend returns one of the following responses:
* **Successful responses** will return the email ID of the sent email.
* **Error responses** will return one of the following errors:
* `400`: `invalid_idempotency_key` - the idempotency key has to be between 1-256 characters. You can retry with a valid key or without supplying an idempotency key.
* `409`: `invalid_idempotent_request` - this idempotency key has already been used on a request that had a different payload. Retrying this request is useless without changing the idempotency key or payload.
* `409`: `concurrent_idempotent_requests` - another request with the same idempotency key is currently in progress. As it isn't finished yet, Resend can't return its original response, but it is safe to retry this request later if needed.
---
# Source: https://resend.com/docs/webhooks/ingester.md
> ## Documentation Index
> Fetch the complete documentation index at: https://resend.com/docs/llms.txt
> Use this file to discover all available pages before exploring further.
# Webhook Ingester
> A self-hosted solution to store all your Resend webhook events in your own database.
The Resend Webhook Ingester is an open-source Next.js application that receives, verifies, and stores all your webhook events in your own database. Deploy it to your infrastructure and gain full control over your email event data.
For more details on why you should store your webhook data, see the [data
storage guide](/dashboard/webhooks/how-to-store-webhooks-data).
## Why use the Webhook Ingester?
While you can build your own webhook handler, the Webhook Ingester provides a production-ready solution with:
* **Signature verification** using Svix to ensure webhook authenticity
* **Idempotent storage** that safely handles duplicate webhook deliveries
* **Multiple database support** including PostgreSQL, MySQL, MongoDB, and data warehouses
* **One-click deployment** to Vercel, Railway, or Render
View the source code and contribute
Pull the official Docker image
## Deploy
Get started in minutes with one-click deployment:
[](https://vercel.com/new/clone?repository-url=https://github.com/resend/resend-webhooks-ingester\&env=RESEND_WEBHOOK_SECRET\&envDescription=Your%20Resend%20webhook%20signing%20secret\&envLink=https://resend.com/webhooks)
[](https://railway.com/deploy/cd2lvJ?referralCode=w2CHHM\&utm_medium=integration\&utm_source=template\&utm_campaign=generic)
[](https://render.com/deploy?repo=https://github.com/resend/resend-webhooks-ingester)
Or use Docker:
```bash theme={"theme":{"light":"github-light","dark":"vesper"}}
docker pull ghcr.io/resend/resend-webhooks-ingester
```
## Supported Databases
| Database | Endpoint | Best For |
| ----------- | -------------- | ------------------------------------------------------- |
| Supabase | `/supabase` | Quick setup with managed Postgres |
| PostgreSQL | `/postgresql` | Self-hosted or managed Postgres (Neon, Railway, Render) |
| MySQL | `/mysql` | Self-hosted or managed MySQL |
| PlanetScale | `/planetscale` | Serverless MySQL |
| MongoDB | `/mongodb` | Document database (Atlas, self-hosted) |
| Snowflake | `/snowflake` | Data warehousing and analytics |
| BigQuery | `/bigquery` | Google Cloud analytics |
| ClickHouse | `/clickhouse` | High-performance analytics |
## Quick Start
```bash theme={"theme":{"light":"github-light","dark":"vesper"}}
git clone https://github.com/resend/resend-webhooks-ingester.git
cd resend-webhooks-ingester
pnpm install
```
Copy the example environment file and add your credentials:
```bash theme={"theme":{"light":"github-light","dark":"vesper"}}
cp .env.example .env.local
```
At minimum, you need:
```env .env.local theme={"theme":{"light":"github-light","dark":"vesper"}}
# Required: Your Resend webhook signing secret
RESEND_WEBHOOK_SECRET=whsec_xxxxxxxxxxxxxxxxxxxxx
# Database credentials (example for PostgreSQL)
POSTGRESQL_URL=postgresql://user:password@host:5432/database
```
Get your webhook signing secret from the [Resend
Dashboard](https://resend.com/webhooks) when creating a webhook.
Set up your database and run the provided schema for your database. The ingester supports PostgreSQL, MySQL, MongoDB, and several data warehouses. Schema files can be found in the `schemas/` directory.
```bash theme={"theme":{"light":"github-light","dark":"vesper"}}
pnpm db:setup --postgresql
# or use a different flag for a different database
```
Deploy to your preferred platform, then register your webhook endpoint in the [Resend Dashboard](https://resend.com/webhooks) and select all the events you'd like to store.
Your endpoint URL will be: `https://your-domain.com/{connector}`
For example: `https://your-app.vercel.app/postgresql`
## Database Schemas
The ingester creates three tables to store webhook events:
| Table | Description |
| -------------------- | ------------------------------------------------------------------ |
| `resend_wh_emails` | All email events (sent, delivered, bounced, opened, clicked, etc.) |
| `resend_wh_contacts` | Contact events (created, updated, deleted) |
| `resend_wh_domains` | Domain events (created, updated, deleted) |
Each table includes:
* `svix_id` - Unique webhook event ID for idempotency
* `event_type` - The type of event (e.g., `email.delivered`)
* `event_created_at` - When the event occurred
* `webhook_received_at` - When the webhook was received
* Event-specific fields (email details, bounce info, click data, etc.)
## Idempotency
The ingester handles duplicate webhooks automatically. Each webhook includes a unique `svix-id` header, and the ingester uses this to ensure events are stored only once.
If Resend retries a webhook delivery (due to a temporary failure), the duplicate will be safely ignored without creating duplicate records in your database.
## Configuration Reference
### Required Environment Variables
| Variable | Description |
| ----------------------- | --------------------------------------- |
| `RESEND_WEBHOOK_SECRET` | Your webhook signing secret from Resend |
### Database-Specific Variables
```env theme={"theme":{"light":"github-light","dark":"vesper"}}
SUPABASE_URL=https://your-project.supabase.co
SUPABASE_SERVICE_ROLE_KEY=eyJhbGciOiJIUzI1NiIsInR5cCI6IkpXVCJ9...
```
```env theme={"theme":{"light":"github-light","dark":"vesper"}}
POSTGRESQL_URL=postgresql://user:password@host:5432/database
```
```env theme={"theme":{"light":"github-light","dark":"vesper"}}
MYSQL_URL=mysql://user:password@host:3306/database
```
```env theme={"theme":{"light":"github-light","dark":"vesper"}}
PLANETSCALE_URL=mysql://username:password@host/database?ssl={"rejectUnauthorized":true}
```
```env theme={"theme":{"light":"github-light","dark":"vesper"}}
MONGODB_URI=mongodb+srv://username:password@cluster.mongodb.net/
MONGODB_DATABASE=resend_webhooks
```
```env theme={"theme":{"light":"github-light","dark":"vesper"}}
SNOWFLAKE_ACCOUNT=your-account-identifier
SNOWFLAKE_USERNAME=your-username
SNOWFLAKE_PASSWORD=your-password
SNOWFLAKE_DATABASE=your-database
SNOWFLAKE_SCHEMA=your-schema
SNOWFLAKE_WAREHOUSE=your-warehouse
```
```env theme={"theme":{"light":"github-light","dark":"vesper"}}
BIGQUERY_PROJECT_ID=your-project-id
BIGQUERY_DATASET_ID=your-dataset-id
BIGQUERY_CREDENTIALS={"type":"service_account","project_id":"..."}
```
```env theme={"theme":{"light":"github-light","dark":"vesper"}}
CLICKHOUSE_URL=https://your-instance.clickhouse.cloud:8443
CLICKHOUSE_USERNAME=default
CLICKHOUSE_PASSWORD=your-password
CLICKHOUSE_DATABASE=default
```
## Example Queries
Once your data is stored, you can run analytics queries. Here's an example to get email status counts by day:
```sql PostgreSQL theme={"theme":{"light":"github-light","dark":"vesper"}}
SELECT
DATE(event_created_at) AS day,
event_type,
COUNT(*) AS count
FROM resend_wh_emails
GROUP BY DATE(event_created_at), event_type
ORDER BY day DESC, event_type;
```
```javascript MongoDB theme={"theme":{"light":"github-light","dark":"vesper"}}
db.resend_wh_emails.aggregate([
{
$group: {
_id: {
day: {
$dateToString: { format: '%Y-%m-%d', date: '$event_created_at' },
},
event_type: '$event_type',
},
count: { $sum: 1 },
},
},
{ $sort: { '_id.day': -1 } },
]);
```
```sql ClickHouse theme={"theme":{"light":"github-light","dark":"vesper"}}
SELECT
toDate(event_created_at) AS day,
event_type,
count() AS count
FROM resend_wh_emails
FINAL
GROUP BY day, event_type
ORDER BY day DESC, event_type;
```
See the
[queries\_examples.md](https://github.com/resend/resend-webhooks-ingester/blob/main/queries_examples.md)
file in the repository for more analytics queries including bounce rates, open
rates, and click-through rates.
## Data Retention
By default, webhook events are stored indefinitely. To implement data retention policies, you can set up scheduled jobs to delete old events.
Example for PostgreSQL (delete events older than 90 days):
```sql theme={"theme":{"light":"github-light","dark":"vesper"}}
DELETE FROM resend_wh_emails
WHERE event_created_at < NOW() - INTERVAL '90 days';
```
For Supabase, use
[pg\_cron](https://supabase.com/docs/guides/database/extensions/pg_cron) to
schedule cleanup queries. For MongoDB, consider using [TTL
indexes](https://www.mongodb.com/docs/manual/core/index-ttl/) or [Atlas
scheduled
triggers](https://www.mongodb.com/docs/atlas/app-services/triggers/scheduled-triggers/).
## Troubleshooting
* Ensure `RESEND_WEBHOOK_SECRET` matches the signing secret in your Resend
Dashboard - Make sure you're using the raw request body for verification -
Check that the secret hasn't been rotated in Resend
* Verify your database credentials are correct - Check that the schema has
been applied to your database - Ensure your database is accessible from your
deployment (check firewall rules)
* Verify your endpoint URL is publicly accessible - Check the webhook status
in your [Resend Dashboard](https://resend.com/webhooks) - Ensure your server
responds with HTTP 200 for successful requests
## Learn More
View all available webhook event types and their payloads
Learn how webhook signature verification works
Understand webhook retry behavior
Learn why and how to store your webhook data
---
# Source: https://resend.com/docs/integrations.md
> ## Documentation Index
> Fetch the complete documentation index at: https://resend.com/docs/llms.txt
> Use this file to discover all available pages before exploring further.
# Integrations
> Integrate Resend with the tools you already use.
## AI
}
>
Tell the Lovable AI to send emails
}
>
Add email to your Anything projects
}
>
Send natural language emails using Wildcard
}
>
Build email AI agents using mcp.run
}
>
Send emails from apps built with Rocket
}
>
Add email to your Base44 apps
}
>
Add email to your Leap apps
}
>
Integrate Pica with Resend
## No-code
Zapier
}
>
Automate emails using Zapier
Pipedream
}
>
Build workflows using Pipedream
Activepieces
}
>
Build workflows using Activepieces
Monkedo
}
>
Automate emails using Monkedo
Make.com
}
>
Build workflows using Make.com
Lindy
}
>
Build workflows using Lindy
}
>
Build workflows using BuildShip
}
>
Build automations using viaSocket
}
>
Build automations using Stacksync
ApiX-Drive}>
Use Resend as a data destination in ApiX-Drive
Post SMTP
}
>
Send emails from WordPress with Post SMTP
## Notifications
Courier
}
>
Trigger messages using Courier
Novu
}
>
Send notifications using Novu
Knock
}
>
Send notifications using Knock
Engagespot
}
>
Send notifications using Engagespot
Dittofeed
}
>
Send automated emails using Dittofeed
Suprsend
}
>
Send notifications using Suprsend
## Content Management Systems
Payload CMS
}
>
Send emails using Payload CMS
Strapi CMS
}
>
Send emails using Strapi CMS
## Developer tools
}
>
Send emails with Convex's Resend Component
Inngest
}
>
Send drip campaigns using Inngest
Upstash
}
>
Send emails using Upstash
Trigger.dev
}
>
Send drip campaigns using Trigger.dev
Infisical
}
>
Send email when self-hosting Infisical
Fastgen
}
>
Build workflows using Fastgen
Medusa
}
>
Send e-commerce emails using Medusa
OpenMeter
}
>
Send usage emails using OpenMeter
Invopop
}
>
Send invoice emails using Invopop
}
>
Analyze your email data in real time
Coolify
}
>
Send email notifications using Coolify
}
>
API-powered email delivery for Ruby apps
}
>
Send auth and billing emails using Kinde
## Build your own integration
Here's how to build your own integration with Resend:
1. Read the documentation on [how to send emails](/api-reference/emails/send-email).
2. Integrate with your product offering.
3. [Reach out to us](https://resend.com/contact) to feature your product on this page.
---
# Source: https://resend.com/docs/webhooks/introduction.md
# Source: https://resend.com/docs/knowledge-base/introduction.md
# Source: https://resend.com/docs/introduction.md
# Source: https://resend.com/docs/dashboard/topics/introduction.md
# Source: https://resend.com/docs/dashboard/templates/introduction.md
# Source: https://resend.com/docs/dashboard/segments/introduction.md
# Source: https://resend.com/docs/dashboard/receiving/introduction.md
# Source: https://resend.com/docs/dashboard/logs/introduction.md
# Source: https://resend.com/docs/dashboard/emails/introduction.md
# Source: https://resend.com/docs/dashboard/domains/introduction.md
# Source: https://resend.com/docs/dashboard/broadcasts/introduction.md
# Source: https://resend.com/docs/dashboard/audiences/introduction.md
# Source: https://resend.com/docs/dashboard/api-keys/introduction.md
# Source: https://resend.com/docs/api-reference/introduction.md
> ## Documentation Index
> Fetch the complete documentation index at: https://resend.com/docs/llms.txt
> Use this file to discover all available pages before exploring further.
# Introduction
> Understand general concepts, response codes, and authentication strategies.
## Base URL
The Resend API is built on **REST** principles. We enforce **HTTPS** in every request to improve data security, integrity, and privacy. The API does not support **HTTP**.
All requests contain the following base URL:
```
https://api.resend.com
```
## Authentication
To authenticate you need to add an *Authorization* header with the contents of the header being `Bearer re_xxxxxxxxx` where `re_xxxxxxxxx` is your [API Key](https://resend.com/api-keys).
```
Authorization: Bearer re_xxxxxxxxx
```
## Response codes
Resend uses standard HTTP codes to indicate the success or failure of your requests.
In general, `2xx` HTTP codes correspond to success, `4xx` codes are for user-related failures, and `5xx` codes are for infrastructure issues.
| Status | Description |
| ------ | --------------------------------------- |
| `200` | Successful request. |
| `400` | Check that the parameters were correct. |
| `401` | The API key used was missing. |
| `403` | The API key used was invalid. |
| `404` | The resource was not found. |
| `429` | The rate limit was exceeded. |
| `5xx` | Indicates an error with Resend servers. |
Check [Error Codes](/api-reference/errors) for a comprehensive breakdown of
all possible API errors.
## Rate limit
The default maximum rate limit is **2 requests per second**. This number can be increased for trusted senders by request. After that, you'll hit the rate limit and receive a `429` response error code.
Learn more about our [rate limits](/api-reference/rate-limit).
## FAQ
Some endpoints support cursor-based pagination to help you browse through
large datasets efficiently. Check our [pagination
guide](/api-reference/pagination) for detailed information on how to use
pagination parameters.
Currently, there's no versioning system in place. We plan to add versioning
via calendar-based headers in the future.
---
# Source: https://resend.com/docs/knowledge-base/ionos.md
> ## Documentation Index
> Fetch the complete documentation index at: https://resend.com/docs/llms.txt
> Use this file to discover all available pages before exploring further.
# IONOS
> Verify your domain on IONOS with Resend.
## Add Domain to Resend
First, log in to your [Resend Account](https://resend.com/login) and [add a domain](https://resend.com/domains).
It is [best practice to use a
subdomain](/knowledge-base/is-it-better-to-send-emails-from-a-subdomain-or-the-root-domain)
(updates.example.com) instead of the root domain (example.com). Using a
subdomain allows for proper reputation segmentation based on topics or purpose
(e.g. marketing) and is especially important if receiving emails with Resend.
## Log in to IONOS
Log in to your [IONOS account](https://my.ionos.com/domains):
1. Choose your Domain from the `Domain` list.
2. Select the `DNS` tab to get to the page to manage DNS records.
## Add MX SPF Record
Select “Add record” on IONOS to copy and paste the values MX from Resend.
1. On the `Add a DNS Record` page, select `MX`.
2. Type `send` for the `Name` of the record.
3. Copy the MX Value from Resend into the `Points to` field.
4. Use the default `Priority` of `10`.
5. Use the default TTL of `1 hour`.
6. Select `Save`.
Omit your domain from the record values in Resend when you paste. Instead of
`send.example.com`, paste only `send` (or `send.subdomain` if you're using a
subdomain).
Below is a mapping of the record fields from Resend to IONOS:
| IONOS | Resend | Example Value |
| --------- | -------- | --------------------------------------- |
| Type | Type | `MX Record` |
| Name | Name | `send` |
| Points to | Value | `feedback-smtp.us-east-1.amazonses.com` |
| TTL | TTL | `1 hour` |
| Priority | Priority | `10` |
Do not use the same priority for multiple records. If Priority `10` is already
in use on another record, try a higher value `20` or `30`.
## Add TXT SPF Record
In the same section, select “Add record” again.
1. On the `Add a DNS Record` page, select `TXT`.
2. Type `send` for the `Host name` of the record.
3. Copy the TXT Value Resend into the `TXT value` field.
4. Use the default TTL of `1 hour`.
5. Select `Save`.
Omit your domain from the record values in Resend when you paste. Instead of
`send.example.com`, paste only `send` (or `send.subdomain` if you're using a
subdomain).
Below is a mapping of the record fields from Resend to IONOS:
| IONOS | Resend | Example Value |
| --------- | ------ | ------------------------------------- |
| Type | Type | `TXT Record` |
| Host name | Name | `send` |
| TXT value | Value | `"v=spf1 include:amazonses.com ~all"` |
| TTL | - | `1 hour` |
## Add TXT DKIM Records
In the same section, select “Add record” again.
1. On the `Add a DNS Record` page, select `TXT`.
2. Type `resend._domainkey` for the `Host name` of the record.
3. Copy the record value from Resend into the `TXT value` field.
4. Use the default TTL of `1 hour`.
5. Select `Save`.
Omit your domain from the record values in Resend when you paste. Instead of
`resend._domainkey.example.com`, paste only `resend._domainkey` (or
`resend._domainkey.subdomain` if you're using a subdomain).
Below is a mapping of the record fields from Resend to IONOS:
| IONOS | Resend | Example Value |
| --------- | ------ | ---------------------------- |
| Type | Type | `TXT Record` |
| Host name | Name | `send` |
| TXT value | Value | `p=example_demain_key_value` |
| TTL | - | `1 hour` |
## Receiving Emails
If you want to receive emails at your domain, toggle the "Receiving" switch on the domain details page.
When you enable Inbound on a domain, Resend receives *all emails* sent to that
specific domain depending on the priority of the MX record. For this reason,
we strongly recommend verifying a subdomain (`subdomain.example.com`) instead
of the root domain (`example.com`). Learn more about [avoiding conflicts with
your existing MX
records](/knowledge-base/how-do-i-avoid-conflicting-with-my-mx-records).
Select “Add record” on IONOS:
1. On the `Add a DNS Record` page, select `MX`.
2. Type `inbound` (or whatever your subdomain is) for the `Name` of the record.
3. Copy the MX Value from Resend into the `Points to` field.
4. Use the default `Priority` of `10`.
5. Use the default TTL of `1 hour`.
6. Select `Save`.
Below is a mapping of the record fields from Resend to IONOS:
| IONOS | Resend | Example Value |
| --------- | -------- | -------------------------------------- |
| Type | Type | `MX Record` |
| Name | Name | `inbound` |
| Points to | Content | `inbound-smtp.us-east-1.amazonaws.com` |
| TTL | TTL | `1 hour` |
| Priority | Priority | `10` |
After verifying your domain, create a webhook to process incoming emails. For help setting up a webhook, how to access email data and attachments, forward emails, and more, see [our guide on receiving emails with Resend](/dashboard/receiving/introduction).
## Complete Verification
Now click [Verify DNS Records](https://resend.com/domains) on your Domain in Resend. It may take a few hours to complete the verification process (often much faster).
## Troubleshooting
If your domain is not successfully verified, these are some common troubleshooting methods.
Review the records you added to IONOS to rule out copy and paste errors.
[Review our guide on a domain not verifying](/knowledge-base/what-if-my-domain-is-not-verifying).
---
# Source: https://resend.com/docs/knowledge-base/is-it-better-to-send-emails-from-a-subdomain-or-the-root-domain.md
> ## Documentation Index
> Fetch the complete documentation index at: https://resend.com/docs/llms.txt
> Use this file to discover all available pages before exploring further.
# Is it better to send emails from a subdomain or the root domain?
> Discover why sending emails from a subdomain can be better than using a root domain.
We recommend sending emails from a subdomain (`notifications.acme.com`) instead of your root/apex domain (`acme.com`).
There are **two main goals you should achieve with your domain setup**:
* Reputation Isolation
* Sending Purpose Transparency
## Reputation Isolation
Things happen. Maybe someone decides to DDOS your signup page and you get stuck sending tens of thousands of bounced verification emails to burner addresses. Or maybe a cold outreach campaign gets out of hand and your sending gets pegged as spam.
Whatever it is, you want to be consistently hedging your reputation. One way to do this is by not using your root domain. This allows you to quarantine a compromised subdomain if needed. If your root domain ends up with a jeopardized reputation, it can be a long road to recovery.
## Sending Purpose Transparency
All of us want all of our emails to go right to the top of the priority folder of the inbox, but the reality is, not all of our email should. A password reset email should have higher priority than a monthly product update. Inbox providers like Outlook and Gmail are constantly trying to triage incoming mail to put only the most important stuff in that priority spot, and move the rest towards Promotional or even Spam.
By segmenting your sending purposes by subdomain, you are giving Inbox Providers clear indication of how they should place your emails, which will build trust and confidence.
## Avoid "Lookalike" Domains
Never use domains that look like your main brand but aren’t actually your main brand. These brand-adjacent domains like `getacme-mail.com` or `acme-alerts.com` can appear suspicious to spam filters and confusing to your recipients. Inbox providers may flag them as phishing or spoofing attempts, and your users are more likely to ignore, delete, or even report the emails as spam.
If you’re launching a new project or sending for a different purpose, again use a subdomain of your main domain. Sticking with clear, consistent subdomains helps reinforce your brand identity and builds trust with inbox providers and recipients alike.
We cover this in depth in our [deliverability
guide](/knowledge-base/how-do-i-avoid-gmails-spam-folder#establish-sending-patterns).
---
# Source: https://resend.com/docs/knowledge-base/leap-new-integration.md
> ## Documentation Index
> Fetch the complete documentation index at: https://resend.com/docs/llms.txt
> Use this file to discover all available pages before exploring further.
# Send emails with Leap and Resend
> Learn how to add the Resend integration to your Leap.new project.
[Leap](https://leap.new) is a platform for building full-stack web and mobile apps via chat.
## 1. Ask Leap to add Resend
You can add Resend in a Leap project by asking the chat to add email sending with Resend.
**Example prompt**
```
When someone fills out the contact form, send an email using Resend.
```
## 2. Add your Resend API key
To use Resend with Leap, you'll need to add a Resend API key, which you can create in the [Resend Dashboard](https://resend.com/api-keys). Do not share your API key with others or expose it in the browser or other client-side code.
Leap will prompt you to set a secret value on the Infrastructure page. Paste your key value and click **Update secret**.
Learn more about the Resend integration in the [Leap
documentation](https://docs.leap.new/integrations/resend).
## 3. Add a custom domain to your Resend account
By default, you can only send emails to your own email address.
To send emails to other email addresses:
1. Add a [custom domain to your Resend account](https://resend.com/domains).
2. Add the custom domain to the `from` field in the `resend` function in Leap (or ask the chat to update these fields).
Get more help adding a custom domain in [Resend's documentation](/dashboard/domains/introduction).
---
# Source: https://resend.com/docs/api-reference/api-keys/list-api-keys.md
> ## Documentation Index
> Fetch the complete documentation index at: https://resend.com/docs/llms.txt
> Use this file to discover all available pages before exploring further.
# List API keys
> Retrieve a list of API keys for the authenticated user.
export const QueryParams = ({type, isRequired}) => {
return <>
Query Parameters
{isRequired ?
Number of {type} to retrieve.
Default value: 20
Maximum value: 100
Minimum value: 1
: <>
Note that the limit parameter is optional. If
you do not provide a limit, all {type} will be returned
in a single response.
Number of {type} to retrieve.
Maximum value: 100
Minimum value: 1
}
The ID after which we'll retrieve more {type} (for pagination).
This ID will not be included in the returned list. Cannot be
used with the
before parameter.
The ID before which we'll retrieve more {type} (for
pagination). This ID will not be included in the returned list.
Cannot be used with the after parameter.
You can only use either after or before{' '}
parameter, not both. See our{' '}
pagination guide for more
information.
;
};
```ts Node.js theme={"theme":{"light":"github-light","dark":"vesper"}}
import { Resend } from 'resend';
const resend = new Resend('re_xxxxxxxxx');
const { data, error } = await resend.apiKeys.list();
```
```php PHP theme={"theme":{"light":"github-light","dark":"vesper"}}
$resend = Resend::client('re_xxxxxxxxx');
$resend->apiKeys->list();
```
```python Python theme={"theme":{"light":"github-light","dark":"vesper"}}
import resend
resend.api_key = "re_xxxxxxxxx"
resend.ApiKeys.list()
```
```ruby Ruby theme={"theme":{"light":"github-light","dark":"vesper"}}
require "resend"
Resend.api_key = "re_xxxxxxxxx"
Resend::ApiKeys.list
```
```go Go theme={"theme":{"light":"github-light","dark":"vesper"}}
package main
import "github.com/resend/resend-go/v3"
func main() {
client := resend.NewClient("re_xxxxxxxxx")
client.ApiKeys.List()
}
```
```rust Rust theme={"theme":{"light":"github-light","dark":"vesper"}}
use resend_rs::{Resend, Result, list_opts::ListOptions};
#[tokio::main]
async fn main() -> Result<()> {
let resend = Resend::new("re_xxxxxxxxx");
let _api_keys = resend.api_keys.list(ListOptions::default()).await?;
Ok(())
}
```
```java Java theme={"theme":{"light":"github-light","dark":"vesper"}}
import com.resend.*;
public class Main {
public static void main(String[] args) {
Resend resend = new Resend("re_xxxxxxxxx");
resend.apiKeys().list();
}
}
```
```csharp .NET theme={"theme":{"light":"github-light","dark":"vesper"}}
using Resend;
IResend resend = ResendClient.Create( "re_xxxxxxxxx" ); // Or from DI
var resp = await resend.ApiKeyListAsync();
Console.WriteLine( "Nr keys={0}", resp.Content.Count );
```
```bash cURL theme={"theme":{"light":"github-light","dark":"vesper"}}
curl -X GET 'https://api.resend.com/api-keys' \
-H 'Authorization: Bearer re_xxxxxxxxx'
```
```json Response theme={"theme":{"light":"github-light","dark":"vesper"}}
{
"object": "list",
"has_more": false,
"data": [
{
"id": "91f3200a-df72-4654-b0cd-f202395f5354",
"name": "Production",
"created_at": "2023-04-08T00:11:13.110779+00:00"
}
]
}
```
---
# Source: https://resend.com/docs/api-reference/broadcasts/list-broadcasts.md
> ## Documentation Index
> Fetch the complete documentation index at: https://resend.com/docs/llms.txt
> Use this file to discover all available pages before exploring further.
# List Broadcasts
> Retrieve a list of broadcast.
export const QueryParams = ({type, isRequired}) => {
return <>
Query Parameters
{isRequired ?
Number of {type} to retrieve.
Default value: 20
Maximum value: 100
Minimum value: 1
: <>
Note that the limit parameter is optional. If
you do not provide a limit, all {type} will be returned
in a single response.
Number of {type} to retrieve.
Maximum value: 100
Minimum value: 1
}
The ID after which we'll retrieve more {type} (for pagination).
This ID will not be included in the returned list. Cannot be
used with the
before parameter.
The ID before which we'll retrieve more {type} (for
pagination). This ID will not be included in the returned list.
Cannot be used with the after parameter.
You can only use either after or before{' '}
parameter, not both. See our{' '}
pagination guide for more
information.
;
};
See all available `status` types in [the Broadcasts
overview](/dashboard/broadcasts/introduction#understand-broadcast-statuses).
```ts Node.js theme={"theme":{"light":"github-light","dark":"vesper"}}
import { Resend } from 'resend';
const resend = new Resend('re_xxxxxxxxx');
const { data, error } = await resend.broadcasts.list();
```
```php PHP theme={"theme":{"light":"github-light","dark":"vesper"}}
$resend = Resend::client('re_xxxxxxxxx');
$resend->broadcasts->list();
```
```py Python theme={"theme":{"light":"github-light","dark":"vesper"}}
import resend
resend.api_key = "re_xxxxxxxxx"
resend.Broadcasts.list()
```
```ruby Ruby theme={"theme":{"light":"github-light","dark":"vesper"}}
require "resend"
Resend.api_key = "re_xxxxxxxxx"
Resend::Broadcasts.list()
```
```go Go theme={"theme":{"light":"github-light","dark":"vesper"}}
package main
import "github.com/resend/resend-go/v3"
func main() {
client := resend.NewClient("re_xxxxxxxxx")
client.Broadcasts.List()
}
```
```rust Rust theme={"theme":{"light":"github-light","dark":"vesper"}}
use resend_rs::{Resend, Result, list_opts::ListOptions};
#[tokio::main]
async fn main() -> Result<()> {
let resend = Resend::new("re_xxxxxxxxx");
let _broadcasts = resend.broadcasts.list(ListOptions::default()).await?;
Ok(())
}
```
```java Java theme={"theme":{"light":"github-light","dark":"vesper"}}
Resend resend = new Resend("re_xxxxxxxxx");
ListBroadcastsResponseSuccess data = resend.broadcasts().list();
```
```csharp .NET theme={"theme":{"light":"github-light","dark":"vesper"}}
using Resend;
IResend resend = ResendClient.Create( "re_xxxxxxxxx" ); // Or from DI
var resp = await resend.BroadcastListAsync();
Console.WriteLine( "Nr Broadcasts={0}", resp.Content.Count );
```
```bash cURL theme={"theme":{"light":"github-light","dark":"vesper"}}
curl -X GET 'https://api.resend.com/broadcasts' \
-H 'Authorization: Bearer re_xxxxxxxxx'
```
```json Response theme={"theme":{"light":"github-light","dark":"vesper"}}
{
"object": "list",
"has_more": false,
"data": [
{
"id": "49a3999c-0ce1-4ea6-ab68-afcd6dc2e794",
"audience_id": "78261eea-8f8b-4381-83c6-79fa7120f1cf", // now called segment_id
"segment_id": "78261eea-8f8b-4381-83c6-79fa7120f1cf",
"status": "draft",
"created_at": "2024-11-01T15:13:31.723Z",
"scheduled_at": null,
"sent_at": null,
"topic_id": "b6d24b8e-af0b-4c3c-be0c-359bbd97381e"
},
{
"id": "559ac32e-9ef5-46fb-82a1-b76b840c0f7b",
"audience_id": "78261eea-8f8b-4381-83c6-79fa7120f1cf", // now called segment_id
"segment_id": "78261eea-8f8b-4381-83c6-79fa7120f1cf",
"status": "sent",
"created_at": "2024-12-01T19:32:22.980Z",
"scheduled_at": "2024-12-02T19:32:22.980Z",
"sent_at": "2024-12-02T19:32:22.980Z",
"topic_id": "b6d24b8e-af0b-4c3c-be0c-359bbd97381e"
}
]
}
```
---
# Source: https://resend.com/docs/api-reference/contact-properties/list-contact-properties.md
> ## Documentation Index
> Fetch the complete documentation index at: https://resend.com/docs/llms.txt
> Use this file to discover all available pages before exploring further.
# List Contact Properties
> Retrieve a list of contact properties.
export const QueryParams = ({type, isRequired}) => {
return <>
Query Parameters
{isRequired ?
Number of {type} to retrieve.
Default value: 20
Maximum value: 100
Minimum value: 1
: <>
Note that the limit parameter is optional. If
you do not provide a limit, all {type} will be returned
in a single response.
Number of {type} to retrieve.
Maximum value: 100
Minimum value: 1
}
The ID after which we'll retrieve more {type} (for pagination).
This ID will not be included in the returned list. Cannot be
used with the
before parameter.
The ID before which we'll retrieve more {type} (for
pagination). This ID will not be included in the returned list.
Cannot be used with the after parameter.
You can only use either after or before{' '}
parameter, not both. See our{' '}
pagination guide for more
information.
;
};
```ts Node.js theme={"theme":{"light":"github-light","dark":"vesper"}}
import { Resend } from 'resend';
const resend = new Resend('re_xxxxxxxxx');
const { data, error } = await resend.contactProperties.list();
```
```php PHP theme={"theme":{"light":"github-light","dark":"vesper"}}
$resend = Resend::client('re_xxxxxxxxx');
$resend->contactProperties->list();
```
```python Python theme={"theme":{"light":"github-light","dark":"vesper"}}
import resend
resend.api_key = 're_xxxxxxxxx'
contact_properties = resend.ContactProperties.list()
```
```ruby Ruby theme={"theme":{"light":"github-light","dark":"vesper"}}
require "resend"
Resend.api_key = "re_xxxxxxxxx"
properties = Resend::ContactProperties.list
```
```go Go theme={"theme":{"light":"github-light","dark":"vesper"}}
package main
import (
"context"
"fmt"
"github.com/resend/resend-go/v3"
)
func main() {
ctx := context.TODO()
client := resend.NewClient("re_xxxxxxxxx")
properties, err := client.ContactProperties.ListWithContext(ctx)
if err != nil {
panic(err)
}
fmt.Println(properties)
}
```
```rust Rust theme={"theme":{"light":"github-light","dark":"vesper"}}
use resend_rs::{list_opts::ListOptions, Resend, Result};
#[tokio::main]
async fn main() -> Result<()> {
let resend = Resend::new("re_xxxxxxxxx");
let _contact_properties = resend
.contacts
.list_properties(ListOptions::default())
.await?;
Ok(())
}
```
```java Java theme={"theme":{"light":"github-light","dark":"vesper"}}
import com.resend.*;
public class Main {
public static void main(String[] args) {
Resend resend = new Resend("re_xxxxxxxxx");
resend.contactProperties().list();
}
}
```
```csharp .NET theme={"theme":{"light":"github-light","dark":"vesper"}}
using Resend;
IResend resend = ResendClient.Create( "re_xxxxxxxxx" ); // Or from DI
var resp = await resend.ContactPropListAsync();
Console.WriteLine( "Nr Props={0}", resp.Content.Data.Count );
```
```bash cURL theme={"theme":{"light":"github-light","dark":"vesper"}}
curl -X GET 'https://api.resend.com/contact-properties' \
-H 'Authorization: Bearer re_xxxxxxxxx'
```
```json Response theme={"theme":{"light":"github-light","dark":"vesper"}}
{
"object": "list",
"has_more": false,
"data": [
{
"id": "b6d24b8e-af0b-4c3c-be0c-359bbd97381e",
"key": "company_name",
"type": "string",
"fallback_value": "Acme Corp",
"created_at": "2023-04-08T00:11:13.110779+00:00"
}
]
}
```
---
# Source: https://resend.com/docs/api-reference/contacts/list-contact-segments.md
> ## Documentation Index
> Fetch the complete documentation index at: https://resend.com/docs/llms.txt
> Use this file to discover all available pages before exploring further.
# List Contact Segments
> Retrieve a list of segments that a contact is part of.
export const QueryParams = ({type, isRequired}) => {
return <>
Query Parameters
{isRequired ?
Number of {type} to retrieve.
Default value: 20
Maximum value: 100
Minimum value: 1
: <>
Note that the limit parameter is optional. If
you do not provide a limit, all {type} will be returned
in a single response.
Number of {type} to retrieve.
Maximum value: 100
Minimum value: 1
}
The ID after which we'll retrieve more {type} (for pagination).
This ID will not be included in the returned list. Cannot be
used with the
before parameter.
The ID before which we'll retrieve more {type} (for
pagination). This ID will not be included in the returned list.
Cannot be used with the after parameter.
You can only use either after or before{' '}
parameter, not both. See our{' '}
pagination guide for more
information.
;
};
export const ResendParamField = ({children, body, path, ...props}) => {
const [lang, setLang] = useState(() => {
return localStorage.getItem('code') || '"Node.js"';
});
useEffect(() => {
const onStorage = event => {
const key = event.detail.key;
if (key === 'code') {
setLang(event.detail.value);
}
};
document.addEventListener('mintlify-localstorage', onStorage);
return () => {
document.removeEventListener('mintlify-localstorage', onStorage);
};
}, []);
const toCamelCase = str => typeof str === 'string' ? str.replace(/[_-](\w)/g, (_, c) => c.toUpperCase()) : str;
const resolvedBody = useMemo(() => {
const value = JSON.parse(lang);
return value === 'Node.js' ? toCamelCase(body) : body;
}, [body, lang]);
const resolvedPath = useMemo(() => {
const value = JSON.parse(lang);
return value === 'Node.js' ? toCamelCase(path) : path;
}, [path, lang]);
return
{children}
;
};
## Path Parameters
Either `id` or `email` must be provided.
The Contact ID.
The Contact Email.
```ts Node.js theme={"theme":{"light":"github-light","dark":"vesper"}}
import { Resend } from 'resend';
const resend = new Resend('re_xxxxxxxxx');
const { data, error } = await resend.contacts.segments.list({
id: 'e169aa45-1ecf-4183-9955-b1499d5701d3',
});
```
```php PHP theme={"theme":{"light":"github-light","dark":"vesper"}}
$resend = Resend::client('re_xxxxxxxxx');
$resend->contacts->segments->list(
contactId: 'e169aa45-1ecf-4183-9955-b1499d5701d3'
);
```
```python Python theme={"theme":{"light":"github-light","dark":"vesper"}}
import resend
resend.api_key = 're_xxxxxxxxx'
params = {
"contact_id": 'e169aa45-1ecf-4183-9955-b1499d5701d3',
}
segments = resend.Contacts.Segments.list(params)
```
```ruby Ruby theme={"theme":{"light":"github-light","dark":"vesper"}}
require 'resend'
Resend.api_key = 're_xxxxxxxxx'
segments = Resend::Contacts::Segments.list(
contact_id: 'e169aa45-1ecf-4183-9955-b1499d5701d3'
)
```
```go Go theme={"theme":{"light":"github-light","dark":"vesper"}}
package main
import (
"context"
"github.com/resend/resend-go/v3"
)
func main() {
client := resend.NewClient("re_xxxxxxxxx")
listParams := &resend.ListContactSegmentsRequest{
ContactId: "479e3145-dd38-476b-932c-529ceb705947",
}
client.Contacts.Segments.List(listParams)
}
```
```rust Rust theme={"theme":{"light":"github-light","dark":"vesper"}}
use resend_rs::{Resend, Result, list_opts::ListOptions};
#[tokio::main]
async fn main() -> Result<()> {
let resend = Resend::new("re_xxxxxxxxx");
let _contacts = resend
.contacts
.list_contact_segment(
"e169aa45-1ecf-4183-9955-b1499d5701d3",
ListOptions::default()
)
.await?;
Ok(())
}
```
```java Java theme={"theme":{"light":"github-light","dark":"vesper"}}
import com.resend.*;
public class Main {
public static void main(String[] args) {
Resend resend = new Resend("re_xxxxxxxxx");
resend.contacts().segments().list("e169aa45-1ecf-4183-9955-b1499d5701d3");
}
}
```
```csharp .NET theme={"theme":{"light":"github-light","dark":"vesper"}}
using Resend;
IResend resend = ResendClient.Create( "re_xxxxxxxxx" ); // Or from DI
var resp = await resend.ContactListSegmentsAsync( new Guid( "e169aa45-1ecf-4183-9955-b1499d5701d3" ));
Console.WriteLine( "Nr Segments={0}", resp.Content.Data.Count );
```
```bash cURL theme={"theme":{"light":"github-light","dark":"vesper"}}
curl -X GET 'https://api.resend.com/contacts/e169aa45-1ecf-4183-9955-b1499d5701d3/segments' \
-H 'Authorization: Bearer re_xxxxxxxxx'
```
```json Response theme={"theme":{"light":"github-light","dark":"vesper"}}
{
"object": "list",
"data": [
{
"id": "78261eea-8f8b-4381-83c6-79fa7120f1cf",
"name": "Registered Users",
"created_at": "2023-10-06T22:59:55.977Z"
}
],
"has_more": false
}
```
---
# Source: https://resend.com/docs/api-reference/contacts/list-contacts.md
> ## Documentation Index
> Fetch the complete documentation index at: https://resend.com/docs/llms.txt
> Use this file to discover all available pages before exploring further.
# List Contacts
> Show all contacts.
export const ResendParamField = ({children, body, path, ...props}) => {
const [lang, setLang] = useState(() => {
return localStorage.getItem('code') || '"Node.js"';
});
useEffect(() => {
const onStorage = event => {
const key = event.detail.key;
if (key === 'code') {
setLang(event.detail.value);
}
};
document.addEventListener('mintlify-localstorage', onStorage);
return () => {
document.removeEventListener('mintlify-localstorage', onStorage);
};
}, []);
const toCamelCase = str => typeof str === 'string' ? str.replace(/[_-](\w)/g, (_, c) => c.toUpperCase()) : str;
const resolvedBody = useMemo(() => {
const value = JSON.parse(lang);
return value === 'Node.js' ? toCamelCase(body) : body;
}, [body, lang]);
const resolvedPath = useMemo(() => {
const value = JSON.parse(lang);
return value === 'Node.js' ? toCamelCase(path) : path;
}, [path, lang]);
return
{children}
;
};
export const QueryParams = ({type, isRequired}) => {
return <>
Query Parameters
{isRequired ?
Number of {type} to retrieve.
Default value: 20
Maximum value: 100
Minimum value: 1
: <>
Note that the limit parameter is optional. If
you do not provide a limit, all {type} will be returned
in a single response.
Number of {type} to retrieve.
Maximum value: 100
Minimum value: 1
}
The ID after which we'll retrieve more {type} (for pagination).
This ID will not be included in the returned list. Cannot be
used with the
before parameter.
The ID before which we'll retrieve more {type} (for
pagination). This ID will not be included in the returned list.
Cannot be used with the after parameter.
You can only use either after or before{' '}
parameter, not both. See our{' '}
pagination guide for more
information.
;
};
## Path Parameters
The Segment ID to filter contacts by. If provided, only contacts in this Segment will be returned.
```ts Node.js theme={"theme":{"light":"github-light","dark":"vesper"}}
import { Resend } from 'resend';
const resend = new Resend('re_xxxxxxxxx');
const { data, error } = await resend.contacts.list();
```
```php PHP theme={"theme":{"light":"github-light","dark":"vesper"}}
$resend = Resend::client('re_xxxxxxxxx');
$resend->contacts->list();
```
```python Python theme={"theme":{"light":"github-light","dark":"vesper"}}
import resend
resend.api_key = "re_xxxxxxxxx"
resend.Contacts.list()
```
```ruby Ruby theme={"theme":{"light":"github-light","dark":"vesper"}}
require "resend"
Resend.api_key = "re_xxxxxxxxx"
Resend::Contacts.list()
```
```go Go theme={"theme":{"light":"github-light","dark":"vesper"}}
package main
import "github.com/resend/resend-go/v3"
func main() {
client := resend.NewClient("re_xxxxxxxxx")
client.Contacts.List()
}
```
```rust Rust theme={"theme":{"light":"github-light","dark":"vesper"}}
use resend_rs::{Resend, Result, list_opts::ListOptions};
#[tokio::main]
async fn main() -> Result<()> {
let resend = Resend::new("re_xxxxxxxxx");
let _contacts = resend
.contacts
.list(
ListOptions::default(),
)
.await?;
Ok(())
}
```
```java Java theme={"theme":{"light":"github-light","dark":"vesper"}}
import com.resend.*;
public class Main {
public static void main(String[] args) {
Resend resend = new Resend("re_xxxxxxxxx");
ListContactsResponseSuccess data = resend.contacts().list();
}
}
```
```csharp .NET theme={"theme":{"light":"github-light","dark":"vesper"}}
using Resend;
IResend resend = ResendClient.Create( "re_xxxxxxxxx" ); // Or from DI
var resp = await resend.ContactListAsync();
Console.WriteLine( "Nr Contacts={0}", resp.Content.Data.Count );
```
```bash cURL theme={"theme":{"light":"github-light","dark":"vesper"}}
curl -X GET 'https://api.resend.com/contacts' \
-H 'Authorization: Bearer re_xxxxxxxxx'
```
```json Response theme={"theme":{"light":"github-light","dark":"vesper"}}
{
"object": "list",
"has_more": false,
"data": [
{
"id": "e169aa45-1ecf-4183-9955-b1499d5701d3",
"email": "steve.wozniak@gmail.com",
"first_name": "Steve",
"last_name": "Wozniak",
"created_at": "2023-10-06T23:47:56.678Z",
"unsubscribed": false
}
]
}
```
---
# Source: https://resend.com/docs/api-reference/domains/list-domains.md
> ## Documentation Index
> Fetch the complete documentation index at: https://resend.com/docs/llms.txt
> Use this file to discover all available pages before exploring further.
# List Domains
> Retrieve a list of domains for the authenticated user.
export const QueryParams = ({type, isRequired}) => {
return <>
Query Parameters
{isRequired ?
Number of {type} to retrieve.
Default value: 20
Maximum value: 100
Minimum value: 1
: <>
Note that the limit parameter is optional. If
you do not provide a limit, all {type} will be returned
in a single response.
Number of {type} to retrieve.
Maximum value: 100
Minimum value: 1
}
The ID after which we'll retrieve more {type} (for pagination).
This ID will not be included in the returned list. Cannot be
used with the
before parameter.
The ID before which we'll retrieve more {type} (for
pagination). This ID will not be included in the returned list.
Cannot be used with the after parameter.
You can only use either after or before{' '}
parameter, not both. See our{' '}
pagination guide for more
information.
;
};
See all available `status` types in [the Domains
overview](/dashboard/domains/introduction#understand-a-domain-status).
```ts Node.js theme={"theme":{"light":"github-light","dark":"vesper"}}
import { Resend } from 'resend';
const resend = new Resend('re_xxxxxxxxx');
const { data, error } = await resend.domains.list();
```
```php PHP theme={"theme":{"light":"github-light","dark":"vesper"}}
$resend = Resend::client('re_xxxxxxxxx');
$resend->domains->list();
```
```python Python theme={"theme":{"light":"github-light","dark":"vesper"}}
import resend
resend.api_key = "re_xxxxxxxxx"
resend.Domains.list()
```
```ruby Ruby theme={"theme":{"light":"github-light","dark":"vesper"}}
Resend.api_key = ENV["RESEND_API_KEY"]
Resend::Domains.list
```
```go Go theme={"theme":{"light":"github-light","dark":"vesper"}}
package main
import "github.com/resend/resend-go/v3"
func main() {
client := resend.NewClient("re_xxxxxxxxx")
client.Domains.List()
}
```
```rust Rust theme={"theme":{"light":"github-light","dark":"vesper"}}
use resend_rs::{Resend, Result, list_opts::ListOptions};
#[tokio::main]
async fn main() -> Result<()> {
let resend = Resend::new("re_xxxxxxxxx");
let _domains = resend.domains.list(ListOptions::default()).await?;
Ok(())
}
```
```java Java theme={"theme":{"light":"github-light","dark":"vesper"}}
import com.resend.*;
public class Main {
public static void main(String[] args) {
Resend resend = new Resend("re_xxxxxxxxx");
ListDomainsResponse response = resend.domains().list();
}
}
```
```csharp .NET theme={"theme":{"light":"github-light","dark":"vesper"}}
using Resend;
IResend resend = ResendClient.Create( "re_xxxxxxxxx" ); // Or from DI
var resp = await resend.DomainListAsync();
Console.WriteLine( "Nr Domains={0}", resp.Content.Count );
```
```bash cURL theme={"theme":{"light":"github-light","dark":"vesper"}}
curl -X GET 'https://api.resend.com/domains' \
-H 'Authorization: Bearer re_xxxxxxxxx'
```
```json Response theme={"theme":{"light":"github-light","dark":"vesper"}}
{
"object": "list",
"has_more": false,
"data": [
{
"id": "d91cd9bd-1176-453e-8fc1-35364d380206",
"name": "example.com",
"status": "not_started",
"created_at": "2023-04-26T20:21:26.347412+00:00",
"region": "us-east-1",
"capabilities": {
"sending": "enabled",
"receiving": "disabled"
}
}
]
}
```
---
# Source: https://resend.com/docs/api-reference/emails/list-email-attachments.md
> ## Documentation Index
> Fetch the complete documentation index at: https://resend.com/docs/llms.txt
> Use this file to discover all available pages before exploring further.
# List Attachments
> Retrieve a list of attachments from a sent email.
export const QueryParams = ({type, isRequired}) => {
return <>
Query Parameters
{isRequired ?
Number of {type} to retrieve.
Default value: 20
Maximum value: 100
Minimum value: 1
: <>
Note that the limit parameter is optional. If
you do not provide a limit, all {type} will be returned
in a single response.
Number of {type} to retrieve.
Maximum value: 100
Minimum value: 1
}
The ID after which we'll retrieve more {type} (for pagination).
This ID will not be included in the returned list. Cannot be
used with the
before parameter.
The ID before which we'll retrieve more {type} (for
pagination). This ID will not be included in the returned list.
Cannot be used with the after parameter.
You can only use either after or before{' '}
parameter, not both. See our{' '}
pagination guide for more
information.
;
};
## Path Parameters
The Email ID.
```ts Node.js theme={"theme":{"light":"github-light","dark":"vesper"}}
import { Resend } from 'resend';
const resend = new Resend('re_xxxxxxxxx');
const { data, error } = await resend.emails.attachments.list({
emailId: '4ef9a417-02e9-4d39-ad75-9611e0fcc33c',
});
```
```php PHP theme={"theme":{"light":"github-light","dark":"vesper"}}
$resend = Resend::client('re_xxxxxxxxx');
$resend->emails->attachments->list(
emailId: '4ef9a417-02e9-4d39-ad75-9611e0fcc33c'
);
```
```python Python theme={"theme":{"light":"github-light","dark":"vesper"}}
import resend
resend.api_key = 're_xxxxxxxxx'
attachments = resend.Emails.Attachments.list(
email_id='4ef9a417-02e9-4d39-ad75-9611e0fcc33c'
)
```
```ruby Ruby theme={"theme":{"light":"github-light","dark":"vesper"}}
require 'resend'
Resend.api_key = 're_xxxxxxxxx'
Resend::Emails::Attachments.list(
email_id: "4ef9a417-02e9-4d39-ad75-9611e0fcc33c"
)
```
```go Go theme={"theme":{"light":"github-light","dark":"vesper"}}
import (
"context"
"github.com/resend/resend-go/v3"
)
func main() {
client := resend.NewClient("re_xxxxxxxxx")
client.Emails.ListAttachmentsWithContext(
context.TODO(),
"4ef9a417-02e9-4d39-ad75-9611e0fcc33c",
)
}
```
```rust Rust theme={"theme":{"light":"github-light","dark":"vesper"}}
use resend_rs::{list_opts::ListOptions, Resend, Result};
#[tokio::main]
async fn main() -> Result<()> {
let resend = Resend::new("re_xxxxxxxxx");
let _email = resend
.emails
.list_attachments(
"4ef9a417-02e9-4d39-ad75-9611e0fcc33c",
ListOptions::default(),
)
.await?;
Ok(())
}
```
```java Java theme={"theme":{"light":"github-light","dark":"vesper"}}
import com.resend.*;
public class Main {
public static void main(String[] args) {
Resend resend = new Resend("re_xxxxxxxxx");
ListAttachmentsResponse response = resend.emails().listAttachments(
"4ef9a417-02e9-4d39-ad75-9611e0fcc33c"
);
}
}
```
```csharp .NET theme={"theme":{"light":"github-light","dark":"vesper"}}
using Resend;
IResend resend = ResendClient.Create( "re_xxxxxxxxx" ); // Or from DI
var resp = await resend.EmailAttachmentListAsync( new Guid( "4ef9a417-02e9-4d39-ad75-9611e0fcc33c" ));
Console.WriteLine( "Nr Attachments={0}", resp.Content.Data.Count );
```
```bash cURL theme={"theme":{"light":"github-light","dark":"vesper"}}
curl -X GET 'https://api.resend.com/emails/4ef9a417-02e9-4d39-ad75-9611e0fcc33c/attachments' \
-H 'Authorization: Bearer re_xxxxxxxxx'
```
```json Response theme={"theme":{"light":"github-light","dark":"vesper"}}
{
"object": "list",
"has_more": false,
"data": [
{
"id": "2a0c9ce0-3112-4728-976e-47ddcd16a318",
"filename": "avatar.png",
"size": 4096,
"content_type": "image/png",
"content_disposition": "inline",
"content_id": "img001",
"download_url": "https://outbound-cdn.resend.com/4ef9a417-02e9-4d39-ad75-9611e0fcc33c/attachments/2a0c9ce0-3112-4728-976e-47ddcd16a318?some-params=example&signature=sig-123",
"expires_at": "2025-10-17T14:29:41.521Z"
}
]
}
```
---
# Source: https://resend.com/docs/api-reference/emails/list-emails.md
> ## Documentation Index
> Fetch the complete documentation index at: https://resend.com/docs/llms.txt
> Use this file to discover all available pages before exploring further.
# List Sent Emails
> Retrieve a list of emails sent by your team.
export const QueryParams = ({type, isRequired}) => {
return <>
Query Parameters
{isRequired ?
Number of {type} to retrieve.
Default value: 20
Maximum value: 100
Minimum value: 1
: <>
Note that the limit parameter is optional. If
you do not provide a limit, all {type} will be returned
in a single response.
Number of {type} to retrieve.
Maximum value: 100
Minimum value: 1
}
The ID after which we'll retrieve more {type} (for pagination).
This ID will not be included in the returned list. Cannot be
used with the
before parameter.
The ID before which we'll retrieve more {type} (for
pagination). This ID will not be included in the returned list.
Cannot be used with the after parameter.
You can only use either after or before{' '}
parameter, not both. See our{' '}
pagination guide for more
information.
;
};
You can list all emails sent by your team. The list returns references to individual emails. If needed, you can use the `id` of an email to retrieve the email HTML to plain text using the [Retrieve Email](/api-reference/emails/retrieve-email) endpoint or the [Retrieve Attachments](/api-reference/emails/list-email-attachments) endpoint to get an email's attachments.
This endpoint only returns emails sent by your team. If you need to list
emails received by your domain, use the [List Received
Emails](/api-reference/emails/list-received-emails) endpoint.
```ts Node.js theme={"theme":{"light":"github-light","dark":"vesper"}}
import { Resend } from 'resend';
const resend = new Resend('re_xxxxxxxxx');
const { data, error } = await resend.emails.list();
```
```php PHP theme={"theme":{"light":"github-light","dark":"vesper"}}
$resend = Resend::client('re_xxxxxxxxx');
$resend->emails->list();
```
```python Python theme={"theme":{"light":"github-light","dark":"vesper"}}
import resend
resend.api_key = "re_xxxxxxxxx"
resend.Emails.list()
```
```ruby Ruby theme={"theme":{"light":"github-light","dark":"vesper"}}
Resend.api_key = "re_xxxxxxxxx"
emails = Resend::Emails.list
puts emails
```
```go Go theme={"theme":{"light":"github-light","dark":"vesper"}}
package main
import (
"context"
"github.com/resend/resend-go/v3"
)
func main() {
ctx := context.TODO()
client := resend.NewClient("re_xxxxxxxxx")
paginatedResp, err := client.Emails.ListWithOptions(ctx, nil)
if err != nil {
panic(err)
}
if paginatedResp.HasMore {
opts := &resend.ListOptions{
After: &paginatedResp.Data[len(paginatedResp.Data)-1].ID,
}
client.Emails.ListWithOptions(ctx, opts)
}
}
```
```rust Rust theme={"theme":{"light":"github-light","dark":"vesper"}}
use resend_rs::{list_opts::ListOptions, Resend, Result};
#[tokio::main]
async fn main() -> Result<()> {
let resend = Resend::new("re_xxxxxxxxx");
let _emails = resend.emails.list(ListOptions::default()).await?;
Ok(())
}
```
```java Java theme={"theme":{"light":"github-light","dark":"vesper"}}
import com.resend.*;
public class Main {
public static void main(String[] args) {
Resend resend = new Resend("re_xxxxxxxxx");
ListEmailsResponseSuccess emails = resend.emails().list();
}
}
```
```csharp .NET theme={"theme":{"light":"github-light","dark":"vesper"}}
using Resend;
IResend resend = ResendClient.Create( "re_xxxxxxxxx" ); // Or from DI
var resp = await resend.EmailListAsync();
Console.WriteLine( "Count={0}", resp.Content.Data.Count );
```
```bash cURL theme={"theme":{"light":"github-light","dark":"vesper"}}
curl -X GET 'https://api.resend.com/emails' \
-H 'Authorization: Bearer re_xxxxxxxxx'
```
```json Response theme={"theme":{"light":"github-light","dark":"vesper"}}
{
"object": "list",
"has_more": false,
"data": [
{
"id": "4ef9a417-02e9-4d39-ad75-9611e0fcc33c",
"to": ["delivered@resend.dev"],
"from": "Acme ",
"created_at": "2023-04-03T22:13:42.674981+00:00",
"subject": "Hello World",
"bcc": null,
"cc": null,
"reply_to": null,
"last_event": "delivered",
"scheduled_at": null
},
{
"id": "3a9f8c2b-1e5d-4f8a-9c7b-2d6e5f8a9c7b",
"to": ["user@example.com"],
"from": "Acme ",
"created_at": "2023-04-03T21:45:12.345678+00:00",
"subject": "Welcome to Acme",
"bcc": null,
"cc": null,
"reply_to": null,
"last_event": "opened",
"scheduled_at": null
}
]
}
```
---
# Source: https://resend.com/docs/api-reference/emails/list-received-email-attachments.md
> ## Documentation Index
> Fetch the complete documentation index at: https://resend.com/docs/llms.txt
> Use this file to discover all available pages before exploring further.
# List Attachments
> Retrieve a list of attachments from a received email.
export const QueryParams = ({type, isRequired}) => {
return <>
Query Parameters
{isRequired ?
Number of {type} to retrieve.
Default value: 20
Maximum value: 100
Minimum value: 1
: <>
Note that the limit parameter is optional. If
you do not provide a limit, all {type} will be returned
in a single response.
Number of {type} to retrieve.
Maximum value: 100
Minimum value: 1
}
The ID after which we'll retrieve more {type} (for pagination).
This ID will not be included in the returned list. Cannot be
used with the
before parameter.
The ID before which we'll retrieve more {type} (for
pagination). This ID will not be included in the returned list.
Cannot be used with the after parameter.
You can only use either after or before{' '}
parameter, not both. See our{' '}
pagination guide for more
information.
;
};
## Path Parameters
The Email ID.
```ts Node.js theme={"theme":{"light":"github-light","dark":"vesper"}}
import { Resend } from 'resend';
const resend = new Resend('re_xxxxxxxxx');
const { data, error } = await resend.emails.receiving.attachments.list({
emailId: '4ef9a417-02e9-4d39-ad75-9611e0fcc33c',
});
```
```php PHP theme={"theme":{"light":"github-light","dark":"vesper"}}
$resend = Resend::client('re_xxxxxxxxx');
$resend->emails->receiving->attachments->list(
emailId: '4ef9a417-02e9-4d39-ad75-9611e0fcc33c'
);
```
```python Python theme={"theme":{"light":"github-light","dark":"vesper"}}
import resend
resend.api_key = 're_xxxxxxxxx'
attachments = resend.Emails.Receiving.Attachments.list(
email_id='4ef9a417-02e9-4d39-ad75-9611e0fcc33c'
)
```
```ruby Ruby theme={"theme":{"light":"github-light","dark":"vesper"}}
require 'resend'
Resend.api_key = 're_xxxxxxxxx'
attachments = Resend::Emails::Receiving::Attachments.list(
email_id: '4ef9a417-02e9-4d39-ad75-9611e0fcc33c'
)
```
```go Go theme={"theme":{"light":"github-light","dark":"vesper"}}
import (
"context"
"github.com/resend/resend-go/v3"
)
func main() {
client := resend.NewClient("re_xxxxxxxxx")
client.Emails.Receiving.ListAttachmentsWithContext(
context.TODO(),
"4ef9a417-02e9-4d39-ad75-9611e0fcc33c",
)
}
```
```rust Rust theme={"theme":{"light":"github-light","dark":"vesper"}}
use resend_rs::{list_opts::ListOptions, Resend, Result};
#[tokio::main]
async fn main() -> Result<()> {
let resend = Resend::new("re_xxxxxxxxx");
let _email = resend
.receiving
.list_attachments(
"4ef9a417-02e9-4d39-ad75-9611e0fcc33c",
ListOptions::default(),
)
.await?;
Ok(())
}
```
```java Java theme={"theme":{"light":"github-light","dark":"vesper"}}
import com.resend.*;
public class Main {
public static void main(String[] args) {
Resend resend = new Resend("re_xxxxxxxxx");
ListAttachmentsResponse response = resend.receiving().listAttachments(
"4ef9a417-02e9-4d39-ad75-9611e0fcc33c"
);
}
}
```
```csharp .NET theme={"theme":{"light":"github-light","dark":"vesper"}}
using Resend;
IResend resend = ResendClient.Create( "re_xxxxxxxxx" ); // Or from DI
var resp = await resend.ReceivedEmailAttachmentListAsync( new Guid( "4ef9a417-02e9-4d39-ad75-9611e0fcc33c" ));
Console.WriteLine( "Nr Attachments={0}", resp.Content.Data.Count );
```
```bash cURL theme={"theme":{"light":"github-light","dark":"vesper"}}
curl -X GET 'https://api.resend.com/emails/receiving/4ef9a417-02e9-4d39-ad75-9611e0fcc33c/attachments' \
-H 'Authorization: Bearer re_xxxxxxxxx'
```
```json Response theme={"theme":{"light":"github-light","dark":"vesper"}}
{
"object": "list",
"has_more": false,
"data": [
{
"id": "2a0c9ce0-3112-4728-976e-47ddcd16a318",
"filename": "avatar.png",
"size": 4096,
"content_type": "image/png",
"content_disposition": "inline",
"content_id": "img001",
"download_url": "https://inbound-cdn.resend.com/4ef9a417-02e9-4d39-ad75-9611e0fcc33c/attachments/2a0c9ce0-3112-4728-976e-47ddcd16a318?some-params=example&signature=sig-123",
"expires_at": "2025-10-17T14:29:41.521Z"
}
]
}
```
---
# Source: https://resend.com/docs/api-reference/emails/list-received-emails.md
> ## Documentation Index
> Fetch the complete documentation index at: https://resend.com/docs/llms.txt
> Use this file to discover all available pages before exploring further.
# List Received Emails
> Retrieve a list of received emails for the authenticated user.
export const QueryParams = ({type, isRequired}) => {
return <>
Query Parameters
{isRequired ?
Number of {type} to retrieve.
Default value: 20
Maximum value: 100
Minimum value: 1
: <>
Note that the limit parameter is optional. If
you do not provide a limit, all {type} will be returned
in a single response.
Number of {type} to retrieve.
Maximum value: 100
Minimum value: 1
}
The ID after which we'll retrieve more {type} (for pagination).
This ID will not be included in the returned list. Cannot be
used with the
before parameter.
The ID before which we'll retrieve more {type} (for
pagination). This ID will not be included in the returned list.
Cannot be used with the after parameter.
You can only use either after or before{' '}
parameter, not both. See our{' '}
pagination guide for more
information.
;
};
You can list all emails received by your team. The list returns references to individual emails. If needed, you can use the `id` of an email to retrieve the email HTML to plain text using the [Retrieve Received Email](/api-reference/emails/retrieve-received-email) endpoint or the [Retrieve Received Attachment](/api-reference/emails/retrieve-received-email-attachment) endpoint to get an email's attachments.
This endpoint only returns emails received by your team. If you need to list
emails sent by your team, use the [List Sent
Emails](/api-reference/emails/list-emails) endpoint.
```ts Node.js theme={"theme":{"light":"github-light","dark":"vesper"}}
import { Resend } from 'resend';
const resend = new Resend('re_xxxxxxxxx');
const { data, error } = await resend.emails.receiving.list();
```
```php PHP theme={"theme":{"light":"github-light","dark":"vesper"}}
$resend = Resend::client('re_xxxxxxxxx');
$resend->emails->receiving->list();
```
```python Python theme={"theme":{"light":"github-light","dark":"vesper"}}
import resend
resend.api_key = "re_xxxxxxxxx"
resend.Emails.Receiving.list()
```
```ruby Ruby theme={"theme":{"light":"github-light","dark":"vesper"}}
require "resend"
Resend.api_key = "re_xxxxxxxxx"
Resend::Emails::Receiving.list()
```
```go Go theme={"theme":{"light":"github-light","dark":"vesper"}}
import (
"context"
"github.com/resend/resend-go/v3"
)
func main() {
client := resend.NewClient("re_xxxxxxxxx")
client.Emails.Receiving.ListWithContext(context.TODO())
}
```
```rust Rust theme={"theme":{"light":"github-light","dark":"vesper"}}
use resend_rs::{list_opts::ListOptions, Resend, Result};
#[tokio::main]
async fn main() -> Result<()> {
let resend = Resend::new("re_xxxxxxxxx");
let _email = resend.receiving.list(ListOptions::default()).await?;
Ok(())
}
```
```java Java theme={"theme":{"light":"github-light","dark":"vesper"}}
import com.resend.*;
public class Main {
public static void main(String[] args) {
Resend resend = new Resend("re_xxxxxxxxx");
ListReceivedEmailsResponse response = resend.receiving().list();
}
}
```
```csharp .NET theme={"theme":{"light":"github-light","dark":"vesper"}}
using Resend;
IResend resend = ResendClient.Create( "re_xxxxxxxxx" ); // Or from DI
var resp = await resend.ReceivedEmailListAsync();
Console.WriteLine( "Nr Received={0}", resp.Content.Data.Count );
```
```bash cURL theme={"theme":{"light":"github-light","dark":"vesper"}}
curl -X GET 'https://api.resend.com/emails/receiving' \
-H 'Authorization: Bearer re_xxxxxxxxx'
```
```json Response theme={"theme":{"light":"github-light","dark":"vesper"}}
{
"object": "list",
"has_more": true,
"data": [
{
"id": "a39999a6-88e3-48b1-888b-beaabcde1b33",
"to": ["recipient@example.com"],
"from": "sender@example.com",
"created_at": "2025-10-09 14:37:40.951732+00",
"subject": "Hello World",
"bcc": [],
"cc": [],
"reply_to": [],
"message_id": "<111-222-333@email.provider.example.com>",
"attachments": [
{
"filename": "example.txt",
"content_type": "text/plain",
"content_id": null,
"content_disposition": "attachment",
"id": "47e999c7-c89c-4999-bf32-aaaaa1c3ff21",
"size": 13
}
]
}
]
}
```
---
# Source: https://resend.com/docs/api-reference/segments/list-segments.md
> ## Documentation Index
> Fetch the complete documentation index at: https://resend.com/docs/llms.txt
> Use this file to discover all available pages before exploring further.
# List Segments
> Retrieve a list of segments.
export const QueryParams = ({type, isRequired}) => {
return <>
Query Parameters
{isRequired ?
Number of {type} to retrieve.
Default value: 20
Maximum value: 100
Minimum value: 1
: <>
Note that the limit parameter is optional. If
you do not provide a limit, all {type} will be returned
in a single response.
Number of {type} to retrieve.
Maximum value: 100
Minimum value: 1
}
The ID after which we'll retrieve more {type} (for pagination).
This ID will not be included in the returned list. Cannot be
used with the
before parameter.
The ID before which we'll retrieve more {type} (for
pagination). This ID will not be included in the returned list.
Cannot be used with the after parameter.
You can only use either after or before{' '}
parameter, not both. See our{' '}
pagination guide for more
information.
;
};
```ts Node.js theme={"theme":{"light":"github-light","dark":"vesper"}}
import { Resend } from 'resend';
const resend = new Resend('re_xxxxxxxxx');
const { data, error } = await resend.segments.list();
```
```php PHP theme={"theme":{"light":"github-light","dark":"vesper"}}
$resend = Resend::client('re_xxxxxxxxx');
$resend->segments->list();
```
```python Python theme={"theme":{"light":"github-light","dark":"vesper"}}
import resend
resend.api_key = 're_xxxxxxxxx'
segments = resend.Segments.list()
```
```ruby Ruby theme={"theme":{"light":"github-light","dark":"vesper"}}
require "resend"
Resend.api_key = "re_xxxxxxxxx"
segments = Resend::Segments.list
```
```go Go theme={"theme":{"light":"github-light","dark":"vesper"}}
package main
import (
"context"
"fmt"
"github.com/resend/resend-go/v3"
)
func main() {
ctx := context.TODO()
client := resend.NewClient("re_xxxxxxxxx")
segments, err := client.Segments.ListWithContext(ctx)
if err != nil {
panic(err)
}
fmt.Println(segments)
}
```
```rust Rust theme={"theme":{"light":"github-light","dark":"vesper"}}
use resend_rs::{list_opts::ListOptions, Resend, Result};
#[tokio::main]
async fn main() -> Result<()> {
let resend = Resend::new("re_xxxxxxxxx");
let _segments = resend.segments.list(ListOptions::default()).await?;
Ok(())
}
```
```java Java theme={"theme":{"light":"github-light","dark":"vesper"}}
import com.resend.*;
public class Main {
public static void main(String[] args) {
Resend resend = new Resend("re_xxxxxxxxx");
ListSegmentsResponseSuccess response = resend.segments().list();
}
}
```
```csharp .NET theme={"theme":{"light":"github-light","dark":"vesper"}}
using Resend;
IResend resend = ResendClient.Create( "re_xxxxxxxxx" ); // Or from DI
var resp = await resend.SegmentListAsync();
Console.WriteLine( "Nr Segments={0}", resp.Content.Data.Count );
```
```bash cURL theme={"theme":{"light":"github-light","dark":"vesper"}}
curl -X GET 'https://api.resend.com/segments' \
-H 'Authorization: Bearer re_xxxxxxxxx'
```
```json Response theme={"theme":{"light":"github-light","dark":"vesper"}}
{
"object": "list",
"has_more": false,
"data": [
{
"id": "78261eea-8f8b-4381-83c6-79fa7120f1cf",
"name": "Registered Users",
"created_at": "2023-10-06T22:59:55.977Z"
}
]
}
```
---
# Source: https://resend.com/docs/api-reference/templates/list-templates.md
> ## Documentation Index
> Fetch the complete documentation index at: https://resend.com/docs/llms.txt
> Use this file to discover all available pages before exploring further.
# List Templates
> List all templates.
export const QueryParams = ({type, isRequired}) => {
return <>
Query Parameters
{isRequired ?
Number of {type} to retrieve.
Default value: 20
Maximum value: 100
Minimum value: 1
: <>
Note that the limit parameter is optional. If
you do not provide a limit, all {type} will be returned
in a single response.
Number of {type} to retrieve.
Maximum value: 100
Minimum value: 1
}
The ID after which we'll retrieve more {type} (for pagination).
This ID will not be included in the returned list. Cannot be
used with the
before parameter.
The ID before which we'll retrieve more {type} (for
pagination). This ID will not be included in the returned list.
Cannot be used with the after parameter.
You can only use either after or before{' '}
parameter, not both. See our{' '}
pagination guide for more
information.
;
};
By default, the API will return the most recent 20 templates. You can optionally use the `limit` parameter to return a different number of templates or control the pagination of the results with the `after` or `before` parameters.
```ts Node.js theme={"theme":{"light":"github-light","dark":"vesper"}}
import { Resend } from 'resend';
const resend = new Resend('re_xxxxxxxxx');
const { data, error } = await resend.templates.list({
limit: 2,
after: '34a080c9-b17d-4187-ad80-5af20266e535',
});
```
```php PHP theme={"theme":{"light":"github-light","dark":"vesper"}}
$resend = Resend::client('re_xxxxxxxxx');
$resend->templates->list([
'limit' => 2,
'after' => '34a080c9-b17d-4187-ad80-5af20266e535'
]);
```
```py Python theme={"theme":{"light":"github-light","dark":"vesper"}}
import resend
resend.api_key = "re_xxxxxxxxx"
resend.Templates.list({
"limit": 2,
"after": "34a080c9-b17d-4187-ad80-5af20266e535",
})
```
```ruby Ruby theme={"theme":{"light":"github-light","dark":"vesper"}}
require "resend"
Resend.api_key = "re_xxxxxxxxx"
Resend::Templates.list(
limit: 2,
after: "34a080c9-b17d-4187-ad80-5af20266e535"
)
```
```go Go theme={"theme":{"light":"github-light","dark":"vesper"}}
import (
"context"
"github.com/resend/resend-go/v3"
)
func main() {
client := resend.NewClient("re_xxxxxxxxx")
client.Templates.ListWithContext(context.TODO(), &resend.ListOptions{
Limit: 2,
After: "34a080c9-b17d-4187-ad80-5af20266e535",
})
}
```
```rust Rust theme={"theme":{"light":"github-light","dark":"vesper"}}
use resend_rs::{list_opts::ListOptions, Resend, Result};
#[tokio::main]
async fn main() -> Result<()> {
let resend = Resend::new("re_xxxxxxxxx");
let list_opts = ListOptions::default()
.with_limit(2)
.list_after("34a080c9-b17d-4187-ad80-5af20266e535");
let _list = resend.templates.list(list_opts).await?;
Ok(())
}
```
```java Java theme={"theme":{"light":"github-light","dark":"vesper"}}
import com.resend.*;
public class Main {
public static void main(String[] args) {
Resend resend = new Resend("re_xxxxxxxxx");
ListParams params = ListParams.builder()
.limit(2)
.after("34a080c9-b17d-4187-ad80-5af20266e535")
.build();
ListTemplatesResponseSuccess data = resend.templates().list(params);
}
}
```
```csharp .NET theme={"theme":{"light":"github-light","dark":"vesper"}}
using Resend;
IResend resend = ResendClient.Create( "re_xxxxxxxxx" ); // Or from DI
var resp = await resend.TemplateListAsync();
Console.WriteLine( "Nr Templates={0}", resp.Content.Data.Count );
```
```bash cURL theme={"theme":{"light":"github-light","dark":"vesper"}}
curl -X GET 'https://api.resend.com/templates?limit=2&after=34a080c9-b17d-4187-ad80-5af20266e535' \
-H 'Authorization: Bearer re_xxxxxxxxx' \
-H 'Content-Type: application/json'
```
```json Response theme={"theme":{"light":"github-light","dark":"vesper"}}
{
"object": "list",
"data": [
{
"id": "e169aa45-1ecf-4183-9955-b1499d5701d3",
"name": "reset-password",
"status": "draft",
"published_at": null,
"created_at": "2023-10-06T23:47:56.678Z",
"updated_at": "2023-10-06T23:47:56.678Z",
"alias": "reset-password"
},
{
"id": "b7f9c2e1-1234-4abc-9def-567890abcdef",
"name": "welcome-message",
"status": "published",
"published_at": "2023-10-06T23:47:56.678Z",
"created_at": "2023-10-06T23:47:56.678Z",
"updated_at": "2023-10-06T23:47:56.678Z",
"alias": "welcome-message"
}
],
"has_more": false
}
```
---
# Source: https://resend.com/docs/api-reference/topics/list-topics.md
> ## Documentation Index
> Fetch the complete documentation index at: https://resend.com/docs/llms.txt
> Use this file to discover all available pages before exploring further.
# List Topics
> Retrieve a list of topics for the authenticated user.
export const QueryParams = ({type, isRequired}) => {
return <>
Query Parameters
{isRequired ?
Number of {type} to retrieve.
Default value: 20
Maximum value: 100
Minimum value: 1
: <>
Note that the limit parameter is optional. If
you do not provide a limit, all {type} will be returned
in a single response.
Number of {type} to retrieve.
Maximum value: 100
Minimum value: 1
}
The ID after which we'll retrieve more {type} (for pagination).
This ID will not be included in the returned list. Cannot be
used with the
before parameter.
The ID before which we'll retrieve more {type} (for
pagination). This ID will not be included in the returned list.
Cannot be used with the after parameter.
You can only use either after or before{' '}
parameter, not both. See our{' '}
pagination guide for more
information.
;
};
```ts Node.js theme={"theme":{"light":"github-light","dark":"vesper"}}
import { Resend } from 'resend';
const resend = new Resend('re_xxxxxxxxx');
const { data, error } = await resend.topics.list();
```
```php PHP theme={"theme":{"light":"github-light","dark":"vesper"}}
$resend = Resend::client('re_xxxxxxxxx');
$resend->topics->list();
```
```python Python theme={"theme":{"light":"github-light","dark":"vesper"}}
import resend
resend.api_key = "re_xxxxxxxxx"
resend.Topics.list()
```
```ruby Ruby theme={"theme":{"light":"github-light","dark":"vesper"}}
require "resend"
Resend.api_key = "re_xxxxxxxxx"
Resend::Topics.list()
```
```go Go theme={"theme":{"light":"github-light","dark":"vesper"}}
import (
"context"
"github.com/resend/resend-go/v3"
)
func main() {
client := resend.NewClient("re_xxxxxxxxx")
client.Topics.ListWithContext(context.TODO(), nil)
}
```
```rust Rust theme={"theme":{"light":"github-light","dark":"vesper"}}
use resend_rs::{list_opts::ListOptions, Resend, Result};
#[tokio::main]
async fn main() -> Result<()> {
let resend = Resend::new("re_xxxxxxxxx");
let _list = resend.topics.list(ListOptions::default()).await?;
Ok(())
}
```
```java Java theme={"theme":{"light":"github-light","dark":"vesper"}}
import com.resend.*;
public class Main {
public static void main(String[] args) {
Resend resend = new Resend("re_xxxxxxxxx");
ListTopicsResponseSuccess response = resend.topics().list();
}
}
```
```csharp .NET theme={"theme":{"light":"github-light","dark":"vesper"}}
using Resend;
IResend resend = ResendClient.Create( "re_xxxxxxxxx" ); // Or from DI
var resp = await resend.TopicListAsync();
Console.WriteLine( "Nr Topics={0}", resp.Content.Data.Count );
```
```bash cURL theme={"theme":{"light":"github-light","dark":"vesper"}}
curl -X GET 'https://api.resend.com/topics' \
-H 'Authorization: Bearer re_xxxxxxxxx'
```
```json Response theme={"theme":{"light":"github-light","dark":"vesper"}}
{
"object": "list",
"has_more": false,
"data": [
{
"id": "b6d24b8e-af0b-4c3c-be0c-359bbd97381e",
"name": "Weekly Newsletter",
"description": "Weekly newsletter for our subscribers",
"default_subscription": "opt_in",
"visibility": "public",
"created_at": "2023-04-08T00:11:13.110779+00:00"
}
]
}
```
---
# Source: https://resend.com/docs/api-reference/webhooks/list-webhooks.md
> ## Documentation Index
> Fetch the complete documentation index at: https://resend.com/docs/llms.txt
> Use this file to discover all available pages before exploring further.
# List Webhooks
> Retrieve a list of webhooks for the authenticated user.
export const QueryParams = ({type, isRequired}) => {
return <>
Query Parameters
{isRequired ?
Number of {type} to retrieve.
Default value: 20
Maximum value: 100
Minimum value: 1
: <>
Note that the limit parameter is optional. If
you do not provide a limit, all {type} will be returned
in a single response.
Number of {type} to retrieve.
Maximum value: 100
Minimum value: 1
}
The ID after which we'll retrieve more {type} (for pagination).
This ID will not be included in the returned list. Cannot be
used with the
before parameter.
The ID before which we'll retrieve more {type} (for
pagination). This ID will not be included in the returned list.
Cannot be used with the after parameter.
You can only use either after or before{' '}
parameter, not both. See our{' '}
pagination guide for more
information.
;
};
```ts Node.js theme={"theme":{"light":"github-light","dark":"vesper"}}
import { Resend } from 'resend';
const resend = new Resend('re_xxxxxxxxx');
const { data, error } = await resend.webhooks.list();
```
```php PHP theme={"theme":{"light":"github-light","dark":"vesper"}}
$resend = Resend::client('re_xxxxxxxxx');
$resend->webhooks->list();
```
```python Python theme={"theme":{"light":"github-light","dark":"vesper"}}
import resend
resend.api_key = 're_xxxxxxxxx'
webhooks = resend.Webhooks.list()
```
```ruby Ruby theme={"theme":{"light":"github-light","dark":"vesper"}}
require 'resend'
Resend.api_key = 're_xxxxxxxxx'
webhooks = Resend::Webhooks.list
```
```go Go theme={"theme":{"light":"github-light","dark":"vesper"}}
package main
import "github.com/resend/resend-go/v3"
func main() {
client := resend.NewClient("re_xxxxxxxxx")
client.Webhooks.List()
}
```
```rust Rust theme={"theme":{"light":"github-light","dark":"vesper"}}
use resend_rs::{list_opts::ListOptions, Resend, Result};
#[tokio::main]
async fn main() -> Result<()> {
let resend = Resend::new("re_xxxxxxxxx");
let _webhooks = resend.webhooks.list(ListOptions::default()).await?;
Ok(())
}
```
```java Java theme={"theme":{"light":"github-light","dark":"vesper"}}
import com.resend.*;
public class Main {
public static void main(String[] args) {
Resend resend = new Resend("re_xxxxxxxxx");
ListWebhooksResponseSuccess response = resend.webhooks().list();
}
}
```
```csharp .NET theme={"theme":{"light":"github-light","dark":"vesper"}}
using Resend;
IResend resend = ResendClient.Create( "re_xxxxxxxxx" ); // Or from DI
var resp = await resend.WebhookListAsync();
Console.WriteLine( "Nr Webhooks={0}", resp.Content.Data.Count );
```
```bash cURL theme={"theme":{"light":"github-light","dark":"vesper"}}
curl -X GET 'https://api.resend.com/webhooks' \
-H 'Authorization: Bearer re_xxxxxxxxx'
```
```json Response theme={"theme":{"light":"github-light","dark":"vesper"}}
{
"object": "list",
"has_more": false,
"data": [
{
"id": "7ab123cd-ef45-6789-abcd-ef0123456789",
"created_at": "2023-09-10T10:15:30.000Z",
"status": "disabled",
"endpoint": "https://first-webhook.example.com/handler",
"events": ["email.sent"]
},
{
"id": "4dd369bc-aa82-4ff3-97de-514ae3000ee0",
"created_at": "2023-08-22T15:28:00.000Z",
"status": "enabled",
"endpoint": "https://second-webhook.example.com/receive",
"events": ["email.received"]
}
]
}
```
---
# Source: https://resend.com/docs/knowledge-base/lovable-integration.md
> ## Documentation Index
> Fetch the complete documentation index at: https://resend.com/docs/llms.txt
> Use this file to discover all available pages before exploring further.
# Send emails with Lovable and Resend
> Learn how to add the Resend integration to your Lovable project.
export const YouTube = ({id}) => {
return ;
};
[Lovable](https://lovable.dev) is a platform for building web sites, tools, apps, and projects via chat. You can add Resend in a Lovable project by asking the chat to add email sending with Resend.
If you prefer to watch a video, check out our video walkthrough below.
## 1. Add your Resend API key
To use Resend with Lovable, you'll need to add a Resend API key, which you can create in the [Resend Dashboard](https://resend.com/api-keys). Do not share your API key with others or expose it in the browser or other client-side code.
Lovable may integrate Resend in a few different ways:
* Use the Supabase integration to store the API key **(highly recommended)**
* Ask users to provide their own API key
* Add the API key directly in the code
You may need to prompt Lovable to store the API key for Resend using Supabase. Clicking **Add API key** will open a modal where you can add the API key.
At the time of writing, Lovable does not securely handle API keys
independently. Instead, it uses the [Supabase integration to store
secrets](https://docs.lovable.dev/integrations/supabase#storing-secrets-api-keys-%26-config).
## 2. Add a custom domain to your Resend account
By default, you can only send emails to your own email address.
To send emails to other email addresses:
1. Add a [custom domain to your Resend account](https://resend.com/domains).
2. Add the custom domain to the `from` field in the `resend` function in Lovable (or ask the chat to update these fields).
Get more help adding a custom domain in [Resend's documentation](/dashboard/domains/introduction).
---
# Source: https://resend.com/docs/dashboard/audiences/managing-unsubscribe-list.md
> ## Documentation Index
> Fetch the complete documentation index at: https://resend.com/docs/llms.txt
> Use this file to discover all available pages before exploring further.
# Managing Unsubscribed Contacts
> Learn how to check and remove recipients who have unsubscribed to your marketing emails.
It's essential to update your Contact list when someone unsubscribes to maintain a good sender reputation.
Benefits of managing your unsubscribe list:
* reduces the likelihood of your emails being marked as spam
* improves deliverability for any other marketing or transactional emails you send
When you include an [an unsubscribe link in your Broadcasts](/dashboard/segments/introduction#automatic-unsubscribes), Resend will automatically handle the unsubscribe flow for you.
## Unsubscribe Statuses
The Contacts page shows the global unsubscribe status of each Contact.
* **Unsubscribed**: the Contact has unsubscribed from all emails from your account.
* **Subscribed**: the Contact is subscribed to at least one Topic.
To filter by Status, click on the **All Statuses** filter next to the search bar, then select a value.
## Topic Subscription Statuses
You can view the subscription status of each Topic for a given Contact by clicking on the Contact's row.
* **Subscribed**: the global subscription status for the Contact.
* **Topics**: the list of Topics the Contact is subscribed to.
You can also check a Contact's Topic subscription status [via the API or SDKs](/api-reference/contacts/get-contact-topics).
## Updating a Topic Subscription for a Contact
You can update a Topic subscription for a Contact by clicking the **Edit** button in the Topic's row.
You can also update a Topic subscription for a Contact [via the API or SDKs](/api-reference/contacts/update-contact-topics).
### Bulk Subscribe to Topics
You can subscribe multiple Contacts to Topics at once:
1. Go to the [Contacts](https://resend.com/audience) page.
2. Select multiple Contacts by clicking the checkbox next to each Contact.
3. Click the **Edit** button in the bulk actions bar.
4. Select **Subscribe to topics**.
5. Choose the Topics you want to subscribe the Contacts to.
6. Click **Subscribe**.
Learn more about [bulk actions for Contacts](/dashboard/audiences/contacts#bulk-actions).
---
# Source: https://resend.com/docs/knowledge-base/mcp-server.md
> ## Documentation Index
> Fetch the complete documentation index at: https://resend.com/docs/llms.txt
> Use this file to discover all available pages before exploring further.
# MCP Server
> Learn how to use the MCP Server to send emails.
export const YouTube = ({id}) => {
return ;
};
## What is an MCP Server?
MCP is an open protocol that standardizes how applications provide context to LLMs. Among other benefits, it provides LLMs tools to act on your behalf.
If you prefer to watch a video, check out our video walkthrough below.
## What can Resend's MCP Server do?
Currently, Resend's MCP Server is a simple server you must build locally that can send emails using Resend's API on your behalf.
* Send plain text and HTML emails
* Schedule emails for future delivery
* Add CC and BCC recipients
* Configure reply-to addresses
* Customizable sender email (requires verification)
As an example, you could use this to run local scripts, chat with Claude, or process data and send the results to yourself or your team.
## How to use Resend's MCP Server
Build the project locally to use this MCP server to use it in a [supported MCP client](#mcp-client-integrations).
```bash theme={"theme":{"light":"github-light","dark":"vesper"}}
git clone https://github.com/resend/mcp-send-email.git
```
```
npm install
npm run build
```
1. [Create an API Key](https://resend.com/api-keys): copy this key to your clipboard
2. [Verify your own domain](https://resend.com/domains): to send to email addresses other than your own
## MCP Client Integrations
With the MCP server built, you can now add it to a supported MCP client.
### Cursor
Open the command palette (`cmd`+`shift`+`p` on macOS or `ctrl`+`shift`+`p` on Windows) and choose **Cursor Settings**.
Select **MCP** from the left sidebar and click **Add new global MCP server** and add the following config:
```json theme={"theme":{"light":"github-light","dark":"vesper"}}
{
"mcpServers": {
"resend": {
"type": "command",
"command": "node ABSOLUTE_PATH_TO_MCP_SEND_EMAIL_PROJECT/build/index.js --key=YOUR_RESEND_API_KEY"
}
}
}
```
You can get the absolute path to your build script by right-clicking on the `/build/index.js` file in Cursor and selecting `Copy Path`.
**Possible arguments**
* `--key`: Your Resend API key (required)
* `--sender`: Your sender email address from a verified domain (optional)
* `--reply-to`: Your reply-to email address (optional)
If you don't provide a sender email address, the MCP server will ask you to
provide one each time you call the tool.
Adding the MCP server to Cursor's global settings will let you send emails from any project on your machine using Cursor's Agent mode.
Test sending emails by going to `email.md` in the cloned project.
* Replace the to: email address with your own
* Select all text in `email.md`, and press `cmd+l`
* Tell cursor to "send this as an email" in the chat (make sure cursor is in Agent mode by selecting "Agent" on lower left side dropdown).
### Claude Desktop
Open Claude Desktop settings and navigate to the "Developer" tab. Click `Edit Config`.
Add the following config:
```json theme={"theme":{"light":"github-light","dark":"vesper"}}
{
"mcpServers": {
"resend": {
"command": "node",
"args": ["ABSOLUTE_PATH_TO_MCP_SEND_EMAIL_PROJECT/build/index.js"],
"env": {
"RESEND_API_KEY": "YOUR_RESEND_API_KEY"
}
}
}
}
```
You can get the absolute path to your build script by right-clicking on the `/build/index.js` file in your IDE and selecting `Copy Path`.
**Possible environment variables**
* `RESEND_API_KEY`: Your Resend API key (required)
* `SENDER_EMAIL_ADDRESS`: Your sender email address from a verified domain (optional)
* `REPLY_TO_EMAIL_ADDRESS`: Your reply-to email address (optional)
If you don't provide a sender email address, the MCP server will ask you to
provide one each time you call the tool.
Close and reopen Claude Desktop. Verify that the `resend` tool is available in the Claude developer settings.
Chat with Claude and tell it to send you an email using the `resend` tool.
---
# Source: https://resend.com/docs/dashboard/segments/migrating-from-audiences-to-segments.md
> ## Documentation Index
> Fetch the complete documentation index at: https://resend.com/docs/llms.txt
> Use this file to discover all available pages before exploring further.
# Migrating from Audiences to Segments
> Learn how to migrate from Audiences to Segments
We've recently changed how Contacts are segmented. Before, each Contact was part of one Audience and if you created another contact with the same email address in a different Audience, it would be a completely separate object.
In the new model, Contacts are now independent of Audiences, which are now called Segments. A Contact can be in zero, one or multiple Segments and still count as one when calculating your quota usage.
Contacts API endpoints that previously required an `audience_id` can now be used directly instead.
## What's changing?
We're moving to a **Global Contacts** model.
* **Before**: If a Contact with the same email appeared in multiple Segments, it was counted as multiple Contacts.
* **Now**: Each email address is treated as a single Contact across your team, even if it appears in multiple Segments.
The new model offers three concepts:
* **Contact**: a global entity linked to a specific email address.
* **Segment**: an internal segmentation tool for your team to organize sending.
* **Topic**: a user-facing tool for managing email preferences.
## Unsubscribing
Previously, when a contact clicked "unsubscribe," their contact status were marked was "Unsubscribed" only from the specific Audience used in that Broadcast.
From now on, contacts will see a preference page where they can:
* Unsubscribe from certain **Topics** (email's preference).
* Or unsubscribe from **everything** you send (update contact status).
## What you should do
If you've been using Audiences for both segmentation and unsubscribes, we recommend switching your unsubscribe logic to **Topics**:
1. Create a Topic for each type of email you send.
2. Assign the right users to each Topic.
3. Use Segments purely for your internal organization.
With this setup, when you send a Broadcast, your users can choose which Topics to unsubscribe from—or opt out completely.
For details on the new API endpoints view:
* [Contacts](/api-reference/contacts/create-contact)
* [Topics](/api-reference/topics/create-topic)
* [Segments](/api-reference/segments/create-segment)
## How can we help?
If you have a use case not covered here, [please reach out](https://resend.com/help). We'll make sure your transition is smooth.
---
# Source: https://resend.com/docs/knowledge-base/namecheap.md
> ## Documentation Index
> Fetch the complete documentation index at: https://resend.com/docs/llms.txt
> Use this file to discover all available pages before exploring further.
# Namecheap
> Verify your domain on Namecheap with Resend.
## Add Domain to Resend
First, log in to your [Resend Account](https://resend.com/login) and [add a domain](https://resend.com/domains).
It is [best practice to use a
subdomain](/knowledge-base/is-it-better-to-send-emails-from-a-subdomain-or-the-root-domain)
(updates.example.com) instead of the root domain (example.com). Using a
subdomain allows for proper reputation segmentation based on topics or purpose
(e.g. marketing) and is especially important if receiving emails with Resend.
## Log in to Namecheap
1. Log in to your [Namecheap account](https://ap.www.namecheap.com).
2. Click `Manage` for the domain.
You may need to expand a dropdown to see the `Manage` button.
3. Go to the `Advanced DNS` page for the domain you want to verify.
## Add MX SPF Record
If you are changing the MX configuration from `Gmail` to `Custom MX`, you need
to [setup new MX records for
Gmail](https://support.google.com/a/answer/174125). If you don't setup new
records, receiving mail in your gmail inboxes will stop.
Under the `Mail Settings` section, click the dropdown and select `Custom MX`:
1. Type `send` for the `Host` of the record.
2. Copy the MX Value from Resend into the `Value` field.
3. Use the `Automatic` TTL.
4. Select `Save all changes`.
Below is a mapping of the record fields from Resend to Namecheap:
| Namecheap | Resend | Example Value |
| --------- | -------- | --------------------------------------- |
| Type | Type | `MX Record` |
| Host | Name | `send` |
| TTL | TTL | `Automatic` |
| Value | Value | `feedback-smtp.us-east-1.amazonses.com` |
| - | Priority | `10` |
Omit your domain from the record values in Resend when you paste. Instead of
`send.example.com`, paste only `send` (or `send.subdomain` if you're using a
subdomain).
Namecheap does not label the `priority` column. It is the empty column after
`Value`. Do not use the same priority for multiple records. If Priority `10`
is already in use, try a higher value `20` or `30`.
## Add TXT SPF Record
Under the `Host Records` section, click `Add New Record`:
1. Set the `Type` to `TXT Record`.
2. Enter `send` into the `Host` field.
3. Copy the TXT Value from Resend into the `Value` field.
4. Use the `Automatic` TTL.
5. Select `Save all changes`.
Below is a mapping of the record fields from Resend to Namecheap:
| Namecheap | Resend | Example Value |
| --------- | ------ | ------------------------------------- |
| Type | Type | `TXT Record` |
| Host | Name | `send` |
| TTL | TTL | `Automatic` |
| Value | Value | `"v=spf1 include:amazonses.com ~all"` |
Omit your domain from the record values in Resend when you paste. Instead of
`send.example.com`, paste only `send` (or `send.subdomain` if you're using a
subdomain).
## Add TXT DKIM Records
In that same `Host Records` section, click `Add New Record`.
1. Set the `Type` to `TXT Record`.
2. Enter `resend._domainkey` into the `Host` field.
3. Copy the TXT Value from Resend into the `Value` field.
4. Use the `Automatic` TTL.
5. Select `Save all changes`.
Below is a mapping of the record fields from Resend to Namecheap:
| Namecheap | Resend | Example Value |
| --------- | ------ | ---------------------------- |
| Type | Type | `TXT Record` |
| Host | Name | `resend._domainkey` |
| TTL | TTL | `Automatic` |
| Value | Value | `p=example_demain_key_value` |
Omit your domain from the record values in Resend when you paste. Instead of
`resend._domainkey.example.com`, paste only `resend._domainkey` (or
`resend._domainkey.subdomain` if you're using a subdomain).
## Receiving Emails
If you want to receive emails at your domain, toggle the "Receiving" switch on the domain details page.
When you enable Inbound on a domain, Resend receives *all emails* sent to that
specific domain depending on the priority of the MX record. For this reason,
we strongly recommend verifying a subdomain (`subdomain.example.com`) instead
of the root domain (`example.com`). Learn more about [avoiding conflicts with
your existing MX
records](/knowledge-base/how-do-i-avoid-conflicting-with-my-mx-records).
Under the `Mail Settings` section, click the dropdown and select `Custom MX`:
1. Type `inbound` (or whatever your subdomain is) for the `Host` of the record.
2. Copy the MX Value from Resend into the `Value` field.
3. Use the `Automatic` TTL.
4. Select `Save all changes`.
Below is a mapping of the record fields from Resend to Namecheap:
| Namecheap | Resend | Example Value |
| --------- | -------- | -------------------------------------- |
| Type | Type | `MX Record` |
| Host | Name | `inbound` |
| TTL | TTL | `Automatic` |
| Value | Content | `inbound-smtp.us-east-1.amazonaws.com` |
| - | Priority | `10` |
After verifying your domain, create a webhook to process incoming emails. For help setting up a webhook, how to access email data and attachments, forward emails, and more, see [our guide on receiving emails with Resend](/dashboard/receiving/introduction).
## Complete Verification
Now click [Verify DNS Records](https://resend.com/domains) on your Domain in Resend. It may take up to 72 hours to complete the verification process (often much faster).
## Troubleshooting
If your domain is not successfully verified, these are some common troubleshooting methods.
Review the records you added to Namecheap to rule out copy and paste errors.
[Review our guide on a domain not verifying](/knowledge-base/what-if-my-domain-is-not-verifying).
---
# Source: https://resend.com/docs/webhooks/emails/opened.md
> ## Documentation Index
> Fetch the complete documentation index at: https://resend.com/docs/llms.txt
> Use this file to discover all available pages before exploring further.
# email.opened
> Received when an email is opened.
export const ResponseBodyParameters = ({type, children}) => {
return
Response Body Parameters
All webhook payloads follow a consistent top-level structure with
event-specific data nested within the data object.
The event type that triggered the webhook (e.g., {type}).
ISO 8601 timestamp when the webhook event was created.
Event-specific data containing detailed information about the event. The
data object for the {type} event contains the following
parameters:
{children}
;
};
Event triggered whenever the **recipient opened the email**.
Unique identifier for the broadcast campaign (if applicable)
ISO 8601 timestamp when the email was created
Unique identifier for the specific email
Sender email address and name in the format "Name
\<[email@domain.com](mailto:email@domain.com)>"
Array of impacted recipient email addresses
Email subject line
Unique identifier for the template used (if applicable)
Array of tag objects associated with the email
The tag key
The tag value
```json theme={"theme":{"light":"github-light","dark":"vesper"}}
{
"type": "email.opened",
"created_at": "2024-02-22T23:41:12.126Z",
"data": {
"broadcast_id": "8b146471-e88e-4322-86af-016cd36fd216",
"created_at": "2024-02-22T23:41:11.894719+00:00",
"email_id": "56761188-7520-42d8-8898-ff6fc54ce618",
"from": "Acme ",
"to": ["delivered@resend.dev"],
"subject": "Sending this example",
"template_id": "43f68331-0622-4e15-8202-246a0388854b",
"tags": {
"category": "confirm_email"
}
}
}
```
---
# Source: https://resend.com/docs/api-reference/pagination.md
> ## Documentation Index
> Fetch the complete documentation index at: https://resend.com/docs/llms.txt
> Use this file to discover all available pages before exploring further.
# Pagination
> Learn how pagination works in the Resend API.
## Overview
Several Resend API endpoints support **cursor-based pagination** to help you efficiently browse through large datasets. You can safely navigate lists with guaranteed stability, even if new objects are created or deleted while you're still requesting pages.
Paginated endpoints responses include:
* `object`: always set to `list`.
* `has_more`: indicates whether there are more elements available.
* `data`: the list of returned items.
You can navigate through the results using the following parameters:
* `limit`: the number of items to return per page.
* `after`: the cursor to use to get the next page of results.
* `before`: the cursor to use to get the previous page of results.
Use the `id` of objects as the cursor for pagination. The cursor itself is *excluded* from the results. For an example, see [pagination strategies below](#strategies).
## Currently-supported endpoints
Existing list endpoints can optionally return paginated results:
* [List Domains](/api-reference/domains/list-domains)
* [List API Keys](/api-reference/api-keys/list-api-keys)
* [List Broadcasts](/api-reference/broadcasts/list-broadcasts)
* [List Segments](/api-reference/segments/list-segments)
* [List Contacts](/api-reference/contacts/list-contacts)
* [List Receiving Emails](/api-reference/emails/list-received-emails)
* [List Receiving Email Attachments](/api-reference/emails/list-received-email-attachments)
Note that for these endpoints, the `limit` parameter is optional. If you do
not provide a `limit`, all items will be returned in a single response.
Newer list endpoints always return paginated results:
* [List Emails](/api-reference/emails/list-emails)
* [List Templates](/api-reference/templates/list-templates)
* [List Topics](/api-reference/topics/list-topics)
## Parameters
All paginated endpoints support the following query parameters:
The number of items to return per page. Default is `20`, maximum is `100`, and
minimum is `1`.
The cursor after which to start retrieving items. To get the next page, use
the ID of the last item from the current page. This will return the page that
**starts after** the object with this ID (excluding the passed ID itself).
The cursor before which to start retrieving items. To get the previous page,
use the ID of the first item from the current page. This will return the page
that **ends before** the object with this ID (excluding the passed ID itself).
You can only use either `after` or `before`, not both simultaneously.
## Response Format
Paginated endpoints return responses in the following format:
```json Response Format theme={"theme":{"light":"github-light","dark":"vesper"}}
{
"object": "list",
"has_more": true,
"data": [
/* Array of resources */
]
}
```
Always set to `list` for paginated responses.
Indicates whether there are more items available beyond the current page.
An array containing the actual resources for the current page.
## Strategies
### Forward Pagination
To paginate forward through results (newer to older items), use the `after` parameter with the ID of the **last item** from the current page:
```ts Node.js theme={"theme":{"light":"github-light","dark":"vesper"}}
const resend = new Resend('re_xxxxxxxxx');
// First page
const { data: firstPage } = await resend.contacts.list({ limit: 50 });
// Second page (if has_more is true)
if (firstPage.has_more) {
const lastId = firstPage.data[firstPage.data.length - 1].id;
const { data: secondPage } = await resend.contacts.list({
limit: 50,
after: lastId,
});
}
```
```php PHP theme={"theme":{"light":"github-light","dark":"vesper"}}
$resend = Resend::client('re_xxxxxxxxx');
// First page
$firstPage = $resend->contacts->list(['limit' => 50]);
// Second page (if has_more is true)
if ($firstPage['has_more']) {
$lastId = end($firstPage['data'])['id'];
$secondPage = $resend->contacts->list([
'limit' => 50,
'after' => $lastId
]);
}
```
```python Python theme={"theme":{"light":"github-light","dark":"vesper"}}
import resend
resend.api_key = "re_xxxxxxxxx"
# First page
first_page = resend.Contacts.list(limit=50)
# Second page (if has_more is true)
if first_page['has_more']:
last_id = first_page['data'][-1]['id']
second_page = resend.Contacts.list(limit=50, after=last_id)
```
```ruby Ruby theme={"theme":{"light":"github-light","dark":"vesper"}}
Resend.api_key = "re_xxxxxxxxx"
# First page
first_page = Resend::Contacts.list(limit: 50)
# Second page (if has_more is true)
if first_page['has_more']
last_id = first_page['data'].last['id']
second_page = Resend::Contacts.list(limit: 50, after: last_id)
end
```
```go Go theme={"theme":{"light":"github-light","dark":"vesper"}}
package main
import "github.com/resend/resend-go/v3"
func main() {
client := resend.NewClient("re_xxxxxxxxx")
// First page
firstPage, err := client.Contacts.List(&resend.ListContactsRequest{
Limit: 50,
})
// Second page (if has_more is true)
if firstPage.HasMore {
lastId := firstPage.Data[len(firstPage.Data)-1].ID
client.Contacts.List(&resend.ListContactsRequest{
Limit: 50,
After: lastId,
})
}
}
```
```rust Rust theme={"theme":{"light":"github-light","dark":"vesper"}}
use resend_rs::{Resend, Result, types::ListContactOptions};
#[tokio::main]
async fn main() -> Result<()> {
let resend = Resend::new("re_xxxxxxxxx");
// First page
let list_opts = ListContactOptions::default().with_limit(50);
let first_page = resend.emails.list(list_opts).await?;
// Second page (if has_more is true)
if first_page.has_more {
let last_id = &first_page.data.last().unwrap().id;
let list_opts = ListContactOptions::default()
.with_limit(10)
.list_after(last_id);
let second_page = resend.contacts.list(list_opts).await?;
}
Ok(())
}
```
```java Java theme={"theme":{"light":"github-light","dark":"vesper"}}
import com.resend.*;
public class Main {
public static void main(String[] args) {
Resend resend = new Resend("re_xxxxxxxxx");
// First page
ListEmailsResponse firstPage = resend.emails().list(10);
// Second page (if has_more is true)
if (firstPage.getHasMore()) {
String lastId = firstPage.getData().get(firstPage.getData().size() - 1).getId();
ListContactsResponse secondPage = resend.contacts().list(50, lastId, null);
}
}
}
```
```csharp .NET theme={"theme":{"light":"github-light","dark":"vesper"}}
using Resend;
using System.Linq;
IResend resend = ResendClient.Create("re_xxxxxxxxx");
// First page
var firstPage = await resend.EmailListAsync( new PaginatedQuery() {
Limit = 50,
});
// Second page (if has_more is true)
if (firstPage.Content.HasMore)
{
var lastId = firstPage.Content.Data.Last().Id;
var secondPage = await resend.EmailListAsync( new PaginatedQuery() {
Limit = 50,
After = lastId.ToString(),
});
}
```
```bash cURL theme={"theme":{"light":"github-light","dark":"vesper"}}
# First page
curl -X GET 'https://api.resend.com/contacts?limit=50' \
-H 'Authorization: Bearer re_xxxxxxxxx'
# Second page
curl -X GET 'https://api.resend.com/contacts?limit=50&after=LAST_ID_FROM_PREVIOUS_PAGE' \
-H 'Authorization: Bearer re_xxxxxxxxx'
```
### Backward Pagination
To paginate backward through results (older to newer items), use the `before` parameter with the ID of the **first item** from the current page (or the most recent ID you have in your system):
```ts Node.js theme={"theme":{"light":"github-light","dark":"vesper"}}
const resend = new Resend('re_xxxxxxxxx');
// Start from a specific point and go backward
const page = await resend.contacts.list({
limit: 50,
before: 'some-contact-id',
});
if (page.data.has_more) {
const firstId = page.data.data[0].id;
const previousPage = await resend.contacts.list({
limit: 50,
before: firstId,
});
}
```
```php PHP theme={"theme":{"light":"github-light","dark":"vesper"}}
$resend = Resend::client('re_xxxxxxxxx');
// Start from a specific point and go backward
$page = $resend->contacts->list([
'limit' => 50,
'before' => 'some-contact-id'
]);
if ($page['has_more']) {
$firstId = $page['data'][0]['id'];
$previousPage = $resend->contacts->list([
'limit' => 50,
'before' => $firstId
]);
}
```
```python Python theme={"theme":{"light":"github-light","dark":"vesper"}}
import resend
resend.api_key = "re_xxxxxxxxx"
# Start from a specific point and go backward
page = resend.Contacts.list(limit=50, before="some-contact-id")
if page["has_more"]:
first_id = page["data"][0]["id"]
previous_page = resend.Contacts.list(limit=50, before=first_id)
```
```ruby Ruby theme={"theme":{"light":"github-light","dark":"vesper"}}
Resend.api_key = "re_xxxxxxxxx"
# Start from a specific point and go backward
page = Resend::Contacts.list(limit: 50, before: 'some-contact-id')
if page['has_more']
first_id = page['data'].first['id']
previous_page = Resend::Contacts.list(limit: 50, before: first_id)
end
```
```go Go theme={"theme":{"light":"github-light","dark":"vesper"}}
package main
import "github.com/resend/resend-go/v3"
func main() {
client := resend.NewClient("re_xxxxxxxxx")
// Start from a specific point and go backward
page, err := client.Contacts.List(&resend.ListContactsRequest{
Limit: resend.Int(50),
Before: resend.String("some-contact-id"),
})
if page.HasMore {
firstId := page.Data[0].ID
client.Contacts.List(&resend.ListContactsRequest{
Limit: resend.Int(50),
Before: resend.String(firstId),
})
}
}
```
```rust Rust theme={"theme":{"light":"github-light","dark":"vesper"}}
use resend_rs::{Resend, Result, types::ListContactOptions};
#[tokio::main]
async fn main() -> Result<()> {
let resend = Resend::new("re_xxxxxxxxx");
// Start from a specific point and go backward
let list_opts = ListContactOptions::default()
.with_limit(50)
.list_before("some-email-id");
let page = resend.contacts.list(list_opts).await?;
if page.has_more {
let first_id = &page.data.first().unwrap().id;
let list_opts = ListContactOptions::default()
.with_limit(10)
.list_before(first_id);
let previous_page = resend.contacts.list(list_opts).await?;
}
Ok(())
}
```
```java Java theme={"theme":{"light":"github-light","dark":"vesper"}}
import com.resend.*;
public class Main {
public static void main(String[] args) {
Resend resend = new Resend("re_xxxxxxxxx");
// Start from a specific point and go backward
ListContactsResponse page = resend.contacts().list(50, null, "some-contact-id");
if (page.getHasMore()) {
String firstId = page.getData().get(0).getId();
ListContactsResponse previousPage = resend.contacts().list(50, null, firstId);
}
}
}
```
```csharp .NET theme={"theme":{"light":"github-light","dark":"vesper"}}
using Resend;
using System.Linq;
IResend resend = ResendClient.Create("re_xxxxxxxxx");
// Start from a specific point and go backward
var page = await resend.EmailListAsync( new PaginatedQuery() {
Limit = 50,
Before = "some-email-id",
});
if (page.Content.HasMore)
{
var firstId = page.Content.Data.First().Id;
var prevPage = await resend.EmailListAsync( new PaginatedQuery() {
Limit = 50,
Before = firstId.ToString(),
});
}
```
```bash cURL theme={"theme":{"light":"github-light","dark":"vesper"}}
curl -X GET 'https://api.resend.com/contacts?limit=50&before=some-contact-id' \
-H 'Authorization: Bearer re_xxxxxxxxx'
```
## Best Practices
Choose a `limit` that balances performance and usability. Smaller pages are good for real-time applications, while larger pages
(hundreds of items) work better for bulk processing.
Always check the `has_more` field before attempting to fetch additional pages.
This prevents unnecessary API calls when you've reached the end of the
dataset.
Be mindful of API rate limits when paginating through large datasets.
Implement appropriate delays or batching strategies if processing many
pages.
## Error Handling
Pagination requests may return the following validation errors:
| Error | Description |
| ------------------ | --------------------------------------------------- |
| `validation_error` | Invalid cursor format or limit out of range (1-100) |
| `validation_error` | Both `before` and `after` parameters provided |
Example error response:
```json Error Response theme={"theme":{"light":"github-light","dark":"vesper"}}
{
"name": "validation_error",
"statusCode": 422,
"message": "The pagination limit must be a number between 1 and 100. See https://resend.com/docs/pagination for more information."
}
```
---
# Source: https://resend.com/docs/dashboard/broadcasts/performance-tracking.md
> ## Documentation Index
> Fetch the complete documentation index at: https://resend.com/docs/llms.txt
> Use this file to discover all available pages before exploring further.
# Performance Tracking
> Track your Broadcasts email performance in real-time
Once your broadcast is sent, you can track its performance right away. The insights you can view are emails delivered, unsubscribed, click rate, and open rate.
You can view these insights by clicking on [Broadcast](https://resend.com/broadcasts) in the left column, and then clicking on the Broadcast that you want to view.
Please note, at times, open rates can be inaccurate for a number of reasons due to the way inbox providers handle incoming emails. You can [read more about this here.](https://resend.com/docs/knowledge-base/why-are-my-open-rates-not-accurate)
---
# Source: https://resend.com/docs/knowledge-base/porkbun.md
> ## Documentation Index
> Fetch the complete documentation index at: https://resend.com/docs/llms.txt
> Use this file to discover all available pages before exploring further.
# Porkbun
> Verify your domain on Porkbun with Resend.
## Add Domain to Resend
First, log in to your [Resend Account](https://resend.com/login) and [add a domain](https://resend.com/domains).
It is [best practice to use a
subdomain](/knowledge-base/is-it-better-to-send-emails-from-a-subdomain-or-the-root-domain)
(updates.example.com) instead of the root domain (example.com). Using a
subdomain allows for proper reputation segmentation based on topics or purpose
(e.g. marketing) and is especially important if receiving emails with Resend.
## Log in to Porkbun
Log in to your [Porkbun account](https://porkbun.com/account/domainsSpeedy):
1. Select the `DNS` option under your domain to manage DNS records.
## Add MX SPF Record
In the `DNS` section on Porkbun copy and paste the values MX from Resend:
1. On the `Type` page, choose `MX`.
2. Type `send` for the `Host` of the record.
3. Copy the MX Value from Resend into the `Answer / Value` field.
4. Use the default TTL of `600`.
5. In the `Priority` field enter `10`.
6. Select `Add`.
Below is a mapping of the record fields from Resend to Porkbun:
| Porkbun | Resend | Example Value |
| -------------- | -------- | --------------------------------------- |
| Type | Type | `MX Record` |
| Host | Name | `send` |
| Answer / Value | Value | `feedback-smtp.us-east-1.amazonses.com` |
| TTL | TTL | `600` |
| Priority | Priority | `10` |
Do not use the same priority for multiple records. If Priority `10` is already
in use on another record, try a higher value `20` or `30`.
## Add TXT SPF Record
On the same section:
1. On the `Type` page, choose `TXT`.
2. Type `send` for the `Host` of the record.
3. Copy the TXT Value Resend into the `Answer / Value` field.
4. Use the default TTL of `600`.
5. Select `Add Record`.
Omit your domain from the record values in Resend when you paste. Instead of
`send.example.com`, paste only `send` (or `send.subdomain` if you're using a
subdomain).
Below is a mapping of the record fields from Resend to Porkbun:
| Porkbun | Resend | Example Value |
| -------------- | ------ | ------------------------------------- |
| Type | Type | `TXT Record` |
| Host | Name | `send` |
| Answer / Value | Value | `"v=spf1 include:amazonses.com ~all"` |
| TTL | TTL | `600` |
## Add TXT DKIM Records
On the same `Create Record` section:
1. On the `Type` page, choose `TXT`.
2. Type `resend._domainkey` for the `Host` of the record.
3. Copy the TXT Value Resend into the `Answer / Value` field.
4. Use the default TTL of `600`.
5. Select `Add Record`.
Omit your domain from the record values in Resend when you paste. Instead of
`resend._domainkey.example.com`, paste only `resend._domainkey` (or
`resend._domainkey.subdomain` if you're using a subdomain).
Below is a mapping of the record fields from Resend to Porkbun:
| Porkbun | Resend | Example Value |
| -------------- | ------ | ---------------------------- |
| Type | Type | `TXT Record` |
| Host | Name | `send` |
| Answer / Value | Value | `p=example_demain_key_value` |
| TTL | TTL | `600` |
## Receiving Emails
If you want to receive emails at your domain, toggle the "Receiving" switch on the domain details page.
When you enable Inbound on a domain, Resend receives *all emails* sent to that
specific domain depending on the priority of the MX record. For this reason,
we strongly recommend verifying a subdomain (`subdomain.example.com`) instead
of the root domain (`example.com`). Learn more about [avoiding conflicts with
your existing MX
records](/knowledge-base/how-do-i-avoid-conflicting-with-my-mx-records).
In the `DNS` section on Porkbun:
1. On the `Type` page, choose `MX`.
2. Type `inbound` (or whatever your subdomain is) for the `Host` of the record.
3. Copy the MX Value from Resend into the `Answer / Value` field.
4. Use the default TTL of `600`.
5. In the `Priority` field enter `10`.
6. Select `Add`.
Below is a mapping of the record fields from Resend to Porkbun:
| Porkbun | Resend | Example Value |
| -------------- | -------- | -------------------------------------- |
| Type | Type | `MX Record` |
| Host | Name | `inbound` |
| Answer / Value | Content | `inbound-smtp.us-east-1.amazonaws.com` |
| TTL | TTL | `600` |
| Priority | Priority | `10` |
After verifying your domain, create a webhook to process incoming emails. For help setting up a webhook, how to access email data and attachments, forward emails, and more, see [our guide on receiving emails with Resend](/dashboard/receiving/introduction).
## Complete Verification
Now click [Verify DNS Records](https://resend.com/domains) on your Domain in Resend. It may take a few hours to complete the verification process (often much faster).
## Troubleshooting
If your domain is not successfully verified, these are some common troubleshooting methods.
Review the records you added to Porkbun to rule out copy and paste errors.
[Review our guide on a domain not verifying](/knowledge-base/what-if-my-domain-is-not-verifying).
---
# Source: https://resend.com/docs/dashboard/audiences/properties.md
> ## Documentation Index
> Fetch the complete documentation index at: https://resend.com/docs/llms.txt
> Use this file to discover all available pages before exploring further.
# Contact Properties
> Learn how to work with Contact Properties with Resend.
Contact Properties can be used to store additional information about your Contacts and then personalize your Broadcasts.
Resend includes a few default properties:
* `first_name`: The first name of the contact.
* `last_name`: The last name of the contact.
* `unsubscribed`: Whether the contact is unsubscribed from all Broadcasts.
* `email`: The email address of the contact.
## Add Custom Contact Properties
You can create additional custom Contact Properties for your Contacts to store additional information. These properties can be used to personalize your Broadcasts across all Segments.
Each Contact Property has a key, a value, and optional fallback value.
* `key`: The key of the property (must be alphanumeric and underscore only, max `50` characters).
* `value`: The value of the property (may be a `string` or `number`).
* `fallback_value`: The fallback value of the property (must match the type of the property).
You can also create Contact Properties [via the API or SDKs](/api-reference/contact-properties/create-contact-property).
```ts Node.js theme={"theme":{"light":"github-light","dark":"vesper"}}
import { Resend } from 'resend';
const resend = new Resend('re_xxxxxxxxx');
const { data, error } = await resend.contactProperties.create({
key: 'company_name',
type: 'string',
fallbackValue: 'Acme Corp',
});
```
```php PHP theme={"theme":{"light":"github-light","dark":"vesper"}}
$resend = Resend::client('re_xxxxxxxxx');
$resend->contactProperties->create([
'key' => 'company_name',
'type' => 'string',
'fallback_value' => 'Acme Corp',
]);
```
```python Python theme={"theme":{"light":"github-light","dark":"vesper"}}
import resend
resend.api_key = 're_xxxxxxxxx'
params = {
"key": "company_name",
"type": "string",
"fallback_value": "Acme Corp",
}
contact_property = resend.ContactProperties.create(params)
```
```ruby Ruby theme={"theme":{"light":"github-light","dark":"vesper"}}
require "resend"
Resend.api_key = "re_xxxxxxxxx"
property = Resend::ContactProperties.create({
key: "company_name",
type: "string",
fallback_value: "Acme Corp"
})
```
```go Go theme={"theme":{"light":"github-light","dark":"vesper"}}
package main
import (
"context"
"fmt"
"github.com/resend/resend-go/v3"
)
func main() {
ctx := context.TODO()
apiKey := "re_xxxxxxxxx"
client := resend.NewClient(apiKey)
params := &resend.CreateContactPropertyRequest{
Key: "company_name",
Type: "string",
FallbackValue: "Acme Corp",
}
property, err := client.ContactProperties.CreateWithContext(ctx, params)
if err != nil {
panic(err)
}
fmt.Println(property)
}
```
```rust Rust theme={"theme":{"light":"github-light","dark":"vesper"}}
use resend_rs::{
types::{CreateContactPropertyOptions, PropertyType},
Resend, Result,
};
#[tokio::main]
async fn main() -> Result<()> {
let resend = Resend::new("re_xxxxxxxxx");
let contact_property = CreateContactPropertyOptions::new("company_name", PropertyType::String)
.with_fallback("Acme Corp");
let _contact_property = resend.contacts.create_property(contact_property).await?;
Ok(())
}
```
```java Java theme={"theme":{"light":"github-light","dark":"vesper"}}
import com.resend.*;
public class Main {
public static void main(String[] args) {
Resend resend = new Resend("re_xxxxxxxxx");
CreateContactPropertyOptions options = CreateContactPropertyOptions.builder()
.key("company_name")
.type("string")
.fallbackValue("Acme Corp")
.build();
resend.contactProperties().create(options);
}
}
```
```csharp .NET theme={"theme":{"light":"github-light","dark":"vesper"}}
using Resend;
IResend resend = ResendClient.Create( "re_xxxxxxxxx" ); // Or from DI
var resp = await resend.ContactPropCreateAsync( new ContactPropertyData() {
Key = "company_name",
PropertyType = ContactPropertyType.String,
DefaultValue = "Acme Corp",
} );
Console.WriteLine( "Prop Id={0}", resp.Content );
```
```bash cURL theme={"theme":{"light":"github-light","dark":"vesper"}}
curl -X POST 'https://api.resend.com/contact-properties' \
-H 'Authorization: Bearer re_xxxxxxxxx' \
-H 'Content-Type: application/json' \
-d $'{
"key": "company_name",
"type": "string",
"fallback_value": "Acme Corp"
}'
```
## Add Properties to a Contact
When you create a Contact Property you can provide a fallback value. This value will be used whenever you don't provide a custom value for a Contact.
To provide a custom value for a Contact, you can use the dashboard:
1. Go to the [Contacts](https://resend.com/audience) page.
2. Click the **more options** button and then **Edit Contact**.
3. Add the property key and value.
4. Click on the **Save** button.
You can also add properties to a Contact when you [create a Contact](/api-reference/contacts/create-contact).
```ts Node.js {10-12} theme={"theme":{"light":"github-light","dark":"vesper"}}
import { Resend } from 'resend';
const resend = new Resend('re_xxxxxxxxx');
const { data, error } = await resend.contacts.create({
email: 'steve.wozniak@gmail.com',
firstName: 'Steve',
lastName: 'Wozniak',
unsubscribed: false,
properties: {
company_name: 'Acme Corp',
},
});
```
```php PHP {9-11} theme={"theme":{"light":"github-light","dark":"vesper"}}
$resend = Resend::client('re_xxxxxxxxx');
$resend->contacts->create(
parameters: [
'email' => 'steve.wozniak@gmail.com',
'first_name' => 'Steve',
'last_name' => 'Wozniak',
'unsubscribed' => false,
'properties' => [
'company_name' => 'Acme Corp',
]
]
);
```
```python Python {10-12} theme={"theme":{"light":"github-light","dark":"vesper"}}
import resend
resend.api_key = "re_xxxxxxxxx"
params: resend.Contacts.CreateParams = {
"email": "steve.wozniak@gmail.com",
"first_name": "Steve",
"last_name": "Wozniak",
"unsubscribed": False,
"properties": {
"company_name": "Acme Corp"
}
}
resend.Contacts.create(params)
```
```ruby Ruby {10-12} theme={"theme":{"light":"github-light","dark":"vesper"}}
require "resend"
Resend.api_key = "re_xxxxxxxxx"
params = {
"email": "steve.wozniak@gmail.com",
"first_name": "Steve",
"last_name": "Wozniak",
"unsubscribed": false,
"properties": {
"company_name": "Acme Corp",
}
}
Resend::Contacts.create(params)
```
```go Go {10-12} theme={"theme":{"light":"github-light","dark":"vesper"}}
import "github.com/resend/resend-go/v3"
client := resend.NewClient("re_xxxxxxxxx")
params := &resend.CreateContactRequest{
Email: "steve.wozniak@gmail.com",
FirstName: "Steve",
LastName: "Wozniak",
Unsubscribed: false,
Properties: map[string]interface{} {
"company_name": "Acme Corp",
}
}
contact, err := client.Contacts.Create(params)
```
```rust Rust {11-12} theme={"theme":{"light":"github-light","dark":"vesper"}}
use resend_rs::{types::CreateContactOptions, Resend, Result};
#[tokio::main]
async fn main() -> Result<()> {
let resend = Resend::new("re_xxxxxxxxx");
let contact = CreateContactOptions::new("steve.wozniak@gmail.com")
.with_first_name("Steve")
.with_last_name("Wozniak")
.with_unsubscribed(false)
.with_properties(vec![("company_name".to_string(), "Acme Corp".to_string())]);
let _contact = resend.contacts.create(contact).await?;
Ok(())
}
```
```java Java {12-13} theme={"theme":{"light":"github-light","dark":"vesper"}}
import com.resend.*;
public class Main {
public static void main(String[] args) {
Resend resend = new Resend("re_xxxxxxxxx");
CreateContactOptions params = CreateContactOptions.builder()
.email("steve.wozniak@gmail.com")
.firstName("Steve")
.lastName("Wozniak")
.unsubscribed(false)
.properties(java.util.Map.of("company_name", "Acme Corp"))
.build();
CreateContactResponseSuccess data = resend.contacts().create(params);
}
}
```
```csharp .NET {12-14} theme={"theme":{"light":"github-light","dark":"vesper"}}
using Resend;
IResend resend = ResendClient.Create( "re_xxxxxxxxx" ); // Or from DI
var resp = await resend.ContactAddAsync(
new ContactData()
{
Email = "steve.wozniak@gmail.com",
FirstName = "Steve",
LastName = "Wozniak",
IsUnsubscribed = false,
Properties = new Dictionary {
{ "company_name", "Acme Corp" }
}
}
);
Console.WriteLine( "Contact Id={0}", resp.Content );
```
```bash cURL {9-11} theme={"theme":{"light":"github-light","dark":"vesper"}}
curl -X POST 'https://api.resend.com/contacts' \
-H 'Authorization: Bearer re_xxxxxxxxx' \
-H 'Content-Type: application/json' \
-d $'{
"email": "steve.wozniak@gmail.com",
"first_name": "Steve",
"last_name": "Wozniak",
"unsubscribed": false,
"properties": {
"company_name": "Acme Corp",
}
}'
```
Or you can update a Contact to add or change a property value [using the update contact endpoint](/api-reference/contacts/update-contact).
```ts Node.js {8-10, 16-18} theme={"theme":{"light":"github-light","dark":"vesper"}}
import { Resend } from 'resend';
const resend = new Resend('re_xxxxxxxxx');
// Update by contact id
const { data, error } = await resend.contacts.update({
id: 'e169aa45-1ecf-4183-9955-b1499d5701d3',
properties: {
company_name: 'Acme Corp',
},
});
// Update by contact email
const { data, error } = await resend.contacts.update({
email: 'acme@example.com',
properties: {
company_name: 'Acme Corp',
},
});
```
```php PHP {7-9, 17-19} theme={"theme":{"light":"github-light","dark":"vesper"}}
$resend = Resend::client('re_xxxxxxxxx');
// Update by contact id
$resend->contacts->update(
id: 'e169aa45-1ecf-4183-9955-b1499d5701d3',
parameters: [
'properties' => [
'company_name' => 'Acme Corp',
]
]
);
// Update by contact email
$resend->contacts->update(
email: 'acme@example.com',
parameters: [
'properties' => [
'company_name' => 'Acme Corp',
]
]
);
```
```python Python {8-10, 18-20} theme={"theme":{"light":"github-light","dark":"vesper"}}
import resend
resend.api_key = "re_xxxxxxxxx"
# Update by contact id
params: resend.Contacts.UpdateParams = {
"id": "e169aa45-1ecf-4183-9955-b1499d5701d3",
"properties": {
"company_name": "Acme Corp",
}
}
resend.Contacts.update(params)
# Update by contact email
params: resend.Contacts.UpdateParams = {
"email": "acme@example.com",
"properties": {
"company_name": "Acme Corp",
}
}
resend.Contacts.update(params)
```
```ruby Ruby {8-10, 18-20} theme={"theme":{"light":"github-light","dark":"vesper"}}
require "resend"
Resend.api_key = "re_xxxxxxxxx"
# Update by contact id
params = {
"id": "e169aa45-1ecf-4183-9955-b1499d5701d3",
"properties": {
"company_name": "Acme Corp",
}
}
Resend::Contacts.update(params)
# Update by contact email
params = {
"email": "acme@example.com",
"properties": {
"company_name": "Acme Corp",
}
}
Resend::Contacts.update(params)
```
```go Go {8-10, 19-21} theme={"theme":{"light":"github-light","dark":"vesper"}}
import "github.com/resend/resend-go/v3"
client := resend.NewClient("re_xxxxxxxxx")
// Update by contact id
params := &resend.UpdateContactRequest{
Id: "e169aa45-1ecf-4183-9955-b1499d5701d3",
Properties: new Dictionary {
{ "company_name", "Acme Corp" }
}
}
params.SetUnsubscribed(true)
contact, err := client.Contacts.Update(params)
// Update by contact email
params = &resend.UpdateContactRequest{
Email: "acme@example.com",
Properties: new Dictionary {
{ "company_name", "Acme Corp" }
}
}
params.SetUnsubscribed(true)
contact, err := client.Contacts.Update(params)
```
```rust Rust {7} theme={"theme":{"light":"github-light","dark":"vesper"}}
use resend_rs::{types::ContactChanges, Resend, Result};
#[tokio::main]
async fn main() -> Result<()> {
let resend = Resend::new("re_xxxxxxxxx");
let changes = ContactChanges::new().with_properties(vec![("company_name".to_string(), "Acme Corp".to_string())]);
// Update by contact id
let _contact = resend
.contacts
.update("e169aa45-1ecf-4183-9955-b1499d5701d3", changes.clone())
.await?;
// Update by contact email
let _contact = resend
.contacts
.update("acme@example.com", changes)
.await?;
Ok(())
}
```
```java Java {10, 16} theme={"theme":{"light":"github-light","dark":"vesper"}}
import com.resend.*;
public class Main {
public static void main(String[] args) {
Resend resend = new Resend("re_xxxxxxxxx");
// Update by contact id
UpdateContactOptions params = UpdateContactOptions.builder()
.id("e169aa45-1ecf-4183-9955-b1499d5701d3")
.properties(vec![("company_name".to_string(), "Acme Corp".to_string())])
.build();
// Update by contact email
UpdateContactOptions params = UpdateContactOptions.builder()
.email("acme@example.com")
.properties(vec![("company_name".to_string(), "Acme Corp".to_string())])
.build();
UpdateContactResponseSuccess data = resend.contacts().update(params);
}
}
```
```csharp .NET {12-14, 25-27} theme={"theme":{"light":"github-light","dark":"vesper"}}
using Resend;
IResend resend = ResendClient.Create( "re_xxxxxxxxx" ); // Or from DI
// By Id
await resend.ContactUpdateAsync(
contactId: new Guid( "e169aa45-1ecf-4183-9955-b1499d5701d3" ),
new ContactData()
{
FirstName = "Stevie",
LastName = "Wozniaks",
Properties = new Dictionary {
{ "company_name", "Acme Corp" }
}
}
);
// By Email
await resend.ContactUpdateByEmailAsync(
"acme@example.com",
new ContactData()
{
FirstName = "Stevie",
LastName = "Wozniaks",
Properties = new Dictionary {
{ "company_name", "Acme Corp" }
}
}
);
```
```bash cURL {6-8, 16-18} theme={"theme":{"light":"github-light","dark":"vesper"}}
# Update by contact id
curl -X PATCH 'https://api.resend.com/contacts/520784e2-887d-4c25-b53c-4ad46ad38100' \
-H 'Authorization: Bearer re_xxxxxxxxx' \
-H 'Content-Type: application/json' \
-d $'{
"properties": {
"company_name": "Acme Corp",
}
}'
# Update by contact email
curl -X PATCH 'https://api.resend.com/contacts/acme@example.com' \
-H 'Authorization: Bearer re_xxxxxxxxx' \
-H 'Content-Type: application/json' \
-d $'{
"properties": {
"company_name": "Acme Corp",
}
}'
```
When you create or update a Contact with properties, the properties are added to the Contact, but only if the property key already exists and the value type is valid. You can [list all Contact Properties](/api-reference/contact-properties/list-contact-properties) to see all available properties.
If the properties don't exist, they are not added to the Contact and the
call fails. An error is returned.
Yes, property keys are case sensitive. If you create a property with a key
of "company\_name", you cannot use "CompanyName" or "company\_Name" in your
Contacts.
If the value isn't the right type, the property value is not added to the
Contact and the call fails. An error is returned.
## Use Contact Properties in Broadcasts
You can use Contact Properties in your Broadcasts to personalize your emails.
You can also use Contact Properties in your Broadcast HTML and Text content when you [create a Broadcast using the API or SDKs](/api-reference/broadcasts/create-broadcast).
---
# Source: https://resend.com/docs/api-reference/templates/publish-template.md
> ## Documentation Index
> Fetch the complete documentation index at: https://resend.com/docs/llms.txt
> Use this file to discover all available pages before exploring further.
# Publish Template
> Publish a template.
export const ResendParamField = ({children, body, path, ...props}) => {
const [lang, setLang] = useState(() => {
return localStorage.getItem('code') || '"Node.js"';
});
useEffect(() => {
const onStorage = event => {
const key = event.detail.key;
if (key === 'code') {
setLang(event.detail.value);
}
};
document.addEventListener('mintlify-localstorage', onStorage);
return () => {
document.removeEventListener('mintlify-localstorage', onStorage);
};
}, []);
const toCamelCase = str => typeof str === 'string' ? str.replace(/[_-](\w)/g, (_, c) => c.toUpperCase()) : str;
const resolvedBody = useMemo(() => {
const value = JSON.parse(lang);
return value === 'Node.js' ? toCamelCase(body) : body;
}, [body, lang]);
const resolvedPath = useMemo(() => {
const value = JSON.parse(lang);
return value === 'Node.js' ? toCamelCase(path) : path;
}, [path, lang]);
return
{children}
;
};
## Path Parameters
The ID or alias of the template to publish.
```ts Node.js theme={"theme":{"light":"github-light","dark":"vesper"}}
import { Resend } from 'resend';
const resend = new Resend('re_xxxxxxxxx');
const { data, error } = await resend.templates.publish(
'34a080c9-b17d-4187-ad80-5af20266e535',
);
```
```php PHP theme={"theme":{"light":"github-light","dark":"vesper"}}
$resend = Resend::client('re_xxxxxxxxx');
$resend->templates->publish('34a080c9-b17d-4187-ad80-5af20266e535');
```
```py Python theme={"theme":{"light":"github-light","dark":"vesper"}}
import resend
resend.api_key = "re_xxxxxxxxx"
resend.Templates.publish("34a080c9-b17d-4187-ad80-5af20266e535")
```
```ruby Ruby theme={"theme":{"light":"github-light","dark":"vesper"}}
require "resend"
Resend.api_key = "re_xxxxxxxxx"
Resend::Templates.publish("34a080c9-b17d-4187-ad80-5af20266e535")
```
```go Go theme={"theme":{"light":"github-light","dark":"vesper"}}
import (
"context"
"github.com/resend/resend-go/v3"
)
func main() {
client := resend.NewClient("re_xxxxxxxxx")
client.Templates.PublishWithContext(
context.TODO(),
"34a080c9-b17d-4187-ad80-5af20266e535",
)
}
```
```rust Rust theme={"theme":{"light":"github-light","dark":"vesper"}}
use resend_rs::{Resend, Result};
#[tokio::main]
async fn main() -> Result<()> {
let resend = Resend::new("re_xxxxxxxxx");
let _published = resend
.templates
.publish("34a080c9-b17d-4187-ad80-5af20266e535")
.await?;
Ok(())
}
```
```java Java theme={"theme":{"light":"github-light","dark":"vesper"}}
import com.resend.*;
public class Main {
public static void main(String[] args) {
Resend resend = new Resend("re_xxxxxxxxx");
PublishTemplateResponseSuccess data = resend.templates().publish("34a080c9-b17d-4187-ad80-5af20266e535");
}
}
```
```csharp .NET theme={"theme":{"light":"github-light","dark":"vesper"}}
using Resend;
IResend resend = ResendClient.Create( "re_xxxxxxxxx" ); // Or from DI
await resend.TemplatePublishAsync( new Guid( "34a080c9-b17d-4187-ad80-5af20266e535" ) );
```
```bash cURL theme={"theme":{"light":"github-light","dark":"vesper"}}
curl -X POST 'https://api.resend.com/templates/34a080c9-b17d-4187-ad80-5af20266e535/publish' \
-H 'Authorization: Bearer re_xxxxxxxxx' \
-H 'Content-Type: application/json'
```
```json Response theme={"theme":{"light":"github-light","dark":"vesper"}}
{
"id": "34a080c9-b17d-4187-ad80-5af20266e535",
"object": "template"
}
```
---
# Source: https://resend.com/docs/api-reference/rate-limit.md
> ## Documentation Index
> Fetch the complete documentation index at: https://resend.com/docs/llms.txt
> Use this file to discover all available pages before exploring further.
# Usage Limits
> Learn about API rate limits, email sending quotas, and contact quotas.
The Resend API enforces three types of limits: **rate limits** control how many API requests you can make per second, **email quotas** control the total number of emails you can send per day and month, and **contact quotas** control how many marketing contacts you can store.
## Rate Limits
### Response Headers
The response headers describe your current rate limit following every request in conformance with the [sixth IETF standard draft](https://datatracker.ietf.org/doc/html/draft-ietf-httpapi-ratelimit-headers-06):
| Header name | Description |
| --------------------- | ------------------------------------------------------------------- |
| `ratelimit-limit` | Maximum number of requests allowed within a window. |
| `ratelimit-remaining` | How many requests you have left within the current window. |
| `ratelimit-reset` | How many seconds until the limits are reset. |
| `retry-after` | How many seconds you should wait before making a follow-up request. |
The default maximum rate limit is **2 requests per second**. This number can be increased for trusted senders upon request.
After that, you'll hit the rate limit and receive a `429` response error code. You can find all 429 responses by filtering for 429 at the [Resend Logs page](https://resend.com/logs?status=429).
To prevent this, we recommend reducing the rate at which you request the API. This can be done by introducing a queue mechanism or reducing the number of concurrent requests per second. If you have specific requirements, [contact support](https://resend.com/contact) to request a rate increase.
## Email Quotas
### Response Headers
In addition to rate limits, the API returns headers that track your email sending quotas:
| Header name | Description |
| ------------------------ | ------------------------------------------------------------------ |
| `x-resend-daily-quota` | Your used daily email sending quota. Only sent to free plan users. |
| `x-resend-monthly-quota` | Your used monthly email sending quota. |
These headers help you monitor your usage and avoid hitting quota limits.
When you exceed your quota limits, you'll receive a `429` response error code with one of the following error types:
* **`daily_quota_exceeded`** - You have reached your daily email quota. [Upgrade your plan](https://resend.com/settings/billing) to remove the daily quota limit or wait until 24 hours have passed.
* **`monthly_quota_exceeded`** - You have reached your monthly email quota. [Upgrade your plan](https://resend.com/settings/billing) to increase the monthly email quota.
Both sent and received emails count towards these quotas. See the full list of [error codes](/api-reference/errors) for more details.
## Contact Quotas
Contact quotas restrict the number of contacts you can store for marketing emails and broadcasts. You can add more contacts beyond your plan's limit, but you won't be able to send broadcasts until you upgrade your plan.
When you attempt to send a broadcast after reaching your contact limit, you'll receive a `403` response error code with a `validation_error` type and the message: "You have reached your contacts quota. Please upgrade your plan to send more emails."
To increase your contact limit, [upgrade your Marketing plan](https://resend.com/settings/billing).
---
# Source: https://resend.com/docs/knowledge-base/react-email-skill.md
> ## Documentation Index
> Fetch the complete documentation index at: https://resend.com/docs/llms.txt
> Use this file to discover all available pages before exploring further.
# React Email Skill
> Build HTML emails using React components with AI agents.
The React Email skill enables AI agents to build production-ready HTML emails using React components. It provides a modern development experience for creating responsive, cross-client compatible emails.
## Installation
Install the skill using the following command:
```bash theme={"theme":{"light":"github-light","dark":"vesper"}}
npx skills add resend/react-email
```
## Advantages
* **Component-based email development**: Build emails using reusable React components for consistent, maintainable templates.
* **Brand-consistent styling with Tailwind**: Use Tailwind CSS to style emails with your brand's design system.
* **Multi-format rendering**: Automatically generate both HTML and plain text versions of your emails.
* **Email client compatibility handling**: Built-in support for rendering emails correctly across all major email clients.
* **Built-in preview server**: Preview your emails in real-time during development with hot reloading.
## Learn More
See the full source code and documentation.
---
# Source: https://resend.com/docs/webhooks/emails/received.md
> ## Documentation Index
> Fetch the complete documentation index at: https://resend.com/docs/llms.txt
> Use this file to discover all available pages before exploring further.
# email.received
> Received when an inbound email is received.
export const ResponseBodyParameters = ({type, children}) => {
return
Response Body Parameters
All webhook payloads follow a consistent top-level structure with
event-specific data nested within the data object.
The event type that triggered the webhook (e.g., {type}).
ISO 8601 timestamp when the webhook event was created.
Event-specific data containing detailed information about the event. The
data object for the {type} event contains the following
parameters:
{children}
;
};
Event triggered whenever Resend **successfully receives an email**.
Unique identifier for the broadcast campaign (if applicable)
ISO 8601 timestamp when the email was created
Unique identifier for the specific email
Sender email address and name in the format "Name
\<[email@domain.com](mailto:email@domain.com)>"
Array of impacted recipient email addresses
Email subject line
Unique identifier for the template used (if applicable)
Array of tag objects associated with the email
The tag key
The tag value
```json theme={"theme":{"light":"github-light","dark":"vesper"}}
{
"type": "email.received",
"created_at": "2024-02-22T23:41:12.126Z",
"data": {
"email_id": "56761188-7520-42d8-8898-ff6fc54ce618",
"created_at": "2024-02-22T23:41:11.894719+00:00",
"from": "Acme ",
"to": ["delivered@resend.dev"],
"bcc": [],
"cc": [],
"message_id": "",
"subject": "Sending this example",
"attachments": [
{
"id": "2a0c9ce0-3112-4728-976e-47ddcd16a318",
"filename": "avatar.png",
"content_type": "image/png",
"content_disposition": "inline",
"content_id": "img001"
}
]
}
}
```
---
# Source: https://resend.com/docs/dashboard/domains/regions.md
> ## Documentation Index
> Fetch the complete documentation index at: https://resend.com/docs/llms.txt
> Use this file to discover all available pages before exploring further.
# Choosing a Region
> Resend offers sending from multiple regions
Resend users have the option to send transactional and marketing emails from four different regions:
* North Virginia (us-east-1)
* Ireland (eu-west-1)
* São Paulo (sa-east-1)
* Tokyo (ap-northeast-1)
No matter where your users are, you can ensure that they receive your emails in a timely and efficient manner. You can visualize the different regions in the Resend dashboard:
## Why is this important?
Especially for transactional emails like magic links, password resets, and welcome messages, users expect to receive them right away. If they don't, they might not be able to access your service right away, which could be a missed opportunity for your organization.
Here are some of the other benefits of using our multi-region email sending feature:
1. **Faster delivery:** By sending emails from the region closest to your user, you can reduce latency and ensure a faster time-to-inbox. This can be the difference between people using/buying your product or not.
2. **Easier account management:** Instead of having to maintain different accounts for each region, we're providing multi-region within the same account. That way, you aren't juggling different login credentials.
3. **Increased resilience:** In case of disruption in one region, our multi-region feature enables you to send emails from a backup domain in a separate region, guaranteeing maximum uptime.
## Get Started
To start using our multi-region email sending feature, go to **[Domains](https://resend.com/domains)**, then select the option to add a new domain.
Finally, select the region you want to send your emails.
## How to set up multi-region for the same domain
For advanced needs, you can set up multiple regions for the same domain. We recommend setting a unique subdomain for each region (e.g., us.domain.com, eu.domain.com). When sending transactional emails or marketing emails, choose the right domain for your users.
## Changing Domain Region
If you'd like to switch the region your domain is currently set to:
1. Delete your current domain in the [Domain's page](https://resend.com/domains).
2. Add the same domain again, selecting the new region.
3. Update your DNS records to point to the new domain.
For more help, please reach out to [Support](https://resend.com/help), and we can help you out.
---
# Source: https://resend.com/docs/knowledge-base/replit-integration.md
> ## Documentation Index
> Fetch the complete documentation index at: https://resend.com/docs/llms.txt
> Use this file to discover all available pages before exploring further.
# Send emails with Replit and Resend
> Learn how to add the Resend integration to your Replit project.
export const YouTube = ({id}) => {
return ;
};
[Replit](https://replit.com/) is a platform for building sites and apps with AI. You can add Resend in a Replit project by asking the chat to add email sending with Resend.
**Example prompt**
```
When someone fills out the contact form, send an email using Resend.
```
Prefer watching a video? Check out our video walkthrough below.
## 1. Add a custom domain to your Resend account
By default, you can only send emails to your own email address.
To send emails to other email addresses:
1. Add a [custom domain to your Resend account](https://resend.com/domains).
2. Add the custom domain to the `from` field in the `resend` function in Replit (or ask the chat to update these fields).
Get more help adding a custom domain in [Resend's documentation](/dashboard/domains/introduction).
## 2. Add your Resend API key and from address
To use Resend with Replit, you'll need to add a Resend API key, which you can create in the [Resend Dashboard](https://resend.com/api-keys). Do not share your API key with others or expose it in the browser or other client-side code.
The from address is the email address that will be used to send emails. Use your custom domain you added in step 1 here (e.g., `hello@yourdomain.com`).
Replit tracks the details of your Resend integration in the [Integrations
page](https://replit.com/integrations).
---
# Source: https://resend.com/docs/dashboard/receiving/reply-to-emails.md
> ## Documentation Index
> Fetch the complete documentation index at: https://resend.com/docs/llms.txt
> Use this file to discover all available pages before exploring further.
# Reply to Receiving Emails
> Reply to Receiving emails in the same thread.
Email clients thread emails by using the `message_id` metadata.
If you want to reply to an email, you should add the `In-Reply-To` header set to the `message_id` of the received email. We also recommend setting the subject to start with `Re:` so that email clients can group the replies together.
Here's an example of replying to an email in a Next.js application:
```ts app/api/events/route.ts theme={"theme":{"light":"github-light","dark":"vesper"}}
import type { NextRequest } from 'next/server';
import { NextResponse } from 'next/server';
import { Resend } from 'resend';
const resend = new Resend('re_xxxxxxxxx');
export const POST = async (request: NextRequest) => {
const event = await request.json();
if (event.type === 'email.received') {
const { data, error } = await resend.emails.send({
from: 'Acme ',
to: ['delivered@resend.dev'],
subject: `Re: ${event.data.subject}`,
html: '
Thanks for your email!
',
headers: {
'In-Reply-To': event.data.message_id,
},
attachments,
});
return NextResponse.json(data);
}
return NextResponse.json({});
};
```
If you're replying multiple times within the same thread, make sure to also append
the previous `message_id`s to the `References` header, separated by spaces.
This helps email clients maintain the correct threading structure.
```js theme={"theme":{"light":"github-light","dark":"vesper"}}
const previousReferences = ['', ''];
const { data, error } = await resend.emails.send({
from: 'Acme ',
to: ['delivered@resend.dev'],
subject: `Re: ${event.data.subject}`,
html: '
Thanks for your email!
',
headers: {
'In-Reply-To': event.data.message_id,
'References': [...previousReferences, event.data.message_id].join(' '),
},
attachments,
});
```
---
# Source: https://resend.com/docs/knowledge-base/resend-email-quota.md
# What are Resend account email quota limits?
> Learn what email quota limits apply to accounts.
Resend regulates email volume in two ways:
1. email volume (quota)
2. sending rate
These limits help improve your deliverability and likelihood of reaching your recipient's inbox.
Both **sent emails** and **received emails** (inbound) count towards your
account's email quota. Each received email counts as 1 email against your
daily and monthly limits, just like sent emails.
## Free Account Daily and Monthly Email Quota
Free accounts have a daily email quota of 100 emails/day and 3,000 emails/month. This quota includes both sent and received emails. Multiple `To`, `CC`, or `BCC` recipients in sent emails count as separate emails towards this quota.
## Paid Plan Email Quota
* Transactional Pro and Scale plans have no daily quota limits, though the plan tier will dictate the monthly email quota. Both sent and received emails count towards this monthly quota. To see your current month usage, view the [**Usage page**](https://resend.com/settings/usage). Multiple `To`, `CC`, or `BCC` recipients in sent emails count as separate emails towards the monthly quota.
* Marketing Pro plans have no email quota limits.
## Rate Limits
All accounts start with a rate limit of 2 requests per second. The [rate limits](/api-reference/introduction#rate-limit) follow the [IETF standard](https://datatracker.ietf.org/doc/html/draft-ietf-httpapi-ratelimit-headers) for stating the rate limit in the response header. If you have specific requirements, [contact support](https://resend.com/help) to request a rate increase.
## Bounce Rate
All accounts must maintain a bounce rate of under **4%**. The [**Metrics page**](https://resend.com/metrics) within an account and/or [webhooks](https://resend.com/docs/dashboard/webhooks/event-types#email-bounced) allow you to monitor your account bounce rates.
Maintaining a bounce rate above 4% may result in a temporary pause in sending until the bounce rate is reduced.
Tips to keep a bounce rate low:
* Remove inactive user email addresses from email lists.
* Only send to recipients who have given consent to receive email.
* When testing, avoid sending to fake email addresses. Use Resend's [test email addresses](/dashboard/emails/send-test-emails) instead.
* If you are using open/click tracking, periodically remove recipients who are not engaging with your emails from your email lists.
## Spam Rate
All accounts must have a spam rate of under **0.08%**. The [**Metrics page**](https://resend.com/metrics) within an account and/or [webhooks](https://resend.com/docs/dashboard/webhooks/event-types#email-complained) allow you to monitor your account spam rates.
Maintaining a spam rate over 0.08% may result in a temporary pause in sending until the spam rate is reduced.
Tips to keep a spam rate low:
* Give recipients an easy way to opt-out of emails.
* Send relevant and timely emails.
* Only send to recipients who have given consent to receive email.
---
# Source: https://resend.com/docs/knowledge-base/resend-skill.md
> ## Documentation Index
> Fetch the complete documentation index at: https://resend.com/docs/llms.txt
> Use this file to discover all available pages before exploring further.
# Resend Skill
> Send emails through the Resend API with AI agents.
The Resend skill enables AI agents to send emails through the Resend API using our official recommendations. It provides a streamlined interface for sending single and batch emails with built-in error handling and retry logic.
## Installation
Install the skill using the following command:
```bash theme={"theme":{"light":"github-light","dark":"vesper"}}
npx skills add resend/resend-skills
```
## Advantages
Build with our official recommendations for sending emails with Resend.
* **Single and batch email sending**: Send individual emails or batch up to 100 emails per request.
* **Built-in error handling and retry logic**: Automatic retries with exponential backoff for transient failures.
* **Idempotency key support**: Prevent duplicate sends with idempotency keys for safe retries.
* **Multi-language SDK support**: Works with Node.js, Python, Ruby, Go, and other supported SDKs.
* **Automatic activation for email tasks**: AI agents automatically use this skill when email sending is needed.
## Learn More
See the full source code and documentation.
---
# Source: https://resend.com/docs/webhooks/retries-and-replays.md
> ## Documentation Index
> Fetch the complete documentation index at: https://resend.com/docs/llms.txt
> Use this file to discover all available pages before exploring further.
# Retries and Replays
> Learn how to use the retries and replays to handle webhook failures.
## Automatic Retries
We attempt to deliver each webhook message based on a schedule with exponential backoff.
Each message is attempted based on the following schedule, where each period is started following the failure of the preceding attempt:
* Immediately
* 5 seconds
* 5 minutes
* 30 minutes
* 2 hours
* 5 hours
* 10 hours
* 10 hours (in addition to the previous)
If an endpoint is removed or disabled delivery attempts to the endpoint will be disabled as well.
To see when a message will be retried next, check the webhook message details in the dashboard.
For example, an attempt that fails three times before eventually succeeding will be delivered roughly 35 minutes and 5 seconds following the first attempt.
## Manual Replays
If a webhook message fails, you can manually replay it.
You can replay both `failed` and `succeeded` webhook messages.
Here's how to replay a webhook message:
1. Go to the [Webhooks](https://resend.com/webhooks) page
2. Navigate to the Webhook Endpoint you are using
3. Go to the Webhook Message you want to replay
4. Click on the "Replay" button
---
# Source: https://resend.com/docs/api-reference/emails/retrieve-email-attachment.md
> ## Documentation Index
> Fetch the complete documentation index at: https://resend.com/docs/llms.txt
> Use this file to discover all available pages before exploring further.
# Retrieve Attachment
> Retrieve a single attachment from a sent email.
## Path Parameters
The Attachment ID.
The Email ID.
```js Node.js theme={"theme":{"light":"github-light","dark":"vesper"}}
import { Resend } from 'resend';
const resend = new Resend('re_xxxxxxxxx');
const { data, error } = await resend.emails.attachments.get({
id: '2a0c9ce0-3112-4728-976e-47ddcd16a318',
emailId: '4ef9a417-02e9-4d39-ad75-9611e0fcc33c',
});
```
```php PHP theme={"theme":{"light":"github-light","dark":"vesper"}}
$resend = Resend::client('re_xxxxxxxxx');
$resend->emails->attachments->get(
id: '2a0c9ce0-3112-4728-976e-47ddcd16a318',
emailId: '4ef9a417-02e9-4d39-ad75-9611e0fcc33c'
);
```
```python Python theme={"theme":{"light":"github-light","dark":"vesper"}}
import resend
resend.api_key = 're_xxxxxxxxx'
attachment = resend.Emails.Attachments.get(
email_id='4ef9a417-02e9-4d39-ad75-9611e0fcc33c',
attachment_id='2a0c9ce0-3112-4728-976e-47ddcd16a318'
)
```
```ruby Ruby theme={"theme":{"light":"github-light","dark":"vesper"}}
require 'resend'
Resend.api_key = 're_xxxxxxxxx'
Resend::Emails::Attachments.get(
id: "2a0c9ce0-3112-4728-976e-47ddcd16a318",
email_id: "4ef9a417-02e9-4d39-ad75-9611e0fcc33c"
)
```
```go Go theme={"theme":{"light":"github-light","dark":"vesper"}}
import (
"context"
"github.com/resend/resend-go/v3"
)
func main() {
client := resend.NewClient("re_xxxxxxxxx")
client.Emails.GetAttachmentWithContext(
context.TODO(),
"4ef9a417-02e9-4d39-ad75-9611e0fcc33c",
"2a0c9ce0-3112-4728-976e-47ddcd16a318",
)
}
```
```rust Rust theme={"theme":{"light":"github-light","dark":"vesper"}}
use resend_rs::{Resend, Result};
#[tokio::main]
async fn main() -> Result<()> {
let resend = Resend::new("re_xxxxxxxxx");
let _email = resend
.emails
.get_attachment(
"2a0c9ce0-3112-4728-976e-47ddcd16a318",
"4ef9a417-02e9-4d39-ad75-9611e0fcc33c",
)
.await?;
Ok(())
}
```
```java Java theme={"theme":{"light":"github-light","dark":"vesper"}}
import com.resend.*;
public class Main {
public static void main(String[] args) {
Resend resend = new Resend("re_xxxxxxxxx");
AttachmentResponse attachment = resend.emails().getAttachment(
"4ef9a417-02e9-4d39-ad75-9611e0fcc33c",
"2a0c9ce0-3112-4728-976e-47ddcd16a318"
);
}
}
```
```csharp .NET theme={"theme":{"light":"github-light","dark":"vesper"}}
using Resend;
IResend resend = ResendClient.Create( "re_xxxxxxxxx" ); // Or from DI
var resp = await resend.EmailAttachmentRetrieveAsync(
emailId: new Guid( "4ef9a417-02e9-4d39-ad75-9611e0fcc33c" ),
attachmentId: new Guid( "2a0c9ce0-3112-4728-976e-47ddcd16a318" )
);
Console.WriteLine( "URL={0}", resp.Content.DownloadUrl );
```
```bash cURL theme={"theme":{"light":"github-light","dark":"vesper"}}
curl -X GET 'https://api.resend.com/emails/4ef9a417-02e9-4d39-ad75-9611e0fcc33c/attachments/2a0c9ce0-3112-4728-976e-47ddcd16a318' \
-H 'Authorization: Bearer re_xxxxxxxxx'
```
```json Response theme={"theme":{"light":"github-light","dark":"vesper"}}
{
"object": "attachment",
"id": "2a0c9ce0-3112-4728-976e-47ddcd16a318",
"filename": "avatar.png",
"size": 4096,
"content_type": "image/png",
"content_disposition": "inline",
"content_id": "img001",
"download_url": "https://outbound-cdn.resend.com/4ef9a417-02e9-4d39-ad75-9611e0fcc33c/attachments/2a0c9ce0-3112-4728-976e-47ddcd16a318?some-params=example&signature=sig-123",
"expires_at": "2025-10-17T14:29:41.521Z"
}
```
---
# Source: https://resend.com/docs/api-reference/emails/retrieve-email.md
> ## Documentation Index
> Fetch the complete documentation index at: https://resend.com/docs/llms.txt
> Use this file to discover all available pages before exploring further.
# Retrieve Email
> Retrieve a single email.
## Path Parameters
The Email ID.
See all available `last_event` types in [the Email Events
overview](/dashboard/emails/introduction#understand-email-events).
```js Node.js theme={"theme":{"light":"github-light","dark":"vesper"}}
import { Resend } from 'resend';
const resend = new Resend('re_xxxxxxxxx');
const { data, error } = await resend.emails.get(
'37e4414c-5e25-4dbc-a071-43552a4bd53b',
);
```
```php PHP theme={"theme":{"light":"github-light","dark":"vesper"}}
$resend = Resend::client('re_xxxxxxxxx');
$resend->emails->get('37e4414c-5e25-4dbc-a071-43552a4bd53b');
```
```python Python theme={"theme":{"light":"github-light","dark":"vesper"}}
import resend
resend.api_key = "re_xxxxxxxxx"
resend.Emails.get(email_id="4ef9a417-02e9-4d39-ad75-9611e0fcc33c")
```
```ruby Ruby theme={"theme":{"light":"github-light","dark":"vesper"}}
Resend.api_key = "re_xxxxxxxxx"
email = Resend::Emails.get("4ef9a417-02e9-4d39-ad75-9611e0fcc33c")
puts email
```
```go Go theme={"theme":{"light":"github-light","dark":"vesper"}}
package main
import "github.com/resend/resend-go/v3"
func main() {
client := resend.NewClient("re_xxxxxxxxx")
client.Emails.Get("4ef9a417-02e9-4d39-ad75-9611e0fcc33c")
}
```
```rust Rust theme={"theme":{"light":"github-light","dark":"vesper"}}
use resend_rs::{Resend, Result};
#[tokio::main]
async fn main() -> Result<()> {
let resend = Resend::new("re_xxxxxxxxx");
let _email = resend
.emails
.get("4ef9a417-02e9-4d39-ad75-9611e0fcc33c")
.await?;
Ok(())
}
```
```java Java theme={"theme":{"light":"github-light","dark":"vesper"}}
import com.resend.*;
public class Main {
public static void main(String[] args) {
Resend resend = new Resend("re_xxxxxxxxx");
Email email = resend.emails().get("4ef9a417-02e9-4d39-ad75-9611e0fcc33c");
}
}
```
```csharp .NET theme={"theme":{"light":"github-light","dark":"vesper"}}
using Resend;
IResend resend = ResendClient.Create( "re_xxxxxxxxx" ); // Or from DI
var resp = await resend.EmailRetrieveAsync( new Guid( "4ef9a417-02e9-4d39-ad75-9611e0fcc33c" ) );
Console.WriteLine( "Subject={0}", resp.Content.Subject );
```
```bash cURL theme={"theme":{"light":"github-light","dark":"vesper"}}
curl -X GET 'https://api.resend.com/emails/4ef9a417-02e9-4d39-ad75-9611e0fcc33c' \
-H 'Authorization: Bearer re_xxxxxxxxx'
```
```json Response theme={"theme":{"light":"github-light","dark":"vesper"}}
{
"object": "email",
"id": "4ef9a417-02e9-4d39-ad75-9611e0fcc33c",
"to": ["delivered@resend.dev"],
"from": "Acme ",
"created_at": "2023-04-03T22:13:42.674981+00:00",
"subject": "Hello World",
"html": "Congrats on sending your first email!",
"text": null,
"bcc": [],
"cc": [],
"reply_to": [],
"last_event": "delivered",
"scheduled_at": null,
"tags": [
{
"name": "category",
"value": "confirm_email"
}
]
}
```
---
# Source: https://resend.com/docs/api-reference/emails/retrieve-received-email-attachment.md
> ## Documentation Index
> Fetch the complete documentation index at: https://resend.com/docs/llms.txt
> Use this file to discover all available pages before exploring further.
# Retrieve Attachment
> Retrieve a single attachment from a received email.
## Path Parameters
The Attachment ID.
The Email ID.
```js Node.js theme={"theme":{"light":"github-light","dark":"vesper"}}
import { Resend } from 'resend';
const resend = new Resend('re_xxxxxxxxx');
const { data, error } = await resend.emails.receiving.attachments.get({
id: '2a0c9ce0-3112-4728-976e-47ddcd16a318',
emailId: '4ef9a417-02e9-4d39-ad75-9611e0fcc33c',
});
```
```php PHP theme={"theme":{"light":"github-light","dark":"vesper"}}
$resend = Resend::client('re_xxxxxxxxx');
$resend->emails->receiving->attachments->get(
id: '2a0c9ce0-3112-4728-976e-47ddcd16a318',
emailId: '4ef9a417-02e9-4d39-ad75-9611e0fcc33c'
);
```
```python Python theme={"theme":{"light":"github-light","dark":"vesper"}}
import resend
resend.api_key = 're_xxxxxxxxx'
attachment = resend.Emails.Receiving.Attachments.get(
email_id='4ef9a417-02e9-4d39-ad75-9611e0fcc33c',
attachment_id='2a0c9ce0-3112-4728-976e-47ddcd16a318'
)
```
```ruby Ruby theme={"theme":{"light":"github-light","dark":"vesper"}}
require 'resend'
Resend.api_key = 're_xxxxxxxxx'
attachment = Resend::Emails::Receiving::Attachments.get(
id: '2a0c9ce0-3112-4728-976e-47ddcd16a318',
email_id: '4ef9a417-02e9-4d39-ad75-9611e0fcc33c'
)
```
```go Go theme={"theme":{"light":"github-light","dark":"vesper"}}
import (
"context"
"github.com/resend/resend-go/v3"
)
func main() {
client := resend.NewClient("re_xxxxxxxxx")
client.Emails.Receiving.GetAttachmentWithContext(
context.TODO(),
"4ef9a417-02e9-4d39-ad75-9611e0fcc33c",
"2a0c9ce0-3112-4728-976e-47ddcd16a318",
)
}
```
```rust Rust theme={"theme":{"light":"github-light","dark":"vesper"}}
use resend_rs::{Resend, Result};
#[tokio::main]
async fn main() -> Result<()> {
let resend = Resend::new("re_xxxxxxxxx");
let _email = resend
.receiving
.get_attachment(
"2a0c9ce0-3112-4728-976e-47ddcd16a318",
"4ef9a417-02e9-4d39-ad75-9611e0fcc33c",
)
.await?;
Ok(())
}
```
```java Java theme={"theme":{"light":"github-light","dark":"vesper"}}
import com.resend.*;
public class Main {
public static void main(String[] args) {
Resend resend = new Resend("re_xxxxxxxxx");
AttachmentDetails attachment = resend.receiving().getAttachment(
"4ef9a417-02e9-4d39-ad75-9611e0fcc33c",
"2a0c9ce0-3112-4728-976e-47ddcd16a318"
);
}
}
```
```csharp .NET theme={"theme":{"light":"github-light","dark":"vesper"}}
using Resend;
IResend resend = ResendClient.Create( "re_xxxxxxxxx" ); // Or from DI
var resp = await resend.ReceivedEmailAttachmentRetrieveAsync(
emailId: new Guid( "4ef9a417-02e9-4d39-ad75-9611e0fcc33c" ),
attachmentId: new Guid( "2a0c9ce0-3112-4728-976e-47ddcd16a318" )
);
Console.WriteLine( "URL={0}", resp.Content.DownloadUrl );
```
```bash cURL theme={"theme":{"light":"github-light","dark":"vesper"}}
curl -X GET 'https://api.resend.com/emails/receiving/4ef9a417-02e9-4d39-ad75-9611e0fcc33c/attachments/2a0c9ce0-3112-4728-976e-47ddcd16a318' \
-H 'Authorization: Bearer re_xxxxxxxxx'
```
```json Response theme={"theme":{"light":"github-light","dark":"vesper"}}
{
"object": "attachment",
"id": "2a0c9ce0-3112-4728-976e-47ddcd16a318",
"filename": "avatar.png",
"size": 4096,
"content_type": "image/png",
"content_disposition": "inline",
"content_id": "img001",
"download_url": "https://inbound-cdn.resend.com/4ef9a417-02e9-4d39-ad75-9611e0fcc33c/attachments/2a0c9ce0-3112-4728-976e-47ddcd16a318?some-params=example&signature=sig-123",
"expires_at": "2025-10-17T14:29:41.521Z"
}
```
---
# Source: https://resend.com/docs/api-reference/emails/retrieve-received-email.md
> ## Documentation Index
> Fetch the complete documentation index at: https://resend.com/docs/llms.txt
> Use this file to discover all available pages before exploring further.
# Retrieve Received Email
> Retrieve a single received email.
## Path Parameters
The ID for the received email.
## Response Parameters
Raw email content download information. Contains a signed URL to download the original email file including all attachments.
Signed CloudFront URL to download the raw email file.
ISO 8601 timestamp indicating when the download URL expires.
```js Node.js theme={"theme":{"light":"github-light","dark":"vesper"}}
import { Resend } from 'resend';
const resend = new Resend('re_xxxxxxxxx');
const { data, error } = await resend.emails.receiving.get(
'37e4414c-5e25-4dbc-a071-43552a4bd53b',
);
```
```php PHP theme={"theme":{"light":"github-light","dark":"vesper"}}
$resend = Resend::client('re_xxxxxxxxx');
$resend->emails->receiving->get('37e4414c-5e25-4dbc-a071-43552a4bd53b');
```
```python Python theme={"theme":{"light":"github-light","dark":"vesper"}}
import resend
resend.api_key = "re_xxxxxxxxx"
resend.Emails.Receiving.get(email_id="37e4414c-5e25-4dbc-a071-43552a4bd53b")
```
```ruby Ruby theme={"theme":{"light":"github-light","dark":"vesper"}}
require "resend"
Resend.api_key = "re_xxxxxxxxx"
Resend::Emails::Receiving.get("37e4414c-5e25-4dbc-a071-43552a4bd53b")
```
```go Go theme={"theme":{"light":"github-light","dark":"vesper"}}
import (
"context"
"github.com/resend/resend-go/v3"
)
func main() {
client := resend.NewClient("re_xxxxxxxxx")
client.Emails.Receiving.GetWithContext(
context.TODO(),
"37e4414c-5e25-4dbc-a071-43552a4bd53b",
)
}
```
```rust Rust theme={"theme":{"light":"github-light","dark":"vesper"}}
use resend_rs::{Resend, Result};
#[tokio::main]
async fn main() -> Result<()> {
let resend = Resend::new("re_xxxxxxxxx");
let _email = resend
.receiving
.get("37e4414c-5e25-4dbc-a071-43552a4bd53b")
.await?;
Ok(())
}
```
```java Java theme={"theme":{"light":"github-light","dark":"vesper"}}
import com.resend.*;
public class Main {
public static void main(String[] args) {
Resend resend = new Resend("re_xxxxxxxxx");
ReceivedEmail email = resend.receiving().get("37e4414c-5e25-4dbc-a071-43552a4bd53b");
}
}
```
```csharp .NET theme={"theme":{"light":"github-light","dark":"vesper"}}
using Resend;
IResend resend = ResendClient.Create( "re_xxxxxxxxx" ); // Or from DI
var resp = await resend.ReceivedEmailRetrieveAsync( new Guid( "4ef9a417-02e9-4d39-ad75-9611e0fcc33c" ) );
Console.WriteLine( "Subject={0}", resp.Content.Subject );
```
```bash cURL theme={"theme":{"light":"github-light","dark":"vesper"}}
curl -X GET 'https://api.resend.com/emails/receiving/4ef9a417-02e9-4d39-ad75-9611e0fcc33c' \
-H 'Authorization: Bearer re_xxxxxxxxx'
```
```json Response theme={"theme":{"light":"github-light","dark":"vesper"}}
{
"object": "email",
"id": "4ef9a417-02e9-4d39-ad75-9611e0fcc33c",
"to": ["delivered@resend.dev"],
"from": "Acme ",
"created_at": "2023-04-03T22:13:42.674981+00:00",
"subject": "Hello World",
"html": "Congrats on sending your first email!",
"text": null,
"headers": {
"return-path": "lucas.costa@resend.com",
"mime-version": "1.0"
},
"bcc": [],
"cc": [],
"reply_to": [],
"message_id": "",
"raw": {
"download_url": "https://example.resend.com/receiving/raw/054da427-439a-4e91-b785-e4fb1966285f?Signature=...",
"expires_at": "2023-04-03T23:13:42.674981+00:00"
},
"attachments": [
{
"id": "2a0c9ce0-3112-4728-976e-47ddcd16a318",
"filename": "avatar.png",
"content_type": "image/png",
"content_disposition": "inline",
"content_id": "img001"
}
]
}
```
---
# Source: https://resend.com/docs/knowledge-base/route53.md
> ## Documentation Index
> Fetch the complete documentation index at: https://resend.com/docs/llms.txt
> Use this file to discover all available pages before exploring further.
# AWS Route 53
> Verify your domain on Route 53 with Resend.
## Add Domain to Resend
First, log in to your [Resend Account](https://resend.com/login) and [add a domain](https://resend.com/domains).
It is [best practice to use a
subdomain](/knowledge-base/is-it-better-to-send-emails-from-a-subdomain-or-the-root-domain)
(updates.example.com) instead of the root domain (example.com). Using a
subdomain allows for proper reputation segmentation based on topics or purpose
(e.g. marketing) and is especially important if receiving emails with Resend.
## Log in to Route 53
Then, log in to your [AWS Management Console, and open Route 53 console](https://console.aws.amazon.com/route53/), then click on your domain name. From there, click on `Create Record`.
## Add MX SPF Record
1. Type in `send` for the `Record name`.
2. Select the `Record type` dropdown, and choose `MX`.
3. Copy the MX Value from your domain in Resend into the `Value` field.
4. Be sure to include the `10` in the `Value` field, as seen in the screenshot.
Omit your domain from the record values in Resend when you paste. Instead of
`send.example.com`, paste only `send` (or `send.subdomain` if you're using a
subdomain).
Below is a mapping of the record fields from Resend to Route 53:
| Route 53 | Resend | Example Value |
| -------------- | ---------------- | ------------------------------------------ |
| Record Type | Type | `MX Record` |
| Record name | Name | `send` |
| Value | Value & Priority | `10 feedback-smtp.us-east-1.amazonses.com` |
| TTL | TTL | `Use Route 53 Default (300)` |
| Routing policy | - | `Simple routing` |
Route 53 does not label the `priority` column, and you will need to add this
in to the `Value` section, as shown in the screenshot. Do not use the same
priority for multiple records. If Priority `10` is already in use, try a
number slightly higher like `11` or `12`.
## Add TXT SPF Record
In the same section, choose `Add another record`:
1. Type in `send` for the `Record name`.
2. Click the `Record type` dropdown.
3. Select the `Record type` dropdown, and choose `TXT`.
4. Copy TXT Value from your domain in Resend into the `Value` field.
Below is a mapping of the record fields from Resend to Route 53:
| Route 53 | Resend | Example Value |
| -------------- | ------ | ------------------------------------- |
| Record type | Type | `TXT Record` |
| Record name | Name | `send` |
| Value | Value | `"v=spf1 include:amazonses.com ~all"` |
| TTL | TTL | `Use Route 53 Default (300)` |
| Routing policy | - | `Simple routing` |
Omit your domain from the record values in Resend when you paste. Instead of
`send.example.com`, paste only `send` (or `send.subdomain` if you're using a
subdomain).
## Add TXT DKIM Records
In the same section, choose `Add another record`:
1. Type in `resend._domainkey` for the `Record name`.
2. Change the `Record Type` to `TXT`.
3. Copy the TXT Value value from your domain in Resend to the `Value` text box.
4. Click on `Create Records`.
Below is a mapping of the record fields from Resend to Route 53:
| Route 53 | Resend | Example Value |
| -------------- | ------ | ---------------------------- |
| Record type | Type | `TXT Record` |
| Record name | Name | `resend._domainkey` |
| Value | Value | `p=example_demain_key_value` |
| TTL | TTL | `Use Route 53 Default (300)` |
| Routing policy | - | `Simple routing` |
Omit your domain from the record values in Resend when you paste. Instead of
`resend._domainkey.example.com`, paste only `resend._domainkey` (or
`resend._domainkey.subdomain` if you're using a subdomain).
## Receiving Emails
If you want to receive emails at your domain, toggle the "Receiving" switch on the domain details page.
When you enable Inbound on a domain, Resend receives *all emails* sent to that
specific domain depending on the priority of the MX record. For this reason,
we strongly recommend verifying a subdomain (`subdomain.example.com`) instead
of the root domain (`example.com`). Learn more about [avoiding conflicts with
your existing MX
records](/knowledge-base/how-do-i-avoid-conflicting-with-my-mx-records).
In the Route 53 console, click `Create Record`:
1. Type in `inbound` (or whatever your subdomain is) for the `Record name`.
2. Select the `Record type` dropdown, and choose `MX`.
3. Copy the MX Value from your domain in Resend into the `Value` field.
4. Be sure to include the `10` in the `Value` field (e.g., `10 inbound-smtp.us-east-1.amazonaws.com`).
Below is a mapping of the record fields from Resend to Route 53:
| Route 53 | Resend | Example Value |
| -------------- | ------------------ | ----------------------------------------- |
| Record Type | Type | `MX Record` |
| Record name | Name | `inbound` |
| Value | Content & Priority | `10 inbound-smtp.us-east-1.amazonaws.com` |
| TTL | TTL | `Use Route 53 Default (300)` |
| Routing policy | - | `Simple routing` |
After verifying your domain, create a webhook to process incoming emails. For help setting up a webhook, how to access email data and attachments, forward emails, and more, see [our guide on receiving emails with Resend](/dashboard/receiving/introduction).
## Complete Verification
Now click [Verify DNS Records](https://resend.com/domains) on your Domain in Resend. It may take up to 5 hours to complete the verification process (often much faster).
## Troubleshooting
If your domain is not successfully verified, these are some common troubleshooting methods.
Review the records you added to Route 53 to rule out copy and paste errors.
[Review our guide on a domain not verifying](/knowledge-base/what-if-my-domain-is-not-verifying).
---
# Source: https://resend.com/docs/dashboard/emails/schedule-email.md
> ## Documentation Index
> Fetch the complete documentation index at: https://resend.com/docs/llms.txt
> Use this file to discover all available pages before exploring further.
# Schedule Email
> Send emails at a specific time without additional complexity.
While some emails need to be delivered as soon as possible, like password resets or magic links, others can be scheduled for a specific time.
Here are some examples of when you might want to schedule an email:
* Send welcome email **5 minutes after** signup
* Trigger a reminder email **24 hours before** an event
* Schedule a weekly digest email for the **next day at 9am PST**
Before, you had to use external services to handle the scheduling logic, but now you can use the new Resend API to schedule emails.
Emails can be scheduled up to 30 days in advance.
There are two ways to schedule an email:
1. [Using natural language](#1-schedule-using-natural-language)
2. [Using date format](#2-schedule-using-date-format)
## 1. Schedule using natural language
You can use the various Resend SDKs to schedule emails.
The date can be defined using natural language, such as `"in 1 hour"`, `"tomorrow at 9am"`, or `"Friday at 3pm ET"`.
```ts Node.js {10} theme={"theme":{"light":"github-light","dark":"vesper"}}
import { Resend } from 'resend';
const resend = new Resend('re_xxxxxxxxx');
await resend.emails.send({
from: 'Acme ',
to: ['delivered@resend.dev'],
subject: 'hello world',
html: '
",
"scheduled_at": "in 1 min"
}'
```
## 2. Schedule using date format
You can also use a date in [ISO 8601](https://en.wikipedia.org/wiki/ISO_8601) format (e.g: `2024-08-05T11:52:01.858Z`).
```ts Node.js {5} theme={"theme":{"light":"github-light","dark":"vesper"}}
import { Resend } from 'resend';
const resend = new Resend('re_xxxxxxxxx');
const oneMinuteFromNow = new Date(Date.now() + 1000 * 60).toISOString();
await resend.emails.send({
from: 'Acme ',
to: ['delivered@resend.dev'],
subject: 'hello world',
html: '
",
"scheduled_at": "2024-08-20T11:52:01.858Z"
}'
```
## View a scheduled email
Once you schedule an email, you can see the scheduled time in the Resend dashboard.
## Reschedule an email
After scheduling an email, you might need to update the scheduled time.
You can do so with the following method:
```ts Node.js {3} theme={"theme":{"light":"github-light","dark":"vesper"}}
resend.emails.update({
id: '49a3999c-0ce1-4ea6-ab68-afcd6dc2e794',
scheduledAt: 'in 1 min',
});
```
```php PHP {2} theme={"theme":{"light":"github-light","dark":"vesper"}}
$resend->emails->update('49a3999c-0ce1-4ea6-ab68-afcd6dc2e794', [
'scheduled_at' => 'in 1 min'
]);
```
```python Python {3} theme={"theme":{"light":"github-light","dark":"vesper"}}
update_params: resend.Emails.UpdateParams = {
"id": "49a3999c-0ce1-4ea6-ab68-afcd6dc2e794",
"scheduled_at": "in 1 min"
}
resend.Emails.update(params=update_params)
```
```rb Ruby {3} theme={"theme":{"light":"github-light","dark":"vesper"}}
update_params = {
"email_id": "49a3999c-0ce1-4ea6-ab68-afcd6dc2e794",
"scheduled_at": "in 1 min"
}
updated_email = Resend::Emails.update(update_params)
```
```go Go {7} theme={"theme":{"light":"github-light","dark":"vesper"}}
package main
import (
"fmt"
"github.com/resend/resend-go/v3"
)
func main() {
client := resend.NewClient("re_xxxxxxxxx")
updateParams := &resend.UpdateEmailRequest{
Id: "49a3999c-0ce1-4ea6-ab68-afcd6dc2e794",
ScheduledAt: "in 1 min",
}
updatedEmail, err := client.Emails.Update(updateParams)
if err != nil {
panic(err)
}
fmt.Printf("%v\n", updatedEmail)
}
```
```rust Rust {2} theme={"theme":{"light":"github-light","dark":"vesper"}}
let update = UpdateEmailOptions::new()
.with_scheduled_at("in 1 min");
let _email = resend
.emails
.update("49a3999c-0ce1-4ea6-ab68-afcd6dc2e794", update)
.await?;
```
```java Java {2} theme={"theme":{"light":"github-light","dark":"vesper"}}
UpdateEmailOptions updateParams = UpdateEmailOptions.builder()
.scheduledAt("in 1 min")
.build();
UpdateEmailResponse data = resend.emails().update("49a3999c-0ce1-4ea6-ab68-afcd6dc2e794", updateParams);
```
```csharp .NET {7} theme={"theme":{"light":"github-light","dark":"vesper"}}
using Resend;
IResend resend = ResendClient.Create( "re_xxxxxxxxx" ); // Or from DI
await resend.EmailRescheduleAsync(
new Guid( "49a3999c-0ce1-4ea6-ab68-afcd6dc2e794" ),
"in 1 min"
);
```
```bash cURL {5} theme={"theme":{"light":"github-light","dark":"vesper"}}
curl -X PATCH 'https://api.resend.com/emails/49a3999c-0ce1-4ea6-ab68-afcd6dc2e794' \
-H 'Authorization: Bearer re_xxxxxxxxx' \
-H 'Content-Type: application/json' \
-d $'{
"scheduled_at": "in 1 min"
}'
```
You can also reschedule an email directly in the Resend dashboard.
## Cancel a scheduled email
Once an email is canceled, it cannot be rescheduled.
If you need to cancel a scheduled email, you can do so with the following code:
```ts Node.js theme={"theme":{"light":"github-light","dark":"vesper"}}
resend.emails.cancel('49a3999c-0ce1-4ea6-ab68-afcd6dc2e794');
```
```php PHP theme={"theme":{"light":"github-light","dark":"vesper"}}
$resend->emails->cancel('49a3999c-0ce1-4ea6-ab68-afcd6dc2e794');
```
```python Python theme={"theme":{"light":"github-light","dark":"vesper"}}
resend.Emails.cancel(email_id="49a3999c-0ce1-4ea6-ab68-afcd6dc2e794")
```
```rb Ruby theme={"theme":{"light":"github-light","dark":"vesper"}}
Resend::Emails.cancel("49a3999c-0ce1-4ea6-ab68-afcd6dc2e794")
```
```go Go theme={"theme":{"light":"github-light","dark":"vesper"}}
canceled, err := client.Emails.Cancel("49a3999c-0ce1-4ea6-ab68-afcd6dc2e794")
if err != nil {
panic(err)
}
fmt.Println(canceled.Id)
```
```rust Rust theme={"theme":{"light":"github-light","dark":"vesper"}}
let _canceled = resend
.emails
.cancel("49a3999c-0ce1-4ea6-ab68-afcd6dc2e794")
.await?;
```
```java Java theme={"theme":{"light":"github-light","dark":"vesper"}}
CancelEmailResponse canceled = resend
.emails()
.cancel("49a3999c-0ce1-4ea6-ab68-afcd6dc2e794");
```
```csharp .NET theme={"theme":{"light":"github-light","dark":"vesper"}}
using Resend;
IResend resend = ResendClient.Create( "re_xxxxxxxxx" ); // Or from DI
await resend.EmailCancelAsync( new Guid( "49a3999c-0ce1-4ea6-ab68-afcd6dc2e794" ) );
```
```bash cURL theme={"theme":{"light":"github-light","dark":"vesper"}}
curl -X POST 'https://api.resend.com/emails/49a3999c-0ce1-4ea6-ab68-afcd6dc2e794/cancel' \
-H 'Authorization: Bearer re_xxxxxxxxx' \
-H 'Content-Type: application/json'
```
You can also cancel a scheduled email in the Resend dashboard.
## Scheduled email failures
Scheduled emails may fail to send for several reasons. When this happens, you'll see a failure notification in the email details screen with specific information about why the email couldn't be sent.
Common failure reasons include:
* **API key is no longer active** - The API key used to schedule the email has been deleted, expired, or suspended. The email cannot be sent.
* **Account under review** - Your account has been flagged for review and sending has been temporarily suspended. Contact [support@resend.com](mailto:support@resend.com) if you believe this is an error.
You can view the failure reason and details in the Resend dashboard by clicking on the failed email.
## Limitations
* Emails sent via SMTP cannot be scheduled
---
# Source: https://resend.com/docs/webhooks/emails/scheduled.md
> ## Documentation Index
> Fetch the complete documentation index at: https://resend.com/docs/llms.txt
> Use this file to discover all available pages before exploring further.
# email.scheduled
> Received when an email is scheduled to be sent.
export const ResponseBodyParameters = ({type, children}) => {
return
Response Body Parameters
All webhook payloads follow a consistent top-level structure with
event-specific data nested within the data object.
The event type that triggered the webhook (e.g., {type}).
ISO 8601 timestamp when the webhook event was created.
Event-specific data containing detailed information about the event. The
data object for the {type} event contains the following
parameters:
{children}
;
};
Event triggered whenever the **email is scheduled to be sent**.
Unique identifier for the broadcast campaign (if applicable)
ISO 8601 timestamp when the email was created
Unique identifier for the specific email
Sender email address and name in the format "Name
\<[email@domain.com](mailto:email@domain.com)>"
Array of impacted recipient email addresses
Email subject line
Unique identifier for the template used (if applicable)
Array of tag objects associated with the email
The tag key
The tag value
```json theme={"theme":{"light":"github-light","dark":"vesper"}}
{
"type": "email.scheduled",
"created_at": "2024-02-22T23:41:12.126Z",
"data": {
"broadcast_id": "8b146471-e88e-4322-86af-016cd36fd216",
"created_at": "2024-02-22T23:41:11.894719+00:00",
"email_id": "56761188-7520-42d8-8898-ff6fc54ce618",
"from": "Acme ",
"to": ["delivered@resend.dev"],
"subject": "Sending this example",
"template_id": "43f68331-0622-4e15-8202-246a0388854b",
"tags": {
"category": "confirm_email"
}
}
}
```
---
# Source: https://resend.com/docs/sdks.md
> ## Documentation Index
> Fetch the complete documentation index at: https://resend.com/docs/llms.txt
> Use this file to discover all available pages before exploring further.
# Official SDKs
> Open source client libraries for your favorite platforms.
## Official SDKs
github.com/resend/resend-node
github.com/resend/resend-php
github.com/resend/resend-laravel
github.com/resend/resend-python
github.com/resend/resend-ruby
github.com/resend/resend-go
github.com/resend/resend-java
github.com/resend/resend-rust
github.com/resend/resend-dotnet
## Community SDKs
github.com/elixir-saas/resend-elixir
github.com/jiangtaste/nestjs-resend
github.com/coderaveHQ/dart\_resend
## OpenAPI
github.com/resend/resend-openapi
---
# Source: https://resend.com/docs/security.md
> ## Documentation Index
> Fetch the complete documentation index at: https://resend.com/docs/llms.txt
> Use this file to discover all available pages before exploring further.
# Security
> An overview of Resend security features and practices.
## Governance
Resend establishes policies and controls, monitors compliance with those controls, and proves the security and compliance to third-party auditors.
Our policies are based on the following **foundational principles**:
Access should be limited to only those with a legitimate business needs,
based on the principle of least privilege.
Security controls should be applied consistently across all areas of the
enterprise.
Security controls should be implemented and layered according to the
principle of defense-in-depth.
The implementation of controls should be iterative, continuously improving
effectiveness and decreasing friction.
### Compliance Standards
Resend is SOC 2 Type II compliant. The audit was completed by Vanta & Advantage Partners.
You can download a copy of the report on the [Documents](https://resend.com/settings/documents) page.
Resend is GDPR compliant. You can learn more about our [GDPR compliance](https://resend.com/security/gdpr) or view our [DPA](https://resend.com/legal/dpa).
## Data Protection
All datastores are encrypted at rest. Sensitive collections and tables also
use row-level encryption.
Resend uses TLS 1.3 or higher everywhere data is transmitted over
potentially insecure networks.
Resend backs-up all production data using a point-in-time approach. Backups
are persisted for 30 days, and are globally replicated for resiliency
against regional disasters.
## Product Security
### Penetration testing
Resend engages with third-party firms to conduct penetration testing at least annually.
All areas of the Resend product and cloud infrastructure are in-scope for these assessments, and source code is fully available to the testers in order to maximize the effectiveness and coverage.
You can download the latest penetration test report on the [Documents](https://resend.com/settings/documents) page.
### Vulnerability scanning
Resend uses multiple vulnerability monitoring techniques including code-level scanning, dependency scanning, and security reviews to identify and remediate vulnerabilities.
Vulnerabilities are prioritized based on severity and risk, and are remediated according to the following schedule:
* Critical: 15 Days
* High: 30 Days
* Medium: 90 Day
* Low: 180 Days
* Informational: As needed
## Enterprise Security
All company devices are equipped with anti-malware protection. Endpoint security alerts are monitored with 24/7/365 coverage. We use MDM software to enforce secure configuration of endpoints, such as disk encryption, screen lock configuration, and software updates.
Resend provides comprehensive security training to all employees upon onboarding and annually.
Resend's conducts threat briefings with employees to inform them of important security and safety-related updates that require special attention or action.
Resend employees are granted access to applications based on their role, and automatically deprovisioned upon termination of their employment. Further access must be approved according to the policies set for each application.
Multi-factor authentication is required for all employees to access company applications.
## Responsible Disclosure
To report a vulnerability, please check the guidelines on the [Responsible Disclosure](https://resend.com/security/responsible-disclosure) page.
---
# Source: https://resend.com/docs/api-reference/emails/send-batch-emails.md
> ## Documentation Index
> Fetch the complete documentation index at: https://resend.com/docs/llms.txt
> Use this file to discover all available pages before exploring further.
# Send Batch Emails
> Trigger up to 100 batch emails at once.
export const ResendParamField = ({children, body, path, ...props}) => {
const [lang, setLang] = useState(() => {
return localStorage.getItem('code') || '"Node.js"';
});
useEffect(() => {
const onStorage = event => {
const key = event.detail.key;
if (key === 'code') {
setLang(event.detail.value);
}
};
document.addEventListener('mintlify-localstorage', onStorage);
return () => {
document.removeEventListener('mintlify-localstorage', onStorage);
};
}, []);
const toCamelCase = str => typeof str === 'string' ? str.replace(/[_-](\w)/g, (_, c) => c.toUpperCase()) : str;
const resolvedBody = useMemo(() => {
const value = JSON.parse(lang);
return value === 'Node.js' ? toCamelCase(body) : body;
}, [body, lang]);
const resolvedPath = useMemo(() => {
const value = JSON.parse(lang);
return value === 'Node.js' ? toCamelCase(path) : path;
}, [path, lang]);
return
{children}
;
};
Instead of sending one email per HTTP request, we provide a batching endpoint that permits you to send up to 100 emails in a single API call.
## Body Parameters
Sender email address.
To include a friendly name, use the format `"Your Name "`.
Recipient email address. For multiple addresses, send as an array of strings.
Max 50.
Email subject.
Bcc recipient email address. For multiple addresses, send as an array of
strings.
Cc recipient email address. For multiple addresses, send as an array of
strings.
Reply-to email address. For multiple addresses, send as an array of strings.
The HTML version of the message.
The plain text version of the message.
If not provided, the HTML will be used to generate a plain text version. You
can opt out of this behavior by setting value to an empty string.
The React component used to write the message. *Only available in the Node.js
SDK.*
Custom headers to add to the email.
The topic ID to receive the email.
* If the recipient is a contact and has opted-in to the topic, the email is sent.
* If the recipient is a contact and has opted-out of the topic, the email is not sent and will be marked as failed.
* If the recipient is not a contact, the email is sent if the topic default subscription value is set to `opt-in`.
Each email address (to, cc, bcc) is checked and handled separately.
Custom data passed in key/value pairs.
[See examples](/dashboard/emails/tags).
The name of the email tag.
It can only contain ASCII letters (a–z, A–Z), numbers (0–9), underscores (\_), or dashes (-).
It can contain no more than 256 characters.
The value of the email tag.
It can only contain ASCII letters (a–z, A–Z), numbers (0–9), underscores (\_), or dashes (-).
It can contain no more than 256 characters.
To send using a template, provide a `template` object with:
* `id`: the id *or* the alias of the published template
* `variables`: an object with a key for each variable (if applicable)
If a `template` is provided, you cannot send `html`, `text`, or `react` in the payload, otherwise the API will return a validation error.
When sending a template, the payload for `from`, `subject`, and `reply_to` take precedence over the template's defaults for these fields. If the template does not provide a default value for these fields, you must provide them in the payload.
The id of the published email template. Required if `template` is provided. Only published templates can be used when sending emails.
Template variables object with key/value pairs.
```ts theme={"theme":{"light":"github-light","dark":"vesper"}}
variables: {
CTA: 'Sign up now',
CTA_LINK: 'https://example.com/signup'
}
```
When sending the template, the HTML will be parsed. If all the variables used in the template were provided, the email will be sent. If not, the call will throw a validation error.
See the [errors reference](/api-reference/errors) for more details or [learn more about templates](/dashboard/templates/introduction).
The key of the variable.
May only contain ASCII letters (a–z, A–Z), numbers (0–9), and underscores (\_). The following variable names are reserved and cannot be used: `FIRST_NAME`, `LAST_NAME`, `EMAIL`, `UNSUBSCRIBE_URL`.
It can contain no more than 50 characters.
The value of the variable.
Observe these technical limitations:
* `string`: maximum length of 2,000 characters
* `number`: not greater than 2^53 - 1
## Headers
Add an idempotency key to prevent duplicated emails.
* Should be **unique per API request**
* Idempotency keys expire after **24 hours**
* Have a maximum length of **256 characters**
[Learn more about idempotency keys →](/dashboard/emails/idempotency-keys)
## Limitations
The `attachments` and `scheduled_at` fields are not supported yet.
```ts Node.js theme={"theme":{"light":"github-light","dark":"vesper"}}
import { Resend } from 'resend';
const resend = new Resend('re_xxxxxxxxx');
const { data, error } = await resend.batch.send([
{
from: 'Acme ',
to: ['foo@gmail.com'],
subject: 'hello world',
html: '
"
}
]'
```
```json Response theme={"theme":{"light":"github-light","dark":"vesper"}}
{
"data": [
{
"id": "ae2014de-c168-4c61-8267-70d2662a1ce1"
},
{
"id": "faccb7a5-8a28-4e9a-ac64-8da1cc3bc1cb"
}
]
}
```
---
# Source: https://resend.com/docs/api-reference/broadcasts/send-broadcast.md
> ## Documentation Index
> Fetch the complete documentation index at: https://resend.com/docs/llms.txt
> Use this file to discover all available pages before exploring further.
# Send Broadcast
> Start sending broadcasts to your audience through the Resend API.
export const ResendParamField = ({children, body, path, ...props}) => {
const [lang, setLang] = useState(() => {
return localStorage.getItem('code') || '"Node.js"';
});
useEffect(() => {
const onStorage = event => {
const key = event.detail.key;
if (key === 'code') {
setLang(event.detail.value);
}
};
document.addEventListener('mintlify-localstorage', onStorage);
return () => {
document.removeEventListener('mintlify-localstorage', onStorage);
};
}, []);
const toCamelCase = str => typeof str === 'string' ? str.replace(/[_-](\w)/g, (_, c) => c.toUpperCase()) : str;
const resolvedBody = useMemo(() => {
const value = JSON.parse(lang);
return value === 'Node.js' ? toCamelCase(body) : body;
}, [body, lang]);
const resolvedPath = useMemo(() => {
const value = JSON.parse(lang);
return value === 'Node.js' ? toCamelCase(path) : path;
}, [path, lang]);
return
{children}
;
};
You can send broadcasts only if they were created via the API.
## Path Parameters
The broadcast ID.
## Body Parameters
Schedule email to be sent later. The date should be in natural language (e.g.:
`in 1 min`) or ISO 8601 format (e.g: `2024-08-05T11:52:01.858Z`).
```ts Node.js theme={"theme":{"light":"github-light","dark":"vesper"}}
import { Resend } from 'resend';
const resend = new Resend('re_xxxxxxxxx');
const { data, error } = await resend.broadcasts.send(
'559ac32e-9ef5-46fb-82a1-b76b840c0f7b',
{
scheduledAt: 'in 1 min',
},
);
```
```php PHP theme={"theme":{"light":"github-light","dark":"vesper"}}
$resend = Resend::client('re_xxxxxxxxx');
$resend->broadcasts->send('559ac32e-9ef5-46fb-82a1-b76b840c0f7b', [
'scheduled_at' => 'in 1 min',
]);
```
```py Python theme={"theme":{"light":"github-light","dark":"vesper"}}
import resend
resend.api_key = "re_xxxxxxxxx"
params: resend.Broadcasts.SendParams = {
"broadcast_id": "559ac32e-9ef5-46fb-82a1-b76b840c0f7b",
"scheduled_at": "in 1 min"
}
resend.Broadcasts.send(params)
```
```ruby Ruby theme={"theme":{"light":"github-light","dark":"vesper"}}
require "resend"
Resend.api_key = "re_xxxxxxxxx"
params = {
broadcast_id: "559ac32e-9ef5-46fb-82a1-b76b840c0f7b",
scheduled_at: "in 1 min"
}
Resend::Broadcasts.send(params)
```
```go Go theme={"theme":{"light":"github-light","dark":"vesper"}}
package main
import "github.com/resend/resend-go/v3"
func main() {
client := resend.NewClient("re_xxxxxxxxx")
sendParams := &resend.SendBroadcastRequest{
BroadcastId: "559ac32e-9ef5-46fb-82a1-b76b840c0f7b",
ScheduledAt: "in 1 min",
}
client.Broadcasts.Send(sendParams)
}
```
```rust Rust theme={"theme":{"light":"github-light","dark":"vesper"}}
use resend_rs::{types::SendBroadcastOptions, Resend, Result};
#[tokio::main]
async fn main() -> Result<()> {
let resend = Resend::new("re_xxxxxxxxx");
let opts =
SendBroadcastOptions::new("559ac32e-9ef5-46fb-82a1-b76b840c0f7b").with_scheduled_at("in 1 min");
let _broadcast = resend.broadcasts.send(opts).await?;
Ok(())
}
```
```java Java theme={"theme":{"light":"github-light","dark":"vesper"}}
Resend resend = new Resend("re_xxxxxxxxx");
SendBroadcastOptions params = SendBroadcastOptions.builder()
.scheduledAt("in 1 min")
.build();
SendBroadcastResponseSuccess data = resend.broadcasts().send(params,
"498ee8e4-7aa2-4eb5-9f04-4194848049d1");
```
```csharp .NET theme={"theme":{"light":"github-light","dark":"vesper"}}
using Resend;
IResend resend = ResendClient.Create( "re_xxxxxxxxx" ); // Or from DI
// Send now
await resend.BroadcastSendAsync( new Guid( "559ac32e-9ef5-46fb-82a1-b76b840c0f7b" ) );
// Send in 5 mins
await resend.BroadcastScheduleAsync(
new Guid( "559ac32e-9ef5-46fb-82a1-b76b840c0f7b" ),
DateTime.UtcNow.AddMinutes( 5 ) );
```
```bash cURL theme={"theme":{"light":"github-light","dark":"vesper"}}
curl -X POST 'https://api.resend.com/broadcasts/559ac32e-9ef5-46fb-82a1-b76b840c0f7b/send' \
-H 'Authorization: Bearer re_xxxxxxxxx' \
-H 'Content-Type: application/json' \
-d $'{
"scheduled_at": "in 1 min"
}'
```
```json Response theme={"theme":{"light":"github-light","dark":"vesper"}}
{
"id": "49a3999c-0ce1-4ea6-ab68-afcd6dc2e794"
}
```
---
# Source: https://resend.com/docs/api-reference/emails/send-email.md
> ## Documentation Index
> Fetch the complete documentation index at: https://resend.com/docs/llms.txt
> Use this file to discover all available pages before exploring further.
# Send Email
> Start sending emails through the Resend Email API.
export const ResendParamField = ({children, body, path, ...props}) => {
const [lang, setLang] = useState(() => {
return localStorage.getItem('code') || '"Node.js"';
});
useEffect(() => {
const onStorage = event => {
const key = event.detail.key;
if (key === 'code') {
setLang(event.detail.value);
}
};
document.addEventListener('mintlify-localstorage', onStorage);
return () => {
document.removeEventListener('mintlify-localstorage', onStorage);
};
}, []);
const toCamelCase = str => typeof str === 'string' ? str.replace(/[_-](\w)/g, (_, c) => c.toUpperCase()) : str;
const resolvedBody = useMemo(() => {
const value = JSON.parse(lang);
return value === 'Node.js' ? toCamelCase(body) : body;
}, [body, lang]);
const resolvedPath = useMemo(() => {
const value = JSON.parse(lang);
return value === 'Node.js' ? toCamelCase(path) : path;
}, [path, lang]);
return
{children}
;
};
## Body Parameters
Sender email address.
To include a friendly name, use the format `"Your Name "`.
Recipient email address. For multiple addresses, send as an array of strings.
Max 50.
Email subject.
Bcc recipient email address. For multiple addresses, send as an array of
strings.
Cc recipient email address. For multiple addresses, send as an array of
strings.
Schedule email to be sent later. The date should be in natural language (e.g.: `in 1 min`) or ISO 8601 format (e.g:
`2024-08-05T11:52:01.858Z`).
[See examples](/dashboard/emails/schedule-email)
Reply-to email address. For multiple addresses, send as an array of strings.
The HTML version of the message.
The plain text version of the message.
If not provided, the HTML will be used to generate a plain text version. You
can opt out of this behavior by setting value to an empty string.
The React component used to write the message. *Only available in the Node.js
SDK.*
Custom headers to add to the email.
The topic ID to receive the email.
* If the recipient is a contact and has opted-in to the topic, the email is sent.
* If the recipient is a contact and has opted-out of the topic, the email is not sent and will be marked as failed.
* If the recipient is not a contact, the email is sent if the topic default subscription value is set to `opt-in`.
Each email address (to, cc, bcc) is checked and handled separately.
Filename and content of attachments (max 40MB per email, after Base64 encoding of the attachments).
[See examples](/dashboard/emails/attachments)
Content of an attached file, passed as a buffer or Base64 string.
Name of attached file.
Path where the attachment file is hosted
Content type for the attachment, if not set will be derived from the filename property
You can embed images using the content id parameter for the attachment. To show the image, you need to include the ID in the `src` attribute of the `img` tag (e.g., ``) of your HTML. [Learn about inline images](/dashboard/emails/embed-inline-images).
Custom data passed in key/value pairs.
[See examples](/dashboard/emails/tags).
The name of the email tag.
It can only contain ASCII letters (a–z, A–Z), numbers (0–9), underscores (\_), or dashes (-).
It can contain no more than 256 characters.
The value of the email tag.
It can only contain ASCII letters (a–z, A–Z), numbers (0–9), underscores (\_), or dashes (-).
It can contain no more than 256 characters.
To send using a template, provide a `template` object with:
* `id`: the id *or* the alias of the published template
* `variables`: an object with a key for each variable (if applicable)
If a `template` is provided, you cannot send `html`, `text`, or `react` in the payload, otherwise the API will return a validation error.
When sending a template, the payload for `from`, `subject`, and `reply_to` take precedence over the template's defaults for these fields. If the template does not provide a default value for these fields, you must provide them in the payload.
The id of the published email template. Required if `template` is provided. Only published templates can be used when sending emails.
Template variables object with key/value pairs.
```ts theme={"theme":{"light":"github-light","dark":"vesper"}}
variables: {
CTA: 'Sign up now',
CTA_LINK: 'https://example.com/signup'
}
```
When sending the template, the HTML will be parsed. If all the variables used in the template were provided, the email will be sent. If not, the call will throw a validation error.
See the [errors reference](/api-reference/errors) for more details or [learn more about templates](/dashboard/templates/introduction).
The key of the variable.
May only contain ASCII letters (a–z, A–Z), numbers (0–9), and underscores (\_). The following variable names are reserved and cannot be used: `FIRST_NAME`, `LAST_NAME`, `EMAIL`, `UNSUBSCRIBE_URL`.
It can contain no more than 50 characters.
The value of the variable.
Observe these technical limitations:
* `string`: maximum length of 2,000 characters
* `number`: not greater than 2^53 - 1
## Headers
Add an idempotency key to prevent duplicated emails.
* Should be **unique per API request**
* Idempotency keys expire after **24 hours**
* Have a maximum length of **256 characters**
[Learn more](/dashboard/emails/idempotency-keys)
```ts Node.js theme={"theme":{"light":"github-light","dark":"vesper"}}
import { Resend } from 'resend';
const resend = new Resend('re_xxxxxxxxx');
const { data, error } = await resend.emails.send({
from: 'Acme ',
to: ['delivered@resend.dev'],
subject: 'hello world',
html: '
",
"reply_to": "onboarding@resend.dev"
}'
```
```json Response theme={"theme":{"light":"github-light","dark":"vesper"}}
{
"id": "49a3999c-0ce1-4ea6-ab68-afcd6dc2e794"
}
```
---
# Source: https://resend.com/docs/dashboard/emails/send-test-emails.md
> ## Documentation Index
> Fetch the complete documentation index at: https://resend.com/docs/llms.txt
> Use this file to discover all available pages before exploring further.
# Send Test Emails
> Simulate different events by sending test emails.
## How to send test emails
During development, it's important to test different deliverability scenarios.
> **Example**: When an email hard bounces or is marked as spam, it's important to stop sending emails to the recipient, as continuing to send emails to those addresses will damage your domain reputation. We recommend [creating a webhook endpoint](/webhooks/introduction) to capture these events and remove the addresses from your mailing lists.
When testing, avoid:
* sending to fake email addresses
* setting up a fake SMTP server
We provide the following test email addresses to help you simulate different email events without damaging your domain reputation. These test emails enable the safe use of Resend's Dashboard, Webhooks, and API when developing your application.
All test email addresses support labeling, which enables you to send emails to the same test address in multiple ways. You can add a label after the `+` symbol (e.g., `delivered+label1@resend.dev`) to help track and differentiate between different test scenarios in your application.
## Test delivered emails
To test that your emails are being successfully delivered, you can send an email to:
```
delivered@resend.dev
```
With labeling support, you can also use:
```
delivered+user1@resend.dev
delivered+user2@resend.dev
delivered+user3@resend.dev
```
## Test bounced emails
To test that the recipient's email provider rejected your email, you can send an email to:
```
bounced@resend.dev
```
With labeling support, you can also use:
```
bounced+user1@resend.dev
bounced+user2@resend.dev
bounced+user3@resend.dev
```
This will generate a SMTP 550 5.1.1 ("Unknown User") response code.
## Test "Marked as Spam" emails
To test that your emails are being received but marked as spam, you can send an email to:
```
complained@resend.dev
```
With labeling support, you can also use:
```
complained+user1@resend.dev
complained+user2@resend.dev
complained+user3@resend.dev
```
## Test suppressed emails
To test that your emails are being suppressed, you can send an email to:
```
suppressed@resend.dev
```
When using this test email, the suppression reason will indicate the address
was previously bounced
## Using labels effectively
The suppressed test email address does not support labeling yet
The labeling feature allows you to use any string as a label after the `+` symbol. This is particularly useful for:
* Testing different email flows (e.g., `delivered+signup@resend.dev`, `delivered+password-reset@resend.dev`)
* Tracking webhook responses for specific test scenarios
* Differentiating between multiple test runs
* Matching responses with the specific email address that triggered the event
---
# Source: https://resend.com/docs/send-with-astro.md
> ## Documentation Index
> Fetch the complete documentation index at: https://resend.com/docs/llms.txt
> Use this file to discover all available pages before exploring further.
# Send emails with Astro
> Learn how to send your first email using Astro, Resend, and Node.js.
export const YouTube = ({id}) => {
return ;
};
## Prerequisites
To get the most out of this guide, you'll need to:
* [Create an API key](https://resend.com/api-keys)
* [Verify your domain](https://resend.com/domains)
If you prefer to watch a video, check out our video walkthrough below.
## 1. Install
Install Resend for Node.js.
```bash npm theme={"theme":{"light":"github-light","dark":"vesper"}}
npm install resend
```
```bash yarn theme={"theme":{"light":"github-light","dark":"vesper"}}
yarn add resend
```
```bash pnpm theme={"theme":{"light":"github-light","dark":"vesper"}}
pnpm add resend
```
```bash bun theme={"theme":{"light":"github-light","dark":"vesper"}}
bun add resend
```
## 2. Install an SSR adapter
Because Astro builds a static site by default, [install an SSR adapter](https://docs.astro.build/en/guides/server-side-rendering/) to enable on-demand rendering of routes.
## 3. Add your API key
[Create an API key](https://resend.com/api-keys) in Resend and add it to your `.env` file to keep your API key secret.
```ini .env theme={"theme":{"light":"github-light","dark":"vesper"}}
RESEND_API_KEY="re_xxxxxxxxx"
```
## 4. Send email using HTML
Create an [Astro Action](https://docs.astro.build/en/guides/actions/) under `actions/index.ts`.
The easiest way to send an email is with the `html` parameter.
```ts src/actions/index.ts theme={"theme":{"light":"github-light","dark":"vesper"}}
import { ActionError, defineAction } from 'astro:actions';
import { Resend } from 'resend';
const resend = new Resend(import.meta.env.RESEND_API_KEY);
export const server = {
send: defineAction({
accept: 'form',
handler: async () => {
const { data, error } = await resend.emails.send({
from: 'Acme ',
to: ['delivered@resend.dev'],
subject: 'Hello world',
html: 'It works!',
});
if (error) {
throw new ActionError({
code: 'BAD_REQUEST',
message: error.message,
});
}
return data;
},
}),
};
```
Call the `send` action from any frontmatter route, script, or component.
## 5. Try it yourself
See the full source code.
---
# Source: https://resend.com/docs/send-with-auth0-smtp.md
> ## Documentation Index
> Fetch the complete documentation index at: https://resend.com/docs/llms.txt
> Use this file to discover all available pages before exploring further.
# Send emails using Auth0 with SMTP
> Learn how to integrate Auth0 with Resend SMTP.
## Prerequisites
To get the most out of this guide, you'll need to:
* [Create an API key](https://resend.com/api-keys)
* [Verify your domain](https://resend.com/domains)
## 1. Get the Resend SMTP credentials
When configuring your SMTP integration, you'll need to use the following credentials:
* **Host**: `smtp.resend.com`
* **Port**: `465` or `587` (see [port options](#port-options) below)
* **Username**: `resend`
* **Password**: `YOUR_API_KEY`
### Port options
Resend supports multiple ports for different security configurations:
| Type | Port | Security |
| -------- | ------------------- | ------------------------------------------------------------------------- |
| SMTPS | `465`, `2465` | Implicit SSL/TLS (Immediately connects via SSL/TLS) |
| STARTTLS | `25`, `587`, `2587` | Explicit SSL/TLS (First connects via plaintext, then upgrades to SSL/TLS) |
For Auth0, we recommend using port `465` (SMTPS) or `587` (STARTTLS).
## 2. Integrate with Auth0 SMTP
After logging into your [Auth0](https://auth0.com/) dashboard, you'll need to enable the SMTP integration.
1. From your Auth0 dashboard, go to [Branding > Email Provider](https://manage.auth0.com/#/templates/provider).
2. Enable the **Use my own email provider** toggle.
3. Select **SMTP Provider**.
4. Enter a **From** email address, and then enter the Resend SMTP server's **Host**, **Port**, **Username**, and your API key as the **Password**.
## 3. Send a test email
Once you have configured the SMTP settings, click **Save**. Next send a test email using the **Send Test Email** button. If everything is configured correctly, you will receive a confirmation email. If you did not receive an email, check your [Auth0 Logs](https://manage.auth0.com/#/logs).
---
# Source: https://resend.com/docs/send-with-aws-lambda.md
> ## Documentation Index
> Fetch the complete documentation index at: https://resend.com/docs/llms.txt
> Use this file to discover all available pages before exploring further.
# Send emails with AWS Lambda
> Learn how to send your first email using AWS Lambda.
## Prerequisites
To get the most out of this guide, you'll need to:
* [Create an API key](https://resend.com/api-keys)
* [Verify your domain](https://resend.com/domains)
## 1. Create a AWS Lambda function
Go to [aws.amazon.com](https://aws.amazon.com) and create a new Lambda function using the Node.js 20.x or later runtime.
## 2. Edit the handler function
Paste the following code into the browser editor:
```js index.mjs theme={"theme":{"light":"github-light","dark":"vesper"}}
const RESEND_API_KEY = 're_xxxxxxxxx';
export const handler = async (event) => {
const res = await fetch('https://api.resend.com/emails', {
method: 'POST',
headers: {
'Content-Type': 'application/json',
'Authorization': `Bearer ${RESEND_API_KEY}`,
},
body: JSON.stringify({
from: 'Acme ',
to: ['delivered@resend.dev'],
subject: 'hello world',
html: 'it works!',
}),
});
if (res.ok) {
const data = await res.json();
return {
statusCode: 200,
body: data,
};
}
};
```
## 3. Deploy and send email
Click on `Deploy` and then `Test` at the top of the screen.
## 4. Try it yourself
See the full source code.
---
# Source: https://resend.com/docs/send-with-axum.md
> ## Documentation Index
> Fetch the complete documentation index at: https://resend.com/docs/llms.txt
> Use this file to discover all available pages before exploring further.
# Send emails with Axum
> Send your first email using Axum and the Resend Rust SDK.
## Prerequisites
To get the most out of this guide, you'll need to:
* [Create an API key](https://resend.com/api-keys)
* [Verify your domain](https://resend.com/domains)
## 1. Install
Get the Resend Rust SDK and the [Tokio](https://tokio.rs) runtime.
```bash theme={"theme":{"light":"github-light","dark":"vesper"}}
cargo add resend-rs
cargo add tokio -F macros,rt-multi-thread
```
## 2. Send an Email
```rust theme={"theme":{"light":"github-light","dark":"vesper"}}
use std::sync::Arc;
use axum::{extract::State, http::StatusCode, routing::get, Router};
use resend_rs::types::CreateEmailBaseOptions;
use resend_rs::{Resend, Result};
// Cloning the Resend client is fine and cheap as the internal HTTP client is
// not cloned.
#[derive(Clone)]
struct AppState {
resend: Resend,
}
#[tokio::main]
async fn main() {
let shared_state = Arc::new(AppState {
resend: Resend::new("re_xxxxxxxxx"),
});
// build our application with a single route
let app = Router::new()
.route("/", get(endpoint))
// provide the state so the router can access it
.with_state(shared_state);
// run our app with hyper, listening globally on port 3000
let listener = tokio::net::TcpListener::bind("0.0.0.0:3000").await.unwrap();
axum::serve(listener, app).await.unwrap();
}
async fn endpoint(State(state): State>) -> Result {
let from = "Acme ";
let to = ["delivered@resend.dev"];
let subject = "Hello World";
let email = CreateEmailBaseOptions::new(from, to, subject)
.with_html("It works!");
// access the state via the `State` extractor and handle the error
match state.resend.emails.send(email).await {
Ok(email) => Ok(email.id.to_string()),
Err(_) => Err(StatusCode::INTERNAL_SERVER_ERROR),
}
}
```
Opening your browser at `http://localhost:3000` (or running `curl localhost:3000`) should send an
email and return you its id!
## 3. Try it yourself!
See the full source code.
---
# Source: https://resend.com/docs/send-with-bun.md
> ## Documentation Index
> Fetch the complete documentation index at: https://resend.com/docs/llms.txt
> Use this file to discover all available pages before exploring further.
# Send emails with Bun
> Learn how to send your first email using Bun and the Resend Node.js SDK.
## Prerequisites
To get the most out of this guide, you'll need to:
* [Create an API key](https://resend.com/api-keys)
* [Verify your domain](https://resend.com/domains)
## 1. Install
Get the Resend Node.js SDK.
```bash theme={"theme":{"light":"github-light","dark":"vesper"}}
bun install resend
```
## 2. Create an email template
Start by creating your email template on `email-template.tsx`.
```tsx email-template.tsx theme={"theme":{"light":"github-light","dark":"vesper"}}
import * as React from 'react';
interface EmailTemplateProps {
firstName: string;
}
export const EmailTemplate = ({ firstName }: EmailTemplateProps) => (
Welcome, {firstName}!
);
```
## 3. Send email using React
Create a new file `index.tsx` and send your first email.
```tsx index.tsx theme={"theme":{"light":"github-light","dark":"vesper"}}
import { Resend } from 'resend';
import { EmailTemplate } from './email-template';
const resend = new Resend(process.env.RESEND_API_KEY);
const server = Bun.serve({
port: 3000,
async fetch() {
const data = await resend.emails.send({
from: 'Acme ',
to: ['delivered@resend.dev'],
subject: 'Hello World',
react: EmailTemplate({ firstName: 'Vitor' }),
});
return new Response(JSON.stringify(data));
},
});
console.log(`Listening on http://localhost:${server.port} ...`);
```
Start the local server by running `bun index.tsx` and navigate to `http://localhost:3000`.
## 3. Try it yourself
See the full source code.
---
# Source: https://resend.com/docs/send-with-cloudflare-workers.md
> ## Documentation Index
> Fetch the complete documentation index at: https://resend.com/docs/llms.txt
> Use this file to discover all available pages before exploring further.
# Send emails with Cloudflare Workers
> Learn how to send your first email using Cloudflare Workers.
## Prerequisites
To get the most out of this guide, you'll need to:
* [Create an API key](https://resend.com/api-keys)
* [Verify your domain](https://resend.com/domains)
* Have a Cloudflare worker with a bundling setup
* Recommended to be bootstrapped with `npm create cloudflare`
## 1. Install
Get the Resend Node.js SDK.
```bash npm theme={"theme":{"light":"github-light","dark":"vesper"}}
npm install resend
```
```bash yarn theme={"theme":{"light":"github-light","dark":"vesper"}}
yarn add resend
```
```bash pnpm theme={"theme":{"light":"github-light","dark":"vesper"}}
pnpm add resend
```
```bash bun theme={"theme":{"light":"github-light","dark":"vesper"}}
bun add resend
```
## 2. Create an email template
Start by creating your email template on `src/emails/email-template.tsx`:
```tsx src/emails/email-template.tsx theme={"theme":{"light":"github-light","dark":"vesper"}}
import * as React from 'react';
interface EmailTemplateProps {
firstName: string;
}
export function EmailTemplate({ firstName }: EmailTemplateProps) {
return (
Welcome, {firstName}!
);
}
export default EmailTemplate;
```
## 3. Send the email using React and the SDK
Change the file extension of the worker's main file to `tsx` and modify your configurations.
After that, you can send your email using the `react` parameter:
```tsx src/index.tsx theme={"theme":{"light":"github-light","dark":"vesper"}}
import { Resend } from 'resend';
import { EmailTemplate } from './emails/email-template';
export default {
async fetch(request, env, context): Promise {
const resend = new Resend('re_xxxxxxxxx');
const data = await resend.emails.send({
from: 'Acme ',
to: ['delivered@resend.dev'],
subject: 'hello world',
react: ,
});
return Response.json(data);
},
} satisfies ExportedHandler;
```
## 4. Deploy and send email
Run `wrangler deploy` and wait for it to finish. Once it's done, it will
give you a URL to try out, like `https://my-worker.your_name.workers.dev`,
that you can open and verify that your email has been sent.
## 5. Try it yourself
See the full source code.
---
# Source: https://resend.com/docs/send-with-customer-io-smtp.md
> ## Documentation Index
> Fetch the complete documentation index at: https://resend.com/docs/llms.txt
> Use this file to discover all available pages before exploring further.
# Send emails using Customer.io with SMTP
> Learn how to integrate Customer.io with Resend SMTP.
### Prerequisites
To get the most out of this guide, you'll need to:
* [Create an API key](https://resend.com/api-keys)
* [Verify your domain](https://resend.com/domains)
## 1. Get the Resend SMTP credentials
When configuring your SMTP integration, you'll need to use the following credentials:
* **Host**: `smtp.resend.com`
* **Port**: `465`
* **Username**: `resend`
* **Password**: `YOUR_API_KEY`
## 2. Integrate with Customer.io SMTP
After logging into your [Customer.io](https://customer.io) account, you'll need to enable the SMTP integration.
1. Go to **Settings** > **Workspace Settings**.
2. Go to the Messaging tab and select **Email**.
3. Select the **Custom SMTP** tab and click **Add Custom SMTP Server**.
4. Select **Other SMTP** and click **Continue to set up**.
5. Copy-and-paste the SMTP credentials from Resend to Customer.io.
---
# Source: https://resend.com/docs/send-with-deno-deploy.md
> ## Documentation Index
> Fetch the complete documentation index at: https://resend.com/docs/llms.txt
> Use this file to discover all available pages before exploring further.
# Send emails with Deno Deploy
> Learn how to send your first email using Deno Deploy.
## Prerequisites
To get the most out of this guide, you'll need to:
* [Create an API key](https://resend.com/api-keys)
* [Verify your domain](https://resend.com/domains)
## 1. Create a Deno Deploy project
Go to [dash.deno.com/projects](https://dash.deno.com/projects) and create a new playground project.
## 2. Edit the handler function
Paste the following code into the browser editor:
```ts main.ts theme={"theme":{"light":"github-light","dark":"vesper"}}
import { Resend } from 'npm:resend';
const resend = new Resend('re_123456789');
Deno.serve(async () => {
try {
const response = await resend.emails.send({
from: 'Acme ',
to: ['delivered@resend.dev'],
subject: 'Hello World',
html: 'It works!',
});
return new Response(JSON.stringify(response), {
status: response.error ? 500 : 200,
headers: {
'Content-Type': 'application/json',
},
});
} catch (error) {
console.error(error);
return new Response(null, {
status: 500,
});
}
});
```
## 3. Deploy and send email
Click on `Save & Deploy` at the top of the screen.
## 4. Try it yourself
See the full source code.
---
# Source: https://resend.com/docs/send-with-django-smtp.md
> ## Documentation Index
> Fetch the complete documentation index at: https://resend.com/docs/llms.txt
> Use this file to discover all available pages before exploring further.
# Send emails using Django with SMTP
> Learn how to integrate Django with Resend SMTP.
## Prerequisites
To get the most out of this guide, you'll need to:
* [Create an API key](https://resend.com/api-keys)
* [Verify your domain](https://resend.com/domains)
* Install `virtualenv` by running `pip install virtualenv`
## 1. Setup your environment
Create and activate your new virtualenv.
```bash theme={"theme":{"light":"github-light","dark":"vesper"}}
virtualenv venv
source venv/bin/activate
```
Install dependencies.
```sh theme={"theme":{"light":"github-light","dark":"vesper"}}
pip install -r requirements.txt
```
Set your `RESEND_API_KEY` environment variable by running.
```sh theme={"theme":{"light":"github-light","dark":"vesper"}}
export RESEND_API_KEY="re_xxxxxxxxx"
```
## 2. Send email using Django's SMTP EmailMessage
Set the necessary attributes in your `settings.py` file.
```py theme={"theme":{"light":"github-light","dark":"vesper"}}
EMAIL_BACKEND = 'django.core.mail.backends.smtp.EmailBackend'
RESEND_SMTP_PORT = 587
RESEND_SMTP_USERNAME = 'resend'
RESEND_SMTP_HOST = 'smtp.resend.com'
```
Use Django's `get_connection` and `EmailMessage`
```py theme={"theme":{"light":"github-light","dark":"vesper"}}
import os
from django.conf import settings
from django.http import JsonResponse
from django.core.mail import EmailMessage, get_connection
# Sample Django view
def index(request):
subject = "Hello from Django SMTP"
recipient_list = ["delivered@resend.dev"]
from_email = "onboarding@resend.dev"
message = "it works!"
with get_connection(
host=settings.RESEND_SMTP_HOST,
port=settings.RESEND_SMTP_PORT,
username=settings.RESEND_SMTP_USERNAME,
password=os.environ["RESEND_API_KEY"],
use_tls=True,
) as connection:
r = EmailMessage(
subject=subject,
body=message,
to=recipient_list,
from_email=from_email,
connection=connection).send()
return JsonResponse({"status": "ok"})
```
## 3. Try it yourself
See the full source code.
---
# Source: https://resend.com/docs/send-with-django.md
> ## Documentation Index
> Fetch the complete documentation index at: https://resend.com/docs/llms.txt
> Use this file to discover all available pages before exploring further.
# Send emails with Django
> Learn how to send your first email using Django and the Resend Python SDK.
## Prerequisites
To get the most out of this guide, you'll need to:
* [Create an API key](https://resend.com/api-keys)
* [Verify your domain](https://resend.com/domains)
## 1. Install
Get the [django-anymail](https://anymail.dev/en/stable/esps/resend/) package with Resend support.
```bash Pip theme={"theme":{"light":"github-light","dark":"vesper"}}
pip install django-anymail[resend]
```
## 2. Configure
Add Anymail to your Django settings.
```py settings.py theme={"theme":{"light":"github-light","dark":"vesper"}}
import os
INSTALLED_APPS = [
# ...
"anymail",
]
EMAIL_BACKEND = "anymail.backends.resend.EmailBackend"
ANYMAIL = {
"RESEND_API_KEY": os.environ.get("RESEND_API_KEY"),
}
DEFAULT_FROM_EMAIL = "onboarding@resend.dev"
```
## 3. Send email using HTML
The easiest way to send an email is by using the `html_message` parameter.
```py views.py theme={"theme":{"light":"github-light","dark":"vesper"}}
from django.core.mail import send_mail
from django.http import JsonResponse
def send_email(request):
send_mail(
subject="Hello from Django + Resend",
message="This is a plain text message.",
from_email="Acme ",
recipient_list=["delivered@resend.dev"],
html_message="it works!",
)
return JsonResponse({"message": "Email sent successfully"})
```
## 4. Send email using a template
For more complex emails, you can use Django's template system.
First, create an HTML template at `templates/emails/welcome.html`:
```html templates/emails/welcome.html theme={"theme":{"light":"github-light","dark":"vesper"}}
Welcome Email
```
Then render and send the template:
```py views.py theme={"theme":{"light":"github-light","dark":"vesper"}}
from django.core.mail import EmailMessage
from django.http import JsonResponse
from django.template.loader import render_to_string
def send_template_email(request):
html_content = render_to_string('emails/welcome.html', {
'user_name': 'Django Developer',
'user_email': 'delivered@resend.dev',
'dashboard_url': 'https://example.com/dashboard',
})
message = EmailMessage(
subject="Welcome to Our Service!",
body=html_content,
from_email="Acme ",
to=["delivered@resend.dev"],
)
message.content_subtype = "html"
message.send()
return JsonResponse({"message": "Email sent successfully"})
```
## 5. Try it yourself
See the full source code.
---
# Source: https://resend.com/docs/send-with-dotnet.md
> ## Documentation Index
> Fetch the complete documentation index at: https://resend.com/docs/llms.txt
> Use this file to discover all available pages before exploring further.
# Send emails with .NET
> Learn how to send your first email using the Resend .NET SDK.
export const YouTube = ({id}) => {
return ;
};
## Prerequisites
To get the most out of this guide, you'll need to:
* [Create an API key](https://resend.com/api-keys)
* [Verify your domain](https://resend.com/domains)
Prefer watching a video? Check out our video walkthrough below.
## 1. Install
```bash dotnet CLI theme={"theme":{"light":"github-light","dark":"vesper"}}
dotnet add package Resend
```
```bash Visual Studio (Package Manager Console) theme={"theme":{"light":"github-light","dark":"vesper"}}
PM> Install-Package Resend
```
## 2. Send emails using HTML
In the startup of your application, configure the DI container as follows:
```csharp theme={"theme":{"light":"github-light","dark":"vesper"}}
using Resend;
builder.Services.AddOptions();
builder.Services.AddHttpClient();
builder.Services.Configure( o =>
{
o.ApiToken = Environment.GetEnvironmentVariable( "RESEND_APITOKEN" )!;
} );
builder.Services.AddTransient();
```
Send an email using the injected `IResend` instance:
```csharp theme={"theme":{"light":"github-light","dark":"vesper"}}
using Resend;
public class FeatureImplementation
{
private readonly IResend _resend;
public FeatureImplementation( IResend resend )
{
_resend = resend;
}
public Task Execute()
{
var message = new EmailMessage();
message.From = "Acme ";
message.To.Add( "delivered@resend.dev" );
message.Subject = "hello world";
message.HtmlBody = "it works!";
await _resend.EmailSendAsync( message );
}
}
```
## 3. Try it yourself
See the full source code.
List of .NET examples (API, Web, HTML rendering, Async sending).
---
# Source: https://resend.com/docs/send-with-elixir.md
> ## Documentation Index
> Fetch the complete documentation index at: https://resend.com/docs/llms.txt
> Use this file to discover all available pages before exploring further.
# Send emails with Elixir
> Learn how to send your first email using the Resend Elixir SDK.
This guides utilizes an [open source
library](https://github.com/elixir-saas/resend-elixir) contributed by a
community member. It's not developed, maintained, or supported by Resend
directly.
## Prerequisites
To get the most out of this guide, you'll need to:
* [Create an API key](https://resend.com/api-keys)
* [Verify your domain](https://resend.com/domains)
## 1. Install
Install by adding `resend` to your list of dependencies in `mix.exs`:
```elixir mix.exs theme={"theme":{"light":"github-light","dark":"vesper"}}
def deps do
[
{:resend, "~> 0.4.0"}
]
end
```
## 2. Send email using HTML
The easiest way to send an email is by using the `html` parameter.
```elixir send.exs theme={"theme":{"light":"github-light","dark":"vesper"}}
client = Resend.client(api_key: System.get_env("RESEND_API_KEY"))
Resend.Emails.send(client, %{
from: "Acme ",
to: ["delivered@resend.dev"],
subject: "hello world",
html: "it works!"
})
```
## 3. Try it yourself
See the full source code.
---
# Source: https://resend.com/docs/send-with-express.md
> ## Documentation Index
> Fetch the complete documentation index at: https://resend.com/docs/llms.txt
> Use this file to discover all available pages before exploring further.
# Send emails with Express
> Learn how to send your first email using Express and the Resend Node.js SDK.
## Prerequisites
To get the most out of this guide, you'll need to:
* [Create an API key](https://resend.com/api-keys)
* [Verify your domain](https://resend.com/domains)
## 1. Install
Get the Resend Node.js SDK.
```bash npm theme={"theme":{"light":"github-light","dark":"vesper"}}
npm install resend
```
```bash yarn theme={"theme":{"light":"github-light","dark":"vesper"}}
yarn add resend
```
```bash pnpm theme={"theme":{"light":"github-light","dark":"vesper"}}
pnpm add resend
```
```bash bun theme={"theme":{"light":"github-light","dark":"vesper"}}
bun add resend
```
## 2. Send email using HTML
The easiest way to send an email is by using the `html` parameter.
```js server.ts theme={"theme":{"light":"github-light","dark":"vesper"}}
import express, { Request, Response } from "express";
import { Resend } from "resend";
const app = express();
const resend = new Resend("re_xxxxxxxxx");
app.get("/", async (req: Request, res: Response) => {
const { data, error } = await resend.emails.send({
from: "Acme ",
to: ["delivered@resend.dev"],
subject: "hello world",
html: "it works!",
});
if (error) {
return res.status(400).json({ error });
}
res.status(200).json({ data });
});
app.listen(3000, () => {
console.log("Listening on http://localhost:3000");
});
```
## 3. Try it yourself
See the full source code.
---
# Source: https://resend.com/docs/send-with-fastapi.md
> ## Documentation Index
> Fetch the complete documentation index at: https://resend.com/docs/llms.txt
> Use this file to discover all available pages before exploring further.
# Send emails with FastAPI
> Learn how to send your first email using FastAPI and the Resend Python SDK.
## Prerequisites
To get the most out of this guide, you'll need to:
* [Create an API key](https://resend.com/api-keys)
* [Verify your domain](https://resend.com/domains)
## 1. Install
Get the Resend Python SDK.
```bash Pip theme={"theme":{"light":"github-light","dark":"vesper"}}
pip install resend
```
## 2. Send email using HTML
The easiest way to send an email is by using the `html` parameter.
```py main.py theme={"theme":{"light":"github-light","dark":"vesper"}}
import os
from typing import Dict
from fastapi import FastAPI
import resend
resend.api_key = os.environ["RESEND_API_KEY"]
app = FastAPI()
@app.post("/")
def send_mail() -> Dict:
params: resend.Emails.SendParams = {
"from": "Acme ",
"to": ["delivered@resend.dev"],
"subject": "hello world",
"html": "it works!",
}
email: resend.Emails.SendResponse = resend.Emails.send(params)
return email
```
## 3. Try it yourself
See the full source code.
---
# Source: https://resend.com/docs/send-with-flask.md
> ## Documentation Index
> Fetch the complete documentation index at: https://resend.com/docs/llms.txt
> Use this file to discover all available pages before exploring further.
# Send emails with Flask
> Learn how to send your first email using Flask and the Resend Python SDK.
## Prerequisites
To get the most out of this guide, you'll need to:
* [Create an API key](https://resend.com/api-keys)
* [Verify your domain](https://resend.com/domains)
## 1. Install
Get the Resend Python SDK.
```bash Pip theme={"theme":{"light":"github-light","dark":"vesper"}}
pip install resend
```
## 2. Send email using HTML
The easiest way to send an email is by using the `html` parameter.
```py index.py theme={"theme":{"light":"github-light","dark":"vesper"}}
import resend
import os
from flask import Flask, jsonify
resend.api_key = os.environ["RESEND_API_KEY"]
app = Flask(__name__)
@app.route("/")
def index():
params: resend.Emails.SendParams = {
"from": "Acme ",
"to": ["delivered@resend.dev"],
"subject": "hello world",
"html": "it works!",
}
r = resend.Emails.send(params)
return jsonify(r)
if __name__ == "__main__":
app.run()
```
## 3. Try it yourself
See the full source code.
---
# Source: https://resend.com/docs/send-with-go.md
> ## Documentation Index
> Fetch the complete documentation index at: https://resend.com/docs/llms.txt
> Use this file to discover all available pages before exploring further.
# Send emails with Go
> Learn how to send your first email using the Resend Go SDK.
## Prerequisites
To get the most out of this guide, you'll need to:
* [Create an API key](https://resend.com/api-keys)
* [Verify your domain](https://resend.com/domains)
## 1. Install
Get the Resend Go SDK.
```bash bash theme={"theme":{"light":"github-light","dark":"vesper"}}
go get github.com/resend/resend-go/v3
```
## 2. Send email using HTML
The easiest way to send an email is by using the `html` parameter.
```Go main.go theme={"theme":{"light":"github-light","dark":"vesper"}}
package main
import "github.com/resend/resend-go/v3"
func main() {
client := resend.NewClient("re_xxxxxxxxx")
params := &resend.SendEmailRequest{
From: "Acme ",
To: []string{"delivered@resend.dev"},
Html: "hello world",
Subject: "Hello from Golang",
Cc: []string{"cc@example.com"},
Bcc: []string{"bcc@example.com"},
ReplyTo: "replyto@example.com",
}
sent, err := client.Emails.Send(params)
if err != nil {
fmt.Println(err.Error())
return
}
fmt.Println(sent.Id)
}
```
## 3. Try it yourself
See the full source code.
---
# Source: https://resend.com/docs/send-with-hono.md
> ## Documentation Index
> Fetch the complete documentation index at: https://resend.com/docs/llms.txt
> Use this file to discover all available pages before exploring further.
# Send emails with Hono
> Learn how to send your first email using Hono and the Resend Node.js SDK.
## Prerequisites
To get the most out of this guide, you'll need to:
* [Create an API key](https://resend.com/api-keys)
* [Verify your domain](https://resend.com/domains)
## 1. Install
Get the Resend Node.js SDK.
```bash npm theme={"theme":{"light":"github-light","dark":"vesper"}}
npm install resend
```
```bash yarn theme={"theme":{"light":"github-light","dark":"vesper"}}
yarn add resend
```
```bash pnpm theme={"theme":{"light":"github-light","dark":"vesper"}}
pnpm add resend
```
```bash bun theme={"theme":{"light":"github-light","dark":"vesper"}}
bun add resend
```
## 2. Create an email template
Start by creating your email template on `emails/email-template.tsx`.
```tsx emails/email-template.tsx theme={"theme":{"light":"github-light","dark":"vesper"}}
import * as React from 'react';
interface EmailTemplateProps {
firstName: string;
}
export function EmailTemplate({ firstName }: EmailTemplateProps) {
return (
Welcome, {firstName}!
);
}
```
To use JSX/TSX with Hono, we need to modify the `tsconfig.json`.
```json tsconfig.json theme={"theme":{"light":"github-light","dark":"vesper"}}
{
"compilerOptions": {
"jsx": "react-jsx",
"jsxImportSource": "react"
}
}
```
## 3. Send email using React
Create a new file `index.tsx` and send your first email.
```ts index.tsx theme={"theme":{"light":"github-light","dark":"vesper"}}
import { Hono } from 'hono';
import { Resend } from 'resend';
import { EmailTemplate } from './emails/email-template';
const app = new Hono();
const resend = new Resend('re_xxxxxxxxx');
app.get('/', async (c) => {
const { data, error } = await resend.emails.send({
from: 'Acme ',
to: ['delivered@resend.dev'],
subject: 'hello world',
react: ,
});
if (error) {
return c.json(error, 400);
}
return c.json(data);
});
export default app;
```
## 4. Try it yourself
See the full source code.
---
# Source: https://resend.com/docs/send-with-java.md
> ## Documentation Index
> Fetch the complete documentation index at: https://resend.com/docs/llms.txt
> Use this file to discover all available pages before exploring further.
# Send emails with Java
> Learn how to send your first email using the Resend Java SDK.
## Prerequisites
To get the most out of this guide, you'll need to:
* [Create an API key](https://resend.com/api-keys)
* [Verify your domain](https://resend.com/domains)
## 1. Install
```bash Gradle theme={"theme":{"light":"github-light","dark":"vesper"}}
implementation 'com.resend:resend-java:+'
```
```xml Maven theme={"theme":{"light":"github-light","dark":"vesper"}}
com.resendresend-javaLATEST
```
## 2. Send emails using HTML
```java Main.java theme={"theme":{"light":"github-light","dark":"vesper"}}
import com.resend.*;
public class Main {
public static void main(String[] args) {
Resend resend = new Resend("re_xxxxxxxxx");
CreateEmailOptions params = CreateEmailOptions.builder()
.from("Acme ")
.to("delivered@resend.dev")
.subject("it works!")
.html("hello world")
.build();
try {
CreateEmailResponse data = resend.emails().send(params);
System.out.println(data.getId());
} catch (ResendException e) {
e.printStackTrace();
}
}
}
```
## 3. Try it yourself
See the full source code.
---
# Source: https://resend.com/docs/send-with-laravel-smtp.md
> ## Documentation Index
> Fetch the complete documentation index at: https://resend.com/docs/llms.txt
> Use this file to discover all available pages before exploring further.
# Send emails using Laravel with SMTP
> Learn how to send your first email using Laravel with SMTP.
## Prerequisites
To get the most out of this guide, you'll need to:
* [Create an API key](https://resend.com/api-keys)
* [Verify your domain](https://resend.com/domains)
## 1. Setup your environment
First, configure your Resend SMTP details in your application's `.env` file:
```ini .env theme={"theme":{"light":"github-light","dark":"vesper"}}
MAIL_MAILER=smtp
MAIL_HOST=smtp.resend.com
MAIL_PORT=587
MAIL_USERNAME=resend
MAIL_PASSWORD=re_xxxxxxxxx
MAIL_ENCRYPTION=tls
MAIL_FROM_ADDRESS=onboarding@resend.dev
MAIL_FROM_NAME=Acme
```
## 2. Send an email
Now you're ready to send emails with Laravel's powerful email service. Here's an example of how you could send your first email using Resend SMTP:
```php OrderShipmentController.php theme={"theme":{"light":"github-light","dark":"vesper"}}
order_id);
// Ship the order...
Mail::to($request->user())->send(new OrderShipped($order));
return redirect('/orders');
}
}
```
## 3. Try it yourself
See the full source code.
---
# Source: https://resend.com/docs/send-with-laravel.md
> ## Documentation Index
> Fetch the complete documentation index at: https://resend.com/docs/llms.txt
> Use this file to discover all available pages before exploring further.
# Send emails with Laravel
> Learn how to send your first email using Laravel.
export const YouTube = ({id}) => {
return ;
};
## Prerequisites
To get the most out of this guide, you will need to:
* [Create an API key](https://resend.com/api-keys)
* [Verify your domain](https://resend.com/domains)
Prefer watching a video? Check out this video walkthrough below.
## 1. Install
First, install Resend for Laravel using the Composer package manager:
```bash Composer theme={"theme":{"light":"github-light","dark":"vesper"}}
composer require resend/resend-laravel
```
## 2. Configuration
### API key
Next, you should configure your Resend API key in your application's `.env` file:
```ini .env theme={"theme":{"light":"github-light","dark":"vesper"}}
RESEND_API_KEY=re_xxxxxxxxx
```
If you've upgraded your Laravel project from an older version (pre-5.5) and haven't enabled auto service provider discovery, you'll need to manually register the Resend service provider. Add the provider to the `providers` array in your `config/app.php` file:
```php config/app.php theme={"theme":{"light":"github-light","dark":"vesper"}}
'providers' => [
// ... other providers
Resend\Laravel\ResendServiceProvider::class,
],
```
Without this registration, the Facade may reference the core Resend PHP client instead of the Resend Laravel library, causing unexpected behavior.
### Mail driver
To use Resend as your mail driver, first create a new mailer definition, in the `mailers` array within your application's `config/mail.php` configuration file:
```php mail.php theme={"theme":{"light":"github-light","dark":"vesper"}}
'resend' => [
'transport' => 'resend',
],
```
Next, update your application's `.env` file to use the Resend mail driver:
```ini .env theme={"theme":{"light":"github-light","dark":"vesper"}}
MAIL_MAILER=resend
MAIL_FROM_ADDRESS=onboarding@resend.dev
MAIL_FROM_NAME=Acme
```
## 3. Send an email
Resend for Laravel provides two convenient ways to send emails, using Laravel's email service or the `Resend` API facade.
### Using the Mail Facade
```php OrderShipmentController.php theme={"theme":{"light":"github-light","dark":"vesper"}}
order_id);
// Ship the order...
Mail::to($request->user())->send(new OrderShipped($order));
return redirect('/orders');
}
}
```
### Using the Resend Facade
```php OrderShipmentController.php theme={"theme":{"light":"github-light","dark":"vesper"}}
order_id);
// Ship the order...
Resend::emails()->send([
'from' => 'Acme ',
'to' => [$request->user()->email],
'subject' => 'hello world',
'html' => (new OrderShipped($order))->render(),
])
return redirect('/orders');
}
}
```
## 4. Receiving webhook requests
By default, Resend for Laravel includes a webhook controller to respond to the `/resend/webhook` URL path. The controller will dispatch a Laravel event that corresponds to a Resend event. For example, an `email.delivered` event type will send an `EmailDelivered` Laravel event.
### Register the webhook endpoint
Register your publicly accessible HTTPS URL in the Resend dashboard.
For development, you can create a tunnel to your localhost server using a tool like
[ngrok](https://ngrok.com/download) or [VS Code Port Forwarding](https://code.visualstudio.com/docs/debugtest/port-forwarding). These tools serve your local dev environment at a public URL you can use to test your local webhook endpoint.
Example: `https://example123.ngrok.io/api/webhook`
### CSRF protection
Webhook requests from Resend need to bypass Laravel's CSRF protection. Be sure to list the URI as an exception in your application's `App\Http\Middleware\VerifyCsrfToken` middleware or list the route outside of the web middleware group:
```php theme={"theme":{"light":"github-light","dark":"vesper"}}
protected $except = [
'resend/*',
];
```
### Verifying webhook signatures
To enable webhook verification, ensure that the `RESEND_WEBHOOK_SECRET` environment variable is set in your application's `.env` file. The **Signing secret** can be retrieved from your [Resend dashboard](https://resend.com/webhooks).
## 5. Try it yourself
See the full source code.
---
# Source: https://resend.com/docs/send-with-liferay-smtp.md
> ## Documentation Index
> Fetch the complete documentation index at: https://resend.com/docs/llms.txt
> Use this file to discover all available pages before exploring further.
# Send emails using Liferay with SMTP
> Learn how to integrate Liferay with Resend SMTP.
## Prerequisites
To get the most out of this guide, you'll need to:
* [Create an API key](https://resend.com/api-keys)
* [Verify your domain](https://resend.com/domains)
## 1. Get the Resend SMTP credentials
When configuring your SMTP integration, you'll need to use the following credentials:
* **Host**: `smtp.resend.com`
* **Port**: `465`
* **Username**: `resend`
* **Password**: `YOUR_API_KEY`
## 2. Integrate with Liferay
After logging into your Liferay instance as the admin user, you'll need to enable the SMTP integration.
1. Navigate to **Control Panel** → **Server Administration** → **Mail**.
2. Copy-and-paste the SMTP credentials from Resend to Liferay.
* **Outgoing SMTP Server**: `smtp.resend.com`
* **Outgoing Port**: `465`
* **Enable StartTLS**: `True`
* **User Name**: `resend`
* **Password**: `YOUR_API_KEY`
Make sure to replace `YOUR_API_KEY` with an existing key or create a new [API Key](https://resend.com/api-keys).
For the additional JavaMail properties, you can use:
```
mail.smtp.auth=true
mail.smtp.starttls.enable=true
mail.smtp.starttls.required=true
```
---
# Source: https://resend.com/docs/send-with-metabase-smtp.md
> ## Documentation Index
> Fetch the complete documentation index at: https://resend.com/docs/llms.txt
> Use this file to discover all available pages before exploring further.
# Send emails using Metabase with SMTP
> Learn how to integrate Metabase with Resend SMTP.
### Prerequisites
To get the most out of this guide, you'll need to:
* [Create an API key](https://resend.com/api-keys)
* [Verify your domain](https://resend.com/domains)
## 1. Get the Resend SMTP credentials
When configuring your SMTP integration, you'll need to use the following credentials:
* **Host**: `smtp.resend.com`
* **Port**: `465`
* **Username**: `resend`
* **Password**: `YOUR_API_KEY`
## 2. Integrate with Metabase SMTP
After logging into your [Metabase Cloud](https://www.metabase.com/cloud/login) account, you’ll need to enable the SMTP integration.
1. From your Metabase Cloud Admin Panel, go to **Settings > Email** in the left menu. You should see the form below.
2. Copy-and-paste the SMTP credentials from Resend to Metabase Cloud. Finally, click the **Save** button and all of your emails will be sent through Resend.
---
# Source: https://resend.com/docs/send-with-nextauth-smtp.md
> ## Documentation Index
> Fetch the complete documentation index at: https://resend.com/docs/llms.txt
> Use this file to discover all available pages before exploring further.
# Send emails using NextAuth with SMTP
> Learn how to send your first email using NextAuth.
## Prerequisites
To get the most out of this guide, you'll need to:
* [Create an API key](https://resend.com/api-keys)
* [Verify your domain](https://resend.com/domains)
## 1. Install
Install the [NextAuth](https://next-auth.js.org/getting-started/example#install-nextauth) package.
```bash npm theme={"theme":{"light":"github-light","dark":"vesper"}}
npm install next-auth
```
```bash yarn theme={"theme":{"light":"github-light","dark":"vesper"}}
yarn add next-auth
```
```bash pnpm theme={"theme":{"light":"github-light","dark":"vesper"}}
pnpm add next-auth
```
```bash bun theme={"theme":{"light":"github-light","dark":"vesper"}}
bun add next-auth
```
Then, install the [Nodemailer](https://www.npmjs.com/package/nodemailer) package.
```bash npm theme={"theme":{"light":"github-light","dark":"vesper"}}
npm install nodemailer
```
```bash yarn theme={"theme":{"light":"github-light","dark":"vesper"}}
yarn add nodemailer
```
```bash pnpm theme={"theme":{"light":"github-light","dark":"vesper"}}
pnpm add nodemailer
```
```bash bun theme={"theme":{"light":"github-light","dark":"vesper"}}
bun add nodemailer
```
## 2. Configure SMTP credentials
Add your Resend SMTP crendentials in your application's `.env` file:
```ini .env theme={"theme":{"light":"github-light","dark":"vesper"}}
EMAIL_SERVER_USER=resend
EMAIL_SERVER_PASSWORD=YOUR_API_KEY
EMAIL_SERVER_HOST=smtp.resend.com
EMAIL_SERVER_PORT=465
EMAIL_FROM=onboarding@resend.dev
```
## 3. Configure Email Provider
Finally, in your \[...nextauth].js file (typically located in pages/api/auth), configure the Email provider with your SMTP settings:
```js index.ts theme={"theme":{"light":"github-light","dark":"vesper"}}
import NextAuth from 'next-auth';
import EmailProvider from 'next-auth/providers/email';
import nodemailer from 'nodemailer';
export default NextAuth({
providers: [
EmailProvider({
server: {
host: process.env.EMAIL_SERVER_HOST,
port: process.env.EMAIL_SERVER_PORT,
auth: {
user: process.env.EMAIL_SERVER_USER,
pass: process.env.EMAIL_SERVER_PASSWORD,
},
},
from: process.env.EMAIL_FROM,
}),
// ... other providers as needed
],
// ... any other NextAuth.js configs
});
```
---
# Source: https://resend.com/docs/send-with-nextjs.md
> ## Documentation Index
> Fetch the complete documentation index at: https://resend.com/docs/llms.txt
> Use this file to discover all available pages before exploring further.
# Send emails with Next.js
> Learn how to send your first email using Next.js and the Resend Node.js SDK.
export const YouTube = ({id}) => {
return ;
};
## Prerequisites
To get the most out of this guide, you'll need to:
* [Create an API key](https://resend.com/api-keys)
* [Verify your domain](https://resend.com/domains)
Prefer watching a video? Check out our video walkthrough below.
## 1. Install
Get the Resend Node.js SDK.
```bash npm theme={"theme":{"light":"github-light","dark":"vesper"}}
npm install resend
```
```bash yarn theme={"theme":{"light":"github-light","dark":"vesper"}}
yarn add resend
```
```bash pnpm theme={"theme":{"light":"github-light","dark":"vesper"}}
pnpm add resend
```
```bash bun theme={"theme":{"light":"github-light","dark":"vesper"}}
bun add resend
```
## 2. Create an email template
Start by creating your email template on `components/email-template.tsx`.
```tsx components/email-template.tsx theme={"theme":{"light":"github-light","dark":"vesper"}}
import * as React from 'react';
interface EmailTemplateProps {
firstName: string;
}
export function EmailTemplate({ firstName }: EmailTemplateProps) {
return (
Welcome, {firstName}!
);
}
```
## 3. Send email using React
Create a route file under `app/api/send/route.ts` (or `pages/api/send.ts` if you're using [Pages Router](https://nextjs.org/docs/pages/building-your-application/routing/api-routes)).
Import the React email template and send an email using the `react` parameter.
```ts app/api/send/route.ts theme={"theme":{"light":"github-light","dark":"vesper"}}
import { EmailTemplate } from '../../../components/email-template';
import { Resend } from 'resend';
const resend = new Resend(process.env.RESEND_API_KEY);
export async function POST() {
try {
const { data, error } = await resend.emails.send({
from: 'Acme ',
to: ['delivered@resend.dev'],
subject: 'Hello world',
react: EmailTemplate({ firstName: 'John' }),
});
if (error) {
return Response.json({ error }, { status: 500 });
}
return Response.json(data);
} catch (error) {
return Response.json({ error }, { status: 500 });
}
}
```
```ts pages/api/send.ts theme={"theme":{"light":"github-light","dark":"vesper"}}
import type { NextApiRequest, NextApiResponse } from 'next';
import { EmailTemplate } from '../../components/email-template';
import { Resend } from 'resend';
const resend = new Resend(process.env.RESEND_API_KEY);
export default async (req: NextApiRequest, res: NextApiResponse) => {
const { data, error } = await resend.emails.send({
from: 'Acme ',
to: ['delivered@resend.dev'],
subject: 'Hello world',
react: EmailTemplate({ firstName: 'John' }),
});
if (error) {
return res.status(400).json(error);
}
res.status(200).json(data);
};
```
## 4. Try it yourself
See the full source code.
See the full source code.
---
# Source: https://resend.com/docs/send-with-nodejs.md
> ## Documentation Index
> Fetch the complete documentation index at: https://resend.com/docs/llms.txt
> Use this file to discover all available pages before exploring further.
# Send emails with Node.js
> Learn how to send your first email using the Resend Node.js SDK.
## Prerequisites
To get the most out of this guide, you'll need to:
* [Create an API key](https://resend.com/api-keys)
* [Verify your domain](https://resend.com/domains)
## 1. Install
Get the Resend Node.js SDK.
```bash npm theme={"theme":{"light":"github-light","dark":"vesper"}}
npm install resend
```
```bash yarn theme={"theme":{"light":"github-light","dark":"vesper"}}
yarn add resend
```
```bash pnpm theme={"theme":{"light":"github-light","dark":"vesper"}}
pnpm add resend
```
```bash bun theme={"theme":{"light":"github-light","dark":"vesper"}}
bun add resend
```
## 2. Send email using HTML
The easiest way to send an email is by using the `html` parameter.
```js server.ts theme={"theme":{"light":"github-light","dark":"vesper"}}
import { Resend } from 'resend';
const resend = new Resend('re_xxxxxxxxx');
(async function () {
const { data, error } = await resend.emails.send({
from: 'Acme ',
to: ['delivered@resend.dev'],
subject: 'Hello World',
html: 'It works!',
});
if (error) {
return console.error({ error });
}
console.log({ data });
})();
```
## 3. Try it yourself
See the full source code.
---
# Source: https://resend.com/docs/send-with-nodemailer-smtp.md
> ## Documentation Index
> Fetch the complete documentation index at: https://resend.com/docs/llms.txt
> Use this file to discover all available pages before exploring further.
# Send emails using Nodemailer with SMTP
> Learn how to send your first email using Nodemailer with SMTP.
## Prerequisites
To get the most out of this guide, you'll need to:
* [Create an API key](https://resend.com/api-keys)
* [Verify your domain](https://resend.com/domains)
## 1. Install
Get the [Nodemailer](https://www.npmjs.com/package/nodemailer) package.
```bash npm theme={"theme":{"light":"github-light","dark":"vesper"}}
npm install nodemailer
```
```bash yarn theme={"theme":{"light":"github-light","dark":"vesper"}}
yarn add nodemailer
```
```bash pnpm theme={"theme":{"light":"github-light","dark":"vesper"}}
pnpm add nodemailer
```
```bash bun theme={"theme":{"light":"github-light","dark":"vesper"}}
bun add nodemailer
```
## 2. Send email using SMTP
When configuring your SMTP integration, you'll need to use the following credentials:
* **Host**: `smtp.resend.com`
* **Port**: `465`
* **Username**: `resend`
* **Password**: `YOUR_API_KEY`
Then use these credentials to create a transport:
```js index.ts theme={"theme":{"light":"github-light","dark":"vesper"}}
import nodemailer from 'nodemailer';
async function main() {
const transporter = nodemailer.createTransport({
host: 'smtp.resend.com',
secure: true,
port: 465,
auth: {
user: 'resend',
pass: 're_xxxxxxxxx',
},
});
const info = await transporter.sendMail({
from: 'onboarding@resend.dev',
to: 'delivered@resend.dev',
subject: 'Hello World',
html: 'It works!',
});
console.log('Message sent: %s', info.messageId);
}
main().catch(console.error);
```
## 3. Try it yourself
See the full source code.
---
# Source: https://resend.com/docs/send-with-nuxt.md
> ## Documentation Index
> Fetch the complete documentation index at: https://resend.com/docs/llms.txt
> Use this file to discover all available pages before exploring further.
# Send emails with Nuxt
> Learn how to send your first email using Nuxt and the Resend Node.js SDK.
## Prerequisites
To get the most out of this guide, you'll need to:
* [Create an API key](https://resend.com/api-keys)
* [Verify your domain](https://resend.com/domains)
## 1. Install
Get the Resend Node.js SDK.
```bash npm theme={"theme":{"light":"github-light","dark":"vesper"}}
npm install resend
```
```bash yarn theme={"theme":{"light":"github-light","dark":"vesper"}}
yarn add resend
```
```bash pnpm theme={"theme":{"light":"github-light","dark":"vesper"}}
pnpm add resend
```
```bash bun theme={"theme":{"light":"github-light","dark":"vesper"}}
bun add resend
```
## 2. Send email using HTML
Create a [Server Route](https://nuxt.com/docs/guide/directory-structure/server) under `server/api/send.ts`.
The easiest way to send an email is by using the `html` parameter.
```ts server/api/send.ts theme={"theme":{"light":"github-light","dark":"vesper"}}
import { Resend } from 'resend';
const resend = new Resend(process.env.RESEND_API_KEY);
export default defineEventHandler(async () => {
const response = await resend.emails.send({
from: 'Acme ',
to: ['delivered@resend.dev'],
subject: 'Hello world',
html: 'It works!',
});
if (response.error) {
throw createError({
statusCode: 500,
message: 'Error sending email',
});
}
return response;
});
```
## 3. Try it yourself
See the full source code.
---
# Source: https://resend.com/docs/send-with-phoenix.md
> ## Documentation Index
> Fetch the complete documentation index at: https://resend.com/docs/llms.txt
> Use this file to discover all available pages before exploring further.
# Send emails with Phoenix
> Learn how to send your first email using Phoenix and the Resend Elixir SDK.
This guides utilizes an [open source
library](https://github.com/elixir-saas/resend-elixir) contributed by a
community member. It's not developed, maintained, or supported by Resend
directly.
## Prerequisites
To get the most out of this guide, you'll need to:
* [Create an API key](https://resend.com/api-keys)
* [Verify your domain](https://resend.com/domains)
## 1. Install
Install by adding `resend` to your list of dependencies in `mix.exs`:
```elixir mix.exs theme={"theme":{"light":"github-light","dark":"vesper"}}
def deps do
[
{:resend, "~> 0.4.5"}
]
end
```
## 2. Send email using Swoosh
This library includes a Swoosh adapter to make using Resend with a new Phoenix project as easy as possible. All you have to do is configure your Mailer:
```elixir theme={"theme":{"light":"github-light","dark":"vesper"}}
config :my_app, MyApp.Mailer,
adapter: Resend.Swoosh.Adapter,
api_key: System.fetch_env!("RESEND_API_KEY")
```
If you're configuring your app for production, configure your adapter in `prod.exs`, and your API key from the environment in `runtime.exs`:
```elixir prod.exs theme={"theme":{"light":"github-light","dark":"vesper"}}
config :my_app, MyApp.Mailer, adapter: Resend.Swoosh.Adapter
```
```elixir runtime.exs theme={"theme":{"light":"github-light","dark":"vesper"}}
config :my_app, MyApp.Mailer, api_key: "re_xxxxxxxxx"
```
## 3. Try it yourself
See the full source code.
---
# Source: https://resend.com/docs/send-with-php.md
> ## Documentation Index
> Fetch the complete documentation index at: https://resend.com/docs/llms.txt
> Use this file to discover all available pages before exploring further.
# Send emails with PHP
> Learn how to send your first email using the Resend PHP SDK.
export const YouTube = ({id}) => {
return ;
};
## Prerequisites
To get the most out of this guide, you will need to:
* [Create an API key](https://resend.com/api-keys)
* [Verify your domain](https://resend.com/domains)
Prefer watching a video? Check out this video walkthrough below.
## 1. Install
Get the Resend PHP SDK.
```bash Composer theme={"theme":{"light":"github-light","dark":"vesper"}}
composer require resend/resend-php
```
## 2. Send email using HTML
The easiest way to send an email is by using the `html` parameter.
```php index.php theme={"theme":{"light":"github-light","dark":"vesper"}}
emails->send([
'from' => 'Acme ',
'to' => ['delivered@resend.dev'],
'subject' => 'hello world',
'html' => 'it works!',
]);
```
## 3. Try it yourself
See the full source code.
---
# Source: https://resend.com/docs/send-with-phpmailer-smtp.md
> ## Documentation Index
> Fetch the complete documentation index at: https://resend.com/docs/llms.txt
> Use this file to discover all available pages before exploring further.
# Send emails using PHPMailer with SMTP
> Learn how to send your first email using PHPMailer with SMTP.
## Prerequisites
To get the most out of this guide, you'll need to:
* [Create an API key](https://resend.com/api-keys)
* [Verify your domain](https://resend.com/domains)
## 1. Install
Get the [PHPMailer](https://github.com/PHPMailer/PHPMailer) package.
```bash php theme={"theme":{"light":"github-light","dark":"vesper"}}
composer require phpmailer/phpmailer
```
## 2. Send email using SMTP
When configuring your SMTP integration, you'll need to use the following credentials:
* **Host**: `smtp.resend.com`
* **Port**: `587`
* **Username**: `resend`
* **Password**: `YOUR_API_KEY`
Then use these credentials to send with PHPMailer:
```php theme={"theme":{"light":"github-light","dark":"vesper"}}
isSMTP();
$mail->Host = 'smtp.resend.com';
$mail->SMTPAuth = true;
$mail->Username = 'resend';
$mail->Password = 're_xxxxxxxxx';
$mail->SMTPSecure = 'tls';
$mail->Port = 587;
// Set email format to HTML
$mail->isHTML(true);
$mail->setFrom('onboarding@resend.dev');
$mail->addAddress('delivered@resend.dev');
$mail->Subject = 'Hello World';
$mail->Body = 'It works!';
$mail->send();
// Log the successfully sent message
echo 'Email successfully sent';
} catch (Exception $e) {
// Log the detailed error for debugging
error_log('Mailer Error: ' . $mail->ErrorInfo);
// Show a generic error message to the user
echo 'There was an error sending the email.';
}
```
## 3. Try it yourself
See the full source code.
---
# Source: https://resend.com/docs/send-with-python.md
> ## Documentation Index
> Fetch the complete documentation index at: https://resend.com/docs/llms.txt
> Use this file to discover all available pages before exploring further.
# Send emails with Python
> Learn how to send your first email using the Resend Python SDK.
## Prerequisites
To get the most out of this guide, you'll need to:
* [Create an API key](https://resend.com/api-keys)
* [Verify your domain](https://resend.com/domains)
## 1. Install
Get the Resend Python SDK.
```bash Pip theme={"theme":{"light":"github-light","dark":"vesper"}}
pip install resend
```
## 2. Send email using HTML
The easiest way to send an email is by using the `html` parameter.
```py index.py theme={"theme":{"light":"github-light","dark":"vesper"}}
import os
import resend
resend.api_key = os.environ["RESEND_API_KEY"]
params: resend.Emails.SendParams = {
"from": "Acme ",
"to": ["delivered@resend.dev"],
"subject": "hello world",
"html": "it works!",
}
email = resend.Emails.send(params)
print(email)
```
## 3. Try it yourself
See the full source code.
---
# Source: https://resend.com/docs/send-with-railway.md
> ## Documentation Index
> Fetch the complete documentation index at: https://resend.com/docs/llms.txt
> Use this file to discover all available pages before exploring further.
# Send emails with Railway
> Learn how to send your first email using Railway and the Resend Node.js SDK.
[Railway](https://railway.com/?referralCode=resend) enables you to focus on building product instead of managing infrastructure, automatically scaling to support your needs as you grow.
## Prerequisites
To get the most out of this guide, you'll need to:
* [Create an API key](https://resend.com/api-keys)
* [Verify your domain](https://resend.com/domains)
## 1. Install
We've created a [Resend template](https://railway.com/deploy/resend?referralCode=resend\&utm_medium=integration\&utm_source=template\&utm_campaign=generic) using the Resend Node.js SDK as an introduction to using Resend on Railway.
To get started, you deploy the template to Railway.
[](https://railway.com/deploy/resend?referralCode=resend\&utm_medium=integration\&utm_source=template\&utm_campaign=generic)
## 2. Add your API key
[Add an API key](https://resend.com/api-keys) from Resend and click **Deploy**.
## 3. Send your first email
Once your deployment finishes, click the deploy URL to open the app and send your first email.
While this example uses the [Resend Node.js SDK](https://www.npmjs.com/package/@resend/node), you can add Resend using [any of our Official SDKs](https://resend.com/docs/sdks) that Railway supports.
Keep in mind that as a basic project, this template sends an email with your
account each time someone visits your deployment URL, so share the link with
discretion.
You can also [set up the project locally](https://docs.railway.com/develop/cli) and make changes to the projectusing the Railway CLI.
## 4. Try it yourself
See the full source code.
---
# Source: https://resend.com/docs/send-with-redwoodjs.md
> ## Documentation Index
> Fetch the complete documentation index at: https://resend.com/docs/llms.txt
> Use this file to discover all available pages before exploring further.
# Send emails with RedwoodJS
> Learn how to send your first email using Redwood.js and the Resend Node.js SDK.
### Prerequisites
To get the most out of this guide, you'll need to:
* [Create an API key](https://resend.com/api-keys)
* [Verify your domain](https://resend.com/domains)
### 1. Install
Get the Resend Node.js SDK.
```bash yarn theme={"theme":{"light":"github-light","dark":"vesper"}}
yarn workspace api add resend
```
### 2. Send email using HTML
```bash theme={"theme":{"light":"github-light","dark":"vesper"}}
yarn rw g function send
```
The easiest way to send an email is by using the `html` parameter.
```ts api/src/functions/send/send.ts theme={"theme":{"light":"github-light","dark":"vesper"}}
import { Resend } from 'resend';
import type { APIGatewayEvent, Context } from 'aws-lambda';
const resend = new Resend('re_xxxxxxxxx');
export const handler = async (event: APIGatewayEvent, context: Context) => {
const { data, error } = await resend.emails.send({
from: 'Acme ',
to: ['delivered@resend.dev'],
subject: 'hello world',
html: 'it works!',
});
if (error) {
return {
statusCode: 500,
headers: { 'Content-Type': 'application/json' },
body: JSON.stringify({ error }),
};
}
return {
statusCode: 200,
headers: { 'Content-Type': 'application/json' },
body: JSON.stringify({ data }),
};
};
```
### 3. Try it yourself
See the full source code.
---
# Source: https://resend.com/docs/send-with-remix.md
> ## Documentation Index
> Fetch the complete documentation index at: https://resend.com/docs/llms.txt
> Use this file to discover all available pages before exploring further.
# Send emails with Remix
> Learn how to send your first email using Remix and the Resend Node.js SDK.
## Prerequisites
To get the most out of this guide, you'll need to:
* [Create an API key](https://resend.com/api-keys)
* [Verify your domain](https://resend.com/domains)
## 1. Install
Get the Resend Node.js SDK.
```bash npm theme={"theme":{"light":"github-light","dark":"vesper"}}
npm install resend
```
```bash yarn theme={"theme":{"light":"github-light","dark":"vesper"}}
yarn add resend
```
```bash pnpm theme={"theme":{"light":"github-light","dark":"vesper"}}
pnpm add resend
```
```bash bun theme={"theme":{"light":"github-light","dark":"vesper"}}
bun add resend
```
## 2. Send email using HTML
Create a [Resource Route](https://remix.run/docs/en/1.16.1/guides/resource-routes) under `app/routes/send.ts`.
The easiest way to send an email is by using the `html` parameter.
```ts app/routes/send.ts theme={"theme":{"light":"github-light","dark":"vesper"}}
import { json } from '@remix-run/node';
import { Resend } from 'resend';
const resend = new Resend(process.env.RESEND_API_KEY);
export const loader = async () => {
const { data, error } = await resend.emails.send({
from: 'Acme ',
to: ['delivered@resend.dev'],
subject: 'Hello world',
html: 'It works!',
});
if (error) {
return json({ error }, 400);
}
return json(data, 200);
};
```
## 3. Try it yourself
See the full source code.
---
# Source: https://resend.com/docs/send-with-retool-smtp.md
> ## Documentation Index
> Fetch the complete documentation index at: https://resend.com/docs/llms.txt
> Use this file to discover all available pages before exploring further.
# Send emails using Retool with SMTP
> Learn how to integrate Retool with Resend SMTP.
### Prerequisites
To get the most out of this guide, you'll need to:
* [Create an API key](https://resend.com/api-keys)
* [Verify your domain](https://resend.com/domains)
## 1. Get the Resend SMTP credentials
When configuring your SMTP integration, you'll need to use the following credentials:
* **Host**: `smtp.resend.com`
* **Port**: `465`
* **Username**: `resend`
* **Password**: `YOUR_API_KEY`
## 2. Integrate with Retool SMTP
Log into your [Retool](https://retool.com) account and create a new SMTP Resource.
1. Go to **Resources** and click **Create New**
2. Search for **SMTP** and select it
3. Add name and SMTP credentials
---
# Source: https://resend.com/docs/send-with-ruby.md
> ## Documentation Index
> Fetch the complete documentation index at: https://resend.com/docs/llms.txt
> Use this file to discover all available pages before exploring further.
# Send emails with Ruby
> Learn how to send your first email using the Resend Ruby SDK.
## Prerequisites
To get the most out of this guide, you'll need to:
* [Create an API key](https://resend.com/api-keys)
* [Verify your domain](https://resend.com/domains)
## 1. Install
Get the Resend Ruby SDK.
```bash RubyGems theme={"theme":{"light":"github-light","dark":"vesper"}}
gem install resend
```
```bash Gemfile theme={"theme":{"light":"github-light","dark":"vesper"}}
gem 'resend'
```
## 2. Send email using HTML
The easiest way to send an email is by using the `html` parameter.
```rb index.rb theme={"theme":{"light":"github-light","dark":"vesper"}}
require "resend"
Resend.api_key = "re_xxxxxxxxx"
params = {
"from": "Acme ",
"to": ["delivered@resend.dev"],
"subject": "hello world",
"html": "it works!"
}
sent = Resend::Emails.send(params)
puts sent
```
## 3. Try it yourself
See the full source code.
---
# Source: https://resend.com/docs/send-with-rust.md
> ## Documentation Index
> Fetch the complete documentation index at: https://resend.com/docs/llms.txt
> Use this file to discover all available pages before exploring further.
# Send emails with Rust
> Learn how to send your first email using the Resend Rust SDK.
## Prerequisites
To get the most out of this guide, you'll need to:
* [Create an API key](https://resend.com/api-keys)
## Install
First, create a rust project with cargo and `cd` into it.
```bash theme={"theme":{"light":"github-light","dark":"vesper"}}
cargo init resend-rust-example
cd resend-rust-example
```
Next, add add the Rust Resend SDK as well as [Tokio](https://tokio.rs):
```bash theme={"theme":{"light":"github-light","dark":"vesper"}}
cargo add resend-rs
cargo add tokio -F macros,rt-multi-thread
```
The Rust SDK is Async-first so Tokio is needed.
## Send email
```rust theme={"theme":{"light":"github-light","dark":"vesper"}}
use resend_rs::types::CreateEmailBaseOptions;
use resend_rs::{Resend, Result};
#[tokio::main]
async fn main() -> Result<()> {
let resend = Resend::new("re_xxxxxxxxx");
let from = "Acme ";
let to = ["delivered@resend.dev"];
let subject = "Hello World";
let email = CreateEmailBaseOptions::new(from, to, subject)
.with_html("It works!");
let _email = resend.emails.send(email).await?;
Ok(())
}
```
## Reading the API key
Instead of using `Resend::new` and hardcoding the API key, the `RESEND_API_KEY` environment variable
can be used instead. The `Resend::default()` should be used in that scenario instead.
### Reading the API key from a `.env` file
Another popular option is to use a `.env` file for environment variables. You can use the
[`dotenvy`](https://crates.io/crates/dotenvy) crate for that:
```bash theme={"theme":{"light":"github-light","dark":"vesper"}}
cargo add dotenvy
```
```rust theme={"theme":{"light":"github-light","dark":"vesper"}}
// main.rs
use dotenvy::dotenv;
use resend_rs::types::CreateEmailBaseOptions;
use resend_rs::{Resend, Result};
#[tokio::main]
async fn main() -> Result<()> {
let _env = dotenv().unwrap();
let resend = Resend::default();
let from = "Acme ";
let to = ["delivered@resend.dev"];
let subject = "Hello World";
let email = CreateEmailBaseOptions::new(from, to, subject)
.with_html("It works!");
let _email = resend.emails.send(email).await?;
Ok(())
}
```
```toml theme={"theme":{"light":"github-light","dark":"vesper"}}
# .env
RESEND_API_KEY=re_xxxxxxxxx
```
## 3. Try it yourself
See the full source code.
---
# Source: https://resend.com/docs/send-with-sinatra.md
> ## Documentation Index
> Fetch the complete documentation index at: https://resend.com/docs/llms.txt
> Use this file to discover all available pages before exploring further.
# Send emails with Sinatra
> Learn how to send your first email using Sinatra and the Resend Ruby SDK.
## Prerequisites
To get the most out of this guide, you'll need to:
* [Create an API key](https://resend.com/api-keys)
* [Verify your domain](https://resend.com/domains)
## 1. Install
Get the Resend Ruby SDK.
```bash RubyGems theme={"theme":{"light":"github-light","dark":"vesper"}}
gem install resend
```
```bash Gemfile theme={"theme":{"light":"github-light","dark":"vesper"}}
gem 'resend'
```
## 2. Send email using HTML
The easiest way to send an email is by using the `html` parameter.
```rb index.rb theme={"theme":{"light":"github-light","dark":"vesper"}}
require "sinatra"
require "resend"
set :port, 5000
set :bind, "0.0.0.0"
Resend.api_key = ENV["RESEND_API_KEY"]
get "/" do
content_type :json
params = {
from: 'Acme ',
to: ['delivered@resend.dev'],
subject: 'hello world',
html: 'it works!',
}
Resend::Emails.send(params).to_hash.to_json
end
```
## 3. Try it yourself
See the full source code.
---
# Source: https://resend.com/docs/send-with-smtp.md
> ## Documentation Index
> Fetch the complete documentation index at: https://resend.com/docs/llms.txt
> Use this file to discover all available pages before exploring further.
# Send emails with SMTP
> Learn how to integrate Resend via SMTP.
export const YouTube = ({id}) => {
return ;
};
## Prerequisites
To get the most out of this guide, you'll need to:
* [Create an API key](https://resend.com/api-keys)
* [Verify your domain](https://resend.com/domains)
Prefer watching a video? Check out our video walkthrough below.
## SMTP Credentials
When configuring your SMTP integration, you'll need to use the following credentials:
* **Host**: `smtp.resend.com`
* **Port**: `25`, `465`, `587`, `2465`, or `2587`
* **Username**: `resend`
* **Password**: `YOUR_API_KEY`
Ports help to instruct the type of security you want to use in your SMTP connection.
| Type | Port | Security |
| -------- | ------------------- | ------------------------------------------------------------------------- |
| SMTPS | `465`, `2465` | Implicit SSL/TLS (Immediately connects via SSL/TLS) |
| STARTTLS | `25`, `587`, `2587` | Explicit SSL/TLS (First connects via plaintext, then upgrades to SSL/TLS) |
## Idempotency Key
Idempotency keys are used to prevent duplicate emails. You can add the `Resend-Idempotency-Key` header to your emails sent with SMTP to prevent duplicate emails.
```yaml SMTP {4} theme={"theme":{"light":"github-light","dark":"vesper"}}
From: Acme
To: delivered@resend.dev
Subject: hello world
Resend-Idempotency-Key: welcome-user/123456789
it works!
```
Learn more about [idempotency keys](/dashboard/emails/idempotency-keys).
## Custom Headers
If your SMTP client supports it, you can add custom headers to your emails.
Here are some common use cases for custom headers:
* Prevent threading on Gmail with the `X-Entity-Ref-ID` header
* Include a shortcut for users to unsubscribe with the `List-Unsubscribe` header
## FAQ
Once configured, you should be able to start sending emails via SMTP. Below are some frequently asked questions:
We currently don't provide SMTP server logs for debugging. If you run into
issues, please [reach out to support](https://resend.com/help).
Emails sent with SMTP will show in your [emails
table](https://resend.com/emails).
Yes, the rate limit is the [same as the
API](https://resend.com/docs/api-reference/introduction#rate-limit).
---
# Source: https://resend.com/docs/send-with-supabase-edge-functions.md
> ## Documentation Index
> Fetch the complete documentation index at: https://resend.com/docs/llms.txt
> Use this file to discover all available pages before exploring further.
# Send emails with Supabase Edge Functions
> Learn how to send your first email using Supabase Edge Functions.
## Prerequisites
To get the most out of this guide, you'll need to:
* [Create an API key](https://resend.com/api-keys)
* [Verify your domain](https://resend.com/domains)
Make sure you have the latest version of the [Supabase CLI](https://supabase.com/docs/guides/cli#installation) installed.
## 1. Create Supabase function
Create a new function locally:
```bash theme={"theme":{"light":"github-light","dark":"vesper"}}
supabase functions new resend
```
## 2. Edit the handler function
Paste the following code into the `index.ts` file:
```ts index.ts theme={"theme":{"light":"github-light","dark":"vesper"}}
const RESEND_API_KEY = Deno.env.get('RESEND_API_KEY');
const handler = async (_request: Request): Promise => {
const res = await fetch('https://api.resend.com/emails', {
method: 'POST',
headers: {
'Content-Type': 'application/json',
'Authorization': `Bearer ${RESEND_API_KEY}`,
},
body: JSON.stringify({
from: 'Acme ',
to: ['delivered@resend.dev'],
subject: 'hello world',
html: 'it works!',
}),
});
const data = await res.json();
return new Response(JSON.stringify(data), {
status: 200,
headers: {
'Content-Type': 'application/json',
},
});
};
Deno.serve(handler);
```
## 3. Deploy and send email
Run function locally:
```bash theme={"theme":{"light":"github-light","dark":"vesper"}}
supabase functions start
supabase functions serve resend --no-verify-jwt
```
Deploy function to Supabase:
```bash theme={"theme":{"light":"github-light","dark":"vesper"}}
supabase functions deploy resend
```
Open the endpoint URL to send an email:
## 4. Try it yourself
See the full source code.
---
# Source: https://resend.com/docs/send-with-supabase-smtp.md
> ## Documentation Index
> Fetch the complete documentation index at: https://resend.com/docs/llms.txt
> Use this file to discover all available pages before exploring further.
# Send emails using Supabase with SMTP
> Learn how to integrate Supabase Auth with Resend SMTP.
## Prerequisites
To get the most out of this guide, you'll need to:
* [Create an API key](https://resend.com/api-keys)
* [Verify your domain](https://resend.com/domains)
## 1. Get the Resend SMTP credentials
When configuring your SMTP integration, you'll need to use the following credentials:
* **Host**: `smtp.resend.com`
* **Port**: `465`
* **Username**: `resend`
* **Password**: `YOUR_API_KEY`
## 2. Integrate with Supabase SMTP
After logging into your Supabase account, you'll need to enable the SMTP integration.
1. Go to your Supabase project
2. Click on **Project Settings** in the left sidebar
3. Select the **Authentication** tab
4. Find the SMTP section and toggle the **Enable Custom SMTP** option
5. Add your Sender email and name (these are required fields). For example: `support@acme.com` and `ACME Support`.
6. You can copy-and-paste the [SMTP credentials](https://resend.com/settings/smtp) from Resend to Supabase.
After that, you can click the **Save** button and all of your emails will be sent through Resend.
---
# Source: https://resend.com/docs/send-with-sveltekit.md
> ## Documentation Index
> Fetch the complete documentation index at: https://resend.com/docs/llms.txt
> Use this file to discover all available pages before exploring further.
# Send emails with SvelteKit
> Learn how to send your first email using SvelteKit and the Resend Node.js SDK.
## Prerequisites
To get the most out of this guide, you'll need to:
* [Create an API key](https://resend.com/api-keys)
* [Verify your domain](https://resend.com/domains)
## 1. Install
Get the Resend Node.js SDK.
```bash npm theme={"theme":{"light":"github-light","dark":"vesper"}}
npm install resend
```
```bash yarn theme={"theme":{"light":"github-light","dark":"vesper"}}
yarn add resend
```
```bash pnpm theme={"theme":{"light":"github-light","dark":"vesper"}}
pnpm add resend
```
```bash bun theme={"theme":{"light":"github-light","dark":"vesper"}}
bun add resend
```
## 2. Send email using HTML
Create a [+server API route](https://svelte.dev/docs/kit/routing#server) under `src/routes/send/+server.ts`.
The easiest way to send an email is by using the `html` parameter.
```ts src/routes/send/+server.ts theme={"theme":{"light":"github-light","dark":"vesper"}}
import { Resend } from 'resend';
import { RESEND_API_KEY } from '$env/static/private'; // define in your .env file
const resend = new Resend(RESEND_API_KEY);
export async function POST() {
try {
const { data, error } = await resend.emails.send({
from: 'Acme ',
to: ['delivered@resend.dev'],
subject: 'Hello world',
html: '
Hello world
',
});
if (error) {
return Response.json({ error }, { status: 500 });
}
return Response.json({ data });
} catch (error) {
return Response.json({ error }, { status: 500 });
}
}
```
## 3. Try it yourself
See the full source code.
---
# Source: https://resend.com/docs/send-with-symfony.md
> ## Documentation Index
> Fetch the complete documentation index at: https://resend.com/docs/llms.txt
> Use this file to discover all available pages before exploring further.
# Send emails with Symfony
> Learn how to send your first email using the Symfony Resend Mailer Bridge.
## Prerequisites
To get the most out of this guide, you will need to:
* [Create an API key](https://resend.com/api-keys)
* [Verify your domain](https://resend.com/domains)
## 1. Install
Get the Resend Mailer Bridge package.
```bash Composer theme={"theme":{"light":"github-light","dark":"vesper"}}
composer require symfony/resend-mailer
```
If your application relies on Resend webhook events, you should also install the Symfony Webhook Component.
```bash Composer theme={"theme":{"light":"github-light","dark":"vesper"}}
composer require symfony/webhook
```
## 2. Configuring Mailer
In your `.env.local` file, which you can create if needed, add the following:
```sh theme={"theme":{"light":"github-light","dark":"vesper"}}
MAILER_DSN=resend+api://API_KEY@default
MAILER_RESEND_SECRET=SIGNING_SECRET
```
Replace `API_KEY` with your Resend API key, and `SIGNING_SECRET` with your webhook secret, which can be retrieved from the Resend dashboard after creating a new webhook endpoint (see below).
## 3. Send your first email
In a controller, inject the `Mailer`:
```php theme={"theme":{"light":"github-light","dark":"vesper"}}
public function __construct(
private readonly MailerInterface $mailer,
) {
}
```
In a controller action, use the `$this->mailer` to send your email:
```php theme={"theme":{"light":"github-light","dark":"vesper"}}
$this->mailer->send(
(new Email())
->from('Acme ')
->to('delivered@resend.dev')
->subject('Hello world')
->html('it works!')
);
```
Learn more about sending emails with Mailer Component in [Symfony's documentation](https://symfony.com/doc/current/mailer.html#creating-sending-messages).
## 4. Receive and handle webhooks
Thanks to the Webhook Component, you can create a webhook listener.
```php src/Webhook/ResendWebhookListener.php theme={"theme":{"light":"github-light","dark":"vesper"}}
#[AsRemoteEventConsumer('mailer_resend')]
readonly class ResendWebhookListener implements ConsumerInterface
{
public function __construct(
#[Autowire(param: 'kernel.project_dir')] private string $projectDir,
) {
}
public function consume(RemoteEvent $event): void
{
if ($event instanceof MailerDeliveryEvent) {
$this->handleMailDelivery($event);
} elseif ($event instanceof MailerEngagementEvent) {
$this->handleMailEngagement($event);
} else {
// This is not an email event
return;
}
}
private function handleMailDelivery(MailerDeliveryEvent $event): void
{
// Todo
}
private function handleMailEngagement(MailerEngagementEvent $event): void
{
// Todo
}
}
```
Bind your listener to the Webhook routing config:
```yaml config/packages/webhook.yaml theme={"theme":{"light":"github-light","dark":"vesper"}}
framework:
webhook:
routing:
mailer_resend:
service: 'mailer.webhook.request_parser.resend'
secret: '%env(MAILER_RESEND_SECRET)%'
```
Next, register your application's webhook endpoint URL (example: `https://{app_domain}/webhook/mailer_resend`) in the [Resend Dashboard](https://resend.com/webhooks):
## 5. Try it yourself
See the full source code.
---
# Source: https://resend.com/docs/send-with-vercel-functions.md
> ## Documentation Index
> Fetch the complete documentation index at: https://resend.com/docs/llms.txt
> Use this file to discover all available pages before exploring further.
# Send emails with Vercel Functions
> Learn how to send your first email using Vercel Functions.
## Prerequisites
To get the most out of this guide, you'll need to:
* [Create an API key](https://resend.com/api-keys)
* [Verify your domain](https://resend.com/domains)
Make sure you have the latest version of the [Vercel CLI](https://vercel.com/docs/cli#installing-vercel-cli) installed.
## 1. Install dependencies
Install the Resend SDK:
```bash theme={"theme":{"light":"github-light","dark":"vesper"}}
npm install resend
```
## 2. Set up environment variables
Add your Resend API key to your environment variables:
```bash .env.local theme={"theme":{"light":"github-light","dark":"vesper"}}
RESEND_API_KEY=re_xxxxxxxxx
```
## 3. Create a Next.js function
Create a route file under `app/api/send/route.ts` if you're using the [App Router](https://nextjs.org/docs/app/building-your-application/routing/router-handlers).
```ts route.ts theme={"theme":{"light":"github-light","dark":"vesper"}}
import { Resend } from 'resend';
const resend = new Resend(process.env.RESEND_API_KEY);
export async function POST() {
const response = await resend.emails.send({
from: 'Acme ',
to: ['delivered@resend.dev'],
subject: 'hello world',
html: 'it works!',
});
return Response.json(response, {
status: response.error ? 500 : 200,
});
}
```
## 4. Send email locally
Run function locally:
```bash theme={"theme":{"light":"github-light","dark":"vesper"}}
npm run dev
```
Open the endpoint URL to send an email: `http://localhost:3000/api/send`
## 5. Send email in production
Deploy function to Vercel:
```bash theme={"theme":{"light":"github-light","dark":"vesper"}}
vercel
```
Make sure to add your `RESEND_API_KEY` environment variable in your Vercel project settings.
Open the endpoint URL to send an email: `https://your-project.vercel.app/api/send`
## 6. Try it yourself
See the full source code.
---
# Source: https://resend.com/docs/send-with-wordpress-smtp.md
> ## Documentation Index
> Fetch the complete documentation index at: https://resend.com/docs/llms.txt
> Use this file to discover all available pages before exploring further.
# Send emails using WordPress with SMTP
> Learn how to send your first email using Wordpress.
## Prerequisites
To get the most out of this guide, you'll need to:
* [Create an API key](https://resend.com/api-keys)
* [Verify your domain](https://resend.com/domains)
## 1. Install a plugin
First, you'll need to install and activate the [WP Mail SMTP](https://wordpress.org/plugins/wp-mail-smtp/) plugin. Once the plugin is activated you will see the setup wizard. You can skip this step as we'll guide you through how to configure the plugin for Resend. Just click on **Go to the Dashboard** at the bottom of the screen to exit the setup wizard.
## 2. Configuration
From your admin dashboard, visit the **WP Mail SMTP > Settings** page to configure the plugin. Firstly, configure your **From Email**, **From Name**, and **Return Path**. Next, we'll configure the SMTP settings for Resend. Select **Other SMTP** in the **Mailer** section.
In the **Other SMTP** section, configure the following settings:
* **SMTP Host**: `smtp.resend.com`
* **Encryption**: `SSL`
* **SMTP Port**: `465`
* **Auto TLS**: `ON`
* **Authentication**: `ON`
* **SMTP Username**: `resend`
* **SMTP Password**: `YOUR_API_KEY`
Make sure to replace `YOUR_API_KEY` with an existing key or create a new [API Key](https://resend.com/api-keys).
## 3. Sending a test email
From your admin dashboard, visit the **WP Mail SMTP > Tools** page to send a test email.
---
# Source: https://resend.com/docs/knowledge-base/sending-apple-private-relay.md
> ## Documentation Index
> Fetch the complete documentation index at: https://resend.com/docs/llms.txt
> Use this file to discover all available pages before exploring further.
# How to prevent bounces with @privaterelay.appleid.com recipients?
> Sending to Apple Private Email Relay requires specific configuration steps to ensure your emails get delivered
If your website or application supports Sign In with Apple, your customers have the option to receive emails from you via Apple’s Private Email Relay service. This feature allows users to keep their actual email addresses private when they sign up or log in.
When a user selects the Hide My Email option, Apple assigns them a unique, randomly generated email address under the `@privaterelay.appleid.com` domain, which you can link to that specific user.
To ensure your emails are delivered through Apple’s Private Email Relay, you must first access the Apple Developer Portal and navigate to `Certificates, Identifiers & Profiles` > `More` > `Sign in with Apple for Email Communication` > `Configure`.
**Apple Offers Multiple Hide My Email Services**
Starting with iOS 15, Apple provides two separate Hide My Email services—one through Sign in with Apple and another via iCloud+.
This guide is specifically for apps and websites utilizing Sign in with Apple, which generates a unique email address for account creation and login purposes.
## Register your sending domains
Apple mandates that you list the domains from which you will send emails to its service. Additionally, if your return-path domain differs from your sending domain, you must include that as well.
If you use Resend, note that its return-path domain is different since it operates through a subdomain. You will find this subdomain in your Domain settings, formatted as `send.yourdomain.tld` or `send.yoursubdomain.yourdomain.tld` for MX and SPF records. Ensure you add both your primary domain and the subdomain as Apple Email Sources.
## Register your email addresses
Alongside your Sending Domains, Apple requires registration of all email addresses used to send messages from those domains.
You can add these email addresses one by one or in a comma-separated list. If you use other email sources outside of Resend to send messages to Private Relay addresses, include those as well.
## Authenticate your sending domains
Since Resend mandates SPF and DKIM authentication for all domains sending emails through its service, your domain will automatically meet Apple’s authentication requirements.
## Still experiencing bounces from @privaterelay.appleid.com?
At times, emails sent to `@privaterelay.appleid.com` may still bounce. While the bounce messages may not always contain detailed explanations, common reasons include:
* The user has deleted their Hide My Email address from Apple’s settings.
* The user has exceeded their daily limit of 100 emails sent to and from their Hide My Email address.
* A misconfiguration in your settings—double-check that all Sending Domains and From Addresses are correctly registered and authenticated with Apple.
Apple allows the account owner and admins in the Apple Developer Portal to receive notifications if messages fail to deliver through the relay. You can enable this setting in the portal.
***
Once you have completed these three steps, you will be ready to send emails to customers using Hide My Email addresses via Apple’s Private Email Relay service.
For additional details on Apple Private Email Relay and configuration options, refer to Apple’s official documentation:
* [Apple: Configure Private Email Relay Service](https://developer.apple.com/help/account/configure-app-capabilities/configure-private-email-relay-service/)
* [Apple: Communicating Using the Private Email Relay Service](https://developer.apple.com/documentation/signinwithapple/communicating-using-the-private-email-relay-service/)
---
# Source: https://resend.com/docs/webhooks/emails/sent.md
> ## Documentation Index
> Fetch the complete documentation index at: https://resend.com/docs/llms.txt
> Use this file to discover all available pages before exploring further.
# email.sent
> Received when an email is sent.
export const ResponseBodyParameters = ({type, children}) => {
return
Response Body Parameters
All webhook payloads follow a consistent top-level structure with
event-specific data nested within the data object.
The event type that triggered the webhook (e.g., {type}).
ISO 8601 timestamp when the webhook event was created.
Event-specific data containing detailed information about the event. The
data object for the {type} event contains the following
parameters:
{children}
;
};
Event triggered whenever the **API request was successful**. Resend will attempt to deliver the message to the recipient's mail server.
Unique identifier for the broadcast campaign (if applicable)
ISO 8601 timestamp when the email was created
Unique identifier for the specific email
Sender email address and name in the format "Name
\<[email@domain.com](mailto:email@domain.com)>"
Array of impacted recipient email addresses
Email subject line
Unique identifier for the template used (if applicable)
Array of tag objects associated with the email
The tag key
The tag value
```json theme={"theme":{"light":"github-light","dark":"vesper"}}
{
"type": "email.sent",
"created_at": "2024-02-22T23:41:12.126Z",
"data": {
"broadcast_id": "8b146471-e88e-4322-86af-016cd36fd216",
"created_at": "2024-02-22T23:41:11.894719+00:00",
"email_id": "56761188-7520-42d8-8898-ff6fc54ce618",
"from": "Acme ",
"to": ["delivered@resend.dev"],
"subject": "Sending this example",
"template_id": "43f68331-0622-4e15-8202-246a0388854b",
"tags": {
"category": "confirm_email"
}
}
}
```
---
# Source: https://resend.com/docs/knowledge-base/should-i-add-an-unsubscribe-link.md
> ## Documentation Index
> Fetch the complete documentation index at: https://resend.com/docs/llms.txt
> Use this file to discover all available pages before exploring further.
# Should I add an unsubscribe link to all of my emails sent with Resend?
> Learn best practices about using unsubscribe links.
Transactional emails are generally exempt from including an unsubscribe link. Unlike marketing emails, transactional emails serve a functional purpose, such as account confirmation, password resets, and order confirmations.
As a best practice, we recommend telling recipients how to opt out of receiving future email from you if the content is more related to nurturing relationships with your customers, rather than pragmatic, action-oriented emails.
Laws enforced by the FTC and GDPR prioritize giving recipients an easy way to give and withdraw their consent to receiving email marketing content. Additionally, not having an option for opting out of emails risks recipients complaining or marking the email as spam, which can hurt your reputation as a sender.
Here is more on how to [manually add and manage unsubscribe links](https://resend.com/docs/dashboard/emails/add-unsubscribe-to-transactional-emails).
If you're using [Resend Broadcasts](https://resend.com/docs/dashboard/audiences/managing-unsubscribe-list), the unsubscribe headers are added automatically to your emails. You can include the Unsubscribe Footer in your Broadcasts, which will be automatically replaced with the correct link for each contact or use `{{{RESEND_UNSUBSCRIBE_URL}}}` as a link target should you want to customize the unsubscribe footer.
---
# Source: https://resend.com/docs/knowledge-base/squarespace.md
> ## Documentation Index
> Fetch the complete documentation index at: https://resend.com/docs/llms.txt
> Use this file to discover all available pages before exploring further.
# Squarespace
> Verify your domain on Squarespace with Resend.
## Add Domain to Resend
First, log in to your [Resend Account](https://resend.com/login) and [add a domain](https://resend.com/domains).
It is [best practice to use a
subdomain](/knowledge-base/is-it-better-to-send-emails-from-a-subdomain-or-the-root-domain)
(updates.example.com) instead of the root domain (example.com). Using a
subdomain allows for proper reputation segmentation based on topics or purpose
(e.g. marketing) and is especially important if receiving emails with Resend.
## Log in to Squarespace
Log in to your [Squarespace domains page](https://account.squarespace.com/domains) and click on your domain.
## Add MX SPF Record
Scroll down to the **Custom records** section and select `Add record` on Squarespace.
1. Type `send` for the `Host` of the record.
2. Set the `Type` to `MX`.
3. Set the `Priority` to `10`.
4. Use the Default 4 hours for `TTL`.
5. Copy the MX Value from Resend into the `Mail Server` field
6. Select `Save`.
Below is a mapping of the record fields from Resend to Squarespace:
| Squarespace | Resend | Example Value |
| ----------- | -------- | --------------------------------------- |
| Type | Type | `MX` |
| Host | Name | `send` |
| TTL | TTL | `4 hrs` (default) |
| Mail Server | Value | `feedback-smtp.us-east-1.amazonses.com` |
| Priority | Priority | `10` |
Omit your domain from the record values in Resend when you paste. Instead of
`send.example.com`, paste only `send` (or `send.subdomain` if you're using a
subdomain).
Do not use the same priority for multiple records. If Priority `10` is already
in use, try a higher value `20` or `30`.
## Add TXT SPF Record
In the same **Custom records** section, select `Add Record` on Squarespace.
1. Type `send` for the `Host` of the record.
2. Set the `Type` to `TXT`.
3. Use the Default 4 hours for `TTL`.
4. Copy the TXT Value from Resend into the `Text` field
5. Select `Save`.
Add the **TXT Record** from your domain in Resend to Squarespace and click "Save".
Below is a mapping of the record fields from Resend to Squarespace:
| Squarespace | Resend | Example Value |
| ----------- | ------ | ------------------------------------- |
| Type | Type | `TXT` |
| Host | Name | `send` |
| TTL | TTL | `4 hrs` (default) |
| Text | Value | `"v=spf1 include:amazonses.com ~all"` |
Omit your domain from the record values in Resend when you paste. Instead of
`send.example.com`, paste only `send` (or `send.subdomain` if you're using a
subdomain).
## Add TXT DKIM Records
In the same **Custom records** section, select `Add Record` on Squarespace.
1. Type `resend._domainkey` for the `Host` of the record.
2. Set the `Type` to `TXT`.
3. Use the Default 4 hours for `TTL`.
4. Copy the TXT Value from Resend into the `Text` field
5. Select `Save`.
Below is a mapping of the record fields from Resend to Squarespace:
| Squarespace | Resend | Example Value |
| ----------- | ------ | ---------------------------- |
| Type | Type | `TXT` |
| Host | Name | `resend._domainkey` |
| TTL | TTL | `4 hrs` (default) |
| Text | Value | `p=example_demain_key_value` |
Omit your domain from the record values in Resend when you paste. Instead of
`resend._domainkey.example.com`, paste only `resend._domainkey` (or
`resend._domainkey.subdomain` if you're using a subdomain).
## Receiving Emails
If you want to receive emails at your domain, toggle the "Receiving" switch on the domain details page.
When you enable Inbound on a domain, Resend receives *all emails* sent to that
specific domain depending on the priority of the MX record. For this reason,
we strongly recommend verifying a subdomain (`subdomain.example.com`) instead
of the root domain (`example.com`). Learn more about [avoiding conflicts with
your existing MX
records](/knowledge-base/how-do-i-avoid-conflicting-with-my-mx-records).
Scroll down to the **Custom records** section and select `Add record` on Squarespace:
1. Type `inbound` (or whatever your subdomain is) for the `Host` of the record.
2. Set the `Type` to `MX`.
3. Set the `Priority` to `10`.
4. Use the Default 4 hours for `TTL`.
5. Copy the MX Value from Resend into the `Mail Server` field.
6. Select `Save`.
Below is a mapping of the record fields from Resend to Squarespace:
| Squarespace | Resend | Example Value |
| ----------- | -------- | -------------------------------------- |
| Type | Type | `MX` |
| Host | Name | `inbound` |
| TTL | TTL | `4 hrs` (default) |
| Mail Server | Content | `inbound-smtp.us-east-1.amazonaws.com` |
| Priority | Priority | `10` |
After verifying your domain, create a webhook to process incoming emails. For help setting up a webhook, how to access email data and attachments, forward emails, and more, see [our guide on receiving emails with Resend](/dashboard/receiving/introduction).
## Complete Verification
Now click [Verify DNS Records](https://resend.com/domains) on your Domain in Resend. It may take up to 72 hours to complete the verification process (often much faster).
## Troubleshooting
If your domain is not successfully verified, these are some common troubleshooting methods.
Review the records you added to Squarespace to rule out copy and paste errors.
[Review our guide on a domain not verifying](/knowledge-base/what-if-my-domain-is-not-verifying).
---
# Source: https://resend.com/docs/knowledge-base/strato.md
> ## Documentation Index
> Fetch the complete documentation index at: https://resend.com/docs/llms.txt
> Use this file to discover all available pages before exploring further.
# Strato
> Verify your domain on Strato with Resend.
## Add Domain to Resend
First, log in to your [Resend Account](https://resend.com/login) and [add a domain](https://resend.com/domains).
It is [best practice to use a
subdomain](/knowledge-base/is-it-better-to-send-emails-from-a-subdomain-or-the-root-domain)
(updates.example.com) instead of the root domain (example.com). Using a
subdomain allows for proper reputation segmentation based on topics or purpose
(e.g. marketing) and is especially important if receiving emails with Resend.
## Log in to Strato
Log in to your [Strato account](https://www.strato.es/apps/CustomerService):
1. In the left-hand navigation, go to Domains > Manage Domain.
## Add MX SPF Record
1. On the domain page, click on the gear icon to redirect to Settings.
2. Create a new subdomain named `send`.
3. Navigate to the subdomain settings.
4. Go to the `DNS` tab, you'll see a list of DNS records you can update. Click on `manage` MX record.
5. Select own mail server.
6. Copy MX value from Resend into `Server` field.
7. Use the default priority `Low`.
8. Save settings.
By default, Strato domains use Strato mail server which uses `mail` as their
send path. You will need to bypass this default behavior by creating a
subdomain and setting the MX record there.
Below is a mapping of the record fields from Resend to Strato:
| Strato | Resend | Example Value |
| ----------- | -------- | ---------------------------------------- |
| Type | Type | `MX Record` |
| Name | Name | `send` |
| Mail server | Value | `feedback-smtp.eu-west-1.amazonses.com.` |
| Priority | Priority | `Low` |
## Add TXT SPF Record
On the base domain settings:
1. Go to the `DNS` tab.
2. Manage TXT and CNAME records.
3. On the bottom, click `Create another record`.
4. Choose `TXT` type.
5. Add `send` for the `name` record.
6. For `value` input `v=spf1 include:amazonses.com ~all`.
7. Save settings.
Strato provides a standard DMARC record similar to Resend's recommended value:
`v=DMARC1;p=reject;`.
Below is a mapping of the record fields from Resend to Strato:
| Strato | Resend | Example Value |
| ------ | ------ | ----------------------------------- |
| Type | Type | `TXT Record` |
| Name | Name | `send` |
| Value | Value | `v=spf1 include:amazonses.com ~all` |
## Add TXT DKIM Records
On the same TXT and CNAME manage page:
1. Click `Create another record`.
2. Choose `TXT` type.
3. Add `resend._domainkey` for the `Name` record.
4. Copy the record value from Resend into the TXT value field.
5. Save settings.
Omit your domain from the record values in Resend when you paste. Instead of
`resend._domainkey.example.com`, paste only `resend._domainkey` (or
`resend._domainkey.subdomain` if you're using a subdomain).
Below is a mapping of the record fields from Resend to Strato:
| Strato | Resend | Example Value |
| ------ | ------ | ---------------------------- |
| Type | Type | `TXT Record` |
| Name | Name | `send` |
| Value | Value | `p=example_demain_key_value` |
Copy DKIM value using the small copy icon in Resend. DKIM records are
case-sensitive and must match up exactly.
## Receiving Emails
If you want to receive emails at your domain, toggle the "Receiving" switch on the domain details page.
When you enable Inbound on a domain, Resend receives *all emails* sent to that
specific domain depending on the priority of the MX record. For this reason,
we strongly recommend verifying a subdomain (`subdomain.example.com`) instead
of the root domain (`example.com`). Learn more about [avoiding conflicts with
your existing MX
records](/knowledge-base/how-do-i-avoid-conflicting-with-my-mx-records).
1. Create a new subdomain named `inbound` (or whatever your subdomain is).
2. Navigate to the subdomain settings.
3. Go to the `DNS` tab and click on `manage` MX record.
4. Select own mail server.
5. Copy MX value from Resend into `Server` field.
6. Use the default priority `Low`.
7. Save settings.
Below is a mapping of the record fields from Resend to Strato:
| Strato | Resend | Example Value |
| ----------- | -------- | --------------------------------------- |
| Type | Type | `MX Record` |
| Name | Name | `inbound` |
| Mail server | Content | `inbound-smtp.us-east-1.amazonaws.com.` |
| Priority | Priority | `Low` |
After verifying your domain, create a webhook to process incoming emails. For help setting up a webhook, how to access email data and attachments, forward emails, and more, see [our guide on receiving emails with Resend](/dashboard/receiving/introduction).
## Complete Verification
Now click [Verify DNS Records](https://resend.com/domains) on your Domain in Resend. It may take a few hours to complete the verification process (often much faster).
## Troubleshooting
If your domain is not successfully verified, these are some common troubleshooting methods.
Review the records you added to Strato to rule out copy and paste errors.
[Review our guide on a domain not verifying](/knowledge-base/what-if-my-domain-is-not-verifying).
---
# Source: https://resend.com/docs/webhooks/emails/suppressed.md
> ## Documentation Index
> Fetch the complete documentation index at: https://resend.com/docs/llms.txt
> Use this file to discover all available pages before exploring further.
# email.suppressed
> Received when an email is suppressed.
export const ResponseBodyParameters = ({type, children}) => {
return
Response Body Parameters
All webhook payloads follow a consistent top-level structure with
event-specific data nested within the data object.
The event type that triggered the webhook (e.g., {type}).
ISO 8601 timestamp when the webhook event was created.
Event-specific data containing detailed information about the event. The
data object for the {type} event contains the following
parameters:
{children}
;
};
Event triggered whenever the **email is suppressed** by Resend.
Learn more about [suppressed
emails](/knowledge-base/why-are-my-emails-landing-on-the-suppression-list).
Unique identifier for the broadcast campaign (if applicable)
ISO 8601 timestamp when the email was created
Unique identifier for the specific email
Sender email address and name in the format "Name
\<[email@domain.com](mailto:email@domain.com)>"
Array of impacted recipient email addresses
Email subject line
Unique identifier for the template used (if applicable)
Array of tag objects associated with the email
The tag key
The tag value
```json theme={"theme":{"light":"github-light","dark":"vesper"}}
{
"type": "email.suppressed",
"created_at": "2024-11-22T23:41:12.126Z",
"data": {
"broadcast_id": "8b146471-e88e-4322-86af-016cd36fd216",
"created_at": "2024-11-22T23:41:11.894719+00:00",
"email_id": "56761188-7520-42d8-8898-ff6fc54ce618",
"from": "Acme ",
"to": ["delivered@resend.dev"],
"subject": "Sending this example",
"template_id": "43f68331-0622-4e15-8202-246a0388854b",
"suppressed": {
"message": "Resend has suppressed sending to this address because it is on the account-level suppression list. This does not count toward your bounce rate metric",
"type": "OnAccountSuppressionList"
},
"tags": {
"category": "confirm_email"
}
}
}
```
---
# Source: https://resend.com/docs/dashboard/emails/tags.md
> ## Documentation Index
> Fetch the complete documentation index at: https://resend.com/docs/llms.txt
> Use this file to discover all available pages before exploring further.
# Managing Tags
> Add unique identifiers to emails sent.
Tags are unique identifiers you can add to your emails. They help associate emails with your application. They are passed in key/value pairs. After the email is sent, the tag is included in the webhook event. Tags can include ASCII letters, numbers, underscores, or dashes.
Some examples of when to use a tag:
* Associate the email a "customer ID" from your application
* Add a label from your database like "free" or "enterprise"
* Note the category of email sent, like "welcome" or "password reset"
Here's how you can add custom tags to your emails.
## Add tags on the `POST /emails` endpoint
```ts Node.js {10-15} theme={"theme":{"light":"github-light","dark":"vesper"}}
import { Resend } from 'resend';
const resend = new Resend('re_xxxxxxxxx');
await resend.emails.send({
from: 'Acme ',
to: ['delivered@resend.dev'],
subject: 'hello world',
html: '
")
.tags(Tag.builder()
.name("category")
.value("confirm_email")
.build())
.build();
CreateBatchEmailsResponse data = resend.batch().send(
Arrays.asList(firstEmail, secondEmail)
);
}
}
```
```csharp .NET {11,20} theme={"theme":{"light":"github-light","dark":"vesper"}}
using Resend;
IResend resend = ResendClient.Create( "re_xxxxxxxxx" ); // Or from DI
var mail1 = new EmailMessage()
{
From = "Acme ",
To = "foo@gmail.com",
Subject = "hello world",
HtmlBody = "
it works!
",
Tags = new List { new EmailTag { Name = "category", Value = "confirm_email" } }
};
var mail2 = new EmailMessage()
{
From = "Acme ",
To = "bar@outlook.com",
Subject = "hello world",
HtmlBody = "
it works!
",
Tags = new List { new EmailTag { Name = "category", Value = "confirm_email" } }
};
var resp = await resend.EmailBatchAsync( [ mail1, mail2 ] );
Console.WriteLine( "Nr Emails={0}", resp.Content.Count );
```
```bash cURL {10-15,22-27} theme={"theme":{"light":"github-light","dark":"vesper"}}
curl -X POST 'https://api.resend.com/emails/batch' \
-H 'Authorization: Bearer re_xxxxxxxxx' \
-H 'Content-Type: application/json' \
-d $'[
{
"from": "Acme ",
"to": ["foo@gmail.com"],
"subject": "hello world",
"html": "
",
"tags": [
{
"name": "category",
"value": "confirm_email"
}
]
}
]'
```
---
# Source: https://resend.com/docs/dashboard/settings/team.md
> ## Documentation Index
> Fetch the complete documentation index at: https://resend.com/docs/llms.txt
> Use this file to discover all available pages before exploring further.
# Managing Teams
> Manage your account across multiple teams
Resend allows multiple teams to be managed under a single email address. Each team is distinct, with its own API keys, billing, and usage.
## Inviting new members to a team
1. Navigate to your [**Team Settings**](https://resend.com/settings/team).
2. Click **Invite**. Input an email address and select a role (**Admin** or **Member**).
* **Members** have access to manage emails, domains and webhooks.
* **Admins** have all Member permissions plus the ability to invite users, update payments, and delete the team.
3. The new member will receive an email invitation to join the team.
## Add a team avatar
1. Navigate to your [**Team Settings**](https://resend.com/settings/team).
2. Click **Upload Image** next to the avatar placeholders.
3. Upload an image file to use as the team avatar.
## Switching between teams
After accepting an invite from the account owner, users can switch between teams:
1. Click on the **team name** in the top left corner of any Resend page.
2. A dropdown menu will appear, listing all the teams you belong to.
3. Select a team to switch between them.
## Change the team member roles
As an admin of your team, you can change the role of members in your team.
1. Navigate to your [**Team Settings**](https://resend.com/settings/team).
2. Find the user you want to change.
3. Select the more options button and choose **Change role**.
Upon confirmation, your team member will be given the new role.
## Leave your Resend team
You can leave your team by following these steps:
1. Navigate to your [**Team Settings**](https://resend.com/settings/team).
2. Under members, click on next to your name for more options.
3. Select the **Leave Team** button.
Upon confirmation, you will leave your team.
If you are the last member of the team, leaving will permanently delete the
team and all its data. You will be prompted to confirm this action by typing
**DELETE**. If the team still has other members, but you are the only admin,
you will be prompted to promote another member to admin before leaving.
---
# Source: https://resend.com/docs/dashboard/templates/template-variables.md
> ## Documentation Index
> Fetch the complete documentation index at: https://resend.com/docs/llms.txt
> Use this file to discover all available pages before exploring further.
# Working with Variables
> How to work with custom variables in Templates.
Custom Template variables provide your team flexibility when sending emails. Define custom variables for your Template with optional fallback values which will be replaced with the actual values when sending the email.
## Create custom variables
Each Template may contain up to 50 variables.
To add a custom variable, select **Variable** in the commands palette or type `{{` in the editor. Define the `name`, `type`, and `fallback_value` (optional).
You can also define custom variables via the API. The payload can optionally
include variables to be used in the Template.
```ts Node.js theme={"theme":{"light":"github-light","dark":"vesper"}}
import { Resend } from 'resend';
const resend = new Resend('re_xxxxxxxxx');
await resend.templates.create({
name: 'order-confirmation',
html: '
",
Variables: []*resend.TemplateVariable{
{
Key: "PRODUCT",
Type: resend.VariableTypeString,
FallbackValue: "item",
},
{
Key: "PRICE",
Type: resend.VariableTypeNumber,
FallbackValue: 25,
}
},
})
}
```
```rust Rust theme={"theme":{"light":"github-light","dark":"vesper"}}
use resend_rs::{
types::{CreateTemplateOptions, Variable, VariableType},
Resend, Result,
};
#[tokio::main]
async fn main() -> Result<()> {
let resend = Resend::new("re_xxxxxxxxx");
let name = "order-confirmation";
let html = "
Name: {{{PRODUCT}}}
Total: {{{PRICE}}}
";
let variables = [
Variable::new("PRODUCT", VariableType::String).with_fallback("item"),
Variable::new("PRICE", VariableType::Number).with_fallback(25)
];
let opts = CreateTemplateOptions::new(name, html).with_variables(&variables);
let template = resend.templates.create(opts).await?;
let _published = resend.templates.publish(&template.id).await?;
Ok(())
}
```
```java Java theme={"theme":{"light":"github-light","dark":"vesper"}}
import com.resend.*;
public class Main {
public static void main(String[] args) {
Resend resend = new Resend("re_xxxxxxxxx");
CreateTemplateOptions params = CreateTemplateOptions.builder()
.name("order-confirmation")
.html("
Name: {{{PRODUCT}}}
Total: {{{PRICE}}}
")
.addVariable(new Variable("PRODUCT", VariableType.STRING, "item"))
.addVariable(new Variable("PRICE", VariableType.NUMBER, 25))
.build();
CreateTemplateResponseSuccess data = resend.templates().create(params);
}
}
```
```csharp .NET theme={"theme":{"light":"github-light","dark":"vesper"}}
using Resend;
IResend resend = ResendClient.Create("re_xxxxxxxxx");
var variables = new List()
{
new TemplateVariable() {
Key = "PRODUCT",
Type = TemplateVariableType.String,
Default = "item",
},
new TemplateVariable() {
Key = "PRICE",
Type = TemplateVariableType.Number,
Default = 25,
}
};
var resp = await resend.TemplateCreateAsync(
new TemplateData()
{
Name = "welcome-email",
HtmlBody = "Hey, {{{PRODUCT}}}, you are {{{PRICE}}} years old.",
Variables = variables,
}
);
Console.WriteLine($"Template Id={resp.Content}");
```
```bash cURL theme={"theme":{"light":"github-light","dark":"vesper"}}
curl -X POST 'https://api.resend.com/templates' \
-H 'Authorization: Bearer re_xxxxxxxxx' \
-H 'Content-Type: application/json' \
-d $'{
"name": "order-confirmation",
"html": "
Name: {{{PRODUCT}}}
Total: {{{PRICE}}}
",
"variables": [
{
"key": "PRODUCT",
"type": "string",
"fallback_value": "item"
},
{
"key": "PRICE",
"type": "number",
"fallback_value": 25
}
]
}'
```
The following variable names are reserved and cannot be used: `FIRST_NAME`,
`LAST_NAME`, `EMAIL`, `UNSUBSCRIBE_URL`, `contact`,`this`.
Each variable is an object with the following properties:
* `key`: The key of the variable. We recommend capitalizing the key. (e.g. `PRODUCT_NAME`).
* `type`: The type of the variable (`'string'` or `'number'`).
* `fallback_value`: The fallback value of the variable. If no fallback value is provided, you must provide a value for the variable when sending an email using the template.
[See the API reference for more details](/api-reference/templates/create-template).
## Fallback values
When you define a variable, you can optionally define a fallback value. This value will be used when sending the email if you fail to provide a value in your call.
In the editor, if you fail to provide a fallback value, a warning sign will show for the variable. To edit a variable's fallback value, click on the variable chip in your template and use the Inspector sidebar on the right to update the fallback value.
[As shown above](#create-template-with-variables), you can also include fallback values when creating a Template via the API.
## Send Test Emails
You can send test emails to your inbox to preview your Template before sending it to your audience. Provide variable values to test the rendered Template in your inbox.
## Send a Template with Variables
When sending a transactional email, you can reference your Template and include your variables in the call. The Template variables will be replaced with the actual values.
* `id`: id of the published template
* `variables`: array of variable objects (if applicable)
Both the `/emails` and `/emails/batch` endpoints support Templates.
```ts Node.js theme={"theme":{"light":"github-light","dark":"vesper"}}
import { Resend } from 'resend';
const resend = new Resend('re_xxxxxxxxx');
const { data, error } = await resend.emails.send({
from: 'Acme ',
to: ['delivered@resend.dev'],
subject: 'hello world',
template: {
id: 'f3b9756c-f4f4-44da-bc00-9f7903c8a83f',
variables: {
PRODUCT: 'Laptop',
},
},
});
```
```php PHP theme={"theme":{"light":"github-light","dark":"vesper"}}
$resend = Resend::client('re_xxxxxxxxx');
$resend->emails->send([
'from' => 'Acme ',
'to' => ['delivered@resend.dev'],
'subject' => 'hello world',
'template'=> [
'id' => 'f3b9756c-f4f4-44da-bc00-9f7903c8a83f',
'variables' => [
'PRODUCT' => 'Laptop'
]
]
]);
```
```python Python theme={"theme":{"light":"github-light","dark":"vesper"}}
import resend
resend.api_key = "re_xxxxxxxxx"
params: resend.Emails.SendParams = {
"from": "Acme ",
"to": ["delivered@resend.dev"],
"subject": "hello world",
"template": {
"id": "f3b9756c-f4f4-44da-bc00-9f7903c8a83f",
"variables": {
"PRODUCT": "Laptop",
},
},
}
email = resend.Emails.send(params)
```
```ruby Ruby theme={"theme":{"light":"github-light","dark":"vesper"}}
require 'resend'
Resend.api_key = 're_xxxxxxxxx'
params = {
from: 'Acme ',
to: ['delivered@resend.dev'],
subject: 'hello world',
template: {
id: 'f3b9756c-f4f4-44da-bc00-9f7903c8a83f',
variables: {
'PRODUCT': 'Laptop'
}
}
}
email = Resend::Emails.send(params)
```
```go Go theme={"theme":{"light":"github-light","dark":"vesper"}}
import (
"context"
"github.com/resend/resend-go/v3"
)
func main() {
client := resend.NewClient("re_xxxxxxxxx")
params := &resend.SendEmailRequest{
From: "Acme ",
To: []string{"delivered@resend.dev"},
Subject: "hello world",
Template: &resend.EmailTemplate{
ID: "f3b9756c-f4f4-44da-bc00-9f7903c8a83f",
Variables: map[string]interface{}{
"PRODUCT": "Laptop",
},
},
}
sent, err := client.Emails.SendWithContext(context.TODO(), params)
}
```
```rust Rust theme={"theme":{"light":"github-light","dark":"vesper"}}
use resend_rs::{types::CreateEmailBaseOptions, Resend, Result};
use std::collections::HashMap;
#[tokio::main]
async fn main() -> Result<()> {
let resend = Resend::new("re_xxxxxxxxx");
let from = "Acme ";
let to = ["delivered@resend.dev"];
let subject = "hello world";
let mut variables = HashMap::new();
variables.insert("PRODUCT".to_string(), "Laptop".to_string());
let email = CreateEmailBaseOptions::new(from, to, subject)
.with_template("f3b9756c-f4f4-44da-bc00-9f7903c8a83f", variables);
let _email = resend.emails.send(email).await?;
Ok(())
}
```
```java Java theme={"theme":{"light":"github-light","dark":"vesper"}}
import com.resend.*;
import java.util.HashMap;
import java.util.Map;
public class Main {
public static void main(String[] args) {
Resend resend = new Resend("re_xxxxxxxxx");
Map variables = new HashMap<>();
variables.put("PRODUCT", "Laptop");
CreateEmailOptions params = CreateEmailOptions.builder()
.from("Acme ")
.to("delivered@resend.dev")
.subject("hello world")
.template("f3b9756c-f4f4-44da-bc00-9f7903c8a83f", variables)
.build();
CreateEmailResponse data = resend.emails().send(params);
}
}
```
```csharp .NET theme={"theme":{"light":"github-light","dark":"vesper"}}
using Resend;
IResend resend = ResendClient.Create( "re_xxxxxxxxx" ); // Or from DI
var resp = await resend.EmailSendAsync( new EmailMessage()
{
From = "Acme ",
To = "delivered@resend.dev",
Subject = "hello world",
Template = new EmailMessageTemplate() {
TemplateId = new Guid( "f3b9756c-f4f4-44da-bc00-9f7903c8a83f" ),
Variables = new Dictionary()
{
{ "PRODUCT", "Laptop" },
{ "PRICE", 1.23 }
}
}
} );
Console.WriteLine( "Email Id={0}", resp.Content );
```
```bash cURL theme={"theme":{"light":"github-light","dark":"vesper"}}
curl -X POST 'https://api.resend.com/emails' \
-H 'Authorization: Bearer re_xxxxxxxxx' \
-H 'Content-Type: application/json' \
-d $'{
"from": "Acme ",
"to": ["delivered@resend.dev"],
"subject": "hello world",
"template": {
"id": "f3b9756c-f4f4-44da-bc00-9f7903c8a83f",
"variables": {
"PRODUCT": "Laptop"
}
}
}'
```
If a `template` is provided, you cannot send `html`, `text`, or `react` in the payload, otherwise the API will return a validation error.
When sending a template, the payload for `from`, `subject`, and `reply_to` take precedence over the template's defaults for these fields. If the template does not provide a default value for these fields, you must provide them in the payload.
Learn more about [sending emails](/api-reference/emails/send-email) or sending [batch emails](/api-reference/emails/send-batch-emails) with Templates via the API.
---
# Source: https://resend.com/docs/dashboard/settings/unsubscribe-page.md
> ## Documentation Index
> Fetch the complete documentation index at: https://resend.com/docs/llms.txt
> Use this file to discover all available pages before exploring further.
# Custom Unsubscribe Page
> Customize your unsubscribe page
When sending to Resend Audiences, Resend can [automatically handle the unsubscribe flow for you](/dashboard/audiences/introduction#automatic-unsubscribes).
You can customize your unsubscribe page to match your brand. Your unsubscribe page is used for every domain on your team.
1. Navigate to your [**Unsubscribe Page**](https://resend.com/settings/unsubscribe-page).
2. Click **Edit**.
You can customize the following:
* **Title**: The title of the unsubscribe page.
* **Description**: The description of the unsubscribe page.
* **Logo**: The logo of the unsubscribe page.
* **Background Color**: The background color of the unsubscribe page.
* **Text Color**: The text color of the unsubscribe page.
* **Accent Color**: The accent color of the unsubscribe page.
Pro plan users or higher can also remove the “Powered by Resend” footer.
---
# Source: https://resend.com/docs/api-reference/broadcasts/update-broadcast.md
> ## Documentation Index
> Fetch the complete documentation index at: https://resend.com/docs/llms.txt
> Use this file to discover all available pages before exploring further.
# Update Broadcast
> Update a broadcast to send to your contacts.
export const ResendParamField = ({children, body, path, ...props}) => {
const [lang, setLang] = useState(() => {
return localStorage.getItem('code') || '"Node.js"';
});
useEffect(() => {
const onStorage = event => {
const key = event.detail.key;
if (key === 'code') {
setLang(event.detail.value);
}
};
document.addEventListener('mintlify-localstorage', onStorage);
return () => {
document.removeEventListener('mintlify-localstorage', onStorage);
};
}, []);
const toCamelCase = str => typeof str === 'string' ? str.replace(/[_-](\w)/g, (_, c) => c.toUpperCase()) : str;
const resolvedBody = useMemo(() => {
const value = JSON.parse(lang);
return value === 'Node.js' ? toCamelCase(body) : body;
}, [body, lang]);
const resolvedPath = useMemo(() => {
const value = JSON.parse(lang);
return value === 'Node.js' ? toCamelCase(path) : path;
}, [path, lang]);
return
{children}
;
};
## Path Parameters
The ID of the broadcast you want to update.
## Body Parameters
The ID of the segment you want to send to.
Audiences are now called Segments. Follow the [Migration
Guide](/dashboard/segments/migrating-from-audiences-to-segments).
Sender email address.
To include a friendly name, use the format `"Your Name "`.
Email subject.
Reply-to email address. For multiple addresses, send as an array of strings.
The HTML version of the message.
The plain text version of the message.
If not provided, the HTML will be used to generate a plain text version. You
can opt out of this behavior by setting value to an empty string.
The React component used to write the message. *Only available in the Node.js
SDK.*
The friendly name of the broadcast. Only used for internal reference.
The topic ID that the broadcast will be scoped to.
```ts Node.js theme={"theme":{"light":"github-light","dark":"vesper"}}
import { Resend } from 'resend';
const resend = new Resend('re_xxxxxxxxx');
const { data, error } = await resend.broadcasts.update(
'49a3999c-0ce1-4ea6-ab68-afcd6dc2e794',
{
html: 'Hi {{{FIRST_NAME|there}}}, you can unsubscribe here: {{{RESEND_UNSUBSCRIBE_URL}}}',
},
);
```
```php PHP theme={"theme":{"light":"github-light","dark":"vesper"}}
$resend = Resend::client('re_xxxxxxxxx');
$resend->broadcasts->update('49a3999c-0ce1-4ea6-ab68-afcd6dc2e794', [
'html' => 'Hi {{{FIRST_NAME|there}}}, you can unsubscribe here: {{{RESEND_UNSUBSCRIBE_URL}}}',
]);
```
```py Python theme={"theme":{"light":"github-light","dark":"vesper"}}
import resend
resend.api_key = "re_xxxxxxxxx"
params: resend.Broadcasts.UpdateParams = {
"id": "49a3999c-0ce1-4ea6-ab68-afcd6dc2e794",
"html": "Hi {{{FIRST_NAME|there}}}, you can unsubscribe here: {{{RESEND_UNSUBSCRIBE_URL}}}"
}
resend.Broadcasts.update(params)
```
```ruby Ruby theme={"theme":{"light":"github-light","dark":"vesper"}}
require "resend"
Resend.api_key = "re_xxxxxxxxx"
params = {
"id": "49a3999c-0ce1-4ea6-ab68-afcd6dc2e794",
"html": "Hi #{FIRST_NAME}, you can unsubscribe here: #{RESEND_UNSUBSCRIBE_URL}",
}
Resend::Broadcasts.update(params)
```
```go Go theme={"theme":{"light":"github-light","dark":"vesper"}}
package main
import "github.com/resend/resend-go/v3"
func main() {
client := resend.NewClient("re_xxxxxxxxx")
params := &resend.UpdateBroadcastRequest{
Id: "49a3999c-0ce1-4ea6-ab68-afcd6dc2e794",
Html: "Hi {{{FIRST_NAME|there}}}, you can unsubscribe here: {{{RESEND_UNSUBSCRIBE_URL}}}",
}
client.Broadcasts.Update(params)
}
```
```rust Rust theme={"theme":{"light":"github-light","dark":"vesper"}}
use resend_rs::{types::UpdateBroadcastOptions, Resend, Result};
#[tokio::main]
async fn main() -> Result<()> {
let resend = Resend::new("re_xxxxxxxxx");
let id = "49a3999c-0ce1-4ea6-ab68-afcd6dc2e794";
let html = "Hi {{{FIRST_NAME|there}}}, you can unsubscribe here: {{{RESEND_UNSUBSCRIBE_URL}}}";
let opts = UpdateBroadcastOptions::new().with_html(html);
let _broadcast = resend.broadcasts.update(id, opts).await?;
Ok(())
}
```
```java Java theme={"theme":{"light":"github-light","dark":"vesper"}}
Resend resend = new Resend("re_xxxxxxxxx");
UpdateBroadcastOptions params = UpdateBroadcastOptions.builder()
.id("49a3999c-0ce1-4ea6-ab68-afcd6dc2e794")
.html("Hi {{{FIRST_NAME|there}}}, you can unsubscribe here: {{{RESEND_UNSUBSCRIBE_URL}}}")
.build();
UpdateBroadcastResponseSuccess data = resend.broadcasts().update(params);
```
```csharp .NET theme={"theme":{"light":"github-light","dark":"vesper"}}
using Resend;
IResend resend = ResendClient.Create( "re_xxxxxxxxx" ); // Or from DI
var resp = await resend.BroadcastUpdateAsync(
new Guid( "49a3999c-0ce1-4ea6-ab68-afcd6dc2e794" ),
new BroadcastUpdateData()
{
HtmlBody = "Hi {{{FIRST_NAME|there}}}, you can unsubscribe here: {{{RESEND_UNSUBSCRIBE_URL}}}",
}
);
```
```bash cURL theme={"theme":{"light":"github-light","dark":"vesper"}}
curl -X PATCH 'https://api.resend.com/broadcasts/49a3999c-0ce1-4ea6-ab68-afcd6dc2e794' \
-H 'Authorization: Bearer re_xxxxxxxxx' \
-H 'Content-Type: application/json' \
-d $'{
"html": "Hi {{{FIRST_NAME|there}}}, you can unsubscribe here: {{{RESEND_UNSUBSCRIBE_URL}}}"
}'
```
```json Response theme={"theme":{"light":"github-light","dark":"vesper"}}
{
"id": "49a3999c-0ce1-4ea6-ab68-afcd6dc2e794"
}
```
---
# Source: https://resend.com/docs/api-reference/contact-properties/update-contact-property.md
> ## Documentation Index
> Fetch the complete documentation index at: https://resend.com/docs/llms.txt
> Use this file to discover all available pages before exploring further.
# Update Contact Property
> Update an existing contact property.
export const ResendParamField = ({children, body, path, ...props}) => {
const [lang, setLang] = useState(() => {
return localStorage.getItem('code') || '"Node.js"';
});
useEffect(() => {
const onStorage = event => {
const key = event.detail.key;
if (key === 'code') {
setLang(event.detail.value);
}
};
document.addEventListener('mintlify-localstorage', onStorage);
return () => {
document.removeEventListener('mintlify-localstorage', onStorage);
};
}, []);
const toCamelCase = str => typeof str === 'string' ? str.replace(/[_-](\w)/g, (_, c) => c.toUpperCase()) : str;
const resolvedBody = useMemo(() => {
const value = JSON.parse(lang);
return value === 'Node.js' ? toCamelCase(body) : body;
}, [body, lang]);
const resolvedPath = useMemo(() => {
const value = JSON.parse(lang);
return value === 'Node.js' ? toCamelCase(path) : path;
}, [path, lang]);
return
{children}
;
};
## Path Parameters
The Contact Property ID.
The `key` and `type` fields cannot be changed after creation. This preserves
data integrity for existing contact values.
## Body Parameters
The default value to use when the property is not set for a contact. Must
match the type of the property.
```ts Node.js theme={"theme":{"light":"github-light","dark":"vesper"}}
import { Resend } from 'resend';
const resend = new Resend('re_xxxxxxxxx');
const { data, error } = await resend.contactProperties.update({
id: 'b6d24b8e-af0b-4c3c-be0c-359bbd97381e',
fallbackValue: 'Example Company',
});
```
```php PHP theme={"theme":{"light":"github-light","dark":"vesper"}}
$resend = Resend::client('re_xxxxxxxxx');
$resend->contactProperties->update('b6d24b8e-af0b-4c3c-be0c-359bbd97381', [
'fallback_value' => 'Example Company',
]);
```
```python Python theme={"theme":{"light":"github-light","dark":"vesper"}}
import resend
resend.api_key = 're_xxxxxxxxx'
params = {
"id": "b6d24b8e-af0b-4c3c-be0c-359bbd97381e",
"fallback_value": "Example Company",
}
contact_property = resend.ContactProperties.update(params)
```
```ruby Ruby theme={"theme":{"light":"github-light","dark":"vesper"}}
require "resend"
Resend.api_key = "re_xxxxxxxxx"
property = Resend::ContactProperties.update({
id: "b6d24b8e-af0b-4c3c-be0c-359bbd97381e",
fallback_value: "Example Company"
})
```
```go Go theme={"theme":{"light":"github-light","dark":"vesper"}}
package main
import (
"context"
"fmt"
"github.com/resend/resend-go/v3"
)
func main() {
ctx := context.TODO()
client := resend.NewClient("re_xxxxxxxxx")
params := &resend.UpdateContactPropertyRequest{
Id: "b6d24b8e-af0b-4c3c-be0c-359bbd97381e",
FallbackValue: "Example Company",
}
property, err := client.ContactProperties.UpdateWithContext(ctx, params)
if err != nil {
panic(err)
}
fmt.Println(property)
}
```
```rust Rust theme={"theme":{"light":"github-light","dark":"vesper"}}
use resend_rs::{types::ContactPropertyChanges, Resend, Result};
#[tokio::main]
async fn main() -> Result<()> {
let resend = Resend::new("re_xxxxxxxxx");
let update = ContactPropertyChanges::default().with_fallback("Example Company");
let _contact_property = resend
.contacts
.update_property("b6d24b8e-af0b-4c3c-be0c-359bbd97381e", update)
.await?;
Ok(())
}
```
```java Java theme={"theme":{"light":"github-light","dark":"vesper"}}
import com.resend.*;
public class Main {
public static void main(String[] args) {
Resend resend = new Resend("re_xxxxxxxxx");
UpdateContactPropertyOptions options = UpdateContactPropertyOptions.builder()
.id("b6d24b8e-af0b-4c3c-be0c-359bbd97381e")
.fallbackValue("Example Company")
.build();
resend.contactProperties().update(options);
}
}
```
```csharp .NET theme={"theme":{"light":"github-light","dark":"vesper"}}
using Resend;
IResend resend = ResendClient.Create( "re_xxxxxxxxx" ); // Or from DI
var resp = await resend.ContactPropUpdateAsync(
new Guid( "b6d24b8e-af0b-4c3c-be0c-359bbd97381e" ),
new ContactPropertyUpdateData() {
DefaultValue = "Example Company",
}
);
```
```bash cURL theme={"theme":{"light":"github-light","dark":"vesper"}}
curl -X PATCH 'https://api.resend.com/contact-properties/b6d24b8e-af0b-4c3c-be0c-359bbd97381e' \
-H 'Authorization: Bearer re_xxxxxxxxx' \
-H 'Content-Type: application/json' \
-d $'{
"fallback_value": "Example Company"
}'
```
```json Response theme={"theme":{"light":"github-light","dark":"vesper"}}
{
"object": "contact_property",
"id": "b6d24b8e-af0b-4c3c-be0c-359bbd97381e"
}
```
---
# Source: https://resend.com/docs/api-reference/contacts/update-contact-topics.md
> ## Documentation Index
> Fetch the complete documentation index at: https://resend.com/docs/llms.txt
> Use this file to discover all available pages before exploring further.
# Update Contact Topics
> Update topic subscriptions for a contact.
## Path Parameters
Either `id` or `email` must be provided.
The Contact ID.
The Contact Email.
## Body Parameters
Array of topic subscription updates.
The Topic ID.
The subscription action. Must be either `opt_in` or `opt_out`.
```ts Node.js theme={"theme":{"light":"github-light","dark":"vesper"}}
import { Resend } from 'resend';
const resend = new Resend('re_xxxxxxxxx');
// Update by contact id
const { data, error } = await resend.contacts.topics.update({
id: 'e169aa45-1ecf-4183-9955-b1499d5701d3',
topics: [
{
id: 'b6d24b8e-af0b-4c3c-be0c-359bbd97381e',
subscription: 'opt_out',
},
{
id: '07d84122-7224-4881-9c31-1c048e204602',
subscription: 'opt_in',
},
],
});
// Update by contact email
const { data, error } = await resend.contacts.topics.update({
email: 'steve.wozniak@gmail.com',
topics: [
{
id: '07d84122-7224-4881-9c31-1c048e204602',
subscription: 'opt_out',
},
{
id: '07d84122-7224-4881-9c31-1c048e204602',
subscription: 'opt_in',
},
],
});
```
```php PHP theme={"theme":{"light":"github-light","dark":"vesper"}}
$resend = Resend::client('re_xxxxxxxxx');
// Update by contact id
$resend->contacts->topics->update('e169aa45-1ecf-4183-9955-b1499d5701d3', [
[
'id' => '07d84122-7224-4881-9c31-1c048e204602',
'subscription' => 'opt_out',
],
[
'id' => '07d84122-7224-4881-9c31-1c048e204602',
'subscription' => 'opt_in',
],
]);
// Update by contact email
$resend->contacts->topics->update('steve.wozniak@gmail.com', [
[
'id' => '07d84122-7224-4881-9c31-1c048e204602',
'subscription' => 'opt_out',
],
[
'id' => '07d84122-7224-4881-9c31-1c048e204602',
'subscription' => 'opt_in',
],
]);
```
```python Python theme={"theme":{"light":"github-light","dark":"vesper"}}
import resend
resend.api_key = 're_xxxxxxxxx'
# Update by contact id
params = {
"id": "e169aa45-1ecf-4183-9955-b1499d5701d3",
"topics": [
{"id": "b6d24b8e-af0b-4c3c-be0c-359bbd97381e", "subscription": "opt_out"},
{"id": "07d84122-7224-4881-9c31-1c048e204602", "subscription": "opt_in"},
],
}
response = resend.Contacts.Topics.update(params)
# Update by contact email
params_by_email = {
"email": "steve.wozniak@gmail.com",
"topics": [
{"id": "07d84122-7224-4881-9c31-1c048e204602", "subscription": "opt_out"},
{"id": "07d84122-7224-4881-9c31-1c048e204602", "subscription": "opt_in"},
],
}
response = resend.Contacts.Topics.update(params_by_email)
```
```ruby Ruby theme={"theme":{"light":"github-light","dark":"vesper"}}
require "resend"
Resend.api_key = "re_xxxxxxxxx"
# Update by contact id
update_params = {
id: "e169aa45-1ecf-4183-9955-b1499d5701d3",
topics: [
{ id: "b6d24b8e-af0b-4c3c-be0c-359bbd97381e", subscription: "opt_out" },
{ id: "07d84122-7224-4881-9c31-1c048e204602", subscription: "opt_in" }
]
}
updated_topics = Resend::Contacts::Topics.update(update_params)
# Update by contact email
update_params = {
email: "steve.wozniak@gmail.com",
topics: [
{ id: "07d84122-7224-4881-9c31-1c048e204602", subscription: "opt_out" },
{ id: "07d84122-7224-4881-9c31-1c048e204602", subscription: "opt_in" }
]
}
updated_topics = Resend::Contacts::Topics.update(update_params)
```
```go Go theme={"theme":{"light":"github-light","dark":"vesper"}}
package main
import (
"context"
"fmt"
"github.com/resend/resend-go/v3"
)
func main() {
ctx := context.TODO()
client := resend.NewClient("re_xxxxxxxxx")
// Update by contact id
params := &resend.UpdateContactTopicsRequest{
ContactId: "e169aa45-1ecf-4183-9955-b1499d5701d3",
Topics: []resend.TopicSubscriptionUpdate{
{
Id: "b6d24b8e-af0b-4c3c-be0c-359bbd97381e",
Subscription: "opt_out",
},
{
Id: "07d84122-7224-4881-9c31-1c048e204602",
Subscription: "opt_in",
},
},
}
updatedTopics, err := client.Contacts.Topics.UpdateWithContext(ctx, params)
if err != nil {
panic(err)
}
fmt.Println(updatedTopics)
// Update by contact email
params = &resend.UpdateContactTopicsRequest{
Email: "steve.wozniak@gmail.com",
Topics: []resend.TopicSubscriptionUpdate{
{
Id: "07d84122-7224-4881-9c31-1c048e204602",
Subscription: "opt_out",
},
{
Id: "b6d24b8e-af0b-4c3c-be0c-359bbd97381e",
Subscription: "opt_in",
},
},
}
updatedTopics, err = client.Contacts.Topics.UpdateWithContext(ctx, params)
if err != nil {
panic(err)
}
fmt.Println(updatedTopics)
}
```
```rust Rust theme={"theme":{"light":"github-light","dark":"vesper"}}
use resend_rs::{
types::{SubscriptionType, UpdateContactTopicOptions},
Resend, Result,
};
#[tokio::main]
async fn main() -> Result<()> {
let resend = Resend::new("re_xxxxxxxxx");
let topics = [
UpdateContactTopicOptions::new(
"b6d24b8e-af0b-4c3c-be0c-359bbd97381e",
SubscriptionType::OptOut,
),
UpdateContactTopicOptions::new(
"07d84122-7224-4881-9c31-1c048e204602",
SubscriptionType::OptIn,
),
];
let _contact = resend
.contacts
.update_contact_topics("e169aa45-1ecf-4183-9955-b1499d5701d3", topics)
.await?;
Ok(())
}
```
```java Java theme={"theme":{"light":"github-light","dark":"vesper"}}
import com.resend.*;
public class Main {
public static void main(String[] args) {
Resend resend = new Resend("re_xxxxxxxxx");
// Update by contact id
UpdateContactTopicsOptions optionsById = UpdateContactTopicsOptions.builder()
.id("e169aa45-1ecf-4183-9955-b1499d5701d3")
.topics(ContactTopicOptions.builder()
.id("b6d24b8e-af0b-4c3c-be0c-359bbd97381e")
.subscription("opt_out")
.build(),
ContactTopicOptions.builder()
.id("07d84122-7224-4881-9c31-1c048e204602")
.subscription("opt_in")
.build())
.build();
resend.contacts().topics().update(optionsById);
// Update by contact email
UpdateContactTopicsOptions optionsByEmail = UpdateContactTopicsOptions.builder()
.email("steve.wozniak@gmail.com")
.topics(ContactTopicOptions.builder()
.id("07d84122-7224-4881-9c31-1c048e204602")
.subscription("opt_in")
.build(),
ContactTopicOptions.builder()
.id("b6d24b8e-af0b-4c3c-be0c-359bbd97381e")
.subscription("opt_out")
.build())
.build();
resend.contacts().topics().update(optionsById);
}
}
```
```csharp .NET theme={"theme":{"light":"github-light","dark":"vesper"}}
using Resend;
IResend resend = ResendClient.Create( "re_xxxxxxxxx" ); // Or from DI
var topics = new List();
topics.Add( new TopicSubscription() {
Id = new Guid( "07d84122-7224-4881-9c31-1c048e204602" ),
Subscription = SubscriptionType.OptIn,
});
topics.Add( new TopicSubscription() {
Id = new Guid( "b6d24b8e-af0b-4c3c-be0c-359bbd97381e" ),
Subscription = SubscriptionType.OptOut,
});
await resend.ContactUpdateTopicsAsync(
new Guid( "e169aa45-1ecf-4183-9955-b1499d5701d3" ),
topics );
```
```bash cURL theme={"theme":{"light":"github-light","dark":"vesper"}}
// Update by contact id
curl -X PATCH 'https://api.resend.com/contacts/e169aa45-1ecf-4183-9955-b1499d5701d3/topics' \
-H 'Authorization: Bearer re_xxxxxxxxx' \
-H 'Content-Type: application/json' \
-d $'[
{
"id": "b6d24b8e-af0b-4c3c-be0c-359bbd97381e",
"subscription": "opt_out"
}
]'
// Update by contact email
curl -X PATCH 'https://api.resend.com/contacts/steve.wozniak@gmail.com/topics' \
-H 'Authorization: Bearer re_xxxxxxxxx' \
-H 'Content-Type: application/json' \
-d $'[
{
"id": "b6d24b8e-af0b-4c3c-be0c-359bbd97381e",
"subscription": "opt_out"
}
]'
```
```json Response theme={"theme":{"light":"github-light","dark":"vesper"}}
{
"id": "b6d24b8e-af0b-4c3c-be0c-359bbd97381e"
}
```
---
# Source: https://resend.com/docs/api-reference/contacts/update-contact.md
> ## Documentation Index
> Fetch the complete documentation index at: https://resend.com/docs/llms.txt
> Use this file to discover all available pages before exploring further.
# Update Contact
> Update an existing contact.
export const ResendParamField = ({children, body, path, ...props}) => {
const [lang, setLang] = useState(() => {
return localStorage.getItem('code') || '"Node.js"';
});
useEffect(() => {
const onStorage = event => {
const key = event.detail.key;
if (key === 'code') {
setLang(event.detail.value);
}
};
document.addEventListener('mintlify-localstorage', onStorage);
return () => {
document.removeEventListener('mintlify-localstorage', onStorage);
};
}, []);
const toCamelCase = str => typeof str === 'string' ? str.replace(/[_-](\w)/g, (_, c) => c.toUpperCase()) : str;
const resolvedBody = useMemo(() => {
const value = JSON.parse(lang);
return value === 'Node.js' ? toCamelCase(body) : body;
}, [body, lang]);
const resolvedPath = useMemo(() => {
const value = JSON.parse(lang);
return value === 'Node.js' ? toCamelCase(path) : path;
}, [path, lang]);
return
{children}
;
};
## Path Parameters
Either `id` or `email` must be provided.
The Contact ID.
The Contact Email.
## Body Parameters
The first name of the contact.
The last name of the contact.
The Contact's global subscription status. If set to `true`, the contact will
be unsubscribed from all Broadcasts.
A map of custom property keys and values to update.
The property key.
The property value.
```ts Node.js theme={"theme":{"light":"github-light","dark":"vesper"}}
import { Resend } from 'resend';
const resend = new Resend('re_xxxxxxxxx');
// Update by contact id
const { data, error } = await resend.contacts.update({
id: 'e169aa45-1ecf-4183-9955-b1499d5701d3',
unsubscribed: true,
});
// Update by contact email
const { data, error } = await resend.contacts.update({
email: 'acme@example.com',
unsubscribed: true,
});
```
```php PHP theme={"theme":{"light":"github-light","dark":"vesper"}}
$resend = Resend::client('re_xxxxxxxxx');
// Update by contact id
$resend->contacts->update(
id: 'e169aa45-1ecf-4183-9955-b1499d5701d3',
parameters: [
'unsubscribed' => true
]
);
// Update by contact email
$resend->contacts->update(
email: 'acme@example.com',
parameters: [
'unsubscribed' => true
]
);
```
```python Python theme={"theme":{"light":"github-light","dark":"vesper"}}
import resend
resend.api_key = "re_xxxxxxxxx"
# Update by contact id
params: resend.Contacts.UpdateParams = {
"id": "e169aa45-1ecf-4183-9955-b1499d5701d3",
"unsubscribed": True,
}
resend.Contacts.update(params)
# Update by contact email
params: resend.Contacts.UpdateParams = {
"email": "acme@example.com",
"unsubscribed": True,
}
resend.Contacts.update(params)
```
```ruby Ruby theme={"theme":{"light":"github-light","dark":"vesper"}}
require "resend"
Resend.api_key = "re_xxxxxxxxx"
# Update by contact id
params = {
"id": "e169aa45-1ecf-4183-9955-b1499d5701d3",
"unsubscribed": true,
}
Resend::Contacts.update(params)
# Update by contact email
params = {
"email": "acme@example.com",
"unsubscribed": true,
}
Resend::Contacts.update(params)
```
```go Go theme={"theme":{"light":"github-light","dark":"vesper"}}
package main
import "github.com/resend/resend-go/v3"
func main() {
client := resend.NewClient("re_xxxxxxxxx")
// Update by contact id
params := &resend.UpdateContactRequest{
Id: "e169aa45-1ecf-4183-9955-b1499d5701d3",
Unsubscribed: true,
}
client.Contacts.Update(params)
// Update by contact email
params = &resend.UpdateContactRequest{
Email: "acme@example.com",
Unsubscribed: true,
}
client.Contacts.Update(params)
}
```
```rust Rust theme={"theme":{"light":"github-light","dark":"vesper"}}
use resend_rs::{types::ContactChanges, Resend, Result};
#[tokio::main]
async fn main() -> Result<()> {
let resend = Resend::new("re_xxxxxxxxx");
let changes = ContactChanges::new().with_unsubscribed(true);
// Update by contact id
let _contact = resend
.contacts
.update("e169aa45-1ecf-4183-9955-b1499d5701d3", changes.clone())
.await?;
// Update by contact email
let _contact = resend
.contacts
.update("acme@example.com", changes)
.await?;
Ok(())
}
```
```java Java theme={"theme":{"light":"github-light","dark":"vesper"}}
import com.resend.*;
public class Main {
public static void main(String[] args) {
Resend resend = new Resend("re_xxxxxxxxx");
// Update by contact id
UpdateContactOptions params = UpdateContactOptions.builder()
.id("e169aa45-1ecf-4183-9955-b1499d5701d3")
.unsubscribed(true)
.build();
// Update by contact email
UpdateContactOptions params = UpdateContactOptions.builder()
.email("acme@example.com")
.unsubscribed(true)
.build();
UpdateContactResponseSuccess data = resend.contacts().update(params);
}
}
```
```csharp .NET theme={"theme":{"light":"github-light","dark":"vesper"}}
using Resend;
IResend resend = ResendClient.Create( "re_xxxxxxxxx" ); // Or from DI
// By Id
await resend.ContactUpdateAsync(
contactId: new Guid( "e169aa45-1ecf-4183-9955-b1499d5701d3" ),
new ContactData()
{
FirstName = "Stevie",
LastName = "Wozniaks",
IsUnsubscribed = true,
}
);
// By Email
await resend.ContactUpdateByEmailAsync(
"acme@example.com",
new ContactData()
{
FirstName = "Stevie",
LastName = "Wozniaks",
IsUnsubscribed = true,
}
);
```
```bash cURL theme={"theme":{"light":"github-light","dark":"vesper"}}
# Update by contact id
curl -X PATCH 'https://api.resend.com/contacts/520784e2-887d-4c25-b53c-4ad46ad38100' \
-H 'Authorization: Bearer re_xxxxxxxxx' \
-H 'Content-Type: application/json' \
-d $'{
"unsubscribed": true
}'
# Update by contact email
curl -X PATCH 'https://api.resend.com/contacts/acme@example.com' \
-H 'Authorization: Bearer re_xxxxxxxxx' \
-H 'Content-Type: application/json' \
-d $'{
"unsubscribed": true
}'
```
```json Response theme={"theme":{"light":"github-light","dark":"vesper"}}
{
"object": "contact",
"id": "479e3145-dd38-476b-932c-529ceb705947"
}
```
---
# Source: https://resend.com/docs/api-reference/domains/update-domain.md
> ## Documentation Index
> Fetch the complete documentation index at: https://resend.com/docs/llms.txt
> Use this file to discover all available pages before exploring further.
# Update Domain
> Update an existing domain.
export const ResendParamField = ({children, body, path, ...props}) => {
const [lang, setLang] = useState(() => {
return localStorage.getItem('code') || '"Node.js"';
});
useEffect(() => {
const onStorage = event => {
const key = event.detail.key;
if (key === 'code') {
setLang(event.detail.value);
}
};
document.addEventListener('mintlify-localstorage', onStorage);
return () => {
document.removeEventListener('mintlify-localstorage', onStorage);
};
}, []);
const toCamelCase = str => typeof str === 'string' ? str.replace(/[_-](\w)/g, (_, c) => c.toUpperCase()) : str;
const resolvedBody = useMemo(() => {
const value = JSON.parse(lang);
return value === 'Node.js' ? toCamelCase(body) : body;
}, [body, lang]);
const resolvedPath = useMemo(() => {
const value = JSON.parse(lang);
return value === 'Node.js' ? toCamelCase(path) : path;
}, [path, lang]);
return
{children}
;
};
## Path Parameters
The Domain ID.
## Body Parameters
Track clicks within the body of each HTML email.
Track the open rate of each email.
`opportunistic`: Opportunistic TLS means that it always attempts to make a
secure connection to the receiving mail server. If it can't establish a
secure connection, it sends the message unencrypted.
`enforced`: Enforced TLS on the other hand, requires that the email
communication must use TLS no matter what. If the receiving server does
not support TLS, the email will not be sent.
Update the domain capabilities for sending and receiving emails. You can specify one or both fields. Omitted fields will keep their current value. At least one capability must remain enabled.
Enable or disable sending emails from this domain. Possible values: `'enabled' | 'disabled'`
Enable or disable receiving emails to this domain. Possible values: `'enabled' | 'disabled'`
```ts Node.js theme={"theme":{"light":"github-light","dark":"vesper"}}
import { Resend } from 'resend';
const resend = new Resend('re_xxxxxxxxx');
const { data, error } = await resend.domains.update({
id: 'b8617ad3-b712-41d9-81a0-f7c3d879314e',
openTracking: false,
clickTracking: true,
tls: 'enforced',
});
```
```php PHP theme={"theme":{"light":"github-light","dark":"vesper"}}
$resend = Resend::client('re_xxxxxxxxx');
$resend->domains->update(
'b8617ad3-b712-41d9-81a0-f7c3d879314e',
[
'open_tracking' => false,
'click_tracking' => true,
'tls' => 'enforced',
]
);
```
```python Python theme={"theme":{"light":"github-light","dark":"vesper"}}
import resend
resend.api_key = "re_xxxxxxxxx"
params: resend.Domains.UpdateParams = {
"id": "b8617ad3-b712-41d9-81a0-f7c3d879314e",
"open_tracking": False,
"click_tracking": True,
"tls": "enforced",
}
resend.Domains.update(params)
```
```ruby Ruby theme={"theme":{"light":"github-light","dark":"vesper"}}
Resend.api_key = "re_xxxxxxxxx"
Resend::Domains.update({
id: "b8617ad3-b712-41d9-81a0-f7c3d879314e",
open_tracking: false,
click_tracking: true,
tls: "enforced",
})
```
```go Go theme={"theme":{"light":"github-light","dark":"vesper"}}
package main
import "github.com/resend/resend-go/v3"
func main() {
client := resend.NewClient("re_xxxxxxxxx")
updateDomainParams := &resend.UpdateDomainRequest{
OpenTracking: false,
ClickTracking: true,
Tls: resend.Enforced,
}
client.Domains.Update("b8617ad3-b712-41d9-81a0-f7c3d879314e", updateDomainParams)
}
```
```rust Rust theme={"theme":{"light":"github-light","dark":"vesper"}}
use resend_rs::{types::{DomainChanges, Tls}, Resend, Result};
#[tokio::main]
async fn main() -> Result<()> {
let resend = Resend::new("re_xxxxxxxxx");
let changes = DomainChanges::new()
.with_open_tracking(false)
.with_click_tracking(true)
.with_tls(Tls::Enforced);
let _domain = resend
.domains
.update("b8617ad3-b712-41d9-81a0-f7c3d879314e", changes)
.await?;
Ok(())
}
```
```java Java theme={"theme":{"light":"github-light","dark":"vesper"}}
Resend resend = new Resend("re_xxxxxxxxx");
UpdateDomainOptions params = UpdateDomainOptions.builder()
.id("b8617ad3-b712-41d9-81a0-f7c3d879314e")
.openTracking(false)
.clickTracking(true)
.tls(Tls.ENFORCED)
.build();
resend.domains().update(params);
```
```csharp .NET theme={"theme":{"light":"github-light","dark":"vesper"}}
using Resend;
IResend resend = ResendClient.Create( "re_xxxxxxxxx" ); // Or from DI
await resend.DomainUpdateAsync(
new Guid( "b8617ad3-b712-41d9-81a0-f7c3d879314e" ),
new DomainUpdateData()
{
TrackOpen = false,
TrackClicks = true,
TlsMode = TlsMode.Enforced,
}
);
```
```bash cURL theme={"theme":{"light":"github-light","dark":"vesper"}}
curl -X PATCH 'https://api.resend.com/domains/b8617ad3-b712-41d9-81a0-f7c3d879314e' \
-H 'Authorization: Bearer re_xxxxxxxxx' \
-H 'Content-Type: application/json' \
-d $'{
"open_tracking": false,
"click_tracking": true,
"tls": "enforced"
}'
```
```json Response theme={"theme":{"light":"github-light","dark":"vesper"}}
{
"object": "domain",
"id": "b8617ad3-b712-41d9-81a0-f7c3d879314e"
}
```
---
# Source: https://resend.com/docs/api-reference/emails/update-email.md
> ## Documentation Index
> Fetch the complete documentation index at: https://resend.com/docs/llms.txt
> Use this file to discover all available pages before exploring further.
# Update Email
> Update a scheduled email.
export const ResendParamField = ({children, body, path, ...props}) => {
const [lang, setLang] = useState(() => {
return localStorage.getItem('code') || '"Node.js"';
});
useEffect(() => {
const onStorage = event => {
const key = event.detail.key;
if (key === 'code') {
setLang(event.detail.value);
}
};
document.addEventListener('mintlify-localstorage', onStorage);
return () => {
document.removeEventListener('mintlify-localstorage', onStorage);
};
}, []);
const toCamelCase = str => typeof str === 'string' ? str.replace(/[_-](\w)/g, (_, c) => c.toUpperCase()) : str;
const resolvedBody = useMemo(() => {
const value = JSON.parse(lang);
return value === 'Node.js' ? toCamelCase(body) : body;
}, [body, lang]);
const resolvedPath = useMemo(() => {
const value = JSON.parse(lang);
return value === 'Node.js' ? toCamelCase(path) : path;
}, [path, lang]);
return
{children}
;
};
## Path Parameters
The Email ID.
## Body Parameters
Schedule email to be sent later. The date should be in ISO 8601 format (e.g:
2024-08-05T11:52:01.858Z).
```ts Node.js theme={"theme":{"light":"github-light","dark":"vesper"}}
import { Resend } from 'resend';
const resend = new Resend('re_xxxxxxxxx');
const oneMinuteFromNow = new Date(Date.now() + 1000 * 60).toISOString();
const { data, error } = await resend.emails.update({
id: '49a3999c-0ce1-4ea6-ab68-afcd6dc2e794',
scheduledAt: oneMinuteFromNow,
});
```
```php PHP theme={"theme":{"light":"github-light","dark":"vesper"}}
$resend = Resend::client('re_xxxxxxxxx');
$oneMinuteFromNow = (new DateTime())->modify('+1 minute')->format(DateTime::ISO8601);
$resend->emails->update('49a3999c-0ce1-4ea6-ab68-afcd6dc2e794', [
'scheduled_at' => $oneMinuteFromNow
]);
```
```python Python theme={"theme":{"light":"github-light","dark":"vesper"}}
import resend
from datetime import datetime, timedelta
resend.api_key = "re_xxxxxxxxx"
one_minute_from_now = (datetime.now() + timedelta(minutes=1)).isoformat()
update_params: resend.Emails.UpdateParams = {
"id": "49a3999c-0ce1-4ea6-ab68-afcd6dc2e794",
"scheduled_at": one_minute_from_now
}
resend.Emails.update(params=update_params)
```
```ruby Ruby theme={"theme":{"light":"github-light","dark":"vesper"}}
require "resend"
Resend.api_key = "re_xxxxxxxxx"
one_minute_from_now = (Time.now + 1 * 60).strftime("%Y-%m-%dT%H:%M:%S.%L%z")
update_params = {
"email_id": "49a3999c-0ce1-4ea6-ab68-afcd6dc2e794",
"scheduled_at": one_minute_from_now
}
Resend::Emails.update(update_params)
```
```go Go theme={"theme":{"light":"github-light","dark":"vesper"}}
package main
import (
"time"
"github.com/resend/resend-go/v3"
)
func main() {
client := resend.NewClient("re_xxxxxxxxx")
oneMinuteFromNow := time.Now().Add(time.Minute * time.Duration(1))
oneMinuteFromNowIso := oneMinuteFromNow.Format("2006-01-02T15:04:05-0700")
updateParams := &resend.UpdateEmailRequest{
Id: "49a3999c-0ce1-4ea6-ab68-afcd6dc2e794",
ScheduledAt: oneMinuteFromNowIso,
}
client.Emails.Update(updateParams)
}
```
```rust Rust theme={"theme":{"light":"github-light","dark":"vesper"}}
use chrono::{Local, TimeDelta};
use resend_rs::types::UpdateEmailOptions;
use resend_rs::{Resend, Result};
#[tokio::main]
async fn main() -> Result<()> {
let resend = Resend::new("re_xxxxxxxxx");
let one_minute_from_now = Local::now()
.checked_add_signed(TimeDelta::minutes(1))
.unwrap()
.to_rfc3339();
let update = UpdateEmailOptions::new()
.with_scheduled_at(&one_minute_from_now);
let _email = resend
.emails
.update("49a3999c-0ce1-4ea6-ab68-afcd6dc2e794", update)
.await?;
Ok(())
}
```
```java Java theme={"theme":{"light":"github-light","dark":"vesper"}}
import com.resend.*;
public class Main {
public static void main(String[] args) {
Resend resend = new Resend("re_xxxxxxxxx");
String oneMinuteFromNow = Instant
.now()
.plus(1, ChronoUnit.MINUTES)
.toString();
UpdateEmailOptions updateParams = UpdateEmailOptions.builder()
.scheduledAt(oneMinuteFromNow)
.build();
UpdateEmailResponse data = resend.emails().update("49a3999c-0ce1-4ea6-ab68-afcd6dc2e794", updateParams);
}
}
```
```csharp .NET theme={"theme":{"light":"github-light","dark":"vesper"}}
using Resend;
IResend resend = ResendClient.Create( "re_xxxxxxxxx" ); // Or from DI
await resend.EmailRescheduleAsync(
new Guid( "49a3999c-0ce1-4ea6-ab68-afcd6dc2e794" ),
DateTime.UtcNow.AddMinutes( 1 ) );
```
```bash cURL theme={"theme":{"light":"github-light","dark":"vesper"}}
curl -X PATCH 'https://api.resend.com/emails/49a3999c-0ce1-4ea6-ab68-afcd6dc2e794' \
-H 'Authorization: Bearer re_xxxxxxxxx' \
-H 'Content-Type: application/json' \
-d $'{
"scheduled_at": "2024-08-05T11:52:01.858Z"
}'
```
```json Response theme={"theme":{"light":"github-light","dark":"vesper"}}
{
"object": "email",
"id": "49a3999c-0ce1-4ea6-ab68-afcd6dc2e794"
}
```
---
# Source: https://resend.com/docs/api-reference/templates/update-template.md
> ## Documentation Index
> Fetch the complete documentation index at: https://resend.com/docs/llms.txt
> Use this file to discover all available pages before exploring further.
# Update Template
> Update a template.
export const ResendParamField = ({children, body, path, ...props}) => {
const [lang, setLang] = useState(() => {
return localStorage.getItem('code') || '"Node.js"';
});
useEffect(() => {
const onStorage = event => {
const key = event.detail.key;
if (key === 'code') {
setLang(event.detail.value);
}
};
document.addEventListener('mintlify-localstorage', onStorage);
return () => {
document.removeEventListener('mintlify-localstorage', onStorage);
};
}, []);
const toCamelCase = str => typeof str === 'string' ? str.replace(/[_-](\w)/g, (_, c) => c.toUpperCase()) : str;
const resolvedBody = useMemo(() => {
const value = JSON.parse(lang);
return value === 'Node.js' ? toCamelCase(body) : body;
}, [body, lang]);
const resolvedPath = useMemo(() => {
const value = JSON.parse(lang);
return value === 'Node.js' ? toCamelCase(path) : path;
}, [path, lang]);
return
{children}
;
};
## Path Parameters
The ID or alias of the template to duplicate.
## Body Parameters
The name of the template.
The HTML version of the template.
The alias of the template.
Sender email address.
To include a friendly name, use the format `"Your Name "`.
If provided, this value can be overridden when sending an email using the template.
Default email subject.
This value can be overridden when sending an email using the template.
Default Reply-to email address. For multiple addresses, send as an array of strings.
This value can be overridden when sending an email using the template.
The plain text version of the message.
If not provided, the HTML will be used to generate a plain text version. You can opt out of this behavior by setting value to an empty string.
The React component used to write the template. *Only available in the Node.js
SDK.*
The array of variables used in the template. Each template may contain up to 50 variables.
Each variable is an object with the following properties:
The key of the variable. We recommend capitalizing the key (e.g. `PRODUCT_NAME`). The following variable names are reserved and cannot be used:
`FIRST_NAME`, `LAST_NAME`, `EMAIL`, `RESEND_UNSUBSCRIBE_URL`, `contact`, and `this`.
The type of the variable.
Can be `'string'` or `'number'`
The fallback value of the variable. The value must match the type of the variable.
If no fallback value is provided, you must provide a value for the variable when sending an email using the template.
Before you can use a template, you must publish it first. To publish a
template, use the [Templates dashboard](https://resend.com/templates) or
[publish template API](/api-reference/templates/publish-template).
[Learn more about Templates](/dashboard/templates/introduction).
```ts Node.js theme={"theme":{"light":"github-light","dark":"vesper"}}
import { Resend } from 'resend';
const resend = new Resend('re_xxxxxxxxx');
const { data, error } = await resend.templates.update(
'34a080c9-b17d-4187-ad80-5af20266e535',
{
name: 'order-confirmation',
html: '
"
}'
```
```json Response theme={"theme":{"light":"github-light","dark":"vesper"}}
{
"id": "34a080c9-b17d-4187-ad80-5af20266e535",
"object": "template"
}
```
---
# Source: https://resend.com/docs/api-reference/topics/update-topic.md
> ## Documentation Index
> Fetch the complete documentation index at: https://resend.com/docs/llms.txt
> Use this file to discover all available pages before exploring further.
# Update Topic
> Update an existing topic.
export const ResendParamField = ({children, body, path, ...props}) => {
const [lang, setLang] = useState(() => {
return localStorage.getItem('code') || '"Node.js"';
});
useEffect(() => {
const onStorage = event => {
const key = event.detail.key;
if (key === 'code') {
setLang(event.detail.value);
}
};
document.addEventListener('mintlify-localstorage', onStorage);
return () => {
document.removeEventListener('mintlify-localstorage', onStorage);
};
}, []);
const toCamelCase = str => typeof str === 'string' ? str.replace(/[_-](\w)/g, (_, c) => c.toUpperCase()) : str;
const resolvedBody = useMemo(() => {
const value = JSON.parse(lang);
return value === 'Node.js' ? toCamelCase(body) : body;
}, [body, lang]);
const resolvedPath = useMemo(() => {
const value = JSON.parse(lang);
return value === 'Node.js' ? toCamelCase(path) : path;
}, [path, lang]);
return
{children}
;
};
## Path Parameters
The Topic ID.
## Body Parameters
The topic name. Max length is `50` characters.
The topic description. Max length is `200` characters.
The visibility of the topic on the unsubscribe page. Possible values: `public` or `private`.
* `private`: only contacts who are opted in to the topic can see it on the unsubscribe page.
* `public`: all contacts can see the topic on the unsubscribe page.
```ts Node.js theme={"theme":{"light":"github-light","dark":"vesper"}}
import { Resend } from 'resend';
const resend = new Resend('re_xxxxxxxxx');
const { data, error } = await resend.topics.update(
'b6d24b8e-af0b-4c3c-be0c-359bbd97381e',
{
name: 'Weekly Newsletter',
description: 'Weekly newsletter for our subscribers',
},
);
```
```php PHP theme={"theme":{"light":"github-light","dark":"vesper"}}
$resend = Resend::client('re_xxxxxxxxx');
$resend->topics->update('b6d24b8e-af0b-4c3c-be0c-359bbd97381e', [
'name' => 'Weekly Newsletter',
'description' => 'Weekly newsletter for our subscribers',
]);
```
```python Python theme={"theme":{"light":"github-light","dark":"vesper"}}
import resend
resend.api_key = "re_xxxxxxxxx"
resend.Topics.update(
id="b6d24b8e-af0b-4c3c-be0c-359bbd97381e",
params={
"name": "Monthly Newsletter",
"description": "Subscribe to our monthly newsletter for updates",
}
)
```
```ruby Ruby theme={"theme":{"light":"github-light","dark":"vesper"}}
require "resend"
Resend.api_key = "re_xxxxxxxxx"
Resend::Topics.update(
topic_id: "b6d24b8e-af0b-4c3c-be0c-359bbd97381e",
name: "Weekly Newsletter",
description: "Weekly newsletter for our subscribers"
)
```
```go Go theme={"theme":{"light":"github-light","dark":"vesper"}}
import (
"context"
"github.com/resend/resend-go/v3"
)
func main() {
client := resend.NewClient("re_xxxxxxxxx")
client.Topics.UpdateWithContext(context.TODO(), "b6d24b8e-af0b-4c3c-be0c-359bbd97381e", &resend.UpdateTopicRequest{
Name: "Weekly Newsletter",
Description: "Weekly newsletter for our subscribers",
})
}
```
```rust Rust theme={"theme":{"light":"github-light","dark":"vesper"}}
use resend_rs::{types::UpdateTopicOptions, Resend, Result};
#[tokio::main]
async fn main() -> Result<()> {
let resend = Resend::new("re_xxxxxxxxx");
let update = UpdateTopicOptions::new()
.with_name("Weekly Newsletter")
.with_description("Weekly newsletter for our subscribers");
let _topic = resend
.topics
.update("b6d24b8e-af0b-4c3c-be0c-359bbd97381e", update)
.await?;
Ok(())
}
```
```java Java theme={"theme":{"light":"github-light","dark":"vesper"}}
import com.resend.*;
public class Main {
public static void main(String[] args) {
Resend resend = new Resend("re_xxxxxxxxx");
UpdateTopicOptions updateTopicOptions = UpdateTopicOptions.builder()
.name("Weekly Newsletter")
.description("Weekly newsletter for our subscribers")
.build();
UpdateTopicResponseSuccess response = resend.topics().update(
"b6d24b8e-af0b-4c3c-be0c-359bbd97381e",
updateTopicOptions
);
}
}
```
```csharp .NET theme={"theme":{"light":"github-light","dark":"vesper"}}
using Resend;
IResend resend = ResendClient.Create( "re_xxxxxxxxx" ); // Or from DI
var resp = await resend.TopicUpdateAsync(
new Guid( "b6d24b8e-af0b-4c3c-be0c-359bbd97381e" ),
new TopicData() {
Name = "Weekly Newsletter",
Description = "Weekly newsletter for our subscribers",
SubscriptionDefault = SubscriptionType.OptIn,
}
);
```
```bash cURL theme={"theme":{"light":"github-light","dark":"vesper"}}
curl -X PATCH 'https://api.resend.com/topics/b6d24b8e-af0b-4c3c-be0c-359bbd97381e' \
-H 'Authorization: Bearer re_xxxxxxxxx' \
-H 'Content-Type: application/json' \
-d $'{
"name": "Weekly Newsletter",
"default_subscription": "opt_in"
}'
```
```json Response theme={"theme":{"light":"github-light","dark":"vesper"}}
{
"object": "topic",
"id": "b6d24b8e-af0b-4c3c-be0c-359bbd97381e"
}
```
---
# Source: https://resend.com/docs/api-reference/webhooks/update-webhook.md
> ## Documentation Index
> Fetch the complete documentation index at: https://resend.com/docs/llms.txt
> Use this file to discover all available pages before exploring further.
# Update Webhook
> Update an existing webhook configuration.
export const ResendParamField = ({children, body, path, ...props}) => {
const [lang, setLang] = useState(() => {
return localStorage.getItem('code') || '"Node.js"';
});
useEffect(() => {
const onStorage = event => {
const key = event.detail.key;
if (key === 'code') {
setLang(event.detail.value);
}
};
document.addEventListener('mintlify-localstorage', onStorage);
return () => {
document.removeEventListener('mintlify-localstorage', onStorage);
};
}, []);
const toCamelCase = str => typeof str === 'string' ? str.replace(/[_-](\w)/g, (_, c) => c.toUpperCase()) : str;
const resolvedBody = useMemo(() => {
const value = JSON.parse(lang);
return value === 'Node.js' ? toCamelCase(body) : body;
}, [body, lang]);
const resolvedPath = useMemo(() => {
const value = JSON.parse(lang);
return value === 'Node.js' ? toCamelCase(path) : path;
}, [path, lang]);
return
{children}
;
};
## Path Parameters
The Webhook ID.
## Body Parameters
The URL where webhook events will be sent.
Array of event types to subscribe to.
See [event types](/webhooks/event-types) for available options.
The webhook status. Can be either `enabled` or `disabled`.
```ts Node.js theme={"theme":{"light":"github-light","dark":"vesper"}}
import { Resend } from 'resend';
const resend = new Resend('re_xxxxxxxxx');
const { data, error } = await resend.webhooks.update(
'430eed87-632a-4ea6-90db-0aace67ec228',
{
endpoint: 'https://new-webhook.example.com/handler',
events: ['email.sent', 'email.delivered'],
status: 'enabled',
},
);
```
```php PHP theme={"theme":{"light":"github-light","dark":"vesper"}}
$resend = Resend::client('re_xxxxxxxxx');
$resend->webhooks->update('430eed87-632a-4ea6-90db-0aace67ec228', [
'endpoint' => 'https://new-webhook.example.com/handler',
'events' => ['email.sent', 'email.delivered'],
'status' => 'enabled',
]);
```
```python Python theme={"theme":{"light":"github-light","dark":"vesper"}}
import resend
resend.api_key = 're_xxxxxxxxx'
params: resend.Webhooks.UpdateParams = {
"webhook_id": "430eed87-632a-4ea6-90db-0aace67ec228",
"endpoint": "https://new-webhook.example.com/handler",
"events": ["email.sent", "email.delivered"],
"status": "enabled",
}
webhook = resend.Webhooks.update(params)
```
```ruby Ruby theme={"theme":{"light":"github-light","dark":"vesper"}}
require 'resend'
Resend.api_key = 're_xxxxxxxxx'
params = {
webhook_id: '430eed87-632a-4ea6-90db-0aace67ec228',
endpoint: 'https://new-webhook.example.com/handler',
events: ['email.sent', 'email.delivered'],
status: 'enabled'
}
webhook = Resend::Webhooks.update(params)
```
```go Go theme={"theme":{"light":"github-light","dark":"vesper"}}
package main
import "github.com/resend/resend-go/v3"
func main() {
client := resend.NewClient("re_xxxxxxxxx")
endpoint := "https://new-webhook.example.com/handler"
status := "enabled"
params := &resend.UpdateWebhookRequest{
Endpoint: &endpoint,
Events: []string{"email.sent", "email.delivered"},
Status: &status,
}
client.Webhooks.Update("430eed87-632a-4ea6-90db-0aace67ec228", params)
}
```
```rust Rust theme={"theme":{"light":"github-light","dark":"vesper"}}
use resend_rs::{
events::EmailEventType::{EmailDelivered, EmailSent},
types::{UpdateWebhookOptions, WebhookStatus},
Resend, Result,
};
#[tokio::main]
async fn main() -> Result<()> {
let resend = Resend::new("re_xxxxxxxxx");
let events = [EmailSent, EmailDelivered];
let opts = UpdateWebhookOptions::default()
.with_endpoint("https://new-webhook.example.com/handler")
.with_events(events)
.with_status(WebhookStatus::Enabled);
let _webhook = resend
.webhooks
.update("430eed87-632a-4ea6-90db-0aace67ec228", opts)
.await?;
Ok(())
}
```
```java Java theme={"theme":{"light":"github-light","dark":"vesper"}}
import com.resend.*;
import static com.resend.services.webhooks.model.WebhookEvent.*;
public class Main {
public static void main(String[] args) {
Resend resend = new Resend("re_xxxxxxxxx");
UpdateWebhookOptions options = UpdateWebhookOptions.builder()
.endpoint("https://new-webhook.example.com/handler")
.events(EMAIL_SENT, EMAIL_DELIVERED)
.status(WebhookStatus.ENABLED)
.build();
UpdateWebhookResponseSuccess response = resend.webhooks()
.update("430eed87-632a-4ea6-90db-0aace67ec228", options);
}
}
```
```csharp .NET theme={"theme":{"light":"github-light","dark":"vesper"}}
using Resend;
IResend resend = ResendClient.Create( "re_xxxxxxxxx" ); // Or from DI
await resend.WebhookUpdateAsync(
new Guid( "430eed87-632a-4ea6-90db-0aace67ec228" ),
new WebhookData()
{
EndpointUrl = "https://new-webhook.example.com/handler",
Events = [ WebhookEventType.EmailSent ],
Status = WebhookStatus.Disabled,
}
);
```
```bash cURL theme={"theme":{"light":"github-light","dark":"vesper"}}
curl -X PATCH 'https://api.resend.com/webhooks/430eed87-632a-4ea6-90db-0aace67ec228' \
-H 'Authorization: Bearer re_xxxxxxxxx' \
-H 'Content-Type: application/json' \
-d '{
"endpoint": "https://new-webhook.example.com/handler",
"events": ["email.sent", "email.delivered"],
"status": "enabled"
}'
```
```json Response theme={"theme":{"light":"github-light","dark":"vesper"}}
{
"object": "webhook",
"id": "430eed87-632a-4ea6-90db-0aace67ec228"
}
```
---
# Source: https://resend.com/docs/webhooks/domains/updated.md
# Source: https://resend.com/docs/webhooks/contacts/updated.md
> ## Documentation Index
> Fetch the complete documentation index at: https://resend.com/docs/llms.txt
> Use this file to discover all available pages before exploring further.
# contact.updated
> Received when a contact is updated.
export const ResponseBodyParameters = ({type, children}) => {
return
Response Body Parameters
All webhook payloads follow a consistent top-level structure with
event-specific data nested within the data object.
The event type that triggered the webhook (e.g., {type}).
ISO 8601 timestamp when the webhook event was created.
Event-specific data containing detailed information about the event. The
data object for the {type} event contains the following
parameters:
{children}
;
};
Event triggered whenever a **contact was successfully updated**.
Unique identifier for the contact
Unique identifier for the audience this contact belongs to
Array of segment IDs the contact belongs to
ISO 8601 timestamp when the contact was created
ISO 8601 timestamp when the contact was last updated
Contact's email address
Contact's first name
Contact's last name
Whether the contact has unsubscribed from all emails sent from your team
```json theme={"theme":{"light":"github-light","dark":"vesper"}}
{
"type": "contact.updated",
"created_at": "2024-10-11T23:47:56.678Z",
"data": {
"id": "e169aa45-1ecf-4183-9955-b1499d5701d3",
"audience_id": "78261eea-8f8b-4381-83c6-79fa7120f1cf",
"segment_ids": ["78261eea-8f8b-4381-83c6-79fa7120f1cf"],
"created_at": "2024-10-10T15:11:94.110Z",
"updated_at": "2024-10-11T23:47:56.678Z",
"email": "steve.wozniak@gmail.com",
"first_name": "Steve",
"last_name": "Wozniak",
"unsubscribed": false
}
}
```
---
# Source: https://resend.com/docs/knowledge-base/v0-integration.md
> ## Documentation Index
> Fetch the complete documentation index at: https://resend.com/docs/llms.txt
> Use this file to discover all available pages before exploring further.
# Send emails with v0 and Resend
> Learn how to add the Resend integration to your v0 project.
[v0](https://v0.dev) by Vercel is a platform for building web sites, tools, apps, and projects via chat. You can add Resend in a v0 project by asking the chat to add email sending with Resend.
## 1. Add your Resend API key
To use Resend with v0, you'll need to add a Resend API key, which you can create in the [Resend Dashboard](https://resend.com/api-keys).
Do not share your API key with others or expose it in the browser or other
client-side code.
## 2. Add a custom domain to your Resend account
By default, you can only send emails to your own email address.
To send emails to other email addresses:
1. Add a [custom domain to your Resend account](https://resend.com/domains).
2. Add the custom domain to the `from` field in the `resend` function in v0 (or ask the chat to update these fields).
Get more help adding a custom domain in [Resend's documentation](/dashboard/domains/introduction).
---
# Source: https://resend.com/docs/knowledge-base/vercel.md
> ## Documentation Index
> Fetch the complete documentation index at: https://resend.com/docs/llms.txt
> Use this file to discover all available pages before exploring further.
# Vercel
> Verify your domain on Vercel with Resend.
This guide helps you verify your domain on Vercel with Resend. We also have
[an official integration for
Vercel](https://resend.com/blog/vercel-integration) that helps you set up your
API keys on Vercel projects so you can start sending emails with Resend. [View
the integration here](https://vercel.com/resend/~/integrations/resend).
## Add Domain to Resend
First, log in to your [Resend Account](https://resend.com/login) and [add a domain](https://resend.com/domains).
It is [best practice to use a
subdomain](/knowledge-base/is-it-better-to-send-emails-from-a-subdomain-or-the-root-domain)
(updates.example.com) instead of the root domain (example.com). Using a
subdomain allows for proper reputation segmentation based on topics or purpose
(e.g. marketing) and is especially important if receiving emails with Resend.
## Log in to Vercel
Log in to your [Vercel account](https://vercel.com/login) and select the `Domains` tab.
## Add MX SPF Record
Copy and paste the values in Resend to Vercel.
1. Type `send` for the `Name` of the record in Vercel.
2. Expand the `Type` dropdown and select `MX`.
3. Copy the record value from Resend into the `Value` field in Vercel.
4. Add `10` for the `Priority`.
5. Select `Add`.
Omit your domain from the record values in Resend when you paste. Instead of
`send.example.com`, paste only `send` (or `send.subdomain` if you're using a
subdomain).
Below is a mapping of the record fields from Resend to Vercel:
| Vercel | Resend | Example Value |
| -------- | -------- | --------------------------------------- |
| Type | Type | `MX Record` |
| Name | Name | `send` |
| Value | Value | `feedback-smtp.us-east-1.amazonses.com` |
| TTL | TTL | `Use Vercel default (60)` |
| Priority | Priority | `10` |
Do not use the same priority for multiple records. If Priority `10` is already
in use on another record, try a higher value `20` or `30`.
## Add TXT SPF Record
In the same section, add another record in Vercel.
1. Type `send` for the `Name` of the record.
2. Expand the `Type` dropdown and select `TXT`.
3. Copy the `TXT` record value from Resend into the `Value` field in Vercel.
4. Use the default TTL of `60`.
5. Select `Add`.
Omit your domain from the record values in Resend when you paste. Instead of
`send.example.com`, paste only `send` (or `send.subdomain` if you're using a
subdomain).
Below is a mapping of the record fields from Resend to Vercel:
| Vercel | Resend | Example Value |
| ------ | ------ | ------------------------------------- |
| Type | Type | `TXT Record` |
| Name | Name | `send` |
| Value | Value | `"v=spf1 include:amazonses.com ~all"` |
| TTL | TTL | `Use Vercel default (60)` |
## Add TXT DKIM Records
In the same section, add another record in Vercel.
1. Type `resend._domainkey` for the `Name` of the record.
2. Expand the `Type` dropdown and select `TXT`.
3. Copy the record value from Resend into the `Value` field in Vercel.
Omit your domain from the record values in Resend when you paste. Instead of
`resend._domainkey.example.com`, paste only `resend._domainkey` (or
`resend._domainkey.subdomain` if you're using a subdomain).
Below is a mapping of the record fields from Resend to Vercel:
| Vercel | Resend | Example Value |
| ------ | ------ | ---------------------------- |
| Type | Type | `TXT Record` |
| Name | Name | `resend._domainkey` |
| Value | Value | `p=example_demain_key_value` |
| TTL | TTL | `Use Vercel default (60)` |
## Receiving Emails
If you want to receive emails at your domain, toggle the "Receiving" switch on the domain details page.
When you enable Inbound on a domain, Resend receives *all emails* sent to that
specific domain depending on the priority of the MX record. For this reason,
we strongly recommend verifying a subdomain (`subdomain.example.com`) instead
of the root domain (`example.com`). Learn more about [avoiding conflicts with
your existing MX
records](/knowledge-base/how-do-i-avoid-conflicting-with-my-mx-records).
Copy and paste the values in Resend to Vercel:
1. Type `inbound` (or whatever your subdomain is) for the `Name` of the record in Vercel.
2. Expand the `Type` dropdown and select `MX`.
3. Copy the MX Value from Resend into the `Value` field in Vercel.
4. Add `10` for the `Priority`.
5. Select `Add`.
Below is a mapping of the record fields from Resend to Vercel:
| Vercel | Resend | Example Value |
| -------- | -------- | -------------------------------------- |
| Type | Type | `MX Record` |
| Name | Name | `inbound` |
| Value | Content | `inbound-smtp.us-east-1.amazonaws.com` |
| TTL | TTL | `Use Vercel default (60)` |
| Priority | Priority | `10` |
After verifying your domain, create a webhook to process incoming emails. For help setting up a webhook, how to access email data and attachments, forward emails, and more, see [our guide on receiving emails with Resend](/dashboard/receiving/introduction).
## Complete Verification
Now click [Verify DNS Records](https://resend.com/domains) on your Domain in Resend. It may take a few hours to complete the verification process (often much faster).
## Troubleshooting
If your domain is not successfully verified, these are some common troubleshooting methods.
Review the records you added to Vercel to rule out copy and paste errors.
[Review our guide on a domain not verifying](/knowledge-base/what-if-my-domain-is-not-verifying).
---
# Source: https://resend.com/docs/api-reference/domains/verify-domain.md
> ## Documentation Index
> Fetch the complete documentation index at: https://resend.com/docs/llms.txt
> Use this file to discover all available pages before exploring further.
# Verify Domain
> Verify an existing domain.
export const ResendParamField = ({children, body, path, ...props}) => {
const [lang, setLang] = useState(() => {
return localStorage.getItem('code') || '"Node.js"';
});
useEffect(() => {
const onStorage = event => {
const key = event.detail.key;
if (key === 'code') {
setLang(event.detail.value);
}
};
document.addEventListener('mintlify-localstorage', onStorage);
return () => {
document.removeEventListener('mintlify-localstorage', onStorage);
};
}, []);
const toCamelCase = str => typeof str === 'string' ? str.replace(/[_-](\w)/g, (_, c) => c.toUpperCase()) : str;
const resolvedBody = useMemo(() => {
const value = JSON.parse(lang);
return value === 'Node.js' ? toCamelCase(body) : body;
}, [body, lang]);
const resolvedPath = useMemo(() => {
const value = JSON.parse(lang);
return value === 'Node.js' ? toCamelCase(path) : path;
}, [path, lang]);
return
{children}
;
};
Calling this API endpoint triggers an **asynchronous domain verification
process**. The domain will be temporarily marked as `pending` regardless of
its current status while the verification is in progress. Since this request
initiates the complete domain verification cycle, it will trigger
`domain.updated` webhook events as the domain status changes during the
verification process.
## Path Parameters
The Domain ID.
```ts Node.js theme={"theme":{"light":"github-light","dark":"vesper"}}
import { Resend } from 'resend';
const resend = new Resend('re_xxxxxxxxx');
const { data, error } = await resend.domains.verify(
'd91cd9bd-1176-453e-8fc1-35364d380206',
);
```
```php PHP theme={"theme":{"light":"github-light","dark":"vesper"}}
$resend = Resend::client('re_xxxxxxxxx');
$resend->domains->verify('d91cd9bd-1176-453e-8fc1-35364d380206');
```
```python Python theme={"theme":{"light":"github-light","dark":"vesper"}}
import resend
resend.api_key = "re_xxxxxxxxx"
resend.Domains.verify(domain_id="d91cd9bd-1176-453e-8fc1-35364d380206")
```
```ruby Ruby theme={"theme":{"light":"github-light","dark":"vesper"}}
Resend.api_key = ENV["RESEND_API_KEY"]
Resend::Domains.verify("d91cd9bd-1176-453e-8fc1-35364d380206")
```
```go Go theme={"theme":{"light":"github-light","dark":"vesper"}}
package main
import "github.com/resend/resend-go/v3"
func main() {
client := resend.NewClient("re_xxxxxxxxx")
client.Domains.Verify("d91cd9bd-1176-453e-8fc1-35364d380206")
}
```
```rust Rust theme={"theme":{"light":"github-light","dark":"vesper"}}
use resend_rs::{Resend, Result};
#[tokio::main]
async fn main() -> Result<()> {
let resend = Resend::new("re_xxxxxxxxx");
resend
.domains
.verify("d91cd9bd-1176-453e-8fc1-35364d380206")
.await?;
Ok(())
}
```
```java Java theme={"theme":{"light":"github-light","dark":"vesper"}}
import com.resend.*;
public class Main {
public static void main(String[] args) {
Resend resend = new Resend("re_xxxxxxxxx");
VerifyDomainResponse verified = resend.domains().verify("d91cd9bd-1176-453e-8fc1-35364d380206");
}
}
```
```csharp .NET theme={"theme":{"light":"github-light","dark":"vesper"}}
using Resend;
IResend resend = ResendClient.Create( "re_xxxxxxxxx" ); // Or from DI
var resp = await resend.DomainVerifyAsync( new Guid( "d91cd9bd-1176-453e-8fc1-35364d380206" ) );
```
```bash cURL theme={"theme":{"light":"github-light","dark":"vesper"}}
curl -X POST 'https://api.resend.com/domains/d91cd9bd-1176-453e-8fc1-35364d380206/verify' \
-H 'Authorization: Bearer re_xxxxxxxxx' \
-H 'Content-Type: application/json'
```
```json Response theme={"theme":{"light":"github-light","dark":"vesper"}}
{
"object": "domain",
"id": "d91cd9bd-1176-453e-8fc1-35364d380206"
}
```
---
# Source: https://resend.com/docs/webhooks/verify-webhooks-requests.md
> ## Documentation Index
> Fetch the complete documentation index at: https://resend.com/docs/llms.txt
> Use this file to discover all available pages before exploring further.
# Verify Webhooks Requests
> Learn how to use the signing secret to verify your webhooks.
Webhook signing secrets are used to validate the payload data sent to your application from Resend. You can find the signing secret on the webhook details page.
Calls to [create](/api-reference/webhooks/create-webhook), [retrieve](/api-reference/webhooks/get-webhook), or [list](/api-reference/webhooks/list-webhooks) webhooks will also return the signing secret in the response body.
To verify the webhook request, you can use the Resend SDK, as in the example below.
Make sure that you're using the raw request body when verifying webhooks. The
cryptographic signature is sensitive to even the slightest change. Some
frameworks parse the request as JSON and then stringify it, and this will also
break the signature verification.
```js theme={"theme":{"light":"github-light","dark":"vesper"}}
export async function POST(req: NextRequest) {
try {
const payload = await req.text();
// Throws an error if the webhook is invalid
// Otherwise, returns the parsed payload object
const result = resend.webhooks.verify({
payload,
headers: {
id: req.headers['svix-id'],
timestamp: req.headers['svix-timestamp'],
signature: req.headers['svix-signature'],
},
webhookSecret: process.env.RESEND_WEBHOOK_SECRET,
});
// Handle the result after validating it
} catch {
return new NextResponse('Invalid webhook', { status: 400 });
}
}
```
Alternatively, you can manually use the Svix libraries and manually pass it the headers, body, and webhook secret. [Learn more and view all supported languages here.](https://docs.svix.com/receiving/verifying-payloads/how)
To verify manually, start by installing the Svix libaries.
```sh npm theme={"theme":{"light":"github-light","dark":"vesper"}}
npm install svix
```
```sh yarn theme={"theme":{"light":"github-light","dark":"vesper"}}
yarn add svix
```
```sh pnpm theme={"theme":{"light":"github-light","dark":"vesper"}}
pnpm add svix
```
```sh bun theme={"theme":{"light":"github-light","dark":"vesper"}}
bun add svix
```
Then, verify the webhooks using the code below. The payload is the raw (string) body of the request, and the headers are the headers passed in the request.
```js theme={"theme":{"light":"github-light","dark":"vesper"}}
import { Webhook } from 'svix';
const secret = process.env.WEBHOOK_SECRET;
// These were all sent from the server
const headers = {
'svix-id': 'msg_p5jXN8AQM9LWM0D4loKWxJek',
'svix-timestamp': '1614265330',
'svix-signature': 'v1,g0hM9SsE+OTPJTGt/tmIKtSyZlE3uFJELVlNIOLJ1OE=',
};
const payload = '{"test": 2432232314}';
const wh = new Webhook(secret);
// Throws on error, returns the verified content on success
wh.verify(payload, headers);
```
If you prefer, you can also [manually verify the headers as well.](https://docs.svix.com/receiving/verifying-payloads/how-manual)
## Why should I verify webhooks?
Webhooks are vulnerable because attackers can send fake HTTP POST requests to endpoints, pretending to be legitimate services. This can lead to security risks or operational issues.
To mitigate this, each webhook and its metadata are signed with a unique key specific to the endpoint. This signature helps verify the source of the webhook, allowing only authenticated webhooks to be processed.
Another security concern is replay attacks, where intercepted valid payloads, complete with their signatures, are resent to endpoints. These payloads would pass the signature verification and be executed, posing a potential security threat.
---
# Source: https://resend.com/docs/dashboard/templates/version-history.md
> ## Documentation Index
> Fetch the complete documentation index at: https://resend.com/docs/llms.txt
> Use this file to discover all available pages before exploring further.
# Version History
> Best practices for using templates in production environments.
Templates in production require a workflow that lets you make changes safely without disrupting active emails. As you build your Template, your entire team can collaborate on the content and design in real-time with full version history.
## Draft vs Published
Templates start in a **draft** state and must be published before they can be used to send emails.
This separation allows you to:
* Test templates thoroughly before going live
* Make changes without affecting active emails
* Maintain version control over your email content
Once you **publish** a template, this published version will be used to send emails until you publish again. You can continue to work on a template in draft state without affecting the published version and the editor will automaticalyl save your progress.
```ts Node.js theme={"theme":{"light":"github-light","dark":"vesper"}}
// Create template
import { Resend } from 'resend';
const resend = new Resend('re_xxxxxxxxx');
await resend.templates.create({
name: 'order-confirmation',
from: 'Resend Store ',
subject: 'Thanks for your order!',
html: "
Name: {{{PRODUCT}}}
Total: {{{PRICE}}}
",
variables: [
{
key: 'PRODUCT',
type: 'string',
fallbackValue: 'item'
},
{
key: 'PRICE',
type: 'number',
fallbackValue: 20
}
]
});
// Publish template
await resend.templates.publish('template_id');
// Or create and publish a template in one step
await resend.templates.create({ ... }).publish();
```
```php PHP theme={"theme":{"light":"github-light","dark":"vesper"}}
$resend = Resend::client('re_xxxxxxxxx');
// Create template
$resend->templates->create([
'name' => 'order-confirmation',
'from' => 'Resend Store ',
'subject' => 'Thanks for your order!',
'html' => "
",
"variables": [
{
"key": "PRODUCT",
"type": "string",
"fallbackValue": "item"
},
{
"key": "PRICE",
"type": "number",
"fallbackValue": 20
}
]
}'
# Publish template
curl -X POST 'https://api.resend.com/templates/{template_id}/publish' \
-H 'Authorization: Bearer re_xxxxxxxxx' \
-H 'Content-Type: application/json'
```
After you publish a template, you can freely work on it through the editor or [via the API](/api-reference/templates/update-template) without affecting the published version. This allows you to test and validate new edits before sending them to users.
## Version History
As you work on a Template, your changes are saved as a draft, although you can also manually save drafts by pressing Cmd + S (Mac) or Ctrl + S (Windows). Only after publishing again will the changes be reflected in emails using the Template.
Each template contains a version history that helps you track changes your team has made over time. You can view the version history by clicking the three dots in the top right corner of the template editor and selecting **Version History**.
Through the version history, you can preview each version, who made them, and when they were made. You can also revert to a previous version if needed.
Reverting creates a new draft based on the selected version's content, without affecting the published template.
## Iterating on a template
You can work on a new draft version of your published template, update the design and messaging, then test it thoroughly before publishing it again. Your email sending will continue to use the current published version until you're ready to make the switch, without the need to create a new separate template or risk leaking your new logo.
This behavior is also useful to avoid breaking changes when you need to edit a template that's in production. Add or remove variables, update the design, and more without affecting your existing emails or raising validation errors.
---
# Source: https://resend.com/docs/knowledge-base/warming-up.md
> ## Documentation Index
> Fetch the complete documentation index at: https://resend.com/docs/llms.txt
> Use this file to discover all available pages before exploring further.
# Domain and/or IP Warm-up Guide
> Learn how to warm up a domain or IP to avoid deliverability issues.
export const WarmupCalculator = () => {
const getToday = () => new Date().toISOString().split('T')[0];
const [domainType, setDomainType] = useState('new');
const [targetVolume, setTargetVolume] = useState(5000);
const [targetDate, setTargetDate] = useState('');
const [startDate, setStartDate] = useState(getToday);
const [isInitialized, setIsInitialized] = useState(false);
useEffect(() => {
const params = new URLSearchParams(window.location.search);
if (params.get('type') === 'existing') setDomainType('existing');
const volumeParam = Number(params.get('volume'));
if (!Number.isNaN(volumeParam) && volumeParam >= 100) setTargetVolume(volumeParam);
if (params.get('target')) setTargetDate(params.get('target'));
if (params.get('start')) setStartDate(params.get('start'));
setIsInitialized(true);
}, []);
useEffect(() => {
if (!isInitialized) return;
const params = new URLSearchParams();
const today = getToday();
if (domainType !== 'new') params.set('type', domainType);
if (targetVolume !== 5000) params.set('volume', String(targetVolume));
if (targetDate) params.set('target', targetDate);
if (startDate !== today) params.set('start', startDate);
const newUrl = params.toString().length > 0 ? `${window.location.pathname}?${params.toString()}` : window.location.pathname;
window.history.replaceState({}, '', newUrl);
}, [domainType, targetVolume, targetDate, startDate, isInitialized]);
const roundVolume = value => {
if (value >= 3000) {
return Math.ceil(value / 500) * 500;
}
return Math.ceil(value / 100) * 100;
};
const newDomainBase = [{
day: 1,
daily: 150,
hourly: null
}, {
day: 2,
daily: 250,
hourly: null
}, {
day: 3,
daily: 400,
hourly: null
}, {
day: 4,
daily: 700,
hourly: 50
}, {
day: 5,
daily: 1000,
hourly: 75
}, {
day: 6,
daily: 1500,
hourly: 100
}, {
day: 7,
daily: 2000,
hourly: 150
}];
const existingDomainBase = [{
day: 1,
daily: 1000,
hourly: 100
}, {
day: 2,
daily: 2500,
hourly: 300
}, {
day: 3,
daily: 5000,
hourly: 600
}, {
day: 4,
daily: 5000,
hourly: 800
}, {
day: 5,
daily: 7500,
hourly: 1000
}, {
day: 6,
daily: 7500,
hourly: 1500
}, {
day: 7,
daily: 10000,
hourly: 2000
}];
const formatDate = (dateStr, addDays = 0) => {
const [year, month, day] = dateStr.split('-').map(Number);
const date = new Date(year, month - 1, day);
date.setDate(date.getDate() + addDays);
return date.toLocaleDateString('en-US', {
month: 'short',
day: 'numeric',
year: 'numeric'
});
};
const getDaysBetween = (start, end) => {
const startD = new Date(start);
const endD = new Date(end);
const diffTime = endD - startD;
return Math.ceil(diffTime / (1000 * 60 * 60 * 24));
};
const schedule = useMemo(() => {
const baseSchedule = domainType === 'new' ? newDomainBase : existingDomainBase;
const baseMax = baseSchedule[baseSchedule.length - 1].daily;
if (targetVolume <= baseMax) {
return baseSchedule.map(item => ({
...item,
date: formatDate(startDate, item.day - 1)
}));
}
const result = baseSchedule.map(item => ({
...item,
date: formatDate(startDate, item.day - 1)
}));
const growthRate = domainType === 'new' ? 1.4 : 1.5;
let currentDay = 8;
let currentDaily = baseMax;
let currentHourly = baseSchedule[baseSchedule.length - 1].hourly;
while (currentDaily < targetVolume && currentDay <= 42) {
currentDaily = Math.min(roundVolume(currentDaily * growthRate), targetVolume);
currentHourly = roundVolume(currentDaily / 10);
result.push({
day: currentDay,
daily: currentDaily,
hourly: currentHourly,
date: formatDate(startDate, currentDay - 1)
});
currentDay++;
}
return result;
}, [domainType, targetVolume, startDate]);
const daysNeeded = schedule.length;
const availableDays = targetDate ? getDaysBetween(startDate, targetDate) : null;
const isTimelineTooShort = availableDays !== null && availableDays < daysNeeded;
const recommendedEndDate = formatDate(startDate, daysNeeded - 1);
return
Your target date allows for {availableDays} days, but a safe warm-up
requires at least {daysNeeded} days to reach{' '}
{targetVolume.toLocaleString()} emails/day. Consider setting your
target date to{' '}
{formatDate(startDate, daysNeeded - 1)} or later,
or adjusting your target volume.
As you warm up, keep your bounce rate below 4% and
your spam rate below 0.08%. If these rates increase,
slow down your warm-up and investigate the root cause before
continuing.
;
};
Warming up a domain or IP refers to the practice of progressively increasing your sending volume to maximize your deliverability. The goal is to send at a consistent rate and avoid any spikes in email volume that might be concerning to inbox service providers.
Whenever you change your sending patterns—whether because you're using a new domain, a new IP, or a new vendor, or because your volume will increase—you should warm-up your domain and/or IP.
A thought-out warm-up plan limits greylisting and delivery throttling, as well as helping establish a good domain and IP reputation.
As your volume increases, you'll need to monitor your bounce rate to ensure it remains below 4%, and your spam rate below 0.08%. An increase in these rates would be a sign that your warm-up plan needs to be slowed down and an investigation into the root causes of the increases started.
Following these rules and metrics will establish a good domain reputation.
Each sender has different constraints and needs, so these numbers are meant as
a baseline. Our [Support team](https://resend.com/help) can work with you on
devising a plan adapted to your needs.
## Existing domain
If you're already sending from an existing domain with established reputation and volumes, you can use the following guidelines to start sending with Resend.
| **Day** | **Messages per day** | **Messages per hour** |
| ------- | -------------------- | --------------------- |
| **1** | Up to 1,000 emails | 100 Maximum |
| **2** | Up to 2,500 emails | 300 Maximum |
| **3** | Up to 5,000 emails | 600 Maximum |
| **4** | Up to 5,000 emails | 800 Maximum |
| **5** | Up to 7,500 emails | 1,000 Maximum |
| **6** | Up to 7,500 emails | 1,500 Maximum |
| **7** | Up to 10,000 emails | 2,000 Maximum |
## New domain
Before you start sending emails with a brand new domain, it's especially important to have a warm-up plan so you can maximize your deliverability right from the start.
| **Day** | **Messages per day** | **Messages per hour** |
| ------- | -------------------- | --------------------- |
| **1** | Up to 150 emails | |
| **2** | Up to 250 emails | |
| **3** | Up to 400 emails | |
| **4** | Up to 700 emails | 50 Maximum |
| **5** | Up to 1,000 emails | 75 Maximum |
| **6** | Up to 1,500 emails | 100 Maximum |
| **7** | Up to 2,000 emails | 150 Maximum |
## Warm-up calculator
Use the calculator below to generate a personalized warm-up schedule based on your specific needs. Enter your target volume, timeline, and domain type to get a custom plan.
The guide is meant as a general plan, but always pay careful attention to your deliverability and adjust accordingly. If you have specific questions, [please reach out to us](https://resend.com/help).
# Warming up your Dedicated IP with Resend
In order for a Dedicated IP to be beneficial or useful, you first need to establish a certain sending volume and patterns. Once you've established this volume and these patterns, our [Support team](https://resend.com/help) can set it up for you.
We provide an automatic warm-up process so that you can simply focus on sending.
[Learn more about requesting a Dedicated IP](https://resend.com/docs/knowledge-base/how-do-dedicated-ips-work#how-to-request-a-dedicated-ip).
# What about third-party warm-up services?
We know email deliverability is important, and it can be tempting to use services promising quick fixes. However, using tools that artificially boost engagement can harm your long-term sender reputation. These services often rely on manipulating anti-spam filters, which can backfire as email providers like Gmail adjust their systems.
Instead, we recommend focusing on sustainable practices—such as sending relevant content, maintaining a clean list, and using proper authentication. These methods build trust with email providers and improve your deliverability over time.
---
# Source: https://resend.com/docs/knowledge-base/what-attachment-types-are-not-supported.md
> ## Documentation Index
> Fetch the complete documentation index at: https://resend.com/docs/llms.txt
> Use this file to discover all available pages before exploring further.
# What attachment types are not supported?
> Learn which file attachment extensions you can't send.
You can **send** any file attachment types except for those in the following list.
| | | | | |
| -------- | ----- | ----- | ------- | --------- |
| .adp | .app | .asp | .bas | .bat |
| .cer | .chm | .cmd | .com | .cpl |
| .crt | .csh | .der | .exe | .fxp |
| .gadget | .hlp | .hta | .inf | .ins |
| .isp | .its | .js | .jse | .ksh |
| .lib | .lnk | .mad | .maf | .mag |
| .mam | .maq | .mar | .mas | .mat |
| .mau | .mav | .maw | .mda | .mdb |
| .mde | .mdt | .mdw | .mdz | .msc |
| .msh | .msh1 | .msh2 | .mshxml | .msh1xml |
| .msh2xml | .msi | .msp | .mst | .ops |
| .pcd | .pif | .plg | .prf | .prg |
| .reg | .scf | .scr | .sct | .shb |
| .shs | .sys | .ps1 | .ps1xml | .ps2 |
| .ps2xml | .psc1 | .psc2 | .tmp | .url |
| .vb | .vbe | .vbs | .vps | .vsmacros |
| .vss | .vst | .vsw | .vxd | .ws |
| .wsc | .wsf | .wsh | .xnk | |
You can *receive* any file attachment types, including those listed above.
These restrictions only apply to *sending* attachments.
---
# Source: https://resend.com/docs/knowledge-base/what-counts-as-email-consent.md
> ## Documentation Index
> Fetch the complete documentation index at: https://resend.com/docs/llms.txt
> Use this file to discover all available pages before exploring further.
# What counts as email consent?
> Learn what valid email permission looks like and why it matters.
Getting consent to send email isn’t just a legal requirement. It’s also essential for keeping your deliverability strong and your Resend account in good standing.
This guide explains what valid email permission looks like, why it matters, and how to set it up properly.
## Why consent matters
Many senders assume that if someone provides an email address, that automatically means it’s okay to email them. But that’s not always true and can often cause large-scale deliverability problems, especially for marketing or bulk messages.
Mailbox providers like Gmail and Outlook closely monitor how recipients react to your emails, paying special attention to whether people mark your emails as spam. High complaint rates or low overall engagement signal that your messages weren’t wanted, which can hurt your reputation and lead to filtering, blocking, or delivery issues.
## What *doesn’t* count as permission
These common methods are **not** considered valid:
* Including a clause in your Terms of Service that says users “agree to receive emails”
* Using a **pre-checked** box on your signup form for marketing messages
* Assuming someone is opted in unless they unsubscribe
These approaches violate email best practices and don’t meet legal standards [like GDPR](https://gdpr-info.eu/art-7-gdpr/).
## What *does* count as permission
Valid consent means the recipient **clearly and knowingly agreed** to receive the specific kind of email you're sending.
[According to GDPR](https://gdpr-info.eu/recitals/no-32/) (and general best practices), consent must be:
* **Freely given** – without pressure, bundling, or tricks
* **Specific** – clearly describes the type of messages the user will receive
* **Informed** – the user knows who you are and how you’ll use their data
* **Unambiguous** – requires an active opt-in (like checking a box)
In other words, recipients should be able to consent to each message type from a particular sender.
## What happens if you send without consent?
If you send to recipients who didn’t explicitly opt in, here’s what can happen:
1. Some of those people will **mark the message as spam**.
2. Mailbox providers may **block your mail or filter it to the spam folder**.
3. If your spam complaint or bounce rate remains high, [Resend may have to **pause or terminate your account**](https://resend.com/legal/acceptable-use) to protect our sending reputation.
And this applies *globally*, not just in the EU. Even if your emails are technically legal in your country, violating consent can lead to your mail being blocked or filtered to the spam folder.
## Best practice: Let people say “yes”
The easiest way to get consent is to **ask for it clearly and separately**. Add an unchecked checkbox to your signup form, like this:
> Yes, I want to receive product updates and occasional marketing emails
**Follow these best practices:**
* Keep it **optional** and **unchecked** by default
* Make the wording clear and specific
* Place it outside of your Terms of Service
* Include a one-click unsubscribe link in every email
## Still have questions?
Following best practices helps everyone — your recipients, your deliverability, and the health of the email ecosystem. When you start with clear consent, your messages are the ones people are *glad* to receive.
If you’re new to permission-based sending, please reach out to [Support](https://resend.com/help) and we’ll help you make sure everything’s on track.
---
# Source: https://resend.com/docs/knowledge-base/what-email-addresses-to-use-for-testing.md
> ## Documentation Index
> Fetch the complete documentation index at: https://resend.com/docs/llms.txt
> Use this file to discover all available pages before exploring further.
# What email addresses to use for testing?
> Learn what email addresses are safe to use for testing with Resend
## Safe email addresses for testing
When testing email functionality, it's important to use designated test addresses to avoid unintended consequences like deliverability issues or spam complaints.
Resend provides a set of safe email addresses specifically designed for testing, ensuring that you can simulate different email events without affecting your domain's reputation.
### Why not use @example.com or @test.com?
Many developers attempt to use domains like `@example.com` or `@test.com` for testing purposes. However, these domains are not designed for email traffic and often reject messages, leading to bounces.
A high bounce rate can negatively impact your sender reputation and affect future deliverability. To prevent this, Resend blocks such addresses and returns a `422 Unprocessable Entity` error if you attempt to send to them.
### List of addresses to use
To help you safely test email functionality, Resend provides the following test addresses, each designed to simulate a different delivery event:
| Address | Delivery event simulated |
| ----------------------- | ------------------------ |
| `delivered@resend.dev` | Email being delivered |
| `bounced@resend.dev` | Email bouncing |
| `complained@resend.dev` | Email marked as spam |
| `suppressed@resend.dev` | Email being suppressed |
Using these addresses in your tests allows you to validate email flows without risking real-world deliverability problems. For more help sending test emails, see our [testing documentation](/dashboard/emails/send-test-emails).
### Labeling support
Most test email addresses support labeling, which enables you to send emails to the same test address in multiple ways. You can add a label after the `+` symbol to help track and differentiate between different test scenarios:
* `delivered+user1@resend.dev`
* `bounced+signup@resend.dev`
* `complained+newsletter@resend.dev`
This is particularly useful for testing different email flows, tracking webhook responses, and matching responses with the specific email address that triggered the event.
Whether you need to confirm that an email has been sent, track engagement events, or simulate a bounce scenario, these addresses provide a controlled and predictable way to test your email integration with Resend.
The suppressed test email address does not support labeling yet
---
# Source: https://resend.com/docs/knowledge-base/what-if-an-email-says-delivered-but-the-recipient-has-not-received-it.md
> ## Documentation Index
> Fetch the complete documentation index at: https://resend.com/docs/llms.txt
> Use this file to discover all available pages before exploring further.
# What if an email says delivered but the recipient has not received it?
> Learn the steps to take when an email is delivered, but the recipient does not receive it.
Some emails may be marked as `Delivered` but not reach the recipient's inbox due to various inbox sorting variables. This guide provides reasons for and advice on avoiding such issues.
## Why does this happen
When an email is sent, it is marked as `Delivered` once the recipient server accepts it with a `250 OK` response. However, the server can then direct the email to the inbox, queue it for later, route it to the spam folder, or even discard it. This is done by major inbox providers (e.g., Gmail, Yahoo, Outlook), as well as by IT departments and individual users who set up firewalls or filtering rules.
As a result, even though most legitimate emails should land in the intended inboxes, your message might end up in the spam/junk folder or, in rare cases, be deleted.
**Inbox Providers do not share any information on how the messages are later filtered.** Resend is only notified about the initial acceptance and marks the email as `Delivered`. Any subsequent events (e.g., open/click events, unsubscribes) require recipient engagement.
## How to avoid this
### If you are in contact with the user
The easiest way to solve this is by cooperating with the end user. If you have direct communication with the recipient, you can ask them to **check these places for your email**:
* Corporate spam filters or firewalls
* Personal inbox filtering
* Promotional, spam, or deleted folders
* Group inboxes or queues
If they find it, ask them to mark the email as `Not Spam` or add your domain to an allowlist.
### If you are not in contact with the user
Debugging without direct contact with the user is challenging. However, there are some optimizations that can **improve your chances of delivering to their inbox next time**:
* [Configure DMARC](/dashboard/domains/dmarc) to build trust with the inbox provider
* Warm up new domains slowly before sending large volumes
* Change all links in your email to use your own domain (matching your sender domain)
* Turn off open and click tracking
* Reduce the number of images in your email
* Improve wording to be succinct, clear, and avoid spammy words
We have an [extensive but practical deliverability guide](/knowledge-base/how-do-i-avoid-gmails-spam-folder) that covers these topics in more detail.
---
# Source: https://resend.com/docs/knowledge-base/what-if-my-domain-is-not-verifying.md
> ## Documentation Index
> Fetch the complete documentation index at: https://resend.com/docs/llms.txt
> Use this file to discover all available pages before exploring further.
# What if my domain is not verifying?
> Learn what steps to take when your domain doesn't seem to be verifying.
Verifying a domain involves a few steps:
1. Add your domain to Resend
2. Copy the required DNS records from Resend
3. Add these records to your DNS provider
4. Wait for verification to complete
When this process is completed correctly, your domain will often verify within 15 minutes of adding the DNS records. What should you do if your domain isn't verifying?
If you are having any conflict issues with the `MX` records, [check out this
guide](/knowledge-base/how-do-i-avoid-conflicting-with-my-mx-records).
## Common verification issues
When your domain doesn't verify as expected, it's typically due to DNS configuration issues. This guide will help you troubleshoot and resolve common verification problems.
Resend provides real-time DNS validation when viewing your domain details.
When viewing your domain, you'll see specific error messages and visual
indicators highlighting any issues with your DNS records in case you've added
them incorrectly.
### Incorrect DNS records
Usually when a domain doesn't verify, it's because the DNS records were not added correctly. Here's how to check:
1. Confirm that you've added all required records (DKIM, SPF, and MX)
2. Verify that the records are added at the correct location (the `send` subdomain, not the root domain)
3. Check that record values match exactly what Resend generated for you
4. Look for red wavy underlines on the domain details page (these indicate specific DNS record errors)
### DNS provider auto-appending domain names
Some DNS providers automatically append your domain name to record MX values, causing verification failures.
**Problem:**
Your MX record appears as:
`feedback-smtp.eu-west-1.amazonses.com.yourdomain.com`
Instead of:
`feedback-smtp.eu-west-1.amazonses.com`
**Solution:**
In your DNS provider, add a trailing period (dot) at the end of the record value:
`feedback-smtp.eu-west-1.amazonses.com.`
The trailing period tells your DNS provider that this is a fully qualified domain name that should not be modified.
Note: The region your domain is added to is in this MX record. It may be
`us-east-1`, `eu-west-1`, `ap-northeast-1`, or `sa-east-1` depending on the
region.
### Nameserver conflicts
If your domain's DNS is managed in multiple places (e.g., Vercel, Cloudflare, your domain registrar), you might be adding records in the wrong location.
**How to check:** Run a nameserver lookup for your domain using a tool like [dns.email](https://dns.email) to see which provider actually controls your DNS. Add the Resend records at that provider, not elsewhere.
### Region mismatch errors
If your MX records point to a different AWS region than where your domain is configured, you'll see a "region-mismatch" error. This happens when:
* Your domain is configured in one region (e.g., `us-east-1`)
* But your MX record points to a different region (e.g., `eu-west-1`)
**Solution:** Update your MX record to match the region shown in your Resend domain configuration. The correct MX record value is displayed in the DNS records table on your domain details page.
### Multiple regions detected
If you have multiple MX records pointing to different AWS regions, you'll see a "multiple-regions" error. All MX records for a domain must point to the same region.
**Solution:** Remove any MX records pointing to incorrect regions, keeping only the one that matches your domain's configured region.
### DKIM record value mismatches
The DKIM record must match exactly what Resend generated. Common mistakes include:
1. Adding extra quotes or spaces
2. Truncating long values
3. Adding SPF information to the DKIM record
4. Not copying the entire value
Always copy and paste the exact value from Resend's domain configuration page. If there's a mismatch, you'll see a red wavy underline on the incorrect value.
### DNS Propagation
After adding or correcting your DNS records:
1. DNS changes can take up to 72 hours to propagate globally (though often much faster)
2. Use the "Restart verification" button in the Resend dashboard to trigger a fresh verification check
3. If verification still fails after 24 hours, use [dns.email](https://dns.email) to check if your records are visible publicly
## Need more help?
If you've followed all the steps above and your domain still isn't verifying, contact [Resend support](https://resend.com/help) with:
1. Your domain name
2. Screenshots of your DNS configuration
Our team will help identify any remaining issues preventing successful verification.
Tools like [dns.email](https://dns.email) allow you to check your DNS records in the browser.
Go to this URL and replace `yourdomain.com` with the domain you added in Resend.
You are looking to see the same values that you see in Resend.
Checking your DNS records in the terminal is just as easy. You can use the `nslookup` command and a record type flag to get the same information.
Replace `yourdomain.com` with whatever you added as the domain in Resend:
Check your DKIM `TXT` record:
```
nslookup -type=TXT resend._domainkey.yourdomain.com
```
Check your SPF `TXT` record:
```
nslookup -type=TXT send.yourdomain.com
```
Check your SPF `MX` record:
```
nslookup -type=MX send.yourdomain.com
```
You are looking to see the same values that you see in Resend.
---
# Source: https://resend.com/docs/knowledge-base/what-is-resend-pricing.md
> ## Documentation Index
> Fetch the complete documentation index at: https://resend.com/docs/llms.txt
> Use this file to discover all available pages before exploring further.
# What is Resend Pricing
> Learn more about Resend's pricing plans.
You can learn more about Resend's pricing at [resend.com/pricing](https://resend.com/pricing).
---
# Source: https://resend.com/docs/knowledge-base/what-sending-feature-to-use.md
> ## Documentation Index
> Fetch the complete documentation index at: https://resend.com/docs/llms.txt
> Use this file to discover all available pages before exploring further.
# What sending feature should I be using?
> How to pick between our different sending features depending on your number of recipients and the nature of the message.
Resend allows you to send both **Transactional** and **Marketing** emails.
## What's the difference between Transactional and Marketing emails?
### What is a Transactional email?
A **Transactional email** is a message triggered by a user action or required for legal compliance. These emails are essential communications that users **cannot unsubscribe** from. Common examples include:
* Order confirmations
* Password reset emails
* Account notifications
Typically, transactional emails are **1-to-1** messages sent in response to a specific event.
### What is a Marketing email?
A **Marketing email** is any email that is not transactional. These can be **promotional**, **informative**, or **general communication** messages.
Marketing emails are regulated by laws like **CAN-SPAM** (US) and **CASL** (Canada), and **recipients must have the option to unsubscribe**.
Examples of marketing emails:
* Promotional offers and discounts
* Newsletters
* Product updates
Marketing emails can be **1-to-1** (e.g., abandoned cart reminders) or **1-to-many** (e.g., newsletters).
## Should I be sending a Transactional or a Marketing email?
While not exhaustive, here's a table listing different examples of emails and the most appropriate type for each example.
| Type of Message | Type of Recipient | Transactional | Marketing |
| ------------------ | ----------------- | ------------- | --------- |
| Order confirmation | Single | ✓ | ⨯ |
| Password reset | Single | ✓ | ⨯ |
| Abandoned cart | Single | ⨯ | ✓ |
| Newsletter | Multiple | ⨯ | ✓ |
| Promotional offer | Multiple | ⨯ | ✓ |
## How to send an email with Resend?
### How to send a Transactional email?
You can send a Transactional email using:
* Our [Send Email API](/api-reference/emails/send-email)
* Our [Batch Send API](/api-reference/emails/send-batch-emails) (send up to 100 transactional emails in one API call)
### How to send a Marketing email?
You can send Marketing emails using:
* [Resend no-code Editor](/dashboard/broadcasts/introduction) – a collaborative interface for designing emails
* [Broadcast API](/api-reference/broadcasts/create-broadcast) – for programmatic sending
---
# Source: https://resend.com/docs/knowledge-base/whats-the-difference-between-opportunistic-tls-vs-enforced-tls.md
> ## Documentation Index
> Fetch the complete documentation index at: https://resend.com/docs/llms.txt
> Use this file to discover all available pages before exploring further.
# What's the difference between Opportunistic TLS vs Enforced TLS?
> Understand the different TLS configurations available.
Resend supports TLS 1.2, TLS 1.1 and TLS 1.0 for TLS connections.
There are two types of TLS configurations available:
* Opportunistic TLS
* Enforced TLS
## What is Opportunistic TLS?
Opportunistic TLS means that Resend always attempts to make a secure connection to the receiving mail server.
If the receiving server does not support TLS, the fallback is sending the message unencrypted.
## What is Enforced TLS?
Enforced TLS means that the email communication must use TLS no matter what.
If the receiving server does not support TLS, the email will not be sent.
## Is Enforced TLS better than Opportunistic TLS?
One strategy is not necessarily better than the other.
The decision is less about one option being safe and the other being unsafe, and more about one option being safe and the other being safer.
When you have Enforced TLS enabled, you might see an increase in bounce rates because some outdated mail servers do not support TLS.
So it's important to understand the different use cases for each configuration. If you're sending sensitive information like authentication emails, you might want to use Enforced TLS. If you're sending marketing emails, you might want to use Opportunistic TLS.
In simple terms, with Opportunistic TLS, delivery is more important than security. On the other hand, with Enforced TLS, security is more important than delivery.
---
# Source: https://resend.com/docs/knowledge-base/why-are-my-emails-landing-on-the-suppression-list.md
> ## Documentation Index
> Fetch the complete documentation index at: https://resend.com/docs/llms.txt
> Use this file to discover all available pages before exploring further.
# Why are my emails landing on the Suppression List?
> Learn why your emails land on the Suppression List and how to remove them.
When sending to an email address results in a hard bounce, Resend places this address on the Suppression List. Emails placed on the list cannot be sent to until they are removed.
We place emails on the Suppression List to protect domain reputation, both
yours and ours. Sending an email to a known hard bounce recipient can damage
domain reputation and affect email deliverability.
## Reasons emails are placed on the Suppression List
Here are some possible reasons an email address is placed on the Suppression List:
* The recipient's email address **contains a typo**.
* The recipient's email address **doesn't exist**.
* The recipient's email server has **permanently blocked delivery**.
* The recipient has marked the delivery as spam.
## View email bounce details
You can view the reason an email bounced on the [Emails](https://resend.com/emails) page:
1. Open the [Emails](https://resend.com/emails) page and search for the recipient's email address in question.
2. Click on the email to view its details.
3. Hover over the `Bounced` status indicator to see a summary of the bounce reason.
For more technical details and suggested next steps, click the **See details** button. The drawer will open on the right side of your screen with the bounce type, subtype, and suggestions on how to proceed.
## What happens if you try sending to a recipient on the suppression list?
Whenever you send an email with Resend, we check if the recipient is on the suppression list. If they are, we'll [suppress](/dashboard/emails/email-suppressions.mdx) the delivery to prevent damaging your sender reputation and our infrastructure.
## Removing an email address from the Suppression List
You may be able to send a message to the same recipient in the future if the issue that caused the message to bounce is resolved and the email address is removed from the Suppression List.
Remember, if you do not address the issue that caused the email to bounce, the
email address will return to the Suppression List the next time you attempt to
send to it.
To remove your recipient from the Suppression List, click on the email in the [emails dashboard](https://resend.com/emails), and click **Remove from suppression list**.
---
# Source: https://resend.com/docs/knowledge-base/why-are-my-open-rates-not-accurate.md
> ## Documentation Index
> Fetch the complete documentation index at: https://resend.com/docs/llms.txt
> Use this file to discover all available pages before exploring further.
# Why are my open rates not accurate?
> Learn why your open rate statistics are not accurate and what you can do about it.
## How are open rates tracked?
A 1x1 pixel transparent GIF image is inserted in each email and includes a unique reference. When the image is downloaded, an open event is triggered.
## Why are my open rates not accurate?
Open tracking is generally not accurate because each inbox handles incoming email differently.
**Clipped messages in Gmail** happen when you send a message over 102KB. A message over this size won’t be counted as an open unless the recipient views the entire message. Resend’s Deliverability Insights on the email will note if a message exceeds this threshold.
**Some inboxes do not download images by default** or block/cache assets with a corporate firewall. This approach can prevent the open event from being tracked.
**Other inboxes open the email prior to delivering** in order to scan for malware or to [protect user privacy](https://www.apple.com/newsroom/2021/06/apple-advances-its-privacy-leadership-with-ios-15-ipados-15-macos-monterey-and-watchos-8/). This approach can trigger an open event without the recipient reading your email.
**Emails sent with only a plain text version** will not include open tracking at all. Since open tracking relies on a 1x1 pixel image, plain text emails cannot trigger open events. Only emails with an HTML version can be tracked for opens.
Because of this, open tracking is **not a statistically accurate way** of detecting if your users are engaging with your content.
## Does open tracking impact inbox placement?
Though open tracking should not impact if your email is delivered, it most likely will impact your inbox placement. Trackers are generally **used by marketers and even spammers**. Because of this, inbox providers will often use open tracking as a signal that your email is promotional, or even spam, and categorize accordingly.
**We suggest disabling open rates for transactional email**, to maximize inbox placement.
## What's the alternative?
Instead of relying on open rates, there are a few other ways to still understand your sending.
1. **Track Clicks:** Monitoring the link clicks is an even more granular way to know how a recipient engaged with your email. By knowing if they clicked, you also know that they read parts of your email and took action.
2. **Track Outside the Inbox:** Often emails are sent as a means to an end. Maybe it's to increase page visits of an announcement or convert free users to paid. Tracking your sending by metrics outside of the inbox can be a great way to understand the true impact of your sending.
---
# Source: https://resend.com/docs/knowledge-base/why-use-topics.md
> ## Documentation Index
> Fetch the complete documentation index at: https://resend.com/docs/llms.txt
> Use this file to discover all available pages before exploring further.
# Why and when to use Topics?
> Learn when to use Topics to improve deliverability and give recipients control over their email preferences.
When you send an email, you make one primary decision: **who is this for?** Those recipients—a person, a list, or a Segment—are the core of sending. By default, everyone in that recipient group receives the message, but not everyone in that group may want that message.
Topics give recipients a way to say "don't send me this kind of email" without unsubscribing from everything. Think of Topics as **contracts with your recipients**: a promise that if they opt out of a content type, you'll respect it.
Topics don't define who receives a message—they **define who asked not to receive that message**. This guide explains why Topics matter for deliverability, when you should use them, and how they differ from Segments.
## Why Topics improve deliverability
Deliverability focuses on landing in the inbox instead of the spam folder. And *recipient engagement* is a key factor in deliverability. Mailbox providers like Gmail and Outlook track whether people open, click, or mark your emails as spam.
When you send all your marketing emails to everyone on your list, a subsection of your recipients will not engage with your content. This leads to:
* **Lower open rates**: recipients ignore emails that don't interest them
* **Higher spam complaints**: frustrated recipients mark emails as spam instead of unsubscribing
* **Decreased sender reputation**: mailbox providers see low engagement and filter your emails to spam
Topics give your recipients agency, and they give you signals. When a recipient says "I don't want promotional emails," the system honors that request while continuing to send them content they do want. Topics let them decline one without losing the other.
## Without topics: global unsubscribe
Without Topics, your unsubscribe page offers only one option: **unsubscribe from everything**. This is a blunt instrument. Many recipients who would have gladly kept receiving some of your content will unsubscribe entirely because they received one too many emails about something they didn't want.
With Topics, recipients can say "no" to specific content types while staying connected to what they value. You retain more engaged subscribers.
## When to use Topics
Topics are most valuable when you send **multiple types of marketing content** to the same audience. Consider using Topics if you send:
| Topic Example | Description |
| -------------------- | --------------------------------------------- |
| **Newsletter** | Regular updates, articles, or curated content |
| **Product Updates** | New features, releases, and announcements |
| **Promotions** | Discounts, sales, and special offers |
| **Events** | Webinars, conferences, and meetups |
| **Tips & Tutorials** | Educational content and how-to guides |
## When you might not need Topics
If you only send one type of marketing email (for example, a monthly newsletter and nothing else), Topics add complexity without much benefit. In that case, a simple subscribe/unsubscribe model is sufficient.
## Topics vs Segments: What's the difference?
Topics and Segments serve fundamentally different purposes. Understanding this distinction is key to using them effectively.
| Aspect | Topics | Segments |
| ------------------- | ---------------------------------- | ------------------------------------------ |
| **Who controls it** | Your recipients | You (the sender) |
| **Visibility** | Shown on the unsubscribe page | Internal only—recipients never see them |
| **Purpose** | Let users manage their preferences | Organize contacts for targeted sending |
| **Example** | "Newsletter", "Product Updates" | "Enterprise customers", "Free trial users" |
## How Segments and Topics work together
Think of Segments as **who you're sending to** and Topics as **what you're sending**.
When you send a Broadcast:
1. You choose a **Segment** as your recipients (your sender intent).
2. You label the content with a **Topic** (so the system can respect recipient preferences).
3. Everyone in the Segment receives the message, **except** those who opted out of that Topic.
For example, you might send a product announcement to your "Enterprise Customers" Segment, labeled with the "Product Updates" Topic. Recipients who previously said "don't send me product updates" are automatically excluded.
**Segments are for targeting. Topics are for protecting preferences.** They work together without competing.
## Customizing your unsubscribe page
When a recipient clicks the unsubscribe link in a Broadcast, they see a preference page showing your public Topics. This page is fully customizable to match your brand.
You can customize:
* **Title and description**
* **Logo**
* **Background color, text color, and accent color**
A branded unsubscribe page looks more professional and trustworthy, which can encourage recipients to adjust their preferences rather than unsubscribe entirely.
Learn more about [customizing your unsubscribe page](/dashboard/settings/unsubscribe-page).
Pro plan users or higher can remove the "Powered by Resend" footer from the
unsubscribe page.
## Opt-in vs Opt-out Topics
When creating a Topic, choose between two default subscription behaviors:
* **Opt-in (default)**: All contacts receive emails for this Topic unless they explicitly unsubscribe (applies retroactively to all contacts)
* **Opt-out**: Contacts do NOT receive emails for this Topic unless they explicitly subscribe
Use **Opt-in** for content that's broadly relevant to your audience (like product updates). Use **Opt-out** for niche content that only some users will want (like a beta program or developer-focused updates).
You cannot change the default subscription type after creating a Topic.
## Public vs Private Topics
When creating a Topic, you can set its visibility:
* **Public**: All contacts see this Topic on the unsubscribe page
* **Private**: Only contacts who are opted in to the Topic can see it
Private Topics are useful for exclusive content, like a beta program or VIP announcements, where you don't want to advertise the Topic to everyone.
## Best practices for Topics
### Keep it simple
Don't create too many Topics. Recipients get overwhelmed when faced with a long list of checkboxes. Aim for 3-5 distinct content types that clearly communicate what the recipient will receive.
### Use clear, descriptive names
Topic names should be immediately understandable. "Newsletter" and "Product Updates" are clear. "Category A" and "Misc" are not.
### Add descriptions
The optional description field helps recipients understand the topic. Use it to set expectations about frequency and content.
### Always label your Broadcasts with a Topic
Whenever you send a Broadcast, label it with a Topic. This ensures:
1. Recipients who declined that content type won't receive the email.
2. If someone unsubscribes, they can opt out of that Topic only, rather than unsubscribe from all your emails.
If you send a Broadcast without a Topic and someone unsubscribes, they'll be
unsubscribed from **all** your emails. Labeling your content protects both you
and your recipients.
## Getting started with Topics
1. [Create your Topics](/dashboard/topics/introduction) in the Resend dashboard
2. [Customize your unsubscribe page](/dashboard/settings/unsubscribe-page) with your branding
3. Use [Segments](/dashboard/segments/introduction) to define who you're sending to
4. When sending [Broadcasts](/dashboard/broadcasts/introduction), always label them with a Topic
By using Segments for targeting and Topics for respecting preferences, you send to the right people while honoring those who said no—improving engagement and protecting your sender reputation.
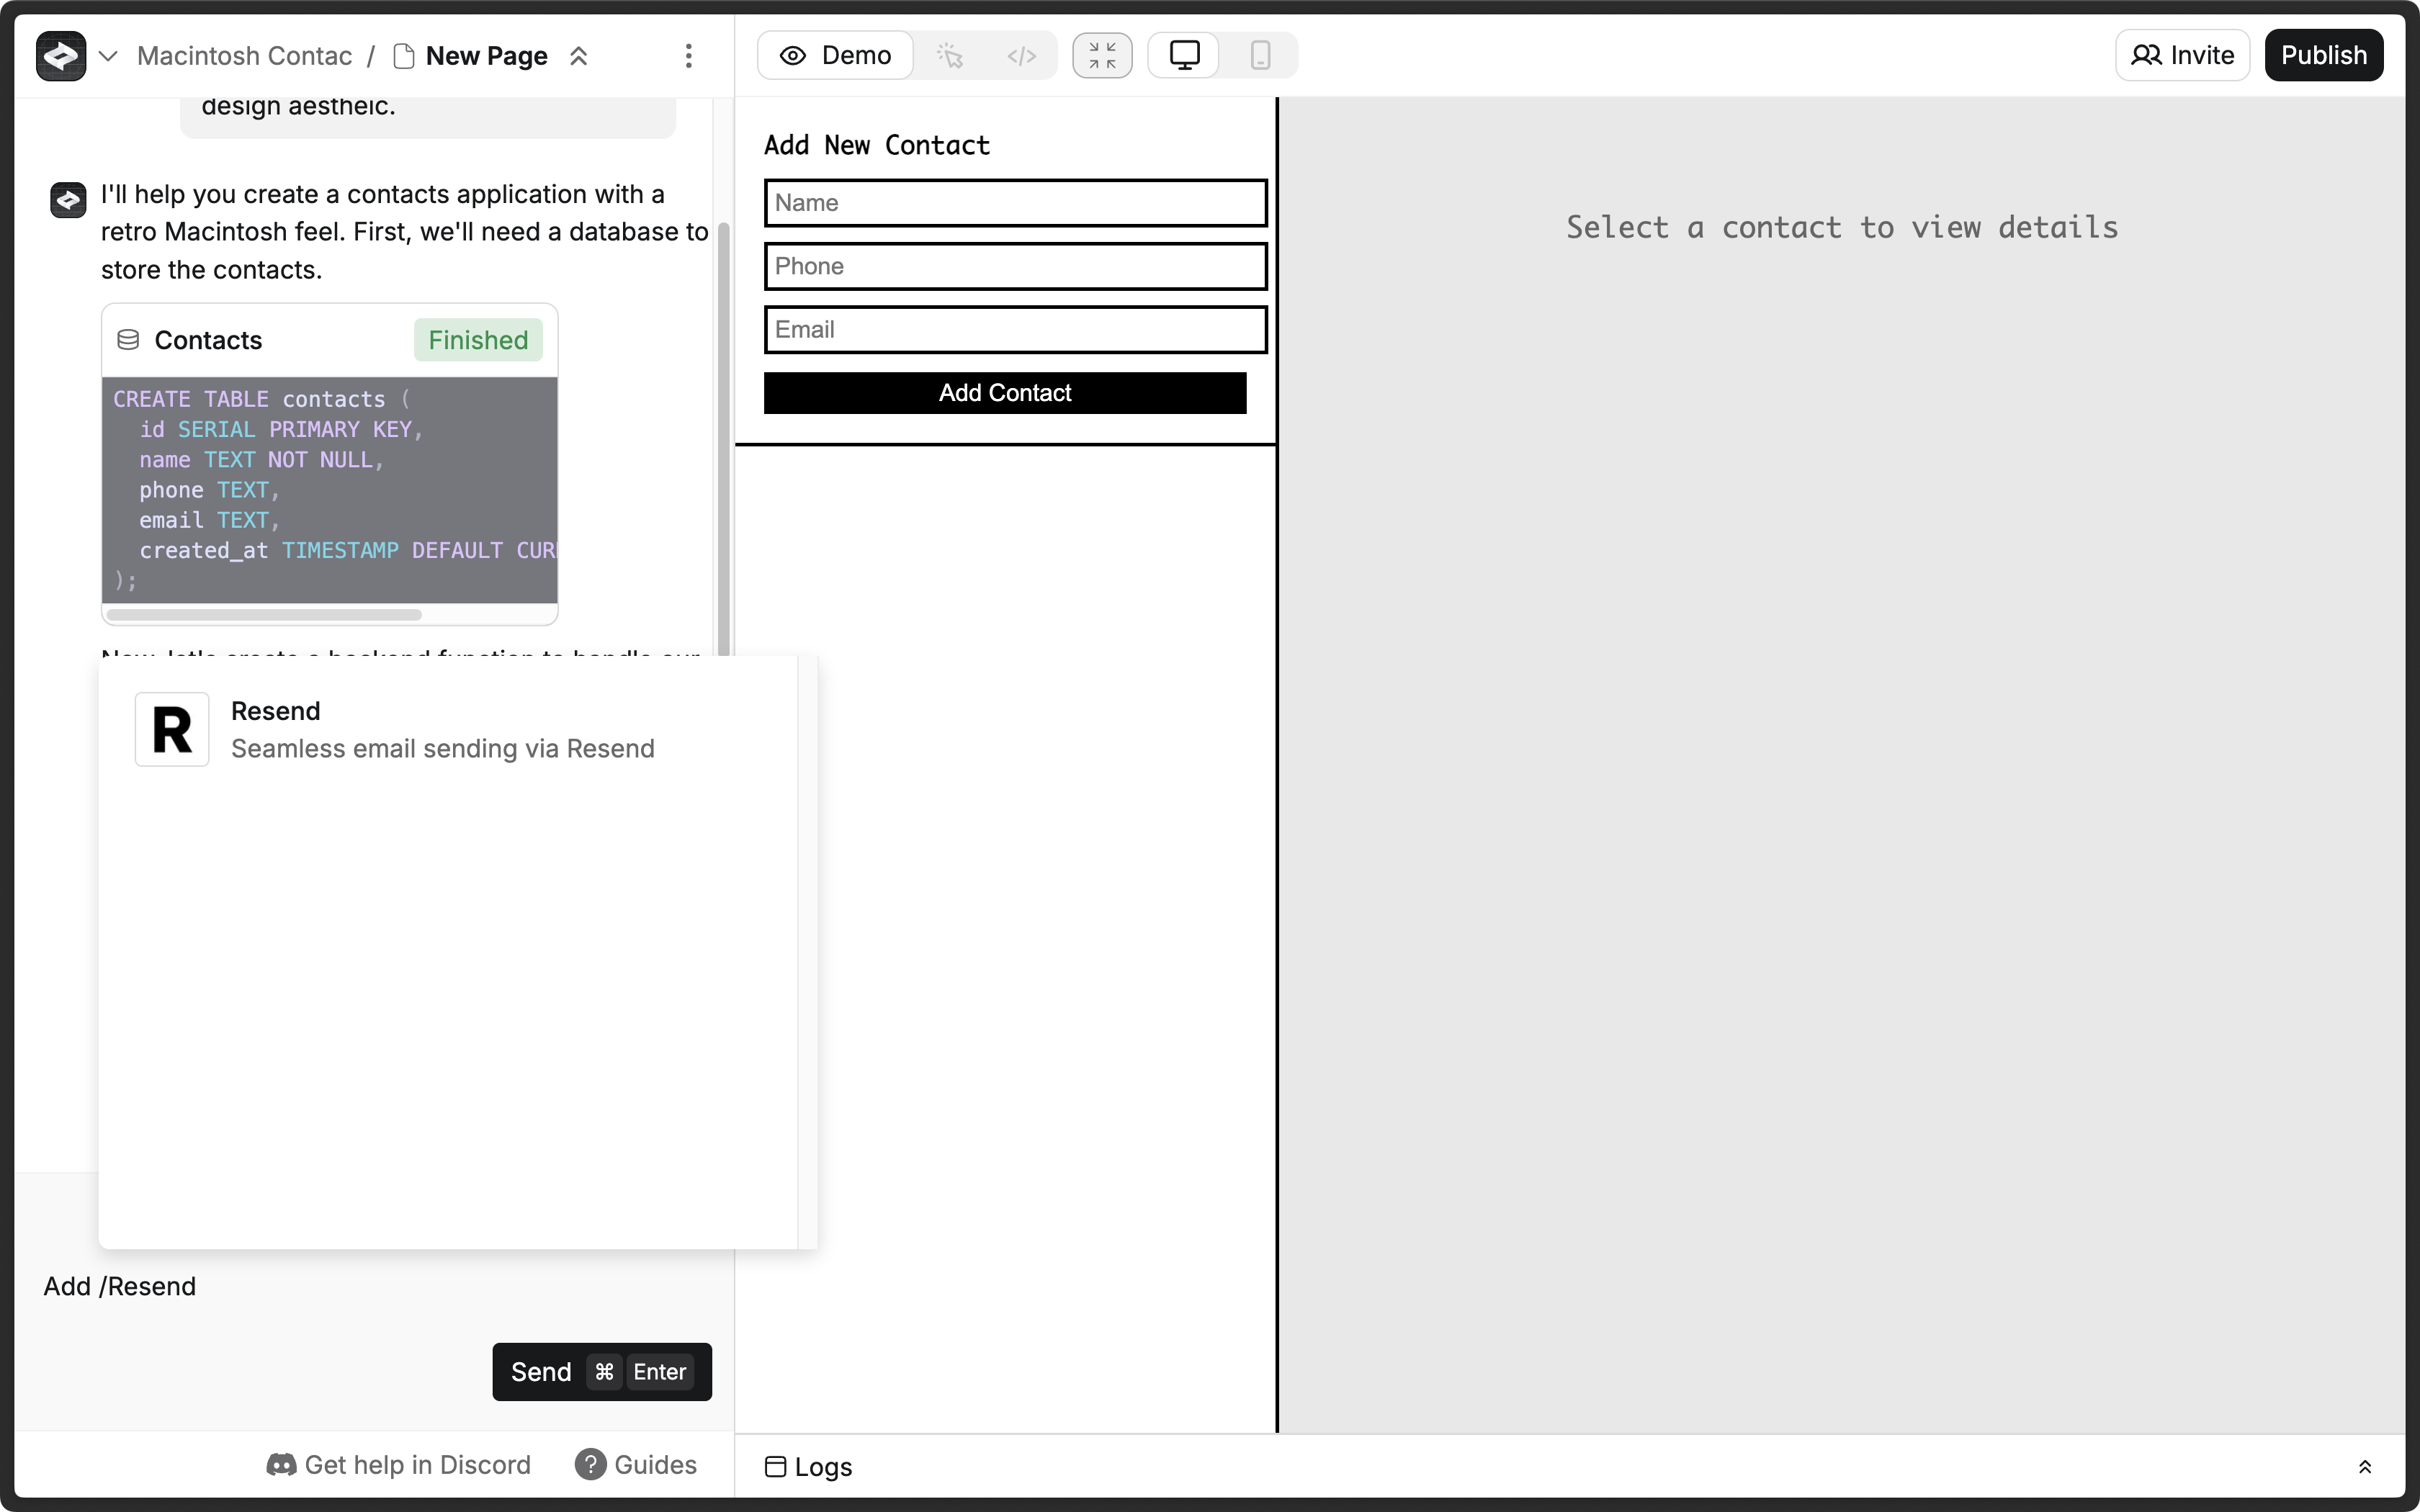 ## 2. Add your Resend API key
Anything usually prompts you for a Resend API key, which you can add in the [Resend Dashboard](https://resend.com/api-keys). If Anything doesn't prompt you for a Resend API key, click the **More options**
## 2. Add your Resend API key
Anything usually prompts you for a Resend API key, which you can add in the [Resend Dashboard](https://resend.com/api-keys). If Anything doesn't prompt you for a Resend API key, click the **More options** 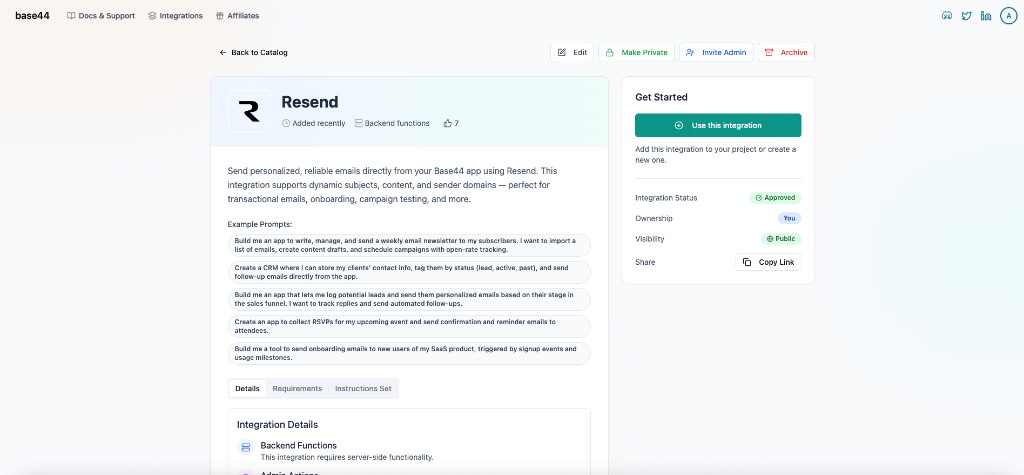 **If adding Resend to an existing app:**
1. Enable backend functions.
2. Ask the chat: "Add the Resend email integration to my app. Prompt me to provide the API key and send a welcome email to new users."
**If adding Resend to an existing app:**
1. Enable backend functions.
2. Ask the chat: "Add the Resend email integration to my app. Prompt me to provide the API key and send a welcome email to new users."
 ## 3. Add a custom domain to your Resend account
By default, you can only send emails to your own email address.
To send emails to other email addresses:
1. Add a [custom domain to your Resend account](https://resend.com/domains).
2. Add the custom domain to the `from` field in the `resend` function in the Base44 backend function (or ask the chat to update these fields).
Get more help adding a custom domain in [Resend's documentation](/dashboard/domains/introduction).
---
# Source: https://resend.com/docs/dashboard/emails/batch-sending.md
> ## Documentation Index
> Fetch the complete documentation index at: https://resend.com/docs/llms.txt
> Use this file to discover all available pages before exploring further.
# Batch Sending
> Send up to 100 emails in a single API call.
Batch sending allows you to send multiple emails at once (up to 100) instead of making individual API requests for each email.
## When to use batch sending
Use batch sending when you need to:
* Send multiple transactional emails (e.g., order confirmations, notifications, etc.)
* Trigger emails to different recipients with unique content
* Reduce the number of API calls to improve performance
## 3. Add a custom domain to your Resend account
By default, you can only send emails to your own email address.
To send emails to other email addresses:
1. Add a [custom domain to your Resend account](https://resend.com/domains).
2. Add the custom domain to the `from` field in the `resend` function in the Base44 backend function (or ask the chat to update these fields).
Get more help adding a custom domain in [Resend's documentation](/dashboard/domains/introduction).
---
# Source: https://resend.com/docs/dashboard/emails/batch-sending.md
> ## Documentation Index
> Fetch the complete documentation index at: https://resend.com/docs/llms.txt
> Use this file to discover all available pages before exploring further.
# Batch Sending
> Send up to 100 emails in a single API call.
Batch sending allows you to send multiple emails at once (up to 100) instead of making individual API requests for each email.
## When to use batch sending
Use batch sending when you need to:
* Send multiple transactional emails (e.g., order confirmations, notifications, etc.)
* Trigger emails to different recipients with unique content
* Reduce the number of API calls to improve performance
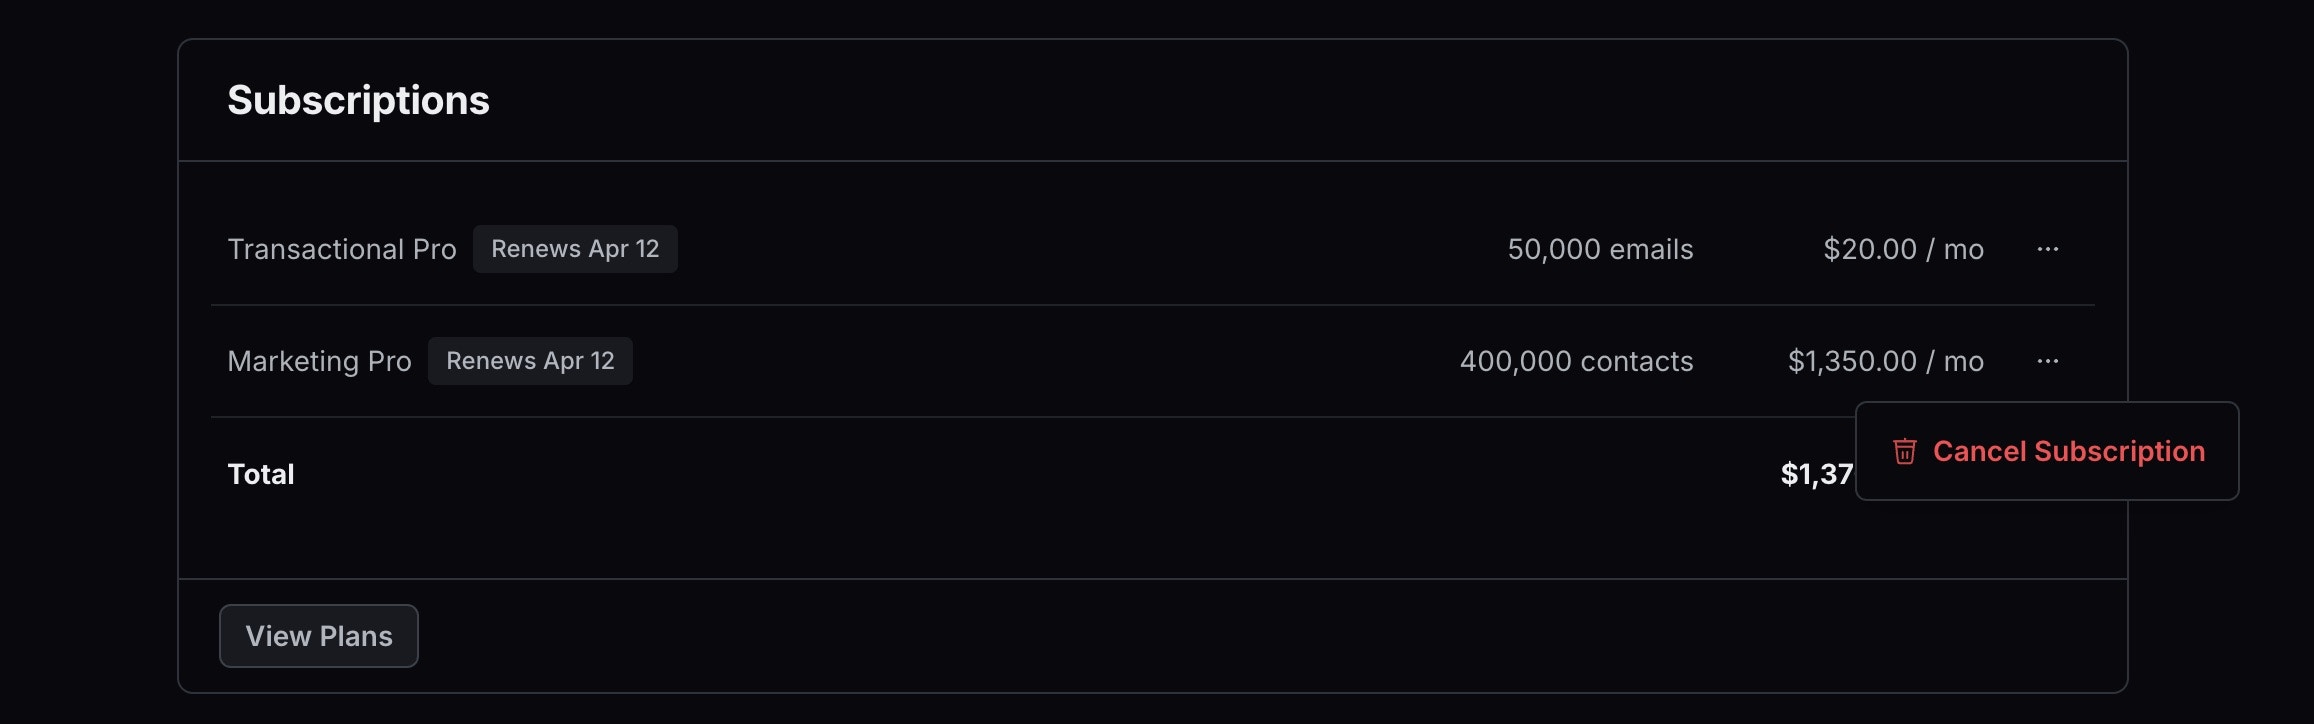 ---
# Source: https://resend.com/docs/dashboard/domains/bimi.md
> ## Documentation Index
> Fetch the complete documentation index at: https://resend.com/docs/llms.txt
> Use this file to discover all available pages before exploring further.
# Implementing BIMI
> Set up BIMI to gain brand recognition by displaying your logo in the inbox.
## Prerequisites
To get the most out of this guide, you will need to:
* Establish verifiable use of your logo
* Obtain a registered trademark for your logo
* Or, use your logo for over one year
* [Add a DMARC record on your domain](/dashboard/domains/dmarc)
## What is BIMI?
BIMI ([Brand Indicators for Message Identification](https://bimigroup.org/)) is a standard that allows you to specify a logo (and sometimes a checkmark) to display next to your email in the inbox. These indicators can increase brand recognition and trust and improve engagement.
---
# Source: https://resend.com/docs/dashboard/domains/bimi.md
> ## Documentation Index
> Fetch the complete documentation index at: https://resend.com/docs/llms.txt
> Use this file to discover all available pages before exploring further.
# Implementing BIMI
> Set up BIMI to gain brand recognition by displaying your logo in the inbox.
## Prerequisites
To get the most out of this guide, you will need to:
* Establish verifiable use of your logo
* Obtain a registered trademark for your logo
* Or, use your logo for over one year
* [Add a DMARC record on your domain](/dashboard/domains/dmarc)
## What is BIMI?
BIMI ([Brand Indicators for Message Identification](https://bimigroup.org/)) is a standard that allows you to specify a logo (and sometimes a checkmark) to display next to your email in the inbox. These indicators can increase brand recognition and trust and improve engagement.
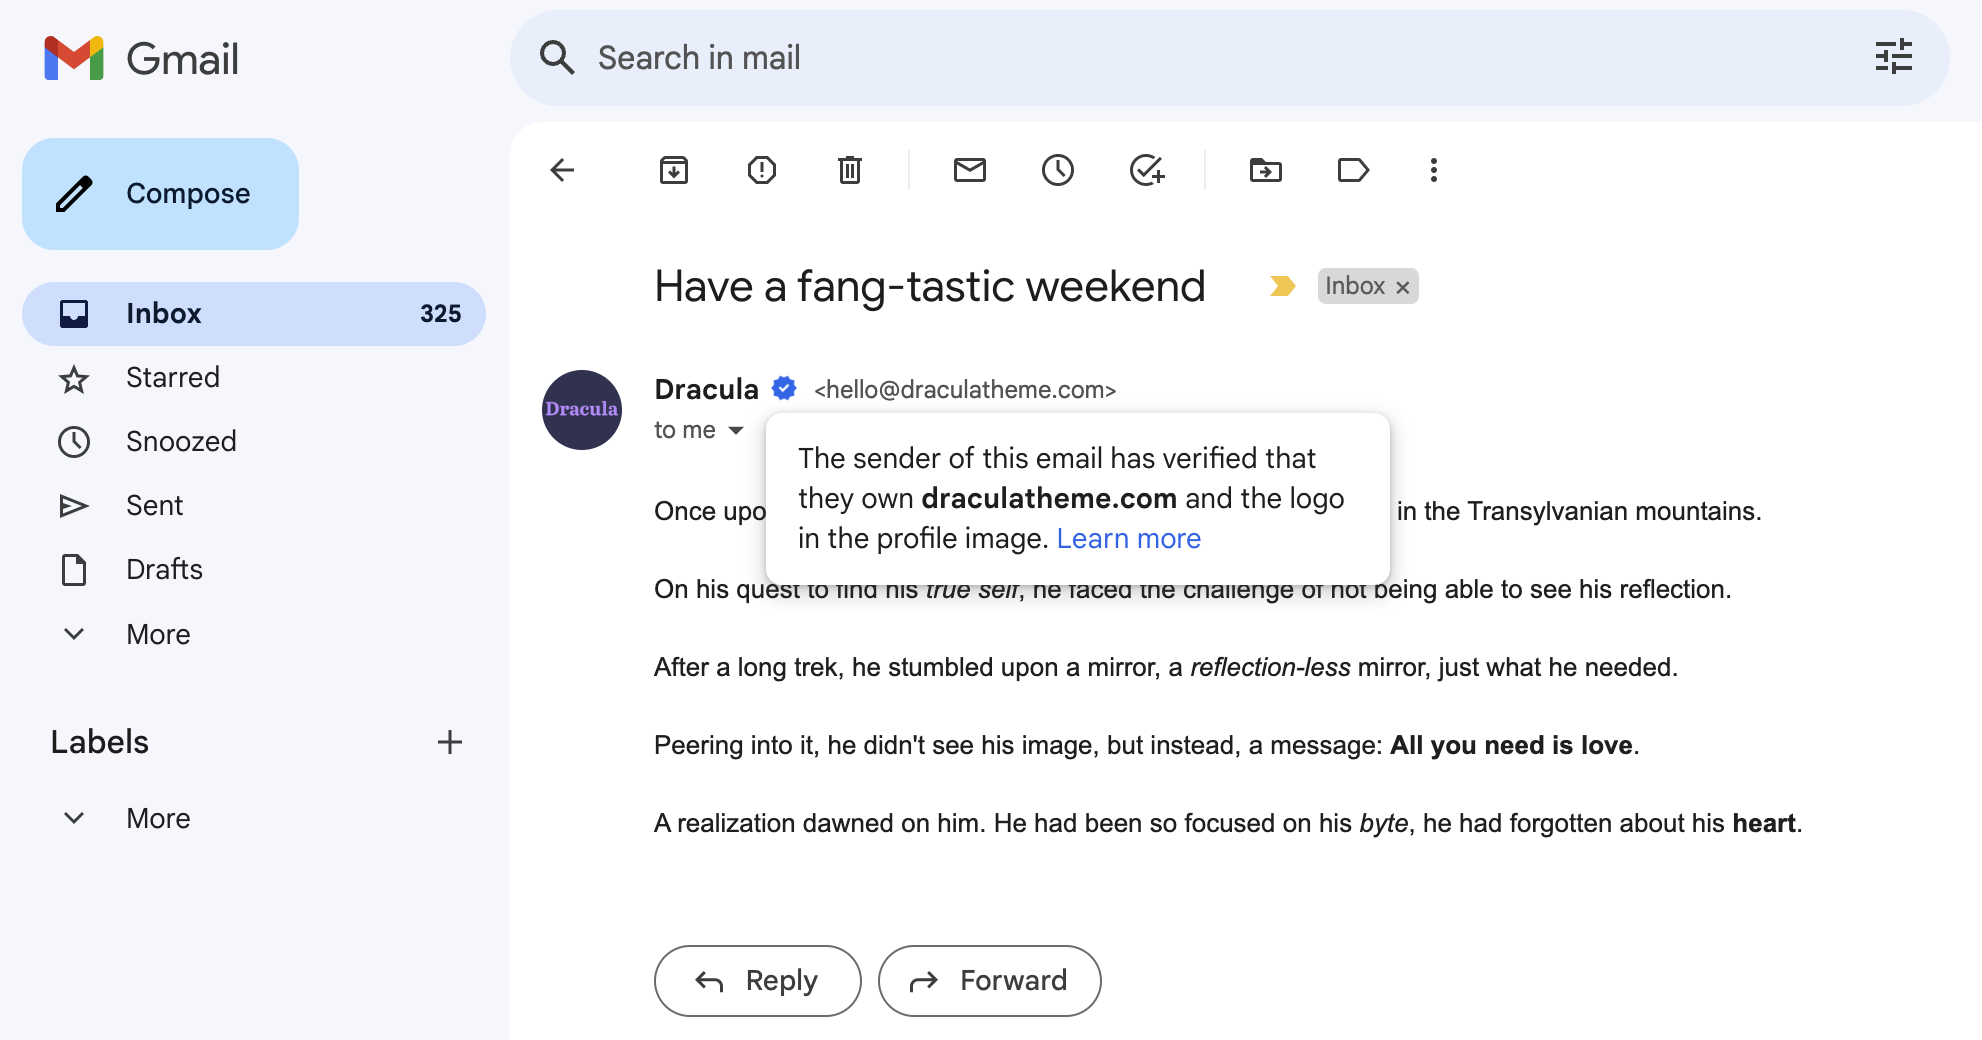 Though this standard is newer, most major mailbox providers now support it. This gives BIMI adoption a competitive edge for brand recognition in the inbox. Most mailbox providers show brand indicators for those who purchase a certificate, of which there are two types: a Common Mark Certificate (CMC) and a Verified Mark Certificate (VMC).
Here's an overview of current email client support:
| Client | BIMI w/a CMC | BIMI w/a VMC | BIMI w/out a VMC or CMC |
| ----------------------------------------------------- | ------------ | ------------ | ----------------------- |
| [Apple Mail](https://support.apple.com/en-us/108340) | X | ✓ | X |
| [Gmail](https://support.google.com/a/answer/10911320) | ✓ | ✓ | X |
| Outlook | X | X | X |
| [Yahoo](https://senders.yahooinc.com/bimi/) | ✓ | ✓ | ✓ |
## Implementing BIMI
### 1. Configure DMARC
Though this standard is newer, most major mailbox providers now support it. This gives BIMI adoption a competitive edge for brand recognition in the inbox. Most mailbox providers show brand indicators for those who purchase a certificate, of which there are two types: a Common Mark Certificate (CMC) and a Verified Mark Certificate (VMC).
Here's an overview of current email client support:
| Client | BIMI w/a CMC | BIMI w/a VMC | BIMI w/out a VMC or CMC |
| ----------------------------------------------------- | ------------ | ------------ | ----------------------- |
| [Apple Mail](https://support.apple.com/en-us/108340) | X | ✓ | X |
| [Gmail](https://support.google.com/a/answer/10911320) | ✓ | ✓ | X |
| Outlook | X | X | X |
| [Yahoo](https://senders.yahooinc.com/bimi/) | ✓ | ✓ | ✓ |
## Implementing BIMI
### 1. Configure DMARC
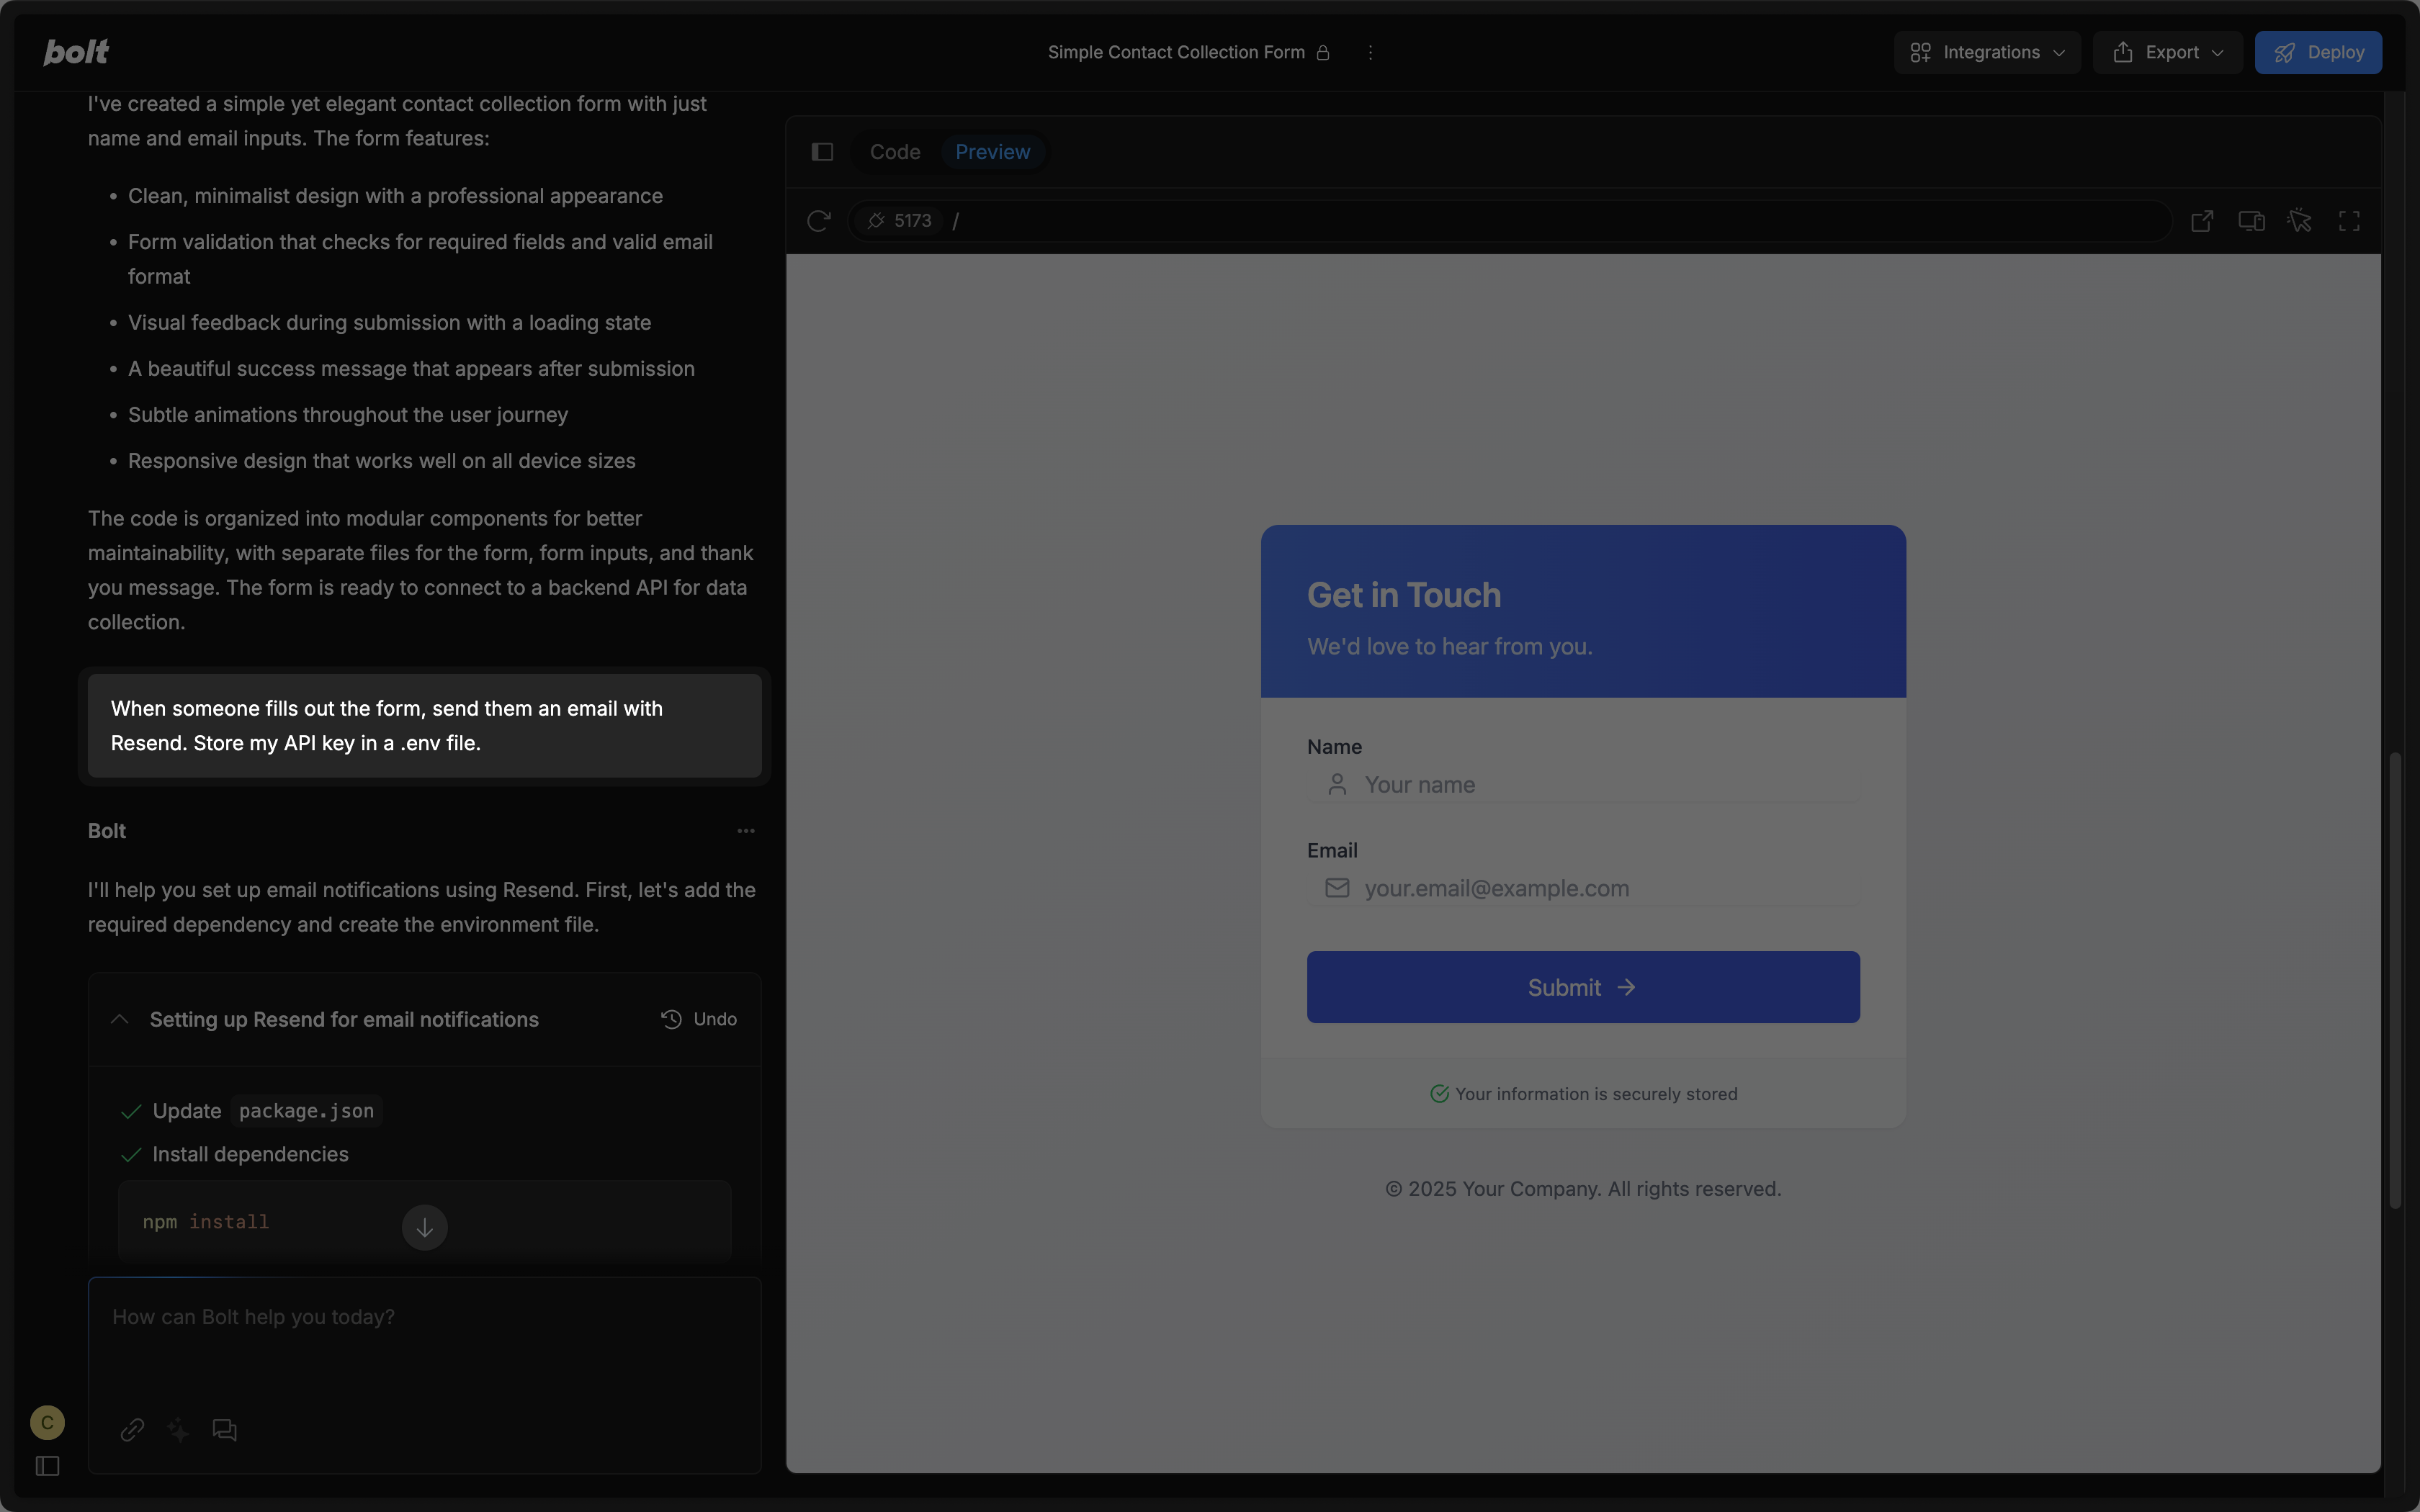 ## 1. Add your Resend API key
To use Resend with Bolt.new, you'll need to add a Resend API key, which you can create in the [Resend Dashboard](https://resend.com/api-keys). Do not share your API key with others or expose it in the browser or other client-side code.
## 1. Add your Resend API key
To use Resend with Bolt.new, you'll need to add a Resend API key, which you can create in the [Resend Dashboard](https://resend.com/api-keys). Do not share your API key with others or expose it in the browser or other client-side code.
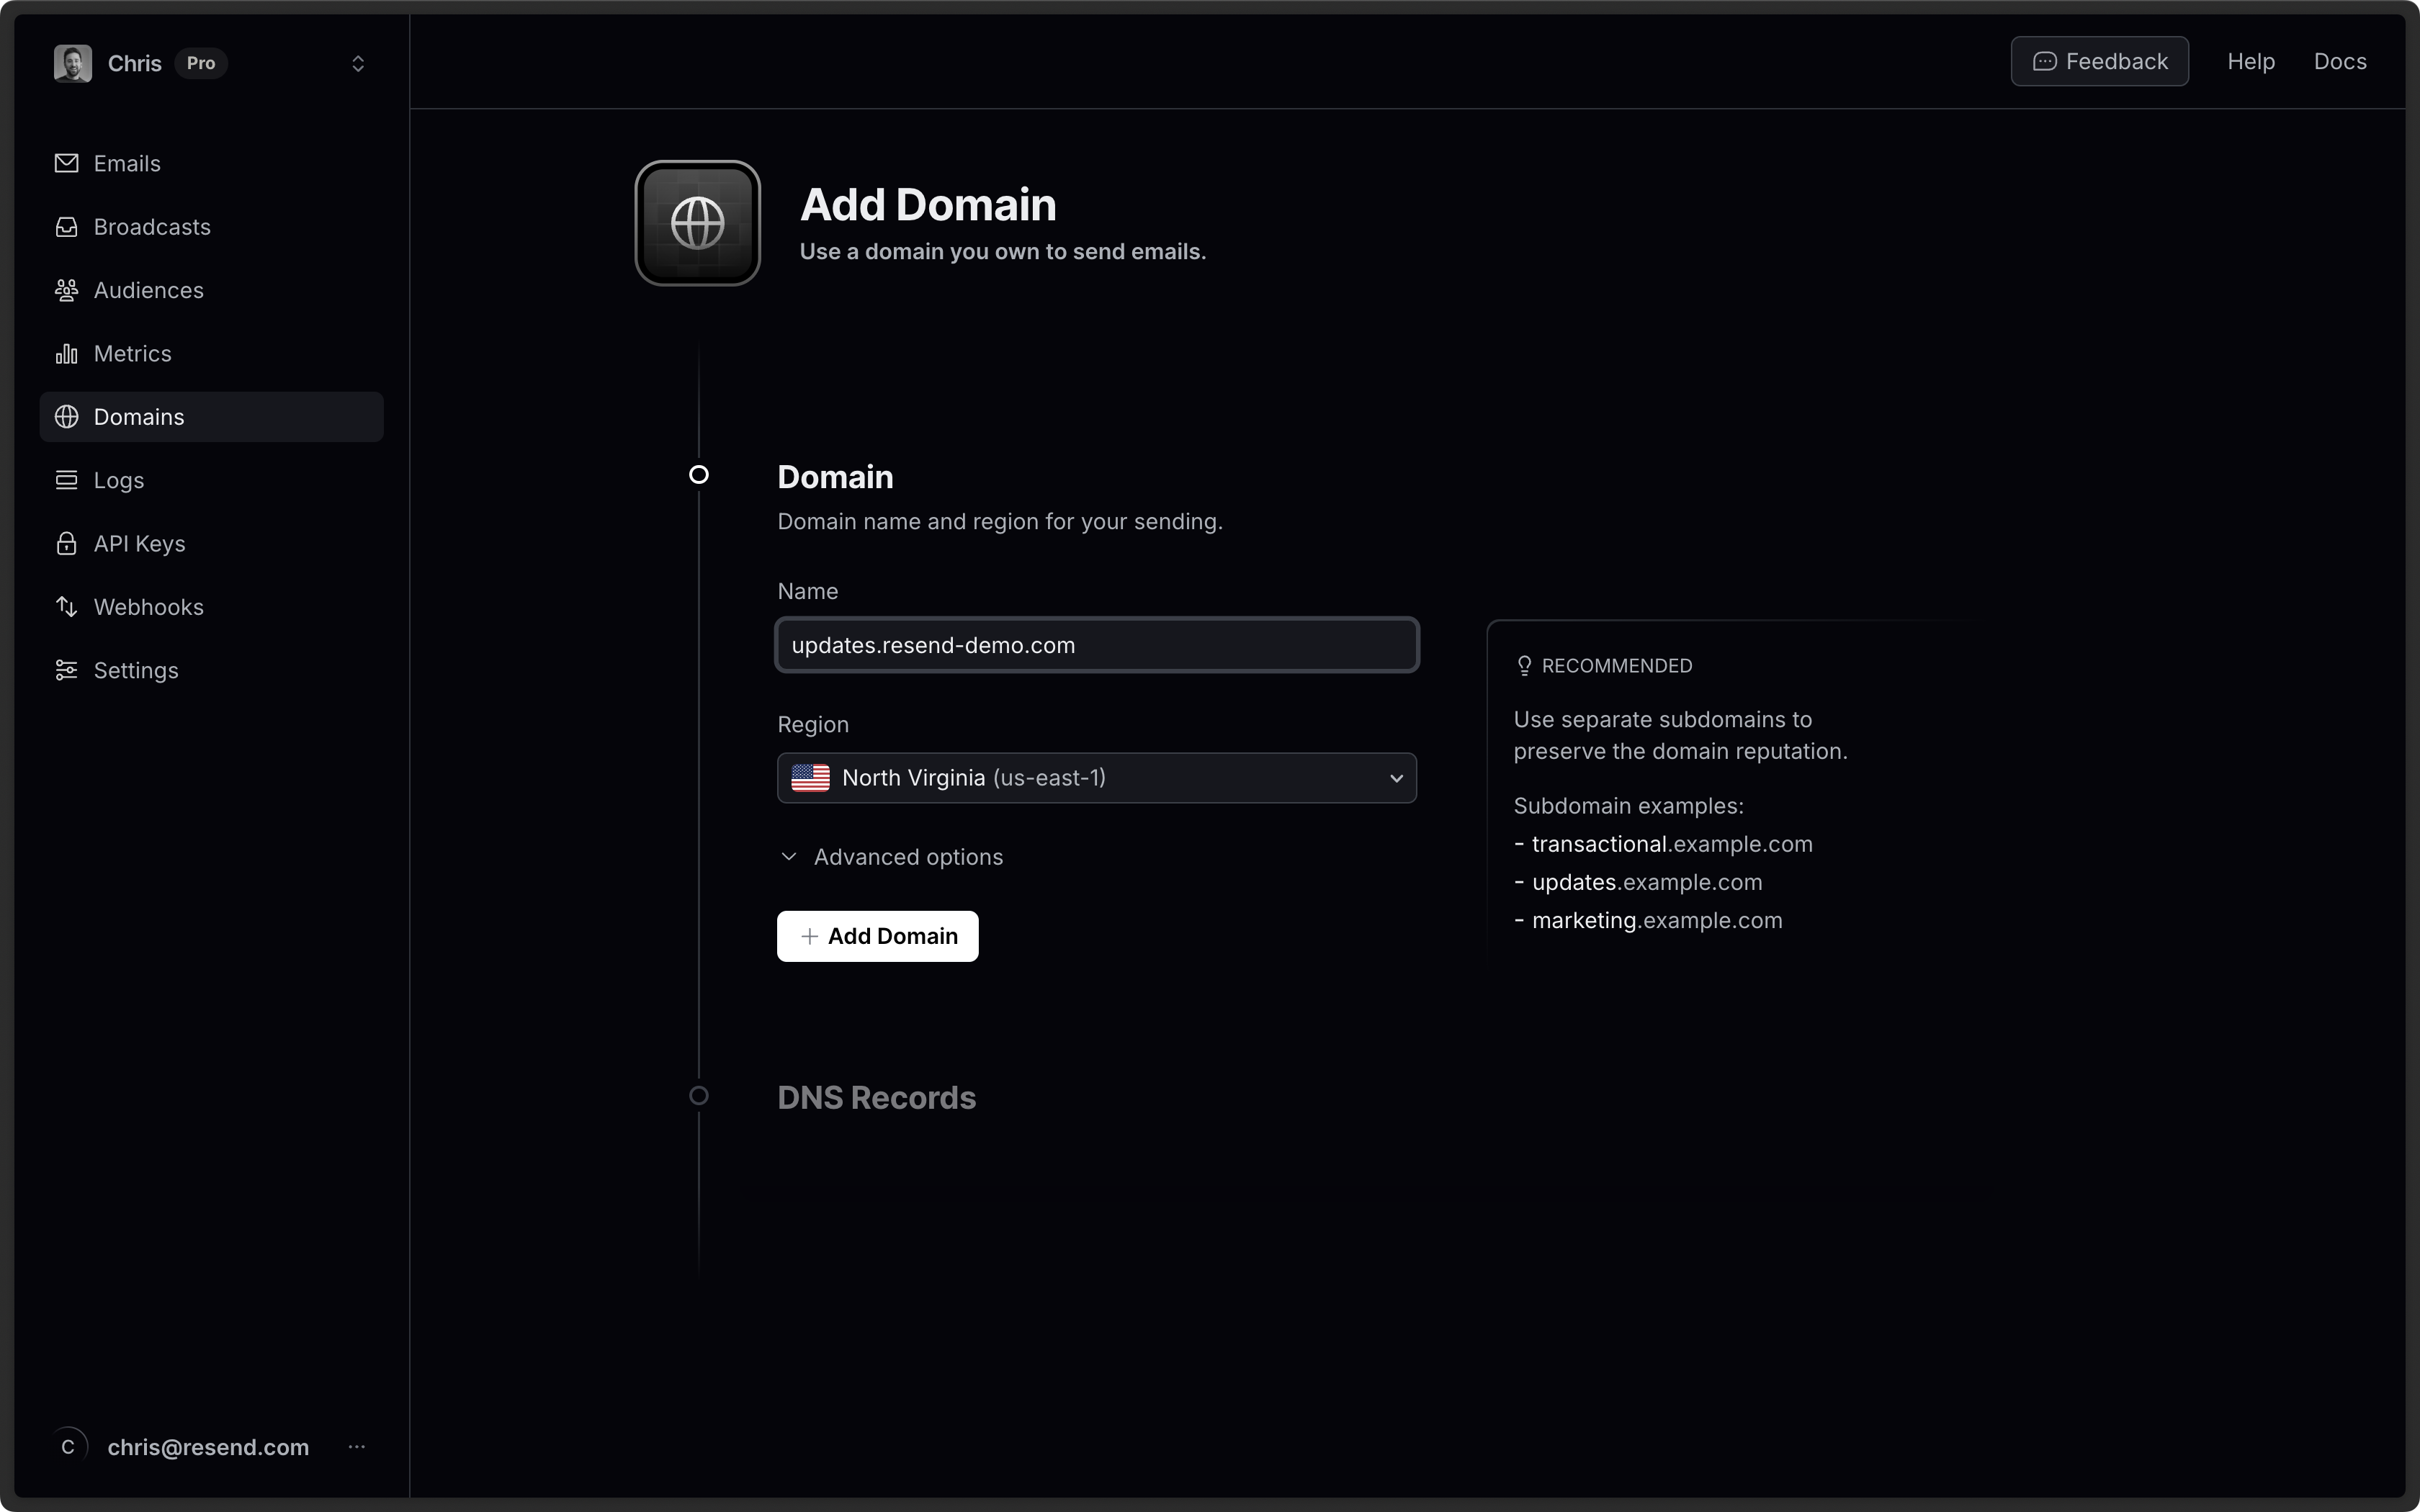
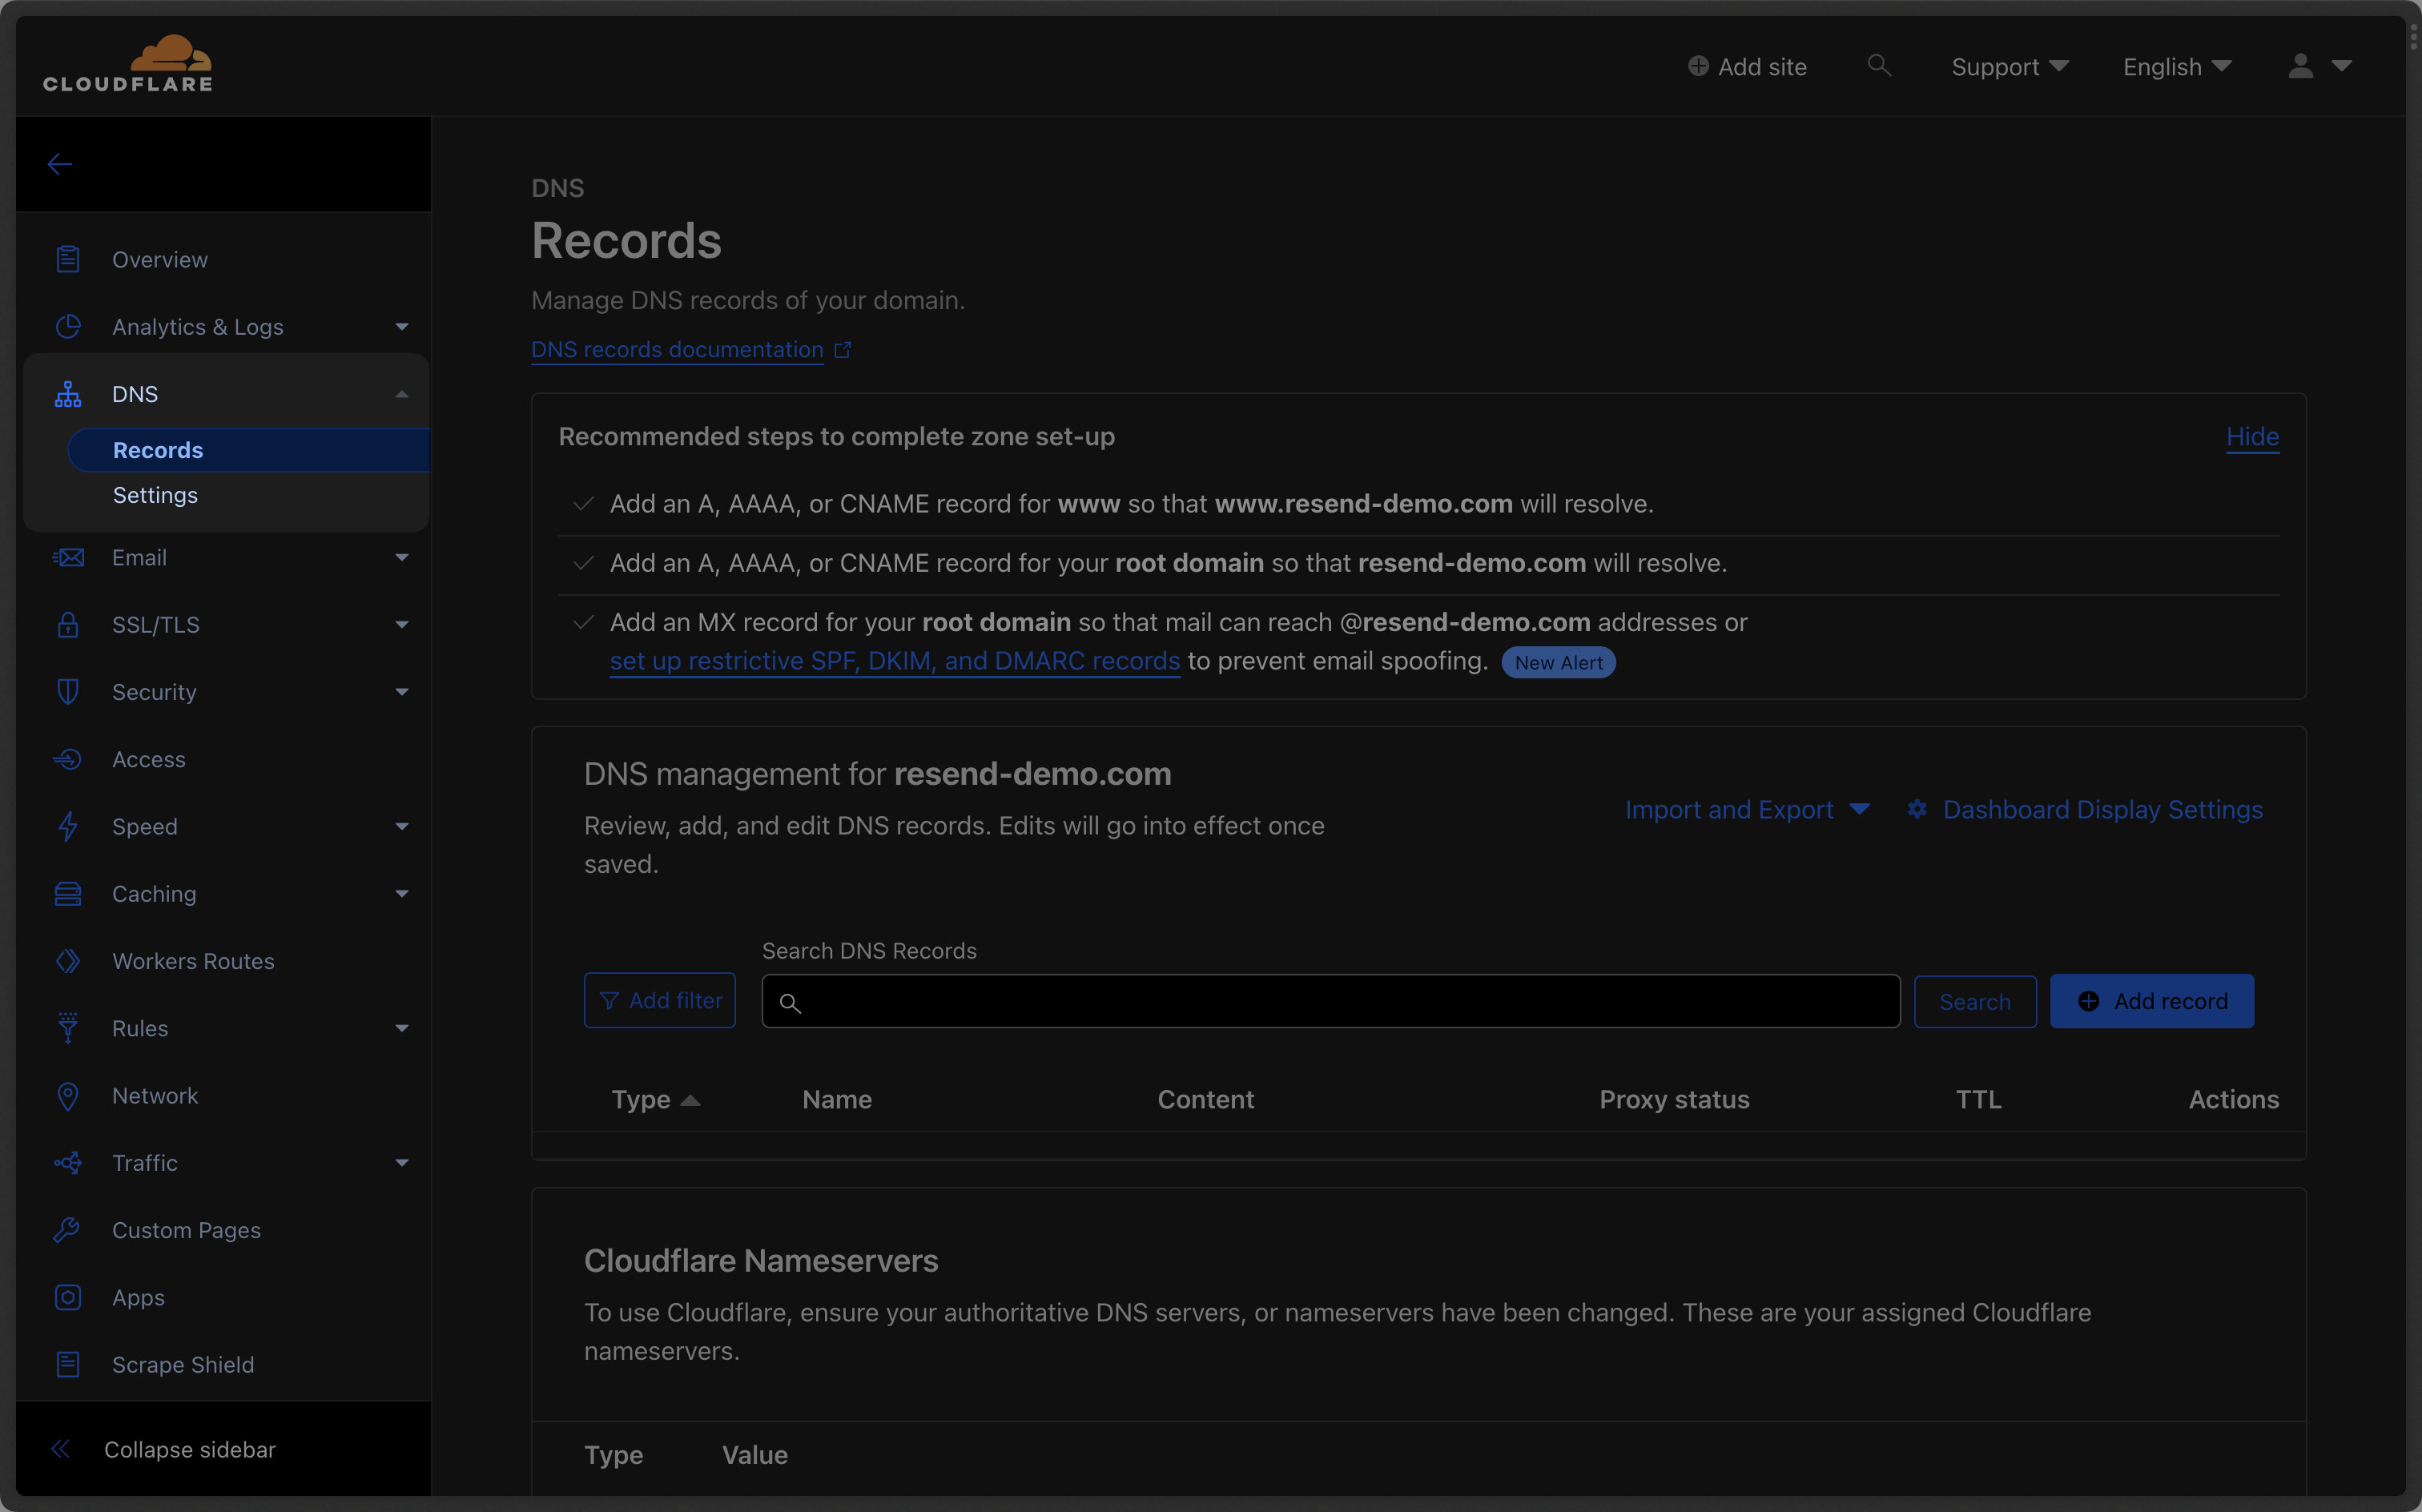 ### Add MX SPF Record
Click "Add Record" on Cloudflare:
1. Set the Type to `MX`.
2. Type `send` for the `Name` of the record.
3. Copy the MX Value from Resend into the `Mail Server` field.
4. Use the default `Auto` for `TTL`.
5. Add `10` for the `Priority`.
6. Select `Save`.
### Add MX SPF Record
Click "Add Record" on Cloudflare:
1. Set the Type to `MX`.
2. Type `send` for the `Name` of the record.
3. Copy the MX Value from Resend into the `Mail Server` field.
4. Use the default `Auto` for `TTL`.
5. Add `10` for the `Priority`.
6. Select `Save`.
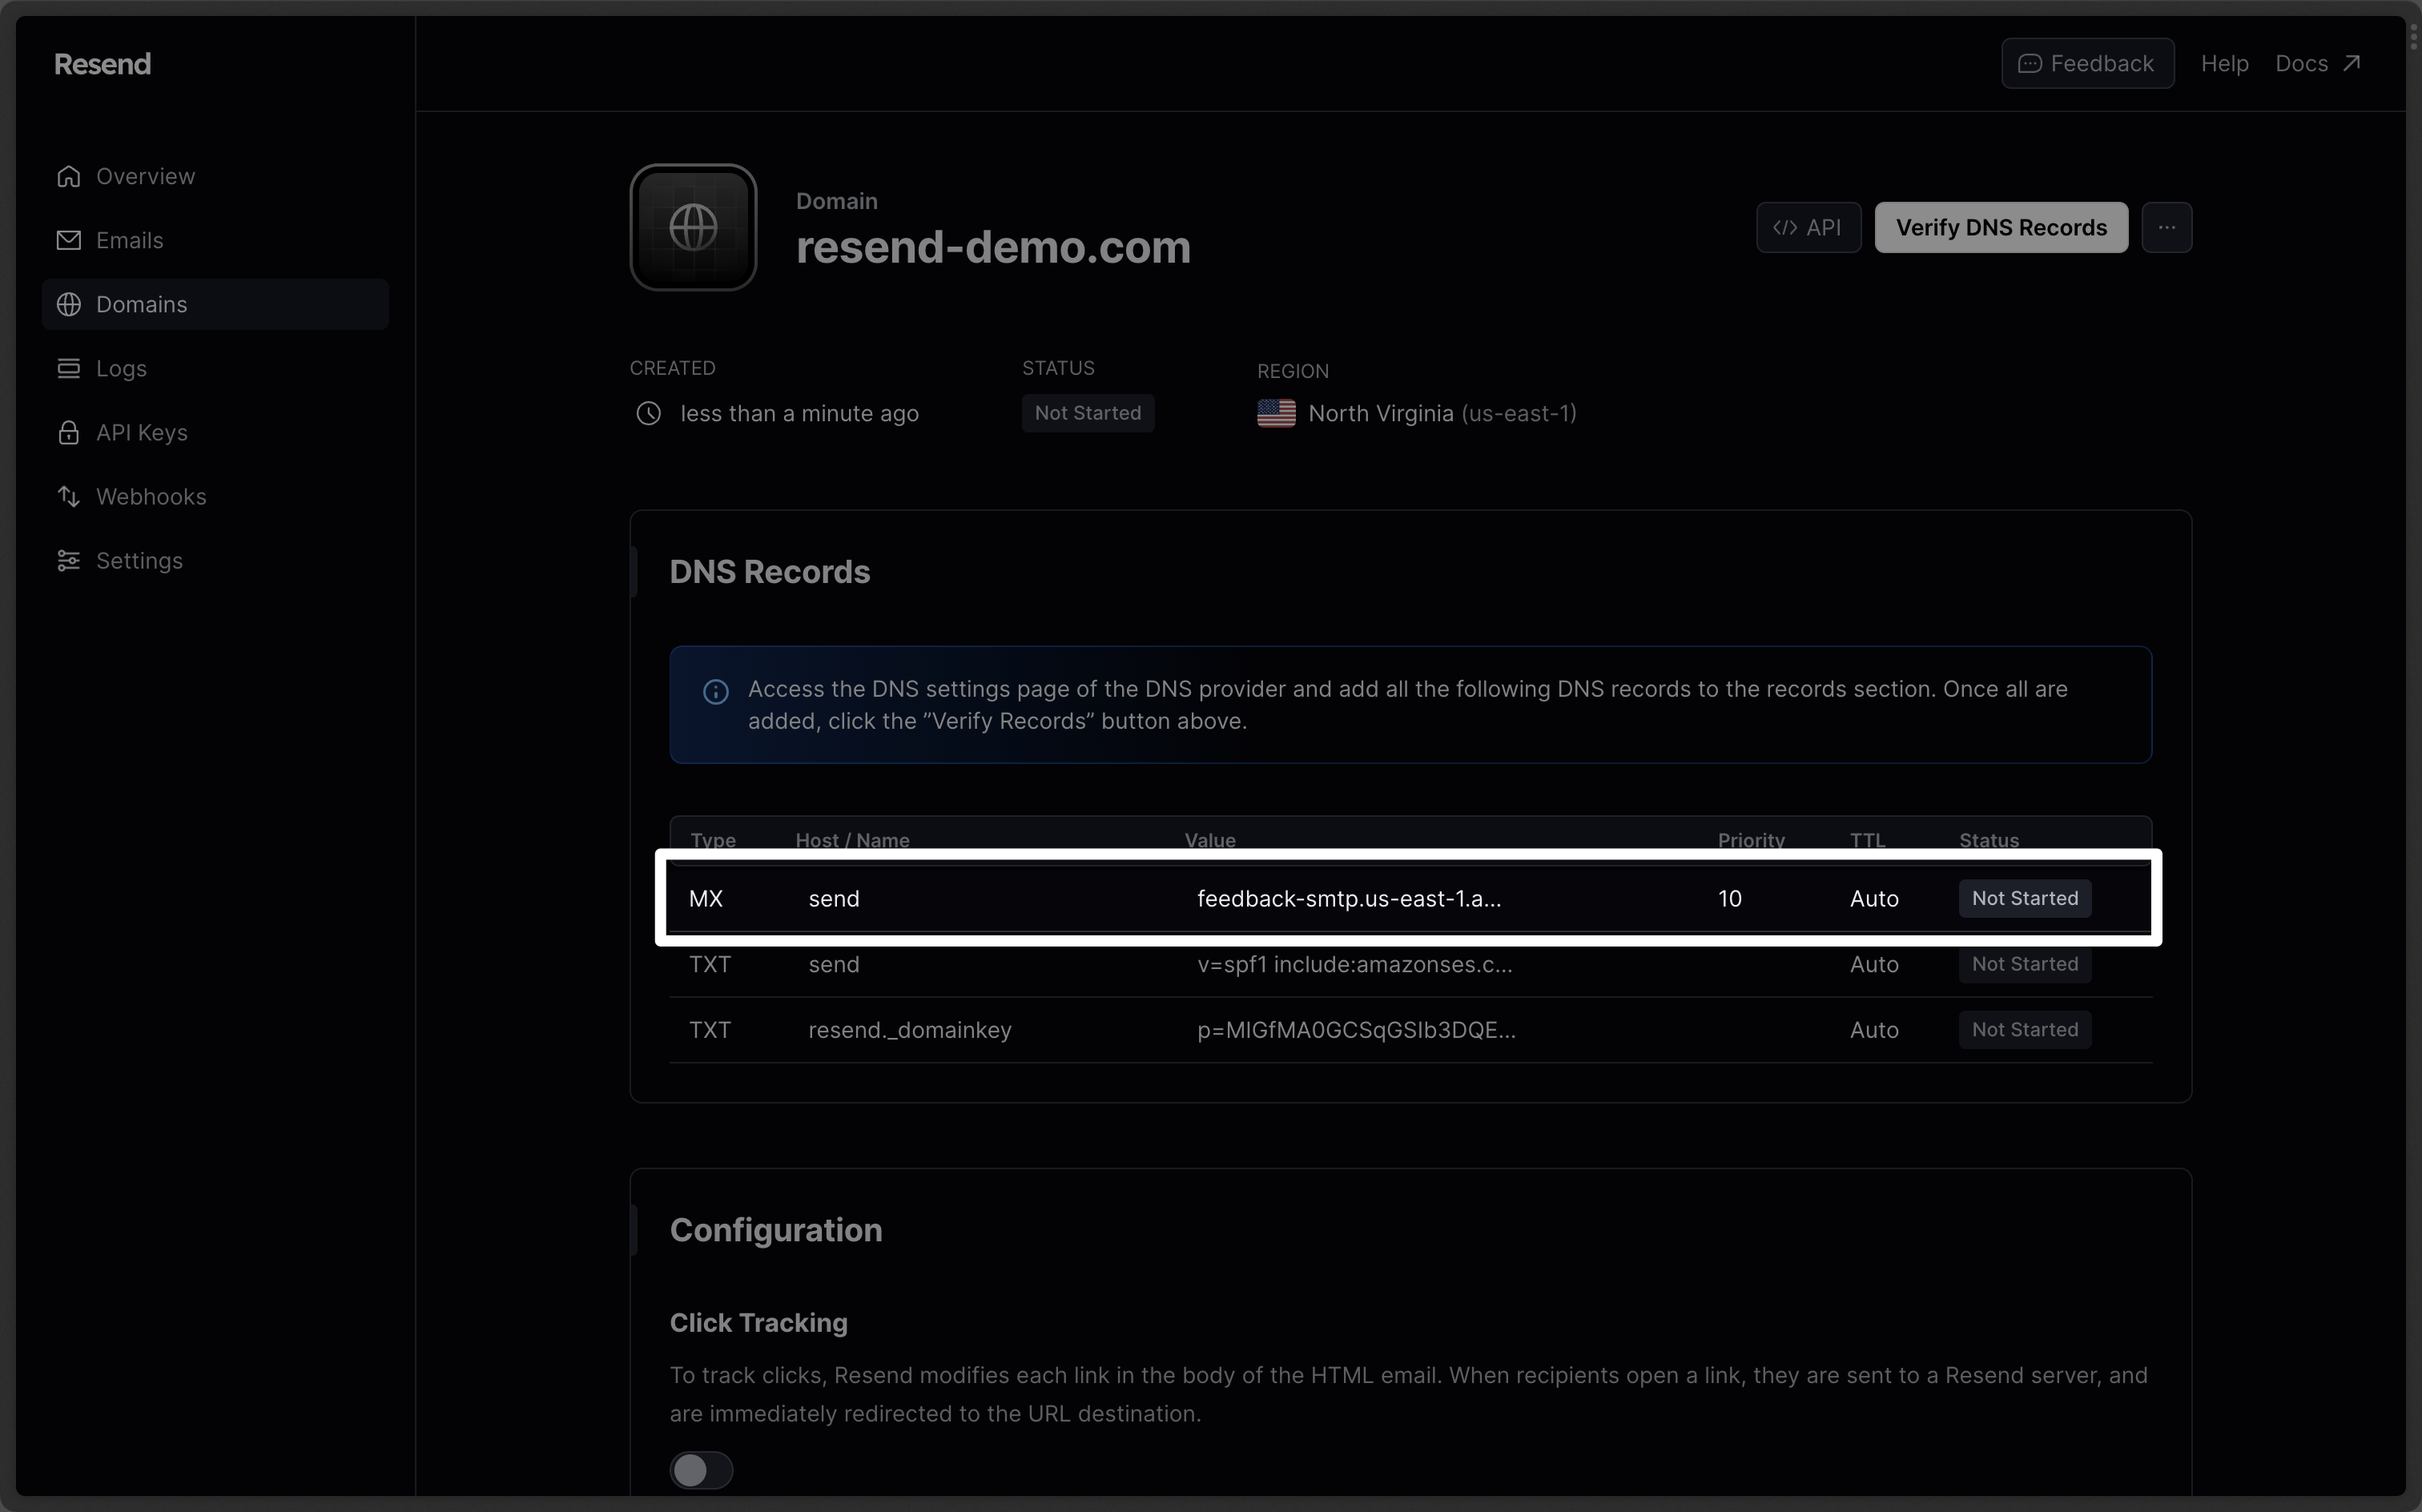
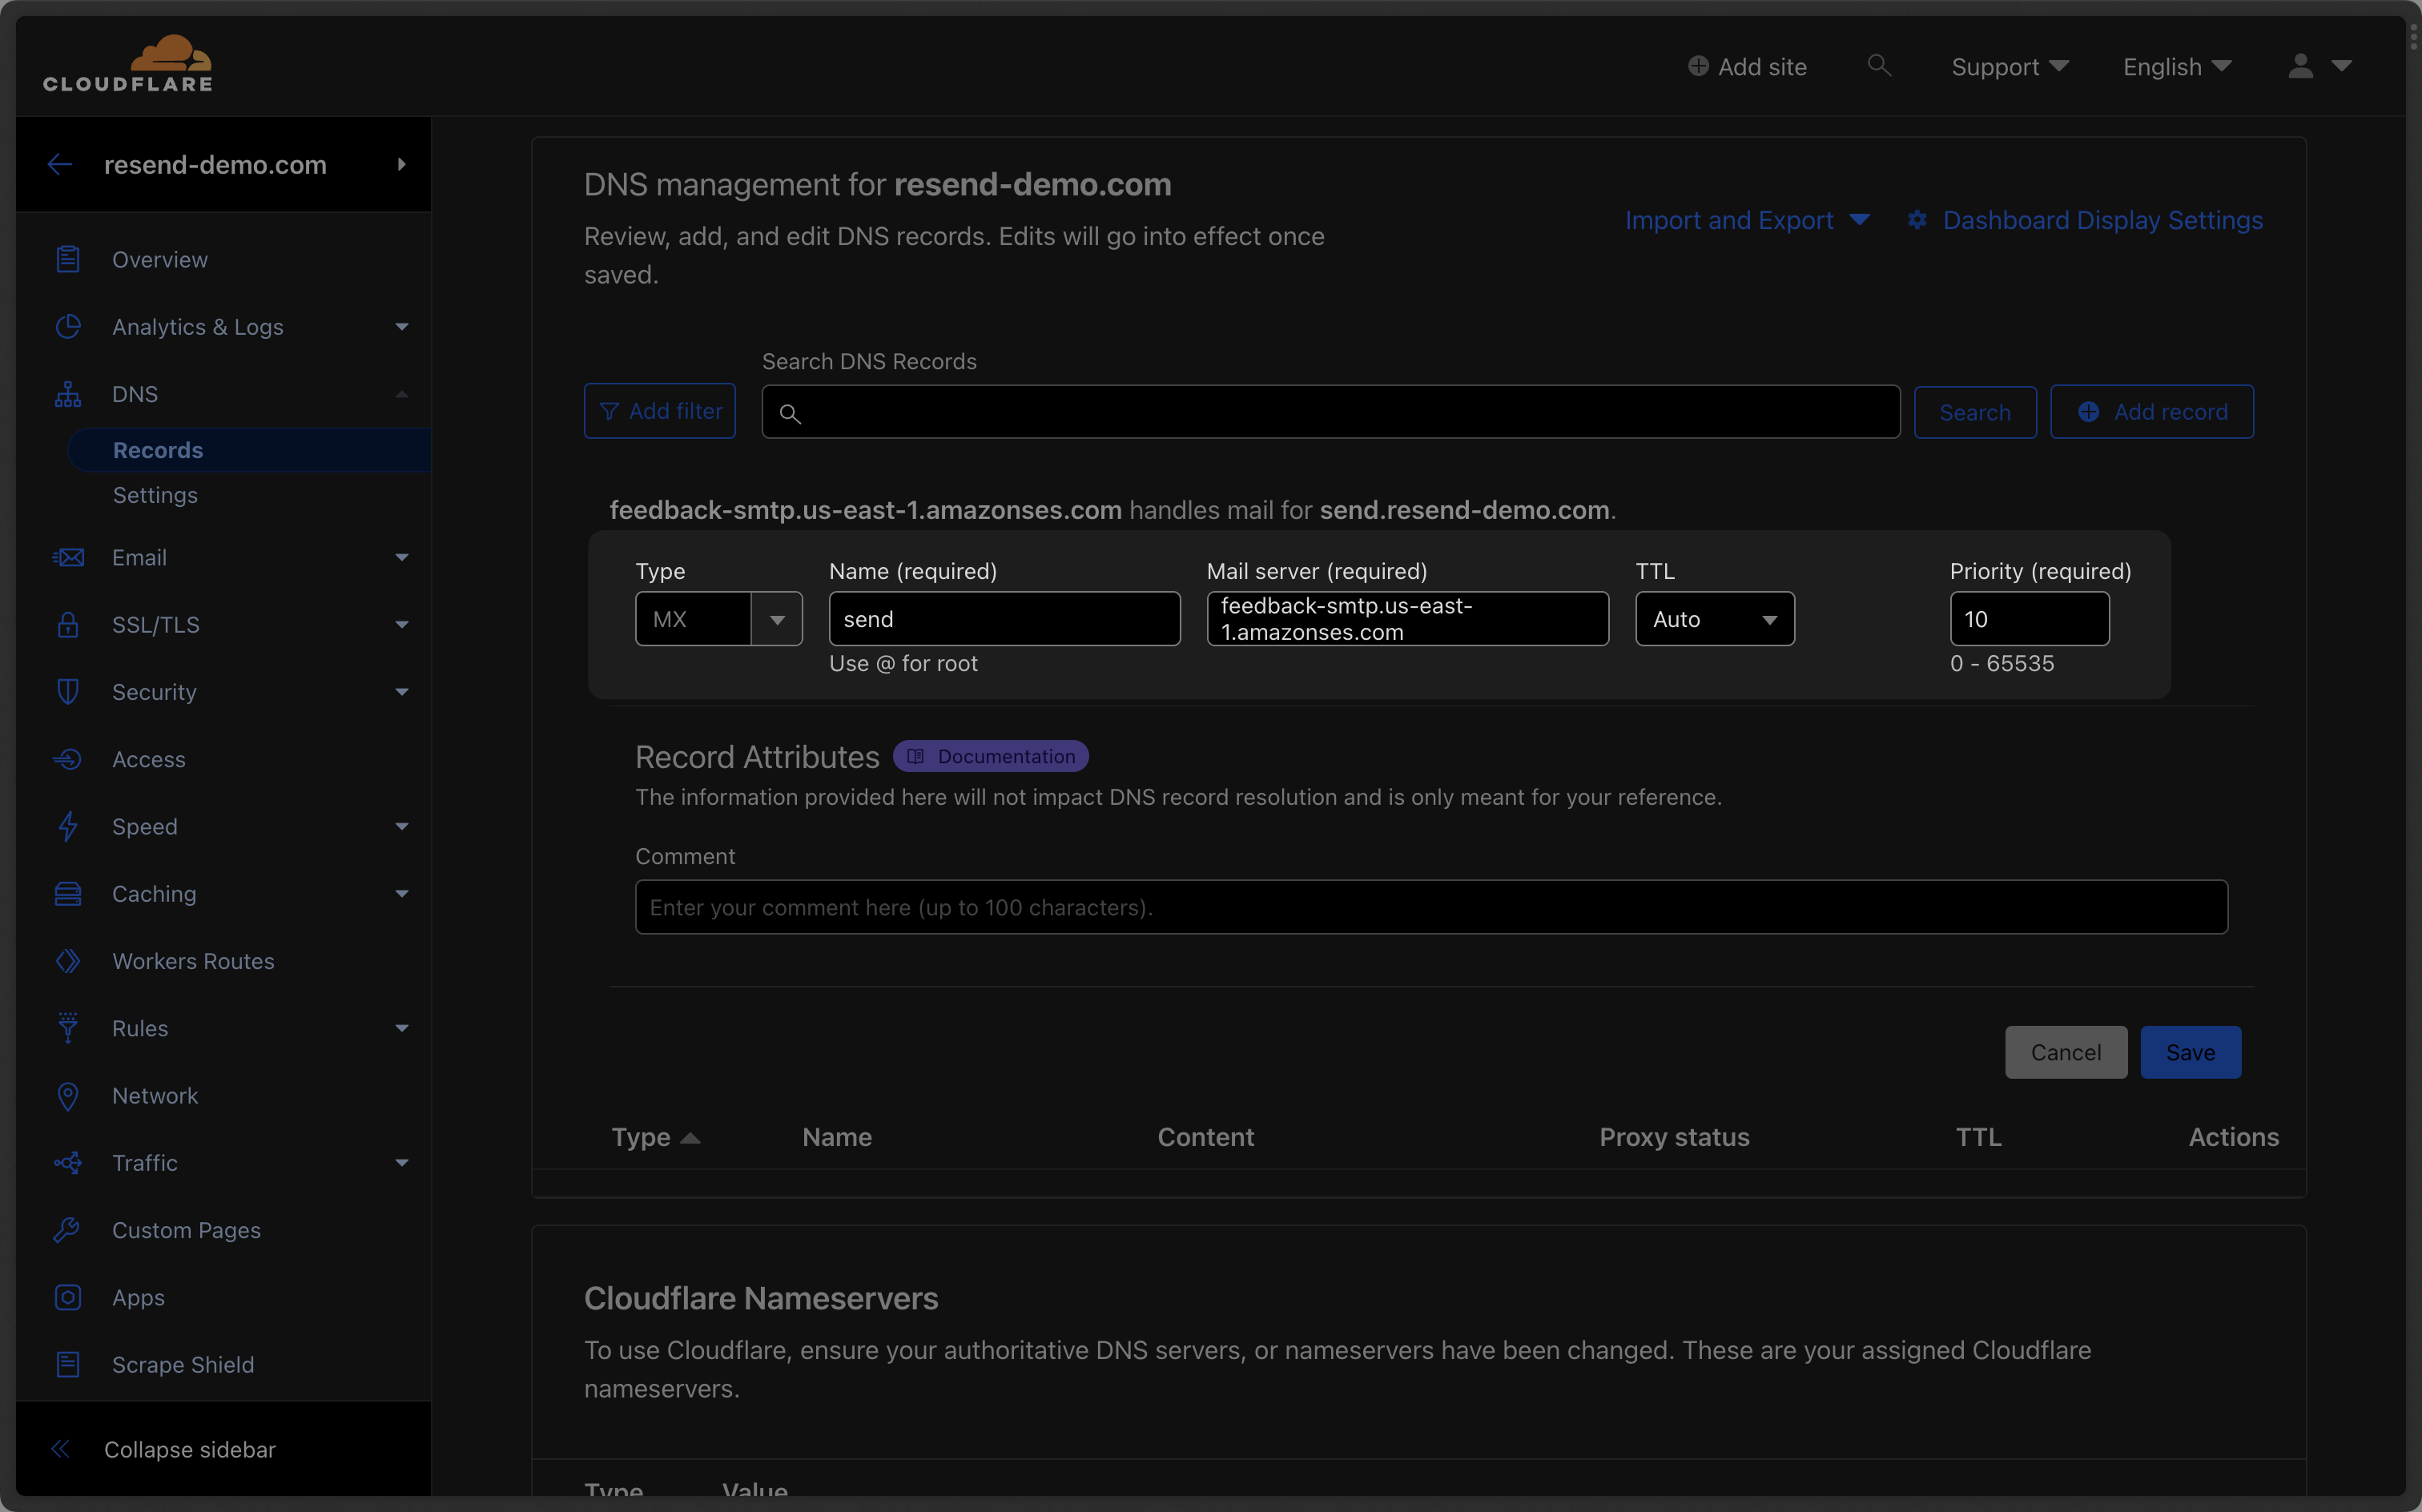 Below is a mapping of the record fields from Resend to Cloudflare:
| Cloudflare | Resend | Example Value |
| ----------- | -------- | --------------------------------------- |
| Type | Type | `MX` |
| Name | Name | `send` |
| Mail Server | Value | `feedback-smtp.us-east-1.amazonses.com` |
| Priority | Priority | `10` |
Below is a mapping of the record fields from Resend to Cloudflare:
| Cloudflare | Resend | Example Value |
| ----------- | -------- | --------------------------------------- |
| Type | Type | `MX` |
| Name | Name | `send` |
| Mail Server | Value | `feedback-smtp.us-east-1.amazonses.com` |
| Priority | Priority | `10` |
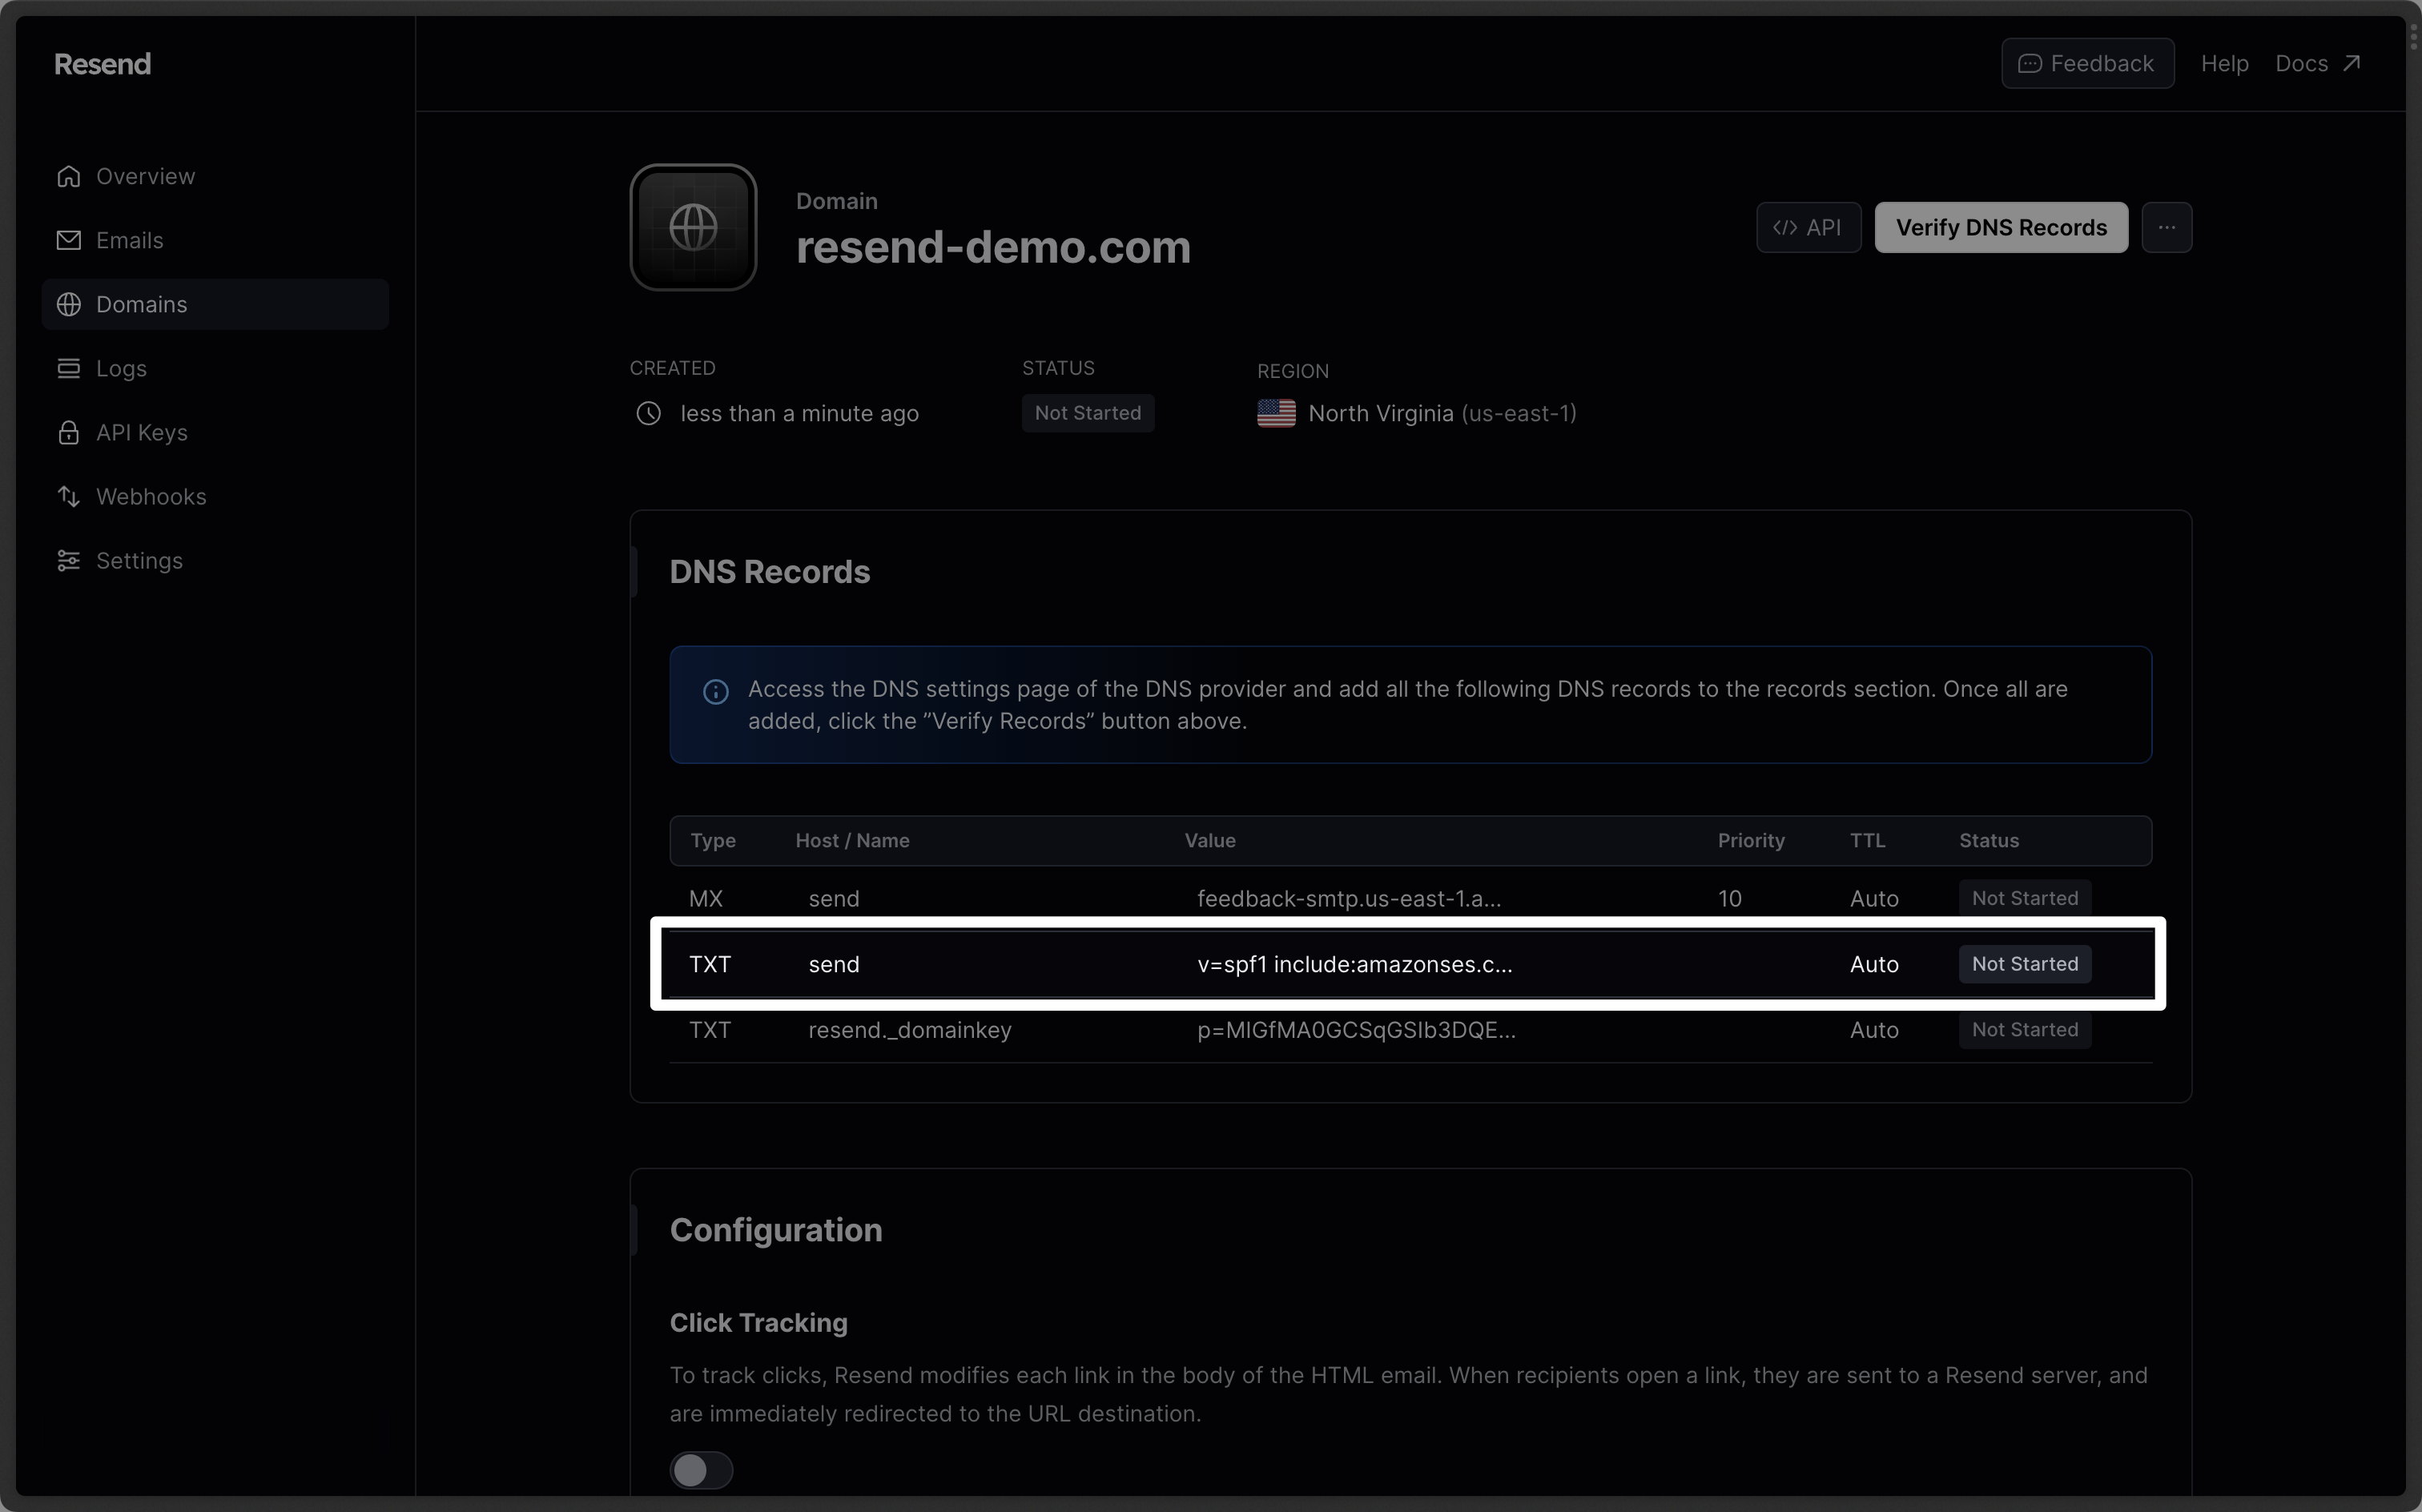
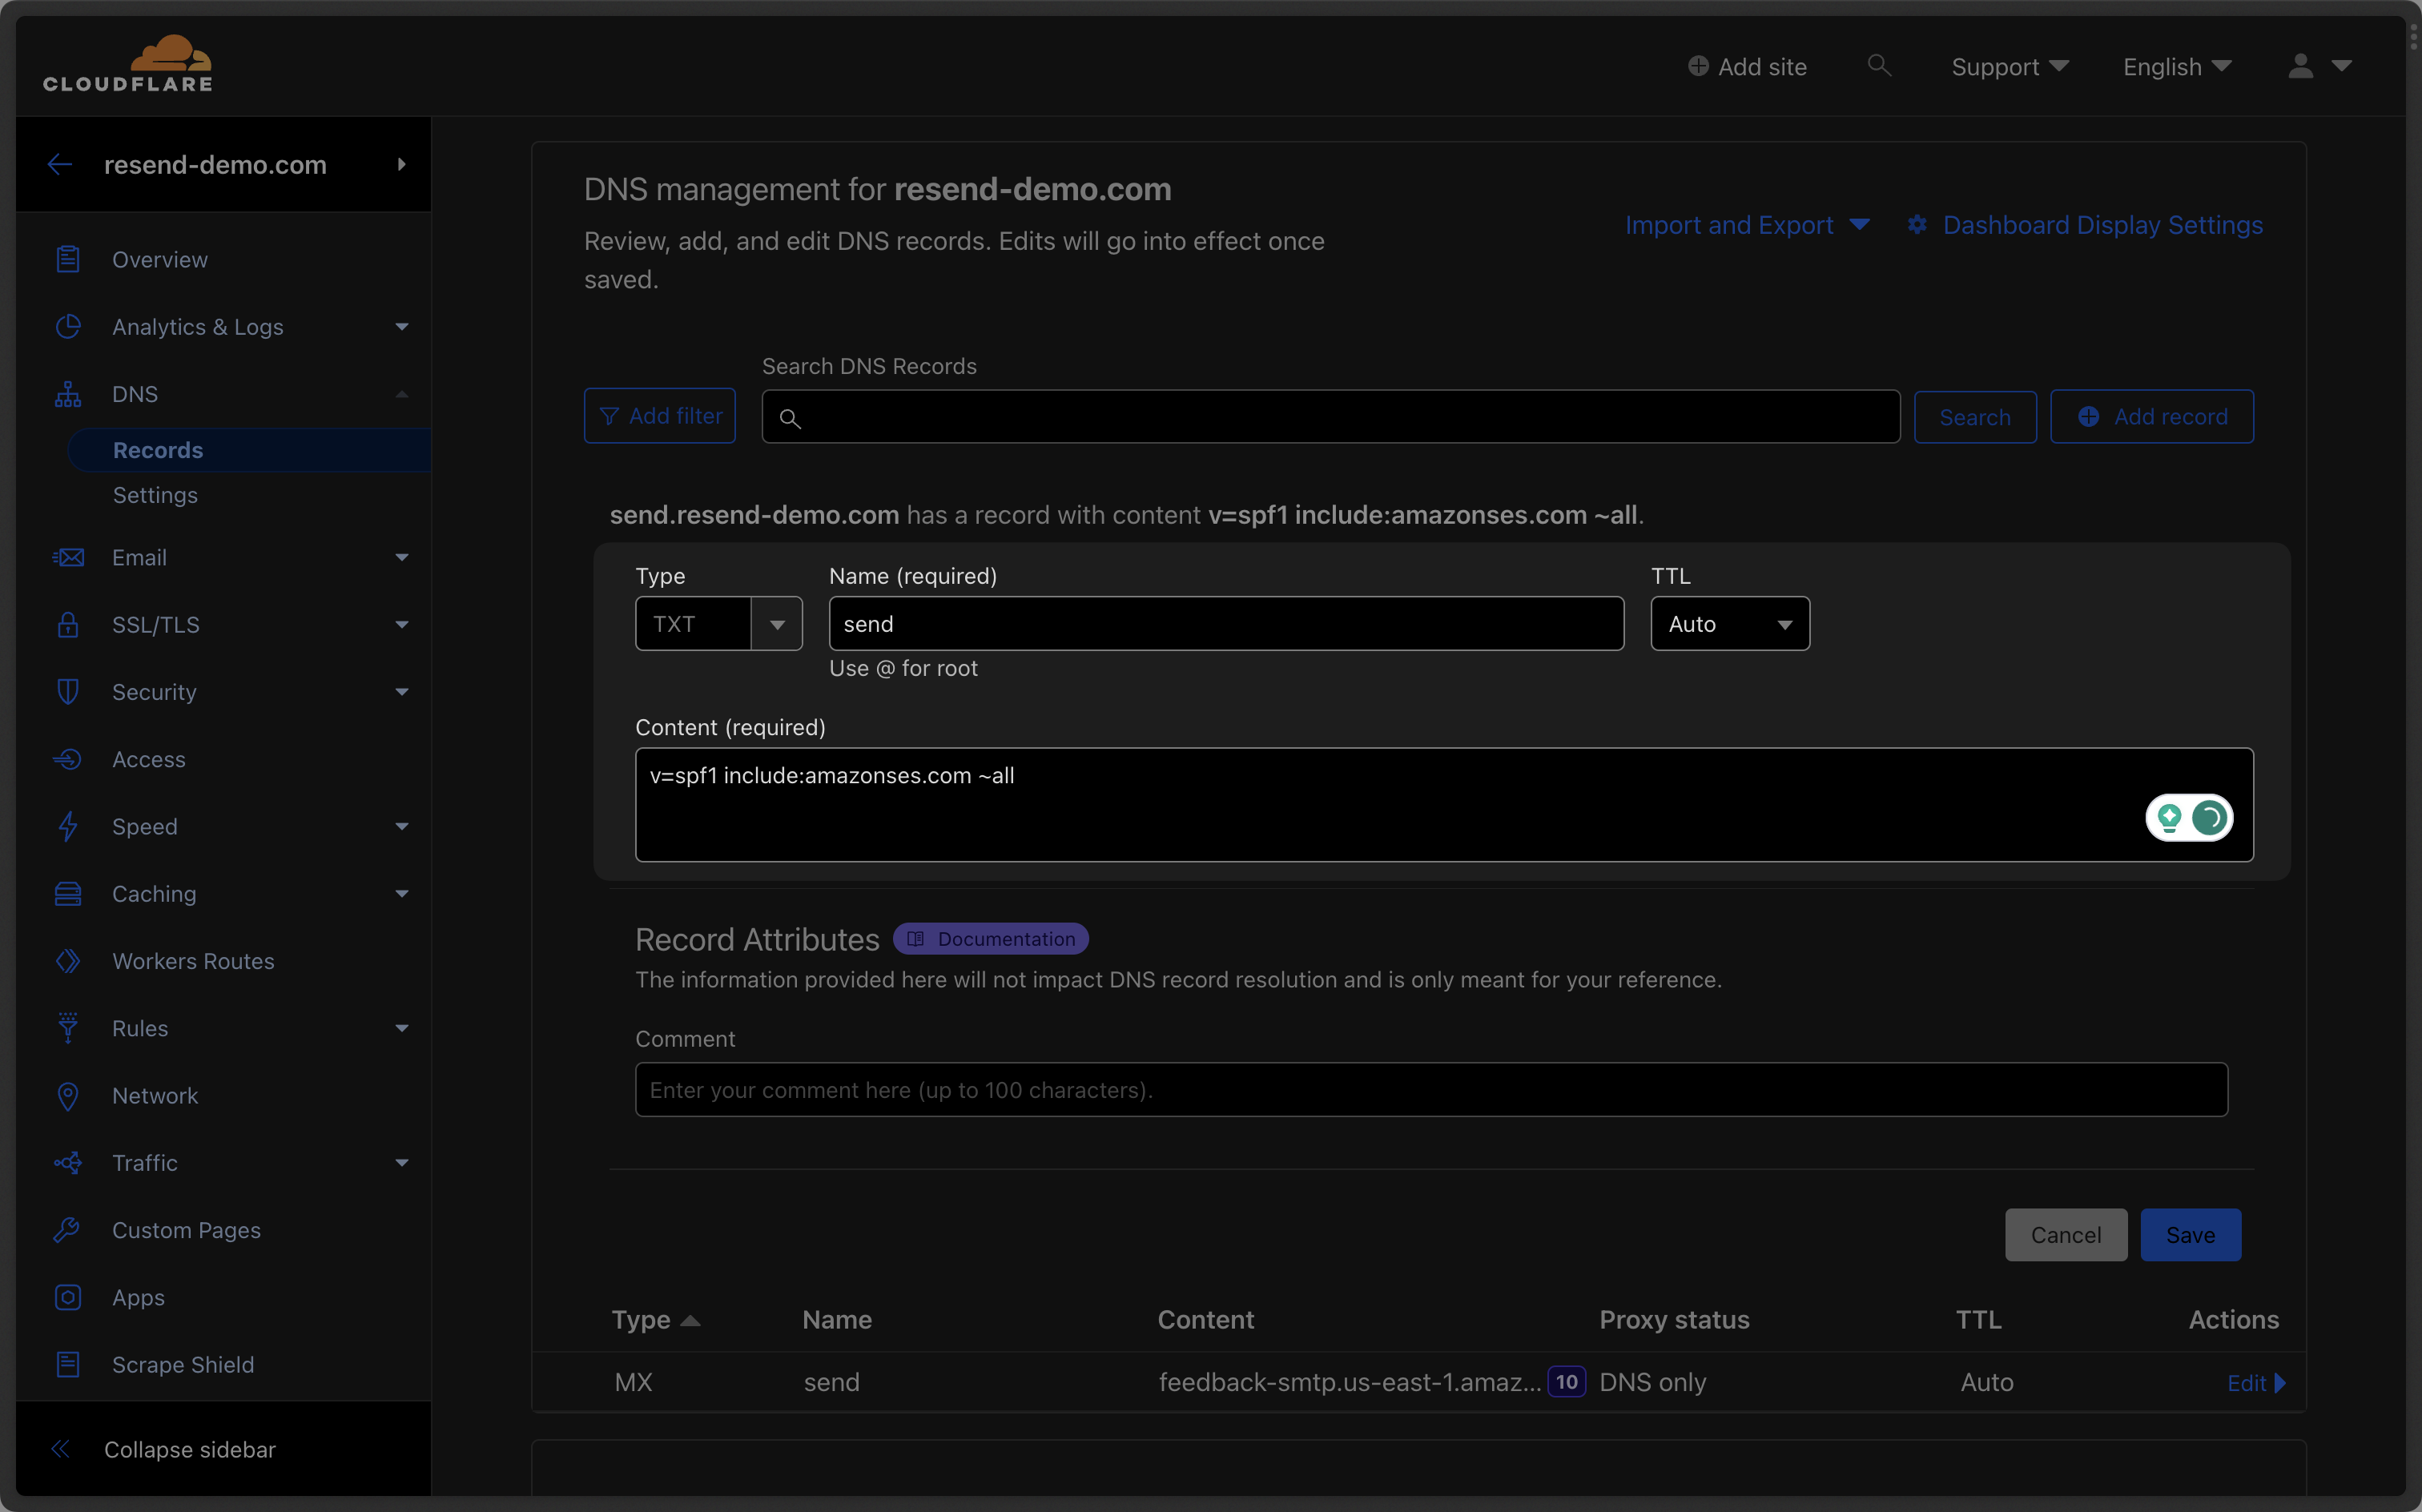 Below is a mapping of the record fields from Resend to Cloudflare:
| Cloudflare | Resend | Example Value |
| ---------- | ------- | ------------------------------------- |
| Type | Type | `TXT` |
| Name | Name | `send` |
| Content | Content | `"v=spf1 include:amazonses.com ~all"` |
| TTL | - | `Auto` |
Below is a mapping of the record fields from Resend to Cloudflare:
| Cloudflare | Resend | Example Value |
| ---------- | ------- | ------------------------------------- |
| Type | Type | `TXT` |
| Name | Name | `send` |
| Content | Content | `"v=spf1 include:amazonses.com ~all"` |
| TTL | - | `Auto` |
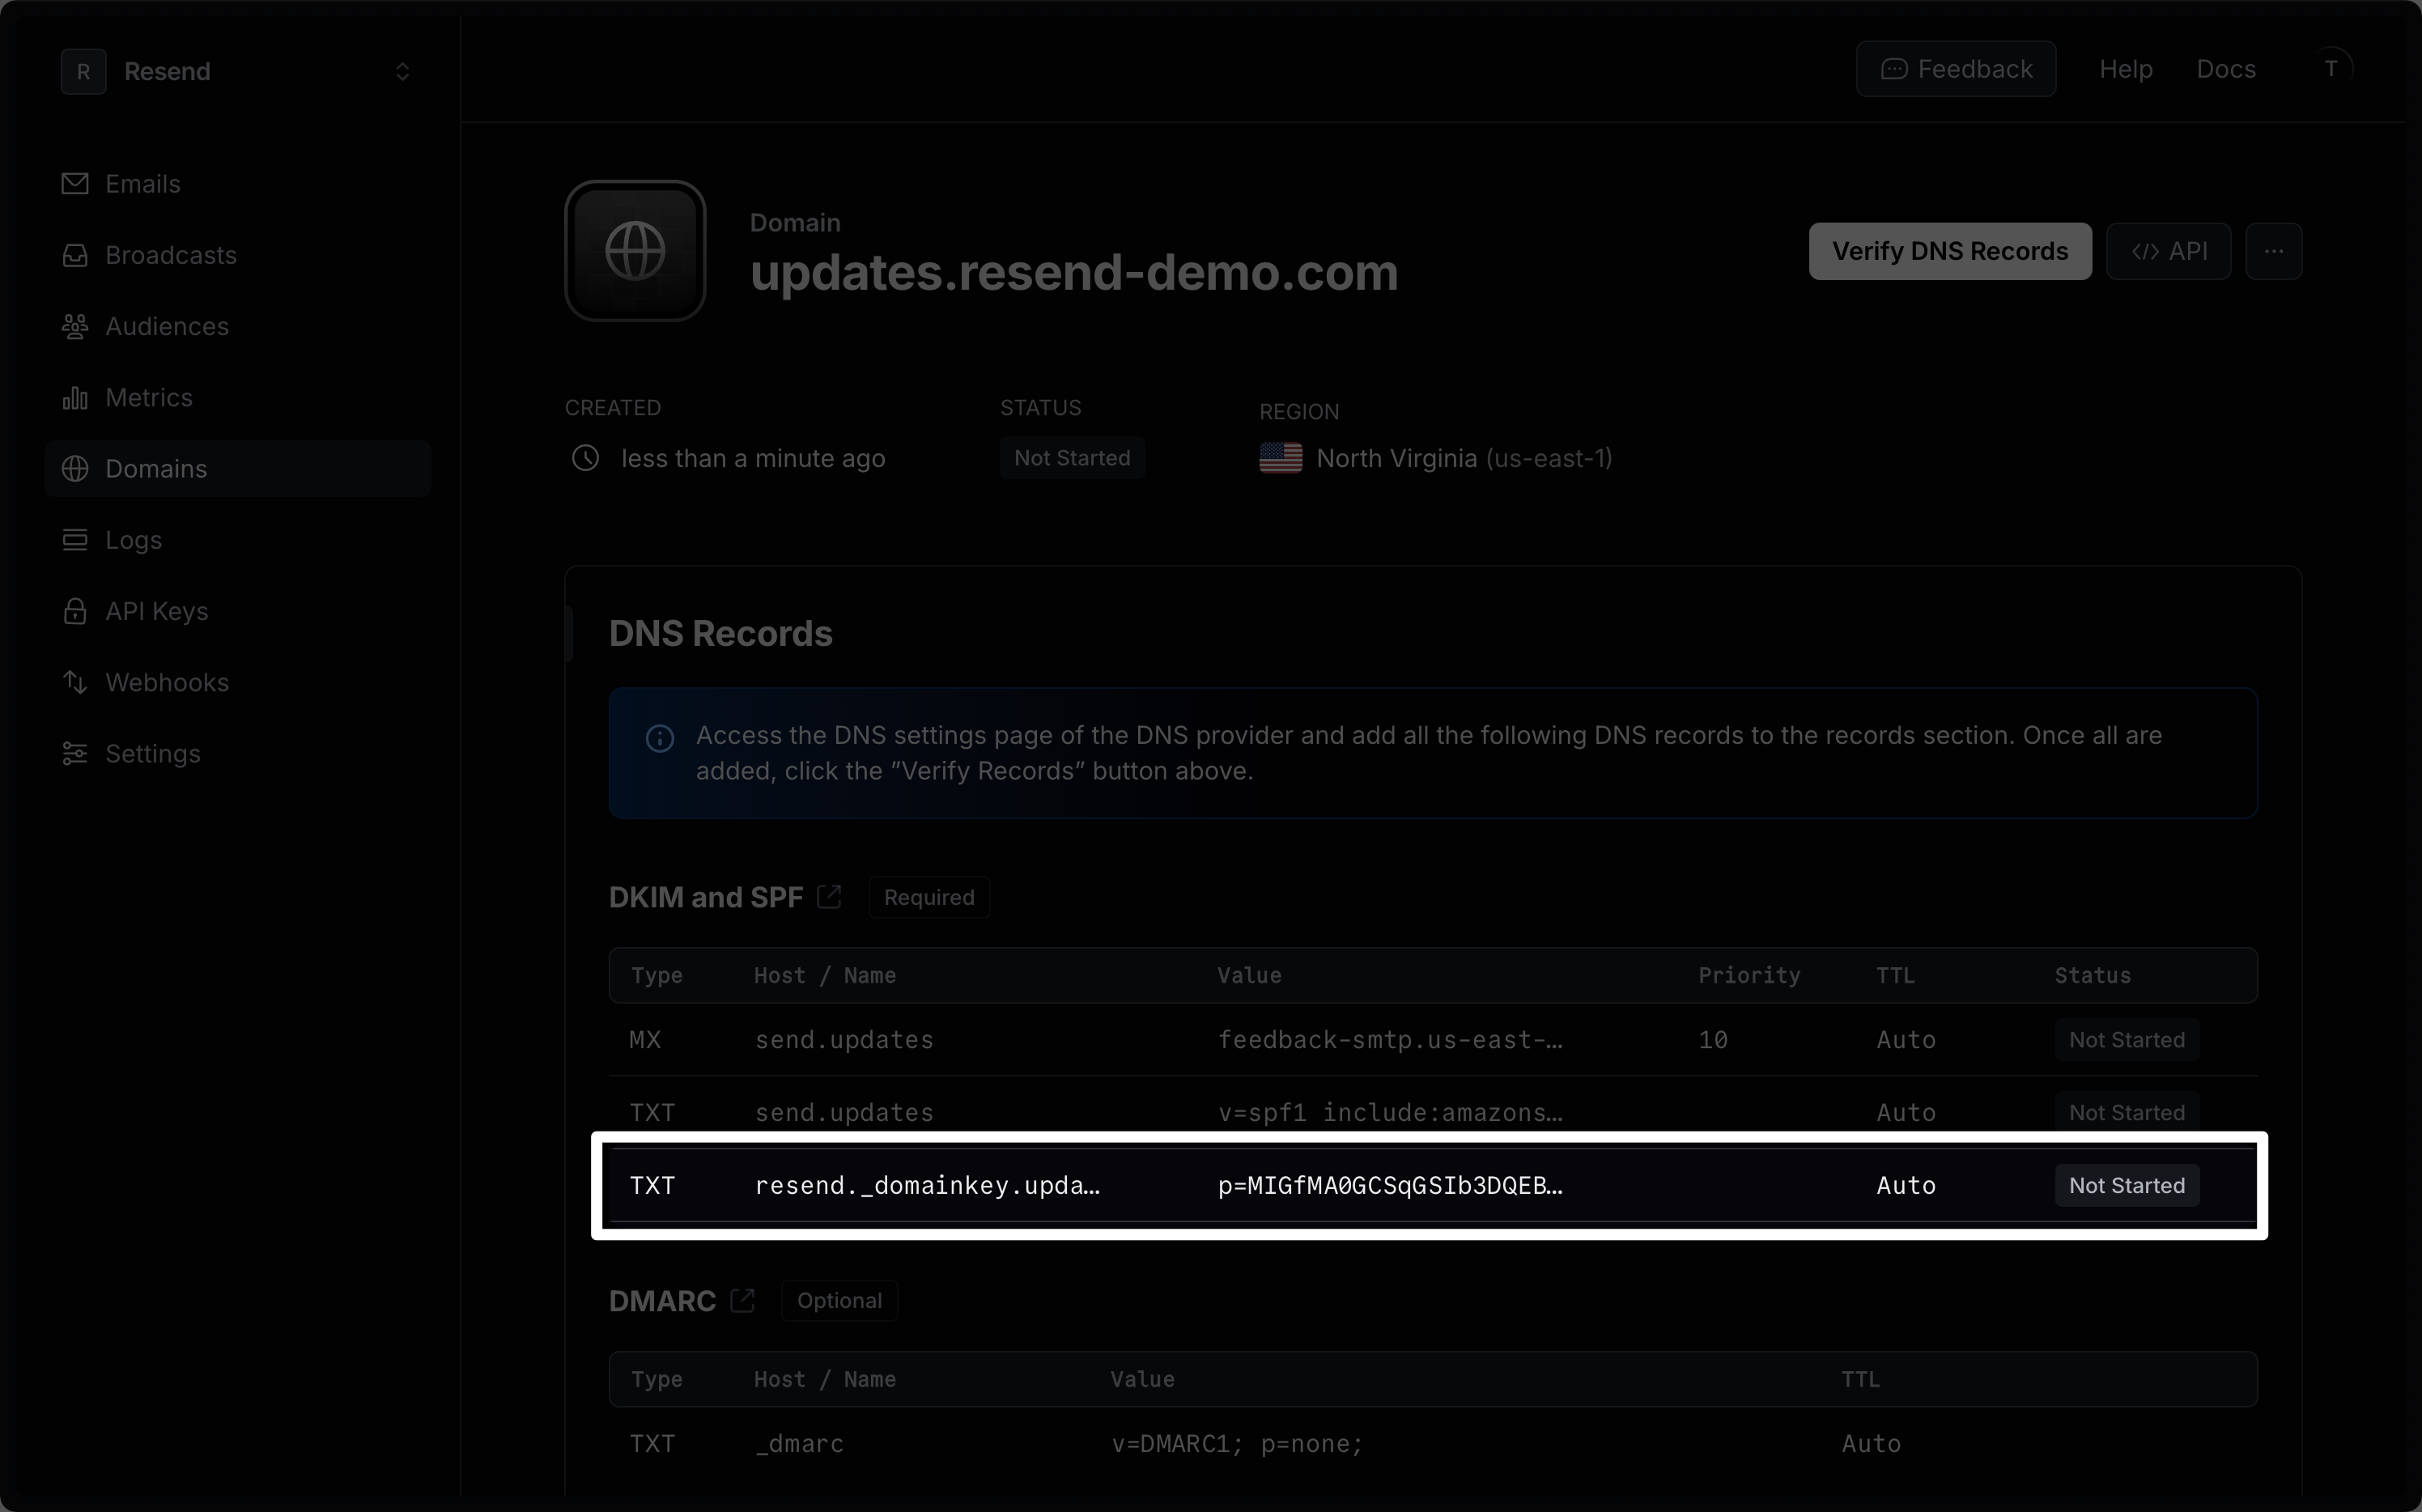
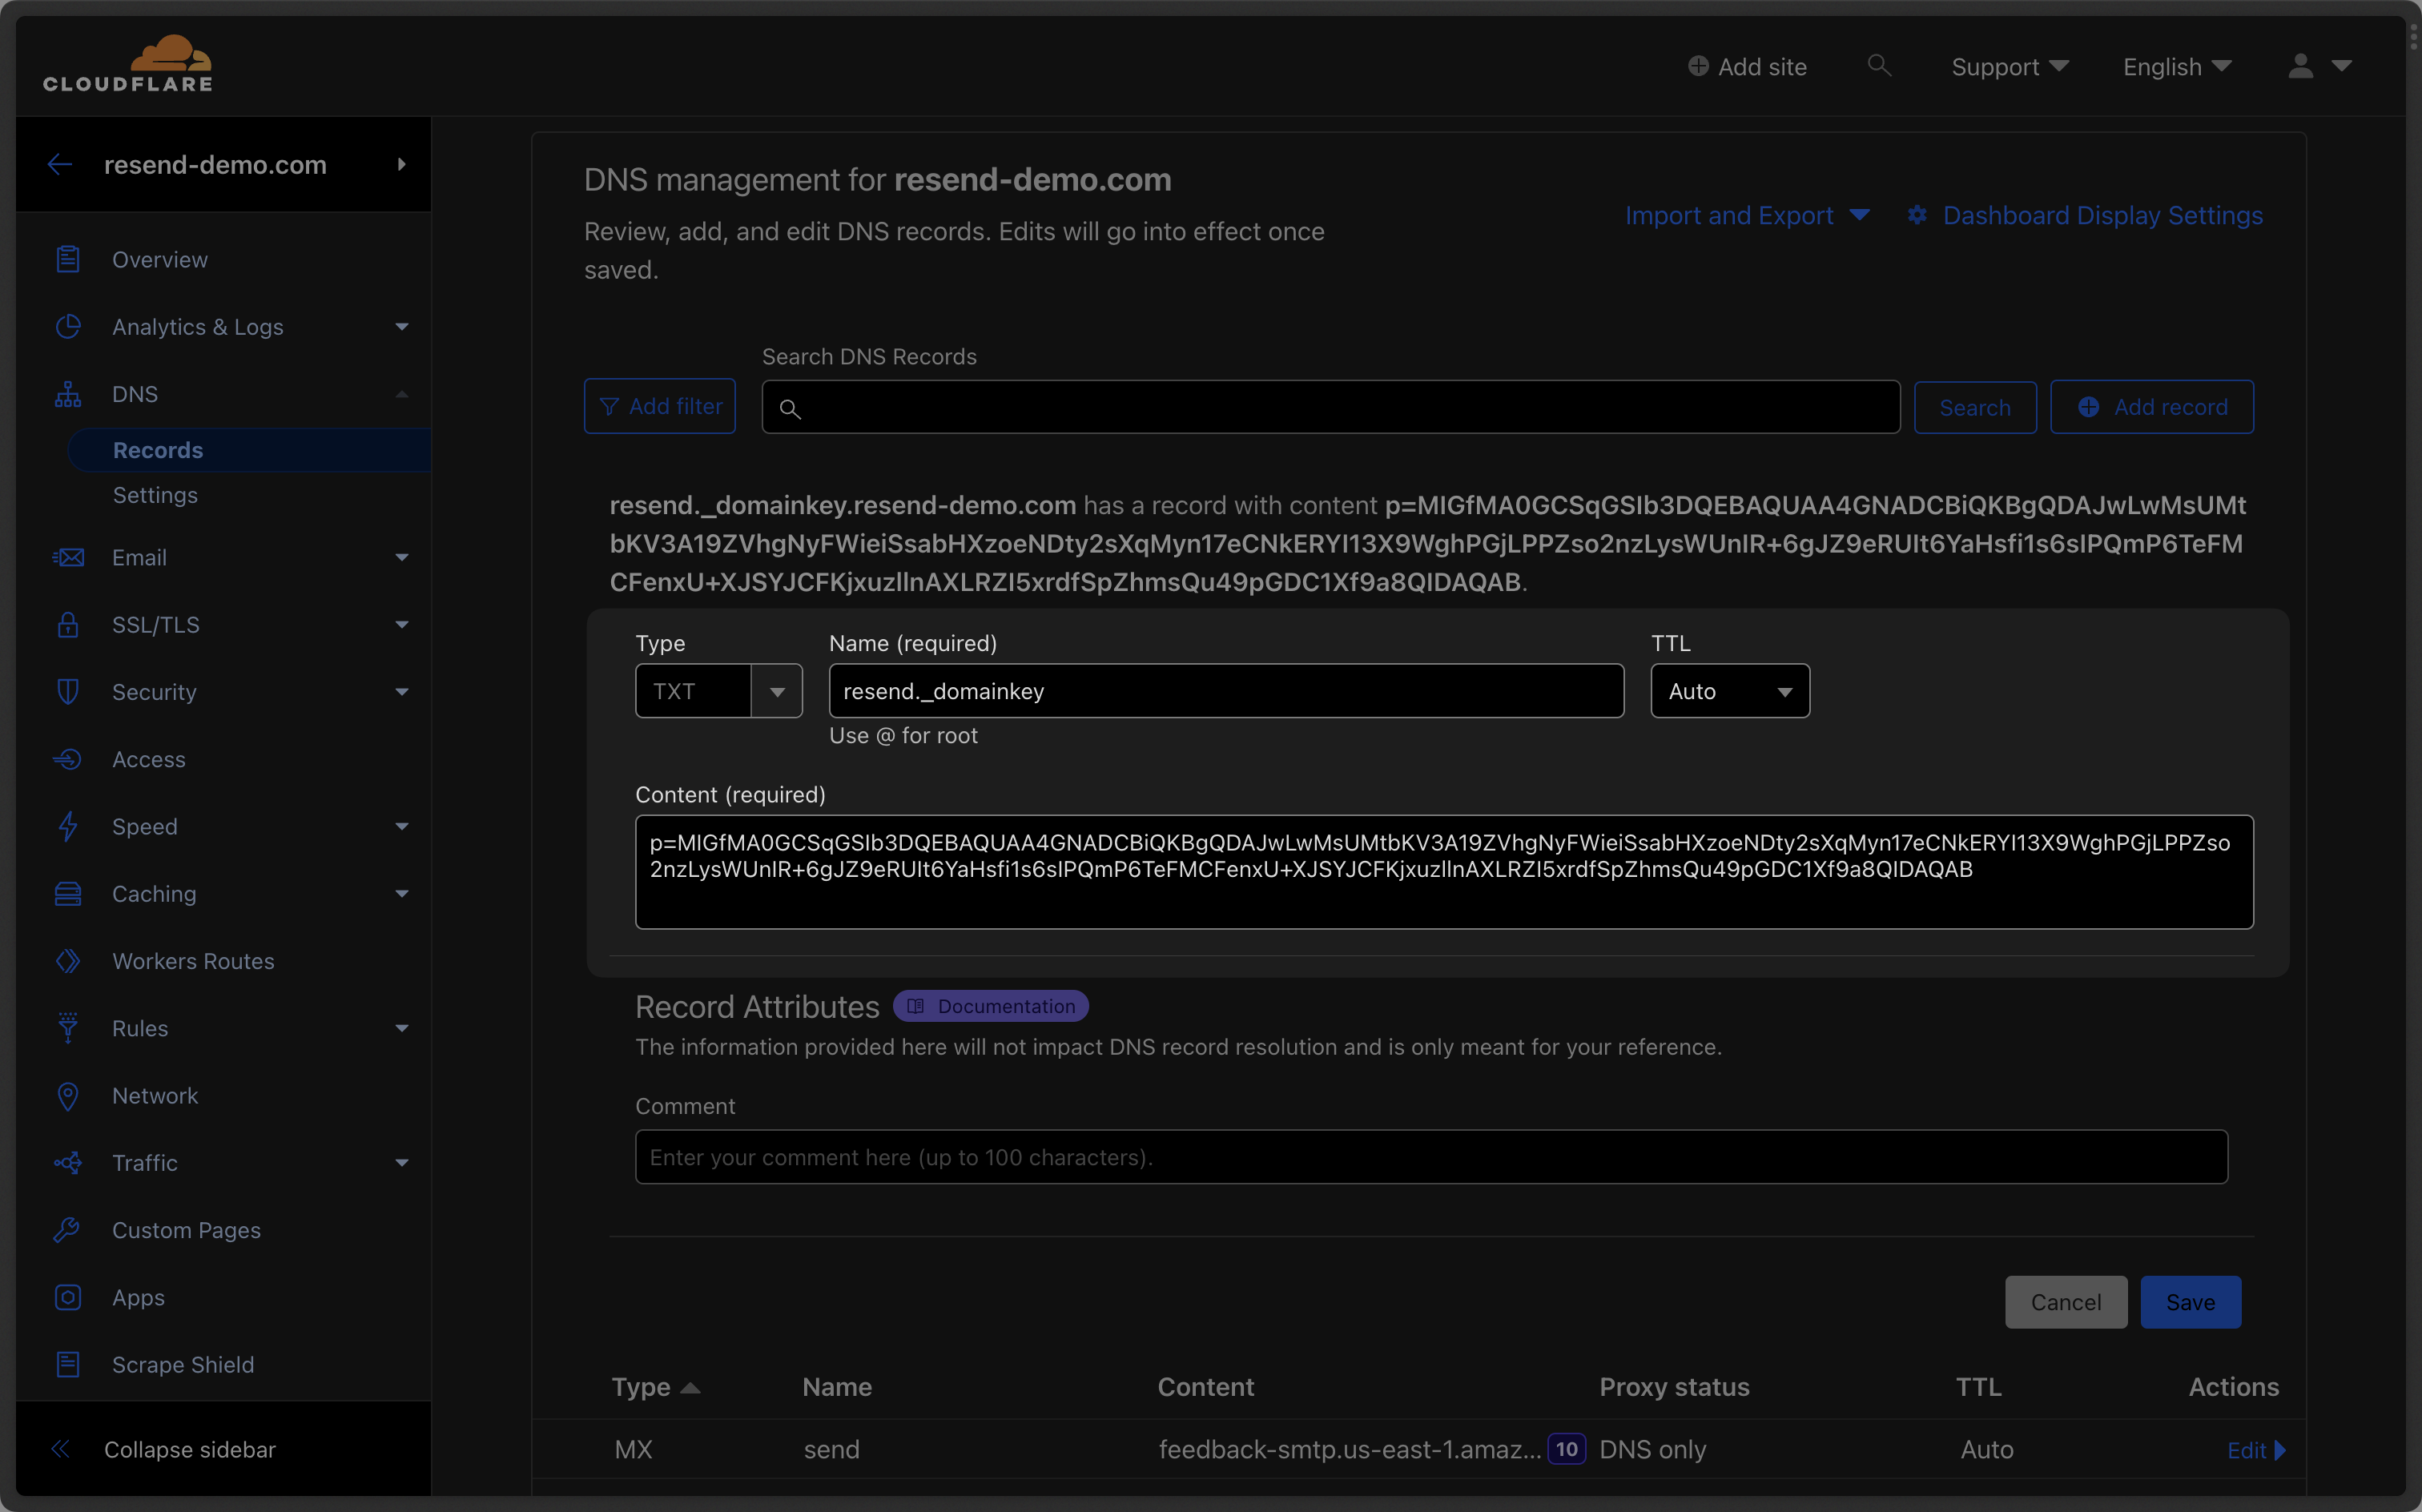 Below is a mapping of the record fields from Resend to Cloudflare:
| Cloudflare | Resend | Example Value |
| ------------ | ------ | ---------------------------- |
| Type | Type | `TXT` |
| Name | Name | `resend._domainkey` |
| Target | Value | `p=example_demain_key_value` |
| Proxy Status | - | `DNS Only (disabled)` |
| TTL | - | `Auto` |
Below is a mapping of the record fields from Resend to Cloudflare:
| Cloudflare | Resend | Example Value |
| ------------ | ------ | ---------------------------- |
| Type | Type | `TXT` |
| Name | Name | `resend._domainkey` |
| Target | Value | `p=example_demain_key_value` |
| Proxy Status | - | `DNS Only (disabled)` |
| TTL | - | `Auto` |
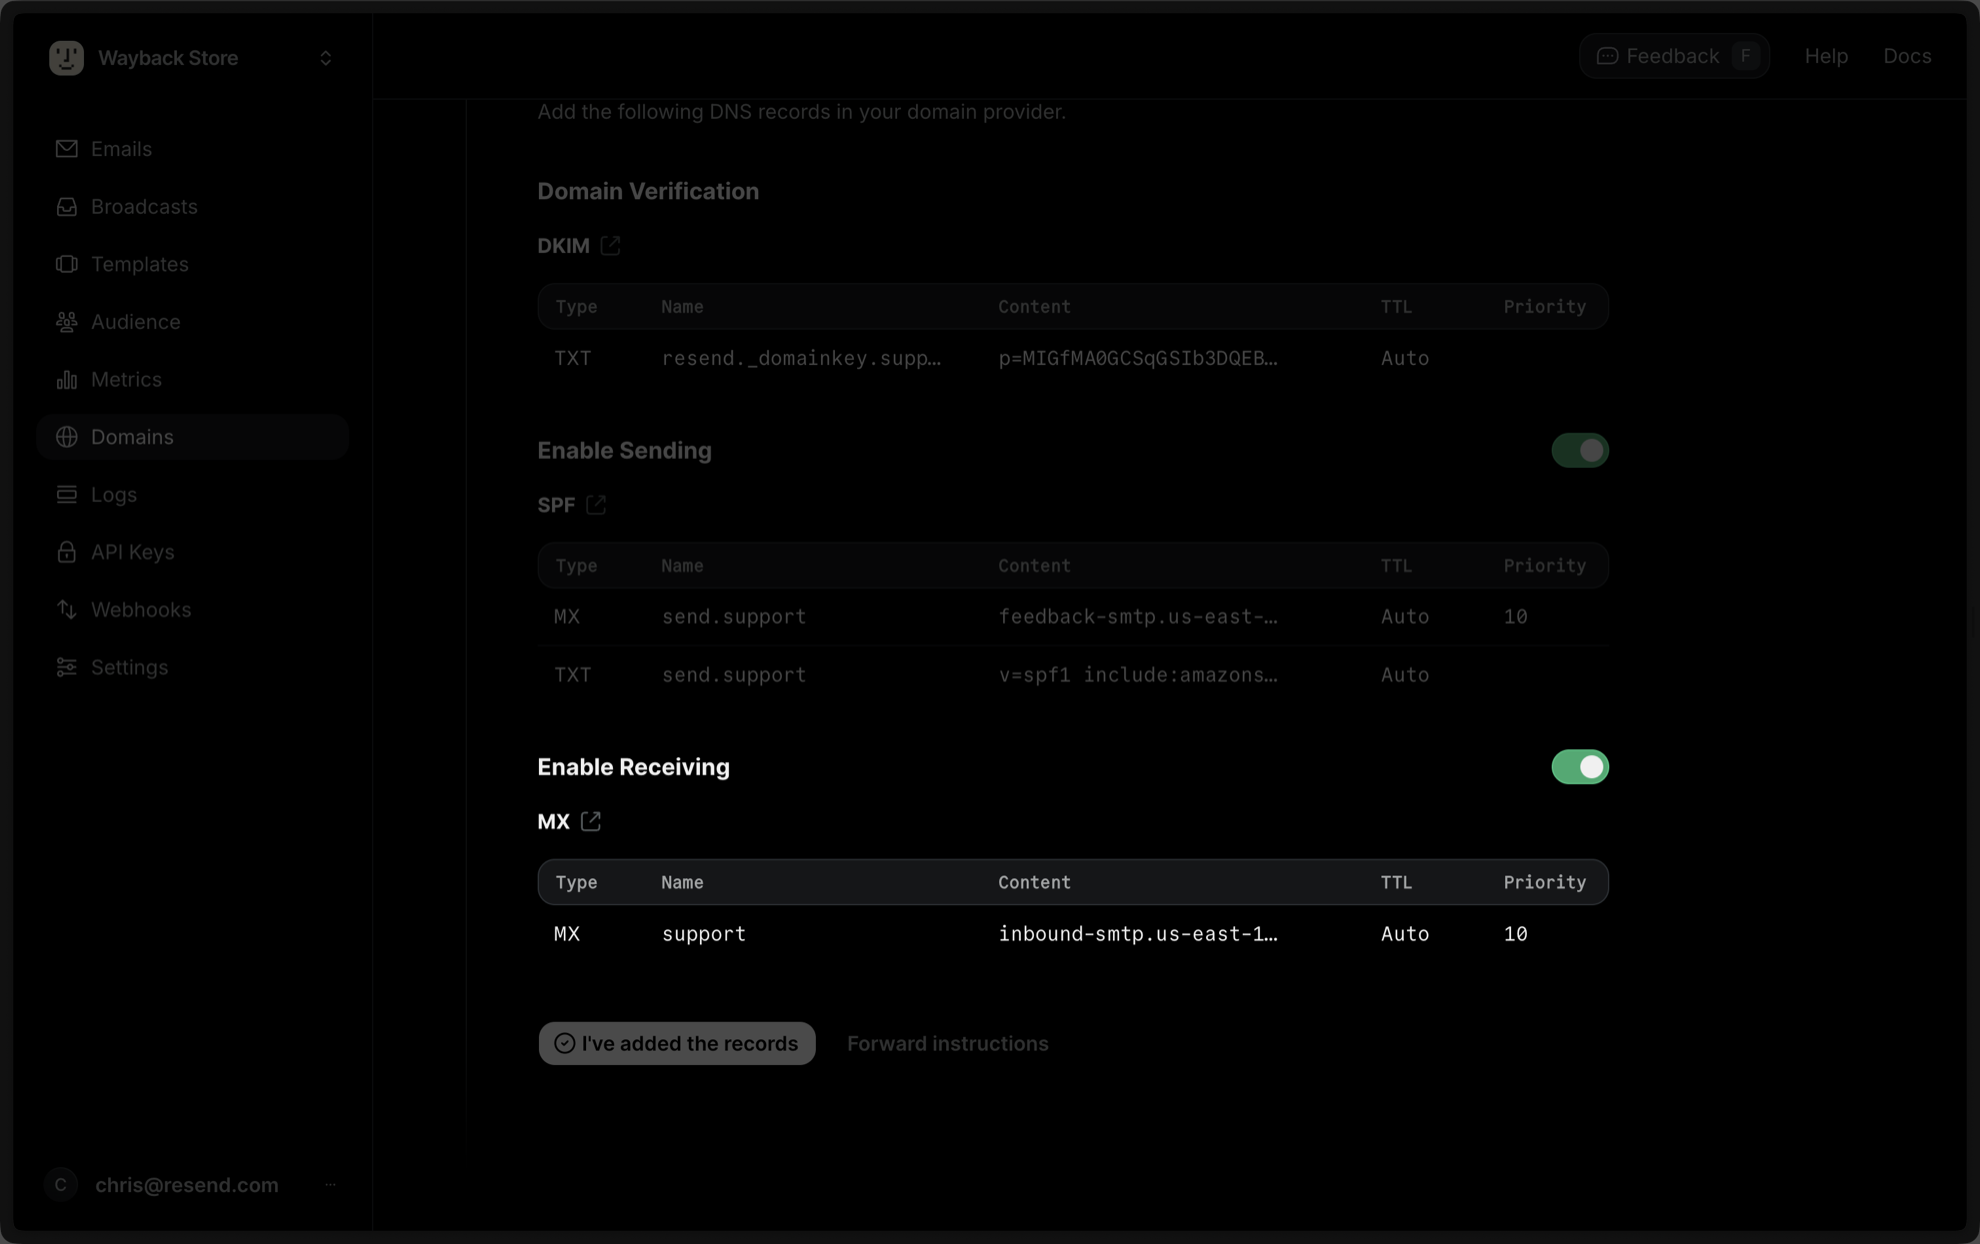
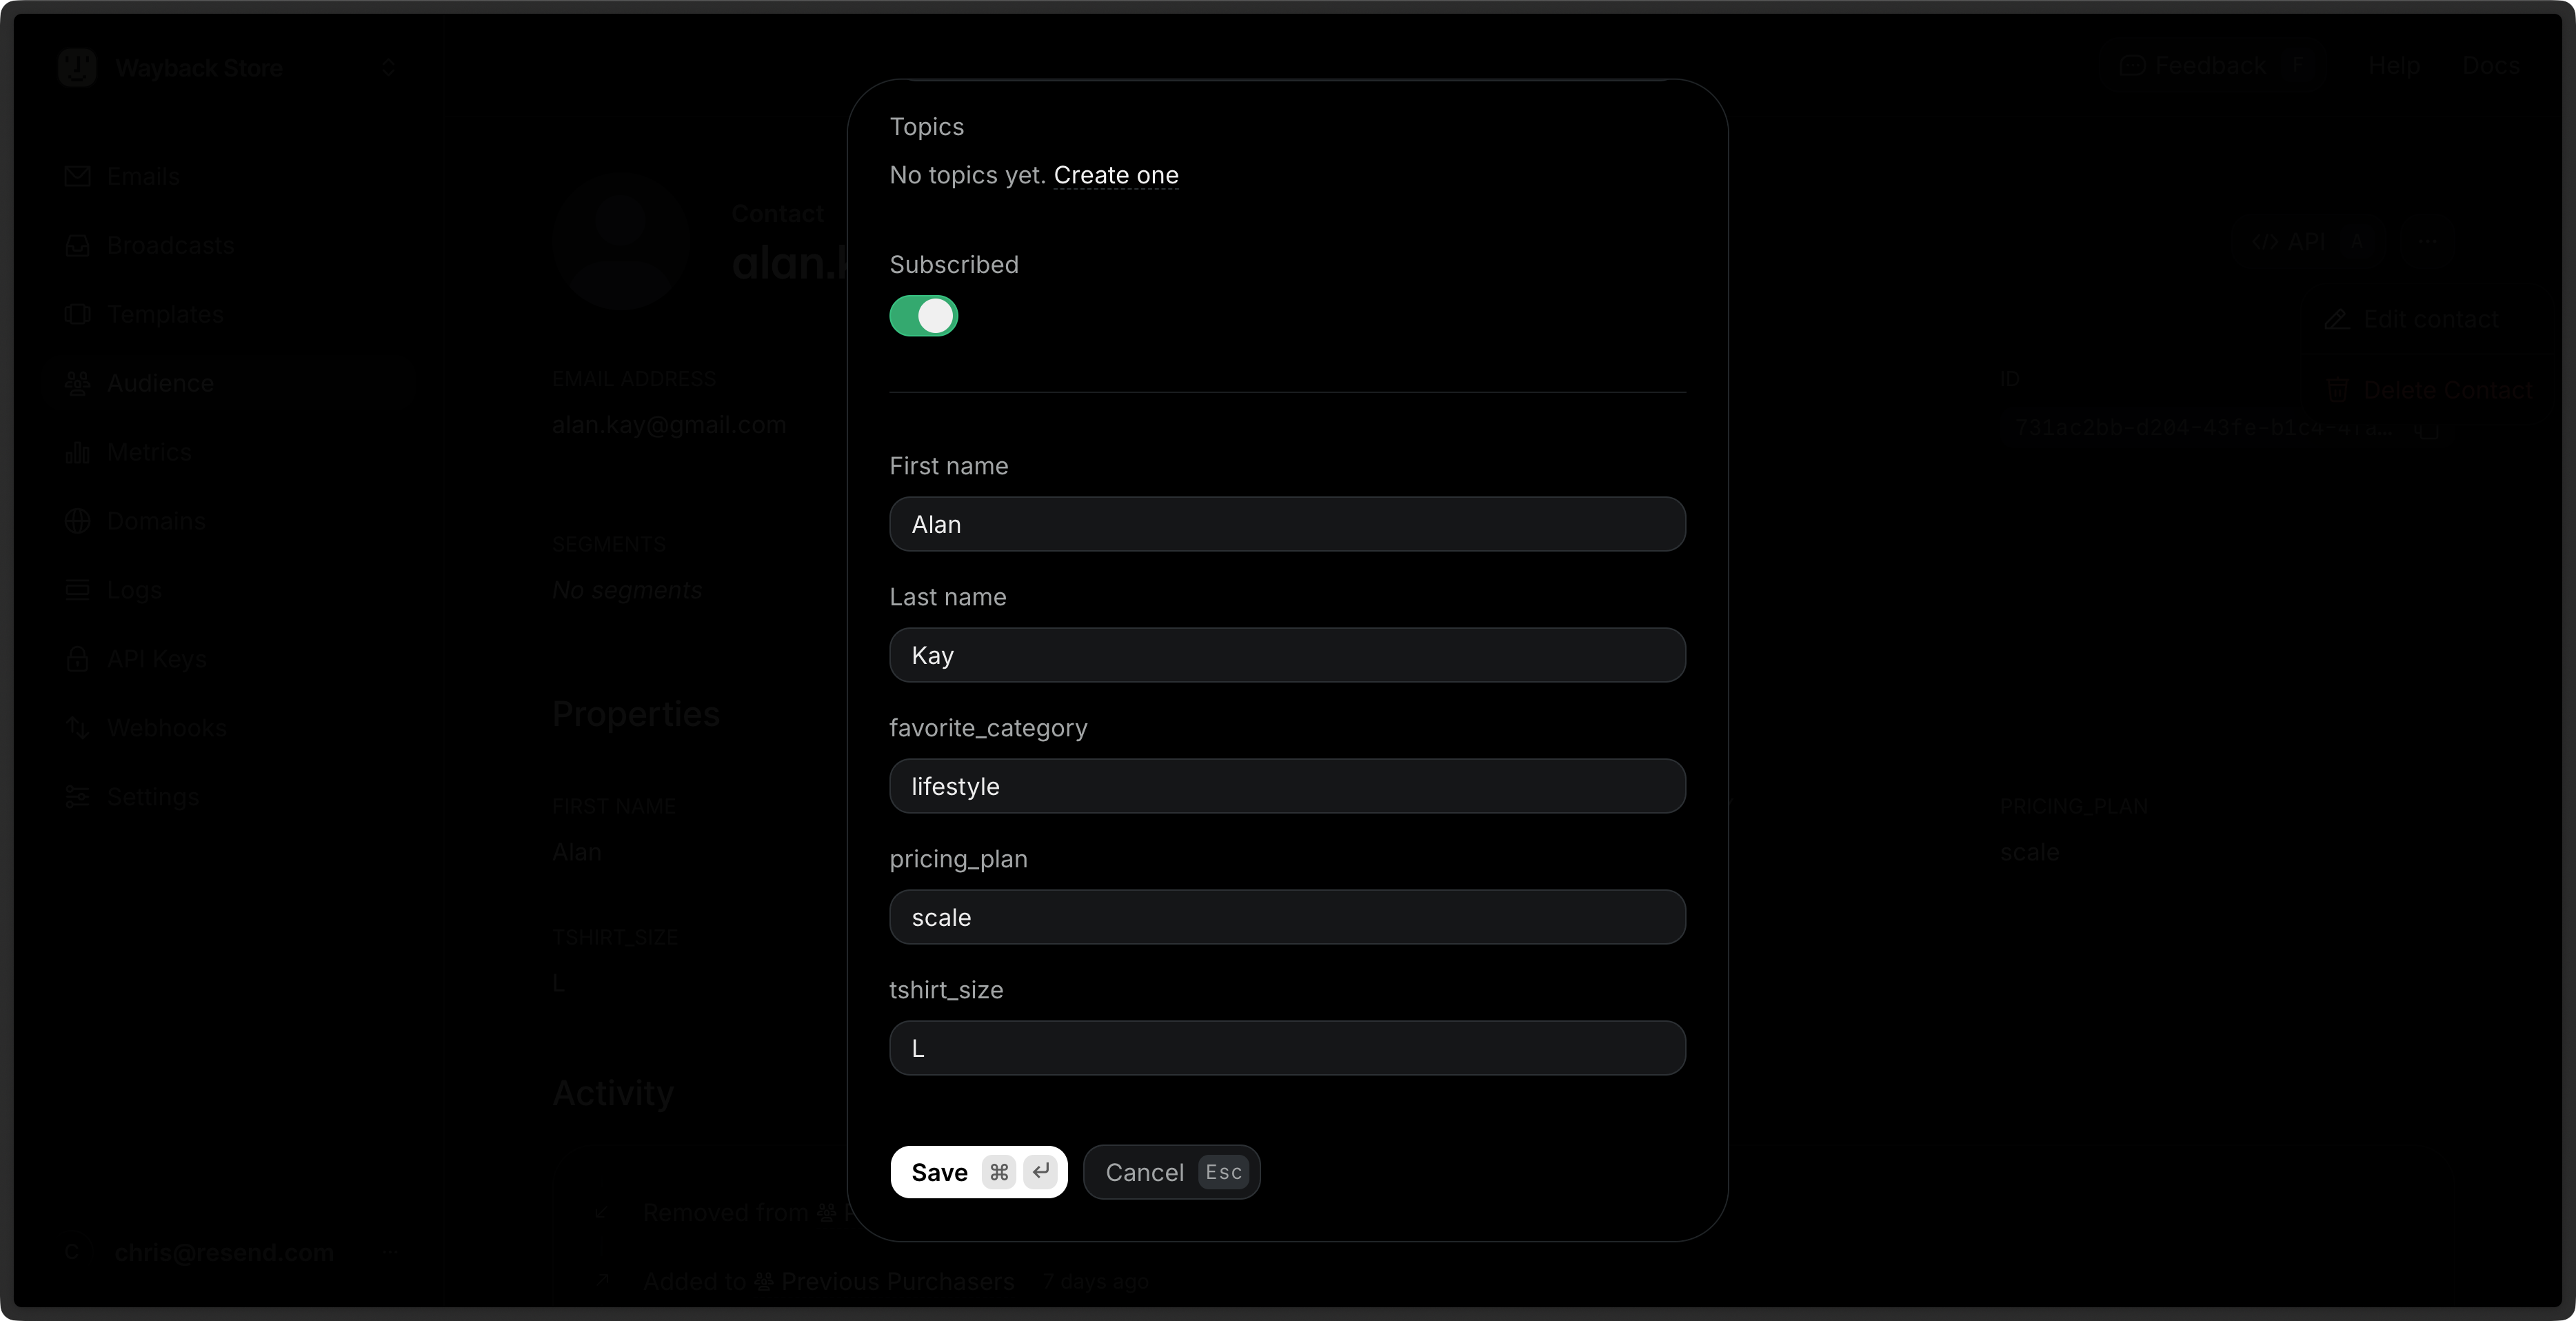 Resend includes a few default properties:
* `first_name`: The first name of the contact.
* `last_name`: The last name of the contact.
* `unsubscribed`: Whether the contact is unsubscribed from all Broadcasts.
* `email`: The email address of the contact.
You can create additional custom Contact Properties for your Contacts to store additional information. These properties can be used to personalize your Broadcasts across all Segments.
Learn more about [Contact Properties](/dashboard/audiences/properties).
## View Contacts
You can view your Contacts in the [Contacts](https://resend.com/audience) page.
1. Go to the [Contacts](https://resend.com/audience) page.
2. Click on the Contact you want to view.
3. View the Contact details.
Each Contact includes the metadata associated with the contact, as well as a full history of all marketing interactions with the Contact.
Resend includes a few default properties:
* `first_name`: The first name of the contact.
* `last_name`: The last name of the contact.
* `unsubscribed`: Whether the contact is unsubscribed from all Broadcasts.
* `email`: The email address of the contact.
You can create additional custom Contact Properties for your Contacts to store additional information. These properties can be used to personalize your Broadcasts across all Segments.
Learn more about [Contact Properties](/dashboard/audiences/properties).
## View Contacts
You can view your Contacts in the [Contacts](https://resend.com/audience) page.
1. Go to the [Contacts](https://resend.com/audience) page.
2. Click on the Contact you want to view.
3. View the Contact details.
Each Contact includes the metadata associated with the contact, as well as a full history of all marketing interactions with the Contact.
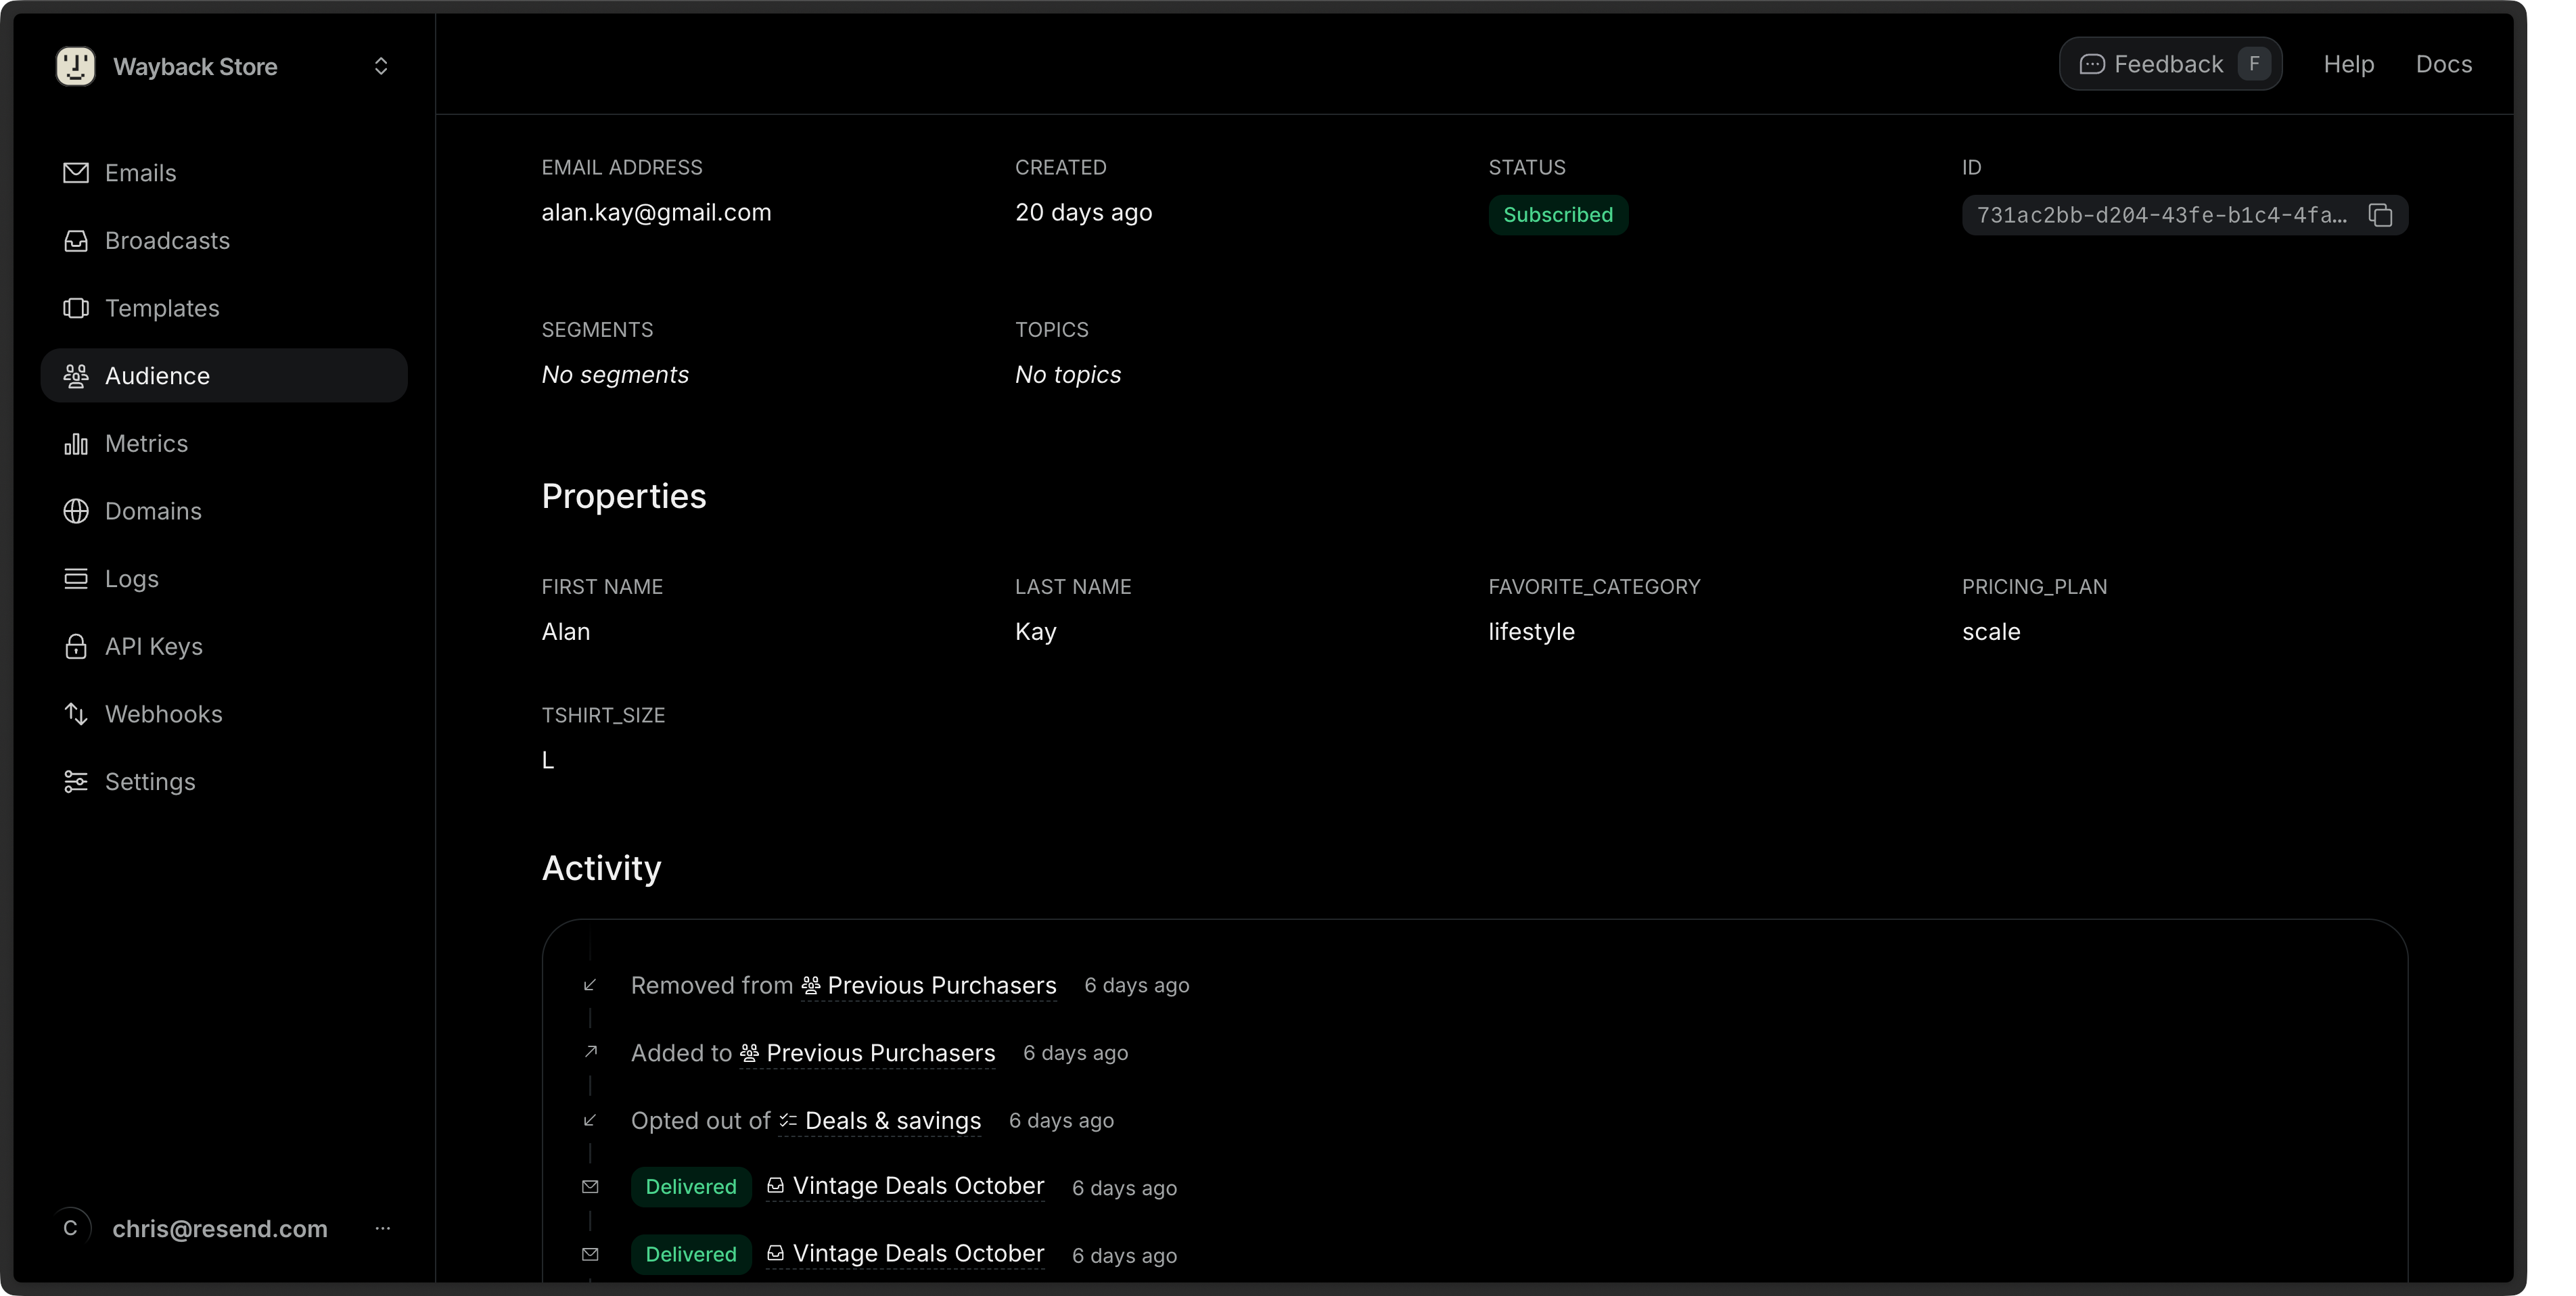 You can also retrieve a [single Contact](/api-reference/contacts/get-contact) or [list all Contacts](/api-reference/contacts/list-contacts) via the API or SDKs.
## Edit Contacts
1. Go to the [Contacts](https://resend.com/audience) page.
2. Click on the **More options**
You can also retrieve a [single Contact](/api-reference/contacts/get-contact) or [list all Contacts](/api-reference/contacts/list-contacts) via the API or SDKs.
## Edit Contacts
1. Go to the [Contacts](https://resend.com/audience) page.
2. Click on the **More options** 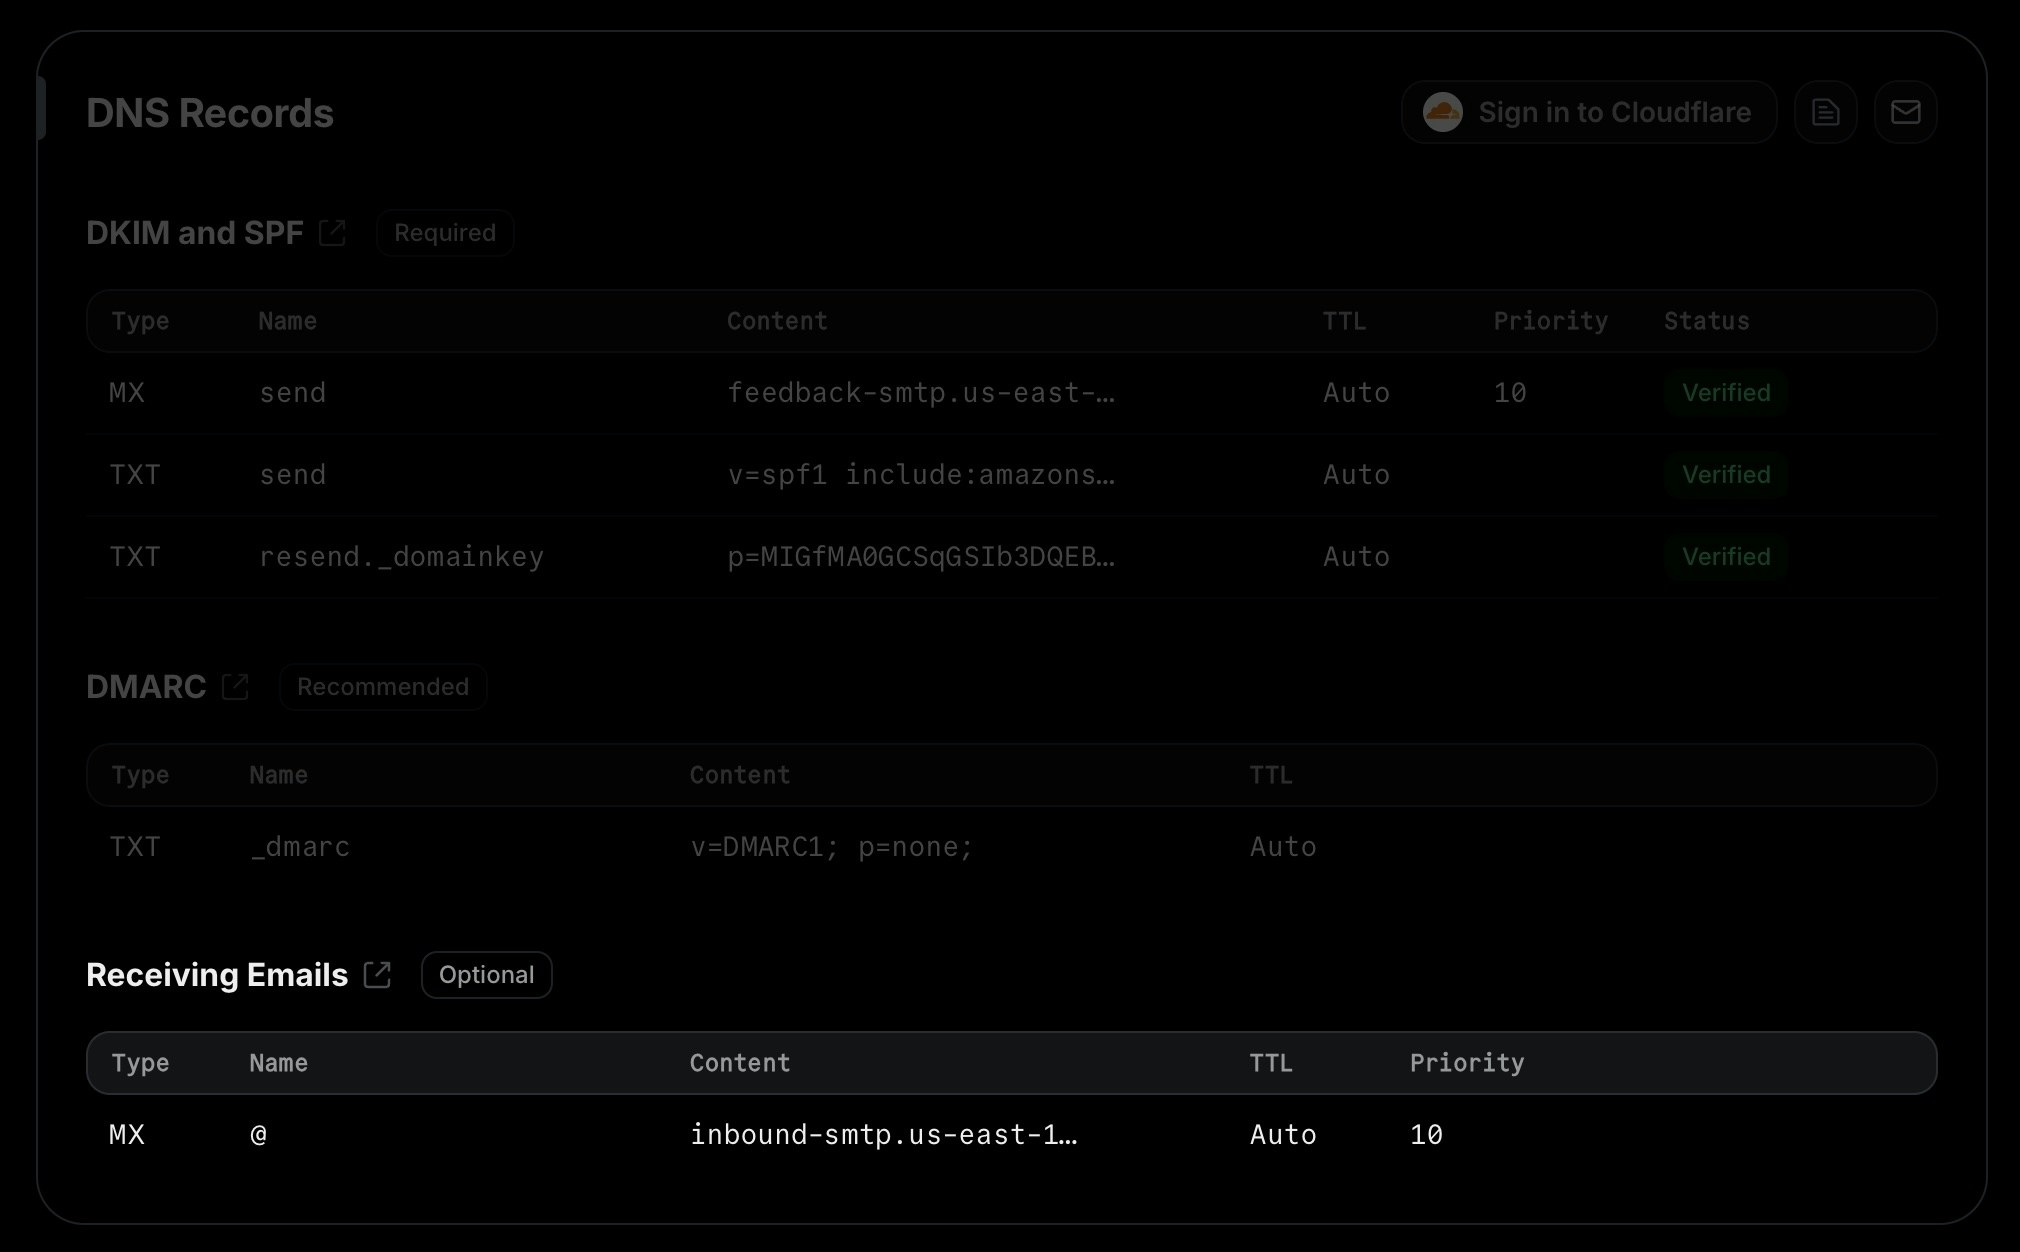
 ## 3. Receive email events
In your application, create a new route that can accept `POST` requests.
For example, here's how you can add an API route in a Next.js application:
```js app/api/events/route.ts theme={"theme":{"light":"github-light","dark":"vesper"}}
import type { NextRequest } from 'next/server';
import { NextResponse } from 'next/server';
export const POST = async (request: NextRequest) => {
const event = await request.json();
if (event.type === 'email.received') {
return NextResponse.json(event);
}
return NextResponse.json({});
};
```
Once you receive the email event, you can process the email body and attachments. We also recommend implementing [webhook request verification](/webhooks/verify-webhooks-requests) to secure your webhook endpoint.
```json theme={"theme":{"light":"github-light","dark":"vesper"}}
{
"type": "email.received",
"created_at": "2024-02-22T23:41:12.126Z",
"data": {
"email_id": "56761188-7520-42d8-8898-ff6fc54ce618",
"created_at": "2024-02-22T23:41:11.894719+00:00",
"from": "Acme
## 3. Receive email events
In your application, create a new route that can accept `POST` requests.
For example, here's how you can add an API route in a Next.js application:
```js app/api/events/route.ts theme={"theme":{"light":"github-light","dark":"vesper"}}
import type { NextRequest } from 'next/server';
import { NextResponse } from 'next/server';
export const POST = async (request: NextRequest) => {
const event = await request.json();
if (event.type === 'email.received') {
return NextResponse.json(event);
}
return NextResponse.json({});
};
```
Once you receive the email event, you can process the email body and attachments. We also recommend implementing [webhook request verification](/webhooks/verify-webhooks-requests) to secure your webhook endpoint.
```json theme={"theme":{"light":"github-light","dark":"vesper"}}
{
"type": "email.received",
"created_at": "2024-02-22T23:41:12.126Z",
"data": {
"email_id": "56761188-7520-42d8-8898-ff6fc54ce618",
"created_at": "2024-02-22T23:41:11.894719+00:00",
"from": "Acme 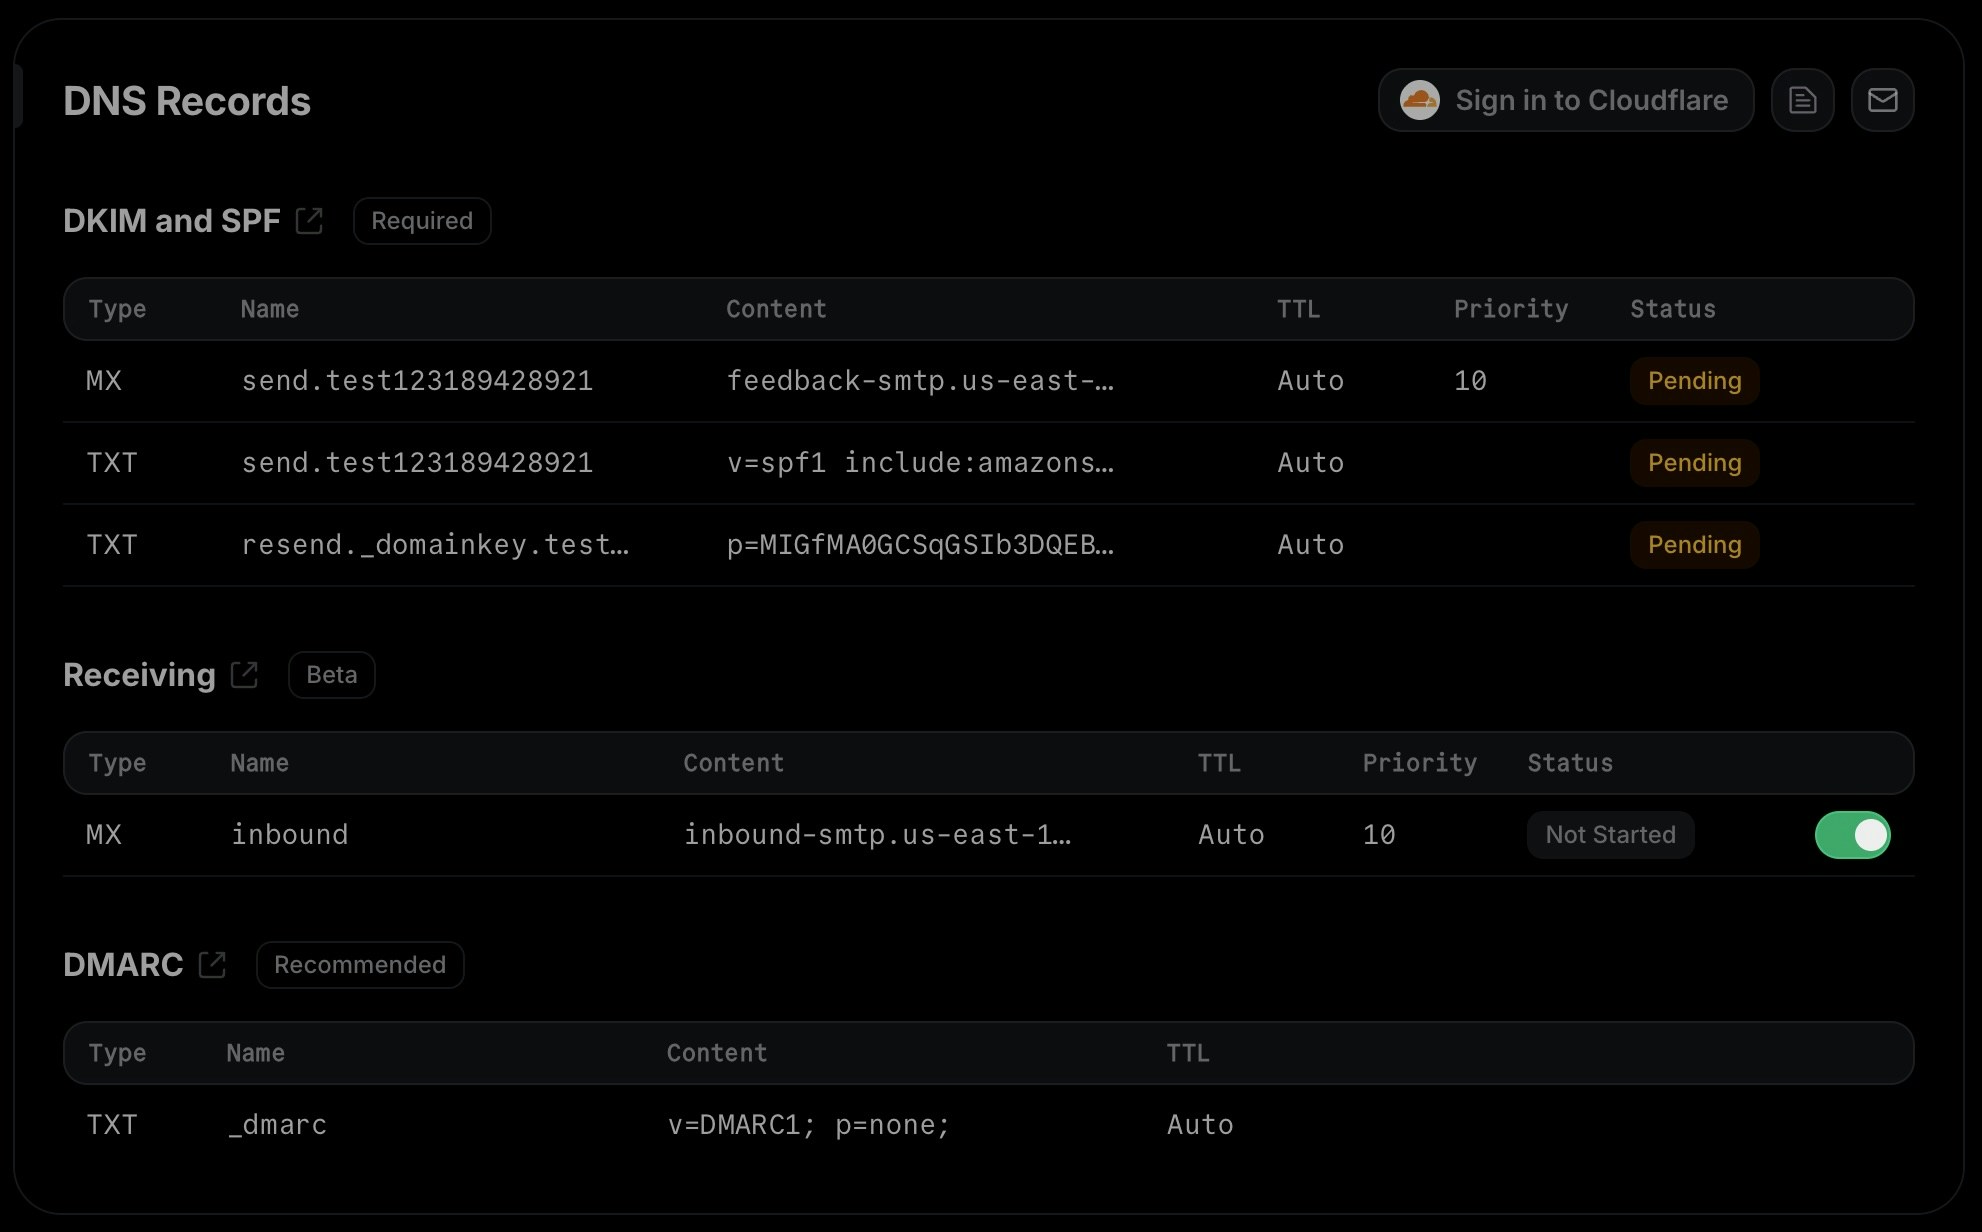 After enabling receiving, you'll see a modal showing the MX record that you need to add to your DNS provider to start receiving emails.
Once you add the MX record, confirm by clicking the "I've added the record" button and wait for the receiving record to show as "verified".
## FAQ
After enabling receiving, you'll see a modal showing the MX record that you need to add to your DNS provider to start receiving emails.
Once you add the MX record, confirm by clicking the "I've added the record" button and wait for the receiving record to show as "verified".
## FAQ
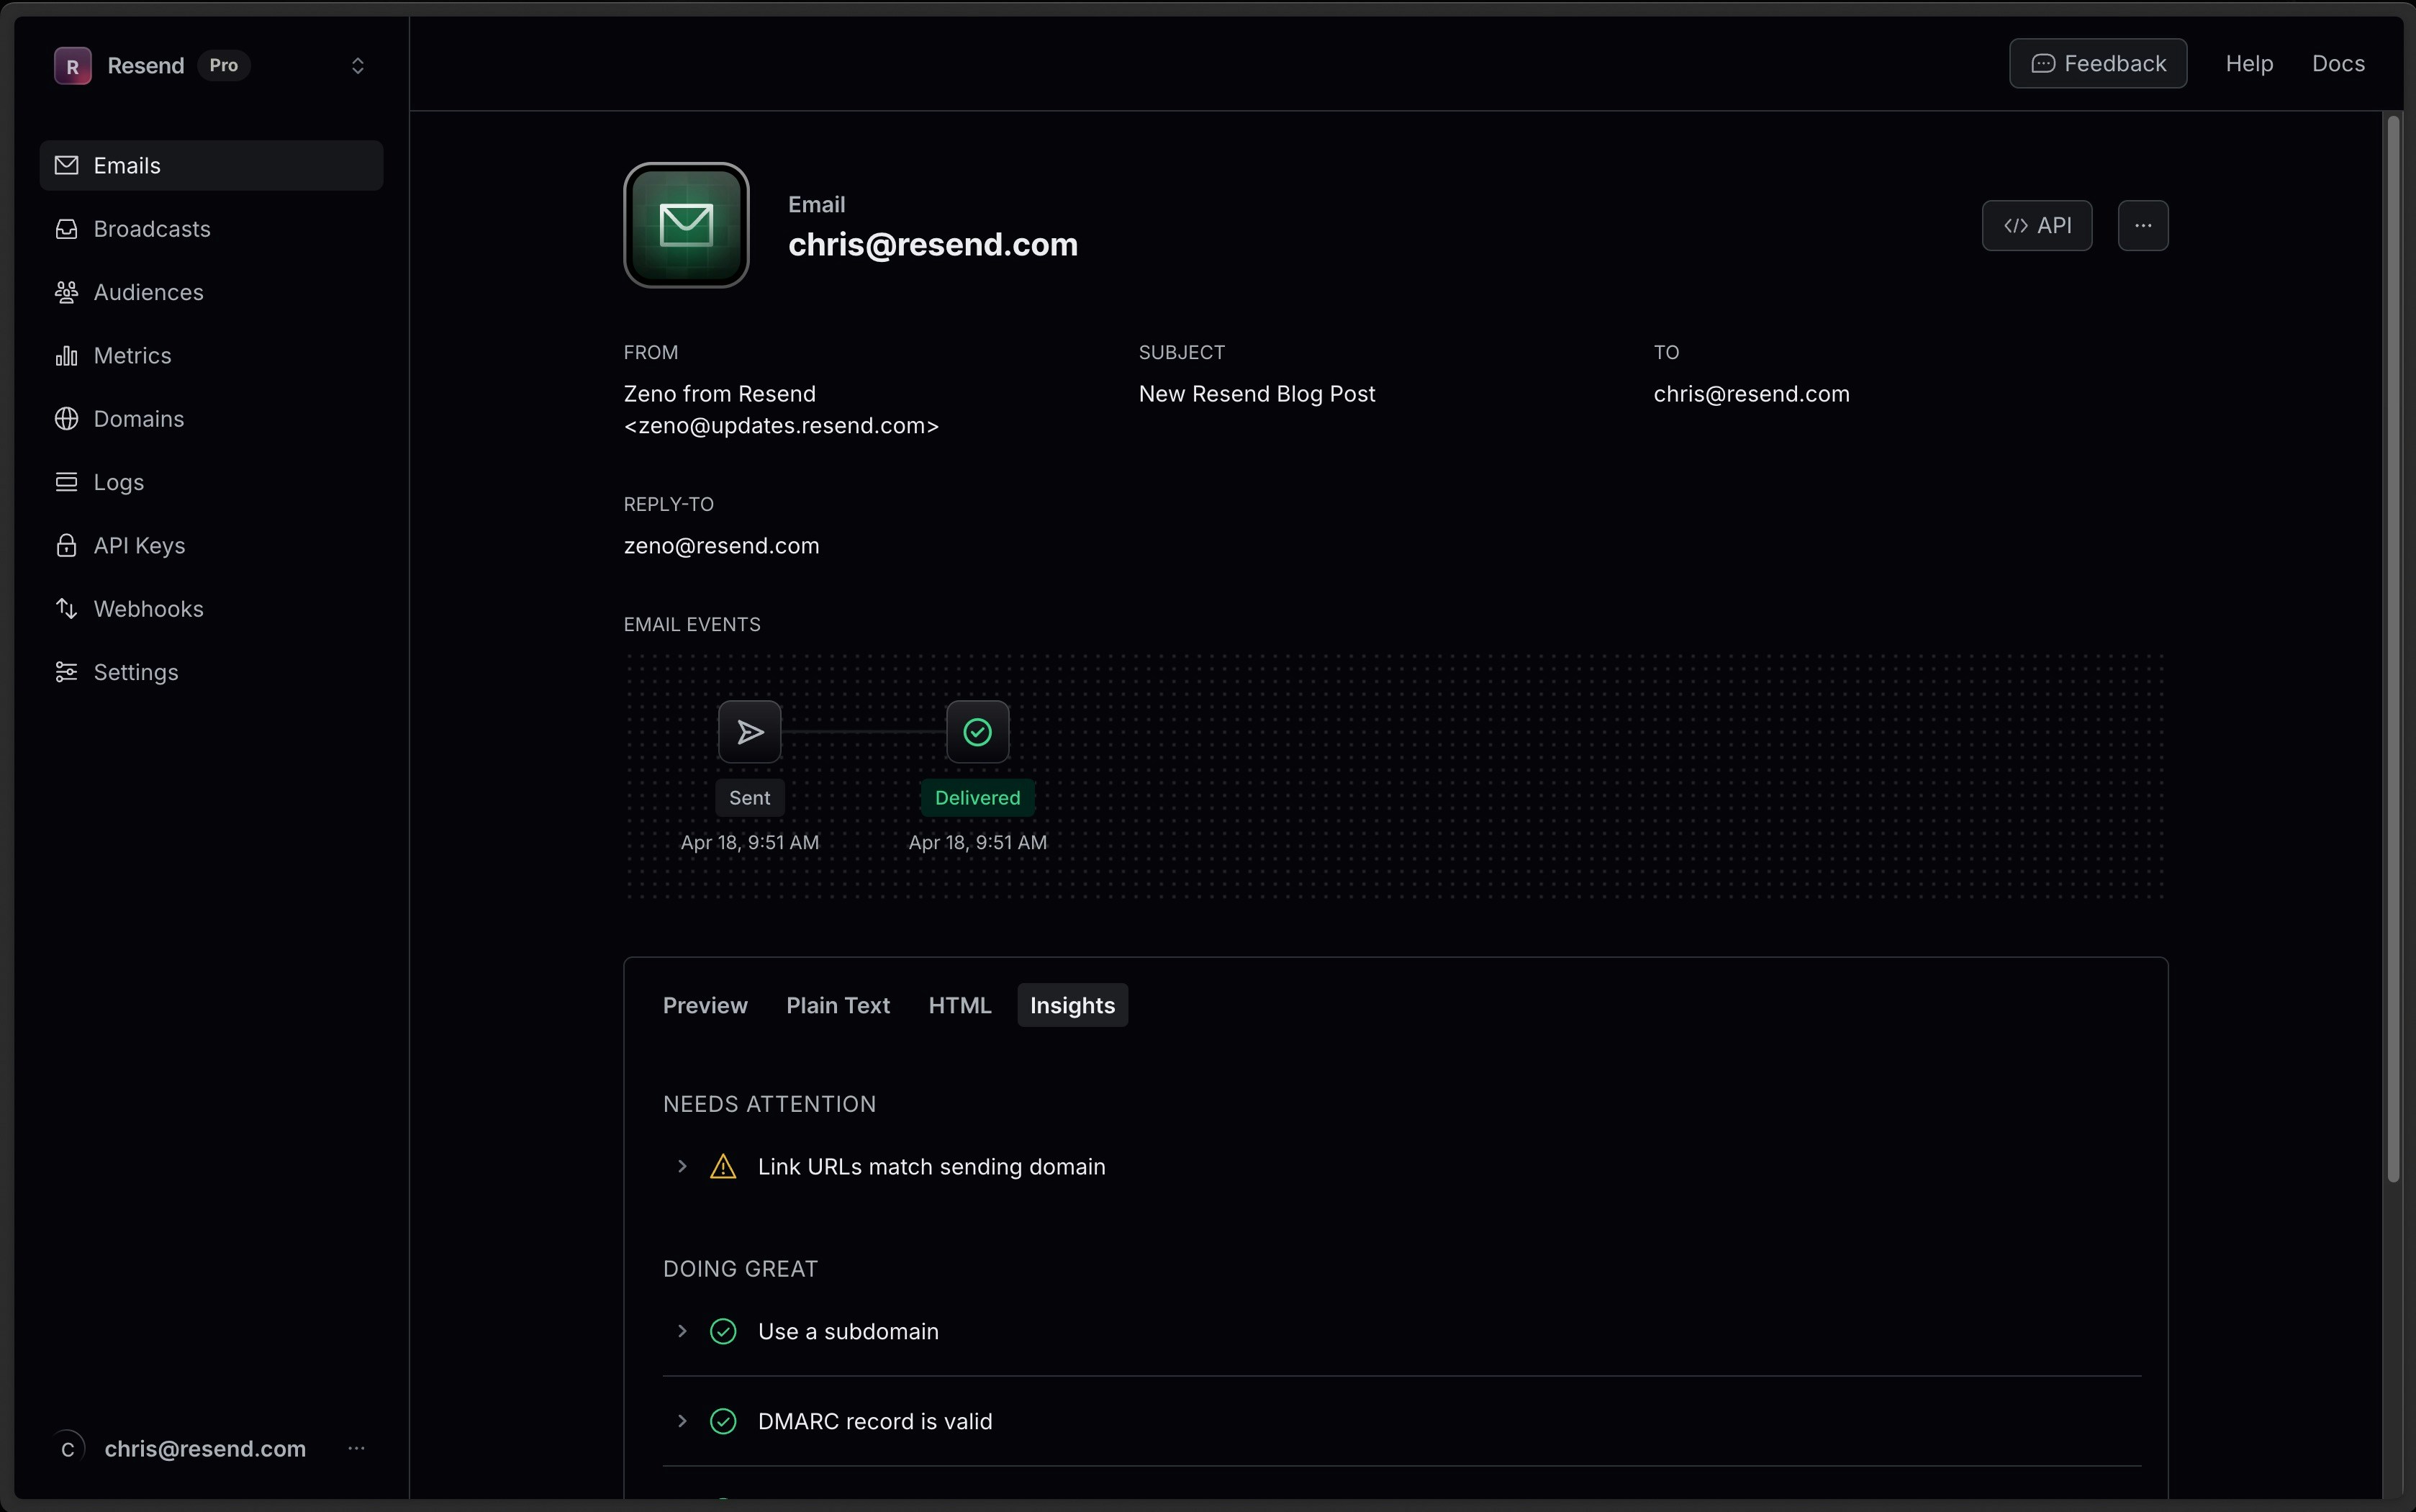 If a check passes, you'll get a nice green check. Resend will provide advice if it fails. We break these into two categories: Attention and Improvements.
## Attention Insights
Changes to your email that can improve deliverability.
If a check passes, you'll get a nice green check. Resend will provide advice if it fails. We break these into two categories: Attention and Improvements.
## Attention Insights
Changes to your email that can improve deliverability.
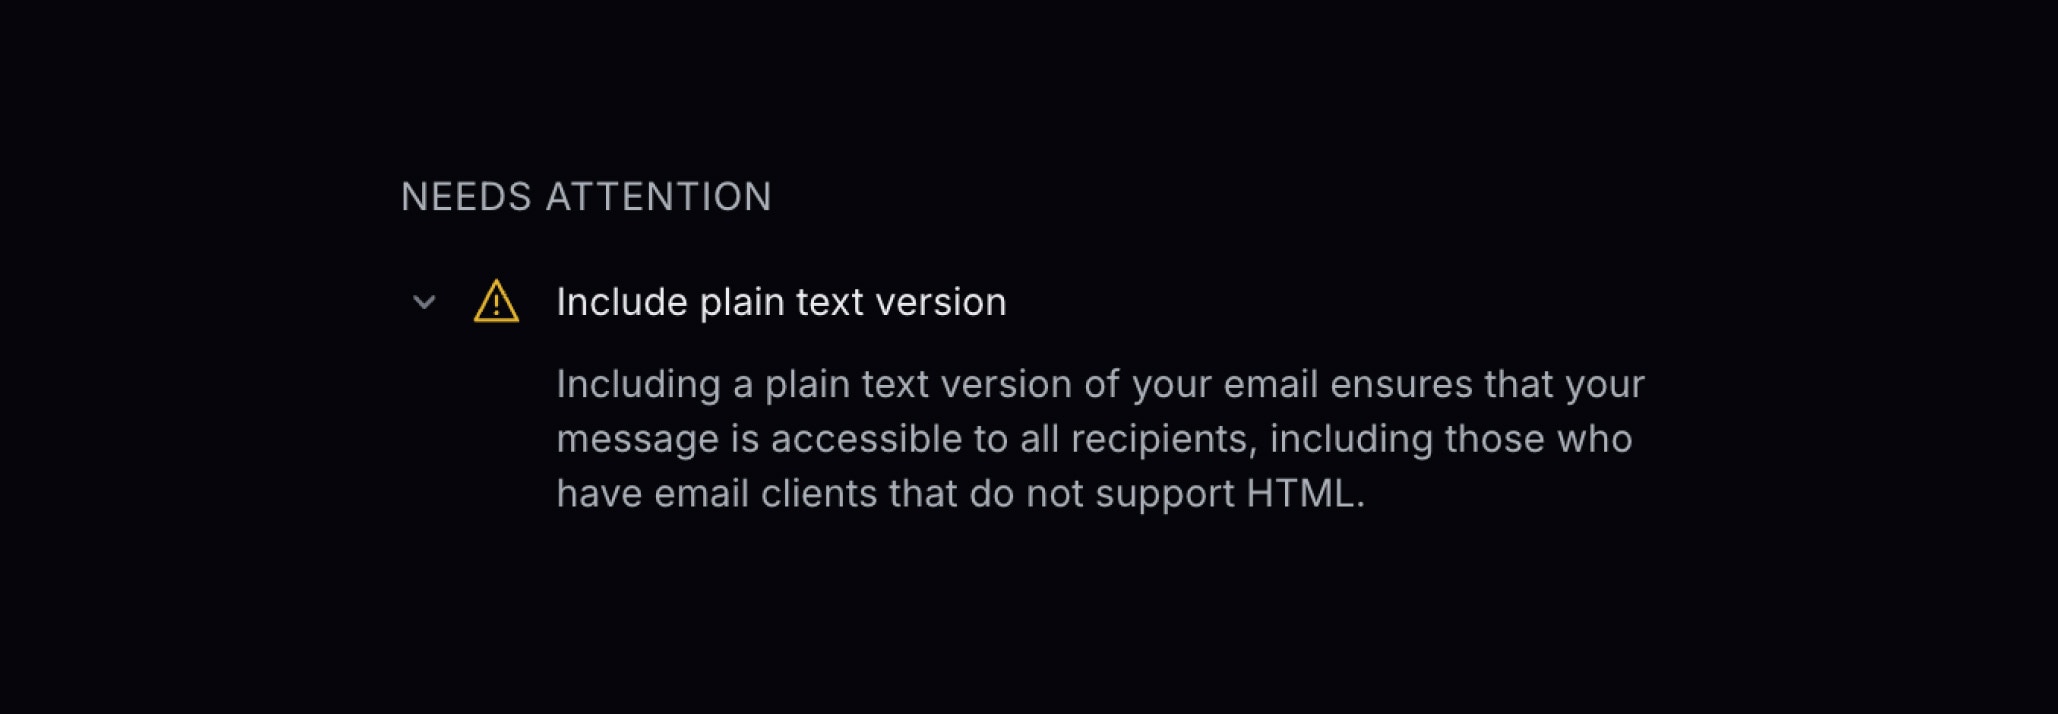 #### Link URLs match sending domain
Ensure that the URLs in your email match the sending domain. Mismatched URLs can trigger spam filters.
For example, if your sending domain is `@widgets.com`, ensure links within the message point back to `https://widgets.com`.
#### DMARC Record is Valid
DMARC is a TXT record published in the DNS that specifies how email receivers should handle messages from your domain that don’t pass SPF or DKIM validation. [A valid DMARC record](/dashboard/domains/dmarc) can help improve email deliverability.
Starting in 2024, Gmail and Yahoo require senders to have a DMARC record published. When [viewing your domain](https://resend.com/domains) in Resend, we provide a suggested DMARC record if you’re unsure what to publish.
#### Include Plain Text Version
Including a plain text version of your email ensures that your message is accessible to all recipients, including those who have email clients that do not support HTML.
If you're using Resend's API, [plain text is passed via the `text` parameter](https://resend.com/docs/api-reference/emails/send-email).
This can also generate plain text using [React Email](https://react.email/docs/utilities/render#4-convert-to-plain-text).
#### Don't use "no-reply"
Indicating that this is a one-way communication decreases trust. Some email providers use engagement (email replies) when deciding how to filter your email. A valid email address allows you to communicate with your recipients easily if they have questions.
#### Keep email body size small
Gmail limits the size of each email message to 102 KB. Once that limit is reached, the remaining content is clipped and hidden behind a link to view the entire message. Keep your email body size small to avoid this issue.
This check will show the current size of your email.
## Improvement Insights
If you're diagnosing a deliverability issue, changing your email practices could be helpful.
#### Link URLs match sending domain
Ensure that the URLs in your email match the sending domain. Mismatched URLs can trigger spam filters.
For example, if your sending domain is `@widgets.com`, ensure links within the message point back to `https://widgets.com`.
#### DMARC Record is Valid
DMARC is a TXT record published in the DNS that specifies how email receivers should handle messages from your domain that don’t pass SPF or DKIM validation. [A valid DMARC record](/dashboard/domains/dmarc) can help improve email deliverability.
Starting in 2024, Gmail and Yahoo require senders to have a DMARC record published. When [viewing your domain](https://resend.com/domains) in Resend, we provide a suggested DMARC record if you’re unsure what to publish.
#### Include Plain Text Version
Including a plain text version of your email ensures that your message is accessible to all recipients, including those who have email clients that do not support HTML.
If you're using Resend's API, [plain text is passed via the `text` parameter](https://resend.com/docs/api-reference/emails/send-email).
This can also generate plain text using [React Email](https://react.email/docs/utilities/render#4-convert-to-plain-text).
#### Don't use "no-reply"
Indicating that this is a one-way communication decreases trust. Some email providers use engagement (email replies) when deciding how to filter your email. A valid email address allows you to communicate with your recipients easily if they have questions.
#### Keep email body size small
Gmail limits the size of each email message to 102 KB. Once that limit is reached, the remaining content is clipped and hidden behind a link to view the entire message. Keep your email body size small to avoid this issue.
This check will show the current size of your email.
## Improvement Insights
If you're diagnosing a deliverability issue, changing your email practices could be helpful.
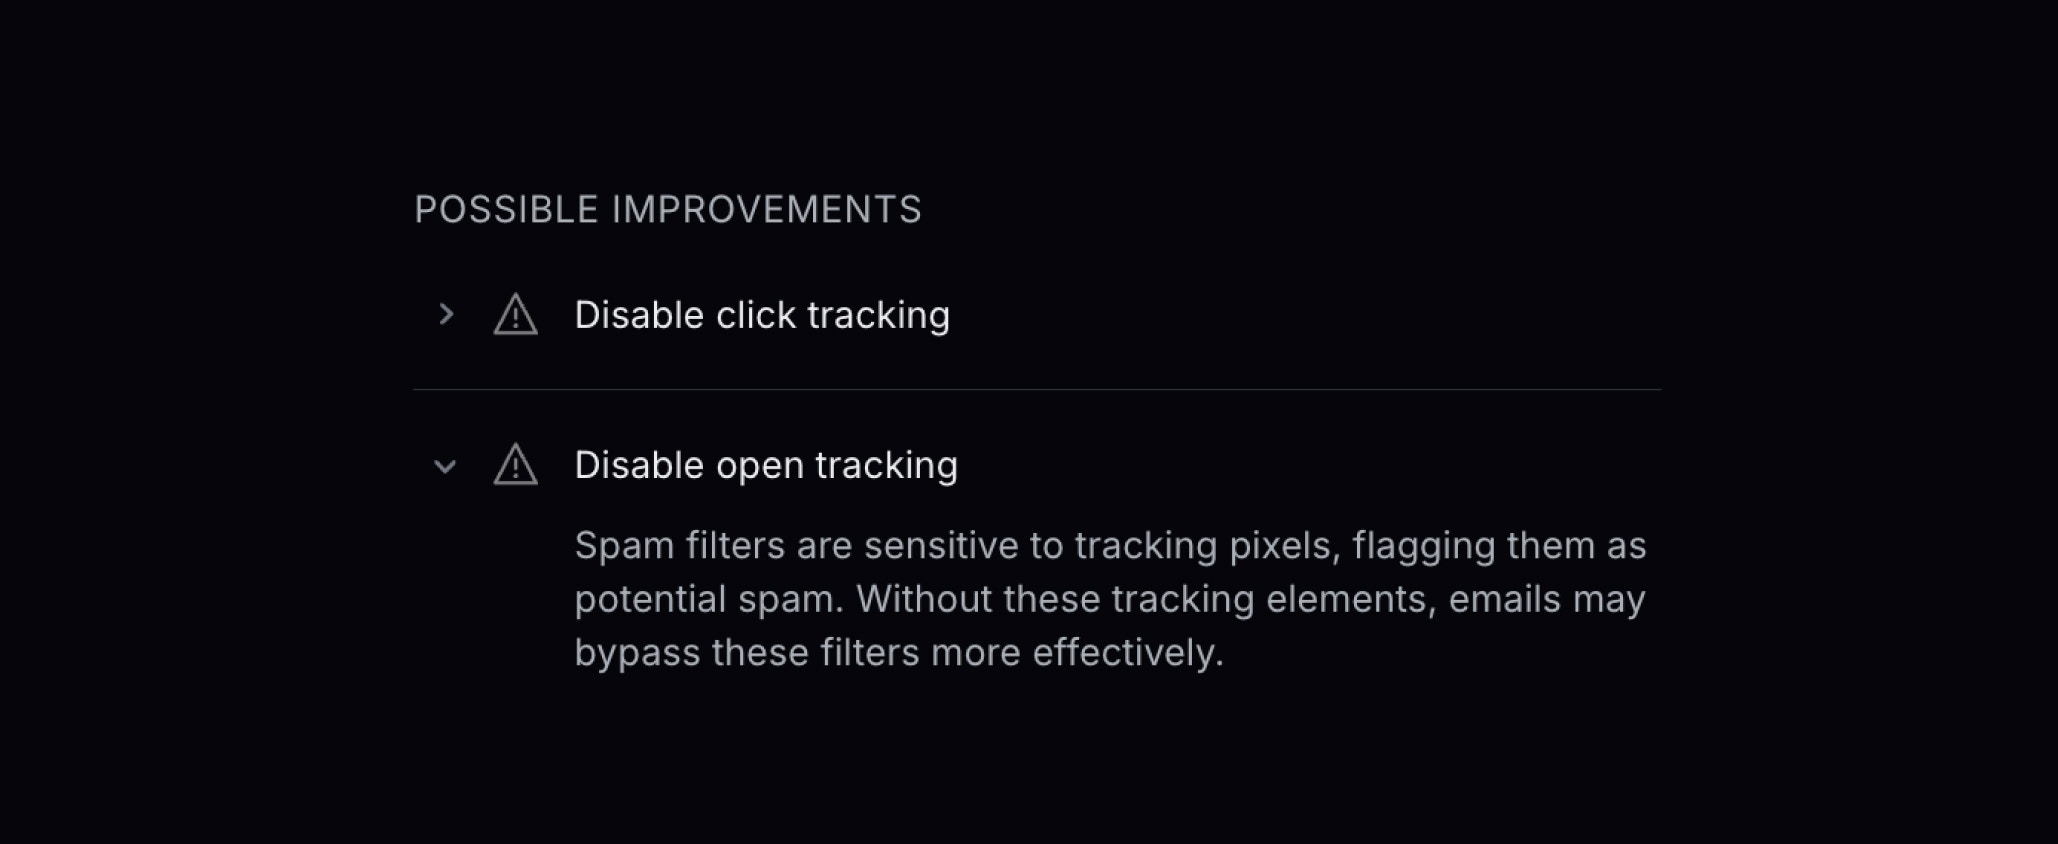 #### Use a Subdomain
Using a subdomain instead of the root domain helps segment your sending by purpose. This protects different types of sending from impacting the reputation of others and clearly shows the sending purpose.
#### Disable Click Tracking
Click tracking modifies links, sometimes causing spam filters to flag emails as suspicious or phishing attempts. Disabling click tracking can help with email deliverability, especially for sensitive transactional emails like login or email verification.
If on, you can [disable click tracking on your domain in Resend](https://resend.com/domains).
#### Disable Open Tracking
Spam filters are sensitive to tracking pixels, flagging them as potential spam. Without these tracking elements, emails may bypass these filters more effectively, especially for sensitive transactional emails like login or email verification.
If on, you can [disable open tracking on your domain in Resend](https://resend.com/domains).
---
# Source: https://resend.com/docs/webhooks/emails/delivered.md
> ## Documentation Index
> Fetch the complete documentation index at: https://resend.com/docs/llms.txt
> Use this file to discover all available pages before exploring further.
# email.delivered
> Received when an email is delivered.
export const ResponseBodyParameters = ({type, children}) => {
return
#### Use a Subdomain
Using a subdomain instead of the root domain helps segment your sending by purpose. This protects different types of sending from impacting the reputation of others and clearly shows the sending purpose.
#### Disable Click Tracking
Click tracking modifies links, sometimes causing spam filters to flag emails as suspicious or phishing attempts. Disabling click tracking can help with email deliverability, especially for sensitive transactional emails like login or email verification.
If on, you can [disable click tracking on your domain in Resend](https://resend.com/domains).
#### Disable Open Tracking
Spam filters are sensitive to tracking pixels, flagging them as potential spam. Without these tracking elements, emails may bypass these filters more effectively, especially for sensitive transactional emails like login or email verification.
If on, you can [disable open tracking on your domain in Resend](https://resend.com/domains).
---
# Source: https://resend.com/docs/webhooks/emails/delivered.md
> ## Documentation Index
> Fetch the complete documentation index at: https://resend.com/docs/llms.txt
> Use this file to discover all available pages before exploring further.
# email.delivered
> Received when an email is delivered.
export const ResponseBodyParameters = ({type, children}) => {
return 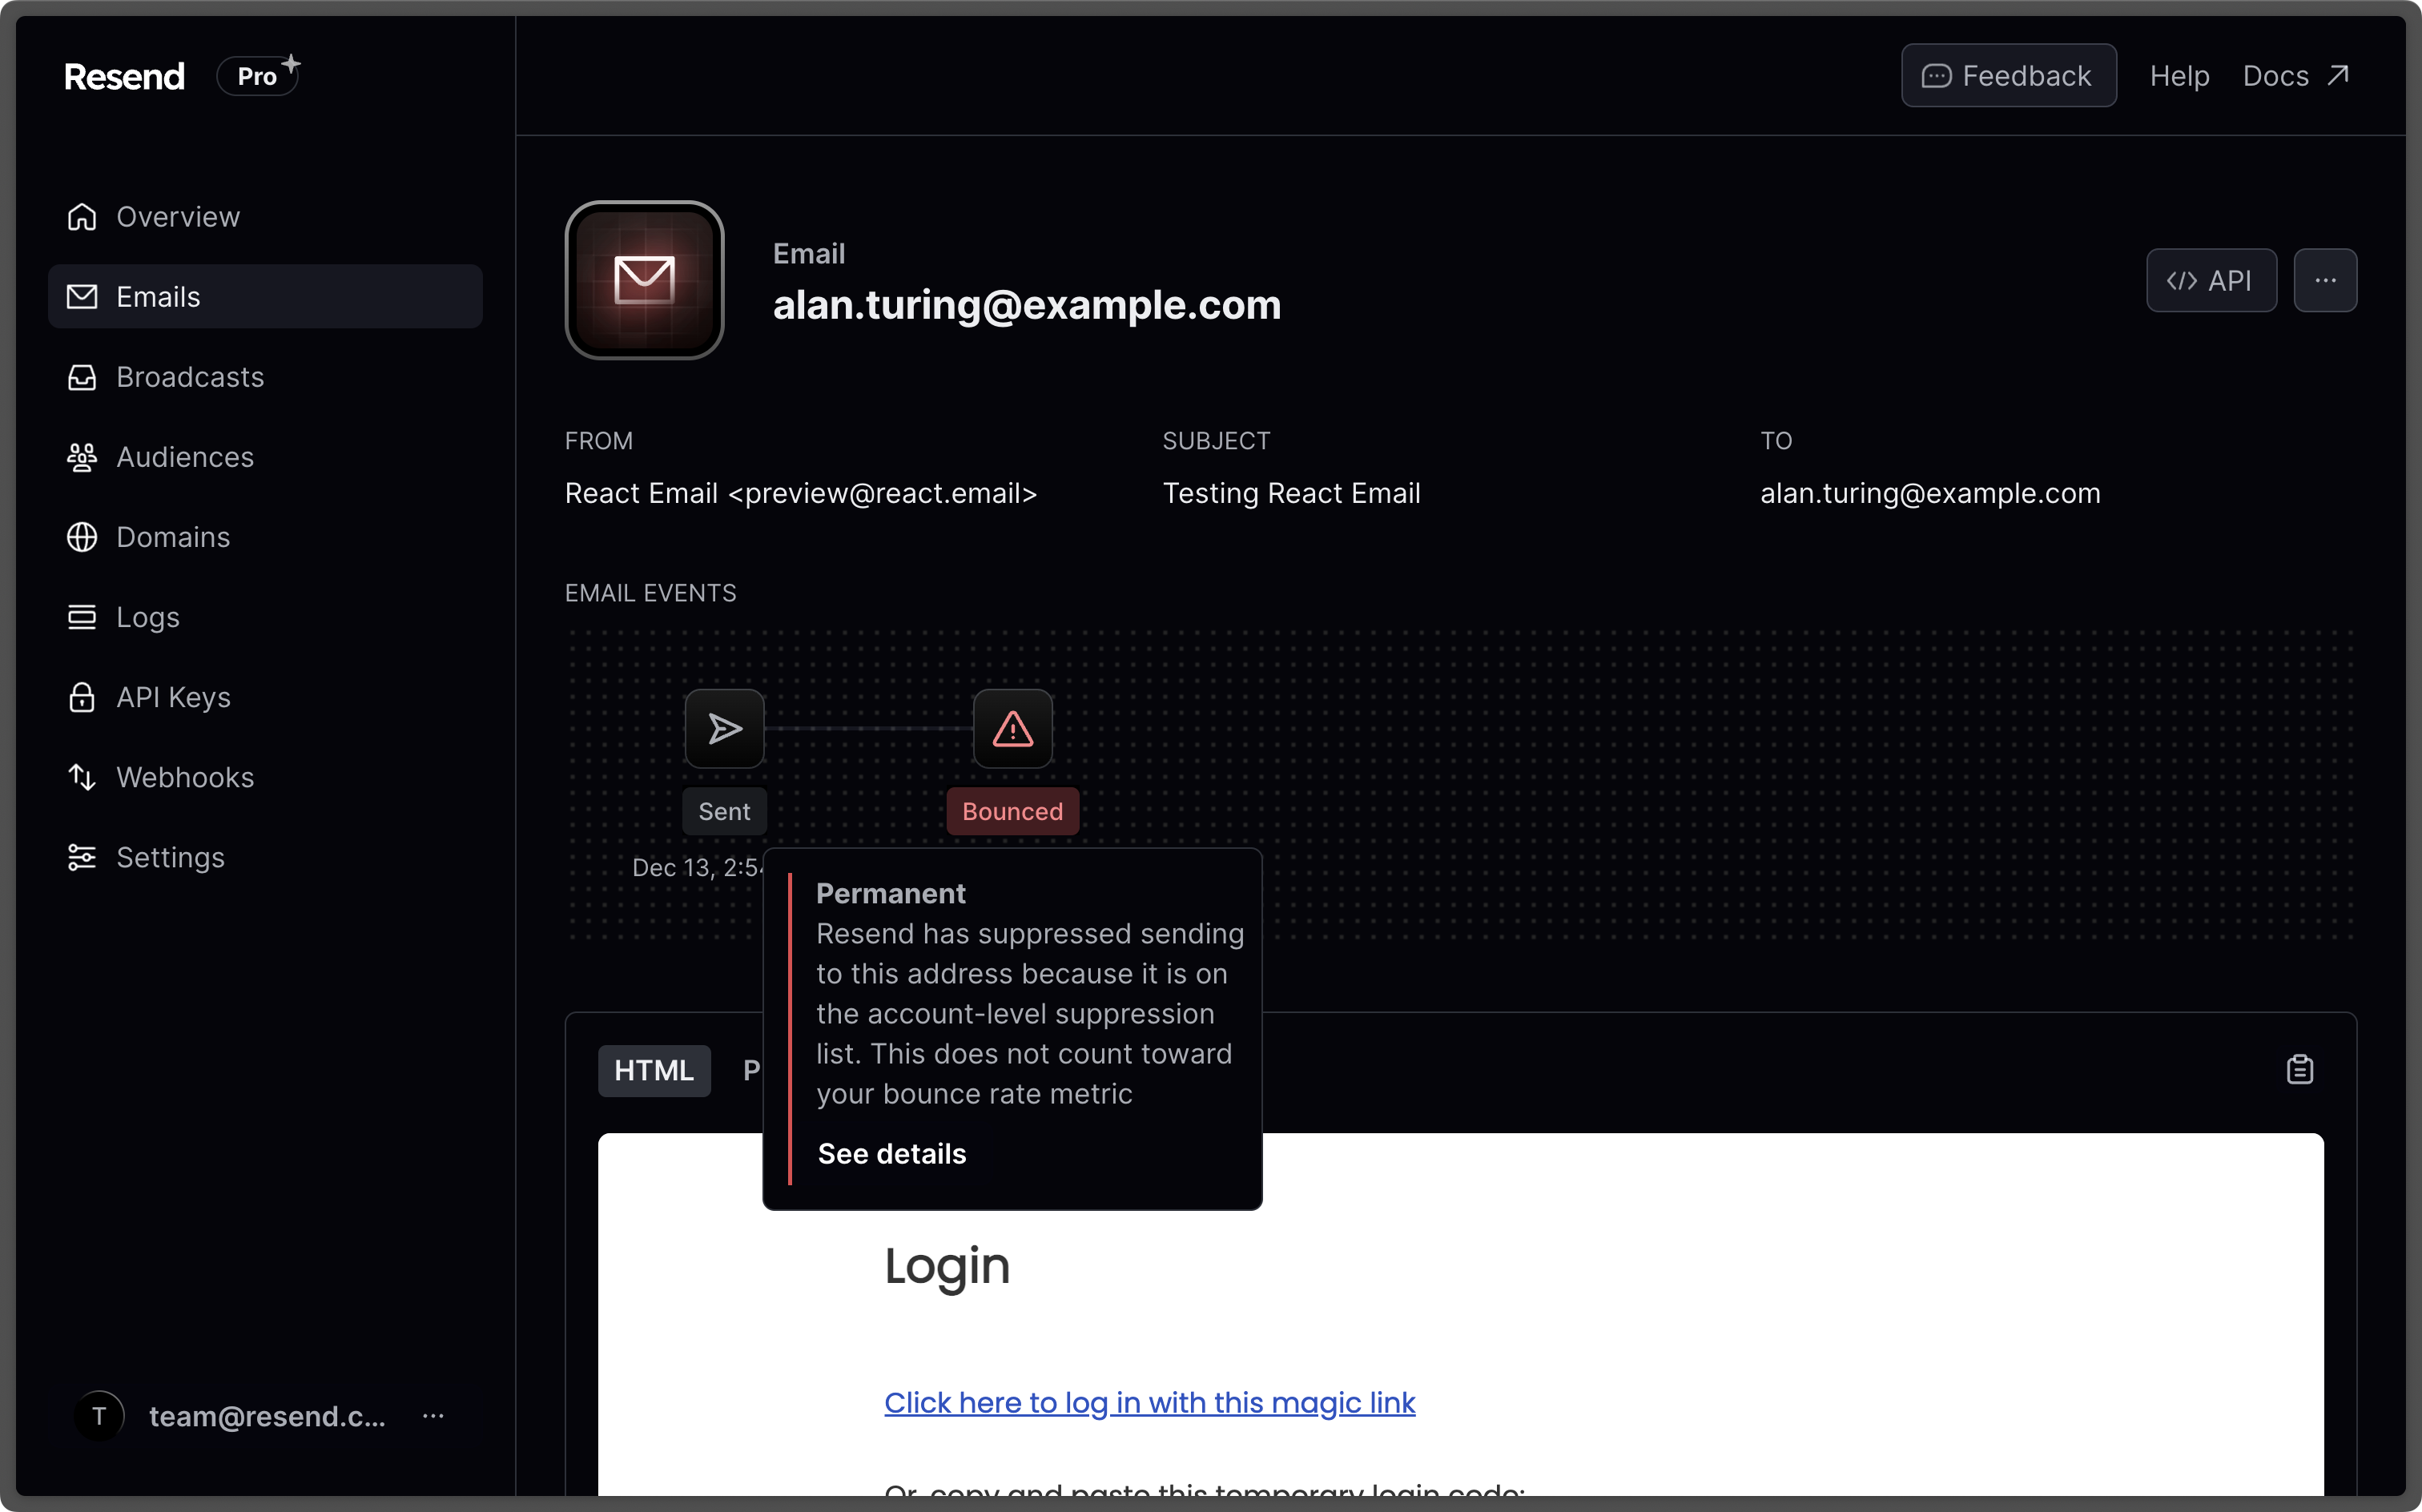 Once you click **See Details**, the drawer will open on the right side of your screen with the bounce type, subtype, along with suggestions on how to proceed.
If the email is on the suppression list, you can click **Remove from Suppression List** to remove it.
Once you click **See Details**, the drawer will open on the right side of your screen with the bounce type, subtype, along with suggestions on how to proceed.
If the email is on the suppression list, you can click **Remove from Suppression List** to remove it.
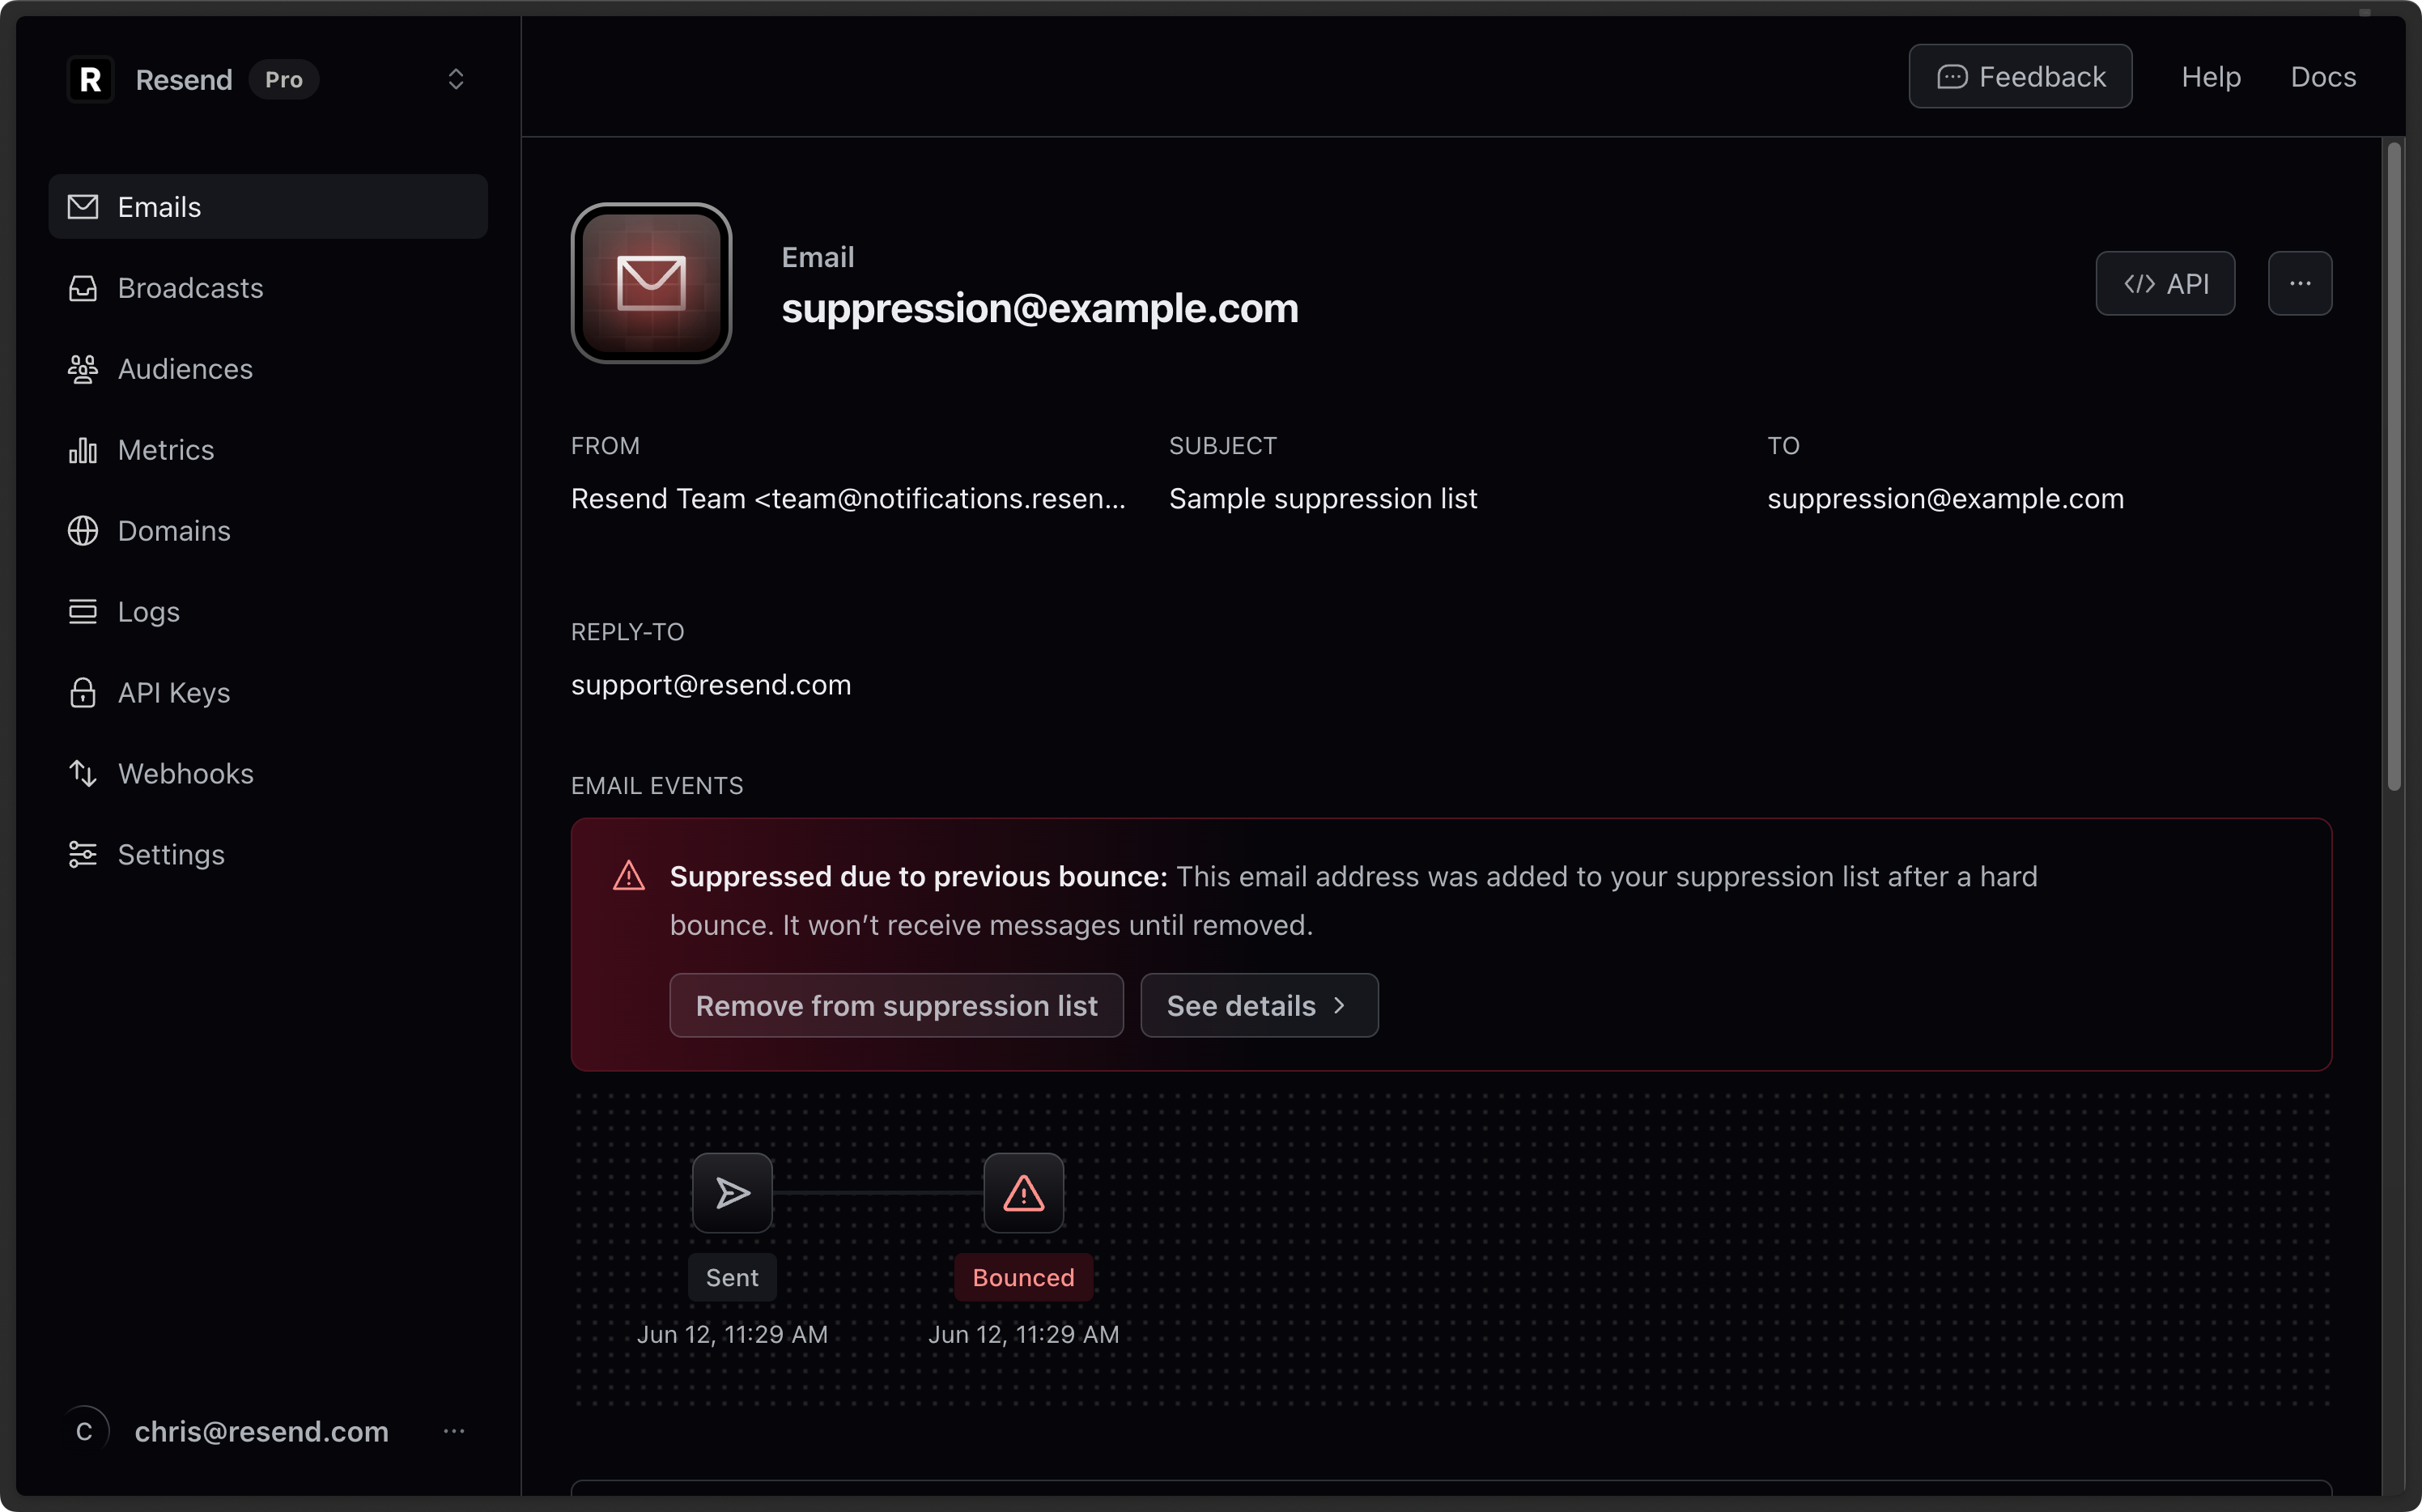 ---
# Source: https://resend.com/docs/dashboard/emails/email-suppressions.md
> ## Documentation Index
> Fetch the complete documentation index at: https://resend.com/docs/llms.txt
> Use this file to discover all available pages before exploring further.
# Email Suppressions
> Understanding and resolving delivery issues.
## What does it mean that the email was `suppressed`?
A suppression happens when you try sending an email to a recipient that previously [bounced](/dashboard/emails/email-bounces) or marked your email as spam.
To protect your sender reputation and our sending infrastructure, we proactively stop that delivery from happening.
## What caused the suppression?
The suppression is caused by:
* `Bounced` when the recipient's mail server rejects the email and the response indicates a permanent failure to deliver. There could be [multiple reasons why an email `bounced`](/dashboard/emails/email-bounces#bounce-types-and-subtypes).
* `Complained` when the recipient marked your email as spam.
---
# Source: https://resend.com/docs/dashboard/emails/email-suppressions.md
> ## Documentation Index
> Fetch the complete documentation index at: https://resend.com/docs/llms.txt
> Use this file to discover all available pages before exploring further.
# Email Suppressions
> Understanding and resolving delivery issues.
## What does it mean that the email was `suppressed`?
A suppression happens when you try sending an email to a recipient that previously [bounced](/dashboard/emails/email-bounces) or marked your email as spam.
To protect your sender reputation and our sending infrastructure, we proactively stop that delivery from happening.
## What caused the suppression?
The suppression is caused by:
* `Bounced` when the recipient's mail server rejects the email and the response indicates a permanent failure to deliver. There could be [multiple reasons why an email `bounced`](/dashboard/emails/email-bounces#bounce-types-and-subtypes).
* `Complained` when the recipient marked your email as spam.
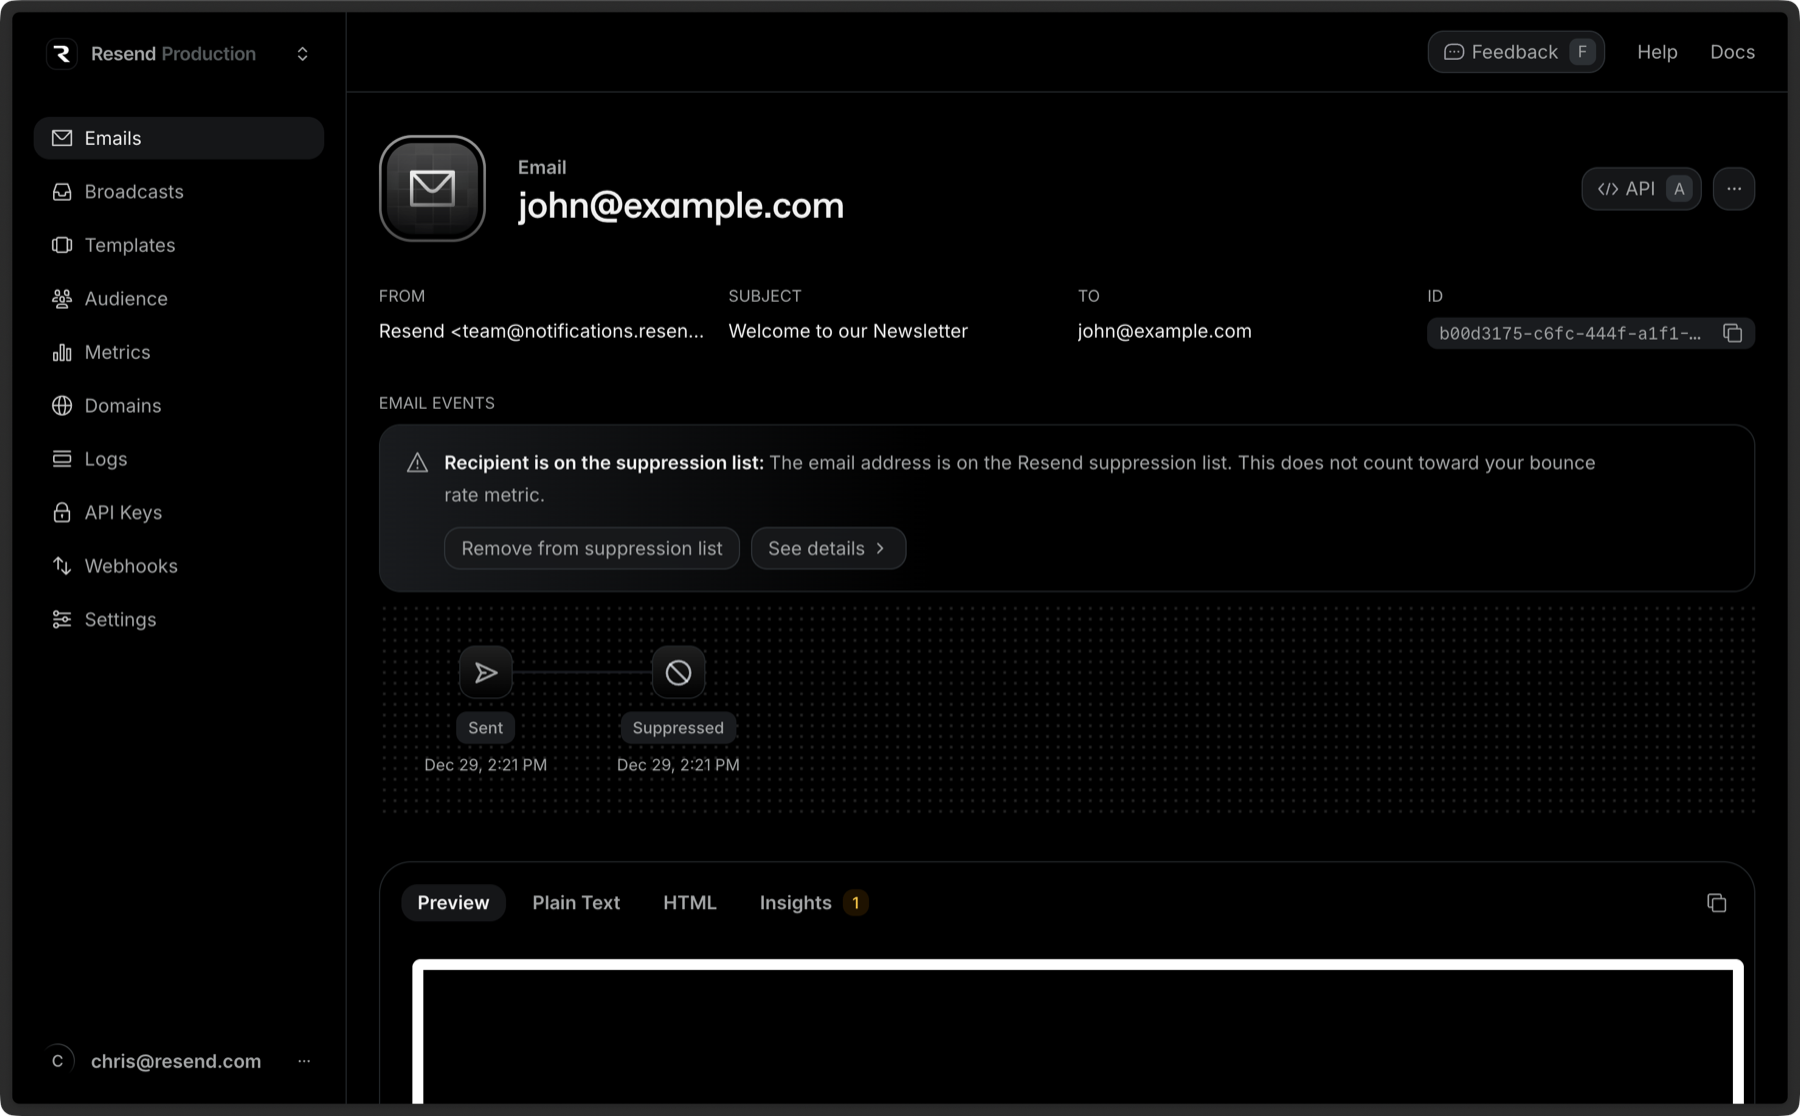 Once you click **See Details**, the drawer will open on the right side of your screen with the suppression reason along with suggestions on how to proceed.
You can also click **Remove from Suppression List** to prevent the address from being suppressed. Do note that if it bounces or is marked as spam again, it'll be suppressed again. Multiple or repeated bounces will negatively impact your sender reputation.
---
# Source: https://resend.com/docs/dashboard/emails/email-templates.md
# Email Templates
> Use high quality, unstyled components for your transactional emails using React and Typescript
While you can generate HTML for your emails using any method, we recommend [React Email](https://react.email/) for React developers. It makes it easy to create email templates with React and TailwindCSS.
* [Getting started quickguide](https://react.email/docs/getting-started/automatic-setup)
* [Email components](https://react.email/components)
* [Email examples](https://react.email/templates)
Each example includes a preview, the React code, the rendered HTML, and the plain text version of the email.
---
# Source: https://resend.com/docs/dashboard/emails/embed-inline-images.md
> ## Documentation Index
> Fetch the complete documentation index at: https://resend.com/docs/llms.txt
> Use this file to discover all available pages before exploring further.
# Embed Inline Images
> Send emails with inline images.
You can optionally embed an image in the HTML body of the email. This allows you to include images without needing to host them in an external server.
Once you click **See Details**, the drawer will open on the right side of your screen with the suppression reason along with suggestions on how to proceed.
You can also click **Remove from Suppression List** to prevent the address from being suppressed. Do note that if it bounces or is marked as spam again, it'll be suppressed again. Multiple or repeated bounces will negatively impact your sender reputation.
---
# Source: https://resend.com/docs/dashboard/emails/email-templates.md
# Email Templates
> Use high quality, unstyled components for your transactional emails using React and Typescript
While you can generate HTML for your emails using any method, we recommend [React Email](https://react.email/) for React developers. It makes it easy to create email templates with React and TailwindCSS.
* [Getting started quickguide](https://react.email/docs/getting-started/automatic-setup)
* [Email components](https://react.email/components)
* [Email examples](https://react.email/templates)
Each example includes a preview, the React code, the rendered HTML, and the plain text version of the email.
---
# Source: https://resend.com/docs/dashboard/emails/embed-inline-images.md
> ## Documentation Index
> Fetch the complete documentation index at: https://resend.com/docs/llms.txt
> Use this file to discover all available pages before exploring further.
# Embed Inline Images
> Send emails with inline images.
You can optionally embed an image in the HTML body of the email. This allows you to include images without needing to host them in an external server.
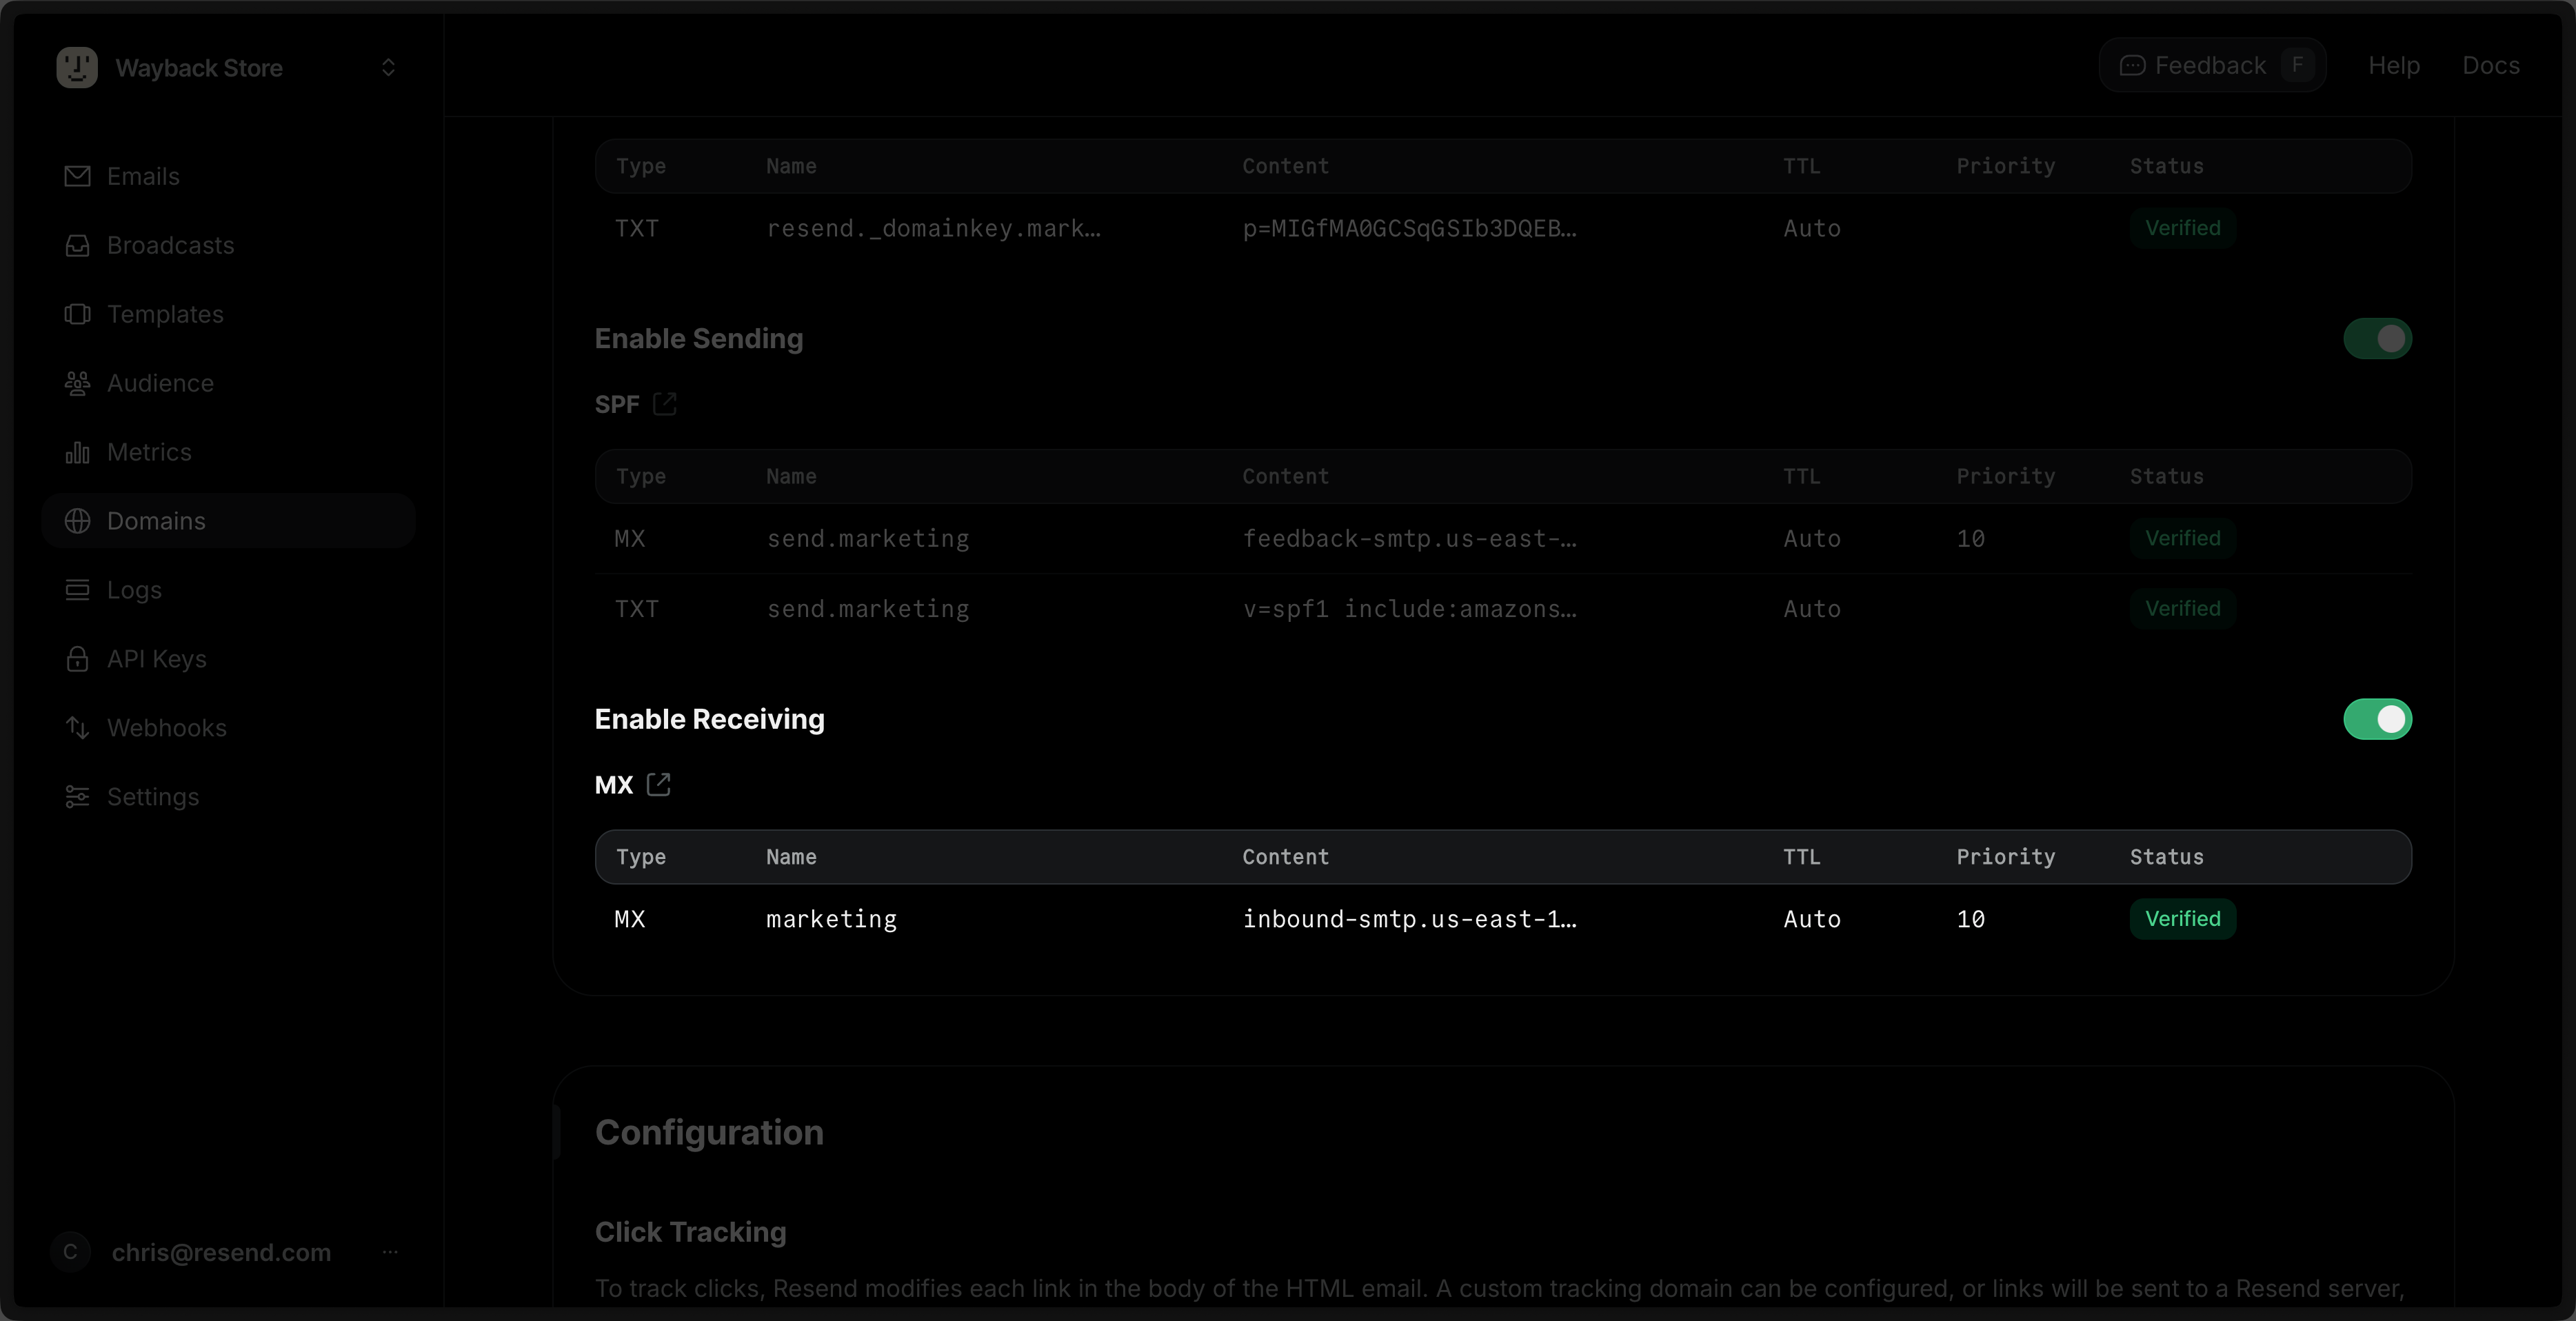 Add the records in your DNS provider and wait for verification to finish in Resend. Learn more about [adding Domains in Resend](/dashboard/domains/introduction).
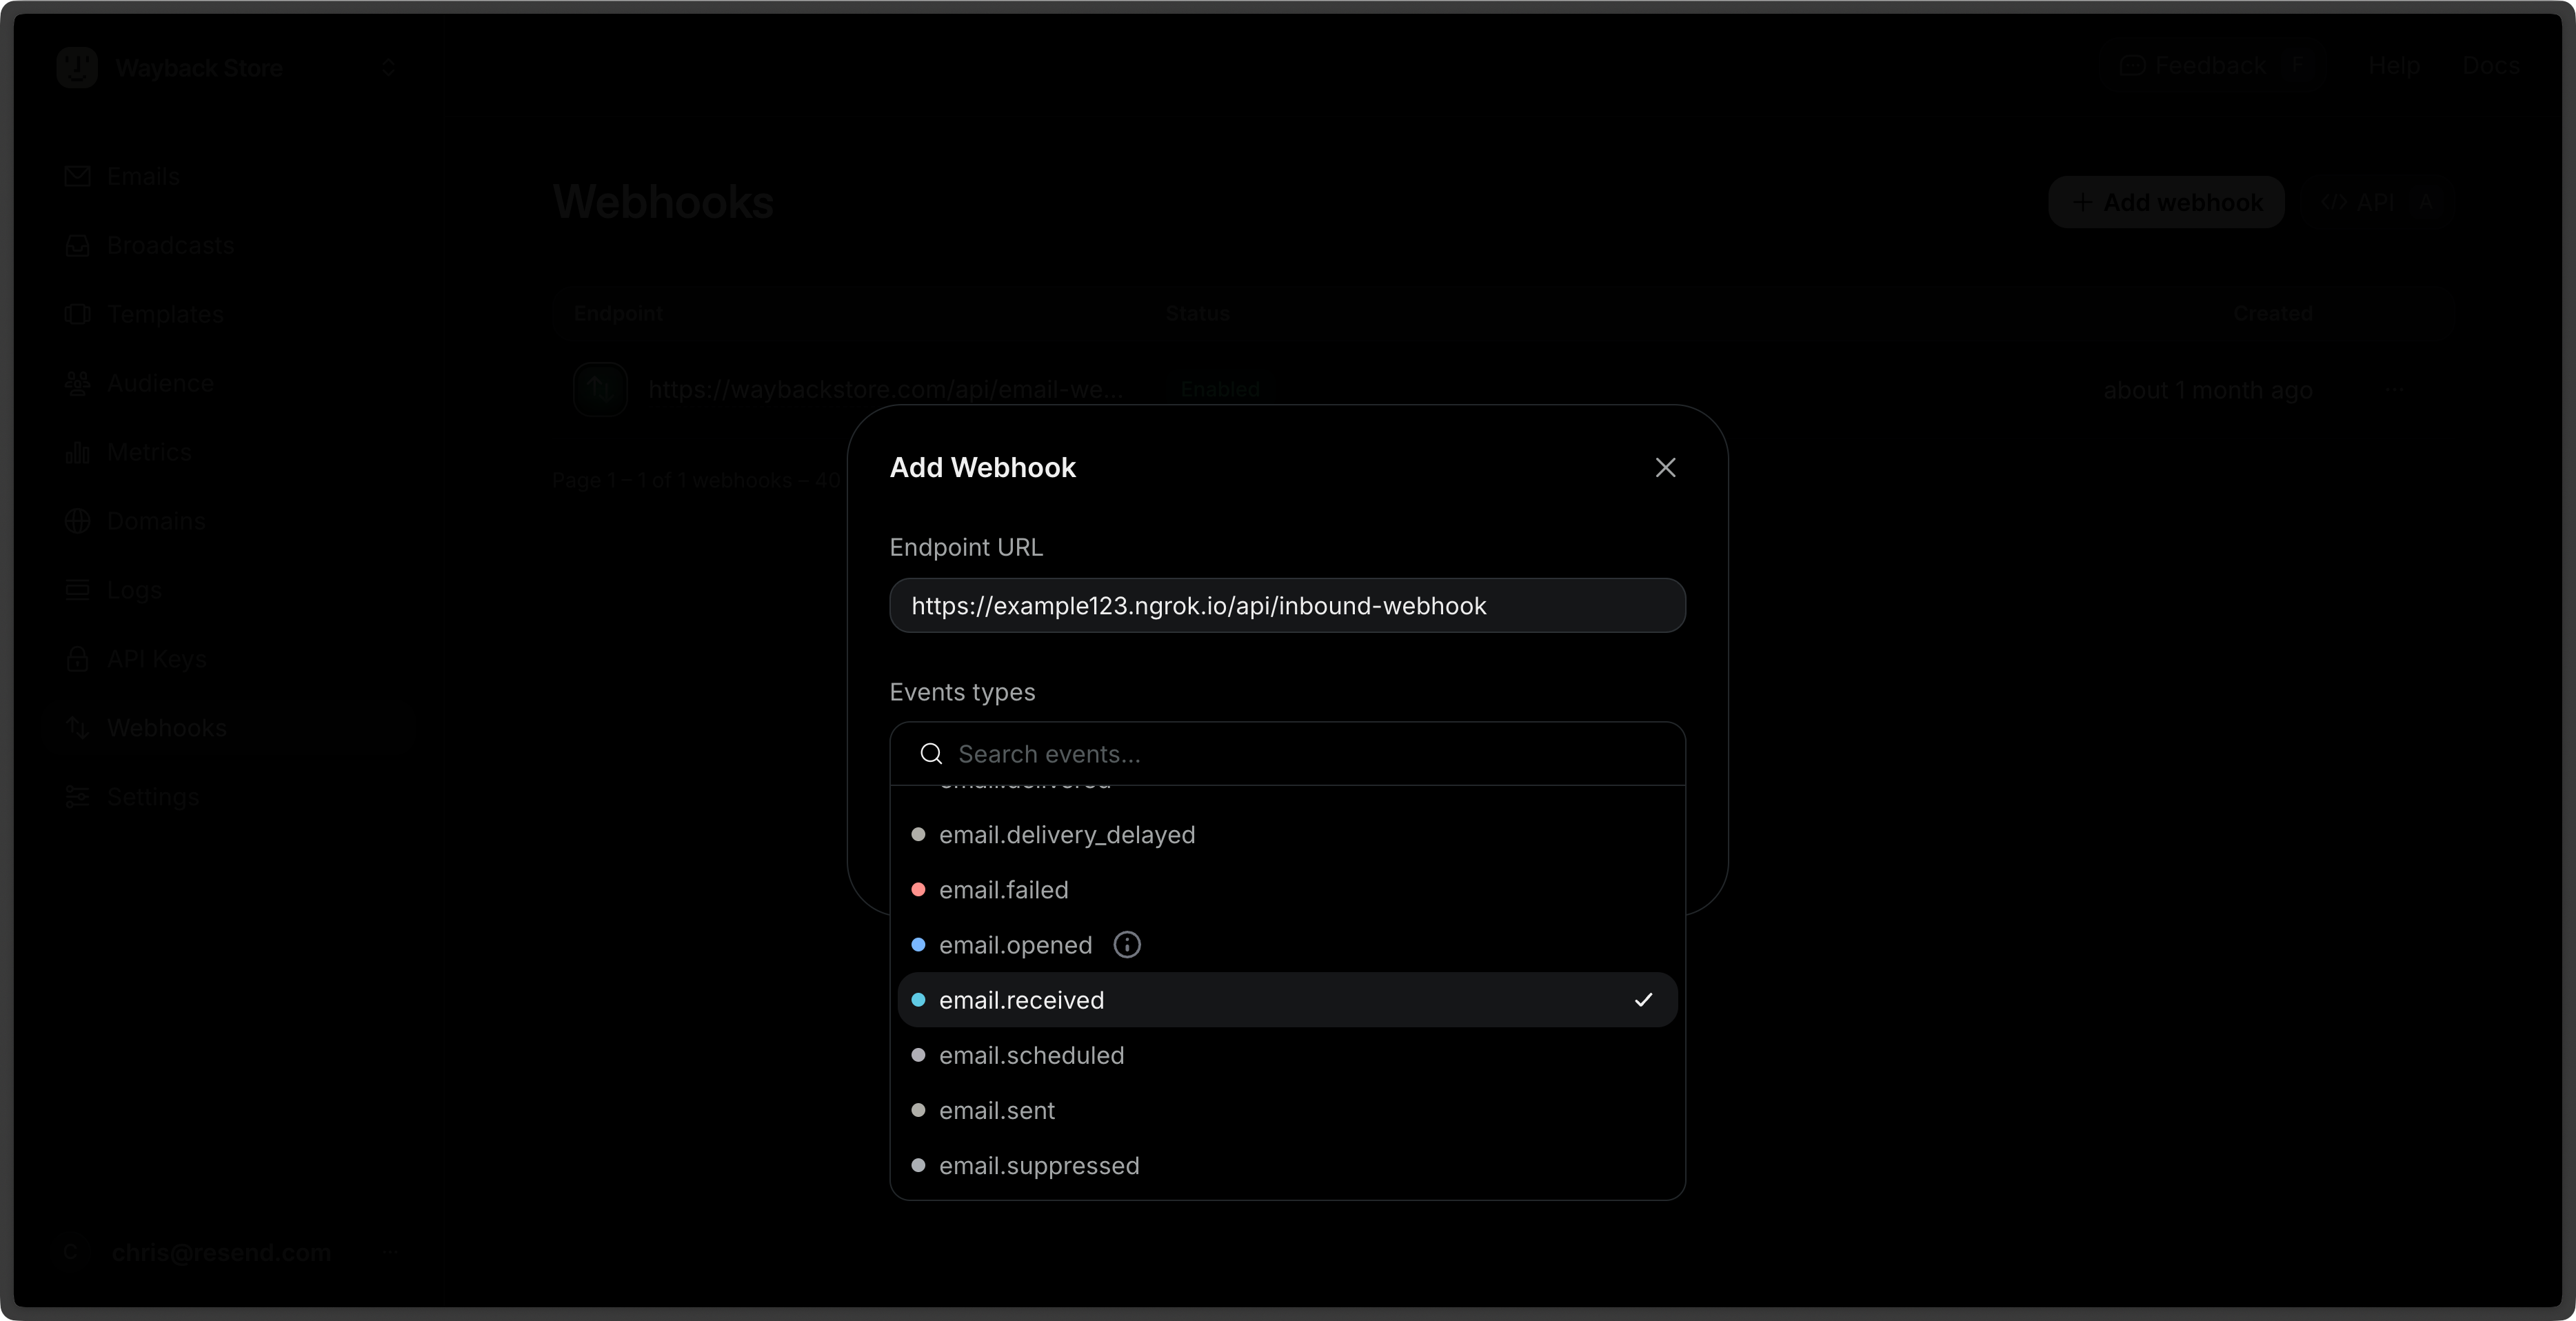
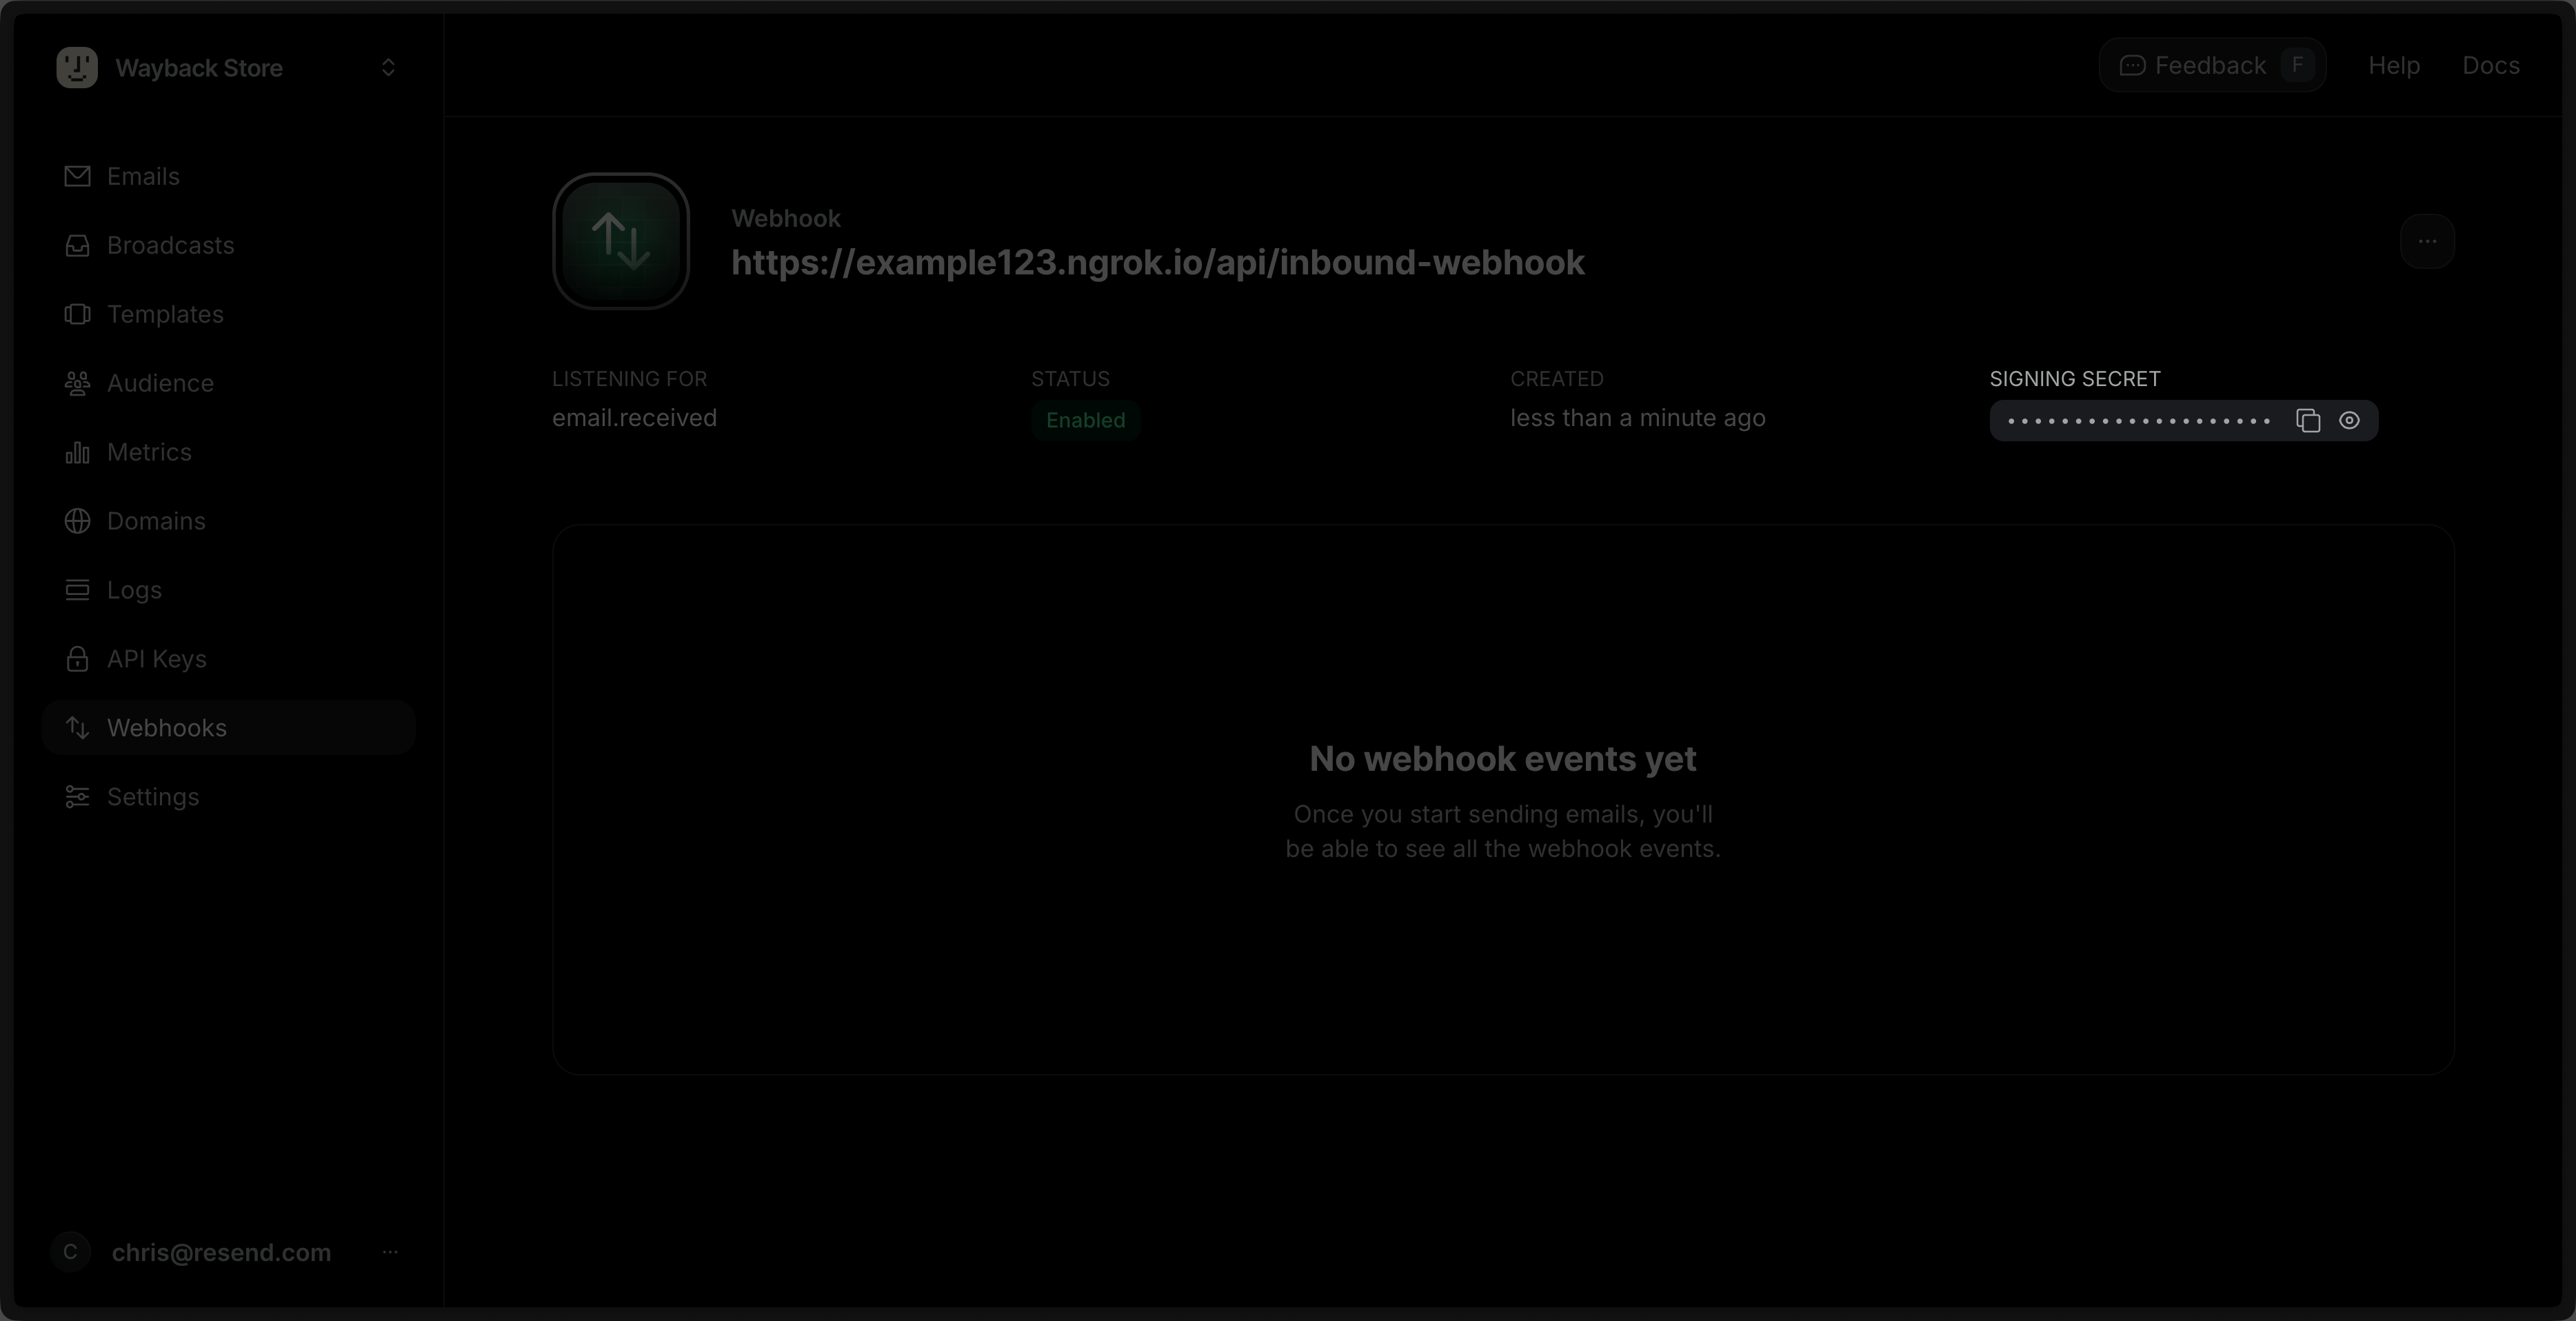 Then, add it to your project's .env file.
```env .env theme={"theme":{"light":"github-light","dark":"vesper"}}
RESEND_WEBHOOK_SECRET=whsec_xxxxxxxxxx
```
Update the POST route to verify the webhook request using the webhook secret.
Then, add it to your project's .env file.
```env .env theme={"theme":{"light":"github-light","dark":"vesper"}}
RESEND_WEBHOOK_SECRET=whsec_xxxxxxxxxx
```
Update the POST route to verify the webhook request using the webhook secret.
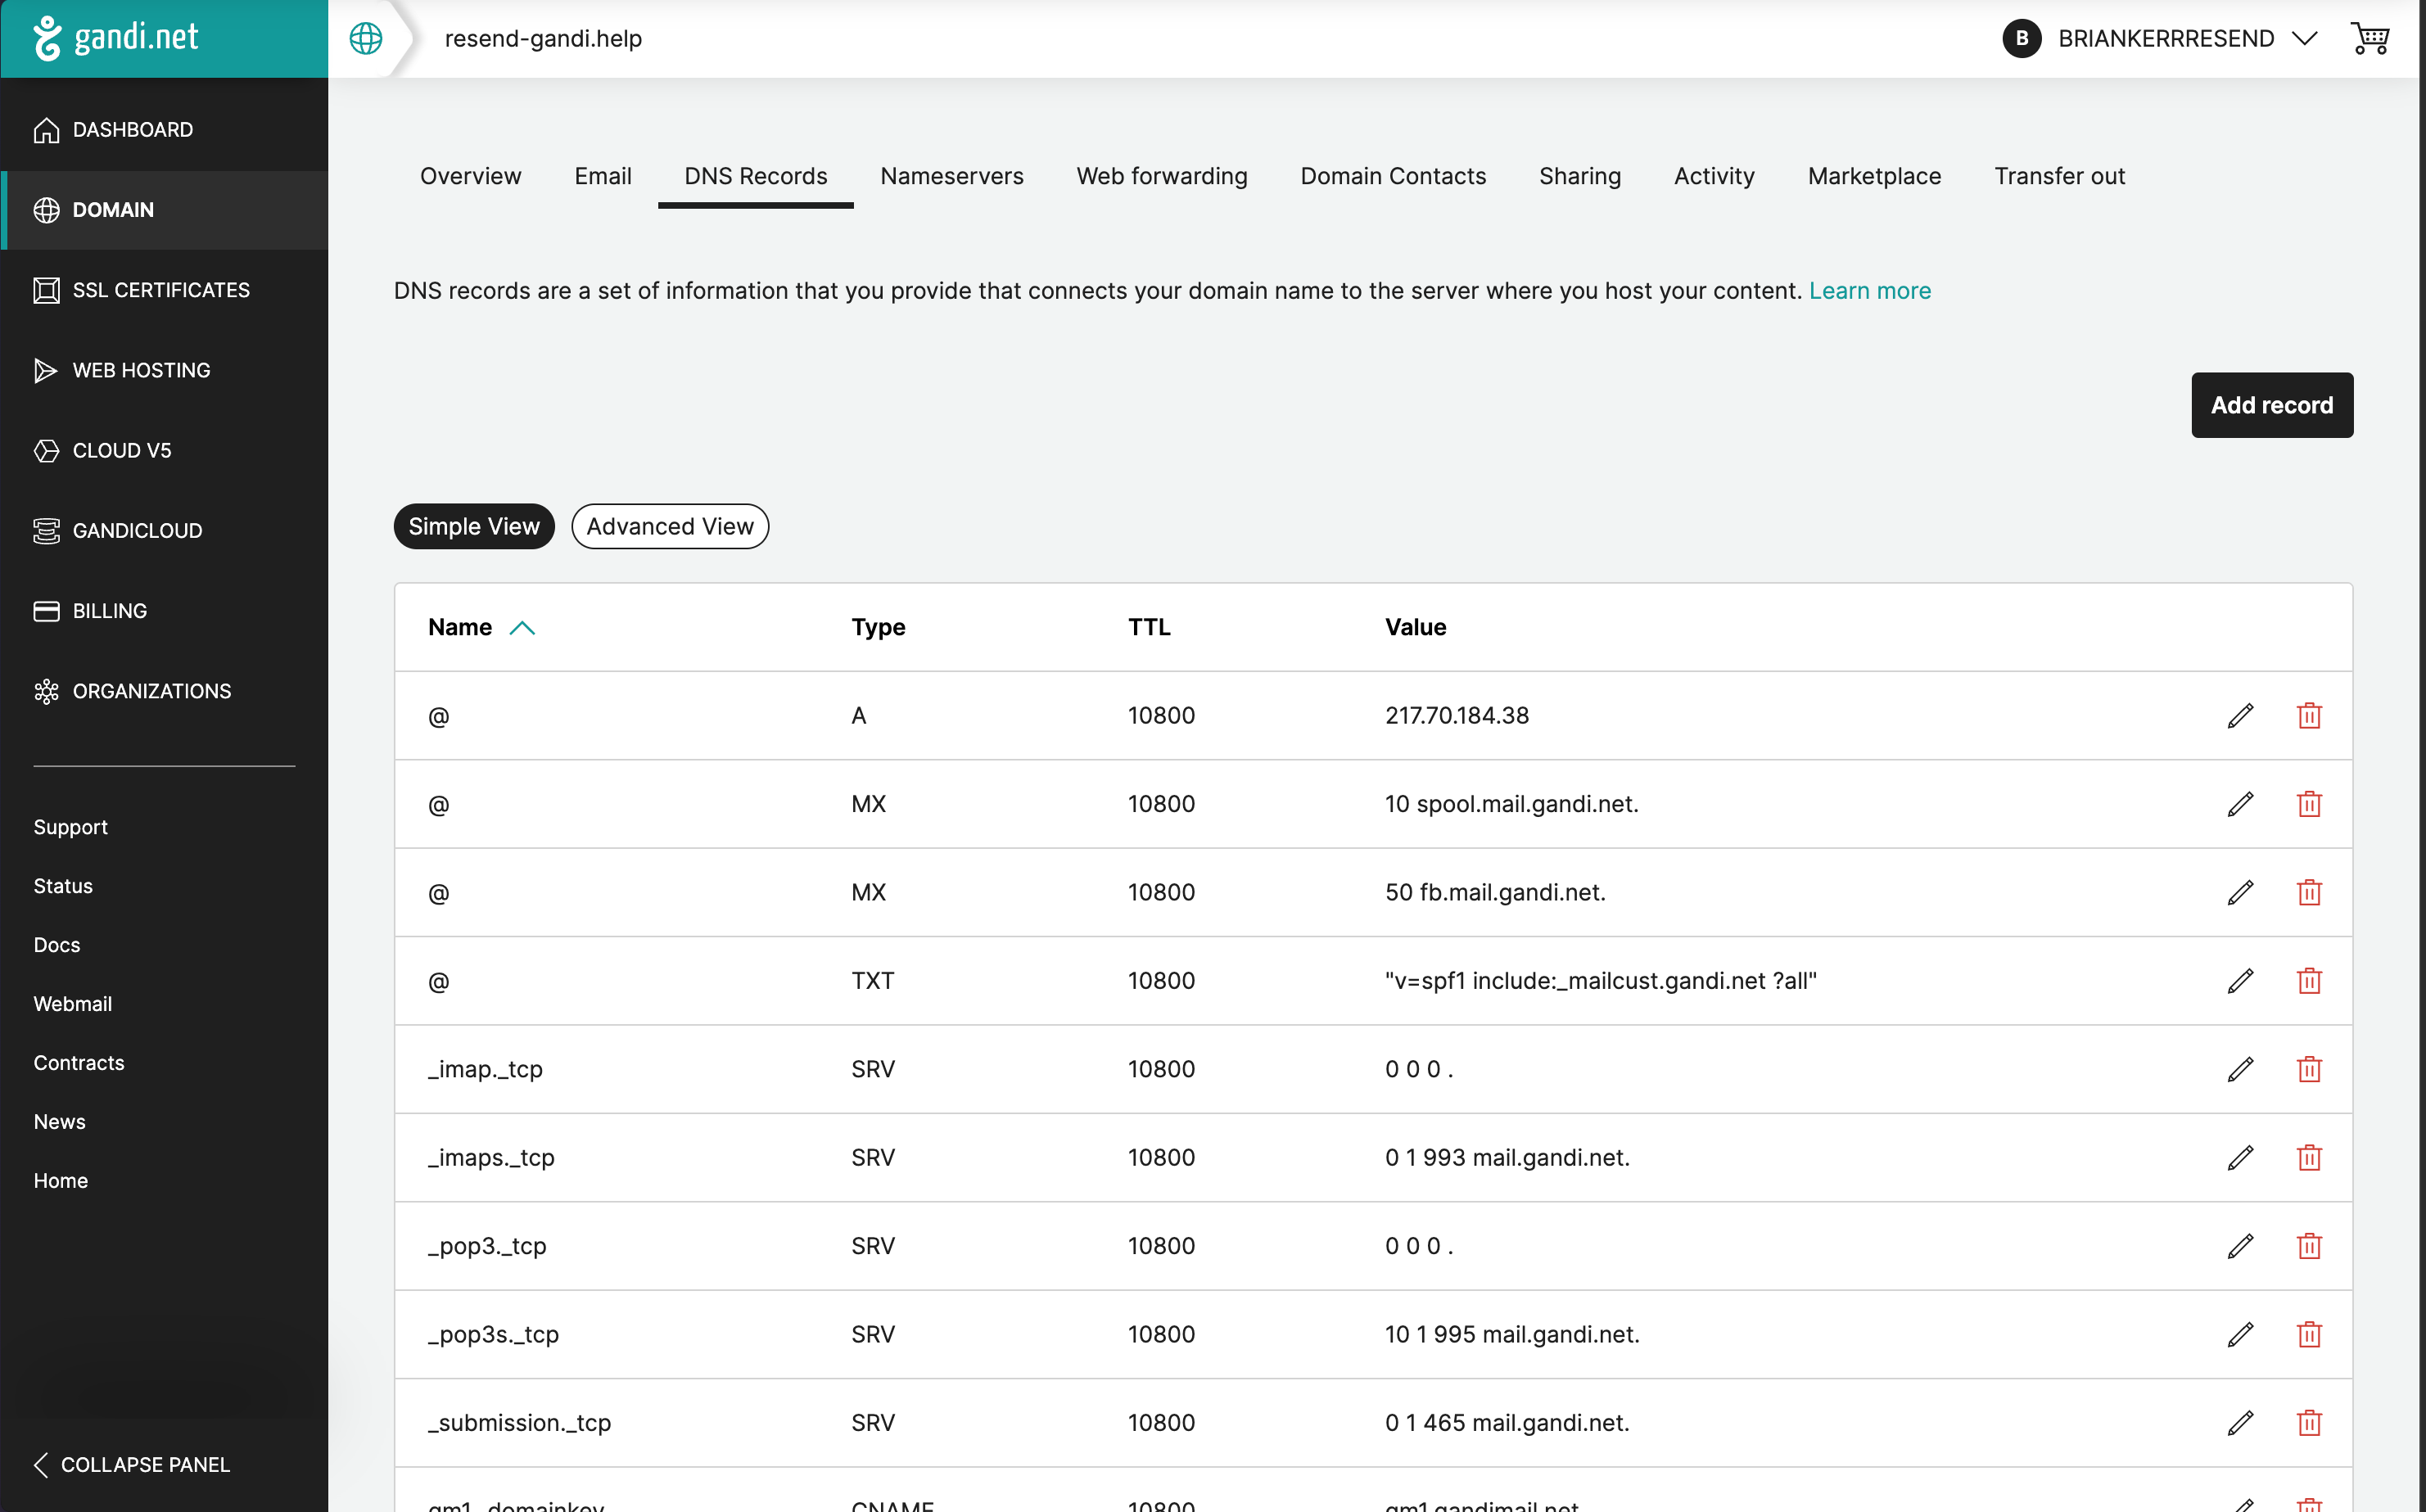 ## Add MX SPF Record
Select “Add record” on Gandi to copy and paste the values MX from Resend.
1. On the `Type` page, choose `MX`.
2. Use the default TTL of `10800`.
3. Type `send` for the `Name` of the record.
4. Use the default `Priority` of `10`.
5. Copy the MX Value from Resend into the `Hostname` field.
6. Select `Create`.
## Add MX SPF Record
Select “Add record” on Gandi to copy and paste the values MX from Resend.
1. On the `Type` page, choose `MX`.
2. Use the default TTL of `10800`.
3. Type `send` for the `Name` of the record.
4. Use the default `Priority` of `10`.
5. Copy the MX Value from Resend into the `Hostname` field.
6. Select `Create`.
 Below is a mapping of the record fields from Resend to Gandi:
| Gandi | Resend | Example Value |
| -------- | -------- | ---------------------------------------- |
| Type | Type | `MX Record` |
| Name | Name | `send` |
| Hostname | Value | `feedback-smtp.us-east-1.amazonses.com.` |
| TTL | - | `10800` |
| Priority | Priority | `10` |
Below is a mapping of the record fields from Resend to Gandi:
| Gandi | Resend | Example Value |
| -------- | -------- | ---------------------------------------- |
| Type | Type | `MX Record` |
| Name | Name | `send` |
| Hostname | Value | `feedback-smtp.us-east-1.amazonses.com.` |
| TTL | - | `10800` |
| Priority | Priority | `10` |
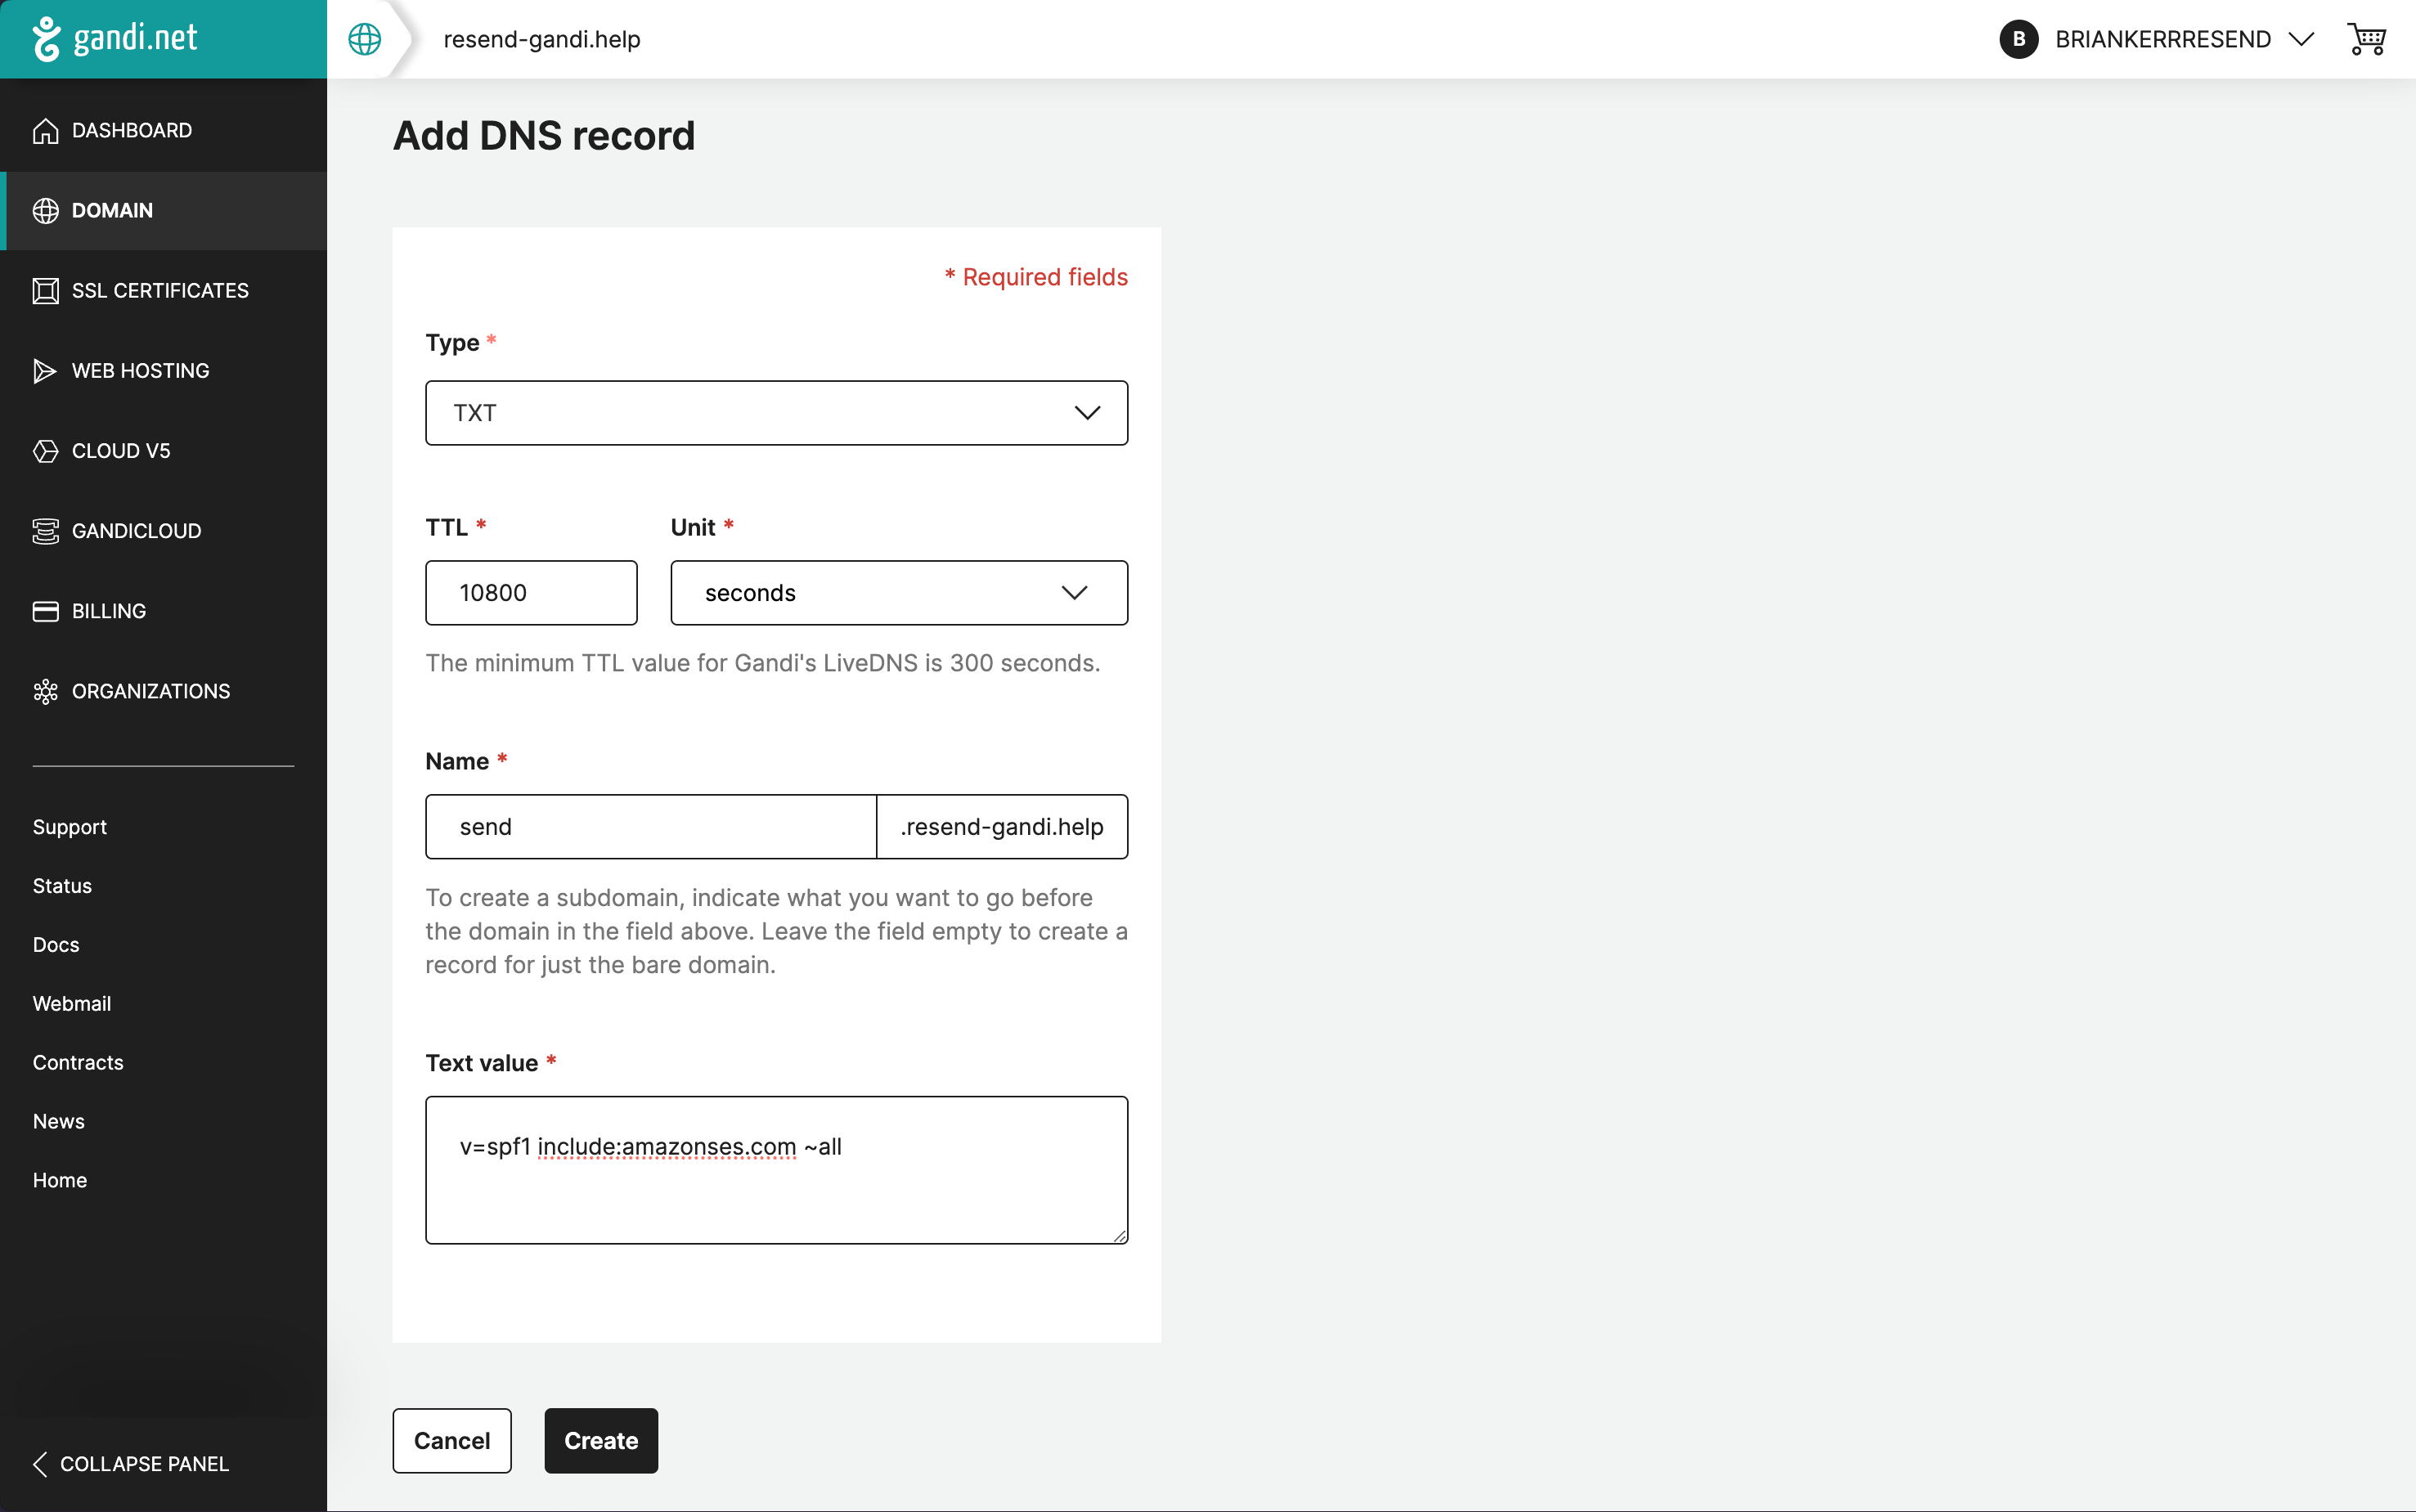 Below is a mapping of the record fields from Resend to Gandi:
| Gandi | Resend | Example Value |
| ---------- | ------ | ------------------------------------- |
| Type | Type | `TXT Record` |
| Name | Name | `send` |
| Text value | Value | `"v=spf1 include:amazonses.com ~all"` |
| TTL | - | `10800` |
## Add TXT DKIM Records
In the same section, select “Add record” again.
1. On the `Type` page, choose `TXT`.
2. Use the default TTL of `10800`.
3. Type `resend._domainkey` for the `Host name` of the record.
4. Copy the record value from Resend into the `TXT value` field.
5. Select `Create`.
Below is a mapping of the record fields from Resend to Gandi:
| Gandi | Resend | Example Value |
| ---------- | ------ | ------------------------------------- |
| Type | Type | `TXT Record` |
| Name | Name | `send` |
| Text value | Value | `"v=spf1 include:amazonses.com ~all"` |
| TTL | - | `10800` |
## Add TXT DKIM Records
In the same section, select “Add record” again.
1. On the `Type` page, choose `TXT`.
2. Use the default TTL of `10800`.
3. Type `resend._domainkey` for the `Host name` of the record.
4. Copy the record value from Resend into the `TXT value` field.
5. Select `Create`.
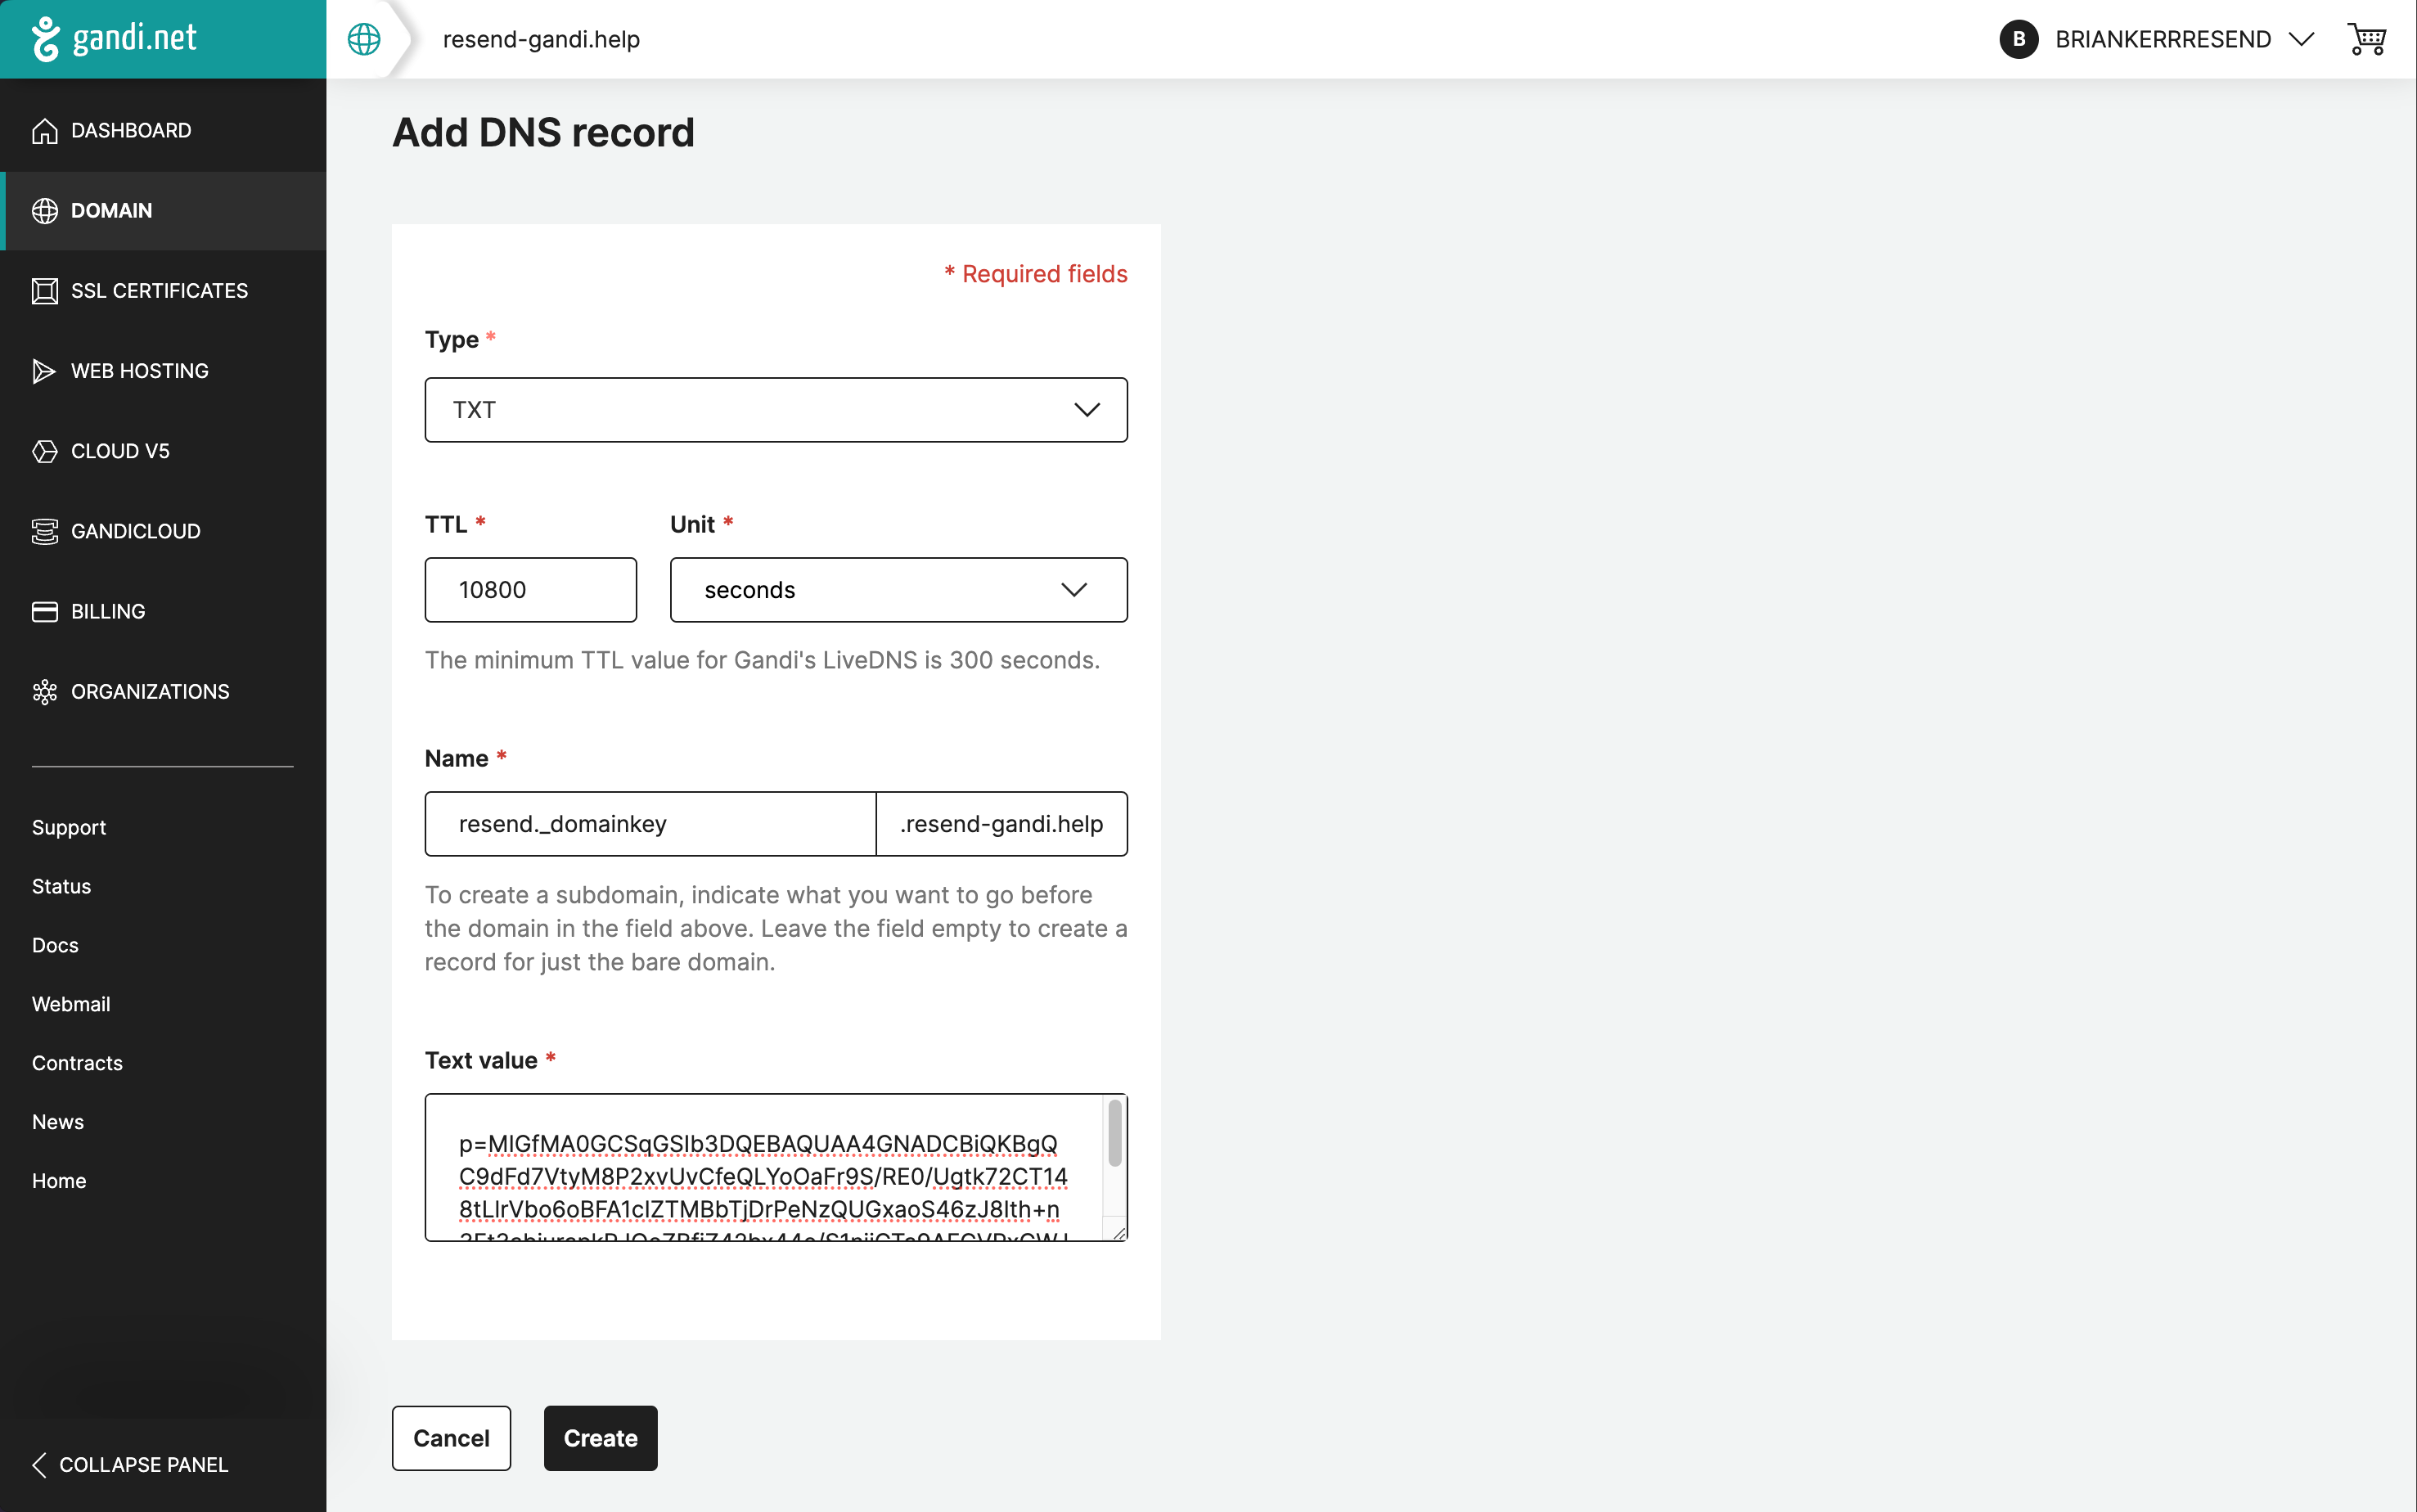 Below is a mapping of the record fields from Resend to Gandi:
| Gandi | Resend | Example Value |
| ---------- | ------ | ---------------------------- |
| Type | Type | `TXT Record` |
| Name | Name | `send` |
| Text value | Value | `p=example_demain_key_value` |
| TTL | - | `1 hour` |
## Receiving Emails
If you want to receive emails at your domain, toggle the "Receiving" switch on the domain details page.
Below is a mapping of the record fields from Resend to Gandi:
| Gandi | Resend | Example Value |
| ---------- | ------ | ---------------------------- |
| Type | Type | `TXT Record` |
| Name | Name | `send` |
| Text value | Value | `p=example_demain_key_value` |
| TTL | - | `1 hour` |
## Receiving Emails
If you want to receive emails at your domain, toggle the "Receiving" switch on the domain details page.
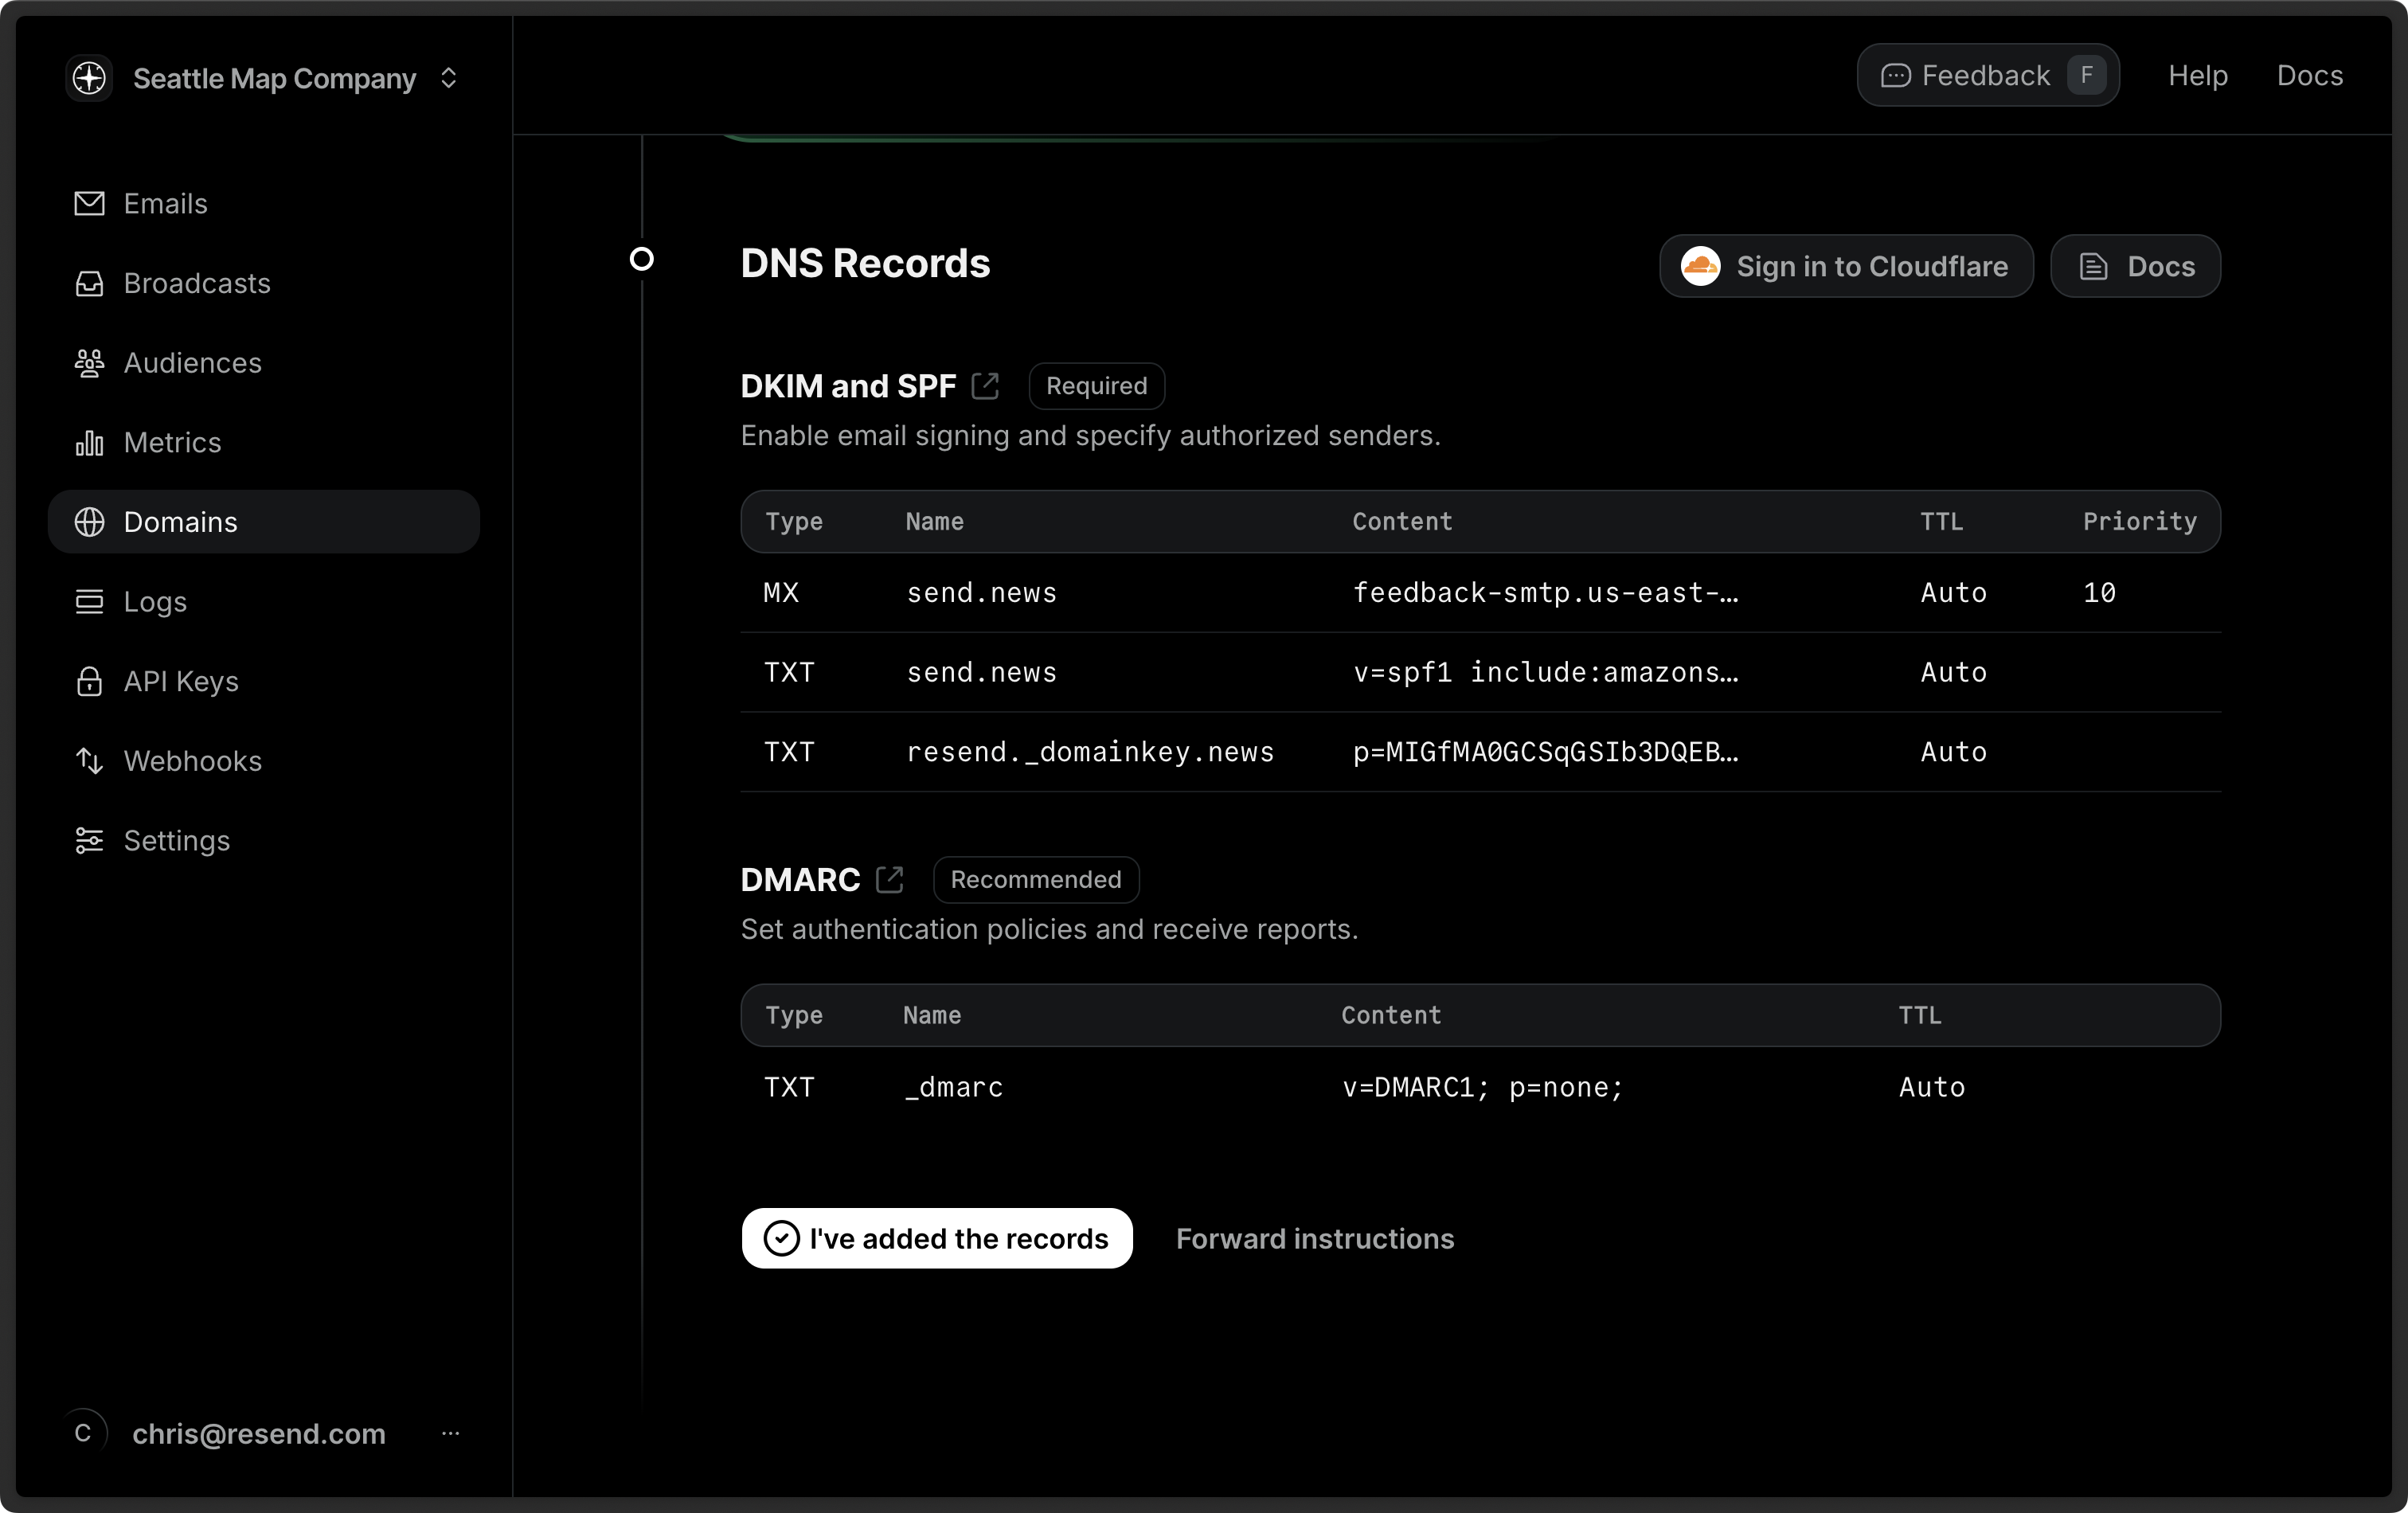 3. Click on **I've added the records** to begin the verification process.
4. Wait for the verification to complete (usually takes 5–10 minutes)
3. Click on **I've added the records** to begin the verification process.
4. Wait for the verification to complete (usually takes 5–10 minutes)
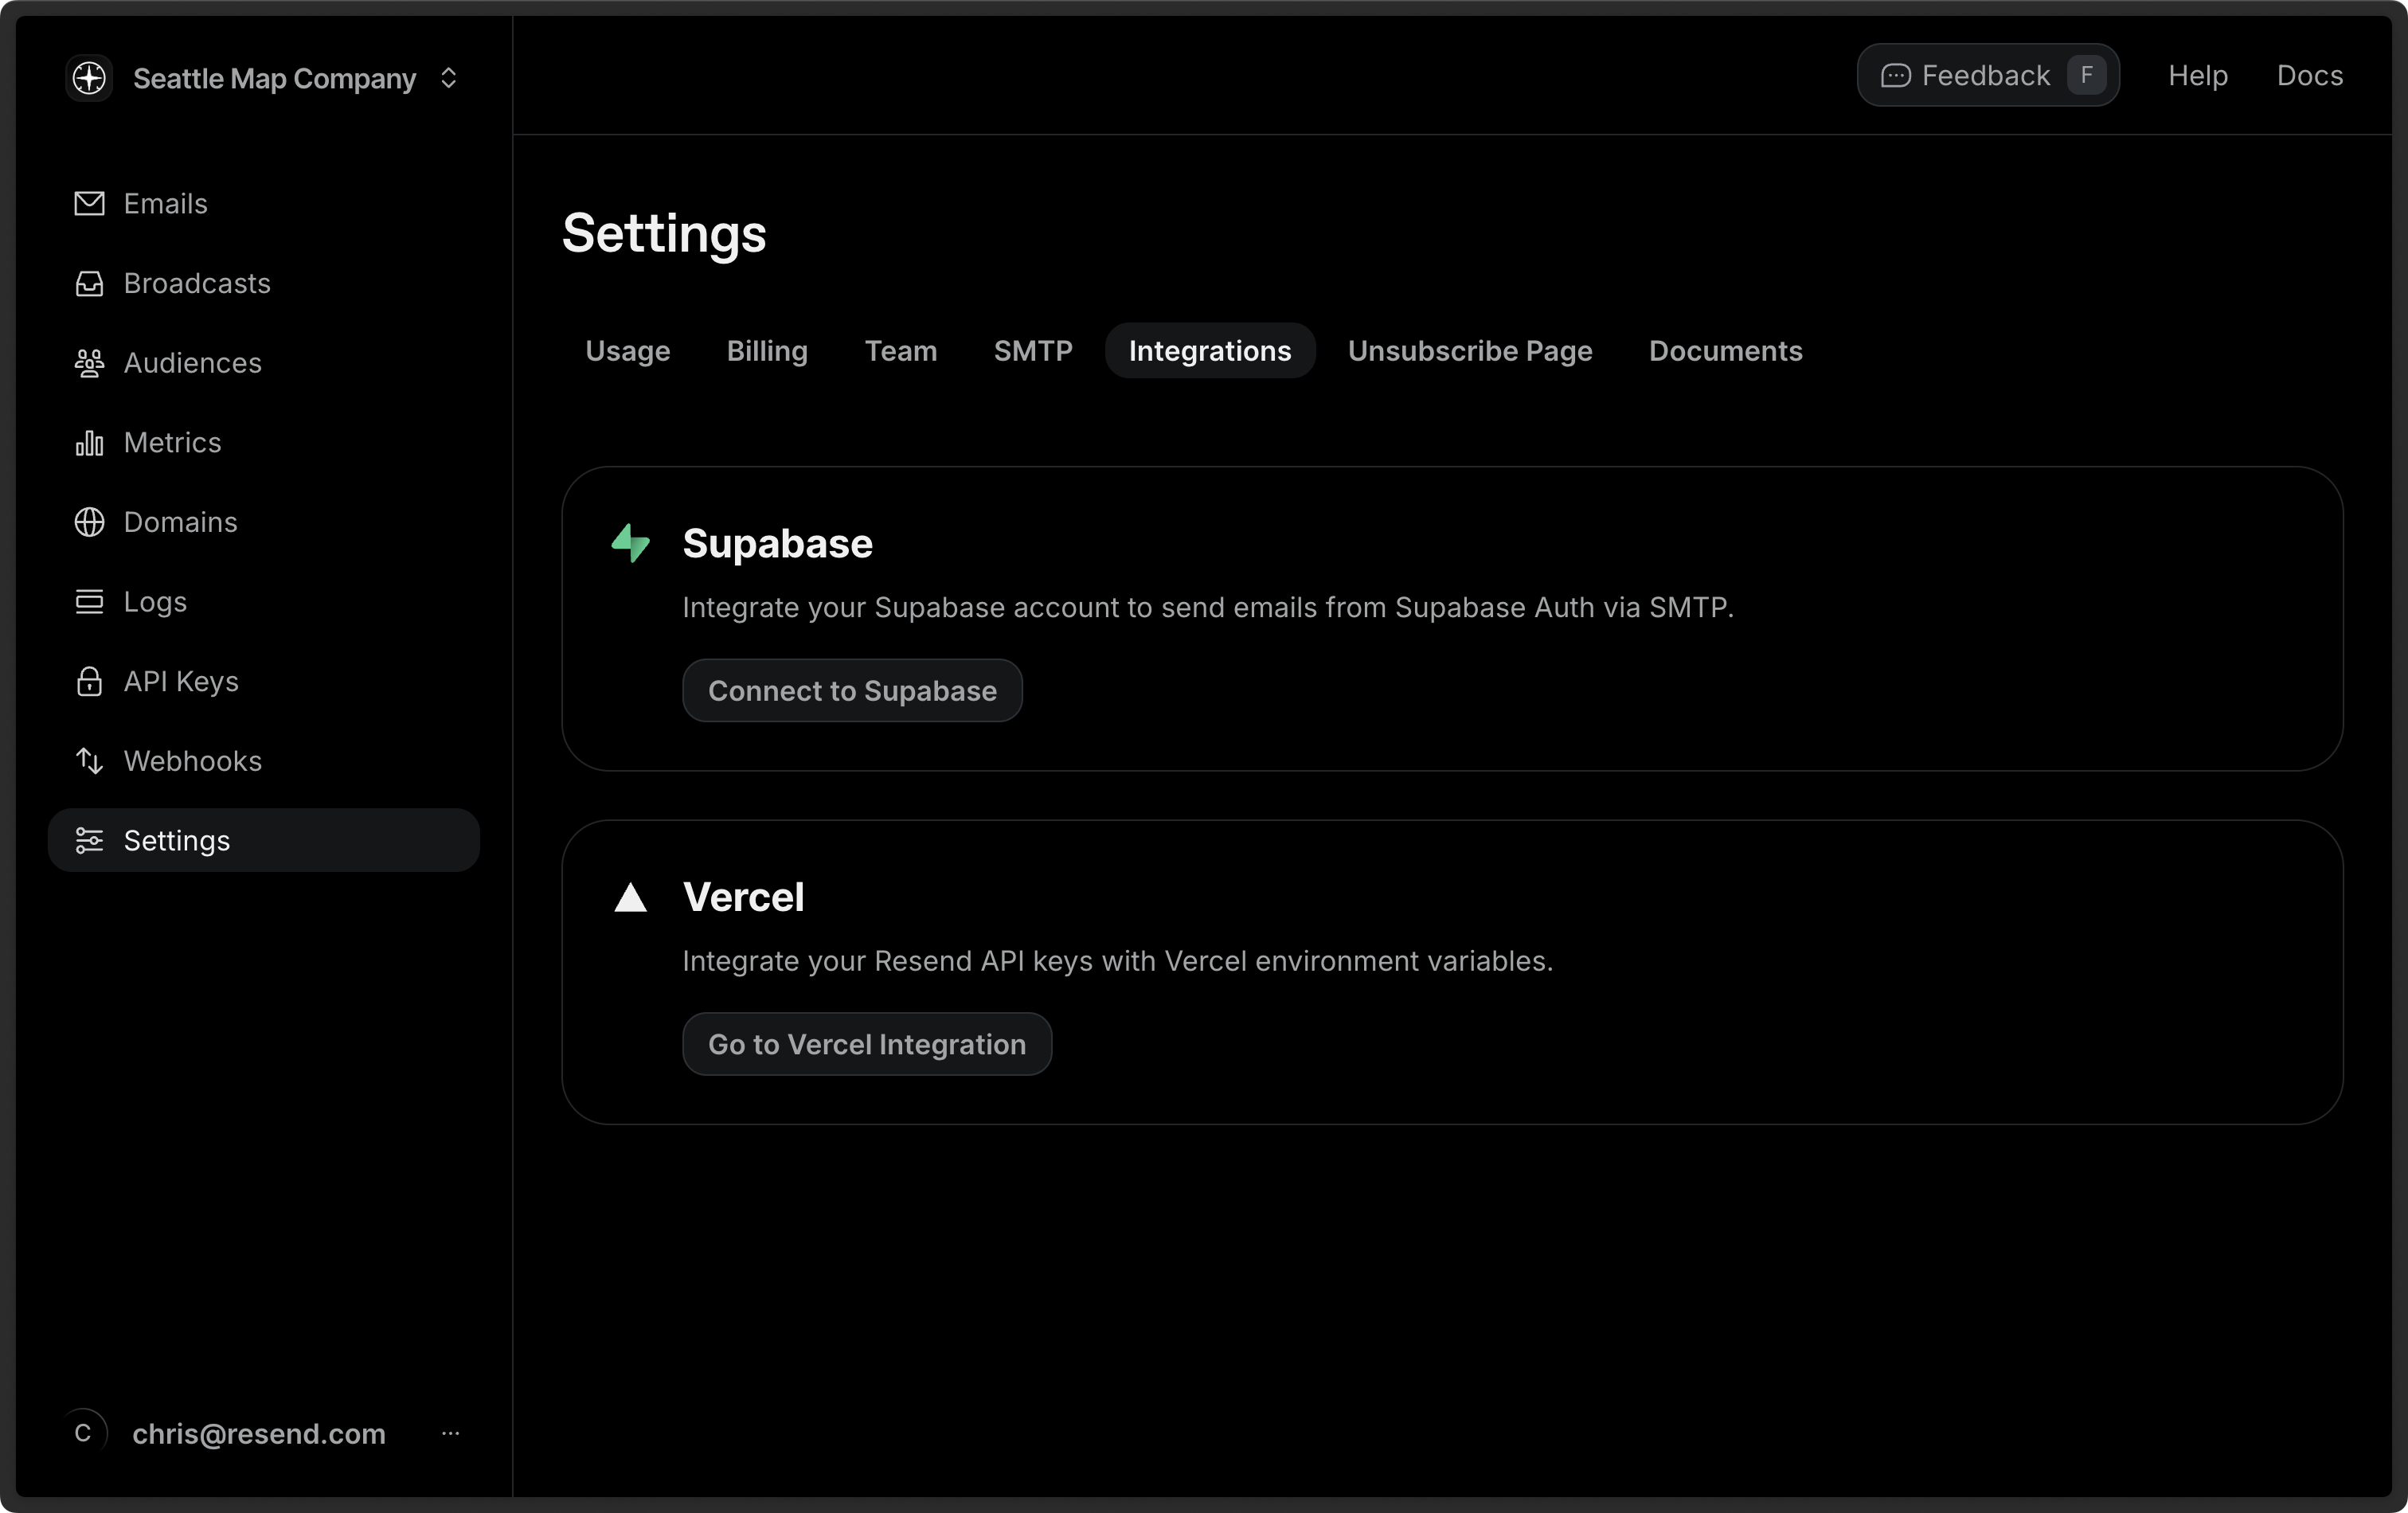 3. Select a project and click **Select Project**, then select your domain and click **Add API Key**. Resend will create an API key for you. Add a sender name and click **Configure SMTP Integration**.
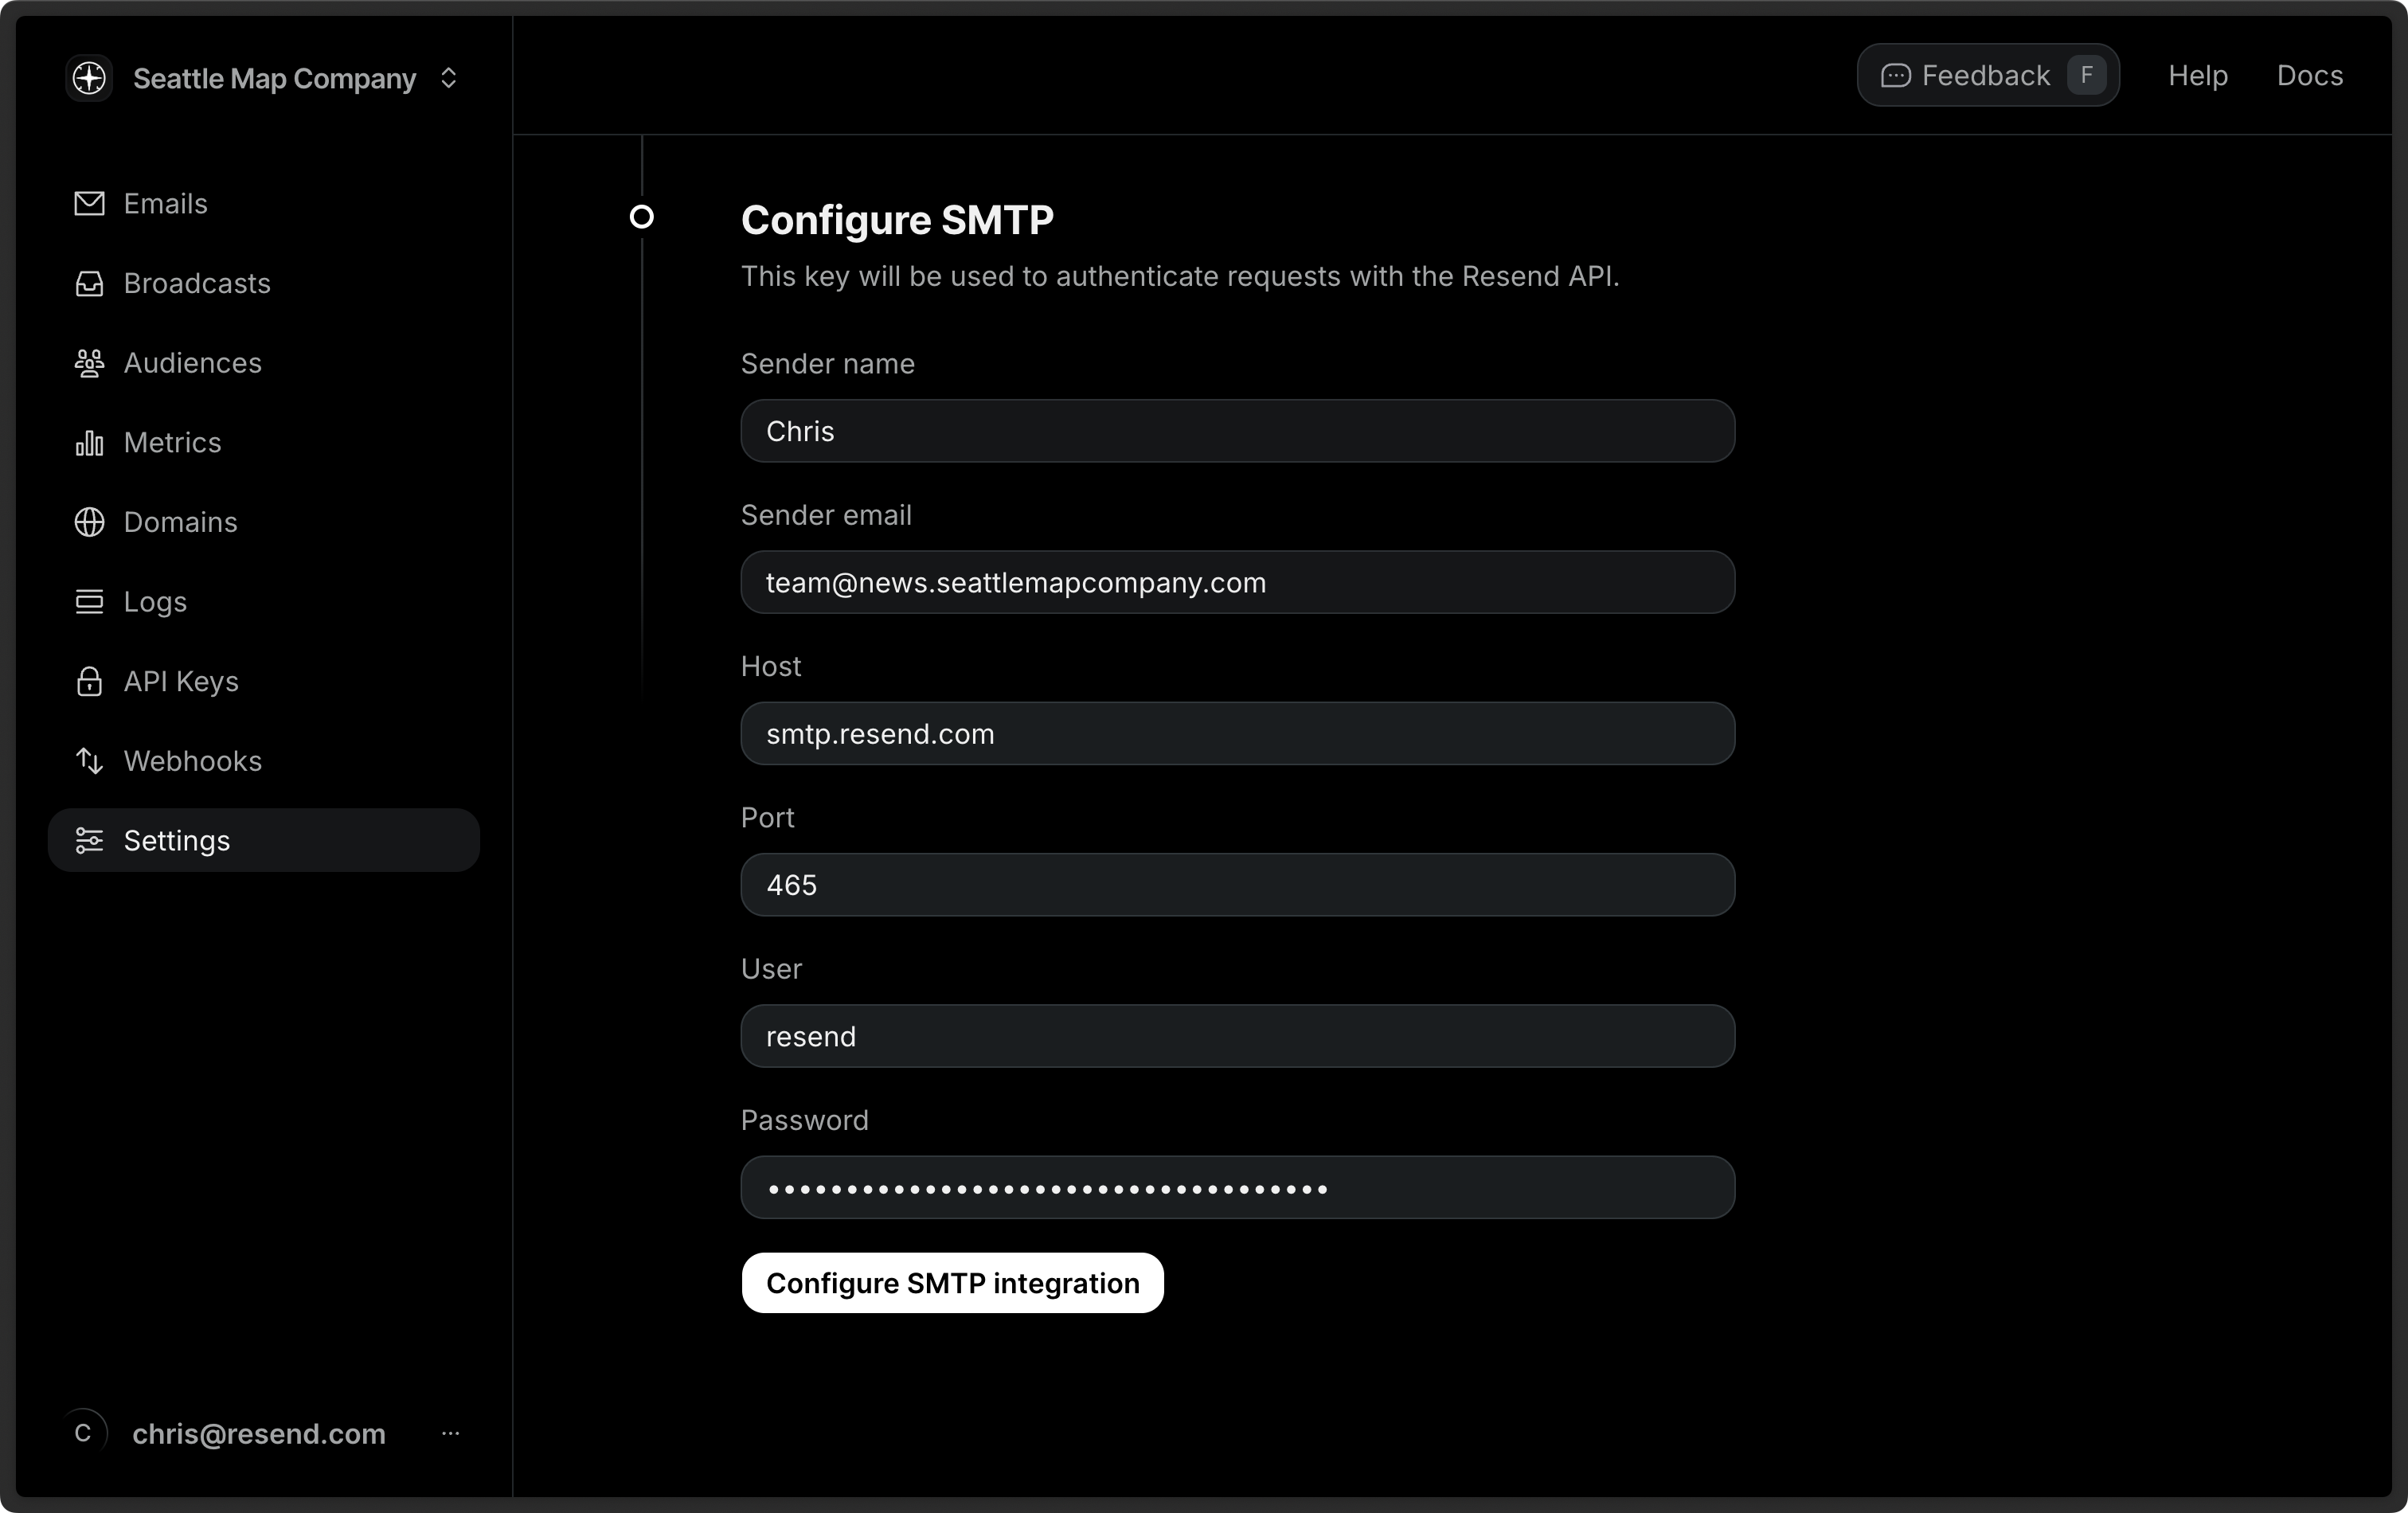 Click on **Supabase Dashboard** to confirm the integration.

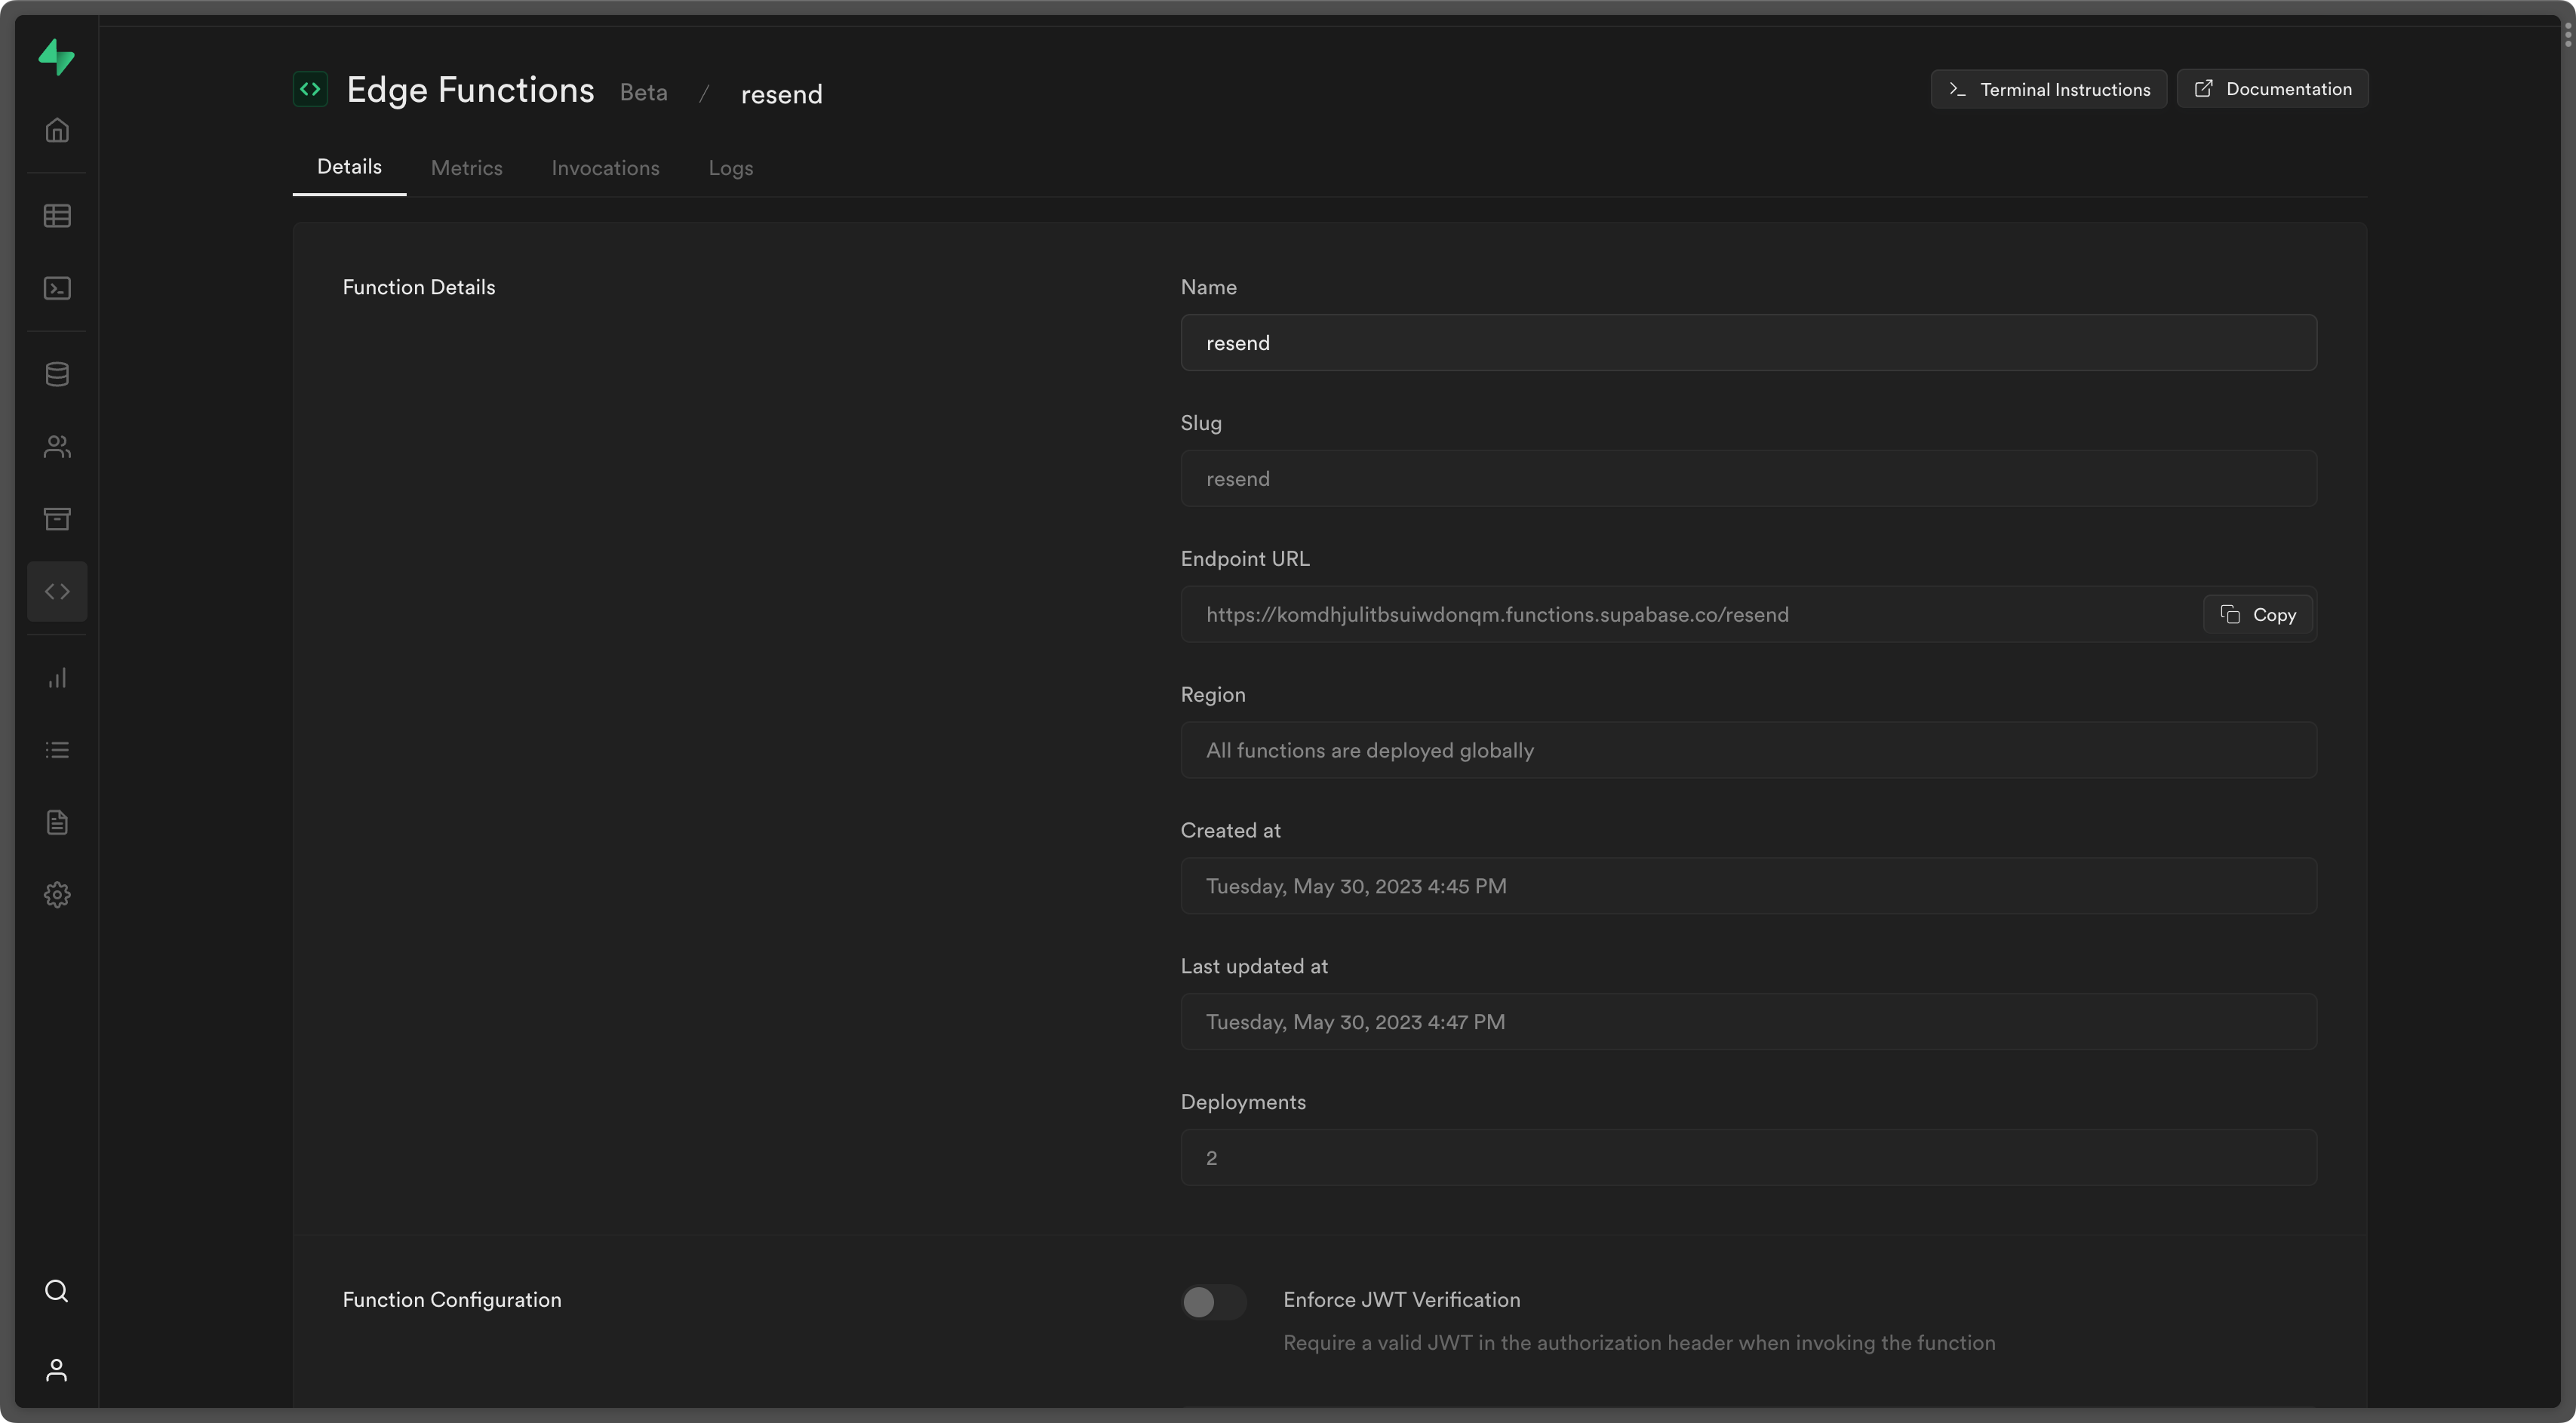 ### 4. Try it yourself
 ## Add MX SPF Record
Copy and paste the values MX in Resend to GoDaddy.
1. Click `Add New Record` to create a new record
2. Set the Type to `MX`.
3. Type `send` for the `Name` of the record.
4. Copy the MX Value from Resend into the `Value` field.
5. Add `10` for the `Priority`.
6. Set the TTL to `600` (or use the default).
7. Click `Save`.
## Add MX SPF Record
Copy and paste the values MX in Resend to GoDaddy.
1. Click `Add New Record` to create a new record
2. Set the Type to `MX`.
3. Type `send` for the `Name` of the record.
4. Copy the MX Value from Resend into the `Value` field.
5. Add `10` for the `Priority`.
6. Set the TTL to `600` (or use the default).
7. Click `Save`.
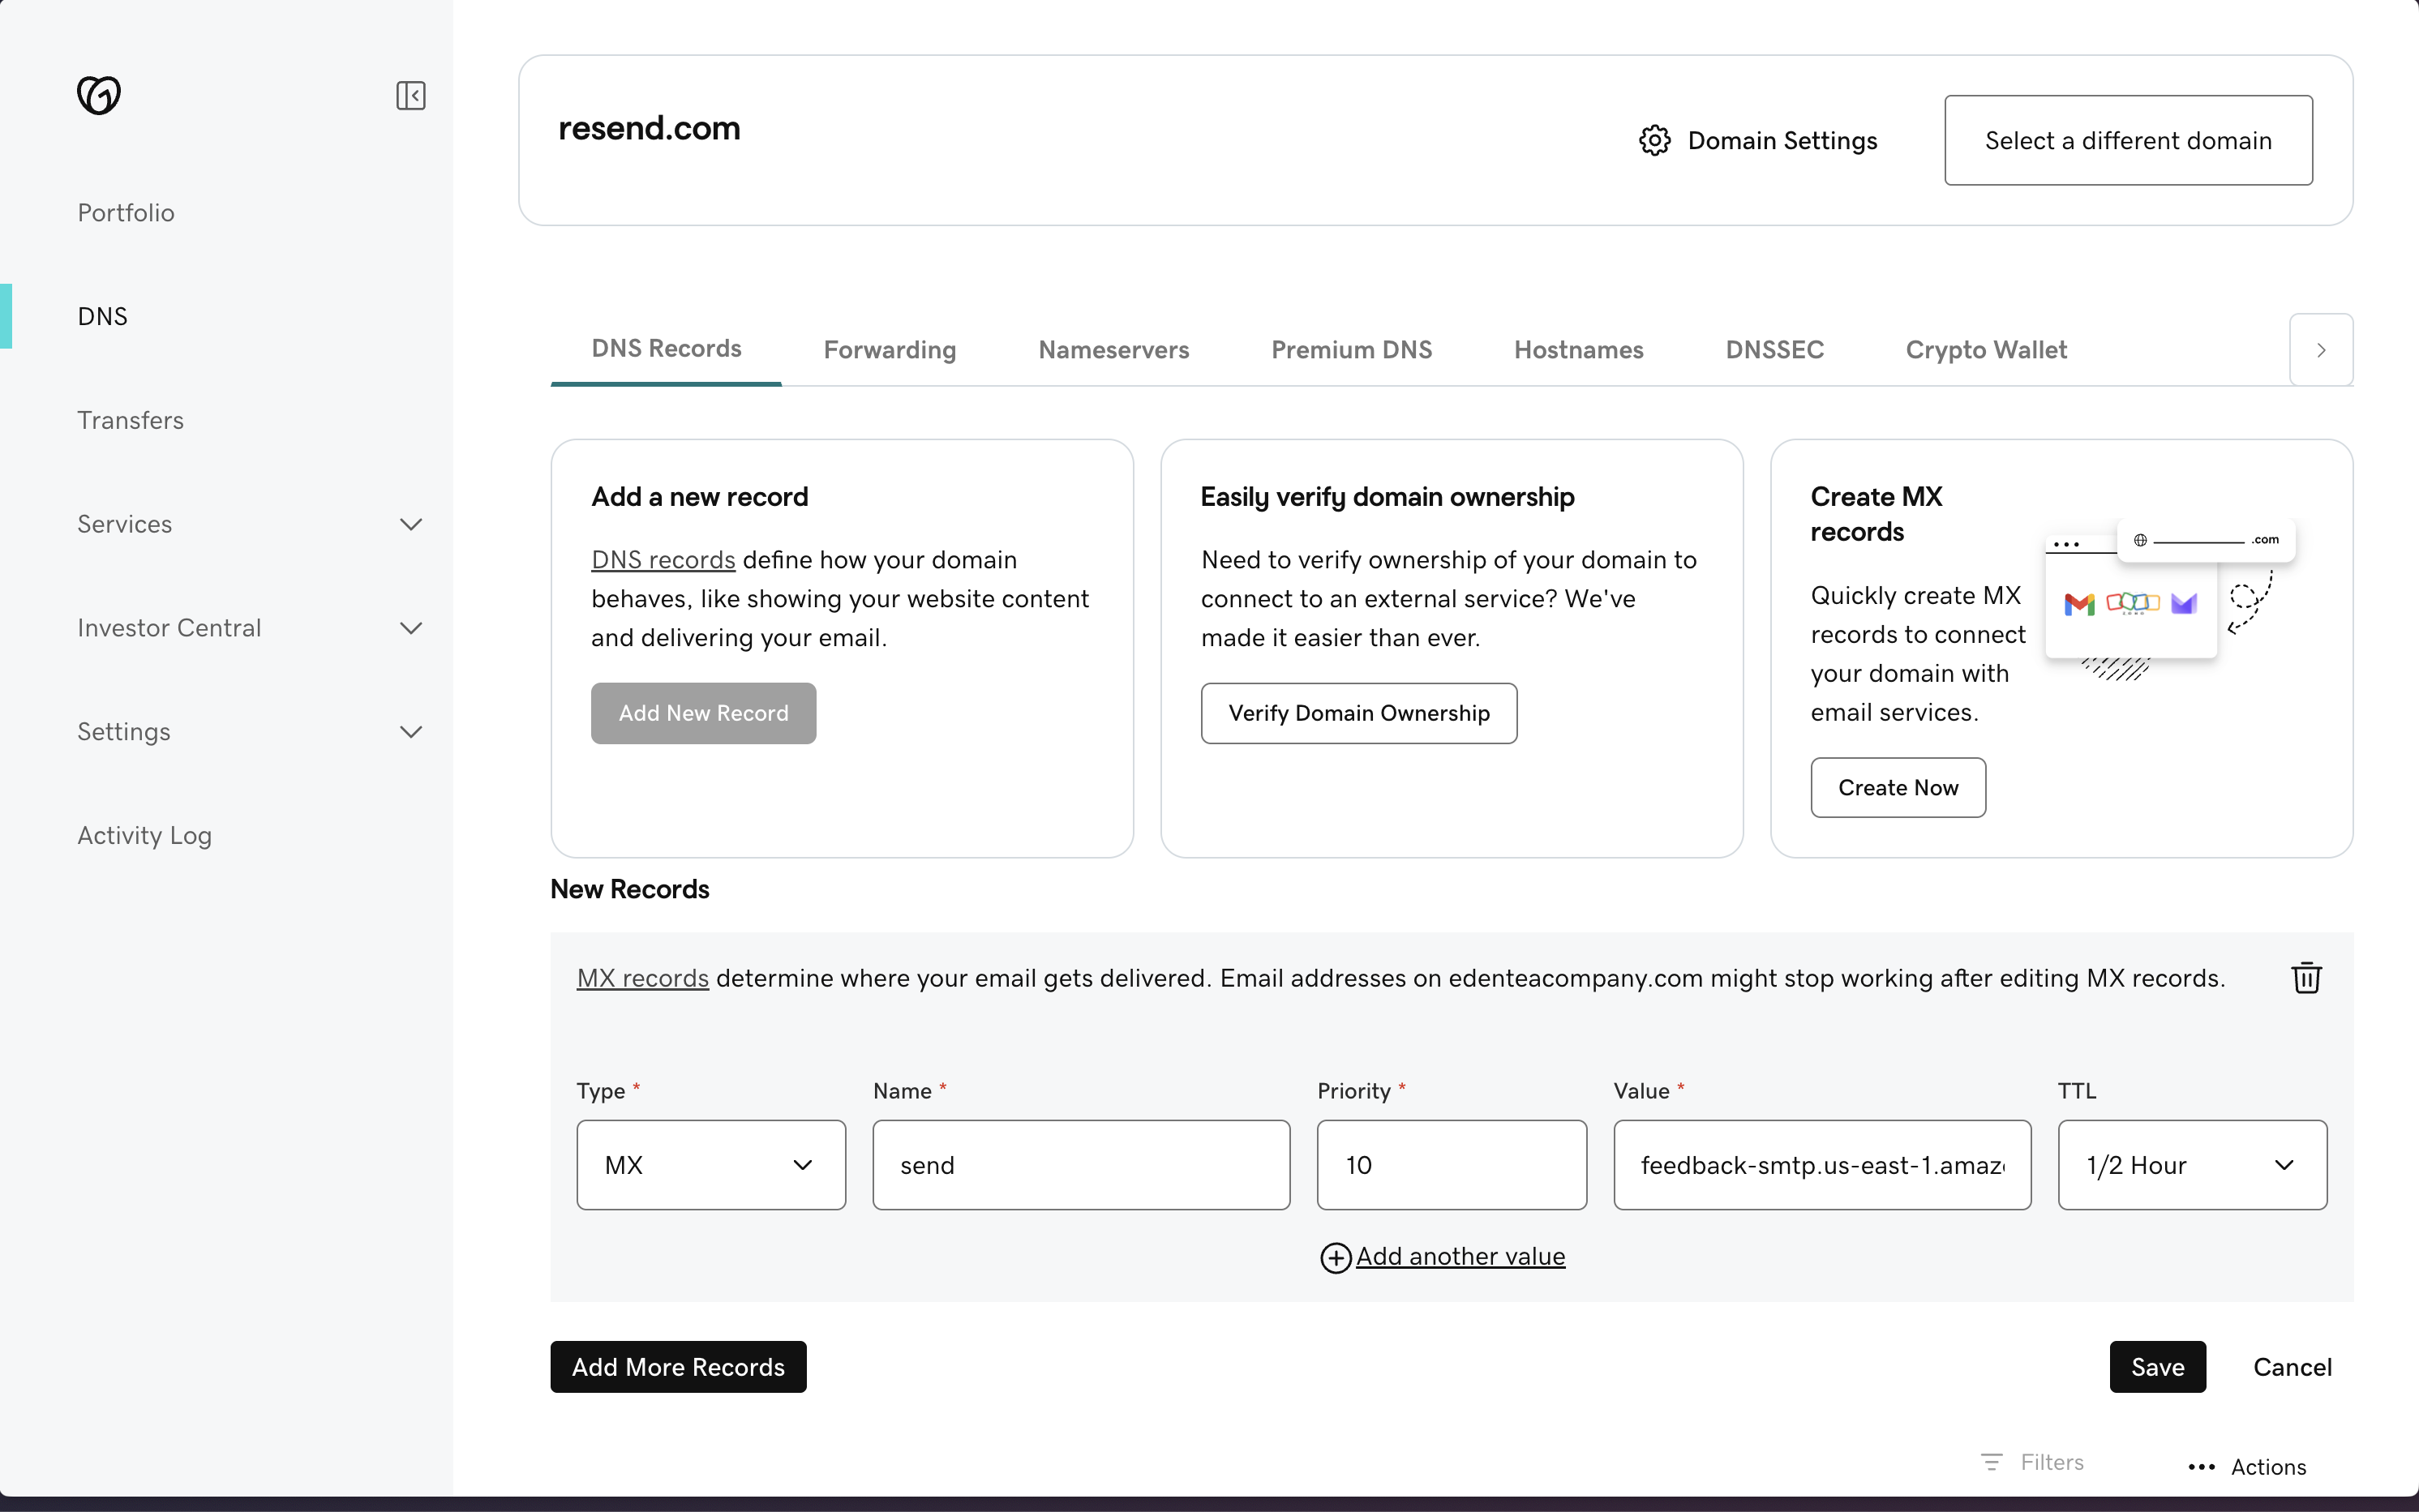 Below is a mapping of the record fields from Resend to GoDaddy:
| GoDaddy | Resend | Example Value |
| -------- | -------- | --------------------------------------- |
| Type | Type | `MX Record` |
| Name | Name | `send` |
| Value | Value | `feedback-smtp.us-east-1.amazonses.com` |
| TTL | - | `600` (or use default) |
| Priority | Priority | `10` |
Below is a mapping of the record fields from Resend to GoDaddy:
| GoDaddy | Resend | Example Value |
| -------- | -------- | --------------------------------------- |
| Type | Type | `MX Record` |
| Name | Name | `send` |
| Value | Value | `feedback-smtp.us-east-1.amazonses.com` |
| TTL | - | `600` (or use default) |
| Priority | Priority | `10` |
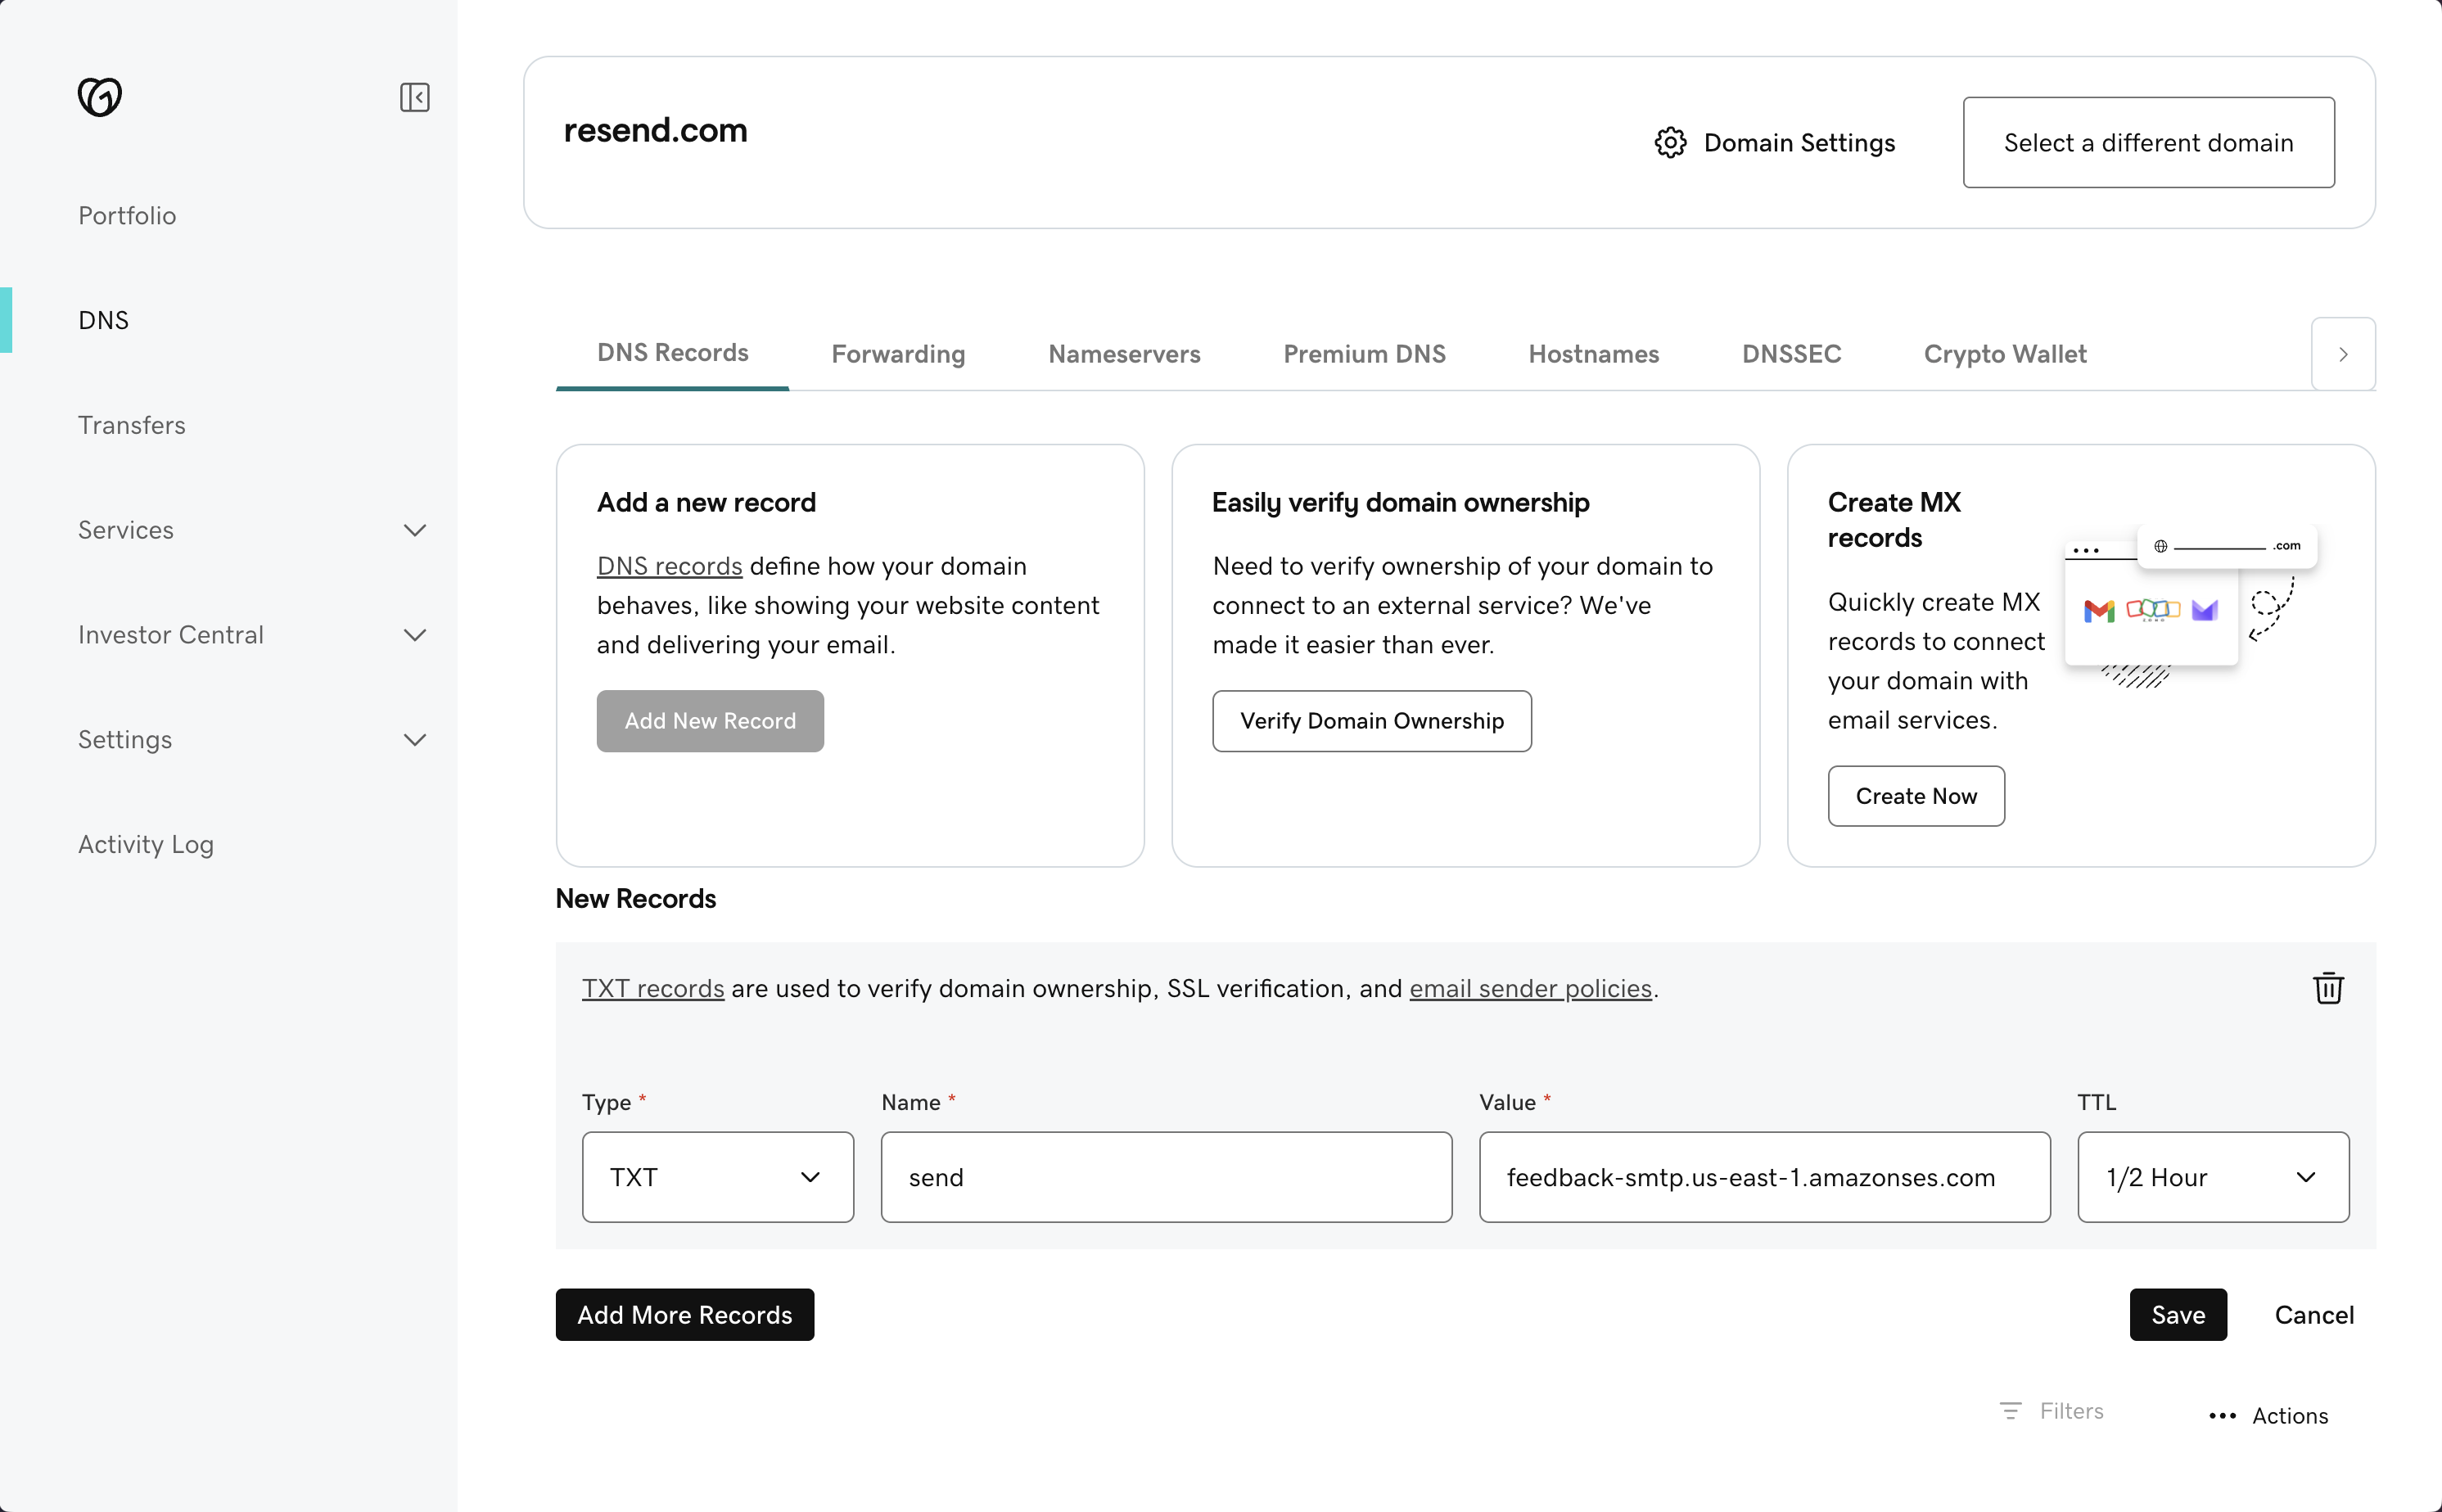 Below is a mapping of the record fields from Resend to GoDaddy:
| GoDaddy | Resend | Example Value |
| ------- | ------ | ------------------------------------- |
| Type | Type | `TXT Record` |
| Name | Name | `send` |
| Value | Value | `"v=spf1 include:amazonses.com ~all"` |
| TTL | - | `600` (or use default) |
## Add TXT DKIM Records
In the same section, add another record in GoDaddy.
1. Click `Add New Record` to create a new record
2. Set the Type to `TXT`.
3. Type `resend._domainkey` for the `Name` of the record.
4. Copy the record value from Resend into the `Value` field.
5. Set the TTL to `600` (or use the default).
6. Click `Save`.
Below is a mapping of the record fields from Resend to GoDaddy:
| GoDaddy | Resend | Example Value |
| ------- | ------ | ------------------------------------- |
| Type | Type | `TXT Record` |
| Name | Name | `send` |
| Value | Value | `"v=spf1 include:amazonses.com ~all"` |
| TTL | - | `600` (or use default) |
## Add TXT DKIM Records
In the same section, add another record in GoDaddy.
1. Click `Add New Record` to create a new record
2. Set the Type to `TXT`.
3. Type `resend._domainkey` for the `Name` of the record.
4. Copy the record value from Resend into the `Value` field.
5. Set the TTL to `600` (or use the default).
6. Click `Save`.
 Below is a mapping of the record fields from Resend to GoDaddy:
| GoDaddy | Resend | Example Value |
| ------- | ------ | ---------------------------- |
| Type | Type | `TXT Record` |
| Name | Name | `resend._domainkey` |
| Value | Value | `p=example_demain_key_value` |
| TTL | - | `600` (or use default) |
## Receiving Emails
If you want to receive emails at your domain, toggle the "Receiving" switch on the domain details page.
Below is a mapping of the record fields from Resend to GoDaddy:
| GoDaddy | Resend | Example Value |
| ------- | ------ | ---------------------------- |
| Type | Type | `TXT Record` |
| Name | Name | `resend._domainkey` |
| Value | Value | `p=example_demain_key_value` |
| TTL | - | `600` (or use default) |
## Receiving Emails
If you want to receive emails at your domain, toggle the "Receiving" switch on the domain details page.
 ## Add MX SPF Record
In the `Create Record` section on Hetzner copy and paste the values MX from Resend:
1. On the `Type` page, choose `MX`.
2. Type `send` for the `Name` of the record.
3. Select the `Value` field.
4. Use the default `Priority` of `10`.
5. Copy the MX Value from Resend into the `Mail server` field.
6. Select the TTL of `1800`.
7. Select `Add Record`.
## Add MX SPF Record
In the `Create Record` section on Hetzner copy and paste the values MX from Resend:
1. On the `Type` page, choose `MX`.
2. Type `send` for the `Name` of the record.
3. Select the `Value` field.
4. Use the default `Priority` of `10`.
5. Copy the MX Value from Resend into the `Mail server` field.
6. Select the TTL of `1800`.
7. Select `Add Record`.
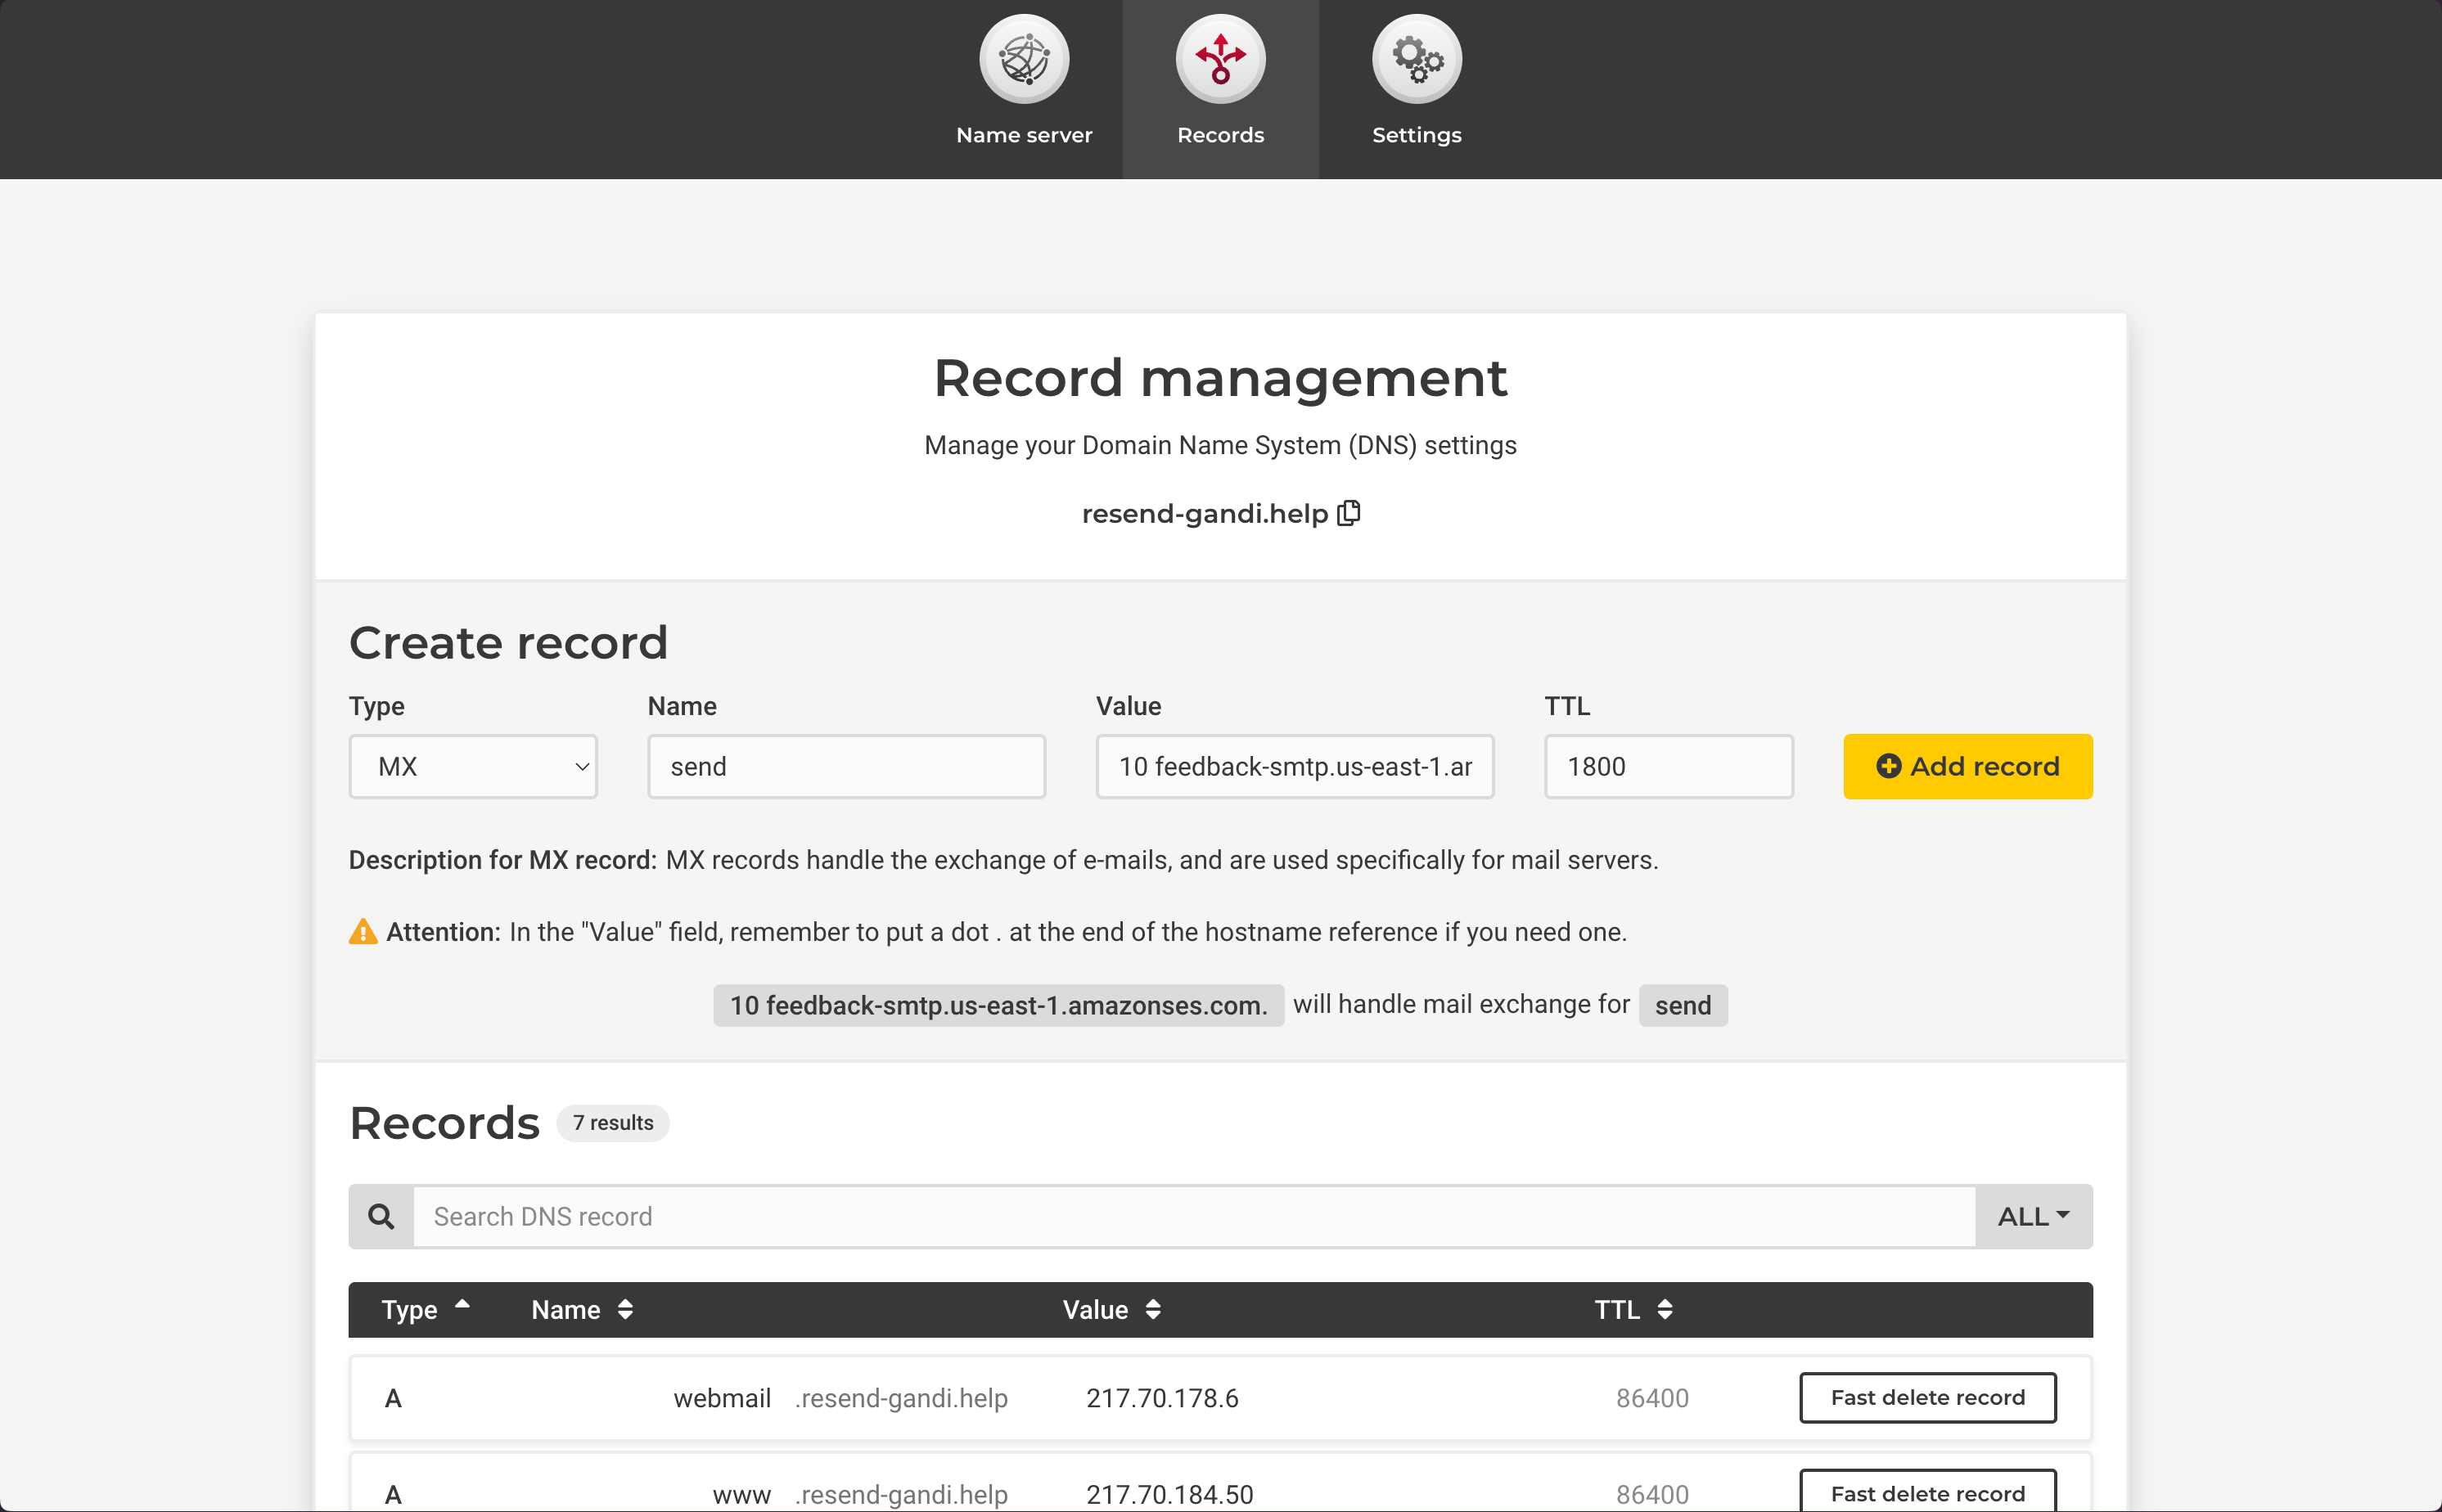 Below is a mapping of the record fields from Resend to Hetzner:
| Hetzner | Resend | Example Value |
| ----------- | -------- | ---------------------------------------- |
| Type | Type | `MX Record` |
| Name | Name | `send` |
| Mail server | Value | `feedback-smtp.us-east-1.amazonses.com.` |
| TTL | TTL | `1800` |
| Priority | Priority | `10` |
Below is a mapping of the record fields from Resend to Hetzner:
| Hetzner | Resend | Example Value |
| ----------- | -------- | ---------------------------------------- |
| Type | Type | `MX Record` |
| Name | Name | `send` |
| Mail server | Value | `feedback-smtp.us-east-1.amazonses.com.` |
| TTL | TTL | `1800` |
| Priority | Priority | `10` |
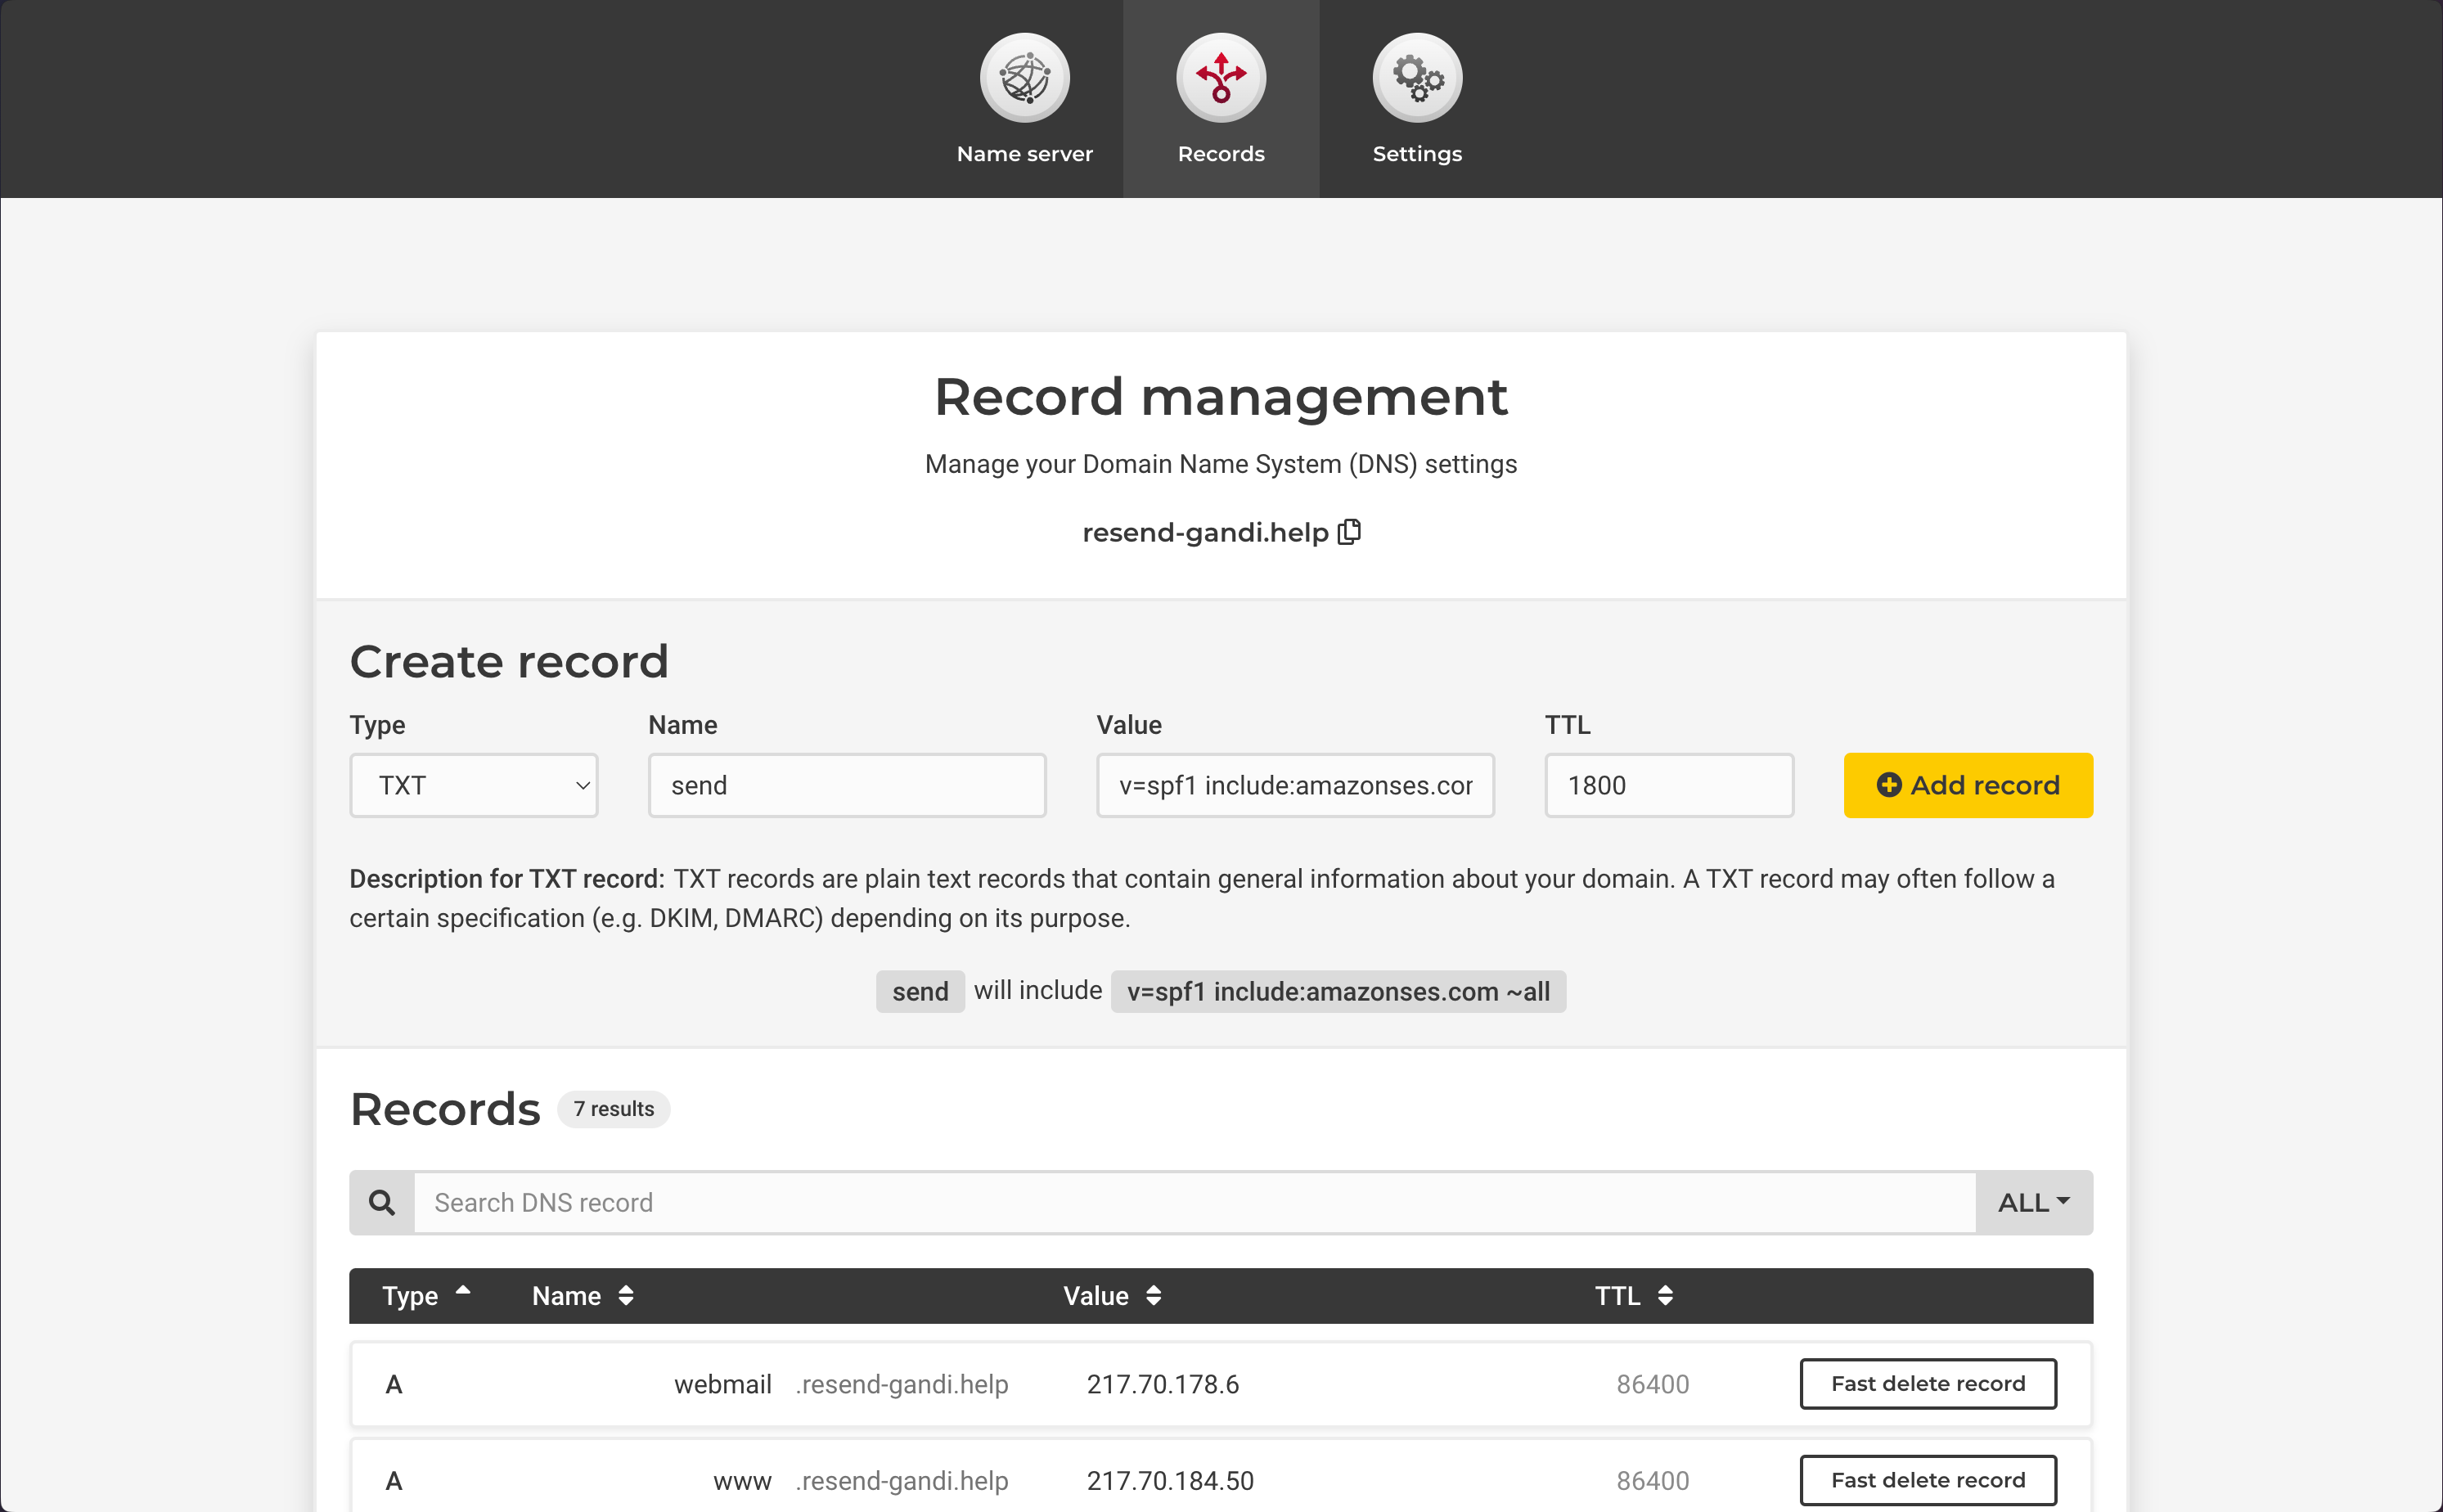 Below is a mapping of the record fields from Resend to Hetzner:
| Hetzner | Resend | Example Value |
| ------- | ------ | ------------------------------------- |
| Type | Type | `TXT Record` |
| Name | Name | `send` |
| Value | Value | `"v=spf1 include:amazonses.com ~all"` |
| TTL | TTL | `10800` |
## Add TXT DKIM Records
On the same `Create Record` section:
1. On the `Type` page, choose `TXT`.
2. Type `resend._domainkey` for the `Name` of the record.
3. Copy the TXT Value Resend into the `Value` field.
4. Select the TTL of `1800`.
5. Select `Add Record`.
Below is a mapping of the record fields from Resend to Hetzner:
| Hetzner | Resend | Example Value |
| ------- | ------ | ------------------------------------- |
| Type | Type | `TXT Record` |
| Name | Name | `send` |
| Value | Value | `"v=spf1 include:amazonses.com ~all"` |
| TTL | TTL | `10800` |
## Add TXT DKIM Records
On the same `Create Record` section:
1. On the `Type` page, choose `TXT`.
2. Type `resend._domainkey` for the `Name` of the record.
3. Copy the TXT Value Resend into the `Value` field.
4. Select the TTL of `1800`.
5. Select `Add Record`.
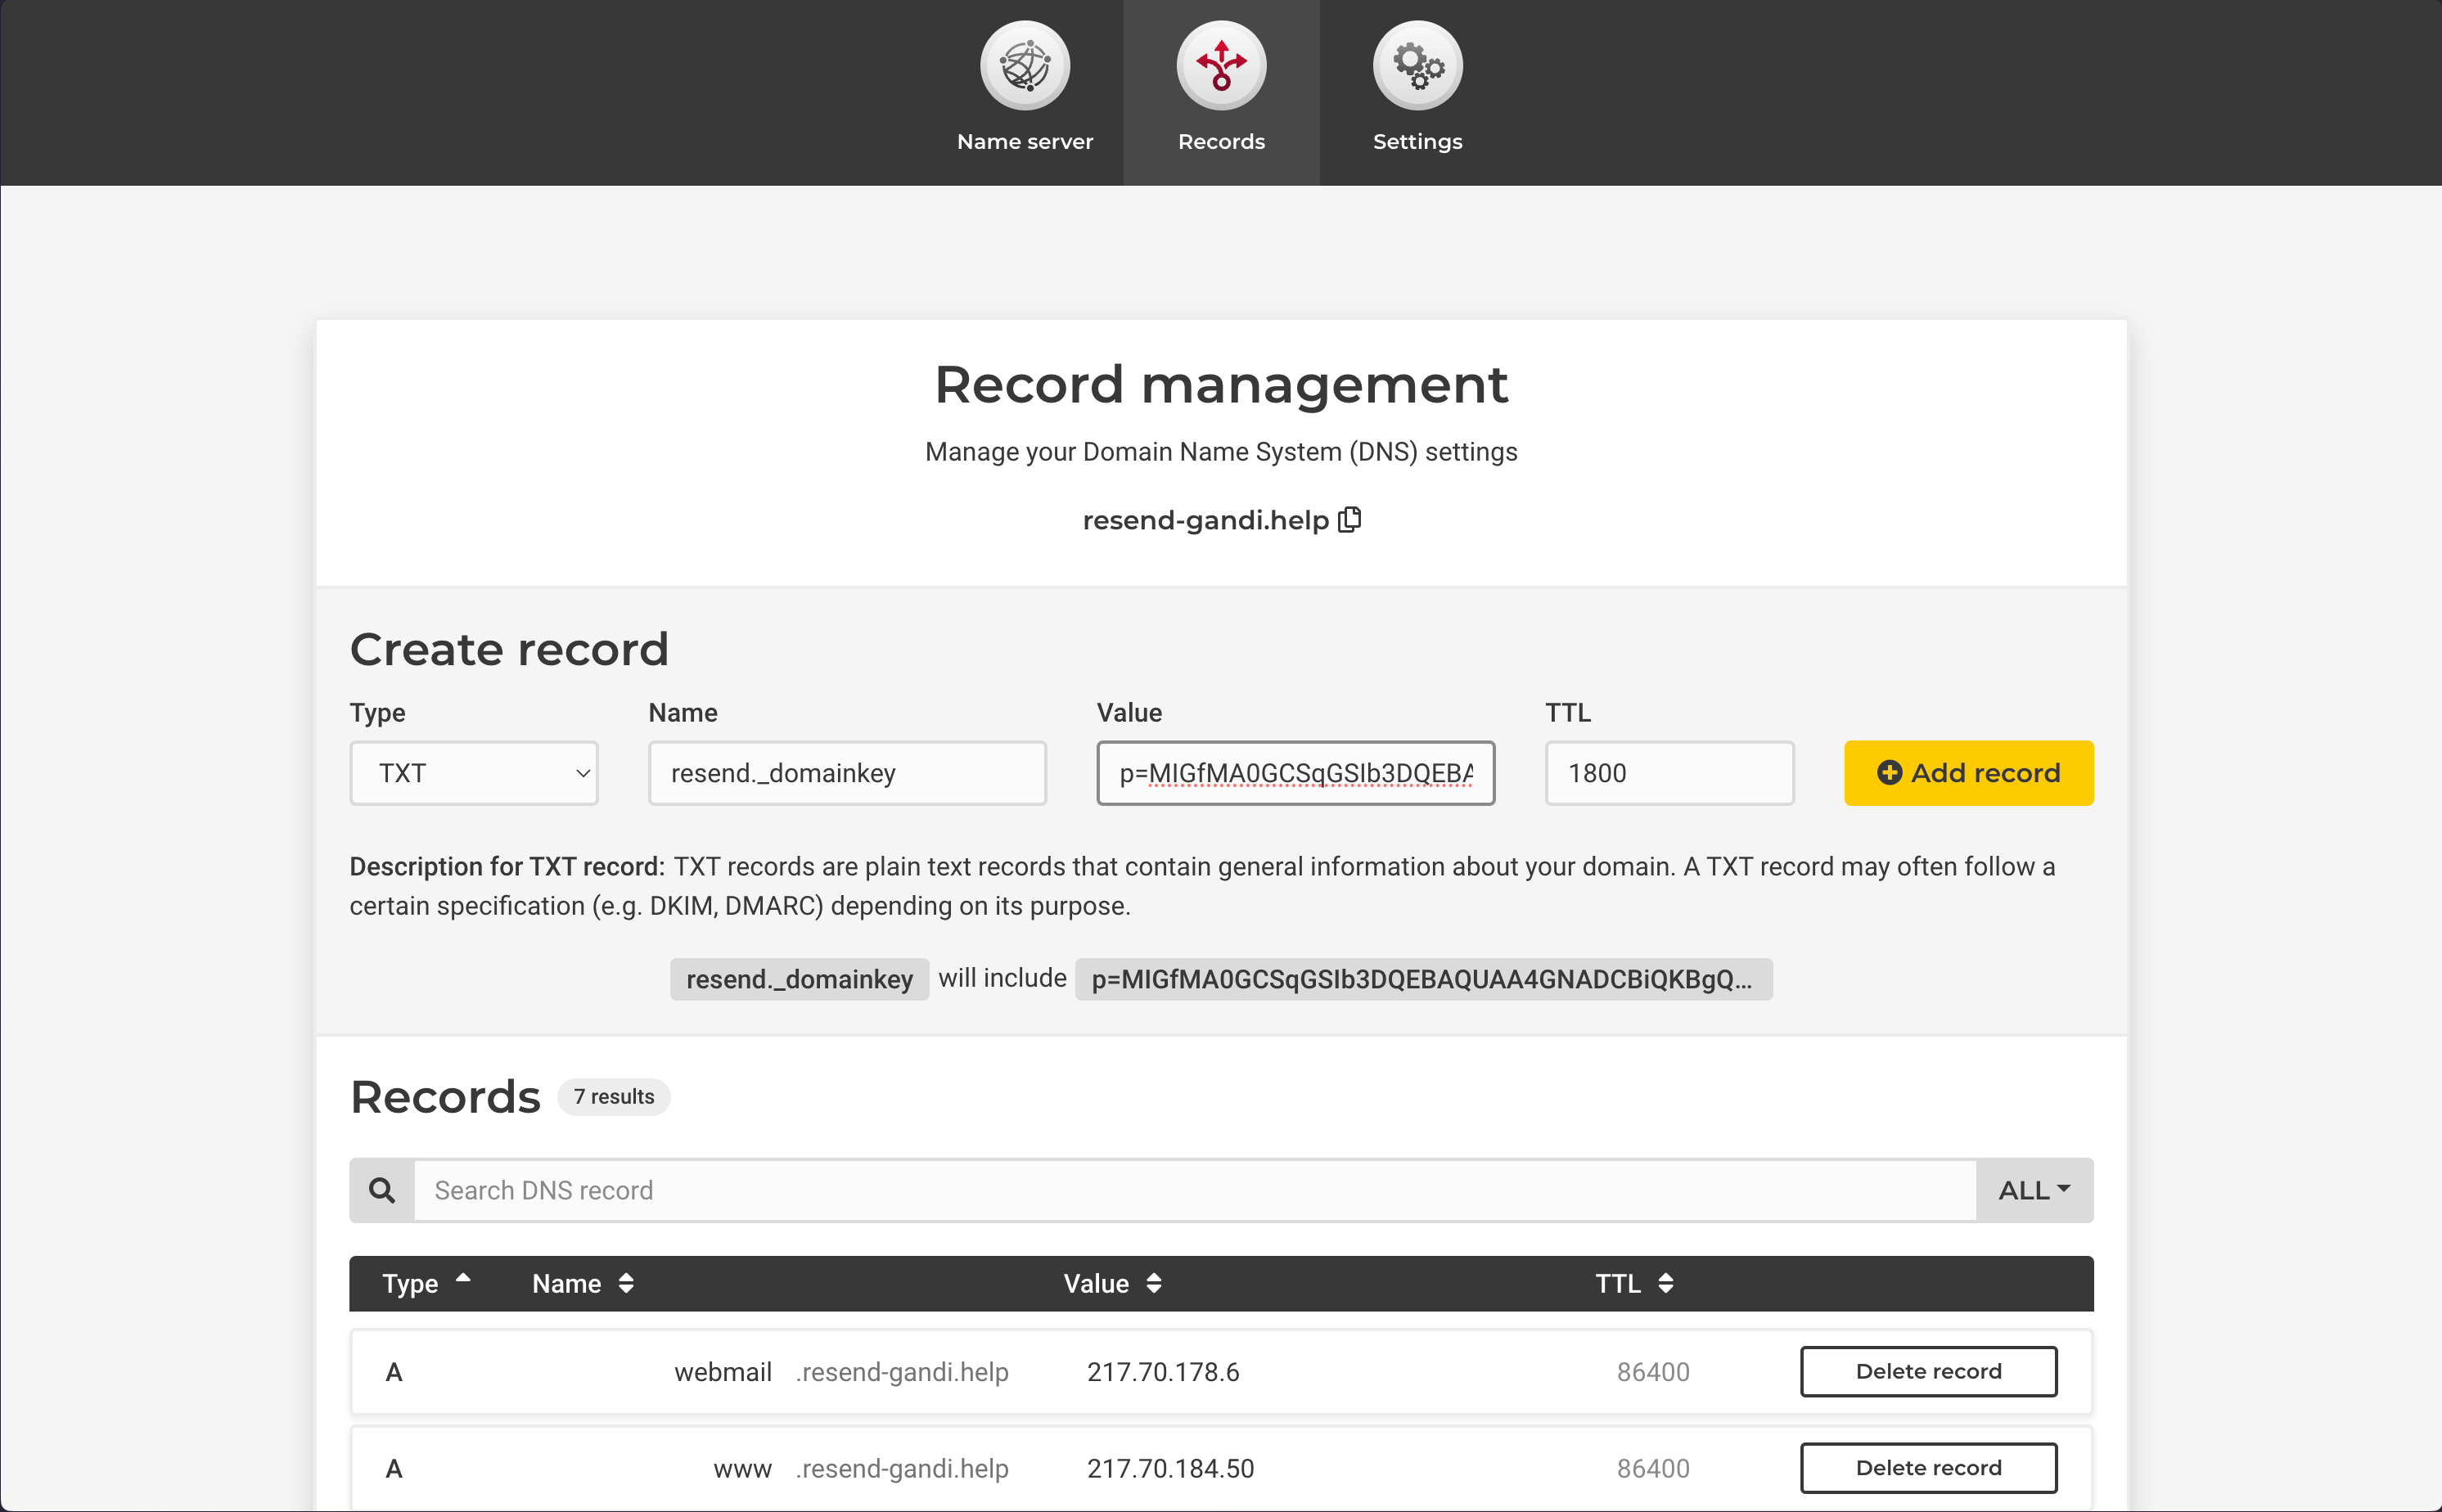 Below is a mapping of the record fields from Resend to Hetzner:
| Hetzner | Resend | Example Value |
| ------- | ------ | ---------------------------- |
| Type | Type | `TXT Record` |
| Name | Name | `send` |
| Value | Value | `p=example_demain_key_value` |
| TTL | TTL | `1 hour` |
## Receiving Emails
If you want to receive emails at your domain, toggle the "Receiving" switch on the domain details page.
Below is a mapping of the record fields from Resend to Hetzner:
| Hetzner | Resend | Example Value |
| ------- | ------ | ---------------------------- |
| Type | Type | `TXT Record` |
| Name | Name | `send` |
| Value | Value | `p=example_demain_key_value` |
| TTL | TTL | `1 hour` |
## Receiving Emails
If you want to receive emails at your domain, toggle the "Receiving" switch on the domain details page.
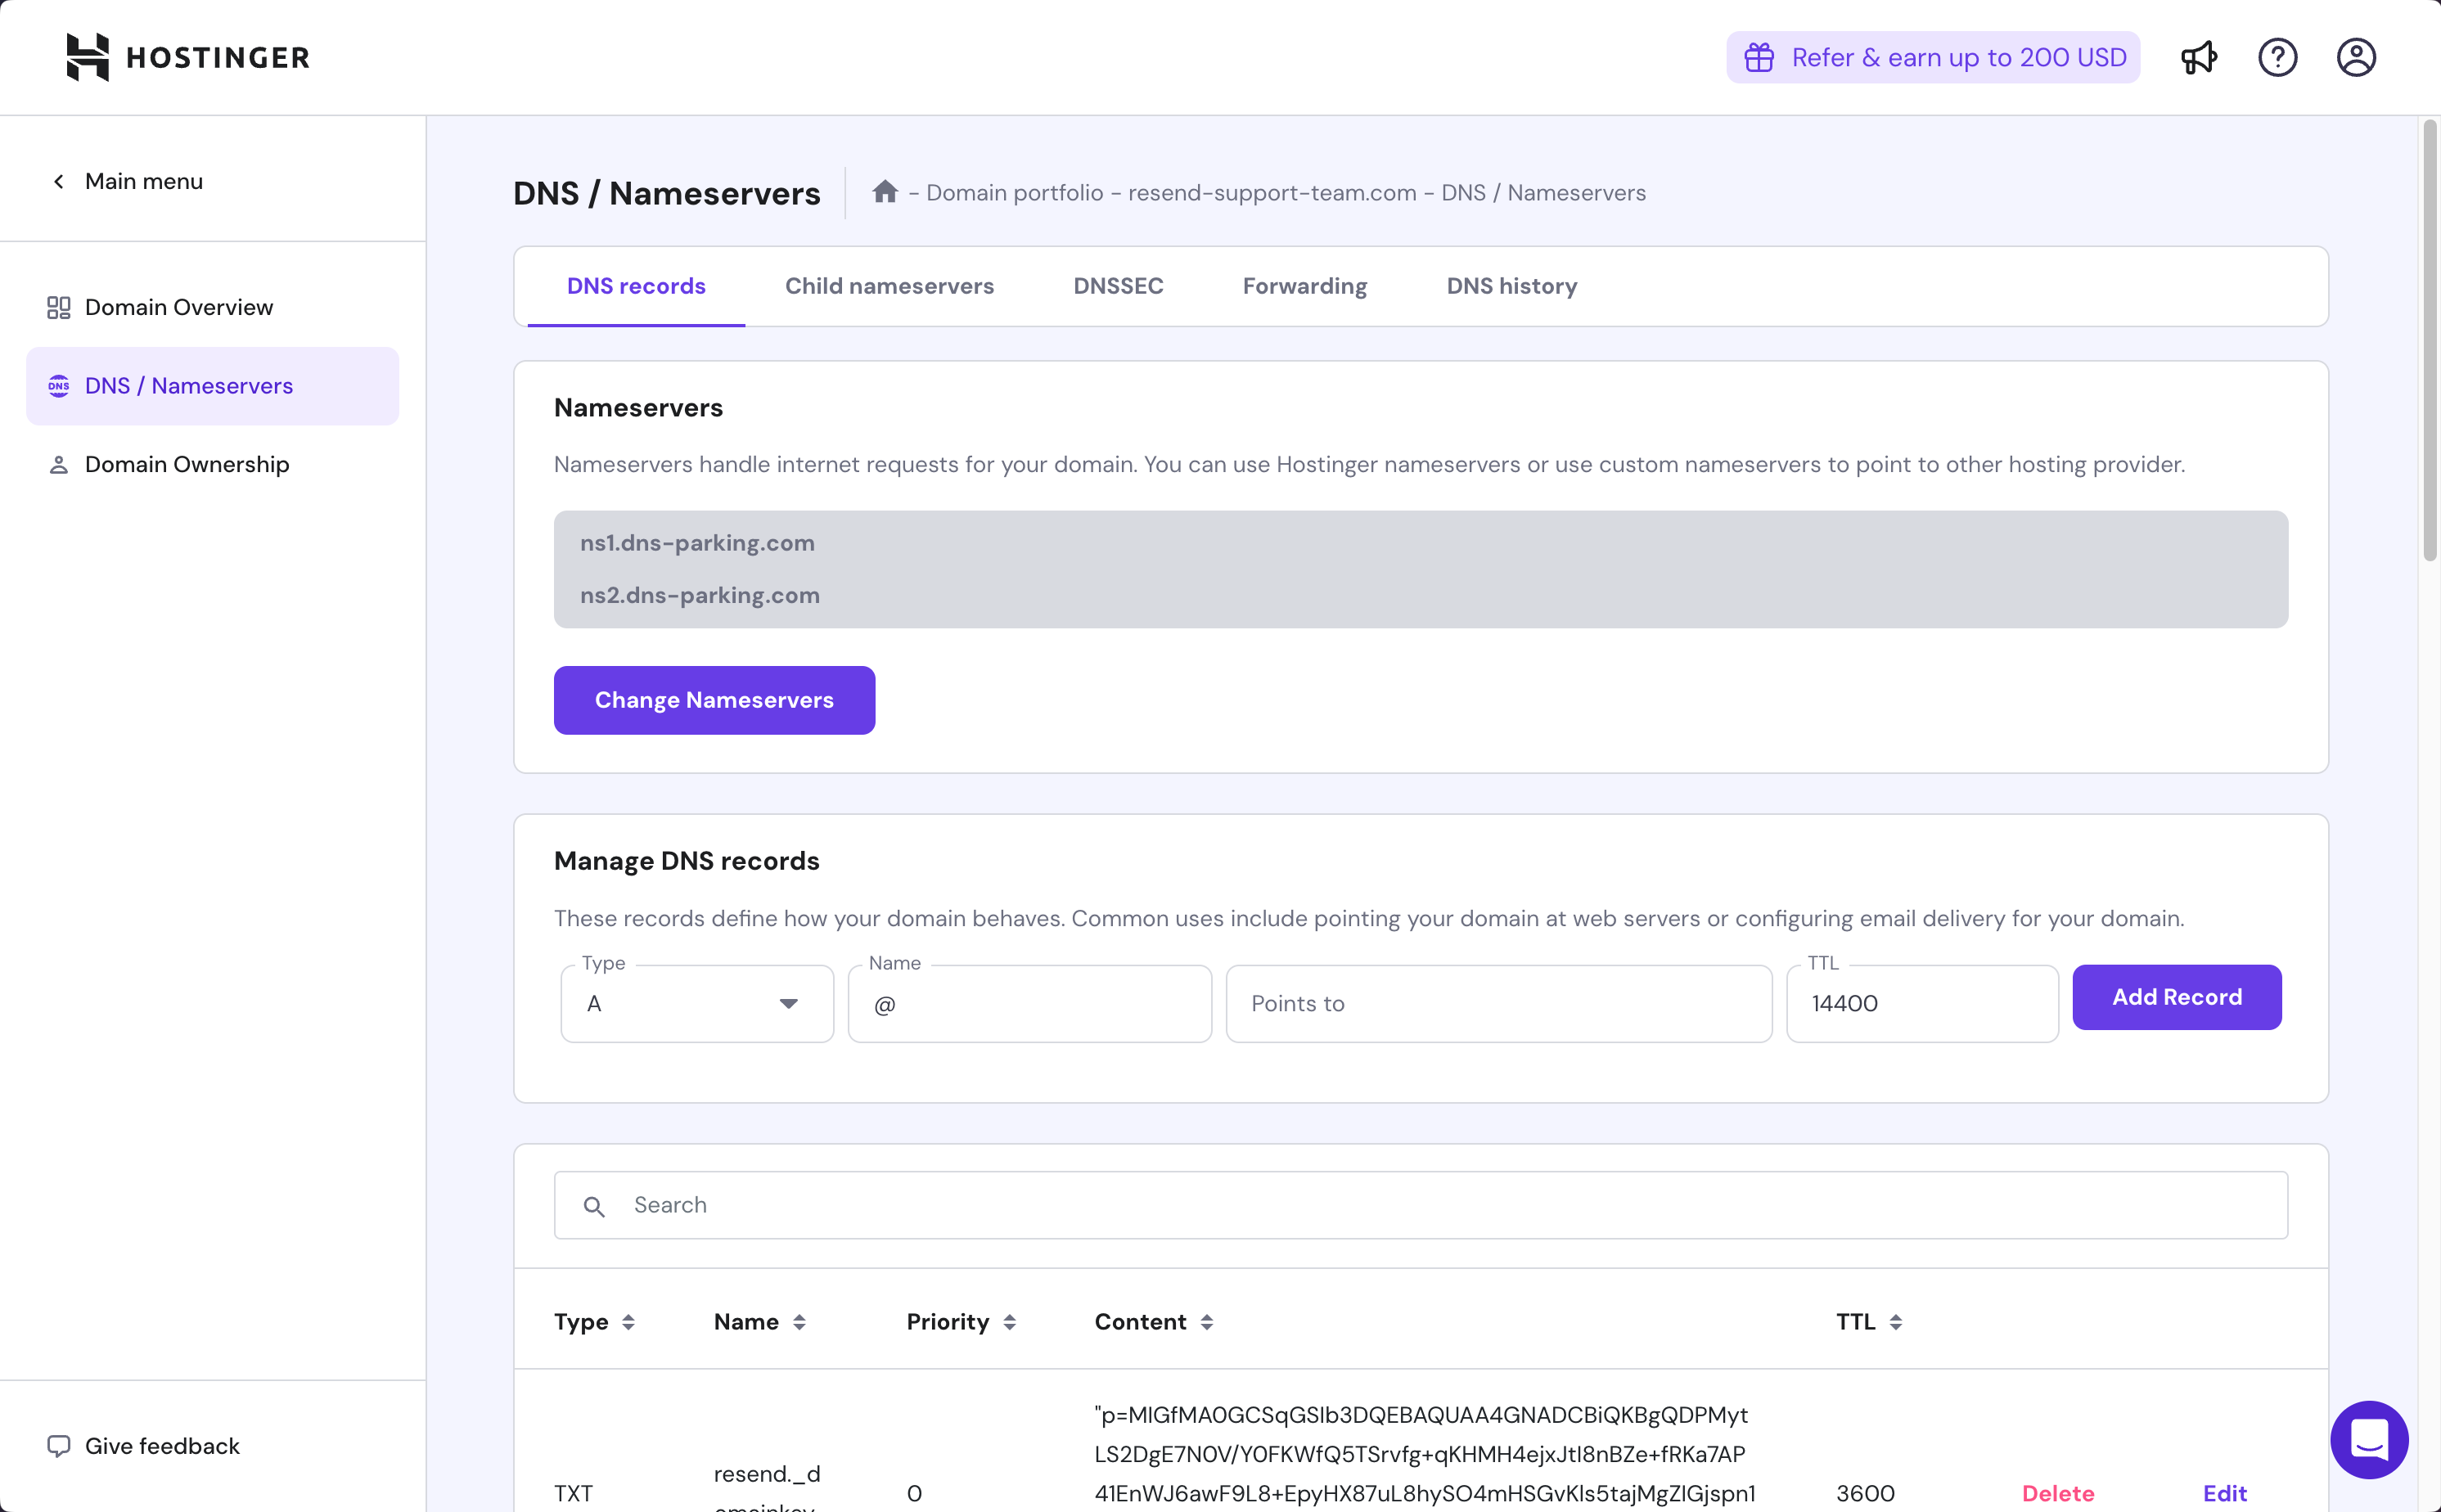 ## Add MX SPF Record
Copy and paste the values MX in Resend to Hostinger.
1. Set the Type to `MX`.
2. Type `send` for the `Name` of the record.
3. Copy the MX Value from Resend into the `Mail Server` field.
4. Add `10` for the `Priority`.
5. Set the TTL to `3600`.
6. Select `Add Record`.
## Add MX SPF Record
Copy and paste the values MX in Resend to Hostinger.
1. Set the Type to `MX`.
2. Type `send` for the `Name` of the record.
3. Copy the MX Value from Resend into the `Mail Server` field.
4. Add `10` for the `Priority`.
5. Set the TTL to `3600`.
6. Select `Add Record`.
 Below is a mapping of the record fields from Resend to Hostinger:
| Hostinger | Resend | Example Value |
| ----------- | -------- | --------------------------------------- |
| Type | Type | `MX Record` |
| Name | Name | `send` |
| Mail Server | Value | `feedback-smtp.us-east-1.amazonses.com` |
| TTL | - | `Set to 3660` |
| Priority | Priority | `10` |
Below is a mapping of the record fields from Resend to Hostinger:
| Hostinger | Resend | Example Value |
| ----------- | -------- | --------------------------------------- |
| Type | Type | `MX Record` |
| Name | Name | `send` |
| Mail Server | Value | `feedback-smtp.us-east-1.amazonses.com` |
| TTL | - | `Set to 3660` |
| Priority | Priority | `10` |
 Below is a mapping of the record fields from Resend to Hostinger:
| Hostinger | Resend | Example Value |
| --------- | ------ | ------------------------------------- |
| Type | Type | `TXT Record` |
| Name | Name | `send` |
| TXT value | Value | `"v=spf1 include:amazonses.com ~all"` |
| TTL | - | `Set to 3600` |
## Add TXT DKIM Records
In the same section, add another record in Hostinger.
1. Set the Type to `TXT`.
2. Type `resend._domainkey` for the `Name` of the record.
3. Copy the record value from Resend into the `TXT value` field.
4. Set the TTL to `3600`.
5. Select `Add Record`.
Below is a mapping of the record fields from Resend to Hostinger:
| Hostinger | Resend | Example Value |
| --------- | ------ | ------------------------------------- |
| Type | Type | `TXT Record` |
| Name | Name | `send` |
| TXT value | Value | `"v=spf1 include:amazonses.com ~all"` |
| TTL | - | `Set to 3600` |
## Add TXT DKIM Records
In the same section, add another record in Hostinger.
1. Set the Type to `TXT`.
2. Type `resend._domainkey` for the `Name` of the record.
3. Copy the record value from Resend into the `TXT value` field.
4. Set the TTL to `3600`.
5. Select `Add Record`.
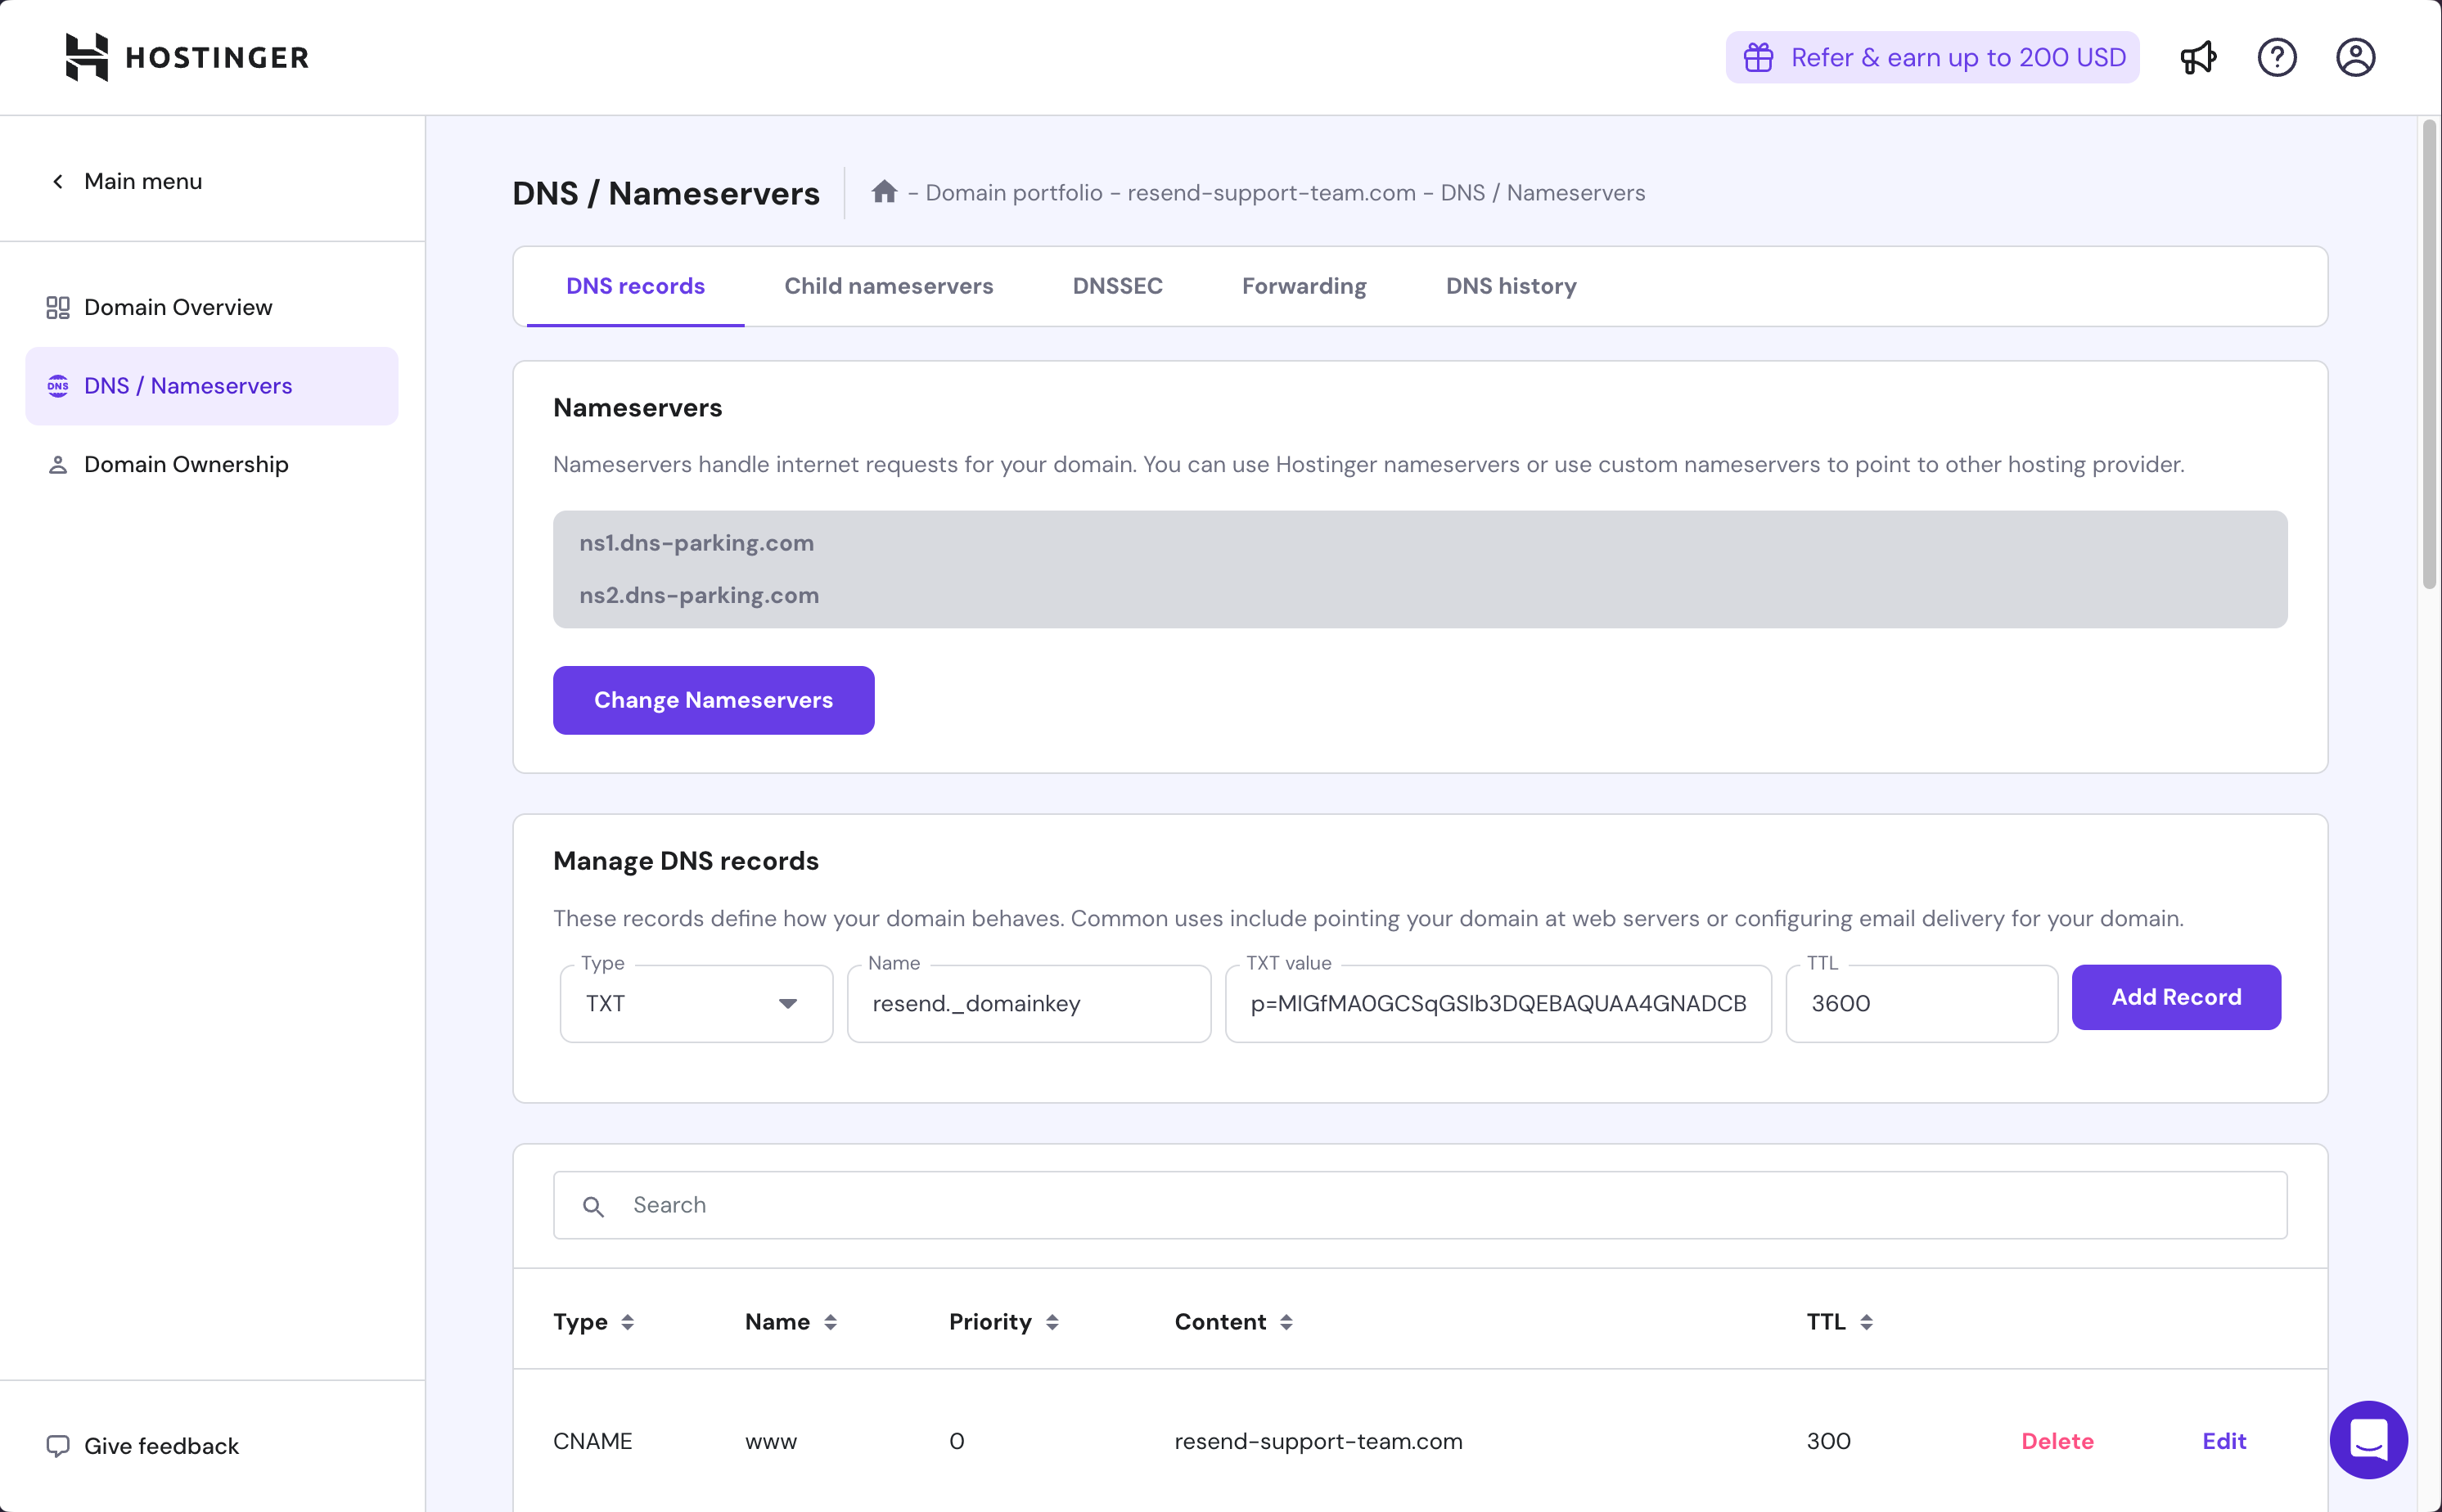 Below is a mapping of the record fields from Resend to Hostinger:
| Hostinger | Resend | Example Value |
| --------- | ------ | ---------------------------- |
| Type | Type | `TXT Record` |
| Name | Name | `send` |
| TXT value | Value | `p=example_demain_key_value` |
| TTL | - | `Set to 3600` |
## Receiving Emails
If you want to receive emails at your domain, toggle the "Receiving" switch on the domain details page.
Below is a mapping of the record fields from Resend to Hostinger:
| Hostinger | Resend | Example Value |
| --------- | ------ | ---------------------------- |
| Type | Type | `TXT Record` |
| Name | Name | `send` |
| TXT value | Value | `p=example_demain_key_value` |
| TTL | - | `Set to 3600` |
## Receiving Emails
If you want to receive emails at your domain, toggle the "Receiving" switch on the domain details page.
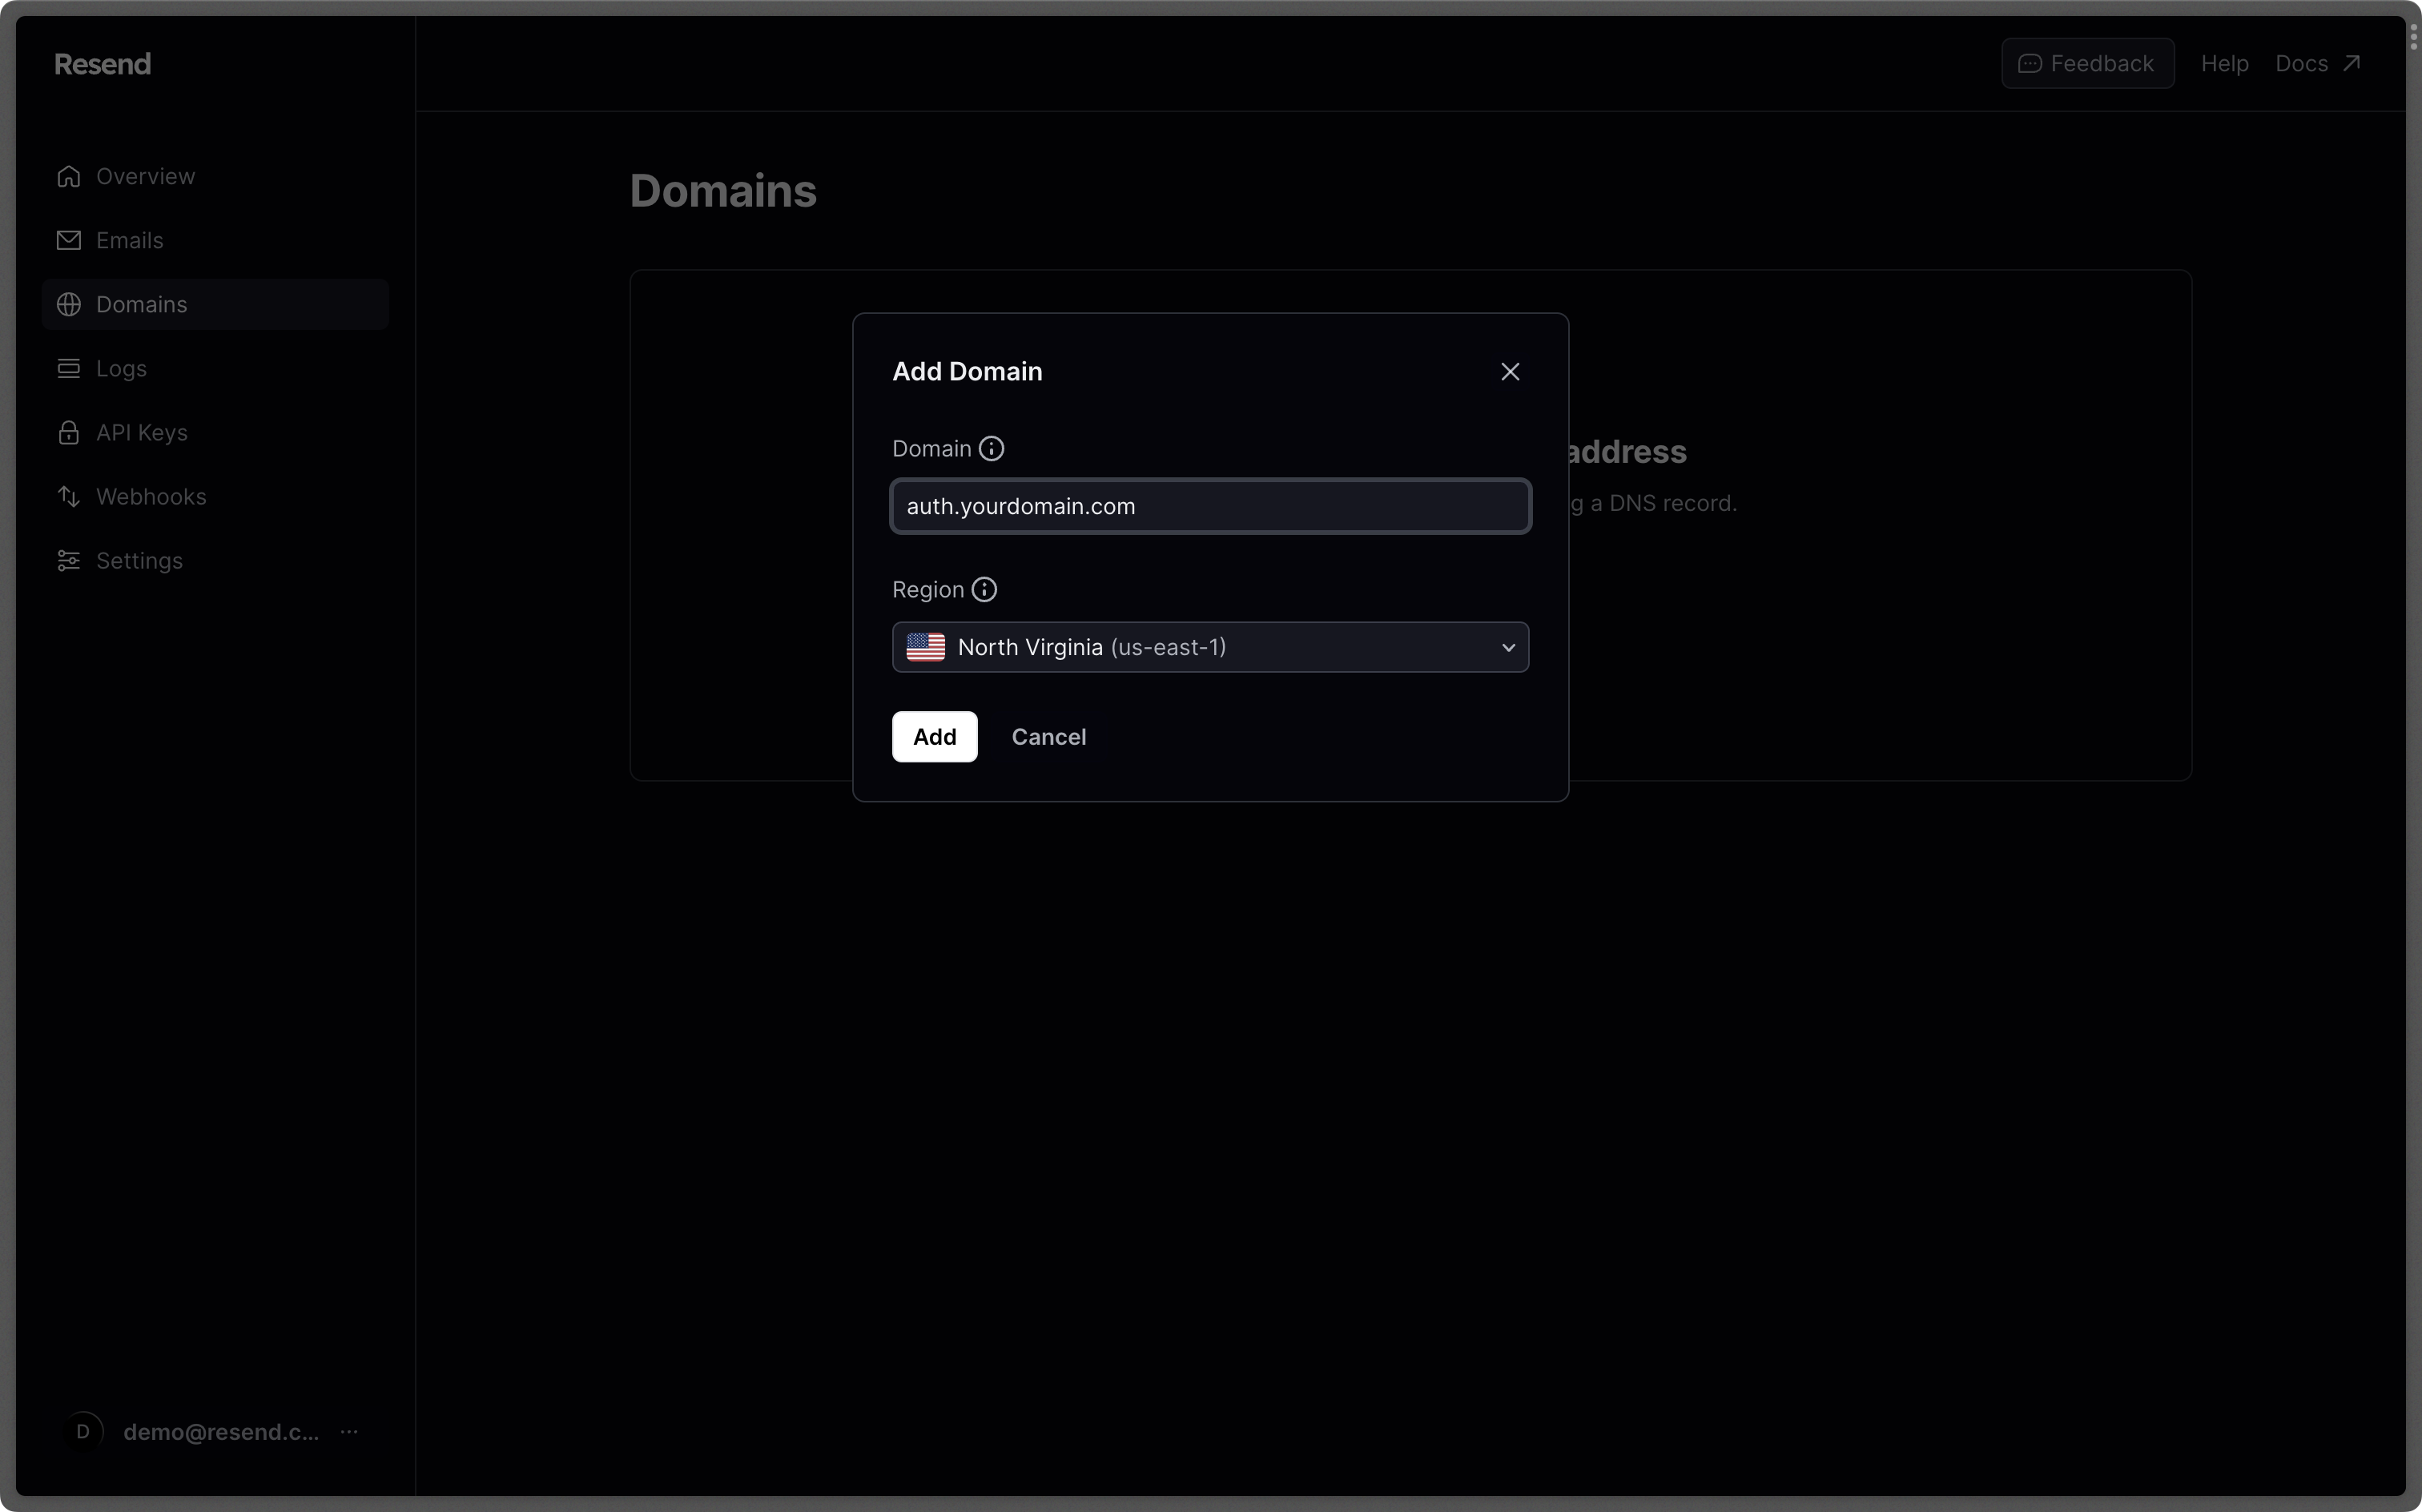 ## 3. Disable link and open tracking
Link and open tracking can be great for marketing emails but not for transactional emails. This kind of **tracking can actually hurt your deliverability**. Open tracking embeds a 1x1 pixel image in the email, and link tracking rewrites the links in the email to point to Resend's servers first. Both types can be seen as suspicious by the inbox provider and hurt your deliverability.
Also, Supabase has noted that link tracking is [known for corrupting verification links](https://supabase.com/docs/guides/platform/going-into-prod), making them unusable for your users.
You can disable link and open tracking by clicking on your domain and disabling at the bottom.
## 3. Disable link and open tracking
Link and open tracking can be great for marketing emails but not for transactional emails. This kind of **tracking can actually hurt your deliverability**. Open tracking embeds a 1x1 pixel image in the email, and link tracking rewrites the links in the email to point to Resend's servers first. Both types can be seen as suspicious by the inbox provider and hurt your deliverability.
Also, Supabase has noted that link tracking is [known for corrupting verification links](https://supabase.com/docs/guides/platform/going-into-prod), making them unusable for your users.
You can disable link and open tracking by clicking on your domain and disabling at the bottom.
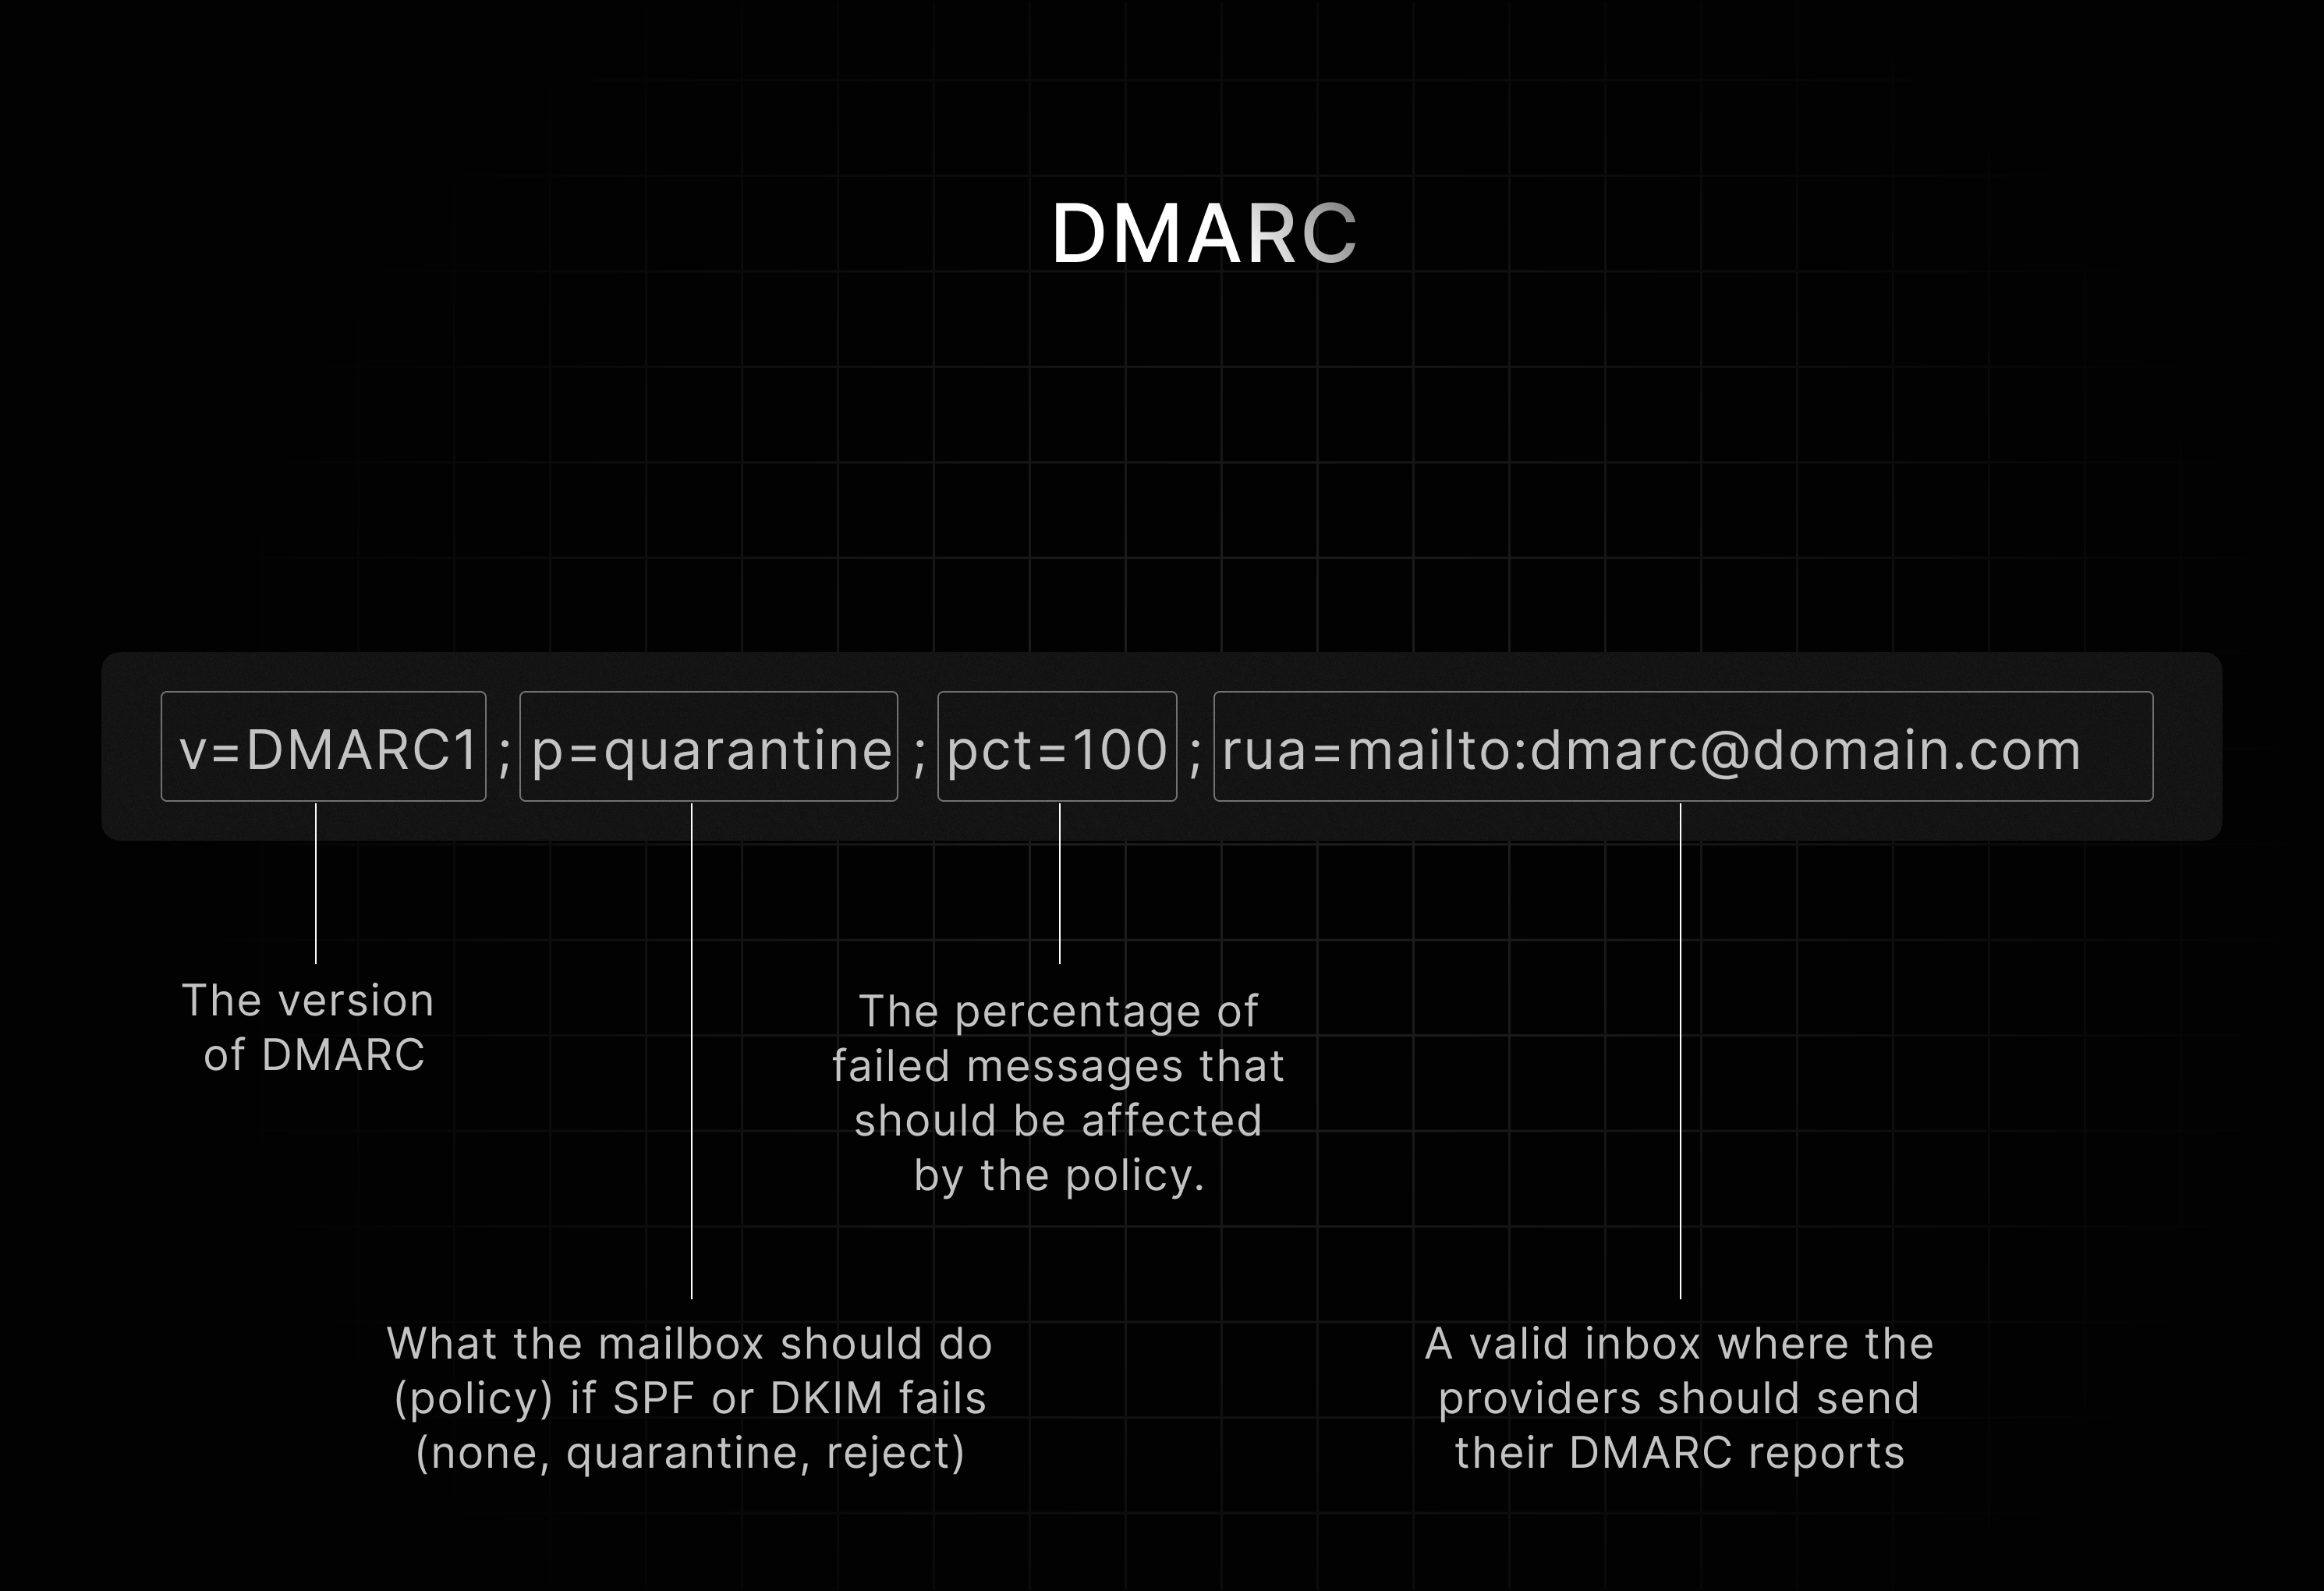 You can use our [DMARC setup guide to get started](/dashboard/domains/dmarc).
---
# Source: https://resend.com/docs/knowledge-base/how-do-i-send-with-an-avatar.md
> ## Documentation Index
> Fetch the complete documentation index at: https://resend.com/docs/llms.txt
> Use this file to discover all available pages before exploring further.
# How do I send with an avatar?
> Learn how to show your avatar in the inbox of your recipients.
[Recent studies](https://www.businesswire.com/news/home/20210720005361/en/Red-Sift-and-Entrust-Survey-Showing-a-Logo-Positively-Affects-Consumer-Interaction-With-Emails-Open-Rates-Buying-Behavior-Brand-Recall-and-Confidence) are showing meaningful benefits of displaying your logo in the inbox:
* Increases brand recall by 18%.
* Improves open rate by 21%.
* Boosts purchase likelihood by 34%.
* Reinforces confidence in email by 90%.
You can use our [DMARC setup guide to get started](/dashboard/domains/dmarc).
---
# Source: https://resend.com/docs/knowledge-base/how-do-i-send-with-an-avatar.md
> ## Documentation Index
> Fetch the complete documentation index at: https://resend.com/docs/llms.txt
> Use this file to discover all available pages before exploring further.
# How do I send with an avatar?
> Learn how to show your avatar in the inbox of your recipients.
[Recent studies](https://www.businesswire.com/news/home/20210720005361/en/Red-Sift-and-Entrust-Survey-Showing-a-Logo-Positively-Affects-Consumer-Interaction-With-Emails-Open-Rates-Buying-Behavior-Brand-Recall-and-Confidence) are showing meaningful benefits of displaying your logo in the inbox:
* Increases brand recall by 18%.
* Improves open rate by 21%.
* Boosts purchase likelihood by 34%.
* Reinforces confidence in email by 90%.
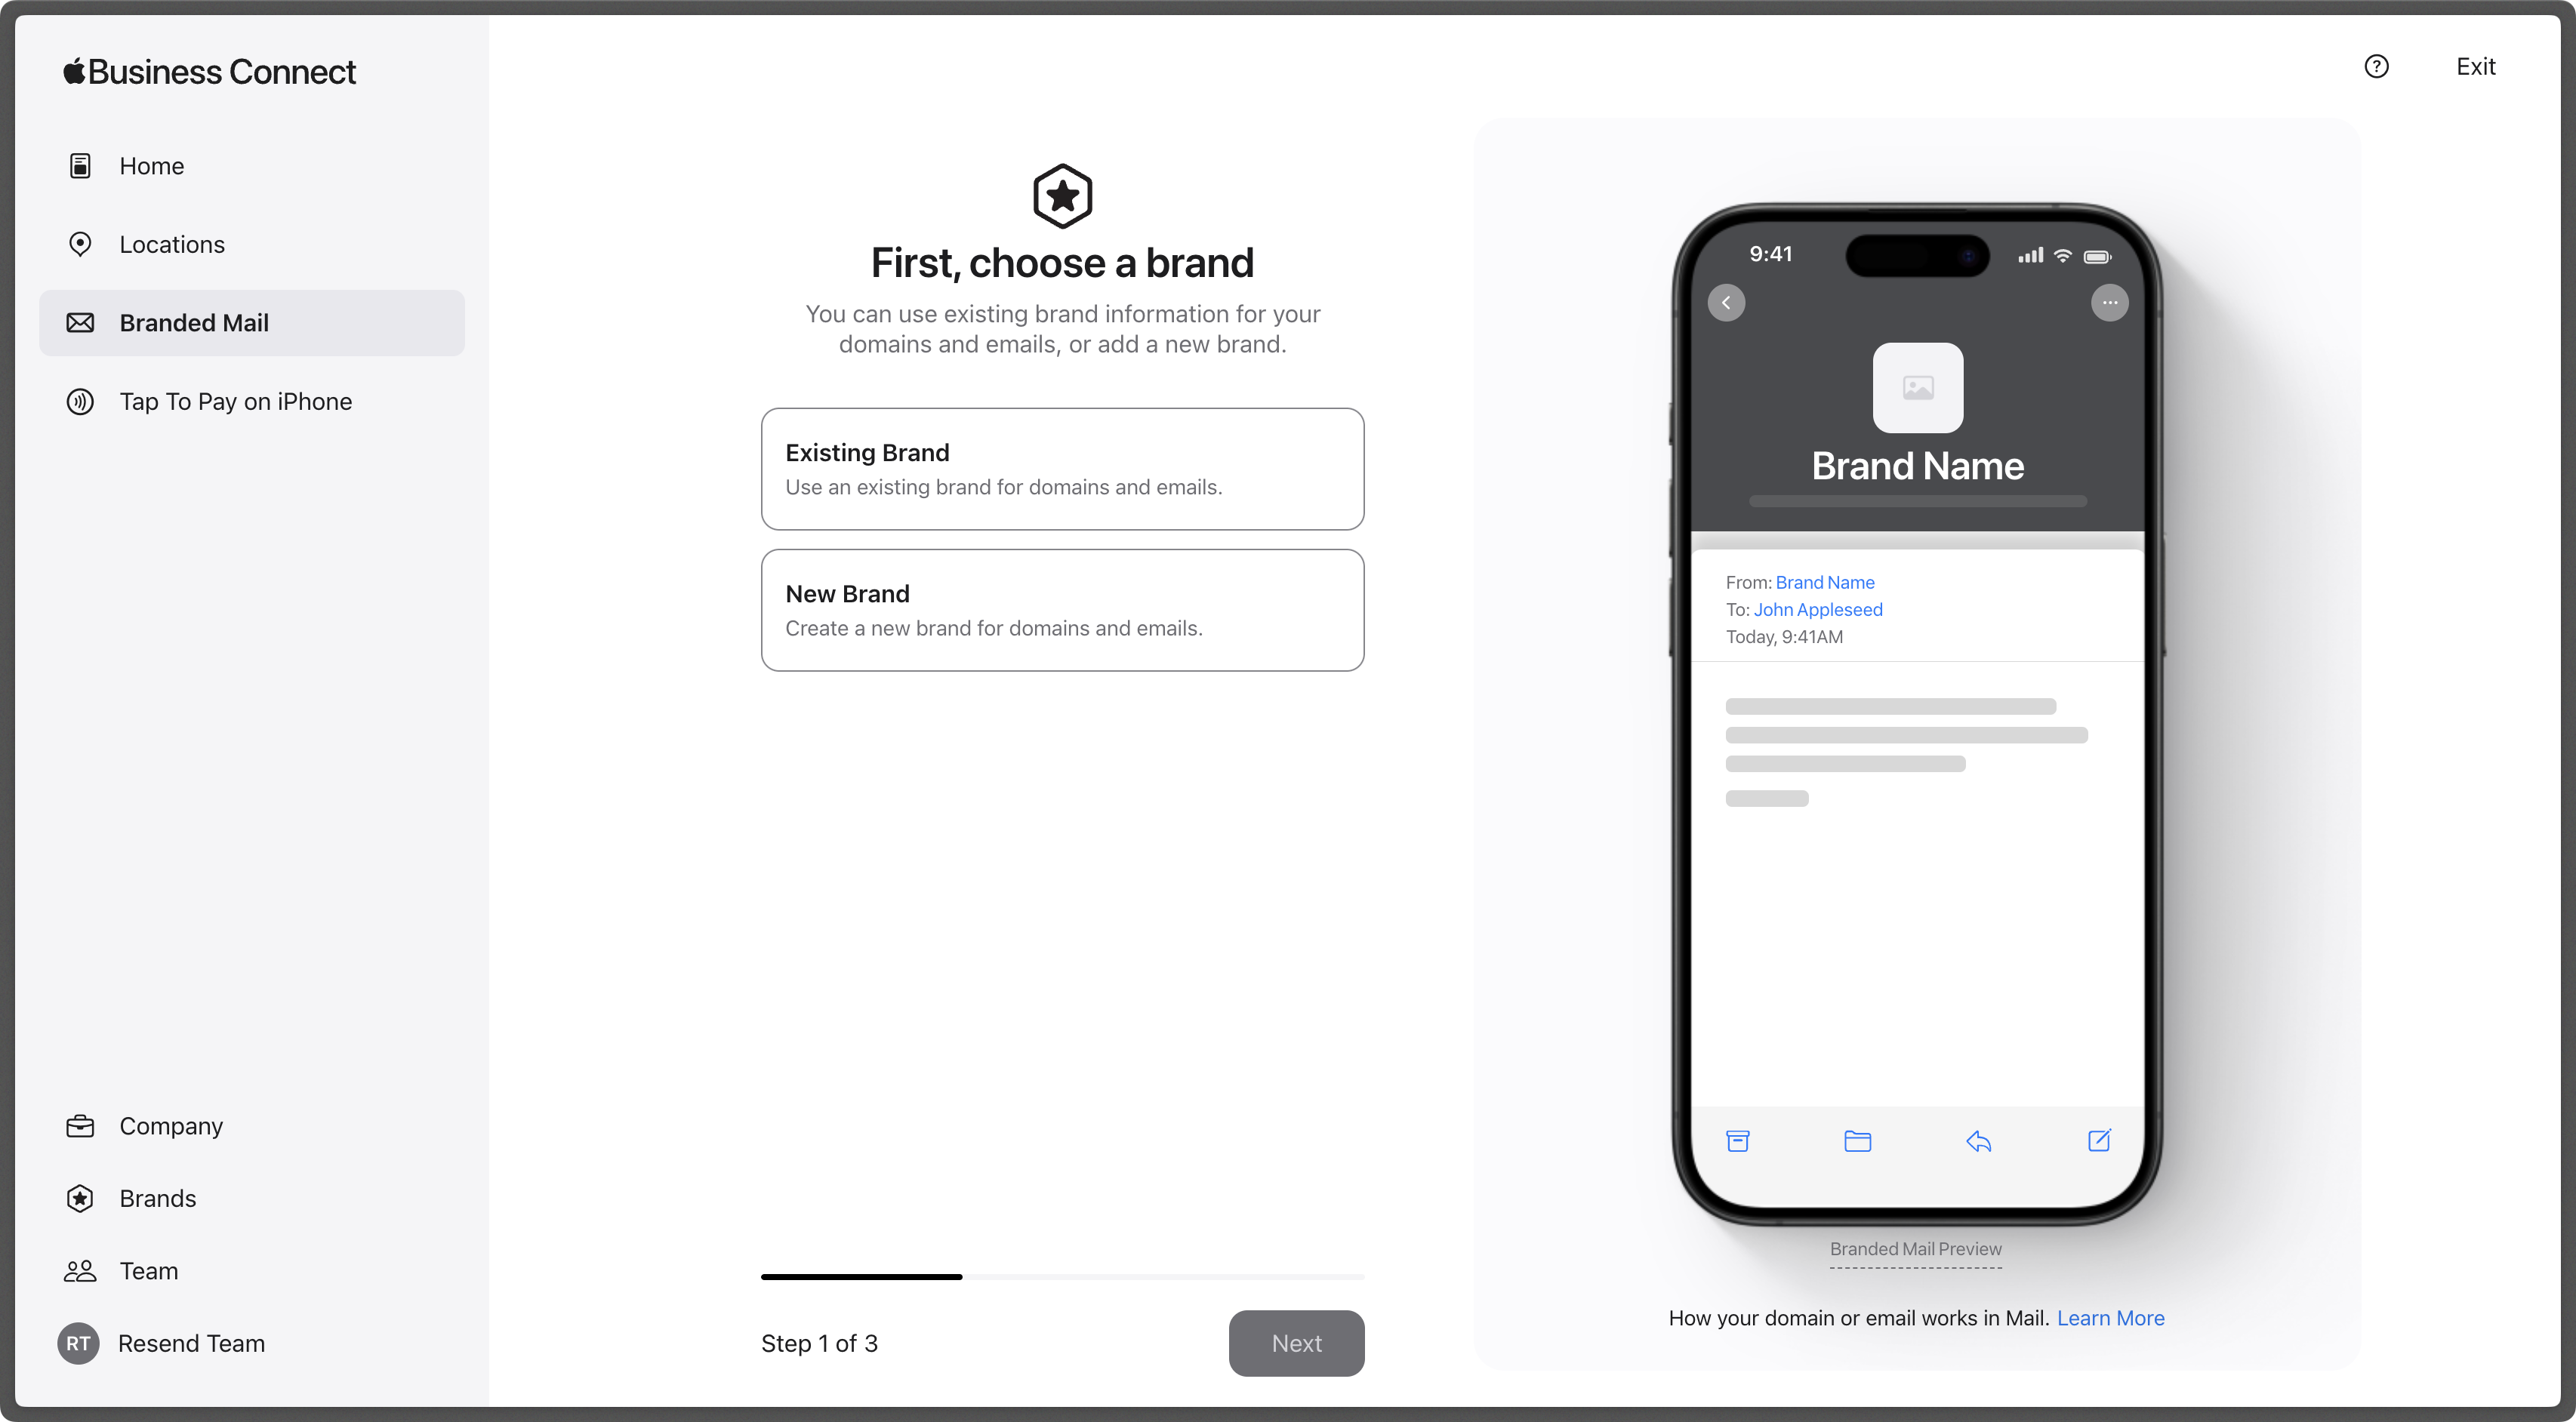
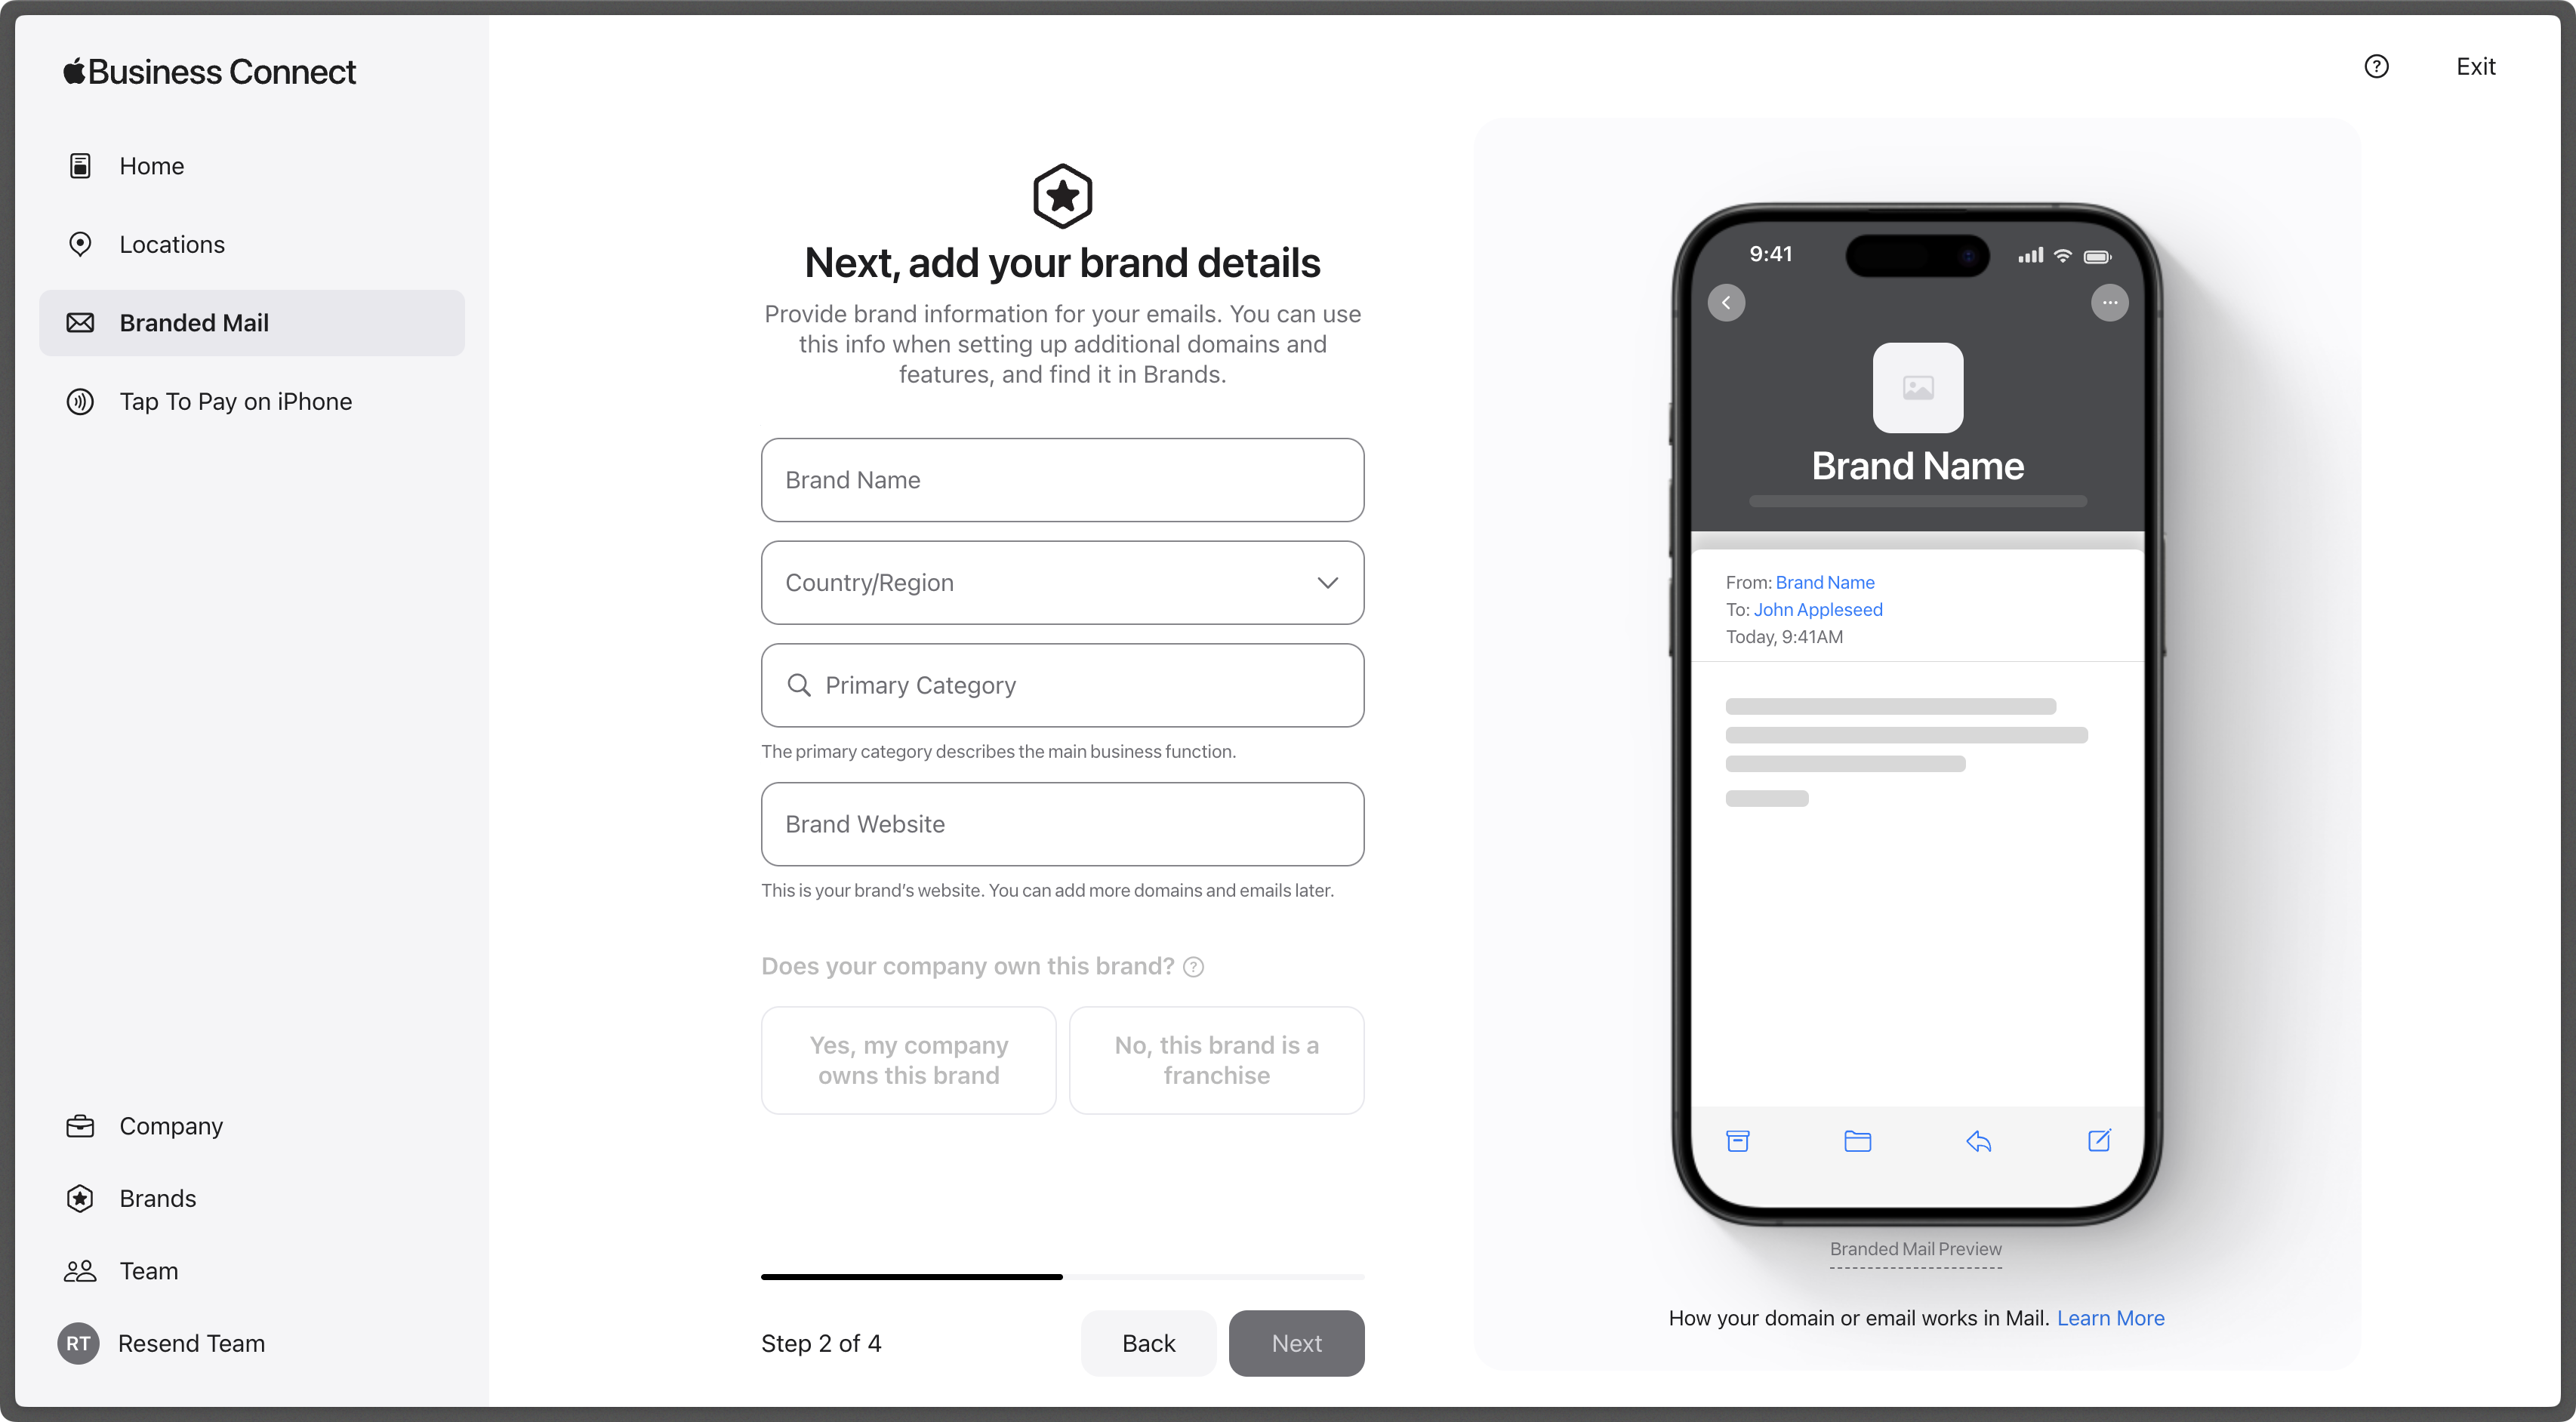 ### 5. Add your logo
Once you fill out the brand details, upload your logo. Apple requires the logo to be at least 1024 x 1024 px in a `.png`, `.heif`, or `.jpeg` format.
### 5. Add your logo
Once you fill out the brand details, upload your logo. Apple requires the logo to be at least 1024 x 1024 px in a `.png`, `.heif`, or `.jpeg` format.
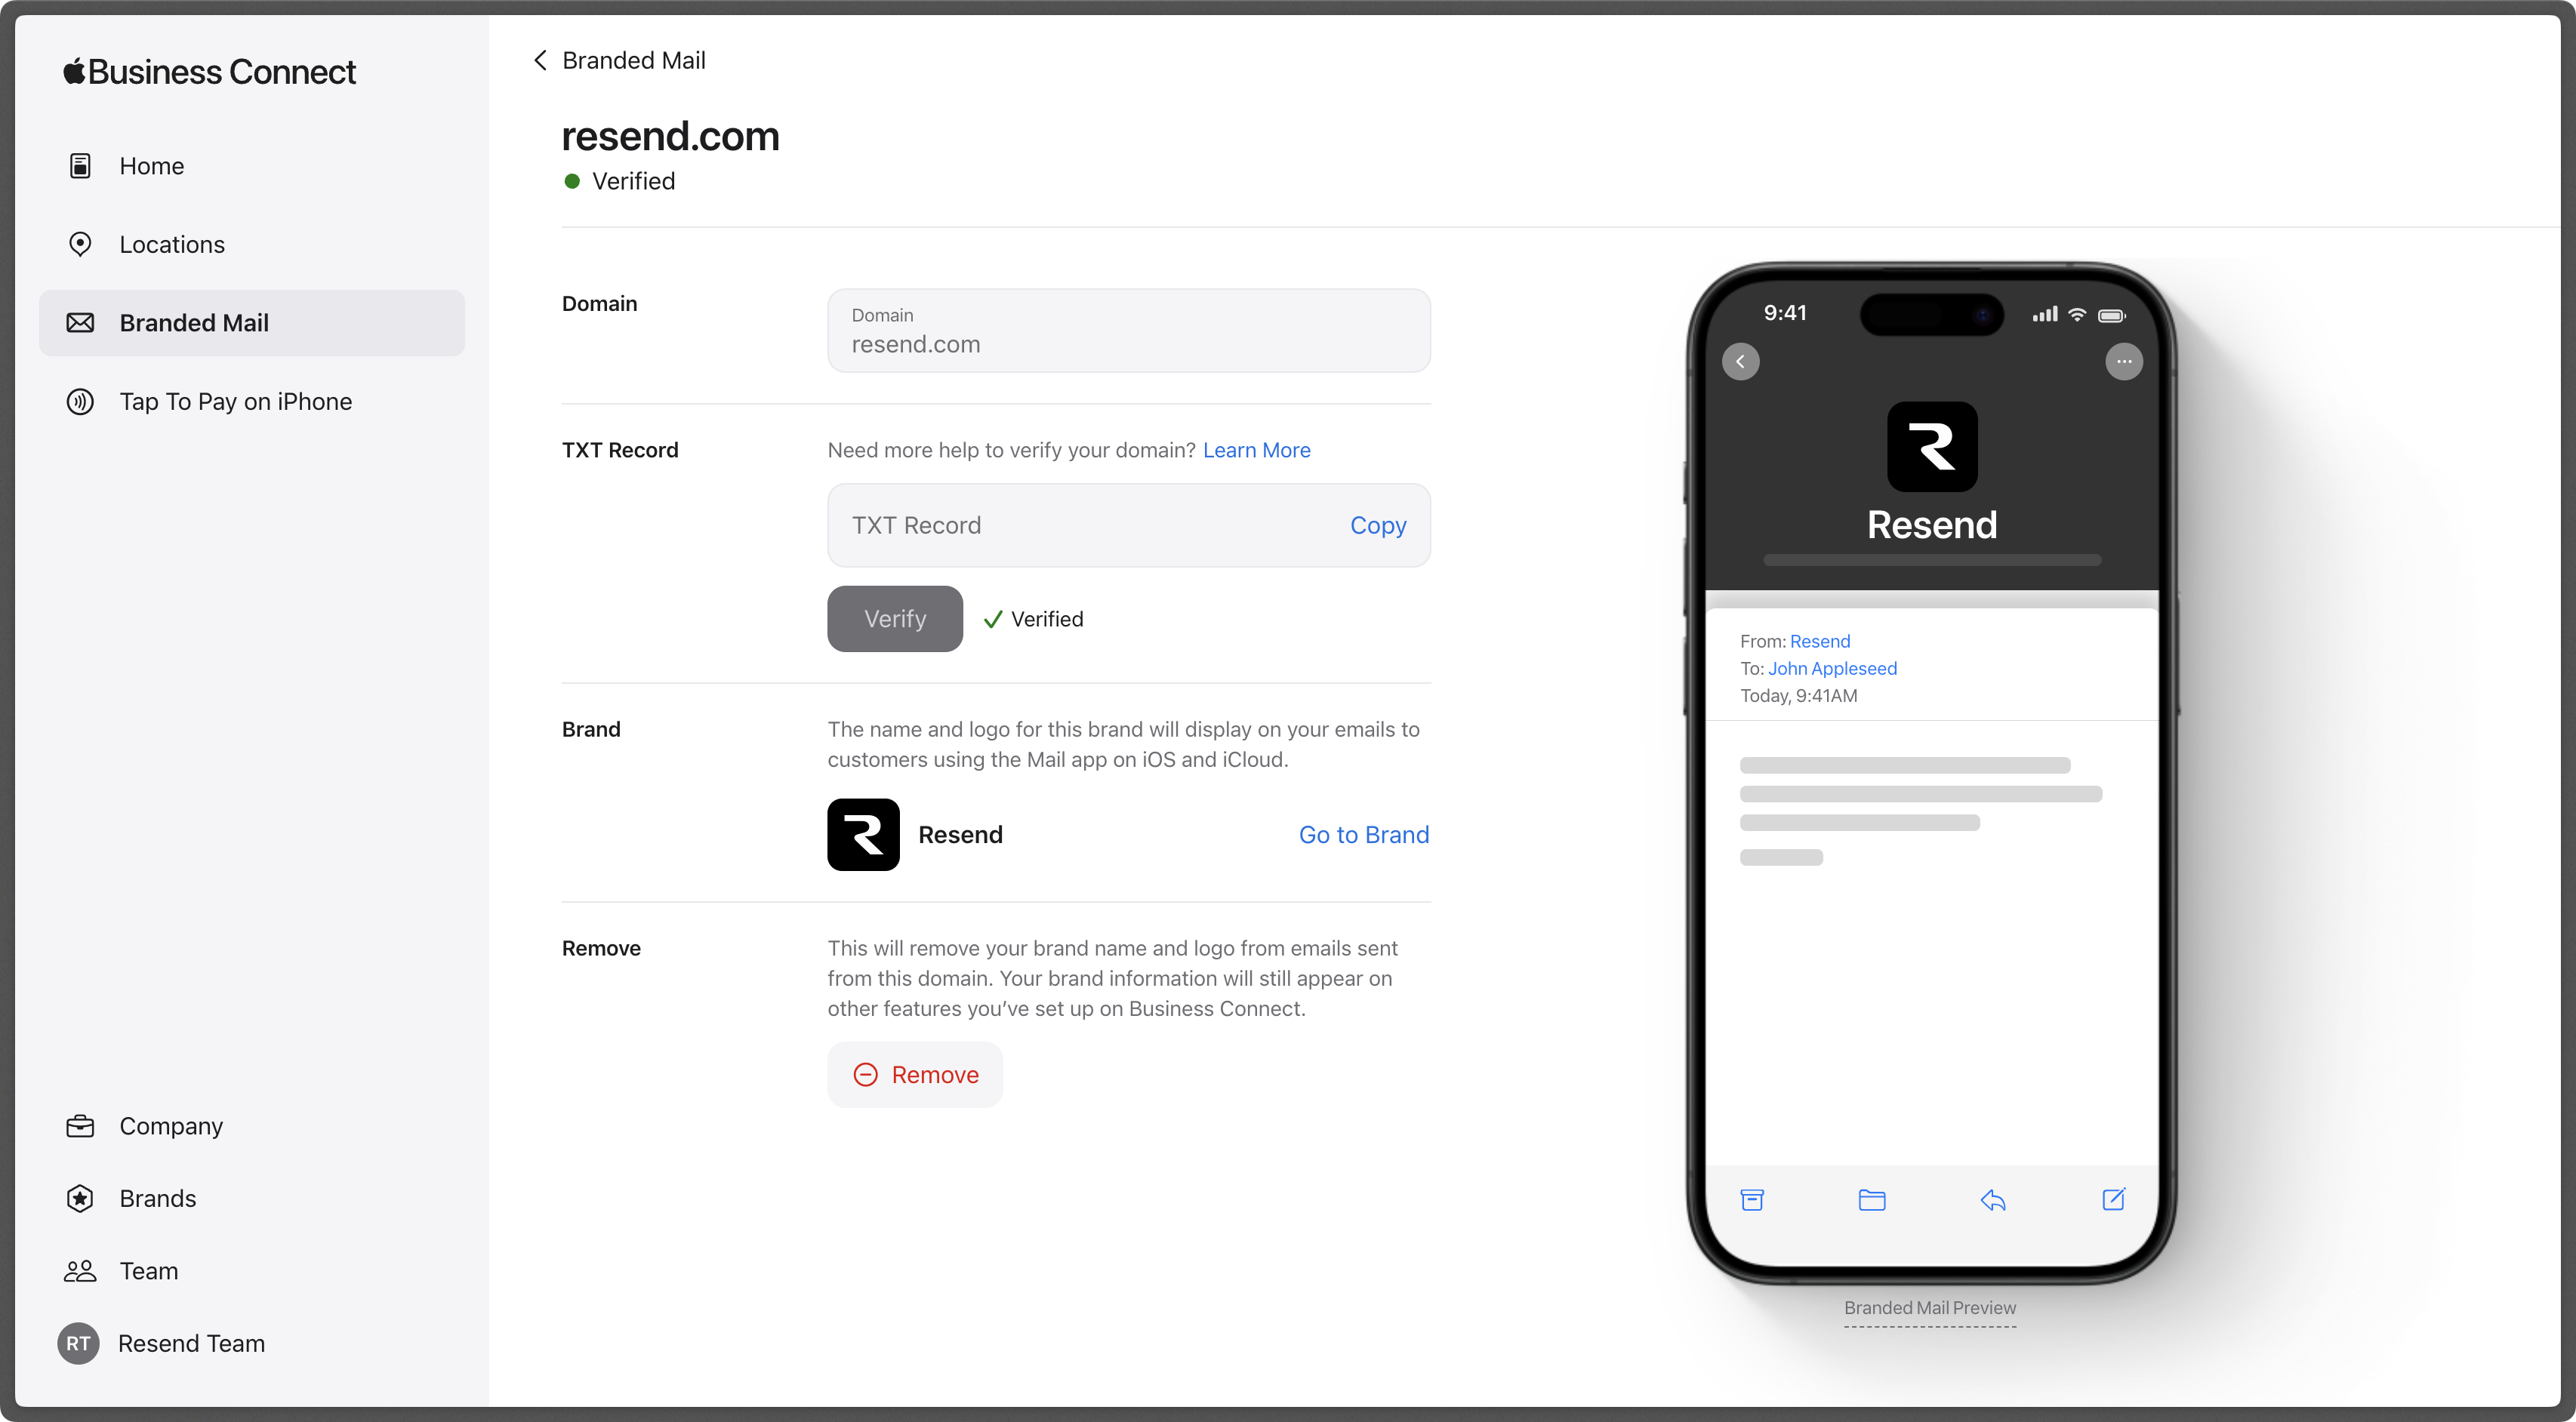
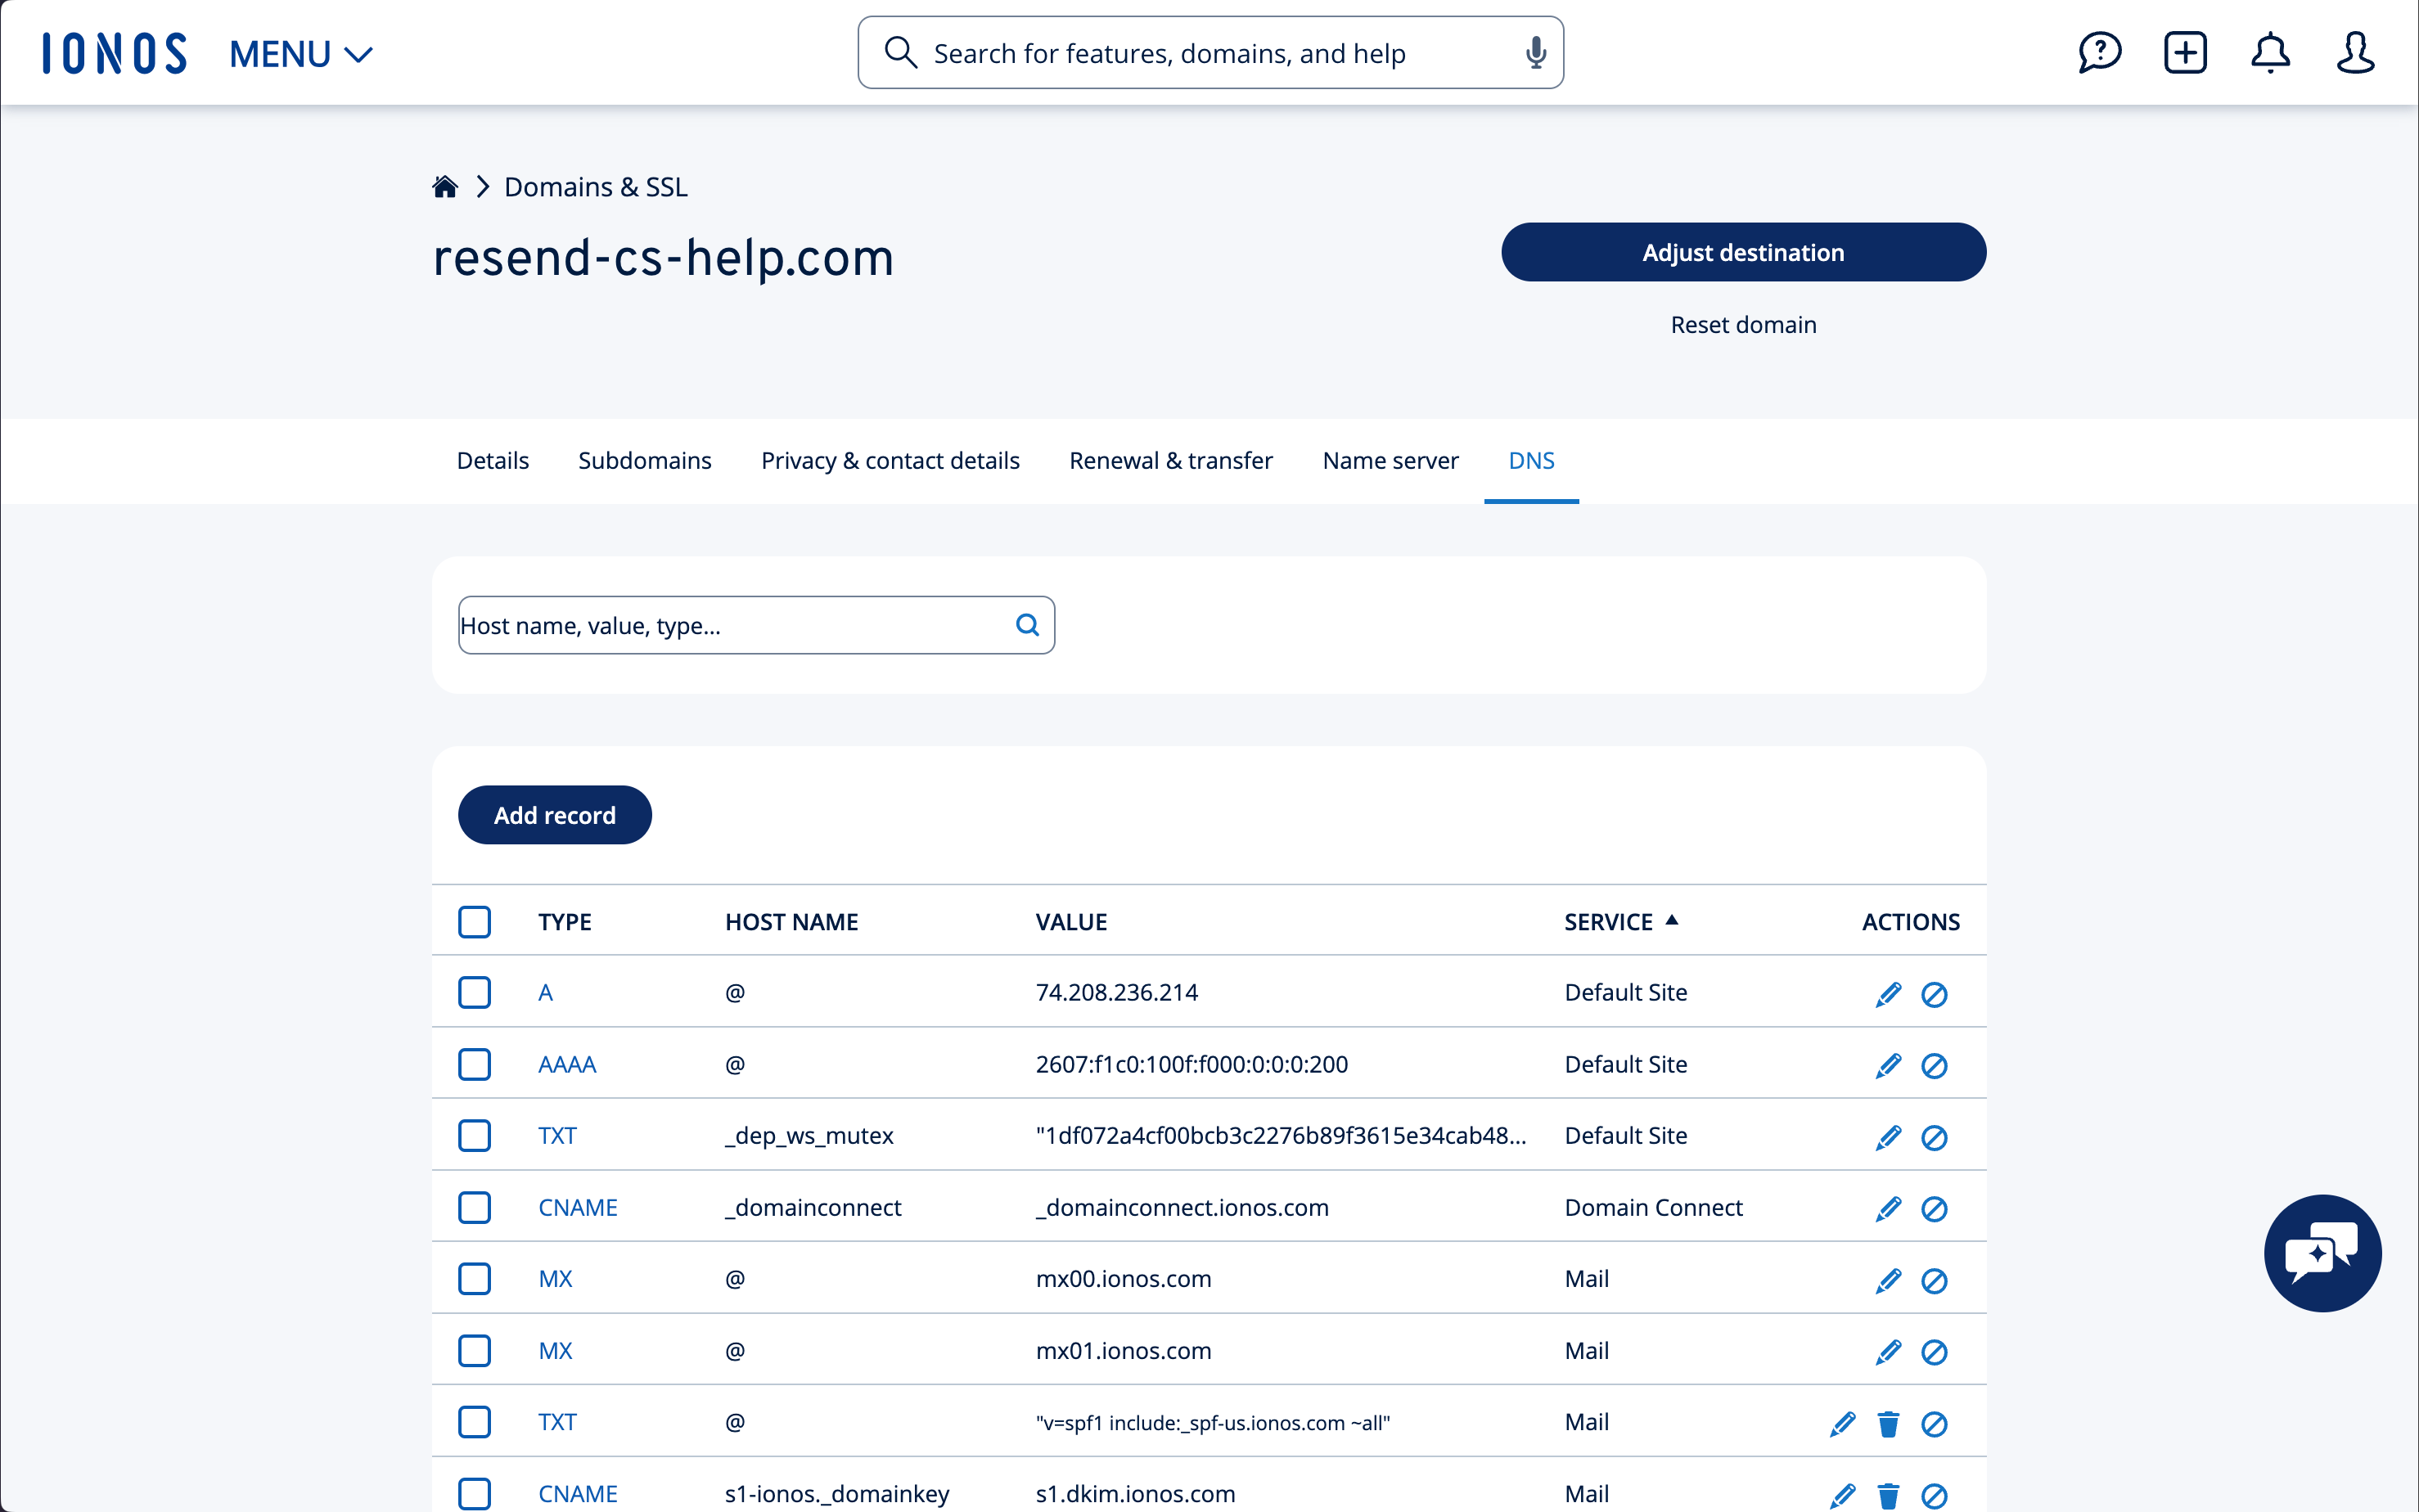 ## Add MX SPF Record
Select “Add record” on IONOS to copy and paste the values MX from Resend.
1. On the `Add a DNS Record` page, select `MX`.
2. Type `send` for the `Name` of the record.
3. Copy the MX Value from Resend into the `Points to` field.
4. Use the default `Priority` of `10`.
5. Use the default TTL of `1 hour`.
6. Select `Save`.
## Add MX SPF Record
Select “Add record” on IONOS to copy and paste the values MX from Resend.
1. On the `Add a DNS Record` page, select `MX`.
2. Type `send` for the `Name` of the record.
3. Copy the MX Value from Resend into the `Points to` field.
4. Use the default `Priority` of `10`.
5. Use the default TTL of `1 hour`.
6. Select `Save`.
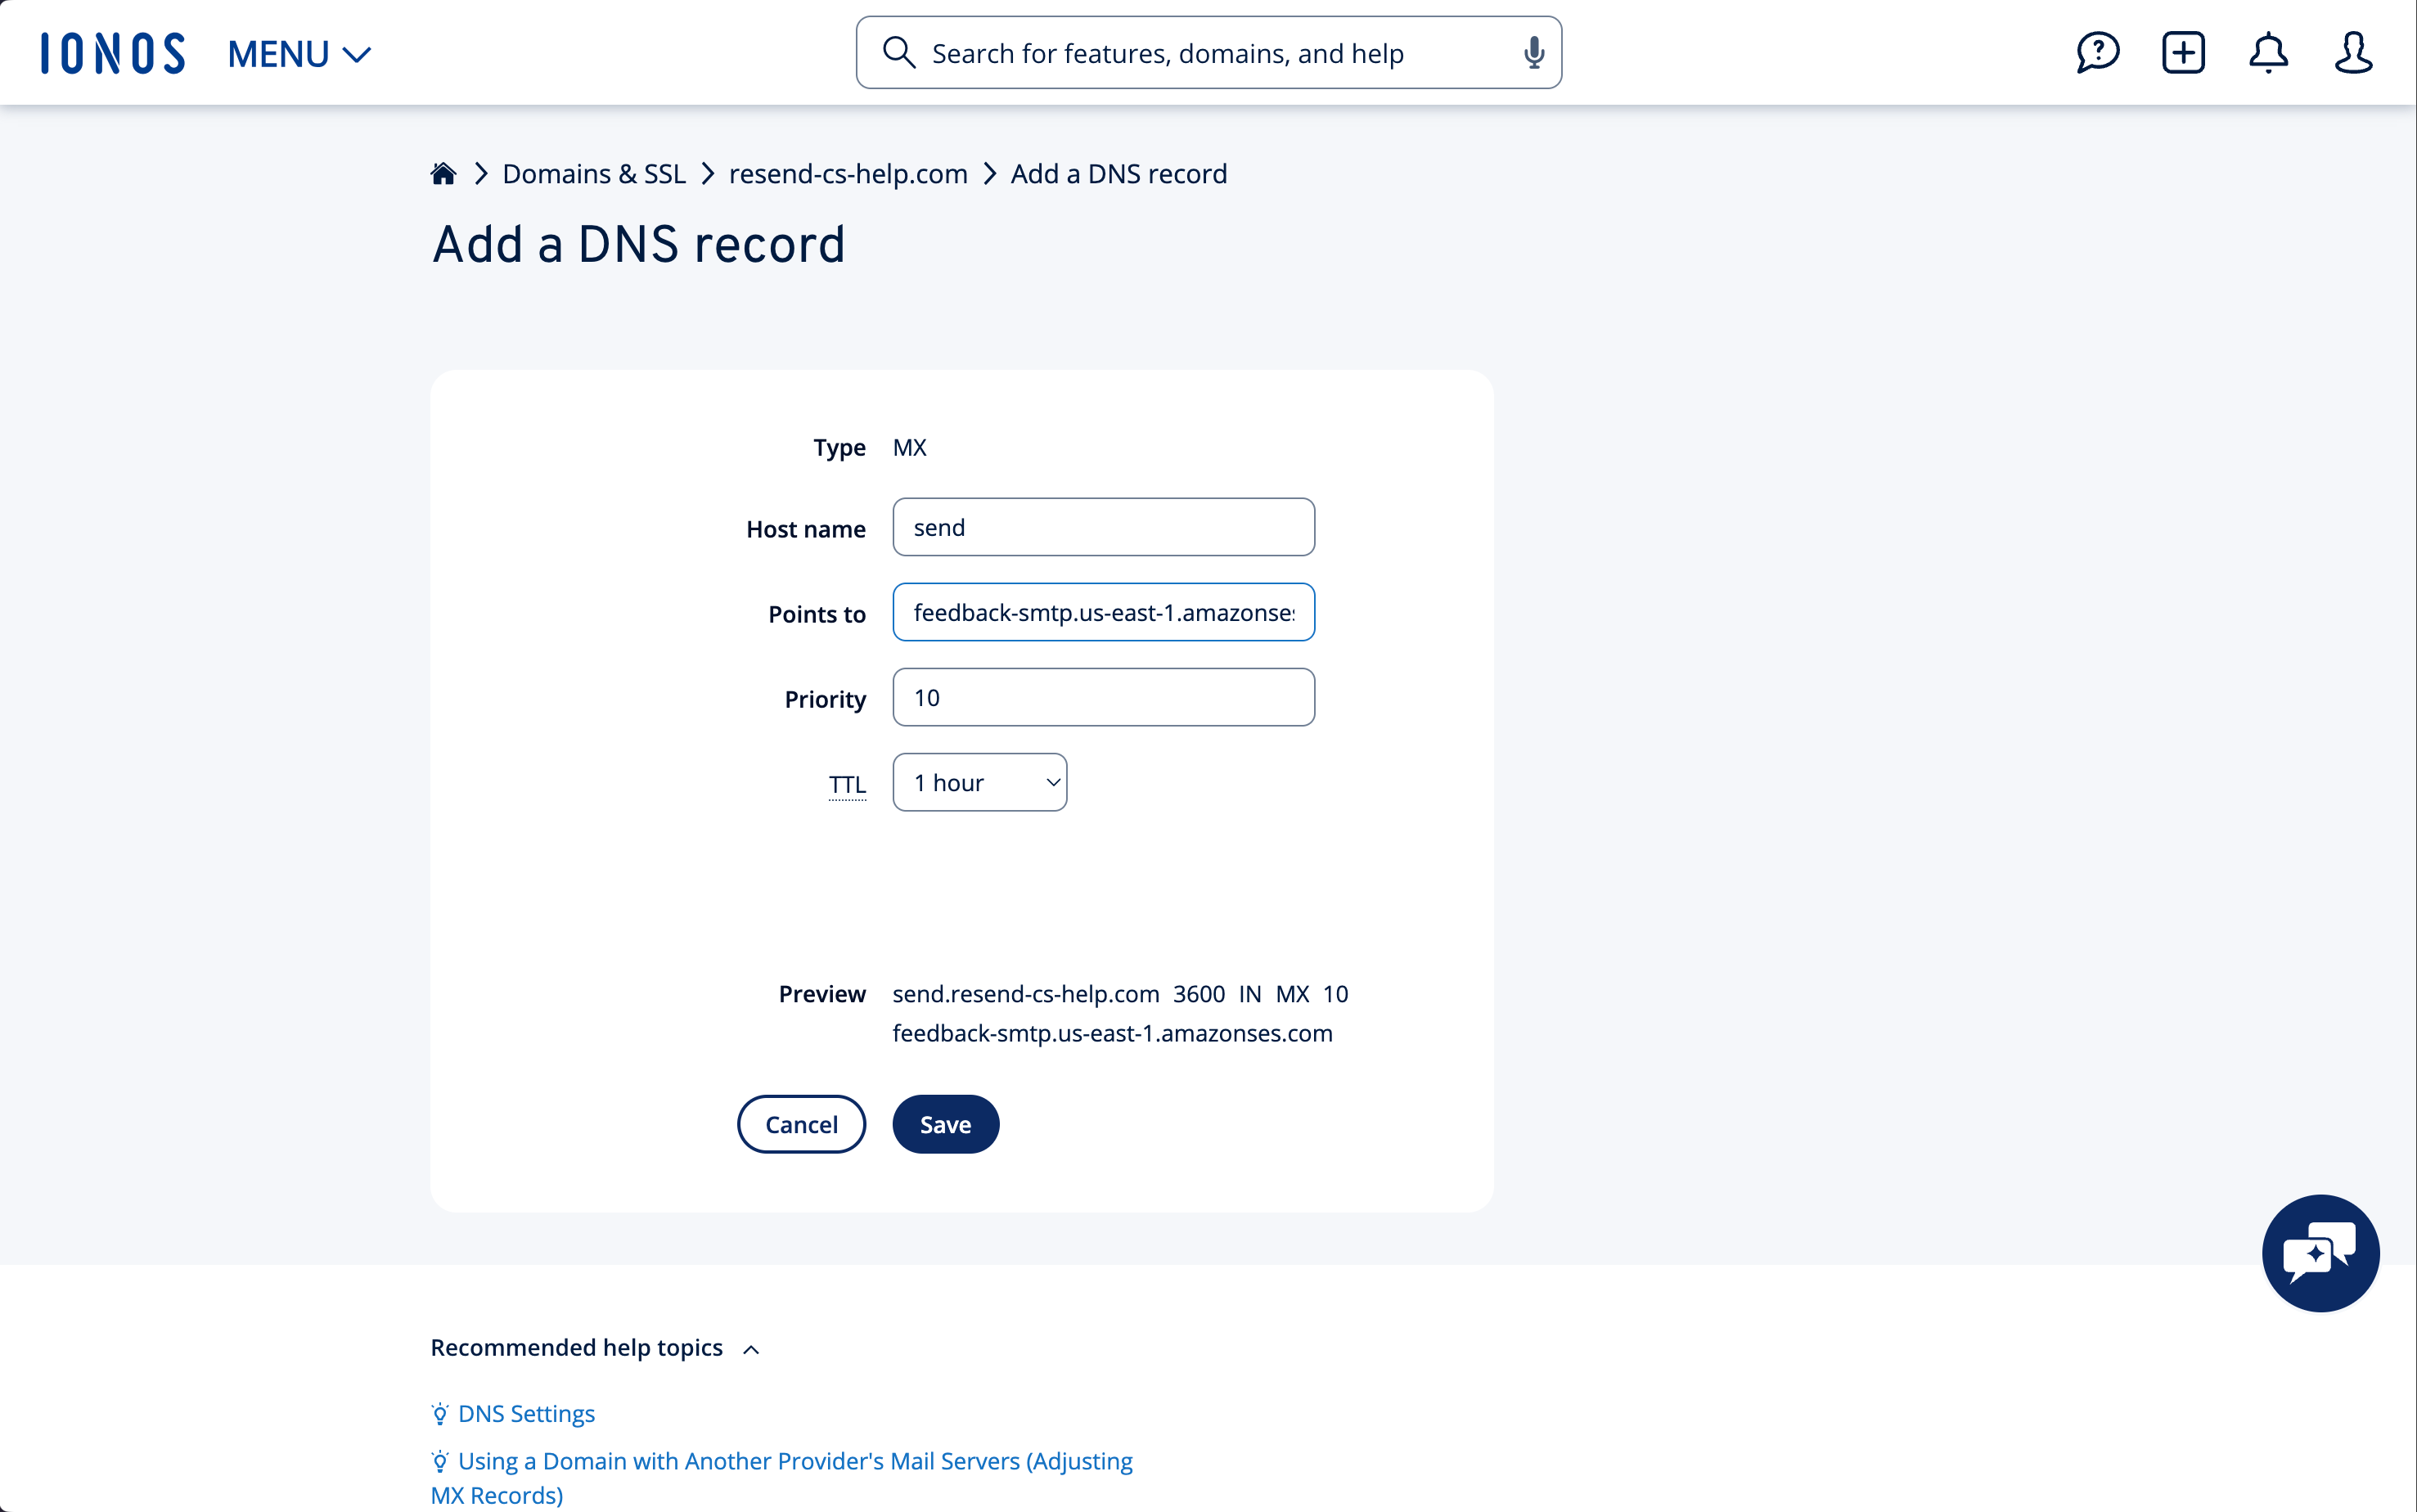 Below is a mapping of the record fields from Resend to IONOS:
| IONOS | Resend | Example Value |
| --------- | -------- | --------------------------------------- |
| Type | Type | `MX Record` |
| Name | Name | `send` |
| Points to | Value | `feedback-smtp.us-east-1.amazonses.com` |
| TTL | TTL | `1 hour` |
| Priority | Priority | `10` |
Below is a mapping of the record fields from Resend to IONOS:
| IONOS | Resend | Example Value |
| --------- | -------- | --------------------------------------- |
| Type | Type | `MX Record` |
| Name | Name | `send` |
| Points to | Value | `feedback-smtp.us-east-1.amazonses.com` |
| TTL | TTL | `1 hour` |
| Priority | Priority | `10` |
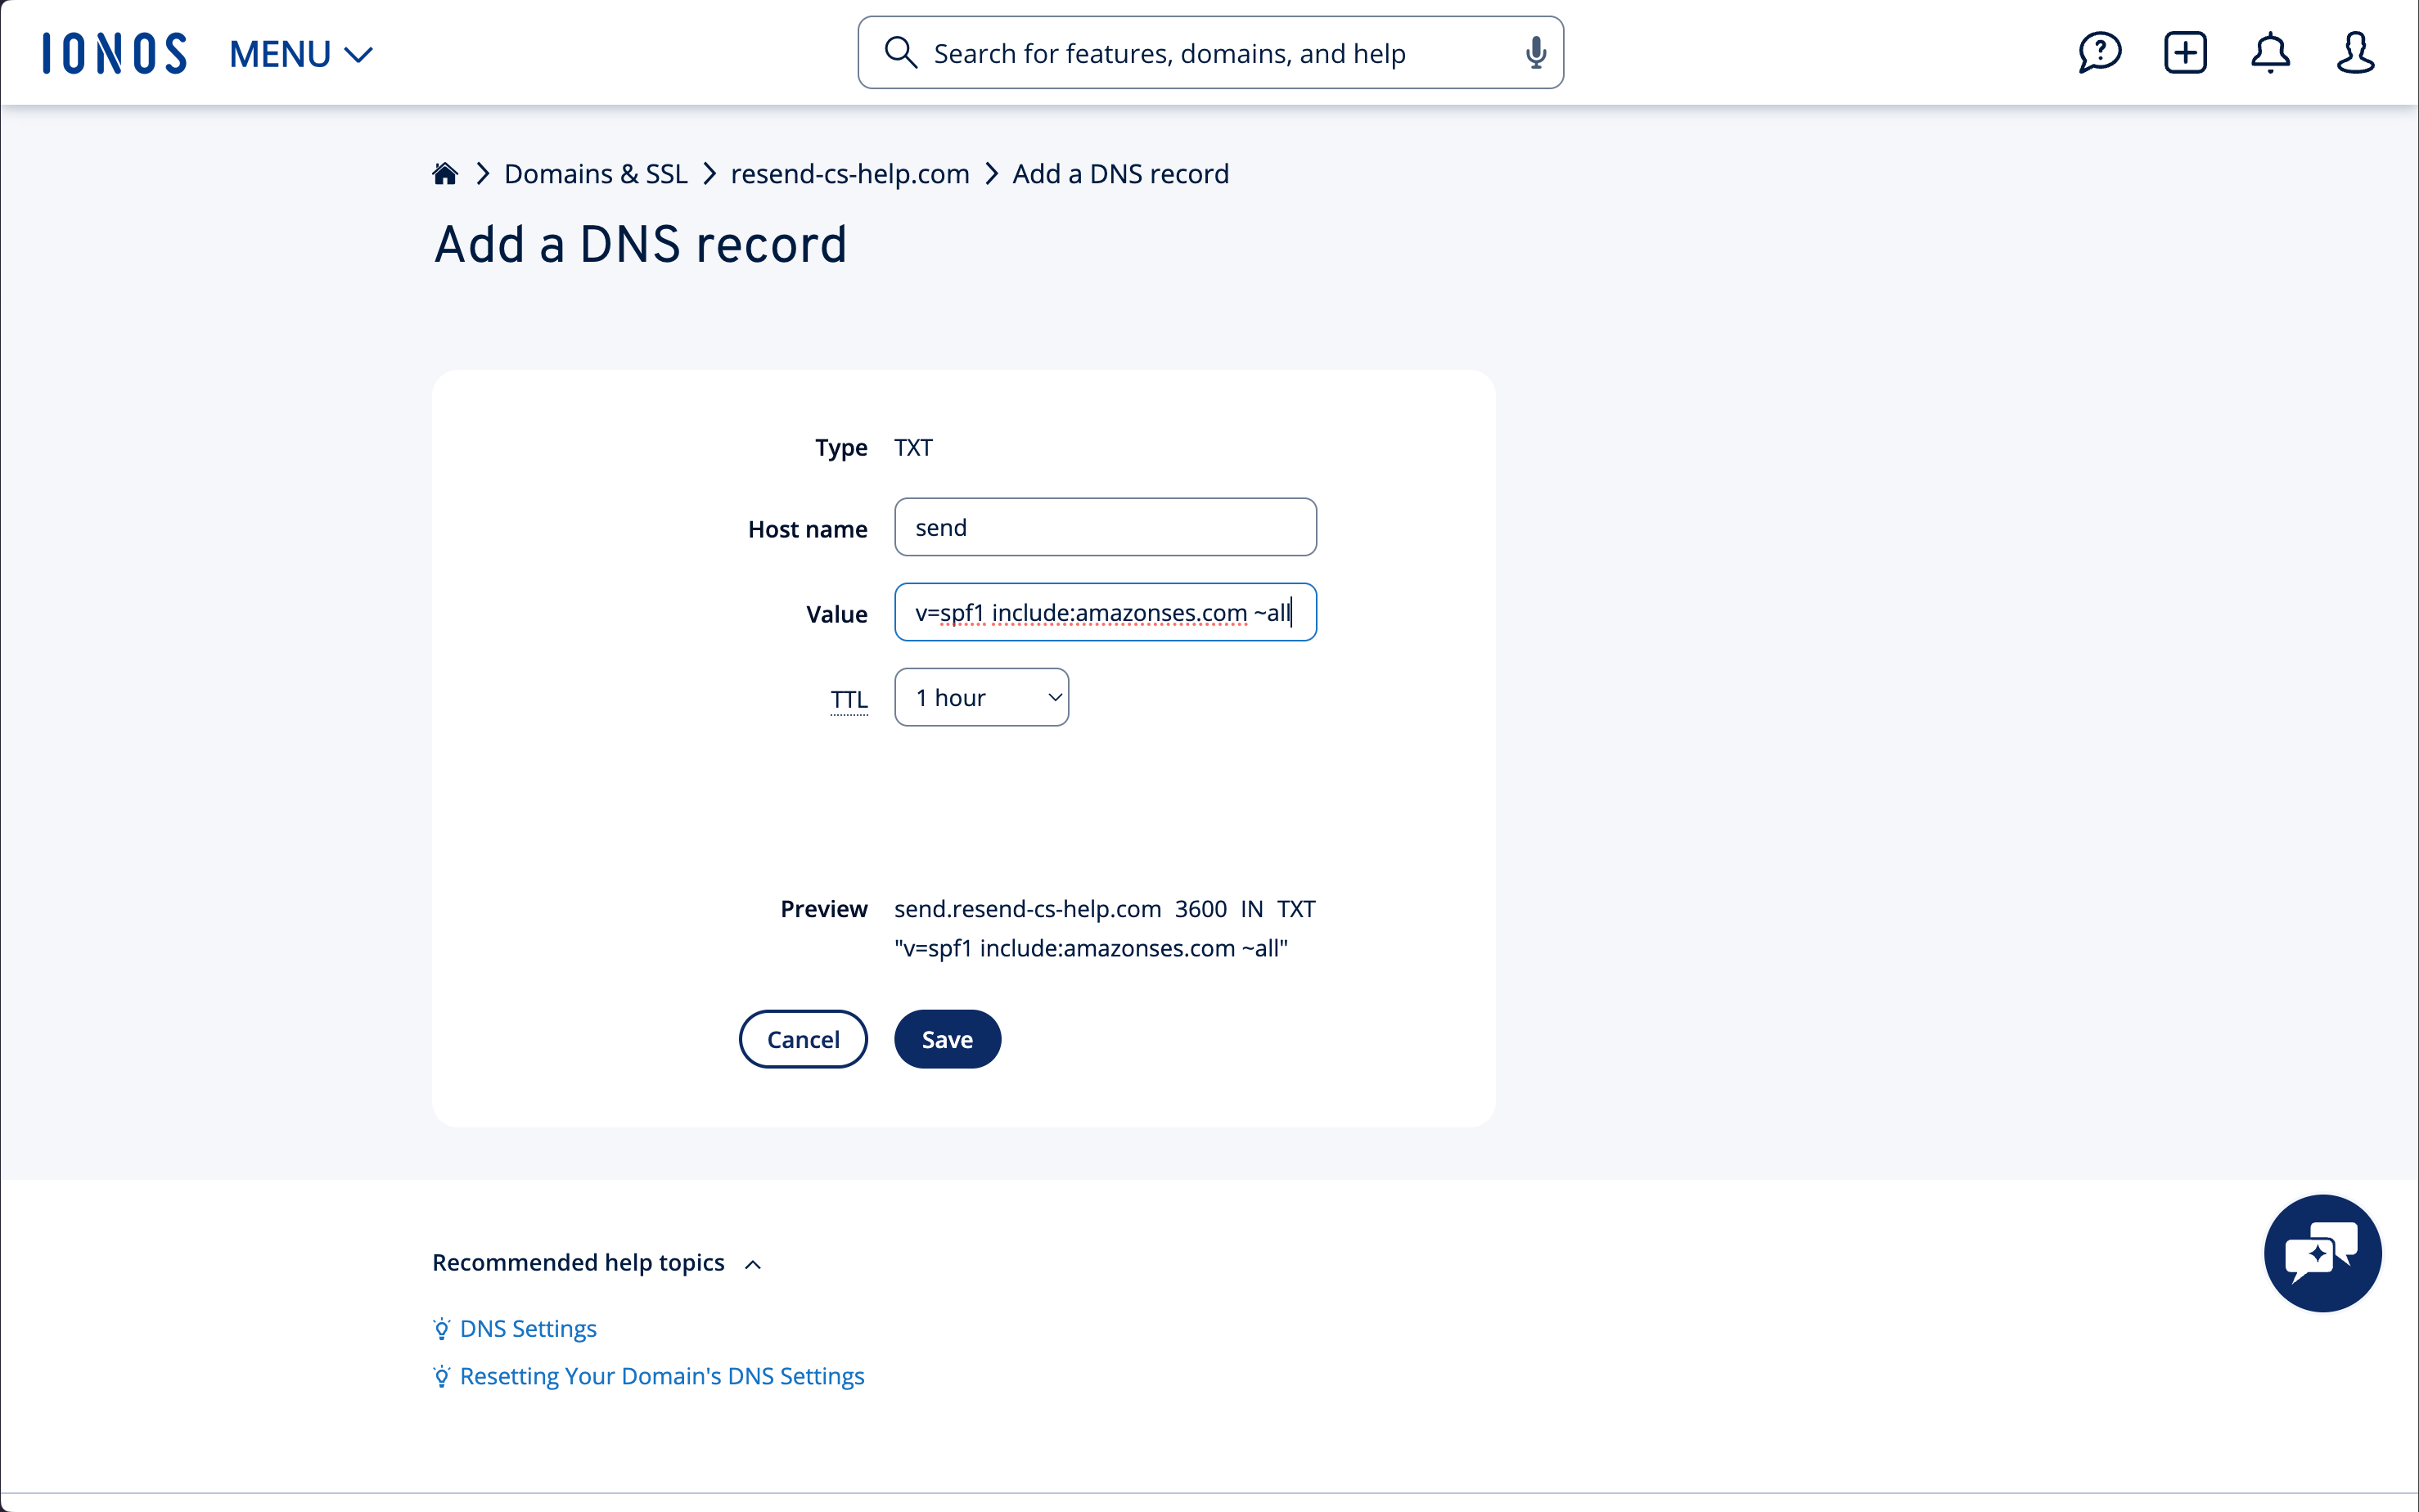 Below is a mapping of the record fields from Resend to IONOS:
| IONOS | Resend | Example Value |
| --------- | ------ | ------------------------------------- |
| Type | Type | `TXT Record` |
| Host name | Name | `send` |
| TXT value | Value | `"v=spf1 include:amazonses.com ~all"` |
| TTL | - | `1 hour` |
## Add TXT DKIM Records
In the same section, select “Add record” again.
1. On the `Add a DNS Record` page, select `TXT`.
2. Type `resend._domainkey` for the `Host name` of the record.
3. Copy the record value from Resend into the `TXT value` field.
4. Use the default TTL of `1 hour`.
5. Select `Save`.
Below is a mapping of the record fields from Resend to IONOS:
| IONOS | Resend | Example Value |
| --------- | ------ | ------------------------------------- |
| Type | Type | `TXT Record` |
| Host name | Name | `send` |
| TXT value | Value | `"v=spf1 include:amazonses.com ~all"` |
| TTL | - | `1 hour` |
## Add TXT DKIM Records
In the same section, select “Add record” again.
1. On the `Add a DNS Record` page, select `TXT`.
2. Type `resend._domainkey` for the `Host name` of the record.
3. Copy the record value from Resend into the `TXT value` field.
4. Use the default TTL of `1 hour`.
5. Select `Save`.
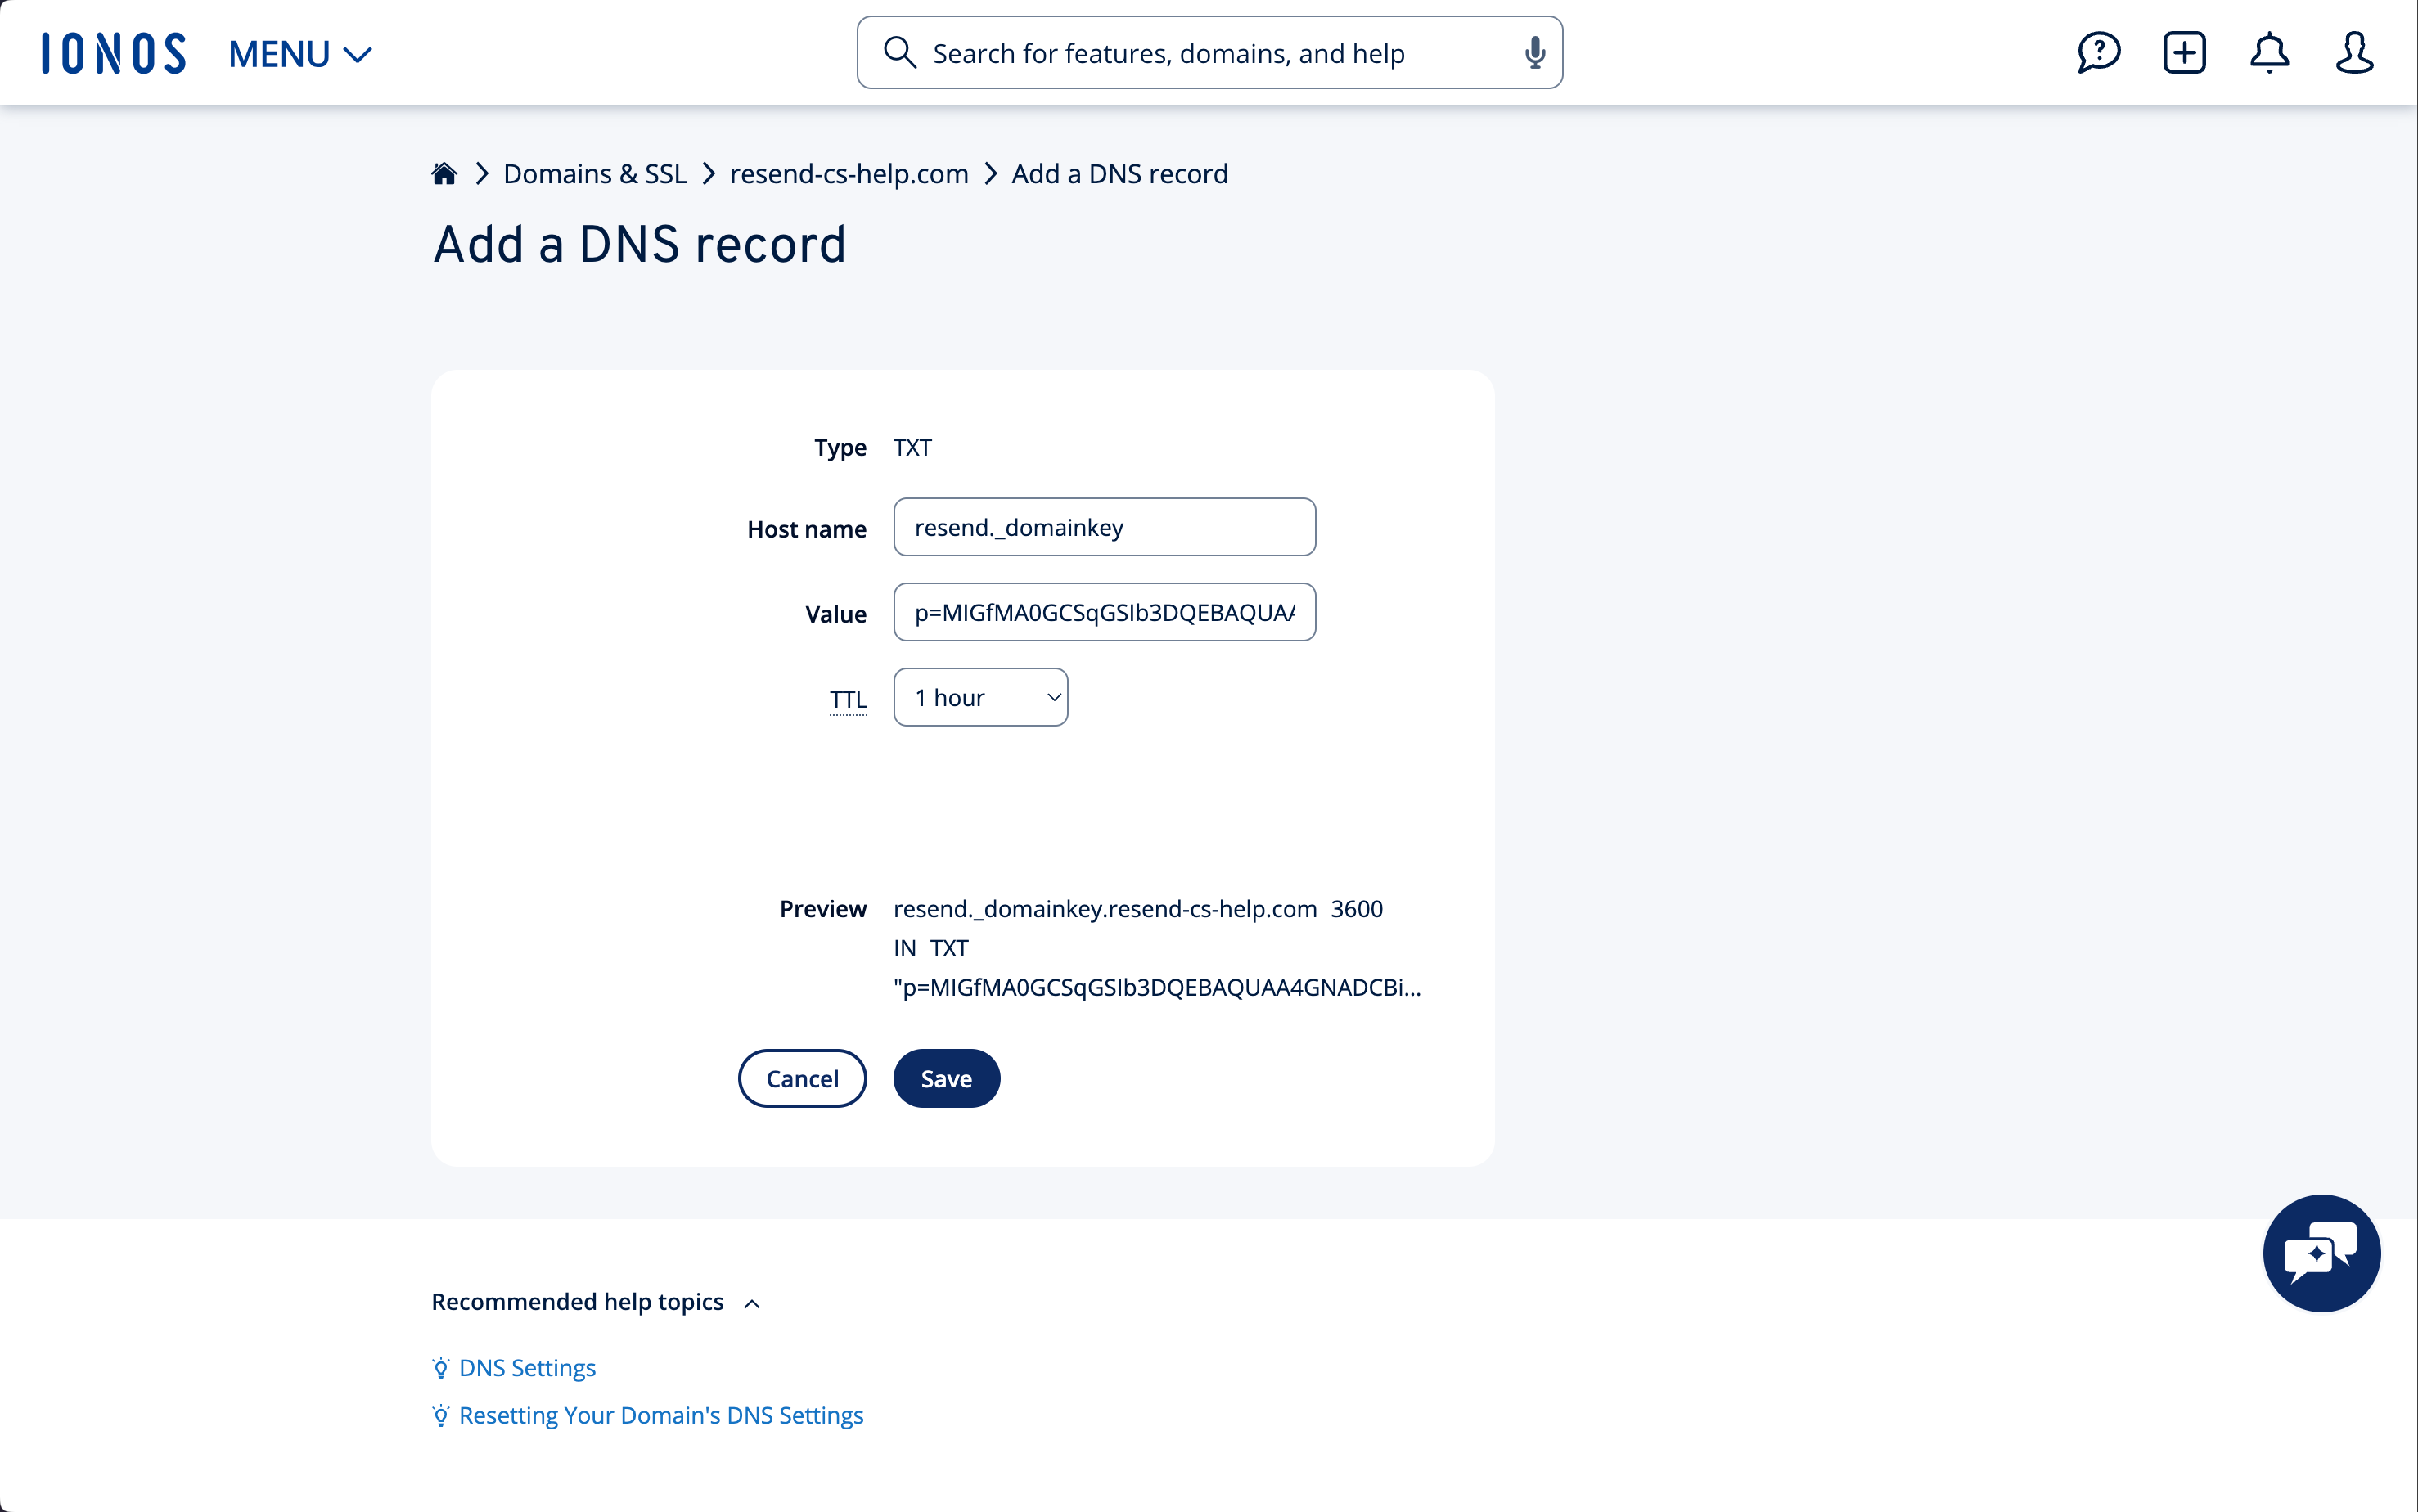 Below is a mapping of the record fields from Resend to IONOS:
| IONOS | Resend | Example Value |
| --------- | ------ | ---------------------------- |
| Type | Type | `TXT Record` |
| Host name | Name | `send` |
| TXT value | Value | `p=example_demain_key_value` |
| TTL | - | `1 hour` |
## Receiving Emails
If you want to receive emails at your domain, toggle the "Receiving" switch on the domain details page.
Below is a mapping of the record fields from Resend to IONOS:
| IONOS | Resend | Example Value |
| --------- | ------ | ---------------------------- |
| Type | Type | `TXT Record` |
| Host name | Name | `send` |
| TXT value | Value | `p=example_demain_key_value` |
| TTL | - | `1 hour` |
## Receiving Emails
If you want to receive emails at your domain, toggle the "Receiving" switch on the domain details page.
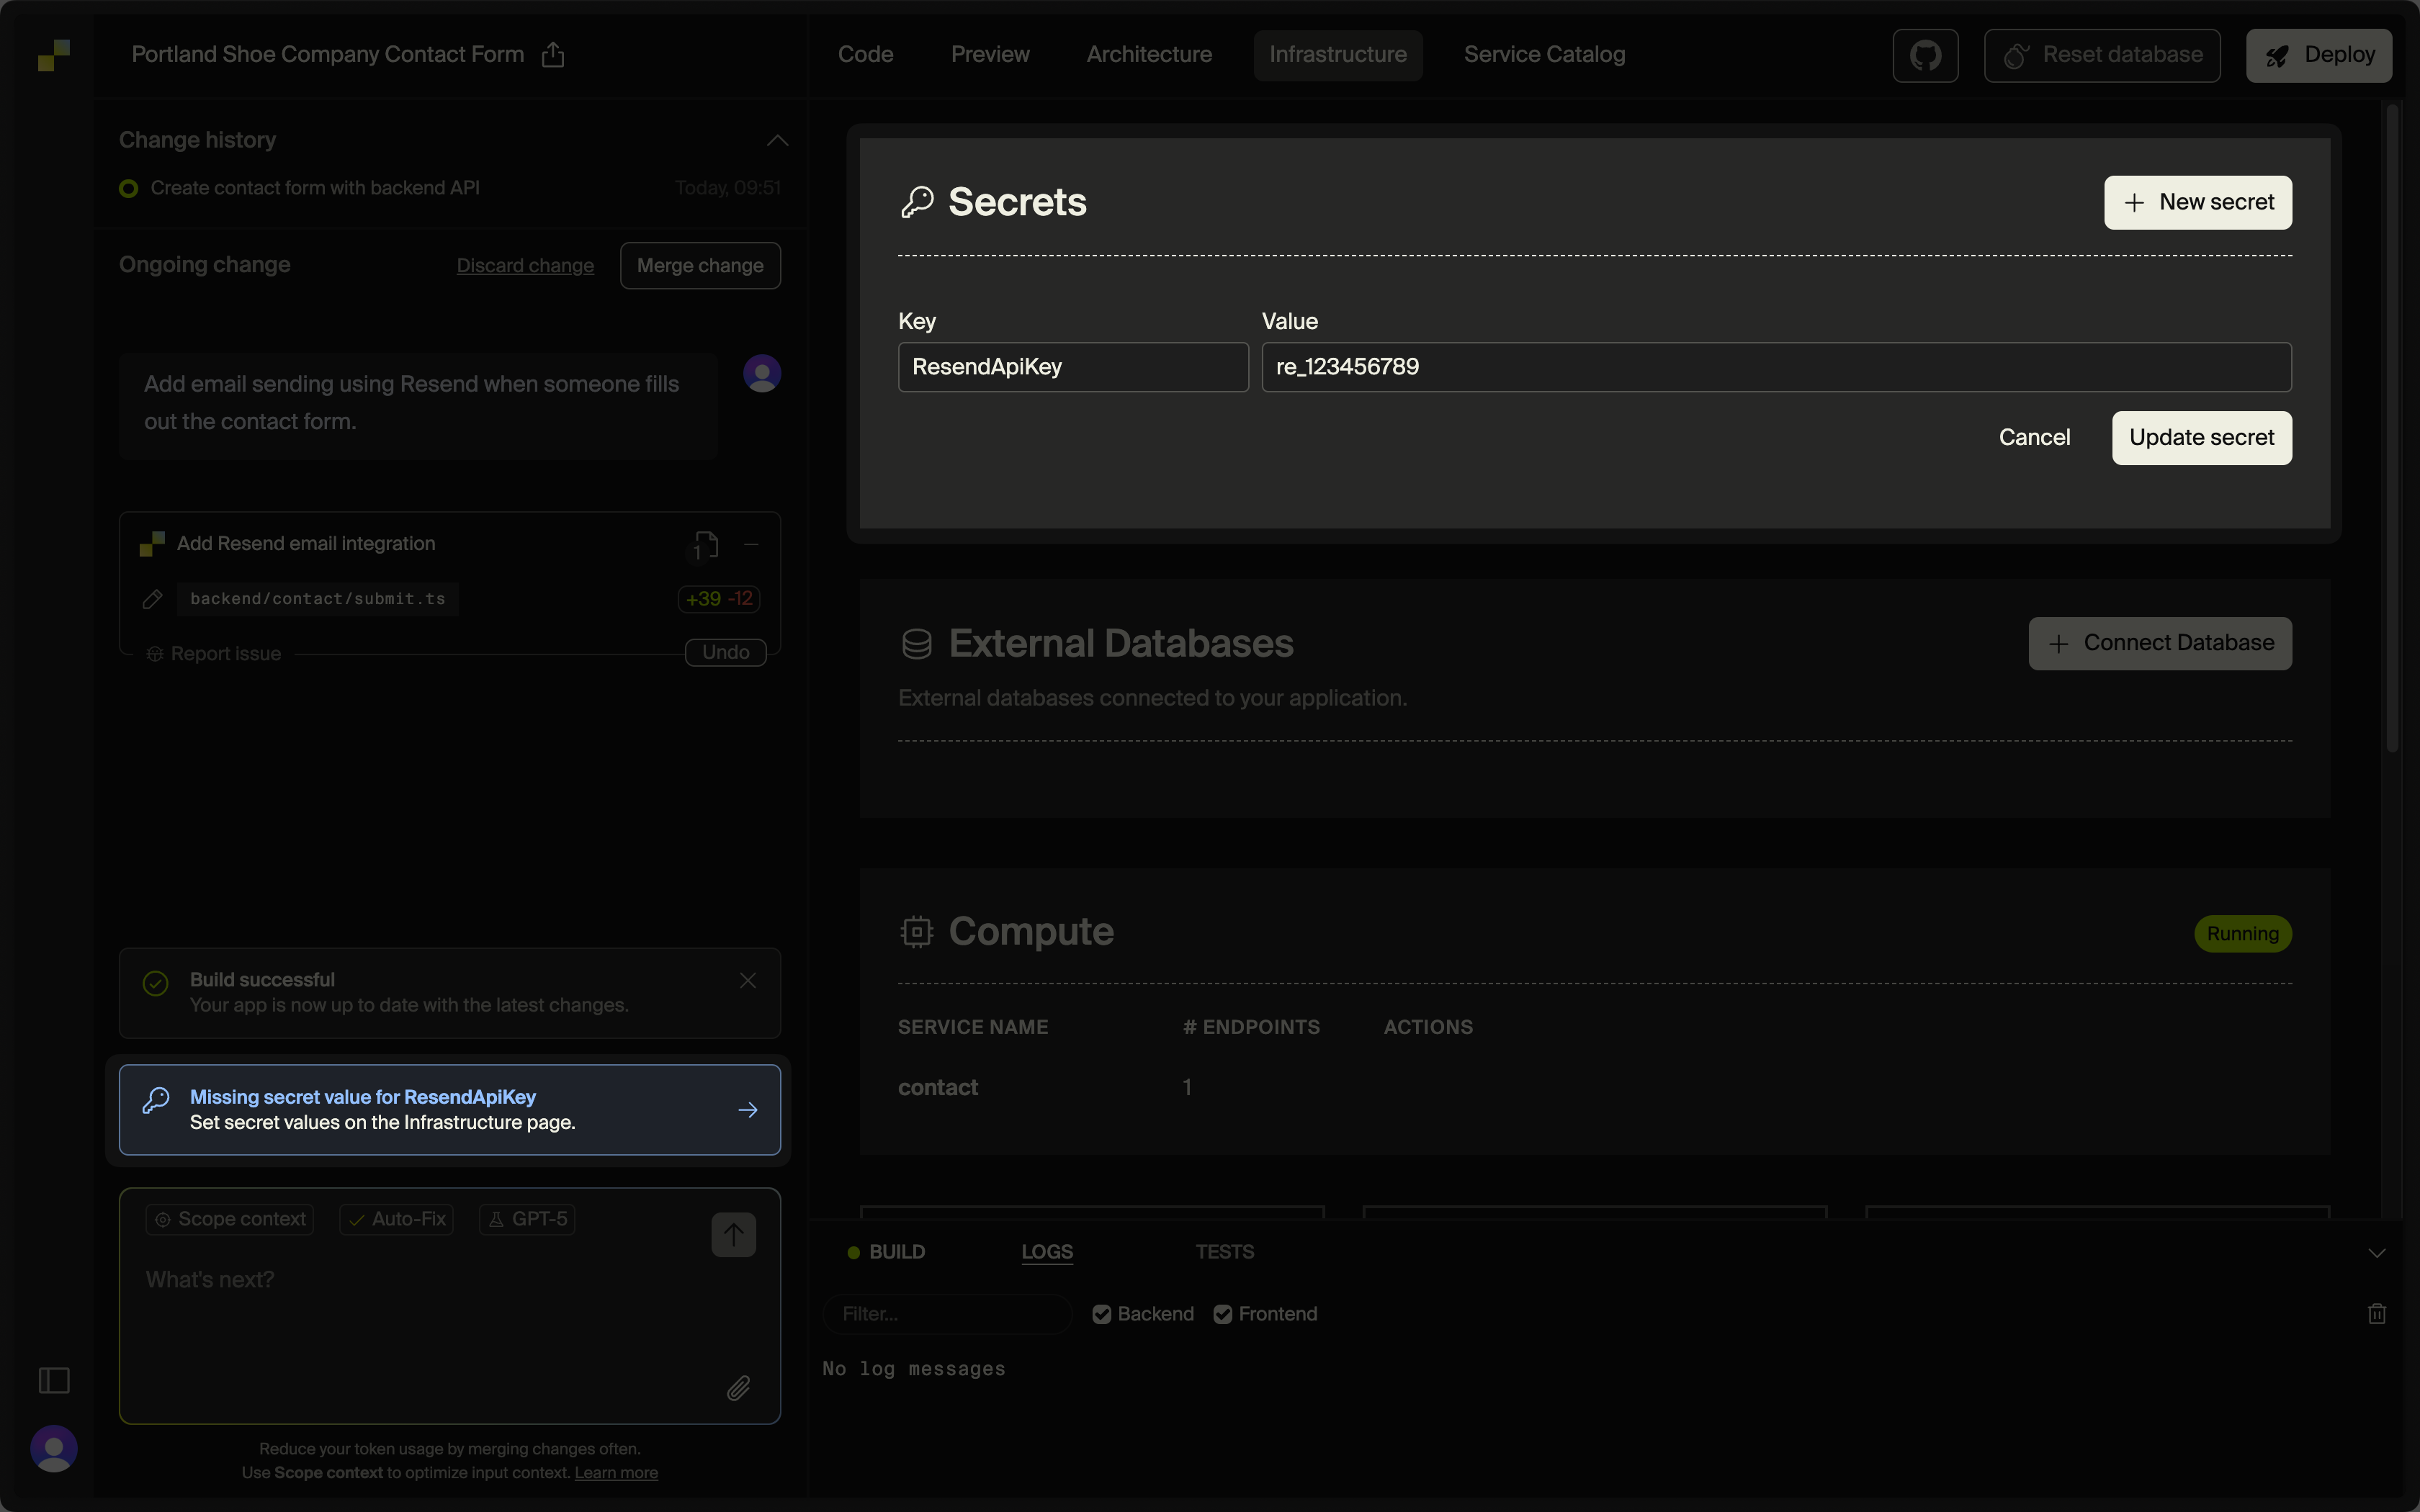
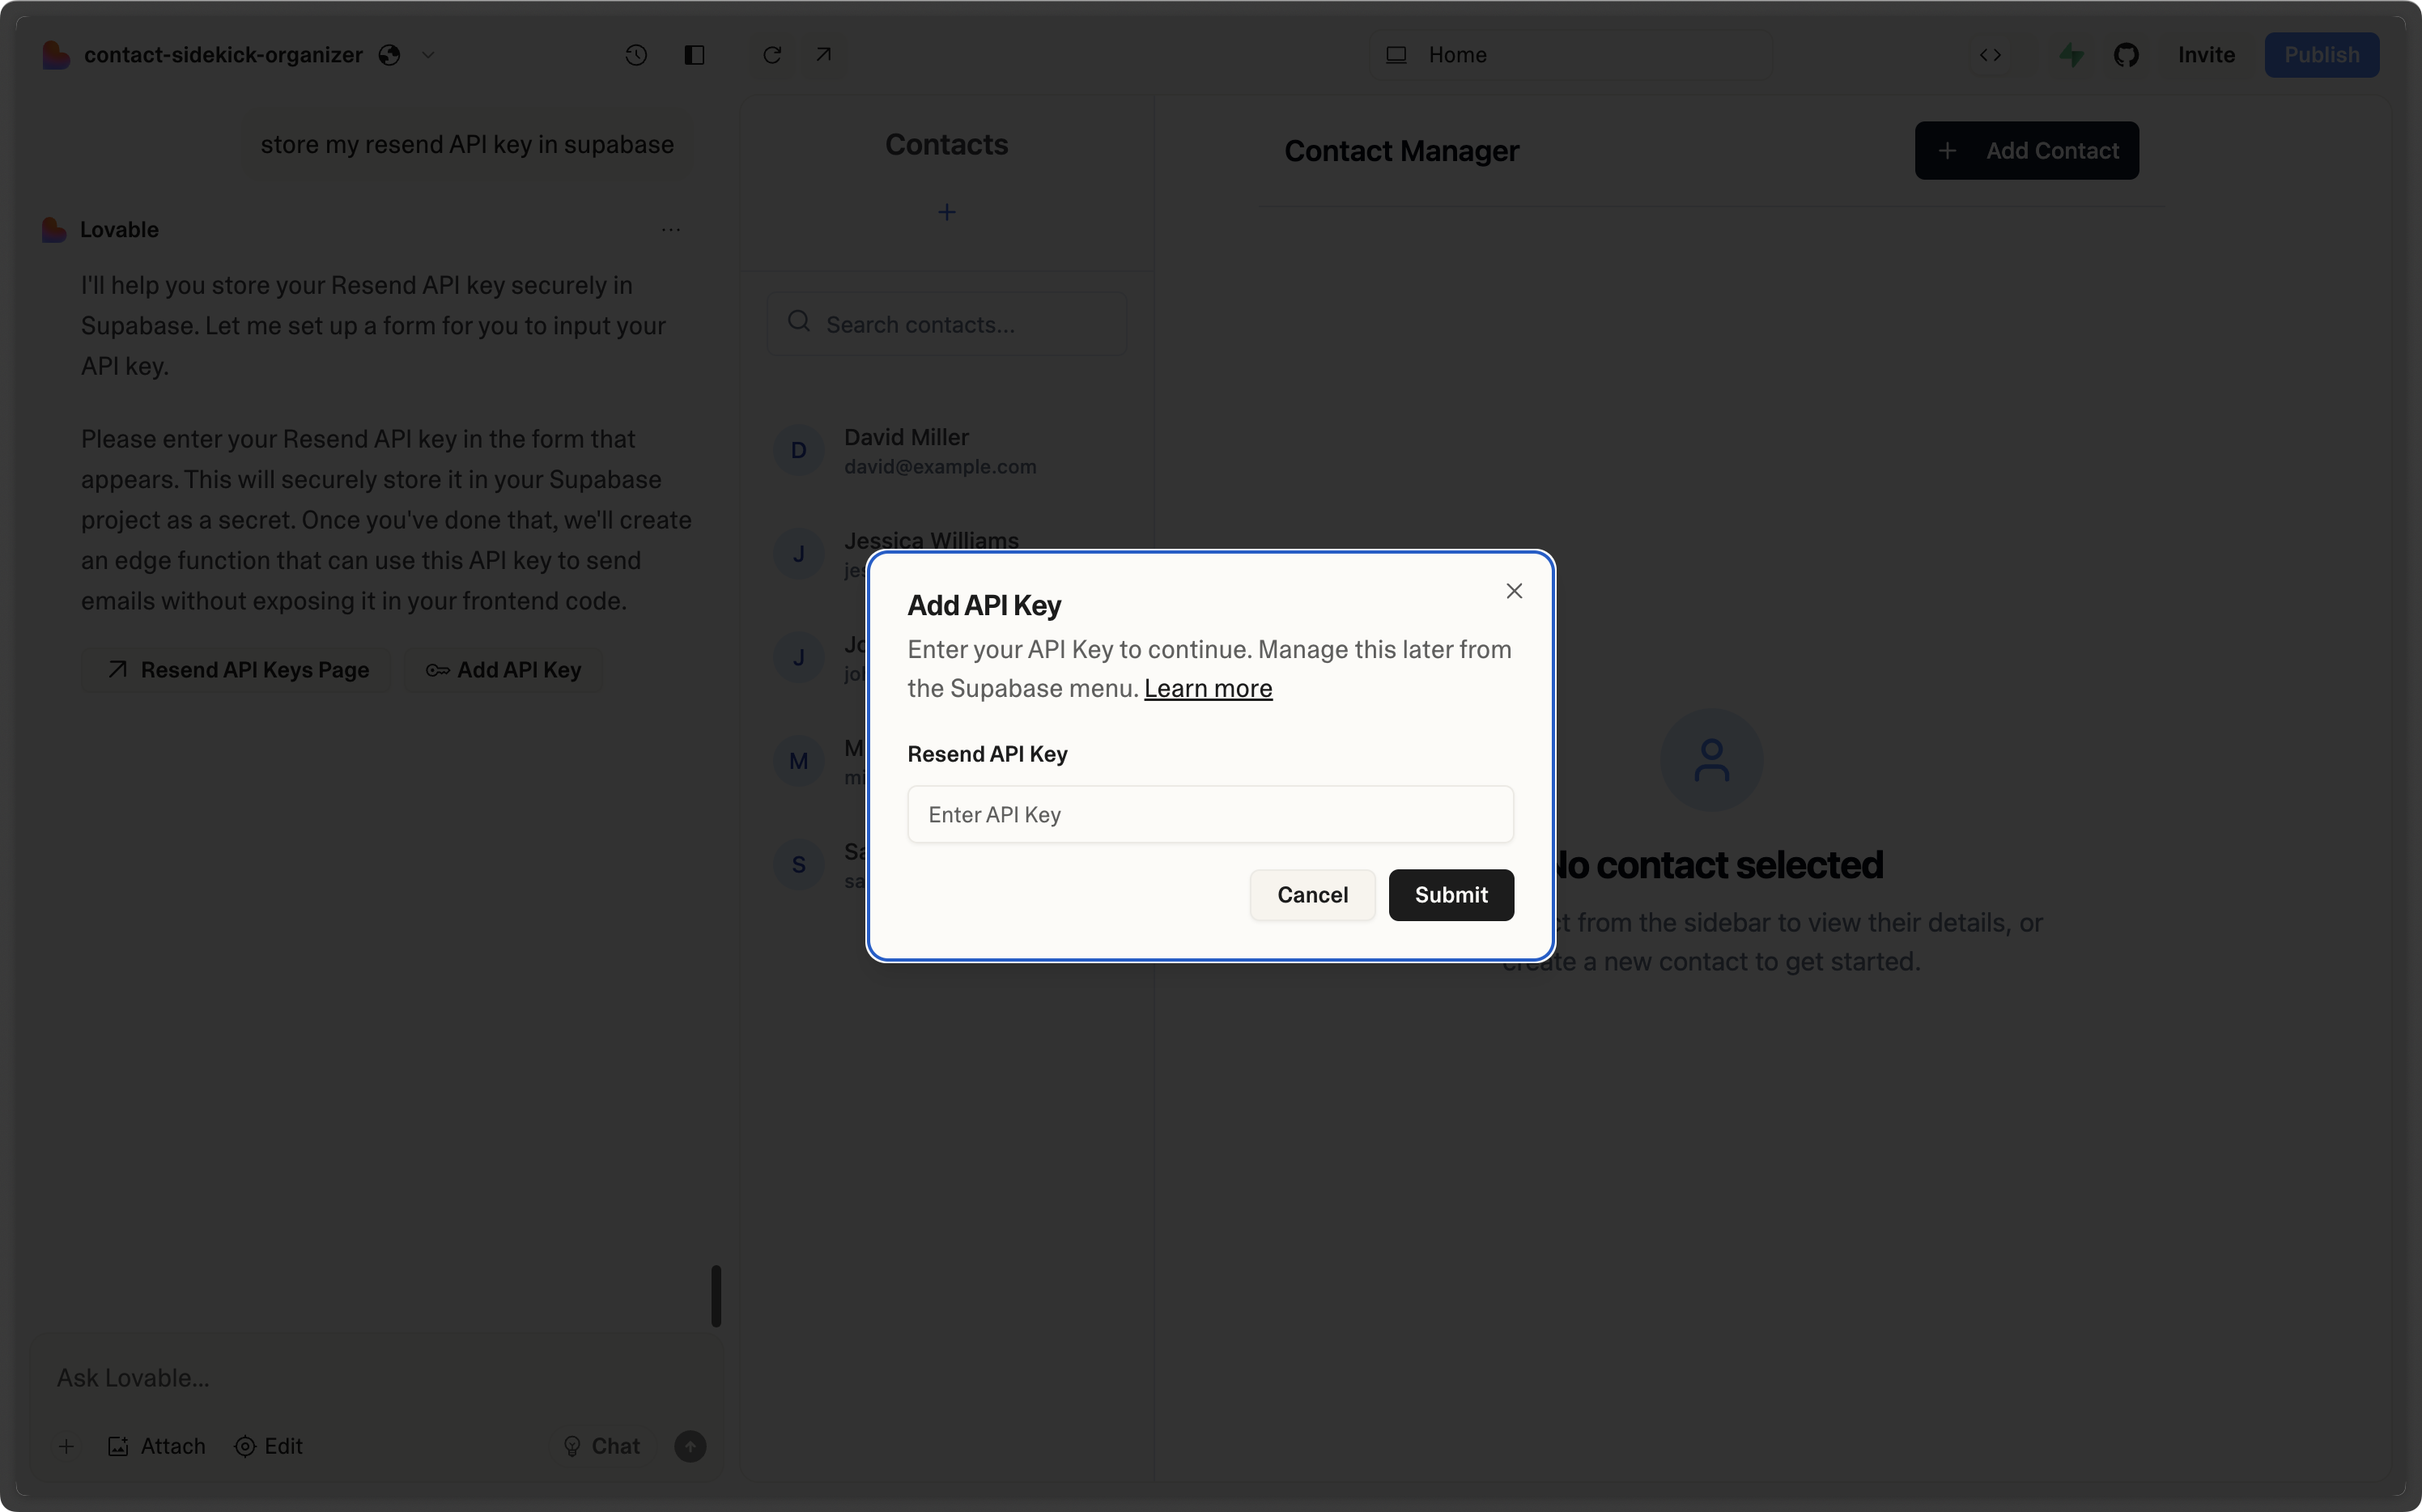
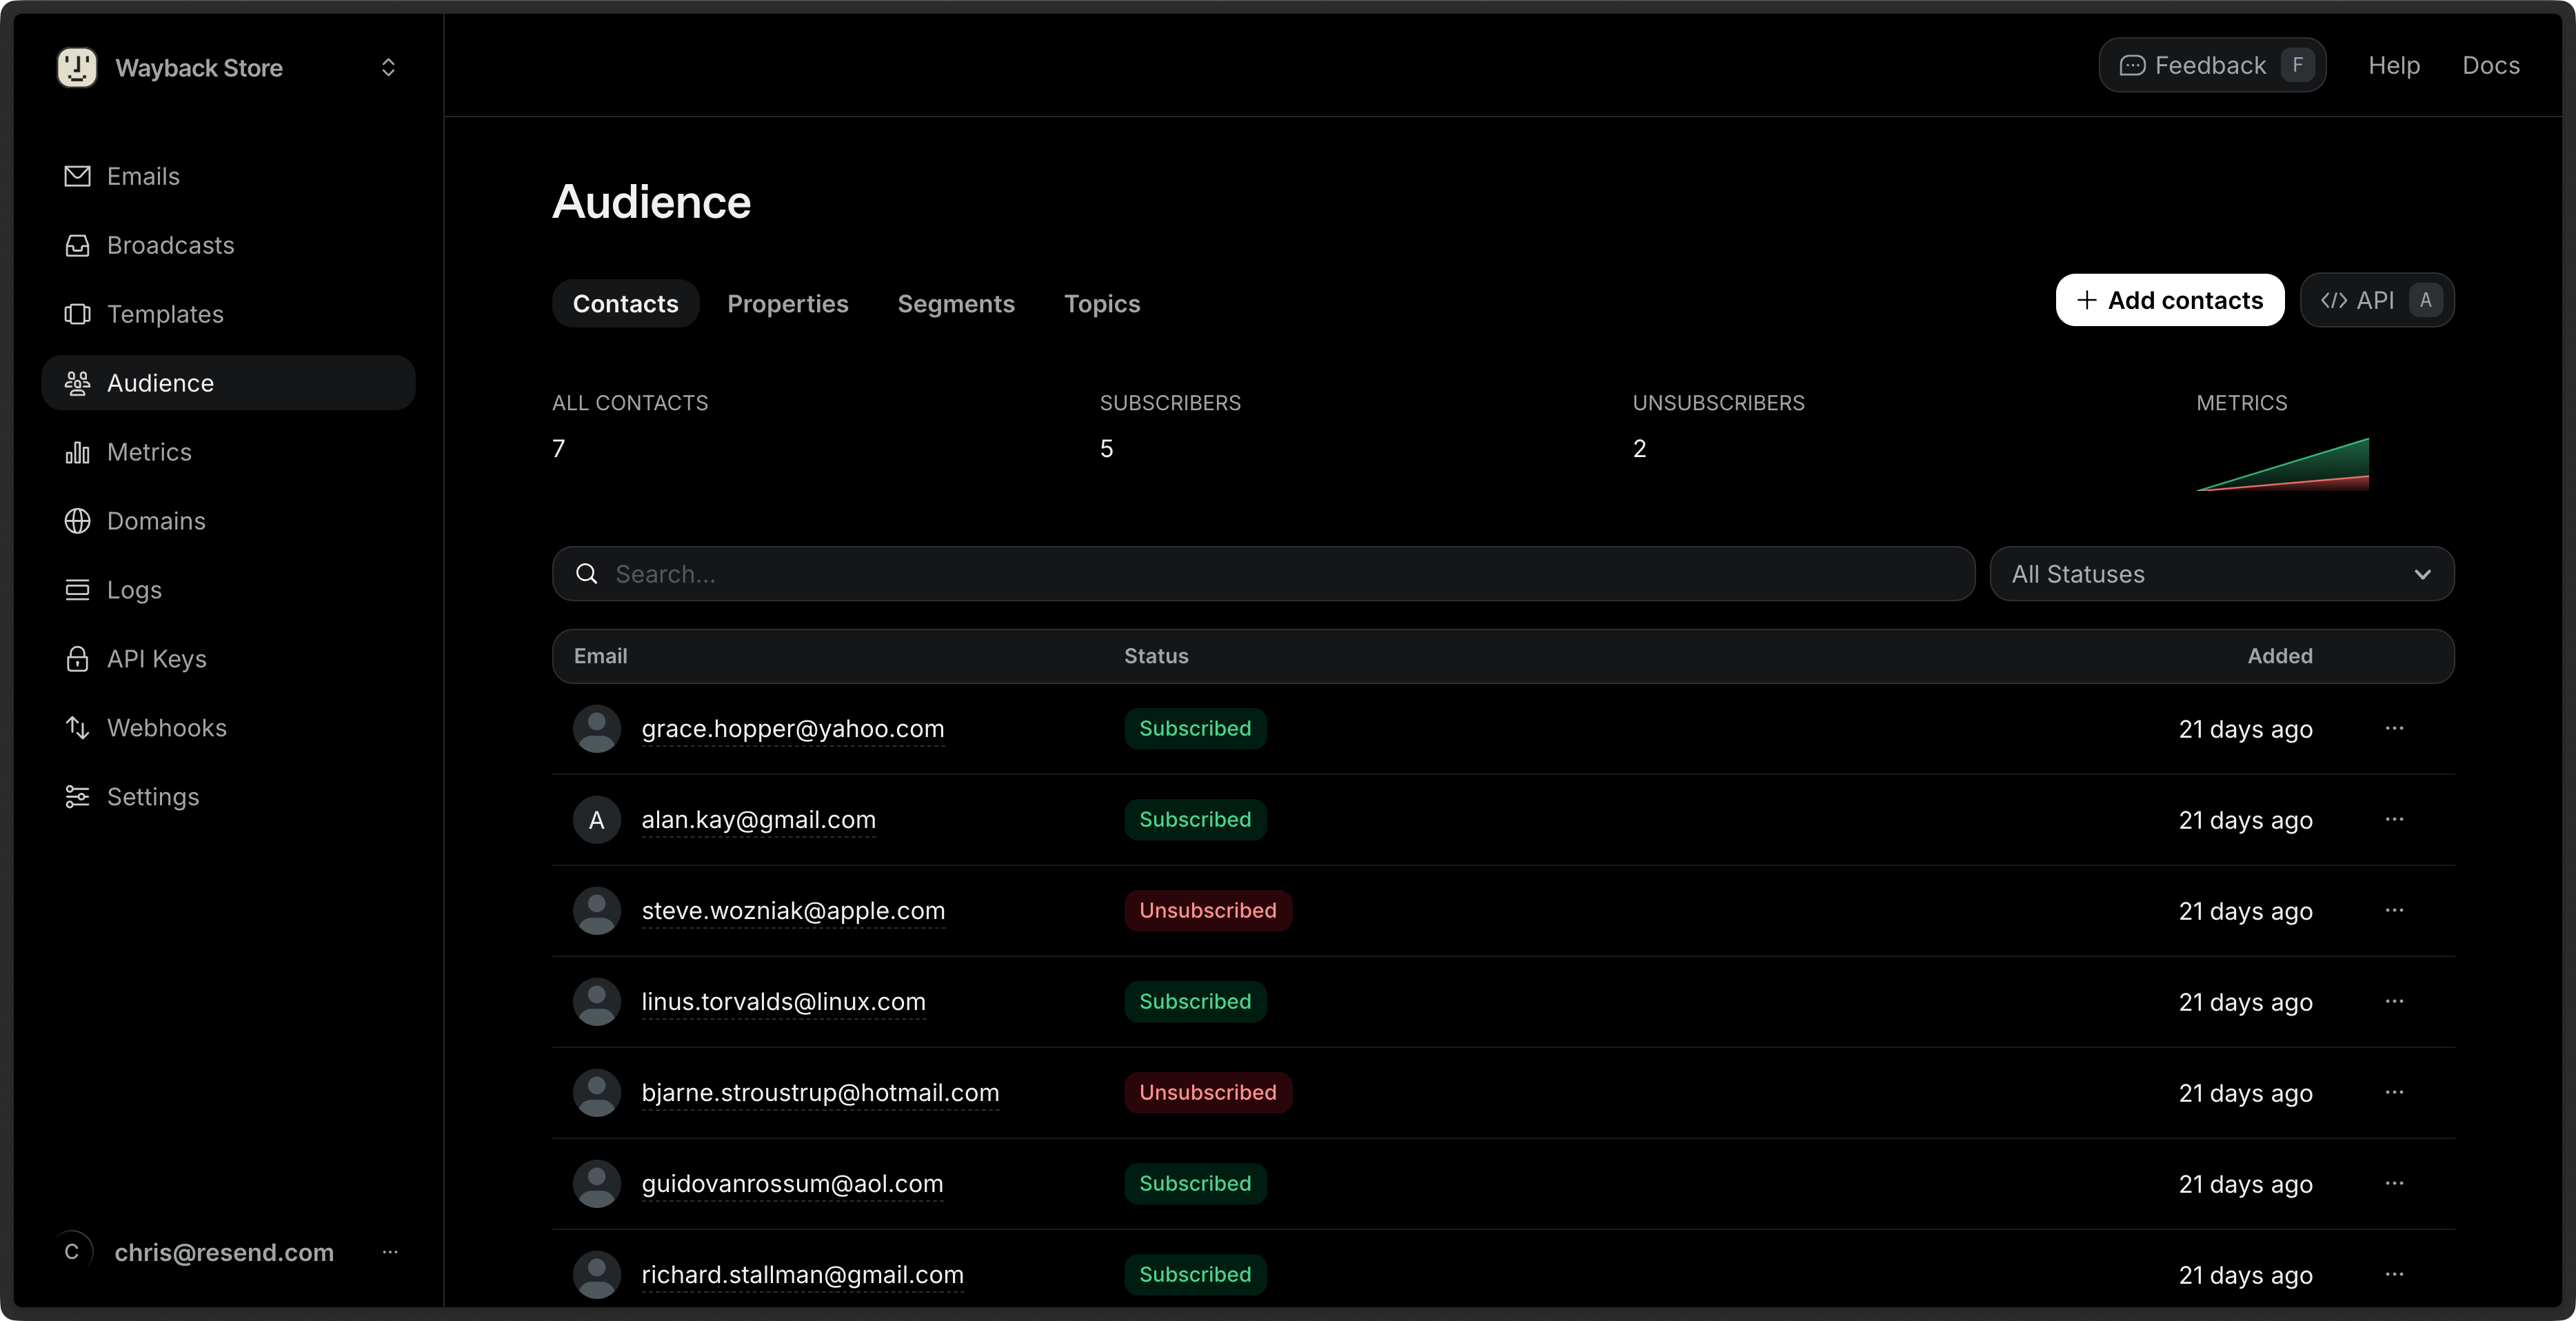 * **Unsubscribed**: the Contact has unsubscribed from all emails from your account.
* **Subscribed**: the Contact is subscribed to at least one Topic.
To filter by Status, click on the **All Statuses** filter next to the search bar, then select a value.
## Topic Subscription Statuses
You can view the subscription status of each Topic for a given Contact by clicking on the Contact's row.
* **Unsubscribed**: the Contact has unsubscribed from all emails from your account.
* **Subscribed**: the Contact is subscribed to at least one Topic.
To filter by Status, click on the **All Statuses** filter next to the search bar, then select a value.
## Topic Subscription Statuses
You can view the subscription status of each Topic for a given Contact by clicking on the Contact's row.
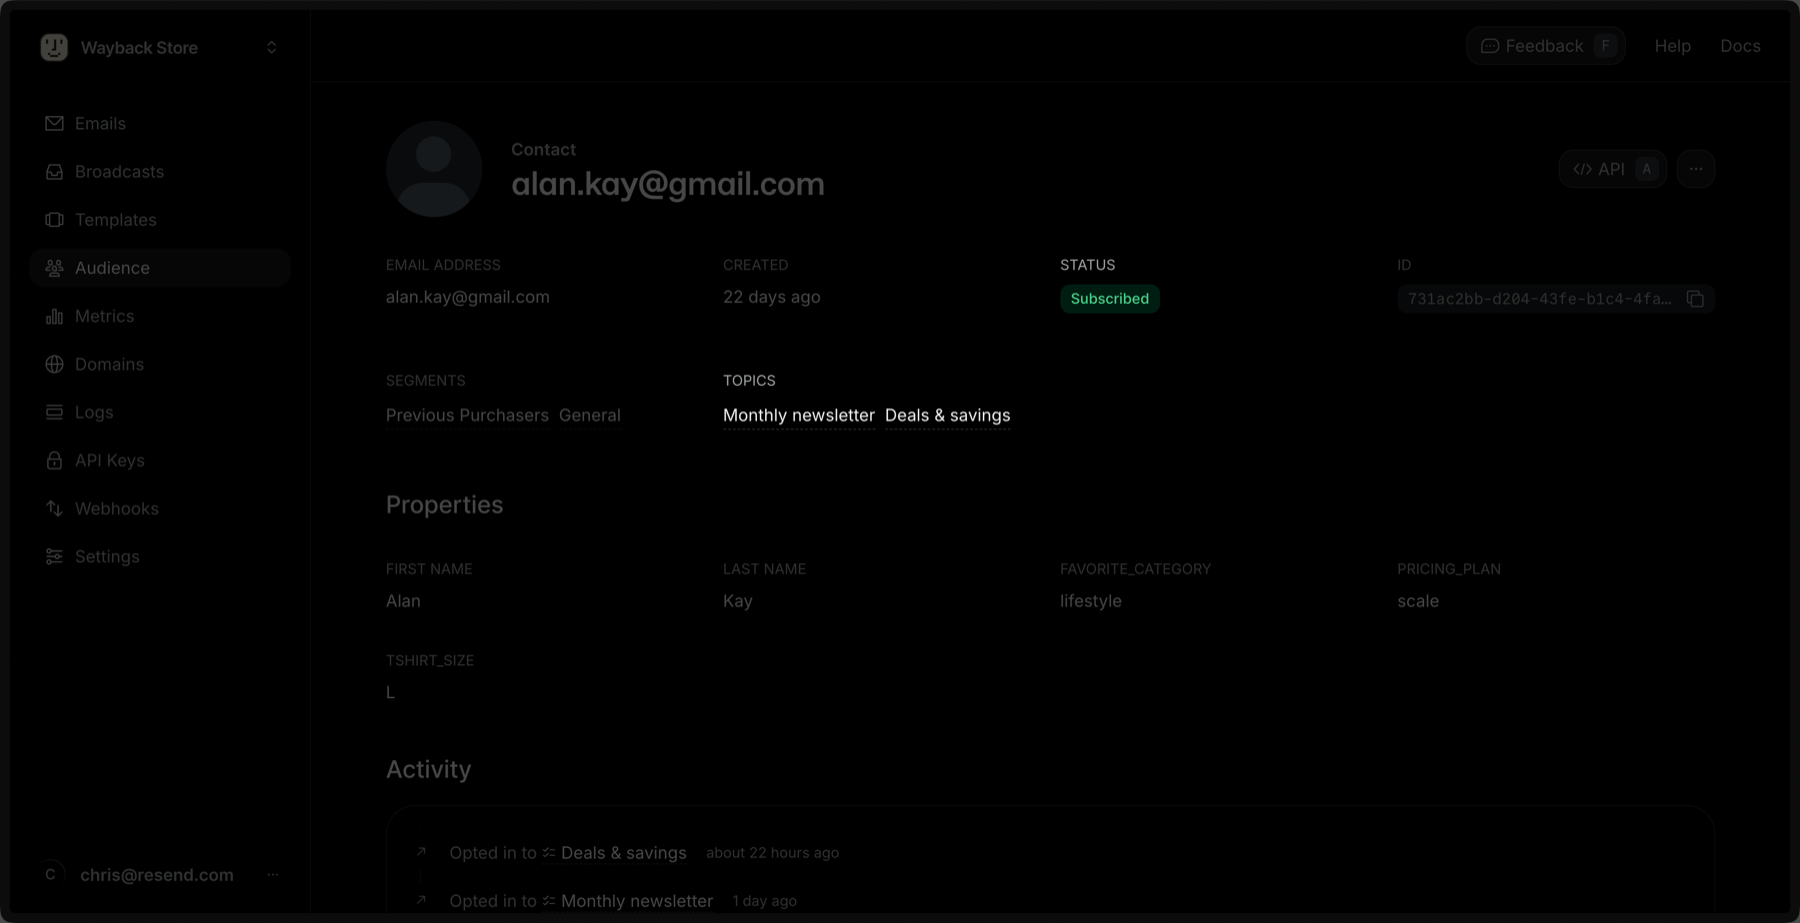 * **Subscribed**: the global subscription status for the Contact.
* **Topics**: the list of Topics the Contact is subscribed to.
You can also check a Contact's Topic subscription status [via the API or SDKs](/api-reference/contacts/get-contact-topics).
## Updating a Topic Subscription for a Contact
You can update a Topic subscription for a Contact by clicking the **Edit** button in the Topic's row.
* **Subscribed**: the global subscription status for the Contact.
* **Topics**: the list of Topics the Contact is subscribed to.
You can also check a Contact's Topic subscription status [via the API or SDKs](/api-reference/contacts/get-contact-topics).
## Updating a Topic Subscription for a Contact
You can update a Topic subscription for a Contact by clicking the **Edit** button in the Topic's row.
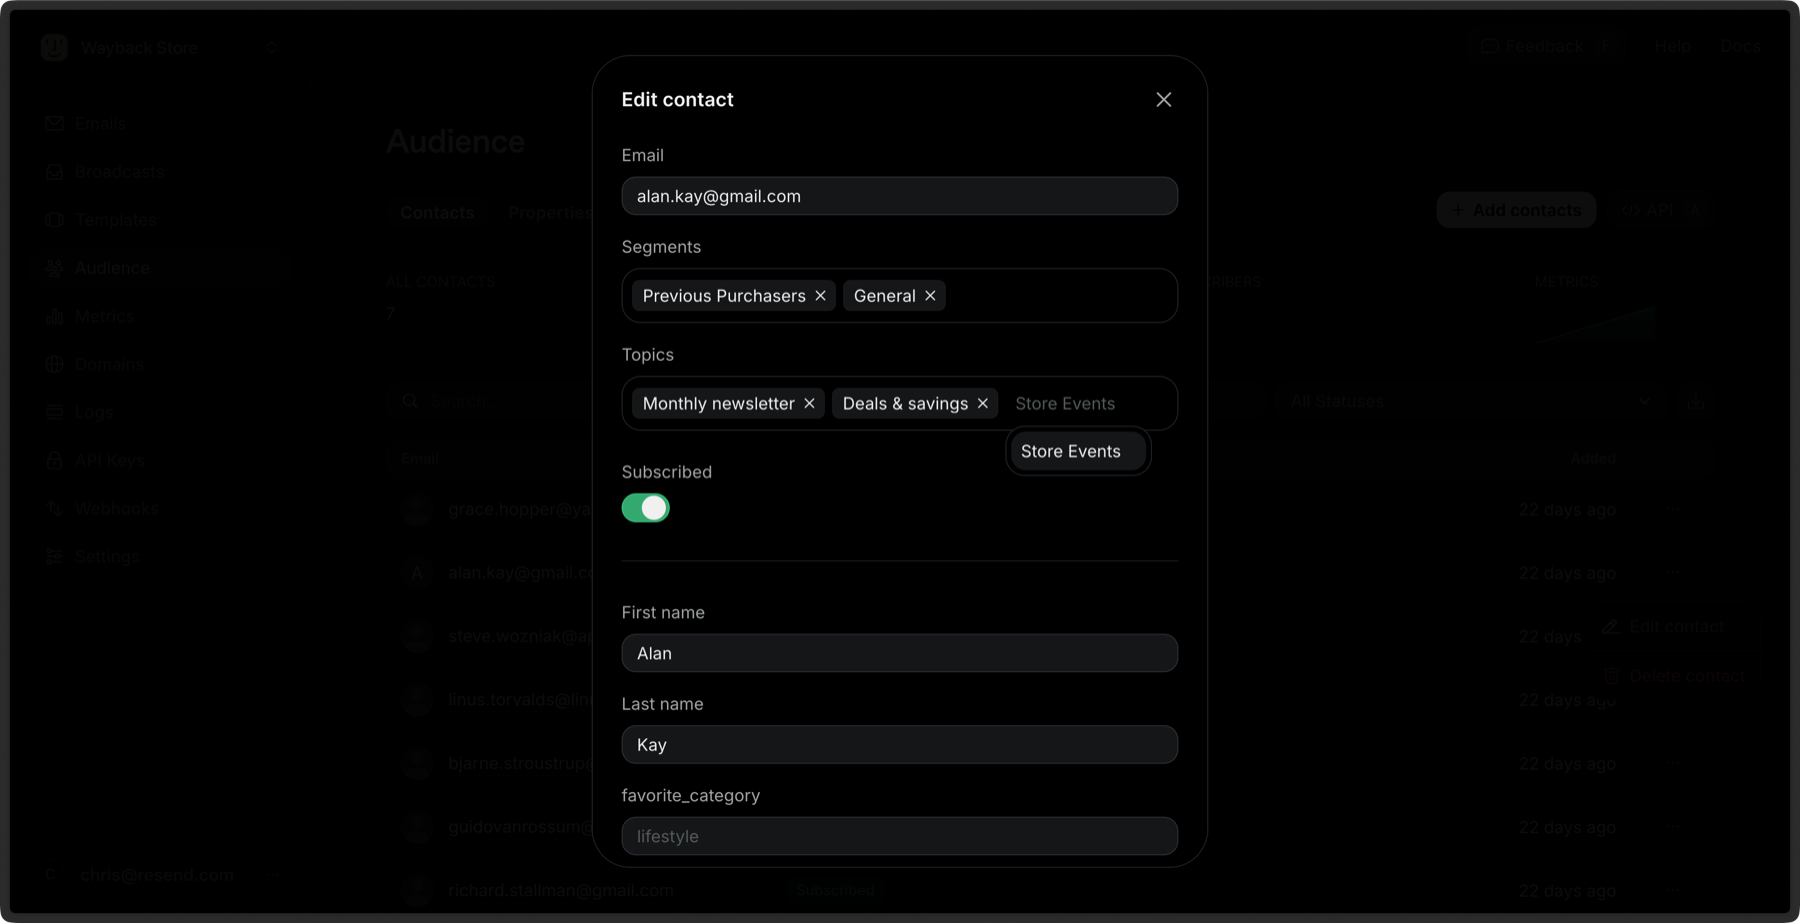 You can also update a Topic subscription for a Contact [via the API or SDKs](/api-reference/contacts/update-contact-topics).
### Bulk Subscribe to Topics
You can subscribe multiple Contacts to Topics at once:
1. Go to the [Contacts](https://resend.com/audience) page.
2. Select multiple Contacts by clicking the checkbox next to each Contact.
3. Click the **Edit** button in the bulk actions bar.
4. Select **Subscribe to topics**.
5. Choose the Topics you want to subscribe the Contacts to.
6. Click **Subscribe**.
Learn more about [bulk actions for Contacts](/dashboard/audiences/contacts#bulk-actions).
---
# Source: https://resend.com/docs/knowledge-base/mcp-server.md
> ## Documentation Index
> Fetch the complete documentation index at: https://resend.com/docs/llms.txt
> Use this file to discover all available pages before exploring further.
# MCP Server
> Learn how to use the MCP Server to send emails.
export const YouTube = ({id}) => {
return ;
};
## What is an MCP Server?
MCP is an open protocol that standardizes how applications provide context to LLMs. Among other benefits, it provides LLMs tools to act on your behalf.
If you prefer to watch a video, check out our video walkthrough below.
You can also update a Topic subscription for a Contact [via the API or SDKs](/api-reference/contacts/update-contact-topics).
### Bulk Subscribe to Topics
You can subscribe multiple Contacts to Topics at once:
1. Go to the [Contacts](https://resend.com/audience) page.
2. Select multiple Contacts by clicking the checkbox next to each Contact.
3. Click the **Edit** button in the bulk actions bar.
4. Select **Subscribe to topics**.
5. Choose the Topics you want to subscribe the Contacts to.
6. Click **Subscribe**.
Learn more about [bulk actions for Contacts](/dashboard/audiences/contacts#bulk-actions).
---
# Source: https://resend.com/docs/knowledge-base/mcp-server.md
> ## Documentation Index
> Fetch the complete documentation index at: https://resend.com/docs/llms.txt
> Use this file to discover all available pages before exploring further.
# MCP Server
> Learn how to use the MCP Server to send emails.
export const YouTube = ({id}) => {
return ;
};
## What is an MCP Server?
MCP is an open protocol that standardizes how applications provide context to LLMs. Among other benefits, it provides LLMs tools to act on your behalf.
If you prefer to watch a video, check out our video walkthrough below.
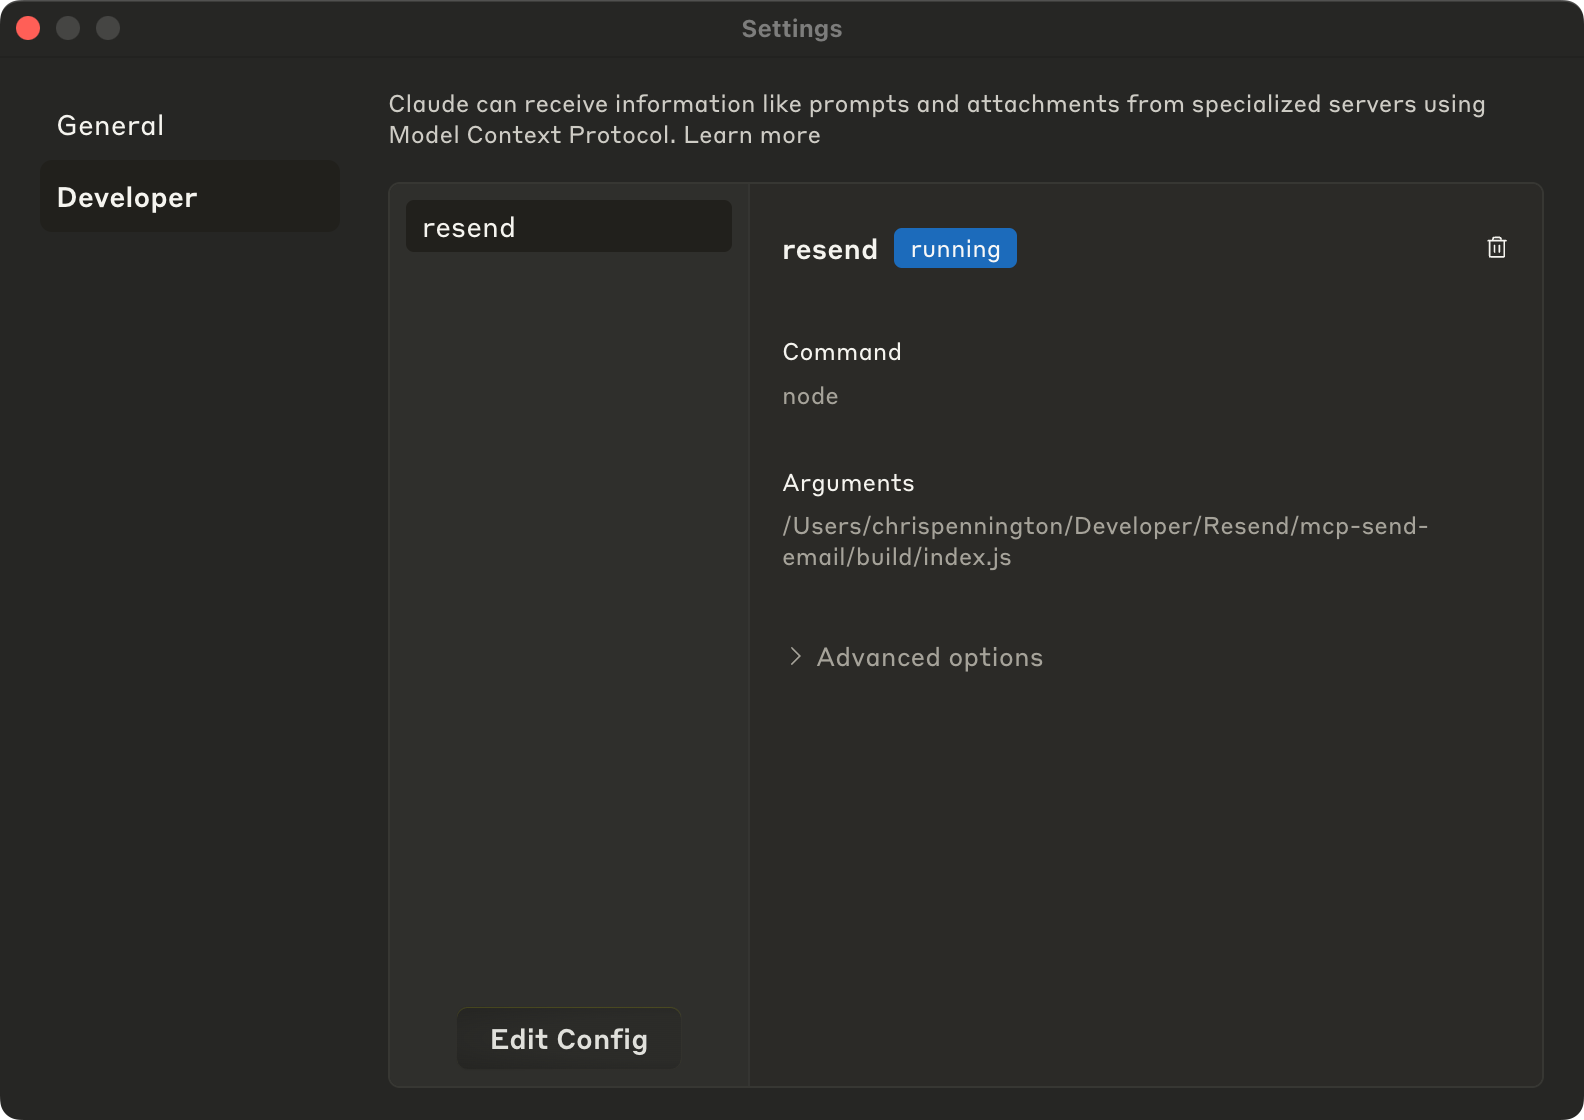 Chat with Claude and tell it to send you an email using the `resend` tool.
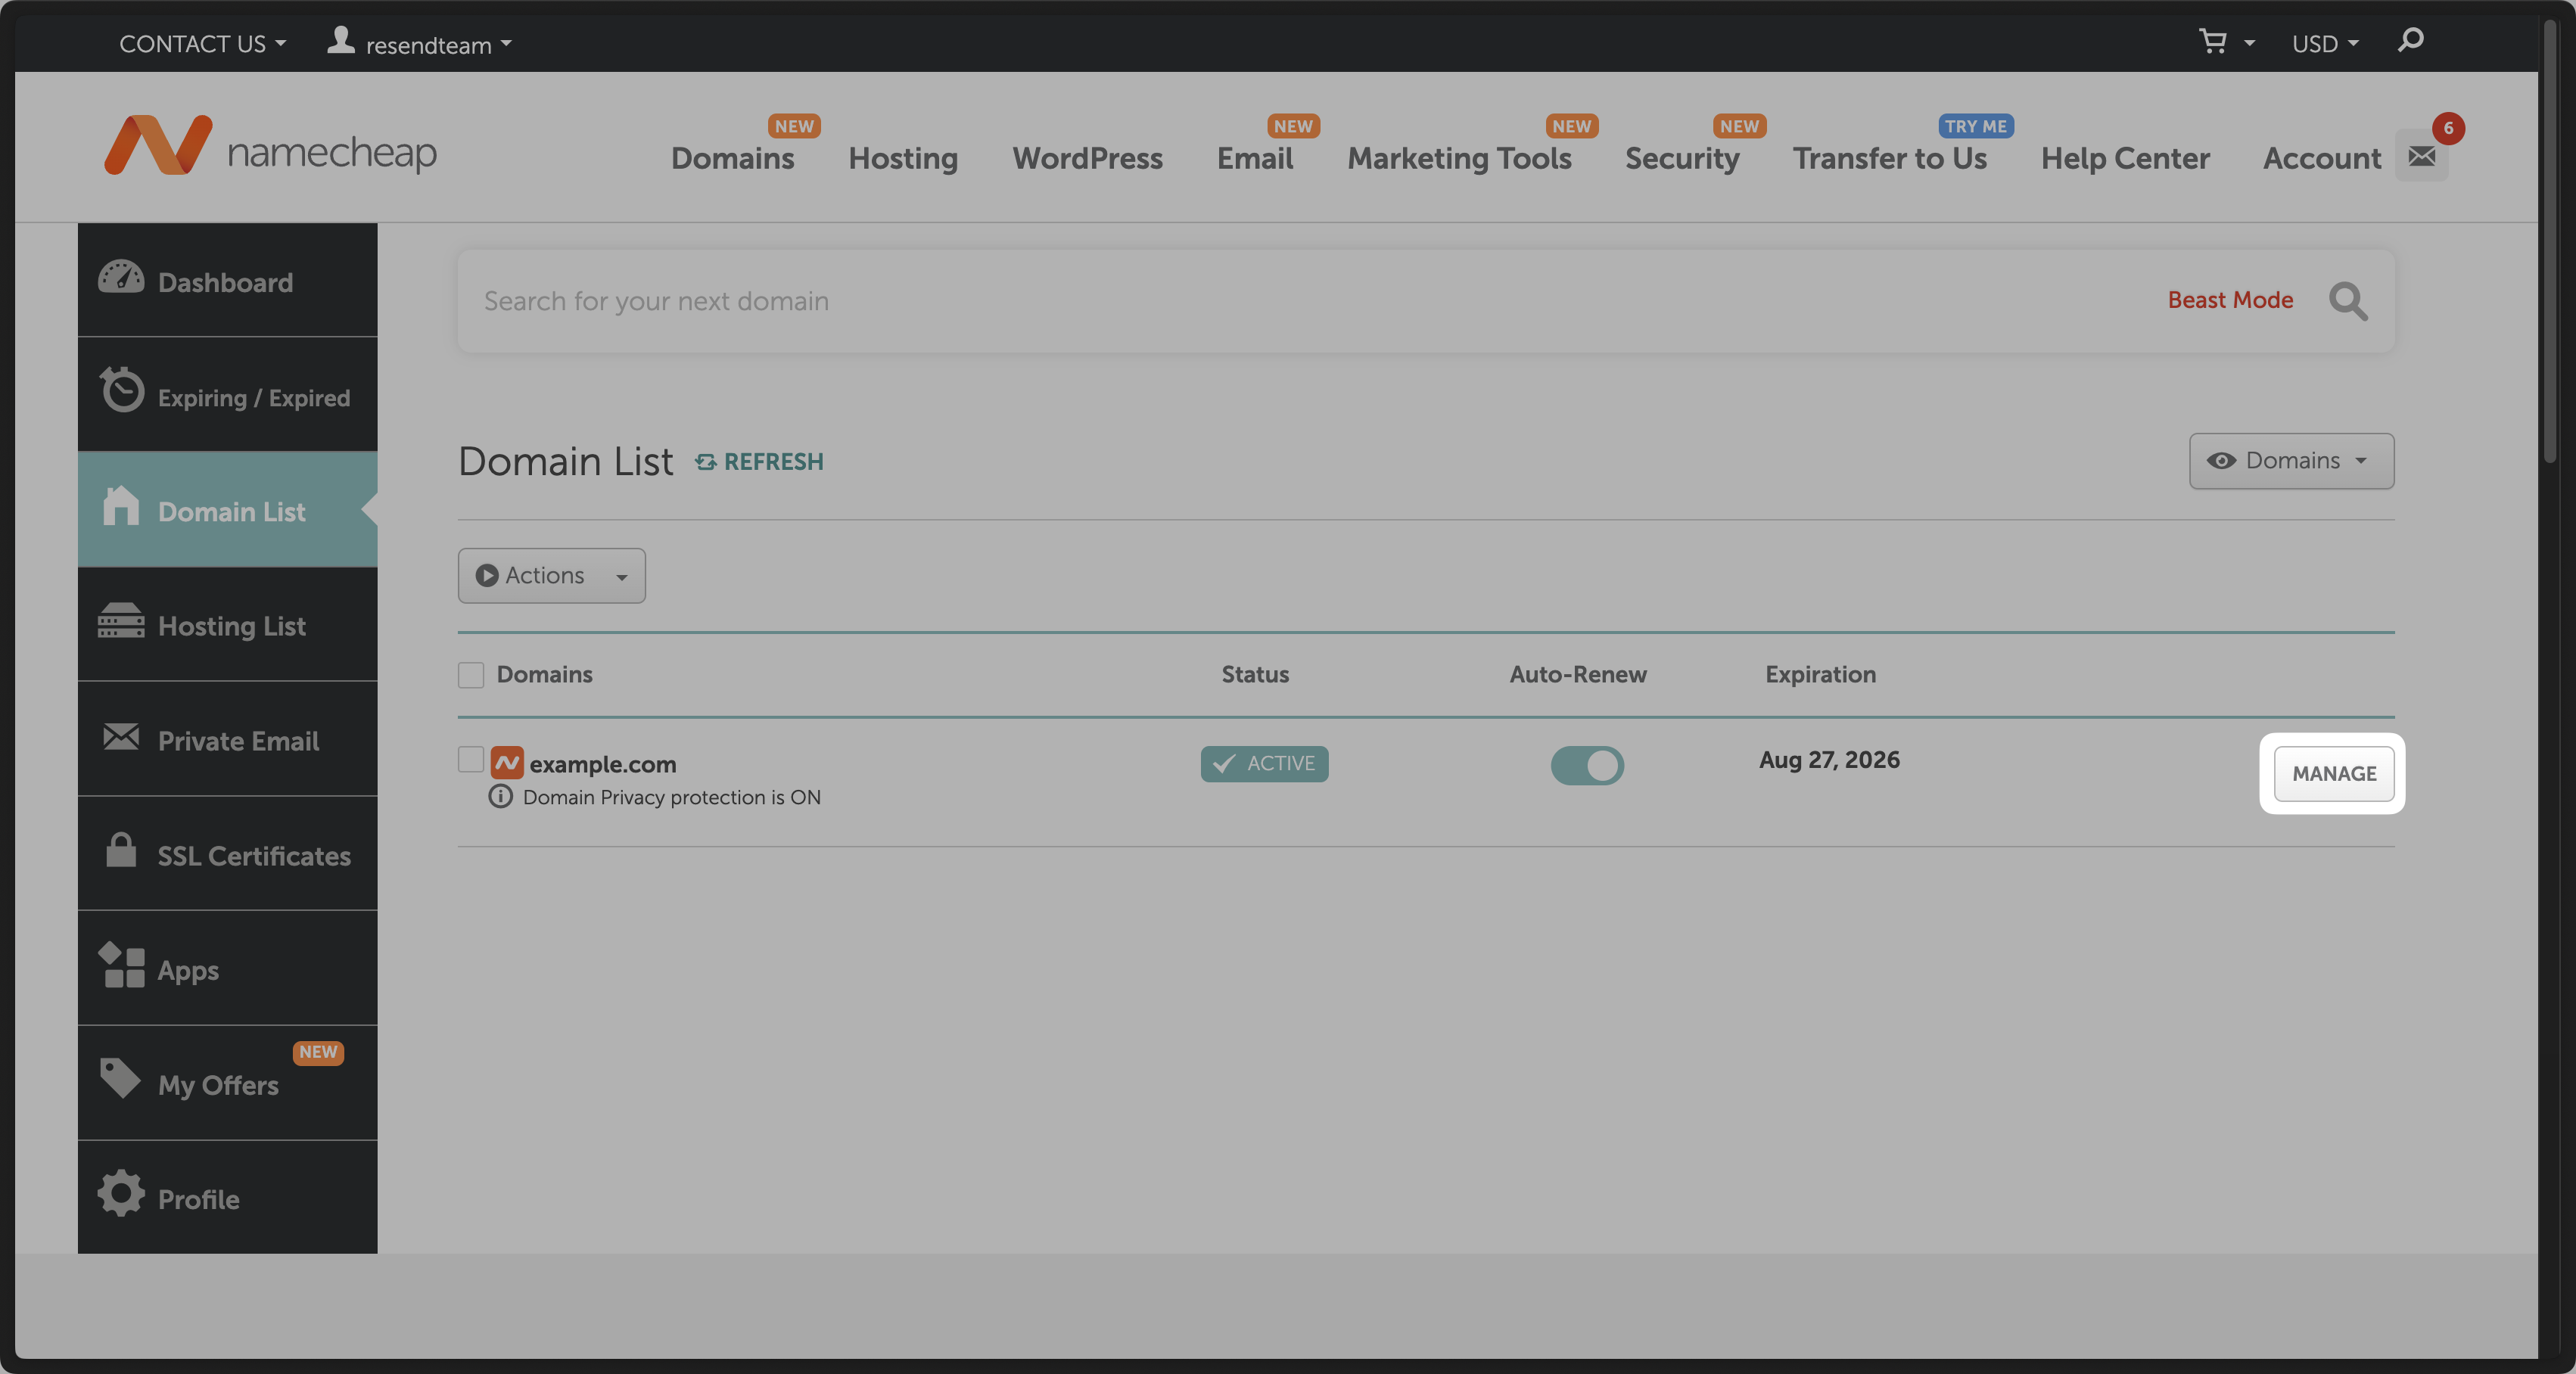
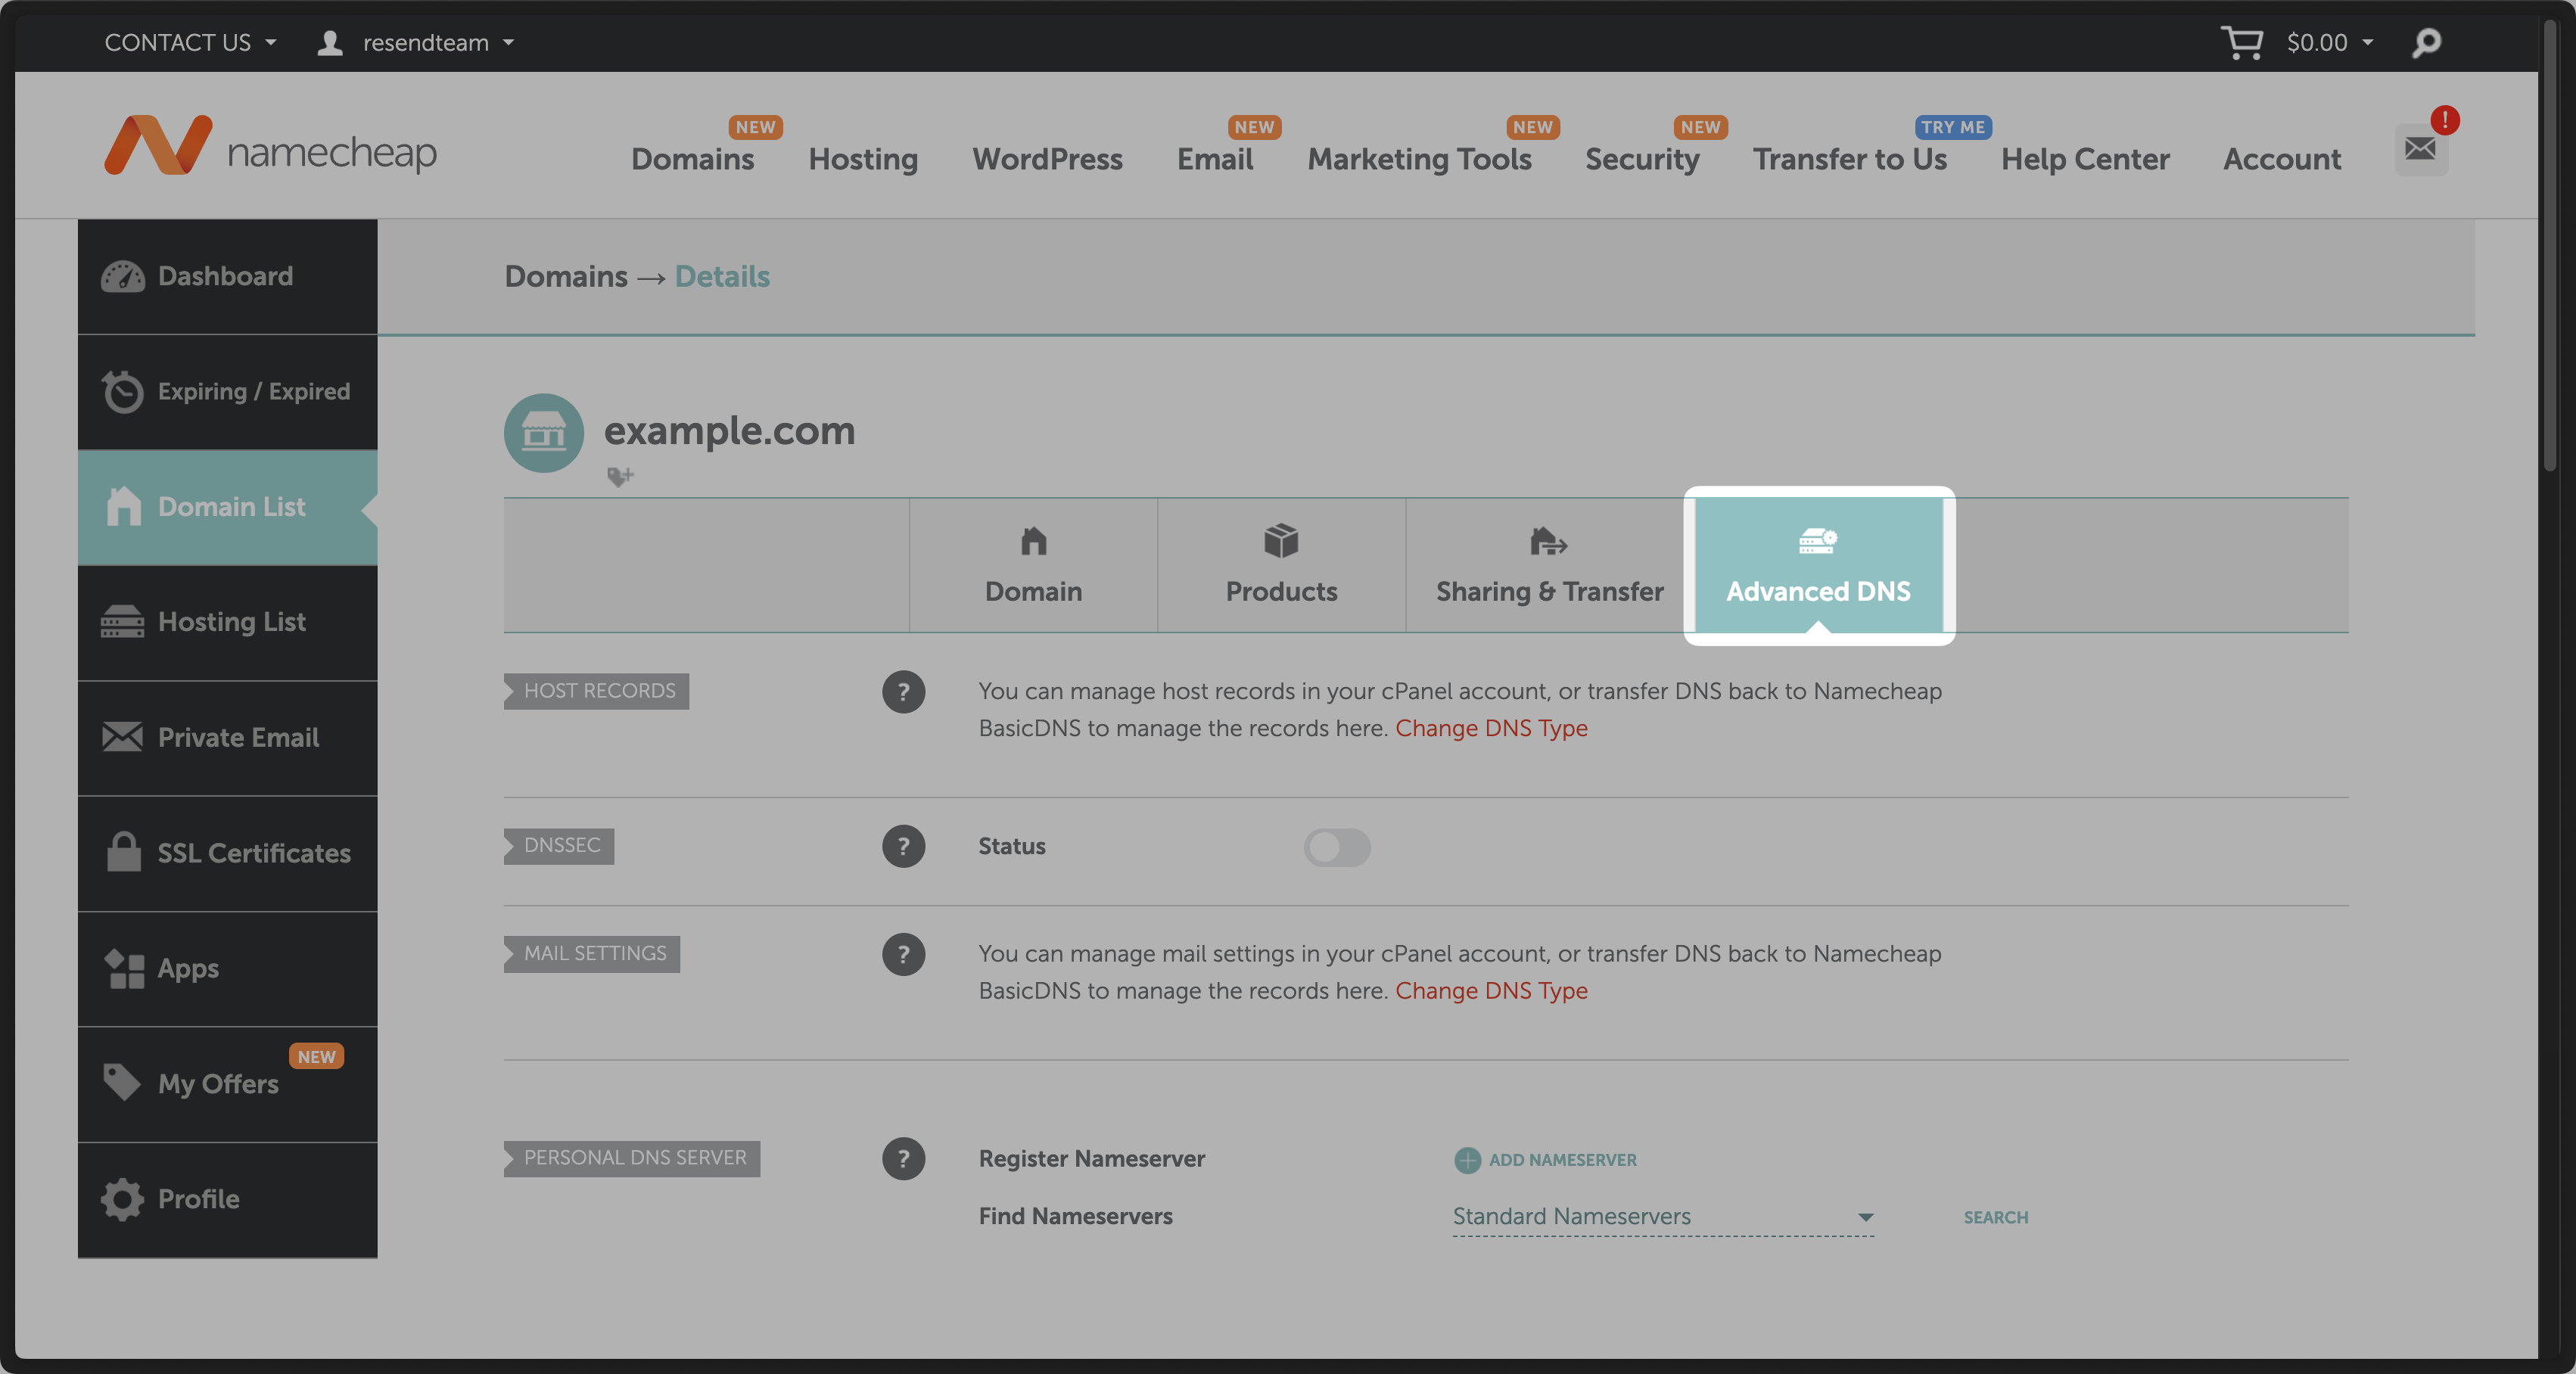 ## Add MX SPF Record
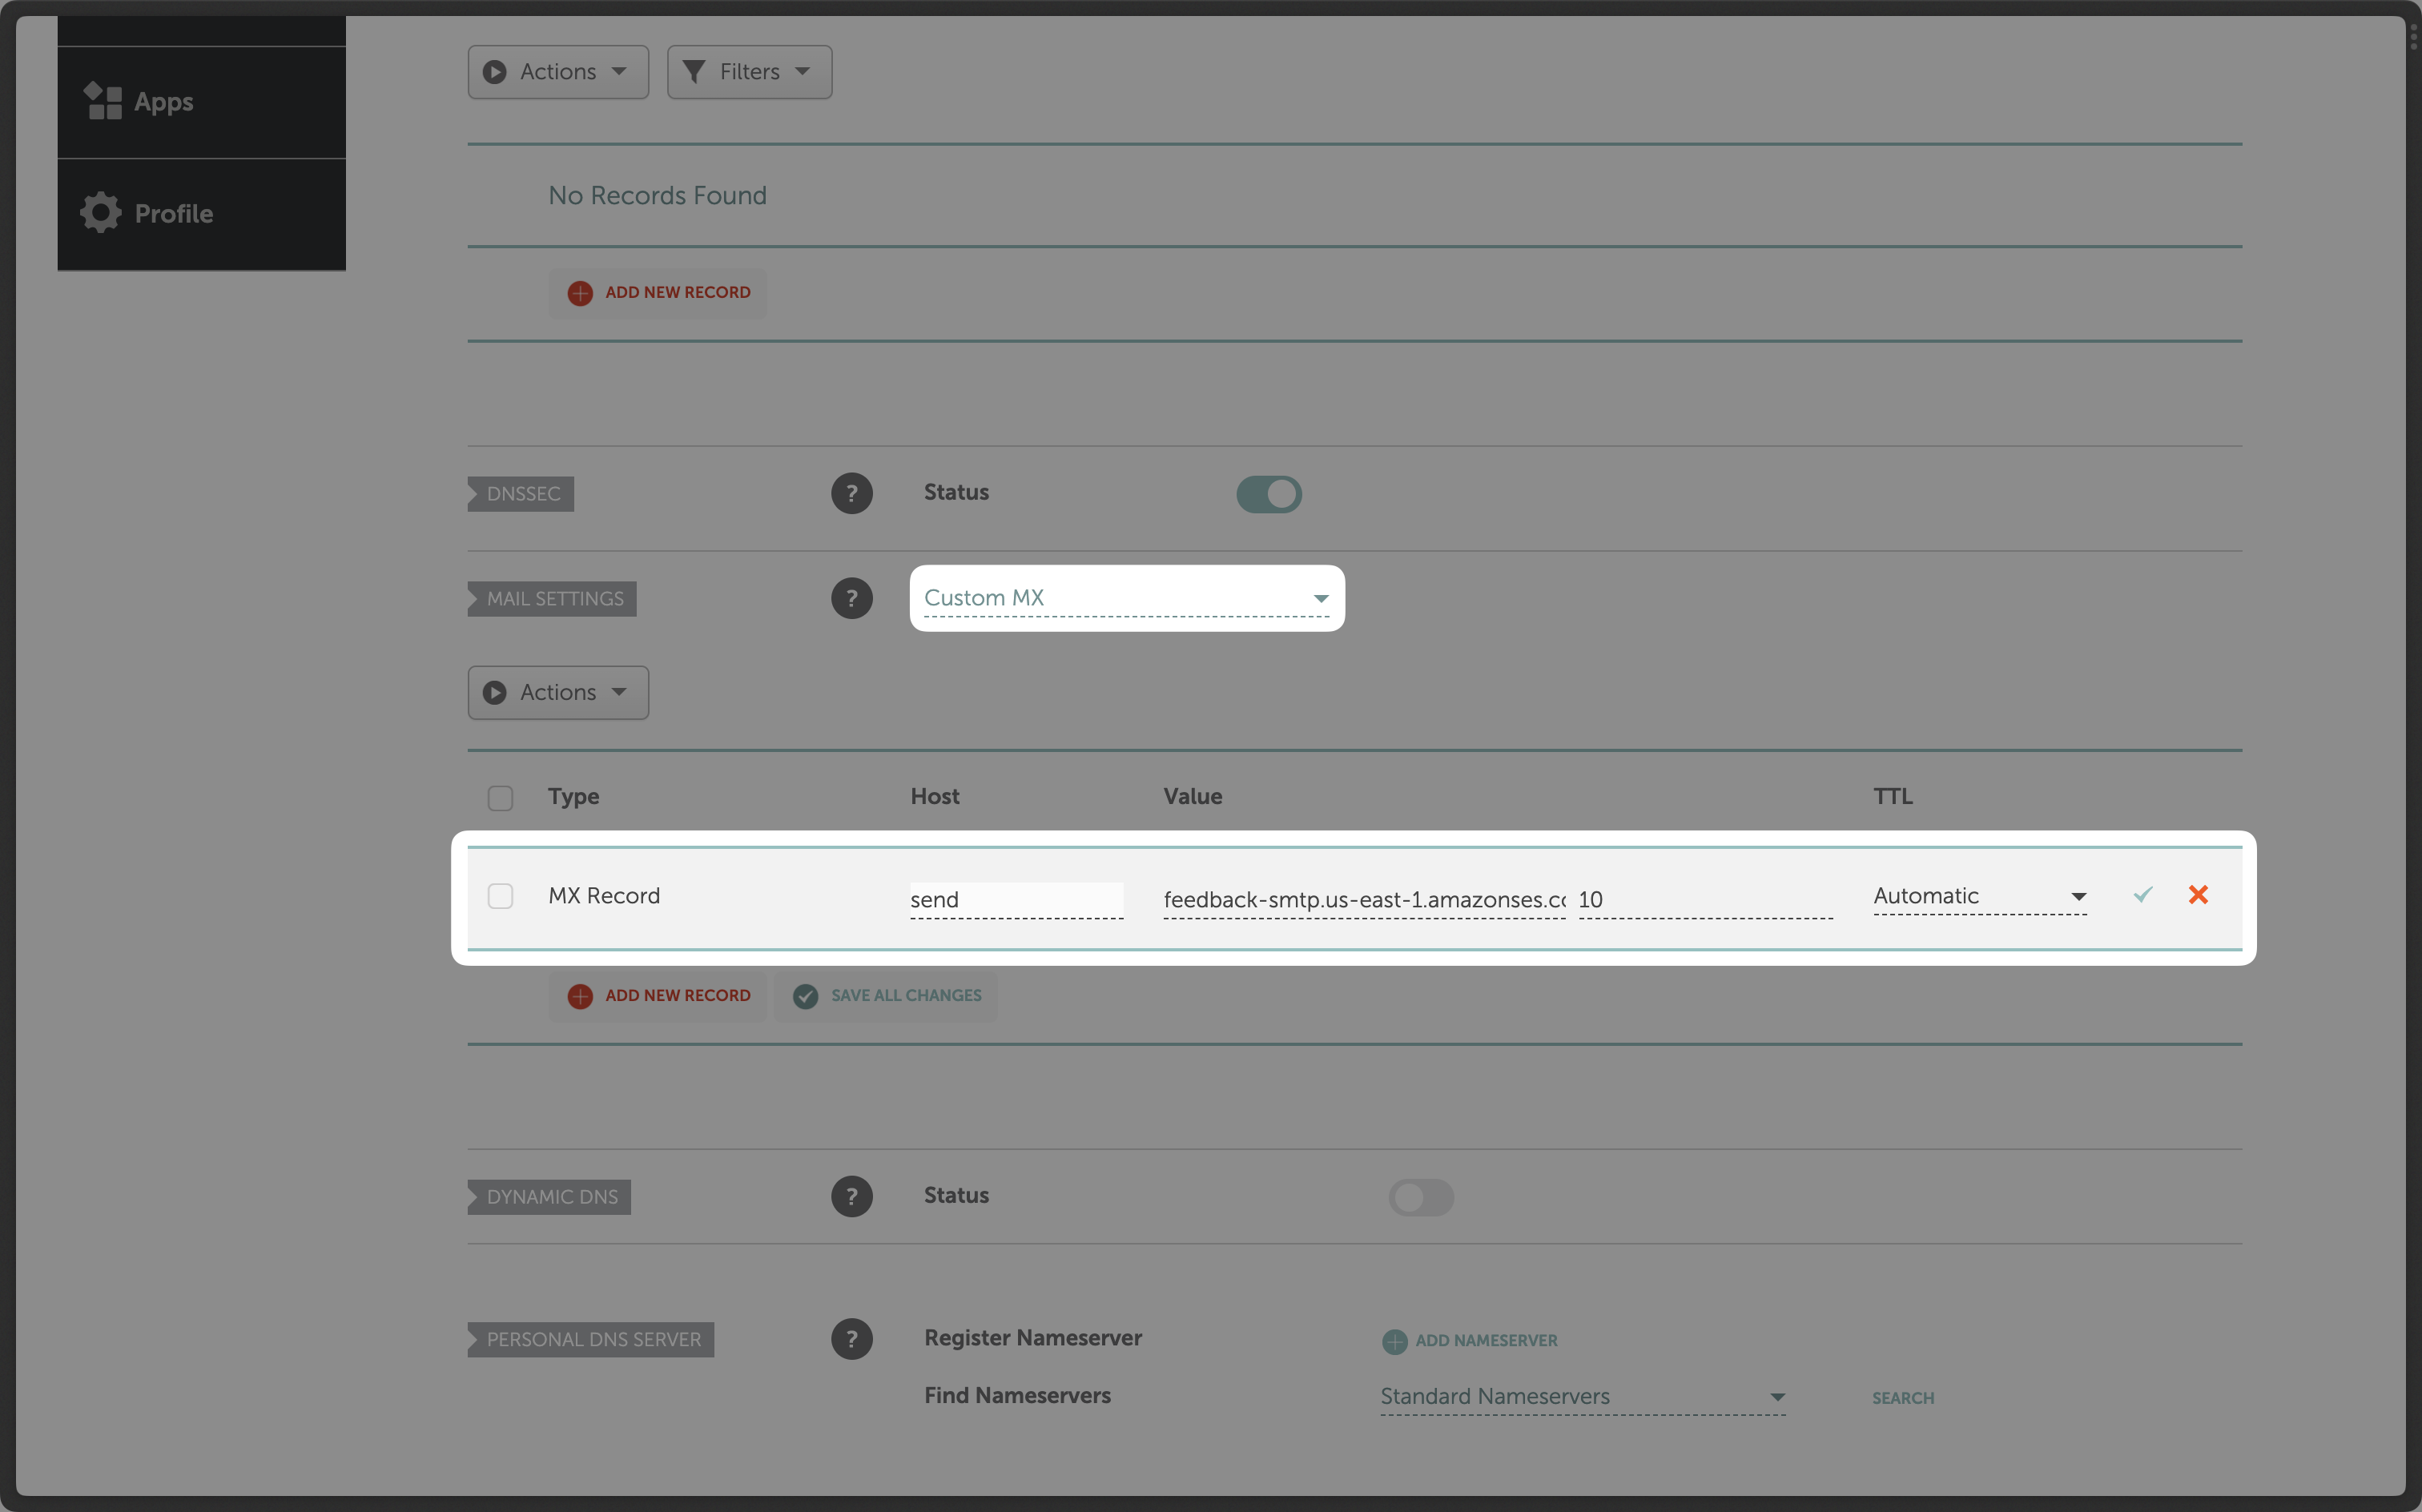 Below is a mapping of the record fields from Resend to Namecheap:
| Namecheap | Resend | Example Value |
| --------- | -------- | --------------------------------------- |
| Type | Type | `MX Record` |
| Host | Name | `send` |
| TTL | TTL | `Automatic` |
| Value | Value | `feedback-smtp.us-east-1.amazonses.com` |
| - | Priority | `10` |
Below is a mapping of the record fields from Resend to Namecheap:
| Namecheap | Resend | Example Value |
| --------- | -------- | --------------------------------------- |
| Type | Type | `MX Record` |
| Host | Name | `send` |
| TTL | TTL | `Automatic` |
| Value | Value | `feedback-smtp.us-east-1.amazonses.com` |
| - | Priority | `10` |
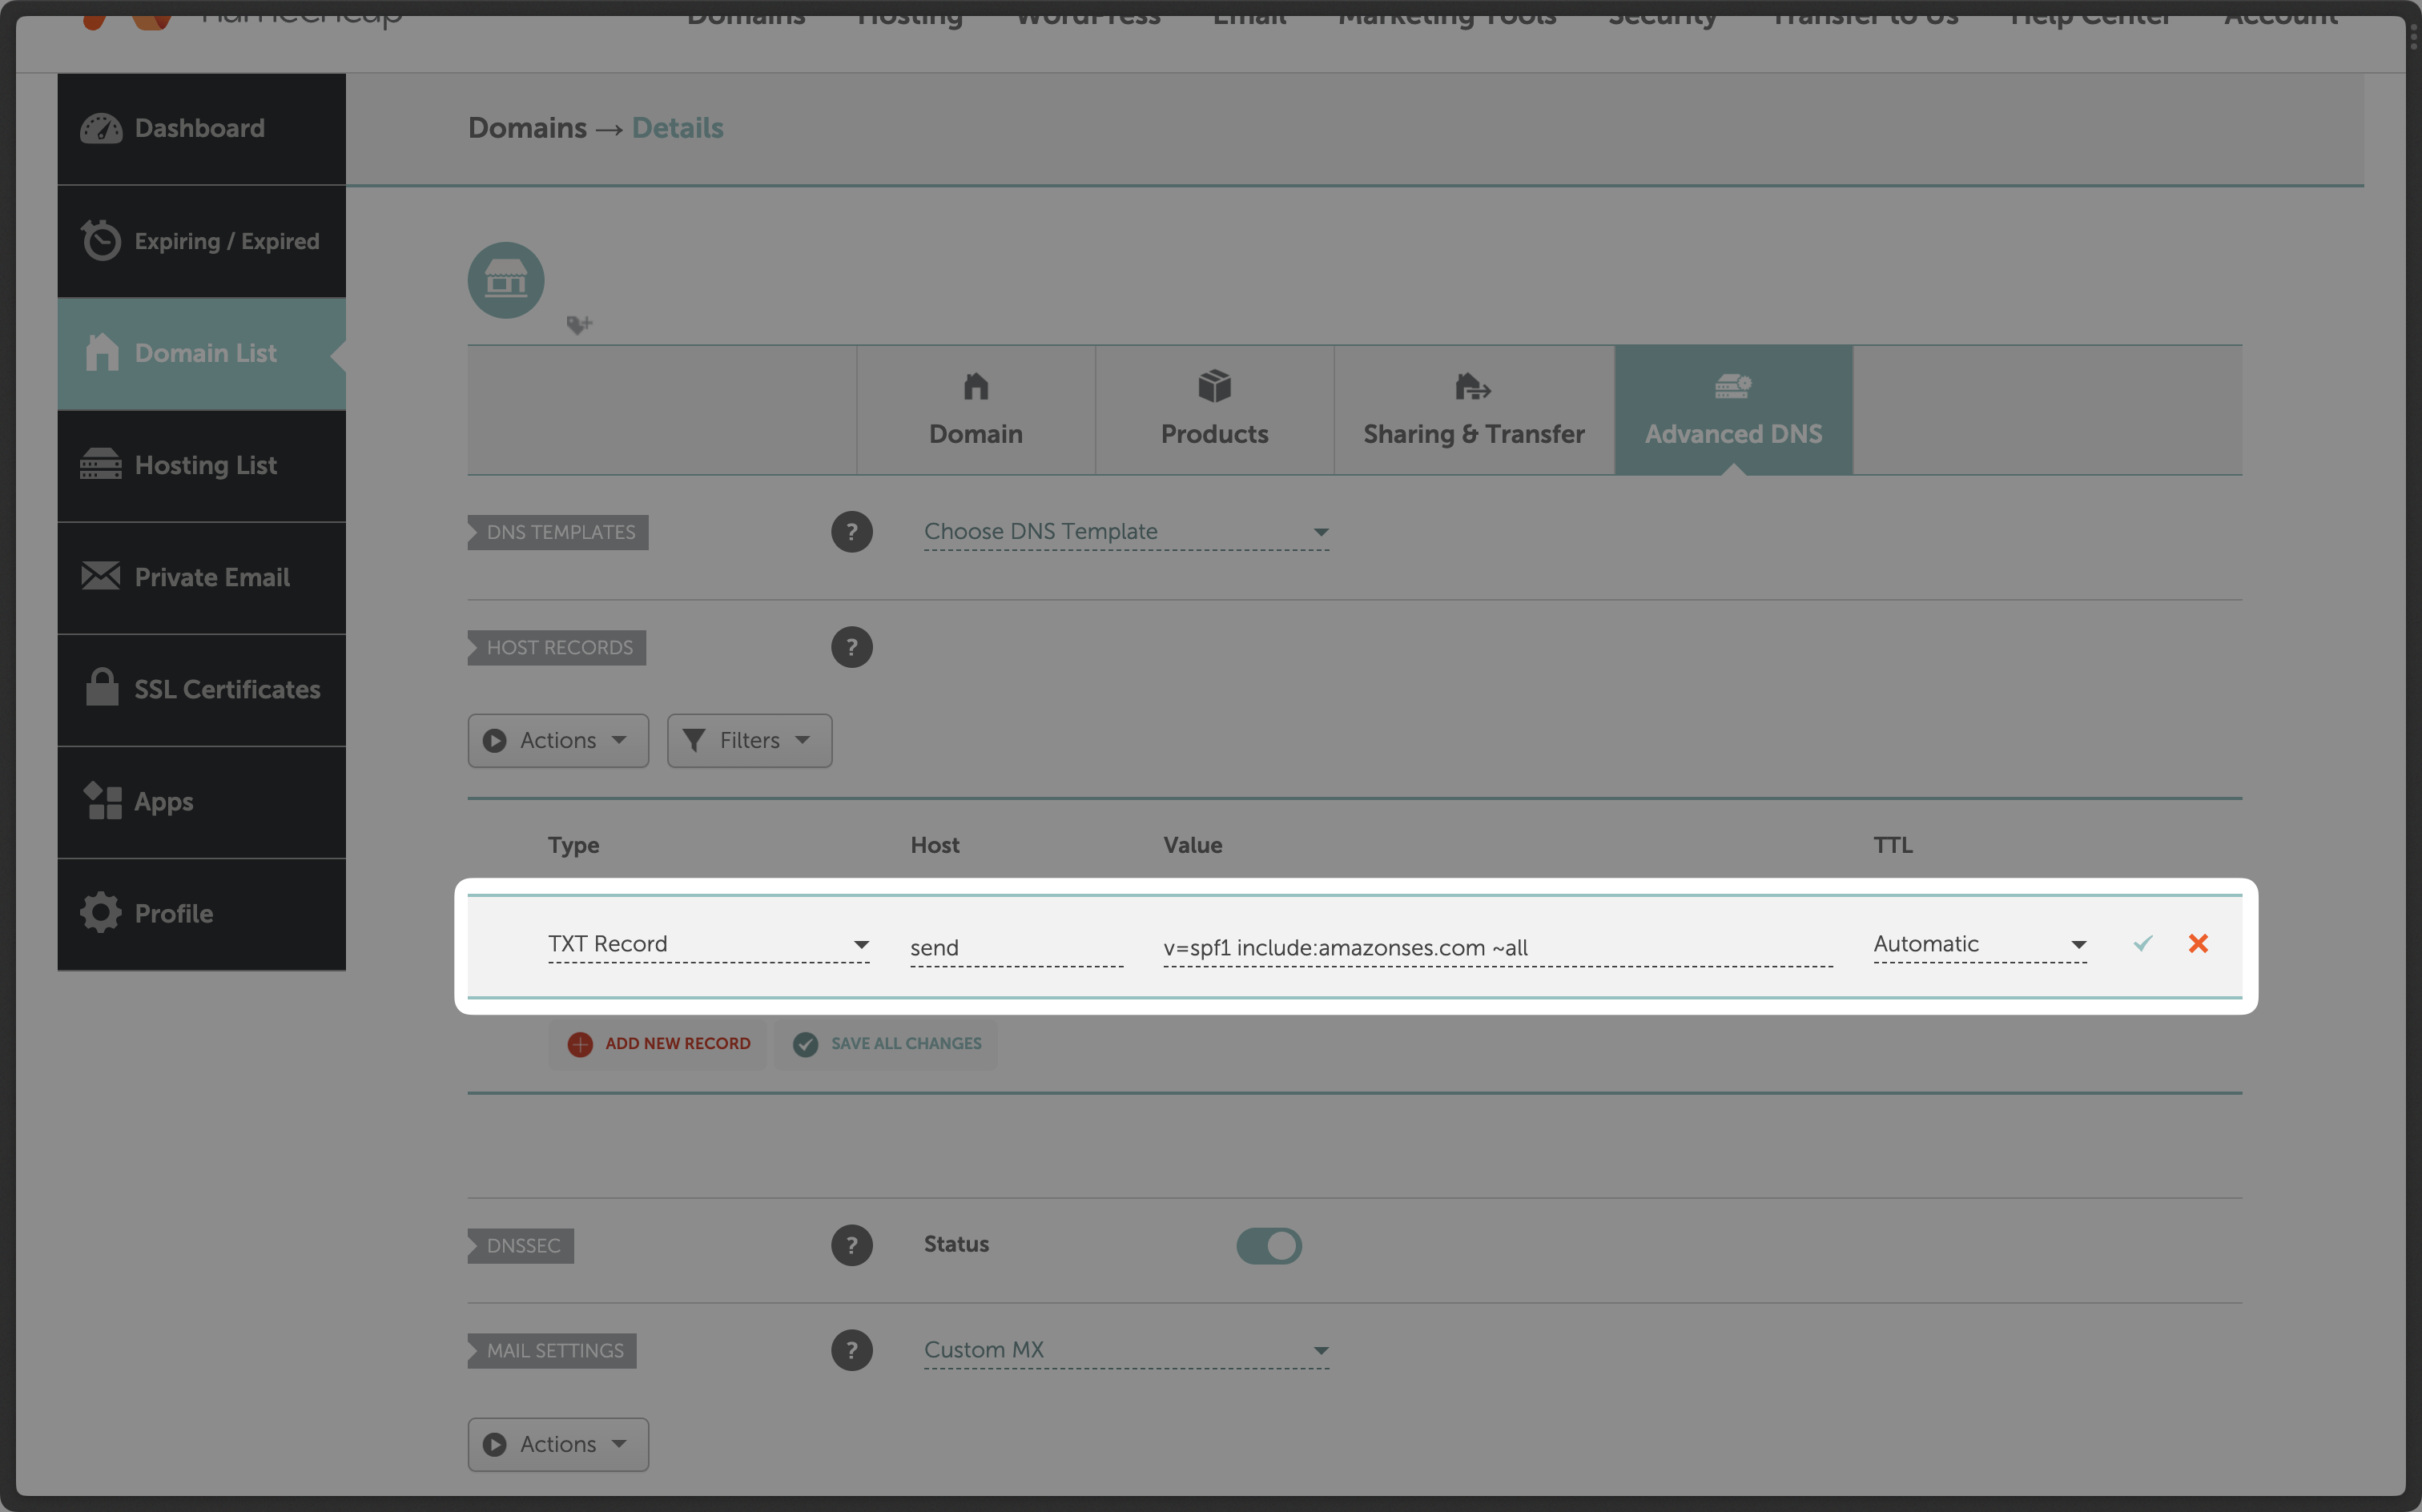 Below is a mapping of the record fields from Resend to Namecheap:
| Namecheap | Resend | Example Value |
| --------- | ------ | ------------------------------------- |
| Type | Type | `TXT Record` |
| Host | Name | `send` |
| TTL | TTL | `Automatic` |
| Value | Value | `"v=spf1 include:amazonses.com ~all"` |
Below is a mapping of the record fields from Resend to Namecheap:
| Namecheap | Resend | Example Value |
| --------- | ------ | ------------------------------------- |
| Type | Type | `TXT Record` |
| Host | Name | `send` |
| TTL | TTL | `Automatic` |
| Value | Value | `"v=spf1 include:amazonses.com ~all"` |
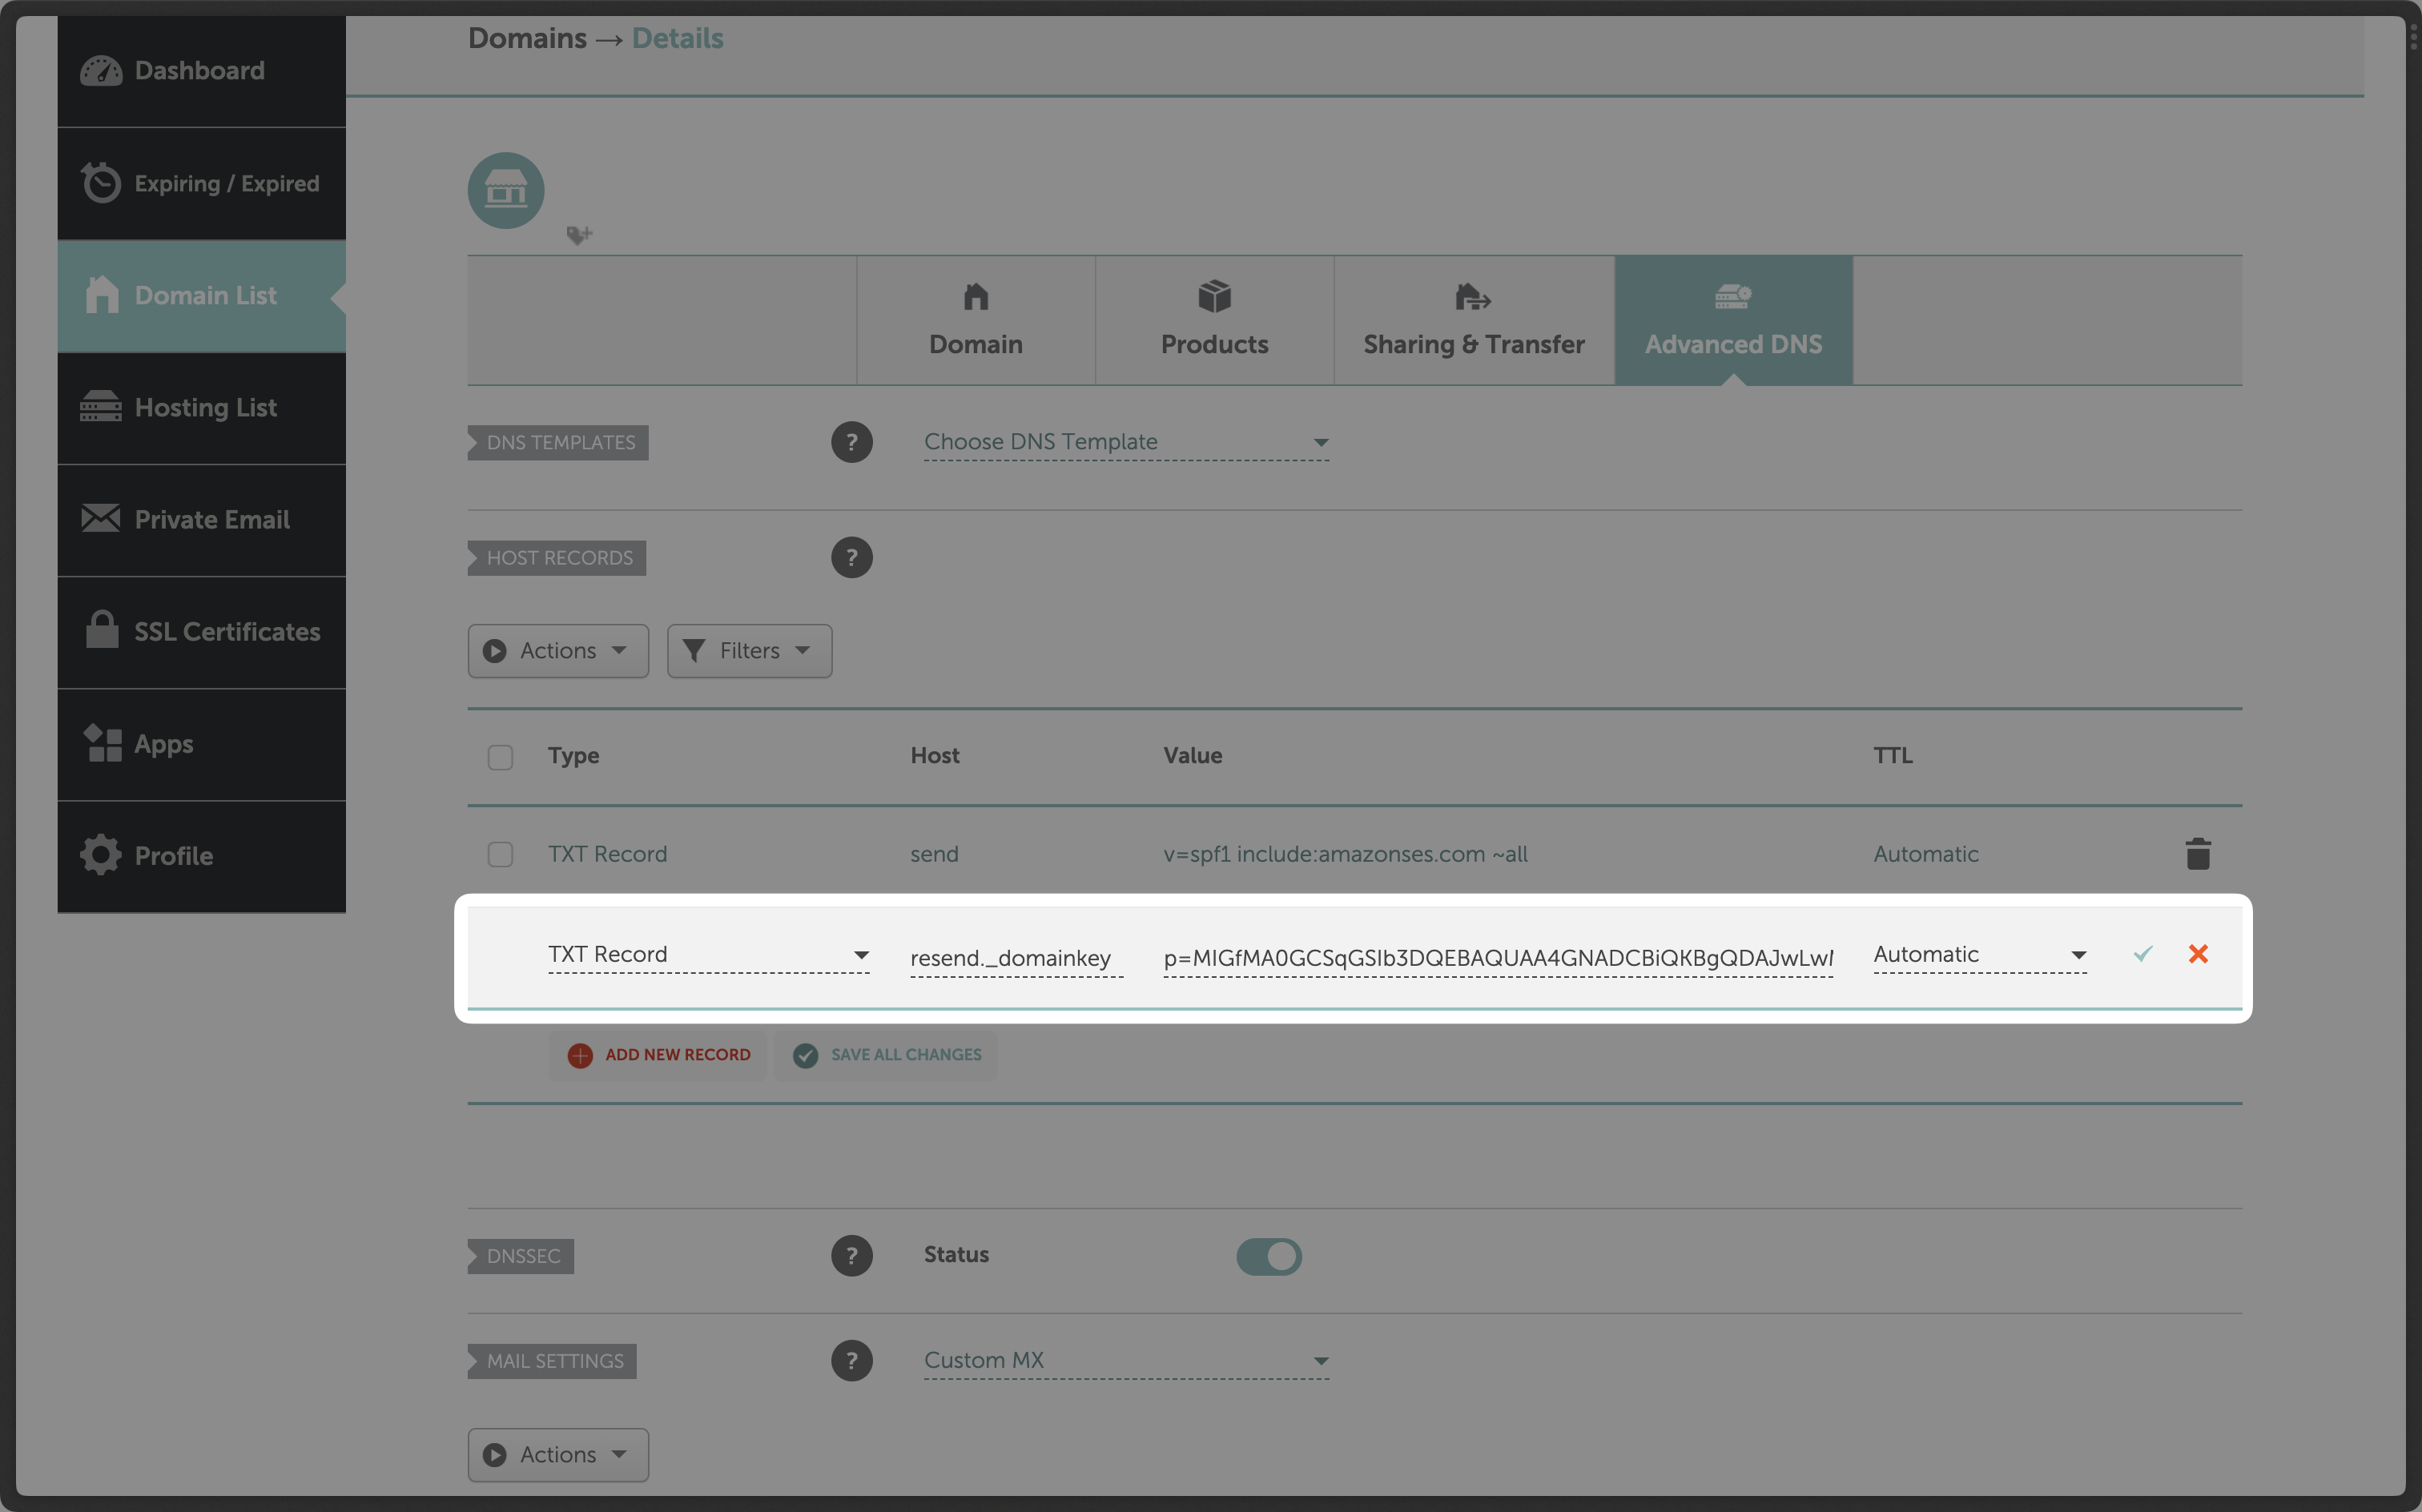 Below is a mapping of the record fields from Resend to Namecheap:
| Namecheap | Resend | Example Value |
| --------- | ------ | ---------------------------- |
| Type | Type | `TXT Record` |
| Host | Name | `resend._domainkey` |
| TTL | TTL | `Automatic` |
| Value | Value | `p=example_demain_key_value` |
Below is a mapping of the record fields from Resend to Namecheap:
| Namecheap | Resend | Example Value |
| --------- | ------ | ---------------------------- |
| Type | Type | `TXT Record` |
| Host | Name | `resend._domainkey` |
| TTL | TTL | `Automatic` |
| Value | Value | `p=example_demain_key_value` |
 ## Add MX SPF Record
In the `DNS` section on Porkbun copy and paste the values MX from Resend:
1. On the `Type` page, choose `MX`.
2. Type `send` for the `Host` of the record.
3. Copy the MX Value from Resend into the `Answer / Value` field.
4. Use the default TTL of `600`.
5. In the `Priority` field enter `10`.
6. Select `Add`.
## Add MX SPF Record
In the `DNS` section on Porkbun copy and paste the values MX from Resend:
1. On the `Type` page, choose `MX`.
2. Type `send` for the `Host` of the record.
3. Copy the MX Value from Resend into the `Answer / Value` field.
4. Use the default TTL of `600`.
5. In the `Priority` field enter `10`.
6. Select `Add`.
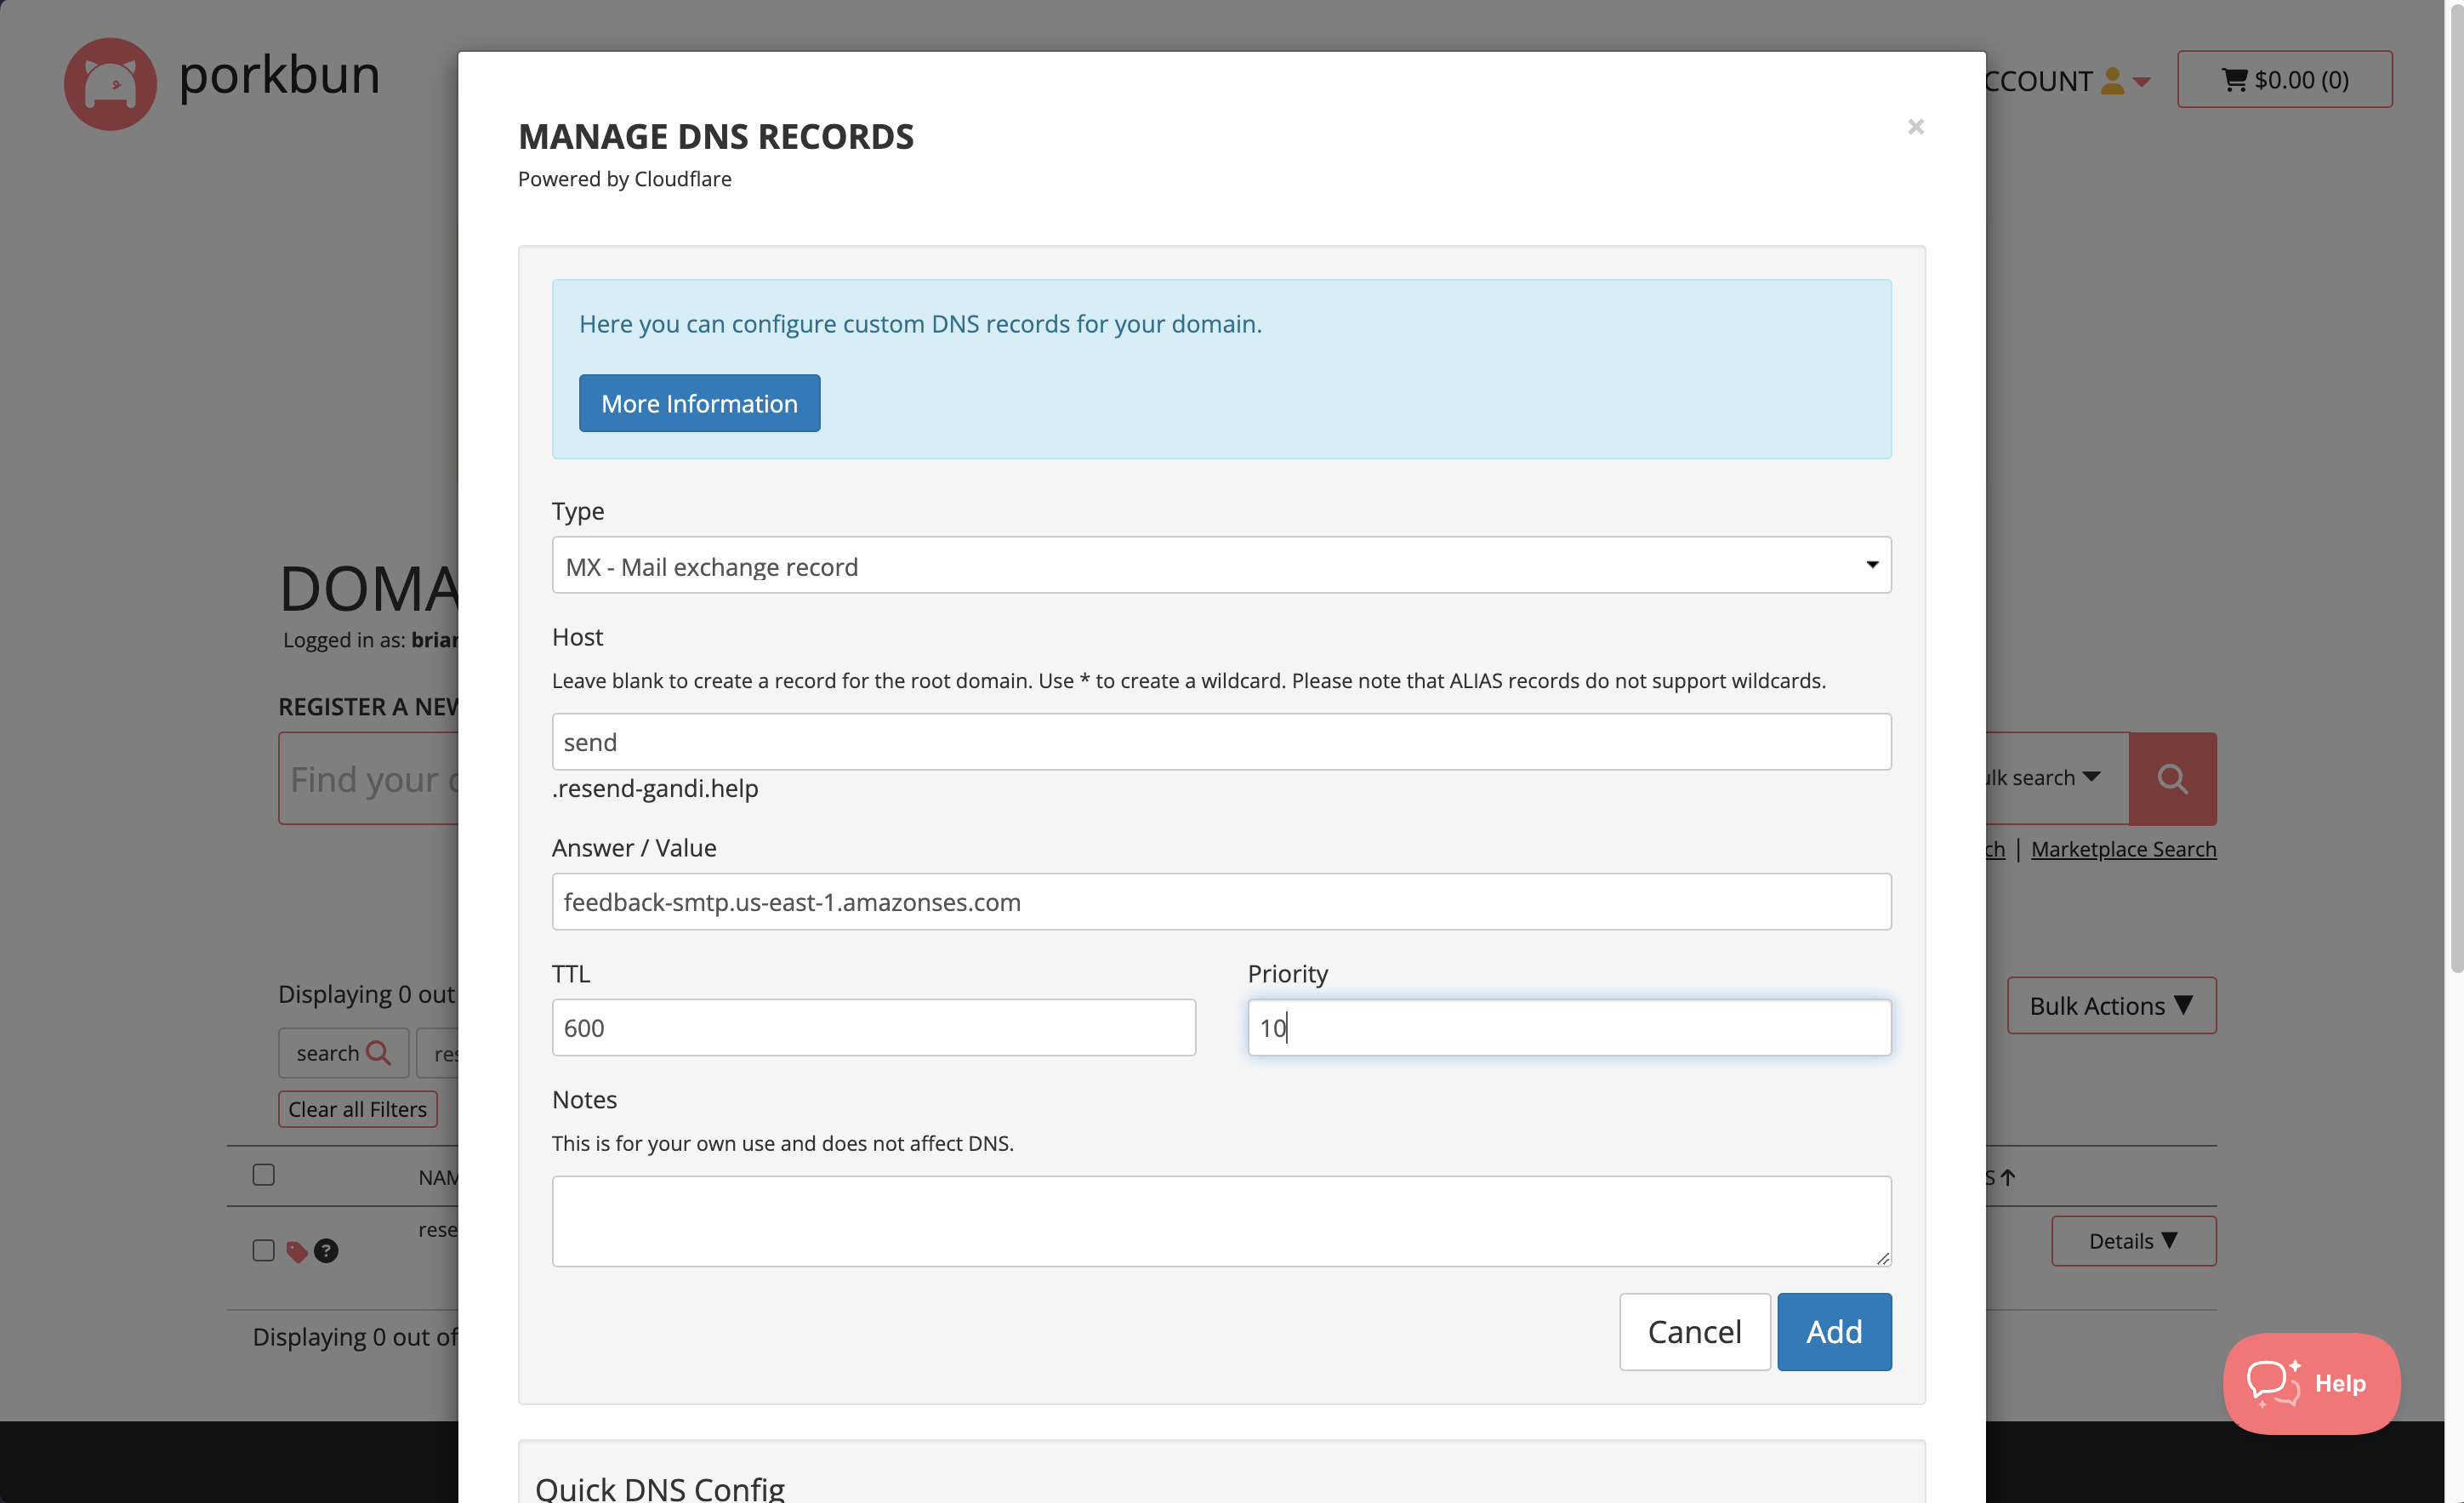 Below is a mapping of the record fields from Resend to Porkbun:
| Porkbun | Resend | Example Value |
| -------------- | -------- | --------------------------------------- |
| Type | Type | `MX Record` |
| Host | Name | `send` |
| Answer / Value | Value | `feedback-smtp.us-east-1.amazonses.com` |
| TTL | TTL | `600` |
| Priority | Priority | `10` |
Below is a mapping of the record fields from Resend to Porkbun:
| Porkbun | Resend | Example Value |
| -------------- | -------- | --------------------------------------- |
| Type | Type | `MX Record` |
| Host | Name | `send` |
| Answer / Value | Value | `feedback-smtp.us-east-1.amazonses.com` |
| TTL | TTL | `600` |
| Priority | Priority | `10` |
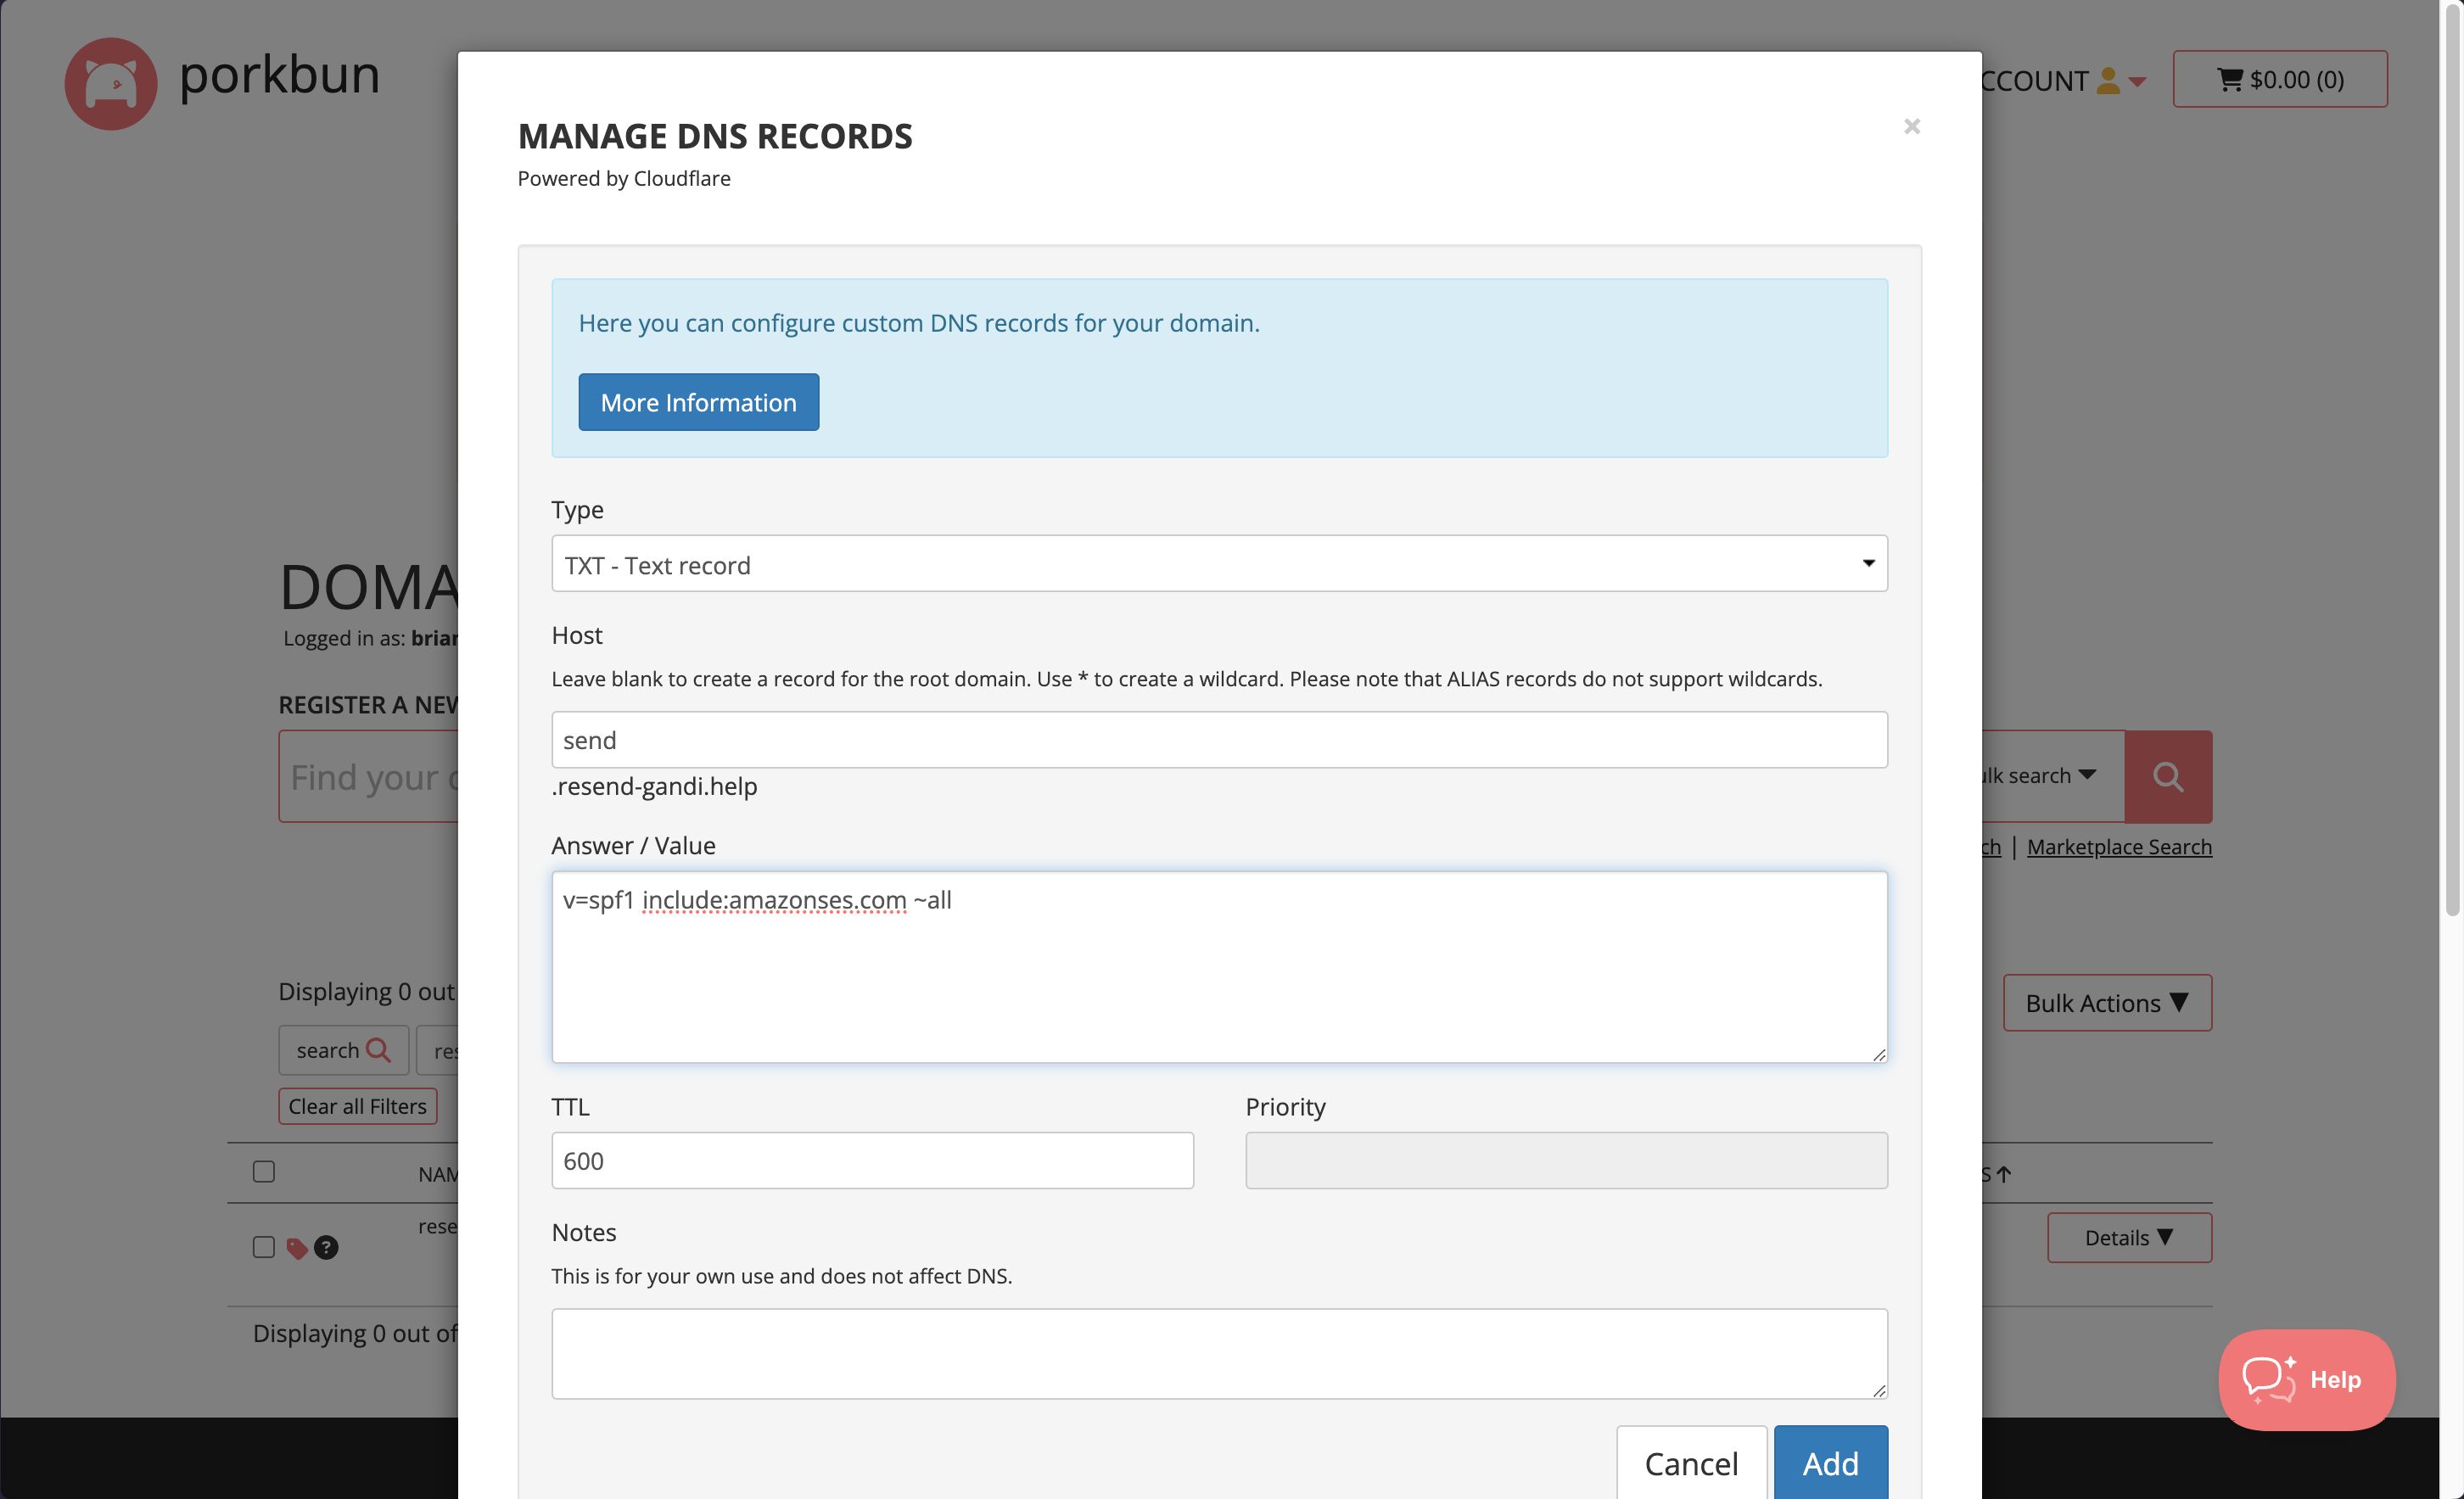 Below is a mapping of the record fields from Resend to Porkbun:
| Porkbun | Resend | Example Value |
| -------------- | ------ | ------------------------------------- |
| Type | Type | `TXT Record` |
| Host | Name | `send` |
| Answer / Value | Value | `"v=spf1 include:amazonses.com ~all"` |
| TTL | TTL | `600` |
## Add TXT DKIM Records
On the same `Create Record` section:
1. On the `Type` page, choose `TXT`.
2. Type `resend._domainkey` for the `Host` of the record.
3. Copy the TXT Value Resend into the `Answer / Value` field.
4. Use the default TTL of `600`.
5. Select `Add Record`.
Below is a mapping of the record fields from Resend to Porkbun:
| Porkbun | Resend | Example Value |
| -------------- | ------ | ------------------------------------- |
| Type | Type | `TXT Record` |
| Host | Name | `send` |
| Answer / Value | Value | `"v=spf1 include:amazonses.com ~all"` |
| TTL | TTL | `600` |
## Add TXT DKIM Records
On the same `Create Record` section:
1. On the `Type` page, choose `TXT`.
2. Type `resend._domainkey` for the `Host` of the record.
3. Copy the TXT Value Resend into the `Answer / Value` field.
4. Use the default TTL of `600`.
5. Select `Add Record`.
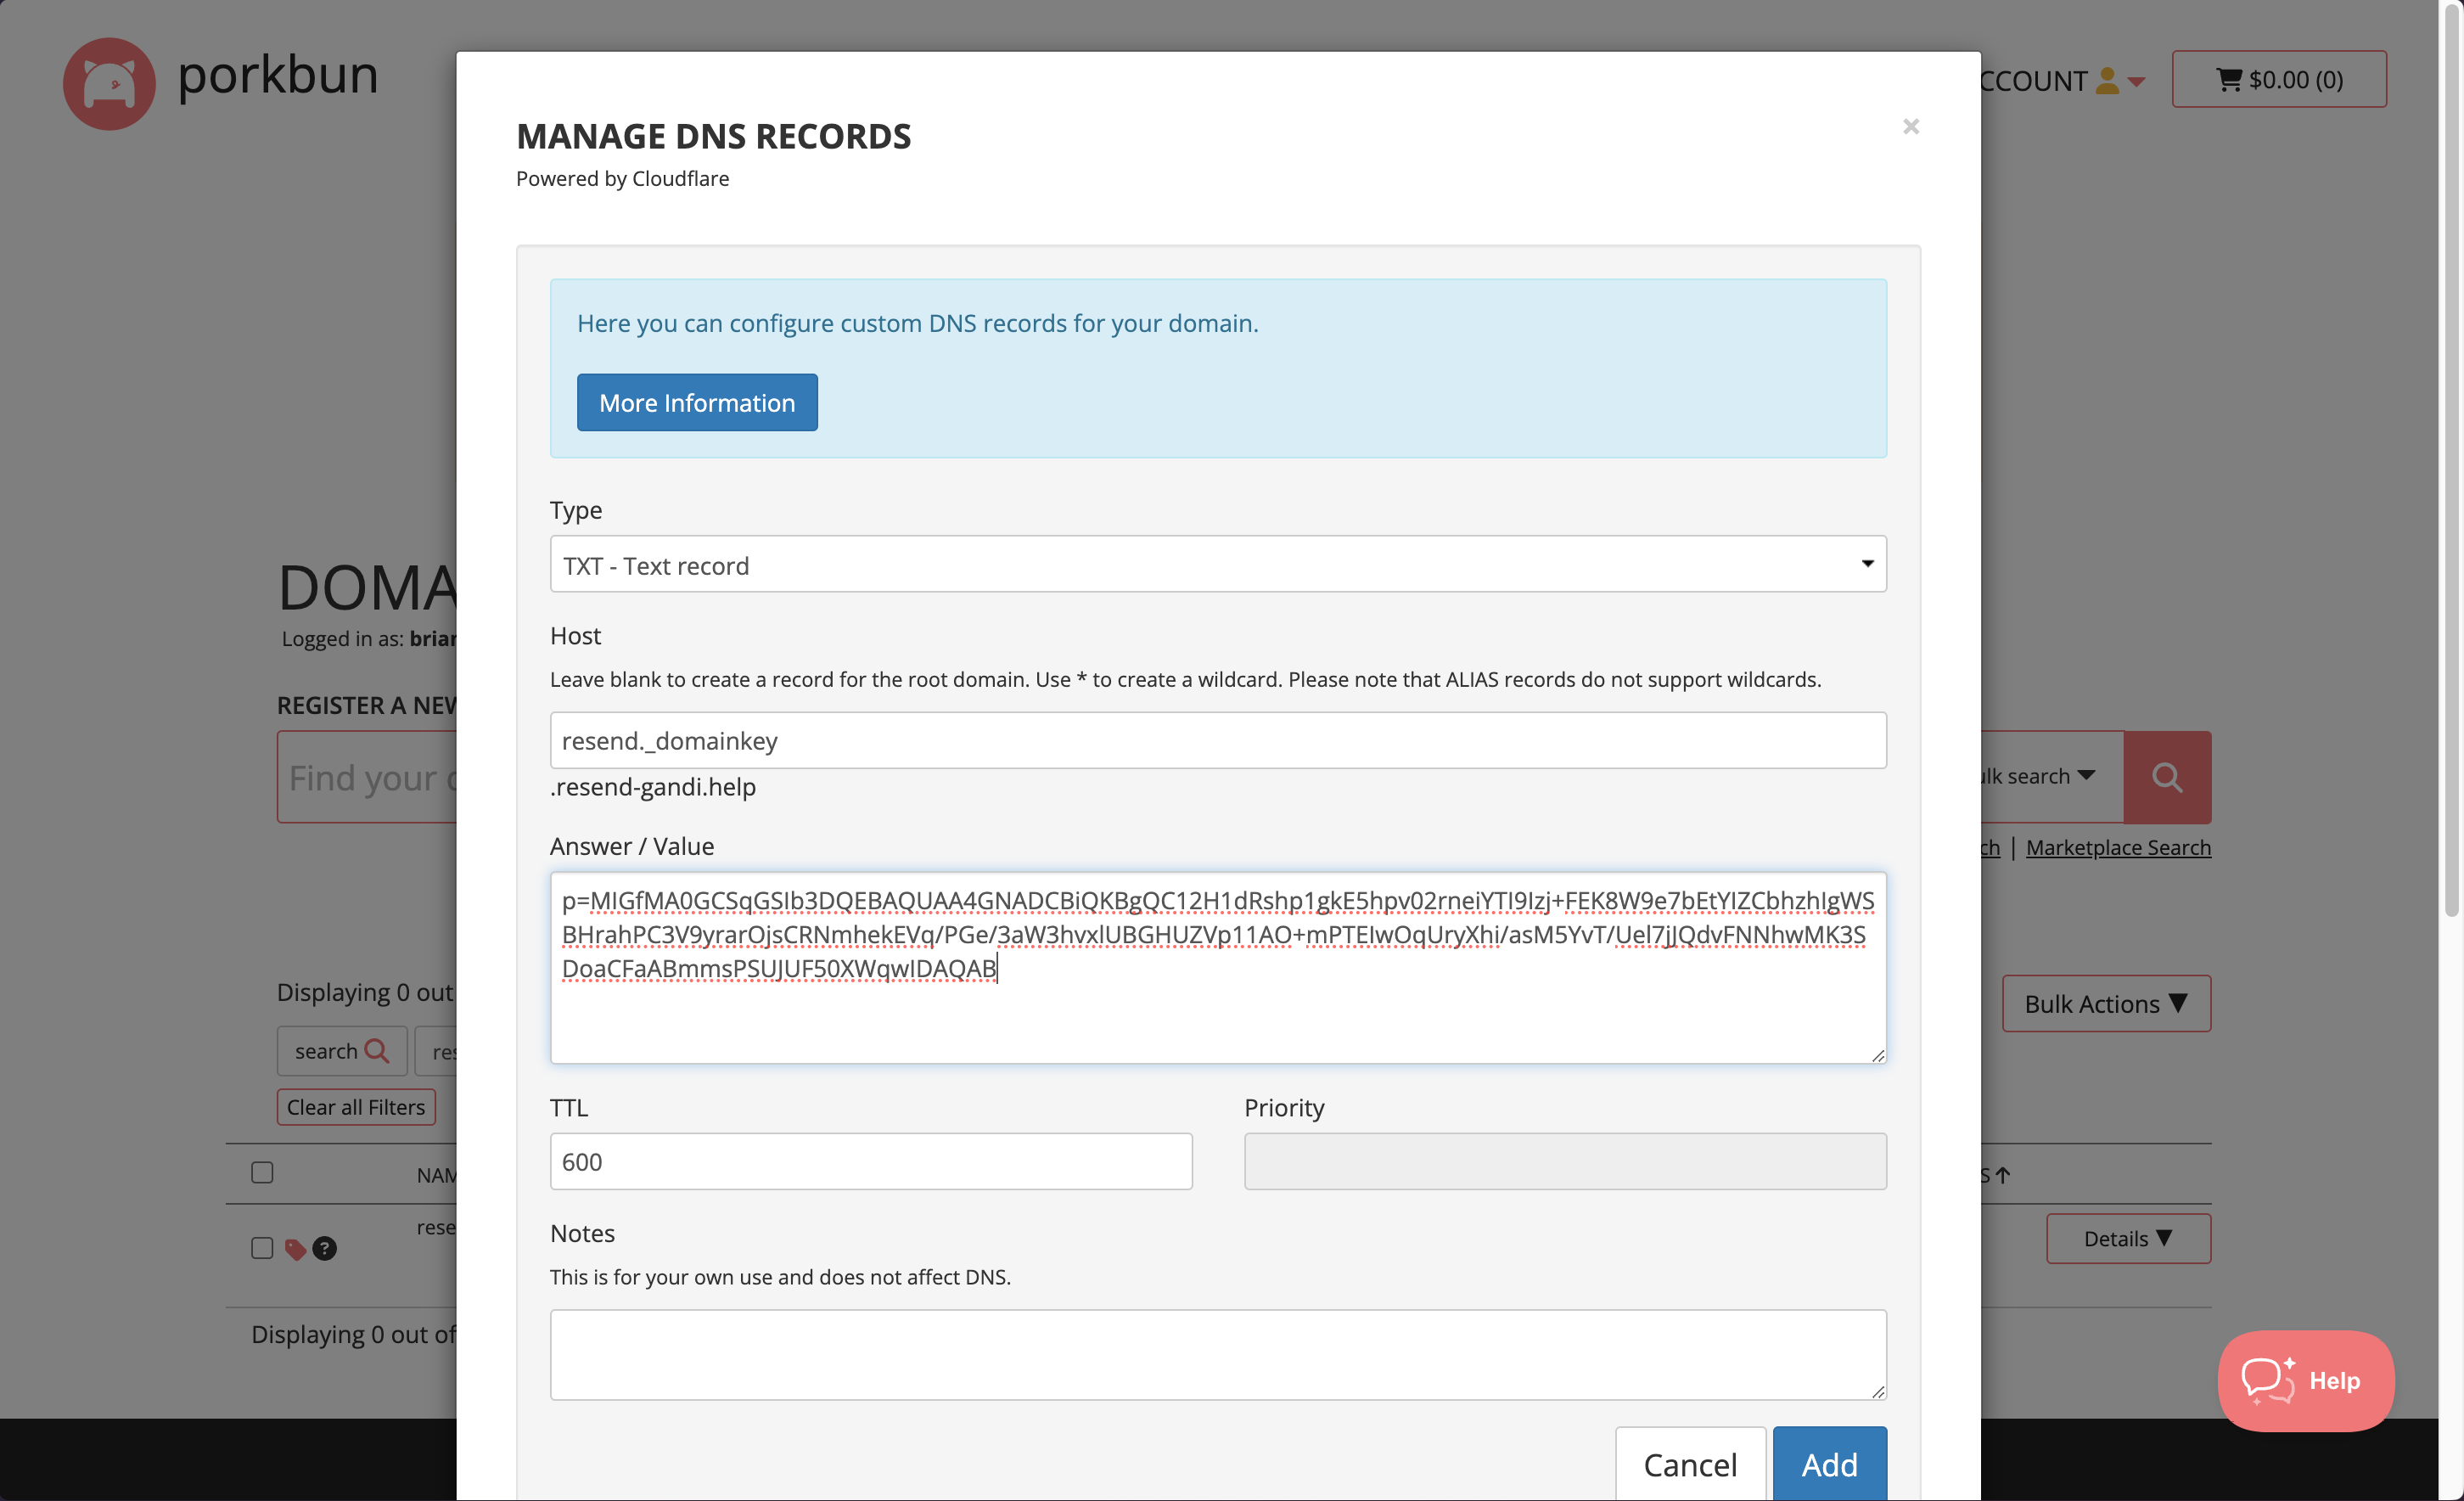 Below is a mapping of the record fields from Resend to Porkbun:
| Porkbun | Resend | Example Value |
| -------------- | ------ | ---------------------------- |
| Type | Type | `TXT Record` |
| Host | Name | `send` |
| Answer / Value | Value | `p=example_demain_key_value` |
| TTL | TTL | `600` |
## Receiving Emails
If you want to receive emails at your domain, toggle the "Receiving" switch on the domain details page.
Below is a mapping of the record fields from Resend to Porkbun:
| Porkbun | Resend | Example Value |
| -------------- | ------ | ---------------------------- |
| Type | Type | `TXT Record` |
| Host | Name | `send` |
| Answer / Value | Value | `p=example_demain_key_value` |
| TTL | TTL | `600` |
## Receiving Emails
If you want to receive emails at your domain, toggle the "Receiving" switch on the domain details page.
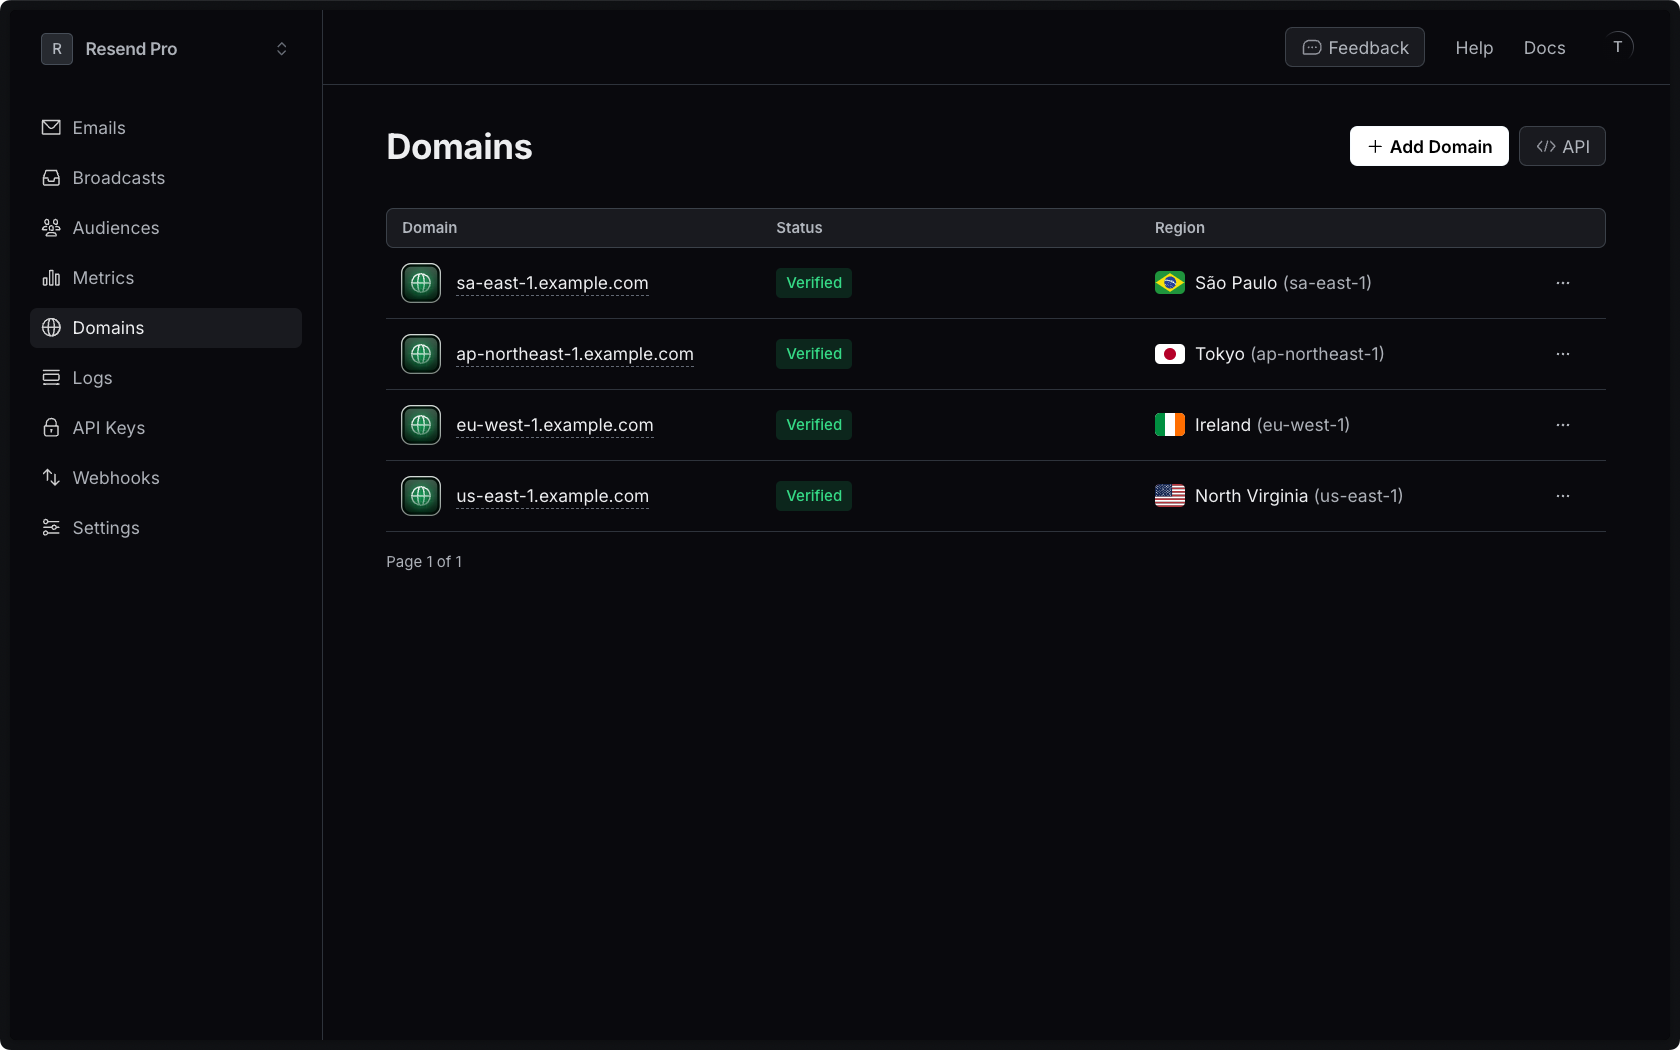 ## Why is this important?
Especially for transactional emails like magic links, password resets, and welcome messages, users expect to receive them right away. If they don't, they might not be able to access your service right away, which could be a missed opportunity for your organization.
Here are some of the other benefits of using our multi-region email sending feature:
1. **Faster delivery:** By sending emails from the region closest to your user, you can reduce latency and ensure a faster time-to-inbox. This can be the difference between people using/buying your product or not.
2. **Easier account management:** Instead of having to maintain different accounts for each region, we're providing multi-region within the same account. That way, you aren't juggling different login credentials.
3. **Increased resilience:** In case of disruption in one region, our multi-region feature enables you to send emails from a backup domain in a separate region, guaranteeing maximum uptime.
## Get Started
To start using our multi-region email sending feature, go to **[Domains](https://resend.com/domains)**, then select the option to add a new domain.
Finally, select the region you want to send your emails.
## How to set up multi-region for the same domain
For advanced needs, you can set up multiple regions for the same domain. We recommend setting a unique subdomain for each region (e.g., us.domain.com, eu.domain.com). When sending transactional emails or marketing emails, choose the right domain for your users.
## Changing Domain Region
If you'd like to switch the region your domain is currently set to:
1. Delete your current domain in the [Domain's page](https://resend.com/domains).
2. Add the same domain again, selecting the new region.
3. Update your DNS records to point to the new domain.
For more help, please reach out to [Support](https://resend.com/help), and we can help you out.
---
# Source: https://resend.com/docs/knowledge-base/replit-integration.md
> ## Documentation Index
> Fetch the complete documentation index at: https://resend.com/docs/llms.txt
> Use this file to discover all available pages before exploring further.
# Send emails with Replit and Resend
> Learn how to add the Resend integration to your Replit project.
export const YouTube = ({id}) => {
return ;
};
[Replit](https://replit.com/) is a platform for building sites and apps with AI. You can add Resend in a Replit project by asking the chat to add email sending with Resend.
**Example prompt**
```
When someone fills out the contact form, send an email using Resend.
```
Prefer watching a video? Check out our video walkthrough below.
## Why is this important?
Especially for transactional emails like magic links, password resets, and welcome messages, users expect to receive them right away. If they don't, they might not be able to access your service right away, which could be a missed opportunity for your organization.
Here are some of the other benefits of using our multi-region email sending feature:
1. **Faster delivery:** By sending emails from the region closest to your user, you can reduce latency and ensure a faster time-to-inbox. This can be the difference between people using/buying your product or not.
2. **Easier account management:** Instead of having to maintain different accounts for each region, we're providing multi-region within the same account. That way, you aren't juggling different login credentials.
3. **Increased resilience:** In case of disruption in one region, our multi-region feature enables you to send emails from a backup domain in a separate region, guaranteeing maximum uptime.
## Get Started
To start using our multi-region email sending feature, go to **[Domains](https://resend.com/domains)**, then select the option to add a new domain.
Finally, select the region you want to send your emails.
## How to set up multi-region for the same domain
For advanced needs, you can set up multiple regions for the same domain. We recommend setting a unique subdomain for each region (e.g., us.domain.com, eu.domain.com). When sending transactional emails or marketing emails, choose the right domain for your users.
## Changing Domain Region
If you'd like to switch the region your domain is currently set to:
1. Delete your current domain in the [Domain's page](https://resend.com/domains).
2. Add the same domain again, selecting the new region.
3. Update your DNS records to point to the new domain.
For more help, please reach out to [Support](https://resend.com/help), and we can help you out.
---
# Source: https://resend.com/docs/knowledge-base/replit-integration.md
> ## Documentation Index
> Fetch the complete documentation index at: https://resend.com/docs/llms.txt
> Use this file to discover all available pages before exploring further.
# Send emails with Replit and Resend
> Learn how to add the Resend integration to your Replit project.
export const YouTube = ({id}) => {
return ;
};
[Replit](https://replit.com/) is a platform for building sites and apps with AI. You can add Resend in a Replit project by asking the chat to add email sending with Resend.
**Example prompt**
```
When someone fills out the contact form, send an email using Resend.
```
Prefer watching a video? Check out our video walkthrough below.
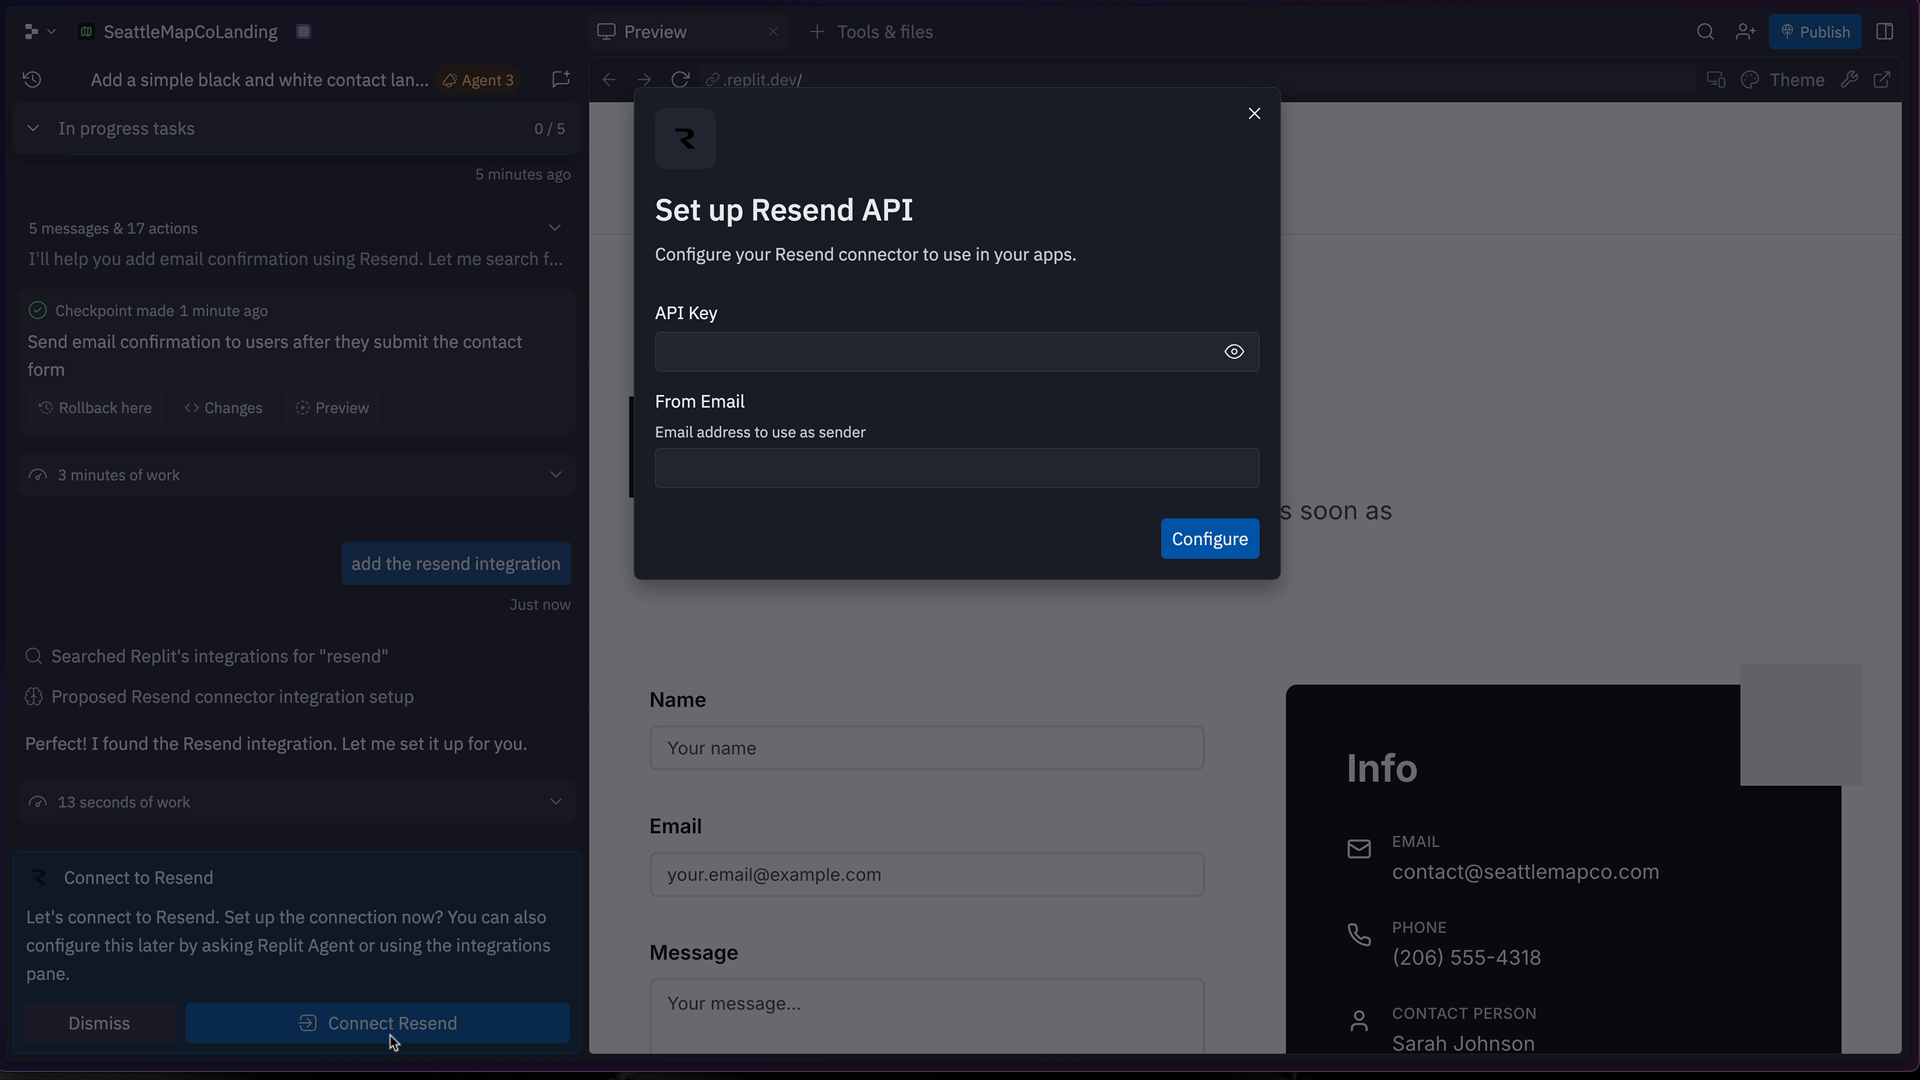
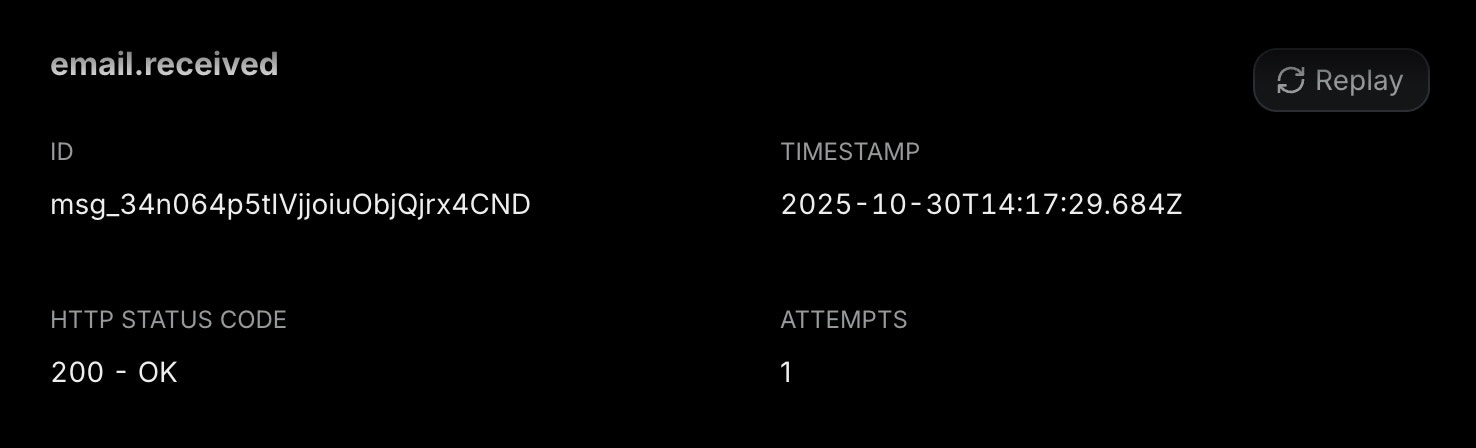 Here's how to replay a webhook message:
1. Go to the [Webhooks](https://resend.com/webhooks) page
2. Navigate to the Webhook Endpoint you are using
3. Go to the Webhook Message you want to replay
4. Click on the "Replay" button
---
# Source: https://resend.com/docs/api-reference/emails/retrieve-email-attachment.md
> ## Documentation Index
> Fetch the complete documentation index at: https://resend.com/docs/llms.txt
> Use this file to discover all available pages before exploring further.
# Retrieve Attachment
> Retrieve a single attachment from a sent email.
## Path Parameters
Here's how to replay a webhook message:
1. Go to the [Webhooks](https://resend.com/webhooks) page
2. Navigate to the Webhook Endpoint you are using
3. Go to the Webhook Message you want to replay
4. Click on the "Replay" button
---
# Source: https://resend.com/docs/api-reference/emails/retrieve-email-attachment.md
> ## Documentation Index
> Fetch the complete documentation index at: https://resend.com/docs/llms.txt
> Use this file to discover all available pages before exploring further.
# Retrieve Attachment
> Retrieve a single attachment from a sent email.
## Path Parameters
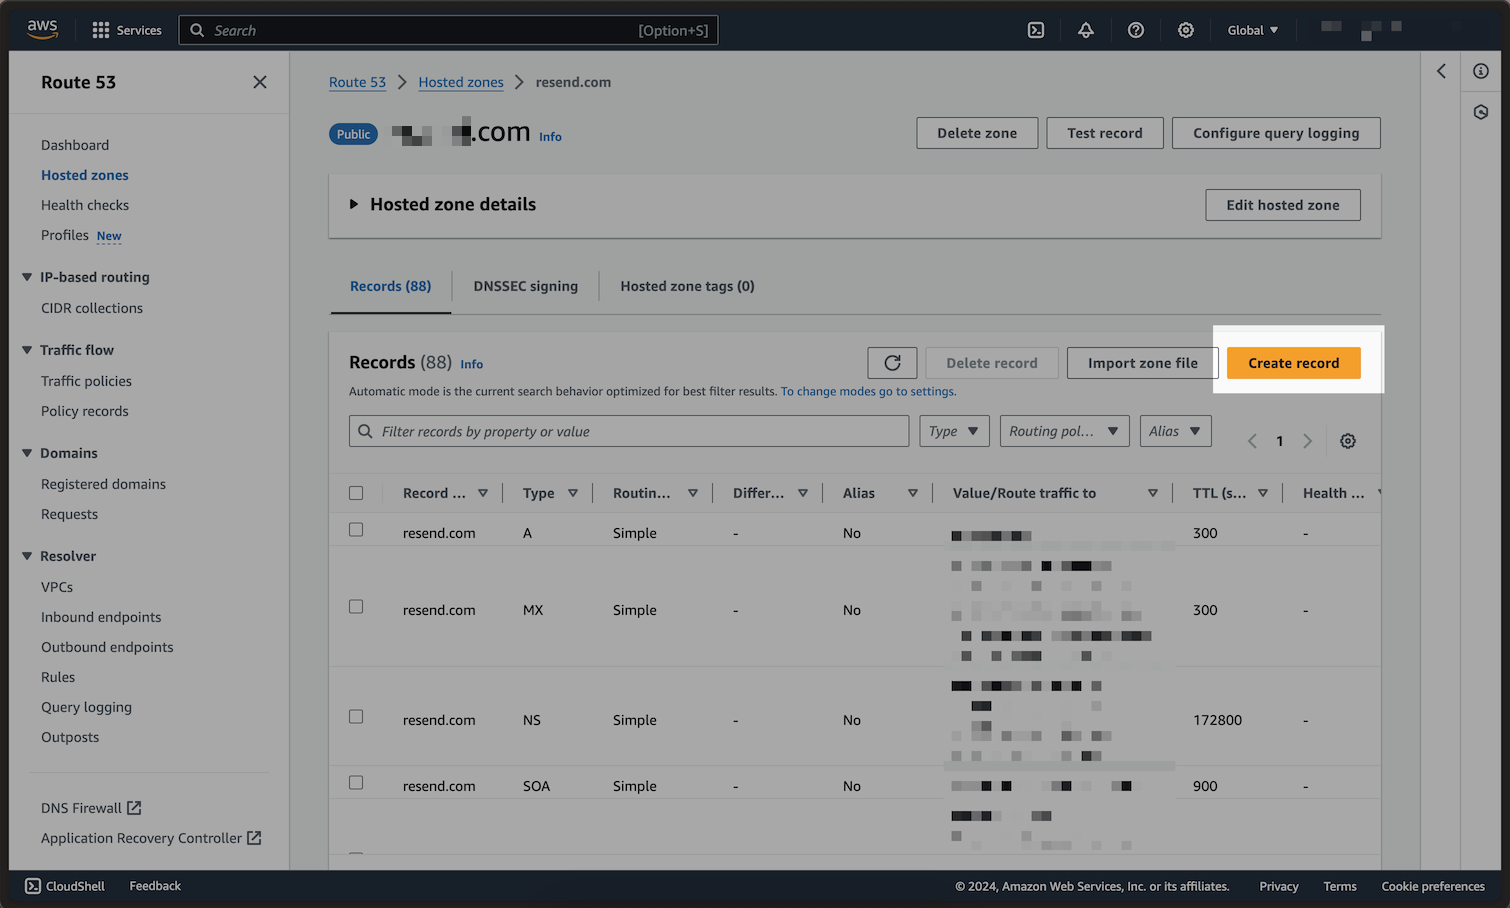 ## Add MX SPF Record
1. Type in `send` for the `Record name`.
2. Select the `Record type` dropdown, and choose `MX`.
3. Copy the MX Value from your domain in Resend into the `Value` field.
4. Be sure to include the `10` in the `Value` field, as seen in the screenshot.
## Add MX SPF Record
1. Type in `send` for the `Record name`.
2. Select the `Record type` dropdown, and choose `MX`.
3. Copy the MX Value from your domain in Resend into the `Value` field.
4. Be sure to include the `10` in the `Value` field, as seen in the screenshot.
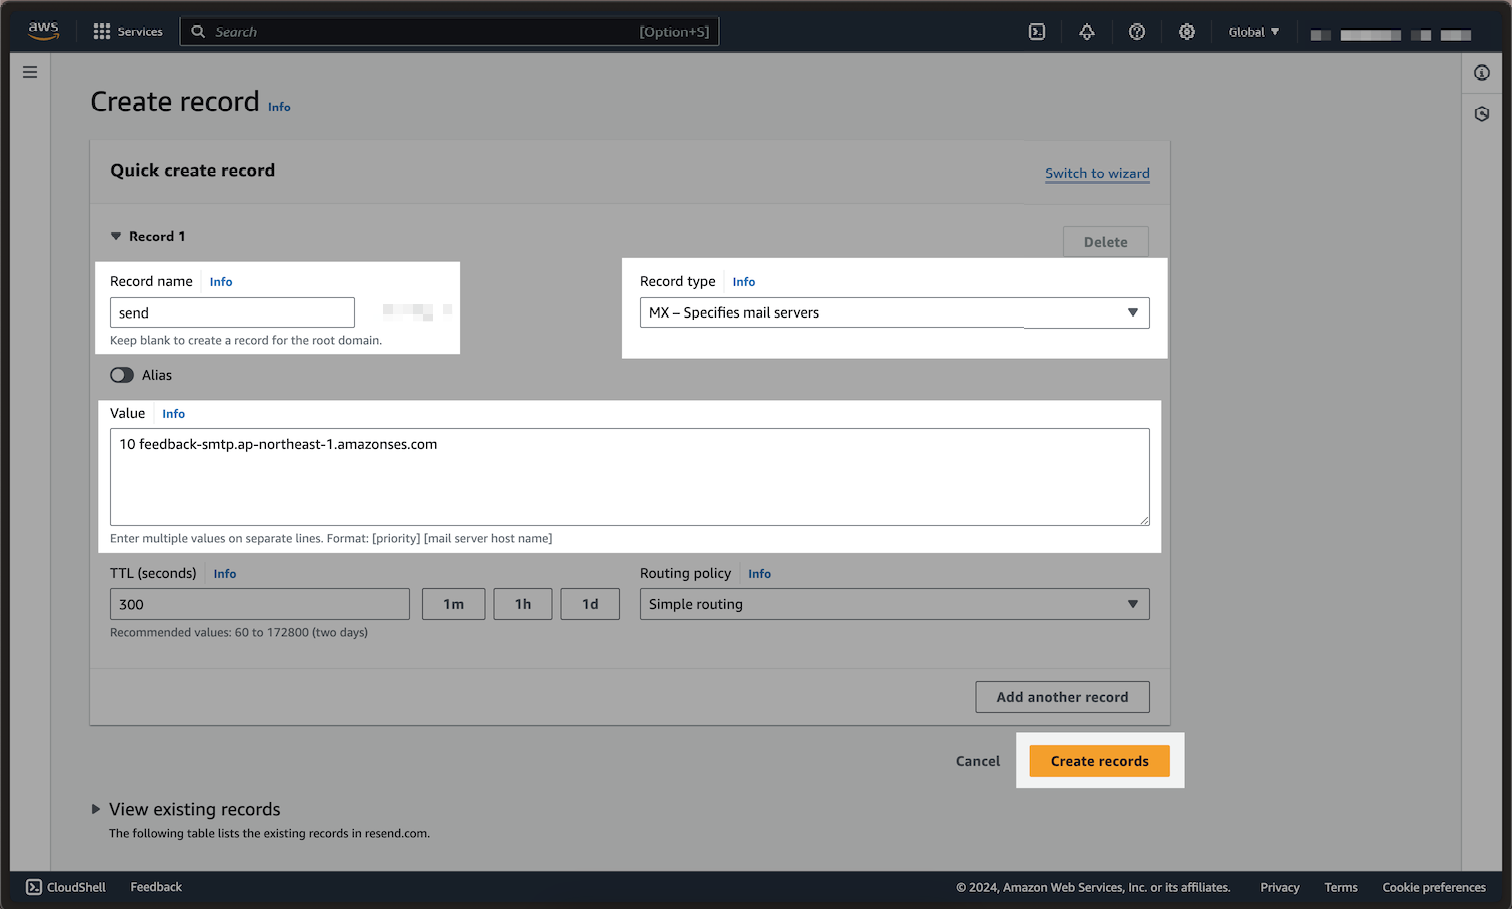 Below is a mapping of the record fields from Resend to Route 53:
| Route 53 | Resend | Example Value |
| -------------- | ---------------- | ------------------------------------------ |
| Record Type | Type | `MX Record` |
| Record name | Name | `send` |
| Value | Value & Priority | `10 feedback-smtp.us-east-1.amazonses.com` |
| TTL | TTL | `Use Route 53 Default (300)` |
| Routing policy | - | `Simple routing` |
Below is a mapping of the record fields from Resend to Route 53:
| Route 53 | Resend | Example Value |
| -------------- | ---------------- | ------------------------------------------ |
| Record Type | Type | `MX Record` |
| Record name | Name | `send` |
| Value | Value & Priority | `10 feedback-smtp.us-east-1.amazonses.com` |
| TTL | TTL | `Use Route 53 Default (300)` |
| Routing policy | - | `Simple routing` |
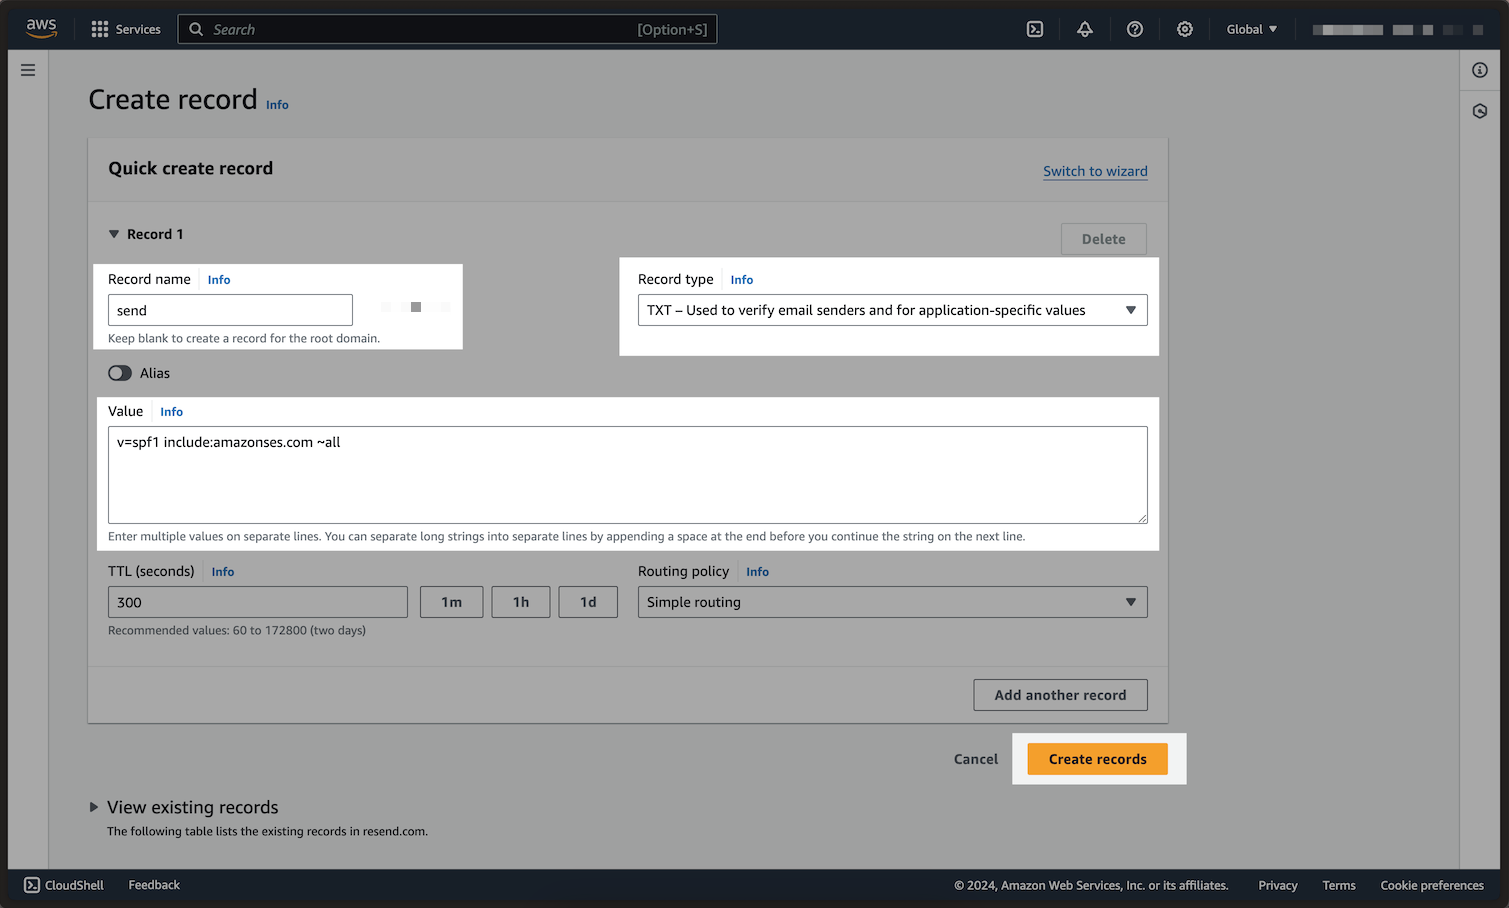 Below is a mapping of the record fields from Resend to Route 53:
| Route 53 | Resend | Example Value |
| -------------- | ------ | ------------------------------------- |
| Record type | Type | `TXT Record` |
| Record name | Name | `send` |
| Value | Value | `"v=spf1 include:amazonses.com ~all"` |
| TTL | TTL | `Use Route 53 Default (300)` |
| Routing policy | - | `Simple routing` |
Below is a mapping of the record fields from Resend to Route 53:
| Route 53 | Resend | Example Value |
| -------------- | ------ | ------------------------------------- |
| Record type | Type | `TXT Record` |
| Record name | Name | `send` |
| Value | Value | `"v=spf1 include:amazonses.com ~all"` |
| TTL | TTL | `Use Route 53 Default (300)` |
| Routing policy | - | `Simple routing` |
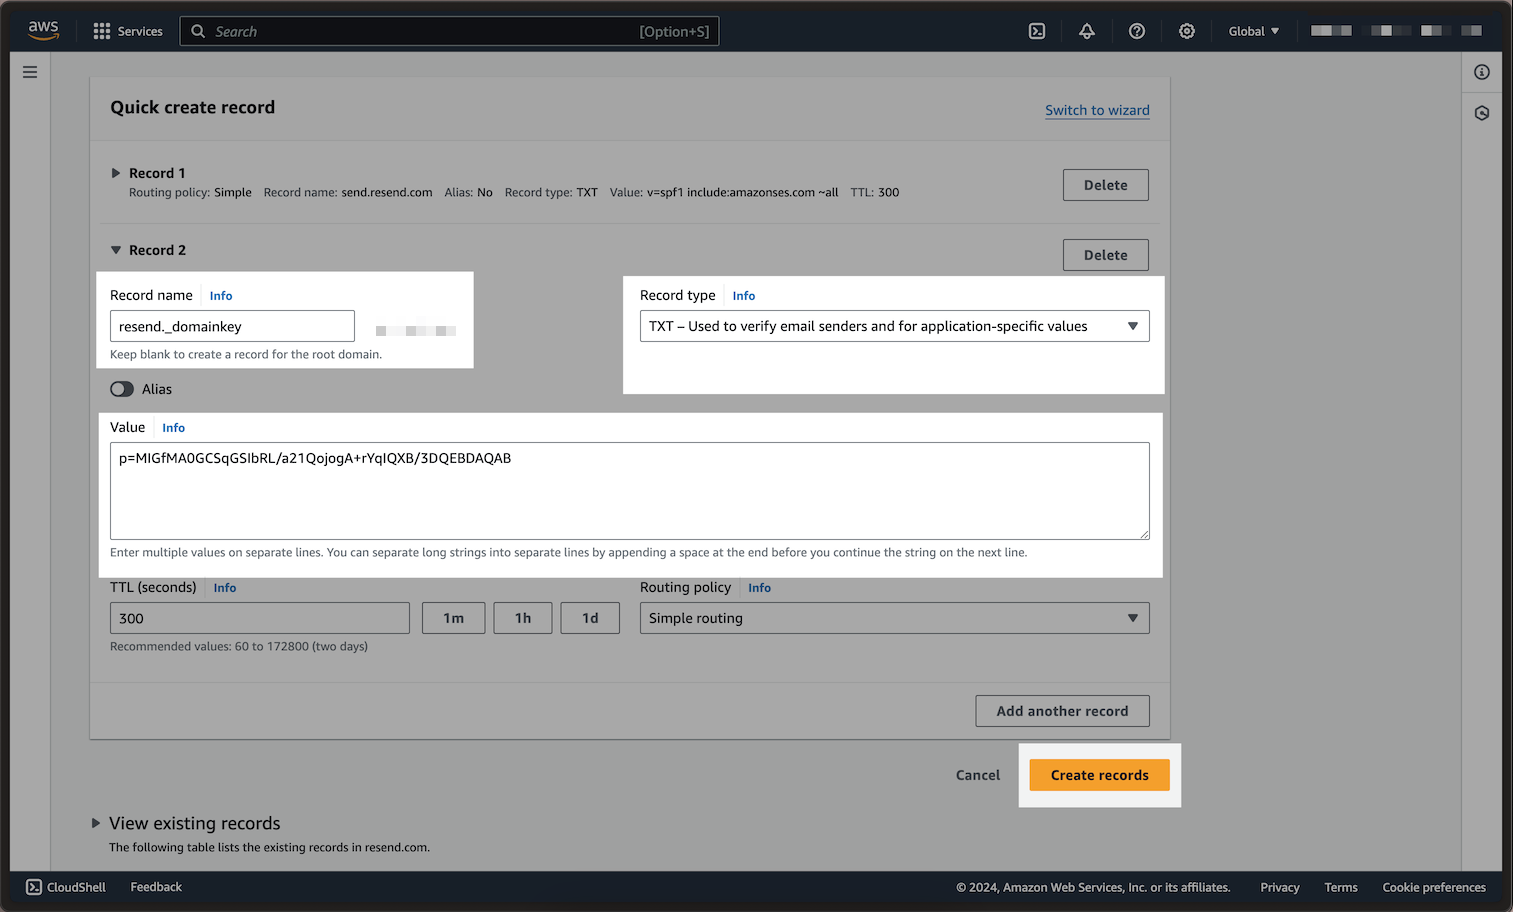 Below is a mapping of the record fields from Resend to Route 53:
| Route 53 | Resend | Example Value |
| -------------- | ------ | ---------------------------- |
| Record type | Type | `TXT Record` |
| Record name | Name | `resend._domainkey` |
| Value | Value | `p=example_demain_key_value` |
| TTL | TTL | `Use Route 53 Default (300)` |
| Routing policy | - | `Simple routing` |
Below is a mapping of the record fields from Resend to Route 53:
| Route 53 | Resend | Example Value |
| -------------- | ------ | ---------------------------- |
| Record type | Type | `TXT Record` |
| Record name | Name | `resend._domainkey` |
| Value | Value | `p=example_demain_key_value` |
| TTL | TTL | `Use Route 53 Default (300)` |
| Routing policy | - | `Simple routing` |
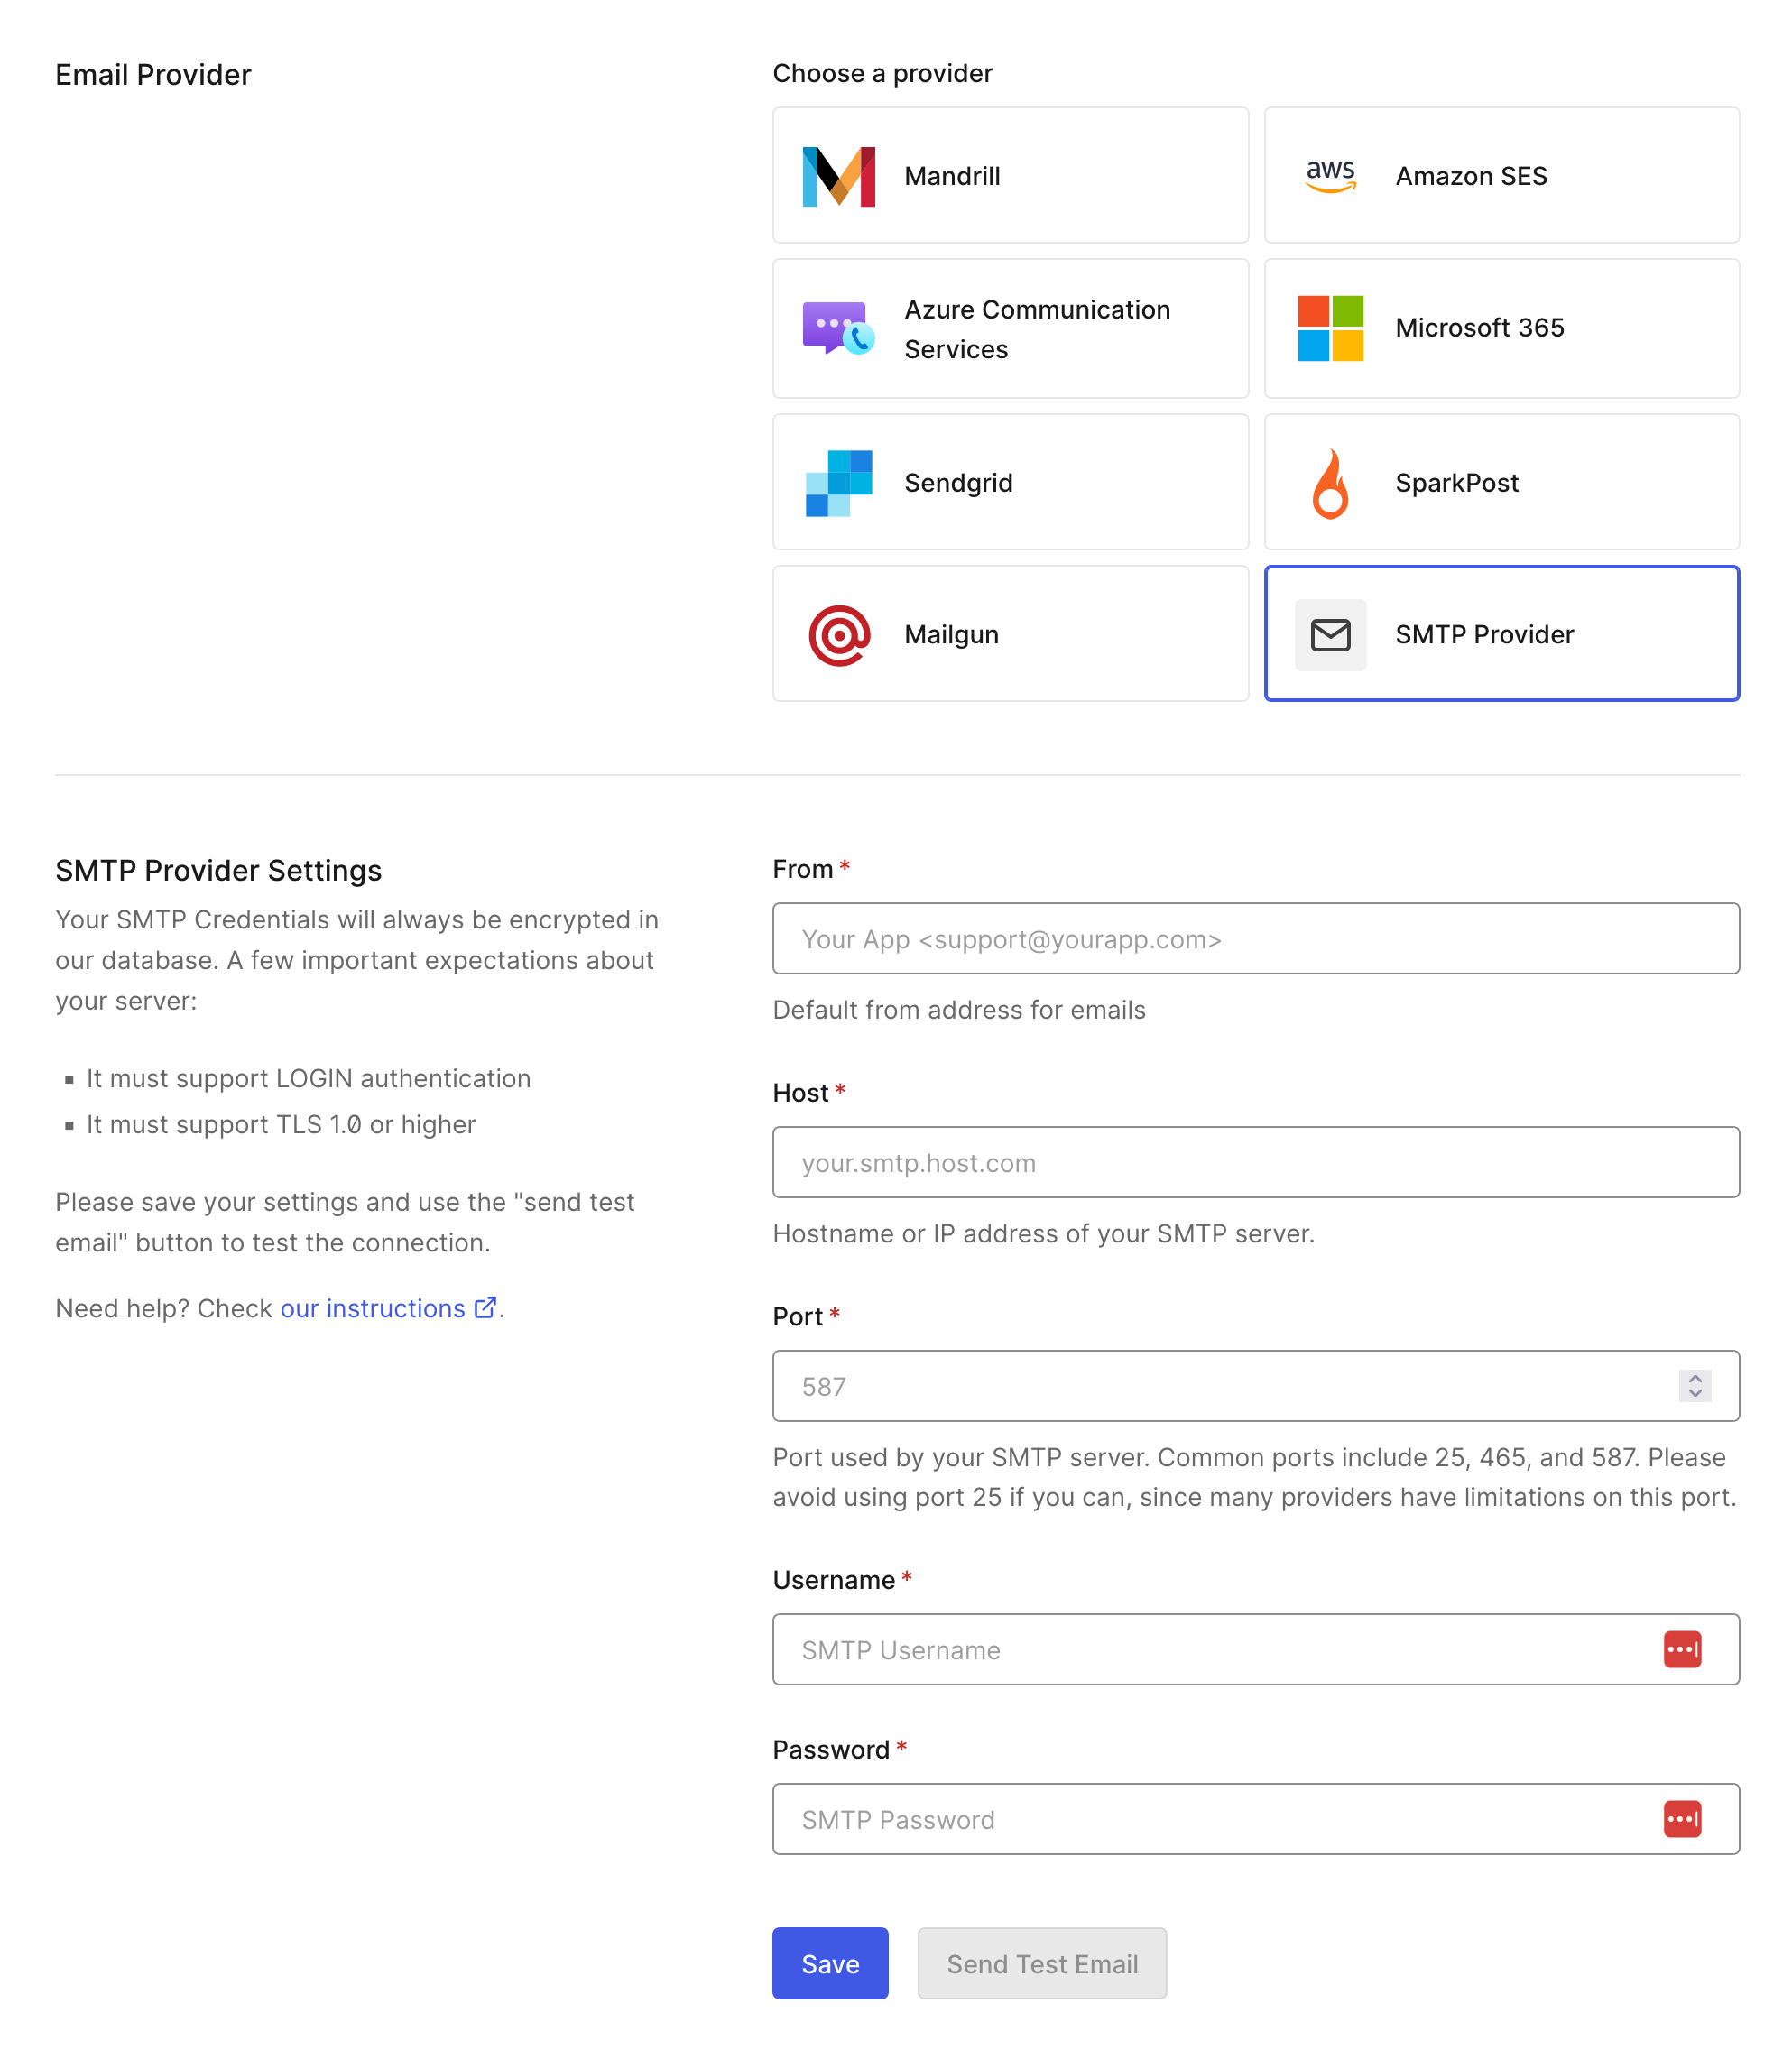 ## 3. Send a test email
Once you have configured the SMTP settings, click **Save**. Next send a test email using the **Send Test Email** button. If everything is configured correctly, you will receive a confirmation email. If you did not receive an email, check your [Auth0 Logs](https://manage.auth0.com/#/logs).
---
# Source: https://resend.com/docs/send-with-aws-lambda.md
> ## Documentation Index
> Fetch the complete documentation index at: https://resend.com/docs/llms.txt
> Use this file to discover all available pages before exploring further.
# Send emails with AWS Lambda
> Learn how to send your first email using AWS Lambda.
## Prerequisites
To get the most out of this guide, you'll need to:
* [Create an API key](https://resend.com/api-keys)
* [Verify your domain](https://resend.com/domains)
## 1. Create a AWS Lambda function
Go to [aws.amazon.com](https://aws.amazon.com) and create a new Lambda function using the Node.js 20.x or later runtime.
## 3. Send a test email
Once you have configured the SMTP settings, click **Save**. Next send a test email using the **Send Test Email** button. If everything is configured correctly, you will receive a confirmation email. If you did not receive an email, check your [Auth0 Logs](https://manage.auth0.com/#/logs).
---
# Source: https://resend.com/docs/send-with-aws-lambda.md
> ## Documentation Index
> Fetch the complete documentation index at: https://resend.com/docs/llms.txt
> Use this file to discover all available pages before exploring further.
# Send emails with AWS Lambda
> Learn how to send your first email using AWS Lambda.
## Prerequisites
To get the most out of this guide, you'll need to:
* [Create an API key](https://resend.com/api-keys)
* [Verify your domain](https://resend.com/domains)
## 1. Create a AWS Lambda function
Go to [aws.amazon.com](https://aws.amazon.com) and create a new Lambda function using the Node.js 20.x or later runtime.
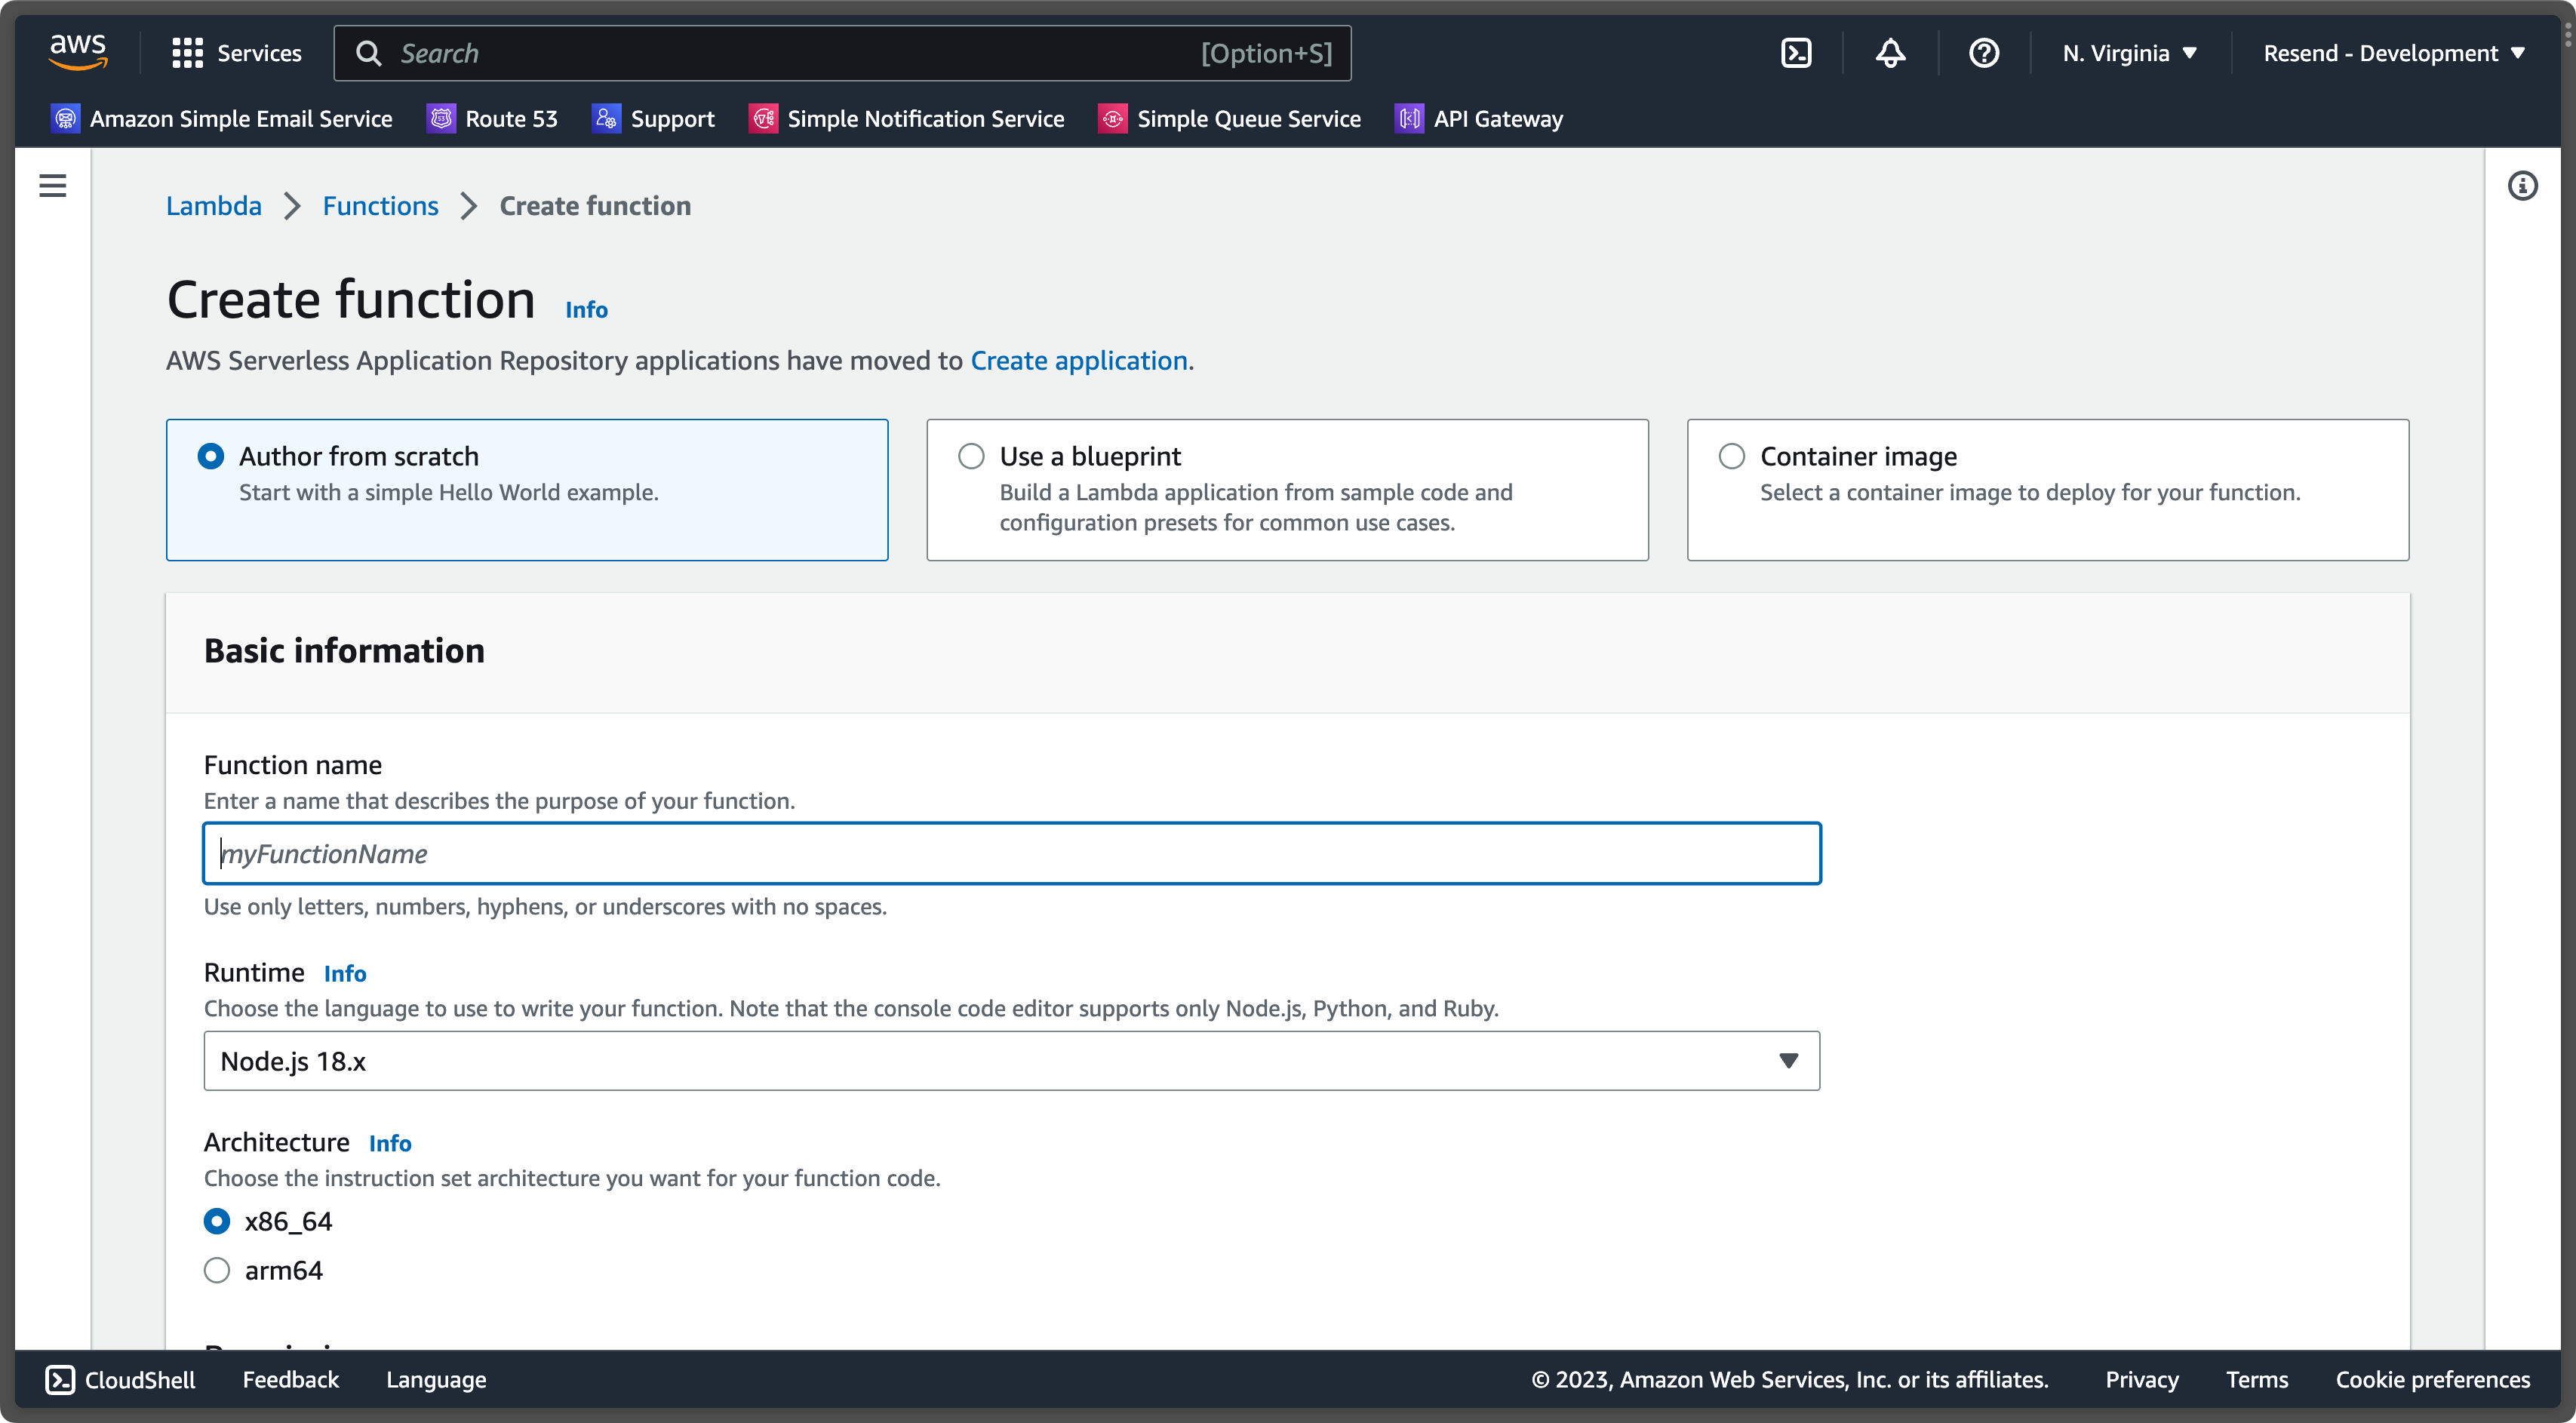 ## 2. Edit the handler function
Paste the following code into the browser editor:
```js index.mjs theme={"theme":{"light":"github-light","dark":"vesper"}}
const RESEND_API_KEY = 're_xxxxxxxxx';
export const handler = async (event) => {
const res = await fetch('https://api.resend.com/emails', {
method: 'POST',
headers: {
'Content-Type': 'application/json',
'Authorization': `Bearer ${RESEND_API_KEY}`,
},
body: JSON.stringify({
from: 'Acme
## 2. Edit the handler function
Paste the following code into the browser editor:
```js index.mjs theme={"theme":{"light":"github-light","dark":"vesper"}}
const RESEND_API_KEY = 're_xxxxxxxxx';
export const handler = async (event) => {
const res = await fetch('https://api.resend.com/emails', {
method: 'POST',
headers: {
'Content-Type': 'application/json',
'Authorization': `Bearer ${RESEND_API_KEY}`,
},
body: JSON.stringify({
from: 'Acme 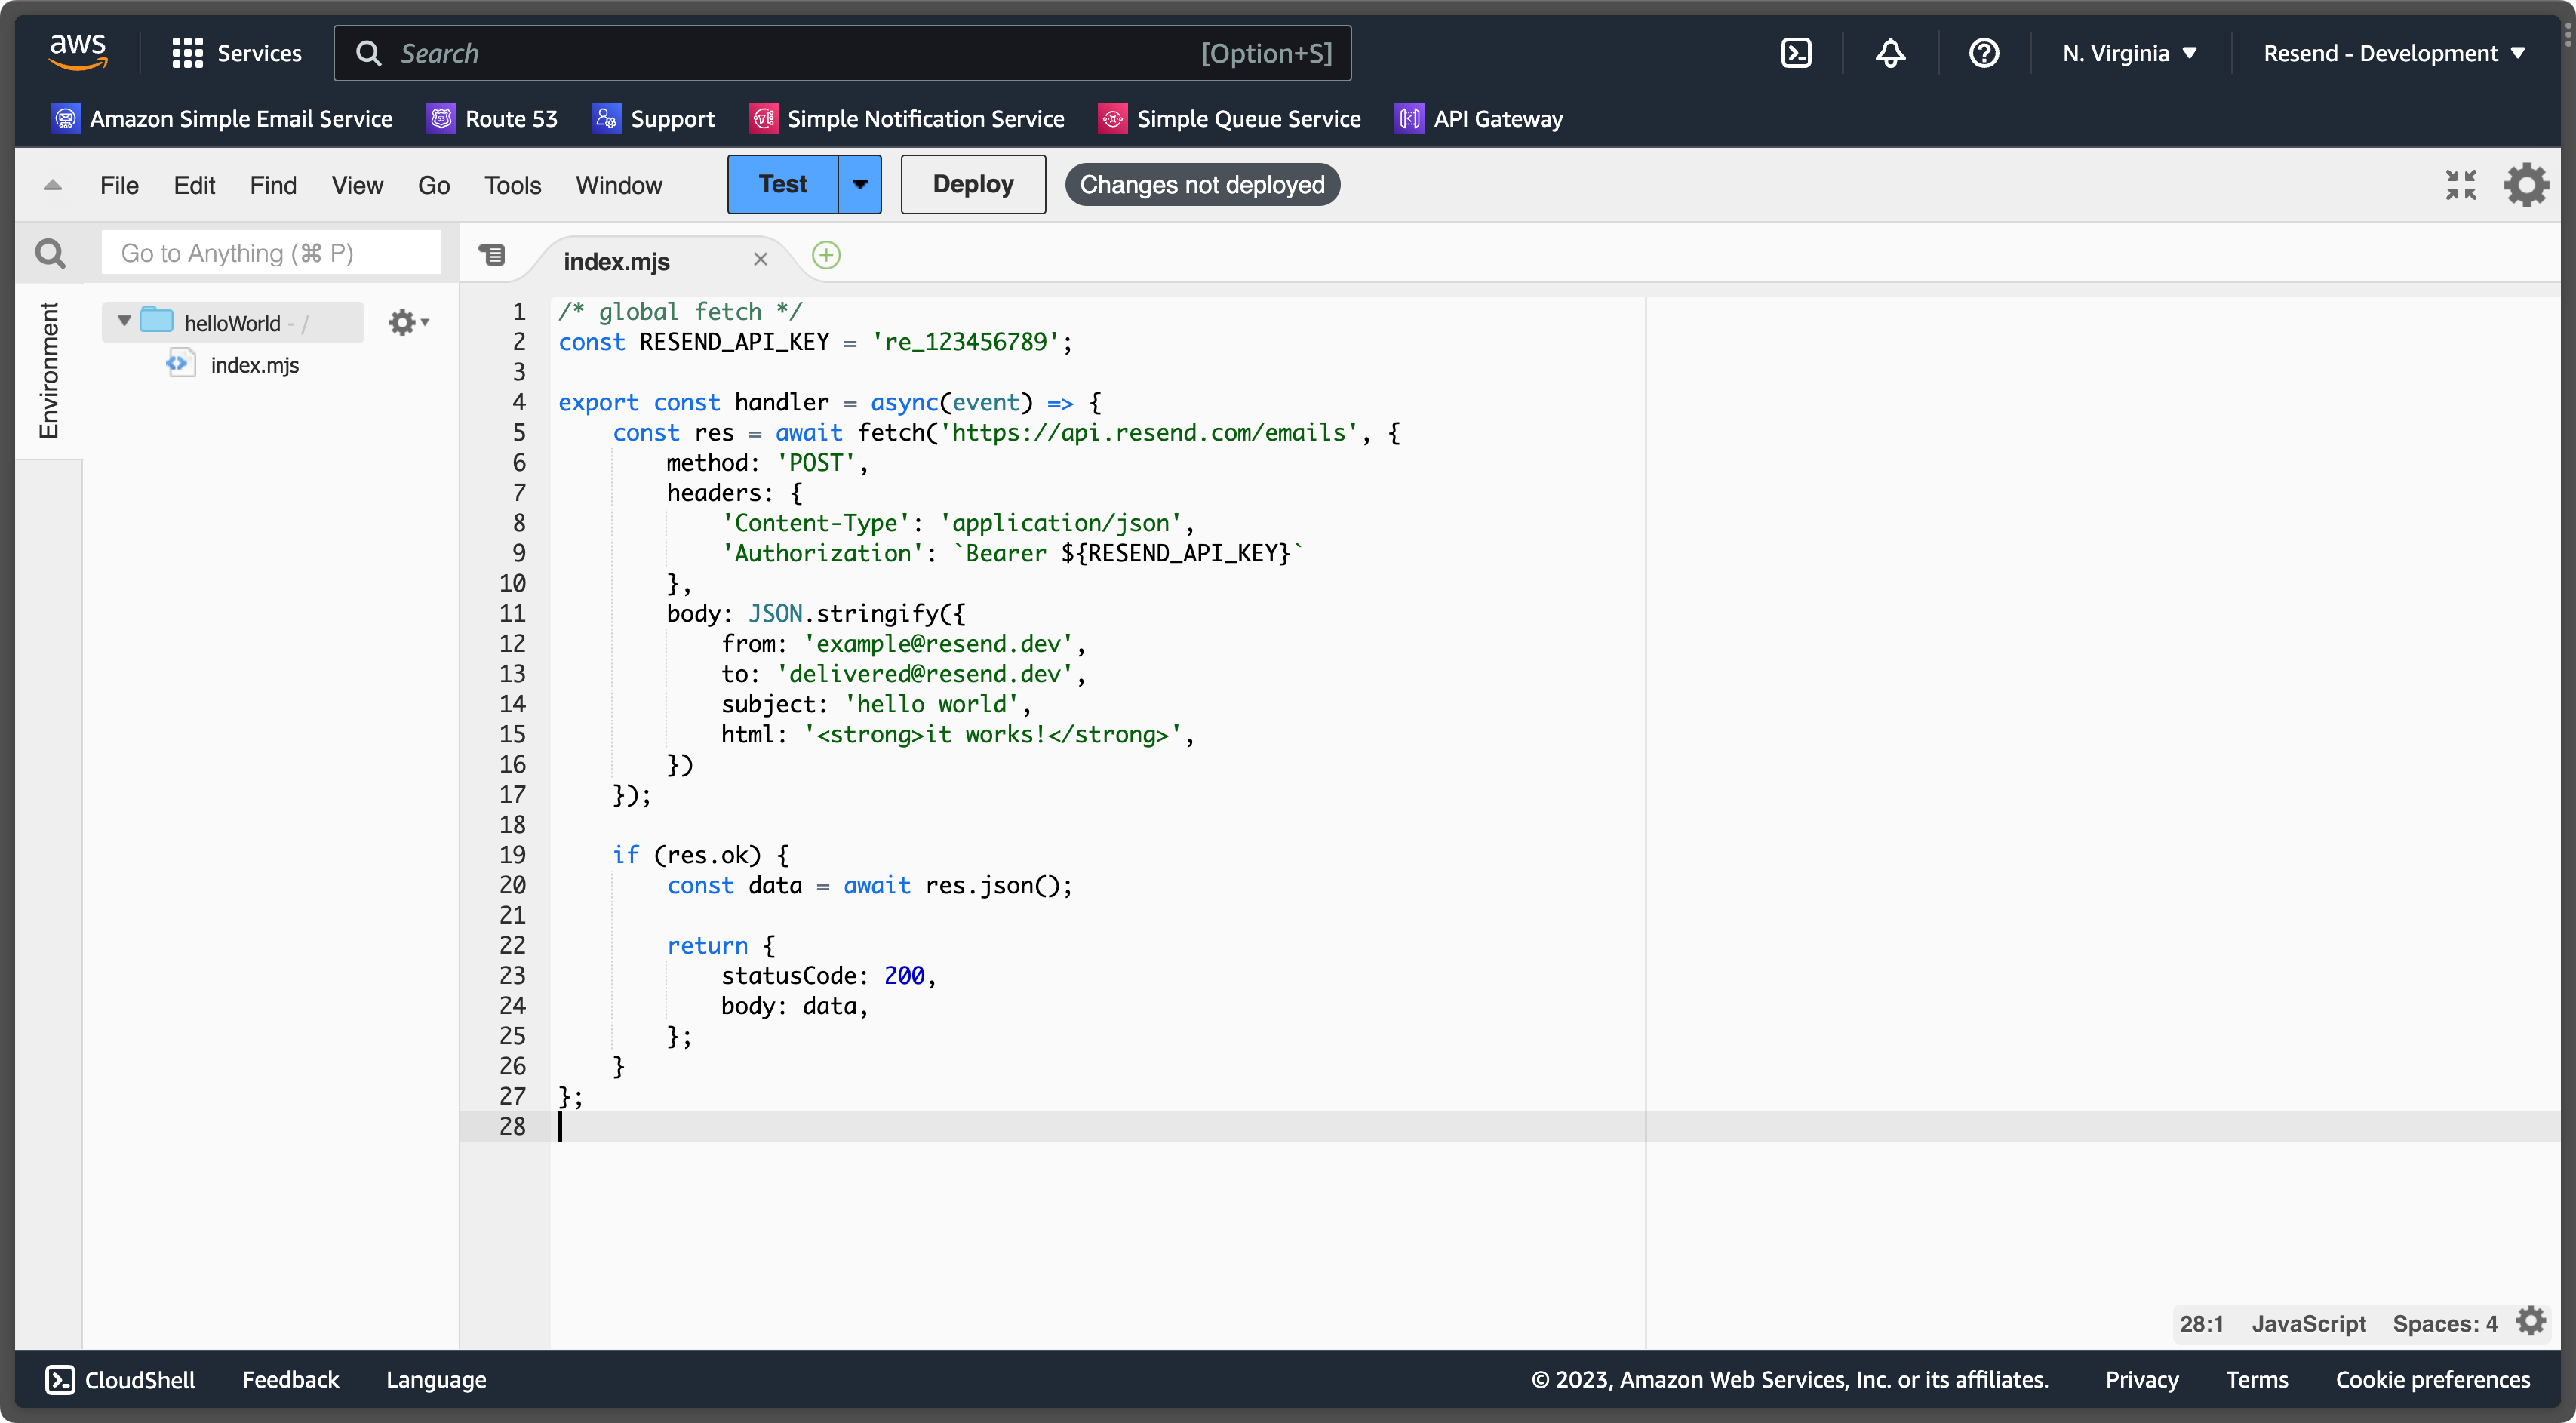 ## 4. Try it yourself
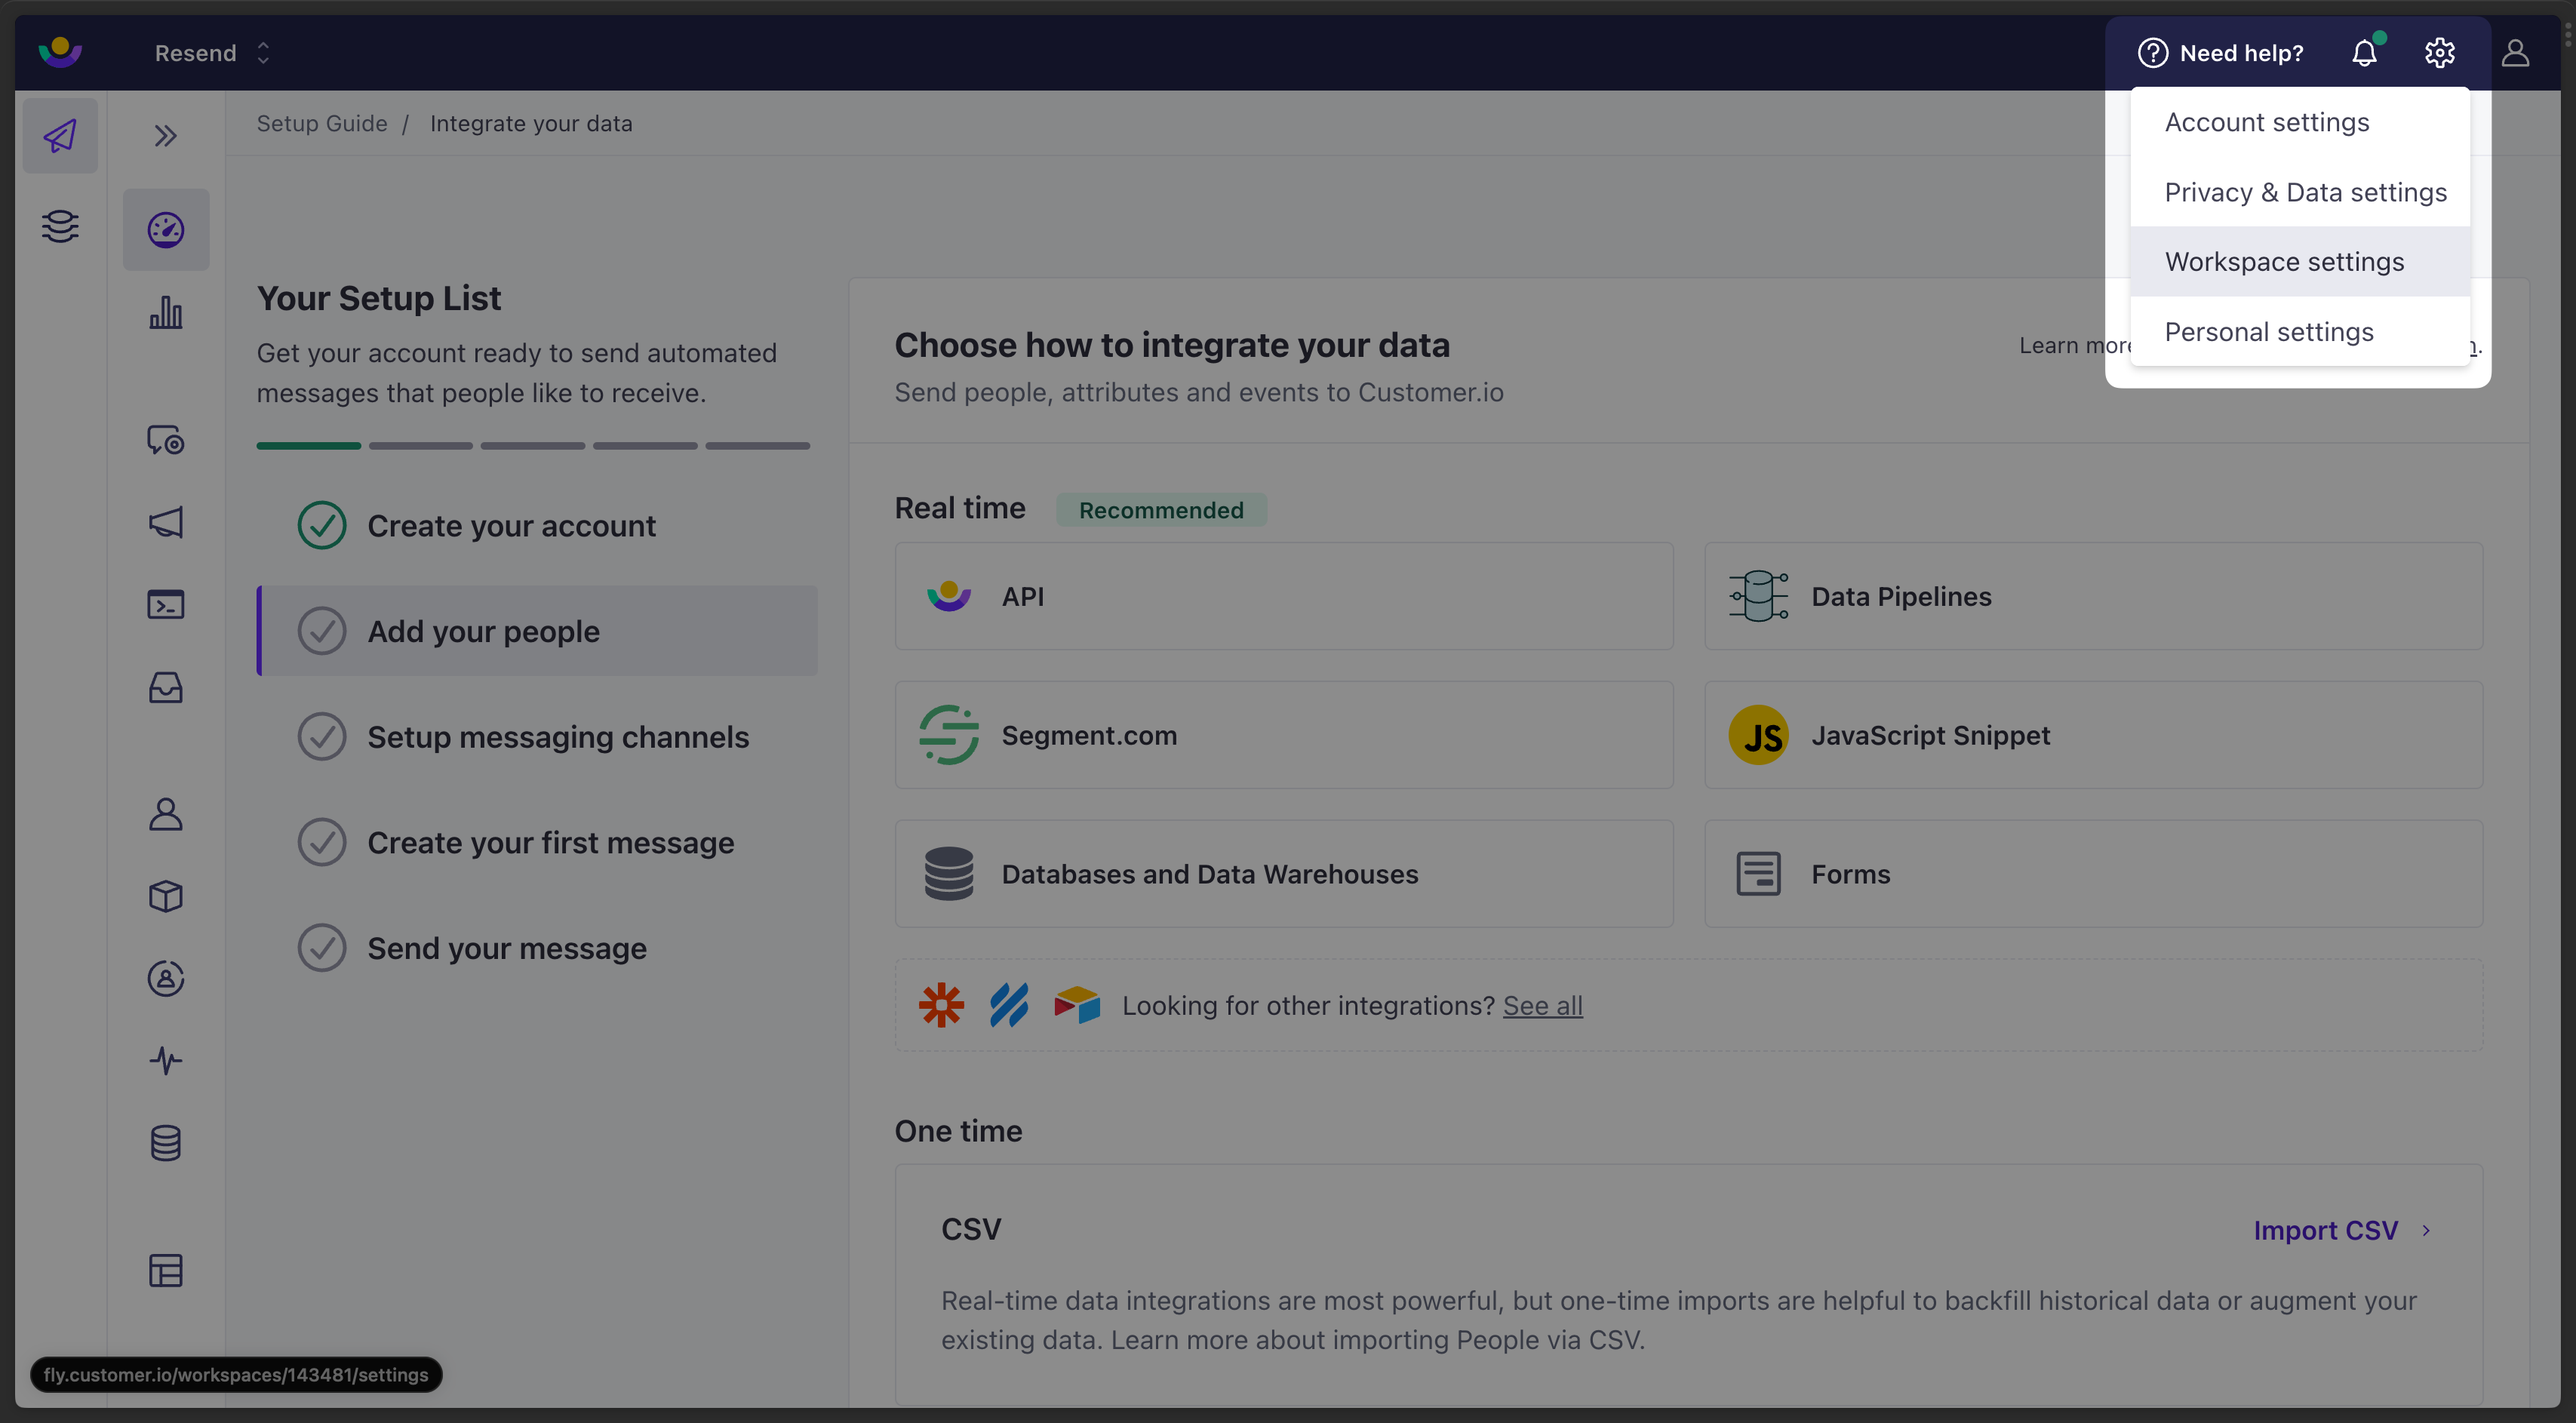 2. Go to the Messaging tab and select **Email**.
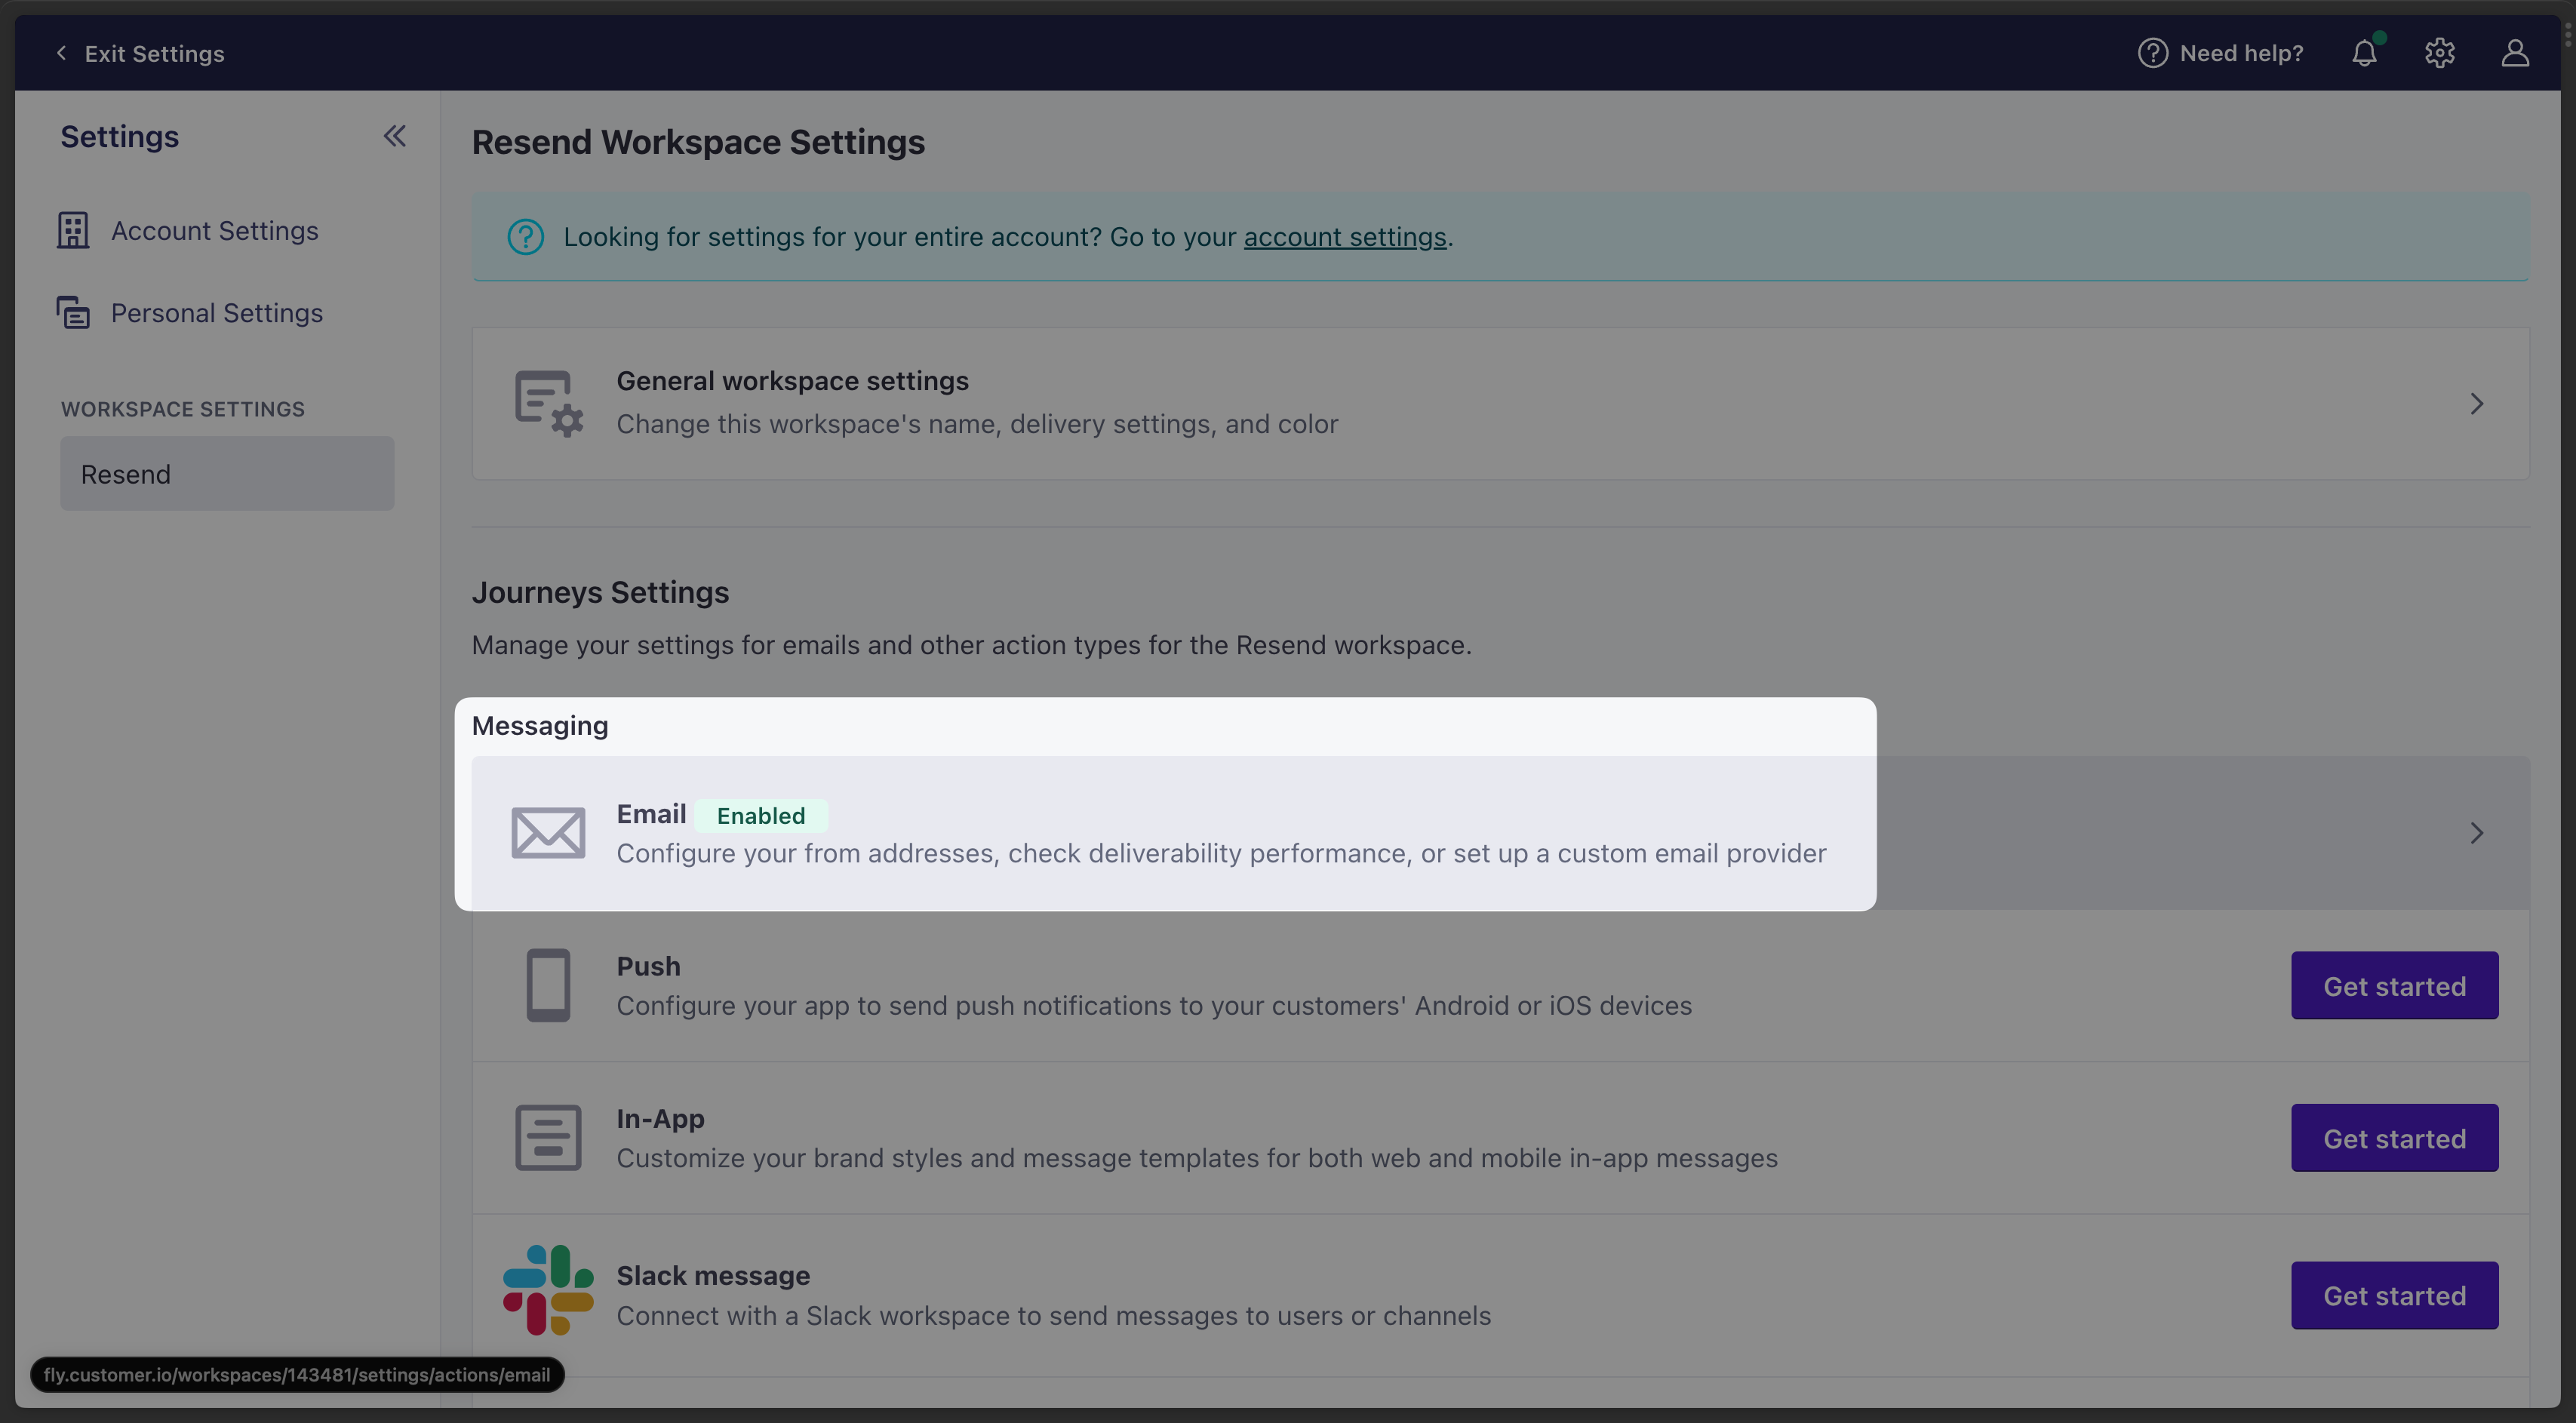 3. Select the **Custom SMTP** tab and click **Add Custom SMTP Server**.
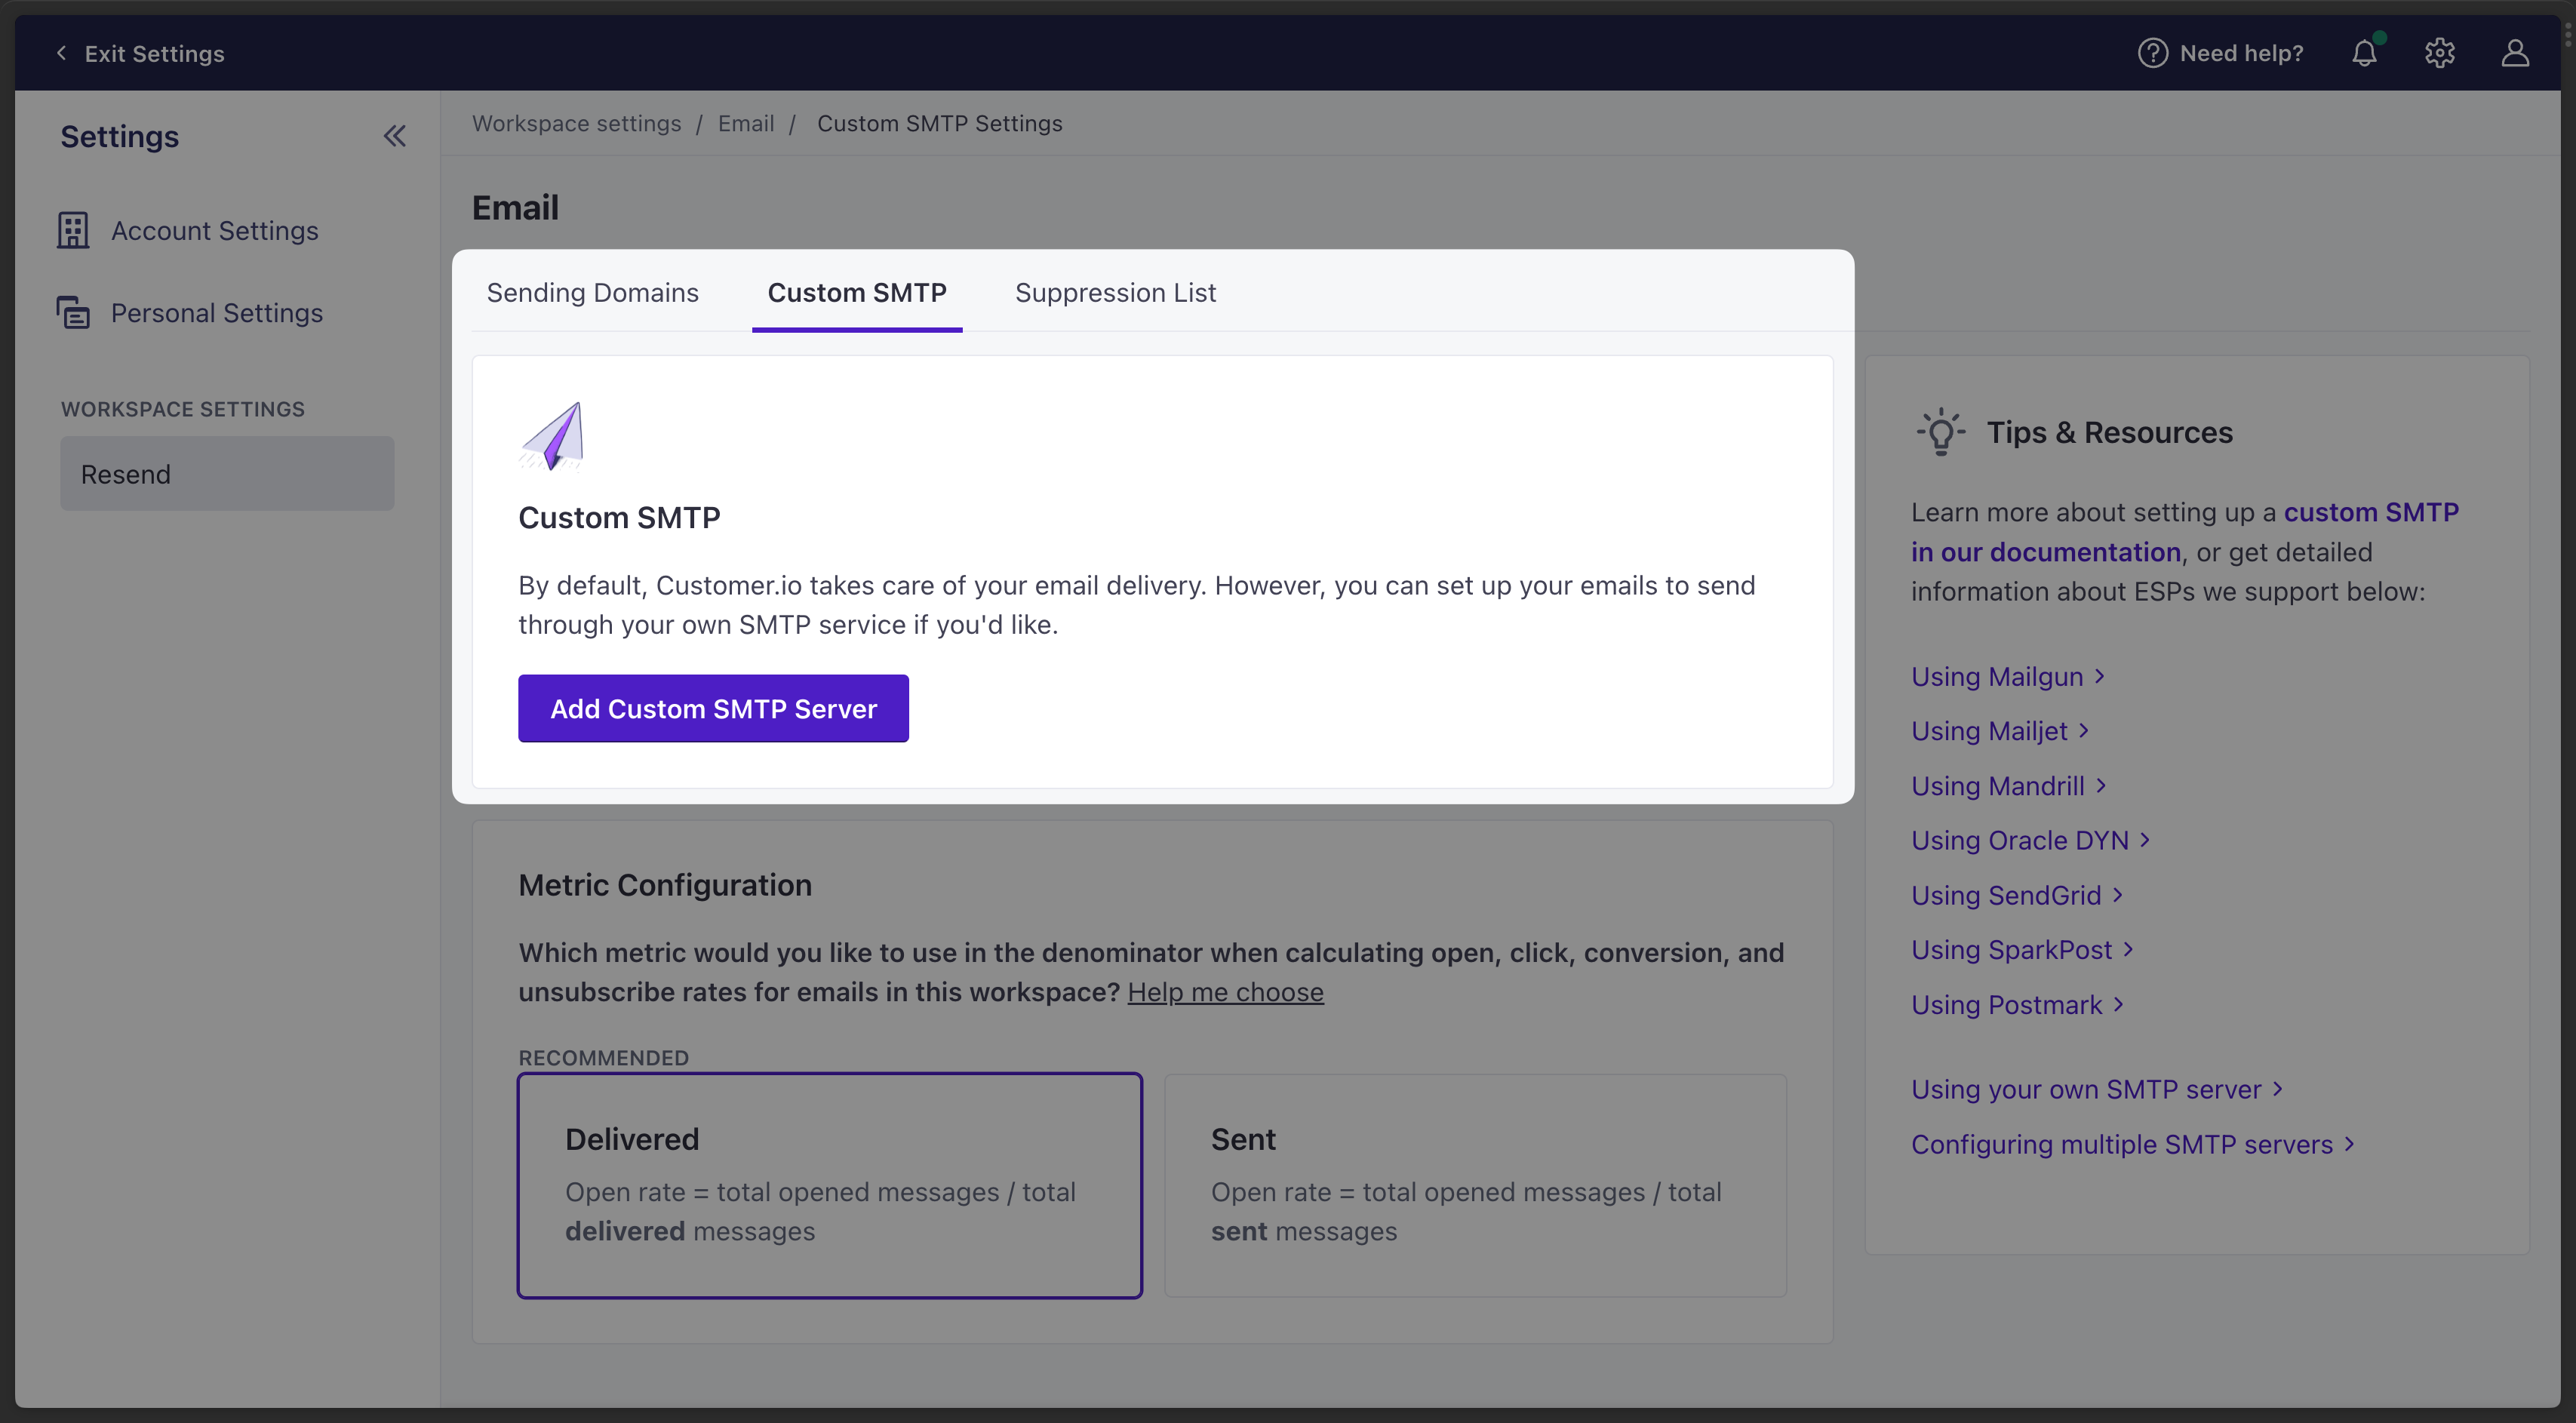 4. Select **Other SMTP** and click **Continue to set up**.
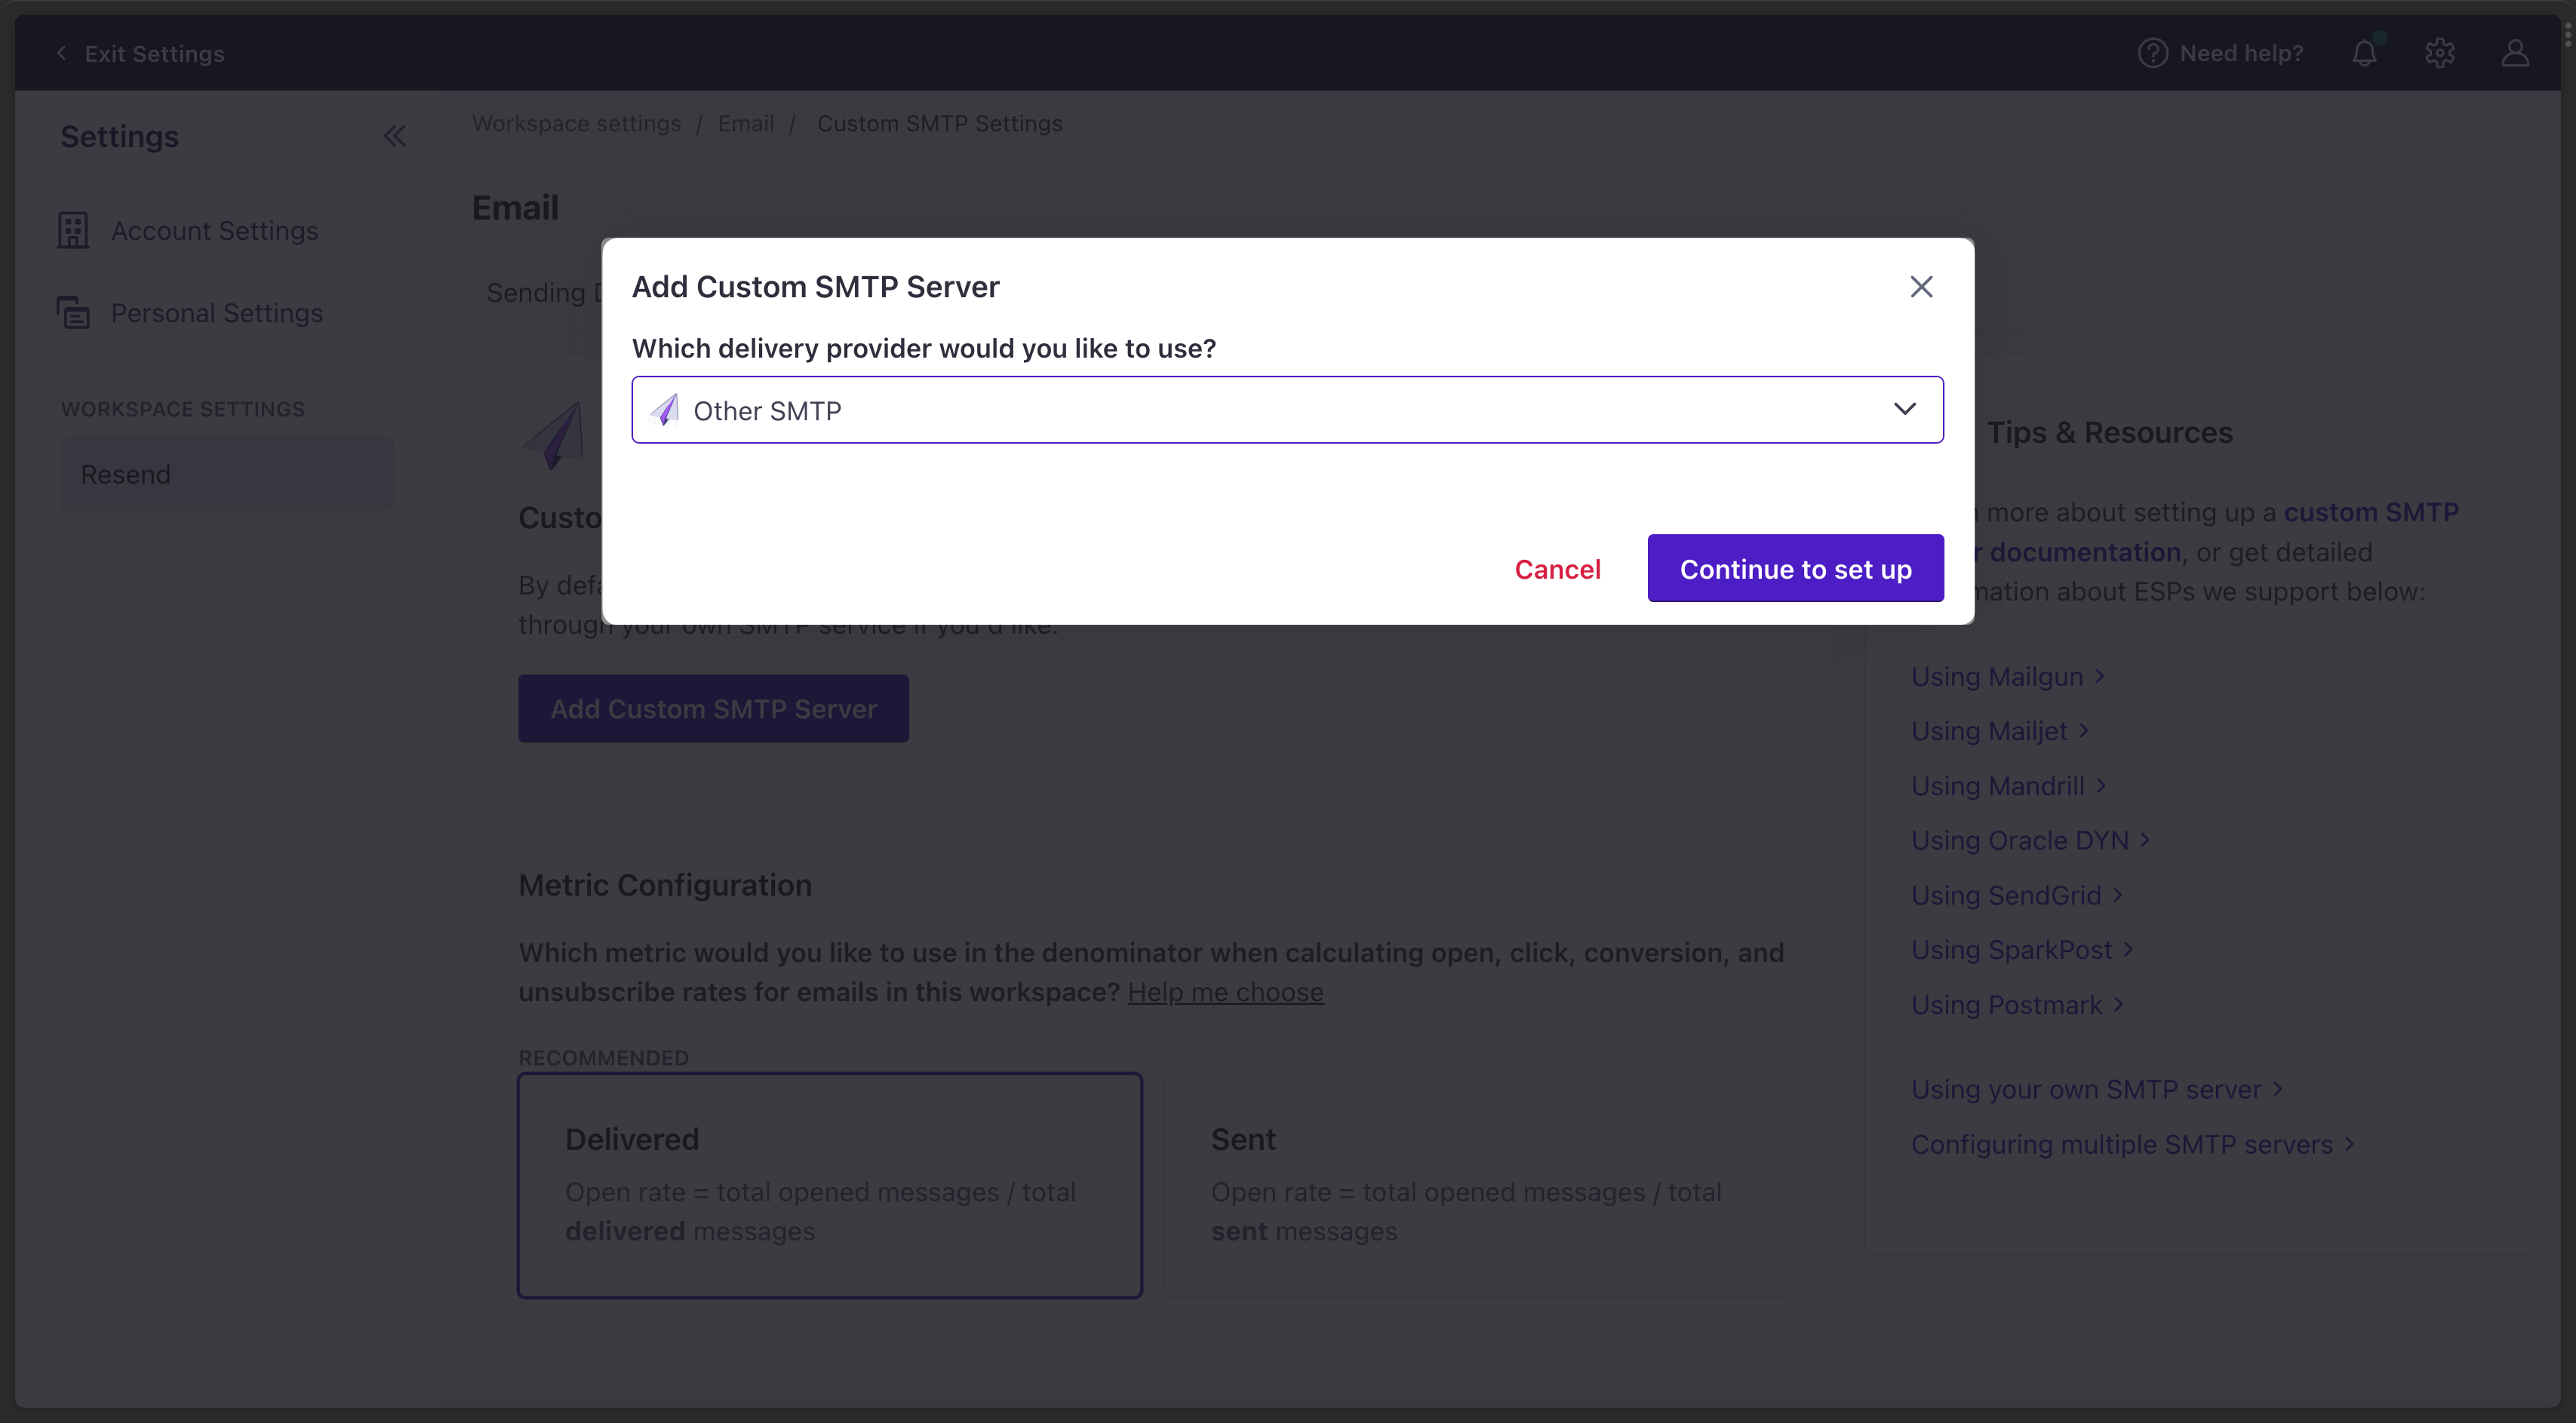 5. Copy-and-paste the SMTP credentials from Resend to Customer.io.
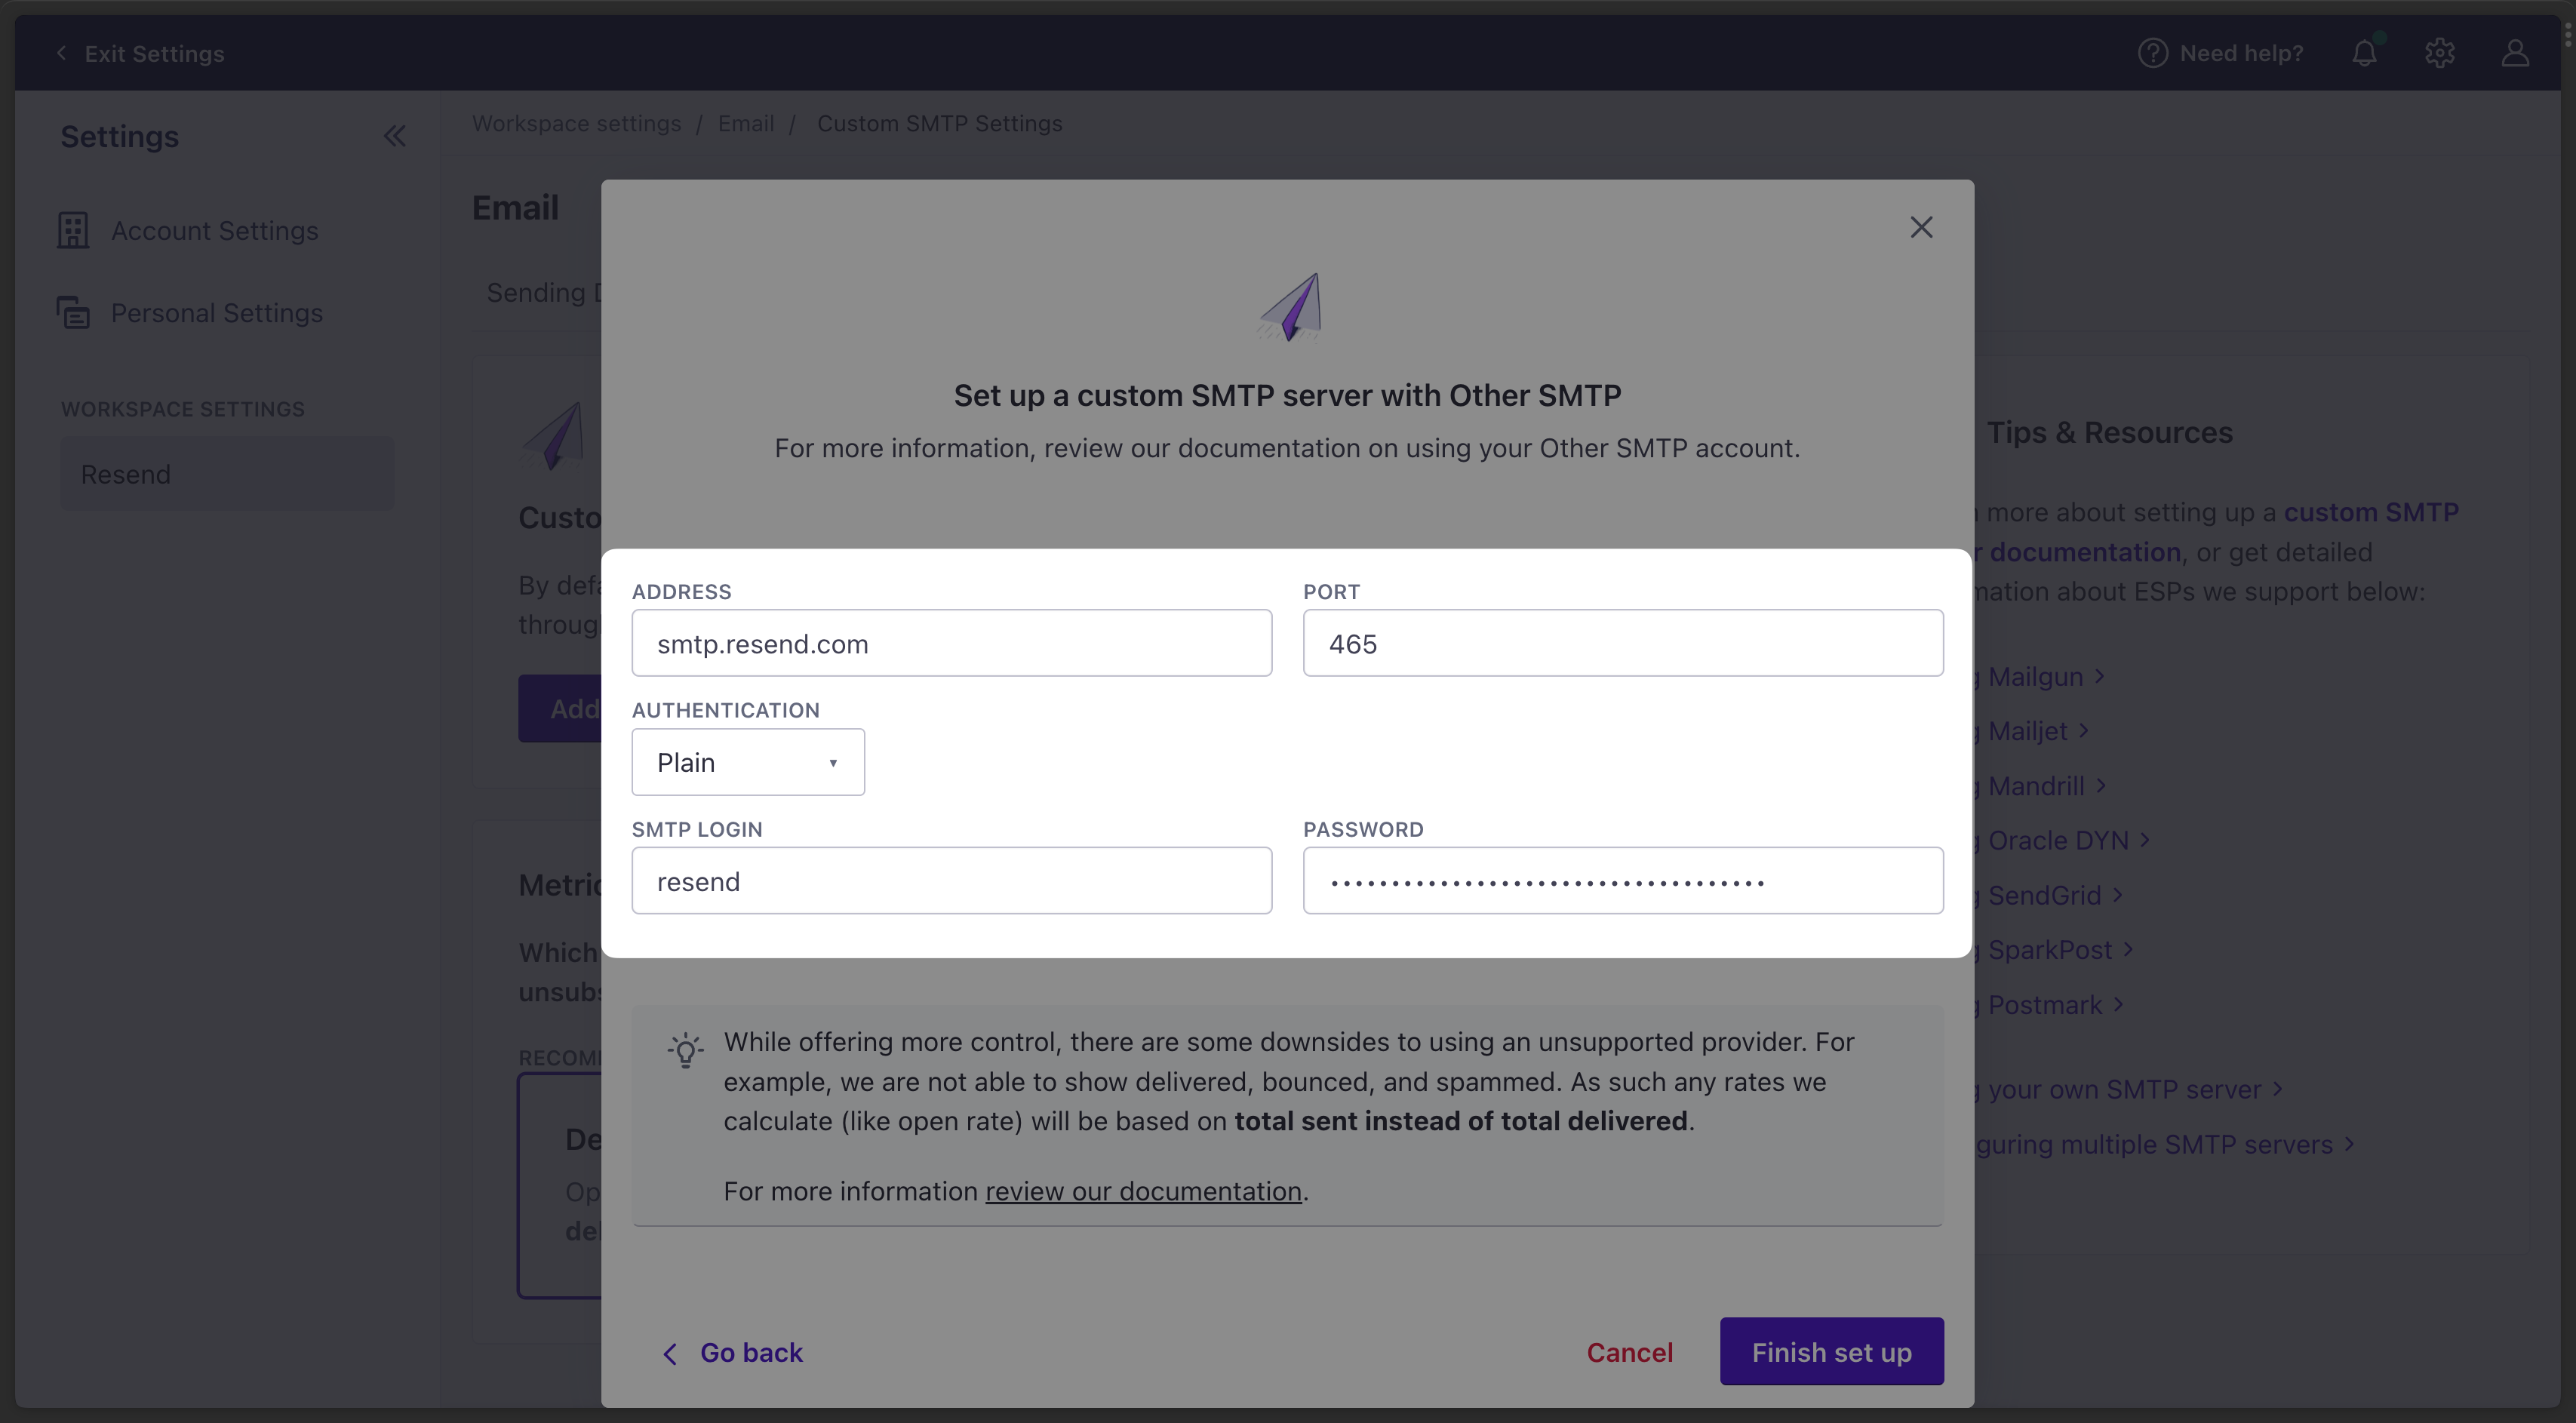 ---
# Source: https://resend.com/docs/send-with-deno-deploy.md
> ## Documentation Index
> Fetch the complete documentation index at: https://resend.com/docs/llms.txt
> Use this file to discover all available pages before exploring further.
# Send emails with Deno Deploy
> Learn how to send your first email using Deno Deploy.
## Prerequisites
To get the most out of this guide, you'll need to:
* [Create an API key](https://resend.com/api-keys)
* [Verify your domain](https://resend.com/domains)
## 1. Create a Deno Deploy project
Go to [dash.deno.com/projects](https://dash.deno.com/projects) and create a new playground project.
---
# Source: https://resend.com/docs/send-with-deno-deploy.md
> ## Documentation Index
> Fetch the complete documentation index at: https://resend.com/docs/llms.txt
> Use this file to discover all available pages before exploring further.
# Send emails with Deno Deploy
> Learn how to send your first email using Deno Deploy.
## Prerequisites
To get the most out of this guide, you'll need to:
* [Create an API key](https://resend.com/api-keys)
* [Verify your domain](https://resend.com/domains)
## 1. Create a Deno Deploy project
Go to [dash.deno.com/projects](https://dash.deno.com/projects) and create a new playground project.
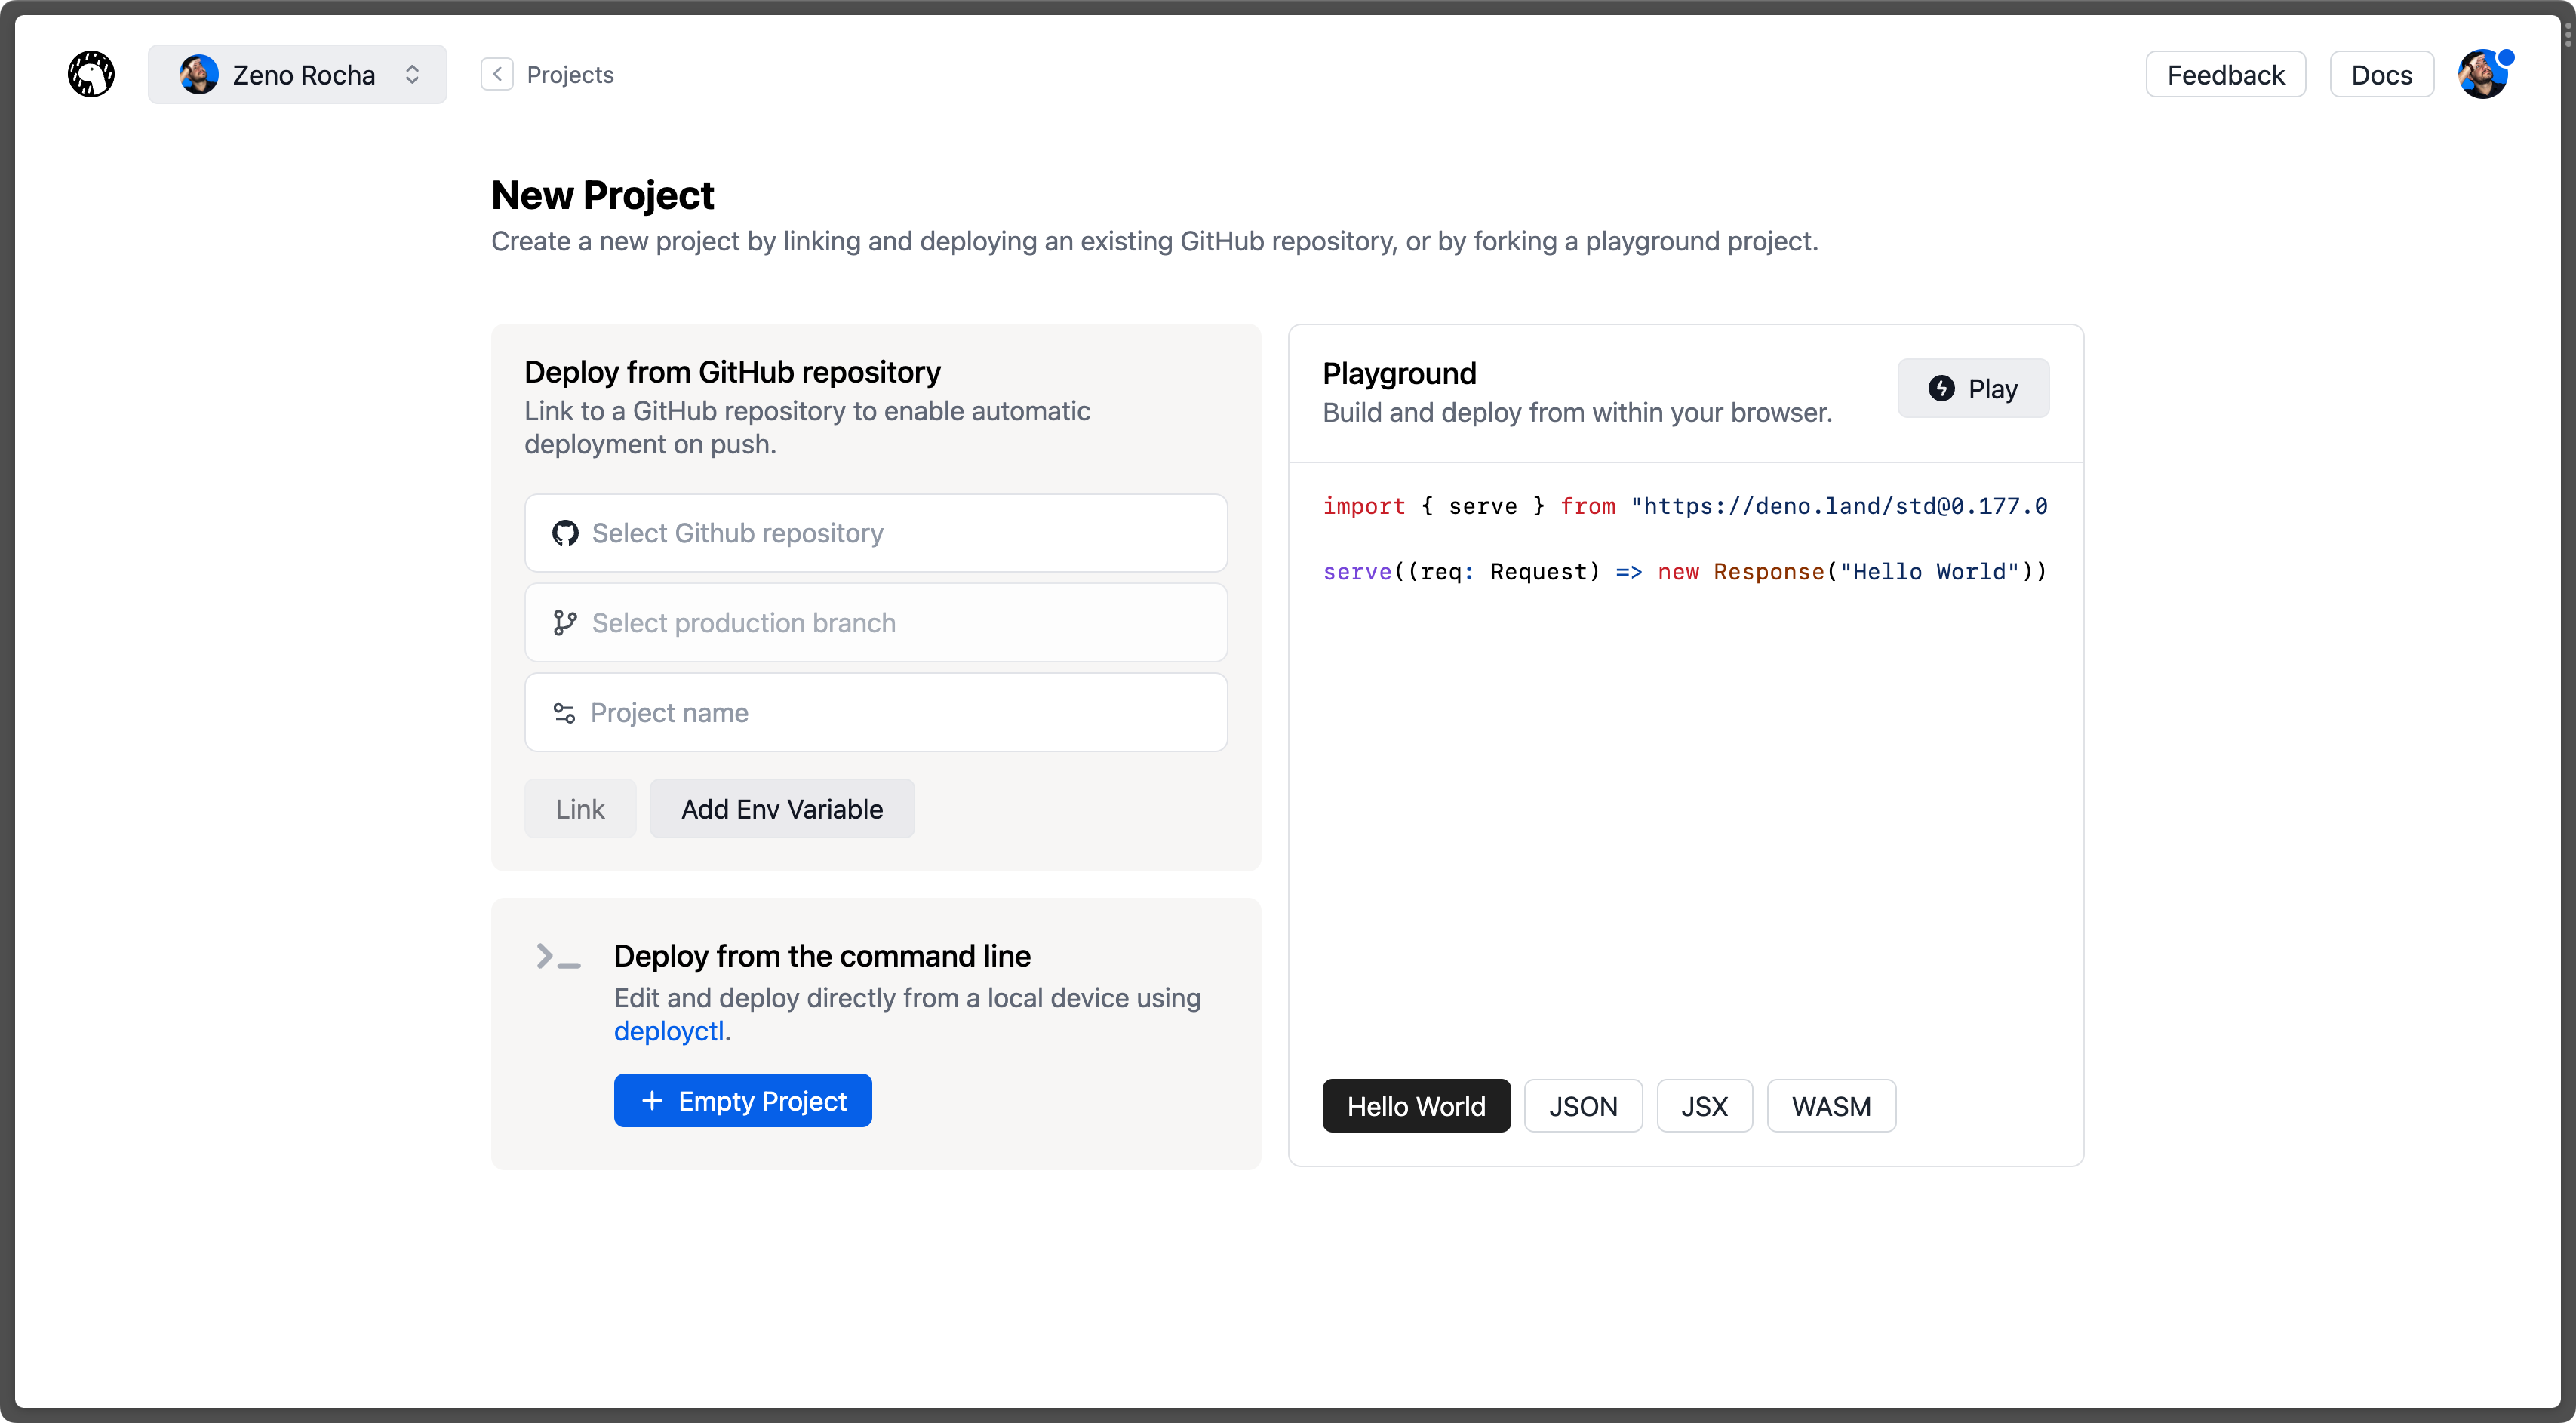 ## 2. Edit the handler function
Paste the following code into the browser editor:
```ts main.ts theme={"theme":{"light":"github-light","dark":"vesper"}}
import { Resend } from 'npm:resend';
const resend = new Resend('re_123456789');
Deno.serve(async () => {
try {
const response = await resend.emails.send({
from: 'Acme
## 2. Edit the handler function
Paste the following code into the browser editor:
```ts main.ts theme={"theme":{"light":"github-light","dark":"vesper"}}
import { Resend } from 'npm:resend';
const resend = new Resend('re_123456789');
Deno.serve(async () => {
try {
const response = await resend.emails.send({
from: 'Acme 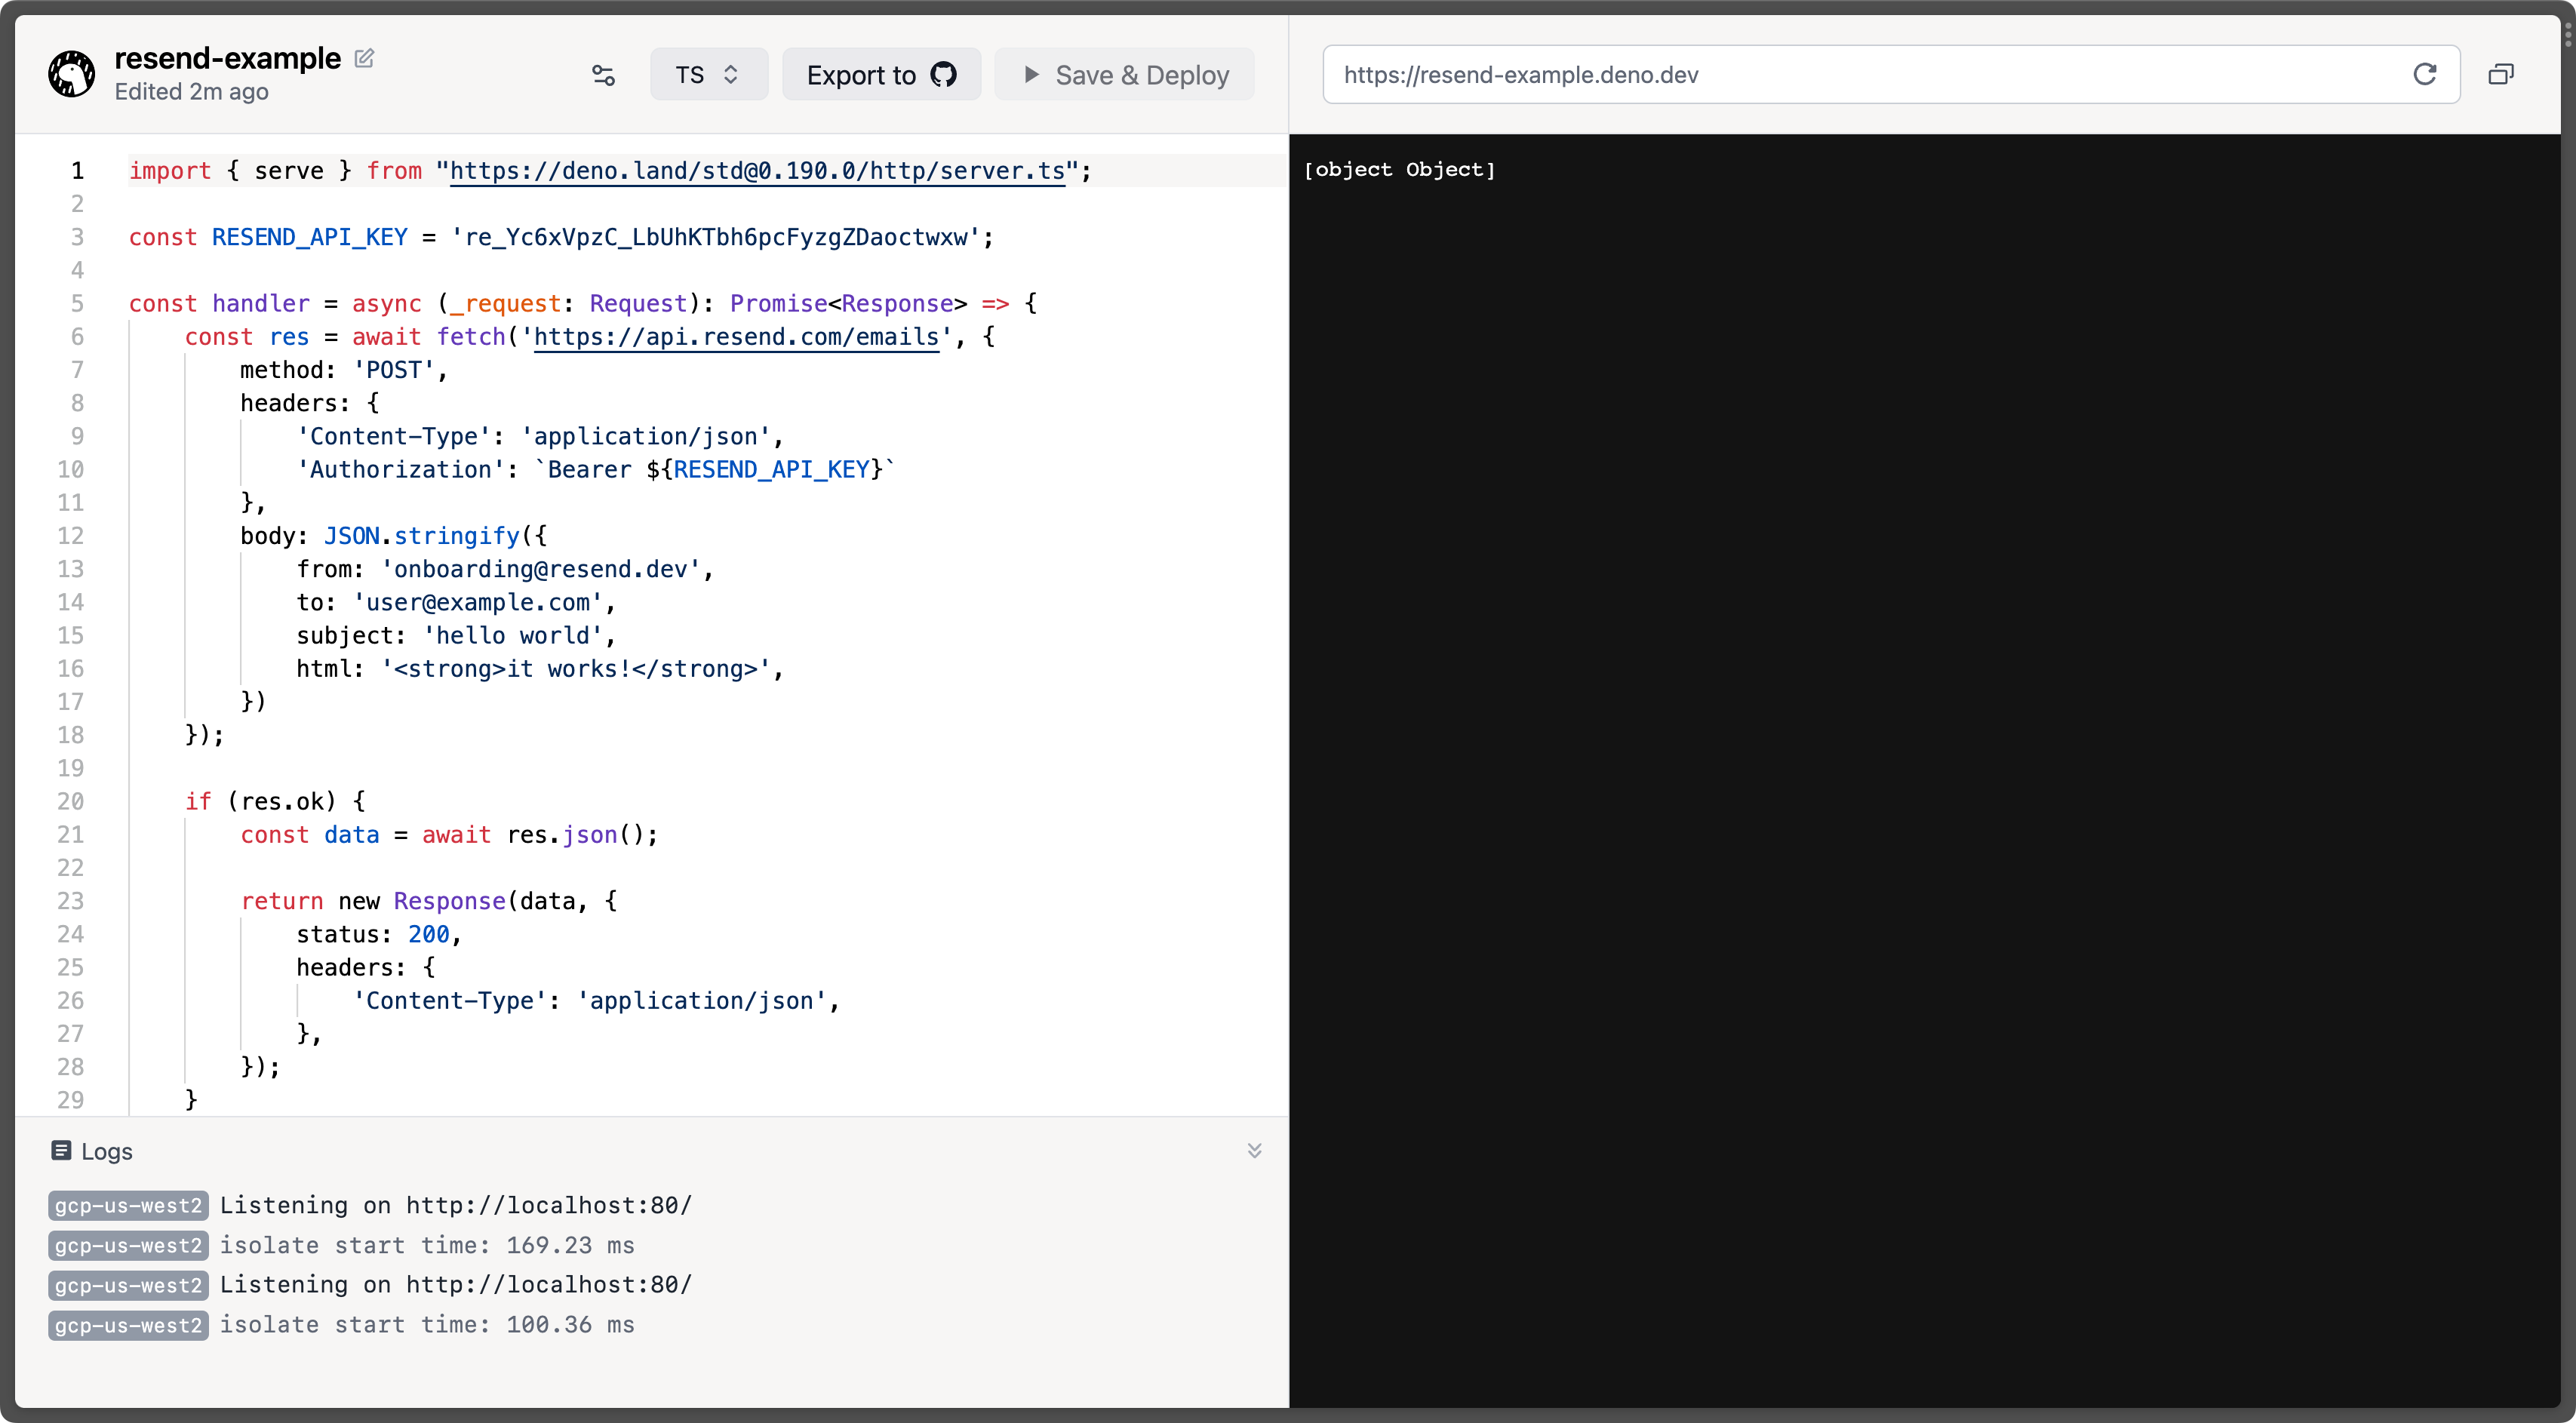 ## 4. Try it yourself
 ### CSRF protection
Webhook requests from Resend need to bypass Laravel's CSRF protection. Be sure to list the URI as an exception in your application's `App\Http\Middleware\VerifyCsrfToken` middleware or list the route outside of the web middleware group:
```php theme={"theme":{"light":"github-light","dark":"vesper"}}
protected $except = [
'resend/*',
];
```
### Verifying webhook signatures
To enable webhook verification, ensure that the `RESEND_WEBHOOK_SECRET` environment variable is set in your application's `.env` file. The **Signing secret** can be retrieved from your [Resend dashboard](https://resend.com/webhooks).
## 5. Try it yourself
### CSRF protection
Webhook requests from Resend need to bypass Laravel's CSRF protection. Be sure to list the URI as an exception in your application's `App\Http\Middleware\VerifyCsrfToken` middleware or list the route outside of the web middleware group:
```php theme={"theme":{"light":"github-light","dark":"vesper"}}
protected $except = [
'resend/*',
];
```
### Verifying webhook signatures
To enable webhook verification, ensure that the `RESEND_WEBHOOK_SECRET` environment variable is set in your application's `.env` file. The **Signing secret** can be retrieved from your [Resend dashboard](https://resend.com/webhooks).
## 5. Try it yourself
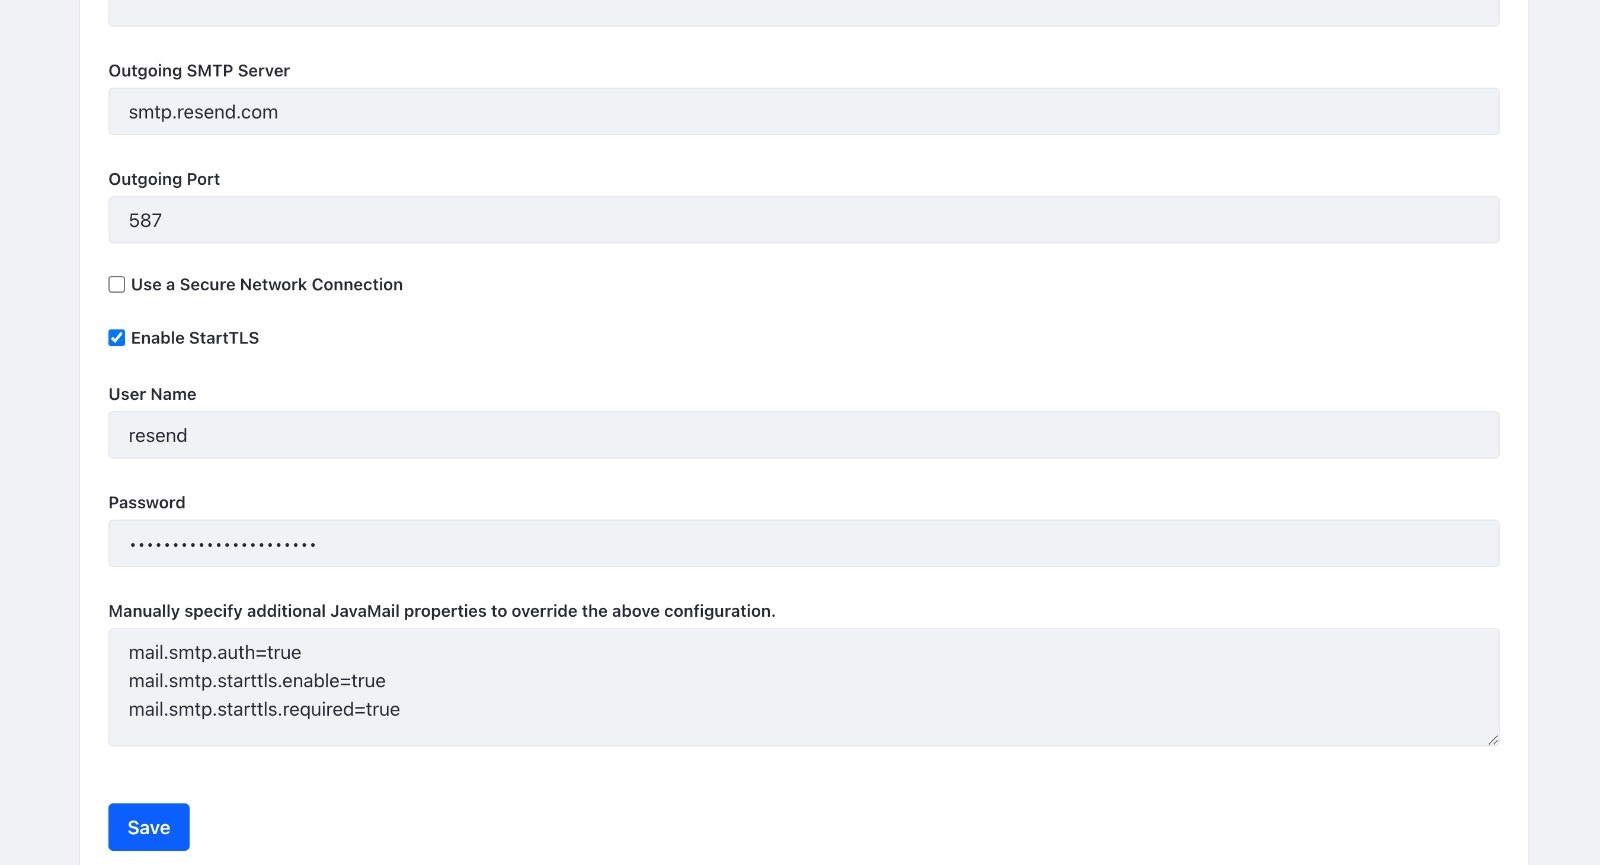 2. Copy-and-paste the SMTP credentials from Resend to Liferay.
* **Outgoing SMTP Server**: `smtp.resend.com`
* **Outgoing Port**: `465`
* **Enable StartTLS**: `True`
* **User Name**: `resend`
* **Password**: `YOUR_API_KEY`
Make sure to replace `YOUR_API_KEY` with an existing key or create a new [API Key](https://resend.com/api-keys).
For the additional JavaMail properties, you can use:
```
mail.smtp.auth=true
mail.smtp.starttls.enable=true
mail.smtp.starttls.required=true
```
---
# Source: https://resend.com/docs/send-with-metabase-smtp.md
> ## Documentation Index
> Fetch the complete documentation index at: https://resend.com/docs/llms.txt
> Use this file to discover all available pages before exploring further.
# Send emails using Metabase with SMTP
> Learn how to integrate Metabase with Resend SMTP.
### Prerequisites
To get the most out of this guide, you'll need to:
* [Create an API key](https://resend.com/api-keys)
* [Verify your domain](https://resend.com/domains)
## 1. Get the Resend SMTP credentials
When configuring your SMTP integration, you'll need to use the following credentials:
* **Host**: `smtp.resend.com`
* **Port**: `465`
* **Username**: `resend`
* **Password**: `YOUR_API_KEY`
## 2. Integrate with Metabase SMTP
After logging into your [Metabase Cloud](https://www.metabase.com/cloud/login) account, you’ll need to enable the SMTP integration.
1. From your Metabase Cloud Admin Panel, go to **Settings > Email** in the left menu. You should see the form below.
2. Copy-and-paste the SMTP credentials from Resend to Liferay.
* **Outgoing SMTP Server**: `smtp.resend.com`
* **Outgoing Port**: `465`
* **Enable StartTLS**: `True`
* **User Name**: `resend`
* **Password**: `YOUR_API_KEY`
Make sure to replace `YOUR_API_KEY` with an existing key or create a new [API Key](https://resend.com/api-keys).
For the additional JavaMail properties, you can use:
```
mail.smtp.auth=true
mail.smtp.starttls.enable=true
mail.smtp.starttls.required=true
```
---
# Source: https://resend.com/docs/send-with-metabase-smtp.md
> ## Documentation Index
> Fetch the complete documentation index at: https://resend.com/docs/llms.txt
> Use this file to discover all available pages before exploring further.
# Send emails using Metabase with SMTP
> Learn how to integrate Metabase with Resend SMTP.
### Prerequisites
To get the most out of this guide, you'll need to:
* [Create an API key](https://resend.com/api-keys)
* [Verify your domain](https://resend.com/domains)
## 1. Get the Resend SMTP credentials
When configuring your SMTP integration, you'll need to use the following credentials:
* **Host**: `smtp.resend.com`
* **Port**: `465`
* **Username**: `resend`
* **Password**: `YOUR_API_KEY`
## 2. Integrate with Metabase SMTP
After logging into your [Metabase Cloud](https://www.metabase.com/cloud/login) account, you’ll need to enable the SMTP integration.
1. From your Metabase Cloud Admin Panel, go to **Settings > Email** in the left menu. You should see the form below.
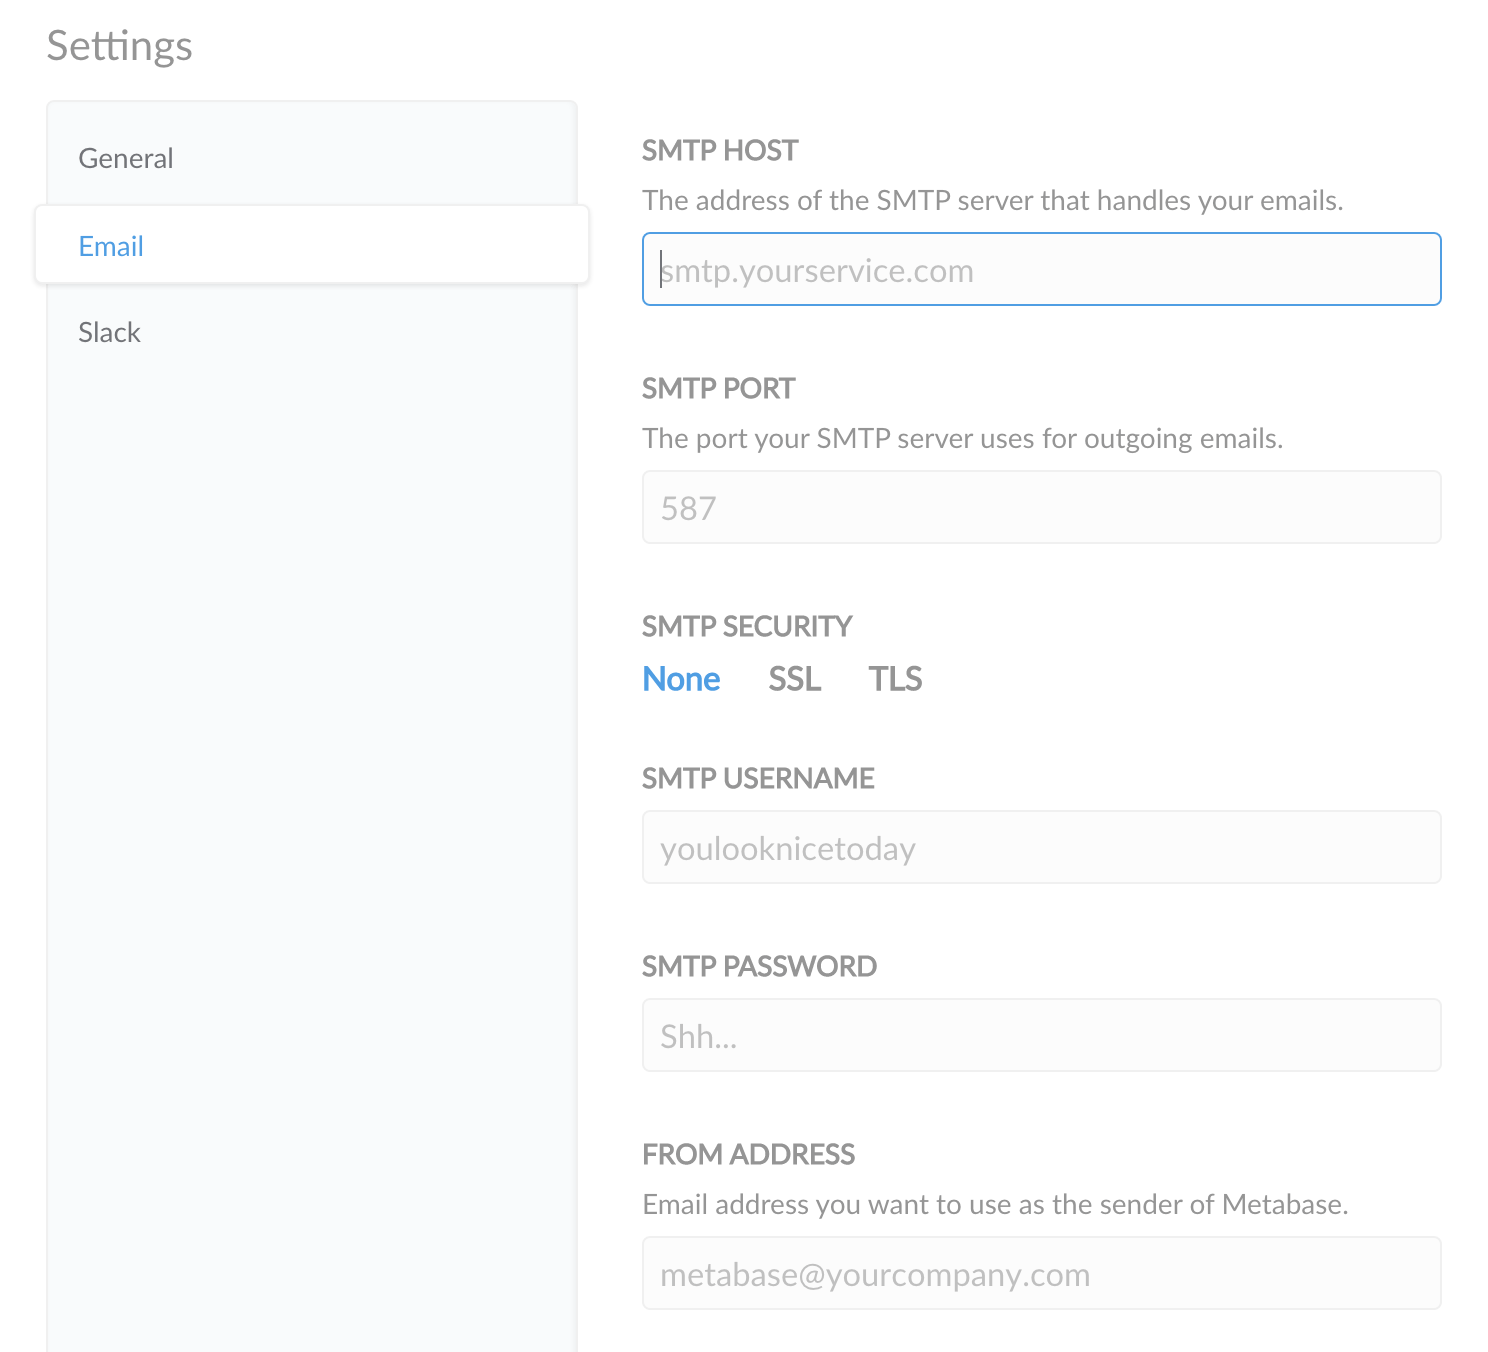 2. Copy-and-paste the SMTP credentials from Resend to Metabase Cloud. Finally, click the **Save** button and all of your emails will be sent through Resend.
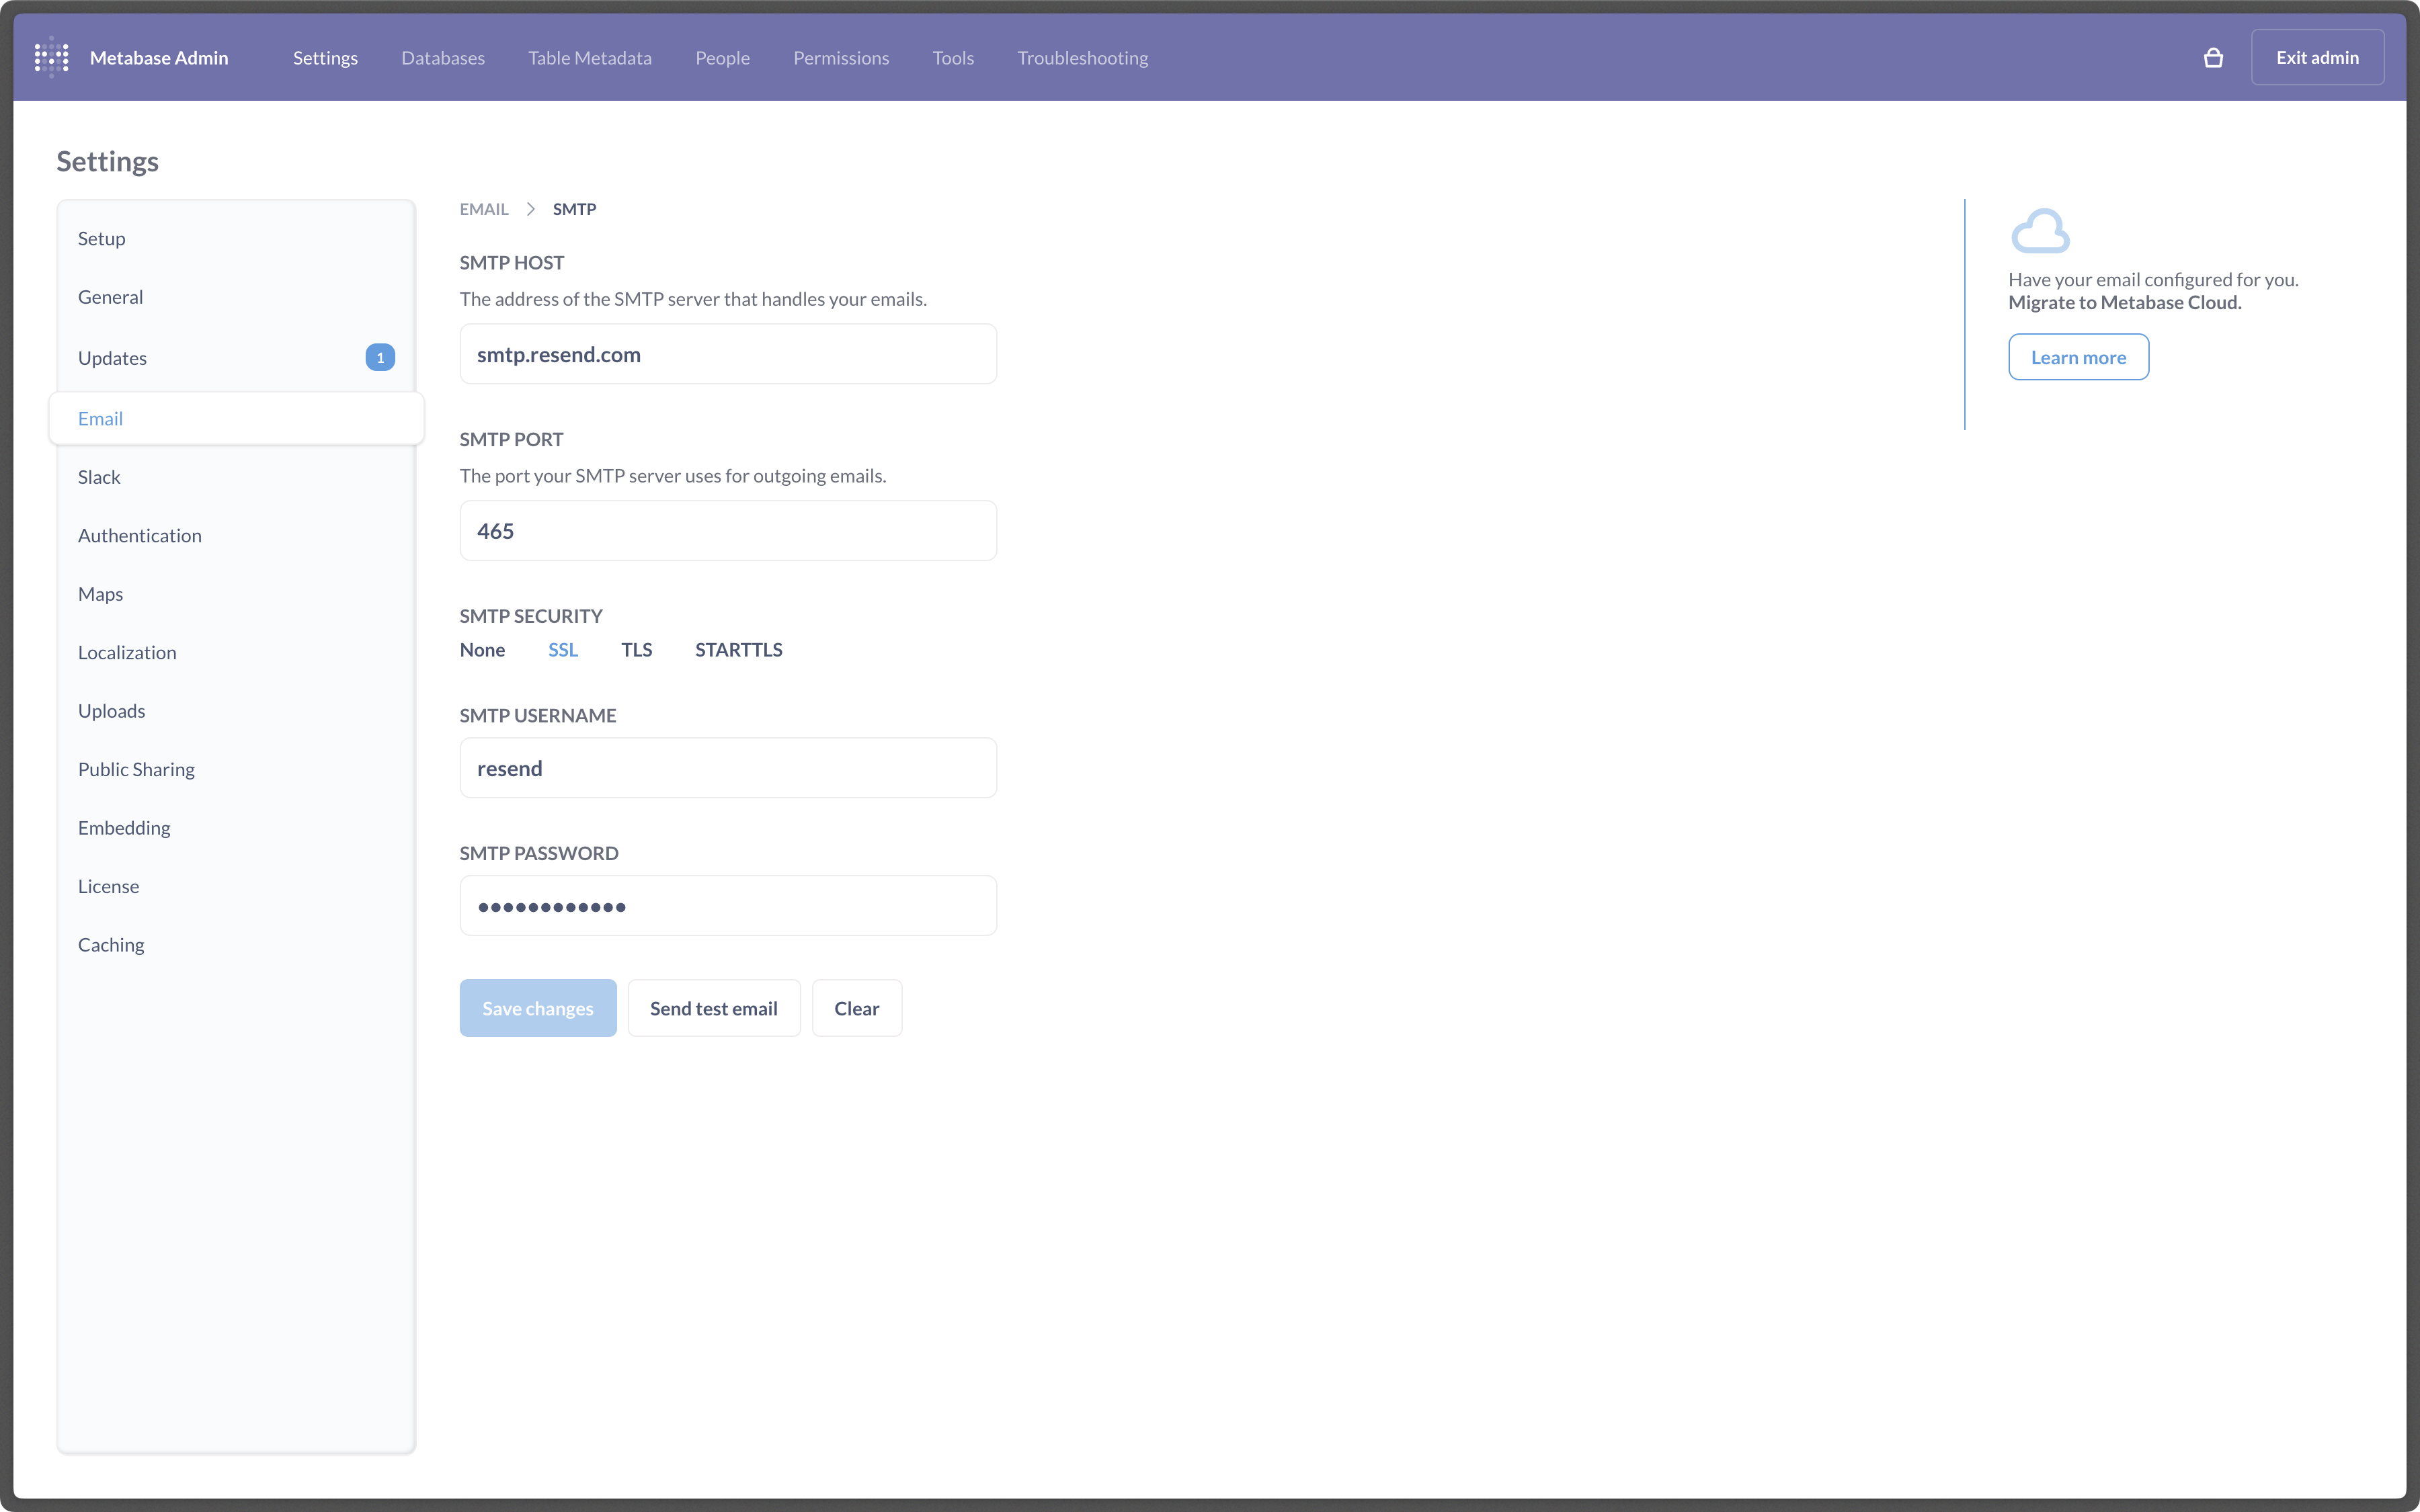 ---
# Source: https://resend.com/docs/send-with-nextauth-smtp.md
> ## Documentation Index
> Fetch the complete documentation index at: https://resend.com/docs/llms.txt
> Use this file to discover all available pages before exploring further.
# Send emails using NextAuth with SMTP
> Learn how to send your first email using NextAuth.
## Prerequisites
To get the most out of this guide, you'll need to:
* [Create an API key](https://resend.com/api-keys)
* [Verify your domain](https://resend.com/domains)
## 1. Install
Install the [NextAuth](https://next-auth.js.org/getting-started/example#install-nextauth) package.
---
# Source: https://resend.com/docs/send-with-nextauth-smtp.md
> ## Documentation Index
> Fetch the complete documentation index at: https://resend.com/docs/llms.txt
> Use this file to discover all available pages before exploring further.
# Send emails using NextAuth with SMTP
> Learn how to send your first email using NextAuth.
## Prerequisites
To get the most out of this guide, you'll need to:
* [Create an API key](https://resend.com/api-keys)
* [Verify your domain](https://resend.com/domains)
## 1. Install
Install the [NextAuth](https://next-auth.js.org/getting-started/example#install-nextauth) package.
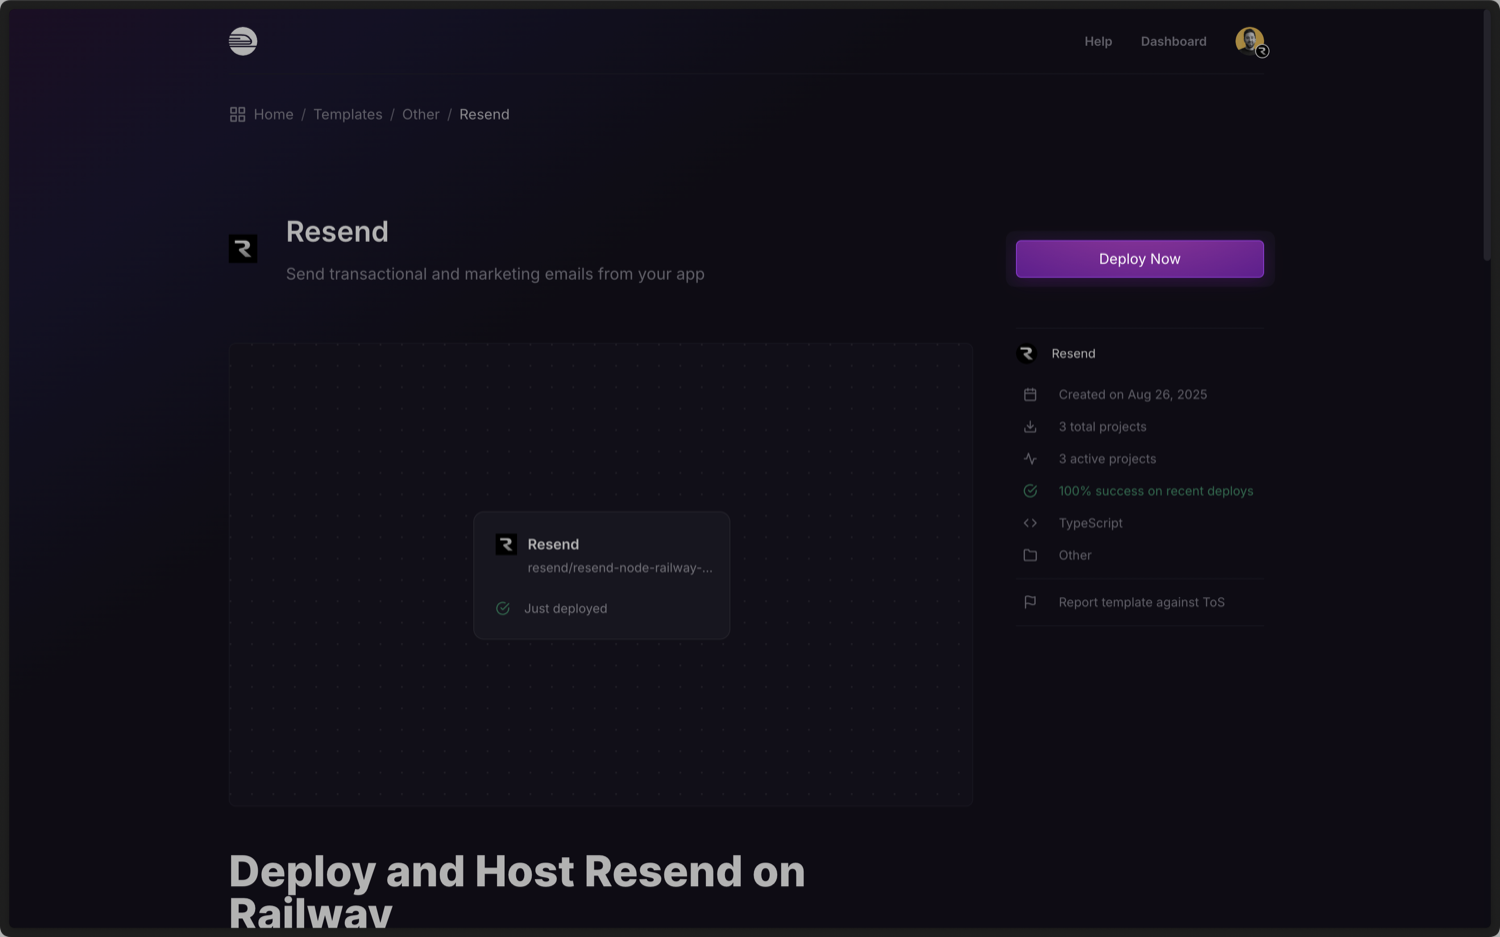 ## 2. Add your API key
[Add an API key](https://resend.com/api-keys) from Resend and click **Deploy**.
## 2. Add your API key
[Add an API key](https://resend.com/api-keys) from Resend and click **Deploy**.
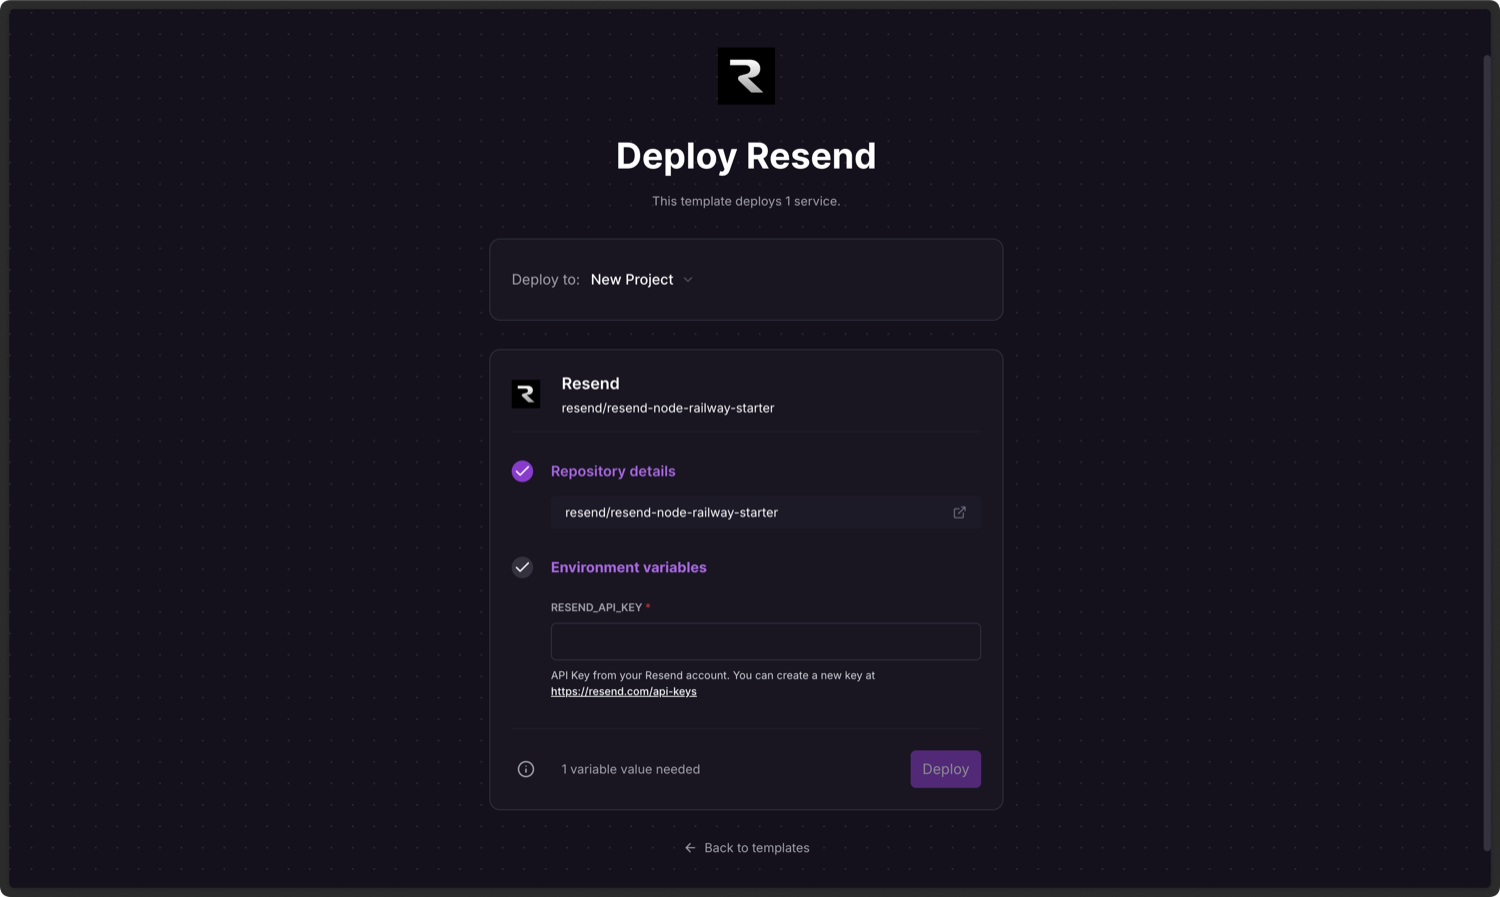 ## 3. Send your first email
Once your deployment finishes, click the deploy URL to open the app and send your first email.
## 3. Send your first email
Once your deployment finishes, click the deploy URL to open the app and send your first email.
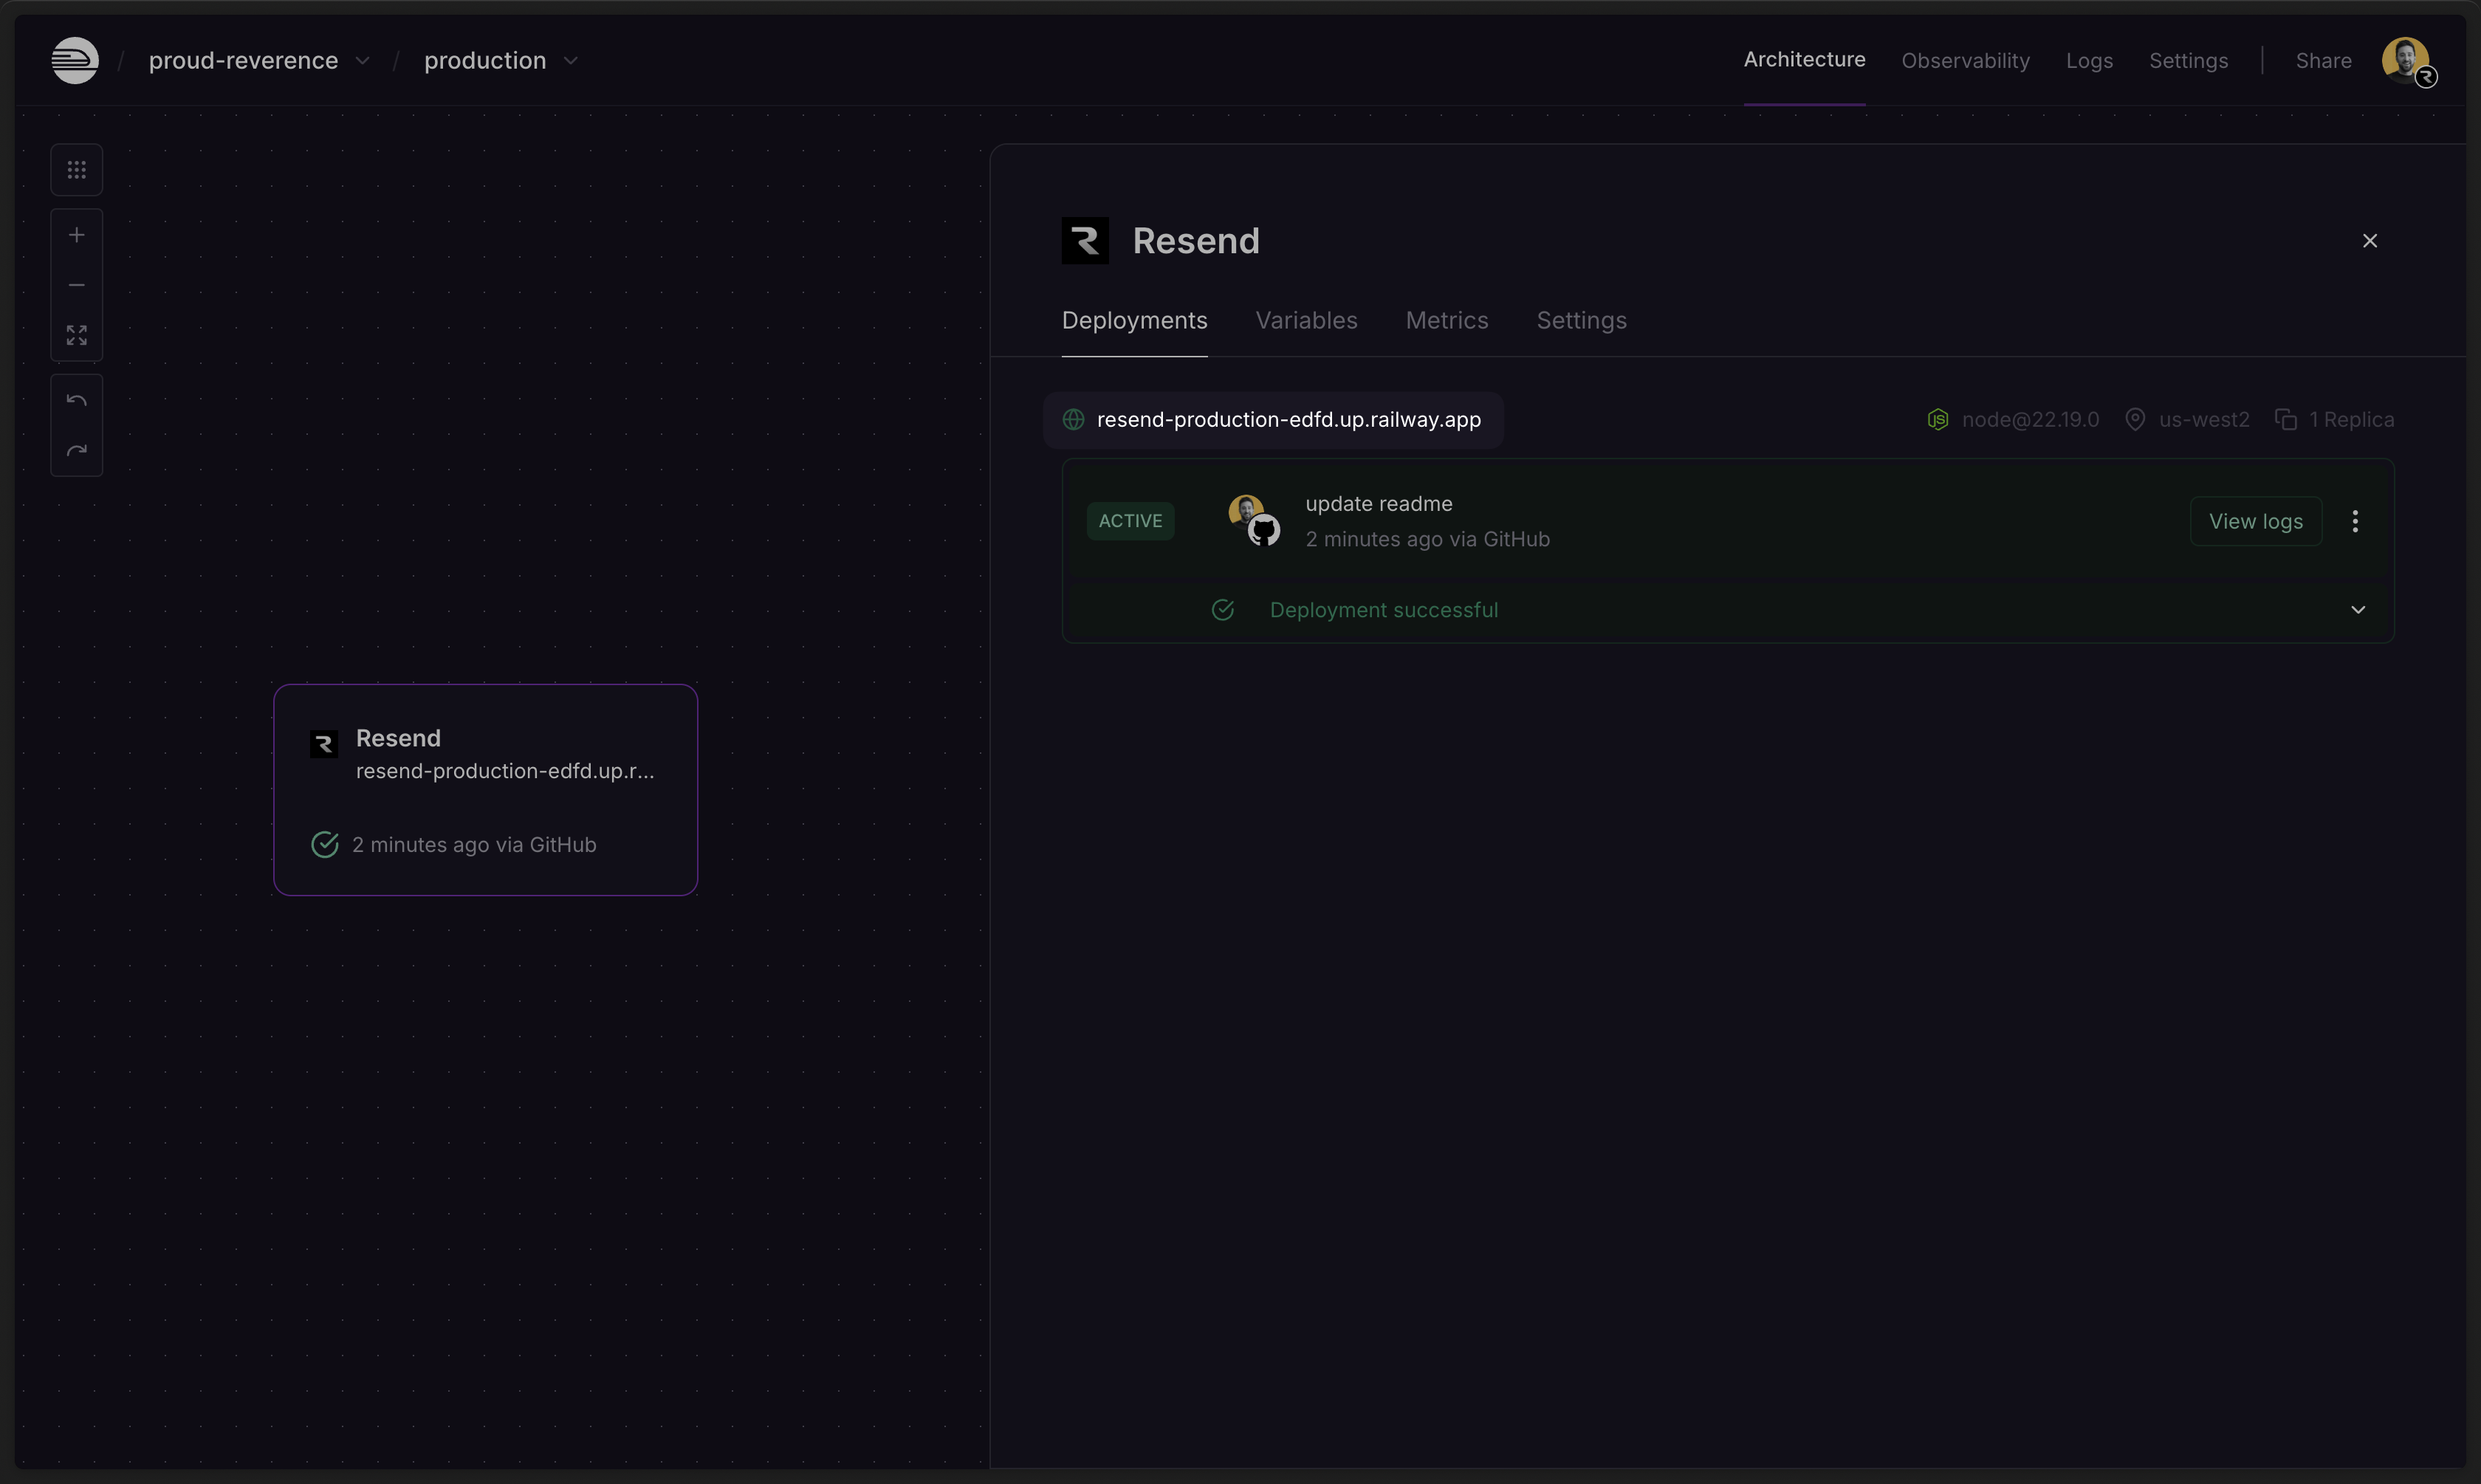 While this example uses the [Resend Node.js SDK](https://www.npmjs.com/package/@resend/node), you can add Resend using [any of our Official SDKs](https://resend.com/docs/sdks) that Railway supports.
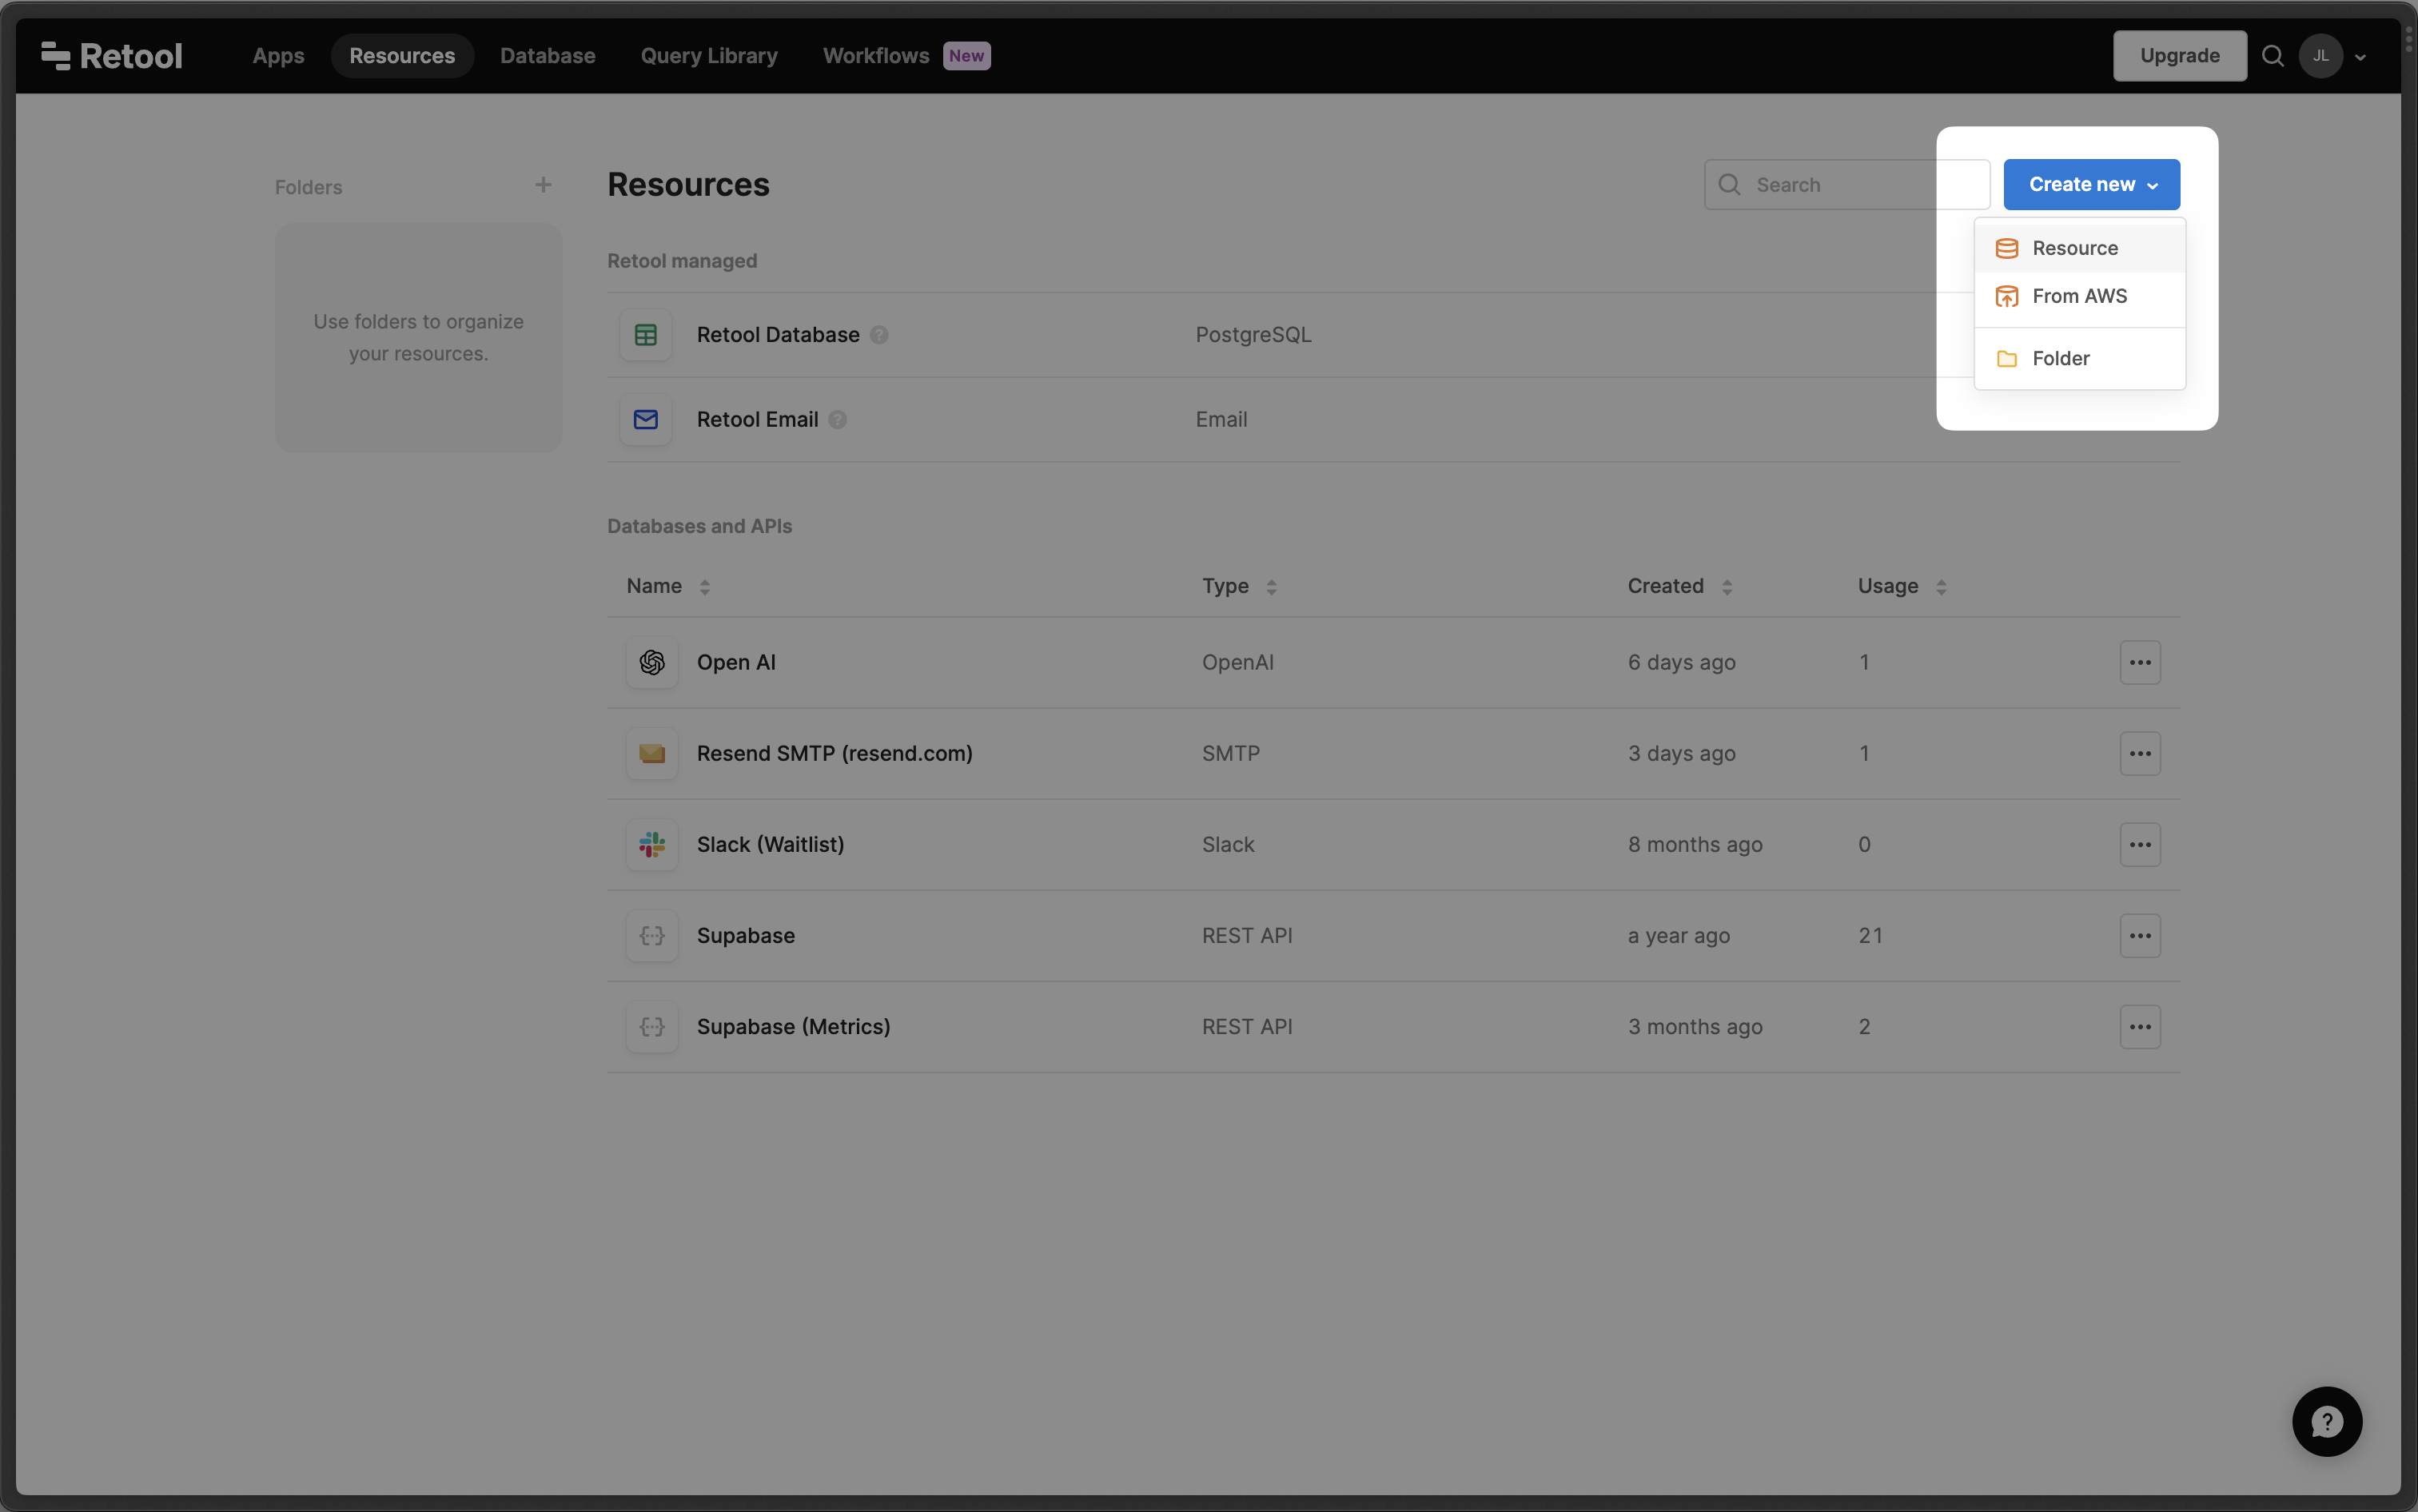 2. Search for **SMTP** and select it
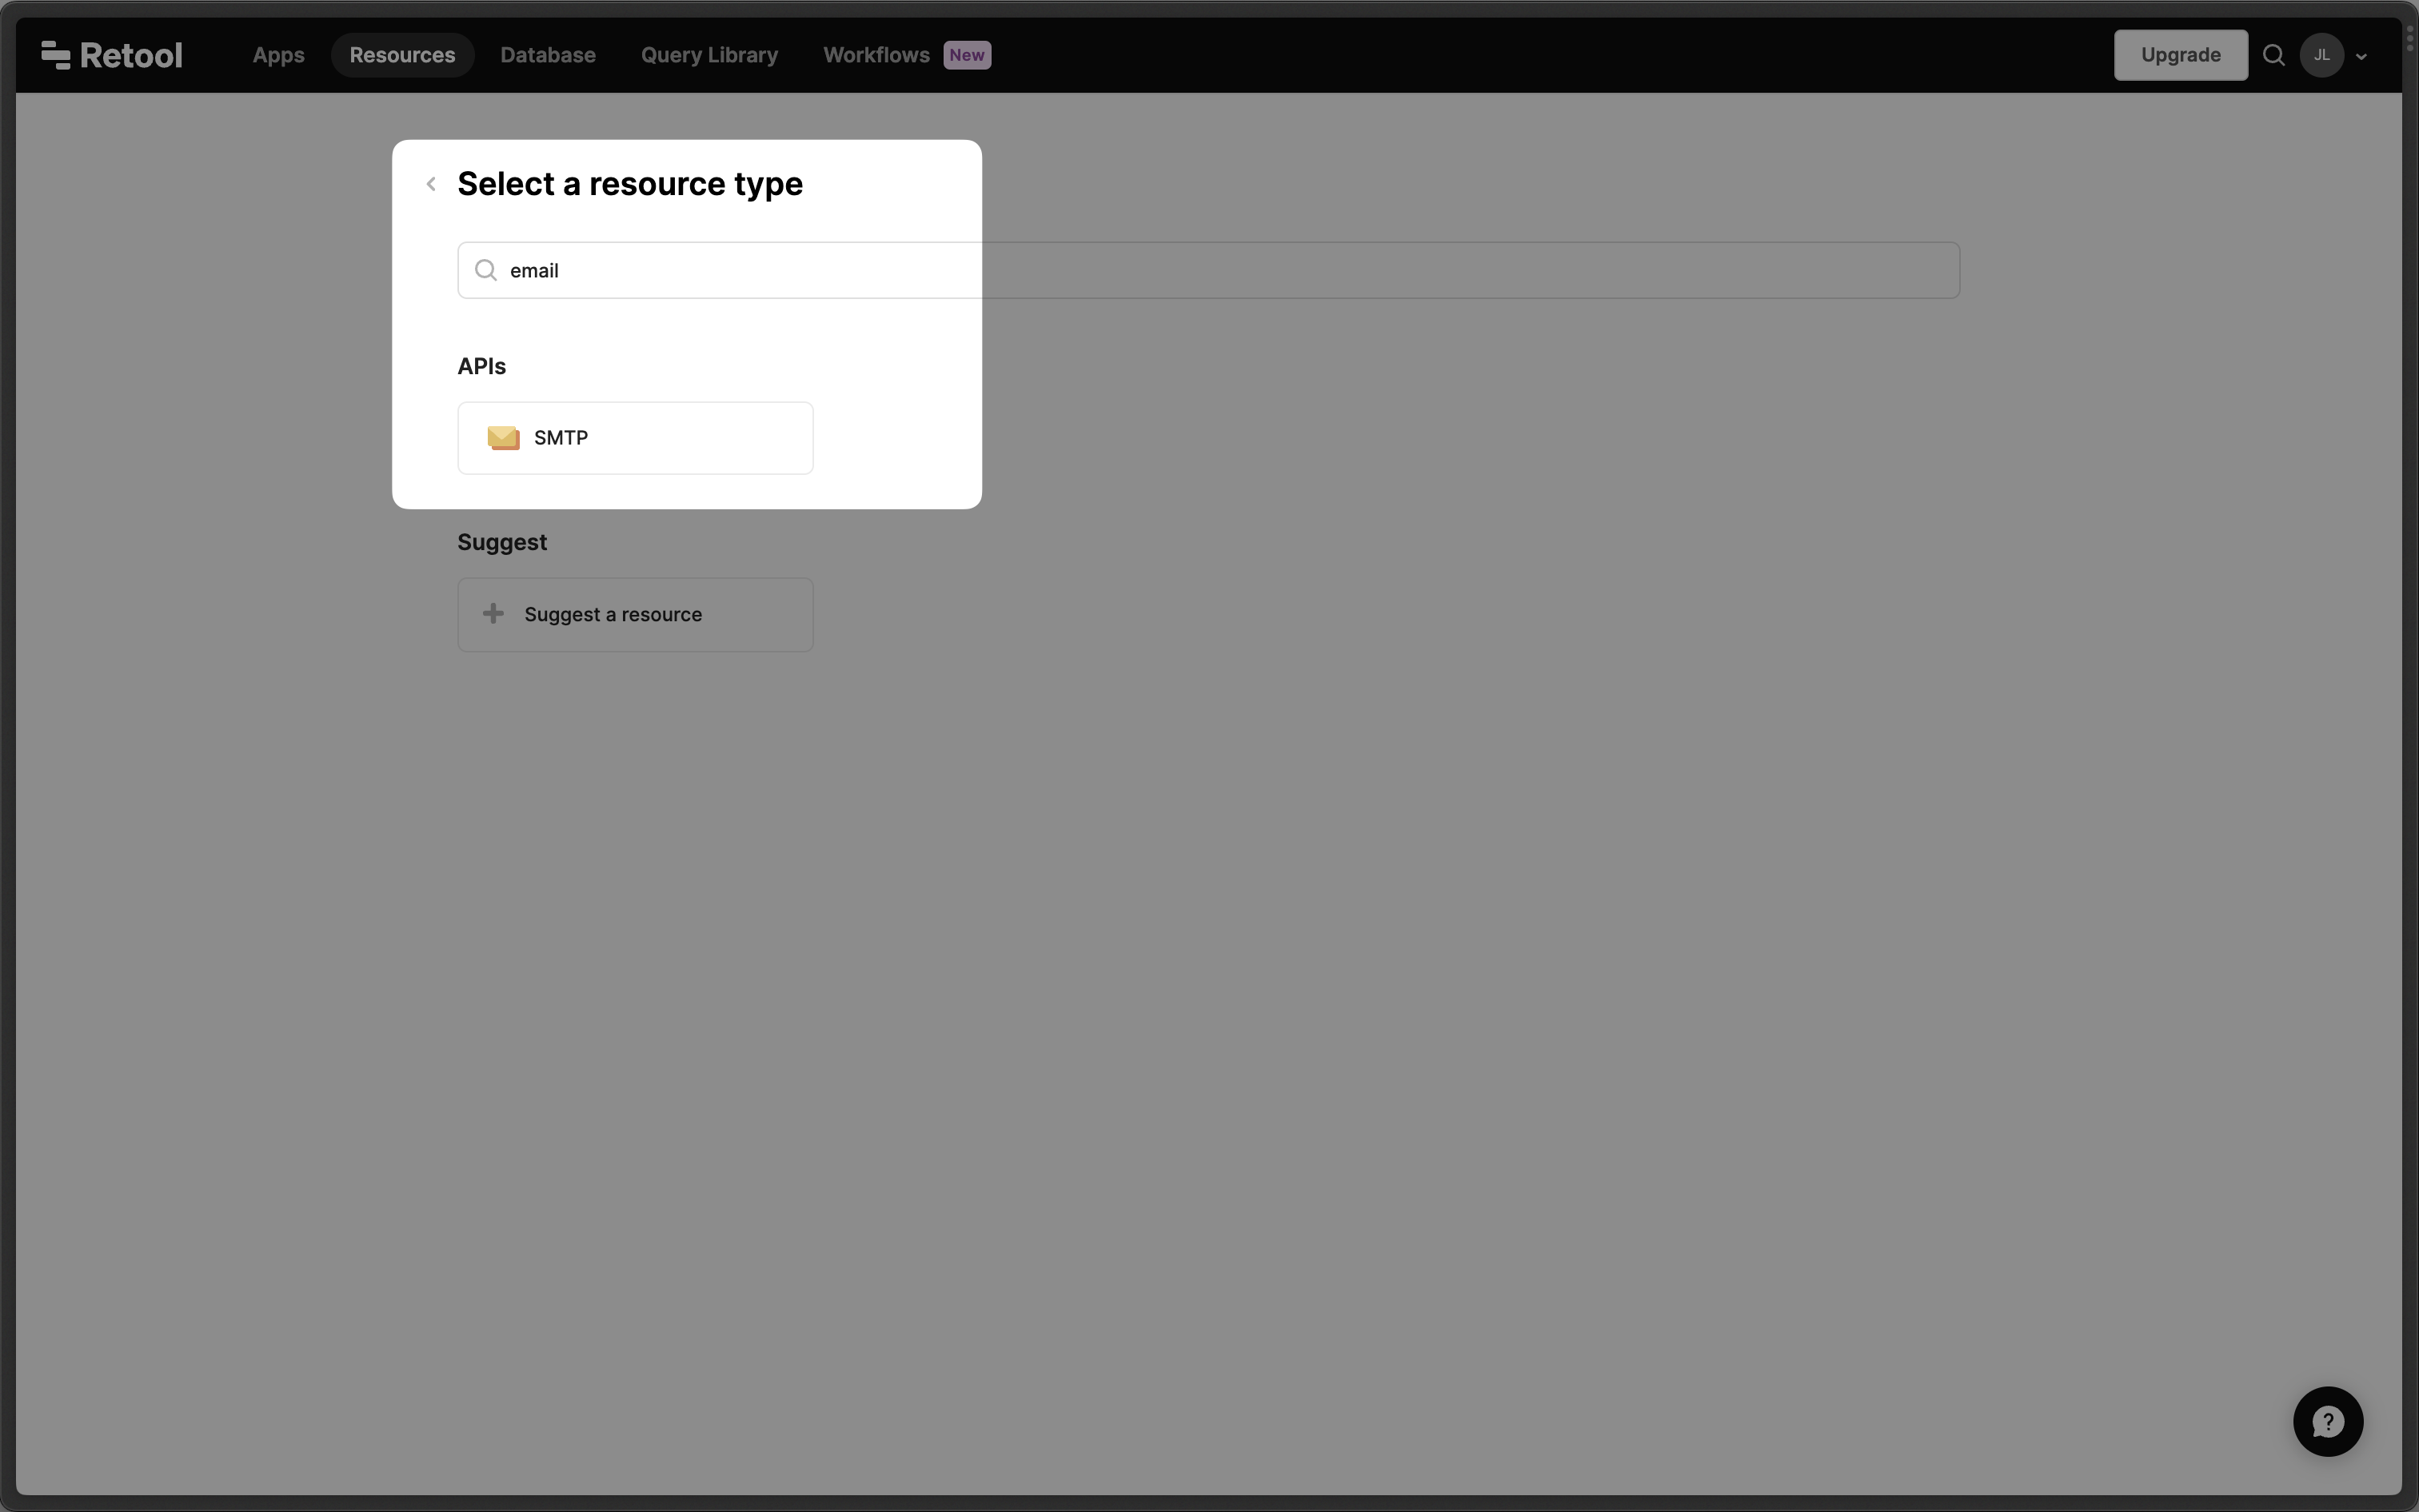 3. Add name and SMTP credentials
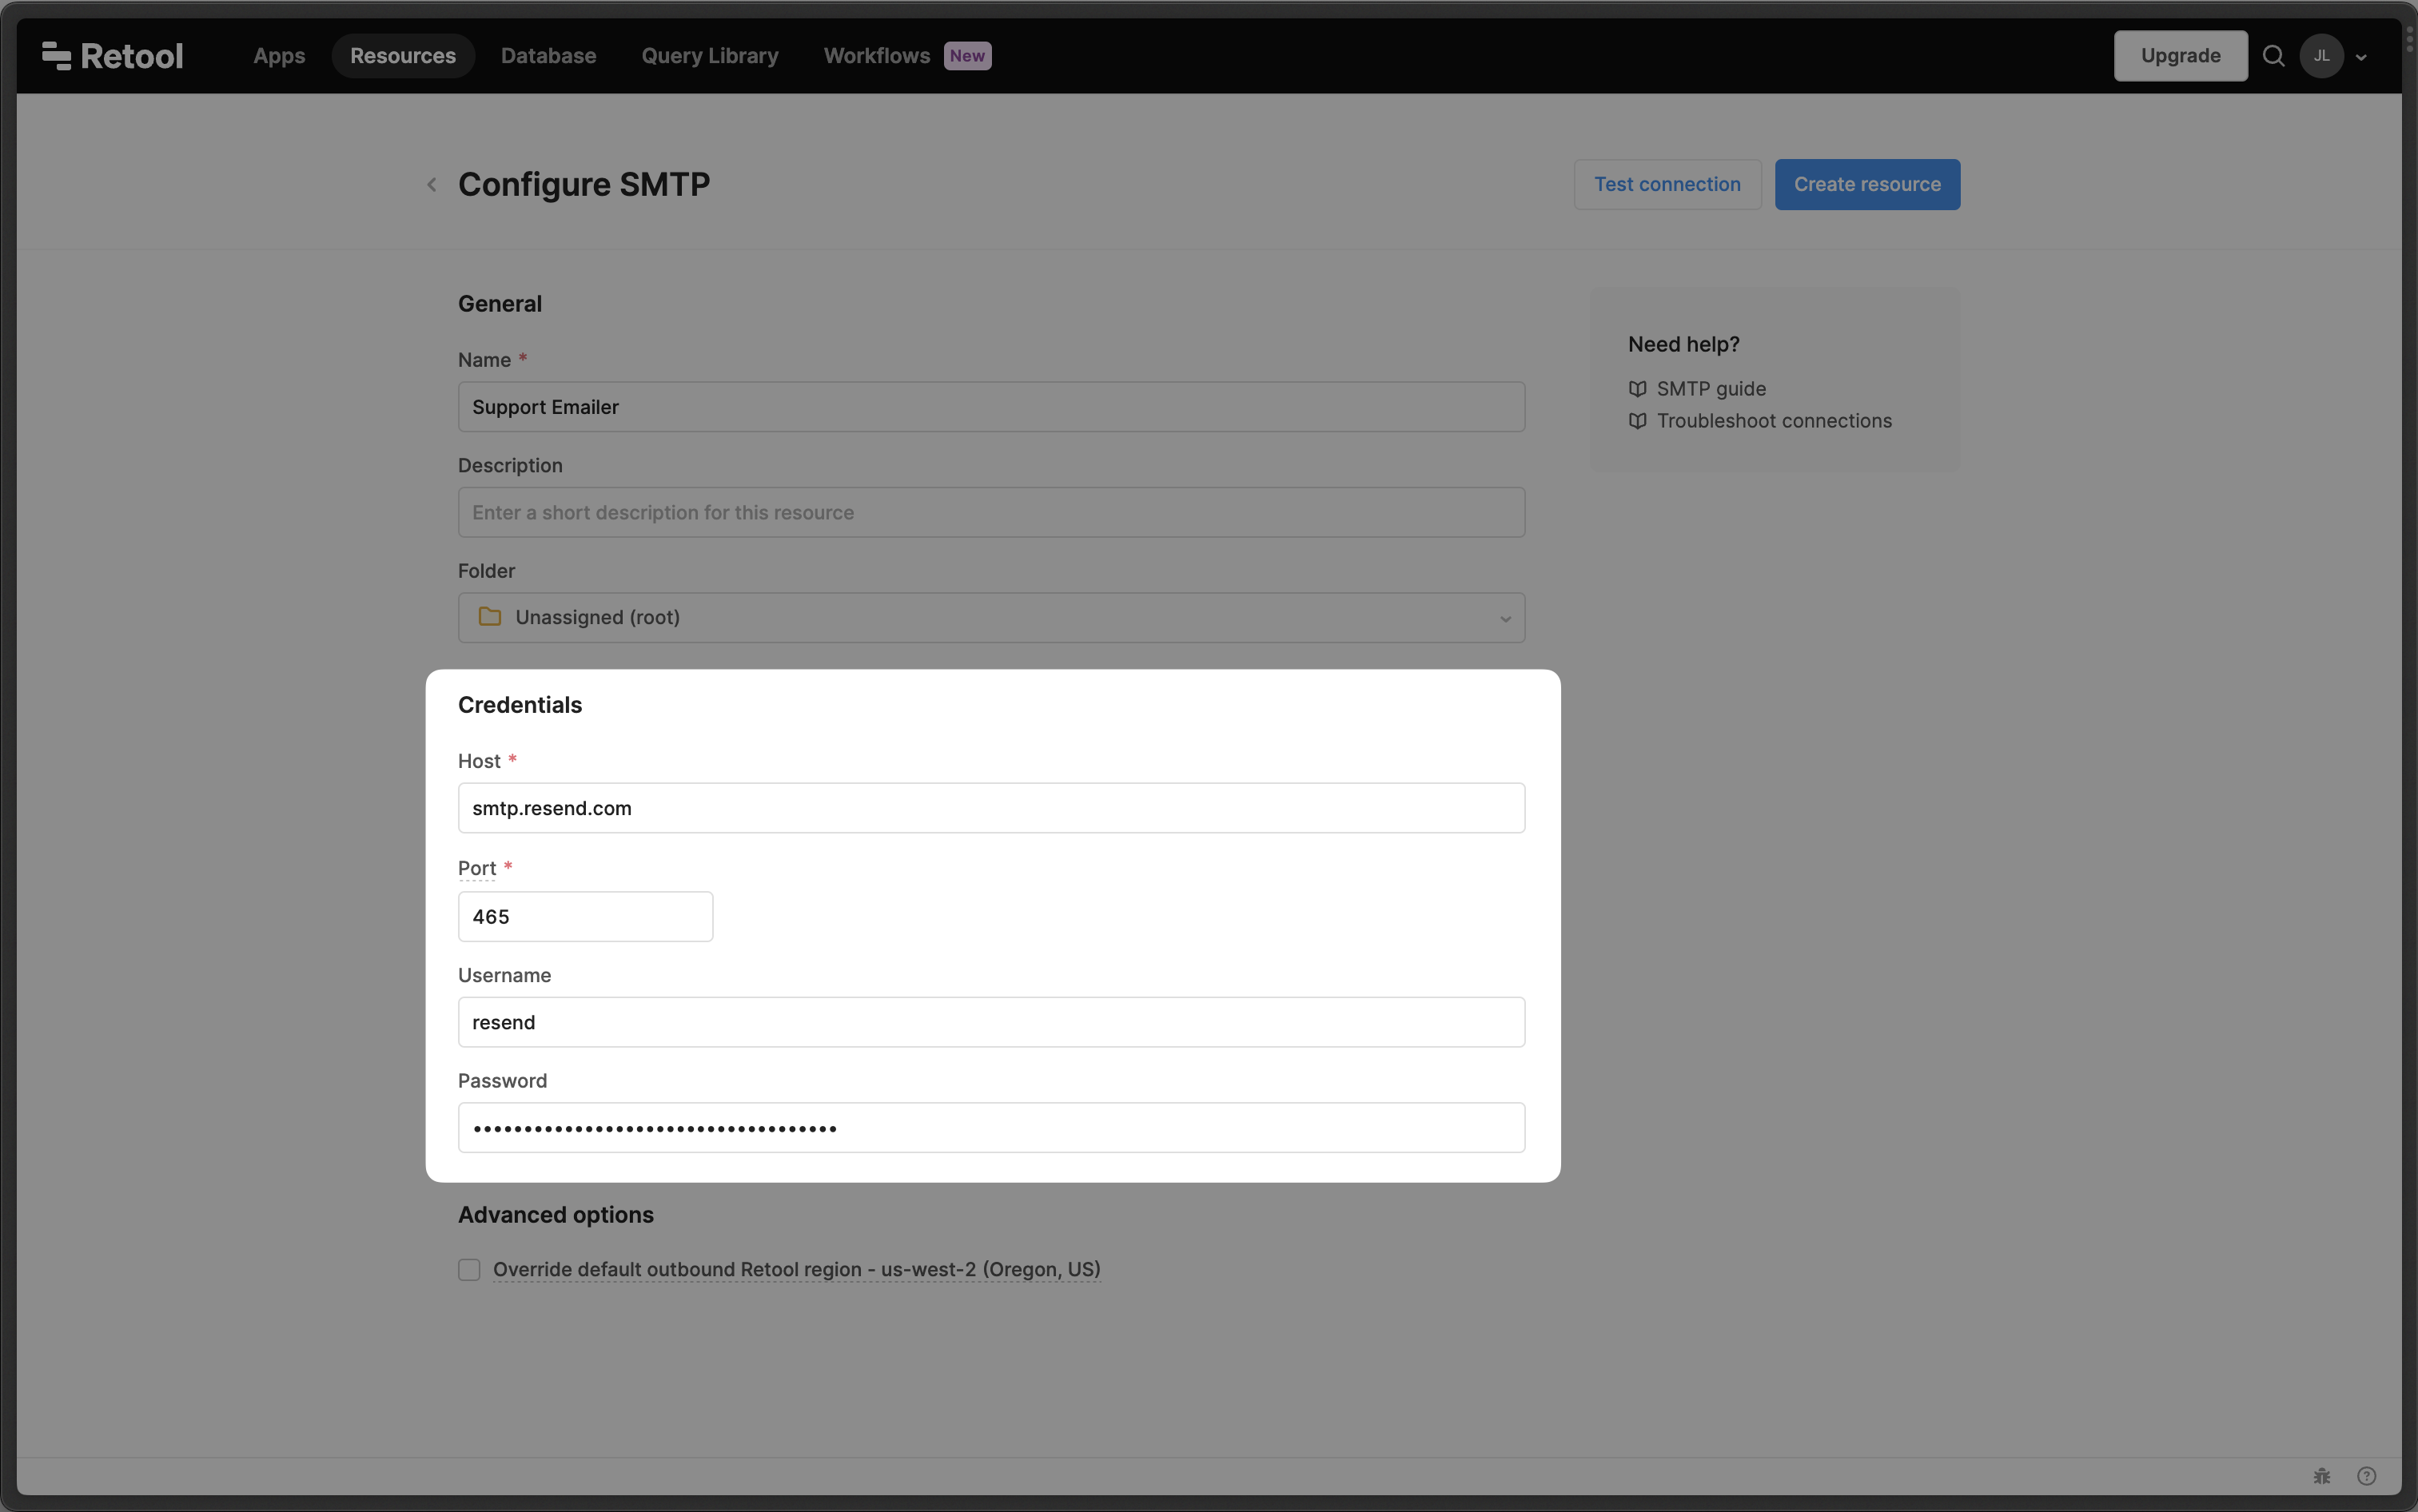 ---
# Source: https://resend.com/docs/send-with-ruby.md
> ## Documentation Index
> Fetch the complete documentation index at: https://resend.com/docs/llms.txt
> Use this file to discover all available pages before exploring further.
# Send emails with Ruby
> Learn how to send your first email using the Resend Ruby SDK.
## Prerequisites
To get the most out of this guide, you'll need to:
* [Create an API key](https://resend.com/api-keys)
* [Verify your domain](https://resend.com/domains)
## 1. Install
Get the Resend Ruby SDK.
---
# Source: https://resend.com/docs/send-with-ruby.md
> ## Documentation Index
> Fetch the complete documentation index at: https://resend.com/docs/llms.txt
> Use this file to discover all available pages before exploring further.
# Send emails with Ruby
> Learn how to send your first email using the Resend Ruby SDK.
## Prerequisites
To get the most out of this guide, you'll need to:
* [Create an API key](https://resend.com/api-keys)
* [Verify your domain](https://resend.com/domains)
## 1. Install
Get the Resend Ruby SDK.
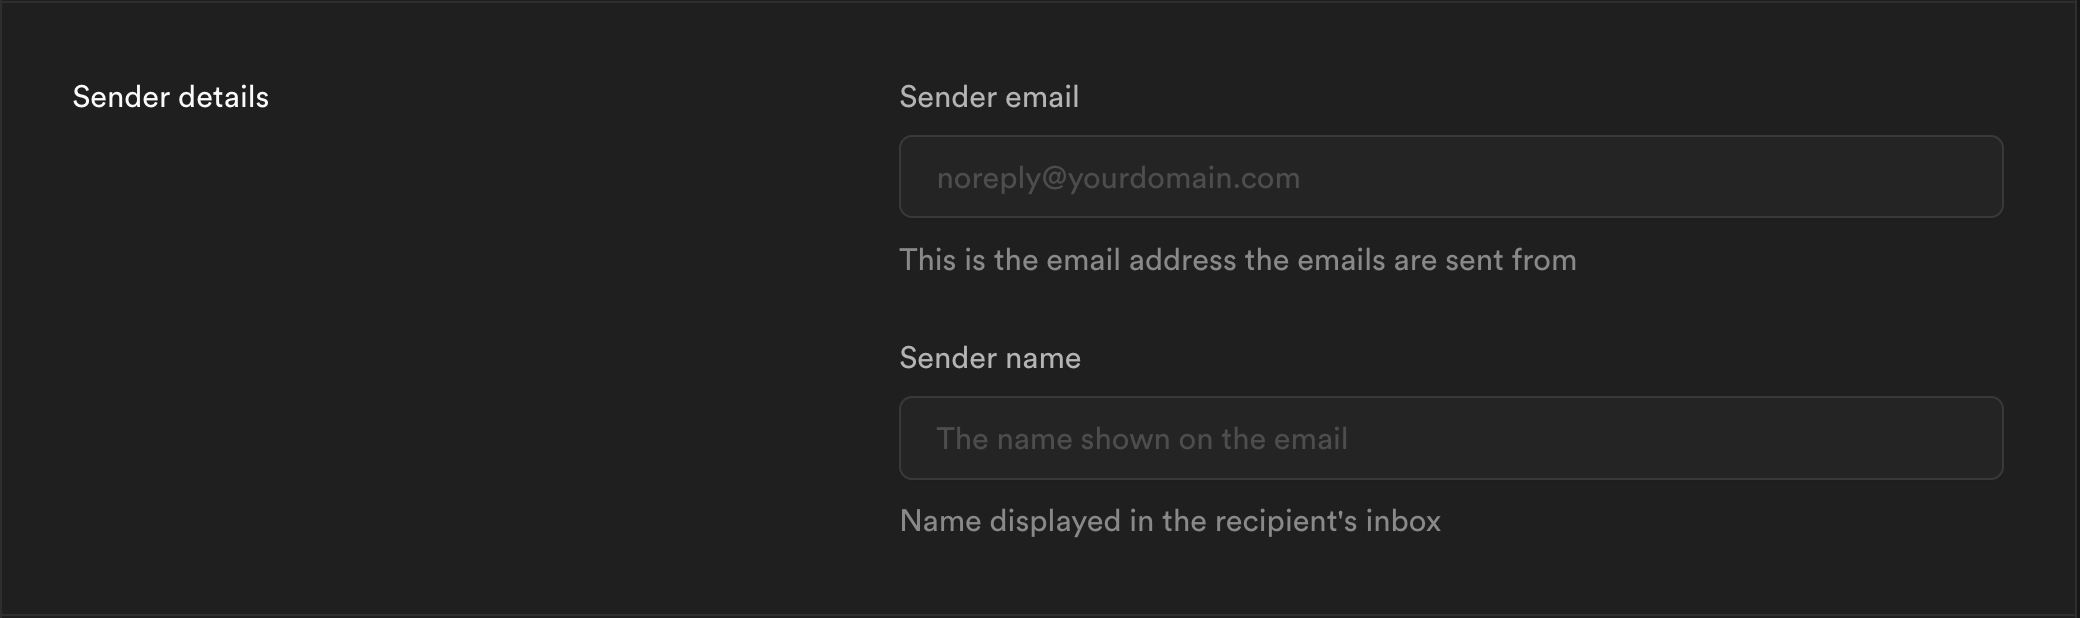 6. You can copy-and-paste the [SMTP credentials](https://resend.com/settings/smtp) from Resend to Supabase.
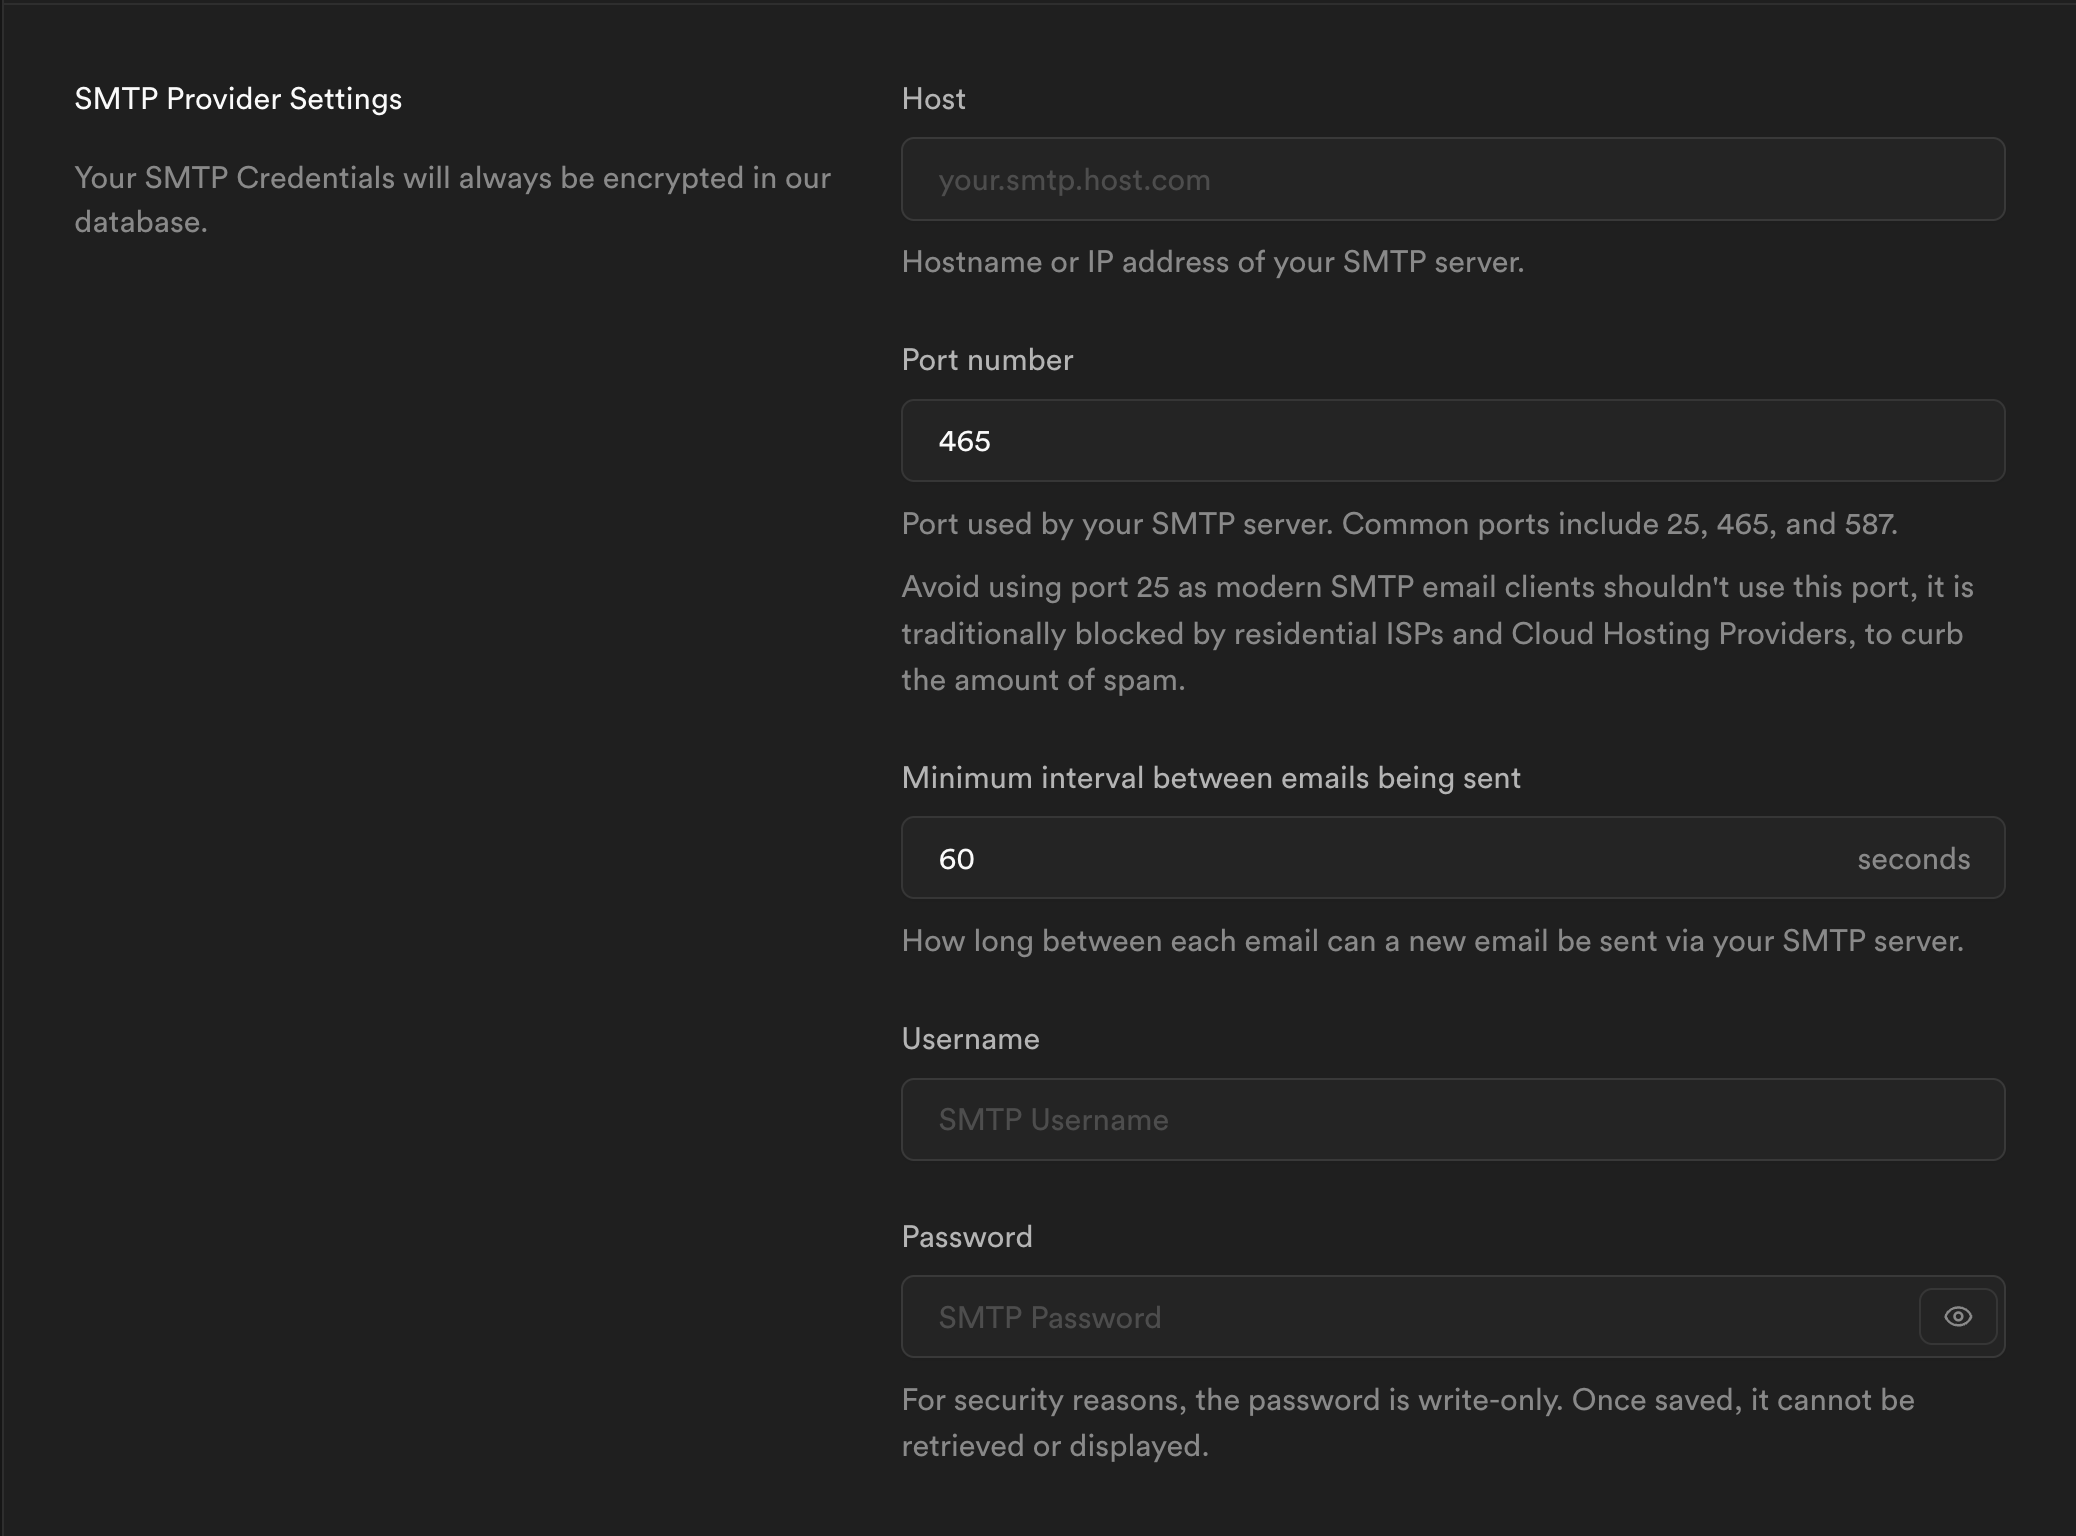 After that, you can click the **Save** button and all of your emails will be sent through Resend.
---
# Source: https://resend.com/docs/send-with-sveltekit.md
> ## Documentation Index
> Fetch the complete documentation index at: https://resend.com/docs/llms.txt
> Use this file to discover all available pages before exploring further.
# Send emails with SvelteKit
> Learn how to send your first email using SvelteKit and the Resend Node.js SDK.
## Prerequisites
To get the most out of this guide, you'll need to:
* [Create an API key](https://resend.com/api-keys)
* [Verify your domain](https://resend.com/domains)
## 1. Install
Get the Resend Node.js SDK.
After that, you can click the **Save** button and all of your emails will be sent through Resend.
---
# Source: https://resend.com/docs/send-with-sveltekit.md
> ## Documentation Index
> Fetch the complete documentation index at: https://resend.com/docs/llms.txt
> Use this file to discover all available pages before exploring further.
# Send emails with SvelteKit
> Learn how to send your first email using SvelteKit and the Resend Node.js SDK.
## Prerequisites
To get the most out of this guide, you'll need to:
* [Create an API key](https://resend.com/api-keys)
* [Verify your domain](https://resend.com/domains)
## 1. Install
Get the Resend Node.js SDK.
 ## 2. Configuration
From your admin dashboard, visit the **WP Mail SMTP > Settings** page to configure the plugin. Firstly, configure your **From Email**, **From Name**, and **Return Path**. Next, we'll configure the SMTP settings for Resend. Select **Other SMTP** in the **Mailer** section.
## 2. Configuration
From your admin dashboard, visit the **WP Mail SMTP > Settings** page to configure the plugin. Firstly, configure your **From Email**, **From Name**, and **Return Path**. Next, we'll configure the SMTP settings for Resend. Select **Other SMTP** in the **Mailer** section.
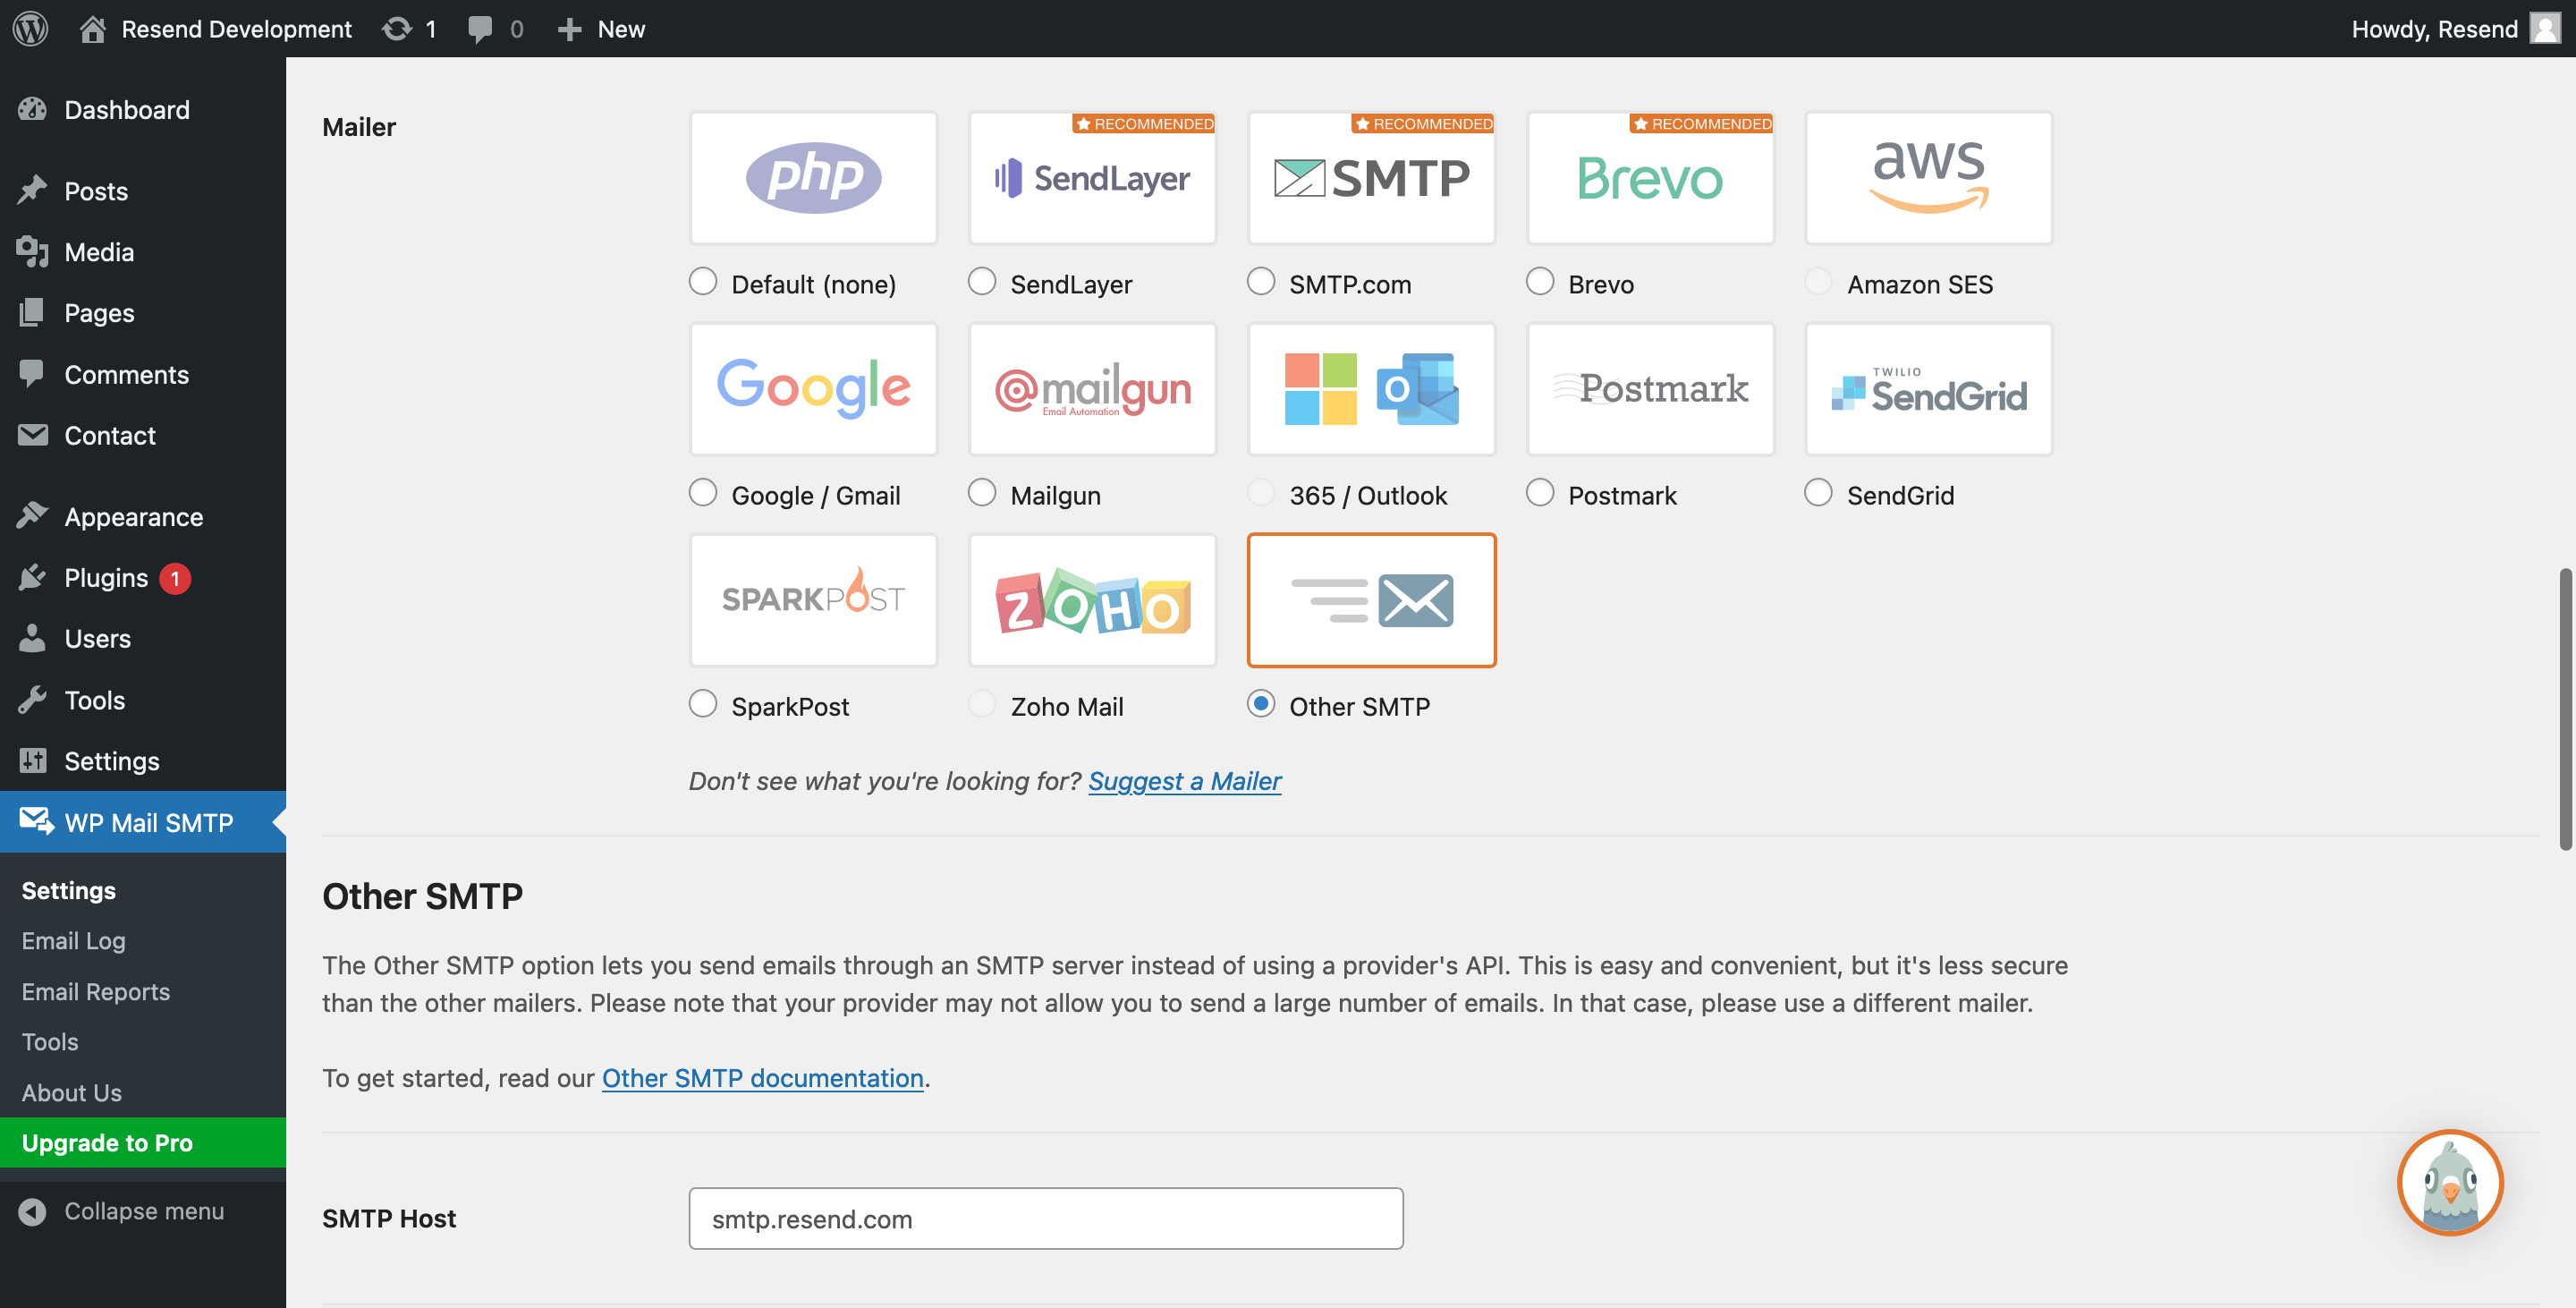 In the **Other SMTP** section, configure the following settings:
* **SMTP Host**: `smtp.resend.com`
* **Encryption**: `SSL`
* **SMTP Port**: `465`
* **Auto TLS**: `ON`
* **Authentication**: `ON`
* **SMTP Username**: `resend`
* **SMTP Password**: `YOUR_API_KEY`
Make sure to replace `YOUR_API_KEY` with an existing key or create a new [API Key](https://resend.com/api-keys).
## 3. Sending a test email
From your admin dashboard, visit the **WP Mail SMTP > Tools** page to send a test email.
In the **Other SMTP** section, configure the following settings:
* **SMTP Host**: `smtp.resend.com`
* **Encryption**: `SSL`
* **SMTP Port**: `465`
* **Auto TLS**: `ON`
* **Authentication**: `ON`
* **SMTP Username**: `resend`
* **SMTP Password**: `YOUR_API_KEY`
Make sure to replace `YOUR_API_KEY` with an existing key or create a new [API Key](https://resend.com/api-keys).
## 3. Sending a test email
From your admin dashboard, visit the **WP Mail SMTP > Tools** page to send a test email.
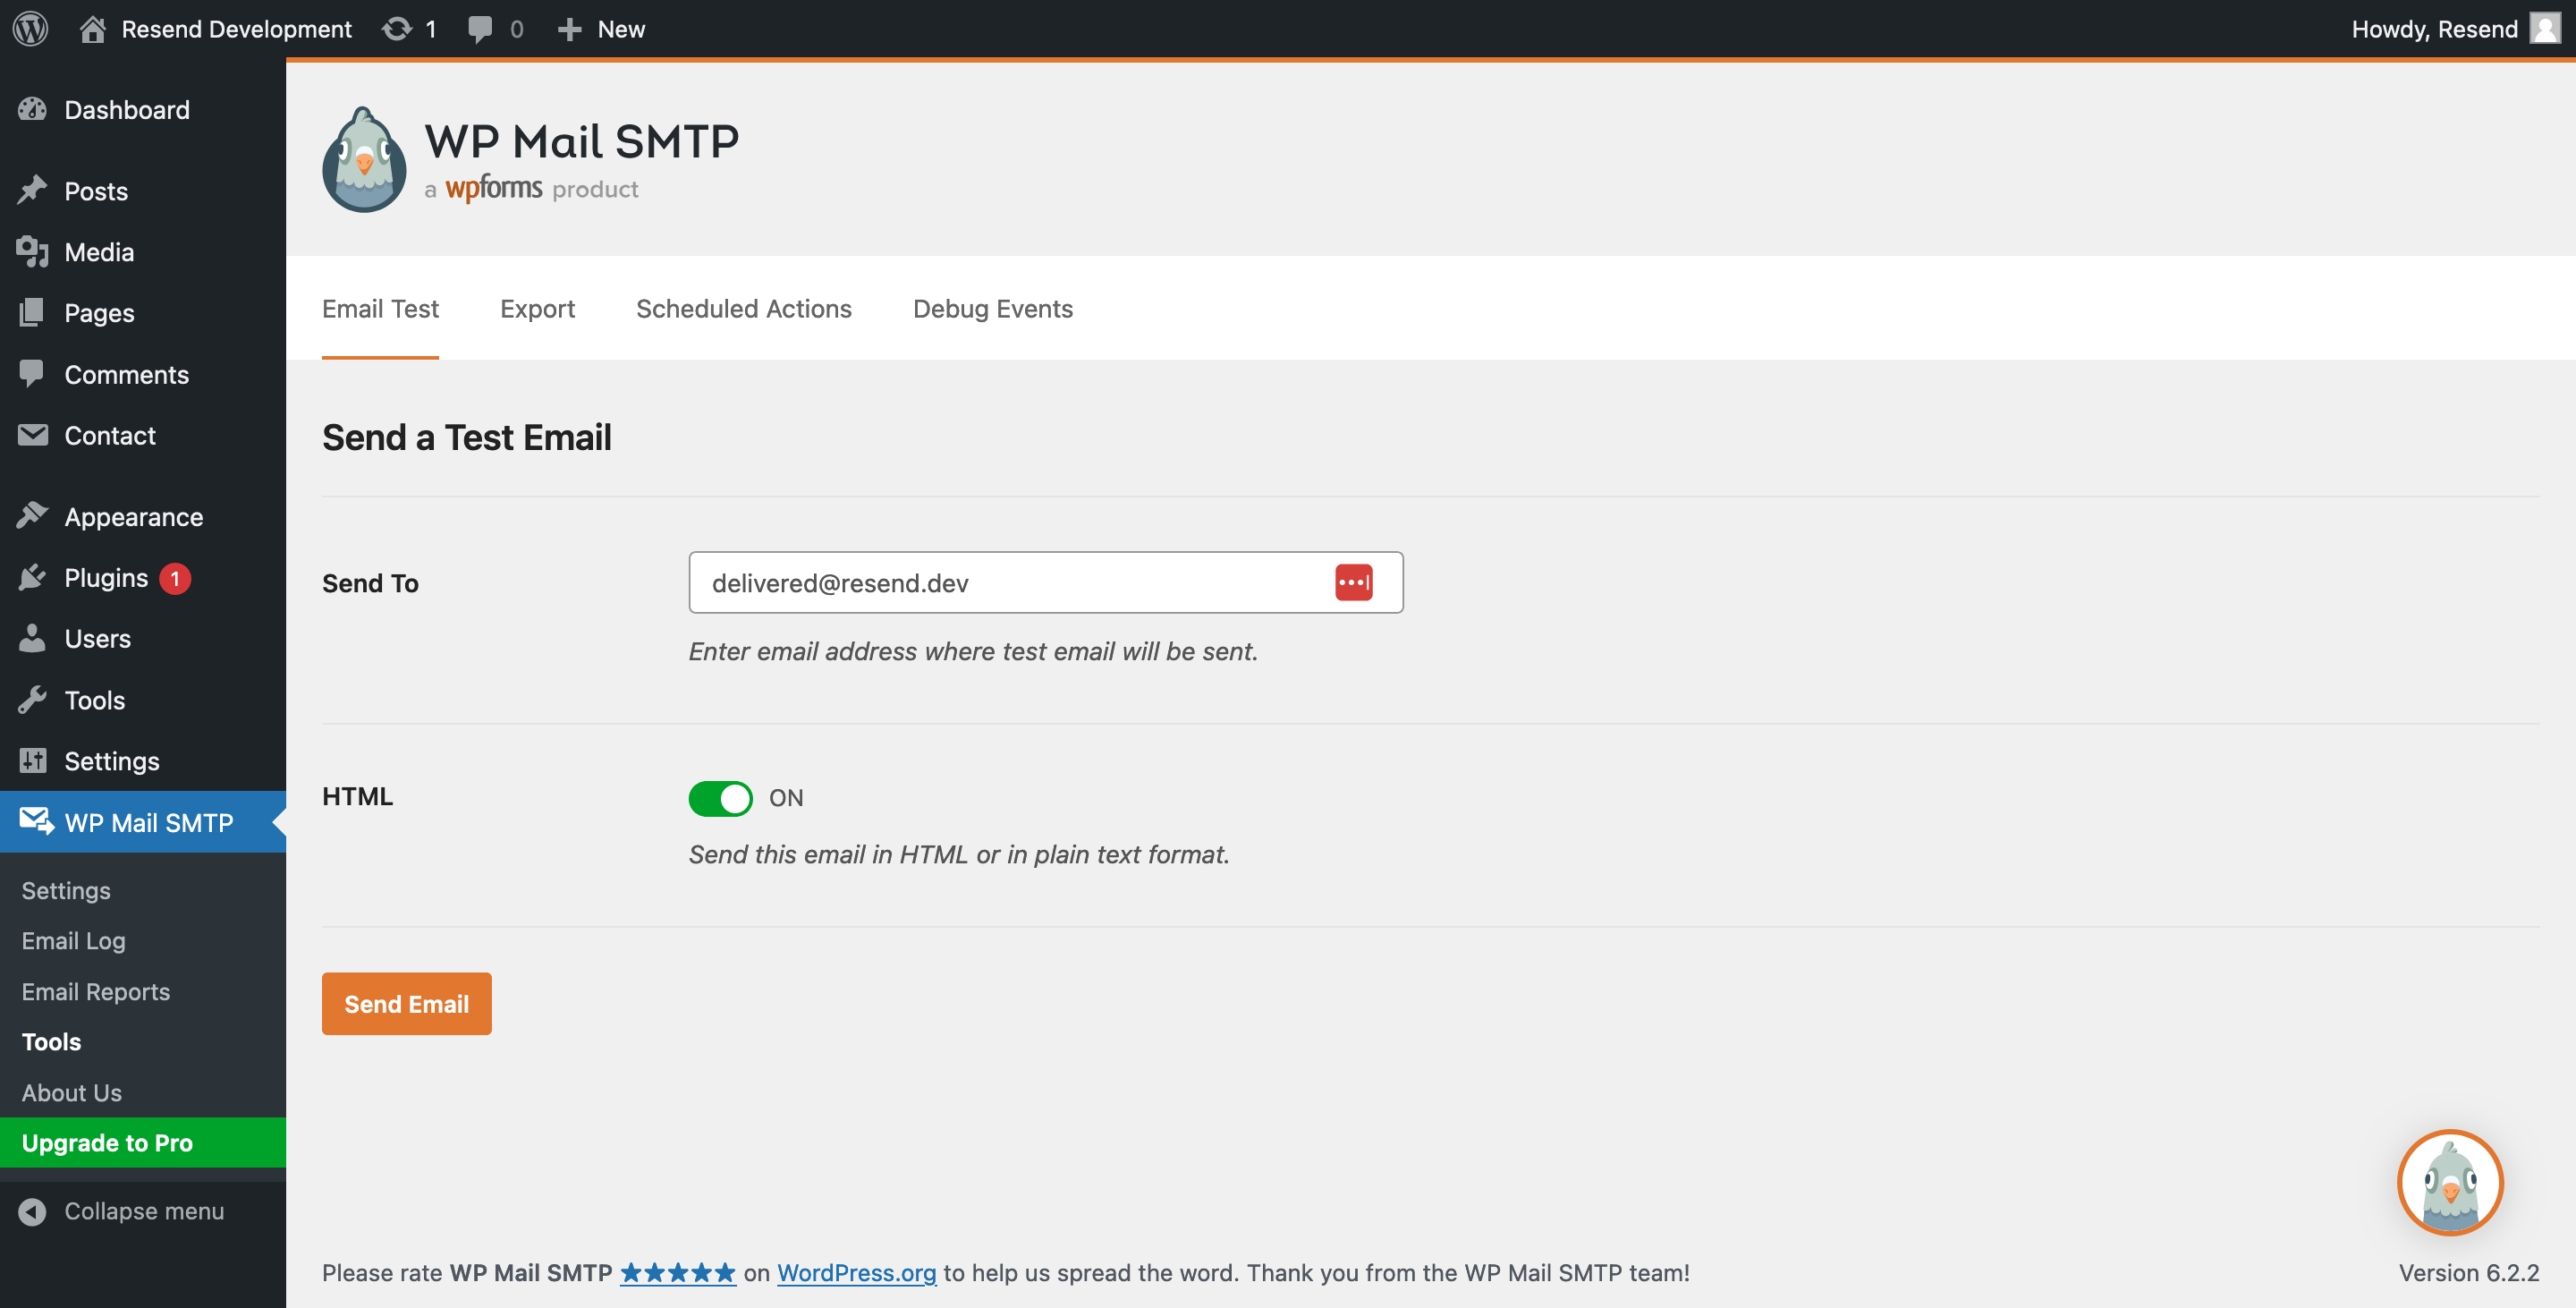 ---
# Source: https://resend.com/docs/knowledge-base/sending-apple-private-relay.md
> ## Documentation Index
> Fetch the complete documentation index at: https://resend.com/docs/llms.txt
> Use this file to discover all available pages before exploring further.
# How to prevent bounces with @privaterelay.appleid.com recipients?
> Sending to Apple Private Email Relay requires specific configuration steps to ensure your emails get delivered
If your website or application supports Sign In with Apple, your customers have the option to receive emails from you via Apple’s Private Email Relay service. This feature allows users to keep their actual email addresses private when they sign up or log in.
When a user selects the Hide My Email option, Apple assigns them a unique, randomly generated email address under the `@privaterelay.appleid.com` domain, which you can link to that specific user.
To ensure your emails are delivered through Apple’s Private Email Relay, you must first access the Apple Developer Portal and navigate to `Certificates, Identifiers & Profiles` > `More` > `Sign in with Apple for Email Communication` > `Configure`.
---
# Source: https://resend.com/docs/knowledge-base/sending-apple-private-relay.md
> ## Documentation Index
> Fetch the complete documentation index at: https://resend.com/docs/llms.txt
> Use this file to discover all available pages before exploring further.
# How to prevent bounces with @privaterelay.appleid.com recipients?
> Sending to Apple Private Email Relay requires specific configuration steps to ensure your emails get delivered
If your website or application supports Sign In with Apple, your customers have the option to receive emails from you via Apple’s Private Email Relay service. This feature allows users to keep their actual email addresses private when they sign up or log in.
When a user selects the Hide My Email option, Apple assigns them a unique, randomly generated email address under the `@privaterelay.appleid.com` domain, which you can link to that specific user.
To ensure your emails are delivered through Apple’s Private Email Relay, you must first access the Apple Developer Portal and navigate to `Certificates, Identifiers & Profiles` > `More` > `Sign in with Apple for Email Communication` > `Configure`.
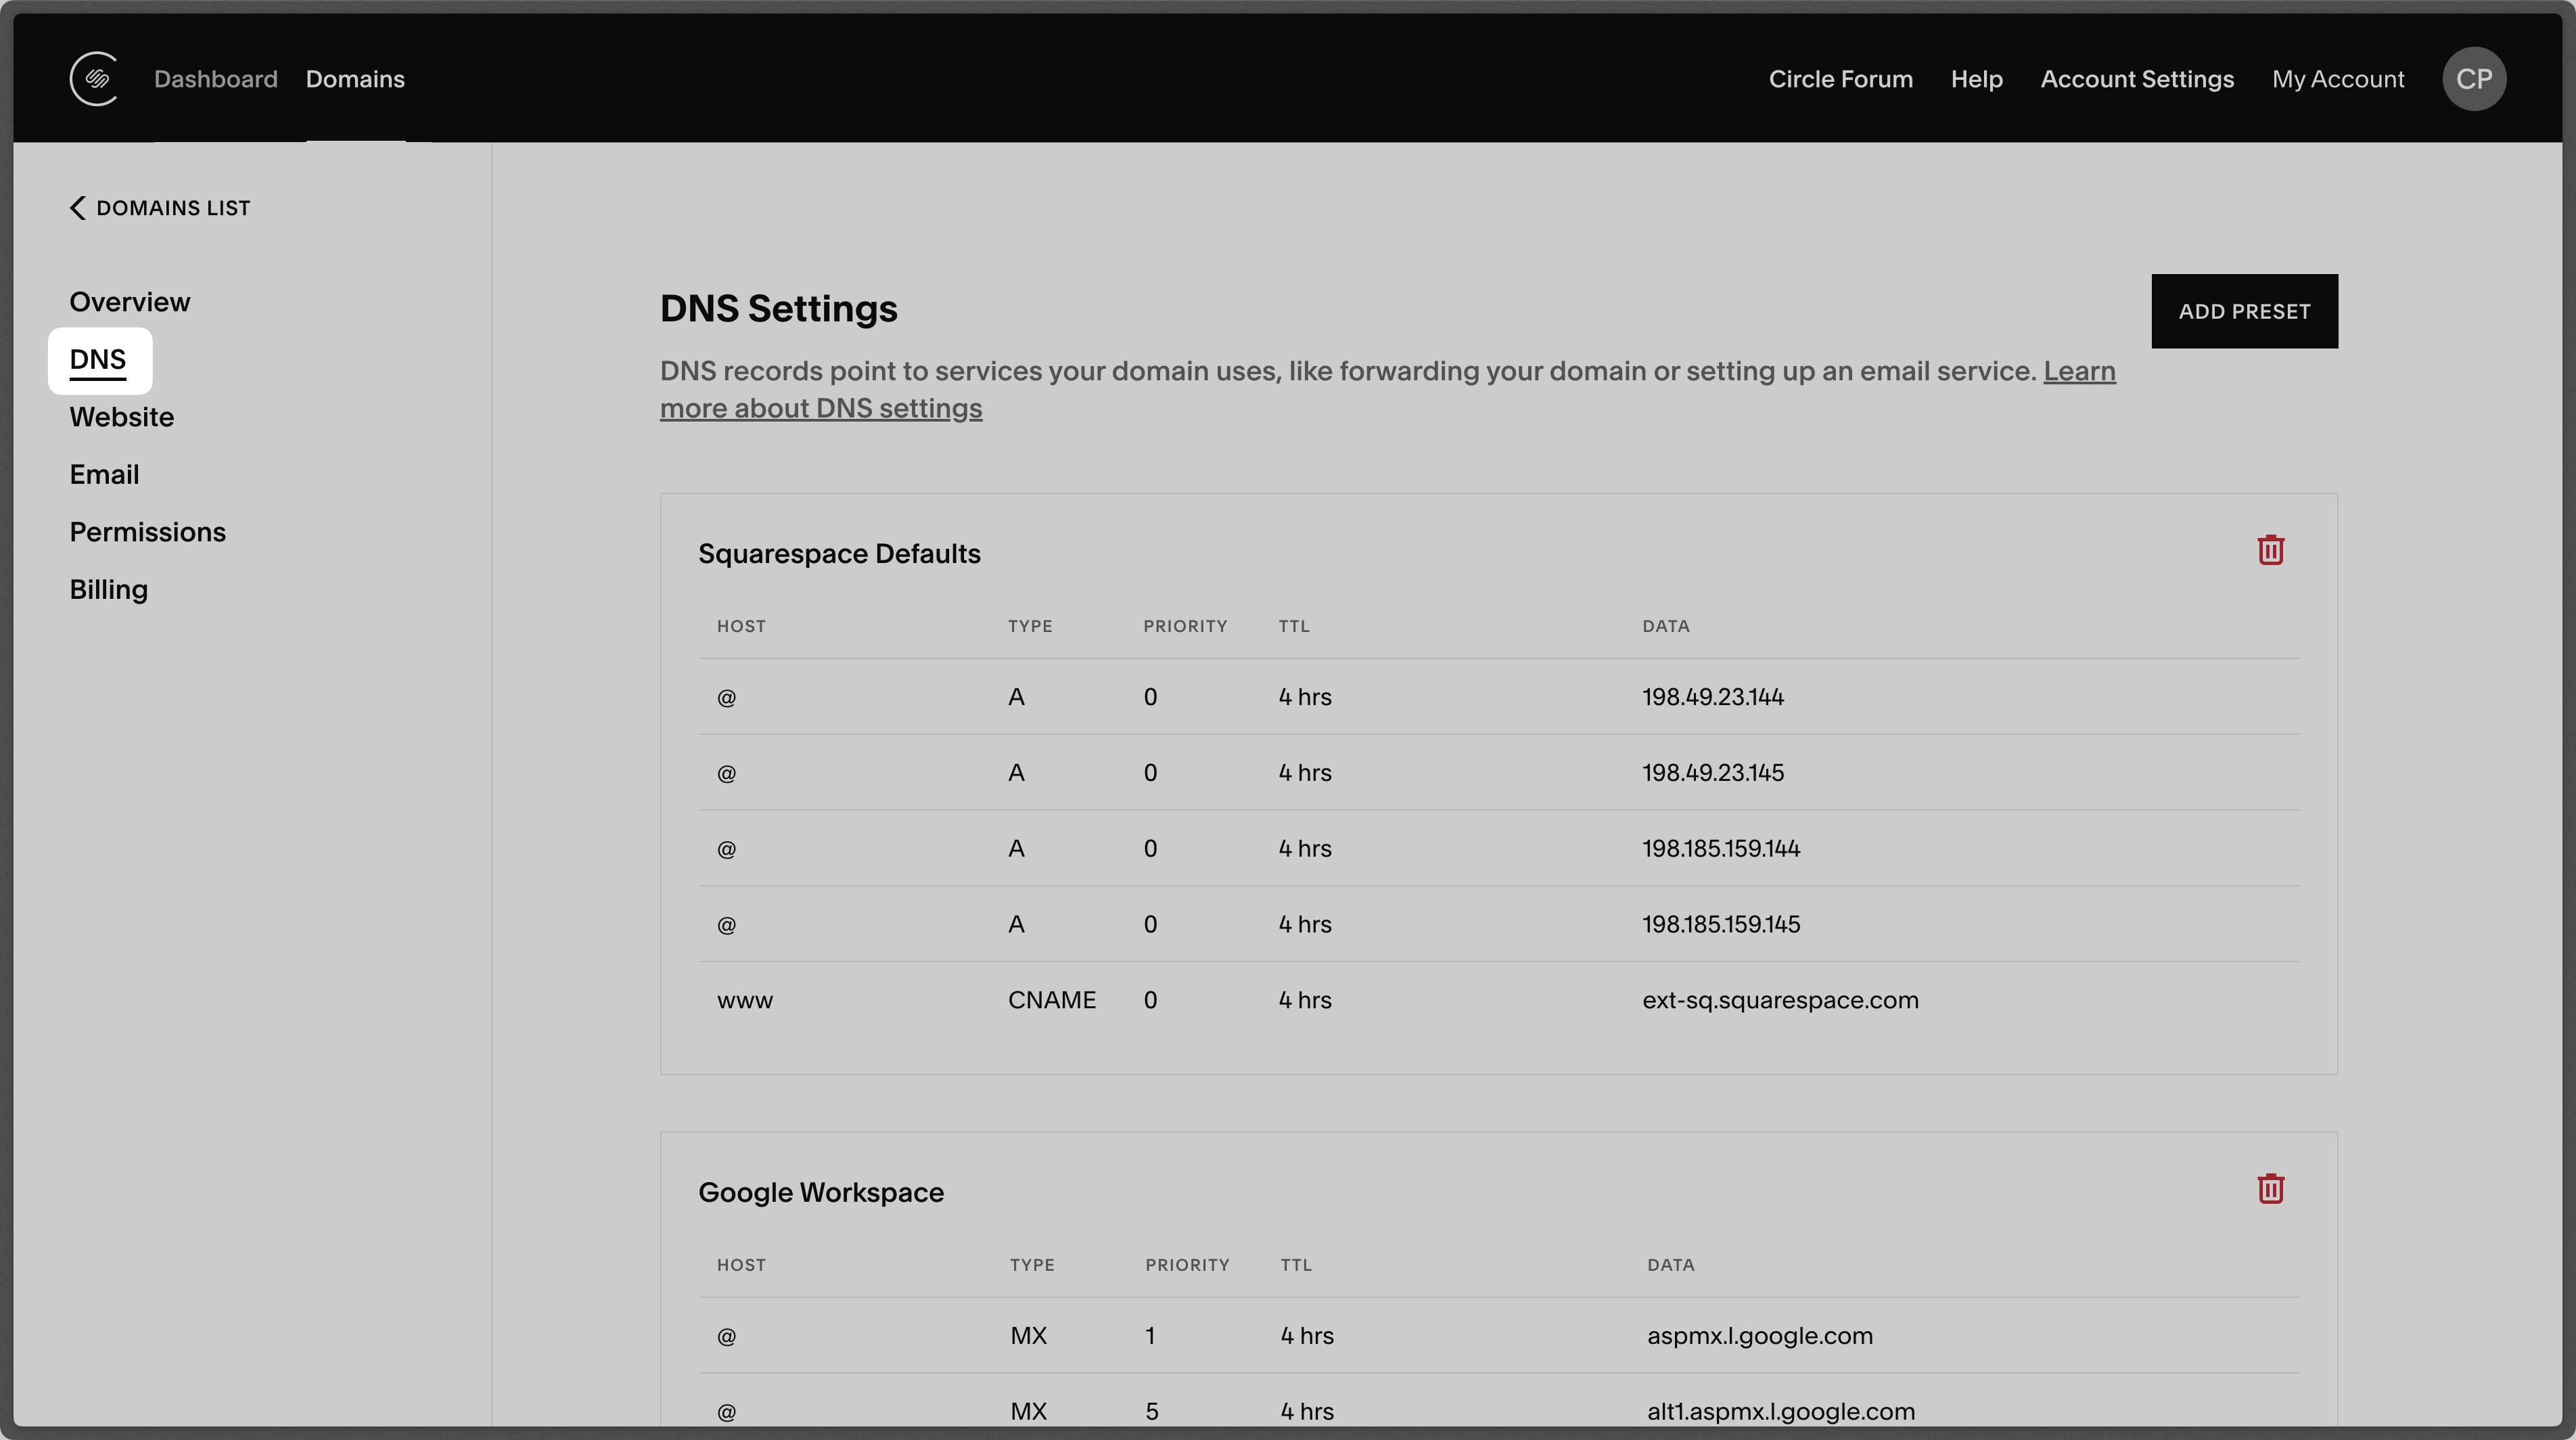 ## Add MX SPF Record
Scroll down to the **Custom records** section and select `Add record` on Squarespace.
1. Type `send` for the `Host` of the record.
2. Set the `Type` to `MX`.
3. Set the `Priority` to `10`.
4. Use the Default 4 hours for `TTL`.
5. Copy the MX Value from Resend into the `Mail Server` field
6. Select `Save`.
## Add MX SPF Record
Scroll down to the **Custom records** section and select `Add record` on Squarespace.
1. Type `send` for the `Host` of the record.
2. Set the `Type` to `MX`.
3. Set the `Priority` to `10`.
4. Use the Default 4 hours for `TTL`.
5. Copy the MX Value from Resend into the `Mail Server` field
6. Select `Save`.
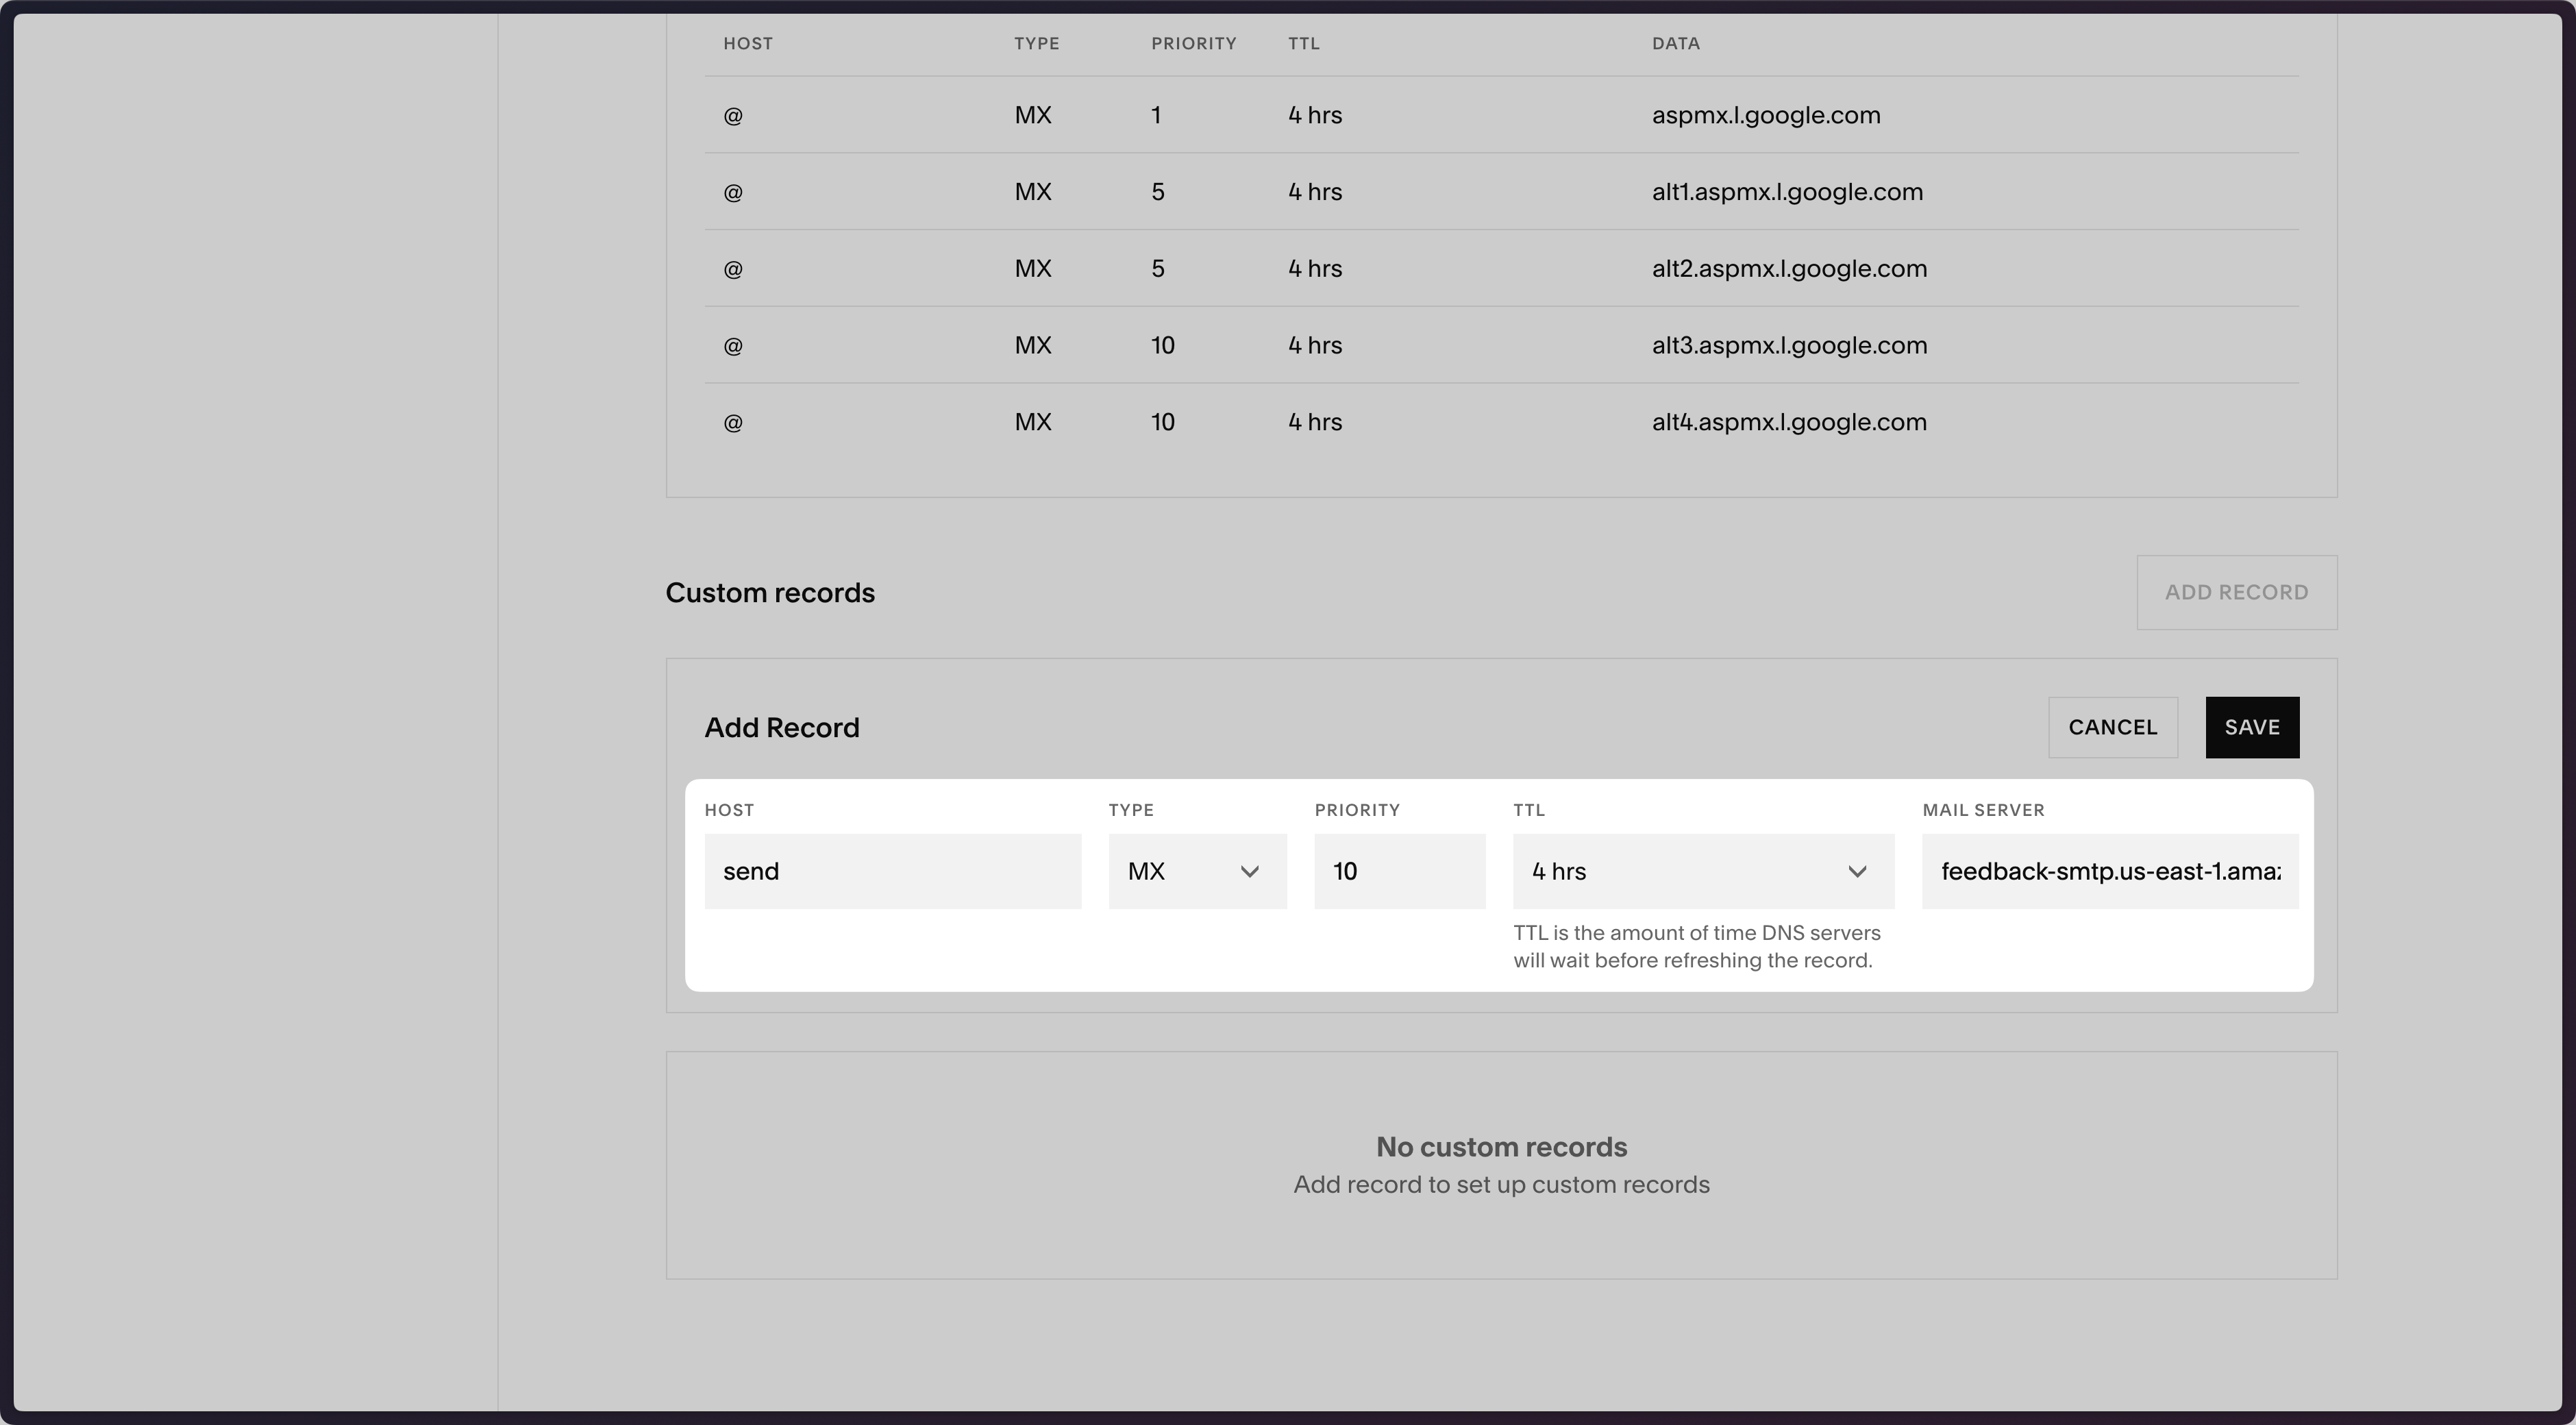 Below is a mapping of the record fields from Resend to Squarespace:
| Squarespace | Resend | Example Value |
| ----------- | -------- | --------------------------------------- |
| Type | Type | `MX` |
| Host | Name | `send` |
| TTL | TTL | `4 hrs` (default) |
| Mail Server | Value | `feedback-smtp.us-east-1.amazonses.com` |
| Priority | Priority | `10` |
Below is a mapping of the record fields from Resend to Squarespace:
| Squarespace | Resend | Example Value |
| ----------- | -------- | --------------------------------------- |
| Type | Type | `MX` |
| Host | Name | `send` |
| TTL | TTL | `4 hrs` (default) |
| Mail Server | Value | `feedback-smtp.us-east-1.amazonses.com` |
| Priority | Priority | `10` |
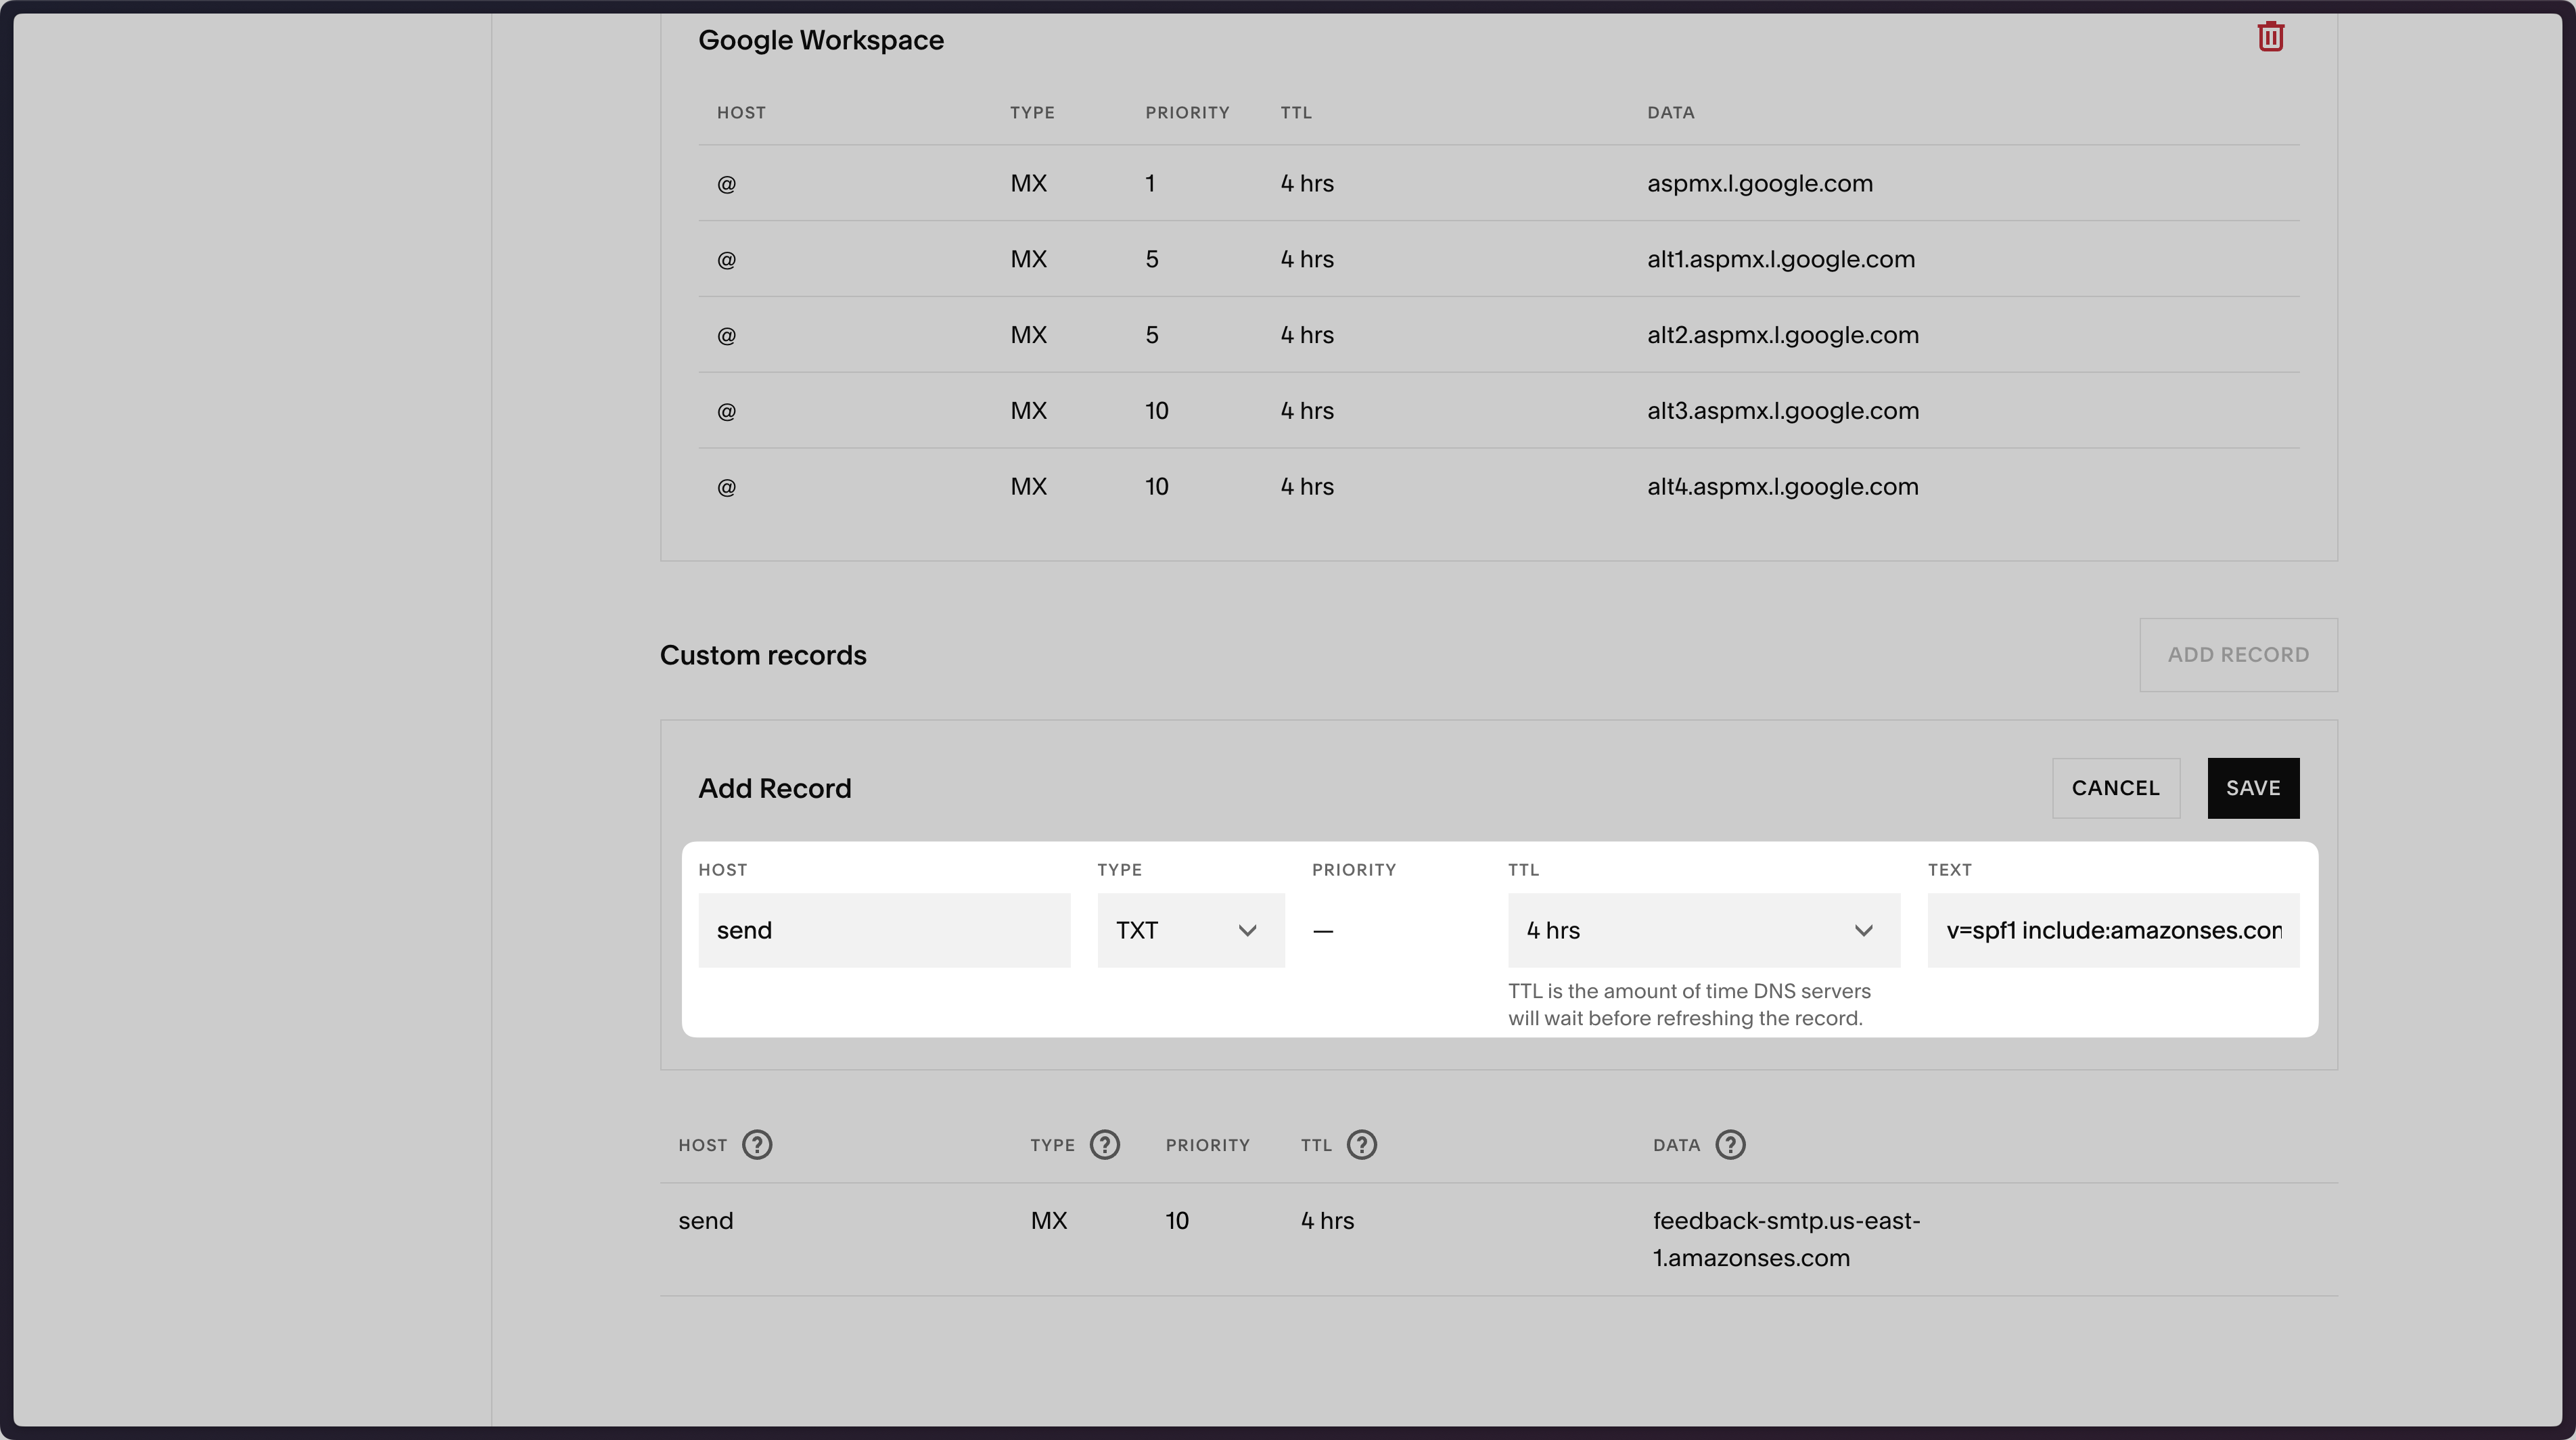 Below is a mapping of the record fields from Resend to Squarespace:
| Squarespace | Resend | Example Value |
| ----------- | ------ | ------------------------------------- |
| Type | Type | `TXT` |
| Host | Name | `send` |
| TTL | TTL | `4 hrs` (default) |
| Text | Value | `"v=spf1 include:amazonses.com ~all"` |
Below is a mapping of the record fields from Resend to Squarespace:
| Squarespace | Resend | Example Value |
| ----------- | ------ | ------------------------------------- |
| Type | Type | `TXT` |
| Host | Name | `send` |
| TTL | TTL | `4 hrs` (default) |
| Text | Value | `"v=spf1 include:amazonses.com ~all"` |
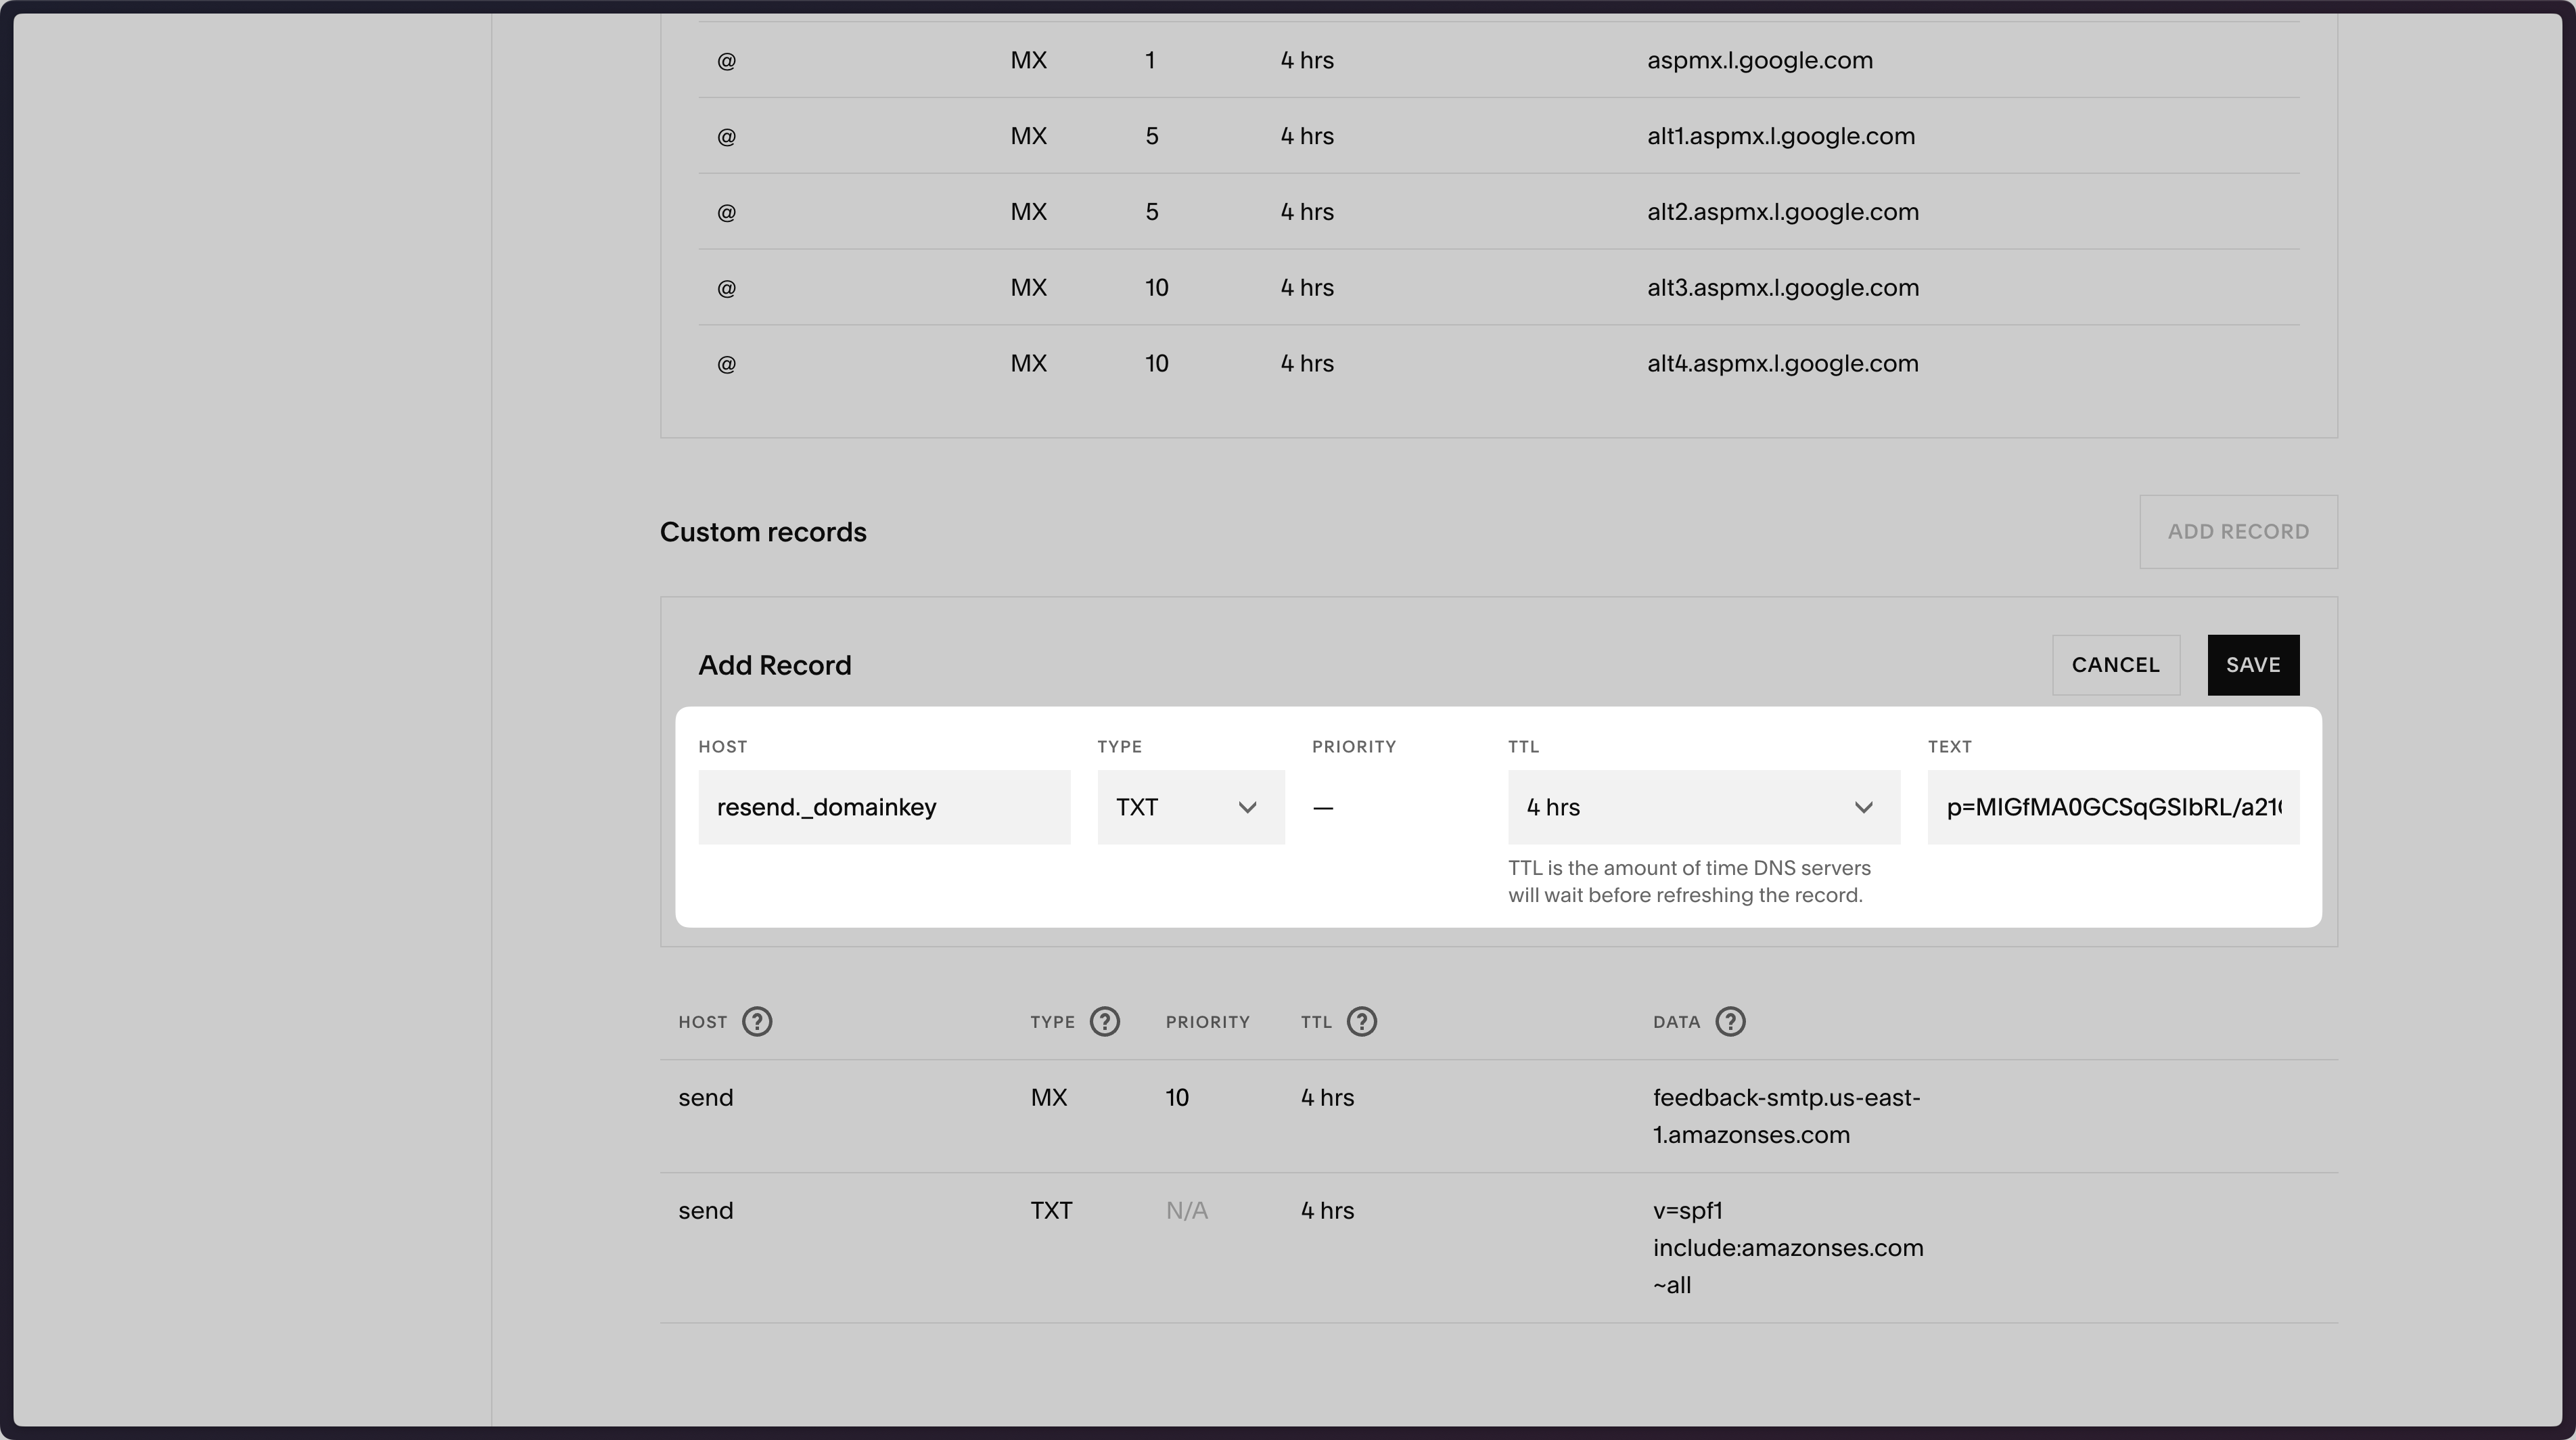 Below is a mapping of the record fields from Resend to Squarespace:
| Squarespace | Resend | Example Value |
| ----------- | ------ | ---------------------------- |
| Type | Type | `TXT` |
| Host | Name | `resend._domainkey` |
| TTL | TTL | `4 hrs` (default) |
| Text | Value | `p=example_demain_key_value` |
Below is a mapping of the record fields from Resend to Squarespace:
| Squarespace | Resend | Example Value |
| ----------- | ------ | ---------------------------- |
| Type | Type | `TXT` |
| Host | Name | `resend._domainkey` |
| TTL | TTL | `4 hrs` (default) |
| Text | Value | `p=example_demain_key_value` |
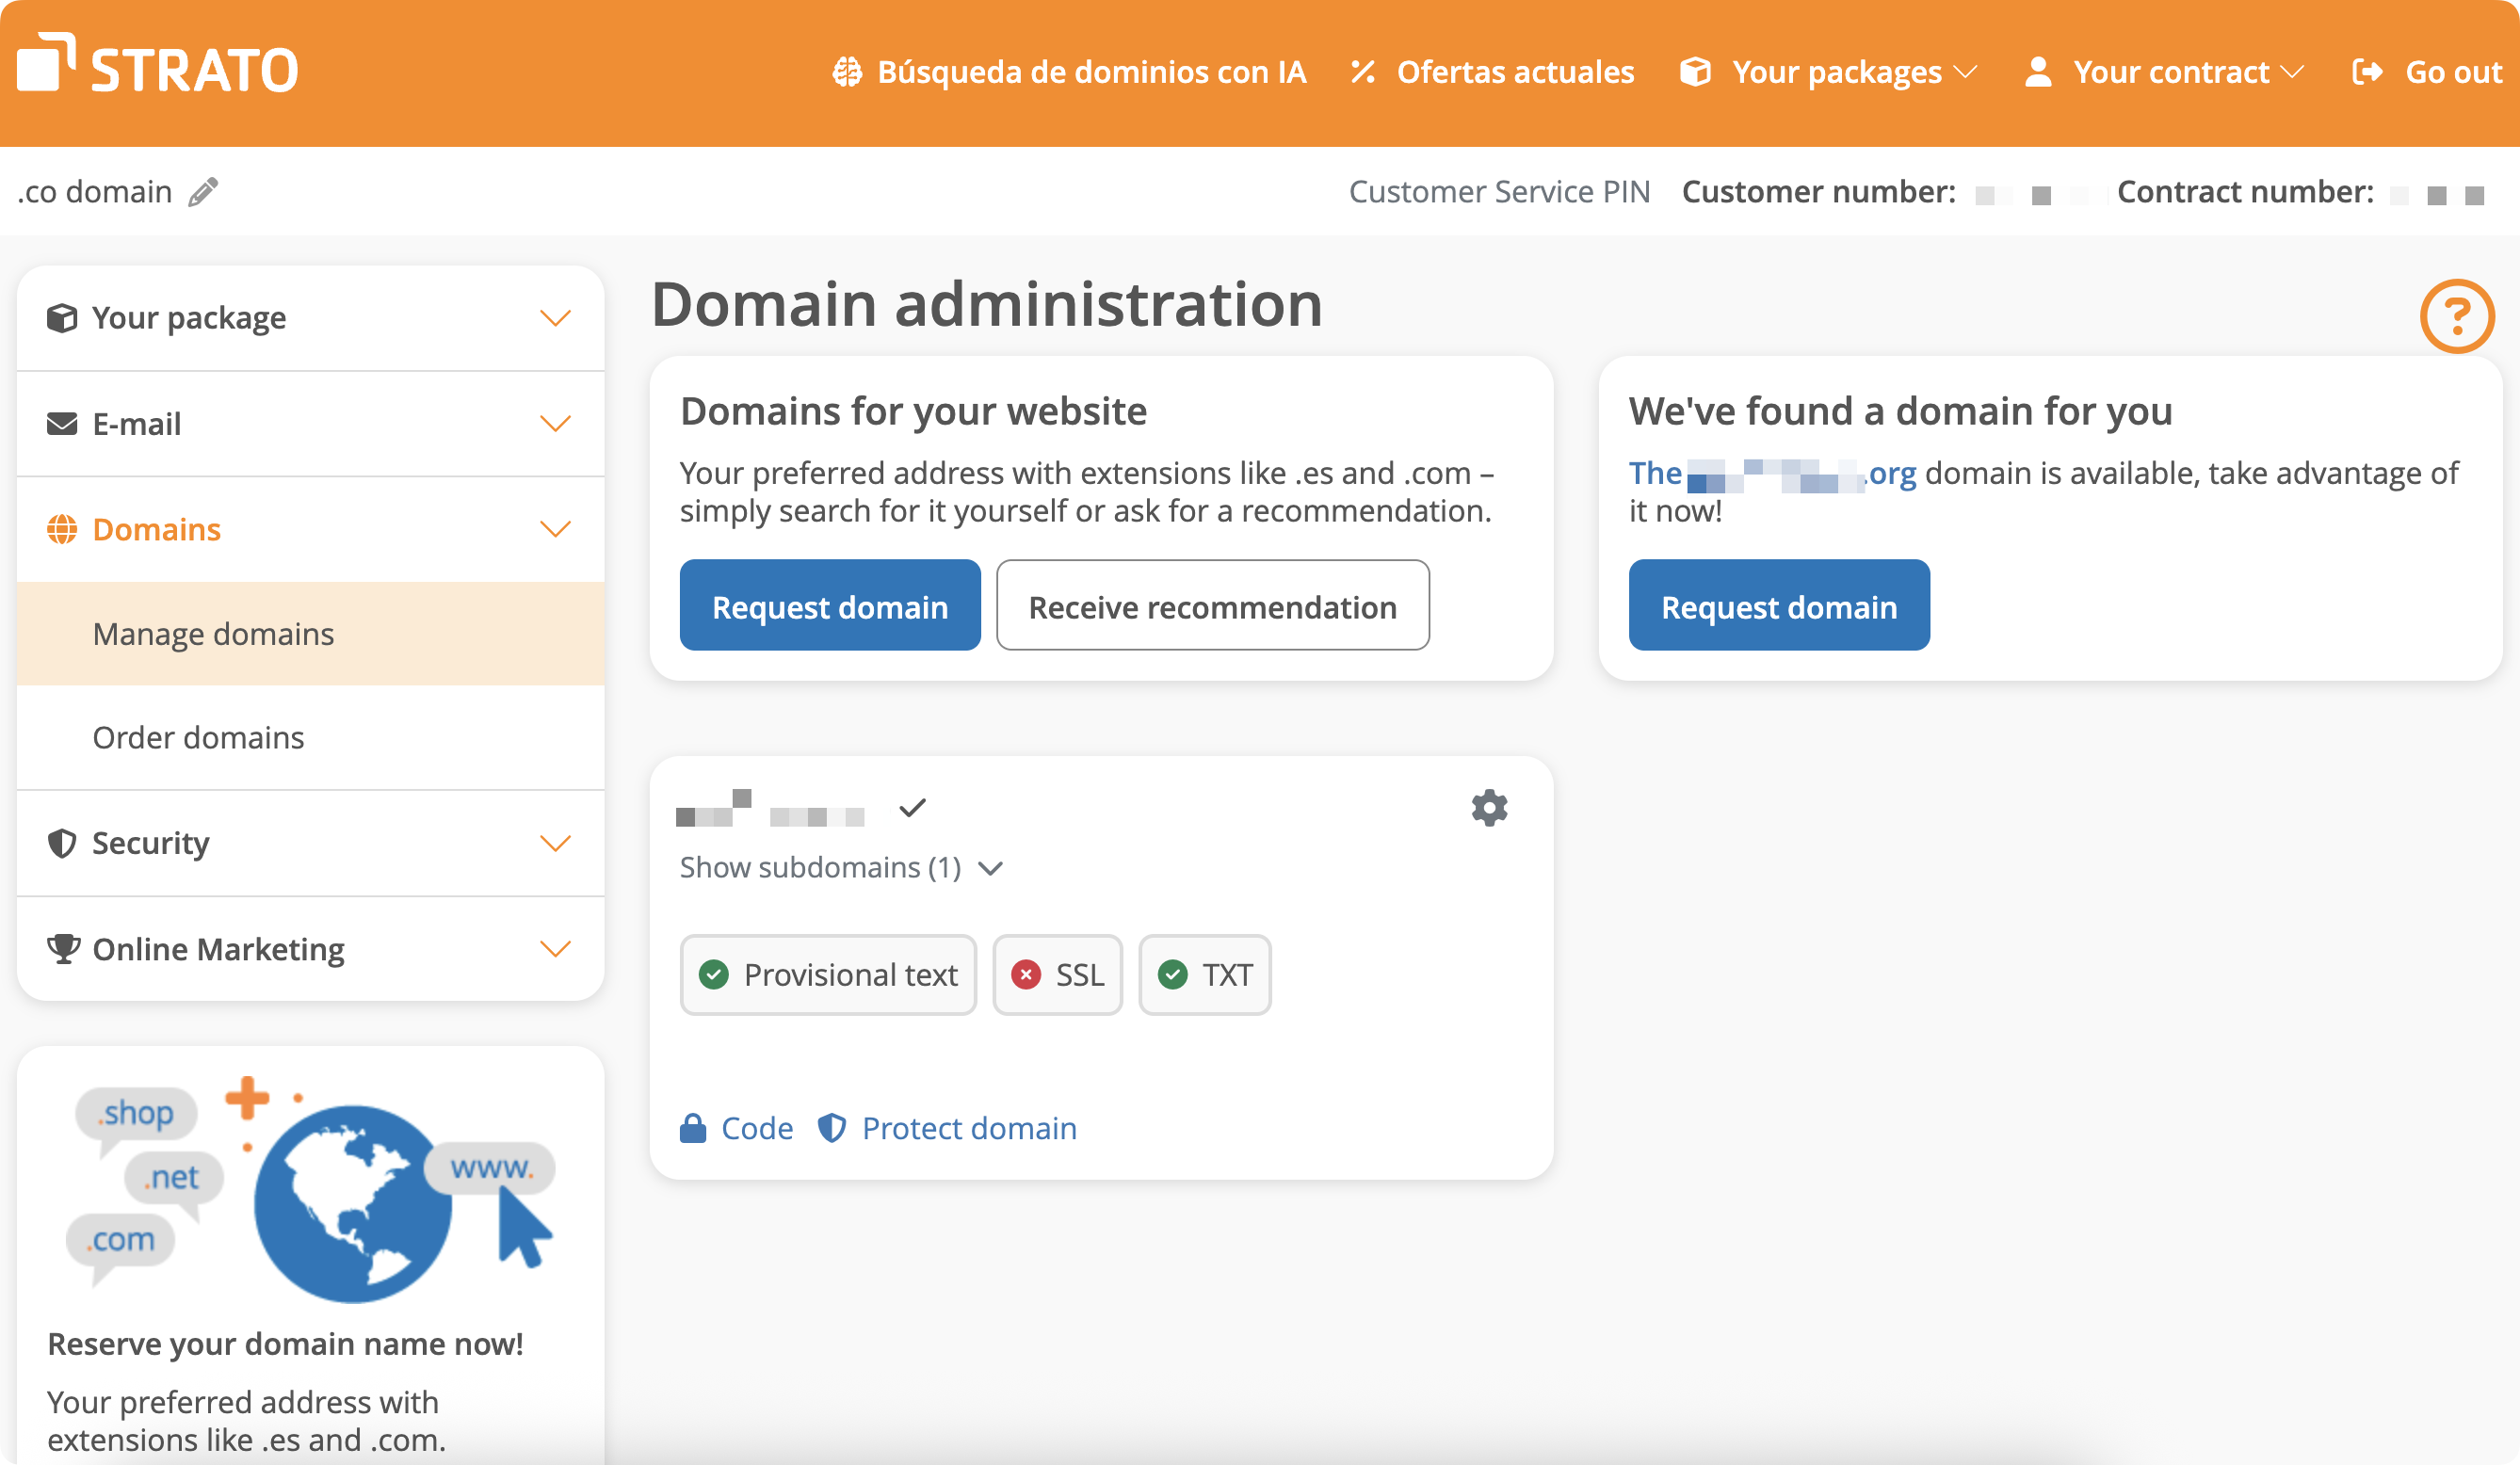 ## Add MX SPF Record
1. On the domain page, click on the gear icon to redirect to Settings.
2. Create a new subdomain named `send`.
3. Navigate to the subdomain settings.
4. Go to the `DNS` tab, you'll see a list of DNS records you can update. Click on `manage` MX record.
5. Select own mail server.
6. Copy MX value from Resend into `Server` field.
7. Use the default priority `Low`.
8. Save settings.
## Add MX SPF Record
1. On the domain page, click on the gear icon to redirect to Settings.
2. Create a new subdomain named `send`.
3. Navigate to the subdomain settings.
4. Go to the `DNS` tab, you'll see a list of DNS records you can update. Click on `manage` MX record.
5. Select own mail server.
6. Copy MX value from Resend into `Server` field.
7. Use the default priority `Low`.
8. Save settings.
 Below is a mapping of the record fields from Resend to Strato:
| Strato | Resend | Example Value |
| ----------- | -------- | ---------------------------------------- |
| Type | Type | `MX Record` |
| Name | Name | `send` |
| Mail server | Value | `feedback-smtp.eu-west-1.amazonses.com.` |
| Priority | Priority | `Low` |
## Add TXT SPF Record
On the base domain settings:
1. Go to the `DNS` tab.
2. Manage TXT and CNAME records.
3. On the bottom, click `Create another record`.
4. Choose `TXT` type.
5. Add `send` for the `name` record.
6. For `value` input `v=spf1 include:amazonses.com ~all`.
7. Save settings.
Below is a mapping of the record fields from Resend to Strato:
| Strato | Resend | Example Value |
| ----------- | -------- | ---------------------------------------- |
| Type | Type | `MX Record` |
| Name | Name | `send` |
| Mail server | Value | `feedback-smtp.eu-west-1.amazonses.com.` |
| Priority | Priority | `Low` |
## Add TXT SPF Record
On the base domain settings:
1. Go to the `DNS` tab.
2. Manage TXT and CNAME records.
3. On the bottom, click `Create another record`.
4. Choose `TXT` type.
5. Add `send` for the `name` record.
6. For `value` input `v=spf1 include:amazonses.com ~all`.
7. Save settings.
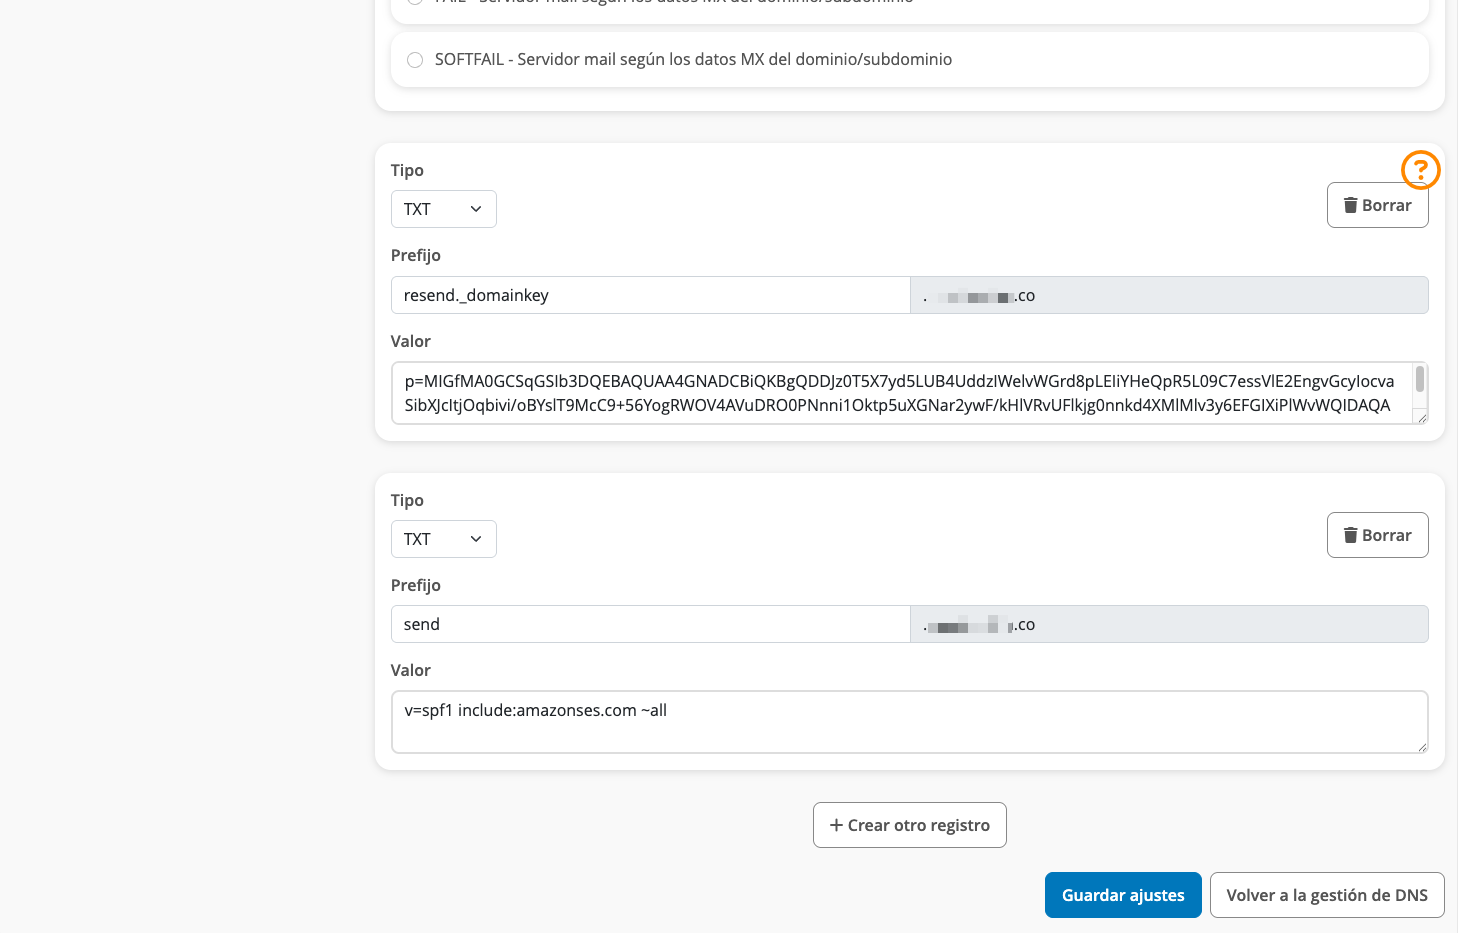 Below is a mapping of the record fields from Resend to Strato:
| Strato | Resend | Example Value |
| ------ | ------ | ----------------------------------- |
| Type | Type | `TXT Record` |
| Name | Name | `send` |
| Value | Value | `v=spf1 include:amazonses.com ~all` |
## Add TXT DKIM Records
On the same TXT and CNAME manage page:
1. Click `Create another record`.
2. Choose `TXT` type.
3. Add `resend._domainkey` for the `Name` record.
4. Copy the record value from Resend into the TXT value field.
5. Save settings.
Below is a mapping of the record fields from Resend to Strato:
| Strato | Resend | Example Value |
| ------ | ------ | ----------------------------------- |
| Type | Type | `TXT Record` |
| Name | Name | `send` |
| Value | Value | `v=spf1 include:amazonses.com ~all` |
## Add TXT DKIM Records
On the same TXT and CNAME manage page:
1. Click `Create another record`.
2. Choose `TXT` type.
3. Add `resend._domainkey` for the `Name` record.
4. Copy the record value from Resend into the TXT value field.
5. Save settings.
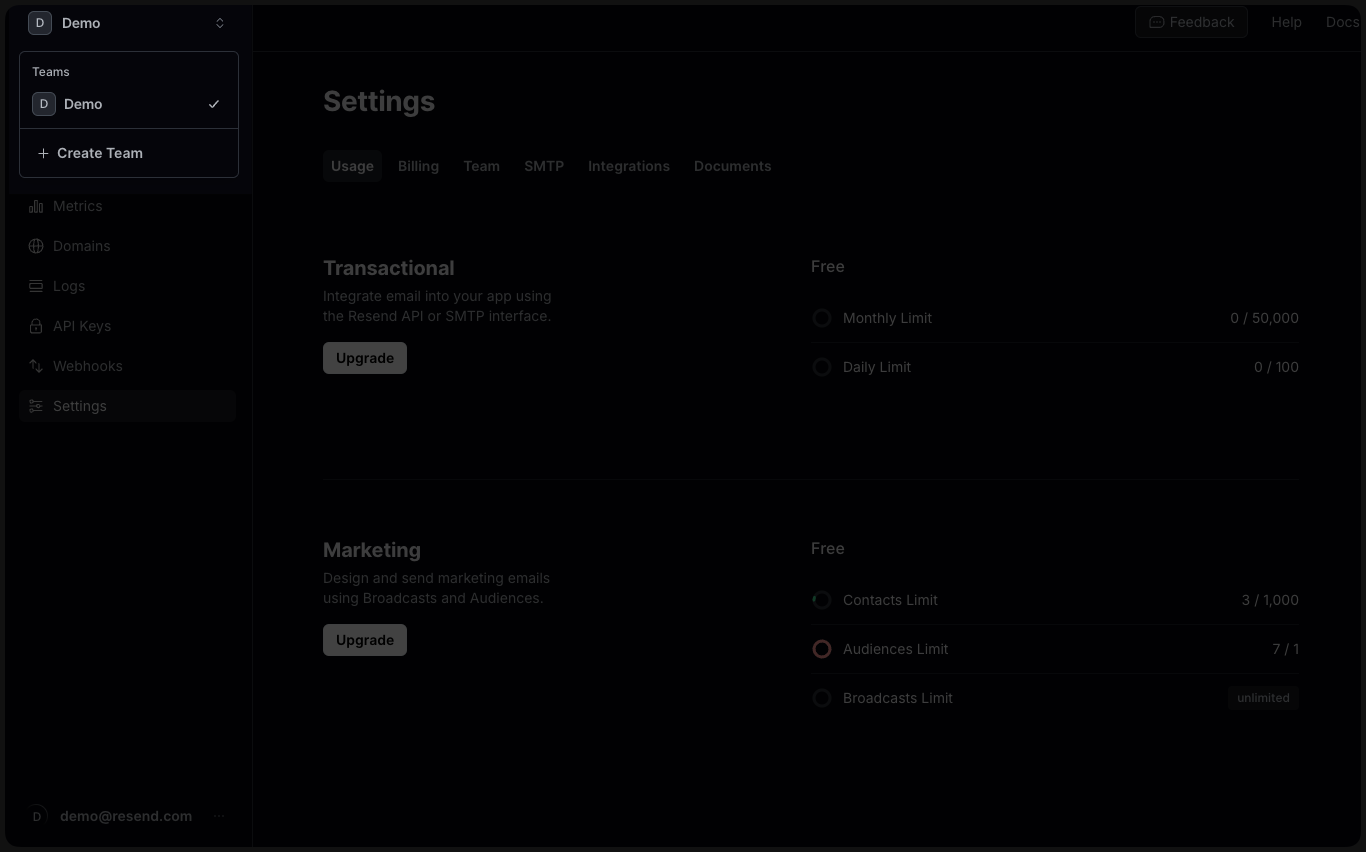 ## Change the team member roles
As an admin of your team, you can change the role of members in your team.
1. Navigate to your [**Team Settings**](https://resend.com/settings/team).
2. Find the user you want to change.
3. Select the more options button
## Change the team member roles
As an admin of your team, you can change the role of members in your team.
1. Navigate to your [**Team Settings**](https://resend.com/settings/team).
2. Find the user you want to change.
3. Select the more options button 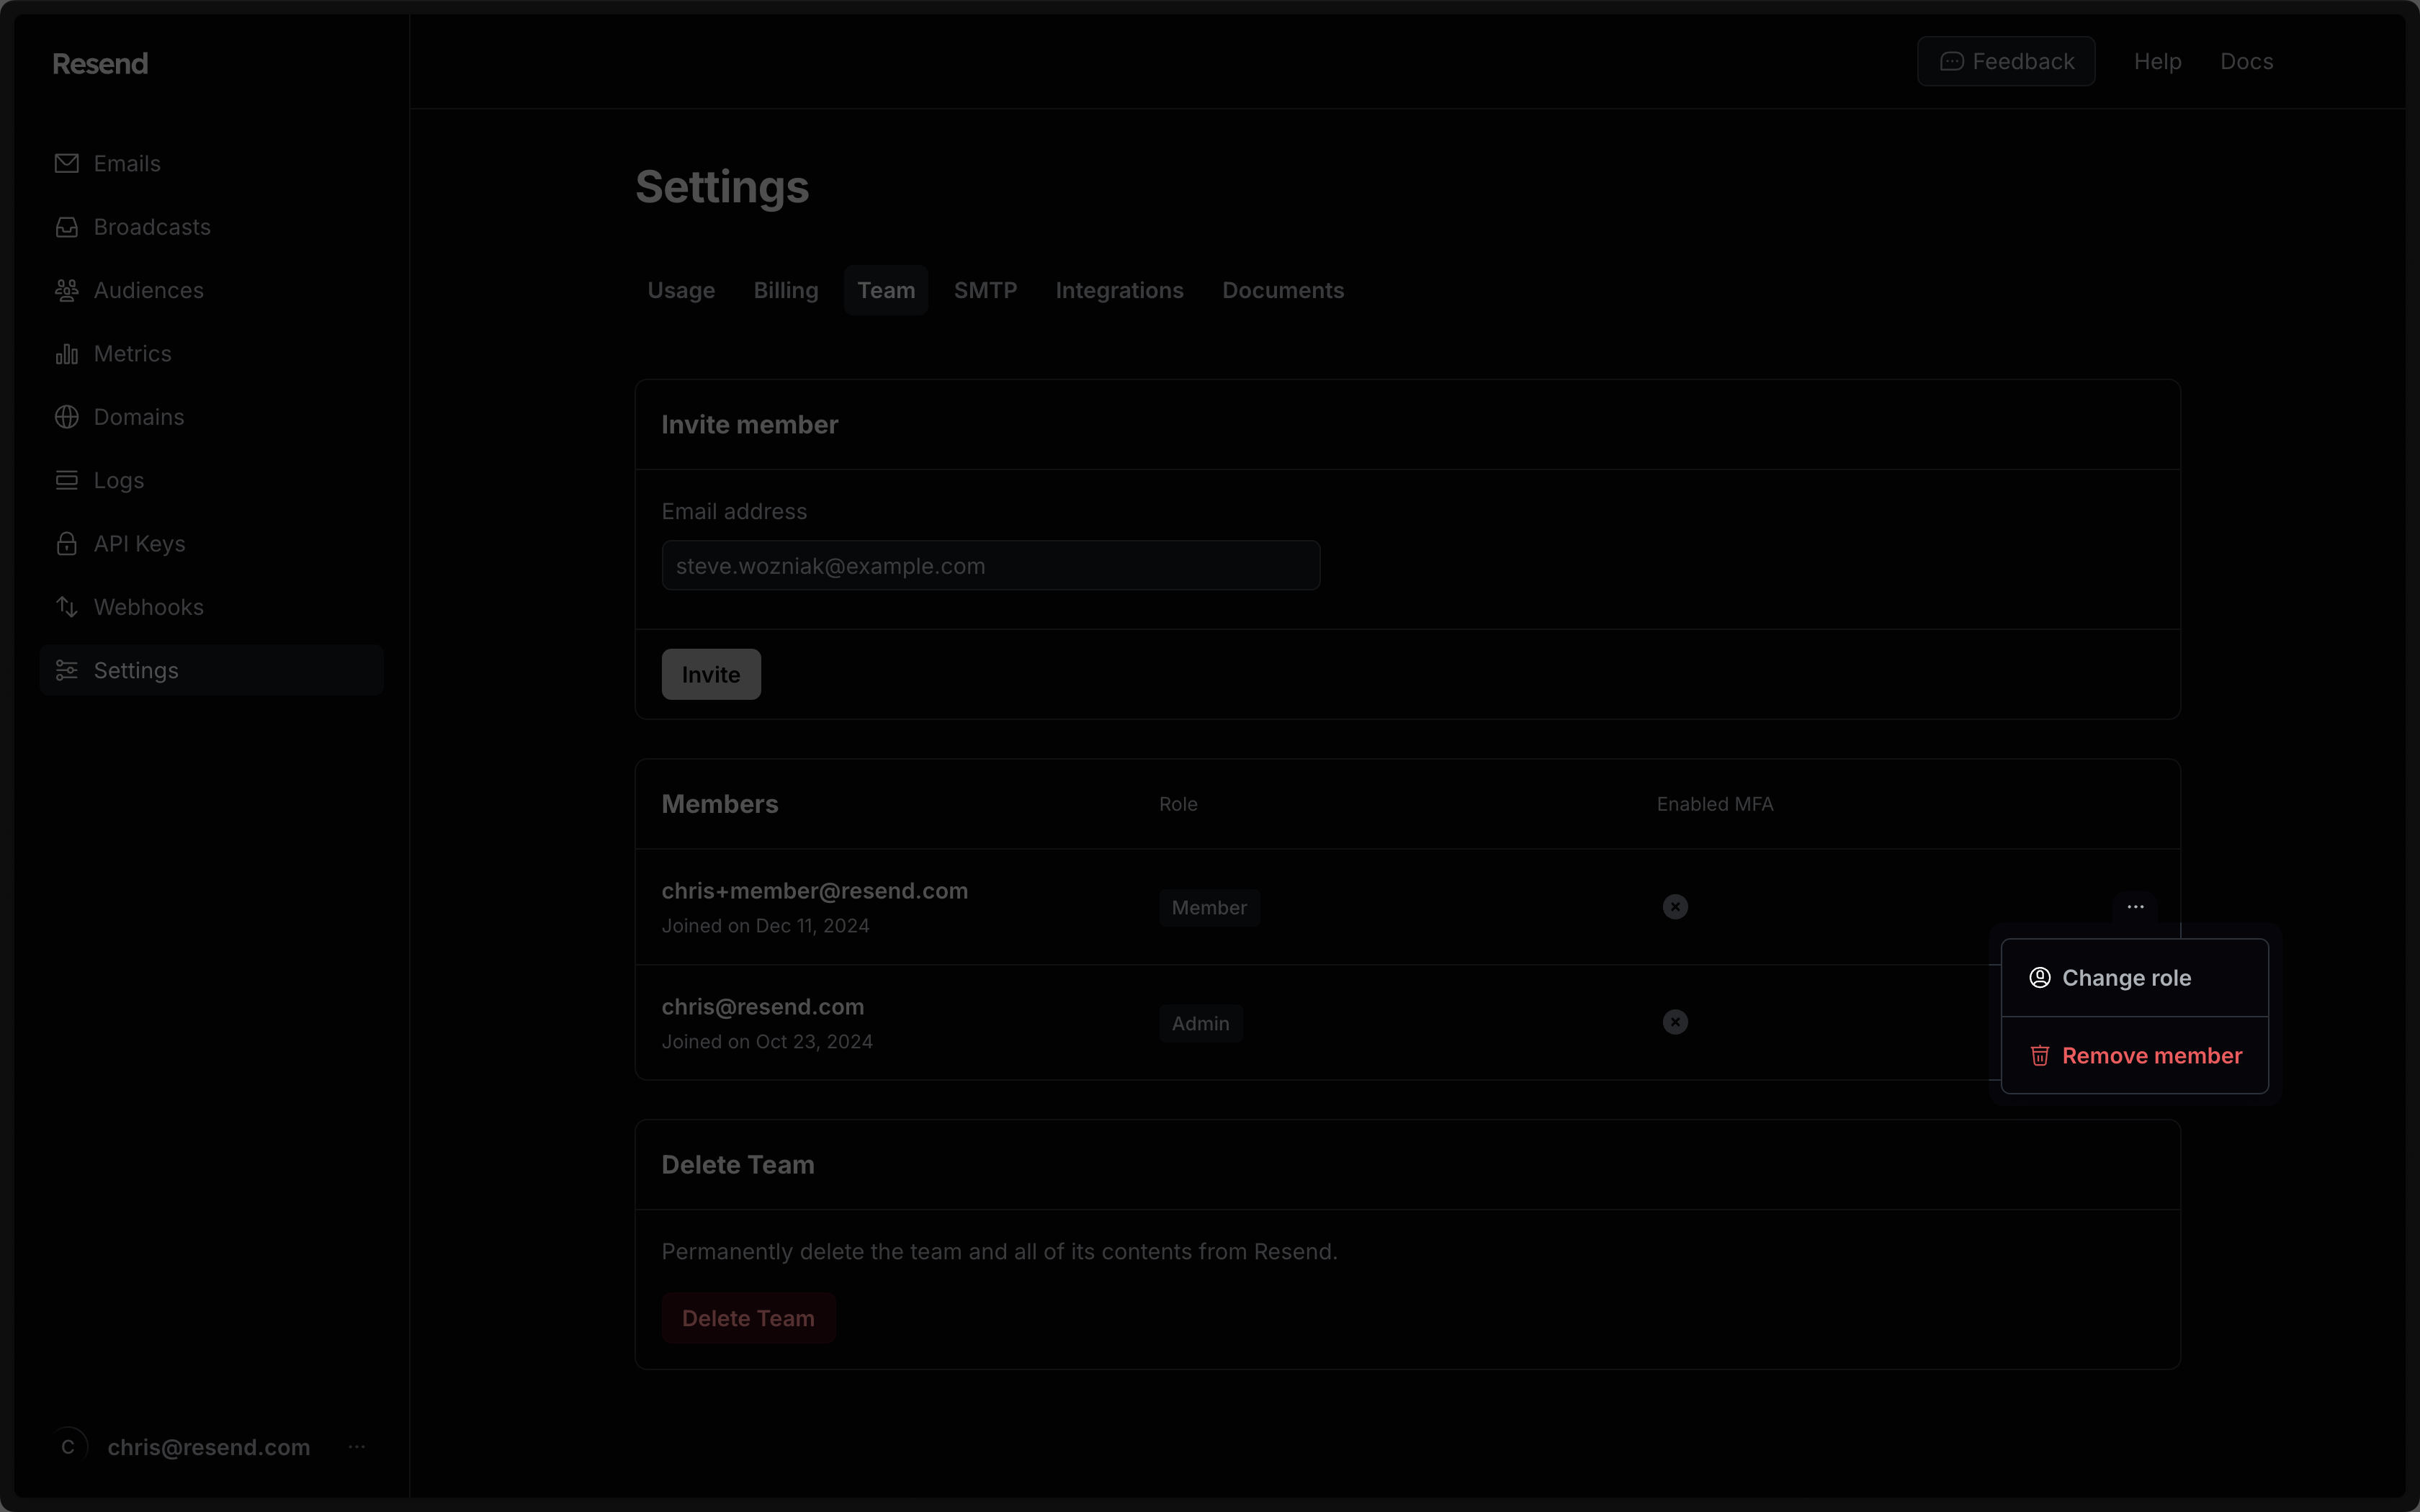 Upon confirmation, your team member will be given the new role.
## Leave your Resend team
You can leave your team by following these steps:
1. Navigate to your [**Team Settings**](https://resend.com/settings/team).
2. Under members, click on
Upon confirmation, your team member will be given the new role.
## Leave your Resend team
You can leave your team by following these steps:
1. Navigate to your [**Team Settings**](https://resend.com/settings/team).
2. Under members, click on 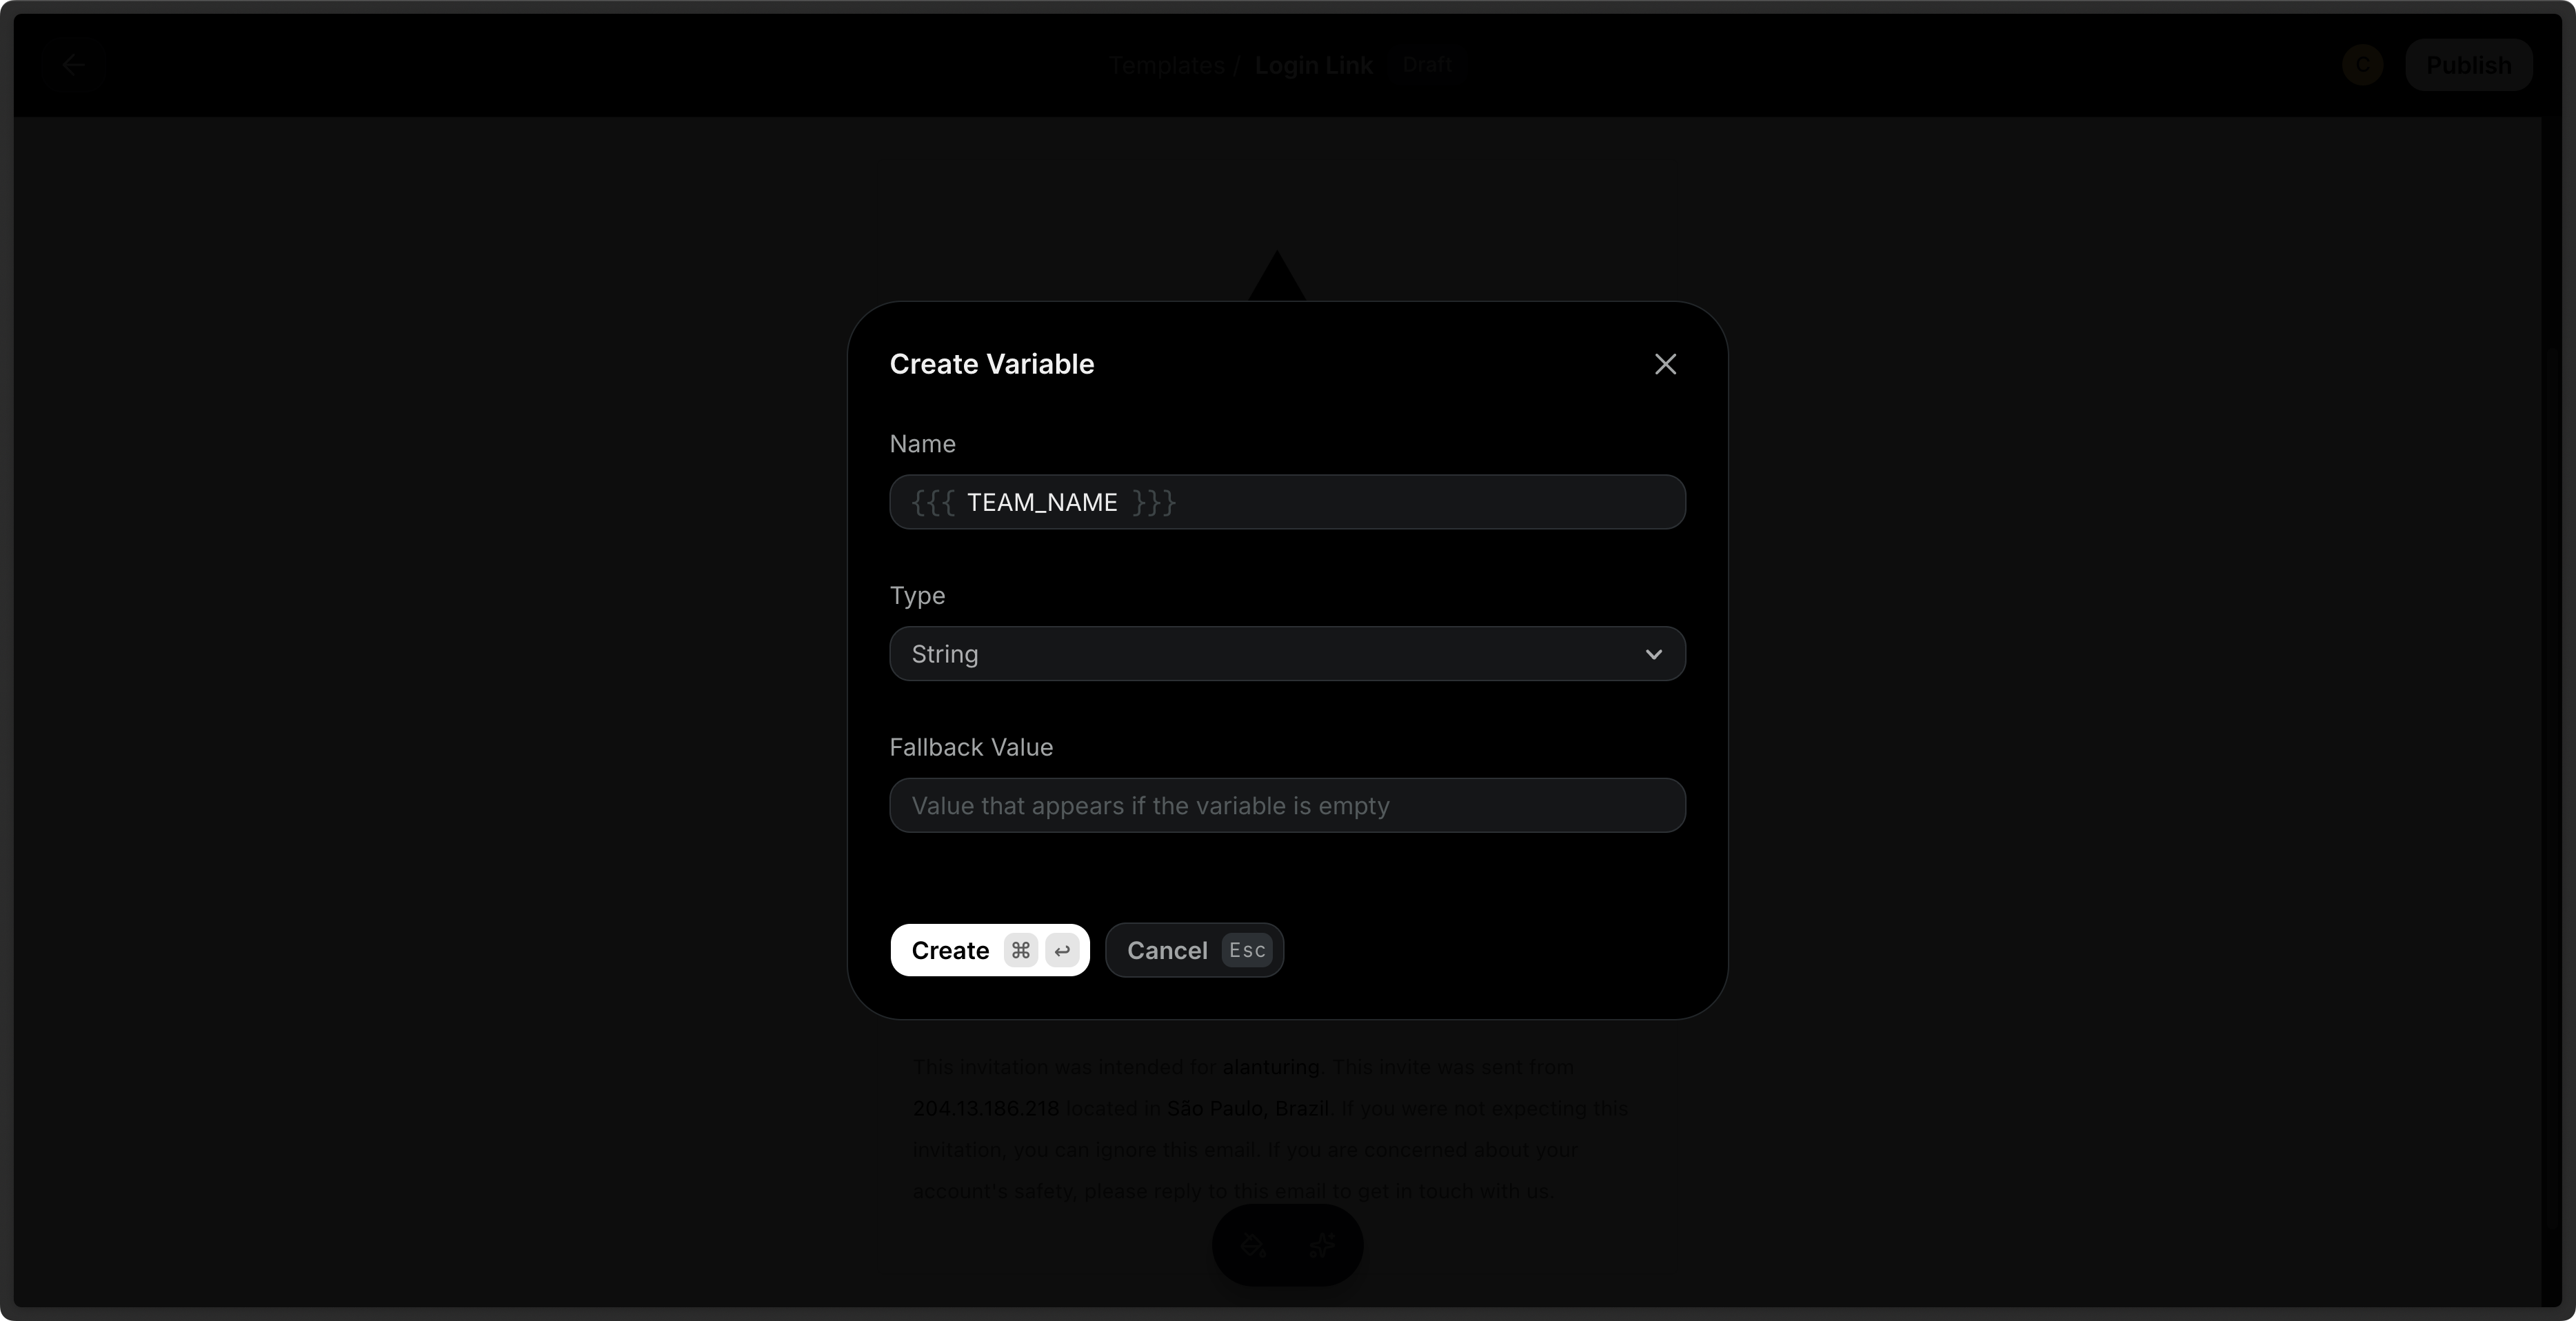
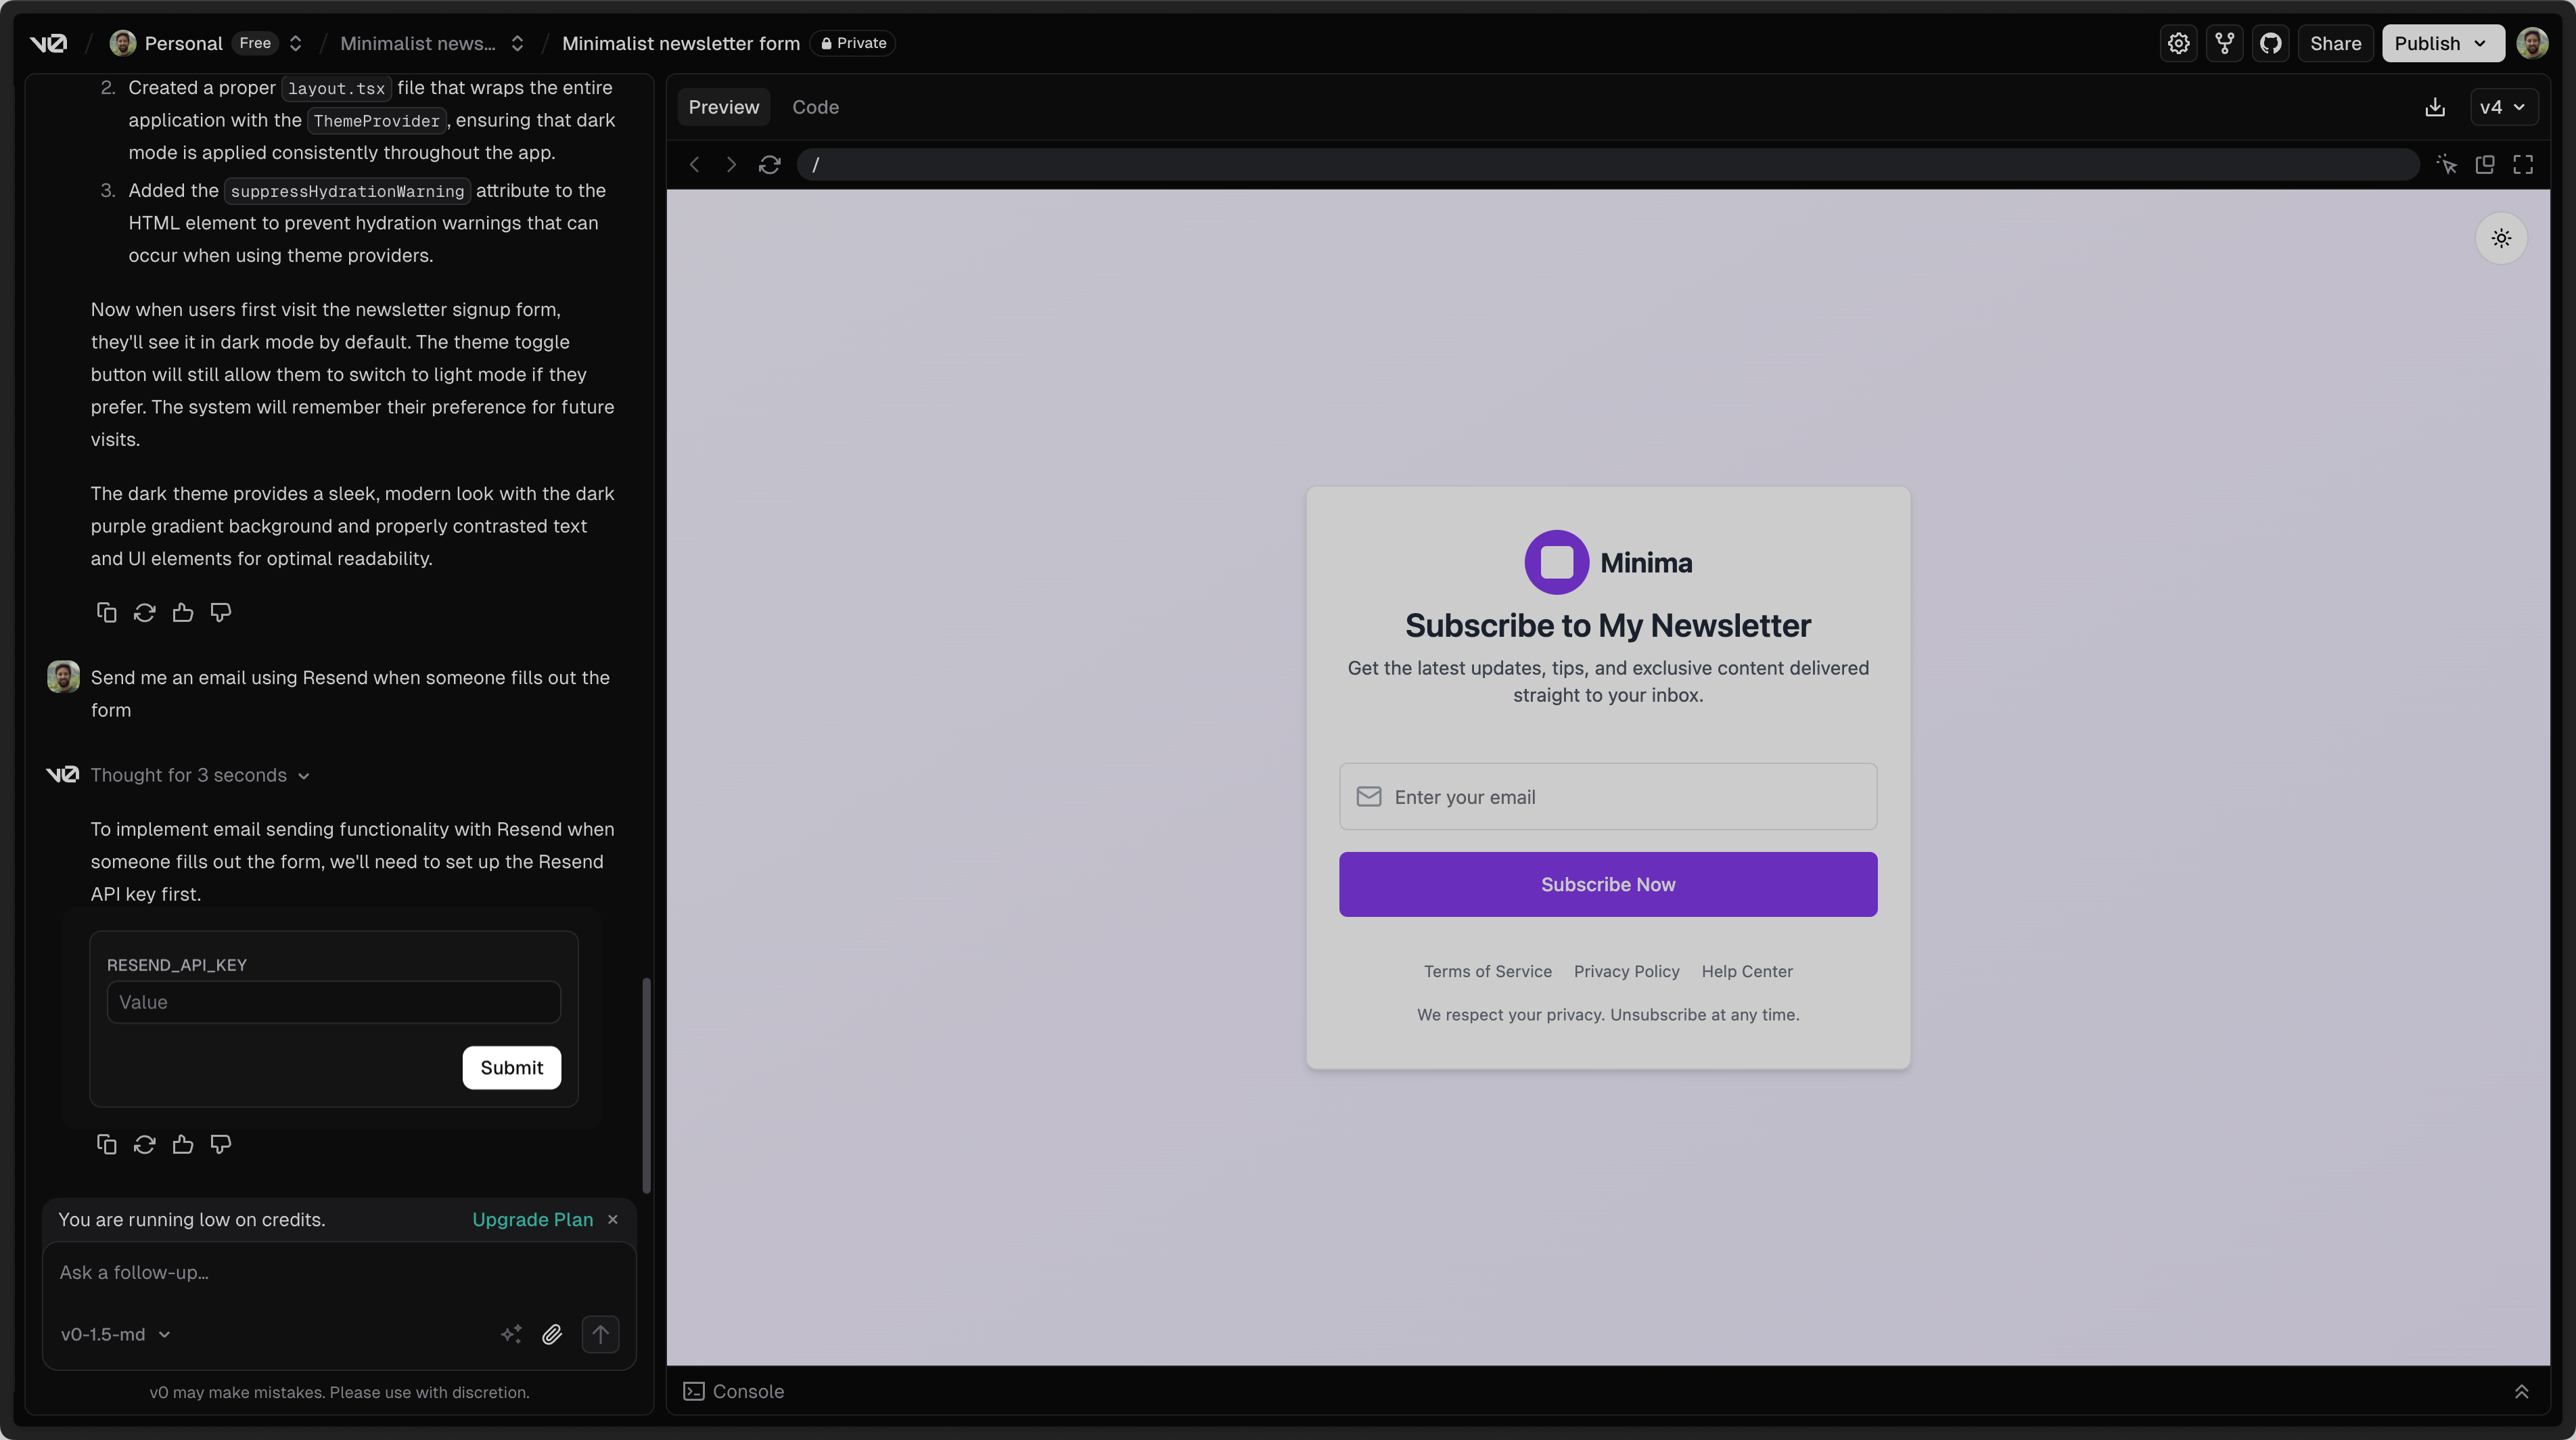 ## 2. Add a custom domain to your Resend account
By default, you can only send emails to your own email address.
To send emails to other email addresses:
1. Add a [custom domain to your Resend account](https://resend.com/domains).
2. Add the custom domain to the `from` field in the `resend` function in v0 (or ask the chat to update these fields).
Get more help adding a custom domain in [Resend's documentation](/dashboard/domains/introduction).
---
# Source: https://resend.com/docs/knowledge-base/vercel.md
> ## Documentation Index
> Fetch the complete documentation index at: https://resend.com/docs/llms.txt
> Use this file to discover all available pages before exploring further.
# Vercel
> Verify your domain on Vercel with Resend.
## 2. Add a custom domain to your Resend account
By default, you can only send emails to your own email address.
To send emails to other email addresses:
1. Add a [custom domain to your Resend account](https://resend.com/domains).
2. Add the custom domain to the `from` field in the `resend` function in v0 (or ask the chat to update these fields).
Get more help adding a custom domain in [Resend's documentation](/dashboard/domains/introduction).
---
# Source: https://resend.com/docs/knowledge-base/vercel.md
> ## Documentation Index
> Fetch the complete documentation index at: https://resend.com/docs/llms.txt
> Use this file to discover all available pages before exploring further.
# Vercel
> Verify your domain on Vercel with Resend.
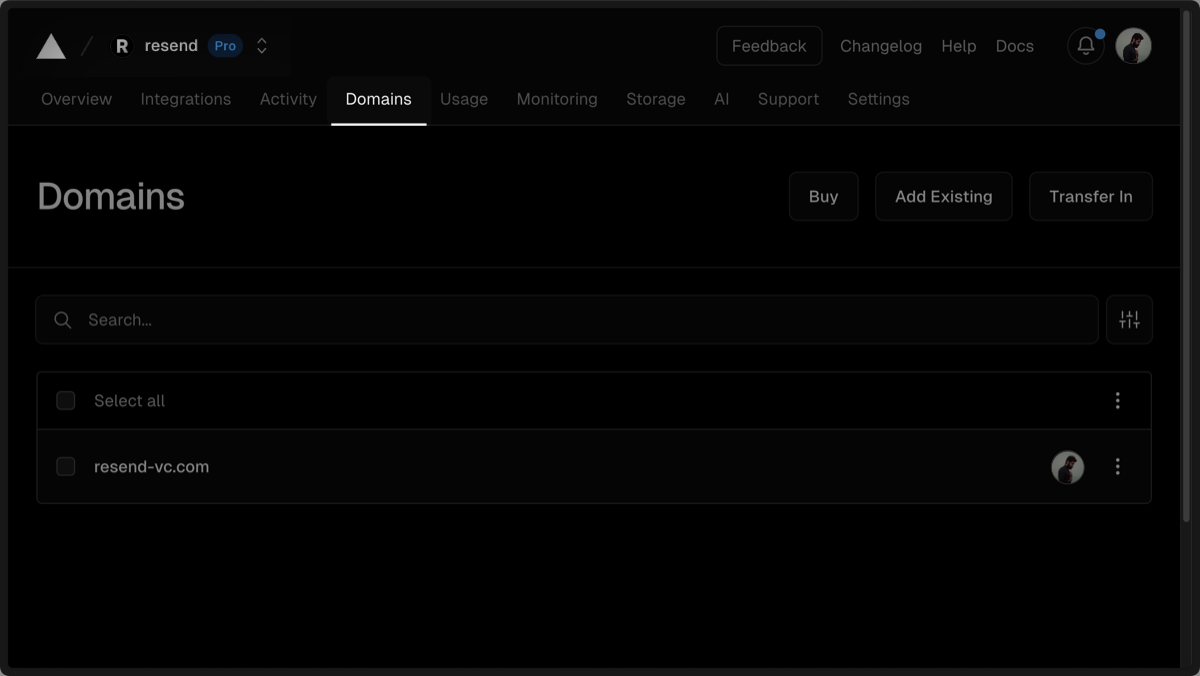 ## Add MX SPF Record
Copy and paste the values in Resend to Vercel.
1. Type `send` for the `Name` of the record in Vercel.
2. Expand the `Type` dropdown and select `MX`.
3. Copy the record value from Resend into the `Value` field in Vercel.
4. Add `10` for the `Priority`.
5. Select `Add`.
## Add MX SPF Record
Copy and paste the values in Resend to Vercel.
1. Type `send` for the `Name` of the record in Vercel.
2. Expand the `Type` dropdown and select `MX`.
3. Copy the record value from Resend into the `Value` field in Vercel.
4. Add `10` for the `Priority`.
5. Select `Add`.
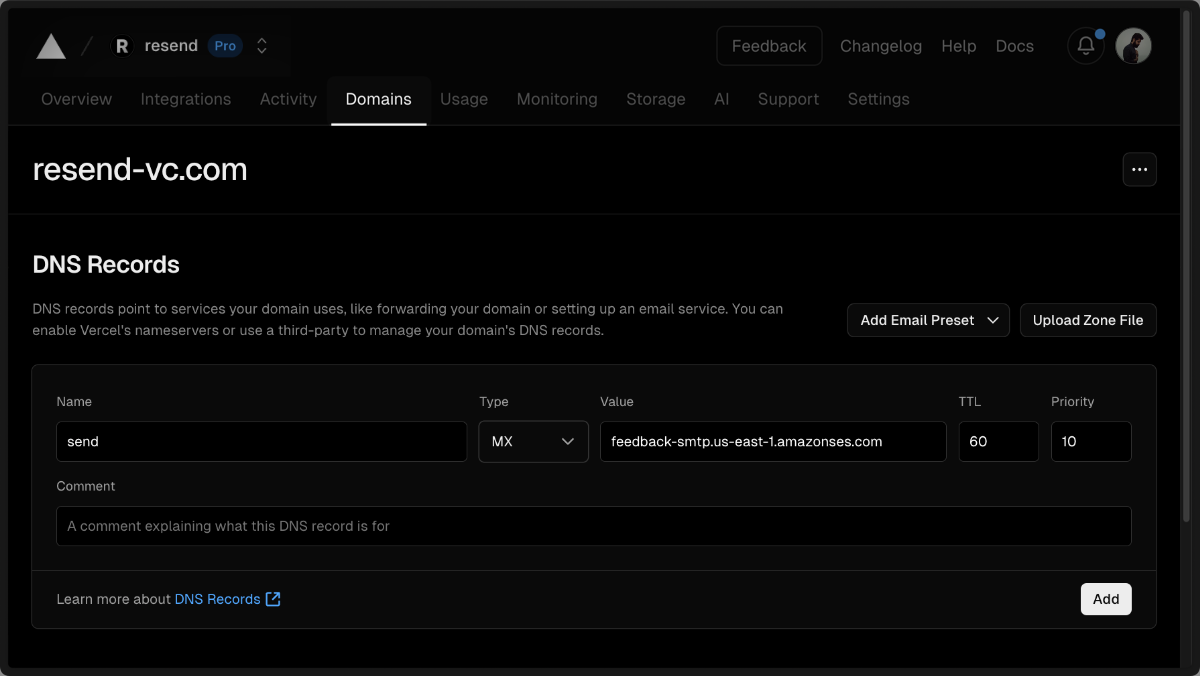 Below is a mapping of the record fields from Resend to Vercel:
| Vercel | Resend | Example Value |
| -------- | -------- | --------------------------------------- |
| Type | Type | `MX Record` |
| Name | Name | `send` |
| Value | Value | `feedback-smtp.us-east-1.amazonses.com` |
| TTL | TTL | `Use Vercel default (60)` |
| Priority | Priority | `10` |
Below is a mapping of the record fields from Resend to Vercel:
| Vercel | Resend | Example Value |
| -------- | -------- | --------------------------------------- |
| Type | Type | `MX Record` |
| Name | Name | `send` |
| Value | Value | `feedback-smtp.us-east-1.amazonses.com` |
| TTL | TTL | `Use Vercel default (60)` |
| Priority | Priority | `10` |
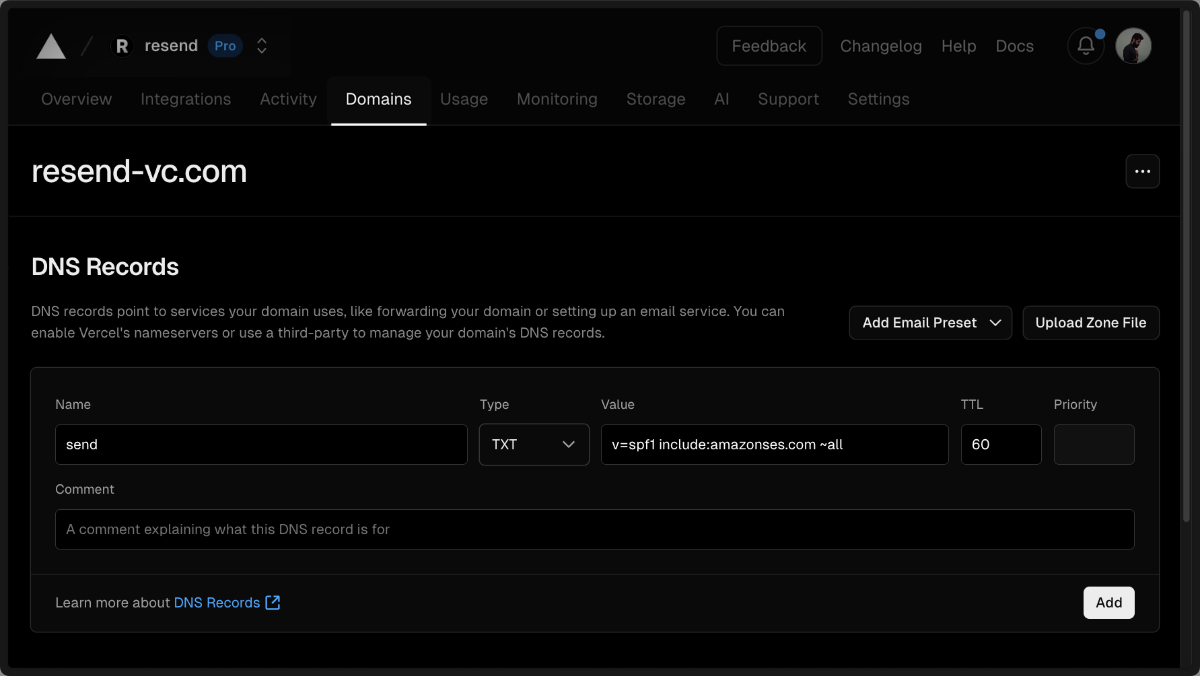 Below is a mapping of the record fields from Resend to Vercel:
| Vercel | Resend | Example Value |
| ------ | ------ | ------------------------------------- |
| Type | Type | `TXT Record` |
| Name | Name | `send` |
| Value | Value | `"v=spf1 include:amazonses.com ~all"` |
| TTL | TTL | `Use Vercel default (60)` |
## Add TXT DKIM Records
In the same section, add another record in Vercel.
1. Type `resend._domainkey` for the `Name` of the record.
2. Expand the `Type` dropdown and select `TXT`.
3. Copy the record value from Resend into the `Value` field in Vercel.
Below is a mapping of the record fields from Resend to Vercel:
| Vercel | Resend | Example Value |
| ------ | ------ | ------------------------------------- |
| Type | Type | `TXT Record` |
| Name | Name | `send` |
| Value | Value | `"v=spf1 include:amazonses.com ~all"` |
| TTL | TTL | `Use Vercel default (60)` |
## Add TXT DKIM Records
In the same section, add another record in Vercel.
1. Type `resend._domainkey` for the `Name` of the record.
2. Expand the `Type` dropdown and select `TXT`.
3. Copy the record value from Resend into the `Value` field in Vercel.
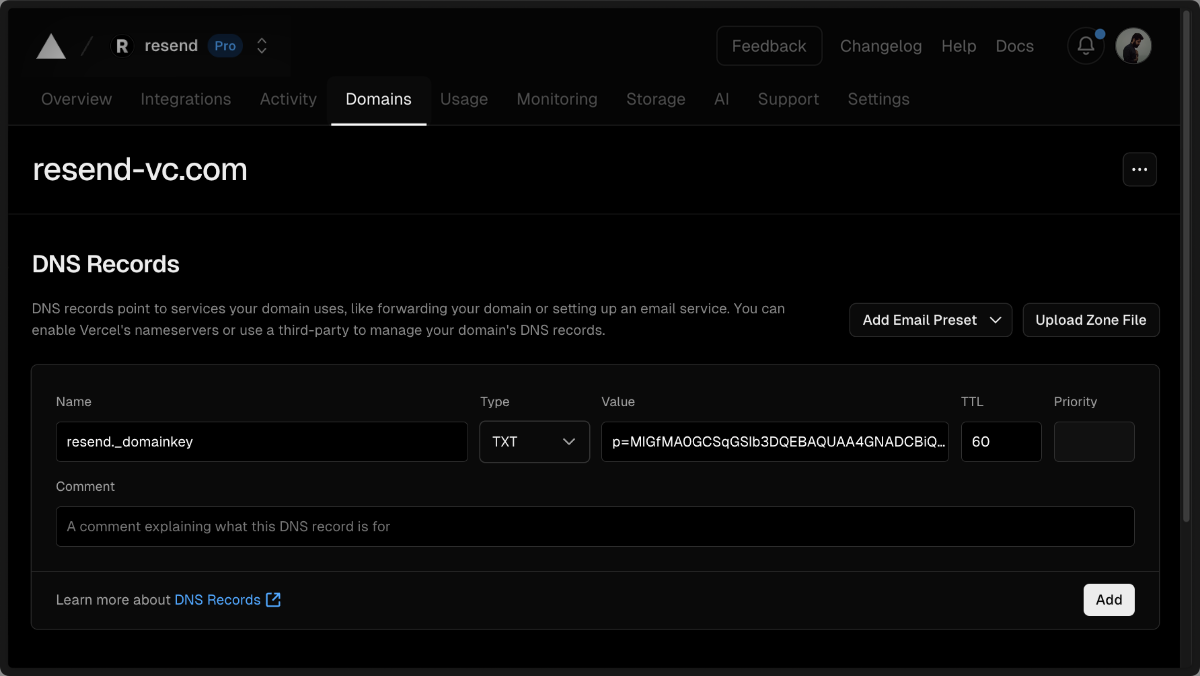 Below is a mapping of the record fields from Resend to Vercel:
| Vercel | Resend | Example Value |
| ------ | ------ | ---------------------------- |
| Type | Type | `TXT Record` |
| Name | Name | `resend._domainkey` |
| Value | Value | `p=example_demain_key_value` |
| TTL | TTL | `Use Vercel default (60)` |
## Receiving Emails
If you want to receive emails at your domain, toggle the "Receiving" switch on the domain details page.
Below is a mapping of the record fields from Resend to Vercel:
| Vercel | Resend | Example Value |
| ------ | ------ | ---------------------------- |
| Type | Type | `TXT Record` |
| Name | Name | `resend._domainkey` |
| Value | Value | `p=example_demain_key_value` |
| TTL | TTL | `Use Vercel default (60)` |
## Receiving Emails
If you want to receive emails at your domain, toggle the "Receiving" switch on the domain details page.
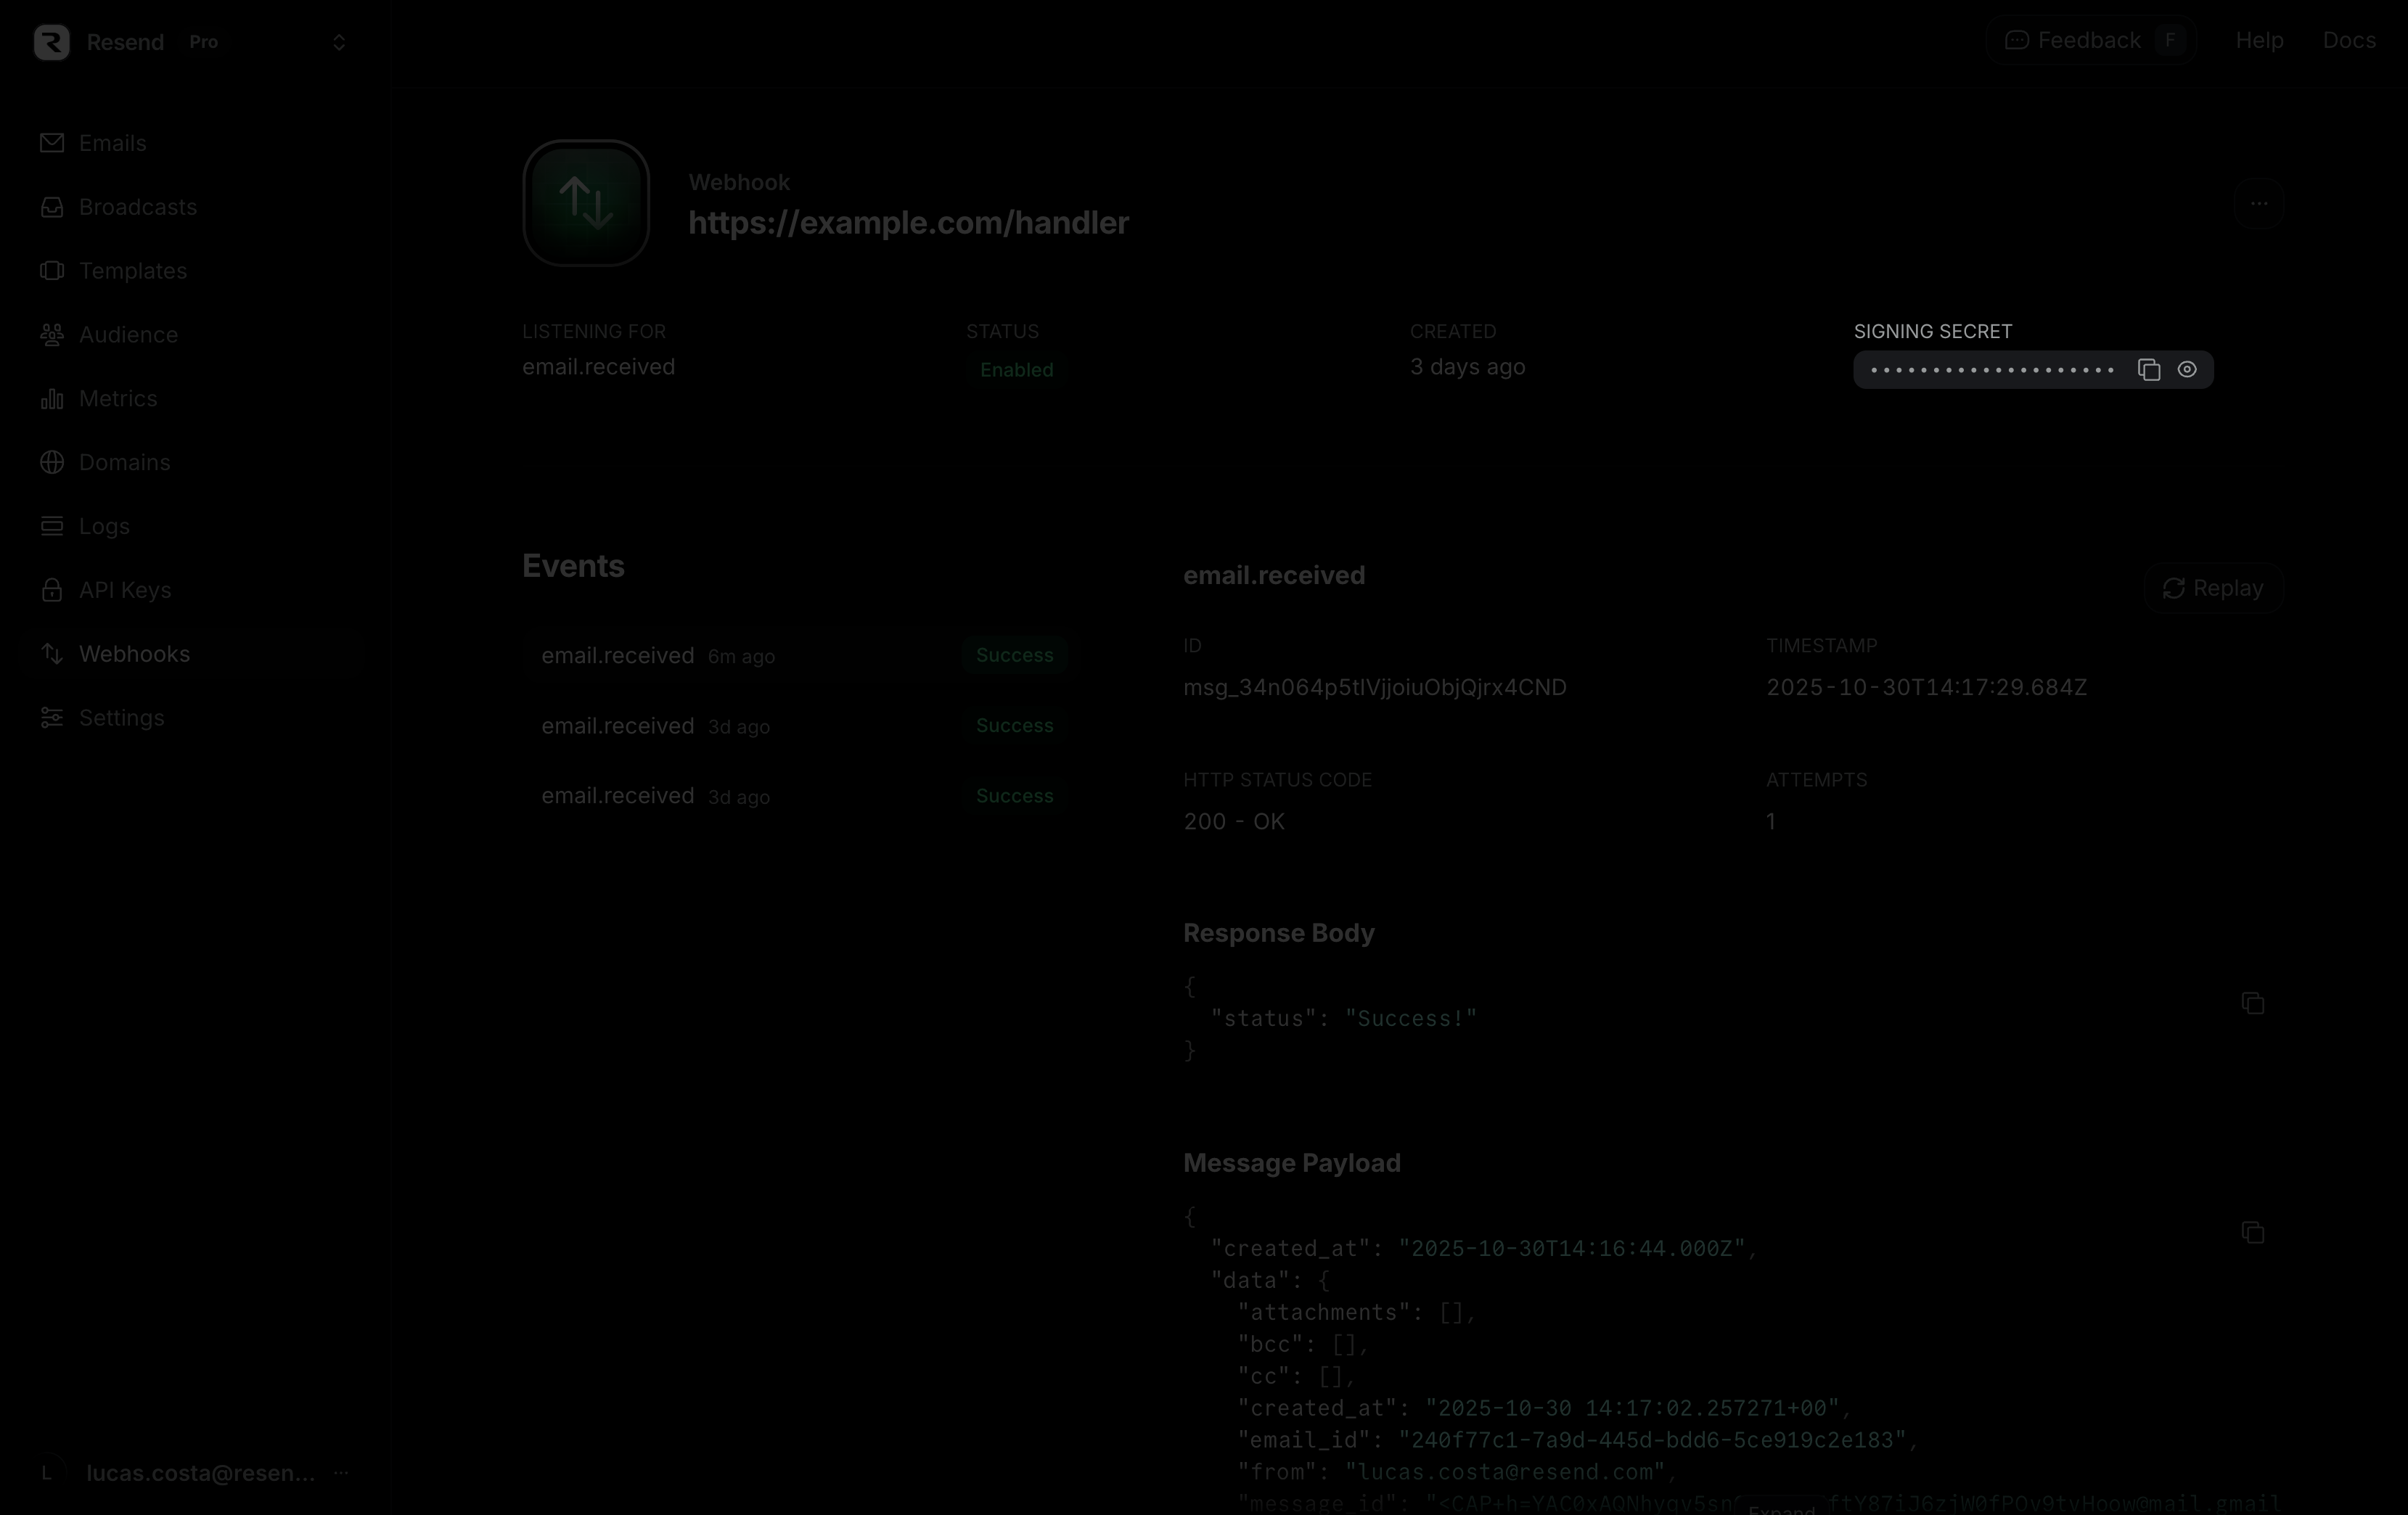 Calls to [create](/api-reference/webhooks/create-webhook), [retrieve](/api-reference/webhooks/get-webhook), or [list](/api-reference/webhooks/list-webhooks) webhooks will also return the signing secret in the response body.
To verify the webhook request, you can use the Resend SDK, as in the example below.
Calls to [create](/api-reference/webhooks/create-webhook), [retrieve](/api-reference/webhooks/get-webhook), or [list](/api-reference/webhooks/list-webhooks) webhooks will also return the signing secret in the response body.
To verify the webhook request, you can use the Resend SDK, as in the example below.
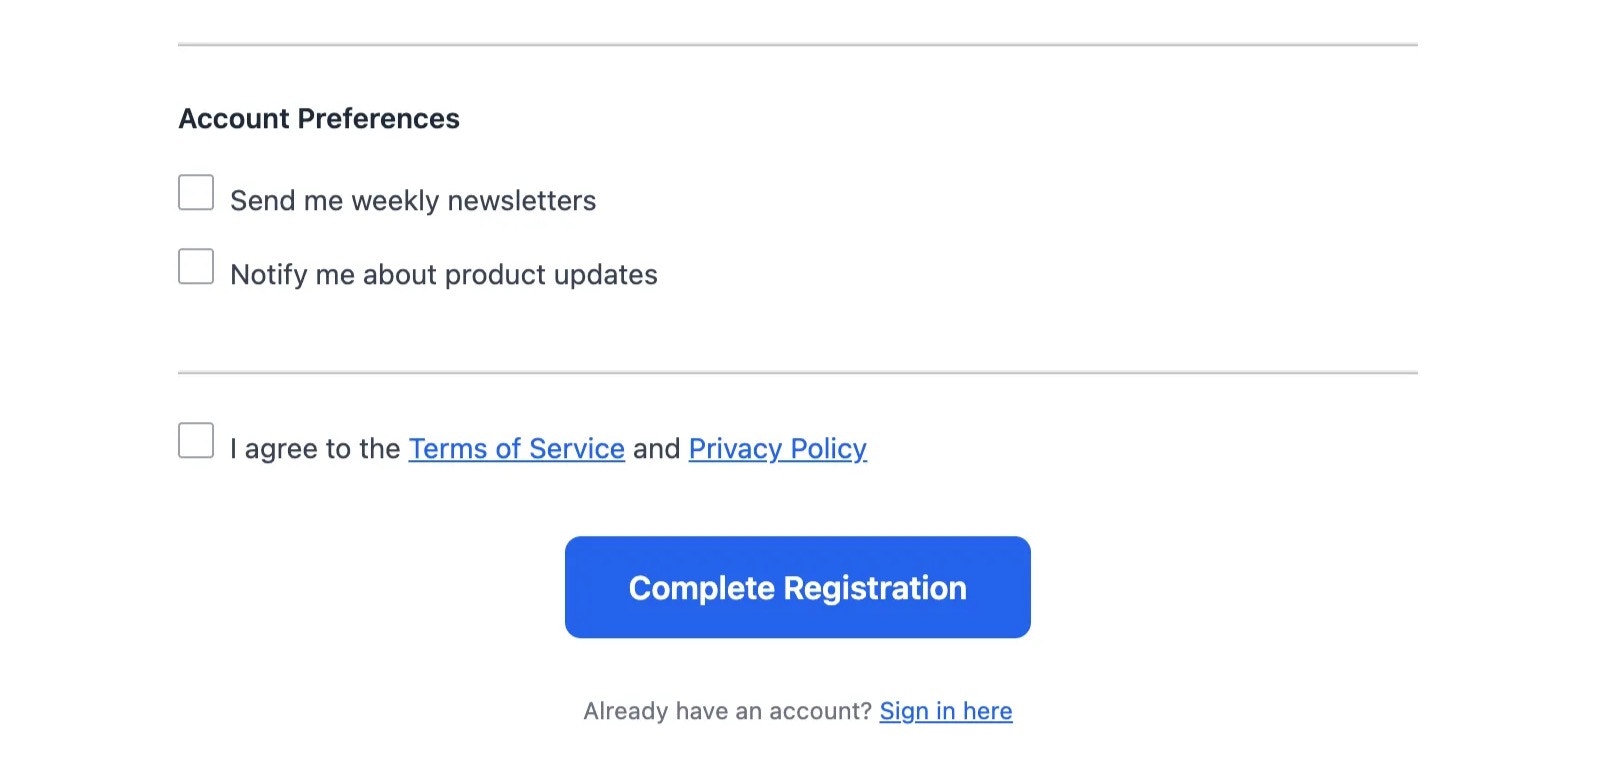 ## Still have questions?
Following best practices helps everyone — your recipients, your deliverability, and the health of the email ecosystem. When you start with clear consent, your messages are the ones people are *glad* to receive.
If you’re new to permission-based sending, please reach out to [Support](https://resend.com/help) and we’ll help you make sure everything’s on track.
---
# Source: https://resend.com/docs/knowledge-base/what-email-addresses-to-use-for-testing.md
> ## Documentation Index
> Fetch the complete documentation index at: https://resend.com/docs/llms.txt
> Use this file to discover all available pages before exploring further.
# What email addresses to use for testing?
> Learn what email addresses are safe to use for testing with Resend
## Safe email addresses for testing
When testing email functionality, it's important to use designated test addresses to avoid unintended consequences like deliverability issues or spam complaints.
Resend provides a set of safe email addresses specifically designed for testing, ensuring that you can simulate different email events without affecting your domain's reputation.
### Why not use @example.com or @test.com?
Many developers attempt to use domains like `@example.com` or `@test.com` for testing purposes. However, these domains are not designed for email traffic and often reject messages, leading to bounces.
A high bounce rate can negatively impact your sender reputation and affect future deliverability. To prevent this, Resend blocks such addresses and returns a `422 Unprocessable Entity` error if you attempt to send to them.
### List of addresses to use
To help you safely test email functionality, Resend provides the following test addresses, each designed to simulate a different delivery event:
| Address | Delivery event simulated |
| ----------------------- | ------------------------ |
| `delivered@resend.dev` | Email being delivered |
| `bounced@resend.dev` | Email bouncing |
| `complained@resend.dev` | Email marked as spam |
| `suppressed@resend.dev` | Email being suppressed |
Using these addresses in your tests allows you to validate email flows without risking real-world deliverability problems. For more help sending test emails, see our [testing documentation](/dashboard/emails/send-test-emails).
### Labeling support
Most test email addresses support labeling, which enables you to send emails to the same test address in multiple ways. You can add a label after the `+` symbol to help track and differentiate between different test scenarios:
* `delivered+user1@resend.dev`
* `bounced+signup@resend.dev`
* `complained+newsletter@resend.dev`
This is particularly useful for testing different email flows, tracking webhook responses, and matching responses with the specific email address that triggered the event.
Whether you need to confirm that an email has been sent, track engagement events, or simulate a bounce scenario, these addresses provide a controlled and predictable way to test your email integration with Resend.
## Still have questions?
Following best practices helps everyone — your recipients, your deliverability, and the health of the email ecosystem. When you start with clear consent, your messages are the ones people are *glad* to receive.
If you’re new to permission-based sending, please reach out to [Support](https://resend.com/help) and we’ll help you make sure everything’s on track.
---
# Source: https://resend.com/docs/knowledge-base/what-email-addresses-to-use-for-testing.md
> ## Documentation Index
> Fetch the complete documentation index at: https://resend.com/docs/llms.txt
> Use this file to discover all available pages before exploring further.
# What email addresses to use for testing?
> Learn what email addresses are safe to use for testing with Resend
## Safe email addresses for testing
When testing email functionality, it's important to use designated test addresses to avoid unintended consequences like deliverability issues or spam complaints.
Resend provides a set of safe email addresses specifically designed for testing, ensuring that you can simulate different email events without affecting your domain's reputation.
### Why not use @example.com or @test.com?
Many developers attempt to use domains like `@example.com` or `@test.com` for testing purposes. However, these domains are not designed for email traffic and often reject messages, leading to bounces.
A high bounce rate can negatively impact your sender reputation and affect future deliverability. To prevent this, Resend blocks such addresses and returns a `422 Unprocessable Entity` error if you attempt to send to them.
### List of addresses to use
To help you safely test email functionality, Resend provides the following test addresses, each designed to simulate a different delivery event:
| Address | Delivery event simulated |
| ----------------------- | ------------------------ |
| `delivered@resend.dev` | Email being delivered |
| `bounced@resend.dev` | Email bouncing |
| `complained@resend.dev` | Email marked as spam |
| `suppressed@resend.dev` | Email being suppressed |
Using these addresses in your tests allows you to validate email flows without risking real-world deliverability problems. For more help sending test emails, see our [testing documentation](/dashboard/emails/send-test-emails).
### Labeling support
Most test email addresses support labeling, which enables you to send emails to the same test address in multiple ways. You can add a label after the `+` symbol to help track and differentiate between different test scenarios:
* `delivered+user1@resend.dev`
* `bounced+signup@resend.dev`
* `complained+newsletter@resend.dev`
This is particularly useful for testing different email flows, tracking webhook responses, and matching responses with the specific email address that triggered the event.
Whether you need to confirm that an email has been sent, track engagement events, or simulate a bounce scenario, these addresses provide a controlled and predictable way to test your email integration with Resend.
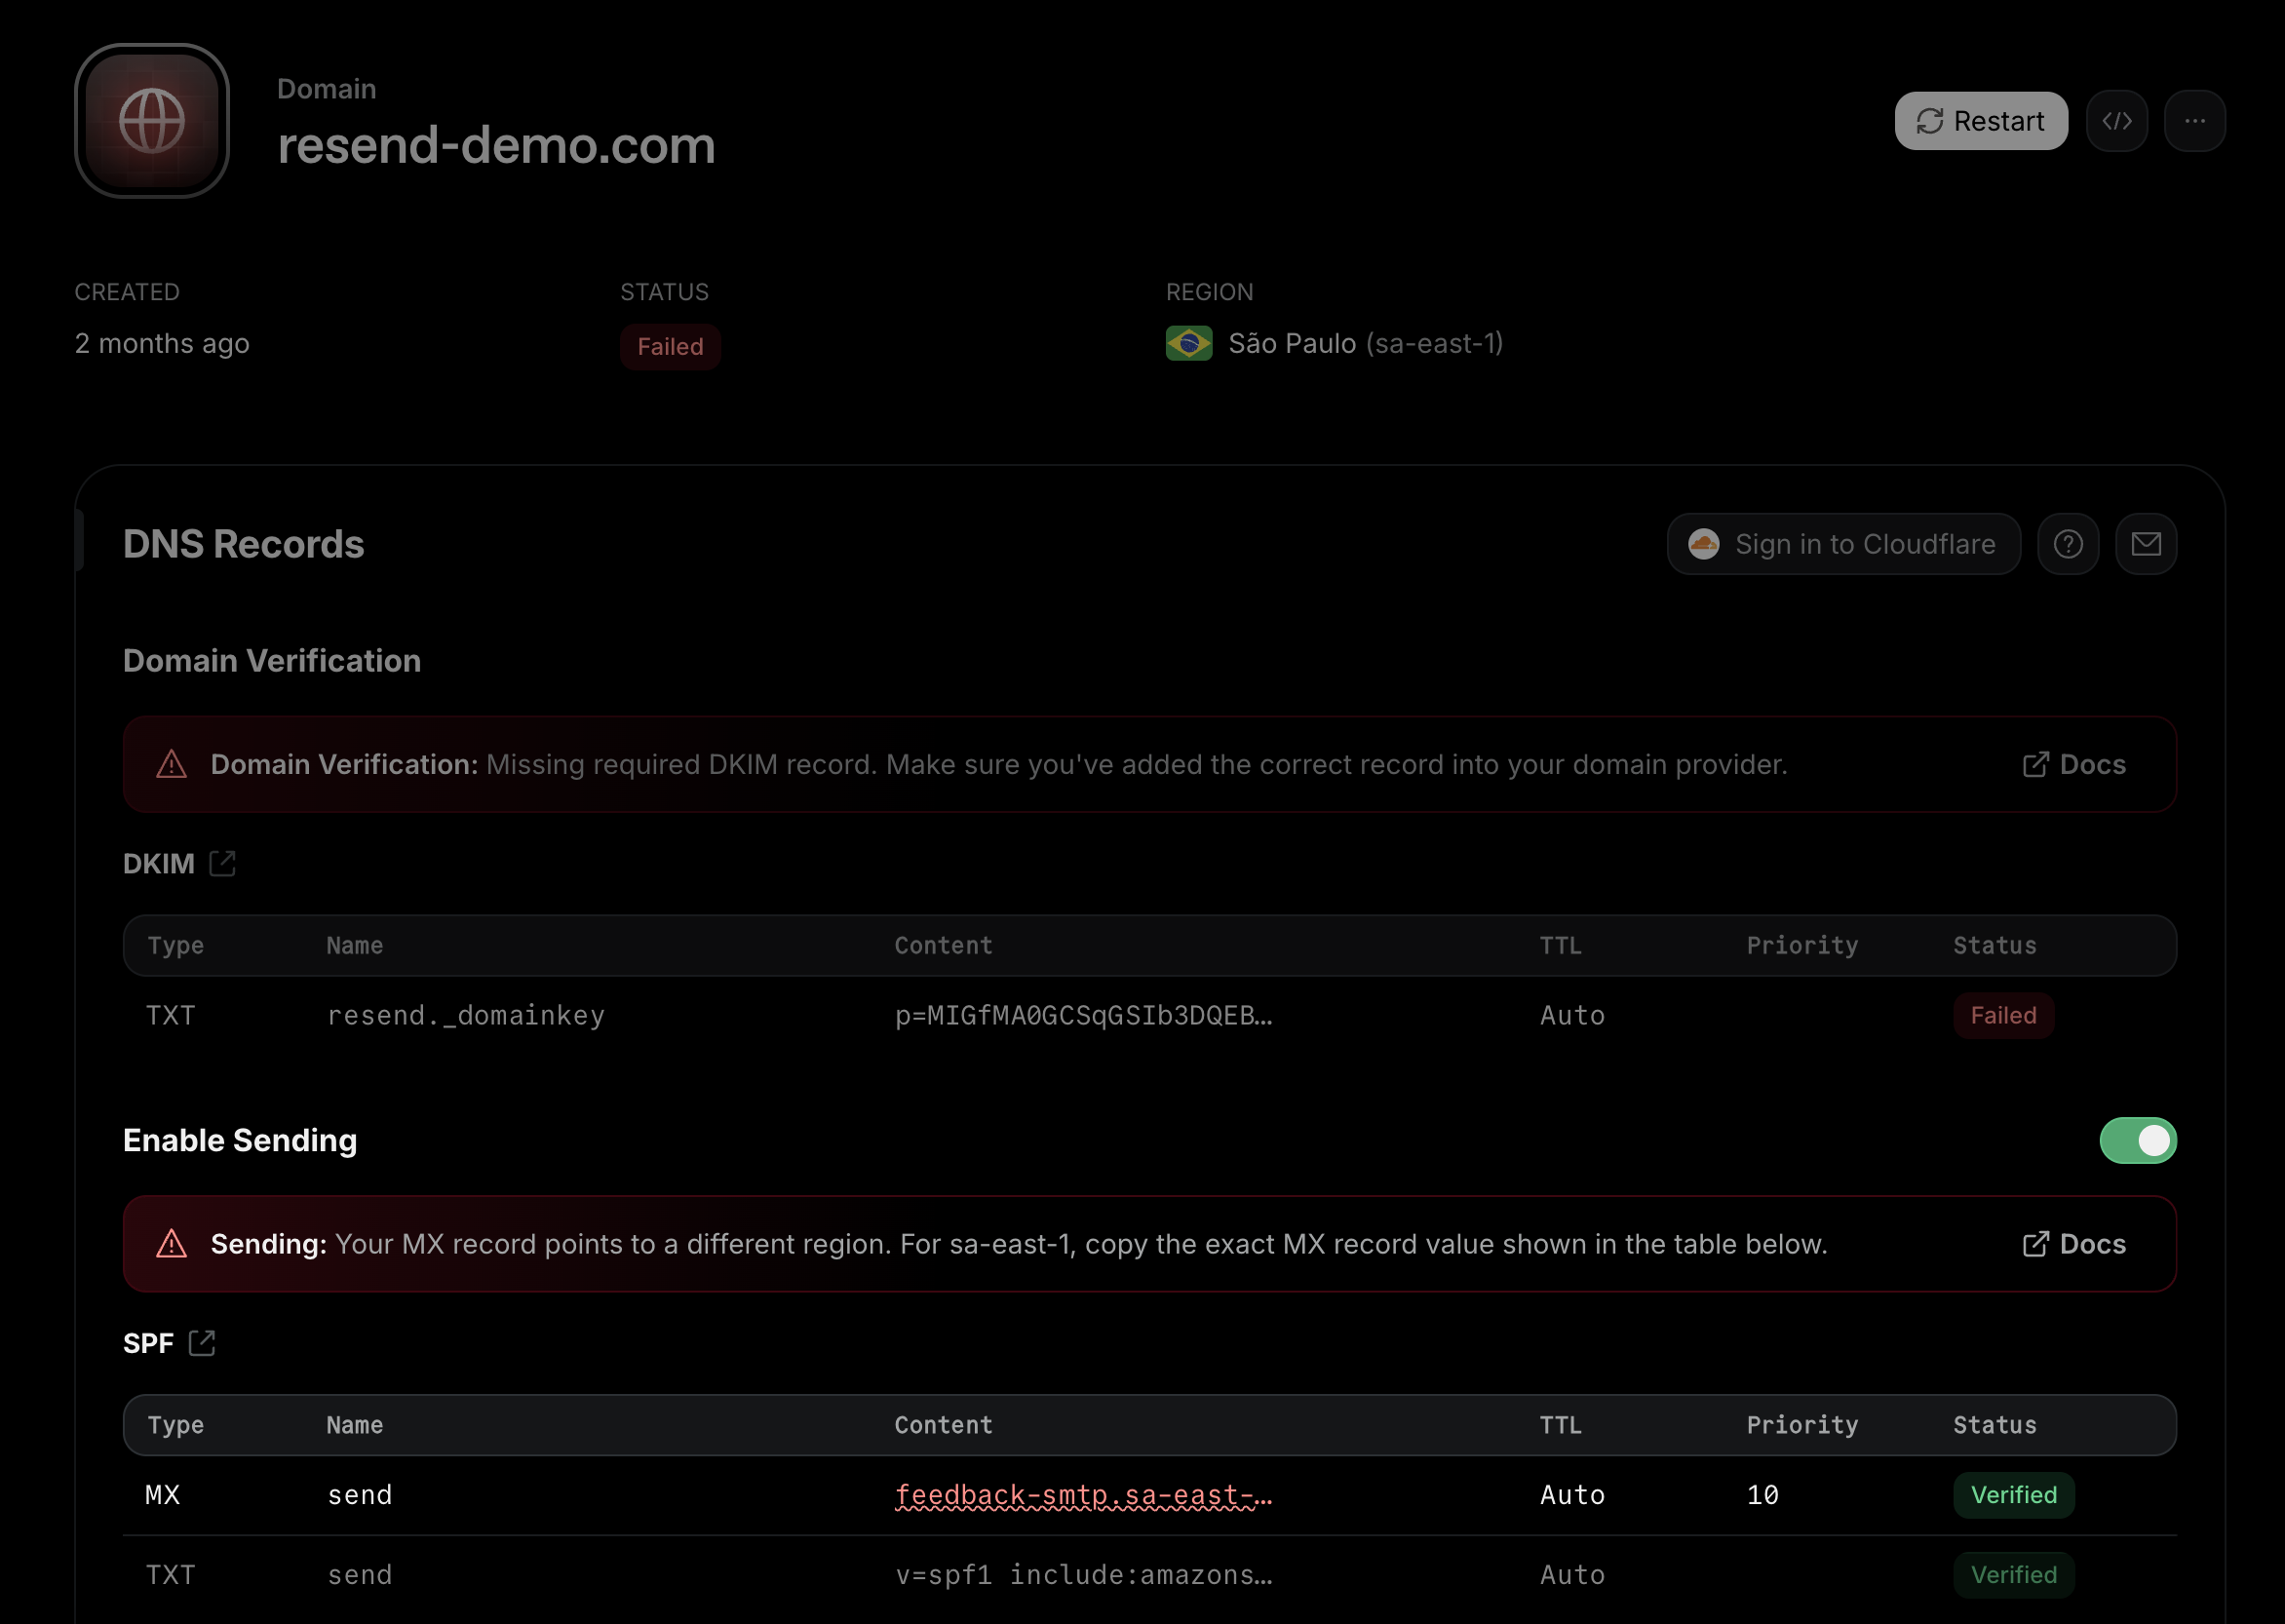 ### DNS provider auto-appending domain names
Some DNS providers automatically append your domain name to record MX values, causing verification failures.
**Problem:**
Your MX record appears as:
`feedback-smtp.eu-west-1.amazonses.com.yourdomain.com`
Instead of:
`feedback-smtp.eu-west-1.amazonses.com`
**Solution:**
In your DNS provider, add a trailing period (dot) at the end of the record value:
`feedback-smtp.eu-west-1.amazonses.com.`
The trailing period tells your DNS provider that this is a fully qualified domain name that should not be modified.
### DNS provider auto-appending domain names
Some DNS providers automatically append your domain name to record MX values, causing verification failures.
**Problem:**
Your MX record appears as:
`feedback-smtp.eu-west-1.amazonses.com.yourdomain.com`
Instead of:
`feedback-smtp.eu-west-1.amazonses.com`
**Solution:**
In your DNS provider, add a trailing period (dot) at the end of the record value:
`feedback-smtp.eu-west-1.amazonses.com.`
The trailing period tells your DNS provider that this is a fully qualified domain name that should not be modified.
 You are looking to see the same values that you see in Resend.
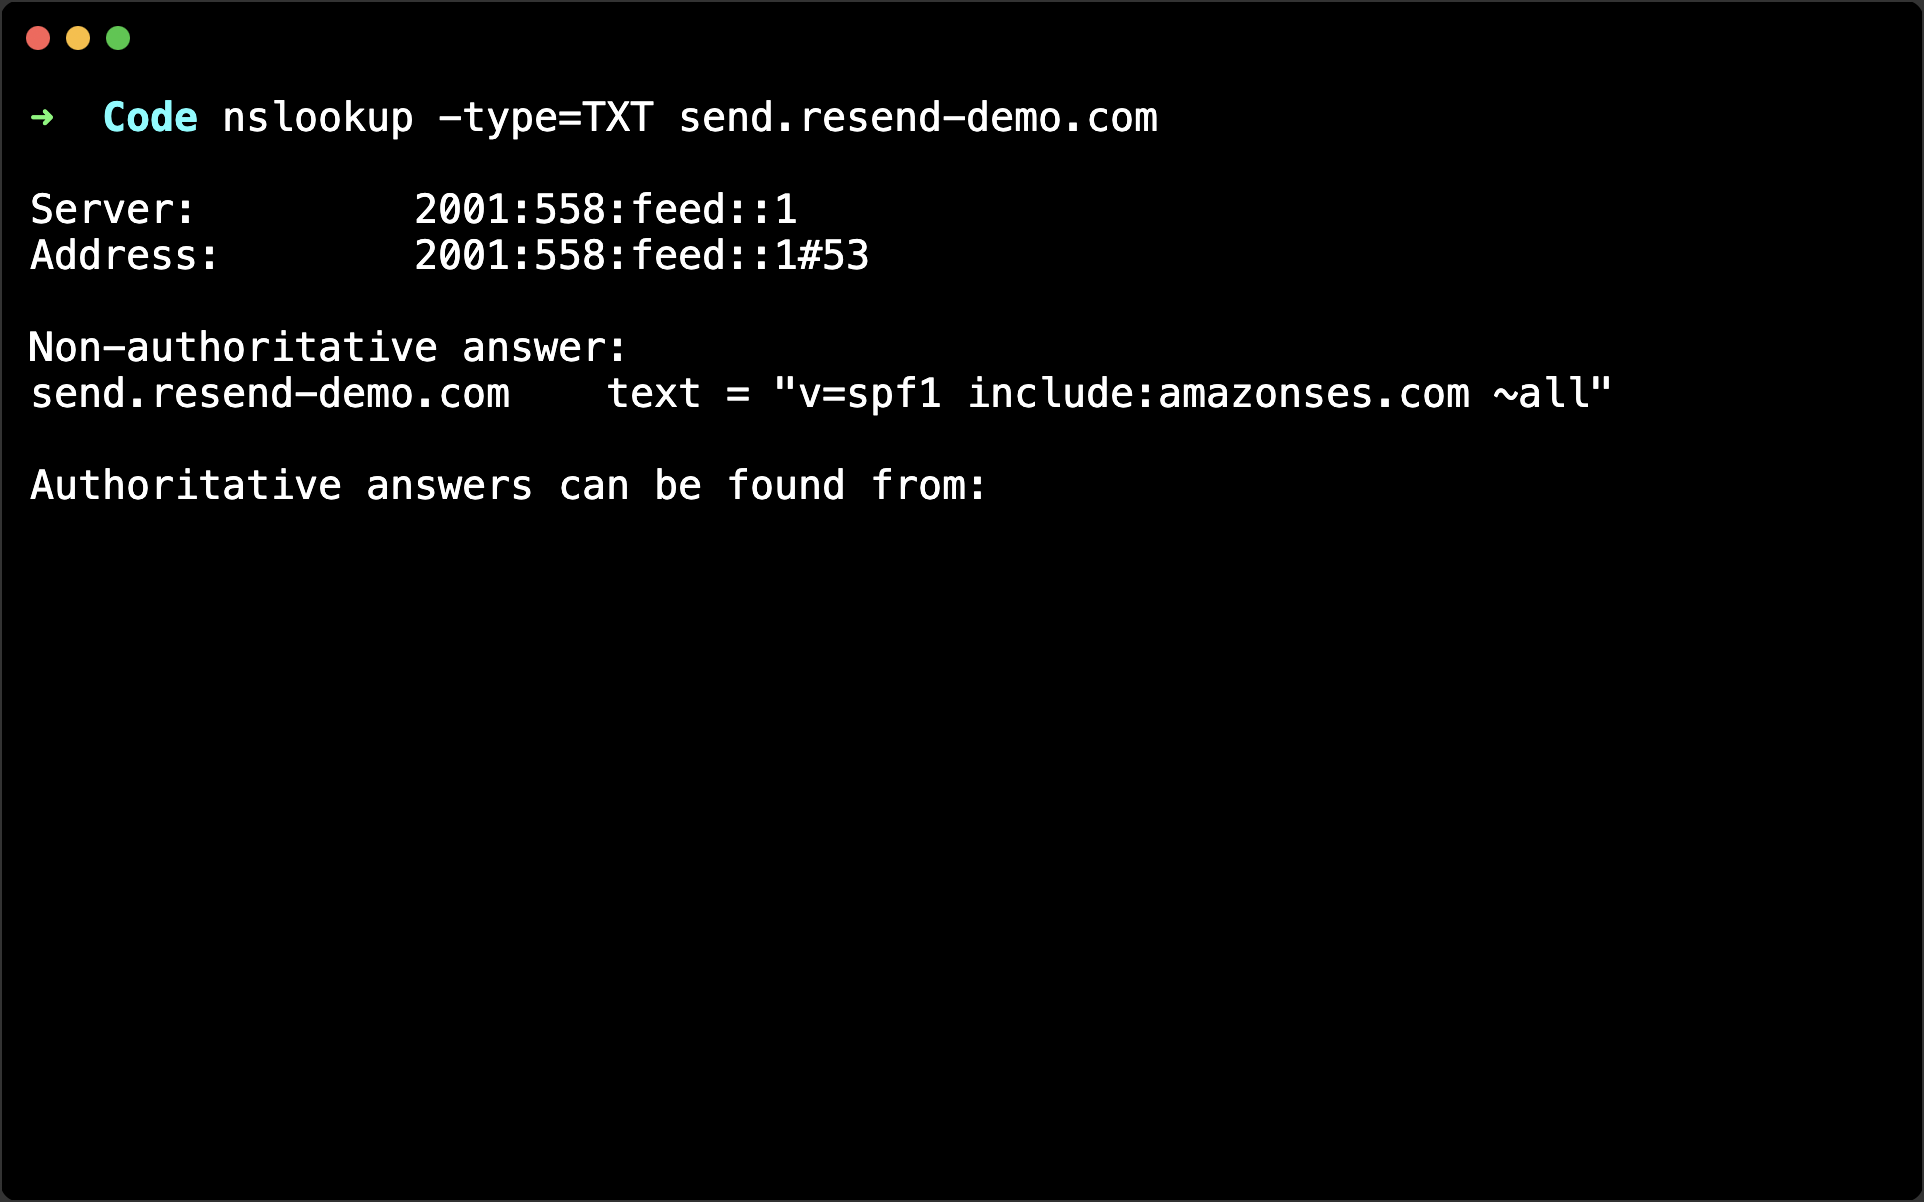 You are looking to see the same values that you see in Resend.