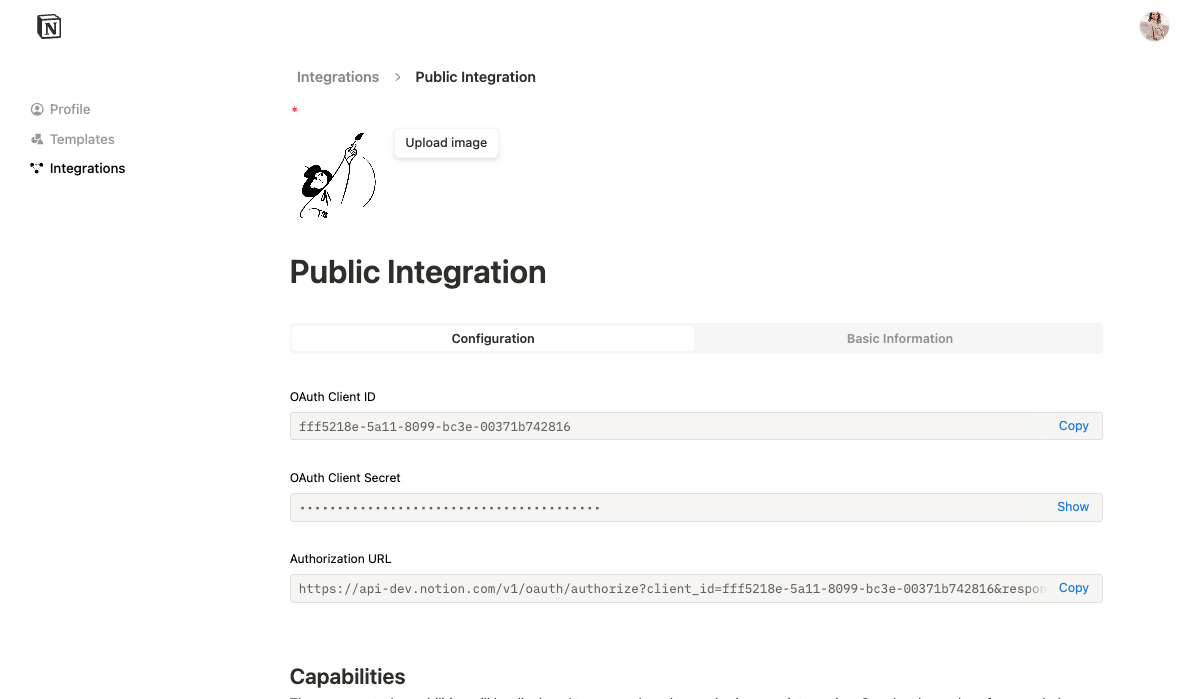
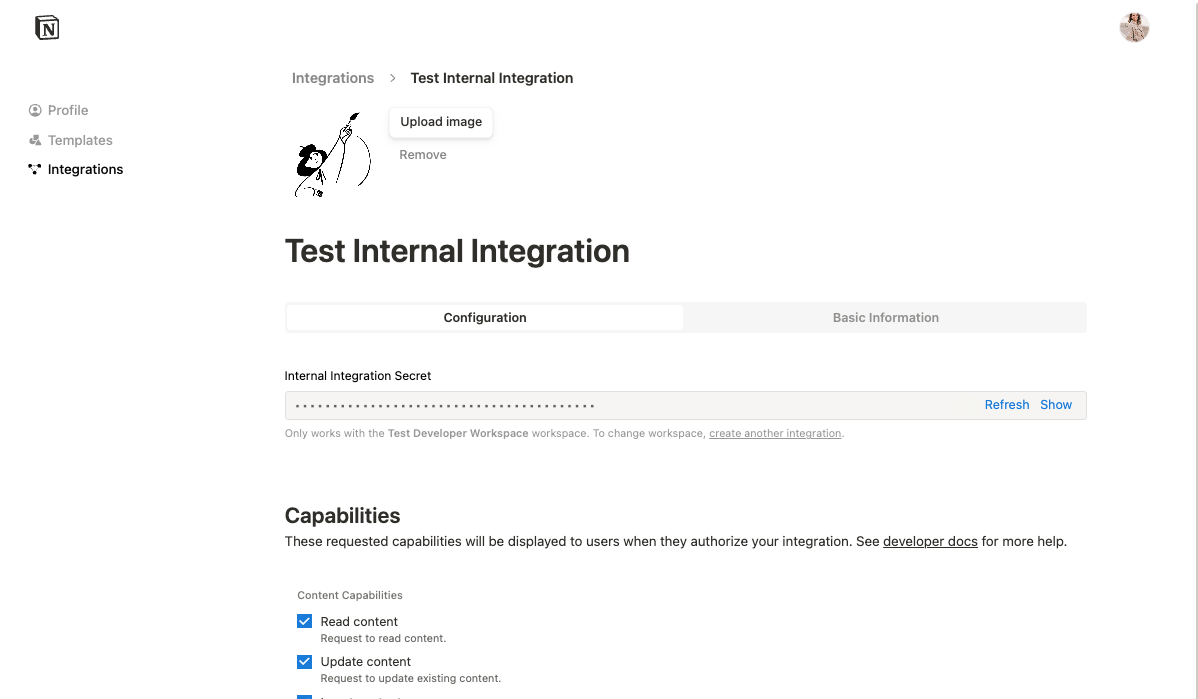
 Once the integration is created, you can update its settings as needed under the `Configuration` tab and retrieve the integration token in this tab.
The integration token will be used to authenticate REST API requests. The integration sends the same token in every API request.
Once the integration is created, you can update its settings as needed under the `Configuration` tab and retrieve the integration token in this tab.
The integration token will be used to authenticate REST API requests. The integration sends the same token in every API request.
 ### Integration permissions
Before an integration can interact with your Notion workspace page(s), the page must be manually shared with the integration. To share a page with an integration, visit the page in your Notion workspace, click the ••• menu at the top right of a page, scroll down to `Add connections`, and use the search bar to find and select the integration from the dropdown list.
Once the integration is shared, you can start making API requests. If the page is not shared, any API requests made will respond with an error.
### Integration permissions
Before an integration can interact with your Notion workspace page(s), the page must be manually shared with the integration. To share a page with an integration, visit the page in your Notion workspace, click the ••• menu at the top right of a page, scroll down to `Add connections`, and use the search bar to find and select the integration from the dropdown list.
Once the integration is shared, you can start making API requests. If the page is not shared, any API requests made will respond with an error.
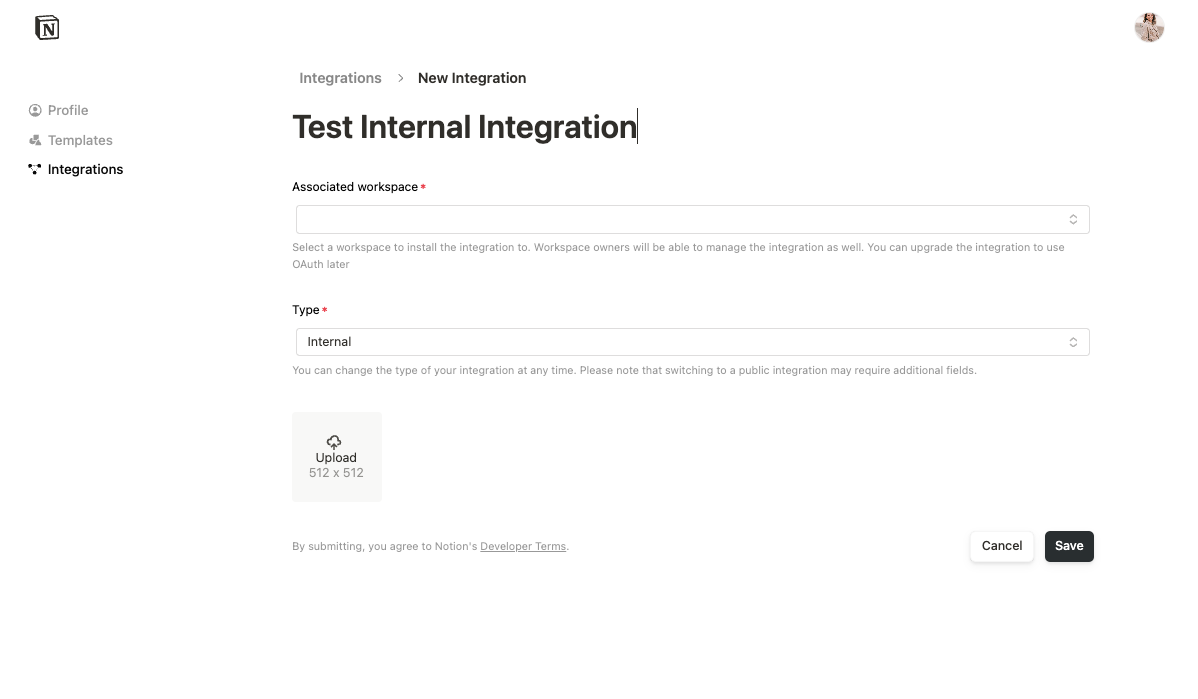
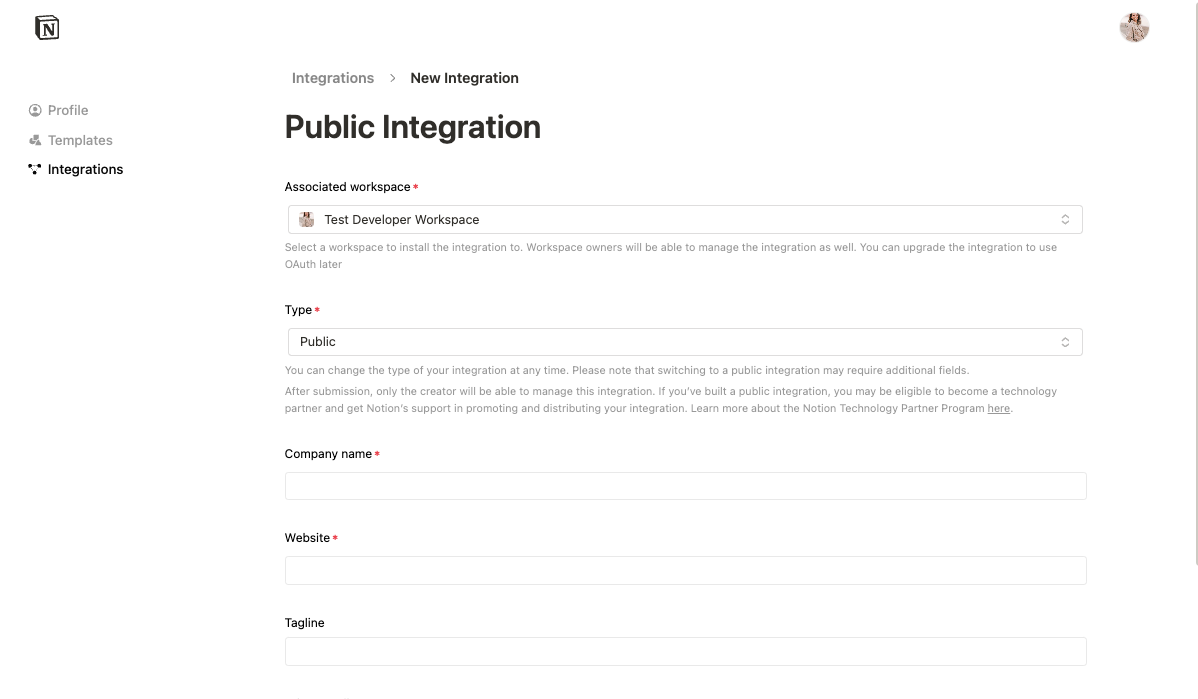 You will need to fill out the form with additional information, including your company name, website, and redirect URI(s).
The redirect URI is the URI your users will be redirected to after authorizing the public integration. To learn more, read [OAuth’s description of redirect URIs](https://www.oauth.com/oauth2-servers/redirect-uris/).
### Public integration authorization overview
Once your integration has been made public, you can update your integration code to use the public auth flow.
As an overview, the authorization flow includes the following steps. Each step will be described in more detail below.
You will need to fill out the form with additional information, including your company name, website, and redirect URI(s).
The redirect URI is the URI your users will be redirected to after authorizing the public integration. To learn more, read [OAuth’s description of redirect URIs](https://www.oauth.com/oauth2-servers/redirect-uris/).
### Public integration authorization overview
Once your integration has been made public, you can update your integration code to use the public auth flow.
As an overview, the authorization flow includes the following steps. Each step will be described in more detail below.
 As an example, your `.env` file using these secrets could look like this:
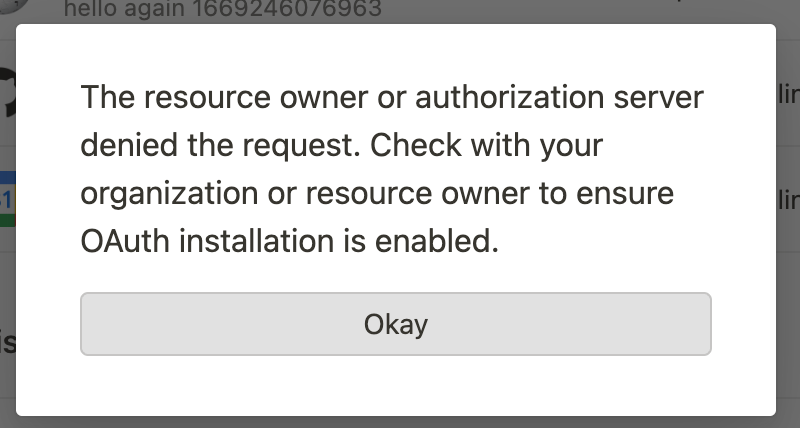
 If the user presses **Cancel**, they will be redirected to the redirect URI with and `error` query param added.
```
www.example.com/my-redirect-uri?error=access_denied&state=
```
You can use this `error`query parameter to conditionally update your app’s state as needed.
If the user opts to `Select pages`, then a page picker interface opens. A user can search for and select pages and databases to share with the integration from the page picker.
If the user presses **Cancel**, they will be redirected to the redirect URI with and `error` query param added.
```
www.example.com/my-redirect-uri?error=access_denied&state=
```
You can use this `error`query parameter to conditionally update your app’s state as needed.
If the user opts to `Select pages`, then a page picker interface opens. A user can search for and select pages and databases to share with the integration from the page picker.
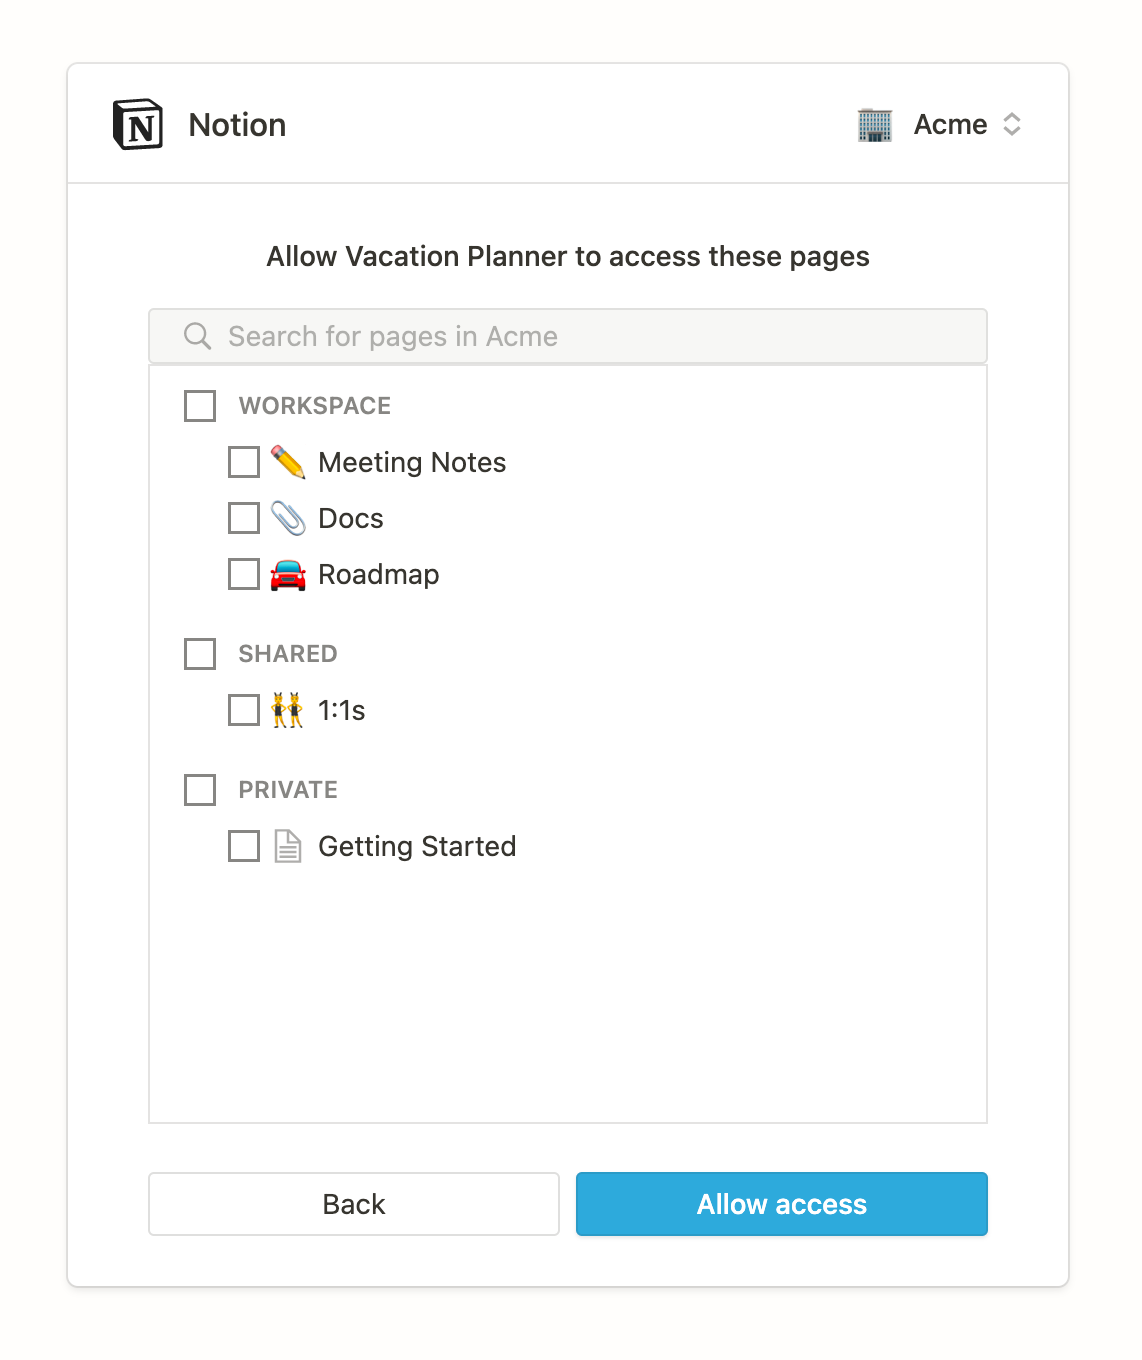 Users can select which pages to give the integration access to, including both private and public pages available to them. Parent pages can be selected to quickly provide access to child pages, as giving access to a parent page will provide access to all available child pages. Users can return to this view at a later time to update access settings if circumstances change.
If the user clicks `Allow access`, they are then redirected to the `redirect_uri` with a temporary authorization `code`. If the user denies access, they are redirected to the `redirect_uri` with an `error` query parameter.
If the user clicks `Allow access` and the rest of the auth flow is not completed, the integration will *not* have access to the pages that were selected.
#### Prompt for an integration with a Notion template option
Public integrations offer the option of providing a public Notion page to use as a template during the auth flow.
To add a template to your workspace, complete the following steps:
* Choose a public page in your workspace that you want users to be able to duplicate.
* Navigate to your
Users can select which pages to give the integration access to, including both private and public pages available to them. Parent pages can be selected to quickly provide access to child pages, as giving access to a parent page will provide access to all available child pages. Users can return to this view at a later time to update access settings if circumstances change.
If the user clicks `Allow access`, they are then redirected to the `redirect_uri` with a temporary authorization `code`. If the user denies access, they are redirected to the `redirect_uri` with an `error` query parameter.
If the user clicks `Allow access` and the rest of the auth flow is not completed, the integration will *not* have access to the pages that were selected.
#### Prompt for an integration with a Notion template option
Public integrations offer the option of providing a public Notion page to use as a template during the auth flow.
To add a template to your workspace, complete the following steps:
* Choose a public page in your workspace that you want users to be able to duplicate.
* Navigate to your 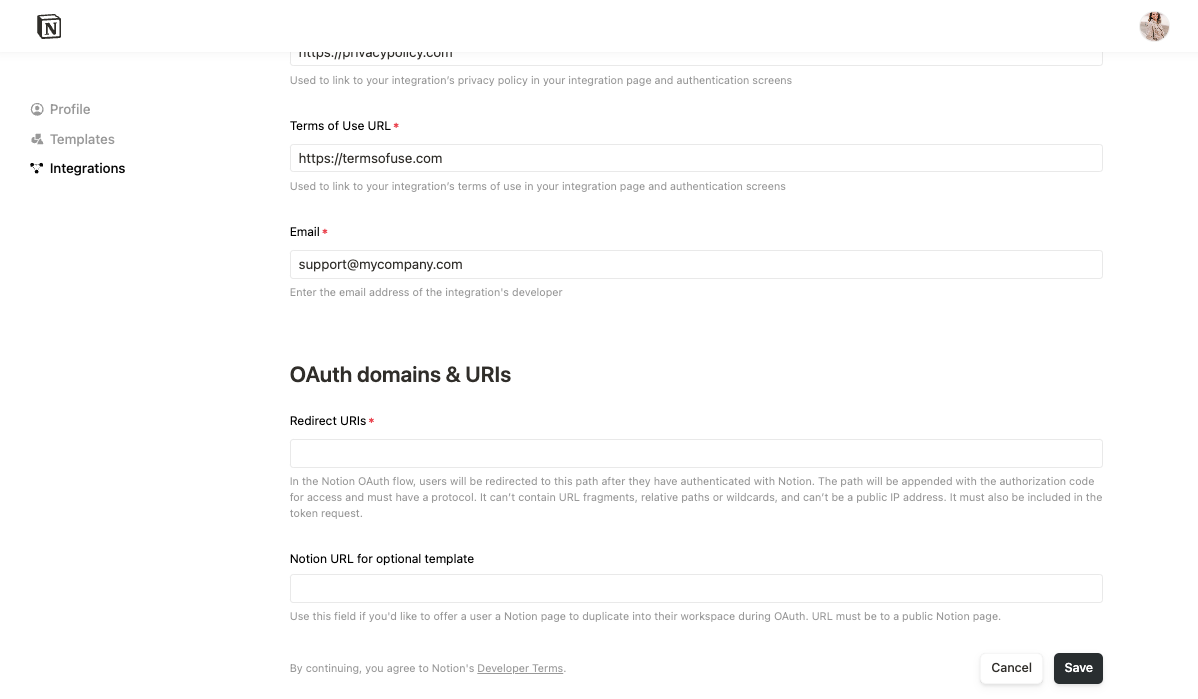 Once this URL is added, your auth flow prompt appearance will be updated.
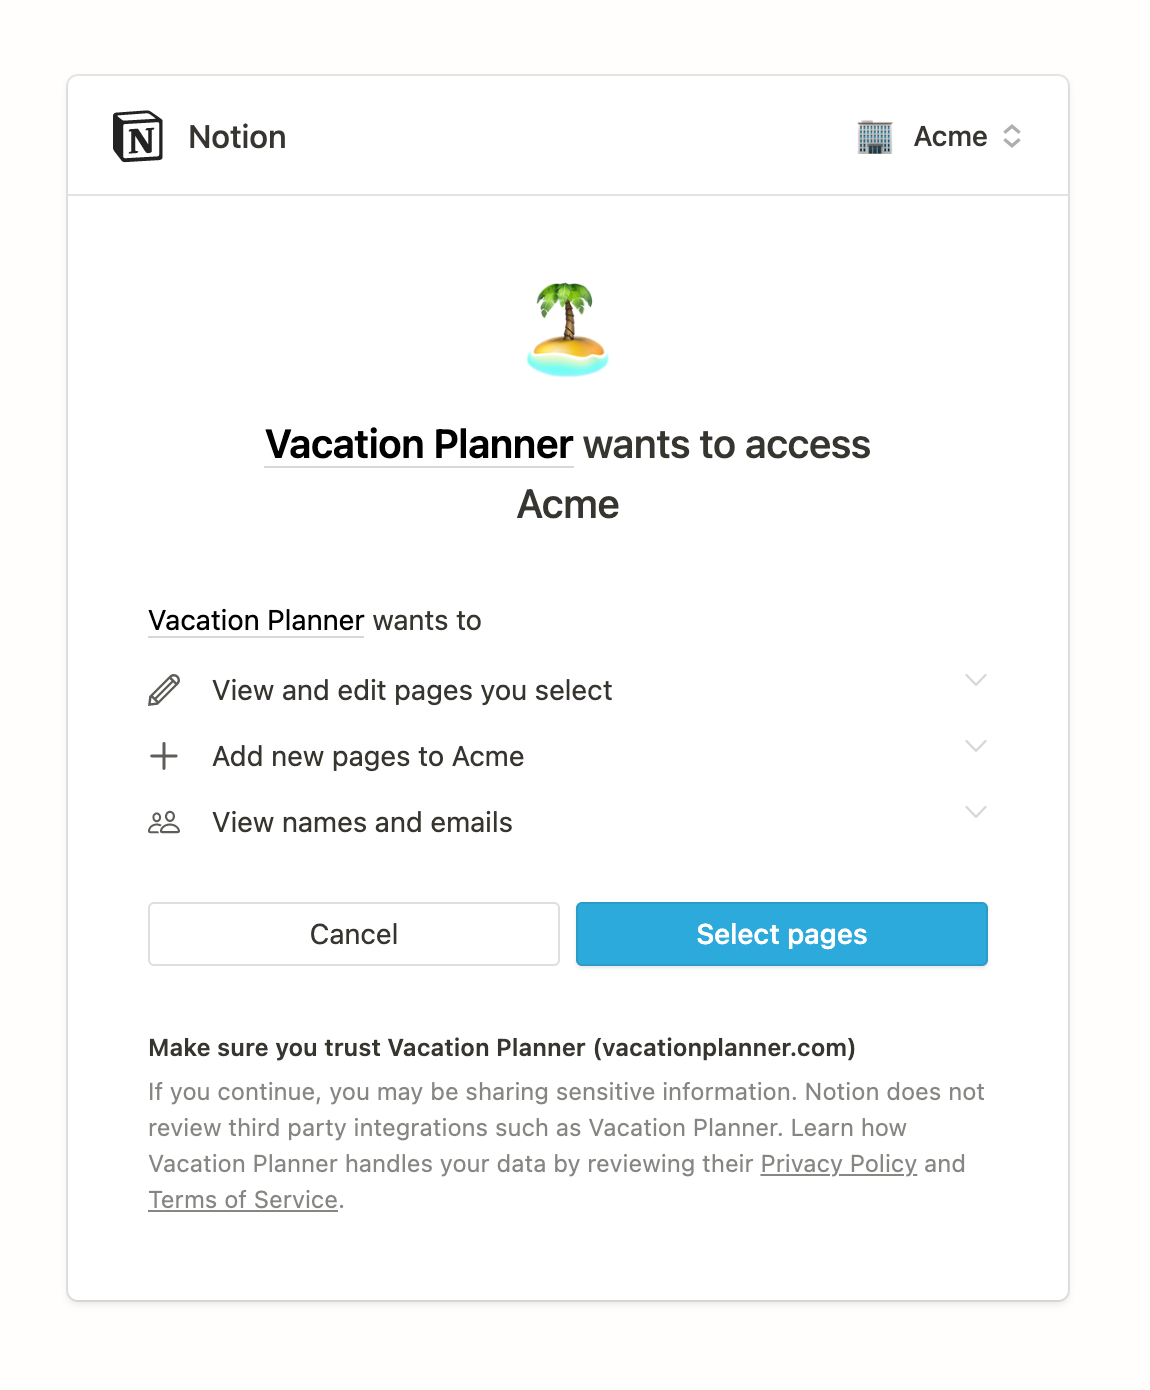
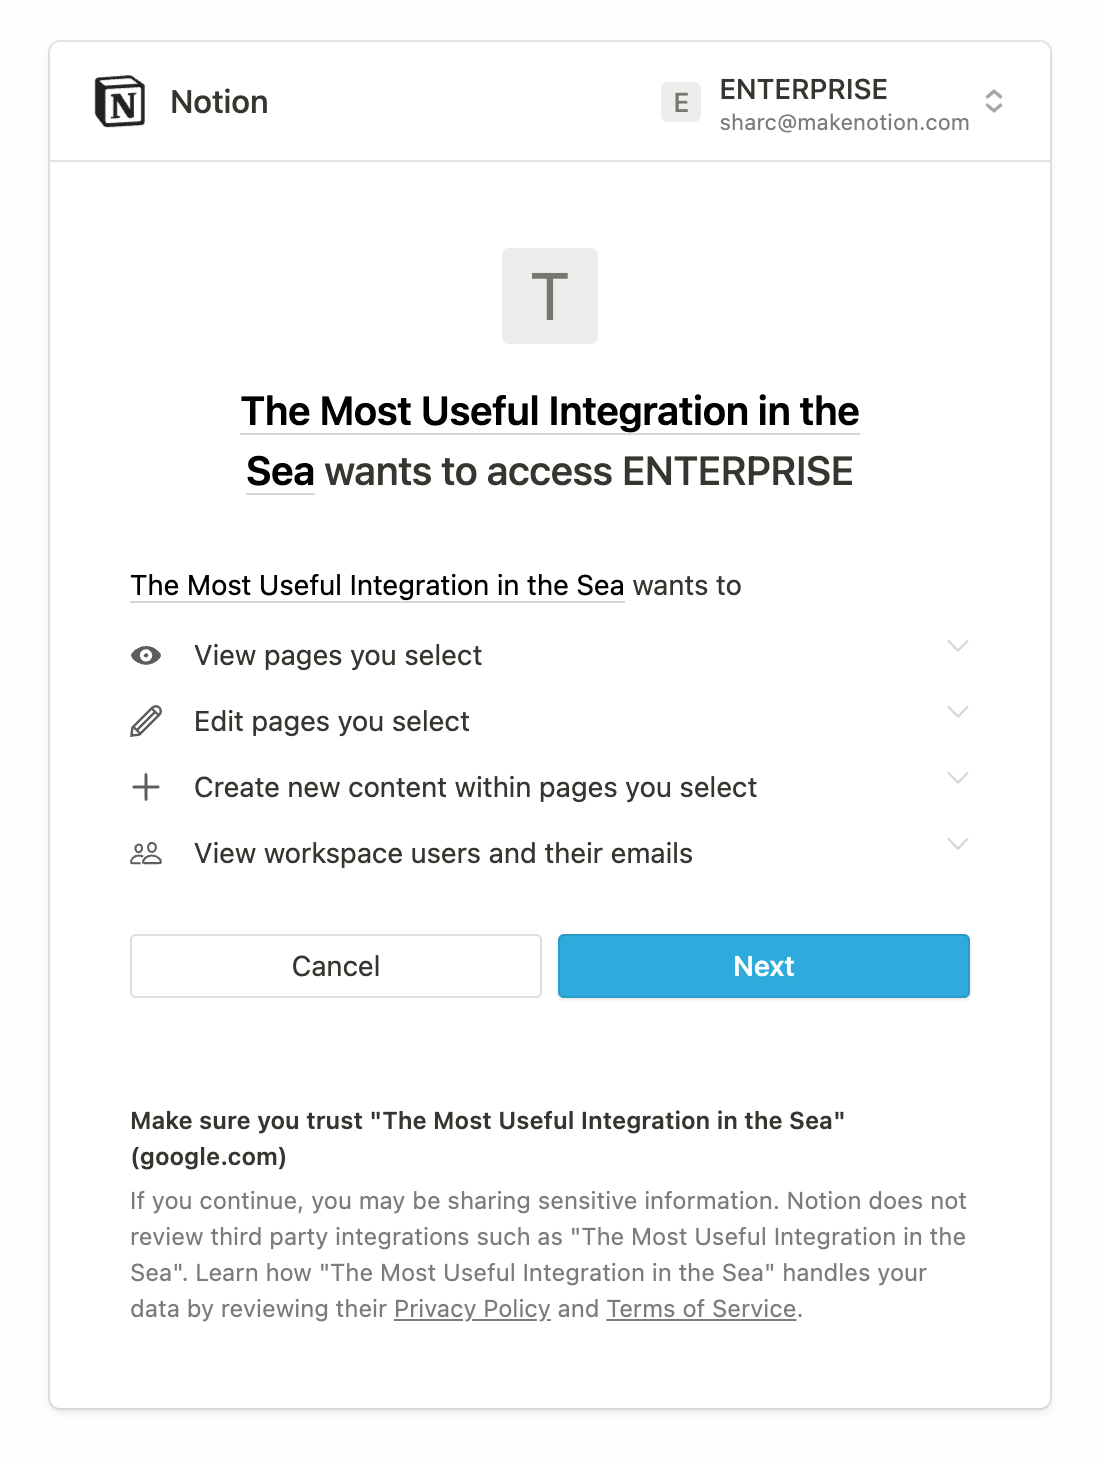
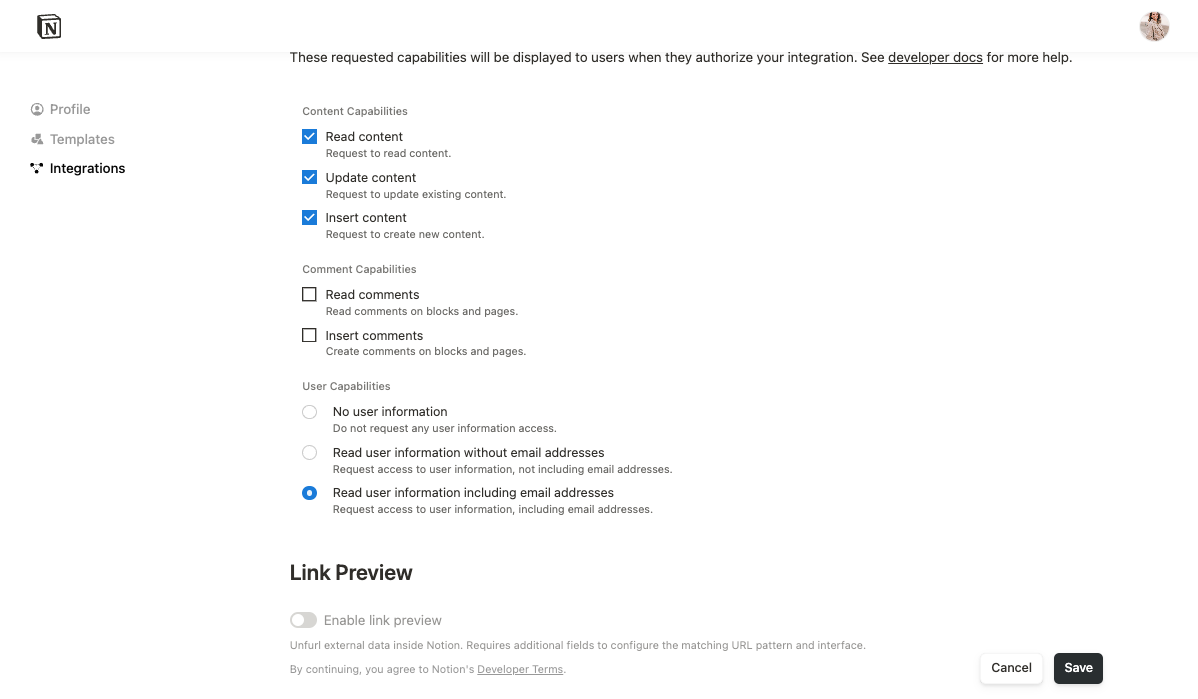
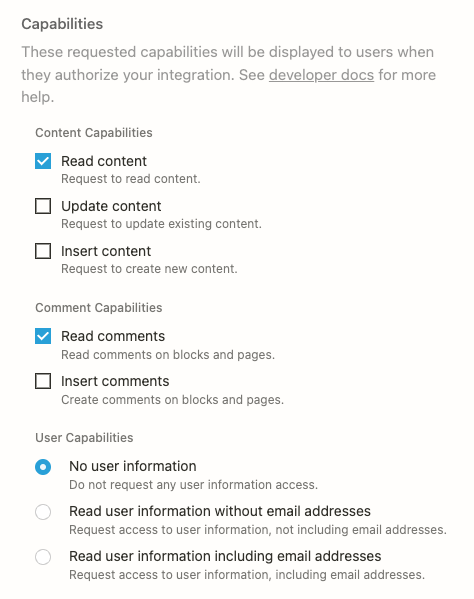
Going back to your prompt view, if the integration offers a Notion template option, the first step in the permissions flow will describe the integration [capabilities](/reference/capabilities). This is presented to the user as what the integration would be able to do in the workspace, and it prompts the user to click `Next`.
Once this URL is added, your auth flow prompt appearance will be updated.
Going back to your prompt view, if the integration offers a Notion template option, the first step in the permissions flow will describe the integration [capabilities](/reference/capabilities). This is presented to the user as what the integration would be able to do in the workspace, and it prompts the user to click `Next`.
 In the next step, a user can either choose to duplicate the template that you provided or to select existing pages to share with the integration.
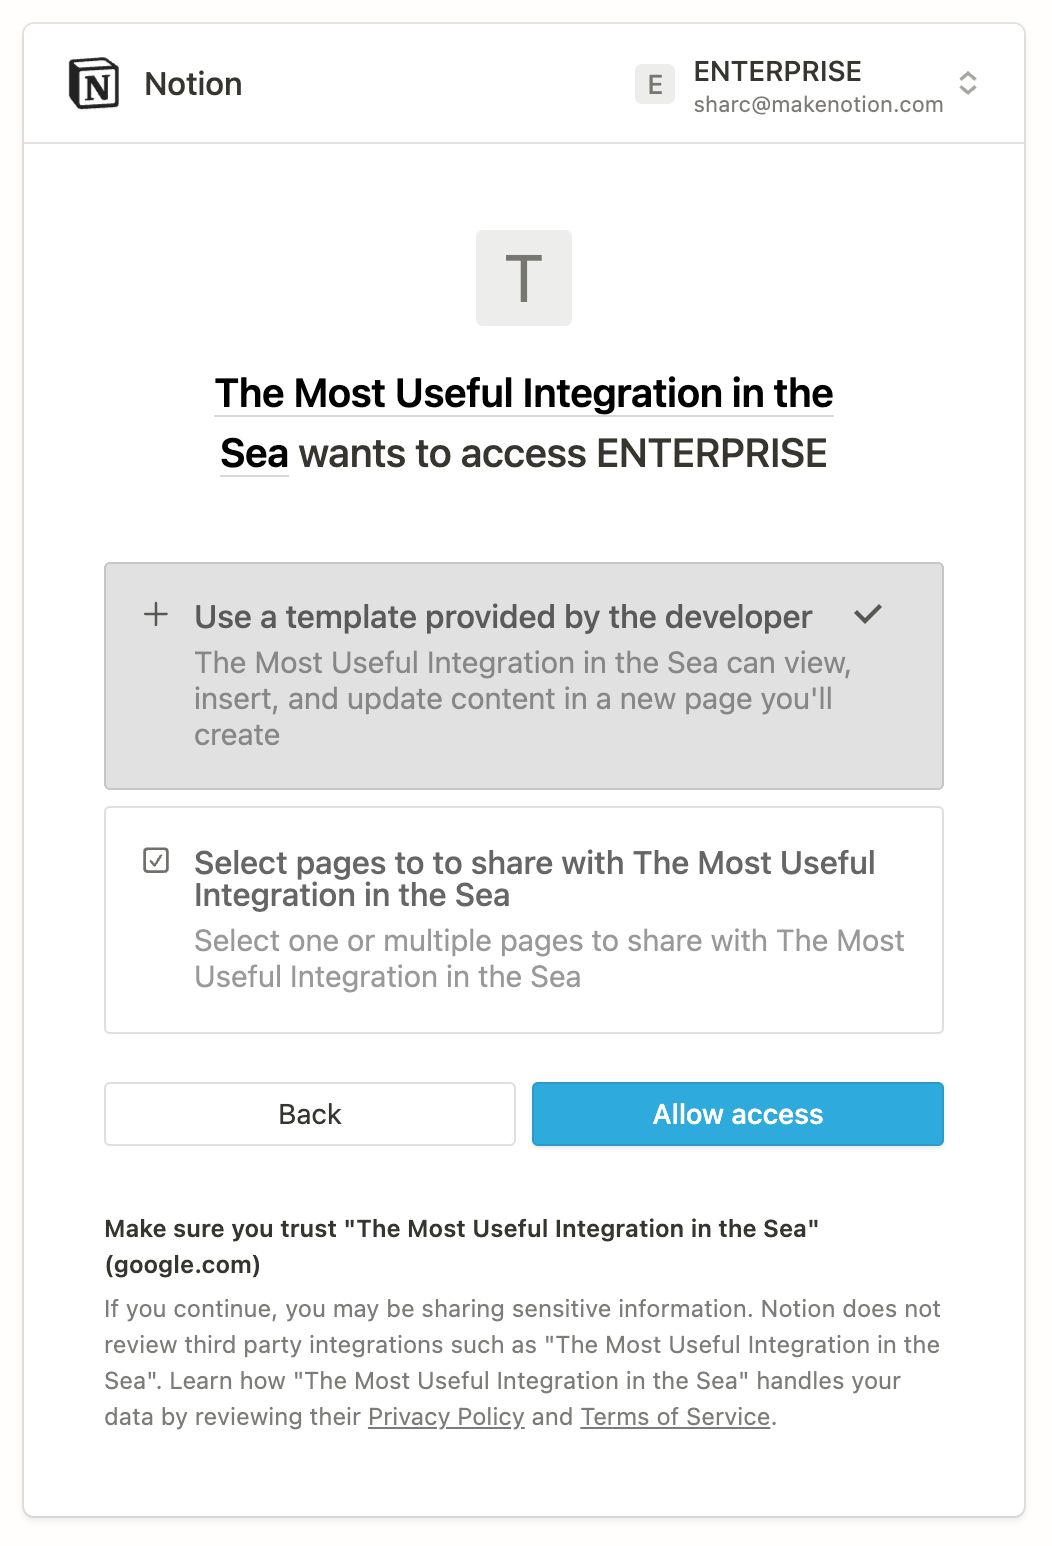 If the user chooses to duplicate the template, then the following happens automatically:
* The integration is added to the user’s workspace.
* The template is duplicated as a new page in the workspace.
* The new page is shared with the integration.
If the user chooses to select pages to share with the integration, then they continue to the page picker interface that’s part of the [prompt for a standard integration](#prompt-for-a-standard-integration-with-no-template-option-default).
If the user chooses to duplicate the template, then the following happens automatically:
* The integration is added to the user’s workspace.
* The template is duplicated as a new page in the workspace.
* The new page is shared with the integration.
If the user chooses to select pages to share with the integration, then they continue to the page picker interface that’s part of the [prompt for a standard integration](#prompt-for-a-standard-integration-with-no-template-option-default).
 ### Step 3 - review recent activity
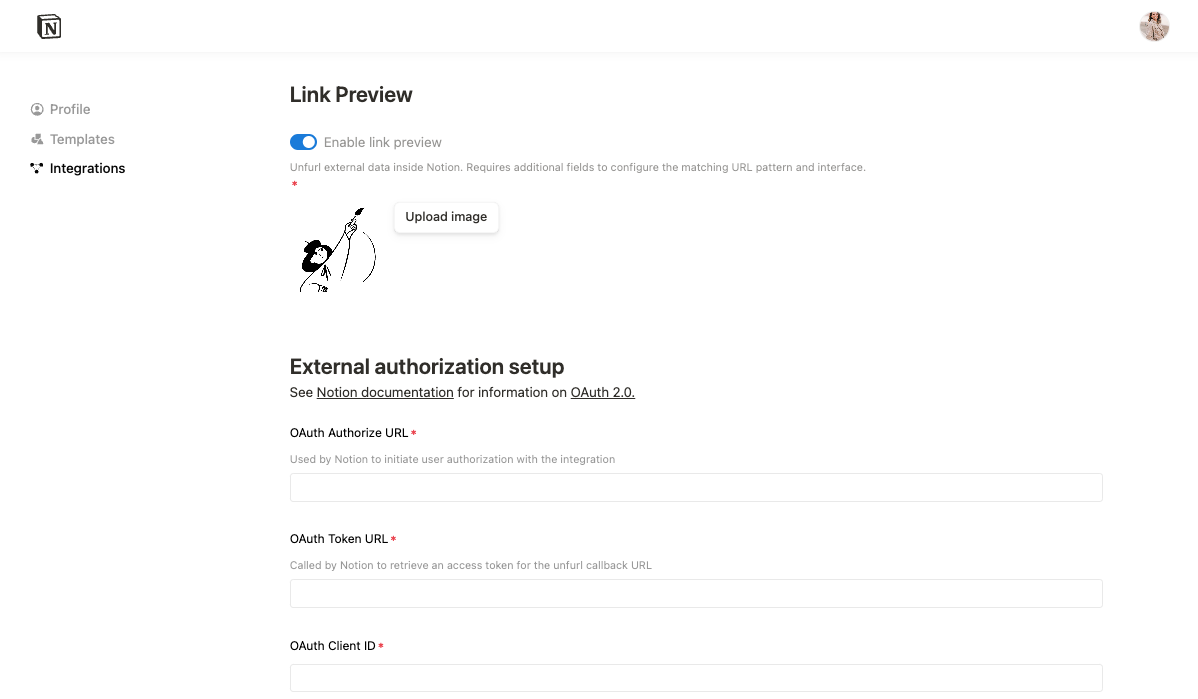 This page contains a toggle input to enable link previews for your integration. Switching it on will display the External Authorization Setup form that will you need to fill out and save.
 Once the link preview toggle is turned on for the integration, you will need to fill out two forms in the following order:
1. The External Authorization Setup form.
2. The Unfurling Domain & Patterns form.
In the next section, we'll review how to fill out these forms.
Once the link preview toggle is turned on for the integration, you will need to fill out two forms in the following order:
1. The External Authorization Setup form.
2. The Unfurling Domain & Patterns form.
In the next section, we'll review how to fill out these forms.
Notion uses the `access_token` to make authenticated requests to your systems. | `https://
You can use the request body that Notion sends to look up the user and deactivate their associated `access_token`s from your service.
Whether or not you use a deleted token callback, Notion invalidates any Notion-side tokens corresponding to the user and the Link Preview that they delete. | `https://
You can leave this blank as you set up OAuth and return to it once you’ve created your unfurl attributes. Refer to [Step 3](#step-3-use-the-unfurl-callback-url-to-set-unfurl-attributes-for-a-link-preview-handle-errors-and-manage-updates) for details.
Must be an internet-accessible URL that can and should be protected by authentication. | `https://
After you add a domain, follow the prompts to verify your domain with Notion. | `
You can provide multiple patterns for one integration. | Refer to the table below. | The URL matching and placeholder field includes its own fields: \| Field | Description | Example value | \| :----------------------- | :---------------------------------------------------------------------------------------------------------------------------------------------------------------------------------------------------------------------------------------------------------------------------------------------------------------------------------------------------------- | ---------------------------------------------------------------:-------------------------------------------------------------------------------------------------------------------------------------------------------------------------------------------------------------------------------------------------------------------------------------------------------------------------------------------------------------- | \| Rule name | A name for the pattern. | `"item"` | \| Sample URLs | An example URL that matches the pattern and triggers a Link Preview. | `https://acme.com/items/23487` | \| Pattern | A Regex pattern that Notion can use to identify URLs that trigger Link Previews.
If the Regex pattern fails to match any sample URL, then an error prompt appears when you save settings. | `^(?
You can leave this blank as you set up OAuth and return to it once you’ve created your unfurl attributes. | `[ { "id": "title", "name": "Title", "type": "inline", "inline": { "title": { "value": "Acme Item #$
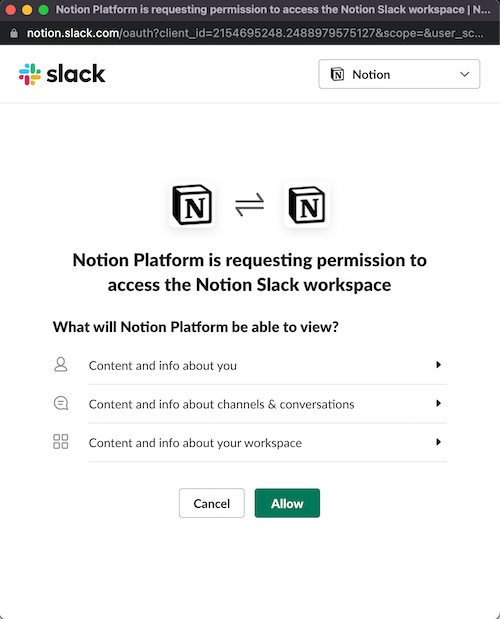
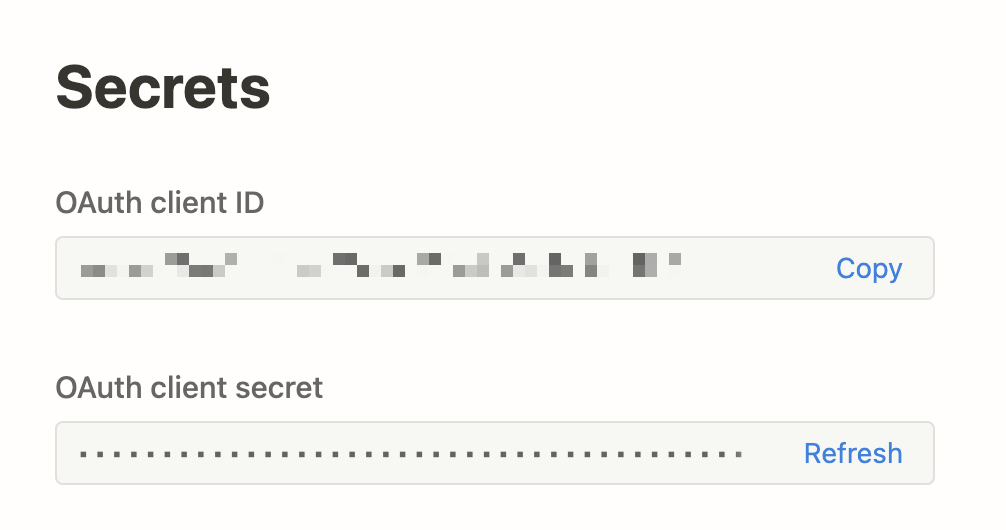
To prevent attackers from providing arbitrary URIs, your service should validate that the redirect URI matches this value. | `https://notion.so/externalIntegrationAuthCallback` | | `client_id` | The OAuth Client ID that you provided when you created the integration. | `mRkZGFjM` (example value) | | `scope` (optional) | The OAuth Scopes value that you provided when you created the integration. | `unfurl`, `user_name` (example values) | | `response_type` | A constant string. | `code` | | `state` | A randomized string for security validation. | `tga@YNV9cfw4yrv0thw` (example value) | Your implementation begins after Notion sends the request. ### 1. Provide OAuth form Listen for requests to your OAuth Authorize URL. When you detect a request from Notion, present a UI that asks the user to allow the authentication process to continue. For example, Slack shares the following interstitial when a user initiates a Link Preview from a Slack URL:
 ### 2. Authenticate with Notion’s `access_token`
In your integration implementation, retrieve the `code` that Notion sent when it called your OAuth Authorize URL. Then, send the `code` as part of a POST request to Notion’s token URL: `https://api.notion.com/v1/oauth/token`.
### 2. Authenticate with Notion’s `access_token`
In your integration implementation, retrieve the `code` that Notion sent when it called your OAuth Authorize URL. Then, send the `code` as part of a POST request to Notion’s token URL: `https://api.notion.com/v1/oauth/token`.
`key` should be a unique identifier for the account. Notion uses the `key` to determine whether or not the user is re-connecting the same account.
`name` should be some way for the user to know which account they used to authenticate with your service. | Refer to the example below. | The following example demonstrates an `external_account` object for `team@makenotion.com`, a Notion employee account, to authenticate with Slack to use a Slack Link Preview.
 A complete POST request looks like the below:
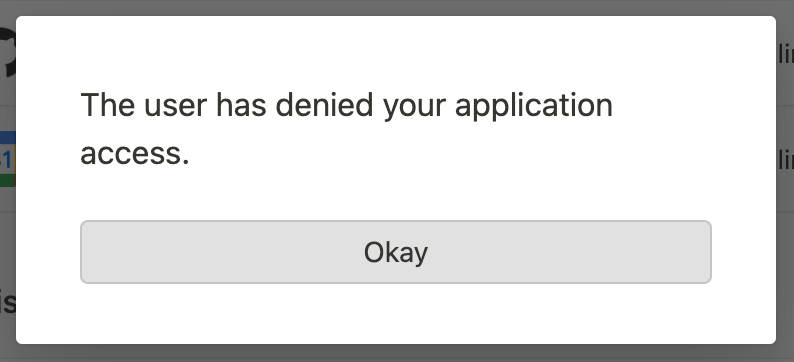
 You can also add an `error_description` to the response:
`https://notion.so/externalintegrationauthcallback?error=access_denied&error_description=The+user+has+denied+your+application+access`
If Notion detects a description, then it replaces the standard dialogue prompt with the specified description, as in the below:
You can also add an `error_description` to the response:
`https://notion.so/externalintegrationauthcallback?error=access_denied&error_description=The+user+has+denied+your+application+access`
If Notion detects a description, then it replaces the standard dialogue prompt with the specified description, as in the below:
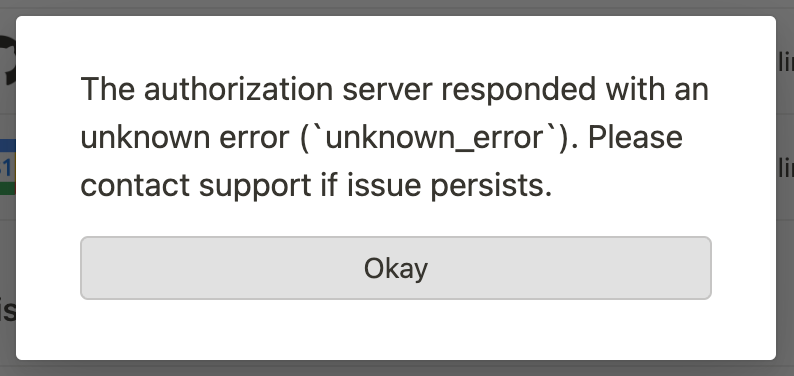
 If Notion doesn’t recognize the error code, then it notes that the error is unknown:
 To verify that the `key` for this connection is unique, repeat the auth flow multiple times using the same credentials to validate that you only get a single entry.
## Use the Unfurl Callback URL
### 1. Configure unfurl attributes
After a user pastes a Link Preview enabled link and completes the auth flow, Notion sends a POST request to the Unfurl Callback URL that you provided in the integration settings.
To verify that the `key` for this connection is unique, repeat the auth flow multiple times using the same credentials to validate that you only get a single entry.
## Use the Unfurl Callback URL
### 1. Configure unfurl attributes
After a user pastes a Link Preview enabled link and completes the auth flow, Notion sends a POST request to the Unfurl Callback URL that you provided in the integration settings.
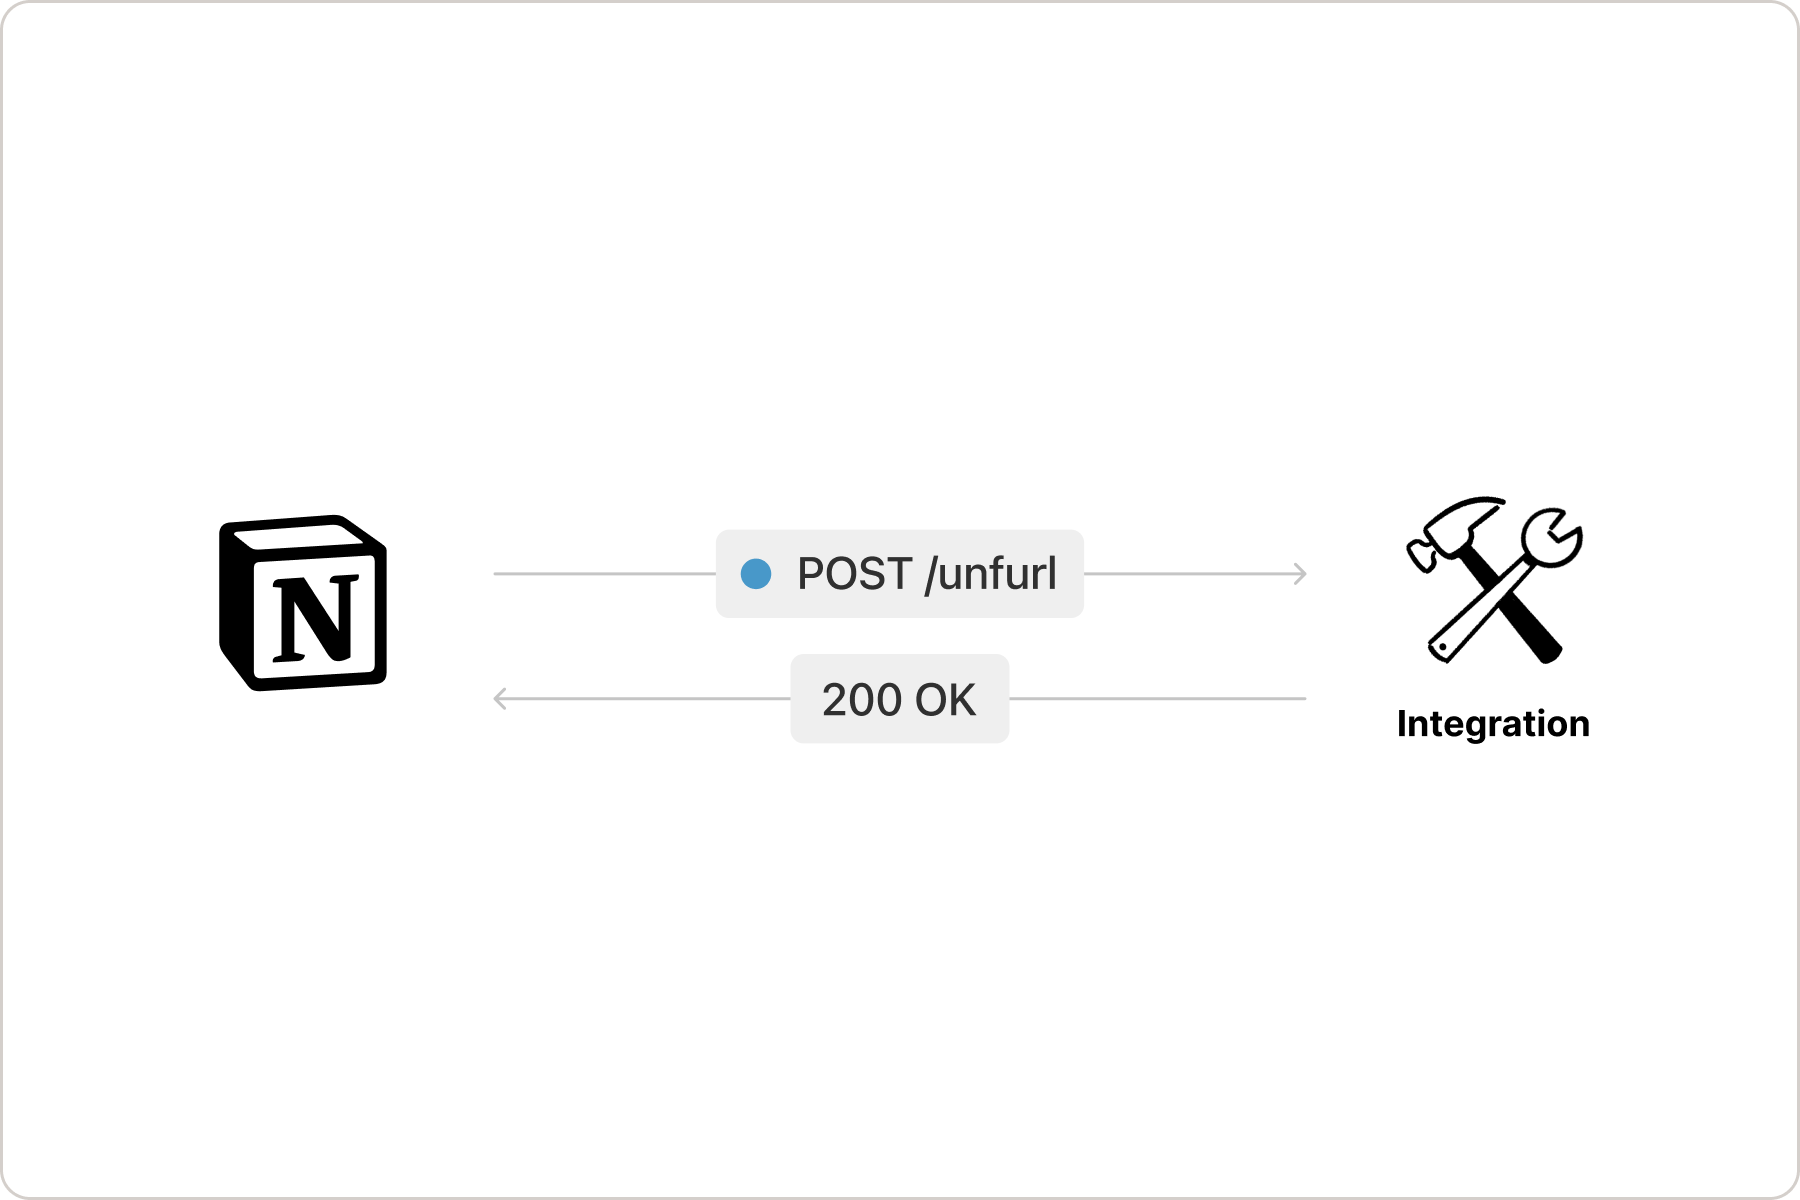 The request includes a Bearer authorization with the user’s `access_token` from your service, and the payload is a single field called `uri` that includes the link that the user shared:
 Include all of the same objects from the Unfurl Callback URL response in the request, including the attributes that haven’t changed, as in the following example:
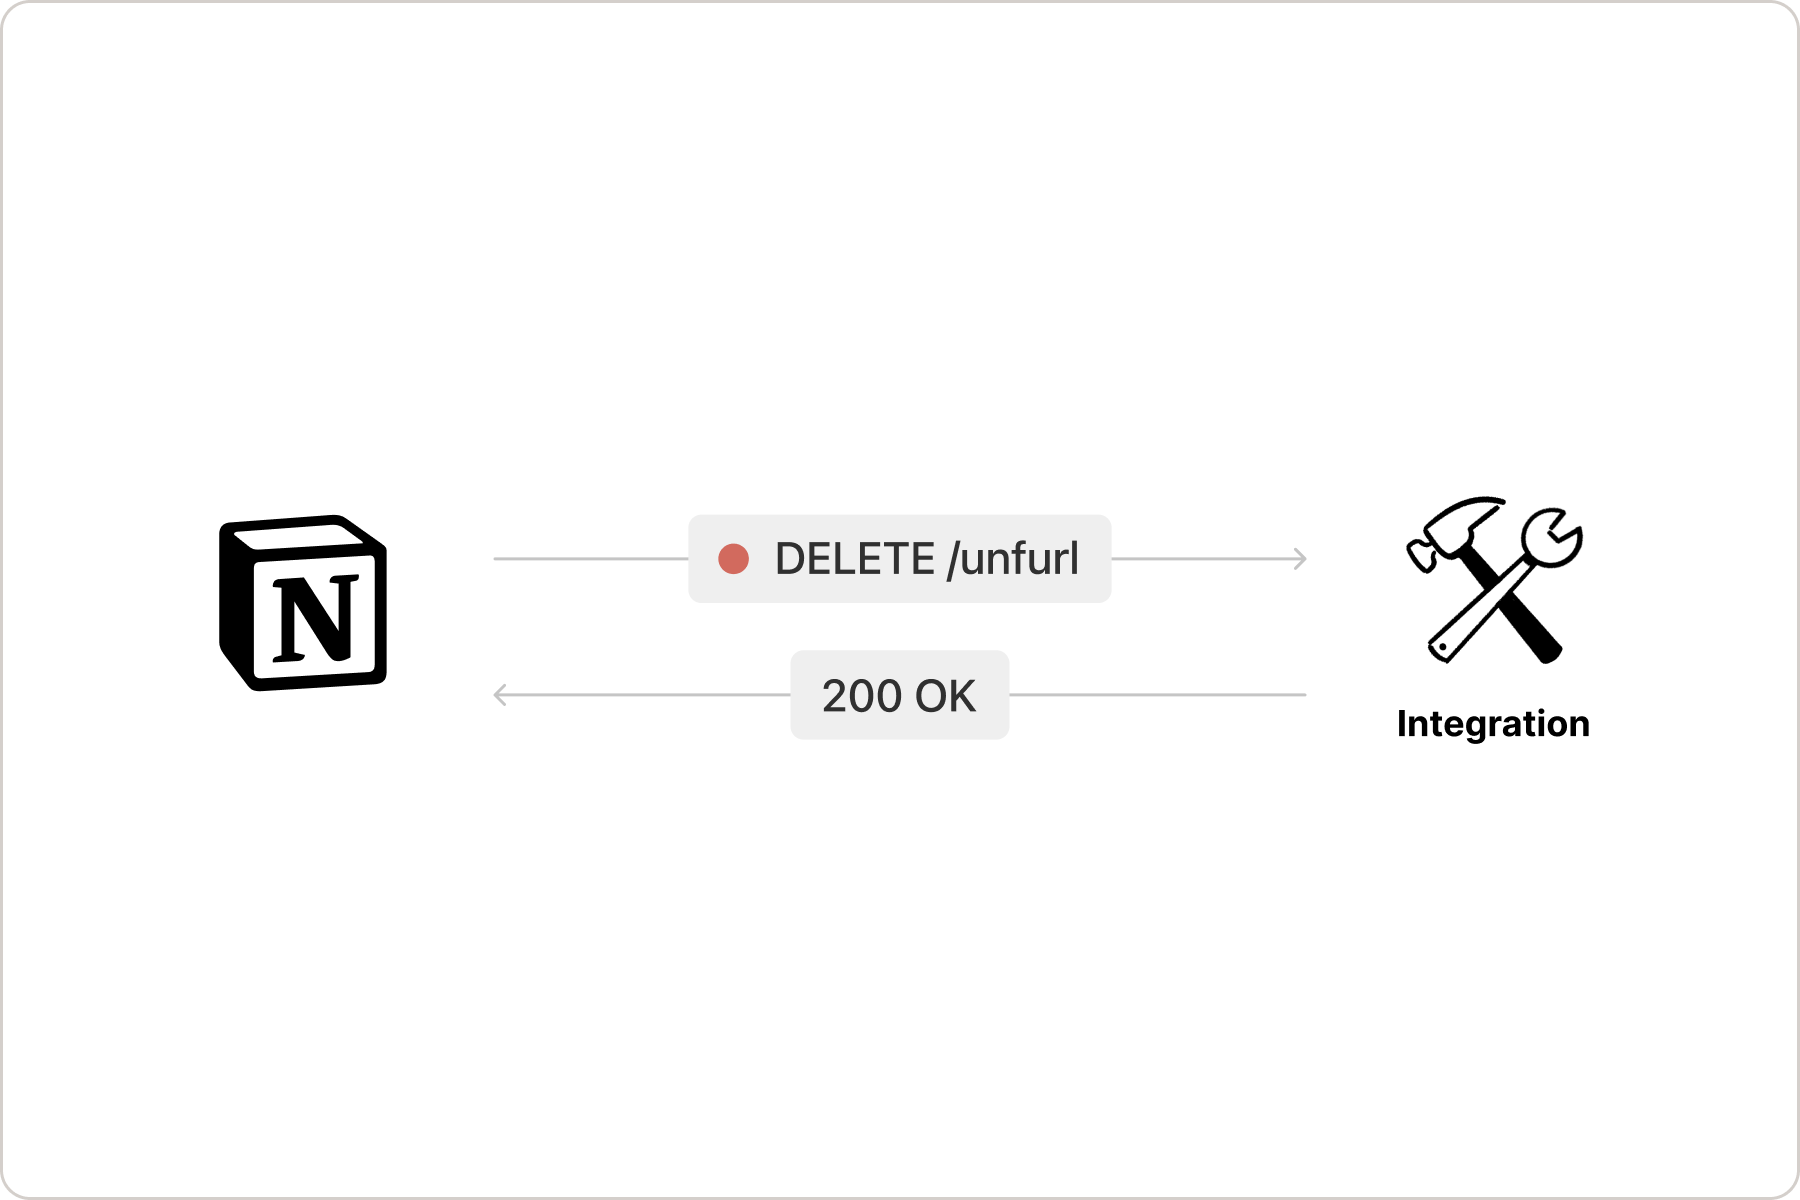 Listen for the request to perform any associated actions, like deleting the record from your service.
## Submit your integration for security review
Before a Link Preview integration can be publicly distributed, it needs to pass a security review. [Fill out this form](https://docs.google.com/forms/d/e/1FAIpQLSd94UcRziV-1yFv6udO0qZwohLyXxhYYadUqEJyyEd03RAj1w/viewform) to submit your integration for review.
**Next steps**
* To learn more about customizing a Link Preview’s unfurl attributes, refer to the [reference docs](/reference/unfurl-attribute-object)
---
# Source: https://developers.notion.com/guides/mcp/build-mcp-client.md
> ## Documentation Index
> Fetch the complete documentation index at: https://developers.notion.com/llms.txt
> Use this file to discover all available pages before exploring further.
# Integrating your own MCP client
> Learn how your custom AI tool can connect to Notion MCP.
This guide walks you through building an
[MCP client](https://modelcontextprotocol.io/docs/develop/build-client) that
connects to [Notion MCP](/guides/mcp/mcp) using OAuth 2.0 authentication with
[PKCE](https://oauth.net/2/pkce/).
## Overview
Notion provides a hosted
[MCP (Model Context Protocol)](https://modelcontextprotocol.io/introduction)
server that enables AI tools to interact with Notion workspaces. The server is
available at:
| Transport | URL | Notes |
| --------------------------------- | ---------------------------- | ---------------------------------- |
| **Streamable HTTP** (recommended) | `https://mcp.notion.com/mcp` | Modern transport, more efficient |
| **Server-Sent Events (SSE)** | `https://mcp.notion.com/sse` | Fallback for broader compatibility |
Both endpoints support the same MCP protocol and OAuth authentication. Your
client should try Streamable HTTP first and fall back to SSE if needed.
**Key requirements:**
* OAuth 2.0 Authorization Code flow with PKCE
* Support for Streamable HTTP (`/mcp`) or SSE (`/sse`) transports
* Token refresh handling
* Secure credential storage
## Prerequisites
Listen for the request to perform any associated actions, like deleting the record from your service.
## Submit your integration for security review
Before a Link Preview integration can be publicly distributed, it needs to pass a security review. [Fill out this form](https://docs.google.com/forms/d/e/1FAIpQLSd94UcRziV-1yFv6udO0qZwohLyXxhYYadUqEJyyEd03RAj1w/viewform) to submit your integration for review.
**Next steps**
* To learn more about customizing a Link Preview’s unfurl attributes, refer to the [reference docs](/reference/unfurl-attribute-object)
---
# Source: https://developers.notion.com/guides/mcp/build-mcp-client.md
> ## Documentation Index
> Fetch the complete documentation index at: https://developers.notion.com/llms.txt
> Use this file to discover all available pages before exploring further.
# Integrating your own MCP client
> Learn how your custom AI tool can connect to Notion MCP.
This guide walks you through building an
[MCP client](https://modelcontextprotocol.io/docs/develop/build-client) that
connects to [Notion MCP](/guides/mcp/mcp) using OAuth 2.0 authentication with
[PKCE](https://oauth.net/2/pkce/).
## Overview
Notion provides a hosted
[MCP (Model Context Protocol)](https://modelcontextprotocol.io/introduction)
server that enables AI tools to interact with Notion workspaces. The server is
available at:
| Transport | URL | Notes |
| --------------------------------- | ---------------------------- | ---------------------------------- |
| **Streamable HTTP** (recommended) | `https://mcp.notion.com/mcp` | Modern transport, more efficient |
| **Server-Sent Events (SSE)** | `https://mcp.notion.com/sse` | Fallback for broader compatibility |
Both endpoints support the same MCP protocol and OAuth authentication. Your
client should try Streamable HTTP first and fall back to SSE if needed.
**Key requirements:**
* OAuth 2.0 Authorization Code flow with PKCE
* Support for Streamable HTTP (`/mcp`) or SSE (`/sse`) transports
* Token refresh handling
* Secure credential storage
## Prerequisites
Existing database IDs stay the same, but a new concept of data source IDs is introduced, and required in order to manage data source properties, to support multi-source databases (new in the Notion app as of September 2025.)
See [changelog](/page/changelog) and [Upgrading to 2025-09-03](/guides/get-started/upgrade-guide-2025-09-03) guide for more details. | | `2022-06-28` | Page properties must be retrieved using the page properties endpoint.
Parents are now always direct parents; a parent field has been added to block.
Database relations have a type of `single_property` and `dual_property`.
See [changelog](/changelog/releasing-notion-version-2022-06-28) for more details. | | `2022-02-22` | See [changelog](/changelog/releasing-notion-version-2022-02-22). | | `2021-08-16` | The [Append block children](/reference/patch-block-children) endpoint returns a list of new [Block object](/reference/block) children instead of the parent block.
Array rollup property types changed from `file`, `text` and `person` to `files`, `rich_text` and `people`.
Property IDs are now encoded to be URL safe.
Empty number, email, select, date, and rollup properties are now returned in page responses as `null`.
[More information](/changelog/notion-version-2021-08-16) | | `2021-05-13` | Rich text property values use the type `rich_text` instead of `text`.
[Migration details](/changelog/unversioned-requests-no-longer-accepted) | --- # Source: https://developers.notion.com/reference/comment-attachment.md > ## Documentation Index > Fetch the complete documentation index at: https://developers.notion.com/llms.txt > Use this file to discover all available pages before exploring further. # Comment attachment > The Comment Attachment object represents [files](/reference/file-object) that have been attached to a [Comment](/reference/comment-object).
 Internal integrations are a good entry point to building integrations because they have a simpler [authorization](/guides/get-started/authorization) flow than [public integrations](/guides/get-started/getting-started#internal-vs-public-integrations).
Before diving in, let’s quickly review Notion integrations. Integrations define how the public API can programmatically interact with your Notion workspace. They need to be authorized (i.e., given explicit permission) to make any changes your workspace.
All integration types use Notion’s public API to make requests to update a Notion workspace. The specific use case for each integration can vary greatly, from using Notion as a CMS for a blog, to [tracking Github issues](https://github.com/makenotion/notion-cookbook/tree/main/examples/javascript/notion-github-sync), to [sending emails](https://github.com/makenotion/notion-cookbook/tree/main/examples/javascript/database-email-update) in response to Notion changes.
This guide is just one introductory example of what you can build with Notion’s public API.
## Today’s goals
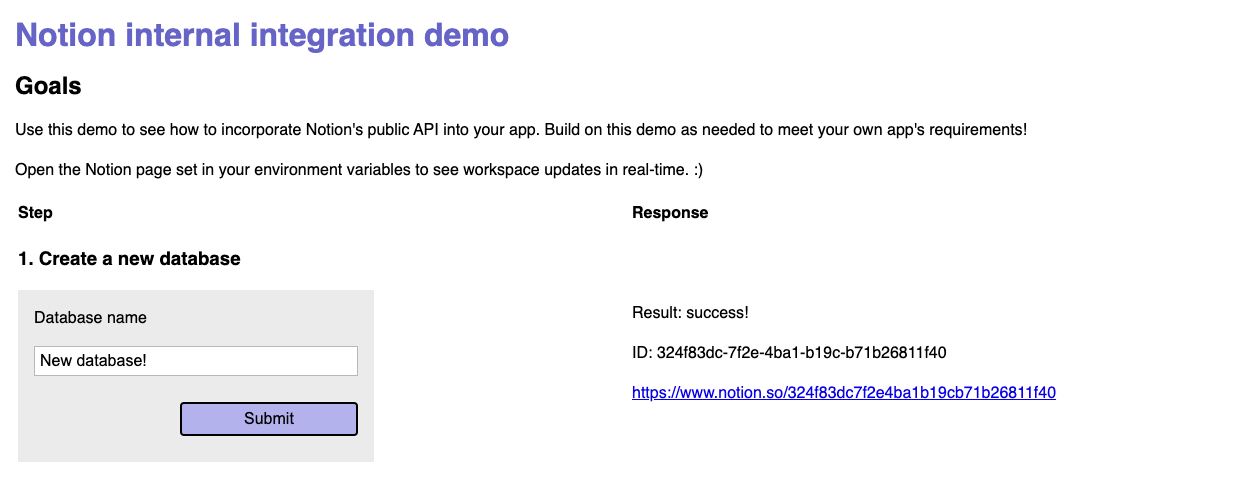
This guide will demonstrate how to build an HTML form that will [create a new Notion database](/reference/create-a-database) when submitted.
By the end of this guide, we’ll have a functional app that looks like this:
Internal integrations are a good entry point to building integrations because they have a simpler [authorization](/guides/get-started/authorization) flow than [public integrations](/guides/get-started/getting-started#internal-vs-public-integrations).
Before diving in, let’s quickly review Notion integrations. Integrations define how the public API can programmatically interact with your Notion workspace. They need to be authorized (i.e., given explicit permission) to make any changes your workspace.
All integration types use Notion’s public API to make requests to update a Notion workspace. The specific use case for each integration can vary greatly, from using Notion as a CMS for a blog, to [tracking Github issues](https://github.com/makenotion/notion-cookbook/tree/main/examples/javascript/notion-github-sync), to [sending emails](https://github.com/makenotion/notion-cookbook/tree/main/examples/javascript/database-email-update) in response to Notion changes.
This guide is just one introductory example of what you can build with Notion’s public API.
## Today’s goals
This guide will demonstrate how to build an HTML form that will [create a new Notion database](/reference/create-a-database) when submitted.
By the end of this guide, we’ll have a functional app that looks like this:
 The completed [sample code](https://github.com/makenotion/notion-cookbook/tree/main/examples/javascript/web-form-with-express) includes additional examples beyond what’s covered in this guide, including forms to:
* [Add a new page](/reference/post-page) to the database
* [Add content](/reference/patch-block-children) to the new page
* [Add a comment](/reference/create-a-comment) to the page content
### Requirements
To follow along with this guide, you will need:
* A [Notion account](https://www.notion.so/signup).
* To be a [Workspace Owner](https://www.notion.so/help/add-members-admins-guests-and-groups) in the workspace you’re using. You can create a new workspace for testing purposes otherwise.
* Knowledge of HTML and JavaScript. We’ll use [Express.js](https://expressjs.com/) for a server, as well.
* [npm and Node.js](https://docs.npmjs.com/downloading-and-installing-node-js-and-npm) installed locally to use the [Notion SDK for JavaScript](https://github.com/makenotion/notion-sdk-js) and [Express.js](https://expressjs.com/)
The completed [sample code](https://github.com/makenotion/notion-cookbook/tree/main/examples/javascript/web-form-with-express) includes additional examples beyond what’s covered in this guide, including forms to:
* [Add a new page](/reference/post-page) to the database
* [Add content](/reference/patch-block-children) to the new page
* [Add a comment](/reference/create-a-comment) to the page content
### Requirements
To follow along with this guide, you will need:
* A [Notion account](https://www.notion.so/signup).
* To be a [Workspace Owner](https://www.notion.so/help/add-members-admins-guests-and-groups) in the workspace you’re using. You can create a new workspace for testing purposes otherwise.
* Knowledge of HTML and JavaScript. We’ll use [Express.js](https://expressjs.com/) for a server, as well.
* [npm and Node.js](https://docs.npmjs.com/downloading-and-installing-node-js-and-npm) installed locally to use the [Notion SDK for JavaScript](https://github.com/makenotion/notion-sdk-js) and [Express.js](https://expressjs.com/)

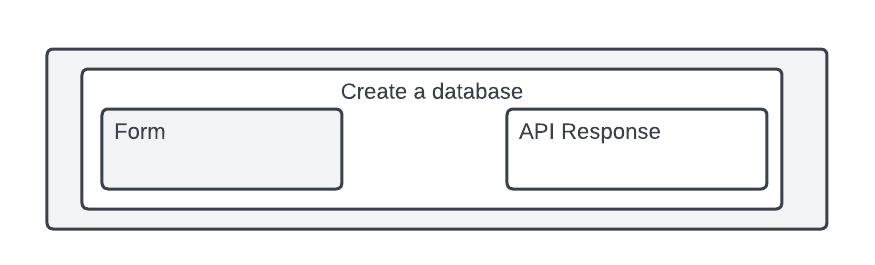
 The corresponding [HTML elements](https://github.com/makenotion/notion-cookbook/blob/main/examples/javascript/web-form-with-express/views/index.html#L40) related to creating a database are shown below:
1. Create a new database |