# Linear
> Adjust your preferences to help you move faster and personalize your workflow.
---
# Source: https://linear.app/docs/account-preferences.md
# Preferences
Adjust your preferences to help you move faster and personalize your workflow.

## General
The general preferences offer high-level adjustments for how you want things to appear in Linear.
### Default home view
This setting lets you set the default view that opens whenever you close or log out of Linear and re-open/re-login. It defaults to your team's `Active issues` view, which is the view that shows all issues that are in an _Unstarted_ or _Started_ workflow status.
To change your default home view, open the dropdown menu to select from any of these default views:
* All issues
* Active issues
* Current cycle
* Inbox
* My Issues
* Favorited Views
* Favorited Projects
### Display full names
Select whether you want to see your team members' full names or the username they have personalized in their Profile section.
### First day of the week
Personalize how you want your calendars to display your weeks.
### Convert text emoticons into emojis
Turn this toggle on to speed up emoji input.
## Interface and theme
Adjust your font size and/or opt for a pointer cursor when hovering over interactive elements.
Choose from our presets or create your own custom theme for your workspace. Select several Light or Dark modes as a preference or choose system preference if you'd like the app to switch based on your computer settings.
You can also build your own custom theme. Find and use over 70 themes (and counting!) on the open source site [linear.style](https://linear.style/), where you can click to copy and use them.
## Desktop application
Choose whether to attempt to open Linear URLs in the desktop app.
Select whether you want notification badges on your desktop app icon, or remove them to avoid the noise.
Choose whether to enable spell check.
## Automations and workflows
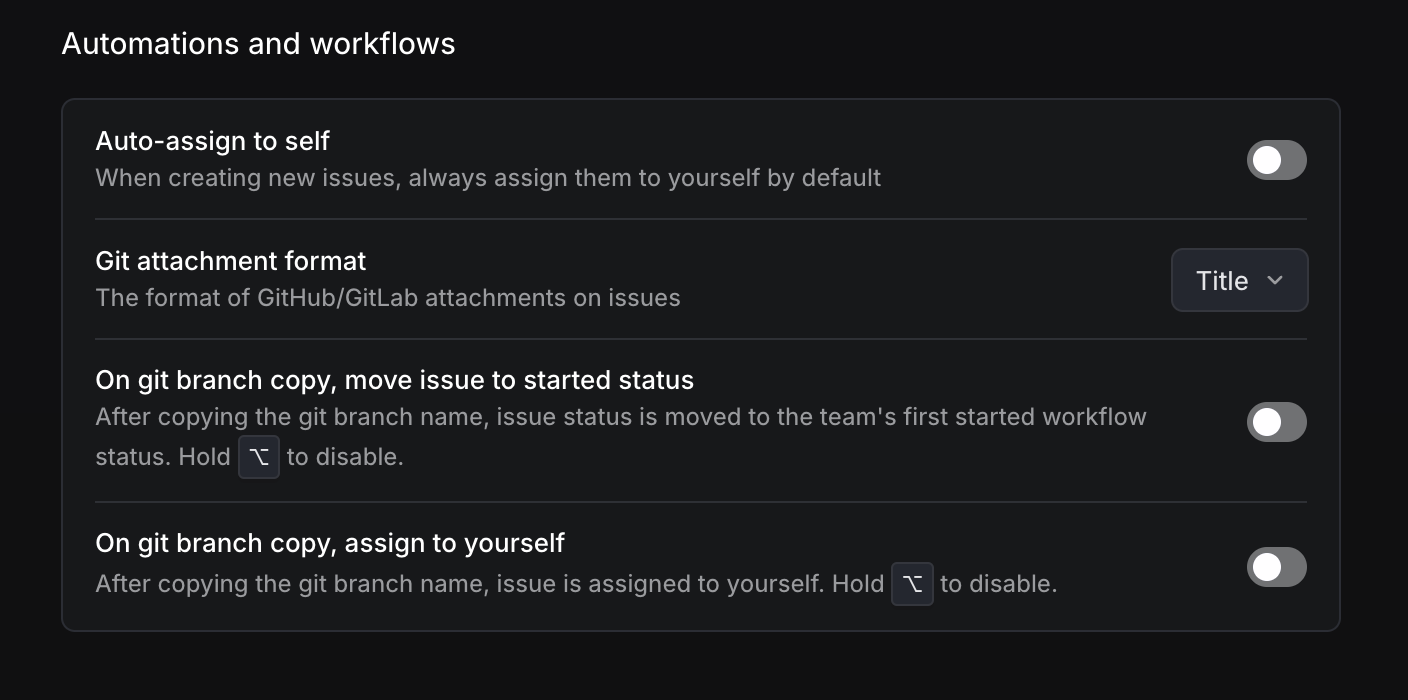
### Auto-assign to self
Optionally, enable an automation to always assign issues you create to yourself. You can also configure whether you should be auto-assigned to issues you move to a started status.
If you don't turn these on, you can always toggle the Create more button or use Cmd/Ctrl Shift Enter when creating issues to create more with the same assignee. We don't have a setting to auto-assign issues to specific users. The best way to accomplish that workflow is to create templates with the assignee field set to a specific user.
### Git attachment format
Display title, or title and repository for your git attachments.
### Git-related automations
If you've enabled Linear's GitHub or GitLab integrations, you'll likely copy the git branch name with `Cmd/Ctrl` `Shift` `.` to link Linear issues to pull requests. You can set two actions to happen whenever you do:
* _**On git branch copy, move issue to started status**_ which moves the issue to the first workflow status under the started category (often "In progress").
* **On git branch copy, auto-assign to yourself**
We highly recommend these settings for any developers using Linear. In combination, they save you a few clicks every time you begin an issue.
### FAQ
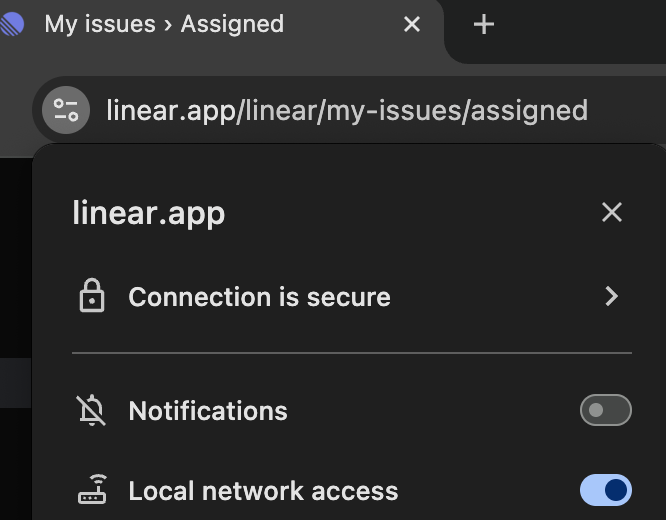
Open in Desktop app is not working (Chromium browsers)
Please ensure you've granted local network access to Linear in Chrome's site settings. If you can still reproduce with these settings on, please let us know at support@linear.app.
---
# Source: https://linear.app/developers/advanced-usage.md
# Advanced usage
The Linear Client wraps the [Linear SDK](https://github.com/linear/linear/tree/master/packages/sdk/src/_generated_sdk.ts), provides a [LinearGraphQLClient](https://github.com/linear/linear/tree/master/packages/sdk/src/graphql-client.ts), and [parses errors](https://github.com/linear/linear/tree/master/packages/sdk/src/error.ts).
## Request Configuration
The `LinearGraphQLClient` can be configured by passing the `RequestInit` object to the Linear Client constructor:
```ts
const linearClient = new LinearClient({ apiKey, headers: { "my-header": "value" } });
```
## Raw GraphQL Client
The `LinearGraphQLClient` is accessible through the Linear Client:
```ts
const graphQLClient = linearClient.client;
graphQLClient.setHeader("my-header", "value");
```
## Raw GraphQL Queries
The Linear GraphQL API can be queried directly by passing a raw GraphQL query to the `LinearGraphQLClient`:
```ts
const graphQLClient = linearClient.client;
const cycle = await graphQLClient.rawRequest(`
query cycle($id: String!) {
cycle(id: $id) {
id
name
completedAt
}
}`,
{ id: "cycle-id" }
);
```
## Custom GraphQL Client
In order to use a custom GraphQL Client, the Linear SDK must be extended with a request function:
```ts
import { LinearError, LinearFetch, LinearRequest, LinearSdk, parseLinearError, UserConnection } from "@linear/sdk";
import { CustomGraphqlClient } from "./graphql-client";
/** Create a custom client configured with the Linear API base url and API key */
const customGraphqlClient = new CustomGraphqlClient("https://api.linear.app/graphql", {
headers: { Authorization: apiKey },
});
/** Create the custom request function */
const customLinearRequest: LinearRequest = (
document: string,
variables?: Variables
) => {
/** The request must take a GraphQL document string and variables, then return a promise for the result */
return customGraphqlClient.request(document, variables).catch(error => {
/** Optionally catch and parse errors from the Linear API */
throw parseLinearError(error);
});
};
/** Extend the Linear SDK to provide a request function using the custom client */
class CustomLinearClient extends LinearSdk {
public constructor() {
super(customLinearRequest);
}
}
/** Create an instance of the custom client */
const customLinearClient = new CustomLinearClient();
/** Use the custom client as if it were the Linear Client */
async function getUsers(): LinearFetch {
const users = await customLinearClient.users();
return users;
}
```
---
# Source: https://linear.app/developers/agent-best-practices.md
# Interaction Best Practices
Linear users have high expectations for the quality and consistency of the experience inside Linear. We aim to extend this to agents, which should act in a predictable and natural manner.
## Recommendations
Upon receiving the `created` webhook, your agent should respond immediately with a `thought` activity to acknowledge that the agent has started working. This lets the user know right away that their prompt has been received.
> [!NOTE]
> The first response must be sent within 10 seconds of receiving the `created` event, or the agent will be shown as unresponsive.
>
> Follow-up activities after the first response can still be sent for up to 30 minutes before the session is considered stale. Note that this stale state is recoverable by sending another agent activity.
If your agent is delegated to work on an issue that is not in a `started`, `completed`, or `canceled` status type, move the issue to the first status in `started` when your agent begins work. You can fetch this by querying the team’s workflow states filtered by `type: { eq: "started" }`, and selecting the one with the lowest `position`:
```graphql
query TeamStartedStatuses($teamId: String!) {
team(id: $teamId) {
states(filter: { type: { eq: "started" } }) {
nodes {
id
name
position
}
}
}
}
```
If your agent is working on implementation and no `Issue.delegate` is currently set, it should set itself as the delegate to make the agent's role in the issue more explicit.
When work is complete, emit an `AgentActivity` with type `response`; or if you require additional actions from the user, emit an `AgentActivity` with type `elicitation` or `error`. We will automatically create a comment under the comment thread as well.
### Agent Activities
> [!NOTE]
> Comments may not be reliable to read from, as they are editable and may have changed since your agent’s last run. Instead, rely on **Agent Activities** as these are frozen-in-time snapshots of user input.
To reconstruct the full conversation, list the Agent Activities associated with the Agent Session instead—see below for examples:
GraphQL
```graphql
query AgentSession($agentSessionId: String!) {
agentSession(id: $agentSessionId) {
activities {
edges {
node {
updatedAt
content {
... on AgentActivityThoughtContent {
body
}
... on AgentActivityActionContent {
action
parameter
result
}
... on AgentActivityElicitationContent {
body
}
... on AgentActivityResponseContent {
body
}
... on AgentActivityErrorContent {
body
}
... on AgentActivityPromptContent {
body
}
}
}
}
}
}
}
```
TypeScript SDK (53.0.0+)
```ts
// @linear/sdk@^53.0.0
const agentSessionActivities = await agentSession.activities();
agentSessionActivities.nodes.forEach(activity => {
switch (activity.content.__typename) {
// type narrowing
case "AgentActivityThoughtContent":
const { body } = activity.content;
...
break;
case "AgentActivityActionContent":
const { action, parameter, result } = activity.content;
...
break;
case "AgentActivityElicitationContent":
const { body } = activity.content;
...
break;
case "AgentActivityResponseContent":
const { body } = activity.content;
...
break;
case "AgentActivityErrorContent":
const { body } = activity.content;
...
break;
case "AgentActivityPromptContent":
const { body } = activity.content;
...
break;
default:
throw Error("Not reachable")
}
})
```
## Additional Webhooks
In addition to the core `AgentSession` webhooks, there are additional webhooks that your agent can listen to in order to build a richer agent experience within Linear. In addition, you can utilize any of the existing GraphQL APIs.
### Inbox Notifications Webhooks
Inbox Notification events are triggered when something directly involves your app user—like when an agent is unassigned from an issue or a user reacts to a comment from the agent.
Enable this category by selecting **Inbox Notifications** in your OAuth app config.
The received webhook payload will have the following shape:
```json
{
type: "AppUserNotification",
action: NotificationType,
createdAt: string,
organizationId: string,
oauthClientId: string,
appUserId: string,
notification: Notification,
}
```
Here are a few action types that could be useful while developing your agent:
```md
issueMention
issueEmojiReaction
issueCommentMention
issueCommentReaction
issueAssignedToYou
issueUnassignedFromYou
issueNewComment
issueStatusChanged
```
### Permission Change Webhooks
Permission Change events are triggered when your agent gains or loses access to a team.
Enable this category by selecting **Permission changes** in your OAuth app config. The webhook will be of type `PermissionChange` with action `teamAccessChanged`.
The received webhook payload will have the following shape when team access is granted or removed:
```json
{
type: "PermissionChange",
action: "teamAccessChanged",
createdAt: string,
organizationId: string,
oauthClientId: string,
appUserId: string,
canAccessAllPublicTeams: boolean,
addedTeamIds: string[],
removedTeamIds: string[],
webhookTimestamp: number,
webhookId: string
}
```
You’ll receive a separate webhook when revoking your OAuth app:
```json
{
type: "OAuthApp",
action: "revoked",
createdAt: string,
organizationId: string,
oauthClientId: string,
webhookTimestamp: number,
webhookId: string
}
```
## Existing integrations
### When to build an integration or agent
If your integration primarily reads data from Linear or performs actions that should be attributed to individual team members, an integration is the right choice.
Build an agent if you want your application to appear as a distinct workspace member with its own identity and actions within Linear.
### Convert an existing integration
If you have an existing Linear integration it can be converted to use the new authentication and gain the new functionality.
The new `actor=app` actor type works quite differently at the core to our legacy `actor=application` approach. However, if you are using `actor=application` today to request a token that is _only_ used to create issues or comments as an app, then it is backwards compatible – you can simply change this parameter.
`actor=application` allows for dual-purpose authentication tokens that can be used both as the authenticating user in some circumstances and as an "app" in others. If you currently are using a token like this, then to migrate you will need to ask users to authenticate twice: once for their personal access and secondarily for the app installation.
## Feedback, requests, questions
Please join the **#api** channel in our [community Slack](https://linear.app/join-slack) to provide feedback on this guide, request API's, and interact with other engineers developing agentic integrations.
---
# Source: https://linear.app/developers/agent-interaction.md
# Developing the Agent Interaction
Once your agent is installed and authenticated, it can begin participating in workflows inside Linear. Agents become active participants through the Agent Session and Agent Activity system—primitives that make agent behavior visible, contextual, and collaborative for end users.
The following sections walk through how your agent will receive instructions though webhooks, how it should communicate back through Agent Activities, and how the Agent Session lifecycle helps track it all.
You can use the [GraphQL schema explorer](https://studio.apollographql.com/public/Linear-Webhooks/variant/current/schema/reference/objects) to look up the object types used in agent webhook payloads.
## Agent session
`AgentSession` tracks the lifecycle of an agent run. Session states let the user know if the agent is currently working, waiting for user input, in an error state, or has finished work. An `AgentSession` is created automatically when an agent is mentioned or delegated an issue.
### Session states
Agent sessions can have one of 5 states: `pending`, `active`, `error`, `awaitingInput`, `complete`. These will be visible to users.
You don’t need to manage agent session state manually. Linear tracks session lifecycle automatically based on the last emitted activity.
### Session external URL
You can set an `externalUrls` on an `AgentSession` so users can open the current session on your web dashboard, desktop app, etc. Doing so also prevents a new session from being marked unresponsive.
Use the [`agentSessionUpdate`](https://studio.apollographql.com/public/Linear-API/variant/current/schema/reference/objects/Mutation?query=agentSessionUpdate#agentSessionUpdate) mutation to set this value.
* `externalUrls` is an object array, each containing a `label` and `url` field. The `url` field should be unique within the array. See schema for [`AgentSessionExternalUrlInput`](https://studio.apollographql.com/public/Linear-API/variant/current/schema/reference/inputs/AgentSessionExternalUrlInput).
* Use the `externalUrls` field of the [`agentSessionUpdate`](https://studio.apollographql.com/public/Linear-API/variant/current/schema/reference/objects/Mutation?query=agentSessionUpdate#agentSessionUpdate) mutation to replace the entire array. To add/remove specific URLs, use the `addedExternalUrls` or `removedExternalUrls` fields.

> [!NOTE]
> **Using `externalLink`?** The `externalLink` field is now deprecated but remains available. See [migration guide](https://linear.app/developers/agents-externalurls-migration) for instructions to adopt the `externalUrls` API.
### Session pull request
Your agent can inform the user that it has published a GitHub pull request by adding the pull request URL to the `externalUrls` field of the AgentSession using the [`agentSessionUpdate`](https://studio.apollographql.com/public/Linear-API/variant/current/schema/reference/objects/Mutation?query=agentSessionUpdate#agentSessionUpdate) mutation.
This will unlock additional features related to pull requests in the future.
### Session webhooks
An `AgentSession` webhook is sent to notify your agent when it's mentioned, delegated an issue through assignment, or when a user provides additional prompts.
To receive these events, enable the agent session events webhooks category in your OAuth application configuration.
You must return a response from your webhook receiver within 5 seconds.
> [!NOTE]
> Once you subscribe to `AgentSessionEvent` webhooks, customers will begin seeing Agent Session UI in Linear. This happens as soon as the event category is enabled, even if you’re only listening for debugging purposes.
>
> If you receive a `created` event, you are expected to send an activity or update your external URL within 10 seconds to avoid the session being marked as unresponsive.
`AgentSessionEvent` webhooks only send events to your specific agent.
For a detailed reference of all Agent Session webhook fields, see the [AgentSessionEventWebhookPayload schema](https://studio.apollographql.com/public/Linear-Webhooks/variant/current/schema/reference/objects/AgentSessionEventWebhookPayload).
There will be two types of actions in the `AgentSessionEvent` category, denoted by the action field of the payload:
**Action** | Behavior
--- | ---
`created` | A new Agent Session has been created (triggered by a user mention or delegation). You should start a new agent loop in response. To construct a prompt for your agent, you can utilize the [`promptContext` field](https://linear.app/developers/agent-interaction?noRedirect=1#collapsible-6a944bd6e1df), a formatted string containing the session’s relevant context, such as issue details, comments, and guidance. Structured data can also be found in the `agentSession.issue`, `agentSession.comment`, `previousComments`, or `guidance` fields. (Guidance refers to any instructions configured at the workspace, parent team, or team level—such as preferred repositories or task constraints.)
Your agent can use this context to determine what action to take.
`prompted` | A user sent a new message into an existing Agent Session. This message is located in the `agentActivity.body` field of the webhook payload.
You should insert that message into the conversation history and take action.
promptContext example
```xml
Fix accessibility on checkout pageMake it screen-reader friendlyParent Issue TitleParent issue descriptionFaster checkout processbotcoder Please implement thisThis is a separate thread commentReply to other commentAlways follow coding standards
```
### Proactively creating sessions
If your agent was not delegated or mentioned but you would like to proactively create an agent session, you can do so via the SDK or API with the `agentSessionCreateOnIssue` or `agentSessionCreateOnComment` mutations.
## Agent activity
Agents communicate progress by emitting semantic agent activities to an `AgentSession`. These activities can represent thoughts, tool calls, prompts for clarification, final responses, or errors.
### Sending agent activities
Agents should communicate progress by emitting Agent Activities to Linear. These activities can represent thoughts, actions, prompts for clarification, final responses, or errors.
You can emit activities using either the TypeScript SDK or a direct GraphQL mutation:
**TypeScript SDK**
```ts
const { success, agentActivity } = await linearClient.createAgentActivity({
agentSessionId: "...",
content: {
type: "...",
... // other payload fields - see below
},
});
```
**GraphQL**
```graphql
# Operation
mutation AgentActivityCreate($input: AgentActivityCreateInput!) {
agentActivityCreate(input: $input) {
success
agentActivity {
...
}
}
}
# Variables
{
"input": {
"agentSessionId": "...",
# Shape of `content` varies by activity `type`
"content": {
"type": "...",
... # other payload fields - see below
}
}
}
```
To include mentions in Agent Activity content, use plain Linear URLs in Markdown. These will be converted into mentions in the UI. For example:
> [!NOTE]
> https://linear.app/linear/profiles/user, I've created a new Linear issue for tracking the documentation work: https://linear.app/linear/issue/LIN-123/docs-issue — please review.
Renders as: "**@user**, I've created a new Linear issue for tracking the documentation work: **@LIN-123 docs issue** — please review.".
More on mentions in [Adding mentions in Markdown](https://linear.app/developers/graphql?noRedirect=1#adding-mentions-in-markdown).
### Activity content payload
Your agent may emit one of five allowed activity types. These are validated server-side, and invalid shapes will be rejected. Unless otherwise noted, all fields shown are required. Markdown is supported in `body` fields.
thought
A thought or internal note.
```json
{
"content": {
"type": "thought",
"body": "The user asked about the weather."
}
}
```
elicitation
Requests clarification or confirmation from the user.
```json
{
"content": {
"type": "elicitation",
"body": "Where are you located? I will find the current weather for you"
}
}
```
action
Describes a tool invocation. You may optionally include a result if the action has completed.
Without result (starting an action):
```json
{
"content": {
"type": "action",
"action": "Searching",
"parameter": "San Francisco Weather",
// "result": undefined (optional)
}
}
```
With result (after completion):
```json
{
"content": {
"type": "action",
"action": "Searched",
"parameter": "San Francisco Weather",
"result": "12°C, mostly clear" // Markdown OK
}
}
```
response
Indicates work has been completed or a final result is available.
```json
{
"content": {
"type": "response",
"body": "The weather in San Francisco is currently **foggy**, no surprise there."
}
}
```
error
Used to report an error or failure.
```json
{
"content": {
"type": "error",
"body": "Out of credits. [Pay up!](https://agent.com/pay)"
}
}
```
Additionally, you may see references to a `prompt` type `AgentActivity`. That is a user-generated message, usually as a follow-up prompt or responding to an elicitation. These are the messages that emit a `prompted` webhook to you on creation.
An agent cannot generate a `prompt` type activity.
### Repository suggestions
Agents can use the [`issueRepositorySuggestions`](https://studio.apollographql.com/public/Linear-API/variant/current/schema/reference#issueRepositorySuggestions) API to request relevant repository matches for a given issue. This query leverages context from the issue, session, agent guidance, and internal Linear signals (like linked issues or recent PRs) and uses an LLM to return ranked suggestions.
The agent provides a list of candidate repositories that it already has access to, and Linear will return a filtered list with confidence scores. This can help the agent proceed confidently—or, if still uncertain, send a shorter list of options back to the user as an elicitation.
**GraphQL**
```graphql
query($issueId: String!, $agentSessionId: String!) {
issueRepositorySuggestions(
issueId: $issueId
agentSessionId: $agentSessionId
candidateRepositories: [
{
hostname: "github.com",
repositoryFullName: "linear/linear-app"
},
{
hostname: "github.com",
repositoryFullName: "linear/linear"
},
{
hostname: "github.com",
repositoryFullName: "linear/security"
}
]
) {
suggestions {
repositoryFullName
hostname
confidence
}
}
}
```
### Signals
Signals are optional metadata that modify how an [Agent Activity](https://linear.app/developers/agent-interaction#agent-activity) should be interpreted or handled by the recipient. They provide additional context about the sender’s intent—guiding how the activity should be processed or responded to.
For details on available signals and sample usage, see [Signals](https://linear.app/developers/agent-signals).
### Ephemeral activities
When creating an agent activity, you may optionally mark it as `ephemeral`. Ephemeral activities are displayed temporarily, and will be replaced when the next activity arrives from the agent. This could be helpful when displaying temporary states.
Only `thought` or `action` type activities can be marked ephemeral.

## Agent plans
> [!NOTE]
> The Agent Plan API is currently in a technology preview and may change as we continue development and refine the experience.
Agent Plans allow your agent to provide a session-level checklist of tasks it's working on, designed to evolve during execution. Agents can freely add, modify, or remove entries as they discover new tasks or complete existing ones.
They’re especially useful when the agent is working through multi-step tasks and needs a way to keep users informed on current and upcoming actions.
The plan is a full array of steps, where each step has a `content` string and a `status`:
```graphql
agentSession.plan = Array<{
content: string,
status: "pending" | "inProgress" | "completed" | "canceled"
}>
```
> [!NOTE]
> **Note**: When updating a plan, agents must replace it the existing plan in its entirety. They cannot update the status of just one item.
To update a session’s plan, use the [`agentSessionUpdate` mutation](https://studio.apollographql.com/public/Linear-API/variant/current/schema/reference/objects/Mutation#agentSessionUpdate):
```graphql
mutation AgentSessionUpdate($agentSessionId: String!, $data: AgentSessionUpdateInput!, ) {
agentSessionUpdate(id: $agentSessionId, input: $data) {
success
}
}
# Variable
{
data: {
plan: [
{
content: "Update @linear/sdk to v61.0.0 and run npm install",
status: "inProgress",
},
{
content: "Implement agent plan mutations",
status: "pending"
},
...
]
}
}
```
## Recommendations
For recommendations on improving agent interaction—like managing delegation and status updates—continue to [best practices](https://linear.app/developers/agent-best-practices).
---
# Source: https://linear.app/developers/agent-signals.md
# Signals
Signals are optional metadata that modify how an [Agent Activity](https://linear.app/developers/agent-interaction#agent-activity) should be interpreted or handled by the recipient. They provide additional context about the sender’s intent—guiding how the activity should be processed or responded to.
Both agents and human users can attach signals to Agent Activity they create. This helps ensure that downstream behavior aligns with the sender’s expectations, whether it’s prompting a specific response type or adjusting how an action is displayed or prioritized.
## Human-to-agent signals
Human-to-agent signals are signals set by human users on Agent Activities of type `prompt`. They provide additional context or intent that guides how an agent should interpret or respond to a user’s message.
These signals are only applicable to `prompt`-type Agent Activities.
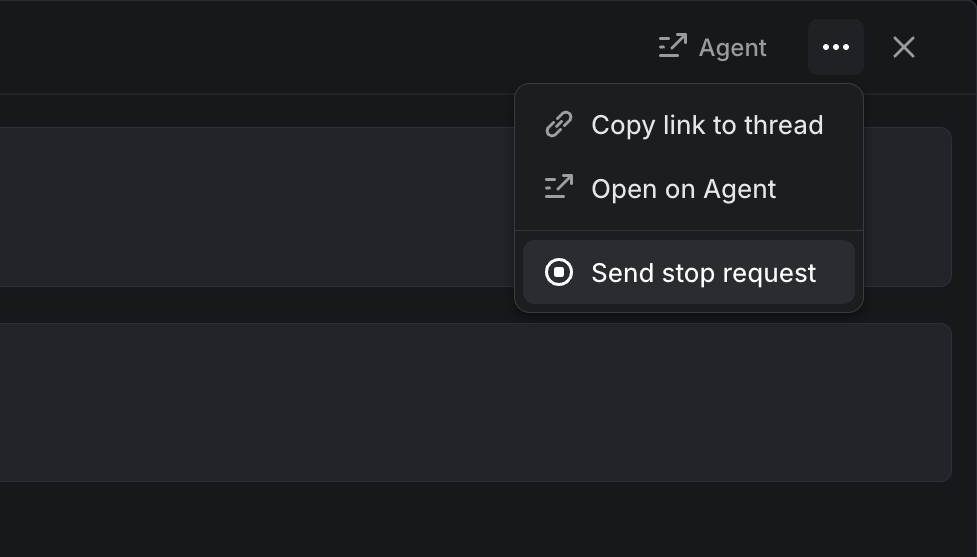
### `stop`
> [!NOTE]
> Applicable to Agent Activities of type [prompt](https://linear.app/developers/agent-interaction#activity-content-payload).
**The `stop` signal instructs the agent to halt work immediately.** From the moment this signal is received, the agent must not perform any further actions—such as making code changes, updates, or additional API calls.
After disengaging, the agent should emit a final activity—either of type `response` or `error`—to confirm that it has stopped and to inform the user of its current state.
An Agent Activity with the `stop` signal is generated when a user requests the agent to stop from within Linear.
## Agent-to-human signals
Agents can include signals when emitting Agent Activities. Signals are added through the `signal` field, alongside the `content` field, to convey additional context or intent to human users.
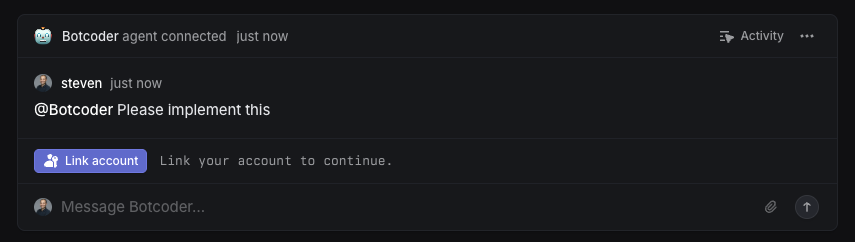
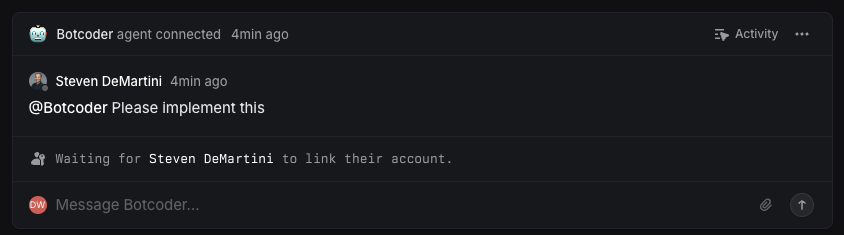
### `auth`
> [!NOTE]
> Applicable to Agent Activities of type [elicitation](https://linear.app/developers/agent-interaction#collapsible-612479899bd6).
The `auth` signal indicates that the agent requires the user to complete an account linking process before it can continue. When this signal is present, Linear renders a temporary UI state containing a link for the user to complete the account linking flow. This UI is ephemeral and will be dismissed once a newer agent-initiated activity is received.
After the required action is completed, the agent should resume work by emitting a `thought` activity.
Sample payload for [agentActivityCreate](https://studio.apollographql.com/public/Linear-API/variant/current/schema/reference/objects/Mutation#agentActivityCreate) mutation:
```javascript
{
agentSessionId: "...",
content: {
type: "elicitation",
body: "Please authenticate to continue"
},
signal: "auth",
signalMetadata: {
url: "https://auth.example.com/oauth",
userId: "...", // Optional: restricts to a specific user
providerName: "Orbit" // Optional: identifies the authentication provider
}
}
```
*Normal View – Targeted User*
*Alt View – Non-target User*
### `select`
> [!NOTE]
> Applicable to Agent Activities of type [elicitation](https://linear.app/developers/agent-interaction#collapsible-612479899bd6).
The `select` signal presents a list of options for the user to choose from as part of an elicitation activity. It’s useful for confirmations, selecting a target (such as a GitHub repository), or any situation with multiple choices.
**Users aren’t required to pick an option**—they can reply in free text, which dismisses the elicitation. Any selected option is emitted as a regular `prompt` activity. And since responses may include natural language, your agent should always involve an LLM when interpreting the prompt.
Sample payload for [agentActivityCreate](https://studio.apollographql.com/public/Linear-API/variant/current/schema/reference/objects/Mutation#agentActivityCreate) mutation:
```javascript
{
agentSessionId: "...",
content: {
type: "elicitation",
body: "Which repository is this issue about?"
},
signal: "select",
signalMetadata: {
options: [
{ value: "https://github.com/YOUR-ORG/YOUR-REPOSITORY" },
{ value: "https://github.com/YOUR-ORG/ANOTHER-REPOSITORY" }
// ...
]
}
}
```
> [!NOTE]
> **GitHub URL Enrichment**
> _If options are GitHub URLs, Linear automatically enriches them with icons and formatted names, so labels are not required._

---
# Source: https://linear.app/docs/agents-in-linear.md
# AI Agents
Build and deploy AI agents that work alongside your team
## Overview
Agents, also known as "app users", behave similar to other users in a workspace. They can be @-mentioned, delegated issues through assignment, create and reply to comments, collaborate on projects and documents, etc. App users are installed and managed by workspace admins.
Agents are not traditional assignees. Assigning an issue to an agent triggers delegation—the agent acts on the issue, but the human teammate remains responsible for its completion.
## Adding Agents
> [!NOTE]
> Workspace admins can install agents by following the setup instructions provided by the agent developer. Find available agents in the [Integrations Directory](https://linear.app/integrations/agents).
During installation, you’ll be prompted to choose which teams the agent has access to.
Example
*Example of installing an agent into Linear*
Once installed, any user with access to the selected teams can interact with the agent.
Agents can be uninstalled or managed by admins from **Settings > Applications** or suspended from **Settings > Administration > Members**.
## Using Agents in Linear
Agents are designed to work seamlessly alongside human teammates:
* **Delegate issues to them** by assigning the issue to the agent. This triggers the agent to take action based on its programmed behavior.
* The human assignee remains responsible for the issue, even after delegation to an agent.
* **@mention them** in comments or descriptions to trigger their functions.
If you're not sure how to interact or what they're able to help with, you can try @mentioning the agent to ask for help.
## Guiding Agents
Agent guidance lets you provide instructions that agents will automatically receive when they work on issues in your workspace.
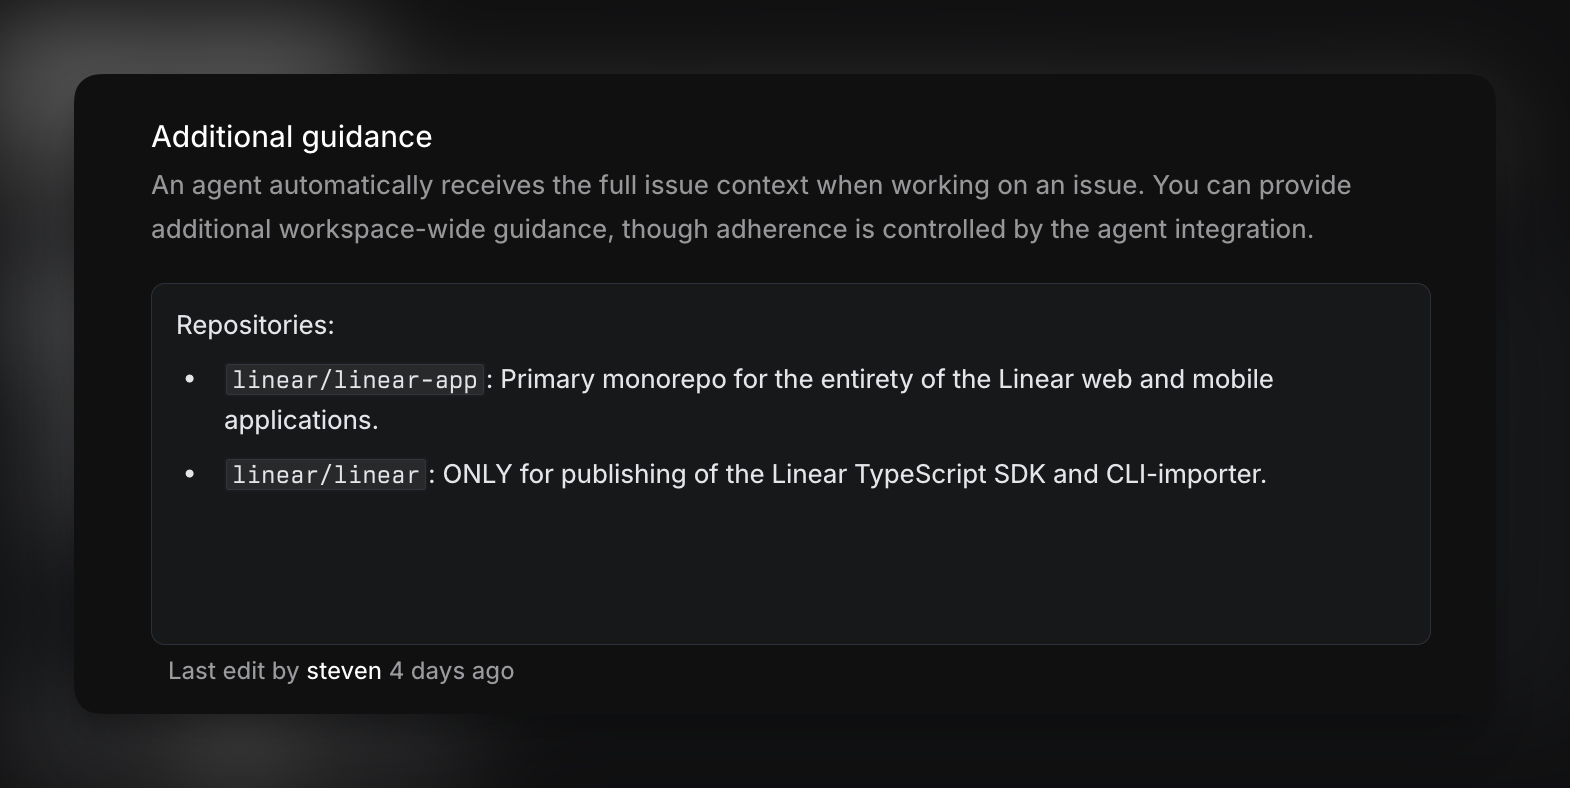
Agent guidance provides instructions that help agents work within your team’s conventions. Guidance can specify which repository to use for certain code changes, how to reference issues in commits or pull requests, and what review process to follow, so agents align with your existing workflows.
> [!NOTE]
> **Note:** All guidance is passed to the agent, but how it is interpreted or applied depends on the specific agent integration. If an agent doesn’t appear to follow the guidance, please share feedback with the team responsible for that agent directly.
Workspace guidance applies across the entire organization, while team-specific guidance can be used to include additional instructions unique to that team. When both exist, team guidance takes priority.
Guidance is authored in a markdown editor with full history, so instructions can be formatted clearly and reviewed or updated over time.
To edit your workspace-level agent guidance, navigate to [_Settings_ > _Agents_ > _Additional guidance_](https://linear.app/settings/agents). For team-level guidance, navigate into your parent or sub-team's settings > _Agents_ > _Additional guidance_. Both workspace and team level guidance may not exist in all agent contexts.
## Viewing Agent Activity
You can track what an agent has done in the same ways you track other teammates:
* **Agent** [**user pages**](https://linear.app/docs/user-views) show issue activity and contributions.
* In the **My issues** view, issues that you’ve delegated to agents will still appear—so you maintain visibility and control over the work in progress.
* **Custom views** filtered by **Delegate** to monitor agent involvement on specific types of issues or workflows.
* Use **Insights** sliced or segmented by **Delegate** to measure how much work is being directed to and handled by agents.
## Building Your Own Agent
Developers can build custom agents using Linear’s developer platform. Documentation on agent APIs, authentication, and behavior can be found in our [Developer Docs](https://linear.app/developers/agents).
## FAQs
Are agents billable seats?
Agents are not counted as billable seats in Linear. The services that provide the agent may have their own pricing structure, and you should refer to their documentation before installing.
How does Linear use data from agents?
Linear does not train on customer's data. We use models from common model providers, a complete list is available in our [DPA](https://linear.app/dpa).
Agents themselves would be 3rd party integrations approved by your workspace, in which case we can't speak to how the agent provider operates and you'd have to refer to the agent service provider.
What are the limitations in agents interacting with Linear?
Agents cannot sign in to the app, access admin functionality or manage users.
What happens if I install an agent but the name is already taken?
In the event that you have a member on your workspace with the same name as an Agent, the Agent's username will simply append a number at the end to keep it unique.
For example, Charlie would become Charlie1.
##
---
# Source: https://linear.app/developers/agents.md
# Getting Started
This guide describes how to best integrate an AI agent into Linear. It includes implementation guidelines on how to design an experience that feels native to Linear’s workflows and interaction patterns.
**Developer Preview**
Linear for Agents APIs are currently in active development and available as a Developer Preview. Functionality and Agent APIs may change before general availability.
## Overview
Agents behave similar to other users in a workspace. They can be @mentioned, delegated issues through assignment, create and reply to comments, collaborate on projects and documents, etc. App users are installed and managed by workspace admins.
You can build agents for internal use within your own workspace or for distribution to other organizations. It does not cost anything to develop agents in Linear. To make your agent available to other workspaces, [submit](https://linear.app/docs/integration-directory#submit-your-integration) your agent to Linear's integration directory.
Additionally, agents installed in your workspace do not count as billable users.
> [!NOTE]
> **Sample agent**
> We've created a demo agent built on our Typescript SDK and Cloudflare, if you want to dive straight into an example codebase.
>
> [Weather Bot](https://github.com/linear/weather-bot) is an agent that will help you look up the weather of any location within a Linear issue.
## Setup
Create a new [Application](https://linear.app/settings/api/applications/new) and configure the settings as you would for a standard OAuth application.
In the configuration, enable webhooks and make sure to select **Agent session events** at the bottom. Enabling this category will notify your webhook when events occur that are directly relevant to your app's user.
> [!NOTE]
> Note that the name and icon of your application will be how the agent appears in workspaces where it is installed (e.g. in the mention and filter menus), so it is best to choose something short, recognizable, but unique.
If you're just getting started, selecting Inbox notifications and Permission changes may also be helpful. You can read more about these in [Interaction Best Practices](https://linear.app/developers/agent-best-practices).
## Authentication
### Actor and scopes
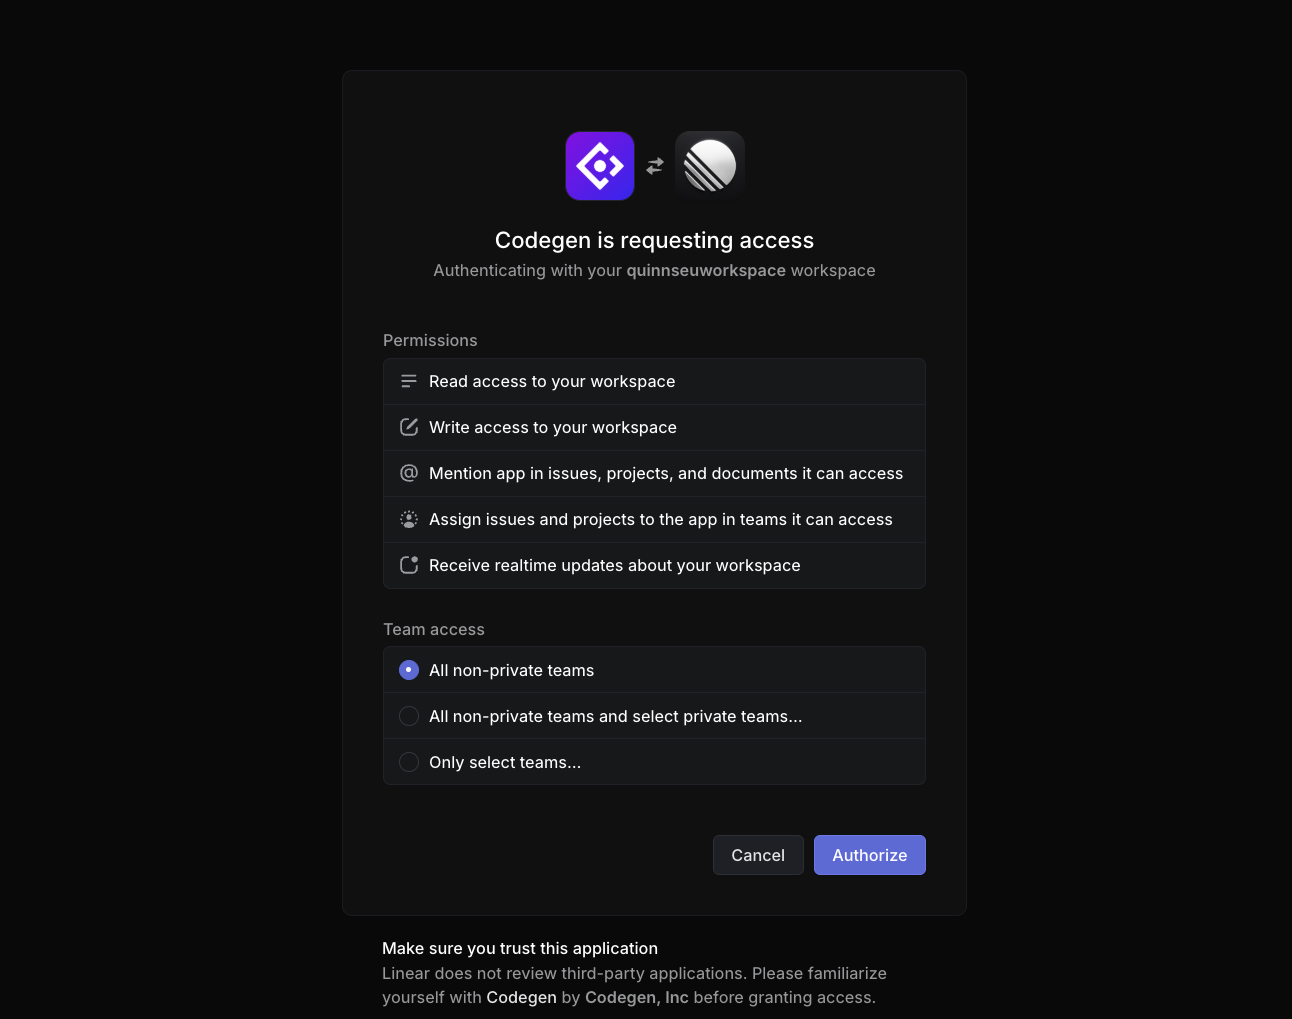
App authentication is built on top of the standard [OAuth2](https://linear.app/developers/oauth-2-0-authentication) flow. To install your agent into a Linear workspace in the OAuth authorization url add the `actor=app` parameter to switch to an app installation rather than requesting authentication as the installing user. Because this will be installed with a workspace scope _admin permissions are required_ to complete the installation.
This new actor type supersedes any references to `actor=application` and can be used for all agent, app, and service account use-cases.
#### Mention + assign scopes
To allow for flexibility, the ability to mention and assign your agent is optional and must be requested through the use of two new additional scopes added to the `scope` query parameter:
Scope | Description
--- | ---
app:assignable | Allow the app to be assigned as a delegate on issues and made a member of projects
app:mentionable | Allow the app to be mentioned in issues, documents, and other editor surfaces
Assigning an issue to your app now sets it as the `delegate`, not the `assignee`—so humans maintain ownership while agents act on their behalf.
#### Customer access scopes
The ability to access customer-related entities in your workspace for your agent must be requested through scopes:
Scope | Description
--- | ---
customer:read | Allow the app to read customer data in the workspace
customer:write | Allow the app to read and write customer data in the workspace
#### Initiative access scopes
The ability to access initiative-related entities in your workspace for your agent must be requested through scopes:
Scope | Description
--- | ---
initiative:read | Allow the app to read initiative data in the workspace
initiative:write | Allow the app to read and write initiative data in the workspace
#### Admin
Note that integrations using the `actor=app` mode are not able to also request `admin` scope.
### Installation
Your app will have a _unique ID for each workspace_ it is installed within, you can find this ID with the following query using the OAuth access token received as part of the installation flow:
```graphql
query Me {
viewer {
id
}
}
```
We highly recommend storing this ID alongside your access token so that you can confidently identify your app in different workspaces.
### Management
The team access available to your app can be changed or revoked at any time by workspace admins. If you're subscribed to the **Permission changes** webhook category, a `PermissionChange` webhook will be sent when access changes occur.
---
## Agent session lifecycle
Once installed and authenticated, your agent is ready to interact in the workspace. The core interaction model centers around the [**Agent Session**](https://linear.app/developers/agent-interaction#agent-session), which tracks the lifecycle of a given agent task. Sessions are created automatically when an agent is mentioned or delegated an issue.
Session state is visible to users, and updated automatically based on the agent’s emitted activities. No manual state management is required.
### Receiving your first webhook
The most common entry point is delegation—when a user assigns an issue to your agent.
This triggers a `created` AgentSessionEvent webhook containing an `agentSession` object with the relevant issue, comment, and context.
To get started, your agent should:
* Emit a `thought` activity within 10 seconds to acknowledge the session has begun
* Use the [`promptContext`](https://linear.app/developers/agent-interaction?noRedirect=1#collapsible-6a944bd6e1df) field to construct a formatted string containing the session’s relevant context, such as issue details, comments, and guidance
Details on the Agent Session webhook structure and how to respond using Agent Activities in [Developing the Agent Interaction](https://linear.app/developers/agent-interaction).
---
# Source: https://linear.app/developers/aig.md
# Agent Interaction Guidelines (AIG)
Agents are changing how software is planned, built, reviewed, and deployed. Because agents produce work in abundance, roles and workflows get reshaped. The value shifts to orchestrating input, context engineering, and reviewing output.
This shift demands a new contract for human‑computer interaction. The Agent Interaction Guidelines (AIG) are the foundational, evolving principles and practices for designing agent interactions that integrate more naturally into human workflows.
## Principles & practices
### **An agent should always disclose that it's an agent**
When humans and agents work side by side, humans need instant certainty about who they are interacting with. The agent must signal its identity clearly so that it can never be mistaken for a person.
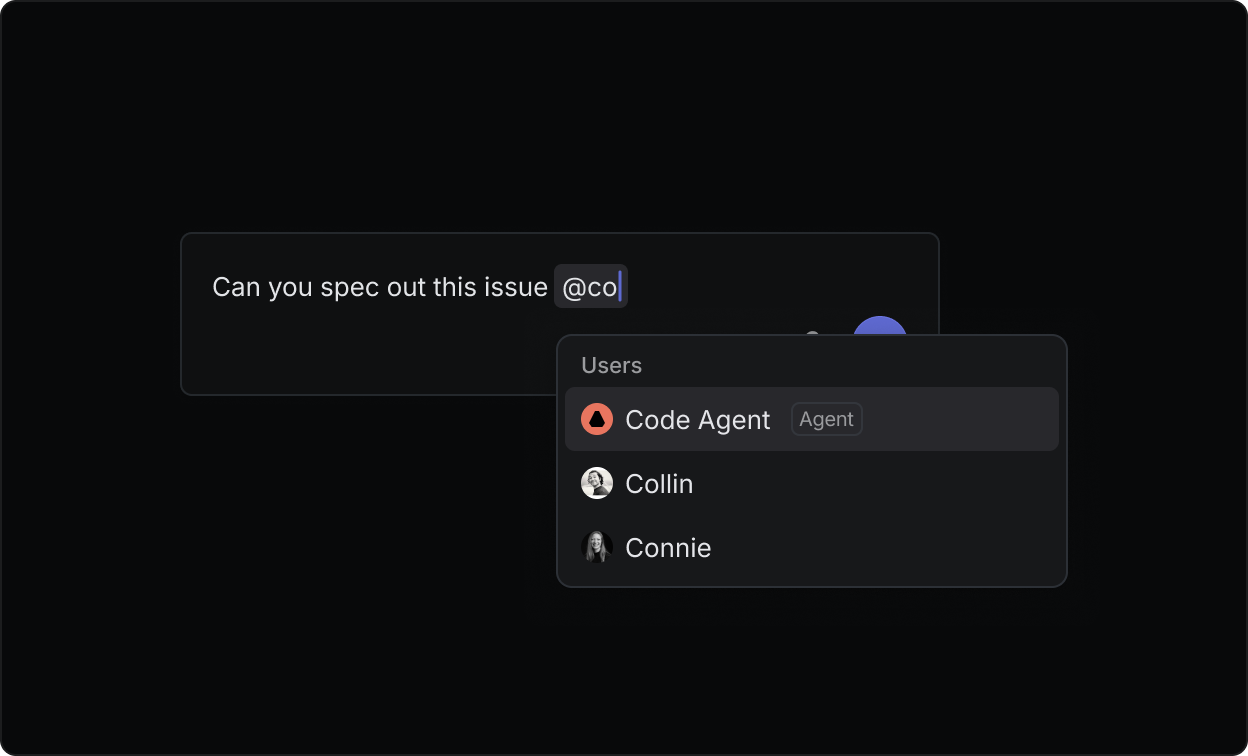
*Clear boundary between human and agentic users*
### **An agent should inhabit the platform natively**
By default, agents should be able to work through existing UI patterns and standard actions of the platform they operate in.
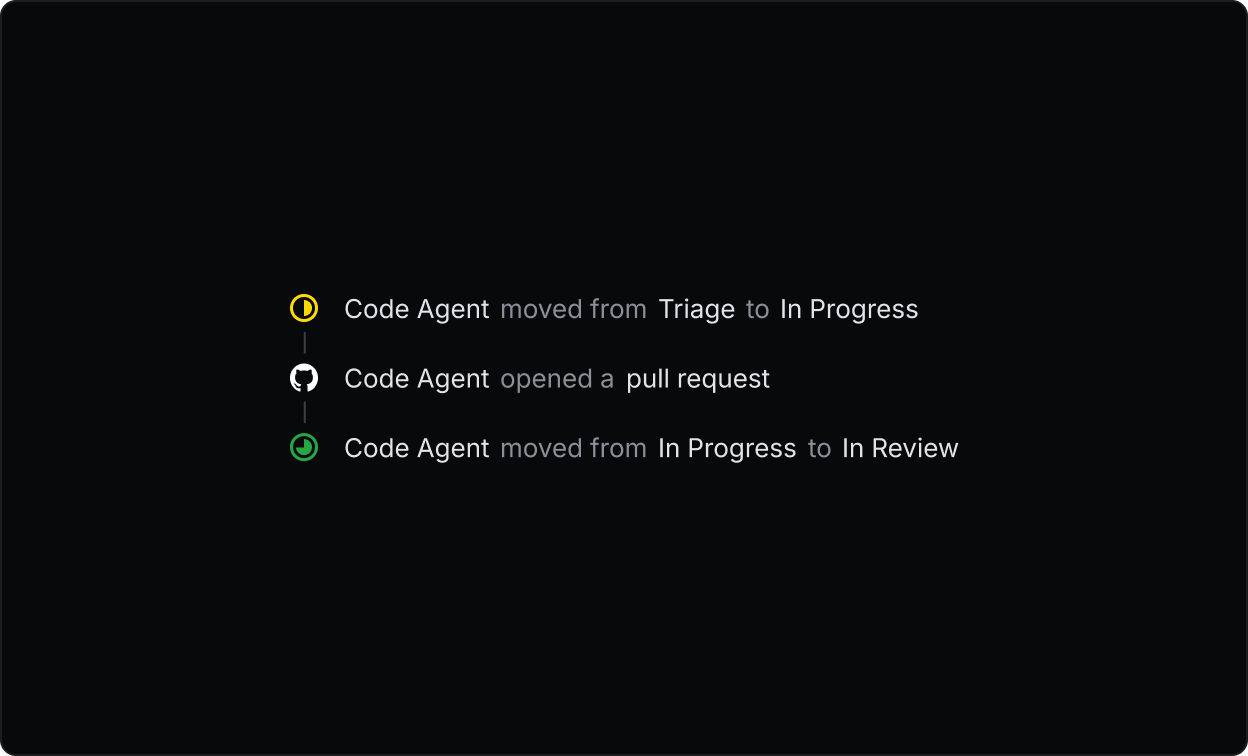
*The agent is able to use the same actions a human user would*
### **An agent should provide instant feedback**
Silence leads to uncertainty. When invoked, an agent should provide immediate, but unobtrusive, feedback to reassure the user it has received a request.
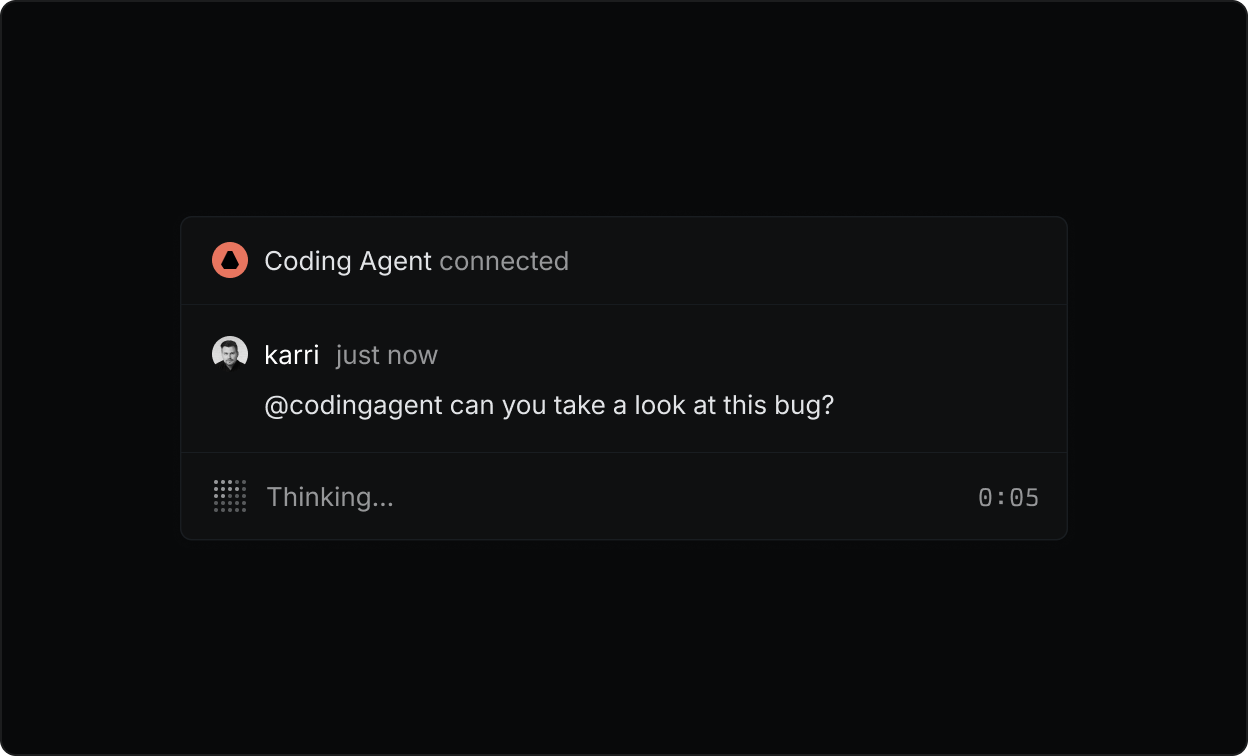
*The agent instantly indicates that it’s processing the request*
### **An agent should be clear and transparent about its internal state**
Agents should clearly indicate whether they’re thinking, waiting for input, executing, or finished working. Humans should be able to understand what’s happening at a glance and, when needed, inspect the underlying reasoning, tool calls, prompts, and decision logic.
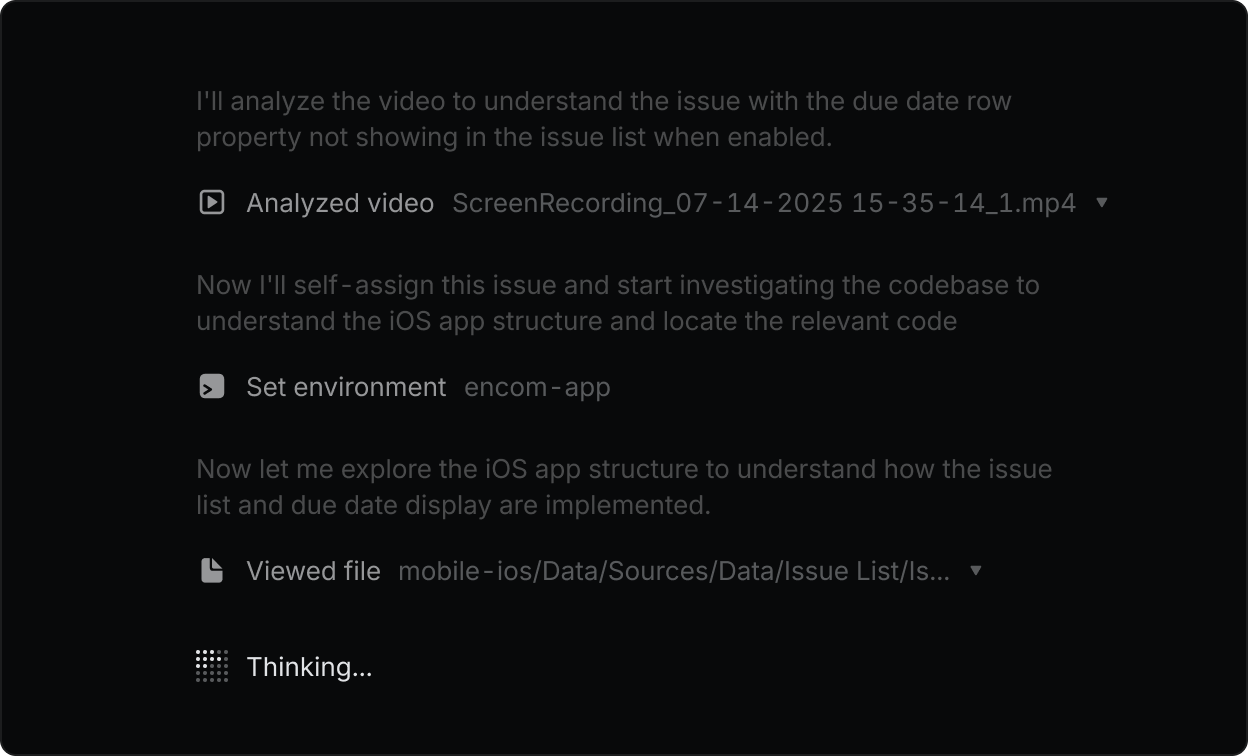
*The agent’s reasoning is fully transparent and open to inspection*
### **An agent should respect requests to disengage**
When asked to disengage, an agent should step back, immediately – and only re-engage once it’s received a clear signal to do so.
### **An agent cannot be held accountable**
There should be a clear delegation model between humans and agents. An agent can carry out tasks, but the final responsibility should always remain with a human.
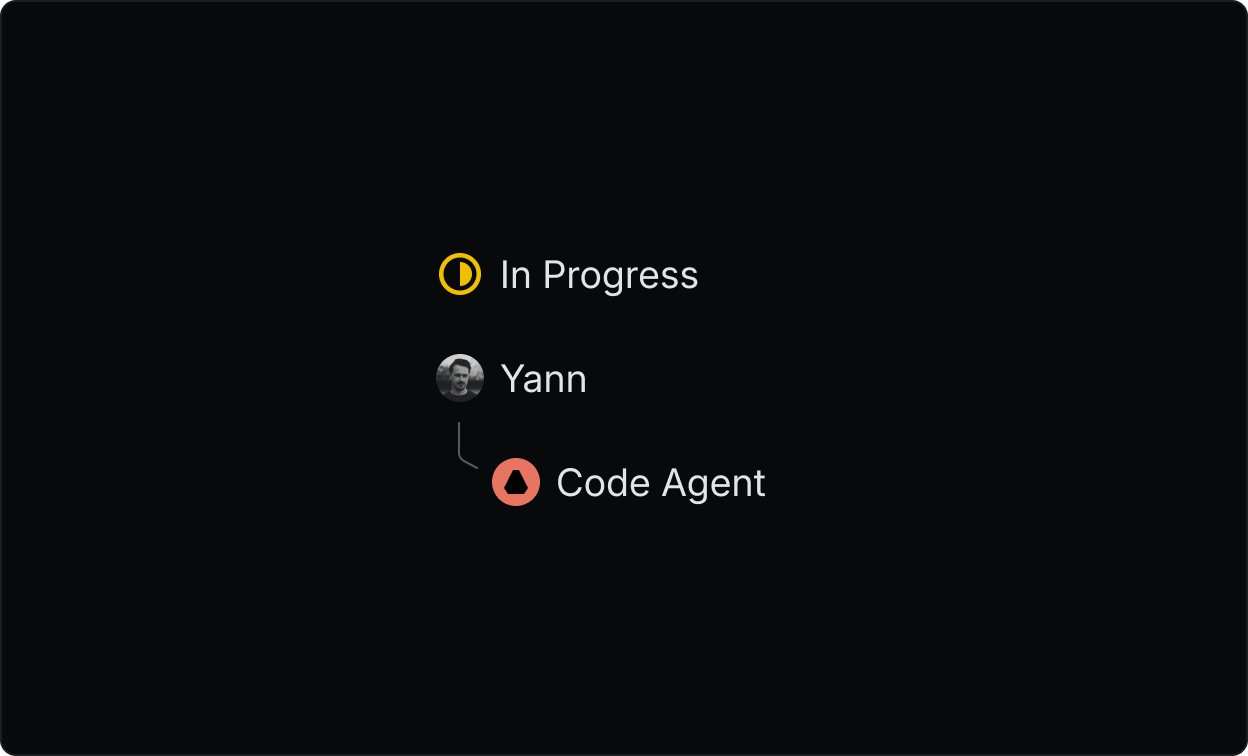
*Clear delegation flow between human and agent*
## Get involved
The Agent Interaction Guidelines are written with the community in mind. If you’re building agents and thinking through these same challenges, [join our Slack community](https://linear.app/join-slack) to contribute to the conversation.
This page is a living document and we expect to continually add to it as we learn more in practice.
---

---
# Source: https://linear.app/docs/airbyte.md
# Airbyte
> [!NOTE]
> Available to workspaces on our [Enterprise](https://linear.app/pricing) plan
Connect with Airbyte to consolidate data in data warehouses, lakes, and databases.
## Overview
With the Airbyte integration you can load your Linear data into any data warehouse, lakes or databases in minutes. Create custom analytics and dashboards for your company and update it on any schedule through Airbyte.
We support Airbyte Open Source environments, and do not support Airbyte Cloud.
## Configure
Configuration requires workspace admin permissions to navigate to [Settings > Features > Integrations > Airbyte](https://linear.app/settings/integrations/airbyte) and click the **Enable** button.
Copy the one time Airbyte API key as you will need this later. With this key the integration receives read access to all data in supported tables. There is no way to _exclude_ access to private team access at this time.
### Set up Airbyte locally
Install [Docker Desktop](https://www.docker.com/products/docker-desktop/) and launch it.
Clone the Airbyte repo and run Docker using the following command in Terminal:
```sh
git clone https://github.com/airbytehq/airbyte.git
cd airbyte
docker-compose up
```
Now you can open Airbyte in your browser at http://localhost:8000.
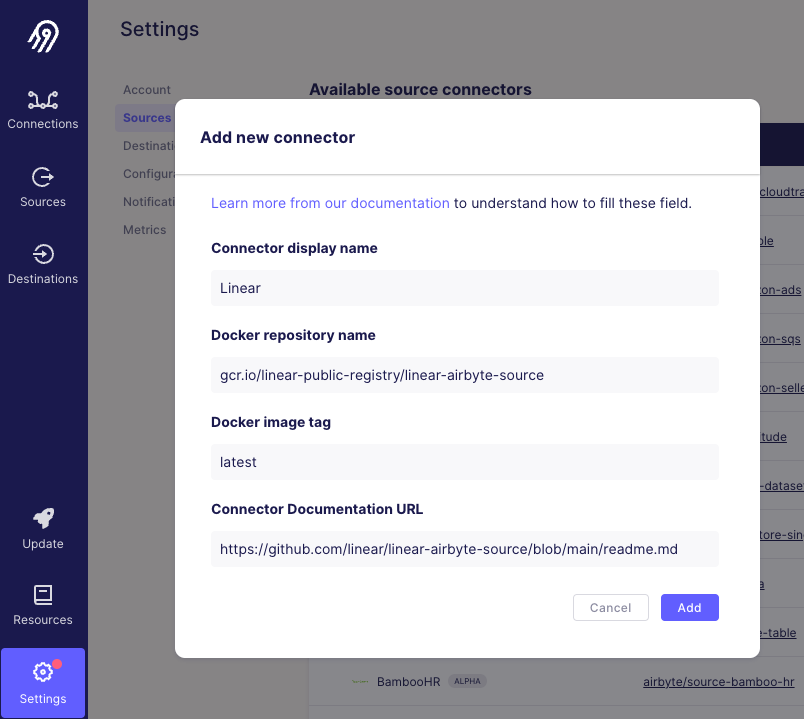
### Set up Linear Source
* In the Airbyte dashboard, click "Settings" on the bottom left.
* Click "Sources" on the left sidebar.
* Click the "New connector" button > enter the following:
**- Connector display name:** `Linear`
**- Docker repository name:** `gcr.io/linear-public-registry/linear-airbyte-source`
**- Docker image tag:** `latest`
**- Connector Documentation URL:** `https://github.com/linear/linear-airbyte-source/blob/main/readme.md`
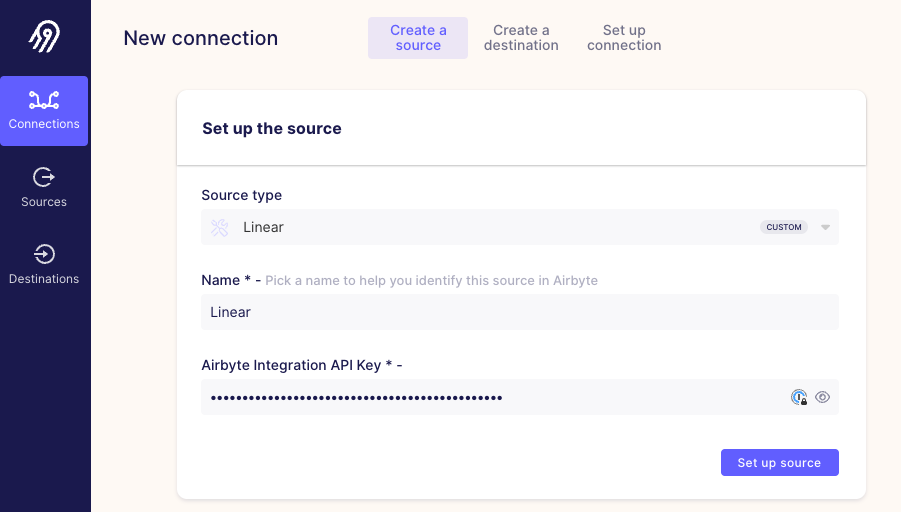
### **Connect your destination**
With the connection complete, you can now choose your destination.
* Click "Connections" in the sidebar and the "New connection" button.
* In the "Source type" box search for "Linear".
* You can give a custom name to your source or leave it as Linear.
* Paste the API key you generated in the Linear integration page for Airbyte and click "Set up source".
* On the next page, you can select an existing destination or set up your destination service, their instructions will be provided there if you have not yet created a destination with them before.
* Save the connection.
### **Choose your sync frequency**
Next, you need to choose how often you want to sync your Linear data to this destination:
* Click on Connections and your chosen Connection in the list
* Click on the "Replication" tab and choose your Replication frequency
* Select the data you want to sync. You should see a list of table names. You can select all or choose which ones to sync individually.
* Choose what type of sync mode you'd like to use for each source table. [Full Refresh](https://docs.airbyte.com/understanding-airbyte/connections/full-refresh-overwrite) and [Append](https://docs.airbyte.com/understanding-airbyte/connections/full-refresh-append/) are the options you can choose from. Incremental is not supported at this time. Linear data can sync every 12 hours, it cannot sync sooner than this.
* Click "Save changes"
Everything is now configured to extract, transform, load (ETL) your Linear data into Airbyte and sync it to the selected destination on the schedule you chose.
> [!NOTE]
> The following models will be synced:
>
> * Organization
> * Teams
> * Team Key
> * Team Membership
> * User
> * Milestone
> * Project
> * Project Updates
> * Project Link
> * Issues
> * Issue History
> * Issue Label
> * Issue Relation
> * Integration Resource
> * Attachment
> * Audit Entry
> * Comment
> * Cycle
> * Workflow State
> * Document
> * documentContent
## Remove connection
You can disable any incremental or full syncs by going to the _Connection_ settings page and clicking _Delete this connection._
## FAQ
Does Airbyte cost an extra fee?
Airbyte Open Source is free to use, only the cloud version is paid — which we don’t currently support.
Which databases or data warehouses does Airbyte connect to?
Airbyte offers many services you can connect your Linear workspace data to, you can view the full list here: https://docs.airbyte.com/integrations/
---
# Source: https://linear.app/docs/api-and-webhooks.md
# API and Webhooks
Linear's GraphQL API and webhooks lets you extend Linear's functionality beyond what we provide out of the box.

## Overview
Linear's public API is built using GraphQL. It's the same API we use internally for developing our applications.
Linear's webhooks allow you to receive HTTP(S) push notifications whenever data is created or updated. This allows you to build integrations on top of Linear.
## Basics
### API
You own your data in Linear and our GraphQL API lets you query that data. In addition to querying, Linear has full support for mutating all entities. Any mutations you make via the API are observed in real-time by all clients.
Go to the API section under Account > Security & Access[ settings](https://linear.app/settings/account/security) and read the linked [API documentation](https://developers.linear.app/docs/graphql/working-with-the-graphql-api) for more information. Our GraphQL schema is available [here](https://studio.apollographql.com/public/Linear-API/variant/current/schema/reference).
> [!NOTE]
> For more in depth documentation visit [developers.linear.app](https://developers.linear.app/docs/). If you have a question the docs don't answer, post it in the #api channel in our [Slack community](https://linear.app/join-slack).
### API Keys
Admins can choose whether or not Members can create their own API keys from _Settings > Administration > API > Member API keys._ This setting will not apply to Admins who can always create API keys.
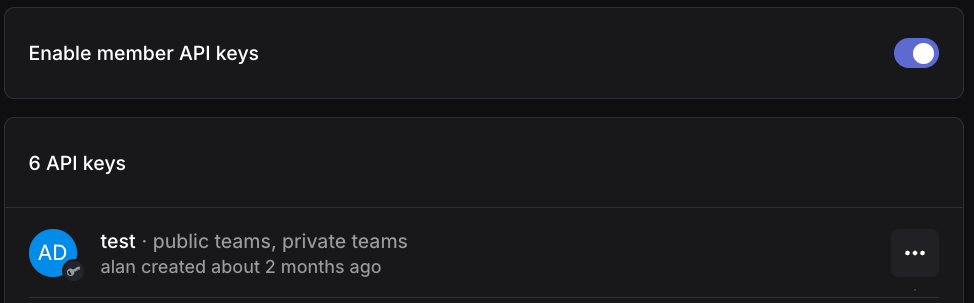
Existing API keys for your workspace can be viewed from the same menu and revoked if needed.
Admins and permitted Members can create personal API keys from _Settings > Account > Security & Access._ For each key you create, you can choose to give it full access to the data your user can access, or restrict it to certain permissions (_Read, Write, Admin, Create issues, Create comments)._ You can also limit an API key's access to specific teams in your workspace.
### Webhooks
Our webhooks support data change events for Issues, Comments, Issue attachments, Documents, Emoji reactions, Projects, Project updates, Cycles, Labels, Users and Issue SLAs.
Consider using webhooks to trigger CI builds, perform calculations on issue data or send messages on specific conditions. Creating and managing webhooks requires admin permissions. Read more in our [webhook documentation](https://linear.app/developers/webhooks).
The configured URL will be called whenever any issue or comment in that team is created or updated. You'll receive the entire data object as the payload. We'll also let you know what the previous values for all changed properties were.
### Create a webhook
Create and manage webhooks and OAuth applications in _Settings > Administration > API._ Admin permissions in your workspace are necessary to view this page.
### Third-party apps
Third-party integrations created for Linear can be found on our [integrations directory.](https://linear.app/integrations)
---
# Source: https://linear.app/docs/assigning-issues.md
# Assign and delegate issues
## Overview
Issues in Linear are assigned to a single person at a time, giving teams clear ownership and responsibility. Assignment helps teammates triage, track, and prioritize work.
Delegation is a form of assignment used with [agents](https://linear.app/docs/agents-in-linear), allowing them to take action on an issue while the assigned teammate maintains ownership.
### Assigning issues
You can assign issues at any point—while creating them, triaging new work, or reviewing and editing existing issues.
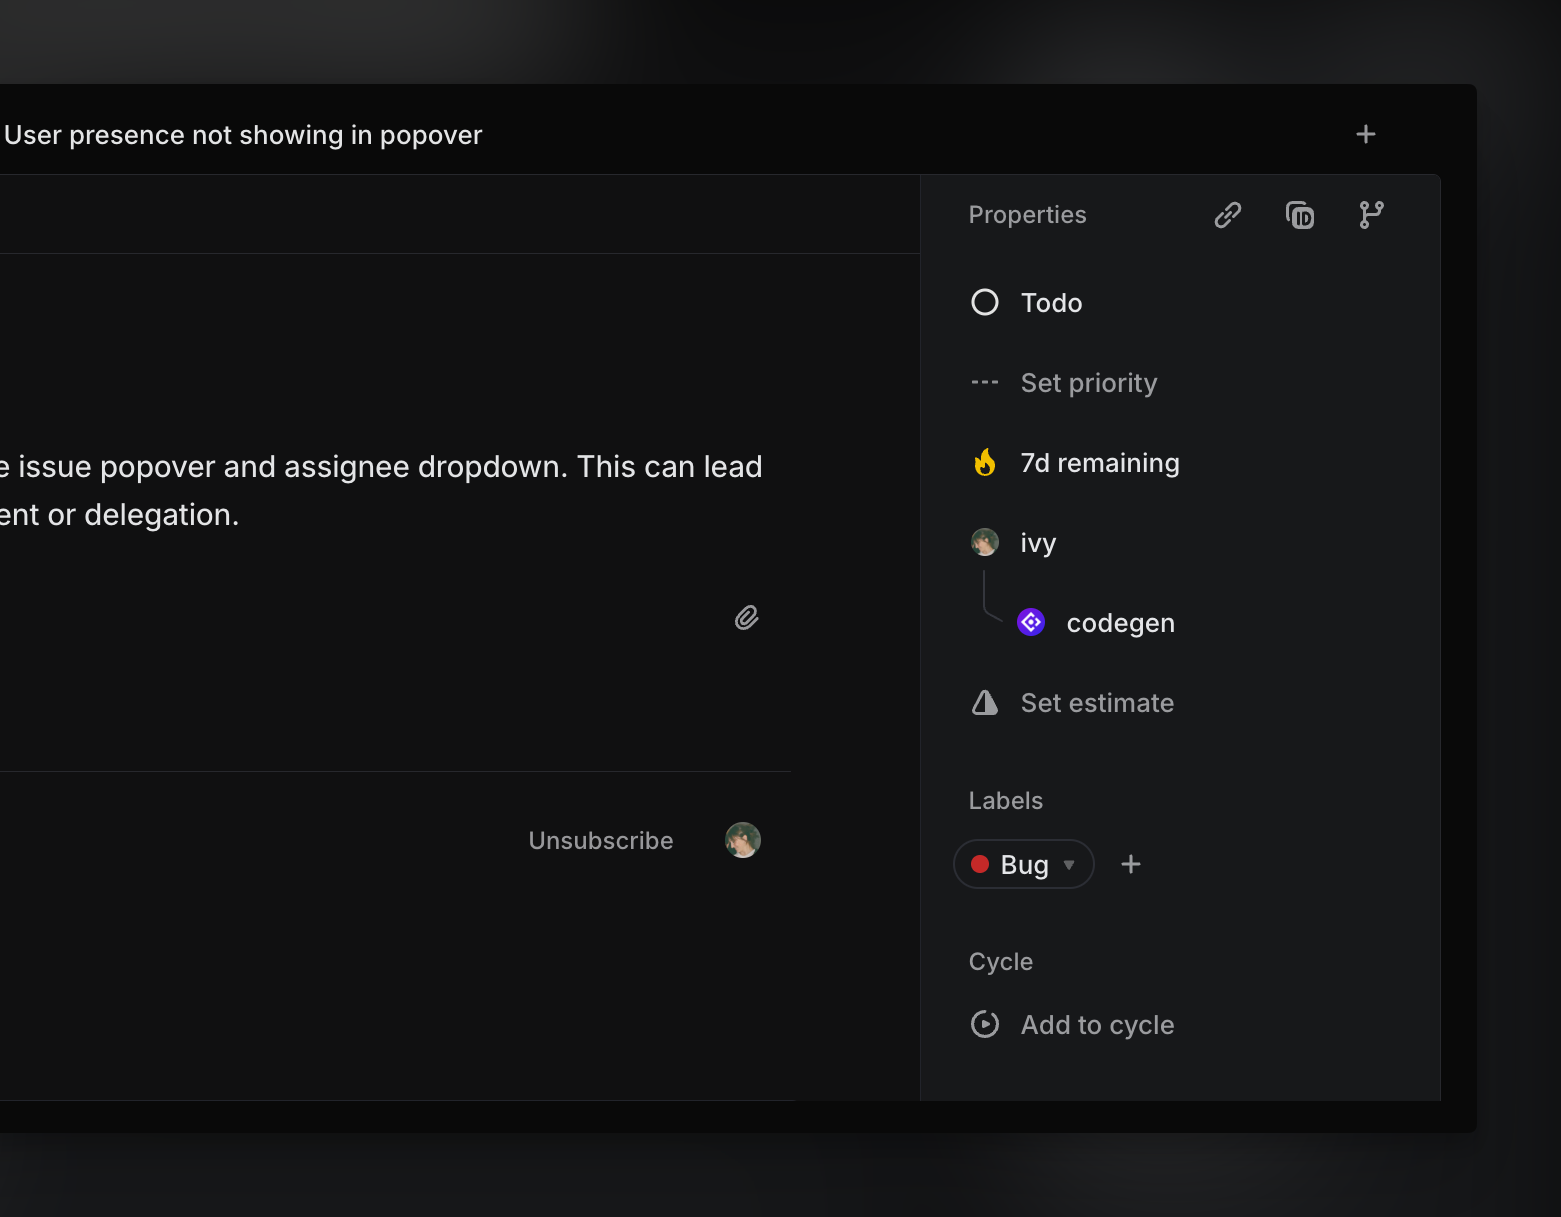
To assign an issue, open the issue and use the assignee field in the properties sidebar to choose a teammate or agent. You can also assign directly from cards in board views and issue list views by clicking the assignee avatar, or press `A` when viewing or hovering over an issue to open the assignment menu.

To assign yourself quickly, press `I` while viewing an issue or when hovering in list view.
You can also open the command menu (`⌘K`) and search for "Assign to..." to make updates via keyboard. For bulk assignment, use multi-select in list or board views by typing `X` when hovering over the issue, and right-click to update the assignee from the bulk action bar.
To remove an assignee, choose "No assignee" from the assignment menu.
#### **Assignment permissions**
* Issues in public teams can be assigned to any workspace member
* Private team issues can only be assigned to members of the private team
* Issues cannot be assigned to guests and inactive users
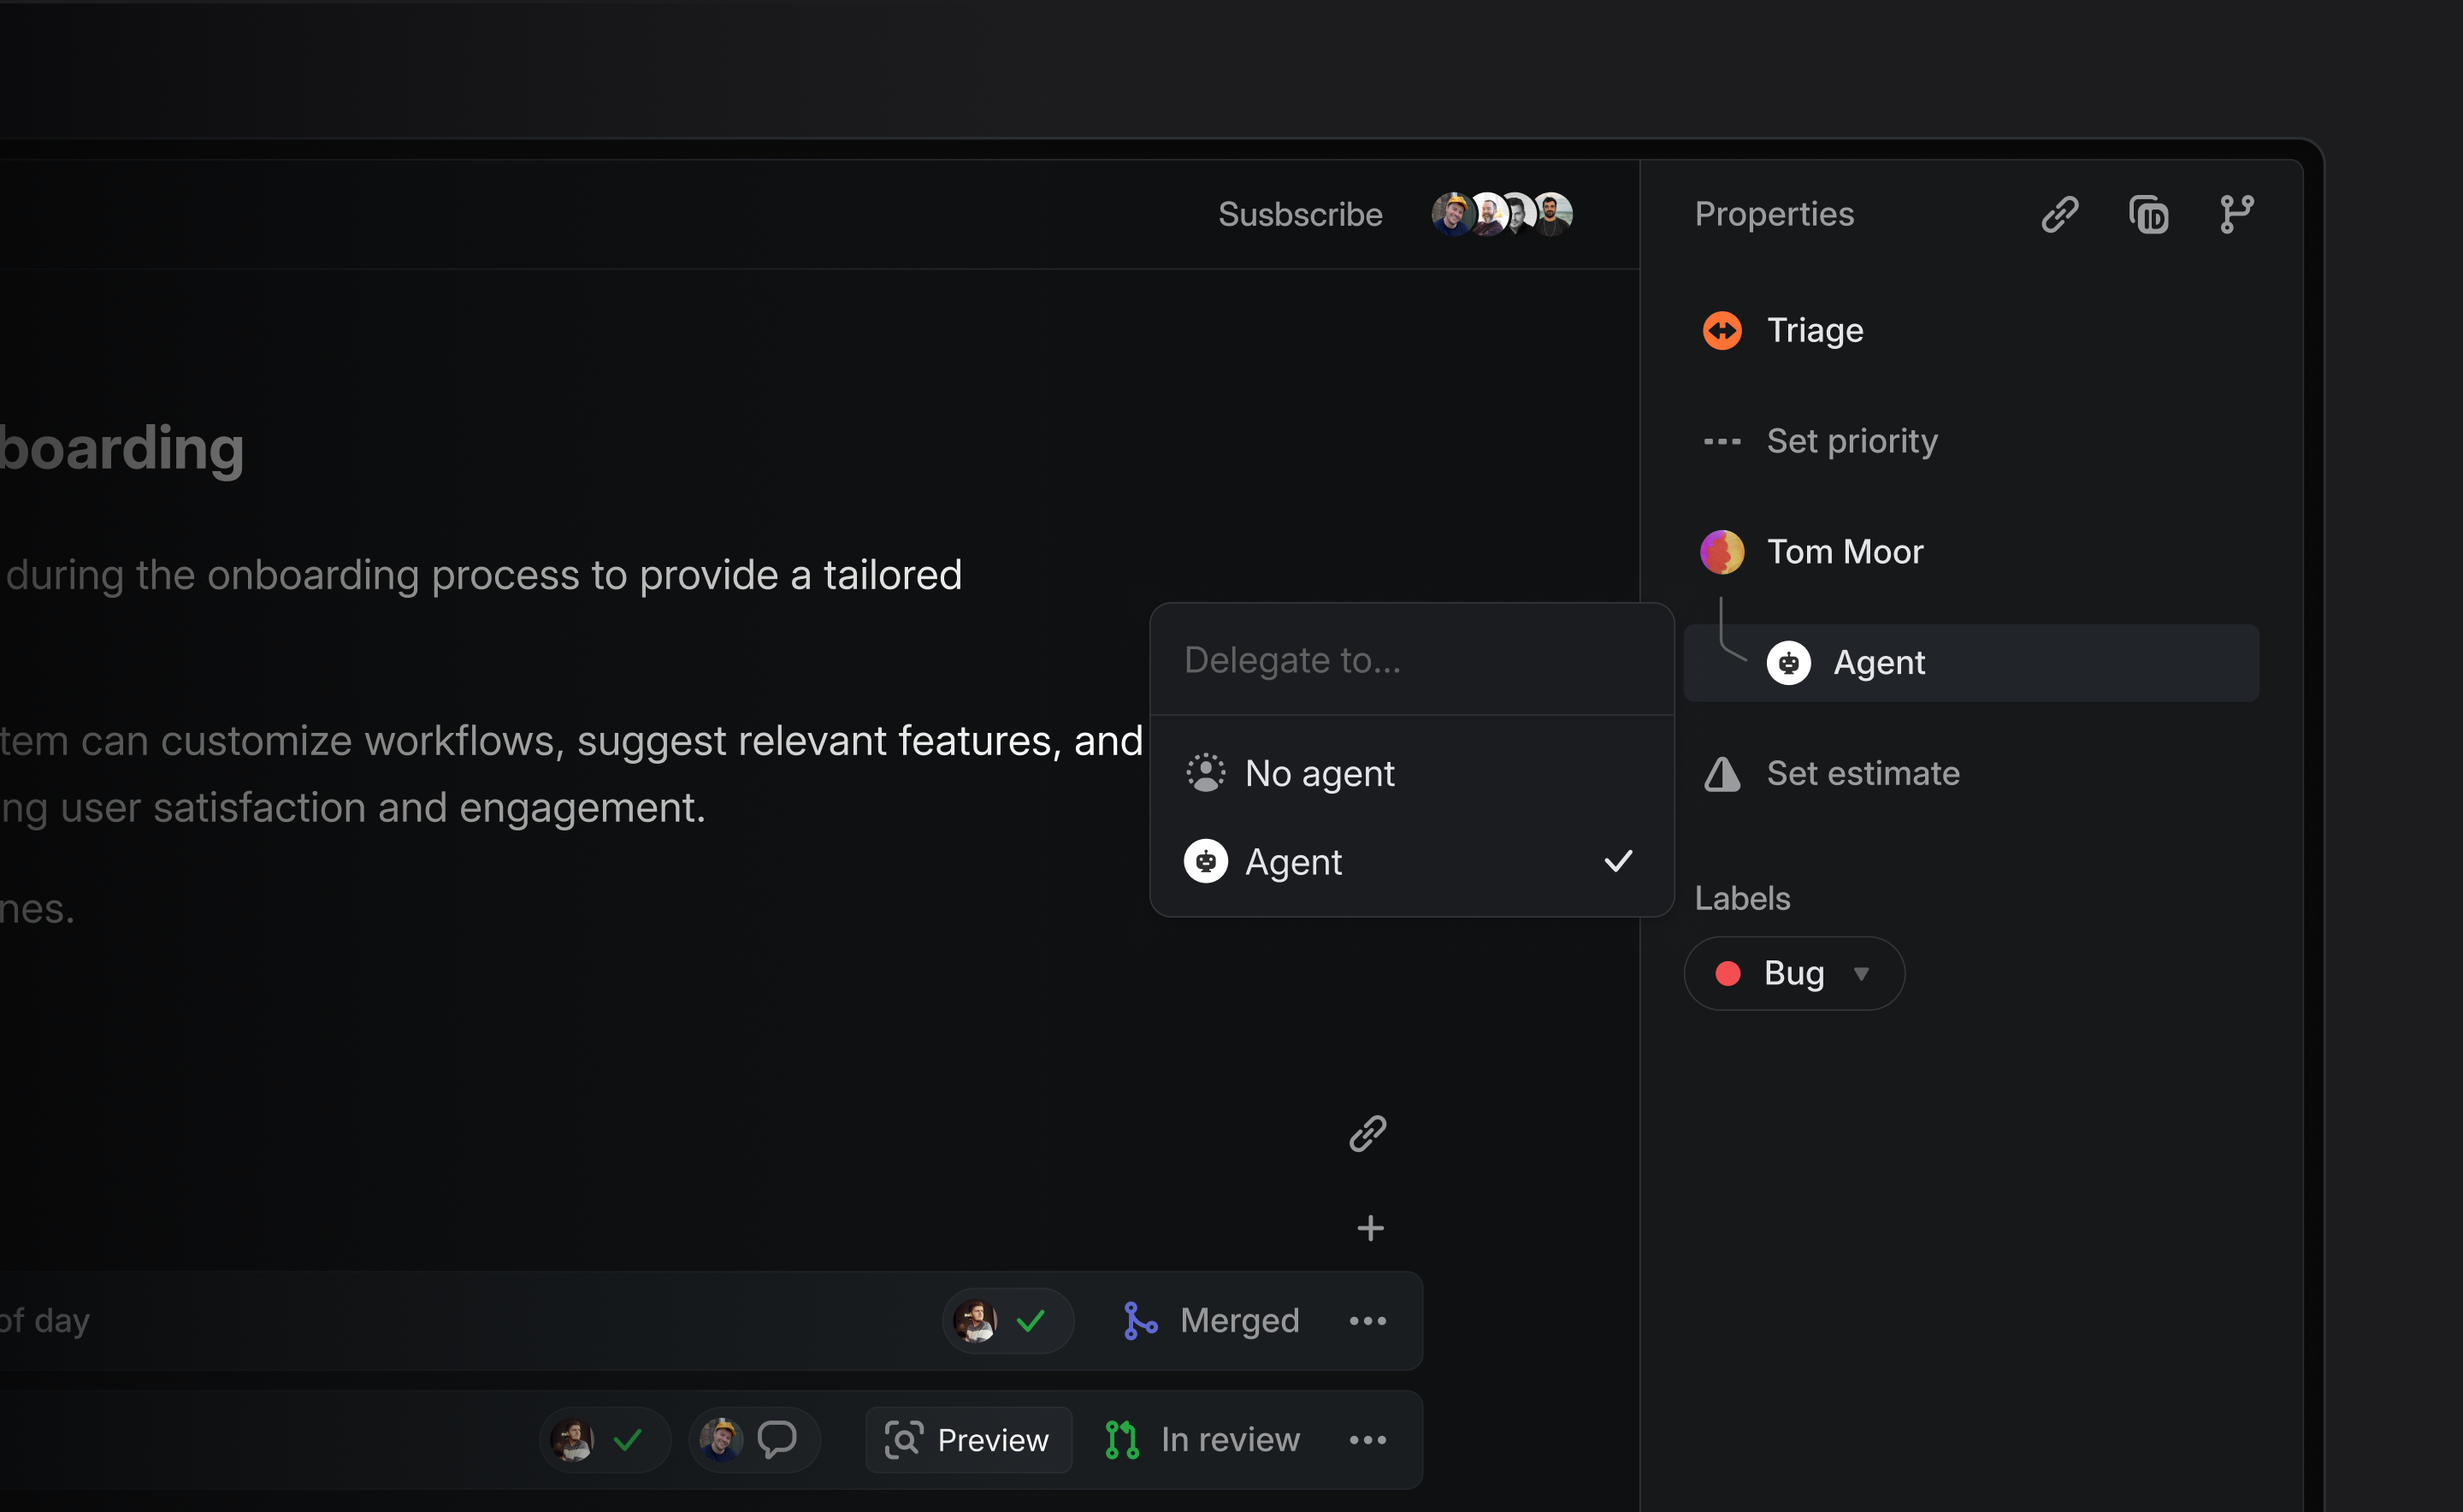
### Delegating to agents
To delegate work, you can assign an issue to an agent. When you delegate an issue to an agent, you remain the primary assignee and the agent is added as an additional contributor working on your behalf.

You can change the agent at any time or remove them by selecting "No agent" from the assignment menu.
To delegate an issue to an agent, make sure the agent has access to the team the issue belongs to. Team membership is set when the agent integration is added to a workspace and can be changed by an admin at any time.
### Managing assigned issues
#### User views
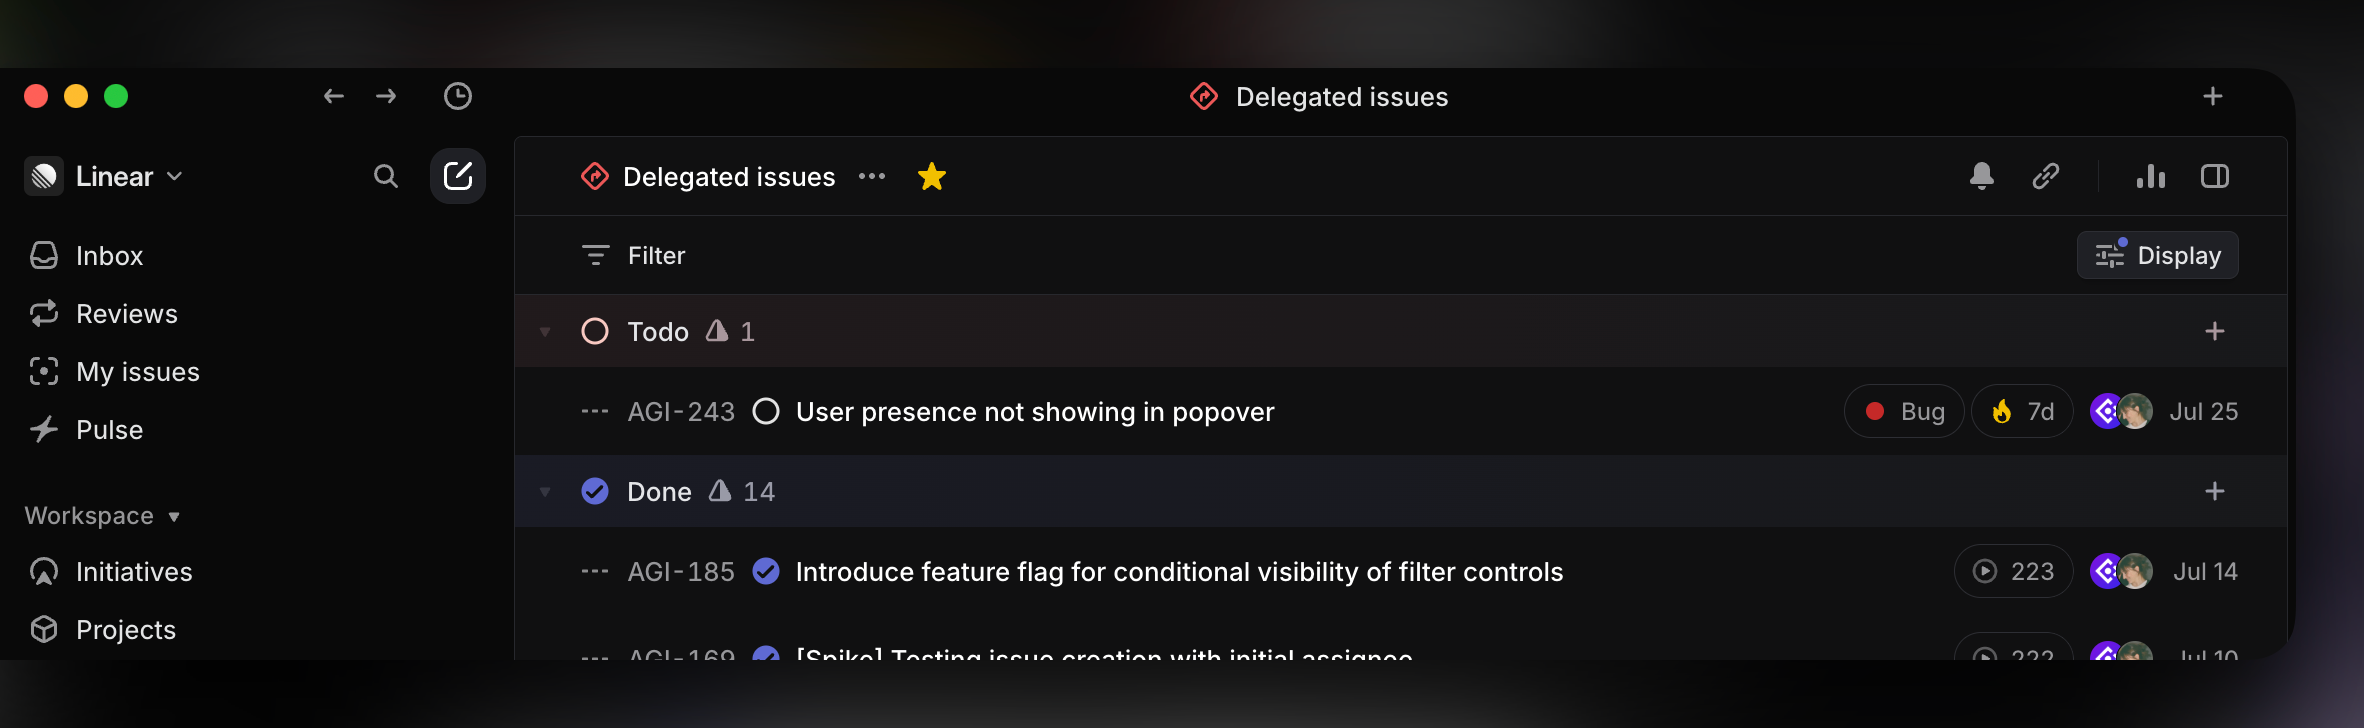
Assigned issues, even those delegated to an agent, appear in your [My Issues](https://linear.app/docs/my-issues) default view, where you can review all issues you're responsible for across your workspace. This view updates automatically based on assignment changes to track the progress of your assigned and delegated work.
Assigned and delegated issues also appear in any [custom views](https://linear.app/docs/custom-views) filtered by _Assignee_ or _Agent_.
#### History
When viewing issues, the assignment and delegation history is tracked in its Activity feed, which shows changes over time and who made them.
#### Inbox
You are automatically subscribed to issues that are assigned to you. You will be notified of any updates to your assigned issues in your [Inbox](https://linear.app/docs/inbox). You can filter Inbox activity by assignment using the "Notification type" filter to focus on issues that have been assigned to you.
#### Search
You can filter your searches by assignee or by the agent they've been delegated to through [Search](https://linear.app/docs/search) to locate relevant issues based on ownership or automation.
#### Insights
[Insights](https://linear.app/docs/insights) surface trends in how work is distributed across assigned teammates and agents. You can report on issues by assignee or by the agent they’ve been delegated to, helping teams understand ownership patterns and automation coverage.
> [!NOTE]
> Available to workspaces on our [Business](https://linear.app/pricing) and [Enterprise](https://linear.app/pricing) plans.
### Automation
Linear supports automated issue assignment that helps teams route and manage issues with minimal input.
Optionally enable an automation to automatically assign yourself to issues you create. To set up this automation, refer to [Preferences](https://linear.app/docs/account-preferences). If you choose not to enable this setting, you can still use the Create more button in an issue draft or press `⌘` + `Shift` + `Enter` when submitting an issue to quickly create another with the same assignee.
Linear doesn’t currently support auto-assigning issues to a specific teammate by default, but you can use templates to pre-fill the assignee field.

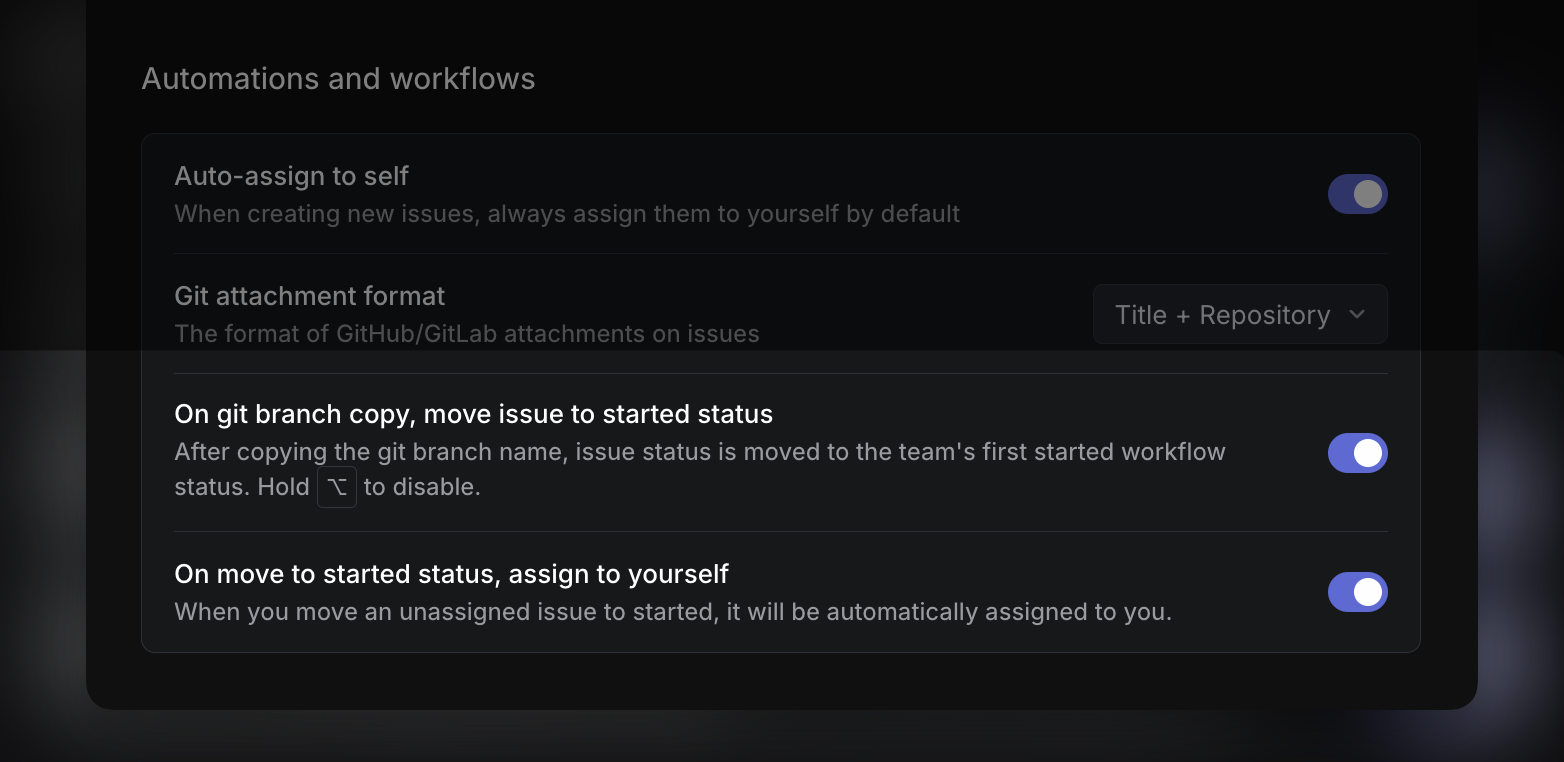
When a teammate creates a Git branch from an issue, it can automatically assign the issue to them and move it to a started status when you copy the git branch name. This is configurable in [Preferences](https://linear.app/docs/account-preferences).
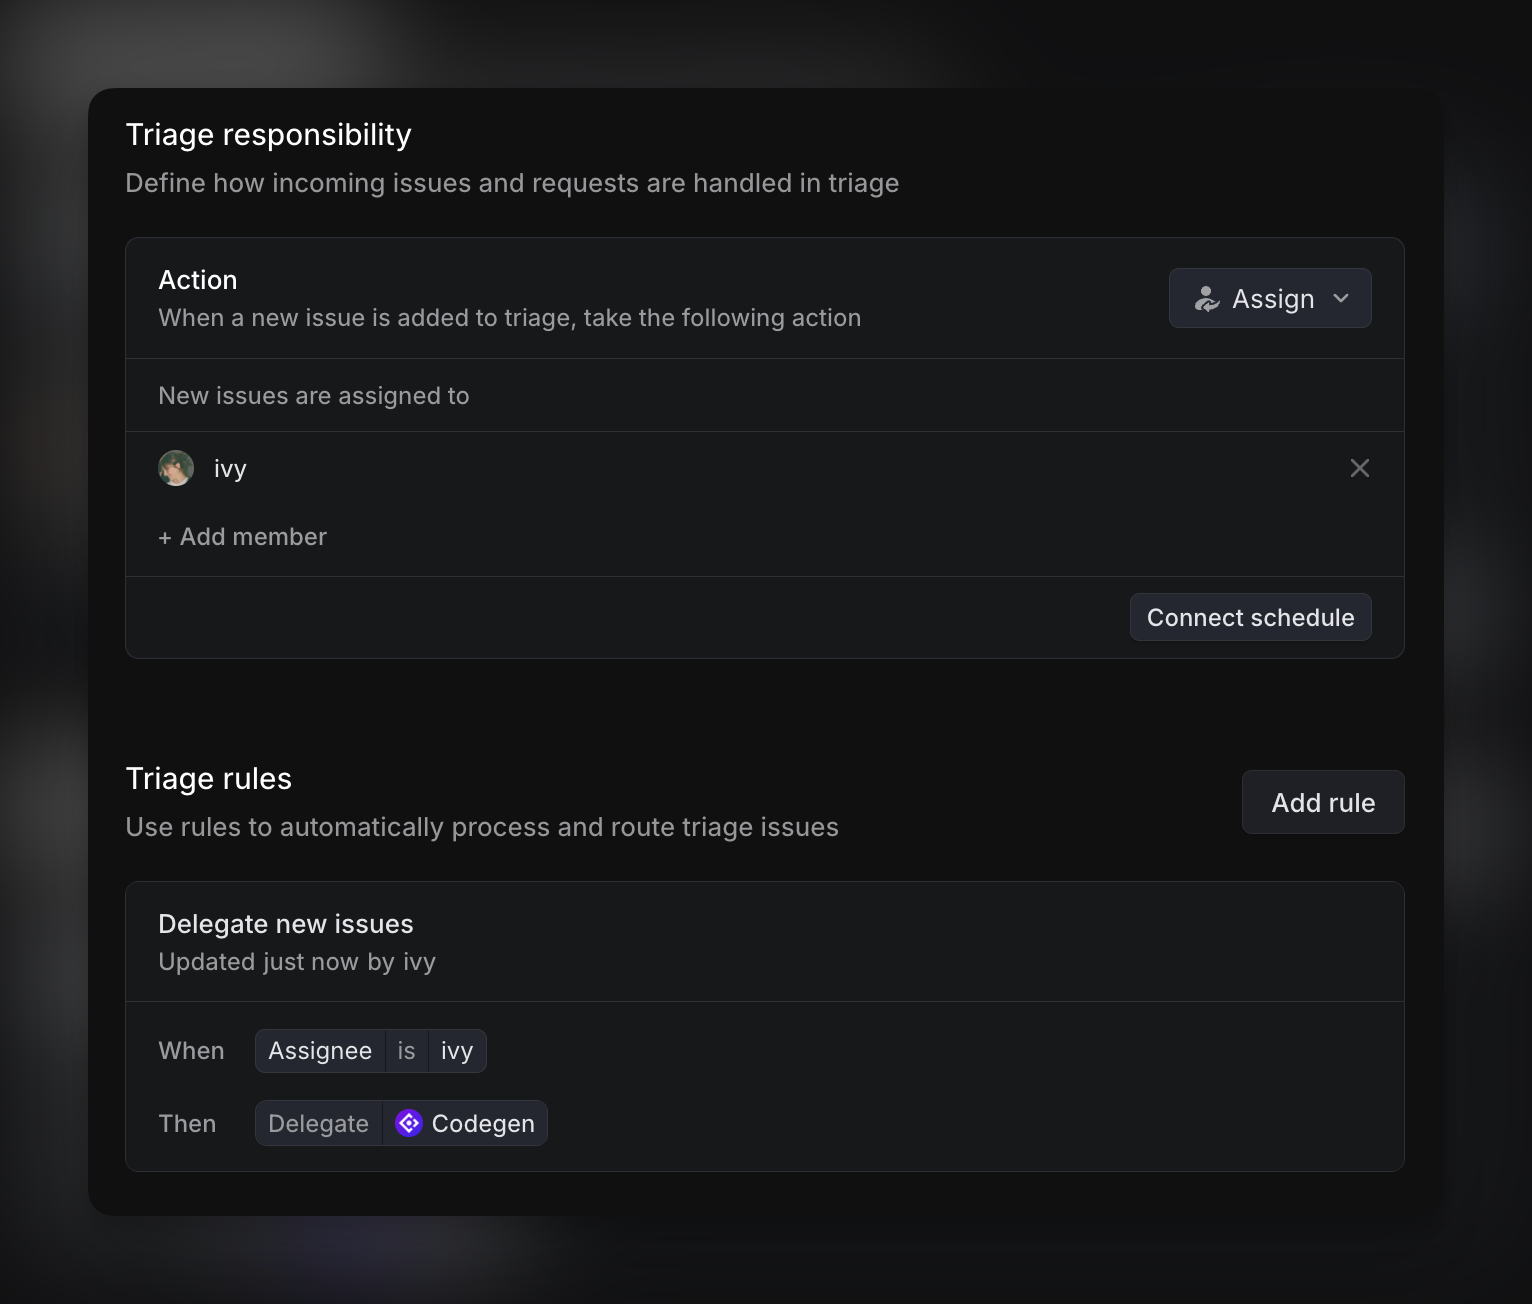
For custom rules to assign issues when they enter Triage, you can configure [triage routing](https://linear.app/docs/triage#triage-routing). Based on issue properties like team, status, or label, these rules route issues to a specific team and set an assignee. Rules can also delegate issues to an agent as part of the same flow for even greater automation during triage.
> [!NOTE]
> Triage routing is available on our Enterprise plan.
---
# Source: https://linear.app/developers/attachments.md
# Attachments
Issue attachments allow you to link external resources to issues and display them inside Linear similarly to GitHub Pull Requests. They are designed with API developers in mind and we also use them for upcoming integrations inside Linear.
Example use cases:
* Customer support software where an agent can create a Linear issue
* Release bot that attached release version to an issue
Unique URLs are a core concept with attachments. They enable building stateless applications and integrations which interact with Linear’s API. _Attachment URL is used as an idempotent value if used in conjunction with the same issue id_ so if you try to re-create an attachment with the same URL on the same issue, the original attachment is updated instead. This enables simple scripts which update the attachment content without storing the attachment ID. _You can also query an attachment, and the associated issue, by its URL_. This makes creating links to Linear issues from external application easy and again you don't need to track the attachment ID.
It's recommended to create attachments through Linear's OAuth authentication. Then the application icon is used for the attachment by default, but an icon image URL can be specified when creating the attachment that overrides the application icon. For API key auth, you can also provide an icon URL when creating an attachment. The image provided by URL must be of png or jpg format.
Attachments also support key-value metadata. Values can be any string or number and you can store information there related to your integration. Right now metadata is only exposed through the API but we're also considering exposing it in the UI.
Linear's webhooks also support attachments so you can subscribe to get updates for new and updated attachments.
## Examples
### Create attachment
```graphql
mutation{
attachmentCreate(input:{
issueId: "590a1127-f98b-49fc-ba74-2df8751c089e"
title: "Exception"
subtitle: "Open"
url: "http://exception.com/123"
iconUrl: "https://exception.com/assets/icon.png"
metadata: {exceptionId: "exc-123"}
}){
success
attachment{
id
}
}
}
```
### Update attachment
```graphql
mutation{
attachmentUpdate(id: "47e14163-404c-4a34-b775-5c536d67760a", input: {
title: "Exception"
subtitle: "Resolved"
metadata: {exceptionId: "exc-123"}
}){
success
attachment{
id
}
}
}
```
### Query attachment
```graphql
query {
attachment(id: "47e14163-404c-4a34-b775-5c536d67760a") {
id
issue {
id
identifier
title
}
}
}
query {
attachmentsForURL(url: "http://exception.com/123") {
nodes {
id
issue {
id
identifier
title
}
}
}
}
```
## Rich metadata
In addition to generic key-value pairs, `metadata` field can include fields which will be rendered as a rich attachment modal inside Linear. This makes it easier to include data that you would otherwise have to fetch/read by following the attachment link.
Key | Type | Description
--- | --- | ---
`title` | `string` | Title for the modal
`messages` | `{ subject?: string, body?: string, timestamp?: string }[]` | Messages included in the attachment. Subject, body, and timestamp are all optional, but we suggest always populating body. Keep under 10k characters.
`attributes` | `{ name: string, value: string }[]` | Additional attributes which will be rendered in a list.
## Formatting
Format | Type | Output example
--- | --- | ---
`{variableName__since}` | Date as ISO string | "2 days ago", "23 hours ago"
`{variableName__relativeTimestamp}` | Date as ISO string | **If +/- 6 days from current:** "today at 9:30 AM", "Friday at 9:30 AM"
**If > 6 days from current:** "Oct 20, 9:30 AM"
In order to use the date formatting, when creating an attachment provide a date variable (in ISO string format) in the attachment's metadata. You may then add that date with the format `{variableName__since}` into the attachment subtitle. When the attachment is rendered, we will format the time since that date, or format that date and time relative to current time, depending on which format is being used.
```graphql
mutation{
attachmentCreate(input:{
issueId: "590a1127-f98b-49fc-ba74-2df8751c089e"
title: "Exception"
subtitle: "Detected {detectedAt__since}"
url: "http://exception.com/123"
iconUrl: "https://exception.com/assets/icon.png"
metadata: {detectedAt: "2021-07-06T17:10:32.090Z"}
}){
success
attachment{
id
}
}
}
```
The above query would yield output like the following:

---
# Source: https://linear.app/docs/audit-log.md
# Audit log
Audit logs show you a record of workspace events over the last 90 days.
> [!NOTE]
> Available to workspaces on our [Enterprise](https://linear.app/pricing) plan

## Overview
Linear automatically tracks events related to account access, subscriptions, and settings changes including the IP and country of the actor. All audit logs are retained for 90 days. You can browse recent events and filter them by event type. For more complex queries, we recommend you access the audit log through the API.
## Configure
Only workspace owners can access audit logs given the sensitive nature of the information. You can find them under [**Workspace Settings > Administration > Audit Log**](https://linear.app/settings/audit-log)
## Access via API
To perform complex queries based on type, actor, and other metadata, we recommend that you access the audit log through [Linear's GraphQL API](https://developers.linear.app/docs/graphql/working-with-the-graphql-api). Visit our [API documentation](https://linear.app/docs/api-and-webhooks) to read more about making GraphQL API requests.
```text
# Simple query to get last 250 events
query {
auditEntries(first: 250) {
nodes {
id
type
createdAt
actor {
id
name
}
metadata
}
}
}
```
You can utilize the advanced filtering capabilities of our API to narrow down your query.
```text
# Get login events for an user
query {
auditEntries(filter: {type: {eq: "login"}, actor: {email: {eq: "user@company.app"}}}) {
nodes {
id
type
createdAt
actor {
email
}
ip
metadata
}
pageInfo {
endCursor
hasNextPage
}
}
}
```
You can also get the list of all the available log entry types from our API.
```text
query {
auditEntryTypes {
type
description
}
}
```
### Webhook and SIEM support
Audit logs can be streamed to a webhook and configured for SIEM data ingestion. To enable the audit log webhook, visit the [Audit Log](https://linear.app/settings/audit-log) under workspace settings and enable **Stream logs.** To learn more about securing your webhook using a signing secret, visit our [API documentation](https://developers.linear.app/docs/graphql/webhooks#securing-webhooks).
#### Sample responses
User joins a team:
```json
{
"action": "create",
"actor":
{
"id": "8e03f2cf-e644-4d68-a7cc-f834ad2f43b4",
"name": "Miha Rebernik",
"email": "miha@linear.app",
"avatarUrl": "https://public.linear.dev/8e03f2cf-e644-4d68-a7cc-f834ad2f43b4/d3c0a4bf-51a7-41cc-ade7-0f61f9d4f886",
"type": "user",
},
"createdAt": "2025-03-28T19:46:01.382Z",
"data":
{
"id": "4b0186dc-a464-4330-9d4b-f4fc8f01db5b",
"createdAt": "2025-03-28T19:46:01.382Z",
"type": "userJoinedTeam",
"organizationId": "5a3b982d-8f04-4971-956c-fbcb2c68642a",
"actorId": "8e03f2cf-e644-4d68-a7cc-f834ad2f43b4",
"metadata":
{
"teamName": "New team",
"teamKey": "NEW",
"teamId": "7586c601-2c9f-4764-bbc5-6132791c68c9",
"owner": false,
},
"requestInformation": {},
},
"type": "AuditEntry",
"organizationId": "5a3b982d-8f04-4971-956c-fbcb2c68642a",
"webhookTimestamp": 1743191166416,
"webhookId": "f1d0caa0-a974-4604-a300-a4edbba66803",
}
```
A webhook is created:
```json
{
"action": "create",
"actor": {
"id": "8e03f2cf-e644-4d68-a7cc-f834ad2f43b4",
"name": "Miha Rebernik",
"email": "miha@linear.app",
"avatarUrl": "https://public.linear.dev/8e03f2cf-e644-4d68-a7cc-f834ad2f43b4/d3c0a4bf-51a7-41cc-ade7-0f61f9d4f886",
"type": "user"
},
"createdAt": "2025-03-28T19:46:18.441Z",
"data": {
"id": "e78bfecd-53a6-4197-8a71-f614b187553a",
"createdAt": "2025-03-28T19:46:18.441Z",
"type": "webhookCreated",
"organizationId": "5a3b982d-8f04-4971-956c-fbcb2c68642a",
"actorId": "8e03f2cf-e644-4d68-a7cc-f834ad2f43b4",
"ip": "::ffff:127.0.0.1",
"metadata": {
"id": "53188995-5f3b-44a9-993b-9bb0d37136a5",
"url": "https://webhook.site/399c1880-02e6-4a2b-8b62-6f2ea5c8cc7e/123",
"label": "A new webhook",
"enabled": true,
"resourceTypes": ["Issue"],
"allPublicTeams": true
},
"requestInformation": {
"userAgent": "Mozilla/5.0 (Macintosh; Intel Mac OS X 10_15_7) AppleWebKit/537.36 (KHTML, like Gecko) Chrome/134.0.0.0 Safari/537.36",
"authMethod": "jwt",
"authService": "google"
}
},
"type": "AuditEntry",
"organizationId": "5a3b982d-8f04-4971-956c-fbcb2c68642a",
"webhookTimestamp": 1743191178476,
"webhookId": "f1d0caa0-a974-4604-a300-a4edbba66803"
}
```
---
# Source: https://linear.app/docs/billing-and-plans.md
# Billing and plans
We offer a free plan and different paid plans to suit your needs.
> [!NOTE]
> Please see [Pricing](https://linear.app/pricing) for rates and a feature-by-feature comparison by plan.

## How our plans and billing works
### Plans
Refer to our [pricing page](https://linear.app/pricing) for the most up-to-date information on our plans offering.
### Billing
Customers are billed for the number of unsuspended users within a workspace. Thus, your paid plan only applies to the single workspace associated with it.
For billing frequency, we offer either monthly or yearly options. On our Enterprise plan, we exclusively offer a yearly option.
#### Monthly billing
Your account is charged on a monthly basis for the number of unsuspended users in any role on your workspace.
Adding users mid-month will not result in a charge until the following month. Similarly, removing a user mid-month will not result in a credit for the remainder of the month.
#### Yearly billing
When you upgrade to a yearly plan, Linear charges for the total number of **unsuspended users** in your workspace at that time. This establishes your subscription year and billing cycle.
If you add or suspend users during that year, your account automatically adjusts to reflect those changes:
* **Adding users** → generates a **pro-rated charge** for the remaining time in your subscription year.
* **Suspending users** → generates a **pro-rated credit** for the remaining time in your subscription year.
All adjustments are fully automated — there’s no need to request manual changes. Credits are automatically applied toward future invoices or renewals (they aren’t refunded).
Linear reconciles these adjustments on your **monthly billing cycle**, which is tied to your annual plan’s start date (not the calendar month).
* If additional users were added during the past monthly billing cycle, a **true-up invoice** is created and charged automatically or sent by email.
* If users were suspended, a **credit** is automatically issued and applied to future invoices.
#### Example
Your annual plan starts on **February 10** and renews the following year.
Date | Event | Result
--- | --- | ---
February 10 | Upgrade with 12 active users | You’re charged for 12 users for the full subscription year (Feb 10 → Feb 10).
April 18 | Add 3 users | Linear calculates a pro-rated charge for those 3 users covering Apr 18 → Feb 10 next year. This appears on your next monthly billing cycle (May 10).
May 15 | Suspend 2 users | Linear calculates a pro-rated credit for those 2 users covering May 15 → Feb 10 next year. This credit appears on your next monthly billing cycle (June 10).
Each change — adding or suspending users — is billed or credited based on the exact date it happens. Invoices only ever reflect past activity, and **we don’t edit or cancel them once issued.**
This ensures your account stays accurate and that all future prorations calculate correctly. Any new user changes are automatically included in your next billing cycle — no manual action or adjustments needed.
#### **Key things to know**
* “Billing month” refers to your plan’s recurring monthly cycle, not the calendar month.
* Annual subscriptions are charged once for the base year, with **automated monthly true-ups** for user changes.
* **Invoices are final once issued.** Future user changes are automatically included in upcoming invoices.
* Credits are automatically applied to future charges or renewals.
## Manage your billing
Navigate to _[Settings > Workspace > Billing](https://linear.app/settings/billing)_ to access your plan information and make changes. From here, you can:
* View and change your plan.
* Update your payment information.
* Update the billing email.
* View billing history — past invoices and charges.
* We will also show if a charge is failed or past due.
### Change or Cancel a subscription
Workspace admins can change or cancel a subscription from [_Settings > Workspace > Plans_](https://linear.app/settings/plans). Subscription updates take effect at the _end of the subscription period_. If you are on a monthly plan, this will be at the end of the billing month. If you are on a yearly plan, this will be at the end of the billing year.
We do not provide refunds for cancellations mid-subscription. If you are uncertain you are ready to commit to a full year, we recommend starting on a monthly plan first. You can switch to yearly at a later date when you are ready to commit longer term and take advantage of the discounted rates.
When cancelling a subscription:
* Nothing will be deleted.
* If you have over 250 issues, you will no longer be able to create new issues.
* Members will become Admins of the workspace, as all users are Admins on free plans.
### Add a VAT number
To add a VAT number, choose the _I'm purchasing as a business_ option on the checkout page when upgrading.
To add a VAT number for an existing subscription, go to [Settings > Billing > Billing Details > Edit](https://linear.app/settings/billing).
## Sales tax
In certain areas Linear is required to apply sales tax. The billing address you provide is used to determine whether tax must be applied, and if so the applicable rate.
Areas in which Linear must apply sales tax as of January 2026 include the following. We anticipate this list will grow over time, and we will keep it updated with new additions.
* Arizona
* Chicago, Illinois (PPLT Tax)
* Colorado
* Connecticut
* District of Columbia
* Kentucky
* Maryland
* Massachusetts
* New York
* Ohio
* Pennsylvania
* South Carolina
* Tennessee
* Texas
* Utah
* Washington
If needed, you can revise your billing address in _[Settings > Workspace > Billing](https://linear.app/settings/billing)._
## Special pricing programs
### Education program
We review eligible applicants for a discounted education rate on our Basic and Business paid plans.
Please reach out to support@linear.app from your .edu email, proof of employer/student ID or letter showing your status where possible to expedite your application.
This discount is only available for college or higher-level educational institutions. High schools and for-profit, online-only educational institutions are not eligible.
### Non-profit program
We offer 75% off our Basic and Business paid plans to eligible charities (otherwise known as NonProfits). Please reach out to us at support@linear.app to apply and provide proof of nonprofit status.
The organizations that are **not** eligible for this discount are the following:
* A legislative or political organization
* A church, association of churches or other religious organization
* A school, college or related organization
* A government office
* An organization that attempts to influence public opinion
* A hospital, an organisation involved with health insurance or group health plans or a related organisation
* A private grant-making, independent or operating foundation
**Please note:** Eligibility is determined at our sole discretion. We reserve the right to approve or deny access to this discount program at any time, for any reason, and to update our eligibility guidelines as needed.
### Linear for Startups program
The Linear for Startups program is designed to help early-stage startups discover a better, faster way to build and ship great products. Startups affiliated with [a partner in Linear’s Startup Program](https://linear.app/startups/partners) receive up to 6 months of free access to Linear’s Basic or Business plans. For more information, visit https://linear.app/startups.
---
# Source: https://linear.app/docs/board-layout.md
# Board layout
Nearly all views in Linear can be shown in board layout in addition to list view.
## Configure
You can toggle on board layout with the keyboard shortcut `Cmd/Ctrl` `B`. Alternatively, you can switch between board or list layout using the board and list icons next to `Display options`.
### Keyboard
`Cmd/Ctrl` `B` to switch to board layout (or back to list)
`X` to select one issue
`Shift` `X` or or `Shift` `Click` to select multiple issues
`Option/Alt` `Shift` `Up` or `Down` to move a selected issue to the top or bottom of the column
`T` to toggle the collapse or expansion of a swimlane
### Mouse
Click on _Board_ icon to the left of _View Options_ and select board layout on most views
Create issue by clicking the _+_ sign at the top of a column to create an issue in that column.
Hide a column by clicking the more menu (three dots). Unhide a column by scrolling to the right-most column. Filter to show only specific columns or toggle off the View _Option Show empty groups_ to hide empty columns.
### Command menu
`board` to select show in `show in board view`
## Basics
### Feature parity
Functionality and keyboard shortcuts are almost exactly the same on board and list views with a few exceptions.
* Board views and List view cannot be ordered independently. If a List view is ordered by priority for example, Board view will be ordered the same way.
* Board views to default to grouping by Status but you can click into `Display options` and `Grouping` to group by Focus, Status, Project, Priority, Cycle, Label, Label group, or SLA status (if applicable).
* When grouping by status, board views are always ordered with statuses from first to last, whereas some list views have unique ordering for statuses.
* You can hide columns in board views but in list views, you can only temporarily hide the equivalent column/grouping option by using filters. You can then make a custom view if you'd like these filters to be permanent.
The same shortcuts work to select issues in the board view, such as `X` to select specific issues and `Shift` `X` or `Shift` `Click` to select multiple.
### Hide columns
Hide columns you don't need by selecting _Hide_ from the column menu (three dots). Hidden columns will show up as the last column on your board. Drag issues into hidden columns without having to unhide them.
### Move to top or bottom
To avoid dragging issues up or down long columns, use keyboard shortcuts instead. `Option/Alt` `Shift` `Up` will move issues to the top of a column whereas `Option/Alt` `Shift` `Down` will move it to the bottom. By default, when you move issues to a new column on a board, it will go to the top if you make the change with the keyboard shortcut `S` or command menu and to wherever you placed it if you used the mouse.
### Navigating columns
Board views with multiple columns can be scrolled horizontally by holding `Shift` and scrolling vertically, or using horizontal scroll if your device supports it (like on a trackpad or Magic Mouse).
Alternatively, click and pull an empty space in the board to scroll horizontally.
### Swimlanes
Board and list views have the option to display an extra dimension for visualising your projects or issues in lanes or rows on a board view, commonly known as swimlanes in project management.
These sub-grouping options are especially useful for a high-level overview of the company's progress or resource allocation. You can sort by columns, group those columns and lay them out as rows for your chosen dimension such as teams, cycles, assignee, lead, initiative or project health to name a few.
These lanes can be collapsed or expanded for further visual clarity in board view.
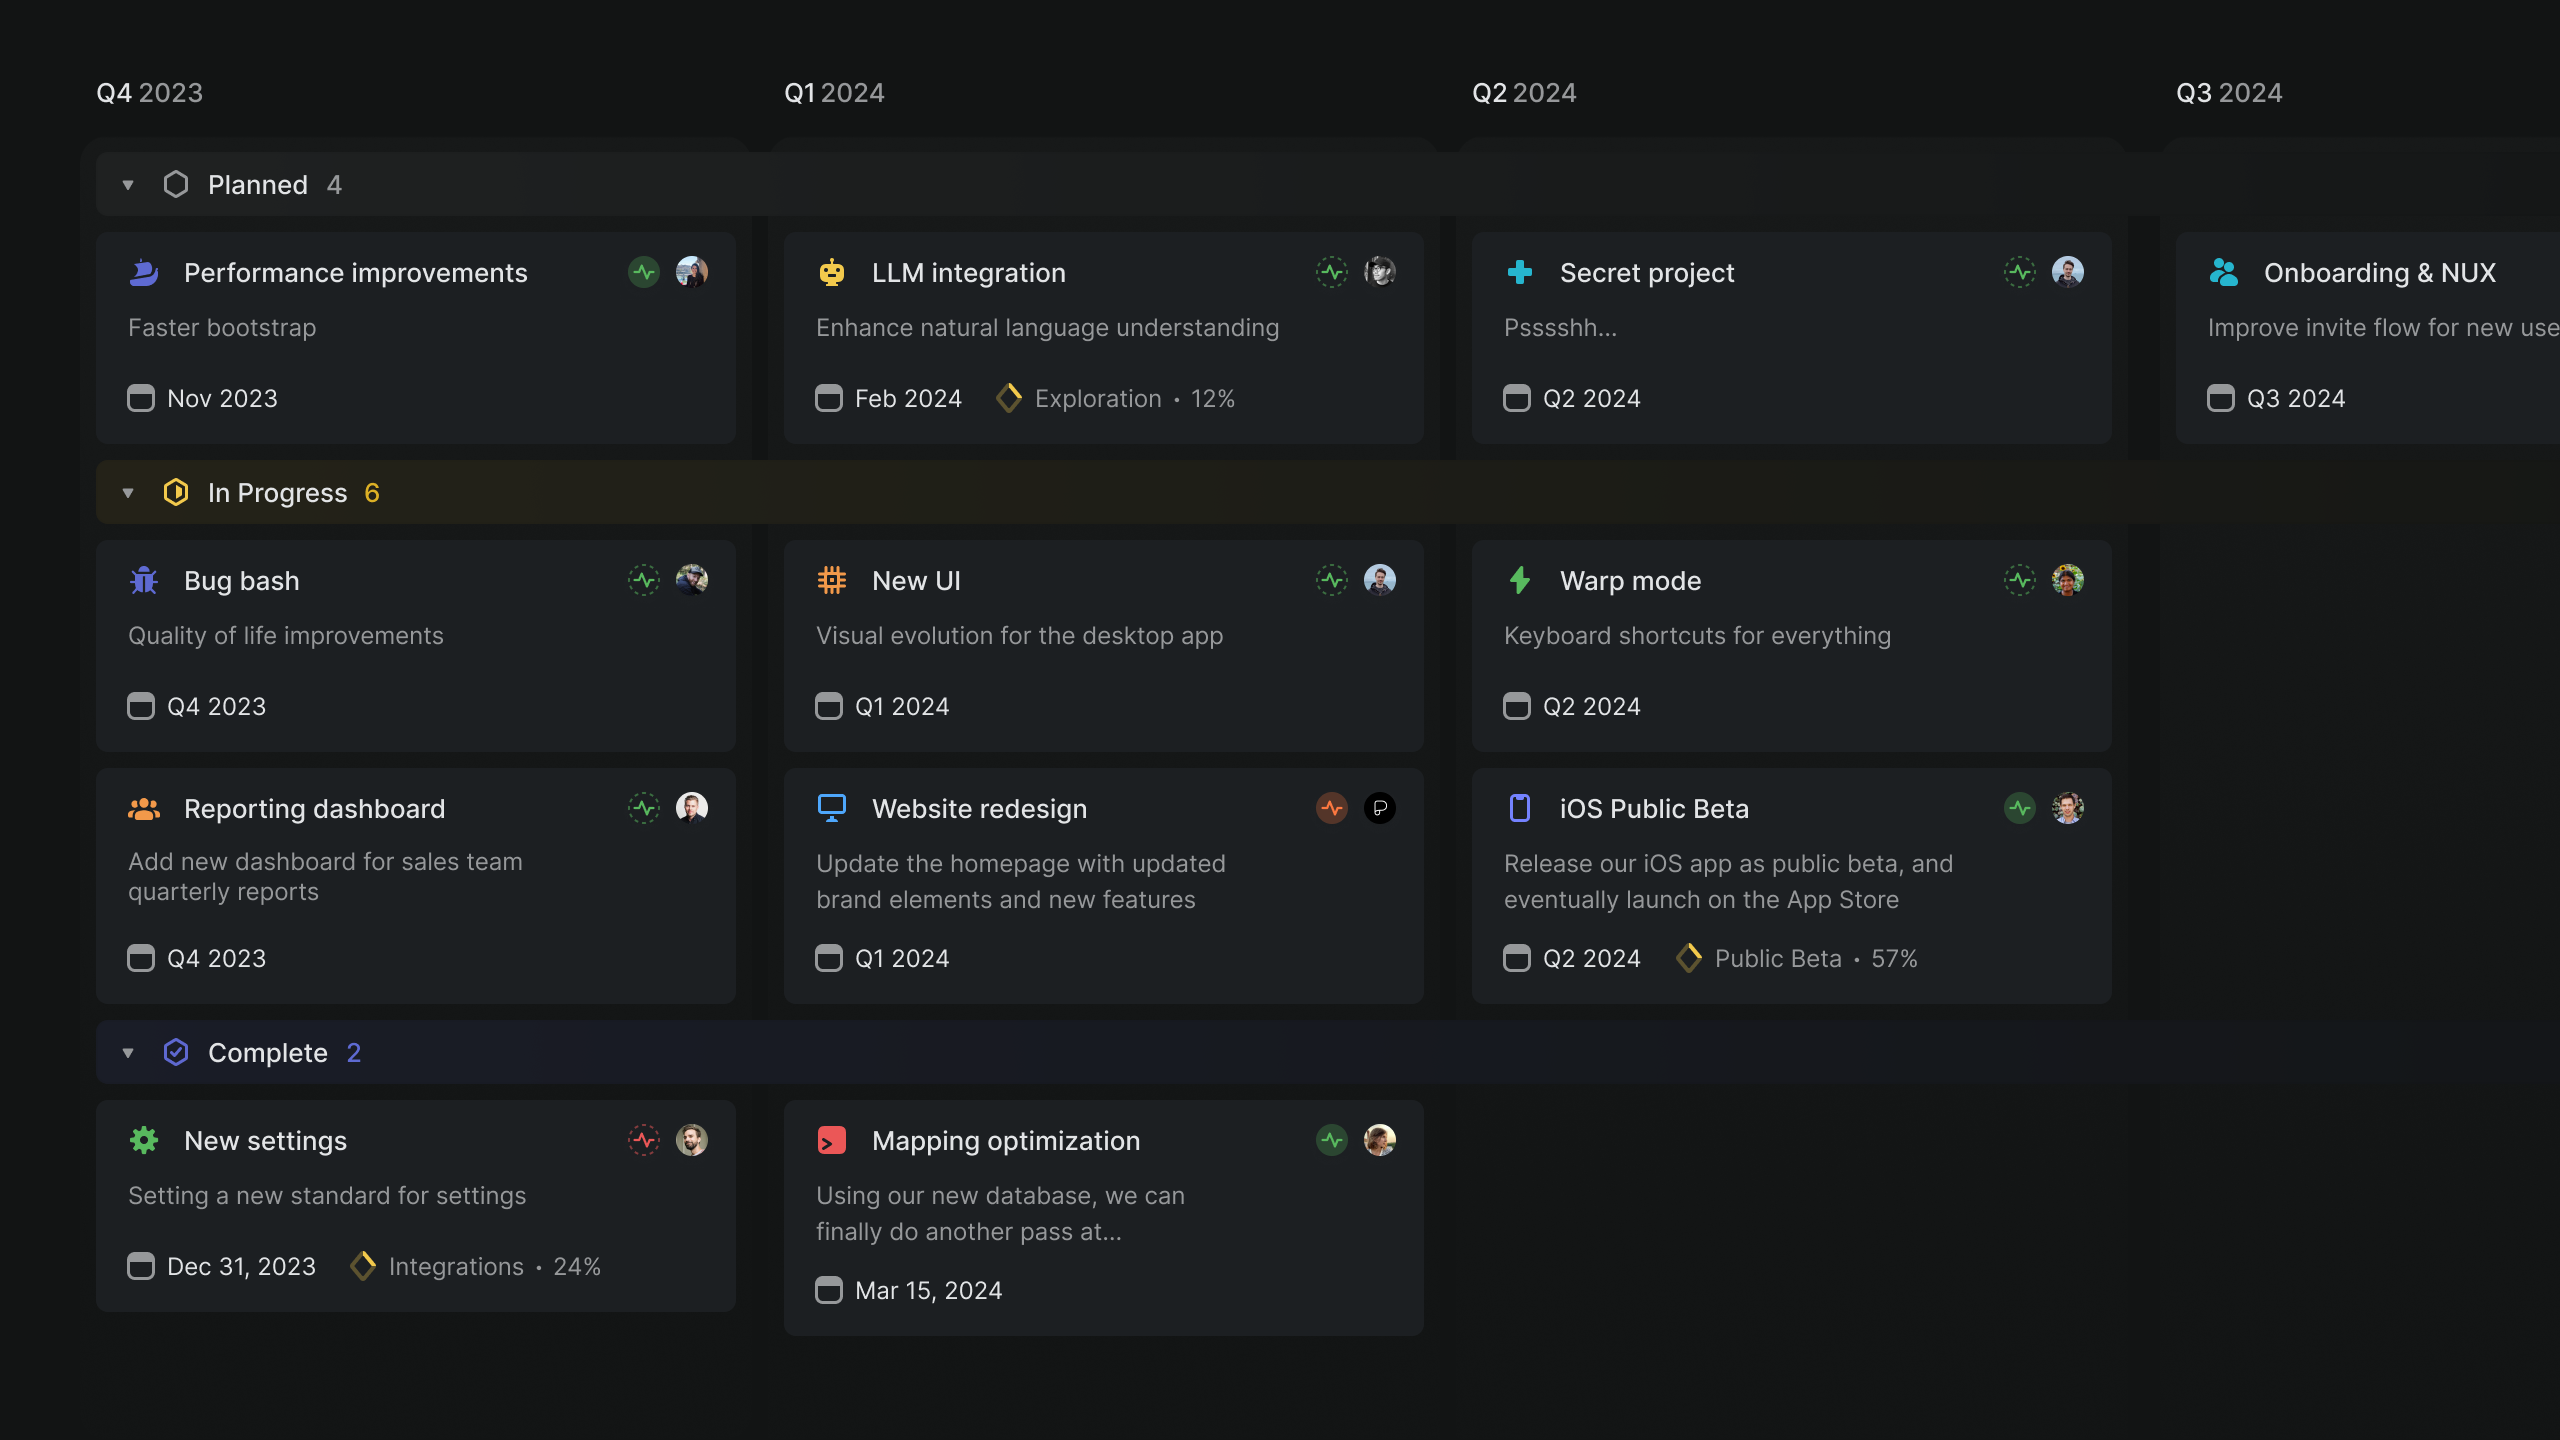
*Swimlanes showing projects grouped by status and target dates.*
## FAQ
Can you set board to be the default layout for the workspace?
Unfortunately, you can't set board view as a universal default. However, a user can choose board layout in a view and then select `view options` and `set as default` to ensure board layout is the default for that view for anyone who visits that one view.
This won't prevent other members from changing this and setting a new default afterwards though.
Why is Board layout not showing as an option?
It is not possible to select board layout in split views like Inbox or Triage.
Can I show descriptions or all issue properties in board layout?
Descriptions are not shown on cards. If an issue has many properties, not all properties may have space to be display on the card.
Use `Space` while hovering your cursor over a card to peek for more detail, or open the issue to see all properties.
---
# Source: https://linear.app/docs/comment-on-issues.md
# Comments and reactions
Leave comments or reactions on issues.

## Overview
Comments and reactions allow for team collaboration within an issue.
All users with access to an issue can post comments and threaded replies. React with emoji on the issue description itself, or on individual comments or threads.
## Post a comment
Comment on an issue by clicking into the "Leave a comment…" text box at the bottom of an issue. While issue description text is saved automatically, you will need to click the _Comment_ button or `⌘/Ctrl + Enter` to post the comment to the issue. Unsent comments are visible on the issue, and in _Drafts_ in your sidebar.
Attach files to a comment using the paperclip icon, `⌘/Ctrl` `Shift` `A`, or drag and drop.
## Edit or manage a comment
To edit an existing comment you wrote on an issue, click on the `...` icon to the top right of the comment and select `edit`. Click `save` to save any changes you make.
Other options in this menu allow you to manage your subscription to that thread, copy a URL to the comment, create a new issue or sub-issue from the comment, or delete the comment.
## Threads
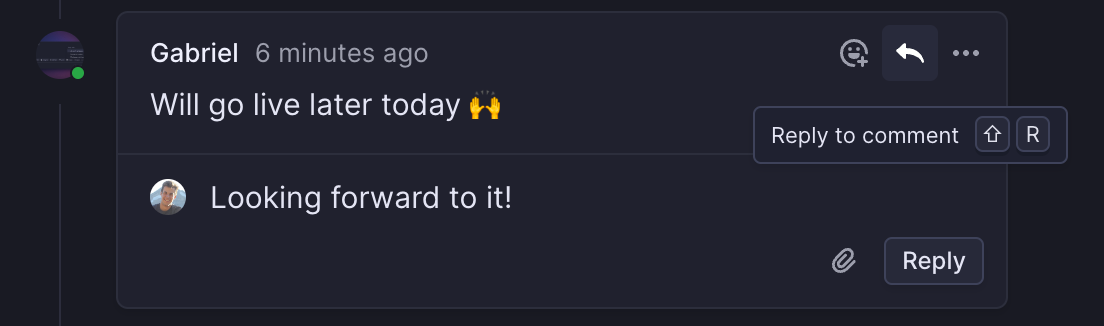
Threads allow you to continue on a topic mentioned in a comment. To create a threaded comment:
1. Hover over the comment you'd like to respond to
2. Click on the _arrow_ icon for **Reply to comment** in the top right.
If a thread already exists, click into the text box at the bottom of this comment thread and start crafting your response. Send threads as you would a regular comment.
### Resolve threads
Resolving threads clarifies when a question has been answered or a decision is made. This is particularly useful in longer threads to clearly identify the resolution.
Mark a thread as resolved through the overflow menu on the root message. To showcase a specific resolution, resolve a thread from a particular reply to expose that reply specifically.
With the setting [_Enable resolved thread AI summaries_](https://linear.app/docs/comment-on-issues#summaries-on-resolved-threads) enabled, AI will generate summaries for resolved comment threads.

## Summaries
Get up to speed on long discussions with AI-generated summaries.
> [!NOTE]
> Available to workspaces on our [Business](https://linear.app/pricing) and [Enterprise](https://linear.app/pricing) plans.
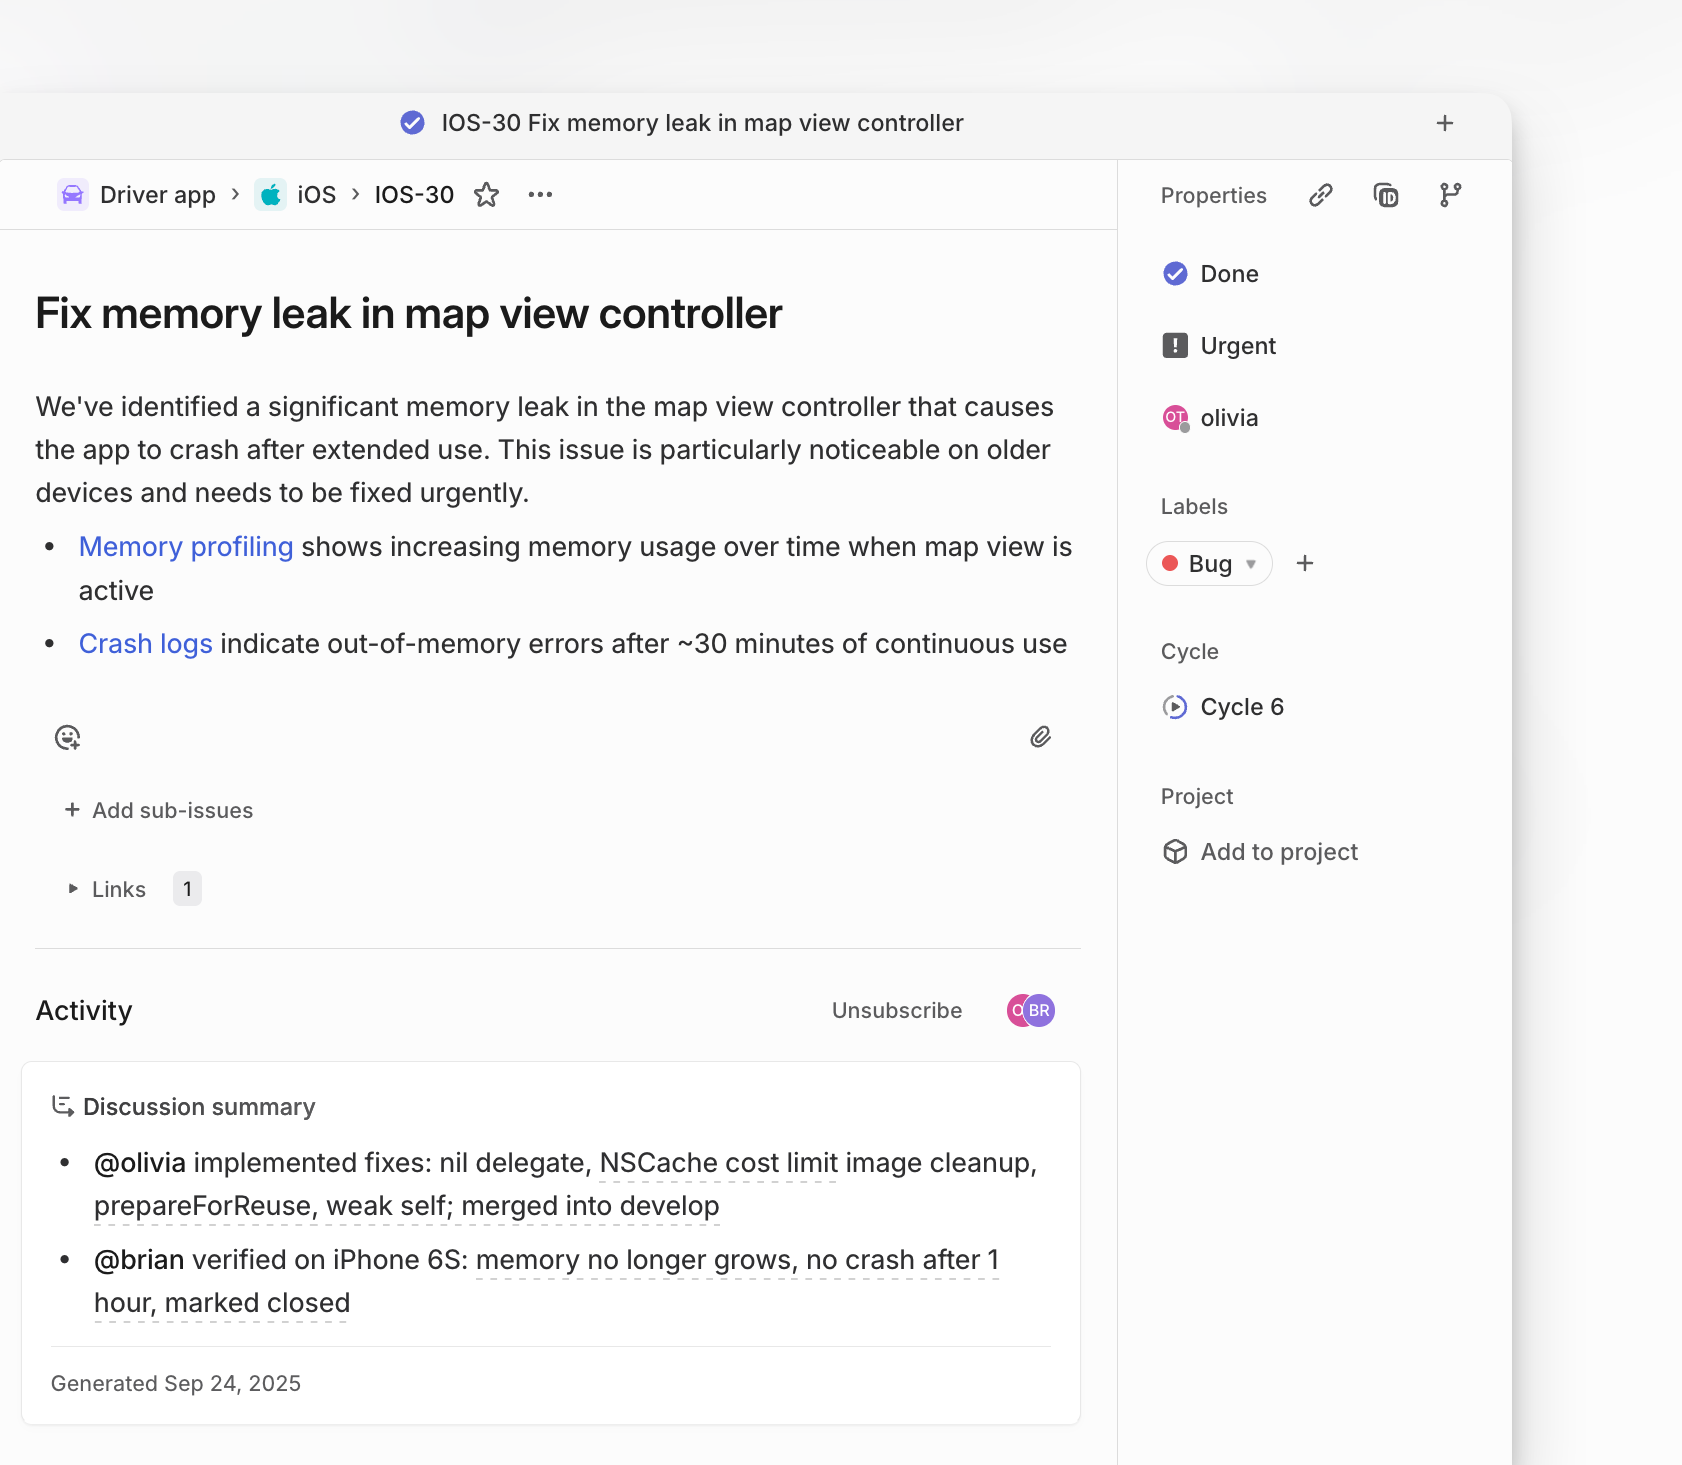
### Issue discussion summaries
Discussion summaries provide a condensed record of decisions, blockers, debates and their resolutions, and the people involved in those discussions. They update automatically as comments are added or removed, ensuring the content reflects the current state of the conversation.
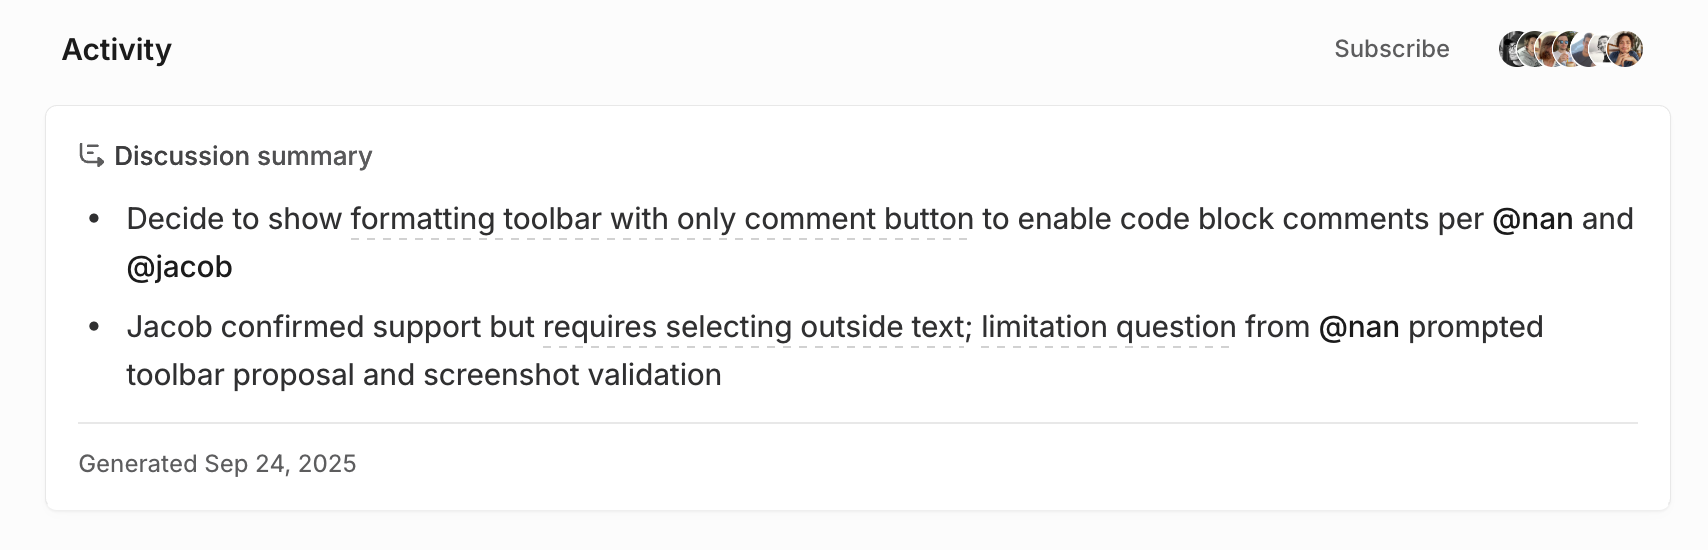
These summaries are generated automatically when an issue contains at least 19 comments or 100 words of discussion. Each bullet point includes a citation linking back to its source comment, so you can see the exact quote and context.
As discussions evolve, summaries regenerate incrementally. The summary appears above the issue’s comments, giving a structured view without needing to read through the entire thread.
### Resolved comment thread summaries
When a thread is resolved without a closing comment, Linear will generate a short summary of the discussion that appears on the resolved thread.

These summaries are visible only when the thread is collapsed, providing just enough context to understand what happened without reading the full thread. Enable this feature in a team's settings under _General_.
If the content of the thread changes, the summary will be updated automatically. If you resolve the thread with a reply comment, no summary is created. In this case, the resolving comment is treated as the final word in the conversation.
## Emoji react to issues and comments
You can leave an emoji reaction on an issue or a comment by clicking the "Add reaction" icon visible at the bottom of any issue or when hovering a comment.
All official Unicode emojis are available by default. Custom emojis can be uploaded individually (JPG, GIF, and PNG formats are supported).
---
# Source: https://linear.app/docs/conceptual-model.md
# Concepts
Gain a basic understanding of Linear's design so you can set up your workspace and navigate efficiently.

## Basic concepts
### Workspace
A Linear workspace is the container for all issues, teams and other concepts relating to an individual company (Vast.craft in the image above). As a user, you can have accounts on one or many workspaces and can switch between these accounts using the dropdown menu in the top left-hand corner of the application. Workspaces each have a unique URL in the style linear.app/example. When you log into Linear, you're logging into a specific workspace.
### Teams
A workspace has one or many teams within it. Teams typically represent groups of people who work together frequently, though in some cases you may choose to structure teams as parts of a product. Teams contain issues, and can have team-specific projects (though projects can also be shared between teams.)
Teams have their own settings available to configure features like Cycles, Triage, and Workflows so you can tailor each team to best fit how work gets done. Each team also contains an archive, which keeps a record of issues that are not being actively kept in your backlog (archive rules can be defined in team settings.)
### Issues
The most basic concept in Linear is the issue. Most other concepts in Linear are either associated with issues, or function to group issues together.
An issue represents a task described in plain language. Each issue must belong to a single Linear team, has an identifier constructed of its team ID and number, like "ENG-123".
Issues are required to have a title and status – all other properties and relations are optional. This makes it quick to create issues and cuts down on unnecessary work (see [_Write Issues Not User Stories_](https://linear.app/method/write-issues-not-user-stories)).
We support basic issue properties such as priority, estimate, label, due date, and assignee. You can create relations between issues to mark issues as blocked or blocking or create sub-issues.
You can create issues from anywhere in the app. Try it - open any page in the app and type `C`.
#### Workflows
As you work on and complete issues, they'll move through workflows; a group of ordered issue statuses defined per-team. These are the statuses that you'll see group issues on list views and show up as column headers on boards. We create a default workflow for you that you can further customize in Settings.
You can update issue statuses manually to reflect the current progress on that task. Where possible however, we recommend using integrations or automations to update issue status to avoid the need to "manage tickets".
For example, our GitHub and GitLab integrations move issues to _In Progress_ when you copy the git branch name and continues to update the status as the PR is drafted, opened, reviewed, and merged. Cycle automations move issues to and from the backlog and you can set issues to close and archive on their own so lists stay relevant.
> [!NOTE]
> **Special Statuses**
>
>
> * **Backlog** is a status category in Linear. Each team has its own backlog and teams can add additional backlog statuses to group issues down further.
>
> * **Triage** is an optional status in Linear that makes it possible to review issues before accepting them and moving them to your team's backlog or cycles.
## Organizing issues
### Projects
Projects group issues towards a specific, time-bound deliverable, like launching a new feature. Projects have their own pages in Linear that display all issues related to a project, project details, and graphs that show progress and project completion date ranges. Projects can be shared across multiple teams and organized under Initiatives or Project views.
#### Milestones
Milestones are a concept used to further organize issues inside an individual project. For each project, define milestones in a way that represent meaningful stages of completion for that project, and assign issues in the project to those milestones.
You can filter by milestones in a project, and easily see how close to completion an individual milestone is at a given time based on the issues belonging to that milestone.
### Cycles
Cycles are similar to sprints and prioritize a set of issues during a specific time period. Cycles are automated and repeating; you'll set a start date and duration for cycles, which will then repeat every _N_ weeks_._ They specifically do not end in a release. Issues not completed during a cycle roll over to the next cycle and we display basic statistics around estimated workload and percentage completion.
Cycles do not necessarily have a thematic grouping like Projects, and recur automatically according to a schedule, where Projects are intentionally curated.
### Issue Views
Views group issues according to a set of filters. Some issue views come standard like a team's _Backlog, All,_ or _Active_ issues, and you can define views based on any filter available in Linear. Because they're based on filters, views are dynamic -- when an issue meets the filter set defining the view they'll appear, when they no longer meet those criteria the issue will leave the view. Views can be constructed to be visible to only you, a particular team or your whole workspace.
* Access views to see all issues under a label, assigned to a user, or part of a particular cycle or project.
* My Issues is a curated set of views that shows you your assigned issues with the most relevant ones first, issues you've created, and ones you're subscribed to.
To build custom views, use filters on an existing view and then create a custom view from those parameters. You can also go to Views in the sidebar and create a custom view from scratch.
## Organizing Projects
### Project Views
Project views are accessible from the sidebar under a team. Projects will appear in those categories based on the status of the project. You can also view projects at the workspace level to get an overview of all projects within your organization.
As with issue views, Project Views are dynamic: when a project meets the filter criteria of the view it will appear there, when it no longer meets the criteria it will leave the view. Project views represent the actual state of projects in your workspace.
### Initiatives
Initiatives organize your projects and showcase the goals your company is working towards alongside their progress. Each Initiative contains a manually curated list of projects and Initiatives are presented within a single Initiatives view at the workspace level. This enables high-level planning across multiple projects and long timelines.
Leadership and managers can use the top-level Initiatives view in their Linear workspace for a quick overview of ongoing goals, objectives, and their progress.
## **Taking actions**
Whenever you do something in Linear that changes an issue, project, or another piece of data, you're taking an action.
### How it works
We've designed Linear so that you can take actions in multiple ways: using buttons, keyboard shortcuts, contextual menus, or by searching for the action in the command line. This makes it easy to figure out how to do anything in the app and build muscle memory since you're always following the same patterns.
For example, let's say you want to apply the label _bug_ to an issue. You can follow any of these steps to do it:
* Open the issue and click the apply label button
* Right-click on the issue from the board or list view and use the contextual menu
* Use the keyboard shortcut `L`
* Open the command menu `Cmd/Ctrl` `K` then search `label`.
To do anything else to an issue - add an estimate, set priority, update status, set the assignee, add it to a project - you follow pretty much the same steps. To do anything to a project from the initiative or project view, you also take similar steps.
### Bulk actions
It's easy to update multiple issues at a time in Linear. You can move issues across teams, to and from cycles and projects, apply labels, and change status to tens or hundreds of issues at once. `Cmd/Ctrl` `A` will select all issues on a view and then you can take the action using any of the aforementioned methods.
An `Undo` action (`Cmd/Ctrl` `Z`) reverses most actions.
### Keyboard shortcuts
Your keyboard is the fastest method for using Linear. Even if you don't use keyboard shortcuts normally, we recommend learning ones for common actions such as creating an issue. These are the most helpful to learn:
`C` to create an issue in any view
`Cmd/Ctrl` `K` to open the command menu
`x` to select
`Shift` `Up/Down` or `Shift` `Click` to select multiple
`Esc` to go back or clear a list selection
Shortcuts cannot be remapped in Linear at this time, though we may consider adding custom shortcuts in the future.
### Quick Navigation
Shortcuts follow patterns so that you learn them quickly. Navigate between views with `G`then `_`shortcuts: `G` then `I` to go to the Inbox, ``G`` then ``V`` to the current cycle, and `G` then `B` to the backlog.
### Easy access
`O` then `_` shortcuts launch menus to then open items on a list. `O` then `F` opens favorites, `O `then `P` opens projects, and `O `then `C` opens cycles.
See the full list of shortcuts by pressing ``?``.
### Command menu
The command menu lets you search and take any actions applicable to your view or selection.
Launch the command menu with `Cmd` `K` on macOS or `Ctrl` `K` on Windows or Linux.
Command menu actions are contextually dependent. For example, if you are looking at cycles and open the command menu, the command menu will first display commands that are related to cycles.
### Mouse
Of course, you can also navigate and take actions with your mouse. We have buttons, menus, and dropdowns throughout the app. Right-clicking on issues in lists or boards or projects on the timeline will bring up contextual menus.
---
# Source: https://linear.app/docs/configuring-workflows.md
# Issue status
Set statuses that your issues will move through on each team.

## Overview
Issues statuses define the type and order of states that issues can move through from start to completion. These workflows are team-specific and come with a default set and order: _Backlog > Todo > In Progress > Done > Canceled_.
## Configure
Add or edit statuses in a team from **Settings -> Teams -> Issue statuses & automations**_. Y_ou will see a list of all statuses in that team and their order. Click the three dots next to each status and select **Edit** to make changes to the name, color, or description. Create statuses by clicking the **+** button, or remove statuses (as long as at least one status exists in each category).
Statuses can be rearranged within a category but categories cannot be moved around. To change the order of a status, drag it to a new position.
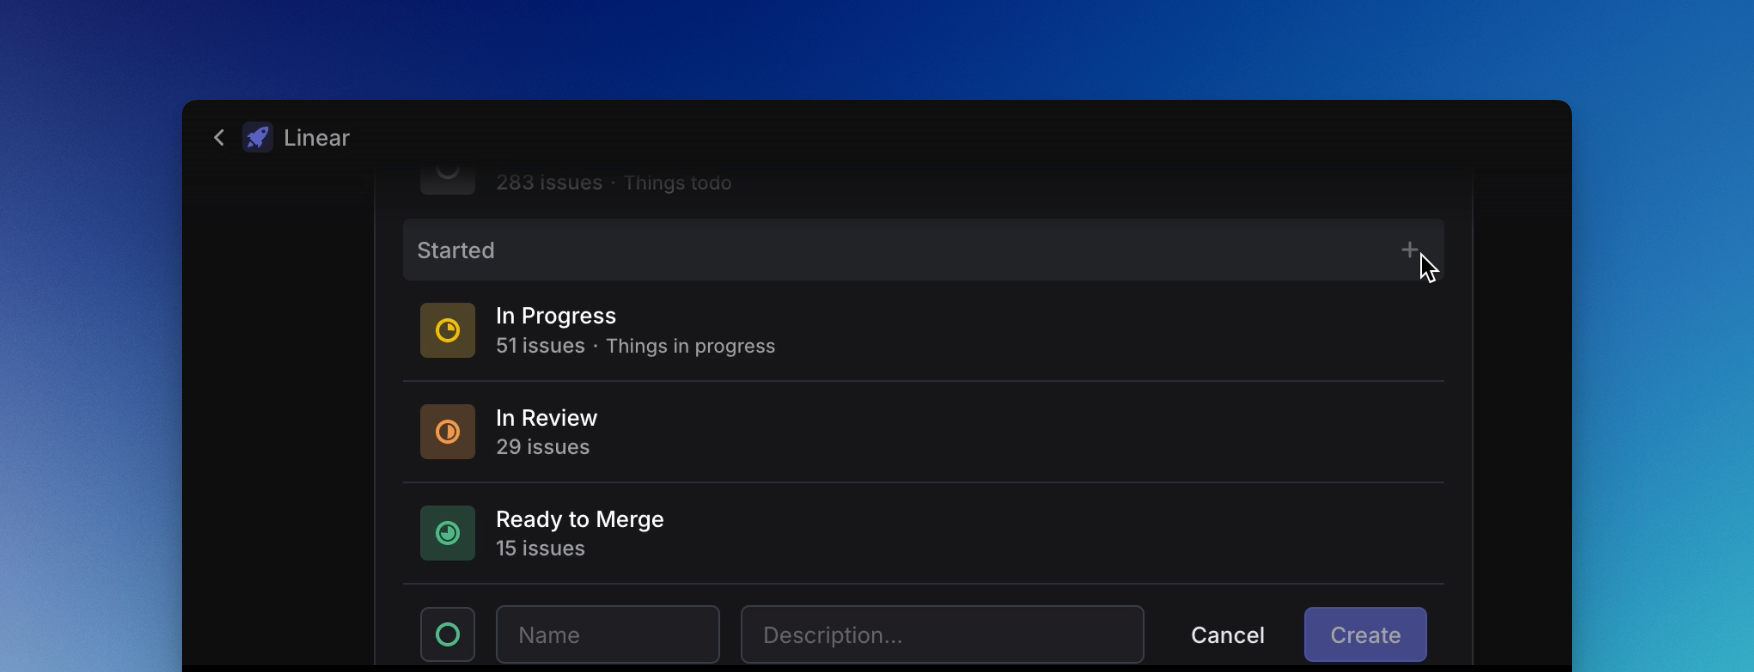
> [!NOTE]
> **How we work at Linear**
> We have the following workflow set up for our product team:
> _Backlog_: Icebox, Backlog
> _Unstarted_: Todo
> _Started_: In Progress, In Review, Ready to Merge
> _Completed_: Done
> _Canceled_: Canceled, Could not reproduce, Won't Fix, Duplicate
### Default status
The default status defines the workflow status that will be applied to newly created issues in your team. This can be overridden by the user when creating an issue, but makes it a lot easier to track and organize new issues that come in. By default, your first _Backlog_ status will be the default status. To change that, hover over a different status in the Backlog or Todo categories and then select **Make default**.
### Duplicate issue status
When you mark an issue as a duplicate of another, its status will change to _Canceled_. You can create a custom status in the Canceled category (e.g. _Duplicate_) and then configure workflow settings so that the custom status is applied instead.
### Triage
Triage is an additional status category that acts as an Inbox for your team. Triage is particularly powerful when combined with other integrations like Asks, Slack, or our support ticketing integrations. Learn more [here](https://linear.app/docs/triage).
## Auto-close and auto-archive
When enabled, auto-close will _close_ issues that have not been updated in a set period of time.
Auto-archive controls when issues in the team will be archived. When an issue archives, its creator will be notified—this is an opportunity to unarchive if the issue is still relevant. Archived issues are still searchable and restorable in the future.
Archiving is only automatic and is not available as a manual action. More information about archiving is available [here](https://linear.app/docs/delete-archive-issues).
> [!NOTE]
> The auto-archive setting also controls when projects and cycles will archive.
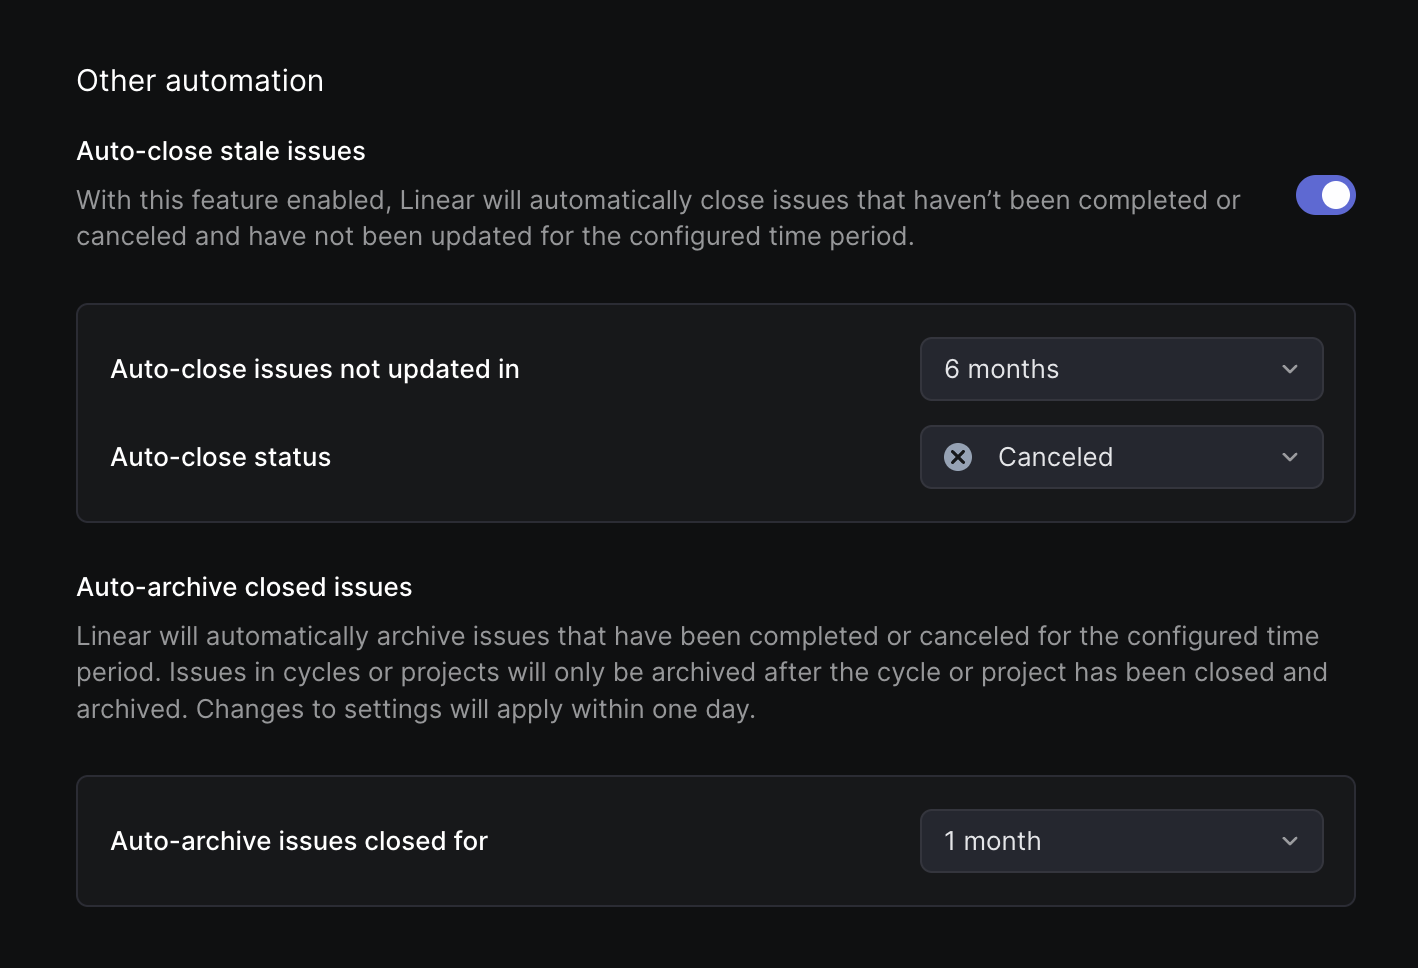
##
---
# Source: https://linear.app/developers/create-issues-using-linear-new.md
# Create issues using linear.new
You can open Linear using a link with specific query parameters to start issue creation and pre-fill fields. This is available without needing to integrate with Linear API.
The following links trigger the creation of a new Linear issue in any browser and you can add query parameters after any of them to pre-fill issue fields:
* http://linear.app/new
* http://linear.app/team//new
* http://linear.new
For example, you can assign new issues to a specific person, set an estimate, add labels, or combine multiple parameters with instructions in the description to create a template for a user to fill out.
## Generate a pre-filled link
You can open any issue page in Linear, open command menu using `Cmd/Ctrl + K` and then select _`Copy pre-filled create issue URL to clipboard`_. This will copy the URL to the clipboard, allowing you to quickly create a URL with parameters that will pre-fill the new issue creation state with the same properties set on the issue page.
### Supported parameters
We support the following query parameters.
Parameter | Description | Examples
--- | --- | ---
`title` and `description` | Use to `+` indicate an empty space in the keyword. For example, `?title=My+Title` meaning "My Title". | * `https://linear.new?title=My+issue+title&description=This+is+my+issue+description`
* `https://linear.app/team/LIN/new?title=Issues+with+scrolling+the+modal+window`
`status` | Indicates the initially selected status of the issue.
Can be set by `UUID` or name of the workflow status. When using `UUID` you also need to indicate a corresponding team key. | * `https://linear.new?status=Todo`
* `https://linear.app/team/MOB/new?status=`
`priority` | Indicates the initially selected priority of the issue.
Possible values are `high`, `urgent`, `medium` and `low.` | * `https://linear.new?priority=urgent`
* `https://linear.app/team/LIN/new?title=Important+Bug&priority=high`
#### ,
,
`assignee` | Indicates the initially selected assignee of the issue.
Possible values: `UUID` of the specific user, display name (shortname) or a full name of a user. | * `https://linear.new?assignee=john`
* `https://linear.new?assignee=John+Doe`
* `https://linear.app/team/LIN/new?assignee=`
`estimate` | Indicates the initially selected estimate of the issue. Applicable only when the targeted team has estimates feature enabled.
Can be set by their point number e.g. `estimate=4`
T-shirt sizes have the following point values: `No priority (0)`, `XS (1)`, `S(2)`, `M (3)`, `L (5)`, `XL (8)`, `XXL (13)`, `XXXL (21)` | * `https://linear.app/team/LIN/new?estimate=2`
`cycle` | Indicates the initially selected cycle of the issue. Applicable only when the targeted team has cycles feature enabled.
Can be set by `UUID`, cycle number or a name of a cycle. | * `https://linear.app/team/MOB?cycle=36`
* `https://linear.app/team/EU/new?cycle=focus+on+bugs`
* `https://linear.app/team/EU/new?cycle=`
`label` or `labels` | Indicates the initially selected labels on the issue. If the label doesn't exist in the workspace, it will be ignored. | * `https://linear.app/team/LIN/new?label=bug`
* `https://linear.new?labels=bug,android,comments`
`project` | Indicates the initially selected project in the issue. Requires `team` to be specified in the URL.
Can be set by `UUID` or the name of the project. | * `https://linear.app/team/LIN/new?project=Project+page+improvements`
* `https://linear.app/team/MOB/new?project=`
`projectMilestone` | Indicates the initially selected project milestones in the issue. Requires `team` and `project` to be specified in the URL.
Can be set by `UUID` or the name of the project milestone. | * `https://linear.app/team/LIN/new?project=Project+page+improvements&projectMilestone=Beta`
* `https://linear.app/team/MOB/new?project=&projectMilestone=`
`template` | Indicates a template that will be used for the issue creation. Issue templates are a powerful tool to set multiple issue properties at once. Also, it's possible to specify sub-issues when using an issue template.
Can be set by `UUID` of the issue template.
You can generate an issue template URL in the app. Go to your team's templates (under team settings), hover over the template you want to use, and then click the "Copy URL" action in the menu. | * `https://linear.app/team/LIN/new?template= [!NOTE]
> Changes made to an issue's properties in the first 3 minutes are considered part of the issue creation process, and won't be added to the activity log as changes to the issue.
## Create an issue via email
Issues can be created by sending an email to a unique intake email address that routes to a team. You can also create an issue via email based off a template.
A link to the original email will be included as an attachment on the Linear issue. Attachments will be synced over, though email attachments are limited to 25 MB.
The sender of the email will not be notified when the issue is updated or resolved.
> [!NOTE]
> Refer to the [Linear Asks](https://linear.app/docs/linear-asks) feature for the ability to:
>
> * Customize the email address you want requesters to send to
> * Reply to customer emails from Linear
> * Customize response emails
#### Create an email address
To create a email address for a Linear team, navigate to **Settings > Teams > General > Create by email** and enable the toggle.
#### Create an email address for a template
To create an email addresses for a team template:
1. Navigate to **Settings > Teams > Select Team > Templates**
2. Click the three dots on the right of the template.
3. Select **Configure email address**.
4. Enable the toggle in the pop-up.
5. Click **Continue**.
When a team template is used, the issue's title and description will be overwritten by the email contents, but the properties of the template will be applied to the new issue. Replies sent on the original email to the forwarding address will not create additional issues.
## Create recurring issues
You can create recurring issues to automate your repeated tasks on a cadence of your choosing.
### Create a recurring issue
When creating a new issue, you can choose to make it into recurring in the issue composer using the `…` menu and choosing _"Make recurring…"_
Creating a recurring issue from the issue composer
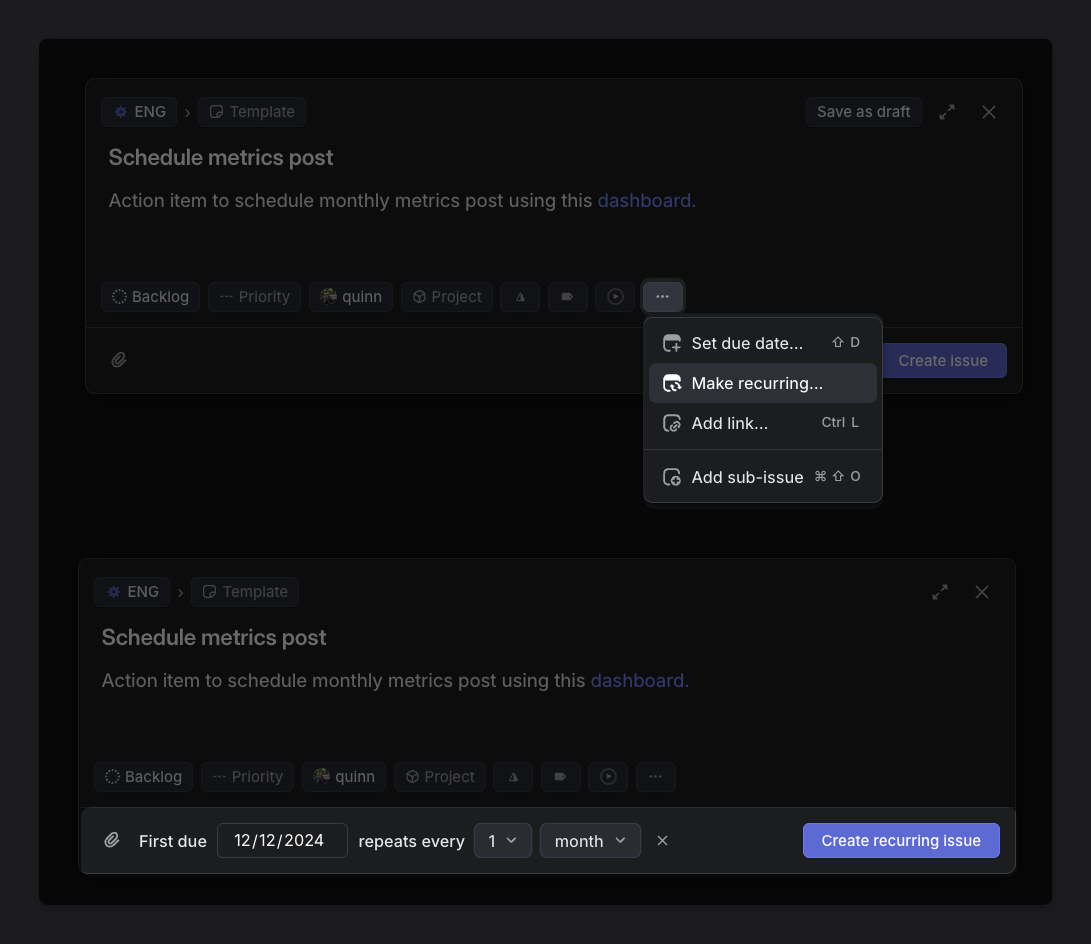
### Convert an existing issue into a recurring issue
To convert any issue into a recurring issue, open the issue and in the `…` menu choose` Convert into > Recurring issue…,
,`You can also use the `Cmd/Ctrl` + `K `menu by typing _"Convert into recurring issue"_.
You can then choose your first due date, and the cadence at which it repeats.
### Create recurring issues in team settings
Navigate to **Team settings > Recurring issues.**
To create a new recurring issue, click the `+` icon and set your chosen schedule of recurrence.
### Create recurring issues from templates
If you have an existing issue template you want to turn into a recurring issue you can do so.
First create your issue and apply your chosen template.
Once created, choose the options to convert to a recurring issue from the `…` menu or command menu. This issue will now turn into a recurring issue, and include any properties that were in the template, including sub-issues.
Recurring issues can easily be found from your **Team settings > Recurring issues**, or filtering your views using the **Recurring issues** filter.
### Cadence of recurring issues
Once you create a recurring issue, future issues in the cadence are expected to be created once the due date passes (00:01 the following day in your team’s timezone.)
> [!NOTE]
> Changes to a template in future will not affect recurring issues that were created from this template. You will need to edit the recurring issue directly or recreate it from your updated template.
## Create a new issue URL
The following links trigger the creation of a new Linear issue in any browser and you can add query parameters after any of them to pre-fill issue fields.
* [http://linear.app/team//new](https://linear.app/team/%3Cteam%20ID%3E/new)
* [http://linear.app/new](https://linear.app/new)
* [http://linear.new](https://linear.new/)
To pre-fill issue fields and/or properties:
1. Add a `?` at the end of the link.
2. Include the field or issue property you want to pre-set.
3. Add `=`.
4. Add the parameter you are setting.
5. Use `&` between each field or issue property when creating a string of pre-settings.
### Apply pre-set properties
We support the following query parameters:
`title` and `description`:
* Use `+` to indicate empty space in the keyword, or fully url encode content if more complex as description can be a markdown document.
* For example, `https://linear.new?title=My+issue+title&description=This+is+my+issue+description`
`status`
* Can be set by `UUID` or name of the workflow status
* For example, `https://linear.new?status=Todo`
`priority`
* Can be set by Medium, Urgent, Medium or Low
* For example: `https://linear.new?priority=urgent`
`assignee`
* Can be set by `UUID`, display name/name of the user, or `assignee=me` to assign the creator
* For example, `https://linear.new?assignee=john` or `https://linear.new?assignee=Erin+Baker` or `https://linear.new?assignee=me`.
`estimate`
* Can be set by their point number e.g. `estimate=4`
* T-shirt sizes have the following point values: No priority (0), XS (1), S(2), M (3), L (5), XL (8), XXL (13), XXXL (21)
* For example, `https://linear.app/team/LIN/new?estimate=2`
`cycle`
* Can be set by `UUID`, cycle number of a name of a cycle
* For example, `https://linear.app/team/MOB?cycle=36` or `https://linear.new/team/EU/new?cycle=focus+on+bugs`
`label`
* Use a comma between each label you want to apply
* For example, `https://linear.new/team/LIN/new?label=bug` or `https://linear.new?labels=bug,android,comments`
`project`
* Can be set by `UUID` or the name of the project
* For example, `https://linear.new/team/LIN/new?project=Project+page+improvements`
`milestone` (a `project` must be defined)
* Can be set by `UUID` or the name of the project milestone
* Project milestone can be read only if `project` is also passed in the URL
* For example, `https://linear.app/team/LIN/new?project=Project+page+improvements&projectMilestone=Beta`
`links`
* URL encoded comma delimited urls with optional title, in format `url|title` . These will be attached to the issue as link attachments.
* For example: `https://linear.new/team/LIN/new?links=https%3A%2F%2Flinear.app%2Chttp%3A%2F%2Fgoogle.com%7CGoogle`
### Create a URL from a template
1. Go to **Settings > Team > Templates**.
2. Click the three dots to the right of the template.
3. Select **Copy URL to create issue from template**.
### Copy a URL from an issue
While on an issue's view, or an issue is highlighted or selected, open command bar by typing `Cmd/Ctrl` + `K `and select **Copy pre-filled create issue URL to clipboard**.
## Drafts
When writing an issue and navigating away to another part of the app, Linear will hide the issue modal and keep a temporary draft. The next time you go to create an issue, the editor will re-open with the previous content draft. This type of draft is saved locally and only available on the client used to create it. Logging out, restarting, or resetting Linear will clear this type of draft.
If you use `Esc` or click on the close button, a pop-up modal will appear giving you the option to save the issue as a draft. This draft type persists across clients and will not clear on logout or reset. To access your saved drafts, open the Drafts page in your sidebar.
> [!NOTE]
> Drafts are stored for 6 months before being deleted automatically
## FAQ
Can you create issues and use keyboard shortcuts in Safari?
If Safari is stealing your focus when hitting tab during issue creation, enable this Safari advanced preference:
Safari > Preferences > Advanced > Enable "Press tab to highlight each item on a webpage".
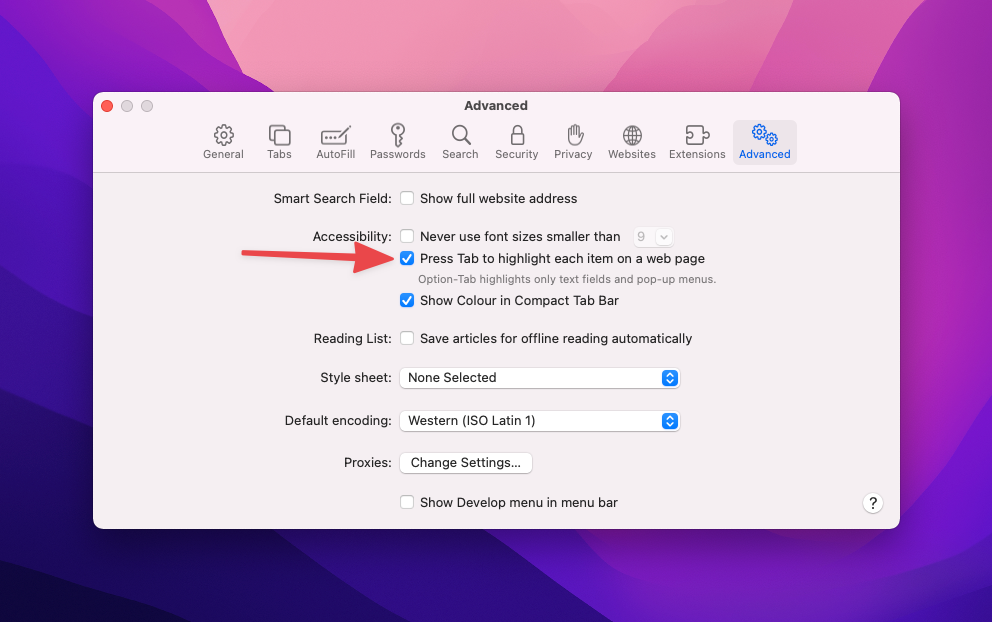
*Safari Accessibility Preferences*
Is there an attachment file size limit when creating issues through email?
Email routing does not support sending messages with file sizes greater than 25MB. If you have attachments exceeding that, it will fail to deliver. Message body must also be less than 250,000 characters.
---
# Source: https://linear.app/docs/custom-views.md
# Custom Views
Create durable filtered views of issues, projects, or initiatives that you can save and share with others in your workspace.
> [!NOTE]
> Initiative views are available on Enterprise plans.
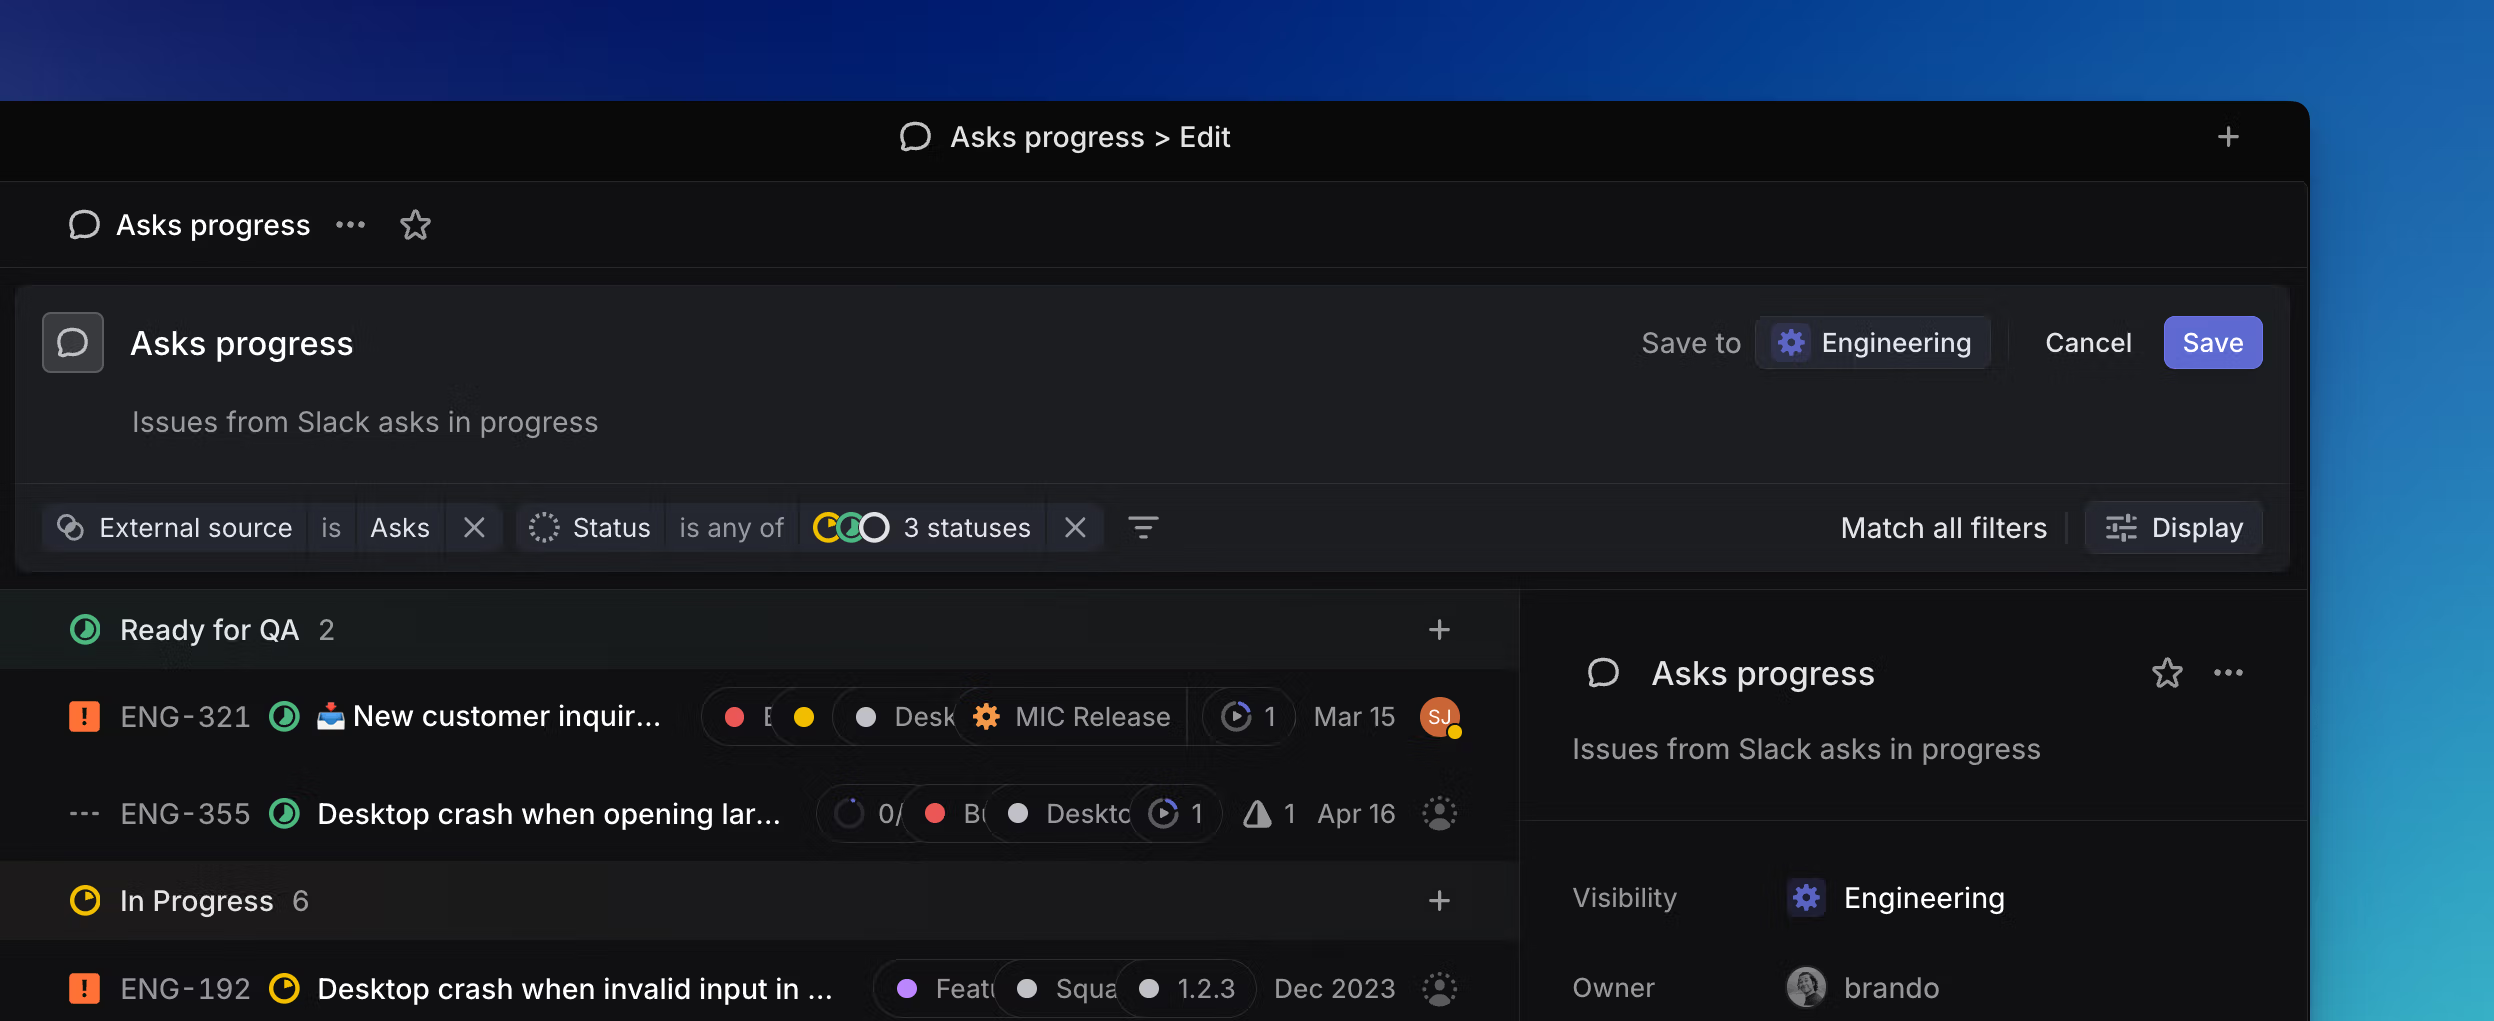
## Overview
Create custom views using filters to show only the items you want to see. Save, share and favorite these views for easy access and faster team collaboration.

## Basics
### Open views
Open views in the team or workspace Views pages in your sidebar, or search for views to open with `O` then `V`.
### Create views
To build a custom view from scratch, click on Views in the sidebar, select the type of view you wish to create (Issue, Project, or Initiative on Enterprise plans) and click _New view_.
You can also save any filtered board or list as a custom view with the keyboard shortcut `Option/Alt` `V` or by clicking on the Save view icon. The icon appears next to the Display Options icon after you've add at least one filter to any team-specific list or board.
### Edit views
To edit an existing view, click on the view name from within the view itself and choose the _Edit view…_ option in the pop-up menu.
You also have the option to duplicate an existing view from here, just click on the _Duplicate view..._ option.
### Share views
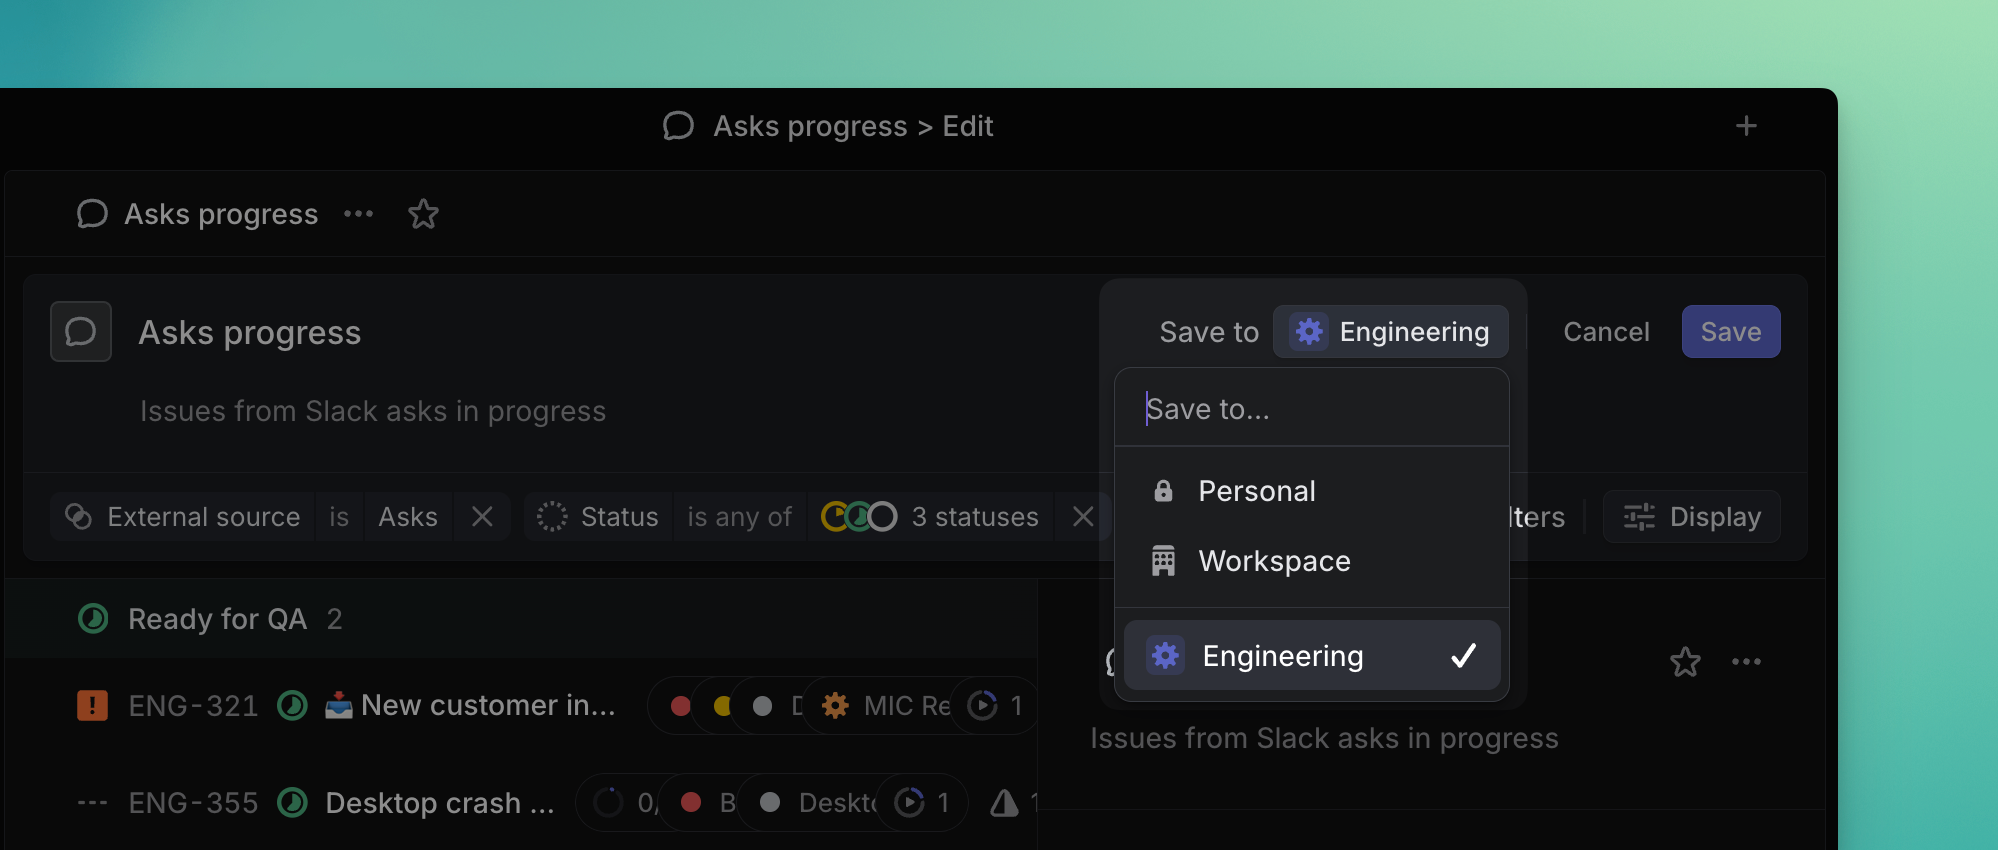
If a shared view is created at the workspace level, then the view will appear under Workspace views on the Views page. If you select a specific team when creating the view, then only members of that team will see the shared view and it will be listed under Team views in the View page.
To share a view across multiple teams but limit it to projects or issues within a specific team or teams, create an _All teams_ view and use filters to refine the list.
### Create views attached to Teams or Projects
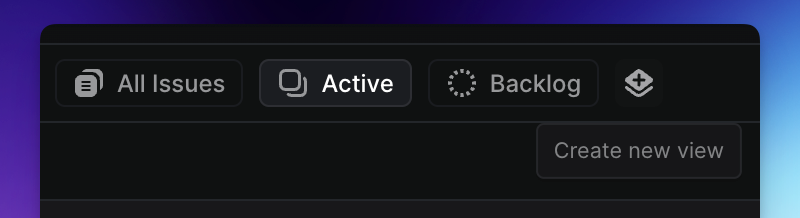
From your team's Issues and Projects sections, you can create new views that appear alongside the team's default views (All Issues, Active and Backlog.)
Unlike shared team views in the Views menu, these contextual views are shown only in the Issues and Projects section.
### Copy view link
To share a specific view in Slack or wherever you discuss work, copy a link by clicking the custom view's three dot (more) menu and selecting _Copy view URL_ or by copying the View's URL in the browser. Sharing a link does not automatically give anyone access to a view, it must be shared first.
### Favorite views
Favorite views that you access frequently to add them to your sidebar. Do this by clicking on the star next to the view name or from the overflow menu. Favoriting custom views lets you select them as your default page when opening Linear in [Settings > Account > Preferences](https://linear.app/settings/account/preferences).
### Collapse view group headers
Expand or collapse group headers when in list view by hovering over the group and pressing `t`, or clicking on the toggle icon at the left side of the group header.
### View sidebars
The righthand sidebar clarifies the view's contents and allows you to quickly filter for common properties. Project view sidebars display information on those project's leads, teams, projects, initiatives and health. Issue view sidebars display assignees, labels and projects.
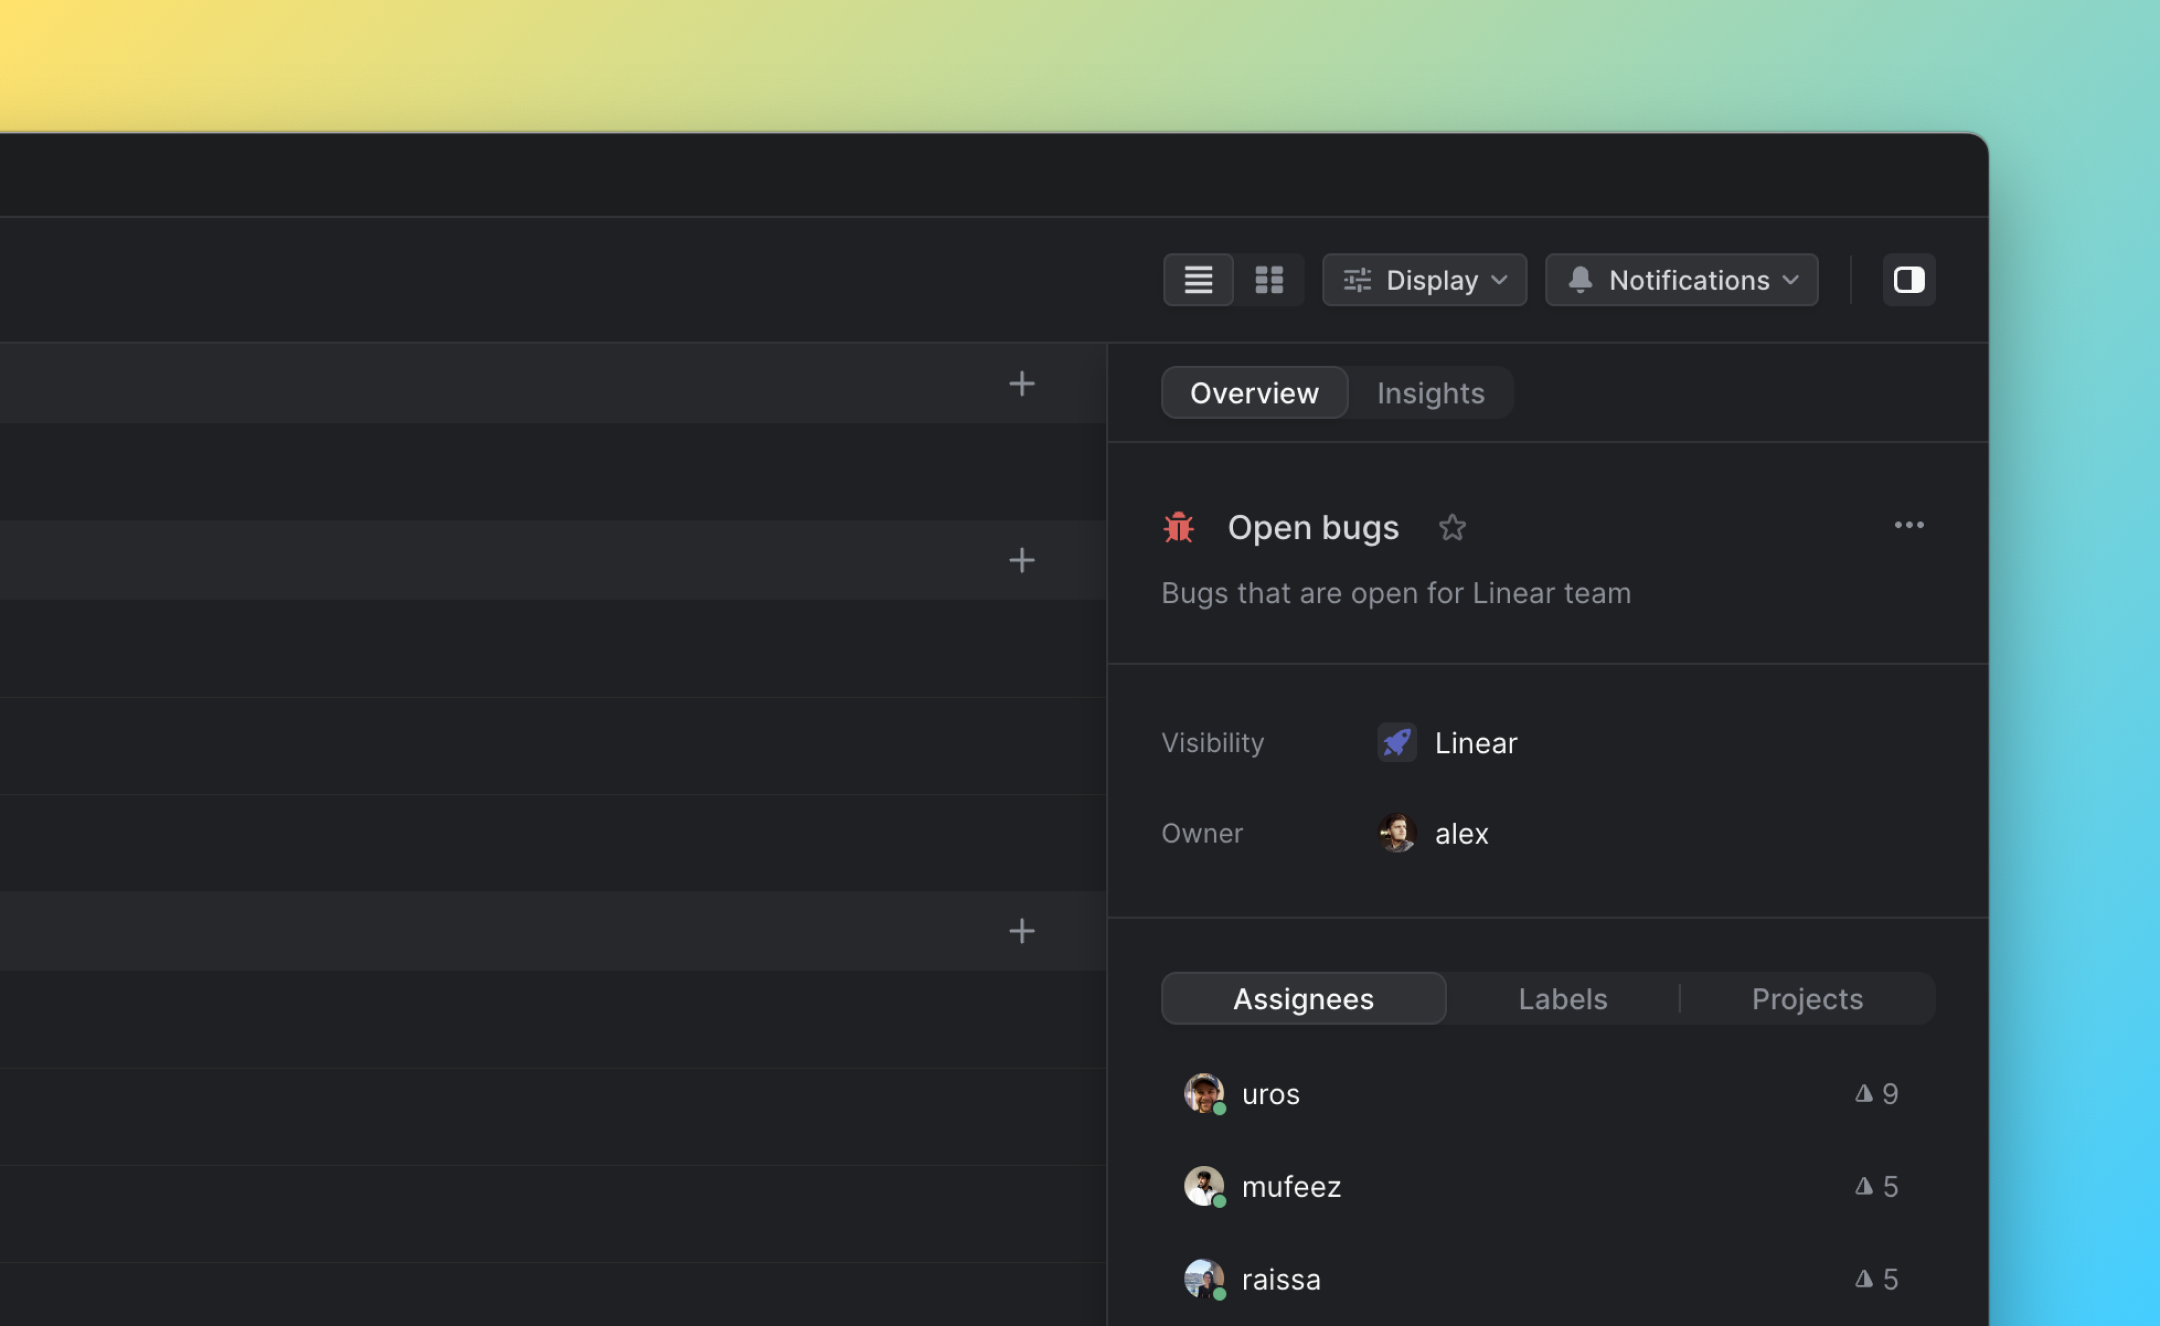
### Issue view subscriptions
Configure personal or Slack channel notifications when an issue meets parameters defined by a view, or when an issue in a view is completed/canceled.
#### Individual notifications
Click the bell icon at the top of an issue view. Select whether you'd like to be notified for when an issue is added to the view, marked completed or canceled, or both.
To reduce notification noise, you won't receive notifications in views you subscribe to for actions you take yourself.
Once you've configured a view subscription, manage the subscription in [notification settings](https://linear.app/settings/account/notifications).
#### Slack channel notifications
Click the bell icon at the top of a view, then the _Configure_ button next to _Slack notifications_. Turn on the toggle and authorize Linear to post to a particular channel. Choose whether to be notified for when an issue is added to the view, completed/canceled, or both.
Moving forwards, notifications for these selected changes will be sent as messages to the chosen Slack channel.
### View owners
Every view has an owner property visible in that View's dedicated sidebar as well as on the main _Views_ page in Linear's main sidebar. This field defaults to the creator of the view but can be changed to other users as desired. Before deleting a view, we advise checking in with its owner to ensure it's no longer needed.
When should I use an initiative to group projects instead of a view?
If you want to curate a list of projects for planning purposes that map to an organization goal or objective and you want to keep track of overall progress, an initiative is the ideal tool. The projects in an initiative are manually curated and do not change over time unless new projects are manually added or removed.
In Project views, any projects meeting the view's filter criteria will appear. Use project views to represent the current state of work, or as a quick way to keep an eye on particular types of projects you care about.
Example Project Views
**At Risk Projects**
See which projects are currently at risk to quickly spot projects that need attention.
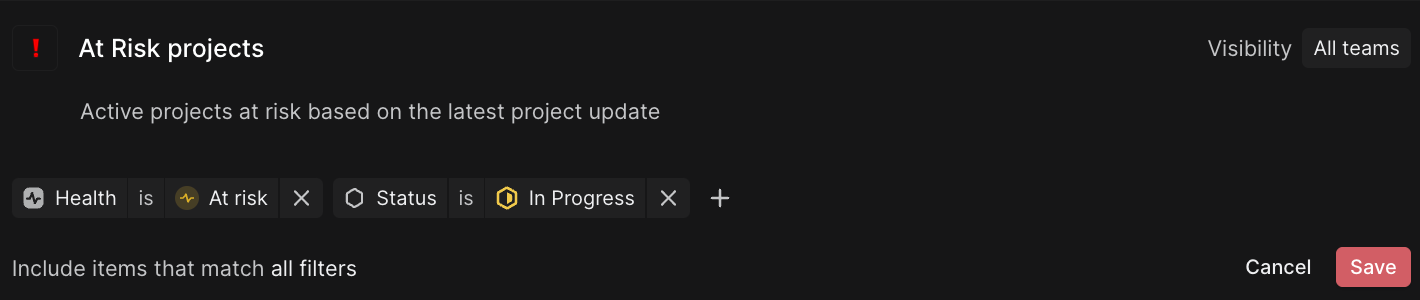
*At Risk projects*
**Quarterly review**
Look at projects completed last quarter and compare that to last quarter's planned roadmap. You can also share this view with stakeholders who need to know which features have launched.
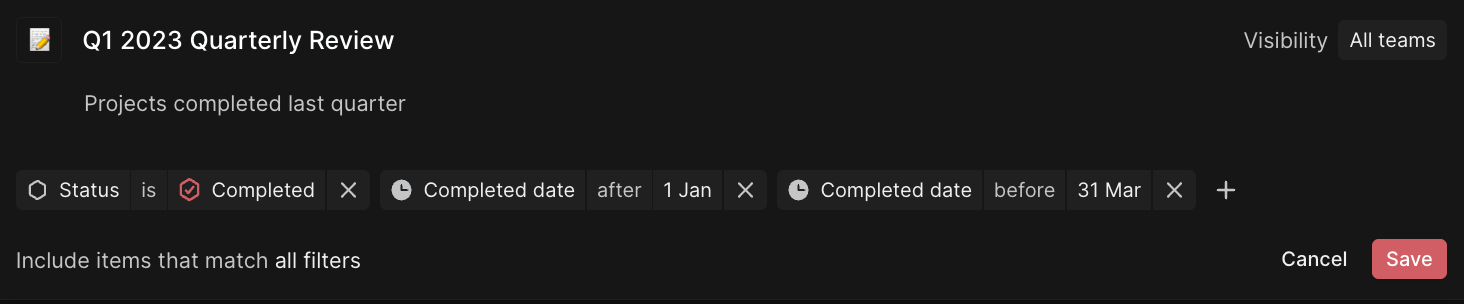
*Quarterly review*
**Projects by user**
Keep a list of your projects or projects or those of your direct report. Order projects by target date and look at the Status indicator to get a sense of when they’ll ship.

*Projects by user*
**Upcoming releases**
Create a list of projects that are coming up for release by filtering for specific milestones (e.g. Alpha, Beta, GA).
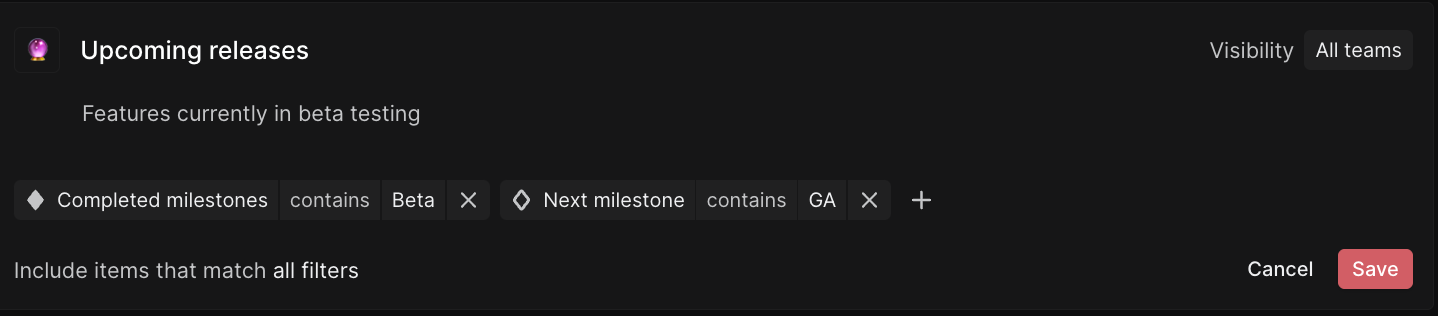
*Upcoming releases*
**Projects by initiative**
Filter by initiative to create a view of projects across different initiatives.

*Q3 team roadmaps*
---
# Source: https://linear.app/docs/customer-requests.md
# Customer Requests
Bring the voice of the customer into product development.

## Overview
Customer Requests allow you to add detailed user feedback and customer attributes to Linear to better align product work with real user needs:
* Link customer requests to specific issues or projects in Linear to make feedback accessible to your product team
* See customer pages displaying all requests made by specific customers along with attributes like revenue, size, and tier
* View and filter issues or projects by customer name, count, status, tier revenue, and size to identify high impact product work
What this video over to see how Customer Requests works:

## Configure
Admins can enable Customer Requests in [Workspace Settings > Customer requests](https://linear.app/settings/customers). Once enabled, anyone in your workspace can view customer pages, create and update customers, and add customer requests to issues and projects in Linear or from a supported integration.
When an issue is created from integrations with [Intercom](https://linear.app/docs/intercom), [Zendesk](https://linear.app/docs/zendesk), [Front](https://linear.app/docs/front), or [Asks](https://linear.app/docs/linear-asks), it will automatically add a request pointing back to the source. Requests can also be added manually and are viewable in their associated issue and the customer's page.
From settings, add further customizations. Choose a team to receive new issues created from a request by default (we recommend selecting a team [exclusively used to track feedback](https://linear.app/blog/how-we-think-about-customer-experience-at-linear#how-do-you-process-incoming-feature-requests)). You can also customize revenue units and tiers for different plans or products you offer. Revenue, Tier and Size fields will be automatically populated if you use the Intercom integration, or can be filled when creating customers manually.
## Customers
A Customer in Linear represents an organization using your product. Customers have a unique domain, name, logo, and attributes which can be viewed on their page.
### Customer pages
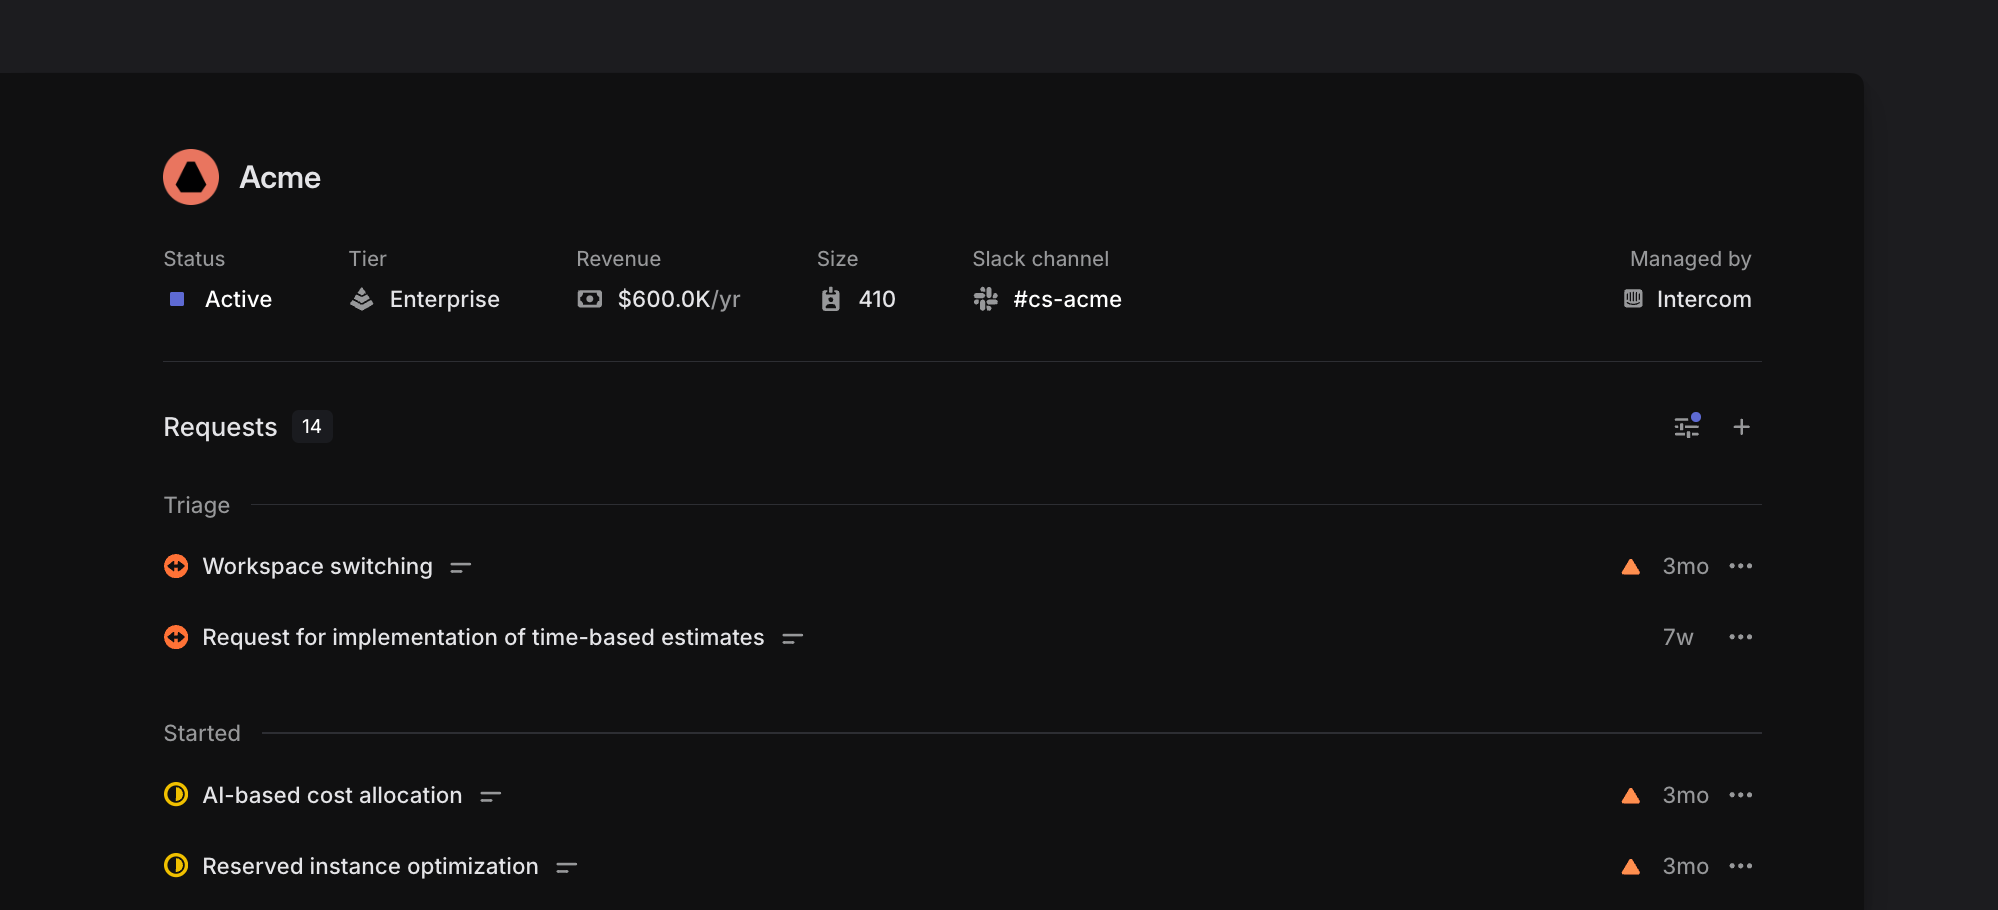
Customer pages show all issues and projects with a request associated with that customer. You can group and order this list of issues to see what issues have been marked as important or what issues are in progress. Click on individual issues to open and view their request on that issue in full detail.
For customers created through Intercom or manually, you'll also see attributes like the customer's revenue, status, tier, and size on the customer page. Individual customer pages can be favorited so that they're easy to access from the sidebar.
### Open Customer pages
* Use `O` then `Q`, then search for the customer's name
* Open the full customer list with `G` then `Q`, then search to narrow down results
* Search for the customer in the `Cmd`/`Ctrl` + `K` menu
### Create Customers
#### From integrations
In most cases, customers will be created automatically through an integration at the same time their first request is created. Linear will use the customer's email domain to correctly map the request.
#### Manually
If your organization does not use these integrations, you can create Customers manually instead. To do so, open the command menu with `CMD + K`, then type `Create new customer`, then `Return`
## Customer requests
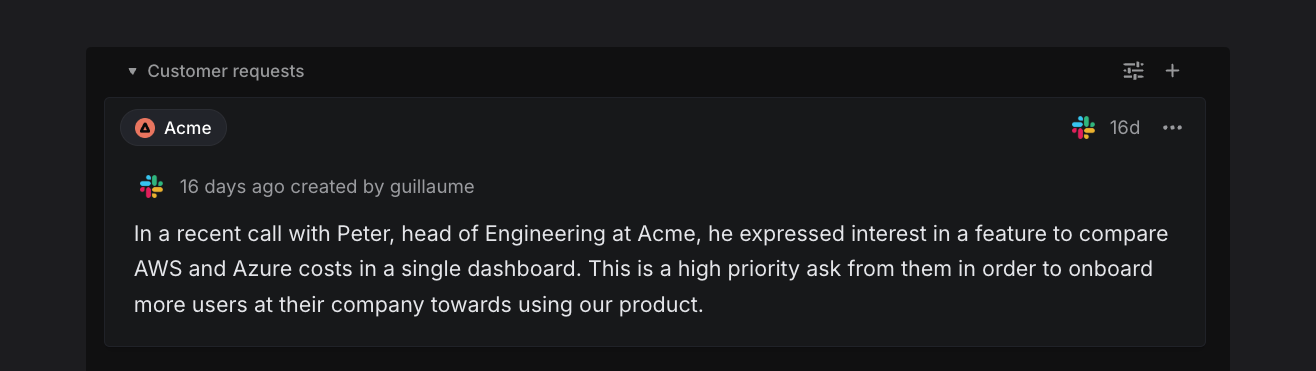
Customer requests link user feedback to specific issues in Linear.
### Add requests to issues or projects
A customer request is created automatically whenever you create or link to an issue or project from a supported integration. The request will appear both on the issue/project itself as well as on the associated customer's page.
#### From integrations
When made from an integration, the customer request will quote the original message from the user. This request can be edited in Linear to add images, videos, or extra context. Requests also include a link to the source (e.g. Intercom conversation), name of the user associated with the request, and timestamp.
#### Manually
Requests can be created manually in Linear using the `+` icon underneath an issue description, from the button on a customer page, or by using the keyboard shortcut `Ctrl` `R` (macOS)/ `Ctrl` `Alt` `R` (Windows). This is useful when a request comes in through a channel not necessarily associated with an integration, like if you have Linear open during an in-person meeting.
From the project page, you can add customer requests using CTRL+R, or the + Customer Request button. Once your first Customer Request is added to a project, a dedicated tab for Customers will appear next to the Overview tab.
Remember to configure a default team in [settings](https://linear.app/settings/customers) for customer requests, so that issues are created in that team when requests are created from individual customer pages.
### Integrations
The following integrations can create issues with customer requests:
#### Intercom
Requests are created when you create new issues or link to an existing issue or project from the Intercom integration. Customer attributes such as size and revenue can be synced with and managed from Intercom.
#### Zendesk & Front
Requests are created when you create issues or link to an existing issue or project from Zendesk or Front conversations.
#### Salesforce
Requests are created when creating an issue from a case, or linking a case to an existing issue.
#### Asks
Whenever an Ask is created, a customer request will be associated with the issue and link the specific feedback and customer to the Ask. The customer association for Asks follows the email of the person who sent the first message in the thread, not the person who created the Ask.
If you have a Linear account and are creating an Ask in Slack, you can also select a customer manually. We do not expose your customer list to other users in your Slack workspace without Linear accounts, but if they create an Ask from the overflow menu on an existing message the customer association will be automatic.
To ensure proper customer attribution despite varying Slack privacy settings in shared channels, we recommend directly linking any shared Slack channels to the customer page (select the three-dot menu, then _link to Slack channel.)_ This way, all Asks created in that channel will automatically be associated with the customer.
#### Slack
When creating an issue from the Slack integration, optionally select "Customer" to associate a customer request with the issue you are creating. This value will prefill if Linear is able to determine the domain of the user who sent the message.
To default a customer being selected in a Slack channel, open the customer page in Linear (`O then Q`) and from the … menu choose the "Link to Slack channel" option.
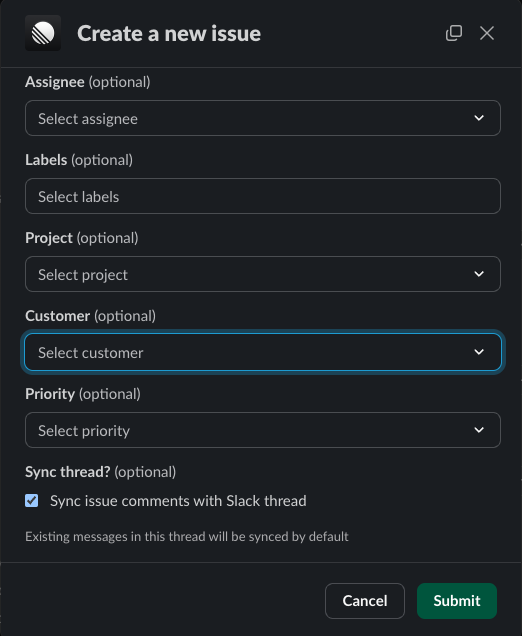
#### API
Requests and Customers can be created with [customerNeedCreate](https://studio.apollographql.com/public/Linear-API/variant/current/schema/reference/objects/Mutation?query=customer#customerNeedCreate) and [customerCreate](https://studio.apollographql.com/public/Linear-API/variant/current/schema/reference/objects/Mutation?query=customer#customerCreate) respectively in our GraphQL API.
However, using our API to import customer data from a warehouse—commonly done through an rETL pipeline—can be challenging, as GraphQL is not optimized for bulk data transfers, and Linear does not currently offer a REST API. We plan to offer better support for importing customers to Linear in the future.
### Mark as important
Requests can be flagged as important to specific customers. For instance, an issue or project may have requests from five different customers but be marked as important by only one of those customers. This binary indicator, shown as a triangle, lets customer-facing teams separate requests that represent a critical need from those expressing a nice-to-have feature.
### Synced Attributes
From _Settings > Customer Requests > Customer attributes data source,_ you can choose a data source for Linear customer attributes such as Intercom, Zendesk or Front and create mappings between source tool attributes and attributes on Linear Customers. You can also choose _None_ as a data source to allow more control via the API or directly in the interface. Once an external source is configured the company name and domain are automatically synced.
_Owner, Revenue, Size, Status_ & _Tier_ can be remapped to pull from data in your source tool. These values are regularly kept up to date as they will be [synced with your source](https://linear.app/docs/customer-requests#collapsible-7589124828b2).
You can also choose to enable manual edits for any attributes that are unmapped. Attributes will always be editable via the Linear API regardless of this UI-specific setting.
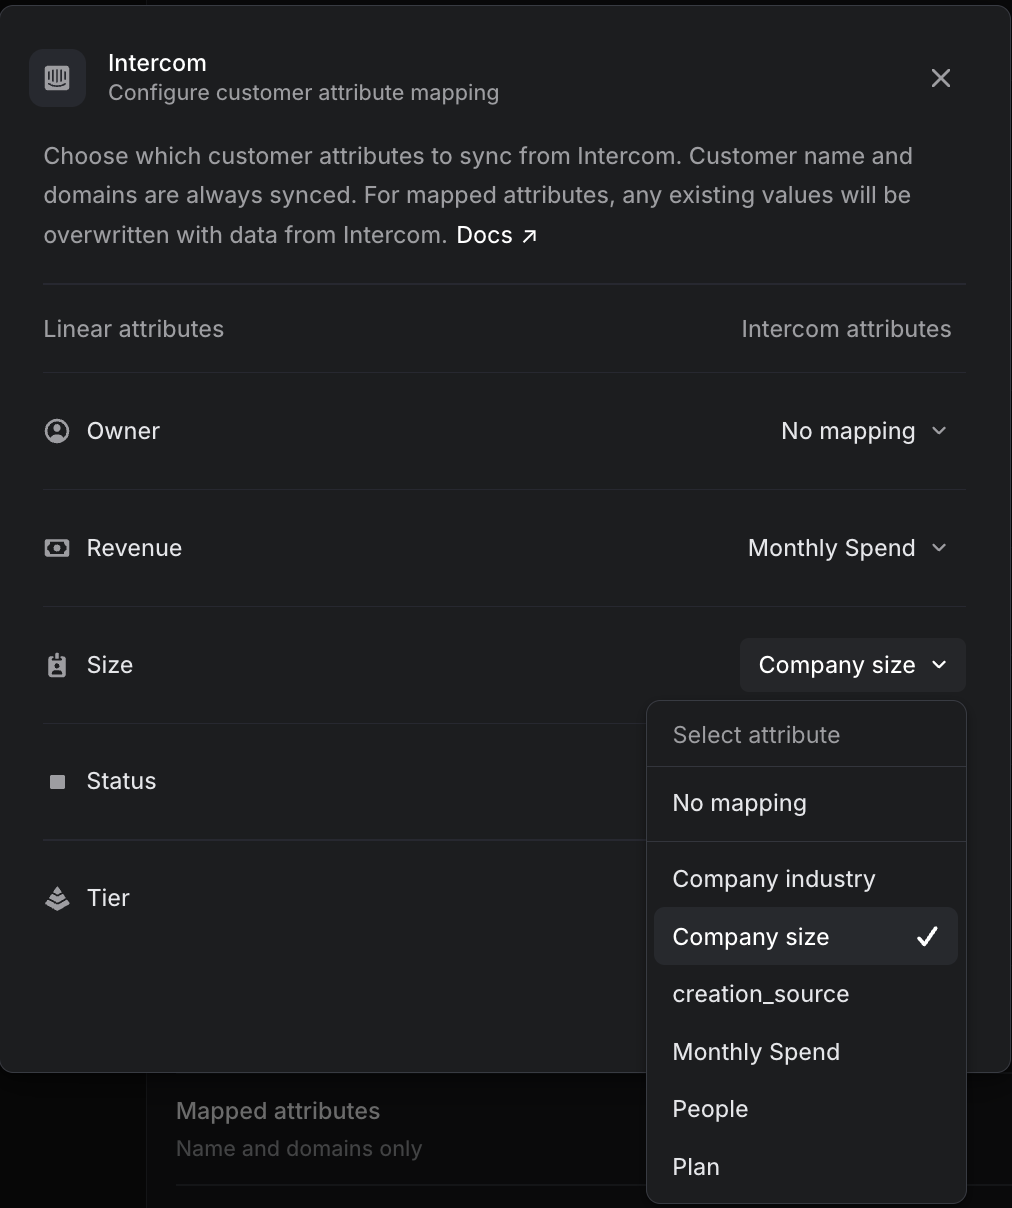
## Build customer views
All customer data brought into Linear can be used to create [custom views](https://linear.app/docs/custom-views) for both issues and projects to surface the impact of your work on your customers. For example, create a view of issues with requests from Enterprise customers ("Tier" property from Intercom), where each issue has at least 20 requests. Ordering this view by customer count surfaces the most highly requested issues to the top. Triangle icons indicating requests marked important surface urgent needs. Consider consulting this view when planning upcoming cycles to ensure what you ship aligns with the needs of the users.
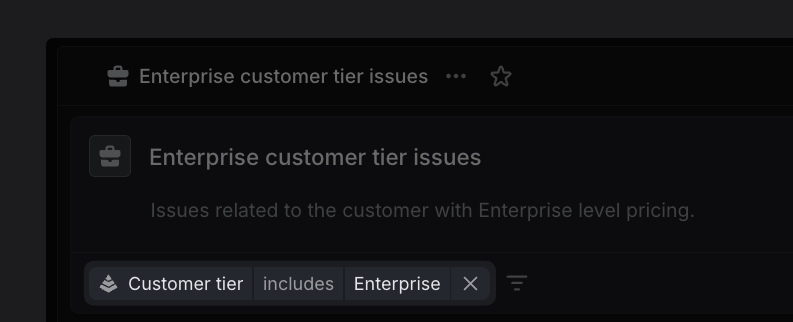
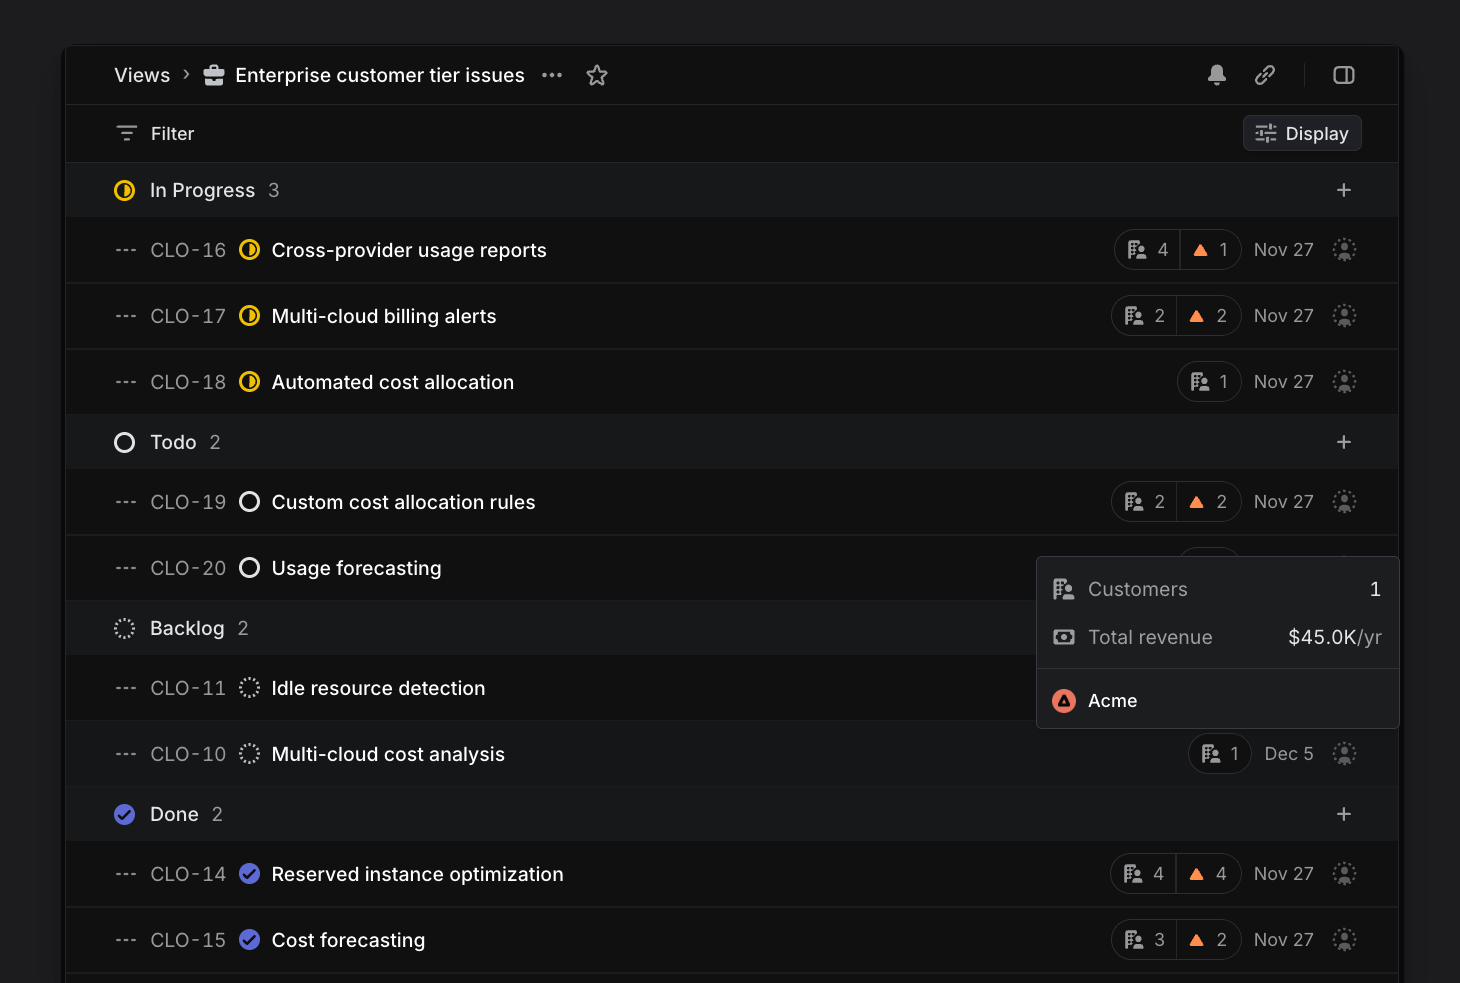
### Notifications
You'll receive Inbox notifications automatically when new requests are added to issues you subscribe to so you're always in the loop. Optionally, configure additional notification styles for new requests [here](https://linear.app/settings/account/notifications).
[Subscribing to custom views](https://linear.app/docs/custom-views#view-subscriptions) is the best option for more targeted alerts. For example, you might wish to stay aware of issues commonly raised by customers who churn. To track that, create a custom view defined by Customer status includes _Churned_, and ordering the issues by customer revenue. Click the bell icon to be alerted when a new issue is added to the view, or configure notifications to a Slack channel for greater visibility.
You can also open a specific customer page (`O ,_then_, Q`) and under the bell icon subscribe to get notified when a request is added, marked important, completed or cancelled.
### Export Customer Requests
Should you need to export your customer requests from a particular customer, issue, or project, an option exists in the `Cmd`/`Ctrl` + `K` menu. Search the command menu and select _Export customer requests as CSV_ to take that action.
## FAQ
Which plans support Customer Requests?
Customer Requests is available on all currently offered plans: (Free, Basic, Business, and Enterprise.) You'll only be able to create requests from integrations available on your plan.
Create requests | Free | Business | Enterprise
--- | --- | --- | ---
Manually | ✔ | ✔ | ✔
From Slack | ✔ | ✔ | ✔
From Asks | | ✔ | ✔
From Intercom, Zendesk, and Front | | ✔ | ✔
From Salesforce Service Cloud | | | Coming soon
Can I manage customer requests through the API?
The following actions are available through our GraphQL [API](https://studio.apollographql.com/public/Linear-API/variant/current/schema/reference?query=customers):
* Create/Edit/Delete customers
* Create/Edit/Delete customer request
* Create/Edit/Delete customer tiers
* Create/Edit/Delete customer statuses
* Query and filter customers
* Query and filter requests by issue/projects/priority/customer
Can I merge duplicate customers?
Linear will prevent duplicate customers from being created in most cases. If you notice a duplicate instance, go to the customer page that you want to merge and select the _Merge with_ option from the dropdown menu.
How do I block domains from creating customers?
In [Settings > Customer requests](https://linear.app/settings/customers), exclude specific email addresses or domains to prevent them from creating a customer.
For example, add a domain to _Excluded domains and emails_ to prevent your own company from creating a customer. Internally, we've excluded `linear.app` here to prevent `Linear` from displaying as a customer when we create issues via integrations.
How do I avoid domains being associated with a customer?
You can prevent specific domains from ever being associated with a customer from [Settings > Customer requests](https://linear.app/settings/customers) and adding a domain or email under Excluded domains and emails.
Common providers like Gmail, Outlook etc. are automatically excluded. The full list of generic domains from common providers can be viewed here:
List of domains
• [10mail.org](http://10mail.org/)
• [10mail.xyz](http://10mail.xyz/)
• [163.com](http://163.com/)
• [alice.it](http://alice.it/)
• [aol.com](http://aol.com/)
• [appleid.com](http://appleid.com/)
• [att.net](http://att.net/)
• [bigpond.com](http://bigpond.com/)
• [comcast.net](http://comcast.net/)
• [cox.net](http://cox.net/)
• [dropmail.me](http://dropmail.me/)
• [duck.com](http://duck.com/)
• [emlhub.com](http://emlhub.com/)
• [emlpro.com](http://emlpro.com/)
• [emltmp.com](http://emltmp.com/)
• [facebook.com](http://facebook.com/)
• [fastmail.com](http://fastmail.com/)
• [flymail.tk](http://flymail.tk/)
• [free.fr](http://free.fr/)
• [freeml.net](http://freeml.net/)
• [gmail.com](http://gmail.com/)
• [gmx.de](http://gmx.de/)
• [googlemail.com](http://googlemail.com/)
• [hey.com](http://hey.com/)
• [hotmail.co.uk](http://hotmail.co.uk/)
• [hotmail.com](http://hotmail.com/)
• [hotmail.fr](http://hotmail.fr/)
• [hotmail.it](http://hotmail.it/)
• [icloud.com](http://icloud.com/)
• [ig.com.br](http://ig.com.br/)
• [laposte.net](http://laposte.net/)
• laste.ml
• [libero.it](http://libero.it/)
• [live.co.uk](http://live.co.uk/)
• [live.com](http://live.com/)
• [live.fr](http://live.fr/)
• [live.nl](http://live.nl/)
• [mac.com](http://mac.com/)
• [mail.ru](http://mail.ru/)
• [me.com](http://me.com/)
• [minimail.gq](http://minimail.gq/)
• [msn.com](http://msn.com/)
• [neut.fr](http://neut.fr/)
• [outlook.com](http://outlook.com/)
• [outlook.de](http://outlook.de/)
• [pm.me](http://pm.me/)
• [privaterelay.appleid.com](http://privaterelay.appleid.com/)
• [proton.me](http://proton.me/)
• [protonmail.com](http://protonmail.com/)
• [qq.com](http://qq.com/)
• [rocketmail.com](http://rocketmail.com/)
• [sbcglobal.net](http://sbcglobal.net/)
• [sfr.fr](http://sfr.fr/)
• [simplelogin.com](http://simplelogin.com/)
• spymail.one
• [terra.com.br](http://terra.com.br/)
• [verizon.net](http://verizon.net/)
• [web.de](http://web.de/)
• [yahoo.com](http://yahoo.com/)
• [yahoo.de](http://yahoo.de/)
• [yahoo.es](http://yahoo.es/)
• [yahoo.it](http://yahoo.it/)
• [yandex.ru](http://yandex.ru/)
• [ymail.com](http://ymail.com/)
• [yomail.info](http://yomail.info/)
• [yopmail.com](http://yopmail.com/)
How does visibility of Customer Requests work across roles?
Admins and Members will be able to see Customers Requests in Linear and in Slack in the dropdown menus on Asks and our Slack integration.
Guests see nothing relating to Customer Requests, including views that use Customer-related filters.
Users in your Slack workspace without Linear accounts will not see your customer list when using Asks, though we'll still match the Ask to a customer where appropriate based on the user domain of the original message's sender.
Can I stop Intercom, Zendesk, Front from creating new customers or customer requests?
In the integration settings for your support tool, you can toggle the setting off.

How often is data synced from an external source?
Intercom is synced in real time and all other integration sources are synced every 12 hours.
---
# Source: https://linear.app/docs/cycle-graph.md
# Cycle graph
The graph displays the progress you've made in your cycle.
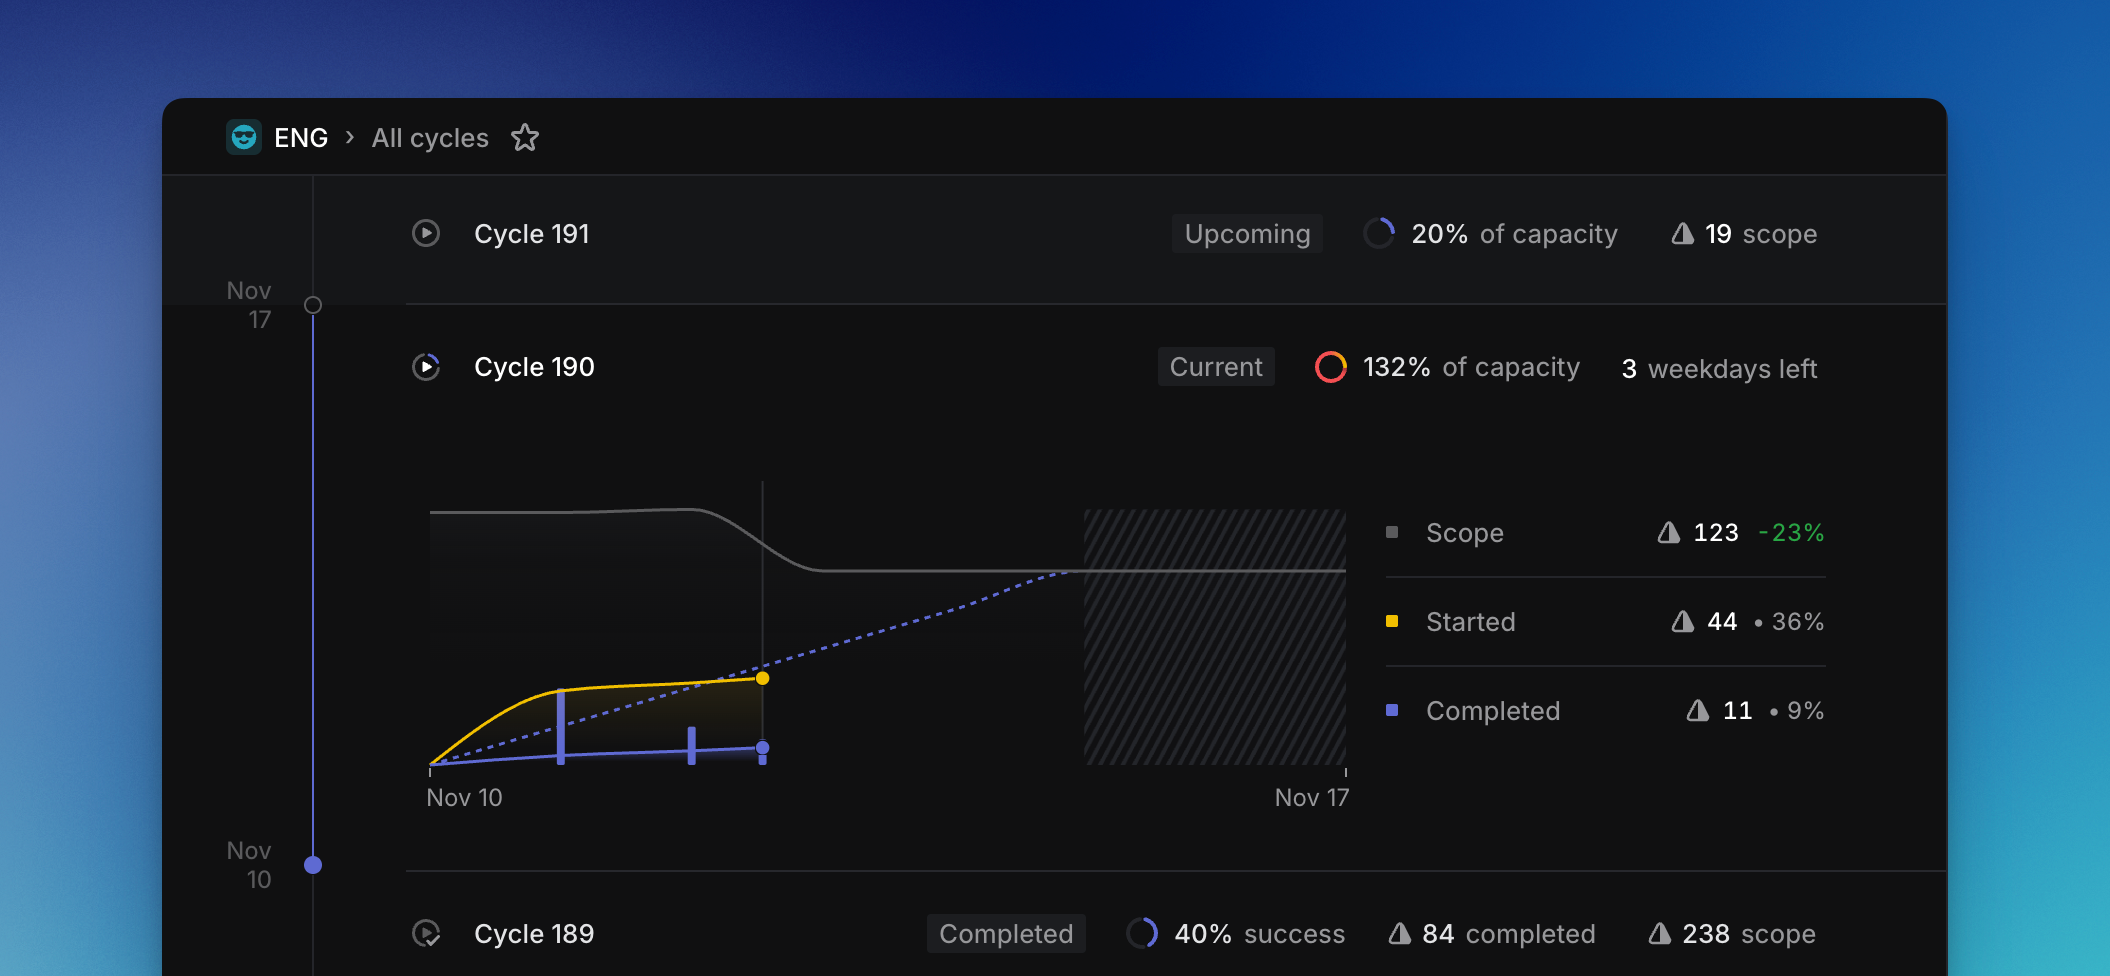
## Overview
Cycle graphs autogenerate once a cycle has begun and update every hour. When viewing a specific cycle, open the cycle sidebar with `Cmd/Ctrl` `I` to view the graph.
From the Cycles view, you'll also see the graph belonging to the current cycle.
## How to read a cycle graph
The **gray line** displays the total scope of your cycle.
The **blue dotted line** represents the "target"—an even distribution of the total estimated points within the cycle over the remaining days in the cycle. Note that it flattens over weekends due to the expectation people do not work during weekend. If your progress stays above that line, it is expected you will complete everything within the cycle.
The **yellow line** depicts the number of issues started.
The **solid blue line** shows how many issues have been completed.
The **blue bars** also represent completed issues. This can be useful to more easily compare relative issue completions over time, especially in cases when completed and started lines travel nearly identical paths.
## Understanding scope
In general, scope will display the sum of estimates applied to an issue. This number can change based on the options selected in [Settings > Team > General > Estimates](https://linear.app/settings/teams), where you have the option to **Count un-estimated issues** so issues without estimates will be added to the total scope.
## Assign completed issues to previous cycles
We allow for completed issues to be added to previous cycles to account for issues that were completed in the previous cycle, but wasn't marked as completed before the cycle closed.
## FAQ
How is Cycle Success Calculated?
The overall Cycle Success is calculated based on the percentage of issues completed or started during a cycle. Completed issues are fully counted, while started issues are counted as 25% done.
For an example cycle with 10 issues, where 5 are completed, 4 are started and 1 is untouched, you will see 60% cycle success (50% for the completed issues, 10% for the 4 started issues)
---
# Source: https://linear.app/docs/dashboards.md
# Dashboards
Dashboards let you bring together insights from across teams and projects onto a single page. Use them to track key metrics, monitor trends, and explore data in one place.
> [!NOTE]
> Available to workspaces on our [Enterprise](https://linear.app/pricing) plans.
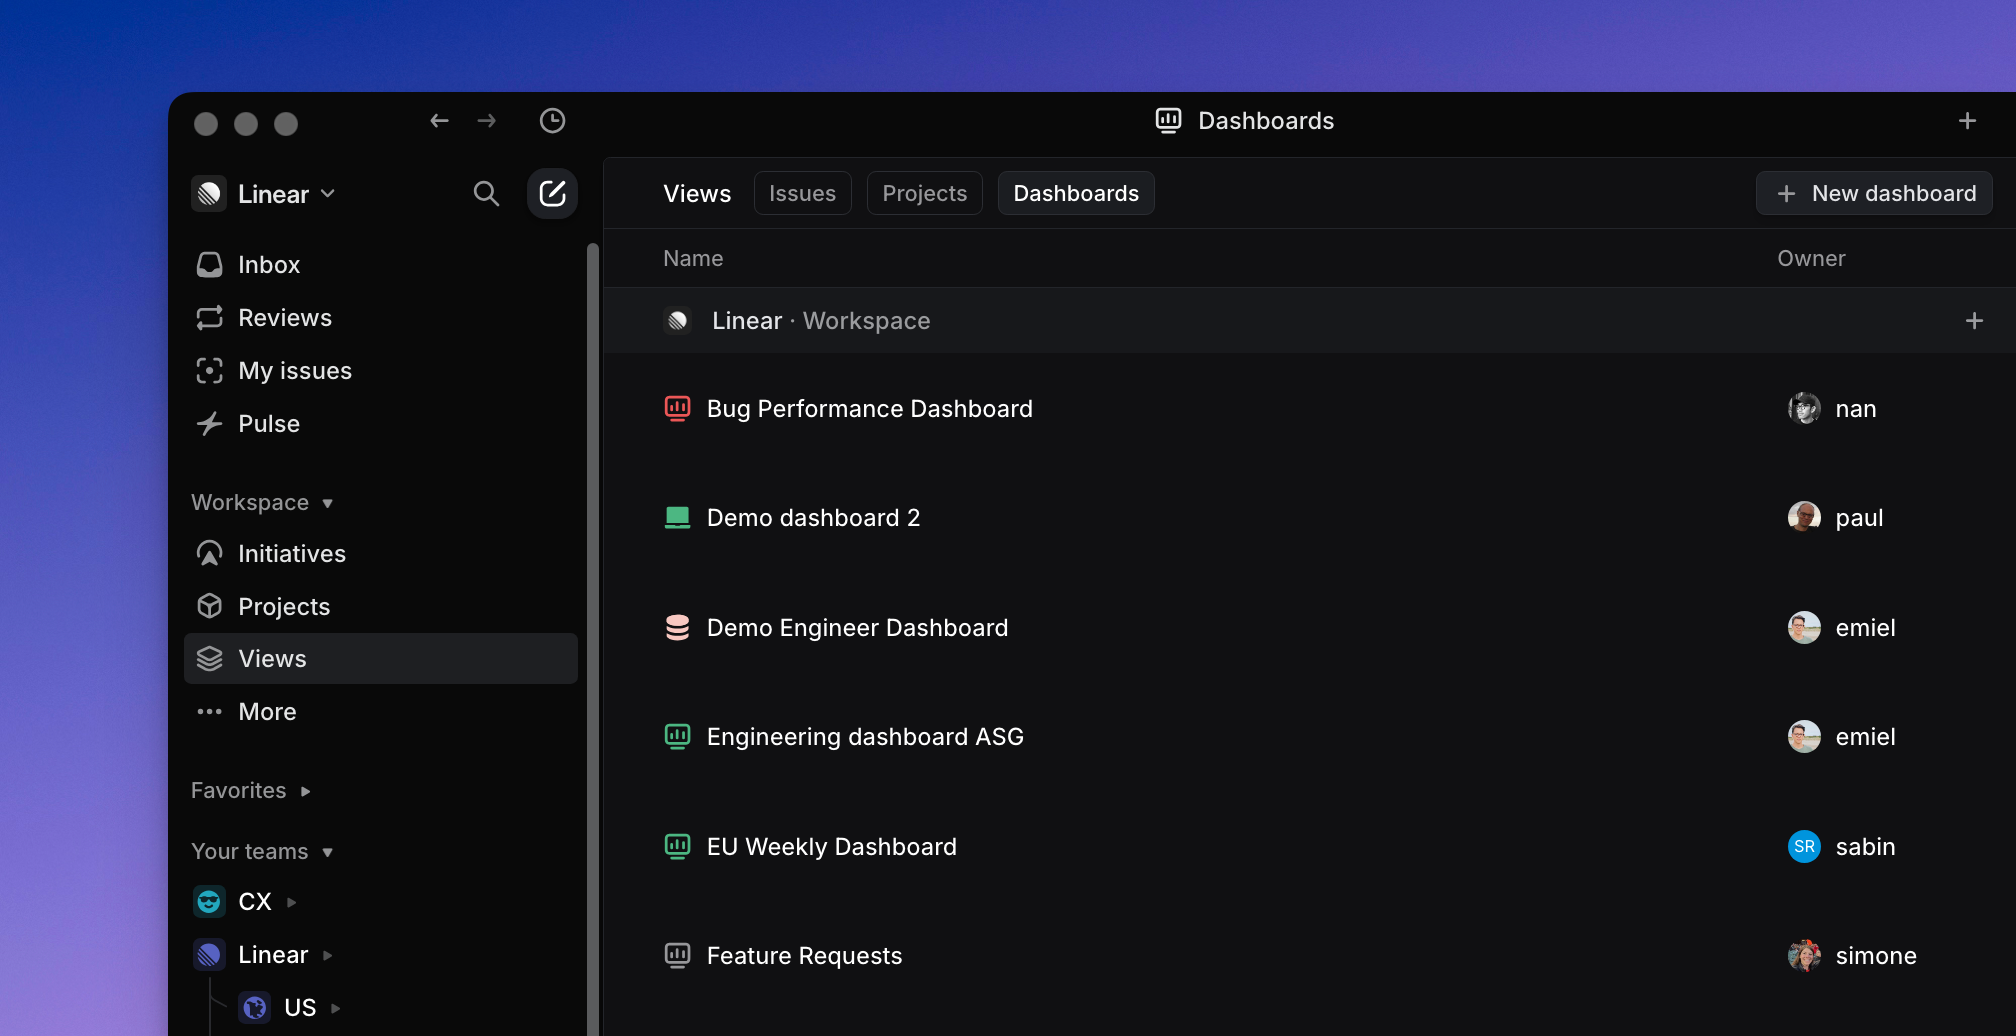
## Overview
Dashboards help teams stay aligned by surfacing key data in one centralized view.
You can use dashboards to:
* Track metrics across multiple teams and projects
* Combine charts, metric blocks, and tables in a single layout
* Filter each insight independently to customize what’s shown
* Explore data directly by clicking into charts and metrics
## Creating dashboards
Dashboards can be created in multiple ways:
* From the **Dashboards tab** in the workspace Views page or a team’s Views page: Navigate to the Views page for your workspace or a team, select the Dashboards tab, and choose “New dashboard”.
* Directly from an existing insight: When viewing an Insight inside a View, open its context menu and select “Add to dashboard” to create a new dashboard or add it to an existing one.
Insights can be included on multiple dashboards.
## Using dashboards
Each insight added to a dashboard can be:
* Displayed as a **chart**, **table**, or **single metric**
* **Individually filtered** to customize the data shown
* Explored directly — click into any slice or metric to view the underlying issues without leaving the dashboard
This makes dashboards useful both for high-level overviews and deeper analysis, without needing to navigate away from the page. The formats supported on dashboards — charts, metric blocks, and tables — are the same as those available in [Insights](https://linear.app/docs/insights#create-insights).
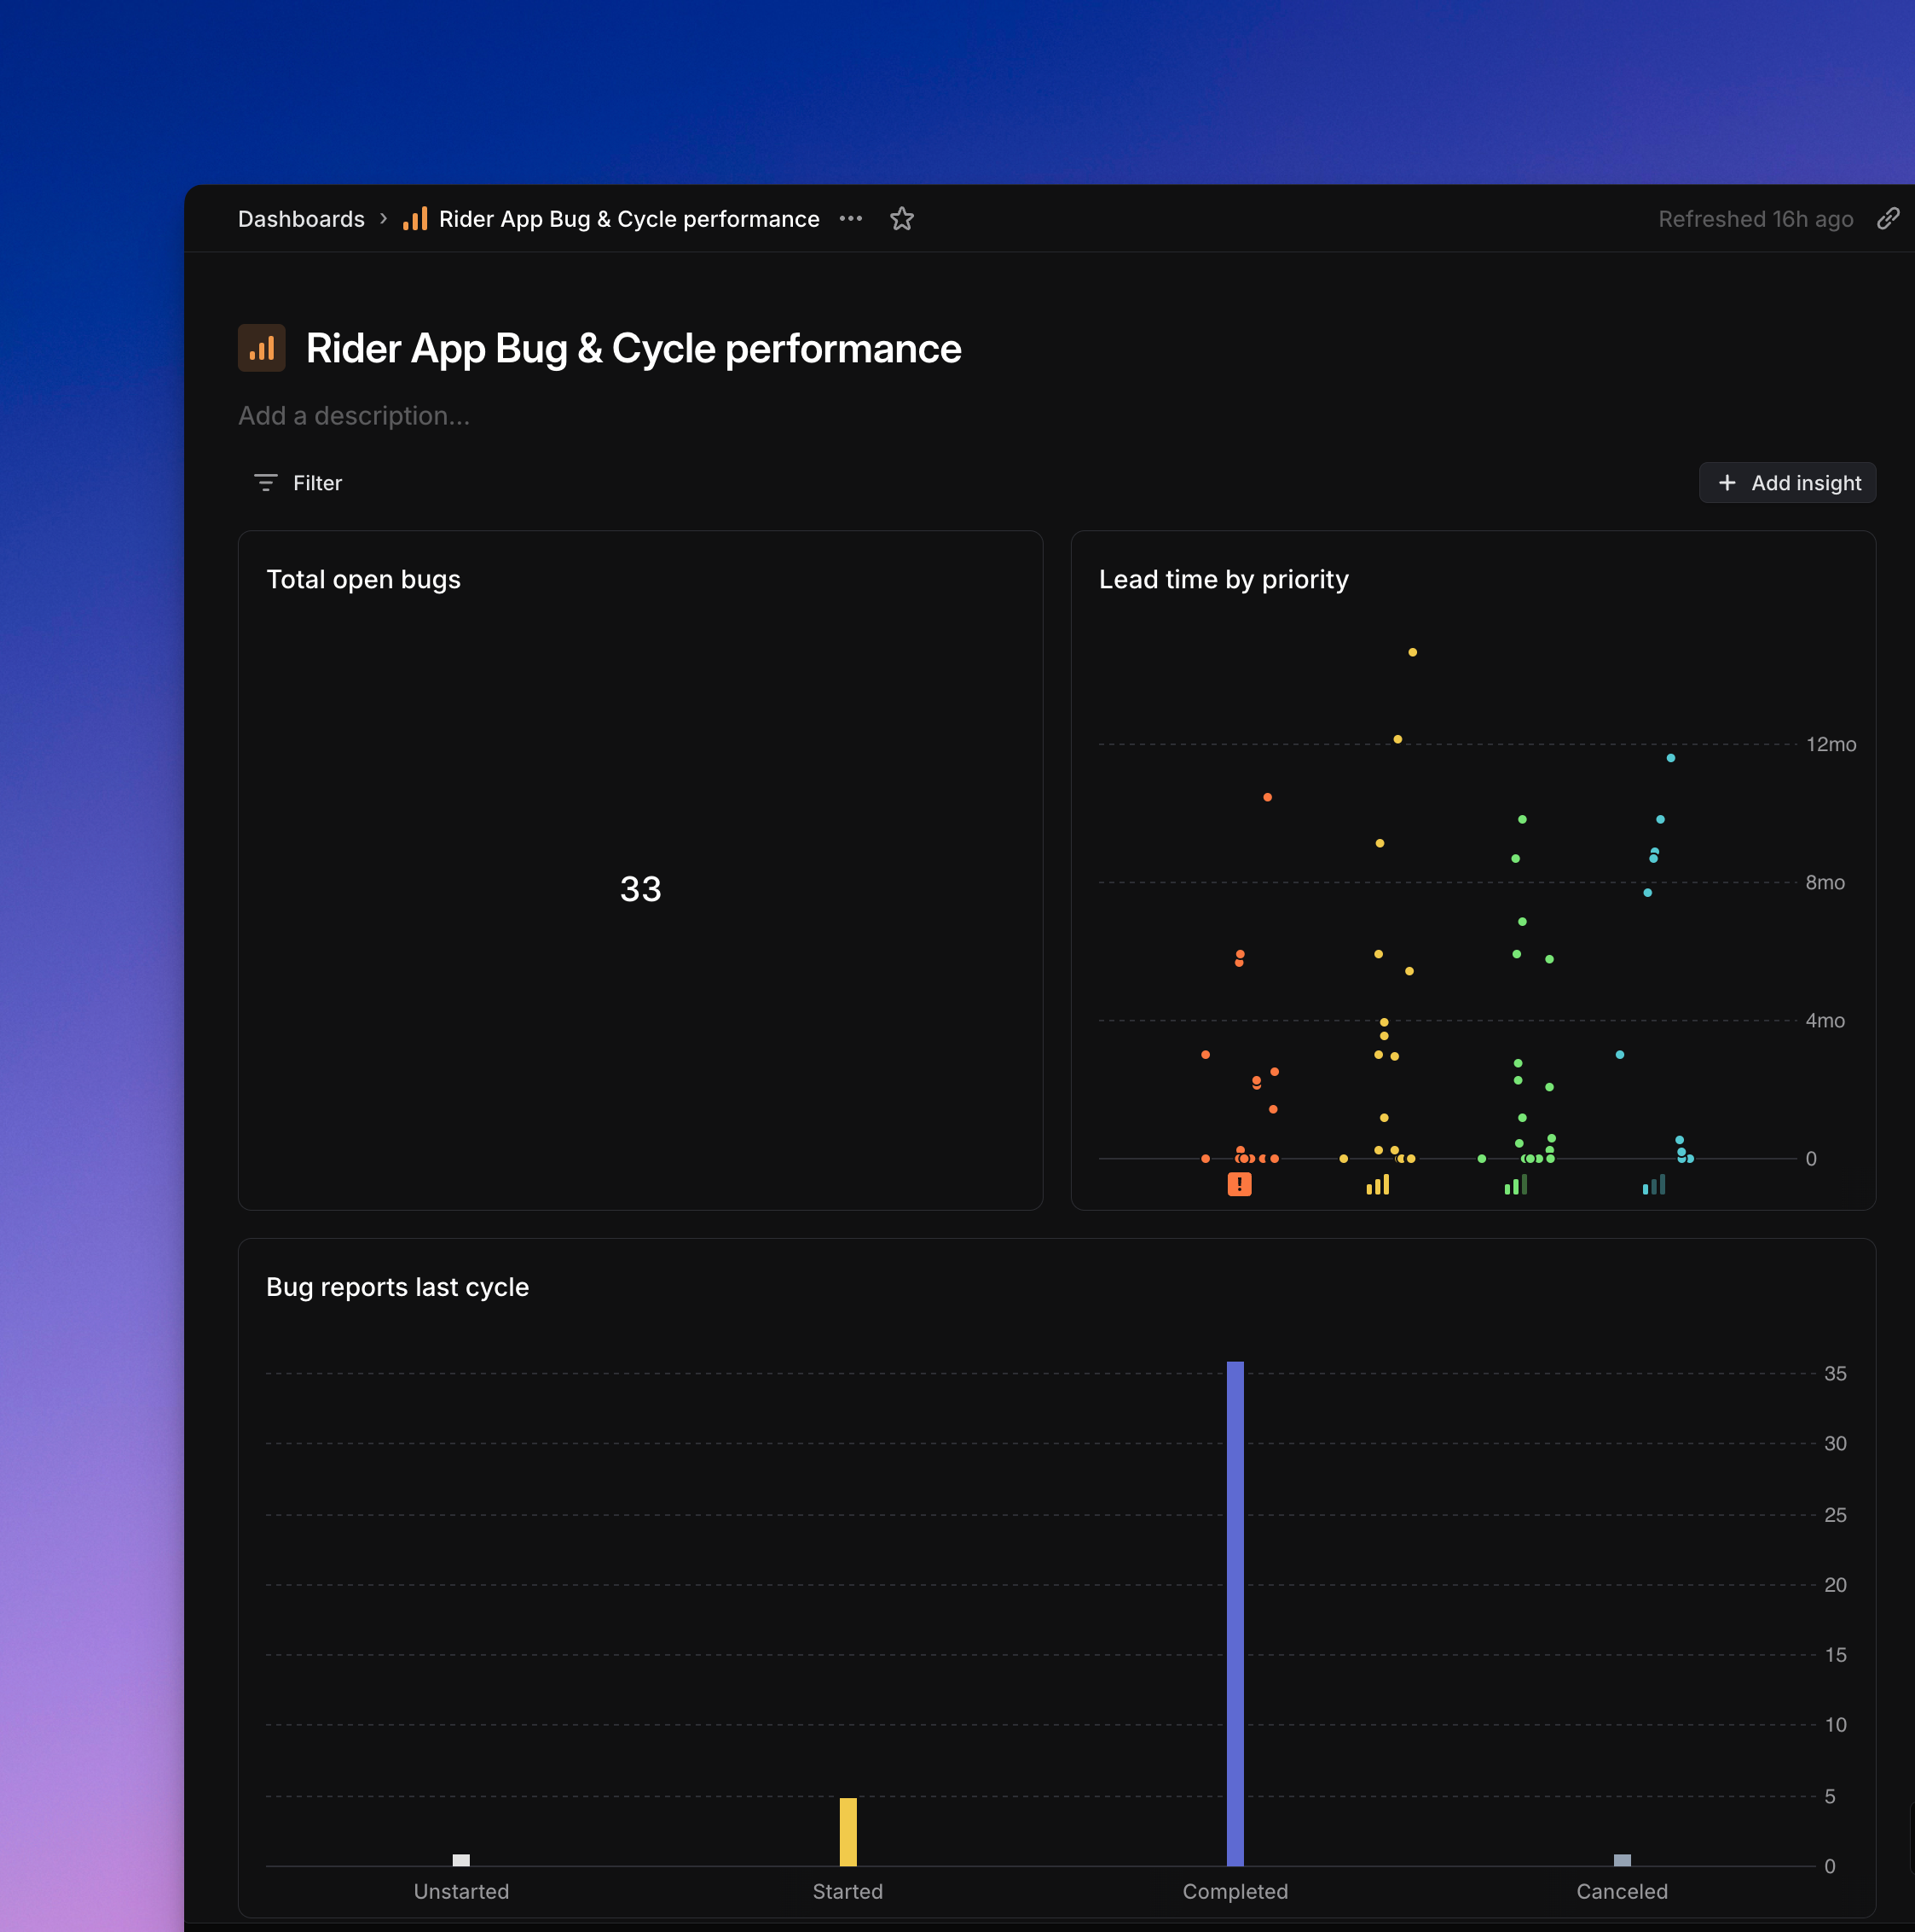
## Filtering dashboards
Dashboards support flexible filtering to help you tailor what data is shown:
* **Dashboard-level filters**: When you create or edit a dashboard, you can set filters that apply globally to all insights in that dashboard. For example, if you filter for issues created by the “Design” team, every insight on that dashboard will reflect that filter automatically. You can configure multiple filters, and once the dashboard is saved, you can optionally hide these dashboard-level filters from view using the “saved filters” button to reduce visual clutter; this does not affect whether they apply.
* **Insight-level filters**: In addition to dashboard-level filters, individual insights on a dashboard can have their own filters. These filters apply _only_ to that specific insight and can further refine the data it shows. For example, one insight might add a filter for a particular label or project while another shows all issues.
* **Filters when adding existing insights**: If you add an existing insight (e.g., from a View) to a dashboard, that insight will automatically inherit the dashboard-level filters. This means the insight may look different when viewed inside the dashboard than when viewed in its original View, since it will reflect both its own filters and any global filters set at the dashboard level.
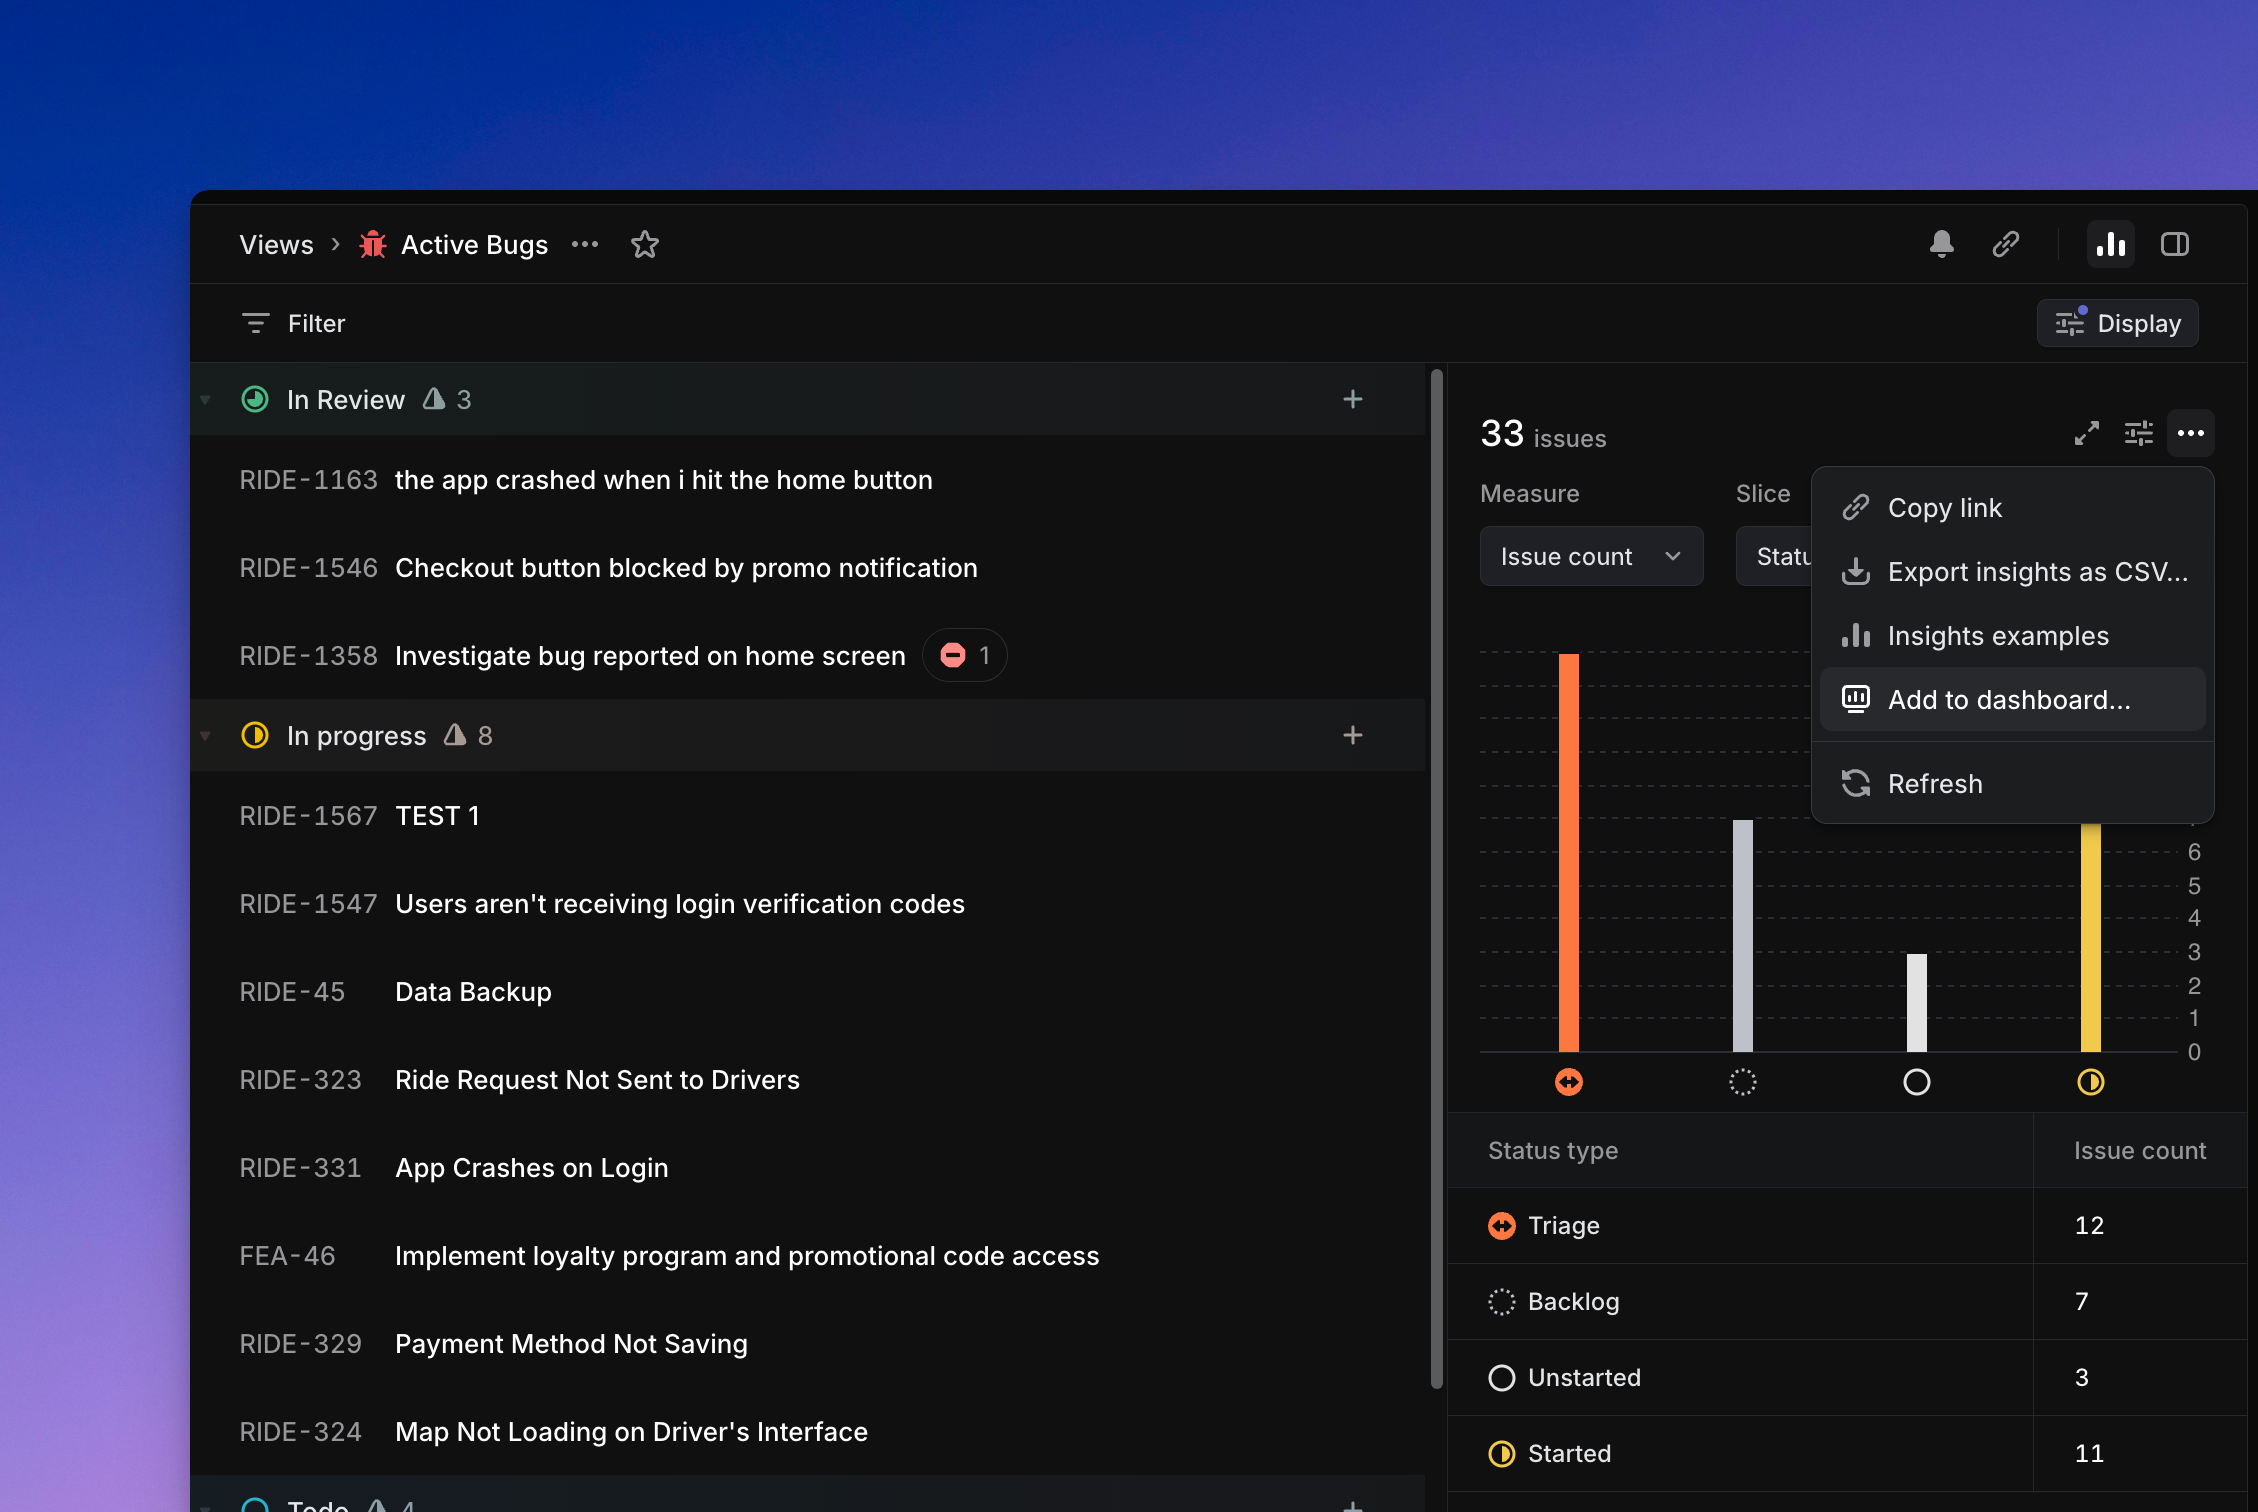
## Managing dashboards
Each dashboard has an owner, which is typically the person who created it. Ownership can be changed at any time from the context menu beside the dashboard name.
You can also move a dashboard to another team, the workspace, or your personal dashboards using the “Move to…” option in its context menu. When a dashboard is moved to Personal, it will appear in the Dashboards tab on the workspace-level Views page, under a separate “Personal dashboards” heading. These dashboards remain visible only to you.
To ensure you’re viewing the most recent data within a dashboard, use the **Refresh data** option in the context menu.
### Private teams
Dashboards have limited support for private teams. By default, workspace-level dashboards do not include data from private teams. To include insights from a private team, a dashboard must either be created inside that team or moved to your personal dashboards.
---
# Source: https://linear.app/docs/default-team-pages.md
# Team pages
Linear teams contain default views to organize issues and projects.

## Overview
Teams on your sidebar have the following pages:
* [Triage](https://linear.app/docs/triage) (when enabled)
* Issues
* Cycles (when enabled)
* Current
* Upcoming
* Projects
* Views
Archived issues can be found under the `...` menu when hovering over a Team name or by using the keyboard shortcut `g` followed by `x`.
You can access views from the sidebar or with keyboard shortcuts.
### Keyboard
`G` then `A` to go to active issues
`G` then `B` to go to backlog
`G` then `E` to go to all issues
`G` then `X` to go to archived issues
`G` then `C` to go to all cycles view
`G` then `V` for current cycle
`G` then `W` for upcoming cycle
`Cmd/Ctrl` `B` to switch to board layout (or back to list)
`O` then `T` to switch between teams, then use shortcuts to get to that team's views
### Mouse
Go to default team views from the sidebar
### Command menu
`view name` to go to that view
`open team` or `Ctrl` `Shift` `1-9` to go to a different team, then access that team's views
## Issues
The Issues page shows all issues across the selected team that are _not archived or deleted._ This includes completed and canceled issues. There are default views within this page for Active issues and Backlog issues.
### Active
Active shows all active issues on your team, which are the issues under _Unstarted_ or _Started_ categories in your team's workflow. If you're using our default states, these would include _To Do_ and _In Progress_ but not _Backlog_, _Completed_, or _Canceled_ issues. Navigate to your team's active issues by hitting `G` then `A`.
### Backlog
This includes issues in _backlog_, which is our default status for newly created unstarted issues. Navigate to your team's backlog issues by hitting `G` then `B`.
One backlog status exists by default but you can add more statuses in this group through team settings (e.g. Icebox). Any issues here will be updated to active (_To do)_ status if they're moved to a cycle. You can also enable a cycle setting to automate the reverse: if issues are moved out of a cycle, they'll move to the backlog. See cycles under team settings for more information.
### Archive
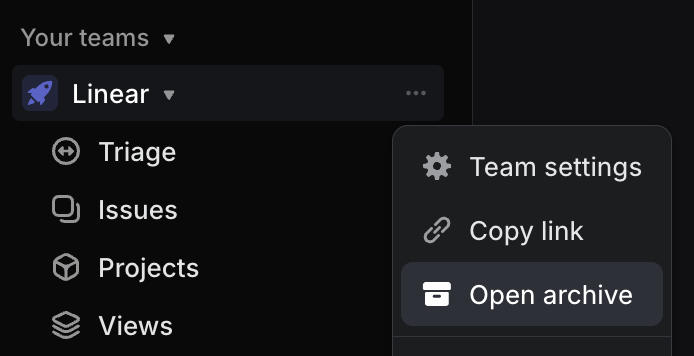
Your team's archive page contains all archived issues, projects, and cycles for the team as well as recently deleted items. Archived items are kept for historical reference and can be restored anytime using the `#` shortcut. Issue links will still work even if the issue has been archived or is awaiting deletion but issues and projects must be unarchived in order to make changes to them. Deleted items are permanently removed 14 days after deletion.

Navigate to your team's archives page by clicking on the three dots next to your team's name in the sidebar and selecting **Open archives...** or use the keyboard shortcut `G` then `X`.
## Cycles
The Cycles page displays current, future, and past (unarchived) cycles and and shows some high level overview for you to compare between cycles. Click into any cycle here to view cycle issues and graphs. Past cycles will be archived according to the settings in auto-archive.
_Current_ cycle opens the current cycle and _Upcoming_ opens the next cycle.
## Projects
Projects shows all projects what are assigned to the team.
## Views
See existing custom views created for your team or workspace. You can also create new issue or project views from here.
---
# Source: https://linear.app/docs/delete-archive-issues.md
# Delete and archive issues
Linear archives issues automatically to keep your workspace uncluttered and easy to search.

## Overview
Linear offers features that helps to manage backlog and stale items in your workspace to streamline your focus on what's current. We introduce our auto-close and auto-archive feature, and talk about deleted issues and the team archives.
## Delete issues
Delete issues with the shortcut `Cmd/Ctrl` `delete`, from an issue's contextual menu, or use command bar `Cmd` `K` and select **Delete issue**.
If you accidentally delete an issue, the fastest way to restore it is to use `Cmd/Ctrl` `Z`. If that isn't an option (e.g. it wasn't the last action you took), go to your team's archives > _Recently deleted issues_ and use the `#` shortcut to restore it. Recently deleted issues are stored in the archives for 30 days, after which they'll be permanently removed from your workspace. It is not possible to restore deleted issues after they have been permanently removed.
## Auto-close

Linear offers an option to close issues that have not been updated after a certain time period. This can be configured in _Team settings > Workflows_. When auto-closed, an issue is marked with one of the Closed statuses, we publish a history item to its Activity feed, and notify subscribers. You can re-open an auto-closed issue anytime by changing its status.
Issues will not be auto-closed until the associated cycle and project are completed.
## Auto-archive
Archiving happens automatically with no option to manually archive items.

You can adjust the auto-archive time period, after which closed issues are auto-archived in _Team Settings > Issue statuses & automations_. Changes made will apply within 24 hours, so if you have issues that have been completed for 2 months and change to a 1 month auto-archive schedule, you can expect to see those archive within the next day.
### Issues are not archiving
* The parent issue is not closed
* Sub-issues are not all closed
* Sub-issues in another project is not closed
* The issue's project is not yet available to archive.
If a completed issue is blocked from auto-archiving by a project or another issue, it will still need to wait the necessary auto-archive time. For example, with a 1 month auto-archive period in place, an issue that's been done for 3 months in an active project will archive 1 month after the project has been completed.
### Projects are not archiving
Scenarios that prevent a project from archiving:
* The project status is not closed (completed or cancelled category)
* Updates/changes have been made (e.g. renaming a project)
* All issues are not yet available to archive. A project's issues has to be available to archive in order for the project to archive. This helps to prevent missing data when looking at a project's graph or other calculations.
## The archives
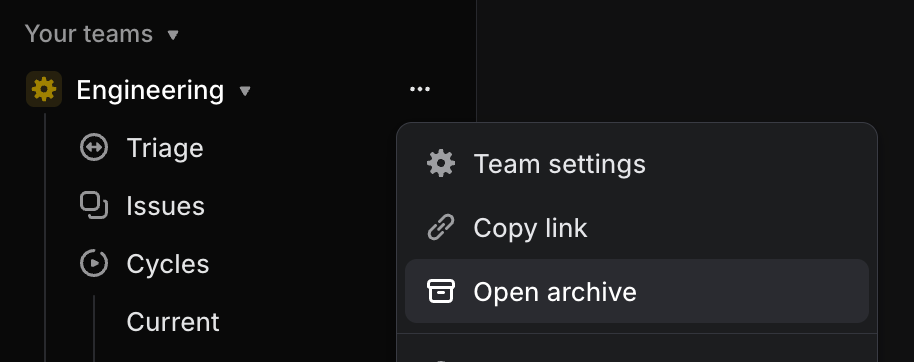
Each team has its own archives page where you will find archived or deleted issues, initiatives, cycles, projects, and documents. Access it with the shortcut `G` then `X` or find it in the sidebar under the three dot menu beside each team name. To keep the app speedy, archived issues are loaded on demand rather than stored in the client, so you may find the issues load a little slower on this page than elsewhere in the app.
### Restore issues
Restore issues, projects, or initiatives from the archive in order to edit them.
---
# Source: https://linear.app/developers/deprecations.md
# Deprecations
Linear's GraphQL API doesn’t have versioning like many REST APIs due to the more constantly evolving nature of GraphQL.
As the product evolves, we need to evolve the API as well, but we take breaking changes and deprecations seriously as we know developers build applications and integrations for the API. If there's a noticeable breaking change in the API, we'll proactively reach out to developers that use that part of the API and give you plenty of time to make changes. In other cases some functionality will be removed and a non-functioning stub will be left in the API to prevent breakage in queries and mutations.
We utilize the `@deprecated` directive to annotate deprecation warnings in the schema. In addition, changes to the API are listed with `[API]` prefix in the [Linear changelog](https://linear.app/changelog).
---
# Source: https://linear.app/docs/discord.md
# Discord
Combine Linear with Discord keep everyone in sync.
## Overview
Create issues and search for them from the Discord app. The wrap command will post a summary of your day's work in the channel.
### Discord
`/linear issue` to create an issue in Linear
`/linear search` to search and then post an issue
`/linear wrap` to share a summary of your issue updates in the last 24 hours
## Configure
Connect to your Discord server to create issues from Discord messages, search issues, and use the wrap command.
### Integration setup
A Linear admin must first enable the integration for the workspace. One they have, you can go to [Settings > Features > Integrations > Discord](https://linear.app/settings/integrations/discord) to connect your Discord account to Linear. Every Linear user must individually link their account in order to use the Linear integration in Discord.
Once connected, anyone with a Linear account will be able to do the following:
* Create Linear issues from Discord with the `/linear issue` command.
* Search and display Linear issues in Discord
* Post a wrap, a summary of your days work, in your Discord channel.
## Basics
### Create issues
Type the `/linear issue` command into any channel to create a Linear issue. You will need to fill in the issue title and team and you will also have the option to add a description, status, assignee and project.
### Search issues
Type the `/linear search` command into any channel to search Linear issues on your workspace. The application uses the same search as the app, so you can search for issues by `issue ID` or words in the title, description, or comments. Once you select the relevant issue and click enter, this will be posted to the channel for all members to see.
### Post your daily wrap
Type the `/linear wrap` command into any channel and click enter to post a summary of any issues you started or completed in the past day.
### Link Discord messages in Linear issues
#### Mouse
* Click on contextual menu icon `…` to the top right of the issue
* Click _Add link_
* Click _Discord message_
#### Command menu
`discord` when in issue view, then select _Link Discord message…_
### Unlink issues
You can remove a Discord link from the Linear issue by right-clicking on the issue attachment.
### Filter for Discord links
From any Linear view, you can filter by issues linked to Discord messages. Click `F` then select `Links` and then select `Discord`.
## FAQ
Why does the Discord integration need the "Read Message History" permission?
We need it in order to fetch individual message data when linking a Discord message to an issue with the "Link Discord message" action.
Will you support project update notifications for Discord?
It's something we'd like to support in the future, but no timeline on if/when that might be yet. If you'd like to see it, let us know at [support@linear.app](mailto:support@linear.app) as we track demand.
---
# Source: https://linear.app/docs/display-options.md
# Display options
Display options let you group and order issues and projects to determine which information appears in your view.
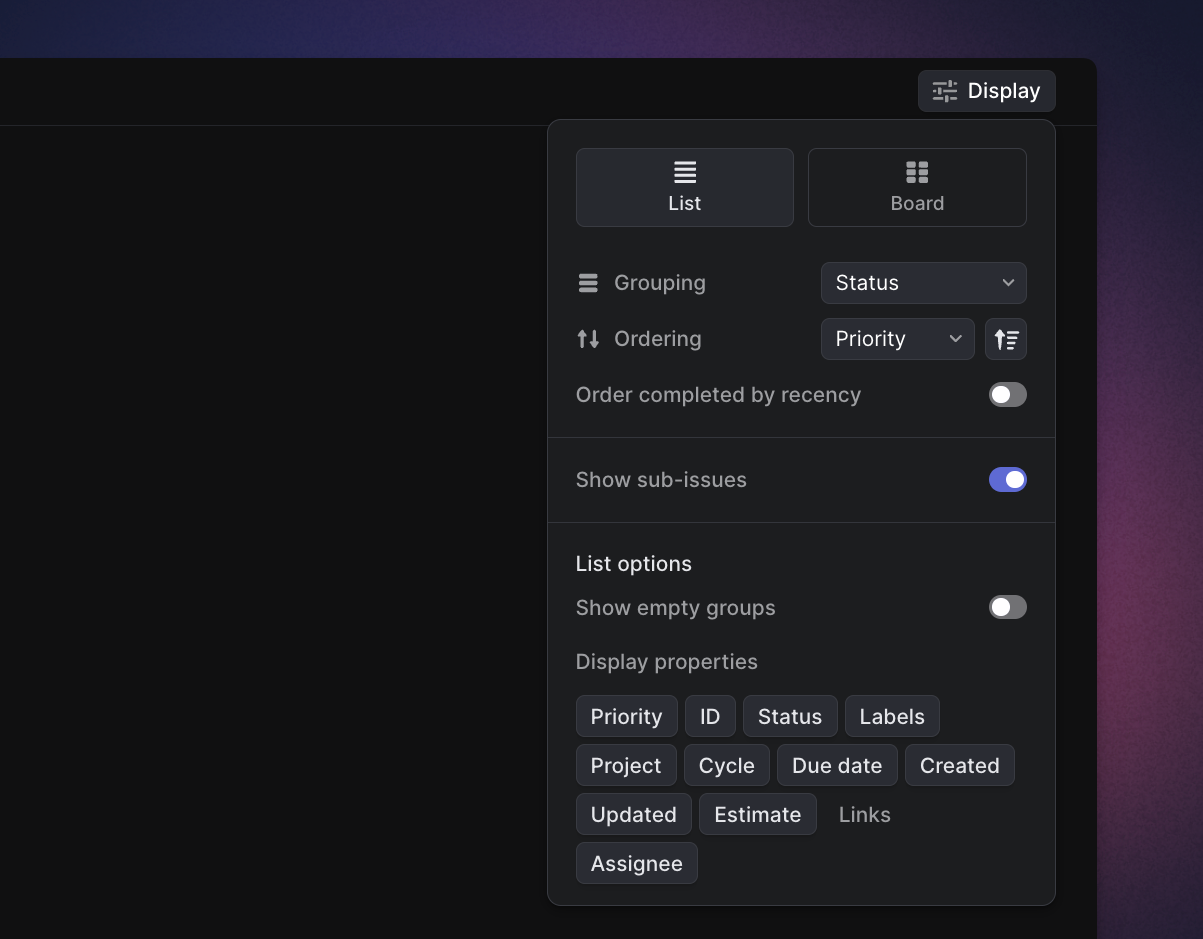
## Overview
Display options appear on every view in Linear. On issue views, they allow you to order and group issues in various ways, switch between board and list layouts, and choose which information is displayed. On project and initiative views, they control the layout between timeline and list views as well the grouping and ordering of information. Display options can be saved as personal preferences or as the default display options on that page for your workspace.
### Keyboard
`Shift` `V` to open display options
`Cmd/Ctrl` `B` to toggle between list and board on issue views
### Mouse
* Select the _Display options_ button that shows up on the top right corner of a view. If the view does not have Display options, it is not supported for that view.
* To update for your view only, simply modify the display options (do _not_ Set as default).
* Press Set as default to save the current display options as the default for other members in your workspace. It will be the view they see when they first open it, but they can always apply their own preferences on top of it.
* Press _Reset to default_ to revert back to the default (Saved) display options.
### Command menu
"Show display options"
## Basics
### Saving display options
To update your view only, customize the view and then navigate away from the options menu by clicking anywhere in the app. Your selections will persist even if you navigate away from the current view.
To update the display options on that page for your whole workspace, press _Set as default_ after customizing the view. This will apply the configuration to every other user in your workspace.
If you customize a view's display options and wish to return to the default configuration, Click _Reset to default._
### Available display options
Every view in Linear is slightly different and will display different display options. _Triage_ and _Inbox_ only let you update the ordering and not grouping properties. We'll work to expand display options over time.
### Issue view
#### Layout
If a board is available for your view, you'll see the option and can toggle between lists and boards. `Cmd/Ctrl` `B` will also toggle the layout.
#### Grouping
Grouping is allowed in most list views and lets you group issues by Status, Assignee, Project, Priority, Cycle or Focus*. No grouping removes all categorization and is especially useful when applying ordering and filters. Grouping settings will affect whether you can order issues manually.
Beside each group in board or list view, you will see either the total number of issues in the group or the total estimate of all issues in the group. You can click this to toggle between either option.
*Focus is available in the _My Issue_s view. Focus is a unique grouping that attempts to organize issues assigned to you in order of what you'd want to work on first.
#### Sub-grouping
Sub-grouping is available in lists and boards (as rows).
In board view having rows helps for a swim-lane style structure common in project management.
The grouping header will remain sticky as you scroll down so it's clear what grouping and sub-grouping you have in these views.
You can drag and drop issues between each grouping and it will automatically adopt the properties of that grouping.
#### Ordering
Ordering is allowed in most list views and lets you order issues within their groupings by a number of properties, including Status, Manual, Priority, Last created, Last updated, Due date, and Link count.
You can also reverse the sort order of your issues, except when sorting manually or by status.
#### Manual ordering
Manual ordering is default for board views and can be selected in most list views. To move issues around, select them with your mouse and drag them to a new position. Manual ordering is unique in that it will update the manual order for everyone in the workspace.
#### Sub-issues
Toggle this setting on to show sub-issues in the list or off to only show parent issues and issues without sub-issues.
#### Show empty groups
When toggled, this setting will hide groupings without any issues.
#### Display properties
Choose what issue properties are displayed on individual issues on lists or the board. This is different from filters; filters will refine the list to only issues with certain properties while display options show all issues in the list but hide or show data on the issue item or board card.
Display properties include _Issue ID_, _Priority_, _Status, Labels, Project, Cycle, Created, Updated, Assignee, Estimate, Links, Time in status, Sentry issues,_ and _Pull Request_s _and Commits._ On Business and Enterprise plans, _SLA_ is also a supported Display property.
## Initiatives and project views
#### Layout
Switch between list view and timeline view.
#### Ordering
Order projects manually, or by properties like status, priority or updated or created time. You can group by lead, member, status, health, start date, and target date in initiatives or in project views. You can also group by initiatives in project views.
You can reverse the sort order of your projects, except when sorting manually or by status.
#### Zoom
Zoom the timeline view to focus on a month, quarter, or year. Use the mouse (two finger swipe on Mac) to scroll backwards and forwards in time.
#### Completed projects
Under the active view tab, show projects that have completed in the last week, month, or year -- even if they've been closed. You can also select to show all projects no matter the status, or no completed projects in the active view.
---
# Source: https://linear.app/docs/due-dates.md
# Due dates
Add due dates to issues to help your team keep track of time-sensitive work.
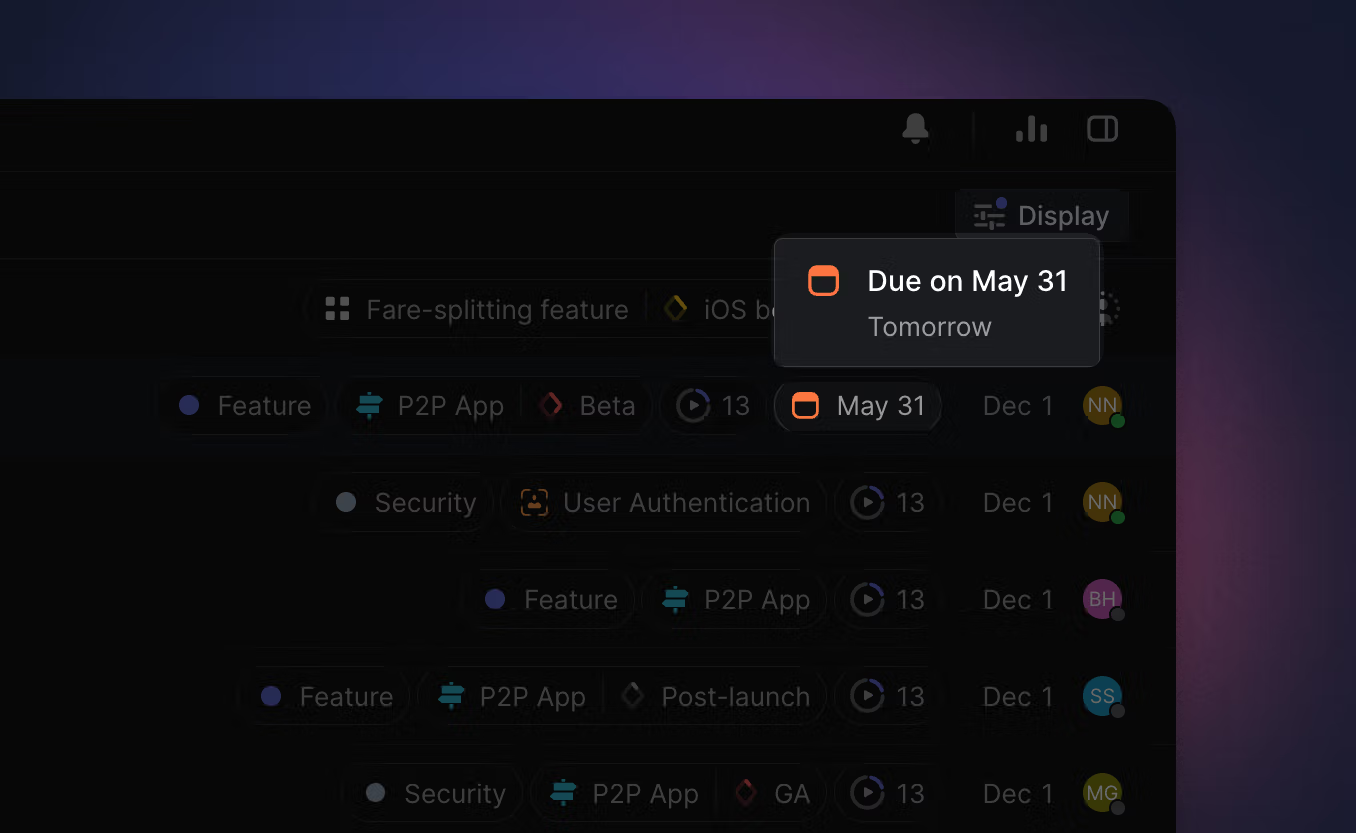
## Overview
Issues with due dates display a calendar icon on the list or board with a color indication to quick understanding of an issue's status. The icon will be:
* Red if it's overdue
* Orange if it's due within the next week, or
* grey otherwise.
Hover over the icon to view the due date and how many days are remaining or have passed since it was due.
If you don't see the icon on your list or board view, open Display Options and make sure that **Due Date** is selected under _Display properties_.
## Add due date
Use the shortcut `Shift` `D` when viewing or selecting an issue to set the due date. During issue creation, select the three dot menu to bring up the set due date option.
## Due date notifications
If enabled in your [notification settings](https://linear.app/settings/account/notifications), you will receive a notification when an issue's due date is near and/or if the issue is past due.
## Filter by due date
Type `F` then search _due_ or click the add filter button to apply the following related Filters to any issue view:
* Overdue
* 1 day from now
* 1 week from now
* 3 months from now
* Custom date or timeframe
* No due date
## Sort by due date
On list views, open view options and select _Ordering: Due date_ to sort issues by due date. Issues with a due date will show up at the top of each group.
### FAQ
What's the relationship between due dates and SLAs?
An issue may use either due dates or an SLA, but not both. If an issue has a due date and then has an SLA applied, the due date will be replaced by the SLA.
---
# Source: https://linear.app/docs/editing-issues.md
# Edit issues
Making changes to an issue.

## Overview
All workspace members will be able to edit an issue's title and description, regardless of who is the original creator of an issue. For comments, only the creator of the comment will be able to perform additional edits.
## Edit issue title and description
You can edit an issue title or description by clicking directly on the title or description and editing inline. You can also use the methods below when editing an issue.
## Revert/Restore issue description
If changes have been made to an issue description and you would like to revert to the original issue description or view changes that have been made, open the command menu with `Cmd` `K` and search for `Issue content history… `or choose the "Show version history" option from the `...` menu on an issue.
The issue description history will be available in this option 10 minutes after a description has been modified.
## Move an issue to another team
When work needs to be passed over to another team, or when you are consolidating teams, issues can be moved to the appropriate Linear team within the same workspace.
For a single issue, simply use `Cmd/Ctrl` `Shift` `M` to move an issue to a new team. To move issues in bulk while retaining as much data as possible, select issues manually or with filters before moving them. Use `Cmd/Ctrl` `A` to select all issues on the list or board.
`Cmd/Ctrl` `Z` will undo moving an issue if you moved it by accident, but it will not undo the removal of issue data.
### Old Issue IDs and URLS
When you move an issue to a new team, we generate a new _issue ID_ and unique URL for the issue. Old URLs will still work and redirect to the new issue URL. Searching for old _issue IDs_ will also bring up the current issue (unfortunately, this doesn't work for old issue titles). Inline references to issues (like #ENG-123) will redirect when clicked, but won't update visually from the original issue ID they're associated with.
### Changes in issue properties
Issue property | Effect | Workaround
--- | --- | ---
Cycle | Removed | Create a temporary label (e.g. Cycle 1) before moving issues if you'd like to retain the grouping when assigning issues to the new team's cycles
Team Labels | Removed | Create a label in the new team with the same name.
Projects | Removed | Add the new team to the current team's project before moving the issue.
Relations | Remain
Priority | Remain
Issue ID | Changed | A new issue ID will be created in the new team. Old issue URLs will redirect and searches for the old ID will bring up the issue
Status | Changed | If the same status name exists, it will be matched. Otherwise, it'll be assigned the first status in the same category.
---
# Source: https://linear.app/docs/editor.md
# Editor
Formatting description fields.

## Overview
We support most Markdown elements in our text editor. Type in Markdown or paste it directly and it will be converted into rich text automatically.
Read more about Markdown and access full capabilities [here](https://www.markdownguide.org/basic-syntax/).
You can also apply styling with a toolbar, which will pop up after you highlight a word or phrase or using slash commands when typing `/`.
## Formatting
These styles can be applied using keyboard shortcuts or by highlighting text to bring up a styling toolbar. You can also hit `/` on your keyboard to bring up the formatting options:
### Text styling
* `**text**` or `Cmd/Ctrl` `B` for **bold text**
* `_text_` or `Cmd/Ctrl` `I` or `Cmd/Ctrl` `>` for _italicized text_
* `~text~` or `Cmd/Ctrl` `S` to strikethrough text
* `Cmd/Ctrl` `U` for underlined text
* `Cmd/Ctrl` `E` for inline code
* `#` then `Space` Heading 1
* `##` then `Space` Heading 2
* `###` then `Space` Heading 3
### Lists
* `*`, `-`, or `+` then `space` or `Cmd/Ctrl` `Shift` `8` for a bulleted list
* `1.` or `Cmd/Ctrl` `Shift` `9` for a numbered list
* `[]` or `Cmd/Ctrl` ``Shift`` `7` for a checklist
### Other formatting options
* `Cmd/Ctrl` `K` Turn text into link (or directly paste issue or URLs for clickable links)
* `>` then `Space` for blockquotes
* `>>>` then `Space `for collapsible section
* /code or `Cmd/Ctrl` `Shift` `\` for a code block
* /diagram or paste a code block beginning with `**```**mermaid` to create a mermaid diagram
* _/collapsible section_ to create a toggle/collapsible text
* `___` then `space` for a horizontal divider
* `|--` to create a new table
* _/table_ to create a table element
* _/date_ or @Oct 1 to insert a date
### Attachments
* /file or /insert to attach files
* `Cmd` `Shift` `u` to upload files
### Helpful commands
* `Cmd/Ctrl` `A` to select all content in an issue (to copy or delete)
* `Cmd/Ctrl` `Z` to undo typing
* `Cmd/Ctrl` `Shift` `Z` to redo typing
* Copy the issue description in Markdown by opening the command menu (`Cmd/Ctrl` `K`) when viewing the issue and selecting the command _`copy issue in markdown`_
* `Shift` `Enter` to generate a line break
* `Enter` `Enter` to break out of codeblock or blockquote formatting
### Embeds
Linear automatically detects links from common applications (Youtube, Descript, Loom) and will embed them automatically. Pasting a Figma link will embed a file preview as long as have the [Figma integration](https://linear.app/docs/figma#configure) set up.
If you'd prefer to display the url rather than the embed, click _Keep as link_ or press `esc` after pasting the link.

### Emoji
Add emojis to descriptions or comments with our native emoji picker or by typing `:` followed by the emoji name, such as `:100:` for 💯 and `:+1:` for 👍 .
### @ Mentions
Write `@text` to mention a user, issue, project, date, or document in a description or comment. For users, this will send a notification to their Inbox and subscribe them to the issue. We only support single user mentions at the moment, not user groups.
Pasting an issue ID will also link it in the editor. Referenced issues are added as [related issues](https://linear.app/docs/issue-relations) automatically.
---
# Source: https://linear.app/docs/estimates.md
# Estimates
Show how much effort each issue will take.
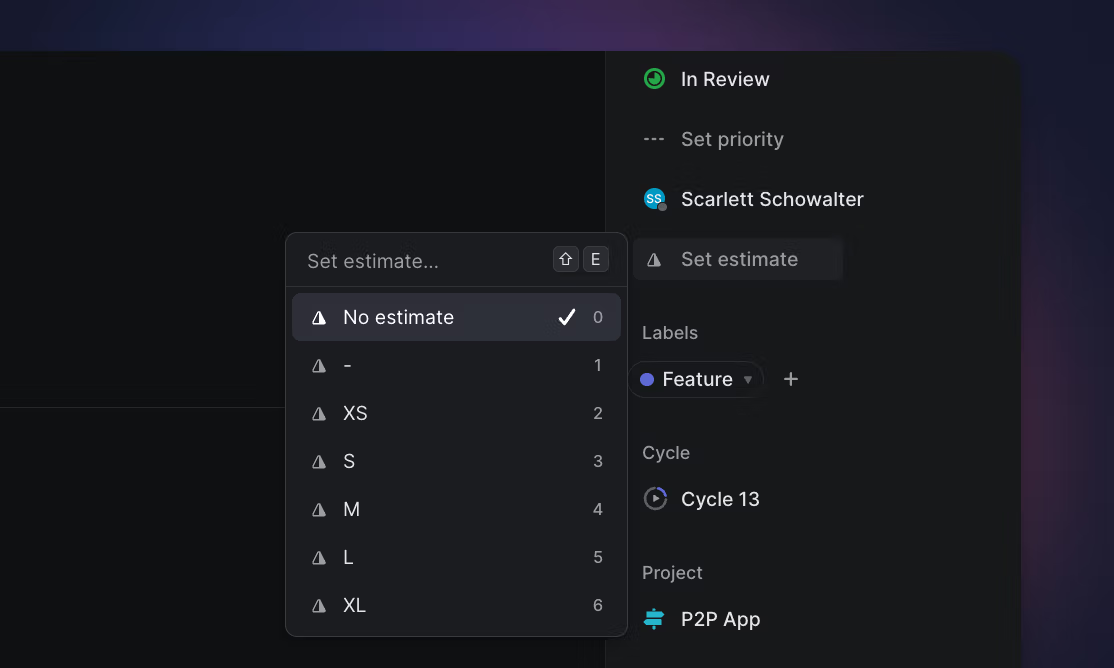
## Overview
Use estimates to describe the complexity or size of an issue. Cycles and projects use estimates to calculate effort and related statistics. You'll opt into estimates on a team level as well as choose which estimate scale to use.
## Configure
Go to _Team Settings > General > Estimates_ to enable the feature. Teams can use different estimate scales and configurations, even if they're working together on the same project.
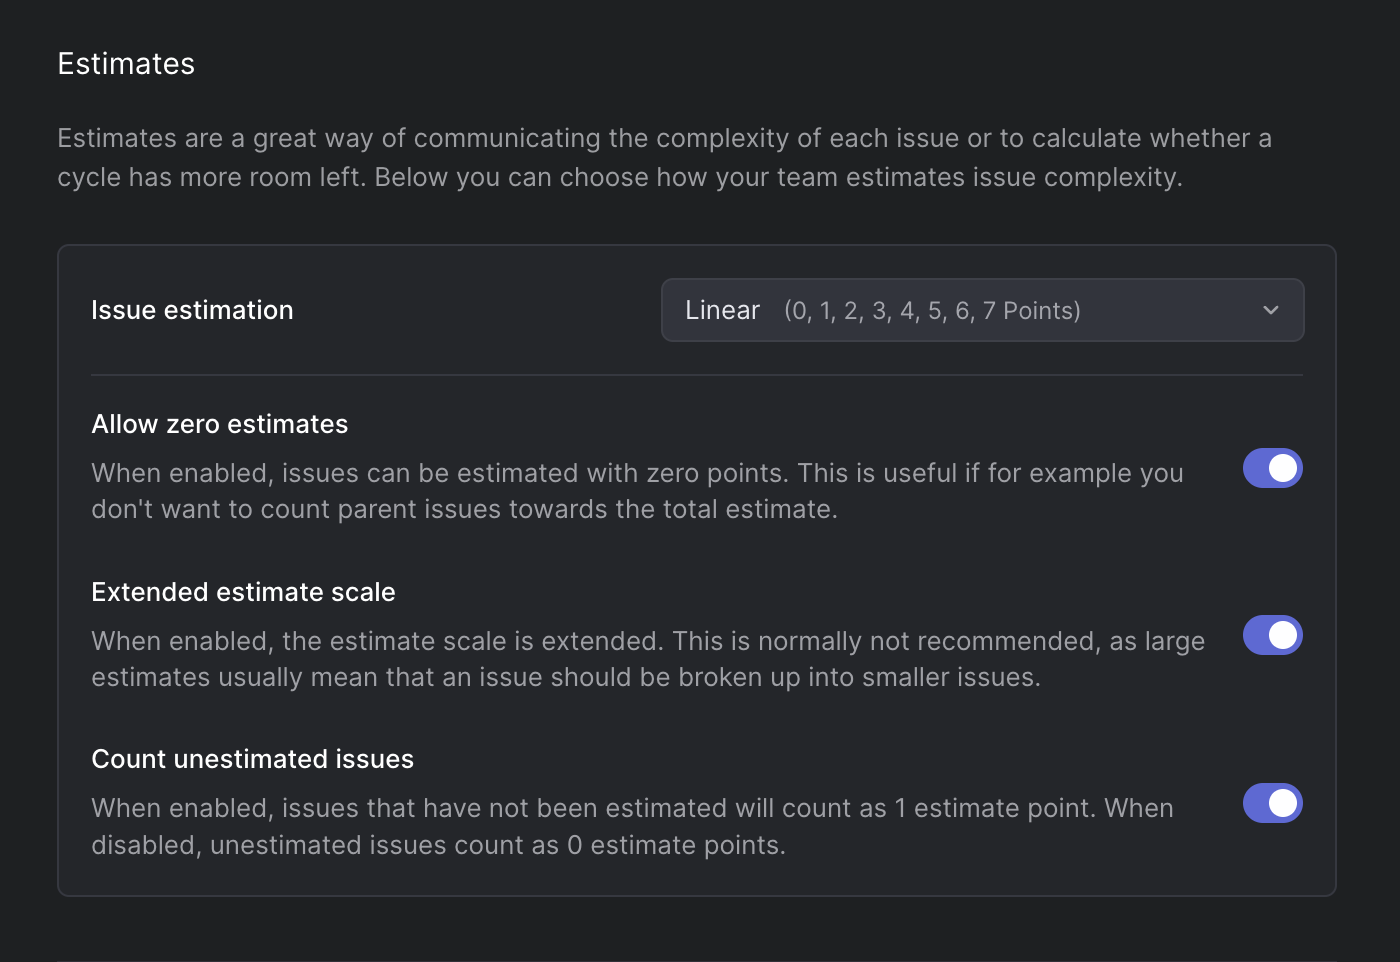
### Scale range options
Scale | | | | |
--- | --- | --- | --- | --- | ---
Exponential | 1 | 2 | 4 | 8 | 16
Fibonacci | 1 | 2 | 3 | 5 | 8
Linear | 1 | 2 | 3 | 4 | 5
T-Shirt | XS | S | M | L | XL
> [!NOTE]
> When T-Shirt sizes require translation to numerical values (for display in graphs, for instance,) they follow the Fibonacci scale.
### Extended estimate scales
Enable the extended scale to add two additional values to your scale.
Extended Scale | |
--- | --- | ---
Exponential | 32 | 64
Fibonacci | 13 | 21
Linear | 6 | 7
T-shirt | XXL | XXXL
### Zero estimates
Allow zero estimates by toggling this option on in estimate settings. By default, we count unestimated issues as one point but you can disable this in estimate settings as well.
## Add, edit, or remove estimates
Add estimates when creating or updating issues with the keyboard shortcut `Shift` `E`. The same keyboard shortcut can be used to edit or remove the estimate.
## Filter for estimates
Find issues with specific point values by filtering for estimates. The shortcut `F` will open the filter menu and you can select estimates from there. This is especially helpful when creating custom views and searching through the backlog.
## Analytics
When you see the word effort, that refers to estimate. When estimates are not enabled, we calculate statistics using a default value of 1 estimate point per issue. T-shirt estimates map to the Fibonacci scale.
If you've enabled estimates, we'll use the estimate values to calculate percentage completion and effort in cycle and project graphs. The top bars on most views will show the total issues count or total estimate value next to the view's name. Hover over the number to see both values.
> [!NOTE]
> **When estimates are too large, refine issue scope**
> Larger estimates usually mean that there is uncertainty about the issue's complexity. We find that breaking up issues into smaller ones is the best approach.
---
# Source: https://linear.app/docs/exporting-data.md
# Exporting Data
Export your workspace data using built-in tools, integrations, or the API

## Overview
Export data from your workspace to build custom reports, keep records, or input into LLMs.
### Workspace CSV exports
Admins (Owners, on Enterprise plans) can export a workspace's issue data in CSV format from [Settings > Administration > Import Export](https://linear.app/settings/import-export) and click **Export data** at the bottom. There is a toggle option to include private teams, if any. This export action is recorded in the audit log.
This export contains the following fields for each issue: _ID, Team, Title, Description, Status, Estimate, Priority, Project ID, Project, Creator, Assignee, Labels, Cycle Number, Cycle Name, Cycle Start, Cycle End, Created, Updated, Started, Triaged, Completed, Canceled, Archived, Due Date, Parent issue, Initiatives, Project Milestone ID, Project Milestone, SLA Status_
## Member list CSV exports
Admins (Owners, on Enterprise plans) can export the list of members in CSV format from your [Settings > Administration > Members](https://linear.app/settings/members) and click **Export CSV** button.
## Issue view CSV exports
Export a CSV of issues from any issue view, project or issue list using the `Ctrl`/`CMD` + `K `menu. In projects and custom views, this action is also accessible through the dropdown menu pictured.
> [!NOTE]
> Members can export up to 250 issues at a time while Admins (Owners, on Enterprise plans) can export views with up to 2,000 issues.
>
> Guest users cannot export issues from a Linear workspace.
### Command menu
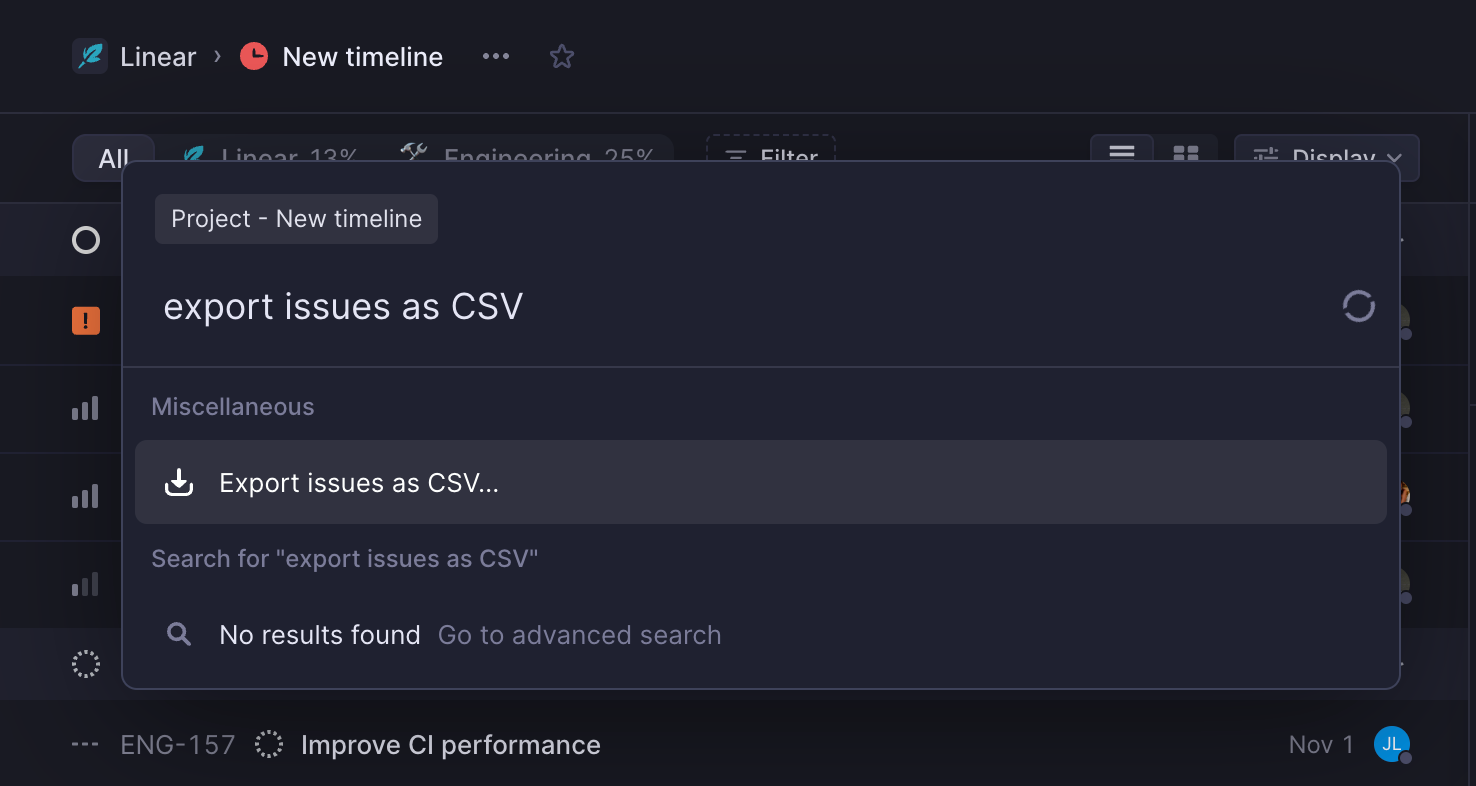
### Mouse
* When in projects or custom views, click the the project/view name and choose "Export issues as CSV…" from the dropdown
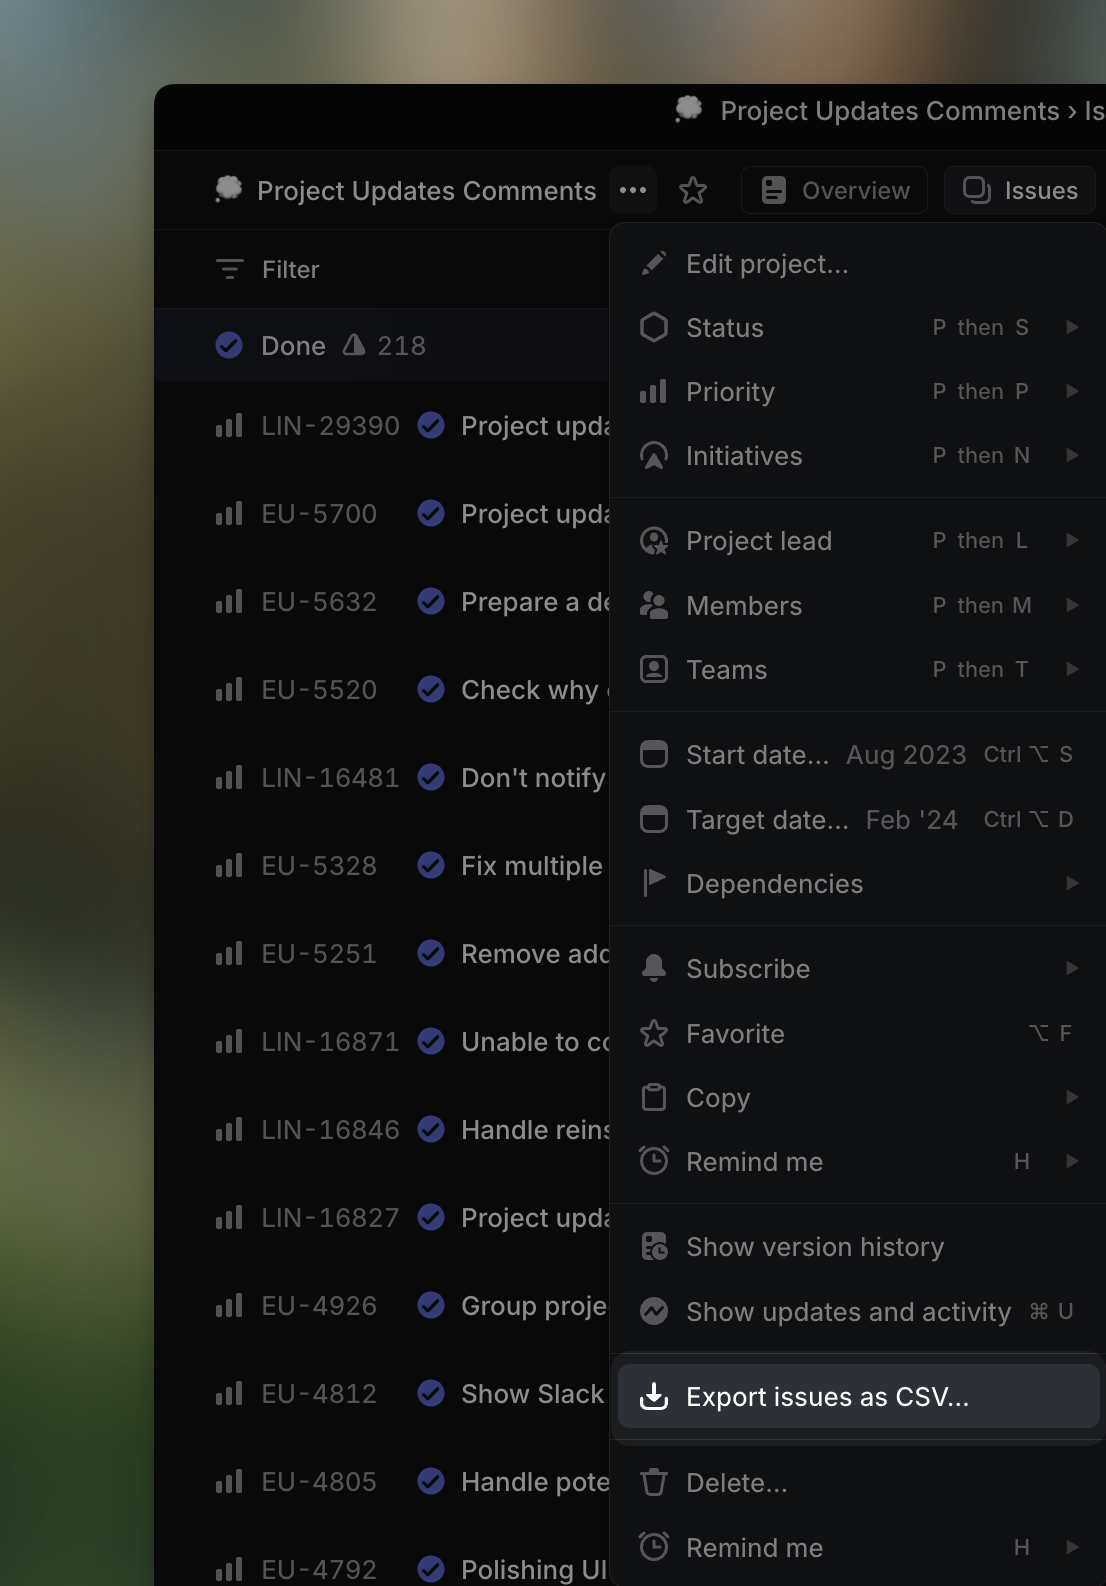
This export contains the following fields for each issue: _ID, Team, Title, Description, Status, Estimate, Priority, Project ID, Project, Creator, Assignee, Labels, Cycle Number, Cycle Name, Cycle Start, Cycle End, Created, Updated, Started, Triaged, Completed, Canceled, Archived, Due Date, Parent issue, Initiatives, Project Milestone ID, Project Milestone, SLA Status_
## Copy issues as markdown for LLMs
Copy issues and documents as Markdown with `Cmd Opt C`, or from the command menu. When copying an issue, this command captures its full context — including title, description, comments, and customer requests — in a structured format for use in AI chat tools.
Copy multiple issues at once by selecting them on a list or a board and using the same command.
## Export individual issues as PDFs
If you need to save individual issues as PDFs, use the Print dialog (`Cmd`/`Ctrl` + `P`) while looking at an individual issue to save an file in that format. On doing this, we'll automatically change the timestamps on each issue event from relative to absolute, which can be helpful if your auditors require seeing precise timestamps for each event on an issue.
## Project and Initiative list CSV exports
Export a project or an initiative view as a CSV. This export type is available to members and admins. Please note if you attempt to export from the issues page of a project you will be exporting issues, not the project itself.
### Command menu
To export only one project or initiative, select just that single project before opening the `Cmd` + `K` menu.
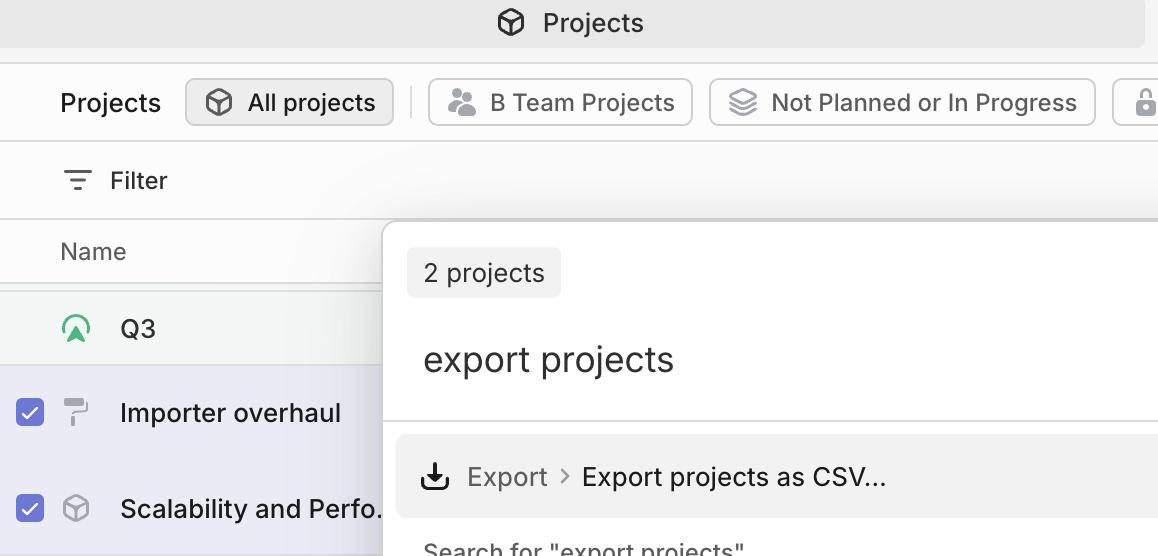
### Mouse
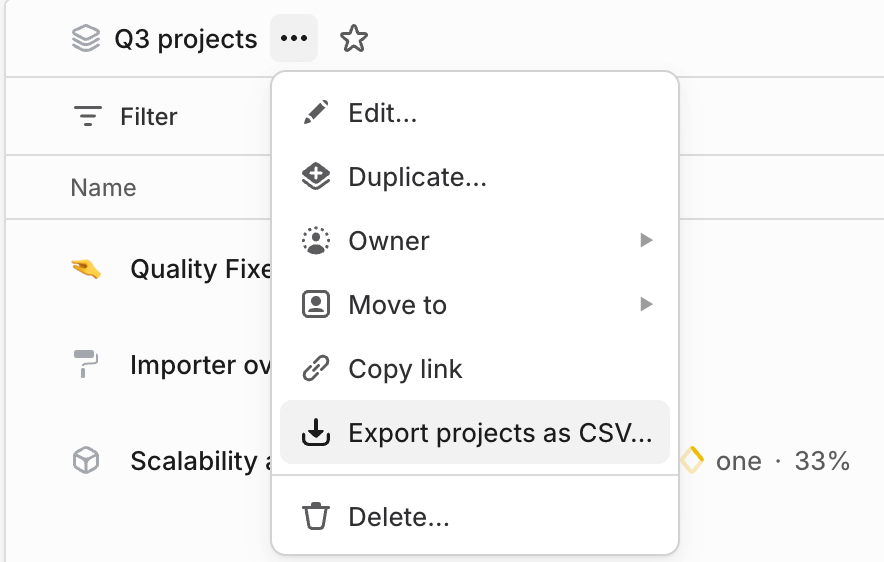
For projects, CSV exports contain: _Name, Summary, Status, Milestones, Creator, Lead, Members, Created At, Started At, Target Date, Completed At, Canceled At, Teams, Initiatives_
For initiatives, CSV exports contain: _Name, Description, Details, Status, Creator, Owner, Target Date, Created At, Started At, Completed At, Projects, Teams, Health, Latest Update, Latest Update Date_
## Integrations
Our [Airbyte](https://linear.app/docs/airbyte) and [Google sheets](https://linear.app/docs/google-sheets) integrations offer ways to export and sync your workspace data to those platforms so you can build your own custom reports. If you're interested in exporting data for analysis, consider using [Insights](https://linear.app/docs/insights) as well for in-product reporting.
## API
You can also export data from issues, projects and more using our [API](https://studio.apollographql.com/public/Linear-API/variant/current/schema/reference), or work with Linear data using [webhooks](https://developers.linear.app/docs/graphql/webhooks).
## FAQ
Can I export teams?
Teams can be imported from one Linear workspace to another. Please find steps to accomplish this [here](https://linear.app/docs/import-issues#linear).
---
# Source: https://linear.app/docs/favorites.md
# Favorites
Favorite views you frequently use.
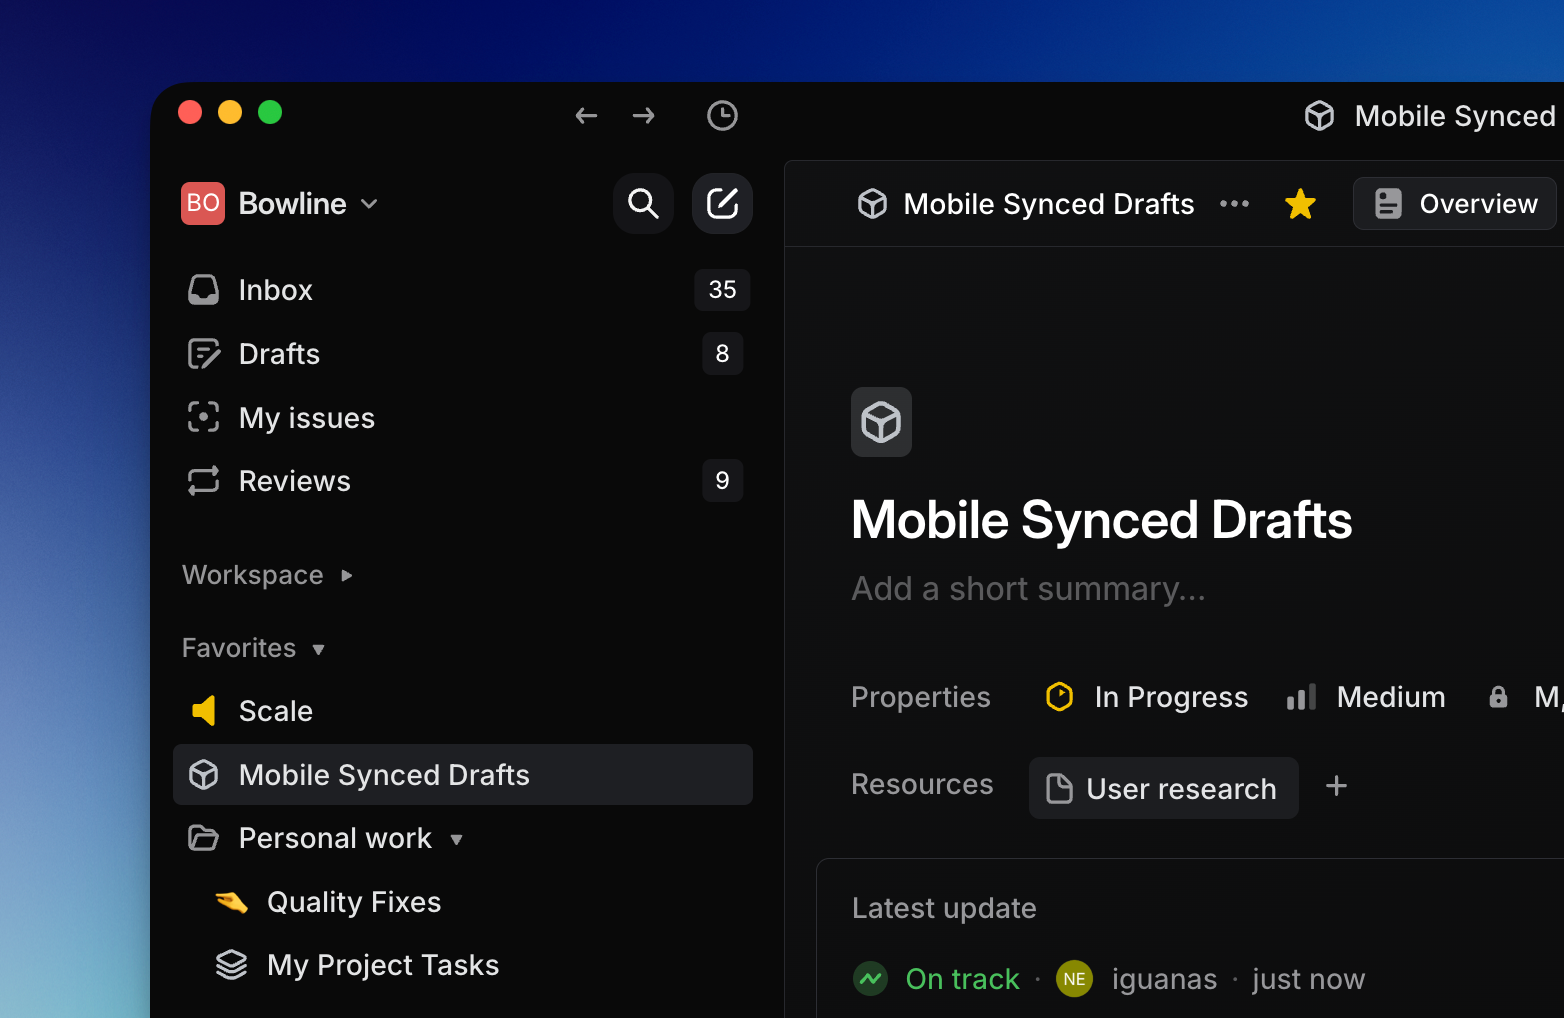
## Overview
Favorites are personal shortcuts which appear in your sidebar.
### Keyboard
`O` then `F` to open favorites
### Mouse
* Click the star next to issue, project, label, and custom views to mark or unmark favorite
* Click on favorites from the sidebar
* Hover over favorite then click `X` to remove it
### Command menu
`favorite` to favorite or unfavorite issue
`open favorite` to open favorite
## Basics
### Applicable views
If a view can be favorited, you'll see the outline of a star in the top bar next to the view name. You can favorite the following views in Linear:
* Issues
* Users
* [Projects](https://linear.app/docs/projects)
* [Specific Cycles](https://linear.app/docs/use-cycles)
* [Custom Views](https://linear.app/docs/custom-views)
* [Label views](https://linear.app/docs/label-views)
* [Default views](https://linear.app/docs/default-views): all issues, active issues, backlog, board, current cycles, upcoming cycles.
> [!NOTE]
> Some views cannot be favorited, like the view of another user's issues that you see after clicking their name. Instead, you can create a custom view with filters to see the same issues, and add this to your favorites instead.
### Add favorites
To favorite, select the ⭐ icon in the page header. You can also select the issue and search for the `favorite` command. Favorites do not always show up on contextual menus.
### Create folders
To create a folder for favorites, hover over favorites and click the icon to the right to create a new folder, or create from the ⭐ icon menu. You can give it a name of your choosing and easily drag any existing favorites in or out of the folder.
### Access favorites
Once you favorite an issue, you'll see a _Favorites_ section appear in your sidebar above _Your Teams_. You can access favorites by clicking on them from the sidebar or searching for them in the command menu. The shortcut `O` then `F` will open a menu from which you can open a favorite, too.
### Remove favorite
Hover over the favorite in the sidebar and click on the `X` to remove it. This is not reversible but you can easily add the favorite again by going to the issue or view and selecting the star.
---
# Source: https://linear.app/docs/figma.md
# Figma
We use Figma at Linear and our integrated tools make it easy for you to collaborate on design.
## Overview
There are two ways to connect Figma to Linear to streamline your design and development workflows. The Linear plugin for Figma allows you to create and link issues directly from Figma. A separate integration enables you to embed designs into Linear descriptions, comments and documents.
### Keyboard
`G` then `S` to go to Settings
Paste the link to embed file
Click on files to open in Figma (no shortcuts)
To update the preview, use `E` to go into issue edit mode or select the more menu (three dots) to edit a comment, then hover to bring up the refresh button
### Mouse
* Paste the link to embed file
* Click on the link to open in Figma
* To update the preview, go into issue or comment edit mode, then hover to bring up the refresh button
### Command menu
No command menu options available
## Configure
#### Embed Figma previews in Linear
Connect to Figma under _[Settings > Features > Integrations > Figma](https://linear.app/settings/integrations/figma)._ We recommend that you do this in a browser and not the desktop client. Once connected, the integration will work across your full workspace.
#### Linear plugin for Figma
To create or link issues from Figma, select a frame, section or link and run the Linear plugin from Resources > Plugins > Linear or run directly from the Figma community [here](https://www.figma.com/community/plugin/1221187540287746170).
## Embed Figma Previews
#### Preview designs
Simply copy a link to specific frames or files and paste it into a Linear issue description or comment. We automatically convert the link into a design preview. Even if the file changes, the snapshot in Linear remains as it appeared when the comment or description was created.
#### Open files
Click to preview the embedded file without having to leave Linear. We currently support interactive in-app preview of publicly shared Figma files only. We're considering building support for private files in the future. We built this as a custom integration using Figma's API with their OAuth2 authentication instead of using their standard embed to create a faster experience.
#### Refresh files
By default, we do not refresh the Figma preview so that you maintain the context of related comments and issue descriptions. To update the preview, go into Edit mode in the issue or comment, then hover over the Figma file. You'll see a Refresh button appear, which you can click to pull the latest version. This action cannot be undone.
## Linear Plugin for Figma
Run the plugin to see all Linear issues linked to your designs. From the plugin, select issues or the linked elements below the issue description to be taken to the inked frame, section, or page.

## Create issues
When using the [Linear plugin](https://www.figma.com/community/plugin/1221187540287746170/Linear) from within Figma, select the `+` button to create issues that link pages, frames, and sections of your Figma design. You'll be able to create issues in any teams that you've joined.
#### Link issues
Link designs to existing issues by searching for the ID, title, or description. From the Linear side, you can link designs to issues by attaching Figma links for the page, section, or frame using `Ctrl` `L`. You can link multiple issues to the same design and multiple frames, sections, or pages to a single Linear issue.
#### Update issues
Update properties such as team, status, assignee, and project directly from Figma. You'll be able to update these at any point during your design process. Any changes made in Linear are immediately synced to the Figma plugin.
#### Filter and sort
Filter your issues that appear in the plugin window to hide completed or cancelled issues, show only assigned or created by you, and to sort by status, priority, nam, or created date. By default, the plugin will hide canceled issues.
## Figma Plugin
### Privacy Policy
1. **Terms of Service** By authenticating the plugin, you agree to Linear's [Terms of Service](https://linear.app/terms). Plugin authentication grants you access to Linear's features and functionality.
2. **Figma File Key Transmission** When the plugin is opened within Figma, Linear will receive the file key for the current Figma file. When connecting a frame in Figma to a Linear issue, Linear will receive and securely store the file key associated with the respective Figma file. This storage of file keys allows Linear to establish the necessary connection and enable bi-directional linking between Figma and Linear.
3. **Figma File Key Access** Any user with access to a Linear issue will also have access to the associated file key for any linked Figma frames.
4. **Data Removal** Users have the authority to remove Figma data stored by Linear at any time. This can be achieved by either disconnecting the frame from the Linear issue or deleting the associated team or workspace. To permanently delete your data from Linear’s storage contact security@linear.app
5. **Data Processing** All data, including Figma file keys, is processed by Linear in accordance with Linear’s Data Processing Agreement ([DPA](https://linear.app/dpa)). The DPA outlines the measures taken by Linear to ensure the privacy and security of customer data. For more details on our data processing practices, please refer to our [DPA](https://linear.app/dpa).
## FAQ
My Figma integration stopped working. How do I fix it?
First, check that the Figma integration is connected in [settings](https://linear.app/settings/integrations/figma). We'll disable integrations if we notice they're not working anymore (admins should receive an email if we do) and it's also possible that someone on your team removed the integration, intentionally or not.
If the Figma integration is enabled and it's still not working, try removing and then reconnecting the integration.
1. Open Linear in the browser and remove the integration.
2. Go to linear.app/reset
3. Reconnect to Figma via the browser.
Reach out to us in support if you still have trouble after taking those steps.
Can I collapse or hide the Figma embed?
By default, any Figma links added to Linear will embed and there is no way to hide it. The workaround is to hyperlink text in a comment or description instead of pasting the full link.
I keep getting prompted to login to Figma yet cannot view the preview. Help?
We've noticed this issue specifically for If your Brave shield is up you must manually allow "cross-site cookies" to be able to view authenticated Figma embeds.

I'm seeing the error message "unable to embed from Figma" when linking a Figma file.
This error message typically also references "Insufficient permissions to access the file". While you yourself may have access to the file, it's important that the installer of the Figma integration in Linear also has access to the file. If they don't this error message will appear. The solution here is to share the file with the team member who installed the Figma integration.
Figma is not working on desktop
Connect the integration using Linear in a web browser. If the integration doesn’t work on the macOS app, open Linear in a browser and disconnect the integration. Then open the macOS app and clear application data (found under Linear in the application menu bar). Open Linear in the browser again and reconnect to Figma. If that doesn’t work, reach out to us at [support@linear.app](mailto:support@linear.app).
---
# Source: https://linear.app/developers/file-storage-authentication.md
# File storage authentication
Files uploaded to Linear, such as images and attachments, are stored in Linear's private cloud storage. You must authenticate to access these files. These files are accessible from the `https://uploads.linear.app` hostname.
## Authorization Header
You can pass the same access token and `authorization` header as you would when making requests to our GraphQL API when requesting files from storage. This is usually the best option when downloading files in a server environment. An example request might look something like:
```http
curl https://uploads.linear.app/6db02bb9-fba2-473b-8f9d-f38188e84813/d20adbea-186d-4643-ad07-004bda7d099d \
-X GET \
-H 'Authorization: Bearer 00a21d8b0c4e2375114e49c067dfb81eb0d2076f48354714cd5df984d87b67cc'
```
## Request Signed URLs
When using the GraphQL API, you can request that all URLs in responses pointing to file storage include a signature which allows temporary access to the file. This is achieved by passing the `public-file-urls-expire-in` header with an integer value representing the signature expiration in seconds.
With the [TypeScript SDK](https://linear.app/developers/sdk) this header can be set directly on the client. Here is an example to receive signatures that are valid for 1 minute:
```ts
const client = new LinearClient({
apiKey: process.env.LINEAR_API_KEY,
headers: {
"public-file-urls-expire-in": "60",
}
});
```
---
# Source: https://linear.app/developers/filtering.md
# Filtering
Most results that are paginated can also be filtered. This makes it easy to retrieve specific information, like any issues assigned to a particular user, but much more complex queries are also possible. For example, you could fetch all issues associated with a project that is supposed to be completed next week and have not yet been started.
For example, to return all urgent and high priority issues in the workspace, you can use the following query:
```graphql
query HighPriorityIssues {
issues(filter: {
priority: { lte: 2 }
}) {
nodes {
id, title, priority
}
}
}
```
The above query will also return any issues that haven’t been given any priority (their priority is 0). To exclude them, you can add another **not equals** comparator:
```graphql
query HighPriorityIssues {
issues(filter: {
priority: { lte: 2, neq: 0 }
}) {
nodes {
id, title, priority
}
}
}
```
## Comparators
You can use the following comparators on **string**, **numeric**, and **date** fields:
Comparator | Description
--- | ---
`eq` | Equals the given value
`neq` | Does not equal the given value
`in` | Value is in the given collection of values
`nin` | Value is not in the given collection of values
Numeric and date fields additionally have the following comparators:
Comparator | Description
--- | ---
`lt` | Less than the given value
`lte` | Less than or equal to the given value
`gt` | Greater than then given value
`gte` | Greater than or equal to the given value
String fields additionally have the following comparators:
Comparator | Description
--- | ---
`eqIgnoreCase` | Case insensitive `eq`
`neqIgnoreCase` | Case insensitive `neq`
`startsWith` | Starts with the given value
`notStartsWith` | Does not start with the given value
`endsWith` | Ends with the given value
`notEndsWith` | Does not end with the given value
`contains` | Contains the given value
`notContains` | Does not contain the given value
`containsIgnoreCase` | Case insensitive `contains`
`notContainsIgnoreCase` | Case insensitive `notContains`
Optional values additionally support the `null` comparator, which can be used to return entities depending on whether the field has a value or not. The following query will return all issues that don't have a description:
```graphql
query Issues {
issues(filter: {
description: { null: true }
}) {
nodes {
id, title, description
}
}
}
```
## Logical operators
By default, all fields described in the filter need to be matched. The filter merges all the conditions together using a logical **and** operator.
For example, The below example will find all urgent issues that are due in the year 2021.
```graphql
query Issues {
issues(filter: {
priority: { eq: 1 }
dueDate: { lte: "2021" }
}) {
nodes {
id, title, priority, dueDate
}
}
}
```
To change the logical operator, all filters support the **`or`** keyword that lets you switch to a logical **or** operator. For example, to filter for low-priority or un-prioritized issues that need to be completed in the year 2021, you can execute the following query:
```graphql
query Issues {
issues(filter: {
or: [
{ priority: { eq: 4 } },
{ priority: { eq: 0 } }
]
dueDate: { lte: "2021" }
}) {
nodes {
id, title, priority, dueDate
}
}
}
```
## Filtering by relationship
Data can also be filtered based on their relations. For example, you can filter issues based on the properties of their assignees. To query all issues assigned to a user with a particular email address, you can execute the following query:
```graphql
query AssignedIssues {
issues(filter: {
assignee: { email: { eq: "john@linear.app" } }
}) {
nodes {
id
title
assignee {
name
}
}
}
}
```
Many-to-many relationships can be filtered similarly. The following query will find issues that have the **Bug** label associated.
```graphql
query Issues {
issues(filter: {
labels: { name: { eq: "Bug" } }
}) {
nodes {
id, title
}
}
}
```
The above query returns all issues that have at least one label that matches the name **Bug**. To create a query where all labels on an issue are matched to the filter criteria, you can use the **`every`** keyword:
```graphql
query Issues {
issues(filter: {
labels: { every: { name: { eq: "Bug" } } }
}) {
nodes {
id, title
}
}
}
```
The above would also filter out issues that have multiple labels, regardless of what they are.
## Relative time
All date fields support relative time, defined as [ISO 8601 durations](https://en.wikipedia.org/wiki/ISO_8601#Durations) relative to the current date. This lets you create a filter that always returns all issues that are due in the next 2 weeks, regardless of when you run it:
```graphql
query IssuesDue {
issues(filter: {
dueDate: { lt: "P2W" }
}) {
nodes {
id, title
}
}
}
```
## Examples
Find all **bugs** and **defects** from projects that are lead by any user named "**John**":
```graphql
query Projects {
projects(filter: {
lead: { name: { startsWith: "John" } }
}) {
nodes {
issues(filter: {
labels: { name: { in: ["Bug", "Defect"] } }
}) {
nodes {
id
title
}
}
}
}
}
```
Find all issues assigned to me that have a comment containing a thumbs-up emoji:
```graphql
query Issues {
viewer {
assignedIssues(filter: {
comments: { body: { contains: "👍" } }
}) {
nodes {
id
title
}
}
}
}
```
Find all issues that have been created by me and have been closed in the past two weeks:
```graphql
query ClosedIssues {
viewer {
createdIssues(filter: { completedAt: { gt: "-P2W" } }) {
nodes {
id, title
}
}
}
}
```
Find all started issues in ongoing projects that don't have an estimate:
```graphql
query Issues {
issues(
filter: {
estimate: { eq: 0 }
state: { type: { eq: "started" } }
project: { state: { eq: "started" } }
}
) {
nodes {
title
estimate
project {
name
}
}
}
}
```
---
# Source: https://linear.app/docs/filters.md
# Filters
Filters allow you to refine existing views and create custom views to show only the relevant issues.

## Overview
Our powerful filtering system lets you refine issue lists down to just the issues you need to work on. You can apply filters to almost every view in Linear and filter by almost any issue property. You can also apply various operators to filters and combine filters to show any or all.
### Keyboard
`F` to open filter menu, then type to select filter _type_ and _name_ or quick filter by typing the name directly
Press `F` again to add additional filters. To refine operators on existing filters, use the mouse.
`Backspace/delete` to clear filters if filter panel is focused
`Option/Alt` `V` to save as custom View
### Mouse
* Click the Filter button in the top bar to filter any view
* Click the _X_ on a filter to remove it
* Click the button in the top right next to View Options that appears on filtered views to create a custom View
### Command menu
`filter` then `filter type` then select specific filters. To refine operators on existing filters, use the mouse.
## Basics
### Apply filters
Type `F` to select filters from the command menu or click the Filter button above the board or list. You'll see a menu of filters that you can apply to the current view along with the number of matching issues. Once you've opened the filter menu, you can move through the menu or use free text search to find the exact filter you need.
### Filter categories
You can filter by the following properties in Linear:
Type | Filters
--- | ---
Issue property | Priority, Cycle, Estimate, Labels, Links
Project property | Project
Workflow | Status, Auto-closed
Issue relations | Blocked, Blocking, Related, Parent, Sub-issue, Duplicate
Dates | Completed, Created, Due, Updated
User | Assignee, Created by, Subscribers
Other | Filter by content
There are a few edge cases with workarounds:
* To filter for **no labels**, you'll have to select all labels and then switch the operator to _does not include_.
* To filter by milestones, filter by project first.
* You cannot filter for **suspended users**. To find issues assigned to or created by suspended users, navigate to their profile page (`linear.app/workspace-name/profiles/username`). If you do not know the username, an admin can find the link by clicking on the user's photo or name on the [Members list](https://linear.app/settings/members).
### Quick search filters
If you know the specific name of the property you want to filter, you can type that directly and the filter will show up as a choice, saving you from having to click through the category to select it.
Property type | Quick filters
--- | ---
Team | Team name
Status | Status name
Assignee | Username
Created by | Username
Priority | "High", "Low", etc.
Labels | Label or label group name
Content | No quick filters available
Cycle | Active, Upcoming
Project | Project name
Subscriber | Username
Relations | These are top level filters
Date filters | "N days", Month, Quarter, Half-year, Year
Links | Front, Zendesk, Intercom, custom link source
Milestone | Milestone name
### Filter with AI
Use natural language combined with artificial intelligence to filter your views. For example filter by phrases like "Show me issues assigned to me", "What issues are important?", " what issues are due next week" and so on, to have your views automatically filtered with the most suited parameters.
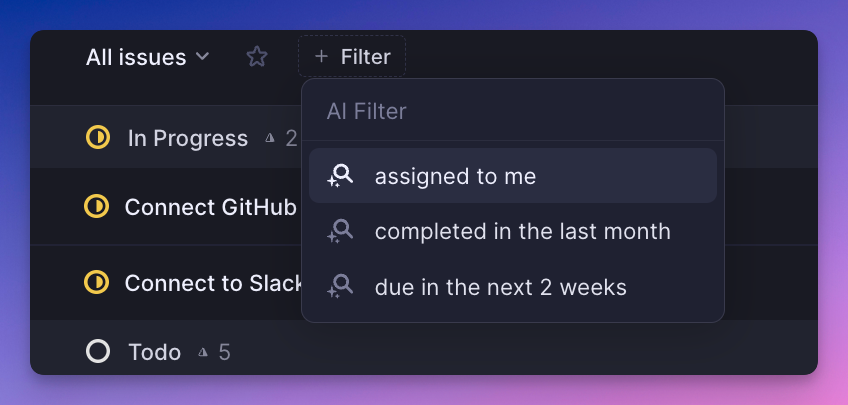
### Build with operators
Once you add a filter, refine it with operators. The filter type cannot be changed but clicking on any other part of the filter formula will give you options to change it and modify the query.
For instance, for a filter that says _Assignee is Andreas,_ clicking on _Assignee_ will do nothing, clicking on _is_ will give you the option to change the operator to i_s not_, and clicking on _Andreas_ will show a selectable list to modify the assignee. If you add another assignee, Adrien, then you'll see the is operator change to _is either_ _of_ or _is not_.
We support the following operators in Linear, which will show up depending on the type of filter and selections:
* _is or is not_ when one option is included in the filter
* _is either of or is not_ when multiple options are included in the filter
* _includes any, all, neither, either,_ or _none_ for labels and links
* _before_ or _after_ for date-related filters
### Combined filters
Show results that match _any or all_ filters applied to a view. Once you add at least two filters, the option will appear in the top right sidebar. Click on the _all filters_ or _any filters_ wording to switch it.
### Create Views
Once you've applied at least one filter to a view, you'll see a button in the top right appear that lets you create a View from the custom filters. If you click it (or use the shortcut `Option/Alt` `V`), you'll be taken to the View editor with those filters already applied. Learn more about [Views](https://linear.app/docs/custom-views).
### Filterable views
Almost every view in Linear can be filtered with a few exceptions:
View | Filters
--- | ---
Search
Inbox
My issues
Reviews
Initiatives
Projects
Customers
Teams
Members
Triage
All issues
Cycles
Archive | Available
Views | Apply filters on any view and click to save to create a new custom view. You can also apply temporary filters on top of any existing view.
### Filter with API
For more complex filters or to build queries on the API, see our [developer documentation](https://developers.linear.app/docs/graphql/working-with-the-graphql-api/filtering).
---
# Source: https://linear.app/docs/front.md
# Front
Our Front integration makes it easier for you and your team to keep track of bugs and feature requests and interact with the customers who report them.
## Overview
The Front integration lets you create and link Linear issues from Front conversations. Linked issues, their status, and assignee show up in the sidebar in Front. Linked conversations will show up in Linear issues as link attachments. When issues close, we'll automatically re-open the Front conversation so you can get back to users with an update.
This integration is available on Linear's Business and Enterprise plans.
### Keyboard
`G` then `S` to go to _Settings > Workspace > Integrations > Front_
`Ctrl` `L` (Mac) or `Alt` `Ctrl` `L` (Windows) to link from Linear issue
### Mouse
* Click the Avatar to go to to go to _Settings > Workspace > Integrations > Front_
* Select the more menu (three dots) after saving the Linear issue to link conversations from Linear
### Command menu
`settings` to go to _Settings > Workspace > Integrations > Intercom_
`link` to link Front conversations from Linear
## Configure
There are three steps to installing the Front integration (you must do them in order):
1. Install and approve Linear for your Front workspace by installing it from the [Front integrations page](https://app.frontapp.com/settings/integrations/native/edit/linear). This will add the Linear widget to your Front application sidebar.
2. Then go into Linear's settings and enable Front automation from the [Front settings page](https://linear.app/settings/integrations/front).
3. From the Front sidebar, click on the Linear widget. Sign into the account and select the workspace.
Front users are required to have a Linear account to use the integration and create and view issues in Front. We also recommend using the Front desktop application for a better experience.
## Basics
### **Create new issues**
You can create new Linear issues from Front conversations. When linked, Linear issue information is shown inside Front while viewing the related message. A link attachment for the Front message is also shown in the Linear issue.
When creating a new linear issue, you can choose a team in which to create the issue, provide a title, and then optionally provide a description, set issue priority, assignee, and labels.
> [!NOTE]
> Get more out of the Front integration by enabling the [Triage](https://linear.app/docs/triage) feature for your teams. Any issues created from Front will go to Triage when enabled (otherwise, the issues will be added to the first backlog status in your team).
### **Link existing issues**
Search for a specific issue ID or words in the related title to link a relevant Linear issue to a Front conversation. This will add a Front link attachment to the Linear issue and gives you the option to add any image content as a comment on the issue. Front's issue search works the same way as our in-app Search.
### ,
,Link Front conversations in Linear issues
#### Mouse
* Click on contextual menu icon `…` to the top right of the issue
* Click _Add link_
* Click _Front conversation_
#### Command menu
`Front` when in issue view, then select _Link Front conversation to issue…_
###
### Re-open conversations
In the [Front settings page](https://linear.app/settings/integrations/front) in Linear, you can automate the reopening of the linked issue when it's completed, cancelled or a comment is made. The integration will post an internal note and re-open the conversation in Front so it's easy to follow up with customers.
### Link multiple issues
Sometimes customers will write in with multiple requests at one time. You can link as many Front messages to a Linear issue as you like.
### Unlink issues
Click _Unlink_ from the Linear sidebar in Front to remove the link between the message and a Linear issue. You can also remove this from the Linear issue by right-clicking on the issue attachment.
### **Merge duplicate reports**
It's common for support requests to relate to bugs or issues already filed in Linear. When you merge duplicate issues that have Front attachments, we'll move any Front attachments and comments over to the canonical issue and update the linked Front message so that it's connected to the canonical issue and automations work.
Click `Unlink` from the Linear sidebar in Front to remove the link between the conversation and the associated Linear issue. You can also remove this link from the Linear issue by right-clicking on the Front link attachment.
### Filter for Front links
From any Linear view, you can filter by issues linked to Front conversations. Click `F` then select `Links` and then select `Front`.
## FAQ
Do internal notes from Front get added to Linear?
No, the only option is to send comments from Linear back as internal notes in Front when a comment is made, or an issue changes status. This is configurable in Linear settings > Integrations > Front
Are templates supported?
Templates are not supported at this time in the Front integration.
Why isn't my conversation on Front reopening?
Conversations in private inboxes do not support automated comments or reopening.
---
# Source: https://linear.app/docs/get-the-app.md
# Download Linear
Linear is available on browsers, macOS, Windows, iOS and Android.

## Overview
Linear is available as a desktop application, from the browser, as native mobile apps or on tablets as a Progressive Web App (PWA).
> [!NOTE]
> We recommend using our desktop clients and mobile apps for the best experience.
## Desktop Clients
Linear is available for macOS Intel, macOS Apple Silicon, and Windows. Download the desktop app at [linear.app/download](https://linear.app/download).
The benefits of using the desktop app are:
* Notifications are integrated with the native OS. This is especially useful to Safari users since Safari does not support our browser notification system (made with PushAPI).
* Linear is always on and the dock quickly alerts you of unread notifications.
* Keyboard shortcuts have less risk of conflicting with browser-based presets or custom shortcuts.
* Tab support within the app
## Browsers
The Linear web app can be access by logging in to [linear.app](https://linear.app). Linear will launch directly in your browser window.
Nearly all functionality in the desktop app including offline mode is available on the web in most browsers. We support the most recent three versions of Chrome, Firebox and Safari.
**Open in desktop app:** This browser preference opens Linear links in the desktop app if installed. Universal links can be configured from the browser version [Account > Preferences > Behavior > Open in desktop app](https://linear.app/settings/account/preferences).
> [!NOTE]
> **Brave Shields**
>
>
> Brave users should disable "Brave Shields" for the linear.app domain to allow the website to connect to and open the desktop app automatically.
## iOS and Android
Linear on mobile lets you unblock work wherever you are and complement use of Linear on other clients. Download these apps from the App Store or Google Play Store, or learn more [here](https://linear.app/mobile).
On both apps, tabs offer entrypoints to common mobile workflows:
### Home
Review your assigned, created or subscribed issues through “My issues”, quickly access your favorites, and explore teams to view their issues, cycles, and triage queues.
### Inbox
Check your Inbox and take action on notifications by sending comments or updating issues directly from the app. Your inbox syncs with Linear on other clients and supports reading, snoozing and deleting your notifications.
### Create issues
Create issues through the center tab. Add more context by attaching media from your camera roll and use rich formatting like codeblocks and quotes.
### Search
Search for issues or projects across your workspace.
### Settings
Switch workspaces, customize your notification schedule, change between light and dark themes or send feedback.
You can also use Linear on your mobile or tablet devices through your browser with our PWA. Go to [linear.app](https://linear.app) to sign in.
## Having Trouble?
### Real time sync and offline
Linear automatically syncs all changes in realtime as they happen. This is critical to your team's ability to collaborate well and work quickly. If for some reason changes cannot be sent to the backend, the app will store changes locally and re-try whenever connectivity is restored (e.g. internet is back up).
You'll start seeing the words "Syncing" appear next to the workspace name at the top of your sidebar when the app detects that there are a lot of changes waiting to be synced or when sending changes take longer than expected. The number next to it shows how many changes are waiting to be sent. They'll be reloaded and retried even if you restart the application before restoring connectivity.
> [!NOTE]
> **Offline mode is designed as a failsafe and not a full-fledged feature.**
> We do not check the creation date of each change before updating data. This means that if you make a lot of edits while in offline mode, you could overwrite changes from someone on your team (e.g. if you edited the issue description or they had updated status).
### Network requests to localhost
We periodically check if the Linear desktop app is installed on your computer. We achieve this by sending network requests to your localhost (your computer) on different ports. Each port check helps us determine if our desktop app is running. This then allows us to seamlessly open certain URLs directly in the desktop app, enhancing your user experience and ensuring better integration between our web and desktop applications.
The ports we check are `44450`, `18450`, and `33234`.
### Automatic app updates
For updates, the desktop app downloads and installs updates automatically in the background. To disable automatic updates for MacOS:
#### **Terminal**
`defaults write /Users/$USER/Library/Preferences/com.linear AutoUpdateDisabled -bool YES`
Use the following command to re-enable automatic updates: `defaults write /Users/$USER/Library/Preferences/com.linear AutoUpdateDisabled -bool NO`
#### Plist
Using a `/Users/$USER/Library/Preferences/com.linear.plist` file deployed through MDM, the contents would be:
```xml
AutoUpdateDisabled
```
## FAQ
Do you support Linux?
We may in the future but it's not on the roadmap for now. Linux users can use Linear on one of our supported browsers.
My app is stuck in offline mode.
Being stuck in offline mode may relate to a known Chromium bug. Please toggle your wifi off and on again from your computer's menubar.
Can I open a Linear URL in the desktop app automatically?
Yes, using a `linear://` protocol followed by the rest of the URL will open that page in the desktop app instead of a browser.
I'm seeing a "Couldn't open in desktop app" error, how do I resolve this?
If accessing Linear in browser and encountering a _Local Network access was denied_ error unexpectedly when attempting to navigate through links, this can indicate a browser-specific configuration that blocks Local Network Access.
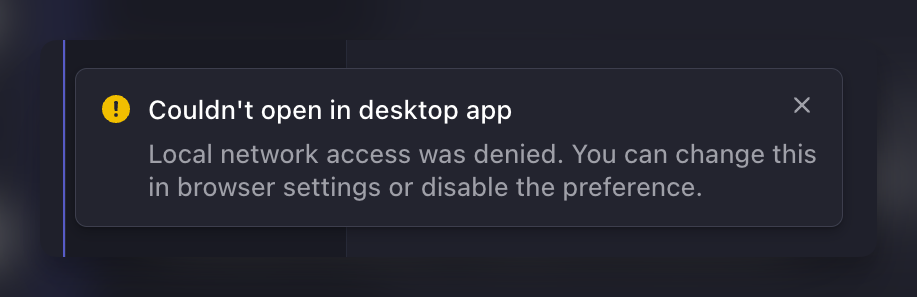
To resolve, navigate into your browser settings and search for _Local Network Access_—you should spot the configuration specific to Linear under _Site Settings_:

After clicking into this setting, ensure _Local network access_ is set to _Allow_:

Note that these screenshots are specific to Chrome, and other affected browsers’ navigation may look slightly different—feel free to reach out to [support@linear.app](mailto:support@linear.app) if you’re having trouble spotting this!
---
# Source: https://linear.app/docs/github-integration.md
# GitHub
---
# Source: https://linear.app/docs/gitlab.md
# GitLab
Linear supports linking your Linear issues to GitLab and automates your merge request workflows.
## Overview
Link Linear issues to GitLab merge requests. Automate your MR workflow so that issues update when MRs are drafted, opened, merged and when reviews are requested. You can link single or multiple issues to a specific MR.
## Configure the GitLab integration
We support linking GitLab merge requests for both hosted and self-hosted installations, as long as your installation is _publicly available_.
1. Navigate to [**Linear Settings > Features > Integrations > GitLab**](https://linear.app/settings/integrations/gitlab)
2. Click **Enable** to launch the set-up pop-up.
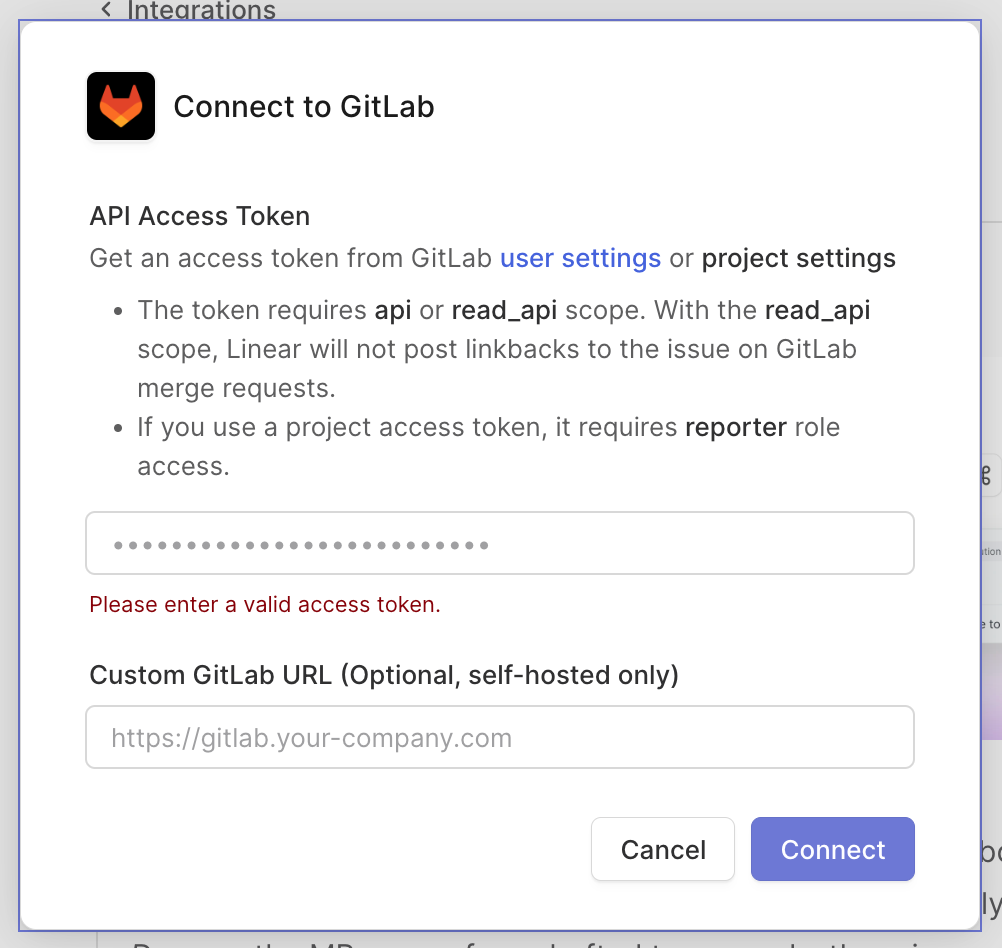
1. Navigate to [**GitLab > User Settings > Personal Access Token**](https://gitlab.com/-/profile/personal_access_tokens) or **GitLab > Project Settings > Access Token** to create an API access token.
An access token is used to query the GitLab API for further information and also used to post issue linkbacks. Because GitLab doesn't support bot accounts, linkbacks are created under the name of the token owner. It's recommended that you create a new user for Linear to act as the bot account.
2. When creating the token, set the `api` _or_ `read_api` scope.
If the `read_api` scope is selected, Linear will not post linkbacks to the issue on GitLab merge requests. If using a project access token, the token needs `Reporter` role or higher.
3. **(Optional)** Enable and set a custom URL for your self-hosted GitLab installation without any path (e.g. `https://gitlab.yourcompany.com`). This URL needs to be accessible to public Internet and is only required for self-hosted installations. The earliest supported version of GitLab is 15.6.
If you need to grant access to Linear's IPs, they are 35.231.147.226, 35.243.134.228, 34.140.253.14, 34.38.87.206, 34.134.222.122, and 35.222.25.142.
4. Click **Connect**.
5. Linear will generate the Webhook URL after it validates the access token. Copy and paste this URL to GitLab in either:
1. A Group's Webhook Settings (For a company on GitLab's Premium or Ultimate tiers) to integrate all projects under it.
2. A Project's Webhook Settings, to individually connect a specific project.
6. Enable the following Triggers:
1. `Push events`
2. `Comments`
3. `Merge request events`
4. `Pipeline events`
7. Under SSL verification, ensure **Enable SSL verification** is checked
8. Click **Save changes**.
## Link Merge Requests
### Create a new branch
Set the branch format in Linear **Settings > Workspace > Integrations GitLab > Branch format**. When viewing or selecting a Linear issue, use the _Copy git branch name_ action or shortcut `Cmd/Ctrl` + `Shift + .` It will give you a branch name with the issue ID which you can use to create a new branch in GitLab.
> [!NOTE]
> We recommend using common branch naming patterns throughout all of your teams.
### Add the issue ID in the MR title
Include the Linear issue ID (e.g. ID-123) in the MR title when creating merge requests.
### Use a magic word
Add a magic word + `issue ID` in the MR description (e.g. `Fixes ENG-123`). The integration cannot link MRs via comments or commit messages. The available magic words to link issues are: `close, closes, closed, closing fix, fixes, fixed, fixing resolve, resolves, resolved, resolving complete, completes, completed, completing.`
To link MRs to issues **without** them automating your issue status on MR merge, use the one of the contributing magic words: `_ref_, _references_, _part of_, _related to_, _contributes to_, _towards_`. When using a non-closing magic word like this, the linked MR or commit will still move the issue through other statuses per Workflow settings, but will not automate the issue's status when the MR or commit merges. Instead, it will only transition the issue through to what’s configured prior to the _On MR or commit merge_ event.
#### Link multiple Linear issues to an MR
To link multiple Linear issues to a single Merge Request, or to link a Merge Request after creating it, use the magic word linking method by including multiple closing statements in the MR description (e.g. `Fixes ENG-123, DES-5 and ENG-256`). Linking will happen after you save your changes. The Linear issue will not close until all Merge Requests have been closed/merged.
## Merge Request automation
The merge request automation allows you to select specific statuses for your Linear issues based on MR changes—saving you the hassle of updating Linear issues manually.
Customize the MR automation in **Settings > Team > Workflow**. Since this is a team setting, it must be configured for each team in your workspace.
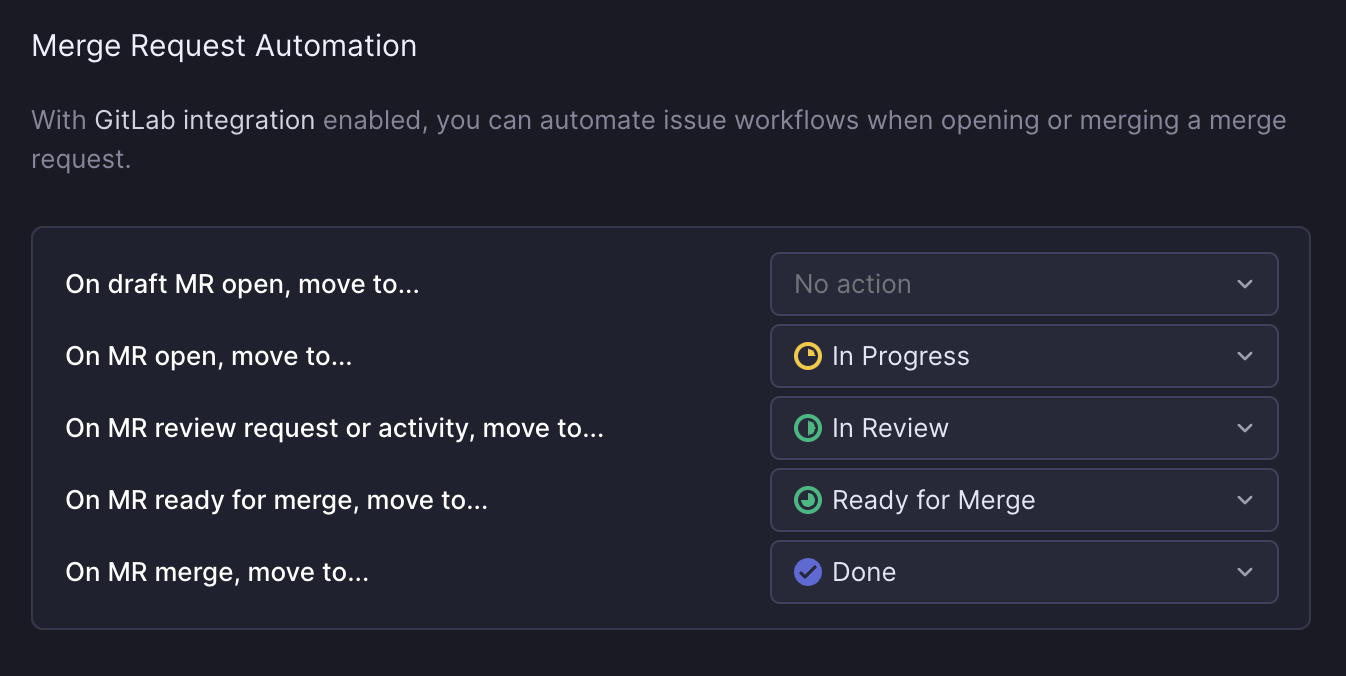
### Ready for merge automation
If you'd like to use the Merge Request automation to capture passing CI checks, please verify in GitLab that:
1. You have enabled Pipeline events under the Webhook settings for any repo part of the GitLab integration.
2. All pipelines that Linear should consider when determining if an MR is mergeable need to be merge request pipelines. GitLab documentation is available [here](https://docs.gitlab.com/ee/ci/pipelines/merge_request_pipelines.html).
3. Under ‘Merge requests’ in project settings, ‘Pipelines must succeed’ is checked.
> [!NOTE]
> If you want to capture MR approvals, please verify in **Project Settings > Merge requests** that Merge request approvals are required.
### Custom merge queues
If you use a custom merge queue that merges changes and then closes the merge request, be sure to add the `externally-merged` label **before** closing it. This tells Linear to treat the merge request as successfully merged even though it was closed.
### Branch-specific rules
You can set custom workflow automations based on particular target branches. For example, you can now configure that when a MR is merged to:
* `staging`, the issue status should change to “In QA”
* `main`, the issue status should change to “Deployed”
You can also override a default rule in a particular branch with “no action” if desired, so that issues linked to a change in that branch will not change status. Branch rules can be specified using regex, e.g: `^fea/.*` can set automations for all feature branches.
## Issue linkbacks
When an issue is linked with a merge request, Linear posts a linkback message as a comment with the issue title and description. All the merge requests are also listed in the issue details in Linear. When your MR is being reviewed in GitLab, see the avatars of up to three most recent reviewers and their review states without leaving Linear. This cross-referencing makes it faster to retain context without jumping between apps. Linkbacks are managed by the scope selected.
## Auto-assign and update status
Save yourself a few steps by toggling on our automations in **Settings > My Account > Preferences > Behavior**.
* Auto-assigns the issue to you, and/or
* Move the issue to the first Started status (which you can customize in **Settings > Team > Workflow)** when you copy the git branch name.
## Auto-linking
GitLab supports rendering URLs pointing to Linear when you mention issue IDs in GitLab. To configure this functionality, please reference GitLab's [documentation](https://docs.gitlab.com/user/project/integrations/linear/).
## FAQ
Can I import or sync GitLab issues?
Our issue migration assistant does not support GitLab issues. We suggest customizing the CLI importer to import issues. One option is to customize the importer to support GitLab imports. Another option is to export GitLab issues to a CSV and then modify the headers and format so that it matches one of the issue trackers supported by the CLI.
How do I connect a MR that is already open?
Modify the MR title or description to link an issue. See the section on this page titled _Linking MRs to issues_.
How do I remove a MR from an issue?
Open the issue in Linear and right click on the merge request attachment to bring up an option to remove it. You can also do this through the command menu in Linear by viewing or selecting an issue, then searching for `git.`
I get a notification in Linear every time a MR is open. How can I change this?
Go to integration settings and remove linkbacks. This should reduce the notifications.
My issue title is not showing up in GitLab comments, just the issue ID. Why?
If your team is private, we won't disclose the issue title. The link will go to your Linear issue and be accessible only by users who are part of that private team.
What permissions do the integrations require?
On GitLab, we have both read and write access with their API (they don't have separate permissions for comments).
Why does Linear need an access token?
During integration setup, Linear requires an access token. The below is an exhaustive list of how that token is used:
* To get supplemental information about merge requests that isn't included in the webhooks we receive
* For posting linkbacks on linked merge requests
* To retrieve merge request information when linking an MR to an issue (for rich attachment)
* To retrieve merge request mergeability status when a pipeline completes
Why are my Linear issues not progressing to my "On MR ready for merge" status?
We currently only allow issues to transition to the status you've chosen for "On MR ready for merge" if you also have a status selected for "On MR review request or activity". Make sure that you have a status selected for this event.
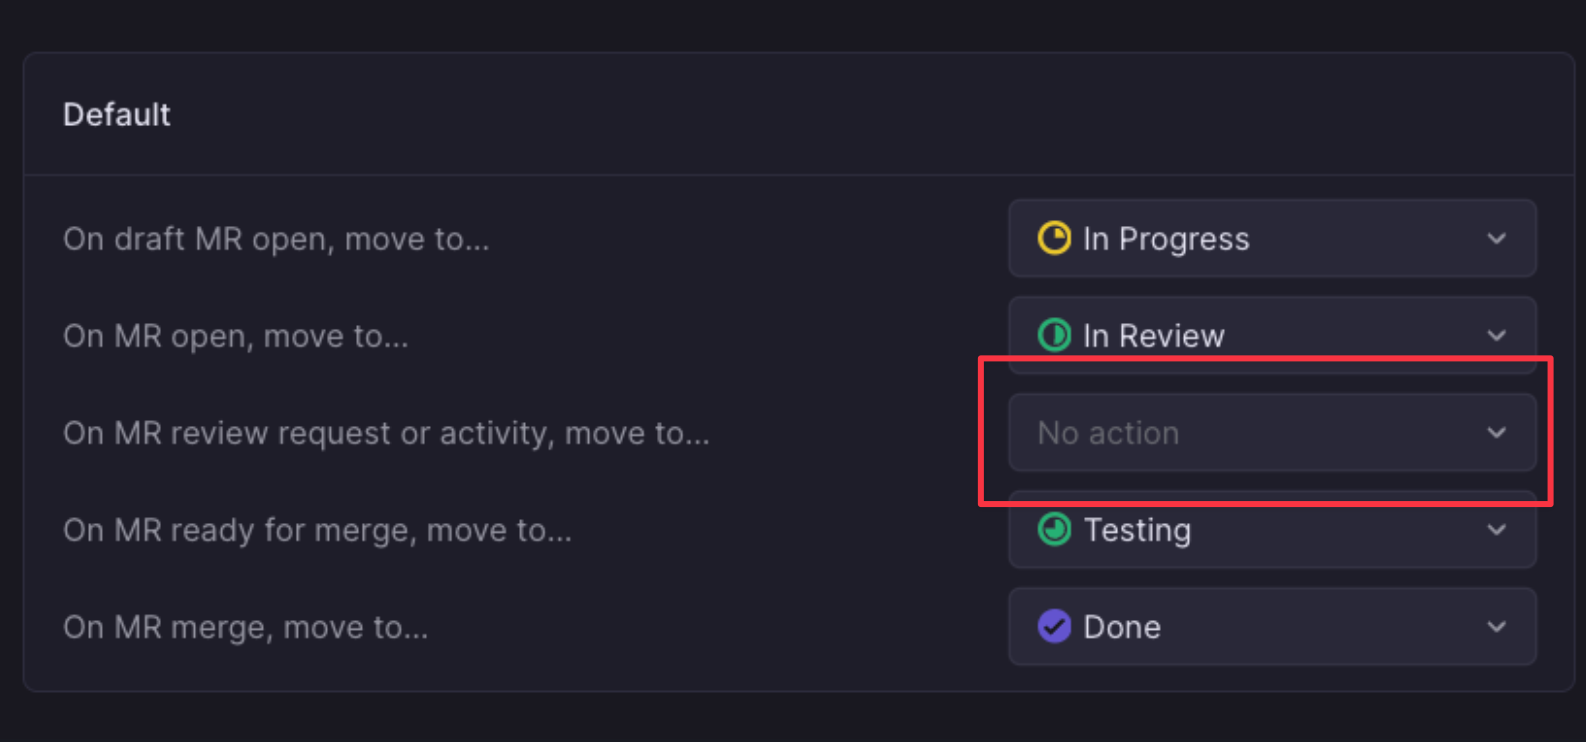
*GitLab MR workflow status events*
My GitLab integration stopped working
In GitLab's webhook settings, check that the webhook used for Linear is active. If it isn't, please send take a screenshot of its recent events and send it into [support@linear.app](mailto:support@linear.app) for further support.
In the meantime, please click the "Test" button for the relevant webhook and confirm if you continue to see issues with the integration.
Can I add multiple GitLab instances?
It is not currently possible to connect multiple GitLab instances to your Linear workspace, you will need to select one GitLab instance to connect within your GitLab settings.
---
# Source: https://linear.app/docs/gong.md
# Gong
Automatically create issues from Gong call recordings.
> [!NOTE]
> Available to workspaces on our [Enterprise](https://linear.app/pricing) plan
## Overview
The Gong integration automatically creates Linear issues from customer call recordings. Each issue includes a drafted title and description, speaker-attributed excerpts pulled directly from the transcript, and a link to the exact moment in the recording where the request or problem was raised.
Once enabled, Linear reviews new customer-facing calls and identifies meaningful product feedback without requiring anyone to listen to the recording. The integration captures what customers are asking for, adds the relevant context from the conversation, and sends the issue into your team’s [Triage](https://linear.app/docs/triage) view for review. This keeps your workflow organized in Linear while leaving calls and transcripts in Gong.
## How it works
Linear periodically checks for new Gong recordings and processes new calls that meet specific criteria for analysis. Only customer-facing conversations are included, so internal or private calls and shorter recordings under 10 minutes are automatically skipped.
The system filters out items that aren’t actionable, like sales-related questions, beta access requests, general inquiries, or internal commentary.
Actionable findings that pass these filters are created as issues in Linear. Each issue includes a concise summary, customer motivation for the request, transcript excerpts with speaker attribution and a link directly to the timestamp in the recording for posterity.
Issues are added to your team’s Triage view, where they can be quickly reviewed, categorized, and moved into your existing backlog.
## Configure
To set up the integration, navigate into your workspace-level _Settings_ > _Integrations_ and search for _Gong_. After enabling the Gong integration, navigate to your Gong settings, enable the recording intake and select the team that should receive Gong-generated issues:
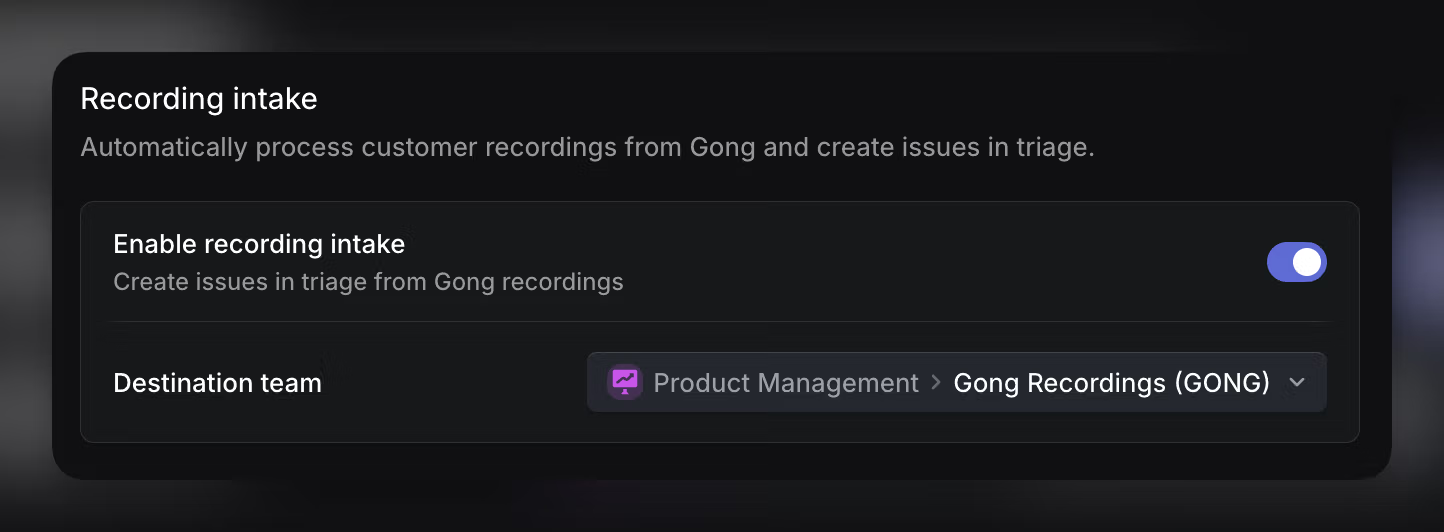
Optionally, you can also provide additional guidance to help route issues to the correct teams or templates. This guidance can include examples, team mentions, or internal rules the Linear Agent should follow when interpreting feedback.
## Customer requests
When customer requests are enabled in your workspace, Gong is capable of creating customers just-in-time as their first request is added. If a customer already exists in Linear that matches the customer on the call, that customer will be re-used for association with the new customer request.
## FAQ
Do users in Gong need Linear seats?
No, once an admin configures this integration it will run on all external calls without a seat for itself or other call participants.
---
# Source: https://linear.app/docs/google-sheets.md
# Google Sheets
Use the Google Sheets integration to create custom analytics and dashboards for your company.
## Overview
The Google Sheets integration creates a Google Sheet for your workspace's issue data, project data, or both, allowing you to build out custom analytics among other uses. The data in these sheets refreshes hourly when changes have been made in your workspace.
All issues in public teams in a workspace will be shared to the issues sheet, and all projects belonging to at least one public team will sync to the projects sheet. We do not export data contained only in private teams.
There isn't a way to select what data is shared to the Google Sheet beyond configuring whether you wish to sync issues, projects, and/or initiatives.
## Configure
Go to the [Google Sheets integration settings](https://linear.app/settings/integrations/google-sheets) and connect Linear to a Google account. This will automatically create a Google Sheet called _Linear Issues_ in your Google Drive. Optionally, also choose to enable new sheets for projects and initiatives.
As this is a workspace setting, you can only connect one account per team. To share the data with teammates, update permissions directly on the sheet. If you're looking for a one-time download, workspace Admins can [export](https://linear.app/settings/import-export) a CSV instead.
## Synced data
### Issues
* ID
* Team
* Title
* Description
* Status
* Estimate
* Priority
* Project ID
* Project
* Creator
* Assignee
* Labels
* Cycle Number
* Cycle Name
* Cycle Start
* Cycle End
* Due Date
* Parent issue
* Initiatives
* Project Milestone ID
* Project Milestone
* SLA Status
* Roadmaps
* Created
* Updated
* Started
* Triaged
* Completed
* Canceled
* Archived
### Projects
* ID
* Name
* URL
* Summary
* Description
* Status
* Priority
* Milestones
* Creator
* Lead
* Members
* Start Date (Start)
* Start Date (End)
* Target Date (Start)
* Target Date (End)
* Created At
* Started At
* Updated At
* Completed At
* Canceled At
* Archived At
* Teams
* Initiatives
* Health
* Latest Update
* Latest Update Date
* Customer Count
* Customer Revenue
### Initiatives
* ID
* Parent ID
* Name
* URL
* Description
* Details
* Status
* Creator
* Owner
* Target Date (Start)
* Target Date (End)
* Created At
* Started At
* Updated At
* Completed At
* Archived At
* Teams
* Health
* Latest Update
* Latest Update Date
## Updating data
The Sheets data refreshes every hour if there is an update to be made, otherwise it won't refresh.
To run an immediate update, Admins can open the `Cmd`/`Ctrl` + `K` menu and select `Sync to Google Sheets` action. Alternatively, go to the integration's page and click _Update now_.
You can rename the sheet or move it to shared drives without affecting the data or uploads.
> [!NOTE]
> Avoid updating cells in the source sheet as any changes will be overridden. If you want to run analytics, do so in a separate sheet.
## Custom project analytics
By using the projects sheet, you have more flexibility to build custom analyses in support of planning decisions. You can see an example of a project prioritization analysis [here](https://docs.google.com/spreadsheets/d/1qi3lV5d22ZGx-9mkHaDS_tT-Y1fT-BEKd7Ik87wkxSw/edit?usp=sharing).
## Custom issue analytics
To build analytics from issue data, import or reference data from the sheet Linear created using IMPORTRANGE, VLOOKUP or similar functions.
Linear users have used the Google integration to build analytics that:
* Track velocity per team member.
* Combine with Linear's cycle statistics to get a deeper view into individual and team velocity.
* Track the types of work completed and planned. To do this, create custom labels and issue statuses in Linear. A common way to do this is to name labels with a prefix or key:value pair for easier filtering (e.g. _comp: feature_name_ or _type: feature/bug/etc_.)
* Build a Gantt chart for planning or other charts and graphs to show issue progress over time.
* Track bugs more granularly. What percent of open issues are bugs? How many bugs were worked on in a cycle compared to features?
* Track time: Use the timestamp data to measure how long issues remain open or how long it takes an issue to go from start to completion.
For more advanced queries, consider using the API or Zapier.
## Timestamp FAQs
* Multiple issue statuses can exist in a single category (e.g. _In Progress_ and _In Review_ fall under _Started._ The timestamp exported reflects the latest timestamp at which an issue was moved to that status category from another category -- not between statuses of the same category.
* Null fields on timestamps mean the issue or project was never in that status, or the timestamp was cleared (an issue moving from Backlog -> Done -> In Progress will clear the completed timestamp.)
* All times in this integration are displayed in GMT.
---
# Source: https://linear.app/developers/graphql.md
# Getting started
Linear's public API is built using GraphQL. It's the same API we use internally for developing our applications. If you are new to GraphQL, Apollo has [resources for beginners](https://blog.apollographql.com/the-basics-of-graphql-in-5-links-9e1dc4cac055). The official [GraphQL documentation](https://graphql.org/) is another good starting point.
## Endpoint
Linear's GraphQL endpoint is:
```http
https://api.linear.app/graphql
```
It supports introspection so you can query the whole schema.
## Authentication
The Linear API supports personal API keys and OAuth2 authentication.
### OAuth
If you’re building an application for others to use, we recommend you use [OAuth2 authentication](https://linear.app/developers/oauth-2-0-authentication). Once you complete the authentication flow and acquire an access token, pass it with the header `Authorization: Bearer `
```sh
curl \
-X POST \
-H "Content-Type: application/json" \
-H "Authorization: Bearer " \
--data '{ "query": "{ issues { nodes { id title } } }" }' \
https://api.linear.app/graphql
```
### Personal API Keys
For personal scripts API keys are the easiest way to access the API. Visit [Security & access](https://linear.app/settings/account/security) settings to create and manage them.
To authenticate your requests, you need to pass the API key with header: `Authorization: `
```sh
curl \
-X POST \
-H "Content-Type: application/json" \
-H "Authorization: " \
--data '{ "query": "{ issues { nodes { id title } } }" }' \
https://api.linear.app/graphql
```
## Error handling
Linear's GraphQL API follows the standard GraphQL error format, returning errors within an errors array in the response. Each error object includes a message describing what went wrong, a path array indicating where in the query the
error occurred, and extensions that may contain additional context such as error codes or validation details.
Always check for the errors array before assuming success—GraphQL queries can partially succeed with a 200 HTTP status, returning some data while
including errors for failed fields. Monitor HTTP status codes for server errors (5xx) and make sure to correctly handle [rate limits](https://linear.app/developers/rate-limiting). Use strongly-typed GraphQL clients when possible to catch validation errors at development time, and always validate required fields to avoid runtime null value errors.
## Linear SDK
The [Linear SDK](https://linear.app/developers/sdk) exposes the Linear GraphQL schema, and makes it easy to access models, or perform mutations. We recommend using it to interact with the GraphQL API. It is written in TypeScript, allowing all operations to be strongly typed.
## Getting Started
> [!NOTE]
> We recommend using a GraphQL client to introspect and explore the schema if you are not using the Linear Client (SDK).
>
> Our GraphQL API is explorable and queryable via [Apollo Studio](https://studio.apollographql.com/public/Linear-API/variant/current/home), no download or log in required. Click the Schema tab to browse the schema, and click the Explorer tab to run queries.
Once you have your client installed, you can start making queries (read) and mutations (write) to the API.
### Queries & Mutations
To get information about the authenticated user, you can use the `viewer` query:
```graphql
query Me {
viewer {
id
name
email
}
}
```
As issues (and most other objects) are team based, you first need to get the ID of the team you want to interact with:
```graphql
query Teams {
teams {
nodes {
id
name
}
}
}
```
Once you have found the correct team, you can get the issues for that team. Lets make a request with also some other issue metadata:
```graphql
query Team {
team(id: "9cfb482a-81e3-4154-b5b9-2c805e70a02d") {
id
name
issues {
nodes {
id
title
description
assignee {
id
name
}
createdAt
archivedAt
}
}
}
}
```
We can also get an issue by id:
```graphql
query Issue {
issue(id: "BLA-123") {
id
title
description
}
}
```
> [!NOTE]
> Locate the IDs of teams, issues and other entities directly within Linear itself from the command menu: `Cmd/Ctrl+K` and "Copy model UUID". This will show results based on the page you're currently viewing within Linear.
### Creating & Editing Issues
To create a new issue, use a mutation:
```graphql
mutation IssueCreate {
issueCreate(
input: {
title: "New exception"
description: "More detailed error report in markdown"
teamId: "9cfb482a-81e3-4154-b5b9-2c805e70a02d"
}
) {
success
issue {
id
title
}
}
}
```
This mutation will create a new issue and return its `id` and `title` if the call was successful (`success: true`).
> [!NOTE]
> If an issue is created without a specified `stateId`(the status field for the issue), the issue will be assigned to the team's first state in the Backlog workflow state category. If the "Triage" feature is turned on for the team, then the issue will be assigned to the Triage workflow state.
A common use case after creating an issue is updating the issue. To do this we can use the `issueUpdate` mutation, using the input field to include whatever it is we want to change. The `id` provided can be either be the uuid returned by the creation query, or the shorthand id like `BLA-123` below.
```graphql
mutation IssueUpdate {
issueUpdate(
id: "BLA-123",
input: {
title: "New Issue Title"
stateId: "NEW-STATE-ID",
}
) {
success
issue {
id
title
state {
id
name
}
}
}
}
```
> [!NOTE]
> Changes made to an issue's properties in the first 3 minutes are considered part of the issue creation process, and won't be added to the activity log as changes to the issue.
### Accessing Images
Linear hosts images and other assets uploaded into Linear behind authentication. Only authenticated users can view their assets. This also applies to the API and all images will require authentication to be displayed outside Linear's application. Regular [API authentication](https://linear.app/developers/graphql#authentication) (OAuth or API keys) is accepted for displaying images. If you're displaying images outside Linear's applications, you should download and self-host them in your application's environment.
### Adding mentions in Markdown
In the Linear application, you can add mentions to users, issues, projects, and other resources by typing @ and then selecting a resource to mention.
In the GraphQL API, mentions can be created in Markdown by using the plain URL of the resource. For example:
```md
https://linear.app/yourworkspaceurl/profiles/someuser what do you think about
https://linear.app/yourworkspaceurl/issue/LIN-123/some-issue here?
```
Will convert into:
> **@user**, what do you think about ,**@LIN-123 some issue**, here?
Where the bolded segments are mentions.
### Adding collapsible sections in Markdown
For collapsible sections in an issue, comment, or document, use `+++ [some section title]` to start the section and `+++` to end it.
```md
+++ Section title
Markdown content (initially hidden)
+++
```
### Fetching Updates
If you're working on building an application which displays Linear data and you want the information to update (near) realtime, you have few options. To prevent excessive usage of our API, we recommend that you be mindful about your implementation.
Lets say you're displaying a big number of issues in your application and want to update them:
**Do:**
* Register [a programmatic webhook](https://linear.app/developers/webhooks) and get updates for all issues for the team. When you detect changes, update the issue information. You can also automatically register webhooks for OAuth applications.
* If you have to poll recent changes, order results by returning recently updated issue first. See [Pagination](https://linear.app/developers/pagination) section above how to implement this
* [Filter issues](https://linear.app/developers/filtering) in your GraphQL request instead of fetching all issues and filtering in code.
**Don't:**
* Poll updates for each issue in the application. There should never be a reason to do this and your application might get rate limited. See above tactics to implement this better
If you have any questions, visit the **#api** channel on our [customer Slack](https://linear.app/join-slack).
### Other Examples
#### Queries
There are many ways to fetch issues. One common use case is to get all the issues assigned to a user.
First let's find our user's id:
```graphql
query {
users {
nodes {
name
id
}
}
}
```
Now we can use the `assignedIssues` field on User:
```graphql
query {
user(id: "USERID") {
id
name
assignedIssues {
nodes {
id
title
}
}
}
}
```
We can do the same thing with `workflowStates` which represent status fields for teams:
```graphql
query {
workflowStates {
nodes {
id
name
}
}
}
query {
workflowState(id: "WORKFLOW_ID") {
issues {
nodes {
title
}
}
}
}
```
#### Archived resources
Archived resources are hidden by default from the paginated responses. They can be included by passing optional `includeArchived: true` as a query parameter for pagination.
## Support
If you run into problems or have questions or suggestions, you can join our customer Slack or send us a note ([hello@linear.app](mailto:hello@linear.app)). Both options are available through the user menu in the Linear application.
---
# Source: https://linear.app/developers/how-to-upload-a-file-to-linear.md
# How to upload a file to Linear
This guide shows you how to upload a file to Linear while using the [GraphQL API](https://linear.app/developers/graphql) or [TypeScript SDK](https://linear.app/developers/sdk).
> [!NOTE]
> Files uploaded to Linear are stored in Linear's private cloud storage. They are only intended to be used within Linear, and you must authenticate to access these files elsewhere. Read more in [File Storage Authentication](https://developers.linear.app/docs/oauth/file-storage-authentication).
## Include an image or a video within markdown content
The easiest way to upload an image or a video to Linear's private cloud storage is to include a URL reference to it within markdown content that you provide while creating issues, comments, or documents.
For example, while using the `IssueCreate` mutation in the GraphQL API, include an image in the markdown content provided in the `description` field:
```graphql
mutation IssueCreate {
issueCreate(
input: {
title: "Issue title"
description: "Markdown image here: \n "
teamId: "9cfb482a-81e3-4154-b5b9-2c805e70a02d"
}
) {
success
}
}
```
The image file at `https://example.com/image.png` will be automatically uploaded to Linear's private cloud storage. You can also embed a base64 encoded image instead of a URL:
```md

```
## Upload files manually
To upload directly to storage and for files other than images, use the `fileUpload` mutation to request a pre-signed upload URL, then send a `PUT` request to that URL with the file content.
> [!NOTE]
> Attempting to upload a file from the client-side will be blocked by Linear's [Content Security Policy (CSP)](https://developer.mozilla.org/en-US/docs/Web/HTTP/CSP). You may request the signed upload URL from the client, but the `PUT` request must be executed on the server.
Here is an example using the TypeScript SDK to upload a file on the server:
```ts
/** Uploads a file to Linear, returning the uploaded URL. @throws */
async function uploadFileToLinear(file: File): Promise {
const uploadPayload = await linearClient.fileUpload(file.type, file.name, file.size);
if (!uploadPayload.success || !uploadPayload.uploadFile) {
throw new Error("Failed to request upload URL");
}
const uploadUrl = uploadPayload.uploadFile.uploadUrl;
const assetUrl = uploadPayload.uploadFile.assetUrl;
// Make sure to copy the response headers for the PUT request
const headers = new Headers();
headers.set("Content-Type", file.type);
headers.set("Cache-Control", "public, max-age=31536000");
uploadPayload.uploadFile.headers.forEach(({ key, value }) => headers.set(key, value));
try {
await fetch(uploadUrl, {
method: "PUT",
headers,
body: file
});
return assetUrl;
} catch (e) {
console.error(e);
throw new Error("Failed to upload file to Linear");
}
}
```
The resulting file URL now points to Linear's private cloud storage and can be used in API mutations, like creating an issue or a comment.
### Proxy the file upload on the server
If you're handling file uploads from a website, for example with the `` element, you must forward the file to a server before attempting to upload it to Linear.
> [!NOTE]
> **Next.js Example**
> Browse or run a full example that proxies a file upload through Next.js API Routes here: [https://github.com/linear/linear/tree/master/examples/nextjs-file-upload](https://github.com/linear/linear/tree/master/examples/nextjs-file-upload)
## Errors
Common errors when uploading files to Linear and how to fix them.
CORS error when sending the PUT request
You are trying to upload a file from the client-side rather than a server, which is not allowed. You must proxy the file upload request via a server.
See [Proxy the file upload on the server](https://developers.linear.app/docs/guides/how-to-upload-a-file-to-linear#proxy-the-file-upload-on-the-server) for an example of how to do this with Next.js.
403 Forbidden response from PUT request
You likely forgot to copy the headers returned by the `fileUpload` mutation onto the `PUT` request. Note that the headers are returned in array format and must be transformed into an object or a `Headers` instance before including them in a `fetch` request.
---
# Source: https://linear.app/docs/import-issues.md
# Importer
Learn best practices for importing to Linear. Select the tool you're importing from in the table of contents for specific instructions.

## Linear Concepts
A Linear [workspace](https://linear.app/docs/workspaces) is our top level concept, which contains one or many [teams](https://linear.app/docs/teams). We recommend that each company using Linear uses only one workspace.
[Issues](https://linear.app/docs/creating-issues) and [projects](https://linear.app/docs/projects) are the core entities used to manage work in Linear. Each issue belongs to a single team, while projects can belong to one or many teams. Other concepts in Linear can be scoped to a team or a workspace like [Views](https://linear.app/docs/custom-views) (filter based groups of issues or projects), [Initiatives](https://linear.app/docs/initiatives) (hand-picked groups of projects) and more.
When you import from another service to Linear, we'll attempt to match data from the source tool with the closest concept in Linear. If a concept from the source tool does not translate well to Linear, it may not be imported; please see details on your individual service for further details.
## Pre-import best practices
Consider the below before starting your first import for a smoother experience.
### Which data is worth importing?
If there is data that is no longer relevant to your organization's day to day work, consider whether it needs to be in Linear at all (perhaps a CSV of exported data from long-resolved issues is sufficient). Some organizations choose to use Linear as a "clean break" from their legacy tool and import only where absolutely necessary so they can start fresh with minimal clutter. Others prefer to maintain as full a historical record as possible in one place.
If you're importing when evaluating Linear instead of transitioning all at once, you may wish to run a pilot by importing just a few teams. We also have a resource for switching tools in our [switch instruction manual. ](https://linear.app/switch)
### Choose an import method
We offer two main methods of importing to Linear; our dedicated import assistants in-product and a CLI import tool. We recommend using the former whenever possible as they retain much more data from the original source, are easier to use, and provide the option to delete an import in bulk if desired.
Use the CLI importer when importing from a service that we don't have a dedicated import assistant for. Import assistants are available for Jira, GitHub Issues, Asana, Shortcut and Linear. More information about the CLI importer can be found [here](https://linear.app/docs/import-issues#trello-or-pivotal-tracker).
### Understand the import process
You'll first need to have an Admin role in Linear in order to access our import tools. You may also need high permissions in the tool you're importing from in order to access the data. In general, the import assistants follow this path:
Step | Detail
--- | ---
Setup | Provide an access token, or sign in to your source tool from Linear. Choose an existing team to import to, or create a new team. Please note that you cannot import to a sub-team directly -- instead, import to a top-level team and convert it to a sub-team afterwards.
Review | We'll display the issues, projects, labels, users and other data fetched from the information provided.
Choose what to import | Choose whether to import only open issues, or also to import closed and stale issues to the archive. The archive can be accessed through the overflow menu on each team in your sidebar.
Map users | For each user fetched, choose not to import them, to create a new user from an email address, or to map them to an existing user in your Linear workspace.
Confirm | At this point, all data available to import will be summarized. If it looks as you expect, hit Finish to start the import.
## How to import
Find instructions on importing from your source tool below:
### Jira
Find instructions [here](https://linear.app/docs/jira-to-linear)
### GitHub Issues
Find instructions [here](https://linear.app/docs/github-to-linear)
### Asana
1. Navigate to [Settings > Administration > Import/Export](https://linear.app/settings/import-export). You must be an admin in Linear to access this page.
2. Click on the button for Asana.
3. Enter your Asana personal access token. You can obtain your personal access token by navigating to your Asana [developer console](https://app.asana.com/0/my-apps).
4. Enter your Asana team name.
5. Select which Linear team to import issues into.
6. Click **Next** to start importing.
An issue cannot belong to multiple projects in Linear, so one project will be chosen if issues are assigned to multiple Asana projects.
> [!NOTE]
> We currently only support in app importing from Asana organizations. Make sure your Asana workspace is an organization before beginning an import, or [convert your Asana workspace to an organization](https://asana.com/guide/help/workspaces/create#gl-convert-workspace) if it is not. If you do not want to convert your Asana workspace to an organization, use the CLI importer.
We'll map fields in Asana to these fields in Linear:
Asana | Linear
--- | ---
Priority | Priority
Notes | Issue description (converted to Markdown)
Attached files | Added to description, all files except images and videos are converted to links
Tags | Labels (team-level)
Assignee | Assignee
Projects | Projects
Comments | Comments (markdown respected)
Status | Imported status will be Backlog or Done only
Sub-issue | Sub-issue
Blocked/blocking | Blocked/blocking
### Shortcut
1. Navigate to [Settings > Administration > Import/Export](https://linear.app/settings/import-export). You must be an admin in Linear to access this page.
2. Click on the button for Shortcut.
3. Enter your Shortcut personal access token.
4. Enter your Shortcut team name.
5. Select which Linear team to import issues into.
6. Click **Next** to start importing.
We'll map fields in Shortcut Issues to these fields in Linear:
Shortcut | Linear
--- | ---
Name | Title
Description | Issue description
Tasks | Appended to the description
External tickets | Appended to the description
State | Mapped to the most similar Linear status
Story type | Added as label (team-level)
Tags | Added as label (team-level)
Owners | First owner added as assignee when possible
Epic | Created as projects
Comments | Comments
Estimate | Estimate
Due date | Due date
Priority | Priority
### Trello, Pivotal Tracker, GitLab Issues
To import issues from these services, use our open source CLI importer_._
For **Trello**, please note that imports must be run from individual board exports, not from the overall workspace.
While CLI imports can also be used to customize imports for services with an import assistant, we don't recommend this as the CLI importer will not import data supported by the import assistant like comments or projects.
Our [Command Line interface (CLI) tool](https://github.com/linear/linear/tree/master/packages/import) uses CSV exports from the source tool and requires some technical expertise. Access it at the link or from [Settings > Workspace > Import/Export](https://linear.app/settings/import-export). For those unfamiliar with the command line, [this](https://drive.google.com/file/d/1cvjXN1c0oDgmtm0OZQyU1EXylDO2Oz2d/view?usp=sharing) video may help with getting started with a CLI import.
### Linear
To import data from one Linear workspace to another, first ensure that you have an admin account in both workspaces using the same email login credential.
> [!NOTE]
> If there isn't already an admin using the same email credential in both source and destination workspaces, invite an admin from the destination workspace to the source workspace (or vice versa) and have them run the import. For best results, avoid creating multiple accounts on the same workspace under different emails.
1. Navigate to [Settings > Administration > Import/Export](https://linear.app/settings/import-export). You must be an admin in Linear to access this page.
2. Click on the "Linear to Linear import" button.
3. Select the workspace you would like to import. We will only show workspaces under the same email address where you are an admin member.
4. Select the teams you would like to import from this workspace.
5. Choose how to map members from the workspace you are importing from to your current workspace.
6. Review a summary of the import.
7. Click "Start import".
> [!NOTE]
> This import will not carry over all data associated with your source workspace. Please note that the data below will not transfer.
>
> * Custom views / view preferences / views attached to projects or initiatives
> * Favorites / reminders / drafts / inbox notifications
> * Integrations* / webhooks / OAuth clients / API keys (Integrations will need to be installed on the new workspace and will not resume notifications or automations for imported issues in most cases.)
> * Billing/plans* (please contact support@linear.app for assistance with billing transfers)
> * Workspace URL (you can switch this manually after import)
> * Personal and Workspace settings
> * Roles (current admins will be imported as members, you will initially be the only admin. Guests will carry over with the same permissions.
Linear (old) | Linear (new)
--- | ---
Title | Title
Description | Description
Estimate | Estimate
Labels | Labels
Due date | Due date
Comments | Comments
Workflow state | Workflow state
Sub-issues | Sub-issues
Relationships | Relationships
Projects | Projects
Initiatives | Initiatives
Team templates | Team templates
Dashboards | Dashboards
### Other
If you'd like to import from a tool not listed here, you can still do so using our [CLI importer](https://github.com/linear/linear/tree/master/packages/import) and the CSV file of your exported data.
First, you'll want to generate a Linear export file from [Settings > Administration > Import/Export > Export CSV](https://linear.app/settings/import-export). Remove any exported text but leave the headers of each column. This will give a CSV in the format that the CLI importer expects for a Linear import.
In the fields below, paste data from your source tool's export file, and save the CSV.
* `Title` - Issue title
* `Description` - Issue description
* `Priority` - Issue priority
* `Status` - Issue state (workflow)
* `Assignee` - Issue assignee (user's full name)
* `Created` - Issue created date
* `Completed` - Issue completed timestamp: please note that this will not appear in issue activity log, but will be stored on the issue.
* `Labels` - Added as a label (separate by commas for multiple labels)
* `Estimate` - Issue estimate: please note that these values only appear on the issue after enabling estimates on the imported issue's team.
Once the above data is in the attached format, you can import the CSV using the CLI and selecting the "Linear" CSV option when prompted.
For those unfamiliar with the command line, [this](https://drive.google.com/file/d/1cvjXN1c0oDgmtm0OZQyU1EXylDO2Oz2d/view?usp=sharing) video may help with getting started with a CLI import.
### Troubleshooting
If something did not import as you expected, please check the section for your specific service to confirm whether we support importing that property. If the property is supported but didn't import as documented, please let us know at [support@linear.app](mailto:support@linear.app).
If you need to delete an import in order to re-import once more, you can do so through Import/Export settings, on the overflow menu on a specific import. If no overflow menu appears, please contact [Linear support](mailto:support@linear.app) for assistance deleting it.
Reimporting from the same external source to the same Linear team without deleting the initial import first will skip any already-imported issues.
---
# Source: https://linear.app/docs/inbox.md
# Inbox
The Inbox is your notification center in Linear and where you’ll find important updates on issues in your workspace.

## Overview
You'll receive an Inbox notification for key events on your subscribed issues. You are automatically subscribed to issues when you create them, are assigned them, or are mentioned in an issue description or comment.
You cannot customize which notifications go to the Inbox (they all will) but you can apply filters to focus on certain notification types.
You can also customize which notifications trigger other alerts in [Settings > My Account > Notifications](https://linear.app/settings/account/notifications).
## View notifications
Find your Inbox in the sidebar. The fastest way to get there is with the keyboard shortcut `G` then `I`, which takes you to the Inbox from any page.
Scroll through the notifications in your Inbox using `J` / `K` or `↑` / `↓` while on the list or individual notification view.
Click into the notification to view the individual issue in a special Inbox view, from which you can take Inbox actions as well as make changes to the issue.
## Inbox actions
From the list view you can take Inbox-related actions such as deleting or snoozing notifications as well as actions to update the issue properties.
`Right-click` over an issue to bring the contextual menu with available actions.
You can delete notifications with `Backspace`, delete all with `Shift` `Backspace`, or delete all read notifications by using `Cmd/Ctrl` `D`.
Select a notification and then use `U` to mark as read or unread, `Option/Alt U` to mark all issues as read or unread, and `H` to Snooze the issue (more below).
To unsubscribe from an issue via the Inbox view, you must click into it first and then unsubscribe use `Shift` `S`, the button in the top menu bar, or the unsubscribe option in the Activity feed.
## Quick search
Press `Cmd/Ctrl` `F` to bring up the quick search bar and then type to filter the list by title, issue ID, notification type, or assignee. It'll update the list to show only issues matching that search. For example, see only notifications where someone commented on an issue or issues that have been auto-closed by Linear. `Esc` will clear the search.
## Display options
Open display options to update what properties are displayed on your notifications. You can toggle **Show snoozed** or **Show read** issues.
Because reminders do not hide an issue, there is no toggle in Display options regarding reminders.
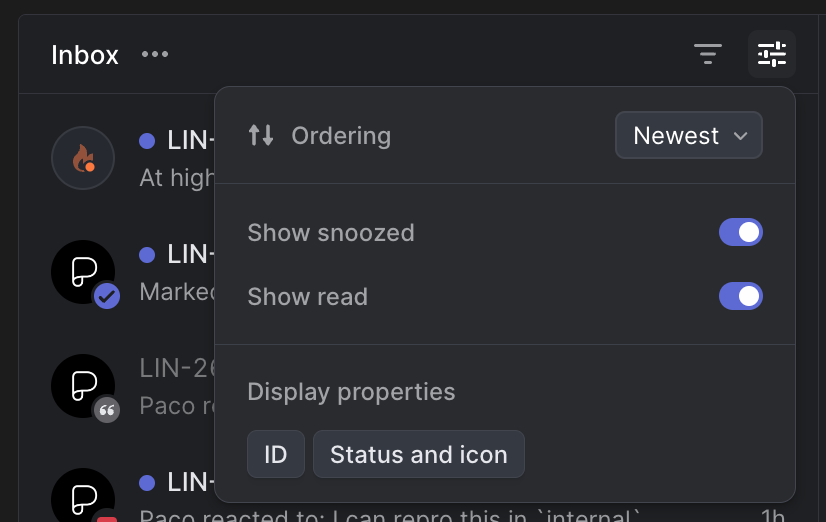
## Snooze
Snoozing temporarily hides a notification from the Inbox or Triage. At the specified time, it will re-appear as a new notification and unread.
If new activity occurs before the Snooze time, you will receive an inbox notification for the activity and the Snooze will be canceled.
You can choose to show or hide snoozed notifications in your inbox display settings.
## Issue Reminders
You can also set issue reminders for an issue, document, project or initiative and receive a notification to your Inbox at the selected time.
Your scheduled reminder will show at the top of the issue and can be rescheduled or canceled as needed.
### Setting Snooze or Reminders
Set a reminder on an issue or document, or snooze existing reminders:
#### Keyboard
Press `H` to snooze a notification from the inbox, or to set a reminder on an issue or document
#### Mouse
From the inbox, right click an issue and select **Snooze** to delay the notification
Click on the display settings at the top of your inbox to show or hide snoozed issues
Click into the **...** menu of an issue and choose **Remind Me** to set reminders
Click on an existing reminder at the top of an issue to reschedule or cancel it.
#### Command Menu
`Snooze this notification` to snooze an existing notification from the inbox
`Remind me about this issue/document` to set or edit a reminder on an issue or document
`Cancel reminder` to cancel a reminder you've set already
**Custom dates**
For custom dates and times, you can type in the selection instead of selecting from the calendar. Be sure to type the option in full (e.g. _next quarter_ not _next quar_) otherwise the option will not appear.
* Month Date Time (e.g. Jan 3 10am)
* Next quarter
* Til or until month / date
* For X months / weeks / days
## FAQ
Can you archive notifications?
We don't support archiving notifications at this time but will consider it in the future.
Can I customize what goes into my Inbox?
You cannot choose which notifications go to your Inbox. All notifications will arrive there, and any additional notification subscriptions you enable under Account > Notifications will link back to the Inbox notification.
Is there a limit on Inbox notifications?
Yes, you can have up to 500 notifications in your inbox at one time. Older notifications beyond that count will not be retained.
---
# Source: https://linear.app/docs/initiative-and-project-updates.md
# Initiative and Project updates
Keep teams and leaders aligned with structured updates on the health and progress of Initiatives and Projects, available in Linear and Slack.
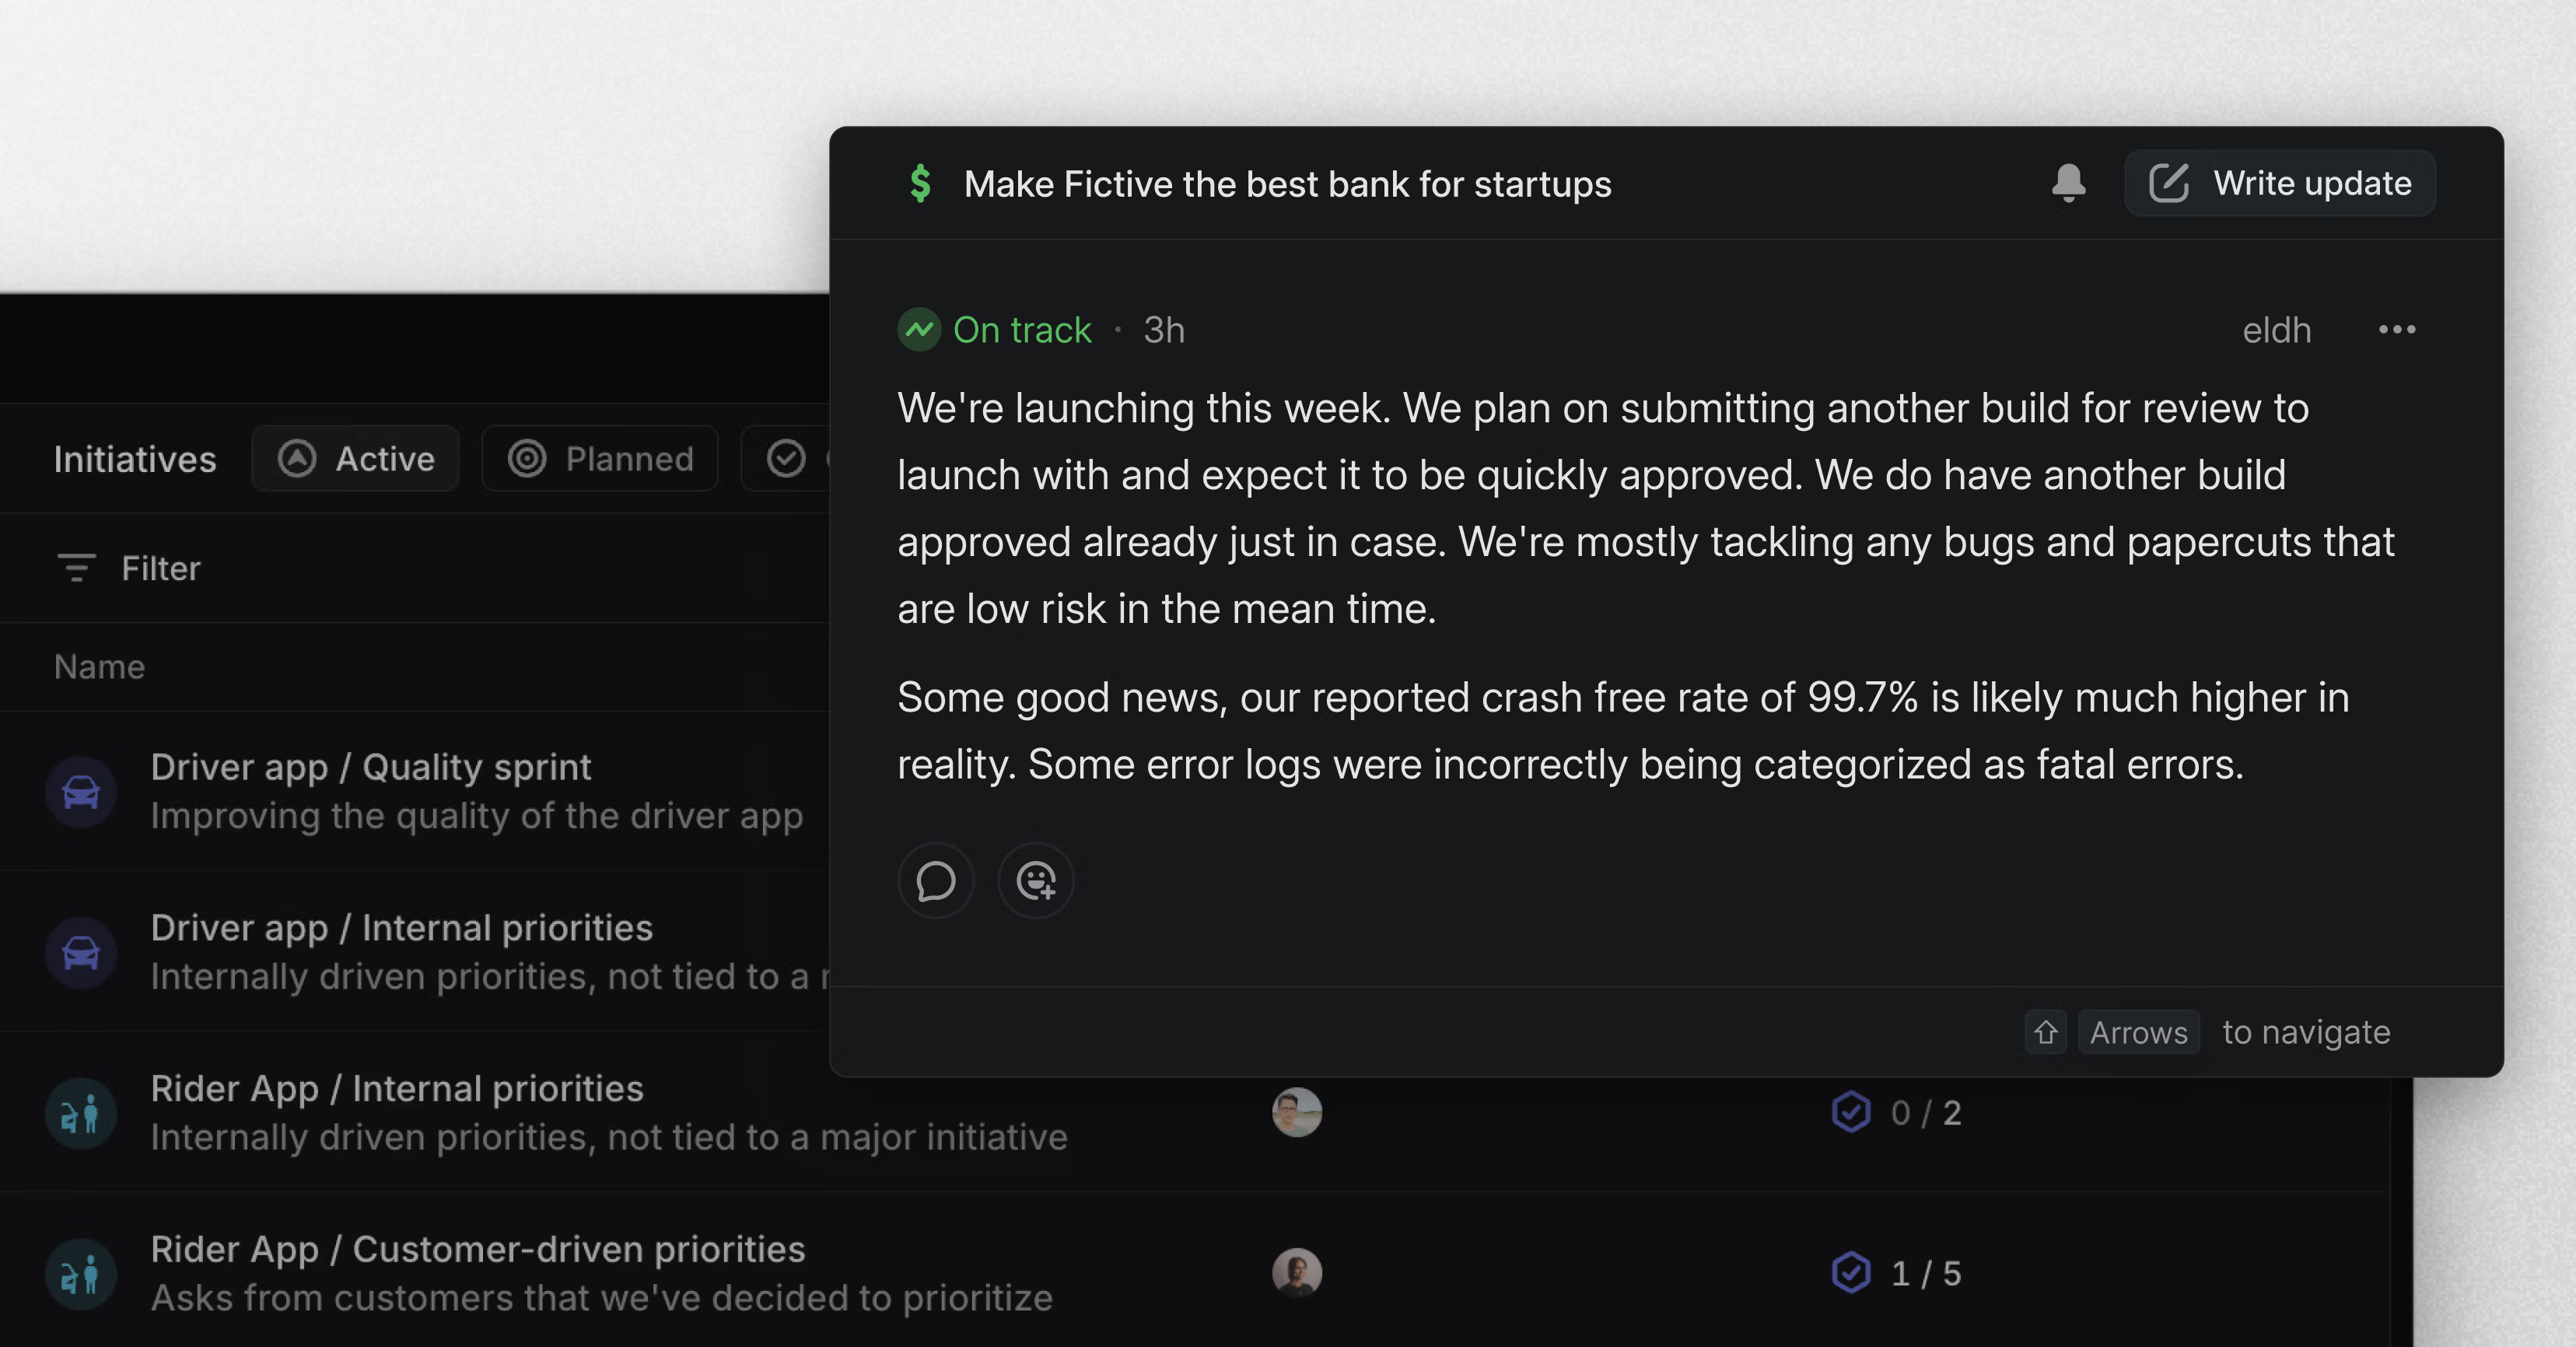
## Overview
Initiative and Project updates are structured reports that keep teams and leaders informed on progress and alignment. They consist of a health indicator that provides high-level signal of the current state and a rich text description for deeper insights into status, challenges, and next steps.
Initiative updates help leaders and teams stay aligned on high-level goals while still providing visibility into the projects that contribute to them. Project updates focus on individual projects, ensuring teams stay informed on progress at a more granular level. Updates can be viewed in Linear and sent to Slack channels.
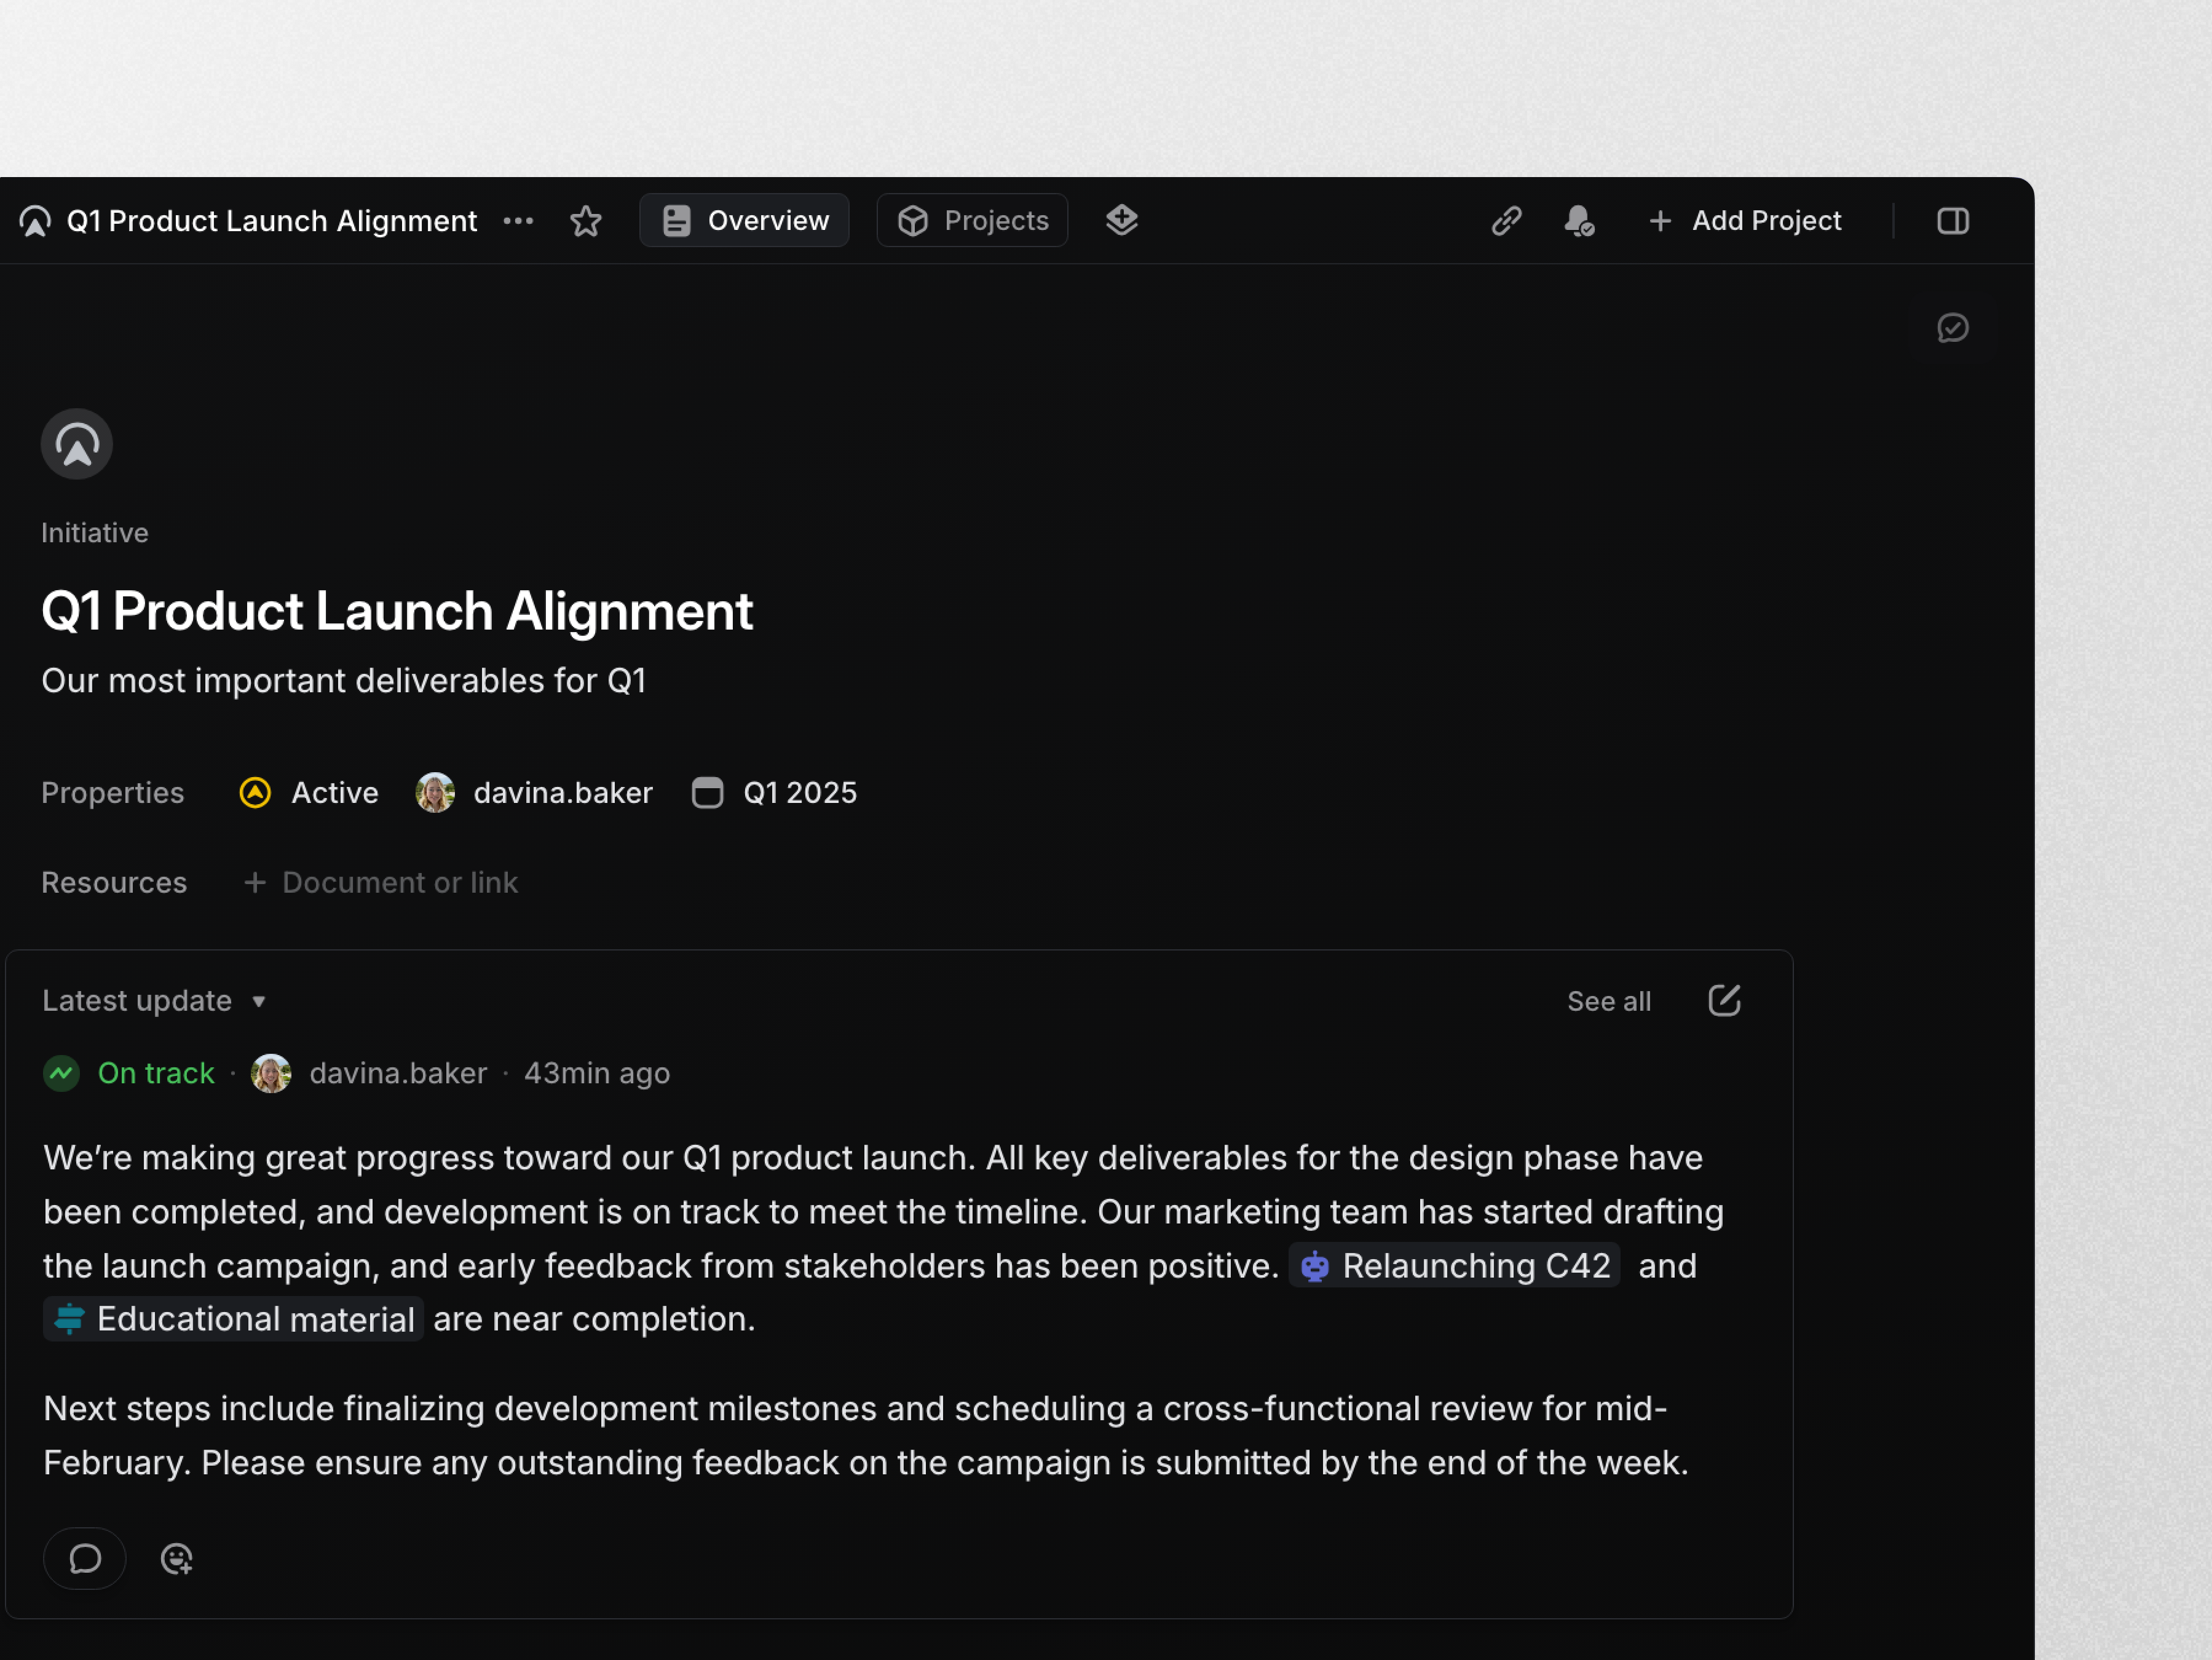
## Configure Initiative updates
Initiative updates can be configured by admins in [Workspace Settings](https://linear.app/settings/initiatives). Once Initiatives are turned on, Admins can set up reminders to ensure Initiative owners post updates consistently. These settings allow you to choose how often reminders are sent, such as weekly or biweekly, and specify the day and time when reminders will appear. Reminders are only sent when there is an Initiative owner.
Admins can also configure a default Slack channel where all Initiative updates are sent. Creating a dedicated channel, such as #initiative-updates, helps ensure updates are visible and accessible to the entire team.
## Configure Project updates
Configure project updates for your workspace under [workspace settings](https://linear.app/settings/projects). Select a Slack channel where updates will go (we recommend a dedicated one such as #project-updates) and set optional reminders to remind project leads to post an update at a regular cadence (e.g. post an update weekly on Wednesdays).
Configure notifications for specific projects by clicking the bell icon in the project's header. From there, you can link the project to its own Slack channel (e.g. #p-project-name) to send updates and notifications there.
> [!NOTE]
> A project must be associated with at least 1 public team for its updates to appear in the channel chosen from the workspace-level project settings. For private-team only projects, you will need to configure separate notifications.
### Keyboard
`G` then `S` to go to _Settings > Updates_ to configure updates
`Shift `+` U` to open project updates panel on a project page
`O` then `P` to go to a project and enable project notifications to Slack channels by clicking on the bell button
`G` then `S` to go to _Settings > Notifications_ to configure personal notifications for projects. You can configure for Desktop, Mobile, Email and Slack.
### Mouse
* Navigate to any project or roadmap view to post an update by clicking _Update_ in the top right corner
* Click on your avatar to go to _Settings > Account > Notifications_ to enable personal notifications for projects
* Navigate to any project and enable project notifications to Slack channels by clicking on the bell icon
### Command menu
`settings` to go to _Settings > Account > Notifications_ to enable personal notifications for projects
`open project` to go to a project and enable project notifications to Slack channels by clicking on the bell button
## Basics
### Create Initiative and Project updates
Updates can be created from the Project Overview or Initiative Overview page. The owner or lead is responsible for posting the first update, after which any workspace member can write subsequent updates.
To draft or edit an update, click the pencil icon in the top-right corner of the latest update in the Initiative or Project overview page. When writing an update, you can highlight text to apply formatting and upload files to provide supporting context.
Select a health indicator—_On track, At risk, or Off track_—to represent the current state of the Initiative or Project.
### View Initiative and Project updates
The most recent update is displayed on the Project Overview or Initiative Overview page. To view previous updates, click on the _Updates_ tab.
When viewing a list of Initiatives, you can also click on the health status to see the most recent updates.
Updates appear in chronological order, and anyone can react with emoji to express sentiment. You can also view updates in Slack if they have been configured to post there.
To share an update, you can copy a link or copy it as Markdown using the `⌘/Ctrl` `K` action menu.
> [!NOTE]
> **How we work**: The project lead adds weekly project updates. As well as viewing these in Linear, we have these set up to appear in a specific channel in our Slack workspace. We can then easily discuss each update in a Slack thread originating from the original posted message.
>
> During weekly syncs, we'll review project updates directly in Linear. We take a few minutes to silently read them and emoji react depending on how we'd like to discuss them in the meeting. ✋ means you have a question, ▶️ means you want to see a demo, and we usually see a few others like 🚀🙌 🥳.
### Updates tab
Visit the updates tab to see the history of all updates and changes to a project or initiative.
Updates appear in chronological order along with any changes to properties such as the target date, members, and milestones. On initiatives, you can enable a display option to also see updates from sub-initiatives and projects, so all relevant information appears in one place.
### Progress reports for Initiatives and Projects
Project updates include a concise overview of project progress since the last update. It covers information such as project delays, changes in the target date, assignment of new leads, progress towards milestones, and overall progress. These updates help you track project changes and effectively communicate progress to stakeholders.
If progress appears when drafting a project update, you can choose to exclude it from posting by clicking _Hide details_. Overall project progress must have changed by more than 2% since the last update in order for progress details to appear here.
For Initiative updates, if the Initiative owner has changed since the previous update, or there has been a change in target date or status, this will automatically be included in the update.
### Manage notifications
Updates can be sent to Slack, delivered to your Linear Inbox, or both, depending on your preferences. Notifications can be configured at both the workspace and individual update level to ensure teams stay informed in the way that works best for them.
Admins can configure a default Slack channel for all Initiative and Project updates in Workspace Settings or through the Slack integration settings. We recommend using dedicated channels such as #initiative-updates and #project-updates to keep updates organized.
For individual Initiatives and Projects, you can override the default Slack channel by clicking the bell icon in the respective view. This allows you to select a custom Slack channel for updates (e.g., #p-project-name), ensuring the right audience is kept in the loop.
If Slack notifications are enabled, edits to updates will also be reflected in Slack. Additionally, you can enable Inbox notifications in your account settings to receive updates directly in your Linear Inbox.
### Initiative and project update comments
It’s possible to comment under Initiative and Project updates to discuss them further. The person who wrote the update and anyone who participates in the thread will receive notifications in their Linear Inbox.
If the Slack integration is enabled and updates are posted in a Slack channel, comments will be bi-directionally synced between Linear and Slack. This ensures that all messages in the Slack thread will sync back to the update in Linear, just as Slack comments on issues [sync with Linear](https://linear.app/docs/slack#sync-threads).
### Initiative and Project update reminders
Admins can enable update reminders in Workspace Settings to ensure Initiative and Project updates are posted consistently. Once enabled, you can customize the frequency of reminders, choosing whether they are sent daily or at a set interval (e.g., weekly or biweekly). You can create custom schedules and also specify the day and time for reminders. Leads will receive reminders in the designated time window in their local timezone.
Reminders are sent for _active_ Initiatives and Projects with statuses in the _started_ category, and only to the Initiative owner or project lead. If an update isn’t made after the initial reminder, follow-up nudges will be sent 1 working day later, and 2 working days after this.
When selecting a reminder time, note that reminders may not be sent precisely at the chosen hour but will be delivered within the hour selected or shortly after.
### Project-level update schedule
You can also change the update schedule for an individual project from the bell icon on the project view menu. Toggle between the following options for your project:
* Follow the workspace default notification schedule
* Set a custom schedule for this project
* Never receive update reminders for this project

### Project staleness
When project update reminders are enabled, in-progress projects that are overdue for updates will reflect this for easier monitoring. If an update schedule is configured for a project, its health icon will reflect when an update has been missed. Projects that remain overdue for an extended period will have their icon turn grey to indicate inactivity.
Projects are marked _Update Missing_ when both of the following are true:
* The last project update was _On Track_
* An update is one reminder cycle + 3 days overdue past the expected update frequency
Projects will instead show _No Update expected_ if they completed or their update schedule is set to _Never_.
A dashed outline indicates a update project update is slightly overdue before the health icon turns grey and the status changes
You can filter projects by " Date > latest project update" (e.g. “before 1 week ago”) for more control.
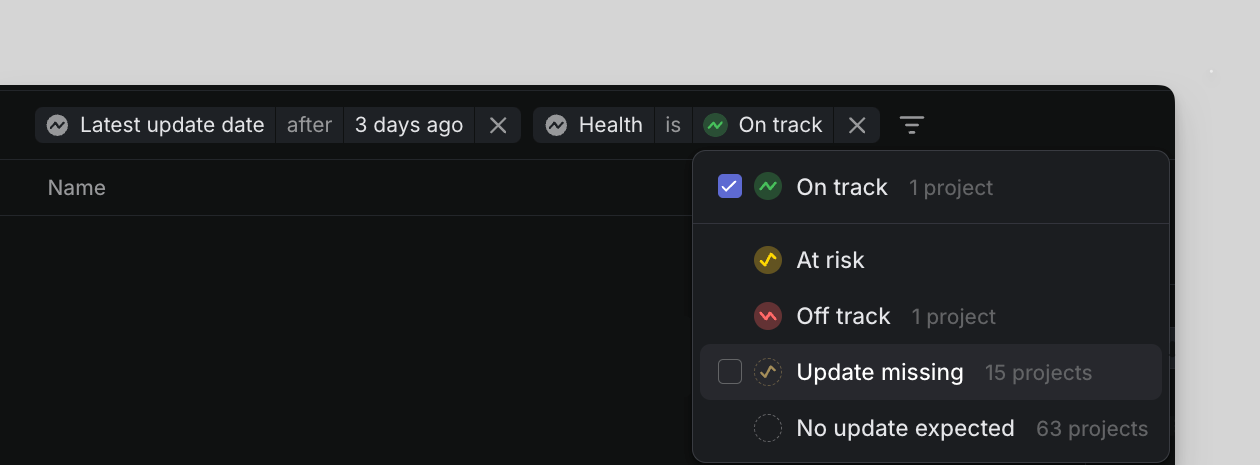
## FAQ
Can I edit an existing project update?
Yes. When viewing project updates, you'll see the edit pencil icon appear when hovering over any project updates you created. If you are not the creator of the update, you will need to ask the creator to make the update.
Can I delete an existing project update?
Yes. Just click on the `… `icon beside the project update you'd like to delete and select the delete option from the pop-up menu which appears.
Can I emoji react to a project update?
Yes. When viewing a project update, hover over it to see the emoji reaction icon appear. Click to add an emoji reaction.
Why am I not receiving project update reminders?
To receive a project update reminder, the following applies:
* You must be the project lead
* The project must have "In Progress" as its status
* You must not have posted an update in the last 24 hours
If the above conditions are true but you are still not receiving project update reminders, reach out to us for help.
What happens when you send updates to multiple Slack channels?
Instead of posting project updates to each of the channel separately, we now post one project update post to a main channel and then forward this post to other channels.
My project update comments are not coming through or are not syncing
In order to benefit from syncing comments between Slack and Linear, you need to make sure that the latest version of the Slack integration is installed in your workspace. An Admin of your Linear workspace can use the "Reconnect" button in the integration settings for Slack.
---
# Source: https://linear.app/docs/initiatives.md
# Initiatives
Use initiatives to group projects by company objective to align on your organization's goals and track progress towards achieving them.
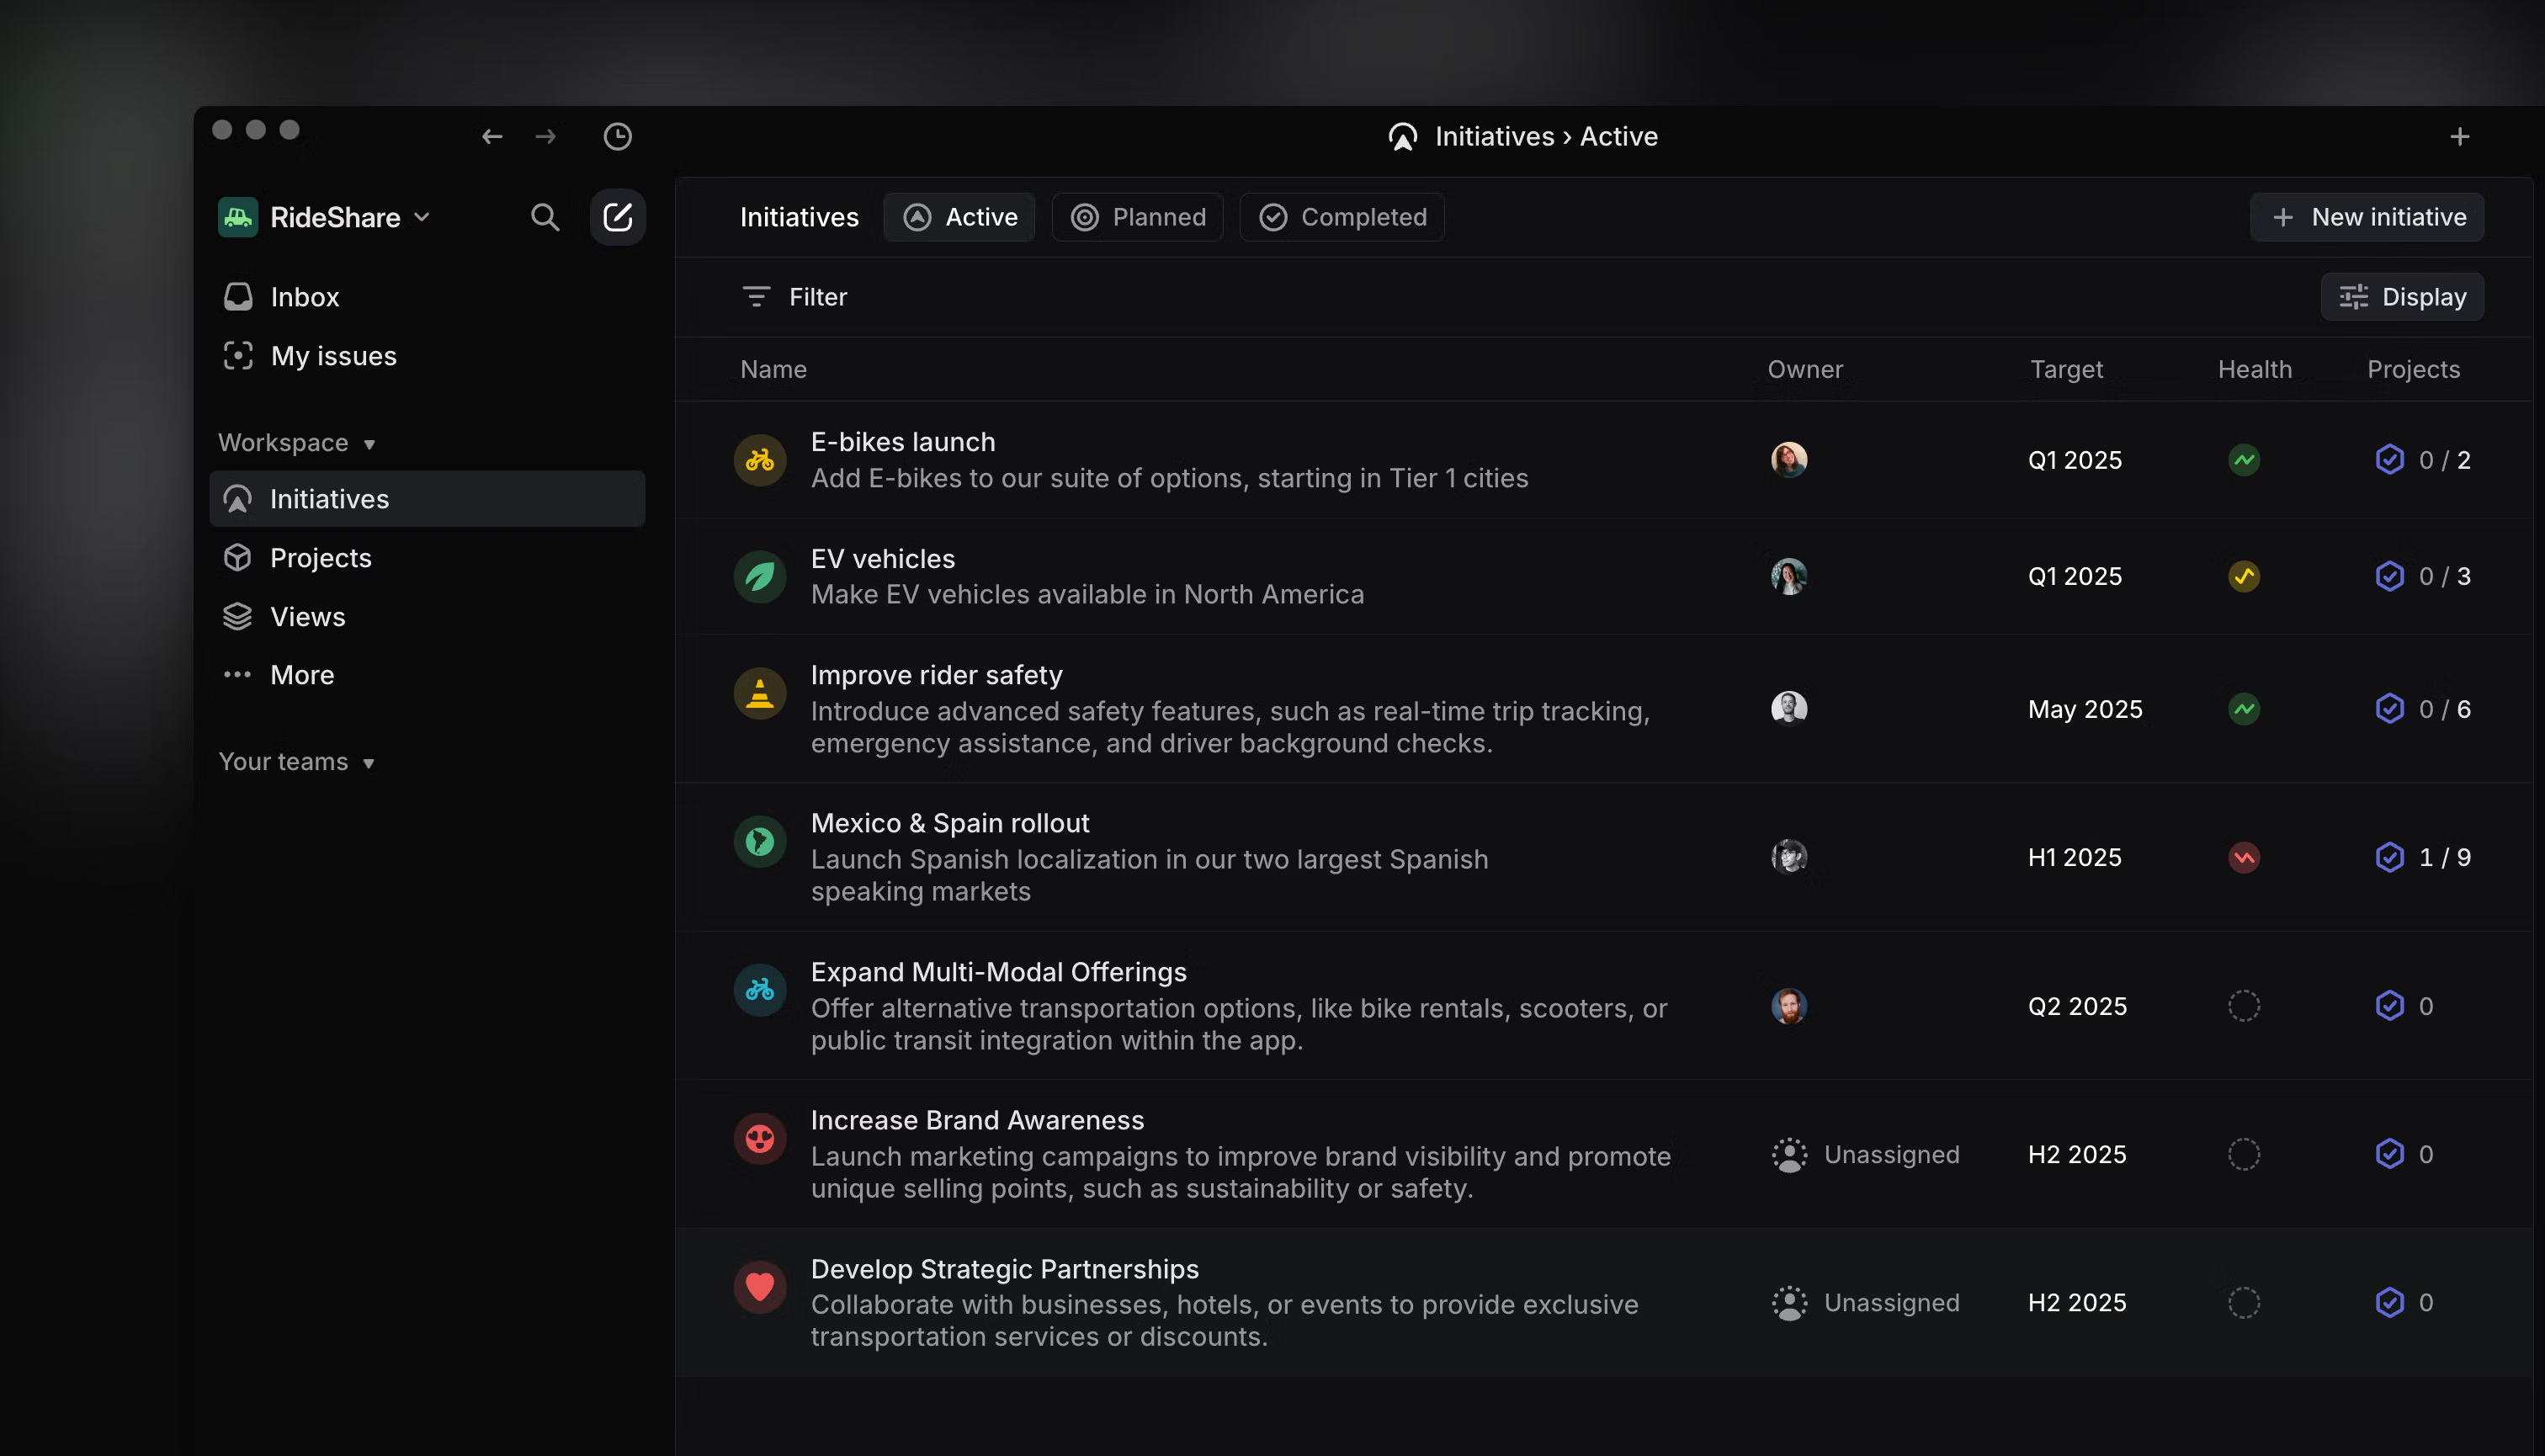
## Overview
An Initiative is a manually curated list of projects with an accompanying document. All Initiatives are shown within a single Initiatives view at the workspace level. Their purpose is to express the goals and objectives an organization aims to achieve and to monitor progress towards those aims. This enables high-level planning across multiple projects and long timelines.
Leadership can use the top-level Initiatives view to see a quick overview of ongoing goals, objectives, and their progress. This allows them to assess overall progress without needing to drill down into each individual project.
## Basics
### Create and view initiatives
Enable Initiatives from [Settings > Initiatives](https://linear.app/settings/initiatives) and navigate to the Initiatives page in your sidebar to create and view existing Initiatives. This page contains all active Initiatives in your workspace. Each Initiative name appears with a short summary, Initiative owner, associated teams, number of projects within, target date, and health status. You can also create a new Initiative from here.
To create an Initiative, all you need is a name. Initiatives will be visible by all members of your workspace except for guests.
There is no concept of a “private” Initiative—Initiatives are always shared workspace-wide. If a project belonging to a private team is added to an initiative, the project remains visible only to those in the private team but the Initiative is viewable by others.
### Initiative Health and Active Projects
When viewing Initiatives, use the Initiative Health and Active projects columns to quickly assess how work is progressing.
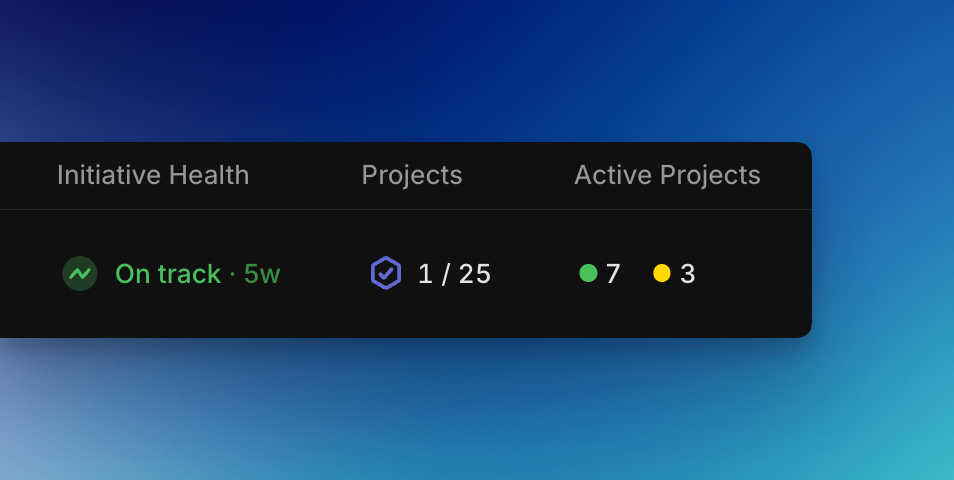
**Initiative Health** shows whether the latest initiative update indicated work was on track, at risk, or off track. Click on it to read the full update.
**Active Projects** rolls up data for individual projects in the initiative based on each project's latest project update. These are color coded, and clicking on them shows the associated updates:
* **Green**: On track
* **Yellow**: At risk
* **Red**: Off track
* **Gray**: No recent update
For projects marked as at risk or off track, consider commenting and to check in and offer assistance. For projects without a recent update, you can mention the project lead to check for any missed updates or potential blockers. Read more about Project and Initiative Updates [here](https://linear.app/docs/initiative-and-project-updates).
### Lifecycle management
Designating Initiatives as planned, active or complete clearly signals the Initiative's current state. When an Initiative is completed, it will move to the completed section to maintain a historical record of work. To change the status of an Initiative, click on the Initiative and update its status from the Initiatives overview page.
### Initiatives overview page
Use the Overview page to share detailed information about the overall Initiative and the projects within it. From this page, you can access and modify the following Initiative properties:
* **Status:** Indicates if an Initiative is Planned, Active, or Completed.
* **Owner:** Initially set to the creator of the Initiative but can be reassigned to another workspace member.
* **Target Date:** The expected completion date of the Initiative.
* **Resources:** Relevant documents or links associated with the Initiative.
* **Latest update:** The most recent Initiative update.
* **Descriptions:** Detailed information about the Initiative.
* **Project List:** Each project included in the Initiative.
### Initiative graph
Each curve on an initiative graph represents the rate of completed issues within a single project in that initiative -- rising during periods of high activity and leveling off during quieter periods or after project completion. Hover over the x-axis to see your most active projects in a given week, or focus one at a time.
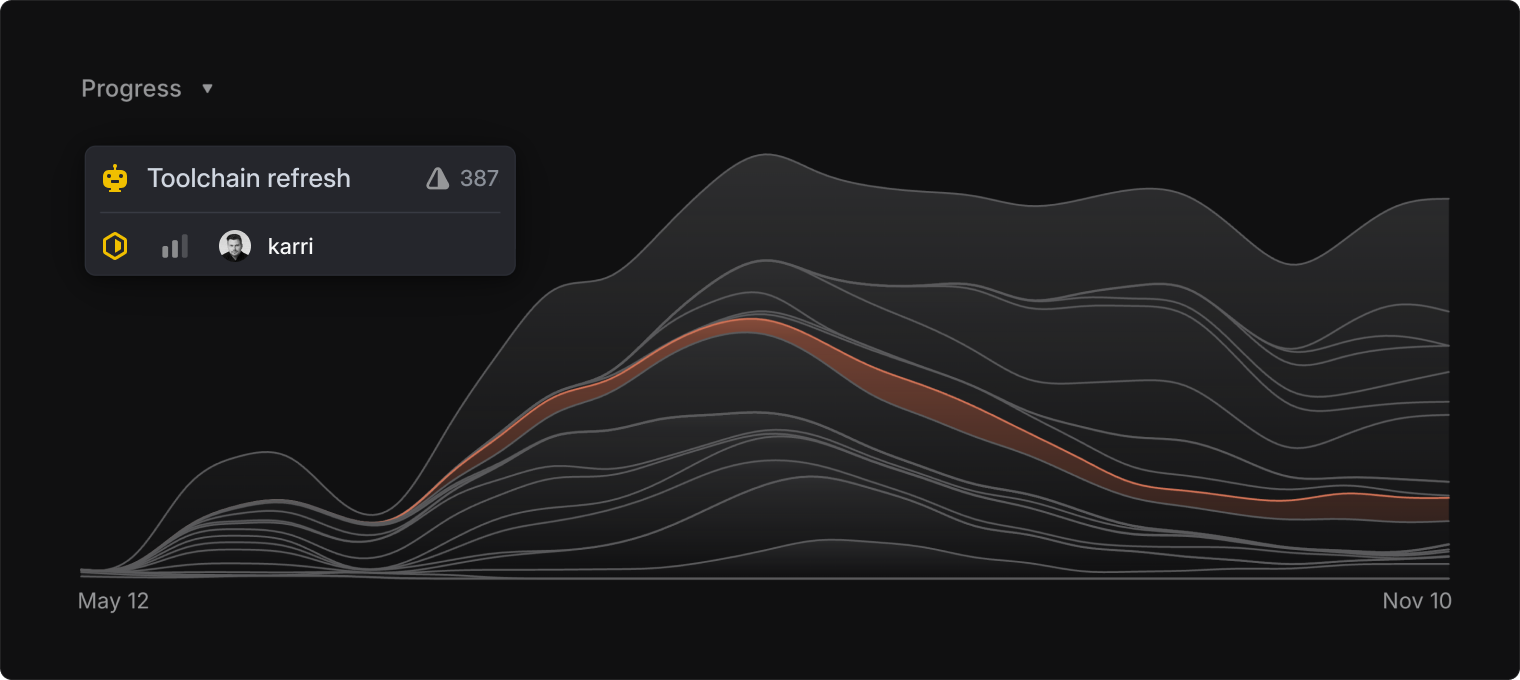
## Example use cases
* **Engineering managers** might look at a pipeline view to help them manage immediately upcoming staffing needs
* **Product leaders** may want to use and revise a scenario plan across multiple quarters
* **Marketing leaders** might look at a release timeline filtered only on projects that require serious GTM communication
* **Product leaders** may want to see an overview of all larger asks from customers that are currently being prioritized and actively worked on
## Initiatives vs. Project Views
Initiatives are manually curated lists of projects that typically align with organizational goals, allowing leadership to easily track progress towards these goals.
If you want to group and filter projects automatically — but they don’t align with clear organizational goals or need close progress tracking — we recommend using [project views](https://linear.app/docs/projects#attach-project-views-to-workspace-projects-page) instead. You can also use [project labels](https://linear.app/docs) to help further categorize and organize projects.
The advantage of project views is that once you set up relevant project filters, all future projects matching these criteria will be automatically included. These views are also visible to all members of your workspace.
For example, you can create a project view to filter all projects with an “In Progress” status, allowing you to see all such projects across your workspace in one place. Another example is creating a view that filters all projects involving your team members, providing a consolidated view of team activities.
---
# Source: https://linear.app/docs/insights.md
# Insights
Real-time analytics for all your Linear data. Visualize issue data to spot trends and remove blockers.
> [!NOTE]
> Available to workspaces on the [Business](https://linear.app/pricing) and [Enterprise](https://linear.app/pricing) plans.
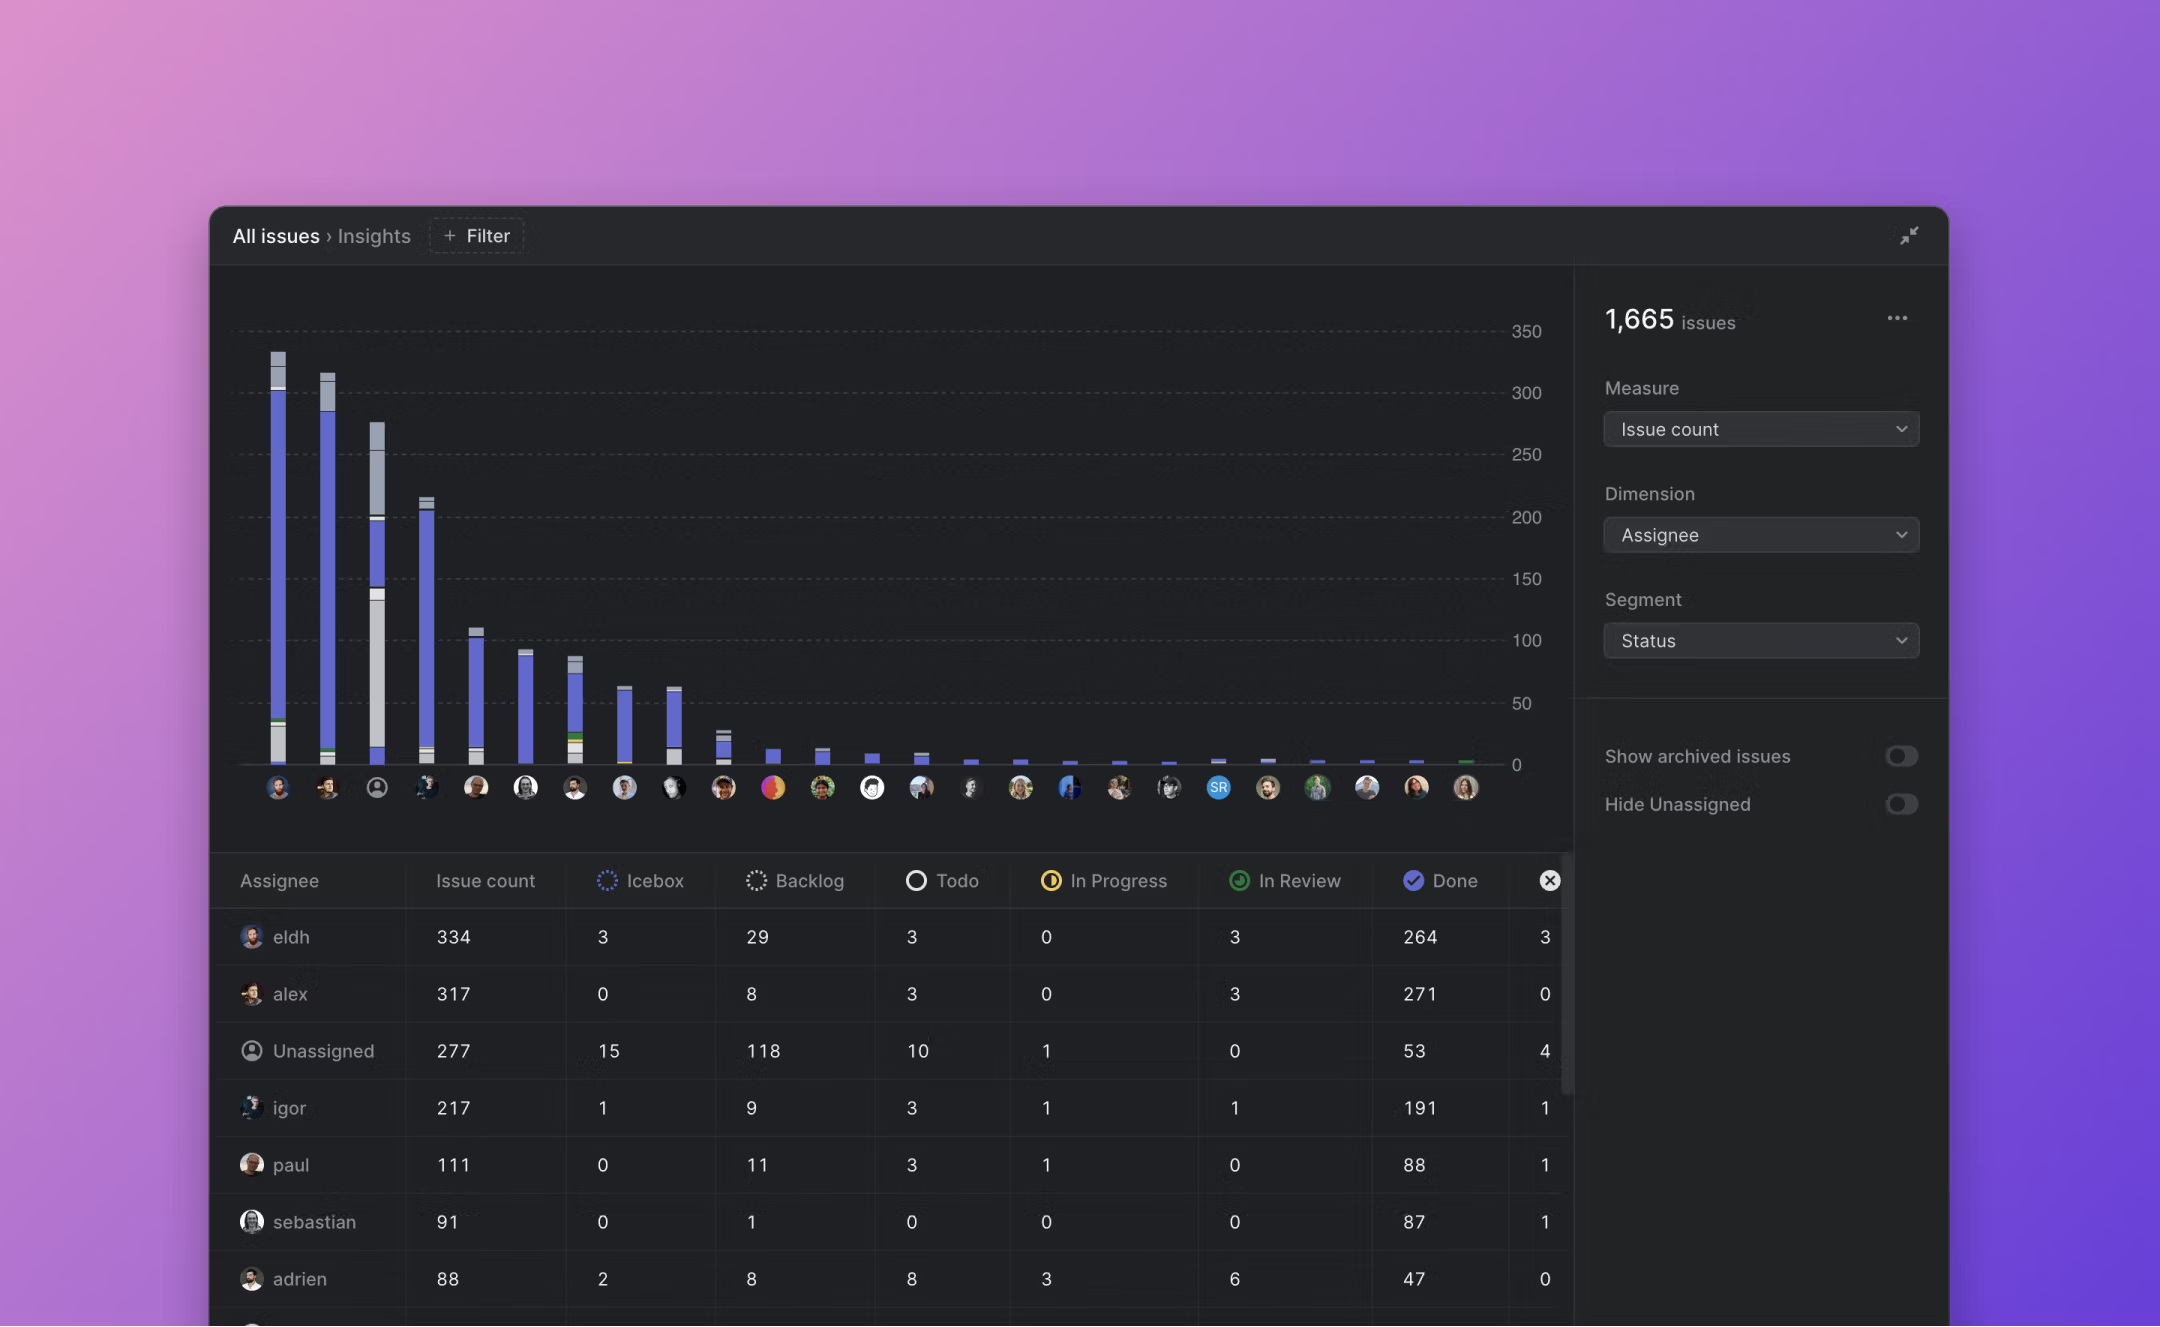
## Overview
Insights turns your Linear issues into a dataset you can analyze to better understand how you work. Use Insights to answer questions like:
* What projects take up the most resources?
* How quickly do you fix bugs?
* How consistently do you prioritize issues?
* Do you estimate accurately?
## Configure
Most issue views in Linear have an Insights panel in the righthand sidebar, which you can open with `Cmd/Ctrl` `Shift` `I`. Find Insights in Custom Views as well as team, project, and cycle views.
> [!NOTE]
> The best place to use Insights is in custom Views that are shared at the Workspace level. They offer the most flexibility and power, since you can access issue data from all teams and filter across any property (e.g. Label, Assignee, Project) in your workspace.
### Examples
The best way to learn how Insights works is to try it. We’ve built an in-app Help Center that walks you through common use cases. You can view instructions on how to create these examples or select a button to apply the example to your current view.
Access the Help Center by selecting the `…` icon from the Insights panel and selecting **Insights examples**
## Create Insights
### Apply filters
Insights will offer analytics for all the issues in the view you’re currently looking at. Add or remove filters to change which issues are included in the dataset. The following filters can be especially helpful when creating Insights.
Filter | Why it's helpful for Insights
--- | ---
Created at | Limits issues to those created during a certain timeframe
Completed at | Limits issues to those completed within a certain timeframe
Status Type | Works across teams (even if Statuses are named differently)
Label, Project, Team | Refines large views to most relevant issues
To include _Archived_ issues in your Insights analysis, open the Insights options (to the left of the three dot menu, just above the _Segment_ dropdown) and toggle on _Show archived issues_. From there you can also filter out issues without a priority assignment.
### Select Insights Parameters
From the dropdown, choose the _Measure_ and _Slice_ for your Insight. This will generate a graph and table showing the data, with the _Measure_ along the y-axis and _Slice_ along the x-axis. _Segments_ are optional and use color to slice the data further.
Values for _Measure_, _Slice_, and _Segment_ vary depending on what issues are displayed in your view.
Measure | What is it? | Type of graph | Automatic filters
--- | --- | --- | ---
Issue count | Total number of issues | Bar | None
Effort | Total estimate value | Bar | None
Cycle Time | Time from issue start to completion | Scatterplot | Only plots issues that spent time in progress before being completed
Lead Time | Time from issue creation to completion | Scatterplot | Only plots completed issues
Triage Time | Time issue spent in Triage status | Scatterplot | Only plots Triaged issues
Issue Age | Time since issue creation | Scatterplot | None
### Graph Interactions
Insight graphs are interactive, so that you can play with the dataset to learn more or focus on a specific type of issue.
#### Bar graph
* Hover over each bar to see data and percentile breakdowns.
* Select full bars or segments to temporarily filter your view to only those issues.
* Hovering or selecting bars or segments will highlight related data in the table below the graph.
#### Scatterplot
* Hover over the graph to see markers indicating that the data below the line represents 25%, 50%, 75%, and 95% of issues plotted.
* Select percentile markers to zoom in or out along the y-axis.
* Hover over points to see the issue details including the issue name, ID, and slice and segment values. This will also highlight related data in the table below the graph.
* Select points to go to open the related issue.
#### Burn-up charts
* Burn-up charts, or cumulative flow diagrams show how streams of work have changed over time. Unlike other insights, burn-up charts display your historical issue data so you can analyze and detect patterns across specific time windows.
* By default, burn-up charts show data in monthly increments. Adjust insights settings to plot the data week over week, or to include archived issues.
* When applicable, select _Burn-up_ under the _Slice_ menu to visualize your data in this style.
#### Table (below graph)
* Hover over row or specific cell to see corresponding data in graph
* Select row, column, or cell to temporarily filter issue view to only those issues
### Share Insights
Select the three dot menu on the top right of the Insights panel to share your Insight.
* Copy a link, which can be viewed by anyone else in your workspace
* Export to CSV, to explore the data outside of Linear
### Full Screen view
Insights can be opened in Full Screen view by selecting the expand button (just above the _Segment_ dropdown). This gives you more room to explore the graph and table data.
---
# Source: https://linear.app/developers/integration-directory.md
# Source: https://linear.app/docs/integration-directory.md
# Integration Directory
Discover Linear add-ons or build your own

## Overview
Linear's [Integration Directory](https://linear.app/integrations) features apps and add-ons created by the Linear team as well as external applications. Install these to improve your workflow and sync with your favorite tools. You can also build your own integrations and submit them to the directory.
## Basics
### Linear crafted
If you see an integration with a star badge on the icon, that means it was crafted by the Linear team. You can install them via the link in the directory or by going to [_Settings > Workspace > Integrations_](https://linear.app/settings/integrations/github) and then select the integration name.
For most integrations, you'll have to be a workspace admin to install them for your workspace. If you don't know who is an admin, go to [_Settings > Workspace > Members_](https://linear.app/settings/members) and filter for Admins.
### Third-party integrations
The directory also features integrations built by other apps and third parties. We recommend doing your own research into the integration owner and permissions required before installing these integrations. You can find the creator's website and contact in the sidebar.
### Build your own
Use [Linear's API](https://developers.linear.app/docs/) to build your own integration and submit it to the directory following the instructions below. We recommend building applications using [OAuth](https://developers.linear.app/docs/oauth/authentication) and having a separate workspace for the application, which gives all admins access to the application (instead of only the application creator).
We'll accept integrations that we think are useful to the community and are built by formal companies. We generally do not accept scripts or apps built by hobbyists, but feel free to reach out to [integrations@linear.app](mailto:integrations@linear.app) if you think it should be included. You can also ask questions and see what others are building in our Slack community's [#api channel](https://linear.app/join-slack).
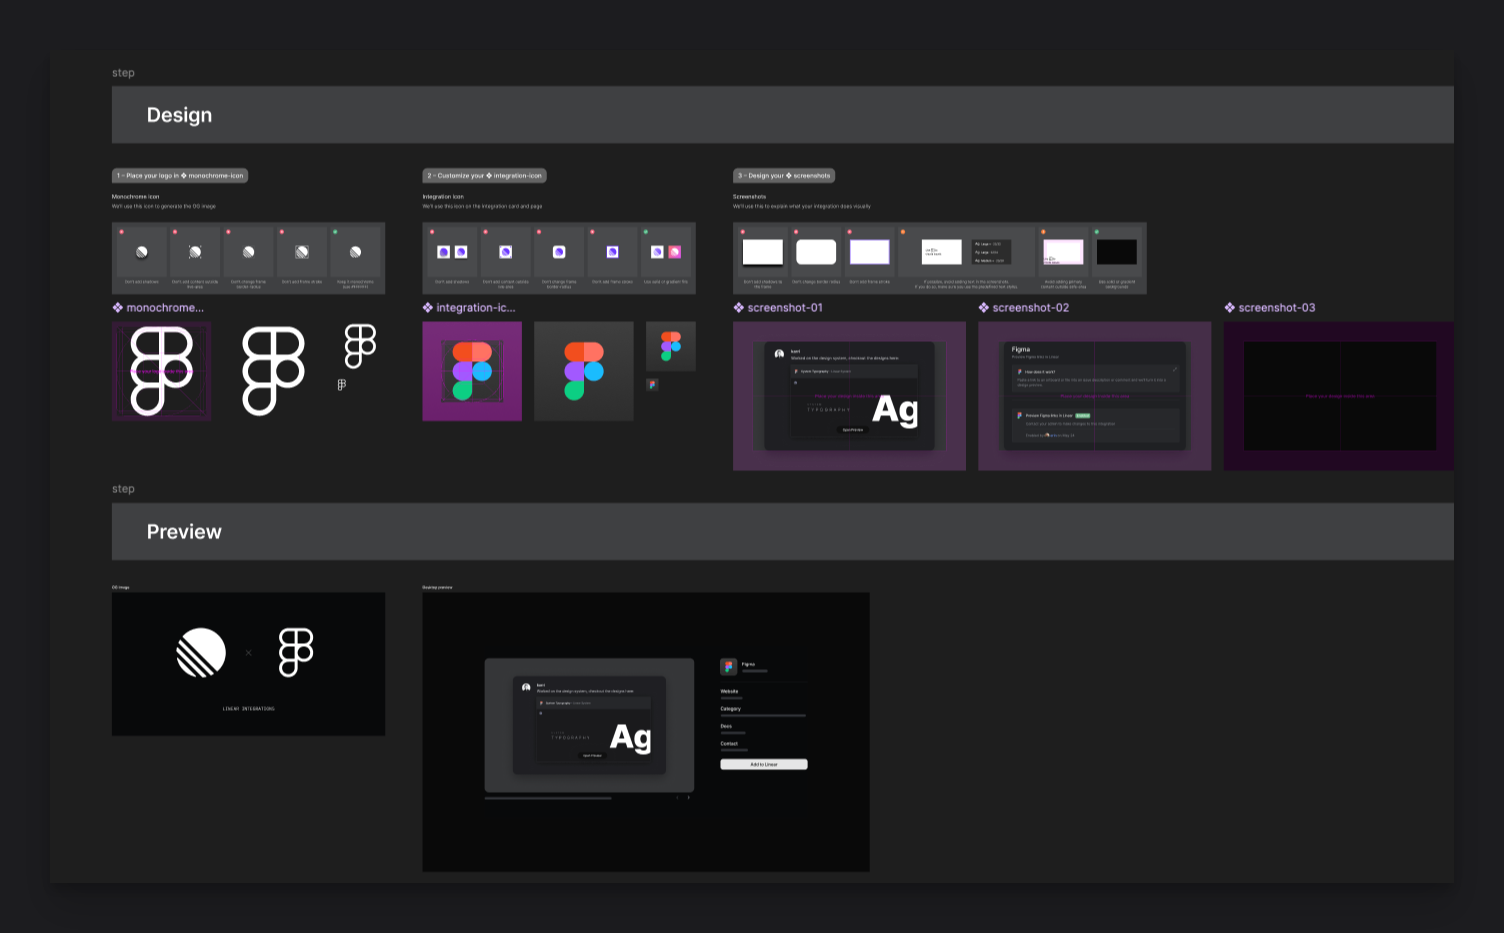
### Submit your integration
1. Fill out this [form](https://docs.google.com/forms/d/e/1FAIpQLSdYKtml_JsVv-sXuP4_eiT-l-8K6IaoEQrxdAP_7w-mb1-hSQ/viewform?usp=sf_link). It includes a sample page to give you a sense of copy style and length.
2. Submit assets to integrations@linear.app or include a link in the form. We've built a [template in Figma](https://www.figma.com/community/file/1111754695287344546) to make this easy.
3. Send any questions to [integrations@linear.app](mailto:integrations@linear.app)
---
# Source: https://linear.app/docs/intercom.md
# Intercom
Our Intercom integration makes easy to keep track of bugs and feature requests and interact with the customers who report them.
> [!NOTE]
> Available to workspaces on our [Business](https://linear.app/pricing) and [Enterprise](https://linear.app/pricing) plans.
## Overview
The Intercom integration lets you create and link Linear issues from Intercom conversations. Linked issues, their status, and relevant assignee show up in the sidebar in Intercom. Linked Intercom conversations will show up in Linear issues as link attachments.
## Configure
Enable the integration in Linear from [Settings > Features > Integrations > Intercom](https://linear.app/settings/integrations/intercom). A Linear app will show up in the Conversation details sidebar in Intercom with options to create issues or link issues. You can show or hide the Linear app in Intercom's sidebar by pinning Linear under _Edit apps._
When troubleshooting where you uninstall and re-install the Intercom integration directly on the same Linear workspace, comment sync and status updates for existing connections will resume without problems.
## User Access
Anyone in Intercom can create or link Linear issues and see the issue details in the sidebar. Only Linear users will be able to view linked issues in Linear. If the person who created the issue is a Linear member, the issue will show that it was created by them and they'll see the issue under _Created_ in _My Issues_. Otherwise, the issue will show it was created by Intercom.
## Create new issues
Create a new issue using the button from the righthand sidebar. It will bring up a form which requires a title and that you assign a team. You can also optionally include a description with additional details from the Intercom conversation, assign a priority, add an assignee or add a label.
Issues created through the integration will be sent to the Linear team's Triage Inbox if you've enabled that feature. The Intercom conversation will show up as a link attachment in the Linear issue.
> [!NOTE]
> Get more out of the Intercom integration by enabling the [Triage](https://linear.app/docs/triage) feature for your teams. Any issues created from Intercom will go to Triage when enabled (otherwise, the issues will be added to the first backlog status in your team).
### Create with Linear Agent
In addition to creating issues manually from an Intercom conversation, you can now use the _Create with Linear Agent_ option to automatically create Linear issues using AI.
When selected, Linear analyzes the entire conversation, including customer messages, support replies, metadata, and any attachments, and identifies the underlying product request or bug. The Linear Agent generates an informed title and description while pulling in the relevant context from your conversation with the customer.
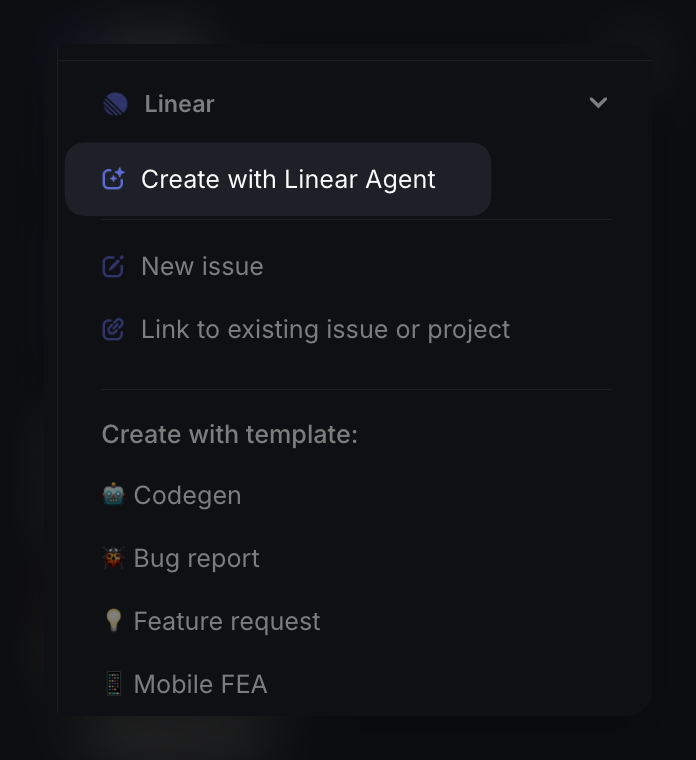
A customer request is created when applicable, and the issue is routed to the desired team for review and prioritization.
To use the Linear Agent in Intercom, make sure the Intercom integration is installed and connected, then enable the feature in _Settings_ > _Integrations_ > _Intercom_.
Once enabled, you can optionally provide guidance that helps the agent choose the right team or template when creating issues. These instructions can include examples, routing hints, or references to internal documentation. The agent will follow this guidance when creating issues, ensuring they land in the appropriate place within your workflow.
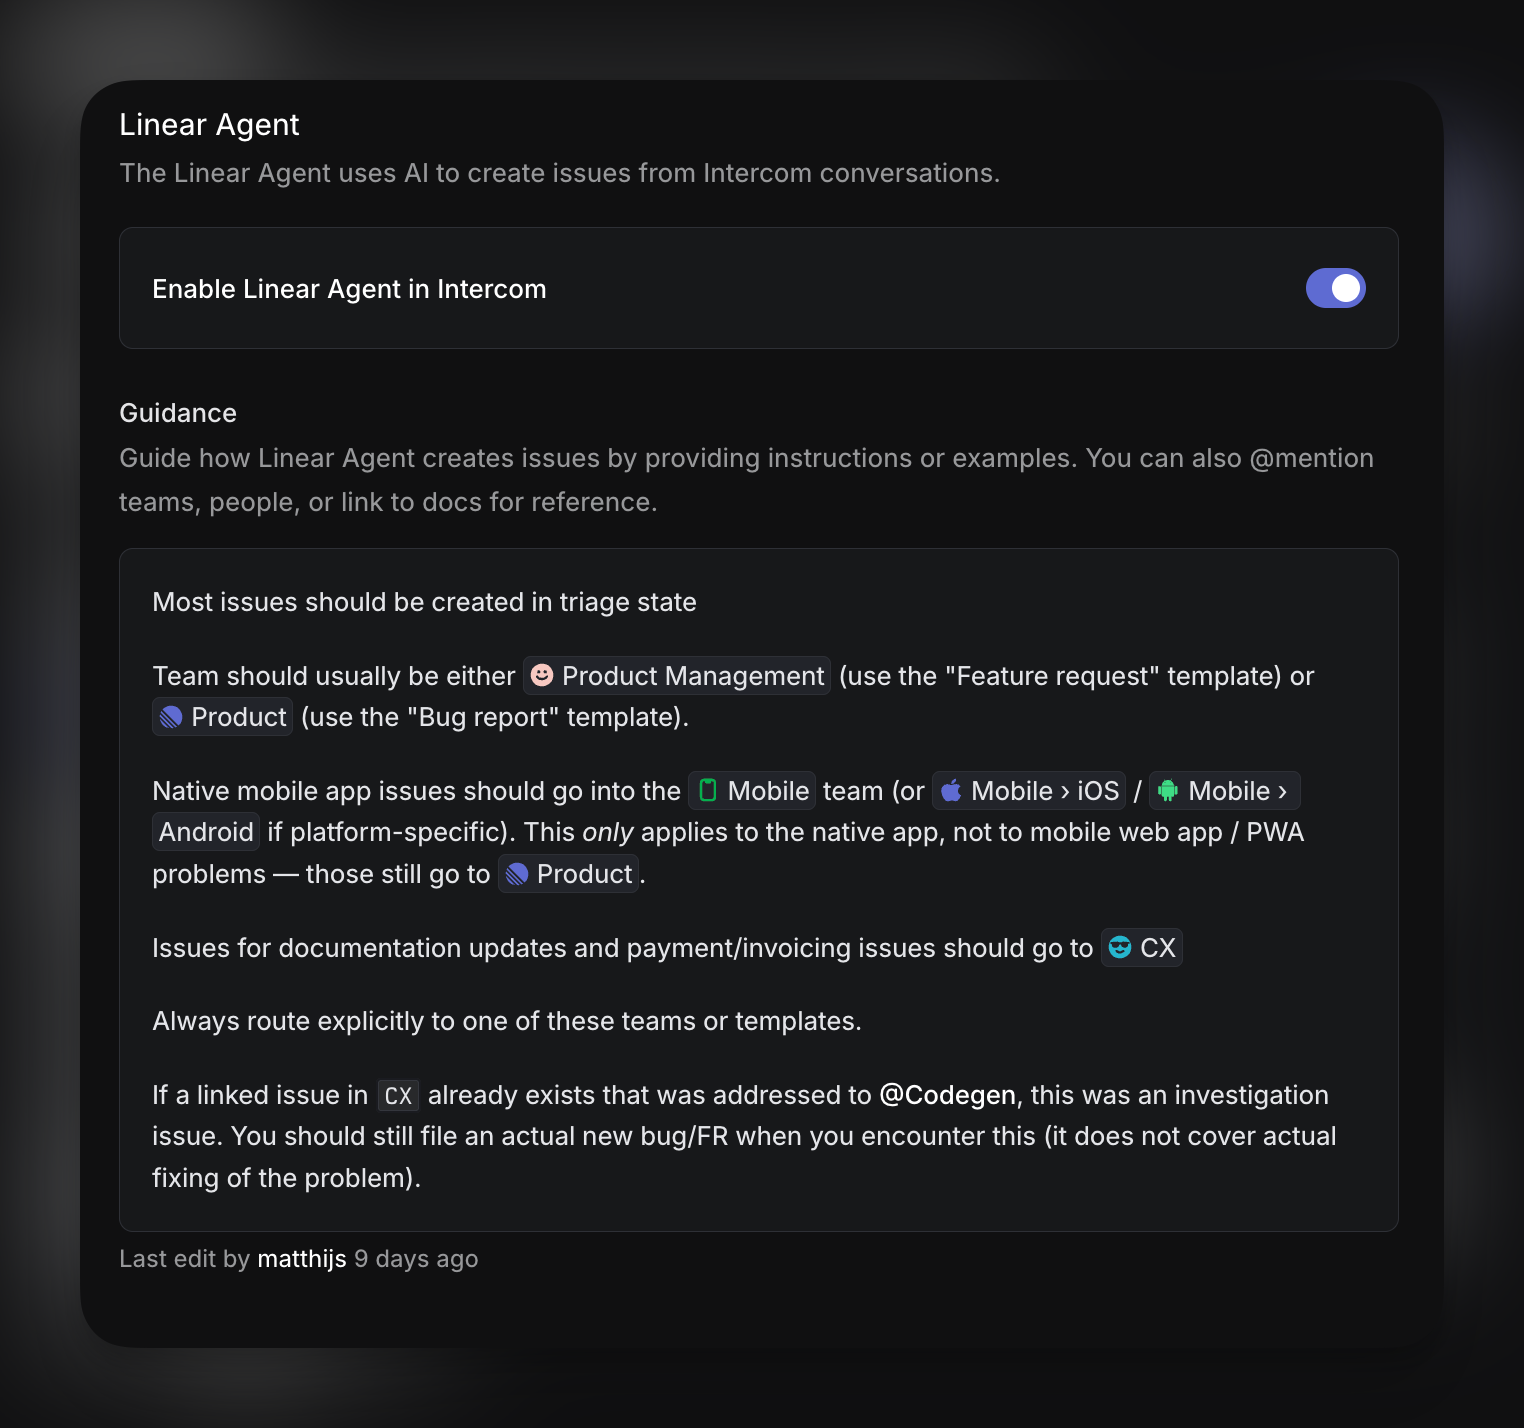
### Use templates
Linear admins can designate up to 10 [templates](https://linear.app/docs/issue-templates) to be available for quick use from within the Linear integration in Intercom. Selecting any of these templates will pre-fill issue property fields appropriately, helping to speed up issue creation and maintain a high level of data hygiene in your issues.
## Search and link issues
Click the link issue option and then search for it by title or issue ID. Linked issues will be added as links to the issue. Optionally add all or parts of the newly linked conversation to the Linear issue as a comment.
### View issue details
From the Intercom conversation, you will see all linked issues in the sidebar along with the issue ID, status, and assignee. Click the issue title from the Intercom sidebar to view more details. From here, you will also have the the option to view the issue in Linear or remove the link with the associated Linear issue.
### Link multiple issues
You can link multiple Intercom conversations to a single Linear issue. You can also link multiple Linear issues to a single conversation in Intercom.
## Re-open conversations
In the integration settings page, you can automate the reopening of linked conversations when the associated issue is marked as completed, cancelled or a comment is made. The integration will post an internal note and re-open the conversation in Intercom so it's easy to follow up with customers. Both closed and snoozed conversations will be reopened.
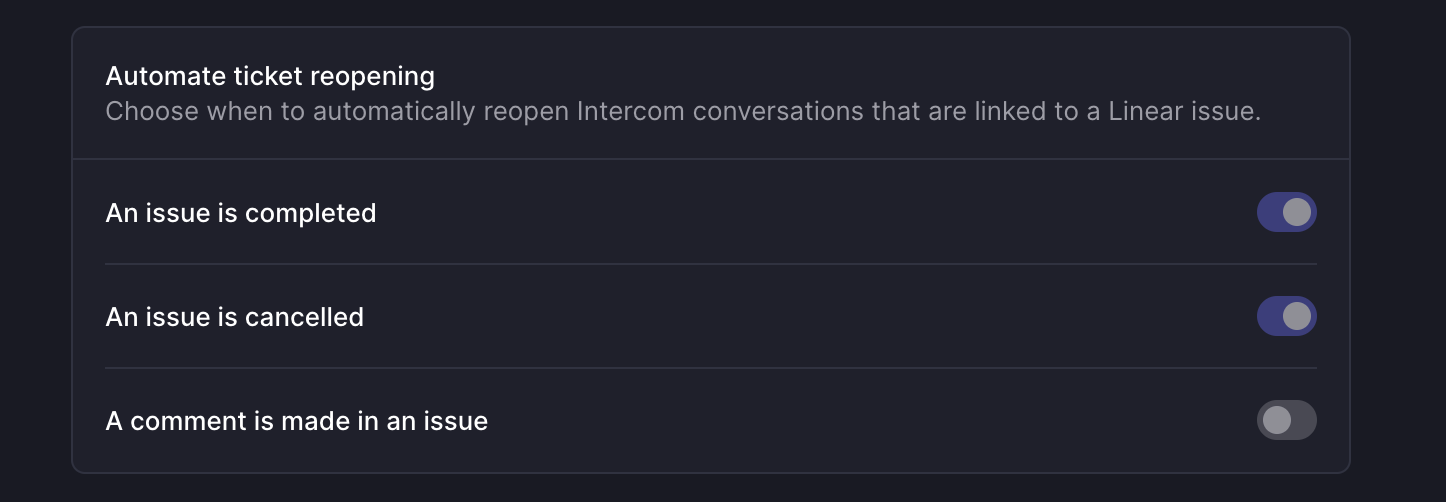
## Internal notes
By default, Intercom posts an internal note when issues are created, cancelled, or completed. Optionally set the integration to post an internal note whenever the issue status is updated. This feature allows Intercom users to gain additional signal on the issue without context switching away from Intercom. Please note that internal notes left in Intercom do not sync to the associated Linear issue.
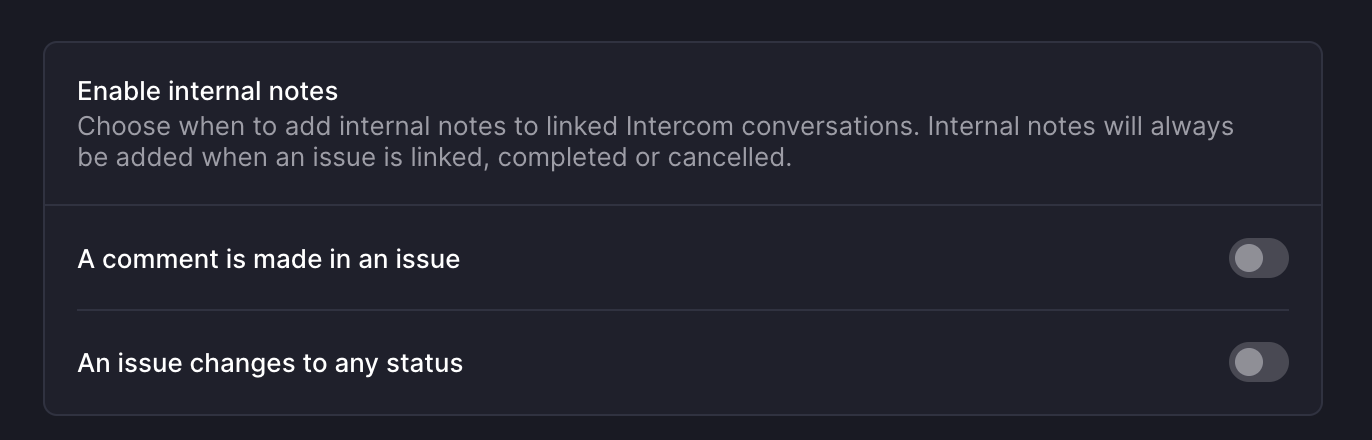
## Link Intercom conversations in Linear issues
* Click on contextual menu icon `…` to the top right of the issue
* Click _Add link_
* Click _Intercom conversation_
### Remove links
Click _Unlink_ from the Linear sidebar in Intercom to remove the link between the conversation and a Linear issue. You can also remove this from the Linear issue by right-clicking on the Intercom link attachment or clicking the `…` icon on the link attachment.
### Filter for Intercom links
From any Linear view, you can filter by issues linked to Intercom issues. Click `F`, then select `Links` and then select `Intercom`.
---
# Source: https://linear.app/docs/invite-members.md
# Invite members
Invite and manage members of your workspace.

## Send an invitation
To send an invitation:
1. Go to the [Settings > Administration > Members](https://linear.app/settings/members)
2. Click the **Invite** button.
3. Enter the invitee(s) email address. To add multiple invitees, separate each email by commas.
4. Under **Invite as...**, select the role you want the invitee(s) to have when joining the workspace (_paid plans_)
5. You can select the team(s) you want your invitee(s) to automatically join.
6. Click **Send invites**. New members will receive an invite link via email along with steps to join the workspace.
> [!NOTE]
> In case an email server is filtering out invitation emails, we recommend adding notifications@linear.app and/or pm_bounces@pm-bounces.linear.app to your allowlist as trusted senders in email settings.
### Email Options by Plan
#### Free plan
All members of a workspace on the Free plan are considered an Admin, thus anyone can send invitations to new members.
#### Paid plans
By default, only Admins can invite members on paid plans. Admins can allow all users to invite members by toggling on **Allow users to send invites** within [Settings > Workspace > Security](https://linear.app/settings/security).
#### Enterprise (SAML & SCIM)
For [SAML-enabled workspaces](https://linear.app/docs/saml-and-access-control), ensure that members are given access in your identity provider (IdP) before inviting them, depending on your login requirements.
Users who have access to Linear through your IdP may login to the workspace without needing an invitation. If no account existed for this user before, one will be created through Just-In-Time (JIT) provisioning. The user will show up as a member in Linear from this point on.
Reach out to [support@linear.app](mailto:support@linear.app) if a new user's email does not match other emails in your workspace, as it will have to be added to the SAML configuration as an approved domain.
When [SCIM](https://linear.app/docs/scim) is enabled for your workspace, you can no longer manually invite users from the Linear members page.
> [!NOTE]
> Learn how [adding](https://linear.app/docs/billing-and-plans?collapsible=b6d516b44aa5) or [removing](https://linear.app/docs/billing-and-plans?collapsible=24c14a946d42) users affects billing.
## Approved email domains
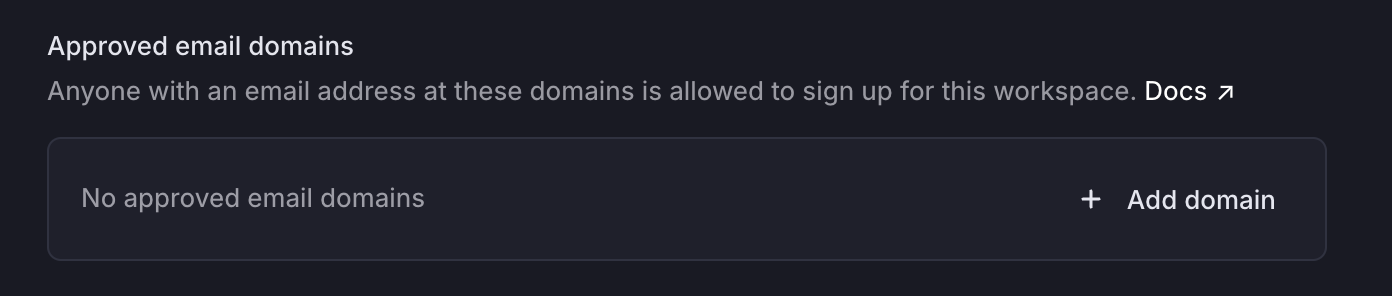
To save time from manually inviting new members, Admins can navigate to [ Settings > Administration > Security](https://linear.app/settings/security) and add allowed email domains. Once set up, anyone with the matching email domain can join the workspace without an invitation or approval. This is only designed to streamline the joining process and does not prevent users from creating new workspaces with that domain email.
Users who are creating new accounts will see a prompt to join the workspace during the onboarding flow.
For members with existing accounts, click on your current workspace icon, hover over **Switch workspace**, select **Create or join a workspace**. The workspace with the allowed email domain should show up under available workspaces.
> [!NOTE]
> Please review this list regularly to ensure it is up to date.
>
> If you ever cancel your domain or transfer control of a domain to another organization, you'll need to remove this domain from your approved email domains in Linear to prevent unwanted access to the workspace.
## Invite links
Navigate to [Settings > Administration > Security](https://linear.app/settings/security) to generate a unique link that allows for anyone with the URL to join your workspace. If enabled, please ensure this link is only shared internally with your organization.
Invite links are persistent and reusable. They can be set to a new unique value with the "_Reset invite link_" button.
## Invite & Assign
Invited users can be assigned issues or marked as project leads before they accept their invitation.
* On any issue or project, open the assignee selection menu and choose _"Invite and assign…"._ After inviting them, search for them in assignee/lead menus to continue to allocate work.
* Or, when sending an invite from the workspace settings members page, click on the invited user and create new issues from their user page. These will automatically be assigned to them.
## FAQ
What happens to API tokens when a user is suspended or converted to a guest?
The API tokens will be revoked and invalidated.
---
# Source: https://linear.app/docs/issue-documents.md
# Issue documents
Create documents for issues.
## Overview
Create documents inside of issues to keep relevant information and updates in one central place. Use documents to create specs and provide additional resources to issues.
## Create documents
Create documents when inside of a issue under the `…` menu of an issue > Add Document. It will get added to the resources section of an issue.
In documents, you can type in plain text, use code snippets, format with headers and reference issues and projects.
## Create document templates
You can create document templates to write documents faster and guide creators to share information effectively. These templates can be selected when creating a new document inside a project or issue.
To create a document template, you can navigate to either the workspace template settings or team template settings. Once you've created the document template, press `save `to make the template available for your team and workspace members.
To edit, duplicate or delete a template, go to the same page where you created the templates and then hover over the template name in order to show contextual controls. Click on the overflow menu and take the desired action.
## Document subscriptions
You can subscribe to notifications for specific documents by clicking on the bell icon in the upper right of the document and selecting yourself or another team member to notification.
The creator of a document will be automatically subscribed to the changes in the document.
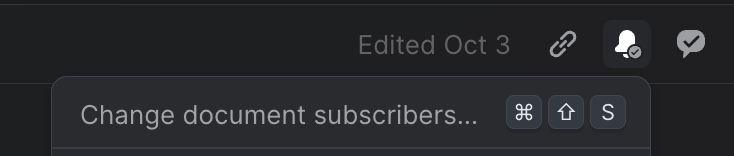
Notification types include document changes, comments, and replies. You do not get a notifications for actions you have taken on a document, but you will receive notifications for when
* A comment or reply has been made in a document.
* Material changes to the content of a document.
* A document was deleted.
* A team member subscribes or unsubscribes you to a document.
* A team member mentions you in a document
* A team member mentions you in a comment
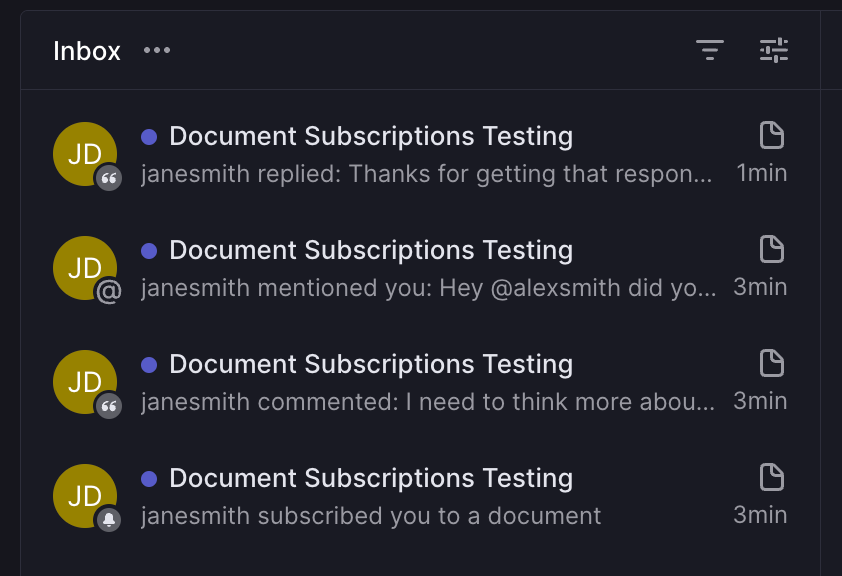
## Inline comments
Select text and press the comment button, or use `Cmd Opt M` to leave a comment. Subscribed or mentioned members will receive notifications about comments and replies.
Reply to comments, or resolve them with a single click.
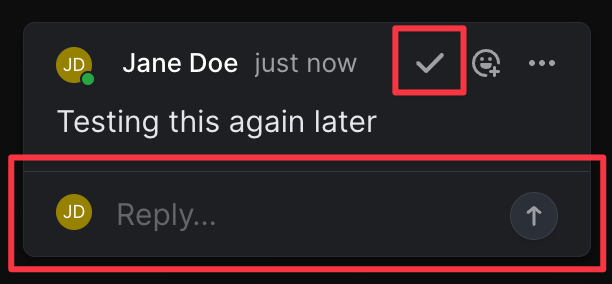
The full comment history of a document is available in the chat bubble icon in the upper right.

## Collaborative editing
Edit documents by opening them and clicking anywhere in the editor to begin editing. We'll show when the document was last edited and by whom. Linear offers collaborative editing, so you'll see input cursors if another user is editing or viewing the text. All changes are instantly saved and synced to everyone in realtime. You can revert documents to a previous version in the `…` menu at the top and choosing _"Revert document content"_.
## Editor slash commands
Type `/` to see additional formatting options in documents (and issues.) Using this menu you can create formatting types including:
* Headers (H1, H2, H3)
* Lists (bulleted, numbered, checklists)
* Codeblocks
* Dividers
* Blockquotes
## Open documents
While in an issue view, you can open documents with the shortcut `O` then `D` or by selecting the relevant document from the Resources section in an issue.
## Reference documents
Reference documents in issue descriptions, comments, and even in other documents by typing @ while in edit mode followed by the document name. This action can also be used to reference issues or projects; matching documents will appear in the lowest section.
## Link to headers
To copy a URL to a specific header, hover over the left side and click _Copy heading URL_. Sharing this URL with a colleague in your workspace will direct them to this specific section.
### External URLs
If you'd like to link related files that live outside of Linear, you can add a link to the `Resources` section of an issue or using` CTRL+L `on your keyboard.
---
# Source: https://linear.app/docs/issue-relations.md
# Issue relations
Create relationships between issues such as blocking, related, and duplicate.
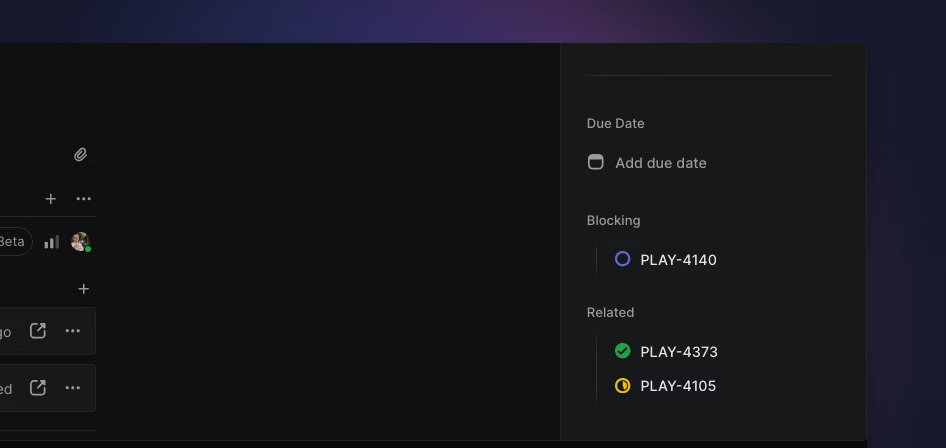
## Overview
Tag issues with relations and dependencies to help your team identify and remove blockers and work on the most important issues. You can mark issues as blocked, blocking, related, and duplicate.
## Add relationships
The issue and type of relationship will show up in the issue properties sidebar.
From the issue editor, add a relation using keyboard shortcuts or by selecting the overflow menu after saving the issue. From a list or board, use either the keyboard shortcut, command menu or contextual menu. You'll be prompted to find and select the related issue. You can add as many related, blocking, blocked, or duplicate flags as you like but will have to repeat the steps for each one.
## Related issue
When you reference issues in a description or comment, they'll automatically become a related issue. Alternatively, use `M `+ `R `to relate one issue to another. When viewing an issue you can open the command menu (`⌘/CTRL+K`) and type _"Create new issue related to…"._
To remove a related issue, hover over the related issue and click the _X._ You can also select _Remove relation_ from the command menu `⌘/Ctrl` `K`. If you have more than one relation, you'll be prompted to select which relation to remove.
## Blocked / blocking
Mark issues as blocked by other issues with `M` then `B`. If other issues are blocking the current issue, they'll show up in the issue sidebar with an orange flag under _Blocked by_.
Mark issues as blocking other issues with `M` then `X`. If the issue is blocking other work, the blocked issues show up in the issue sidebar with a red flag under _Blocks_.
Once the blocking issue has been resolved, the blocked issue flag turns green and moves under _Related_.
## Duplicate
Merge duplicate issues into the canonical (saved) issue with the shortcut by pressing `M` and `M`. This will mark the issue you are viewing or have selected as a duplicate issue and change the status to canceled. You cannot mark issues the other way around (e.g. view the canonical issue and mark other issues as duplicates of it). If you have more than one canceled status, you can specify which status to apply under _Team Settings > Workflow_.
---
# Source: https://linear.app/docs/issue-templates.md
# Issue templates
Templates speed up issue creation, ensure properties are applied when necessary, and facilitate reporting.
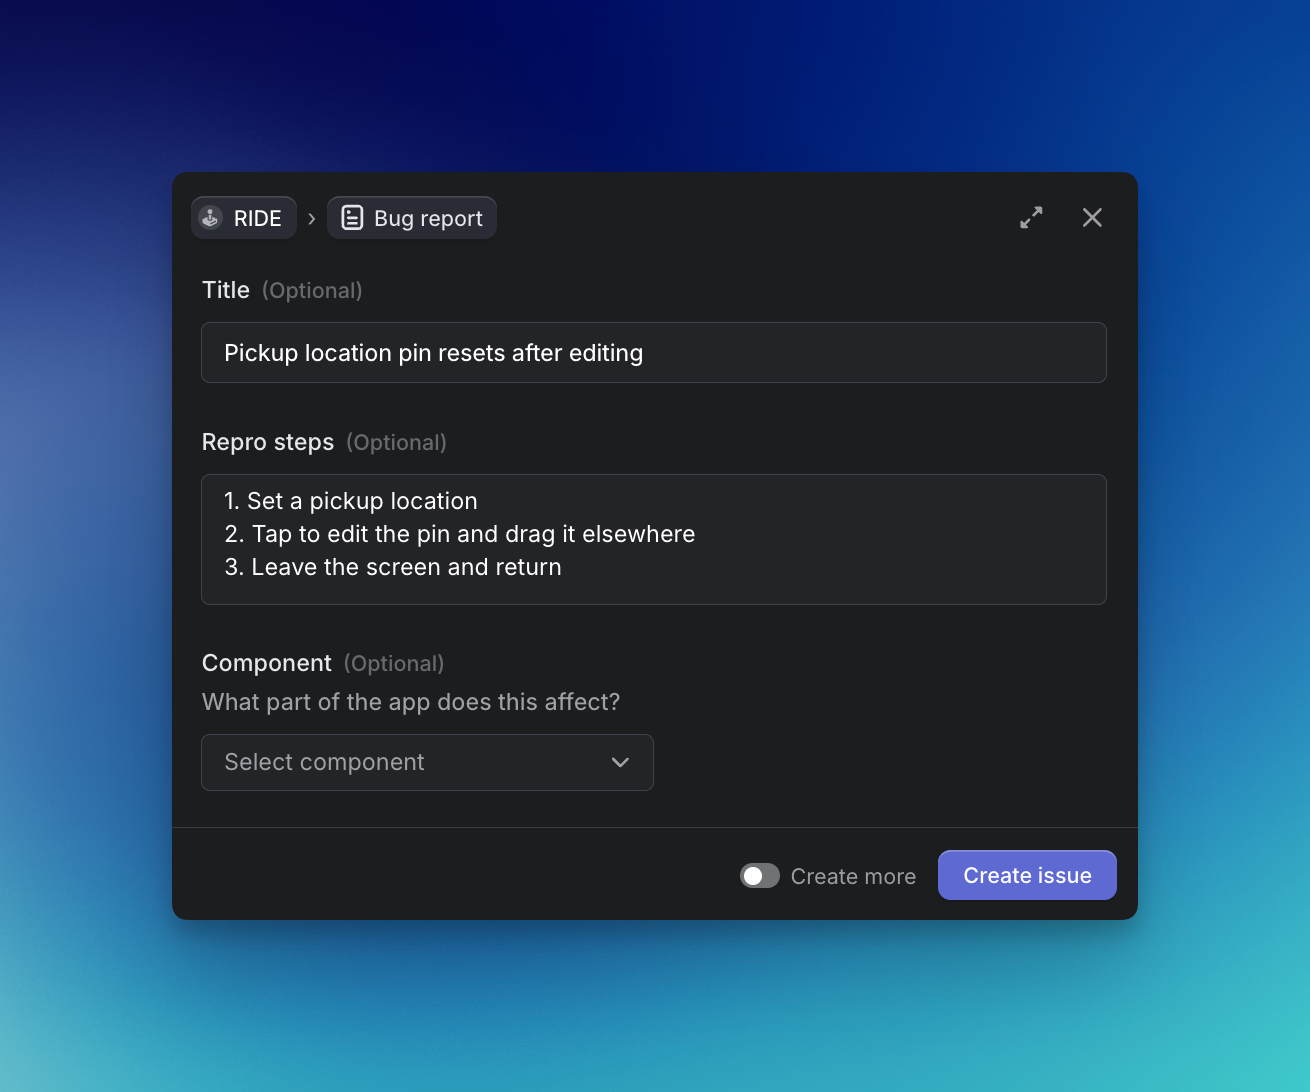
## Overview
Templates help you file issues more quickly, and ensure desired issue properties are applied without having to add each one manually. When a template is set as default for a team, each new issue in that team will be created from that template unless manually changed.
## Create standard issue templates
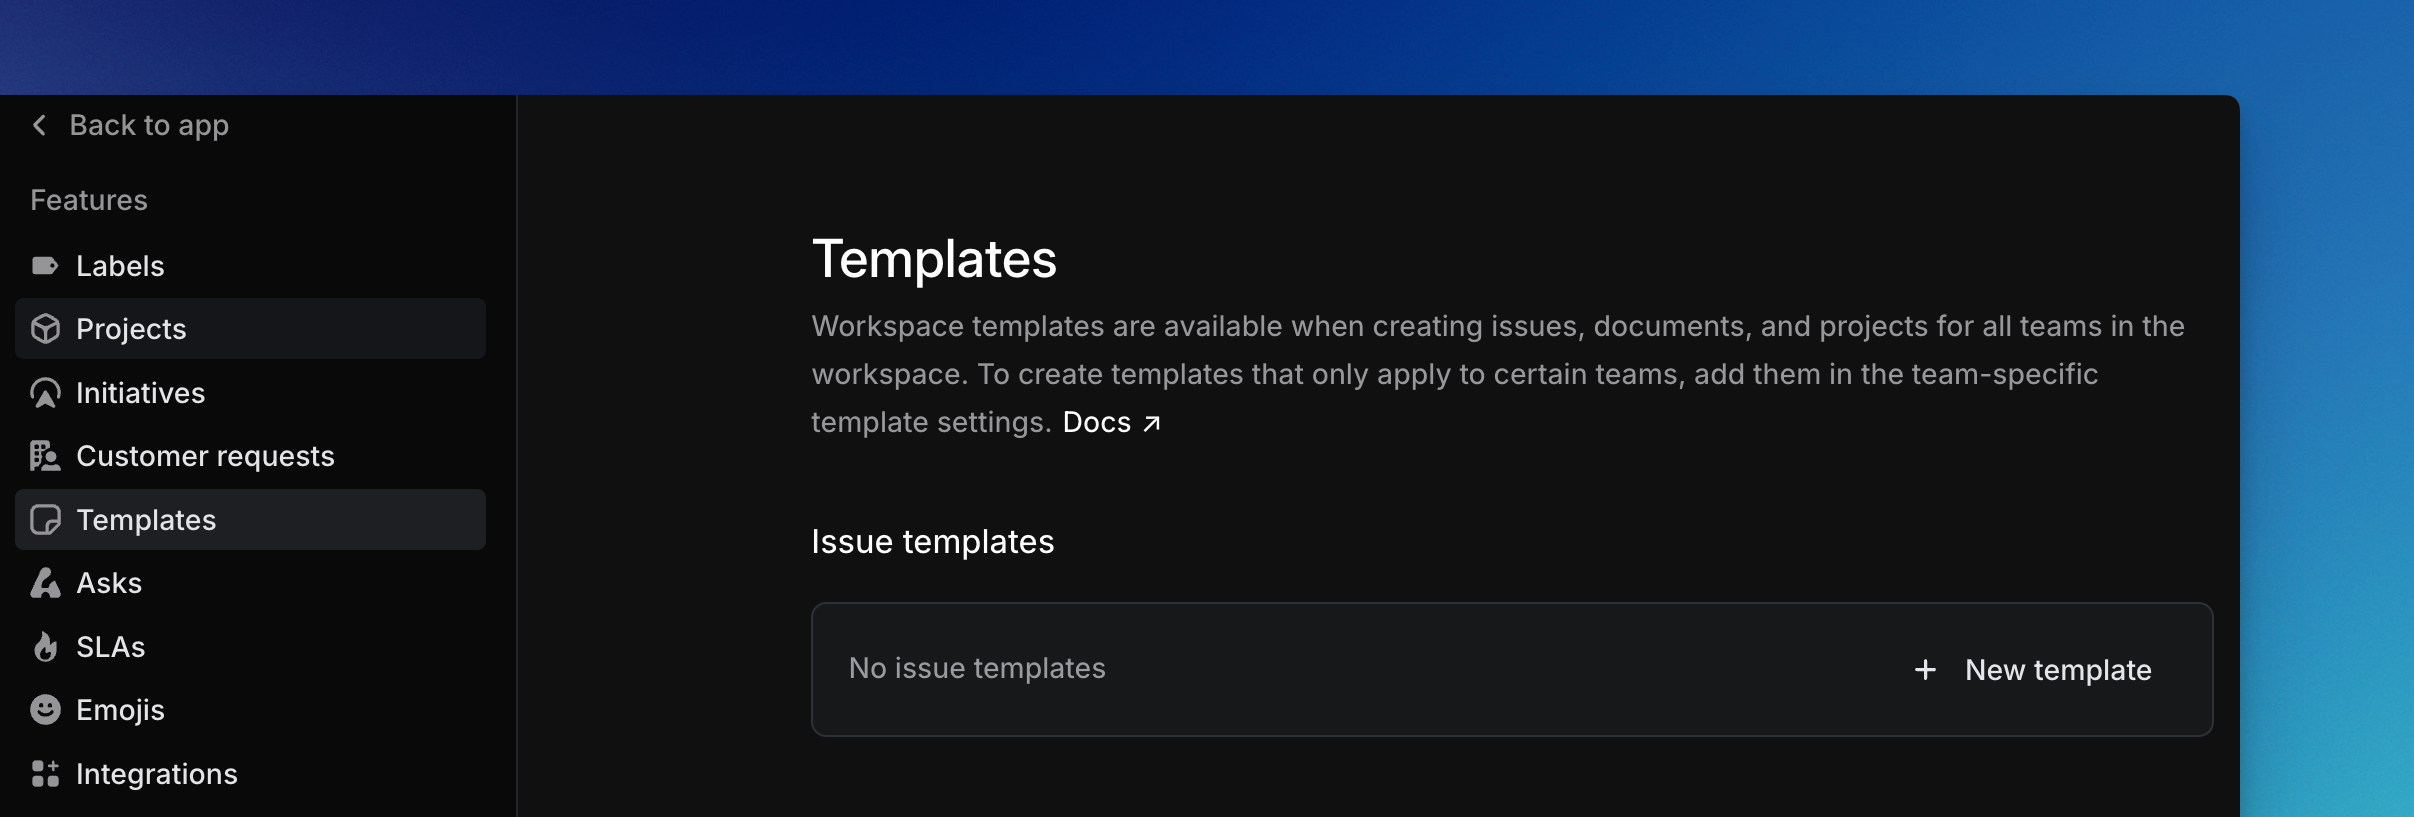
Create new templates by navigating to either [_Workspace settings > Templates_](https://linear.app/settings/templates) or _Team settings > Templates_. Standard templates allow you set the properties of the issue, and provide some context in the description if desired.
Standard templates have the same formatting options of regular issues, with the addition of placeholder text. If you want to prompt the creator to input information in the issue's description, consider using this formatting in your template.
To format text as a placeholder, select text while editing your template and click the `Aa` icon on the formatting bar. This formatting type is only available when creating or editing templates.
### Workspace Templates
You can create issues with a workspace template on any team in your workspace. Team specific properties like team labels or issue statuses cannot be preset in a workspace level template.
Use workspace templates for issue types that are likely to appear across different teams.
### Team Templates
When a template is scoped to a particular team, it's available only when creating issues in that team. This template type has full access to team properties like team labels and issue statuses.
Team templates are commonly used in our Asks integration, or for types of issues should always be filed to only one team in your Linear workspace.
## Create form templates
Form templates are more structured than standard issue templates and can be used when it's important that certain information is provided at issue creation. They support a set of generic form fields that the submitting user can fill out, as well as fillable fields that correspond to the issue's properties directly. Form templates can be triggered in the Slack integration and in Asks, and also directly in Linear by selecting the template. Any field can be required in a form template.
### Generic form fields
Field | Function
--- | ---
Text | Single-line text input
Long text | Multi-line text input
Dropdown | One value can be selected among options you provide
Checkboxes | One or more values can be selected among options you provide
Date | Date picker, not tied to any issue property
Instructions | Static text that you can use to provide context for how to fill the form, or a particular field in it. Instructions text will be included in the description of the created issue.
### Property form fields
You can also elect to include **customer, a label group, priority, title, and due date**. These fields are treated like generic fields as the user fills the form, but they correspond directly to an issue property rather than being a value input into the created issue's description.
### Default properties
Like standard templates, some properties can be applied by default. These appear to the user when the form template is triggered in Linear, but not elsewhere. These fields are **team, status, priority, assignee, project, label,** and **sub-issue.**
## Use issue templates
Create an issue from a template with the keyboard shortcut `Option/Alt` `C`. Alternatively, access templates directly from the issue creation modal by clicking on _Template_ next to the team name.
If you don't see the template, check that you're creating the issue from the right team. In a sub-issue, only templates that do not themselves contain sub-issues are available.
## Default templates
Default templates are templates that are automatically applied when creating a new issue, given the conditions are met. Configure default templates from a team's template settings page. You can configure defaults differently for members of your team or people who are not part of your team. Form templates are only available as default templates for non-team members.
## Templates in integrations
Templates created in Linear can also be used in integrations to help save time and keep properties applied consistently where needed.
Integration | Use-case | Supports form templates
--- | --- | ---
Intercom & Zendesk | Support agents can select a template for the type of issue being reported, speeding up filing and prefilling needed properties like status Triage and label Bug
Slack | When creating issues from a Slack message, select a template from the dropdown menu | ✔
Asks in Slack | Asks is designed to be primarily template driven; users outside your Linear workspace but in your Slack workspace create issues via template enabled in Asks, so their issues end up with the necessary data in Linear | ✔
Asks in Email | Internal request intake via email through Asks
Zapier | Consider creating issues via template in the Create Issue step for Linear in Zapier for more complex, multi-application workflows
Email | Templates can have unique email addresses; sending an email to that address will create an issue with the properties of the template
Add a template to a supported integration in that integration's settings page in Linear.
## Template based Insights
Issues created by template are filterable by their template, regardless of where they were created. For example, for a template Bug Report, filtering for that template will return issues created with that template in created in Slack with our Slack or Asks integrations, Intercom/Zendesk, and Linear's interface. Questions like "What's our breakdown of bug reports vs. feature requests look like, and how many of them are solved" can be explored with [Insights](https://linear.app/docs/insights):
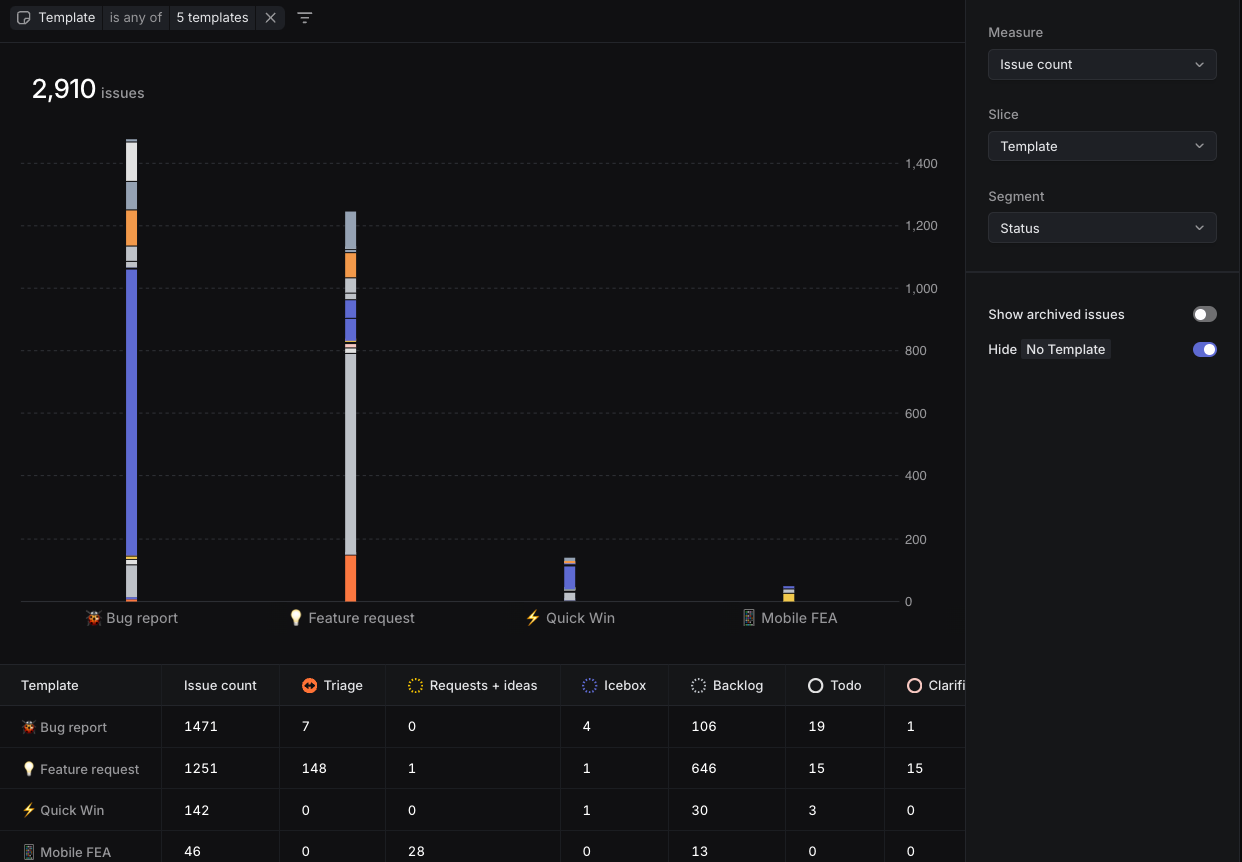
Or, investigate the breakdown of template use by intake source:
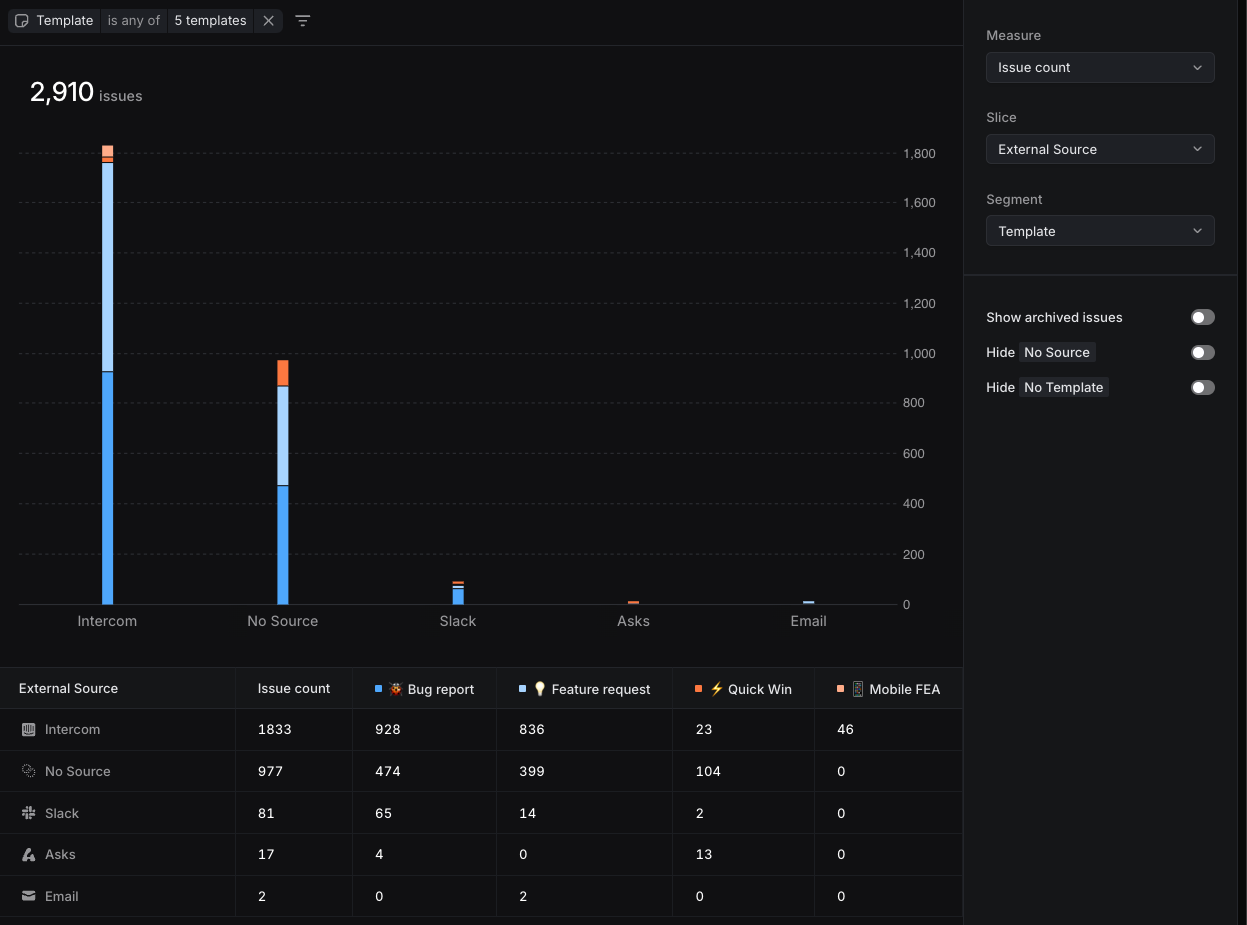
### FAQ
Some of my standard templates are now form templates. How do I change them back?
All templates that used Asks fields have been migrated to form templates, as this feature replaces the former Asks fields functionality.
You can use this option to run a best effort conversion back from a form template to a standard issue template.

---
# Source: https://linear.app/docs/jira.md
# Jira
Enable Jira Sync while trialing or transitioning to Linear to keep Jira spaces up to date.
> [!NOTE]
> For pre-existing issues, you can complete a one-time import from Jira to Linear, use the CSV or API credential options in our [importer](https://linear.app/docs/import-issues#jira).
>
> Imported issues and projects import as synced only if the Jira integration is [configured](https://linear.app/docs/jira#configure) prior to completing your import. Switching from another tool? [Follow our manual.](https://linear.app/switch)
## Overview
Some companies choose to [import issues and projects](https://linear.app/docs/import-issues#jira) and switch to Linear immediately; others prefer to trial Linear on a small team first or need some time to make the full transition. For the latter cases, we built Jira Sync.
This feature allows you to connect Jira spaces to Linear teams, so that new issues and projects created in Jira or Linear are kept current in both places.
## Permissions
The user creating the API token to enable Jira Sync must have the ADMINISTER [permission](https://support.atlassian.com/jira-cloud-administration/docs/manage-global-permissions/) in Jira. This is necessary for Linear to install the required webhooks. It is possible to remove the global ADMINISTER permission after the setup is complete without impacting this integration.
If the ADMINISTER holder does not have a Linear seat or does not want this permission stored in Linear, please see the FAQ.
### Jira Cloud
Create an API key for this user by following instructions [here](https://support.atlassian.com/atlassian-account/docs/manage-api-tokens-for-your-atlassian-account/). The default token expiry is one week, please choose to enable for a year instead.
### Jira Server
API keys might not be available. Instead, you need to create a personal access token (or PAT). Instructions can be found [here](https://confluence.atlassian.com/enterprise/using-personal-access-tokens-1026032365.html). The default token expiry is one week, please choose to enable for a year instead.
#### Posting in a synced thread
In order to send a reply to a synced thread, you'll need to link your Atlassian account first.
Individual permissions requested in OAuth consent screen
Permission | What we use it for
--- | ---
User → View → me | We use this to capture the Jira Account ID of each user. This allows us to properly map users between Linear and Jira
User → View → me | This allows us to create issues and comments on behalf of the user. This does not grant access to read issues or comments not created by this user.
Jira Server users will be presented with a simple form to input their own personal access token.
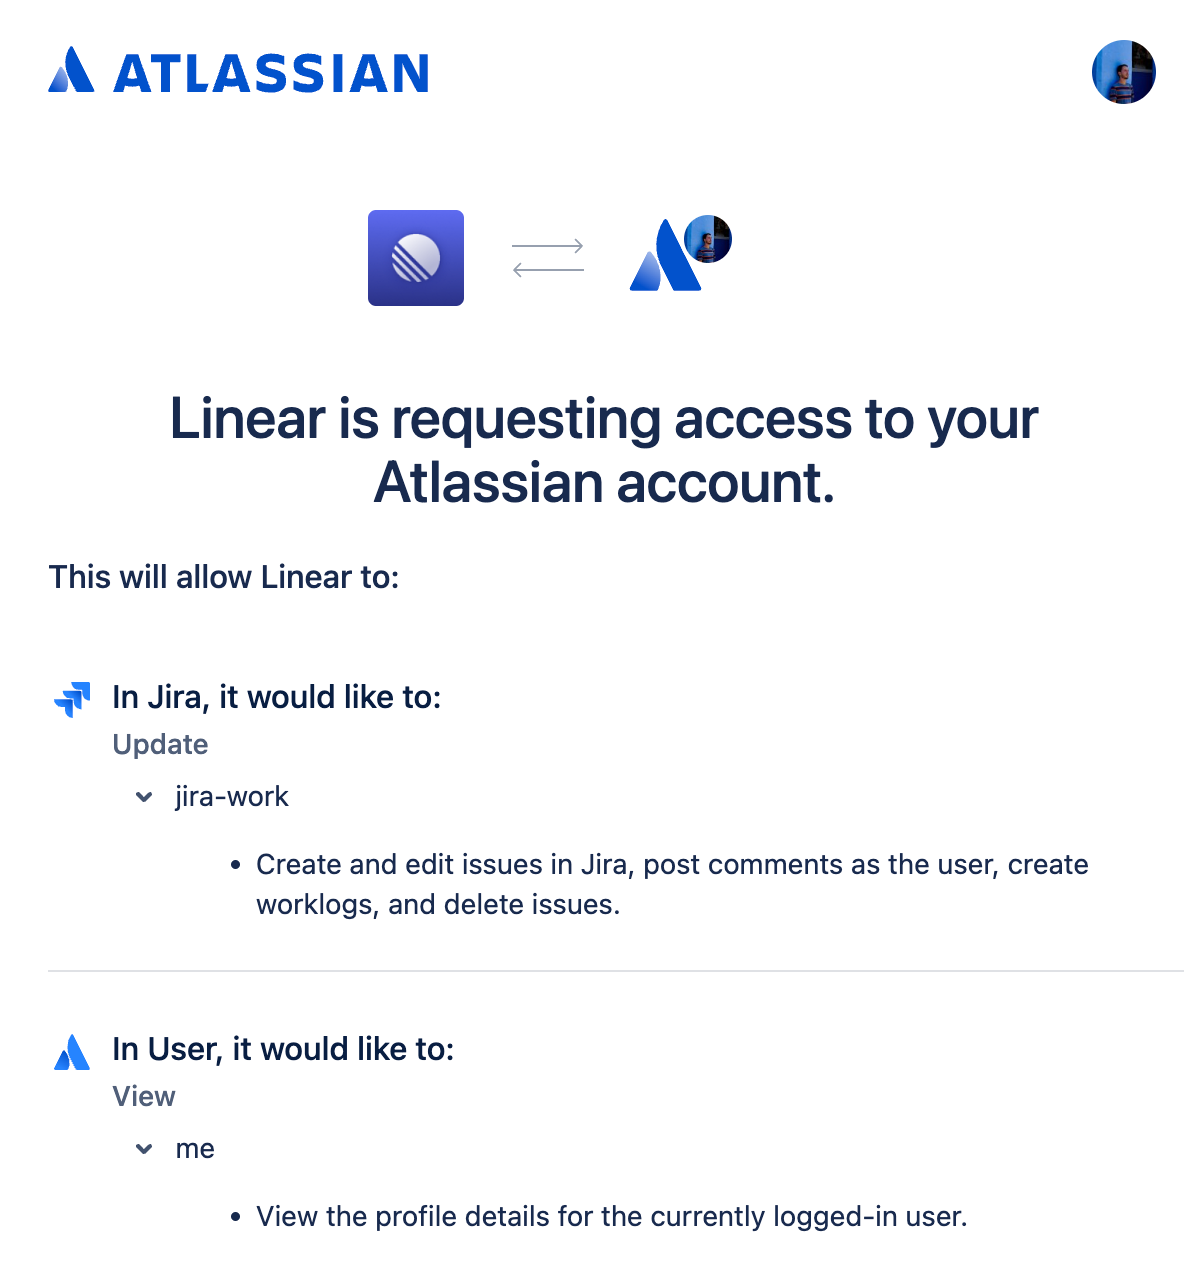
## Configure
Enable the integration in Linear from [workspace settings](https://linear.app/settings/integrations) under _Workspace > Integrations > Jira_.
Enter your personal access token (see Permissions > Setup above), email address and installation or cloud hostname and then select which Jira space to link to which Linear team. For the installation or cloud hostname, remember to remove the `http://` and anything after `.net`.
For best performance, users should link their individual Jira accounts in Settings > Integrations > Jira > Connect personal account. This allows better handling of fields in Jira like Assignee and Creator.
## Basics
### Select Jira Spaces
We've set up the integration so that Jira spaces map to teams in Linear.
You can link each Jira space to only a single team in Linear, so the same space cannot create issues in multiple Linear teams. Multiple Jira spaces can be linked to the same Linear team though and issues will be created in Linear from any connected Jira space.
### Relationship to Jira Imports
Running a Jira import will not automatically import issues as synced _unless_ you've configured the Jira integration prior to the import. You do not need to create the space/team mappings prior to importing. For full instructions about importing issues as synced, please see our [Importer](https://linear.app/docs/import-issues#import-and-sync-with-jira) documentation.
### Synced properties
Once the integration is enabled, any new issue created in a linked Jira space or Linear team will create a synced version of that issue in the other service.
Jira epics automatically sync as Linear projects, maintaining parent-child relationships between issues and their projects/epics.
#### Issues:
Name in Linear | Name in Jira
--- | ---
Title | Title
Description | Description
Assignee* | Assignee*
Creator* | Creator/Reporter*
Priority | Priority
Status** | Status**
Labels*** | Labels***
Due date | Due date
### Epics/Projects:
Name in Linear | Name in Jira
--- | ---
Project title | Epic title
Project status | Epic status
Project labels*** | Epic labels***
Project priority | Epic priority
Project description | Epic description
Project lead* | Epic assignee*
Special cases
* For these fields to sync successfully, the relevant user must connect their Jira account to Linear in Settings > Integrations > Jira > Connect personal account. If no connection exists, the Assignee field will be unassigned, and/or the creator field will be the user who configured Jira.
** Deleting a synced issue in either Jira or Linear will not delete the issue in the other direction, or otherwise affect status in the synced issue.
If a synced issue in Jira moves to a status not in Linear, The Linear issue's status will not update. The status will update in Linear if the synced issue is moved in Jira to a status that can be mapped properly, or if the status is changed in Linear directly.
*** For labels to sync from Jira to Linear, the label must have already been created in Linear (either through a previous import, or by creating the label manually or through our GraphQL API. When labels sync from Linear to Jira, we'll create a new label in Jira when appropriate.
### Sync directionality
When configuring the mapping between a Jira space and a Linear team, you have the choice of syncing uni-directionally or bi-directionally.
When syncing uni-directionally, issues created in Jira are also created in Linear. Changes made to that issue from Jira are synced to Linear, but changes made in Linear do not sync back to Jira.
When syncing bi-directionally, creating an issue in either service will create a synced copy in the other. Updating the synced copy in either service will sync changes back to the other issue.
### Sync banners
Once an issue or project is synced between Jira and Linear, a banner will appear at the top of the issue to make this clear. The banners will display information to show current sync status or will surface any errors with syncing.

### Limitations
There are a number of features in Jira that Linear has chosen not to pursue as a matter of product philosophy. These discrepancies are worth noting, as they will affect sync. Among these are Issue Type, Constraints, Components, and Required fields. Read more about how these differences are handled by sync below.
Required fields
If a Jira project's workflow demands required fields, we will not create the synced issue or project in Linear. In the case where an issue has been created in Linear before required fields are enforced in Jira, we'll send an error to the Linear issue as a comment to surface the problem.
Issue type
Issue type is a native required field in Jira. Bug, Story, Epic and Task are common issue types. When you create a new issue in Linear and we create a synced issue in Jira, it will be type _Task_ if we find that type in Jira.
If this type has been deleted, we'll fallback to the first type on the list. If issues created in Linear are created in Jira as _Story_ for instance, you may wish to create a type _Task_ so that future issues created in Linear will display appropriately.
Constraints
You may have constraints in Jira that prevent certain updates to a Jira issue until various conditions are met.
If you update a synced Linear issue in a way that violates Jira constraint, the Linear issue will update but the Jira issue will not.
Components
In a synced Linear issue or project, components appear as labels - "Component: Engineering" for instance. These labels cannot be grouped or deleted. Removing a component label from an issue in Linear will remove the component in the synced Jira issue.
Hierarchy Limitations
Linear and Jira have different restrictions for issue and project hierarchy that can lead to discrepancies. If you remove a parent relationship (Project > Issue > Sub-issue) in Linear that would violate Jira's hierarchy constraints (Epic > Story/Bug/Task > Sub-issue), the sync may fail or show discrepancies.
### Issue filter
By default, Jira Sync will create and sync every issue that’s created in the mapped Jira space. If you wish to filter out some issues, you have the ability to do so by editing the webhook in Jira.
Please note that any JQL filters you applied to limit the scope of _import_ do not apply for Jira Sync purposes. In order to change what is provided to Linear for Jira Sync, follow the instructions below:
Go to `Settings` → `System` → `Advanced` → `Webhooks`. Select the Linear webhook and click `Edit`.
The `Issue related events` box allows you to provide a custom JQL query to filter out some issues that you do not want to sync with Linear. This works both when the conditions are met at the time of the Jira issue's creation, as well as if the Jira issue is updated to meet the parameters of your filter later.
Here is an example to only sync issues with the label `Bug`:

### Pre-existing content in Jira
Once configured, Jira Sync will create issues and projects in Linear when issues and epics are created in a synced Jira space. Issues belonging to that synced space from before the sync was configured will not create issues in Linear.
However, when those older issues and epics receive updates in Jira, the updates will prompt those issues to be created and synced in Linear.
### FAQ
Can I sync all tickets in Jira with a Linear team?
Jira Sync is a forward looking integration -- it will create new issues in Linear or Jira when a new issue is created in a synced context in either service.
If you'd like to import your Jira issues as synced, please follow the steps [here](https://linear.app/docs/import-issues#import-and-sync-with-jira).
Does Linear become aware of updates to synced Jira space metadata?
If you change metadata in synced Jira spaces (delete, add, make them unrequired) this may cause the Jira issue and Linear issue to become out of sync.
Clicking the refresh button on the list of synced Jira spaces in Linear settings will update the list of available spaces, but also update the metadata to Linear's context. This is a fix forward; issues already out of sync because of missing metadata will not update after pressing this.
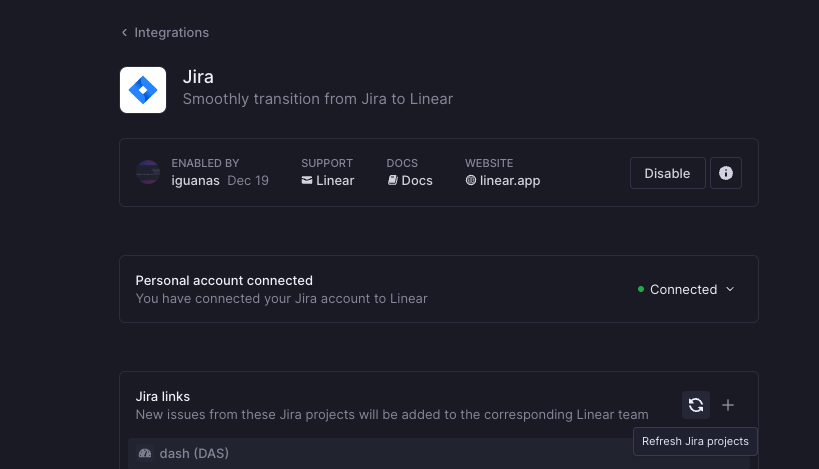
Will issues created by import from another service sync with Jira?
No, Issues imported to Linear in general will not create a synced copy in Jira. The specific exception to this is if you set up a synced Jira project in Linear and import from that Jira project to Linear.
Other imports outside of this will not create synced issues in Jira.
Can I send Linear tickets created by Jira to Triage?
You may wish to triage Linear issues created by Jira instead of syncing their status automatically (for example, you may want the opportunity to decline the issue before admitting it to your backlog).
While this integration is broadly intended to keep Jira and Linear issues in sync, you can workaround this by renaming your first status under type _Started_ something besides To do, to-do or similar variants. When the integration can't determine the right status at issue creation, it falls back to Triage. In other words, if your first started status is called "Started" in Linear and "To do" in Jira, new issues created by Jira in Linear will go to Triage.
Will moving a Jira issue from an unsynced space to a synced space create a Linear issue?
Yes, a Linear issue will be created when a Jira issue is moved into a synced space.
Will moving a Linear issue from an unsynced team to a bidirectionally synced team create a Linear issue?
No, a Jira issue will not be created when a Linear issue is moved from one team to another. This will only work when an issue is created directly in the Linear Team.
How can I set up Jira Sync without a Linear admin having ADMINISTER permissions in Jira?
This integration may also be setup with the webhook option. The actor who configures the webhook must still have ADMINISTER, but this can be done between two people synchronously -- A Jira ADMINISTER holder without a Linear seat, and a Linear admin with BROWSE PROJECTS permissions.
To do this, the Linear actor would choose the "Manual Webhook" option in Linear > Settings > Integrations > Jira
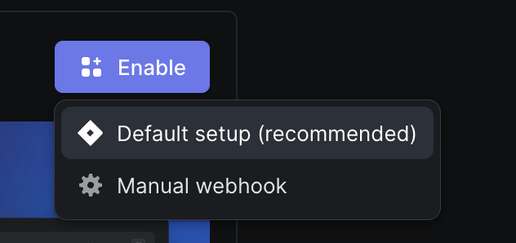
Then, the same person can fill this section:
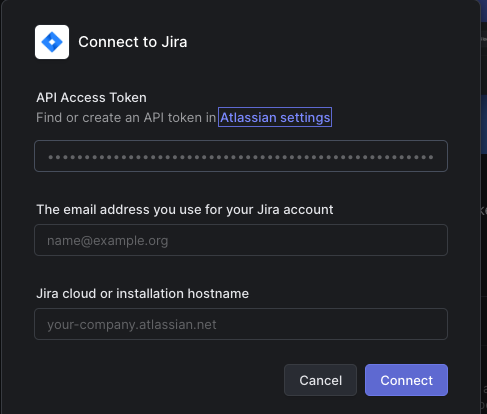
On submission, they'll be presented with this form. They can then share the webhook URL and these instructions with the Jira ADMINISTER holder, who can setup the webhook in Jira directly:
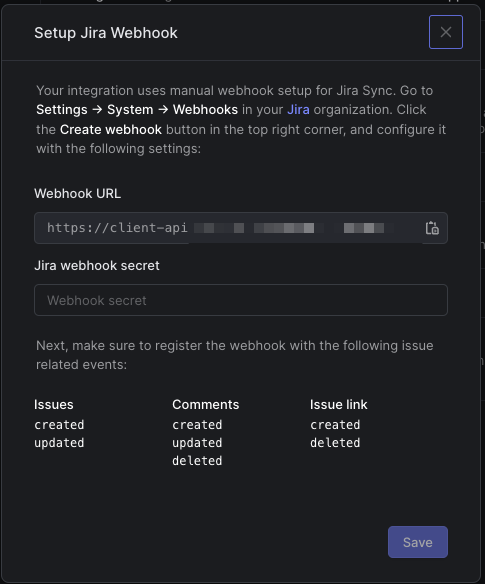
After the webhook is setup, the Jira actor can securely share the webhook secret (through something like 1Password) to the Linear admin, who can input it where prompted and click Save. Any Linear admin can then manage the integration from within Linear.
My issues are showing a sync or permissions error
Viewing the sync error will tell you more specific information about the root cause of the sync error. This can typically occur in cases where an issue is missing on Jira or your permissions are not configured correctly.
For permissions errors, using Jira's permissions helper can shed light on where the error lies.
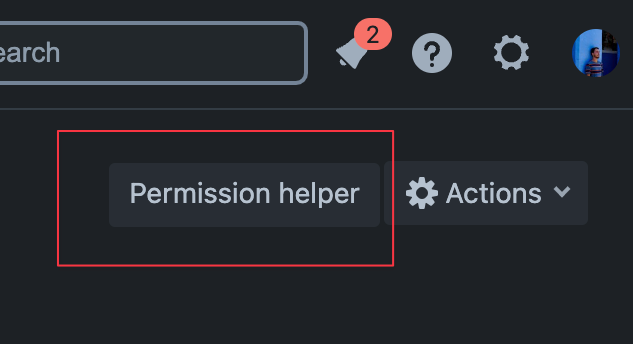
Fill the values to:
* **User**: This should be set to the user who created the Jira Sync integration (you can check this in Linear in Settings > Integrations > Jira > Enabled by)
* **Issue**: Even though we are looking to check permissions to create new issues, the form requires us to pick an issue to check against. Choose any issue.
* **Permission:** Choose `Create issues`. Then click submit and look for a status in the blue box, it should tell if that user has access to this permission on this project. If not, the details below should contain some clues about what's missing.
Do Linear Sub-teams work with Jira Sync?
[Sub-teams](https://linear.app/docs/sub-teams) are not considered when mapping Jira spaces and Linear teams.
If a parent team is linked to Jira bidirectionally, issues created in that parent team will be created in Jira. Issues created in its sub-teams will not be created in the linked Jira team.
The sub-teams themselves may be linked individually to Jira spaces however, and this will work independent of the parent team's sync settings.
Do epics that were previously imported or synced as issues automatically sync as projects?
No. Epics that were previously imported as projects or synced as issues will not retroactively sync as projects. Only newly created epics (after bi-directional sync is enabled) will sync as Linear projects going forward.
---
# Source: https://linear.app/docs/label-views.md
# Label views
Label views show all issues under a specific label or label group.
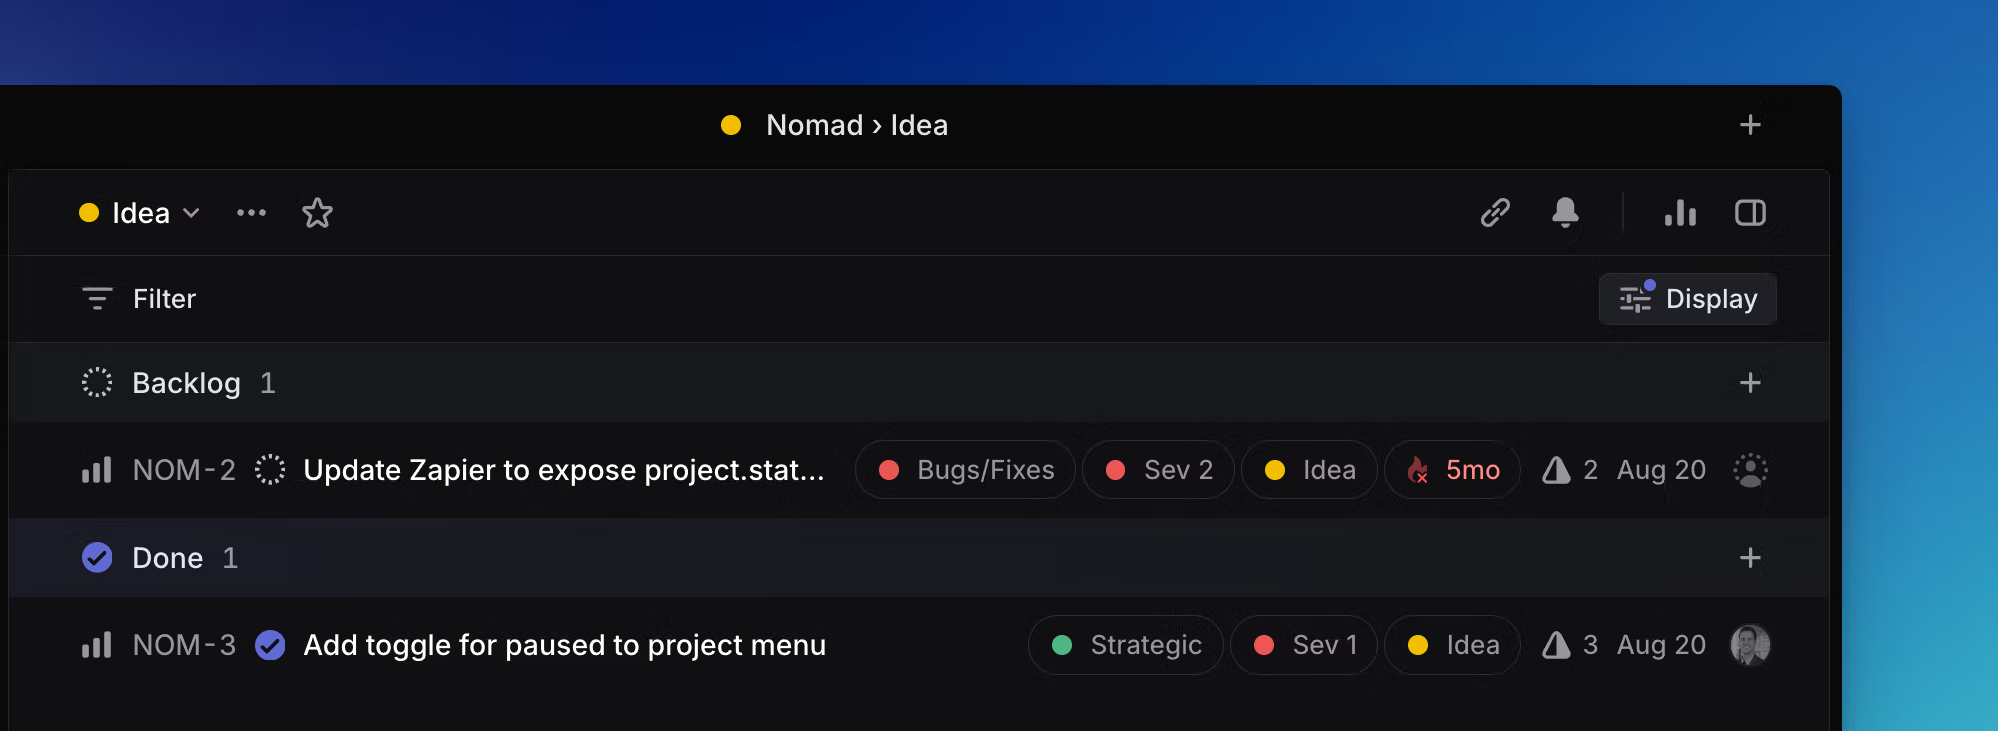
## Overview
Label views show you all the issues associated with a label.
### Keyboard
`O` then `L` to open a label view
### Mouse
Click on a label from an issue, board, or list to open the label view
### Command menu
`open label` to open a label view
## Basics
To open a label view, click on the label or label group from a board, list, or issue view. You can also use `O` then `L` to launch a menu and select the label view. You can favorite label views as well as filter them. Team-specific label views only show issues in the specific team associated with the label, whereas workspace label pages show issues associated with the label from all teams.
### Workspace labels
If multiple teams have a a team-specific label (e.g. _Design_), and you want to view all issues with the same label across these teams, it is possible to use filters and custom views to do so.
To set this up, create an _All teams_ view, then apply a filter for the specific label. Make sure the label is spelled exactly the same across all teams, though capitalization and label color don't matter.
---
# Source: https://linear.app/docs/labels.md
# Labels
Use labels to categorize issues.
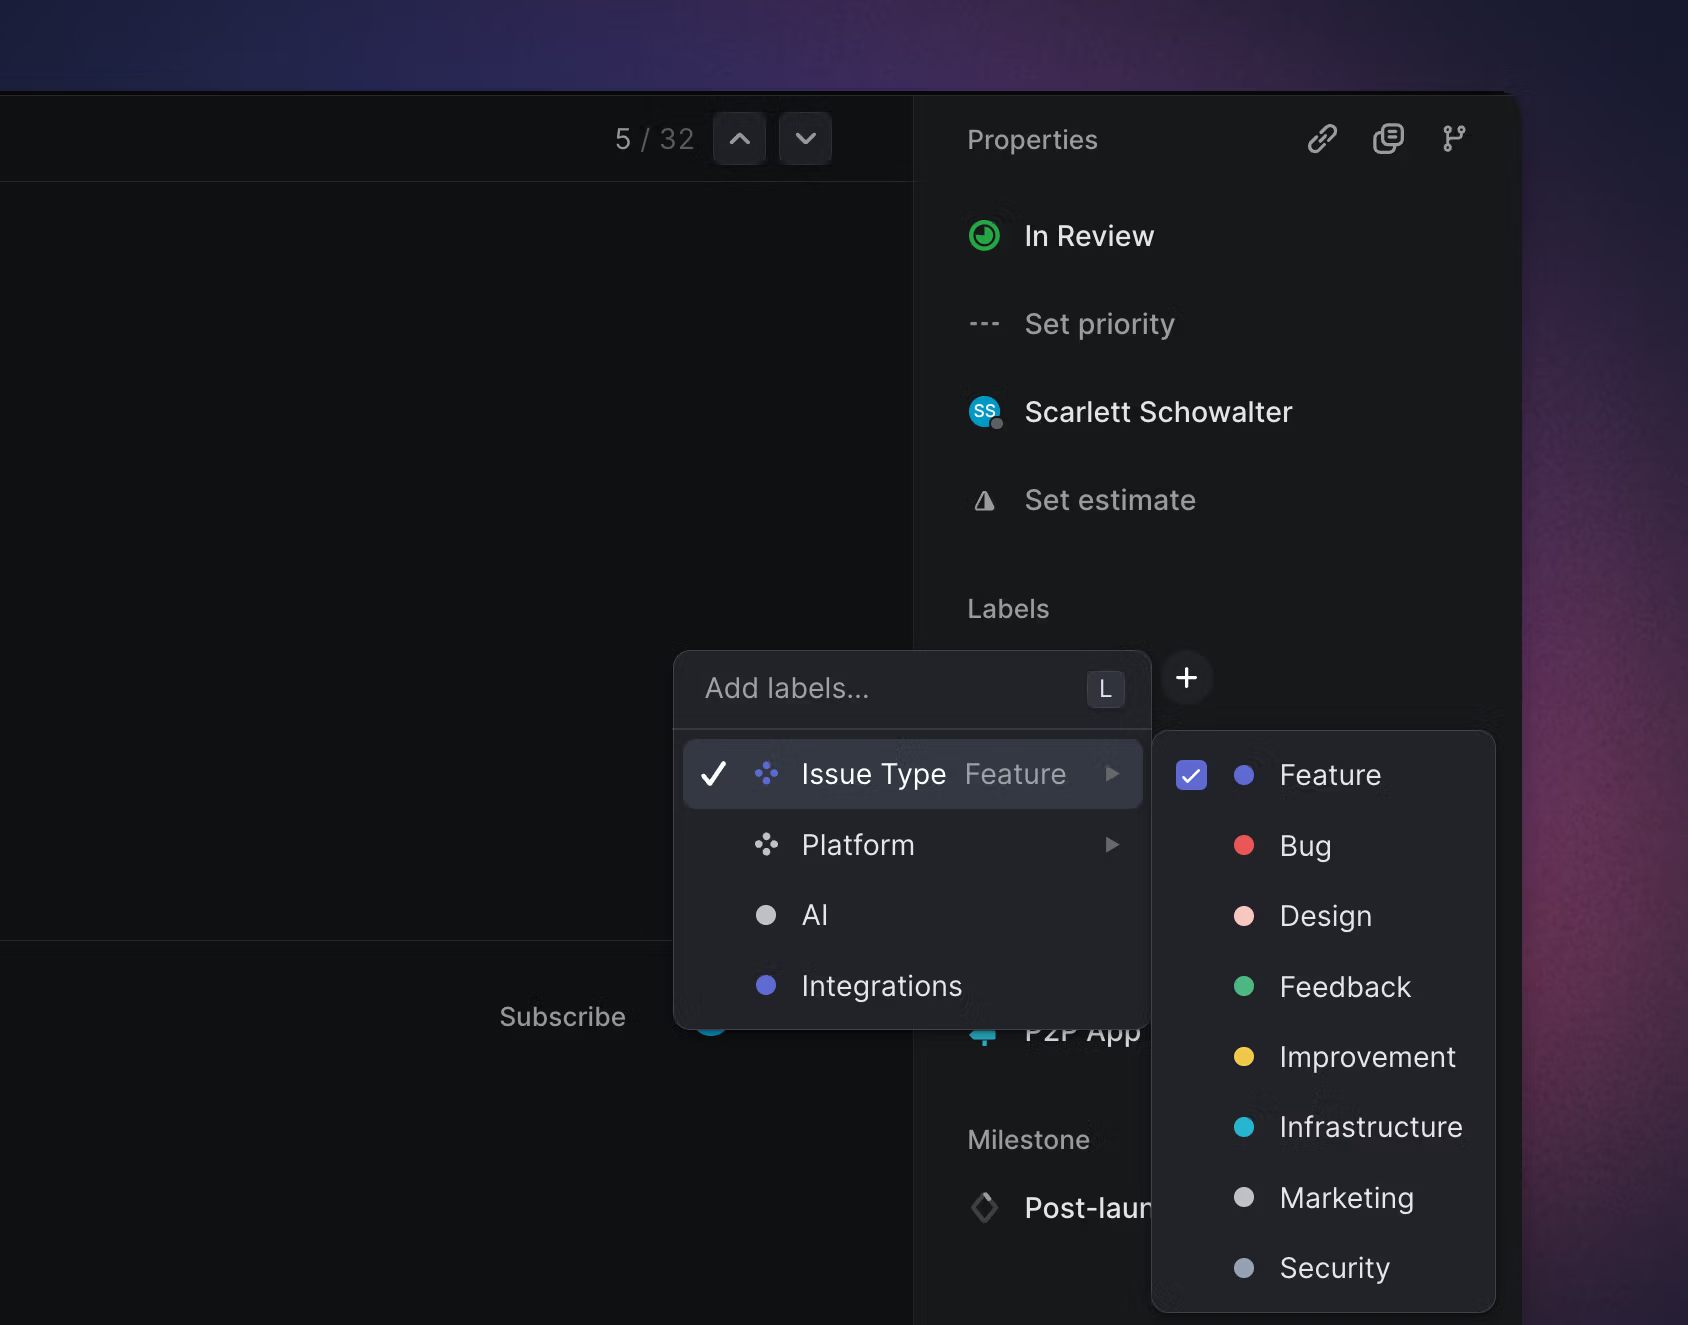
## Overview
### Labels
Labels allow you to organize issues. Create them scoped to the workspace or a specific team level, so they're available only where relevant. You should create labels that are used by all teams (e.g. "Bug") in the workspace-level, so they will be accessible to all teams.
### Label groups
Label groups create one level of nesting in your workspace and team labels, giving you more options when organizing issues. Each label group is limited to 250 labels.
Please note that labels within groups are _not multi-selectable_, so when applying labels to issues only one label from each group may be applied.
## Create labels
Create labels in [Settings > Workspace > Labels](https://linear.app/settings/labels) page or _Team settings > Labels_.
### Create a label during add label workflow
You can also create labels in the _Add label_ flow. Take the action to apply a label, then type the name of the label you want to create. The label will be automatically be saved to your team's labels.
If you'd like to create a label or label group directly from the _Add label_ flow, this is available with the syntax `label group`_/`label`_ or `label group:_label_` . For example, using _Type/Bug or Type:Bug_ will create the label group "Type" and the label "Bug".

## Apply labels
Apply labels to any issue with the shortcut `L`, or by clicking into the label property field in an issue's right sidebar.
## Manage labels
Labels can be edited, merged, and deleted in issue label settings. Label data like SLA and Triage rules the label's used in, when it was last applied, and how many issues have that label appear in settings to guide your choices.
In workspace label settings, optionally select to display both all team and workspace labels on that page for ease of editing. Or, in larger workspaces, search for particular labels to assist in cleanup.
Edit label name or color by clicking on those properties in a label row. Or, right click on the row to see additional options like converting to a group, moving to workspace, or deleting the label.
Take bulk actions by selecting multiple labels (`x` or `Shift `+ click), then right-clicking on any selected label to choose an action. You can move rescope labels to and from the workspace level to a particular team, or change a label's team. If you find duplicates, merge multiple labels into a single label.
### Label descriptions
Add brief label descriptions in label settings. These descriptions appear when you hover over an applied label anywhere in Linear. These descriptions give a consistent understanding of when a label should be applied. [Triage Intelligence](https://linear.app/docs/triage-intelligence) also considers label descriptions to inform whether to suggest a particular label.
### Archive labels
Archiving a label keeps it on any issues where it's been applied, but stops people from using that label moving forward. Views, insights, filters and groups all respect archived labels. Take this option when you no longer need a label actively, but you want to retain historical context.
Archive labels in label settings, through the overflow menu on a particular label's row.
### Delete labels
If you're sure a label no longer needs to exist, you can also delete it. Deleting labels is not reversible (including by Linear support) and will remove it from issues where it's applied, so please proceed with caution.
Delete labels in label settings, through the overflow menu on a particular label's row.
## Filtering and views
Team-specific labels "act" like workspace labels when filtering all teams or multi-team views. As long as labels in different teams share the same name, filtered results will show all issues across all teams that match the label. This holds true in custom views, my issues, project all team view_s_, and general search (/). It does not extend to the API (you'll have to use the unique identifier for each team's label).
If you only want to see results for a specific team's labels in a multi-team view, add a team filter on top of the label filter. Creating a workspace label with the same name as existing team label(s), will present the option to convert the team label(s) to the workspace level.
Learn more about [Label views](https://linear.app/docs/label-views) and how to [filter](https://linear.app/docs/filters) for labels.
## Reserved label names
We reserve the following label names that are duplicative of existing features to not cause confusion:
"assignee", "cycle", "effort", "estimate", "hours", "priority", "project", "state", "status",
---
# Source: https://linear.app/docs/linear-asks.md
# Asks
Asks turns requests like bug reports, questions, and IT needs into actionable issues in Linear.
> [!NOTE]
> Available to workspaces on our [Business](https://linear.app/pricing) and [Enterprise](https://linear.app/pricing) plans. Additional features available to Enterprise workspaces through Advanced Linear Asks.
## Overview
Linear Asks gives organizations a powerful tool to manage common workplace requests. Once enabled, anyone can create an Ask to send their request to the relevant Linear team—even if they don’t have a Linear account—via Slack or email.
### Purpose and use cases
Linear Asks is purpose-built to support internal requests that are typically scattered across tools or lost in chat threads. It’s ideal for:
* **Engineering teams** receiving bug reports from non-technical staff
* **IT and support teams** fielding hardware, access, or setup questions
* **Operations and HR** gathering requests from across the company
* **Product and design** teams collecting feedback or feature requests
By providing familiar and low-friction channels, Asks allows teams to quickly make requests without context switching.
### Multi-channel request intake
Linear Asks supports multiple intake channels to meet teams where they already work:
Asks with Slack | Asks with email
--- | ---
Users can submit Asks directly from Slack, using a simple flow that turns messages into issues without leaving the conversation.
When Asks are submitted to a Linear team, they will always arrive in the team's Triage where they can be reviewed, prioritized, and assigned.
Asks issues in Linear have a comment thread synced with Slack. Any replies to this shared comment thread will cross-post to the Asks Slack thread and notify the creator of the Ask (and vice versa). | Set up a custom email address (e.g., `helpdesk@acme.com`) to automatically forward messages to a unique Linear intake address.
Each email received will create a new Linear issue, using the email subject as the issue title and the message body as the description. Senders will receive a confirmation email letting them know any replies they send will be synced to the same Linear issue.
A synced thread will be visible within the Linear issue. Teams can reply to the original email directly from this thread and view any incoming responses as they arrive.
> [!NOTE]
> It’s important to note that Asks via email intake is not designed for high-volume, front-line customer support, therefore feature development does not reflect those found in other customer support tools—first response times, NPS scores, etc. As part of Linear's development, we will continue to evolve the feature for internal requests.
### Linear Asks vs Advanced Linear Asks
Asks features are available in both Business and Enterprise plans, with additional features available to Enterprise workspaces as follows:
Feature | Business
(Linear Asks) | Enterprise
(Advanced Linear Asks)
--- | --- | ---
Email intake & replies | ✔ | ✔
Custom email domains | ✔ | ✔
Private Asks (DMs & Linear Asks bot) | ✔ | ✔
Asks fields | ✔ | ✔
Auto-create on :ticket: emoji reaction | ✔ | ✔
Form templates support | ✔ | ✔
Asks in private Slack channels | | ✔
Per-channel configurations | | ✔
Auto-create on new message | | ✔
Multiple Slack workspaces | | ✔
---
## Using Linear Asks with Slack
### Configure Asks
#### Install Asks
1. Navigate to [Settings > Features > Asks](https://linear.app/settings/asks)
2. Click the "+" icon under Slack intake to **Connect Asks integration**
3. Authenticate into a Slack workspace
#### Connect teams and invite @Linear Asks
1. Click the three dots next to **Private Asks** or **All public Slack channels**.
2. Hover over **Add teams to channel**
3. Select the team to add to a private Ask or a public Slack channel. Repeat this process for each channel that will be used to create Asks. DMs do not need to be added as channels.
4. Add Asks to each channel using `/invite @Linear Asks` in Slack
There are some Asks that you’ll want to keep private between the requester and the team managing the issue. Add these sensitive requests under the Private Asks section in Asks settings. Private Asks includes Asks in DMs or created in the Asks app home (Apps > Linear Asks in Slack's sidebar). Asks templates added to Private Asks are available when creating Asks in DMs.
> [!NOTE]
> Ensure that the Linear teams you connect to Private Asks are also private. This guarantees that only members of the desired Linear team will see content shared on that issue.
#### Per-channel configuration
1. Click **Add channel** button
2. Select the correct Slack workspace
3. Select the specific channel
4. Click **Allow**
5. Add Asks to each channel using `/invite @Linear Asks` in Slack
> [!NOTE]
> To set up Asks with a private channel, use a channel-specific configuration.
#### Add templates to channels
If you wish to allow users to submit Asks without selecting a template, keep "Create Asks without a template" enabled.
Select available templates under each team. Workspace level templates are not available for use with Asks.
Asks templates added to Private Asks are available when creating Asks in DMs.
#### Enable auto-creation
Configure automations in settings to allow Asks to be created automatically. Asks auto-creation is not supported in DMs.
Select a default template by hovering over the template you wish to use, and clicking "Set as default". This template will apply to auto-created Asks in the set context. The description of the template will not be used and will be replaced by the user's message. If you'd just like to select a default team, consider selecting a default of "Create Asks without a template."
##### On 🎫 emoji
By default, users can turn a message in Slack into an Ask by reacting to it with the 🎫 (:ticket:) emoji. This can be turned off in Asks settings as shown below. Starting a Slack message with 🎫 will also trigger this behavior.
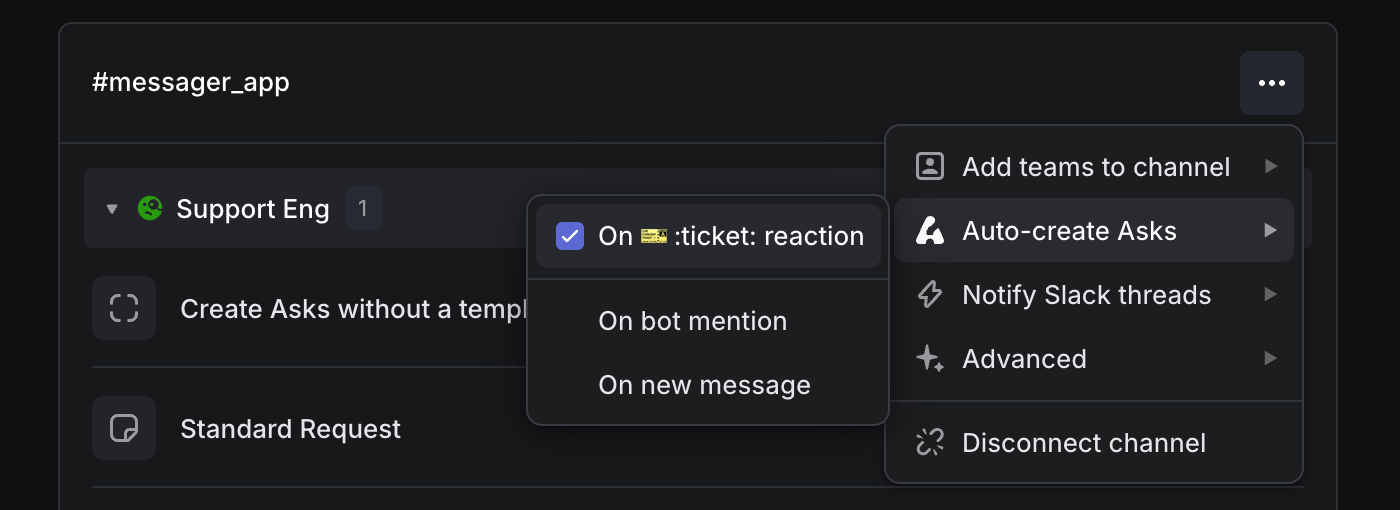
Bot-posted messages can create an ask on 🎫 if the bot's message's first character is 🎫.
If multiple Linear teams are associated with the channel or channel type in your Asks settings, the 🎫 emoji will create an issue in the team template marked "default."
##### On every new message
For Slack channels meant solely for the creation of Asks, you can enable auto-creation whenever a new message is posted to the channel. This is common for channels such as #it-asks or #bugs, in which you want all messages to be triaged. This feature is available on Enterprise plans only as it requires a single-channel configuration.
To exempt a message from creating an Ask with this setting on, begin the message with 📢 or 📣 emojis.
Please note that this auto-creation on new messages is not available in private channels
##### On mentioning Asks
If desired, Slack users can also create an ask by mentioning `@Linear Asks` in the body of their Slack message.
View in Settings
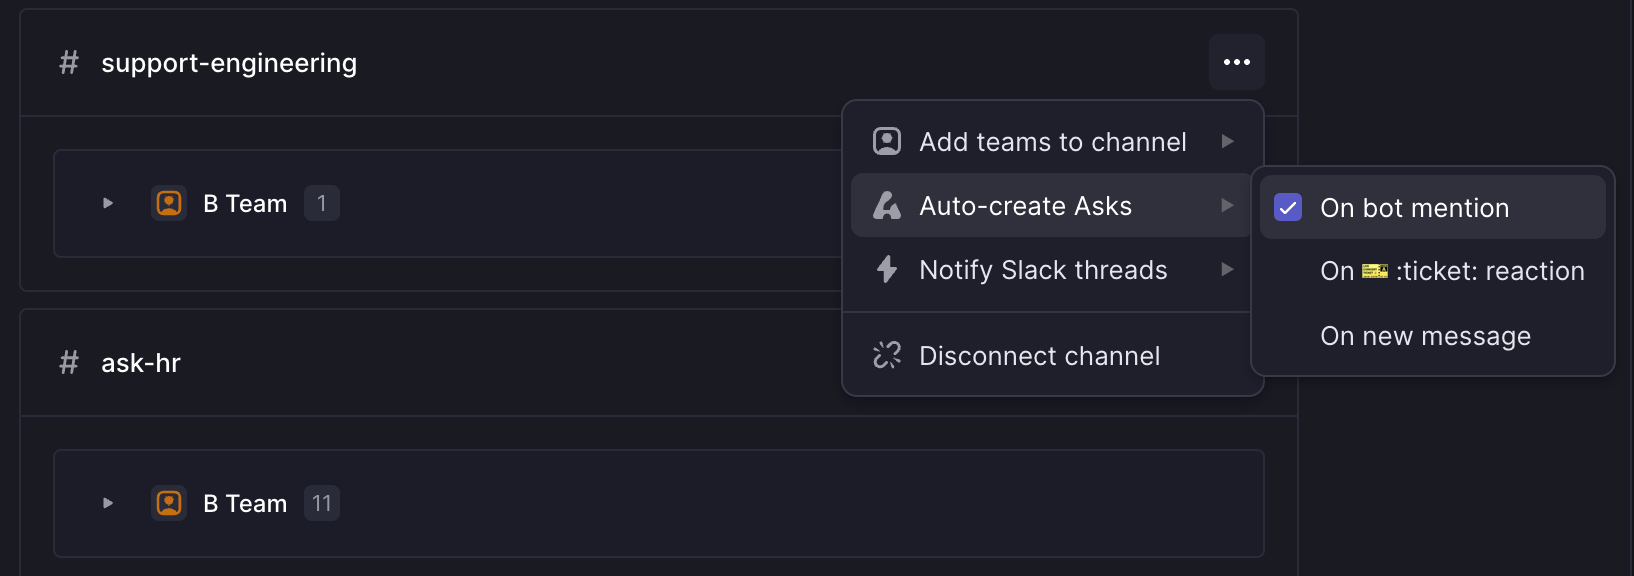
##### On bot-posted messages
Bot-posted messages can create an Ask automatically if the bot's message begins with 🎫. Use this behavior when auto-create Asks "on 🎫 reaction" or "On new message" is enabled. On Business plans, you can still use this functionality to allow bot messages to create Asks, provided the bot message is sent in a public channel.
View in settings
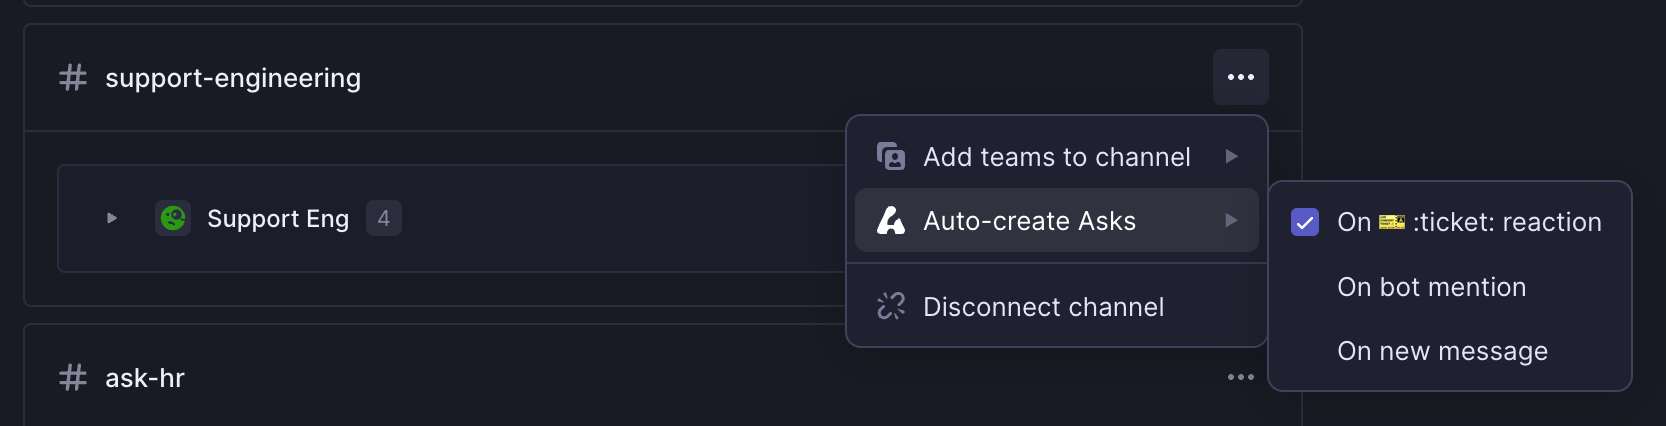
### Set permissions for managing Asks
Linear admins can determine whether Asks channels, teams and templates can be managed by all users, or admins only.
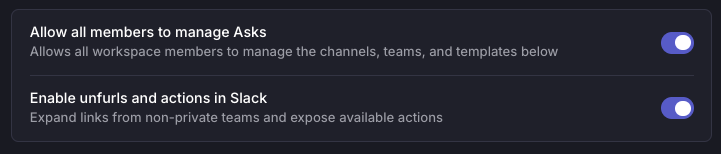
### Customer field visibility
For organizations using Customer requests, Asks has the capacity to surface a customer field. This can be helpful when someone wants to associate a particular Slack message with a particular customer. With customer requests on, this happens automatically when the Slack message was sent by your actual customer, but not if it's being raised internally.
This field is sensitive, as it contains the list of your customers.
Choose to make the field available to Linear users only in Slack, all members in your Slack workspace, or Slack members and Guests.
### Customize templates
When creating Asks from a template, the newly created issue will use the properties assigned to the template by default. Create or edit templates under Template settings for the relevant team. Workspace-level templates cannot be associated with Linear Asks.
There are a variety of formatting tools you can use to customize the behavior of a particular template. Form templates are particularly useful in combination with Asks. Learn more about template fields [here](https://linear.app/docs/issue-templates).
> [!NOTE]
> If you set required form template fields on a default template for a channel, auto-creation options will not be available.
### Submit Asks in Slack
From any connected Slack channel, use the following actions to create an Ask:
Creation method | Location
--- | ---
Create from an existing Slack message | Overflow menu on a Slack message
Create from a slash command | Use the /asks slash command in Slack and hit Enter
Create Private Asks | In your DM with Asks in Slack (Apps > Asks from the sidebar), select the option to Create Private Ask
Auto-create with emoji | Apply the 🎫 (:ticket:) emoji to a message in Slack
Auto-create on new public channel messages | Configure in Asks settings per-channel
Auto-create on @Linear Asks | Configure in Asks settings per-channel
Once created, Asks will create a threaded reply with a link to the Ask and connected Linear issue. The Slack thread and Linear issue share a synced comment thread, so comments and files can be shared across both applications.
Whoever submits the Asks can see the issue status, assignee, and reply in the synced comment thread. They will be notified on the thread automatically when the Ask is completed, canceled, or re-opened.
Users with a Linear account will be able to make updates to Asks from Slack using the Quick Actions menu, including changing the status and assigning it to themselves.
### Manage your Asks from Slack
**View Asks**
Navigate to the Linear Asks bot in Slack. See a list of all active and closed Asks in Linear Asks > Home tab. Click _Open thread_ to go to the Ask in the channel it was created. You can also view Asks and their threads (including private Asks) in the Messages tab.
**Mark as urgent**
If your Ask is urgent, you can choose to override its default priority by selecting the _Mark as urgent_ option in your Ask's unfurl menu. This will also apply a siren emoji to your Ask for better visibility in Slack.
**See status and assignee**
Asks app home will show the real-time status and assignee of your Ask. You'll also be notified in the original thread when your issue leaves Triage (all Asks start in Triage), and when it's completed, canceled, or reopened. In a shared channel using Asks, users from the other organization will not see Asks app home.
**Reply and share files**
Reply to the Slack thread to ask questions, follow up on the Ask, or even send files, screenshots, and video to the assignee working on your Ask. All replies are sent to the Linear issue on a synced comment thread.
**Close Asks**
You’ll get a notification on the thread whenever a comment is posted to the Ask and when the Ask is completed, canceled, or re-opened. When completed, the Ask message will also have a ✅ on the original Ask.
Requestors can close their own Asks in Slack from _Linear Asks > Home_ by changing its status.
---
## Using Linear Asks with email
### Permissions
Admins can add new email, edit, or delete a custom intake email. Members can change settings related to the configured email (team/template/sync-reply/customer requests).
### Configure
1. Navigate to [Settings > Asks](https://linear.app/settings/asks)
2. Click the “+” icon for **Add Asks intake email**
3. Select the Linear team and [optional] issue template that should be applied to incoming emails to this address.
4. A unique forwarding email will be created.
5. [Configure email forwarding](https://linear.app/docs/linear-asks#configure-email-forwarding-in-google-workspace) so emails sent to your custom email address are forwarded to the unique Linear email address.
6. _(Optional)_ If you want your replies to appear from your custom email address, upload the provided DNS records to your DNS hosting provider, or provide these records to an engineer on your team. If this step is skipped, the replies will still be delivered, but they will come from a Linear address (issues@linear.app) instead of your own.
### Configure email forwarding
Configure email forwarding in Google Workspace
You will need administrator permissions to set up email forwarding in your Google Workspace.
> [!NOTE]
> We do not recommend using Google Groups to set up forwarding as it modifies email headers which can result in several downstream issues.
Refer to Google’s help documents in [Forward email to a third-party CRM](https://support.google.com/a/answer/10486484?product_name=UnuFlow&hl=en&visit_id=638690871651590812-3129432273&rd=1&src=supportwidget0&hl=en) for more details.
Configure email forwarding in Microsoft 365
1. Log into your [Microsoft 365 Admin Center](https://admin.microsoft.com/)
2. Select the mailbox that you wish to configure forwarding for:
1. **Shared mailbox:** On the admin center homepage, go to the _Teams & groups > Shared mailboxes_ page. Select the mailbox, then select **Edit** in the "Email forwarding" section.
2. **User:** On the admin center homepage, go to the _Users > Active users_ page. Select the user, then the mail tab and select **Manage email forwarding** in the "Email forwarding" section.
3. On the "Shared mailbox" email forwarding side panel, select the "Forward all email sent to this mailbox" checkbox.
4. Enter your Linear intake email address copied from Linear Email Asks Settings
5. Select **Save**
> [!NOTE]
> Automatic forwarding needs to be enabled in your anti-spam outbound policy before trying to verify your forwarding setup. This is found in the [Microsoft Defender portal](https://learn.microsoft.com/en-us/defender-office-365/outbound-spam-policies-configure).
Refer to Microsoft's help documents in [Configure email forwarding in Microsoft 365](https://learn.microsoft.com/en-us/microsoft-365/admin/email/configure-email-forwarding?view=o365-worldwide).
Configure email forwarding for other email providers
Refer to your providers routing/forwarding instructions.
### Configure the reply sender email address
To have replies appear from your custom email address instead of the default Linear address (`issues@linear.app`), you'll need to update your DNS settings. **Add the provided DNS records** to your DNS hosting provider. Alternatively, share them with your engineering team for implementation.
**Important:** If you skip this step, replies will still be delivered, but they'll be sent from Linear’s default email (`issues@linear.app)` address rather than your own.
### Synced email thread
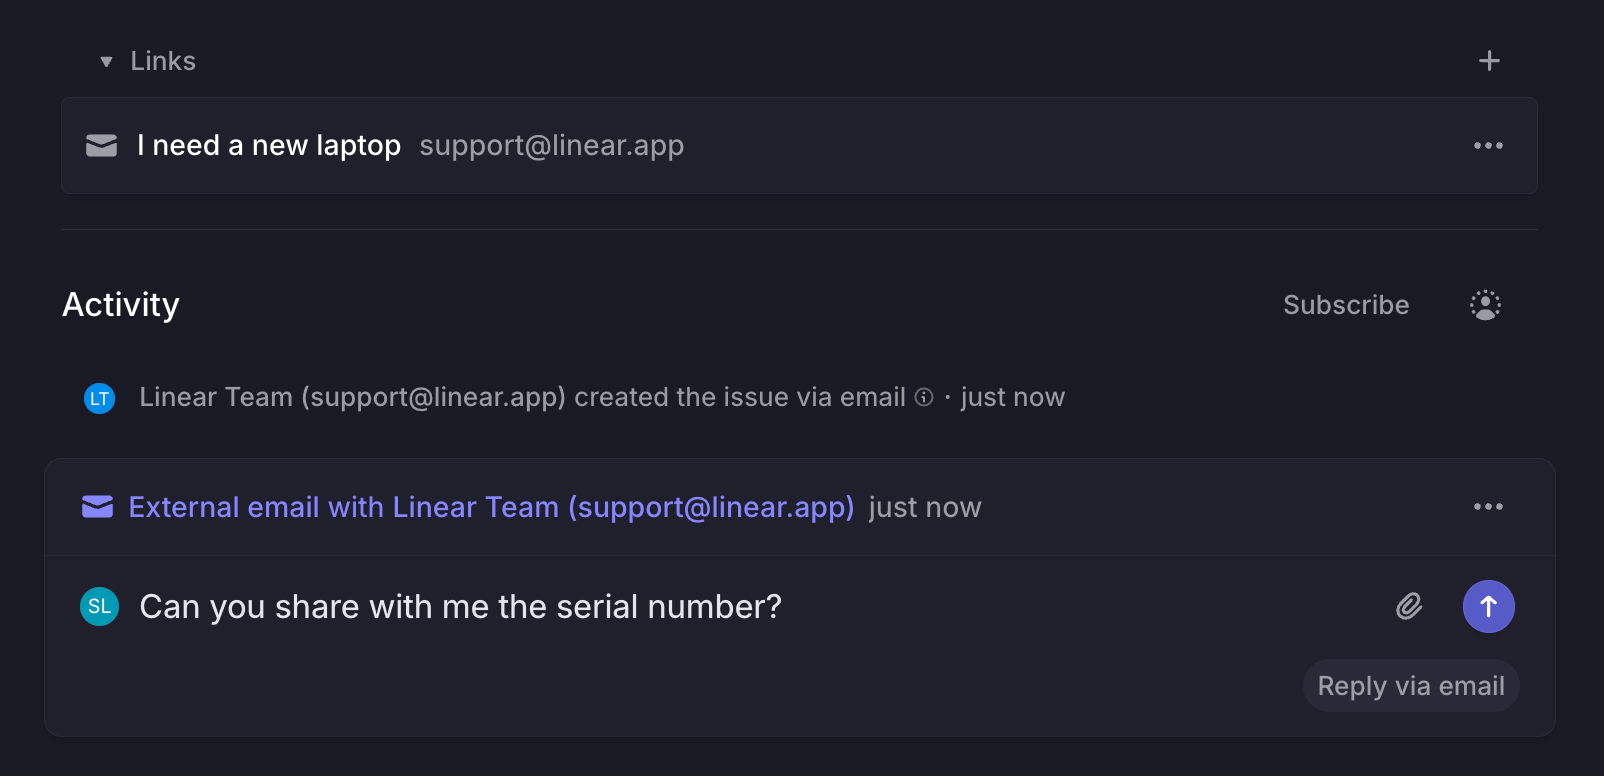
When an issue is created from an email, a synced thread will appear in the Linear issue, allowing members in Linear to communicate with requesters directly.
* Any new email reply to the original email thread will appear as a comment in the synced thread within Linear
* Any new comment on the synced Linear thread will be sent out as a new email to the email thread
This keeps all context centralized in Linear while enabling seamless communication with non-Linear users.
### Customize auto-replies
By default, new emails are sent by Asks when an issue is first created, and again when it's completed or canceled. Customize which messages are sent, and their copy in Settings > Asks > Email Intake > [Email address].
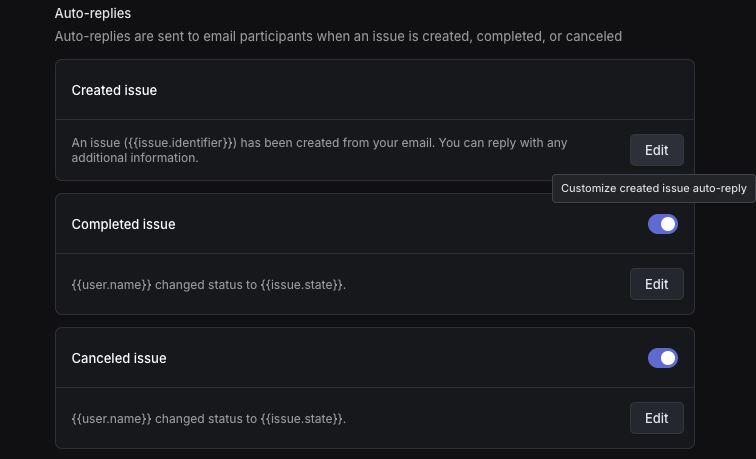
### Enable customer requests
Toggle this feature on to automatically link inbound emails with customers based on the sender’s email domain. Refer to [customer requests](https://linear.app/docs/customer-requests) feature for more details.
---
## FAQ
Can Asks be used in shared Slack Connect channels?
Yes! In a shared channel initiated by your organization, use Asks as you would in a public channel.
Users in the channel from _external_ Slack workspaces can create issues in your Linear workspace by applying the 🎫 `:ticket:` emoji reaction or mentioning `@Linear Asks` if enabled in Asks settings. If you've enabled auto-creation on every new message in the channel, this will create issues from the messages of both internal and external users.
Entrypoints to Asks not mentioned above are unavailable to external users in a shared channel.
External users can also mark their Ask as urgent through the overflow menu in its unfurl.
Why are there multiple Asks icons in a Slack thread?
There is a limitation to the Slack integration where it will show up as a new person for every unique `User via Linear` response. There is not a way to fully get around some duplication in avatars.
Can I link a Slack thread to an Linear issue over API to create a synced thread?
Yes, you can link an existing Slack thread to a Linear issue over our API. To do so, pass `syncToCommentThread: true` in the input to the `attachmentLinkSlack `mutation (documentation is available [here](https://studio.apollographql.com/public/Linear-API/variant/current/schema/reference/objects/Mutation?query=attachmentLinkSlack#attachmentLinkSlack).)
Can Asks be used in multi-person DMs?
If you start a DM with multiple users that includes _Linear Asks_ as a recipient from the beginning, you'll be able to use Asks there. However, as Slack will not allow you to add a bot user to an ongoing multi-person DM, you cannot create an Ask from an ongoing conversation that did not have _Linear Asks_ in it from the start.
On Enterprise Linear plans, you can workaround this if desired by converting the multi-person DM to a private channel. Then, adding a configuration for that channel in Linear's Asks settings will allow you to create Asks from that private channel.
Can I use Asks in multi-workspace channels on an Enterprise Grid?
Yes, though some setup is required.
1. Check which workspaces in your Grid the channel belongs to in Slack.
2. Ensure that each of those workspaces is connected to Asks in Linear > Settings > Asks
3. From that same Asks settings page, open each workspace and add the channel. Ensure that your auto-create settings are the same to ensure consistent behavior.
When do URLs associated with an Ask show unfurl previews in Slack?
* If an Ask is associated with a private team, it will never unfurl in Slack
* Please ensure that "Enable unfurls and actions in Slack" is toggled on in Settings > Integrations > Asks if you wish to see Asks unfurls in Slack.
Why am I not seeing some linked private channels in Asks settings?
We only show private channels in Asks settings if we can verify that you belong to those channels in Slack. If you do belong to the channel:
* Please ensure you've linked your Slack account to Linear in Settings > Connected Accounts
* Double check the Linear Asks bot is a member of the private channel. It can be added using `/invite @Linear Asks` if it's not already a member. After doing so, refresh your Linear client with Cmd/Ctrl + R and check settings again.
Can I configure email forwarding from inbox settings?
You can use per-account Gmail forwarding, which requires no Google Workspace admin permissions. This requires you to have a dedicated Gmail user—costing money—and requires confirming access to the intake address where Gmail will send an email with an activation code to the intake address that you will need to input back into Gmail settings.
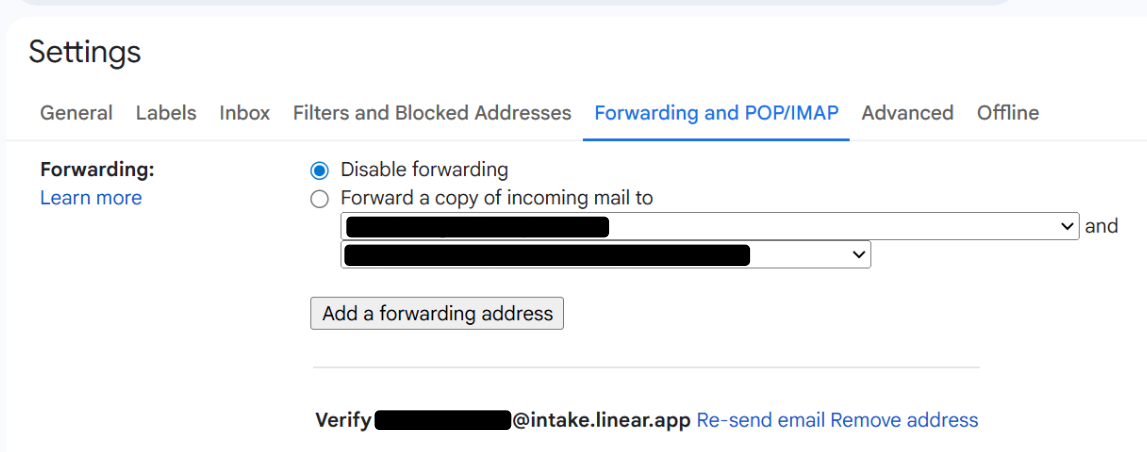
DNS Error using email Asks with Microsoft 365
When hitting the error
`550 5.7.520 Access denied, Your organization does not allow external forwarding. Please contact your administrator for further assistance. AS(7555)`
Microsoft 365 (Outlook) by default blocks automatic forwarding to external email addresses to prevent data exfiltration/phishing abuse, even if you set up an inbox rule to forward. You will need an admin to explicitly allow it in the Exchange or Defender policies.
**Allow external forwarding as Exchange admin:**
1. Navigate to **Microsoft 365 Admin Center**
2. Open the **Exchange Admin Center (EAC)**
3. Navigate to **Mail Flow → Remote Domains**
4. Edit the default (or relevant) remote domain (usually `*`)
5. Set "Allow automatic forwarding" to **"On"**
**Fix via Microsoft 365 Defender UI**
1. Go to [https://security.microsoft.com/antispam](https://security.microsoft.com/antispam)
2. Go to **Email & Collaboration → Policies & Rules → Threat policies → Anti-spam policies**
3. Click into your **Outbound spam filter policy** (likely called “Default”).
4. Scroll down to the **"Automatic forwarding rules"** section.
5. Set it to **"On – allow automatic forwarding"**
6. Save the policy.
"Address not found" error
Double check your forwarding settings to ensure it is set up for the custom email address to be forwarded to the Linear intake email address.
---
# Source: https://linear.app/docs/login-methods.md
# Login methods
We offer multiple ways to log in and options to restrict login methods for added security.
> [!NOTE]
> Login restrictions are available to workspaces on our [Business](https://linear.app/pricing) and [Enterprise](https://linear.app/pricing) plans.
>
> SAML authentication and IP restrictions are only available to workspaces on our [Enterprise](https://linear.app/pricing) plan.

## Overview
Linear provides several options for members to log into a workspace and allows for different tiers of restriction methods for added security.
## Login methods
### Google authentication
Members can authenticate with Linear using Google authentication when using a Google supported email address.
### Email login
When selecting **Continue with Email** as the login option, an email will be sent to your inbox containing a login link. You can either use the link to log in or copy the code provided in the email and paste it into the "Enter code" field on the login page.
> [!NOTE]
> We recommend whitelisting notifications@linear.app and/or pm_bounces@pm-bounces.linear.app as trusted senders in your email settings to ensure login emails reach your inbox.
### Passkey
Passkeys allow a secure and fast login without having to rely on passwords. They are supported by all major browsers, mobile operating systems, and many password managers like 1Password. You can register multiple devices to log in via passkey from _[Preferences > Account > Security & Access](https://linear.app/settings/account/security)._
### SAML
Refer to our [SAML](https://linear.app/docs/saml-and-access-control) help docs.
## Restrict login methods
Admins can require specific login methods to allow for all members. This setting can be managed by navigating to [Settings > Administration > Security](https://linear.app/settings/security).
Users with the highest role in the workspace (owners or admins, depending on the workspace) can login through any method to ensure they have access to these settings and prevent lockouts for other users.
### IP restrictions
> [!NOTE]
> IP restrictions are available only on the Enterprise plan.
Workspace access can be restricted to specific IPs to enable an extra security layer for accessing Linear. Once set, all direct user access to the workspace, including web, desktop, mobile, and API access, will be limited to the set of configured IPs. Access can be restricted to one or more IP addresses or ranges, specified using CIDR notation.
To configure IP restrictions, go to [Settings > Administration > Security](https://linear.app/settings/security).
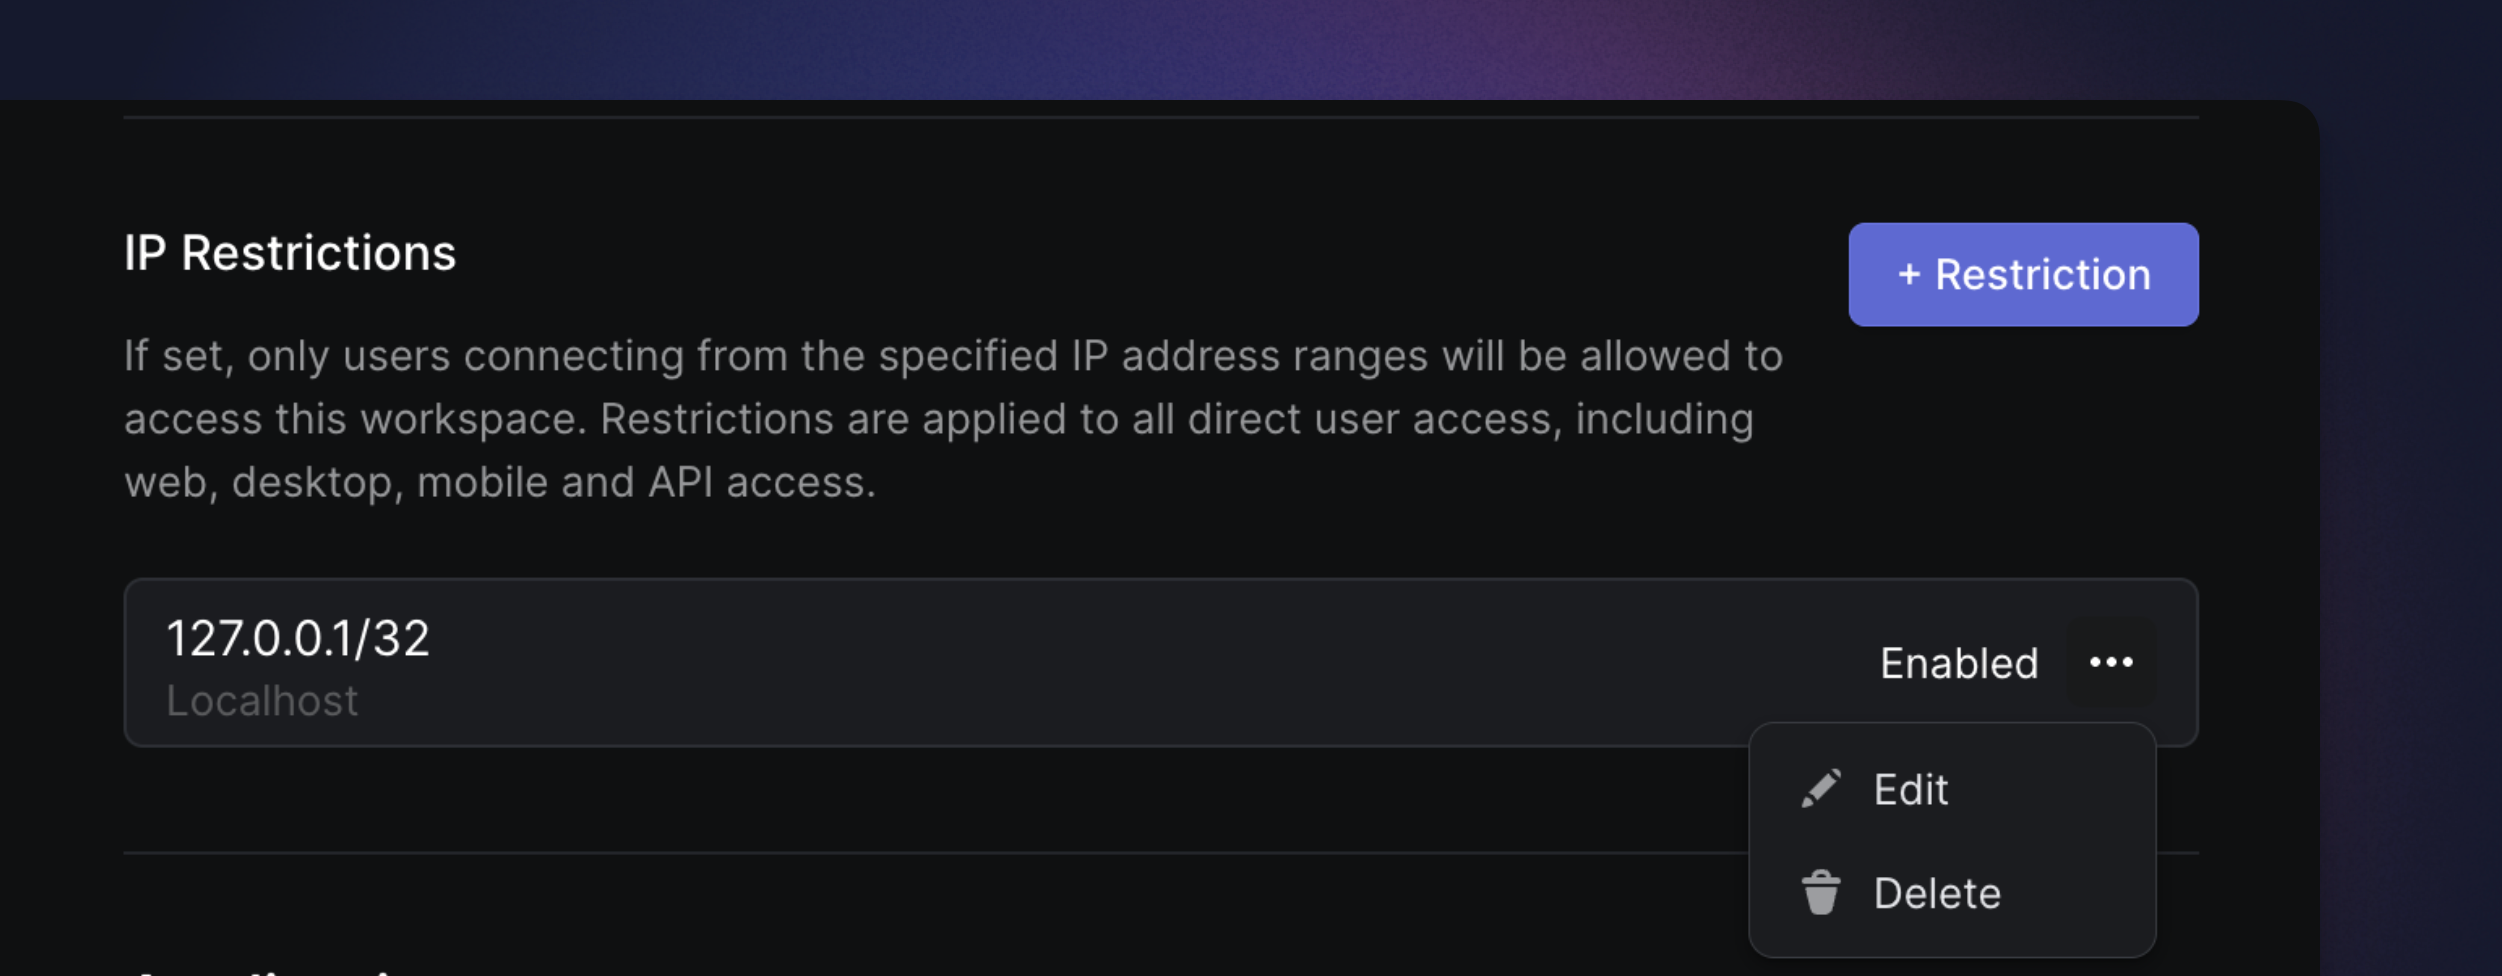
## Switch accounts and workspaces
You can log in to multiple user accounts in Linear, which allows you to switch between workspaces associated with those accounts without re-authenticating. To add a user account:
1. Click on your workspace name in the top left corner to launch a dropdown
2. Hover over **Switch workspace**.
3. Select **Create or join a workspace**.
4. (Optional) Follow the prompts to create a new workspace.
5. If you have an existing workspace under a different email address, click your existing email address in the upper-right corner.
6. Select **Add account**.
7. Log in using a different email.
8. Once authenticated, you will be directed to the last visited workspace for that email address.
If you click the workspace name in the upper left and hover over **Switch workspace**, you will see all the other workspaces associated with the added email in the list of option.
## Logging out
For security purposes, when signing out of a workspace in a given location, you will be signed out of all other sessions, requiring you to log back in next time you access Linear elsewhere.
## FAQ
I can't find my workspace after logging in. Where is it?
Click on your workspace name in the top left and check that you are logged into all accounts. If you see a number next to _Create or join a workspace_, it's possible you've have a pending workspace invite and can accept this to join. If you're still having difficulty, please reach out to support@linear.app.
---
# Source: https://linear.app/developers/managing-customers.md
# Managing Customers
The Customers requests feature allows you to manage customers and requests inside of Linear.
## Data Models
The Customer requests relies on two objects: `Customer` and `CustomerNeed`.
### `Customer`
The `Customer` object represents an external company.
#### Fields
Field | Type | Description
--- | --- | ---
`id` | string | The id of the Customer in Linear.
`name` | string | The name of the Customer.
### `CustomerNeed`
The `CustomerNeed` object represents a customer request. It’s attached to an `Issue` and optionally, to a specific `Customer`.
#### Fields
Field | Type | Description
--- | --- | ---
`customerId` | `uuid` | The `id` of the Customer in Linear this request is associated with. Can be `undefined` if the request is not attached to a Customer.
`issueId` | `uuid` | The `id` of the Issue this request is associated with.
`attachmentId` | `uuid` | The `id` of the Attachment this request is associated with. All requests with a source URL are backed by an Attachment.
`priority` | `number` | Whether the customer request is important or not. `0` = Not important, `1` = Important.
`body` | `string` | Optional content for the request, in markdown format.
`creatorId` | `uuid` | The `id` of the User in Linear who created the request.
## Create a Customer
The [`customerCreate`](https://studio.apollographql.com/public/Linear-API/variant/current/schema/reference/objects/Mutation#customerCreate) mutation allows to create a customer through the API:
```graphql
mutation CustomerCreate($input: CustomerCreateInput!) {
customerCreate(input: $input) {
success
customer {
id
}
}
}
{
"input": {
"name": "ACME"
}
}
```
```json
{
"data": {
"customerCreate": {
"success": true,
"customer": {
"id": "bc993fb1-bf7e-48ab-aff9-2d014cfc5842"
}
}
}
}
```
### Customer with metadata
The following request creates a customer with additional metadata:
* `tierId` is the id of Linear tier this customer is associated with. Tiers must be created with mutation `customerTierCreate` before they can be used with a Customer
* `externalIds` contains a list of all unique external identifiers for this Customer. It can be the uuid of the Customer in your own database or any other external system you are getting customer information from. Setting this value allows to refer to this customer by this specific external id when creating customer requests rather than the Linear defined Customer id.
* `domains` must contain unique values and cannot contain any public email provider.
```graphql
mutation CustomerCreate($input: CustomerCreateInput!) {
customerCreate(input: $input) {
success
customer {
id
}
}
}
{
"input": {
"name": "ACME",
"domains": ["acme.com"],
"externalIds": ["cus-acme-12345"]
"tierId": "e7cfd601-5582-41aa-8f52-77685191e221",
"revenue": 1250,
"size": 12,
}
}
```
## Create a Customer Request
Once a Customer has been created, it is possible to use it to create a Customer Request on a specific issue.
```graphql
mutation CustomerNeedCreate($customerNeedCreateInput: CustomerNeedCreateInput!) {
customerNeedCreate(input: $customerNeedCreateInput) {
success
}
}
{
"input": {
"issueId": "be65eaec-314c-412c-baf8-4787f2b85bdd",
"body": "Content of the request",
"customerId": "021d4b25-b0a9-4f02-85ad-bd840ac9c3ee"
}
}
```
Alternatively, it is possible to use one of the external id of the Customer to attach the request to the Customer:
```graphql
mutation CustomerNeedCreate($customerNeedCreateInput: CustomerNeedCreateInput!) {
customerNeedCreate(input: $customerNeedCreateInput) {
success
}
}
{
"input": {
"issueId": "be65eaec-314c-412c-baf8-4787f2b85bdd",
"body": "Content of the request",
"customerExternalId": "cus-acme-12345"
}
}
```
When passing an `url` to the input, an `Attachment` will be created and attached to the request:
```graphql
mutation CustomerNeedCreate($customerNeedCreateInput: CustomerNeedCreateInput!) {
customerNeedCreate(input: $customerNeedCreateInput) {
success
}
}
{
"input": {
"issueId": "be65eaec-314c-412c-baf8-4787f2b85bdd",
"body": "Content of the request",
"customerExternalId": "cus-acme-12345",
"attachmentUrl": "https://conversations.support.com/conversations/12345"
}
}
```
```json
{
"data": {
"customerNeedCreate": {
"success": true,
"need": {
"id": "26c9dbf5-44b5-4e00-9978-c779467d87f0",
"body": "Content of the request",
"attachment": {
"url": "https://conversations.support.com/conversations/12345"
}
}
}
}
}
```
## Update a Customer
The [`customerUpdate`](https://studio.apollographql.com/public/Linear-API/variant/current/schema/reference/objects/Mutation?query=customerUpdate#customerUpdate) mutation allows to update a Customer. Linear will automatically attempt to match created Customers against customers in your integrations (Intercom, Zendesk or Front). When a match happens, the Customer object in Linear becomes managed by the integration and only certain fields can be updated.
Integration | Allowed fields
--- | ---
[Intercom](https://linear.app/docs/intercom) | ```ts
"ownerId" | "statusId" | "logoUrl"
```
[Zendesk](https://linear.app/docs/zendesk) or [Front](https://linear.app/docs/front) | ```ts
"ownerId" | "statusId" | "logoUrl" | "revenue" | "size" | "tierId"
```
If you are building an integration with Linear and need to manage or operate with Customers that could have been created by other integrations, please refer to the [Upsert Customers](https://linear.app/developers/managing-customers#upsert-customers) section
## Upsert Customers
Customers are created automatically when an issue is created from one of the supported sources: Intercom, Zendesk, Front, Email intake or Slack. If you are building an integration that will create Customer Requests and associate them with Customers, it is likely that you will encounter the case where the request should be attached to a Customer that's been already created by another integration. As there is a uniqueness constraint on `domains`, you cannot create a duplicate Customer in Linear. Instead, you must re-use this existing Customer. The `customerUpsert` mutation allows you to append domains and external identifiers to an existing Customer and contribute to its definition.
Starting with the following Customer, assuming it has been created by the Intercom integration:
```json
{
"name": "ACME",
"domains": ["acme.com"],
"externalIds": ["intercom-654536452625"]
"revenue": 1250,
"size": 12,
}
```
It is possible to upsert this existing Customer with your integration's own definition:
```graphql
mutation CustomerUpsert($customerUpsertInput: CustomerUpsertInput!) {
customerUpsert(input: $customerUpsertInput) {
success
customer {
domains
name
externalIds
}
}
}
{
"customerUpsertInput": {
"domains": ["acme.com", "acme.dev"],
"externalId": "own-customer-id",
}
}
```
```json
{
"data": {
"customerUpsert": {
"success": true,
"customer": {
"domains": [
"acme.com",
"acme.dev"
],
"name": "ACME",
"externalIds": [
"cus-acme-12345",
"own-customer-id"
]
}
}
}
}
```
Your integration's Customer id has been appended to the list of `externalIds` of the Customer, after it matched by domain. If there had been no match, a new Customer would have been created.
This allows your integration to push Customers into Linear without having to check ahead of time if there is already an existing Customer for the same domains. Either the Customer does not exist and will be created, either it exists already and will be reused. The `domains` and `externalIds` will be merged.
Your integration can then attach Customer Requests using your integration's customer id:
```graphql
mutation CustomerNeedCreate($customerNeedCreateInput: CustomerNeedCreateInput!) {
customerNeedCreate(input: $customerNeedCreateInput) {
success
}
}
{
"input": {
"issueId": "be65eaec-314c-412c-baf8-4787f2b85bdd",
"body": "Content of the request",
"customerExternalId": "own-customer-id",
"attachmentUrl": "https://conversations.support.com/conversations/12345"
}
}
```
---
# Source: https://linear.app/docs/mcp.md
# MCP server
The Model Context Protocol (MCP) server provides a standardized interface that allows any compatible AI model or agent to access your Linear data in a simple and secure way.
Connect to our MCP server natively in Claude, Cursor, and other clients or use the [`mcp-remote`](https://github.com/geelen/mcp-remote) module for backwards compatibility with clients that do not support remote MCP.
Linear's MCP server follows the authenticated remote [MCP spec](https://modelcontextprotocol.io/specification/2025-03-26), so the server is centrally hosted and managed. The Linear MCP server has tools available for finding, creating, and updating objects in Linear like issues, projects, and comments — with more functionality on the way, and [feedback](https://linear.app/contact/support) on its functionality is welcomed.
## Setup Instructions
### General
Our MCP server supports both Server-Sent Events (SSE) and Streamable HTTP transports. Both transports use OAuth 2.1 with dynamic client registration for authentication at the following addresses:
* HTTP: `https://mcp.linear.app/mcp`
* SSE: `https://mcp.linear.app/sse`
We recommend using the streamable HTTP endpoint where supported for increased reliability. For instructions for specific clients, read on…
### Claude
**Team, Enterprise (Claude.ai)**
* Navigate to **Settings** in the sidebar on web or desktop
* Scroll to **Integrations** at the bottom and click **Add more**
* In the prompt enter:
* Integration name: `Linear`
* Integration URL: `https://mcp.linear.app/mcp`
* Make sure to enable the tools in any new chats
**Free, Pro (Claude desktop)**
1. Open the file `~/Library/Application Support/Claude/claude_desktop_config.json`
2. Add the following and restart the Claude desktop app:
```json
{
"mcpServers": {
"linear": {
"command": "npx",
"args": ["-y", "mcp-remote", "https://mcp.linear.app/mcp"]
}
}
}
```
**Claude Code**
```json
claude mcp add --transport http linear-server https://mcp.linear.app/mcp
```
Then run `/mcp` once you've opened a Claude Code session to go through the authentication flow.
### Codex
The setup steps for the MCP server are the same regardless of whether you use the IDE Extension or the CLI since the configuration is shared.
**Configuration via CLI:**
Run the following command in Terminal:
```sh
codex mcp add linear --url https://mcp.linear.app/mcp
```
This will automatically prompt you to log in with your Linear account and connect it to your Codex.
**Note**: If this is the first time you are using an MCP in Codex you will need to enable the `rmcp` feature for this to work. Add the following into your `~/.codex/config.toml`:
```sh
[features]
experimental_use_rmcp_client = true
```
**Configuration through environment variables:**
1. Open the `~/.codex/config.toml` file in your preferred editor
2. Add the following:
```sh
[features]
experimental_use_rmcp_client = true
[mcp_servers.linear]
url = "https://mcp.linear.app/mcp"
```
Run `codex mcp login linear` to move through the authentication flow.
### Cursor
To add the MCP to Cursor, you can install by clicking [here](cursor://anysphere.cursor-deeplink/mcp/install?name=Linear&config=eyJ1cmwiOiJodHRwczovL21jcC5saW5lYXIuYXBwL21jcCJ9), or searching for Linear from Cursor's [MCP tools page](https://cursor.com/docs/context/mcp/directory).
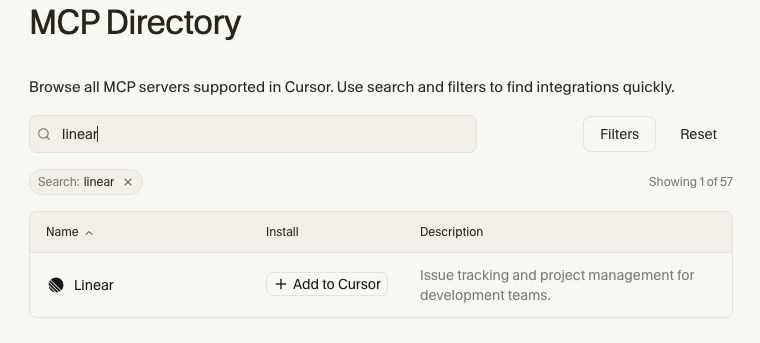
### Jules
* In Linear, go to **Settings** > **Account** > **Security & Access** and copy your API key
* In Jules, go to [MCP Settings](https://jules.google.com/settings/mcp)
* Select **Connect** on the Linear server and paste your API key
* Run a task invoking the server to confirm it works
### Visual Studio Code
```json
{
"mcpServers": {
"linear": {
"command": "npx",
"args": ["-y", "mcp-remote", "https://mcp.linear.app/mcp"]
}
}
}
```
1. `CTRL/CMD + P` and search for **MCP: Add Server**.
2. Select **Command (stdio)**
3. Enter the following configuration, and hit enter.
`npx mcp-remote https://mcp.linear.app/mcp`
1. Enter the name **Linear** and hit enter.
2. Activate the server using **MCP: List Servers** and selecting **Linear**, and selecting **Start Server**.
### v0 by Vercel
To add the MCP to v0, you can install from the [connections](https://v0.app/chat/settings/mcp-connections) page.
### Windsurf
1. `CTRL/CMD + ,` to open Windsurf settings.
2. Under Scroll to Cascade -> MCP servers
3. Select **Add Server -> Add custom server**
4. Add the following:
```json
{
"mcpServers": {
"linear": {
"command": "npx",
"args": ["-y", "mcp-remote", "https://mcp.linear.app/mcp"]
}
}
}
```
### Zed
1. `CMD + ,` to open Zed settings.
2. Add the following:
```json
{
"context_servers": {
"linear": {
"source": "custom",
"command": "npx",
"args": ["-y", "mcp-remote", "https://mcp.linear.app/mcp"],
"env": {}
}
}
}
```
### Others
Hundreds of other tools now support MCP servers, you can configure them to use Linear's MCP server with the following settings:
* **Command**: `npx`
* **Arguments**: `-y mcp-remote https://mcp.linear.app/mcp`
* **Environment**: None
## FAQ
Why am I seeing an internal server error when trying to connect?
Enter the following in the Terminal to clear saved auth info: `rm -rf ~/.mcp-auth` then try again to connect.
Additionally you may need to update to a newer version of node if required.
I'm using WSL on Windows, and seeing an error
Try instead to connect using:
{"mcpServers": {"linear": {"command": "wsl","args": ["npx","-y","mcp-remote","[https://mcp.linear.app/sse](https://mcp.linear.app/sse)","--transport sse-only"]}}}
Does the MCP support Streamable HTTP?
Yes, at the [`https://mcp.linear.app/mcp`](https://mcp.linear.app/mcp) endpoint
Can I authenticate with my own API keys or OAuth access tokens?
The MCP server now supports passing OAuth token and API keys directly in the `Authorization: Bearer ` header instead of using the interactive authentication flow.
You can use this to interact with the MCP server as an `app` user, provide read-only access through a restricted API key, or integrate with an existing Linear OAuth application without an extra authentication hop.
---
# Source: https://linear.app/docs/members-roles.md
# Members and roles
Linear provides several role types to help you control access and permissions across your workspace. Each role gives team members the right level of access—from full administrative control to limited guest visibility.
## Overview
Administrative roles can manage workspace members and their from [Settings > Administration > Members](https://linear.app/settings/members). This page lists all active and suspended members and allows filtering by role or status (Pending invites, Suspended, or users who have left the workspace).
> [!NOTE]
> On Enterprise plans with [SCIM](https://linear.app/docs/scim) enabled, some or all member management will be accomplished through your IdP instead of the Members settings page.
## Managing user roles
### Changing a member's role
To update a user’s role:
1. Go to _Settings > Administration > Members_ page
2. Hover over a member’s row
3. Click the **overflow menu (⋯)**
4. Select the **Change role...**
### Suspend a member
Administrative roles can suspend a member from the workspace:
1. Go to [Settings > Administration > Members](https://linear.app/settings/members)
2. Hover over a member’s row
3. Click on the **overflow menu (⋯)**
4. Select **Suspend user...**
Suspended users lose all access immediately and are removed from your next billing cycle. They remain visible in the members list for historical purposes—for example, when viewing issues they created or were assigned to.
To view issue activity for a suspended user, visit their profile page at:
`linear.app//profiles/`
Admins can access this link from the user’s avatar or by filtering the Members page for **Suspended** users.
### Viewing workspace admins
Any member who needs to quickly identify workspace administrators can:
* Open Command menu `Cmd/Ctrl` `K` and select **View workspace admins**
* Navigate directly to [linear.app/settings/view-admins](https://linear.app/settings/view-admins)
---
## Role types
### Workspace owner
> [!NOTE]
> The workspace owner role is only available on Enterprise plans
Workspace owners have full administrative control, including access to the most sensitive settings such as billing, security, audit log, workspace exports, and approvals and team access management for OAuth applications. Admins in these workspaces, by contrast, have more limited permissions—ideal for routine workspace management.
In workspaces that need more flexibility, workspace owners can configure which roles can perform certain workspace-level actions via [_Settings > Administration > Security_](https://linear.app/settings/security) under the "Workspace restrictions" section.
**SCIM-managed workspaces**
Enterprise workspaces with brand new SCIM setups should create a `linear-owners` group to manage workspace owners, in addition to any other role groups described [here](https://linear.app/docs/scim#provisioning-roles).
If you are upgrading an existing workspace that uses SCIM to the Enterprise plan, please look at [this article](https://linear.app/docs/changes-to-user-roles-when-upgrading-to-enterprise) to understand what actions you need to take.
---
### Admin
Admins have elevated permissions to manage routine workspace operations. This role is well-suited for managers, team leads, and operations-focused members.
**Free plan behavior**
All workspace members become admins automatically
**Basic and Business plan behavior**
The user who upgrades the workspace is granted the admin role
**Enterprise plan behavior**
Admins will have limited permissions
---
### Team owner
> [!NOTE]
> Available on Business and Enterprise plans
Delegated control over how individual teams are run, without routing every change through workspace owners or admins.
**Configure team owners**
Workspace admins/owners or team owners may:
1. Go to _Team settings > Access and permissions_ and adjust settings to be restrictive to team owners only
2. Navigate to _Team settings > Members_ to promote members to team owners
There is no limit to the number of team owners a team can have, and teams are not required to have a team owner.
**Who are team owners?**
* _Workspace admins and owners_ are automatically team owners for all teams they can access. For any newly created team, the creator becomes a team owner by default
* Any team member can be promoted to team owner by an existing team owner or a workspace admin/owner
* Team owners in the parent team are team owners in the sub-teams
* Guests cannot be team owners
**Team owner only operations**
Certain critical actions are restricted to team owners only:
* Deleting a team
* Making a team private
* Changing a team's parent
**Configurable permissions**
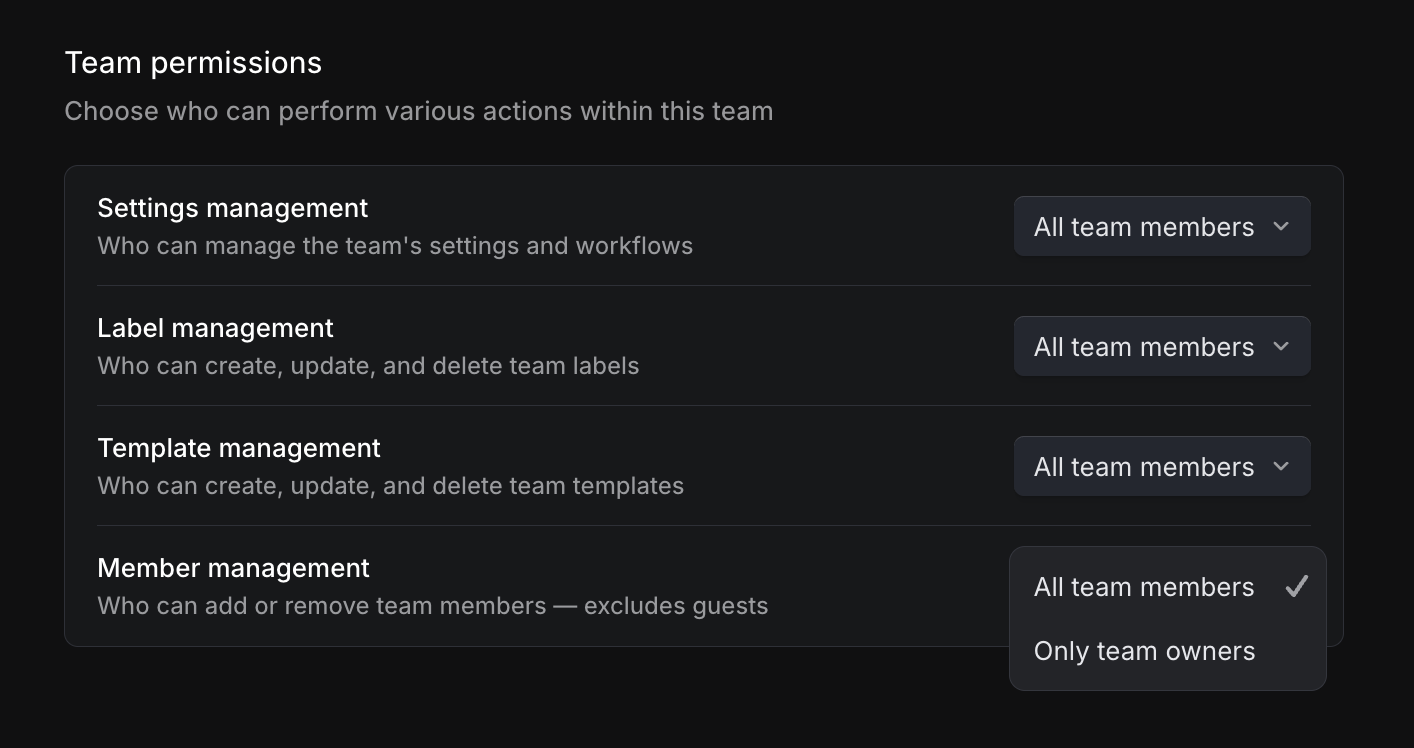
From _Team settings > Access and permissions_, team owners can choose whether to allow all members or only team owners to manage the following:
* **Issue Label Management** - Control who can create and edit team issue labels.
* **Template Management** - Control who can create and edit team templates.
* **Team Settings Management** - Control who can manage workflow statuses, cycles, triage rules, agent guidance, and other team settings.
* **Member Management** - Control who can add new users to the team. Note: Only team owners can add guest users, regardless of this setting.
> [!NOTE]
> Permission settings are not inherited from parent team to sub-team.
**Team access**
From _Team settings > Access and permissions_, team owners can also choose to restrict how members can join your team. By default, any member of your workspace can join a non-private team. Team owners now have the option to restrict access to only members they add or invite.
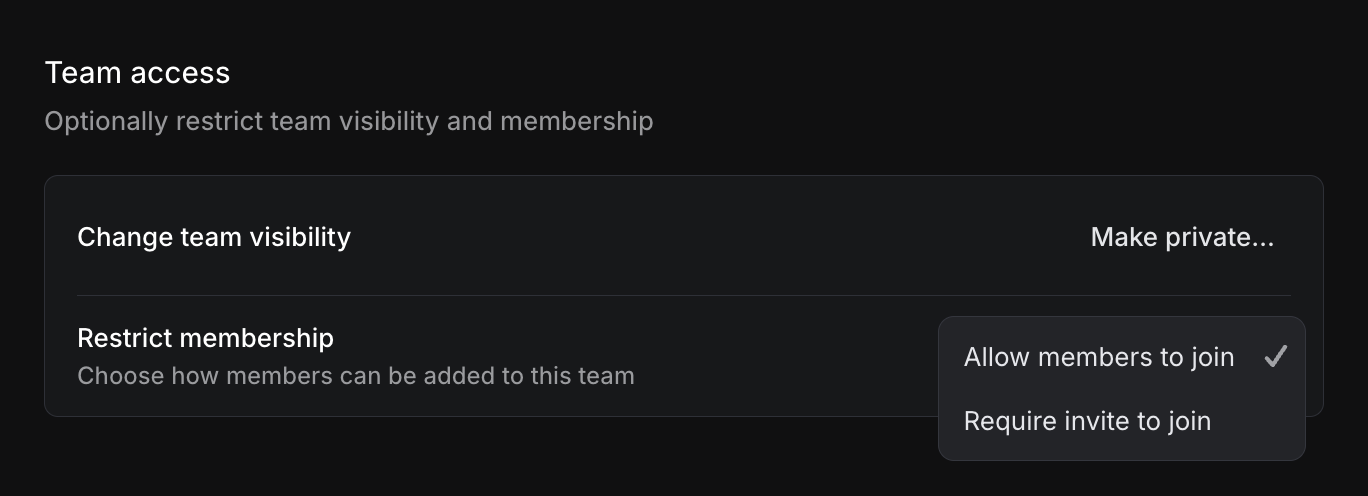
---
### Member
Members can collaborate across teams they have access to and use all standard workspace features. They **cannot access** workspace-level administration pages
---
### Guest
> [!NOTE]
> Guest accounts are only available on Business and Enterprise plans, and are billed as regular members.
Guest accounts grant restricted access to specified teams—ideal for contractors, clients, or cross-company collaborators.
**Guests can**
* Access issues, projects, and documents for the teams they are explicitly added to
* Take the same actions as Members within those teams
**Guests cannot**
* View workspace-wide features such as workspace views, customer requests, or initiatives
* Access settings beyond their own **Account** tab
**Sharing projects with guests**
If a project spans multiple teams:
* Guests will only see issues belonging to the teams they’re part of
* They will still see the project shell, but only with their allowed team’s issues visible
**Integration security**
Integrations enabled for the workspace will be accessible to guest users, which could potentially allow them to access Linear data from teams outside those they're invited to join. To prevent data leakage:
* For Linear-built integrations (GitHub, GitLab, Figma, Sentry, Intercom, Zapier, Airbyte): Ensure guest users don't have access to your accounts on those services
* For integrations requiring email authentication (Slack, Discord, Front, Zendesk): These should automatically limit access to only issues and data in invited teams
* For third-party integrations: review access individually or contact the integration provider in the [Integrations directory](https://linear.app/integrations).
## FAQ
What permission will a user get if they are in both admin and owner groups in SCIM?
If a user is in two groups, they will get the permission of the most recent group that was pushed.
---
# Source: https://linear.app/developers/migrating-from-1-x-to-2-x.md
# Migrating from 1.x to 2.x
Version 2 of the SDK introduces a new naming pattern for mutations. The action verb (create, update, delete, archive) should now precede the name of the model being mutated. In order to migrate from version 1.x of the SDK, all mutations usages need to be renamed. Here is an example with the mutation to update a `User`.
### Version 1.x
```ts
const me = await linearClient.viewer;
if (me.id) {
await linearClient.userUpdate(me.id, { displayName: "Alice" });
}
```
### Version 2.x
```ts
const me = await linearClient.viewer;
if (me.id) {
await linearClient.updateUser(me.id, { displayName: "Alice" });
}
```
---
# Source: https://linear.app/docs/my-issues.md
# My issues
See your most important issues in one view.

## Overview
My issues is a curated view that shows your most pertinent issues. It's split into four tabs: Issues assigned to you, created by you, to which you are subscribed, and issues with recent activity.
### Keyboard
`G` then `M` to go to _My Issues_
`Shift` `S` to subscribe to issues
`Cmd/Ctrl` `Shift` `S` to unsubscribe to issues
### Mouse
Find _My Issues_ in the top left sidebar under _Inbox_
Open an issue then click the three dots (more menu) at the top of the Activity to subscribe or unsubscribe to it
### Command menu
`my issues` to go to my issues
## Basics
### Curated priority order
By default, _My issues_ uses a unique grouping called _Focus_ that attempts to organize issues assigned to you in order of what you'd want to work on first. Issues are grouped in the following order:
* Urgent Issues
* Issues with SLAs
* Assigned issues blocking others
* Issues in your current cycle (optional)
* Issues in future cycles (optional)
* Other active _(e.g. issues in progress that do not fall into previous categories)_
* Triage (optional)
* Backlog issues
* Done
* Cancelled
Within each category, issues are ordered by priority, with started issues showing first.
You can change the grouping options from the [display options](https://linear.app/docs/display-options) on the top-right of the view.
### Created issues
My Issues is also where you'll find a list of all the issues you've created in the workspace, ordered by creation date. This includes issues you create via integrations with Slack, support tools such as Front, Intercom, and Zendesk, and Sentry.
### Subscribed issues
You're automatically subscribed to issues assigned to you, in which you've been @mentioned, and created by you. From subscribed issues (and most other places in the app), you can unsubscribe from issues individually or in bulk by selecting the issue(s) and then pressing `Shift` `S`. Do the same with `Cmd/Ctrl` `Shift` `S` to manage subscribers. Unsubscribe options show up in the command menu but not the contextual menu.
### Activity
The activity tab will show issues with the actions below that have occurred by date.
* issue created
* issue updated
* assigned issue state changed
* issue commented
* comment reacted
* opened pull request
---
# Source: https://linear.app/docs/notifications.md
# Notifications
Receive alerts on important updates in the Linear desktop app, mobile app, Slack, or email.

## Overview
You’ll always see notifications in your Linear inbox. For real-time alerts, you can use the Linear desktop app, mobile app, Slack, or email digests.
## Configure
Go to [Settings > Account > Notifications](https://linear.app/settings/account/notifications) to manage your notifications.
You can customize for the types of updates you'd like to receive from Linear such as changelogs, DPA updates and other communications.
Notification are categorized by channel: Desktop, Mobile, Email, and Slack. A green dot next to a channel will signify this method is enabled and a gray dot means it is disabled.
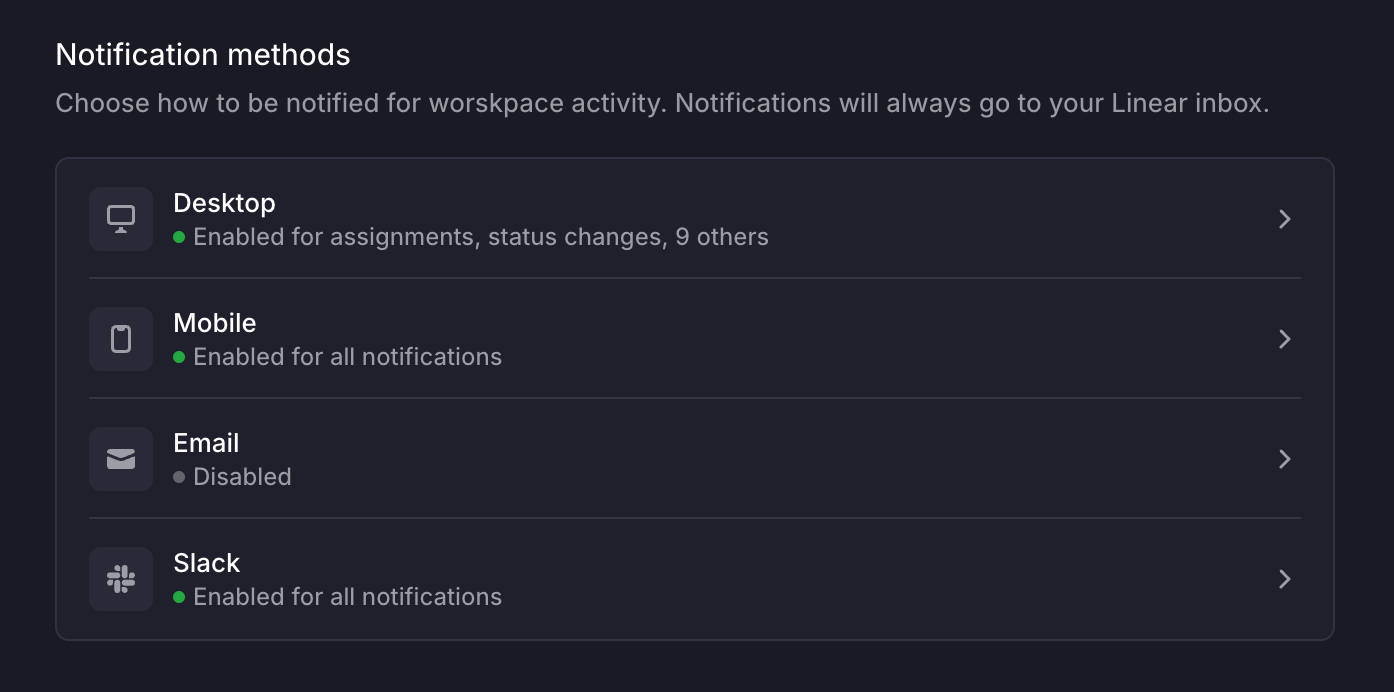
To enable a notification, click into the method and click the toggle to turn on the notification. Below will be a list of the types of notifications for that method you want to receive.
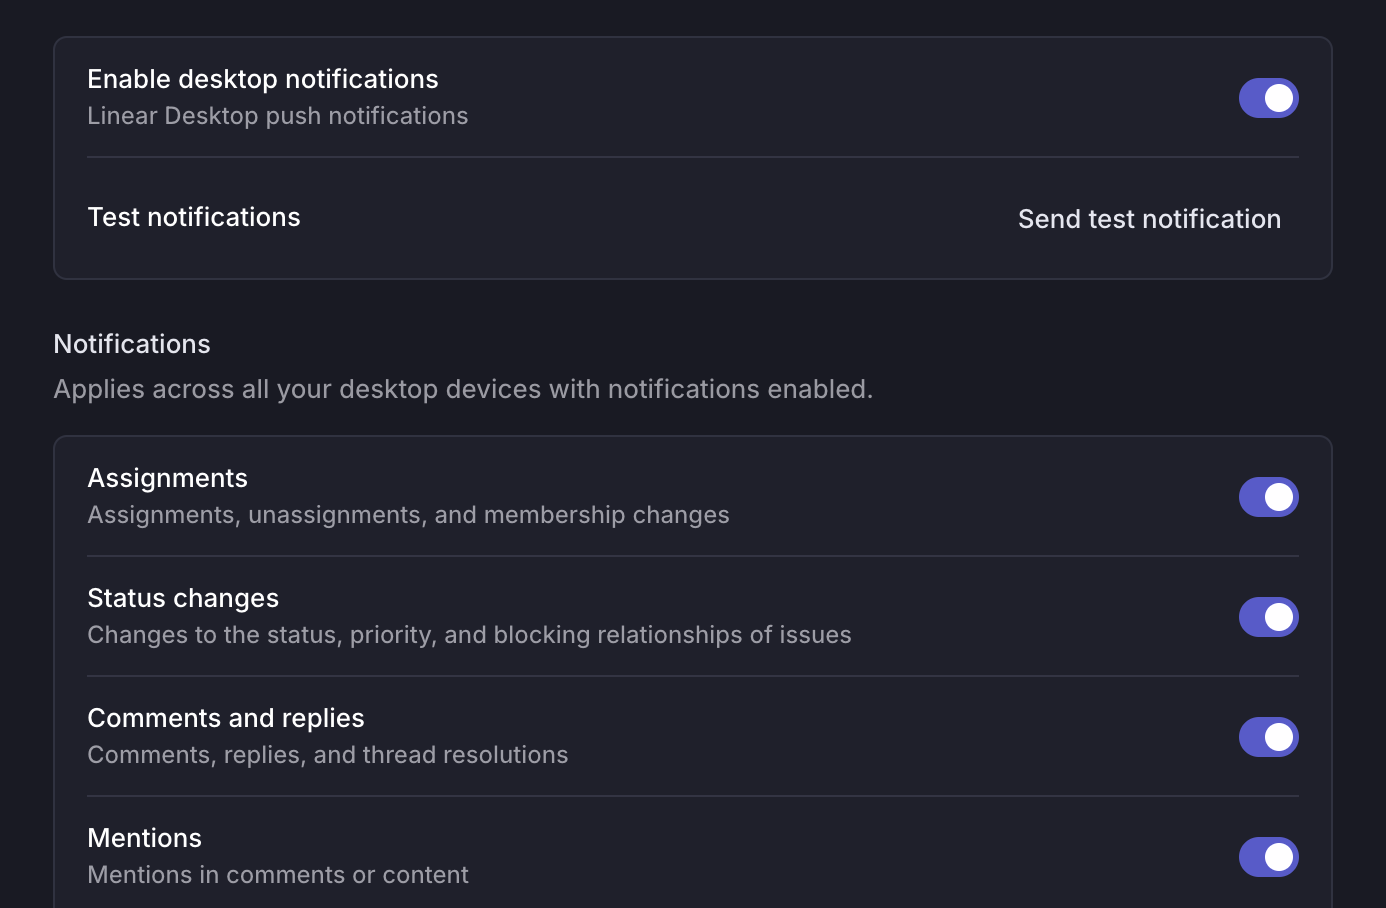
Notifications are grouped. For example, if you want notifications for status changes on an issue, you will be notified if the status, priority, or blocking relationship of that issue has been changed. You cannot select _only_ status changes.
## Notification timing
Desktop, mobile and Slack notifications are sent in real-time. Email digests send with time delays based on urgency, and are only sent if you haven't already read the Linear inbox notification.
### Email digests
Email digests send a summary of unread notifications. They're configured to send out after a certain amount of time has elapsed depending on properties such as issue status.
You can opt to send a notification email immediately if an issue assigned to you is marked urgent or breaches SLA and/or delay low priority emails outside for work hours until the next day. Work hours are defined as 8 am - 6 pm in your timezone.
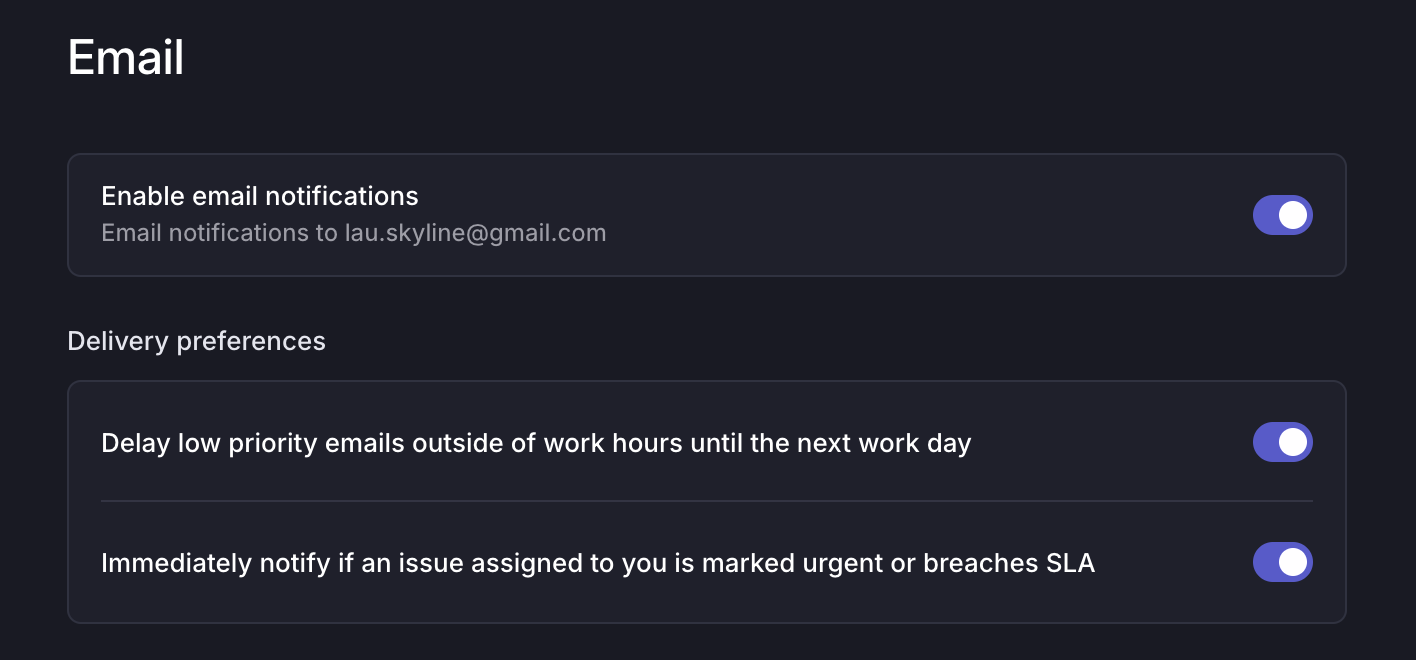
## Subscribing to an issue
Subscribing to an issue will determine whether you will receive a notification for that issue based on your notification preferences. You are automatically subscribed to an issue when you create them, are assigned to them, are @mentioned in an issue comment or description, or if you use the menu in the Activity section to subscribe manually. If you are @mentioned in a comment in an issue thread, you will be automatically subscribed to the thread, but not to the overall issue.
To manage subscriptions, open issues individually and then press `Shift` `S` to subscribe or `Cmd/Ctrl` `Shift` `S` unsubscribe. View all subscribed issues under [My Issues > Subscribed](https://linear.app/my-issues/subscribed).
## FAQ
My notifications are enabled. Why am I not receiving them?
If you have Linear open in multiple tabs or both the Desktop and website app open, it's possible that notifications are sent to one but not the other. The workaround is to only use one version of Linear at a time. If none of those apply, please reach out to our support team.
Do you support browser-based notifications?
Browser-based desktop notifications are no longer supported in Linear, and cannot be configured unless they were already active in your current browser. To receive notifications, use the Linear desktop app, mobile app, Slack, or email digests instead.
Why isn't the red badge showing up on the Linear icon in my dock?
Please check that you've enabled notifications for Linear in the macOS settings as well as marked to show the red badge icon.
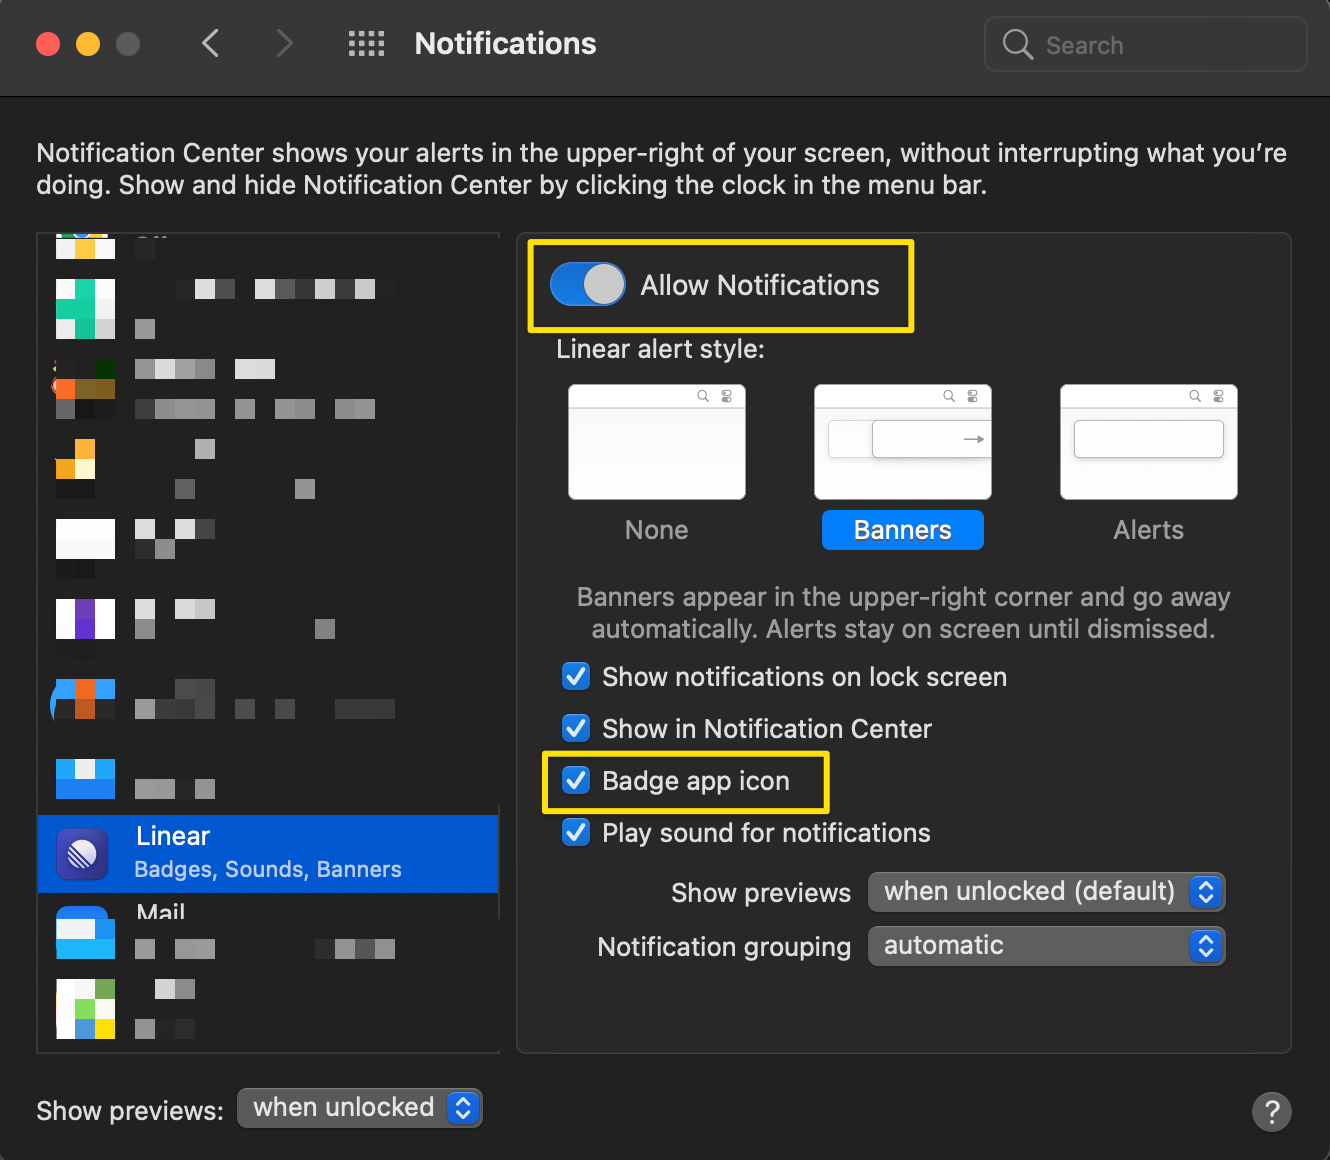
What status changes generate notifications?
When "Status changes" is selected in Notification settings, issue completions and cancelations will notify you if you subscribe to the issue.
If you wish to configure notifications for issues entering a specific status, consider setting up a [view subscription](https://linear.app/docs/custom-views#view-subscriptions).
Is there a limit to how many notifications you can keep in your inbox?
We will retain up to 500 notifications in your inbox. If you have more than 500 notifications, we will only keep the most recent 500 and remove any older notifications.
---
# Source: https://linear.app/docs/notion.md
# Notion
Preview Linear issues directly from Notion
### **Overview**
The Notion integration embeds Linear issues and projects into Notion pages. They can be previewed in Notion or clicked to open the file in Linear.
### **Configure**
Paste a link from Linear into Notion and follow the setup steps. Alternatively, Connect to Notion from within Linear under _[Settings > Features > Integrations > Notion](https://linear.app/settings/integrations/notion)._ Each user in a workspace wishing to use this integration must set it up individually.
If desired, multiple Notion workspaces can be connected to the same Linear workspace.
### **Basics**
**Embed files**
Simply copy a link to a specific Linear issue or project and paste it into a Notion document. Choose whether to paste the link as a rich preview, a less detailed mention, or the raw URL.
**Open files**
Click the preview, mention or URL to open the associated data in Linear.
**Refreshing mentions and previews**
Once issue, project, or view properties change in Linear, the preview in Notion changes accordingly (on page reload or manual preview refresh).
---
# Source: https://linear.app/developers/oauth-2-0-authentication.md
# OAuth 2.0 authentication
Linear supports OAuth2 authentication, which is recommended if you’re building applications to integrate with Linear.
> [!NOTE]
> It is **highly recommended** you create a workspace for the purpose of managing the OAuth2 Application, as each admin user will have access.
> [!NOTE]
> OAuth2 applications created from October 1, 2025 onwards have refresh tokens enabled by default for user-initiated OAuth with no option to disable them.
## Create an OAuth2 application
Create a new [OAuth2 Application](https://linear.app/settings/api/applications/new) and configure the redirect callback URLs to your application.
## Redirect user access requests to Linear
When authorizing a user to the Linear API, redirect to an authorization URL with correct parameters and scopes:
```http
GET https://linear.app/oauth/authorize HTTP/1.1
```
Name | Description
--- | ---
`client_id` | (required) Client ID provided when you create the OAuth2 Application
`redirect_uri` | (required) Redirect URI
`response_type=code` | (required) Expected response type
`scope` | (required) Comma separated list of scopes:
* `read` - (Default) Read access for the user's account. This scope will always be present.
* `write` - Write access for the user's account. If your application only needs to create comments, use a more targeted scope
* `issues:create` - Allows creating new issues and their attachments
* `comments:create` - Allows creating new issue comments
* `timeSchedule:write` - Allows creating and modifying time schedules
* `admin` - Full access to admin level endpoints. You should never ask for this permission unless it's absolutely needed
See [App authentication](https://linear.app/developers/agents?noRedirect=1#actor-and-scopes) for agent-specific scopes such as `app:assignable` or `app:mentionable`.
`state` | (optional, **recommended**) Prevents CSRF attacks and should always be supplied. Read more about it [here](https://auth0.com/docs/protocols/state-parameters).
`prompt=consent` | (optional) The consent screen is displayed every time, even if all scopes were previously granted. This can be useful if you want to give users the opportunity to connect multiple workspaces.
`actor` | Define how the OAuth application should create issues, comments and other changes:
* `user` - (Default) Resources are created as the user who authorized the application. This option should be used if you want each user to do their own authentication
* `app` - Resources are created as the application. This option should be used for agents and service accounts or agents.
### PKCE
Linear supports the [PKCE flow](https://www.oauth.com/oauth2-servers/pkce/authorization-request/). To use this flow, you'll need to include two additional parameters as part of your `/authorize` request:
**Name** | Description
--- | ---
`code_challenge` | (required) Code challenge you generated
`code_challenge_method` | (required) Either `plain` or `S256`, depending on whether the challenge is the plain verifier string or the SHA256 hash of the string
### Example
```http
GET https://linear.app/oauth/authorize?response_type=code&client_id=YOUR_CLIENT_ID&redirect_uri=YOUR_REDIRECT_URL&state=SECURE_RANDOM&scope=read HTTP/1.1
GET https://linear.app/oauth/authorize?client_id=client1&redirect_uri=http%3A%2F%2Flocalhost%3A3000%2Foauth%2Fcallback&response_type=code&scope=read,write HTTP/1.1
GET https://linear.app/oauth/authorize?client_id=client1&redirect_uri=http%3A%2F%2Flocalhost%3A3000%2Foauth%2Fcallback&response_type=code&scope=read,write&code_challenge=challenge&code_challenge_method=S256 HTTP/1.1
```
## Handle the redirect URLs you specified in the OAuth2 Application
Once the user approves your application they will be redirected back to your application, with the OAuth authorization `code` in the URL params.
Any `state` parameter you specified in step 2 will also be returned in the URL params and must match the value specified in step 2. If the values do not match, the request should not be trusted.
### Example
```http
GET https://example.com/oauth/callback?code=9a5190f637d8b1ad0ca92ab3ec4c0d033ad6c862&state=b1ad0ca92 HTTP/1.1
```
## Exchange ,`code`, for an access token
After receiving the `code`, you can exchange it for a Linear API access token:
```http
POST https://api.linear.app/oauth/token HTTP/1.1
```
> [!NOTE]
> Pass parameters in body as [URL-encoded form submission](https://developer.mozilla.org/en-US/docs/Web/HTTP/Methods/POST#url-encoded_form_submission), where the `Content-Type` header must be `application/x-www-form-urlencoded`.
Parameter | Description
--- | ---
`code` | (required) Authorization code from the previous step
`redirect_uri` | (required) Same redirect URI which you used in the previous step
`client_id` | (required) Application's client ID
`client_secret` | (required) Application's client secret
`grant_type=authorization_code` | (required)
### PKCE
If you are using the PKCE flow, the parameters required by the `/token` endpoint are different:
**Name** | **Description**
--- | ---
`code` | (required) Authorization code from the previous step
`redirect_uri` | (required) Same redirect URI which you used in the previous step
`client_id` | (required) Application's client ID
`client_secret` | (optional) Application's client secret
`code_verifier` | (required) The code verifier for the PKCE request that you originally generated before the authorization request
`grant_type=authorization_code` | (required)
### Response
After a successful request, a valid access token will be returned in the response.
If your application has refresh tokens enabled (default behavior for applications created from October 1, 2025 onwards), your response will contain a refresh token along with an access token. The access token is valid for 24 hours and will need to be refreshed when it expires. Example response:
```json
{
"access_token": "00a21d8b0c4e2375114e49c067dfb81eb0d2076f48354714cd5df984d87b67cc",
"token_type": "Bearer",
"expires_in": 86399,
"scope": "read write",
"refresh_token": "sz0c8ffy95zj2ff6bh1hiausauw3dbfsu4gly1z4p49b5odqv8l7owunb654vg1f",
}
```
If your application does not have refresh tokens enabled, your response will contain an access token that is valid for 10 years. Example response:
```json
{
"access_token": "00a21d8b0c4e2375114e49c067dfb81eb0d2076f48354714cd5df984d87b67cc",
"token_type": "Bearer",
"expires_in": 315705599,
"scope": "read write"
}
```
> [!NOTE]
> Note: OAuth apps created prior to Dec 1, 2023 will instead return `scope` as an array of strings in the token response.
## Refresh an access token
If your application uses refresh tokens, you'll need to use the refresh token you receive alongside your access token to retrieve a new access token when the previous one expires.
For authorization, you have two options:
1. Use HTTP basic authentication by passing a Base64-encoded `client_id:client_secret` string as an authorization header: `Authorization: Basic `
2. Pass `client_id` and `client_secret` as parameters
If your access token was generated using PKCE, you can simply pass `client_id` as a parameter.
```http
POST https://api.linear.app/oauth/token HTTP/1.1
```
> [!NOTE]
> Pass parameters in body as [URL-encoded form submission](https://developer.mozilla.org/en-US/docs/Web/HTTP/Methods/POST#url-encoded_form_submission), where the `Content-Type` header must be `application/x-www-form-urlencoded`.
**Parameter** | **Description**
--- | ---
`refresh_token` | (required) Refresh token from the previous step
`grant_type=refresh_token` | (required)
`client_id` | (optional if you're using HTTP basic authentication) Application's client ID
`client_secret` | (optional if you're using HTTP basic authentication or refreshing a token generated using PKCE) Application's client secret
### Response
After a successful request, a new valid access token and a new refresh token will be returned in the response:
```json
{
"access_token": "fxra4u0msw3bagb9rdn2i641bs52m9zo8ksoxljouygcu31nh8s2jf8fygbepy16",
"token_type": "Bearer",
"expires_in": 86399,
"scope": "read write",
"refresh_token": "qjmj51q8f8fnwe188702jarfqxwhdy6r5ivqy4yjuhw2crubm5e7nyu84un3marx",
}
```
## Make an API request
Once you have obtained a valid access token, you can make a request to Linear's GraphQL API. You can initialize the [Linear Client](https://linear.app/developers/sdk) with the access token:
```typescript
const client = new LinearClient({ accessToken: response.access_token })
const me = await client.viewer
```
Or pass the token as an authorization header: `Authorization: Bearer `
```sh
curl https://api.linear.app/graphql \
-X POST \
-H "Content-Type: application/json" \
-H 'Authorization: Bearer ' \
--data '{ "query": "{ viewer { id name } }" }' \
```
## Revoke an access token
To revoke a user’s access, call the revocation endpoint and include the token to be revoked in the `token` form field of the request body.
If available, include `token_type_hint` (`access_token` or `refresh_token`) to help the server identify the token.
```http
POST https://api.linear.app/oauth/revoke HTTP/1.1
```
> [!NOTE]
> Note: For backwards compatibility, we still accept revocation via the `Authorization` header or the legacy `access_token` / `refresh_token` form fields. New integrations should use the `token` field. The `token` field must not be combined with legacy fields.
### Response
Expected HTTP status:
* `200` - token was revoked
* `400` - unable to revoke token (e.g. token was already revoked)
* `401` - unable to authenticate with the token
## Migrate to using refresh tokens
To ease the transition to refresh tokens for OAuth2 applications that aren't currently using them, we've added a temporary endpoint to migrate any old, long-lived access token to a new, short-lived access token with a refresh token.
You'll still need to enable refresh tokens on your application to use them going forward after you migrate your old tokens.
```http
POST https://api.linear.app/oauth/migrate_old_token HTTP/1.1
```
> [!NOTE]
> Pass parameters in body as [URL-encoded form submission](https://developer.mozilla.org/en-US/docs/Web/HTTP/Methods/POST#url-encoded_form_submission), where the `Content-Type` header must be `application/x-www-form-urlencoded`.
**Parameter** | **Description**
--- | ---
`access_token` | (required) Existing long-lived access token
`client_id` | (required) Application's client ID
`client_secret` | (required) Application's client secret
## Client credentials tokens
We support the `client_credentials` grant type for OAuth2 apps that use tokens for server-to-server communication and cannot support a user-initiated OAuth flow involving refresh tokens.
> [!NOTE]
> **Client credentials**
> You must first toggle on client credentials tokens for your OAuth2 app when creating or editing the app in Linear
The token generated using this grant type will be an `app` actor token that has access to all public teams in the workspace and is valid for 30 days. You can learn more about `app` actor tokens [here](https://linear.app/developers/oauth-actor-authorization).
The app user's team access can be modified through the [app details page](https://linear.app/settings/applications/) for your app at any point after the token is generated. Since there is no refresh token paired with this access token, your server is expected to fetch a new token if it receives a 401 error when making a request with the previous token.
Every OAuth2 app can only have one active client credentials token at a time since it is an `app` token. If you request a new client credentials token while you still have an active one, we will invalidate the currently active token and return a new token with a 30-day validity.
For increased security, we will also invalidate your app's client credentials token if its client secret is rotated.
### Request
For authorization, you have two options:
1. Use HTTP basic authentication by passing a Base64-encoded `client_id:client_secret` string as an authorization header: `Authorization: Basic `
2. Pass `client_id` and `client_secret` as parameters
```http
POST https://api.linear.app/oauth/token HTTP/1.1
```
Name | Description
--- | ---
`grant_type=client_credentials` | (required)
`scope` | (required) Comma-separated list of scopes
`client_id` | (optional if you're using HTTP basic authentication) Application's client ID
`client_secret` | (optional if you're using HTTP basic authentication) Application's client secret
### Response
After a successful request, a new valid access token will be returned in the response:
```json
{
"access_token": "fxra4u0msw3bagb9rdn2i621bs52m9zo8ksoxljouygcu31nh8s2jf8fygbepy16",
"token_type": "Bearer",
"expires_in": 2591999,
"scope": "read write",
}
```
If your OAuth2 app does not have client credentials tokens enabled, you will receive an error response:
```json
{
"error":"Error",
"error_description":"Client does not support the client_credentials grant type"
}
```
---
# Source: https://linear.app/developers/oauth-actor-authorization.md
# OAuth actor authorization
By default all Linear’s API authentication methods treat the authenticating user as the API actor. This means that actions performed with the OAuth token will appear to come from that user, this is usually what you want!
Linear also supports an alternative authentication method with **OAuth Actor Authorization** – when authenticating this way the user will instead authorize installing the app within the workspace, actions performed with the received OAuth token will come from the app itself. This is particularly useful for agents and service accounts.
To enable the actor authorization, add `actor=app` parameter to your [OAuth authorization URL](https://linear.app/developers/oauth-2-0-authentication#redirect-user-access-requests-to-linear). The setting is tied to the authorization and its access token. In this mode, all mutations such as creating issues, comments, and status changes will be performed by the app.
You can also add an optional user name and avatar to go with the application to have it rendered in _User (via Application)_ format. This will help identify the user that performed the action in the 3rd party system that do not have a Linear account.
To set the custom user name, set the `createAsUser` attribute with the user name and set `displayIconUrl` with the URL of the avatar in `issueCreate` or `commentCreate` mutations:
```graphql
mutation IssueCreate {
issueCreate(
input: {
title: "New exception"
description: "More detailed error report in markdown"
teamId: "9cfb482a-81e3-4154-b5b9-2c805e70a02d"
createAsUser: "Mark"
displayIconUrl: "http://path.to/image.png"
}
) {
success
issue {
id
title
}
}
}
```
> [!NOTE]
> Note, we previously supported a similar `actor=application` as a mode – this was deprecated in favor of the behavior in `actor=app`. If your app already uses this option then you can continue to do so.
---
# Source: https://linear.app/developers/pagination.md
# Pagination
All list responses from queries return paginated results. We implement Relay style cursor-based pagination model with `first`/`after` and `last`/`before` pagination arguments. For example, this is how to query the first 10 issues in your workspace:
```graphql
query Issues {
issues(first: 10) {
edges {
node {
id
title
}
cursor
}
pageInfo {
hasNextPage
endCursor
}
}
}
```
To query the next 10, simply pass the value of `pageInfo.endCursor` as `after` parameter for the next request. You can do this as long as `pageInfo.hasNextPage` return true and you'll paginate through all the values in the collection.
The first 50 results are returned by default without query arguments. Pagination also supports simpler syntax where instead of edges you can directly get all the nodes similar to GitHub's GraphQL API:
```graphql
query Teams {
teams {
nodes {
id
name
}
}
}
```
By default results are ordered by `createdAt` field. To get most recently updated resources, you can alternatively order by `updatedAt` field:
```graphql
query Issues {
issues(orderBy: updatedAt) {
nodes {
id
identifier
title
createdAt
updatedAt
}
}
}
```
---
# Source: https://linear.app/docs/parent-and-sub-issues.md
# Parent and sub-issues
Use sub-issues to break down larger "parent" issues into smaller pieces of work.

## Overview
Consider creating sub-issues when a set of work is too large to be a single issue but too small to be a project. Sub-issues are also ideal for splitting up work shared across teammates. When you add a sub-issue to another issue, the other issue becomes its "parent".
## Create a sub-issue
Create a sub-issue by opening the parent issue and click the `+ Add sub-issues` button below the issue description. This will launch the sub-issue editor. You can also use the shortcut `Command` `Shift` `O` to open the editor.
You can also create sub-issues in the issue creation modal (C) by pressing `Command` `Shift` `O` to open the editor or under the `...` menu and _"Add sub-issue"._
When you save a sub-issue, it will automatically launch the editor to create a new one. If you want to create a new one with the same values (labels/assignee etc.) you can press `⌘ Shift` `Enter `or `Shift`+ click the save button. Press `Esc` to exit the sub-issue editor and continue updating the parent issue.
You can turn a comment under an issue into a sub-issue by hovering over a comment and clicking the `…` menu then _"new sub-issue from comment"._ Selecting a comment's text and pressing `⌘` `Shift` `O` will also create a sub-issue.
If you have a list (bulleted, numbered or checklist) you can highlight the checklist and hit `⌘` `Shift` `O` to convert to sub-issues or choose the _"Create sub-issues(s) from selection"_ item in the formatting toolbar.
You can add a template using the templates icon when creating a sub-issue or using the command menu under "Create new sub-issue from template" when viewing the parent.
## Copy properties
Sub-issues created in the editor automatically copy issue properties from the parent issue such as the project and cycle _as long as those are set before you create the sub-issue_.
Team, labels and assignees are not copied over. You can't create sub-issues while editing the parent issue, but the option will come up once you press save.
You can duplicate a parent and its sub-issues from the Parent's `... `menu under _"Duplicate"_ and hit the toggle _"Include sub-issues"._
## Status automation
Optionally, configure the following behaviors at the team level (Settings > Team > Workflow) to automate status relations between parent and sub-issues. Status changes triggered by Git integrations will also respect these automations.
**Parent auto-close**
When all sub-issues are marked as done, the parent issue will also be marked as done automatically.
**Sub-issue auto-close**
When the parent issue is marked as done, all remaining sub-issues will also be marked as done.
## Converting issues
### Turn issues into sub-issues
Turn an existing issue(s) into sub-issues of another issue by selecting one or multiple issues and then taking the action to set the parent issue. This action is accessible from the command menu or by pressing `Cmd` `Shift` `P` and selecting a parent issue.
### Turn issues into parent issues
To make an existing issue a parent issue of another issue, hover over a sub-issue and take the action _"Set Parent"_ in the contextual menu, command menu or `... `menu.
### Turn sub-issues into issues
You can turn a sub-issue into a regular issue again using the `⌘/ctrl+K` menu option "Remove parent".
### Turn issues into projects
Sometimes an issue grows so large it's more appropriate to turn it into a project instead. To do so, hover over the parent's `...` menu and choose "_Convert to project."_ The project will inherit its details from the original parent issue, and former sub-issues will become standard issues in the project.
## Filter sub-issues
You can usually set the view to show or hide sub-issues in [Display Options.](https://linear.app/docs/display-options) You can also use [Filters](https://linear.app/docs/filters) to show only top-level (parent) issues, issues with sub-issues, or only sub-issues. If you use these filters frequently, consider creating a [custom view.](https://linear.app/docs/custom-views)
You can also hide completed sub-issues by default under the `...` menu and toggling "Always hide completed sub-issues".
You can also sort your sub-issues under an issue from the `…` menu and _"Order by"_ though this only updates it for the current user, not globally.
## Display options
When looking at sub-issues from the context of their parent issue, you can customize the order of the sub-issues and the properties that display.
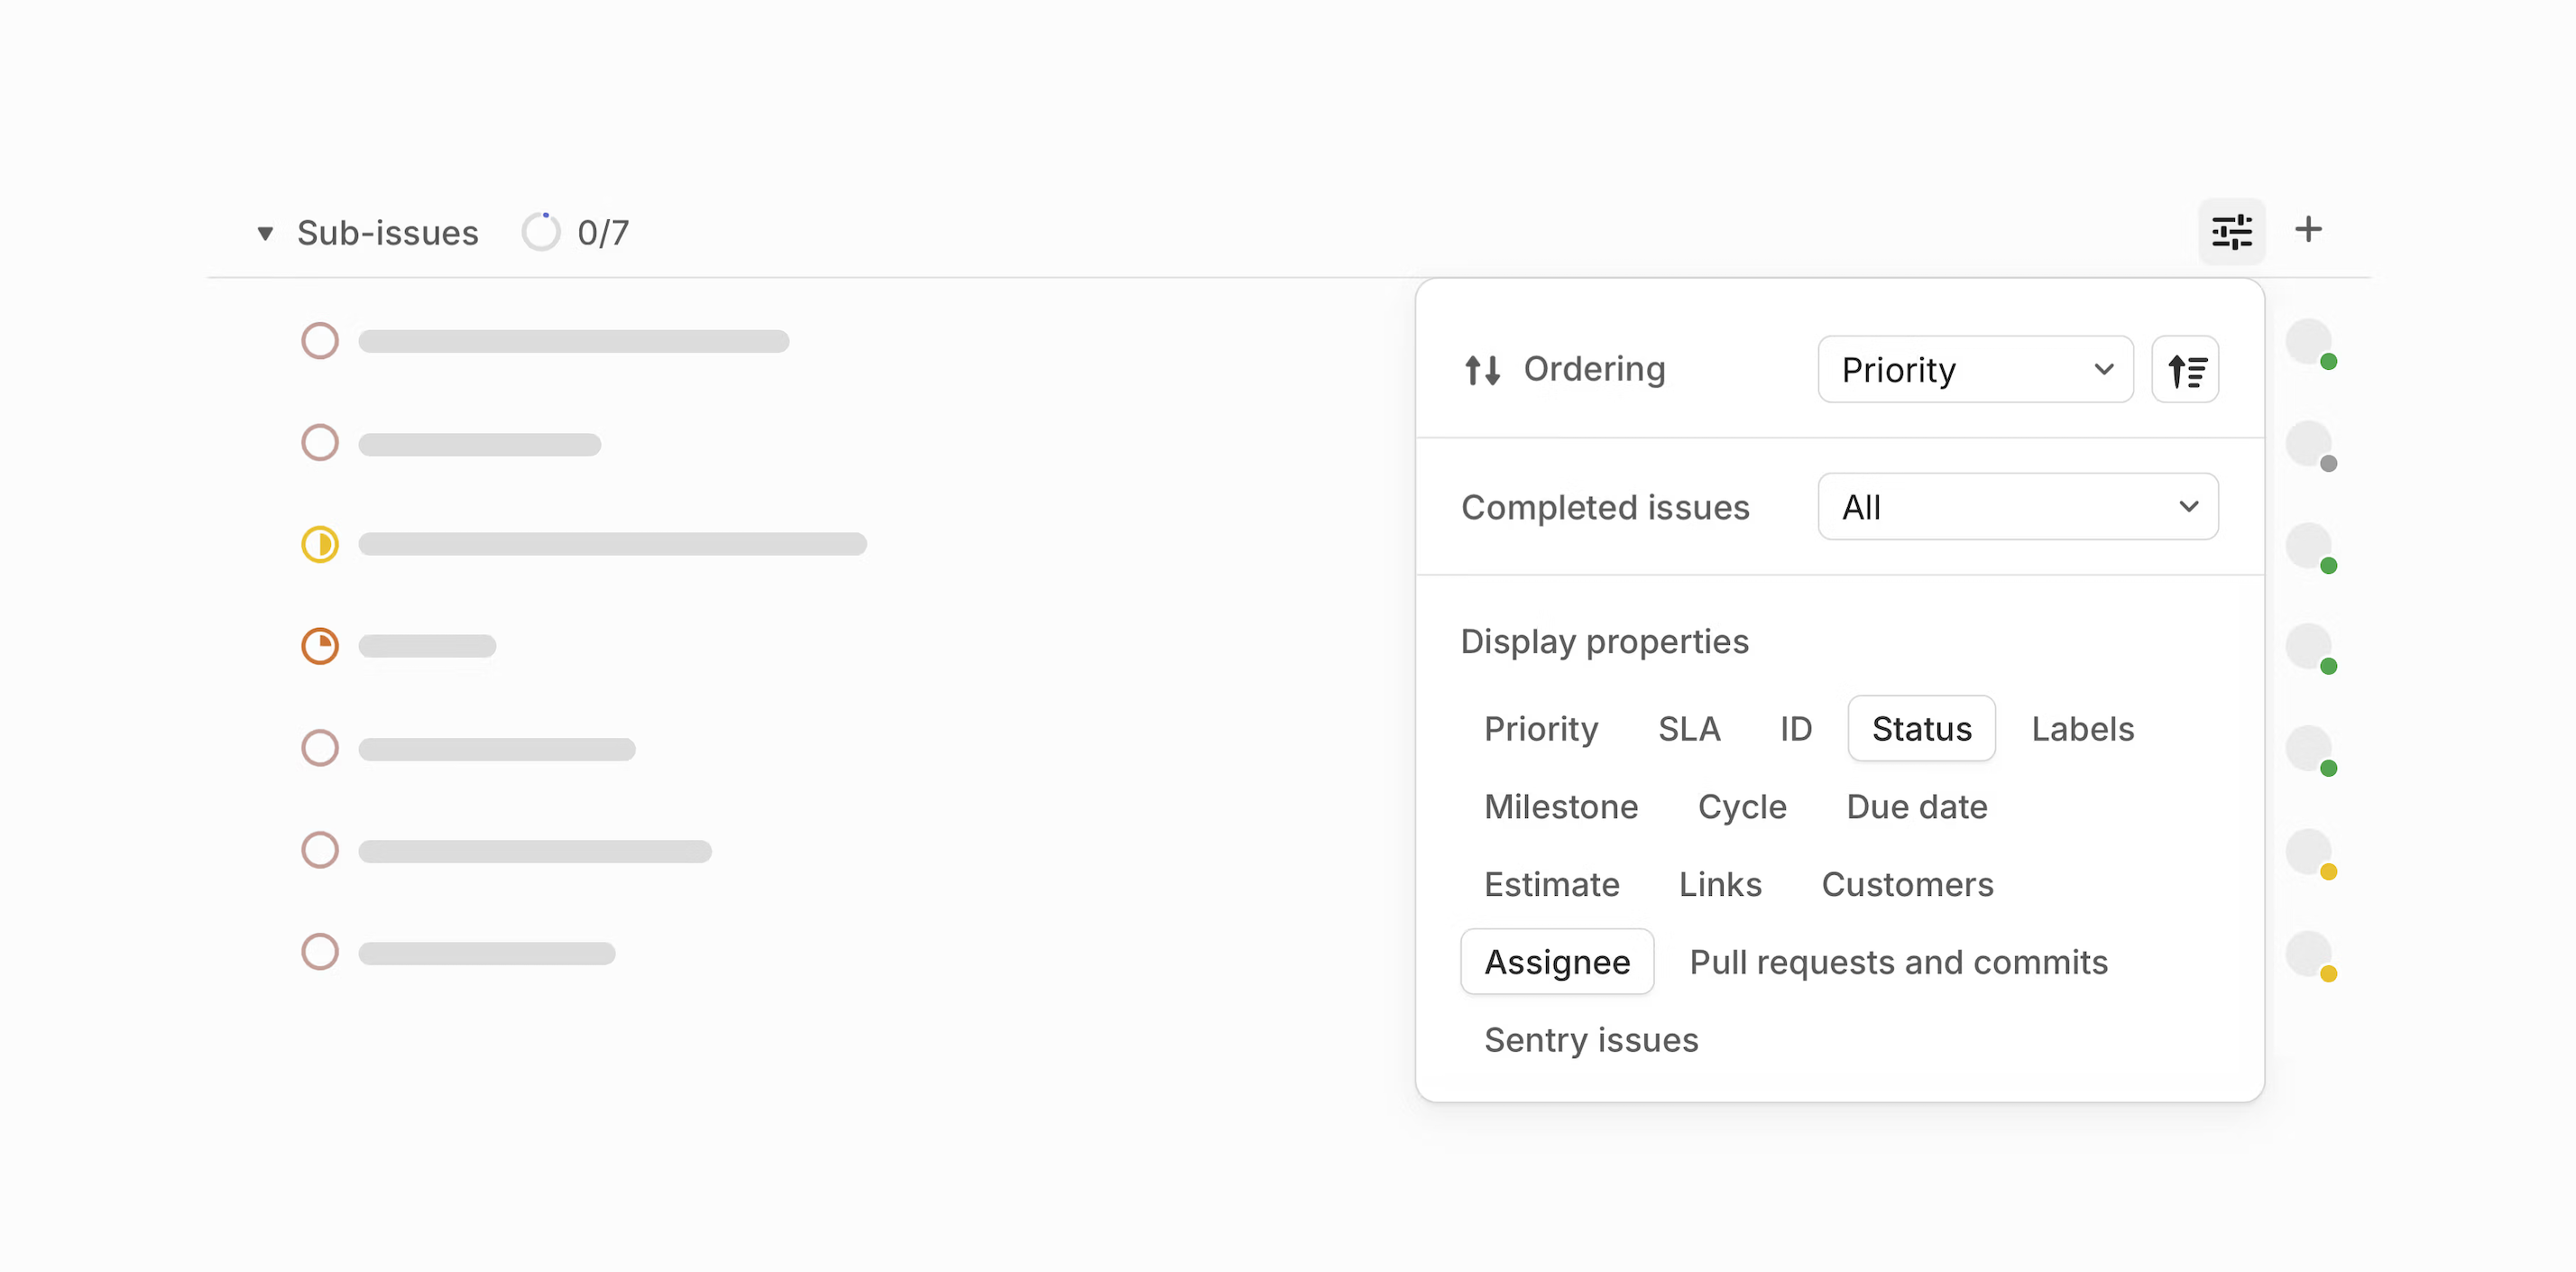
---
# Source: https://linear.app/docs/peek.md
# Peek preview
View issue details without having to open issues.
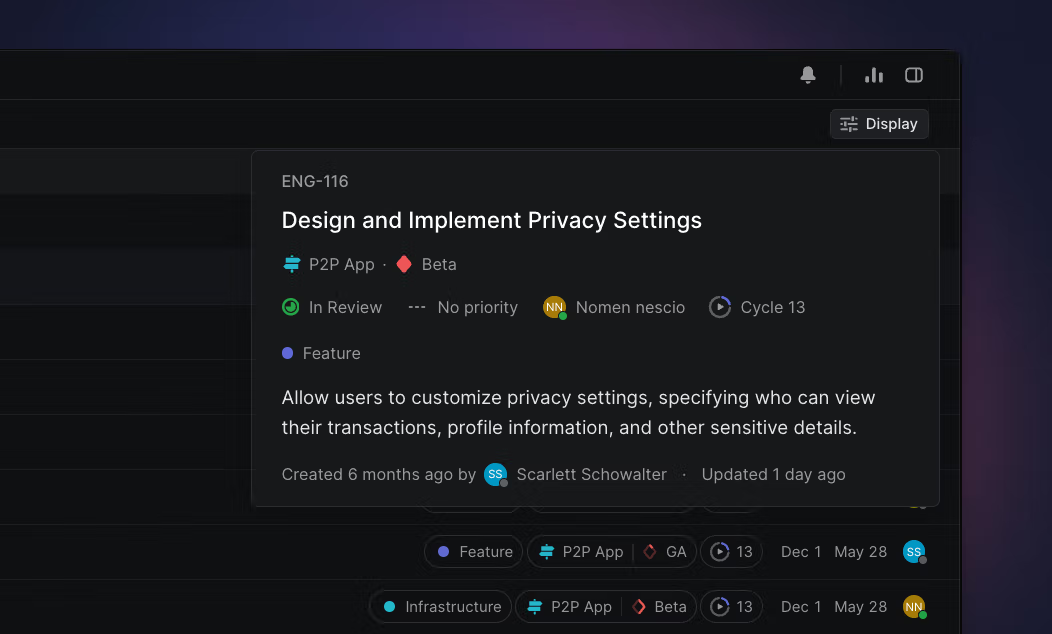
## Overview
Peek is one of the semi-secrets of the Linear UI. It lets you view details of focused issues at a glance from any list or board view, similar to Quicklook in macOS.
### Keyboard
Tap `Space` to toggle peek on or off
`Space` and _hold_ to turn on peek only while `Space` is depressed
### Mouse
Peek can only be launched with the keyboard shortcut
### Command menu
Peek can only be launched with the keyboard shortcut
## Configure
Peek is a default setting in Linear available on many issue and project views. If peek is available for your page or view, you can launch it by pressing the `Space` bar and turn it off by pressing the `Space` bar again. To temporarily turn it on, hold the `Space` bar down. Peek will remain active until you let go of the `Space` bar.
## Basics
Press `Space` to launch peek, then scroll through a list or board with (`J`/`K` or `↑`/`↓`) to launch the peek pop up. The peek preview will show information based on the items
* For issues, it will show a preview issue details including the description, assignee, status, priority, cycle, labels, estimate, creation date, and updated date.
* For projects, peek will show project details as well as the project graph.
## Quick look
When you have projects or issues in view in the `Cmd`/`Ctrl` + `K` menu, get a preview without opening it by using quick look -- a variation on peek. When available, this is triggered by the right arrow key and adds a preview to the right side of the command menu.
---
# Source: https://linear.app/docs/priority.md
# Priority
Set issue priority to indicate which issues to complete first.
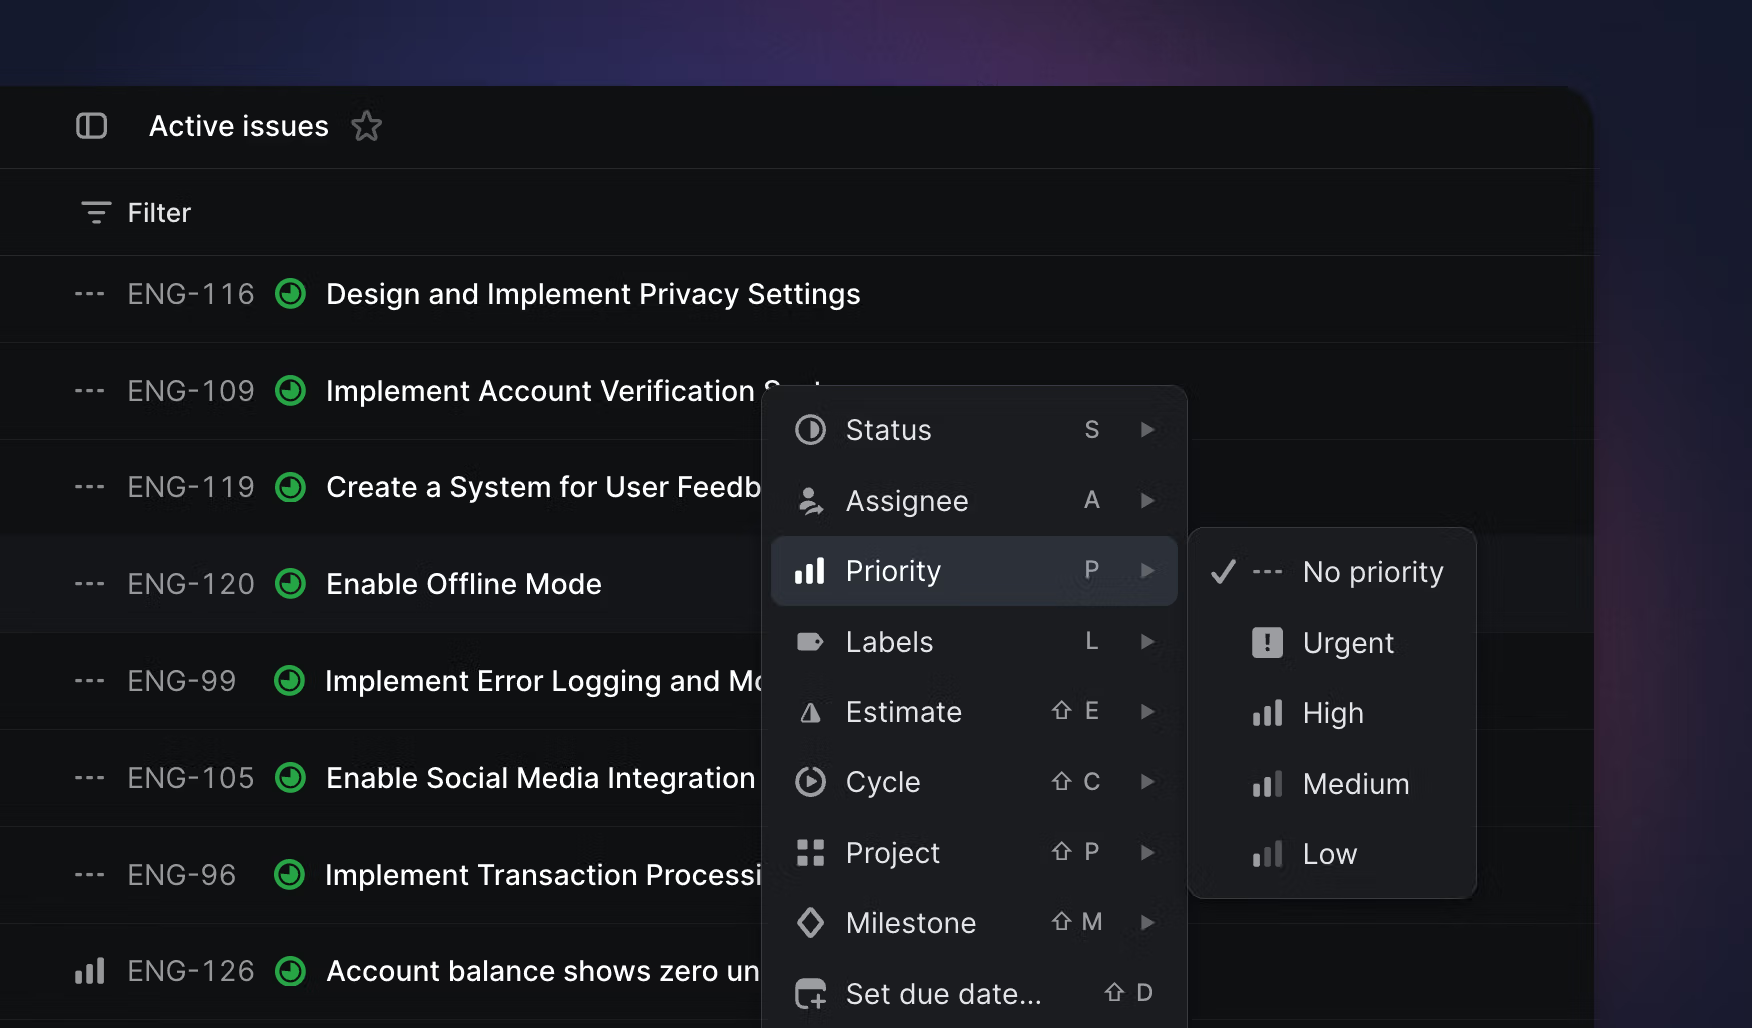
## Overview
Priority is an optional property for Linear issues to signify to your team the urgency of the issue. You can add the following priorities to issues: low, medium, high, and urgent.
We don't have the option to set custom priorities or more granular priorities since it's easy to get carried away with specificity. Adding too many options makes it harder to set priority and leads to diminishing returns. If more granularity is needed, the best workaround is to create additional workflow statuses or use labels.
## Set priority
Select an issue or issues or from the issue view, type `P` and then select the issue priority. Use the shortcut again to change or remove the priority.
## Priority ordering
On any view ordered by priority, simply drag & drop an issue or project above other ones to indicate it is more important. The exact position will be saved globally across your workspace, so that anyone else looking at a view ordered by priority will see these issues or projects in the same relative positions. By default, items without an assigned priority level are now always sorted last.
## Urgent Notifications
When you set issues to have Urgent priority, we'll send a notification to the issue assignee and immediately send an email notification if they have those enabled.
---
# Source: https://linear.app/docs/private-teams.md
# Private teams
Create private teams for issues that should only be accessed by certain workspace members.
> [!NOTE]
> Available to workspaces on our [Business](https://linear.app/pricing) and [Enterprise](https://linear.app/pricing) plans.

## Overview
> [!NOTE]
> If you want a team to be public to all but a particular set of users, consider using the [Guest](https://linear.app/docs/members-roles#guest) role instead of making the team private.
This feature is available on Linear's Business and Enterprise [plans](https://linear.app/pricing). Anyone in the workspace can create a new private team. Only workspace owners, admins, and team owners can change visibility of an existing team.
Private teams are helpful in cases where:
* Work is sensitive and should be limited to only some team members (e.g. HR, customer data, founders or exec team).
* You want a personal team to keep track of issues.
## Visibility
**Private team:** Workspace admins can see all private teams in settings under [Settings > Administration > Teams](https://linear.app/settings/teams), update team settings, or join a private team by adding themselves as a member. If an admin attempts to join a team, they will receive a pop-up warning before confirming.
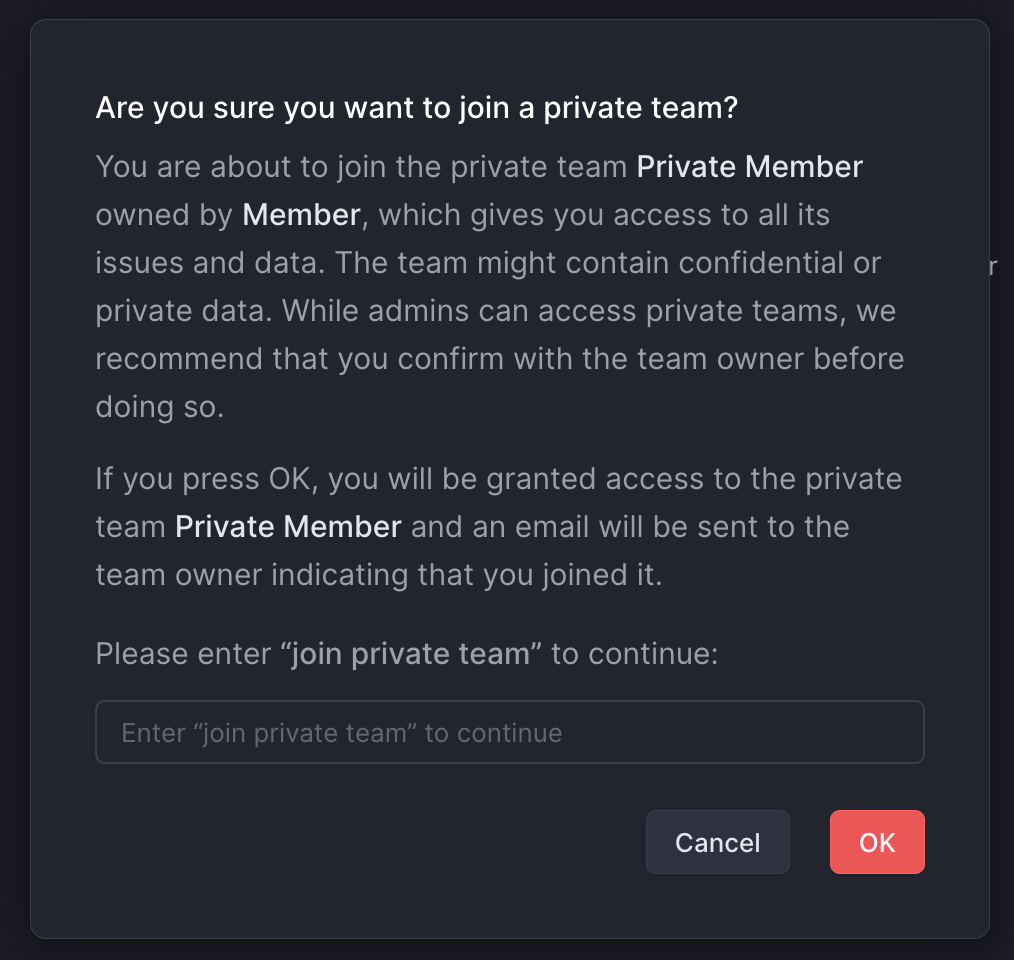
**Issues:** Those who are not a member of the private team will not be able to see issues associated with the team. You cannot @ mention a member in an issue in the private team if they are not already a member of the private team.
**Projects created under public teams:** Projects created under public teams can also be shared with private teams. Only private team members will be able to see that the project has been associated with their team. Similarly, project issues related to the private team will only be visible to members of that team.
If all public teams are removed from the project, it will become private and only visible to members of the private team from then on.
**Projects created under private teams:** Projects created under private teams are visible to the private team members only. If the project is shared with a public team later on, the project will become visible to others. The name of the private team or issues from that team do not become visible to non-members.
**Initiatives:** Members of a private team can see its projects on the associated initiatives but those projects won't be visible to others.
## Configure
When creating teams from workspace settings, toggle the option **Make team private**.

To make an existing team private or vice versa, go to your team's settings (right-click on the team from your sidebar) and then _Access and permissions > Change team visibility._
Any assignees that are not members of the private team will be removed and any subscribers to issues in the newly private team will be unsubscribed.
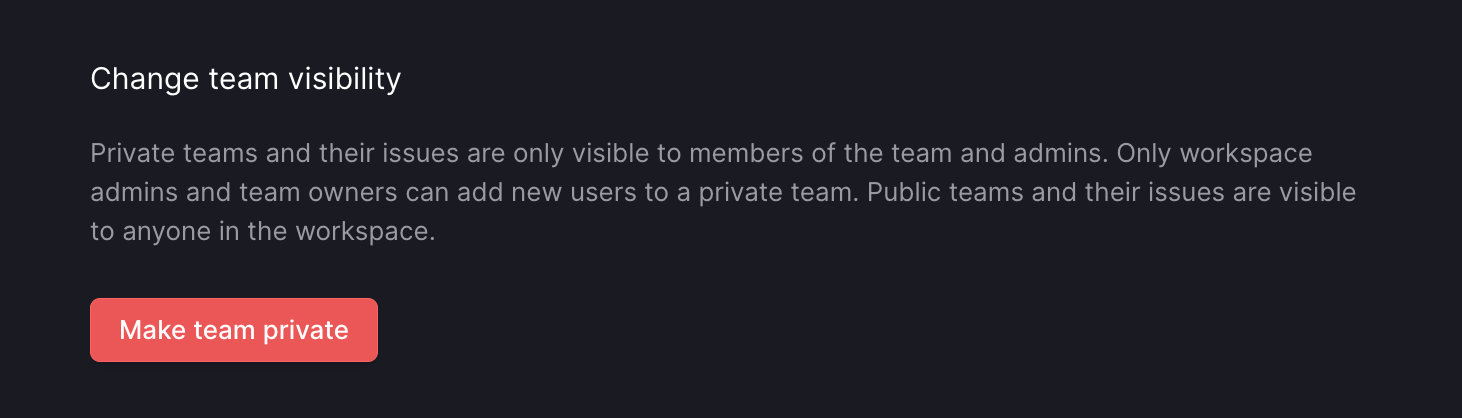
## Private team members
The person who creates a private team or converts an existing team to private becomes the default owner of the private team.
Owners of a private team can go to _Members_ (from the team's settings page) to invite other workspace members to the team or promote an existing team member to team owner (admins can search for the team from _Settings > Administration > Teams_ and then select the three dot menu to access this page).
Members of a private team can leave the team on their own, but they won't be able to re-join the team without an explicit invite.
## Exports
When exporting issues from the workspace using our Export tool, admins can choose to include issues from any private team.
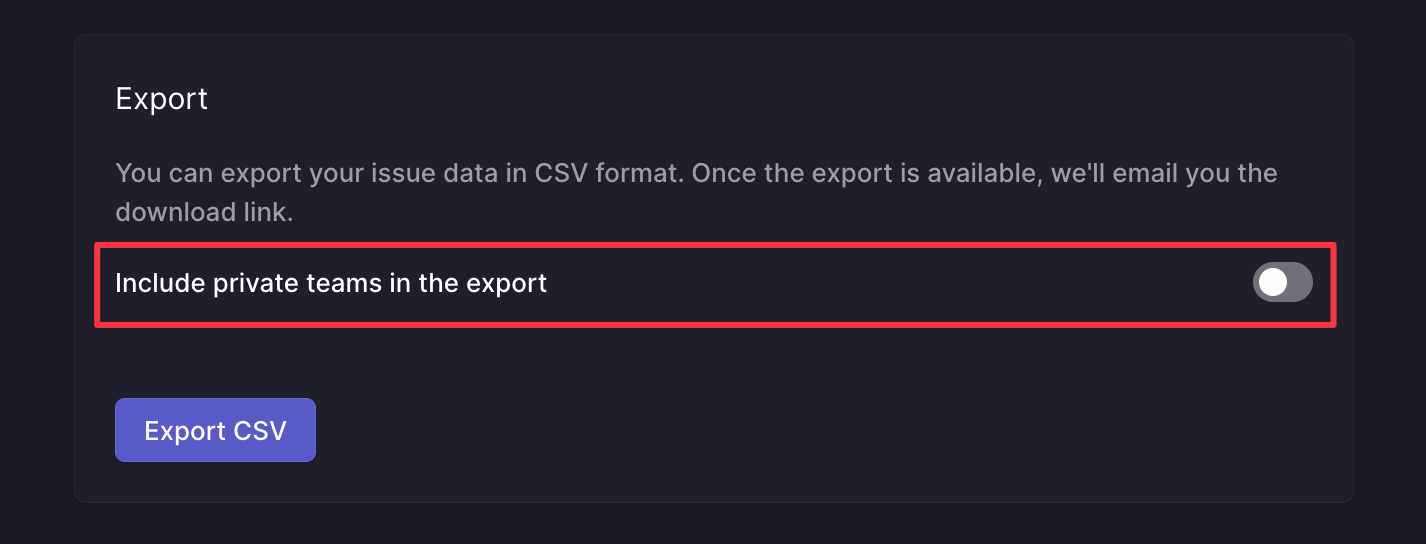
## API Security Considerations
If your workspace has set up custom integrations or apps or is working with third party integrations, please consider their behavior and who has access to their output when adding private team data to Linear issues.
The API, webhooks, and integrations such as Zapier can expose a user's private team and issue titles. It's possible to access private issue data with the API if you are using a personal API key of a user that has access to private teams. Webhooks can also expose data from private teams as webhooks for private teams can be set up by team owners and workspace admins.
## Integrations
Some existing integrations have limitations to account for private data, while others will have more complete access to all workspace contents.
GitHub and GitLab | Private issues will be posted as linkbacks on PRs or MRs with the issue ID and link only
--- | ---
Google Sheets | Issue data from private teams is not accessible
Intercom | You cannot create or link issues in private teams
Sentry | You cannot create or link issues in private teams
Zapier | See our note above on API and webhooks
Zendesk | You cannot create or link issues in private teams
Front | If you have access to a private team, you can create and link to issues in that private team.
Airbyte | Information from all public and private teams will be loaded in Airbyte
---
# Source: https://linear.app/docs/profile.md
# Profile
## Overview
Your profile found in [Settings > Account > Profile](https://linear.app/settings/account/profile) is where you personalize how other team members will see you in your Linear workspace.
## Set your profile picture

The default avatar will be the first and last initials of your account. To add a new photo, hover over the avatar until the edit pencil icon shows up, and click on it. A pop-up folder will show up for you to select the photo you want to update.
Once you've updated your avatar, you cannot remove it—only replace it with another photo.
## Name and username
Members can set whether they see their team members' full names or usernames in their [Settings > Account > Preferences](https://linear.app/settings/account/preferences). You can adjust these to your preference of how you want others to refer you to.

## Email address
Your email address is your unique ID (User Account) for all workspaces you have created a User for. For example:
Action | Result
--- | ---
You joined Workspace A using jane.doe@email.com | A User Account was created under jane.doe@gmail.com and a User was created for Workspace A.
You joined Workspace B. | A User was created for Workspace B under your User Account jane.doe@email.com
You updated your email address in Workspace B to jdoe@gmail.com | Your email address for your User Account, Workspace A, and Workspace B was updated to jdoe@email.com. Jane.doe@email.com does not exist.
### Change your email address
To change your email address:
1. Go to [Settings > Account > Profile](https://linear.app/settings/account/profile).
2. Hover over your email address and click the pencil icon.
3. A pop-up box will appear for you to enter the new email address you want to switch to.
4. A confirmation email will be sent to both old and new email addresses. You need to click _both_ in order for the new email address to be confirmed.
Changing an email address will change the email address for **_all_** workspaces using the old email address. If you want to change the email address for just one workspace, we suggest inviting that email as a new user and leaving the workspace from the old email user.
> [!NOTE]
> If your organization is changing domains and you'd like to change all emails in your workspace, please reach out to us at [support@linear.app](mailto:support@linear.app) from the existing domain and let us know the domain you would like to change to.
## Connected Accounts
Connected Accounts are software integrations in which each user has their own specific account. This helps Linear to associate your Linear user when an action taken in the third-party integration. You can see which of your account integrations are connected with Linear, as well as disconnect them.
## Leave your workspace

To leave the workspace, click the **Leave workspace** option in Settings > Profile. Once removed, you no longer have access to the workspace. An admin will have to unsuspend your account in order for you to log back in.
---
# Source: https://linear.app/docs/project-dependencies.md
# Project dependencies
Visualize blocked and blocking relationships amongst projects.
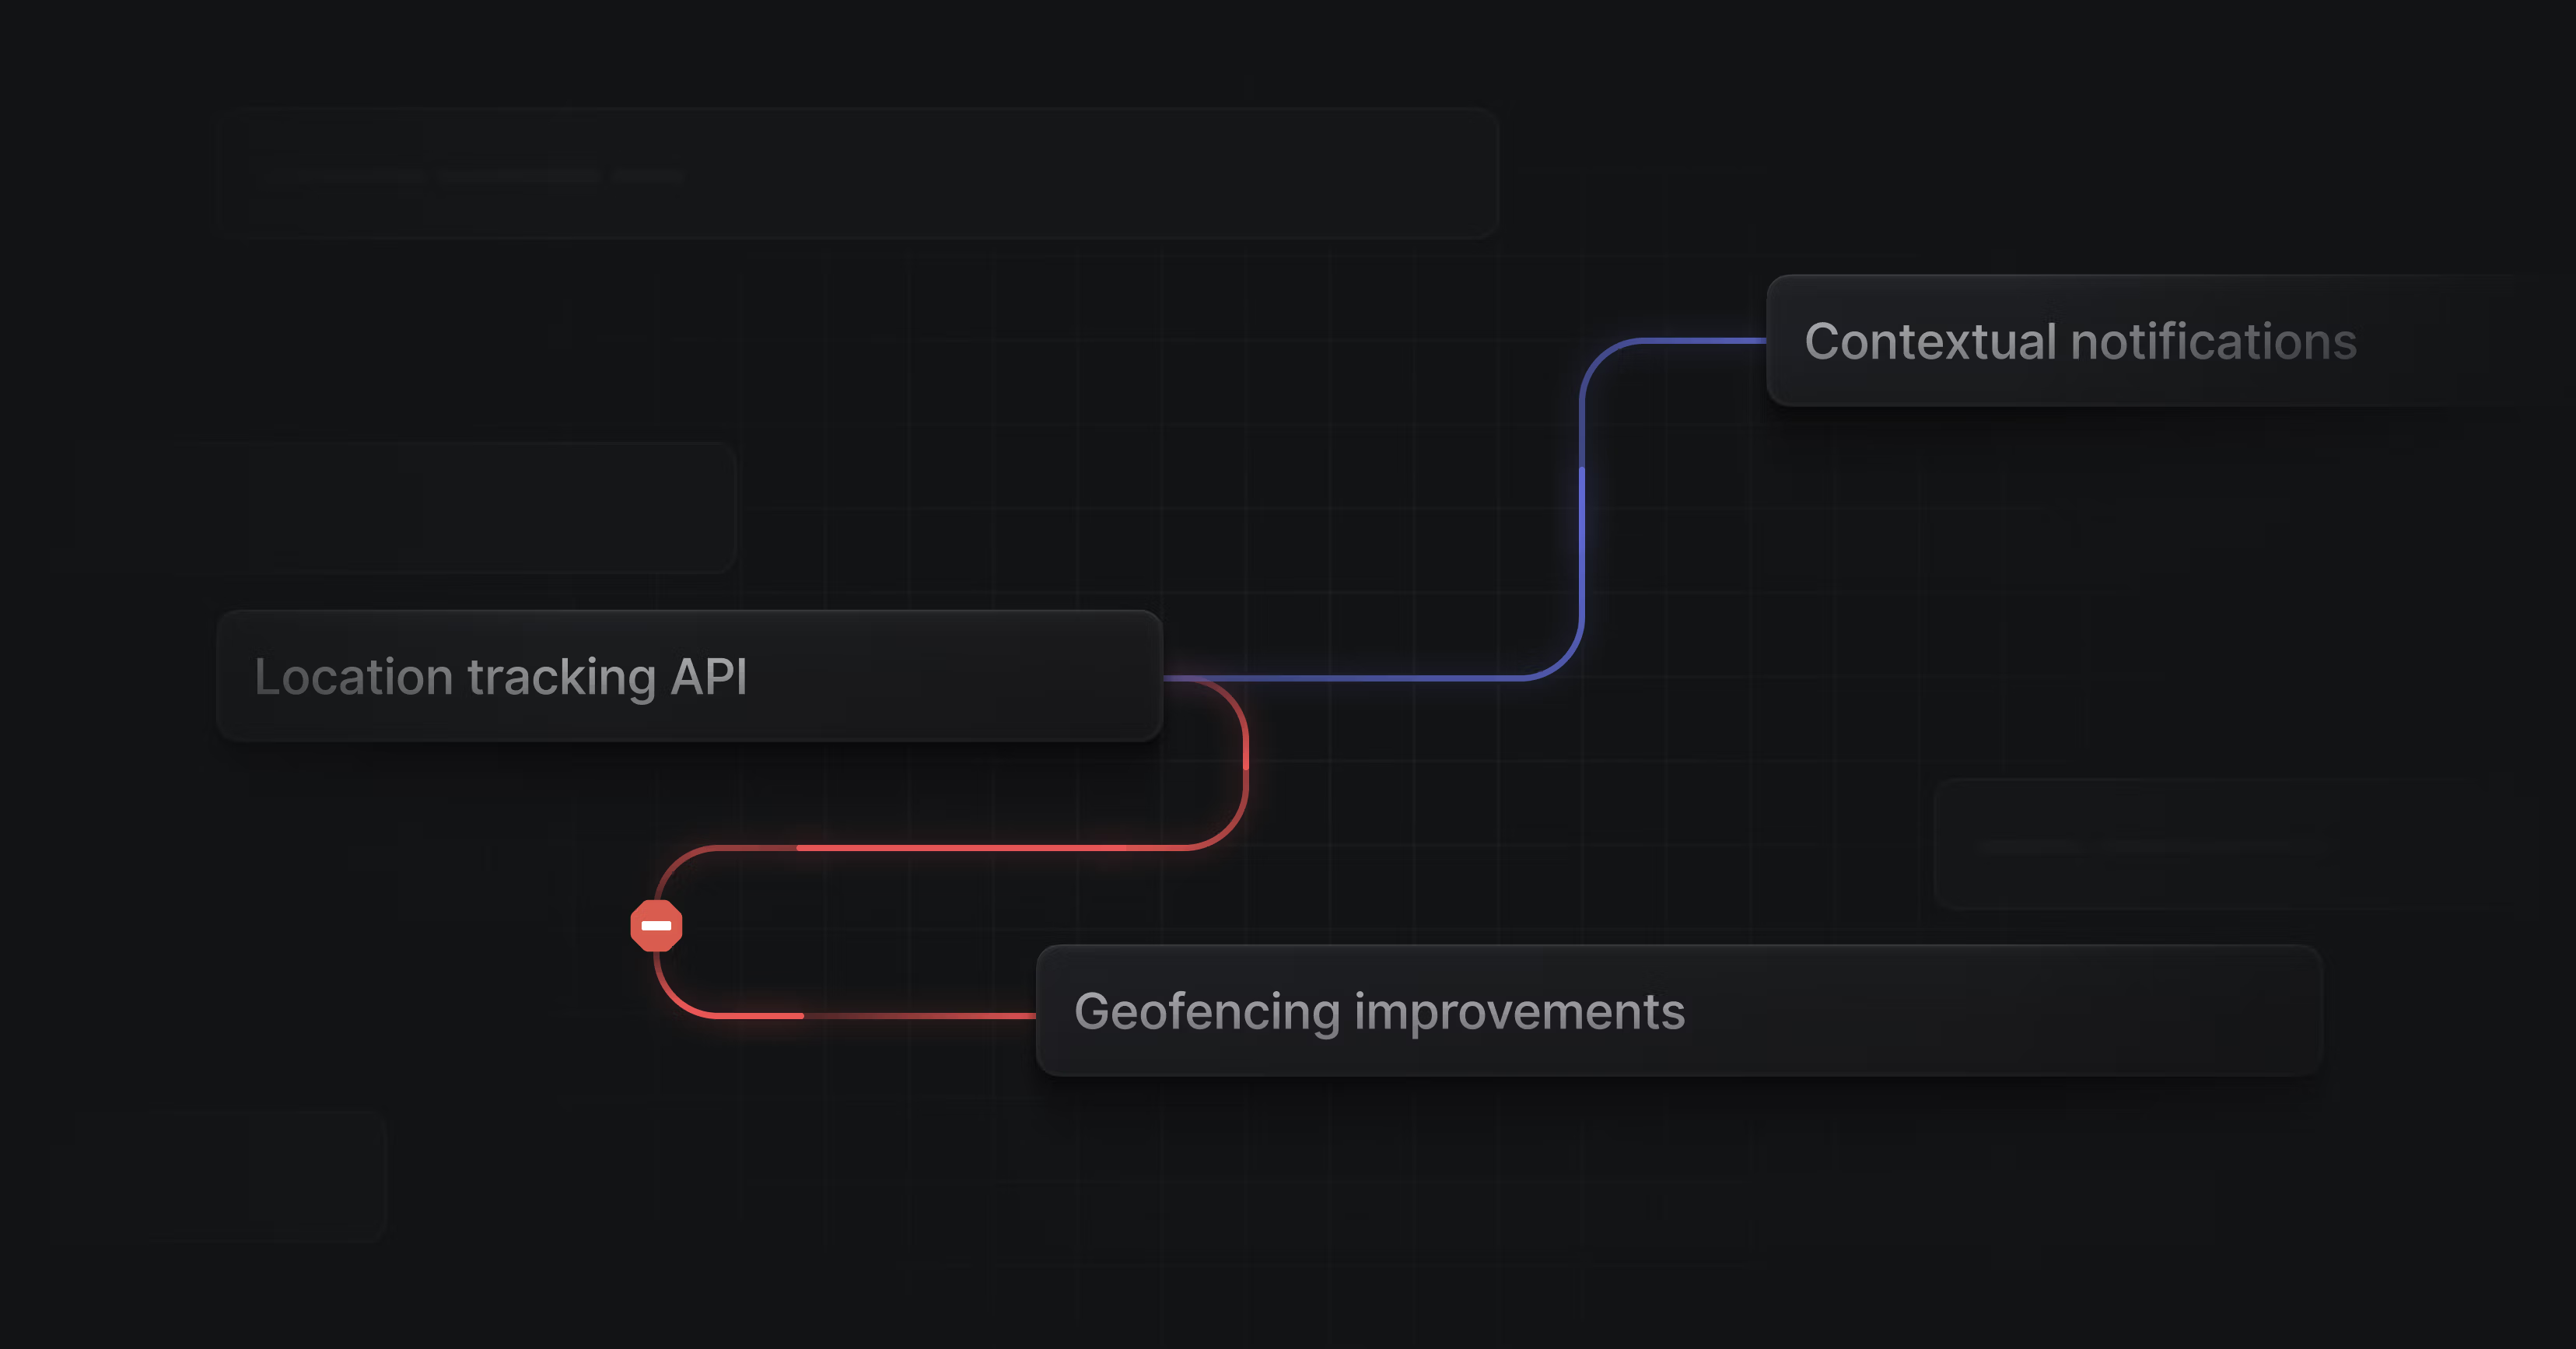
## Overview
Project dependencies provide a visual depiction of blocking relationships on timeline views. Currently we only support a end -> start dependency.
## Create a project dependency
You can establish a project dependency from the project's contextual menu by clicking the three dots next to the project name, or using command bar `Cmd/Ctrl` `K`. Select or hover over _Dependencies,_ select or hover over **Blocked by...** or **Blocking...**, then select the related project.
You can also create dependencies from the timeline view. Hover at the end of a project bar to see a circle. Click and drag from that circle to another projects to create a new dependency.
## Working with dependencies on the timeline
* Click on any dependency line to jump to a project, or remove that dependency.
* When dragging a project with dependencies, there are several ergonomics to help you plan quickly:
* Any projects in the dependency chain that are backlog or planned will be "bumped" with the dragged project. Hold `Cmd/Ctrl` to keep the chain in place.
* Hold `Shift` to move all projects in the dependency together, regardless of status.
## View project dependencies
When a dependency relationship has been established, the Project Overview and the Project Properties right side panel will display "Blocked by" and "Blocking" fields.
Project dependencies can be seen on the project timeline view. You will see lines connecting the blocked and blocking projects.
### Dependency line color
* The blue line depicts a dependency that has not been violated.
* The red line is a dependency that has been violated.
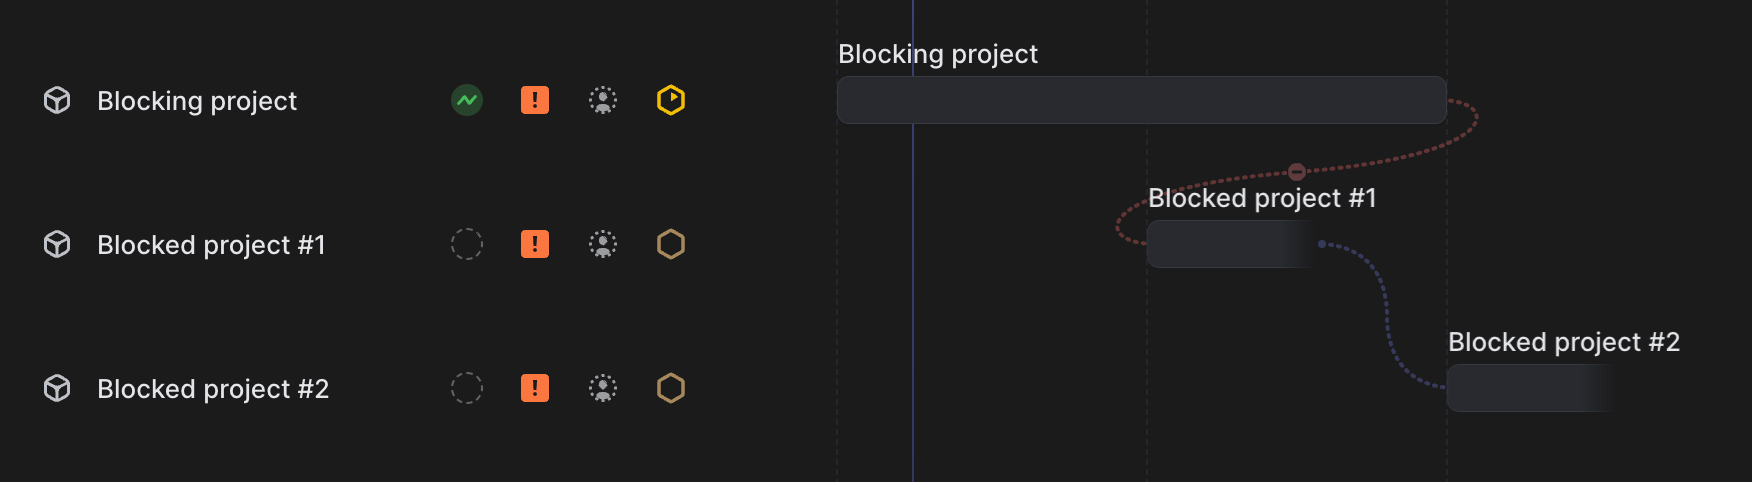
### Dates used for dependency start/end
* The dependency line will start at either the **target end date** or **predicted end date** (if no target end date is available) of the blocking project.
* The ferry line will link with either the **target start date** or the **target end date** of the blocked project.
## Filtering for project dependencies
There are several filter options related to project dependencies:
* `Project has dependencies`
* `Project has blocking dependency`
* `Project has blocked by dependency`
* `Project has violated dependencies`
---
# Source: https://linear.app/docs/project-documents.md
# Project documents
Create documents for projects.
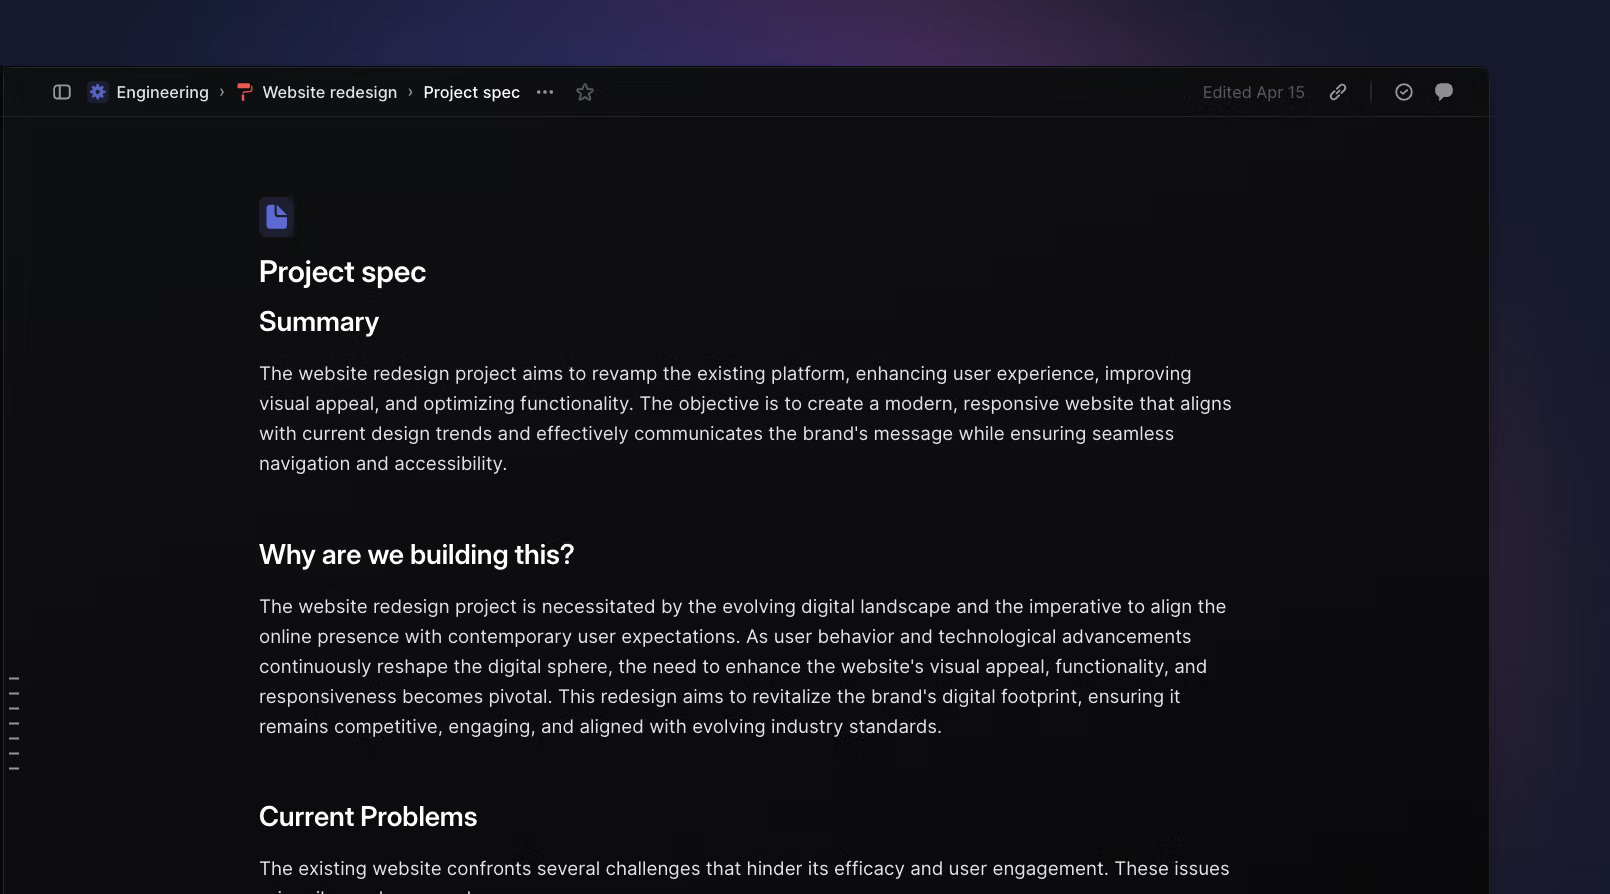
## Overview
Create documents inside of projects to keep relevant information and updates in one central place. Use documents to create specs, PRDS, and share status updates with the project team.
## Create documents
Create documents when inside of a project by navigating to the [project overview](https://linear.app/docs/project-overview) and adding a document under the `Resources` section. You'll be required to give the document a title and can pick a custom icon and icon color.
Projects use the same Markdown editor as issues. In documents, you can type in plain text, use code snippets, format with headers and reference issues and projects. You can also create documents in issues themselves.
## Create document templates
You can create document templates to write documents faster and guide creators to share information effectively. These templates can be selected when creating a new document inside a project or issue.
To create a document template, you can navigate to either the workspace template settings or team template settings. Once you've created the document template, press `save `to make the template available for your team and workspace members.
To edit, duplicate or delete a template, go to the same page where you created the templates and then hover over the template name in order to show contextual controls. Click on the overflow menu and take the desired action.
## Document subscriptions
You can subscribe to notifications for specific documents by clicking on the bell icon in the upper right of the document and selecting yourself or another team member to notification.
> [!NOTE]
> This will also subscribe you to notifications in the description section of a project overview.
The creator of a document will be automatically subscribed to the changes in the document.

Notification types include document changes, comments, and replies. You do not get a notifications for actions you have taken on a document, but you will receive notifications for when
* A comment or reply has been made in a document.
* Material changes to the content of a document.
* A document was deleted.
* A team member subscribes or unsubscribes you to a document.
* A team member mentions you in a document
* A team member mentions you in a comment

## Inline comments
Select text and press the comment button, or use `Cmd Opt M` to leave a comment. Subscribed or mentioned members will receive notifications about comments and replies.
Reply to comments, or resolve them with a single click.

The full comment history of a document is available in the chat bubble icon in the upper right.

## Collaborative editing
Edit documents by opening them and clicking anywhere in the editor to begin editing. We'll show when the document was last edited and by whom. Linear offers collaborative editing, so you'll see input cursors if another user is editing or viewing the text. All changes are instantly saved and synced to everyone in realtime. You can revert documents to a previous version in the `…` menu at the top and choosing _"Revert document content"_.
## Editor slash commands
Type `/` to see additional formatting options in documents (and issues.) Using this menu you can create formatting types including:
* Headers (H1, H2, H3)
* Lists (bulleted, numbered, checklists)
* Codeblocks
* Dividers
* Blockquotes
## Open documents
While in a project view, you can open documents with the shortcut `O` then `D` or by selecting the relevant document from the Overview tab on a specific project.
## Reference documents
Reference documents in issue descriptions, comments, and even in other documents by typing @ while in edit mode followed by the document name. This action can also be used to reference issues or projects; matching documents will appear in the lowest section.
## Link to headers
To copy a URL to a specific header, hover over the left side and click _Copy heading URL_. Sharing this URL with a colleague in your workspace will direct them to this specific section.

### External URLs
If you'd like to link related files that live outside of Linear, you can add a link to the `Resources` section of a Project overview.
---
# Source: https://linear.app/docs/project-graph.md
# Project graph
The graph shows you the progress you're making toward completing your project and estimates when you'll complete it.
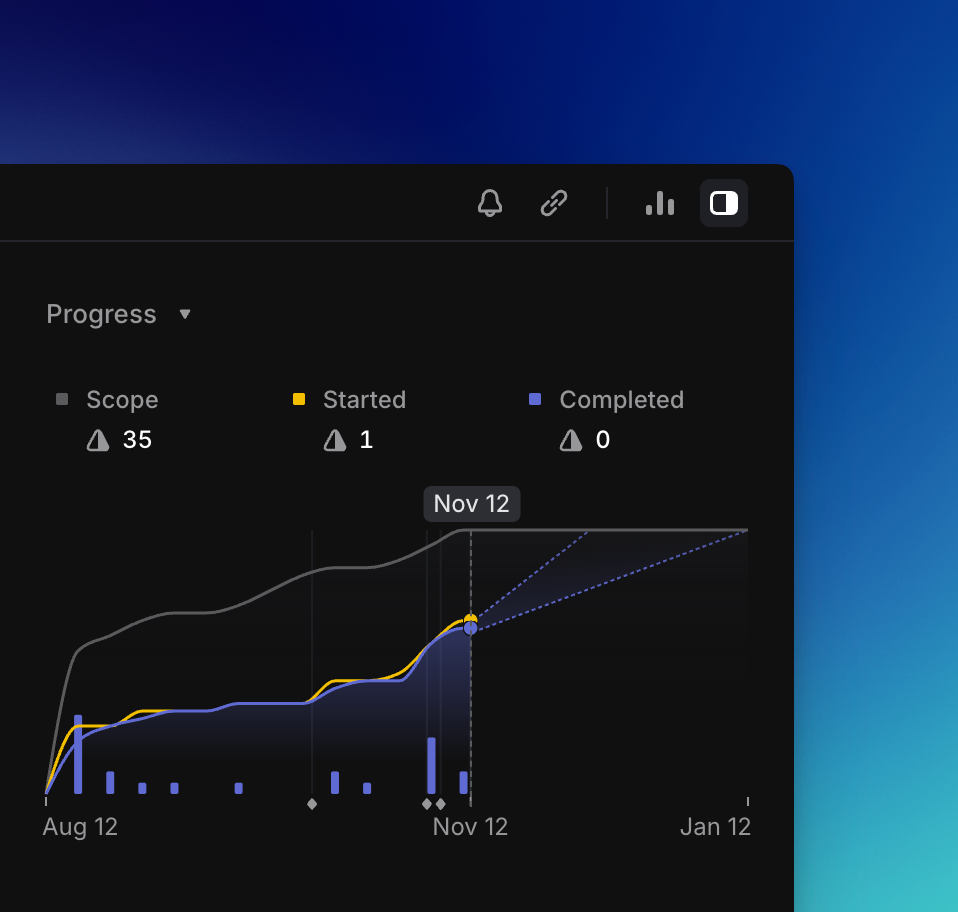
## Overview
Project graphs autogenerate once the status of a project has been moved to a Started status and we've collected enough project issue data for them to be created. Project graph statistics update hourly with the latest issue activity, and the time granularity of graph points is every 7 days. Predictions are calculated based on weekly velocity data.
## Where to find it
From the project view, open the project sidebar `Cmd/Ctrl` `I` to view the graph. If it's not there, that means that we have not generated it yet.
> [!NOTE]
> **ProTip**: It can be helpful to set a target date to deter scope creep and create accountability for the project to ship in a reasonable amount of time.
## How to read it
A gray line shows you the project scope and how it has changed over time, giving you an easy way to see (and mitigate) scope creep.
We have separate lines for _Started_ and _Completed_ issues. This lets you see exactly what is being worked on and what is done. Blue bars also indicate completed issues over time for ease of interpretation when _Started_ and _Completed_ lines overlap.
You can see how a project’s issues break down by assignee and label, as well as what percentage of issues in those categories have been completed. You can hover over any assignee or label and click "filter" to show related issues.
You can also hover over the graph to see the exact values of scoped, completed and started issues over time.
If you have a target date set, it'll show up as a red vertical line.
### Live predictions
We show an estimated completion date for the project as long as you've moved an issue into a "Started" status. You'll see the purple line for completed issues continues on with a dotted line to the predicted completion date. The graph will always start at 0.
The projected completion date(s) are calculated by how long it will take to complete the remaining issues based on the current weekly project velocity.
Project velocity is calculated based on weekly historical data: how many completed issue points per week. More recent weeks are weighted more heavily, as they indicate a more current rate of progress. We need at least one week of data to show prediction.
Remaining issue points are calculated by summing the points of incomplete issues with a 1/4 modifier for any in-progress issues. After calculating a predicted completion date, we offer an optimistic and pessimistic completion date that includes a buffer of about ±40%. When available, these predictions are displayed as dotted lines starting from the Completed line at the current date.
## FAQ
Why did my progress go down?
This can happen when project scope is reduced, in order to maintain a representative relationship between the Scope and Progress lines. Examples include when someone deletes or removes issues from a project, cancels issues from a project, or reduces issue scope.
When a team doesn't use estimates, how is the project graph constructed?
If estimates are off in a team, all issues are treated as 1 estimate point for the purposes of building the project graph.
---
# Source: https://linear.app/docs/project-labels.md
# Project labels
Organize projects with custom labels relevant to your organization's specific context. Filter projects or issues by their project's label to clearly segment work.
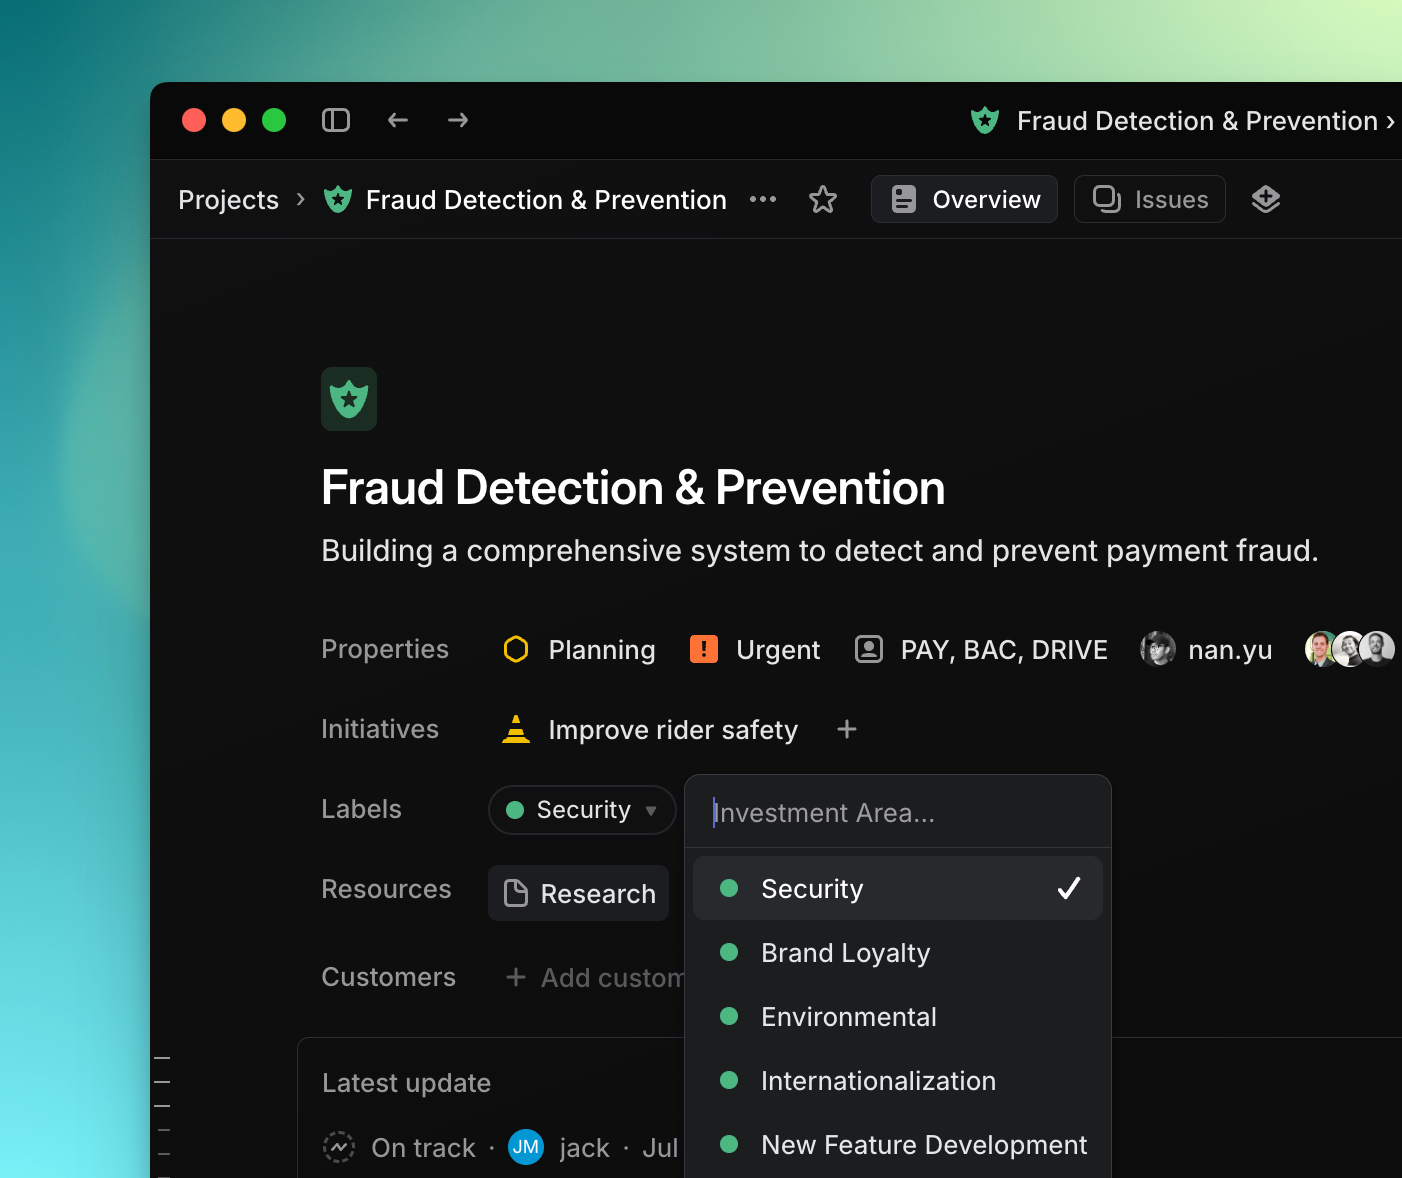
## Overview
Project labels categorize work at scale and make it easier to filter, group, and locate projects across your workspace. While Initiatives are a great way to group projects by overarching company goal, project labels provide a more flexible and granular grouping dimension.
Use project labels to define project views grouped by label and filter issues themselves by their upstream project's label to get a granular understanding of work contributing towards a common area.
### Create a project label or group
Project labels and groups can be created and managed in Settings > Projects > Labels. Alternatively, create a project label directly from the label menu on a project.
As with issue label groups, project label groups are mutually exclusive; only one sub-label per group may be applied to a project.
### Filtering and grouping
Filtering projects by their label or label group allows you to organize work in units that make sense for your business and the way your work gets done.
Group projects by label or label group in project views, or issues by their project's label in issue views.

### List project label columns
When displaying a project view in a list format, you can add label groups as a display property by clicking on the Display menu and selecting the desired group. This will add a new column for that group at the list level.
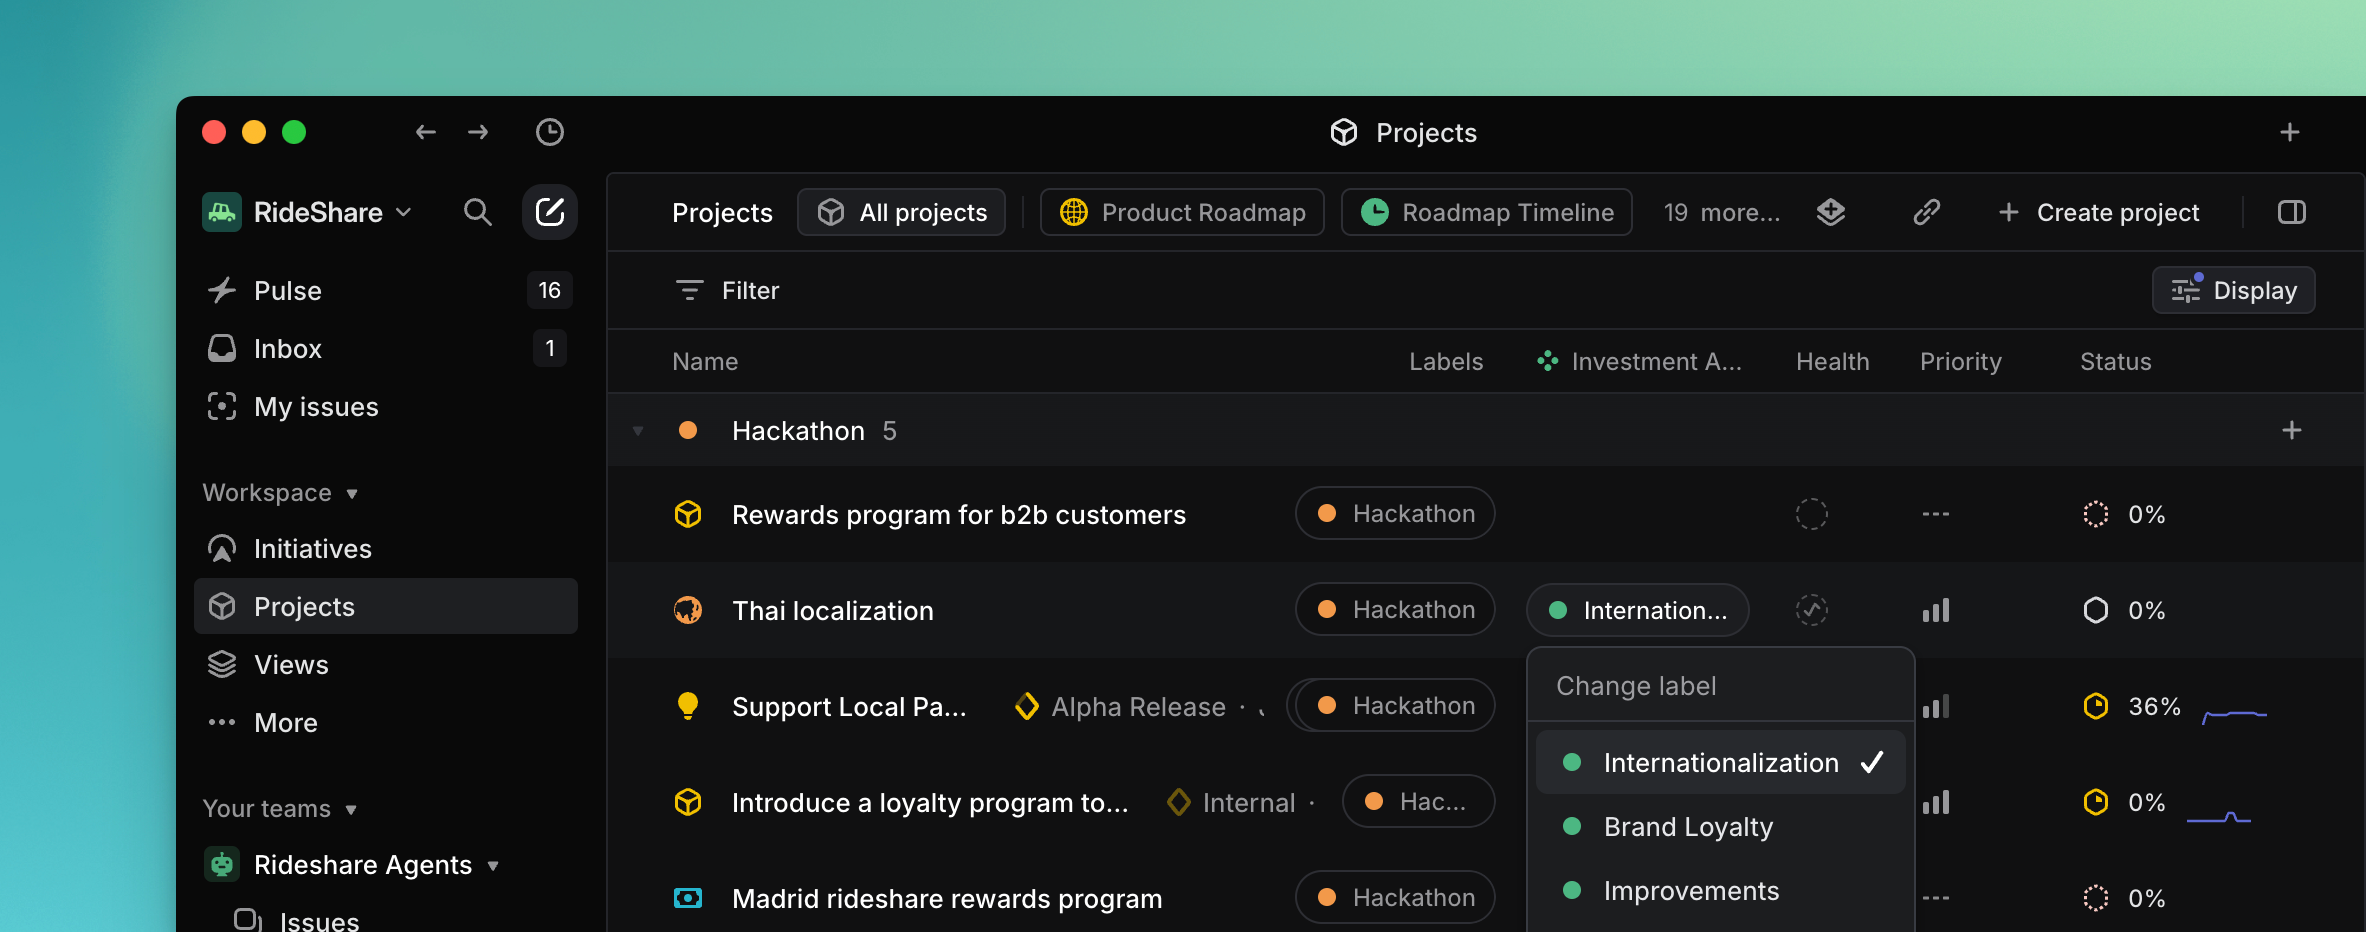
Adding a project label column
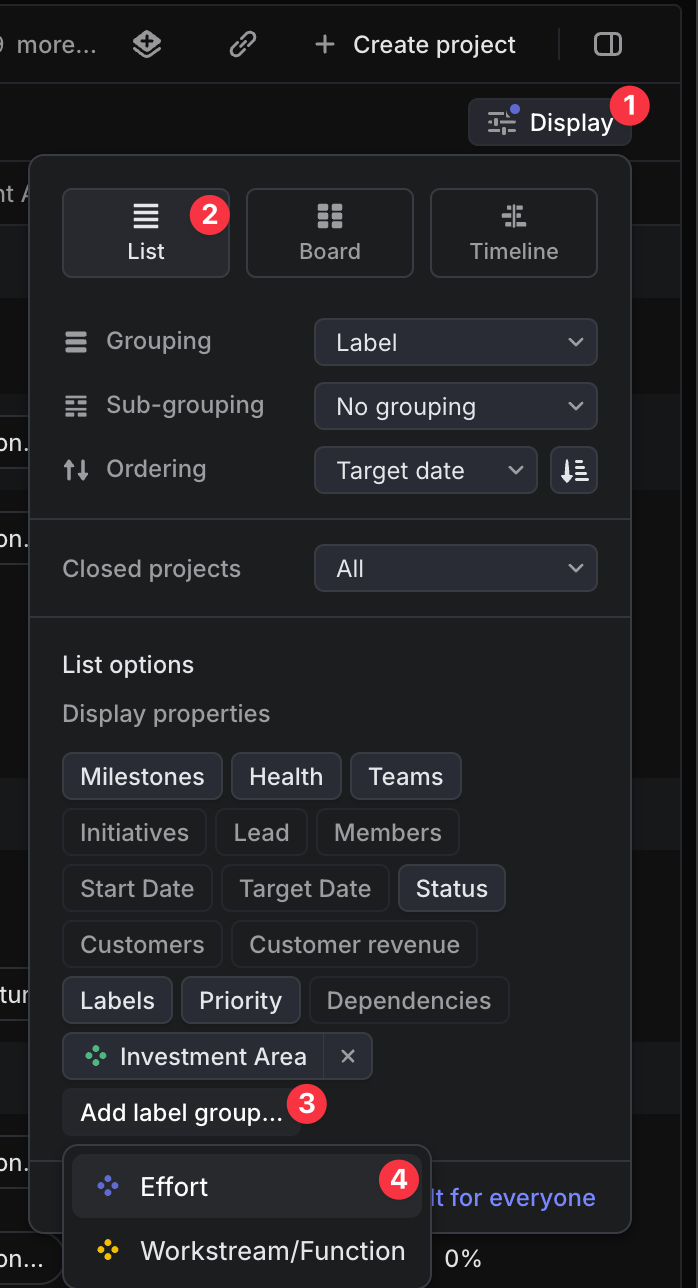
### Insights
Project label is a supported property on Insights, so you can now measure issue count, issue age, or triage time on issues in aggregate sliced by the project label upstream of those issues. Please note that when using this feature you'll be running Insights on issue views rather than project views, and slicing by the project's label the issues belong to.
Use this functionality to identify which upstream projects are driving the most work across your teams and compare performance metrics between project labels.
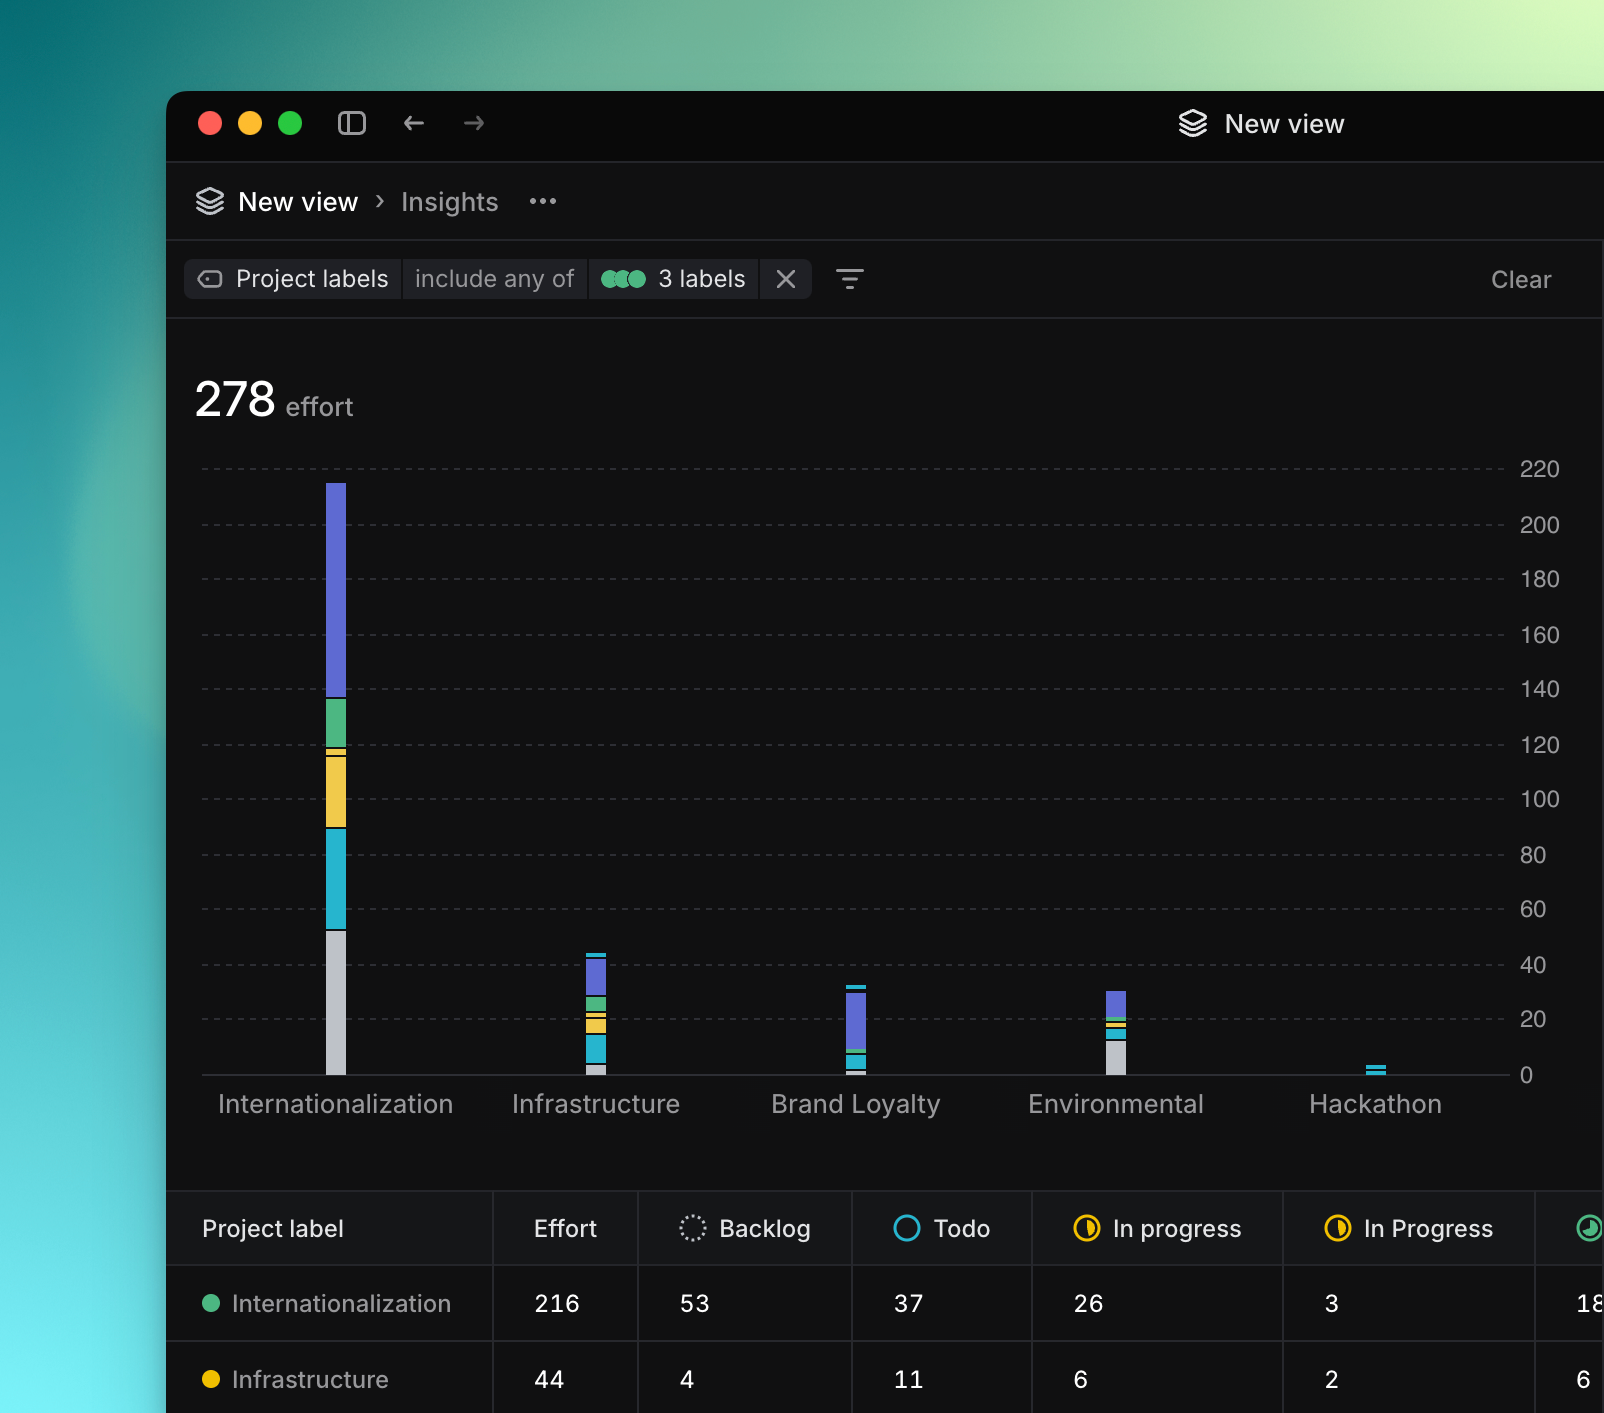
---
# Source: https://linear.app/docs/project-milestones.md
# Project milestones
Project milestones help you divide and organize work inside projects.
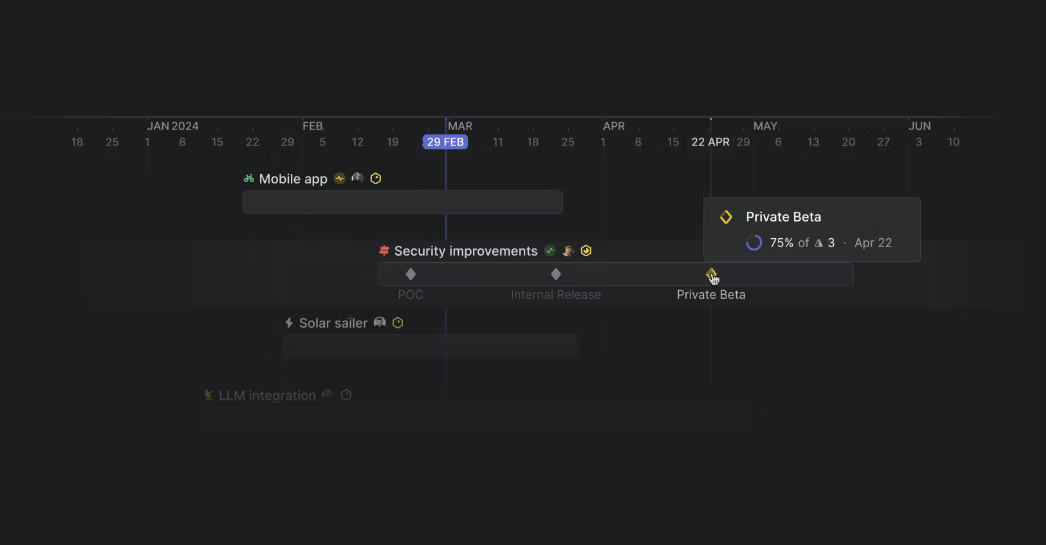
## Overview
Project milestones represent different stages in a project’s lifecycle. You can easily create milestones, add issues to milestones, and track the progress of each milestone in a project. Progress towards project milestones are also visible from Initiatives and project views on a timeline to help quickly contextualize the current state of work.
### Keyboard
`Shift` `M` to add a milestone to an issue or to move an issue to another milestone
### Command Menu
`milestone` to add a milestone to an issue or to move an issue to a different milestone
### Mouse
* Click on the `+` icon beside the milestones header in the project details pane to create a new milestone
* Click on the calendar icon when creating a milestone to add a date
* Click on the `…` icon beside an existing milestone to edit or delete the milestone
* Click on the date beside an existing milestone to edit the date
## ,
,Basics
### Create milestones
When viewing the project overview, you can easily create milestones directly beneath the detailed project description. Here, you have the option to add descriptions to each milestone and monitor their progress.
Alternatively, whether in the project overview or while browsing issues within a project, you can open the project details pane (`⌘` `I`) and create a new milestone by clicking `+` beside the milestones header. Milestones can also be created through the command menu (`⌘` `/` `ctrl`+`K`.)
While assigning a date to a milestone is optional, you can add one at any time after the milestone has been created. Additionally, on the project timeline, right-clicking on a selected date allows you to add a milestone directly to that date.
### Edit and delete milestones
When viewing existing milestones in the project overview, hover over each milestone to access additional options by clicking the `⋮` Here, you can delete the milestone or copy its link. You also have the opportunity to set or edit the milestone’s target date in this view.
In the project information pane, click the `…` icon beside each milestone to edit or delete the milestone. next to each milestone to either edit or delete it. If you need to assign or change a milestone’s target date, click "Edit" and then select the date using the calendar icon.
On a project timeline view, you can right-click on a milestone to delete or when selected hit `⌘/ctrl+backspace.`
You can also drag milestones on the timeline to your preferred date, select multiple or hold shift to drag all to a new date.
### Add milestones to issues
If an issue belongs to a project that contains milestones, you can add a milestone to the issue from the command menu by searching "Add to milestone". You can also use the keyboard shortcut `Shift` `M`, or you can drag the issue onto the milestone in the project details pane.
When creating a new issue in a project with milestones, we will automatically suggest suitable milestones during the creation process. You can choose one of the suggestions or click on the diamond icon to choose another milestone.
### Filter and group by milestones
Filter by milestone by pressing `F` from within a project, searching for the _Milestone_ filter type and choosing the desired milestones. Alternatively, open the project details pane and quickly filter for a single milestone by clicking on it.
When viewing an issue that has a milestone attached, you can also click on the arrow beside the milestone in the issue details pane to open the project with that milestone applied as a quick filter.
Clicking into the [display options](https://linear.app/docs/display-options) for a project permits grouping by milestone.
### Reorder milestones
When viewing milestones in the project overview, you can rearrange the order by hovering over each milestone and dragging the `**⋮⋮**` icon to change the order of the milestone. The same process applies in the project details pane. Simply hover over a milestone and use the `**⋮⋮**` icon to drag and reorder it as desired.
### Convert milestones to projects
You may find that a milestone grows large enough to handle as its own project. When this happens, convert the milestone to a project through the overflow menu on an individual milestone. When you take this action, we'll suggest properties like project description and priority based on the content of the original milestone and the properties of the original project.
## Milestones and Initiatives
When viewing projects within an [Initiative](https://linear.app/docs/initiatives), the current milestone is displayed on the timeline alongside its completion percentage. The same is true when viewing projects within a team. Hover or click a milestone to view more details.
Double-clicking on a milestone from either view will open the project with that milestone applied as a quick filter. Clear this filter from the project details sidebar to view all issues within the project.
You can also filter by completed and upcoming milestones on the initiative view. Click _Filter_ at the top of an initiative, choose between _Next milestone_ and _Completed milestones_, and then enter the text contained with the milestone names you are looking for.
## Milestones progress
When viewing milestones in the project details pane, we will show a completion percentage for each milestone. This is the percentage of issues in the milestone that have been moved to a completed status.
The diamond icon for the milestone will change depending on the completion status and the milestone currently being worked towards will have a yellow icon to show focus. Take a look at the below video to see this in action.

If you have access to our [Insights](https://linear.app/docs/insights) feature, you will be able to view milestones as a dimension and segment milestones by status type so you can see which milestones are currently in progress.
## ,
,How Linear uses milestones
Once we had completed a functional prototype, we used milestones to help us organize work inside our milestones project. We chose the following milestones:
* Internal alpha
* Beta 1
* Beta 2
* Public launch
* Post launch
In our weekly project syncs, we were able to quickly see at a glance the current milestone's completion percentage. We could also easily filter for issues in the current milestone to check if there were any issues we needed to discuss or move to another milestone.
Looking at how other teams have used milestones while in beta, we have seen similar patterns of dividing work into development and release phases.
## FAQ
Can I remove the yellow focus on the current milestone since we run multiple milestones in parallel?
It's not possible to remove the yellow icon beside the next incomplete milestone in a project. In the majority of cases, this icon appearing yellow signals a current focus on this milestone but if you are running multiple milestones in parallel, you can ignore this indicator.
Can I share milestones across multiple projects?
This isn't currently possible. You will need to recreate milestones in each individual project on your workspace.
---
# Source: https://linear.app/docs/project-notifications.md
# Project notifications
Set up personal notifications as well as updates that can be shared with the whole company via Slack.
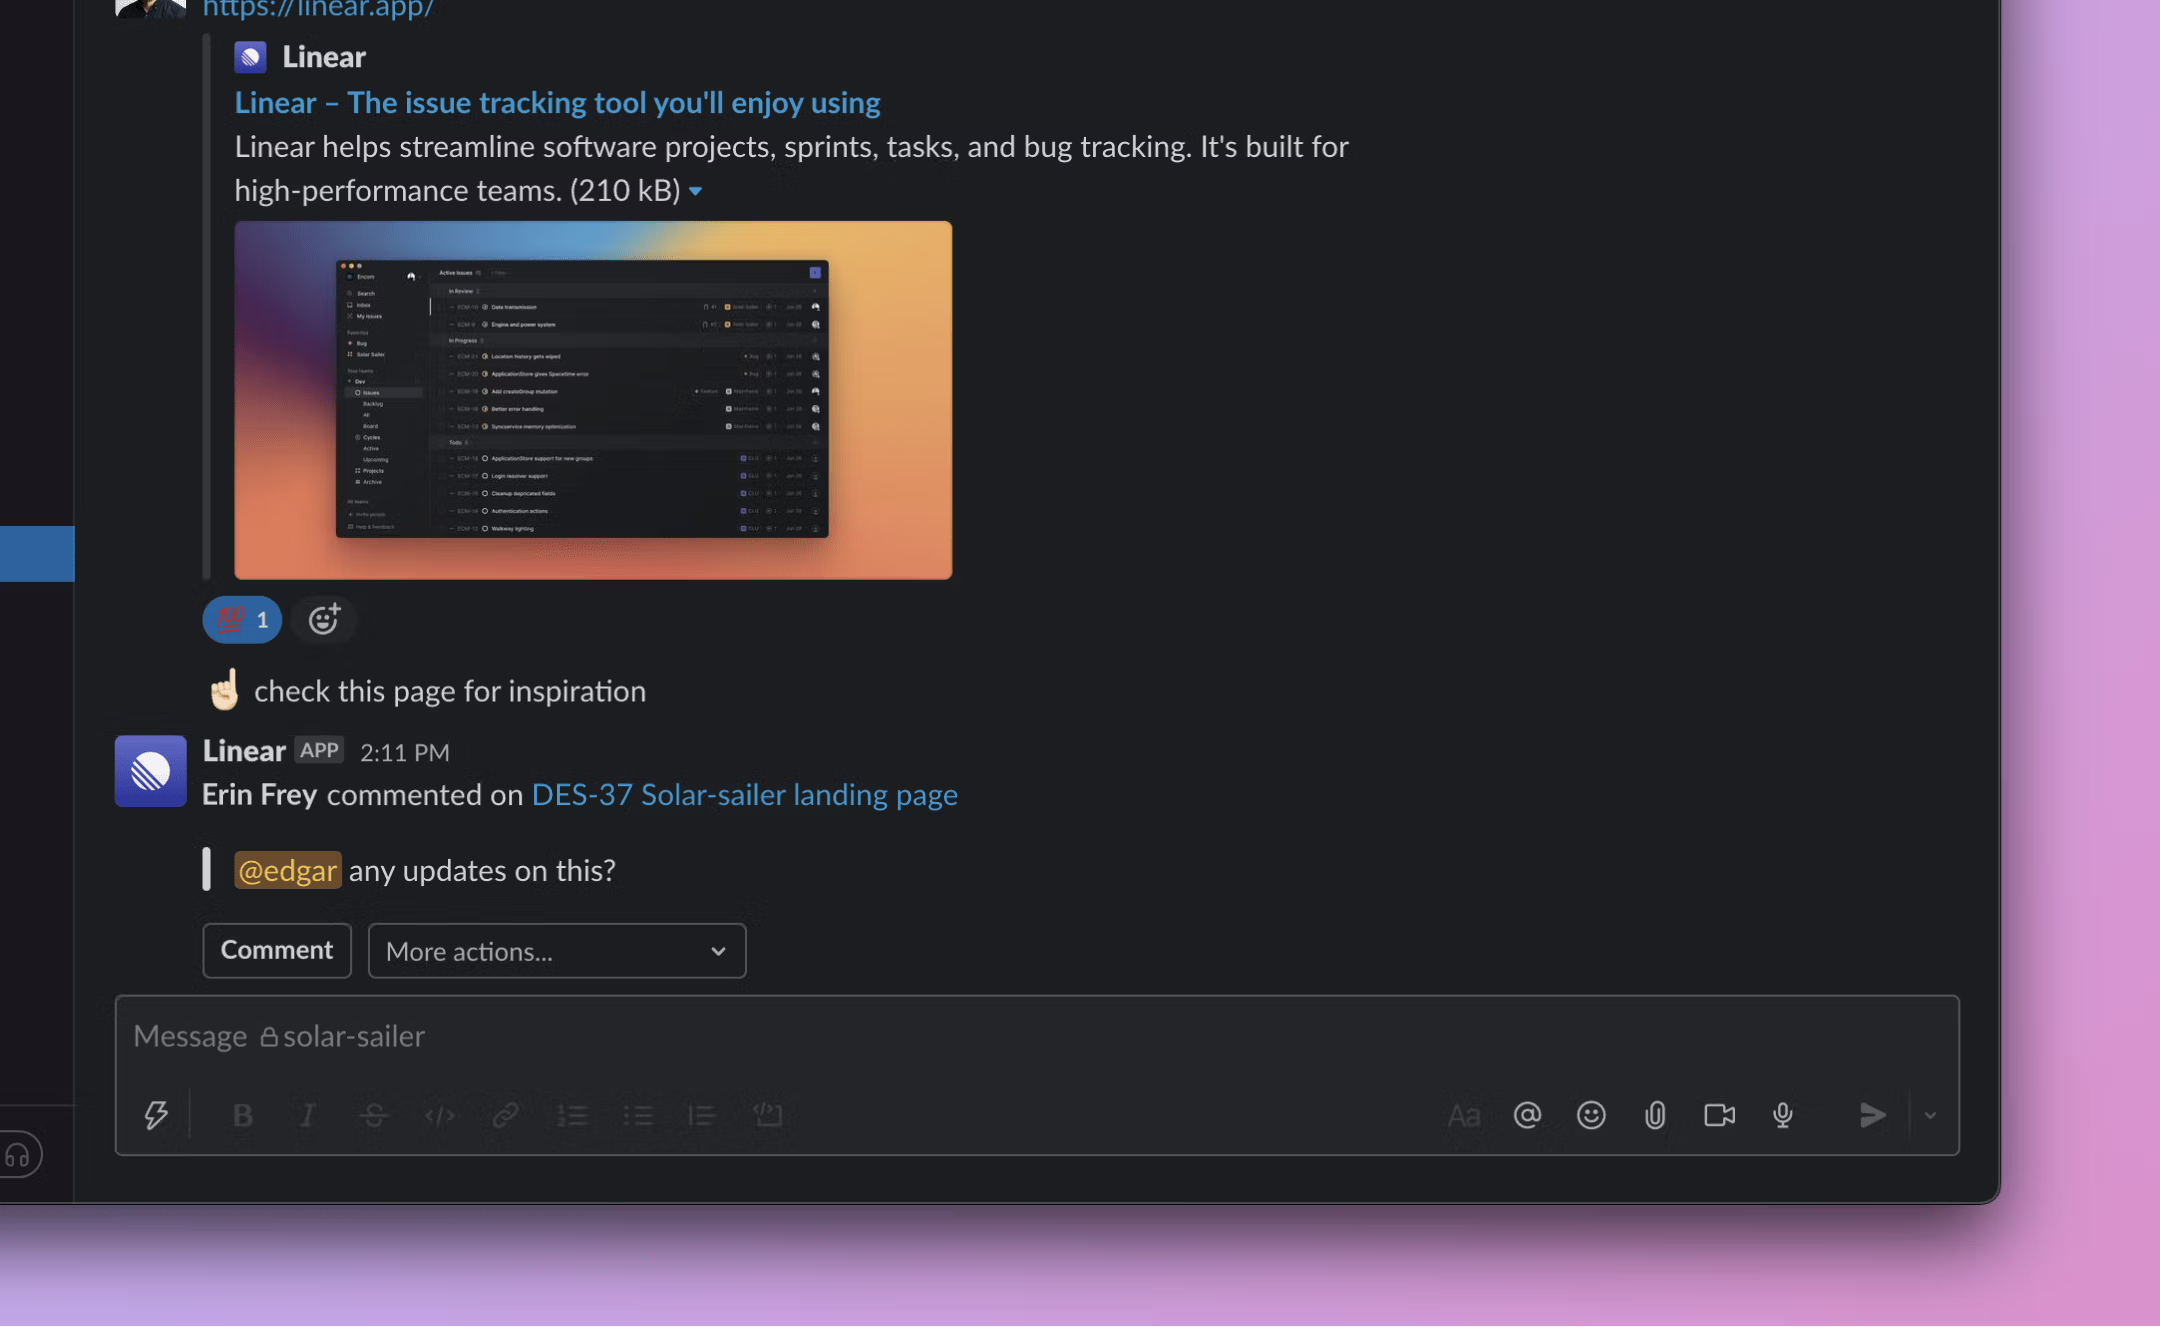
## Configure
Click on the bell icon on any project page to subscribe to that project's notifications. You can also enable these notifications via [account notifications settings](https://linear.app/settings/account/notifications).
### Keyboard
`G` then `S` to go to _Settings > Account > Notifications_ to enable personal notifications for projects
`O` then `P` to go to a project and enable project notifications to Slack channels by clicking on the bell button
### Mouse
* Click on your avatar to go to _Settings > Account > Notifications_ to enable personal notifications for projects
* Navigate to any project and enable project notifications to Slack channels by clicking on the bell button
### Command menu
`settings` to go to _Settings > Account > Notifications_ to enable personal notifications for projects
`open project` to go to a project and enable project notifications to Slack channels by clicking on the bell button
### Personal notifications
Toggle these on to receive a notification in your Inbox whenever a new issue is created in the project, a comment or change is made to the project description, an issue is marked as completed or canceled, or a new project update is posted. You can manage these notifications from the project view or under [account notifications settings](https://linear.app/settings/account/notifications).
### Slack channel notifications
Toggle these on to post updates to a specific Slack channel when issues in that project are created, receive new comments, and/or have an updated status. It's a great way to keep other team members in the loop.
Linear members will be able to take actions on the issue directly from Slack. If you've connected the Linear Slack integration, then anyone in the Slack channel will be able to see the notification and basic details about the issue, even if they aren't part of the Linear workspace.
> [!NOTE]
> **How we work**: We check in on active projects regularly during meetings and share async updates and requests for feedback in Slack. We create a Slack channel for every project (#p-project-name) and will send Linear project notifications there (but we leave it up to the project team to decide if they want them).
---
# Source: https://linear.app/docs/project-overview.md
# Project overview
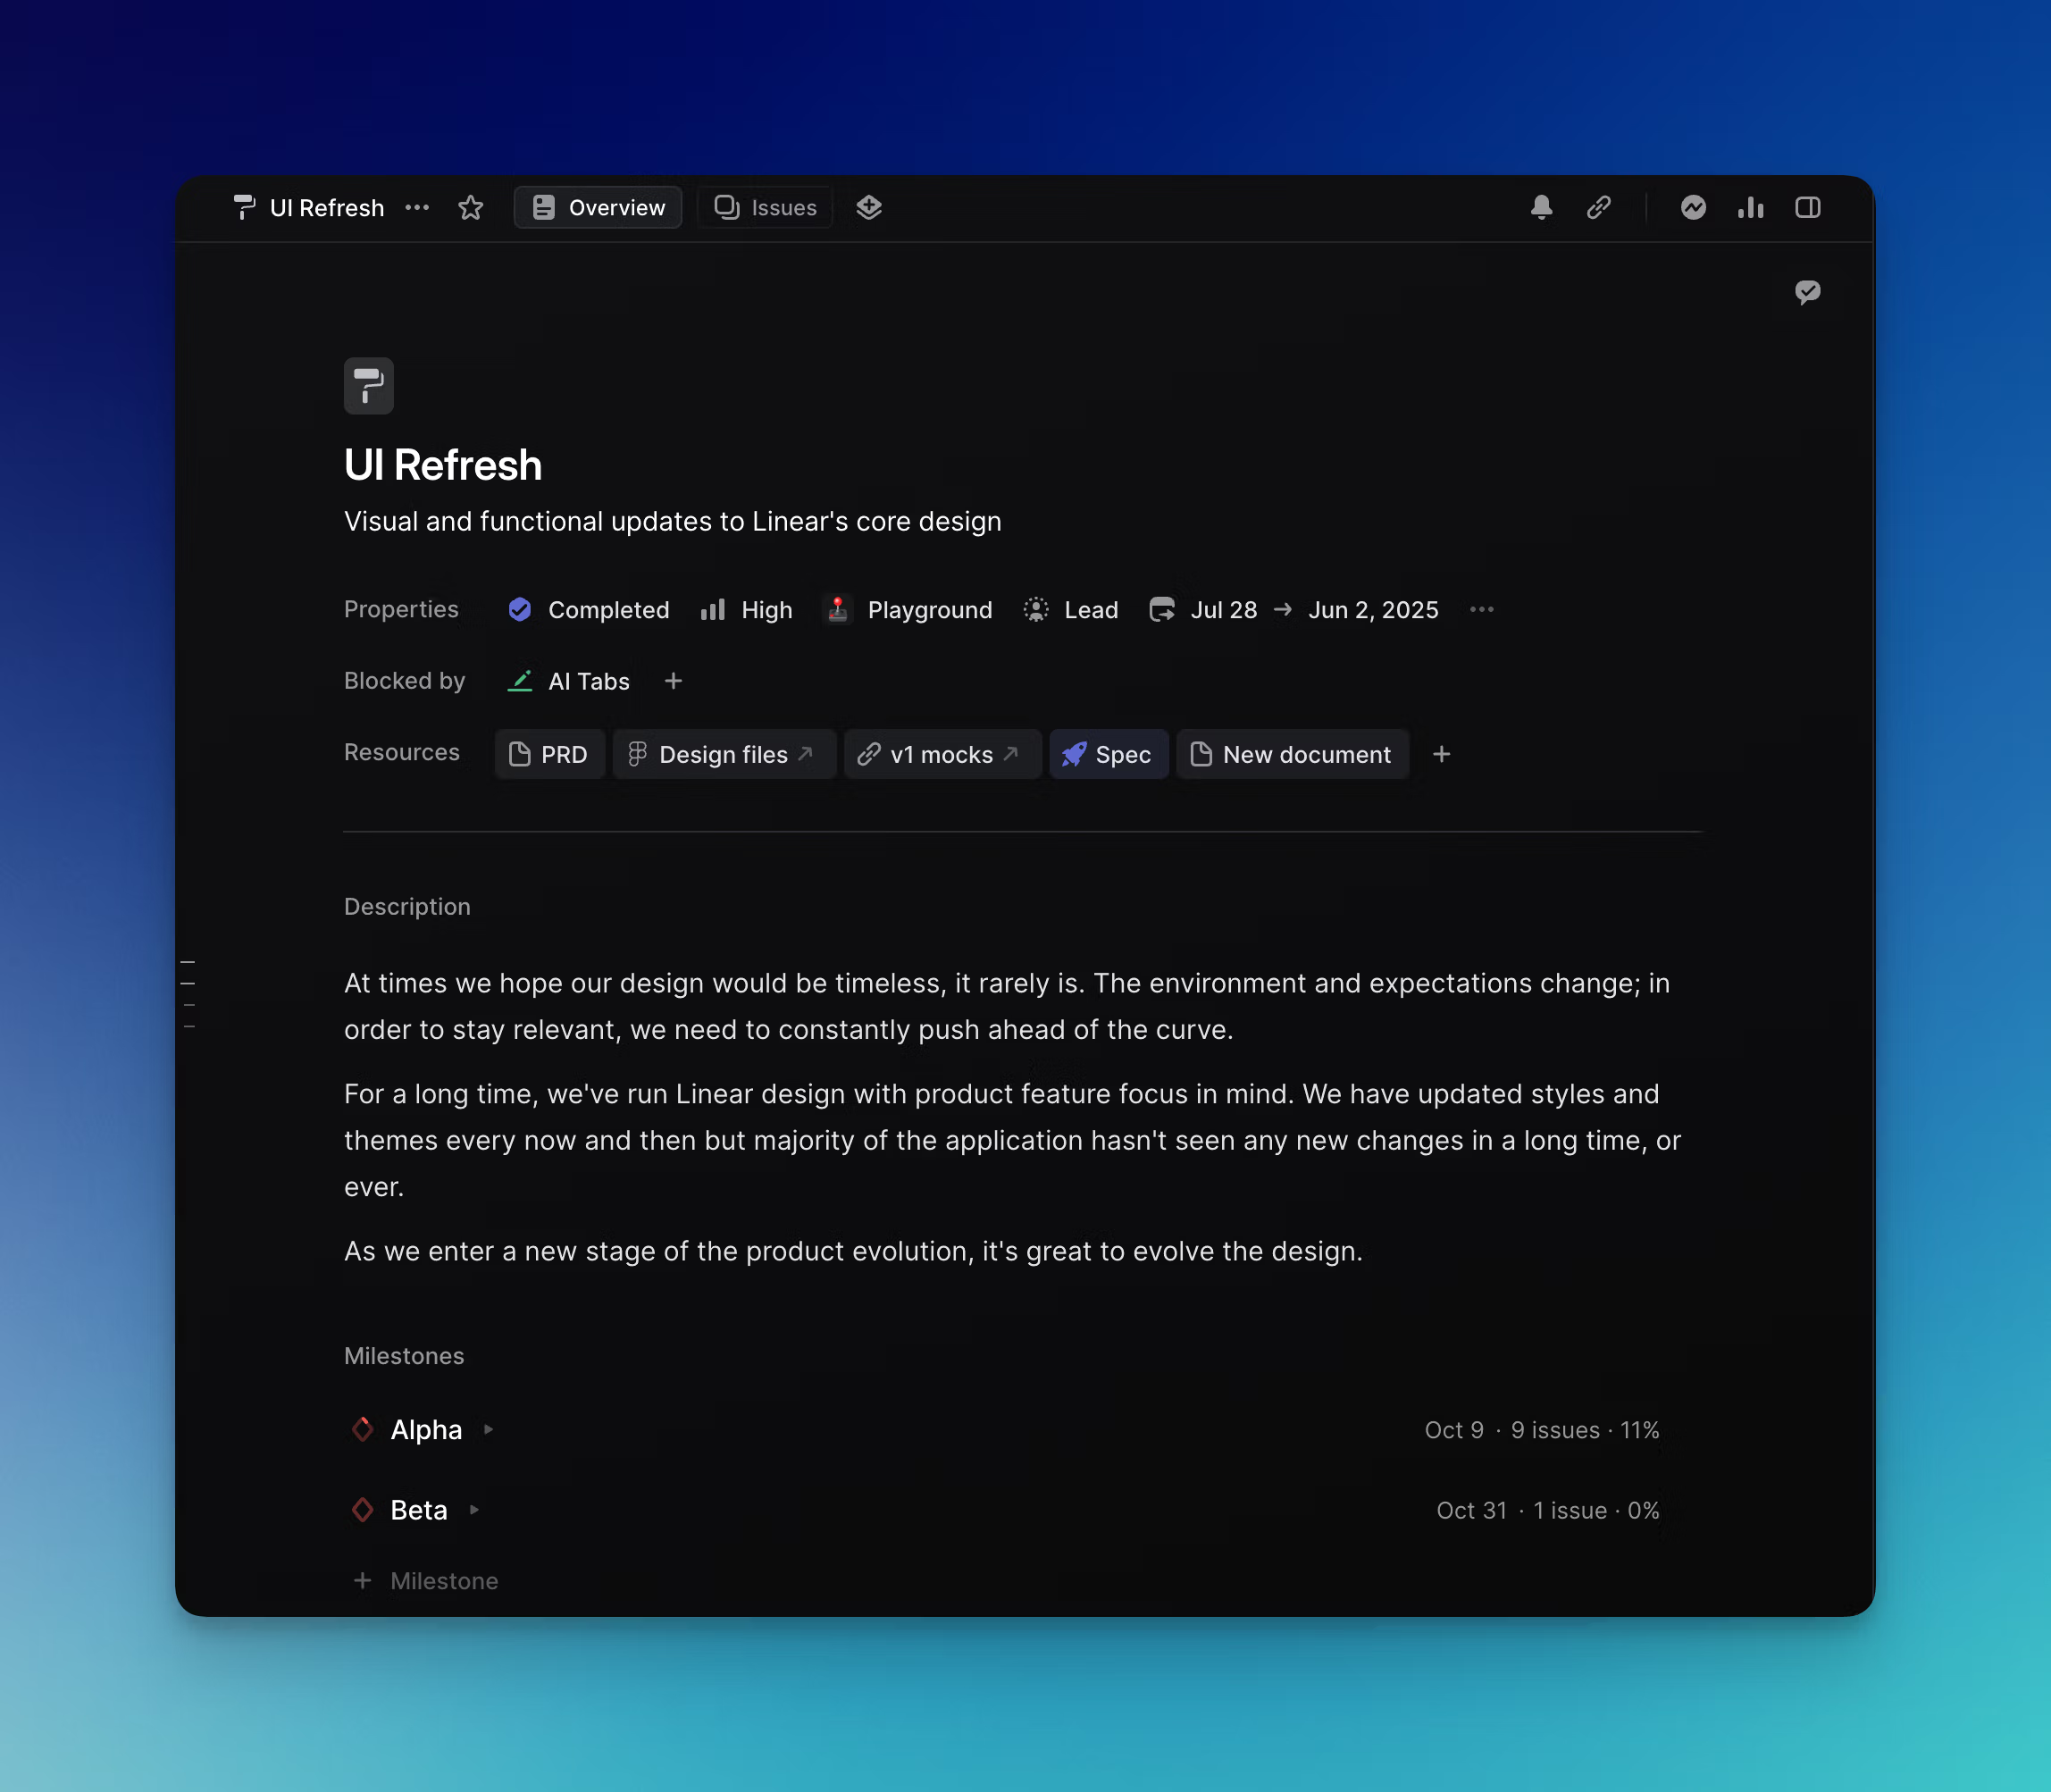
## Overview
The project overview provides a comprehensive summary of the project. It allows you to include both a brief summary and an extensive description. You can also link to external resources for easy team access, and create [documents](https://linear.app/docs/project-documents) inside of Linear to track project specs, updates, and notes. Milestones can be created and viewed from here, and milestone progress can also be tracked. This ensures that project planning can begin directly in Linear from the first moment a project is conceived.
### Keyboard
`Cmd/Ctrl` `I` to open or close the project details sidebar
### Mouse
Click on the sidebar button in the top right corner to open or close the project details sidebar
### Command menu
`details` to open or close the project details sidebar
## Basics
When viewing a project, click into the `Overview` tab to view the project overview.
### Project properties
We'll display all project properties beneath the short project summary. Click on any property to add or edit it. Clicking on the project name or description will let you edit the text directly.
Property | Description
--- | ---
Status | Defaults to planned. These statuses are preset and not configurable.
Lead | Limited to one member of your workspace
Team | Defaults to single team but you can add multiple teams
Milestone | Defaults to Upcoming
Start date | Required for project graphs
Target date | Required to estimate completion date
Members | Add anyone from the workspace
Icon | Customize color and icon from our presets
### External links
To add an external link to a Linear project, go to the `Resources` section. Press the `+` button, then add the link and press enter. Add a link label to give the link a title, otherwise we'll show the link source (e.g. docs.google.com). To edit an existing link label, hover over the relevant link, click on the **`⋮ `** icon and choose the edit option here.
### Project documents
To add an external link to a Linear project, go to the `Resources` section. Press the `+` button and select Create Document. Documents use the same Markdown as issues and have similar editing capabilities including tagging others and linking to issues.
### Detailed description
The detailed description of a project functions similarly to a document and you can edit text, tag team members and link to issues, projects and documents from here. You can also post [inline comments](https://linear.app/docs/project-documents#inline-comments).
### Milestones
You can view a list of [project milestones](https://linear.app/docs/project-milestones) in the project overview. You can reorder the milestones from here, set their target dates and edit their names. You can also include a detailed description below each milestone.
## Project details sidebar
As well as viewing project properties, documents and link attachments attachments in the project overview, you can also view them in the project details sidebar with `Cmd/Ctrl` `I ` or by clicking on the sidebar button in the top right. You can change all properties from here as well as from the project overview. The project details sidebar is accessible from the project overview and also from the project issues page.
### Project graph
We'll generate a [graph](https://linear.app/docs/project-graph) for your project that shows scope, velocity, progress over time, and generates live predictions for when the project will complete. This is viewable from the project details sidebar.
---
# Source: https://linear.app/docs/project-priority.md
# Project priority
Set project priority to indicate which projects to complete first.
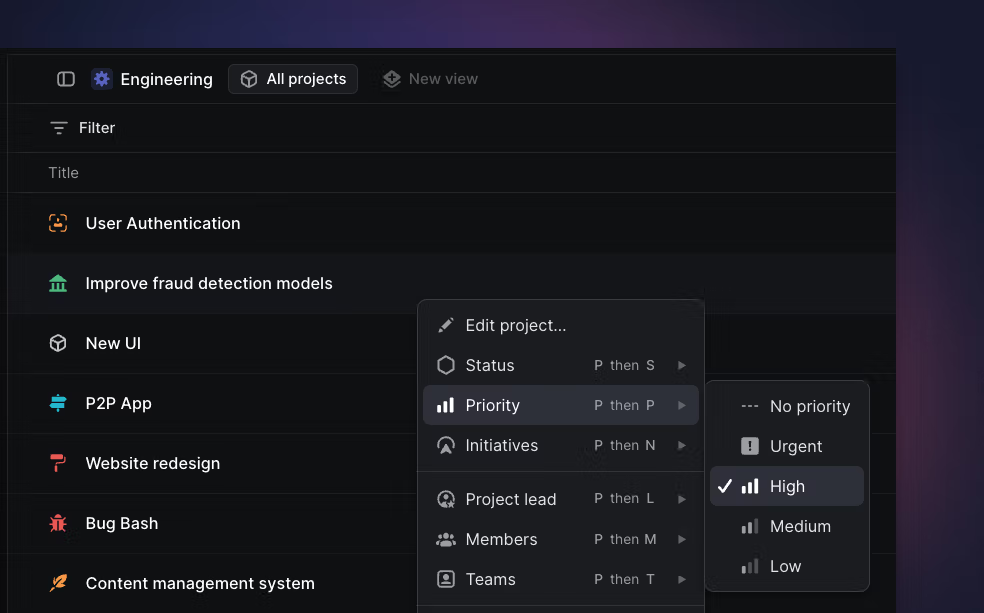
## Overview
Priority is an optional property for Linear projects to signify to your team the urgency of the project. You can add the following priorities to projects: no priority, low, medium, high, and urgent.
## Set priority
Select a project (or multiple) from the projects view, type `P ,_then_, P` to select the project priority. Use the shortcut again to change or remove the priority.
You can also right-click on a project to set priority from the menu.
## Priority ordering
By default, items without an assigned priority level are now always sorted last.
If projects are ordered by priority, you can manually or micro-adjust a projects position within the same priority group, if needed. So if you have multiple high priority projects for example, you can click and drag to reorder a project to be higher in its group.
Dragging a project into a priority group will apply that same priority to the project.
---
# Source: https://linear.app/docs/project-status.md
# Project status
Project statuses clarify where each project is in its lifecycle
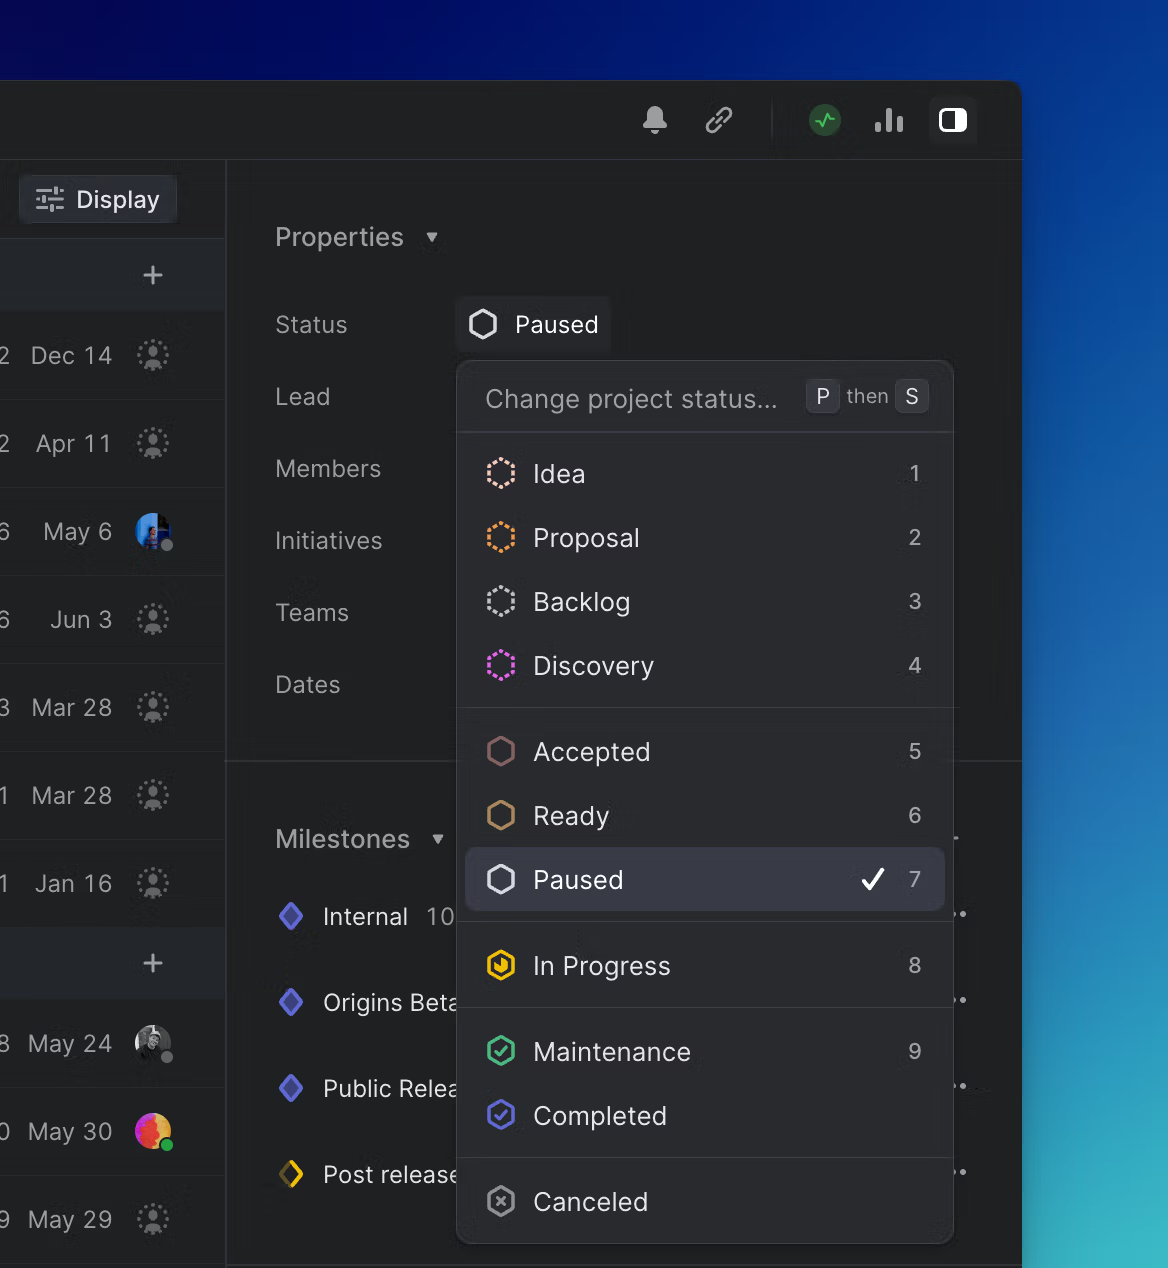
## Overview
A project status offers a quick update for stakeholders to gauge the progress of the status. The status will appear next to the project name in the initiative or project timeline pages as well as in an icon on the project bar.
## Change a project's status
Project statuses are updated manually—we do not do this automatically, even if all issues are completed.
## Create a custom project status
Project statuses can have customized name, description, and color, which is configured in **Settings -> Projects -> Statuses**. You can have multiple statuses within the available project status categories: _Backlog, Planned, In Progress, Completed, and Canceled._
## Archive projects
Projects are archived based on the team's auto-archive setting as long as all issues within the project are closed, and the project is also marked as closed.
We archive issues the same time as their project—even if they have been closed for longer than the auto-archive setting—in order to not affect project statistics. Therefore, _closed issues do not archive unless the project is closed._
Archived projects are accessible in a team's archive page.
## Delete projects
Deleting a project will move it to the recently deleted projects section of your team's archive. A deleted project can be restored within 14 days after deleting, after which point it is no longer recoverable. To delete a project, open the three dot menu from the project's page and select `Delete`, or open command bar and select **Delete project**.
---
# Source: https://linear.app/docs/project-templates.md
# Project templates
Create project templates for repeated projects and their associated milestones and issues.
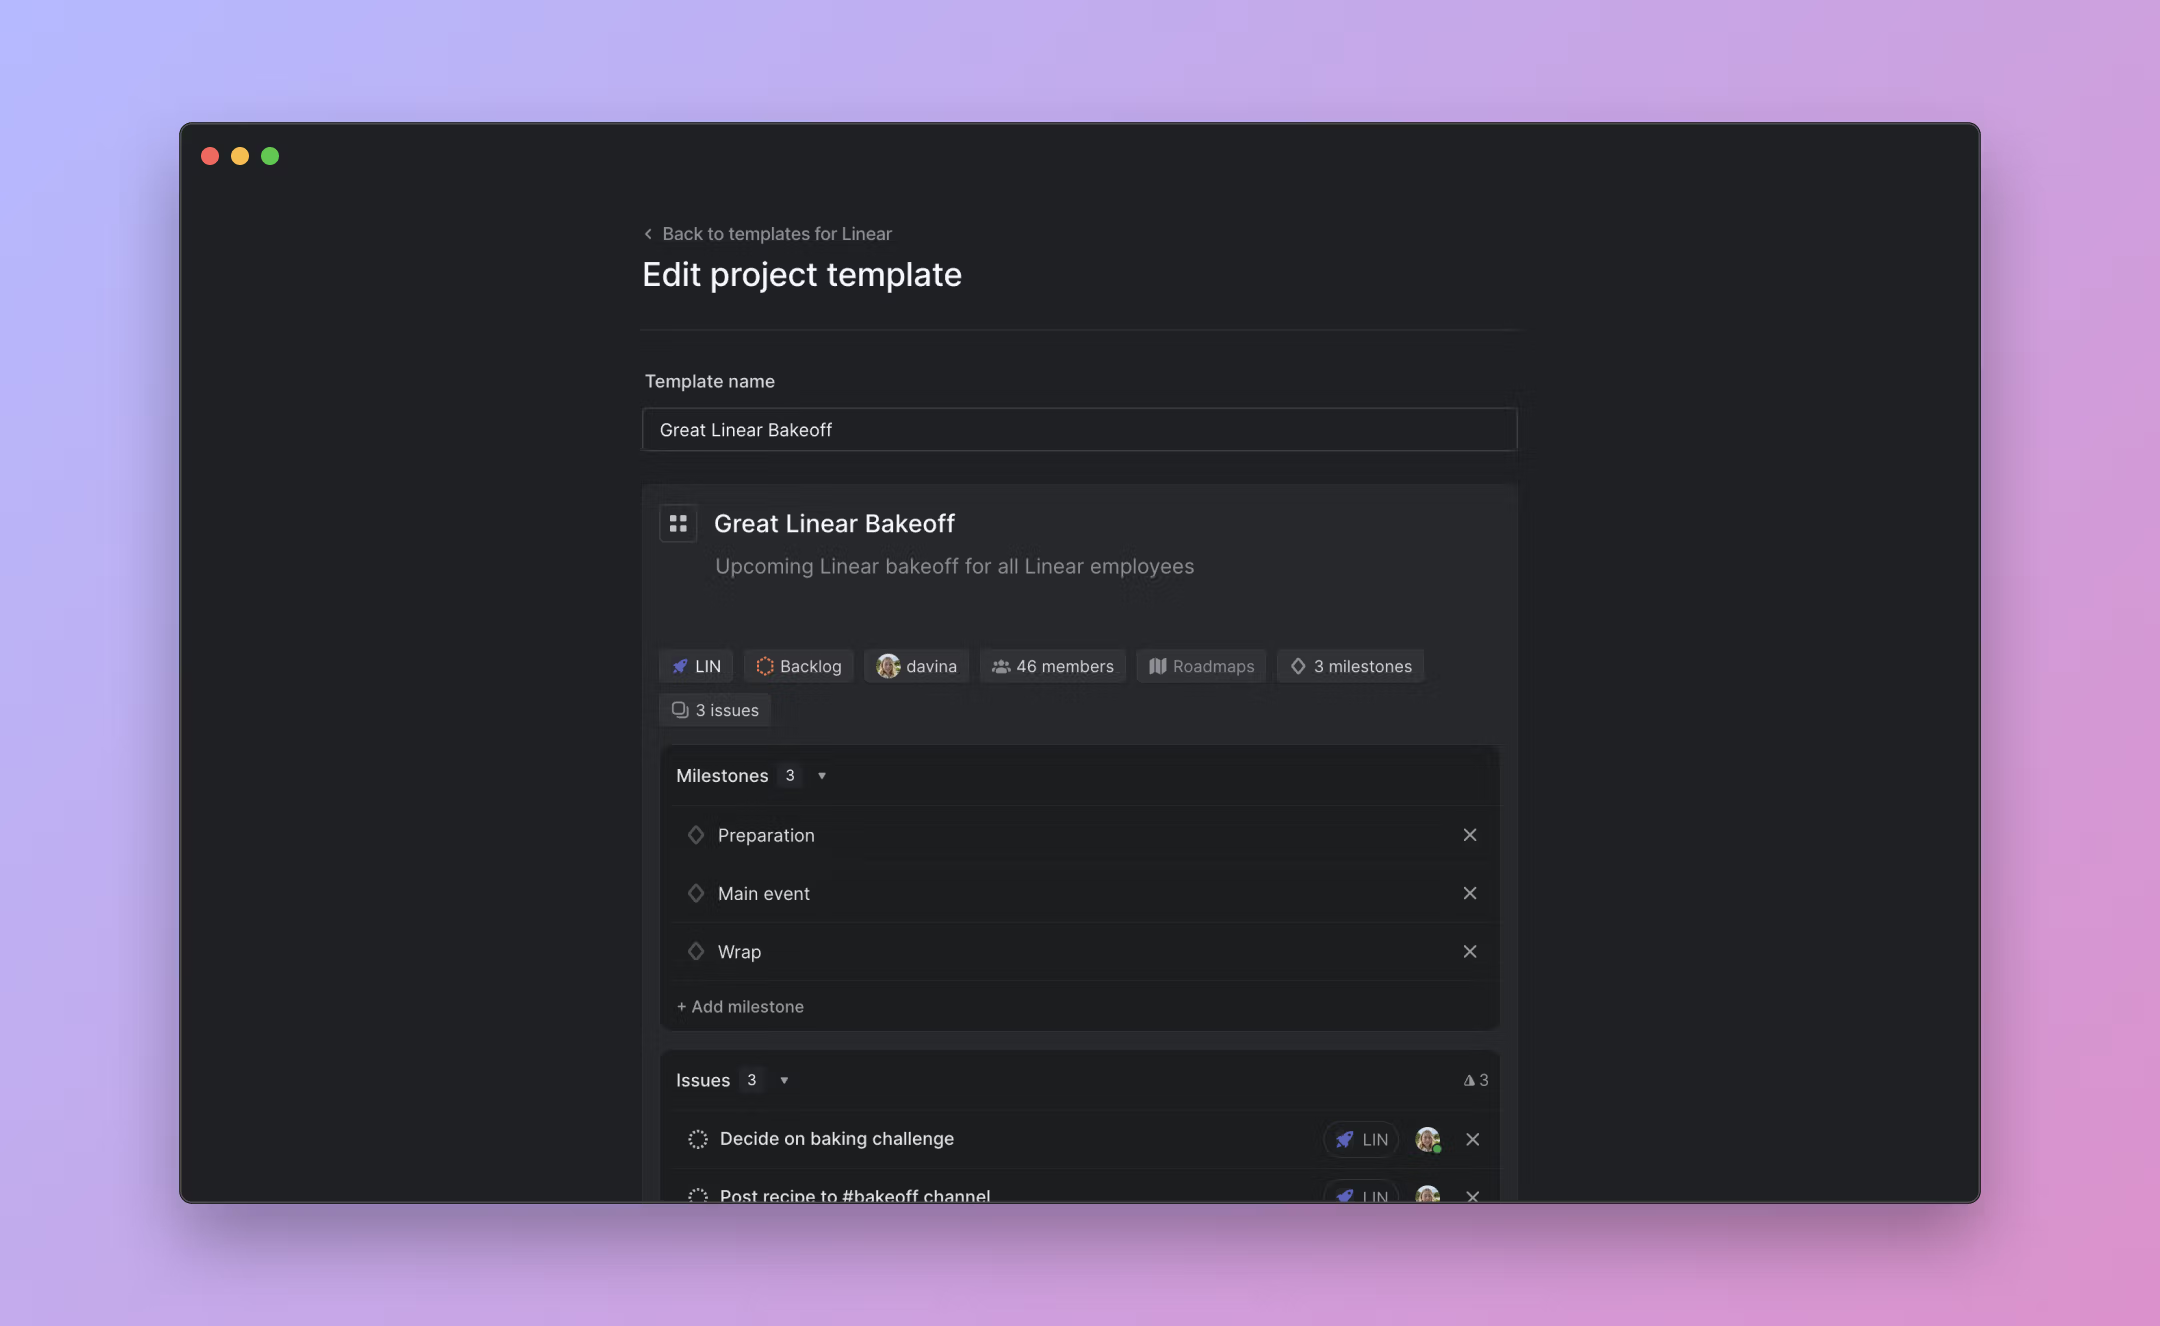
## Overview
Use project templates to quickly create new projects containing predefined issues and milestones. You can also define the project lead, project members, project status and any associated initiatives.
### Keyboard
`G` `S` to open up your workspace settings and create a project template at the workspace level or within individual teams
### Mouse
* In a roadmap or project view, click on `New Project` to create a new project and select the template option beside the team
### Command menu
`create new project from template` to create a new project using an issue template
`create new project template` to create a new project template in your workspace or team settings
## Configure
Open Settings > Templates to add a Workspace level project template, or the individual Team settings Templates page to add team-specific templates or edit existing ones.
## Basics
### Create templates
Create new templates by navigating to either the workspace template settings or team template settings.
When creating a project template, you have the option to add the following:
* Project name
* Project description
* Team(s) the project lives in
* Project status
* Project lead
* Project members
* Associated initiatives
* Project milestones
* Issues to be created within the project
When you create a template for the workspace, all teams can use it. When you create a template for a team, only that team can use the template.
### Edit templates
To edit or delete a template, go to the same page where you created the templates and then hover over the template name in order to show contextual controls. From there, you can edit the the template, rename it, duplicate it or delete it.
### Use templates
When creating a new project, you will see the option to select a template beside the team identifier in the top left of the project create modal. You can also open our command menu using `CMD` `K `and search for the option to create a project using a template here.
## FAQ
Why can't I access a project template when creating a new project?
The template you are looking to use might be team-specific. Make sure you haven't opted to create the project in a team where the template does not live.
Can I add sub-issues to a project template?
Yes, when an issue is added to the template the `…` menu will show the option to add a sub-issue. You can also add any issue template to the project template, including ones that have sub-issues in them.
Can I make a template the default for my team?
Yes. Navigate to the Team settings > Templates and scroll down to the "Default templates" section at the bottom.
---
# Source: https://linear.app/docs/projects.md
# Projects
Create Projects for features or large units of work.
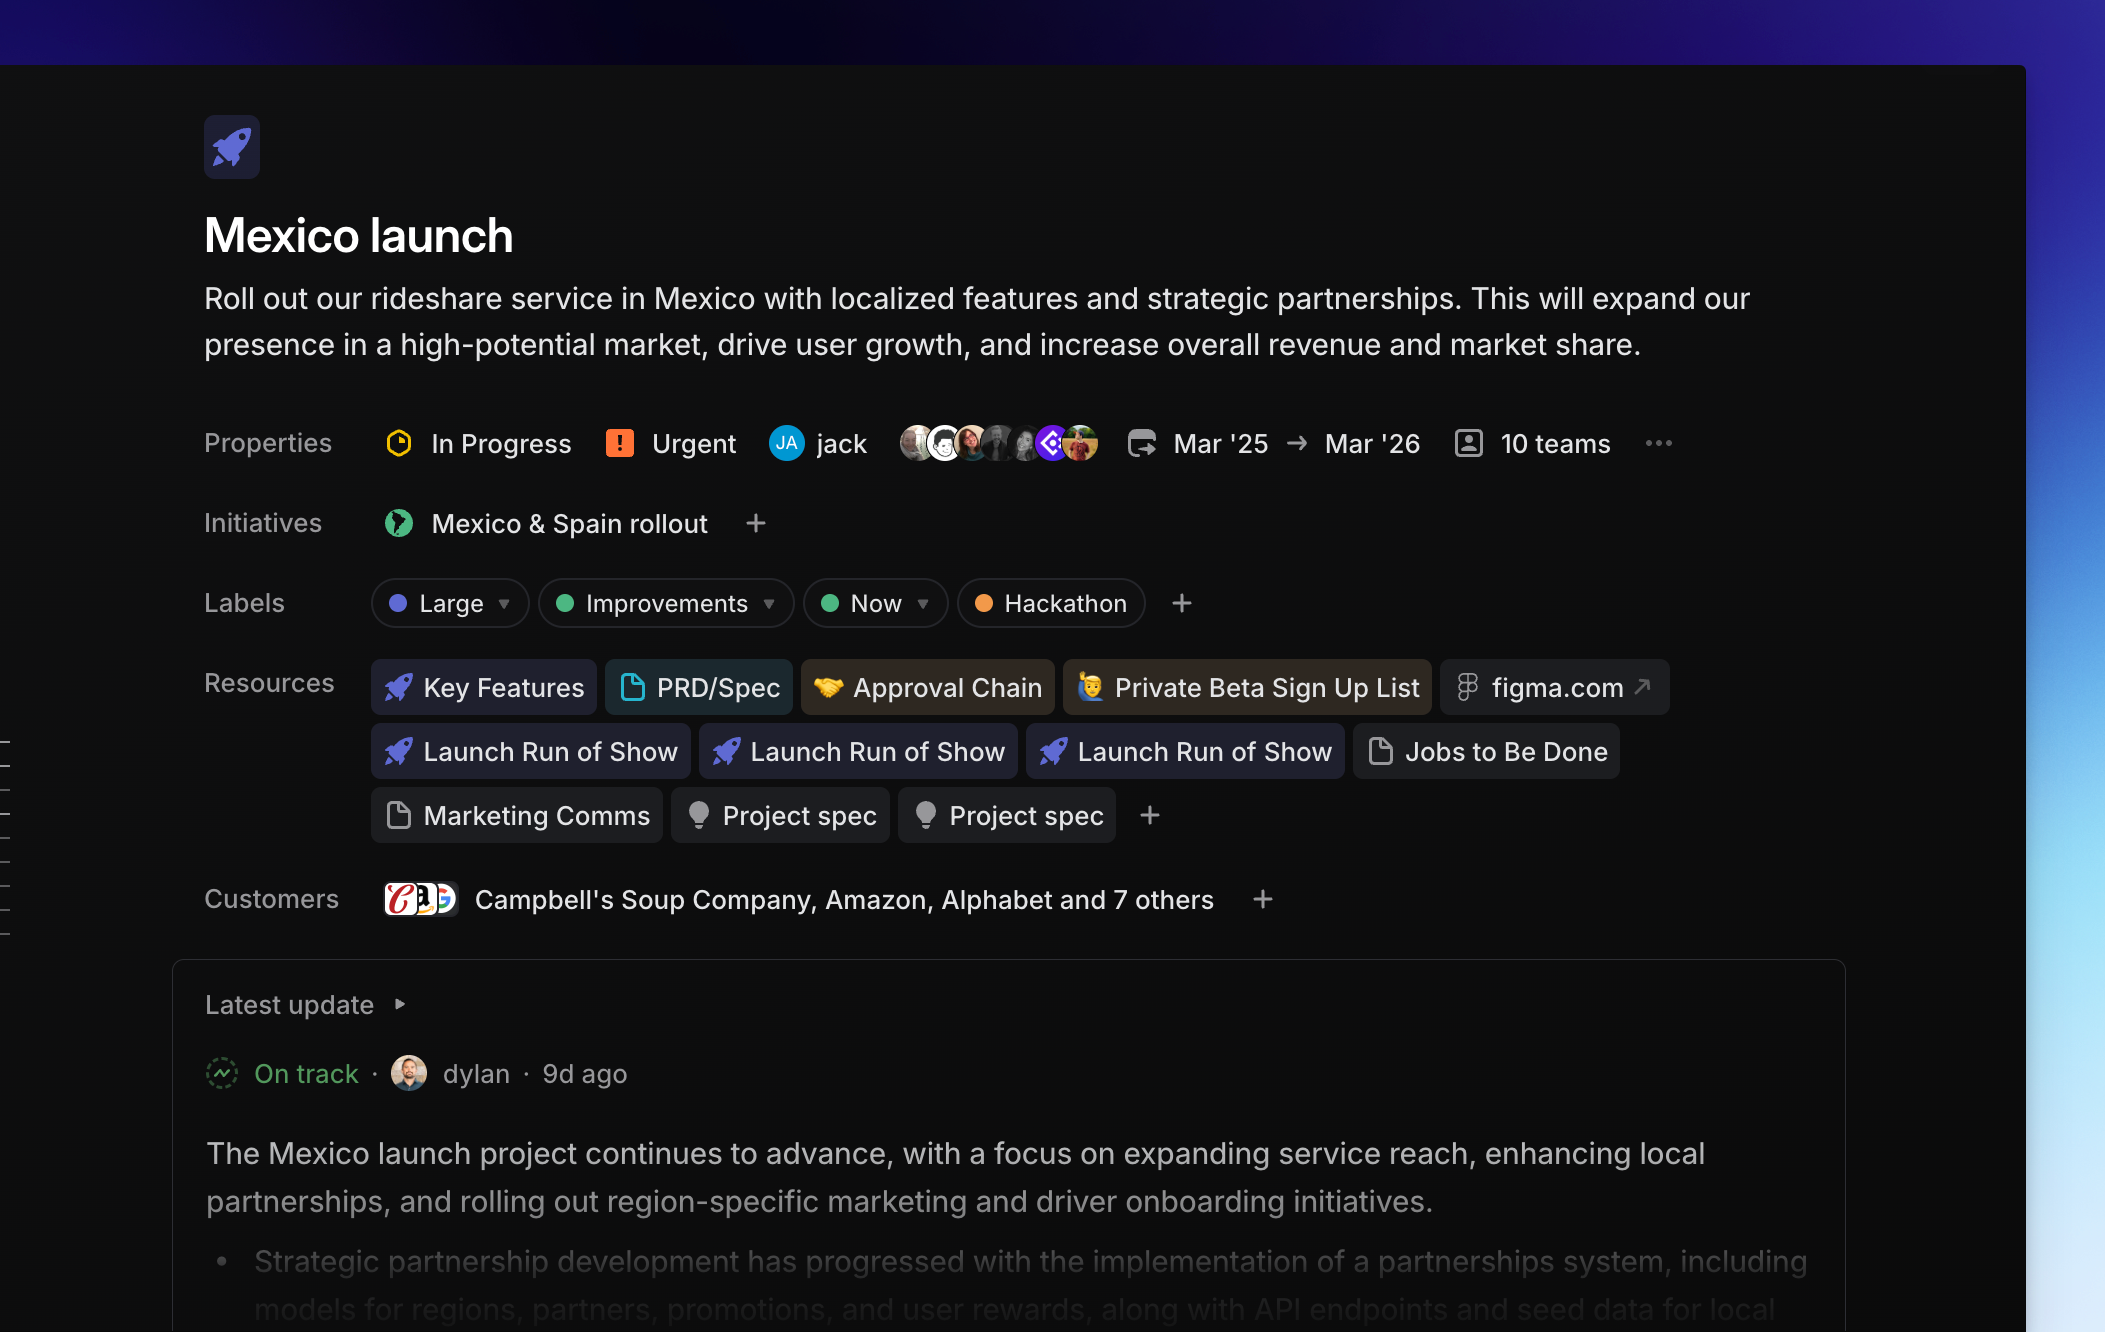
## Overview
Projects are units of work that have a clear outcome or planned completion date, such as a new feature's launch and are comprised of issues and optional documents. They can be shared across multiple teams and come with their own unique features, progress graph, and notification options.

## Create a project
Create new projects directly from your workspace or team's project view by clicking the `+` button. This action opens a prompt where you're asked to fill in specific fields. While the only required field is the project name, we recommend also assigning a project lead and updating the project icon for better visibility and organization. To edit these properties later, simply right-click on a project within an [Initiative](https://linear.app/docs/initiatives) or [custom project view](https://linear.app/docs/custom-views#create-views) and select **Edit project**, or click on these properties from the project overview page.
## Delete a project
To delete a project that you have in focus, click the three dots next to the project name beside the Overview and Issues tabs and select **Delete**.
From a view containing multiple projects, you can also right click on any project and select **Delete** from the bottom of the menu.
Once you've confirmed this action, your deleted projects can be found in the team's archive under the "Recently deleted projects" tab for 30 days before they are permanently deleted.
## View your projects
Each team has a _Projects_ page which organizes the team's projects into a list, board, or timeline. There is also a _Projects_ page at the workspace level so you can view all projects within your workspace in one location.
To explore a specific project, click on it to access the project overview. Here, you'll find a brief project summary, project properties, any associated documents and links, a detailed project description, and a list of project milestones.
## Add issues to a project
Add existing issues to projects or move issues between projects by selecting the issues and using the shortcut `Shift` `P`. To create new issues in a project, use `C` from the project view or add the project property manually if creating the issue from another page.
> [!NOTE]
> **How we work**: The project lead is in charge of writing the spec and general execution. Other team members collaborate on the brief, split up areas of work, and then write their own issues.
Issues can only be associated with one project at a time. A workaround would be to create sub-issues for the task, then assign each sub-issue to a different project.
## Attach issue views to projects
Next to the "Issues" tab in each project, you'll find the `new view` icon. This feature enables the creation of custom views of the project's issues. By clicking this icon, you can filter a subset of the issues and save this filtered perspective under a specific view name.
Once a view is created within the project, it can be repositioned by clicking and dragging it to the left or right to adjust the order in which these views appear. These views are accessible to anyone who has access to the project and are displayed as tabs, similar to the `Overview` and `Issues` tabs, allowing users to easily share and switch between different perspectives within the project.
Additionally, right-clicking on a view opens options to copy the view link, add it to your favorites, edit its details, or delete it.
> [!NOTE]
> **Example views we've attached to projects:** A view we use often is a view that filters for all issues assigned to the `current user`. This ensures everyone viewing a project can quickly view all their issues. We also use a `bug` view that filters for all issues with the "bug" label. A "standup" view filtering for `In Progress` helps us have more efficient standups.
## Attach project views to workspace projects page
Similar to attaching issue views to projects, you can also attach project views within the workspace projects page. This allows you to create custom views of projects in your workspace. These views can be repositioned just like attached issue views within projects and are accessible to all members of your workspace.
> [!NOTE]
> **Example project views we've attached**: In our workspace, we have attached a project view that filters for all projects with an “In Progress” status. Projects are automatically added to this view based on the selected filters, eliminating the need for manual curation. This makes it easy to reference and see all in-progress projects at a glance. We also have an attached project view that filters for all projects involving a specific team, allowing us to quickly review that team’s activity.
## Project details sidebar
Press the sidebar icon or use `Cmd/Ctrl` `I` to toggle the project details sidebar on or off. You'll be able to update any properties from here as well as add resources such as external files, create project documents, and view the project progress graph.
## Multi-team projects
Projects can be shared across multiple teams. Add more teams when creating a project or from the project details page by clicking on the team name, then marking off more teams in the dropdown. Once you add more than one team, the project view will create tabs so you can toggle between seeing all issues or issues on specific teams.
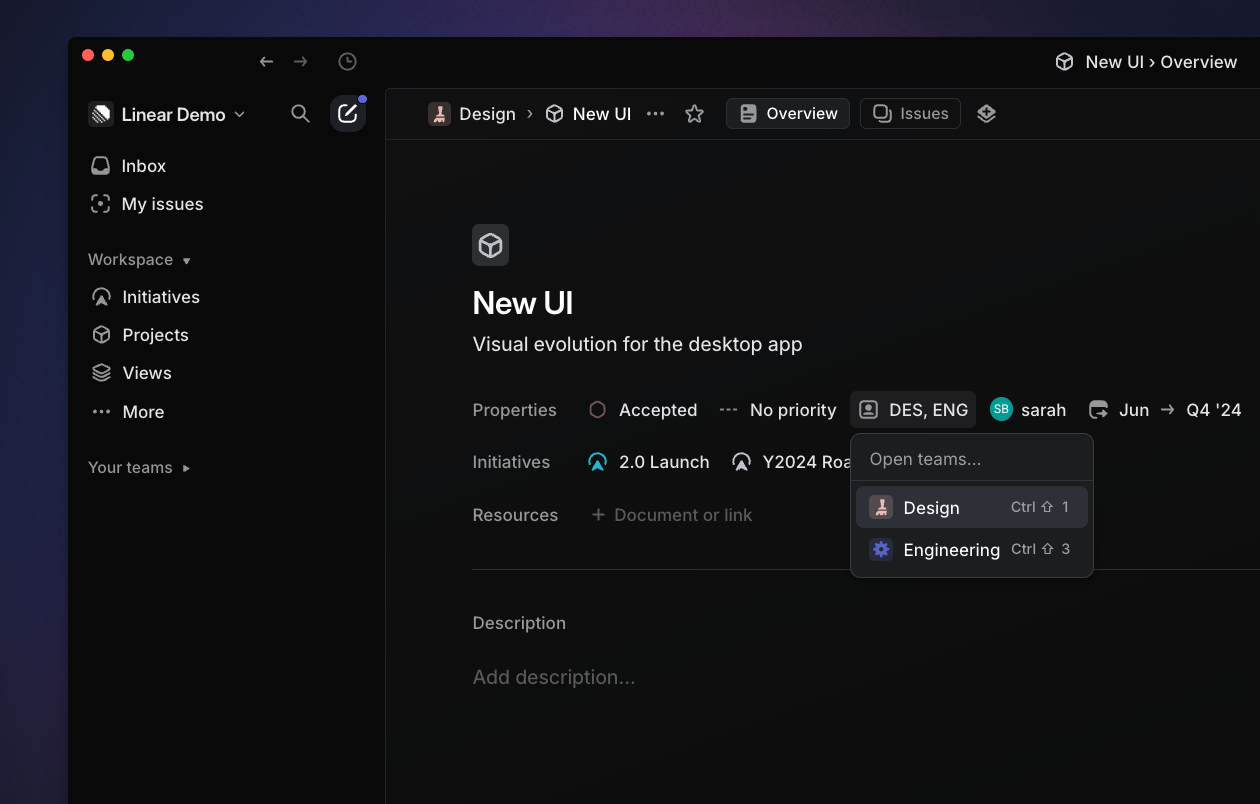
## Timeframes
Rarely will a project's precise end date be known in its early stages. Select start and target dates that match your level of certainty. Options are available to choose a year, half-year, quarter, month or precise day. Choose start and target dates using these timeframes by selecting the appropriate fields in the project's right sidebar.
You can also use these timeframes in project views in [Initiatives](https://linear.app/docs/initiatives) when grouping by start or target date, or in start/target date filters as well as created at under the "custom date or timeframe…" option.
## FAQ
Can I make a project for ongoing work?
Technically yes, you can create a project without a completion date -- but we encourage projects to have a clear start and end. We're looking into better ways to manage this type of work but in the meantime there are a few workarounds:
* Use projects without target dates (you may want to create an Initiative to group these projects)
* Break up the work into smaller time-based projects (e.g. bugweek, Q1 infrastructure)
* In cases where a project should remain unclosed for some time but not forever, consider creating a custom Maintenance project status.
Can I add multiple project leads?
We have a single lead field to keep ownership of the project clear. If more people are involved with the project, consider adding them as members, however members have to opt-in to receive notifications.
How is it decided what projects are listed in the project picker menu?
It will default to show you the following options when adding a project to an issue:
Projects you lead, are a member of, created by user recently, has overlapping teams with user, active, recently created, then cancelled and completed.
Where is the roadmap timeline view?
Roadmaps are renamed to Initiatives and can be enabled in your workspace settings.
Timeline views are available on any view with projects in your team projects view, inside an initiative or the workspace projects view. You can choose a timeline view under "Display".
---
# Source: https://linear.app/docs/pull-request-reviews.md
# Pull Request Reviews
View and comment on pull request reviews from Linear.

## Overview
Access GitHub Pull Requests (PRs) from Linear to streamline the code review process.
This feature adds a dedicated Reviews section to your sidebar, where you can see all of your PRs awaiting review as well as PRs that you've been asked to review. You'll be able to view PRs, comment on them, and get notifications in your Inbox whenever a review is requested.
You'll need to open the PR in GitHub to review the code and approve reviews, and will see those changes reflected in Linear.
Go to Reviews quickly with the shortcut `G` + `R`, or open a specific review with `O` + `R`.
## Basics
#### Enable Reviews
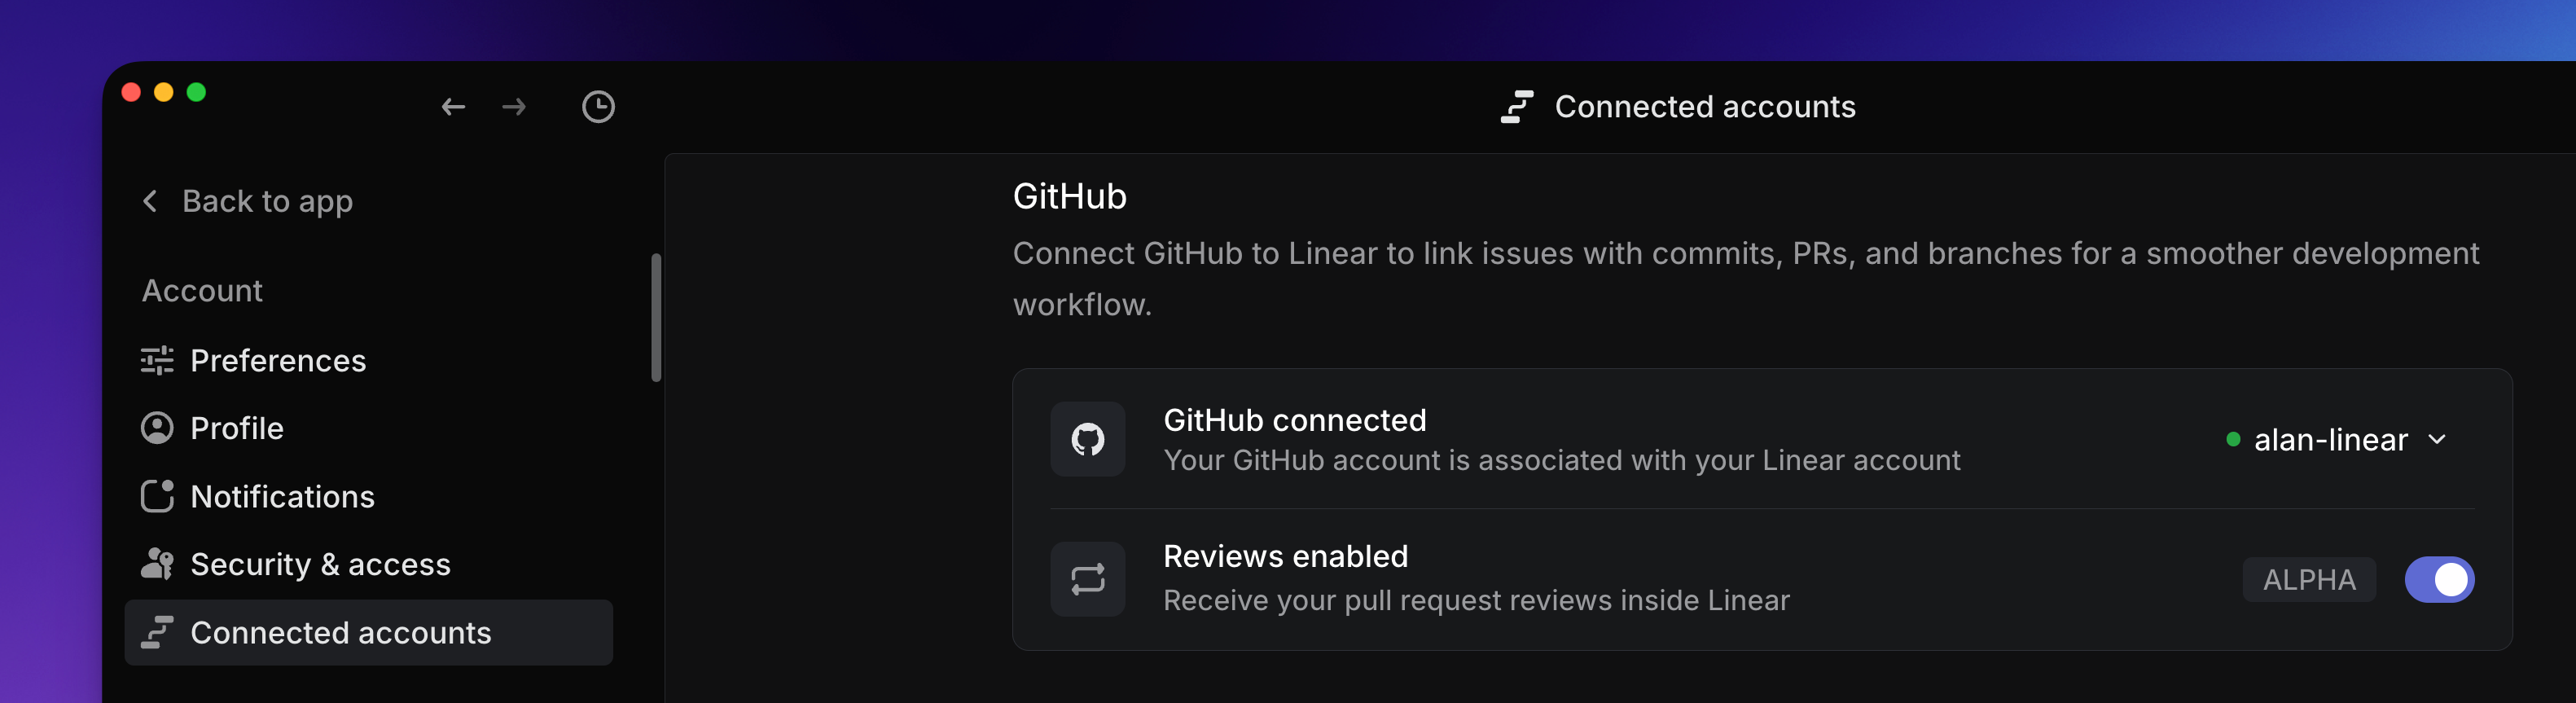
To enable Reviews, make sure your personal account is connected with GitHub from [Settings > Connected Accounts](https://linear.app/settings/account/connections) and then toggle on _Enable pull request reviews inside Linear_.
#### Display and grouping
By default, PRs are grouped by Responsibility, divided between PRs that are _To Do_ (need your review), _Waiting for others_ or _Approved._
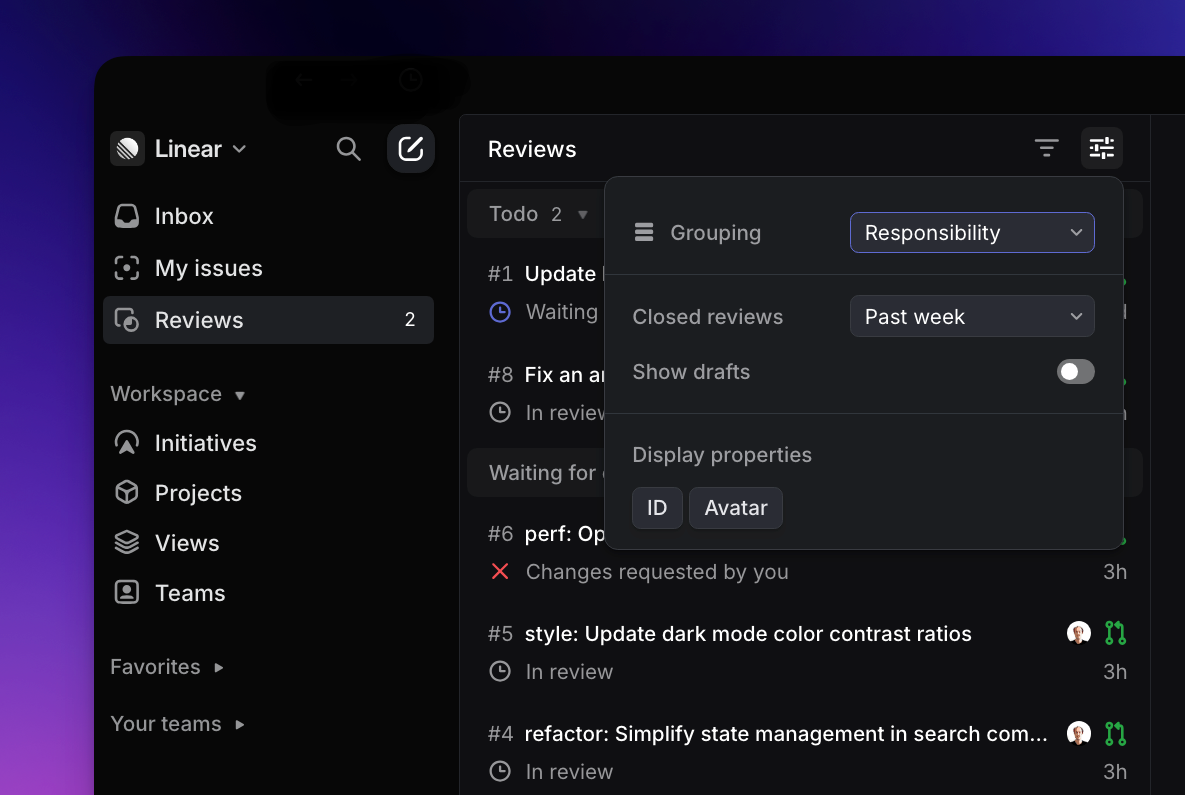
Similar to other views in Linear, you can adjust the display settings to pick different groupings and decide whether closed PRs and drafts will show. PRs in Reviews can be grouped by _Status_, _Author, Repository_ or switched to _No Grouping_. You can also adjust the display settings to show/hide the Pull Request ID or the avatar of the reviewing user
#### View PRs
Select a PR to view it. You'll see the PR title, description, and a link to the PR in Github. You can also see a summary of changes and checks associated with the PR.
Open the PR in GitHub to review the full PR and approve or request changes.
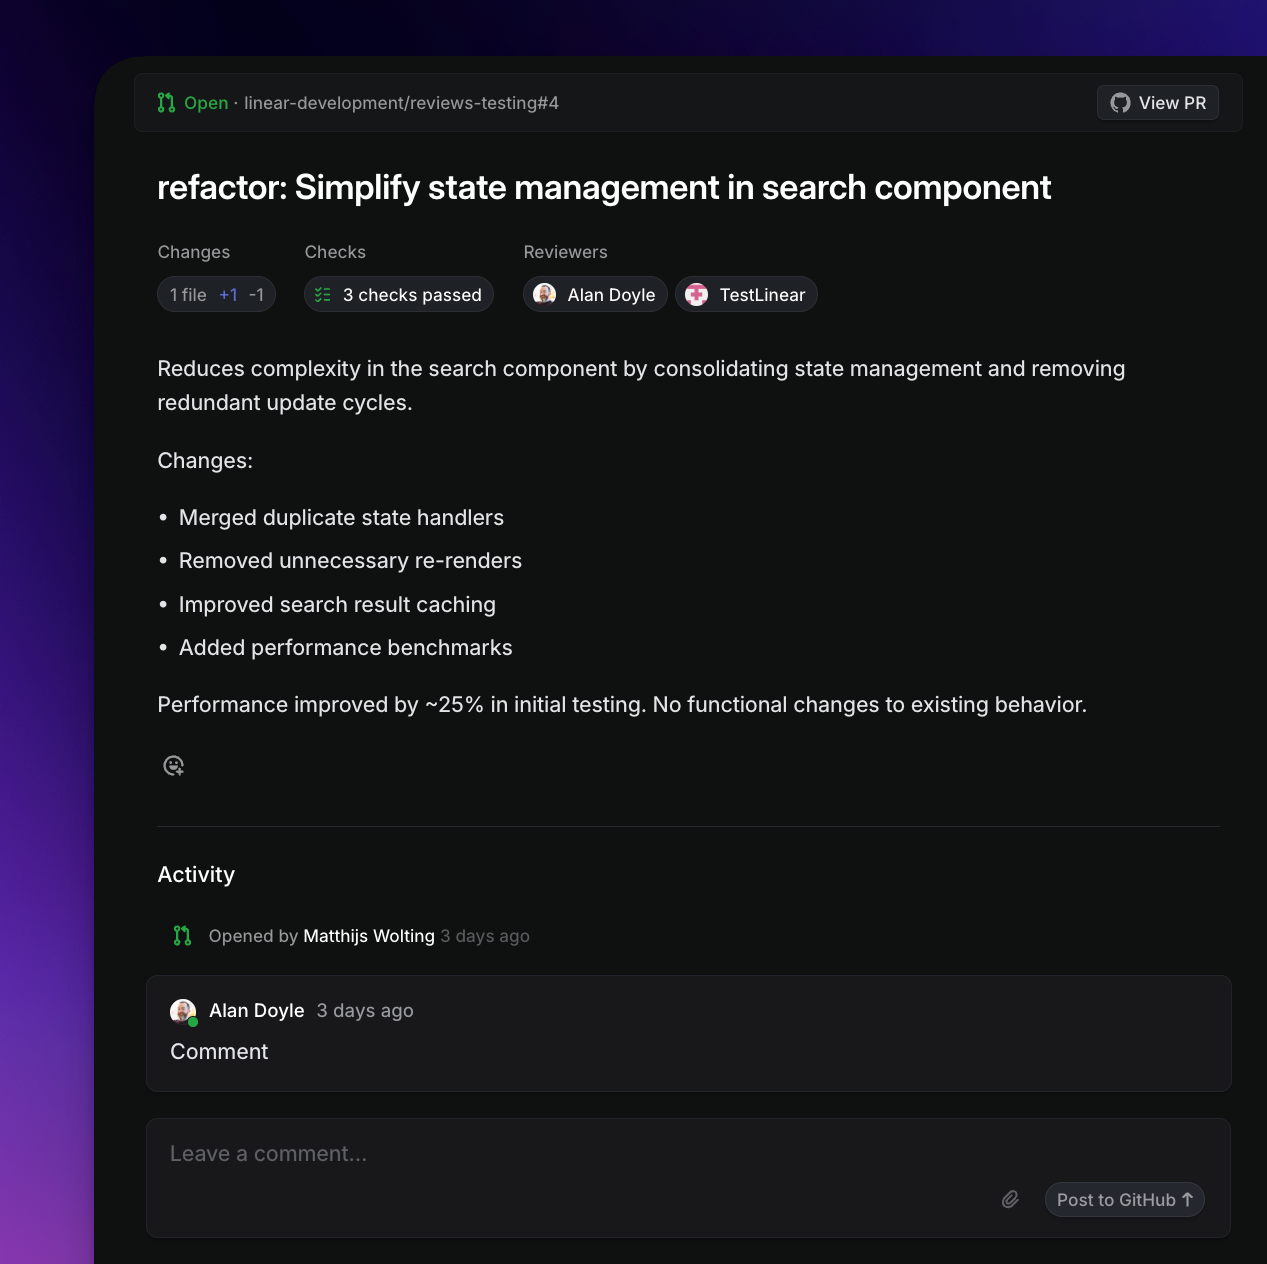
#### Comment on PRs
You'll see all comments related to the PR in the Activity section, including suggested changes from those comments. From here you can create new comments, reply to comments, or react with emoji.
Commenting on a PR will move it from _To Do_ into _Waiting for Others_ until your comment is addressed.
#### Taking other Actions
Most of the review information is read-only in Linear for the moment, and you'll need to navigate to Github to approve the PR, comment on code inline, or perform actions like requesting other reviewers.
#### Notifications
With this feature enabled, your inbox notifications will include the following:
* **For PR Authors:** Notifications for all comments, reviews by others, and check failures on their PRs.
* **For PR reviewers**: Notifications for review requests as well as comments in PR discussion threads they're participating in.
* **Everyone:** Notifications about mentions in PRs.
## FAQ
Can I see my teammates' PRs in Reviews?
No, you can only access your PRs and PRs awaiting your review.
How do I update a PR that is showing the wrong state?
This can happen sometimes if a webhook is missed between Linear and GitHub and we fail to capture the change in PR state automatically.
You can trigger an update to the PR state shown in Linear by making a small edit to the PR description in GitHub - for example adding and removing a space.
Otherwise please reach out to support@linear.app with the PR IDs and we can help refresh these for you.
---
# Source: https://linear.app/docs/pulse.md
# Pulse
Pulse keeps you informed about your workspace's project and initiative updates.
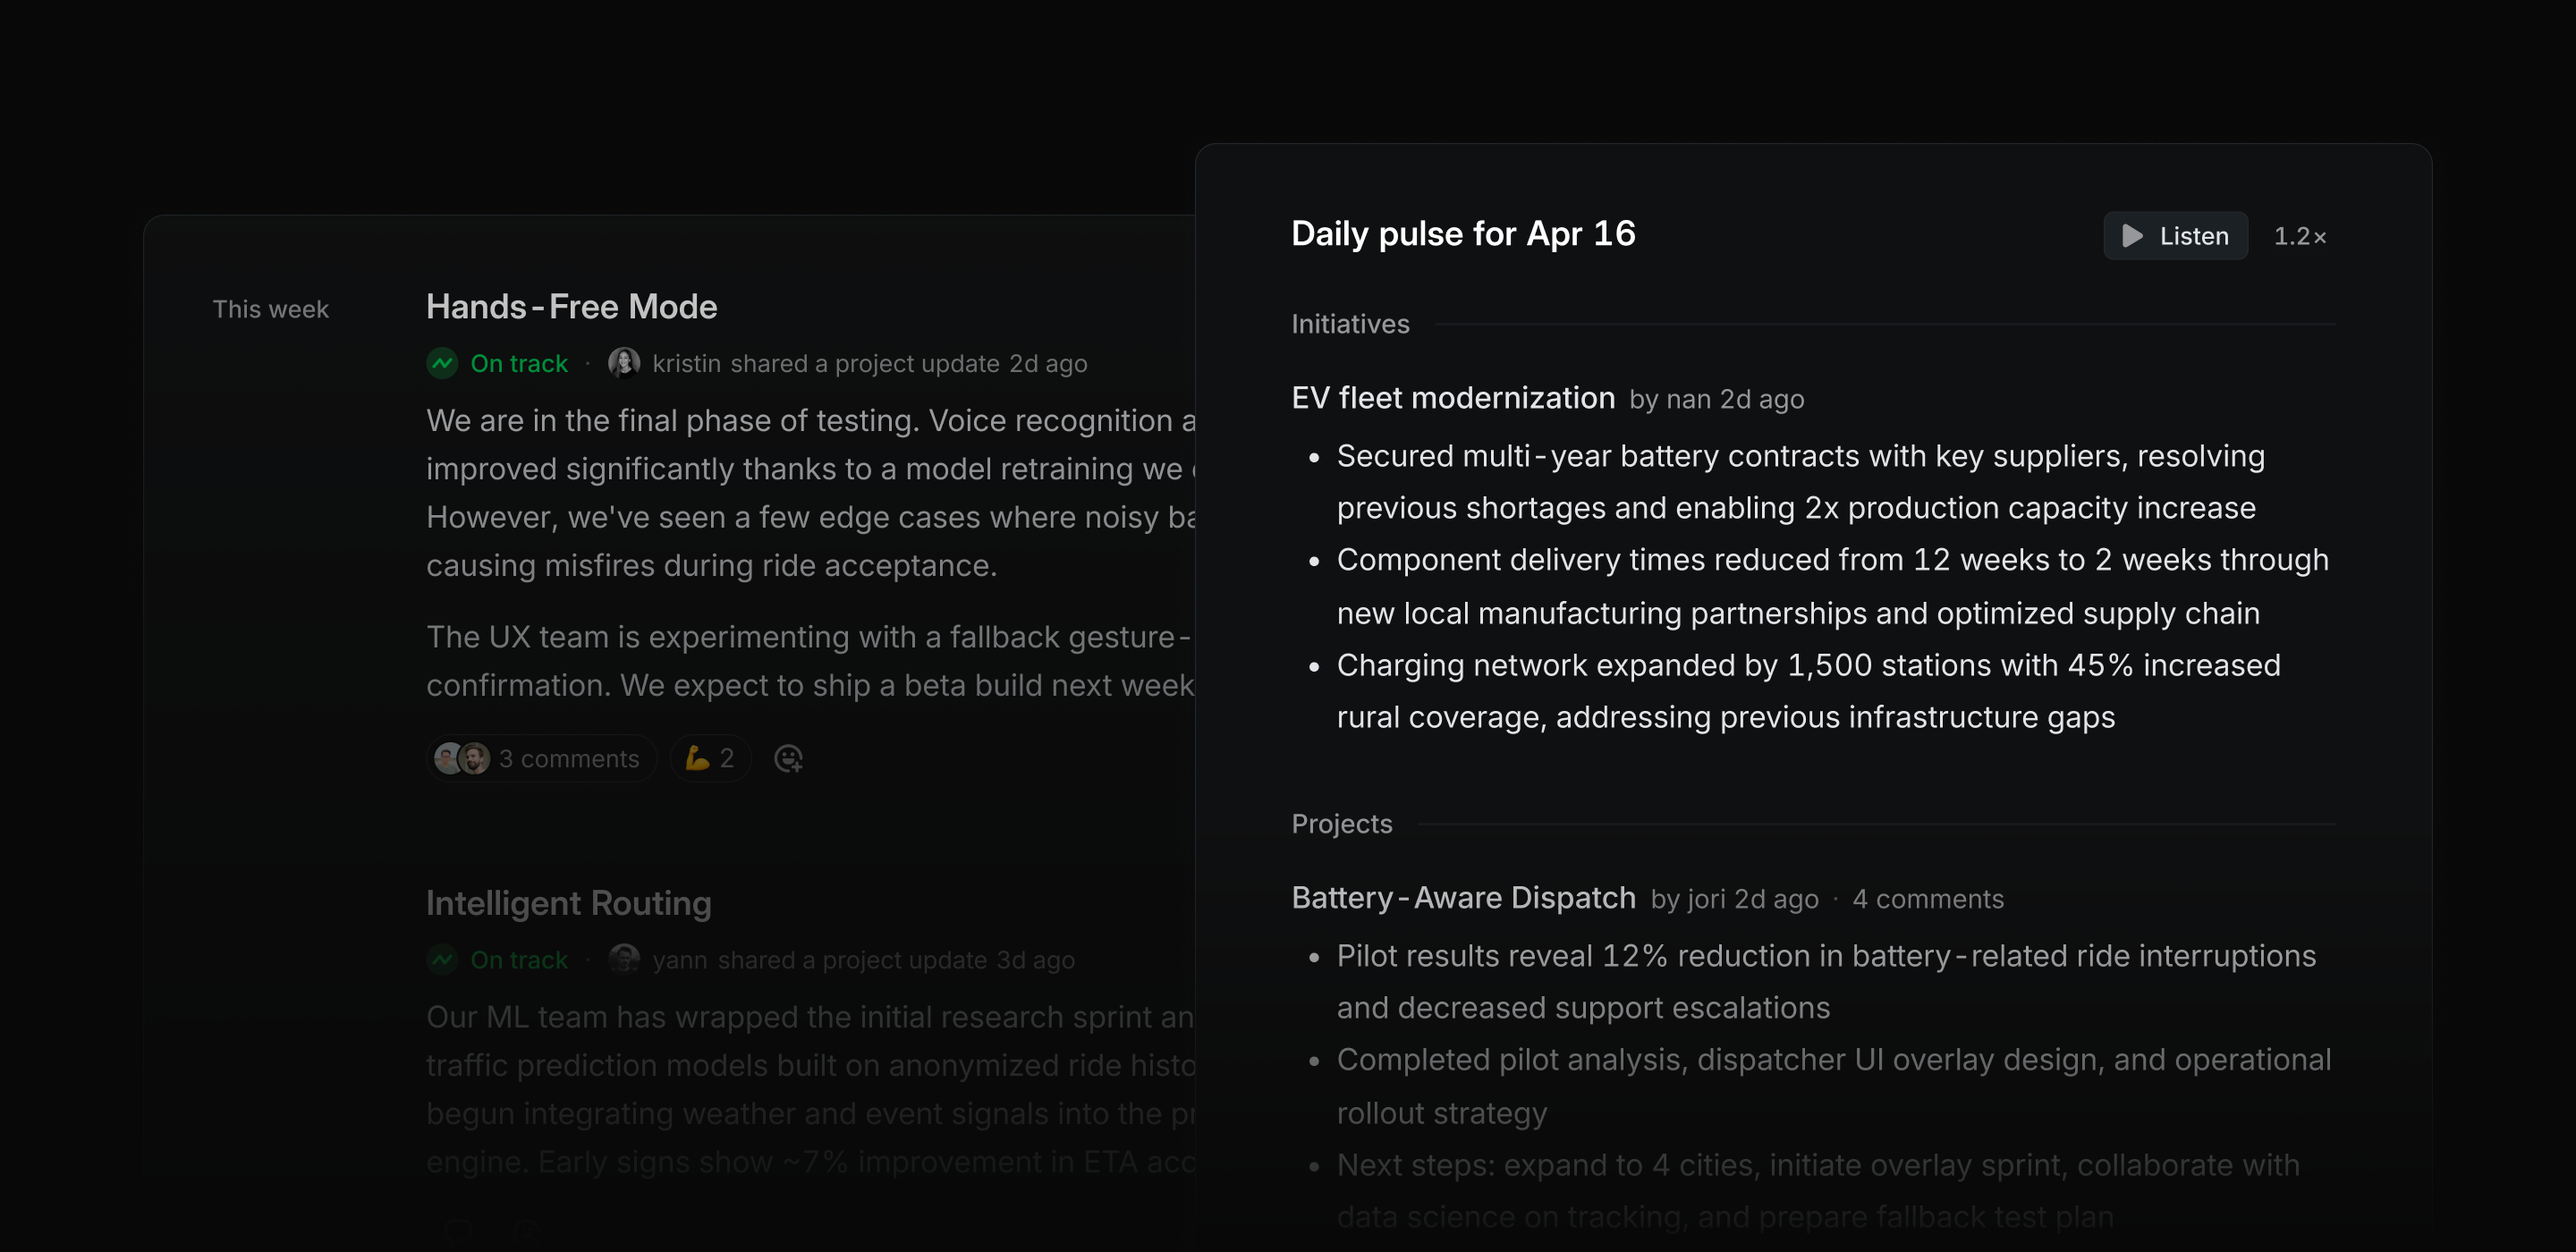
## Overview
Pulse is a feed of project and initiative updates in your workspace. It's available as a sidebar item when you want to read full updates as written, and as daily or weekly summaries delivered to your Inbox.
## Basics
### Enable Pulse
Admins can turn on Pulse for their workspace in [Settings > Pulse](https://linear.app/settings/pulse), and set a default cadence for delivering summary notifications (Weekly on Mondays, every weekday, or never). If users customize their own schedule, they will override this default. Pulse is available on all Linear plans, but as a workspace-level concept it is not available to Guest roles.
### View Pulse
Read the full text of updates from the Pulse page in your sidebar. Optionally, customize your sidebar by right clicking on to change whether Pulse always appears, only appears when badged, or never appears.
Choose a specific Pulse tab to focus on the updates you want to see. The _For me_ tab includes projects you're a part of or may be interested in. _Popular_ gives priority to recent updates with emoji or comment engagement. _Recent_ displays every update organized by recency.
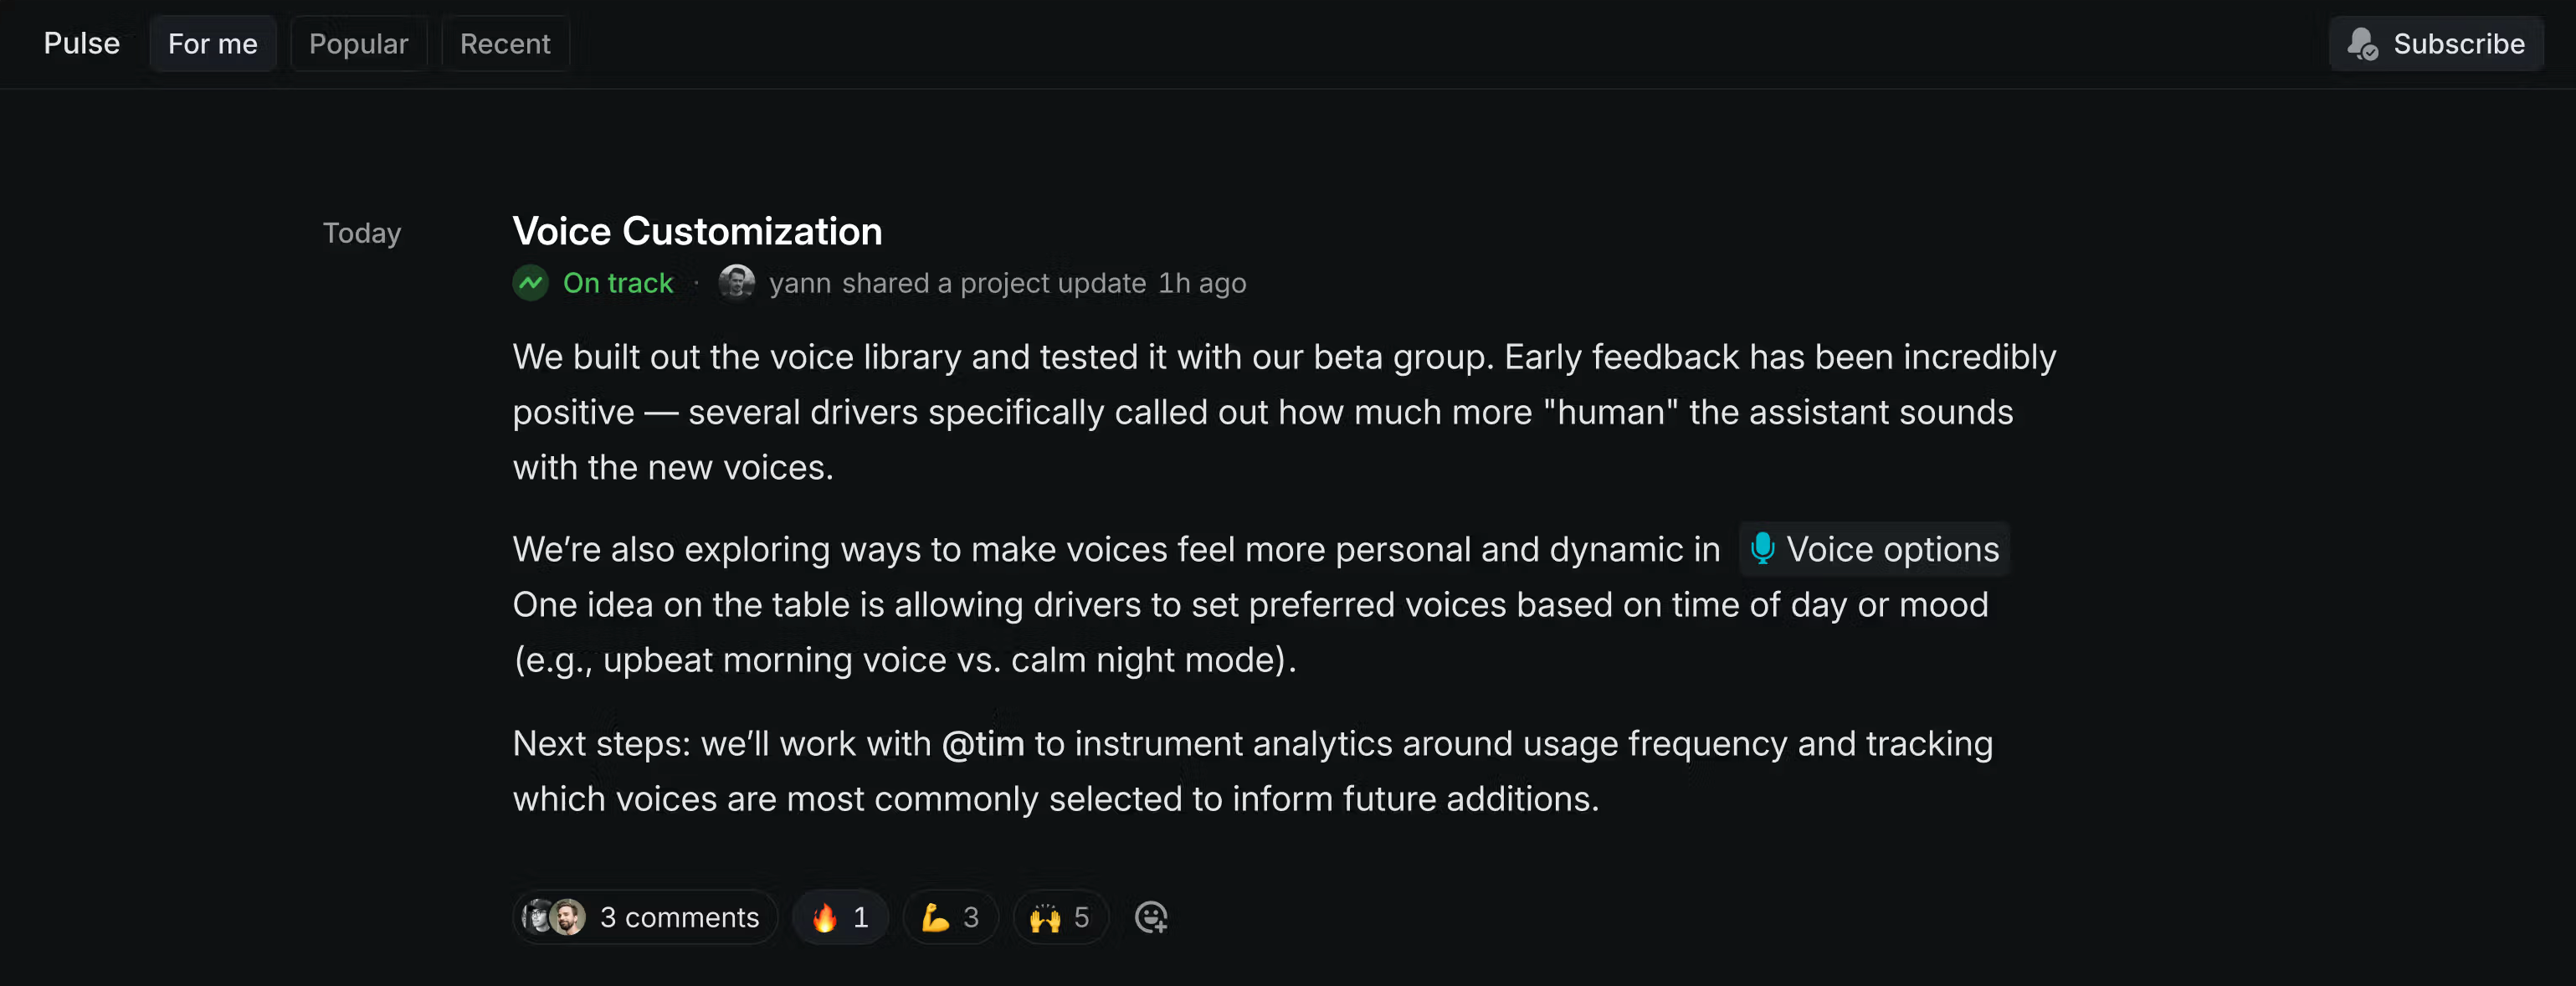
### Inbox notifications
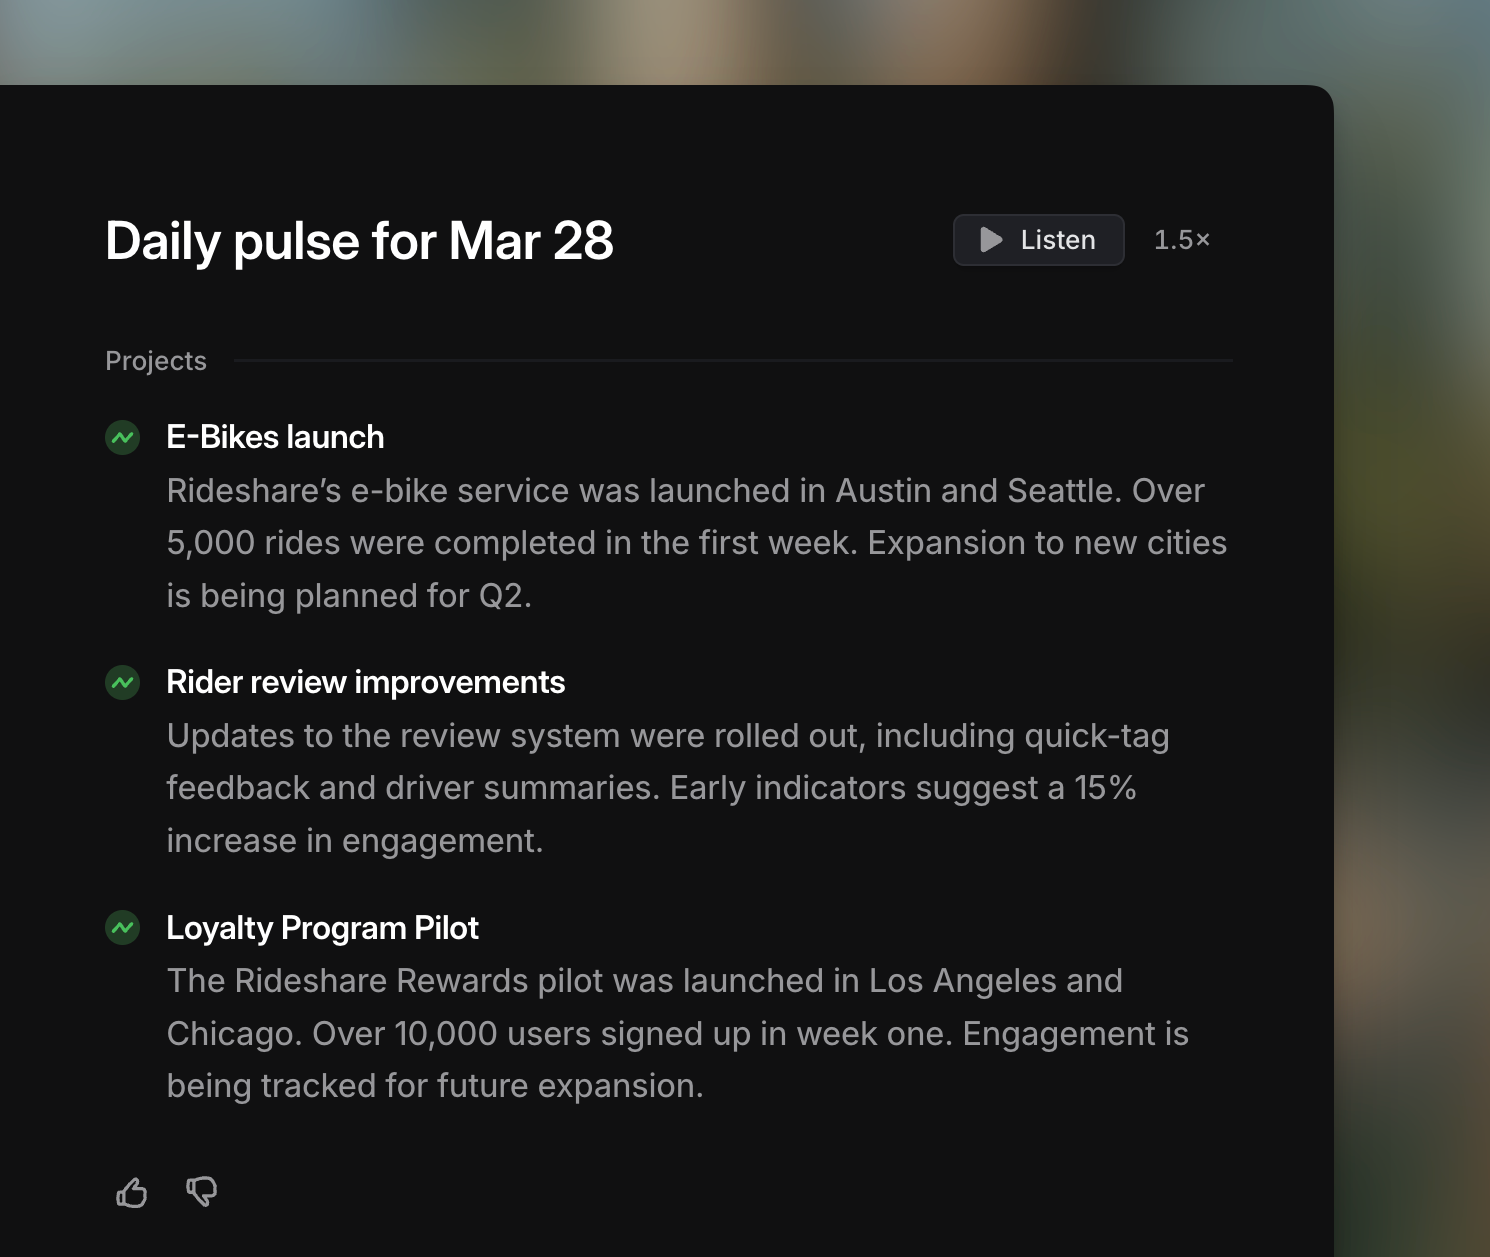
Optionally, receive daily or weekly update summaries to your Inbox. Customize the cadence by right clicking on a Pulse inbox notification, through the Subscribe menu in Pulse, or in Preferences. Pulse updates arrive in your inbox by 7:00 AM in your local time.
These notifications contain updates for projects when
* You're a member of the project
* The project rolls up to an initiative you own
* You explicitly subscribed the project
* You're subscribed to all sub-projects for a project's initiative
* You're subscribed to all project updates from a particular team
You'll also receive Initiative updates to inbox when:
* You're the initiative's owner
* You're a member of the initiative's projects
### Custom feeds
Optionally, create personal feeds in Pulse based on custom filters.
In busy workspaces with a high velocity of project and initiative updates, this can help narrow focus to a specific set of updates without needing to subscribe and unsubscribe to/from individual projects and initiatives. These feeds are only visible to you in the main Pulse page, and cannot be shared with others or subscribed to.
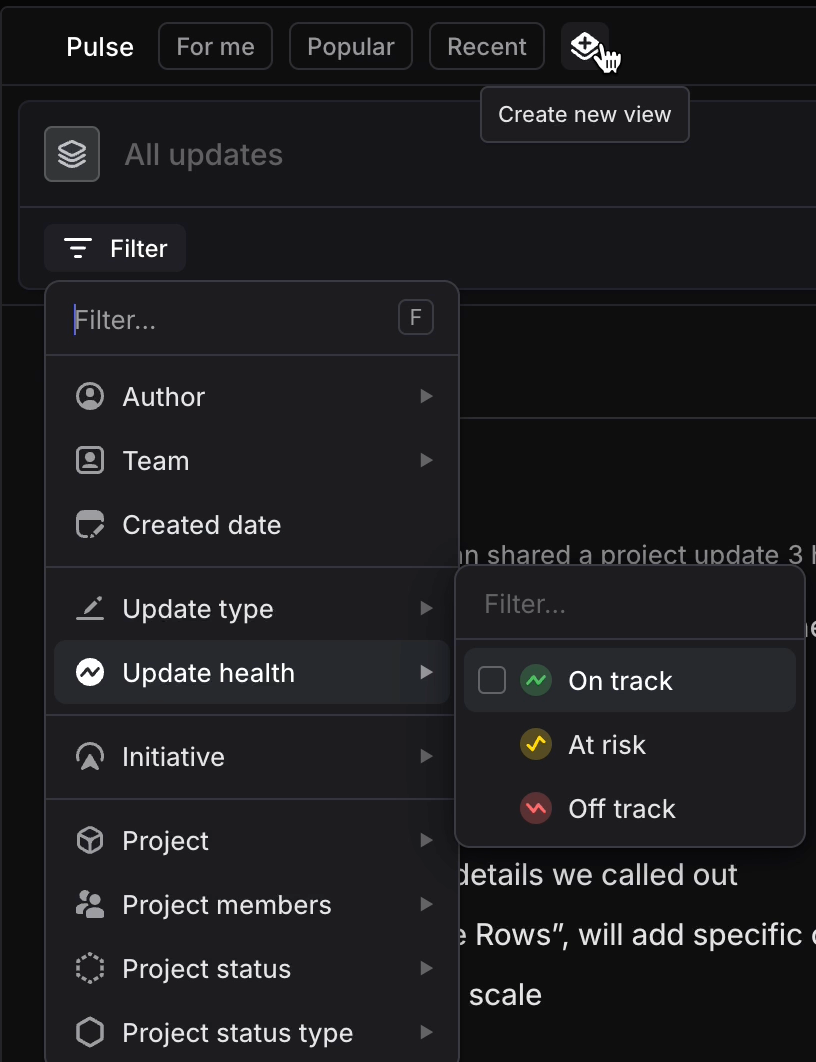
### Pulse audio
When consuming Pulse from your Inbox on desktop, web or mobile, click on the Play button to hear your summarized updates read aloud. Audio is not available in the Pulse sidebar page.
---
# Source: https://linear.app/developers/rate-limiting.md
# Rate limiting
Calls to our GraphQL API are rate limited to provide equitable access to the API for everyone and to prevent abuse. We are going to be evolving these limits as we gather more information, and encourage your feedback. Any changes to limits will be announced in our Slack community [API announcements channel](https://linearcustomers.slack.com/archives/CN61HRZ9T).
We use the [leaky bucket](https://en.wikipedia.org/wiki/Leaky_bucket) algorithm for our rate limiters, which means that your tokens are refilled with a constant rate of `LIMIT_AMOUNT / LIMIT_PERIOD`.
> [!NOTE]
> If you temporarily require higher limits, you can request them by contacting Linear support where we'll review them on a case by case basis.
## Avoiding hitting limits
These are best practices for using our APIs that will, in most cases, avoid hitting any rate limits.
### Avoid polling
One thing that we especially discourage is polling the API to fetch updates. If you need to know when data updates in Linear, you should use our [Webhook](https://linear.app/developers/webhooks) functionality.
### Avoid fetching unneeded data
Avoid fetching data you don't need by using our [filtering](https://linear.app/developers/filtering) functionality. This way you can drill down on specific records only and avoid pagination in some cases.
Keep in mind that by default our [pagination](https://linear.app/developers/pagination) returns up to 50 records. When querying for children this can quickly multiply the requested complexity. Consider specifying the amount of records you want returned.
### Order data
In certain cases where you do need to fetch all data, we suggest sorting it by the updated timestamp instead of when it was created. This way you can get the most recently changed data first, and avoid paginating through the entire dataset.
### Write custom, specific queries
This applies especially if you're using our SDK. If you're fetching lots of different entities or dependencies, or have specific data needs, it's always recommended to write your own custom GraphQL queries and use filters to narrow down the data as much as possible.
## API request limits
We limit the amount of requests you make to our GraphQL API. To make it easier to keep track and avoid going over the limits, there are 3 HTTP response headers we send back on each request.
HTTP Header | Description
--- | ---
`X-RateLimit-Requests-Limit` | The maximum number of API requests you're permitted to make per hour.
`X-RateLimit-Requests-Remaining` | The number of API requests remaining in the current rate limit window.
`X-RateLimit-Requests-Reset` | The time at which the current rate limit window resets in [UTC epoch milliseconds](https://en.wikipedia.org/wiki/Unix_time).
When authenticated using an API key you can make up to **5,000 requests per hour**. Requests are associated with the authenticated user, which means all requests by the same user share the same quota even when using different API keys.
When making unauthenticated requests, you are limited to **60 requests per hour**. These requests are associated with the originating IP address instead of the user making the request.
Authentication | Limit | per | Period
--- | --- | --- | ---
API key | 5,000 | User | 1 hour
OAuth App | 5,000 | User (or App User) | 1 hour
Unauthenticated | 60 | IP Address | 1 hour
### Query- and mutation- specific request limits
Some queries and mutations have individual request rate limits that are lower than the global request limit. When one of these limits is hit, the Linear API will send the same response as described in [Handling rate limited errors](https://linear.app/developers/rate-limiting#handling-rate-limit-errors). The window for each endpoint can be different, and is described in the response body. We will also send these extra headers:
HTTP Header | Description
--- | ---
`X-RateLimit-Endpoint-Requests-Limit` | The maximum number of API requests you're permitted to make to this endpoint in a rate limit window.
`X-RateLimit-Endpoint-Requests-Remaining` | The number of API requests remaining in the current rate limit window.
`X-RateLimit-Endpoint-Requests-Reset` | The time at which the current rate limit window resets in [UTC epoch milliseconds](https://en.wikipedia.org/wiki/Unix_time).
`X-RateLimit-Endpoint-Name` | The name of the endpoint that was rate limited.
### Complexity limits
In order to protect our system from queries that are too complex and resource intensive, we calculate the complexity of each query, based on the amount of requested data.
To make it easier to keep track and avoid going over the limits, there are 4 HTTP response headers we send back on each request.
HTTP Header | Description
--- | ---
`X-Complexity` | The complexity of the query.
`X-RateLimit-Complexity-Limit` | The maximum number of API complexity points you're permitted to request per hour.
`X-RateLimit-Complexity-Remaining` | The number of points of API request complexity remaining in the current rate limit window.
`X-RateLimit-Complexity-Reset` | The time at which the current rate limit window resets in [UTC epoch milliseconds](https://en.wikipedia.org/wiki/Unix_time).
Requests authenticated using an API key can request up to **250,000 points per hour**. Requests are associated with the authenticated user, which means all requests by the same user share the same quota even when using different API keys.
Unauthenticated requests are limited to **10,000 points per hour**. These requests are associated with the originating IP address instead of the user making the request.
Authentication | Limit | Per | Period
--- | --- | --- | ---
API key | 3,000,000 | User | 1 hour
OAuth app | 2,000,000 | User (or App User) | 1 hour
Unauthenticated | 10,000 | IP Address | 1 hour
#### Maximum complexity
We also enforce a maximum complexity of a single query at any time to **10,000 points**. Your query will always get rejected if it exceeds that.
#### Understanding query complexity
In order to protect our systems from too complex and resource intensive queries, we calculate the complexity of each query. Each property is 0.1 point, each object is 1 point and any connection multiplies its children's points based on the given pagination argument, or the default 50. The score is then rounded up to the nearest integer.
As an example, let's fetch an object that returns only one user and request only one property. The calculation is `1 + 0.1 = 1.1`, which equals a **complexity of 2** when rounded up.
```graphql
query WhoAmI {
user(id: "me") {
name
}
}
```
Let's now fetch all of our created issue's ID, title and when they were created. This has a **complexity of 66**. Here's why:
Query | Complexity
--- | ---
`user` | 1 point
`createdIssues` (assuming 50, the default pagination) | 50 points
`id`, `title`, `createdAt` | 15 points (50 × 3 × 0.1)
You can use pagination parameters to specify a different limit than the default 50 to let the complexity calculator know how much data you're trying to fetch. This query with an explicit limit of the first 10 nodes then has a **complexity of 14**.
```graphql
query MyCreatedIssues {
user(id: "me") {
createdIssues(first: 10) {
nodes {
id
title
createdAt
}
}
}
}
```
### Dynamic rate limits
We dynamically increase rate limits for workspace level OAuth apps using [Actor Authorization](https://linear.app/developers/oauth-actor-authorization) based on number of paid users in that workspace.
## Handling rate limit errors
Once you actually exceed rate limits, Linear API will start returning rate limit error responses. With GraphQL requests, response http status code will be 400, but you can catch these by inspecting the `errors` in the response body containing the `RATELIMITED` error code.
```json
{
"errors": [
{
"message": "...",
"extensions": {
"code": "RATELIMITED",
...
}
}
]
}
```
---
# Source: https://linear.app/docs/salesforce.md
# Salesforce
Create or link to issues from cases. Linear's Salesforce integration is available as an add-on to our Enterprise plan.
## Overview
Salesforce users—whether or not they use Linear—can link cases to existing issues and projects or create new issues using a Linear template.
Real-time updates ensure Salesforce users stay informed of issue/project status and priority changes as they happen, streamlining collaboration between teams.
## Configure
### Contact us
Please reach out to [sales@linear.app](mailto:sales@linear.app) to purchase licenses for this integration. Once purchased, assign them to Salesforce users to enable them to access the integration.
### Configure from Salesforce App Exchange
1. Install the Linear integration from the Salesforce Marketplace
2. Find the **Linear Development** app in the Salesforce **App Launcher**. In order to see this app in the menu launcher, you must have been granted a licence to use this integration.
3. Click **Login with Linear**
4. Select the Linear workspace you want to connect
5. Confirm the integration between Salesforce and Linear
### Configure from Linear
1. Navigate to **Settings > Integrations > Salesforce**
2. Click **Enable**
3. Copy the URL from any page in your Salesforce installation
4. Paste the URL in the modal in Linear settings
### Enable the Linear component
1. Navigate to a case detail page (commonly in Service Cloud or Support Cloud)
2. Edit the case detail page
3. Find Linear in the list of custom components
4. Place the component in the location of your choice on the page
### Linear x Salesforce integration configuration video
Watch a video overview of how to set up the Salesforce integration.

---
## Permissions
Three permission sets will become available in Salesforce:
Role | Function
--- | ---
Linear Admin | Has admin permissions in Linear and allows full access and configuration rights
Linear Create Issues | Can create and/or link issues and/or projects
Linear Link Only | Can only link existing issues. This is useful for large support teams who want more control over issues being created in order to limit noise in Linear.
---
## Settings
### Restrict issue visibility
Once enabled, only Linear issues that were created from or previously linked to Salesforce can be found when searching from the Linear component. This allows teams with privacy concerns to reduce the scope of visible issues in the Salesforce workspace.
### Internal notes
Automatically notify your team in Salesforce when an issue linked to a case has been completed to cancelled. Changes will be added to the _All updates_ section of a case.
### Automatic case reopening
When the linked Linear issue is completed or canceled, you can automate reopening the case to the case status of your choice. This signals your team to follow up with customers.
Case statuses are customizable. If a new case status is added, visiting the Salesforce integration's page in Linear settings will reflect the addition.
### Templates
Once a template has been created in Linear, click the **+** icon to make a template available to Salesforce.
---
### Mapping attributes from Salesforce to Linear
When [Customer Requests](https://linear.app/docs/customer-requests) is enabled, creating issues from a Salesforce case will create new Customers in Linear as needed. The customer request added to the created issue contains the case description.
Customers support attributes you can use to group, order, and filter for data in Linear. For example, filter issues by the tier of the Customer who requested them, order projects by the associated sum of attributed customer revenue, and more. To bring this data into Linear from Salesforce, set the desired mapping between Salesforce account properties and Customer attributes in Linear in **Settings > Customer Requests**.
You can set mappings with any property you use on Salesforce accounts, as long as the data type is allowable:
Customer attribute | Allowed data type
--- | ---
Owner | String (email address)
Tier | String
Status | String
Revenue | Number
Size | Number
If you're using lookup fields in Salesforce and wish to map to these in Linear, consider using formula fields as described in the FAQ.
## Using the integration
### Create a new issue
1. From a case's details, click **Create issue**
2. Select a template. All issues created by this integration use templates to drive consistency.
3. Include a title
4. Write a new issue description, or turn on the **Include case description** toggle to automatically insert the case description into the Linear issue description. The case description will appear in Linear as the Customer Request attached to the issue.
### Link cases to existing issues or projects
1. Click **Link issue or project** (_depending on permission levels_)
2. Search for the issue or project and confirm
### Link to cases from Linear
You can also link a Linear issue to a case by pasting the case's URL into the Linear issue as a link attachment with `Control `+` L`.
---
## Synced details
### Status and priority
When an issue is linked to a case, a reference to that issue appears in the Salesforce integration. The linked issue's status and priority are always current.
### User account attribution
If a Salesforce user is also a Linear user, their name will be displayed as the issue creator in relevant issue activity sections. If the user does not have a Linear account, the issue creator displays as “User User” (the name of the Salesforce developer account) and the email of the Salesforce user who created or linked the issue.
### Customer information
Linear syncs customer information from the Salesforce workspace. Modify attribute mapping as discussed in _Mapping attributes_ above.
---
## Triage rules
Using the Salesforce integration concurrently with [Triage rules](https://linear.app/docs/triage#triage-routing) offers tools to direct how issues are routed after they're created from Salesforce. You can create rule conditions using properties of the Salesforce Case specifically, along with the normal set of filterable issue data in Linear. Triage rules can set an issue's team, status, assignee, label, project, and priority.
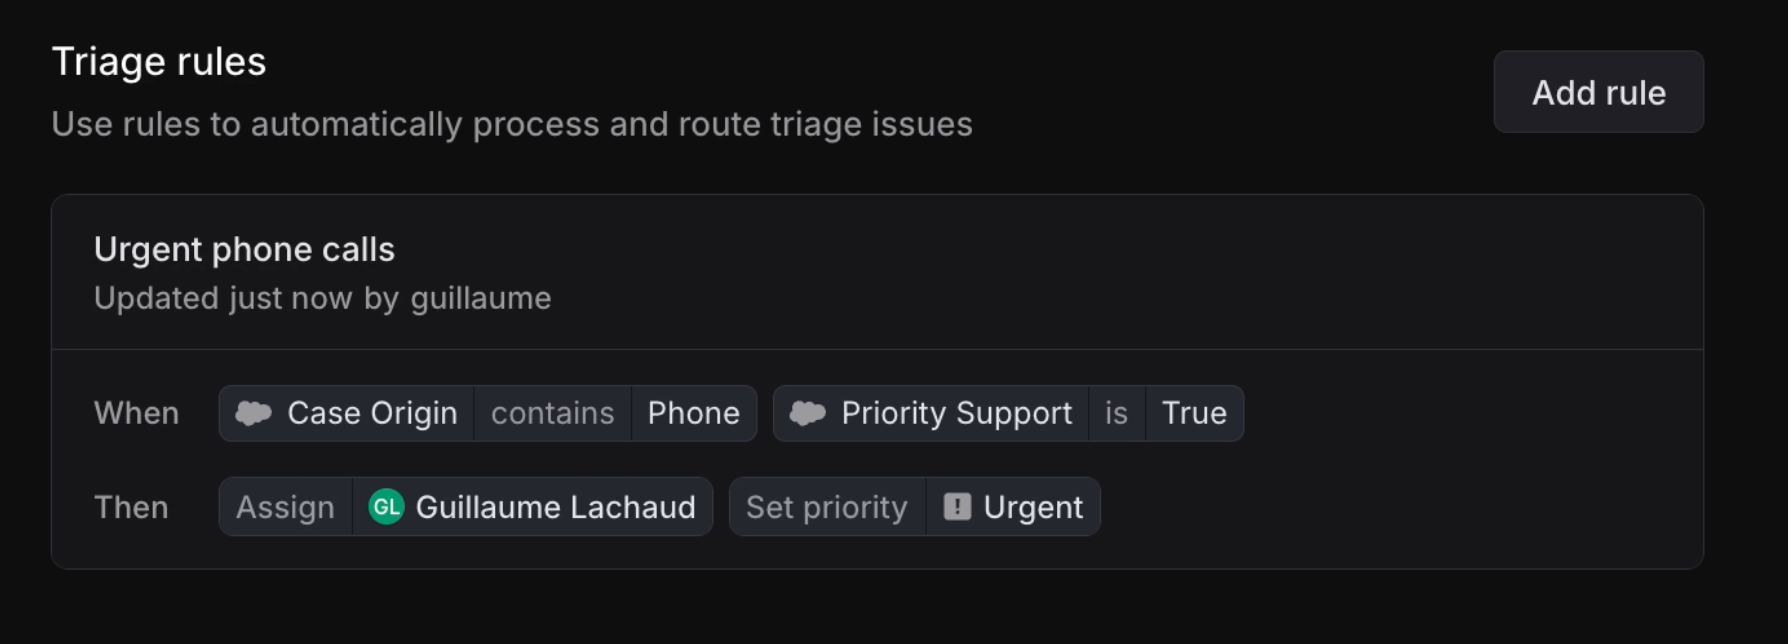
## FAQ
What happens when an issue linked to a case is closed as a duplicate in Linear?
The case will reopen in Salesforce as the linked issue has been canceled. We do not merge Salesforce cases. If desired you may link the reopened case to the canonical issue and re-close the case.
How can Salesforce formula fields make more properties available for mapping?
Suppose in Salesforce you have a field called "account owner"; an owner ID with a lookup to the user email. This would not work by default in our attribute mapping, as the owner field in Linear requires an email address.
You can work around this by using a formula field. To do so, create a new custom field of type formula. Clicking into "Advanced Formula" will help you build the formula you need.
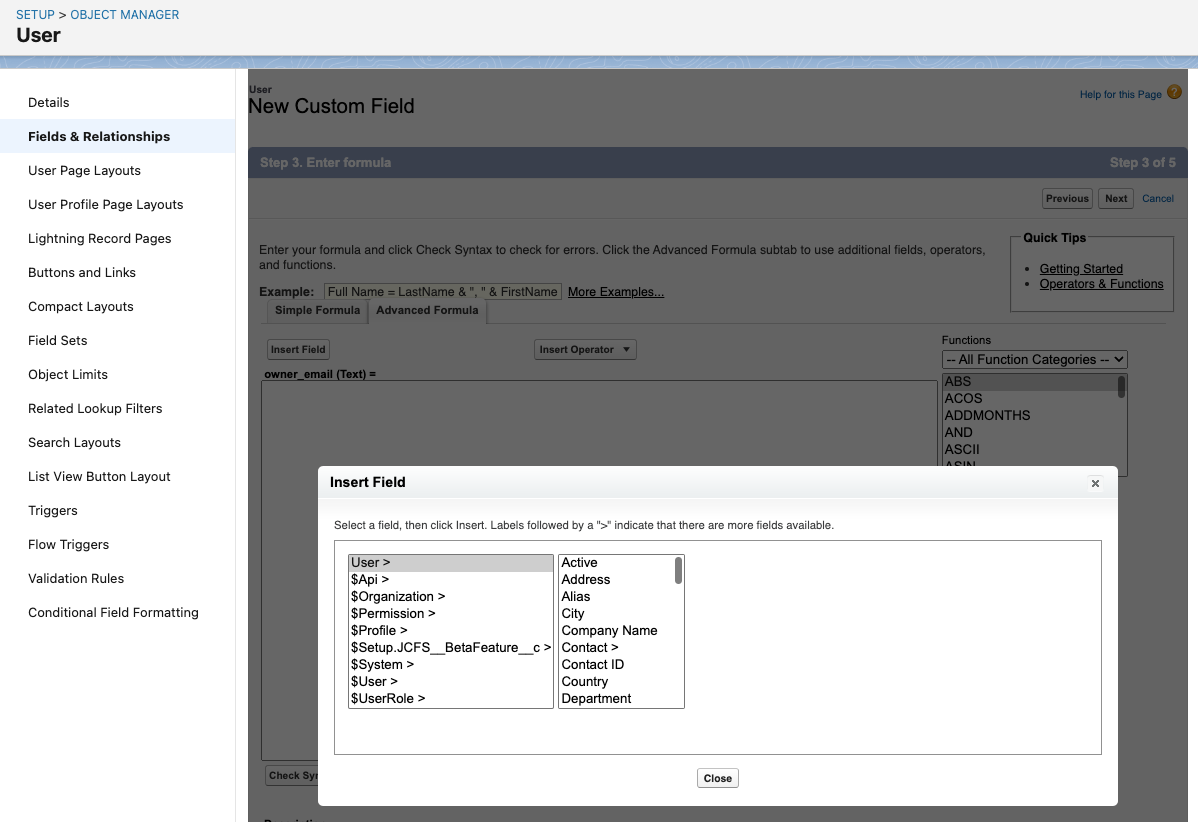
In this scenario, a formula field for account.owner returning an email address can be used to map between Linear's Customer owner and the necessary value in Salesforce.
Can I use SOQL to query Linear data?
Linear data living inside of Salesforce (like which customers have the most issues created from within Salesforce) can be queried directly with SOQL. This can be used to run analyses like returning issues linked to cases, or building custom dashboards within Salesforce.
Can I filter issues by their Salesforce case data in Linear views?
Yes, you can filter issues in views in Linear under the filter sub-menu _Salesforce case properties._ Salesforce properties are not supported in Insights or Dashboards.
---
# Source: https://linear.app/docs/saml-and-access-control.md
# SAML
Customers can opt to enable SAML for their workspace to manage logins through an Identity Provider.
> [!NOTE]
> Available to workspaces on our [Enterprise](https://linear.app/pricing) plan

## Overview
We support most identity providers (Okta, Entra, OneLogin, LastPass, Auth0, Bitum, etc.)
Once SAML is enabled, members on SAML-approved domains will be required to login via SAML by default, while you can allow other login types for users on other domains.
User sessions won't be logged out or notified at the time of enabling, but affected users will need to sign in with SAML from that point on.
Members can login via your identity provider's website or by clicking the option to **Continue with SAML SSO** on the login page.
Guests are an exception, and will be able to sign in by selecting **Continue via email**.
> [!NOTE]
> Admins and Owners can log in through any method to prevent lockouts.
## Configure
1. Navigate to [Settings > Administration > Security](https://linear.app/settings/security)_._
2. Under the "Authentication methods" section, click **Configure** next to "SAML & SCIM".
3. Enter the requested details from Linear into your IDP and press "Continue"
4. You can paste in an XML URL or the raw XML text to complete the configuration with your identity provider. If you're not sure where to find this in your identity provider, take a look at their documentation or reach out to us for help.
You can make changes to your configuration later on from `...` > **Edit Configuration** within the SAML authentication & SCIM provisioning settings page.
If you need to replace the XML URL or metadata from your IDP, just press `Continue` past the Linear-side configuration details to reach this page.
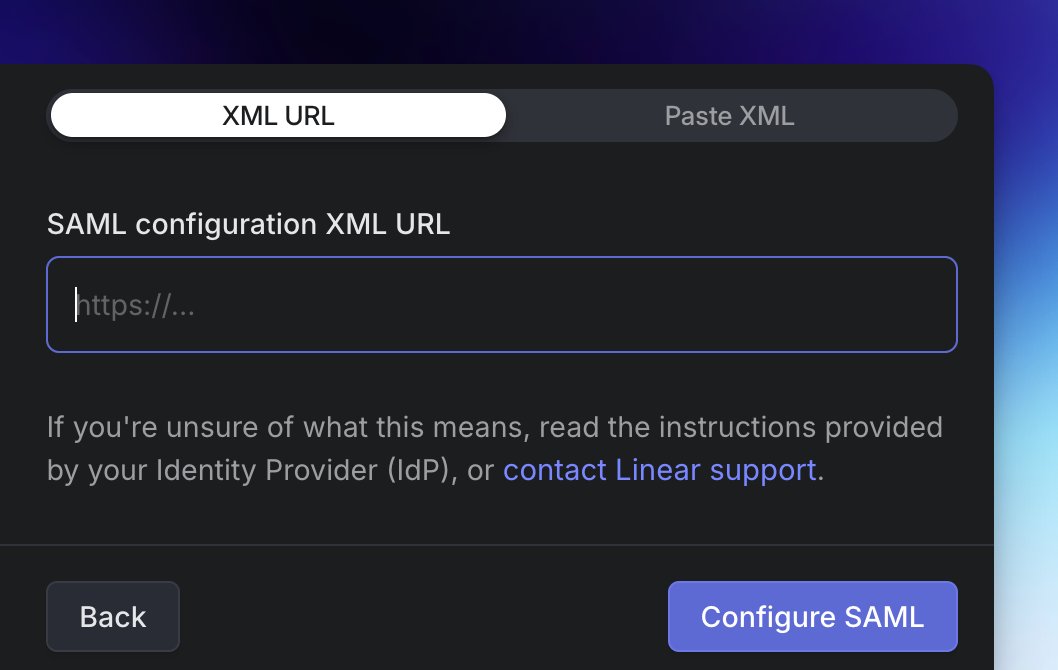
If you want to add our logo in your Identity Provider, our Brand Assets are available for download [here](https://linear.app/brand).
## Multi-SAML Setup
If you're working with multiple IDPs, you can add additional configurations from the `+` Icon beside Connected identity providers in your SAML settings. Each IDP can be associated with 1 or more domains to determine which IDP each user need to authenticate with.
## Just-in-Time Provisioning
When a new user signs in via SAML for the first time, Linear creates the account using the data provided by your IDP. After the account exists, later SAML logins won’t overwrite profile details.
**The following properties are set during account creation:**
* **Name**: taken from `name` attribute if it exists. If not, created from `firstName` and `lastName` attributes combined or else drawn from `displayName`.
* **Email:** taken from the SAML `NameID` which must be a valid email address
* **Avatar (profile image):** taken from any of `avatarurl || photo || picture || profilepicture || profilephoto`
* **Username:** Generated from the supplied Name (as detailed above) or email address if no name is provided. This value must be unique and numbers will be appended if an existing user has this username already.
> [!NOTE]
> User profile fields are only populated **during initial account creation**. Subsequent SAML logins do **not** update the user’s profile automatically; changes can be made in Linear or via SCIM provisioning if enabled.
## Domain Management
### Allowed domains
Once you have configured your settings for an IDP, you'll need to add approved domains for this IDP under the settings for **SAML-approved email domains**. You will need to add a TXT code to your DNS record to claim this domain.
Please reach out to support@linear.app if you have any trouble claiming a domain, or if you are working across multiple workspaces.
### Other auth methods for other domains
You can choose to allow non-SAML logins only for other email domains, if you are working with contractors or other members that don't have accounts in your IDP.
### Disable new workspace creation
Once SAML is enabled, you have the option to prevent non-admins from creating new Linear workspaces with their email credential from the domain you claimed during setup. This can be useful to make sure all work is consolidated in a single Linear workspace.
## FAQ
I get an error when logging in. Can you help?
If SAML is enabled for your workspace, you must login via your SAML service's website or by selecting the "Continue with SAML SSO" option on the Linear login page.
If you're getting an error about the workspace not being accessible and it is your first time logging into Linear with SAML, please try logging out of the SAML provider and then logging in.
If you get repeated errors, then please [contact support](https://linear.app/docs/tutorials#contact-us).
How can I add new users?
For [SAML-enabled Workspaces](https://linear.app/docs/saml-and-access-control), you can still invite Members as normal from Linear's side. However, you'll need to make sure that members are given access in your identity provider(IdP) in order to log in.
New members who login successfully with SSO will be automatically provisioned using Just-In-Time (JIT) provisioning and an account will be created for them.
Do you support SCIM? (System for Cross-domain Identity Management)
We support enabling SCIM 2.0 for you on the Enterprise plan if you have SAML enabled. More details [here](https://linear.app/docs/scim).
How can I add Guests?
Guests must be invited over email to make sure they're permissioned appropriately. In order to invite them, enable a login method for users outside of your claimed domain as pictured, then choose "Invite" in Settings > Administration > Members to invite your Guests.
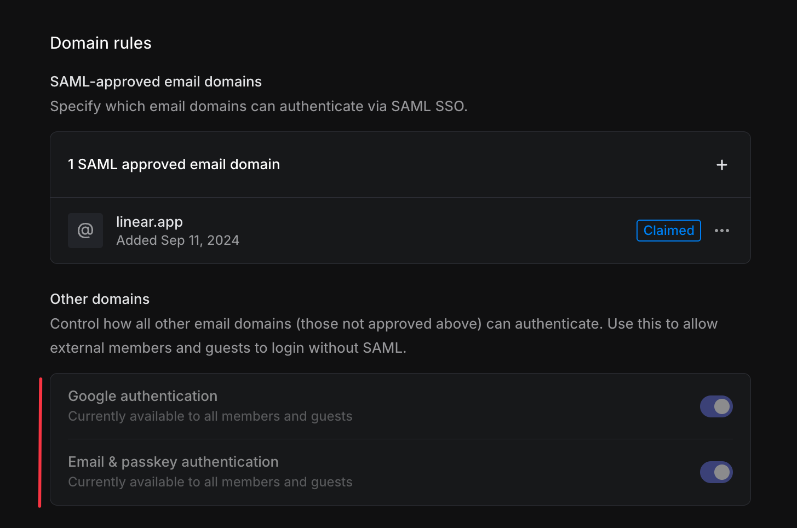
---
# Source: https://linear.app/docs/scim.md
# SCIM
SCIM, or _System for Cross-domain Identity Management_ allows for the automation of user provisioning for your Linear workspace.
> [!NOTE]
> Available to workspaces on our [Enterprise](https://linear.app/pricing) plan

## Overview
With SCIM enabled, user accounts can be automatically created, updated, and suspended based on your IDP settings—eliminating the need for manual account management in Linear. This integration helps ensure that your team's access stays in sync with your organization’s directory.
## Configure
### Enable and test
1. Navigate to [Settings > Administration > Security](https://linear.app/settings/security)_._
2. Under the "Authentication" section, click **Configure** next to "SAML & SCIM".
3. Toggle the option to enable SCIM
4. Click _"View configuration"_ to get your **SCIM base connector URL** and **Bearer Auth token.** Keep these values at hand as you will need them to configure SCIM in your Identity provider.
> [!NOTE]
> Once enabled, Admins will **not** be able to manage users from within Linear as they will be kept up to date through your identity provider.
> If necessary, you can temporarily enable a manual override to allow user suspension. This may be useful if you need to remove members or Guests that were added to Linear before you enabled SCIM.
#### OneLogin
* In OneLogin's Admin panel > Applications, click _Add App_
* Search for the "SCIM Provisioner with SAML (SCIM v2 Enterprise, full SAML)" app and add
* Click on the _Configuration_ tab and add your SCIM base URL and Bearer token
* Click on the _Provisioning_ tab and Enable Provisioning
* Save your App
#### Okta
* In the Okta admin pages, open the Linear application you have for SAML 2.0
* In the _General_ tab, click _Edit_ and choose _SCIM_ in the Provisioning section and _Save_
* In the _Provisioning_ tab, enter the SCIM Base connector URL you generated from Linear
* For the _Unique identifier_ field for users section enter **email**
* For _Supported provisioning actions_ you can enable "Import New Users and Profile Updates", "Push New Users" and "Push Profile Updates". Also select "Push Groups" if you are planning to sync selected Okta groups with Linear teams. "Import Groups" is optional, but can be selected to import existing Linear teams to be later linked to Okta groups.
* For _Authentication mode_ field, choose HTTP Header and enter your Bearer token generated from Linear. You can now test the configuration and save
* Lastly, return to the Provisioning tab in Okta and edit your settings under "To App" to enable the SCIM functionality needed for your Linear application (Create, Update and Deactivate users)
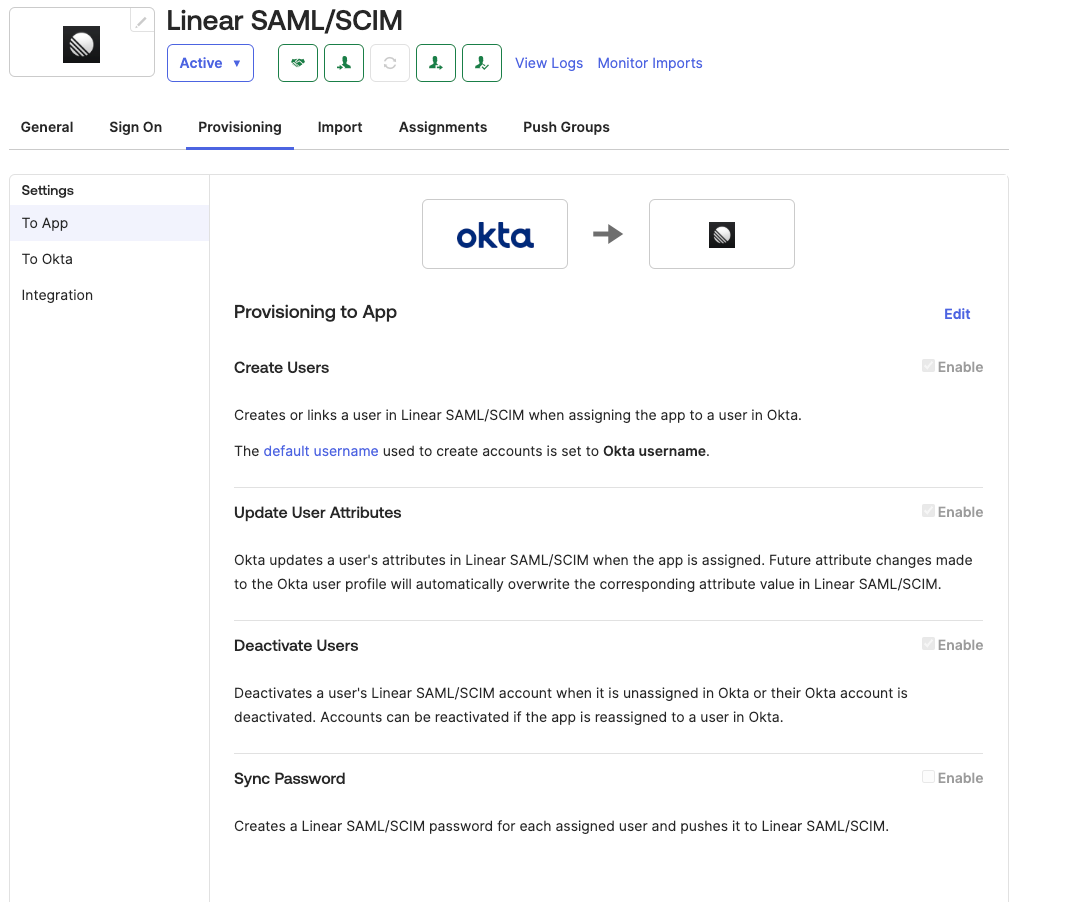
## Group push
Linear's SCIM integration also supports group push. From your side all you have to do is start pushing groups from your Identity provider to Linear. These will then map 1:1 with teams in Linear.
To link an existing team to a Group, you first need to import teams from Linear. These teams will be recognized as groups by your Identity provider. Once imported, you can then select the appropriate team when configuring group push.
Once a team is linked to a Group, this team's membership is solely managed through your identity provider and not in Linear directly.
If you choose to disconnect the Push group from Linear in the future, you may see different options offered by your IDP:
* Opting to delete the group on Linear's side will remove all members from the Linear team and convert the team to private. Issues will remain unchanged.
* Disconnecting the group without sending a delete request will leave the team unchanged and not sync any changes to the team on Linear's side. From the team **Settings > Danger Zone** you can then unlink SCIM manually to resume managing the team as normal.
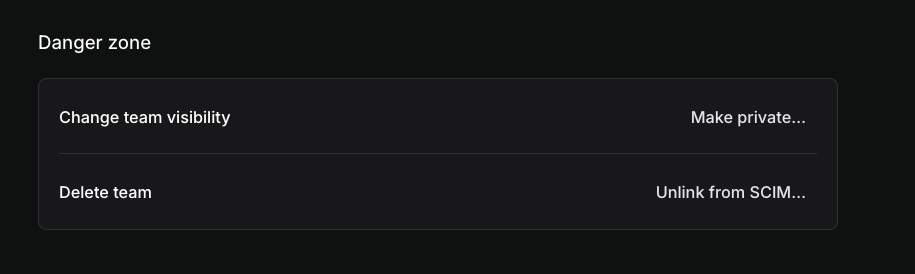
## Provisioning Roles
By default, all accounts created via SCIM via individual assignment or group push are provisioned as Members. You can also choose to provision specific users into Owner (if on an Enterprise plan), Admin and Guest roles directly from your IDP.
To do this, you need to create `linear-owners` (only if on an Enterprise plan), `linear-admins` and `linear-guests` as push groups on the IDP side and sync their members with Linear.
Once these have been connected to Linear, any users added to the group will be given the corresponding role in Linear.
* These particular groups do not create Teams in Linear or sync membership with existing teams.
* You can rename these groups from your IDP after you've pushed them at first as `linear-owners` (if applicable), `linear-admins` and `linear-guests`
* You will not be able to assign or edit admin or guest roles manually when this link is in place.
If your workspace already uses SCIM and is now migrating to an Enterprise plan for the first time, follow [this migration guide](https://linear.app/docs/changes-to-user-roles-when-upgrading-to-enterprise) to make sure both Owner and Admin roles get provisioned correctly going forward.
> [!NOTE]
> **Guest Exceptions**
> You may prefer to invite external Guests to your workspace manually, without adding them through your IDP.
>
> The Invite menu in _Settings > Members_ will allow you to invite Guests only, even with SCIM enabled.
>
> For Guests added before this was an option, you can use the ... menu on the Members page to unlink their account from your identity provider and manage them in Linear.
## SCIM Sync
Linear keeps the following user and team properties in Linear up to date in near real time when we receive SCIM updates from your IDP.
**Users**
* **Email (`userName`):** primary identifier; must be a valid email. SCIM updates are accepted when the email domains are claimed by your workspace.
* **Full Name:** resolved in order: `name.formatted` → `name.givenName + name.familyName` → `displayName`
* **Username/Nickname:** updated from `displayName`. Linear ensures uniqueness by appending a number when needed.
* **Active:** `active: false` suspends the user; `active: true` unsuspends.
* **Avatar:** updated from `avatarUrl` or `photos[].value`
**Teams**
* **Name (`displayName`):** updates the team name; uniqueness enforced with a suffix if needed (e.g., “Engineering (2)”).
* **Members (`members`):** add/replace/remove members to SCIM-managed teams via user references (`value` = user ID).
## Disabling SCIM
Once SCIM is disabled on Linear side:
* SCIM requests coming from your Identity provider will be rejected on Linear side.
* Any team that was linked to a Group will be unlinked.
* All SCIM restrictions will stop being enforced.
This does mean that if SCIM is re-enabled on Linear side, any changes or member removals that happened on your Identity provider will have to be pushed again to Linear. Refer to your Identity provider documentation for more information on accomplishing this.
If you need to remove some Linear accounts that are not part of your IDP, we recommend enabling the temporary override from your Linear SCIM settings, rather than disabling SCIM. You'll find the option for this at the bottom of your SCIM settings page.

## FAQ
Can you set default public teams for users created through SCIM?
Yes, we support setting default public teams for SCIM provisioned users.
What identity providers do you support?
SCIM should work with most identity providers though we have only tested with Okta and OneLogin.
What version of SCIM do you use?
We support SCIM 2.0 (not SCIM 1.1.)
When do SCIM created users become billable seats?
As of August 14th 2025, SCIM-created users are billable only after they've logged on for the first time, not at time of creation.
---
# Source: https://linear.app/developers/sdk-errors.md
# Errors
Errors can be caught and inspected by wrapping the operation in a try catch block:
```ts
async function createComment(input: LinearDocument.CommentCreateInput): LinearFetch {
try {
/** Try to create a comment */
const commentPayload = await linearClient.createComment(input);
/** Return it if available */
return commentPayload.comment;
} catch (error) {
/** The error has been parsed by Linear Client */
throw error;
}
}
```
Or by catching the error thrown from a calling function:
```ts
async function archiveFirstIssue(): LinearFetch {
const me = await linearClient.viewer;
const issues = await me.assignedIssues();
const firstIssue = issues.nodes[0];
if (firstIssue?.id) {
const payload = await linearClient.archiveIssue(firstIssue.id);
return payload;
} else {
return undefined;
}
}
archiveFirstIssue().catch(error => {
throw error;
});
```
The parsed error type can be compared to standard error types with `instanceof` to determine the course of action:
```ts
import { InvalidInputLinearError, LinearError, LinearErrorType } from '@linear/sdk'
import { UserError } from './custom-errors'
const input = { name: "Happy Team" };
createTeam(input).catch(error => {
if (error instanceof InvalidInputLinearError) {
/** If the mutation has failed due to an invalid user input return a custom user error */
return new UserError(input, error);
} else {
/** Otherwise throw the error and handle in the calling function */
throw error;
}
});
```
Information about the `request` resulting in the error is attached if available:
```ts
run().catch(error => {
if (error instanceof LinearError) {
console.error("Failed query:", error.query);
console.error("With variables:", error.variables);
}
throw error;
});
```
Information about the `response` is attached if available:
```ts
run().catch(error => {
if (error instanceof LinearError) {
console.error("Failed HTTP status:", error.status);
console.error("Failed response data:", error.data);
}
throw error;
});
```
Any GraphQL `errors` are parsed and added to an array:
```ts
run().catch(error => {
if (error instanceof LinearError) {
console.log("The original error", error.raw);
}
throw error;
});
```
The `raw` error returned by the `LinearGraphQLClient` is still available:
```ts
run().catch(error => {
if (error instanceof LinearError) {
error.errors?.map(graphqlError => {
console.log("Error message", graphqlError.message);
console.log("LinearErrorType of this GraphQL error", graphqlError.type);
console.log("Error due to user input", graphqlError.userError);
console.log("Path through the GraphQL schema", graphqlError.path);
});
}
throw error;
});
```
---
# Source: https://linear.app/developers/sdk-fetching-and-modifying-data.md
# Fetching & modifying data
## Queries
Some models can be fetched from the Linear Client without any arguments:
```ts
const me = await linearClient.viewer;
const org = await linearClient.organization;
```
Other models are exposed as connections, and return a list of nodes:
```ts
const issues = await linearClient.issues();
const firstIssue = issues.nodes[0];
```
All required variables are passed as the first arguments:
```ts
const user = await linearClient.user("user-id");
const team = await linearClient.team("team-id");
```
Any optional variables are passed as the last argument as an object:
```ts
const fiftyProjects = await linearClient.projects({ first: 50 });
const allComments = await linearClient.comments({ includeArchived: true });
```
Most models expose operations to fetch other models:
```ts
const me = await linearClient.viewer;
const myIssues = await me.assignedIssues();
const myFirstIssue = myIssues.nodes[0];
const myFirstIssueComments = await myFirstIssue.comments();
const myFirstIssueFirstComment = myFirstIssueComments.nodes[0];
const myFirstIssueFirstCommentUser = await myFirstIssueFirstComment.user;
```
> [!NOTE]
> **Note**
> Parenthesis is required only if the operation takes an optional variables object.
> [!NOTE]
> **Tip**
> You can find IDs for any entity within the Linear app by searching for "Copy model UUID" in the command menu.
## Mutations
To create a model, call the Linear Client mutation and pass an input object:
```ts
const teams = await linearClient.teams();
const team = teams.nodes[0];
if (team.id) {
await linearClient.createIssue({ teamId: team.id, title: "My Created Issue" });
}
```
To update a model, call the Linear Client mutation and pass in the required variables and input object:
```ts
const me = await linearClient.viewer;
if (me.id) {
await linearClient.updateUser(me.id, { displayName: "Alice" });
}
```
Or call the mutation from the model:
```ts
const me = await linearClient.viewer;
await me.update({ displayName: "Alice" });
```
All mutations are exposed in the same way:
```ts
const projects = await linearClient.projects();
const project = projects.nodes[0];
if (project.id) {
await linearClient.archiveProject(project.id);
await project.archive();
}
```
Mutations will often return a success boolean and the mutated entity:
```ts
const commentPayload = await linearClient.createComment({ issueId: "some-issue-id" });
if (commentPayload.success) {
return commentPayload.comment;
} else {
return new Error("Failed to create comment");
}
```
## Pagination
Connection models have helpers to fetch the next and previous pages of results:
```ts
const issues = await linearClient.issues({ after: "some-issue-cursor", first: 10 });
const nextIssues = await issues.fetchNext();
const prevIssues = await issues.fetchPrevious();
```
Pagination info is exposed and can be passed to the query operations. This uses the [Relay Connection spec](https://relay.dev/graphql/connections.htm):
```ts
const issues = await linearClient.issues();
const hasMoreIssues = issues.pageInfo.hasNextPage;
const issuesEndCursor = issues.pageInfo.endCursor;
const moreIssues = await linearClient.issues({ after: issuesEndCursor, first: 10 });
```
Results can be ordered using the `orderBy` optional variable:
```ts
import { LinearDocument } from "@linear/sdk";
const issues = await linearClient.issues({ orderBy: LinearDocument.PaginationOrderBy.UpdatedAt });
```
---
# Source: https://linear.app/developers/sdk-webhooks.md
# Webhooks
The SDK provides a helper class to help you start listening to Linear [webhook events](https://linear.app/developers/webhooks) quickly.
Use `LinearWebhookClient` to create a typed, signature-verified event listener that can be mounted on Bun, Fastify, Express, or other server frameworks, so you can start working with webhook events with minimal boilerplate.
```ts
import express from "express";
import { LinearWebhookClient } from "@linear/sdk/webhooks";
// Example with Express
const app = express();
const webhookClient = new LinearWebhookClient("WEBHOOK_SECRET");
// Create a handler
const handler = webhookClient.createHandler();
// Handle the webhook event
handler.on("Issue", (payload) => {
console.log(payload.data.title);
...
});
// Mount handler to server
app.post("/hooks/linear", handler);
```
> [!NOTE]
> Ensure no middleware (e.g., body parser) consumes the raw request body before the handler! Linear signs the exact raw body, so signature verification will fail if any parsing occurs beforehand.
It also provides a helper to verify [webhook signatures](https://linear.app/developers/webhooks#securing-webhooks), in case you'd like to handle the webhook events manually:
```ts
import {
LinearWebhookClient,
LINEAR_WEBHOOK_SIGNATURE_HEADER,
LINEAR_WEBHOOK_TS_FIELD
} from '@linear/sdk/webhooks';
const webhookClient = new LinearWebhookClient("WEBHOOK_SECRET");
...
// Example with Express
app.use(
"/hooks/linear",
bodyParser.json({
verify: (req, res, buf) => {
webhookClient.verify(
buf,
req.headers[LINEAR_WEBHOOK_SIGNATURE_HEADER] as string,
JSON.parse(buf.toString())[LINEAR_WEBHOOK_TS_FIELD],
);
},
}),
(req, res, next) => {
// Handle the webhook event
next();
},
);
```
---
# Source: https://linear.app/developers/sdk.md
# Getting started
The Linear Typescript SDK exposes the [Linear GraphQL schema](https://github.com/linear/linear/blob/master/packages/sdk/src/schema.graphql) through strongly typed [models and operations](https://github.com/linear/linear/blob/master/packages/sdk/src/_generated_sdk.ts). It’s written in Typescript but can also be used in any Javascript environment.
All operations return models, which can be used to perform operations for other models and all types are accessible through the Linear SDK package.
```ts
import { LinearClient, LinearFetch, User } from "@linear/sdk";
const linearClient = new LinearClient({ apiKey });
async function getCurrentUser(): LinearFetch {
return linearClient.viewer;
}
```
You can view the Linear SDK source code on [GitHub](https://github.com/linear/linear/tree/master/packages/sdk).
## Connect to the Linear API and interact with your data in a few steps:
### 1. Install the Linear Client
```sh
npm install @linear/sdk
```
### 2. Create a Linear client
SDK supports both authentication methods, personal API keys and OAuth 2. See [authentication](https://linear.app/developers/graphql#authentication) for more details.
You can create a client after creating authentication keys:
```ts
import { LinearClient } from '@linear/sdk'
// Api key authentication
const client1 = new LinearClient({
apiKey: YOUR_PERSONAL_API_KEY
})
// OAuth2 authentication
const client2 = new LinearClient({
accessToken: YOUR_OAUTH_ACCESS_TOKEN
})
```
### 3. Query for your issues
Using async await syntax:
```ts
async function getMyIssues() {
const me = await linearClient.viewer;
const myIssues = await me.assignedIssues();
if (myIssues.nodes.length) {
myIssues.nodes.map(issue => console.log(`${me.displayName} has issue: ${issue.title}`));
} else {
console.log(`${me.displayName} has no issues`);
}
}
getMyIssues();
```
Or promises:
```ts
linearClient.viewer.then(me => {
return me.assignedIssues().then(myIssues => {
if (myIssues.nodes.length) {
myIssues.nodes.map(issue => console.log(`${me.displayName} has issue: ${issue.title}`));
} else {
console.log(`${me.displayName} has no issues`);
}
});
});
```
---
# Source: https://linear.app/docs/search.md
# Search
Quickly find issues, projects and documents with Search.

## Overview
Use the shortcut `/` to open Search. Search retrieves issues, projects, and documents across your workspace.
Use `O` + `I` to search for issues specifically by title or identifier.
### Keyboard
`/` to search all issues in workspace by title, description, comments
`Cmd/Ctrl` `F` to search issue titles in the current view (board, list, Inbox)
`O` then `I` to view recently opened issues
`O` then `I` to quick search issues by _issue ID_ or _title_
### Mouse
* Select the button with the magnifying glass from the sidebar next to the _New Issue_ button to search all issues in workspace by title, description, comments
* Searching boards, lists, or the Inbox must be done using the keyboard shortcut or command line
* Select the clock button in the top bar (next to the arrow buttons) to open recent issues or find a list of recent issues under the workspace search
### Command menu
`find in view` to search issue titles in the current view (board, list, Inbox)
`open issue` to launch quick issues search
`issue ID` then `Enter` to open any issue
Type ``i`` followed by space to focus your command menu on issue results
Additionally, you can type ``p`` followed by space for projects, ``u`` for users, ``t`` for team, ``l`` for labels, ``f`` for favorites and ``d`` for documents.
## Basics
### Search workspace
Click on the search button in the top left or type ``/`` to open the quick search menu and then type your query. Search looks for issues and documents across the full workspaces and matches the issue ID or terms in the title, description, or comments. You can search by ID exactly e.g. `LIN-123` or shorthand e.g. `lin123`. The search term will be highlighted if it's in the title.
We sort search results in what we assume is the most relevant order, showing unstarted and in progress issues first, then backlog, completed, canceled, and archived issues.
To further refine your search, use operators like:
* **"keyword"** to search for an exact term. Without quotes, searches may also include results for similar terms.
> [!NOTE]
> **ProTip**: Use filters to refine search results. Apply them after entering the search by clicking the search icon in the upper left using `Cmd/Ctrl` `F` to search a view (list, board, Inbox).
### Search filters
Narrow your search by `@`-mentioning teams, users, status, and other properties. This will automatically create and apply a filter to your search. Apply additional filter options through the Filter menu.
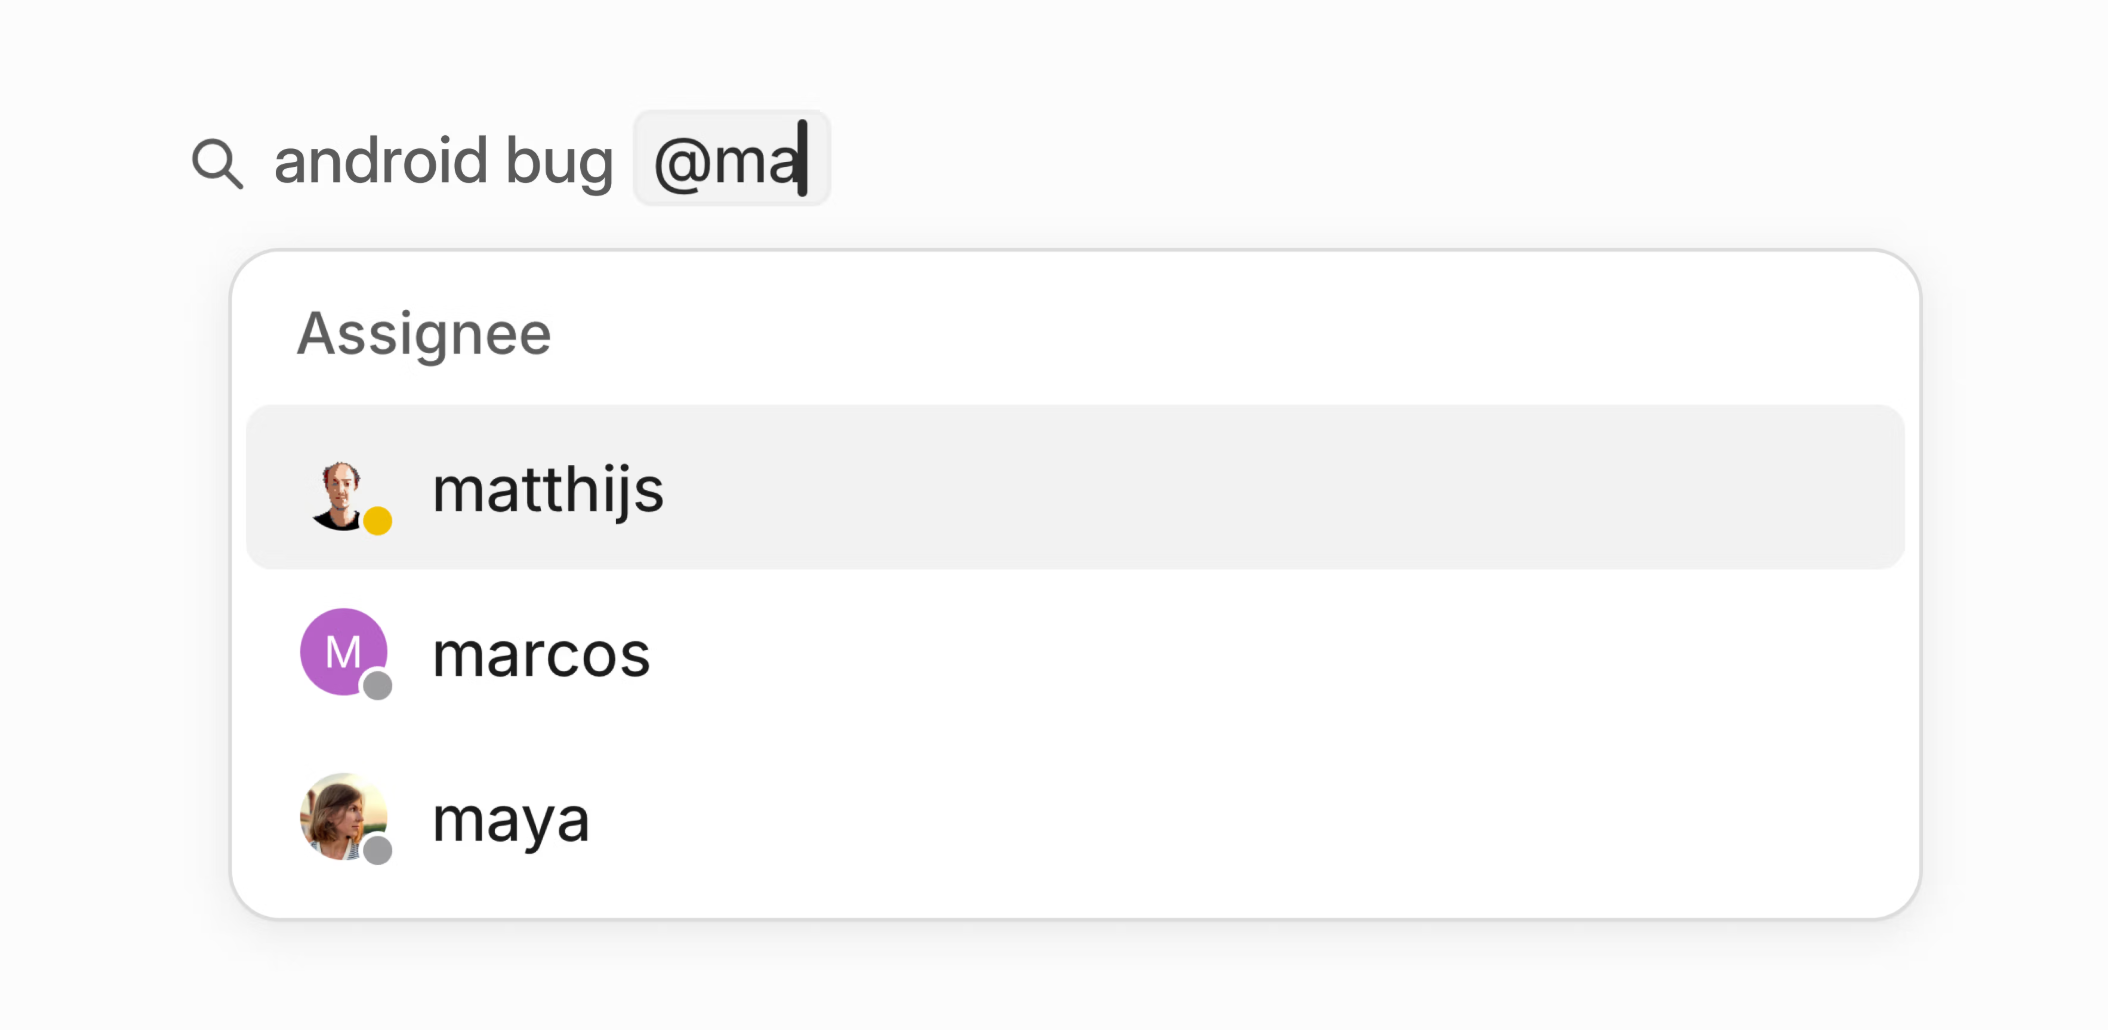
### Recent issues
When you open the search menu, you'll be shown recent searches as well as a list of recent issues for easy access. You can also find recent issues on the macOS desktop app by clicking the clock icon above the lefthand sidebar or launching it with `O` then `I`.
### Search specific views
Type `Cmd/Ctrl` `F` to search for issues within the current view. The search bar will appear in the top right corner next to the Display Options button. You'll need to search by exact _issue ID_ or words in the title. This search acts more like a temporary filter, so as you type, only matching issues remain on the board or list. Press `Esc` to clear the search and show all of your issues.
### Quick search
The shortcut `O` then `I` will open a recent issues search where you can also search for issues by _issue ID_ or _title_. This supports partial word search but will only search by title (not description or comments).
## Q&A
Can you sort search results?
Yes, you can adjust the display settings of your search results to order these by relevance, last updated or last created.
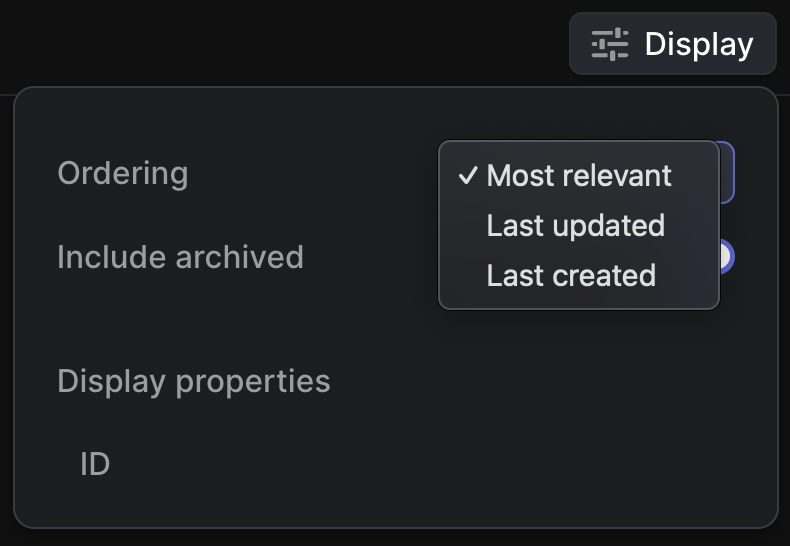
What is the maximum number of results returned?
We return 500 results maximum at this time.
Words search excludes by default
When not searched within quotations, search removes the following English stop words:
`a`, `an`, `and`, `are`, `as`, `at`, `be`, `but`, `by`, `for`, `if`, `in`, `into`, `is`, `it`, `no`, `not`, `of`, `on`, `or`, `such`, `that`, `the`, `their`, `then`, `there`, `these`, `they`, `this`, `to`, `was`, `will`, `with`
###
---
# Source: https://linear.app/docs/security-and-access.md
# Security & Access
Manage your account security and access.

## Overview
The security and access page allows you to view and manage connected devices and applications.
## Sessions
See a list of current and previously connected devices from here along with details of the location, source type and date last seen.
To revoke individual sessions, hover over them and choose the _Revoke access_ option. To remove all connections except the current one, choose _Revoke all._
You can view additional details such as IP address or the original sign in date, by clicking on each entry.
Inactive sessions will be automatically expired after 30 days.
## Passkeys
Passkeys allow a secure and fast login without having to rely on passwords. They are supported by all major browsers, mobile operating systems, and many password managers like 1Password. You can register multiple devices to login via passkey from this page.
## Personal API keys
Create or revoke API keys associated with your account.
## Authorized applications
View a list of your authorized OAuth applications here and the permissions they have been granted. You can remove their access by hovering over them and clicking on _Revoke access_.
---
# Source: https://linear.app/docs/security.md
# Security
Learn more about our data security practices and compliance measures.
## Overview
Linear is built with best-in-class security practices to keep your work safe and secure at every layer. This includes state-of-the-art encryption, safe and reliable infrastructure partners, and independently verified security controls.
Refer to our [Data Processing Agreement](https://linear.app/dpa) (DPA) for specific details.
## Shared responsibility
Under our shared responsibility model, Linear secures the components that we control, including the application layer, underlying platform, and cloud infrastructure. This includes protecting against threats targeting these components through security controls, monitoring, and incident response.
Customers are responsible for how they use Linear. This includes configuring workspace security and access, determining what data they store and retain, managing API keys and integrations, and monitoring their audit log.
## Certifications
Linear is compliant with GDPR, SOC 2 Type II, and HIPAA.
For HIPAA compliance, we offer a Business Associate Agreement (BAA) to customers on [our Enterprise plan](https://linear.app/pricing). Please contact us at sales@linear.app for more information.
To request other security and compliance documents for Linear, please visit our [Trust Center](https://trust.linear.app/). If you have further questions about any of our certifications, please let us know at support@linear.app.
## Data regions
When creating a new workspace, you have the option to select the region where you want your data to be stored. The available options are:
* United States
* European Union
> [!NOTE]
> Your data region selection chosen at workspace creation is permanent, and cannot be updated at a later date.
Most of the data associated with the workspace — including issue descriptions and uploaded attachments—will only be stored in the selected region. Regardless of the region you select for your workspace, the following data is always stored in the United States:
* Information about the workspace, all user account information and user created API keys, used to authenticate users and direct them to the right region.
* Notification emails that are sent to workspace users will be stored in the U.S. for 7 days by our email sending partner.
* Usage data, used for analytical purposes.
* Workspace data and user account information used for analytical purposes. This data has been stripped of any information that might be confidential, including issue titles and descriptions, comment content, project names, team names, and document content and initiative names among others.
* User account information associated with any crashes that happen on the client or when processing a client or API request, in order to be able to debug crashes.
## Report a vulnerability
You can read more about reporting any suspected security issues, what's in scope for reports, and other guidelines on our [report a vulnerability page.](https://linear.app/security/vulnerability)
## FAQ
Is your data encrypted?
All communication outside our cloud environment is encrypted. In addition, our databases are encrypted at rest.
How can I access, transfer or delete my data?
Contact us at support@linear.app and we can help.
How to set up Linear for HIPAA compliance?
For HIPAA compliance, we offer a Business Associate Agreement (BAA) to customers on [our Enterprise plan](https://linear.app/pricing). Contact us at sales@linear.app.
---
# Source: https://linear.app/docs/select-issues.md
# Select issues
Take actions on groups of issues.

## Overview
Highlighting or selecting one issue both allow you to take actions on the issue using keyboard shortcuts, the command menu, or right-click to bring up the contextual menu. The two differentiates when it comes to multiple issues.
By default, no issue is selected when you open a board or list of issues.
## Highlight an issue
* Hover over the issue with your cursor until the issue is highlighted
* Use `↑` / `↓` or `J` / `K` to navigate the page to the issue.
## Select issues
* Once an issue is highlighted, press `X` shortcut.
* Hold `Shift` and _click_ your mouse on the issue.
* Bring up a checkbox element by moving your cursor over the far left of any issue (near where the issue meets the sidebar).
### Select multiple issues
Once an issue is selected, use the navigation to highlight another issue and press `X`.
To select multiple _consecutive_ issues:
* Hold down Shift after selecting the first issue, then use the `↑` / `↓` keys to increase the selected range one issue at a time.
* Use filters to refine the issue list first, then use Cmd/Ctrl A to select all issues on a board or list.
### Clear selection
Press `Esc` will clear selected issues on your list or board.
## Take actions
Once an issue or set of issues are selected, use `Cmd/Ctrl` `K` to open the command bar and select the preferred action or right-click anywhere on the selected issue(s) to open the contextual menu for a list of available actions.
### Moving issues to top, bottom, or in increments
To move an issue or issues up or down the list:
1. In the _Display Options_, set the Grouping to **No grouping**.
2. Set the _Ordering_ to **Manual**.
3. Select the issue(s) you want to move.
4. Use the shortcut `Option/Alt` `Shift` `↑` or `Option/Alt` `Shift` `↓` to move an issue/issues in increments.
### Update multiple issues
Select them with shortcuts or the mouse and then update the issue field like you would any issue. Common bulk actions will show up at the bottom.
* **Select all keyboard shortcut:** To change issue priority so all issues without a priority were assigned no priority, filter to `no priority` issues and then used `Cmd/Ctrl` `A` then `P` to update the priority.
* **Use mouse to select multiple issues:** To move some issues from Todo to backlog, select by hovering over them and individually marking the checkbox that popped up.
* **Use keyboard to select multiple issues and bulk action toolbar:** Holding down `Shift` while moving the `up/down` buttons to select multiple issues and choose a bulk action such as `Move to backlog`.
---
# Source: https://linear.app/docs/sentry.md
# Sentry
Our integration with Sentry lets you create Linear issues from Sentry and create links between Linear and Sentry issues.
## Overview
Create new Linear issues from Sentry exceptions and link Sentry exceptions to existing Linear issues. Once enabled, the option will show up in Sentry under _Linked Issues_. When a Linear issue is completed, any linked Sentry issues will be automatically resolved. Re-assigning an issue in Linear will update the assignee on linked Sentry issues, too. Read more about the integration on [Sentry](https://sentry.io/integrations/linear/).
### Keyboard
`G` then `S` to go to _Settings > Workspace > Integrations > Sentry_
Use mouse to interact with Sentry links in Linear
### Mouse
* Click the Avatar to go to to go to _Settings > Workspace > Integrations > Sentry_
* Click on link to go open in Sentry
* Right-click on link to remove it
### Command menu
`settings` to go to _Settings > Workspace > Integrations > Sentry_
## Configure
Enable the integration in Linear from [workspace settings](https://linear.app/settings/integrations/sentry).
## Basics
### Create issues
When viewing a Sentry issue, go to the right sidebar and select Create Linear issue, then fill out the quick form. We pre-fill the description with the Sentry issue details and you'll add the title, team, assignee and priority.
### Link issues
When viewing a Sentry issue, go to the right sidebar and select _Link Linear_ _issue,_ then search for it existing issue by ID or title.
### Automations
We’ll automatically close Sentry issues when the linked Linear issue is resolved. We'll also update the assignee in Sentry if it changes in Linear (this will work if you use the same email for Linear and Sentry).
You can also configure automatic creation of Linear issues based on issue/event alerts and metric alerts in Sentry from Alerts > Create Alert and customize your rules to create a Linear issue.
> [!NOTE]
> **Protip:** Most list or board views let you display a Sentry icon when issues are linked to Sentry issues. If the view supports this option, you'll see it as an optional field under Display properties. Clicking the icon will take you directly to Sentry, saving you a click.
### Remove links
To remove the Sentry link, right-click on the link from the Linear issue and select Remove.
## FAQ
Do you support self-hosted installations?
Unfortunately, the integration is limited to cloud accounts. This is a limitation with their integrations, reach out to Sentry if you'd like them to support this in the future.
Can you connect more than one Sentry Organisation?
Not at this time.
Why is my Linear team not showing up?
You can only use this integration for public Linear teams, private teams aren't supported. If you convert a team to private any existing connection will no longer work.
---
# Source: https://linear.app/docs/sla.md
# SLAs
Automate SLAs for issues that should be completed within a certain amount of time.
> [!NOTE]
> Available to workspaces on [Business](https://linear.app/pricing) and [Enterprise](https://linear.app/pricing) plans
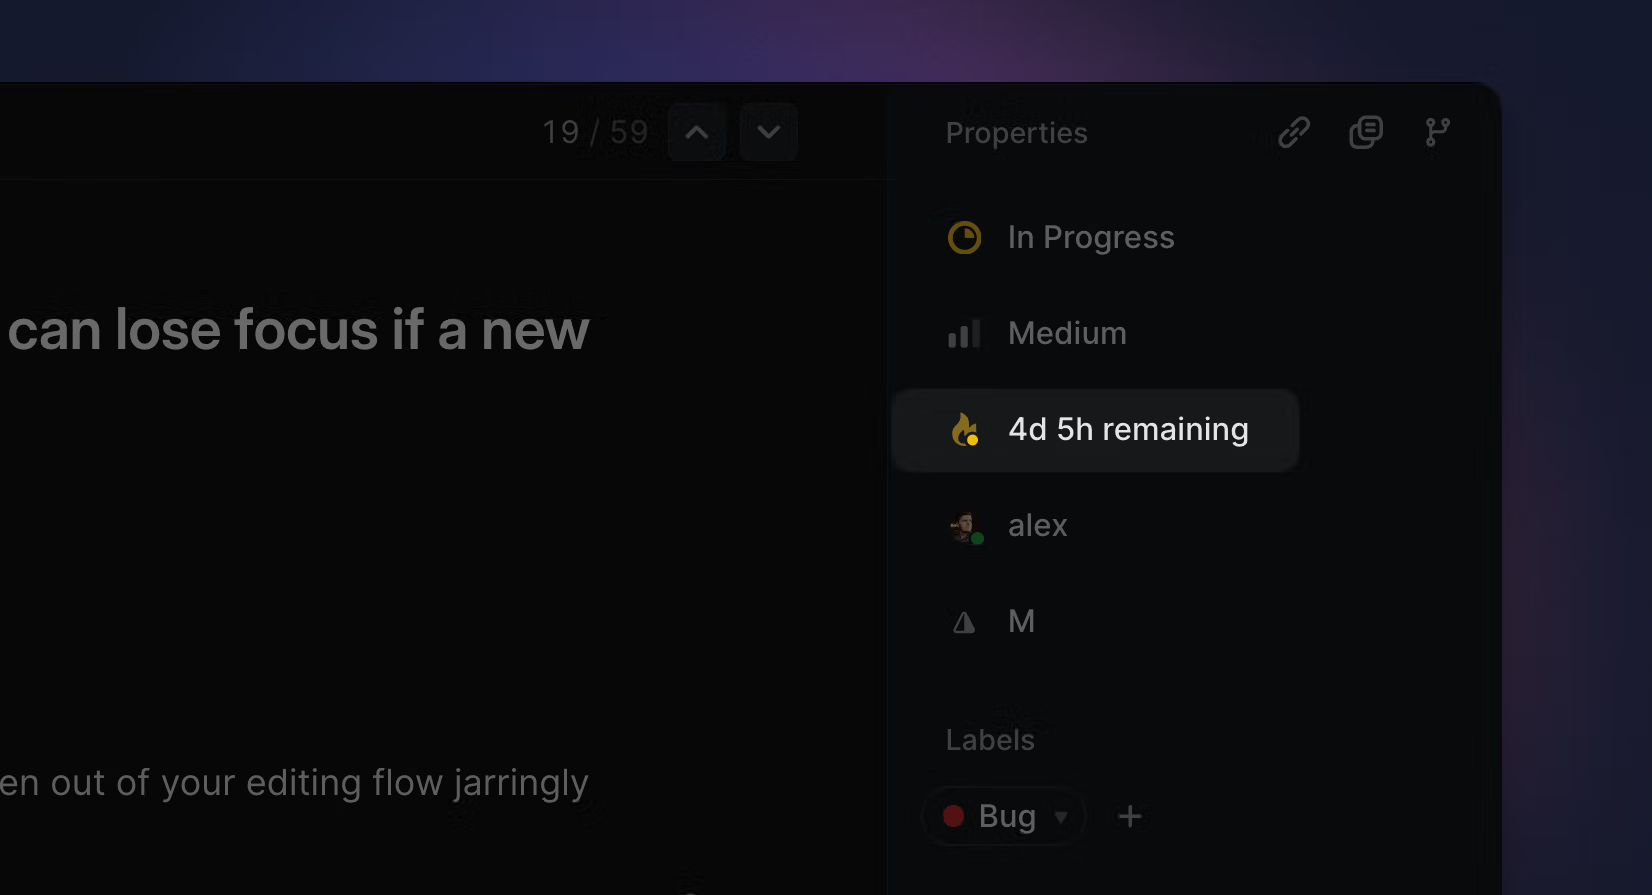
## Overview
SLAs (Service-level agreements) automatically apply deadlines to issues when they match your defined parameters. While traditionally used to describe service level agreements with your customers, SLAs can also be used to maintain internal standards for how quickly bugs will be fixed and time-sensitive issues will be resolved.
## Configure
Enable the feature in [settings](https://linear.app/settings/sla) under _Workspace > SLAs_, then use the workflow builder to create rules for when to apply an SLA to a newly created issue.
> [!NOTE]
> SLAs won't be applied to existing issues that have already been prioritized. Changing the priority of an existing issue will trigger SLAs however once the change matches your SLA rules.
## Basics
SLAs appear on issues as a fire icon which transitions from gray > yellow > orange > red as an issue nears and breaches the SLA. Once the issue is completed, the SLA field remains and indicates completion time down to the minute and whether the SLA was achieved early or failed.
SLAs are automatically created on any issue that matches the rules set in SLA settings. You can also manually add SLAs to issues if desired.
### Default SLAs
When you enable SLAs, you'll enable a set of default rules:
* When Priority is Urgent, add a 24 hour SLA
* When Priority is High, add a 1 week SLA
* When Priority is Medium, Low, or No Priority, remove the SLA
You can edit, delete or create new SLA rules as desired.
### Create new SLA Rules
Select _New Rule_ to create a new SLA rule.
Set the time interval to any of the following durations:
* 12 hours
* 24 hours
* 48 hours
* 1 week
* 2 weeks
* 4 weeks
* Custom time: Hour, Day, Business day and Week
You can filter by almost any field to specify when SLAs should be applied, including _Team, Status, Assignee, Creator, Priority, Labels, Project, Project Status,_ and _Initiative,_ and filters can be combined.
### Business Day SLAs
When configuring an SLA with a custom time period, you can choose business days as your unit of time to exclude days that are not a part of your work week.
By default Business days are considered Monday through Friday.
On the SLA settings page, you can choose optionally to set your work week to Sunday > Thursday. This will affect your SLA calculations and other features that skip working days, like [nudges on project reminder updates](https://linear.app/docs/initiative-and-project-updates#initiative-and-project-update-reminders).
When setting an SLA manually on an issue, you can choose business days or standard days when choosing a duration.

### Remove SLAs
Linear's default SLA rules contain conditions to remove SLAs when priority is marked as Medium, Low, or No priority. These "removal" rules are helpful to maintain data hygiene, so that if an issue's priority is downgraded, SLAs which are no longer relevant will be removed. We recommend keeping these in the workspace.
### SLA status and filtering
Linear groups SLAs into different SLA statuses. You will be able to filter and organize views of issues by their SLA status, and the different statuses will be indicated by the color of the SLA icon.
SLA status | Definition
--- | ---
Low risk | More than 1 week away from SLA
Medium risk | Within 1 week of SLA
High risk | Within 1 day of SLA
Breached | SLA has passed
Achieved | Issue was completed within SLA
Failed | Issue was completed after SLA was breached
### SLA notifications
Subscribers to an issue with an SLA receive notifications in their Inbox when SLAs are 24 hours away from being breached as well as when SLAs are breached. Individuals can opt in to receive notifications whenever any issue in their Team has an SLA, too. Manage these notifications in [settings](https://linear.app/settings/account/notifications) under _Account > Notifications_.
### Viewing SLA issues
You can filter any view to see issues according to SLA status: _Breached, High Risk, Medium Risk, Low Risk, Achieved, Failed,_ and _No SLA._
[Insights](https://linear.app/docs/insights) offers a helpful way to evaluate how well you're meeting your SLAs. Filter a view by SLA, set Insight parameters to _Issue count_ (measure) and _SLA status_ (dimension) to see a clear breakdown of how well you're meeting your SLAs.
### Manually apply SLAs
You can add SLAs to issues even when they don't apply to a predefined rule. Select the three dot menu from the issue creation modal to apply an SLA.
Note that if you create an SLA that conflicts with a "removal" rule, the SLA will automatically be removed after the issue is created. In these cases, you can override the rule but only if you add the SLA by editing the issue after it's created (not during issue creation). Do so from the issue view by selecting the three dot menu, then _Set SLA_.
## FAQ
What is the best way to view SLAs?
We recommend creating a custom view filtered down to issues that contain SLAs. You can group the view by SLA status and also use Insights to explore the data.
Can I add custom names for SLAs?
No, we do not offer custom naming for SLAs.
When does Linear send a notification to subscribers that an SLA will be breached?
Subscribers will be notified 24 hours prior to a potential SLA breach.
What's the relationship between SLAs and due dates?
An issue may use either due dates or an SLA, but not both. If an issue has a due date and then has an SLA applied, the due date will be replaced by the SLA
---
# Source: https://linear.app/docs/slack.md
# Slack
Combine Linear with Slack to keep everyone in sync.
## Overview
Create Linear issues from Slack messages, sync threads between Slack and Linear, set up personal and channel-specific notifications, display rich unfurls in Slack and more.

## Configure
### Integration setup
Go to [Settings > Features > Integrations > Slack](https://linear.app/settings/integrations/slack) to connect your Slack account to Linear. You must be a Linear admin to do this.
Once this has been completed, others in your Linear workspace can:
* Use Linear agent if your plan is Business or Enterprise
* Create Linear issues from the _More actions_ menu on Slack messages or by using the `/linear` command on all plans
* Take quick actions from Linear links shared in your Slack workspace
* View rich unfurls in Slack that show key issue, comment, document, initiative or project details
* Enable personal Slack notifications
* Send team and project updates to dedicated Slack channels
### Notifications setup
Slack notifications are available for teams, projects, and individuals. Once the initial integration has been configured, any user can set up these notifications.
#### Team notifications
Set up **team notifications** from team general settings or from the integration [settings](https://linear.app/settings/integrations/slack) page. Authenticate to Slack and then choose a channel for the notifications to post to.
#### Project notifications
Set up **project notifications** from individual project pages. Click on the bell in the titlebar on the top right of the app, authenticate to Slack, and choose a channel for the notifications to post to.
#### Personal notifications
Set up **personal Slack notifications** from [notification settings](https://linear.app/settings/account/notifications). Authenticate to Slack and then choose which notifications to receive.
#### View Subscriptions
Click the bell icon at the top of a view, then the _Configure_ button next to _Slack notifications_. Turn on the toggle and authorize Linear to post to a particular channel. Choose whether to be notified for when an issue is added to the view, completed/canceled, or both.
Moving forwards, notifications for these selected changes will be sent as messages to the chosen Slack channel.
### Connect multiple Slack workspaces
Linear's Enterprise plan supports connecting multiple Slack workspaces to Linear to use the Slack integration. If you're using Slack's Enterprise Grid plan for example, this would allow you to use the Slack integration across your workspaces. To add a new workspace, go to Linear's Slack integration settings and click the `+` button under connected workspaces. You must hold Admin permissions on an Enterprise Linear plan in order to enable this feature.
## Linear agent for Slack
Mention `@linear` in discussions on Slack, and the Linear agent will create issues informed by your conversation's context. Use natural language to specify issue details or simply let the agent infer what's needed.
For example, try:
* @linear file a bug, assign me
* @linear make feature requests from this thread
* @linear file to the Rideshare Loyalty project
To use this functionality, send `/invite @linear` to the desired Slack channel before sending. This feature is available to users in your Slack workspace with Linear accounts.
> [!NOTE]
> To use Linear Agent in group DMs, you have to invite the Linear Agent at the creation of group DM.
### Set Linear agent guidance
Linear agent considers instructions you write in Slack integration [settings](https://linear.app/settings/integrations/slack) on how to create issues. Use this field to refine the agent's behavior and give it more context about how you use Slack.
You might give it context about your channel naming structure and how it relates to your Linear projects, what statuses you prefer it create in, the team it should use when unsure, and more.
Outside of this field, the agent also uses contextual clues to help infer where to create issues (for example, if you're sending project updates from a project to a channel that sounds related, issues created in that channel will favor creation in that project.)
## Create issues with message actions
You can also create issues using the _More actions_ menu on a Slack message if you prefer to specify all the details of your created issue.
If you select a team in the resulting window that uses default templates, that template's text will appear in the description field. Only Linear users in your Slack workspace can create issues with this integration.
> [!NOTE]
> If you're interested in allowing non-Linear users in your Slack workspace to create issues, consider using [Asks](https://linear.app/docs/linear-asks) instead.
### Use templates
Your issue templates in Linear can also be used in Slack. Add templates to your Slack integration from [workspace template settings](https://linear.app/settings/templates) or the [Slack](https://linear.app/settings/integrations/slack) settings page. Admins can make up to 10 issue templates available in your Slack integration, which any Linear members in your Slack workspace can view and apply during issue creation. If you have a default template set for your team, it’ll show up as an additional template option after the team has been selected.
Templates in private teams are not available to the Slack integration (nor in other integrations that support templates like Intercom and Zendesk.) If you need to allow users to create issues using templates in private teams, consider using [Asks](https://linear.app/docs/linear-asks) where this use-case is supported.
### Sync threads
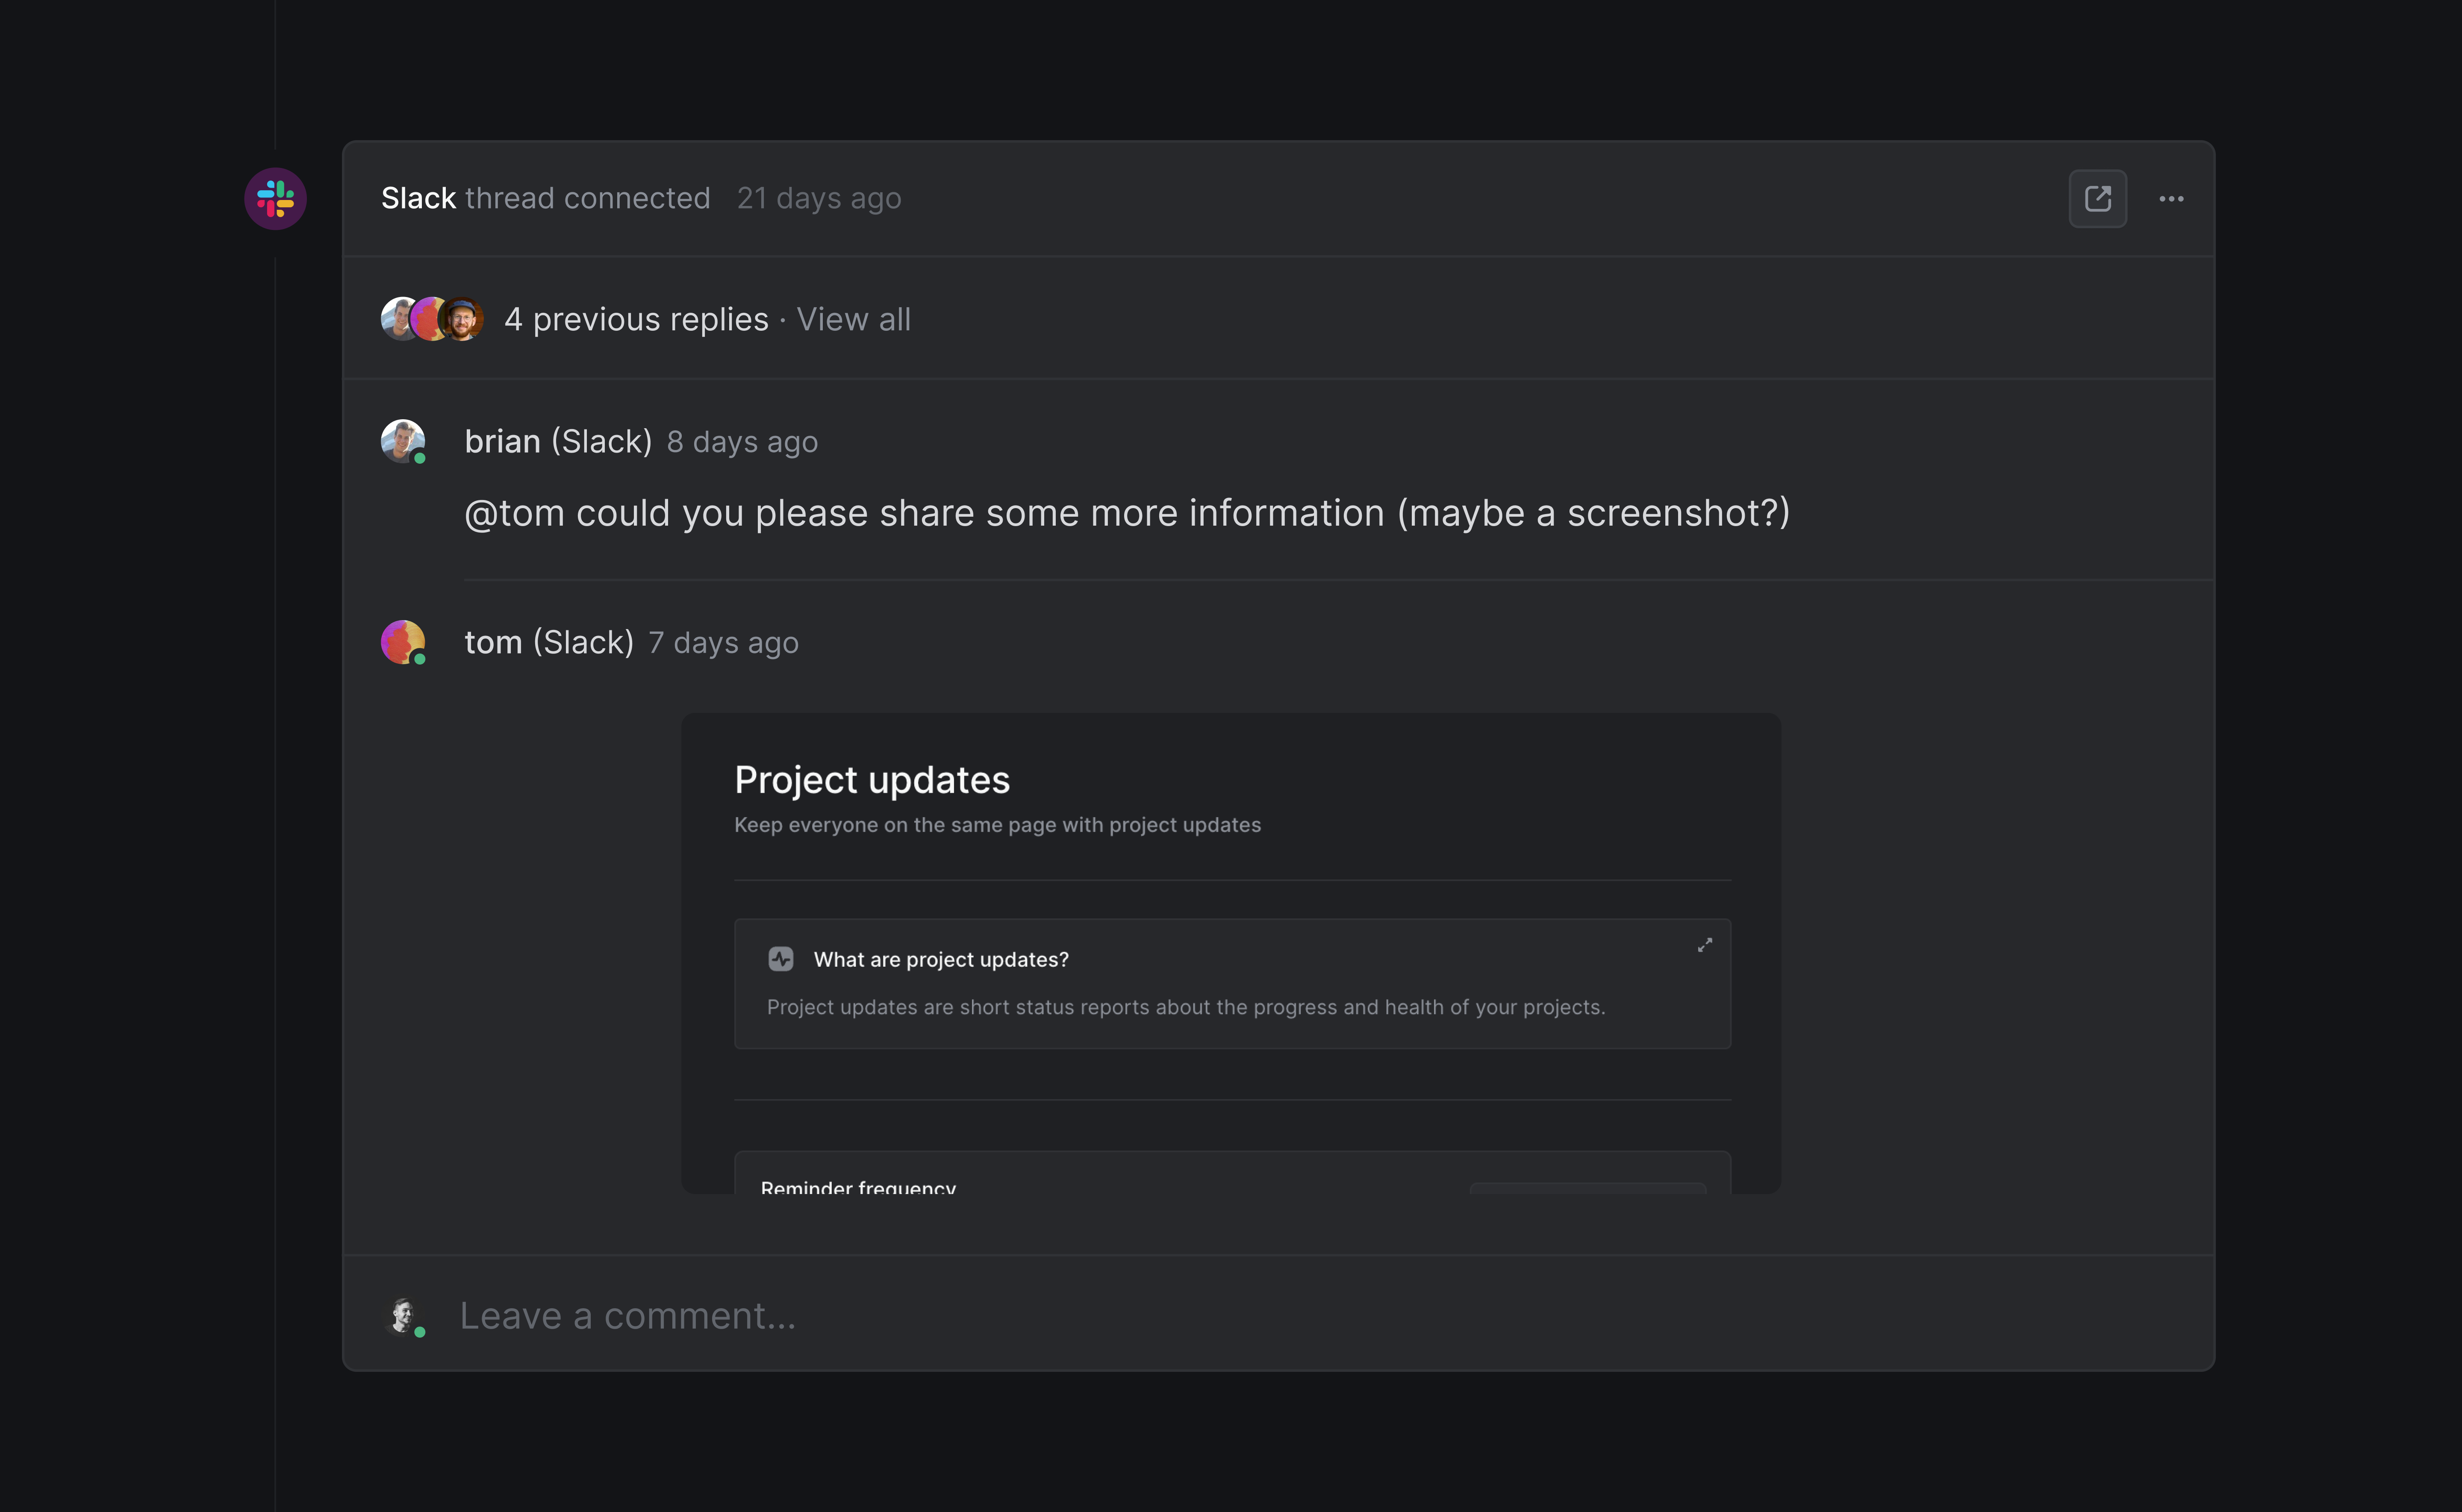
> [!NOTE]
> To use synced threads in private channels, invite the integration using `/invite @Linear`. Synced threads are not available in DMs.
To create a synced thread, create an issue from Slack through the _More actions_ menu on a Slack message.
When you click _Submit_, you'll also create a synced comment thread in the Linear issue by default. Both threads will update as replies are sent in either location, and we'll also update the synced thread in Slack when the issue is completed or canceled, or reopened after being completed or canceled.
When people in your company report issues in Slack, syncing threads is a great way to keep them in the loop regardless of whether they're in your Linear workspace. Comments made in the synced Linear thread will also appear in Slack, and the Slack thread will be updated when the issue is completed or canceled.
If an issue synced to a Slack thread is marked as a duplicate of another issue, we'll also update the Slack thread where the duplicate was created once the canonical issue is resolved.
### Add Slack messages to existing issues
There are a few options to link Slack messages to existing Linear issues.
#### Sync existing Slack thread with Linear issue
If there is not already a synced thread on the issue, you can choose to sync with an existing Slack thread. To do so, paste the issue's URL into the thread and send the message. Select the overflow menu from inside the unfurl and choose "Sync thread".
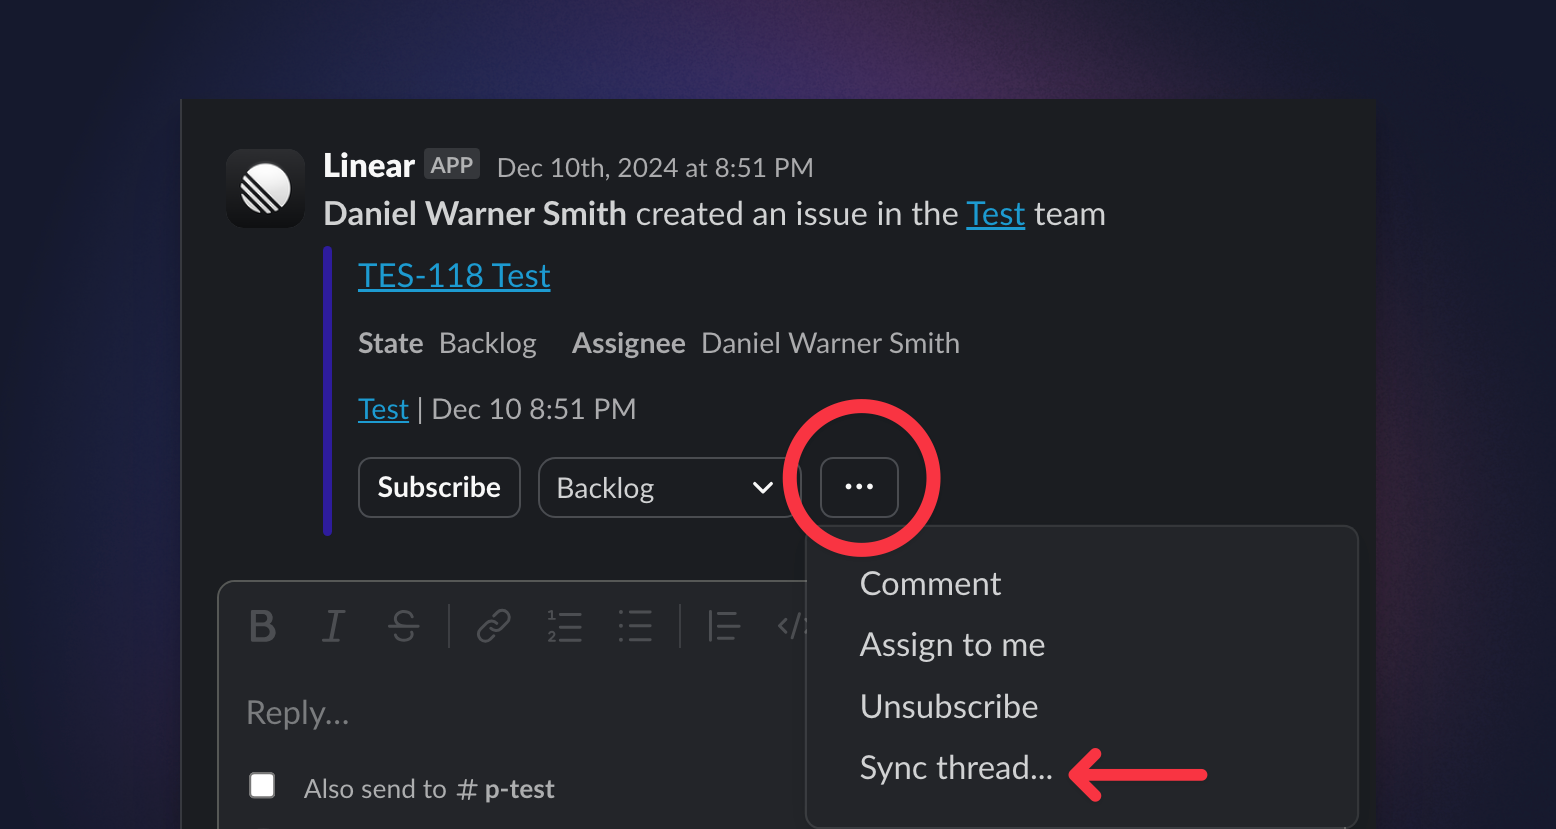
#### Attach the Slack message's URL in Linear
To associate a Slack message to a Linear issue without syncing, copy the Slack message's URL through the overflow menu on that message. In the Linear issue, use `Control L` to add that URL as an attachment. No updates or messages will be sent to the Slack message when linking this way.
#### Link to issue from Slack
On an issue in Slack, use the overflow menu to select "Link existing issue". Search for and select the issue to associate the Slack message with the Linear issue. With this type of linking, no terminal updates will be sent to the Slack thread, and no synced thread will be created.
### Notifications functionality
#### Team notifications
Team notifications will post updates to a specific Slack channel when issues in that team are created, receive comments, and/or update status.
We recommend creating a separate #linear or #linear-team channel in Slack for these updates, especially if you choose the option to post status updates (we post every time an issue status changes).
#### Project notifications
Projects have two types of notifications: Slack channel notifications and personal notifications.
Project Slack channel notifications will post updates to a specific Slack channel when issues in that team are created, receive comments, and/or update status.
Personal notifications for projects are not directly tied to Slack. They'll subscribe you to receive a notification whenever an issue is created in a project, which you will get in the Inbox (and personal Slack notifications if you have set those up to receive those in [notification settings](https://linear.app/settings/account/notifications)).
#### Personal notifications
Receive the same notifications in Slack that you normally get in Inbox, email, or desktop push notifications. Once enabled, the notification settings page will let you choose which issue, project, and team updates you want to receive via Slack. A Linear app will appear under Apps in your Slack workspace which is where these notifications will be sent.
### Rich unfurls and issue actions
Once you've connected the integration for Slack, we'll show expanded links anytime you post issue, project, document, or initiative links from public teams in Slack.
URLs associated with private Linear teams never unfurl. Unfurling can be disabled in Settings > Integrations > Slack if desired.
#### Issue links
**Issue links** show the issue title, description, status, assignee, and creation date.
They also give other Linear users in Slack the option to update the assignee, comment on the issue, and subscribe or unsubscribe to the issue directly from Slack. You can also engage Slack sync in an existing thread from this menu.
#### Project links
**Project links** in Slack will show a preview with the project name, description, status and target date.
#### Issue IDs
Whenever you mention an issue ID in Slack , a reply with the issue link is automatically added in thread. To prevent clutter, repeated mentions of the same issue ID in this thread within 60 minutes won't generate additional replies. After 60 minutes, posting the issue ID in this thread will prompt a new link reply. Mentioning this issue ID in additional messages or threads elsewhere during this 60 minutes will generate a reply. You can disable this feature in 'Linear settings > Integrations > Slack' if desired.
This feature does not work in shared channels to protect the privacy of your issues
## FAQ
Is there a slash command for creating issues?
You can use the `/linear` command in Slack as a lightweight way to create an issue.
This action will be confirmed by an ephemeral message in Slack which is only displayed to you. `/linear` is not supported in Slack threads, for Slack sync or for uploading files to issues.
When creating an issue from Slack, why does the title and description populate with the original message content?
This is intentional behaviour. There's rarely a scenario where you will create an issue without having to change the title or the description in some way. We choose to populate both the issue title and the issue description with the message text so that there's a higher chance you won't need to change both prior to creating the issue.
Can anyone in my Slack workspace create Linear issues?
Only users with Linear accounts can create issues in Slack using the Linear integration. Slack Guests cannot install or approve apps in Slack, so they'll be unable to use the Linear integration even if they have a Linear account.
Everyone in your Slack workspace will be able to see team and project notifications pushed to Slack channels and issues created in channels as long as they are part of the Slack channel.
We do have an integration which enables non-Linear users to create issues for workspaces on on our Business and Enterprise plans: [Linear Asks](https://linear.app/docs/linear-asks).
Can I get in touch with Linear's team on Slack?
Yes! Separate from the integration, you can also [join our community](https://linear.app/join-slack) on Slack! We have a community of Linear users who share tips, feedback, and discuss how they're using Linear with their team. There's also an #api channel for people building apps on our GraphQL API.
How can I access additional support for this integration?
Please contact us at support@linear.app for any feedback or issues around using the Linear integration for Slack.
How does the integration collect, manage, and store third-party data?
Our privacy policy is [here](https://linear.app/privacy) and you can refer to our security FAQs [here](https://linear.app/docs/security) for further information.
Can I link a Slack thread to an Linear issue over API to create a synced thread?
Yes, you can link an existing Slack thread to a Linear issue over our API. To do so, pass `syncToCommentThread: true` in the input to the `attachmentLinkSlack` mutation (documentation is available [here](https://studio.apollographql.com/public/Linear-API/variant/current/schema/reference/objects/Mutation?query=attachmentLinkSlack#attachmentLinkSlack).)
Slack URLs aren't unfurling in Linear after installing this integration
If you are not seeing the expected preview of Linear issues in Slack, please check the following:
#### Slack Preferences
Certain preview types may be blocked by Slack’s Messages and Media settings.
If you are seeing an empty preview block in Slack when a Linear issue is mentioned, please toggle on “Show text previews of linked websites” in your Slack Preferences > Messages & Media > In-line media and links
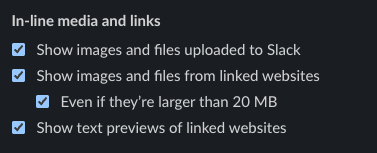
#### Installation Order
If your org installed Linear Asks first and the Slack integration discussed on this page second, unfurls will not work for the regular Slack integration. To fix this:
1. Disconnect both the Asks and Slack integrations from Linear.
2. Disconnect Asks from the [Slack Marketplace](https://instance.slack.com/marketplace/A04RHP43AKH-linear-asks?next_id=0&tab=settings)
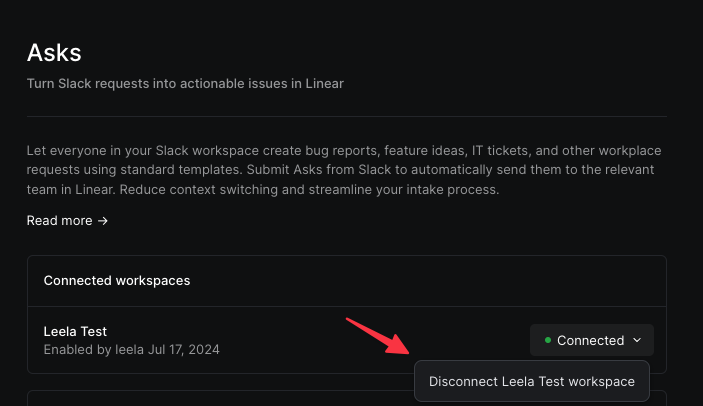
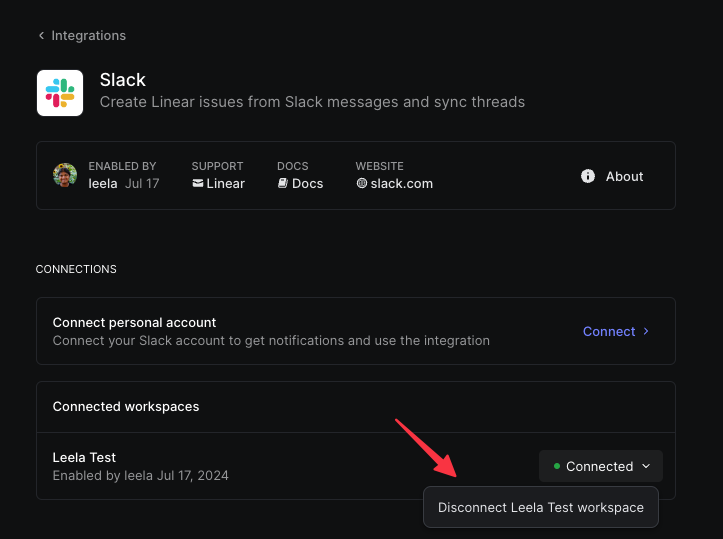
* On the Slack side, go to Tools & settings -> Manage apps. Linear Asks should not appear in the list of installed apps (Linear may still appear if other users in the workspace have personal Slack integrations installed, but this is fine)
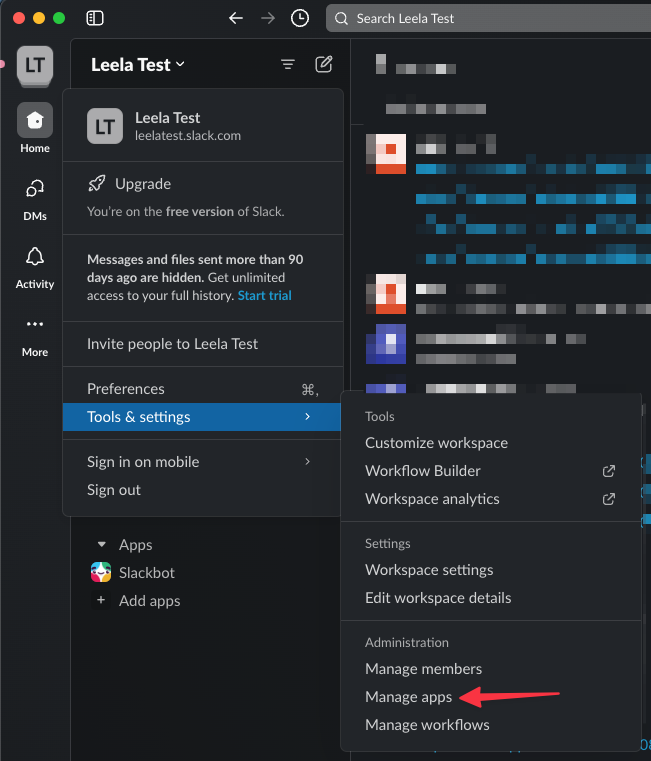
* Reconnect the Slack integration in Linear
* Unfurls for public team issues should now work in Slack
* Templates available to Slack will need to be reconfigured
* Reconnect the Asks integration in Linear. You will have to manually re-add the Asks bot to any channels you have configured for Asks in Slack.
* Asks team to Linear channel configuration is retained after reconnecting, but you will need to toggle the available templates on for each team.
Does the Slack integration leverage LLMs?
Linear uses LLMs from OpenAI that have the potential to generate inaccurate results.
---
# Source: https://linear.app/docs/start-guide.md
# Start Guide
Linear helps teams plan, track, and deliver work without a lot of overhead. This guide gets you from “new workspace” to “working in Linear” quickly, with a few paths depending on your role.
## Get a quick overview
Start here if you want to understand the layout and core workflows before setting anything up.
* [**Intro to Linear**](https://www.youtube.com/watch?v=9Q5BoiIFBiY&list=PLP9v0Y4zla9vG7k8e279bSz5hUl0oXlMH&index=1) Watch a high-level walkthrough of the Linear environment.
* [**Demo Linear**](https://linear.app/demo) Explore our demo workspace to see how issues, projects, and workflows fit together.
_Note: Changes are local to your browser and reset on refresh. The demo does not include settings, and it does not show or support SLAs._
* [**Live onboarding session**](https://luma.com/linear?utm_source=docs) Join a guided session to learn the essentials and see common workflows in action
* [**Learning Library**](https://www.youtube.com/playlist?list=PLP9v0Y4zla9vG7k8e279bSz5hUl0oXlMH) Visit this playlist of onboarding videos covering the most common day-to-day workflows.
## Setting up Linear for your organization
Once you’ve seen the basics, the next step is creating a workspace and configuring it for how your team works.
### **Create your workspace**
* [Sign up](https://linear.app/signup) using your work email (recommended).
* Create a workspace for your organization.
### Choose the onboarding guide that fits your role
**Admins**
* [How to use Linear: Small teams](https://linear.app/docs/how-to-use-linear-small-teams)
* [How to use Linear: Startups & mid-size companies](https://linear.app/docs/how-to-use-linear-startups-mid-size-companies)
* [How to use Linear: Large & scaling companies](https://linear.app/docs/how-to-use-linear-large-scaling-companies)
**Team members**
[Tips for joining your team on Linear](https://linear.app/docs/joining-your-team-on-linear) (recommended if you’re new to an existing workspace)
## Learn from real examples
If you learn best by seeing how other teams run things, these are good next reads:
* [How we run projects](https://linear.app/blog/how-we-run-projects-at-linear)
* [Continuous planning in Linear](https://linear.app/now/continuous-planning-in-linear)
* [How we think about customer experience](https://linear.app/now/cx-in-linear)
* [Linear for Marketing Teams](https://www.youtube.com/watch?v=Z0hQWaBLrxw)
* [How Descript uses Linear](https://linear.app/blog/descript-internal-guide-for-using-linear)
## Join our Slack community
Meet other Linear users to get advice and exchange tips in our [Slack community](https://linear.app/join-slack). The Linear team is active in the Slack community as well, so it's a great place to ask questions.
We host regular events through our Slack community as well, which you can register for [here](https://lu.ma/welcome-to-linear).
---
# Source: https://linear.app/docs/sub-initiatives.md
# Sub-initiatives
Sub-initiatives allow Initiatives to be nested inside one another, enabling deeper planning and visibility across large programs of work. Use sub-initiatives to organize your company goals, workstreams, or OKRs into a structured hierarchy.
> [!NOTE]
> **Available to workspaces on our Enterprise plan.**
> Available to workspaces on our [Enterprise](https://linear.app/pricing) plan.
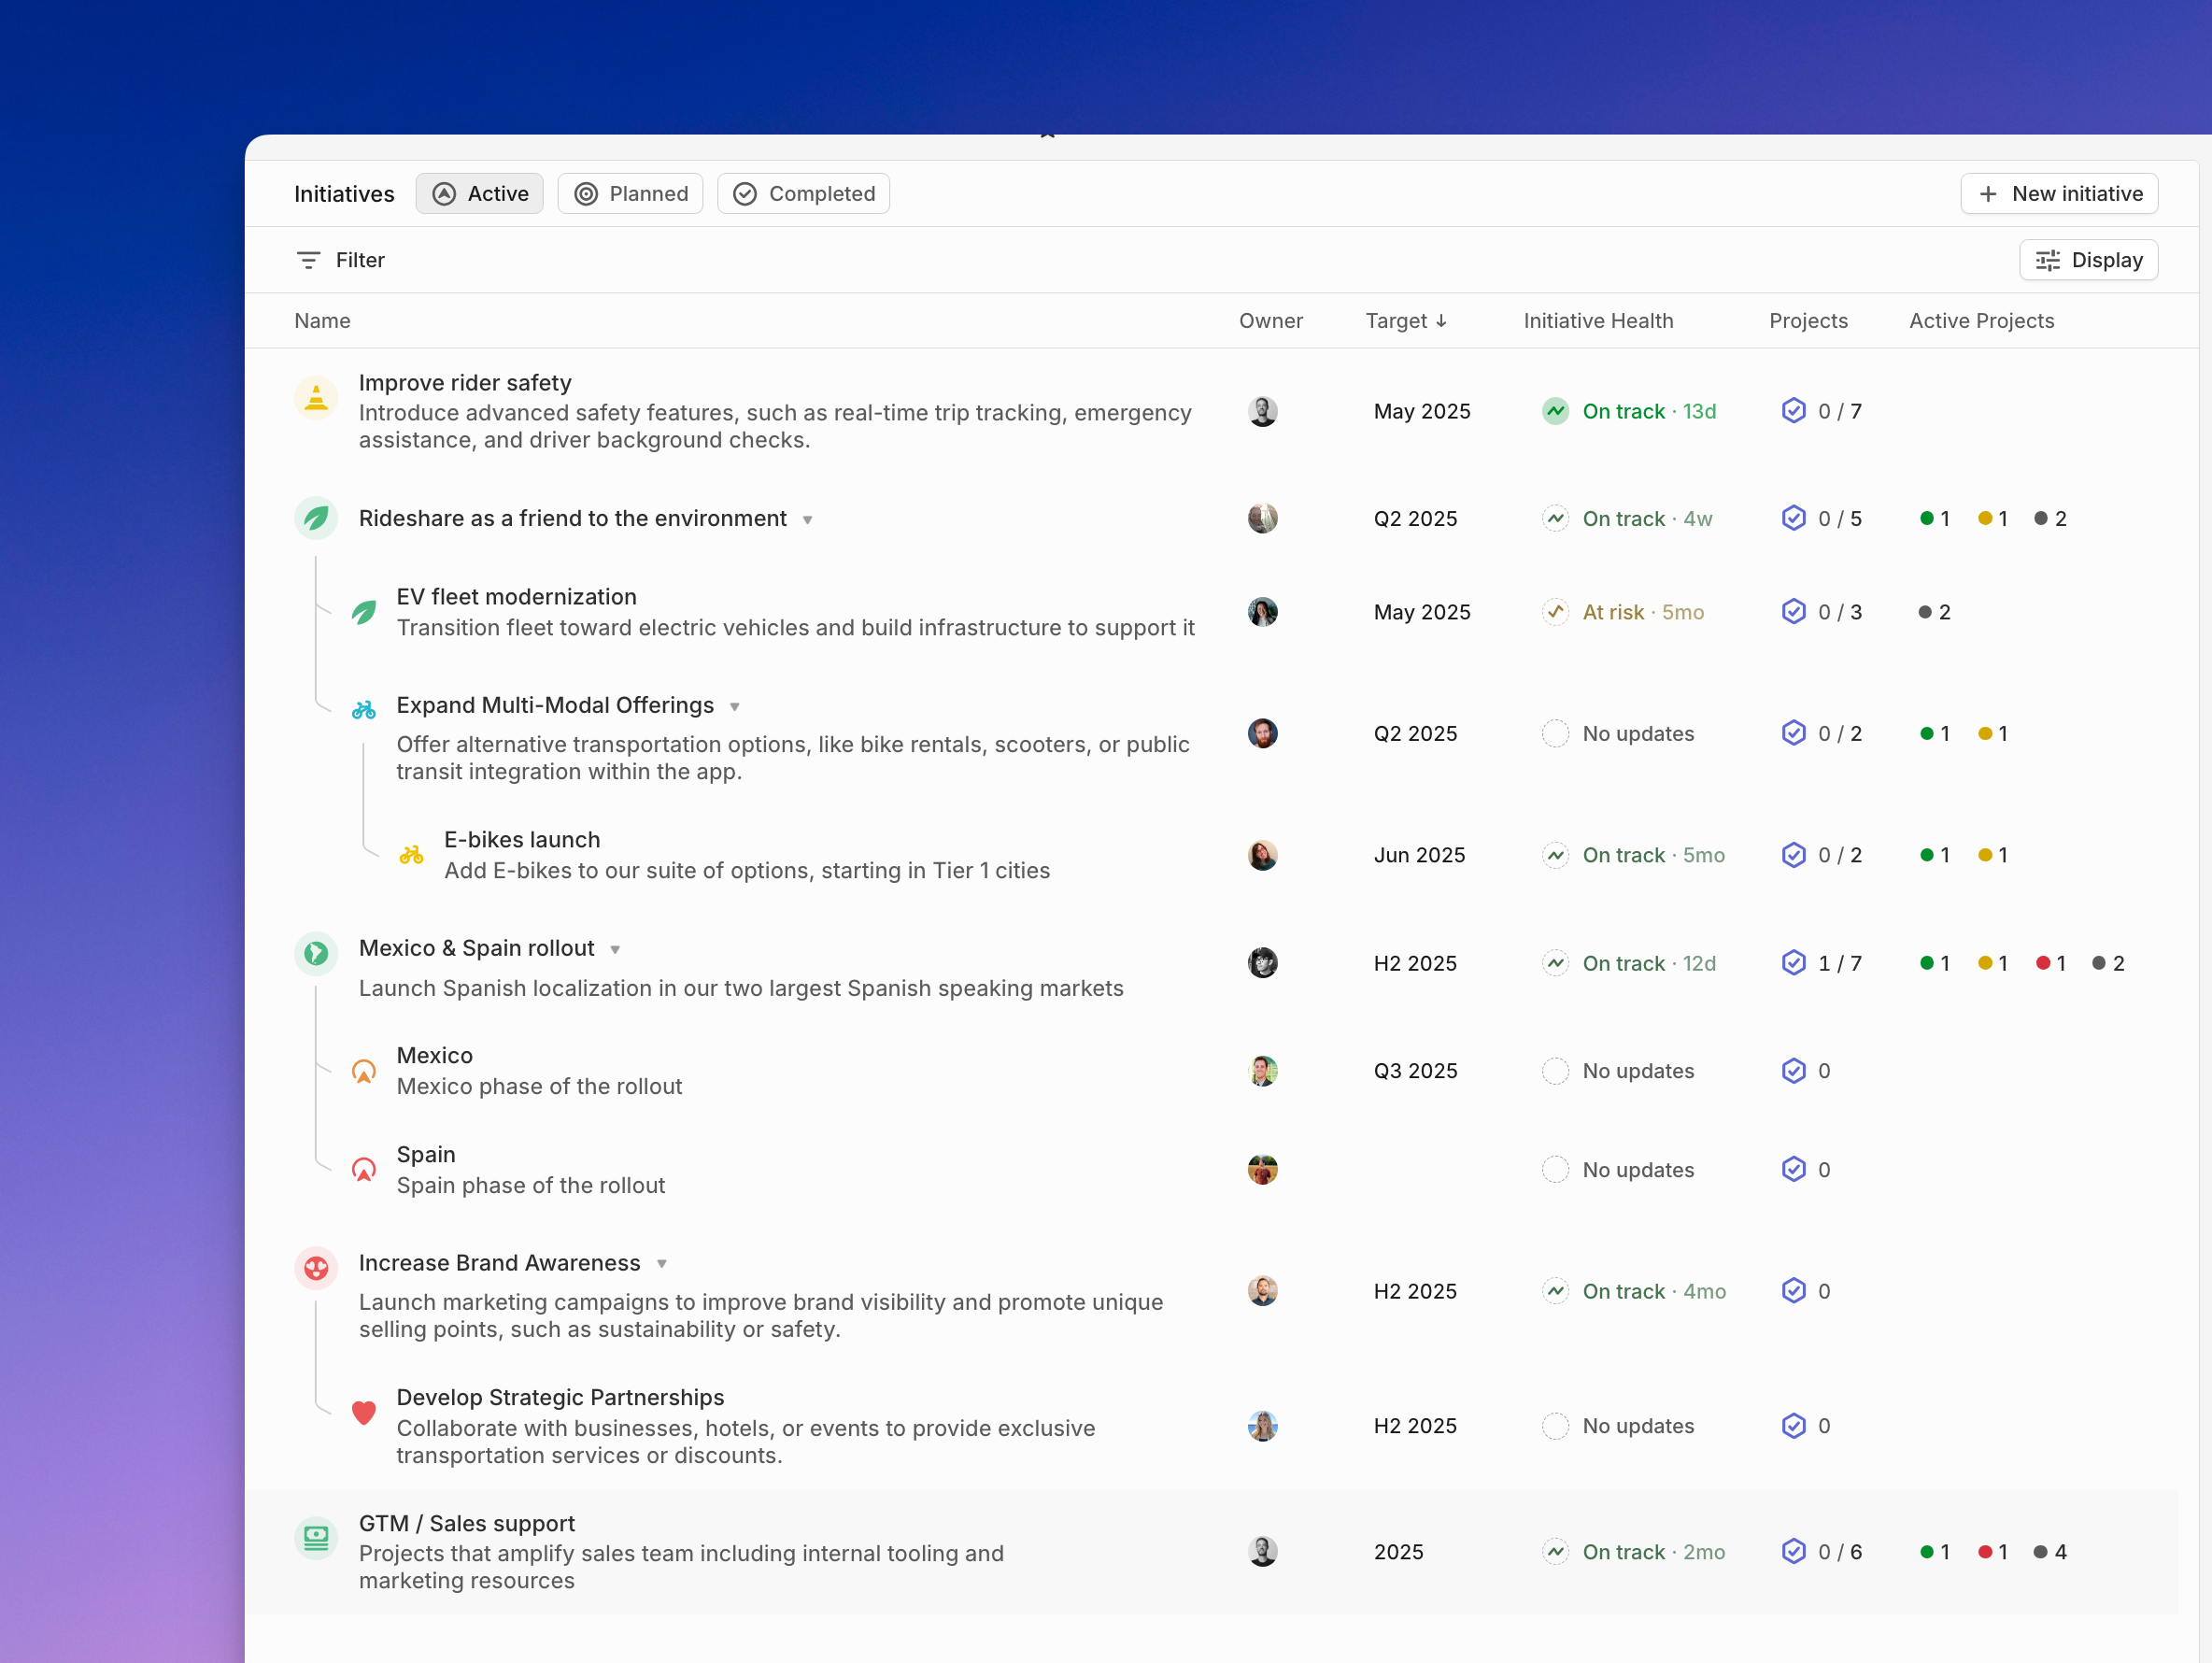
## Basics
Sub-initiatives let you nest Initiatives up to five levels deep in a tree-like structure. A parent Initiative automatically includes all the projects it owns directly, as well as all the projects from its sub-initiatives. This makes it easy to roll up work from multiple departments, teams, or quarters into one overarching goal.
You can use sub-initiatives to:
* Structure company-wide objectives across multiple departments
* Break down a large strategic goal into phased delivery Initiatives
* Group Initiatives by quarter, theme, or ownership
Each Initiative can only have one parent. Projects added to any sub-initiative will automatically be included in the parent’s view of progress.
### Creating and managing sub-initiatives
You can create and organize sub-initiatives from two places in Linear:
**From the workspace Initiative views (Active, Planned, Completed)**
* Create a new Initiative using the `+ New` Initiative button or the keyboard shortcut `N` then `I`. You can also choose a parent Initiative during creation.
* Nest Initiatives by holding `Option` (`Alt` on Windows) while dragging one beneath another.
* To remove a parent, drag the Initiative out of the nested section and drop it elsewhere in the list to return it to the top level.
* These pages are best for managing structure across multiple teams or quarters.
**From an Initiative Overview page**
* Use the `+ Add` button in the top right, or the ... menu beside the Initiative title, to create or attach sub-initiatives.
* Use the `+` icon above the sub-initiative list (if shown) to add more.
* Use the command menu (`Cmd` + `K`) or shortcut `Cmd` + `Shift` + `P` to set or change the parent.
Sub-initiatives created from an Overview page are nested under that Initiative automatically.
### Viewing sub-initiatives
Sub-initiatives appear nested beneath their parent Initiative both on the full workspace Initiative views (_Active_, _Planned_, or _Completed_) and on the parent’s Initiative Overview page. If you’d like to temporarily collapse or expand a nested list, press `T` — this affects only your own view.
By default, a parent Initiative’s project list includes all projects from its sub-initiatives. You can adjust this using the display settings in the top right of the project list to show only directly owned projects. Each sub-initiative displays a project count, which includes all projects from any further sub-initiatives nested within it.
When Initiatives are grouped by owner or other properties, parent Initiatives will still appear above their sub-initiatives to provide context — but they’ll be shown grayed out if they don’t directly match the grouping property.
Visibility and filtering
Sub-initiatives follow the same visibility rules as standard Initiatives: they’re visible to all workspace members except guests. If a project belongs to a private team, its details remain restricted — but the Initiative itself will still be listed.
When viewing a parent Initiative, filters (such as by team, status, or project health) will include projects from all of its sub-initiatives. This gives you a complete picture of progress at every level of the hierarchy.
---
# Source: https://linear.app/docs/sub-teams.md
# Sub-teams
Group sub-teams underneath a parent team. Feature settings configured in the parent team drive alignment throughout the group.
> [!NOTE]
> Available to workspaces on our [Business](https://linear.app/pricing) and [Enterprise](https://linear.app/pricing) plans.
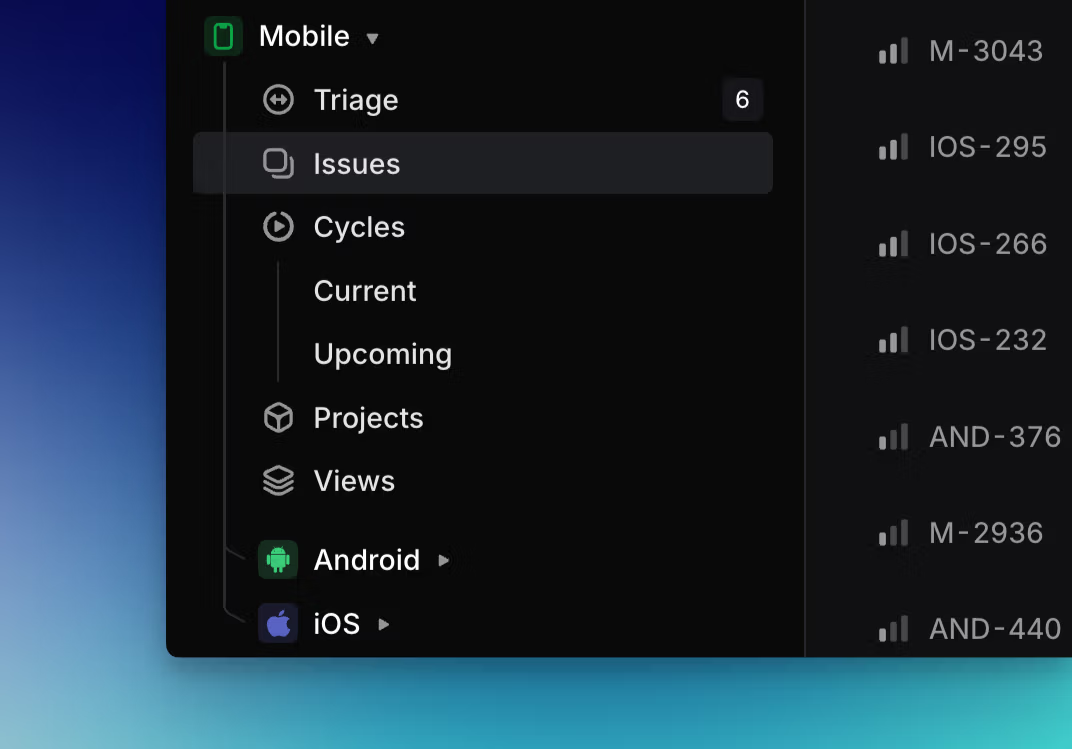
## Overview
Sub-teams allow you to reflect your organization's structure in Linear, making it easier to understand and manage work across different levels of your company. Create new sub-teams to organize work into specialized units as your organization scales while keeping existing workflows standard within the group.
Concepts like cycles and labels set in a parent team are inherited by its sub-teams, allowing sub-teams to operate well both as individual units and as a unified whole.
## Basics
### Update an existing team to a sub-team
Go to Settings > Teams > Team hierarchy and select another existing team as its parent. Taking this action requires admin permissions. To protect the privacy of private teams, a private parent team may have only private sub-teams.
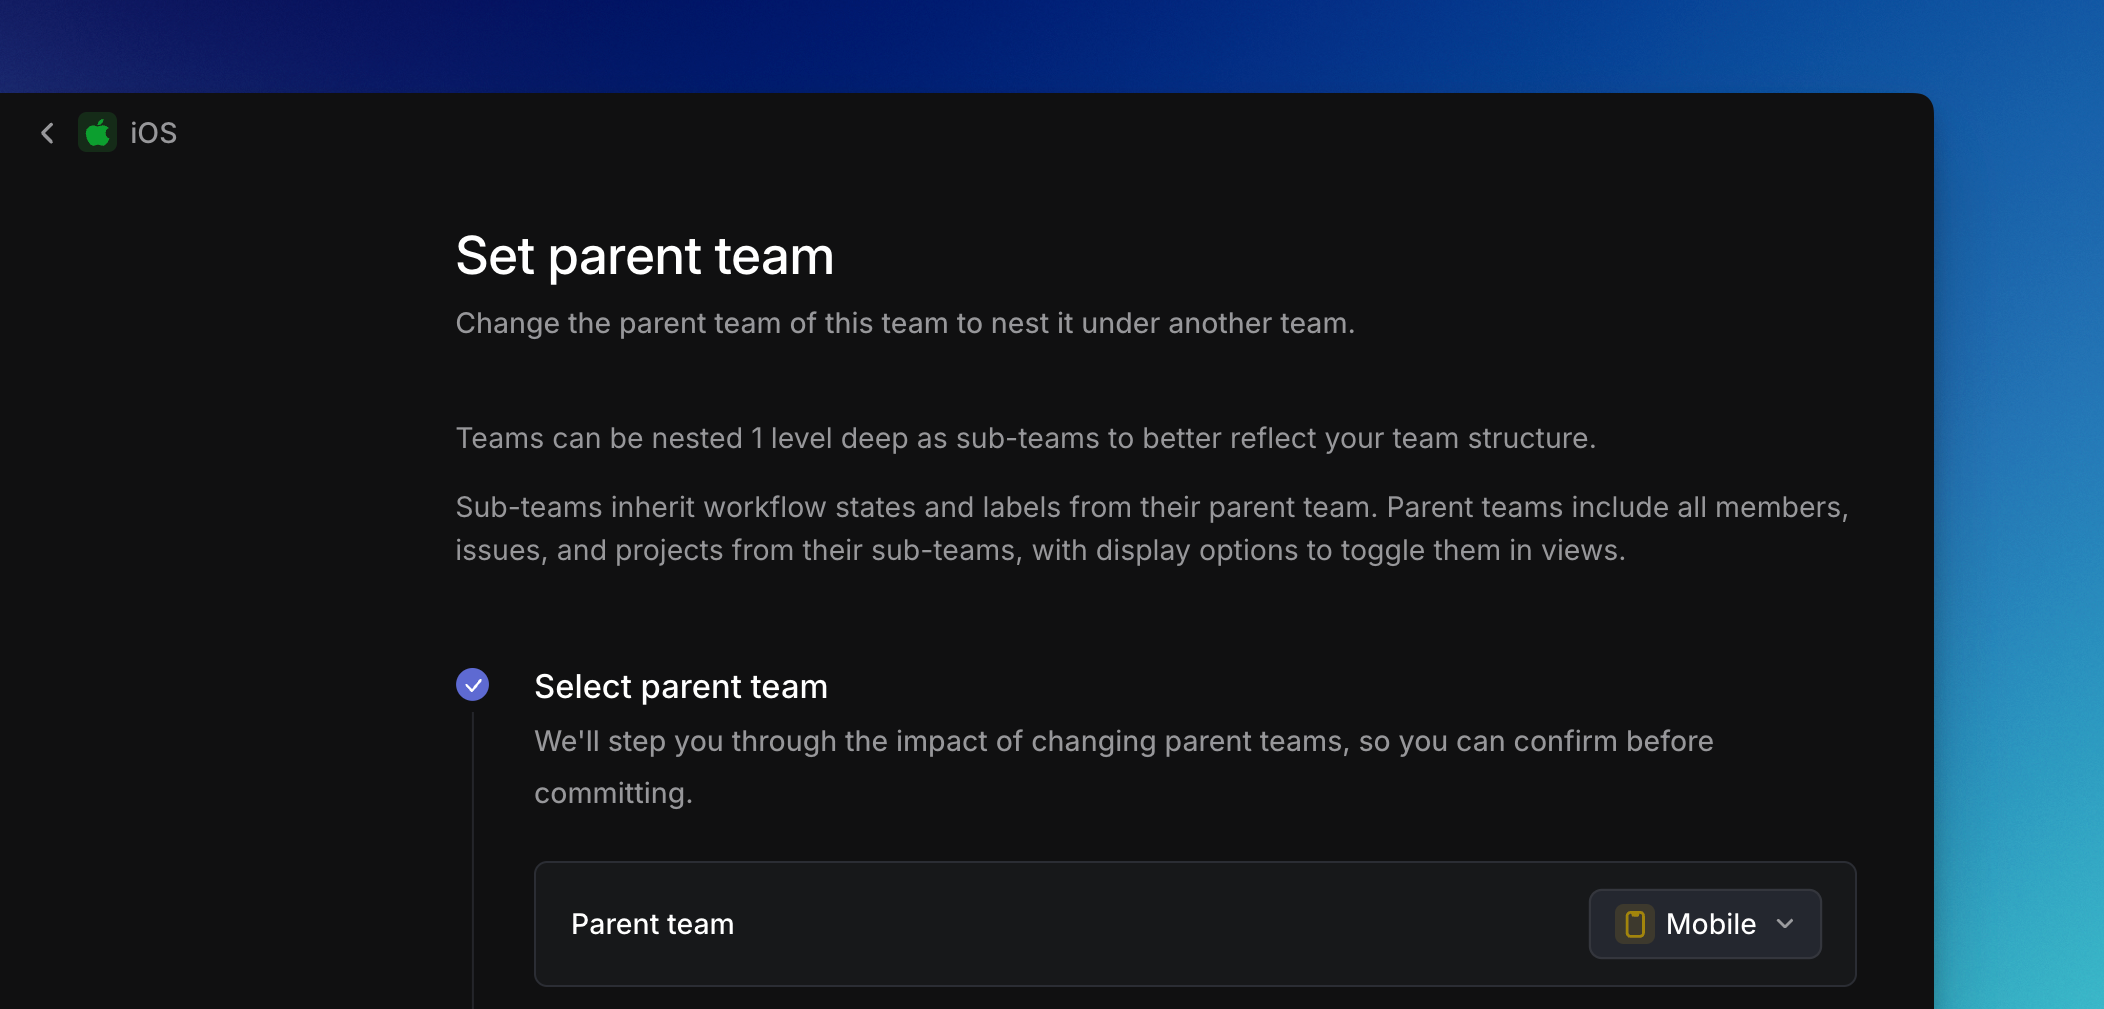
### Create a new sub-team
When creating a new team, optionally designate it as a sub-team at creation. To protect the privacy of private teams, a private parent team may have only private sub-teams.
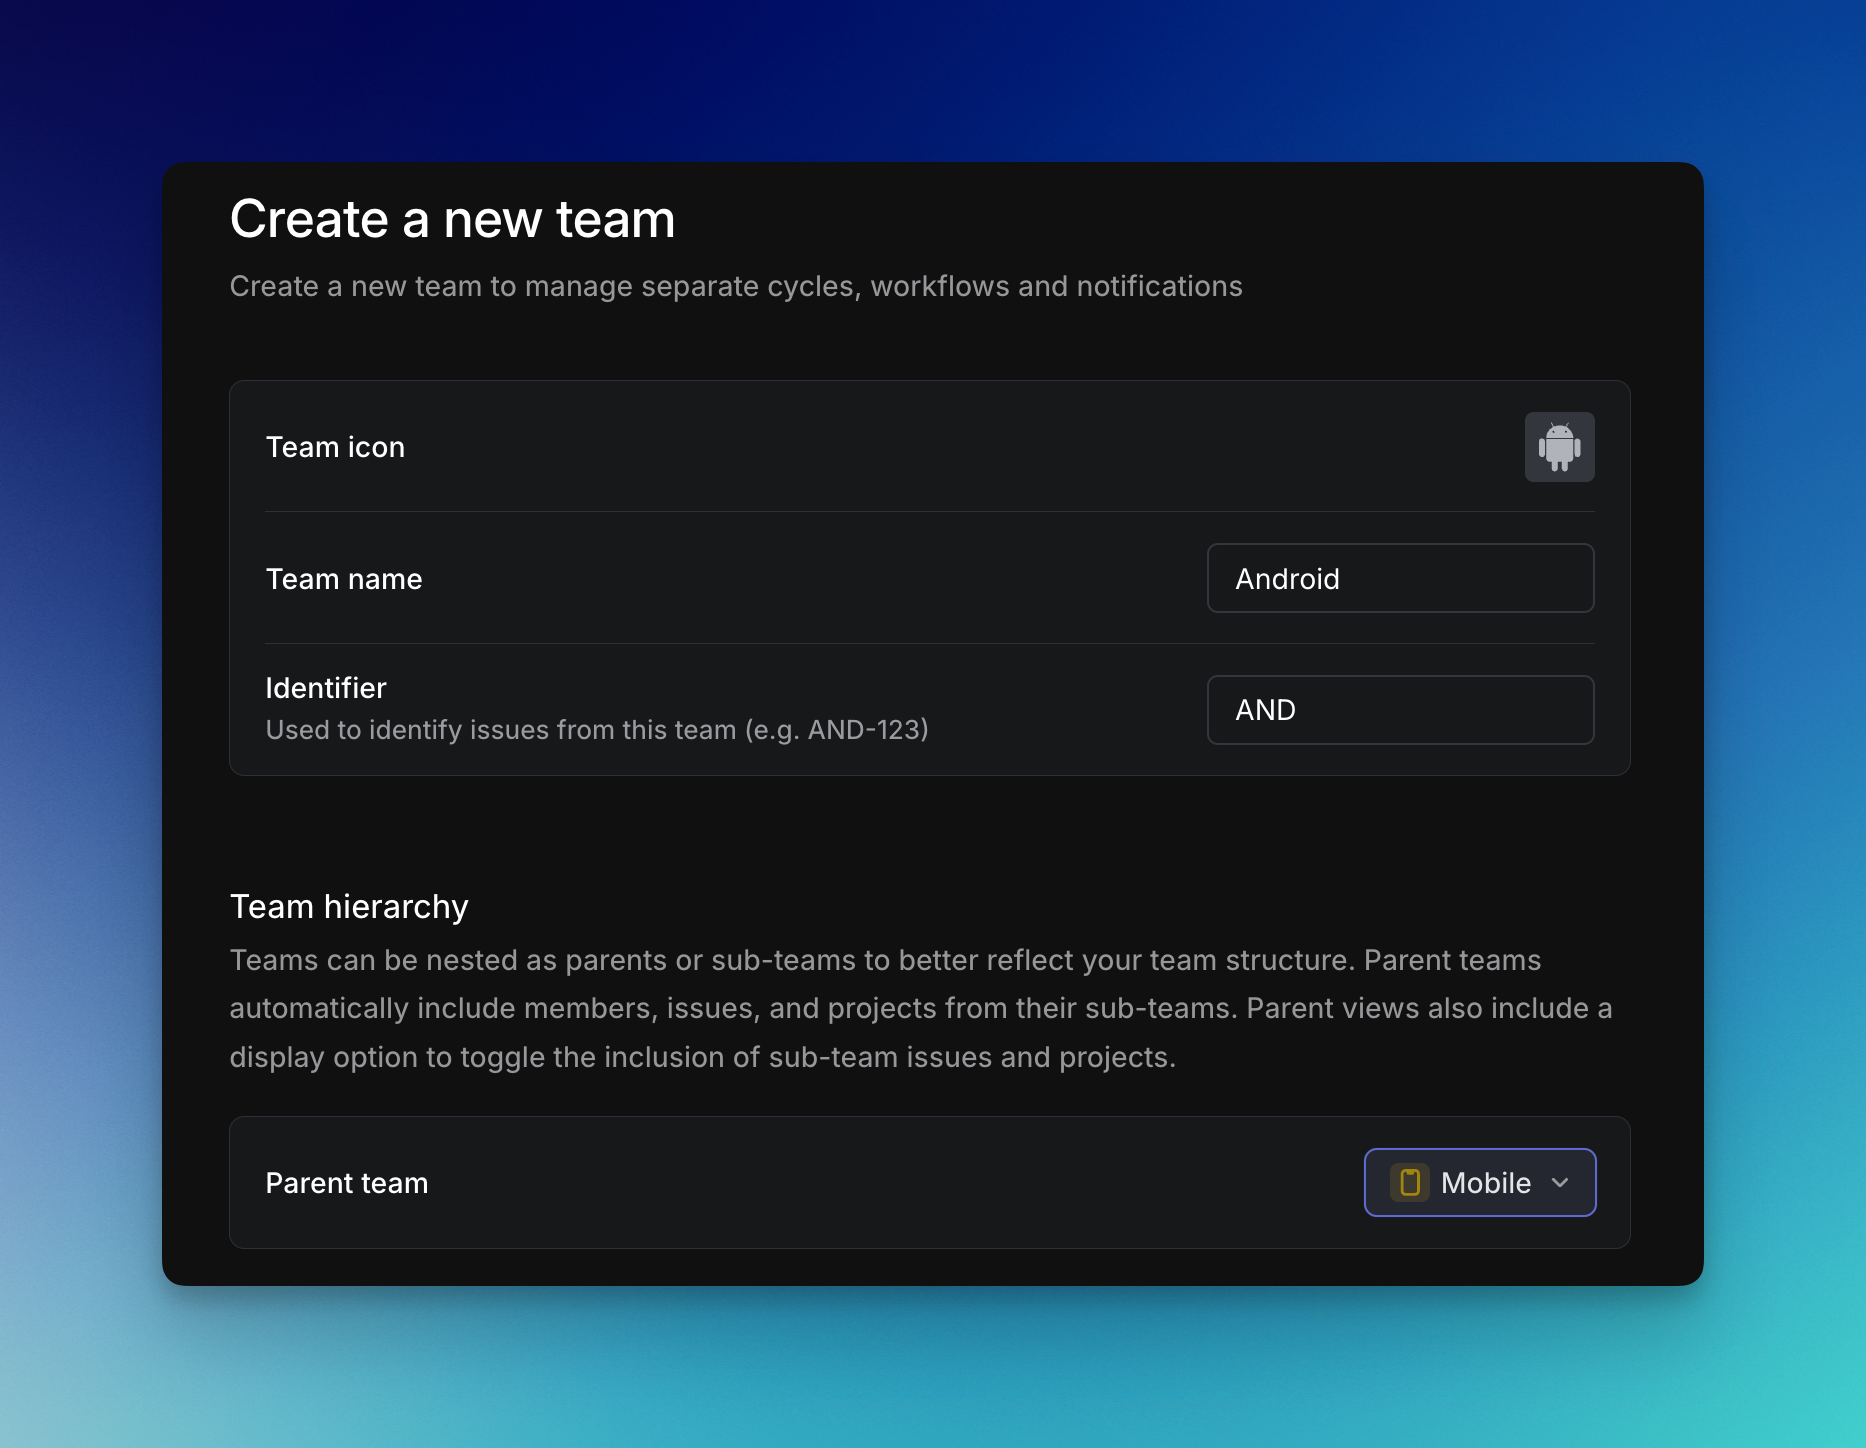
### Configure a sub-team
Once you've created a sub-team, a wizard will take you through any conflicts that need to be resolved. Common tasks include normalizing statuses between parent and sub-teams and resolving duplicate label conflicts.
After configuring a sub-team, check its settings to customize features unique to that team (GitHub PR automations, for instance) to ensure they meet the sub-team's needs.
### Private parent and sub-teams
If a parent team is private, its sub-teams must also be private. If a parent team is public, its sub-teams may be public or private.
As with all private teams in Linear, a user can see private team-specific data only when they belong to the private team themselves.
As an example, given a private parent team A with private sub-teams B and C, a user belonging to A and C cannot see issues belonging to B, even if those issues are in a project or view shared with teams A and C. If there is a project shared between teams B and C, this user would only see issues belonging to team C in the project.
### Un-nesting a sub-team
Navigate to the sub-team's settings and click **Remove from parent...** under the "Team hierarchy" section. Once removed, you can expect:
* Labels, issue status, cycles, and members will no longer be inherited by the sub-team. We have a warning about this when you start to un-nest the team. Broadly speaking, inherited items that are not currently in use will be permanently removed, while anything actively used will be converted into independent copies so issues remain fully intact.
* Specifically, any inherited labels or templates that weren't used in the old sub-team are not carried over. Those that are used become standalone versions for that team.
## Parent and sub-team settings
### Parent team feature settings inherited by sub-teams
Certain settings from a parent team are enforced throughout all sub-teams.
Feature | Inheritance by sub-teams
--- | ---
Membership | Members in a sub-team must also be members of the parent team. Guests are the exception to this and may belong to a sub-team but not its parent.
Status | Optionally, sub-teams can elect to inherit statuses from their parent team.
Cycles | If a parent team has a cycles schedule defined, all sub-teams will inherit the same schedule. If the parent has no schedule then sub-teams may define their own. When merging a sub-team cycle schedule with a parent's, past cycles remain untouched. The current cycle on the subteam will close, and upcoming cycles of the sub-team update to the closest parent cycles.
Estimates | Optionally, sub-teams can elect to inherit estimation settings from their parent team.
### Parent team feature settings accessible to sub-teams
Sub-teams benefit from other features used in the parent team, and retain the flexibility to create similar entities scoped to the sub-team.
Feature | Use in sub-team
--- | ---
Labels | Issues in a sub-team can use labels scoped to the sub-team, its parent team, or the workspace.
Templates | Issues in a sub-team can use a template scoped to the sub-team, its parent team, or the workspace.
Views | Sub-teams can have dedicated views. Issues in sub-teams are accessible in the views stored in their parent teams.
### Independent feature settings in sub-teams
Other features in sub-teams have no relation to the parent team and should be customized to meet the needs of the sub-team specifically. These include:
* Team timezone
* Recurring issues
* GitHub/GitLab automations
### Notification settings for sub-teams
* **Public sub-teams inherit Slack notifications from their parent team by default.**
If the parent team has Slack notifications enabled, newly created issues in its public sub-teams will also post to the same Slack channel.
* **Sub-teams can have their own Slack notifications.**
You can configure notifications on a per–sub-team basis, including sending updates to a different Slack channel. These notifications can run alongside the parent team’s notifications.
* **Private sub-teams do not inherit notifications.**
Private sub-teams must have their own Slack notification settings enabled in order to send notifications to Slack.
---
# Source: https://linear.app/docs/teams.md
# Teams
Create teams in your workspace to organize different types of work functions.
> [!NOTE]
> Different plans support different numbers of teams: details available [below](https://linear.app/docs/teams#team-limits).

## Overview
A workspace is composed of one or several teams. Teams typically represent groups of people who work together frequently. Teams contain issues and can be assigned to a project.
By default, when you create a workspace we'll generate a team for you with the same name. It's up to you how to split up teams and users can be part of one or many teams.
Consider grouping teams by:
* Teammates who work together frequently.
* Areas of work such as marketing, mobile app, etc.
* Keeping everyone on one team is the simplest approach (best for small teams).
> [!NOTE]
> If you are unsure how to structure your teams, start with one or two. It is easy to add more teams in the future.
## Your teams
Teams you have joined will appear in your sidebar.
Each team has the following pages to organize your work:
* [Triage](https://linear.app/docs/triage)* Newly created issues to be reviewed, assigned or prioritized before entering the team's workflow
* [Issues](https://linear.app/docs/default-views) Default views of all issues in this team
* [Cycles](https://linear.app/docs/use-cycles)* Review current, past and upcoming cycles to plan and schedule your team's workload
* [Projects](https://linear.app/docs/projects#view-your-projects) Default views of all projects linked to this team, along with custom views of projects that you can add and edit.
* [Views](https://linear.app/docs/custom-views#overview) Custom views filtered to this team's issue, visible to members of the team
> [!NOTE]
> Sections marked with an * are opt-in and need to be enabled in team settings.
### Team settings
Team settings allow you to configure each team differently to support different workflows. To access your team's settings, hover over the team name in your sidebar, click the three dots `···` menu, and select **Team settings**.
Available team settings can be configured depending on your role.
Team settings page | Configure
--- | ---
General | Customize team name and team identifier, set timezone, enable and manage estimates, set up issue creation by email, toggle detailed issue history.
Members | Manage team members
Issue labels | Manage team-level labels and label groups
Templates | Manage team-level issue, project, and document templates
Recurring issues | View all existing and create new recurring issues
Slack notifications | Set team-level notifications to Slack
Issue statuses & automations | Customize workflows, add and edit statuses, set up git automations and branch naming preferences, enable auto-close and auto-archive
Triage | Enable Triage, assign Triage responsibility (compatible with PagerDuty and incident.io)
Cycles | Enable and configure cycles, set cycle automations
## Working with other teams
### View other teams
Teams you navigate to that you are not a member of will show up in your sidebar under a temporary _Exploring_ section.
You can search for and view issues, projects, and documents from other teams, too, as long as those teams are not private.
### Access control
All members of a workspace can view and join teams as long as the team is not private.
Anyone in the workspace can create issues for other teams or be assigned issues in other teams, too. You don't have to join teams to collaborate with others unless you use them frequently and want them to show up in your sidebar.
## Create or join teams
Depending on your workspace permissions, team creation may be restricted.
To create or join a team:
* Navigate to your Settings
* Scroll down to “Your teams” section
* Click the “+” symbol for "Join or create a team"
> [!NOTE]
> Admins can create teams from their [Teams page](https://linear.app/settings/teams) in settings.
### Team limits
The number of teams that can be created is dependent on a workspace's subscription:
Plan | Team limit
--- | ---
Free | 2
Basic | 5
Business | Unlimited
Enterprise | Unlimited
### Team creation settings
**Private teams:** During team creation, you'll have the option to copy over settings from an existing team and make the team [private](https://linear.app/docs/private-teams).
**Copy team settings**: If you want to copy an existing team's settings when creating a team, use the "Copy team settings..." option when creating a new team.
**Restrict team creation**: Admins can restrict team creation to only admin users under [Settings > Administration > Security](https://linear.app/settings/security).
### Tips on structuring teams
Keep these tips in mind when deciding how to structure your workspace's teams:
* **Issues are tied to teams**. Think about how you prefer to manage your work and interact with features such as the backlog and archive.
* **Workflows can be customized per team.** Different work areas or internal teams (e.g. engineering, design, marketing, sales) may require different statuses.
* **Cycles are team-specific**. You can set up cycles so that all teams follow the same schedule, but you can't view more than one team's cycles at once. Think about how you manage your work, run meetings, measure progress, and whose work you'll want to oversee as a manager.
* **Projects** can belong to a single team or be shared across many teams (but issues can only be tied to one team)
* **Sub-issues** can be assigned to any team or member in the workspace, not just the parent issue's team.
* **Other features** are team-specific but also easy to copy over to another team, such as pull request automation and issue templates. Labels are team-specific but you can create views that show issues from multiple teams as long as the label has the same name across them.
## Manage teams
### Make a team private
Business and Enterprise support [private teams](https://linear.app/docs/private-teams). To make an existing team private, go to _Settings > Your teams > Team_ and then scroll down to the Danger Zone.
### Join / leave / invite teams
Admins can add users to a team in [Settings > Administration > Members](https://linear.app/settings/members).
Members can join and leave teams on their own, by hovering over the team name, then clicking the `···` and selecting to **Join team** or **Leave team...** To join a private team, members must be invited by the team owner.
### Sub-teams
Refer to documentation on sub-teams [here](https://linear.app/docs/sub-teams).
### Delete a team
Deleting the team will also permanently delete its issues. Once the grace period ends, this can't be undone and your data cannot be recovered by Linear.
You will have **30 day grace period** to restore the team under _Recently deleted teams_. Access this by opening Settings > Teams and selecting the _Recently deleted_ option in the menu. Restore a team through its overflow menu on the far right of its row.
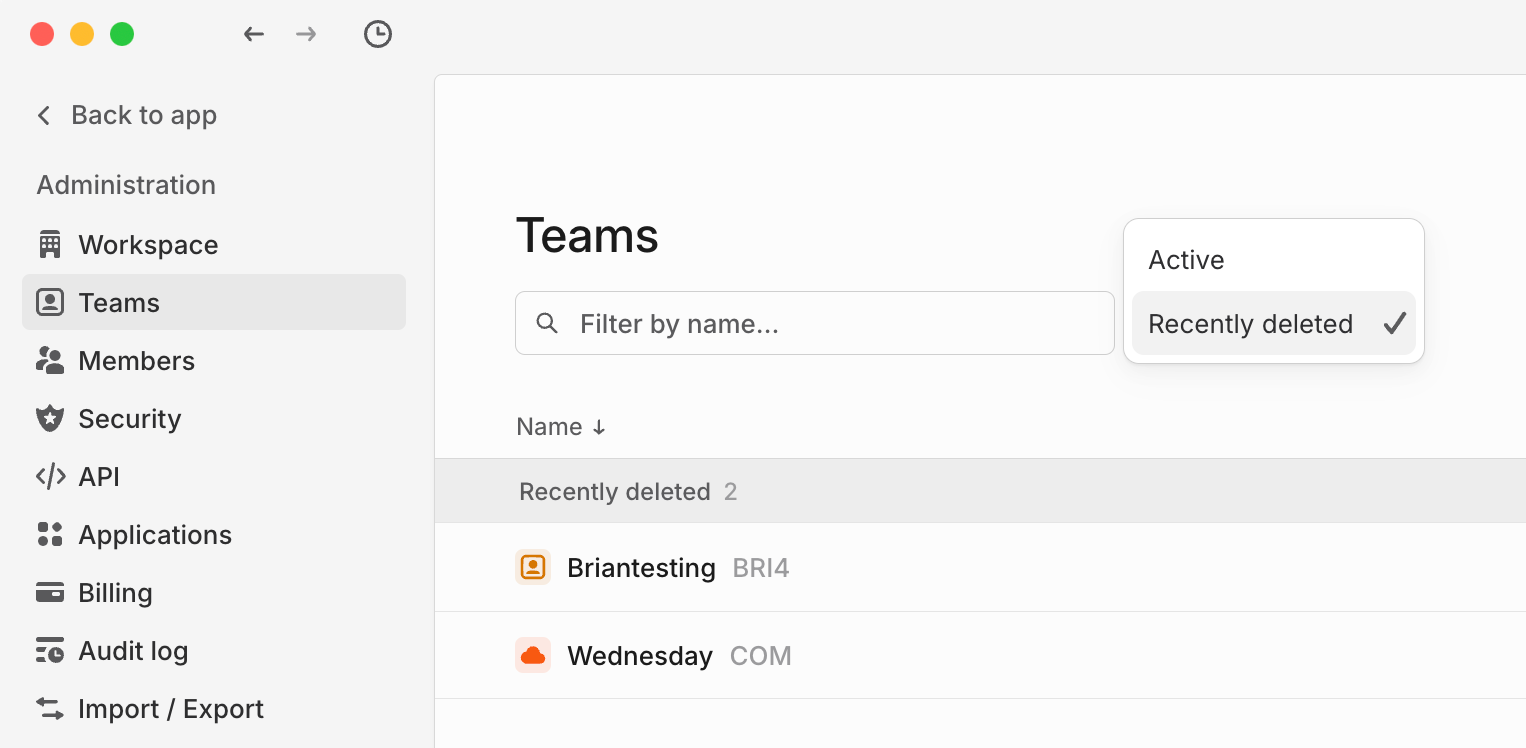
If you may need the data in the future, consider making the team private, exporting the team's issues as a CSV before deleting, or moving the issues to a different team.
### Restore a team
You can restore a retired team at any time, or a deleted team before it is permanently deleted.
To restore a retired or deleted team:
1. Find the retired team in team settings.
2. Select **Restore team**.
---
# Source: https://linear.app/docs/third-party-application-approvals.md
# Third-Party App Approvals
Enable third-party application approvals for your workspace to maintain control over which applications can be installed.
> [!NOTE]
> Available to workspaces on our [Enterprise](https://linear.app/pricing) plan

## Overview
Requiring admin approval for third-party applications ensures that admins have full control over which applications will have access to their Linear workspace and workspace information.
## Configure
1. To enable third-party application approvals, you'll need to [upgrade](https://linear.app/pricing) to the Enterprise plan.
2. An admin member of the workspace can then turn on third-party application approvals from [Settings > Administration > Security](https://linear.app/settings/security).
3. Apps that have been approved or denied will show up here for future reference.
## Requesting approval
When a workspace member tries to install a third-party app, Linear will display a screen which allows the member to request an approval. If the application has already been denied previously, Linear will let the requestor know and share the reason.
## Notifications
Admins will receive an email and an in-app notification when an application has been requested for approval. This notification will contain a link to the workspace applications page so you can approve or deny the application swiftly.
Once the application has been approved or denied, the member who requested the application will also receive an email and an in-app notification.
---
# Source: https://linear.app/docs/timeline.md
# Timeline
Display projects chronologically to track their progress, deadlines, and dependencies over time
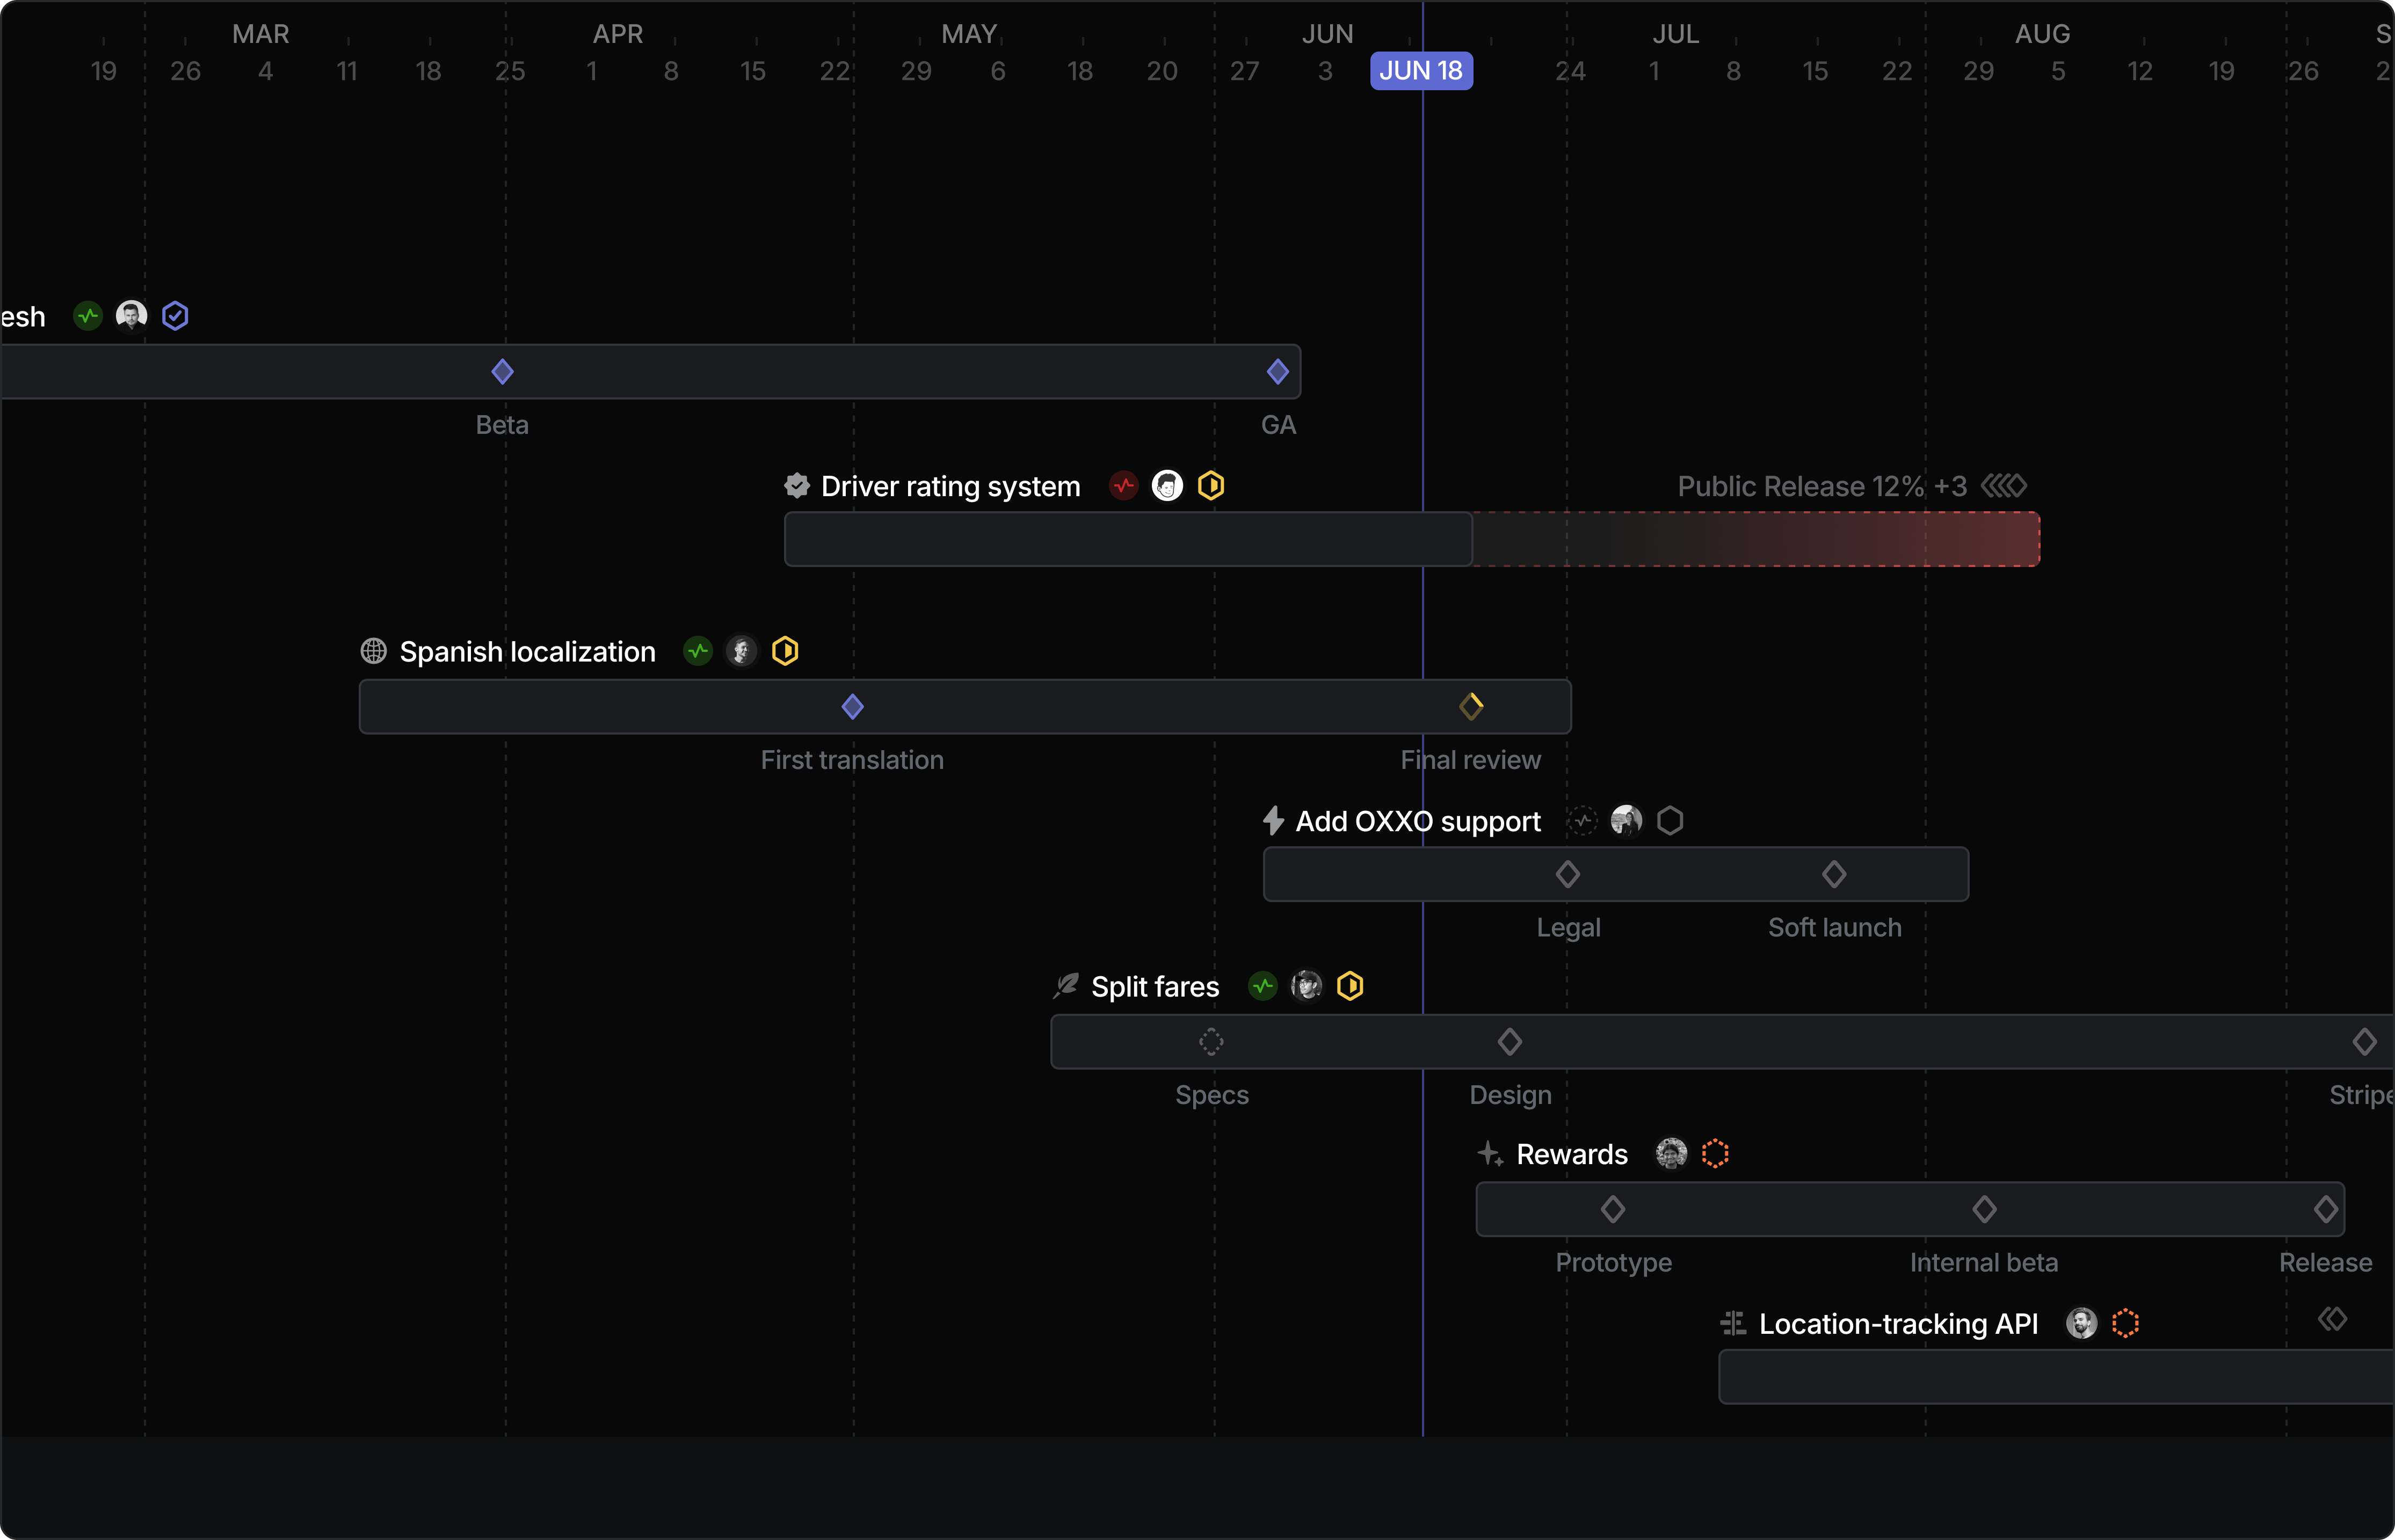
## Overview
Timeline views are a project planning tool that allows you to visualize and manage projects across time. It's specifically designed to only surface projects to keep project planning work cleanly separated from granular issue implementation.
## Accessing Timeline View
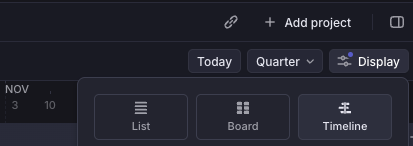
1. Navigate to any Project view
2. Click on **Display** dropdown
3. Select **Timeline** view
## How to use Timeline view
### Product roadmap planning
* Use the timeline view for high-level project planning and roadmap visualization
* Use [milestones](https://linear.app/docs/project-dependencies) to mark important in-project checkpoints
* Set [project dependencies](https://linear.app/docs/project-dependencies) between related projects to maintain proper sequencing
* Set your view to week, month, quarter, or year to adjust your preferred level of detail.
### Launch planning
* Gain visibility into what’s shipping and when.
* Plan more effectively across product, engineering, and align on launch timings with GTM
### Cross-team project coordination
* Regularly update project timelines to reflect current status
* Select a team's cycle to be viewable on the Timeline. Refer to "[Timeline customization](https://linear.app/docs/timeline#timeline-customization)" below.
### Resource planning
* Identify dependencies and blockers by customizing visible project properties in the Display options. Refer to "[Timeline customization](https://linear.app/docs/timeline#timeline-customization)" below.
> [!NOTE]
> Timeline view is only available for projects. Individual issues cannot be viewed on the timeline, but they can be viewed in list or board layouts.
## Timeline Customization
1. Group projects by [Initiatives](https://linear.app/docs/initiatives) or other attributes
2. Adjust timeline resolution (days, weeks, months, quarters)
3. Customize visible project properties such as cycles, milestones, and more...
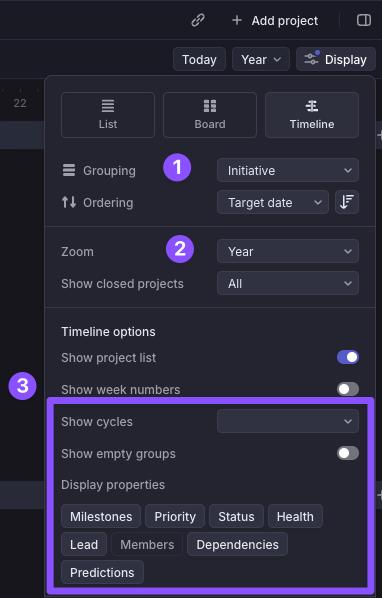
---
# Source: https://linear.app/docs/triage-intelligence.md
# Triage Intelligence
Route issues by using LLMs to infer issue properties and relationships.
> [!NOTE]
> Available to workspaces on [Business](https://linear.app/pricing) and [Enterprise](https://linear.app/pricing) plans
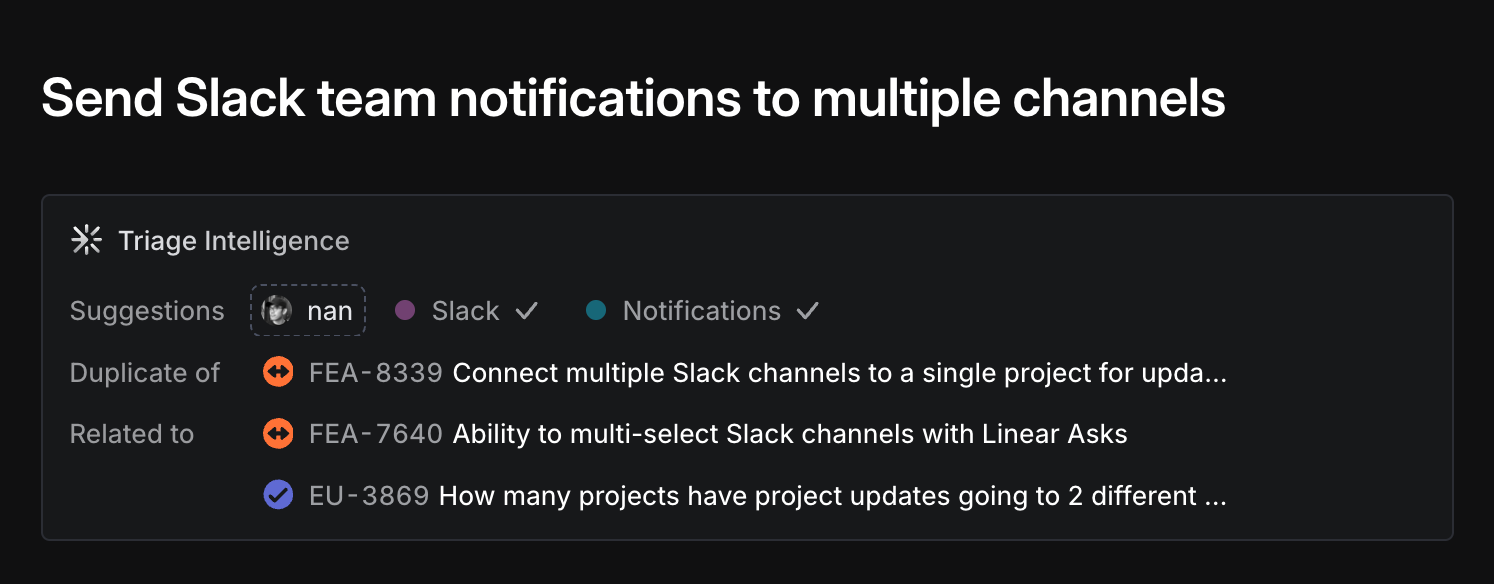
## Overview
Triage Intelligence automates the time consuming assessment and routing steps required when triaging issues.
When enabled, issues in your workspace are analyzed by agentic models. Every future issue that enters triage is assessed against the rest of your data. This allows Triage Intelligence to proactively surface suggested issue properties and relationships. Accept, decline, or view more information about why a suggestion was made before making a decision. Issue properties suggested include teams, projects, assignees, and labels, and can be configured to auto-apply when suggested.
## Configure
Enable Triage Intelligence by navigating to Settings > AI and toggling the feature on; this will enable the feature for every team. Taking this action requires admin permissions.
In teams where the functionality won't be useful, turn it off in that team's individual triage suggestions settings. Or, if the scope of suggestions should be limited to that team and its sub-teams (don't suggest related issues in other teams, for example), set that behavior in the "Include suggestions from" menu.
### Issue property suggestions

As organizations scale, questions like "who should work on this" or "what labels are usually applied in these scenarios" become harder to answer. Triage Intelligence uses historical trends evaluated against the current issue's content to proactively surface these suggestions. These suggestions appear alongside suggested duplicates and when issues are in Triage.
### Issue property suggestion automation
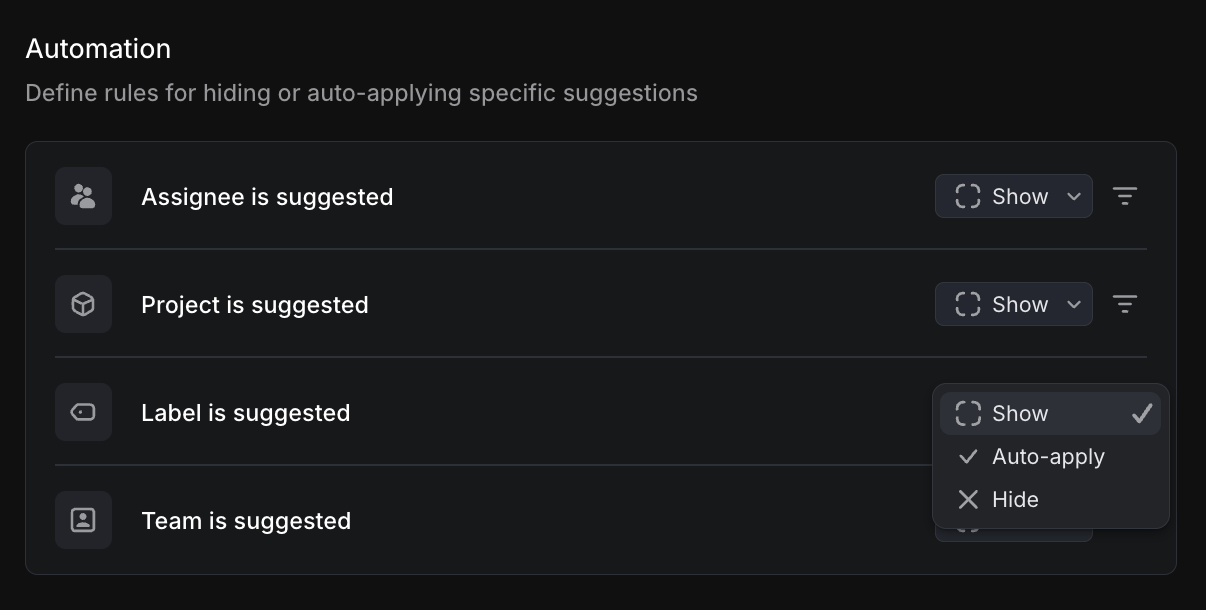
In each team where Triage Intelligence is on, customize whether issue property suggestions appear, are hidden, or are auto-applied for different property types. Optionally, filter to specific values to suggest or auto-apply. Sub-team rules are inherited from the parent team by default, but can be overridden in sub-team settings.
### Duplicate and relationship detection
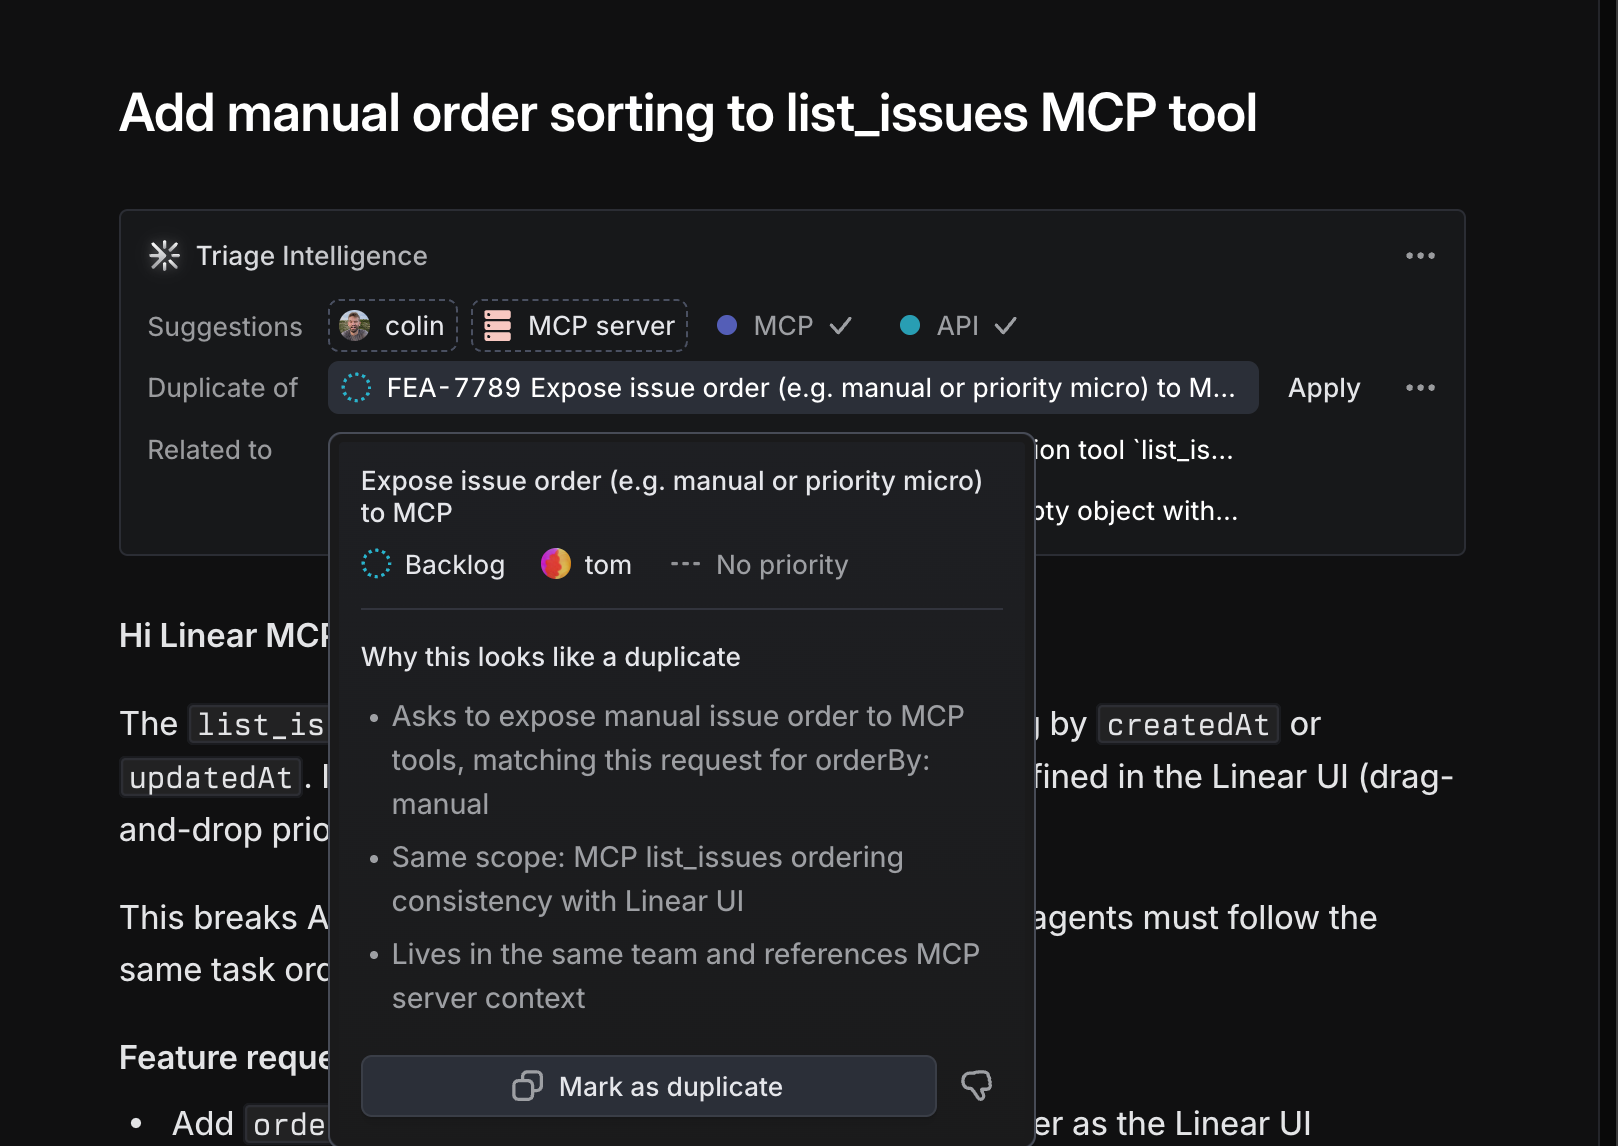
When Triage Intelligence determines there is a strong semantic similarity between an issue in Triage and an existing issue, a suggestion appears to accept the relation. Hover over the suggestion to see why it's appearing, and optionally accept it, dismiss it, or follow the reference to the secondary issue to analyze further.
### Refine suggestion behavior
In Triage Intelligence settings at any level (sub-team, parent team, or workspace) you can provide additional guidance to refine suggestion behavior. This is best used reactively (for example, if you're seeing persistent suggestion themes that are incorrect) rather than as part of initial configuration for Triage Intelligence. When additional guidance is set at multiple levels like team and workspace, all are considered but the most local guidance is considered first and weighted most heavily.
### Triggering on issues outside Triage
Triage Intelligence can still be run on issues in other statuses (if you're looking at a backlog issue for instance, and would like to double-check for duplicates).
To do so, use the `Cmd` / `Ctrl` + `K` menu to search for _Find Suggestions._ This will run in the background and enrich the issue with suggestions when available.
### FAQ
AI Privacy
Linear does not utilize your data to train its own AI models. Any data processed to enable Linear’s AI features is shared with our trusted partners (AI subprocessors, see our DPA) exclusively to deliver those AI functionalities to you without permission to train on provided data.
To provide features powered by AI and large language models (LLMs), Linear utilizes voluntary data provided by the user in terms of labeling feature outputs (thumbs up/down) or in other opt-in ways. If you have any questions or concerns, please let us know at security@linear.app.
For further information, please see AI Security FAQ in our [Trust Center](https://trustcenter.linear.app/).
Can I see reasoning about why suggestions are made?
Yes! Click on the Triage Intelligence window in an issue in Triage while it's processing, or on the suggestion overflow menu once suggestions have been made.
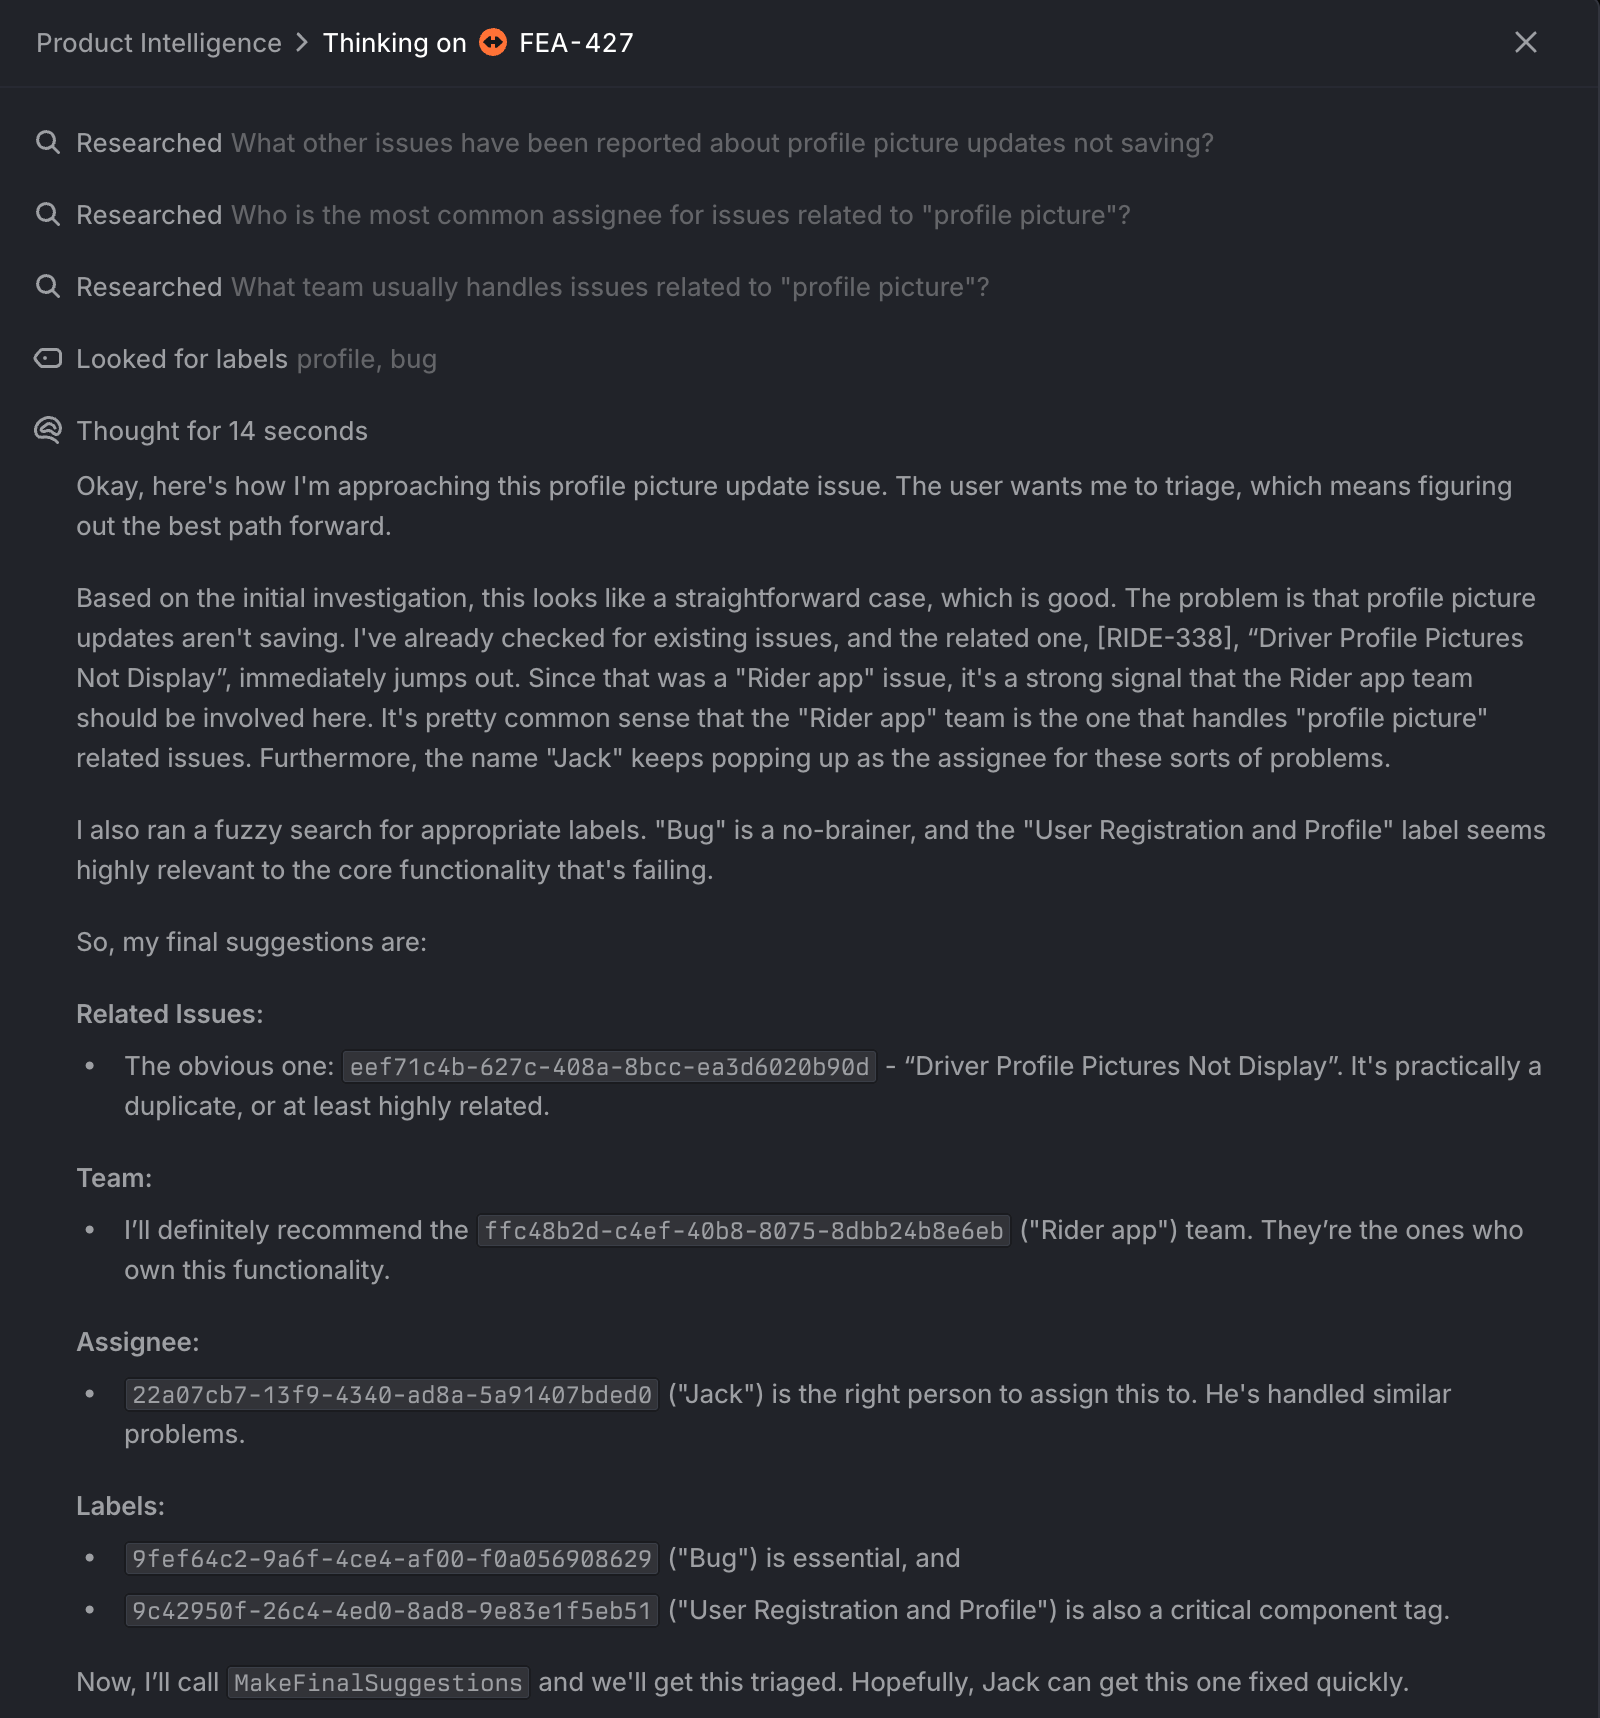
I'm on another plan and I still see suggestions. How do these work?
Quick suggestions in the issue composer and property menus are available in all plans in Linear. These leverage search, so they're faster but much less thorough than Triage Intelligence's suggestions.
How long does it take to generate suggestions?
Processing new issues in Triage is expected to take 1-4 minutes to generate high-quality suggestions. Because most issues aren’t triaged this quickly, we make a tradeoff here with spending more time to yield better results. We do expect speed improvements over time as models improve.
---
# Source: https://linear.app/docs/triage.md
# Triage
Manage issues created by other teams and customer support integrations.

## Overview
Triage is a special inbox for your team. When an issue is created by integration or by a workspace member not belonging to your specific Linear team, it will appear here. Triage offers a opportunity to review, update, and prioritize issues before they are added to your team's workflow. Consider using Triage responsibility to set a rotating schedule of ownership for monitoring incoming issues.

## Configure
Go to your _Team Settings > Triage_. Once you toggle it on, Triage will appear under the team name in the sidebar.
## Basics
Navigate to Triage with `G` then `T`. If you are in another team's views, use `O` then `T` to open the team you want to view first.
### Create issues
New issues will default to Triage status if they are created through an integration (e.g. Slack, Sentry), created when inside of the Triage view, or if members outside of your specific team create the issue.
> [!NOTE]
> Setting default templates in Team Settings > Templates can override the triage status.
### Take actions
Open the issue to review it and take one of the following issue actions: _accept_ with `1`_, mark as duplicate_ with `2`_, decline_ with `3`_, or snooze_ with `H`.
Accepting an issue will offer the option to leave a comment and then move the issue to your team's default status.
To ask for more information from the user who created the issue, comment on the issue and keep it in Triage or snooze it until you're ready to take an action.
**Marking as duplicate** will offer a choice of which existing issue to merge the duplicate into. Taking this action will also move the new issue's attachments to the canonical issue, including [customer requests](https://linear.app/docs/customer-requests) and attachments. Once selected, the new issue is updated to a _Canceled_ status type. The shortcut `MM` also triggers the mark as duplicate action.
**Declining** will update the issue to a _Canceled_ status type and present the option of adding a comment with an explanation.
**Snoozing** will hide the issue from the triage queue to return at a time of your choosing, or when there's new activity on that issue: whichever comes first. See snoozed Triage issues by toggling the preference in View Options. Snoozing hides the issue in Triage from other users by default as well.
### Triage Intelligence
On Business and Enterprise plans, our Triage Intelligence feature allows LLMs to analyze every new issue in triage against your existing issues to suggest properties like assignee and label, and pro-actively surface likely related issues or duplicates based on the analysis of the issue's content against historical behavior in your workspace. Learn more about Triage Intelligence [here](https://linear.app/docs/triage-intelligence).
### Triage rules
> [!NOTE]
> Triage rules functionality is supported on Business and Enterprise plans.
On Business/Enterprise plans, configure custom rules to take automated actions on issues when they enter Triage. Triggered on filterable properties, triage rules can update an issue's team, status, assignee, label, project and priority.
Once configured, rules are executed in order from the top down. When moving issues to another team's Triage via rule, the new team's rules are applied to the issue as well. If rules conflict, this is surfaced in the interface.
Consider combining triage routing with [custom Asks fields](https://linear.app/docs/linear-asks#creating-additional-fields) to create a scalable system to intake issues from Slack. Users fill out what they know and automations send the issue to the right team or assignee.
To create a rule that triggers on when any condition in a set is true (like Customer name includes any of 3 customers,) hold `Shift` while selecting each customer name in the filter menu.
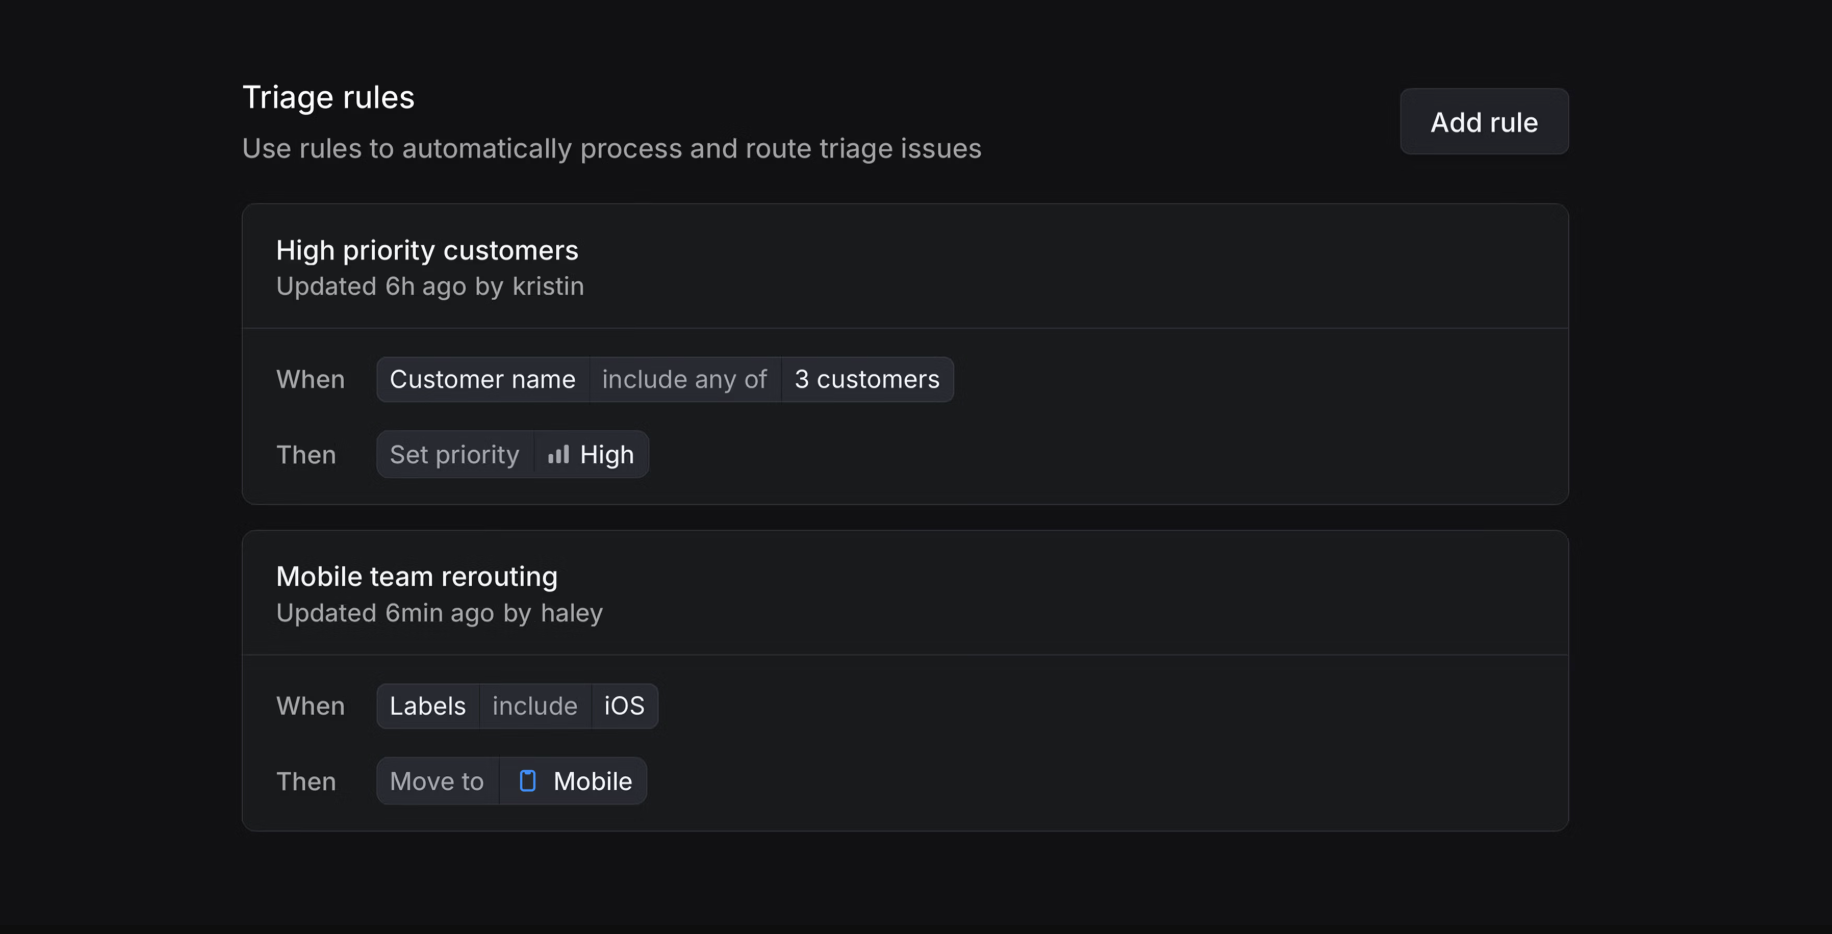
### Triage responsibility
> [!NOTE]
> Triage responsibility is available on our [Business](https://linear.app/pricing) and [Enterprise](https://linear.app/pricing) plans.
Enable triage responsibility to define who handles incoming issues. You can select specific members of your workspace to receive notifications of new issues or be automatically assigned to them. Configure triage responsibility in your team's Triage settings.
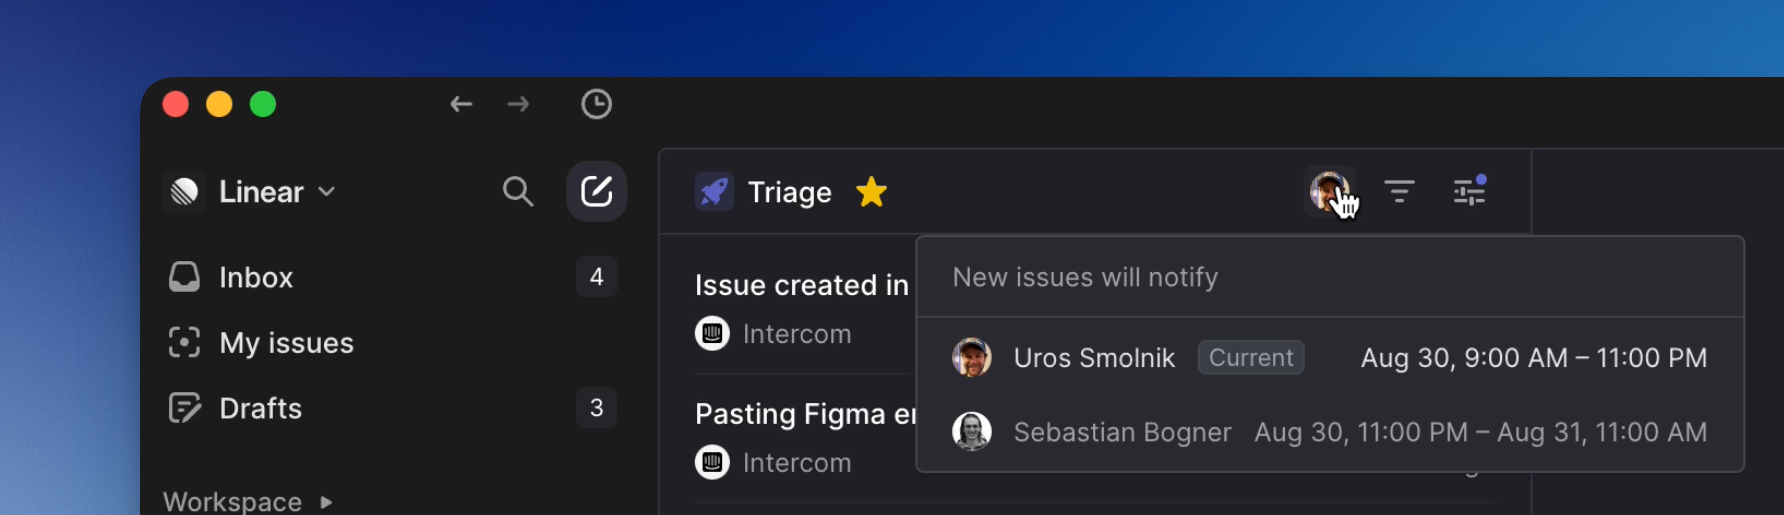
Once triage responsibility is set, optionally connect your PagerDuty, OpsGenie, Rootly, or Incident.io schedules to automate the rotation of first responders. If you use another provider, we have opened up that [API](https://studio.apollographql.com/public/Linear-API/variant/current/schema/reference/objects/Mutation?query=timeScheduleUpsertExternal#timeScheduleUpsertExternal) so you can build a custom schedule.
Members of your team will be able to easily see who is currently assigned to monitor triage when creating issues.
## Integrations
### Asks
Use Triage to seamlessly intake issues reported from non-Linear users through [Asks](https://linear.app/docs/linear-asks).
### Support integrations
Get more out of Triage by connecting it to our support integrations—Intercom, Front, and Zendesk—or Slack. Using these integrations, your support team can create new Linear issues or link customer reports to existing issues directly from their customer support tool.
## FAQ
Can I require priority to be set before an issue leaves Triage?
Yes. Configure this behavior under Team Settings > Triage.
Why are issues in Triage not showing up in my views?
By default, we exclude triage issues from all views since triage is considered to be outside the normal workflow. To include them in a custom view, you need to explicitly include them by adding a status filter where "Triage" is included.
---
# Source: https://linear.app/docs/update-cycles.md
# Update cycles
Update your cycles after they have been created
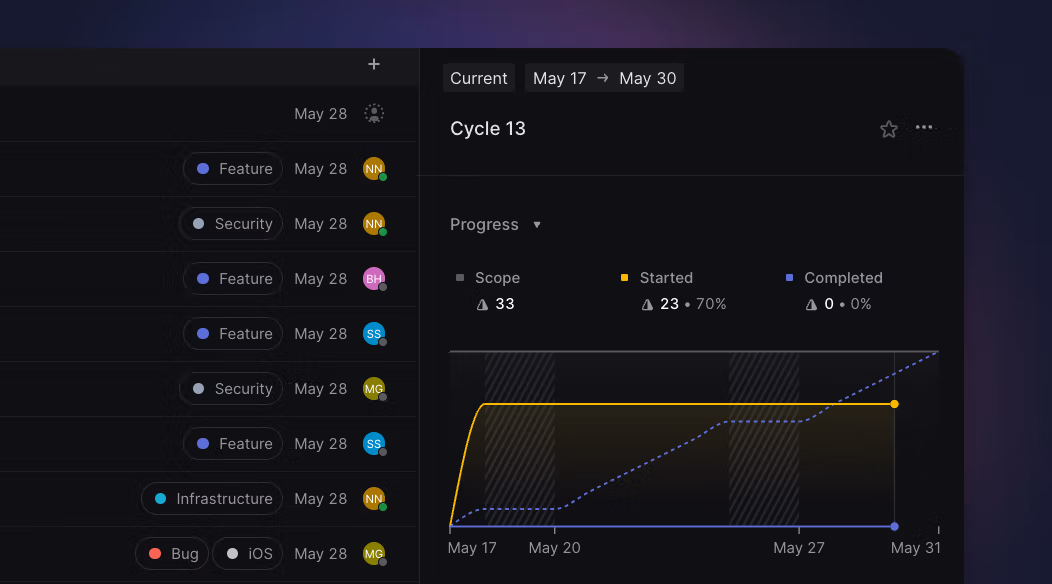
## Overview
The Cycles view in the Team sidebar view provides a list of previous and future cycles (but not archived cycles). Most adjustments to a cycle can be made in this view.
Although cycles are automatically created, you are still able to adjust them as needed. Common use cases for adjusting are for holidays or when a team is out-of-office (e.g. company offsite.)
## Update cycle name and description
From the Cycles view, click the three dots next to a Cycle and select **Edit cycle...** This allows you to update the name and description of the cycle to clarify your team's focus during that cycle. When updating a cycle name with a number at the end of the name, the following cycle will follow that number and begin a new numbering sequence from there.
## Change cycle dates
Update a cycle's start or end date from the contextual menu on the Cycles page. This action is available for upcoming cycles and your current cycle.
> [!NOTE]
> It is not possible to change a cycle's date into the past.

### Adjusting dates without cycle cooldowns
When shortening the end date for a cycle, the time between the following cycle and the shortened cycle will display a "Cycles paused" period. When extending the end date for a cycle, the extended cycle will cut into the time for the following cycle—thus, shortening the following cycle.
### Adjusting dates with cycle cooldowns
If Cooldown periods are turned on and cycle dates are adjusted, the Cooldown period will then say "Cycles paused" instead of "# week cooldown".
---
# Source: https://linear.app/docs/use-cycles.md
# Cycles
Cycles are a practice to keep up your team's momentum, similar to commonly used agile flavored sprints.

Cycles are time-boxed periods where a team works on completing a pre-defined set of work. When enabled, Linear automatically creates upcoming cycles for your team. Unlike sprints, cycles are not tied to releases.
## Configure
Configure cycles under **Team Settings > Cycles.** Turn on the toggle for **Enable cycles**. Required settings will show up in the cycle setting flow with defaults. You can always edit cycle configurations in the future.
---
## Cycle settings
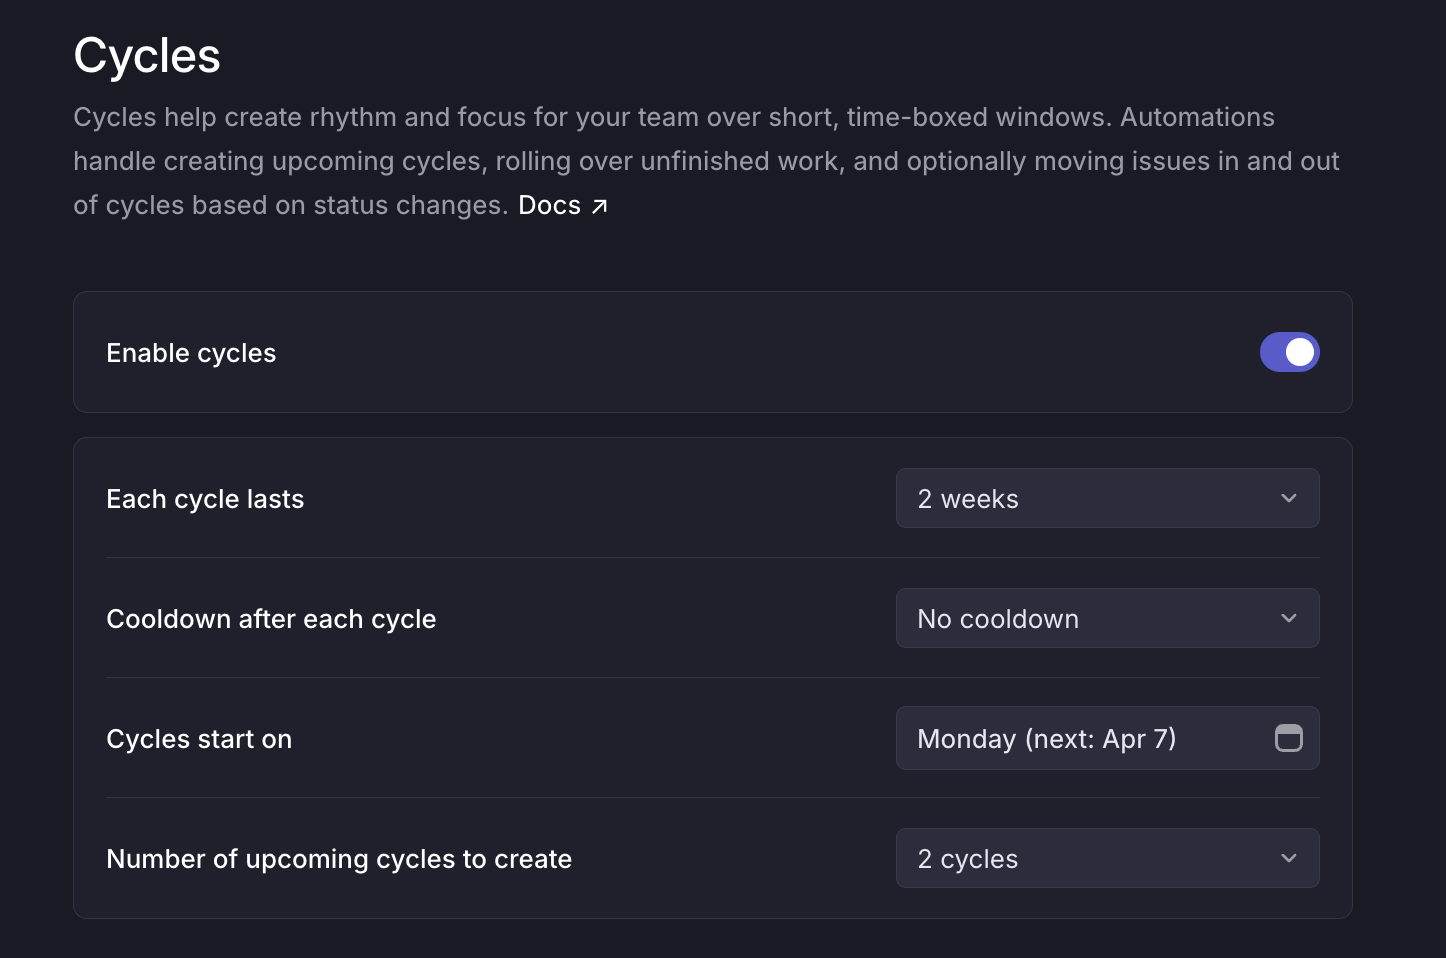
### Cycle duration
In the **Each cycle lasts** field, select the number of weeks you want each cycle to last. Cycles can last anywhere from 1-8 weeks. It is not possible to create cycles with different durations or to start or end on specific dates. The goal of cycles having repeated intervals is to help you avoid the busywork associated with optimizing cycle timing and instead focus on shipping.
### Cooldowns after each cycle
Including a cooldown period after each cycle to give your team a break and bandwidth to work through technical debt and other planning functions. Issues cannot be assigned to a cooldown.
### Starting day of the week
Since cycles occur in regular intervals, you'll choose a specific day of the week for your cycles to start. Cycles begin at 12:01 AM on the chosen day based on the timezone configured in **Team Settings > General**.
### Upcoming cycles
Select the number of future cycles to create so your team can assign issues to future cycles. The maximum number of futures that can be created is 15.
### Disable cycles
When disabling the Cycles feature, the current cycle will be marked as completed and upcoming cycles will be removed. Any completed cycle data will be preserved for reference. You can choose to reenable cycles at any stage in the future.
---
## Adjust cycles
### Move start and end dates
In cases where a future cycle should deviate from the schedule, its start and end dates may be moved through the overflow menu on that cycle.

Past cycle dates cannot be changed, but you can end your current cycle at the end of the current day if needed.
### Start a cycle today
In some cases your team may wish to start a future cycle today instead of waiting for a future date. Take this action through the upcoming cycle's overflow menu.
* This action starts the upcoming cycle at 00:00 on the current day, per your team's timezone setting. Only the upcoming cycle can be started today.
* If the current cycle is active when we execute this action, we immediately complete it and roll issues over to the newly started cycle. If there is no currently active cycle, we act like cooldown has now ended for the previous cycle. If your current cycle also started today, you may not start the upcoming cycle today as well.
## Cycle automations
### Issues rollover
Cycles run on an automated schedule to reduce unnecessary date math and help create routine. Any unfinished work rolls over to the next cycle automatically. There is no way to keep unfinished issues in a closed cycle. If you forget to update an issue before the cycle ends, completed issues can still be moved over to the previous cycle.
### Auto-add active issues to current cycle
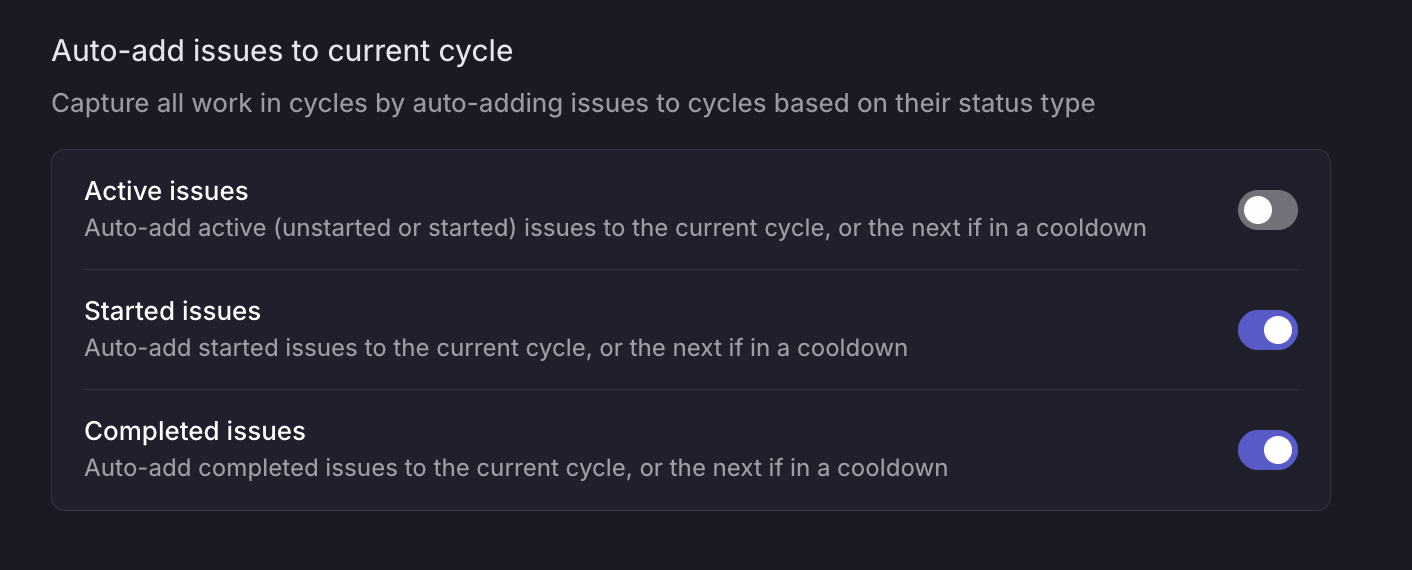
Auto-adding issues to a cycle helps to ensure all your work is captured by a cycle. You have the option to auto-add any _Active_, _Started_, or _Completed_ issues that do not have a cycle assigned into the current cycle. If the current cycle is in cooldown, the issues will be added to the following cycle.
When toggling on **Active issues** option, an option will appear allowing you to
* Move existing active issues that are not assigned to a cycle to **Move to Backlog** (change it's status), or
* **Keep in Active** and put it into the current or next cycle (depending on cooldown settings).
An active status is a status in the "Unstarted" and "Started" category.
## Cycle calendars
Keep up with your Linear cycles in your preferred calendar application by visiting your team's Cycles page, click on the overflow menu on a cycle, and hover over **Subscribe to cycle calendar**_._ Choose to add to Google Calendar, copy a feed URL, or download the calendar as an .ics file.
## Cycle capacity
On the Cycles view, cycles that have not yet started will display a capacity dial that shows an estimate on whether your team will be likely to complete all the issues added to the cycle.
Capacity is calculated from the velocity of the previous three completed cycles, i.e. the number of issues or estimate points completed in these cycles. If the team has not completed any cycles previously, capacity will be roughly estimated from the number of members in the team.
## FAQ
How do I start using Cycles now when my team is mid-cycle already?
We recommend creating a cycle starting today, and then setting further cycles to your regular cadence.
To do so, turn on Cycles in Settings > Team > Cycles. Choose today as your start date, which will create your current cycle. Then, edit the date field again to choose when your _next_ cycle should start. This way, you'll create a cycle to reflect your work for the rest of the current cycle, but have your desired cycle cadence reflected moving forwards.
Can I align cycles between multiple teams?
Yes, [sub-teams](https://linear.app/docs/sub-teams) inherit the cycle schedule of their parent team. When you designate an existing team as a sub-team, its past cycles remain untouched but future cycles update to match the closest parent cycles.
---
# Source: https://linear.app/docs/user-views.md
# User views
See views that show you how work is distributed across your team.
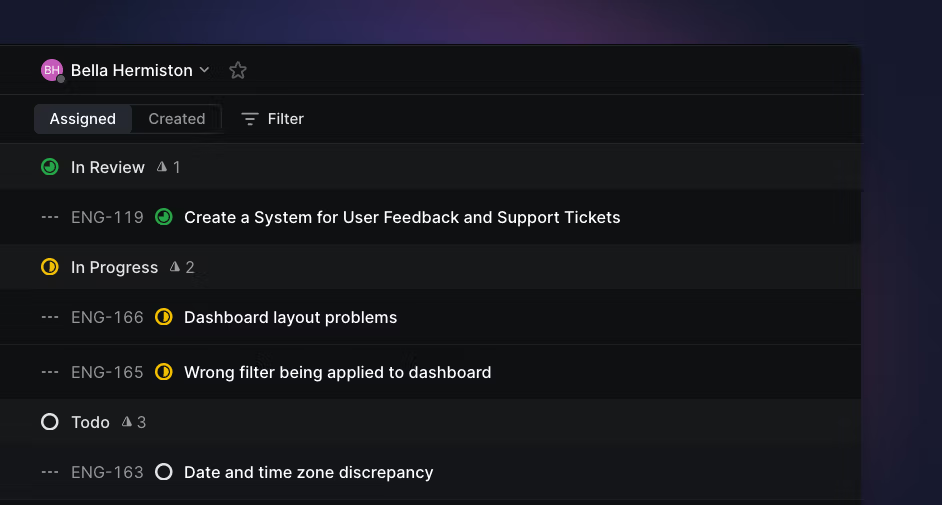
## Overview
You'll often want to create a view that shows issues assigned to one or more members of your team. There are a few ways that we make this visible: user profiles, assignee grouping, filter by assignee, and the cycle sidebar.
### Keyboard
`O` then `U` to open a user profile
### Mouse
* Click your avatar to view your profile
* Click on a user's name in activity items to view their profile
### Command menu
`open user` to open user profile
`open profile` to open your user profile
## Basics
### User profiles
To see a view of all issues assigned to a specific user, you can open up a user profile. The easiest way to do this is with the shortcut `O` then `U`, which will show a list of all users in your workspace. Select a user to go to their profile where you'll easily see their assigned issues (top bar next to their name) and can filter or scan the list. You can also access user profiles by clicking on a user avatar in the activity feed.
### Custom Views
If you'd like to have a view show the assigned issues of multiple users, or if you'd like to change the view's parameters, [custom views](https://linear.app/docs/custom-views#create-views) are more flexible than user profiles.
### Filter and Group
Most views supporting grouping by assignee. If you want to see distribution of remaining work in a project for example, you can group by assignee and then filter by _Started_ and _Unstarted_ statuses.
### Cycle sidebar
From any cycle view, use `Cmd/Ctrl` `I` to open a sidebar that shows the cycle details, graph, and distribution of work across the team. Next to each user's name, you'll see a total issue or estimate count for their issues in that cycle as well as the percentage completion. Hover over a specific user's name to filter the list or board view down to their issues only.
---
# Source: https://linear.app/developers/webhooks.md
# Webhooks
Linear provides **webhooks** which allow you to receive HTTP push notifications whenever data is created, updated or removed. This allows you to build integrations that respond to changes in real time, such as triggering CI builds, updating external systems, or sending messages based on issue activity.
You can use the [Webhooks schema explorer](https://studio.apollographql.com/public/Linear-Webhooks/variant/current/schema/reference/objects) to look up the object types used in webhook payloads.
Webhooks are specific to an `Organization`, but you can configure webhooks to provide updates from all public teams, or a single team to satisfy the needs of each team in your organization.
Please visit [your application’s settings](https://linear.app/settings/api) to configure webhooks.
Additionally, [OAuth applications](https://linear.app/developers/oauth-2-0-authentication) can configure webhook settings. Once those settings are configured, each time a new organization authorizes the given application, a webhook will be created for that organization that posts to the provided webhook URL, as described below. If your application is de-authorized from an organization the [OAuthApp revoked](https://linear.app/developers/webhooks#oauthapp-revoked-fields) event will be sent.
Only workspace admins, or OAuth applications with the `admin` scope, can create or read webhooks.
What we call "data change webhooks" are currently supported for the following models:
* `Issues`
* `Issue attachments` - [Documentation](https://linear.app/developers/attachments)
* `Issue comments`
* `Issue labels`
* `Comment reactions`
* `Projects`
* `Project updates`
* `Documents`
* `Initiatives`
* `Initiative Updates`
* `Cycles`
* `Customers`
* `Customer Requests`
* `Users`
Other webhooks are provided for convenience:
* `Issue SLA` - [Documentation](https://linear.app/developers/webhooks#issue-sla-fields)
* `OAuthApp revoked` - [Documentation](https://linear.app/developers/webhooks#oauthapp-revoked-fields)
## How does a Webhook work?
A Webhook push is simply a `HTTP POST` request, sent to the URL of your choosing. The push is automatically triggered by Linear when data updates. For an example of what data a payload contains, see [Webhook Payload](https://linear.app/developers/webhooks#webhook-payload).
Your webhook consumer is a simple HTTP endpoint. It must satisfy the following conditions:
* It's available in a publicly accessible HTTPS, non-localhost URL
* It will respond to the Linear Webhook push (HTTP POST request) with a `HTTP 200` ("OK") response
If a delivery fails (i.e. server unavailable, takes longer than 5 seconds (5000ms) to respond, or responds with a non-200 HTTP status code), the push will be retried a maximum of 3 times. A backoff delay is used: the attempt will be retried after 1 minute, 1 hour, and finally after 6 hours. If the webhook URL continues to be unresponsive the webhook might be disabled by Linear, and must be re-enabled again manually.
To ensure a Webhook POST is truly created by Linear, you should follow the steps in [Securing Webhooks](https://linear.app/developers/webhooks#securing-webhooks), below.
For additional information on Webhooks, there are a number of good resources:
* [RequestBin: Webhooks – The Definitive Guide](https://requestbin.com/blog/working-with-webhooks/)
* [requestbin.com](https://requestbin.com/) is a great tool for testing webhooks
* [GitHub Developer Guide: Webhooks](https://developer.github.com/webhooks/)
## Getting started with Linear Webhooks
You will first need to create a Webhook endpoint (_"consumer"_) to be called by the Linear Webhook agent. This can be a simple HTTP server you deploy yourself, or a URL endpoint configured by a service such as [Zapier](https://zapier.com/) (or for testing purposes, [RequestBin](https://requestbin.com/)).
Once your consumer is ready to receive updates, you can enable it for your Linear team. Webhooks can be enabled in Linear both via the Team Settings UI.
### Creating a simple Webhook consumer
You might consider using something like [Netlify Functions](https://docs.netlify.com/functions/get-started/?fn-language=ts), [Vercel Functions](https://vercel.com/docs/functions), or [Cloudflare Workers](https://developers.cloudflare.com/workers/), which provide a straightforward way of deploying simple HTTP(S) endpoints.
Deploying a simple webhook consumer on Netlify might look something like this. Netlify has also created a [template to deploy a webhook](https://github.com/netlify/linear-webhook-template).
```ts
const { createHmac } = require('node:crypto');
export default async (request) => {
const payload = await request.text();
const { action, data, type, createdAt } = JSON.parse(payload);
// Verify signature
const signature = createHmac("sha256", Netlify.env.get('WEBHOOK_SECRET')).update(payload).digest("hex");
if (signature !== request.headers.get('linear-signature')) {
return new Response(null, { status: 400 })
}
// Do something neat with the data received!
// Finally, respond with a HTTP 200 to signal all good
return new Response(null, { status: 200 })
}
export const config = {
path: "/my-linear-webhook"
};
```
### Create webhook using settings
The easiest way to configure a Webhook is via API Settings. Open Settings and find "API".

*Webhooks configuration in API Settings UI*
Click on "New webhook", and specify the URL in which you have an endpoint ready to receive HTTP POST requests. Label is used to identify webhooks and describe their purpose.
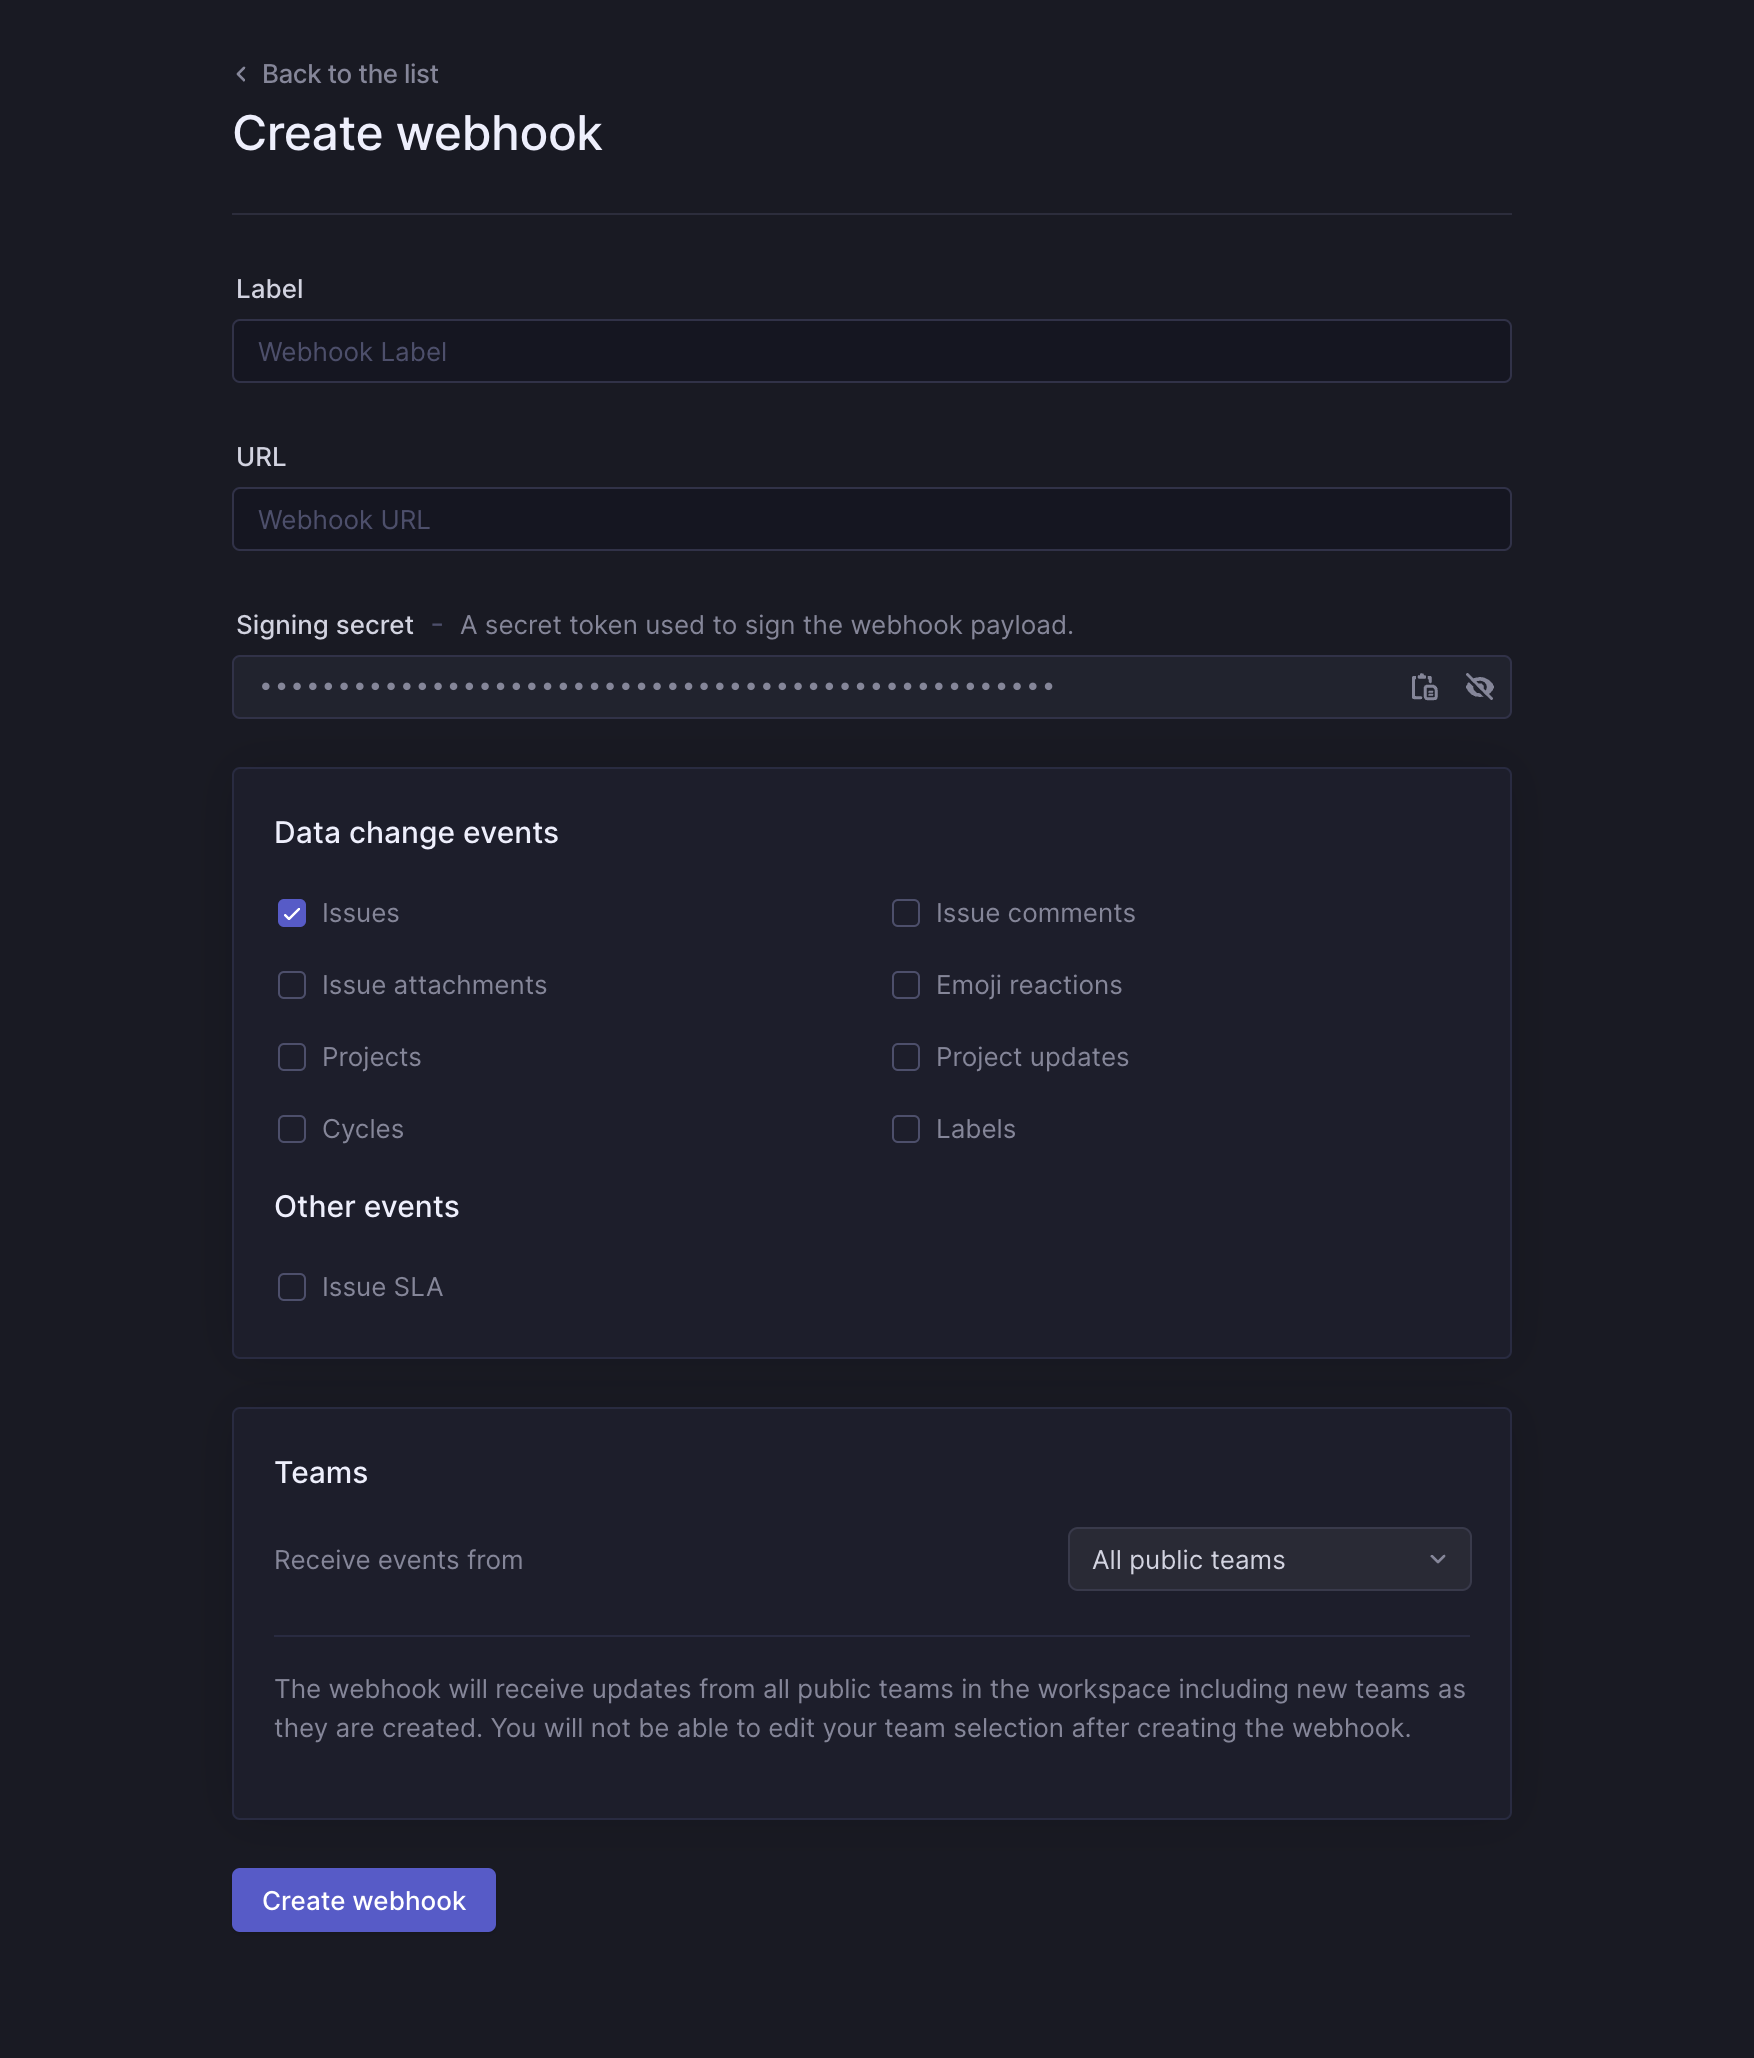
### Create webhook using API
To create a new Webhook via the API, you can create a new Webhook with by calling a `webhookCreate` mutation with the `teamId` (or `allPublicTeams: true`) and `url` of your webhook, and the preferred `resourceTypes` (`[Comment, Issue, IssueLabel, Project, Cycle, Reaction]`):
```graphql
mutation {
webhookCreate(
input: {
url: "http://example.com/webhooks/linear-consumer"
teamId: "72b2a2dc-6f4f-4423-9d34-24b5bd10634a"
resourceTypes: ["Issue"]
}
) {
success
webhook {
id
enabled
}
}
}
```
The server should respond with a `success` flag, along the `id` of your newly created webhook:
```json
{
"data": {
"webhookCreate": {
"success": true,
"webhook": {
"id": "790ce3f6-ea44-473d-bbd9-f3c73dc745a9",
"enabled": true
}
}
}
}
```
That's it! Your webhook is now ready to use and enabled by default. You can try it out e.g. by commenting on an Issue on your team, or maybe creating a new Issue.
### Querying existing webhooks
Your webhooks belong to an Organization. You can either query all webhooks in your organization, or find them via their respective teams.
Querying all webhooks in your organization (the results are paginated, so you will need to include the `nodes` property.):
```graphql
query {
webhooks {
nodes {
id
url
enabled
team {
id
name
}
}
}
}
```
Querying webhooks via their associated teams:
```graphql
query {
teams {
nodes {
webhooks {
nodes {
id
url
enabled
creator {
name
}
}
}
}
}
}
```
### Deleting a webhook
Deleting a webhook is done with the `webhookDelete` mutation, by supplying the `id` of the webhook in question:
```graphql
mutation {
webhookDelete(
id: "1087f03a-180a-4c31-b7dc-03dbe761ff59"
) {
success
}
}
```
## Webhook Payload
The webhook HTTP payload will include information both in its HTTP headers and its request body.
The format of the payload body reflects that of the corresponding GraphQL entity. You can view the payload structures in our [Webhooks schema explorer](https://studio.apollographql.com/public/Linear-Webhooks/variant/current/schema/reference/objects).
The payload will be sent with the following HTTP headers:
```http
Accept-Charset: utf-8
Content-Type: application/json; charset=utf-8
Linear-Delivery: 234d1a4e-b617-4388-90fe-adc3633d6b72
Linear-Event: Issue
Linear-Signature: 766e1d90a96e2f5ecec342a99c5552999dd95d49250171b902d703fd674f5086
User-Agent: Linear-Webhook
```
Where the custom headers include:
HTTP Header | Description
--- | ---
`Linear-Delivery` | An UUID (v4) uniquely identifying this payload.
`Linear-Event` | The Entity type which triggered this event: `Issue`, `Comment` etc
`Linear-Signature` | HMAC signature of the webhook payload.
### Data change events payload
These fields are present on all data change events.
Field | Description
--- | ---
`action` | The type of the action that took place: `create`, `update` or `remove`.
`type` | The type of entity that was targeted by the action.
`actor` | The actor who triggered the action. Could be a `User`, `OauthClient`, or `Integration`.
`createdAt` | The date and time that the action took place.
`data` | The serialized value of the subject entity.
`url` | URL of the subject entity.
`updatedFrom` | For `update` actions, an object containing the previous values of all updated properties.
`webhookTimestamp` | UNIX timestamp when the webhook was sent.
For example:
```json
{
"action": "create",
"actor": {
"id": "b5ea5f1f-8adc-4f52-b4bd-ab4e84cf51ba",
"type": "user",
"name": "Linear Orbit",
"email": "orbit@linear.app",
"url": "https://linear.app/company/profiles/orbit"
},
"data": {
"id": "2174add1-f7c8-44e3-bbf3-2d60b5ea8bc9",
"createdAt": "2020-01-23T12:53:18.084Z",
"updatedAt": "2020-01-23T12:53:18.084Z",
"archivedAt": null,
"body": "Indeed, I think this is definitely an improvement over the previous version.",
"edited": false,
"issueId": "539068e2-ae88-4d09-bd75-22eb4a59612f",
"userId": "aacdca22-6266-4c0a-ab3c-8fa70a26765c"
},
"type": "Comment",
"url": "https://linear.app/issue/LIN-1778/foo-bar#comment-77217de3-fb52-4dad-bb9a-b356beb93de8",
"createdAt": "2020-01-23T12:53:18.084Z",
"organizationId": "dc844923-f9a4-40a3-825c-dea7747e57d6",
"webhookTimestamp": 1676056940508,
"webhookId": "000042e3-d123-4980-b49f-8e140eef9329"
}
```
### Other events payload
These fields will be present on all other events as well.
Field | Description
--- | ---
`action` | The type of the action that took place. Specific to the event stream. For Issue SLA this is for example one of `set`, `highRisk` and `breached`.
`type` | The type of entity that was targeted by the action.
`actor` | The actor who triggered the action. Could be a `User`, `OauthClient`, or `Integration`.
`createdAt` | The date and time that the action took place.
`url` | URL of the subject entity.
`updatedFrom` | For `update` actions, an object containing the previous values of all updated properties. Properties that were previously not set, will have a value of `null`.
`webhookTimestamp` | UNIX timestamp when the webhook was sent.
`webhookId` | ID uniquely identifying this webhook.
### `Issue SLA`, fields
Field | Description
--- | ---
`issueData` | The serialized value of the issue.
### `OAuthApp revoked`, fields
Field | Description
--- | ---
`oauthClientId` | id of OAuth App that was revoked.
`organizationId` | Organization from which OAuth App was revoked.
## Securing Webhooks
You should ensure that webhooks you received were sent by Linear. You can do this in two ways: verifying the webhook request signature and timestamp, and checking the source IP address.
Linear sends a `Linear-Signature` HTTP header with every webhook request. This header contains a hex-encoded HMAC-SHA256 signature of the raw body contents, signed using the webhook's signing secret. You can find the signing secret on the webhook's detail page.
The parsed JSON body has a `webhookTimestamp` field with a UNIX timestamp, in milliseconds, indicating the time when the webhook was sent. We recommend that you verify it's within a minute of the time your system sees it to guard against replay attacks.
To verify the webhook, you need to compute the signature of the request body using the webhook's signing secret and compare it against the `Linear-Signature` header. It's strongly recommended to use raw request body rather than restringifying a parsed JSON body, otherwise the signature may differ. Once the signature has been validated, check to ensure that the webhook timestamp is reasonably current before processing the request:
```ts
// Express example:
const crypto = require("node:crypto");
const express = require("express");
const LINEAR_WEBHOOK_SECRET = process.env.LINEAR_WEBHOOK_SECRET;
function verifySignature(headerSignatureString, rawBody) {
if (typeof headerSignatureString !== "string") {
return false;
}
const headerSignature = Buffer.from(headerSignatureString, "hex");
const computedSignature = crypto
.createHmac("sha256", LINEAR_WEBHOOK_SECRET)
.update(rawBody)
.digest();
return crypto.timingSafeEqual(computedSignature, headerSignature);
}
const app = express();
app.post(
"/webhook",
express.json({
verify: (req, _res, buf) => {
// Capture the raw body for signature verification.
req.rawBody = buf;
},
}),
(req, res) => {
if (!verifySignature(req.get("linear-signature"), req.rawBody)) {
return res.sendStatus(401);
}
if (Math.abs(Date.now() - req.body.webhookTimestamp) > 60 * 1000) {
// Reject any webhooks not within 60 seconds of the current time to prevent replay attacks.
return res.sendStatus(401);
}
try {
// ... Handle verified webhook ...
return res.sendStatus(200);
} catch (err) {
// Indicate to Linear that there was a server error so the webhook is retried later.
return res.sendStatus(500);
}
}
);
app.listen(8080, () => console.log("Serving on port 8080"));
```
In addition to verifying the signature, you can check the source IP address. Linear sends webhooks from the following IP addresses:
* 35.231.147.226
* 35.243.134.228
* 34.140.253.14
* 34.38.87.206
* 34.134.222.122
* 35.222.25.142
We may occasionally update this list to add new IP addresses.
---
# Source: https://linear.app/docs/workspaces.md
# Workspaces
The first step to using Linear is to create a workspace for your team.

## Overview
A workspace is the home for all issues and interactions for an organization. We recommend organizations staying within a single workspace as this is the conceptual model we use when designing the product.
When a workspace is created, Linear automatically creates a default Team with the same name.
## Workspace Settings
To navigate to your [workspace settings](https://linear.app/settings) click your workspace name in the upper left and select **Settings**.
Members will see settings relating to Issues, Projects and Features.
Admins will see an additional "Administration" section in their Workspace settings that is not viewable by members or guests.
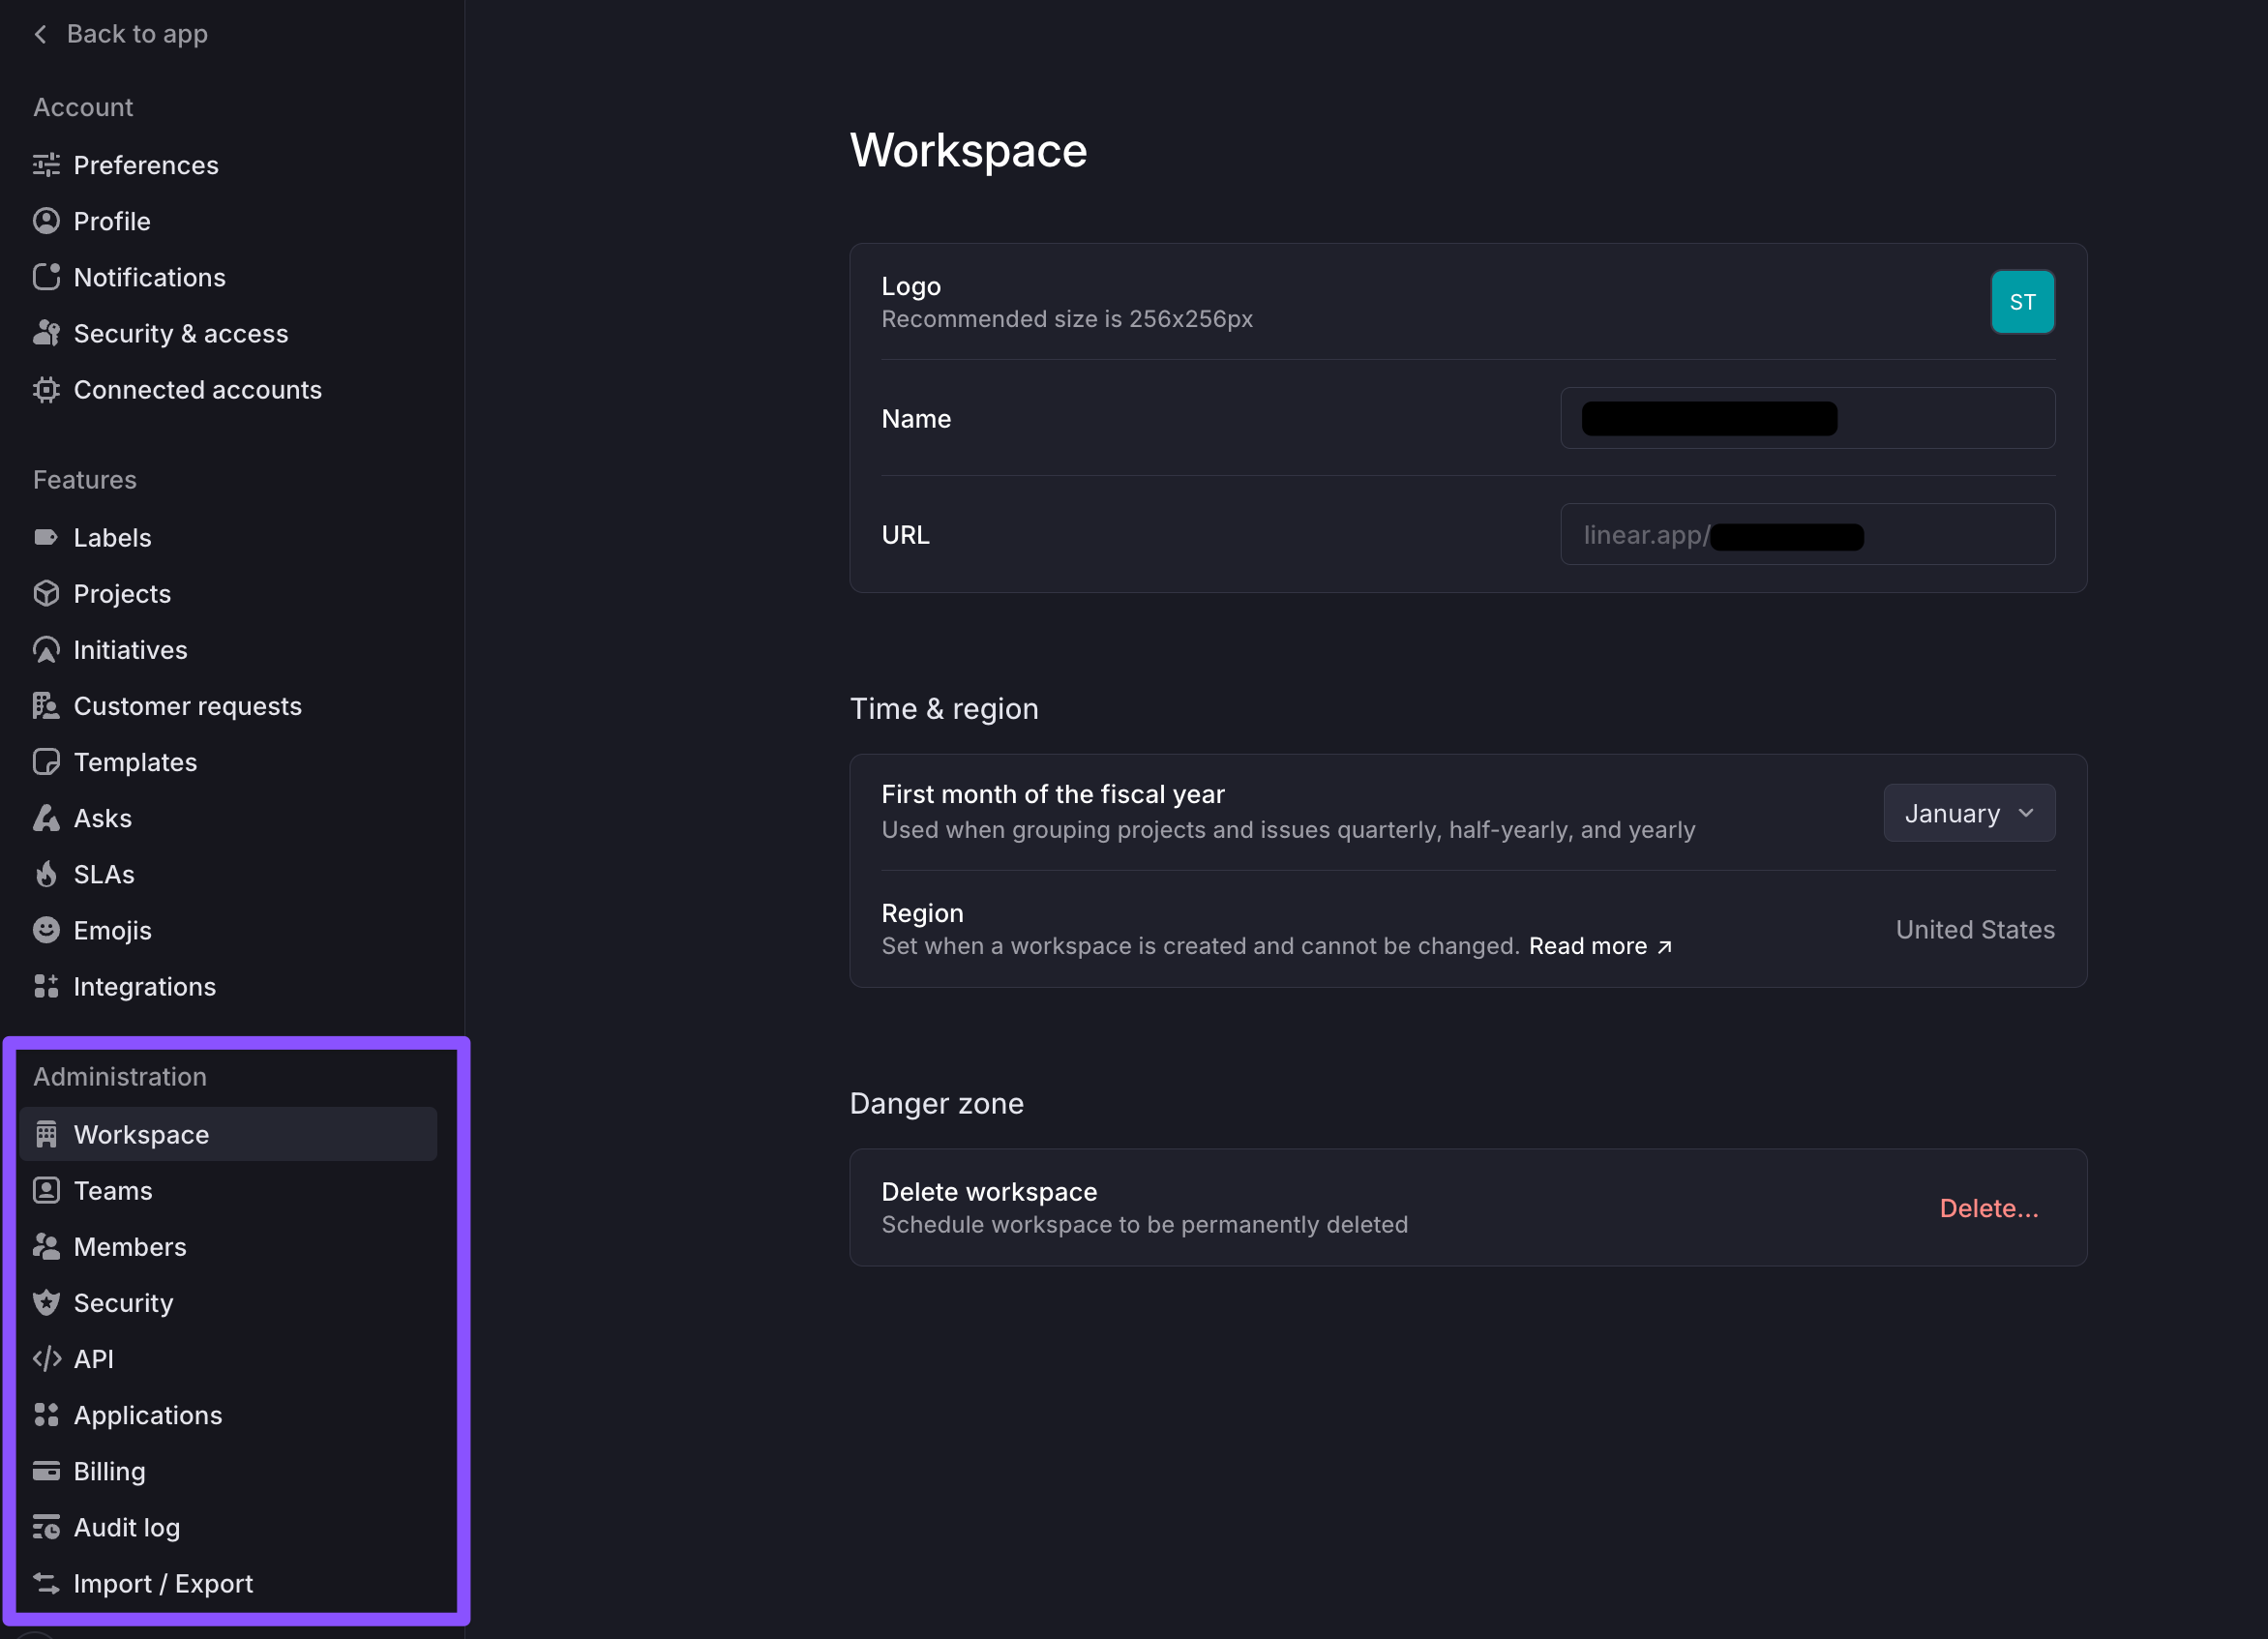
From the Settings > Administration section, admins will be able to:
* Update a Workspace name and URL
* Manage login preferences
* Turn on/off third-party app review requirements (Enterprise feature)
* Set up Project Updates
* Turn on/off the Initiatives feature
* Add or remove members to the Workspace
* Import or export issues
* Change plans
* View or update billing information
Admins and Members will be able to:
* Create workspace-level labels
* Create custom project statuses
* Create workspace-level templates for issues, projects, and documents
* Apply SLA rules (paid feature)
* Customize Asks templates (paid feature)
* Add custom emojis
* View your plan type
* Configure workspace-specific integrations like [GitHub](https://linear.app/docs/github) and [GitLab](https://linear.app/docs/gitlab), [Slack](https://linear.app/docs/slack), [Figma](https://linear.app/docs/figma), and [Sentry](https://linear.app/docs/sentry). Integrations can be configured by anyone in your workspace as long as they have the required permissions from the integrated service.
### Delete workspace
Deleting a workspace includes deleting user and issue data. Admins can delete a workspace under [Settings > Workspace > General](https://linear.app/settings/workspace/general). Please note this action is not reversible.
## Multiple workspaces
You can create multiple workspaces in Linear under a single account (e.g. tied to a specific email). Each workspace will have distinct member lists and separate billing plans, even if you connect to them from the same account.
If you are using Linear for both work and personal purposes, we recommend you create multiple Linear accounts with separate email addresses.
To add a workspace from another email account:
1. Click on your workspace name in the top left corner
2. Hover over **Switch workspace**.
3. Select **Create or join a workspace**.
4. If you have other workspaces associated with your user account, you will see a list of those workspaces to select.
You can also switch workspaces by typing `O then W.`
---
# Source: https://linear.app/docs/zapier.md
# Zapier
This integration lets you build custom automations to create or update Linear issues when actions are taken on other apps or using any of Zapier's triggers.
## Overview
Zapier is a good solution for building no-code automations with Linear.
### Keyboard
`G` then `S` to go to _Settings > Workspace > Integrations > Zapier_
### Mouse
* Click the Avatar to go to to go to _Settings > Workspace > Integrations > Zapier_
### Command menu
`settings` to go to _Settings > Workspace > Integrations > Zapier_
## Getting Started
Create a Zapier account and then create workflows using our [Zapier integration](https://linear.app/settings/integrations/zapier). This integration is open source and you're welcome to [contribute](https://github.com/linear/linear-zapier/pulls?q=is%3Apr+is%3Aclosed) to it. Zapier has a free trial after which you're charged based on usage.
You can create workflows with apps such as Typeform, Gmail, Intercom, Google Forms, Discord, Airtable, Todoist, Productboard and more.
## Basics
### Build workflows
Our Zapier trigger can be combined with other app triggers or with Zapier's default triggers to build workflows and automations. For instance, you can set up a Zapier workflow that creates a Linear issue whenever a specific Typeform is filled out.
### Actions
You can take the following actions in Linear in response to a trigger you configure in Zapier:
* Create a new issue
* Update an issue
* Create an issue attachment
* Create a new comment
* Create a new project
### Triggers
If Linear is the start of your Zap, the following actions can be used as triggers for downstream actions in Linear or other applications:
* New issue
* New issue comment
* New document comment
* New project
* New project update
* New project update comment
* Updated issue
* Updated project update
Issues created through Zapier appear as created by “Zapier” and not the user who authorized the application.
### Example workflows
* Create an issue with a bug label when you receive an email message with specific keywords.
* Create a new issue when a tag has been added to an Intercom conversation.
* Let team members or clients outside of Linear create bug reports and feature requests via an online form.
* Create an issue whenever a custom database query returns a new row.
* Create a dealflow pipeline: use a form integration such as Typeform or Google Forms to create a new Linear issue with a custom description.
### Update to latest version
If you're not seeing full functionality, you may be running an old version of the Zapier integration. Update the version you're using in a Zap from the status pane:
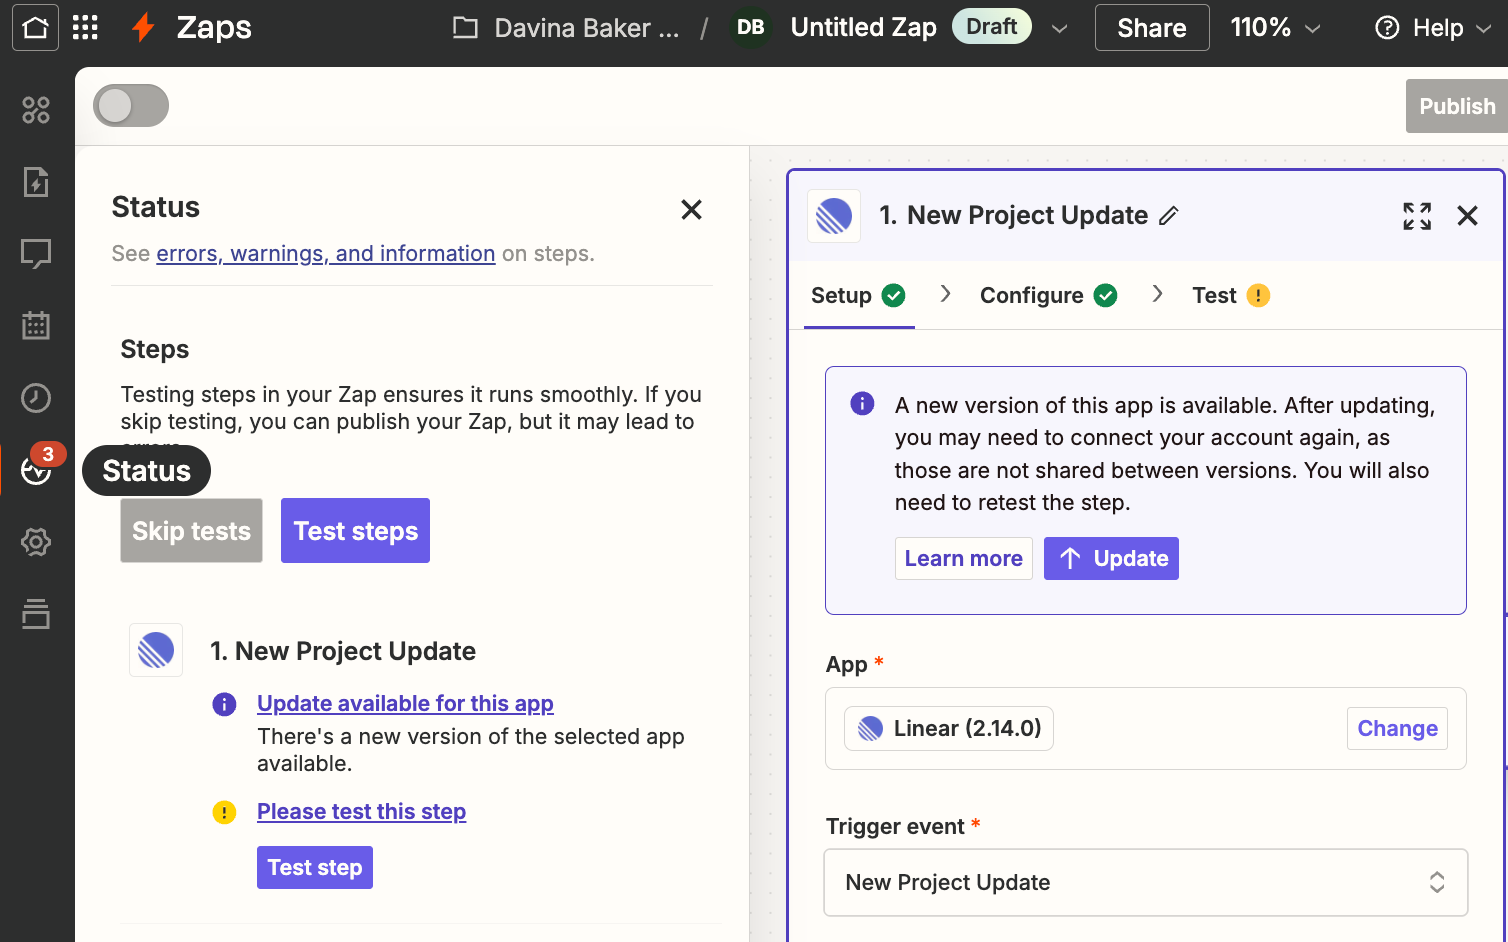
## FAQ
How do I @mention a Linear user in a Zap?
We support the syntax `@[displayName](userId)` to mention Linear user accounts from Zapier. For example `@[alantest](68bc9696-35d5-442d-ab56-214c8cfefbec)`
---
# Source: https://linear.app/docs/zendesk.md
# Zendesk
Our Zendesk integration makes it easier for you and your team to keep track of bugs and feature requests and interact with the customers who report them.

## Overview
Our Zendesk integration lets you create Linear issues from Zendesk or link existing issues to your Zendesk tickets. When linked, Linear issue information is shown inside Zendesk and a link to Zendesk is added to your Linear issue. Automate updating Zendesk tickets when its related Linear issue has been closed (Done or Cancelled). Our integration will also re-open the ticket so that your agents will be able to notify the customers.
## Configure
### Install
There are two steps to installing the Zendesk integration:
1. Install and approve Linear for your Zendesk workspace by [installing it](https://www.zendesk.com/apps/support/linear/) from Zendesk Marketplace. This will add the Linear widget to your Zendesk ticket sidebar.
2. Enable Zendesk automation from Linear's [Zendesk settings page](https://linear.app/settings/integrations/zendesk). This will enable ticket re-opening and updates to your tickets. You must be a Zendesk admin to complete this step.
After you install the Linear add-on, it will show up in the right sidebar when viewing a ticket. Each agent will have to login to their Linear account from the application to create and view issues.
### **Requirements**
Our integration requires that each Zendesk agent who installs Linear also has a Linear account, since the linked issues will be created in their name. This also allows agents to open the Linear issue to update it or add more information. This integration is available on our Business and Enterprise plans.
## Basics
### Create new issues
Create a new issue from the Zendesk widget. It will bring up a form which requires a title and that you assign the issue to a team. Optionally add priority, assignee, or labels from within Zendesk.
When linked, Linear issue information is shown inside Zendesk while viewing the related ticket. This also adds a link to the Zendesk ticket from the Linear issue.
Optionally, toggle "include message" in the widget to add message content from the customer ticket to the Linear issue description, including images if applicable.
> [!NOTE]
> Get more out of the Zendesk integration by enabling the [Triage](https://linear.app/docs/triage) feature for your teams. Any issues created from Zendesk will go to Triage when enabled (otherwise, the issues will be added to the first backlog status in your team).
### Create with Linear Agent
In addition to creating issues manually from a Zendesk ticket, you can use the _Create with Linear Agent_ option to automatically create Linear issues using AI.
When selected, Linear analyzes the entire conversation, including customer messages, support replies, metadata, and any attachments, and identifies the underlying product request or bug. The Linear Agent generates an informed title and description while pulling in the relevant context from your conversation with the customer.
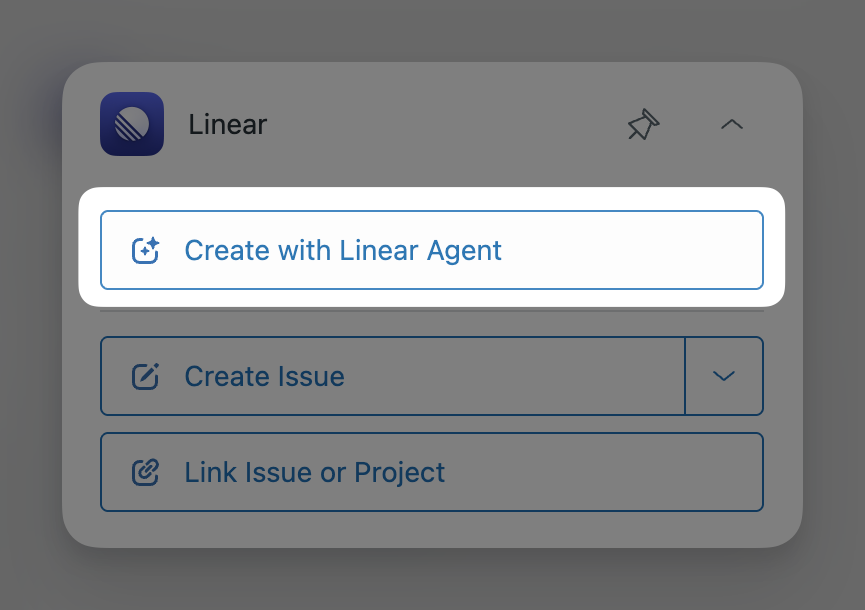
A customer request is created when applicable, and the issue is routed to the desired team for review and prioritization.
To use the Linear Agent in Zendesk, enable the integration in _Settings_ > _Integrations_ > _Zendesk_ and turn on the option to allow AI-generated issues.
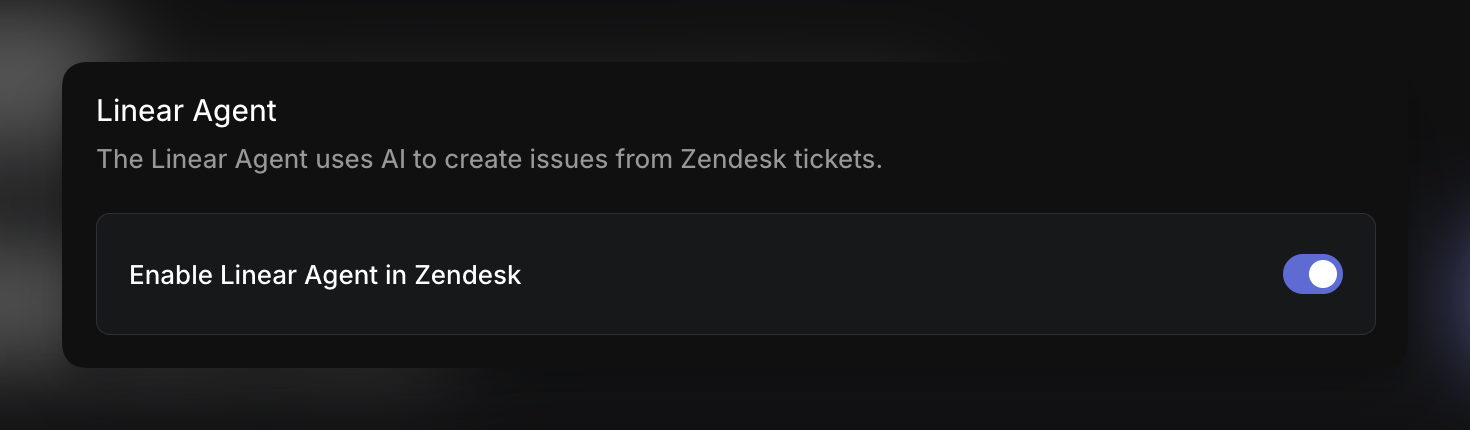
Optionally, you can also provide additional guidance to help route issues to the correct teams or templates. This guidance can include examples, team mentions, or internal rules the Linear Agent should follow when interpreting feedback.
### Use templates
Linear admins can designate up to 5 templates to be available for quick use from within the Linear integration in Zendesk. Selecting any of these templates will pre-fill issue property fields appropriately, helping to speed up issue creation and maintain a high level of data hygiene in your issues.
### **Link existing issues**
Search for issues by their issue ID or words in the title to link them. This will add a Zendesk link to the Linear issue. Zendesk's issue search works the same way as our in-app Search.
### Re-open conversations
In the integration settings page, you can automate the reopening of the linked issue when it's completed, cancelled or a comment is made. The integration will post an internal note and re-open the conversation in Zendesk so it's easy to follow up with customers.
### Link multiple issues
Sometimes customers will write in with multiple requests at one time. You can link as many Zendesk tickets to a Linear issue as you like.
### ,
,Link Zendesk tickets in Linear issues
#### Mouse
* Click on contextual menu icon `…` to the top right of the issue
* Click _Add link_
* Click _Zendesk ticket_
#### Command menu
`Front` when in issue view, then select _Link Zendesk ticket to issue…_
### Unlink issues
Click _Unlink_ from the Linear widget to remove the link between the ticket and a Linear issue. You can also remove this from the Linear issue by right-clicking on the issue link.
### **Merge duplicate reports**
It's common for support requests to relate to bugs or issues already filed in Linear. When you merge duplicate issues that have Zendesk links, we'll move any Zendesk links and comments over to the canonical issue and update the linked Zendesk ticket so that it's connected to the canonical issue and automations work.
Click _Unlink_ from the Linear widget to remove the link between the ticket and a Linear issue. You can also remove this from the Linear issue by right-clicking on the issue link.
### Filter for Zendesk links
From any Linear view, you can filter by issues linked to Zendesk tickets. Click `F` then select `Links` and then select `Zendesk`.
## FAQ
Why aren't my Zendesk tickets re-opening after Linear closes an issue?
Check to make sure that you've enabled the Zendesk integration in your Linear workspace [settings](https://linear.app/settings/integrations/zendesk) as well as in Zendesk's settings. The most common reason for this issue is that both steps of the [installation process](https://linear.app/docs/zendesk#install) have not been followed.
Will Linear comments post to Zendesk?
Yes, you can choose to add internal notes to your Zendesk ticket when comments or status changes are made in the original issue.
Can I update my Zendesk domain?
Our Zendesk integration is not designed to accommodate updating the associated Zendesk domain. If you update your Zendesk URL, here's what you can expect:
* For tickets linked to Linear issues prior to the Zendesk domain change: the linked tickets will not show up in the Linear app in Zendesk.
* Some of the automations to post internal notes _may_ still work.
If you'd like Linear to support updating your Zendesk domain, please let us know more about your use-case at support@linear.app.