


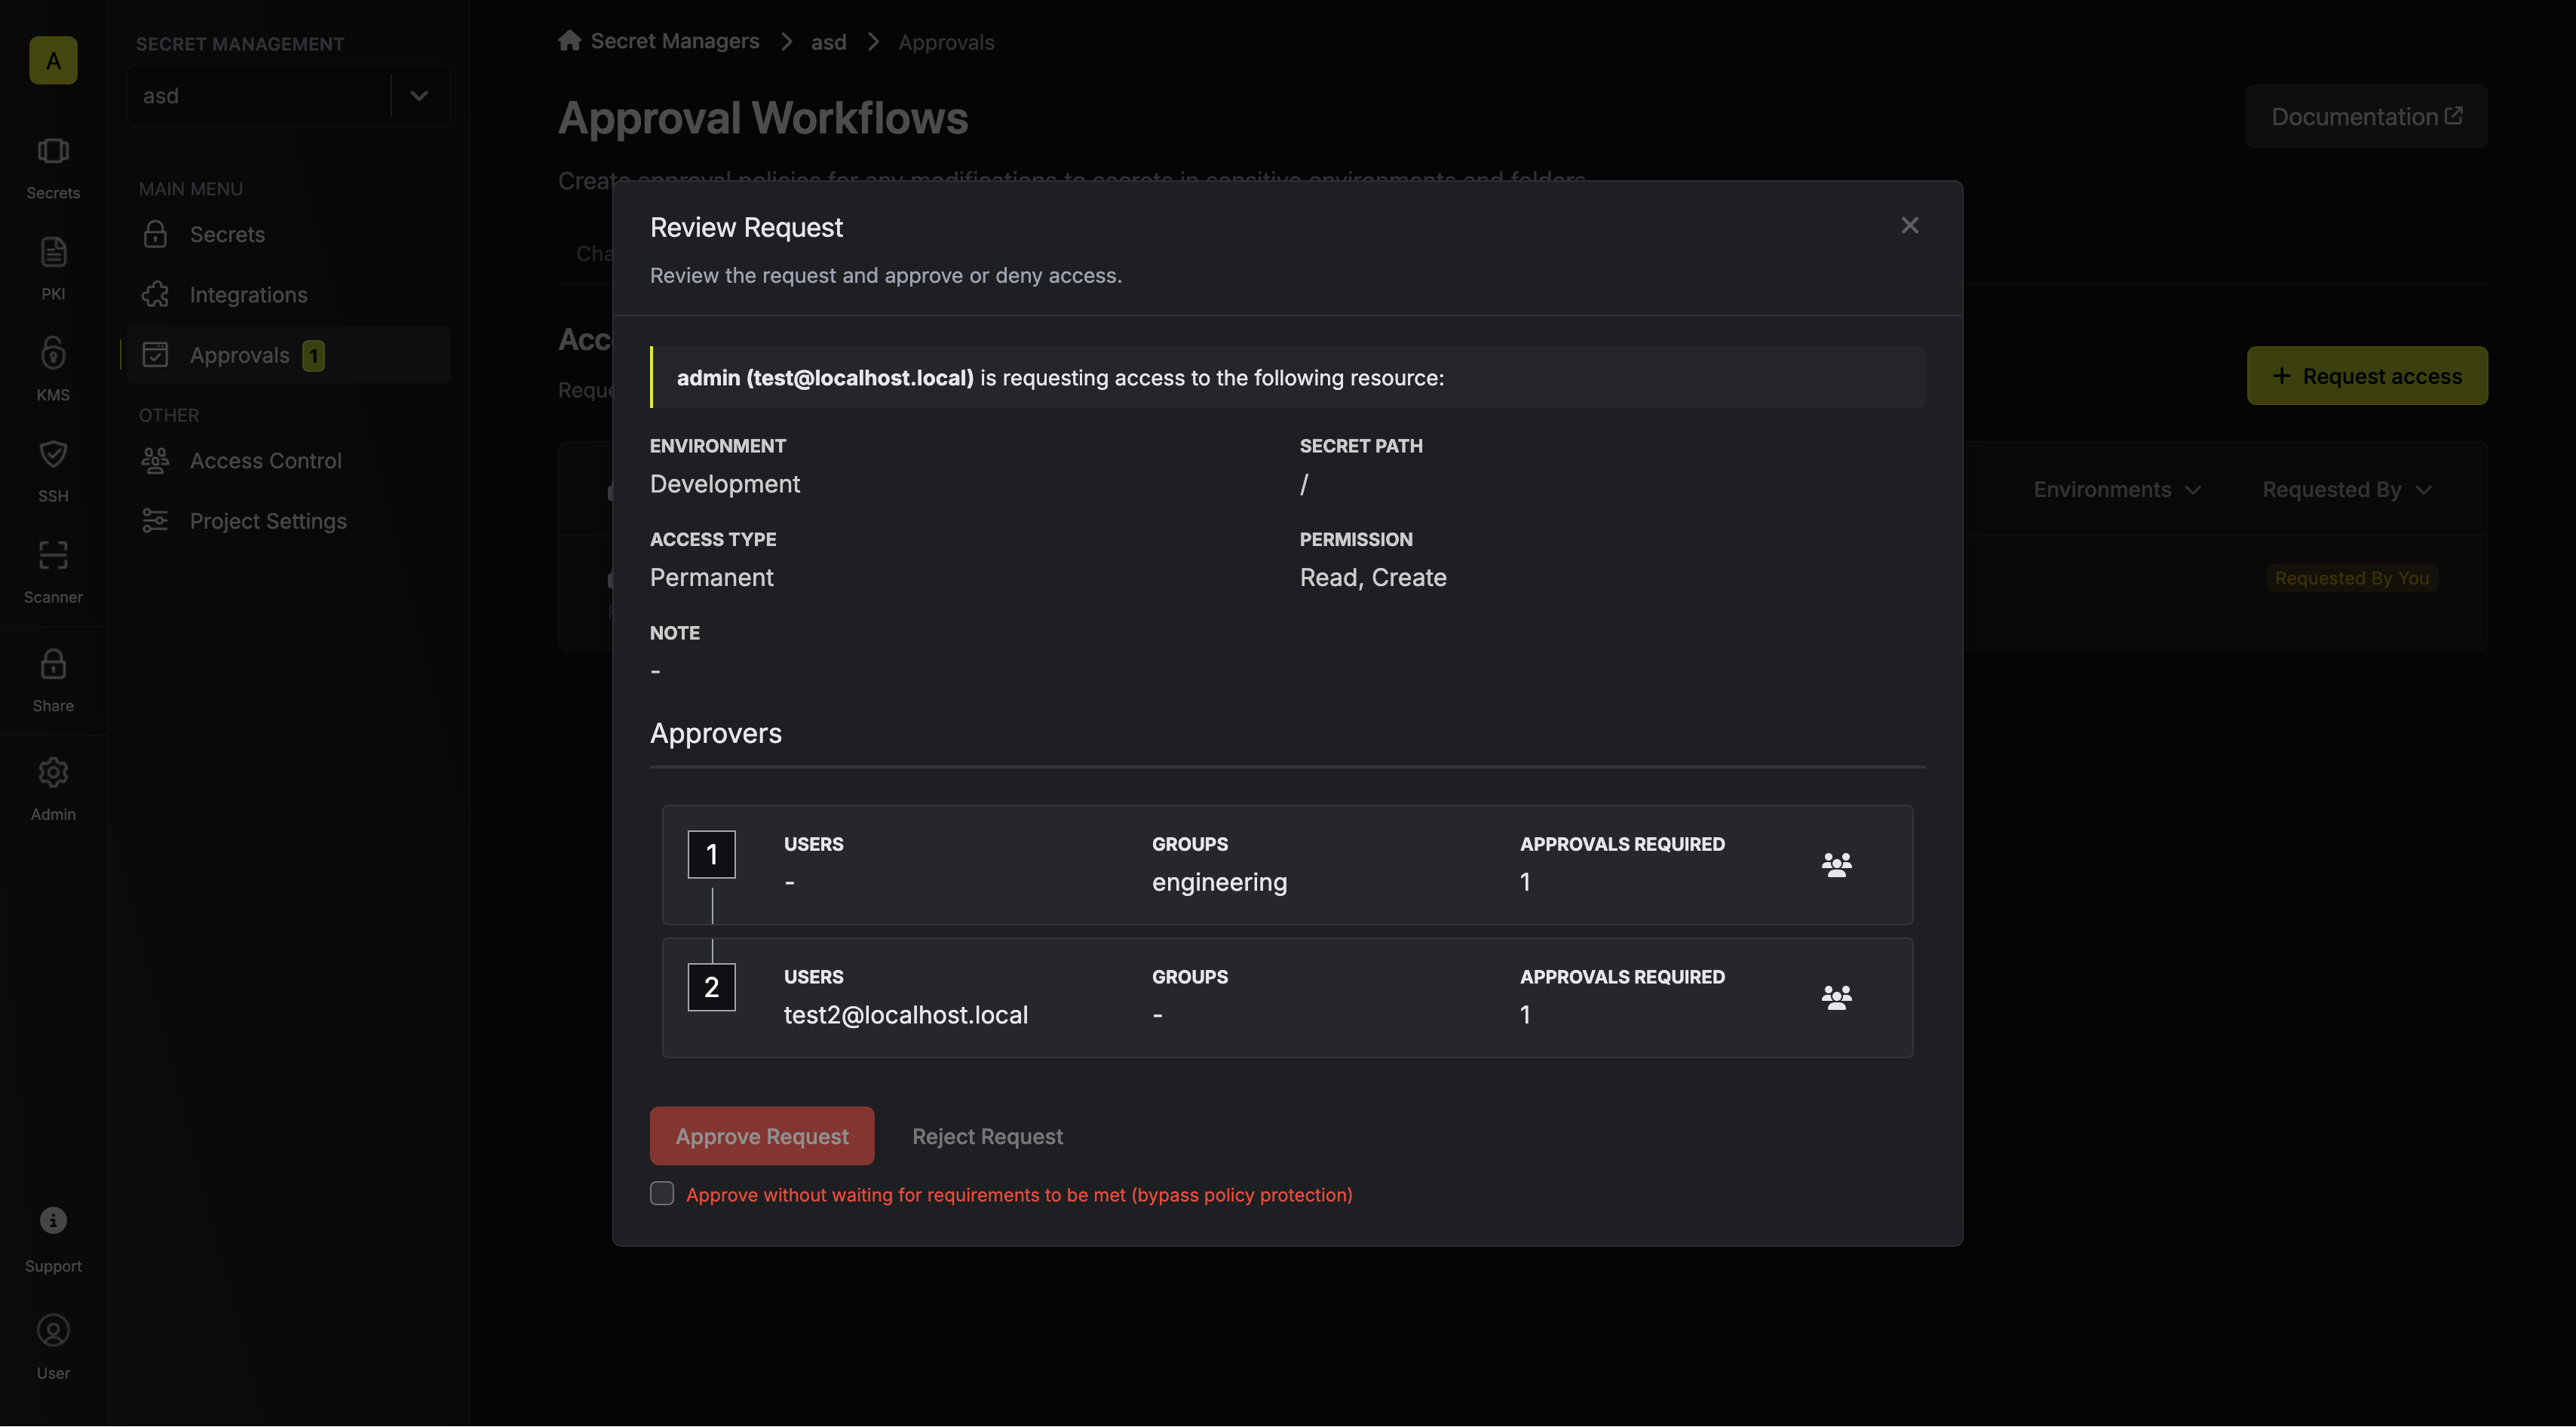
 2. When a developer requests access to one of such sensitive resources, the request is visible in the dashboard, and the corresponding eligible approvers get an email notification about it.
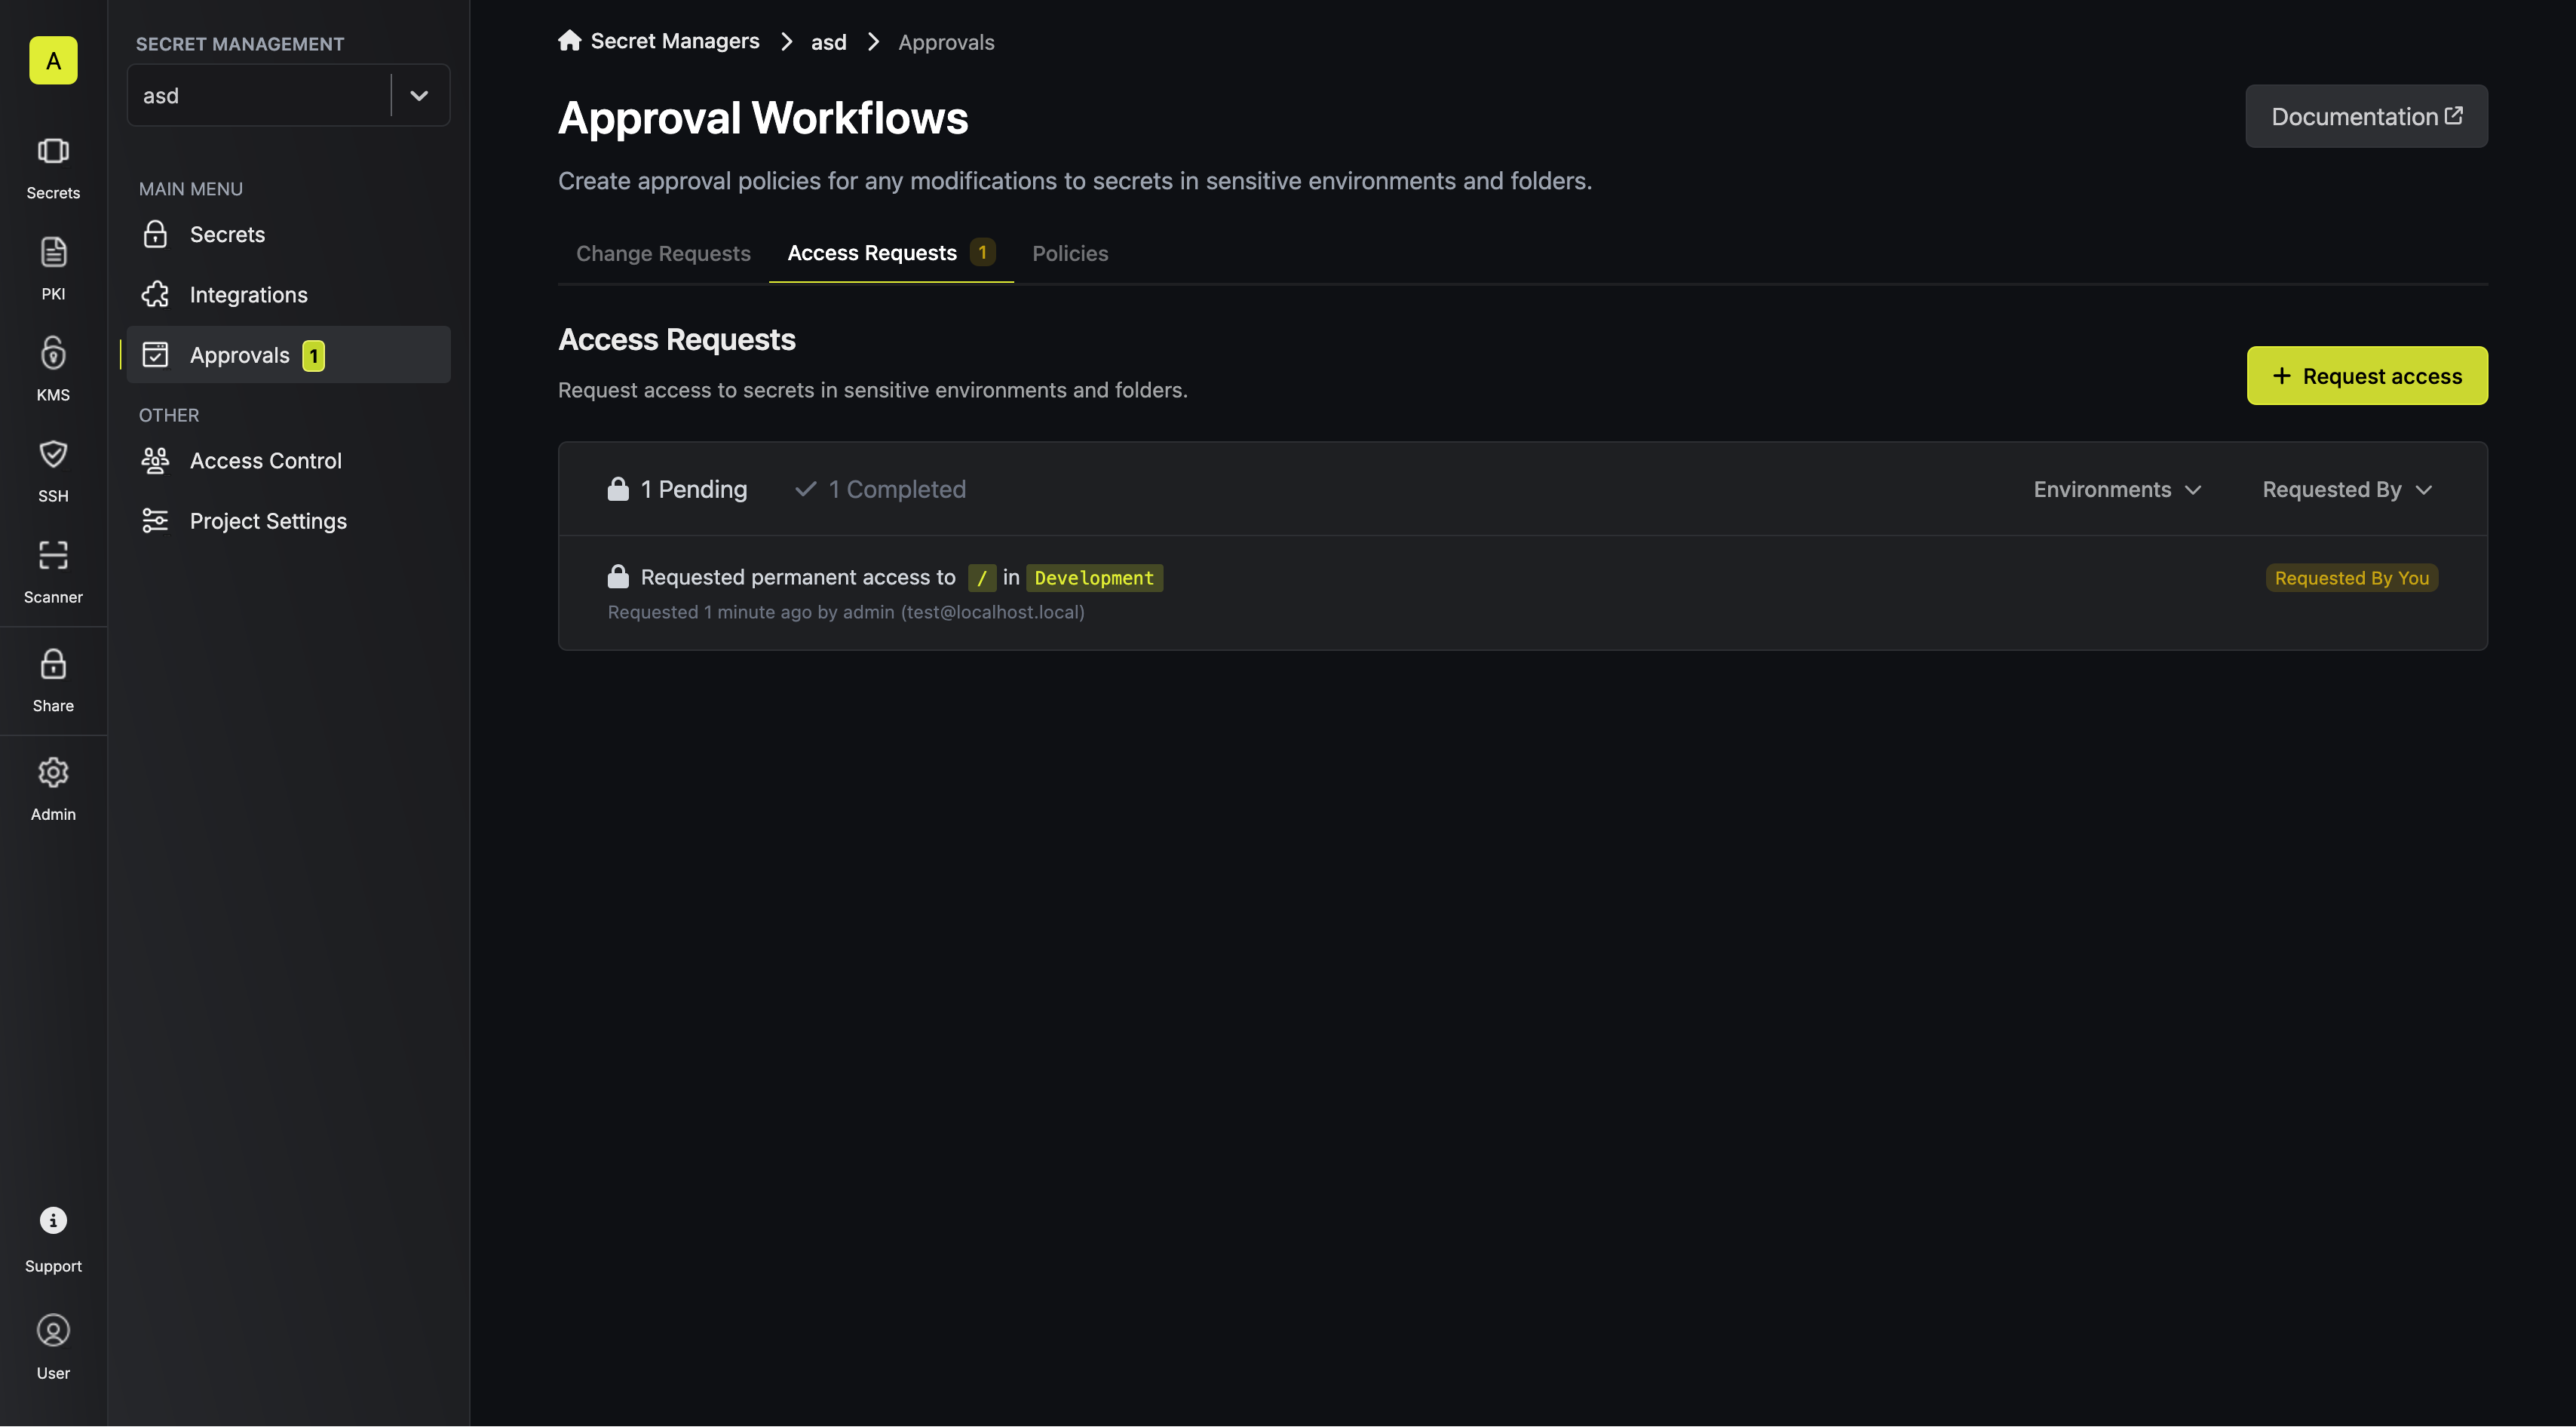 3. An eligible approver can approve or reject the access request.

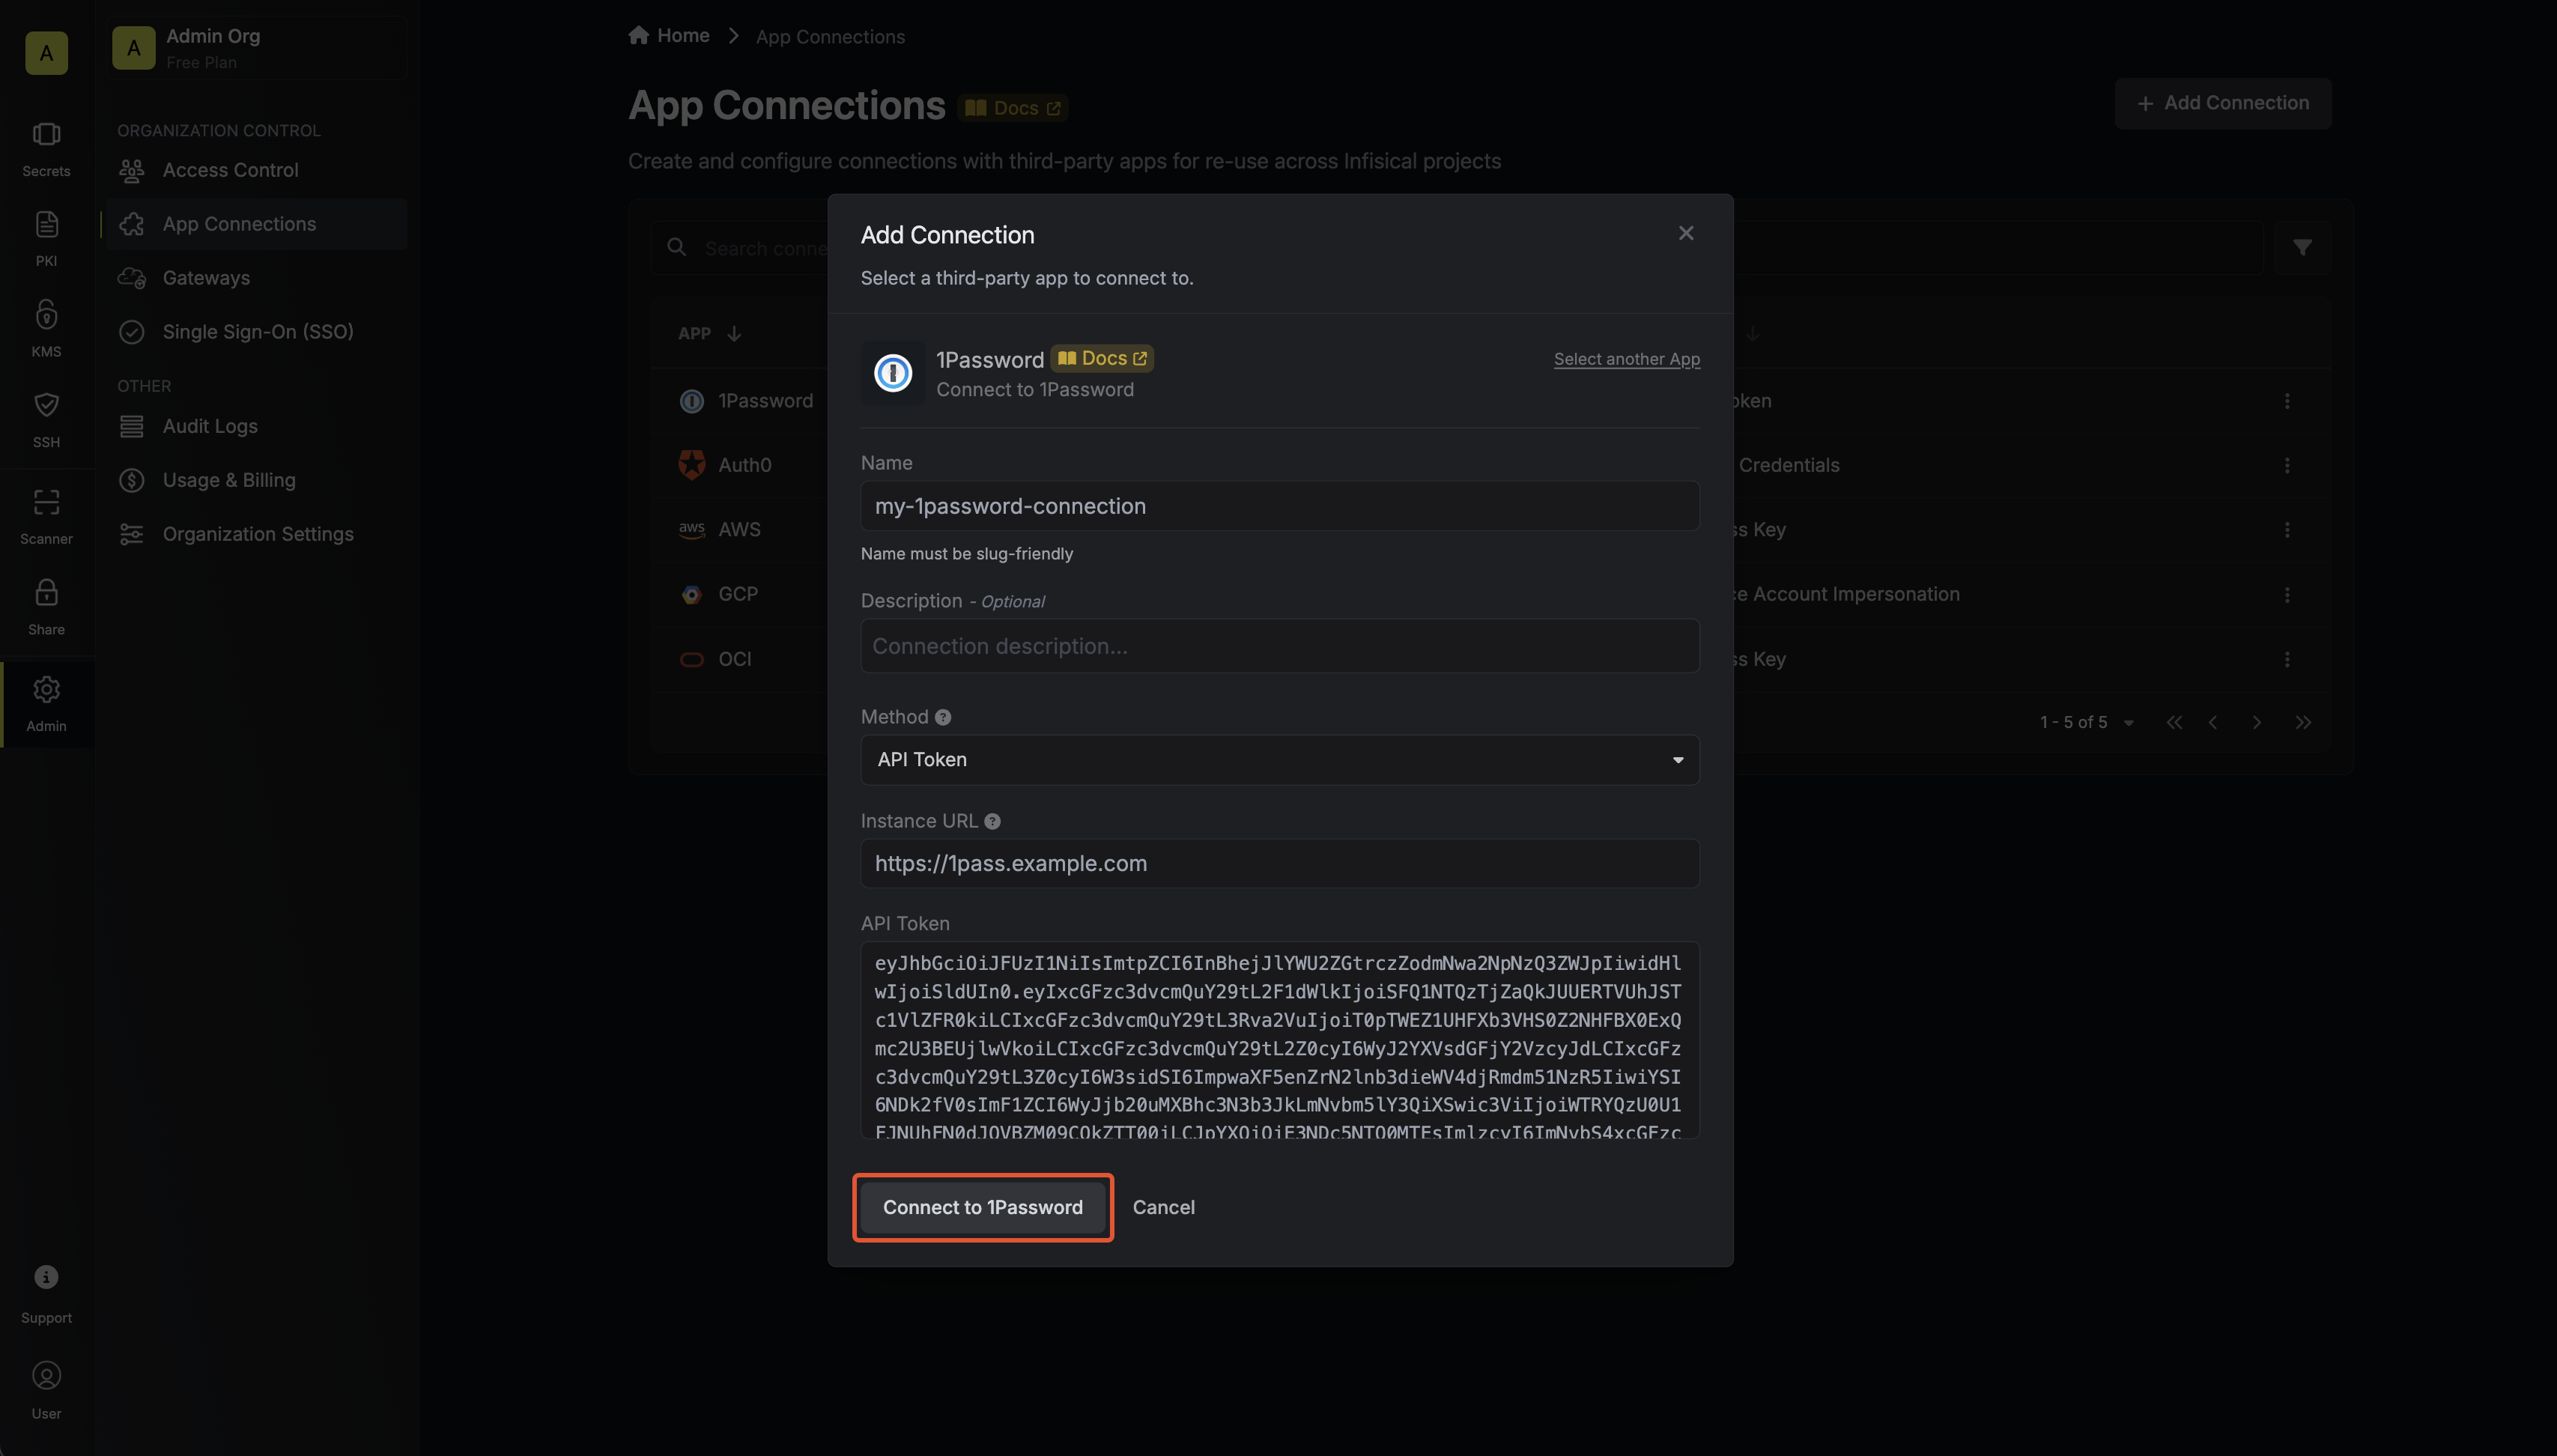
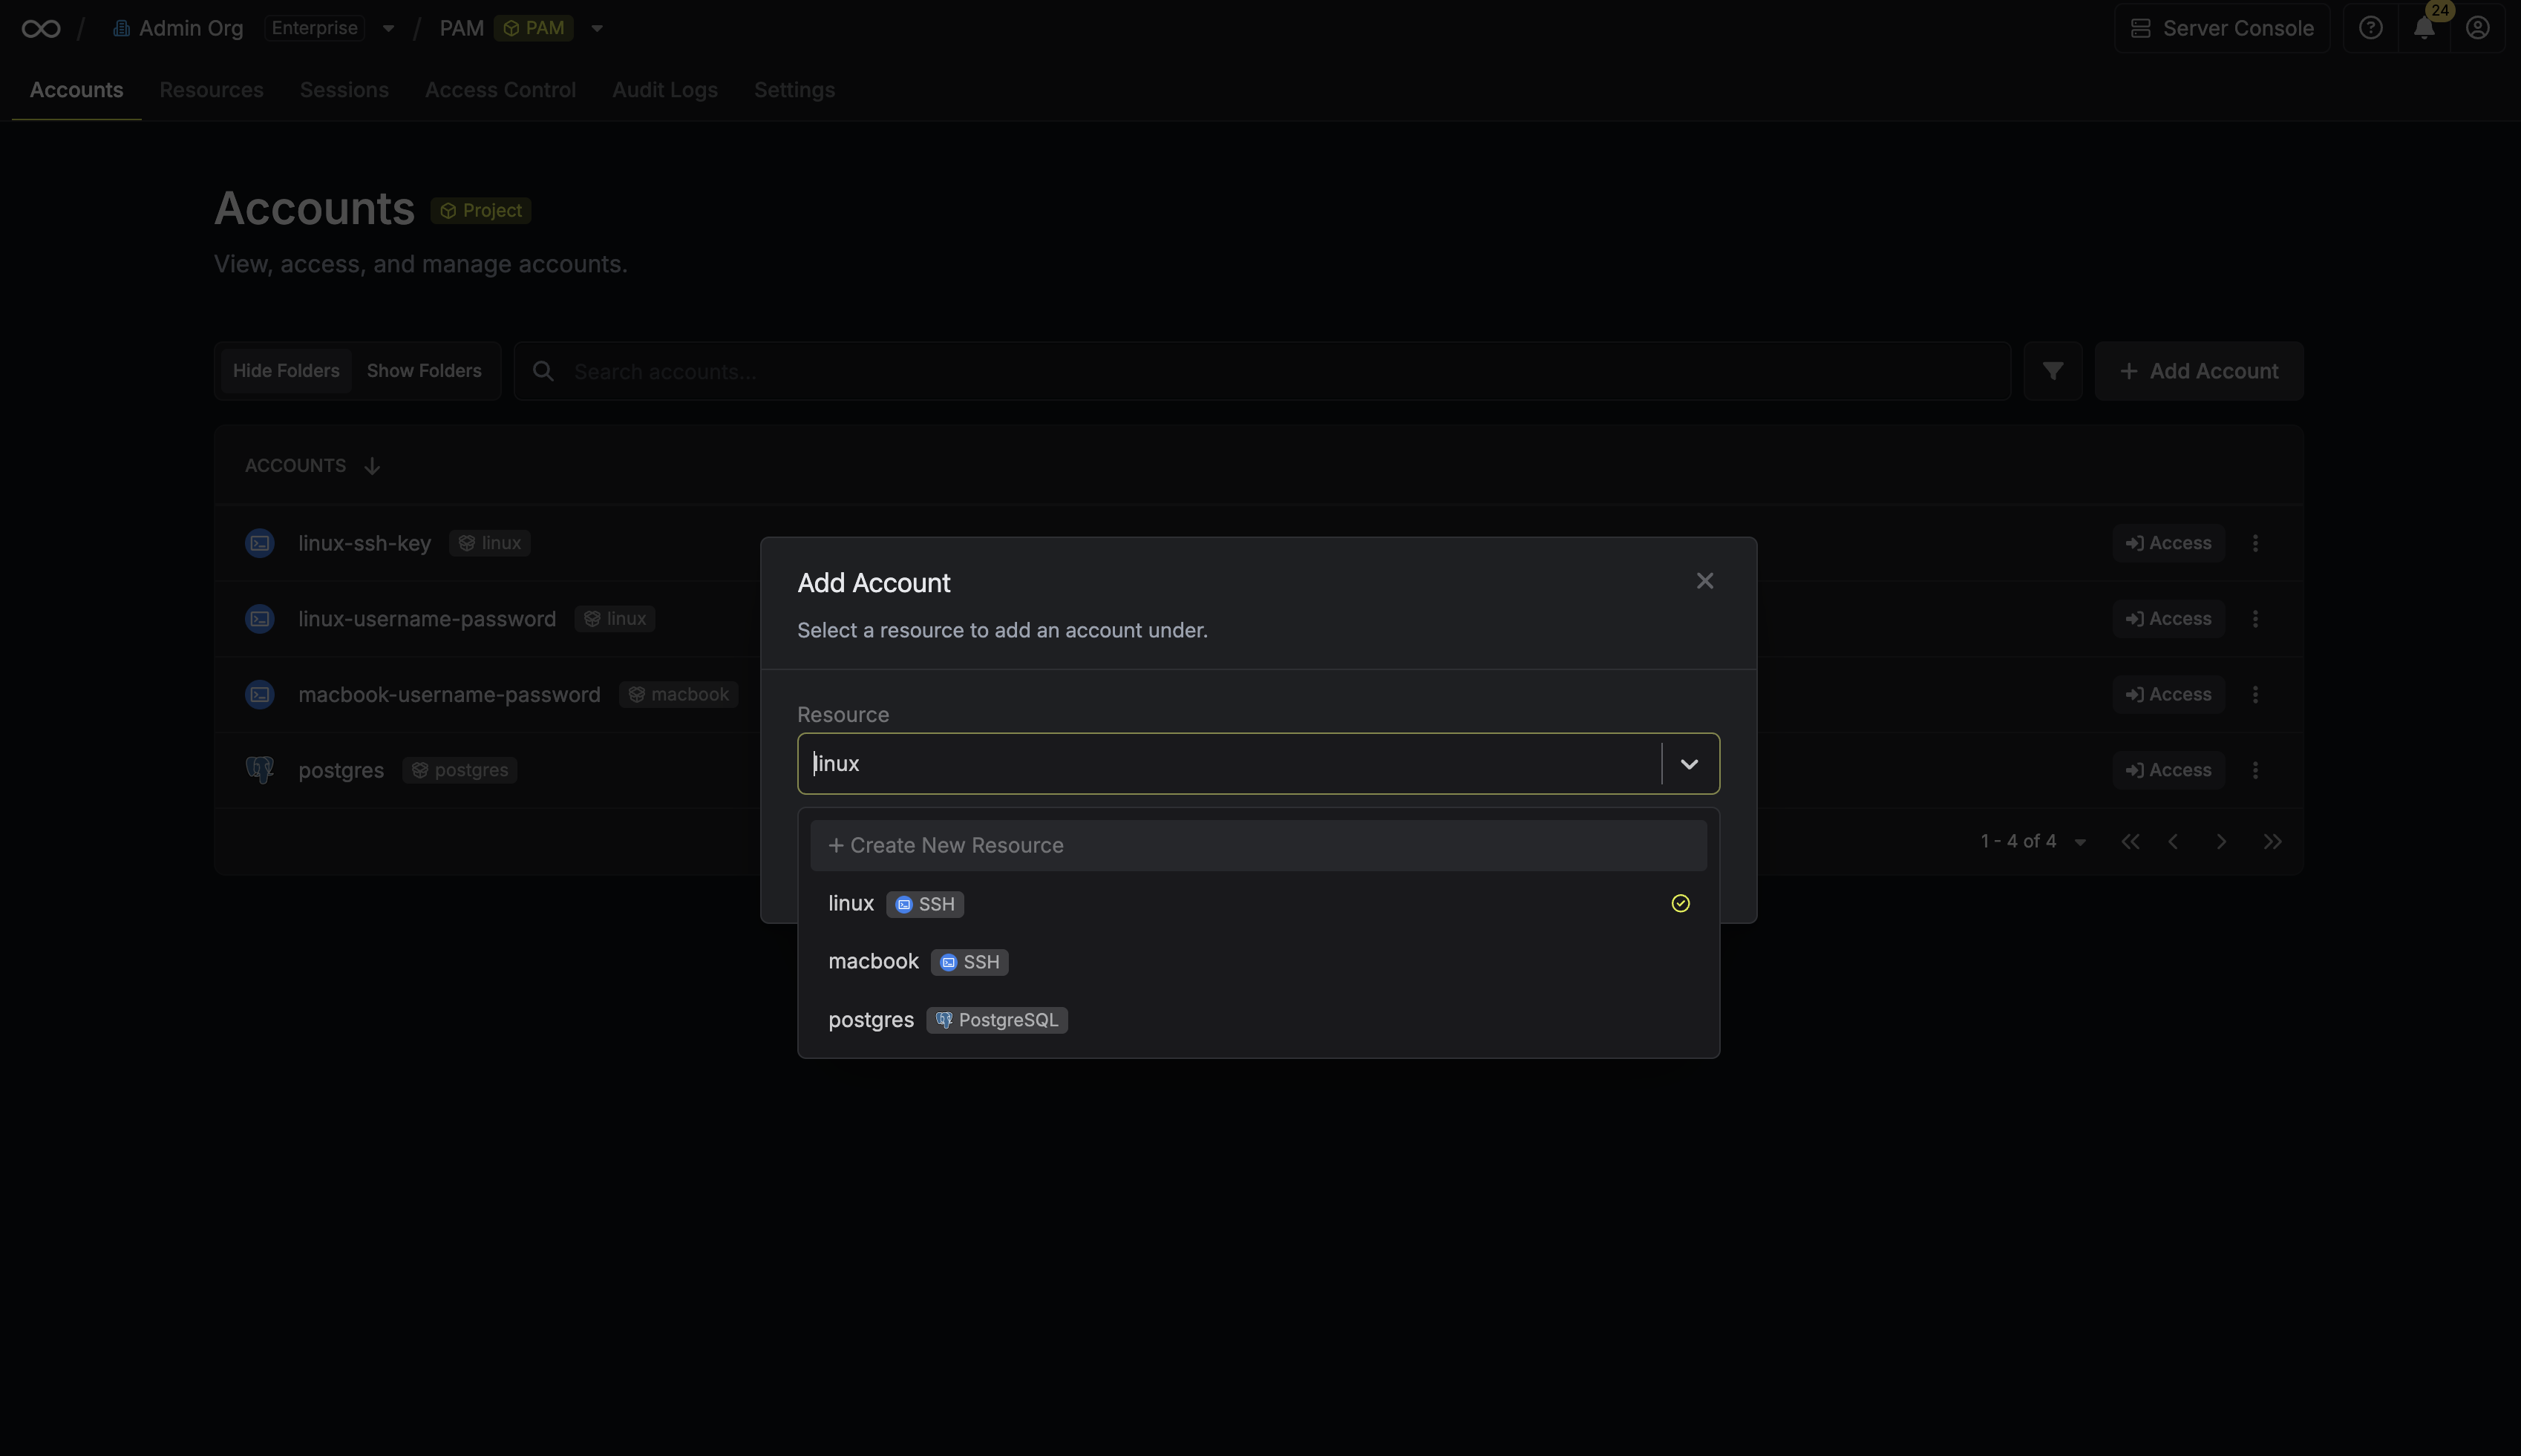
 Next, select the **Resource** that this account belongs to.
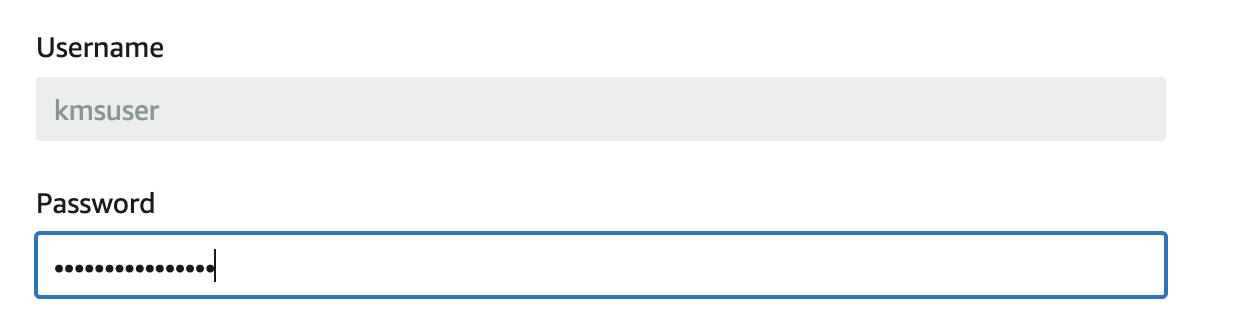
 After selecting a resource, provide the credentials (username, password, etc.) for this account. The required fields vary depending on the resource type. For example, for a Linux server, you would enter the username and the corresponding password or SSH key.
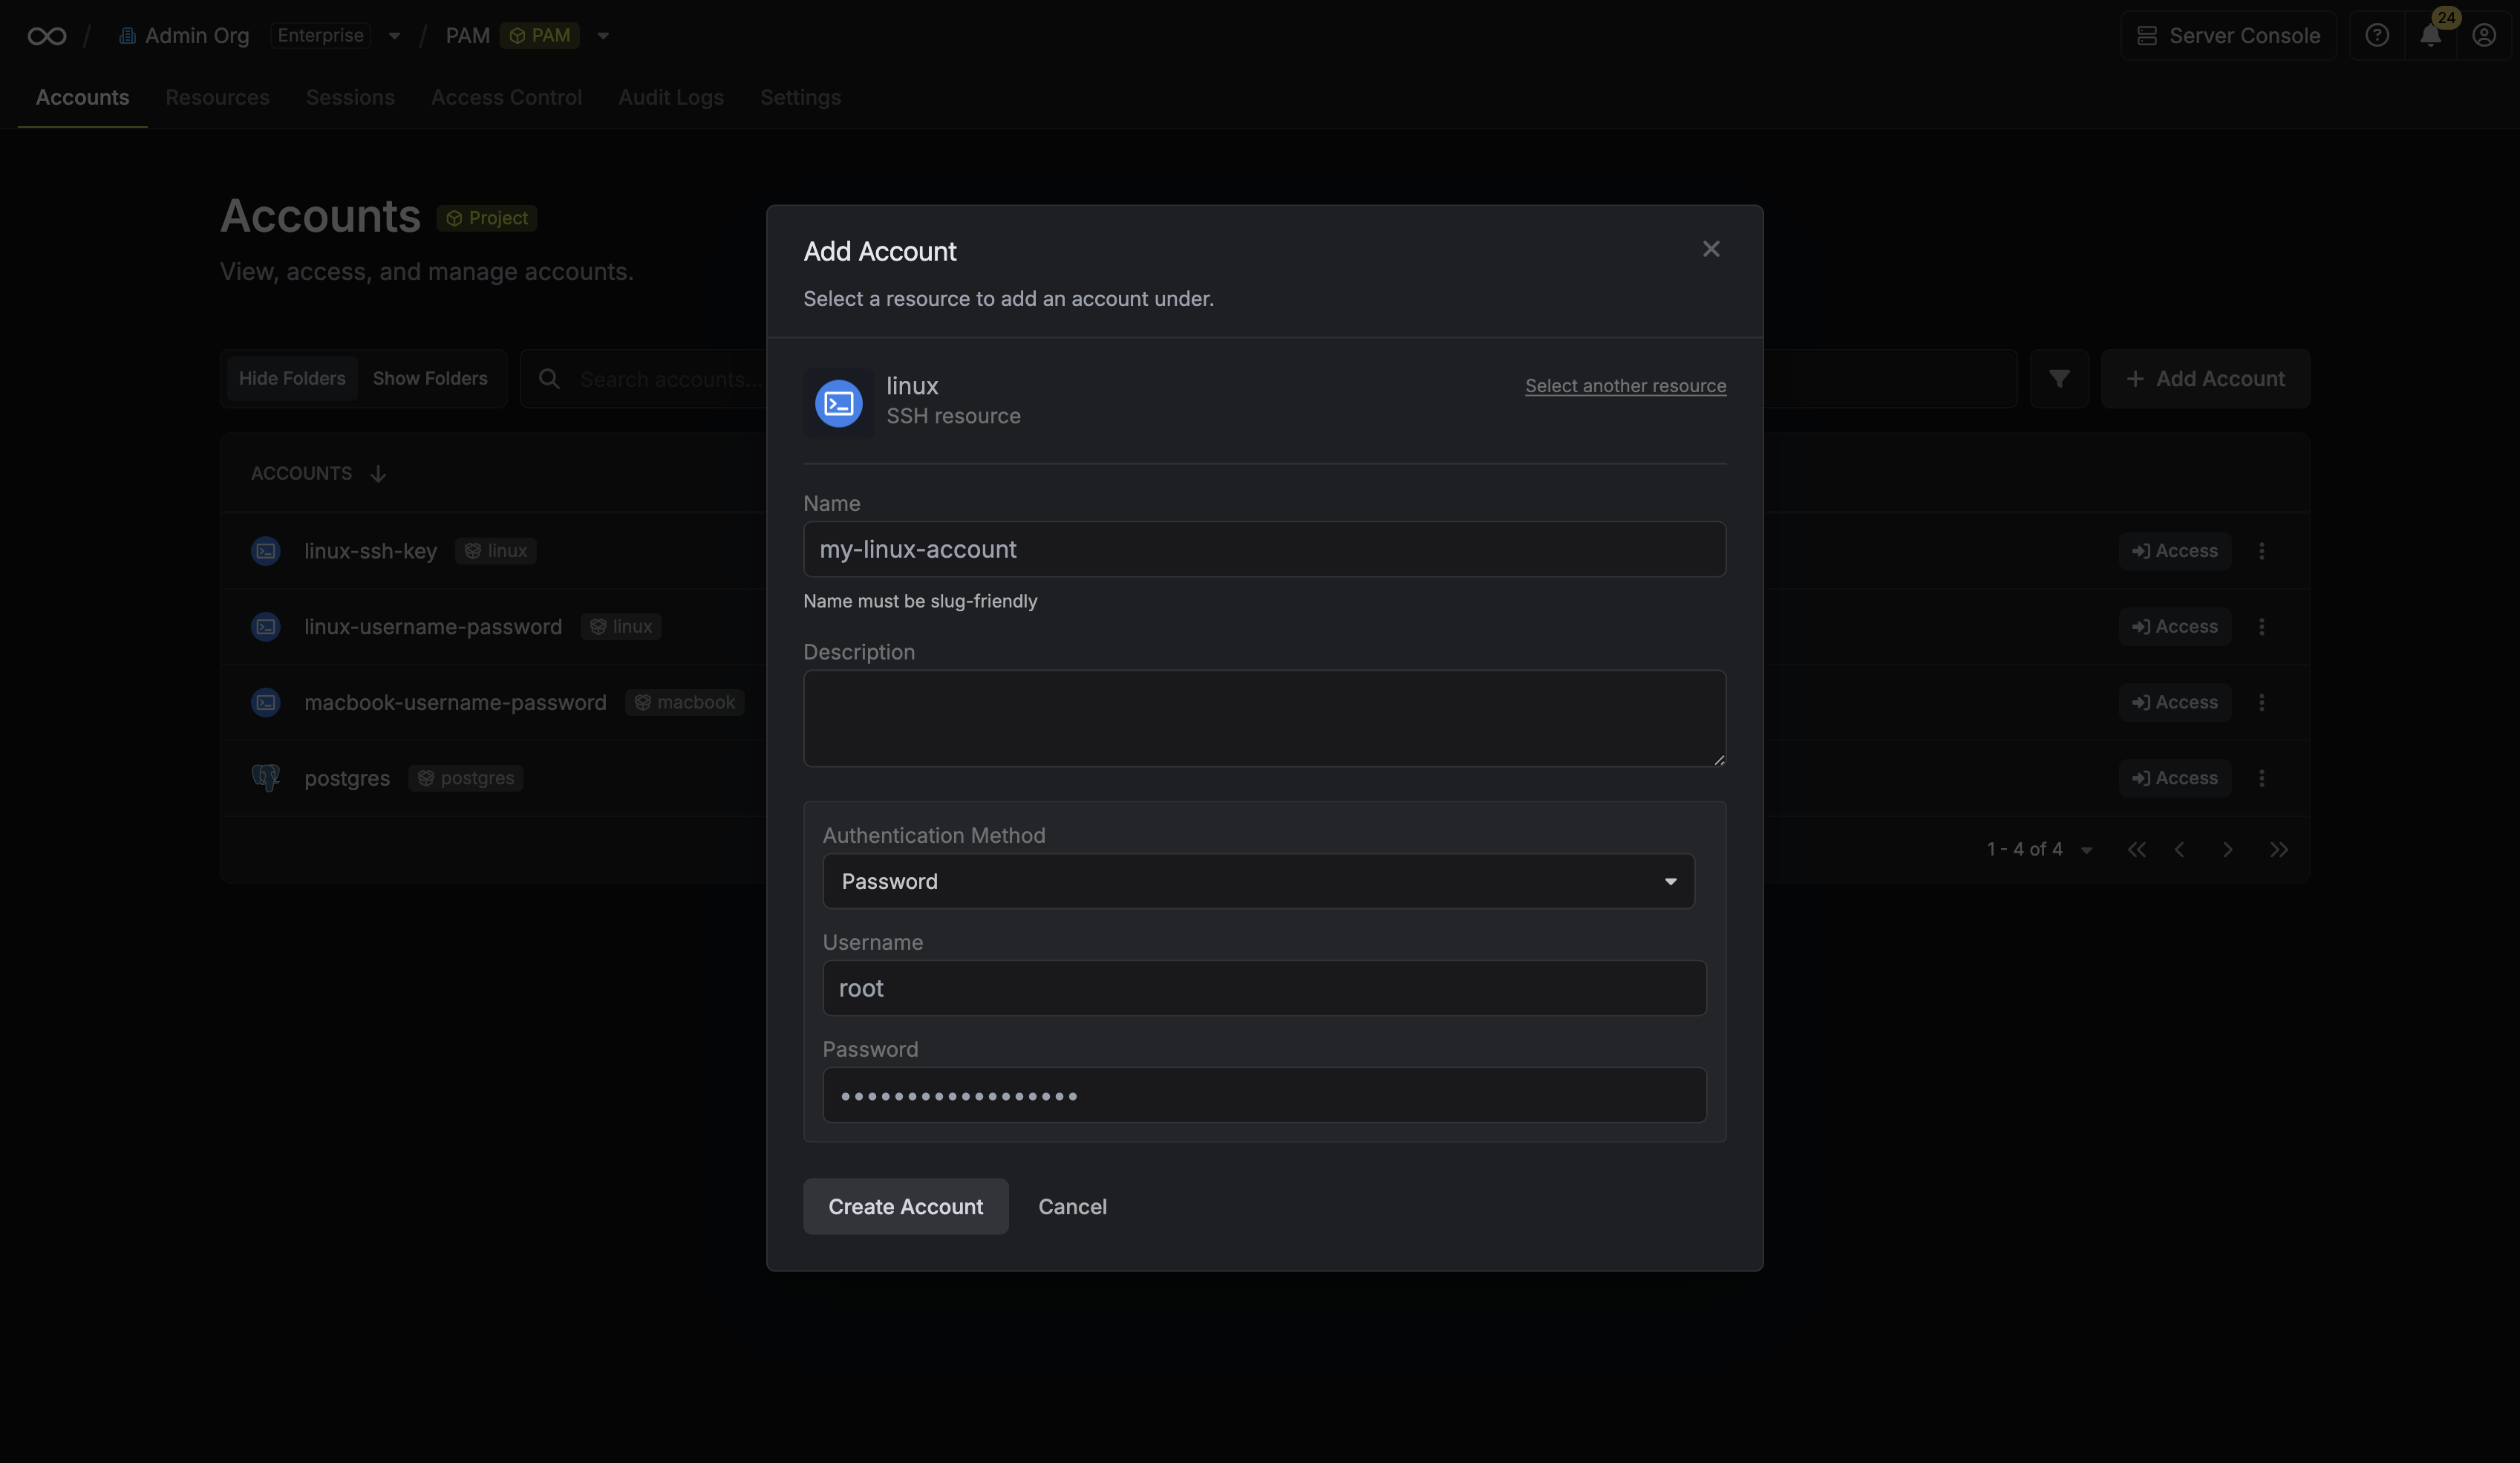 Clicking **Create Account** will trigger a validation check. Infisical will attempt to connect to the resource using the provided credentials to verify they are valid.
## Automated Credential Rotation
Infisical supports automated credential rotation for some accounts on select resources, allowing you to automatically change passwords at set intervals to enhance security.
To learn more about how to configure this, please refer to the [Credential Rotation guide](/documentation/platform/pam/product-reference/credential-rotation).
---
# Source: https://infisical.com/docs/documentation/platform/pki/ca/acme-ca.md
> ## Documentation Index
> Fetch the complete documentation index at: https://infisical.com/docs/llms.txt
> Use this file to discover all available pages before exploring further.
# ACME-compatible CA
> Learn how to connect Infisical to an ACME-compatible CA to issue certificates.
## Concept
Infisical can connect to any upstream ACME-compatible CA (e.g. Lets's Encrypt, DigiCert, etc.) supporting the [ACME protocol](https://en.wikipedia.org/wiki/Automatic_Certificate_Management_Environment) to issue certificates back to your end-entities. This integration uses the [DNS-01 challenge](https://letsencrypt.org/docs/challenge-types/#dns-01-challenge) method as part of the ACME domain validation challenge workflow for a requested certificate.
The upstream ACME-compatible CA integration lets you connect Infisical to providers by specifying
their **ACME Directory URL** such as:
* [Let's Encrypt](/documentation/platform/pki/ca/lets-encrypt): `https://acme-v02.api.letsencrypt.org/directory`.
* [DigiCert](/documentation/platform/pki/ca/digicert): `https://acme.digicert.com/v2/acme/directory`.
* Google GTS: `https://dv.acme-v02.api.pki.goog/directory`.
* Buypass: `https://api.buypass.com/acme/directory`.
* ZeroSSL: `https://acme.zerossl.com/v2/DV90`.
* SSL.com: `https://acme.ssl.com/sslcom-dv-rsa`.
When Infisical requests a certificate from an ACME-compatible CA, it creates a TXT record at `_acme-challenge.{your-domain}` in your configured DNS provider (e.g. Route53, Cloudflare, DNS Made Easy, etc.); this TXT record contains the challenge token issued by the ACME-compatible CA to validate domain control for the requested certificate.
The ACME provider checks for the existence of this TXT record to verify domain control before issuing the certificate back to Infisical.
After validation completes successfully, Infisical automatically removes the TXT record from your DNS provider.
Clicking **Create Account** will trigger a validation check. Infisical will attempt to connect to the resource using the provided credentials to verify they are valid.
## Automated Credential Rotation
Infisical supports automated credential rotation for some accounts on select resources, allowing you to automatically change passwords at set intervals to enhance security.
To learn more about how to configure this, please refer to the [Credential Rotation guide](/documentation/platform/pam/product-reference/credential-rotation).
---
# Source: https://infisical.com/docs/documentation/platform/pki/ca/acme-ca.md
> ## Documentation Index
> Fetch the complete documentation index at: https://infisical.com/docs/llms.txt
> Use this file to discover all available pages before exploring further.
# ACME-compatible CA
> Learn how to connect Infisical to an ACME-compatible CA to issue certificates.
## Concept
Infisical can connect to any upstream ACME-compatible CA (e.g. Lets's Encrypt, DigiCert, etc.) supporting the [ACME protocol](https://en.wikipedia.org/wiki/Automatic_Certificate_Management_Environment) to issue certificates back to your end-entities. This integration uses the [DNS-01 challenge](https://letsencrypt.org/docs/challenge-types/#dns-01-challenge) method as part of the ACME domain validation challenge workflow for a requested certificate.
The upstream ACME-compatible CA integration lets you connect Infisical to providers by specifying
their **ACME Directory URL** such as:
* [Let's Encrypt](/documentation/platform/pki/ca/lets-encrypt): `https://acme-v02.api.letsencrypt.org/directory`.
* [DigiCert](/documentation/platform/pki/ca/digicert): `https://acme.digicert.com/v2/acme/directory`.
* Google GTS: `https://dv.acme-v02.api.pki.goog/directory`.
* Buypass: `https://api.buypass.com/acme/directory`.
* ZeroSSL: `https://acme.zerossl.com/v2/DV90`.
* SSL.com: `https://acme.ssl.com/sslcom-dv-rsa`.
When Infisical requests a certificate from an ACME-compatible CA, it creates a TXT record at `_acme-challenge.{your-domain}` in your configured DNS provider (e.g. Route53, Cloudflare, DNS Made Easy, etc.); this TXT record contains the challenge token issued by the ACME-compatible CA to validate domain control for the requested certificate.
The ACME provider checks for the existence of this TXT record to verify domain control before issuing the certificate back to Infisical.
After validation completes successfully, Infisical automatically removes the TXT record from your DNS provider.
 Here, set the **CA Type** to **ACME** and fill out details for it.
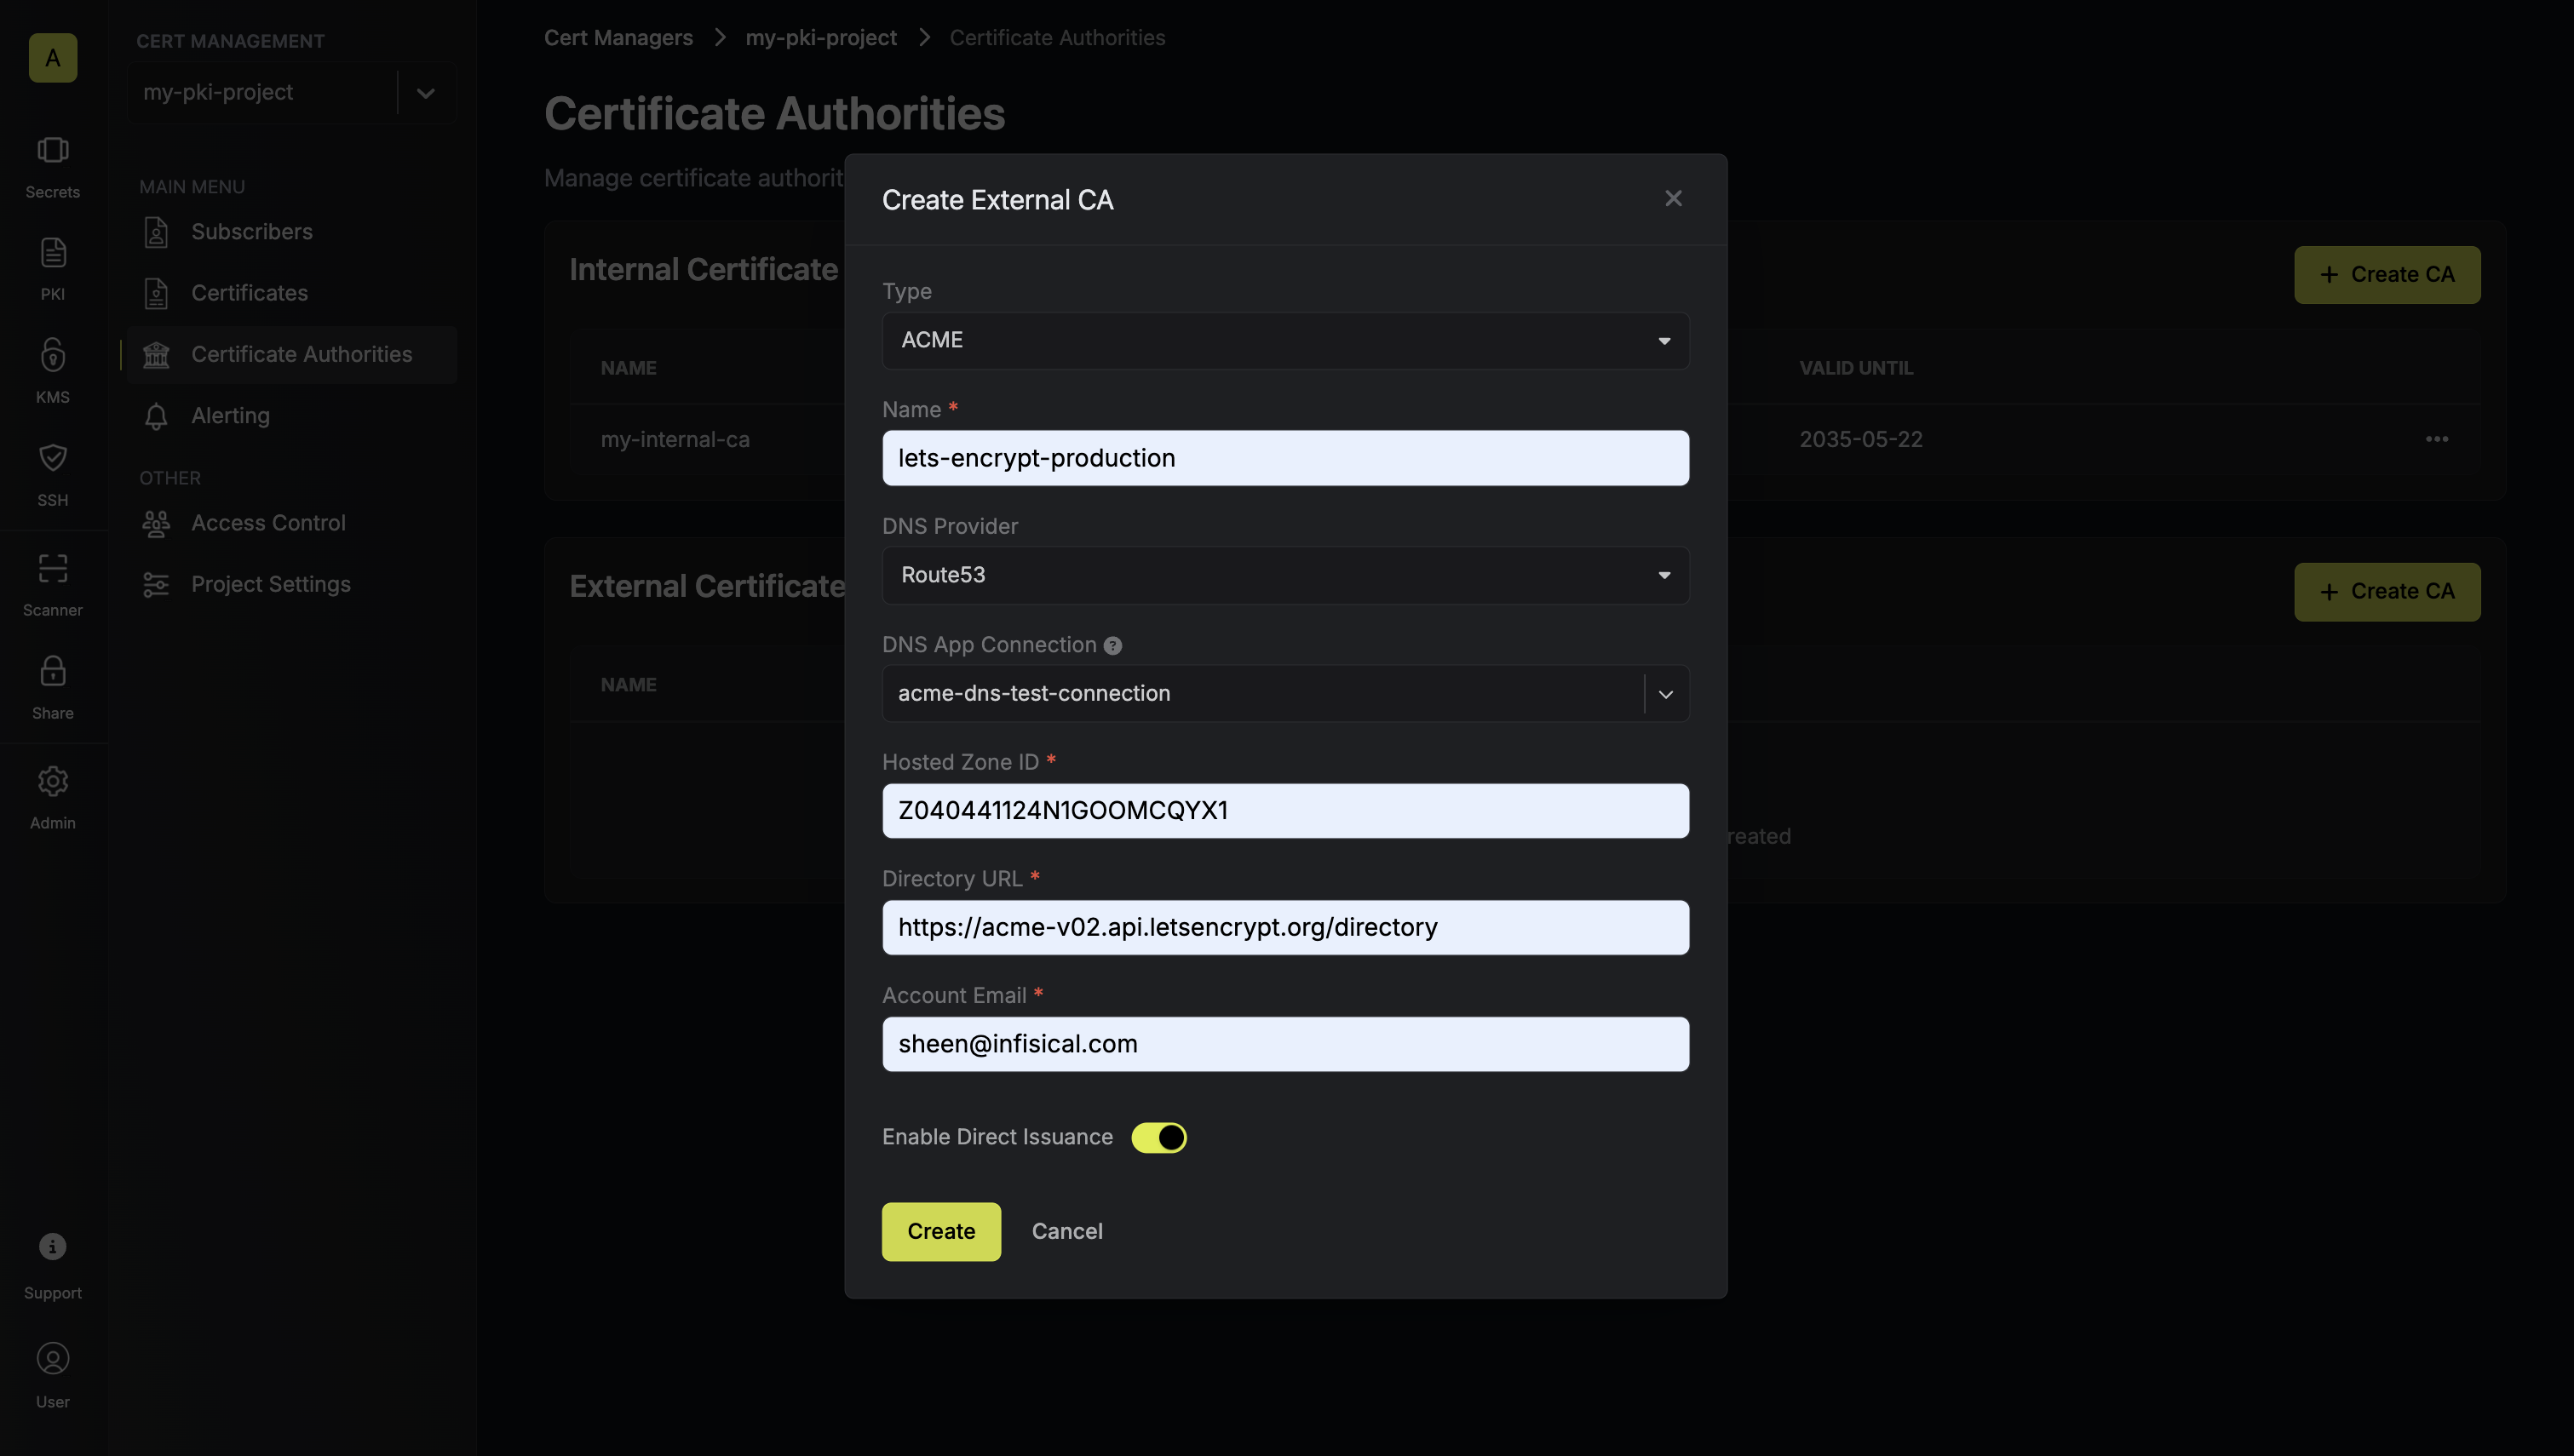 Here's some guidance for each field:
* Name: A slug-friendly name for the ACME-compatible CA such as `lets-encrypt-production`.
* DNS App Connection: The App Connection from Step 1 used for Infisical to connect to your DNS provider and create/remove DNS records as part of the DNS-01 challenge in ACME.
* Zone / Zone ID: Enter the Zone / Zone ID for the domain(s) you'll be requesting certificates for.
* Directory URL: Enter the **ACME Directory URL** for your desired upstream ACME-compatible CA such as `https://acme-v02.api.letsencrypt.org/directory` for Let's Encrypt.
* Account Email: The email address to associate with your ACME account. This email will receive important notifications about your certificates.
* EAB Key Identifier (KID): (Optional) The Key Identifier (KID) provided by your ACME CA for External Account Binding (EAB). This is required by some ACME providers (e.g., ZeroSSL, DigiCert) to link your ACME account to an external account you've pre-registered with them.
* EAB HMAC Key: (Optional) The HMAC Key provided by your ACME CA for External Account Binding (EAB). This key is used in conjunction with the KID to prove ownership of the external account during ACME account registration.
Finally, press **Create** to register the ACME-compatible CA with Infisical.
Great! You’ve successfully registered an external ACME-compatible CA with Infisical. Now check out the [Certificates](/documentation/platform/pki/certificates/overview) section to learn more about how to issue X.509 certificates using the ACME-compatible CA.
Here's some guidance for each field:
* Name: A slug-friendly name for the ACME-compatible CA such as `lets-encrypt-production`.
* DNS App Connection: The App Connection from Step 1 used for Infisical to connect to your DNS provider and create/remove DNS records as part of the DNS-01 challenge in ACME.
* Zone / Zone ID: Enter the Zone / Zone ID for the domain(s) you'll be requesting certificates for.
* Directory URL: Enter the **ACME Directory URL** for your desired upstream ACME-compatible CA such as `https://acme-v02.api.letsencrypt.org/directory` for Let's Encrypt.
* Account Email: The email address to associate with your ACME account. This email will receive important notifications about your certificates.
* EAB Key Identifier (KID): (Optional) The Key Identifier (KID) provided by your ACME CA for External Account Binding (EAB). This is required by some ACME providers (e.g., ZeroSSL, DigiCert) to link your ACME account to an external account you've pre-registered with them.
* EAB HMAC Key: (Optional) The HMAC Key provided by your ACME CA for External Account Binding (EAB). This key is used in conjunction with the KID to prove ownership of the external account during ACME account registration.
Finally, press **Create** to register the ACME-compatible CA with Infisical.
Great! You’ve successfully registered an external ACME-compatible CA with Infisical. Now check out the [Certificates](/documentation/platform/pki/certificates/overview) section to learn more about how to issue X.509 certificates using the ACME-compatible CA.
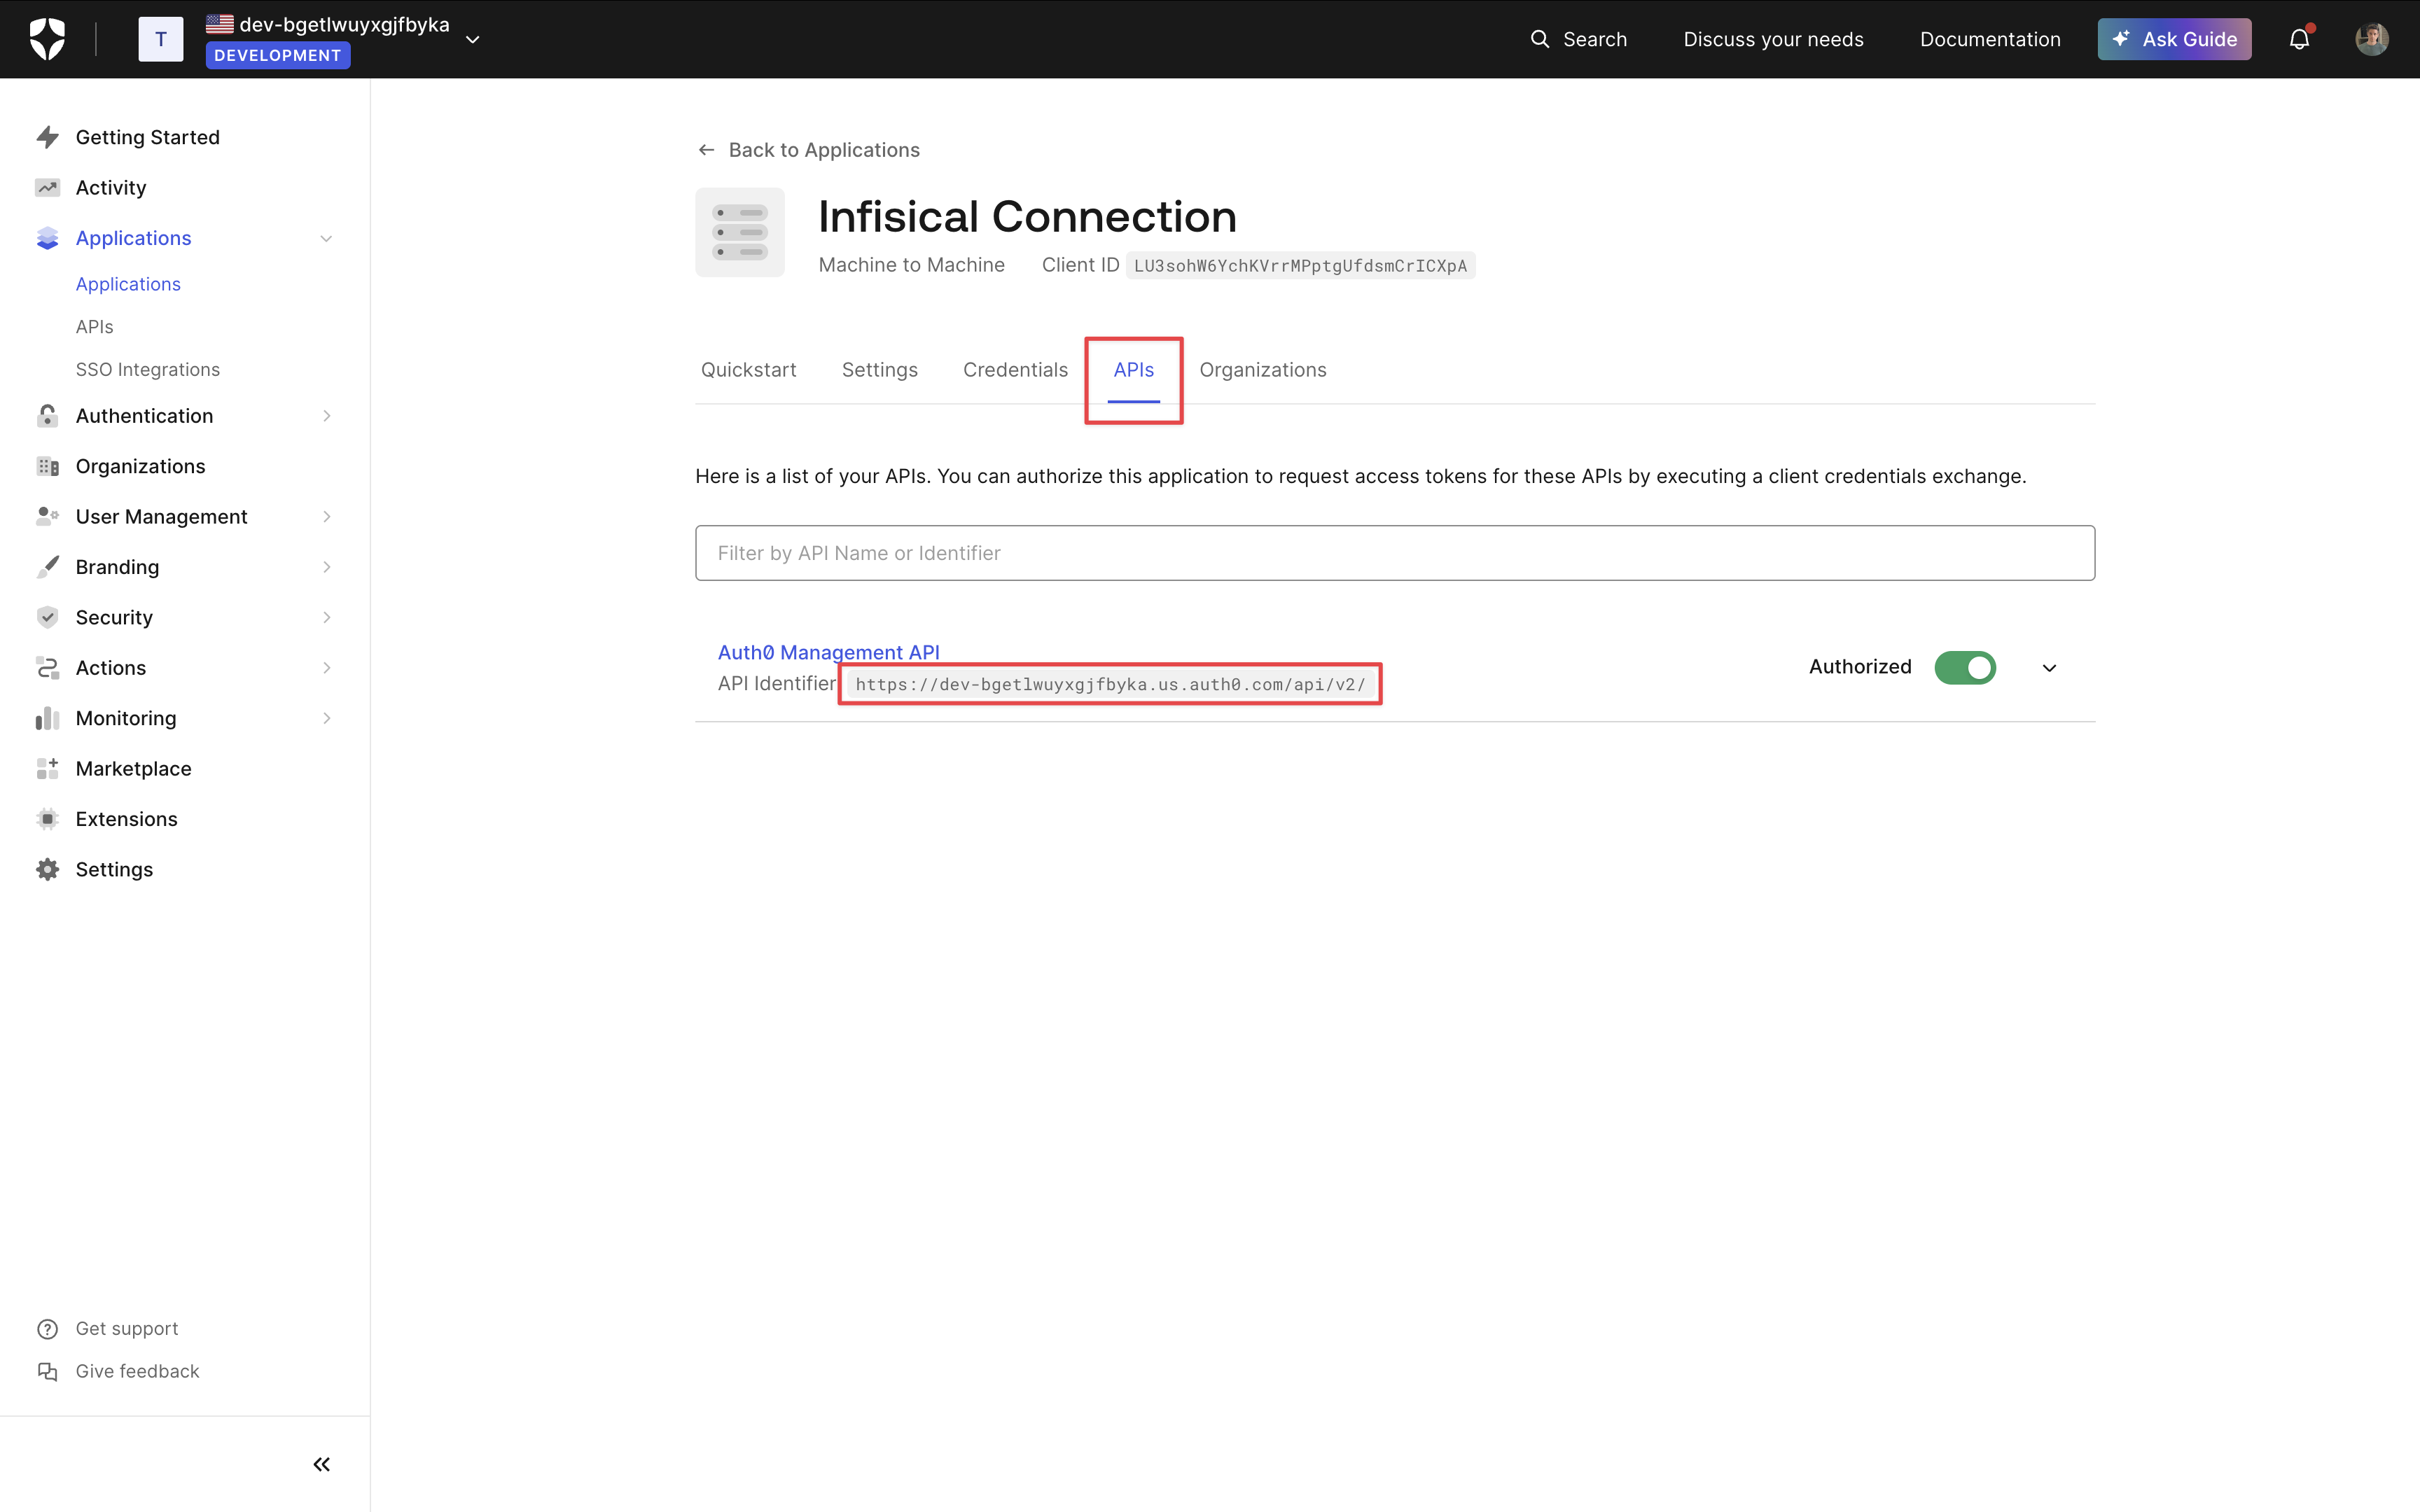
 From the ACME configuration, gather the following values:
* ACME Directory URL: The URL that the ACME client will use to communicate with Infisical's ACME server.
* EAB Key Identifier (KID): A unique identifier that tells Infisical which ACME account is making the request.
* EAB Secret: A secret key that authenticates your ACME client with Infisical.
From the ACME configuration, gather the following values:
* ACME Directory URL: The URL that the ACME client will use to communicate with Infisical's ACME server.
* EAB Key Identifier (KID): A unique identifier that tells Infisical which ACME account is making the request.
* EAB Secret: A secret key that authenticates your ACME client with Infisical.
 2. Click `Add Additional Privileges` in the corresponding section of the permission management modal.
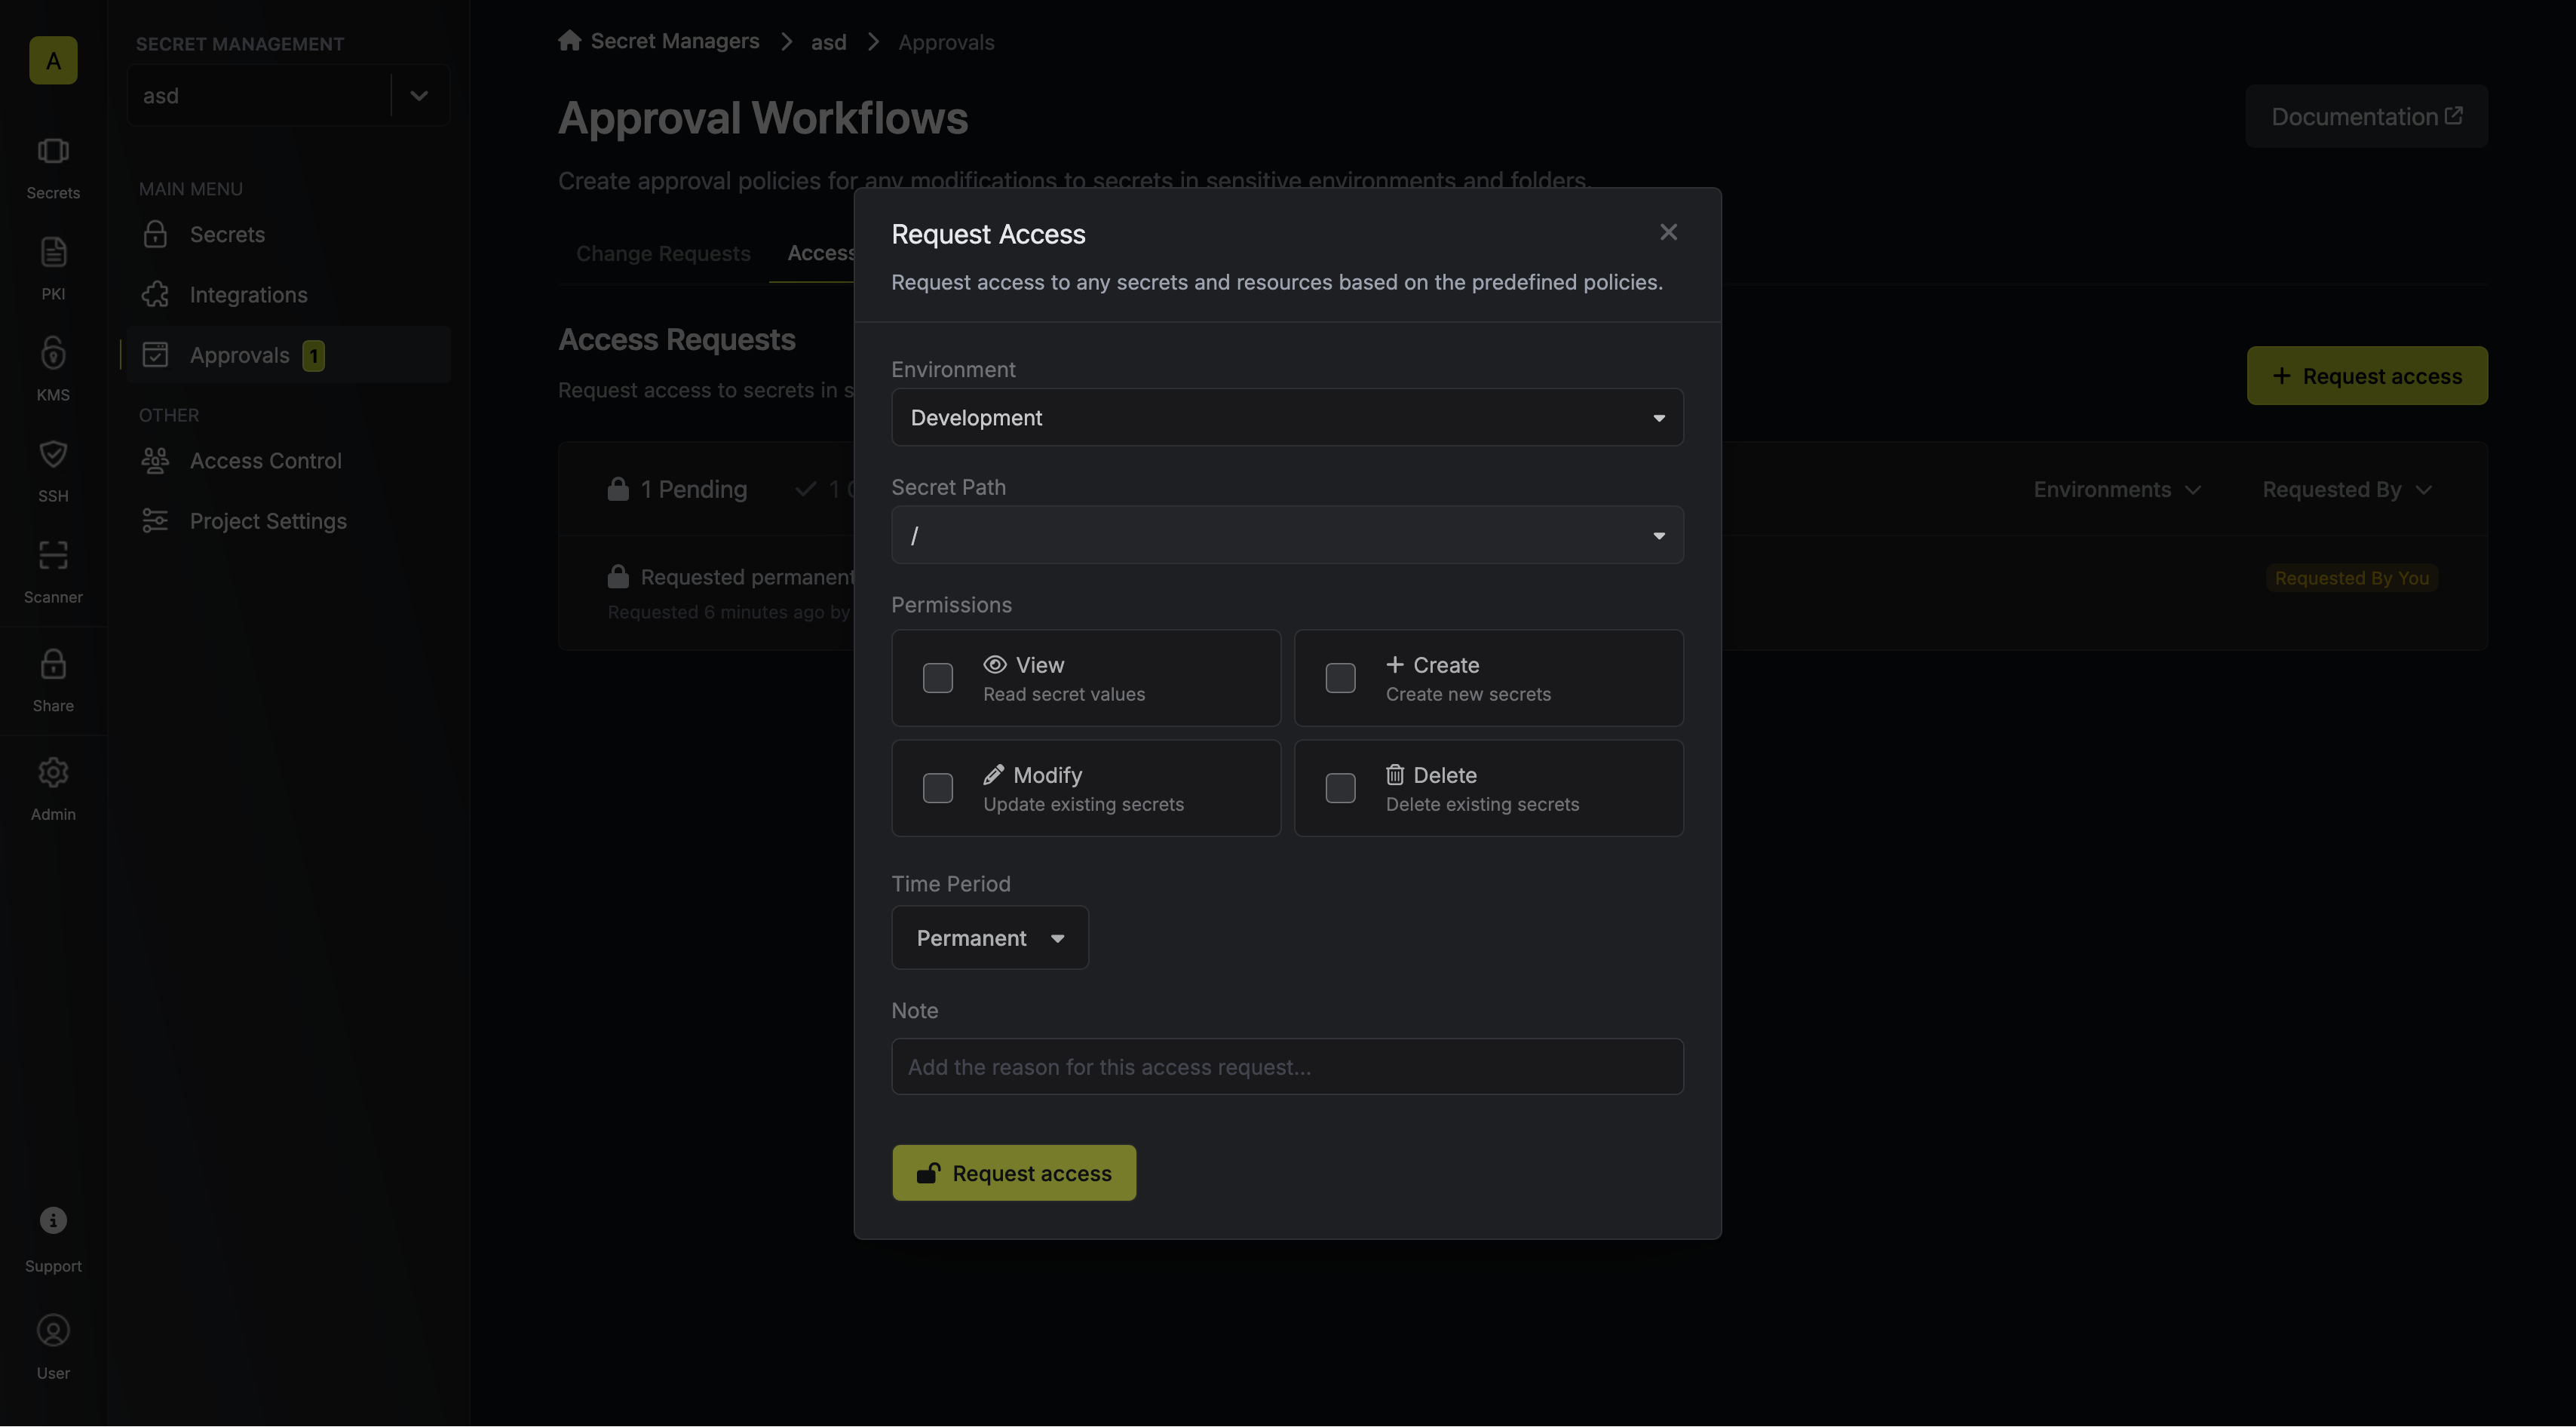
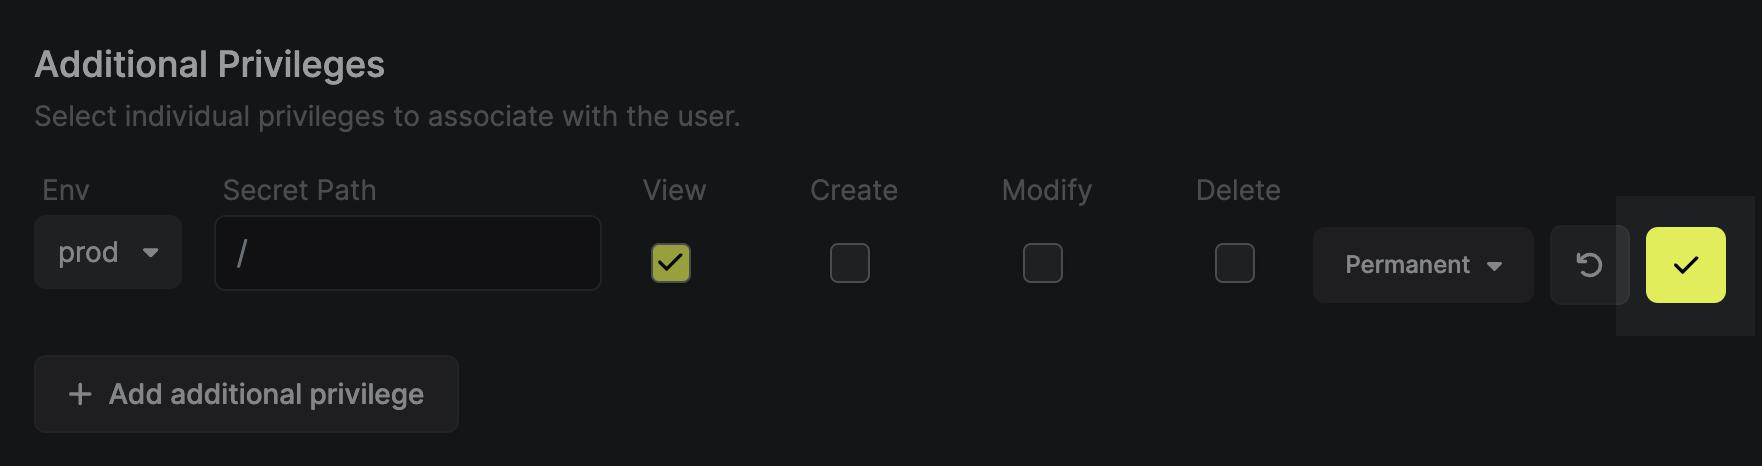
 3. Fill out the necessary parameters in the privilege entry that appears. It is possible to specify the `Environment` and `Secret Path` to which you want to enable access.
It is also possible to define the range of permissions (`View`, `Create`, `Modify`, `Delete`) as well as how long the access should last (e.g., permanent or timed).
3. Fill out the necessary parameters in the privilege entry that appears. It is possible to specify the `Environment` and `Secret Path` to which you want to enable access.
It is also possible to define the range of permissions (`View`, `Create`, `Modify`, `Delete`) as well as how long the access should last (e.g., permanent or timed).
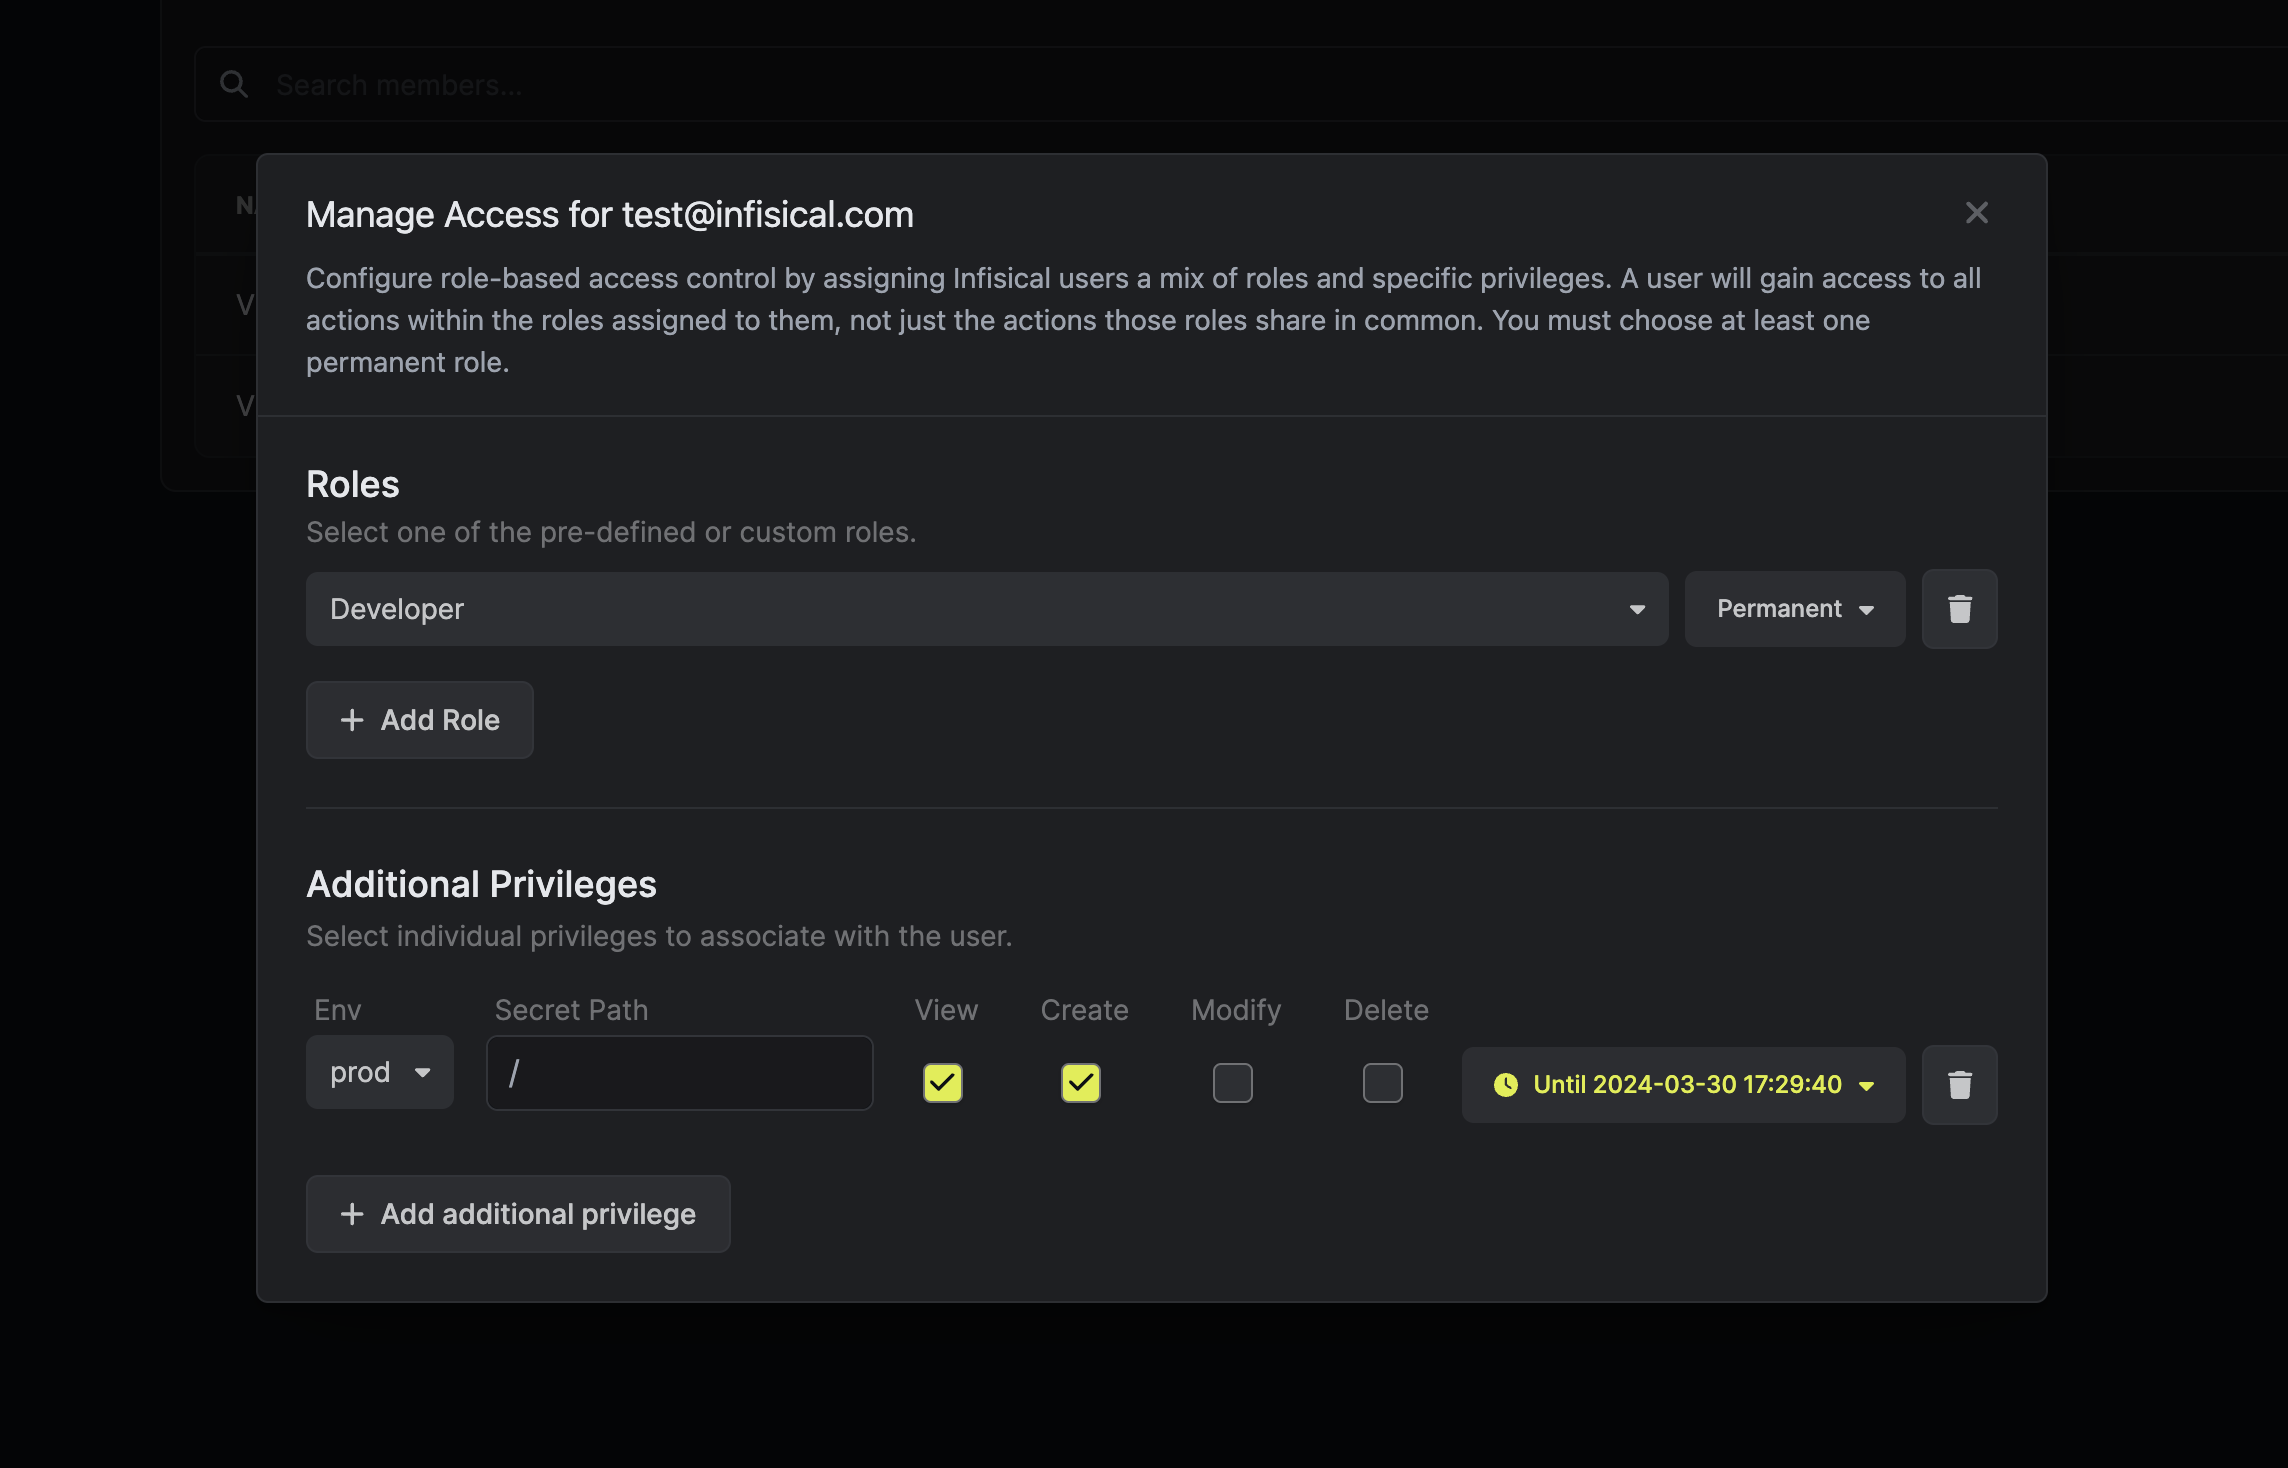 4. Click the `Save` button to enable the additional privilege.
 ---
# Source: https://infisical.com/docs/documentation/platform/pki/alerting.md
> ## Documentation Index
> Fetch the complete documentation index at: https://infisical.com/docs/llms.txt
> Use this file to discover all available pages before exploring further.
# Alerting
> Learn how to set up alerting for expiring certificates with Infisical
## Concept
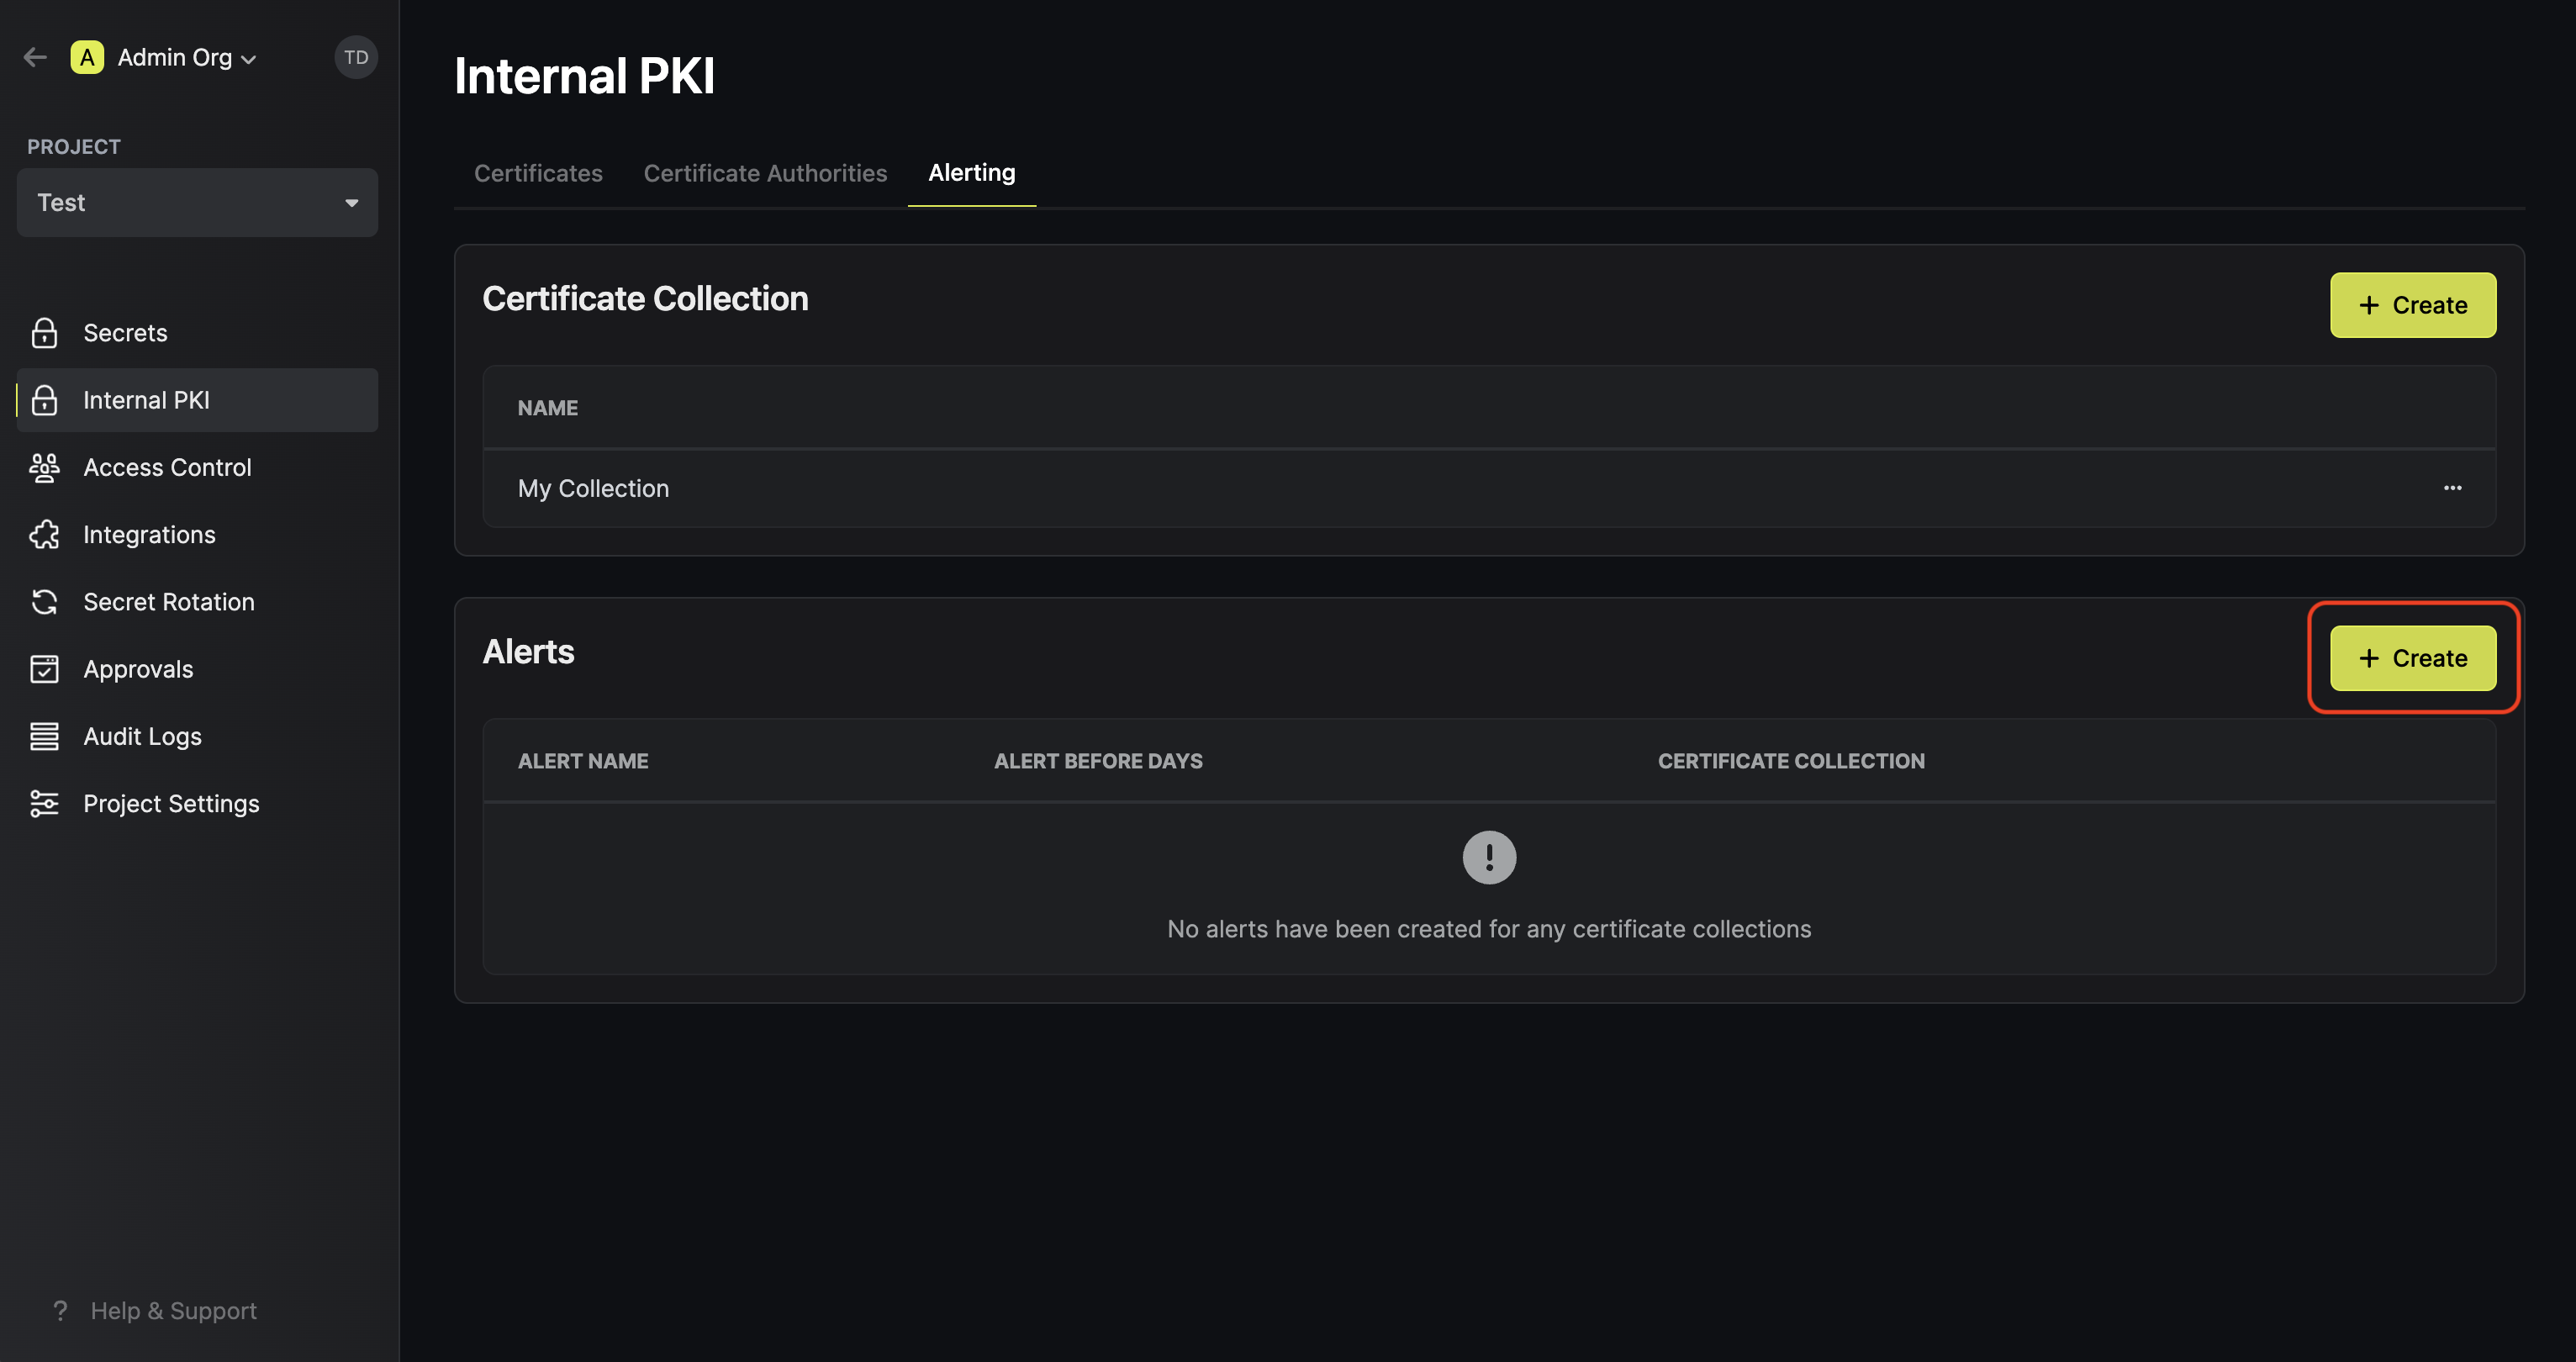
In order to ensure that your certificates are always up-to-date and not expired, you can set up alerting in Infisical for expiring CA and leaf certificates based on customizable filters.
## Guide to Creating an Alert
To create an alert, head to your Certificate Management Project > Alerting and press **Create Certificate Alert**.
---
# Source: https://infisical.com/docs/documentation/platform/pki/alerting.md
> ## Documentation Index
> Fetch the complete documentation index at: https://infisical.com/docs/llms.txt
> Use this file to discover all available pages before exploring further.
# Alerting
> Learn how to set up alerting for expiring certificates with Infisical
## Concept
In order to ensure that your certificates are always up-to-date and not expired, you can set up alerting in Infisical for expiring CA and leaf certificates based on customizable filters.
## Guide to Creating an Alert
To create an alert, head to your Certificate Management Project > Alerting and press **Create Certificate Alert**.
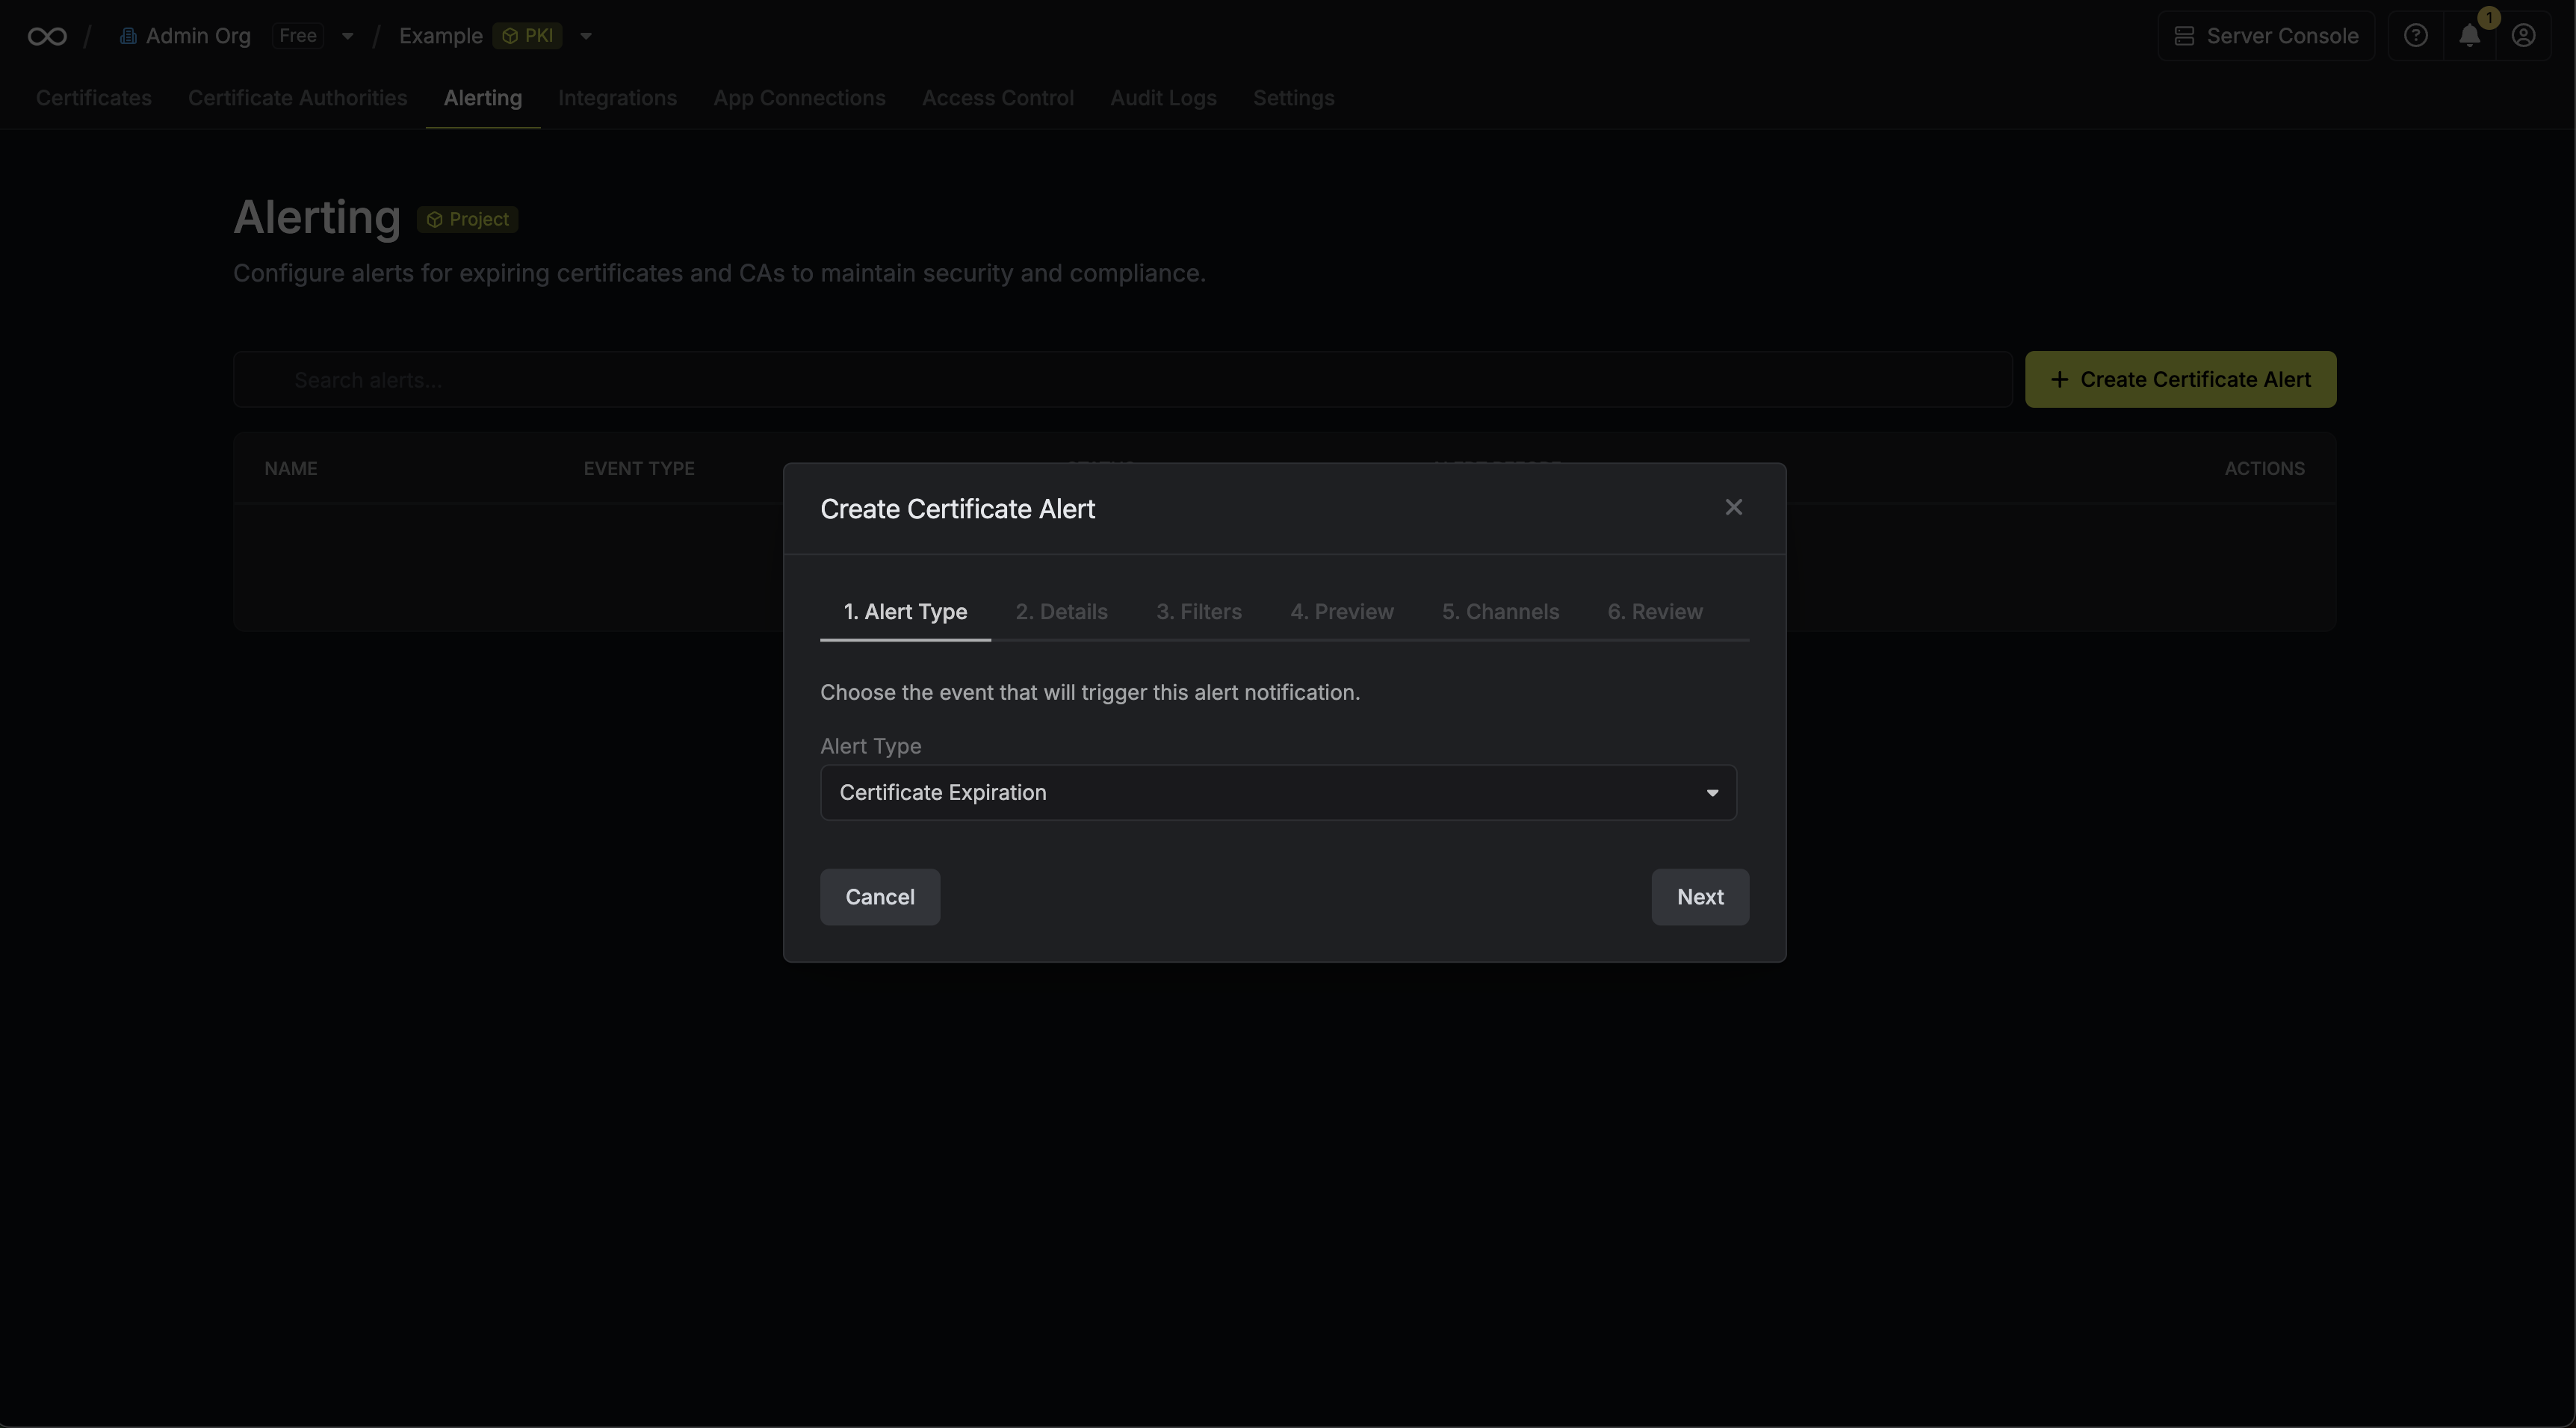 Here's some guidance for each field in the alert configuration sequence:
* Alert Type: The type of alert to create such as **Certificate Expiration**.
* Alert Name: A slug-friendly name for the alert such as `tls-expiry-alert`.
* Description: An optional description for the alert.
* Alert Before: The time before certificate expiration to trigger the alert such as 30 days denoted by `30d`.
* Filters: A list of filters that determine which certificates the alert applies to. Each row includes a **Field**, **Operator**, and **Value** to match against. For example, you can filter for certificates with a common name containing `example.com` by setting the field to **Common Name**, the operator to **Contains**, and the value to `example.com`.
* Channels / Email Recipients: A list of email addresses to notify when the alert triggers.
---
# Source: https://infisical.com/docs/documentation/platform/identities/alicloud-auth.md
> ## Documentation Index
> Fetch the complete documentation index at: https://infisical.com/docs/llms.txt
> Use this file to discover all available pages before exploring further.
# Alibaba Cloud Auth
> Learn how to authenticate with Infisical using Alibaba Cloud user accounts.
**Alibaba Cloud Auth** is an authentication method that verifies Alibaba Cloud users through signature validation, allowing secure access to Infisical resources.
## Diagram
The following sequence diagram illustrates the Alibaba Cloud Auth workflow for authenticating Alibaba Cloud users with Infisical.
```mermaid theme={"dark"}
sequenceDiagram
participant Client
participant Infisical
participant Alibaba Cloud
Note over Client,Client: Step 1: Sign user identity request
Note over Client,Infisical: Step 2: Login Operation
Client->>Infisical: Send signed request details to /api/v1/auth/alicloud-auth/login
Note over Infisical,Alibaba Cloud: Step 3: Request verification
Infisical->>Alibaba Cloud: Forward signed request
Alibaba Cloud-->>Infisical: Return user details
Note over Infisical: Step 4: Identity property validation
Infisical->>Client: Return short-lived access token
Note over Client,Infisical: Step 5: Access Infisical API with token
Client->>Infisical: Make authenticated requests using the short-lived access token
```
## Concept
At a high level, Infisical authenticates an Alibaba Cloud user by verifying its identity and checking that it meets specific requirements (e.g., its ARN is whitelisted) at the `/api/v1/auth/alicloud-auth/login` endpoint. If successful,
then Infisical returns a short-lived access token that can be used to make authenticated requests to the Infisical API.
To be more specific:
1. The client signs a `GetCallerIdentity` request using an Alibaba Cloud user's access key secret; this is done using an HMAC sha1 algorithm.
2. The client sends the signed request information alongside the signature to Infisical at the `/api/v1/auth/alicloud-auth/login` endpoint.
3. Infisical reconstructs the request and sends it to Alibaba Cloud for verification and obtains the identity associated with the Alibaba Cloud user.
4. Infisical checks the user's properties against set criteria such as **Allowed ARNs**.
5. If all checks pass, Infisical returns a short-lived access token that the client can use to make authenticated requests to the Infisical API.
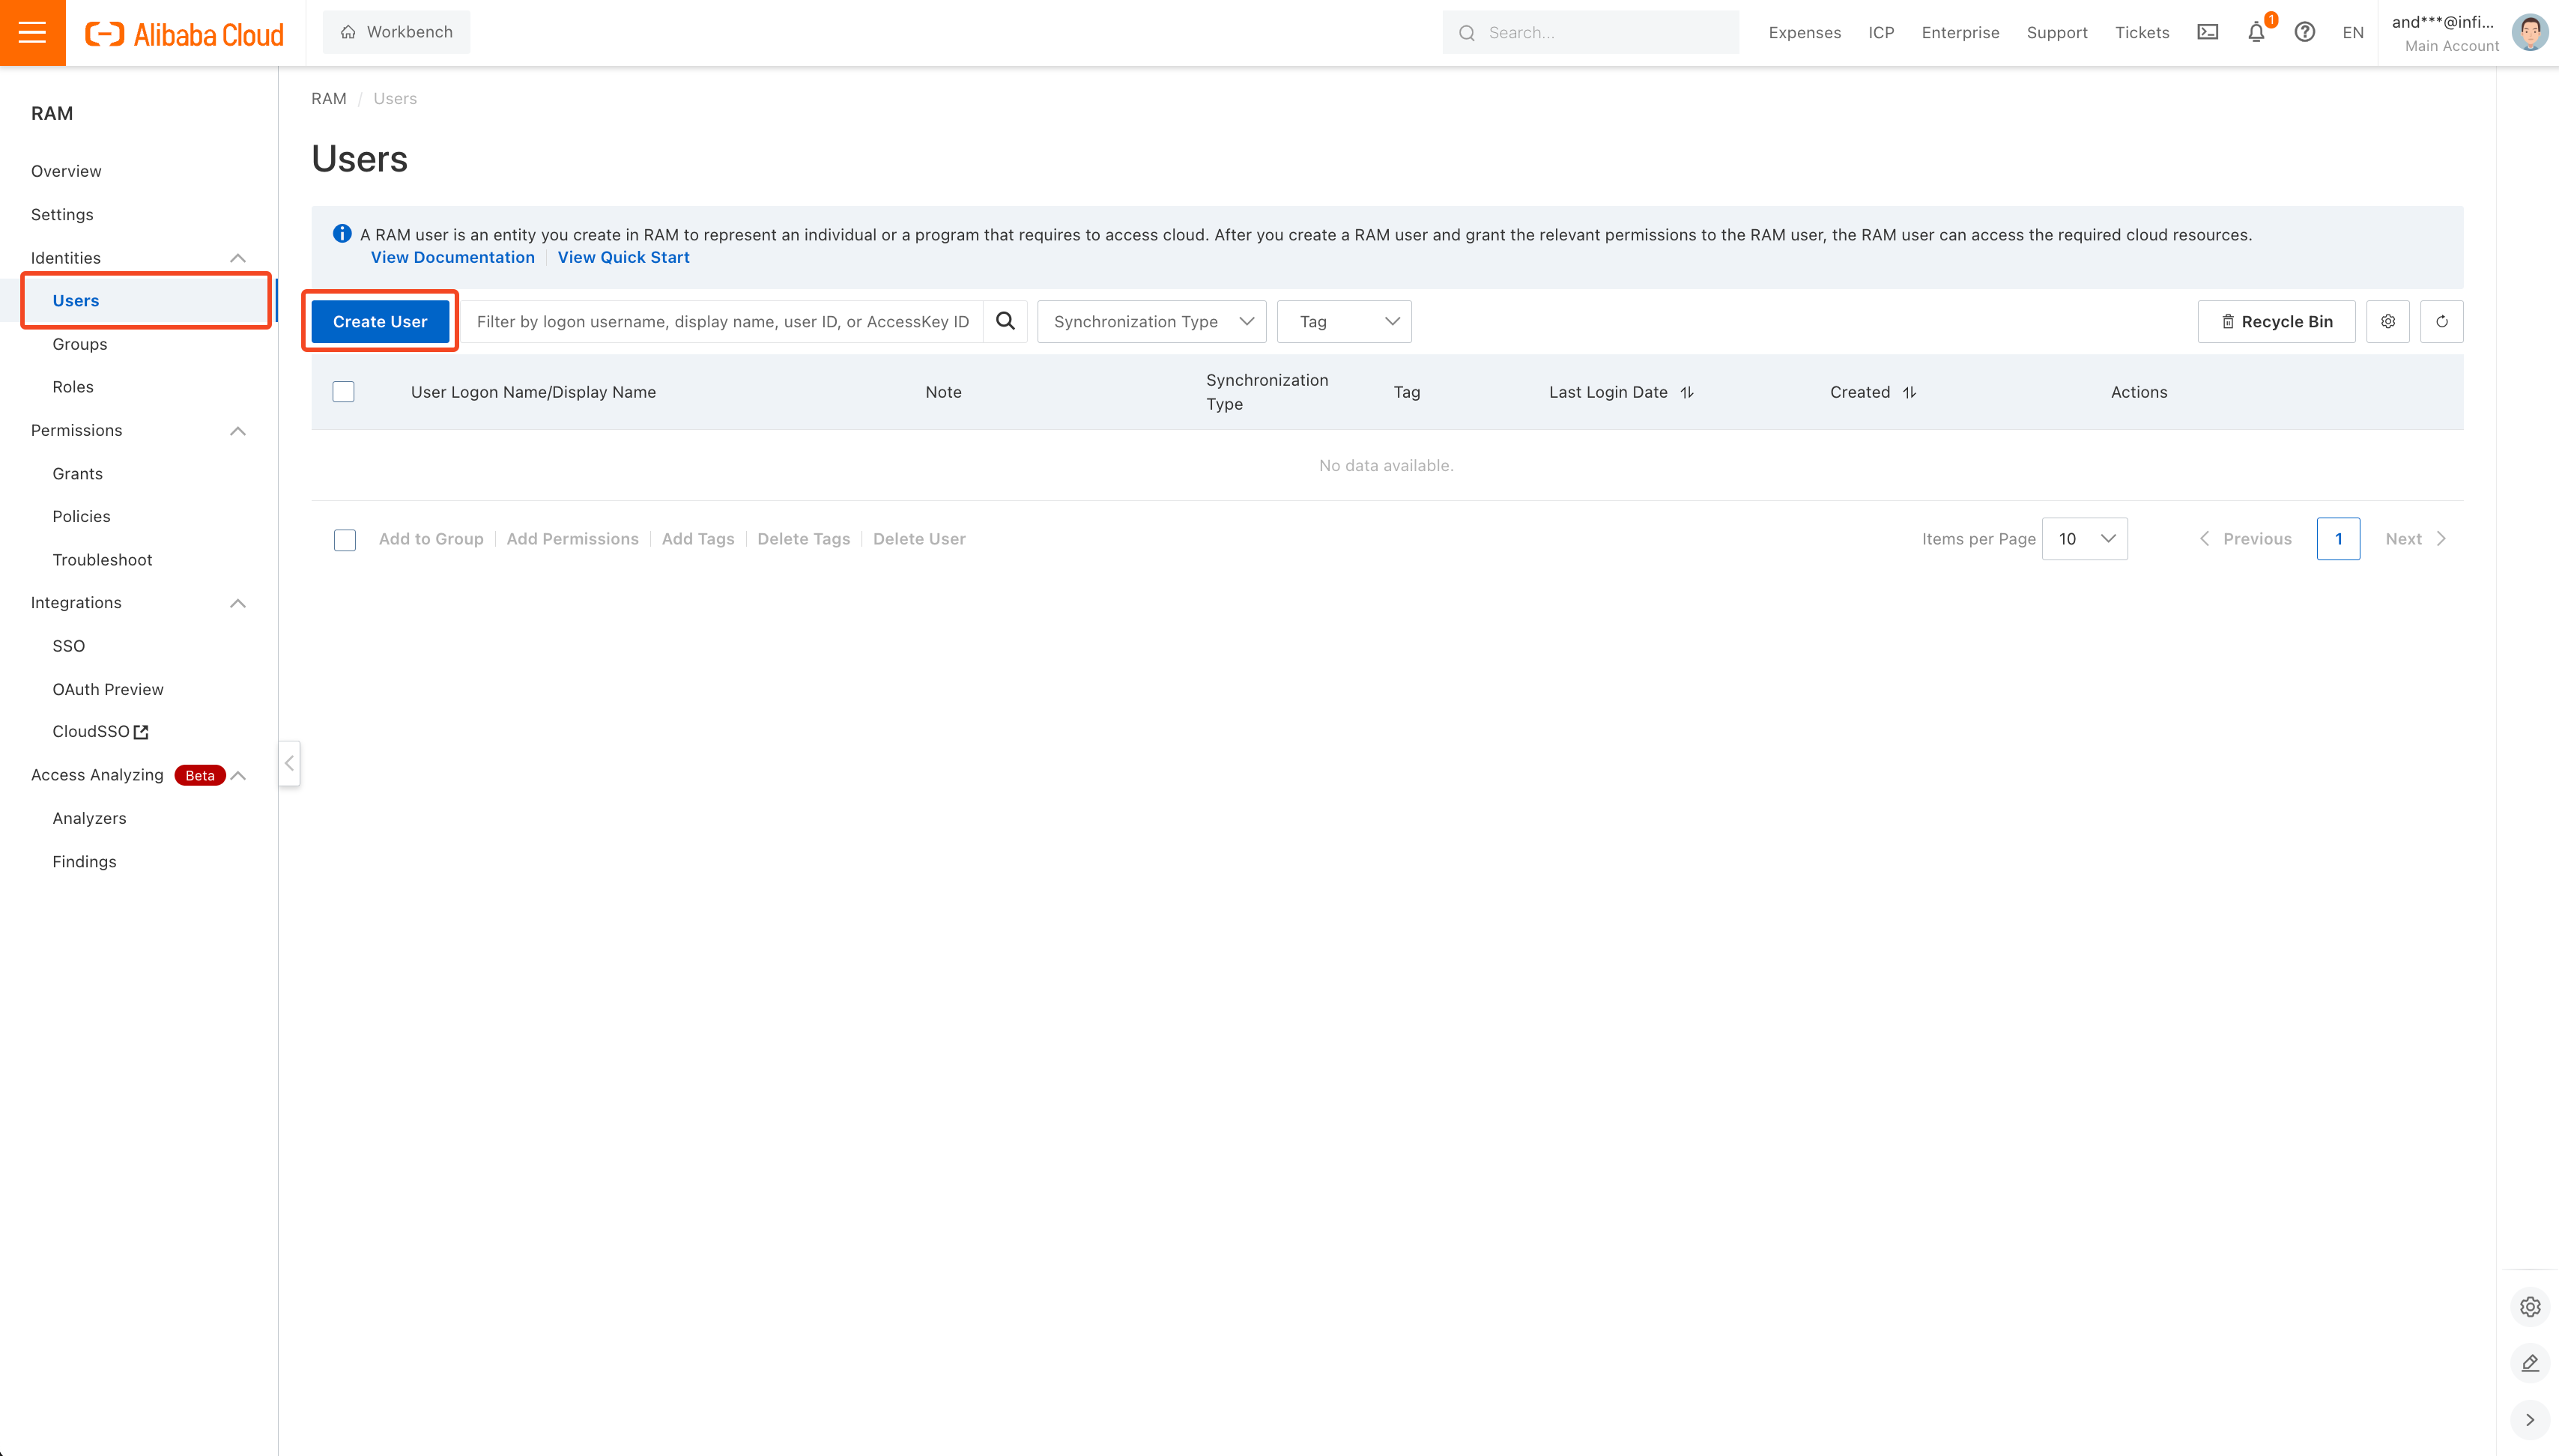
## Prerequisite
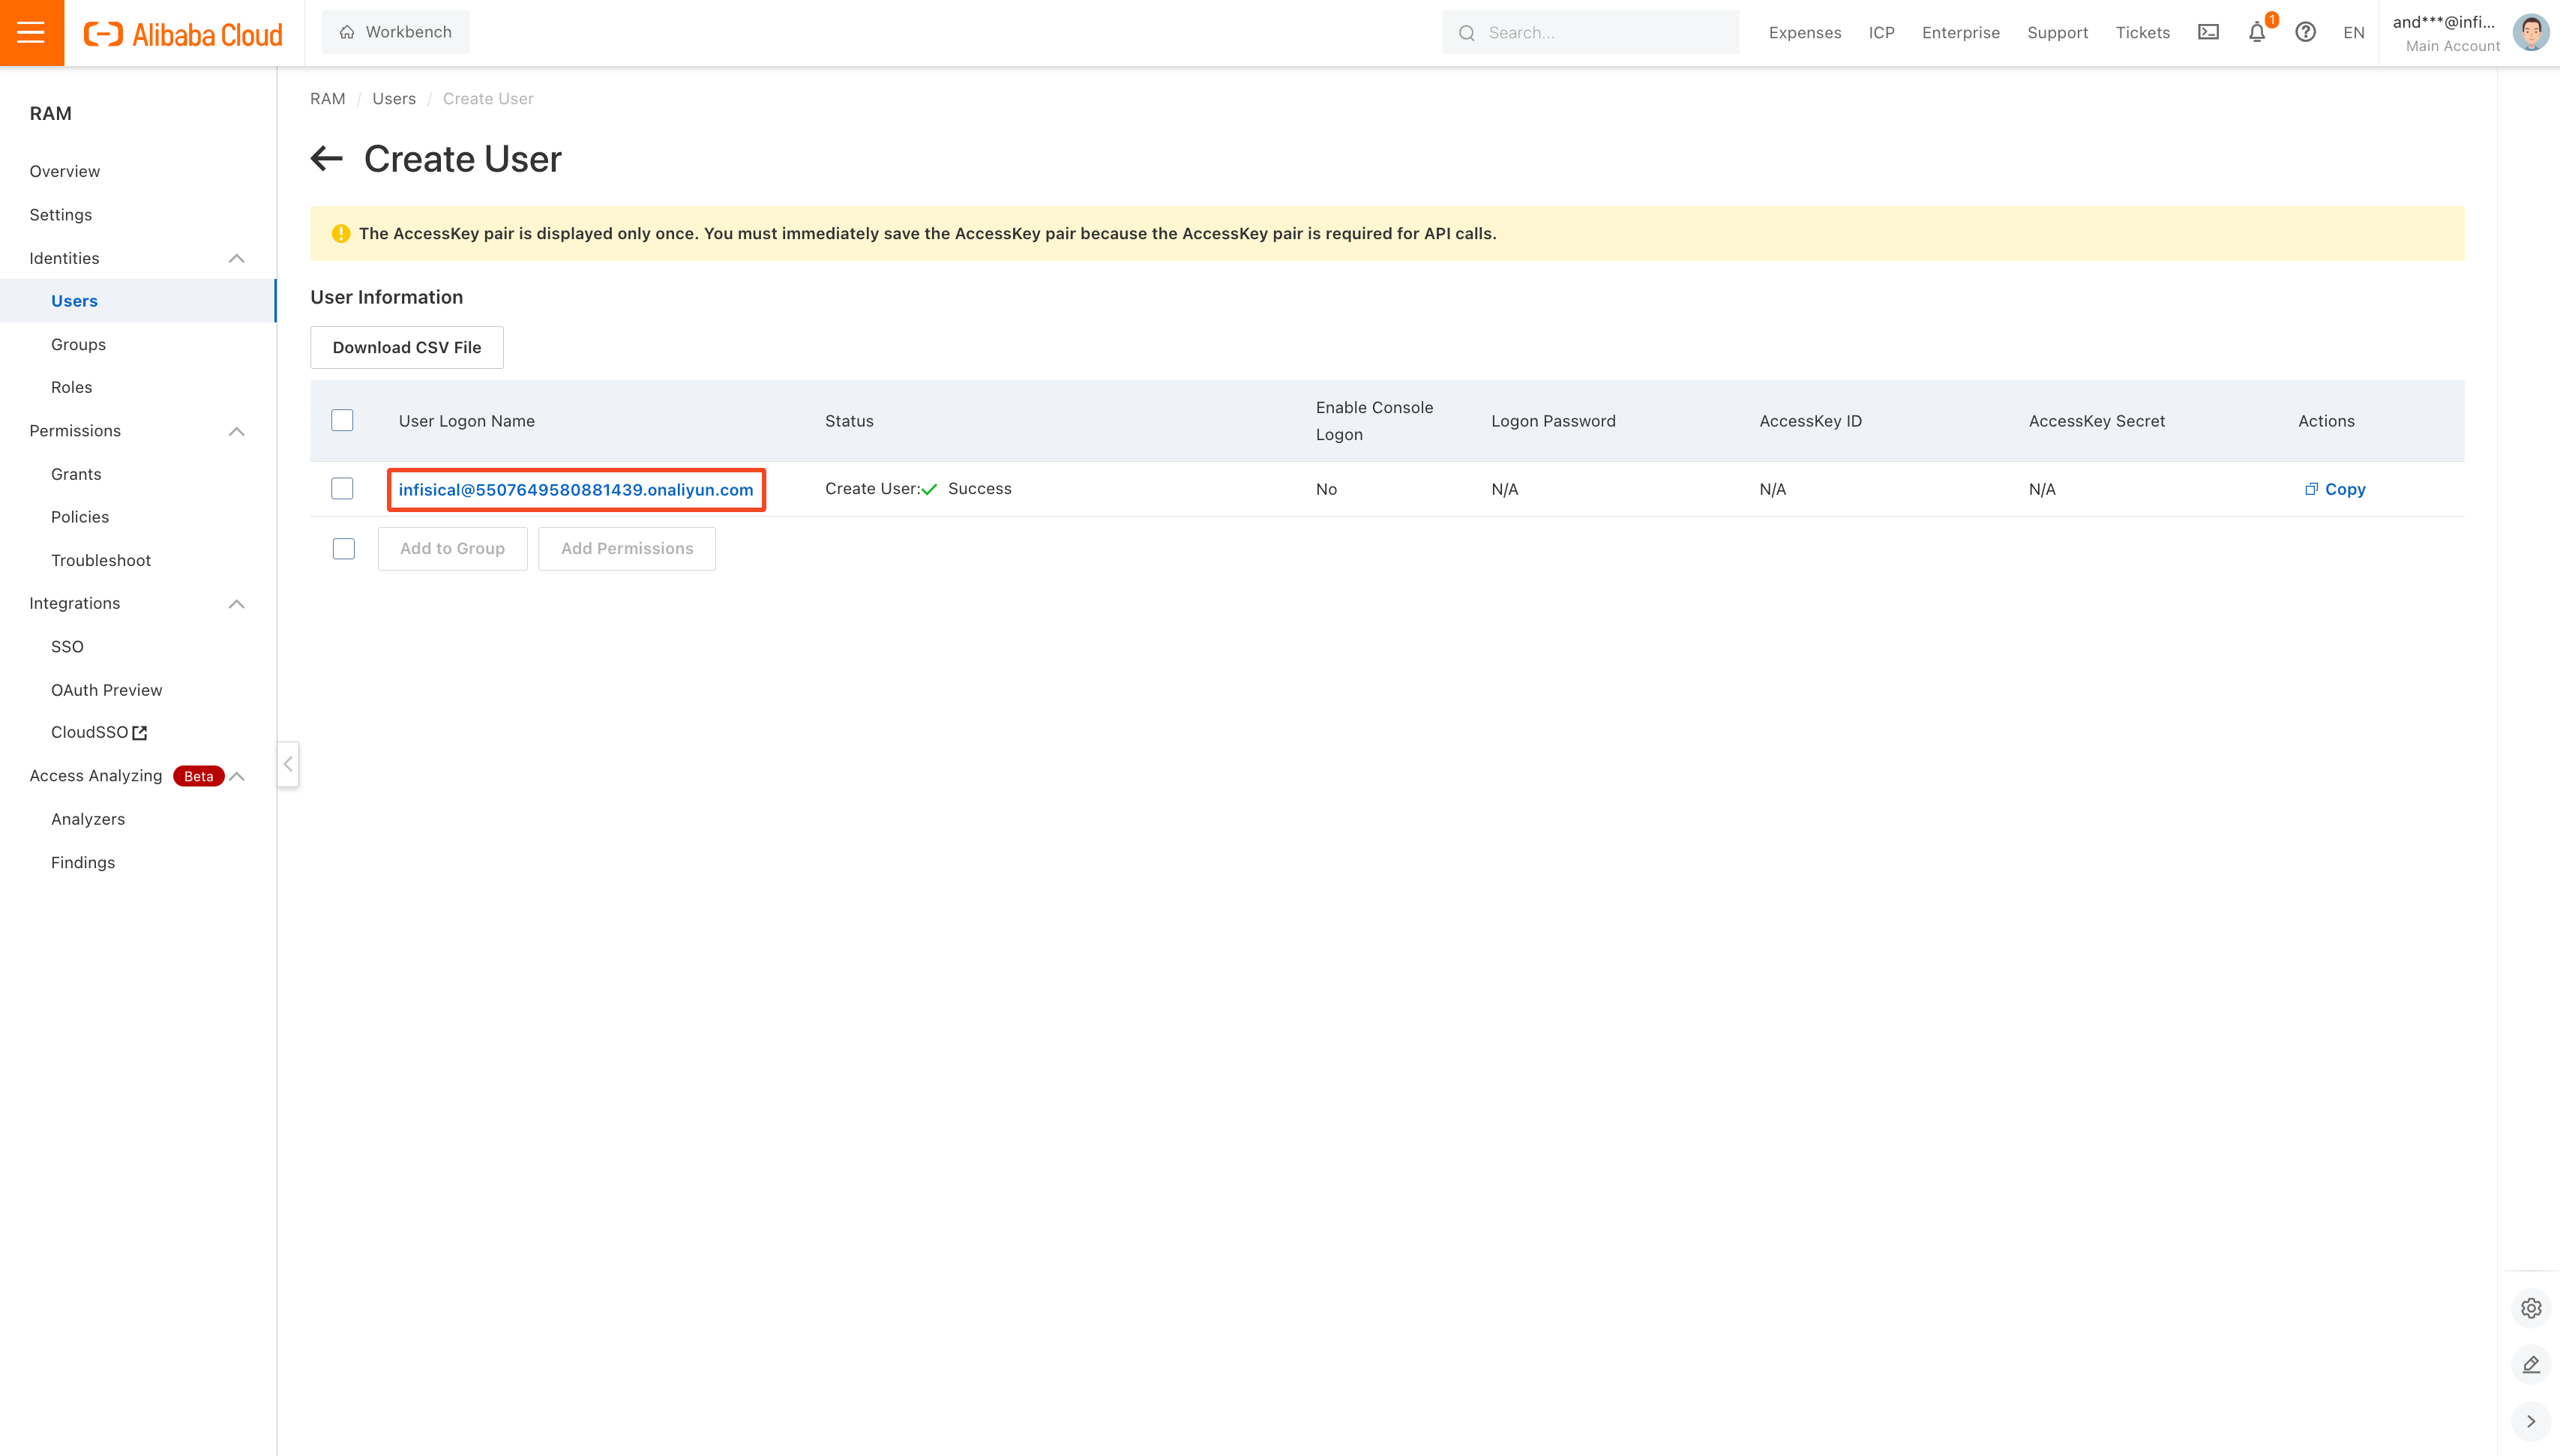
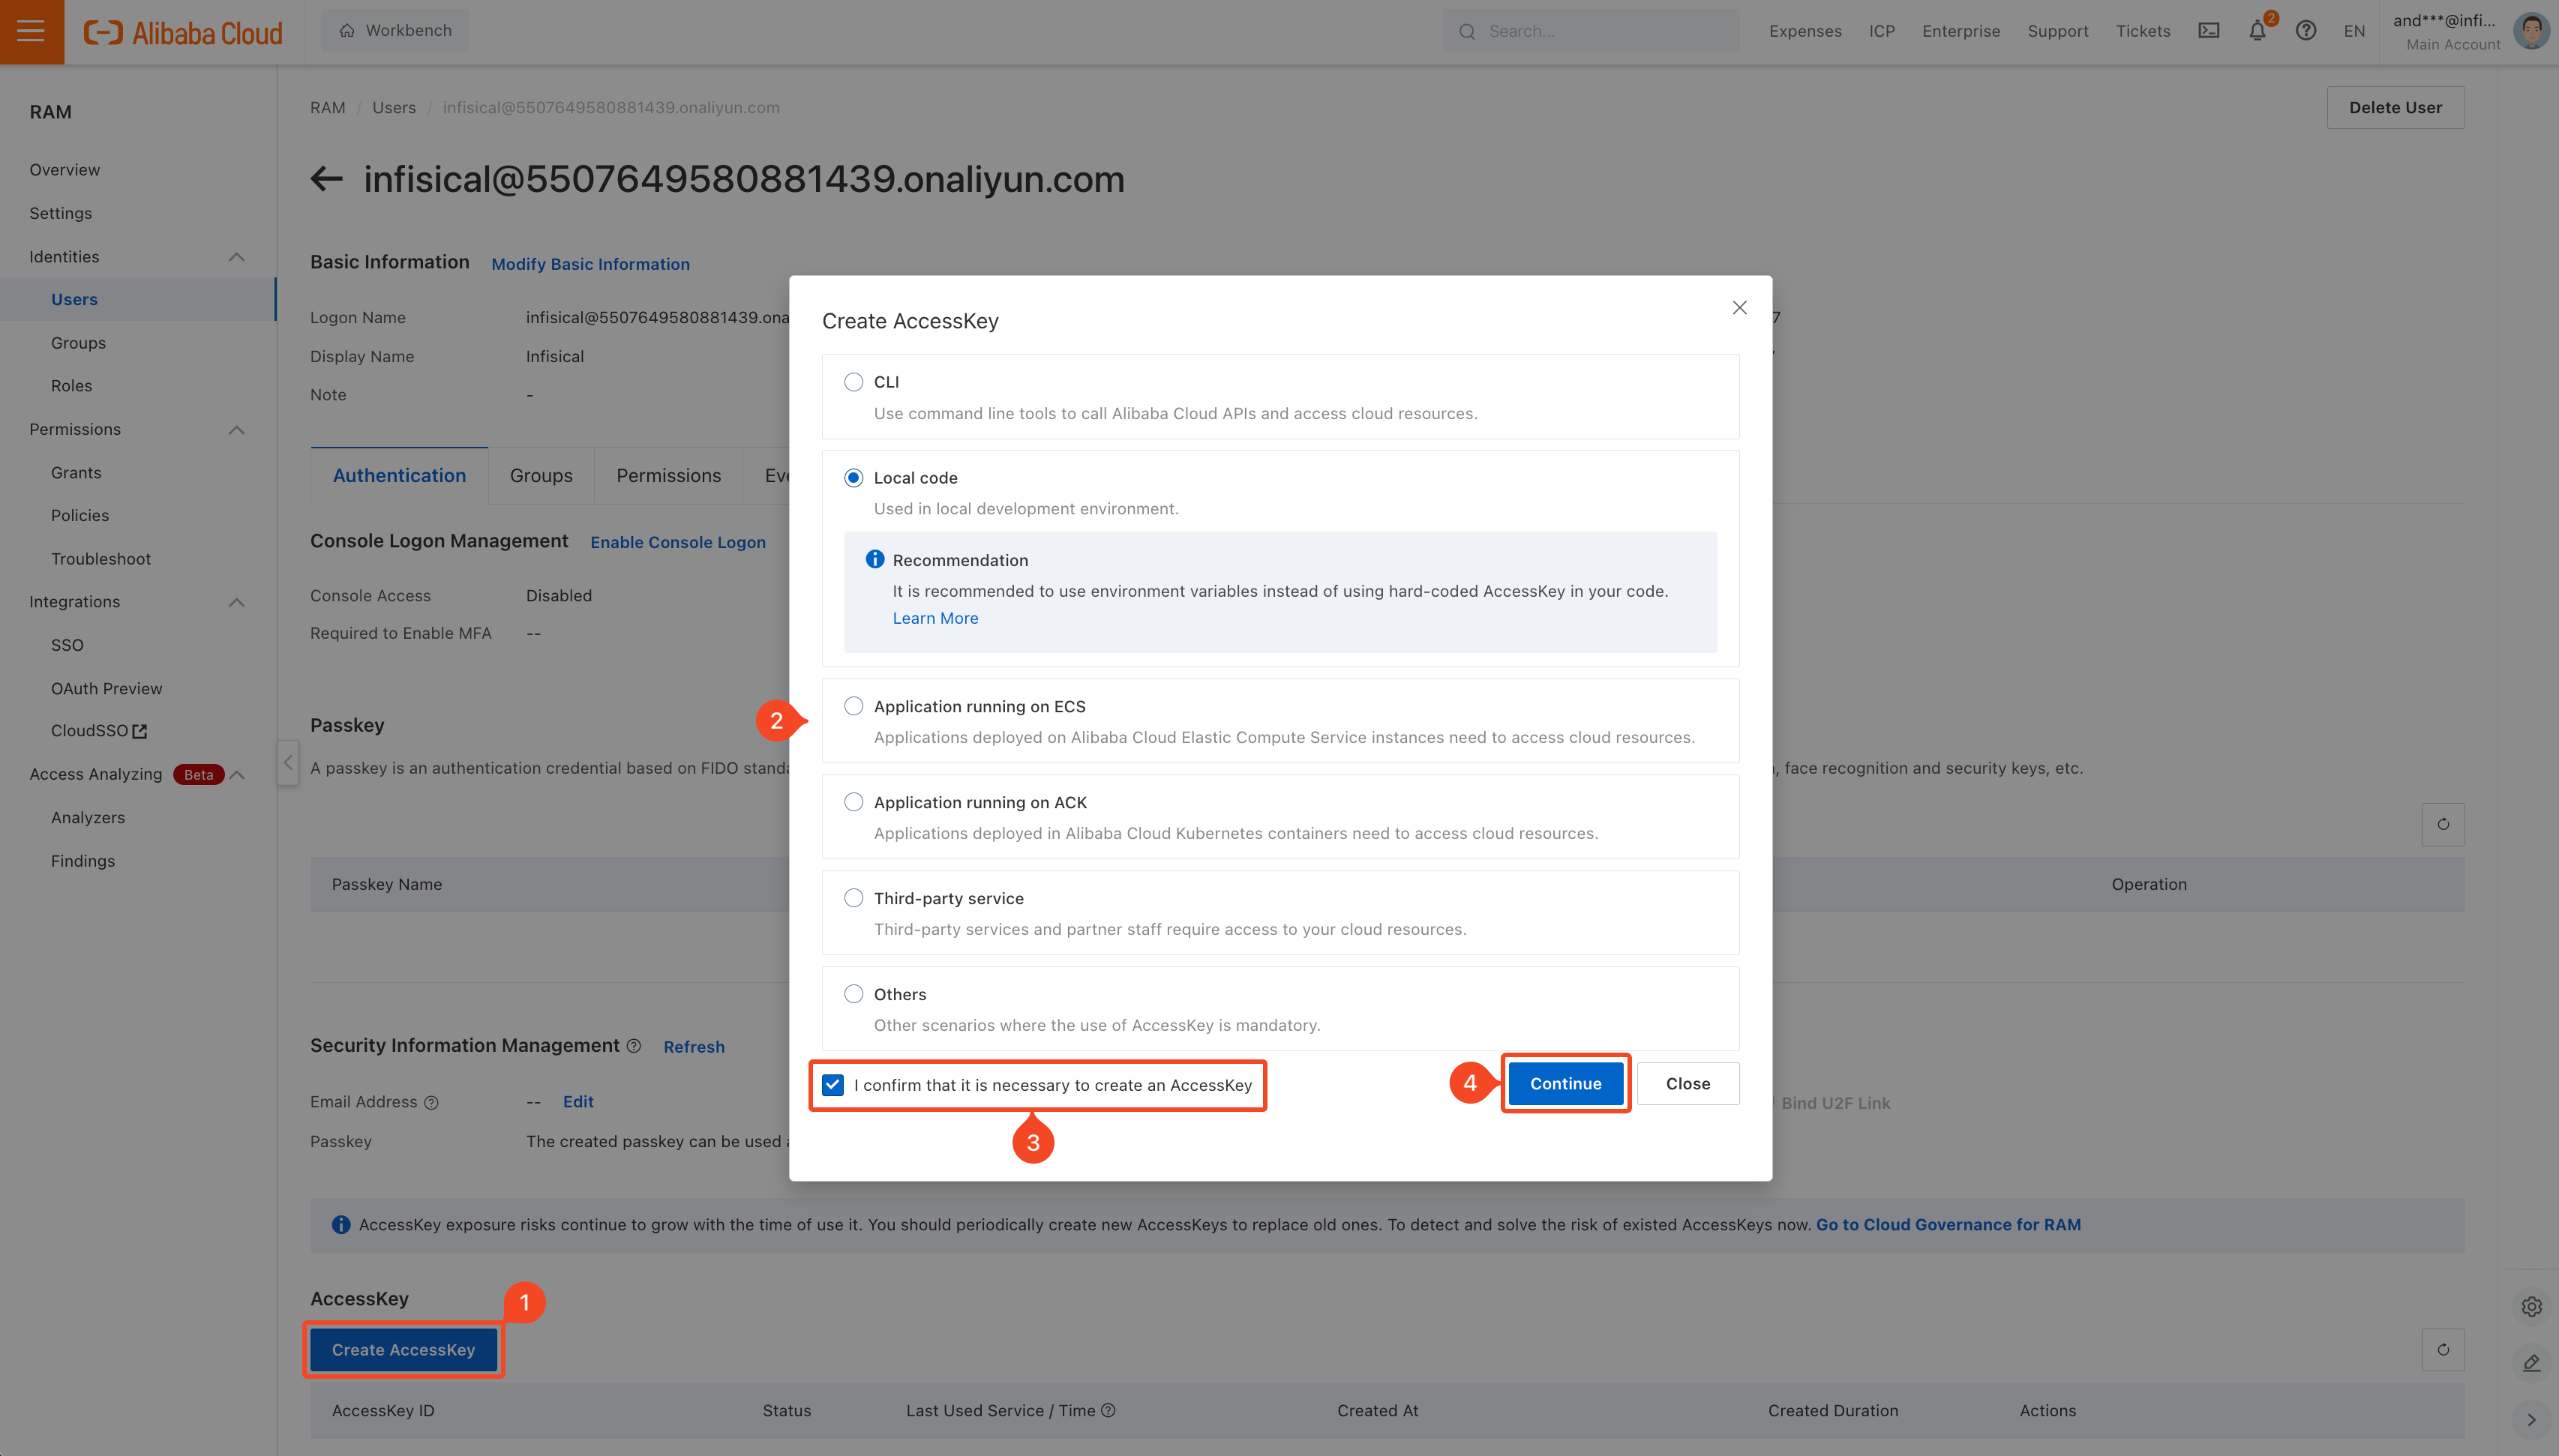
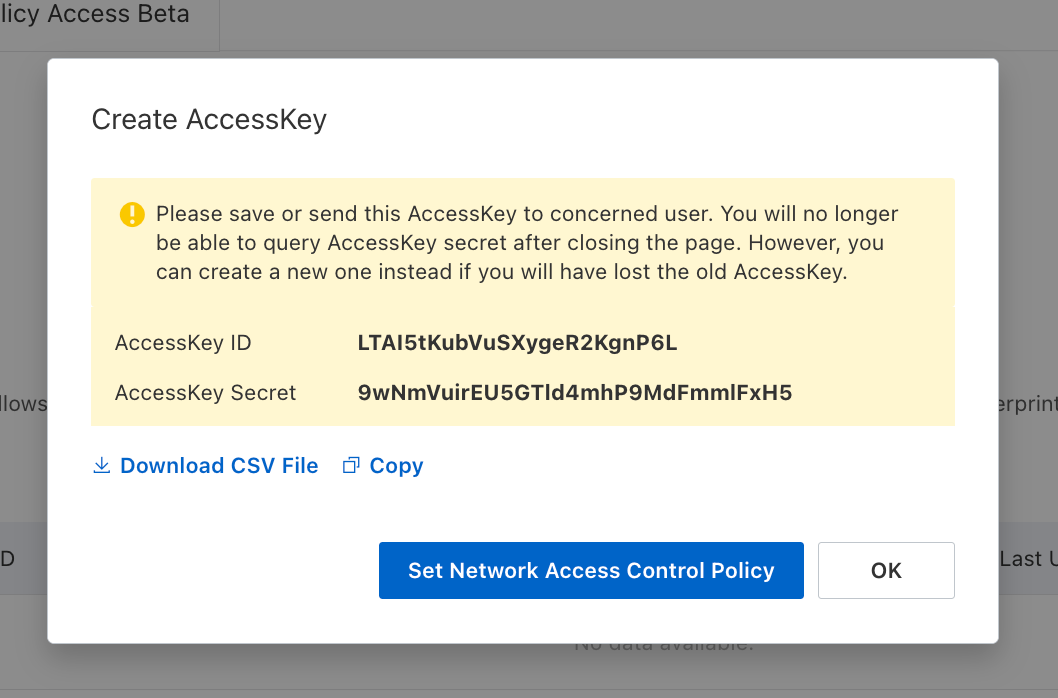
In order to sign requests, you must have an Alibaba Cloud user with credentials such as access key ID and secret. If you're unaware of how to create a user and obtain the needed credentials, expand the menu below.
Here's some guidance for each field in the alert configuration sequence:
* Alert Type: The type of alert to create such as **Certificate Expiration**.
* Alert Name: A slug-friendly name for the alert such as `tls-expiry-alert`.
* Description: An optional description for the alert.
* Alert Before: The time before certificate expiration to trigger the alert such as 30 days denoted by `30d`.
* Filters: A list of filters that determine which certificates the alert applies to. Each row includes a **Field**, **Operator**, and **Value** to match against. For example, you can filter for certificates with a common name containing `example.com` by setting the field to **Common Name**, the operator to **Contains**, and the value to `example.com`.
* Channels / Email Recipients: A list of email addresses to notify when the alert triggers.
---
# Source: https://infisical.com/docs/documentation/platform/identities/alicloud-auth.md
> ## Documentation Index
> Fetch the complete documentation index at: https://infisical.com/docs/llms.txt
> Use this file to discover all available pages before exploring further.
# Alibaba Cloud Auth
> Learn how to authenticate with Infisical using Alibaba Cloud user accounts.
**Alibaba Cloud Auth** is an authentication method that verifies Alibaba Cloud users through signature validation, allowing secure access to Infisical resources.
## Diagram
The following sequence diagram illustrates the Alibaba Cloud Auth workflow for authenticating Alibaba Cloud users with Infisical.
```mermaid theme={"dark"}
sequenceDiagram
participant Client
participant Infisical
participant Alibaba Cloud
Note over Client,Client: Step 1: Sign user identity request
Note over Client,Infisical: Step 2: Login Operation
Client->>Infisical: Send signed request details to /api/v1/auth/alicloud-auth/login
Note over Infisical,Alibaba Cloud: Step 3: Request verification
Infisical->>Alibaba Cloud: Forward signed request
Alibaba Cloud-->>Infisical: Return user details
Note over Infisical: Step 4: Identity property validation
Infisical->>Client: Return short-lived access token
Note over Client,Infisical: Step 5: Access Infisical API with token
Client->>Infisical: Make authenticated requests using the short-lived access token
```
## Concept
At a high level, Infisical authenticates an Alibaba Cloud user by verifying its identity and checking that it meets specific requirements (e.g., its ARN is whitelisted) at the `/api/v1/auth/alicloud-auth/login` endpoint. If successful,
then Infisical returns a short-lived access token that can be used to make authenticated requests to the Infisical API.
To be more specific:
1. The client signs a `GetCallerIdentity` request using an Alibaba Cloud user's access key secret; this is done using an HMAC sha1 algorithm.
2. The client sends the signed request information alongside the signature to Infisical at the `/api/v1/auth/alicloud-auth/login` endpoint.
3. Infisical reconstructs the request and sends it to Alibaba Cloud for verification and obtains the identity associated with the Alibaba Cloud user.
4. Infisical checks the user's properties against set criteria such as **Allowed ARNs**.
5. If all checks pass, Infisical returns a short-lived access token that the client can use to make authenticated requests to the Infisical API.
## Prerequisite
In order to sign requests, you must have an Alibaba Cloud user with credentials such as access key ID and secret. If you're unaware of how to create a user and obtain the needed credentials, expand the menu below.

 When creating an identity, you specify an organization-level [role](/documentation/platform/access-controls/role-based-access-controls) for it to assume; you can configure roles in Organization Settings > Access Control > [Organization Roles](https://app.infisical.com/organization/access-management?selectedTab=roles).
 Input some details for your new identity:
* **Name (required):** A friendly name for the identity.
* **Role (required):** A role from the [**Organization Roles**](https://app.infisical.com/organization/access-management?selectedTab=roles) tab for the identity to assume. The organization role assigned will determine what organization-level resources this identity can have access to.
Once you've created an identity, you'll be redirected to a page where you can manage the identity.
Input some details for your new identity:
* **Name (required):** A friendly name for the identity.
* **Role (required):** A role from the [**Organization Roles**](https://app.infisical.com/organization/access-management?selectedTab=roles) tab for the identity to assume. The organization role assigned will determine what organization-level resources this identity can have access to.
Once you've created an identity, you'll be redirected to a page where you can manage the identity.
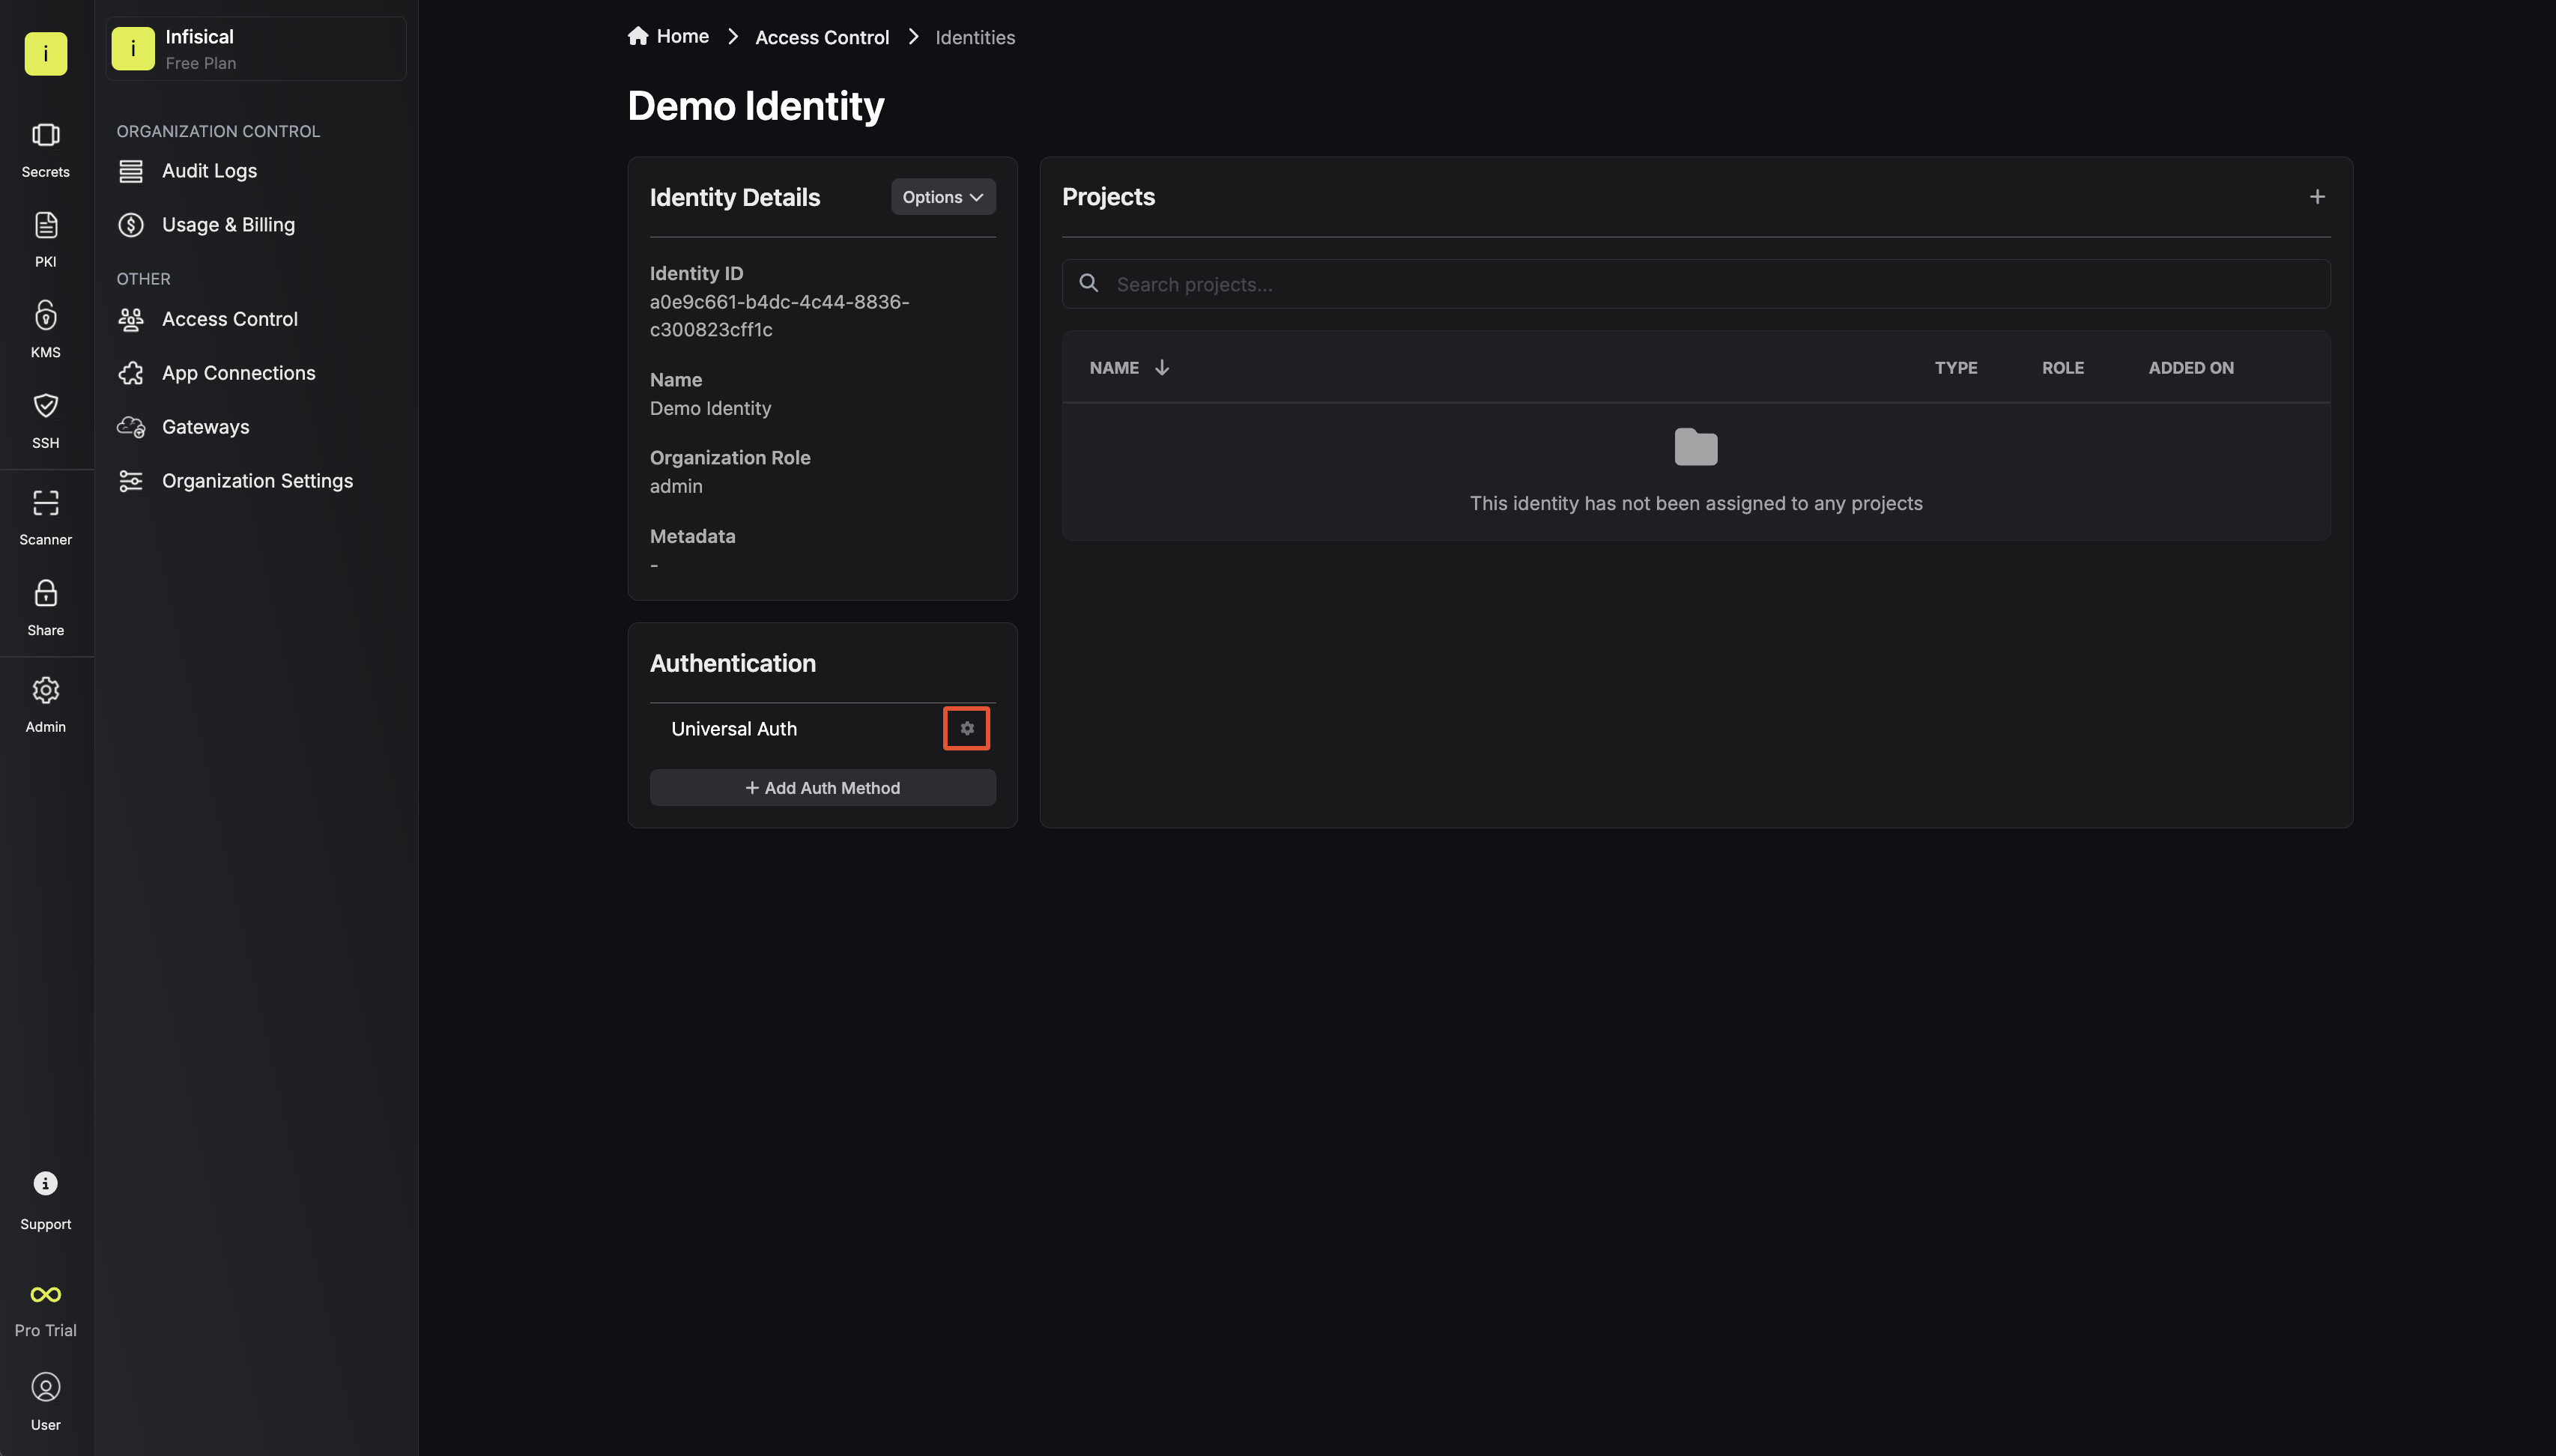
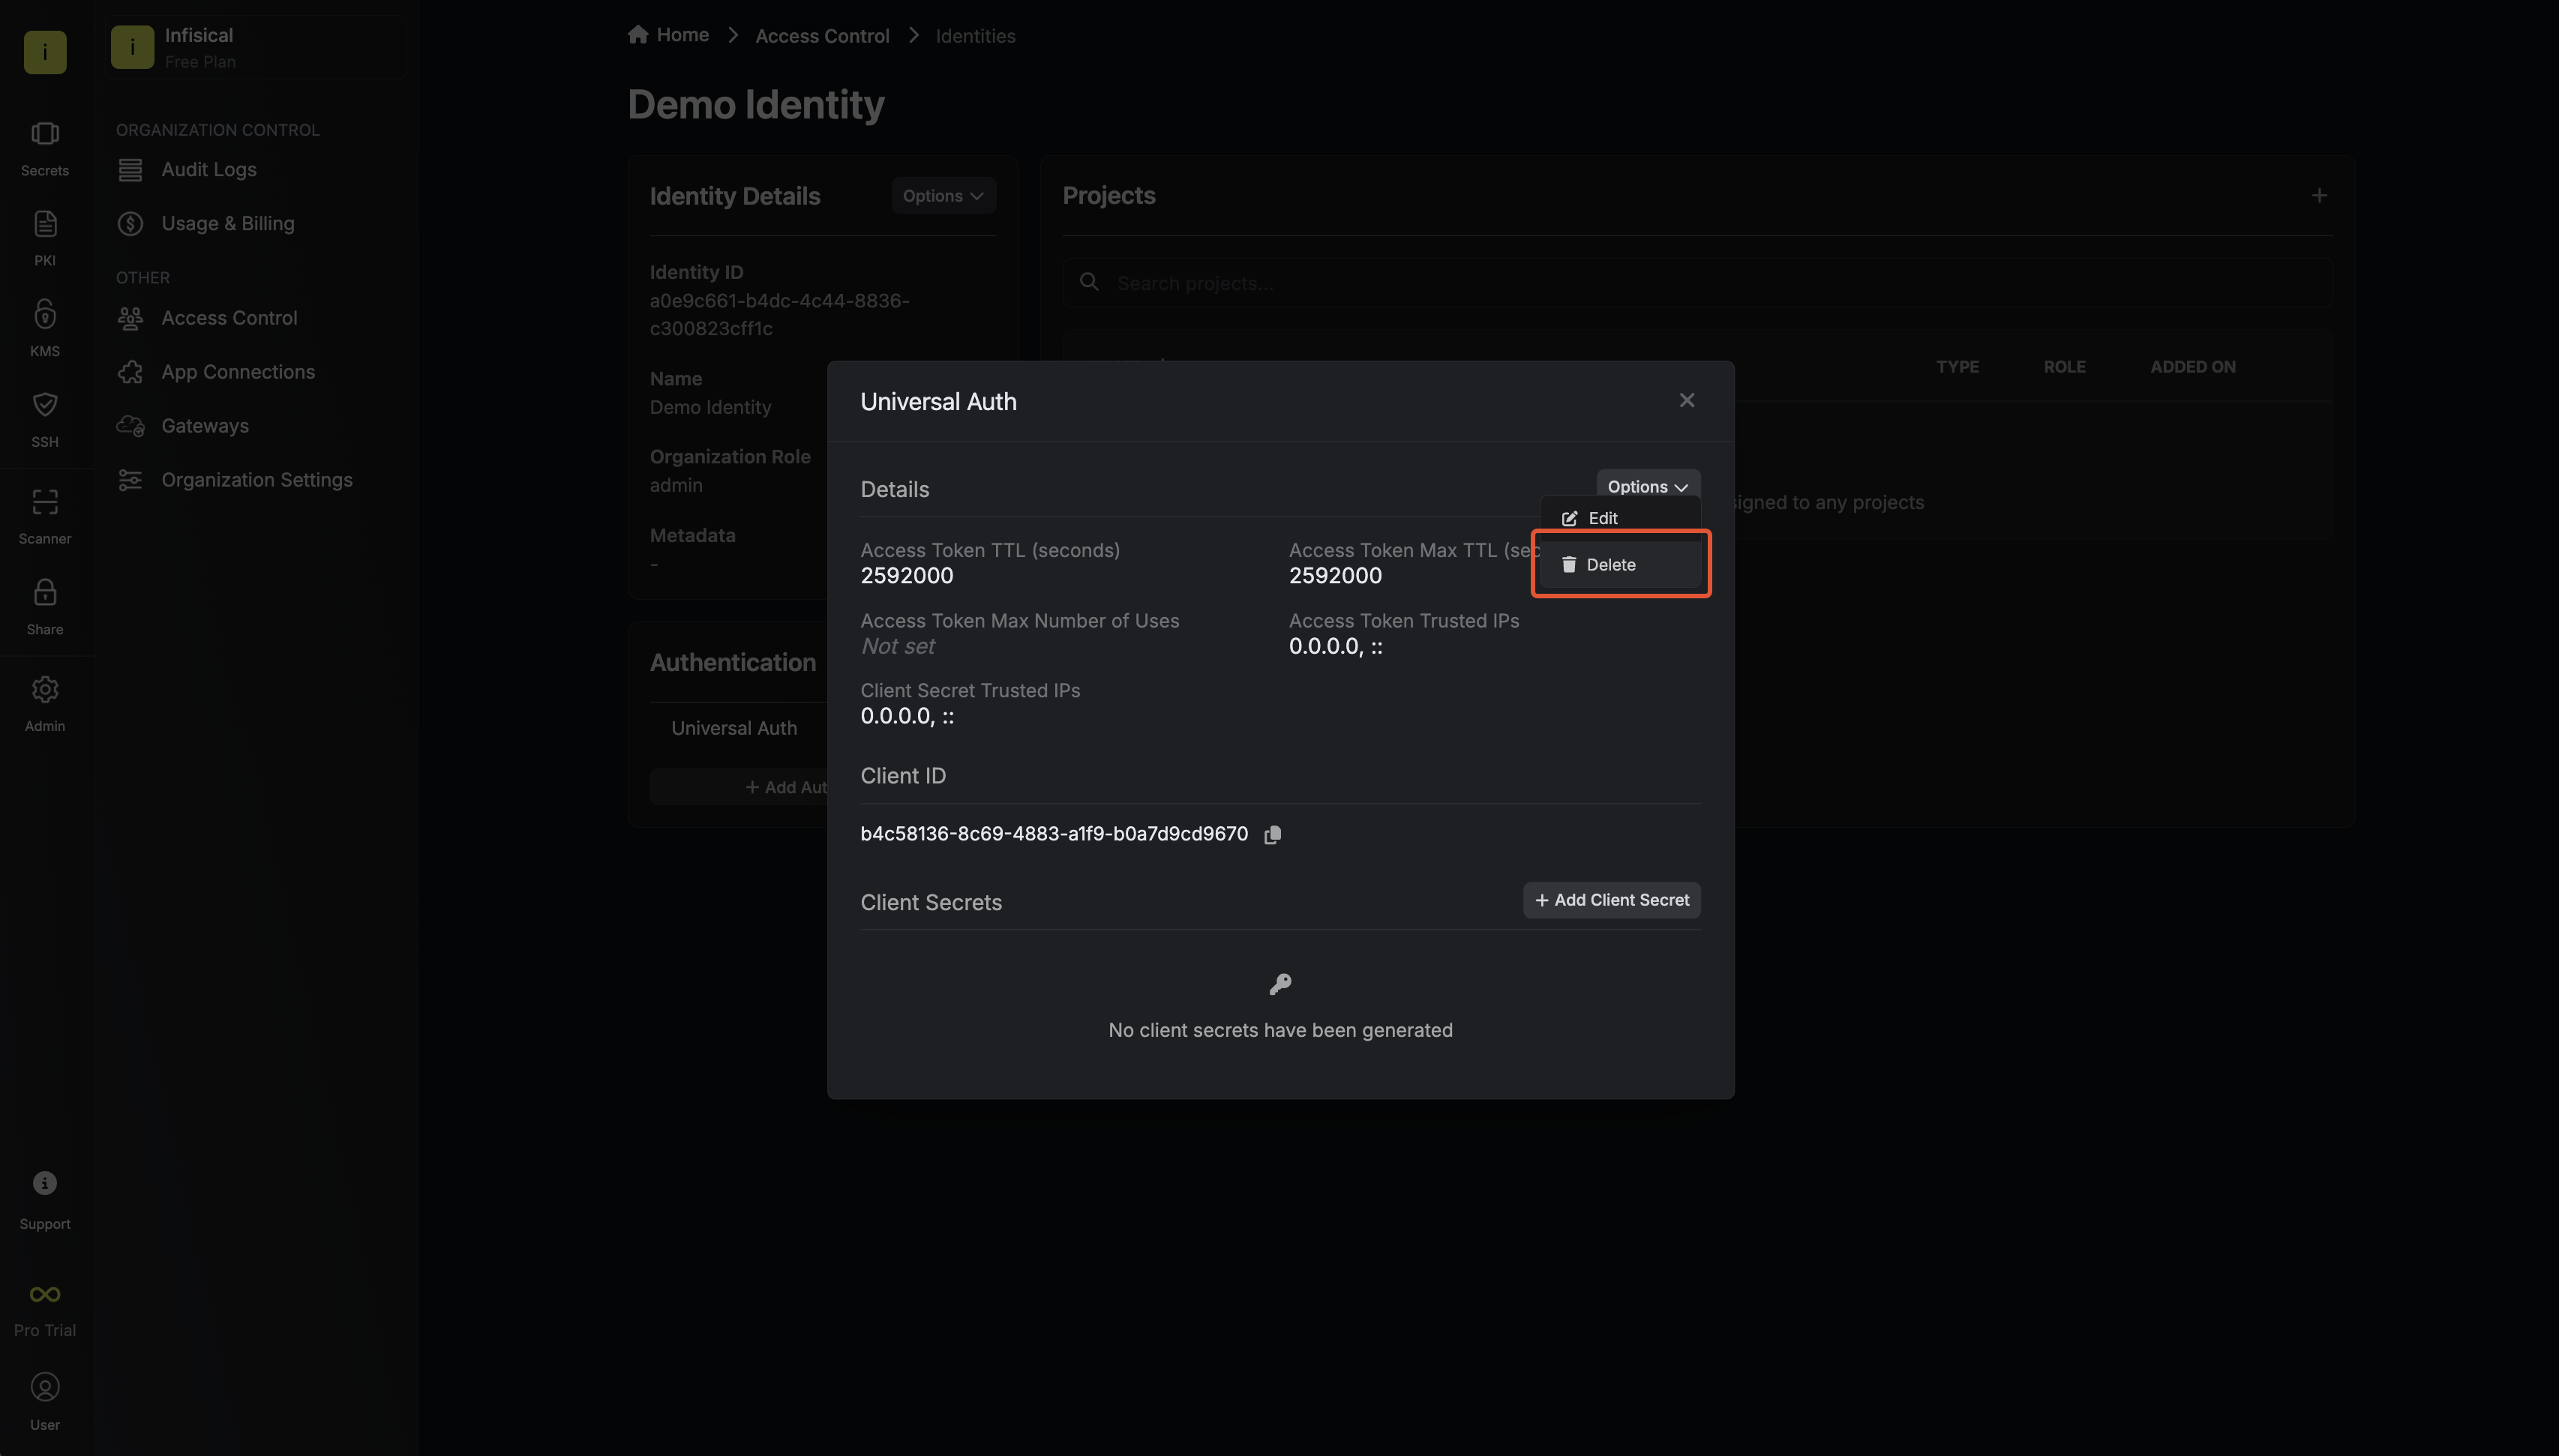
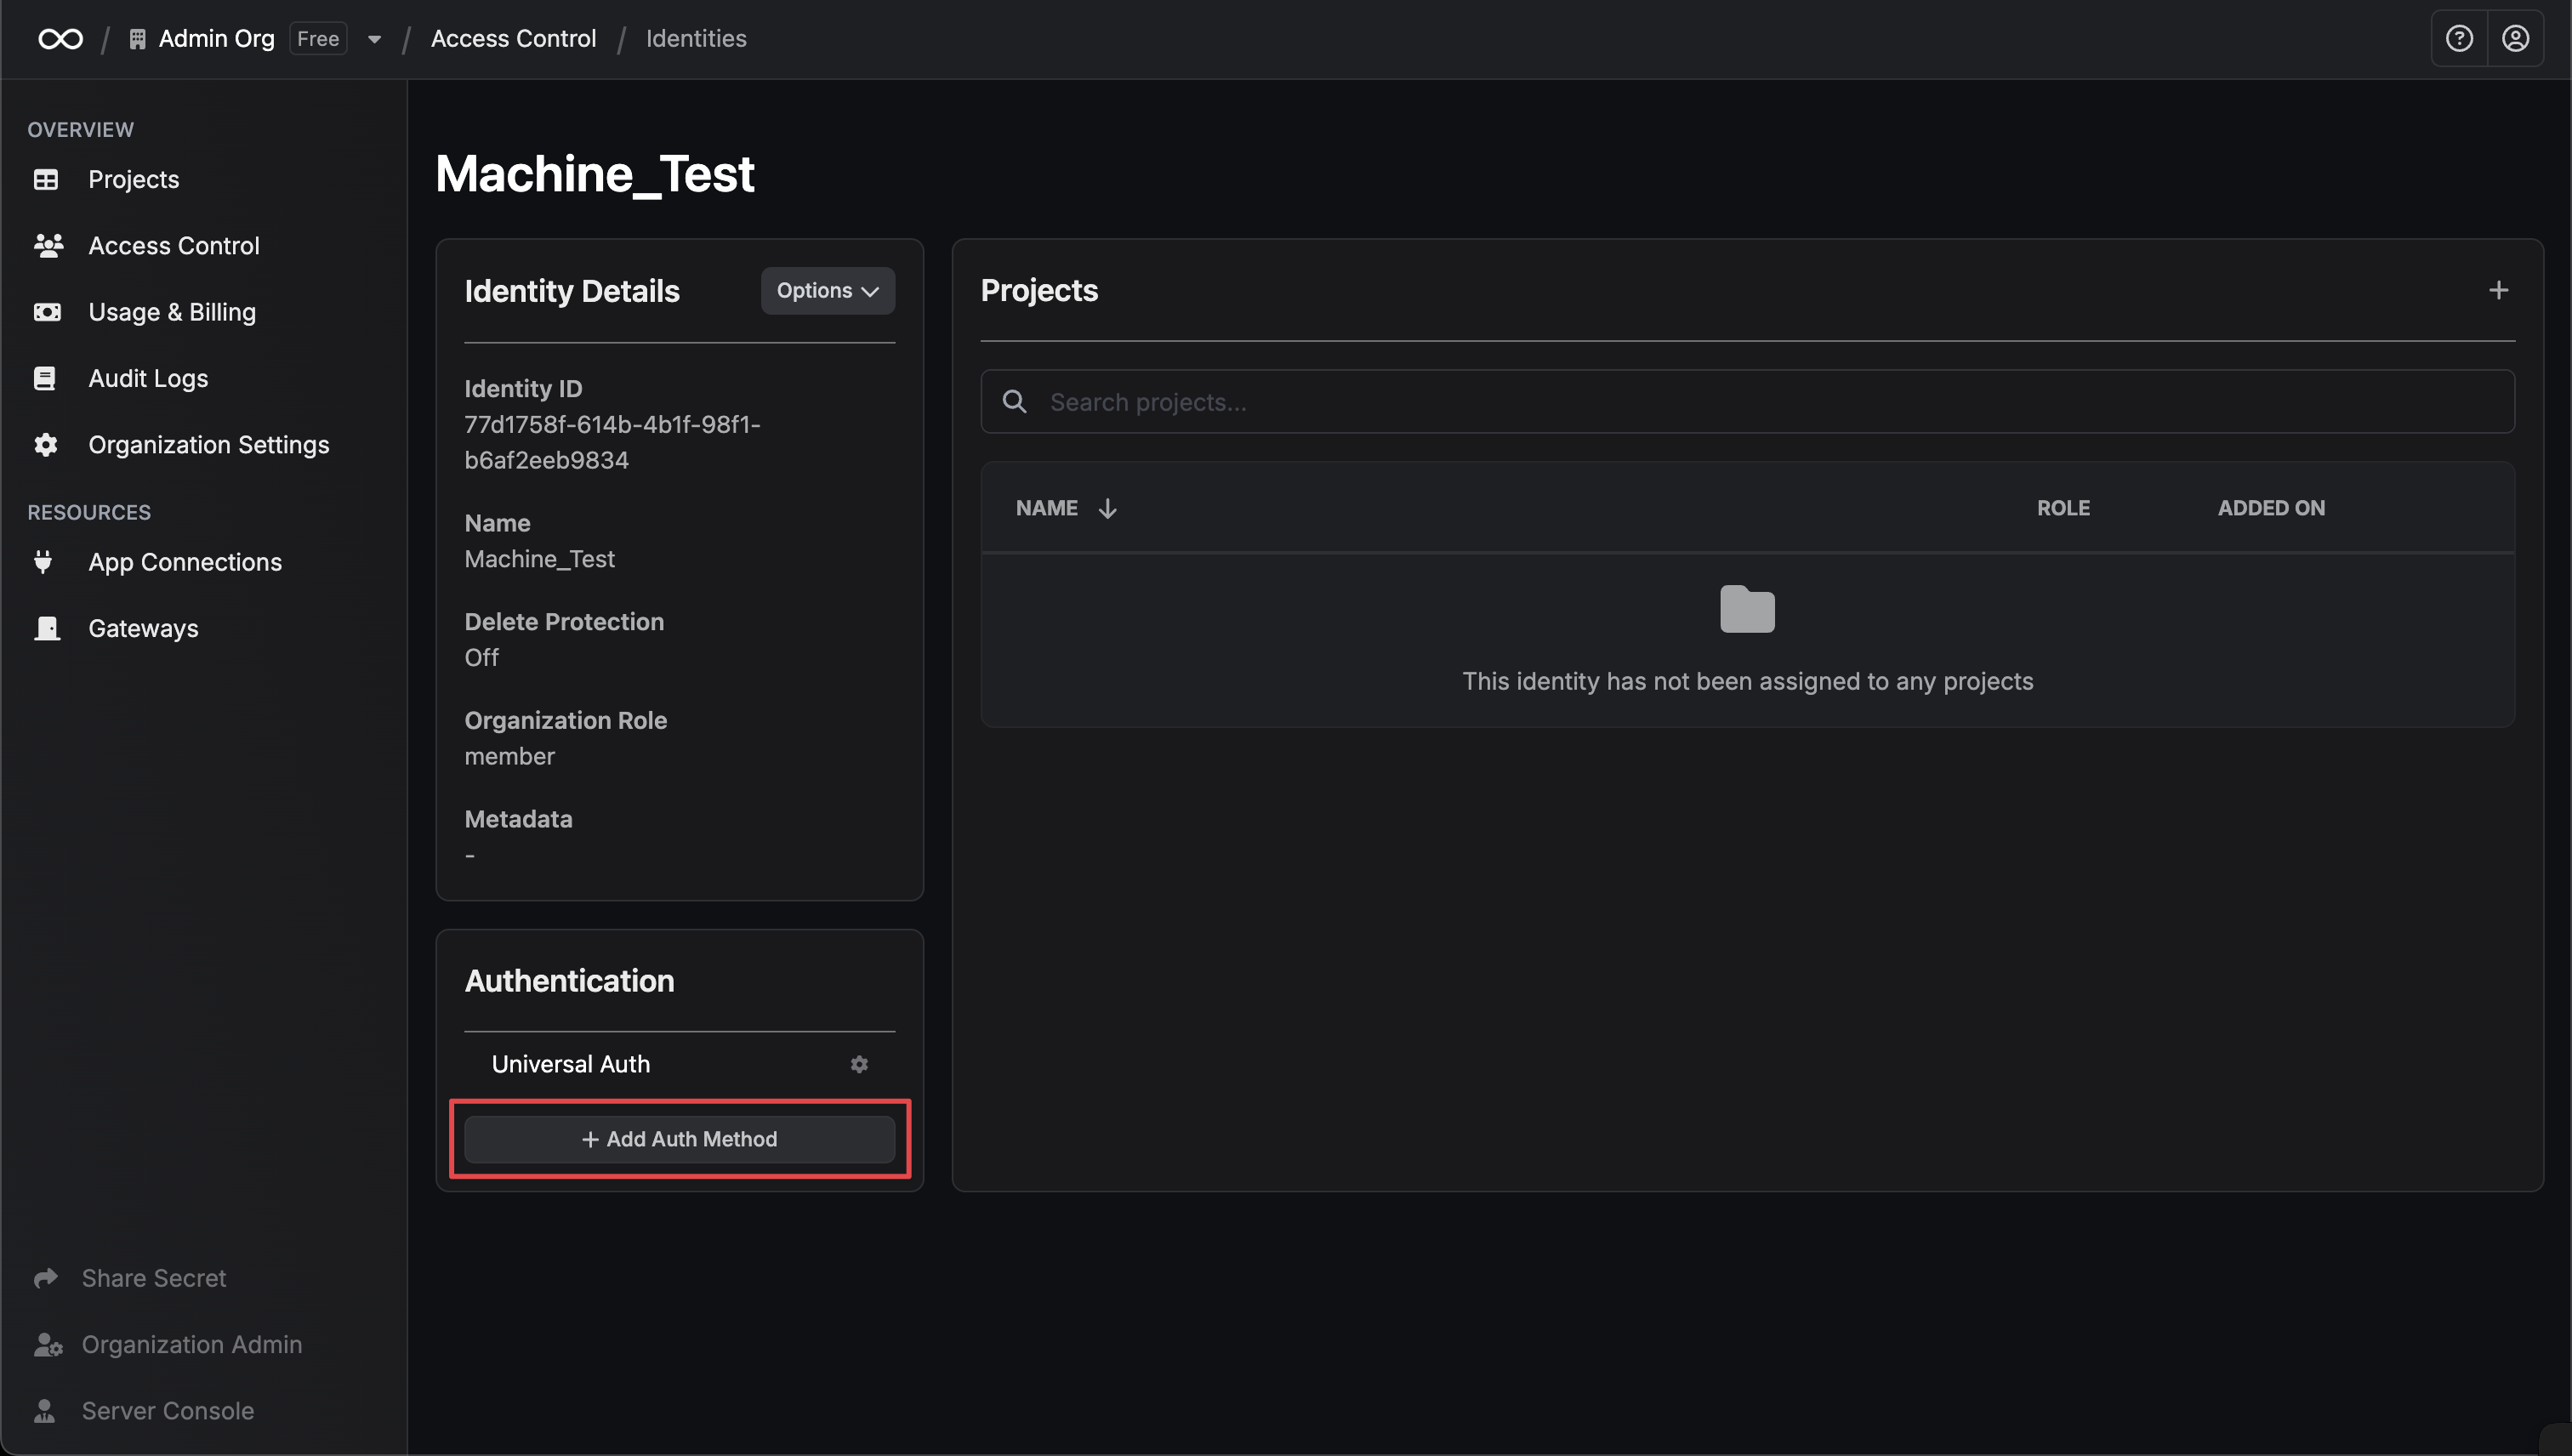
 Since the identity has been configured with [Universal Auth](https://infisical.com/docs/documentation/platform/identities/universal-auth) by default, you should reconfigure it to use Alibaba Cloud Auth instead. To do this, click the cog next to **Universal Auth** and then select **Delete** in the options dropdown.
 Now create a new Alibaba Cloud Auth Method.
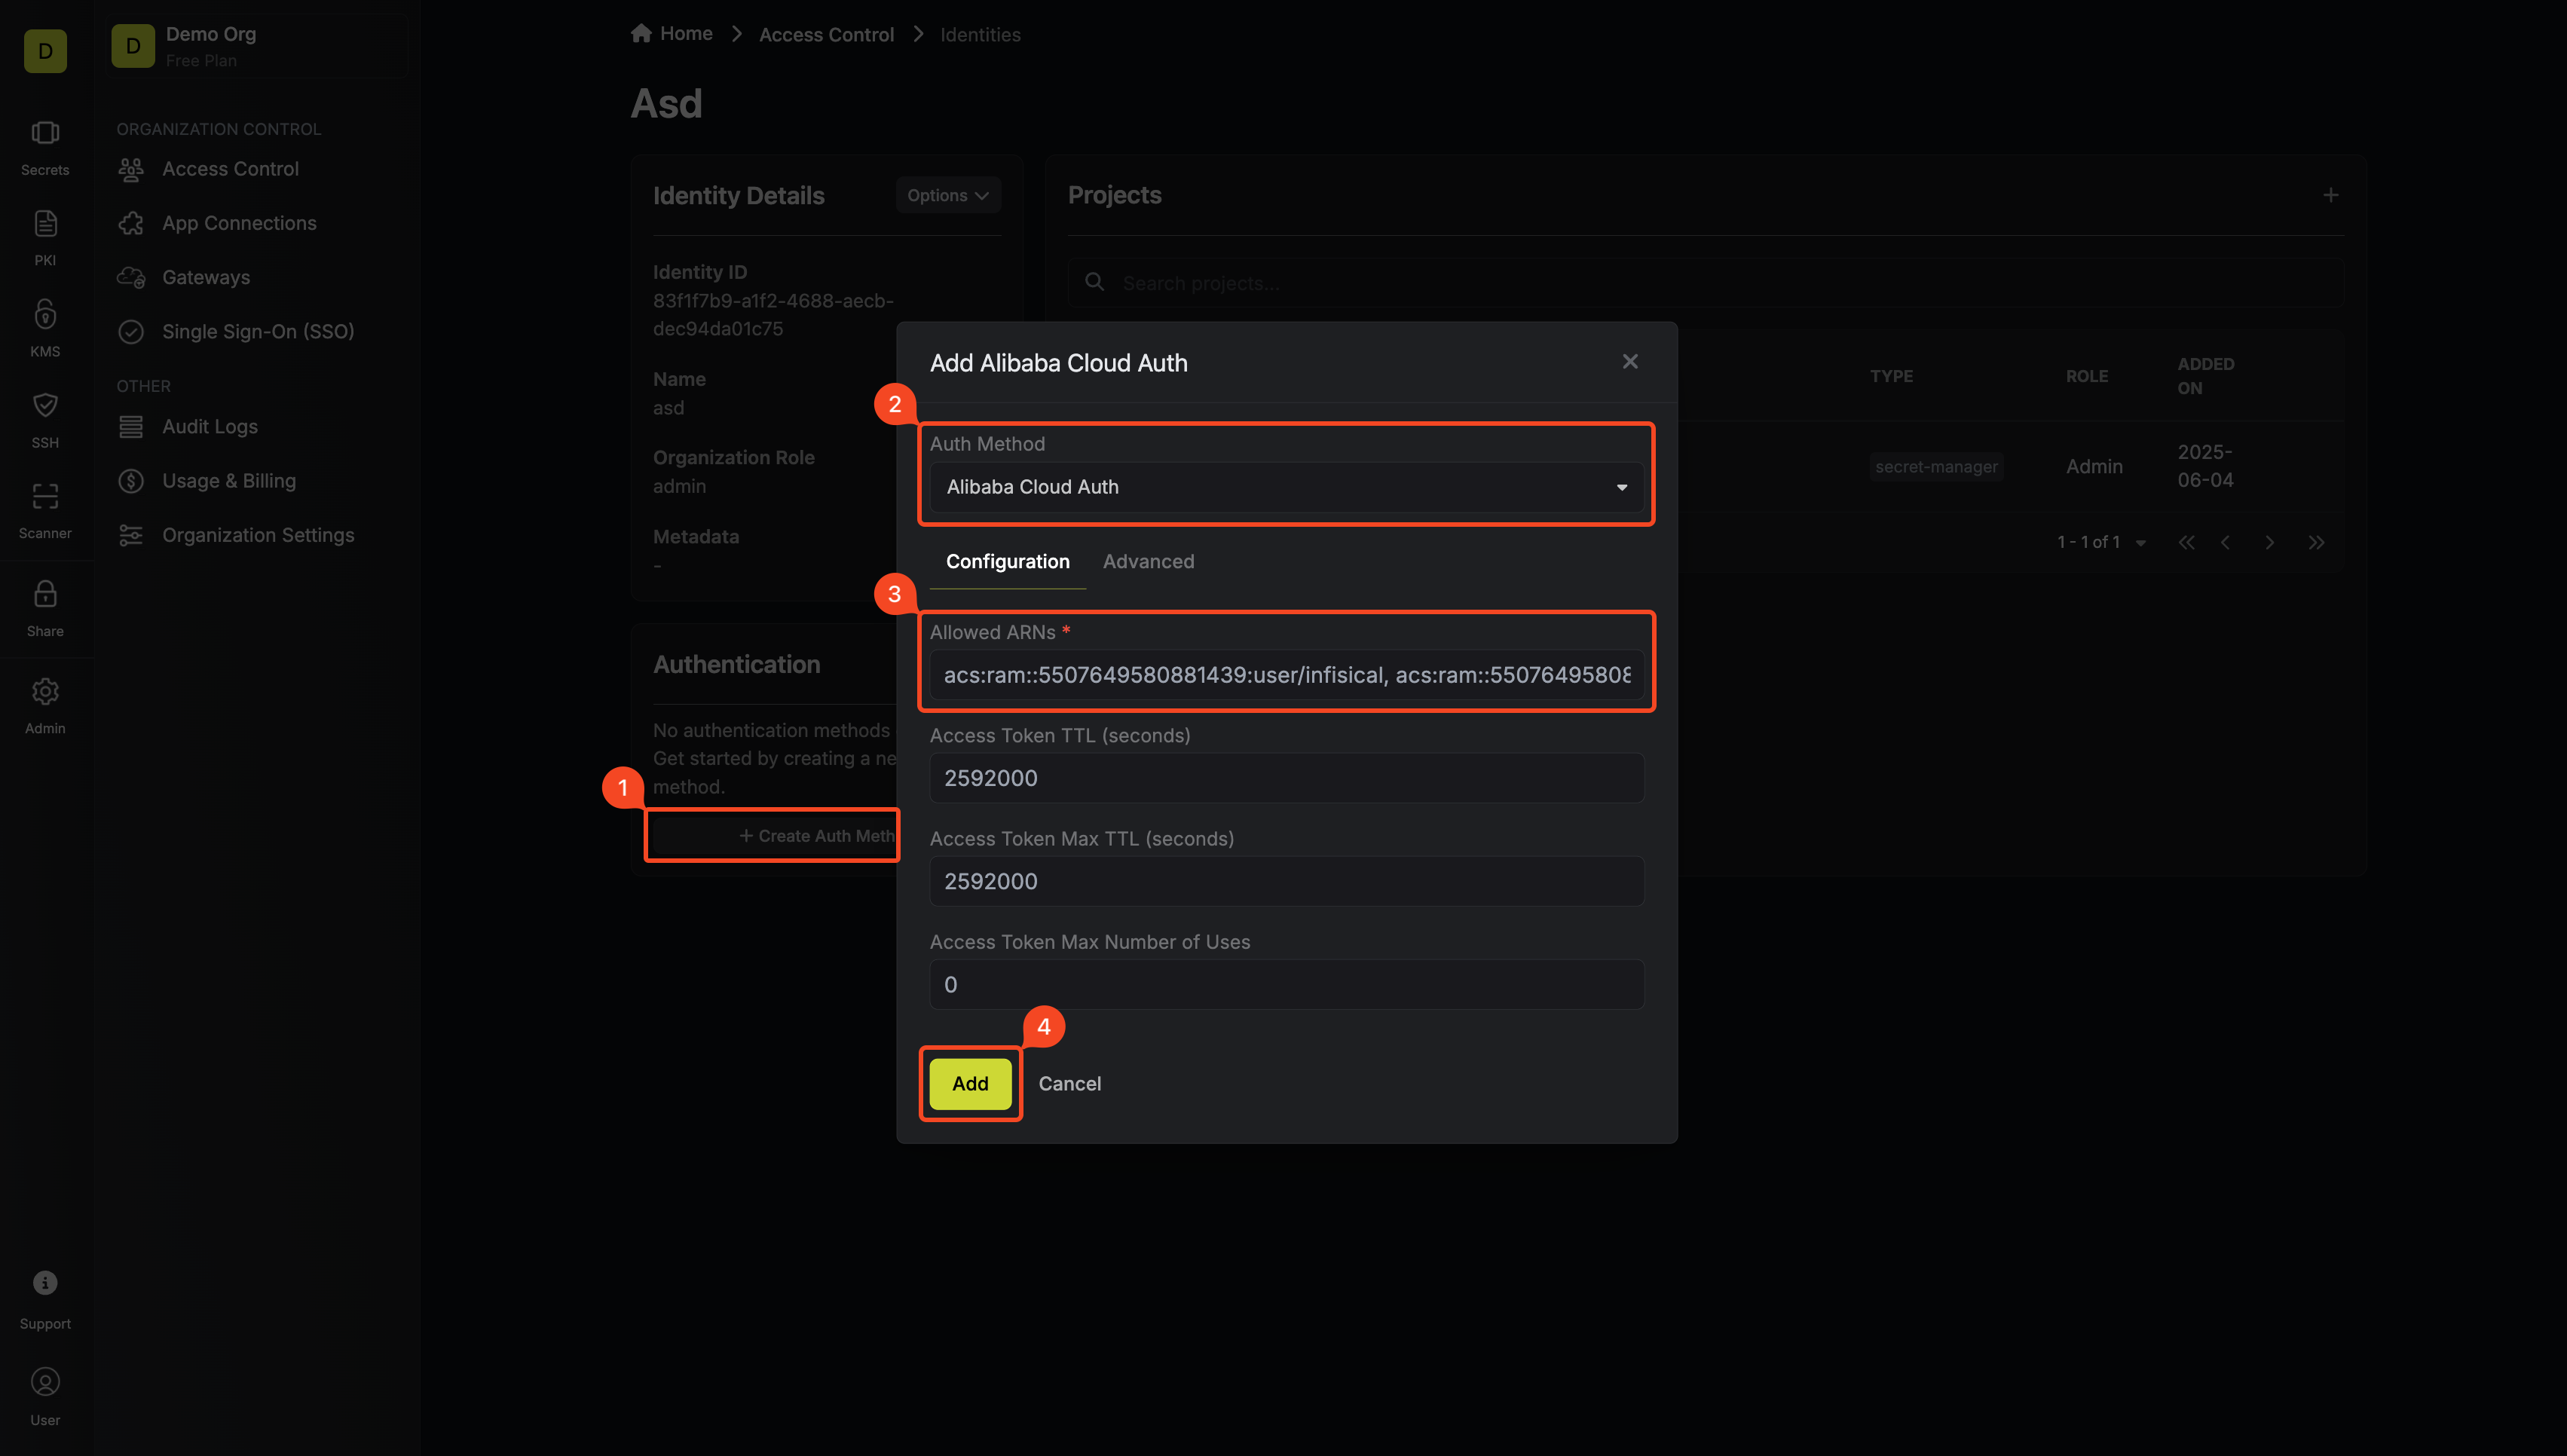 Here's some information about each field:
* **Allowed ARNs:** A comma-separated list of trusted Alibaba Cloud ARNs that are allowed to authenticate with Infisical.
* **Access Token TTL (default is `2592000` equivalent to 30 days):** The lifetime for an access token in seconds. This value will be referenced at renewal time.
* **Access Token Max TTL (default is `2592000` equivalent to 30 days):** The maximum lifetime for an access token in seconds. This value will be referenced at renewal time.
* **Access Token Max Number of Uses (default is `0`):** The maximum number of times that an access token can be used; a value of `0` implies an infinite number of uses.
* **Access Token Trusted IPs:** The IPs or CIDR ranges that access tokens can be used from. By default, each token is given the `0.0.0.0/0`, allowing usage from any network address.
### Adding an identity to a project
In order to allow an identity to access project-level resources such as secrets, you must add it to the relevant projects.
To do this, head over to the project you want to add the identity to and navigate to Project Settings > Access Control > Machine Identities and press **Add Identity**.
Here's some information about each field:
* **Allowed ARNs:** A comma-separated list of trusted Alibaba Cloud ARNs that are allowed to authenticate with Infisical.
* **Access Token TTL (default is `2592000` equivalent to 30 days):** The lifetime for an access token in seconds. This value will be referenced at renewal time.
* **Access Token Max TTL (default is `2592000` equivalent to 30 days):** The maximum lifetime for an access token in seconds. This value will be referenced at renewal time.
* **Access Token Max Number of Uses (default is `0`):** The maximum number of times that an access token can be used; a value of `0` implies an infinite number of uses.
* **Access Token Trusted IPs:** The IPs or CIDR ranges that access tokens can be used from. By default, each token is given the `0.0.0.0/0`, allowing usage from any network address.
### Adding an identity to a project
In order to allow an identity to access project-level resources such as secrets, you must add it to the relevant projects.
To do this, head over to the project you want to add the identity to and navigate to Project Settings > Access Control > Machine Identities and press **Add Identity**.
 Select the identity you want to add to the project and the project-level role you want it to assume. The project role given to the identity will determine what project-level resources this identity can access.
 ### Accessing the Infisical API with the identity
To access the Infisical API as the identity, you need to construct a signed `GetCallerIdentity` request and then make a request to the `/api/v1/auth/alicloud-auth/login` endpoint passing the signed data and signature.
Below is an example of how you can authenticate with Infisical using NodeJS.
```ts theme={"dark"}
import crypto from "crypto";
// We highly recommend using environment variables instead of hardcoding these values
const ALICLOUD_ACCESS_KEY_ID = "...";
const ALICLOUD_ACCESS_KEY_SECRET = "...";
const params: { [key: string]: string } = {
Action: "GetCallerIdentity",
Format: "JSON",
Version: "2015-04-01",
AccessKeyId: ALICLOUD_ACCESS_KEY_ID,
SignatureMethod: "HMAC-SHA1",
Timestamp: new Date().toISOString(),
SignatureVersion: "1.0",
SignatureNonce: crypto.randomBytes(16).toString("hex"),
};
const canonicalizedQueryString = Object.keys(params)
.sort()
.map((key) => `${encodeURIComponent(key)}=${encodeURIComponent(params[key])}`)
.join("&");
const stringToSign = `GET&%2F&${encodeURIComponent(canonicalizedQueryString)}`;
const signature = crypto
.createHmac("sha1", `${ALICLOUD_ACCESS_KEY_SECRET}&`)
.update(stringToSign)
.digest("base64");
const res = await fetch(
"https://app.infisical.com/api/v1/auth/alicloud-auth/login",
{
method: "POST",
headers: {
"Content-Type": "application/json",
},
body: JSON.stringify({
identityId: "...", // Replace with your identity ID
Signature: signature,
...params,
}),
},
);
const json = await res.json();
console.log("Infisical Response:", JSON.stringify(json));
```
### Accessing the Infisical API with the identity
To access the Infisical API as the identity, you need to construct a signed `GetCallerIdentity` request and then make a request to the `/api/v1/auth/alicloud-auth/login` endpoint passing the signed data and signature.
Below is an example of how you can authenticate with Infisical using NodeJS.
```ts theme={"dark"}
import crypto from "crypto";
// We highly recommend using environment variables instead of hardcoding these values
const ALICLOUD_ACCESS_KEY_ID = "...";
const ALICLOUD_ACCESS_KEY_SECRET = "...";
const params: { [key: string]: string } = {
Action: "GetCallerIdentity",
Format: "JSON",
Version: "2015-04-01",
AccessKeyId: ALICLOUD_ACCESS_KEY_ID,
SignatureMethod: "HMAC-SHA1",
Timestamp: new Date().toISOString(),
SignatureVersion: "1.0",
SignatureNonce: crypto.randomBytes(16).toString("hex"),
};
const canonicalizedQueryString = Object.keys(params)
.sort()
.map((key) => `${encodeURIComponent(key)}=${encodeURIComponent(params[key])}`)
.join("&");
const stringToSign = `GET&%2F&${encodeURIComponent(canonicalizedQueryString)}`;
const signature = crypto
.createHmac("sha1", `${ALICLOUD_ACCESS_KEY_SECRET}&`)
.update(stringToSign)
.digest("base64");
const res = await fetch(
"https://app.infisical.com/api/v1/auth/alicloud-auth/login",
{
method: "POST",
headers: {
"Content-Type": "application/json",
},
body: JSON.stringify({
identityId: "...", // Replace with your identity ID
Signature: signature,
...params,
}),
},
);
const json = await res.json();
console.log("Infisical Response:", JSON.stringify(json));
```
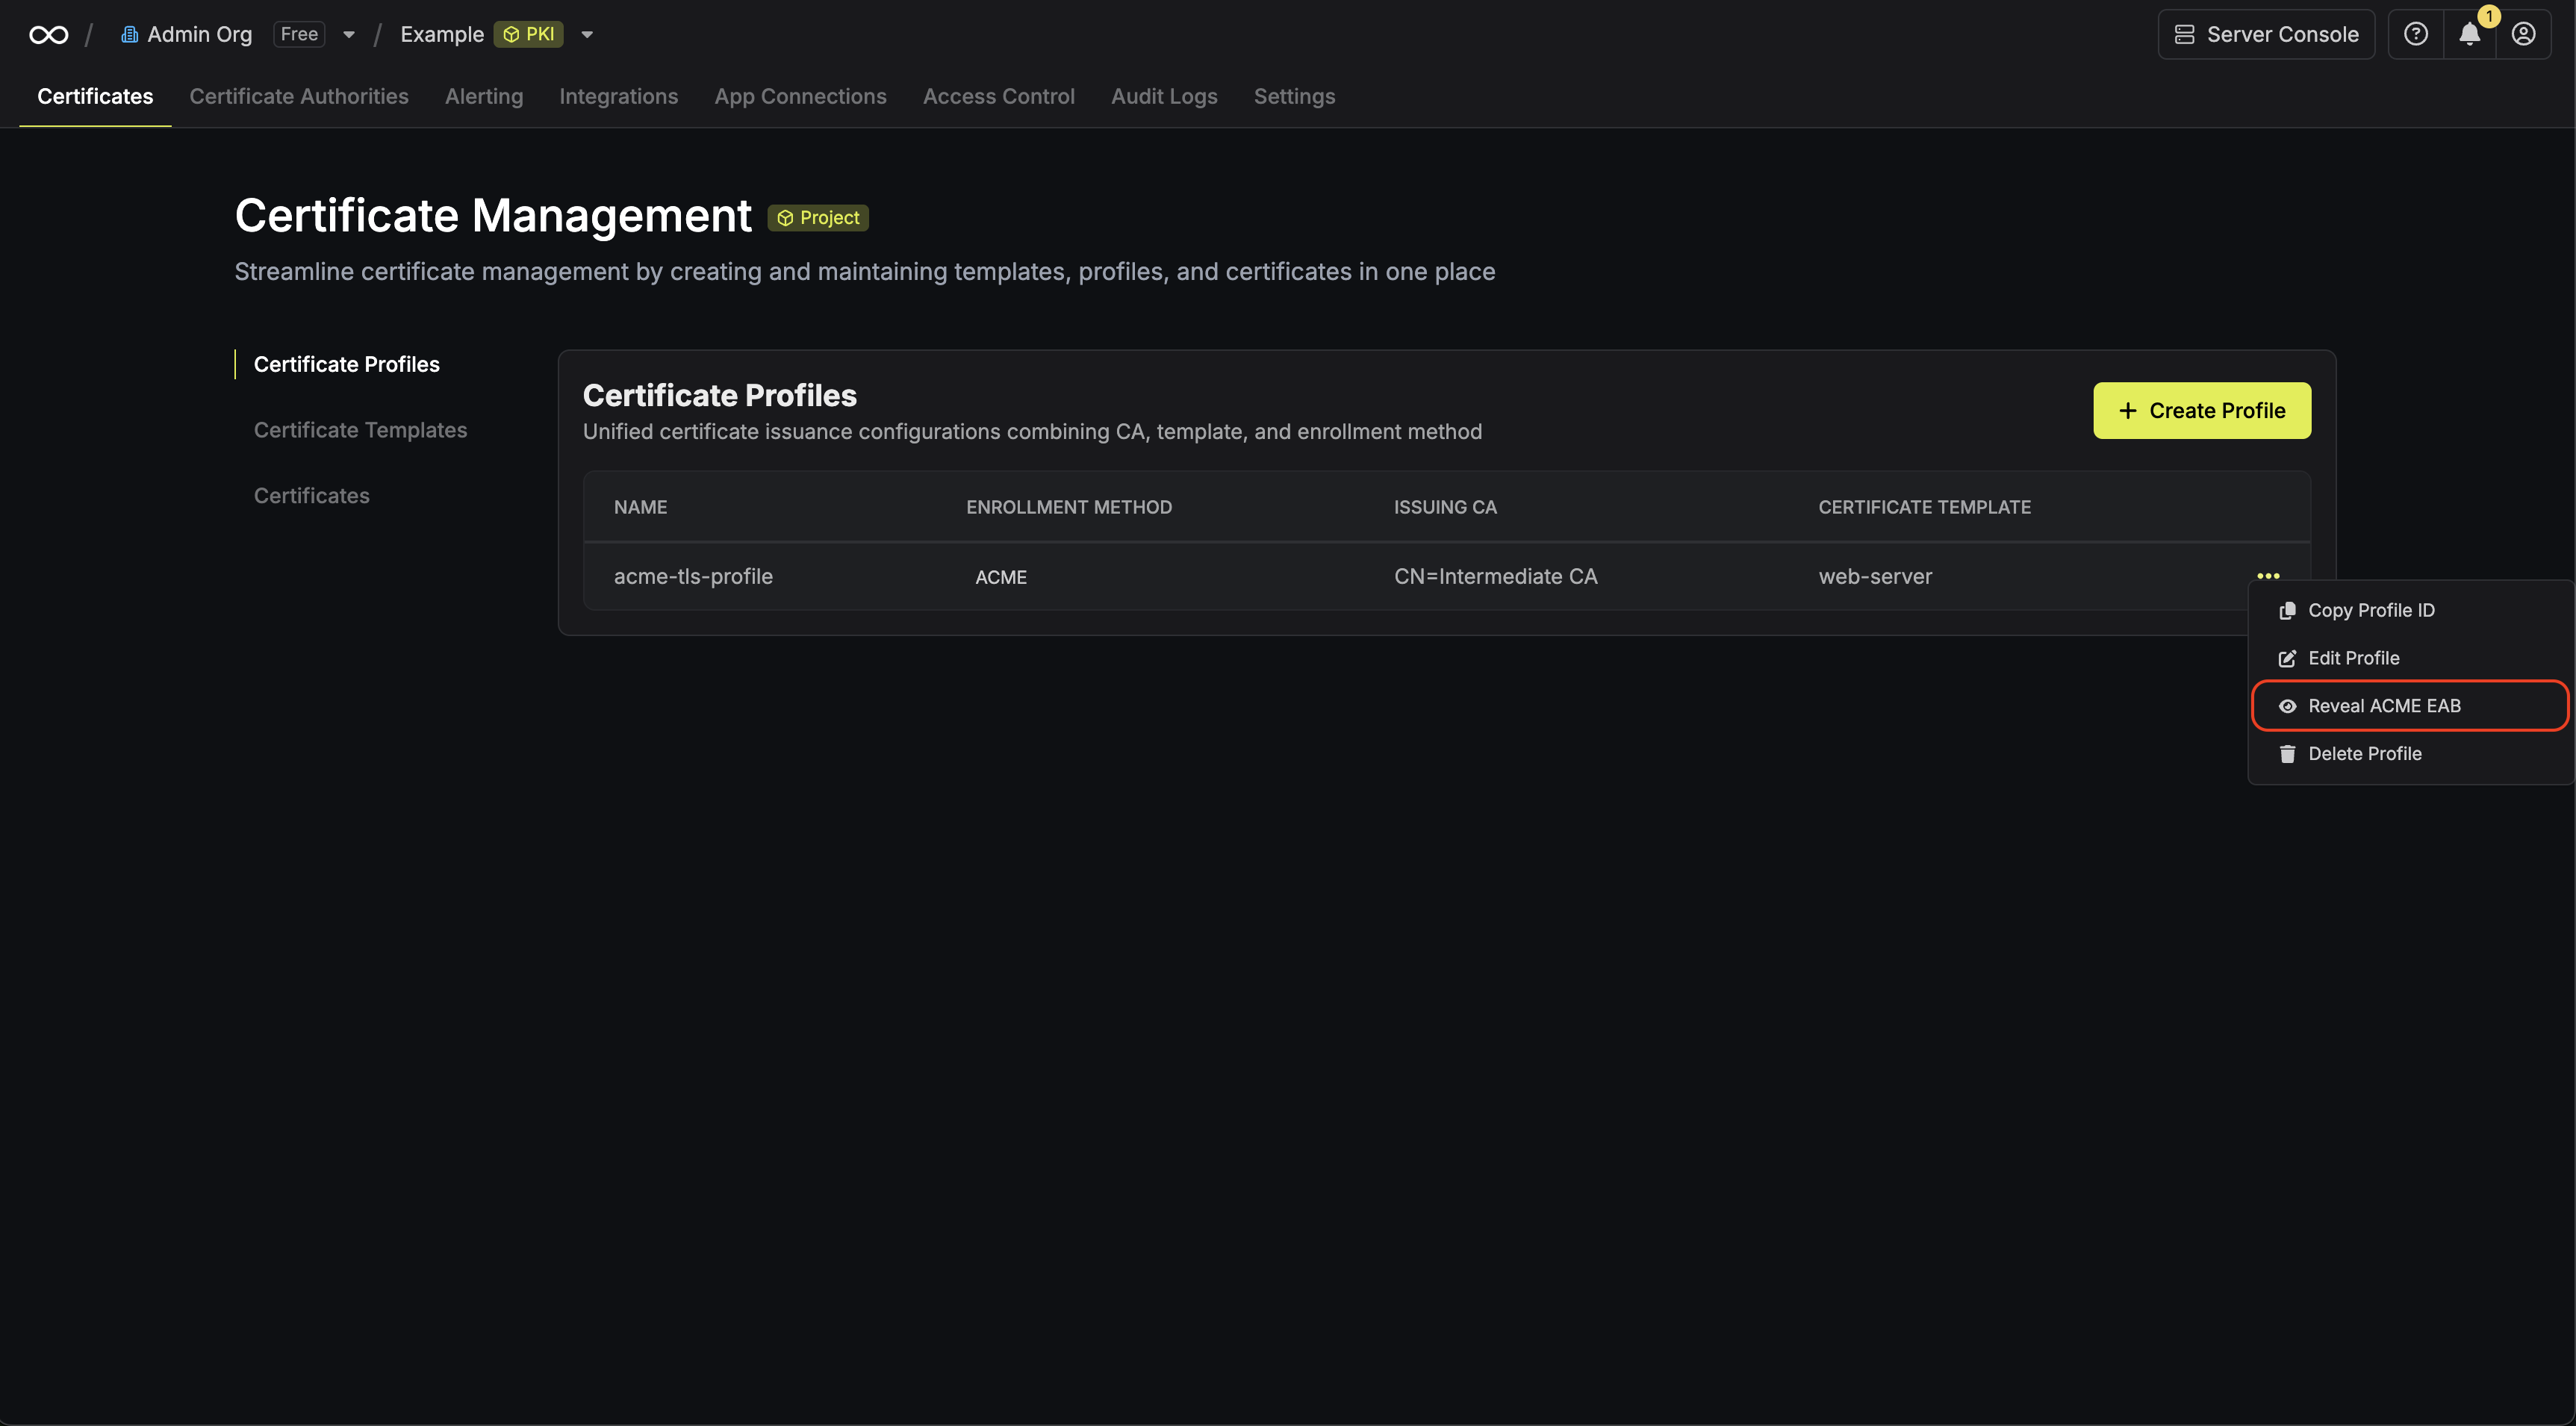
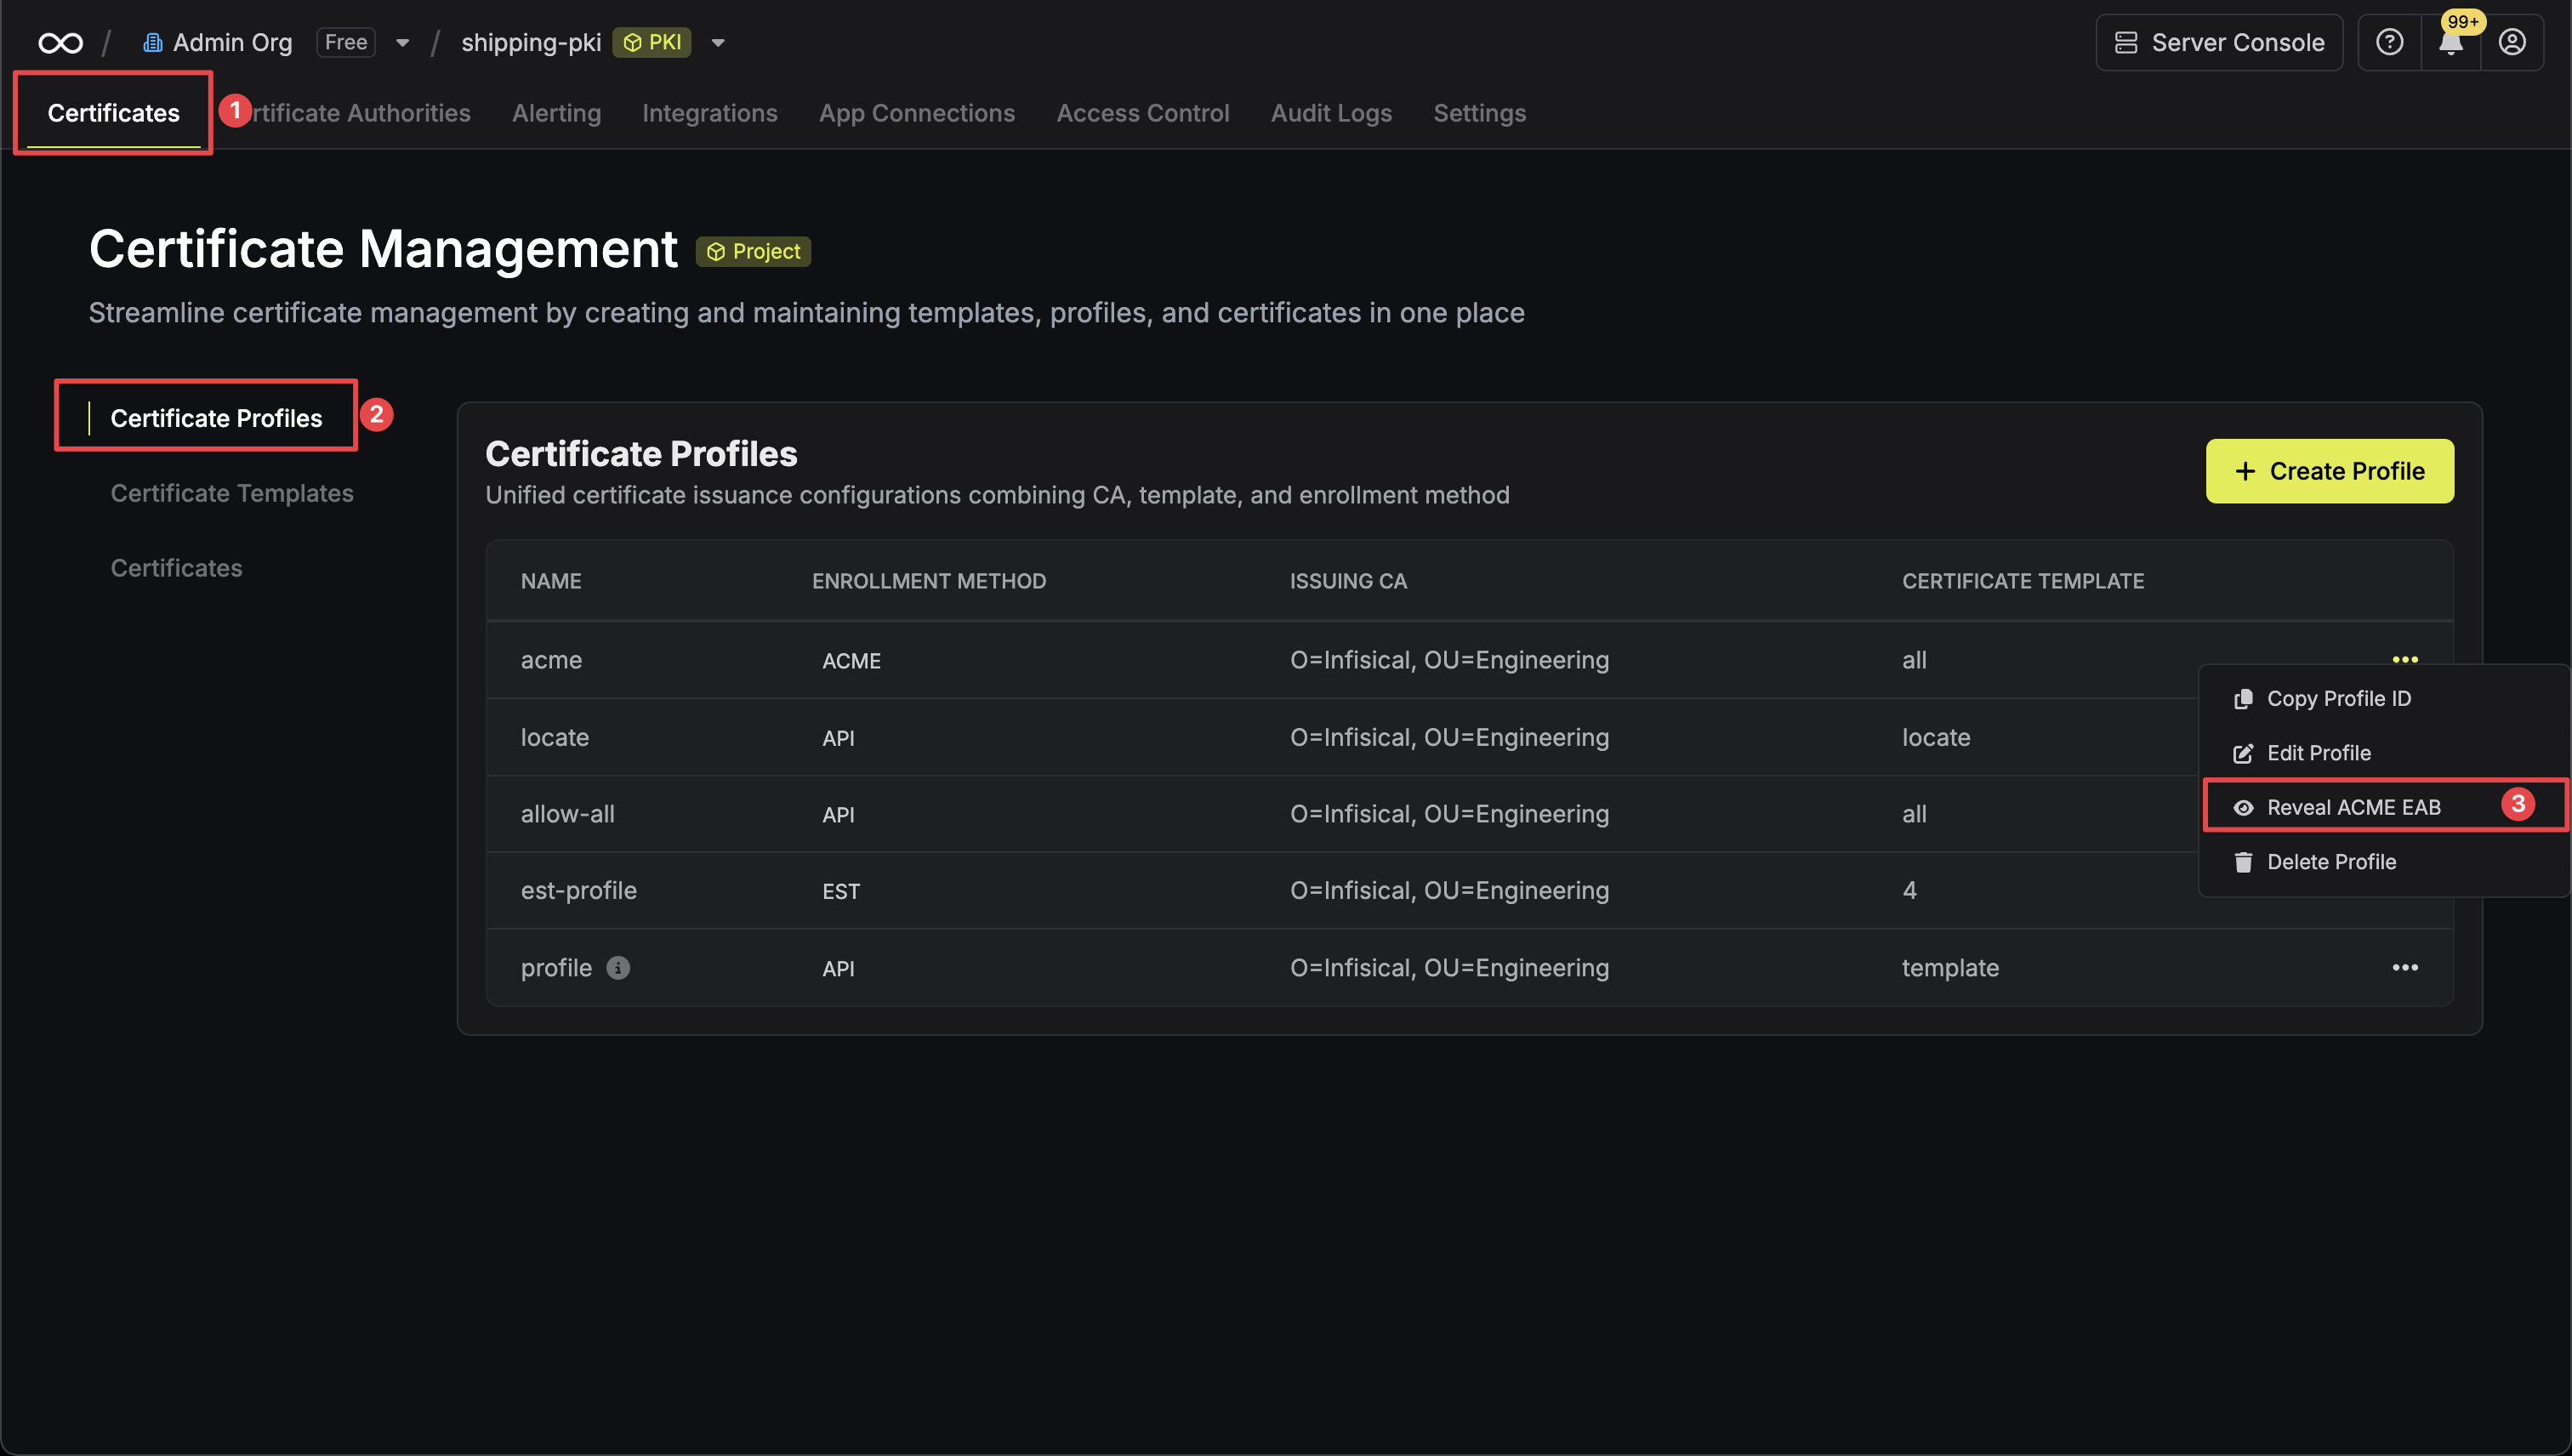 Click the **Reveal ACME EAB** option to view the ACME configuration details.
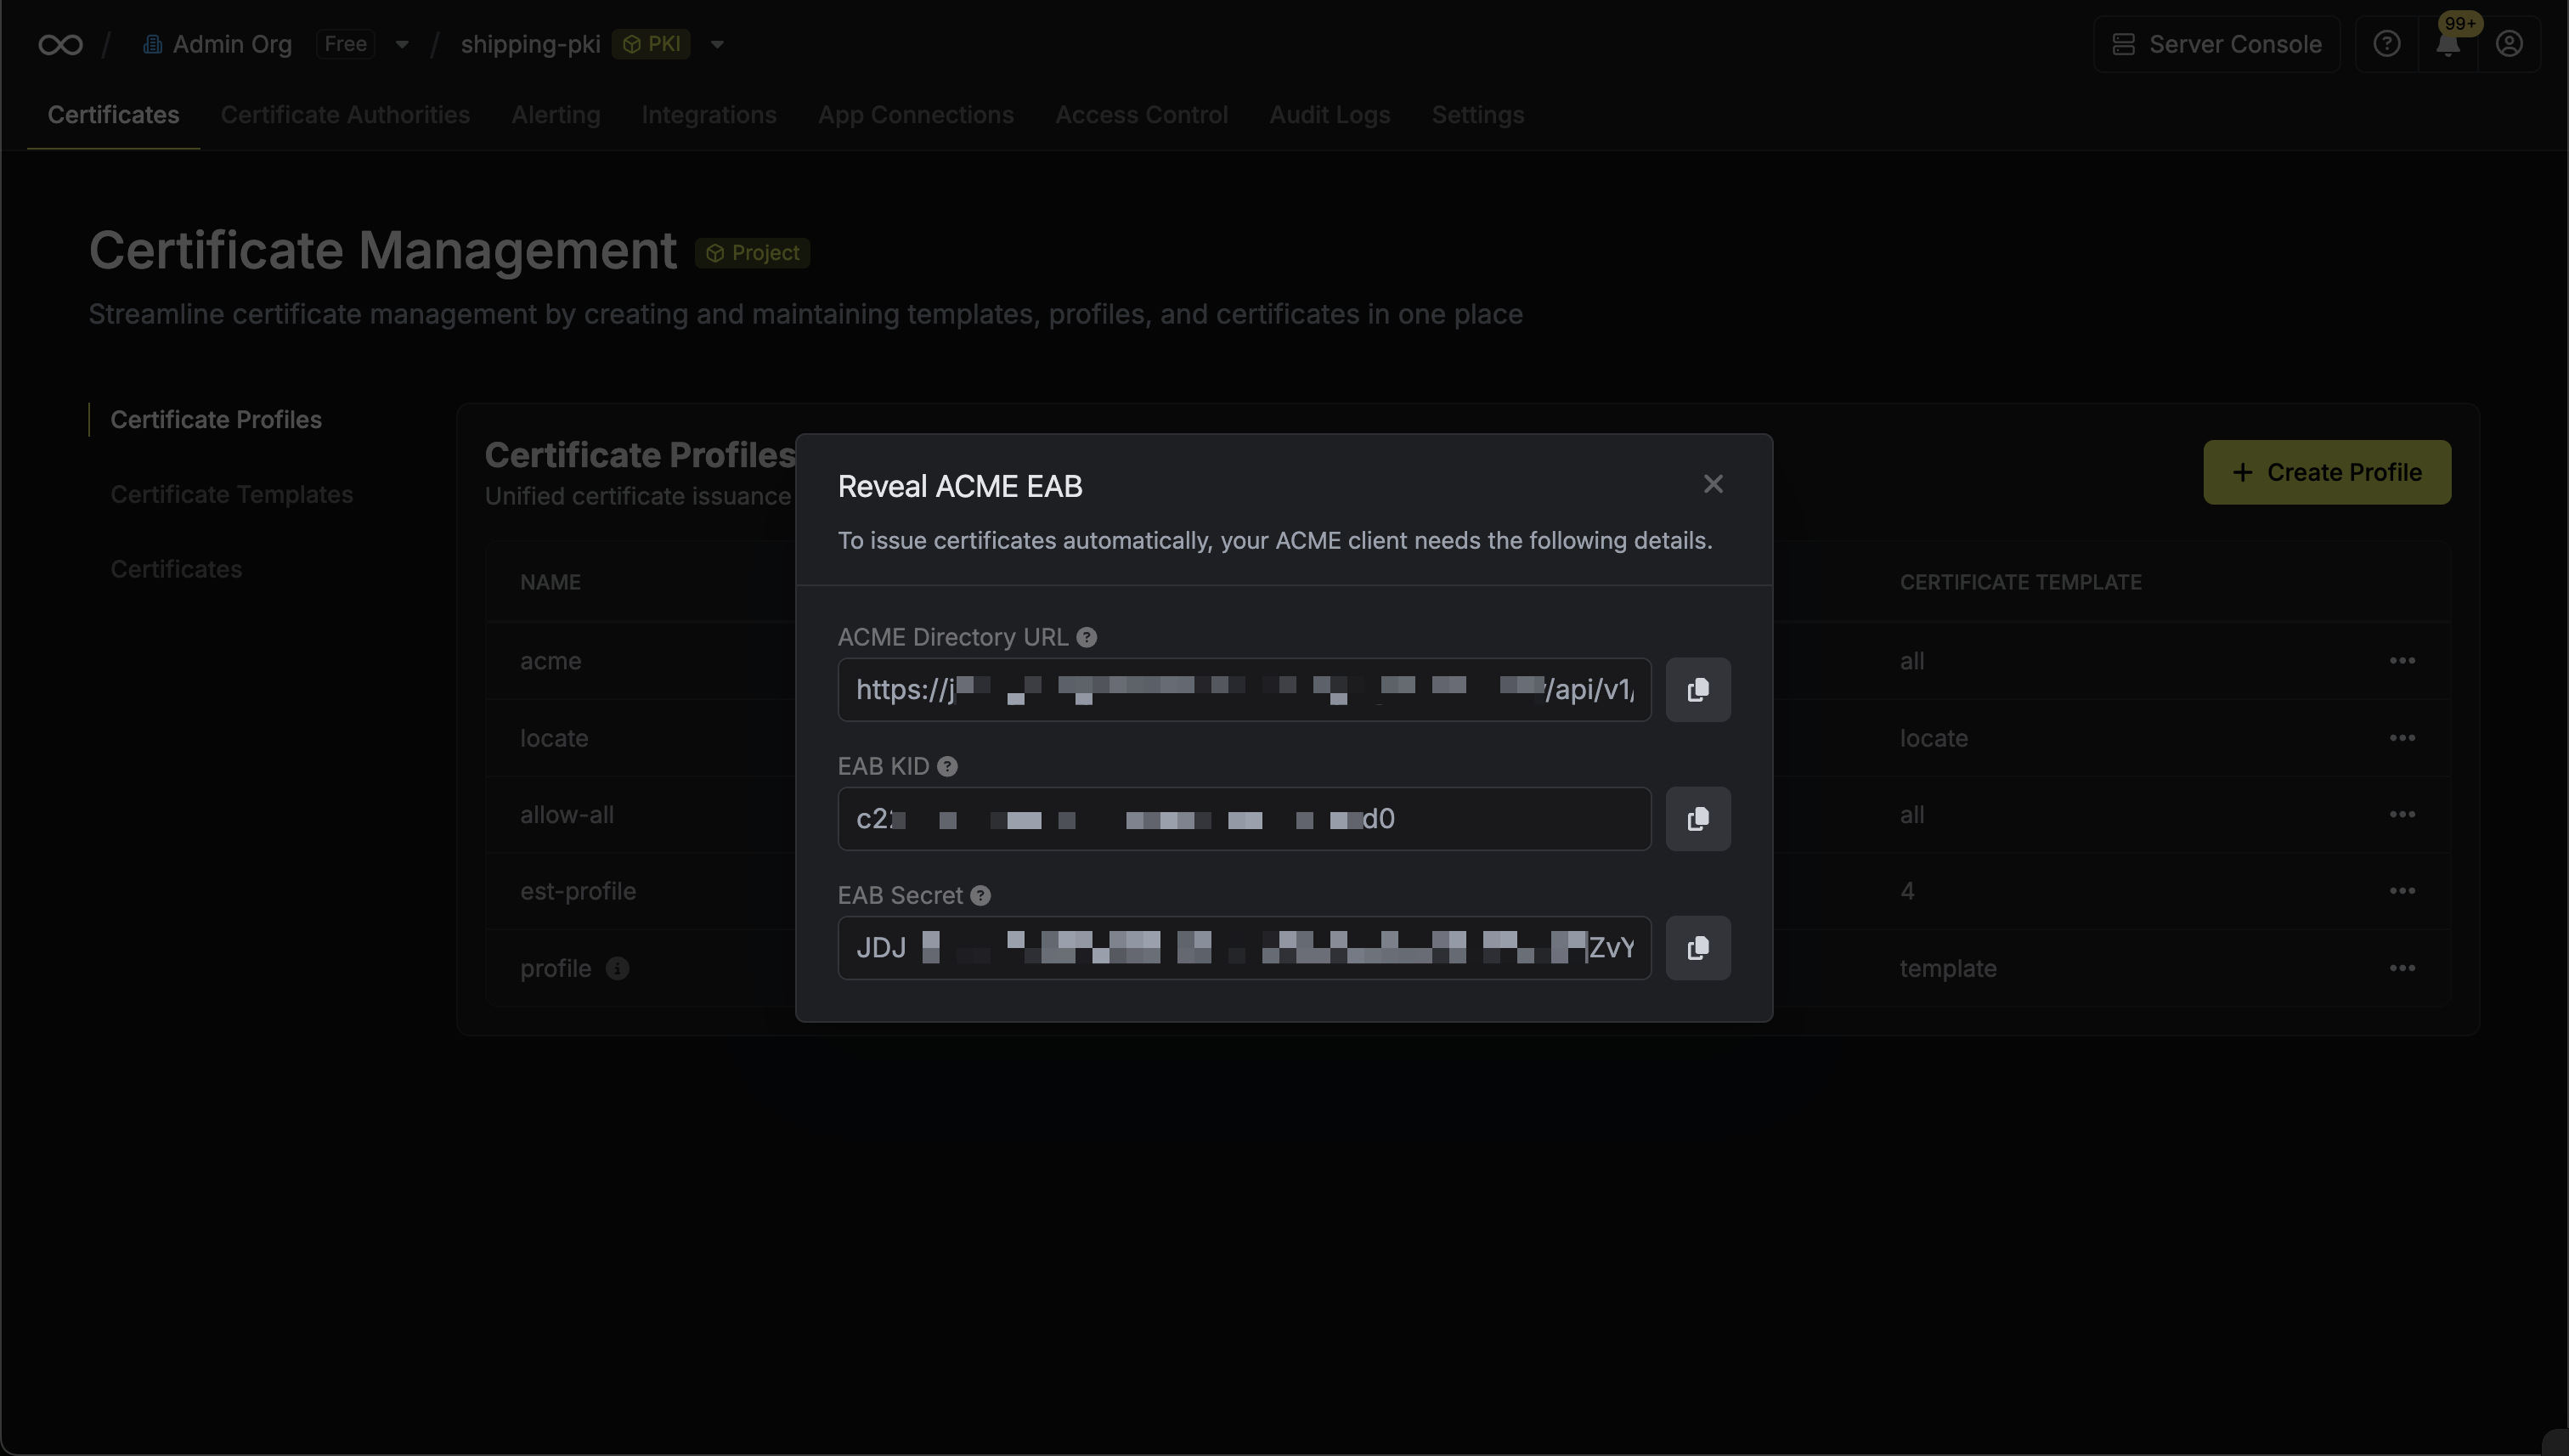 From the ACME configuration, gather the following values:
* ACME Directory URL: The URL that Certbot will use to communicate with Infisical's ACME server. This takes the form `https://your-infisical-instance.com/api/v1/cert-manager/certificate-profiles/{profile-id}/acme/directory`.
* EAB Key Identifier (KID): A unique identifier that tells Infisical which ACME account is making the request.
* EAB Secret: A secret key that authenticates your ACME client with Infisical.
From the ACME configuration, gather the following values:
* ACME Directory URL: The URL that Certbot will use to communicate with Infisical's ACME server. This takes the form `https://your-infisical-instance.com/api/v1/cert-manager/certificate-profiles/{profile-id}/acme/directory`.
* EAB Key Identifier (KID): A unique identifier that tells Infisical which ACME account is making the request.
* EAB Secret: A secret key that authenticates your ACME client with Infisical.
 Here, select the certificate profile from step 1 that will be used to issue the certificate and fill out the rest of the details for the certificate to be issued.


{filteredConnections.length} app connection {filteredConnections.length !== 1 ? "s" : ""} found {selectedCategory !== "All" && ` in ${selectedCategory}`} {searchTerm && ` for "${searchTerm}"`}
{connection.description}
No app connections found matching your criteria
{searchTerm &&Try adjusting your search terms or filters
}

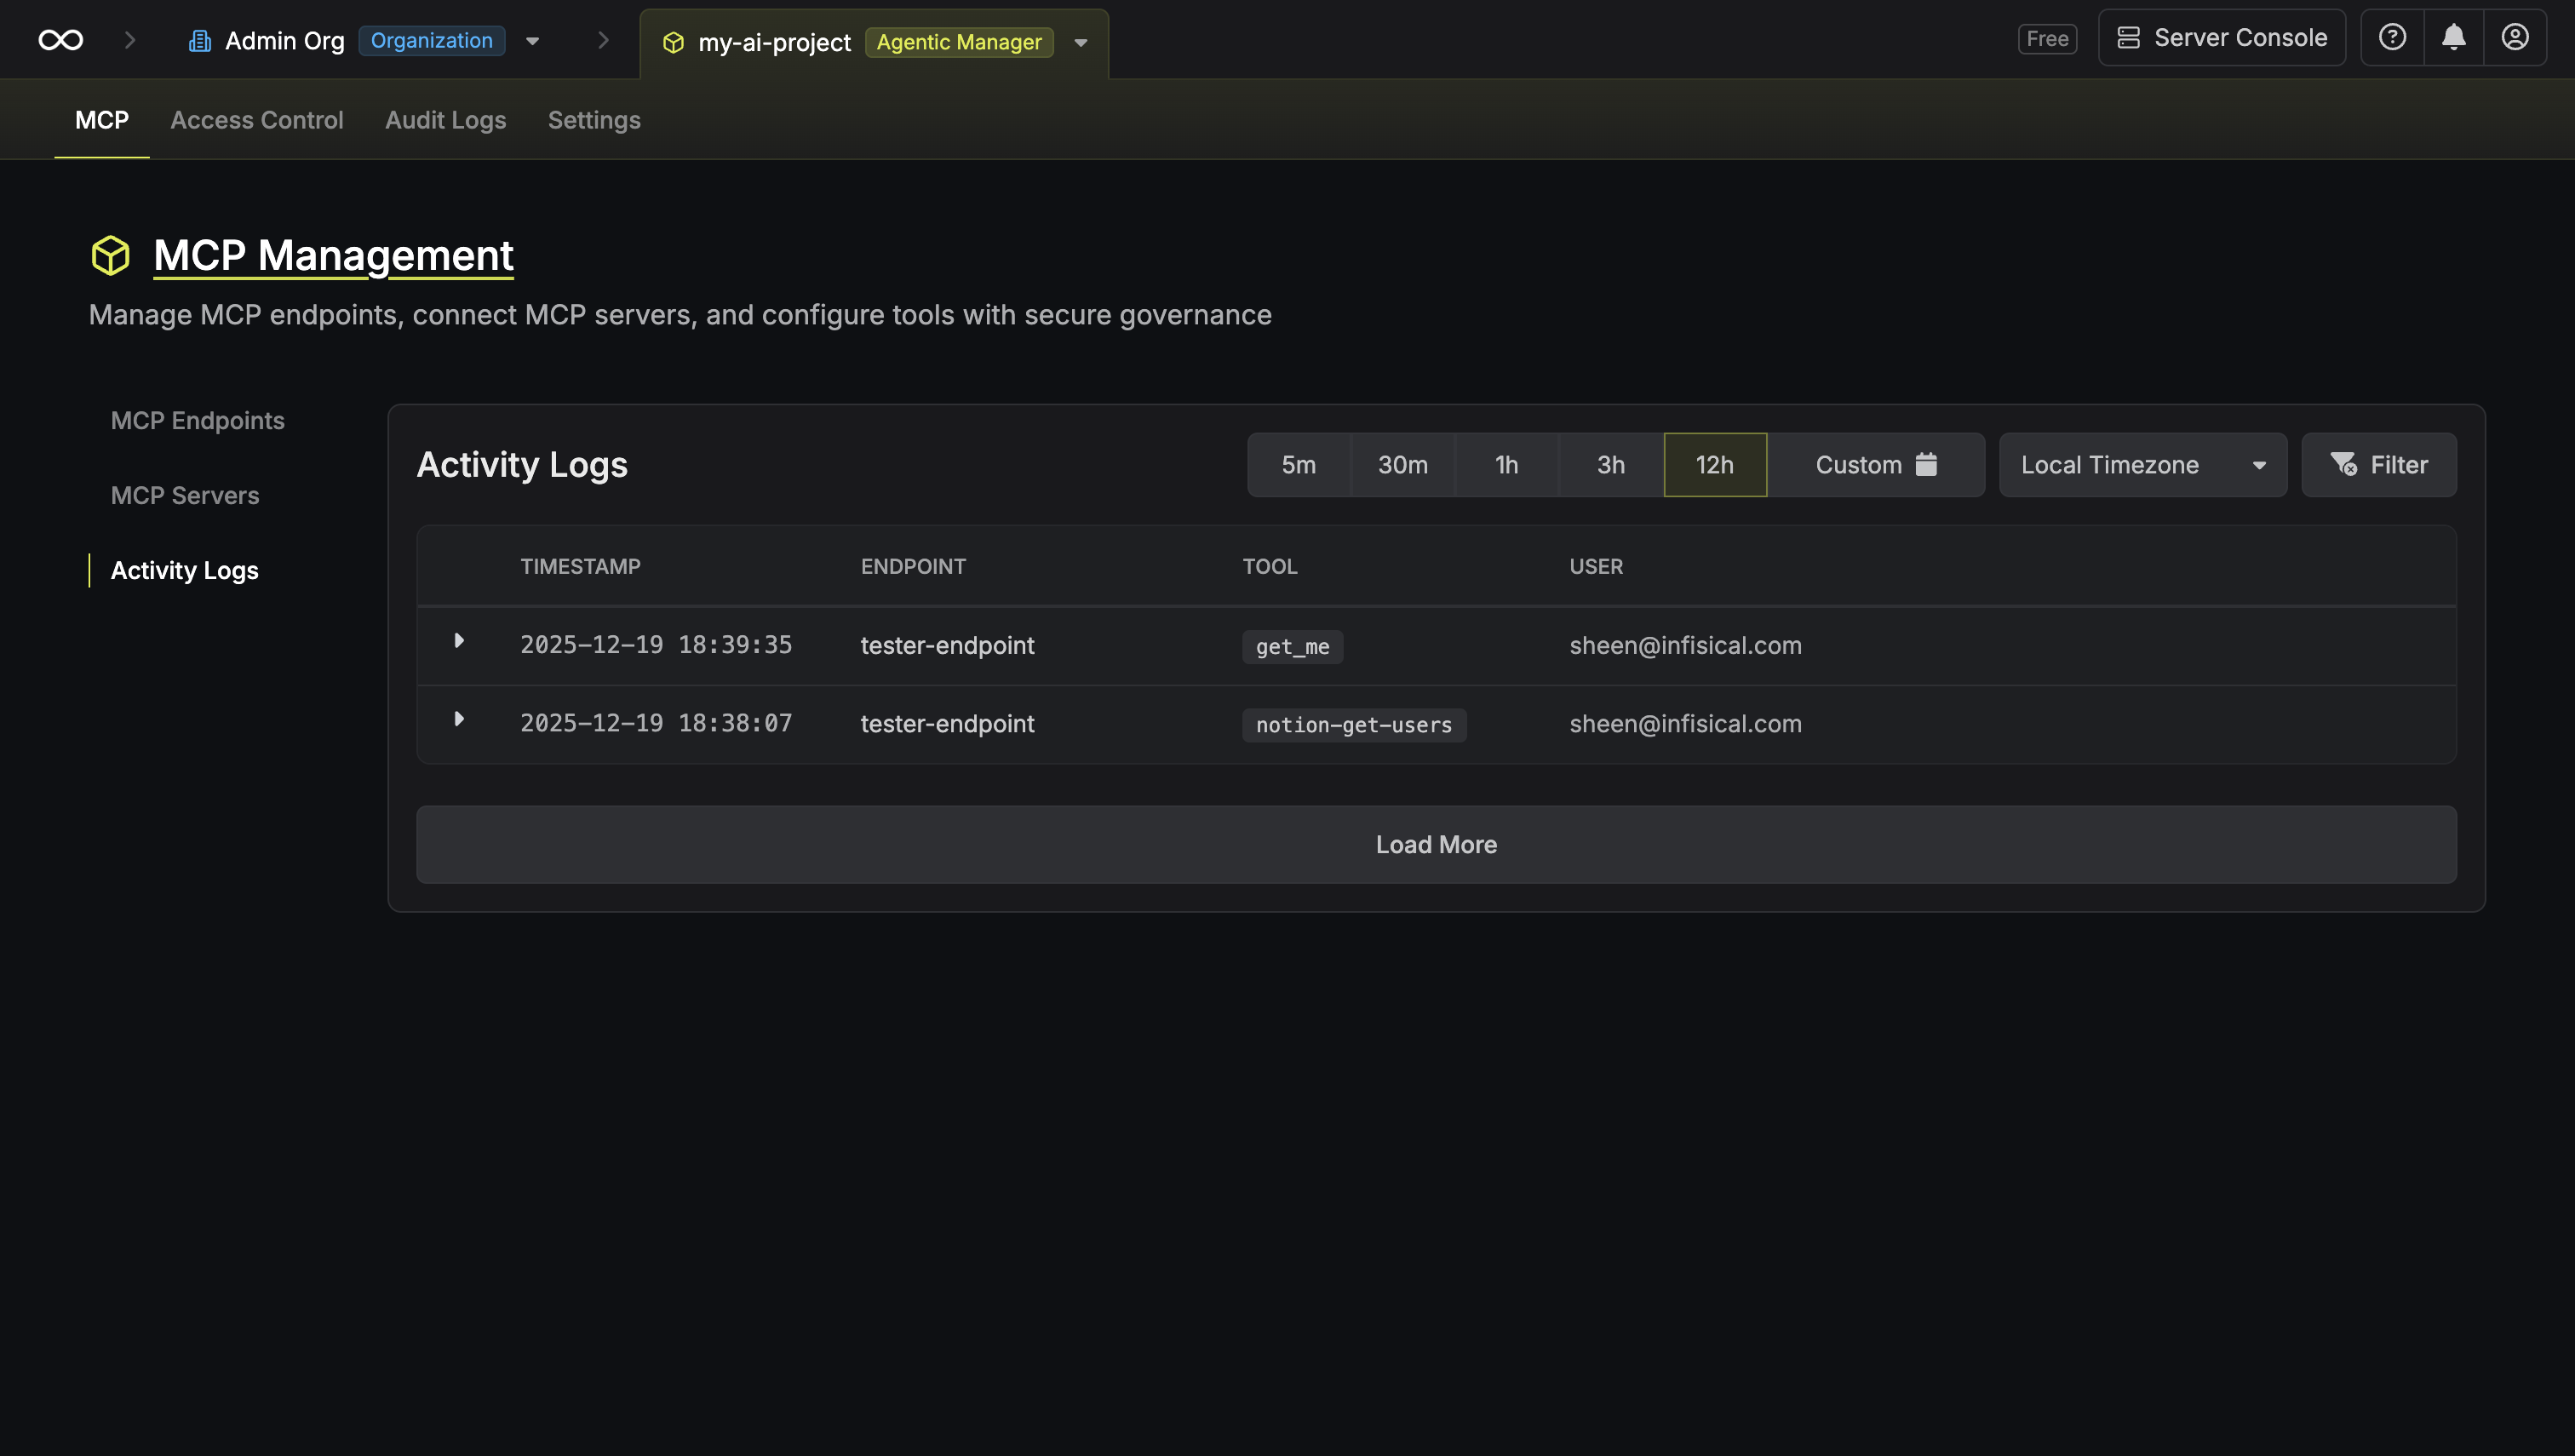
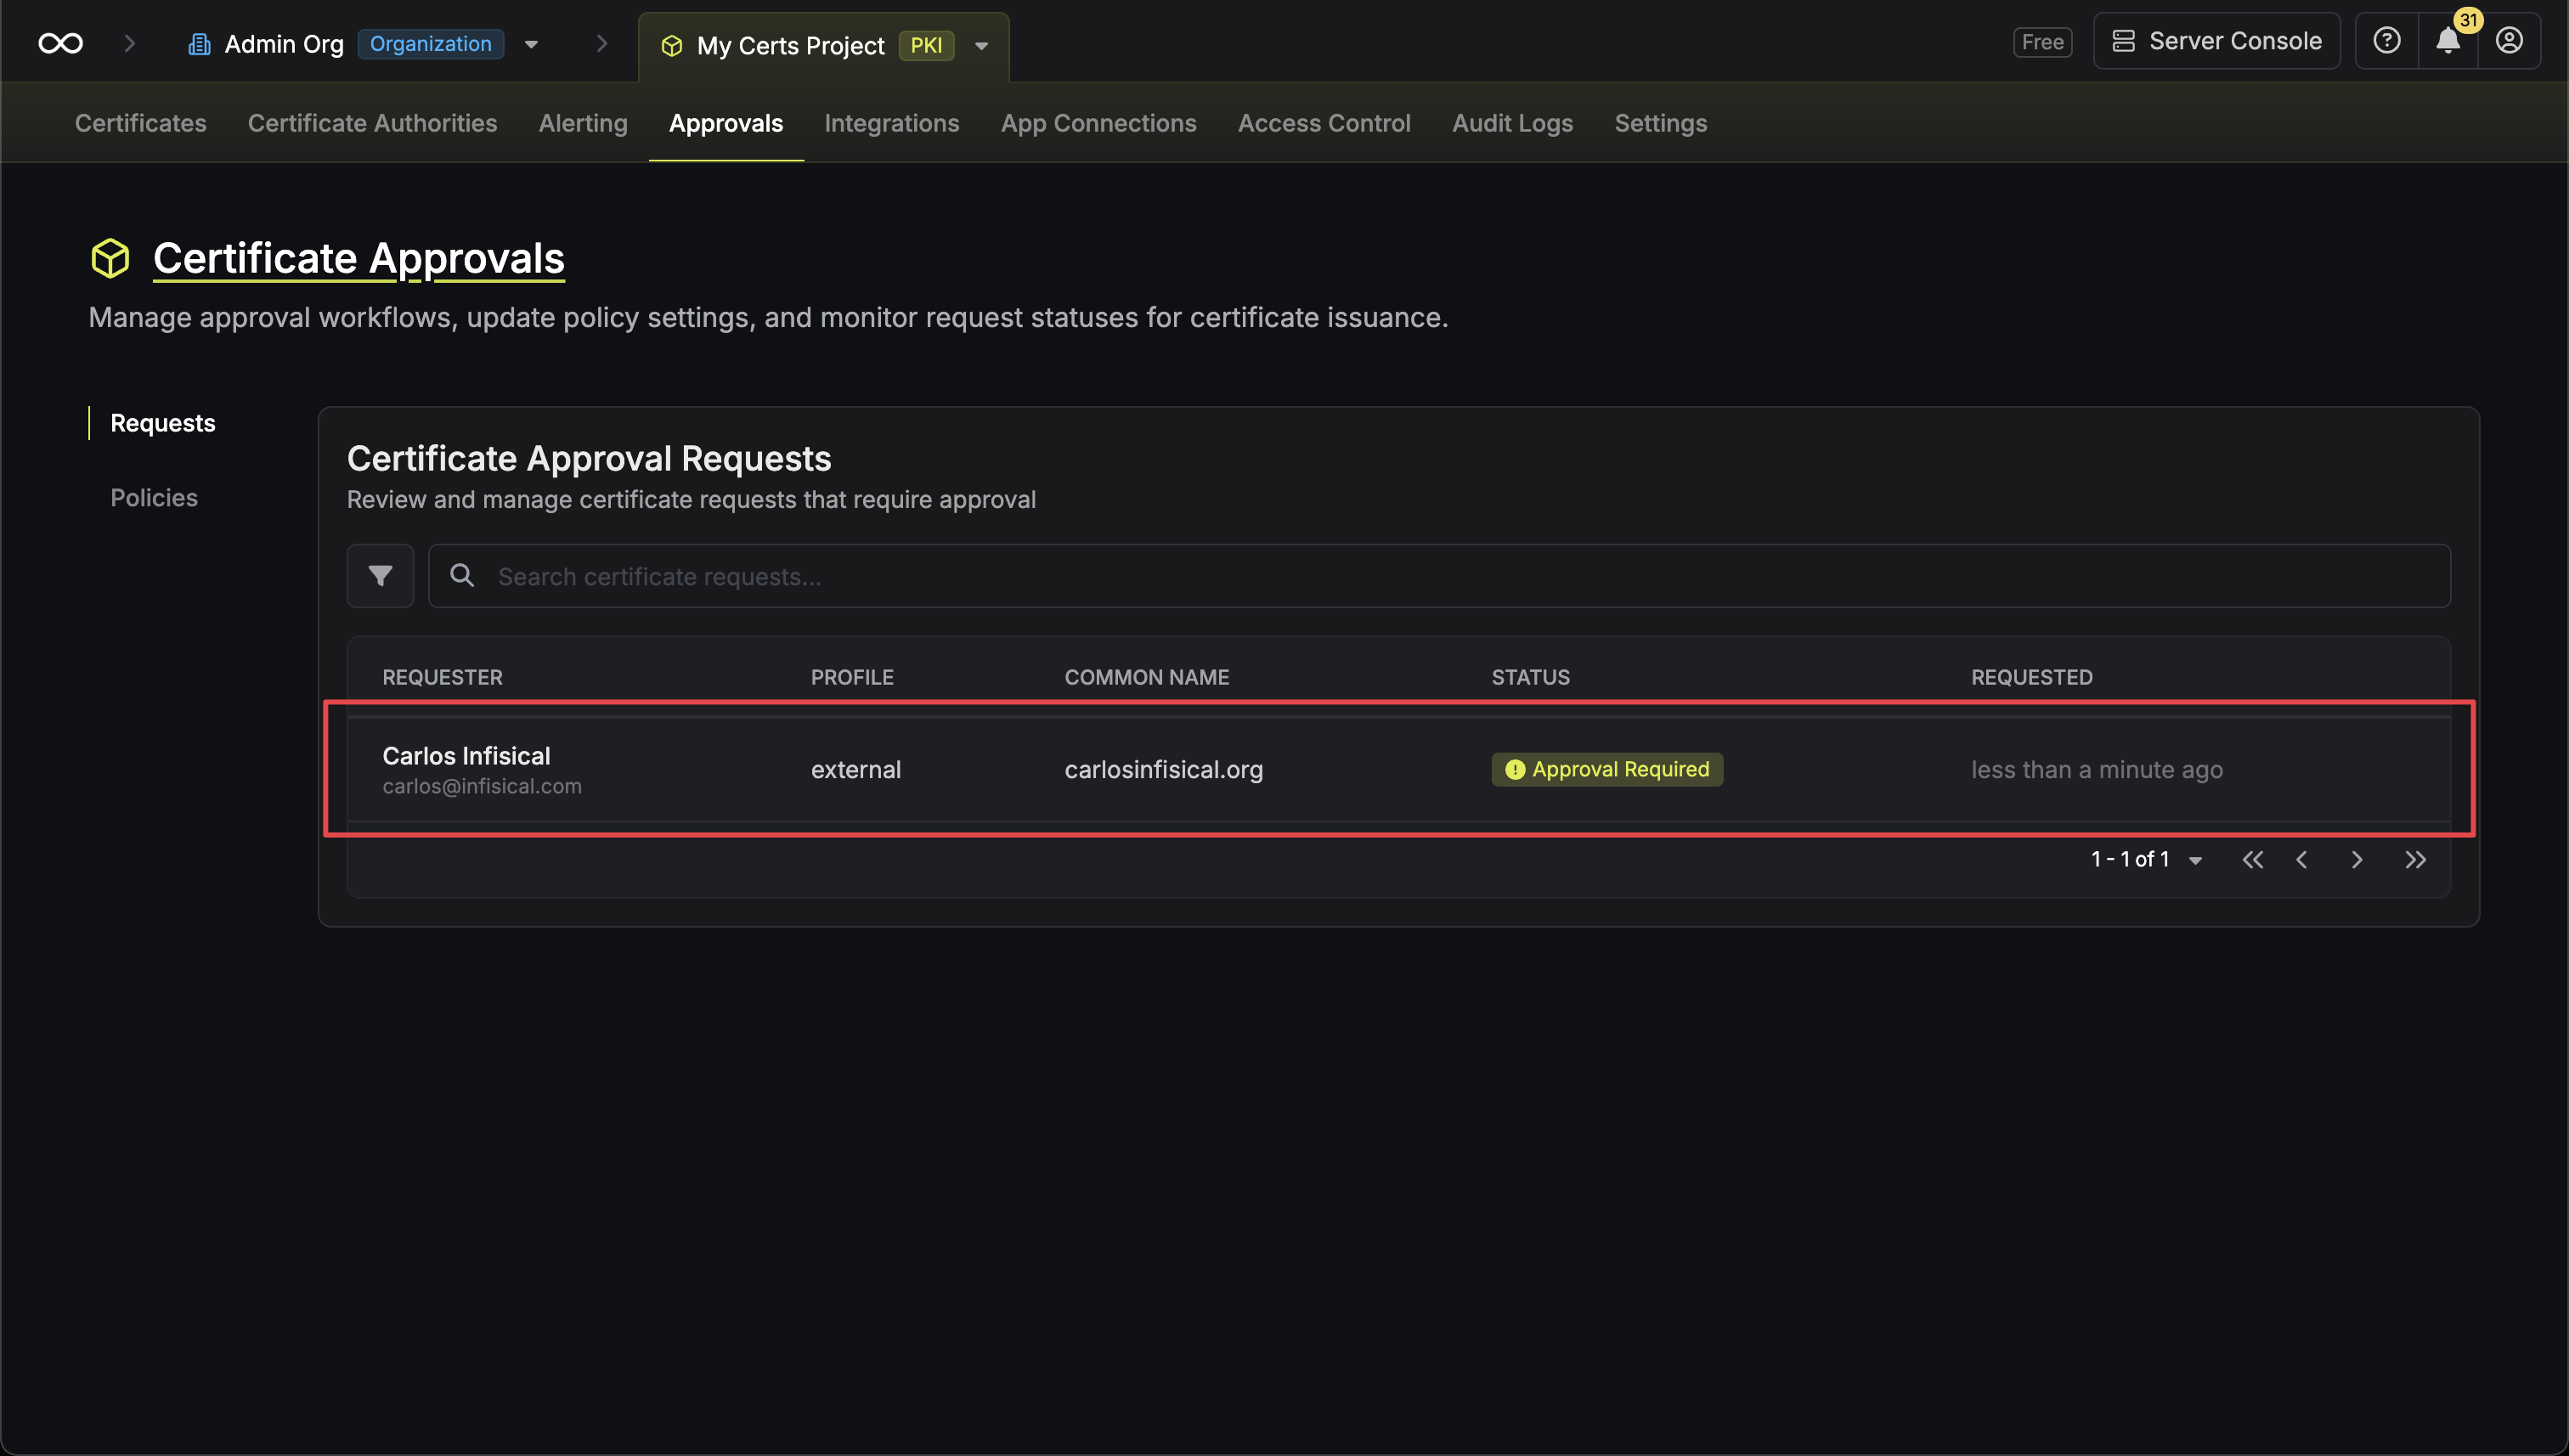
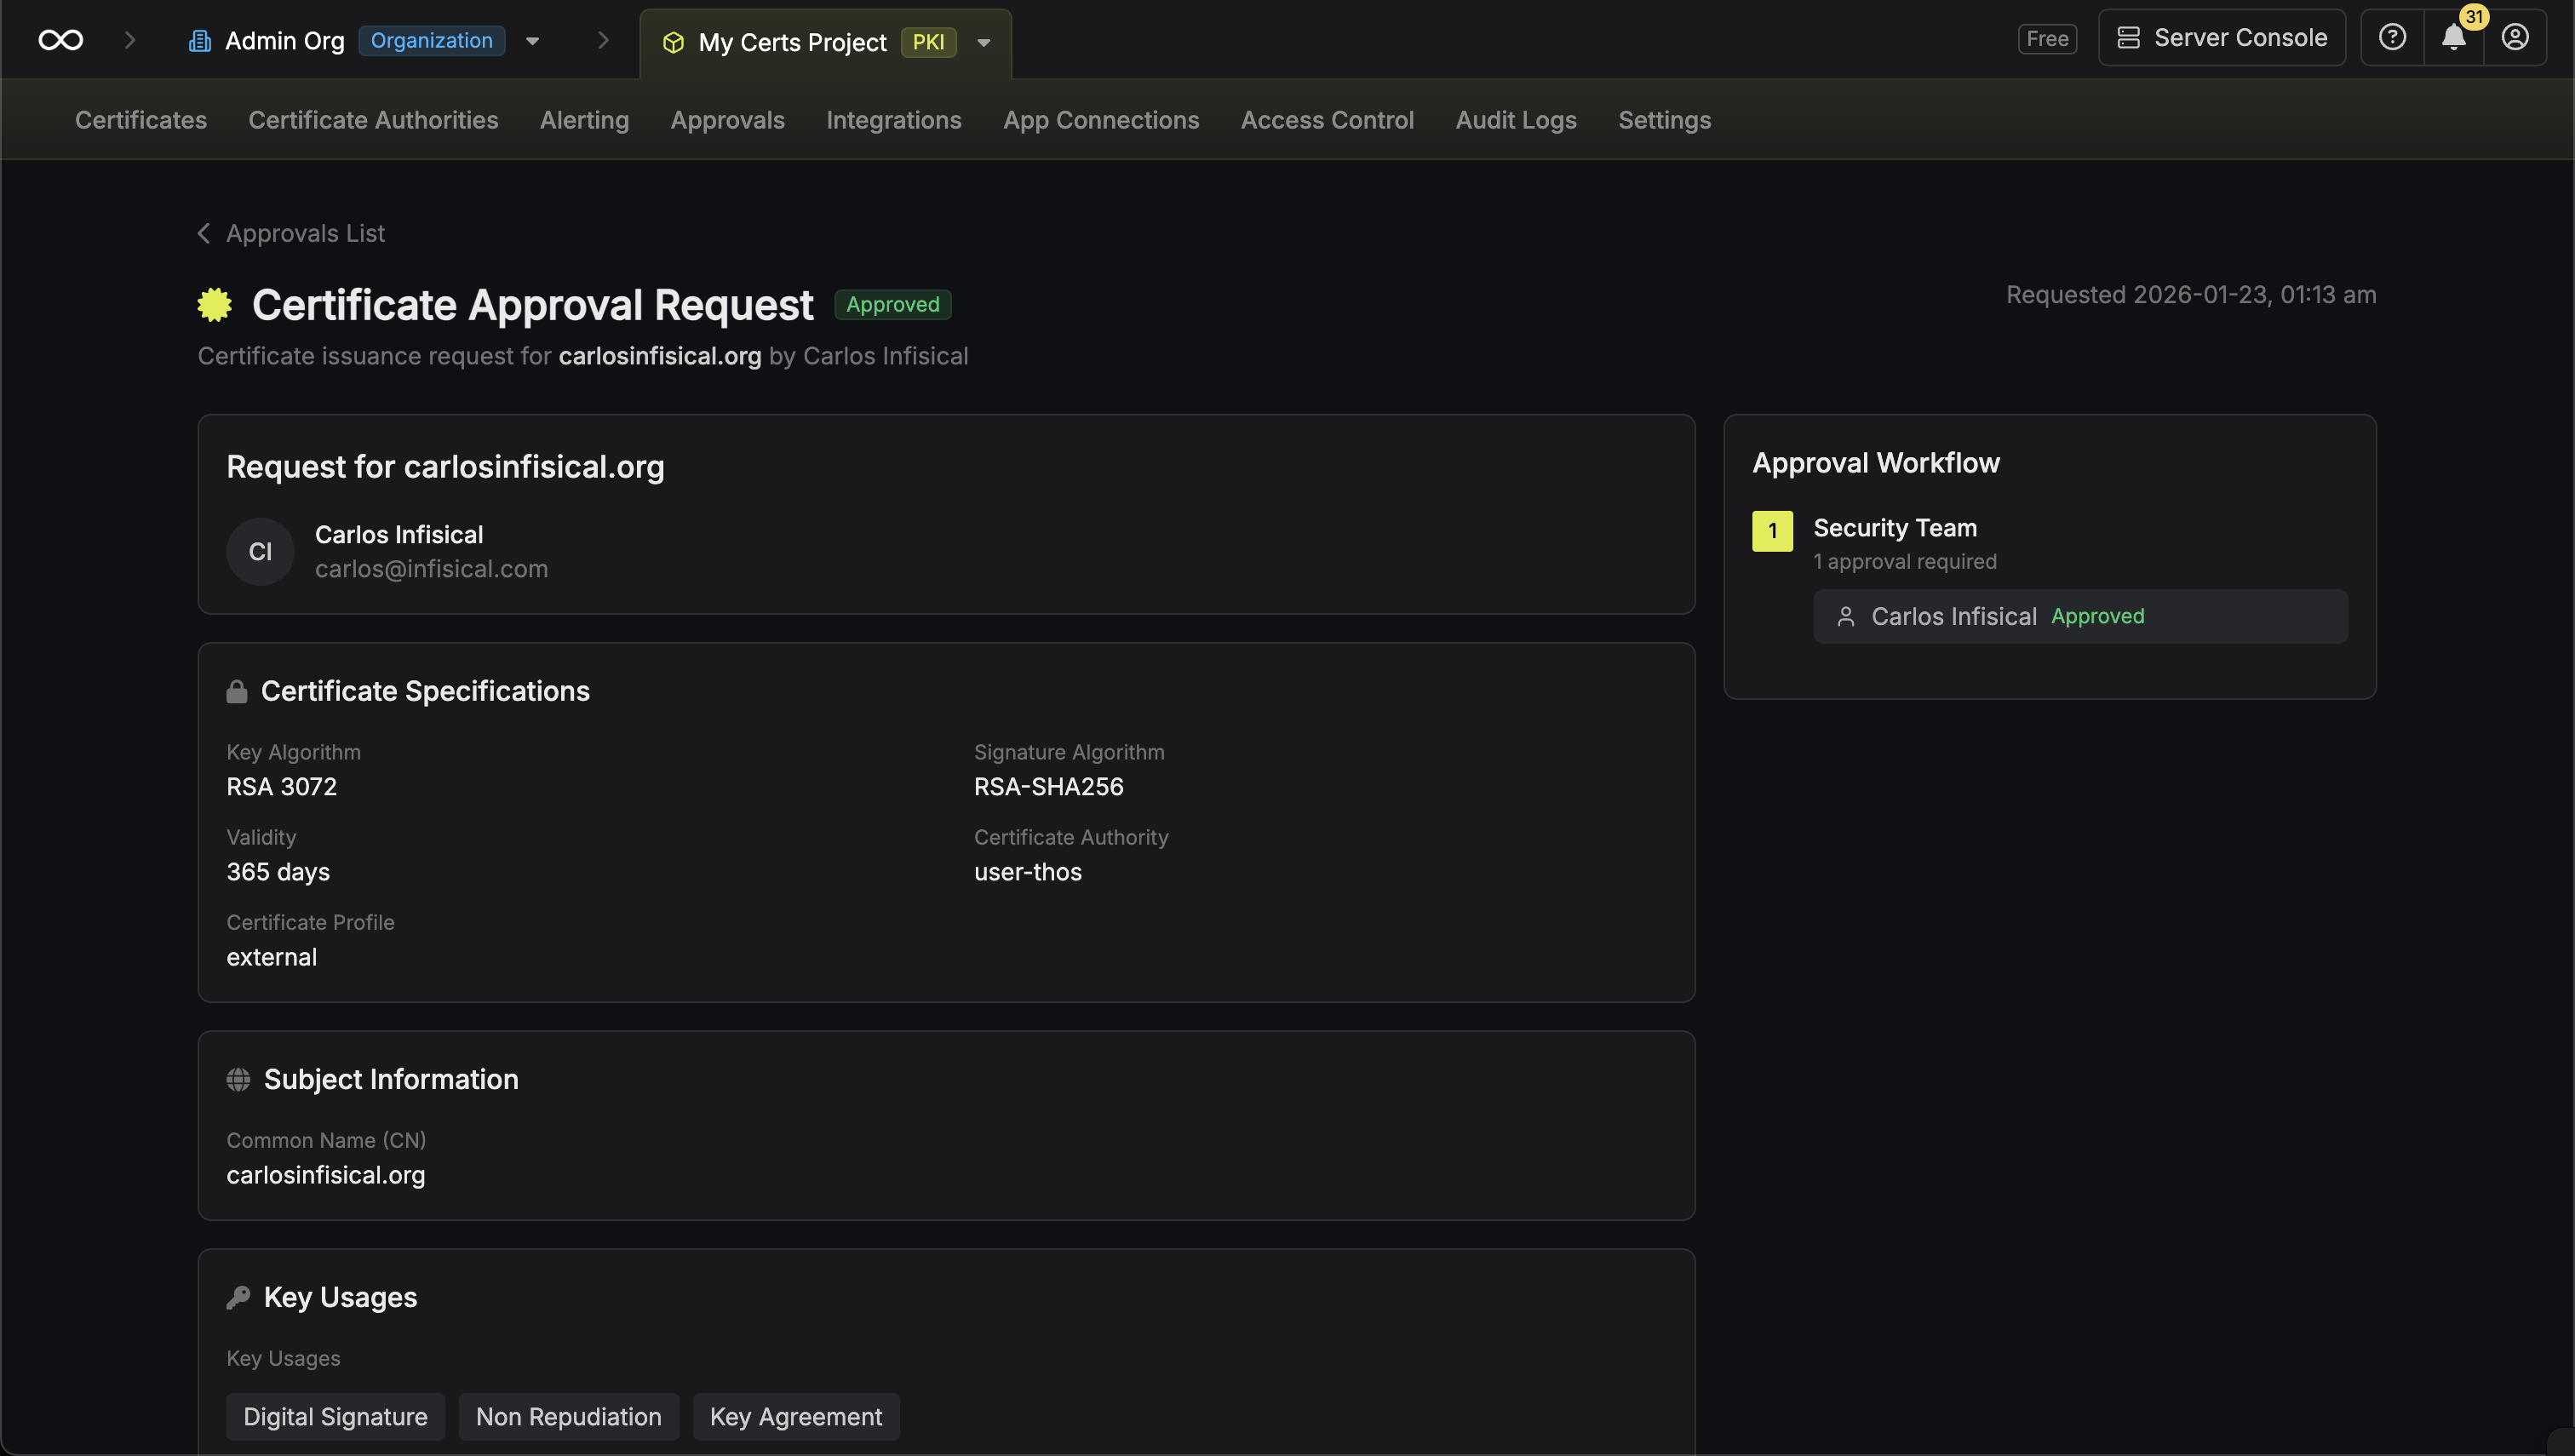
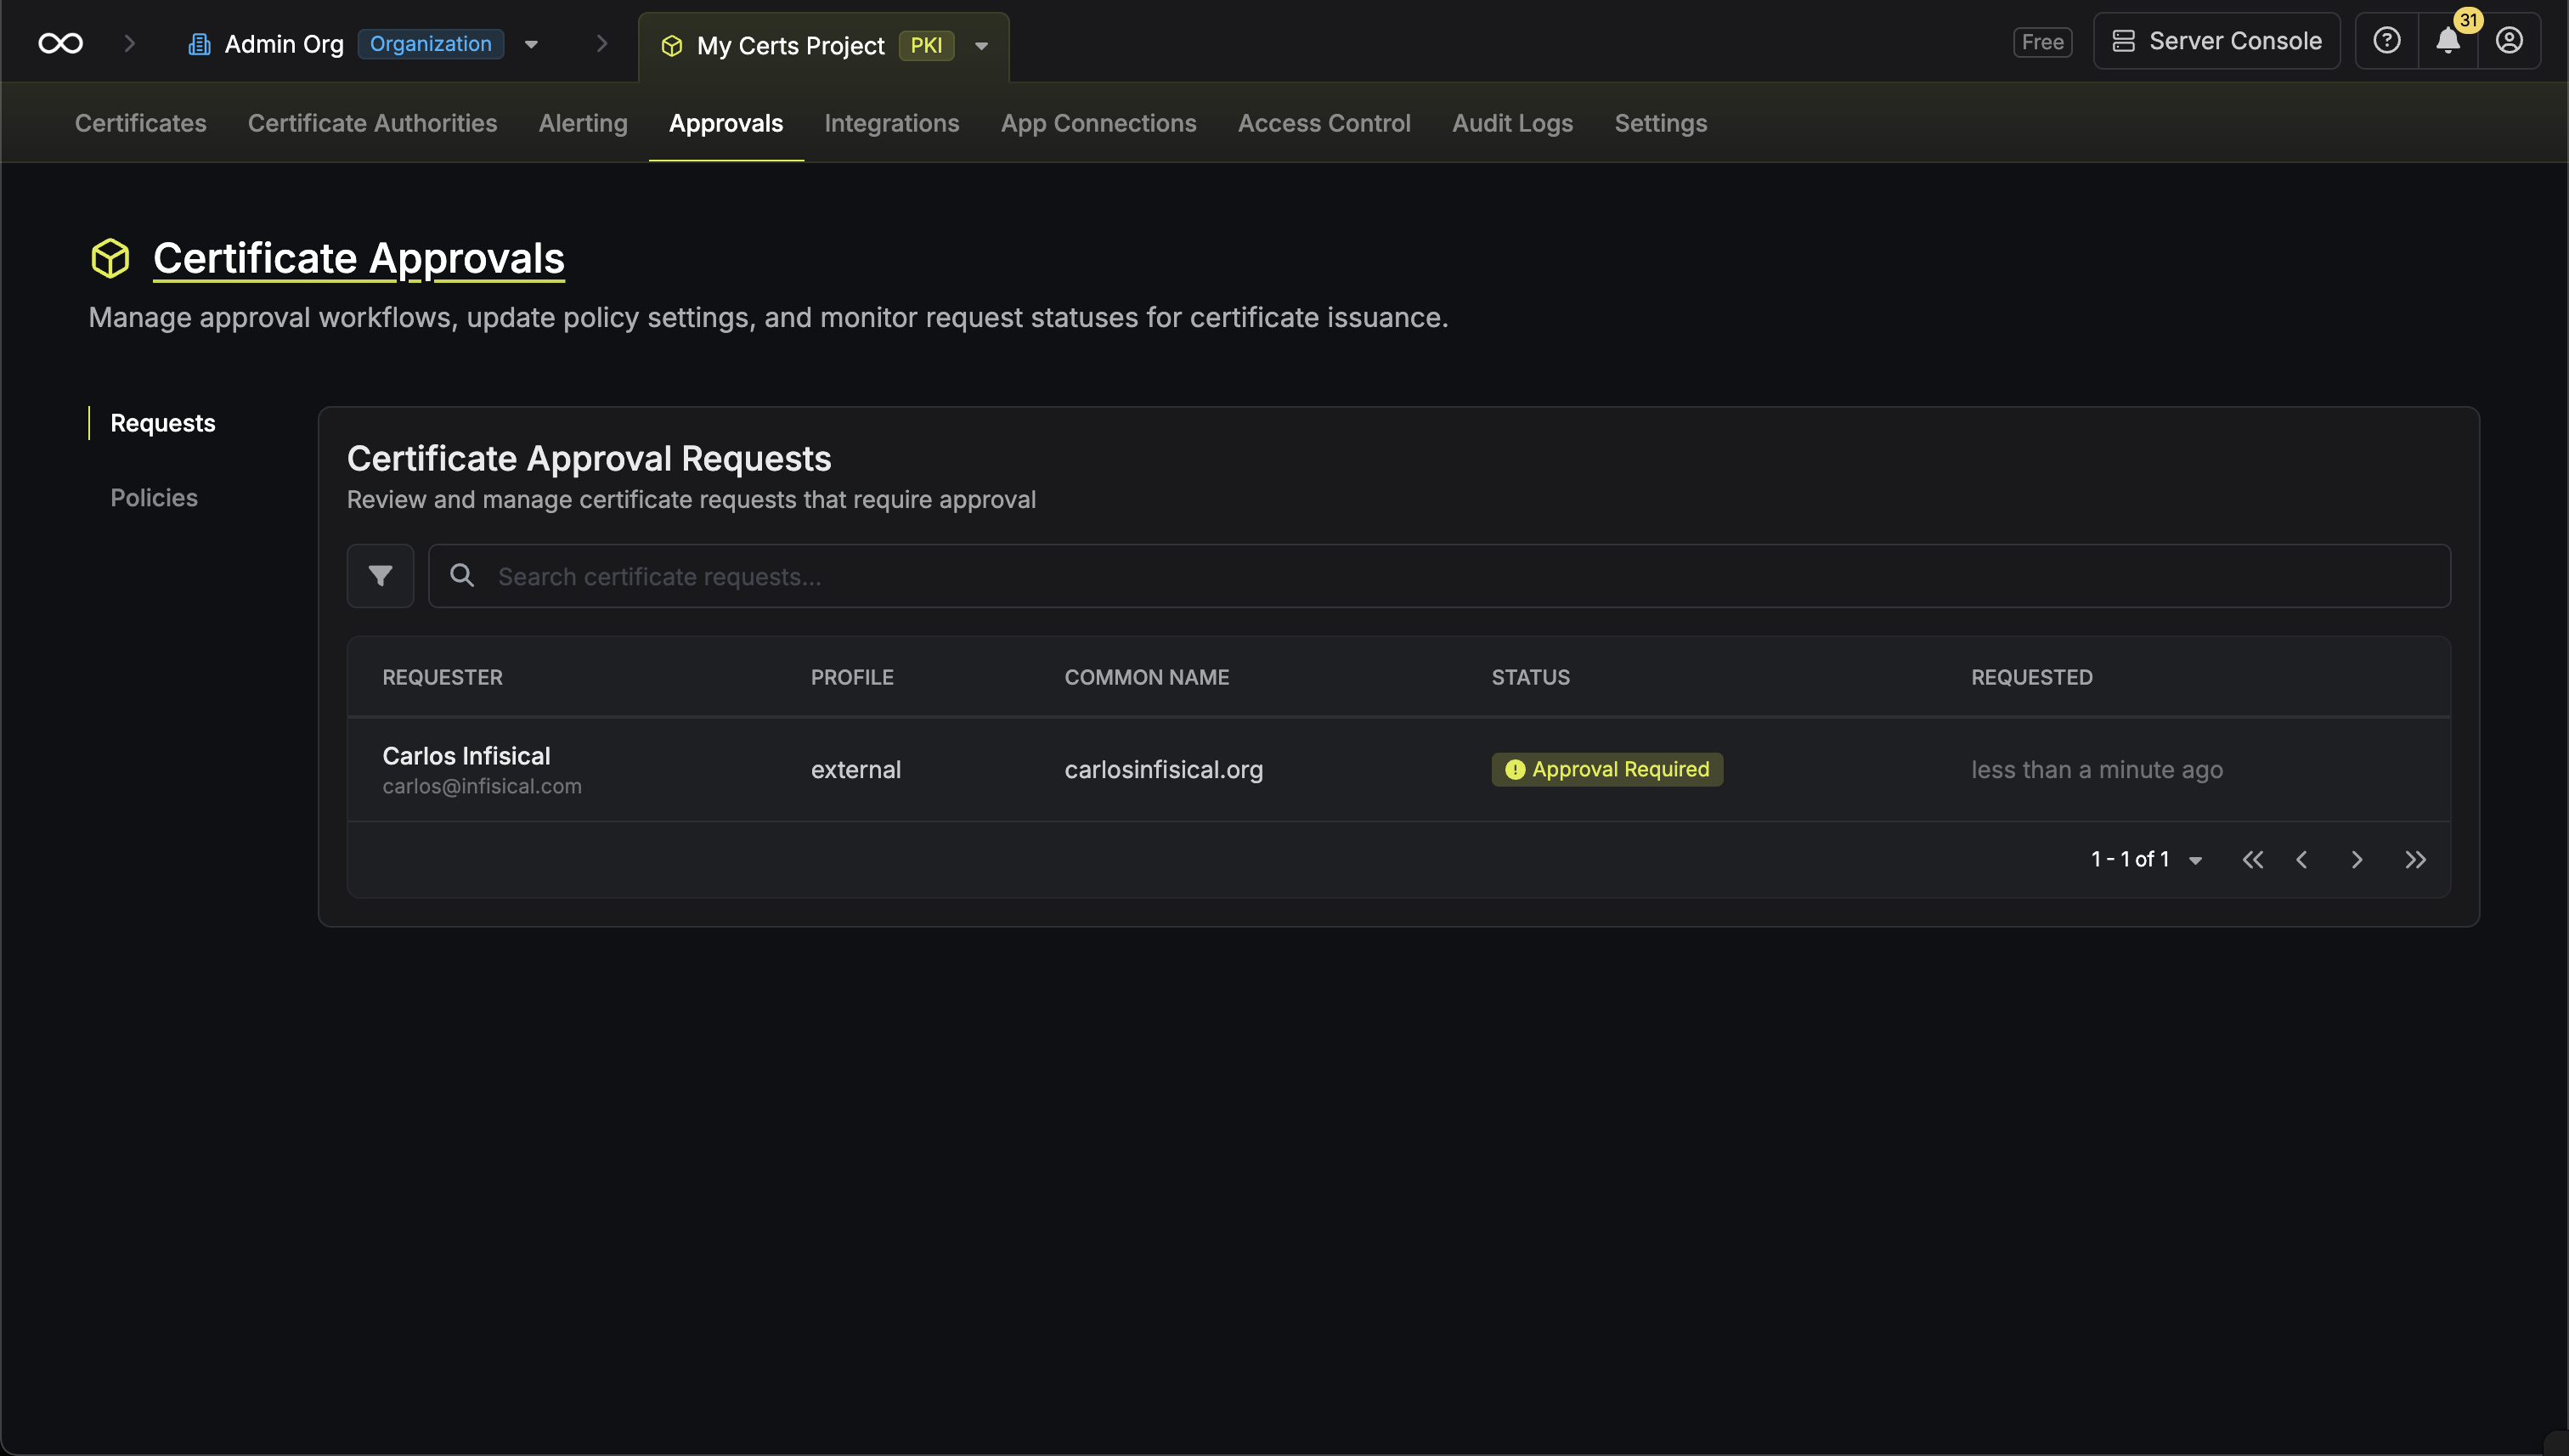 * **Open Requests**: Requests currently pending approval
* **Approved**: Requests that have been approved and certificates issued
* **Rejected**: Requests that were rejected by an approver
* **Cancelled**: Requests cancelled by the requester
* **Expired**: Requests that exceeded their maximum TTL
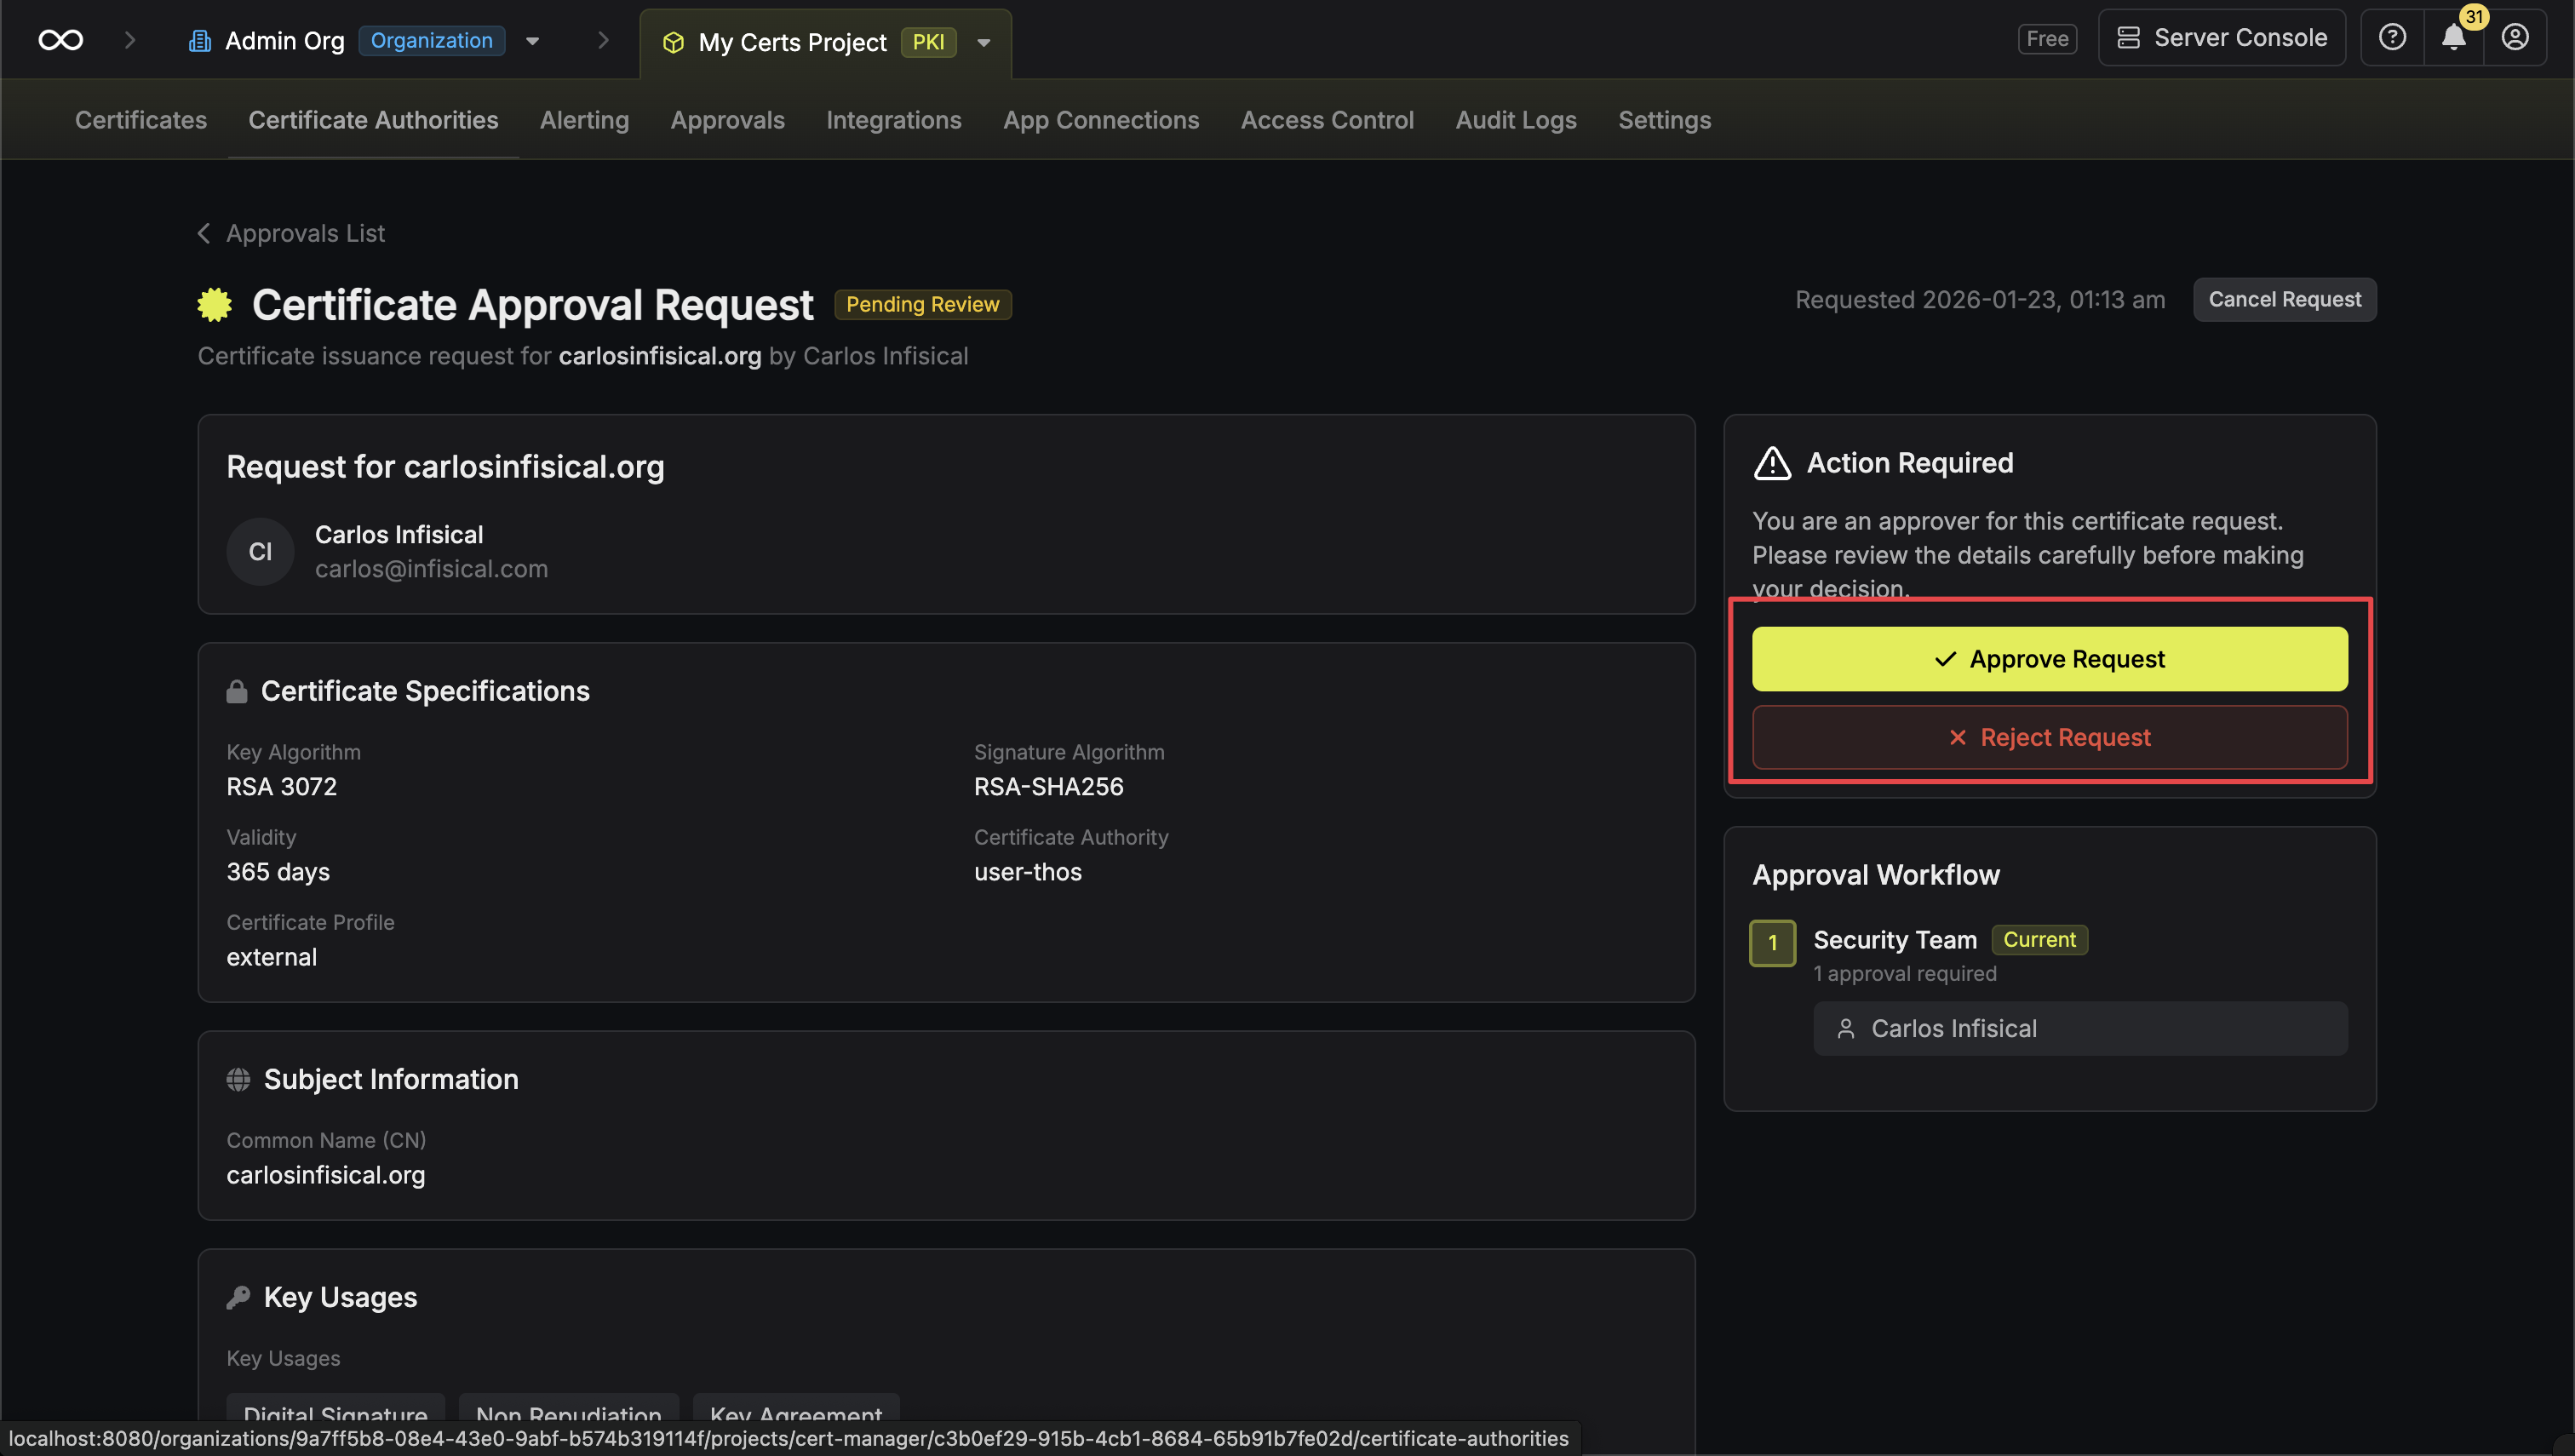
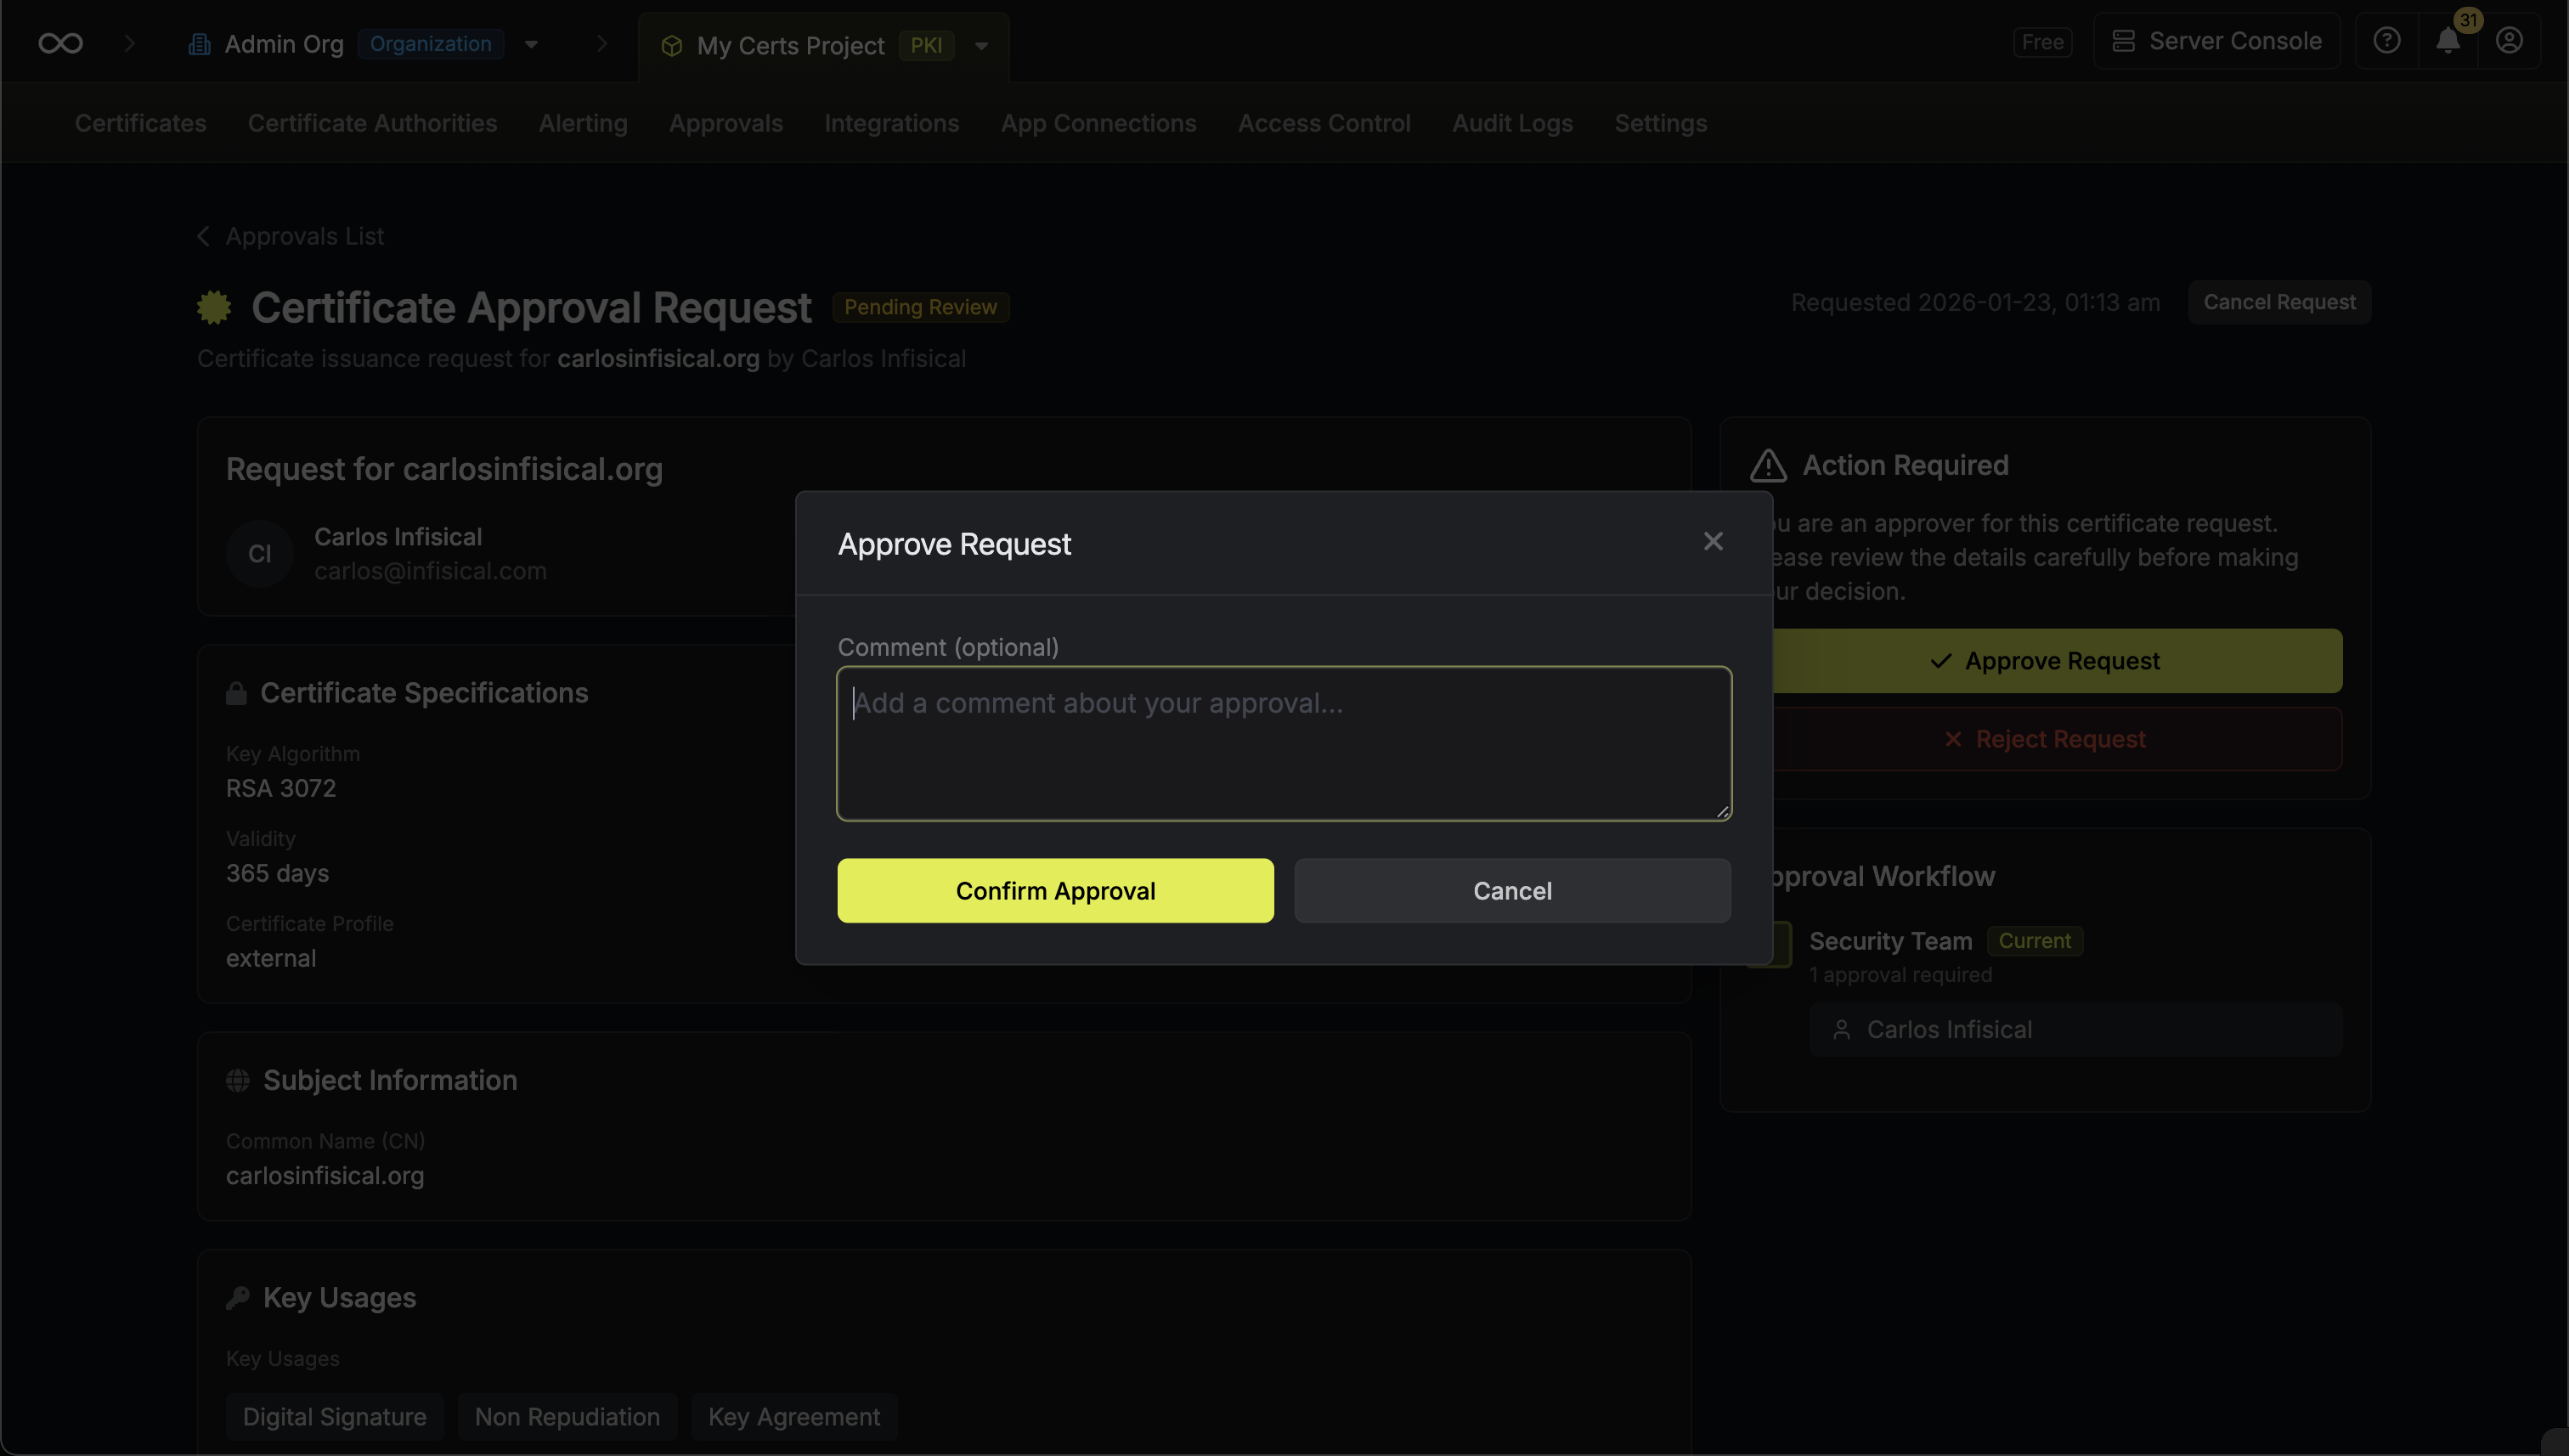
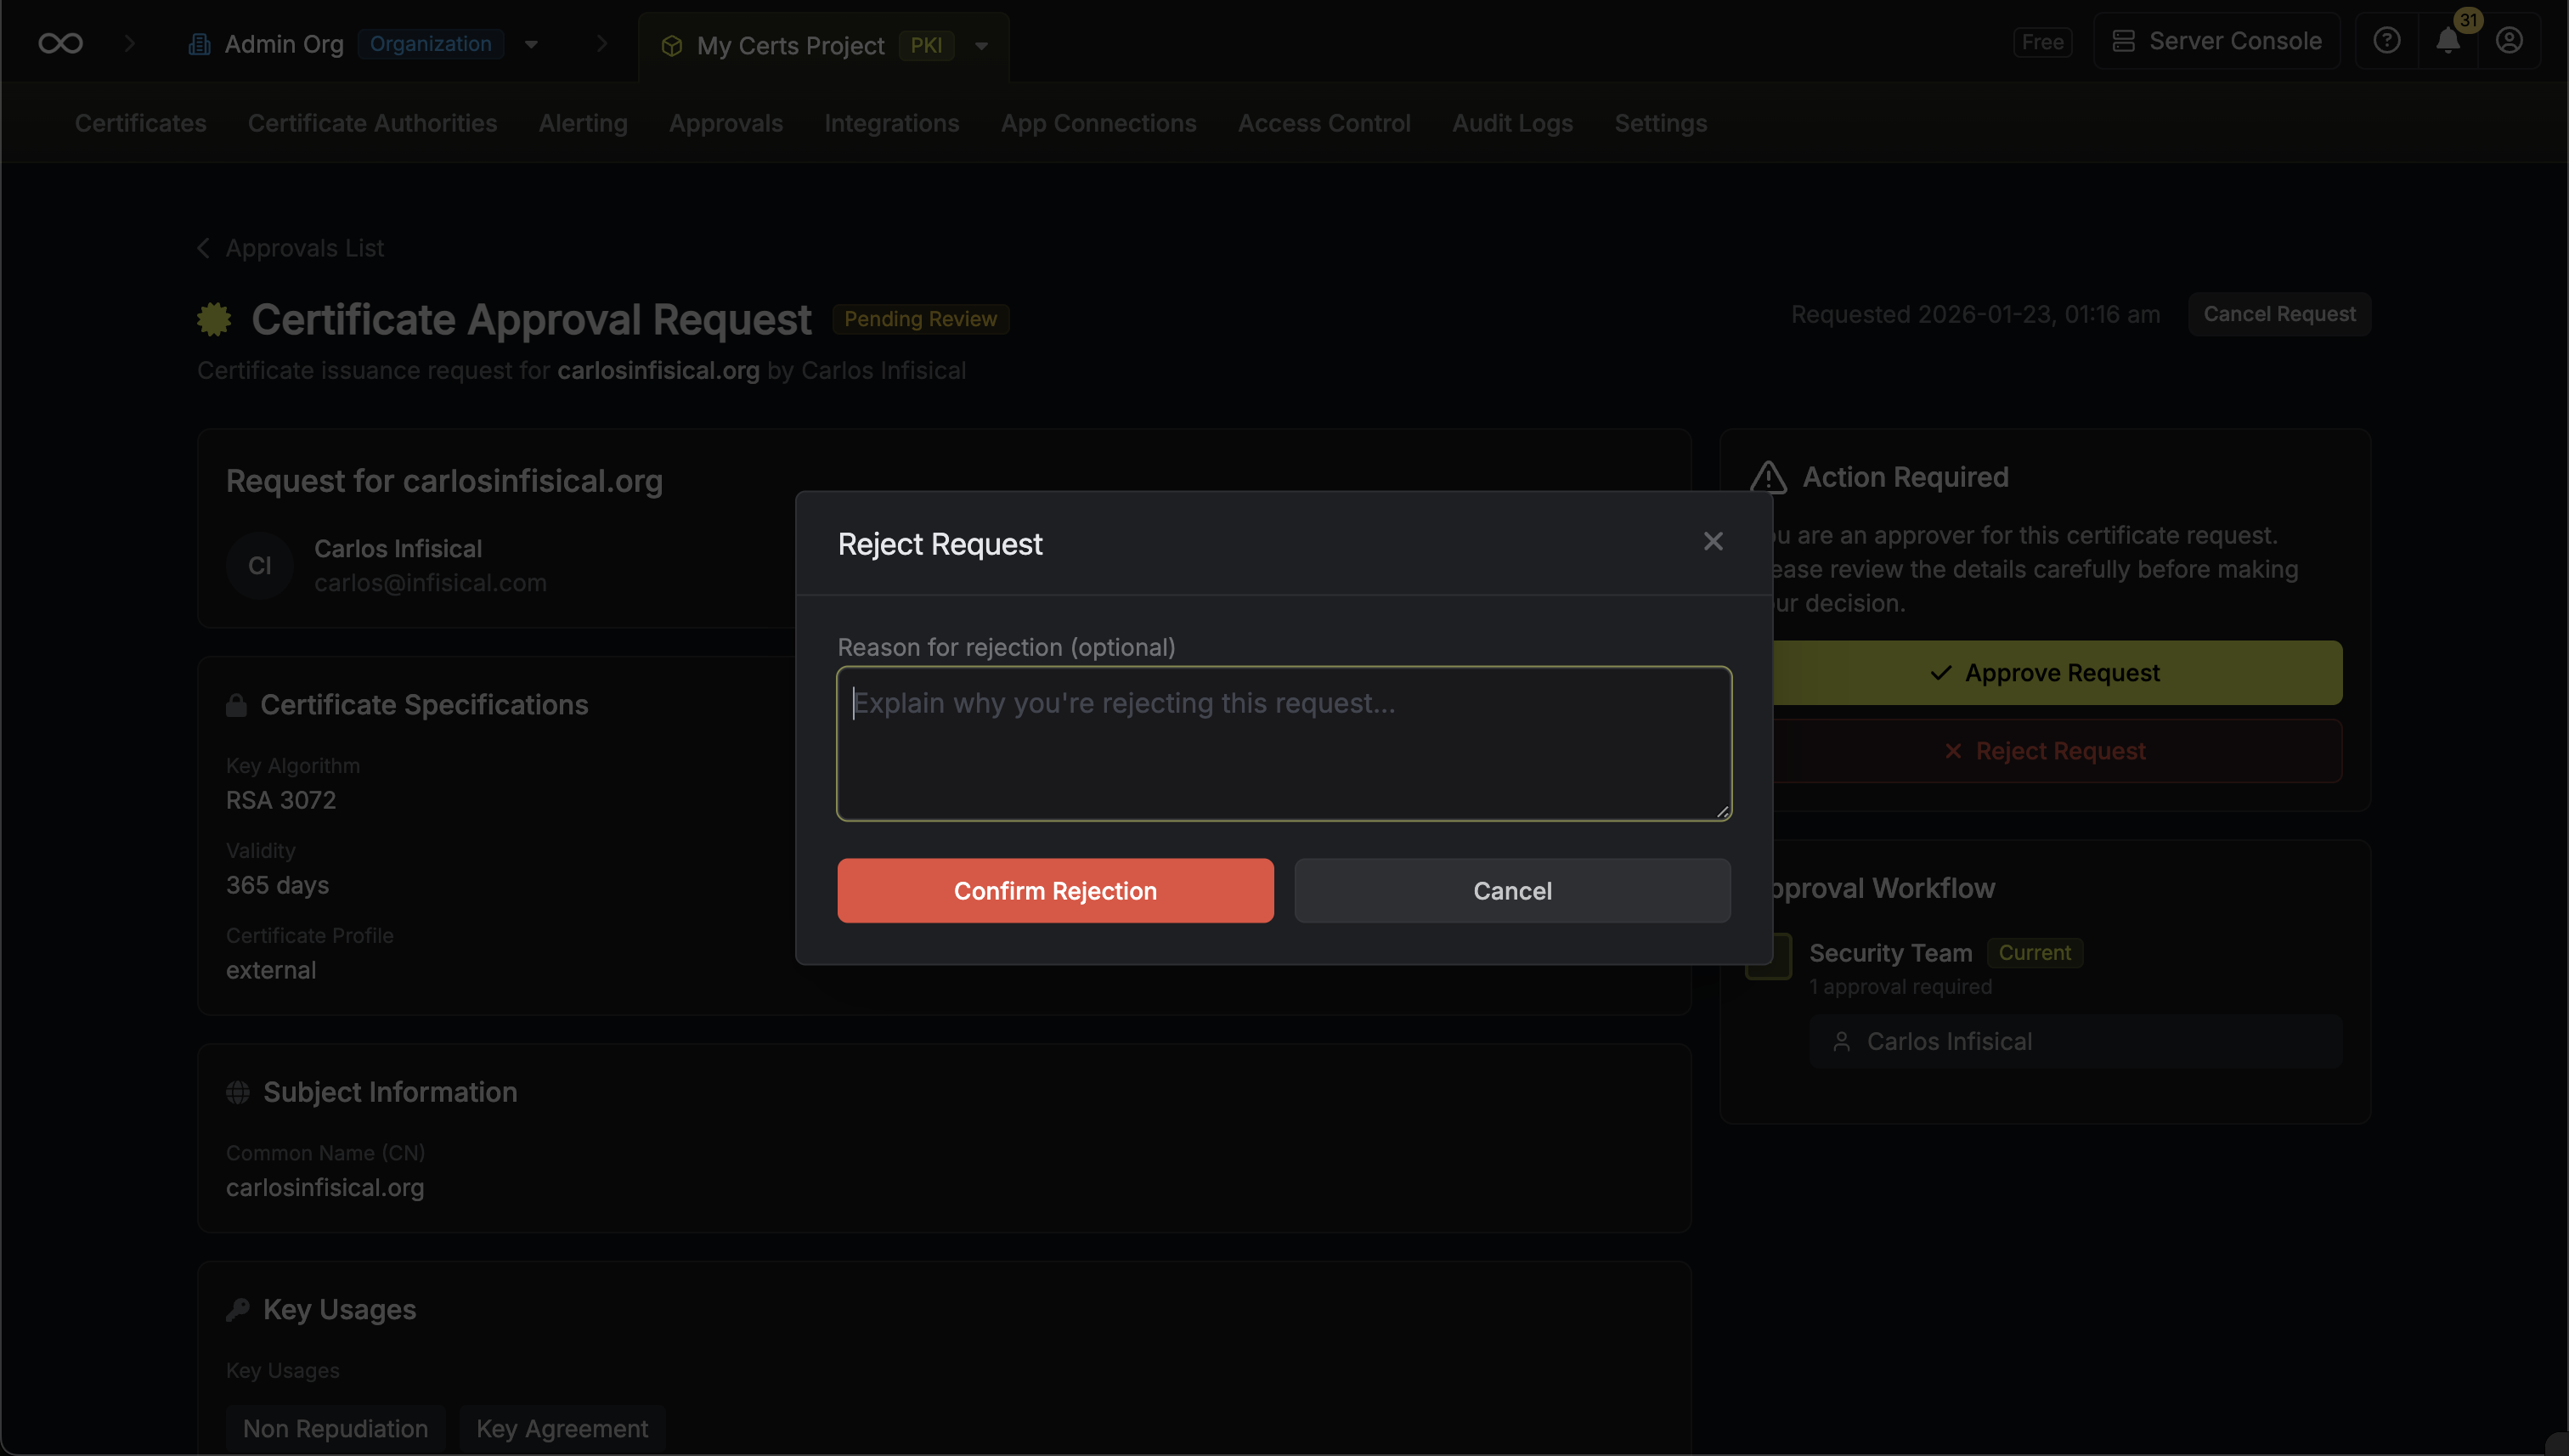
### Approving a Request
* **Open Requests**: Requests currently pending approval
* **Approved**: Requests that have been approved and certificates issued
* **Rejected**: Requests that were rejected by an approver
* **Cancelled**: Requests cancelled by the requester
* **Expired**: Requests that exceeded their maximum TTL
### Approving a Request
 A key feature of the Gateway is its ability to act as a "middleman" for all session traffic.
* **Interception**: Because the Gateway sits between the secure tunnel and the target resource, it intercepts all data flowing through the connection.
* **Logging**: This traffic is logged as part of [Session Recording](/documentation/platform/pam/product-reference/session-recording). The Gateway temporarily stores encrypted session logs locally.
* **Upload**: Once the session concludes, the logs are securely uploaded to the Infisical platform for storage and review.
## Security Architecture
The PAM security model allows you to maintain a zero-trust environment while enabling convenient access.
### End-to-End Encryption
The connection between the Infisical CLI (client) and the Gateway is end-to-end encrypted. The Relay server acts solely as a router for encrypted packets and **cannot decrypt or inspect** the traffic passing through it.
### Network Security
The Gateway uses **SSH reverse tunnels** to connect to the Relay. This design offers significant security benefits:
* **No Inbound Ports**: You do not need to open any inbound firewall ports (like 22 or 5432) to the internet.
* **Outbound-Only**: The Gateway only requires outbound connectivity to the Relay server and Infisical API.
For a deep dive into the underlying cryptography, certificate management, and isolation guarantees, refer to the [Gateway Security Architecture](/documentation/platform/gateways/security).
### Deployment
For instructions on setting up the necessary infrastructure, see the [Gateway Deployment Guide](/documentation/platform/gateways/gateway-deployment).
---
# Source: https://infisical.com/docs/documentation/platform/access-controls/assume-privilege.md
> ## Documentation Index
> Fetch the complete documentation index at: https://infisical.com/docs/llms.txt
> Use this file to discover all available pages before exploring further.
# Assume Privileges
> Learn how to temporarily assume the privileges of a user or machine identity within a project.
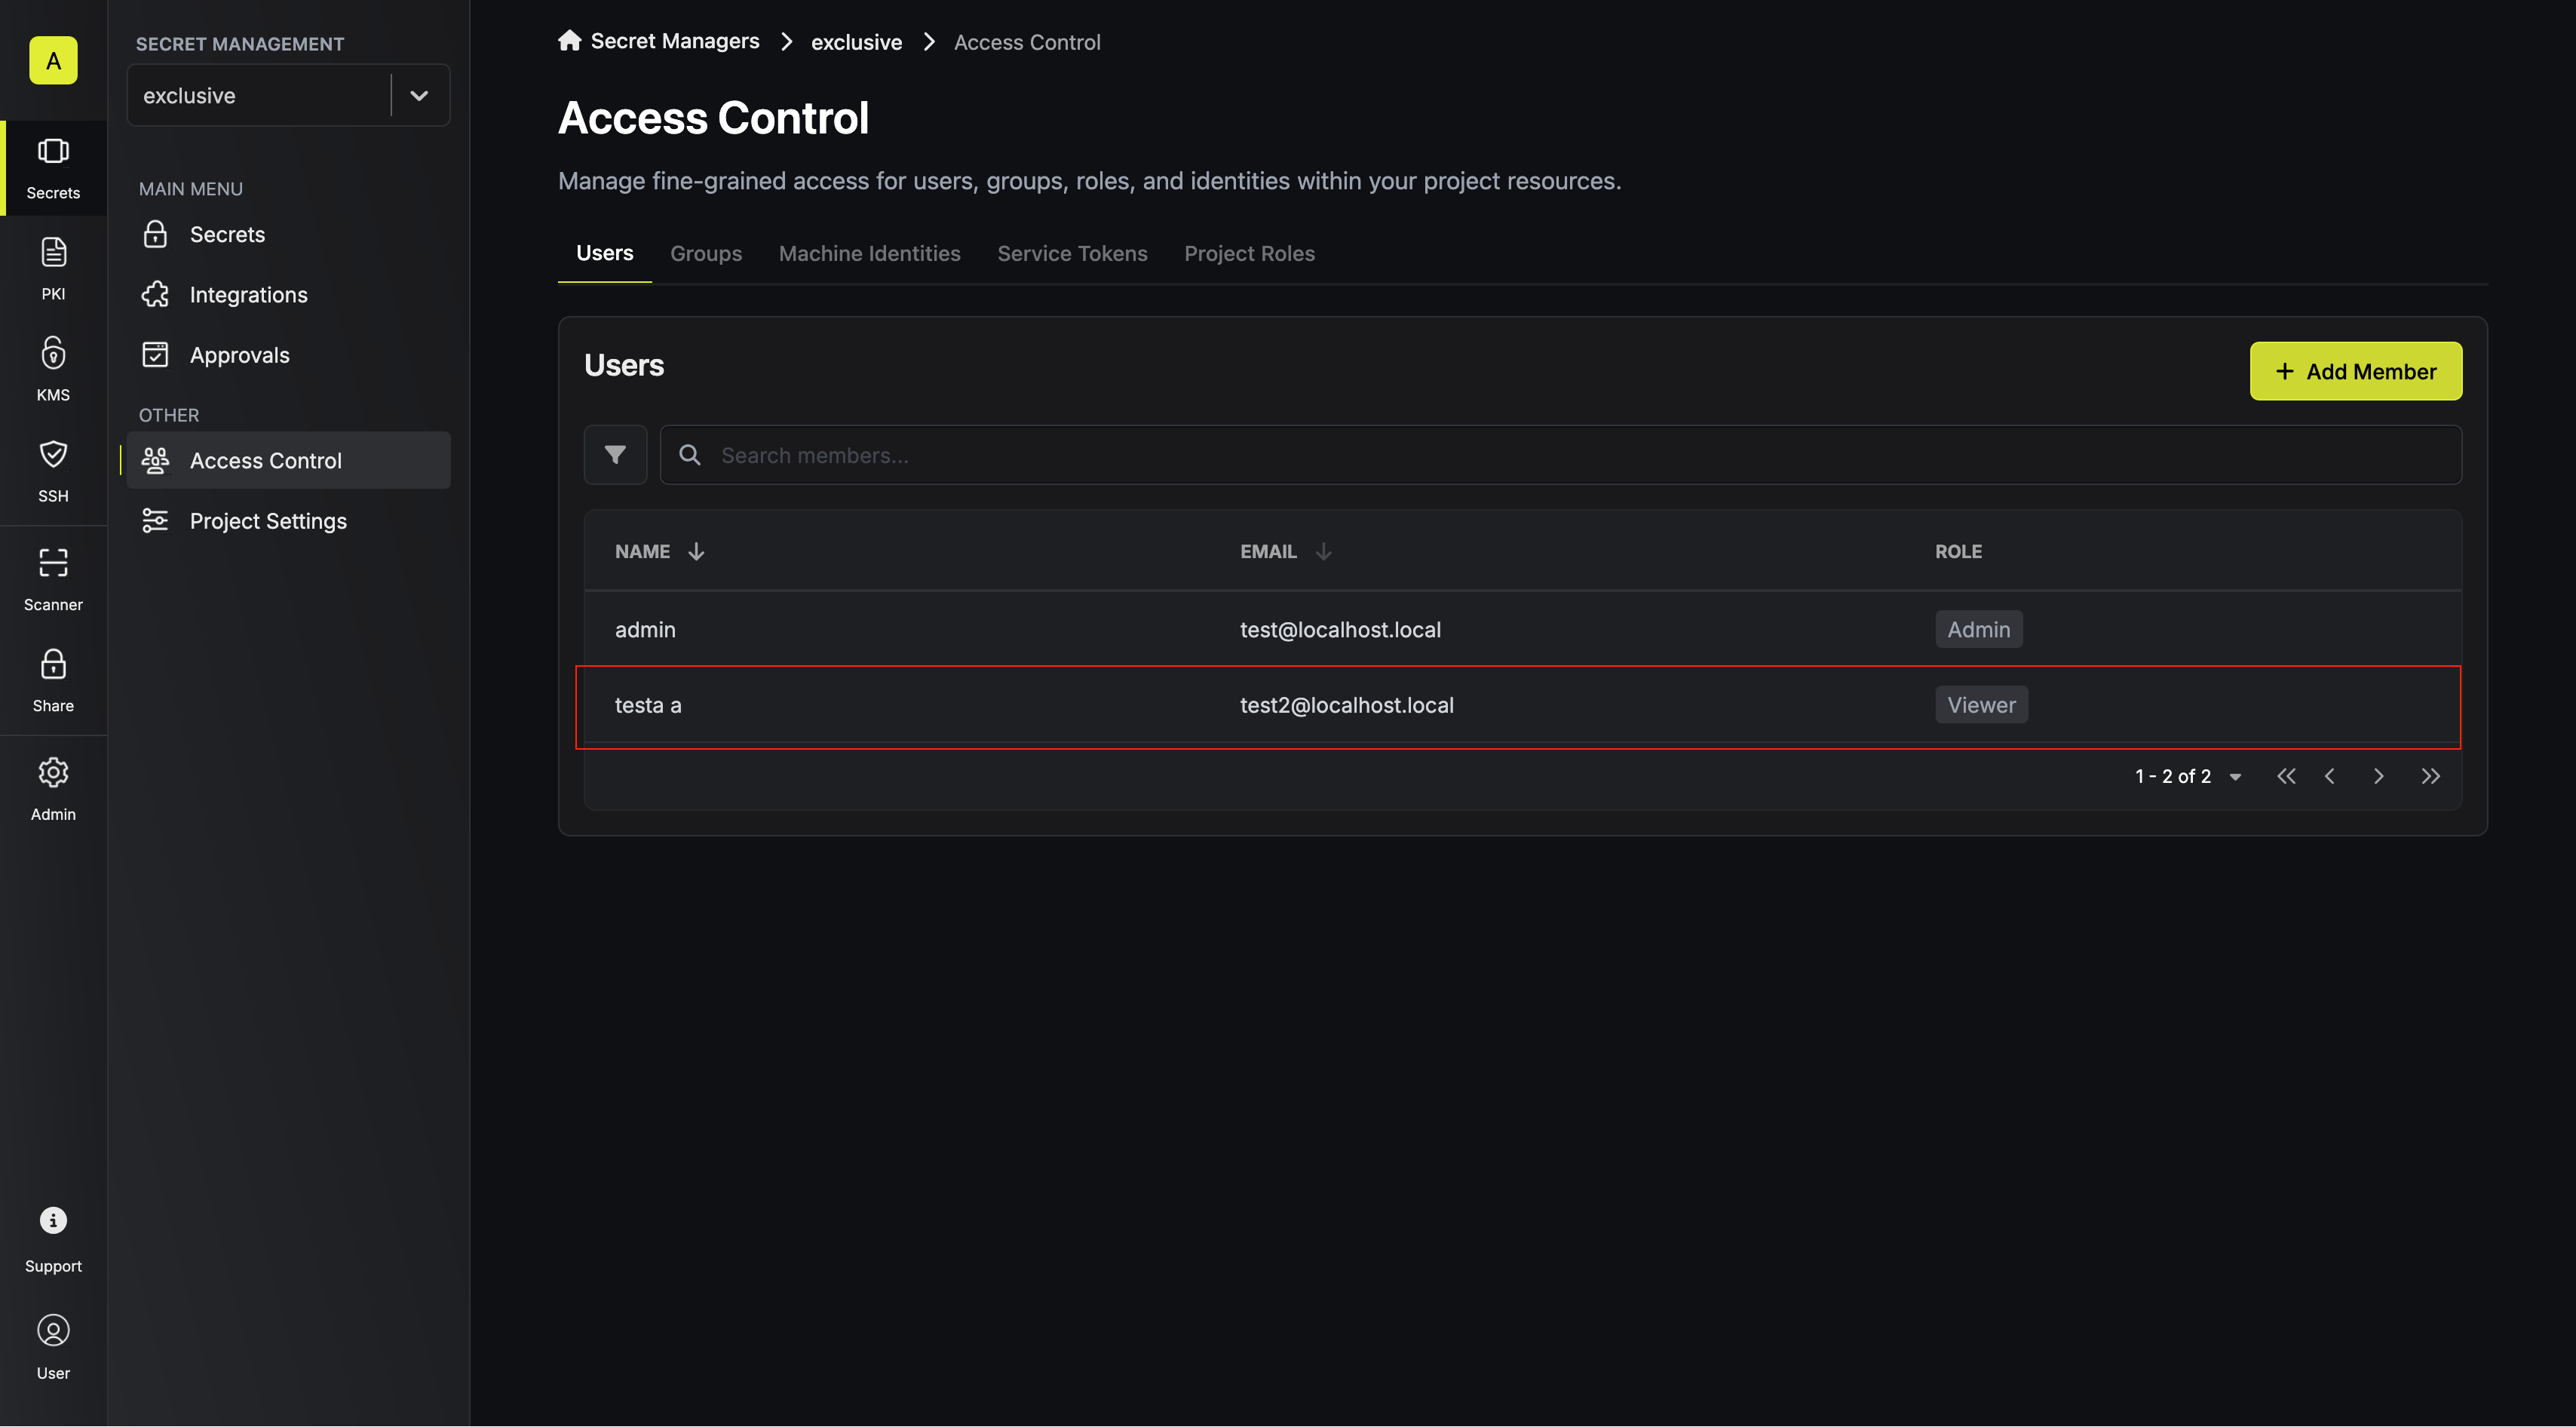
This feature allows authorized users to temporarily take on the permissions of another user or identity. It helps administrators and access managers test and verify permissions before granting access, ensuring everything is set up correctly.
It also reduces back-and-forth with end users when troubleshooting permission-related issues.
## How It Works
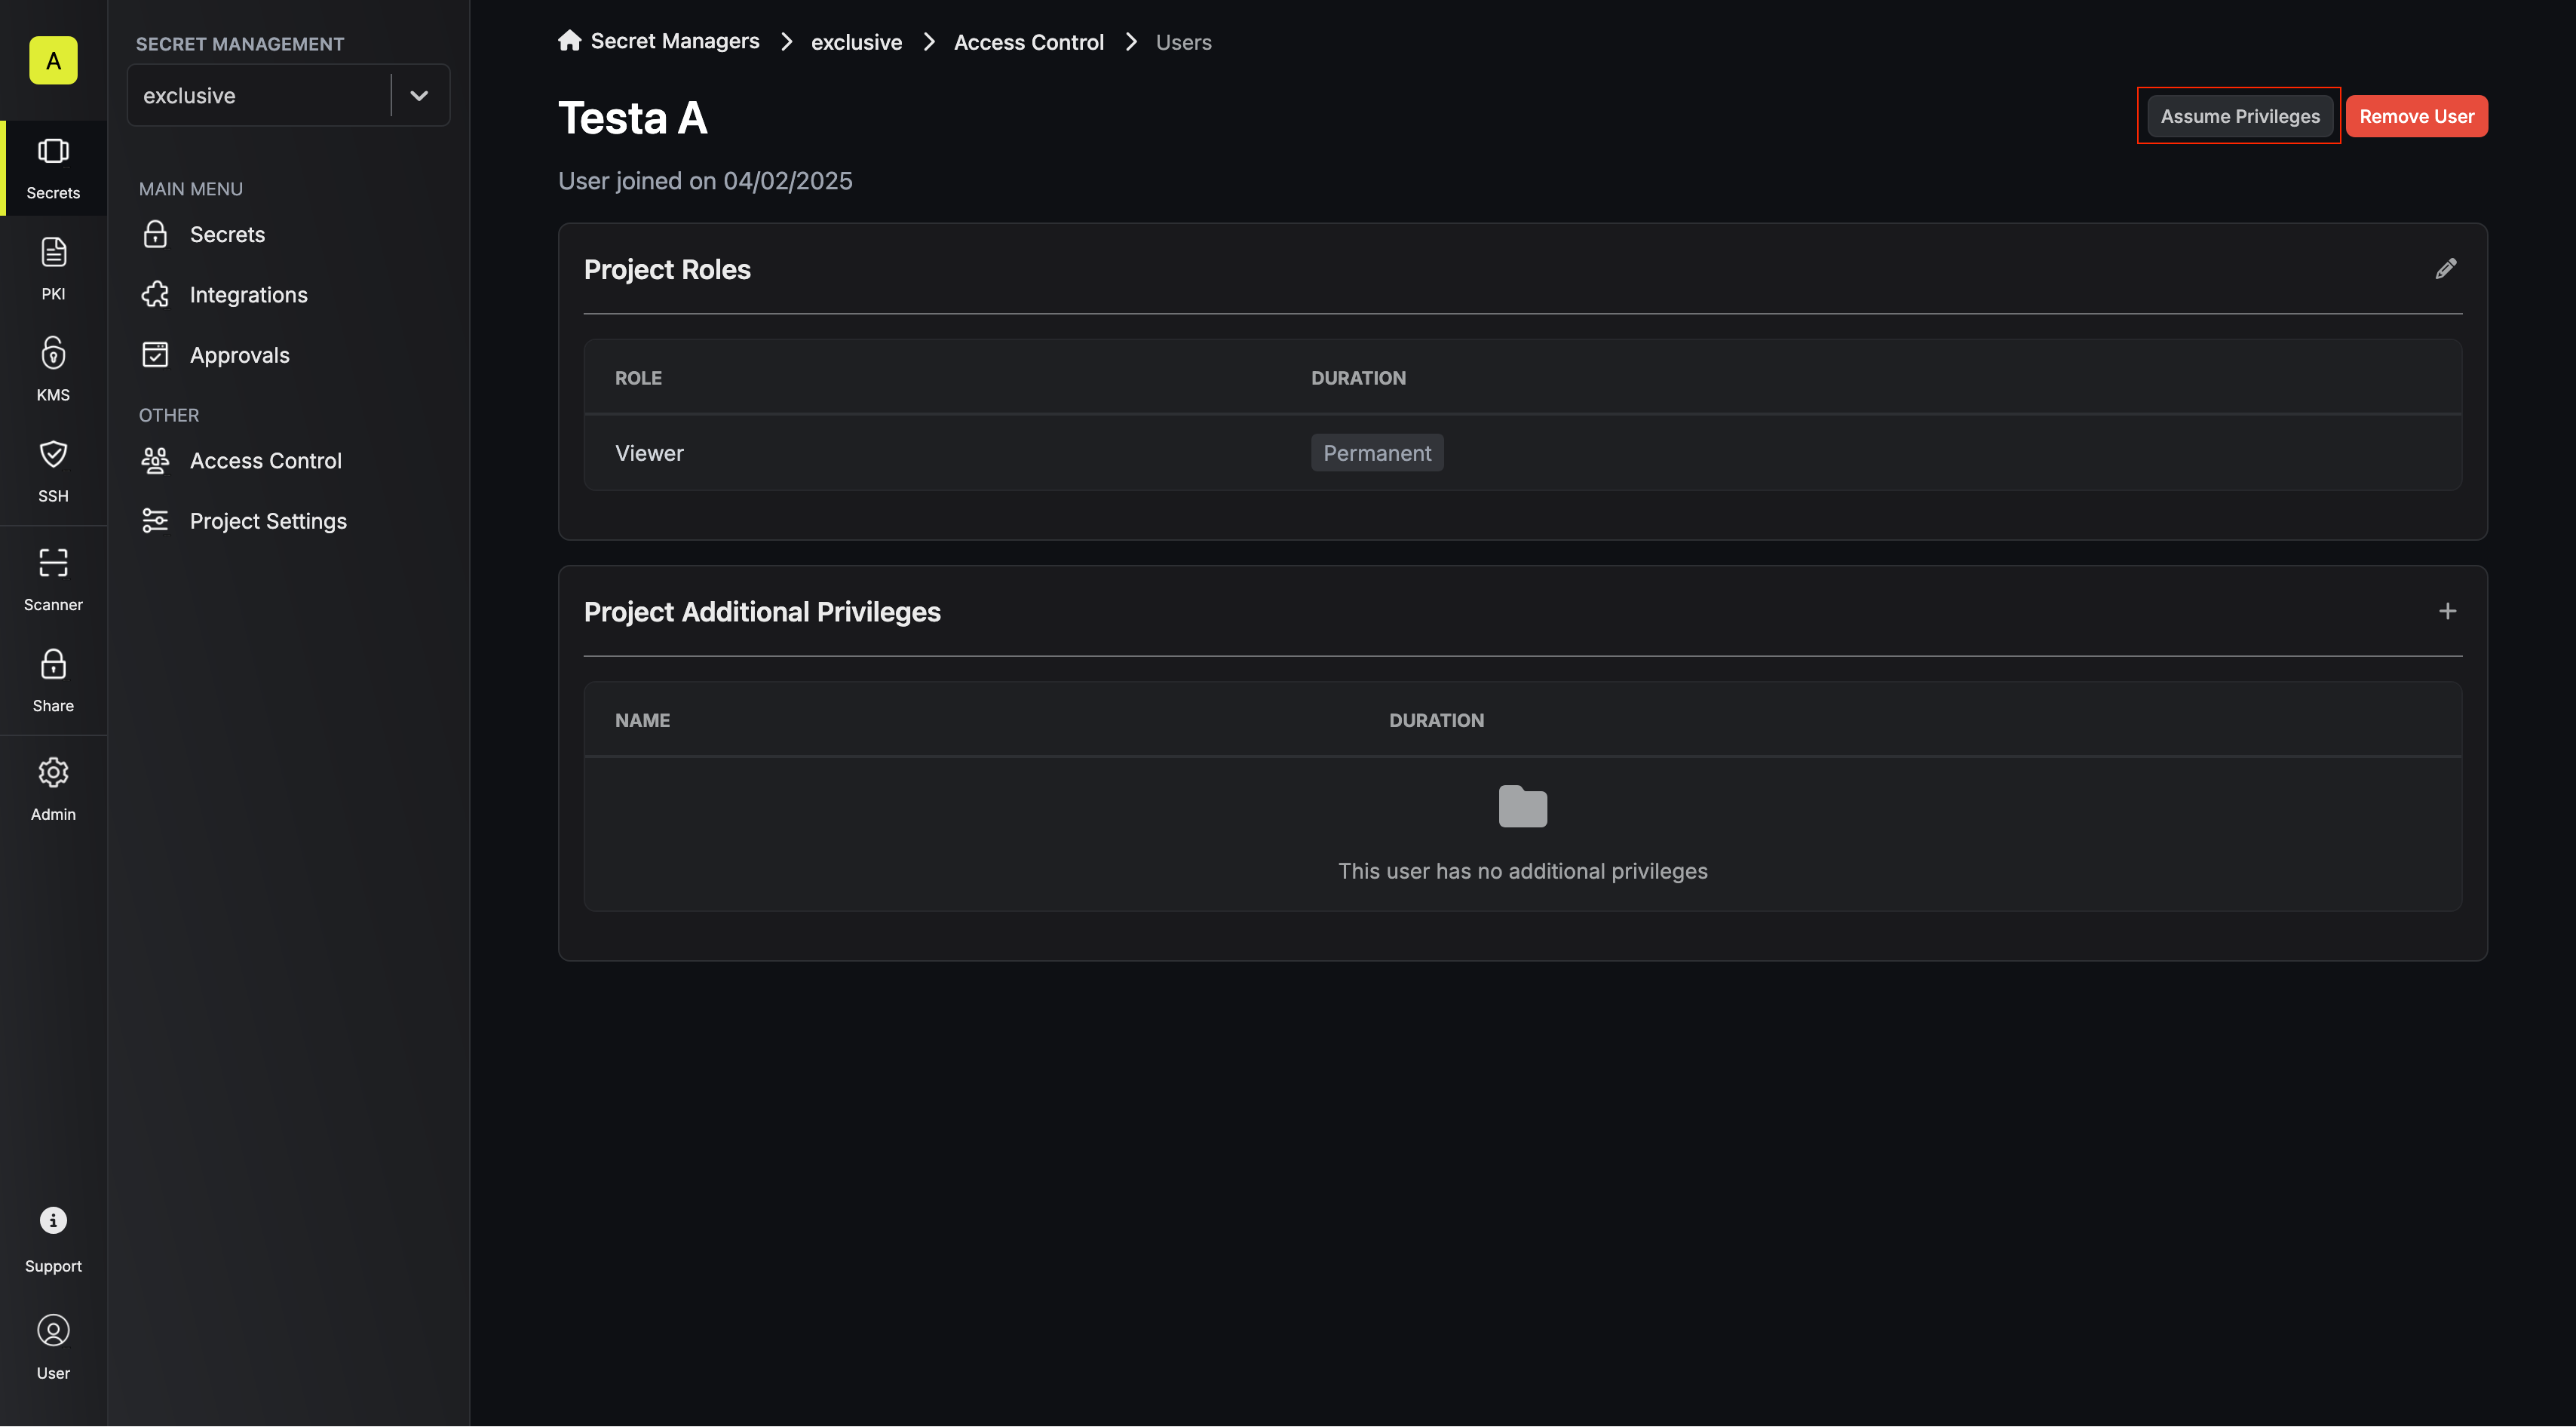
When an authorized user activates assume privileges mode, they temporarily inherit the target user or identity’s permissions for up to one hour.\
During this time, they can perform actions within the system with the same level of access as the target user.
* **Permission-based**: Only permissions are inherited, not the full identity
* **Time-limited**: Access automatically expires after one hour
* **Audited**: All actions are logged under the original user's account. This means any action taken during the session will be recorded under the entity assuming the privileges, not the target entity.
* **Authorization required**: Only users with the specific **assume privilege** permission can use this feature
* **Scoped to a single project**: You can only assume privileges for one project at a time
## How to Assume Privileges
A key feature of the Gateway is its ability to act as a "middleman" for all session traffic.
* **Interception**: Because the Gateway sits between the secure tunnel and the target resource, it intercepts all data flowing through the connection.
* **Logging**: This traffic is logged as part of [Session Recording](/documentation/platform/pam/product-reference/session-recording). The Gateway temporarily stores encrypted session logs locally.
* **Upload**: Once the session concludes, the logs are securely uploaded to the Infisical platform for storage and review.
## Security Architecture
The PAM security model allows you to maintain a zero-trust environment while enabling convenient access.
### End-to-End Encryption
The connection between the Infisical CLI (client) and the Gateway is end-to-end encrypted. The Relay server acts solely as a router for encrypted packets and **cannot decrypt or inspect** the traffic passing through it.
### Network Security
The Gateway uses **SSH reverse tunnels** to connect to the Relay. This design offers significant security benefits:
* **No Inbound Ports**: You do not need to open any inbound firewall ports (like 22 or 5432) to the internet.
* **Outbound-Only**: The Gateway only requires outbound connectivity to the Relay server and Infisical API.
For a deep dive into the underlying cryptography, certificate management, and isolation guarantees, refer to the [Gateway Security Architecture](/documentation/platform/gateways/security).
### Deployment
For instructions on setting up the necessary infrastructure, see the [Gateway Deployment Guide](/documentation/platform/gateways/gateway-deployment).
---
# Source: https://infisical.com/docs/documentation/platform/access-controls/assume-privilege.md
> ## Documentation Index
> Fetch the complete documentation index at: https://infisical.com/docs/llms.txt
> Use this file to discover all available pages before exploring further.
# Assume Privileges
> Learn how to temporarily assume the privileges of a user or machine identity within a project.
This feature allows authorized users to temporarily take on the permissions of another user or identity. It helps administrators and access managers test and verify permissions before granting access, ensuring everything is set up correctly.
It also reduces back-and-forth with end users when troubleshooting permission-related issues.
## How It Works
When an authorized user activates assume privileges mode, they temporarily inherit the target user or identity’s permissions for up to one hour.\
During this time, they can perform actions within the system with the same level of access as the target user.
* **Permission-based**: Only permissions are inherited, not the full identity
* **Time-limited**: Access automatically expires after one hour
* **Audited**: All actions are logged under the original user's account. This means any action taken during the session will be recorded under the entity assuming the privileges, not the target entity.
* **Authorization required**: Only users with the specific **assume privilege** permission can use this feature
* **Scoped to a single project**: You can only assume privileges for one project at a time
## How to Assume Privileges
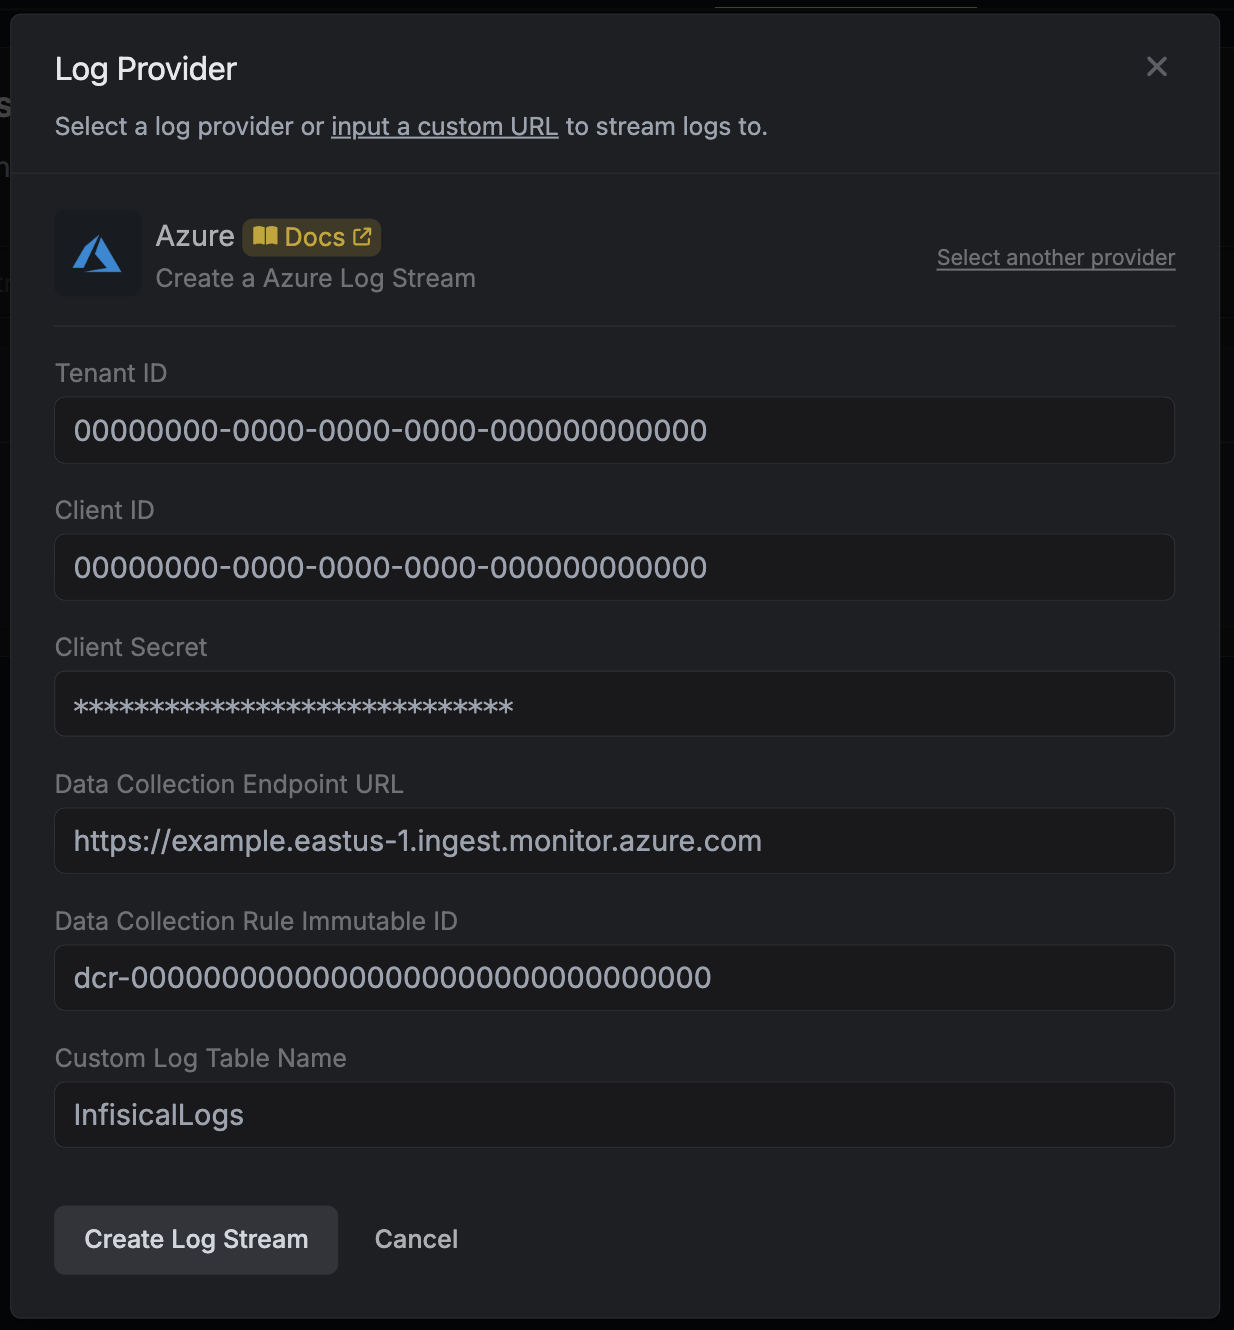
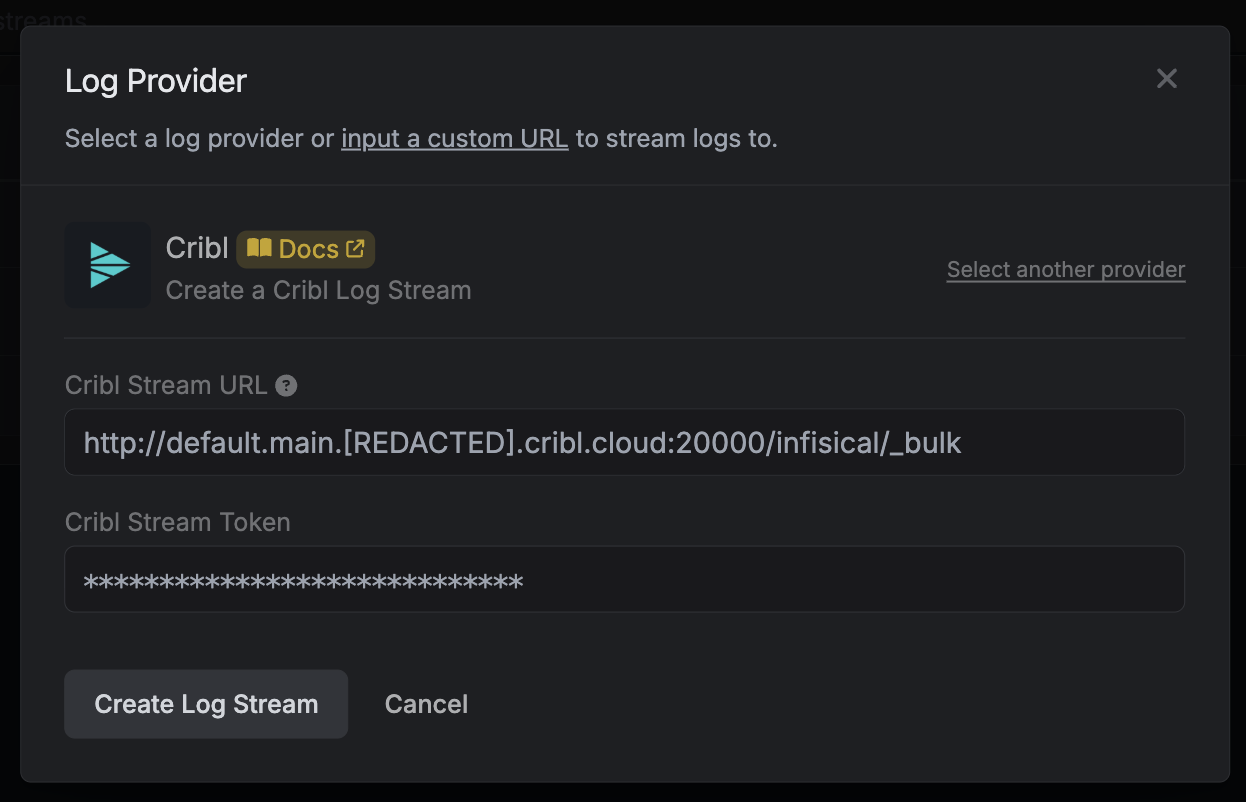
 Once you're finished, click **Create Log Stream**.
 Configure your Data Collection Endpoint by providing an **Endpoint Name**, **Subscription**, and a **Resource group**. Then click **Review + Create**.
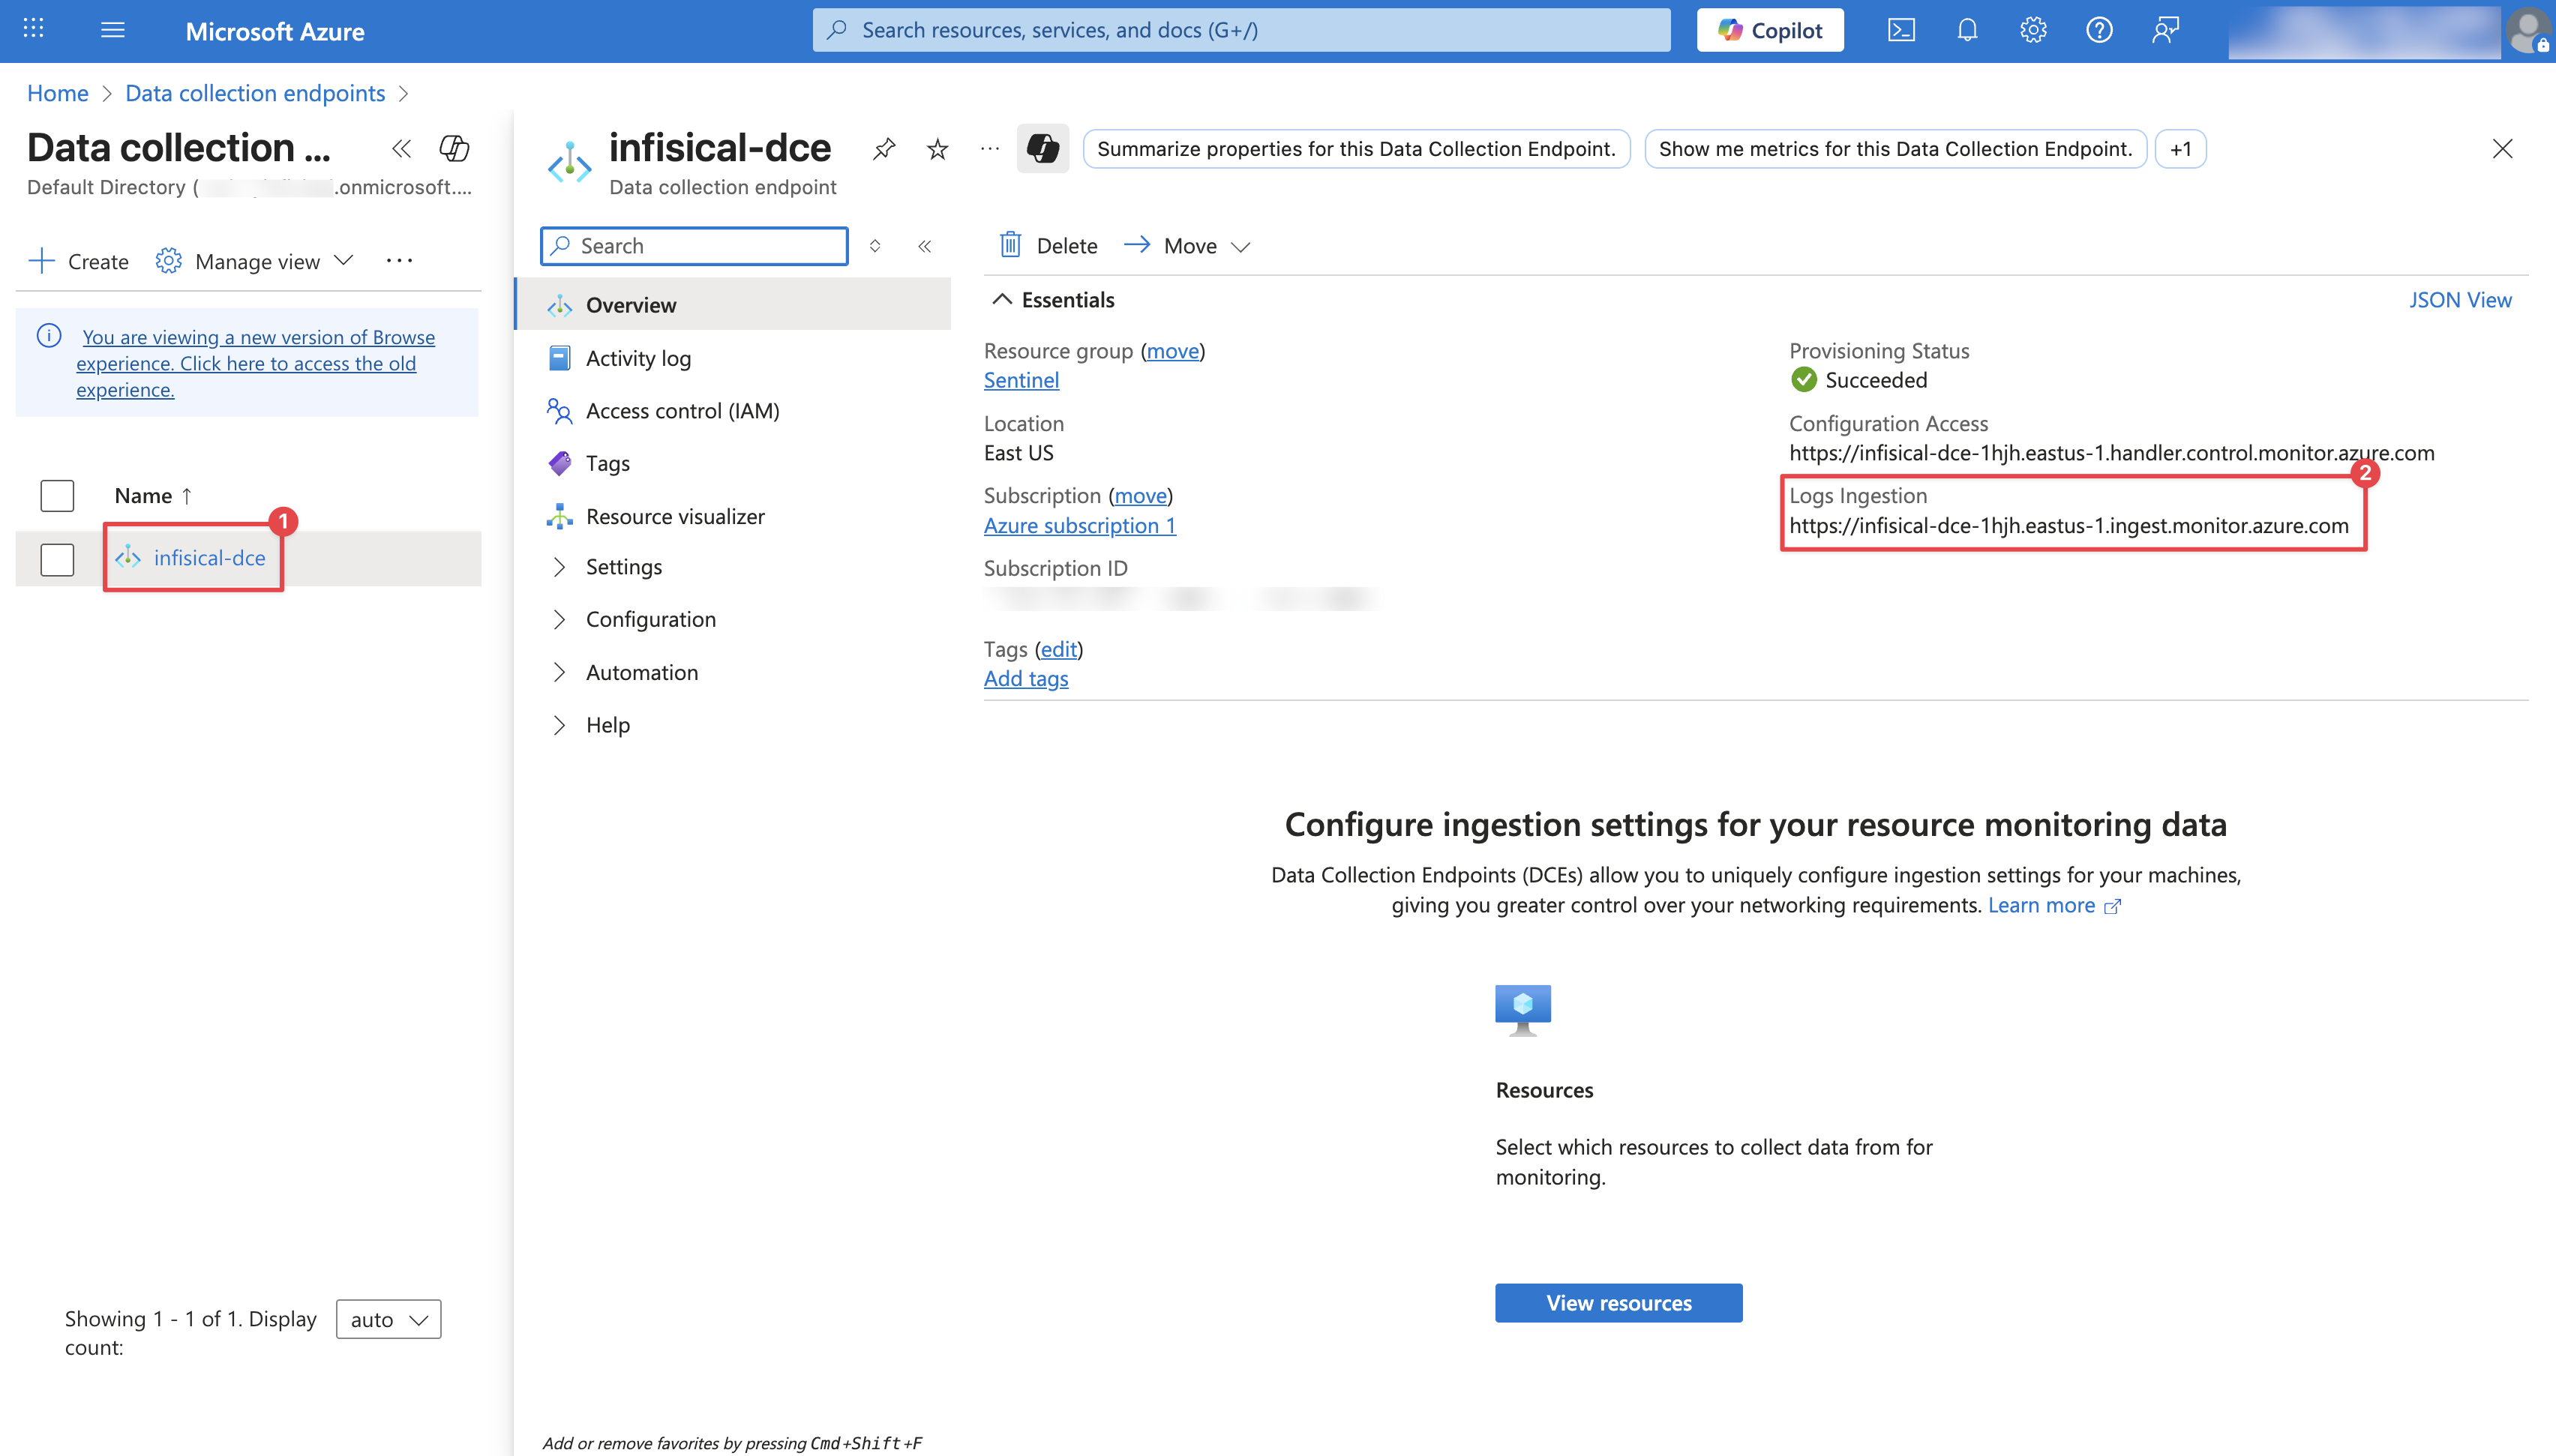
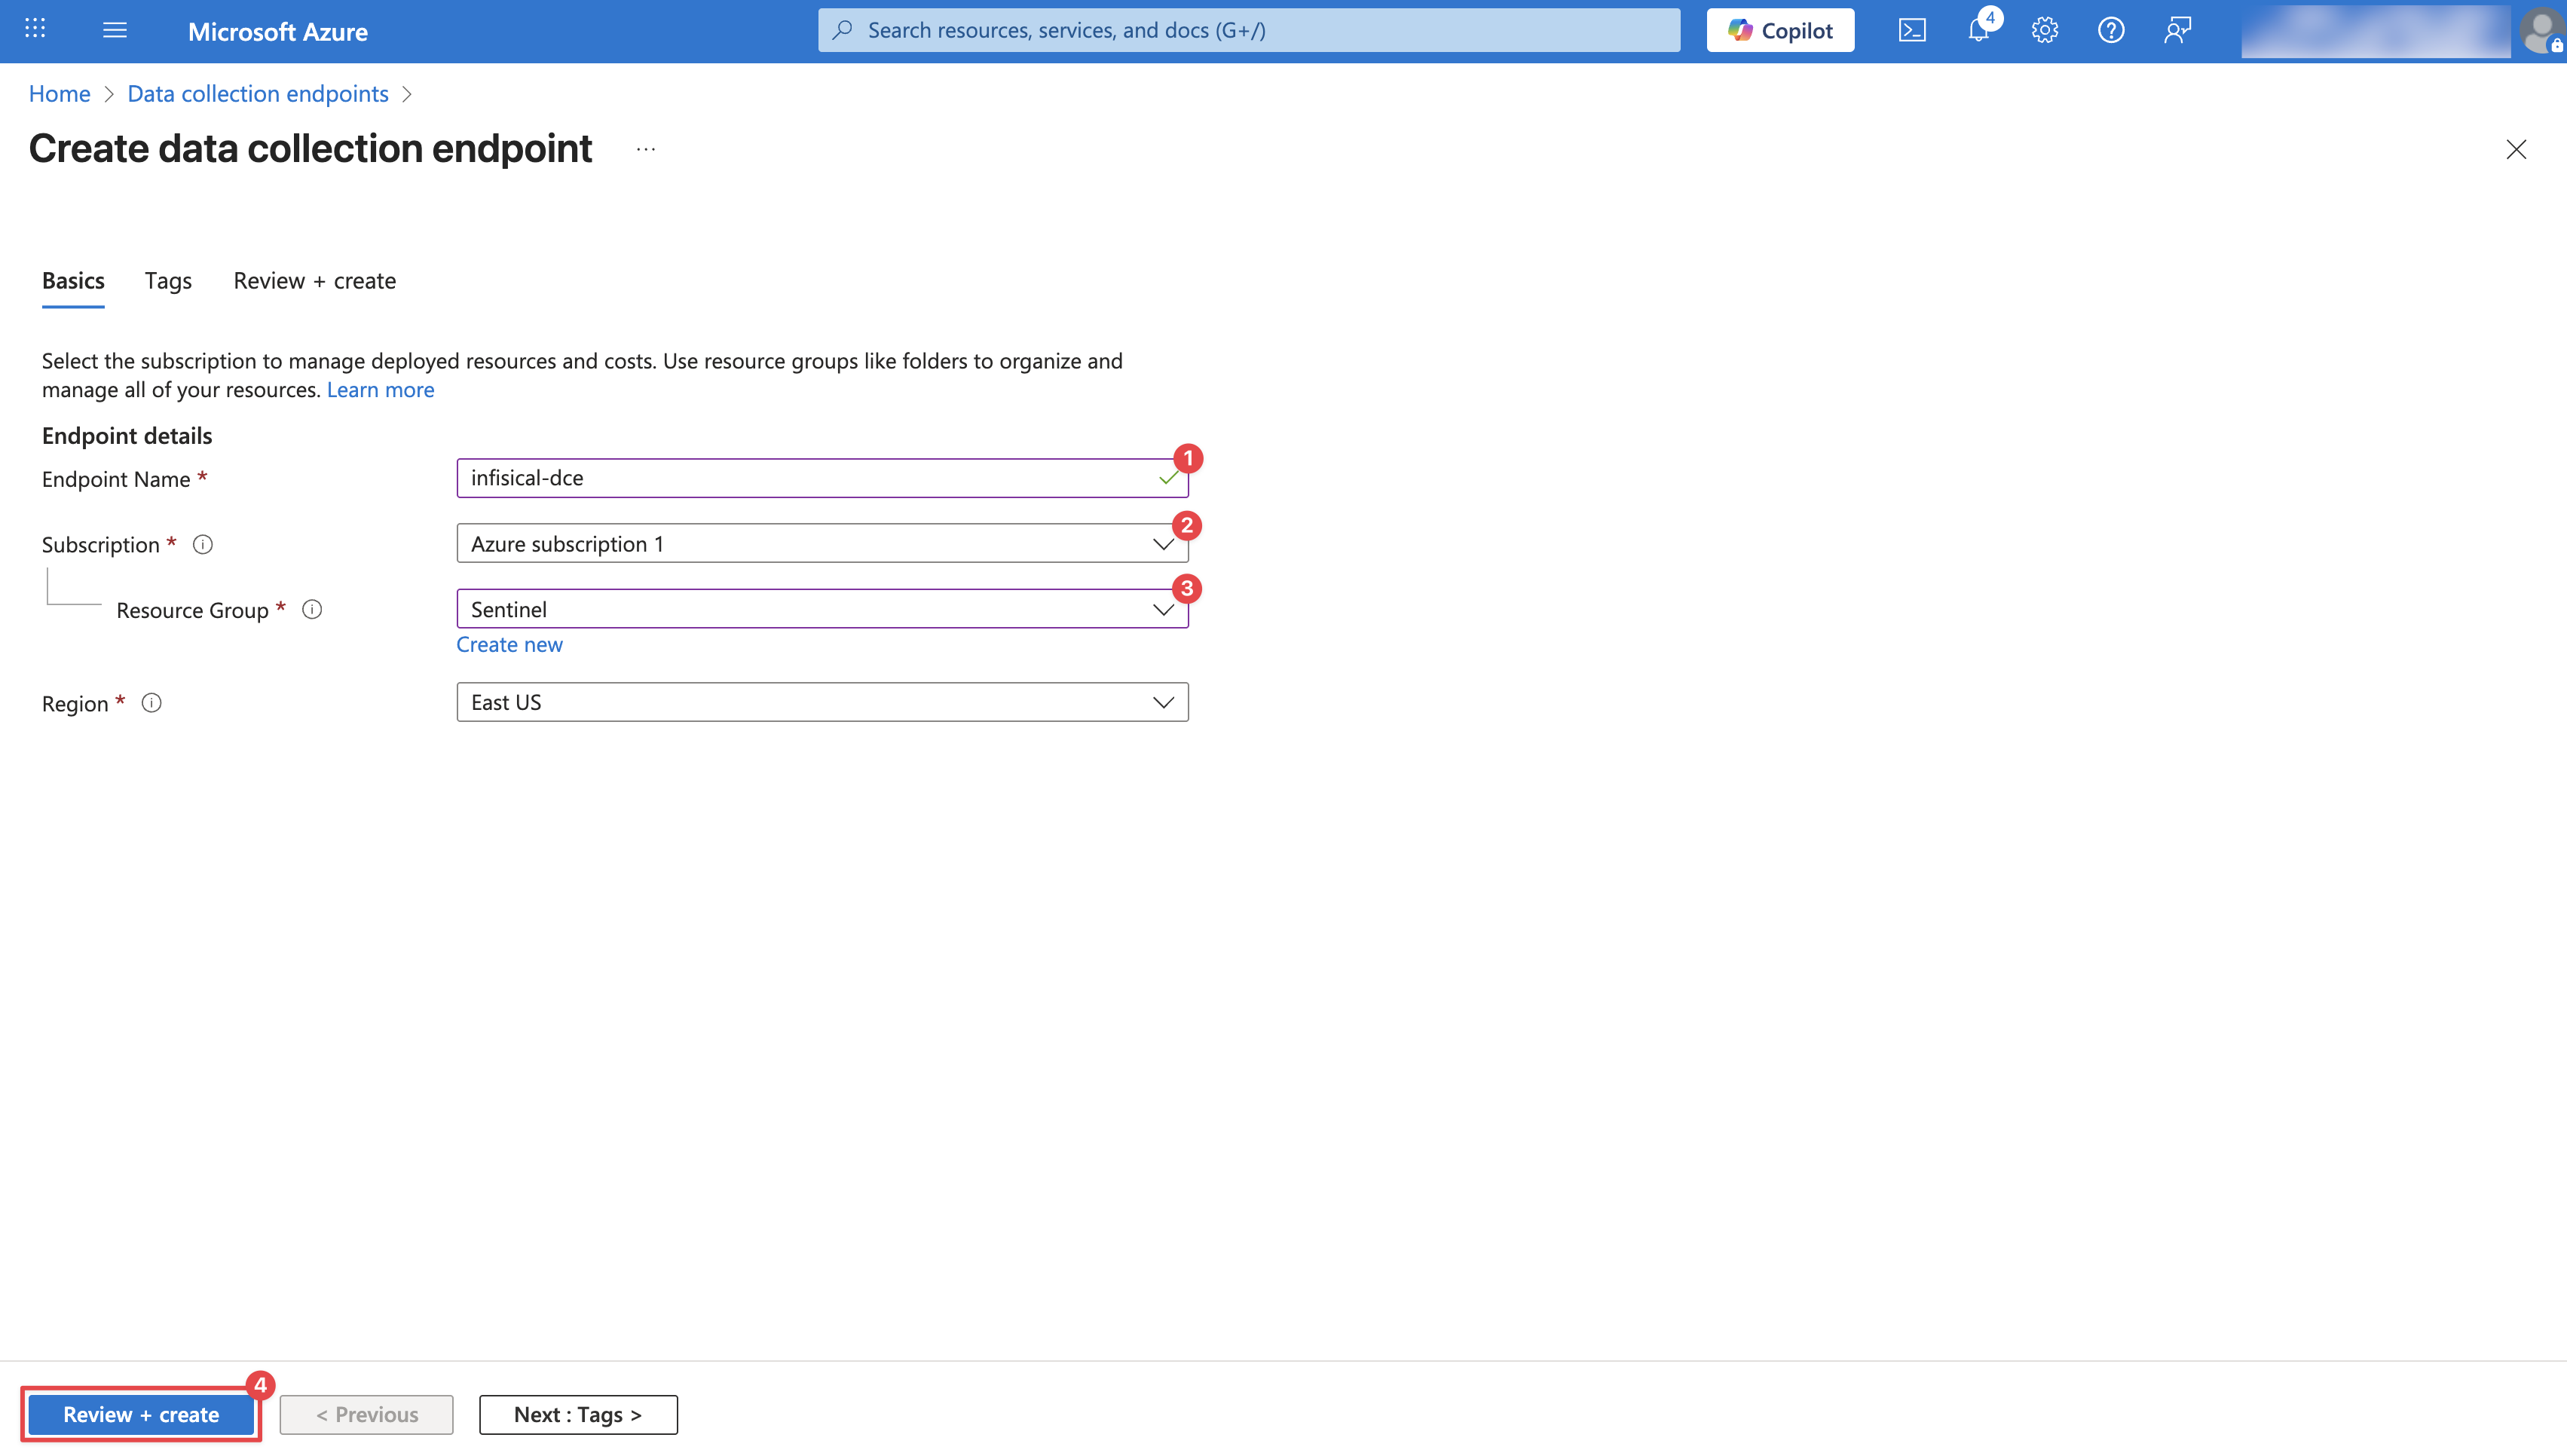 After creation, it may take a few minutes for the Data Collection Endpoint to appear. Once visible, click on it and copy the **Logs Ingestion** URL. You will need this URL in later steps.
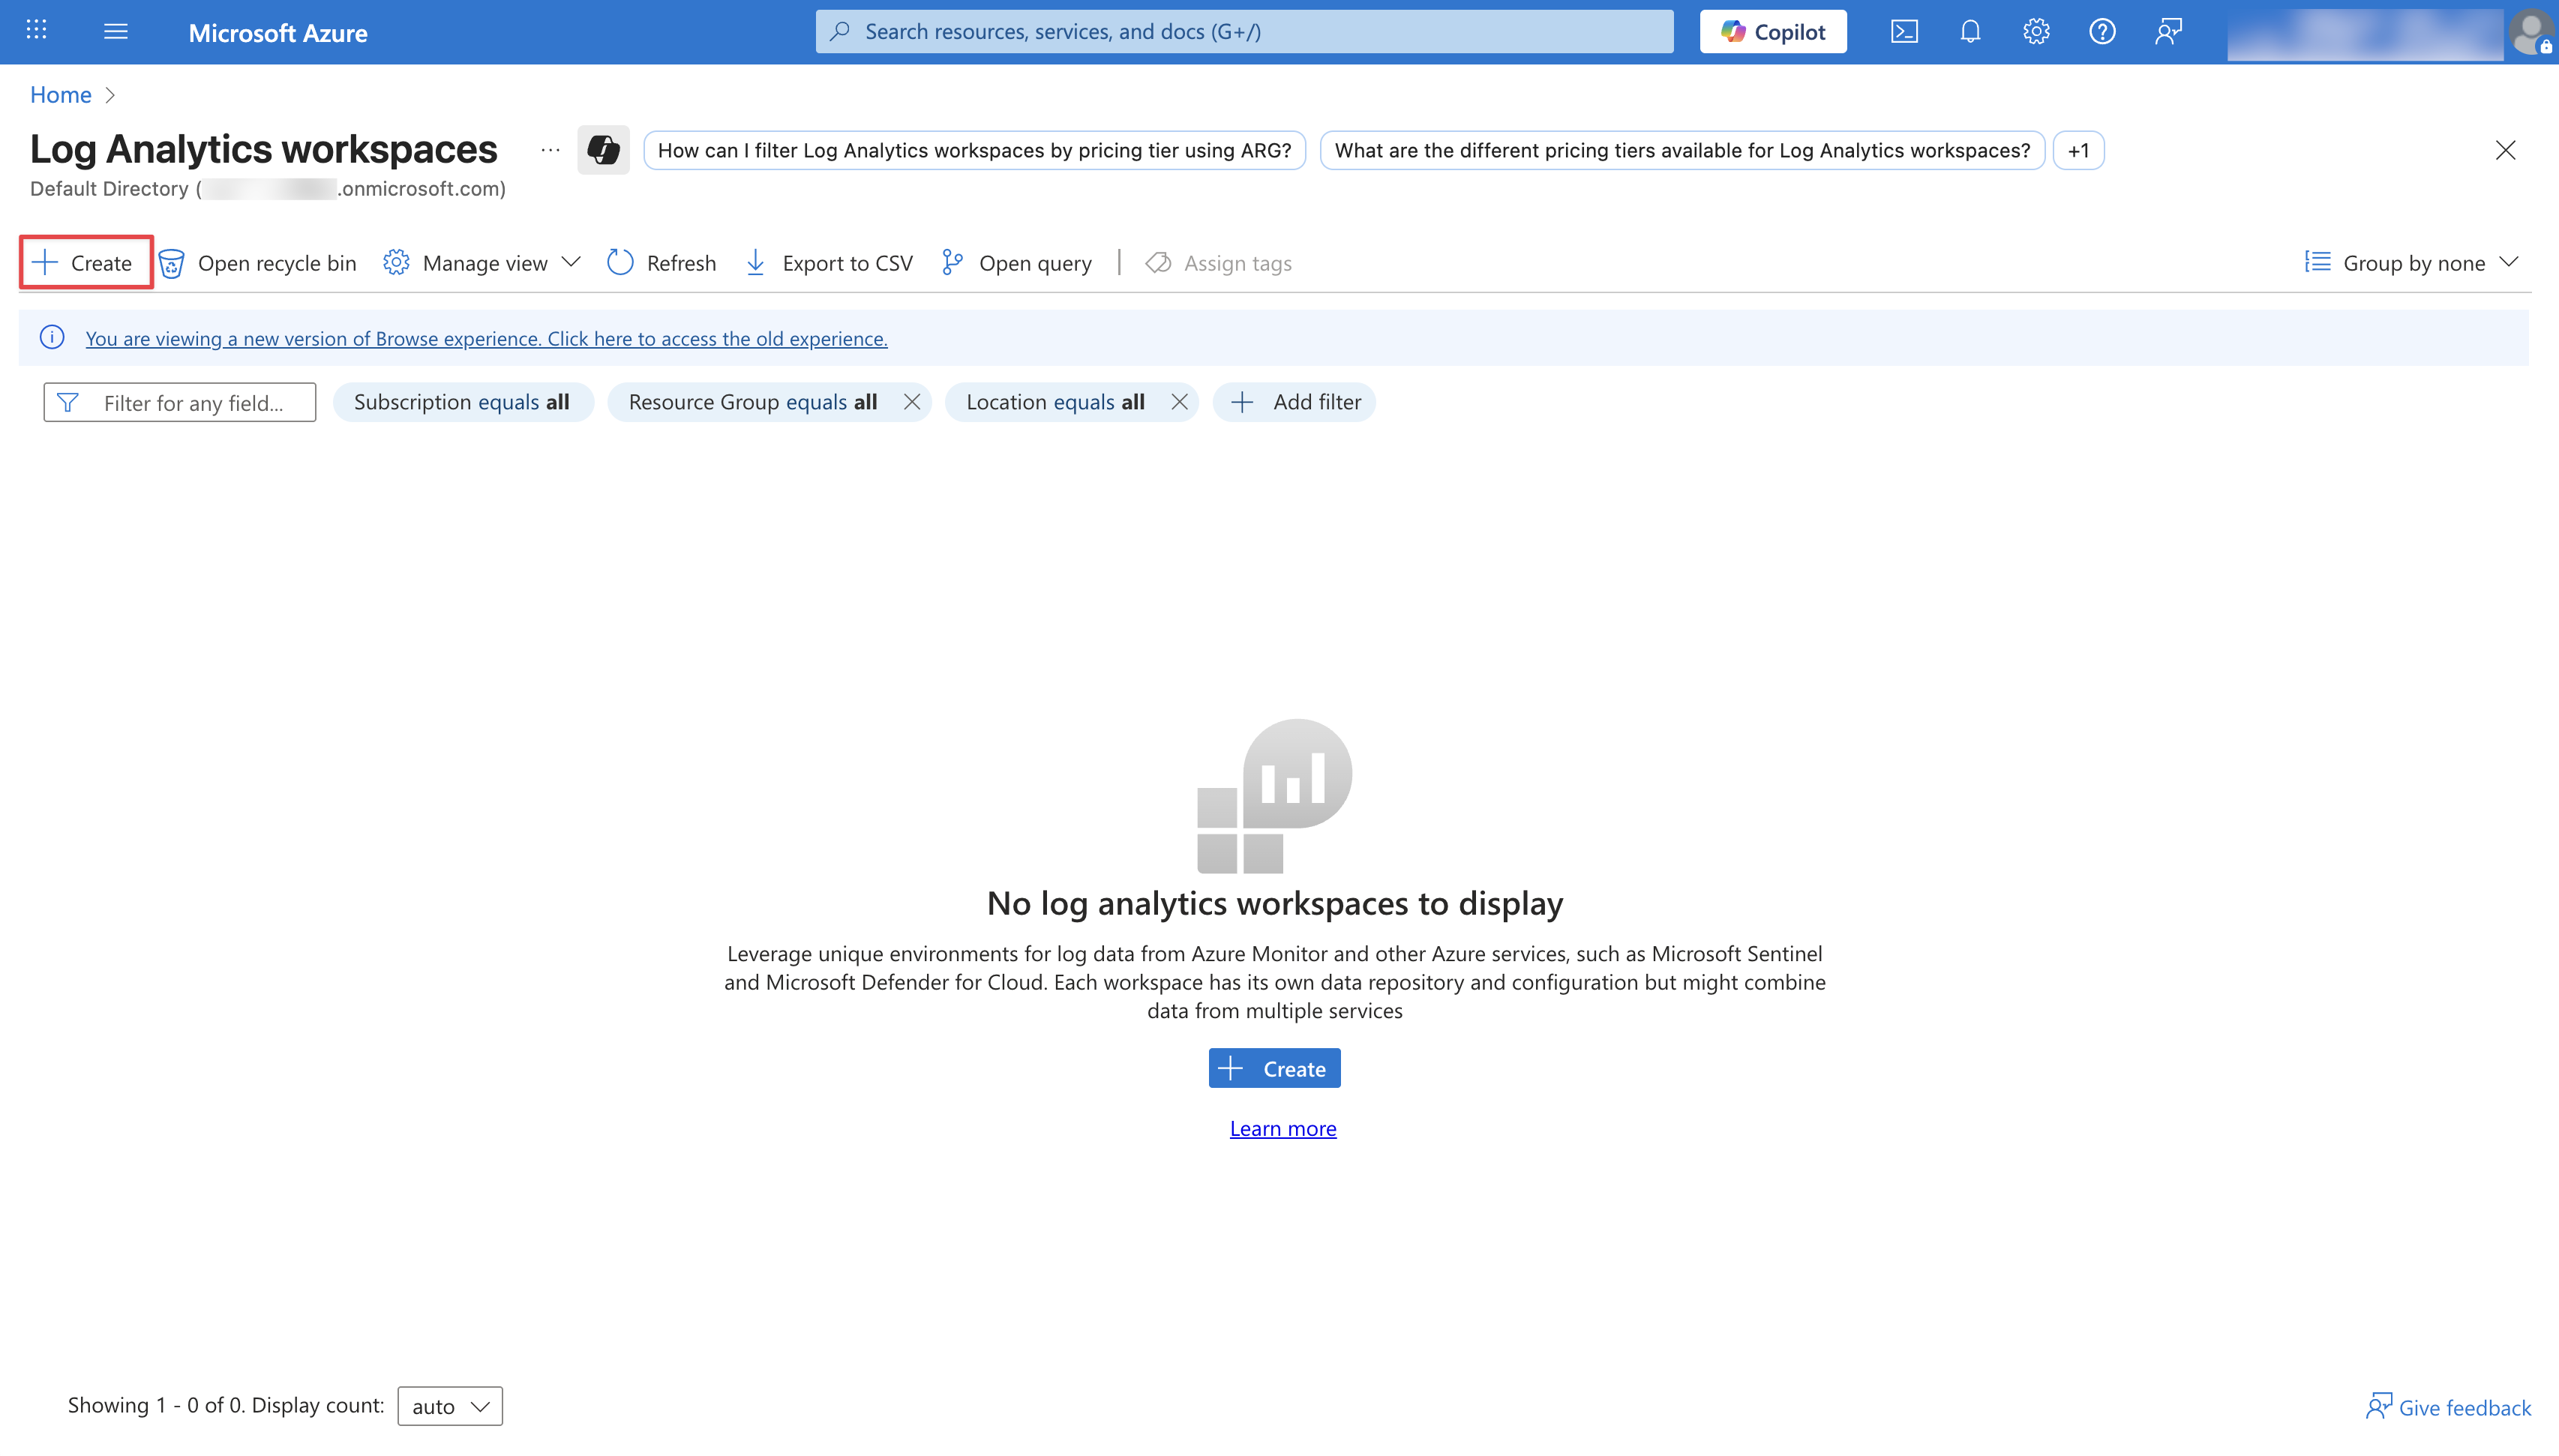 Configure your Log Analytics Workspace by providing a **Subscription**, **Resource group**, and a **Name**. Then click **Review + Create**.
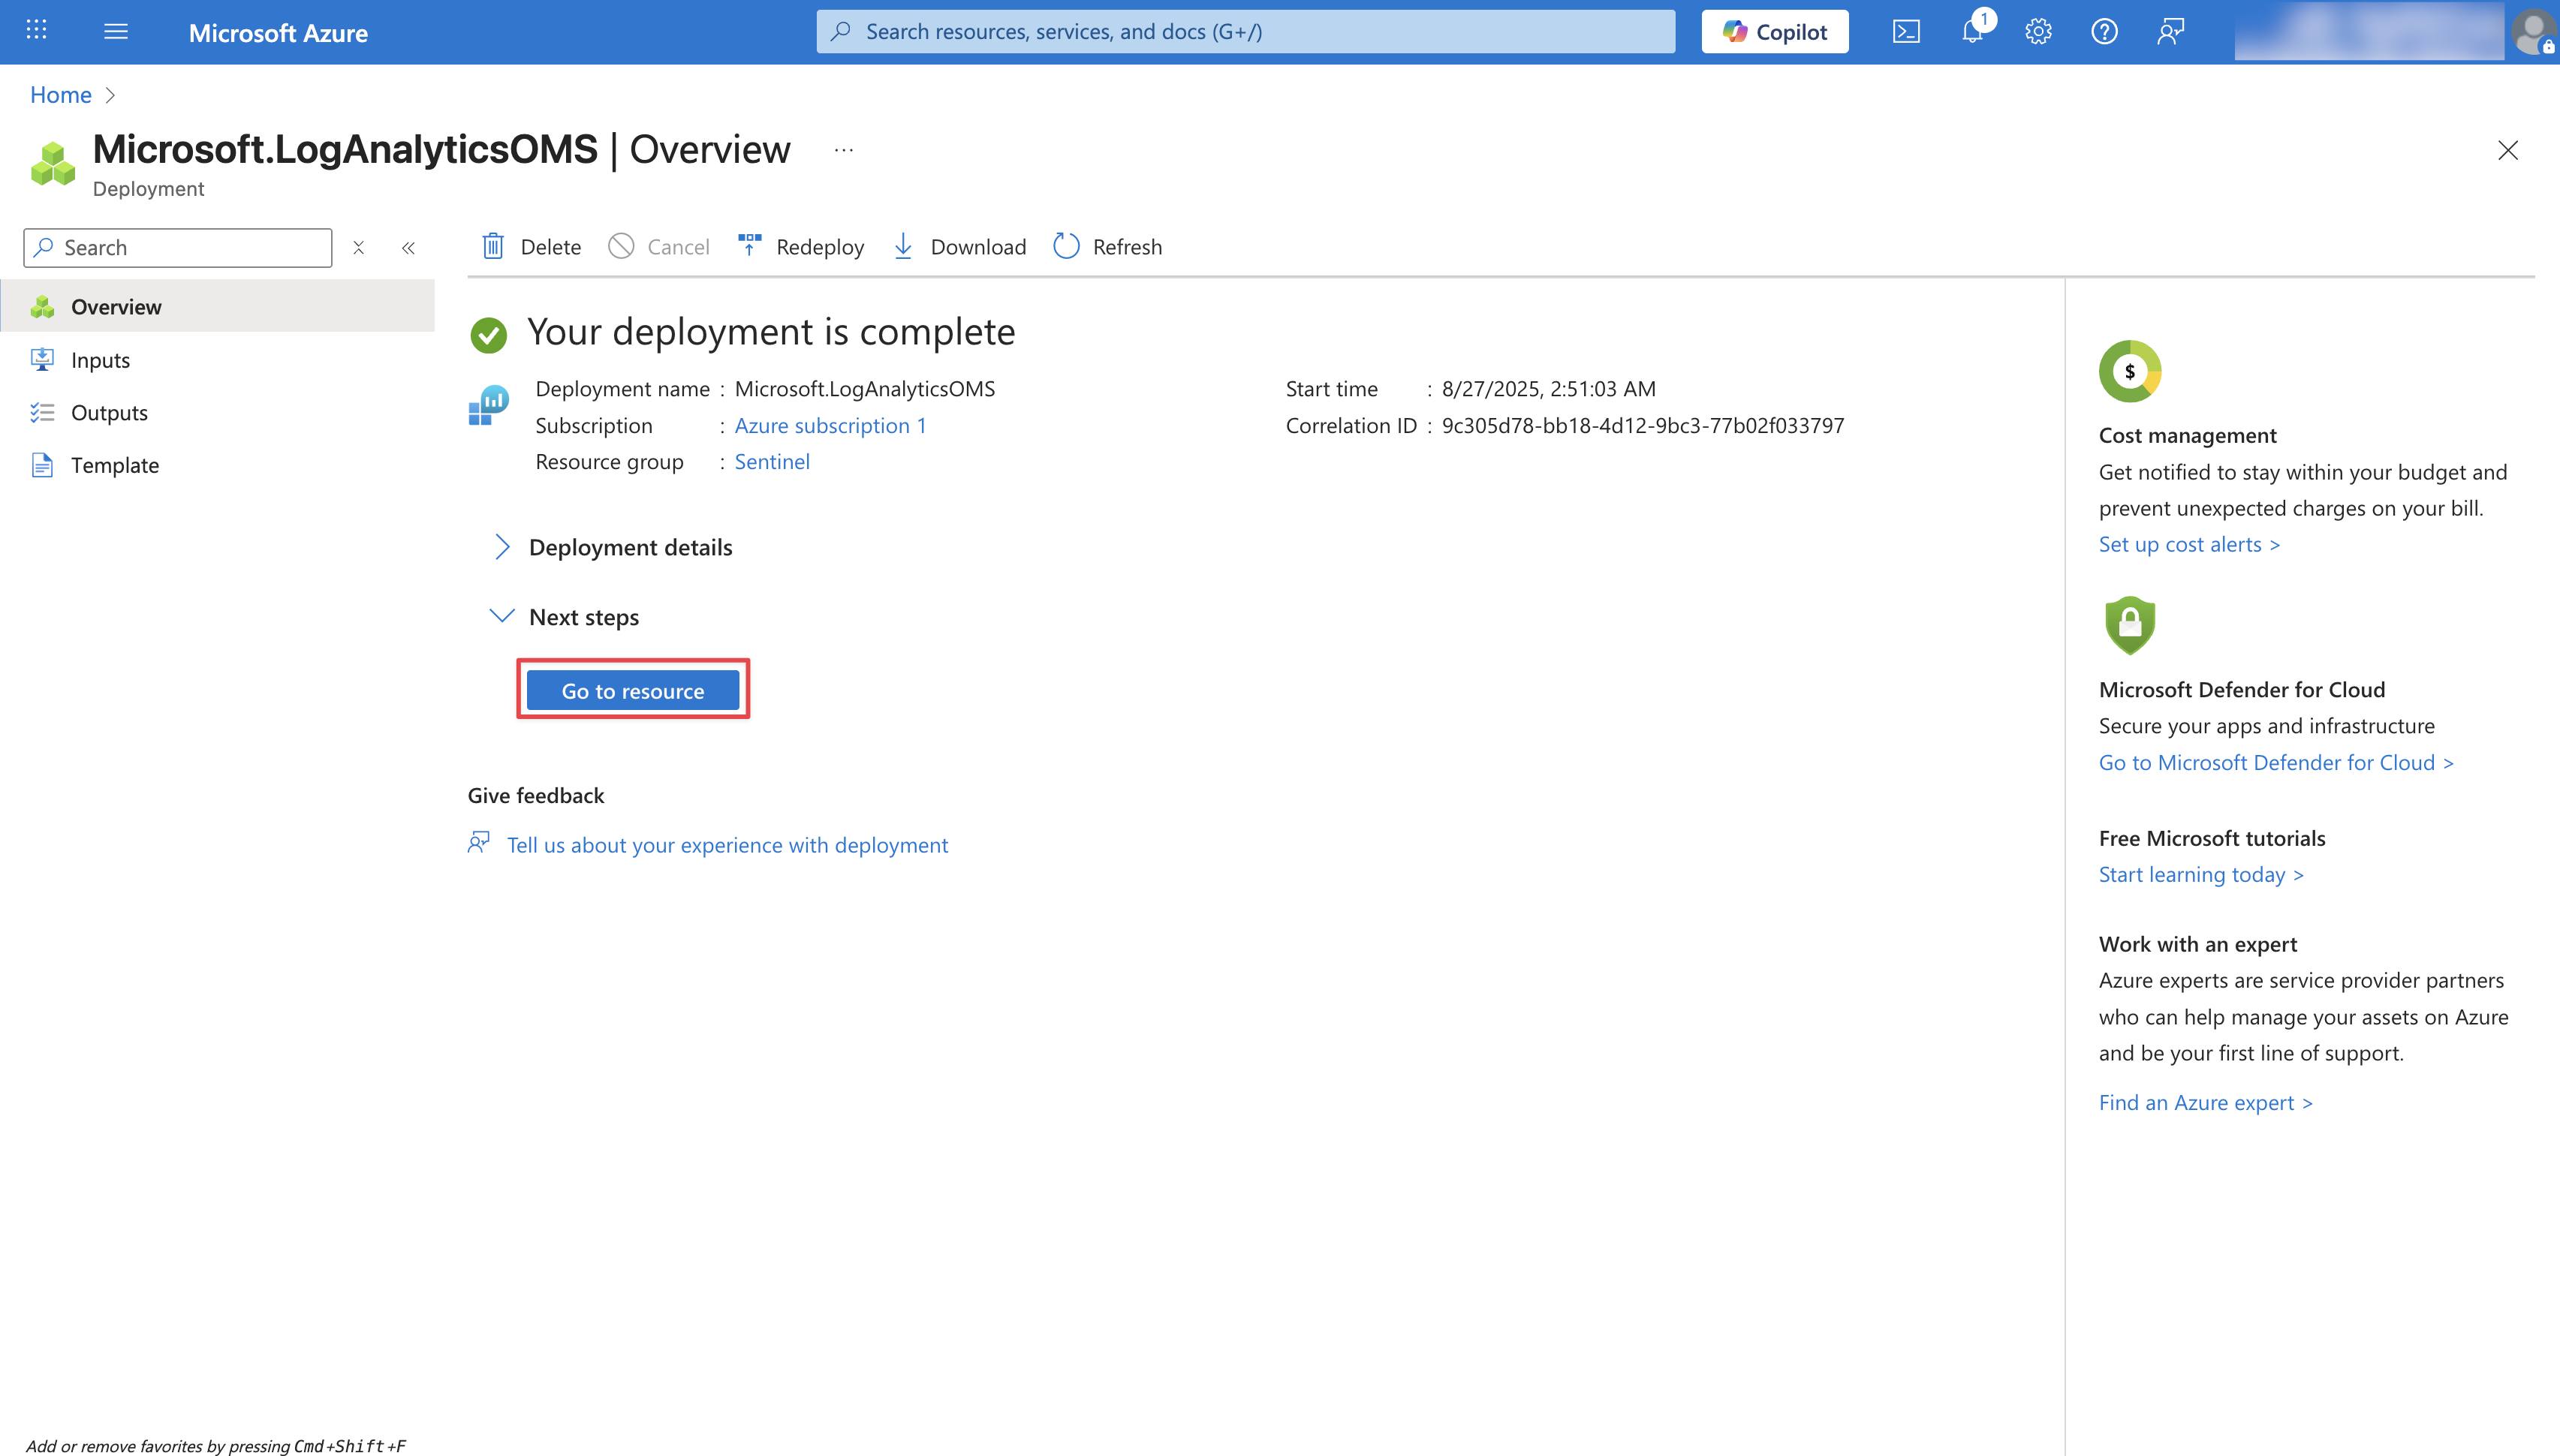
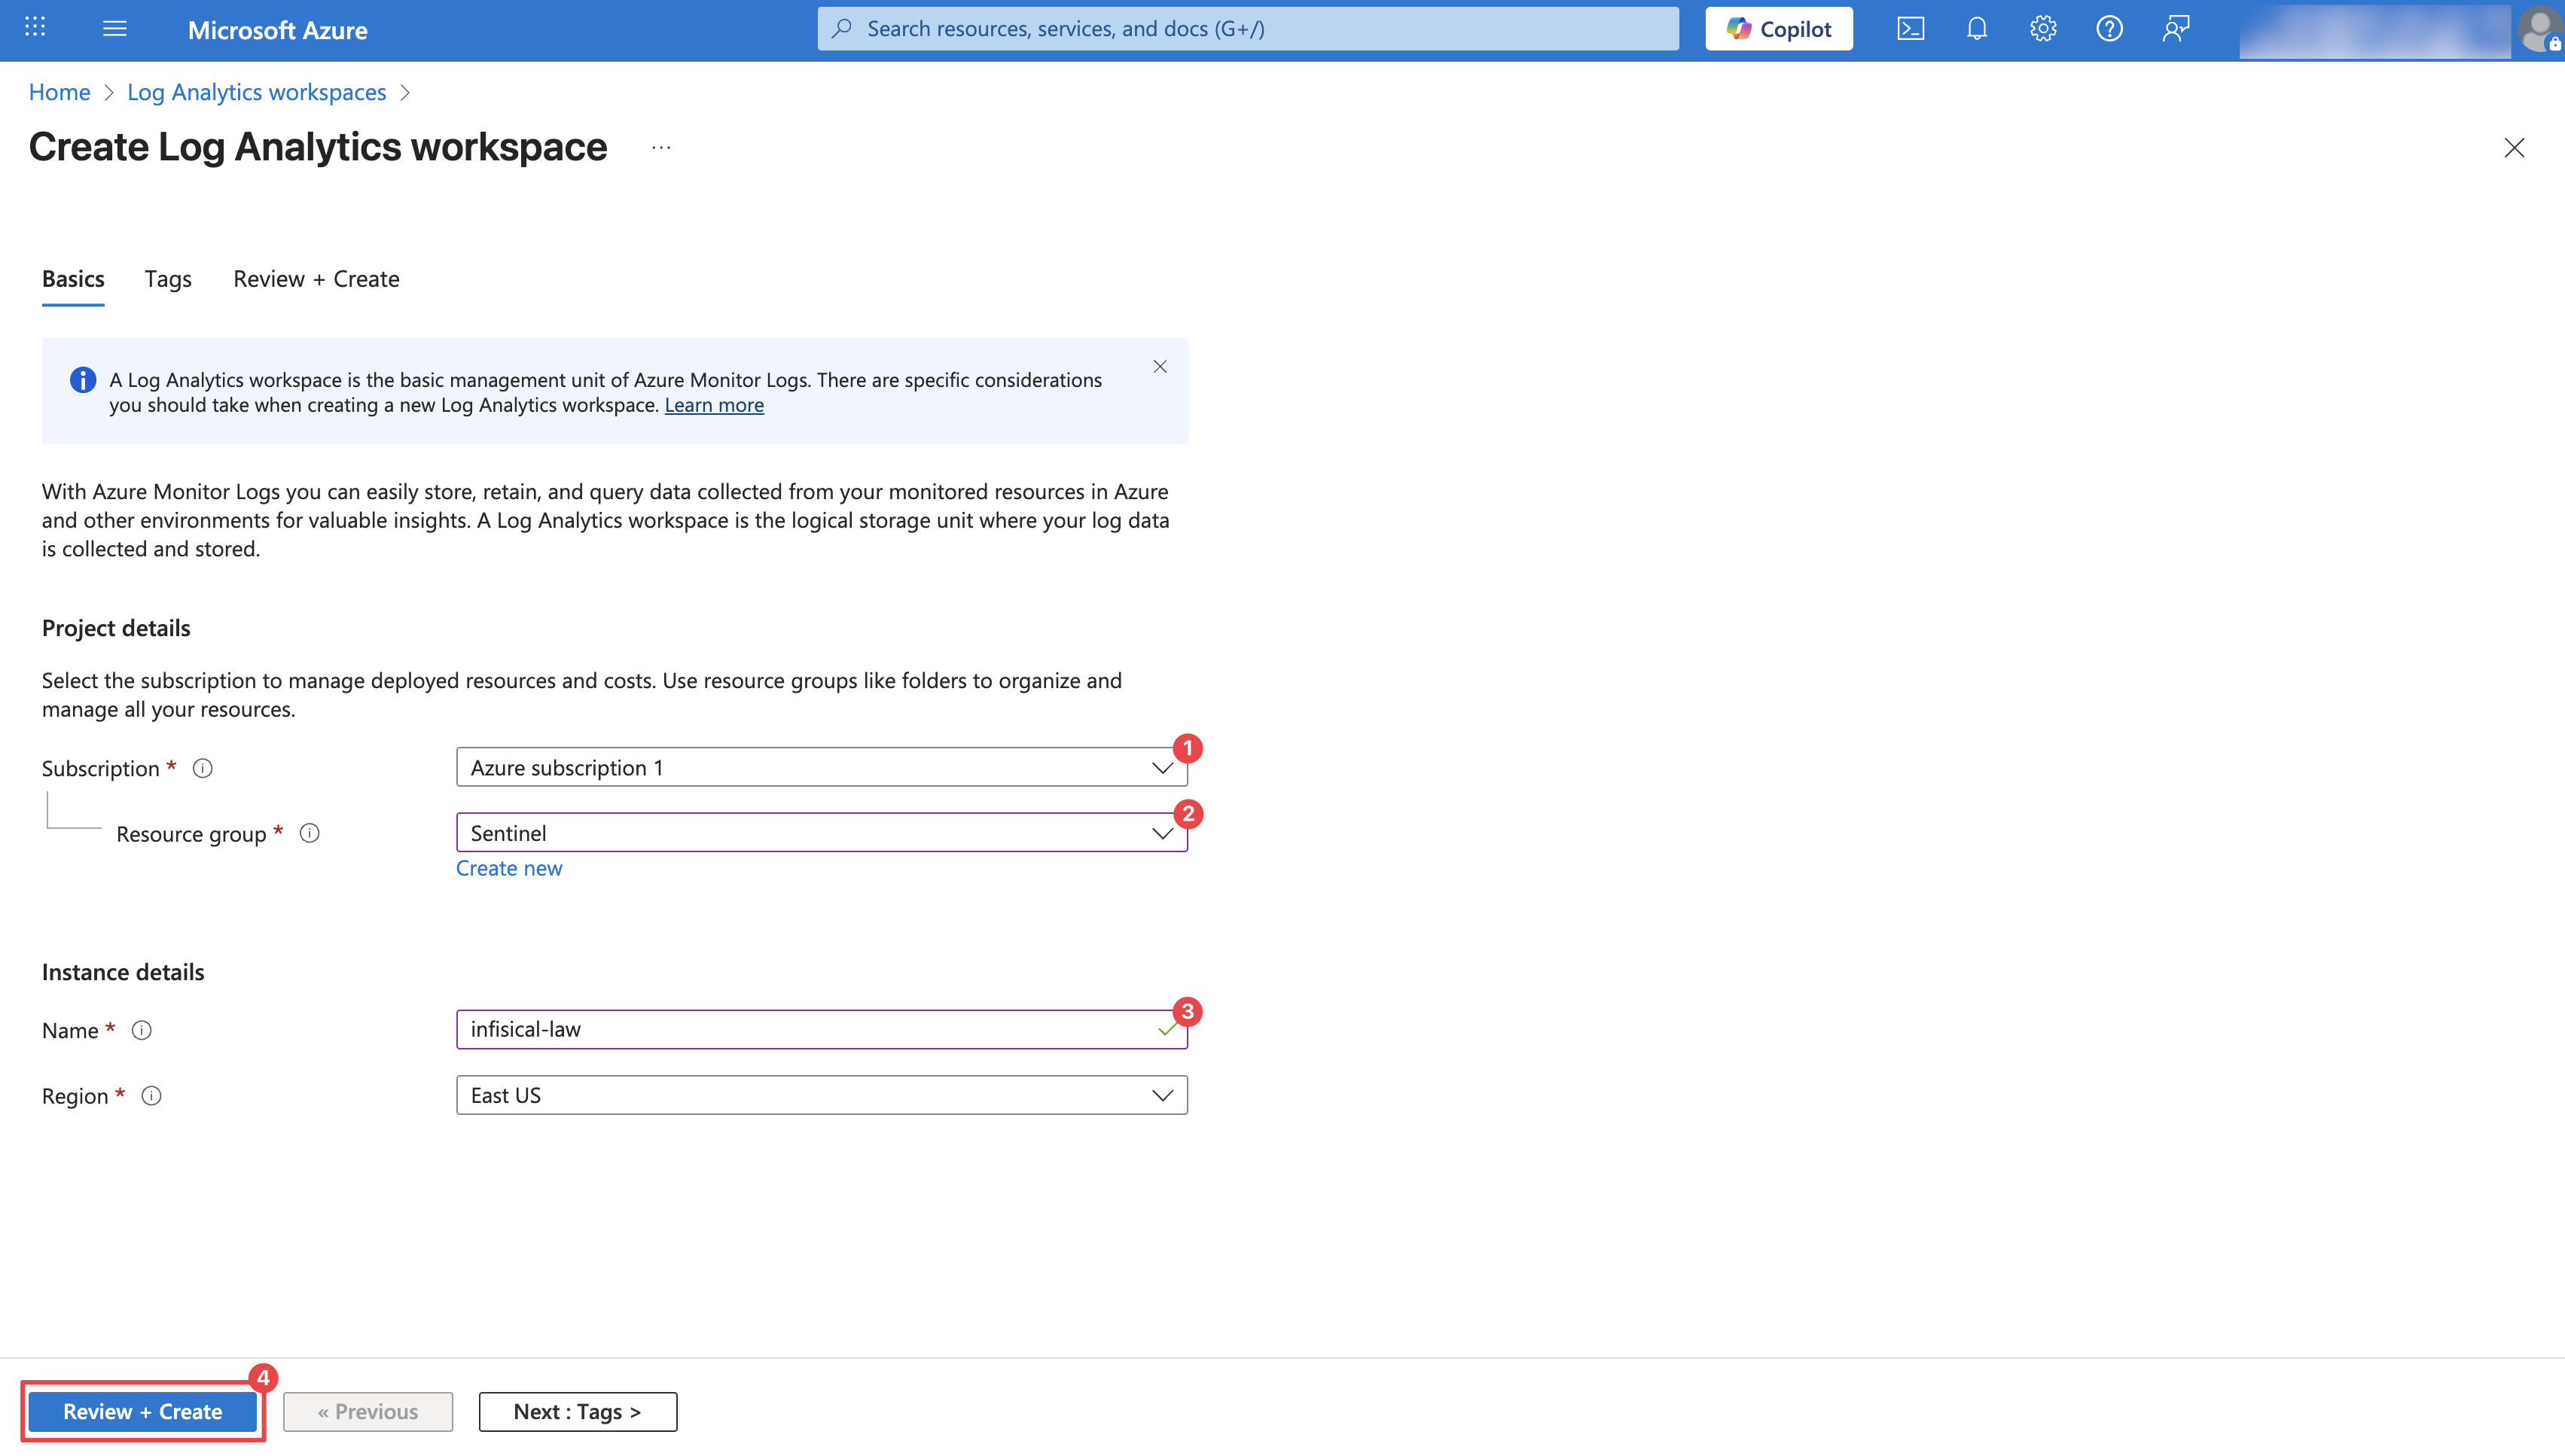 Once the workspace is deployed, click **Go to resource** to access it.
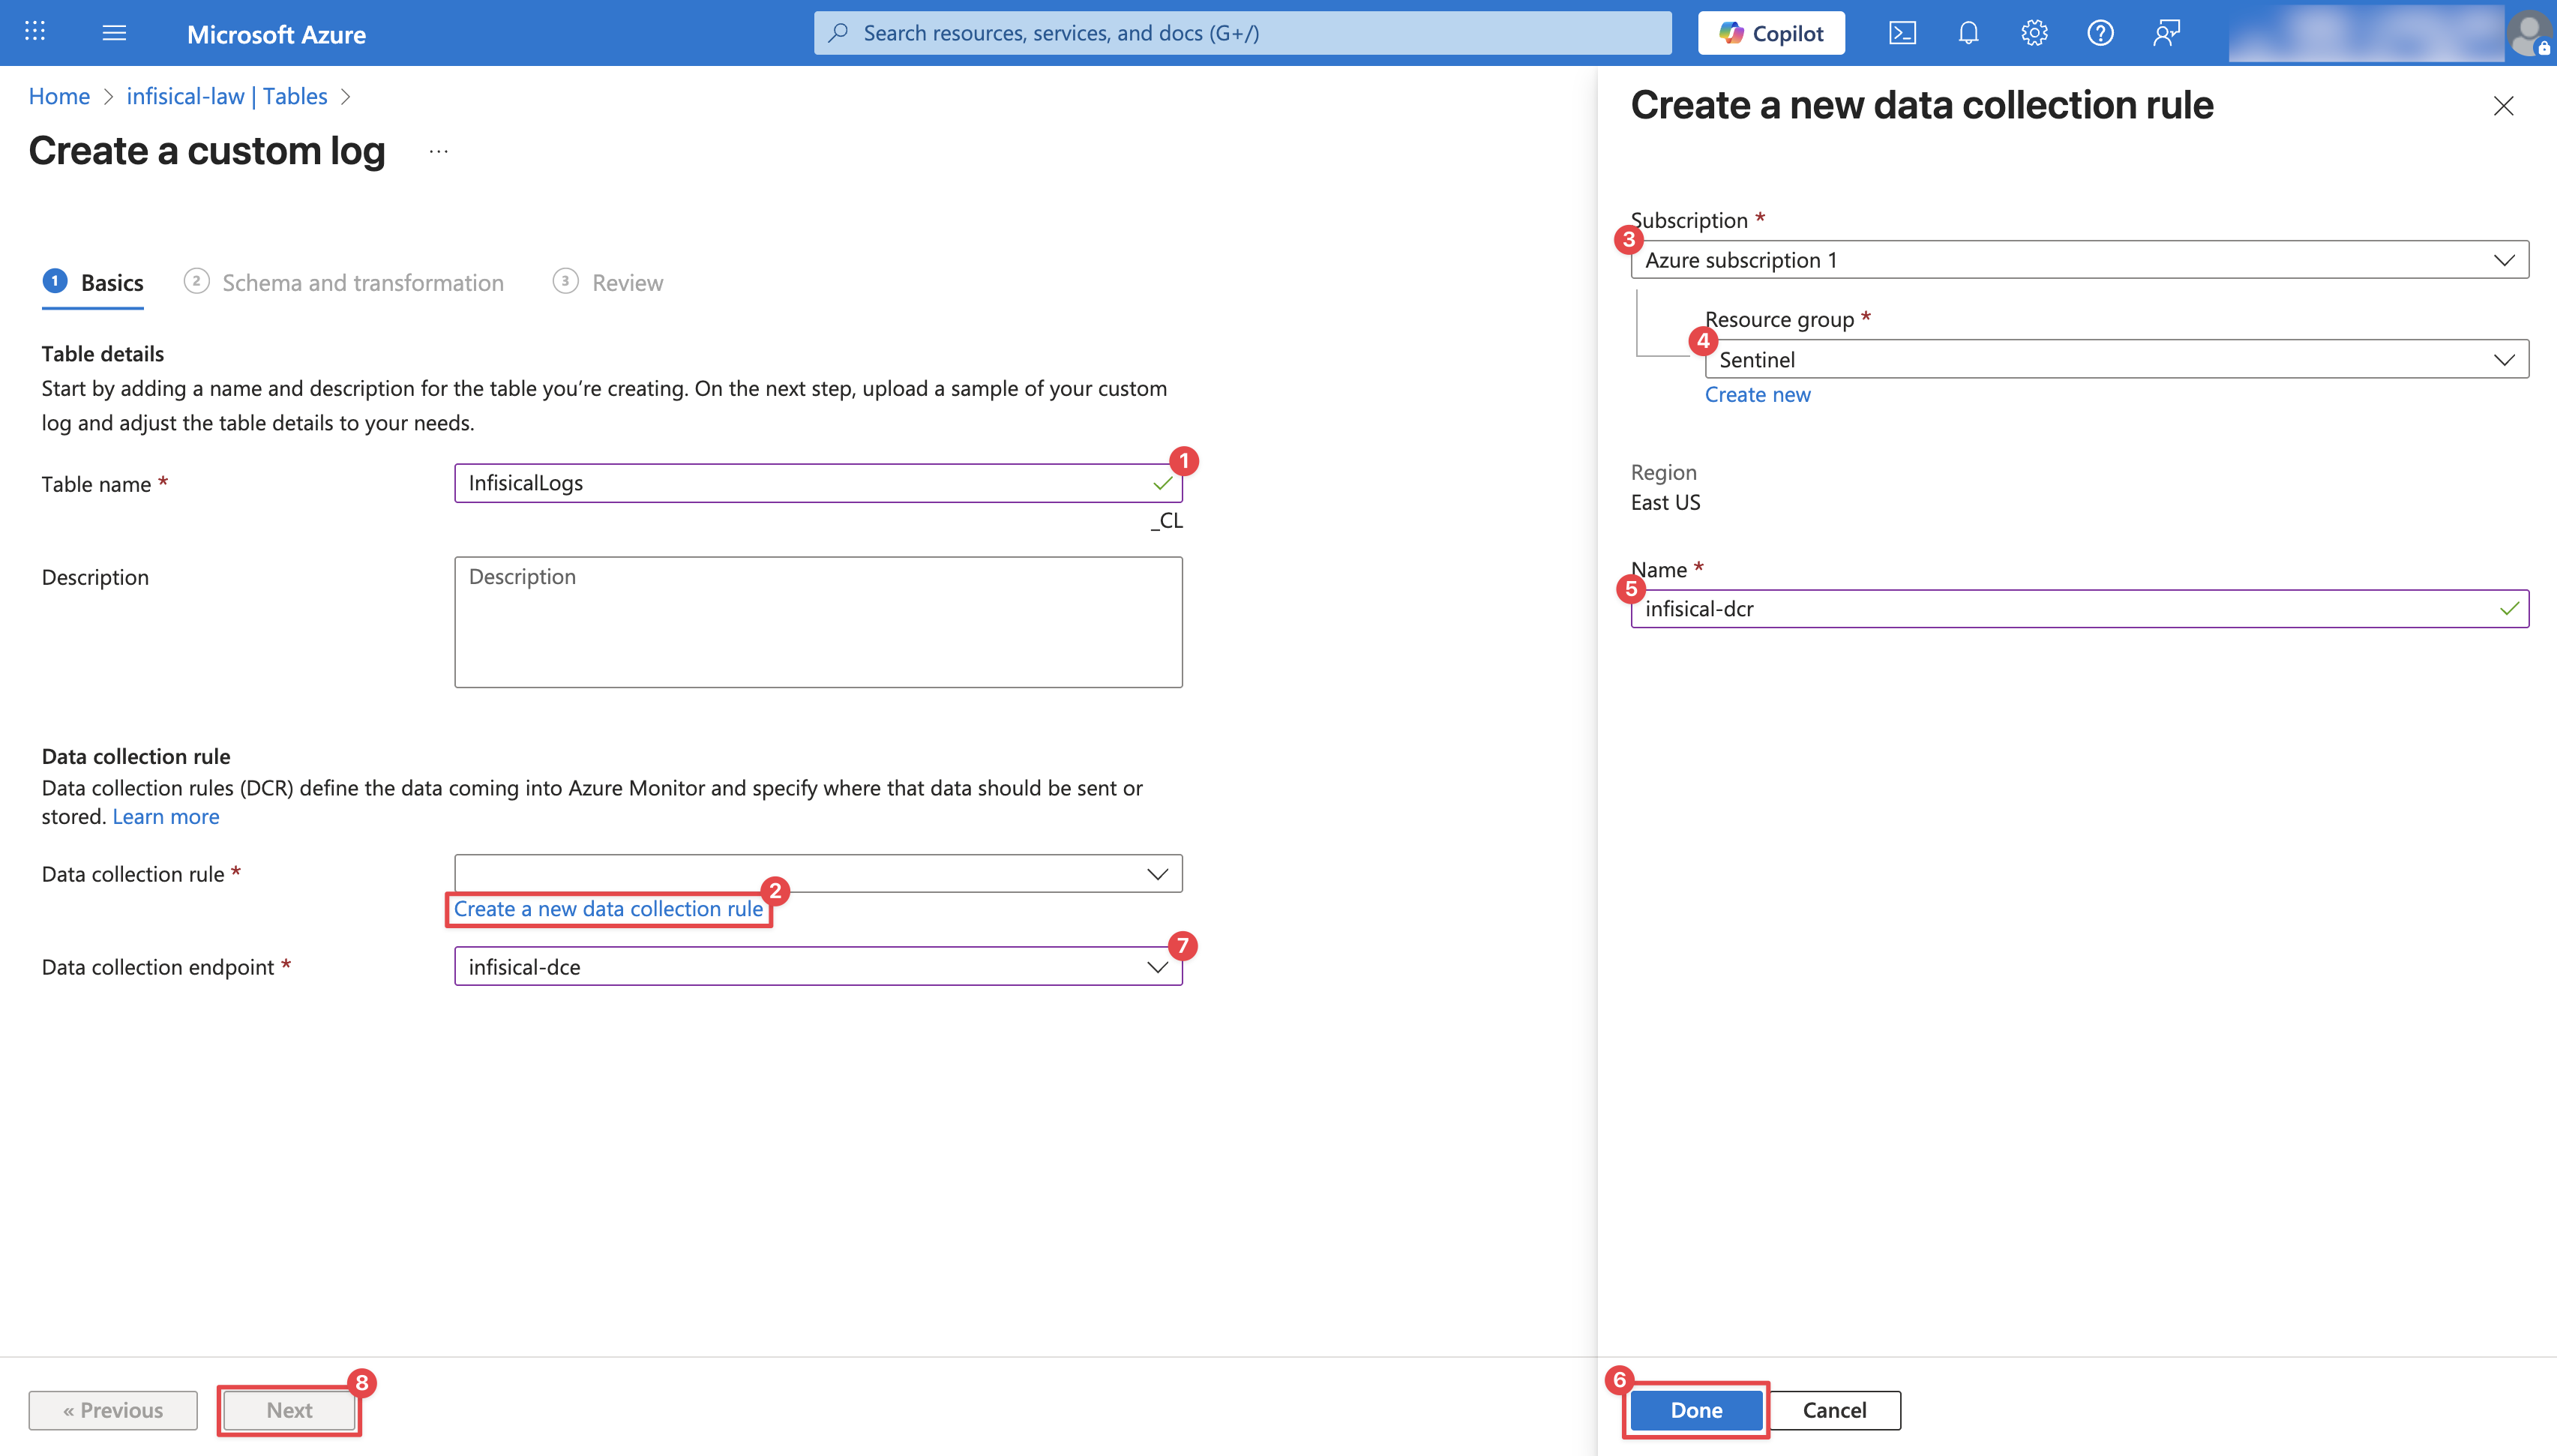
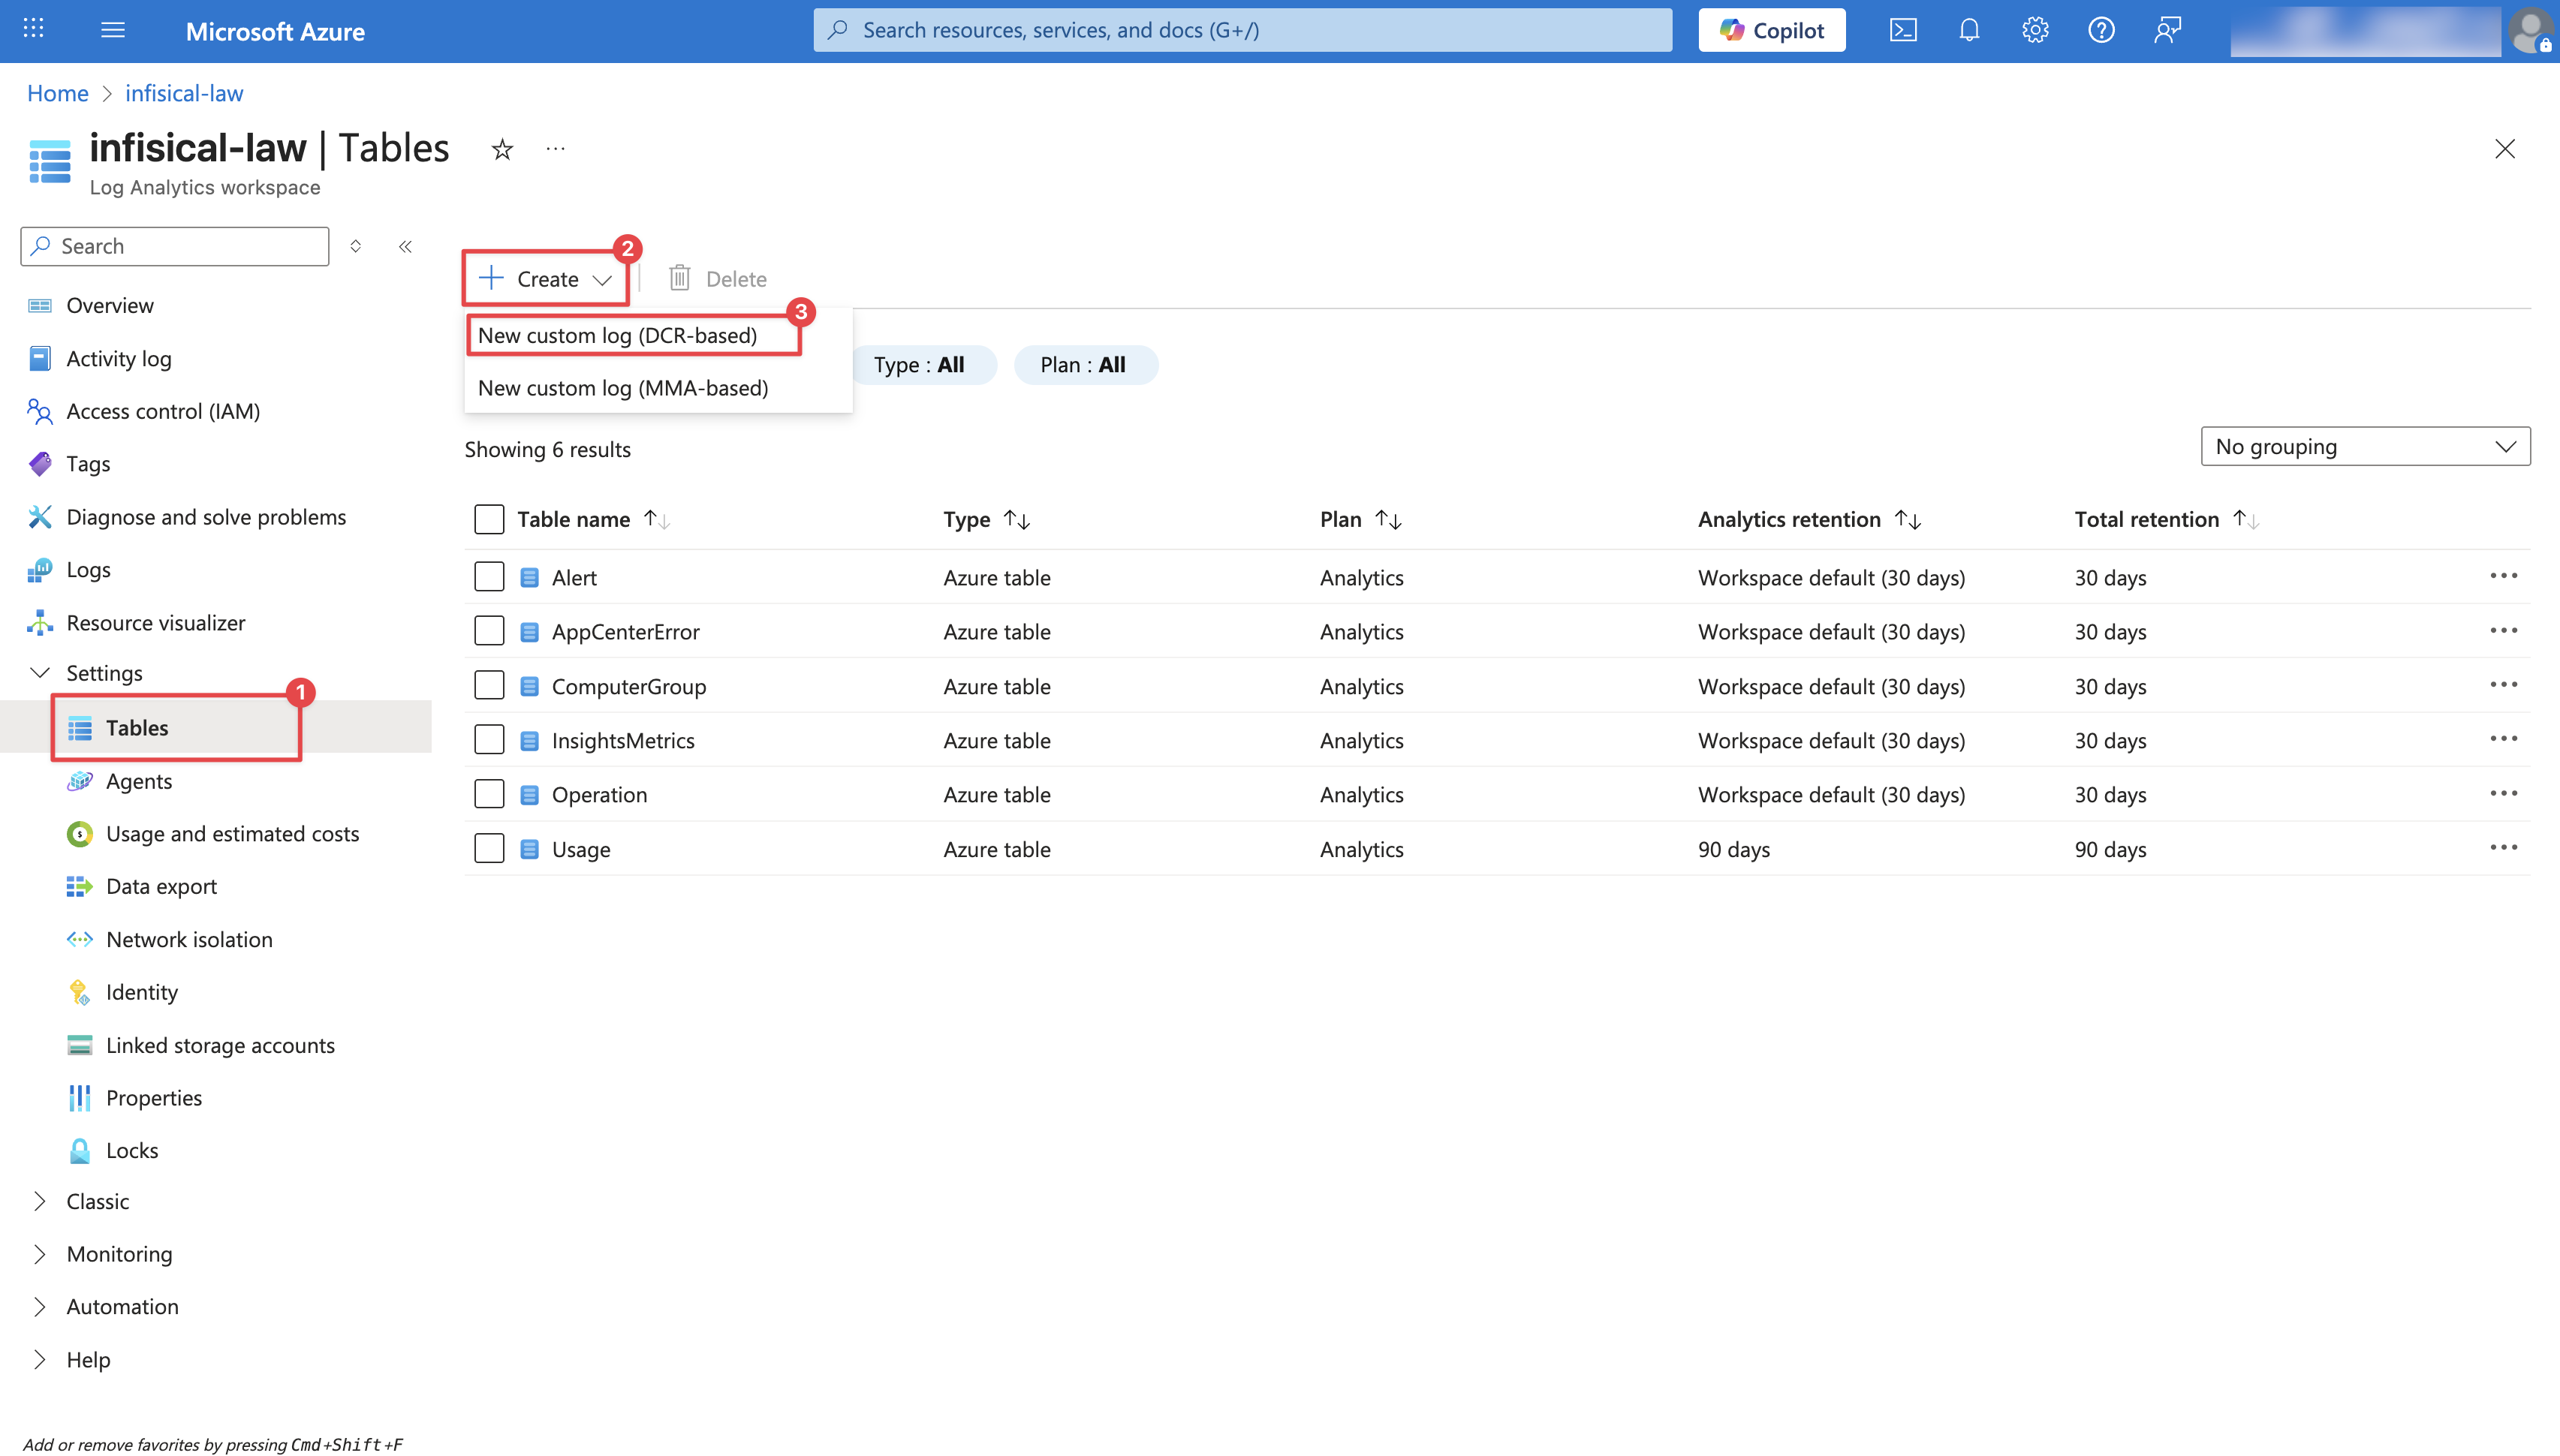 Configure the Custom Log Table: Provide a **Table name** (e.g., `InfisicalLogs`), select the **Data collection endpoint** created in Step 1, and create a new **Data collection rule** as illustrated in the image below. Then, click **Next**.
 On the **Schema and transformation** page, you'll be prompted to upload a **Log Sample**. Create a `.json` file with the following content and upload it:
```json theme={"dark"}
{
"id": "00000000-0000-0000-0000-000000000000",
"actor": "user",
"actorMetadata": {
"email": "user@example.com",
"userId": "00000000-0000-0000-0000-000000000000",
"username": "user@example.com"
},
"ipAddress": "0.0.0.0",
"userAgent": "Mozilla/5.0 (Macintosh; Intel Mac OS X 10_15_7) AppleWebKit/537.36 (KHTML, like Gecko) Chrome/139.0.0.0 Safari/537.36",
"userAgentType": "web",
"eventType": "get-secrets",
"eventMetadata": {},
"projectName": "MyProject",
"orgId": "00000000-0000-0000-0000-000000000000",
"projectId": "00000000-0000-0000-0000-000000000000",
"TimeGenerated": "2025-01-01T00:00:00.000Z"
}
```
Optionally, you can add **Transformations** to further destructure the data. For example, to extract actor email and userId:
```
source
| extend
ActorEmail = tostring(actorMetadata.email),
ActorUserId = tostring(actorMetadata.userId)
```
On the final step, click **Create**.
On the **Schema and transformation** page, you'll be prompted to upload a **Log Sample**. Create a `.json` file with the following content and upload it:
```json theme={"dark"}
{
"id": "00000000-0000-0000-0000-000000000000",
"actor": "user",
"actorMetadata": {
"email": "user@example.com",
"userId": "00000000-0000-0000-0000-000000000000",
"username": "user@example.com"
},
"ipAddress": "0.0.0.0",
"userAgent": "Mozilla/5.0 (Macintosh; Intel Mac OS X 10_15_7) AppleWebKit/537.36 (KHTML, like Gecko) Chrome/139.0.0.0 Safari/537.36",
"userAgentType": "web",
"eventType": "get-secrets",
"eventMetadata": {},
"projectName": "MyProject",
"orgId": "00000000-0000-0000-0000-000000000000",
"projectId": "00000000-0000-0000-0000-000000000000",
"TimeGenerated": "2025-01-01T00:00:00.000Z"
}
```
Optionally, you can add **Transformations** to further destructure the data. For example, to extract actor email and userId:
```
source
| extend
ActorEmail = tostring(actorMetadata.email),
ActorUserId = tostring(actorMetadata.userId)
```
On the final step, click **Create**.
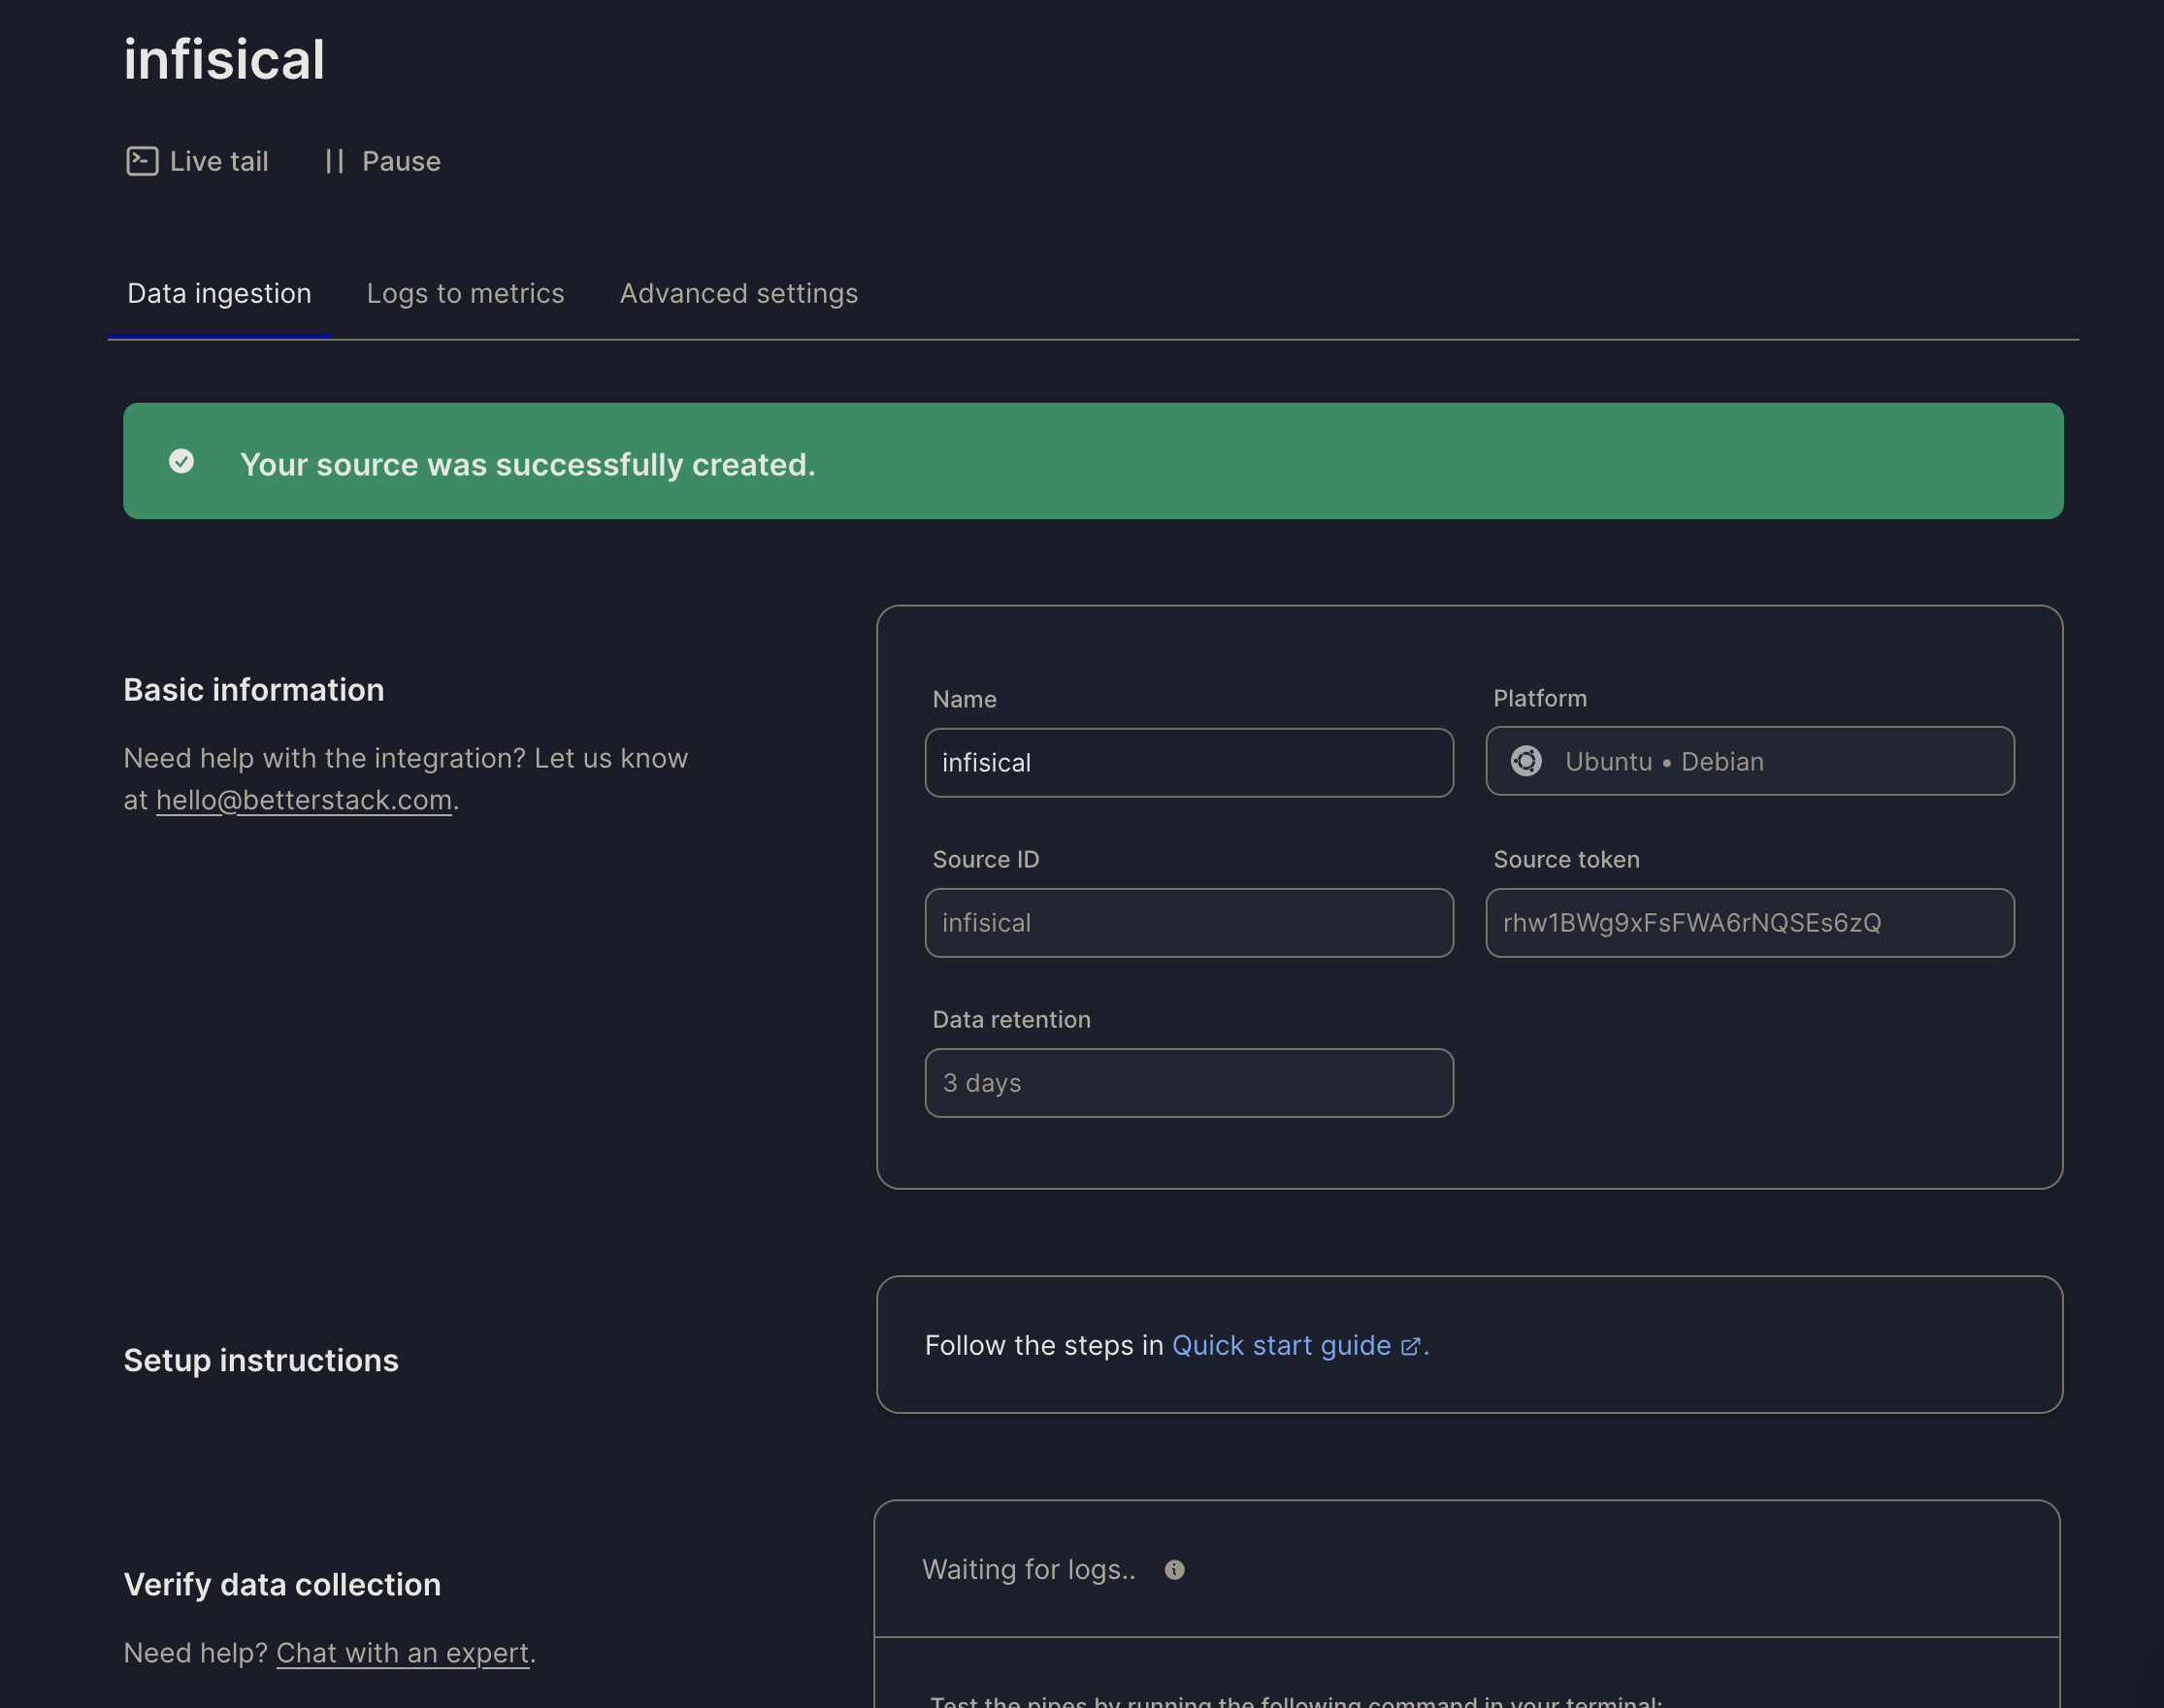
 Once your source is created, take note of the **endpoint** and **Source token** for the next step.
 1. Fill in the endpoint URL with your Better Stack source endpoint
2. Create a new header with key `Authorization` and set the value as `Bearer
Once you're finished, click **Create Log Stream**.
1. Fill in the endpoint URL with your Better Stack source endpoint
2. Create a new header with key `Authorization` and set the value as `Bearer
Once you're finished, click **Create Log Stream**.
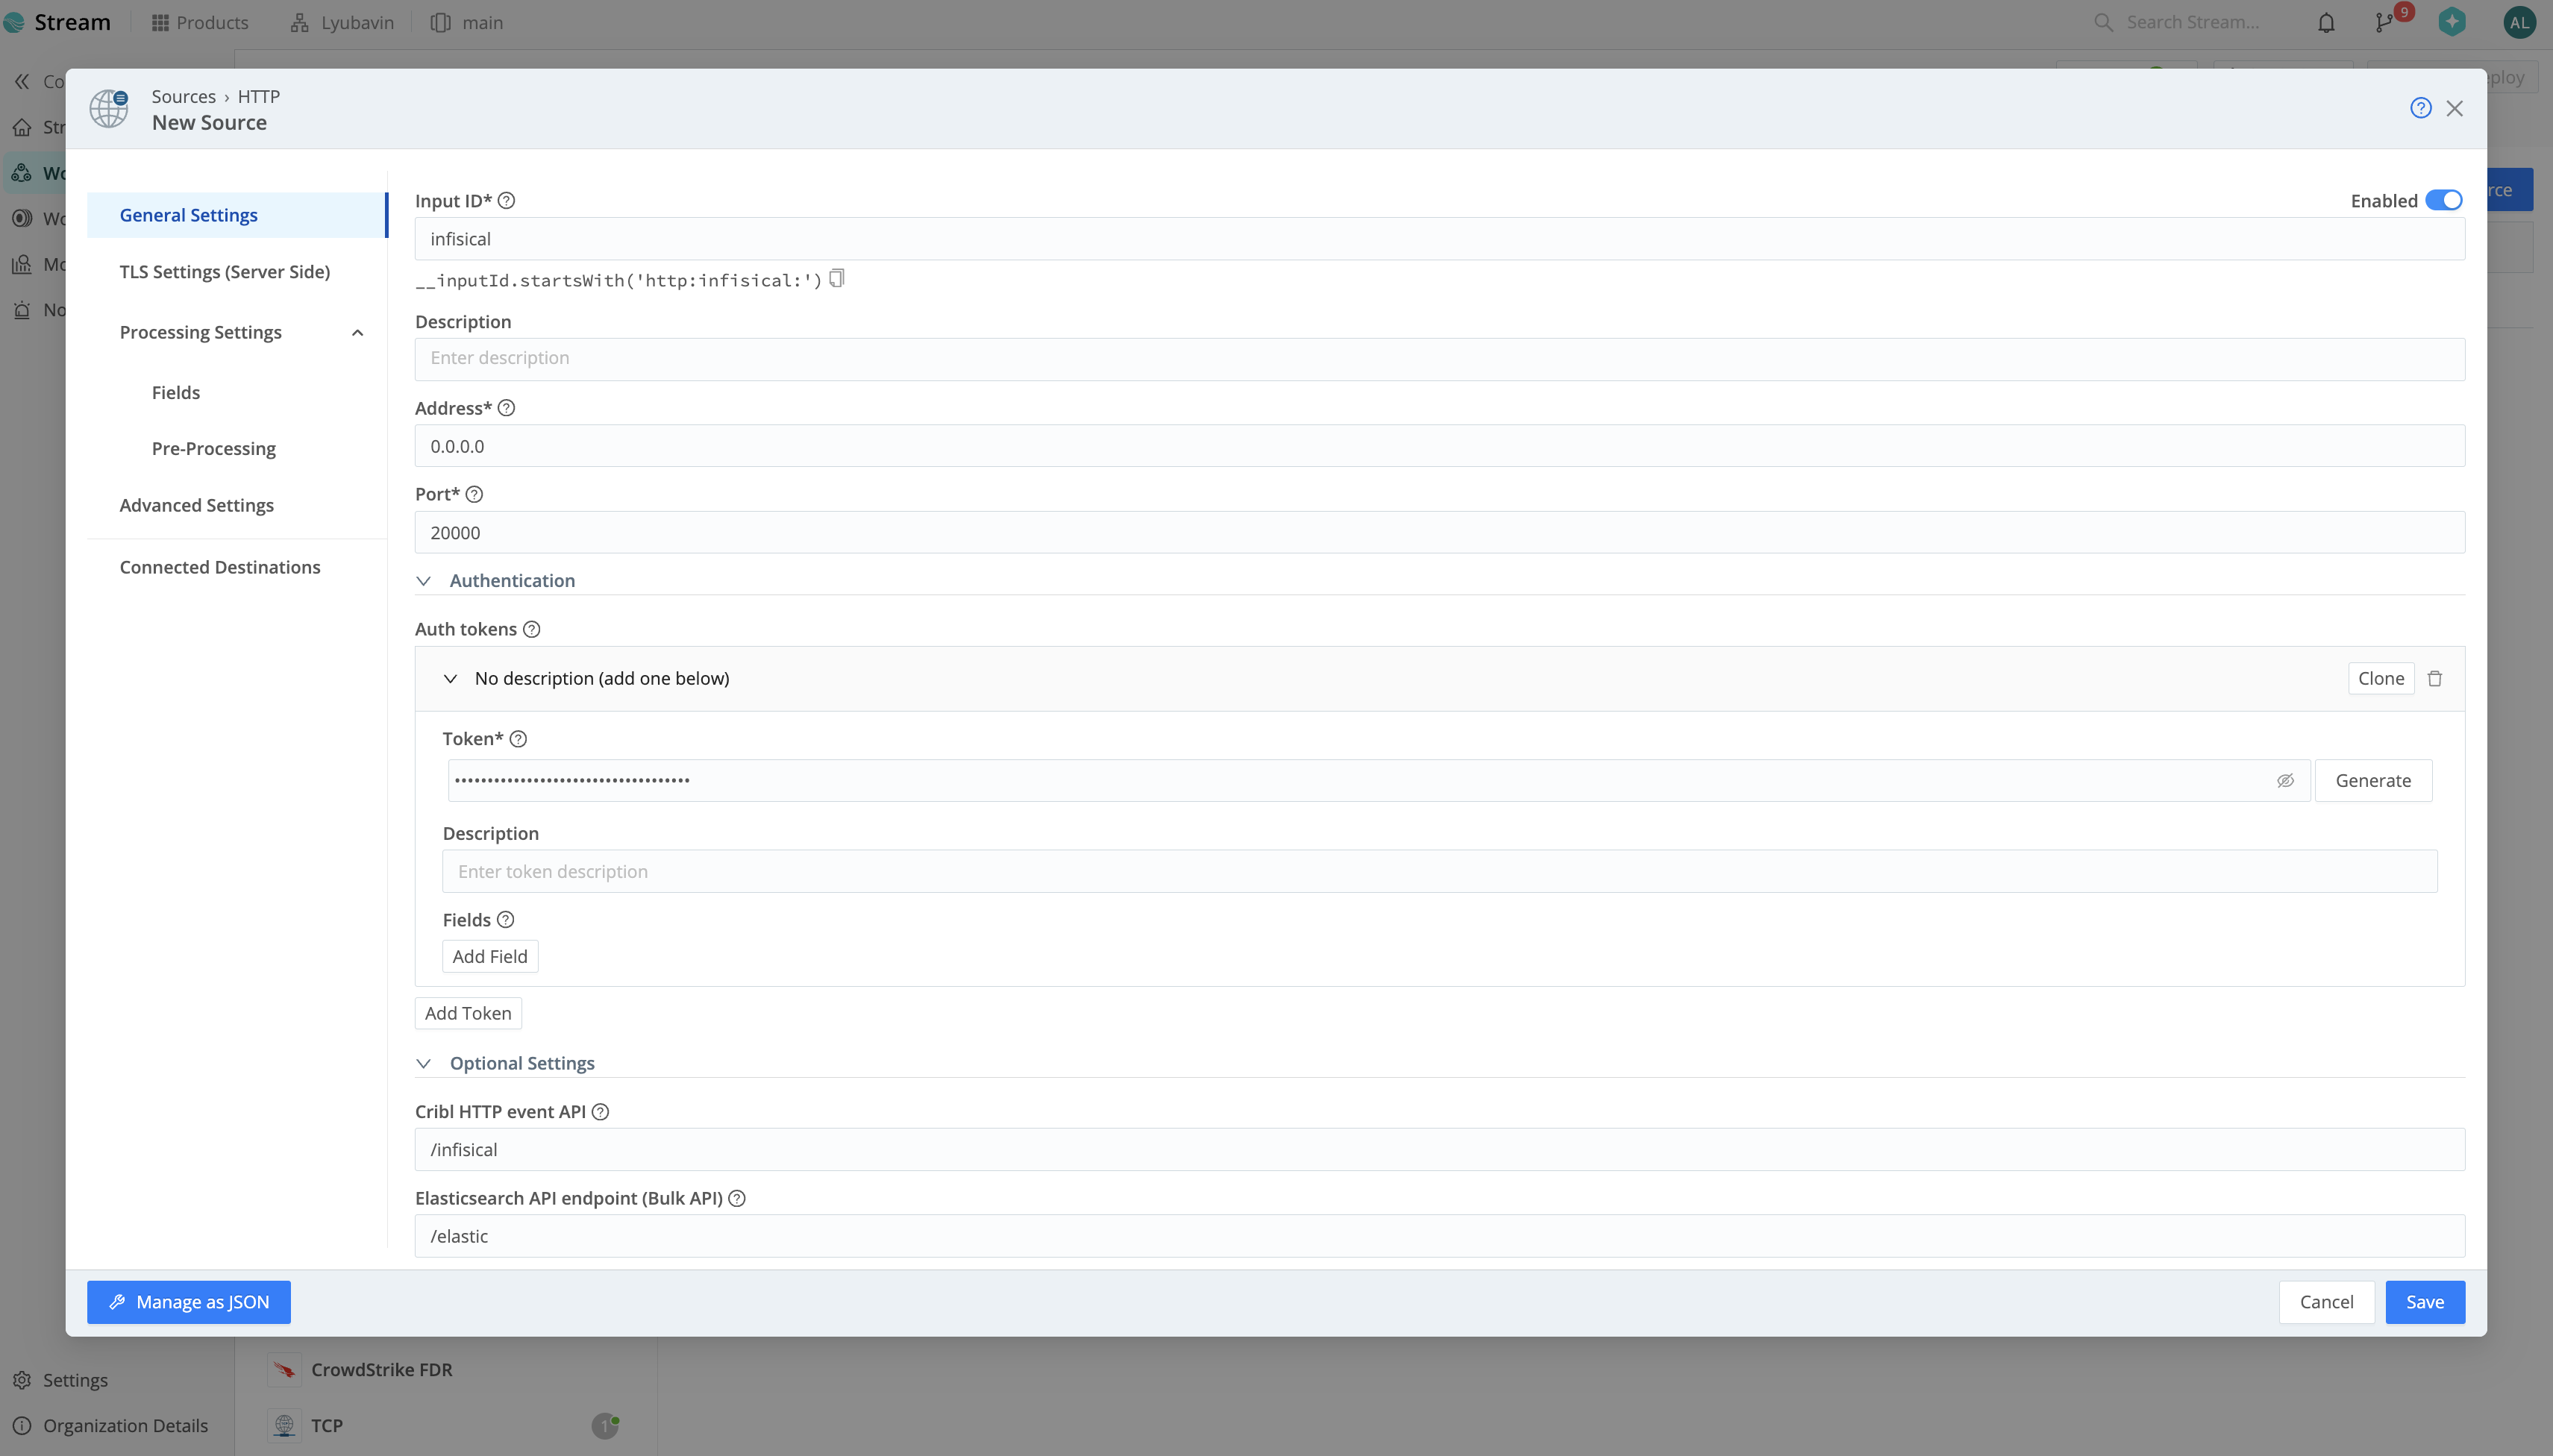
 Within your Worker Group, navigate to **Data > Sources > HTTP** and click **Add Source**.
 Configure the **Input ID**, **Port**, and **Cribl HTTP event API** path (e.g., `/infisical`). Then, generate an **Auth Token**.
You can optionally configure TLS in the **TLS Settings** tab and add a pipeline in the **Pre-Processing** tab.
Configure the **Input ID**, **Port**, and **Cribl HTTP event API** path (e.g., `/infisical`). Then, generate an **Auth Token**.
You can optionally configure TLS in the **TLS Settings** tab and add a pipeline in the **Pre-Processing** tab.
 Once you've configured the Data Source, click **Save** and deploy your changes.
 Once you're finished, click **Create Log Stream**.
 Once you're finished, click **Create Log Stream**.
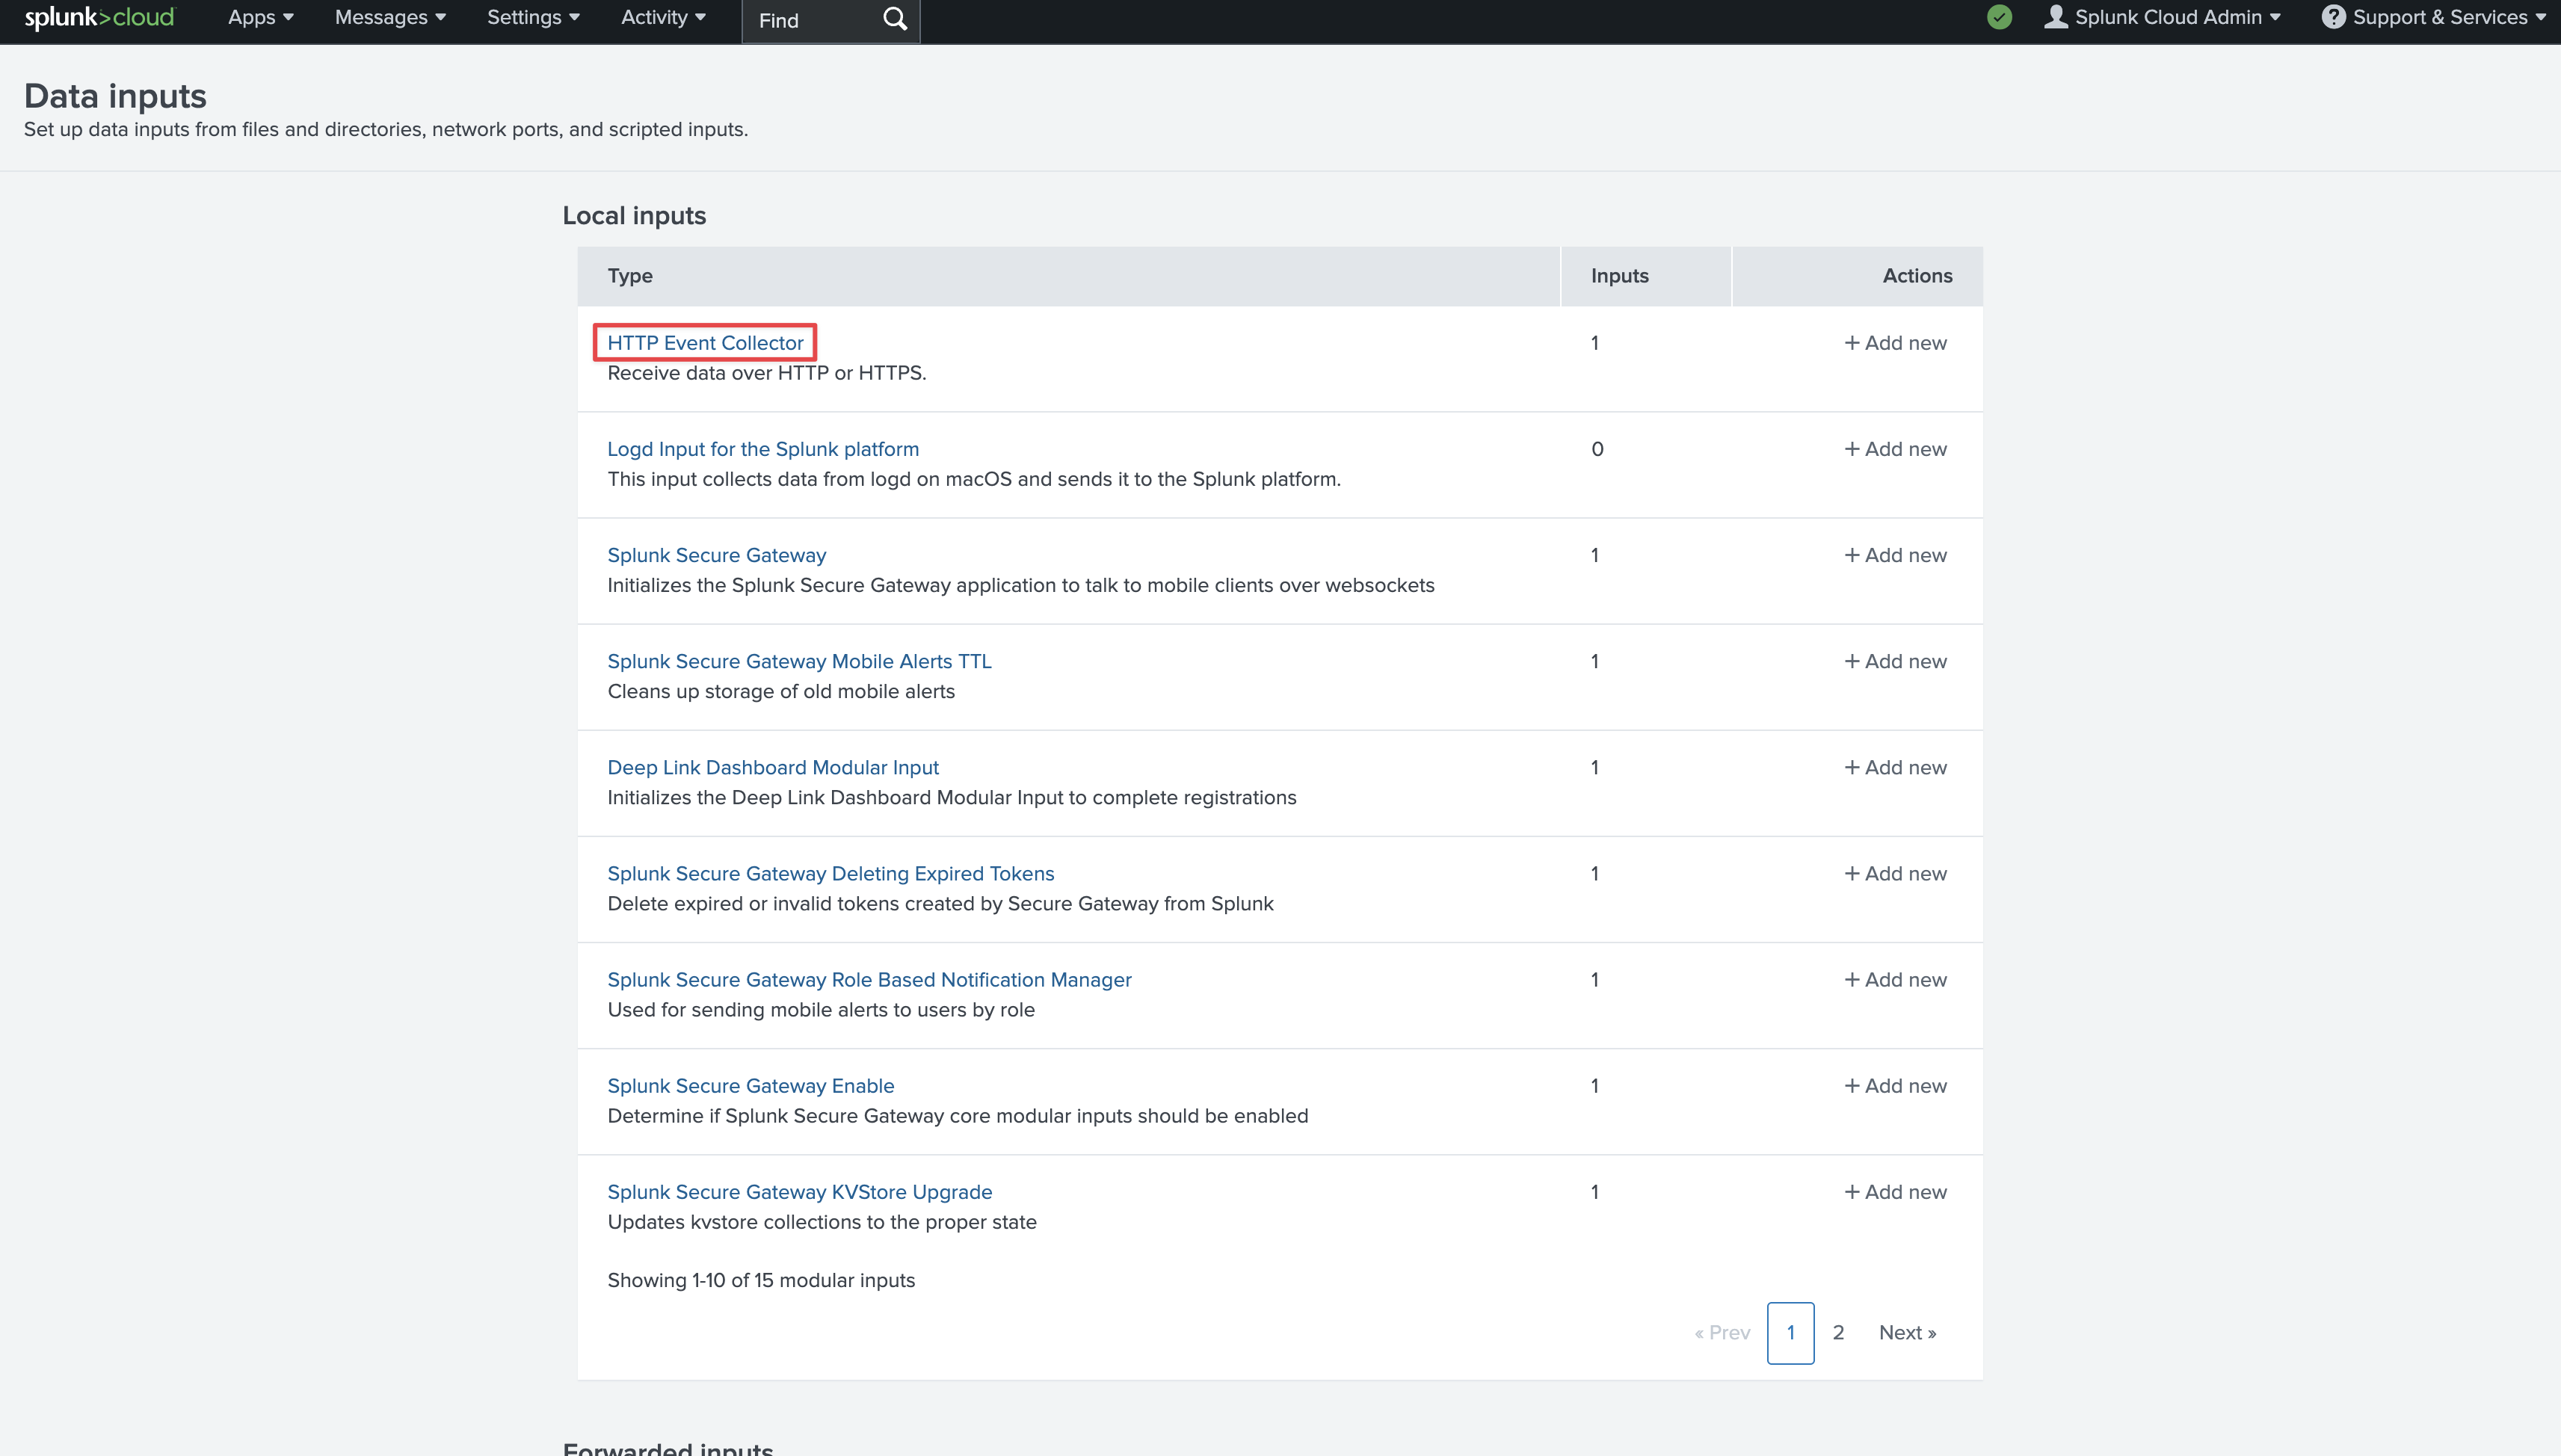
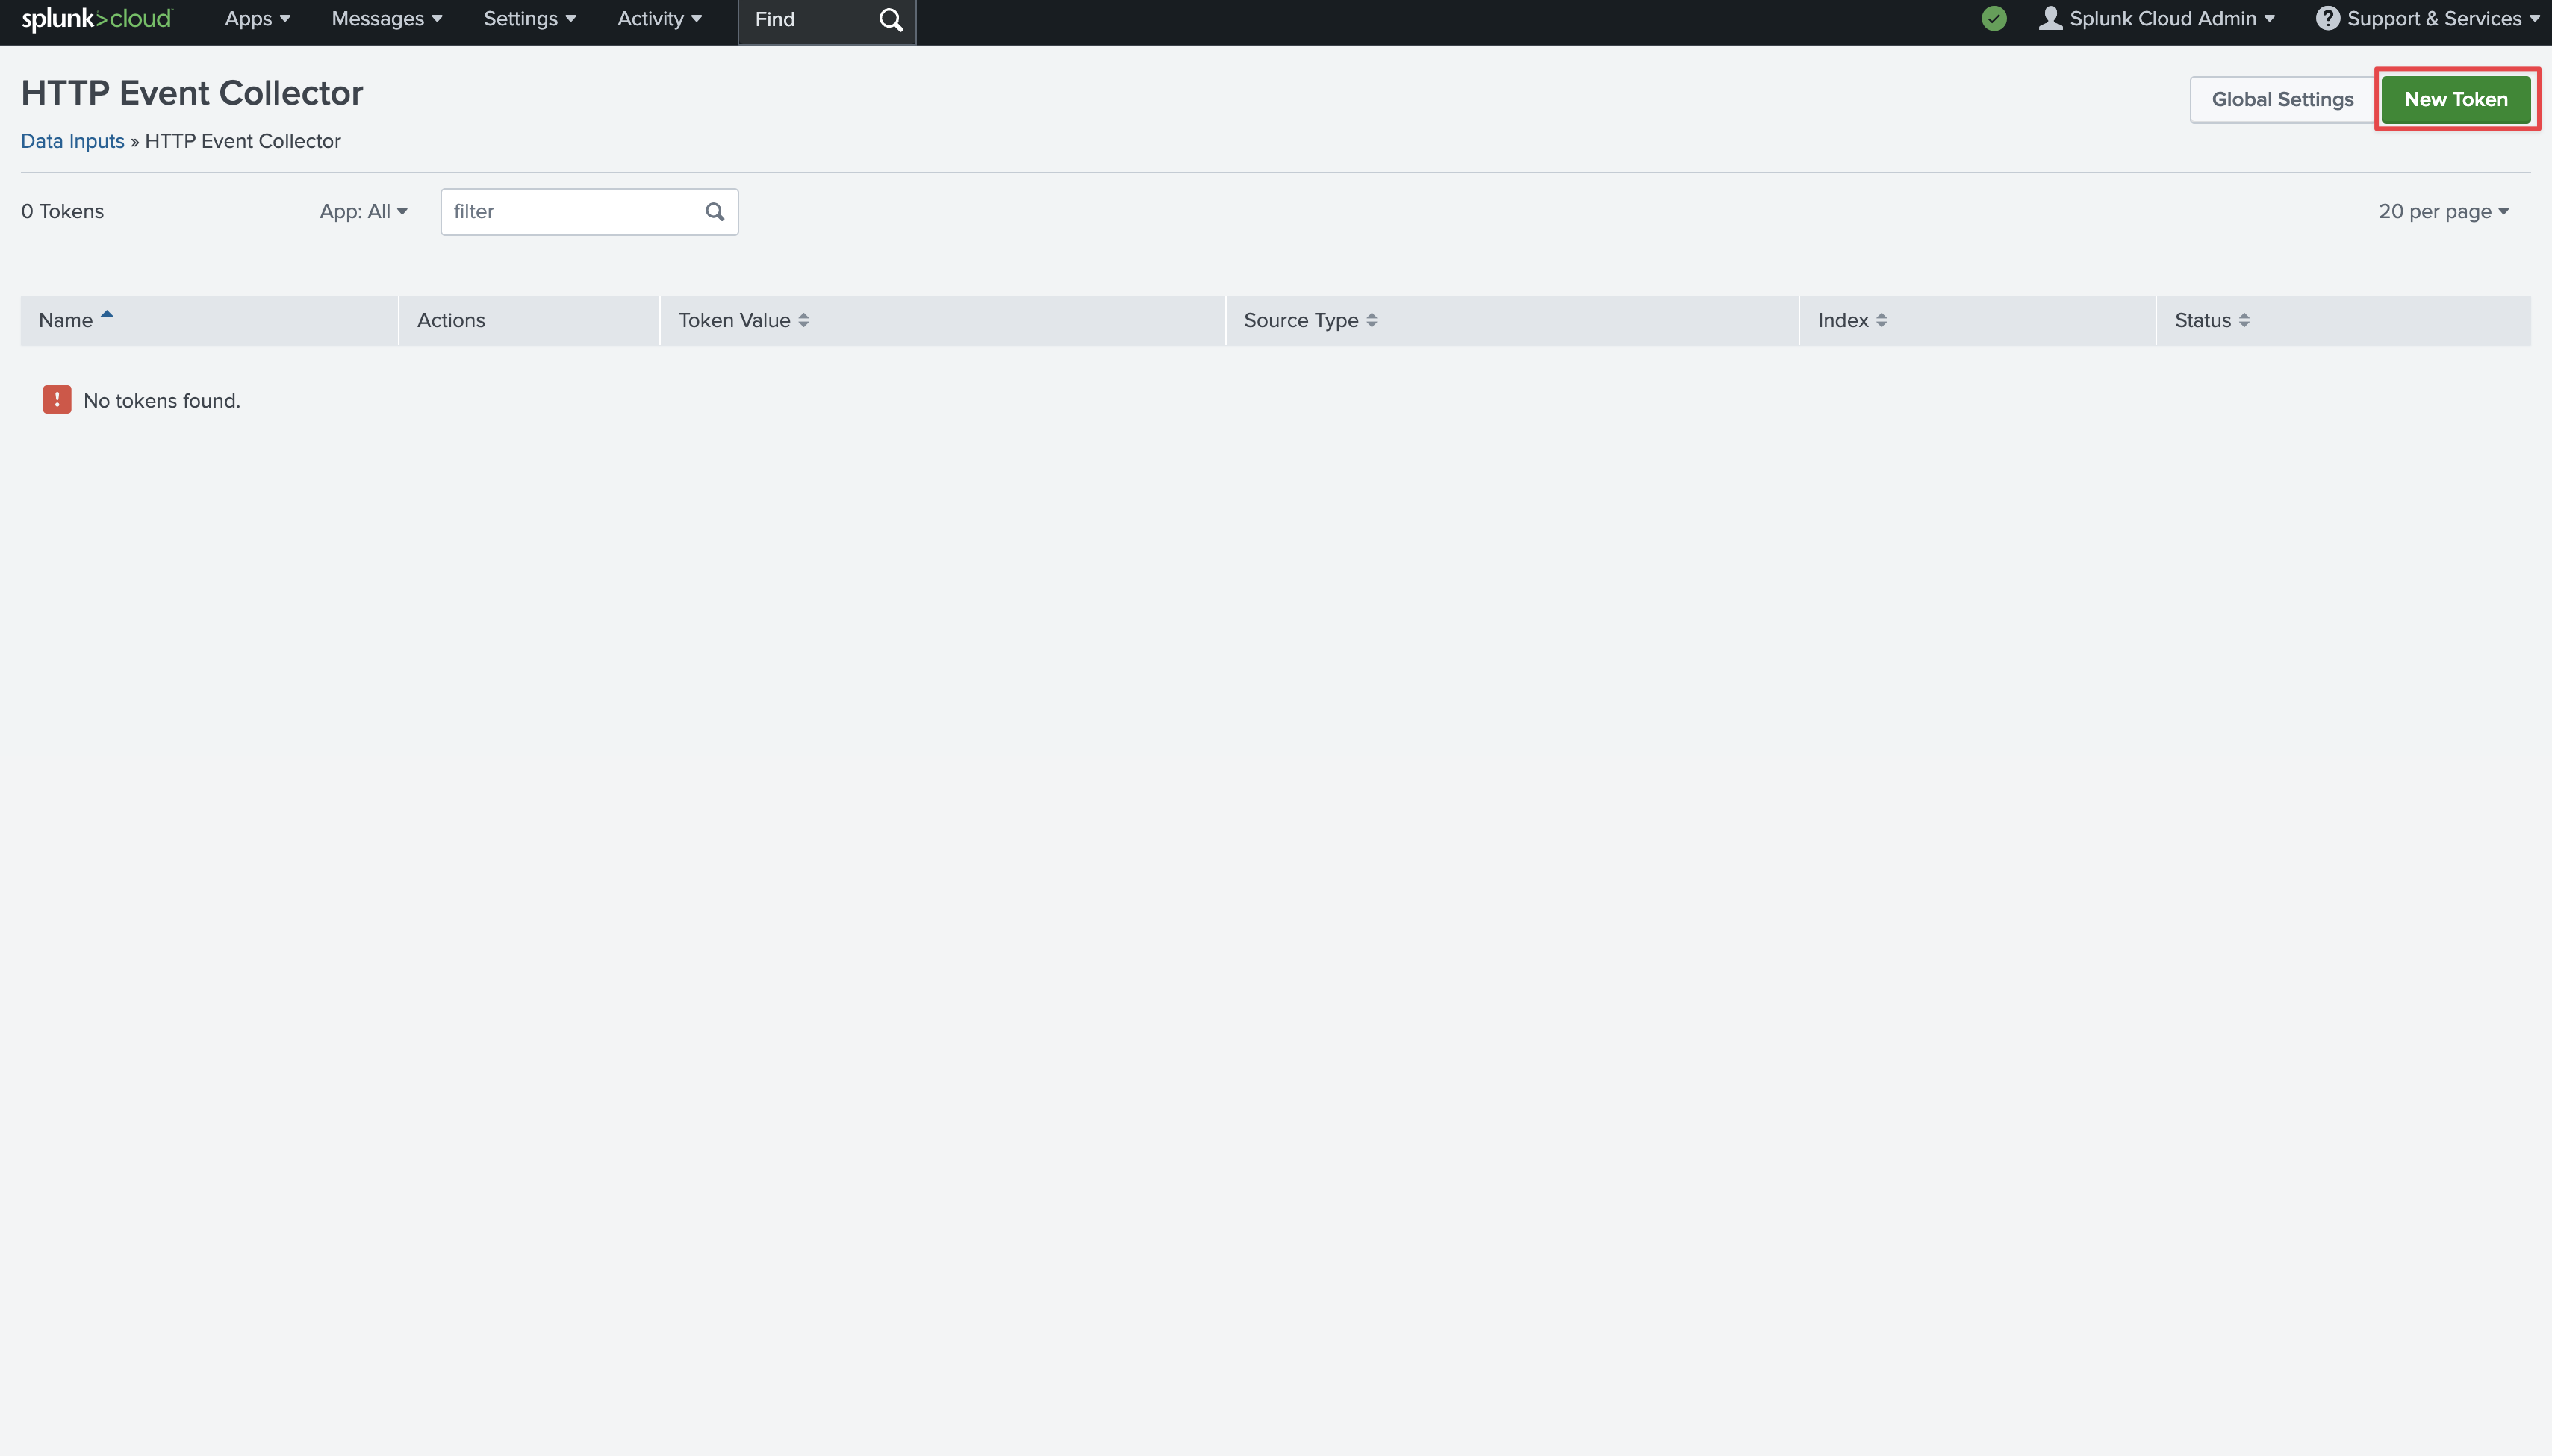
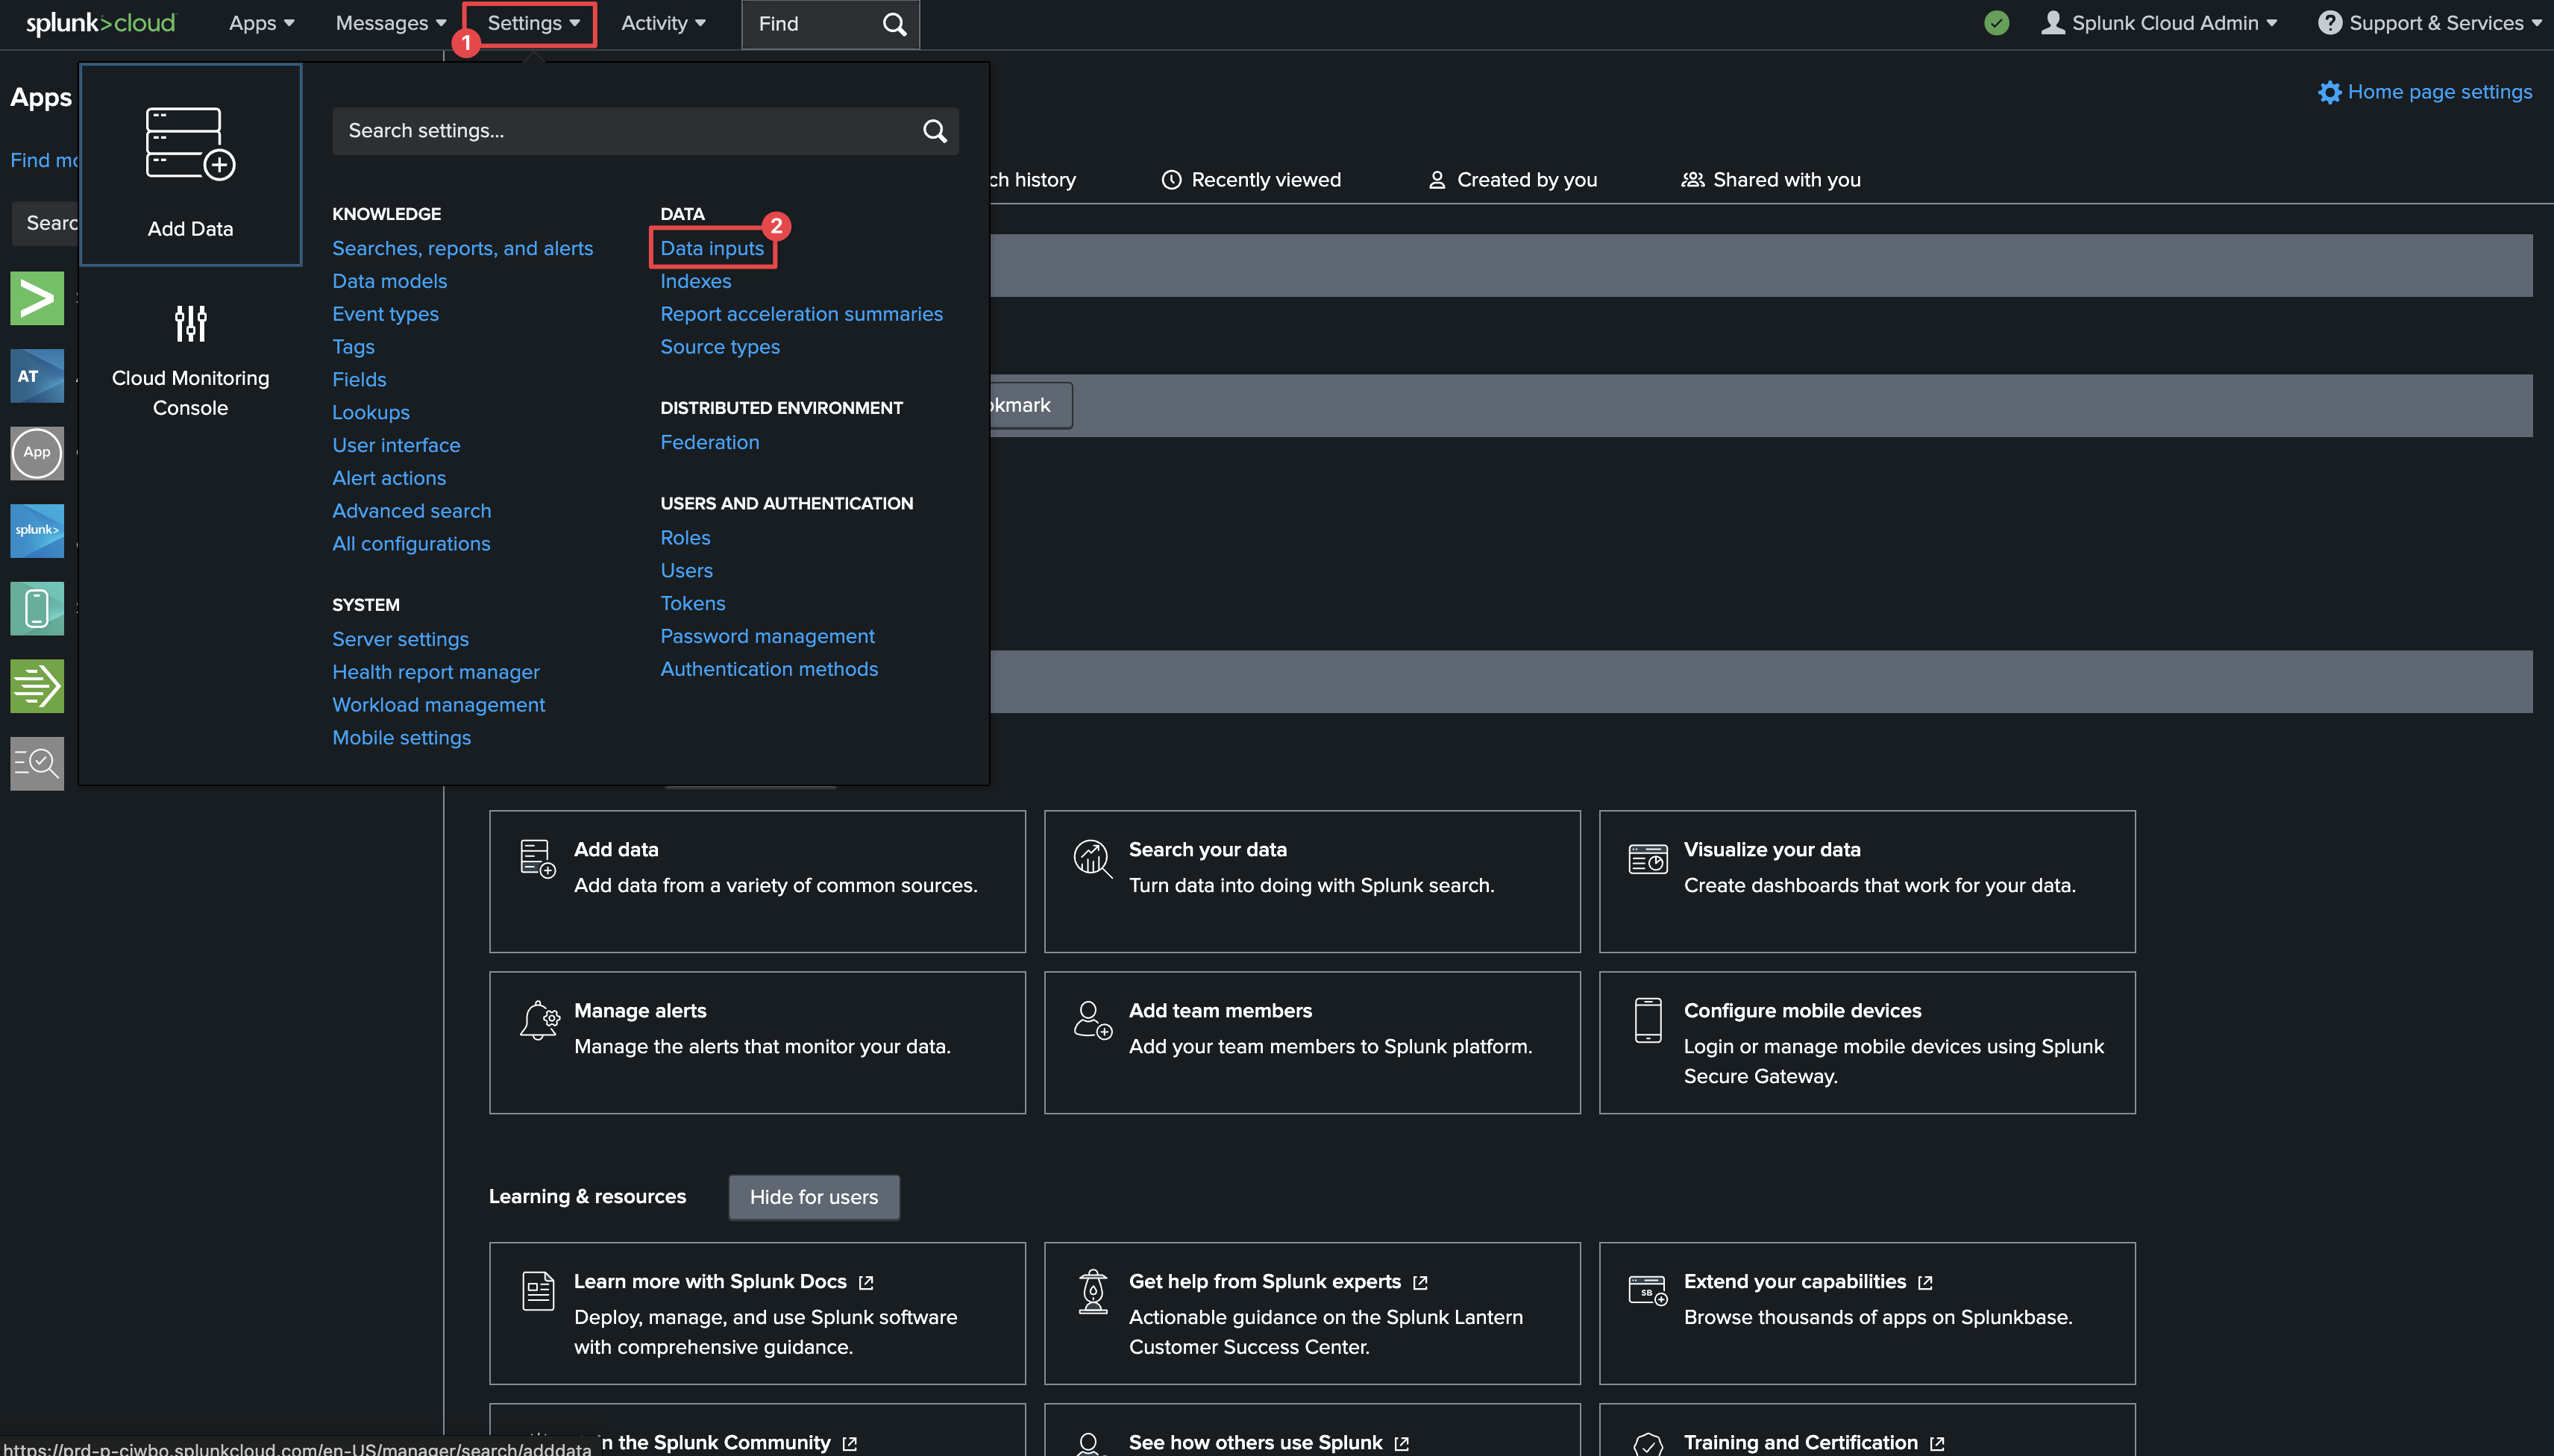 Click on **HTTP Event Collector**.
 Click on **New Token** in the top left.
 Provide a name and click **Next**.
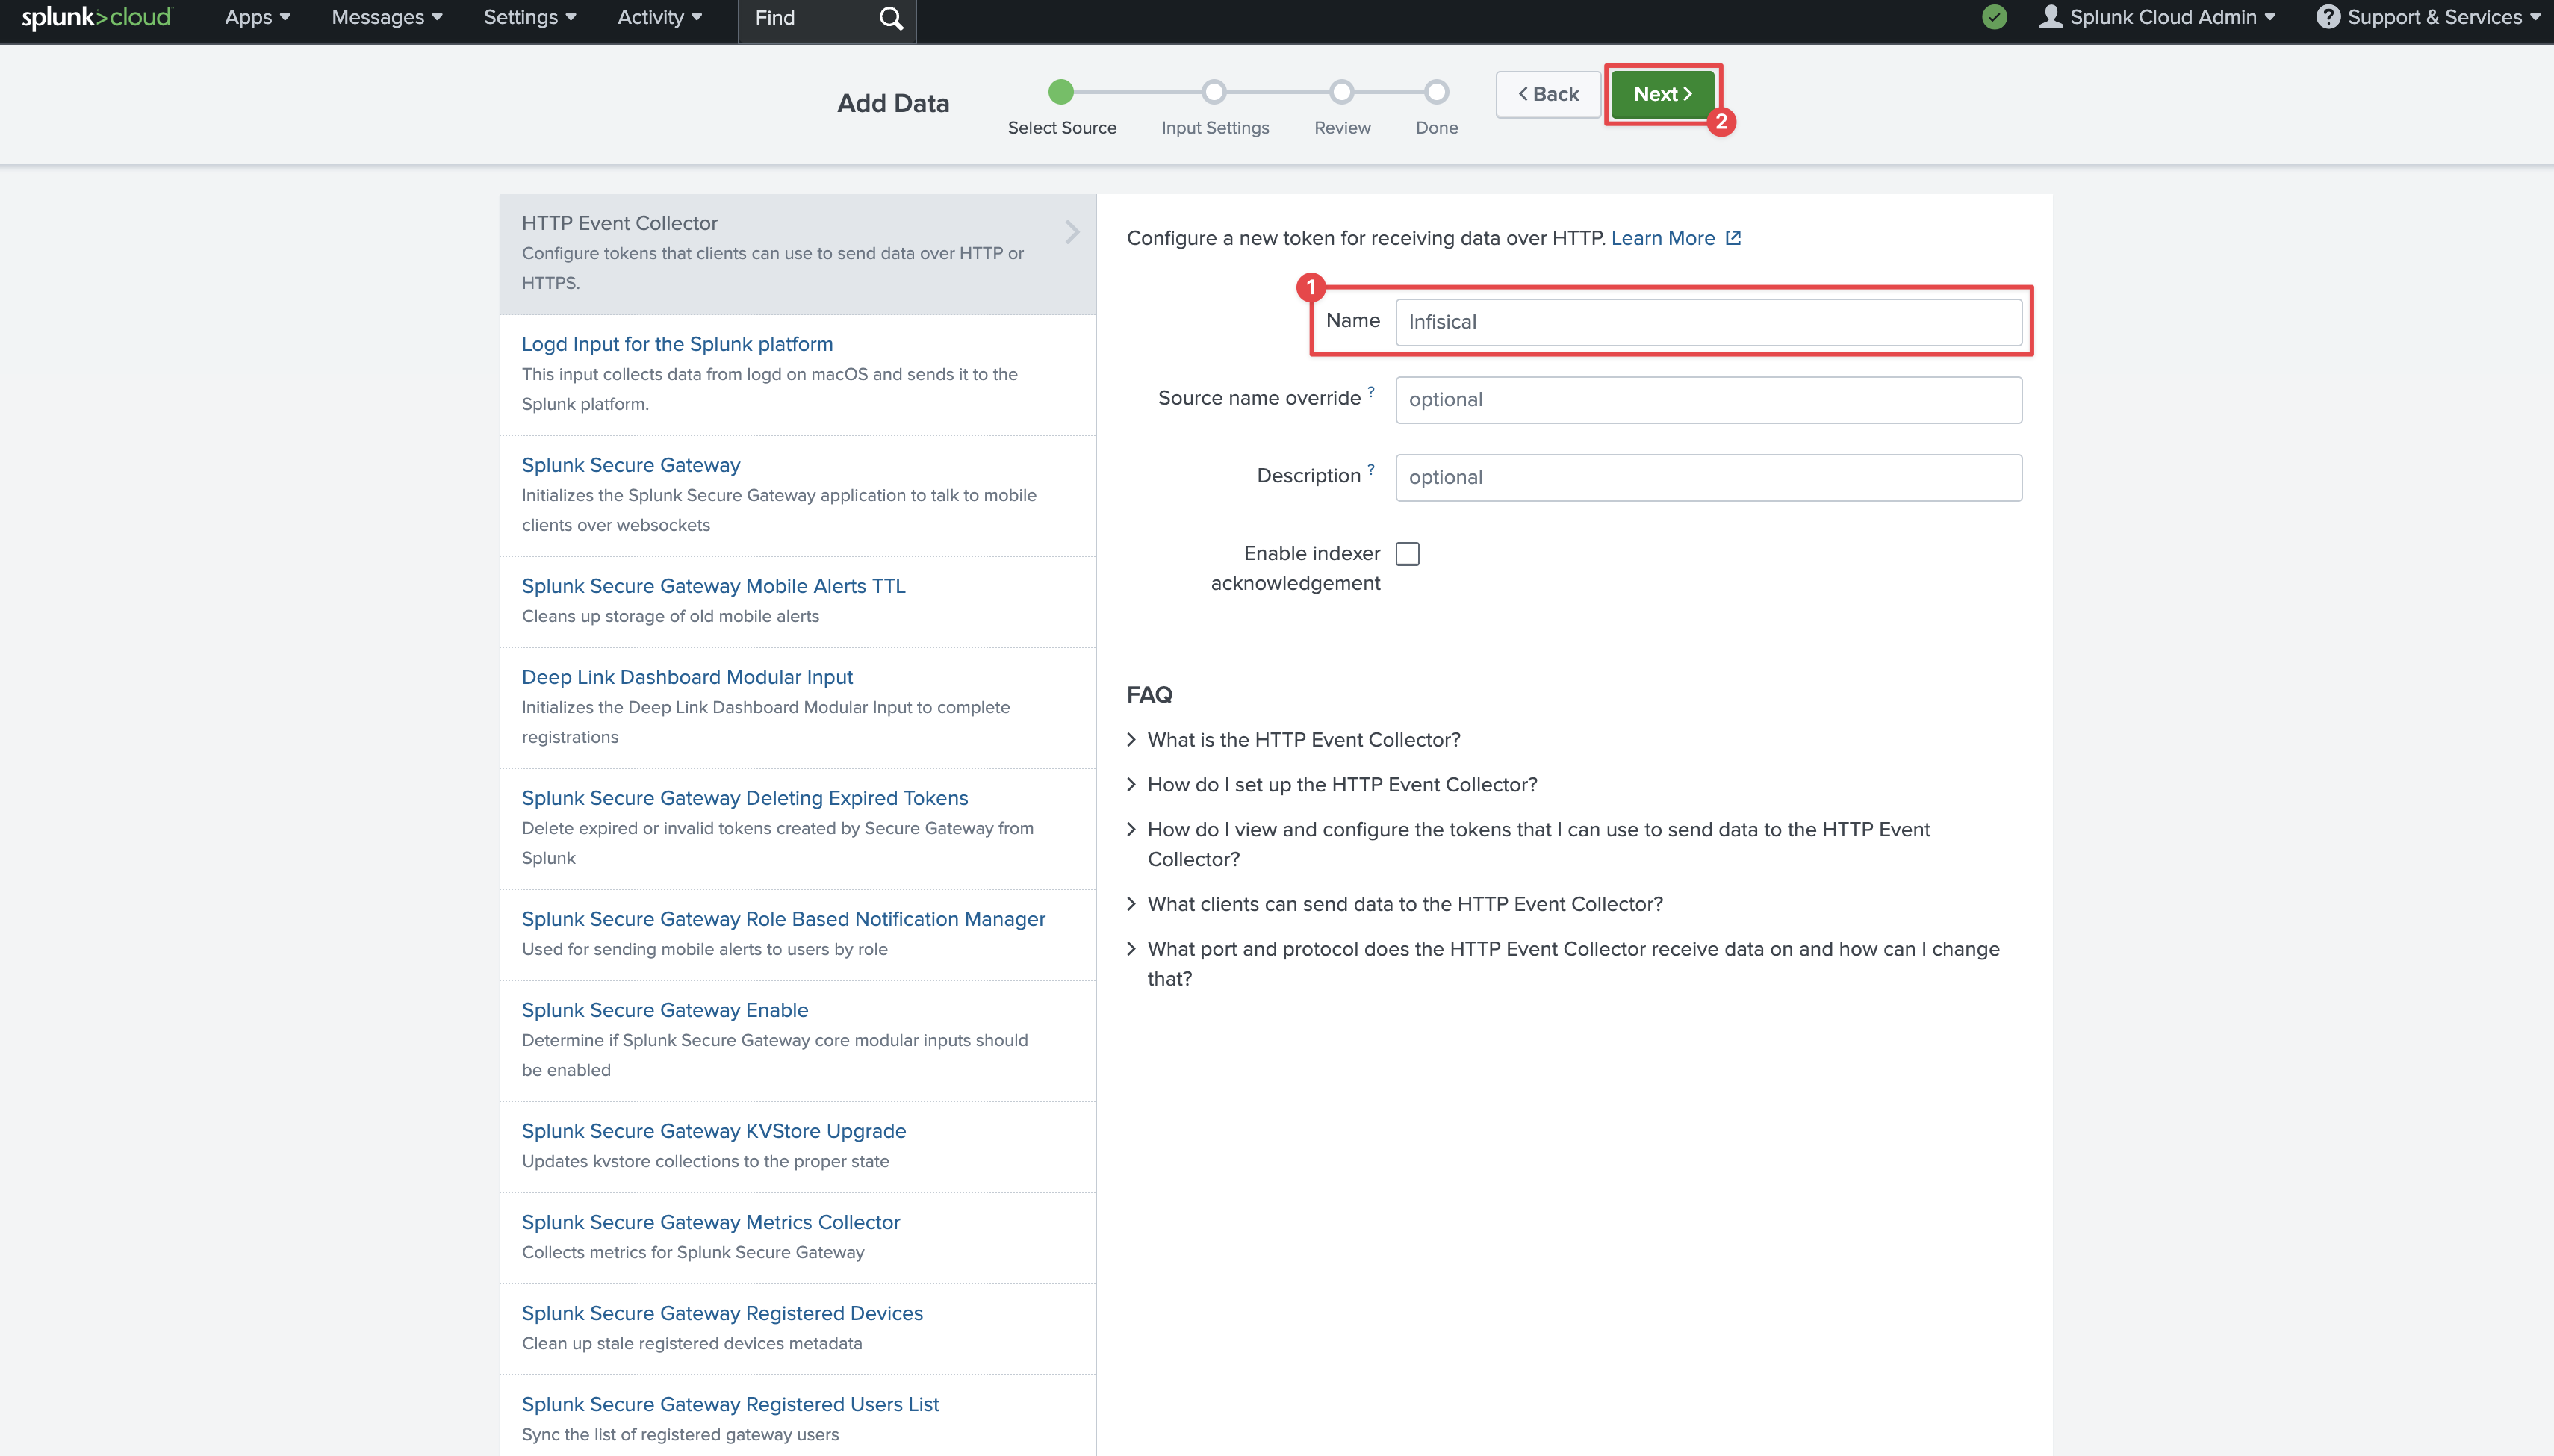 On the next page, click **Review** and then **Submit** at the top. On the final page you'll see your token.
Copy the **Token Value** and your Splunk hostname from the URL to be used for later.
On the next page, click **Review** and then **Submit** at the top. On the final page you'll see your token.
Copy the **Token Value** and your Splunk hostname from the URL to be used for later.

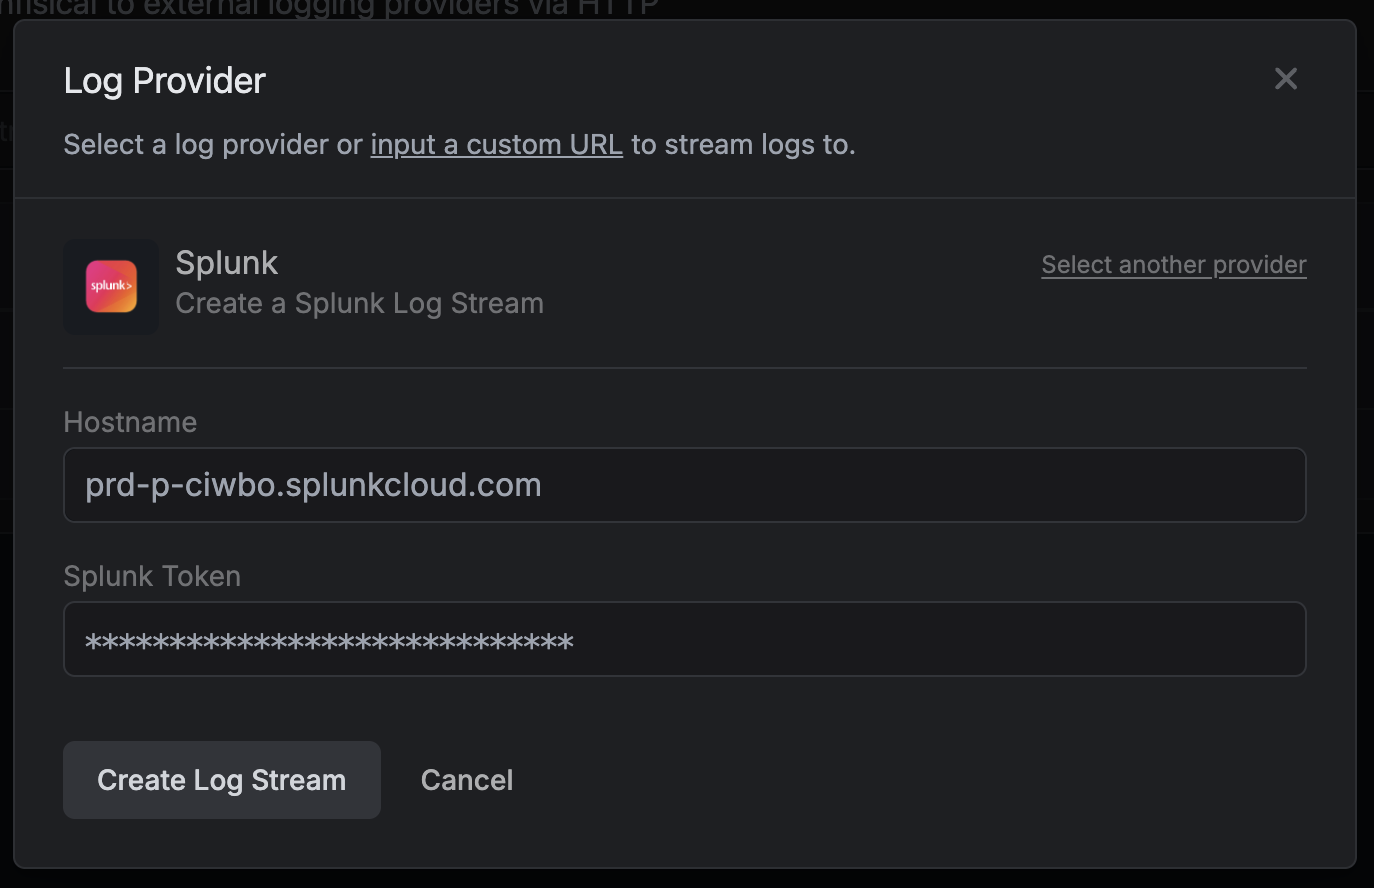 Once you're finished, click **Create Log Stream**.
 ---
# Source: https://infisical.com/docs/documentation/platform/identities/auth-templates.md
> ## Documentation Index
> Fetch the complete documentation index at: https://infisical.com/docs/llms.txt
> Use this file to discover all available pages before exploring further.
# Machine Identity Auth Templates
> Learn how to use auth templates to standardize authentication configurations for machine identities.
## Concept
Machine Identity Auth Templates allow you to create reusable authentication configurations that can be applied across multiple machine identities. This feature helps standardize authentication setups, reduces configuration drift, and simplifies identity management at scale.
Instead of manually configuring authentication settings for each identity, you can create templates with predefined authentication parameters and apply them to multiple identities. This ensures consistency and reduces the likelihood of configuration errors.
Key Benefits:
* **Standardization**: Ensure consistent authentication configurations across identities
* **Efficiency**: Reduce time spent configuring individual identities
* **Governance**: Centrally manage and update authentication parameters
* **Scalability**: Easily apply proven configurations to new identities
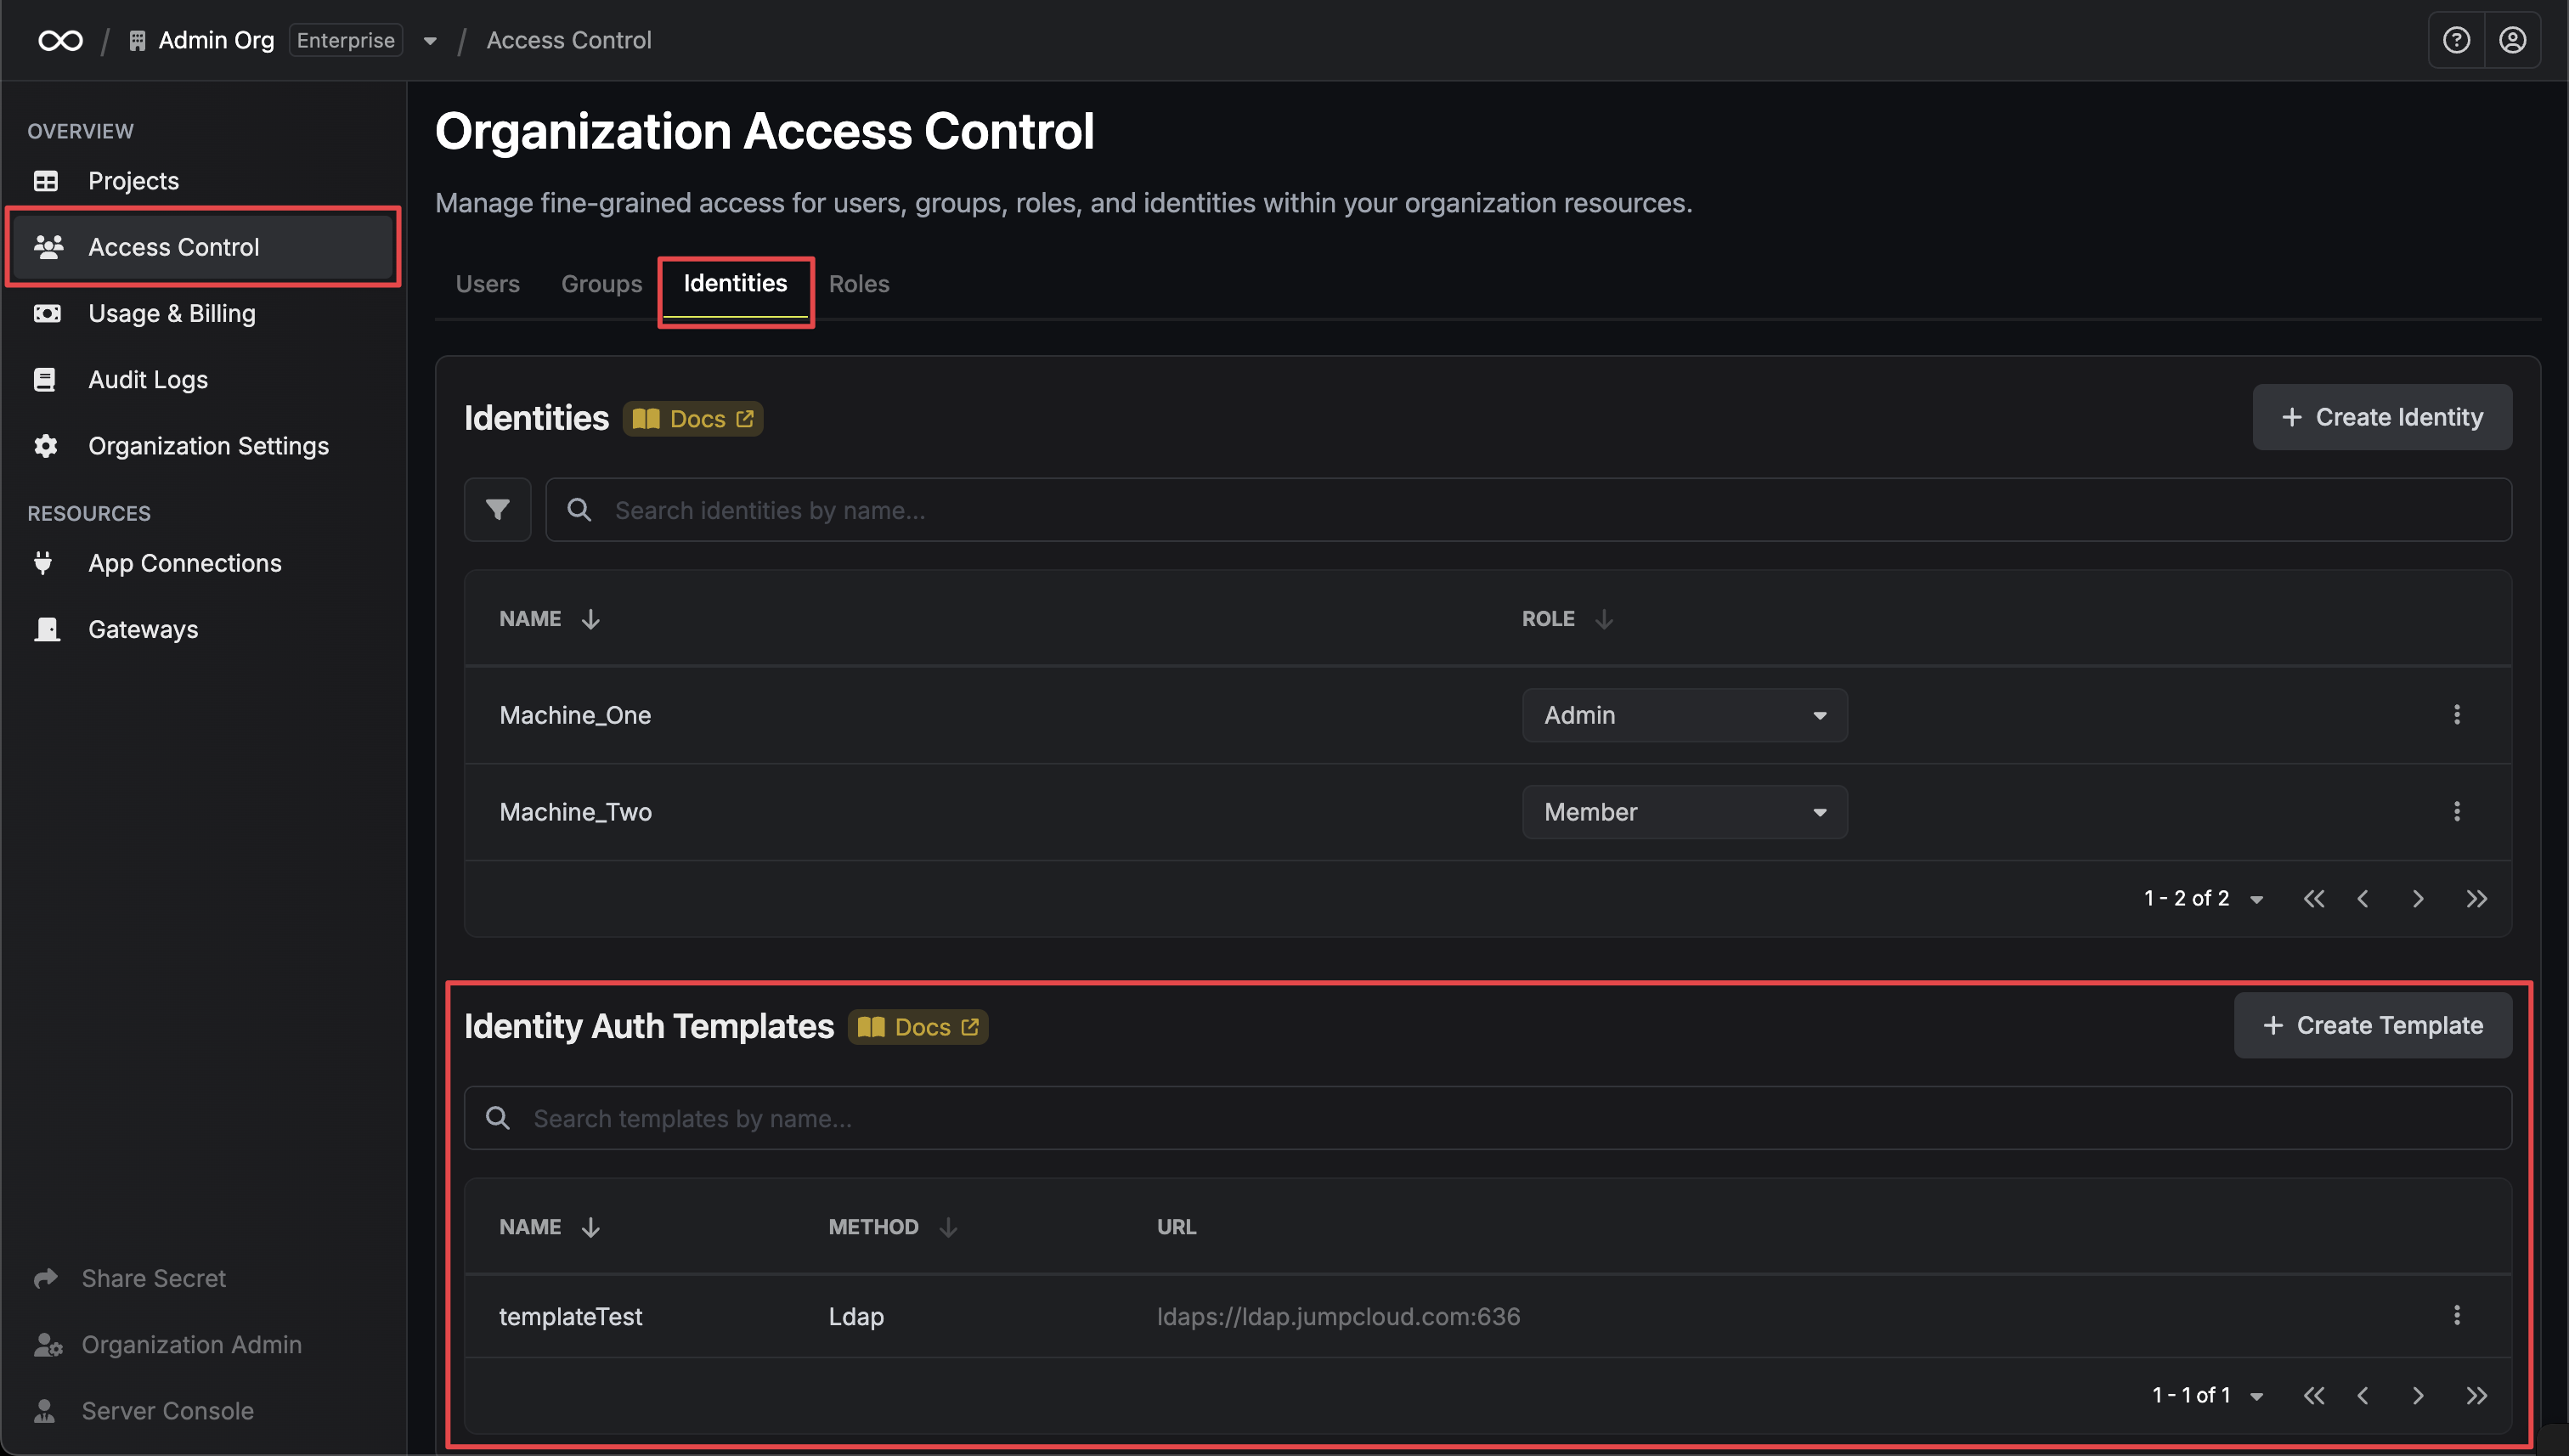
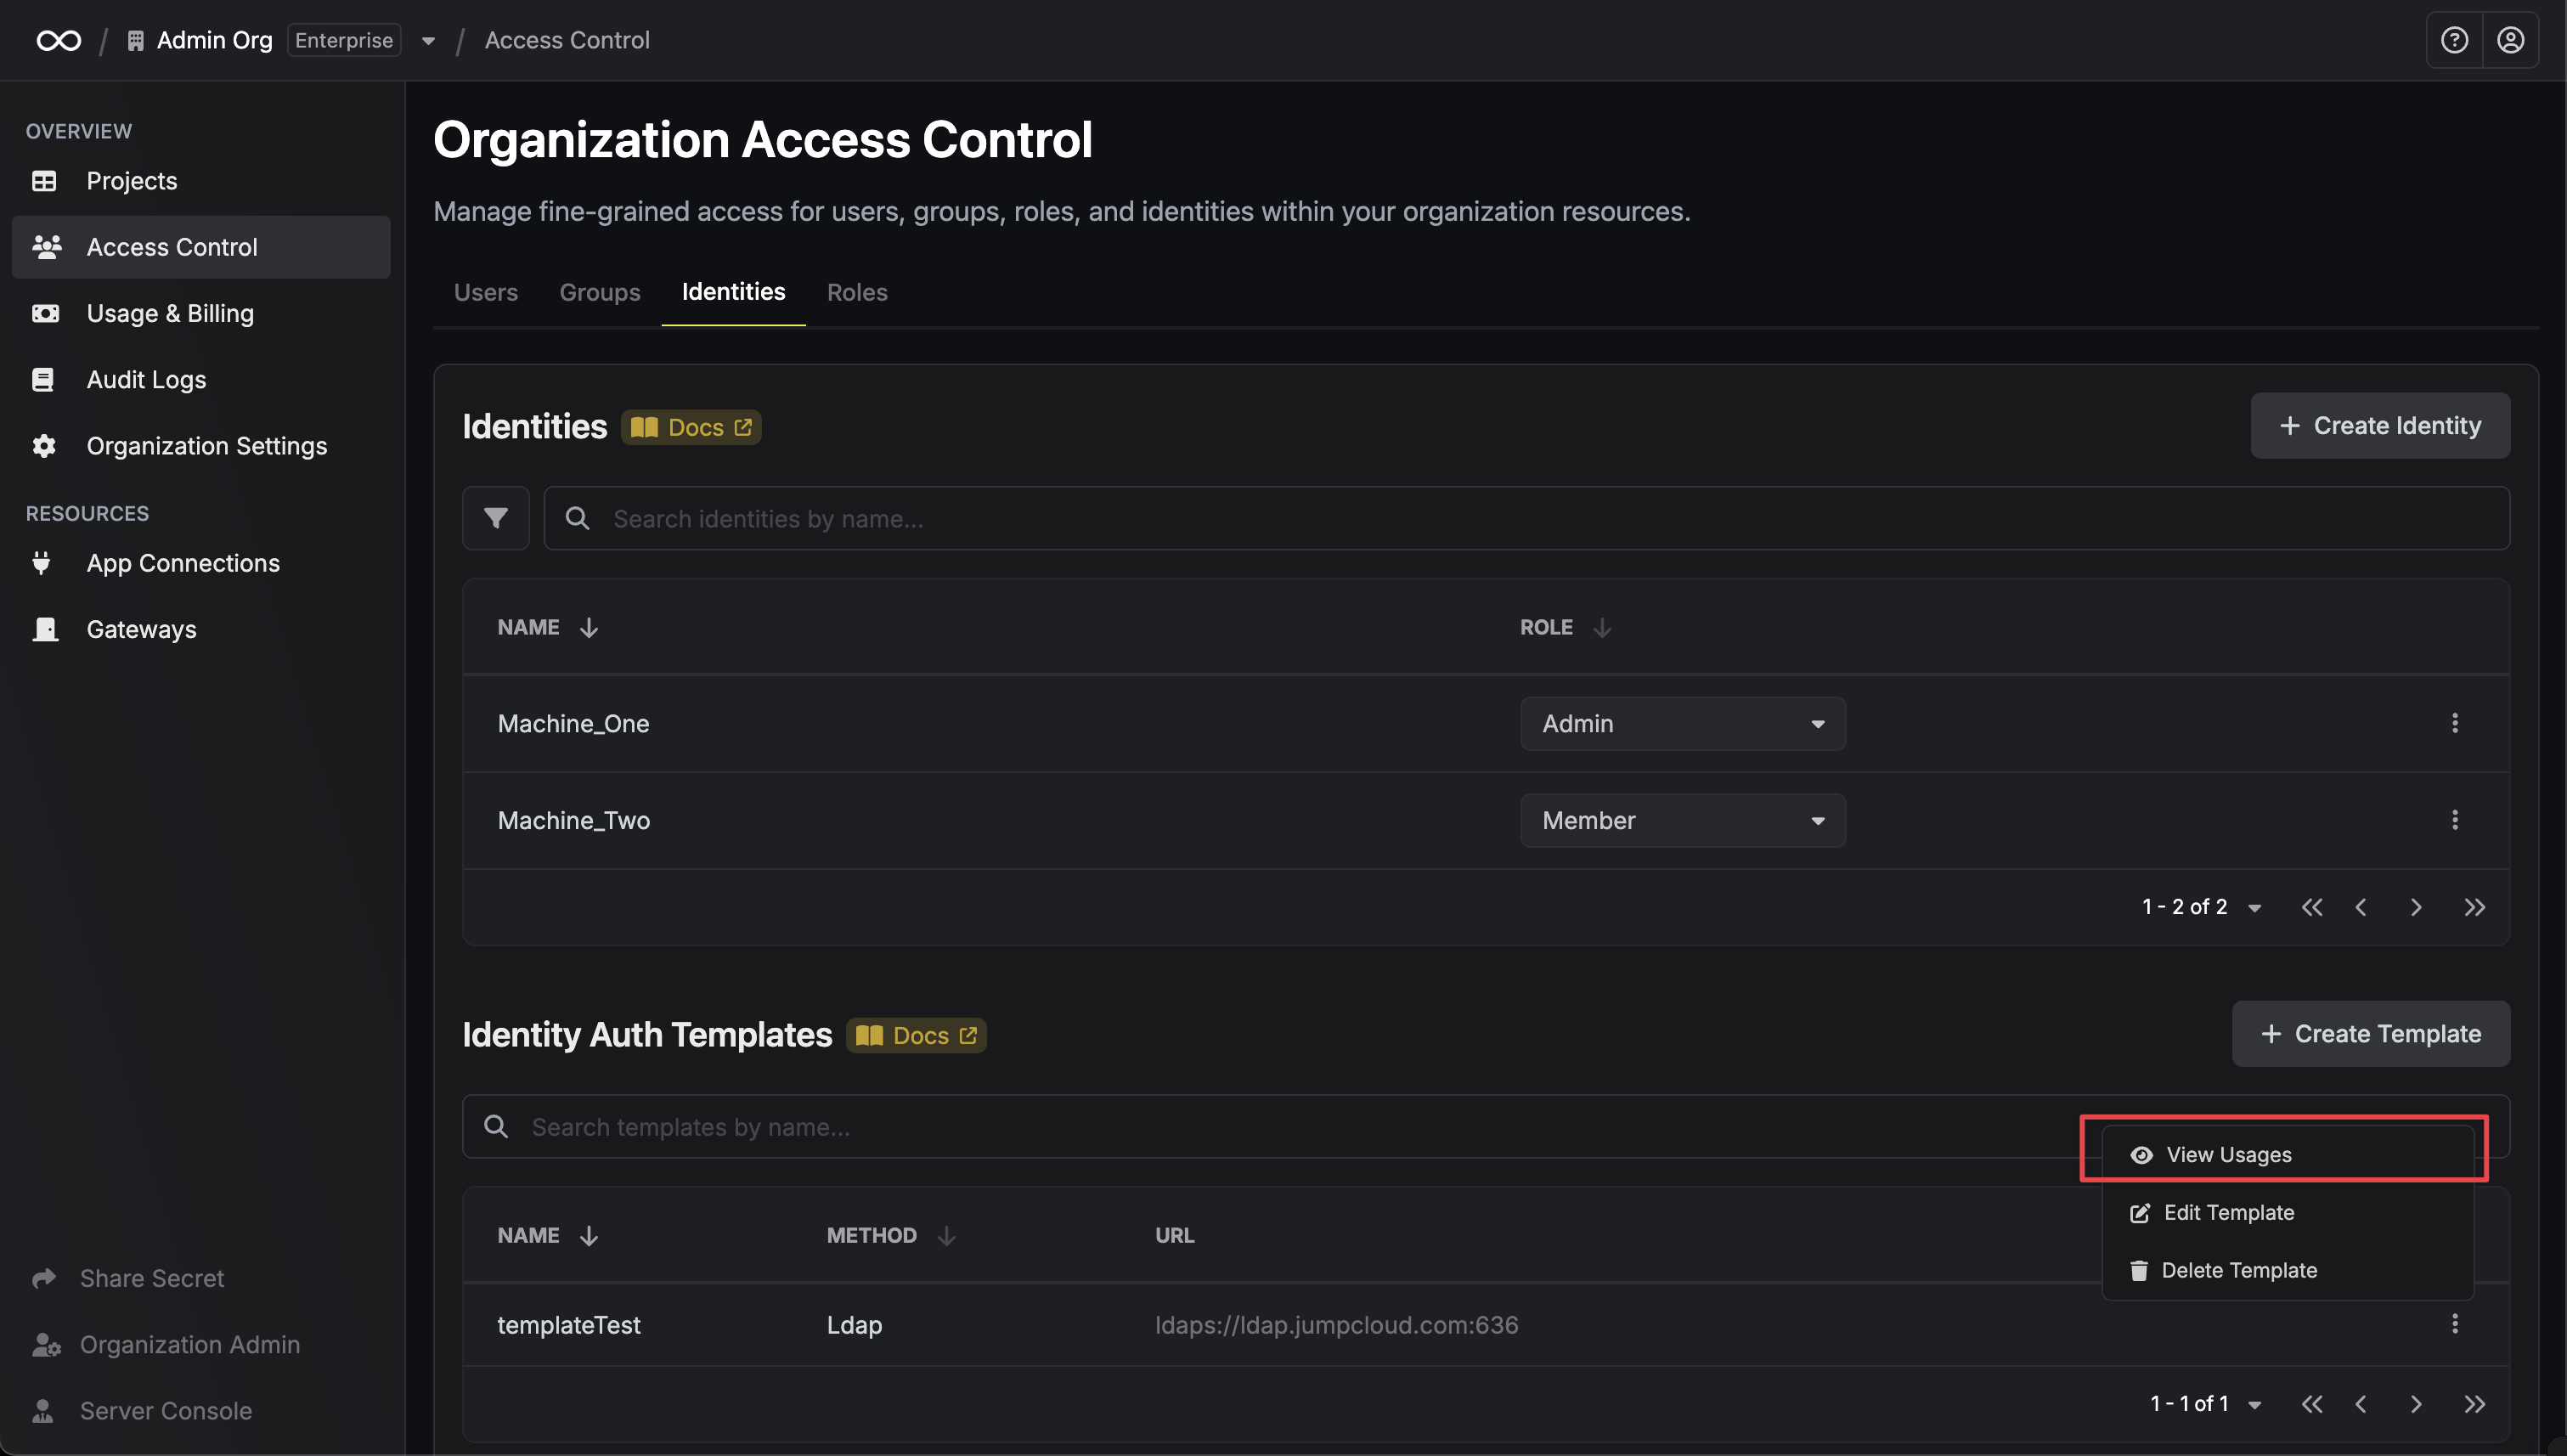
## Managing Auth Templates
Auth templates are managed in **Organization Settings > Access Control > Identities** under the **Identity Auth Templates** section.
---
# Source: https://infisical.com/docs/documentation/platform/identities/auth-templates.md
> ## Documentation Index
> Fetch the complete documentation index at: https://infisical.com/docs/llms.txt
> Use this file to discover all available pages before exploring further.
# Machine Identity Auth Templates
> Learn how to use auth templates to standardize authentication configurations for machine identities.
## Concept
Machine Identity Auth Templates allow you to create reusable authentication configurations that can be applied across multiple machine identities. This feature helps standardize authentication setups, reduces configuration drift, and simplifies identity management at scale.
Instead of manually configuring authentication settings for each identity, you can create templates with predefined authentication parameters and apply them to multiple identities. This ensures consistency and reduces the likelihood of configuration errors.
Key Benefits:
* **Standardization**: Ensure consistent authentication configurations across identities
* **Efficiency**: Reduce time spent configuring individual identities
* **Governance**: Centrally manage and update authentication parameters
* **Scalability**: Easily apply proven configurations to new identities
## Managing Auth Templates
Auth templates are managed in **Organization Settings > Access Control > Identities** under the **Identity Auth Templates** section.
 ### Creating a Template
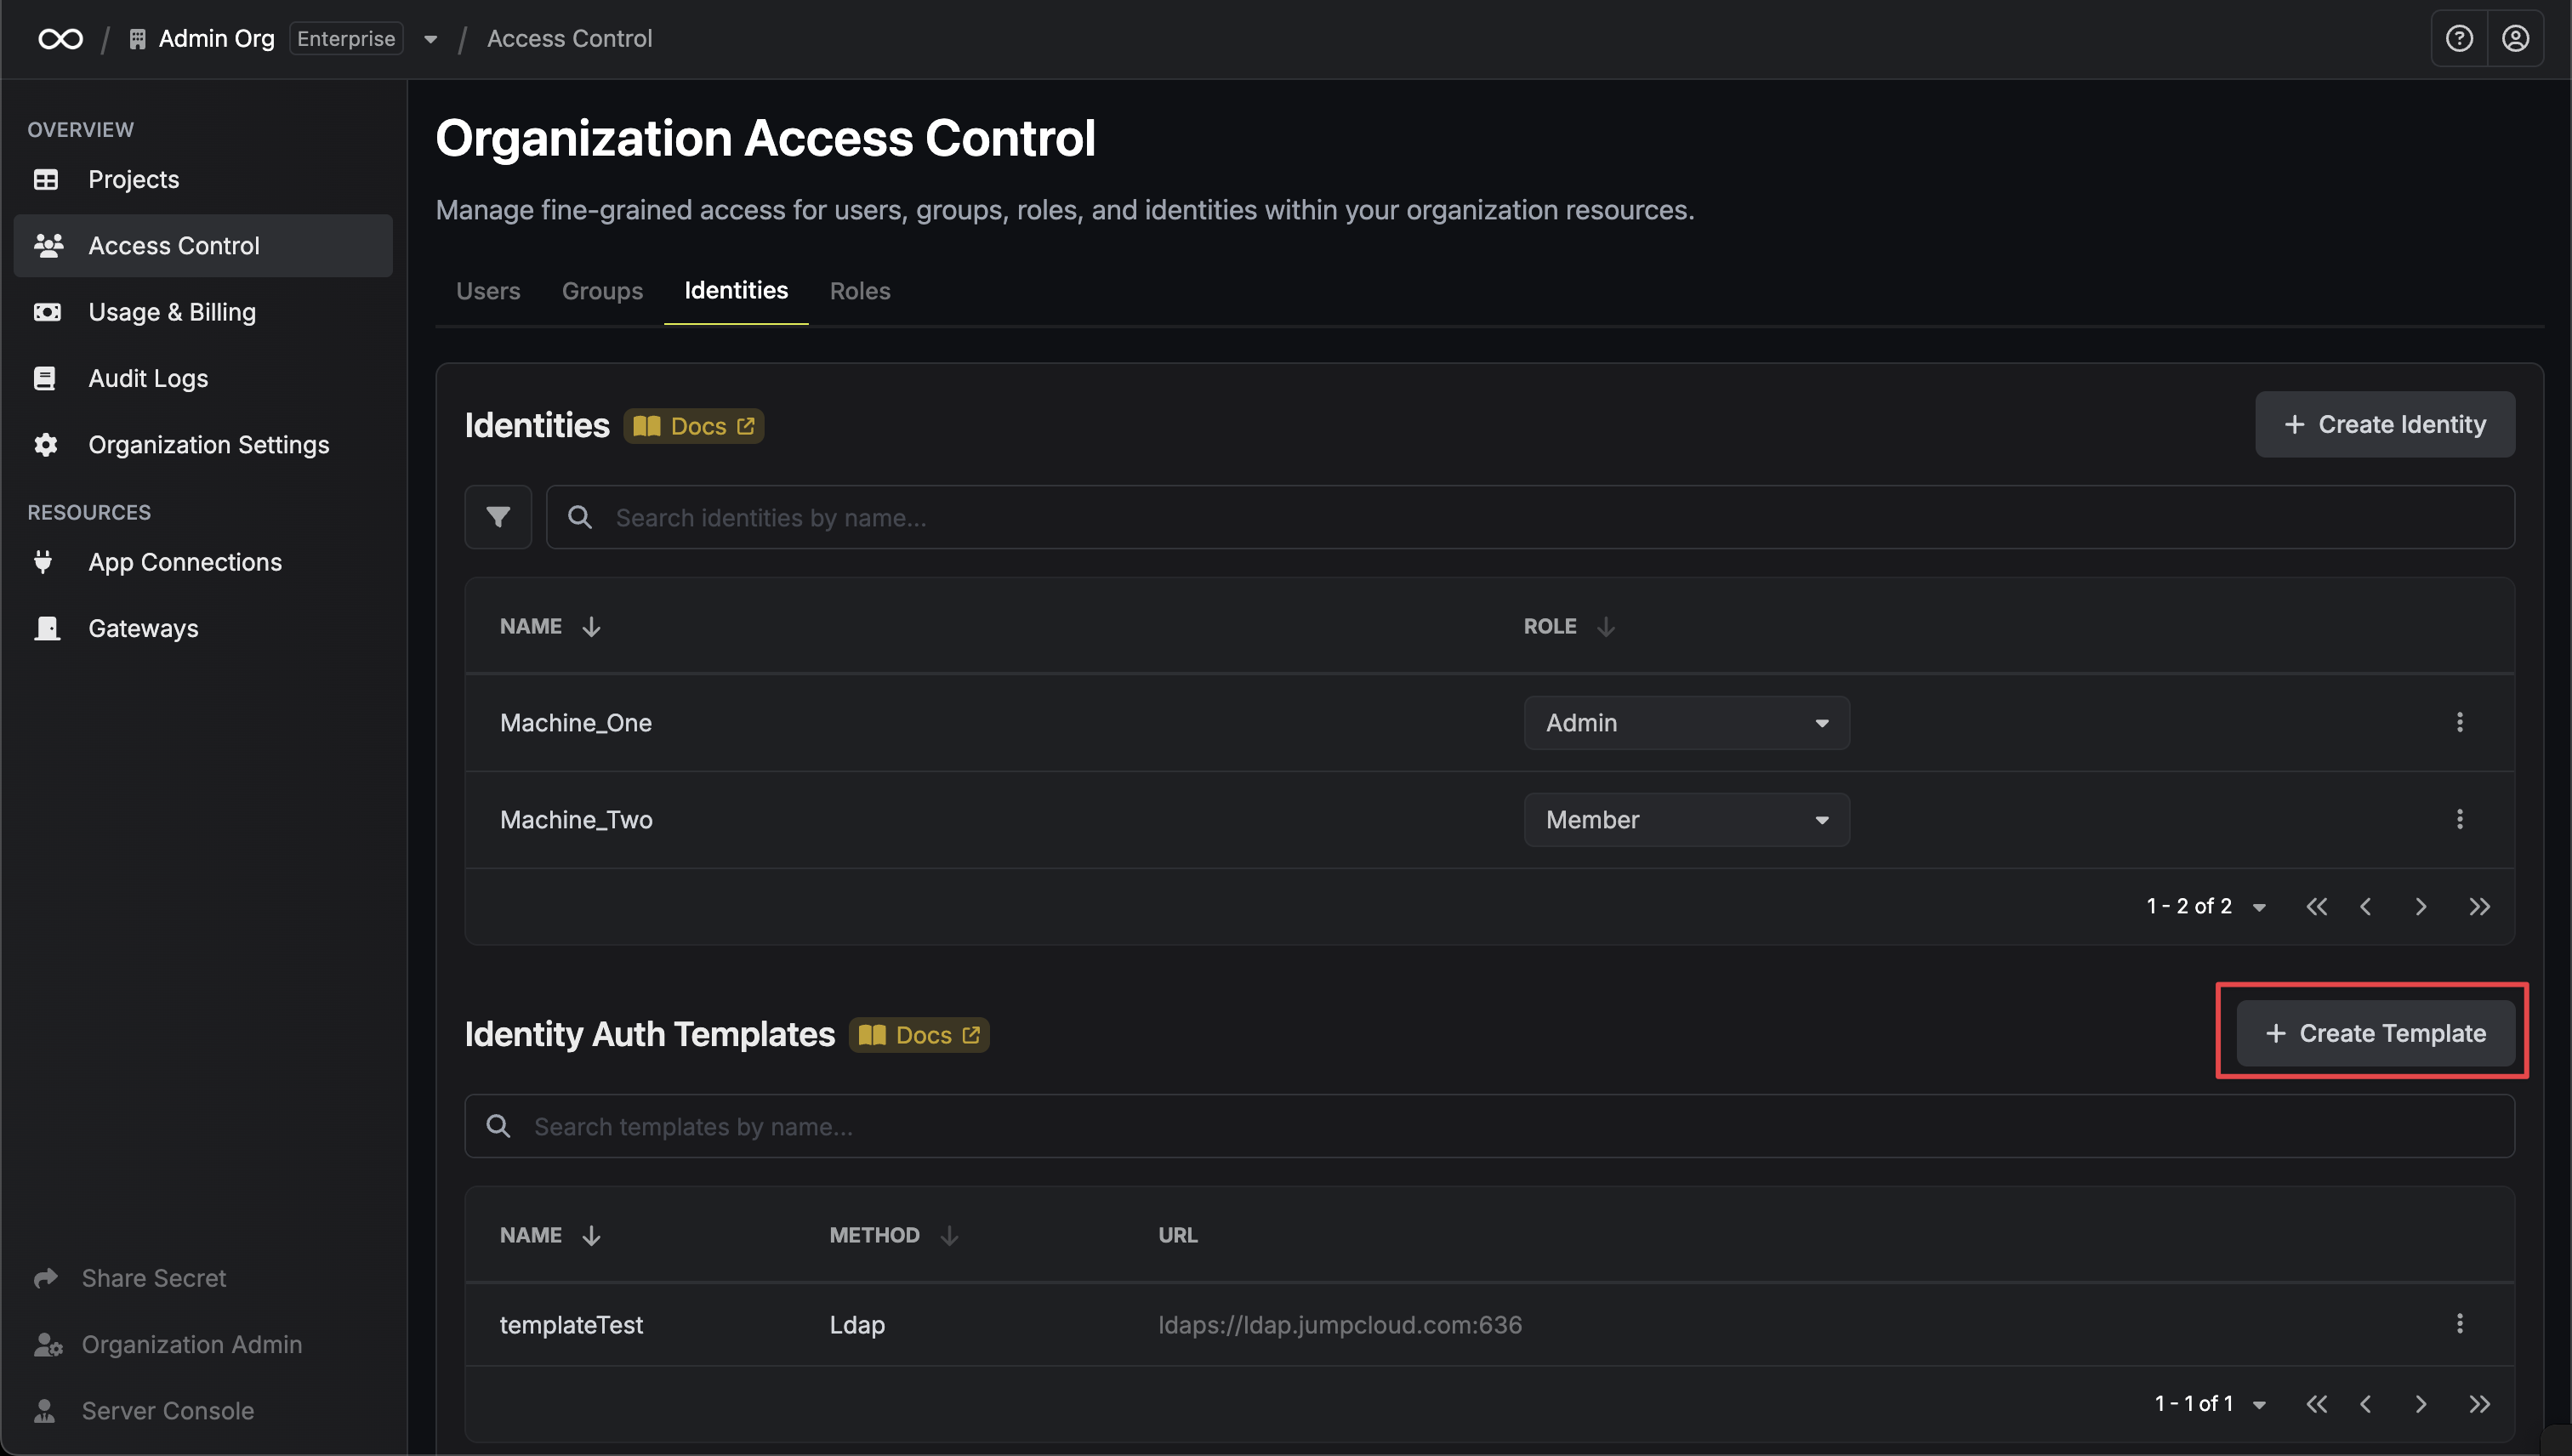 Select the authentication method you want to create a template for (currently supports LDAP Auth).
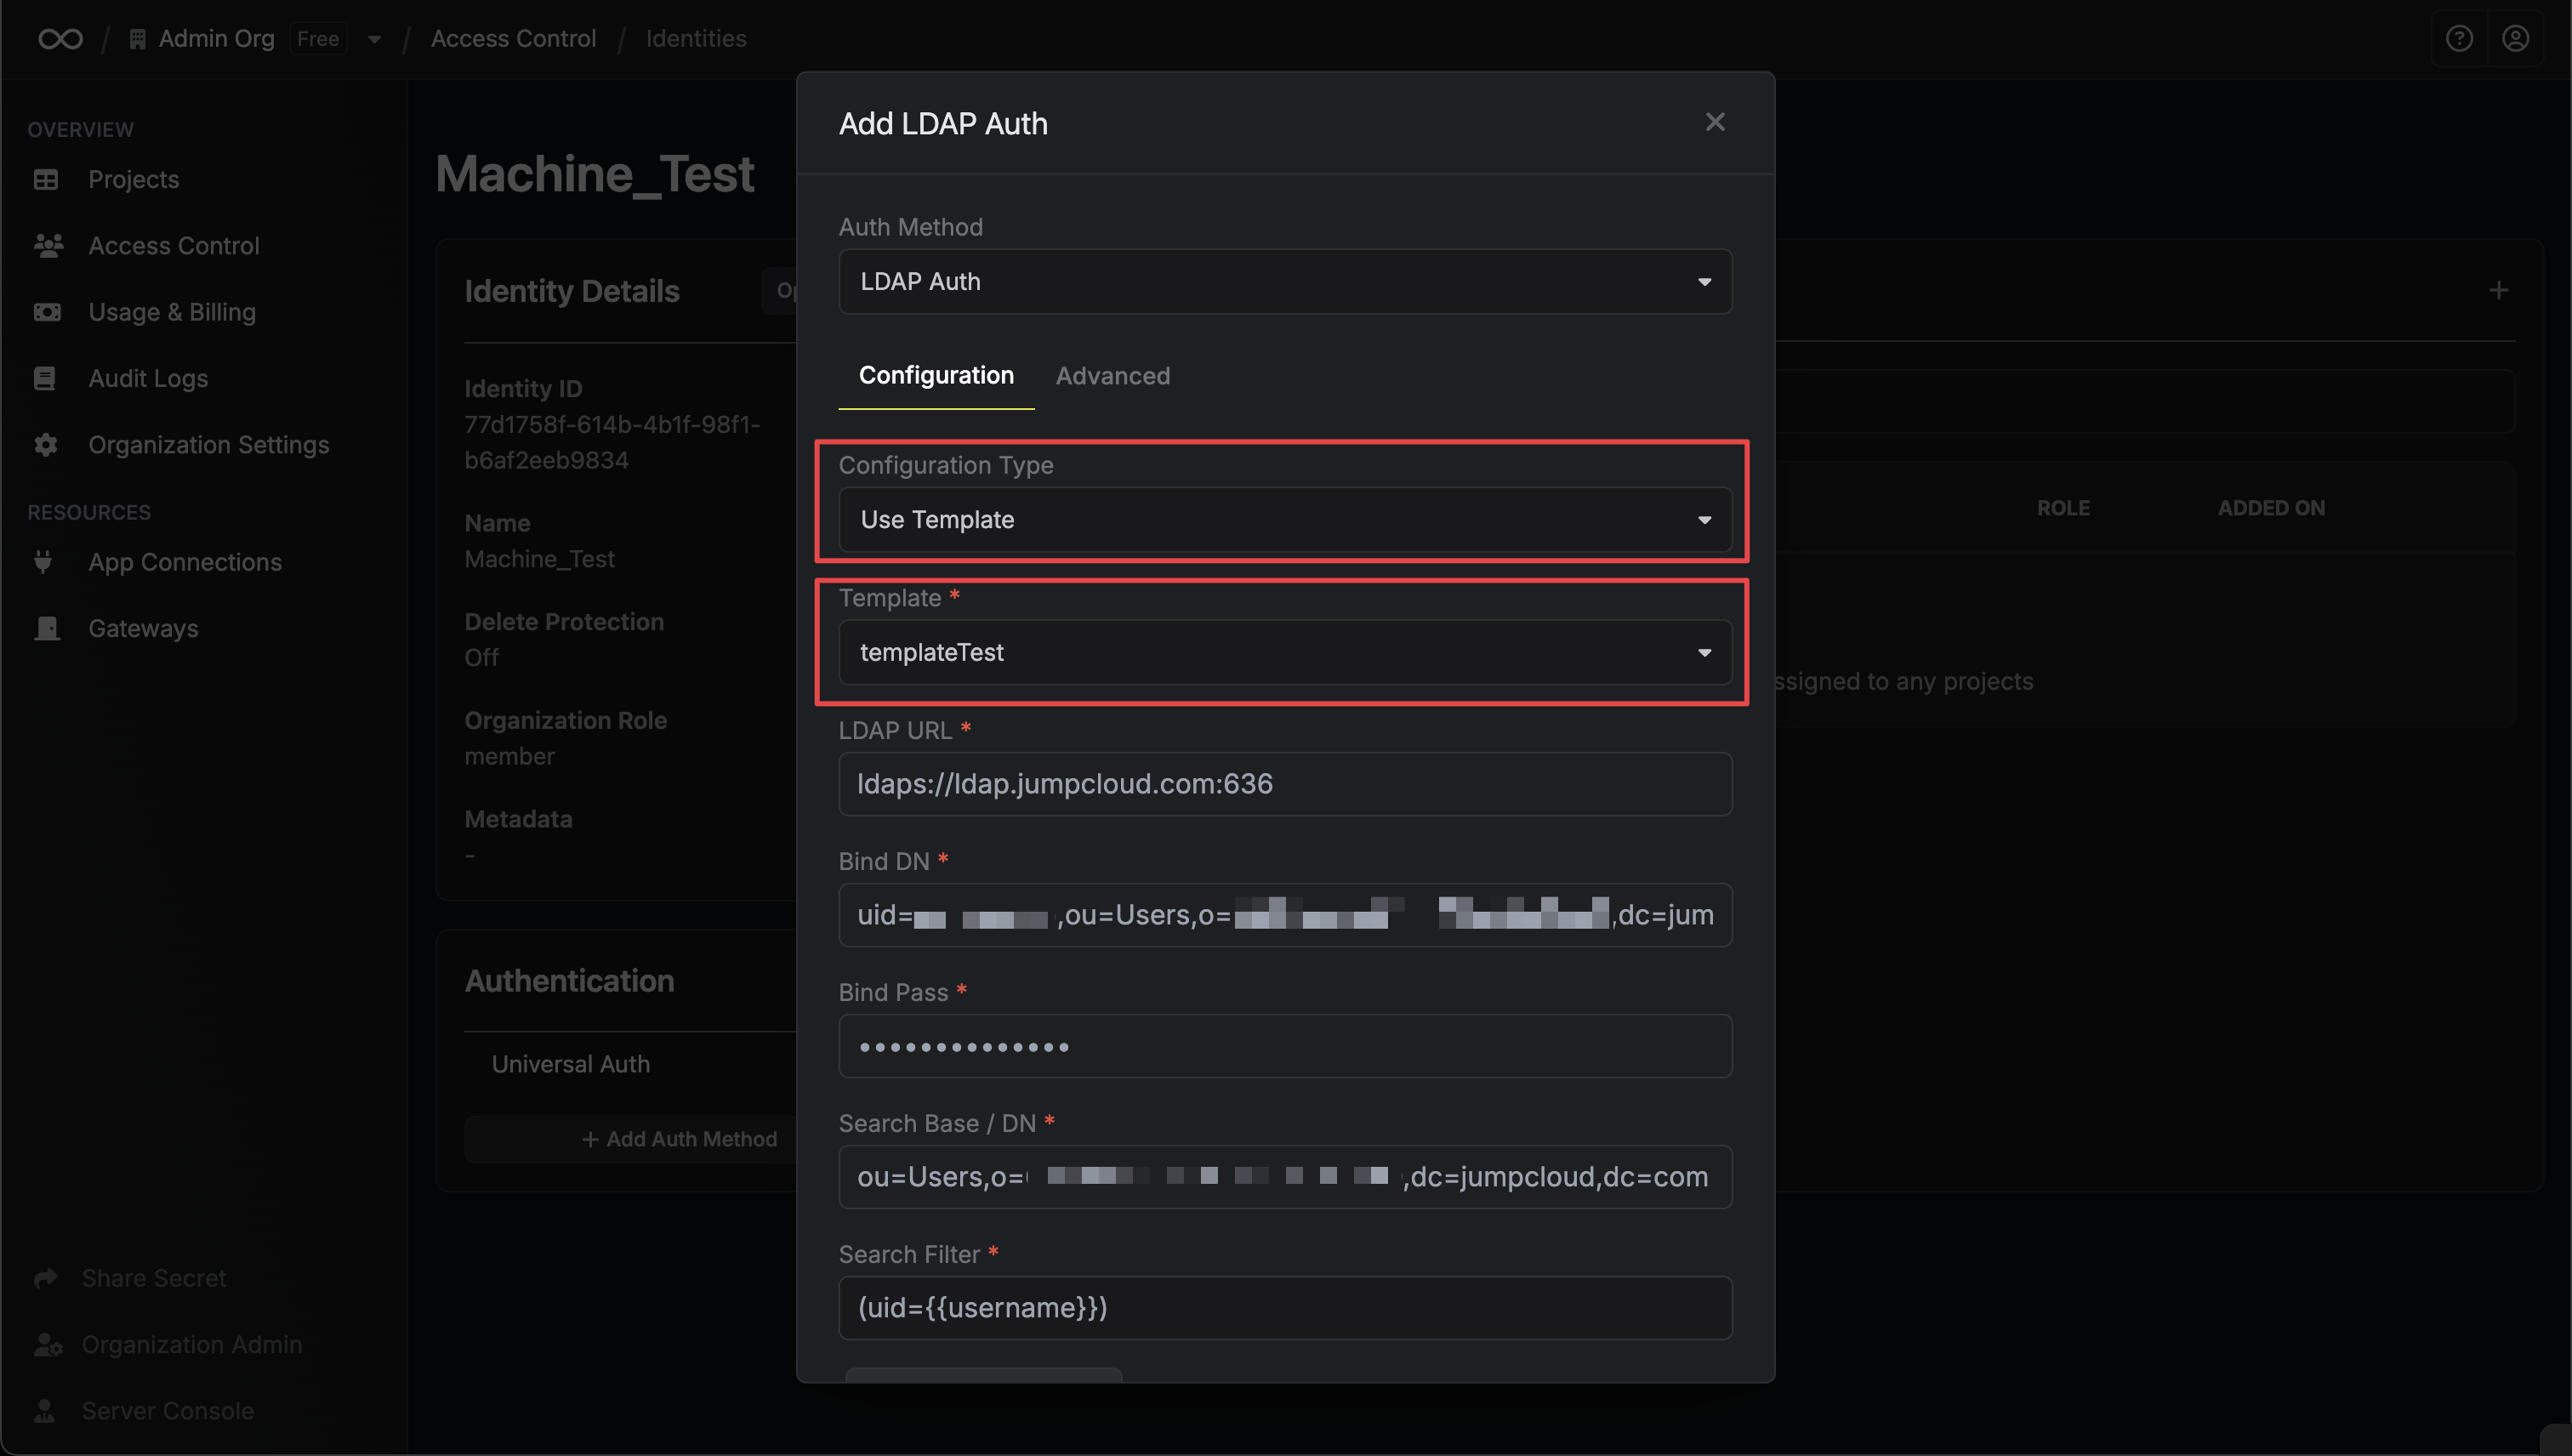
 * **Template Name**: A descriptive name for your template
* **URL**: The LDAP server to connect to such as `ldap://ldap.your-org.com`, `ldaps://ldap.myorg.com:636` *(for connection over SSL/TLS)*, etc.
* **Bind DN**: The DN to bind to the LDAP server with.
* **Bind Pass**: The password to bind to the LDAP server with.
* **Search Base / DN**: Base DN under which to perform user search such as `ou=Users,dc=acme,dc=com`.
* **CA Certificate**: The CA certificate to use when verifying the LDAP server certificate. This field is optional but recommended.
* **Template Name**: A descriptive name for your template
* **URL**: The LDAP server to connect to such as `ldap://ldap.your-org.com`, `ldaps://ldap.myorg.com:636` *(for connection over SSL/TLS)*, etc.
* **Bind DN**: The DN to bind to the LDAP server with.
* **Bind Pass**: The password to bind to the LDAP server with.
* **Search Base / DN**: Base DN under which to perform user search such as `ou=Users,dc=acme,dc=com`.
* **CA Certificate**: The CA certificate to use when verifying the LDAP server certificate. This field is optional but recommended.
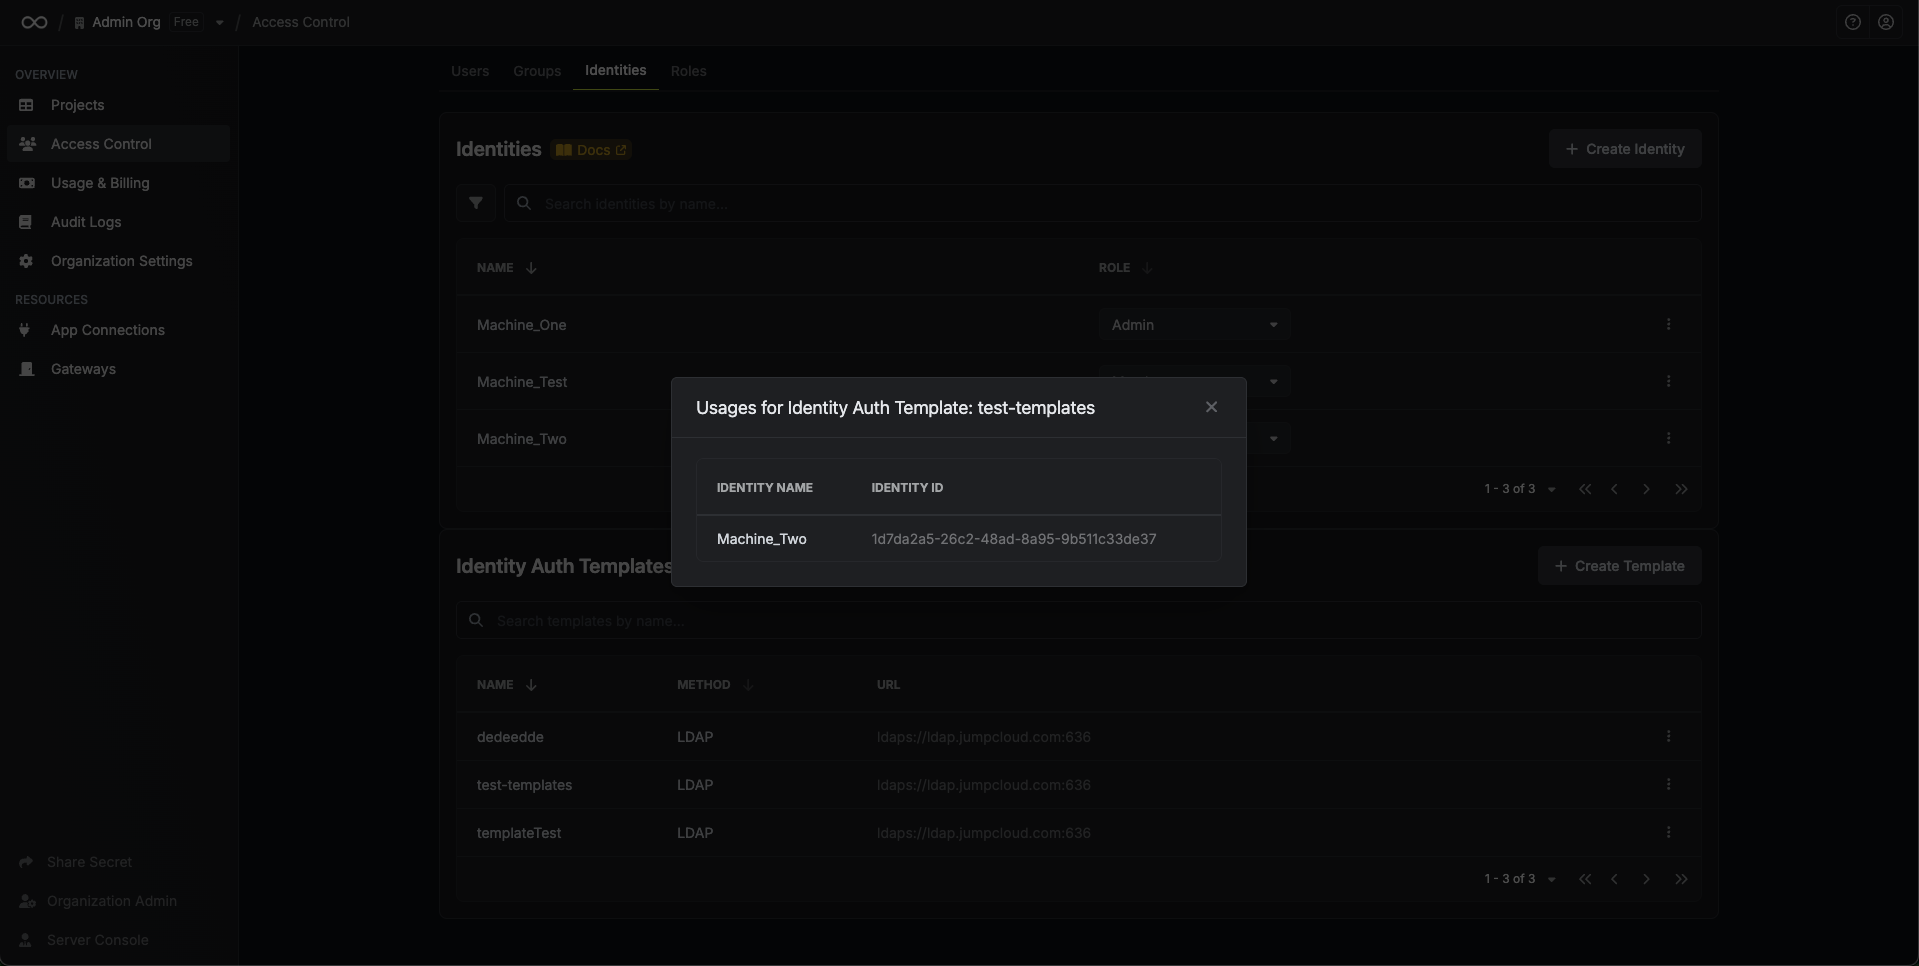
 ### Managing Template Usage
You can view which identities are using a specific template by clicking **View Usages** in the template's dropdown menu.
### Managing Template Usage
You can view which identities are using a specific template by clicking **View Usages** in the template's dropdown menu.
 ## FAQ
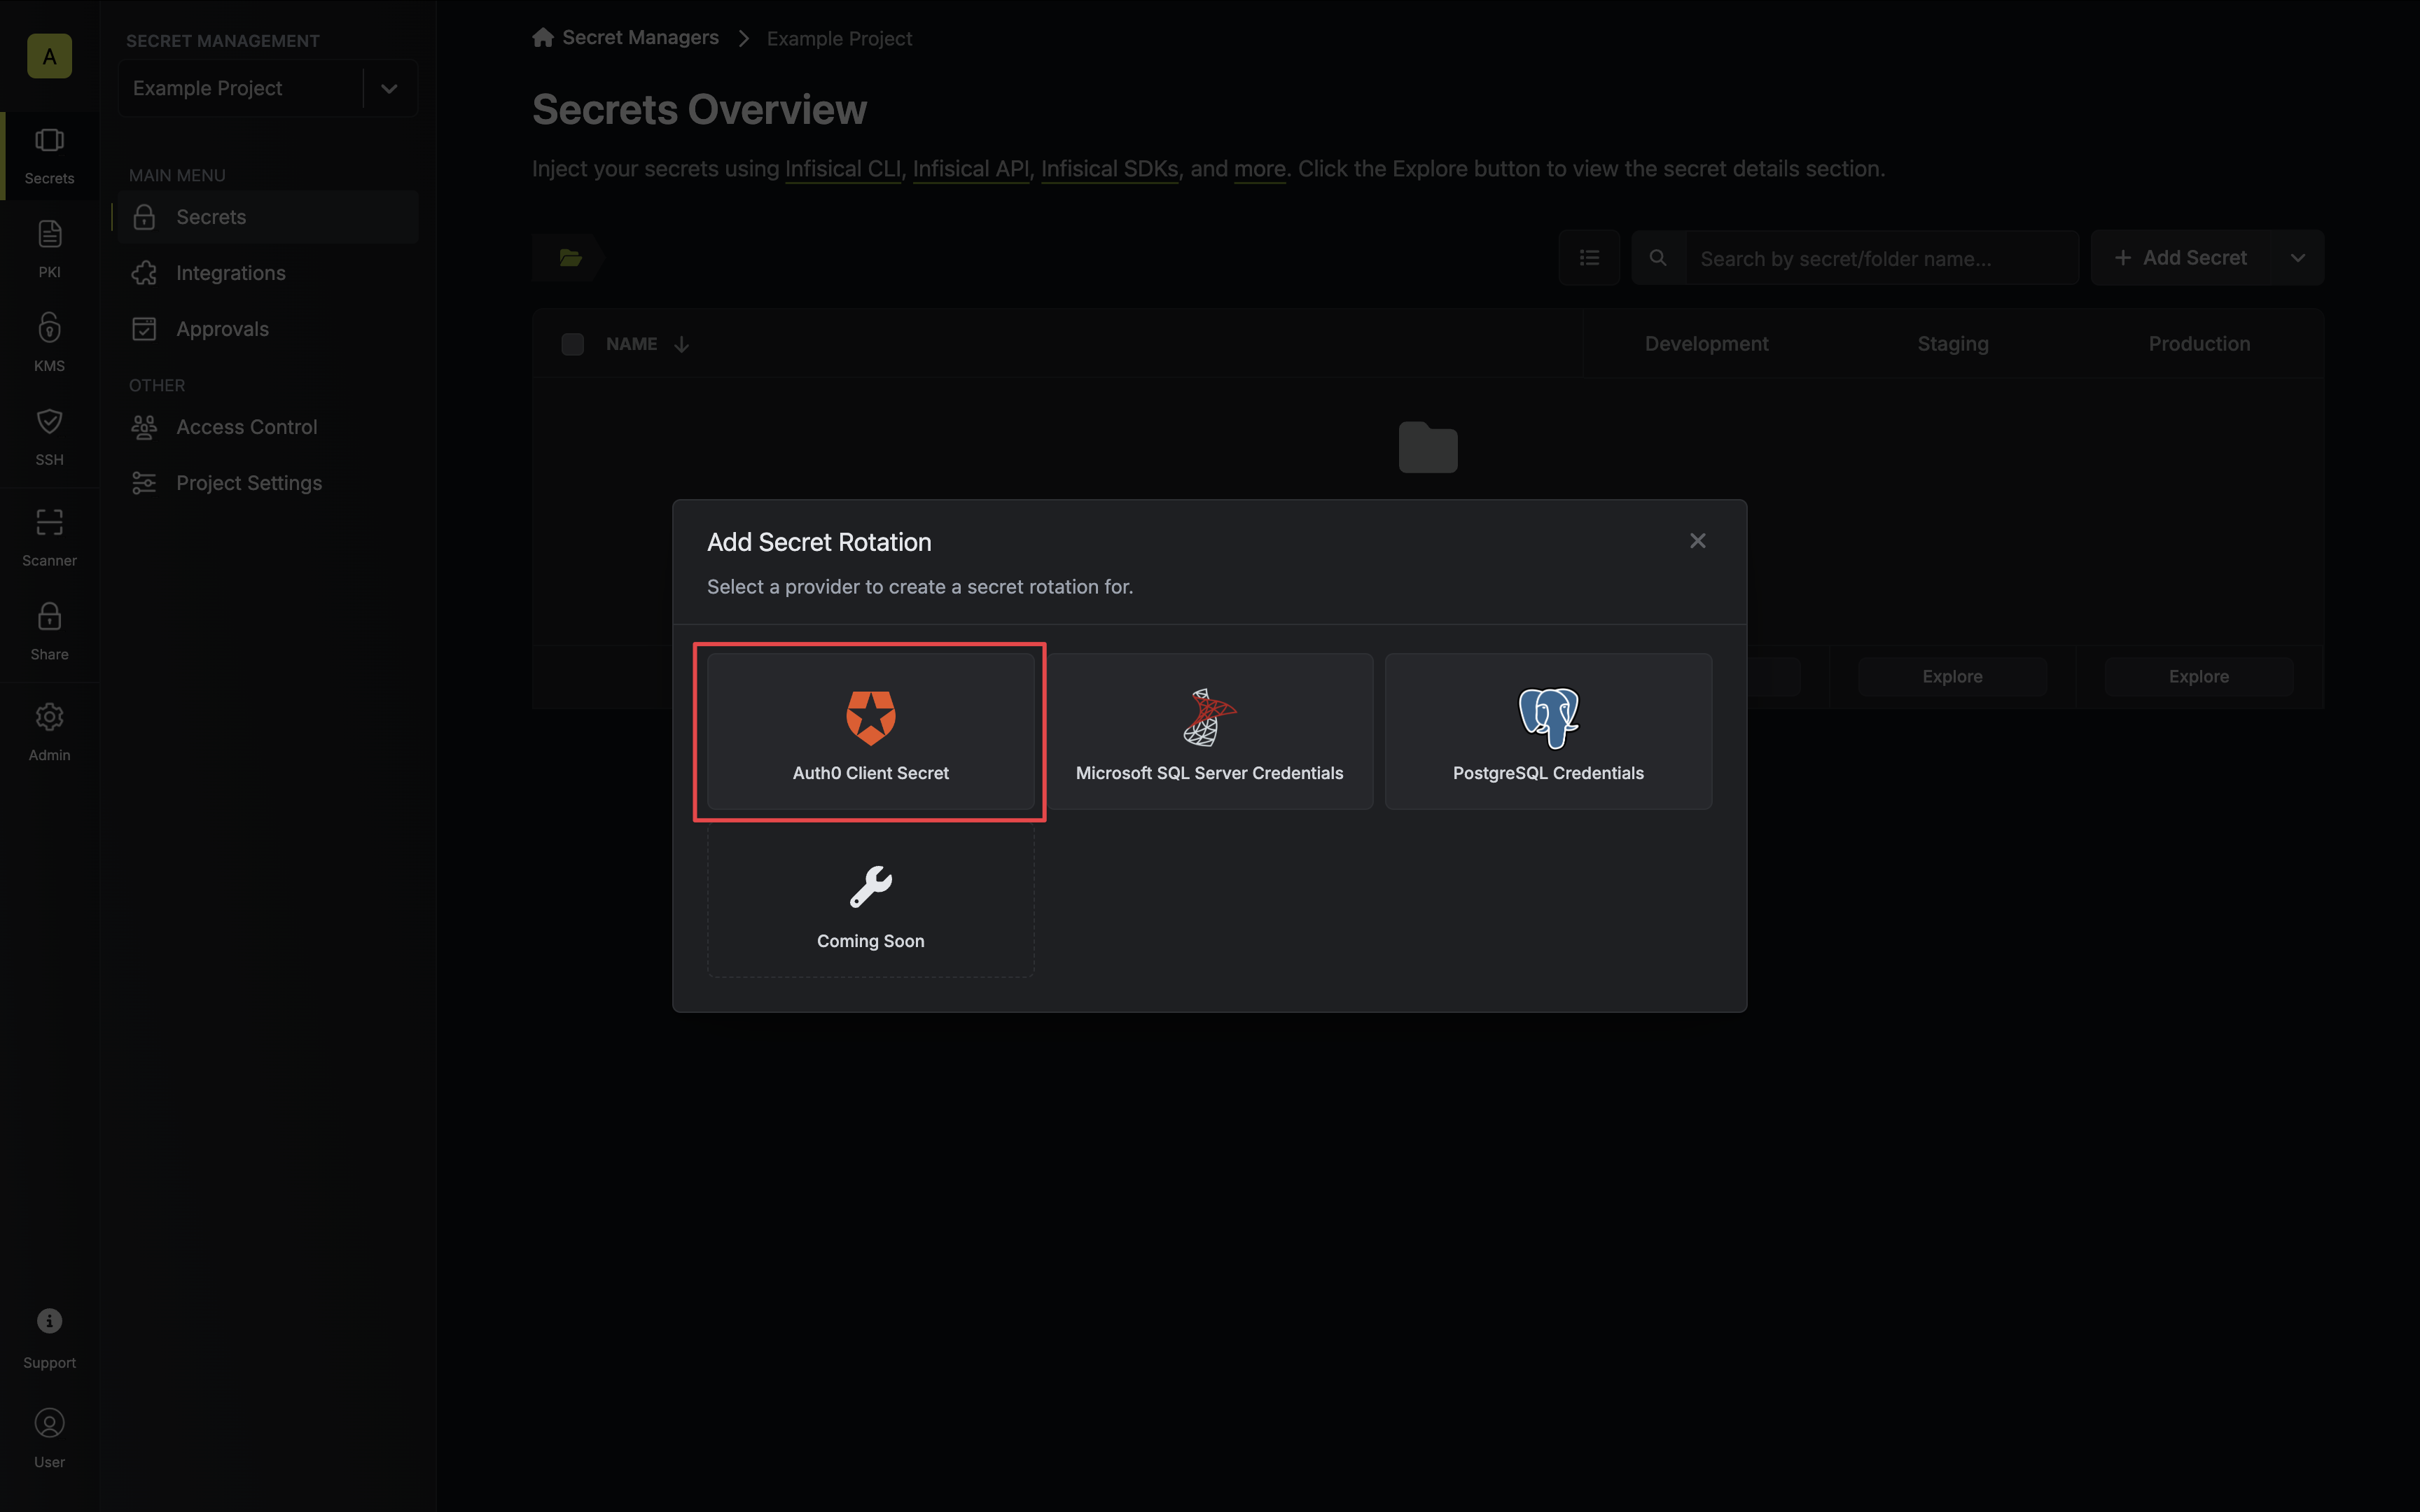
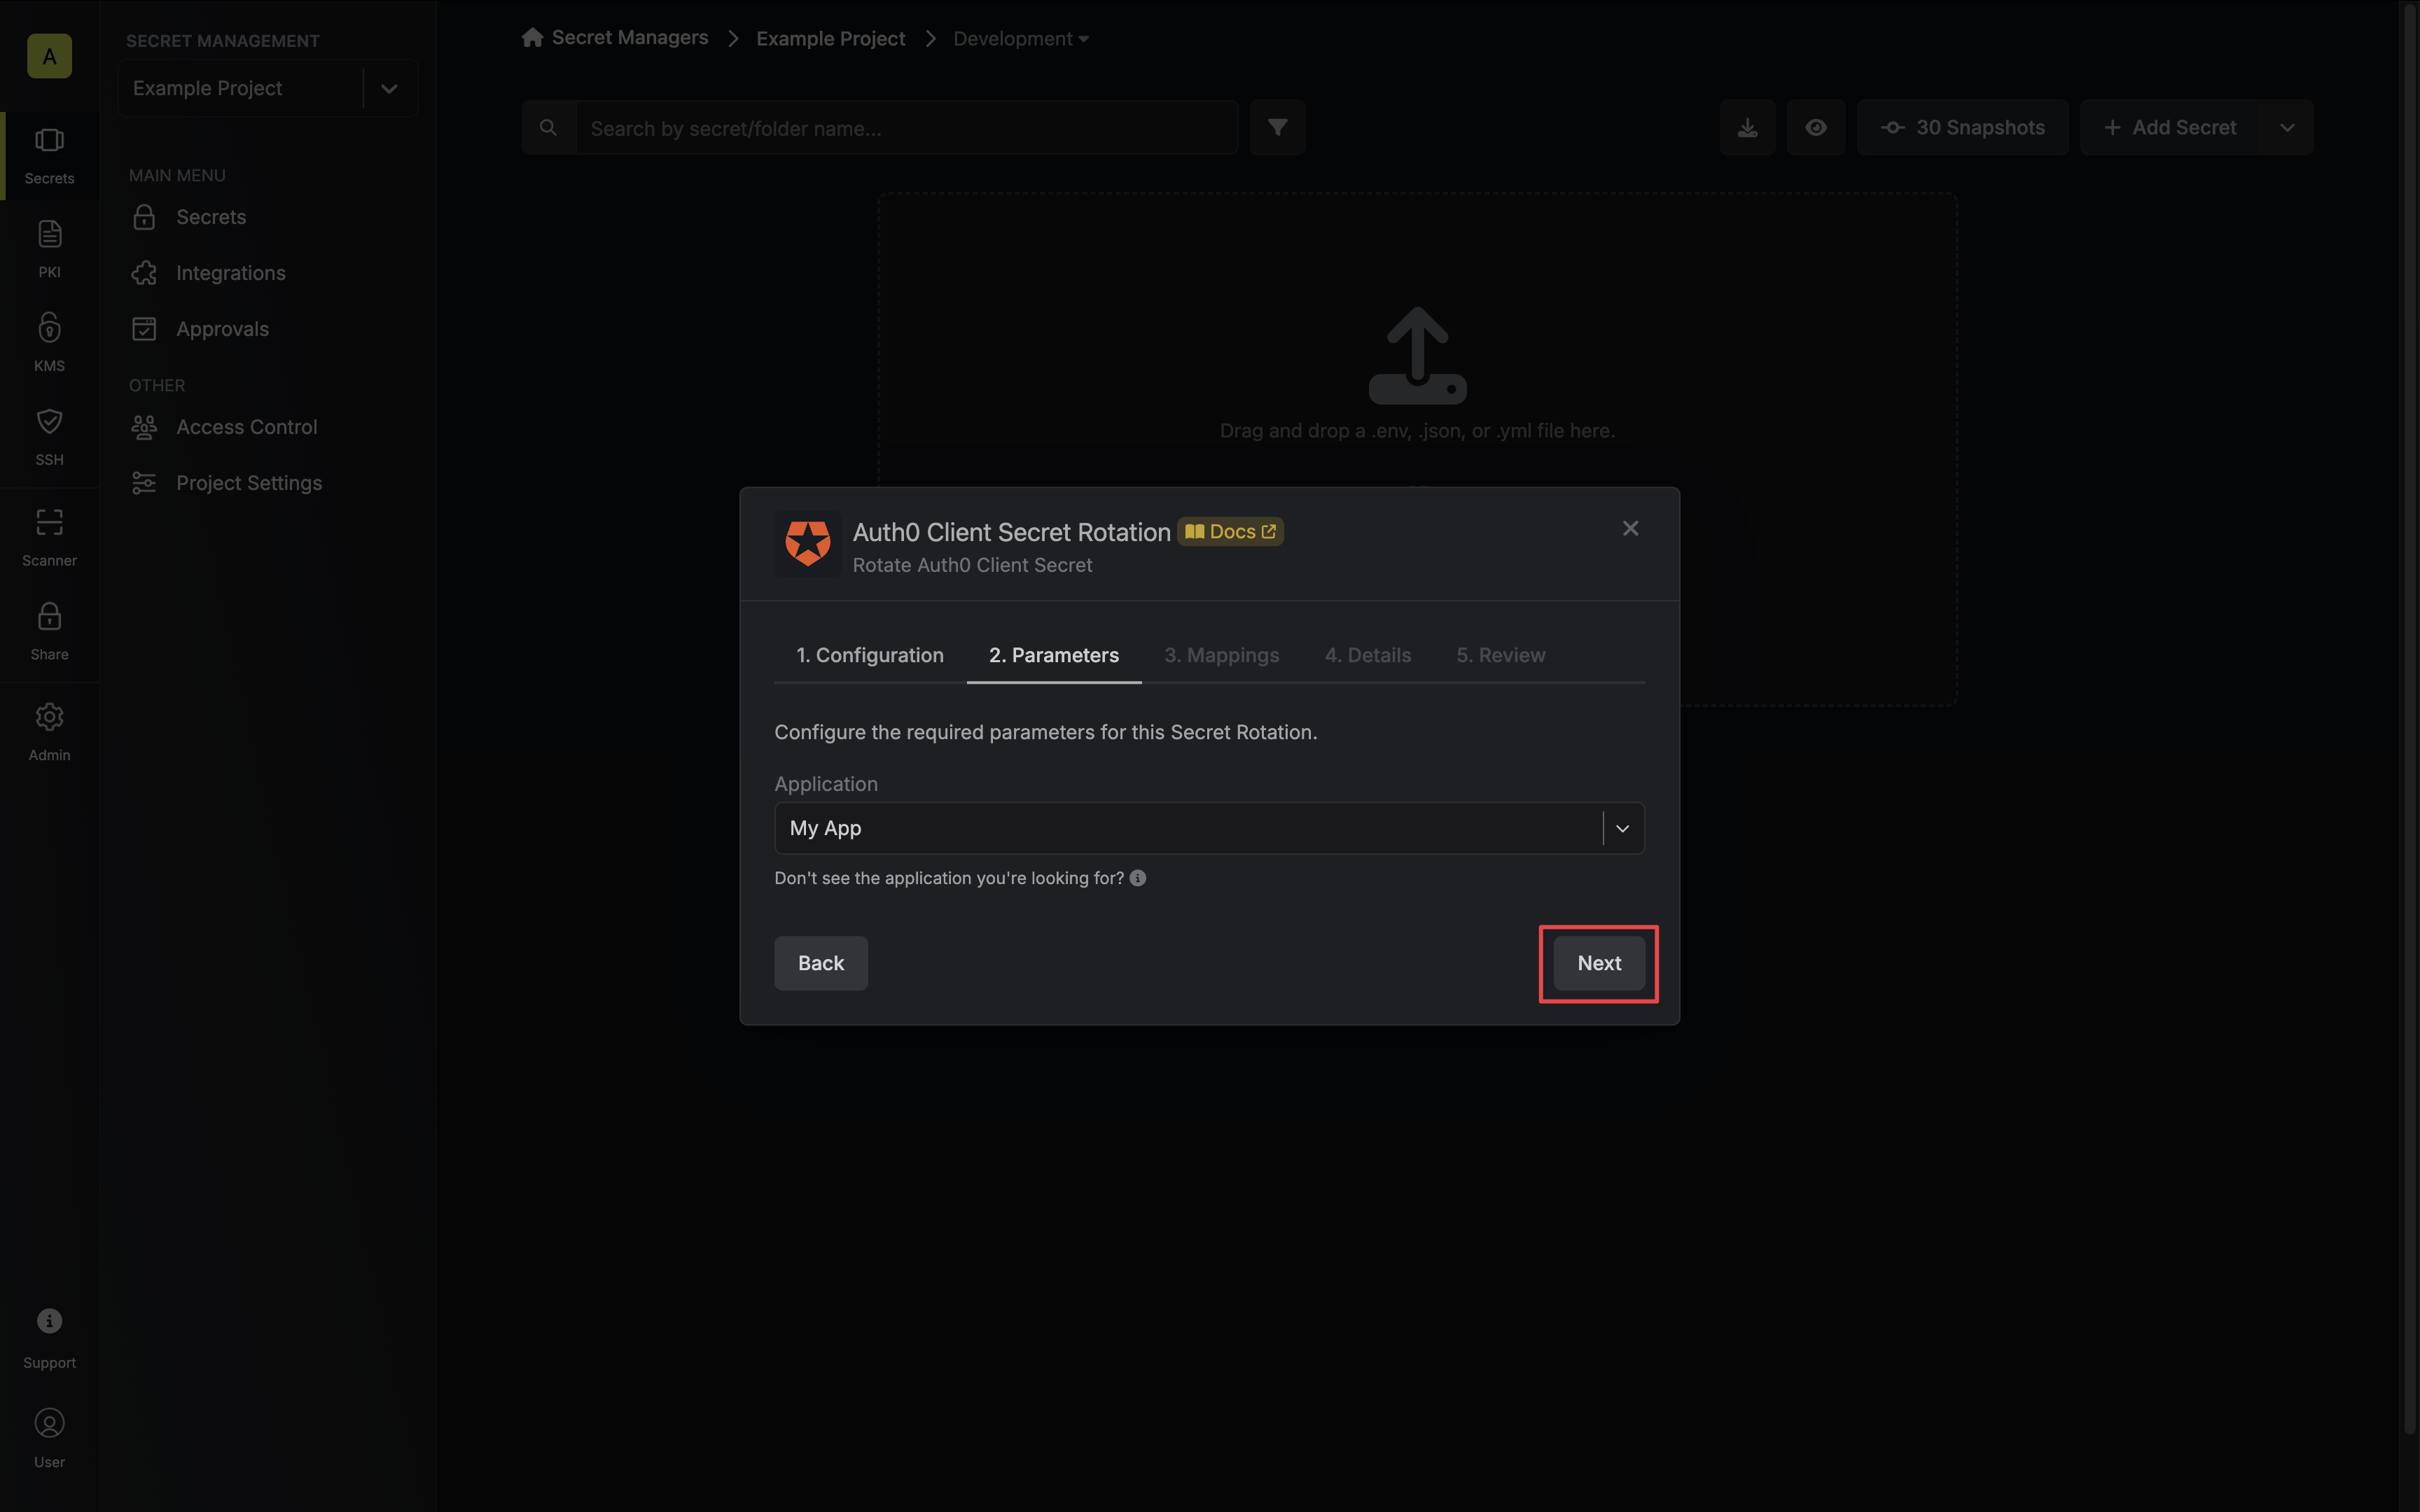
 2. Select the **Auth0 Client Secret** option.
 3. Select the **Auth0 Connection** to use and configure the rotation behavior. Then click **Next**.
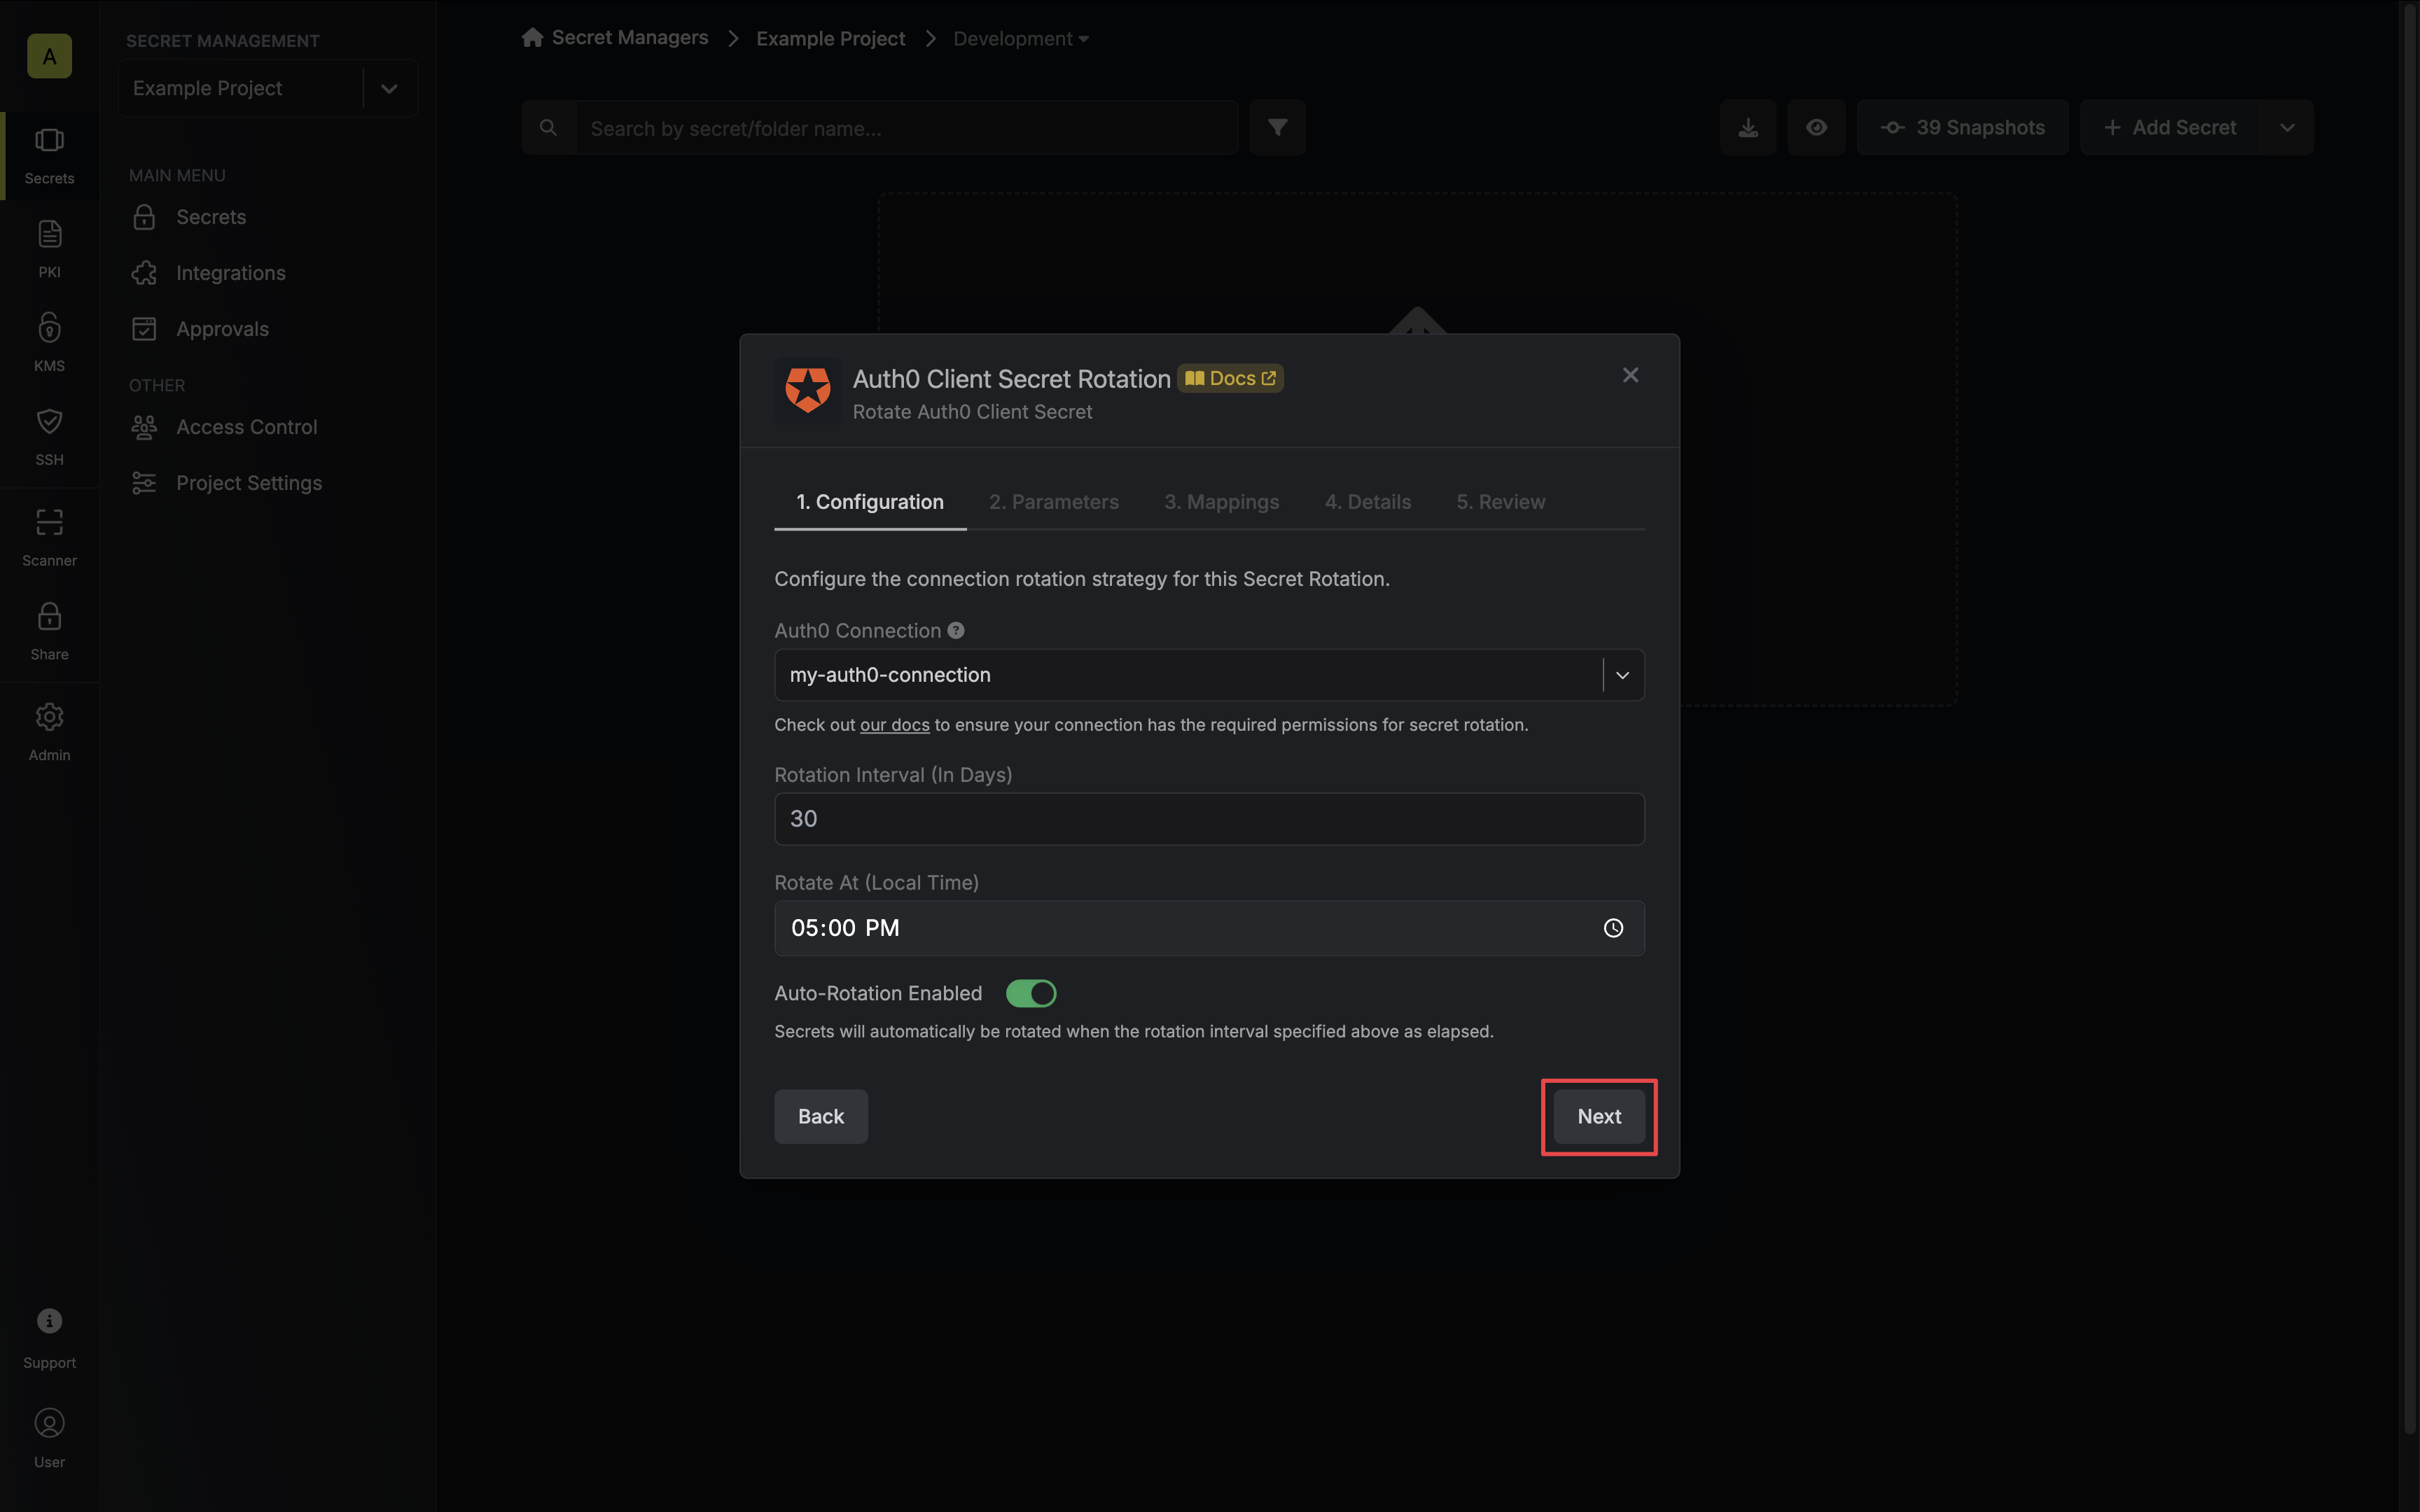 * **Auth0 Connection** - the connection that will perform the rotation of the specified application's Client Secret.
* **Rotation Interval** - the interval, in days, that once elapsed will trigger a rotation.
* **Rotate At** - the local time of day when rotation should occur once the interval has elapsed.
* **Auto-Rotation Enabled** - whether secrets should automatically be rotated once the rotation interval has elapsed. Disable this option to manually rotate secrets or pause secret rotation.
* **Auth0 Connection** - the connection that will perform the rotation of the specified application's Client Secret.
* **Rotation Interval** - the interval, in days, that once elapsed will trigger a rotation.
* **Rotate At** - the local time of day when rotation should occur once the interval has elapsed.
* **Auto-Rotation Enabled** - whether secrets should automatically be rotated once the rotation interval has elapsed. Disable this option to manually rotate secrets or pause secret rotation.
 5. Specify the secret names that the client credentials should be mapped to. Then click **Next**.
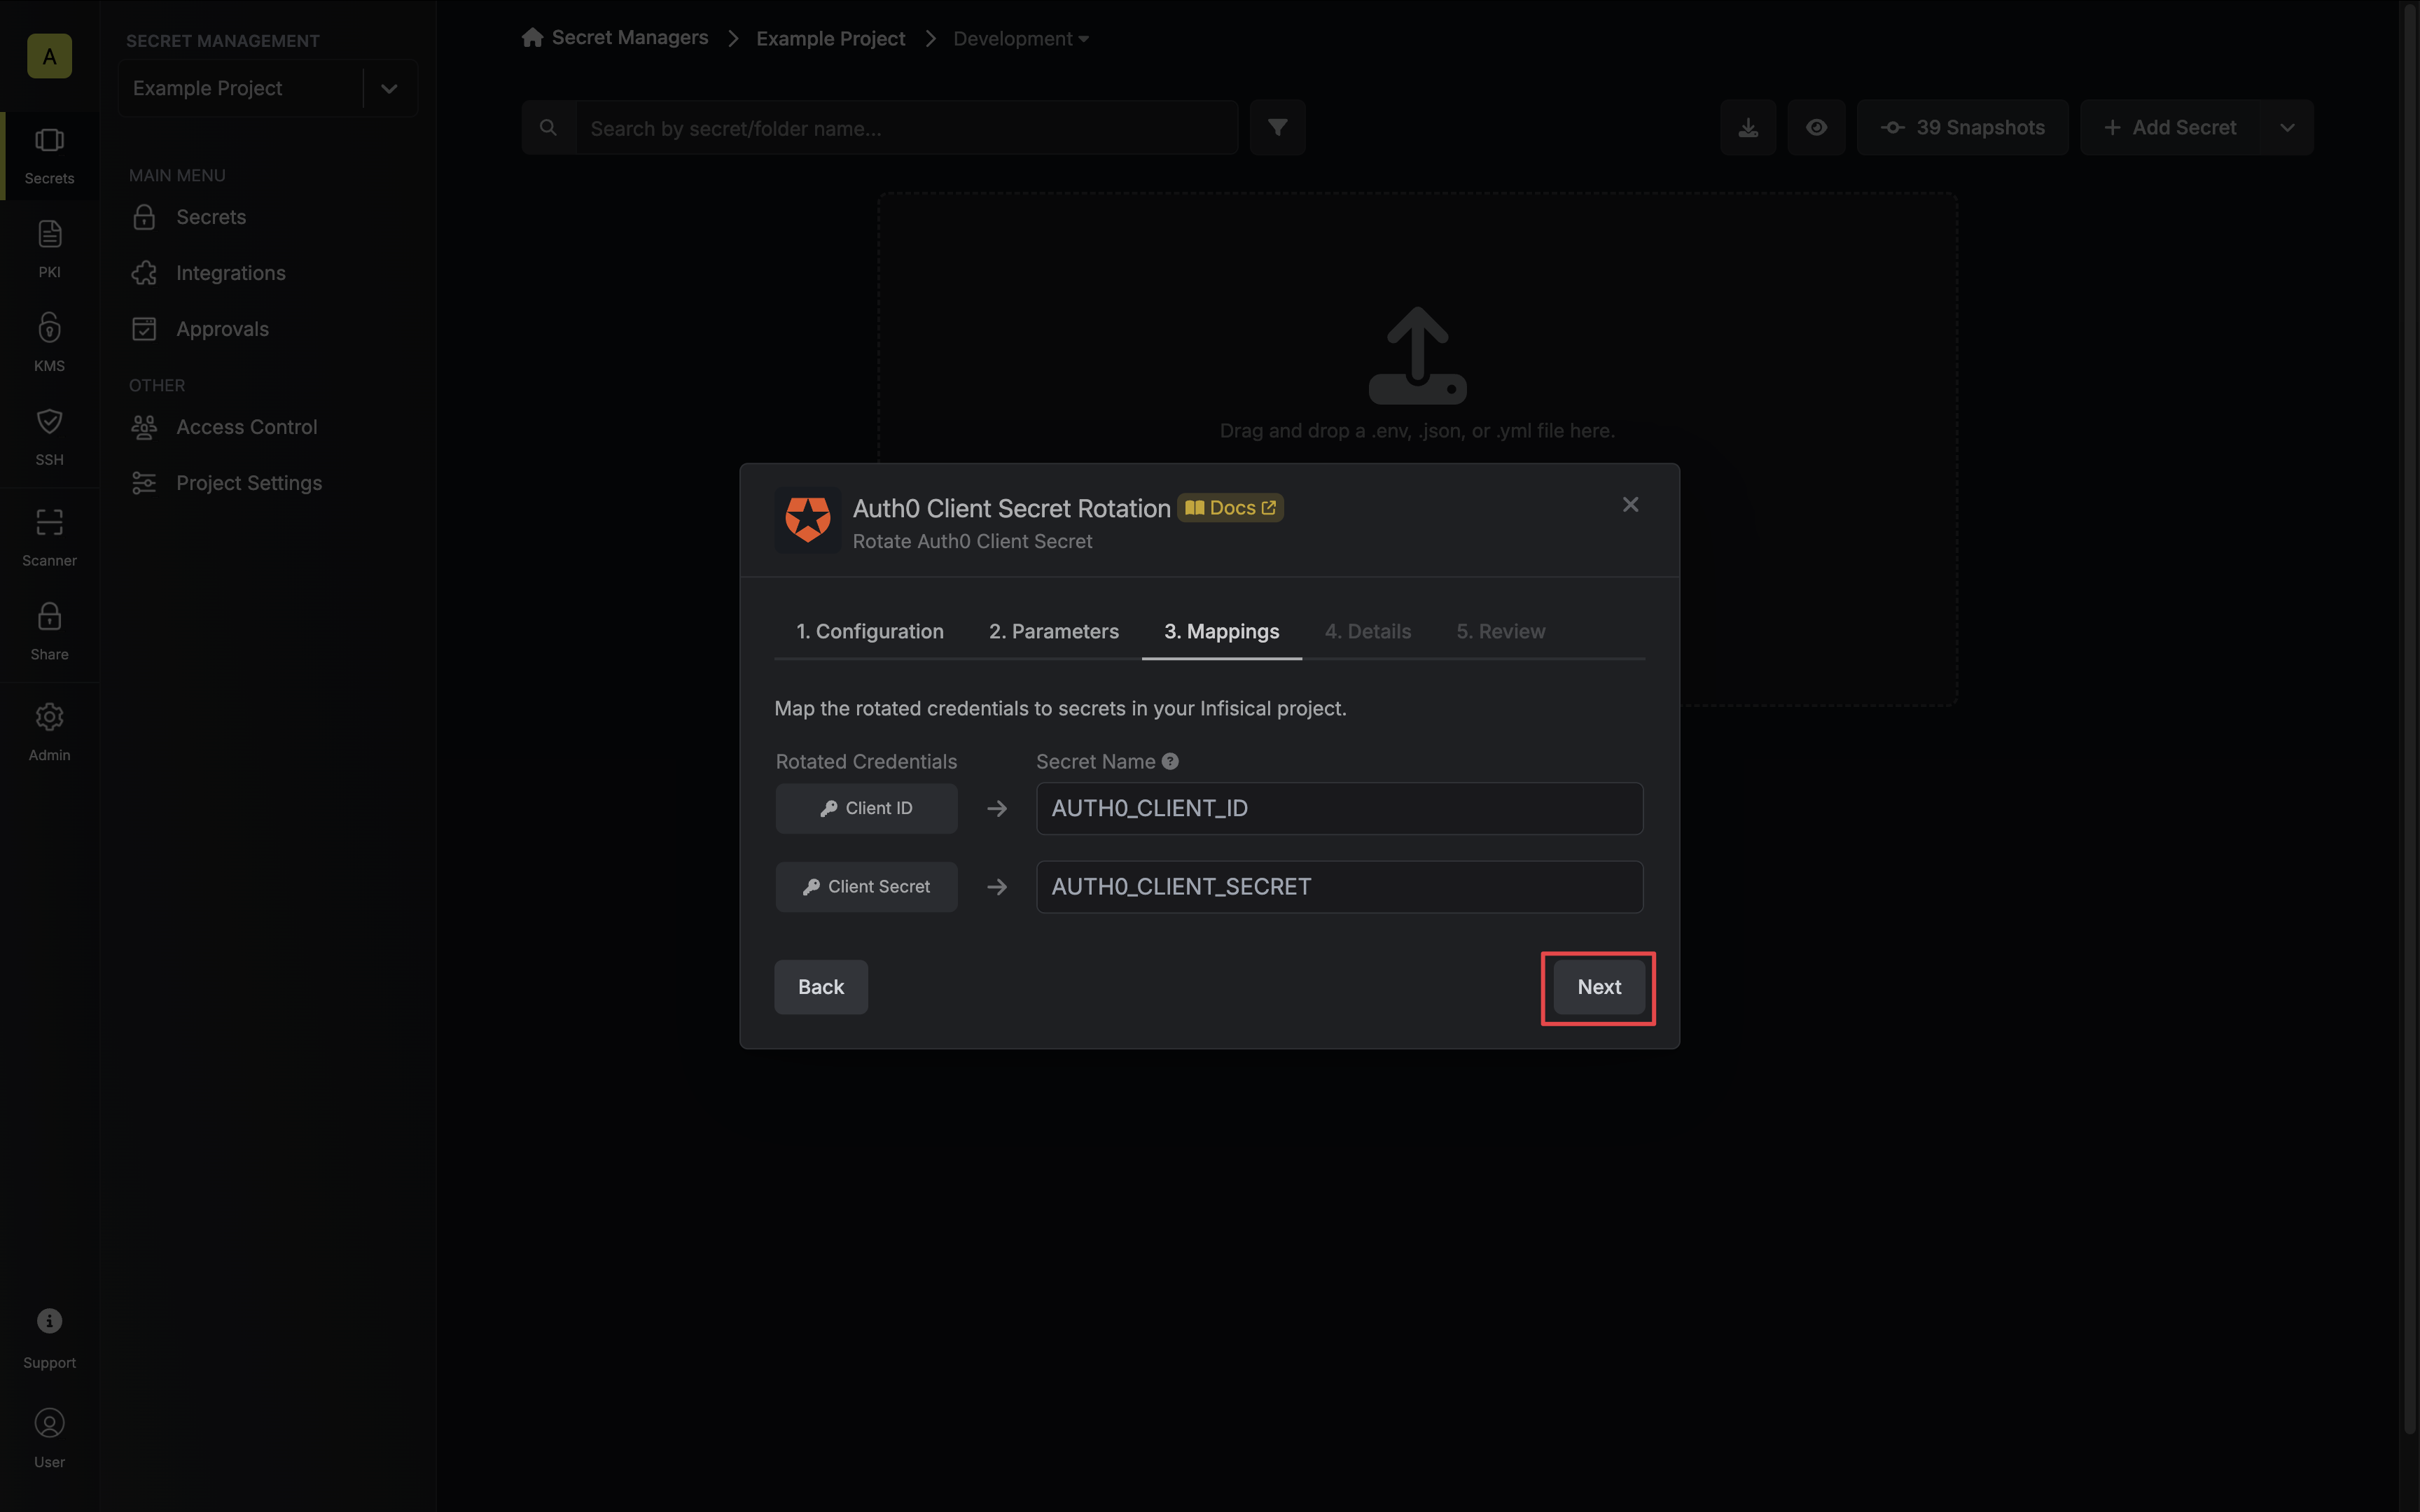 * **Client ID** - the name of the secret that the application Client ID will be mapped to.
* **Client Secret** - the name of the secret that the rotated Client Secret will be mapped to.
6. Give your rotation a name and description (optional). Then click **Next**.
* **Client ID** - the name of the secret that the application Client ID will be mapped to.
* **Client Secret** - the name of the secret that the rotated Client Secret will be mapped to.
6. Give your rotation a name and description (optional). Then click **Next**.
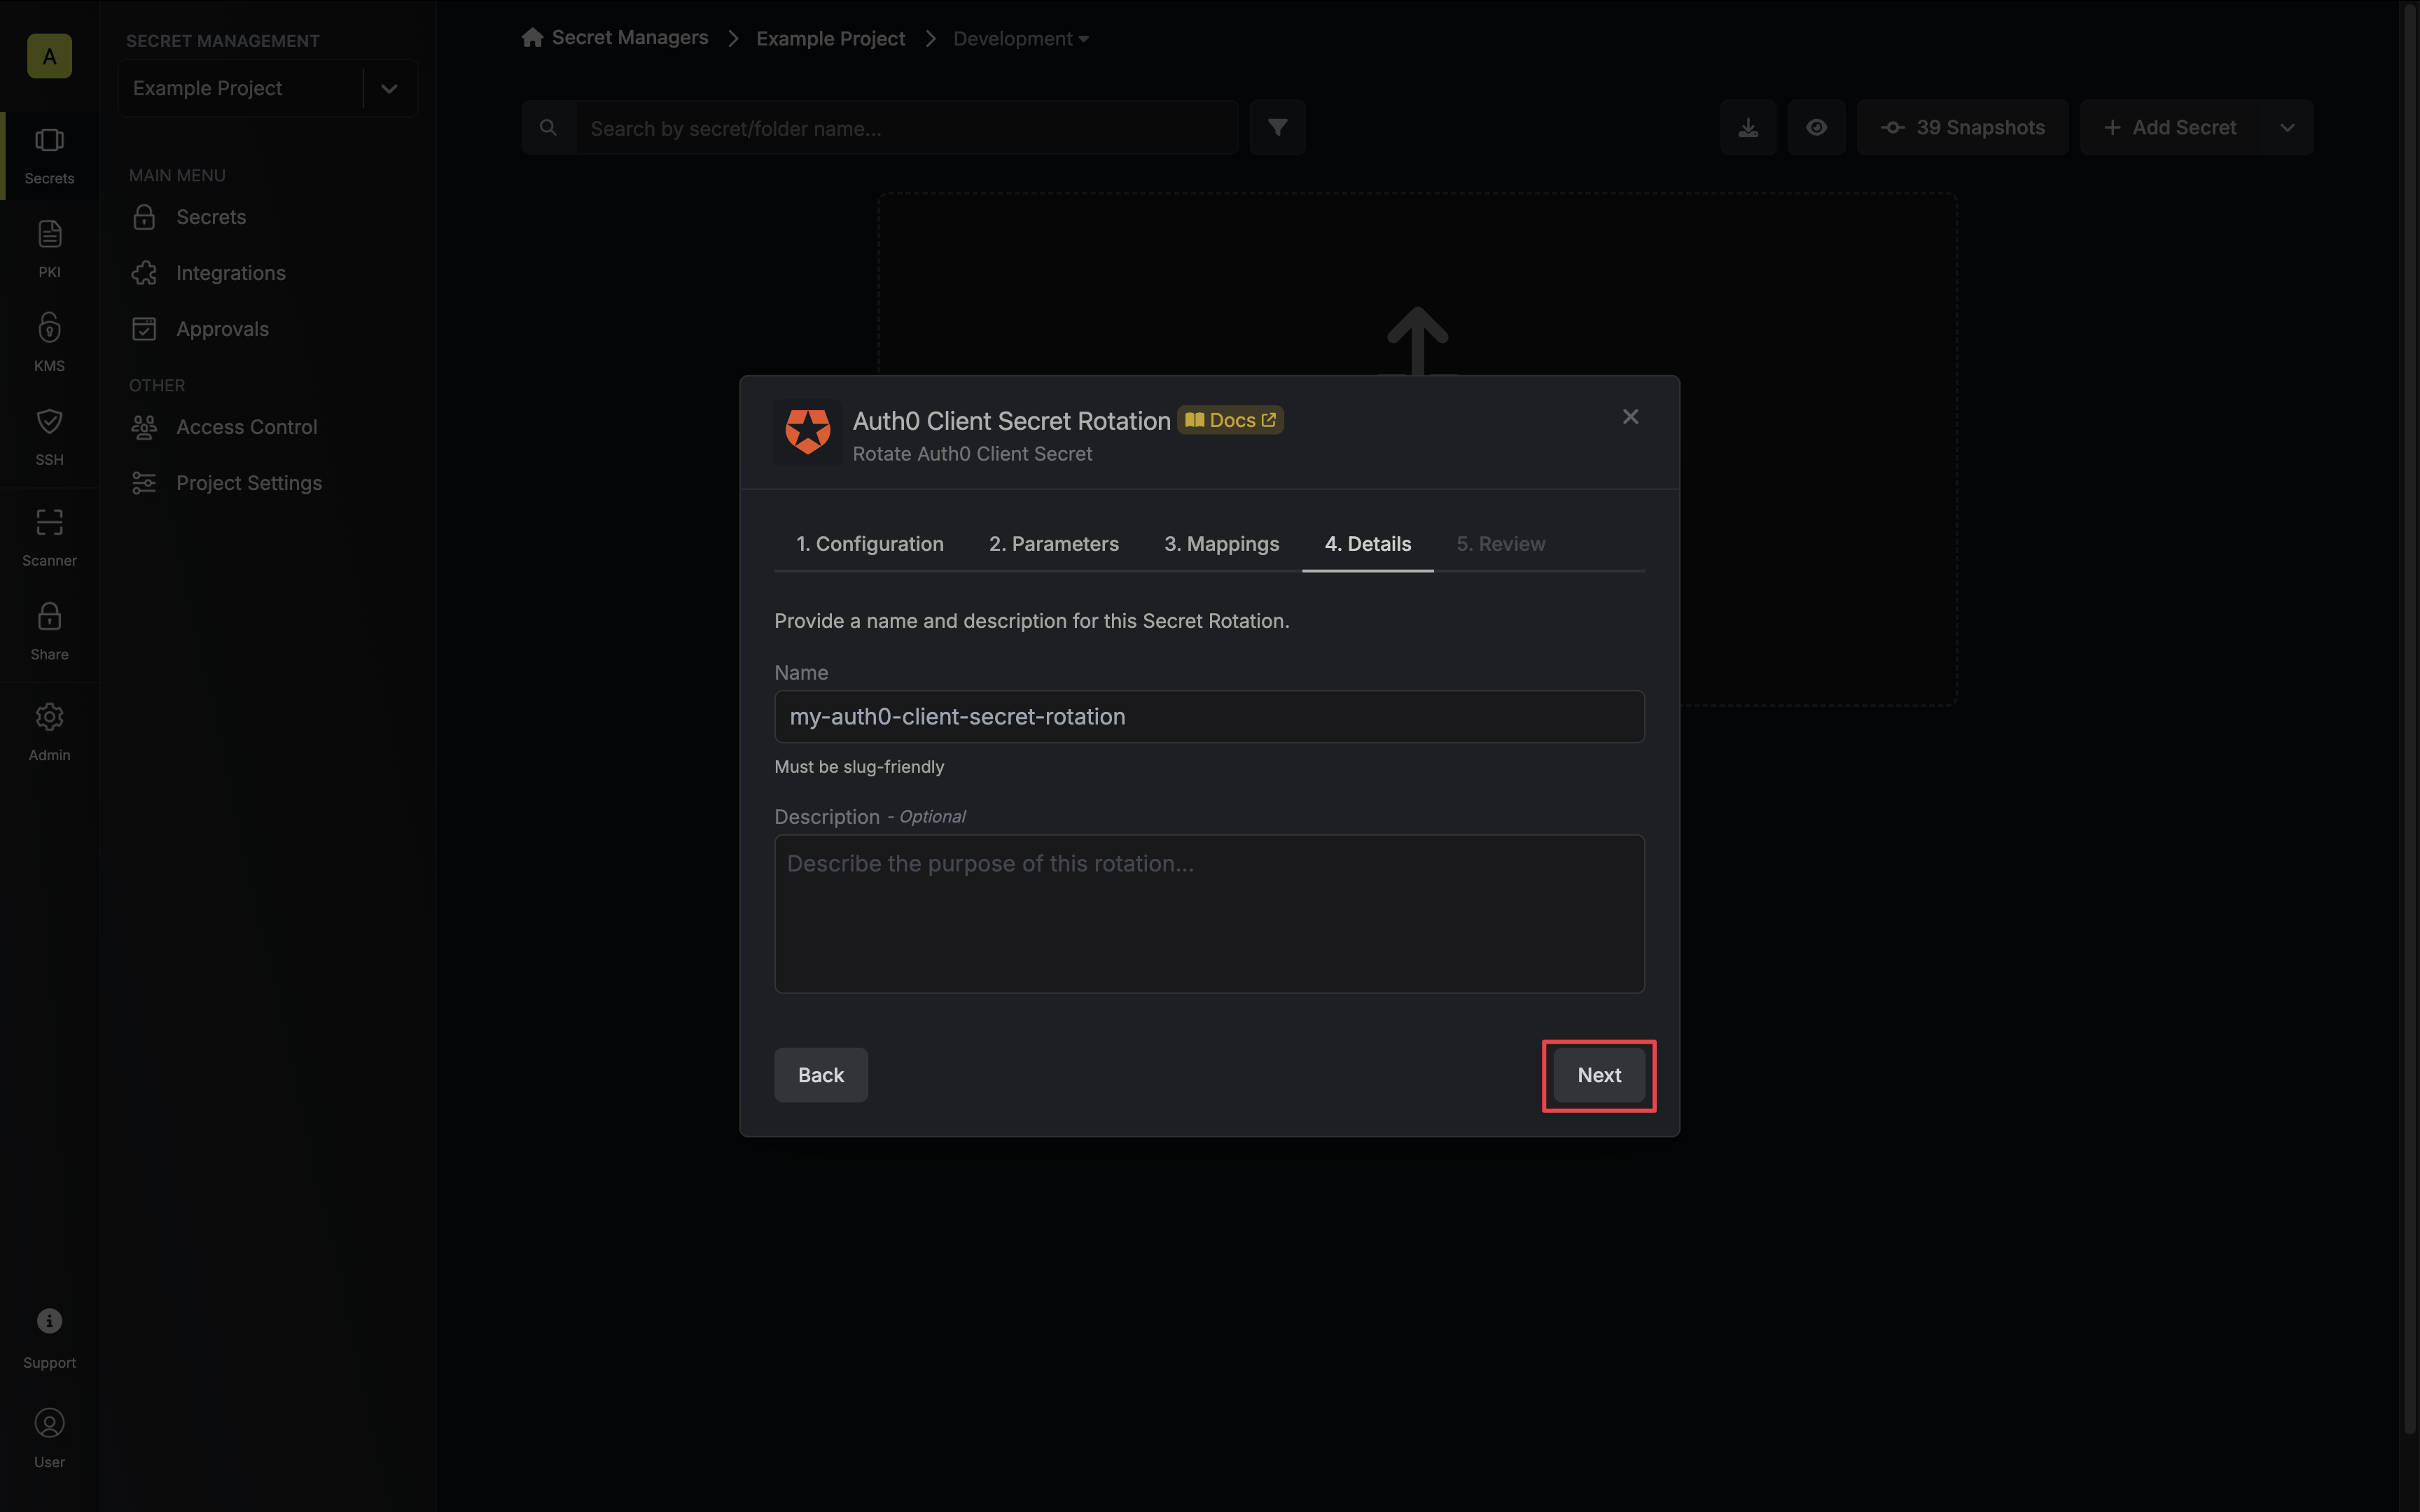 * **Name** - the name of the secret rotation configuration. Must be slug-friendly.
* **Description** (optional) - a description of this rotation configuration.
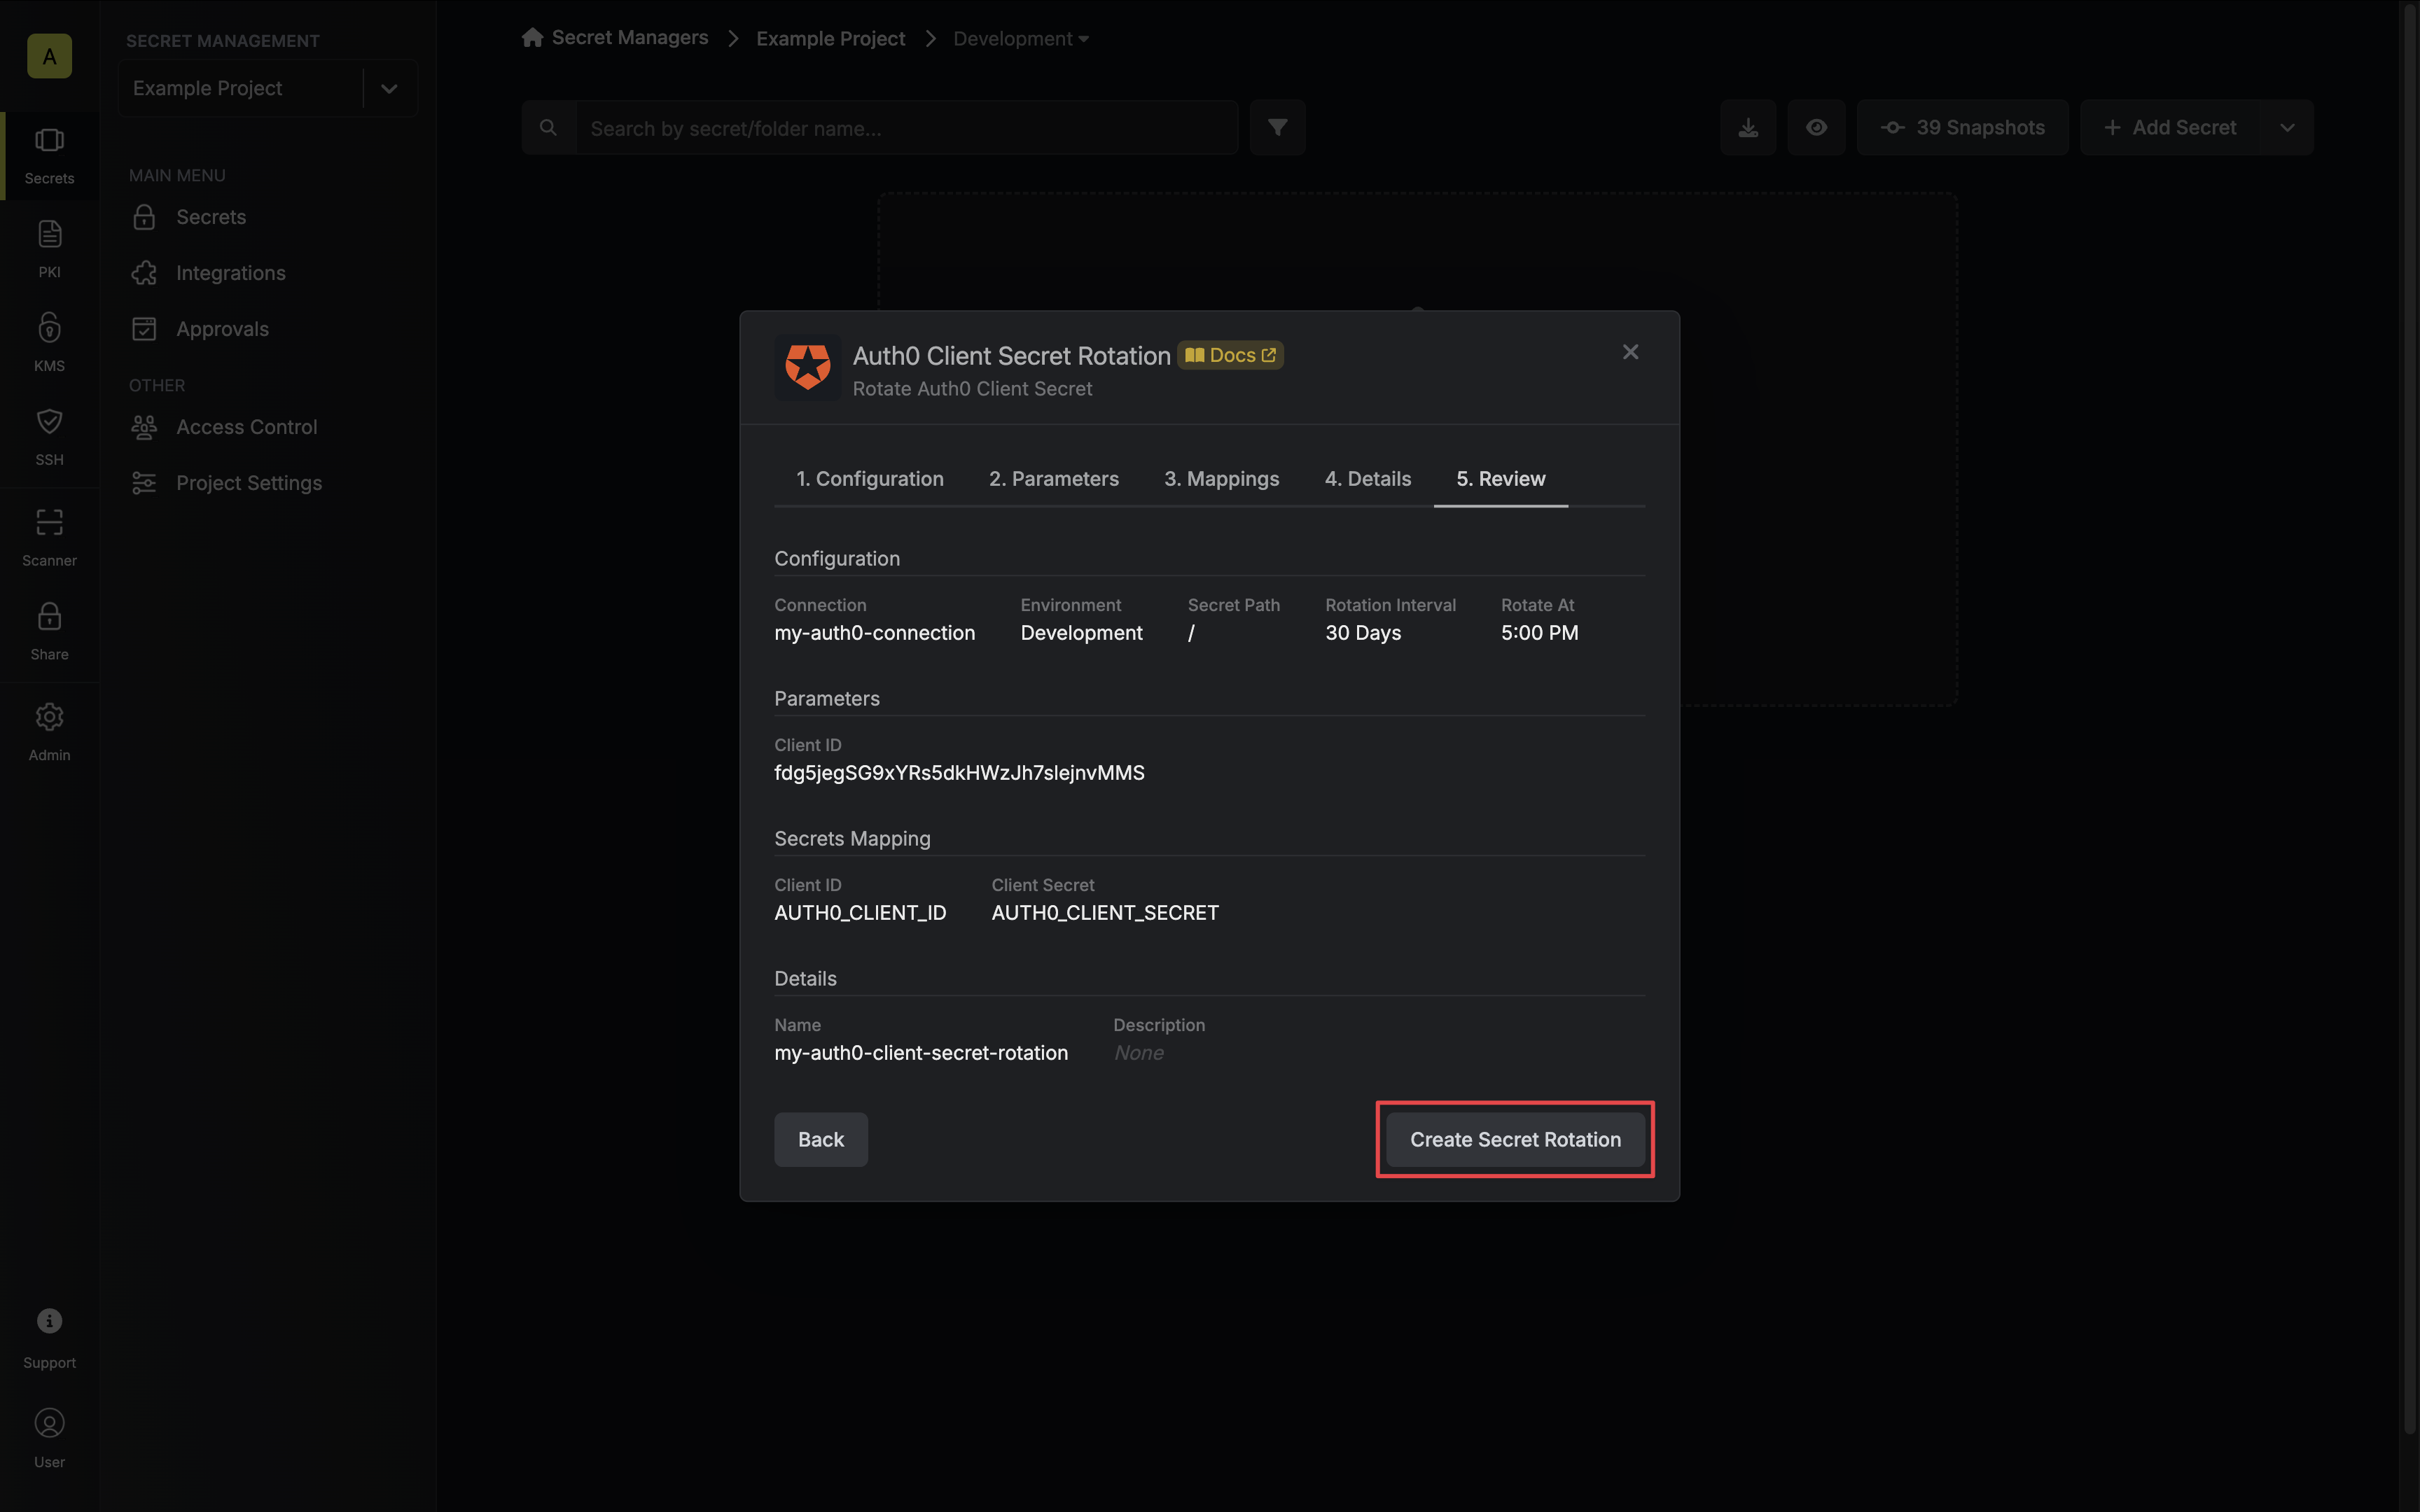
7. Review your configuration, then click **Create Secret Rotation**.
* **Name** - the name of the secret rotation configuration. Must be slug-friendly.
* **Description** (optional) - a description of this rotation configuration.
7. Review your configuration, then click **Create Secret Rotation**.
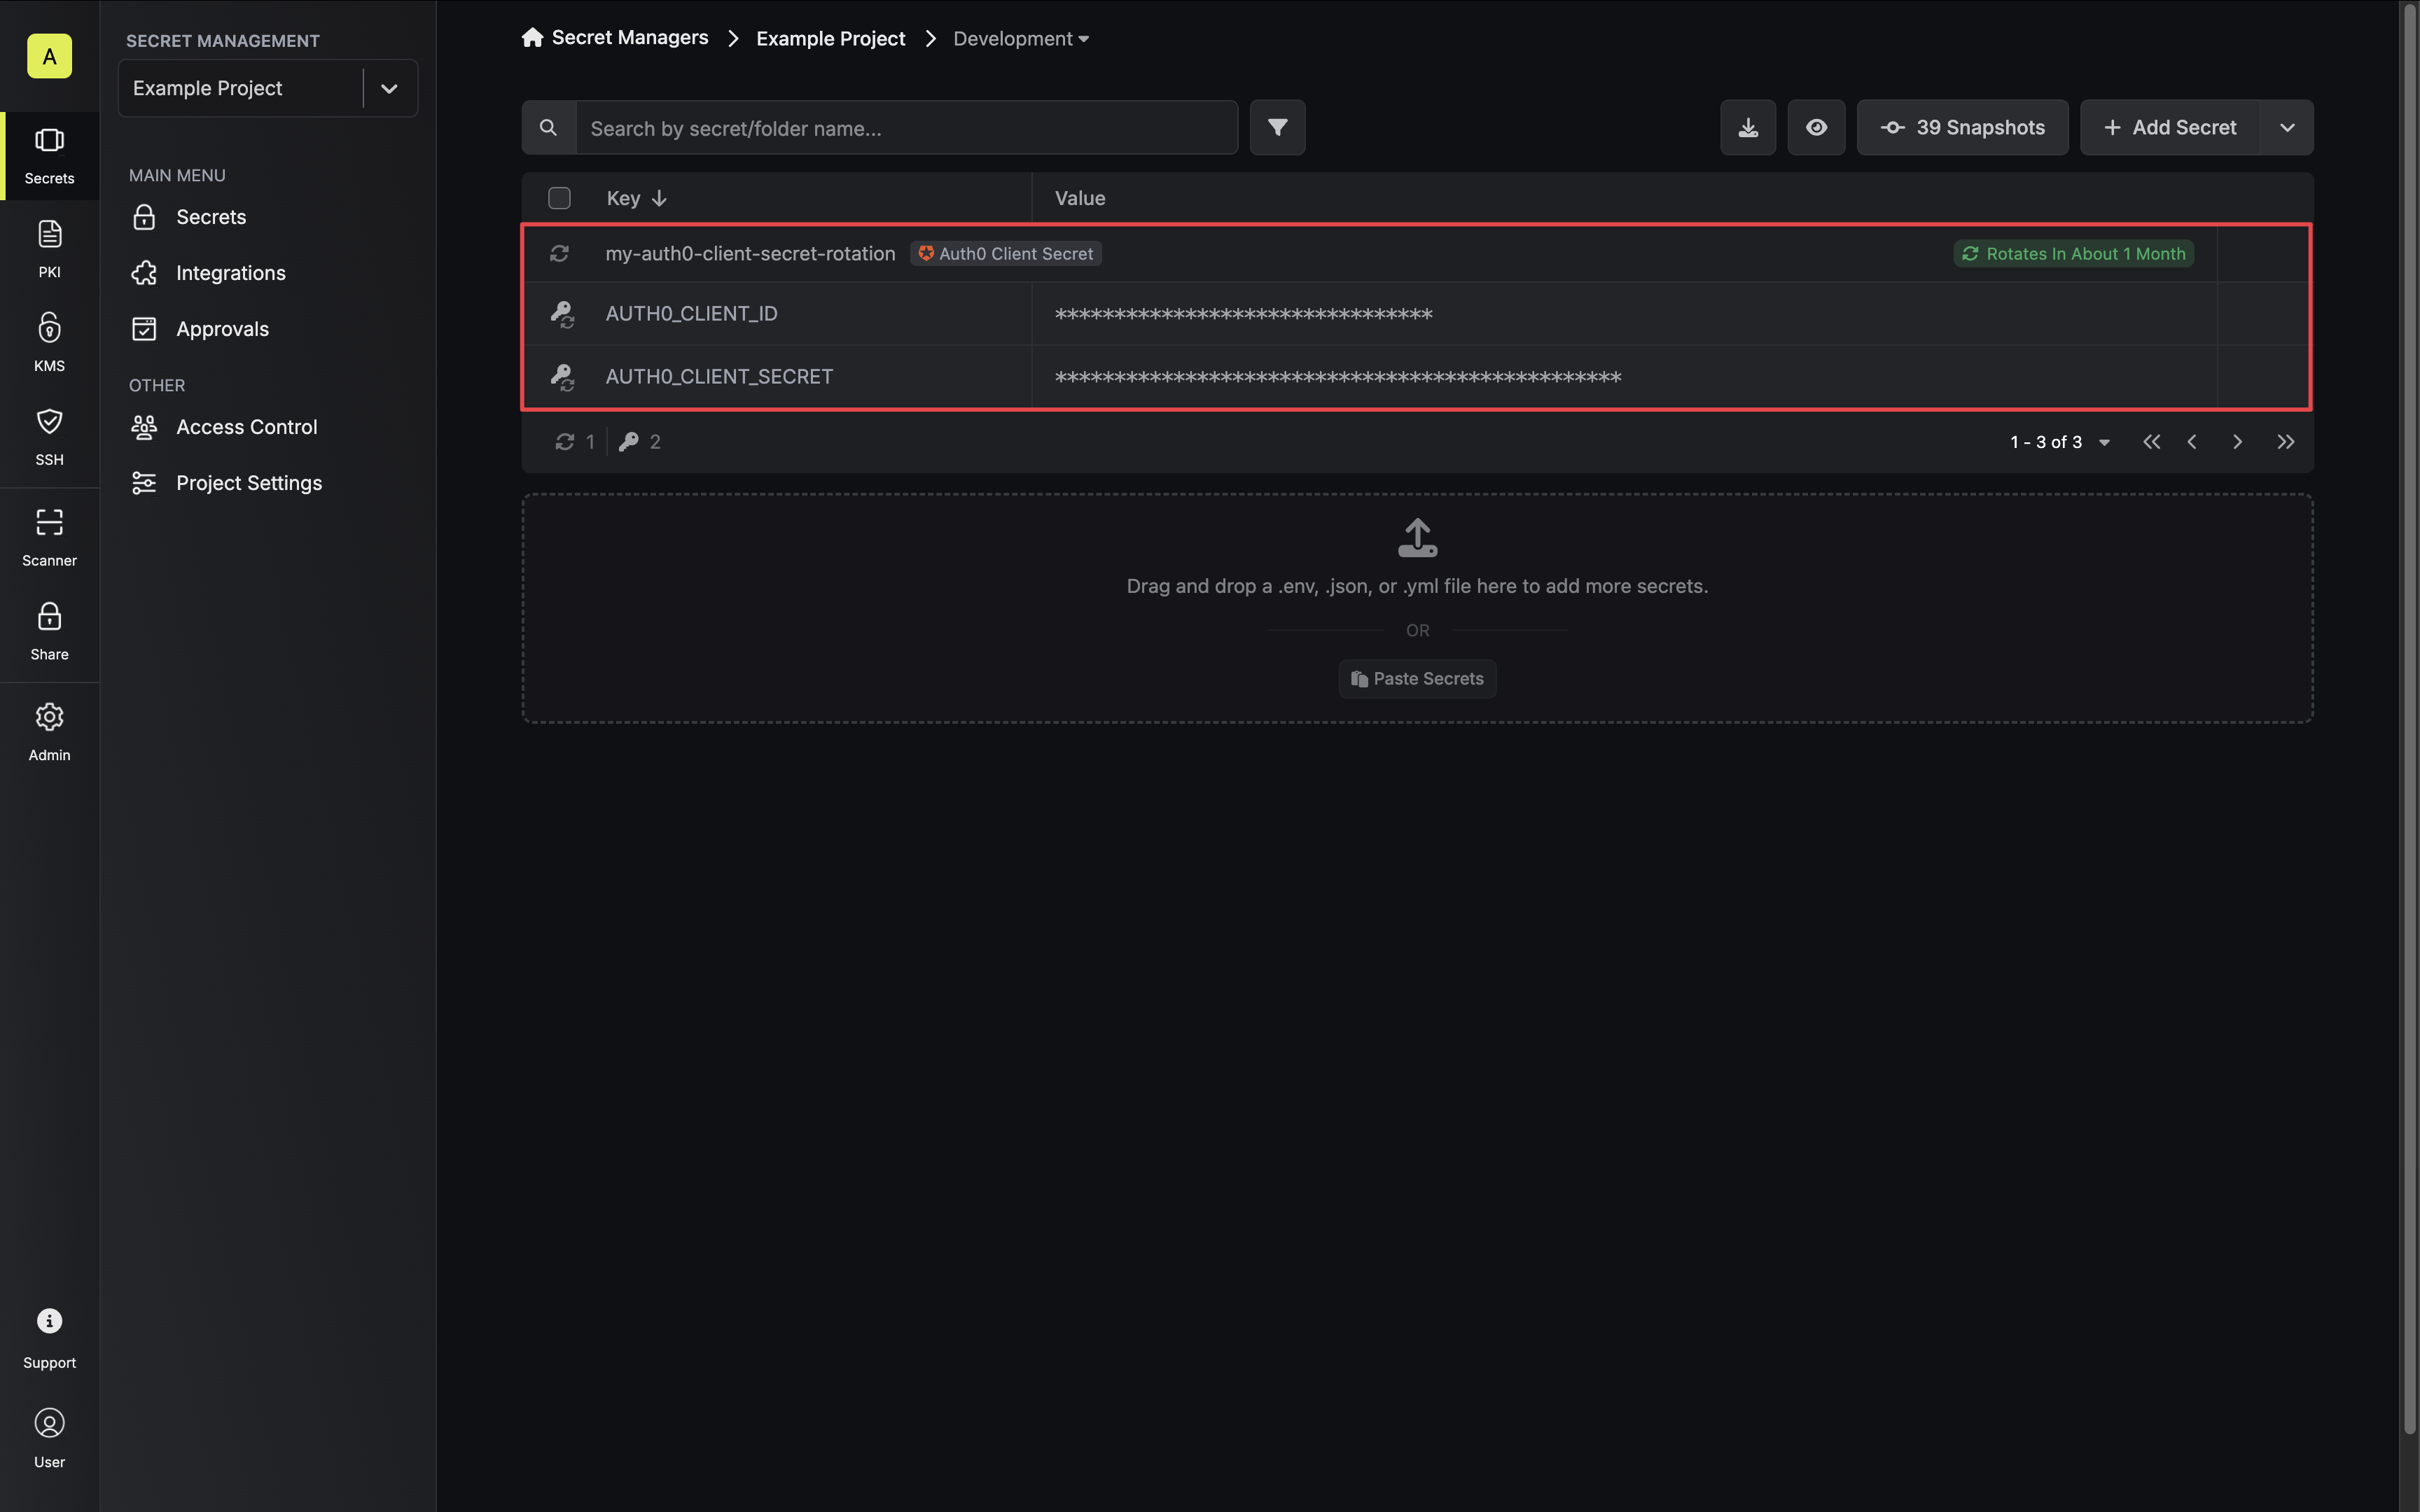
 8. Your **Auth0 Client Secret** credentials are now available for use via the mapped secrets.
 ### Sample request
```bash Request theme={"dark"}
curl --request POST \
--url https://us.infisical.com/api/v2/secret-rotations/auth0-client-secret \
--header 'Content-Type: application/json' \
--data '{
"name": "my-auth0-rotation",
"projectId": "3c90c3cc-0d44-4b50-8888-8dd25736052a",
"description": "my client secret rotation",
"connectionId": "3c90c3cc-0d44-4b50-8888-8dd25736052a",
"environment": "dev",
"secretPath": "/",
"isAutoRotationEnabled": true,
"rotationInterval": 30,
"rotateAtUtc": {
"hours": 0,
"minutes": 0
},
"parameters": {
"clientId": "...",
},
"secretsMapping": {
"clientId": "AUTH0_CLIENT_ID",
"clientSecret": "AUTH0_CLIENT_SECRET"
}
}'
```
### Sample request
```bash Request theme={"dark"}
curl --request POST \
--url https://us.infisical.com/api/v2/secret-rotations/auth0-client-secret \
--header 'Content-Type: application/json' \
--data '{
"name": "my-auth0-rotation",
"projectId": "3c90c3cc-0d44-4b50-8888-8dd25736052a",
"description": "my client secret rotation",
"connectionId": "3c90c3cc-0d44-4b50-8888-8dd25736052a",
"environment": "dev",
"secretPath": "/",
"isAutoRotationEnabled": true,
"rotationInterval": 30,
"rotateAtUtc": {
"hours": 0,
"minutes": 0
},
"parameters": {
"clientId": "...",
},
"secretsMapping": {
"clientId": "AUTH0_CLIENT_ID",
"clientSecret": "AUTH0_CLIENT_SECRET"
}
}'
```
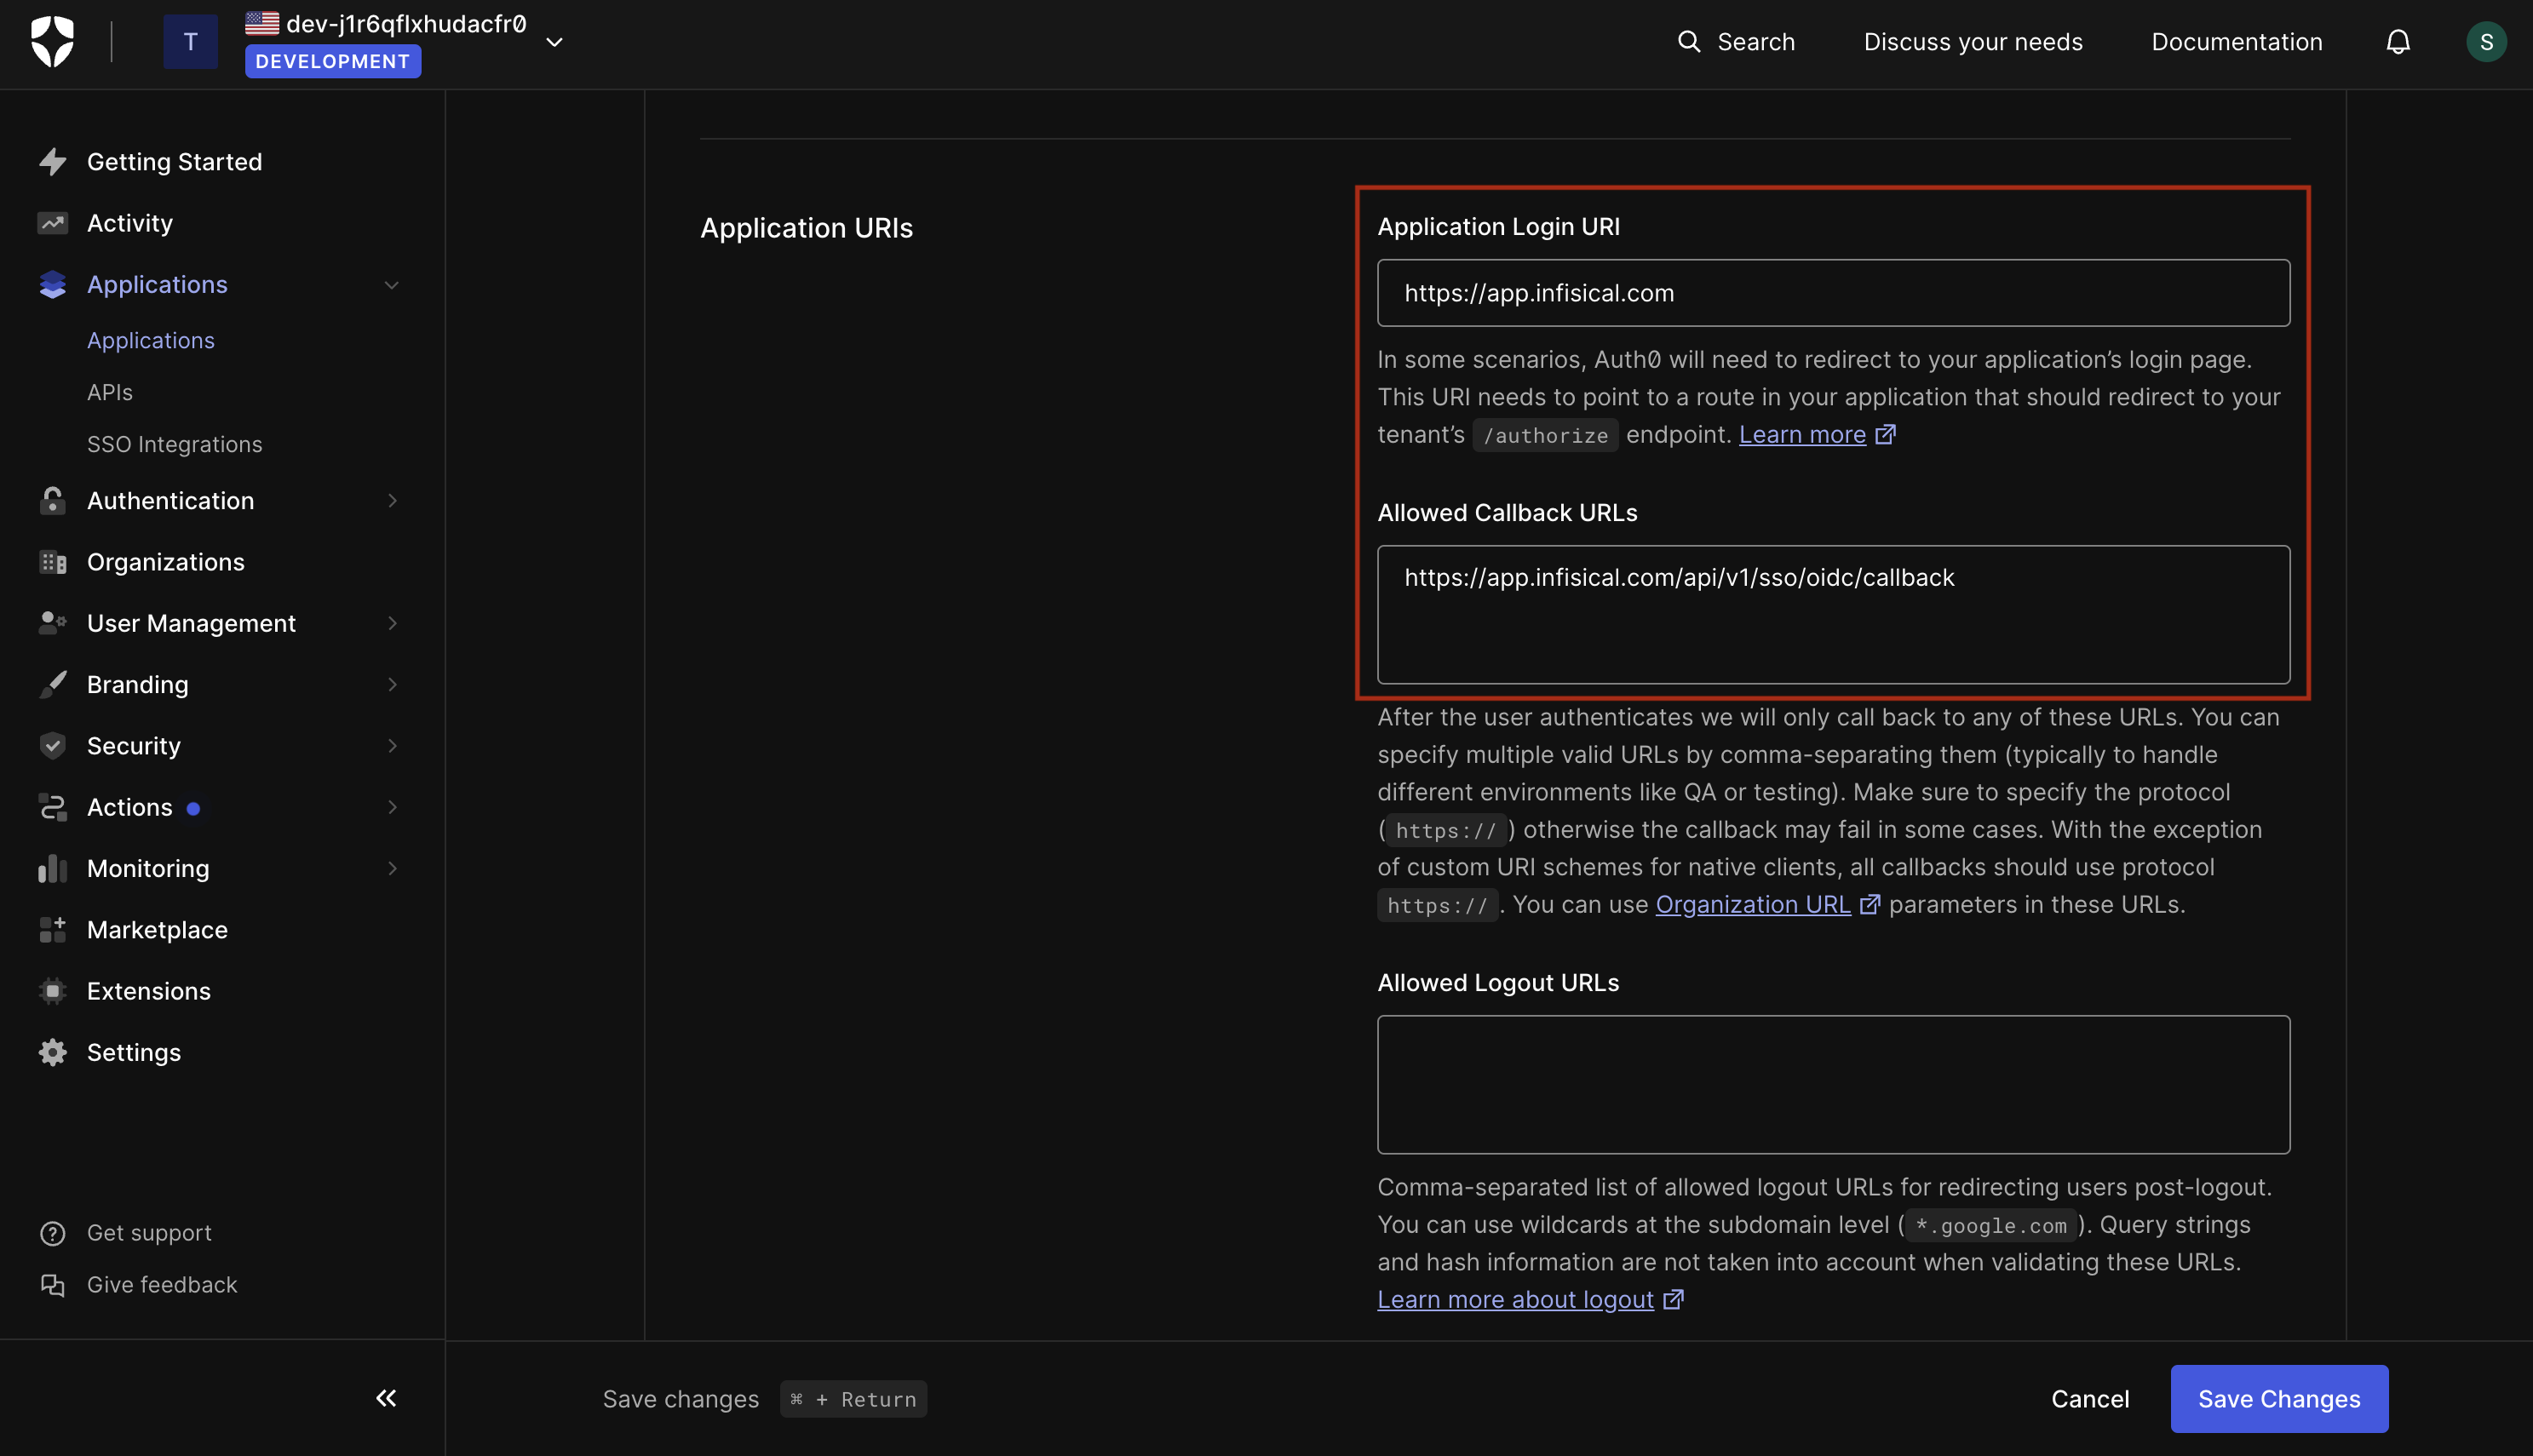
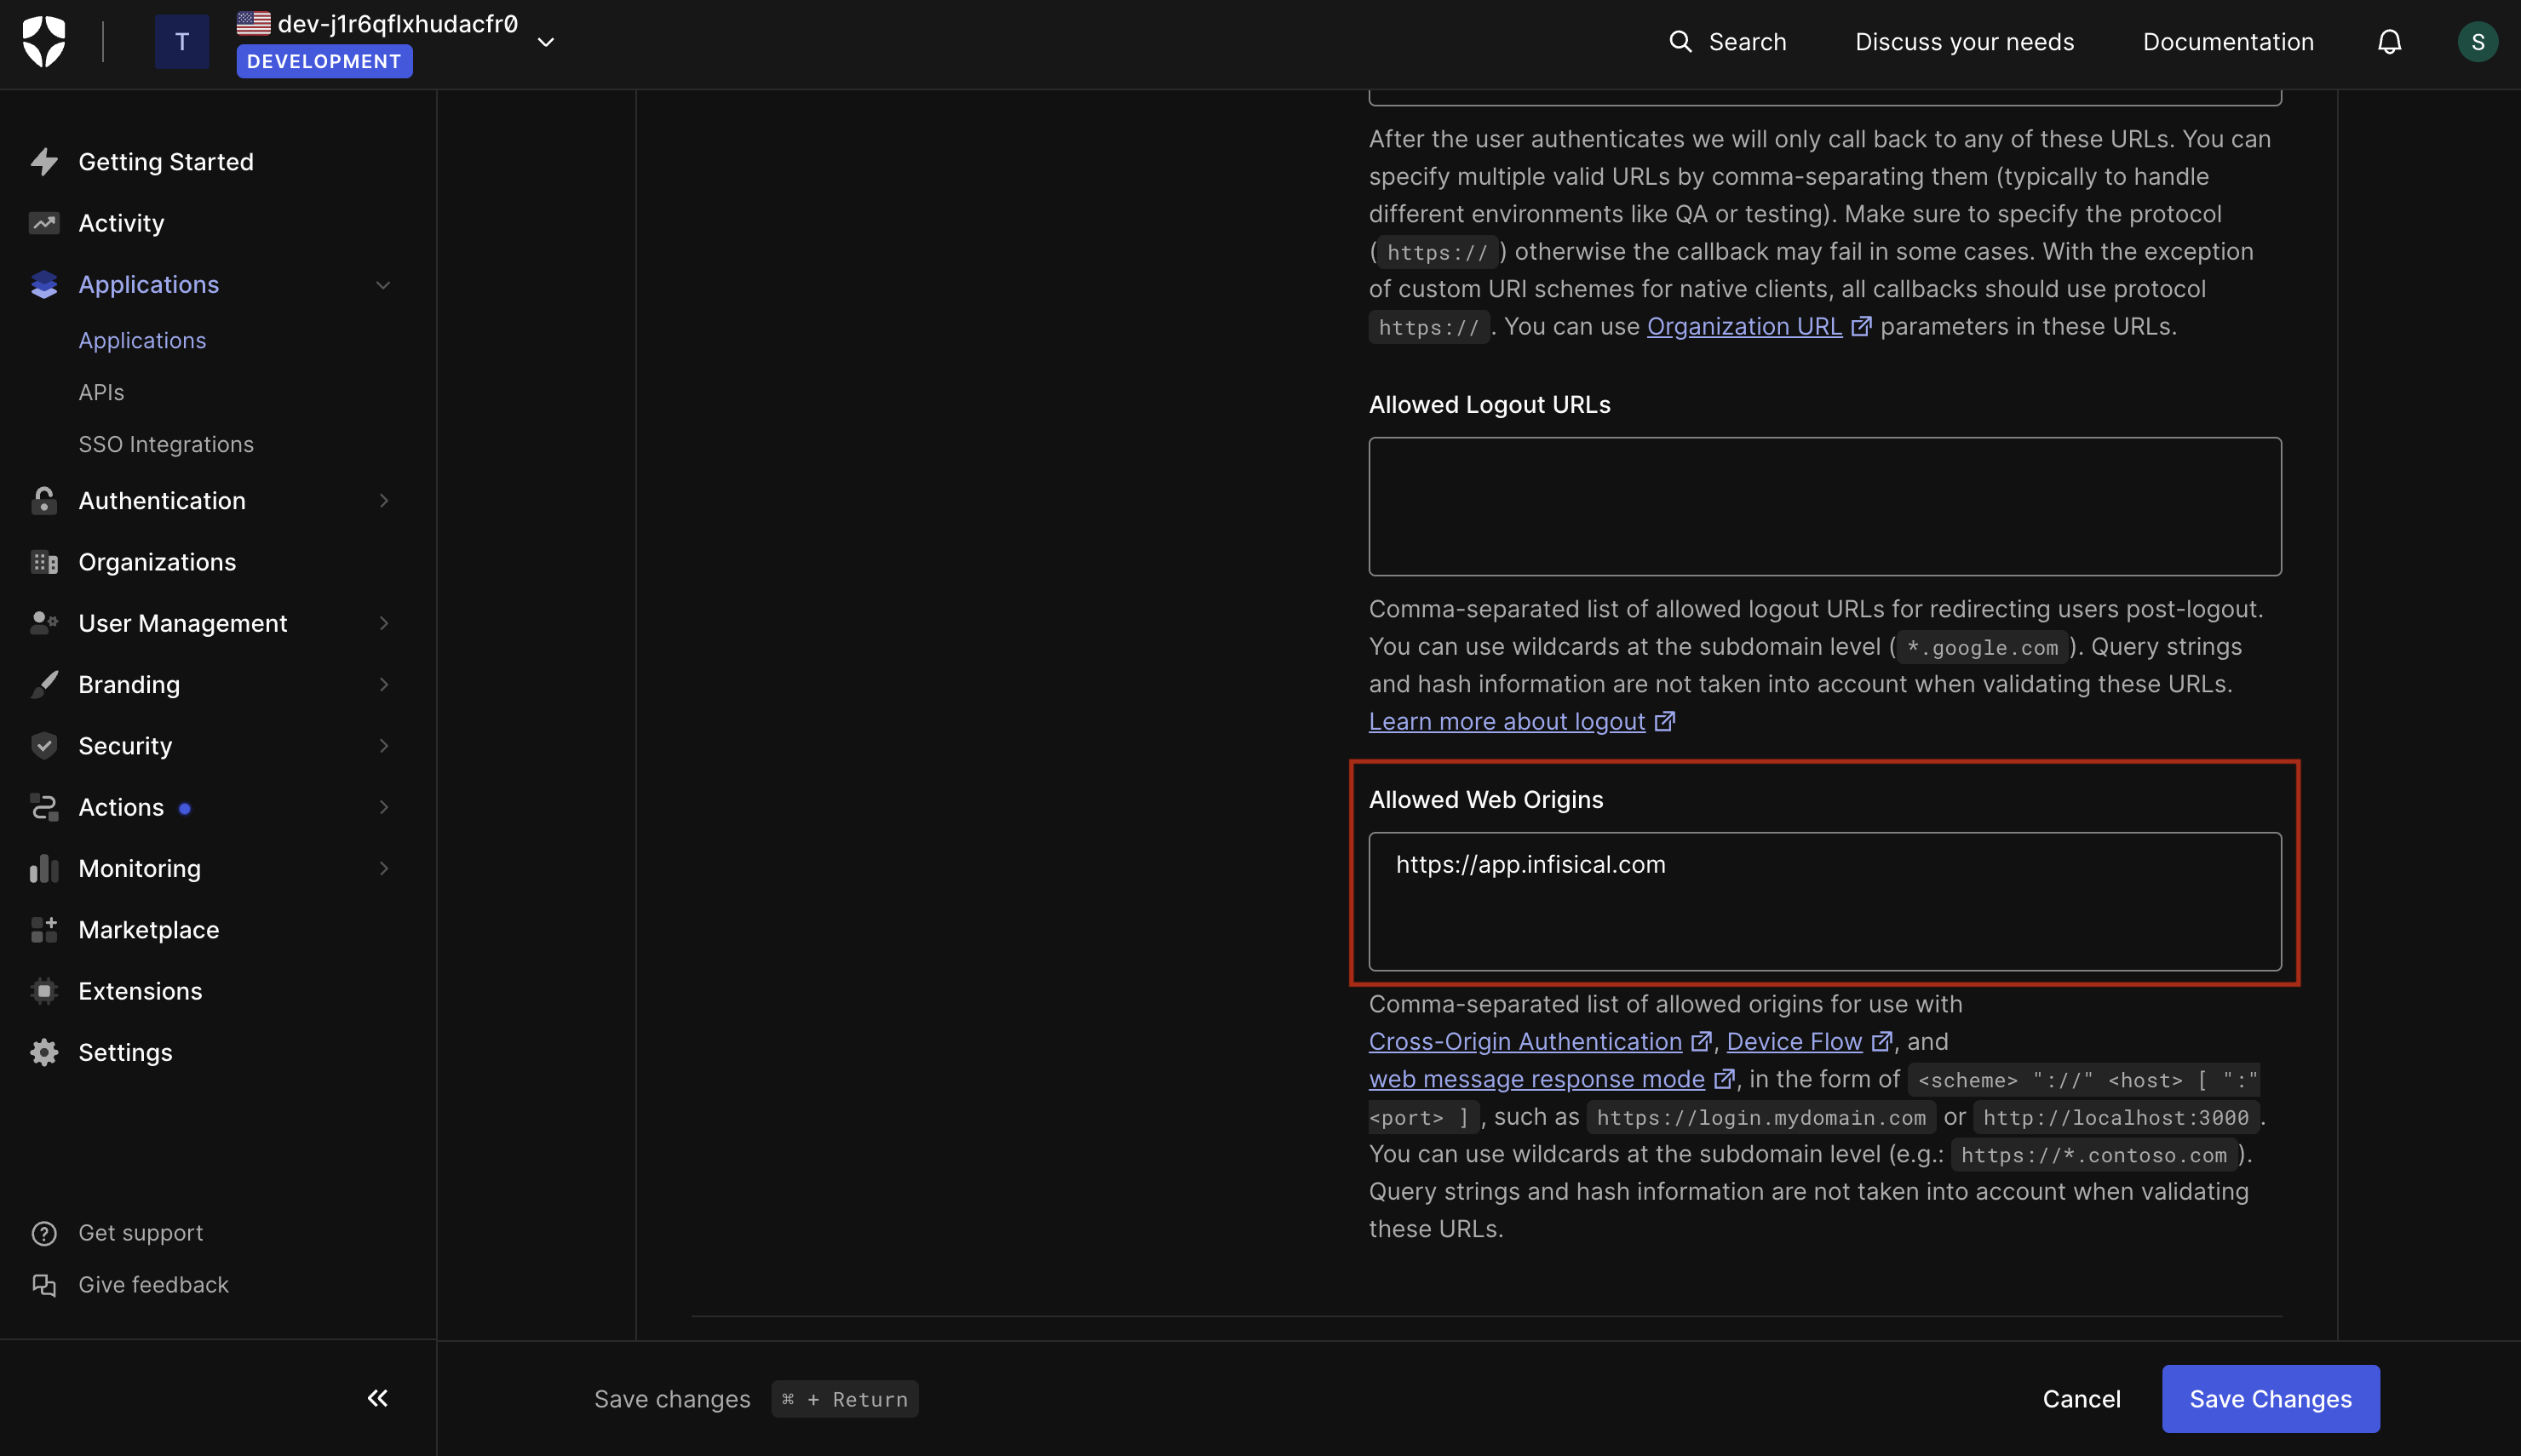
 1.2. In the Application URIs section, set the **Application Login URI** and **Allowed Web Origins** fields to `https://app.infisical.com` and the **Allowed Callback URL** field to `https://app.infisical.com/api/v1/sso/oidc/callback`.
 2.2. In the advanced settings (bottom-most section), retrieve the **OpenID Configuration URL** from the Endpoints tab.
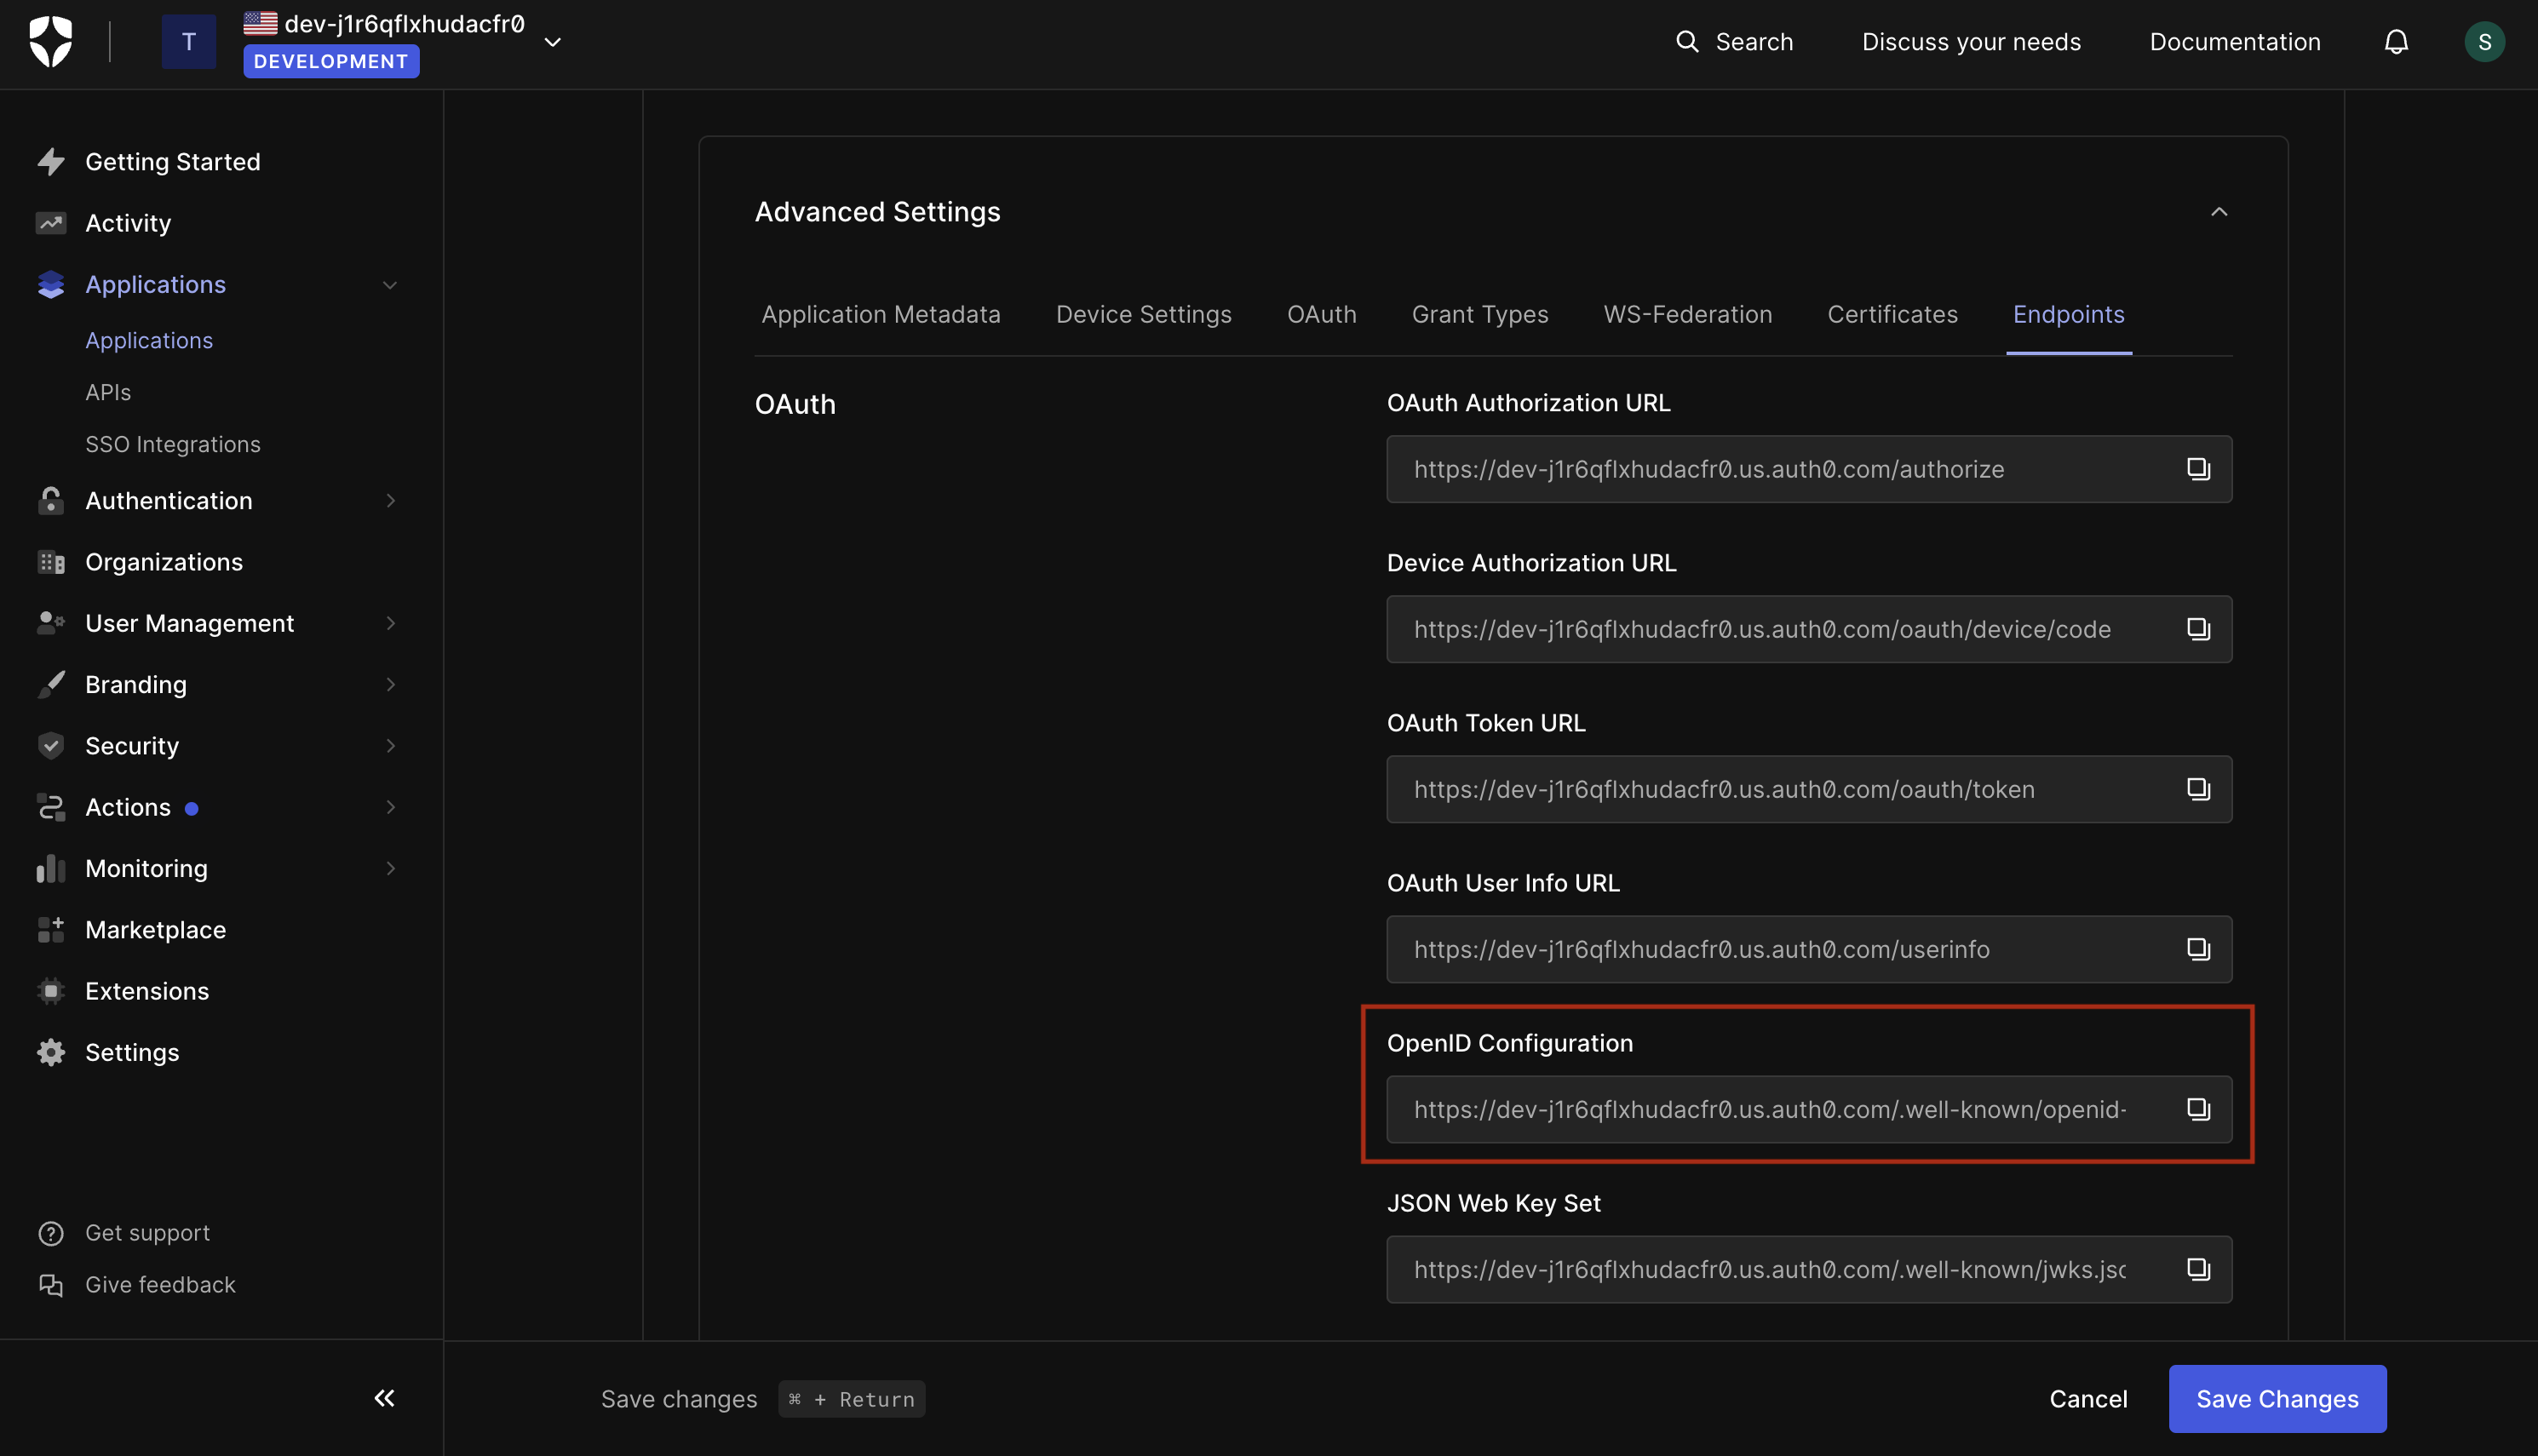 Keep these values handy as we will need them in the next steps.
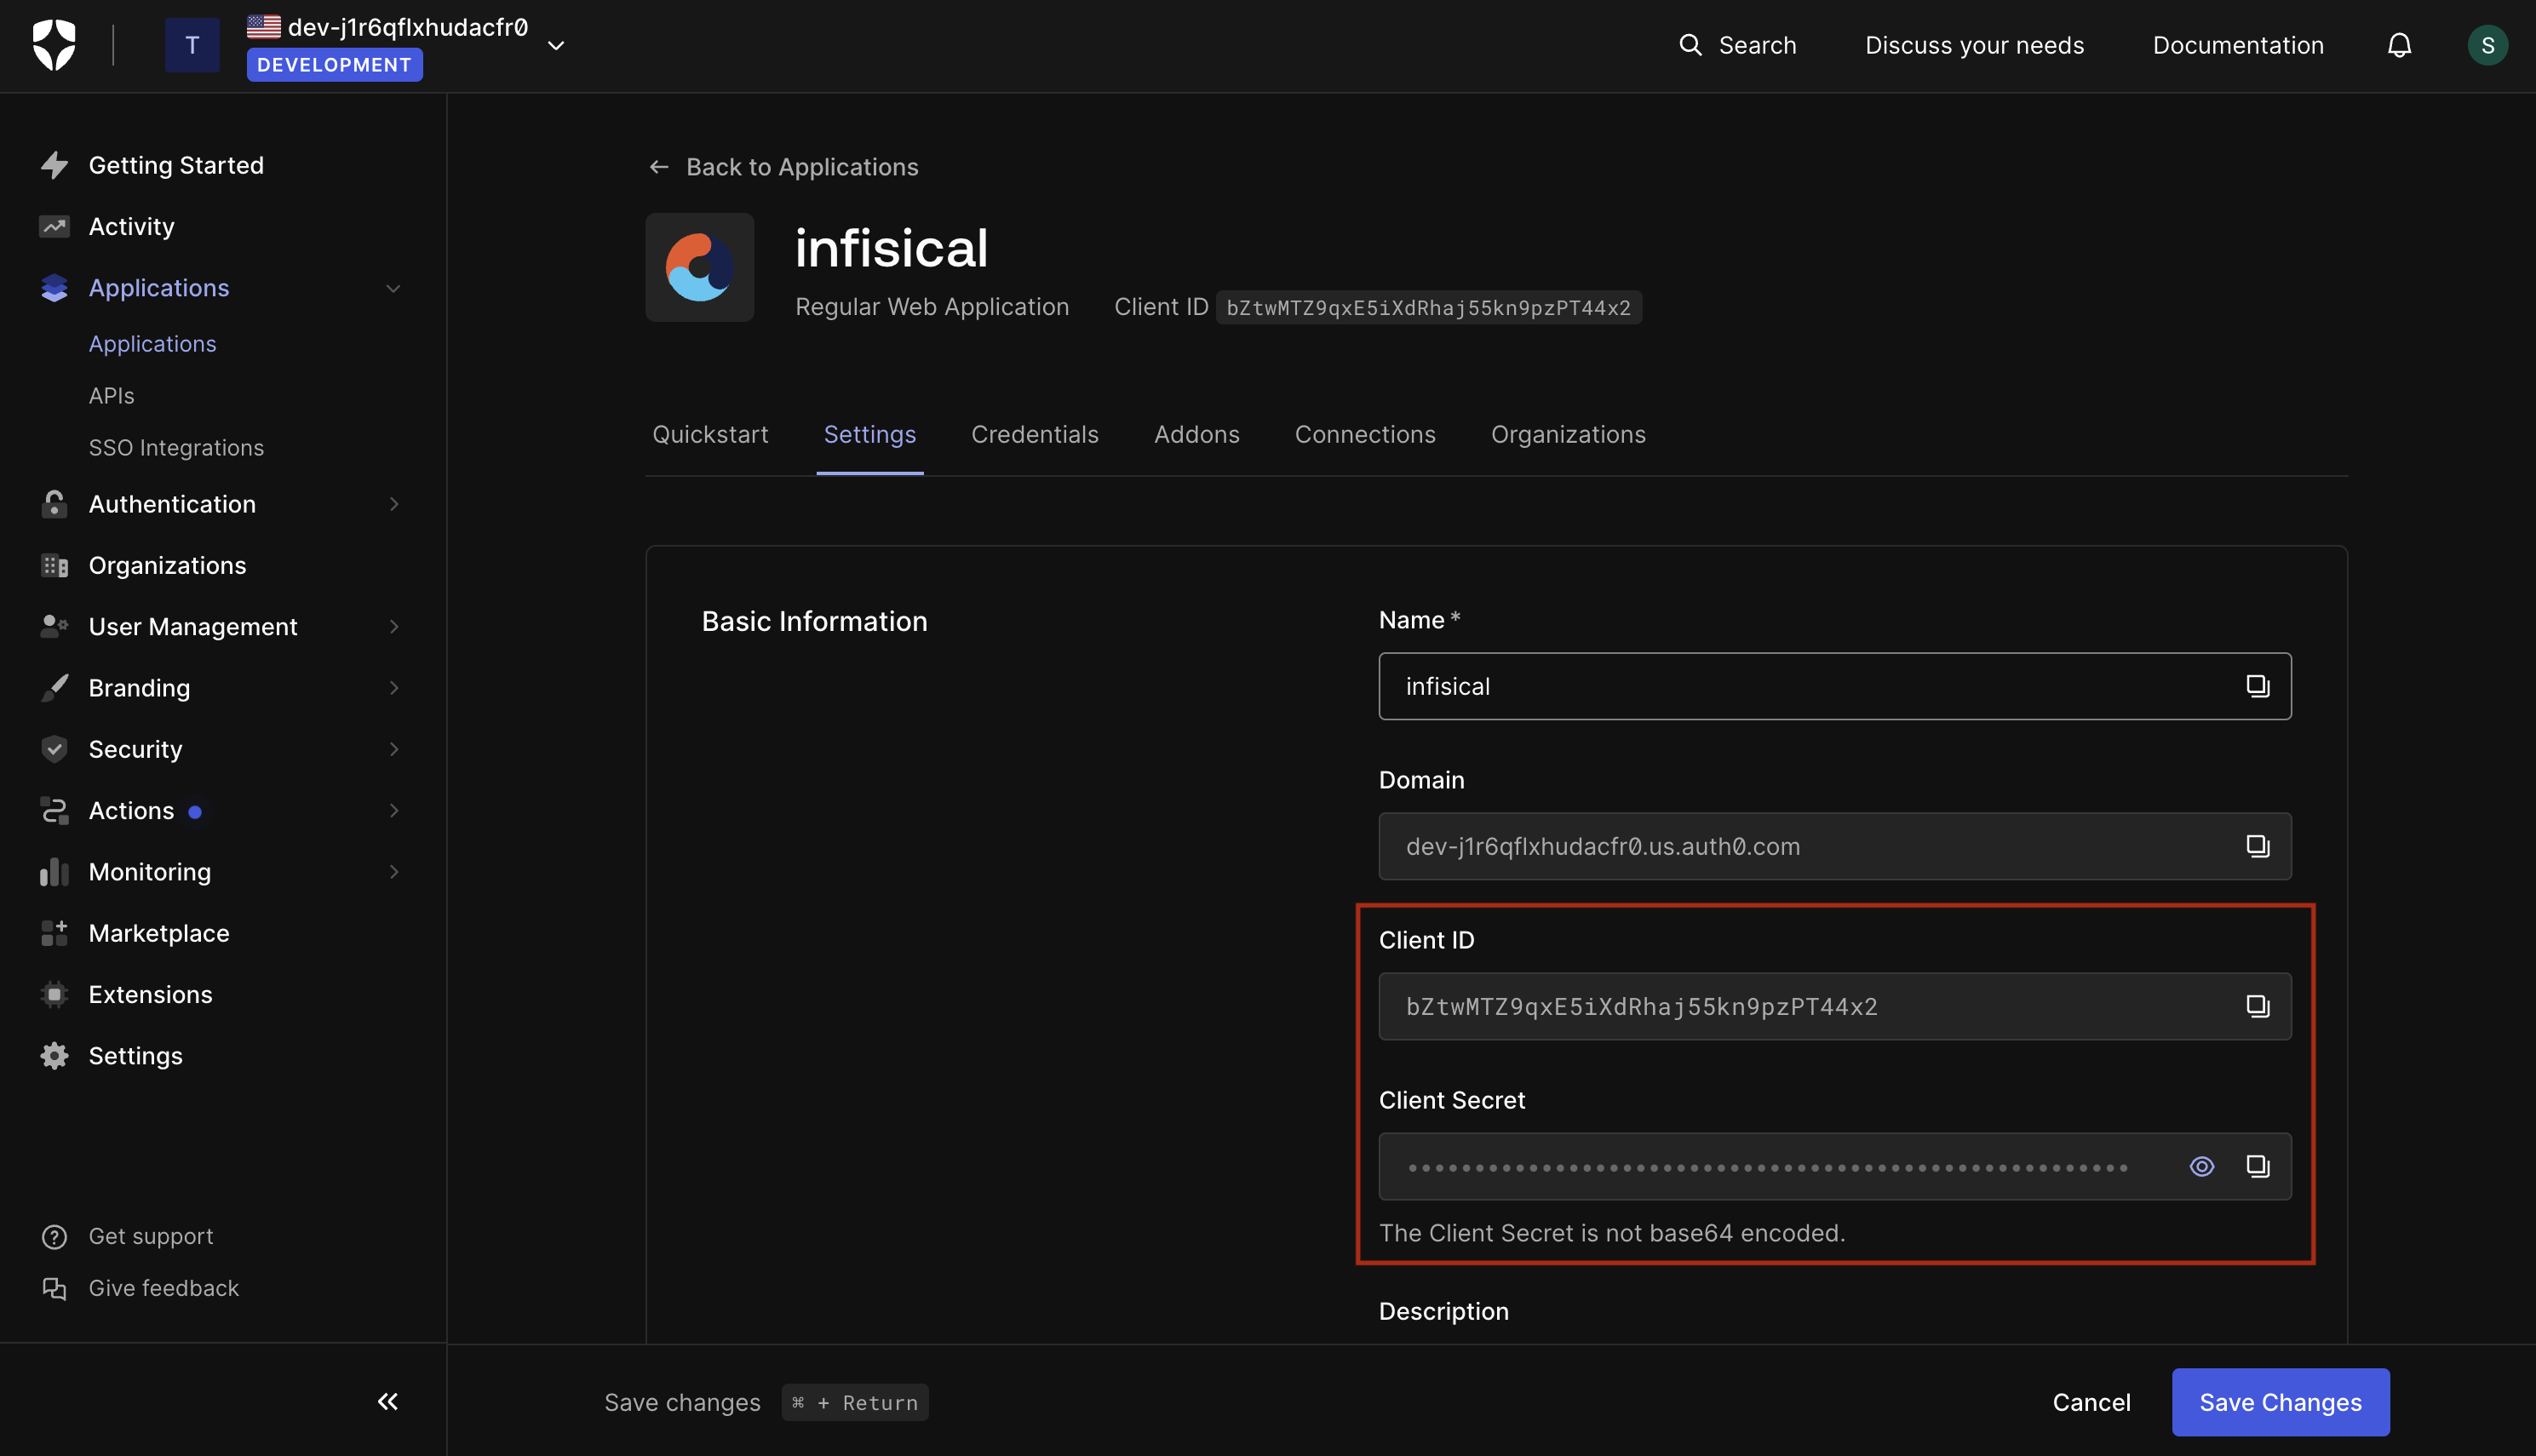
 3.2. For configuration type, select **Discovery URL**. Then, set **Discovery Document URL**, **JWT Signature Algorithm**, **Client ID**, and **Client Secret** from step 2.1 and 2.2.

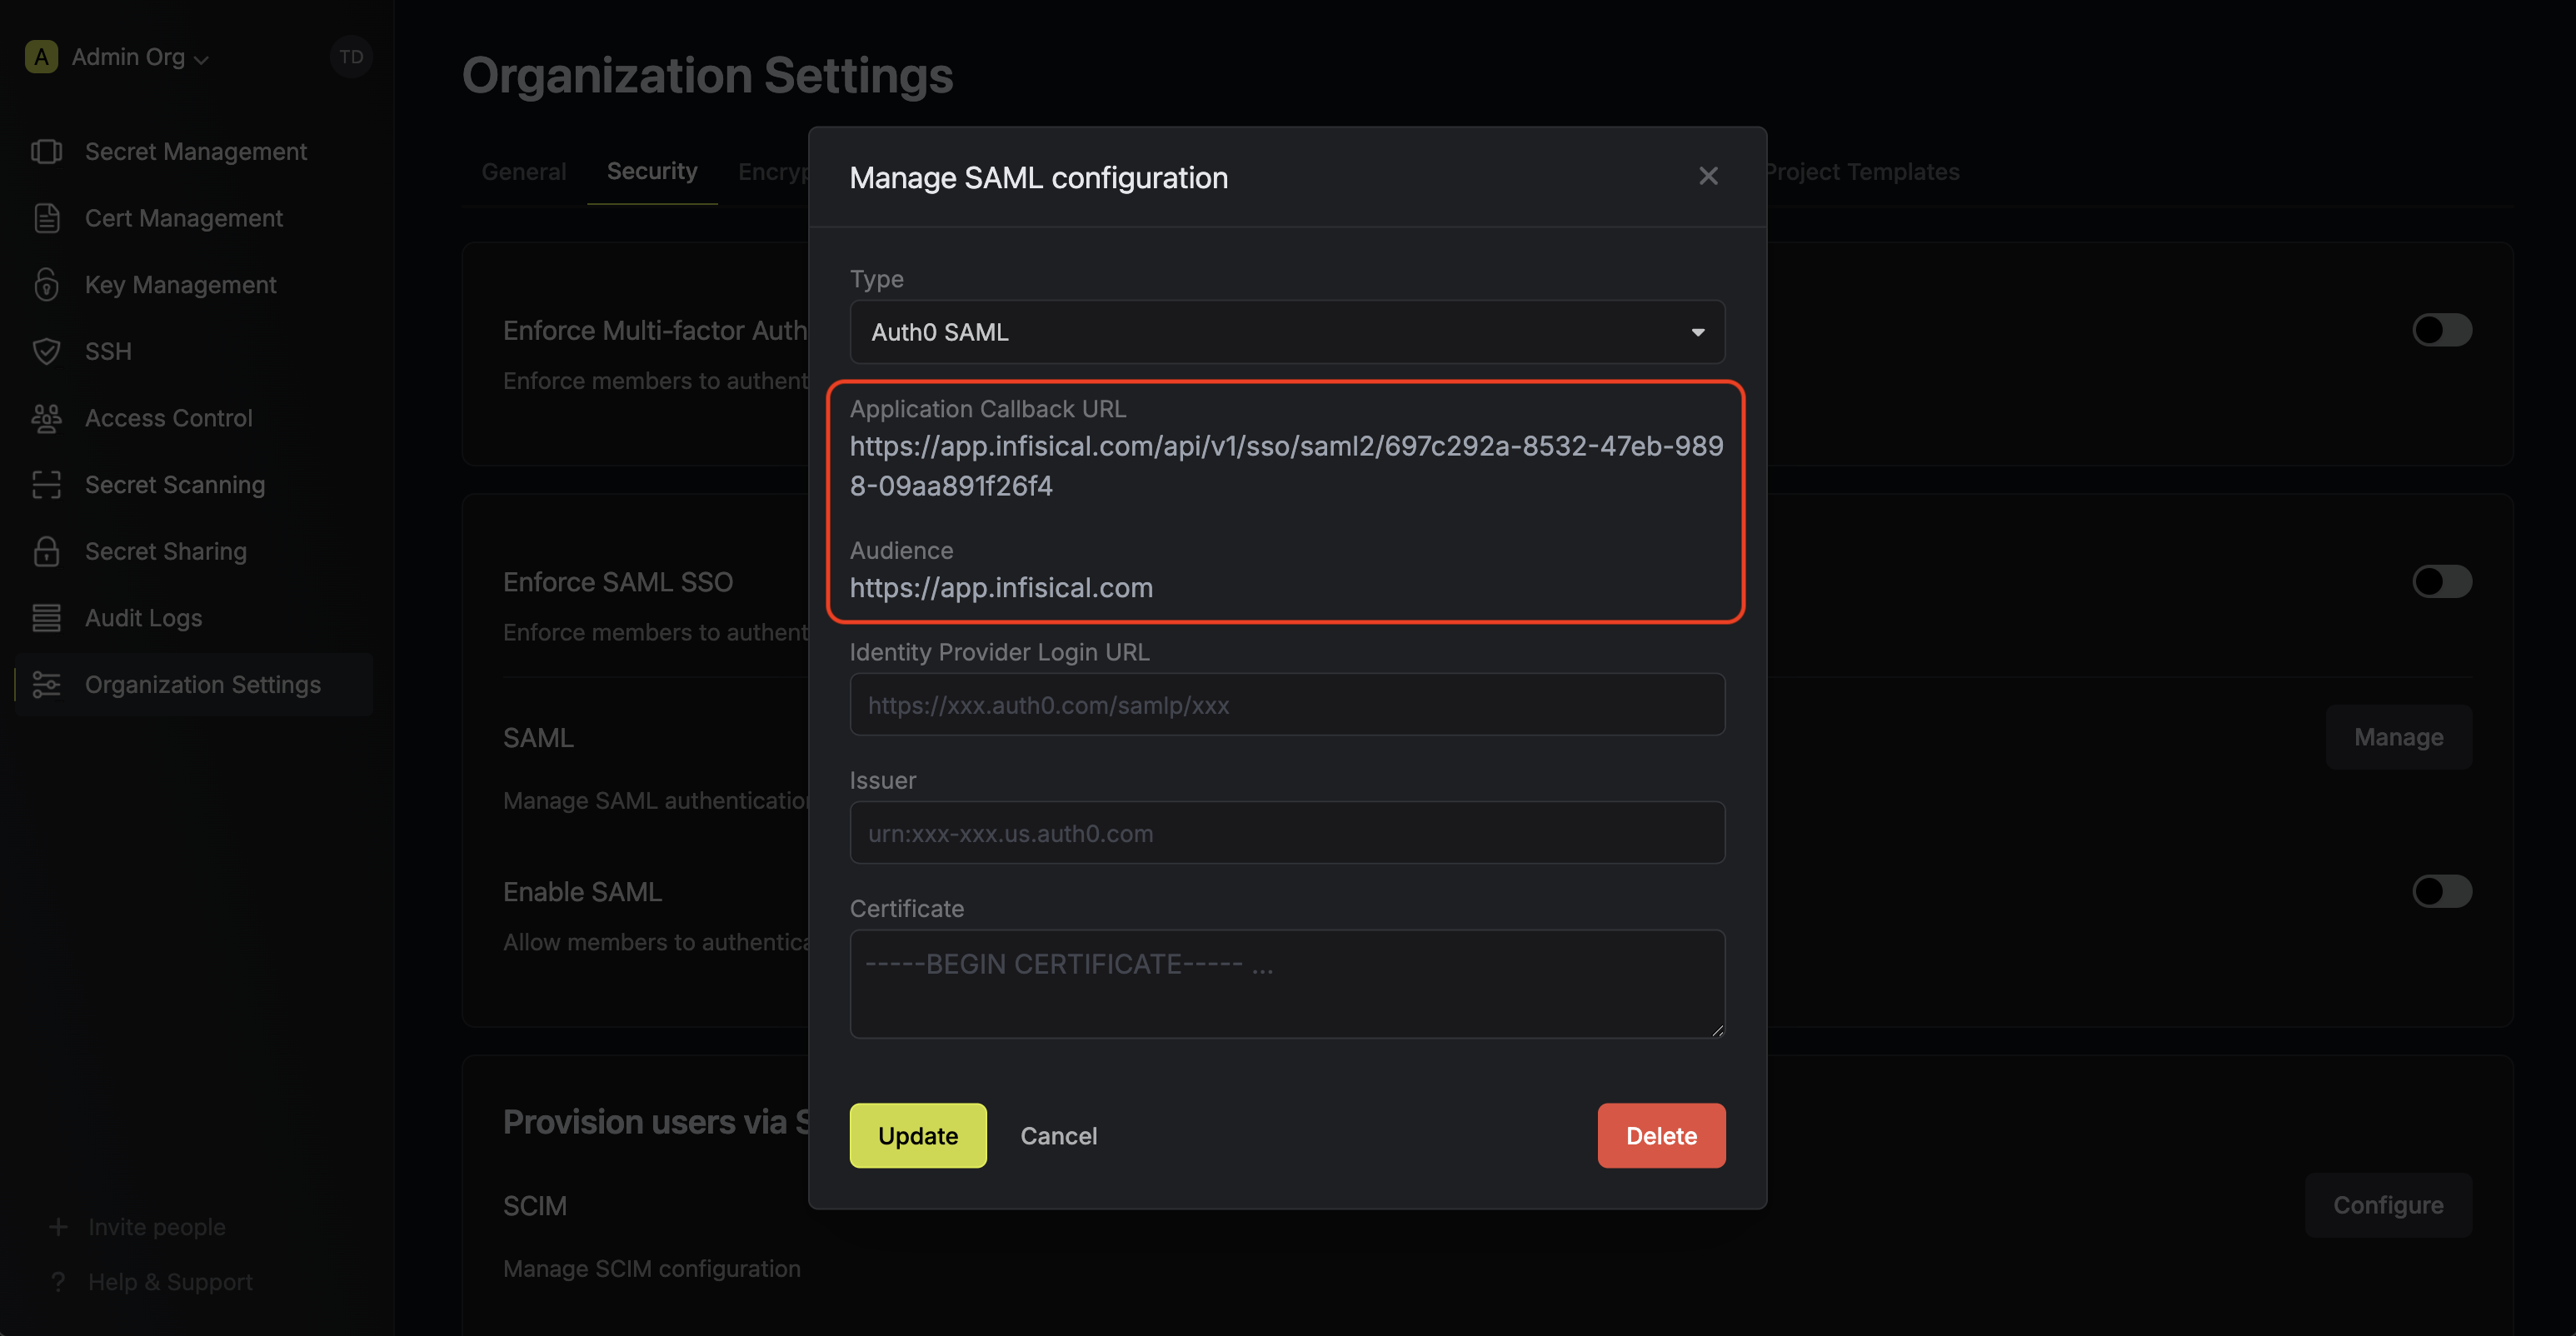
 Next, note the **Application Callback URL** and **Audience** to use when configuring the Auth0 SAML application.
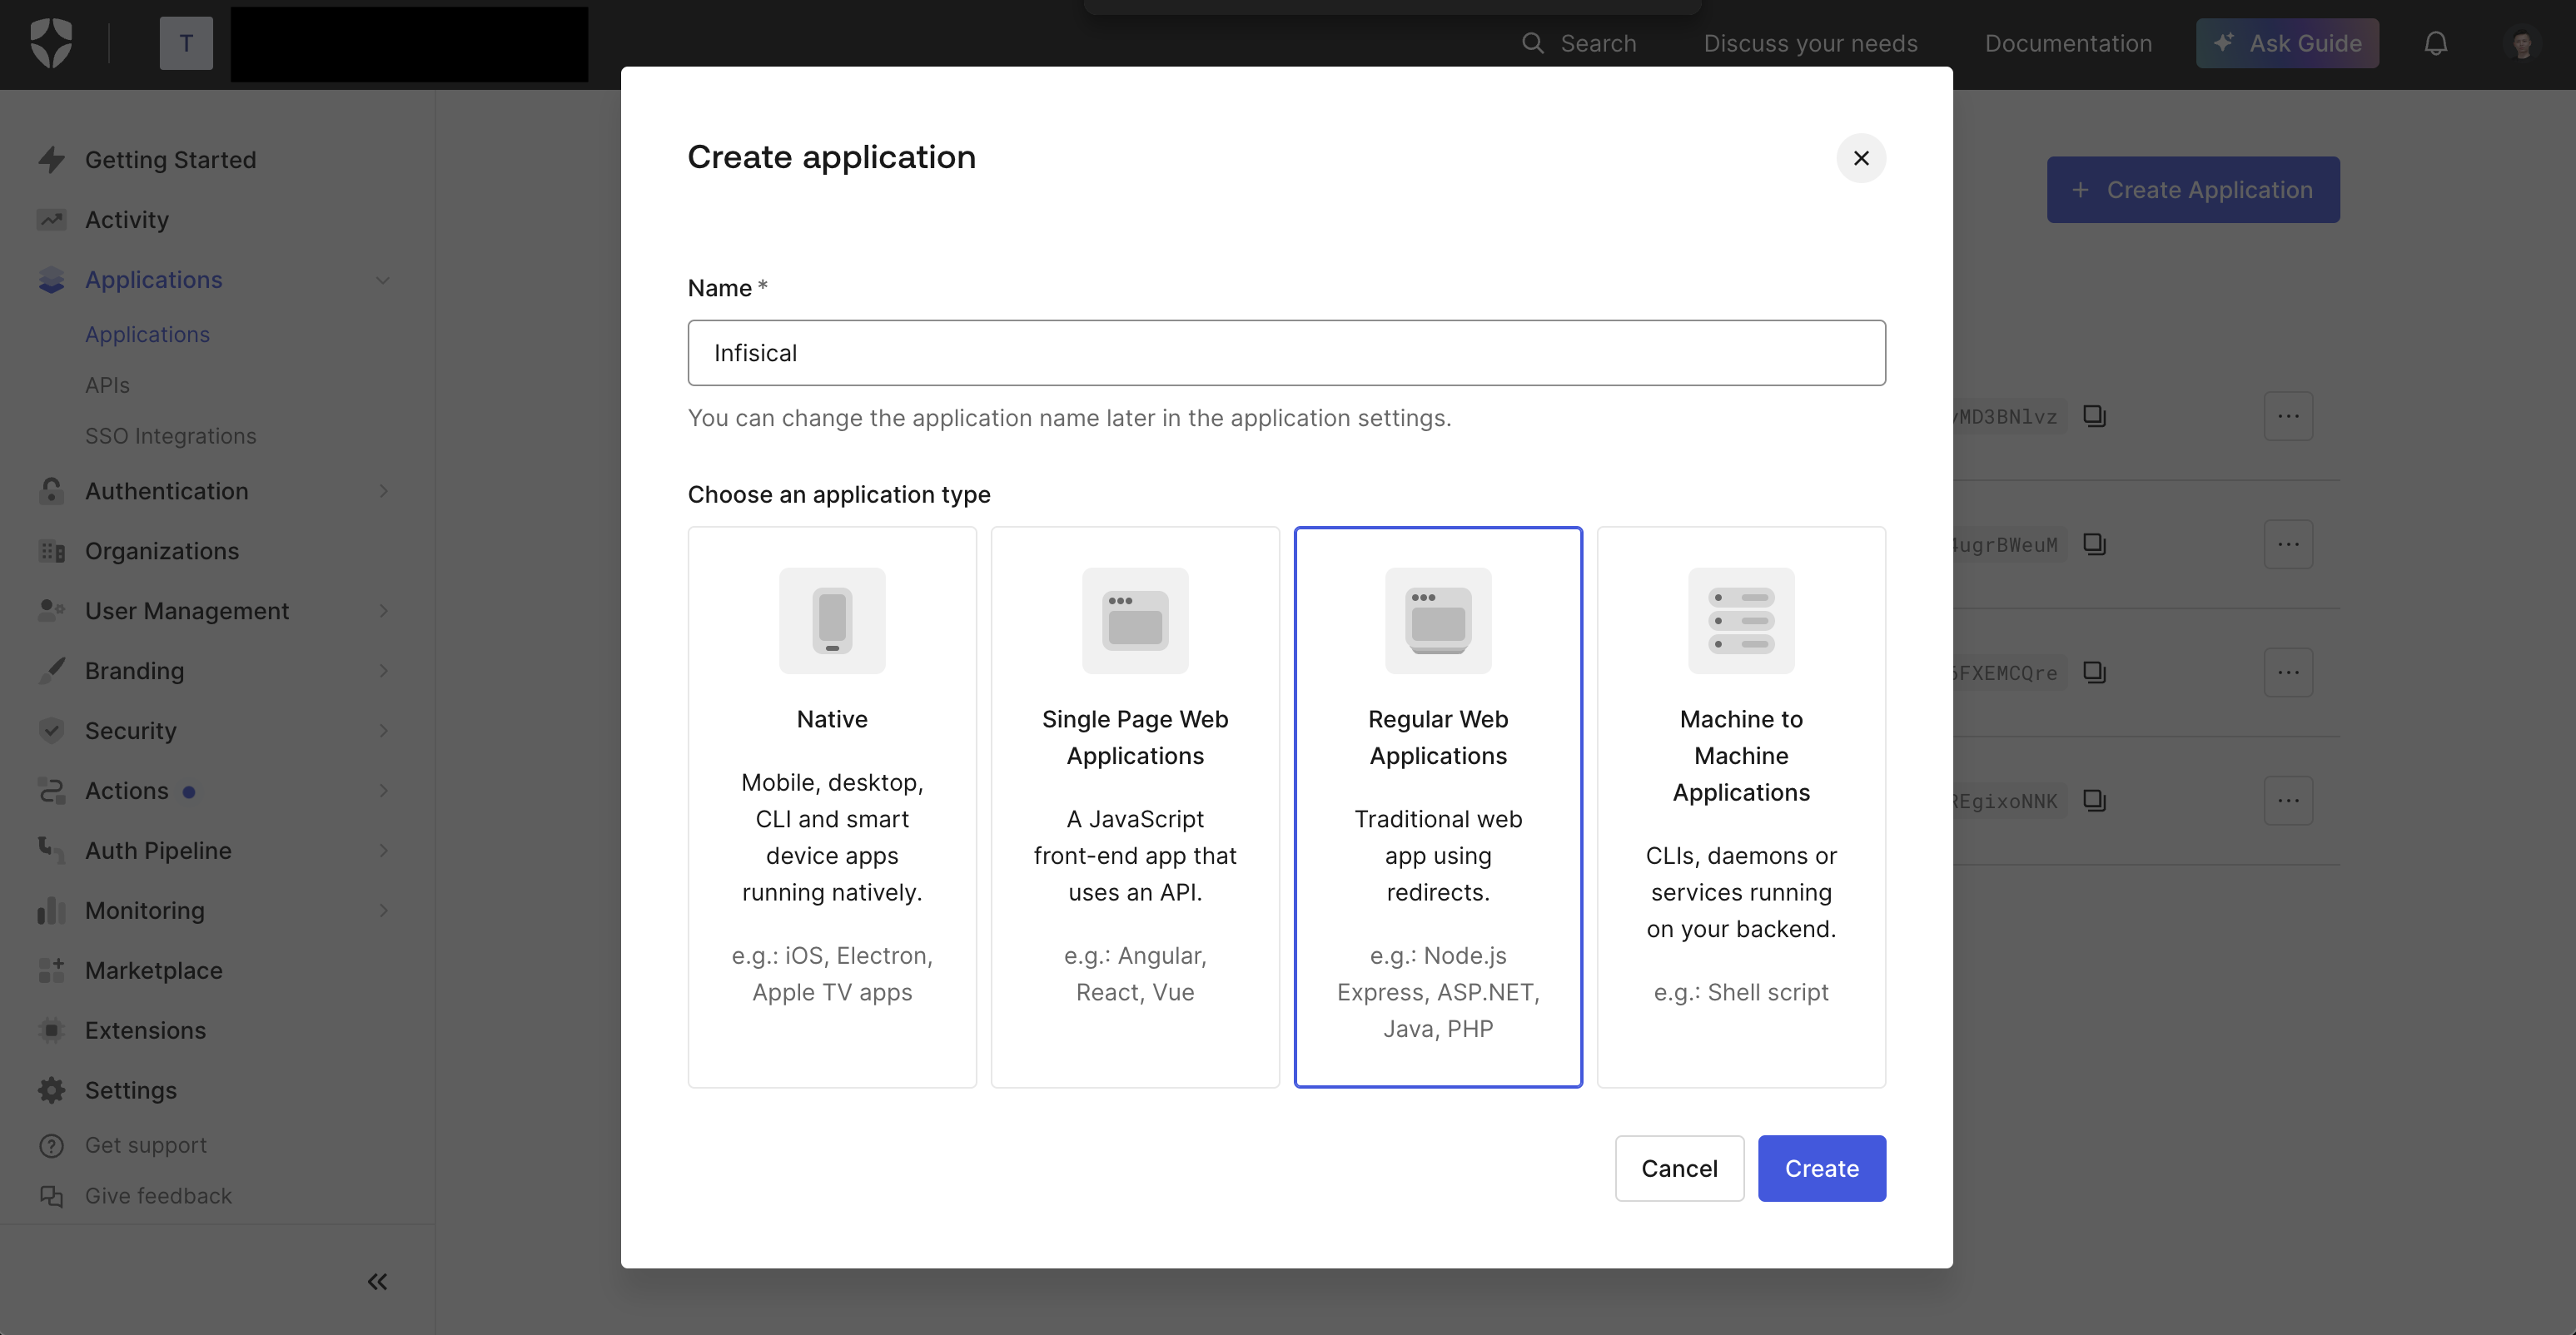
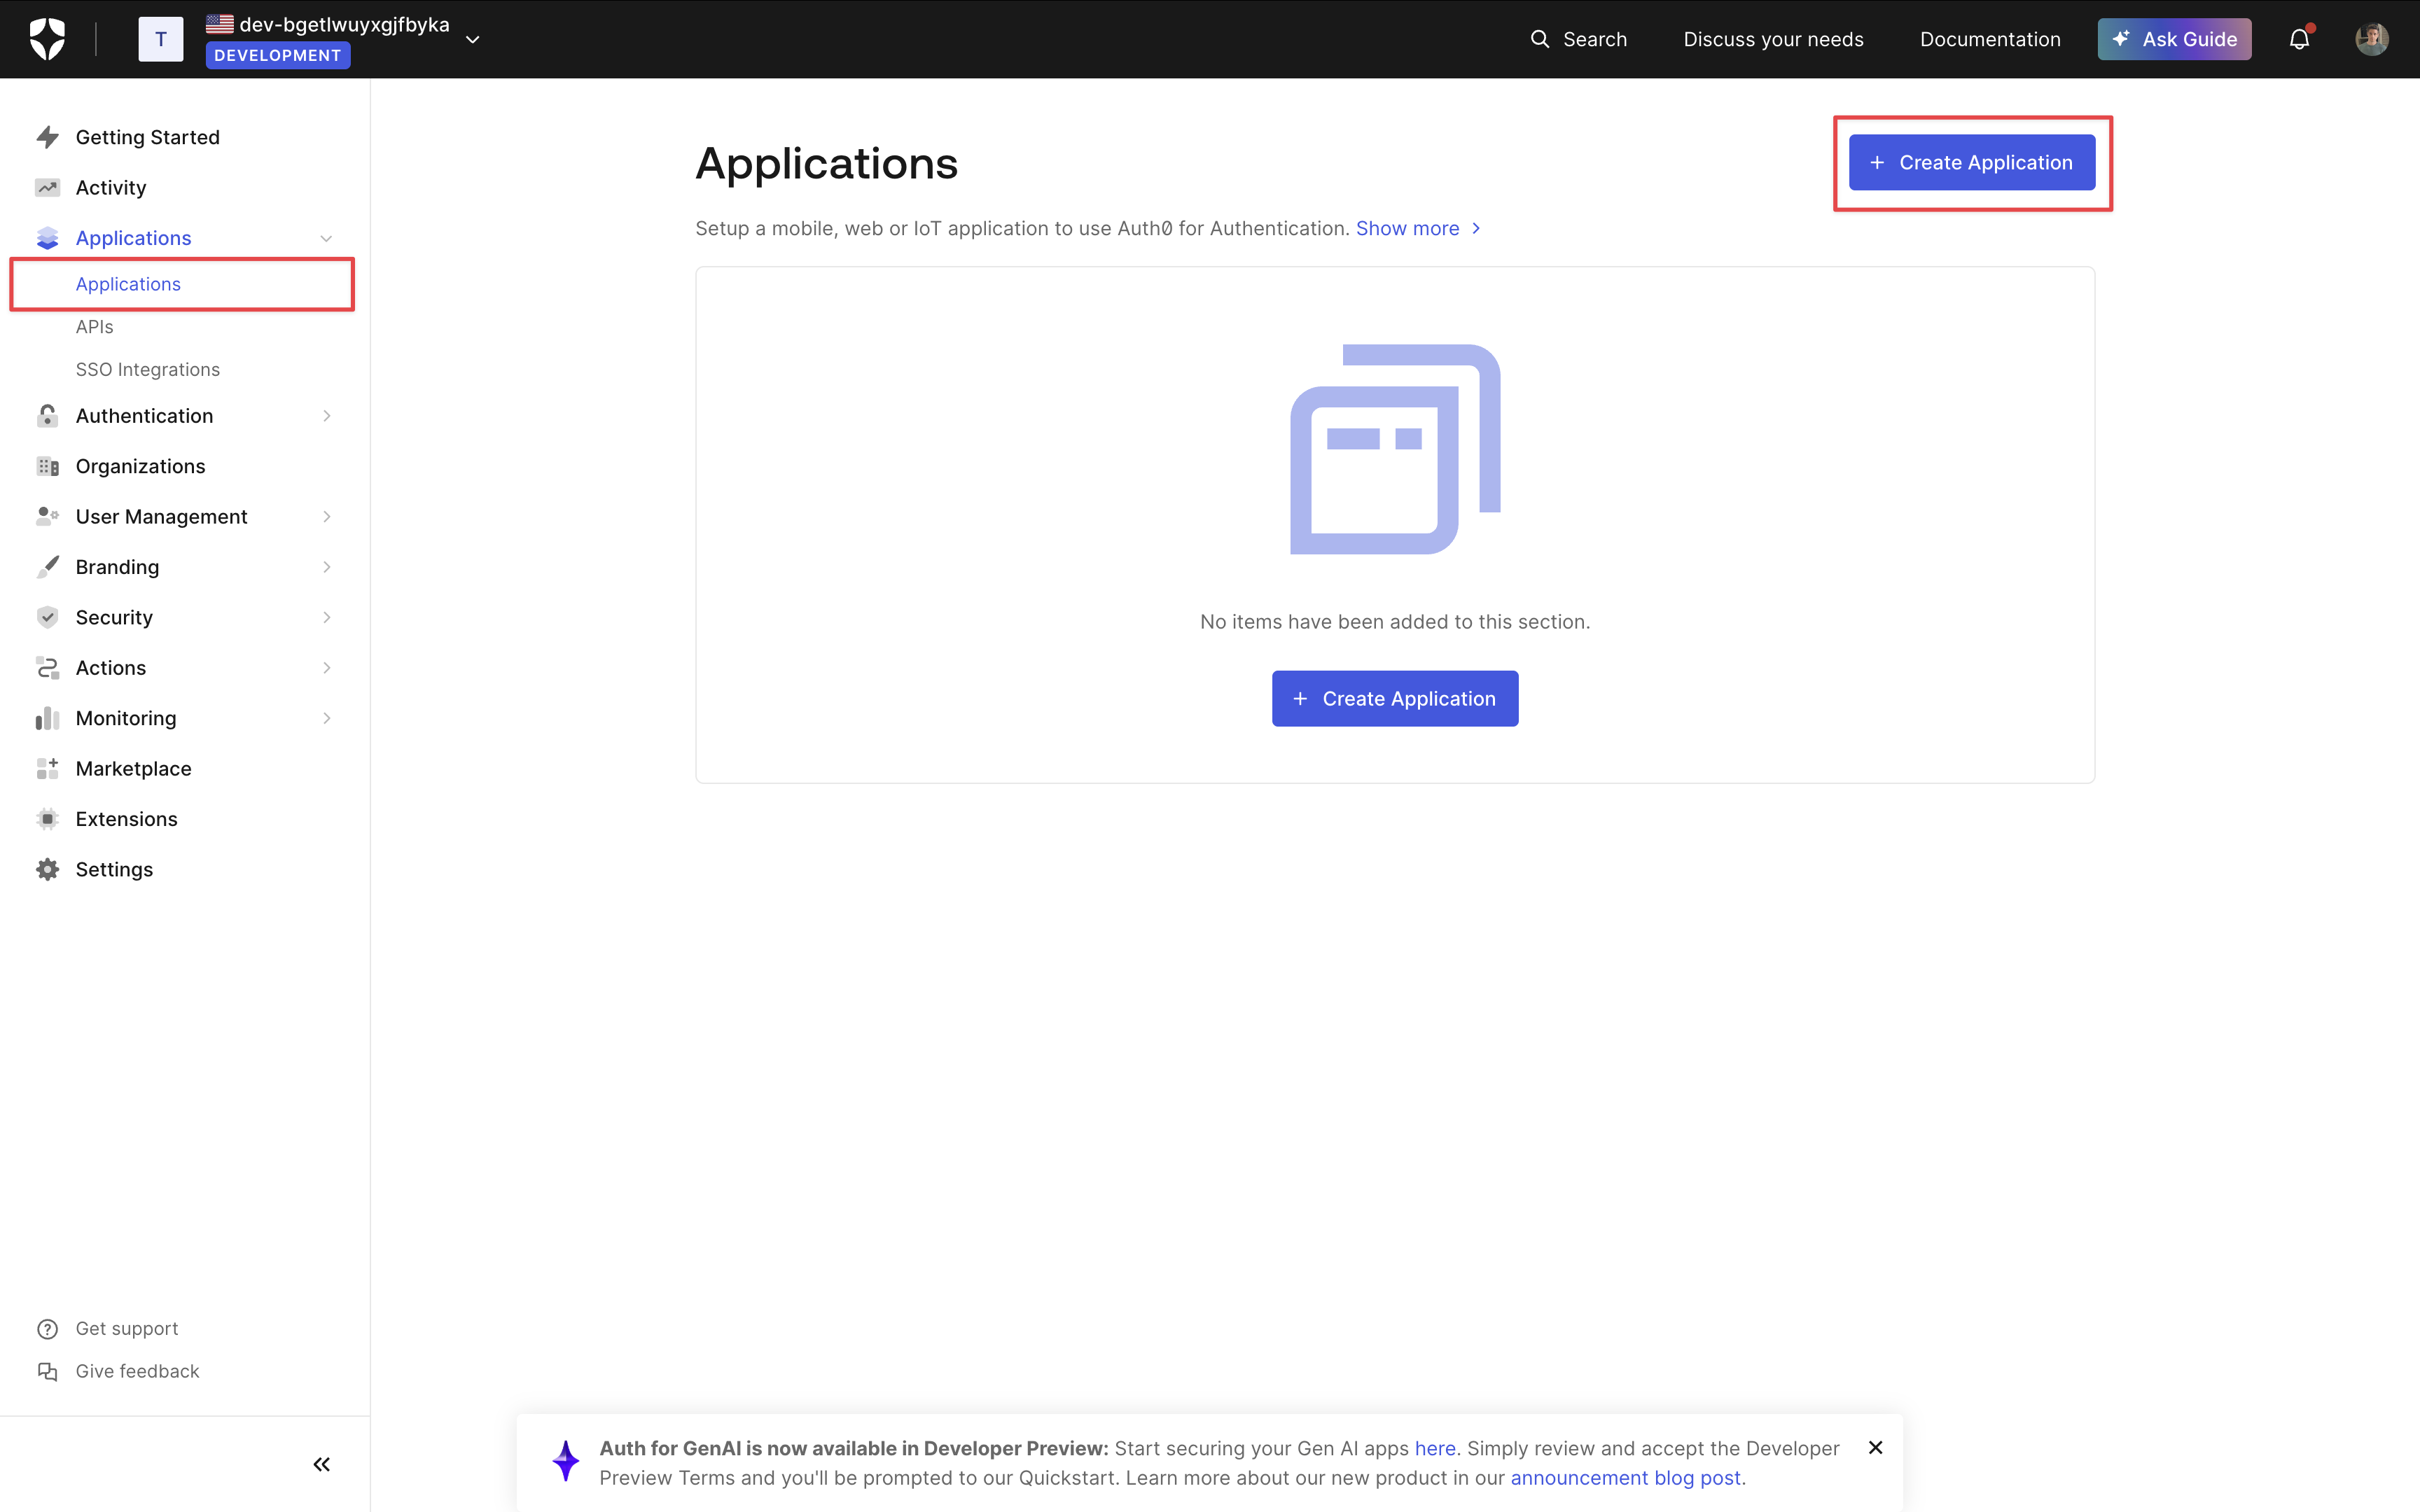
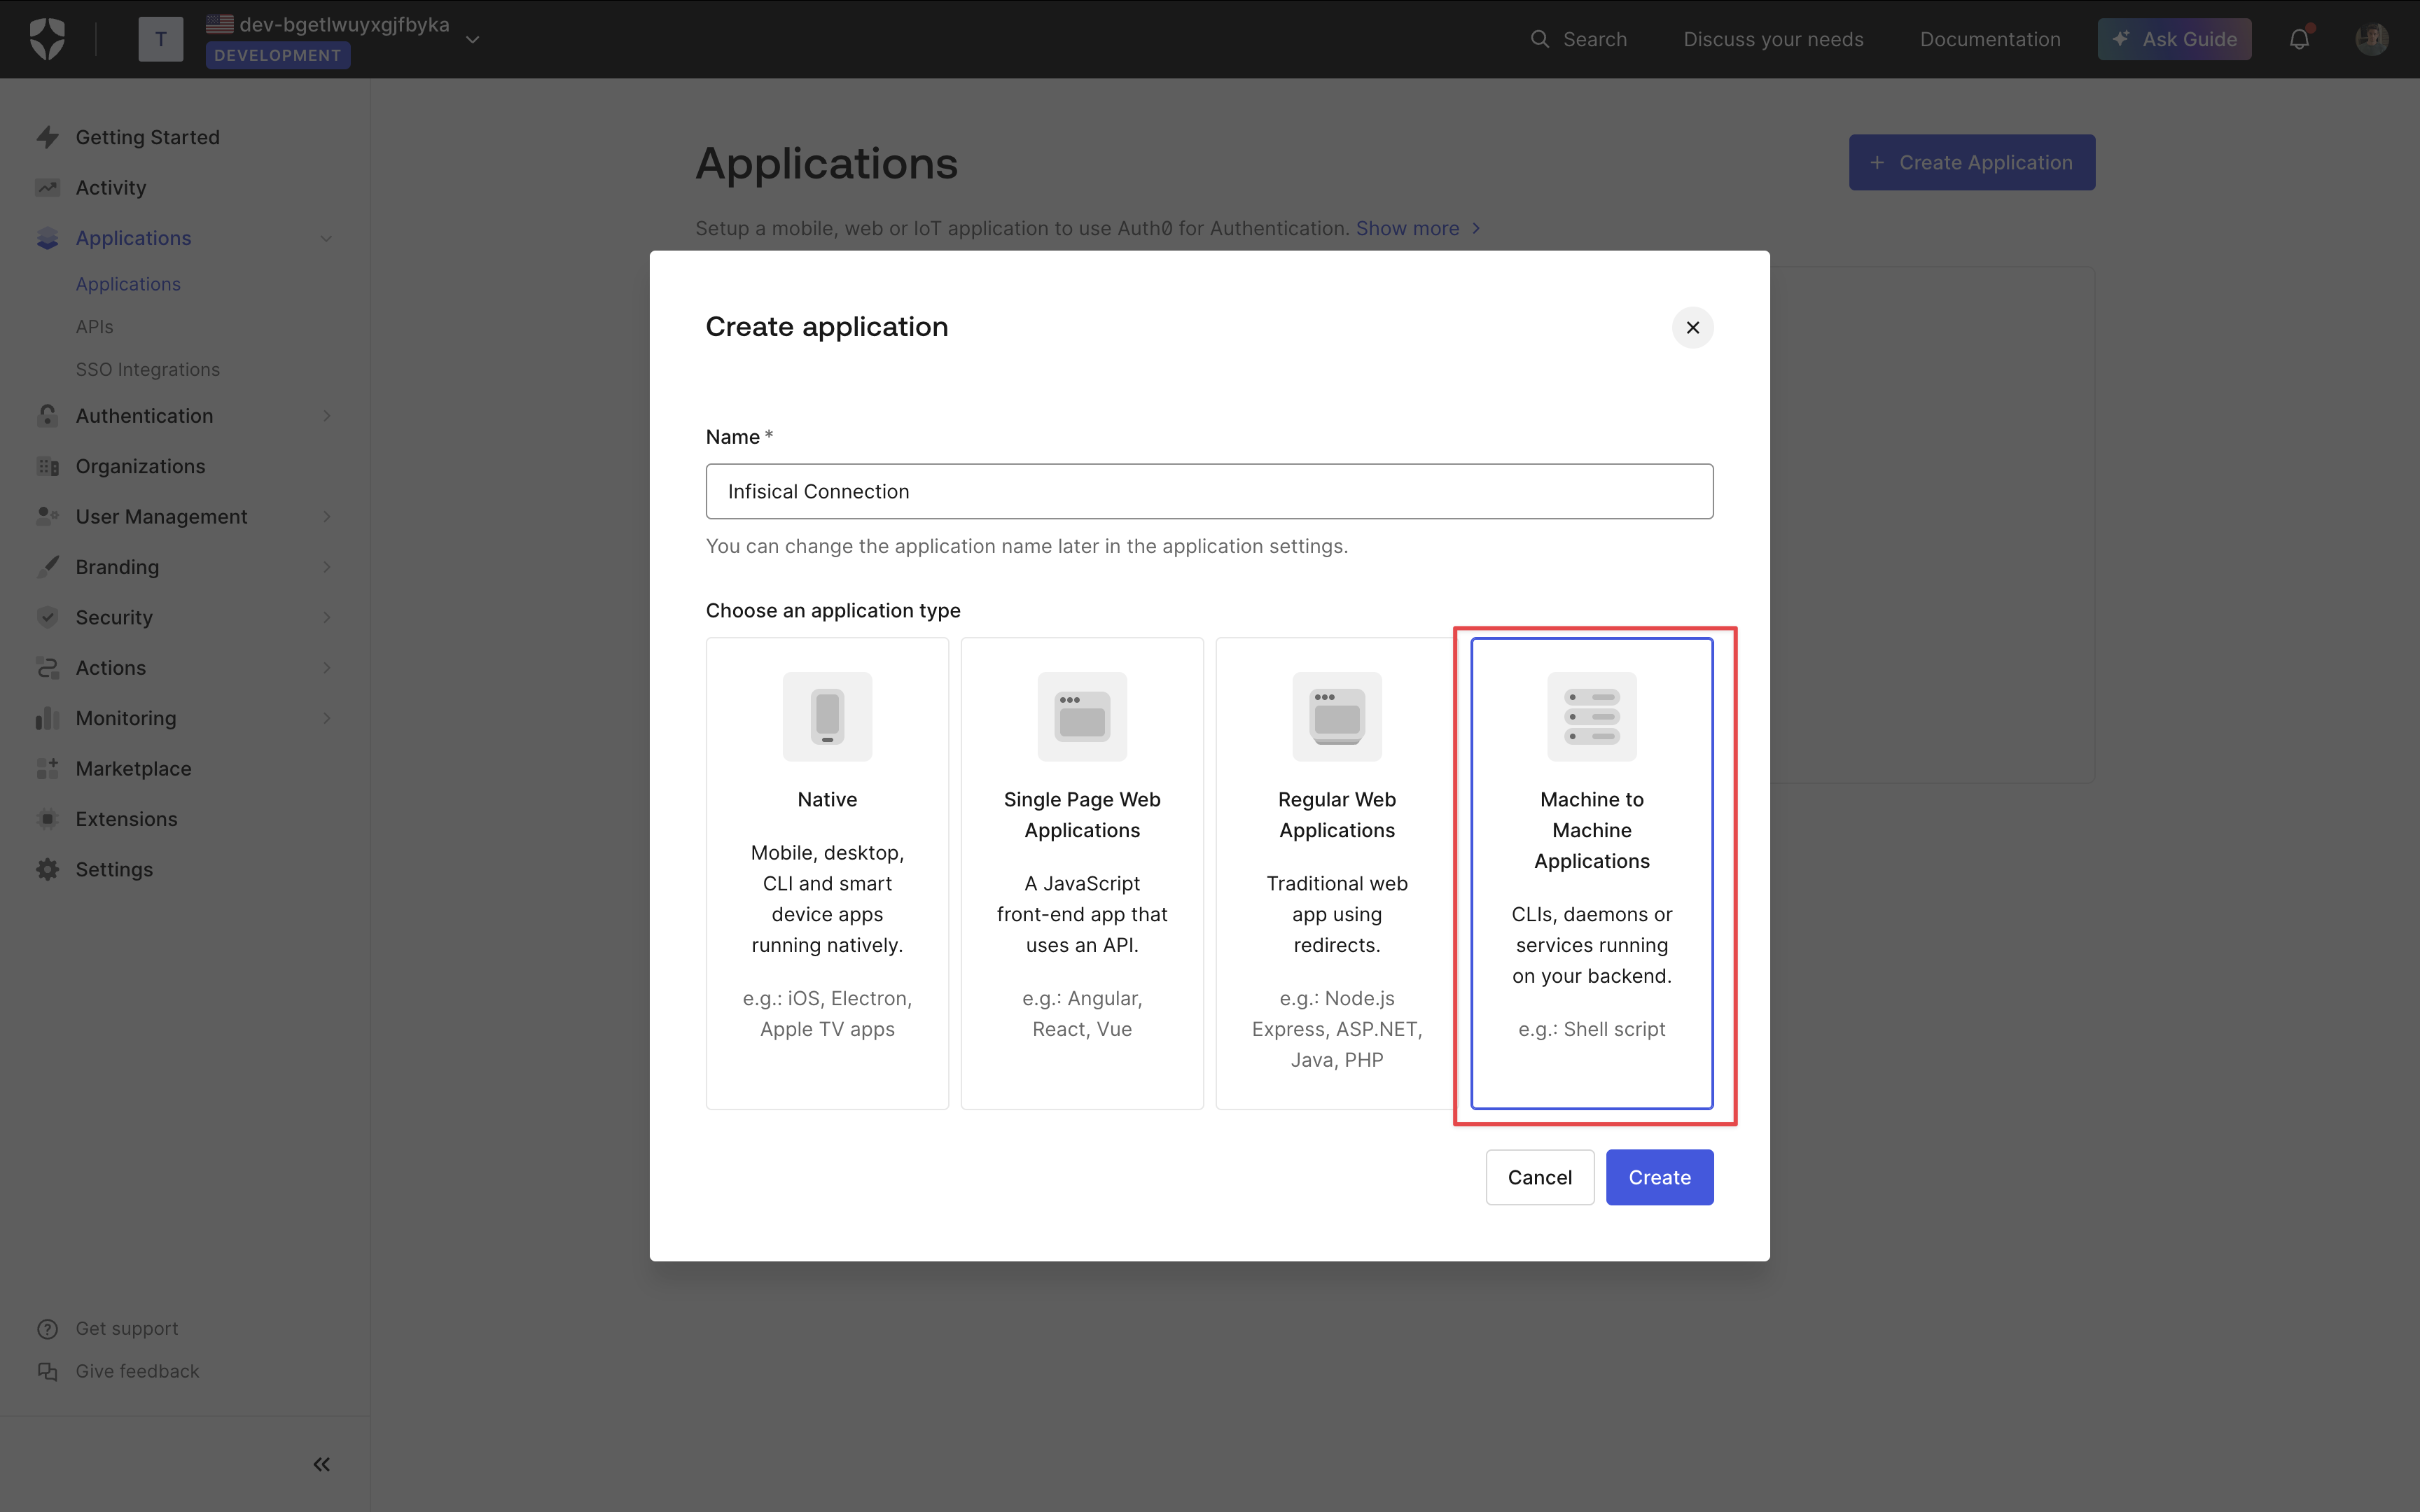
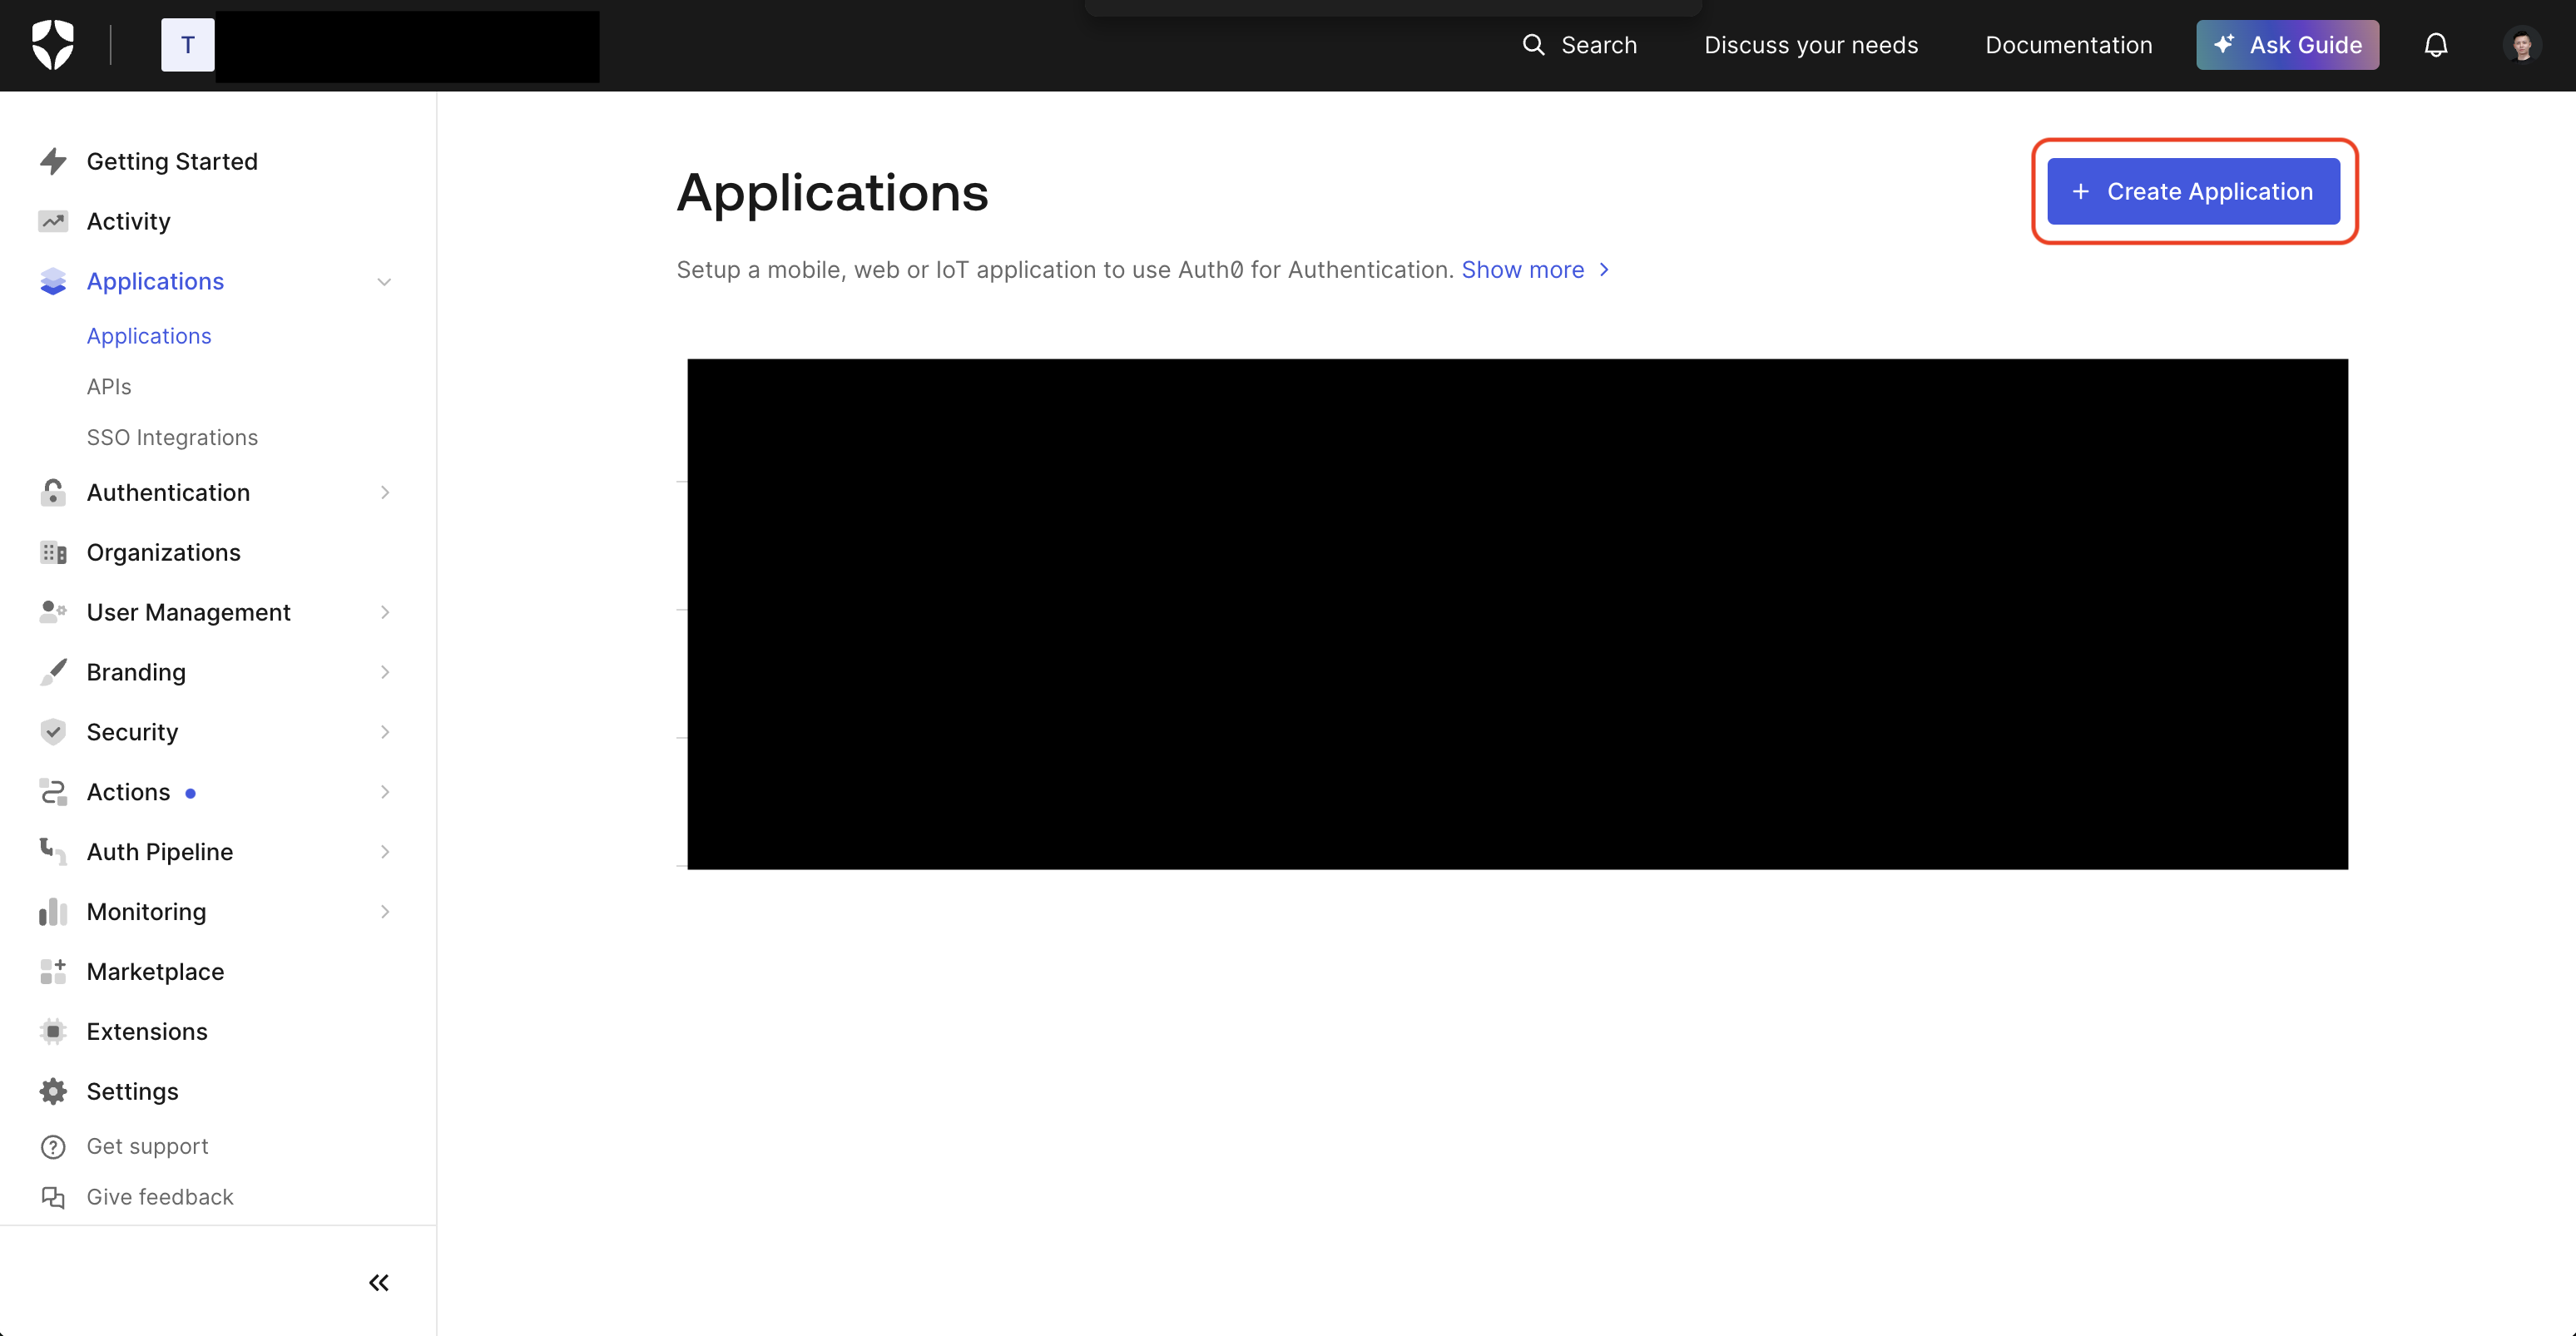 Select **Regular Web Application** and press **Create**.
 2.2. In the Application head to Settings > Application URIs and add the **Application Callback URL** from step 1 into the **Allowed Callback URLs** field.
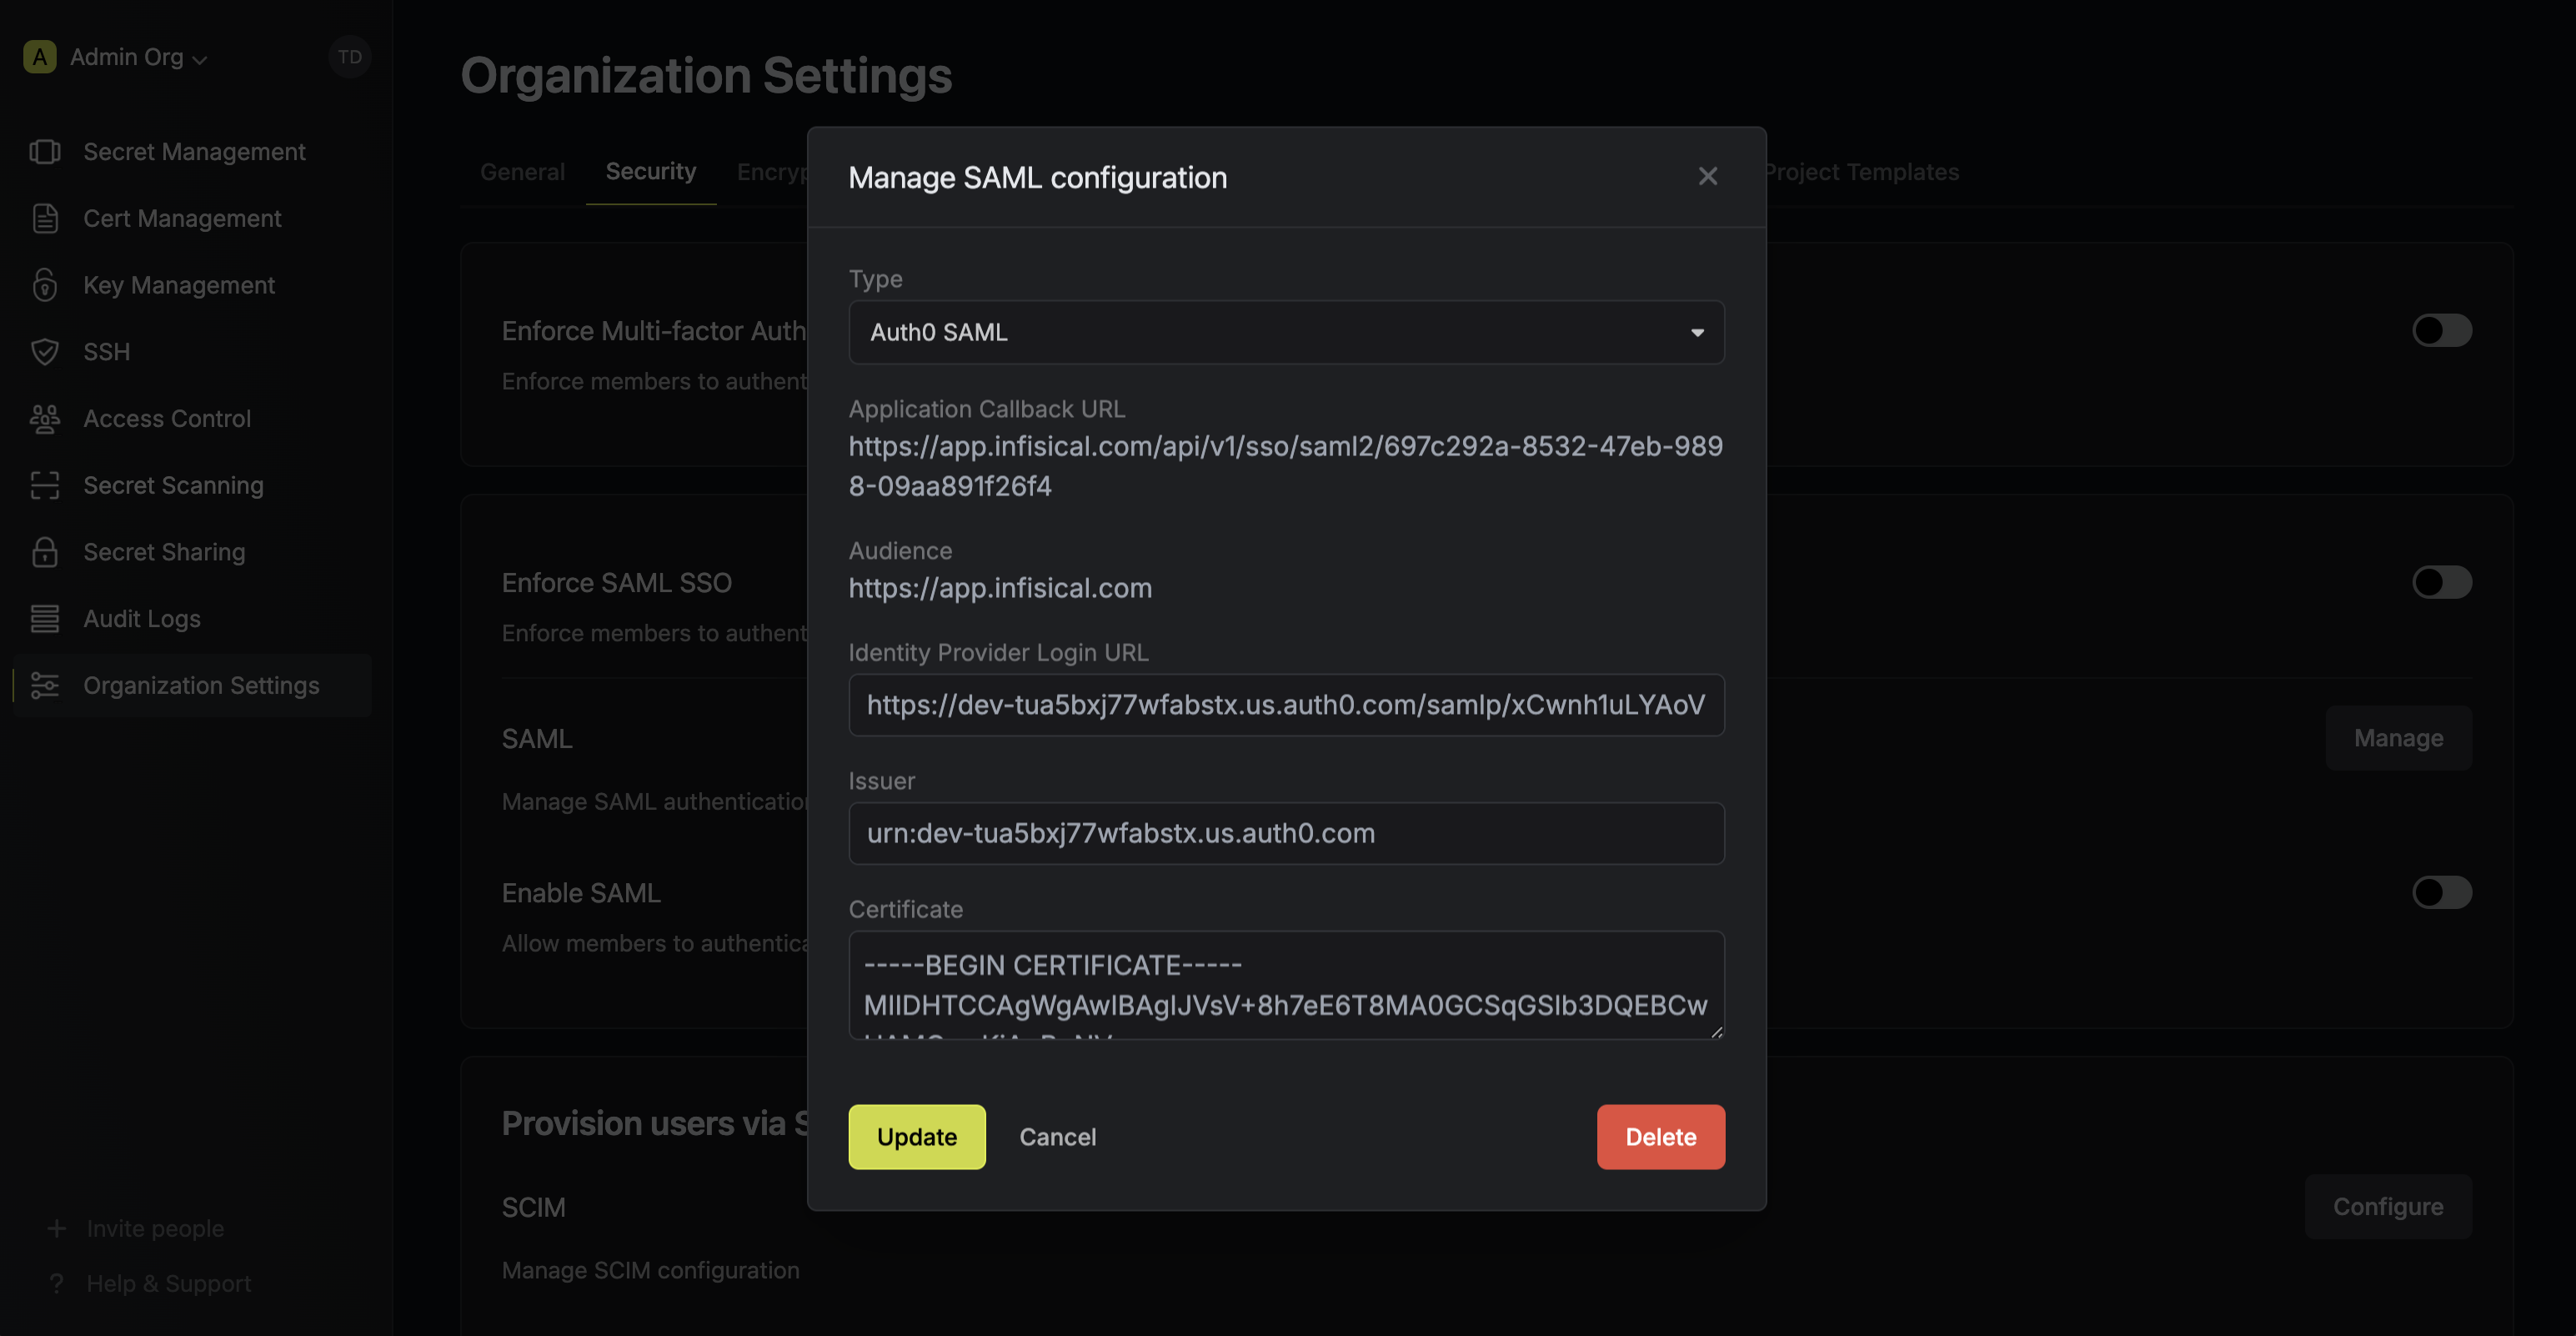
 2.3. In the Application head to Addons > SAML2 Web App and copy the **Issuer**, **Identity Provider Login URL**, and **Identity Provider Certificate** from the **Usage** tab.
 2.4. Back in Infisical, set **Issuer**, **Identity Provider Login URL**, and **Certificate** to the corresponding items from step 2.3.
 2.5. Back in Auth0, in the **Settings** tab, set the **Application Callback URL** to the **Application Callback URL** from step 1
and update the **Settings** field with the JSON under the picture below (replacing `
2.5. Back in Auth0, in the **Settings** tab, set the **Application Callback URL** to the **Application Callback URL** from step 1
and update the **Settings** field with the JSON under the picture below (replacing ` ```json theme={"dark"}
{
"audience": "
```json theme={"dark"}
{
"audience": "
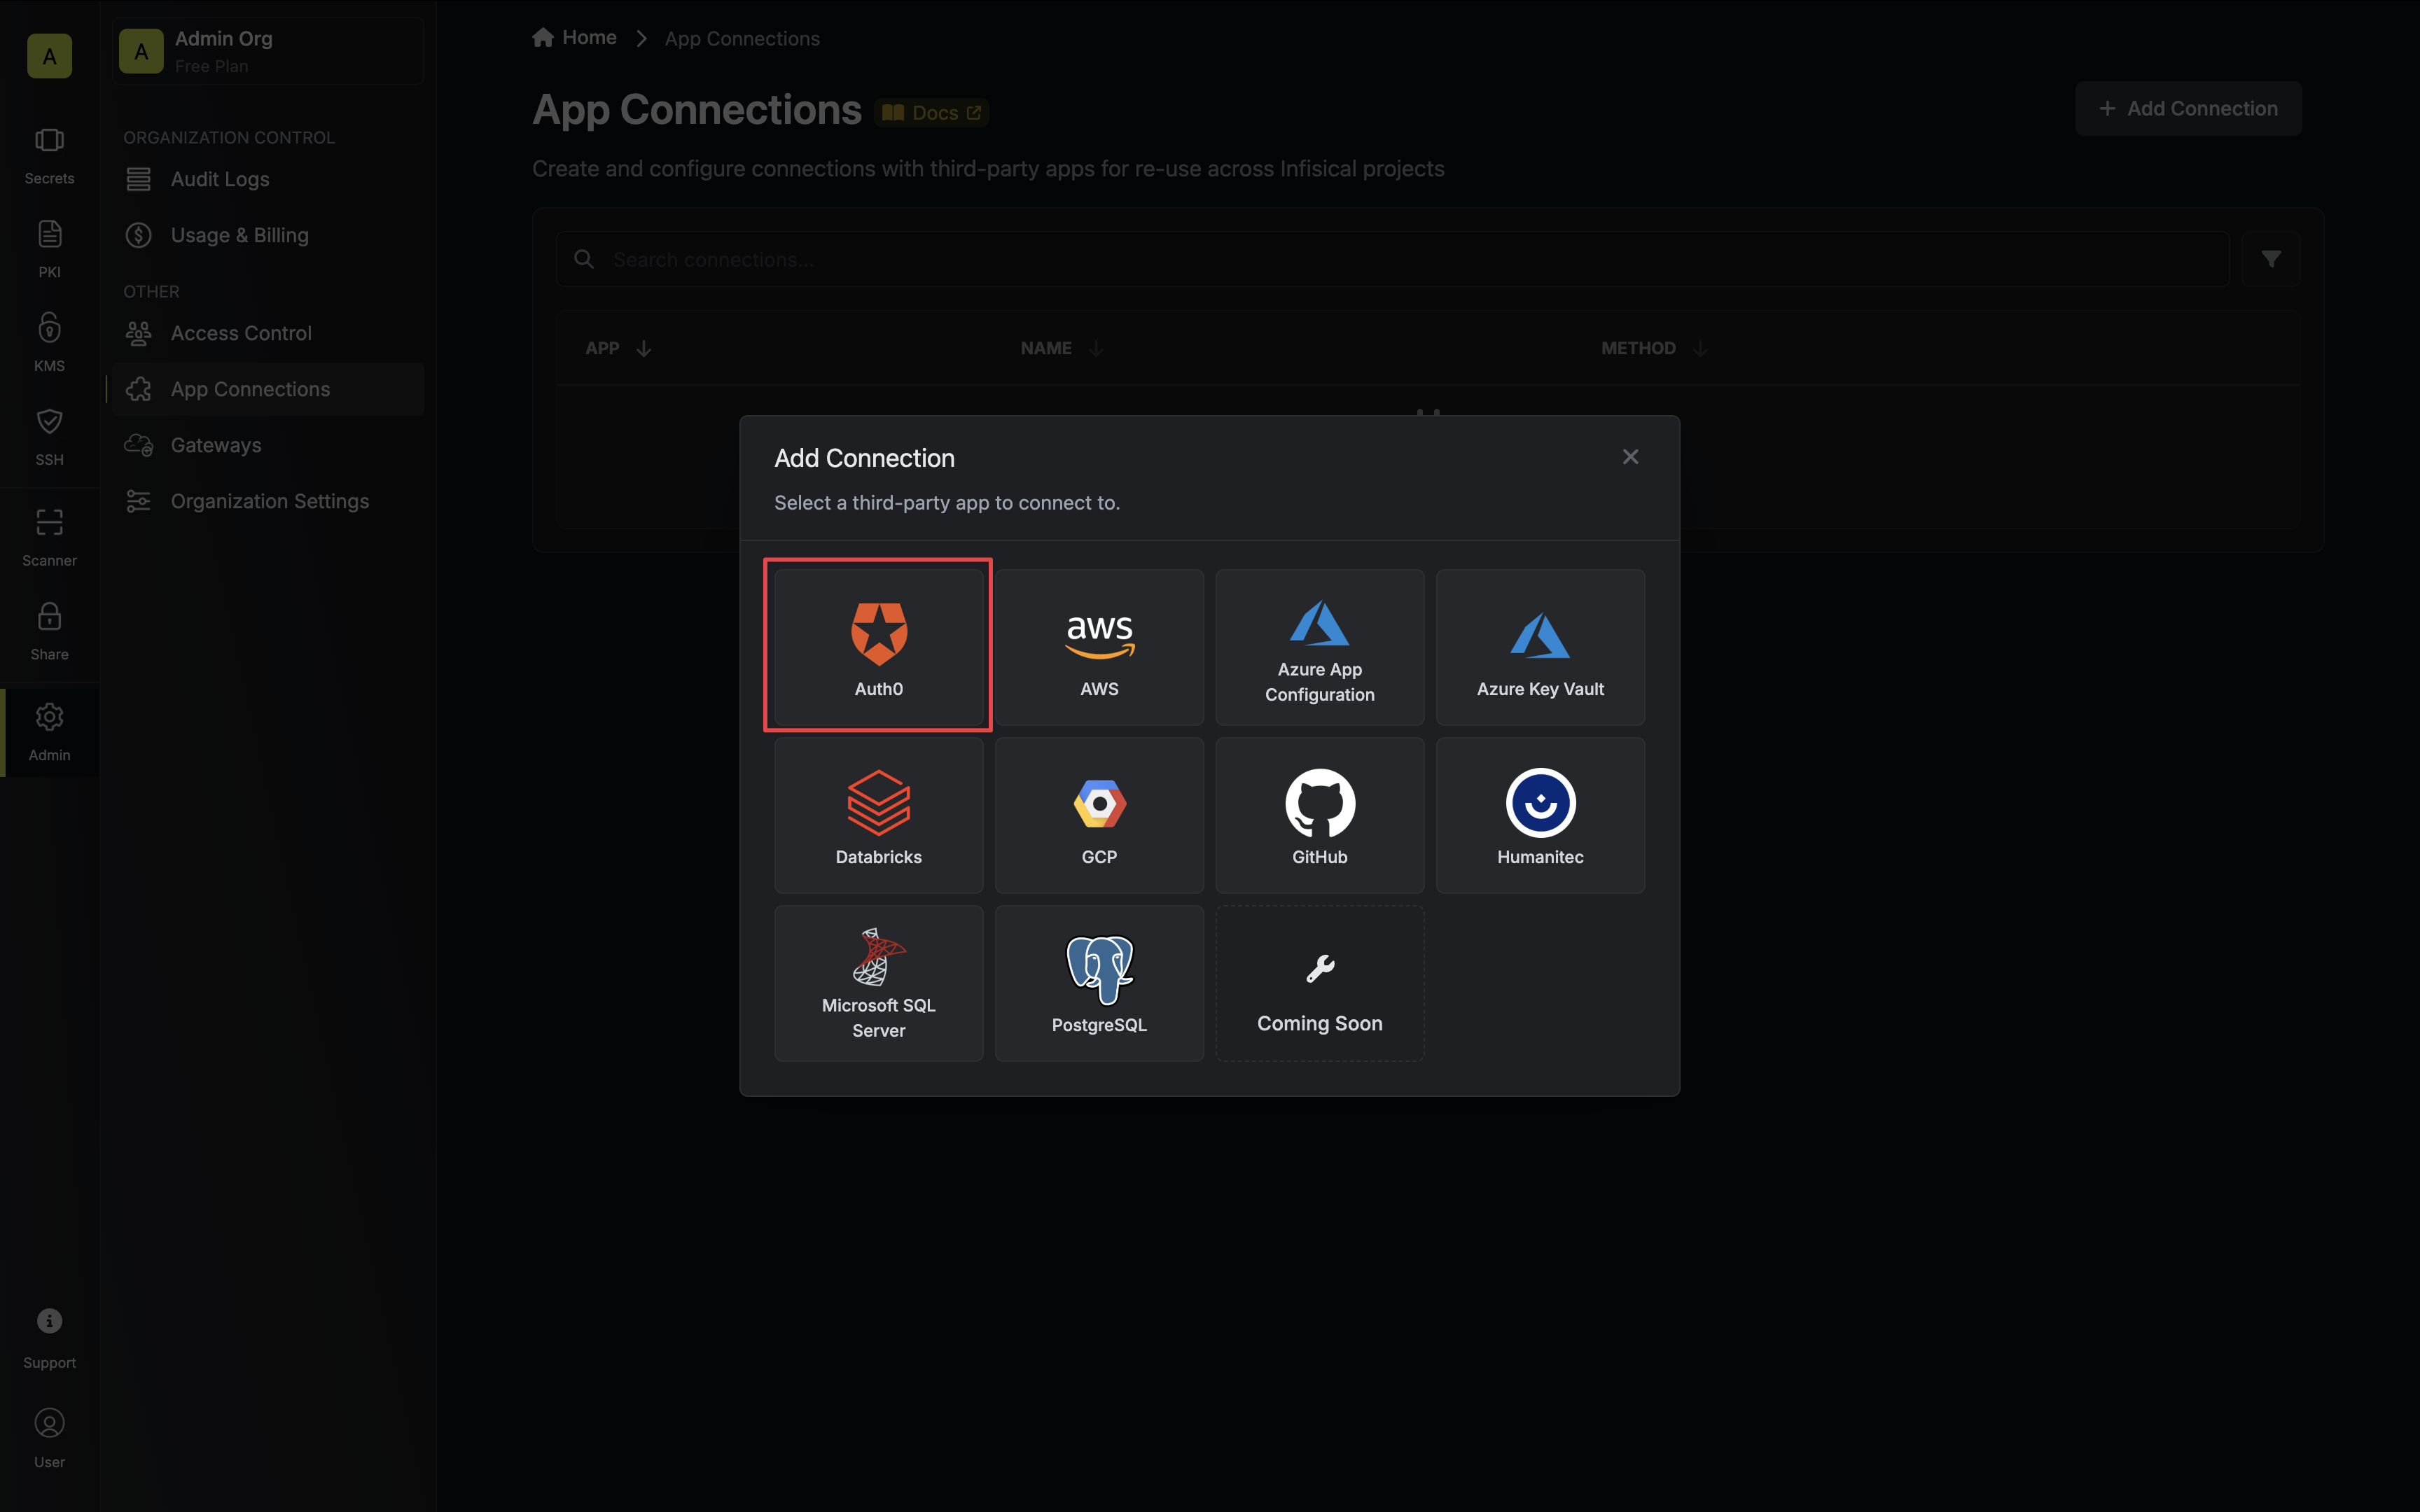
 2. Select the **Auth0 Connection** option.
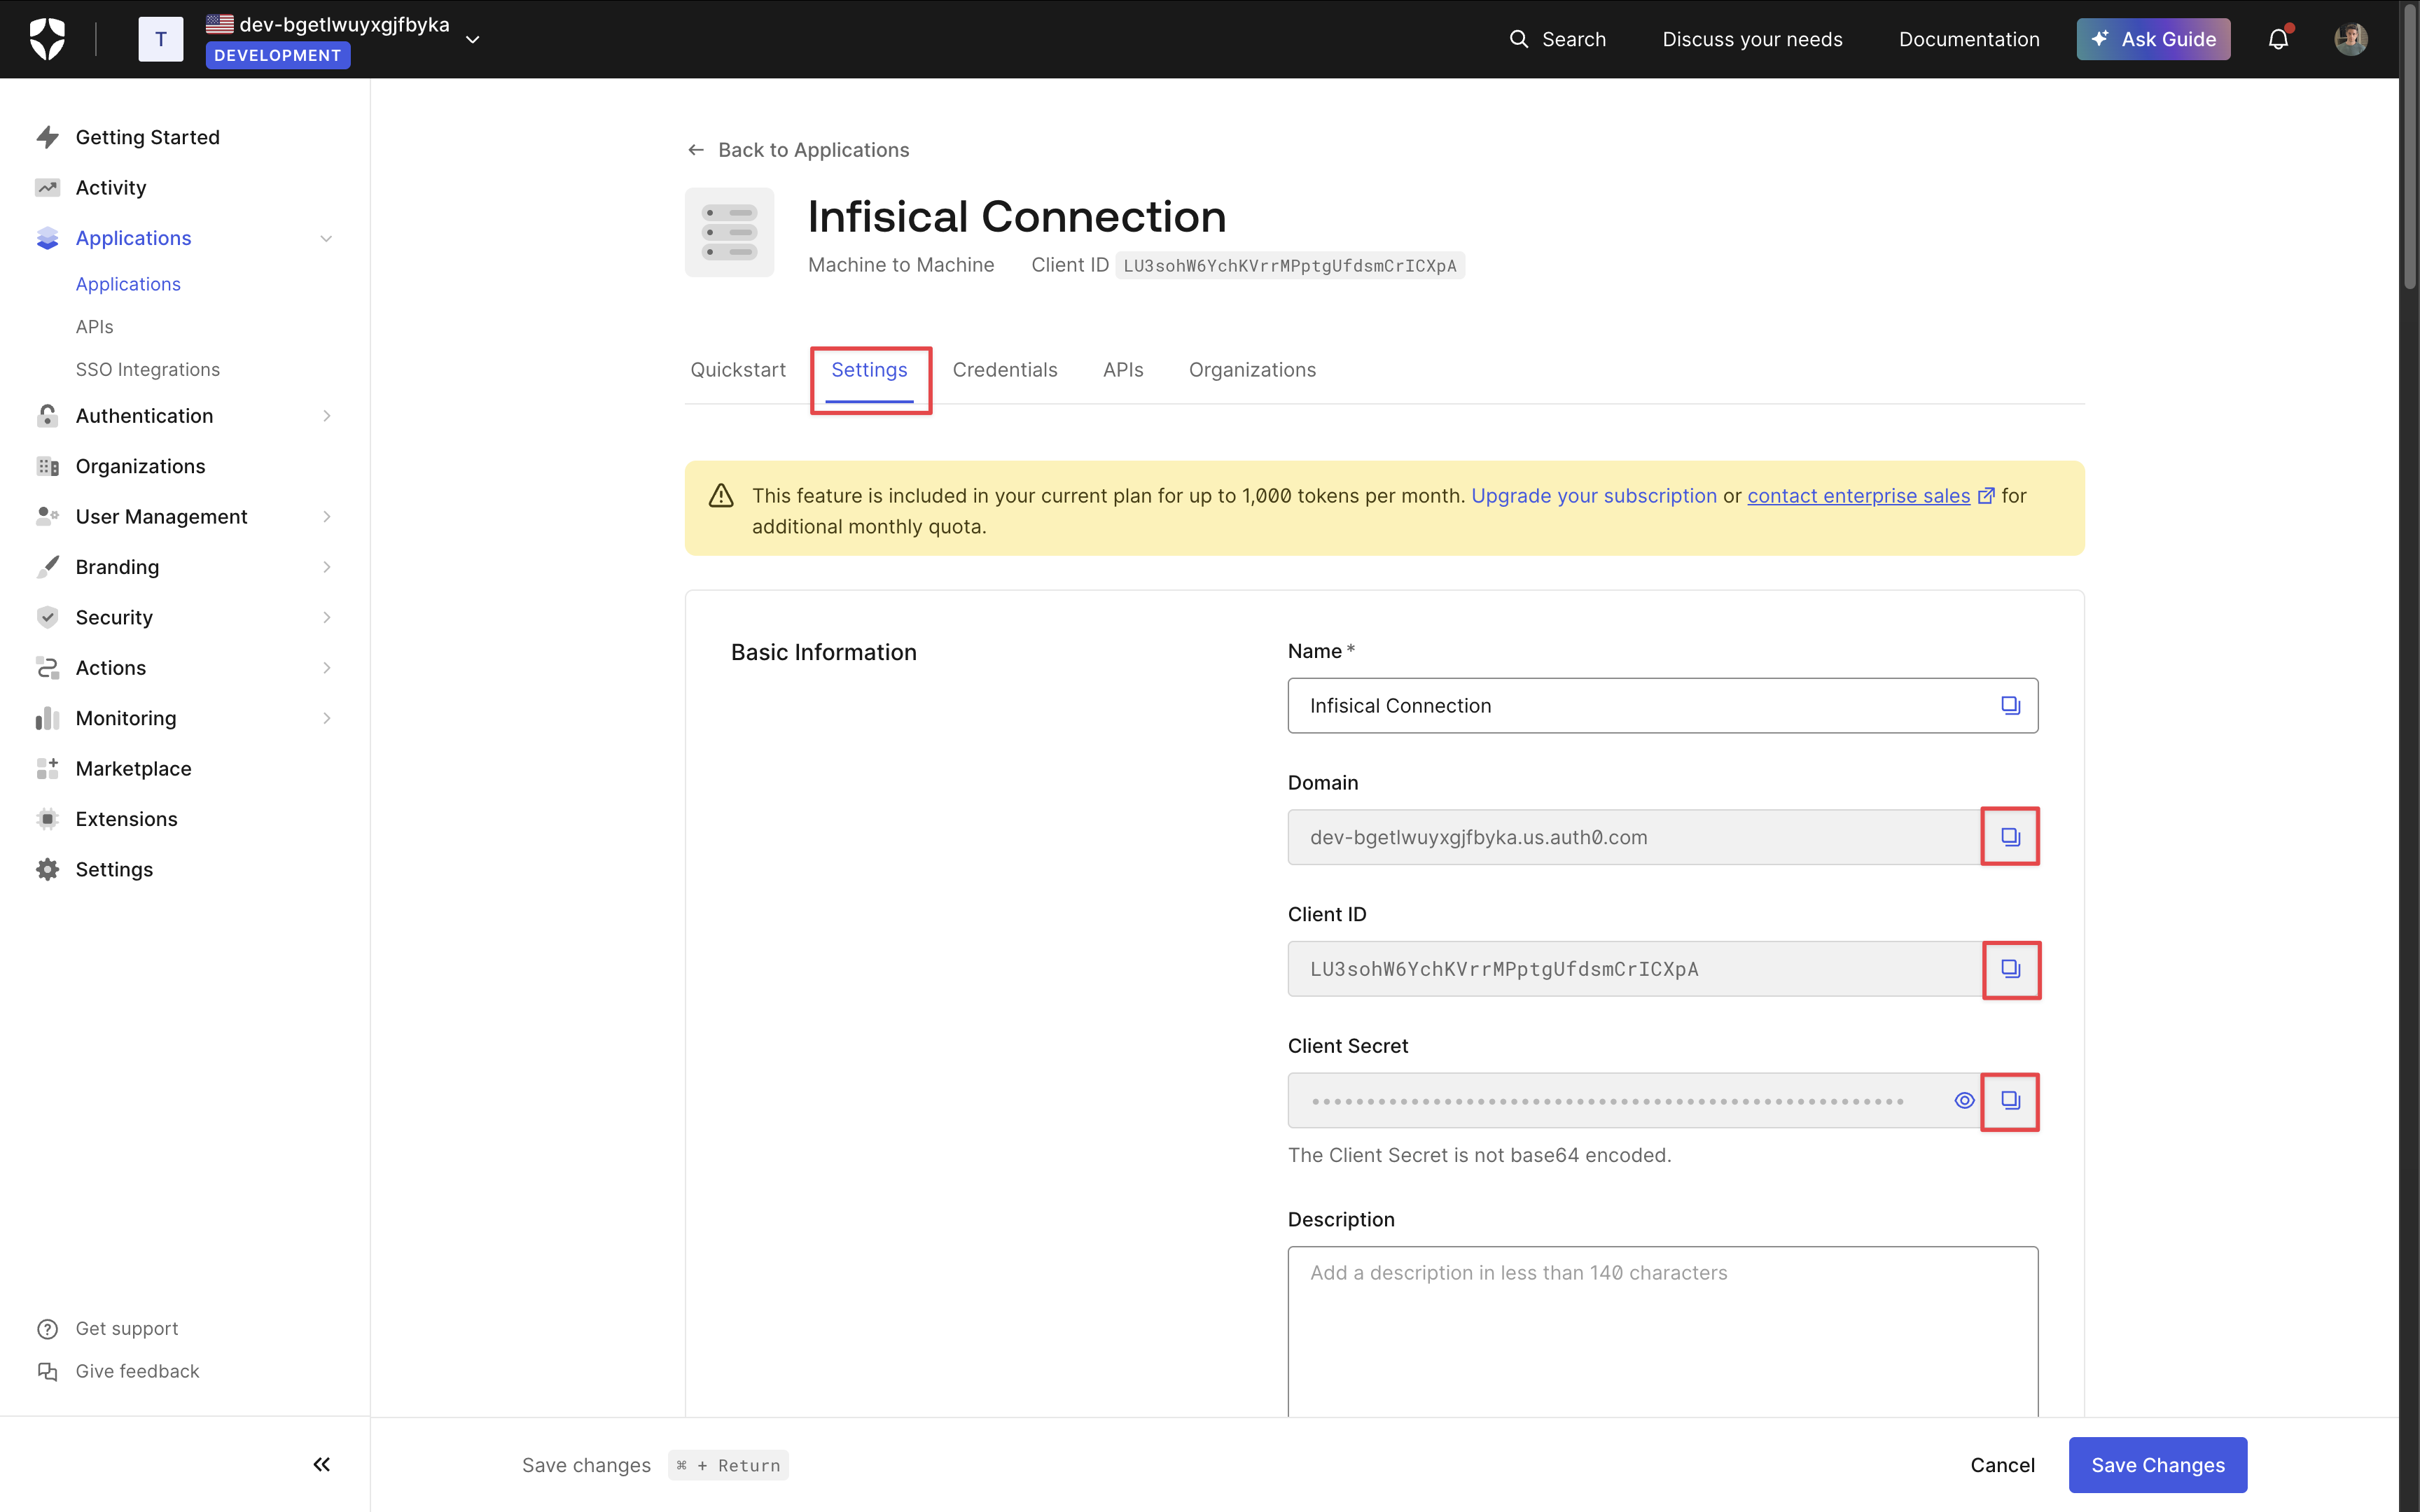
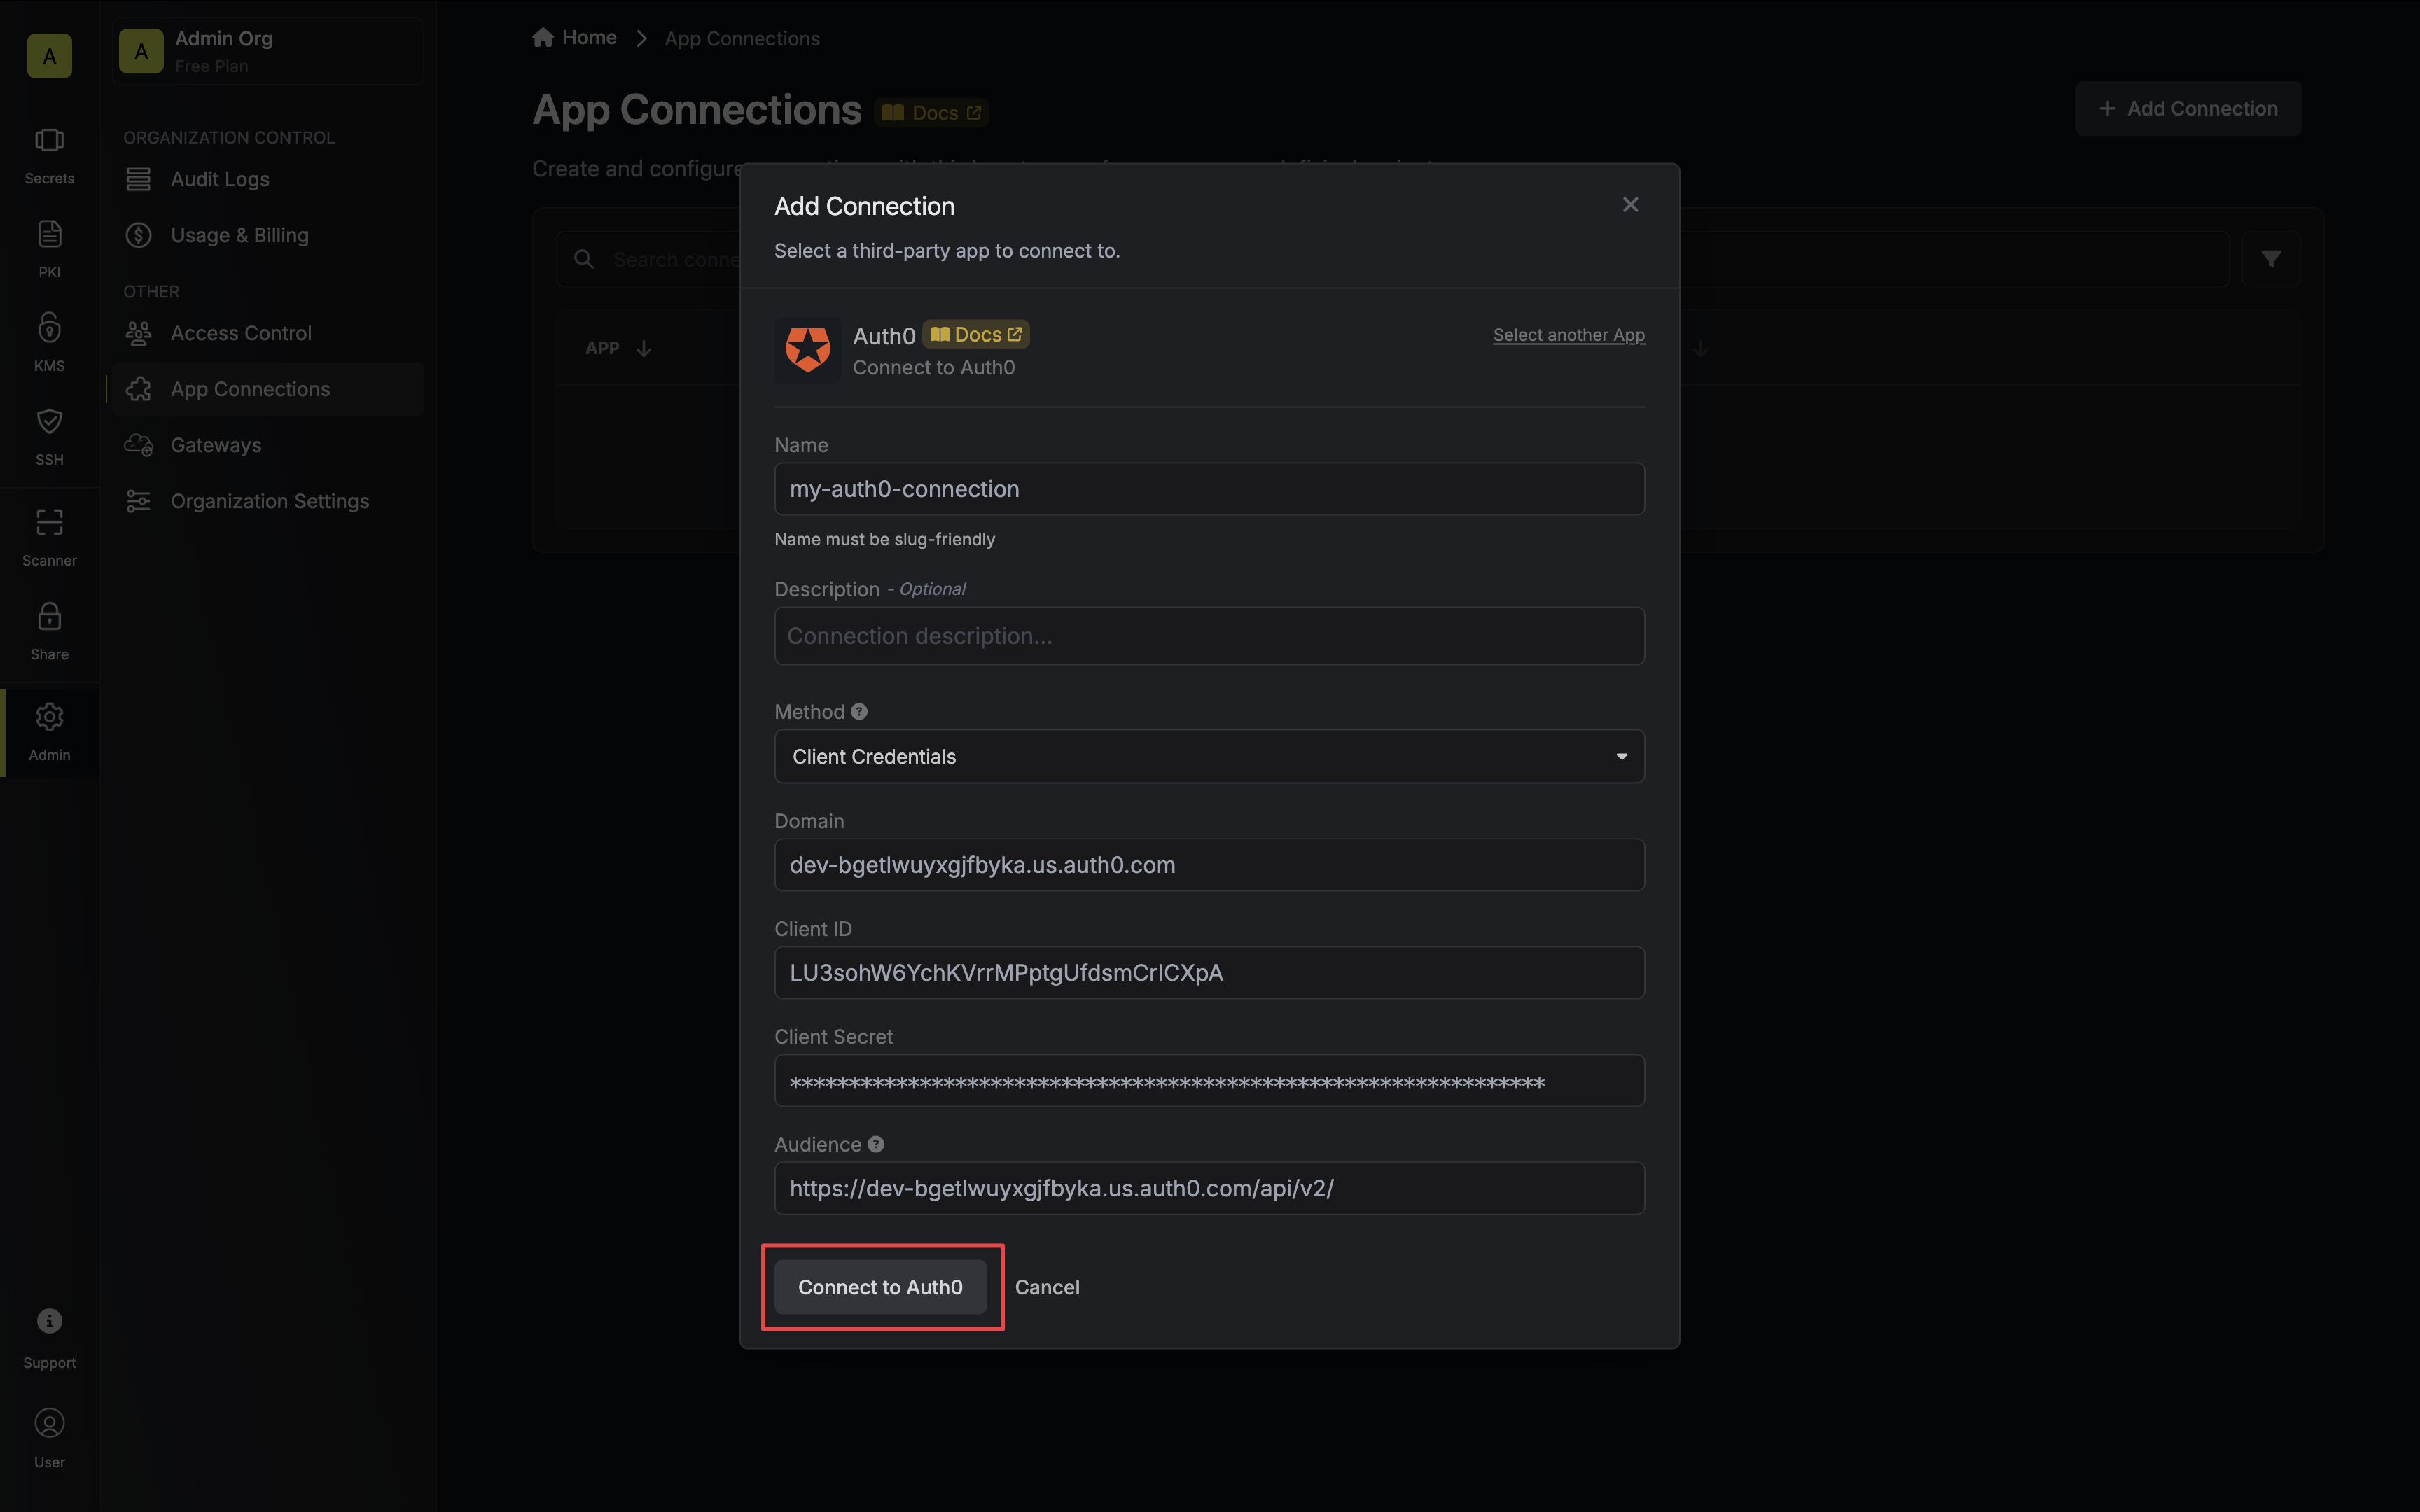
 3. Select the **Client Credentials** method option and provide the details obtained from the previous section and press **Connect to Auth0**.
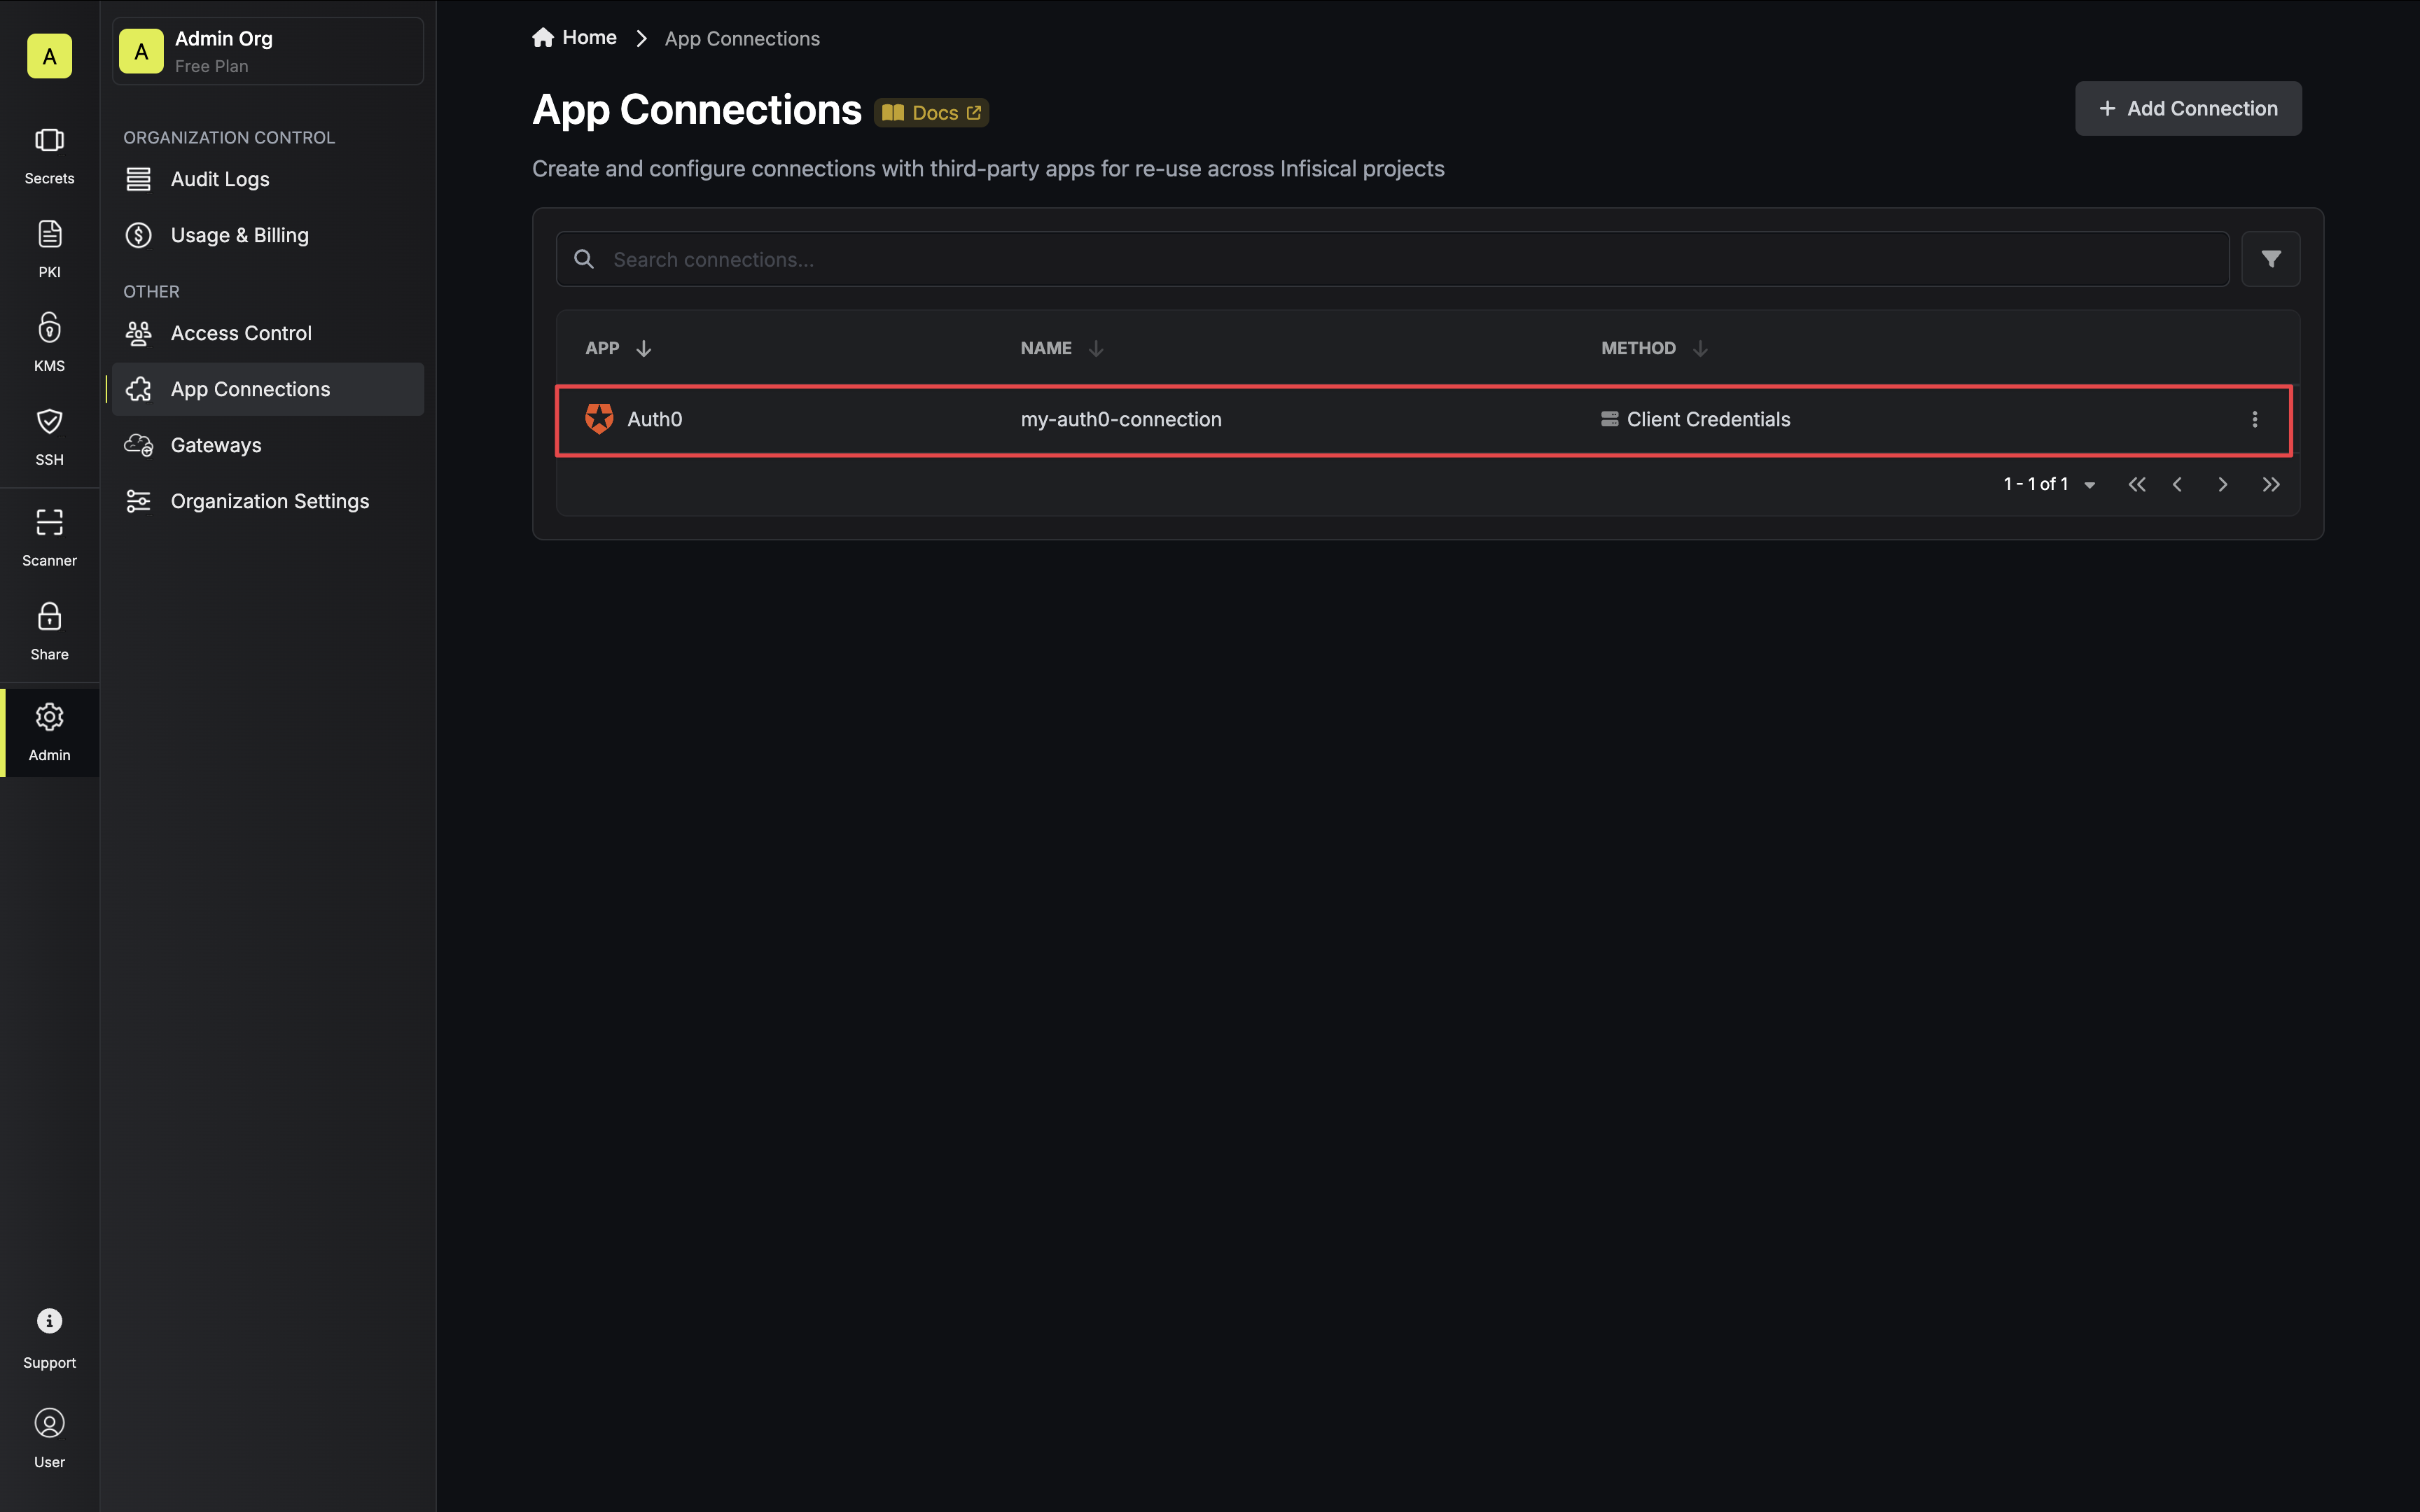
 4. Your **Auth0 Connection** is now available for use.
 * **Token Auth**: The instance admin machine identity uses [Token Auth](/documentation/platform/identities/token-auth), providing a JWT token that can be used directly to make authenticated requests to the Infisical API.
## Bootstrap Methods
You can bootstrap an Infisical instance using the API, CLI, or Helm chart.
* **Token Auth**: The instance admin machine identity uses [Token Auth](/documentation/platform/identities/token-auth), providing a JWT token that can be used directly to make authenticated requests to the Infisical API.
## Bootstrap Methods
You can bootstrap an Infisical instance using the API, CLI, or Helm chart.
 1. In the Amplify console, choose App Settings, and then select Environment variables.
2. In the Environment variables section, select Manage variables.
3. Under the first Variable enter `INFISICAL_MACHINE_IDENTITY_CLIENT_ID`, and for the value, enter the client ID of the machine identity you created in the previous step.
4. Under the second Variable enter `INFISICAL_MACHINE_IDENTITY_CLIENT_SECRET`, and for the value, enter the client secret of the machine identity you created in the previous step.
5. Click save.
1. In the Amplify console, choose App Settings, and then select Environment variables.
2. In the Environment variables section, select Manage variables.
3. Under the first Variable enter `INFISICAL_MACHINE_IDENTITY_CLIENT_ID`, and for the value, enter the client ID of the machine identity you created in the previous step.
4. Under the second Variable enter `INFISICAL_MACHINE_IDENTITY_CLIENT_SECRET`, and for the value, enter the client secret of the machine identity you created in the previous step.
5. Click save.
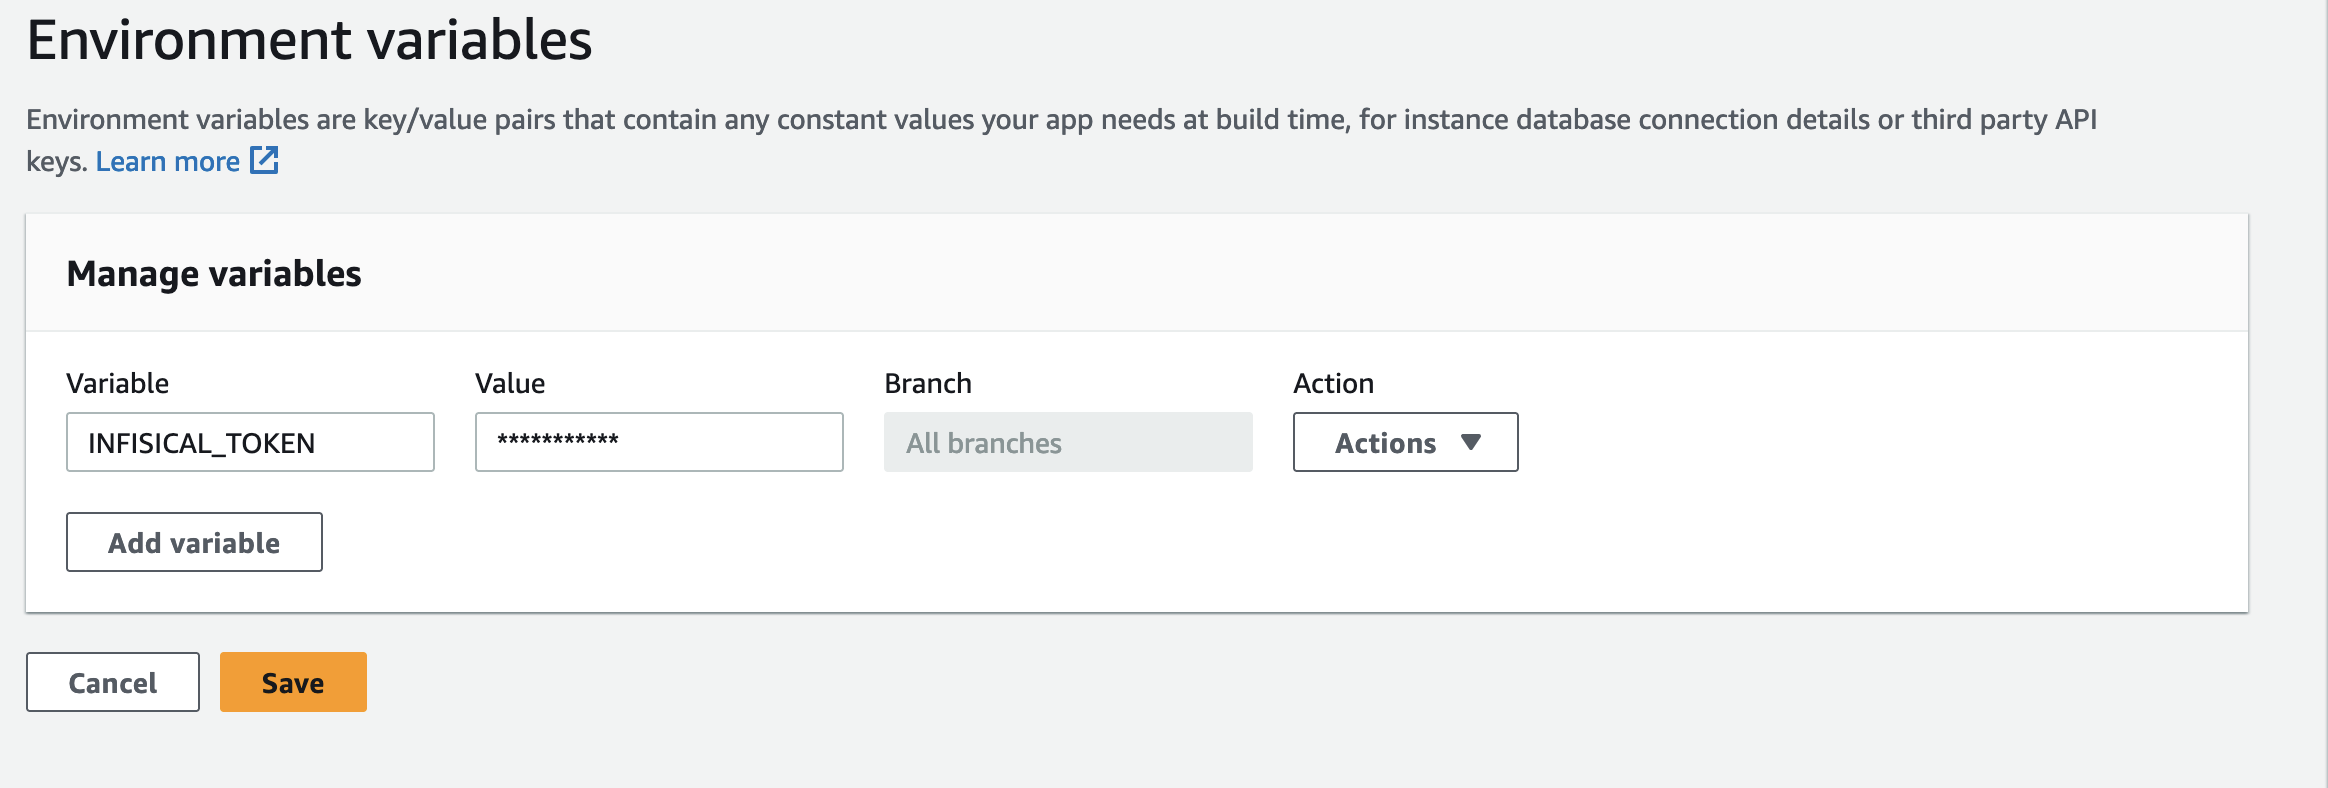 1. In the Amplify console, choose App Settings, and then select Environment variables.
2. In the Environment variables section, select Manage variables.
3. Under Variable, enter the key **INFISICAL\_TOKEN**. For the value, enter the generated service token from the previous step.
4. Click save.
1. In the Amplify console, choose App Settings, and then select Environment variables.
2. In the Environment variables section, select Manage variables.
3. Under Variable, enter the key **INFISICAL\_TOKEN**. For the value, enter the generated service token from the previous step.
4. Click save.
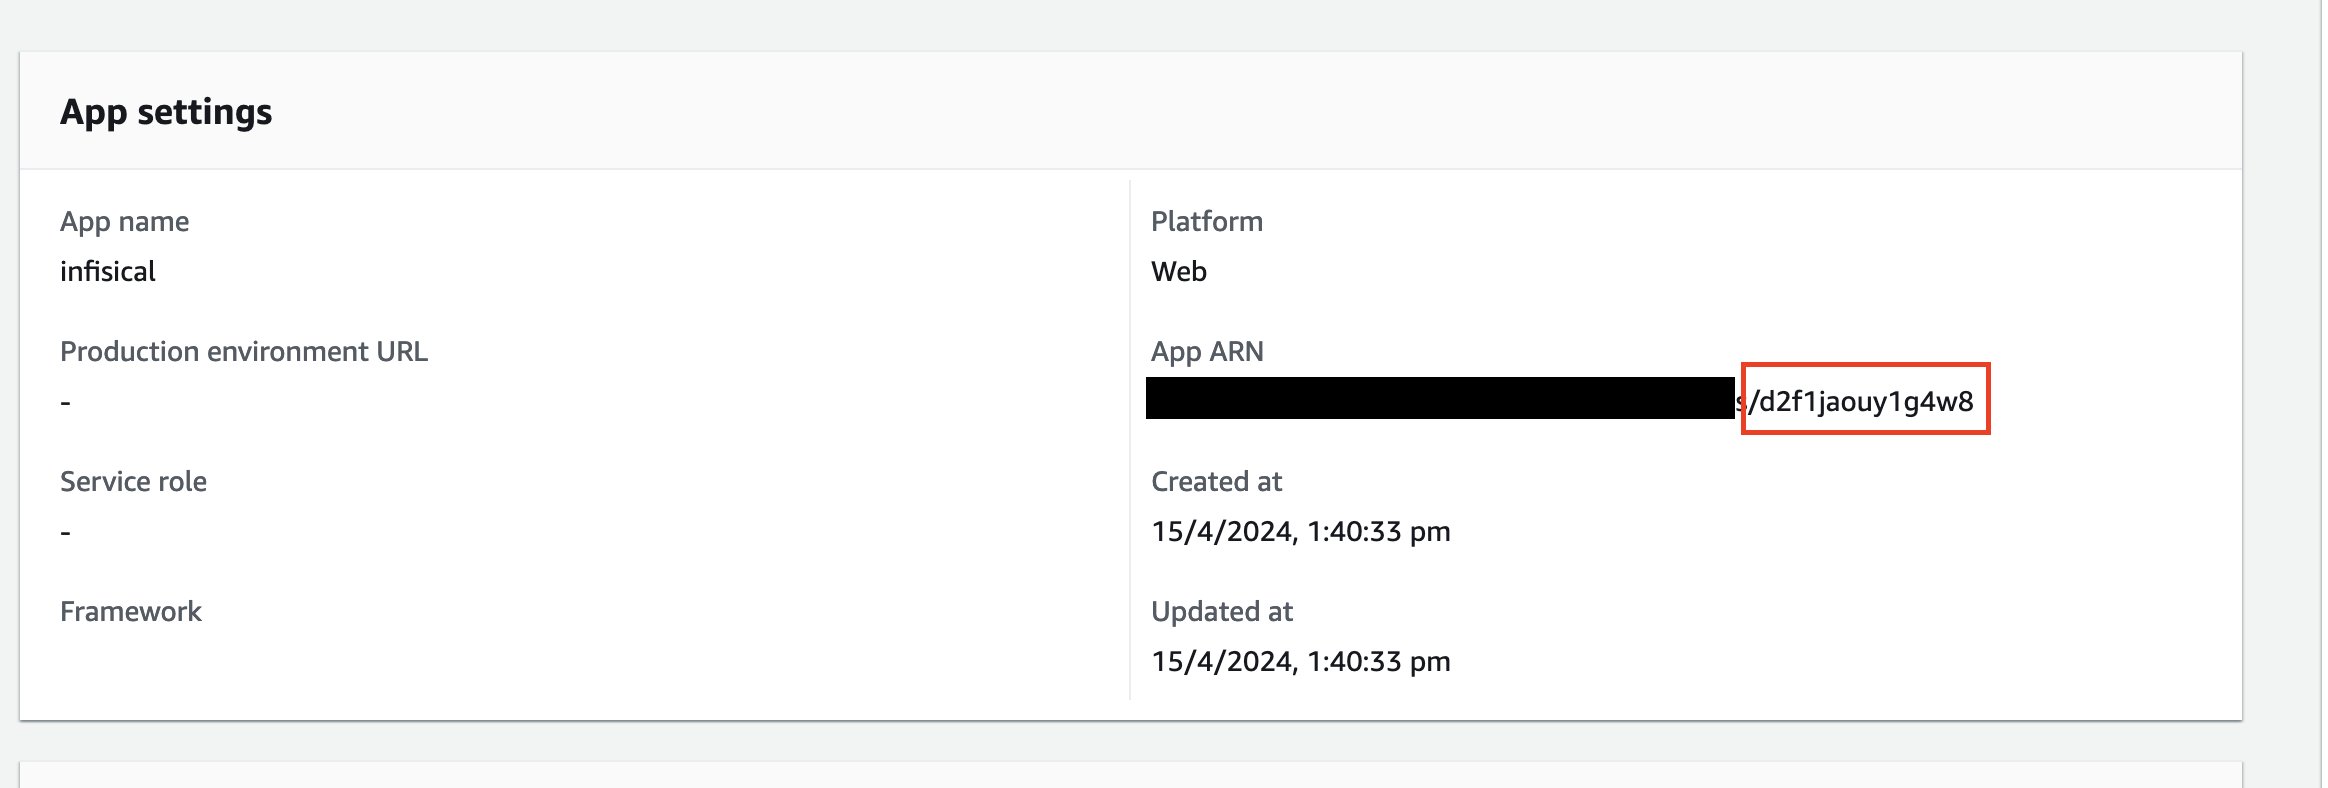 1. Open your AWS Amplify App console.
2. Go to **Actions >> View App Settings**
3. The App ID will be the last part of the App ARN field after the slash.
When creating an identity, you specify an organization level [role](/documentation/platform/access-controls/role-based-access-controls) for it to assume; you can configure roles in Organization Settings > Access Control > Organization Roles.
Now input a few details for your new identity. Here's some guidance for each field:
* Name (required): A friendly name for the identity.
* Role (required): A role from the **Organization Roles** tab for the identity to assume. The organization role assigned will determine what organization level resources this identity can have access to.
Once you've created an identity, you'll be redirected to a page where you can manage the identity.
Since the identity has been configured with Universal Auth by default, you should re-configure it to use AWS Auth instead. To do this, press to edit the **Authentication** section,
remove the existing Universal Auth configuration, and add a new AWS Auth configuration onto the identity.
1. Open your AWS Amplify App console.
2. Go to **Actions >> View App Settings**
3. The App ID will be the last part of the App ARN field after the slash.
When creating an identity, you specify an organization level [role](/documentation/platform/access-controls/role-based-access-controls) for it to assume; you can configure roles in Organization Settings > Access Control > Organization Roles.
Now input a few details for your new identity. Here's some guidance for each field:
* Name (required): A friendly name for the identity.
* Role (required): A role from the **Organization Roles** tab for the identity to assume. The organization role assigned will determine what organization level resources this identity can have access to.
Once you've created an identity, you'll be redirected to a page where you can manage the identity.
Since the identity has been configured with Universal Auth by default, you should re-configure it to use AWS Auth instead. To do this, press to edit the **Authentication** section,
remove the existing Universal Auth configuration, and add a new AWS Auth configuration onto the identity.
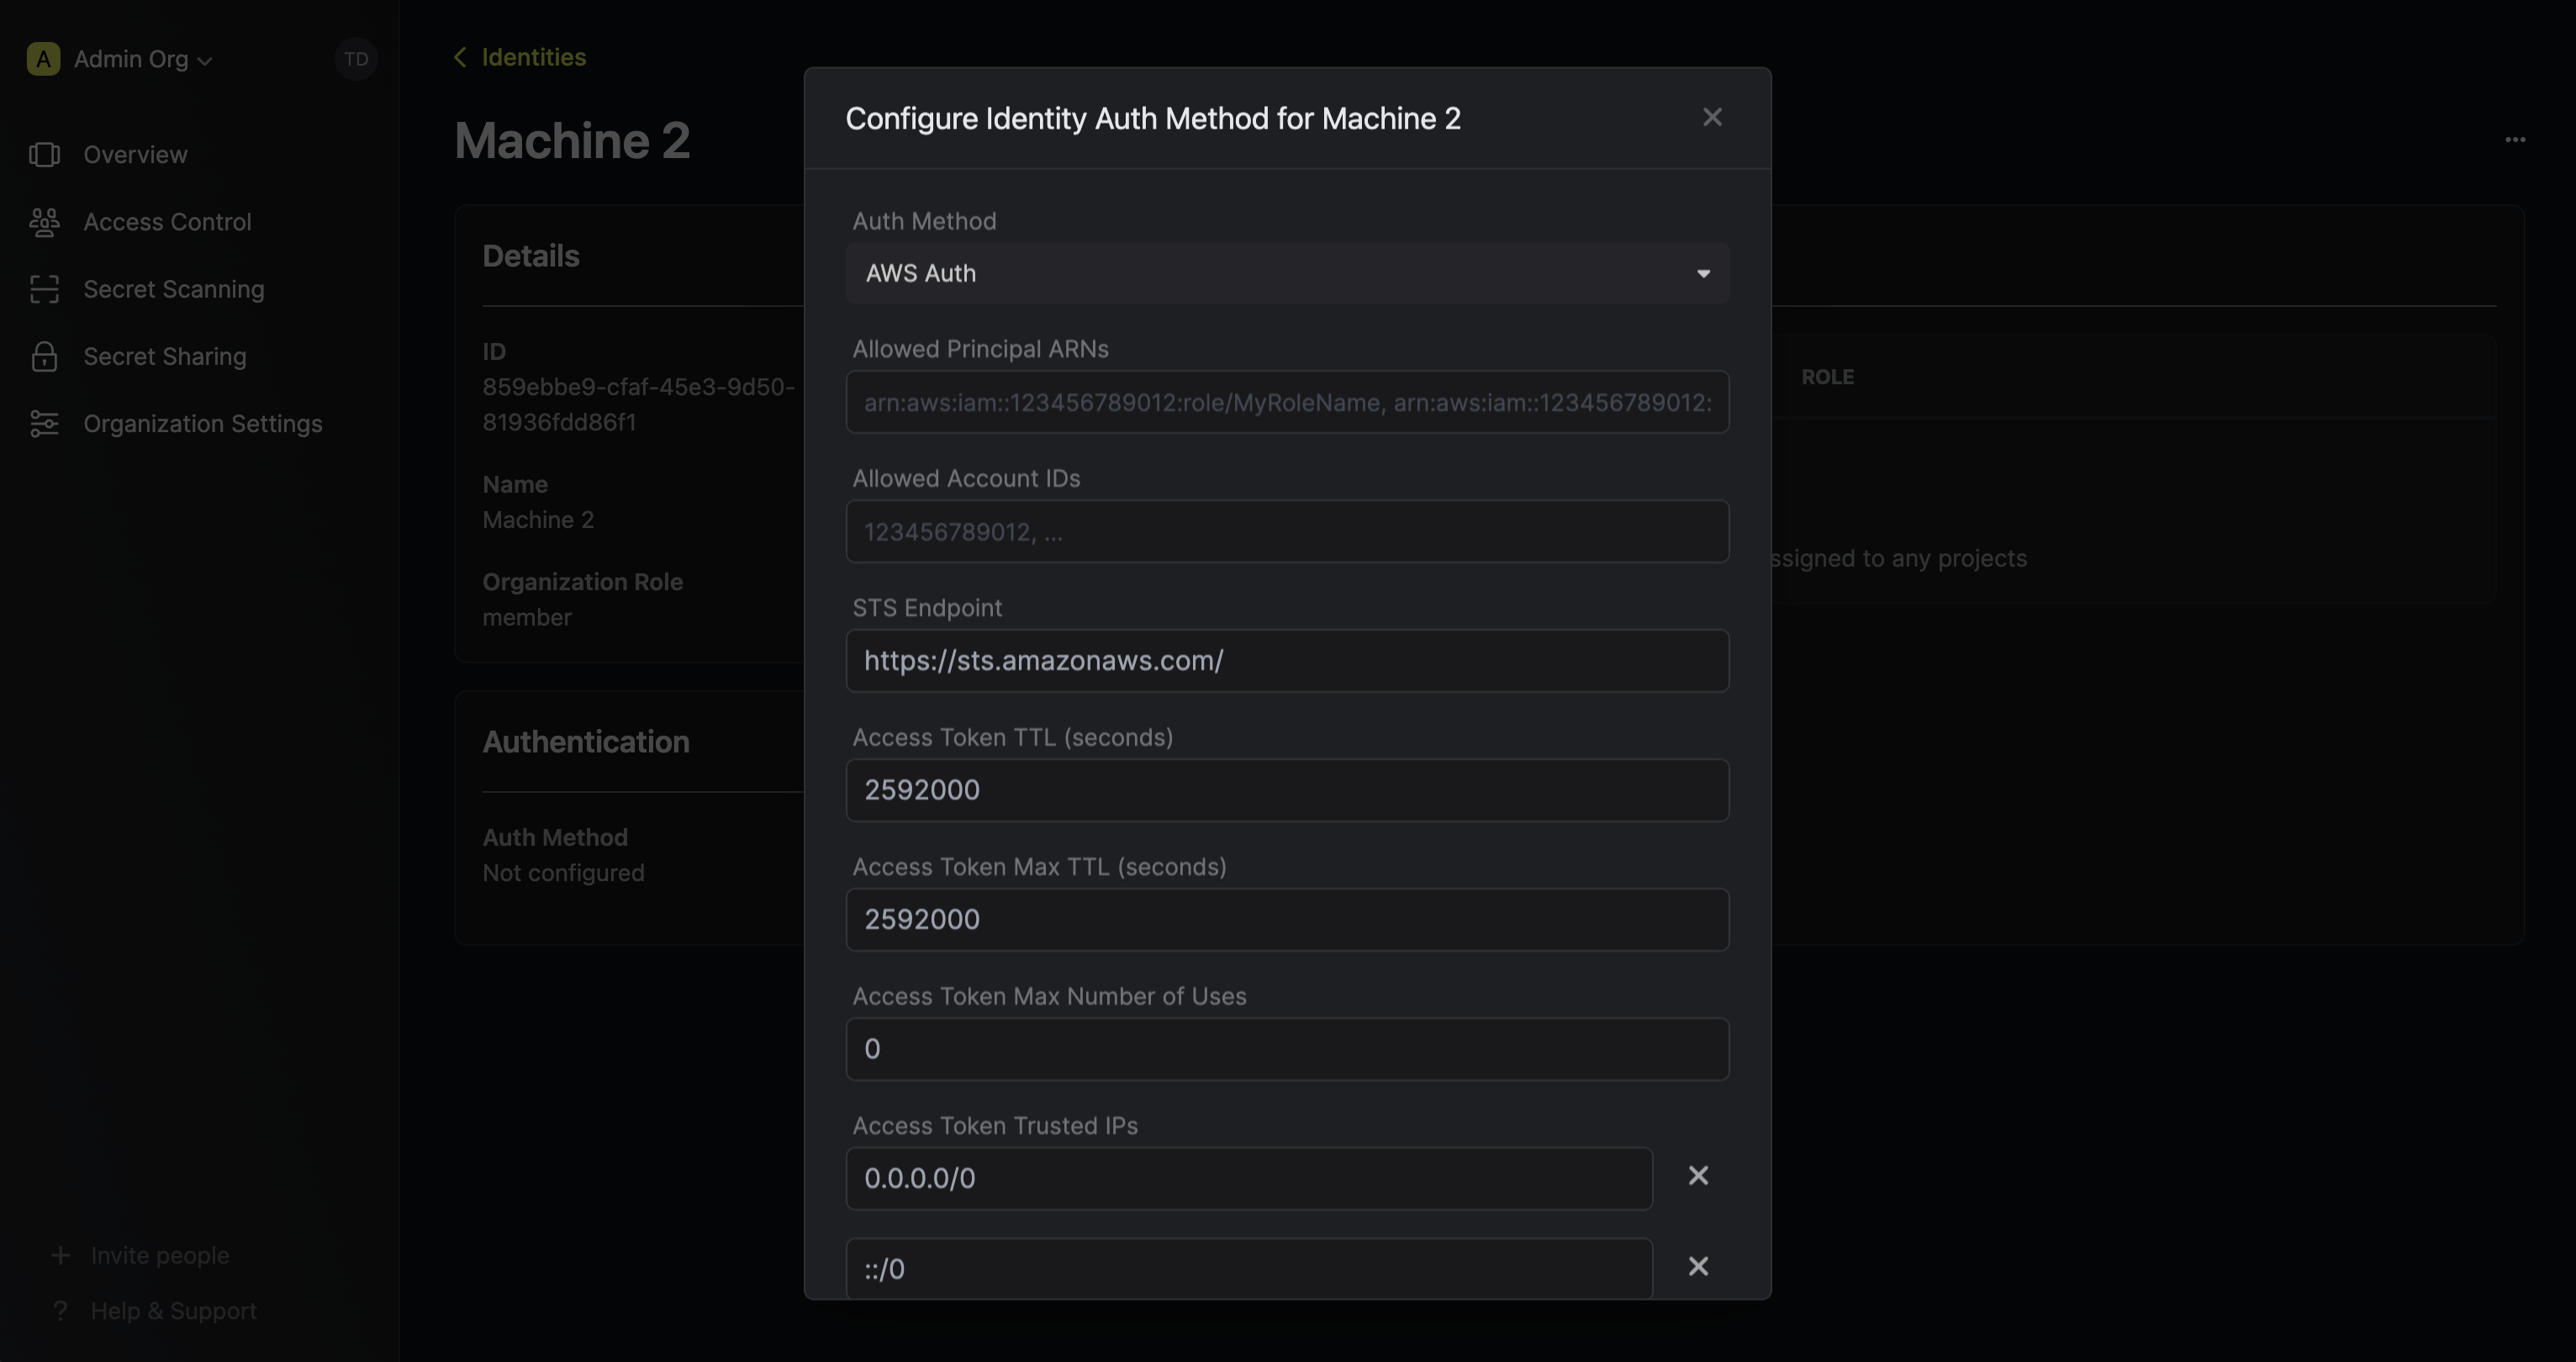 Here's some more guidance on each field:
* Allowed Principal ARNs: A comma-separated list of trusted IAM principal ARNs that are allowed to authenticate with Infisical. The values should take one of three forms: `arn:aws:iam::123456789012:user/MyUserName`, `arn:aws:iam::123456789012:role/MyRoleName`, or `arn:aws:iam::123456789012:*`. Using a wildcard in this case allows any IAM principal in the account `123456789012` to authenticate with Infisical under the identity.
* Allowed Account IDs: A comma-separated list of trusted AWS account IDs that are allowed to authenticate with Infisical.
* STS Endpoint (default is `https://sts.amazonaws.com/`): The endpoint URL for the AWS STS API. This value should be adjusted based on the AWS region you are operating in (e.g. `https://sts.us-east-1.amazonaws.com/`); refer to the list of regional STS endpoints [here](https://docs.aws.amazon.com/general/latest/gr/sts.html).
* Access Token TTL (default is `2592000` equivalent to 30 days): The lifetime for an acccess token in seconds. This value will be referenced at renewal time.
* Access Token Max TTL (default is `2592000` equivalent to 30 days): The maximum lifetime for an acccess token in seconds. This value will be referenced at renewal time.
* Access Token Max Number of Uses (default is `0`): The maximum number of times that an access token can be used; a value of `0` implies infinite number of uses.
* Access Token Trusted IPs: The IPs or CIDR ranges that access tokens can be used from. By default, each token is given the `0.0.0.0/0`, allowing usage from any network address.
Here's some more guidance on each field:
* Allowed Principal ARNs: A comma-separated list of trusted IAM principal ARNs that are allowed to authenticate with Infisical. The values should take one of three forms: `arn:aws:iam::123456789012:user/MyUserName`, `arn:aws:iam::123456789012:role/MyRoleName`, or `arn:aws:iam::123456789012:*`. Using a wildcard in this case allows any IAM principal in the account `123456789012` to authenticate with Infisical under the identity.
* Allowed Account IDs: A comma-separated list of trusted AWS account IDs that are allowed to authenticate with Infisical.
* STS Endpoint (default is `https://sts.amazonaws.com/`): The endpoint URL for the AWS STS API. This value should be adjusted based on the AWS region you are operating in (e.g. `https://sts.us-east-1.amazonaws.com/`); refer to the list of regional STS endpoints [here](https://docs.aws.amazon.com/general/latest/gr/sts.html).
* Access Token TTL (default is `2592000` equivalent to 30 days): The lifetime for an acccess token in seconds. This value will be referenced at renewal time.
* Access Token Max TTL (default is `2592000` equivalent to 30 days): The maximum lifetime for an acccess token in seconds. This value will be referenced at renewal time.
* Access Token Max Number of Uses (default is `0`): The maximum number of times that an access token can be used; a value of `0` implies infinite number of uses.
* Access Token Trusted IPs: The IPs or CIDR ranges that access tokens can be used from. By default, each token is given the `0.0.0.0/0`, allowing usage from any network address.
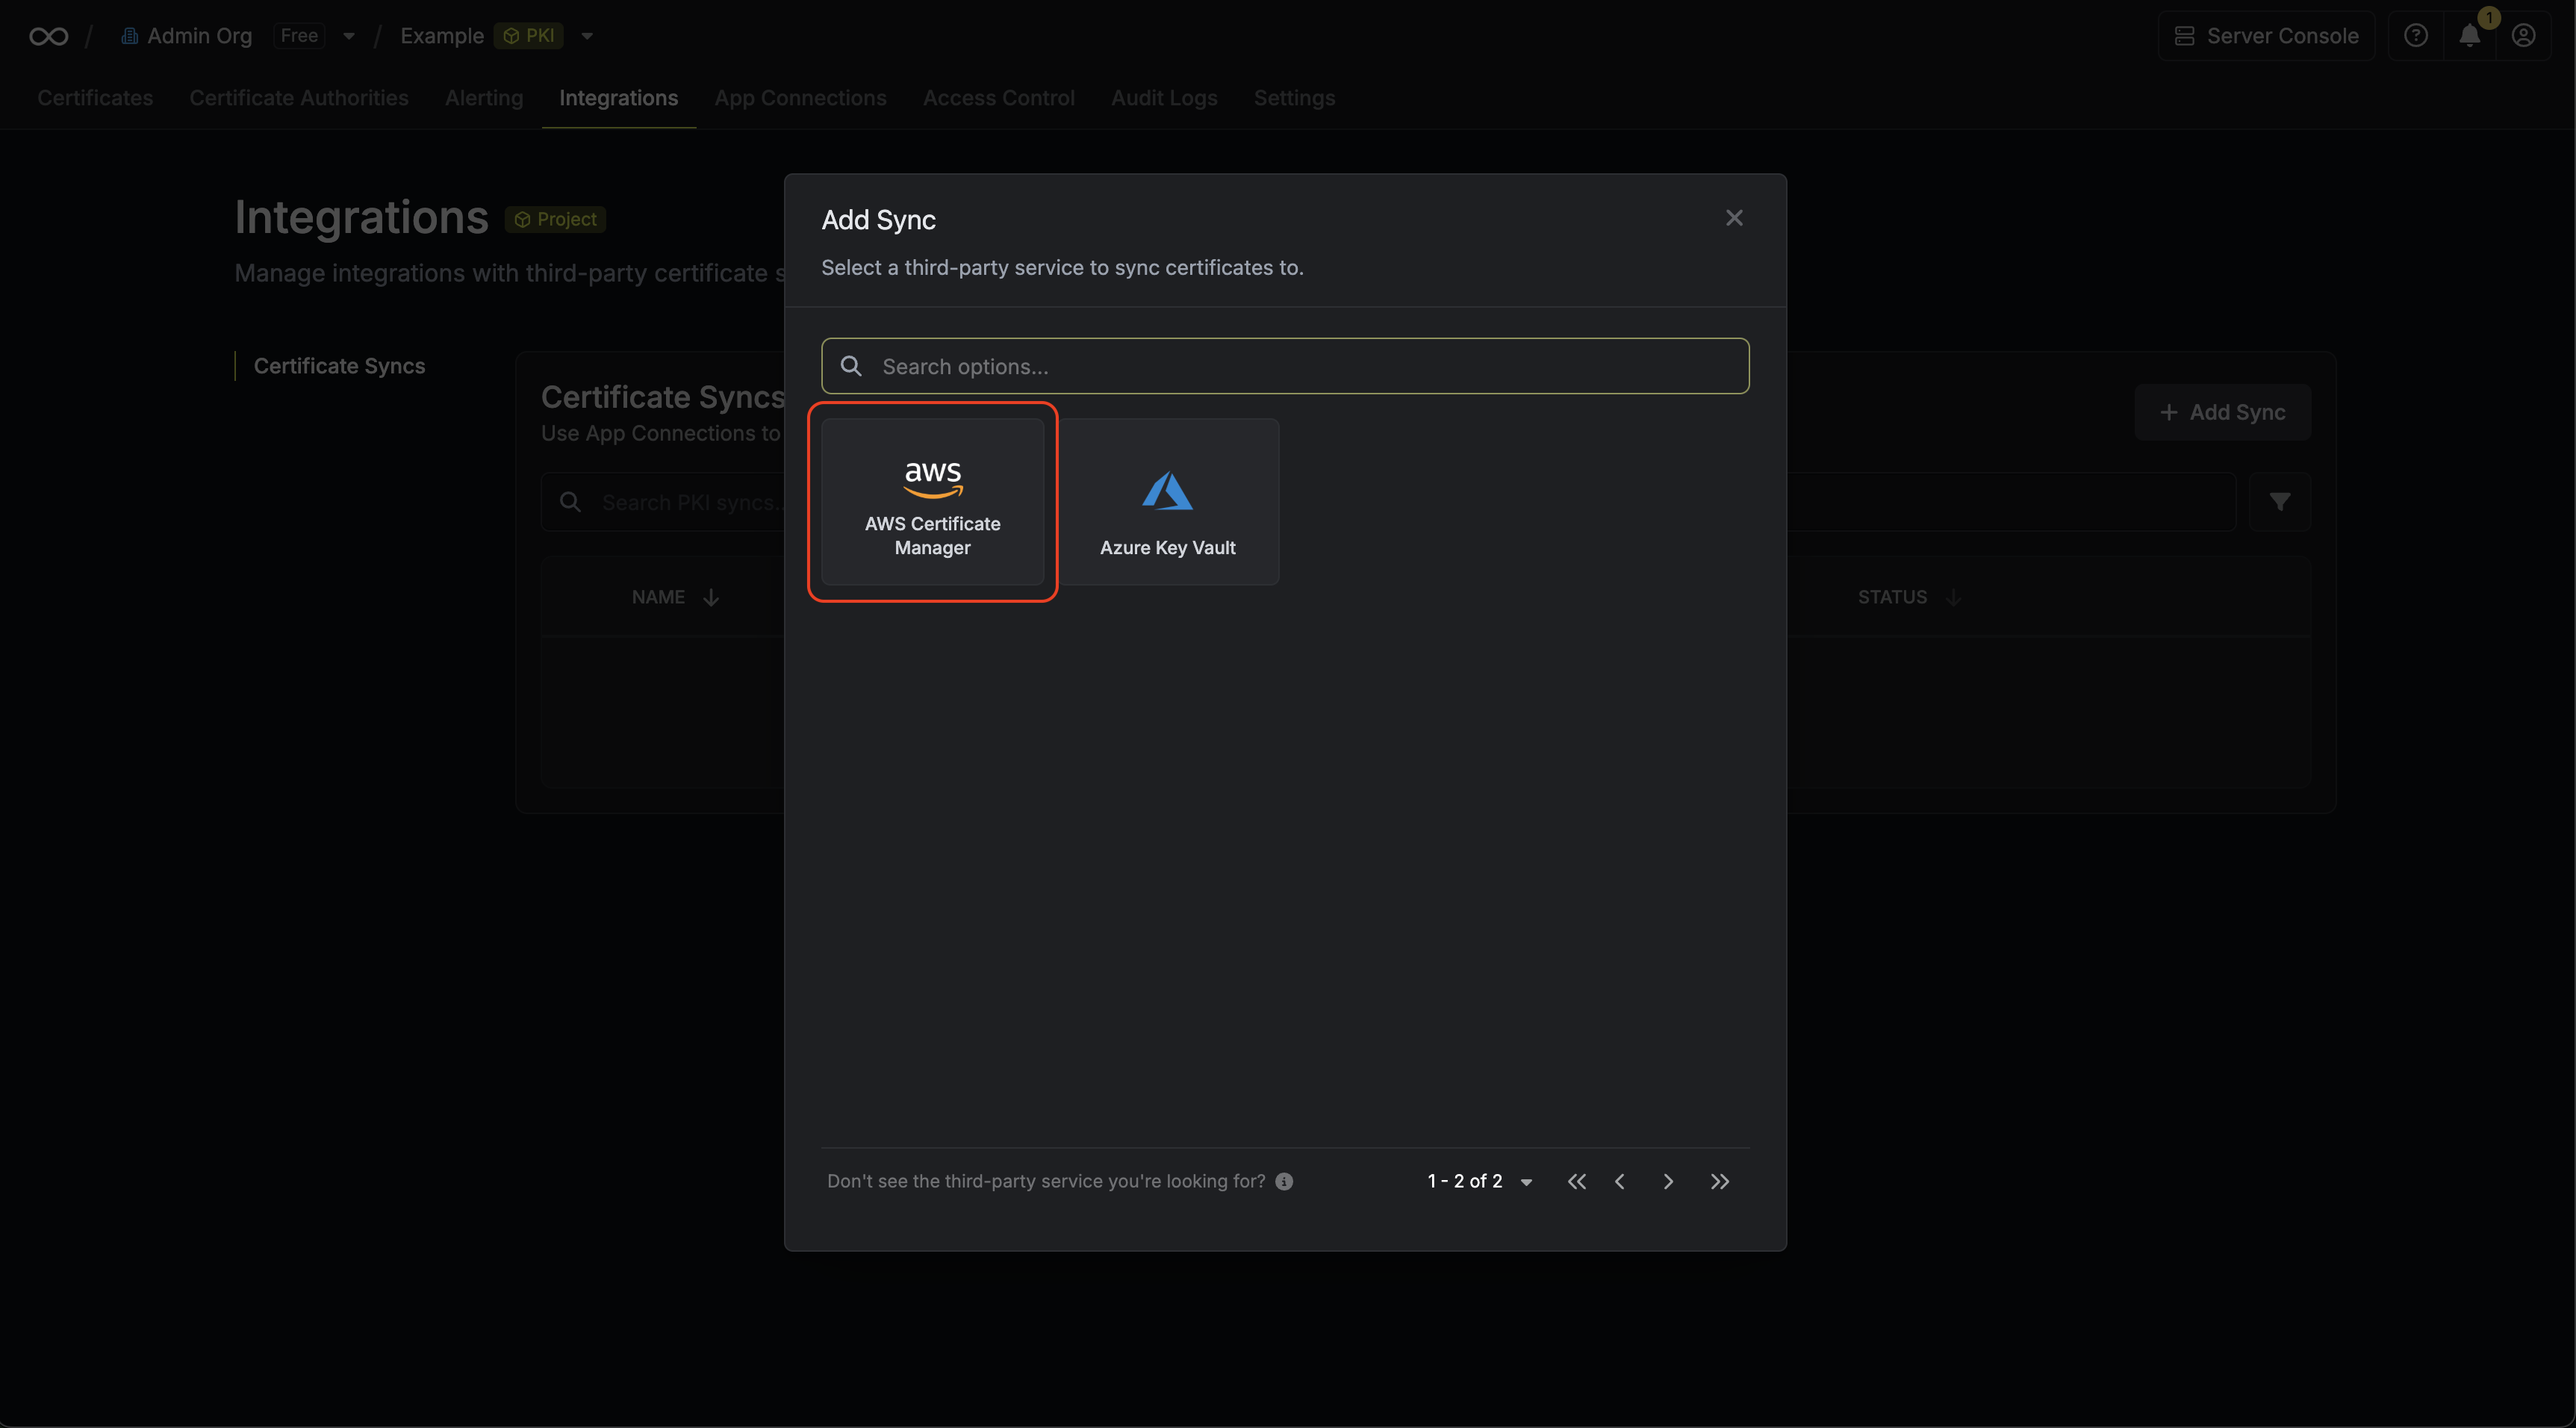
 2. Select the **AWS Certificate Manager** option.
 3. Configure the **Destination** to where certificates should be deployed, then click **Next**.
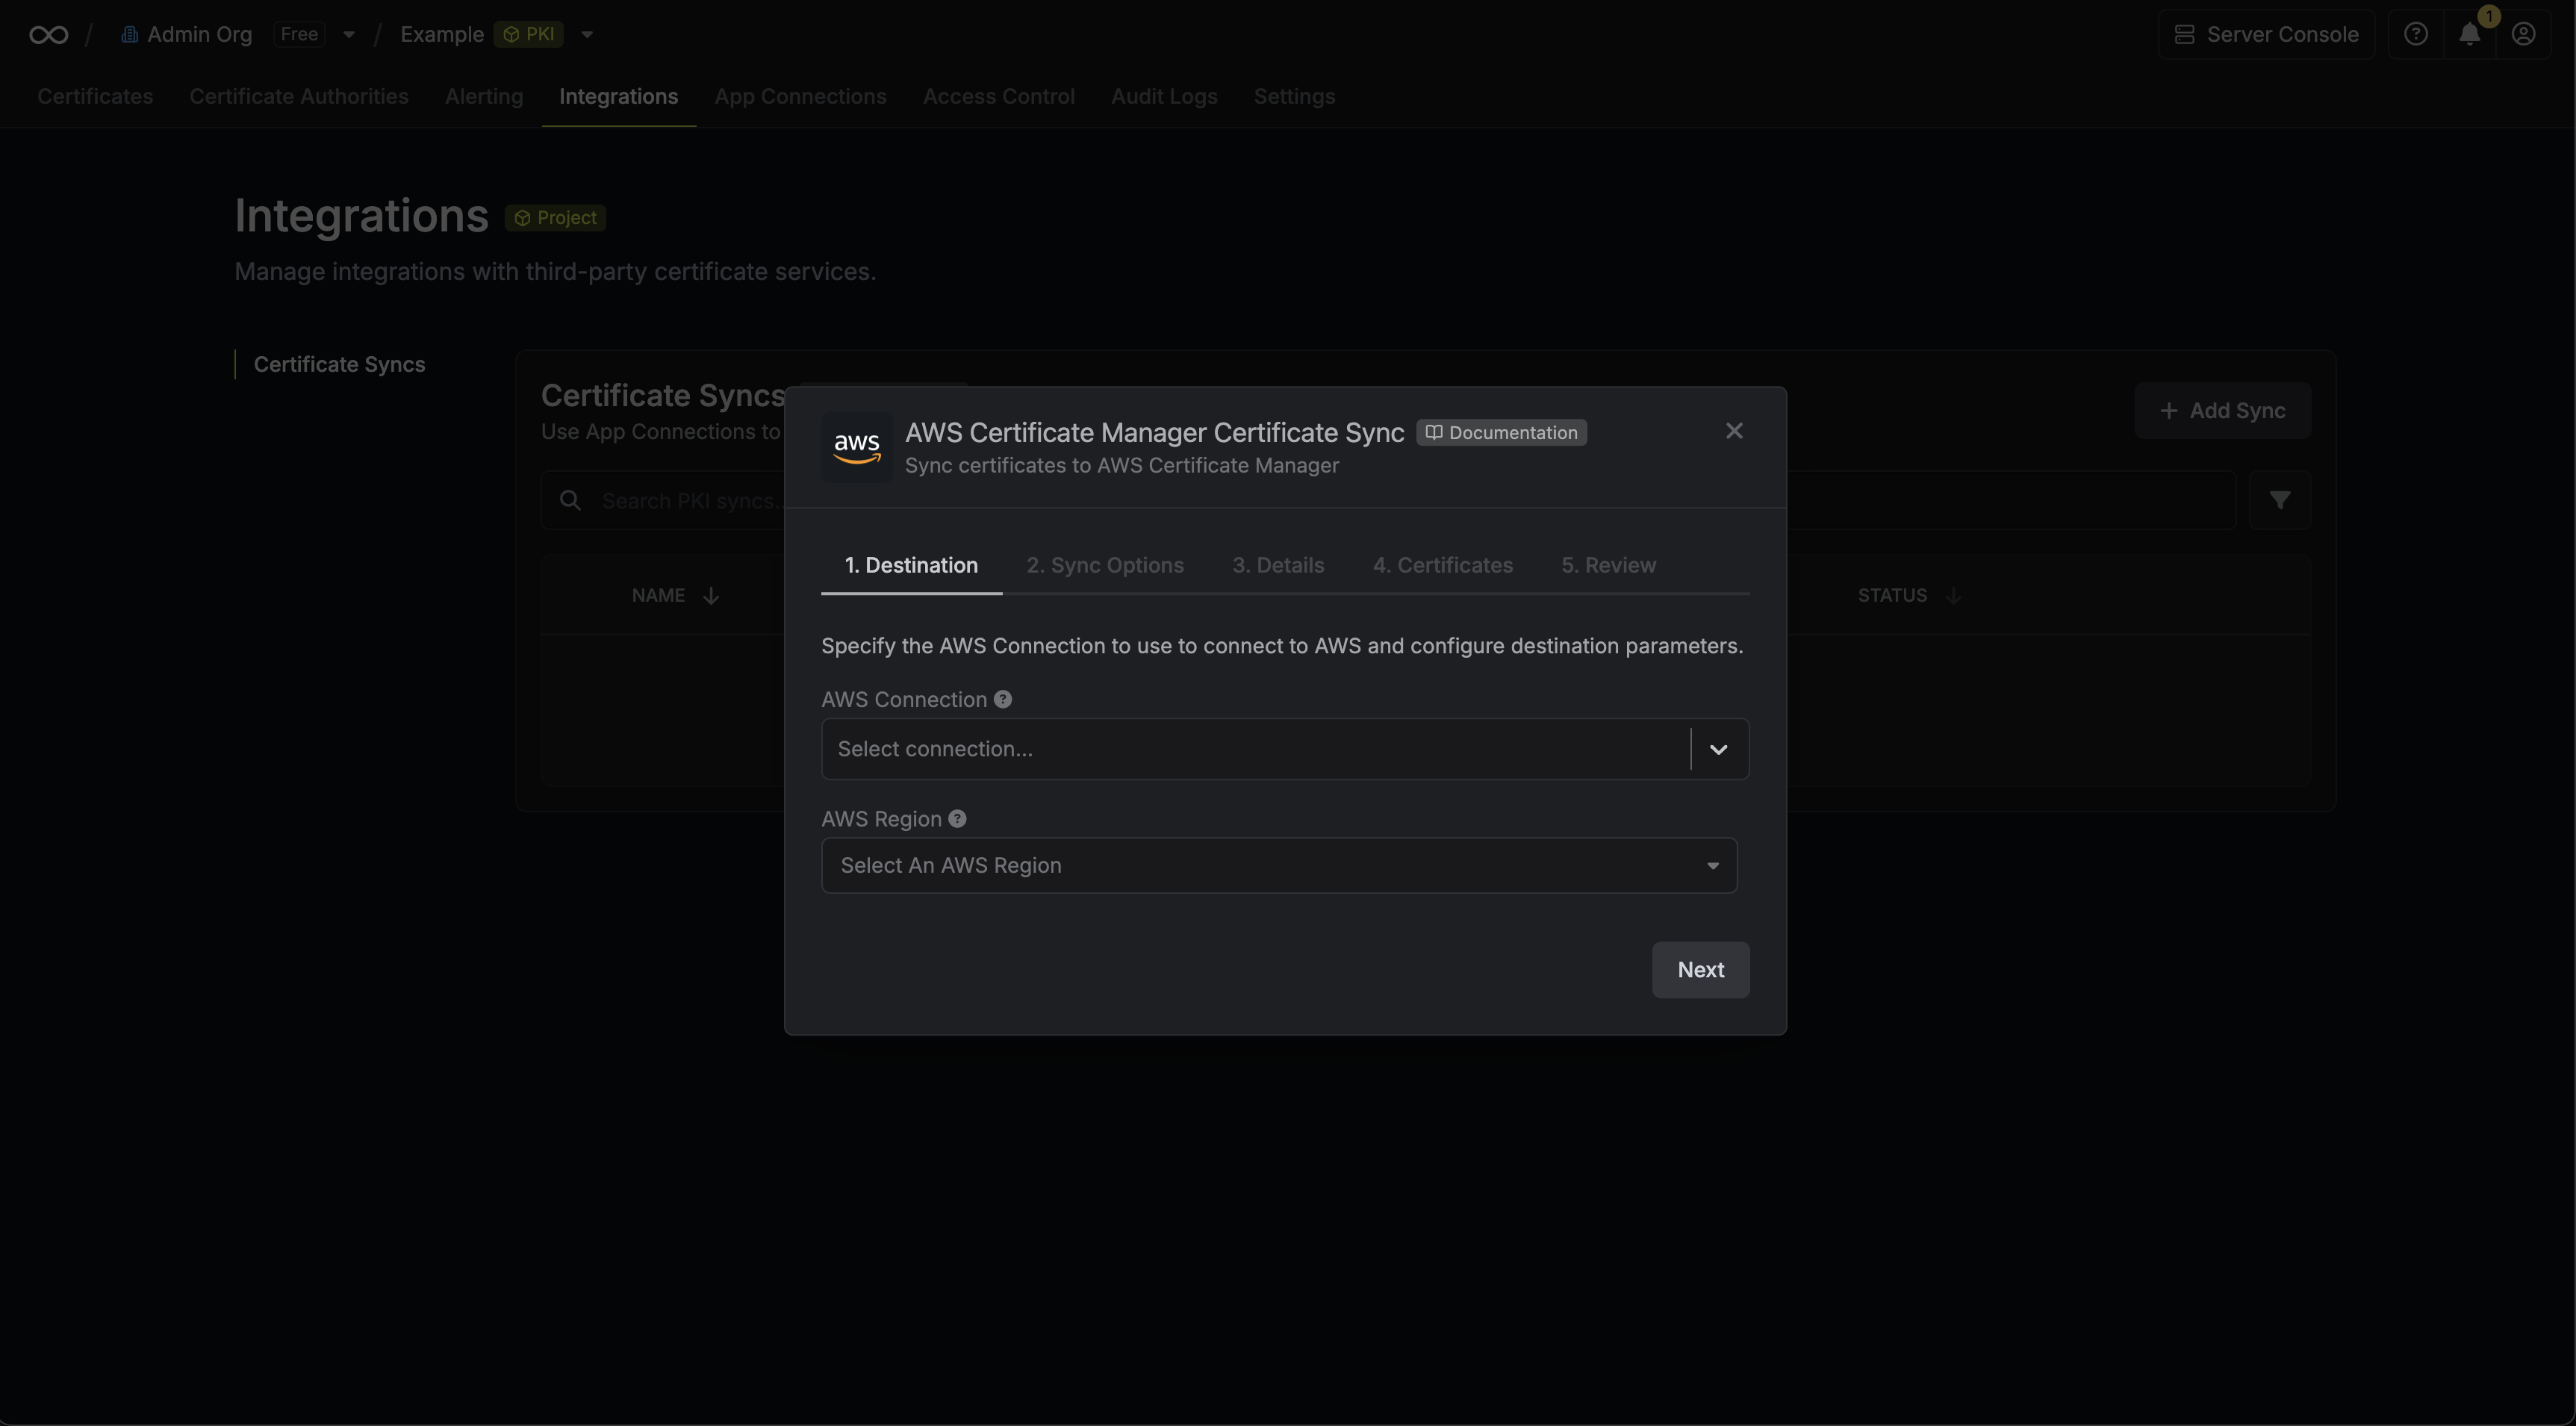 * **AWS Connection**: The AWS Connection to authenticate with.
* **AWS Region**: The AWS region where certificates should be stored.
4. Configure the **Sync Options** to specify how certificates should be synced, then click **Next**.
* **AWS Connection**: The AWS Connection to authenticate with.
* **AWS Region**: The AWS region where certificates should be stored.
4. Configure the **Sync Options** to specify how certificates should be synced, then click **Next**.
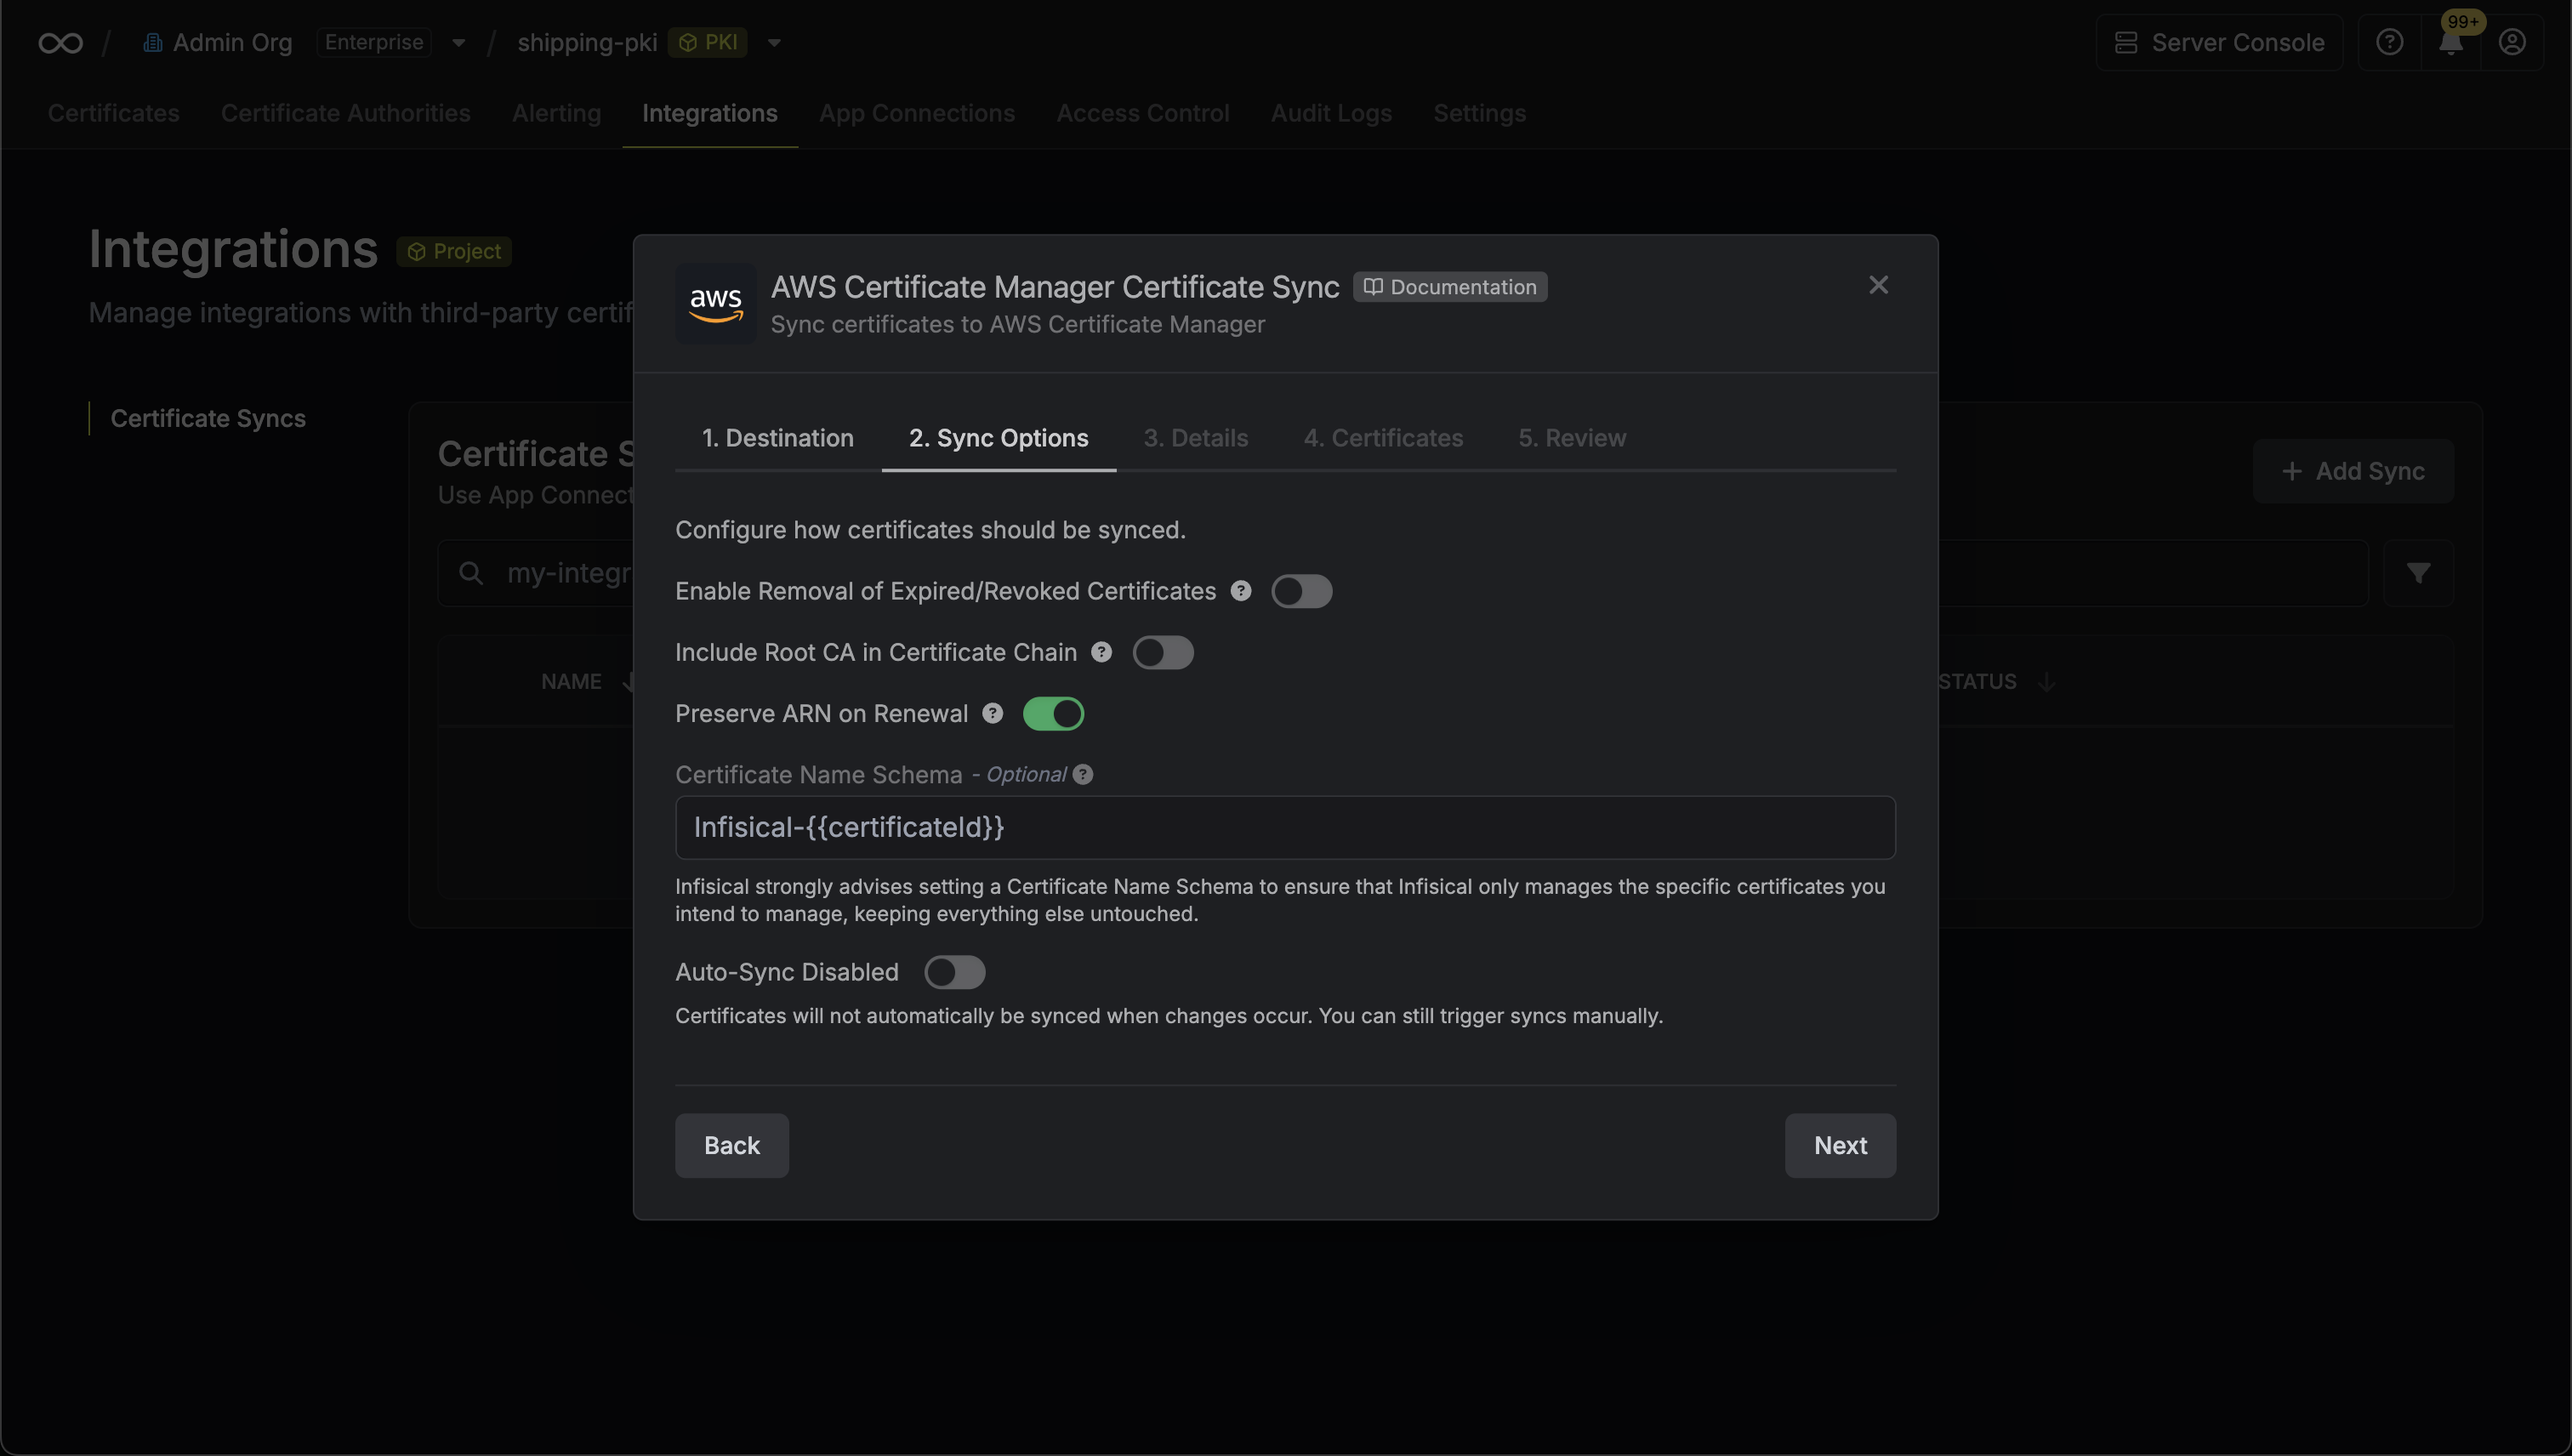 * **Enable Removal of Expired/Revoked Certificates**: If enabled, Infisical will remove certificates from the destination if they are no longer active in Infisical.
* **Preserve ARN on Renewal**: If enabled, Infisical will sync renewed certificates to the destination under the same ARN as the original synced certificate instead of creating a new certificate with a new ARN.
* **Include Root CA**: If enabled, the Root CA certificate will be included in the certificate chain when syncing to AWS Certificate Manager. If disabled, only intermediate certificates will be included.
* **Certificate Name Schema** (Optional): Customize how certificate tags are generated in AWS Certificate Manager. Must include `{{certificateId}}` as a placeholder for the certificate ID to ensure proper certificate identification and management. If not specified, defaults to `Infisical-{{certificateId}}`.
* **Auto-Sync Enabled**: If enabled, certificates will automatically be synced when changes occur. Disable to enforce manual syncing only.
5. Configure the **Details** of your AWS Certificate Manager Certificate Sync, then click **Next**.
* **Enable Removal of Expired/Revoked Certificates**: If enabled, Infisical will remove certificates from the destination if they are no longer active in Infisical.
* **Preserve ARN on Renewal**: If enabled, Infisical will sync renewed certificates to the destination under the same ARN as the original synced certificate instead of creating a new certificate with a new ARN.
* **Include Root CA**: If enabled, the Root CA certificate will be included in the certificate chain when syncing to AWS Certificate Manager. If disabled, only intermediate certificates will be included.
* **Certificate Name Schema** (Optional): Customize how certificate tags are generated in AWS Certificate Manager. Must include `{{certificateId}}` as a placeholder for the certificate ID to ensure proper certificate identification and management. If not specified, defaults to `Infisical-{{certificateId}}`.
* **Auto-Sync Enabled**: If enabled, certificates will automatically be synced when changes occur. Disable to enforce manual syncing only.
5. Configure the **Details** of your AWS Certificate Manager Certificate Sync, then click **Next**.
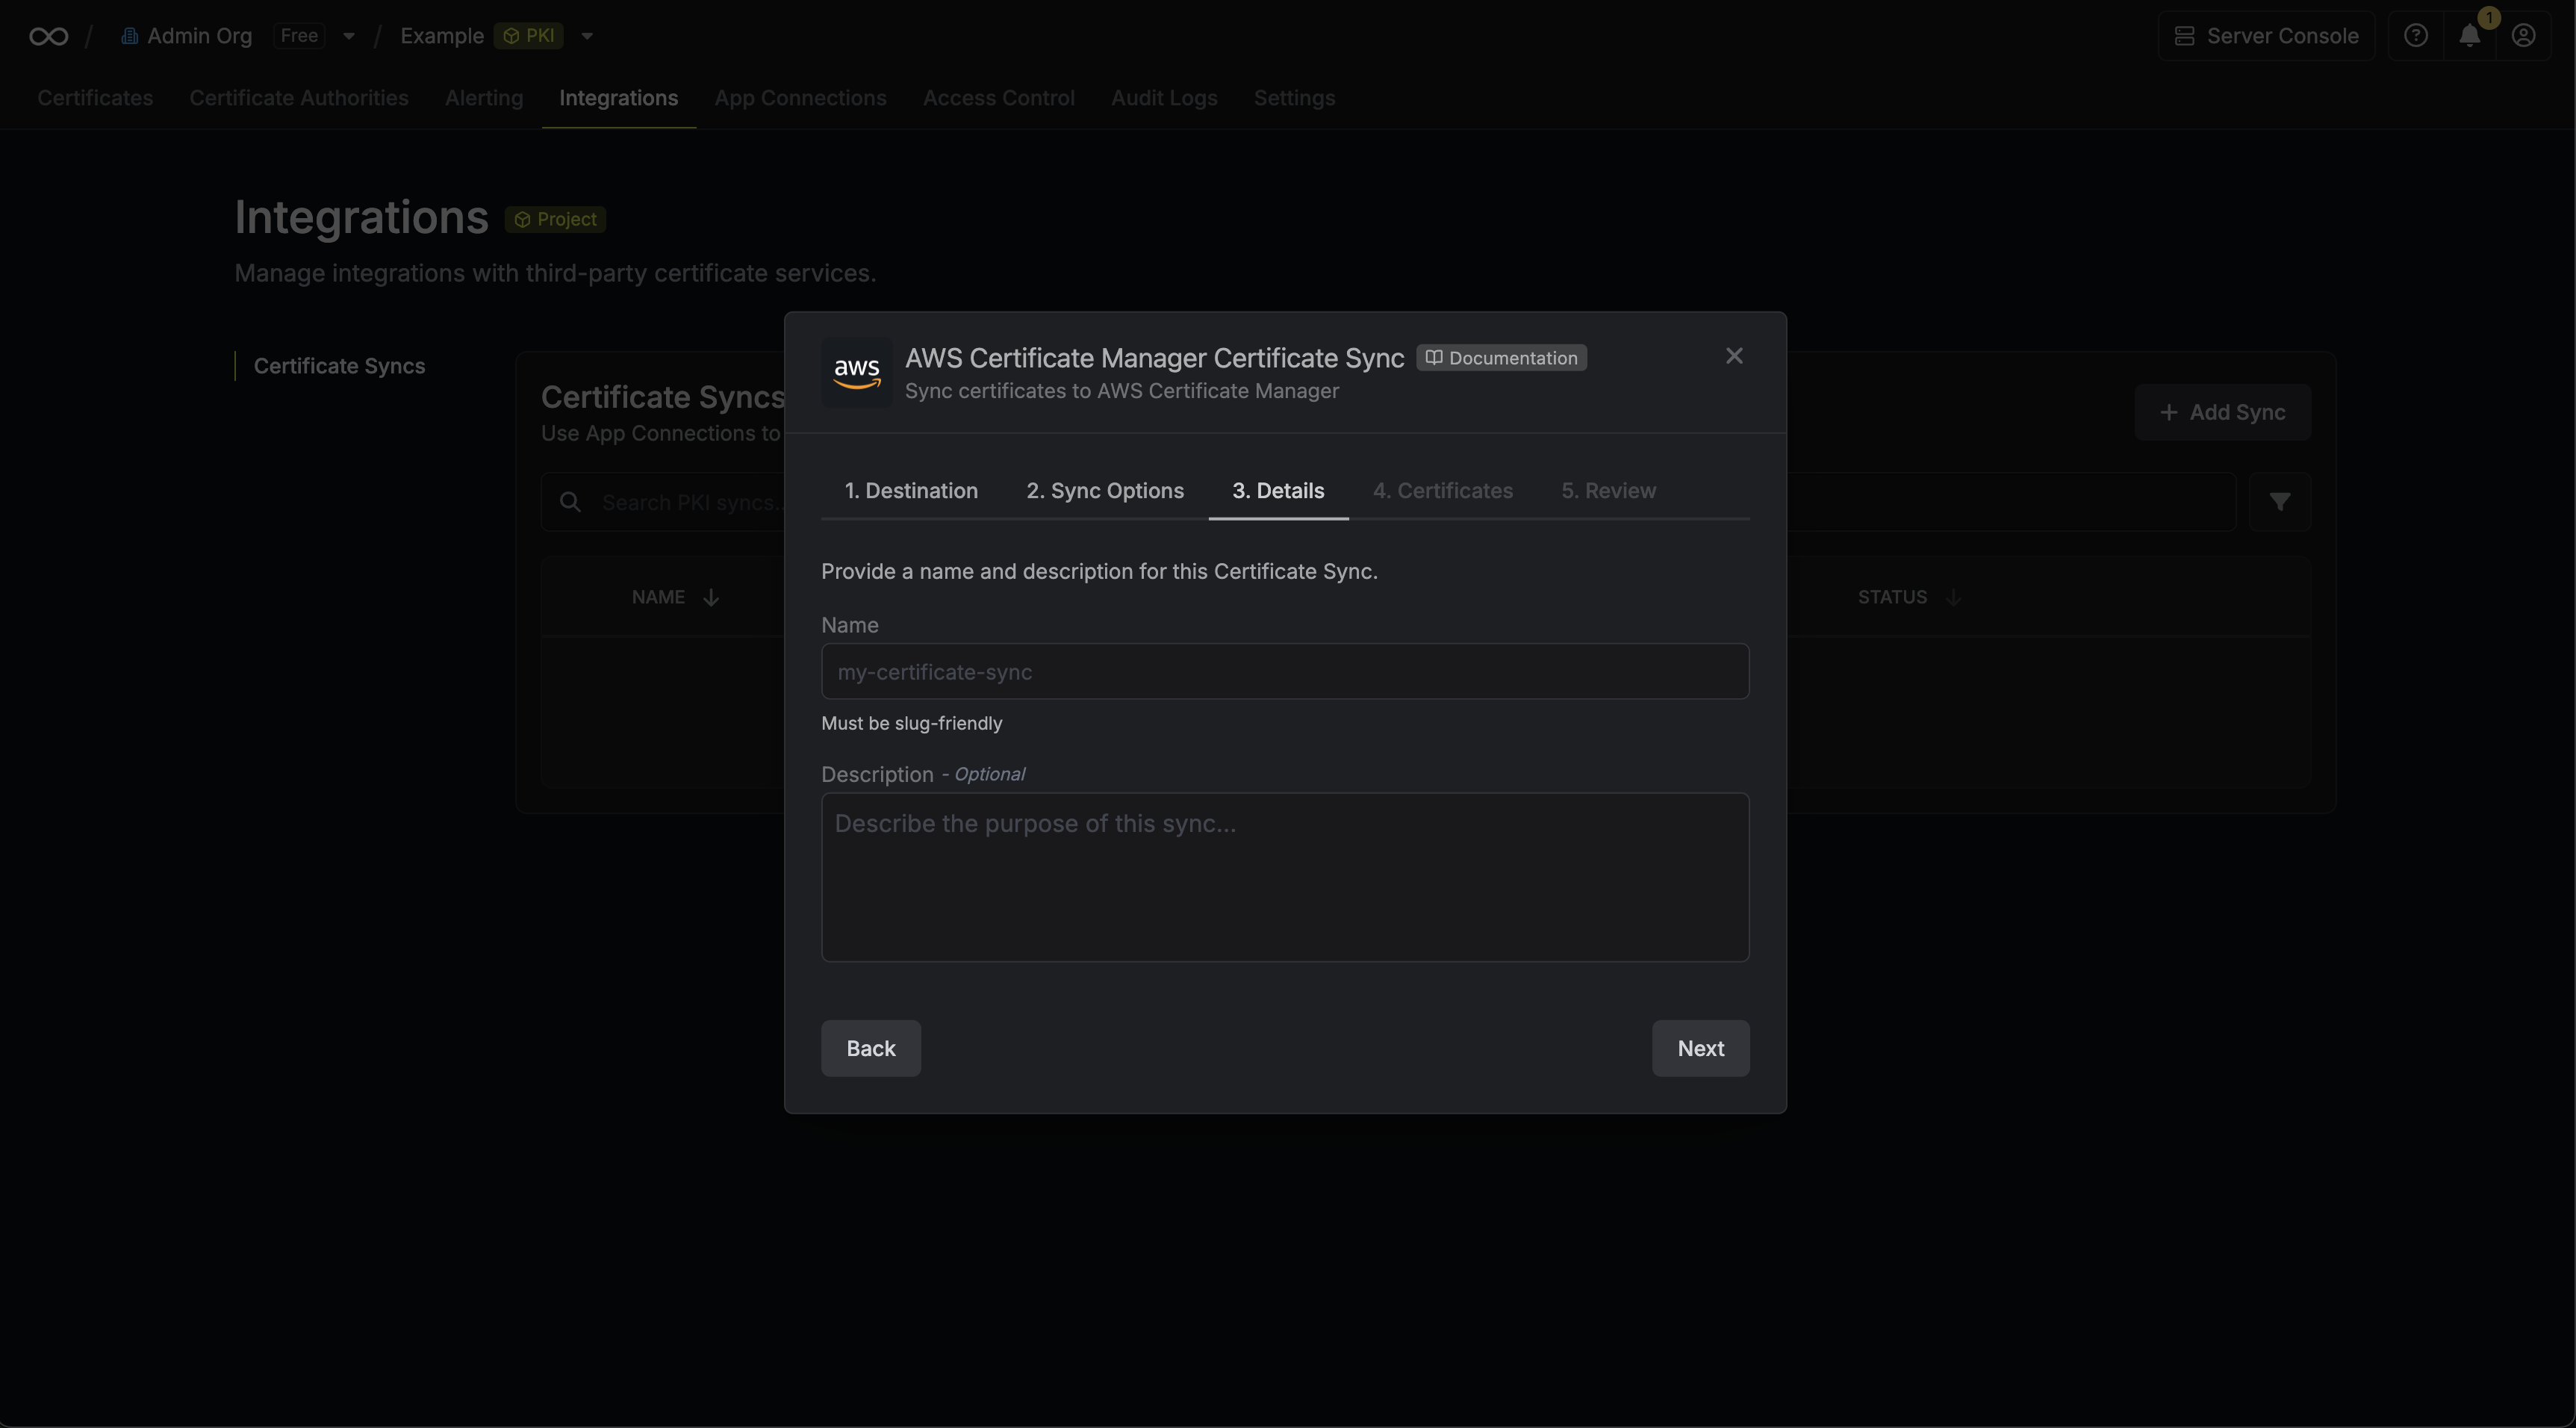 * **Name**: The name of your sync. Must be slug-friendly.
* **Description**: An optional description for your sync.
6. Select which certificates should be synced to AWS Certificate Manager.
* **Name**: The name of your sync. Must be slug-friendly.
* **Description**: An optional description for your sync.
6. Select which certificates should be synced to AWS Certificate Manager.
 7. Review your AWS Certificate Manager Certificate Sync configuration, then click **Create Sync**.
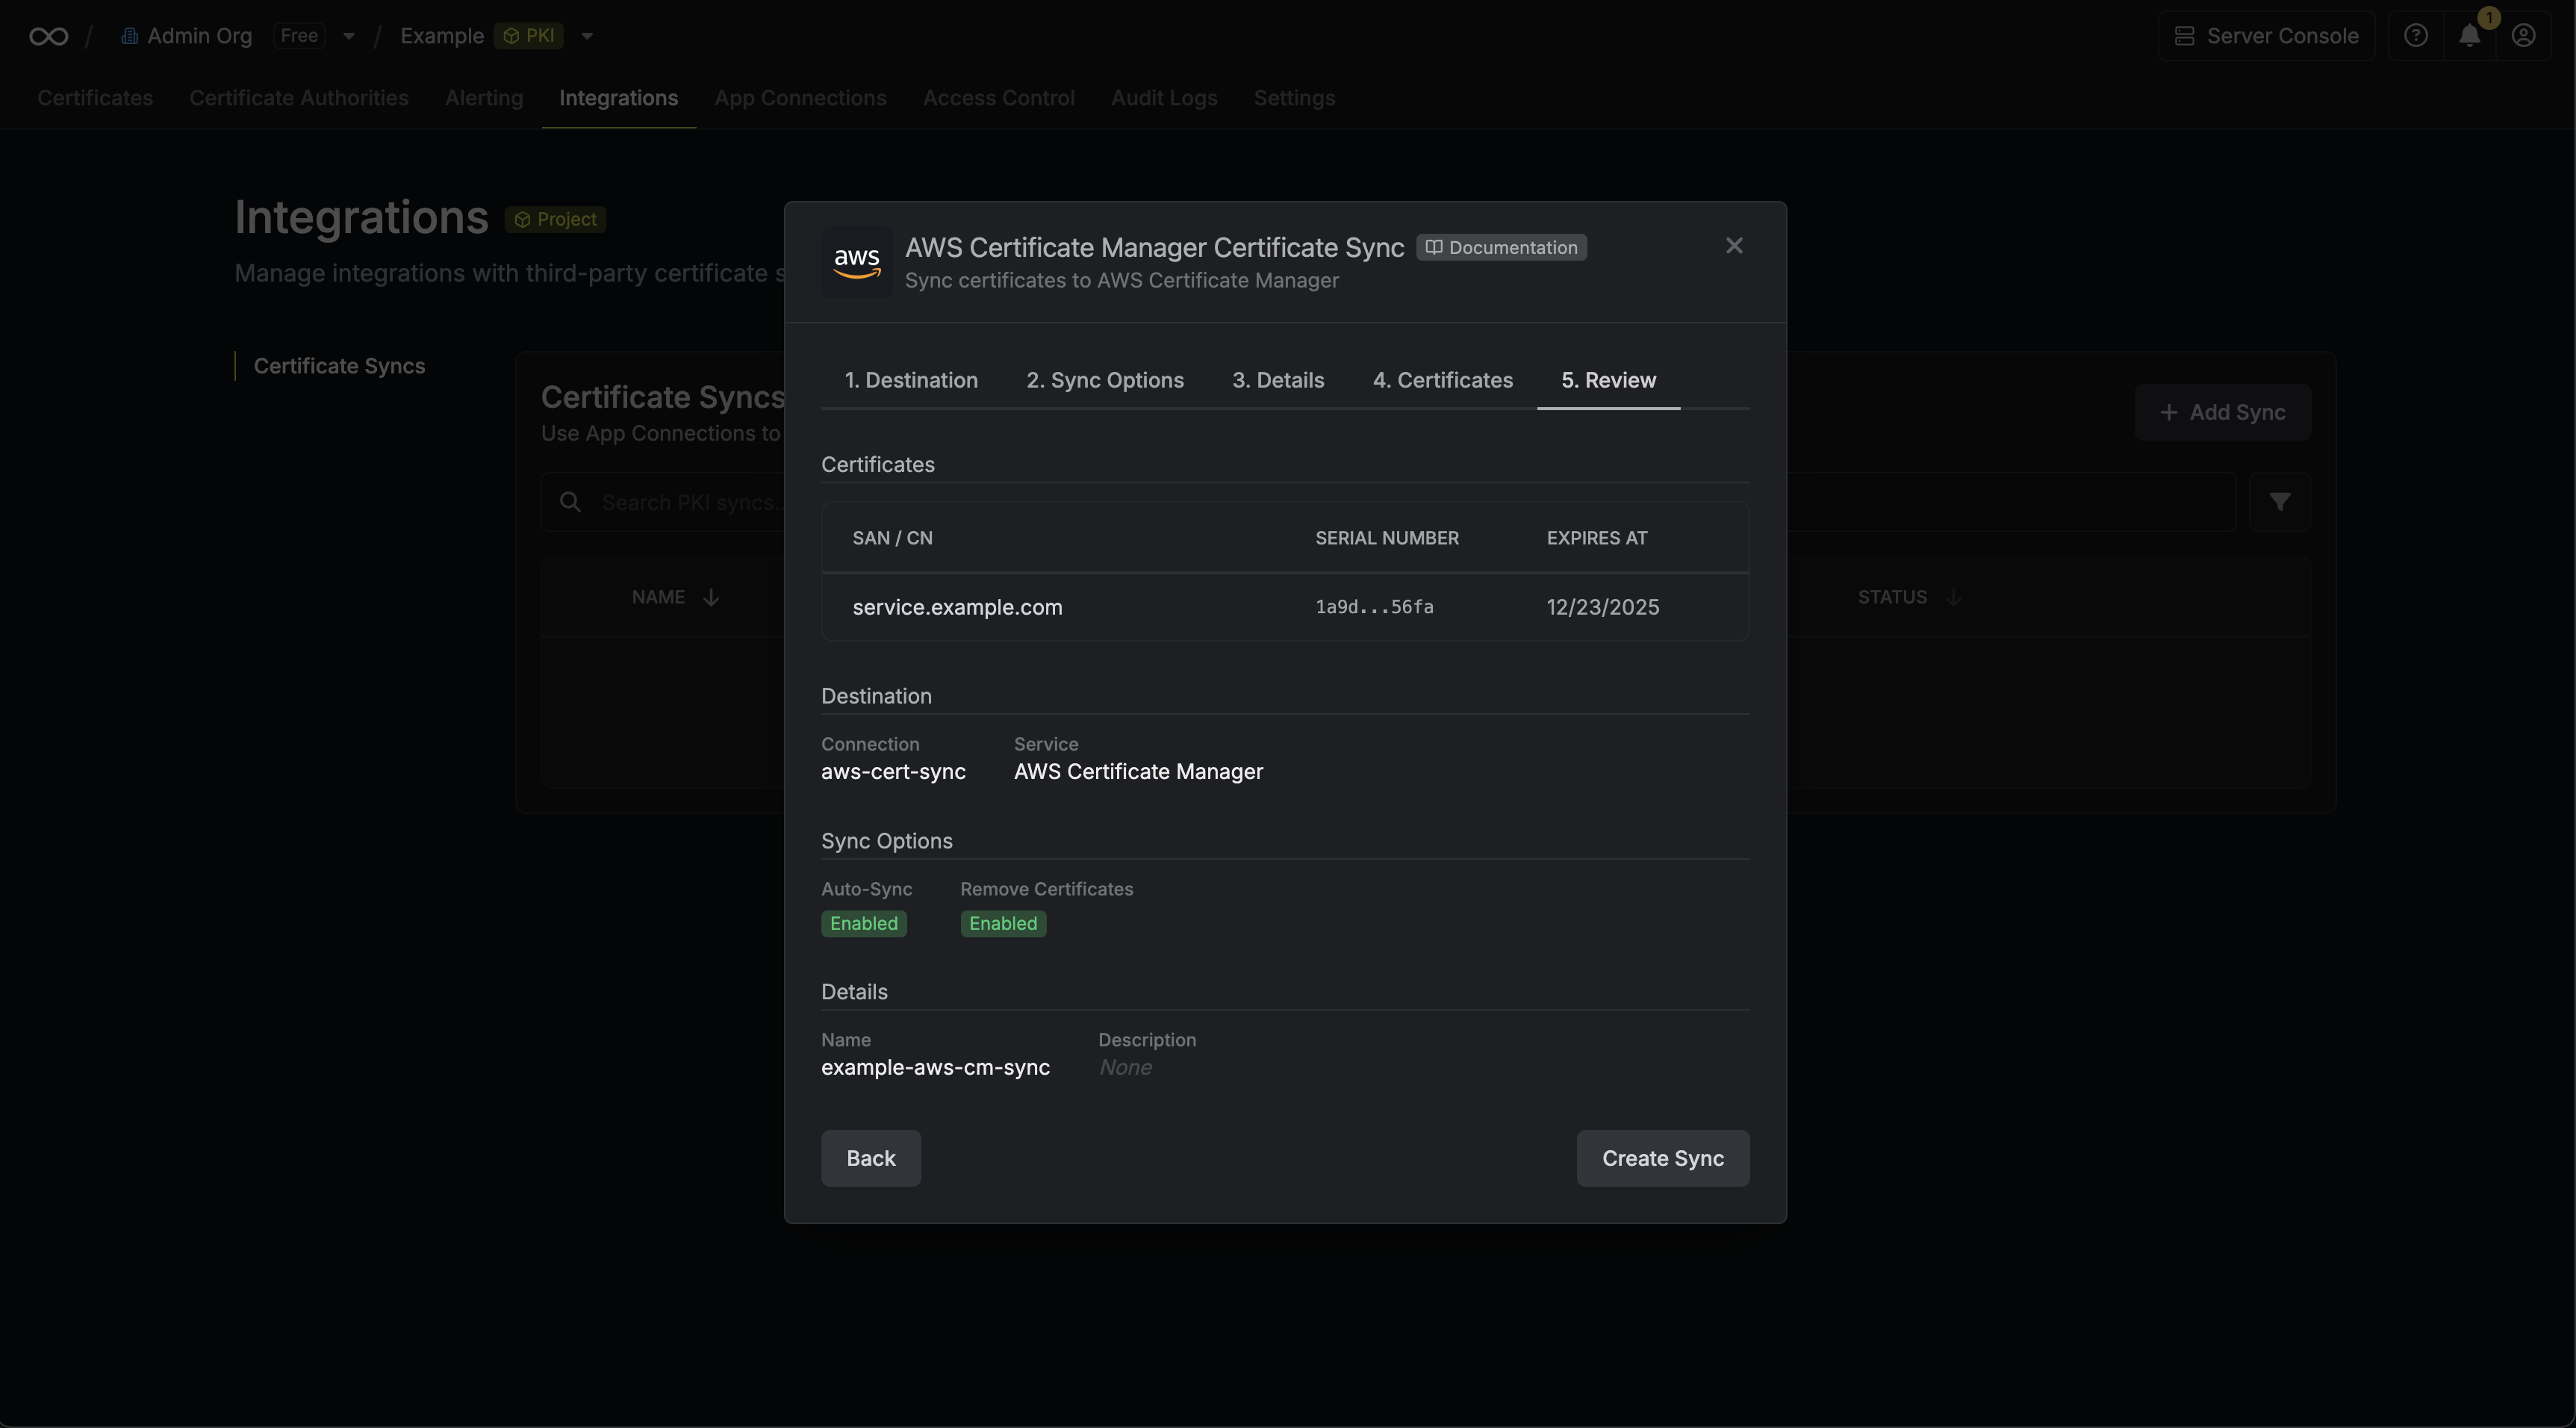 8. If enabled, your AWS Certificate Manager Certificate Sync will begin syncing your certificates to the destination endpoint.

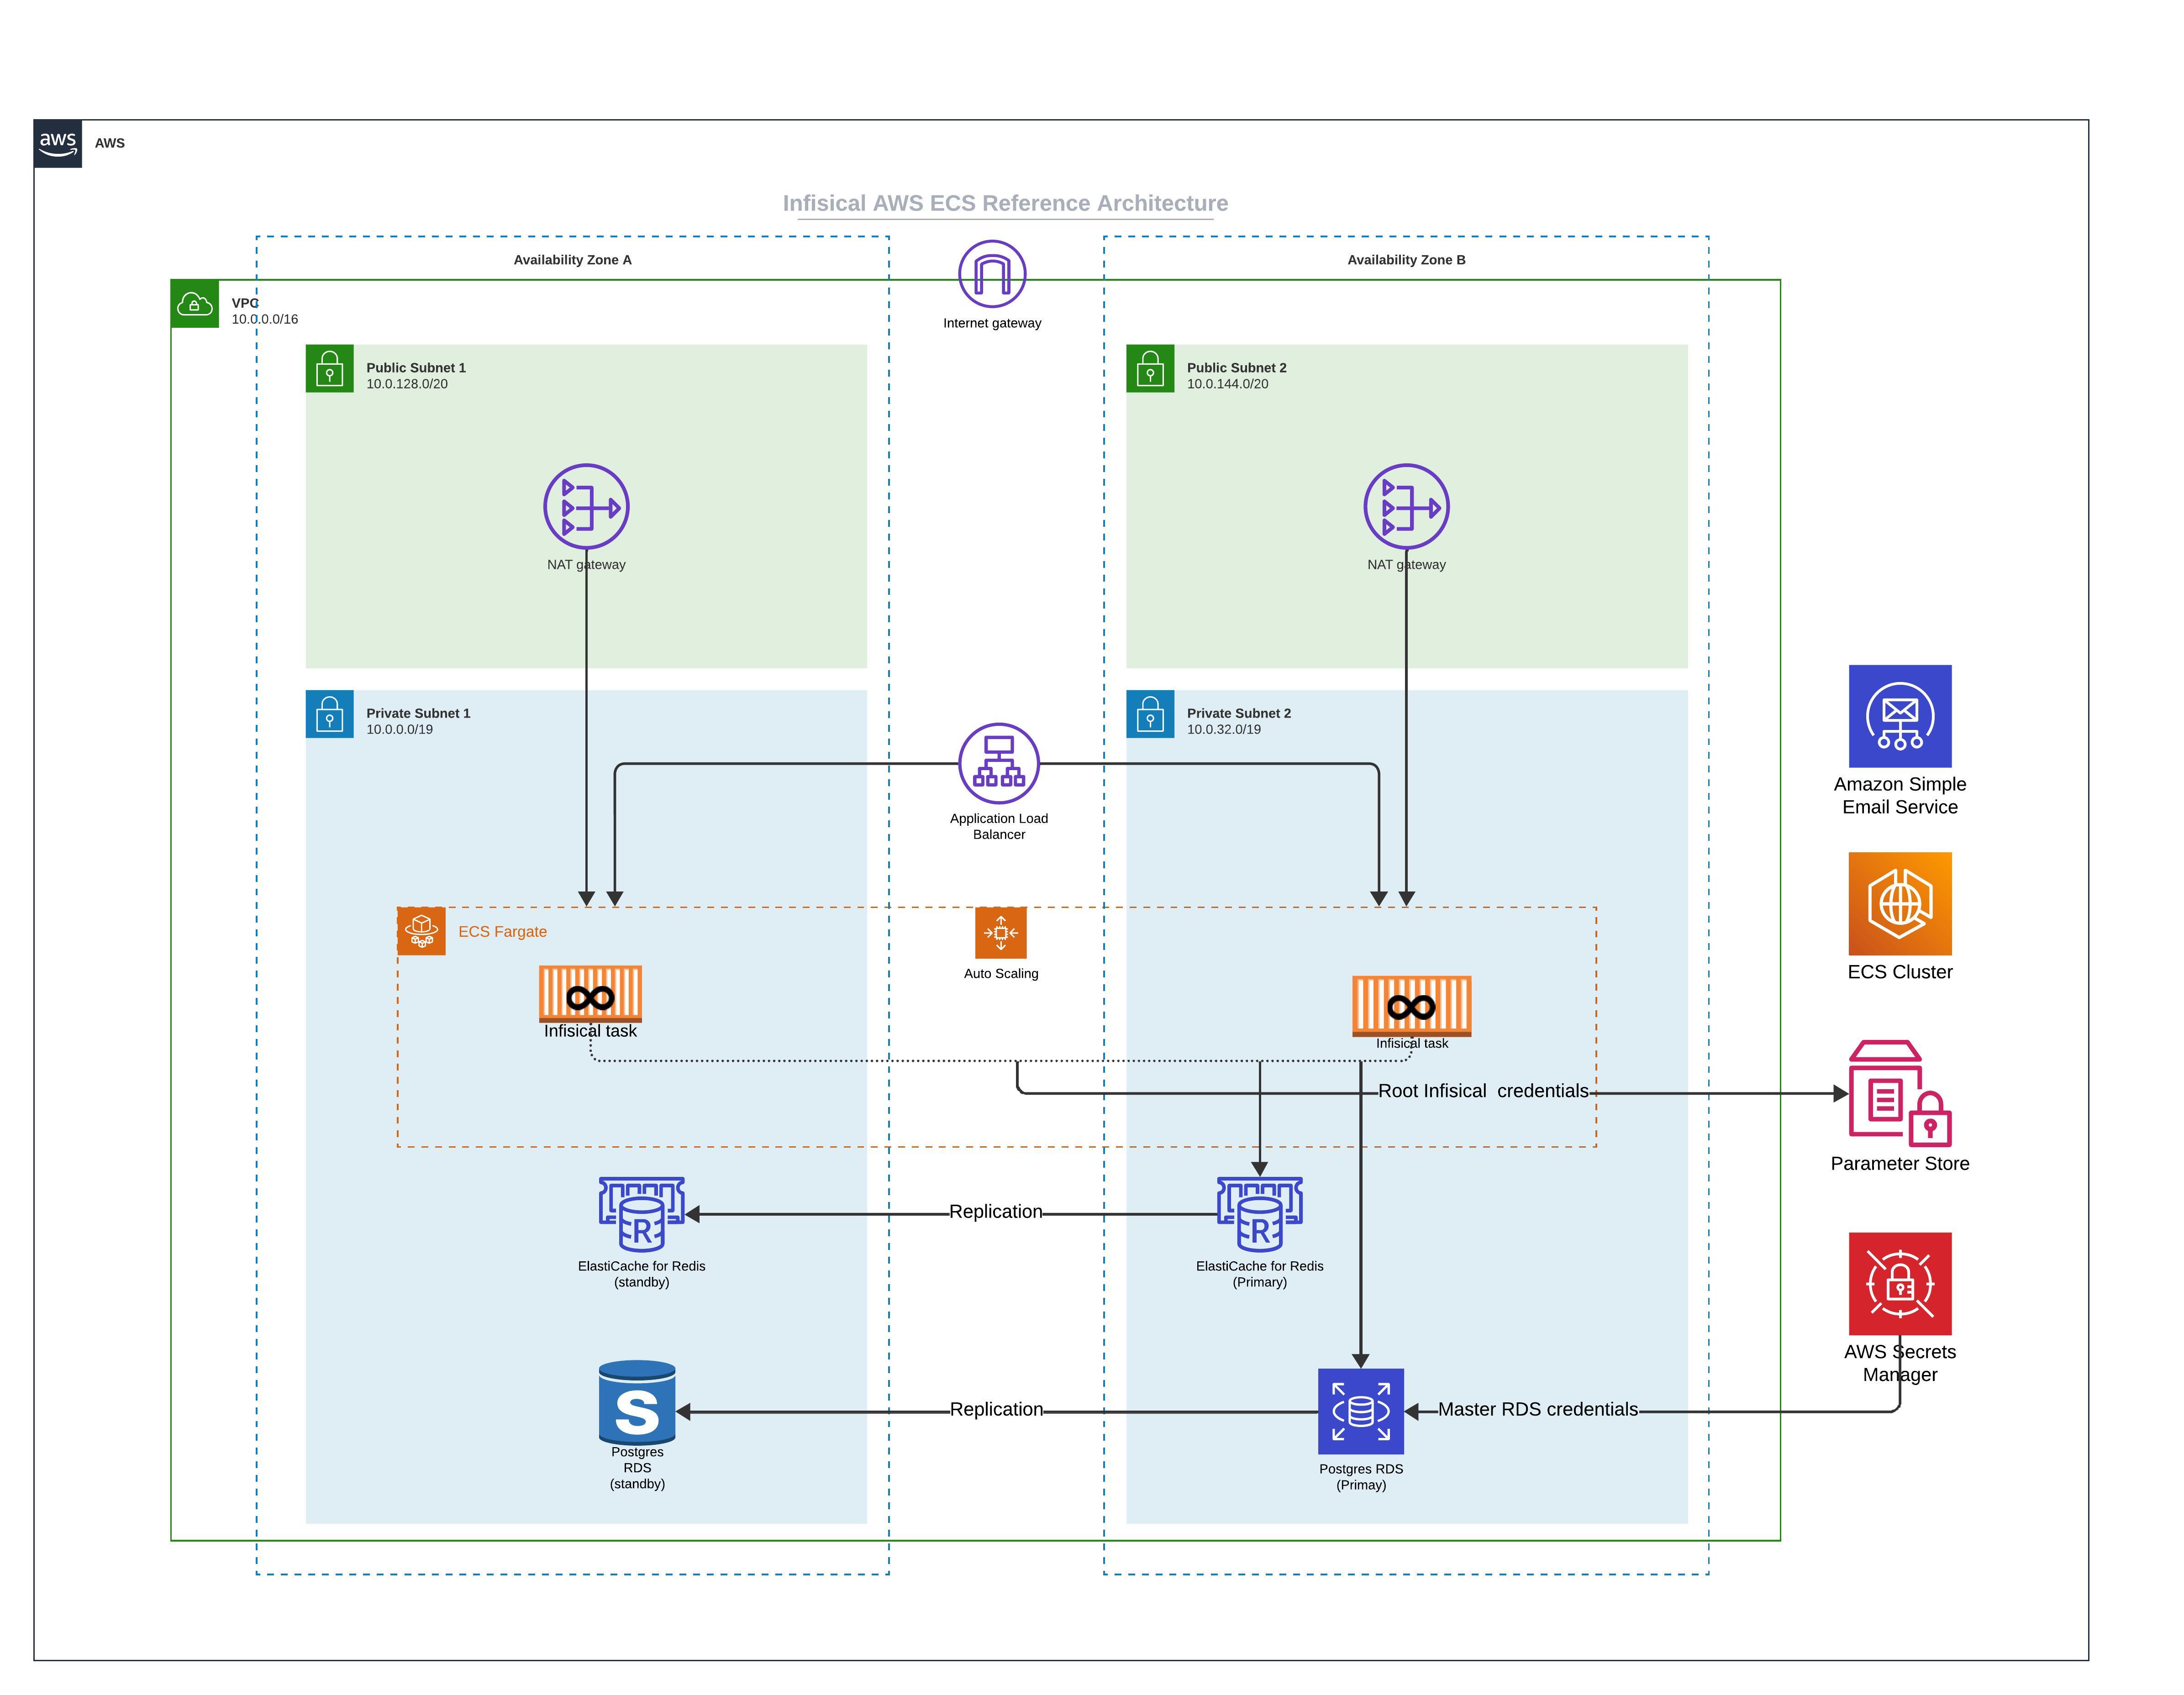 ### Core Components
* **ECS Fargate:** In this architecture, Infisical is deployed on ECS using Fargate launch type. The ECS services are deployed across multiple Availability Zones to ensure high availability.
* **Amazon RDS:** Infisical uses Postgres as it's persistent layer. As such, RDS for PostgreSQL is used as the database engine. The setup includes a primary instance in one AZ and a read replica in another AZ.
This ensures that if there is a failure in one availability zone, the working replica will become the primary and continue processing workloads.
* **Amazon ElastiCache for Redis:** To enhance performance, Infisical requires Redis. In this architecture, Redis is set up with a primary and standby replication group across two AZs to increase availability.
* **Amazon Simple Email Service (SES):** Infisical requires email service to facilitate outbound communication. AWS SES is integrated into the architecture to handle such communication.
### Network Setup
* **Public Subnets:** Each Availability Zone contains a public subnet. There are two main reasons you might need internet access. First, if you intend to use Infisical to communicate with external secrets managers not located within your virtual private network, enabling internet access is necessary. Second, downloading the Docker image from Docker Hub requires internet access, though this can be avoided by utilizing AWS ECR with VPC Endpoints through AWS Private Link.
* **NAT Gateway:** This is used to route outbound requests from Infisical to the internet and is only used to communicate with external secrets manager and or downloading container images.
### Securing Infisical's root credential
* **Parameter Store:** To secure Infisical's root credentials (database connection string, encryption key, etc), we highly recommend that you use AWS Parameter Store and only allow the tasks running Infisical to access them.
* **AWS Secrets Manager:** We strongly advise securing the master credentials for RDS by utilizing the latest AWS RDS integration with AWS Secrets Manager. This integration automatically stores the master database user's credentials in AWS Secrets Manager, thereby reducing the risk of misplacing the root RDS credential.
### High Availability (HA) and Scalability
* **Multi-AZ Deployment:** By spreading resources across multiple Availability Zones, we ensure that if one AZ experiences issues, traffic can be redirected to the remaining healthy AZ without service interruption.
* **Auto Scaling:** AWS Auto Scaling is in place to adjust capacity to maintain steady and predictable performance at the lowest possible cost.
* **Cross-Region Deployment:** For even greater high availability, you may deploy Infisical across multiple regions. This extends the HA capabilities of the architecture and protects against regional service disruptions.
### Frequently asked questions
### Core Components
* **ECS Fargate:** In this architecture, Infisical is deployed on ECS using Fargate launch type. The ECS services are deployed across multiple Availability Zones to ensure high availability.
* **Amazon RDS:** Infisical uses Postgres as it's persistent layer. As such, RDS for PostgreSQL is used as the database engine. The setup includes a primary instance in one AZ and a read replica in another AZ.
This ensures that if there is a failure in one availability zone, the working replica will become the primary and continue processing workloads.
* **Amazon ElastiCache for Redis:** To enhance performance, Infisical requires Redis. In this architecture, Redis is set up with a primary and standby replication group across two AZs to increase availability.
* **Amazon Simple Email Service (SES):** Infisical requires email service to facilitate outbound communication. AWS SES is integrated into the architecture to handle such communication.
### Network Setup
* **Public Subnets:** Each Availability Zone contains a public subnet. There are two main reasons you might need internet access. First, if you intend to use Infisical to communicate with external secrets managers not located within your virtual private network, enabling internet access is necessary. Second, downloading the Docker image from Docker Hub requires internet access, though this can be avoided by utilizing AWS ECR with VPC Endpoints through AWS Private Link.
* **NAT Gateway:** This is used to route outbound requests from Infisical to the internet and is only used to communicate with external secrets manager and or downloading container images.
### Securing Infisical's root credential
* **Parameter Store:** To secure Infisical's root credentials (database connection string, encryption key, etc), we highly recommend that you use AWS Parameter Store and only allow the tasks running Infisical to access them.
* **AWS Secrets Manager:** We strongly advise securing the master credentials for RDS by utilizing the latest AWS RDS integration with AWS Secrets Manager. This integration automatically stores the master database user's credentials in AWS Secrets Manager, thereby reducing the risk of misplacing the root RDS credential.
### High Availability (HA) and Scalability
* **Multi-AZ Deployment:** By spreading resources across multiple Availability Zones, we ensure that if one AZ experiences issues, traffic can be redirected to the remaining healthy AZ without service interruption.
* **Auto Scaling:** AWS Auto Scaling is in place to adjust capacity to maintain steady and predictable performance at the lowest possible cost.
* **Cross-Region Deployment:** For even greater high availability, you may deploy Infisical across multiple regions. This extends the HA capabilities of the architecture and protects against regional service disruptions.
### Frequently asked questions


 When generating these secrets, it's important to specify a Time-to-Live (TTL) duration. This will dictate how long the credentials are valid for.


 ## Renew Leases
To extend the life of the generated dynamic secret leases past its initial time to live, simply click on the **Renew** button as illustrated below.
## Renew Leases
To extend the life of the generated dynamic secret leases past its initial time to live, simply click on the **Renew** button as illustrated below.


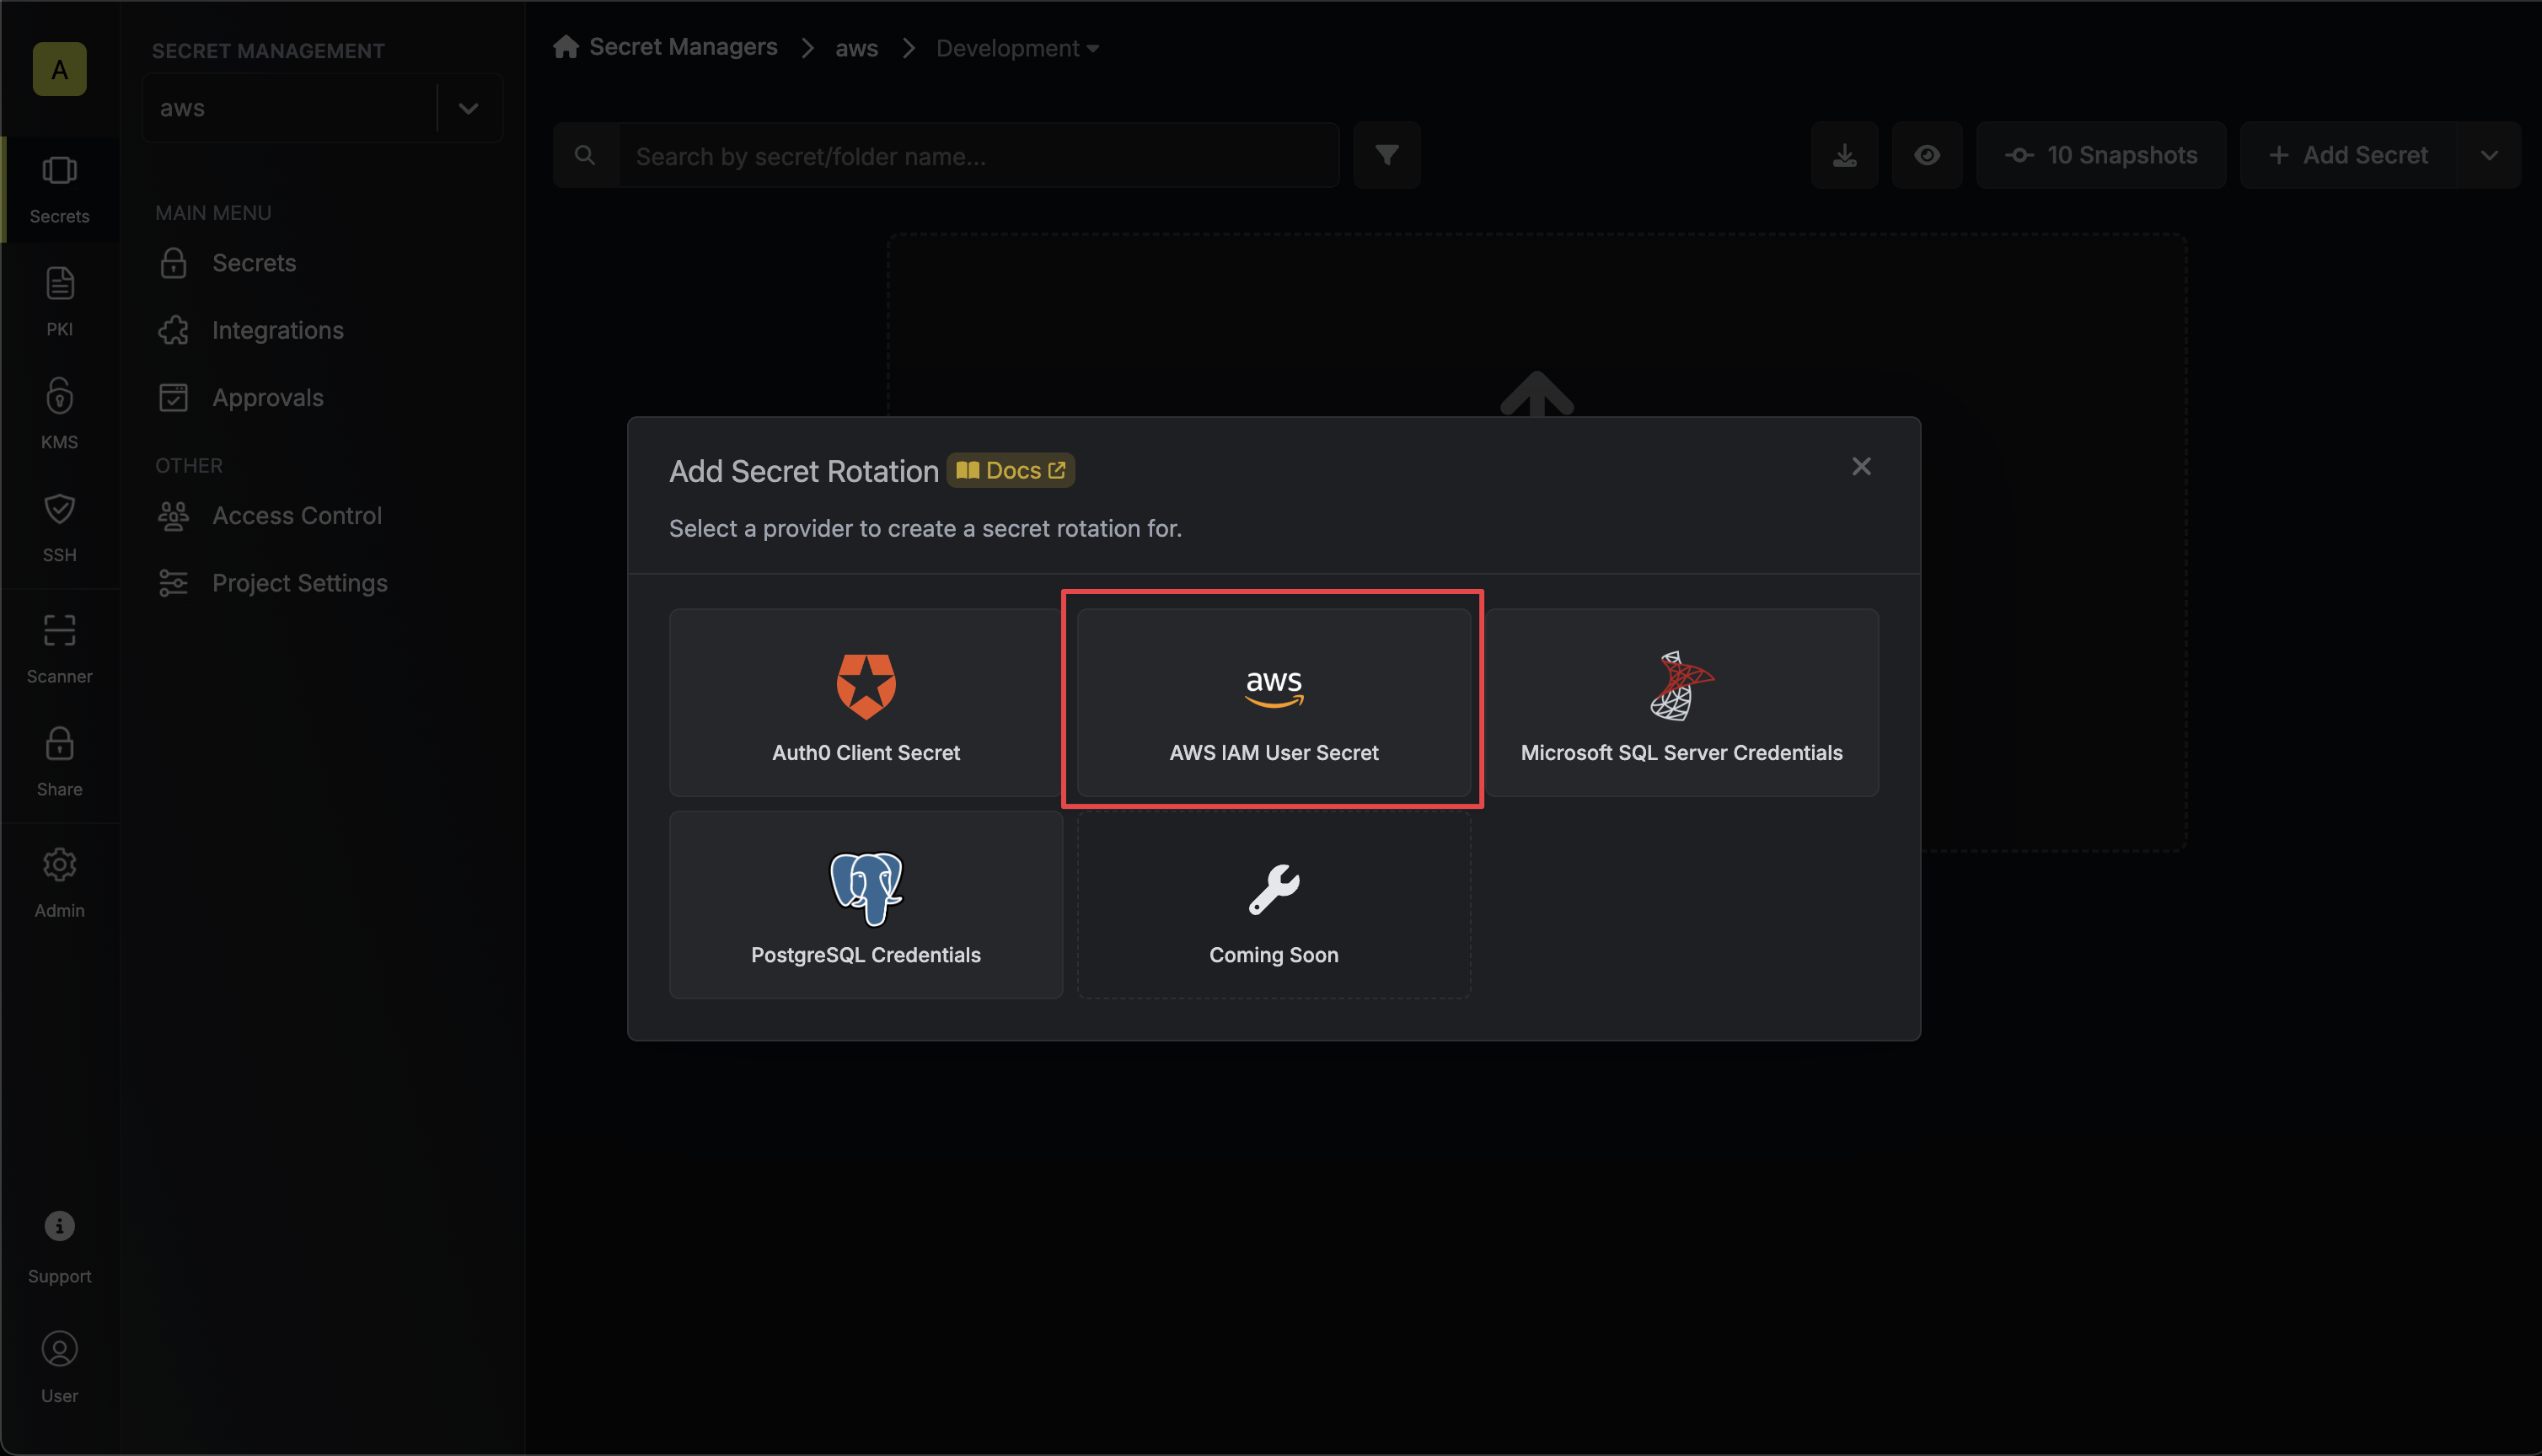
 2. Select the **AWS IAM User Secret** option.
 3. Select the **AWS Connection** to use and configure the rotation behavior. Then click **Next**.
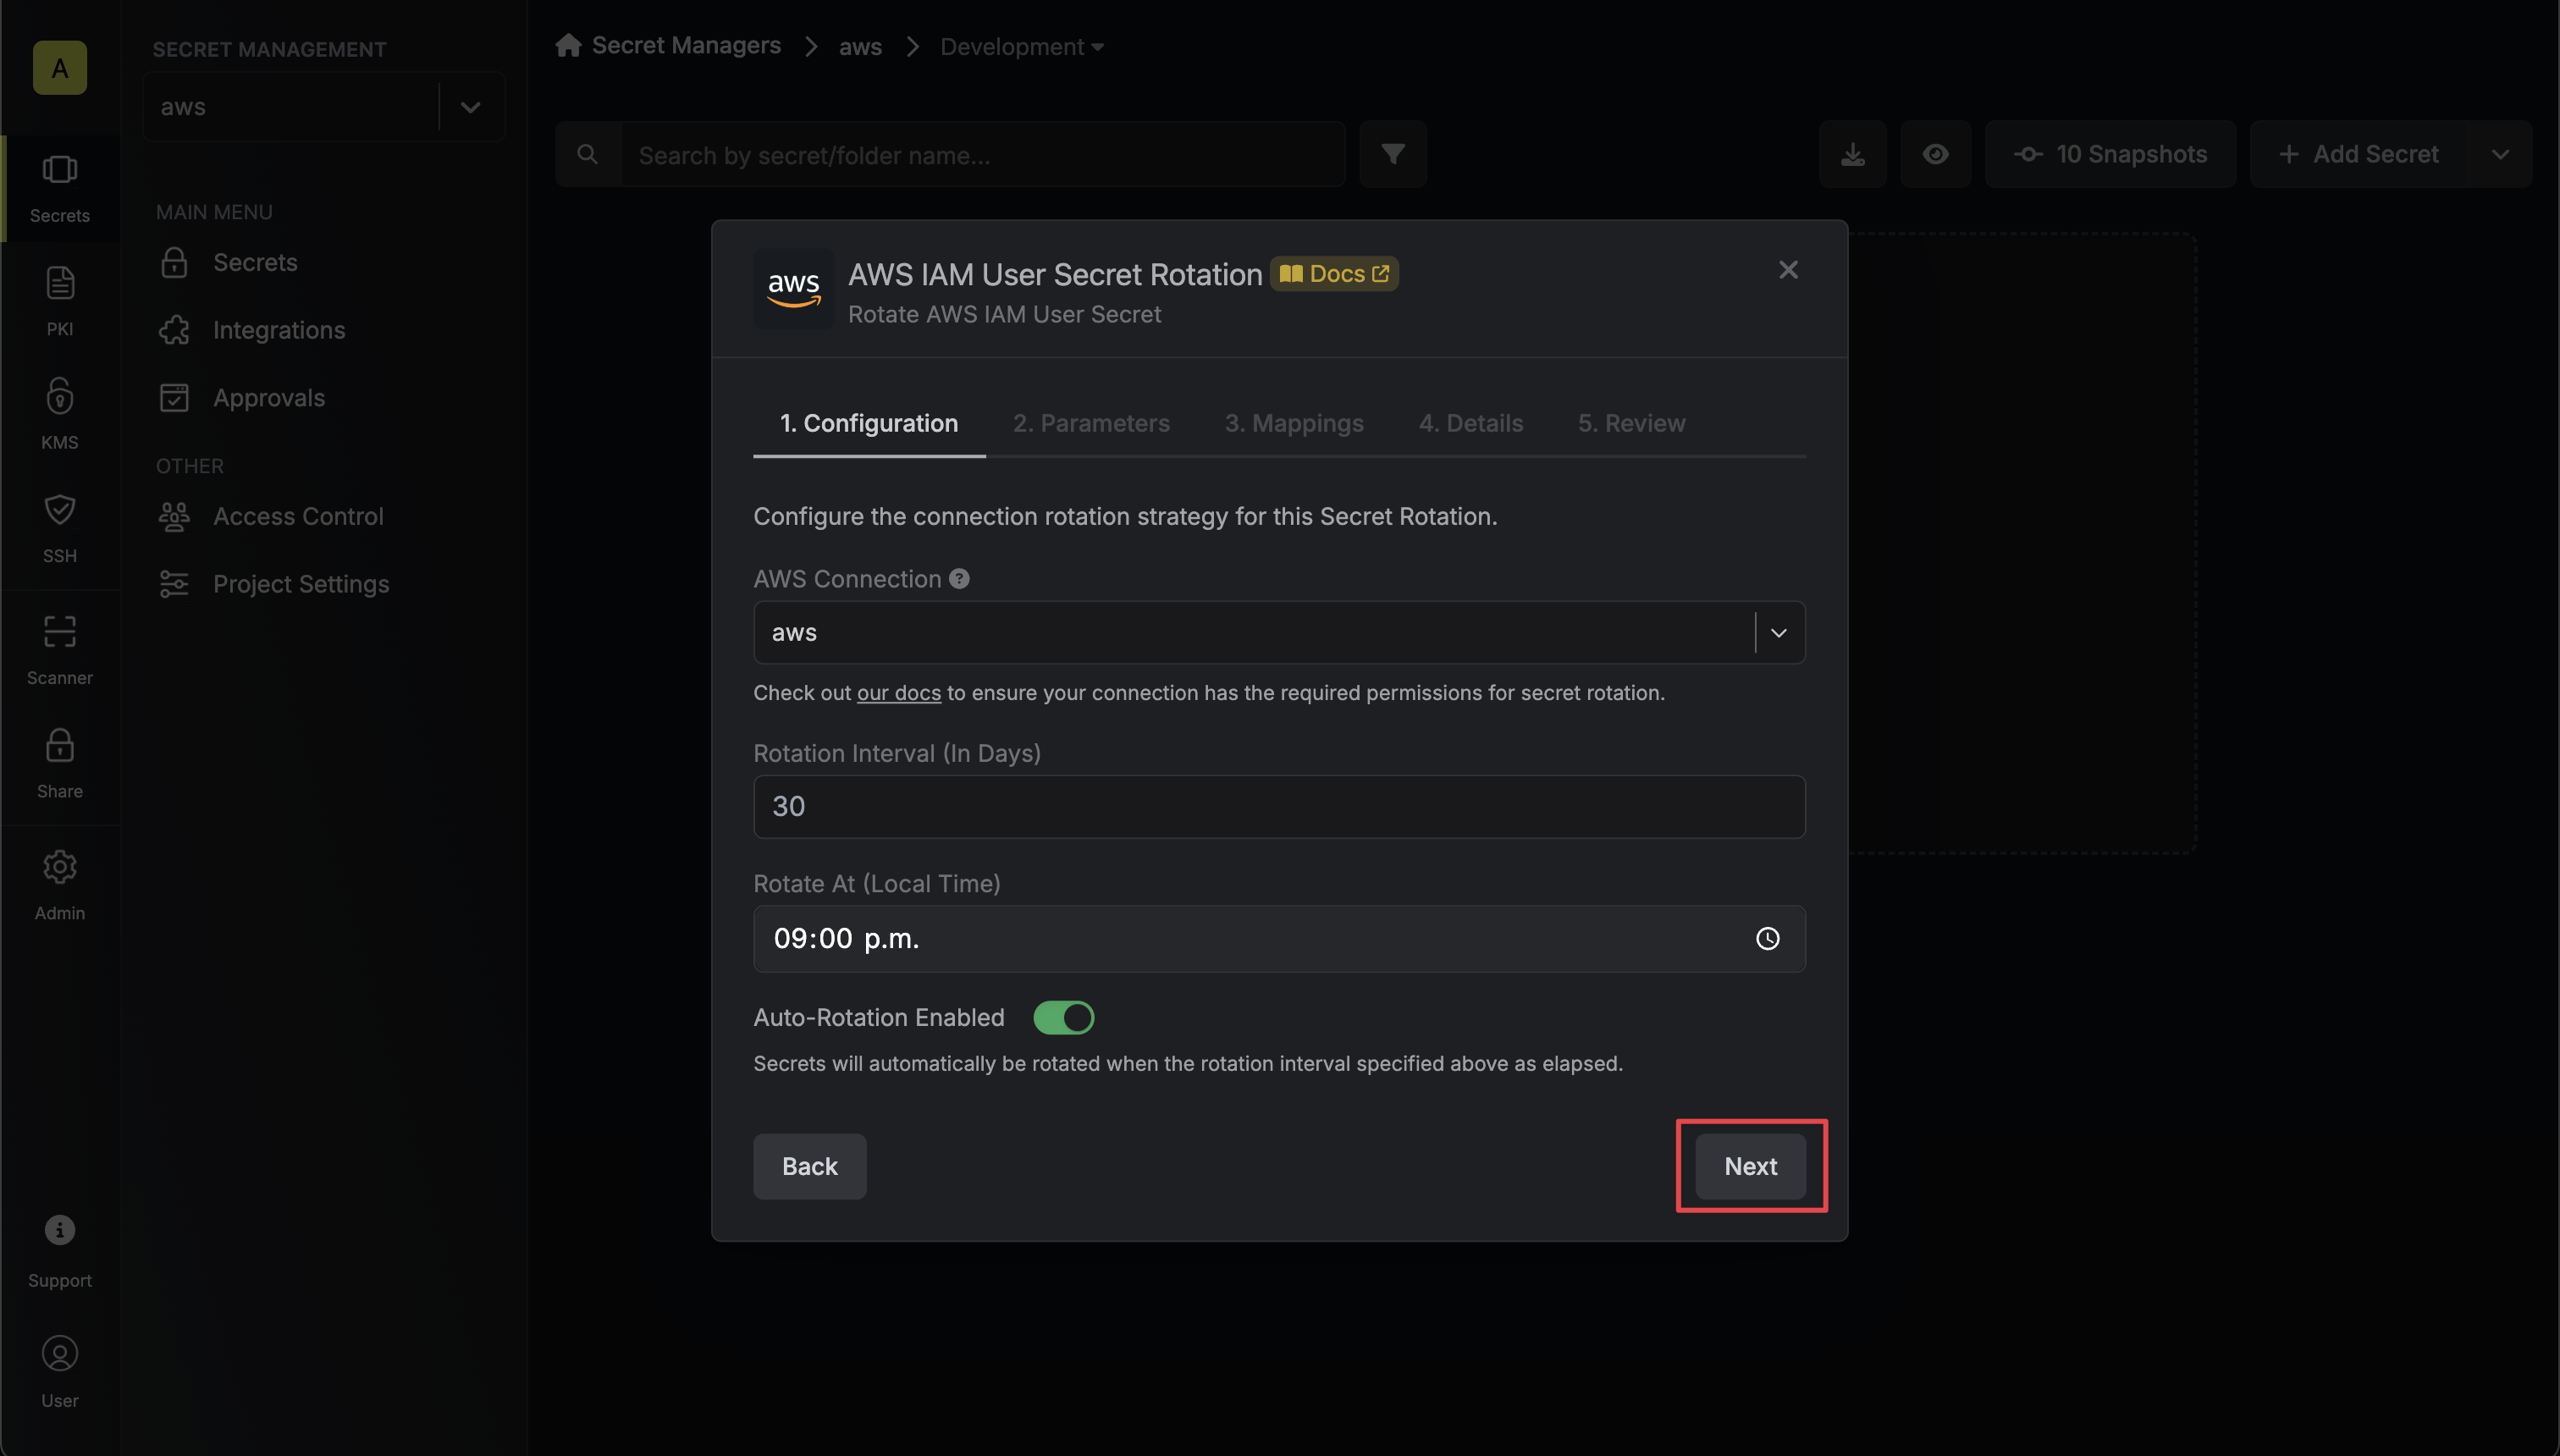 * **AWS Connection** - the connection that will perform the rotation of the specified application's Client Secret.
* **Rotation Interval** - the interval, in days, that once elapsed will trigger a rotation.
* **Rotate At** - the local time of day when rotation should occur once the interval has elapsed.
* **Auto-Rotation Enabled** - whether secrets should automatically be rotated once the rotation interval has elapsed. Disable this option to manually rotate secrets or pause secret rotation.
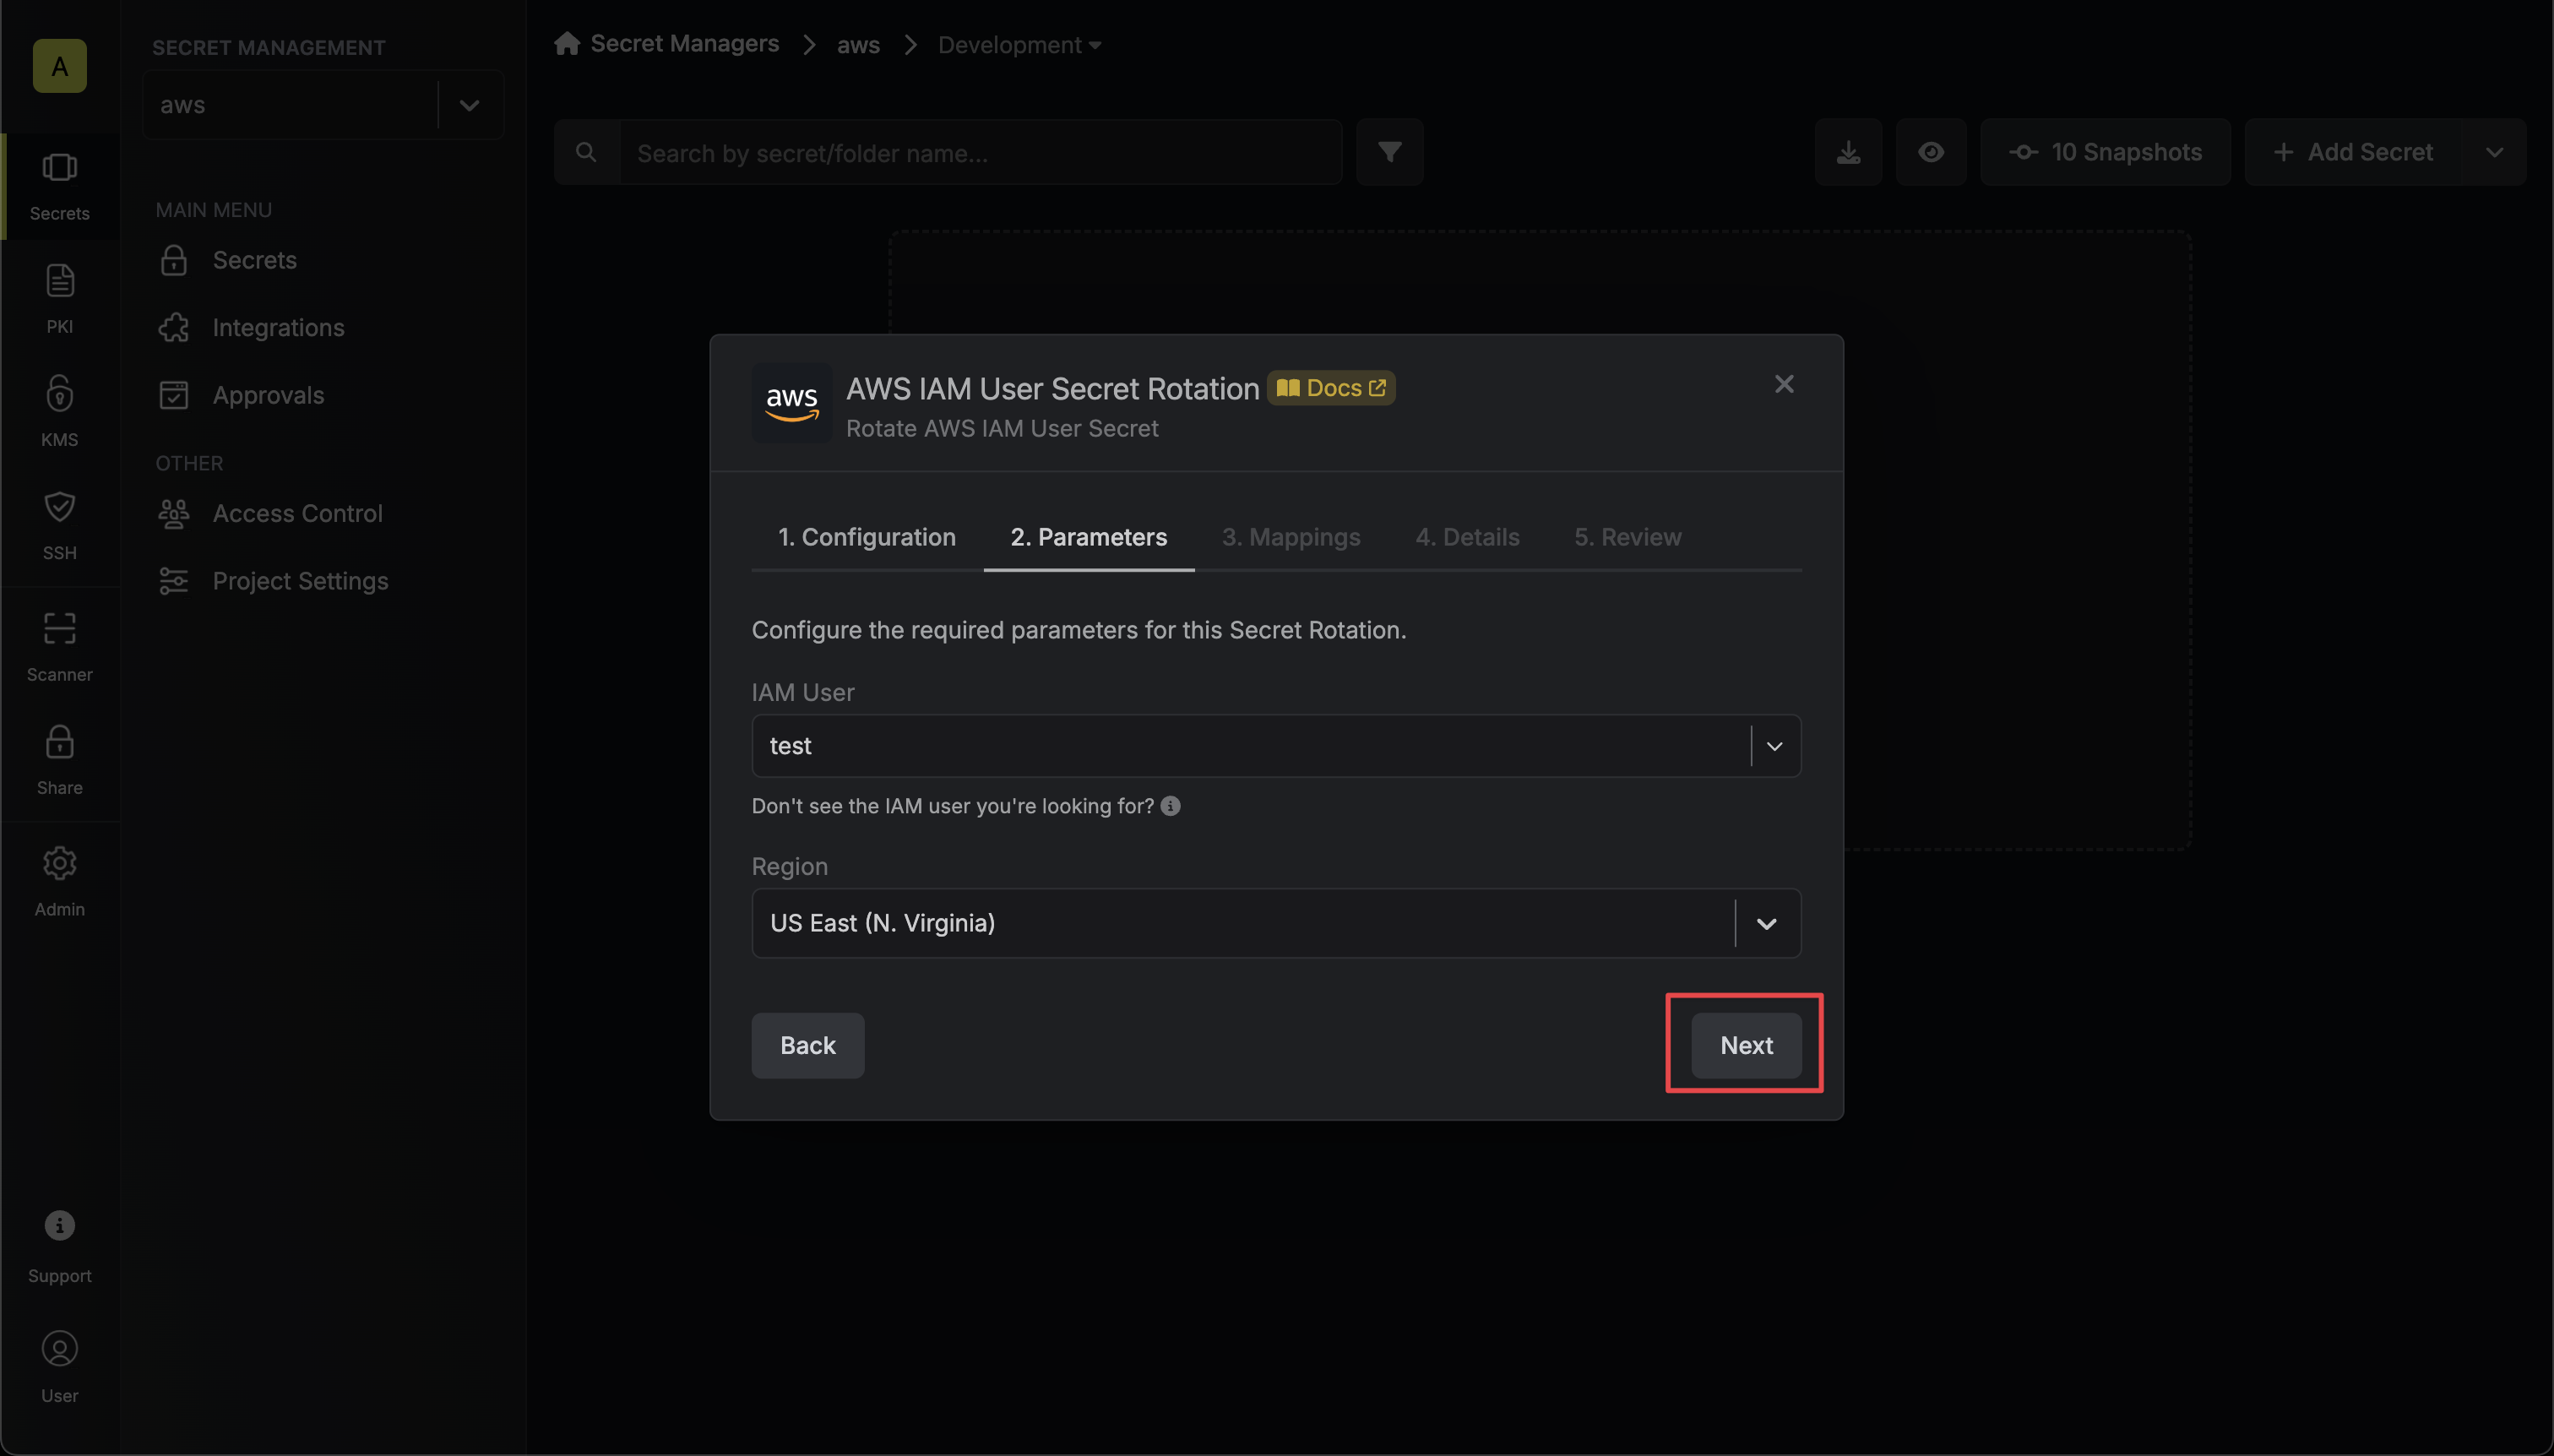
4. Select the AWS IAM user and the region of the user whose credentials you want to rotate. Then click **Next**.
* **AWS Connection** - the connection that will perform the rotation of the specified application's Client Secret.
* **Rotation Interval** - the interval, in days, that once elapsed will trigger a rotation.
* **Rotate At** - the local time of day when rotation should occur once the interval has elapsed.
* **Auto-Rotation Enabled** - whether secrets should automatically be rotated once the rotation interval has elapsed. Disable this option to manually rotate secrets or pause secret rotation.
4. Select the AWS IAM user and the region of the user whose credentials you want to rotate. Then click **Next**.
 5. Specify the secret names that the AWS IAM access key credentials should be mapped to. Then click **Next**.
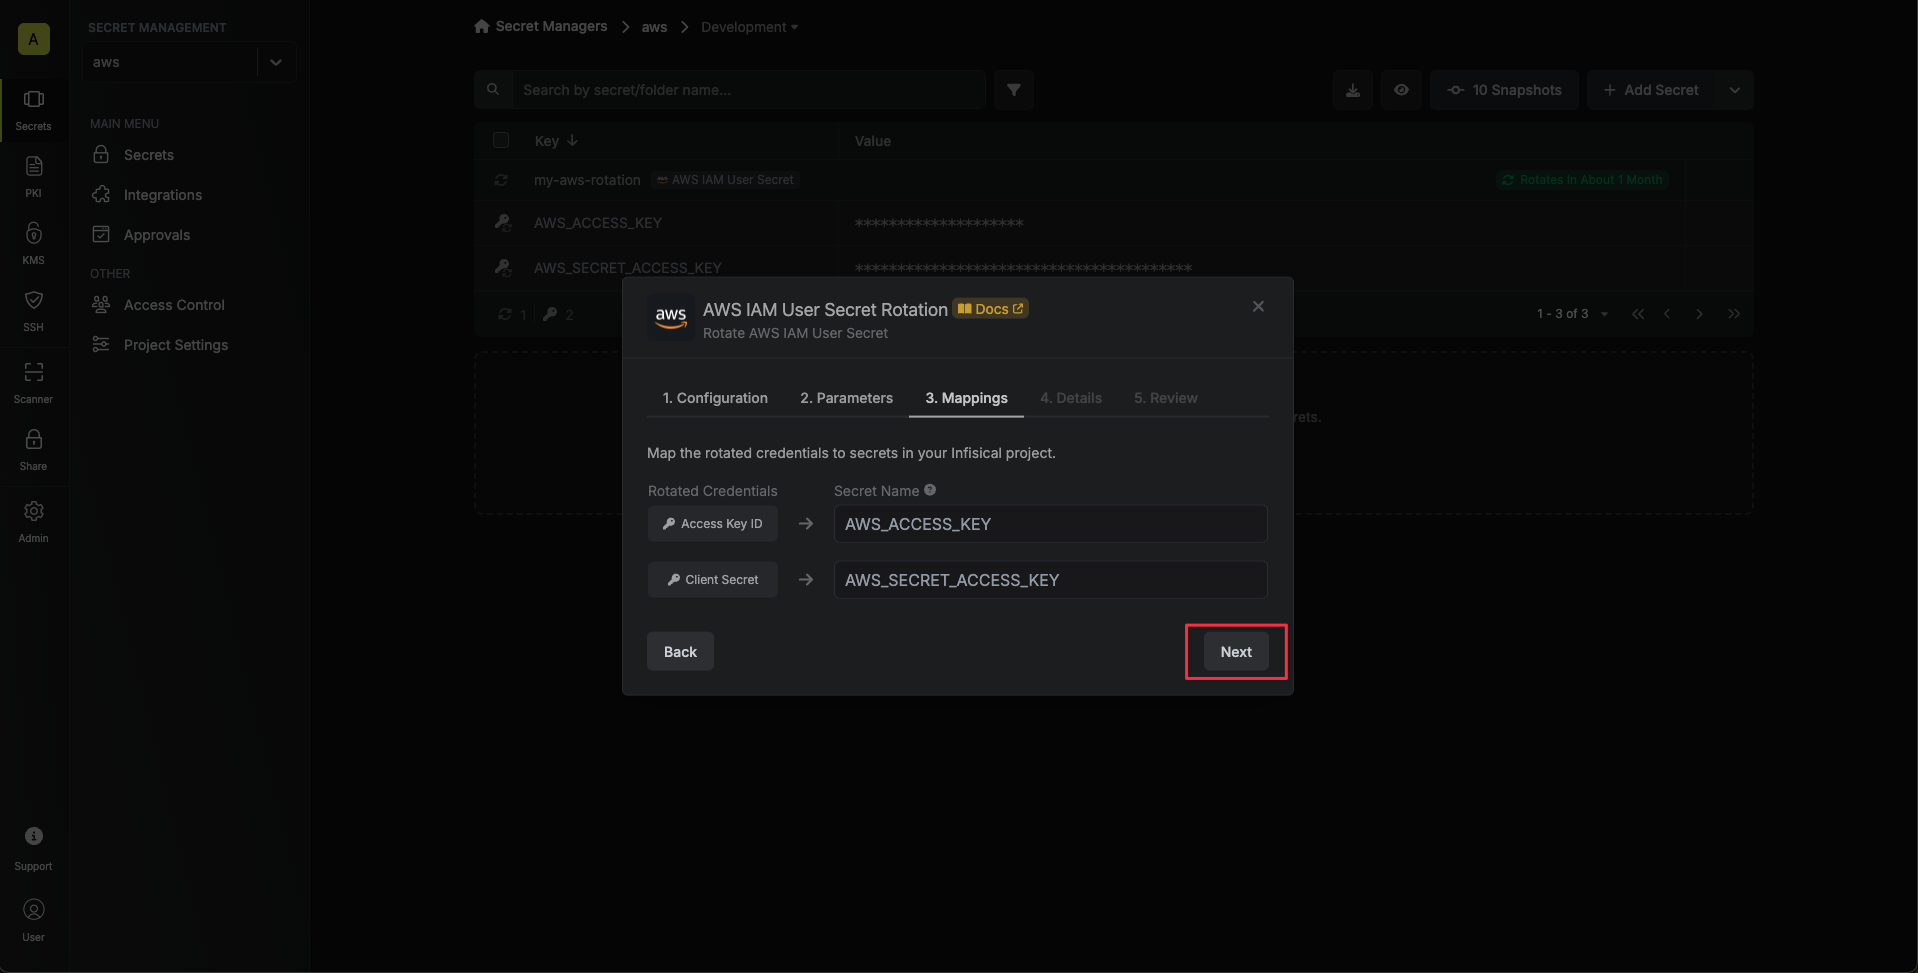 * **Access Key ID** - the name of the secret that the AWS access key ID will be mapped to.
* **Secret Access Key** - the name of the secret that the rotated secret access key will be mapped to.
6. Give your rotation a name and description (optional). Then click **Next**.
* **Access Key ID** - the name of the secret that the AWS access key ID will be mapped to.
* **Secret Access Key** - the name of the secret that the rotated secret access key will be mapped to.
6. Give your rotation a name and description (optional). Then click **Next**.
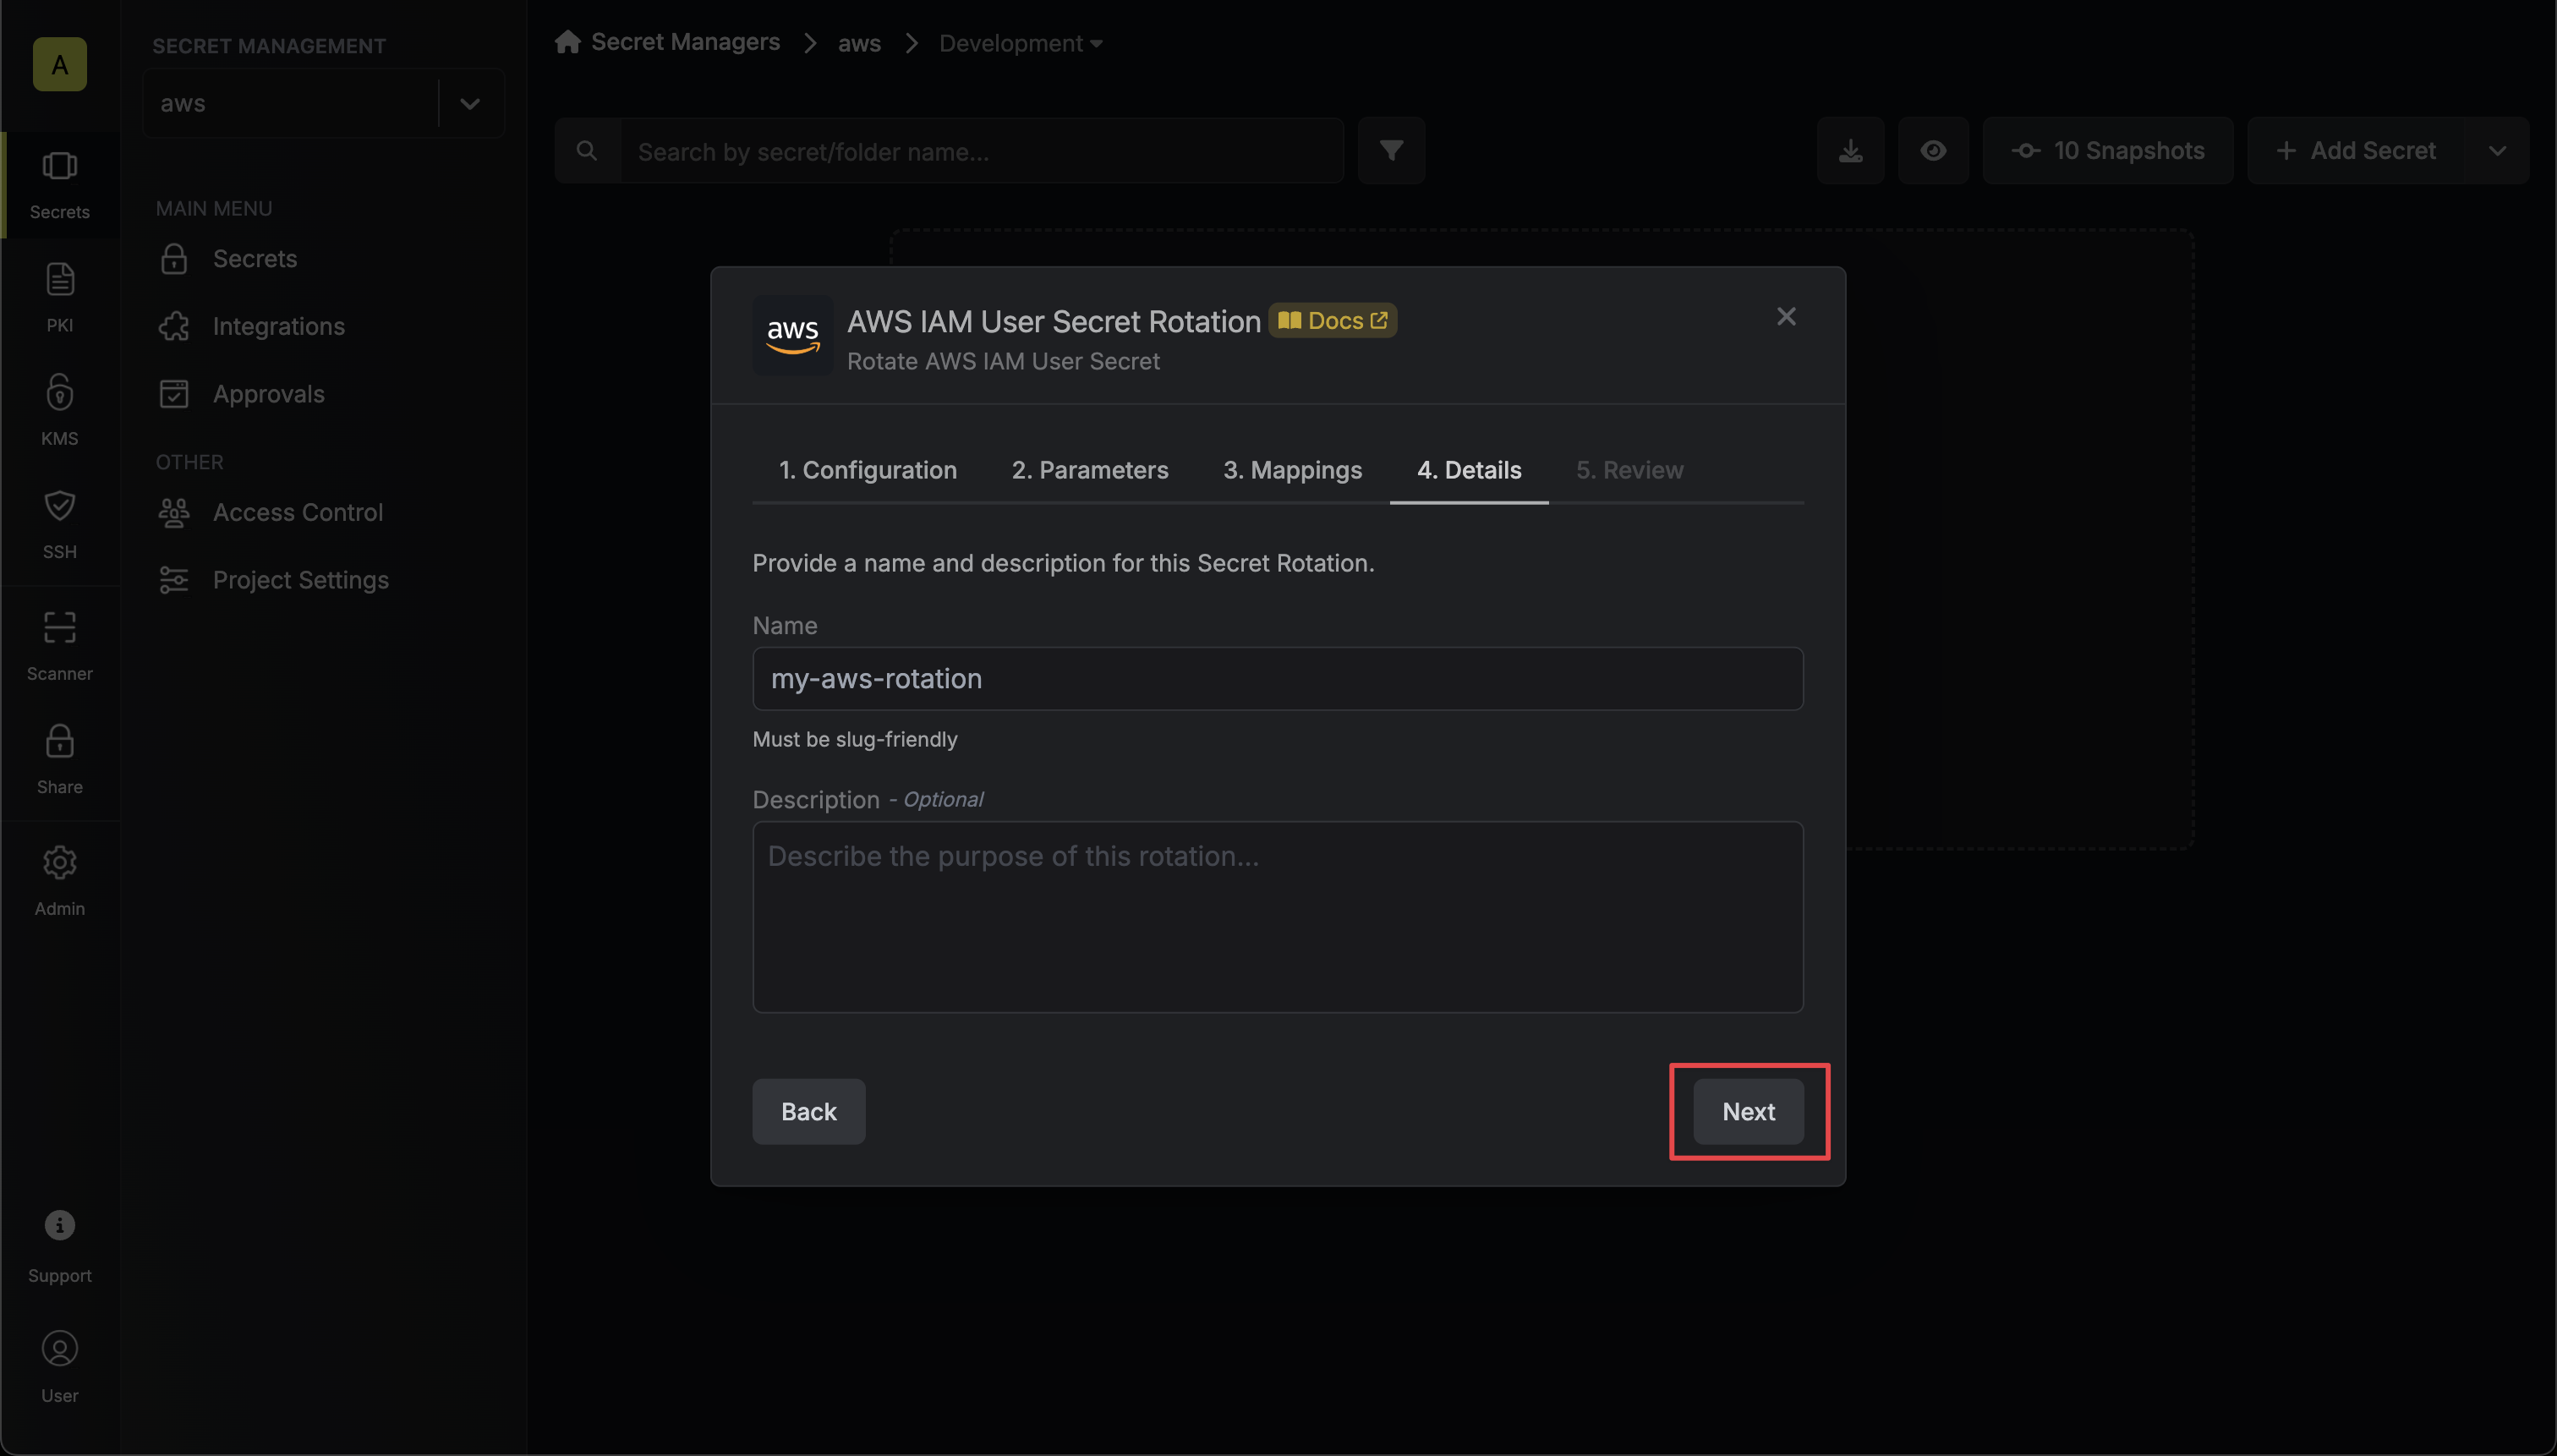 * **Name** - the name of the secret rotation configuration. Must be slug-friendly.
* **Description** (optional) - a description of this rotation configuration.
7. Review your configuration, then click **Create Secret Rotation**.
* **Name** - the name of the secret rotation configuration. Must be slug-friendly.
* **Description** (optional) - a description of this rotation configuration.
7. Review your configuration, then click **Create Secret Rotation**.
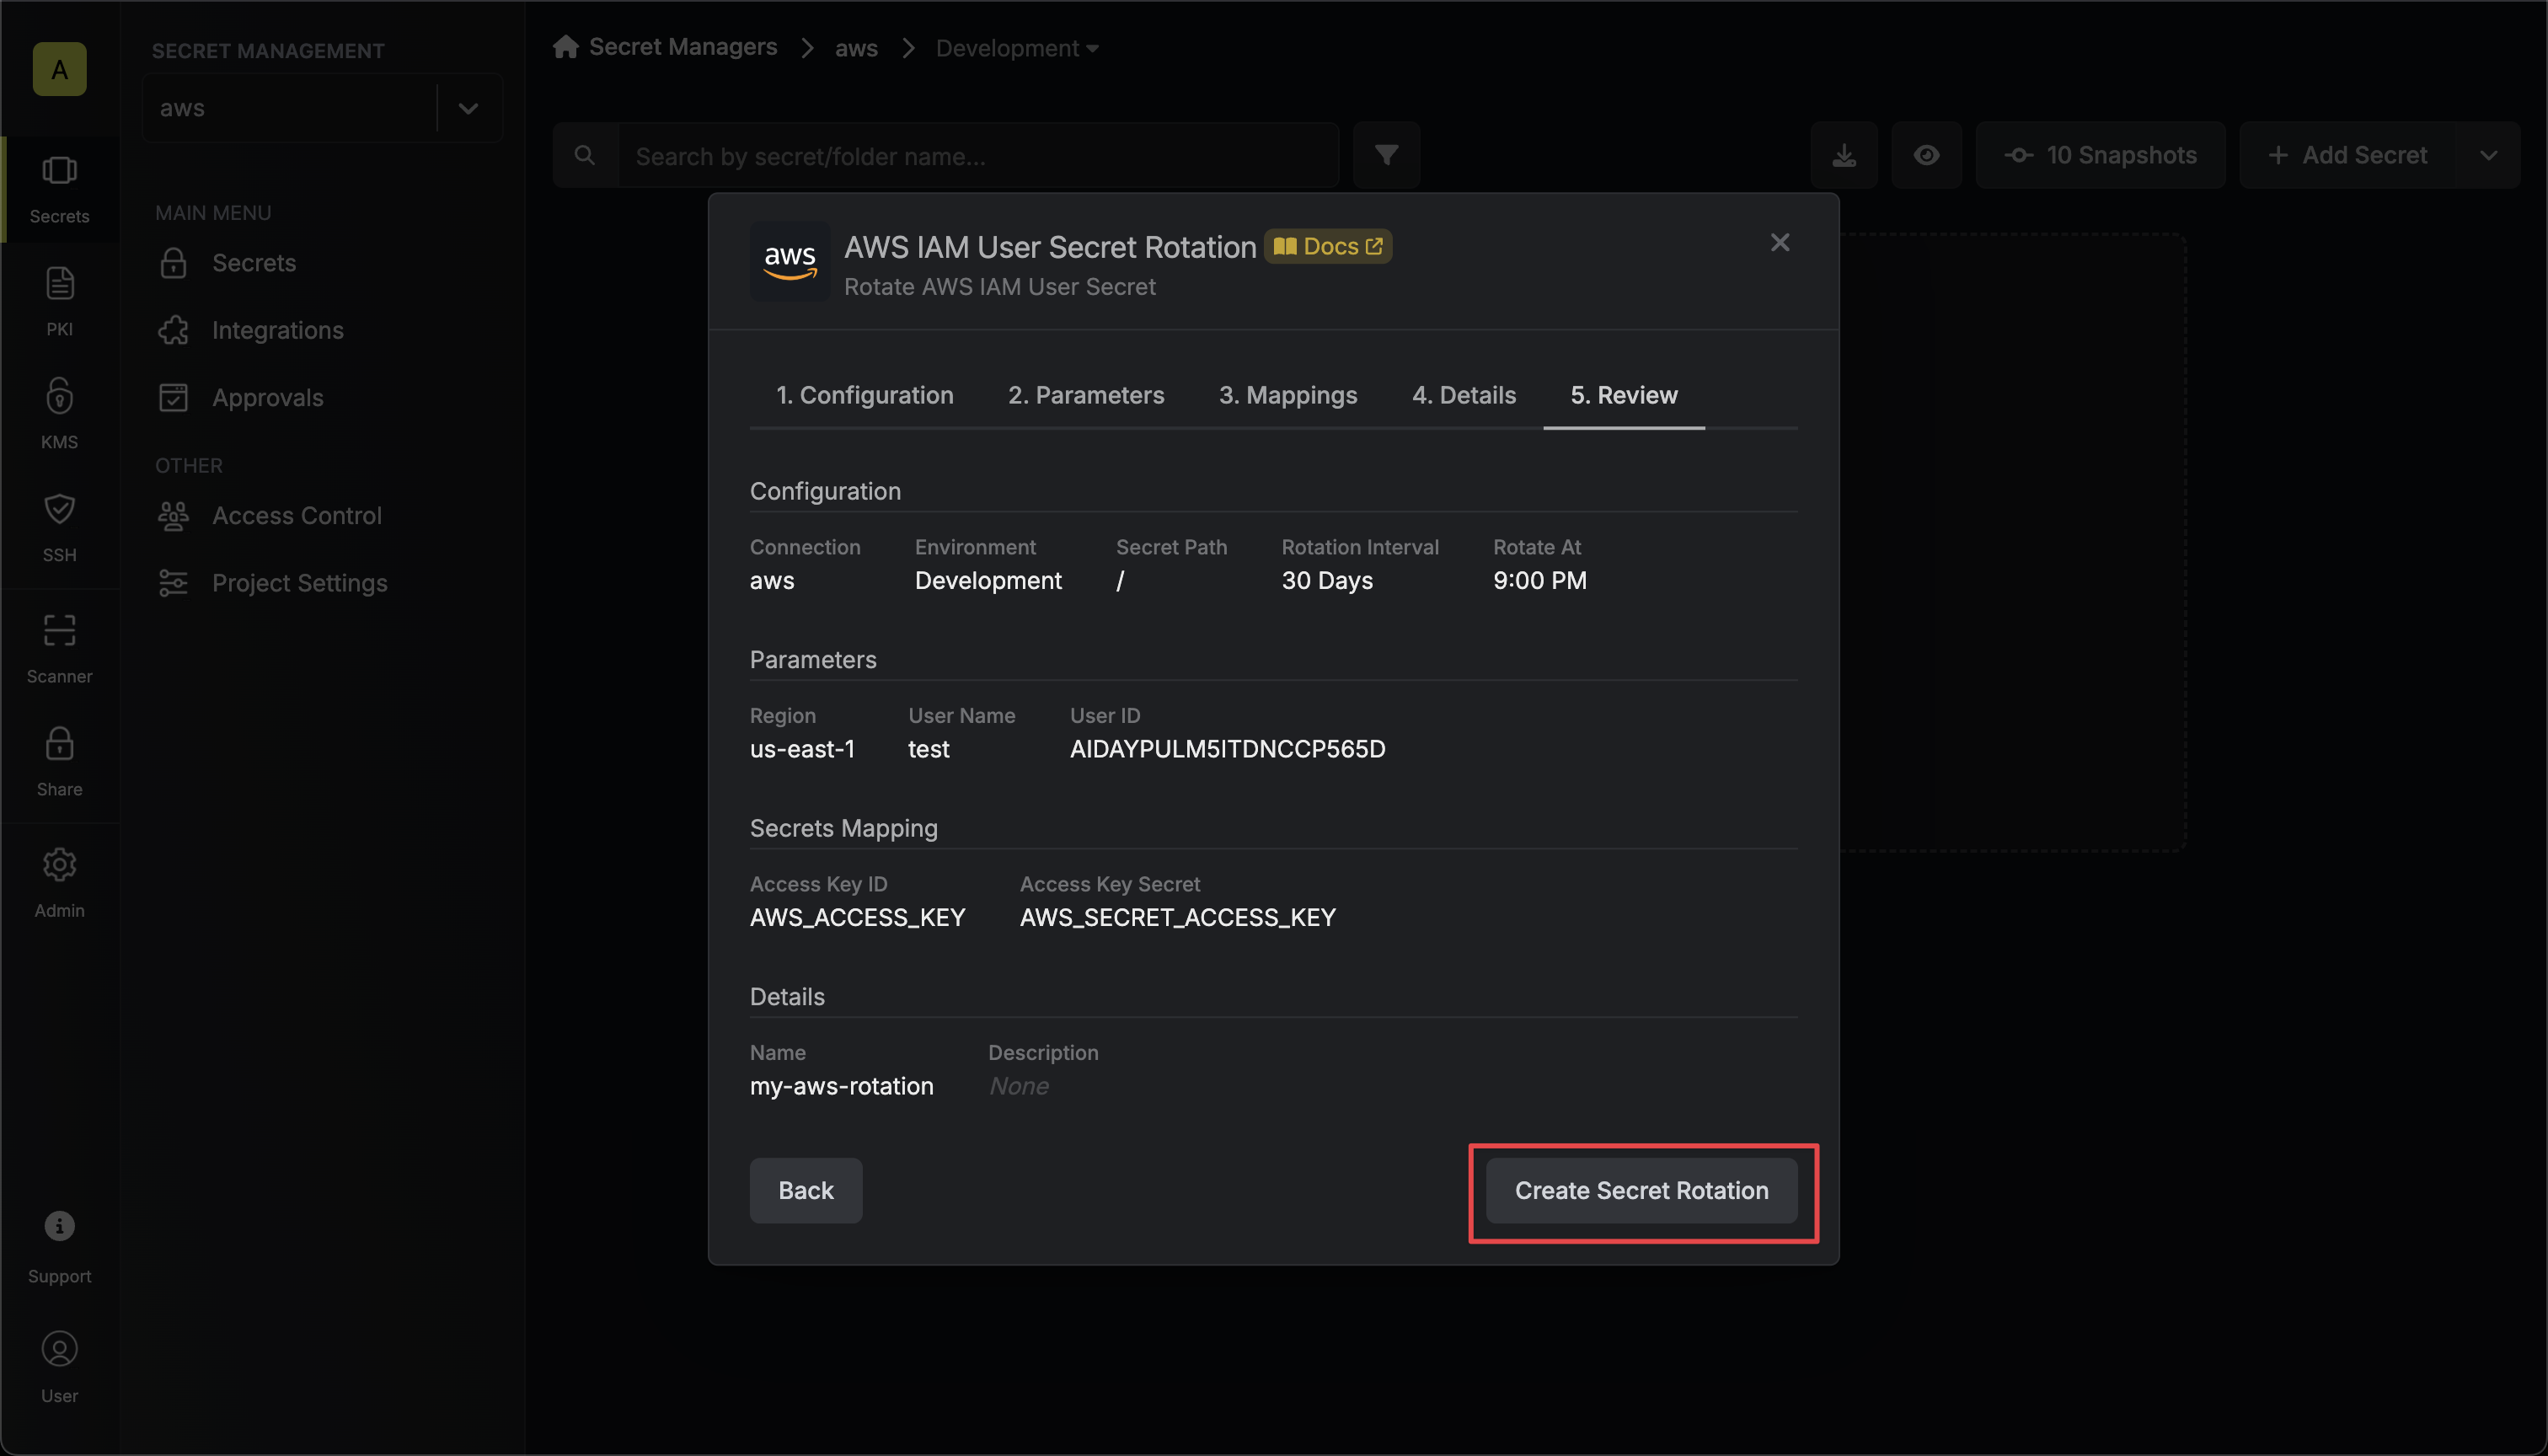 8. Your **AWS IAM User** credentials are now available for use via the mapped secrets.
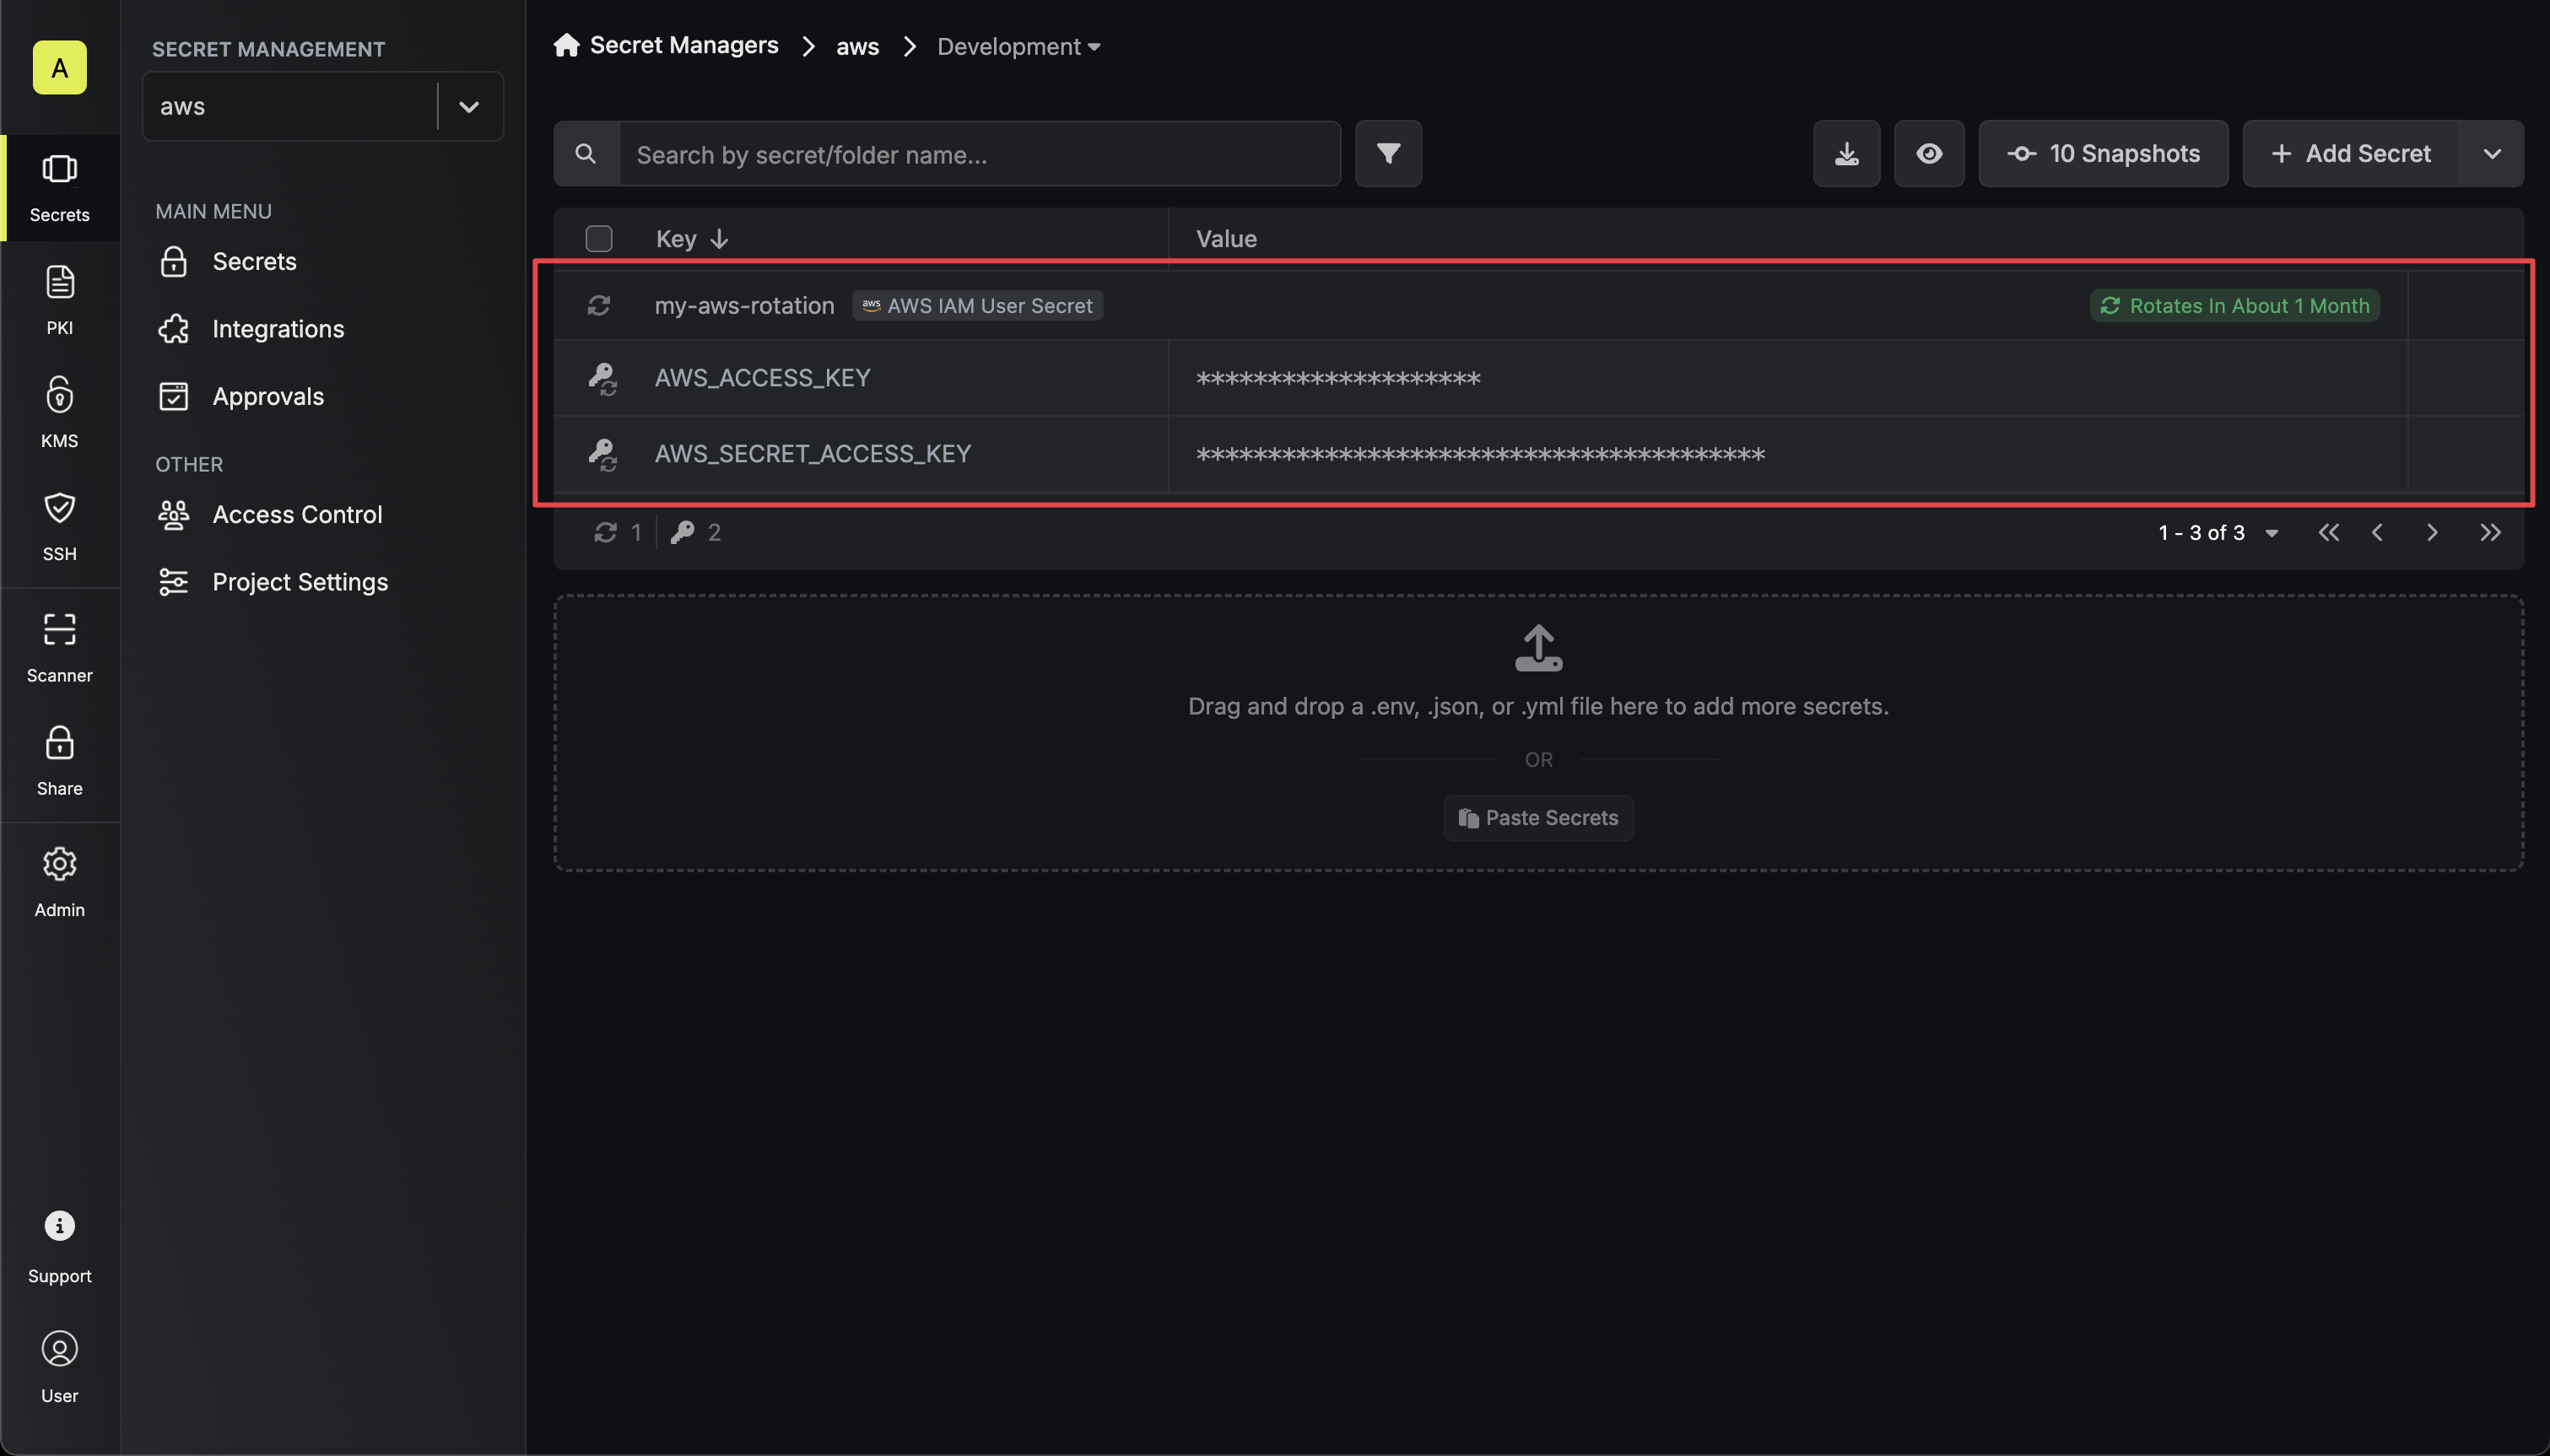
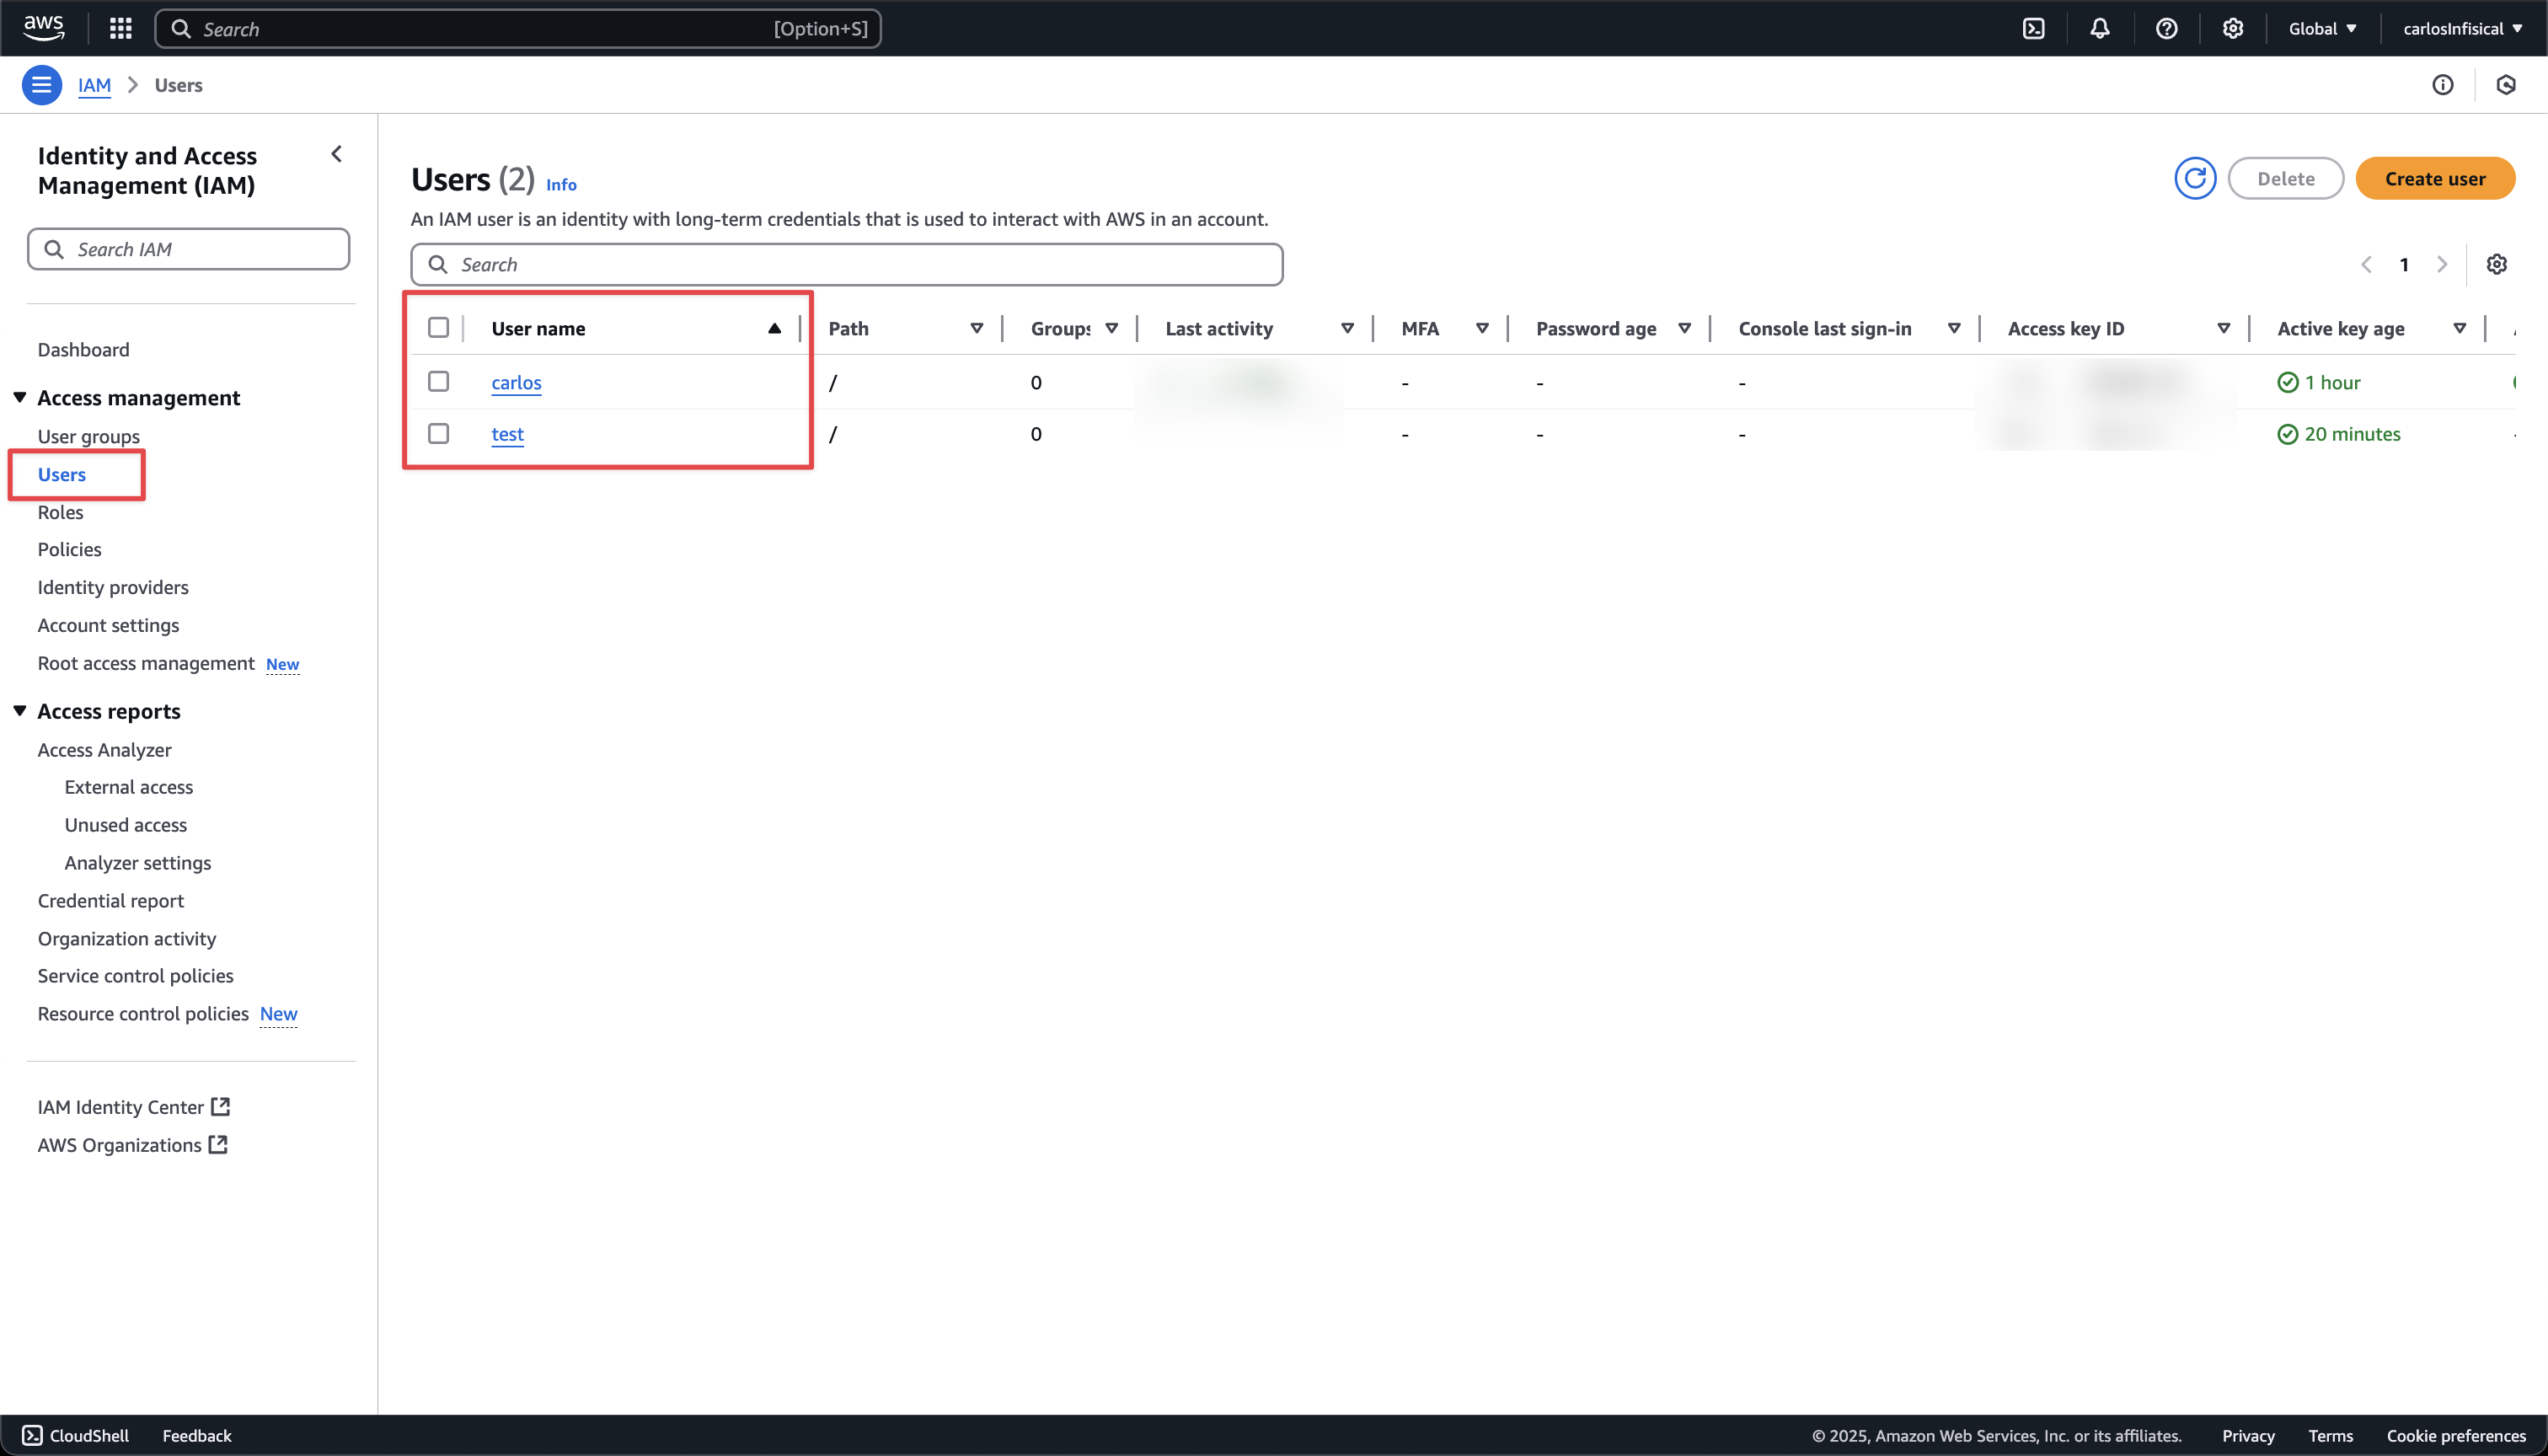 ### Sample request
```bash Request theme={"dark"}
curl --request POST \
--url https://us.infisical.com/api/v2/secret-rotations/aws-iam-user-secret \
--header 'Content-Type: application/json' \
--data '{
"name": "my-aws-rotation",
"projectId": "9602cfc5-20b9-4c35-a056-dd7372db0f25",
"description": "My rotation strategy description",
"connectionId": "3c90c3cc-0d44-4b50-8888-8dd25736052a",
"environment": "dev",
"secretPath": "/",
"isAutoRotationEnabled": true,
"rotationInterval": 2,
"rotateAtUtc": {
"hours": 11.5,
"minutes": 29.5
},
"parameters": {
"userName": "testUser",
"region": "us-east-1"
},
"secretsMapping": {
"accessKeyId": "AWS_ACCESS_KEY_ID",
"secretAccessKey": "AWS_SECRET_ACCESS_KEY"
}
}'
```
### Sample response
```bash Response theme={"dark"}
{
"secretRotation": {
"id": "3c90c3cc-0d44-4b50-8888-8dd25736052a",
"name": "my-aws-rotation",
"description": "My rotation strategy description",
"secretsMapping": {
"accessKeyId": "AWS_ACCESS_KEY_ID",
"secretAccessKey": "AWS_SECRET_ACCESS_KEY"
},
"isAutoRotationEnabled": true,
"activeIndex": 0,
"folderId": "3c90c3cc-0d44-4b50-8888-8dd25736052a",
"connectionId": "3c90c3cc-0d44-4b50-8888-8dd25736052a",
"createdAt": "2023-11-07T05:31:56Z",
"updatedAt": "2023-11-07T05:31:56Z",
"rotationInterval": 123,
"rotationStatus": "success",
"lastRotationAttemptedAt": "2023-11-07T05:31:56Z",
"lastRotatedAt": "2023-11-07T05:31:56Z",
"lastRotationJobId": null,
"nextRotationAt": "2023-11-07T05:31:56Z",
"isLastRotationManual": true,
"connection": {
"app": "aws",
"name": "my-aws-connection",
"id": "3c90c3cc-0d44-4b50-8888-8dd25736052a"
},
"environment": {
"slug": "dev",
"name": "Development",
"id": "3c90c3cc-0d44-4b50-8888-8dd25736052a"
},
"projectId": "9602cfc5-20b9-4c35-a056-dd7372db0f25",
"folder": {
"id": "3c90c3cc-0d44-4b50-8888-8dd25736052a",
"path": "/"
},
"rotateAtUtc": {
"hours": 11.5,
"minutes": 29.5
},
"lastRotationMessage": null,
"type": "aws-iam-user-secret",
"parameters": {
"userName": "testUser",
"region": "us-east-1"
}
}
}
```
### Sample request
```bash Request theme={"dark"}
curl --request POST \
--url https://us.infisical.com/api/v2/secret-rotations/aws-iam-user-secret \
--header 'Content-Type: application/json' \
--data '{
"name": "my-aws-rotation",
"projectId": "9602cfc5-20b9-4c35-a056-dd7372db0f25",
"description": "My rotation strategy description",
"connectionId": "3c90c3cc-0d44-4b50-8888-8dd25736052a",
"environment": "dev",
"secretPath": "/",
"isAutoRotationEnabled": true,
"rotationInterval": 2,
"rotateAtUtc": {
"hours": 11.5,
"minutes": 29.5
},
"parameters": {
"userName": "testUser",
"region": "us-east-1"
},
"secretsMapping": {
"accessKeyId": "AWS_ACCESS_KEY_ID",
"secretAccessKey": "AWS_SECRET_ACCESS_KEY"
}
}'
```
### Sample response
```bash Response theme={"dark"}
{
"secretRotation": {
"id": "3c90c3cc-0d44-4b50-8888-8dd25736052a",
"name": "my-aws-rotation",
"description": "My rotation strategy description",
"secretsMapping": {
"accessKeyId": "AWS_ACCESS_KEY_ID",
"secretAccessKey": "AWS_SECRET_ACCESS_KEY"
},
"isAutoRotationEnabled": true,
"activeIndex": 0,
"folderId": "3c90c3cc-0d44-4b50-8888-8dd25736052a",
"connectionId": "3c90c3cc-0d44-4b50-8888-8dd25736052a",
"createdAt": "2023-11-07T05:31:56Z",
"updatedAt": "2023-11-07T05:31:56Z",
"rotationInterval": 123,
"rotationStatus": "success",
"lastRotationAttemptedAt": "2023-11-07T05:31:56Z",
"lastRotatedAt": "2023-11-07T05:31:56Z",
"lastRotationJobId": null,
"nextRotationAt": "2023-11-07T05:31:56Z",
"isLastRotationManual": true,
"connection": {
"app": "aws",
"name": "my-aws-connection",
"id": "3c90c3cc-0d44-4b50-8888-8dd25736052a"
},
"environment": {
"slug": "dev",
"name": "Development",
"id": "3c90c3cc-0d44-4b50-8888-8dd25736052a"
},
"projectId": "9602cfc5-20b9-4c35-a056-dd7372db0f25",
"folder": {
"id": "3c90c3cc-0d44-4b50-8888-8dd25736052a",
"path": "/"
},
"rotateAtUtc": {
"hours": 11.5,
"minutes": 29.5
},
"lastRotationMessage": null,
"type": "aws-iam-user-secret",
"parameters": {
"userName": "testUser",
"region": "us-east-1"
}
}
}
```


 2. Select **AWS Account** as the **Trusted Entity Type**.
3. Select **Another AWS Account** and provide the appropriate Infisical AWS Account ID: use **381492033652** for the **US region**, and **345594589636** for the **EU region**. This restricts the role to be assumed only by Infisical. If self-hosting, provide your AWS account number instead.
2. Select **AWS Account** as the **Trusted Entity Type**.
3. Select **Another AWS Account** and provide the appropriate Infisical AWS Account ID: use **381492033652** for the **US region**, and **345594589636** for the **EU region**. This restricts the role to be assumed only by Infisical. If self-hosting, provide your AWS account number instead.

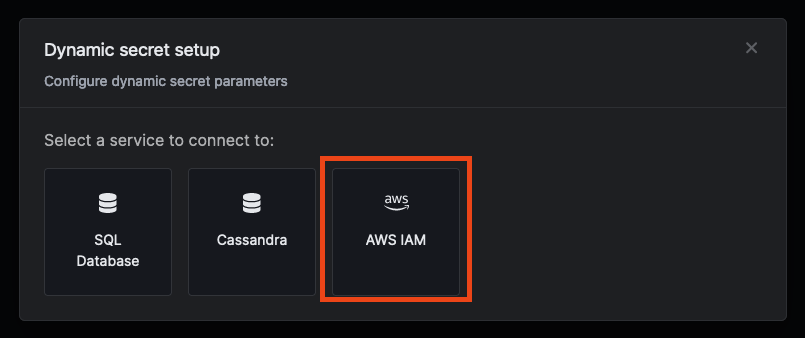
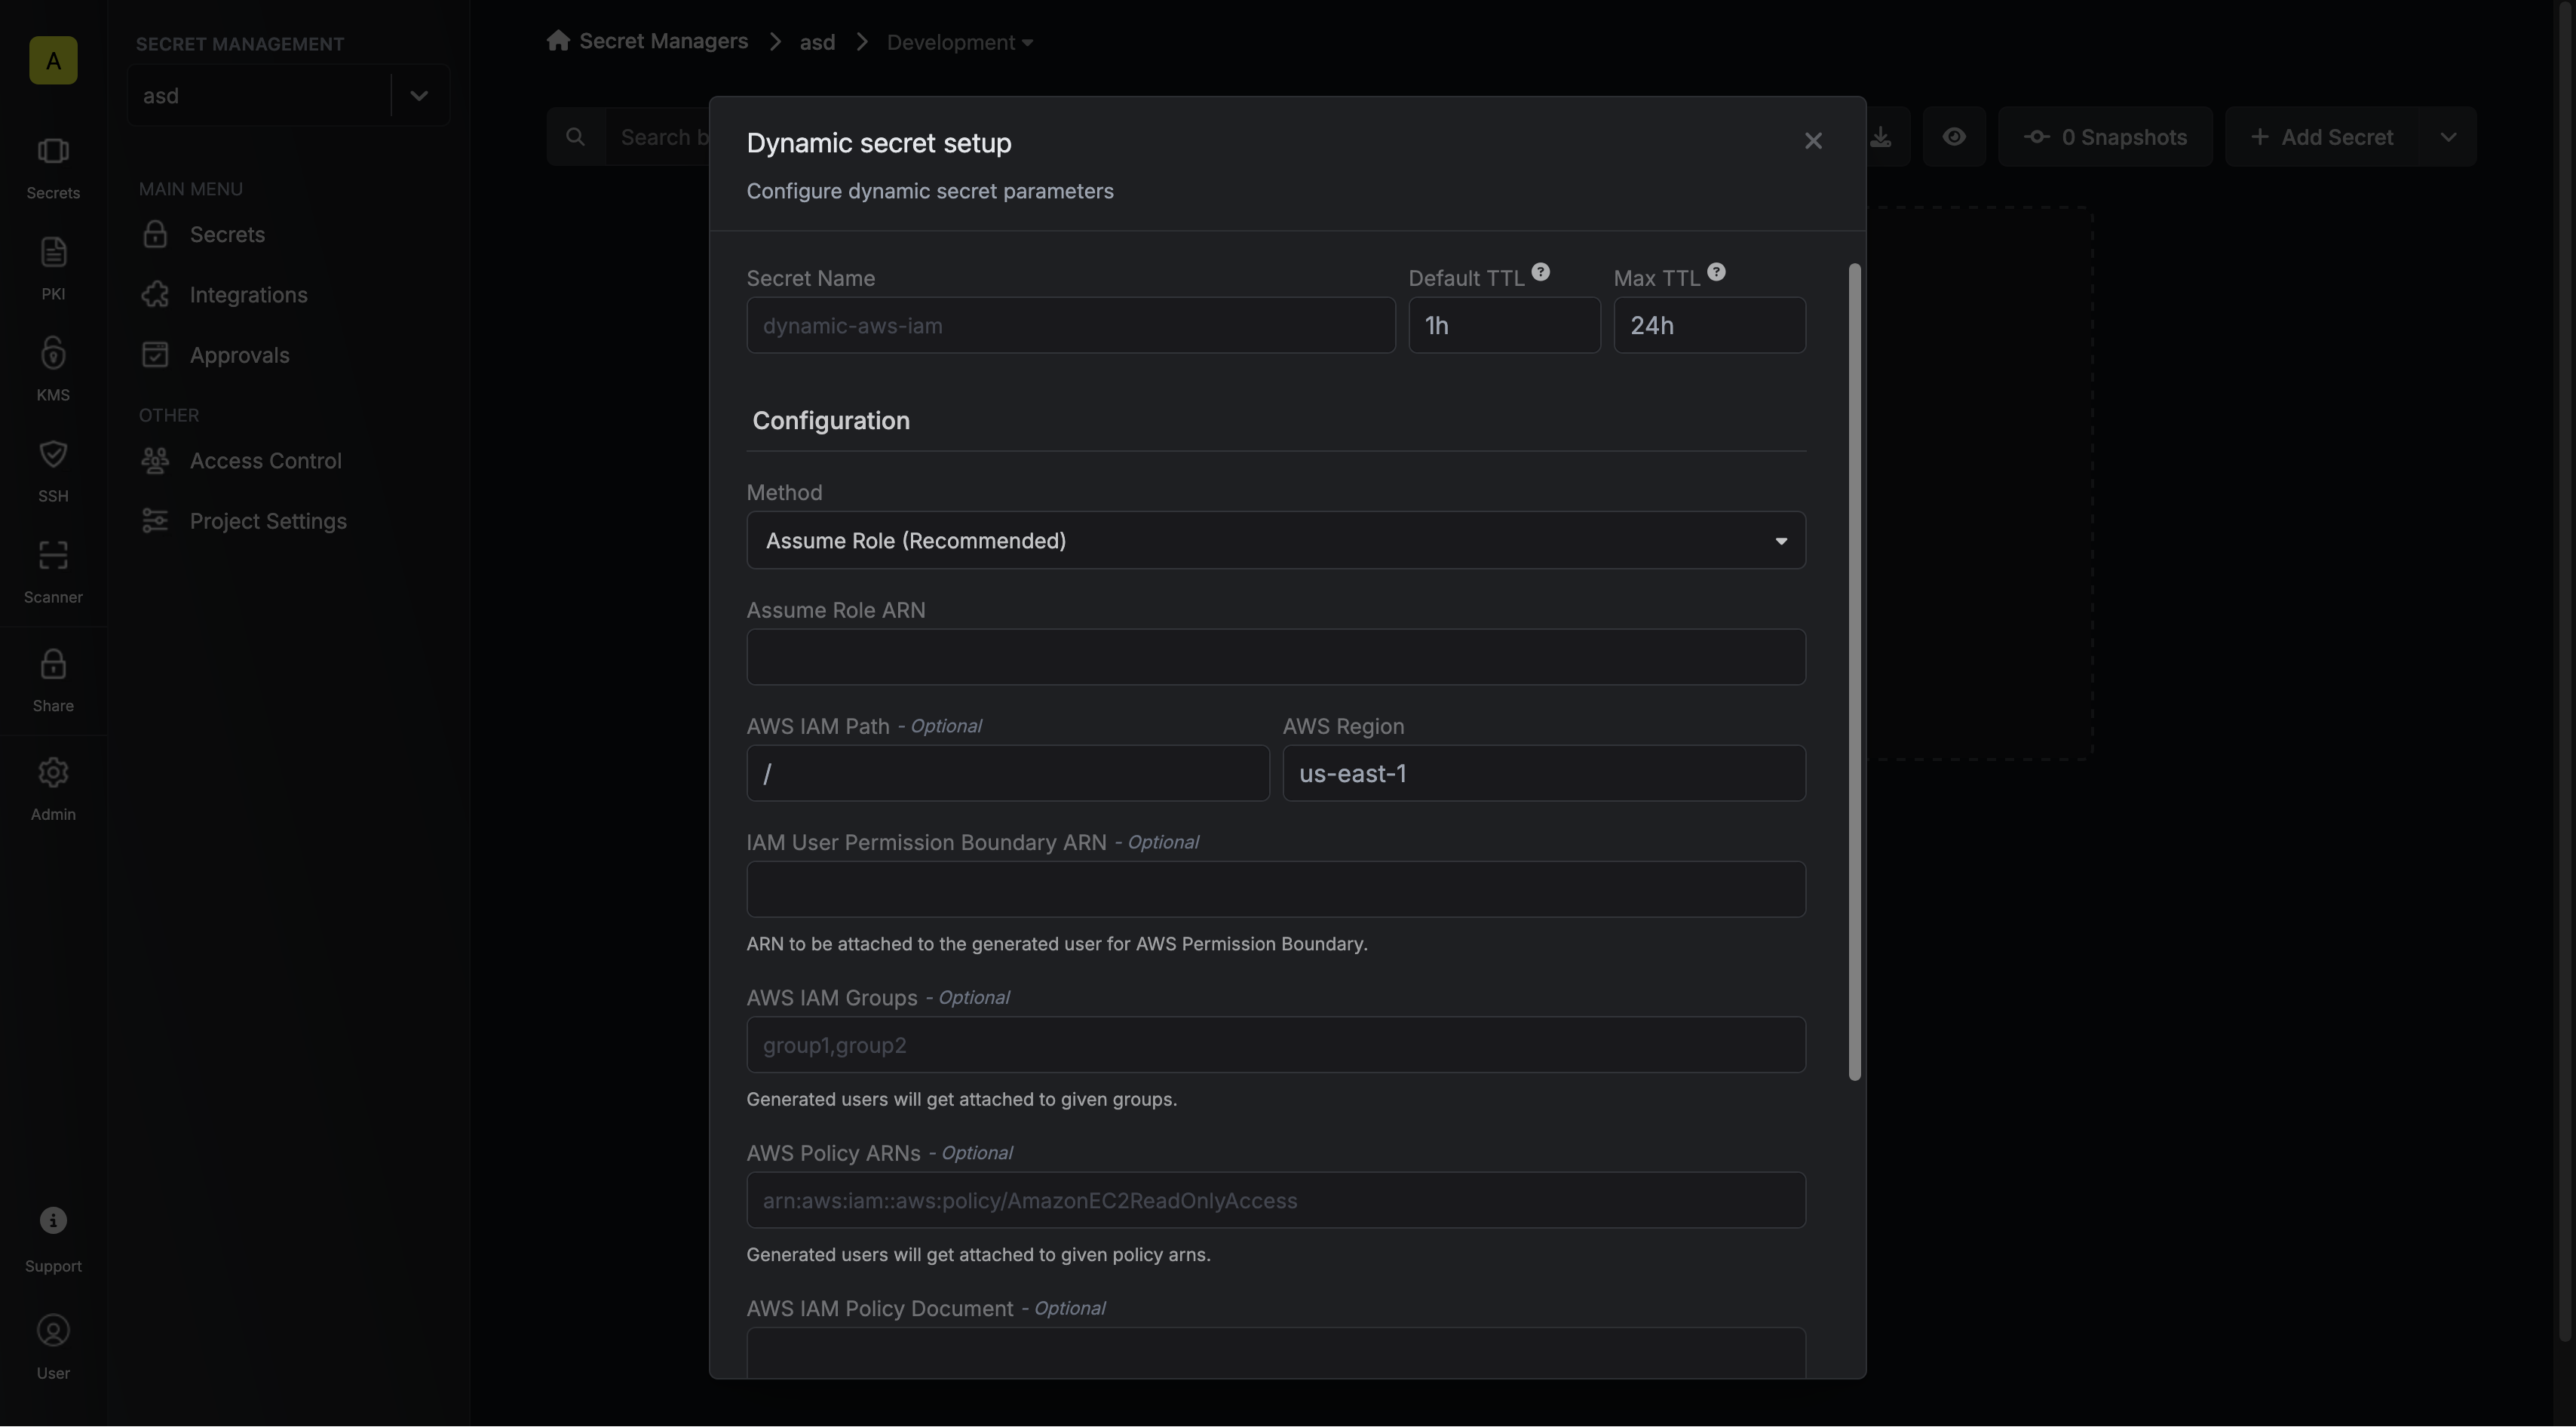
 When generating these secrets, it's important to specify a Time-to-Live (TTL) duration. This will dictate how long the credentials are valid for.

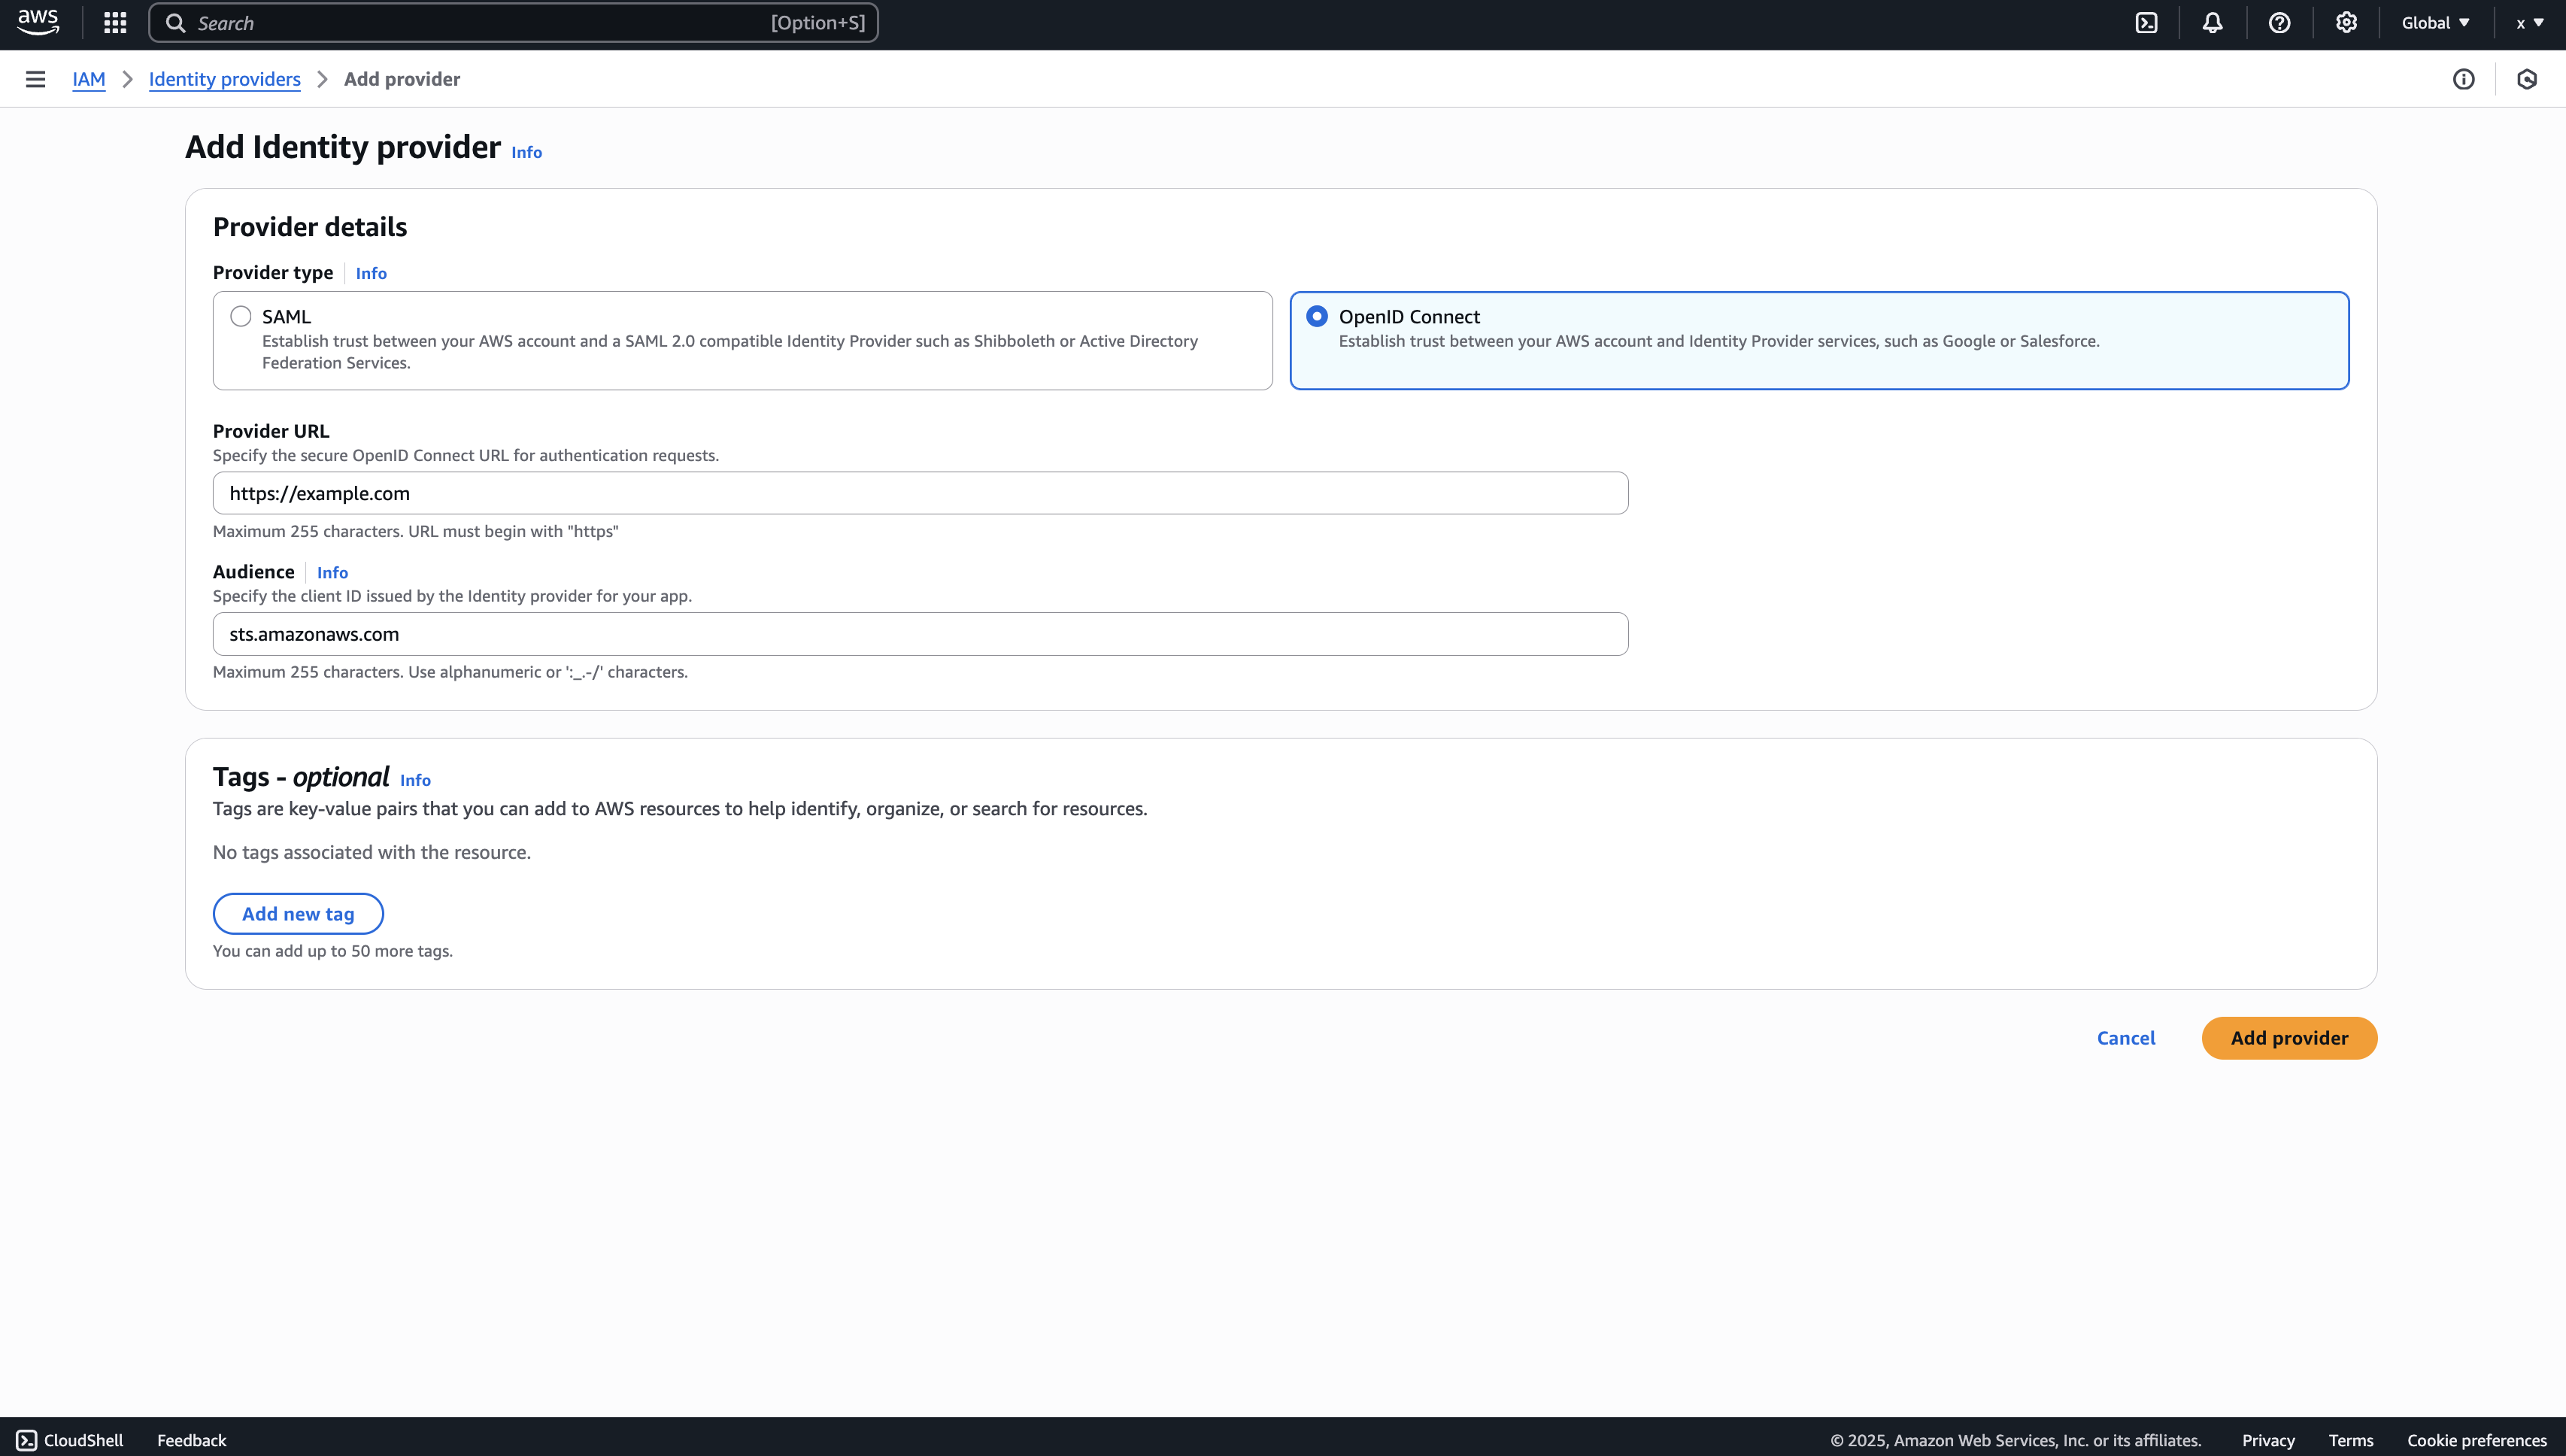
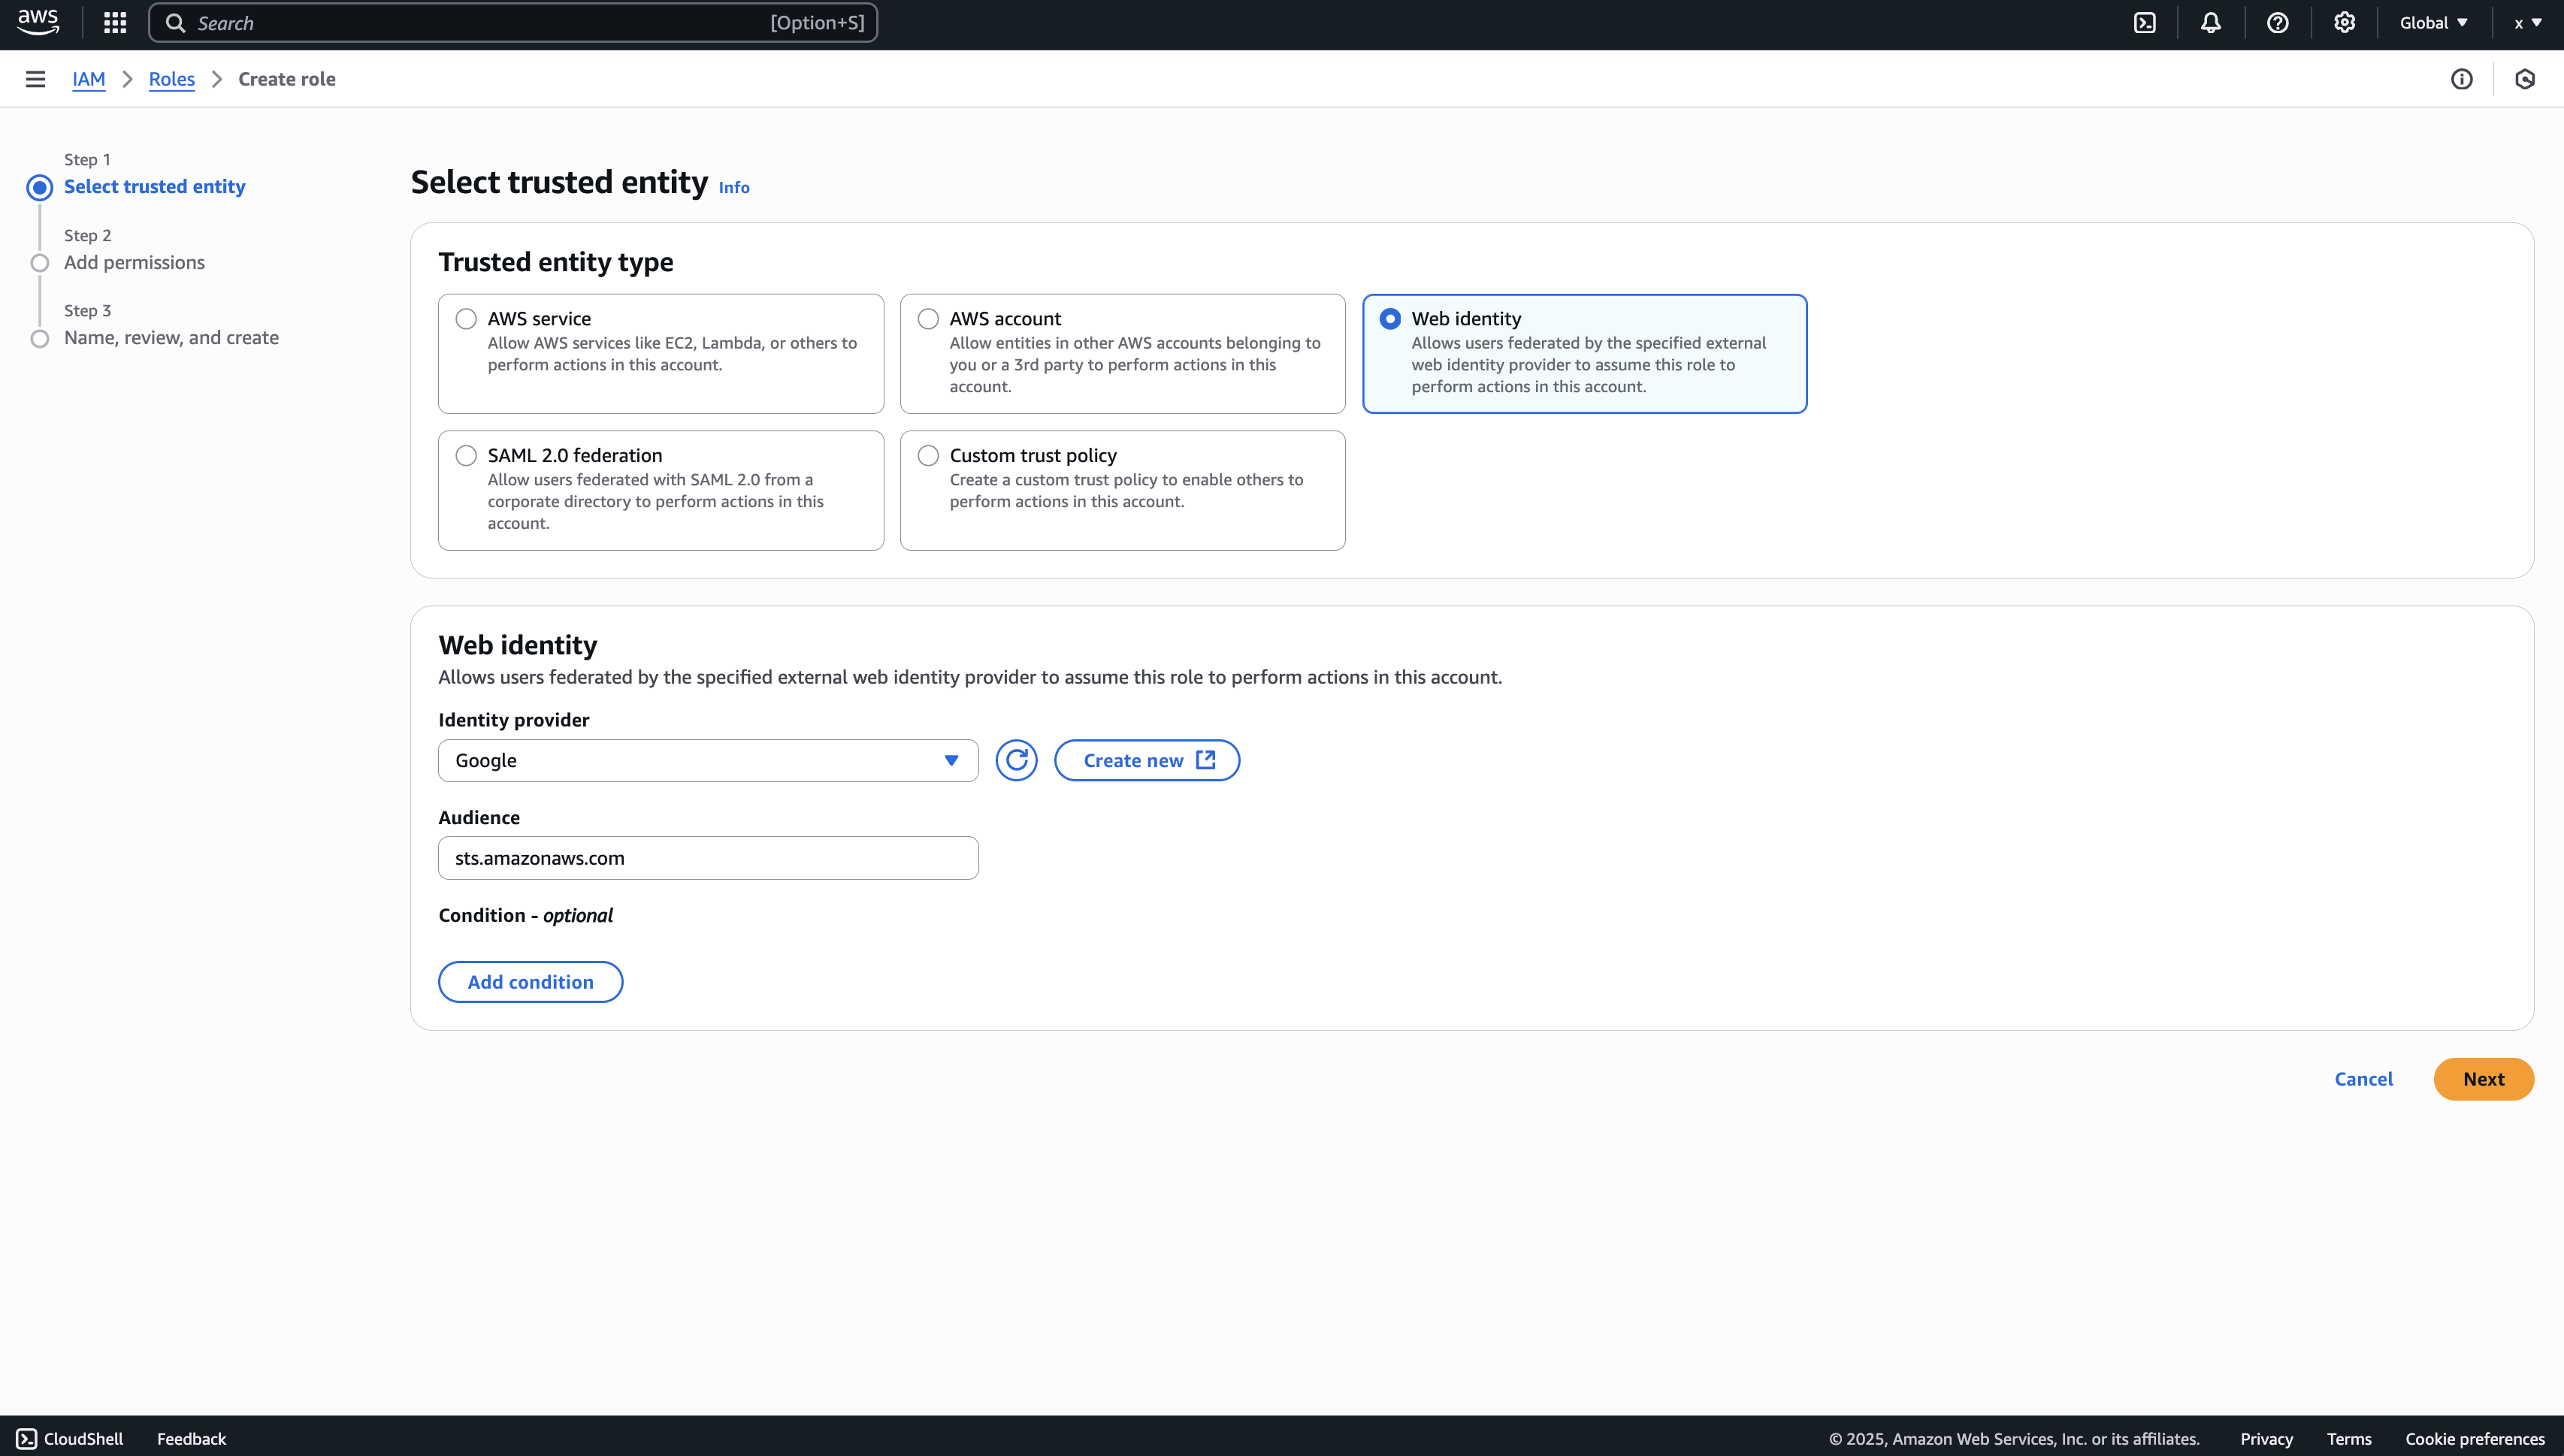 5. Attach the permission policy detailed in the **Prerequisite** section at the top of this page.
6. After creating the role, edit its **Trust relationship** to specify the service account Infisical is using in your cluster. This ensures only the Infisical pod can assume this role.
```json theme={"dark"}
{
"Version": "2012-10-17",
"Statement": [
{
"Effect": "Allow",
"Principal": {
"Federated": "arn:aws:iam::
5. Attach the permission policy detailed in the **Prerequisite** section at the top of this page.
6. After creating the role, edit its **Trust relationship** to specify the service account Infisical is using in your cluster. This ensures only the Infisical pod can assume this role.
```json theme={"dark"}
{
"Version": "2012-10-17",
"Statement": [
{
"Effect": "Allow",
"Principal": {
"Federated": "arn:aws:iam::
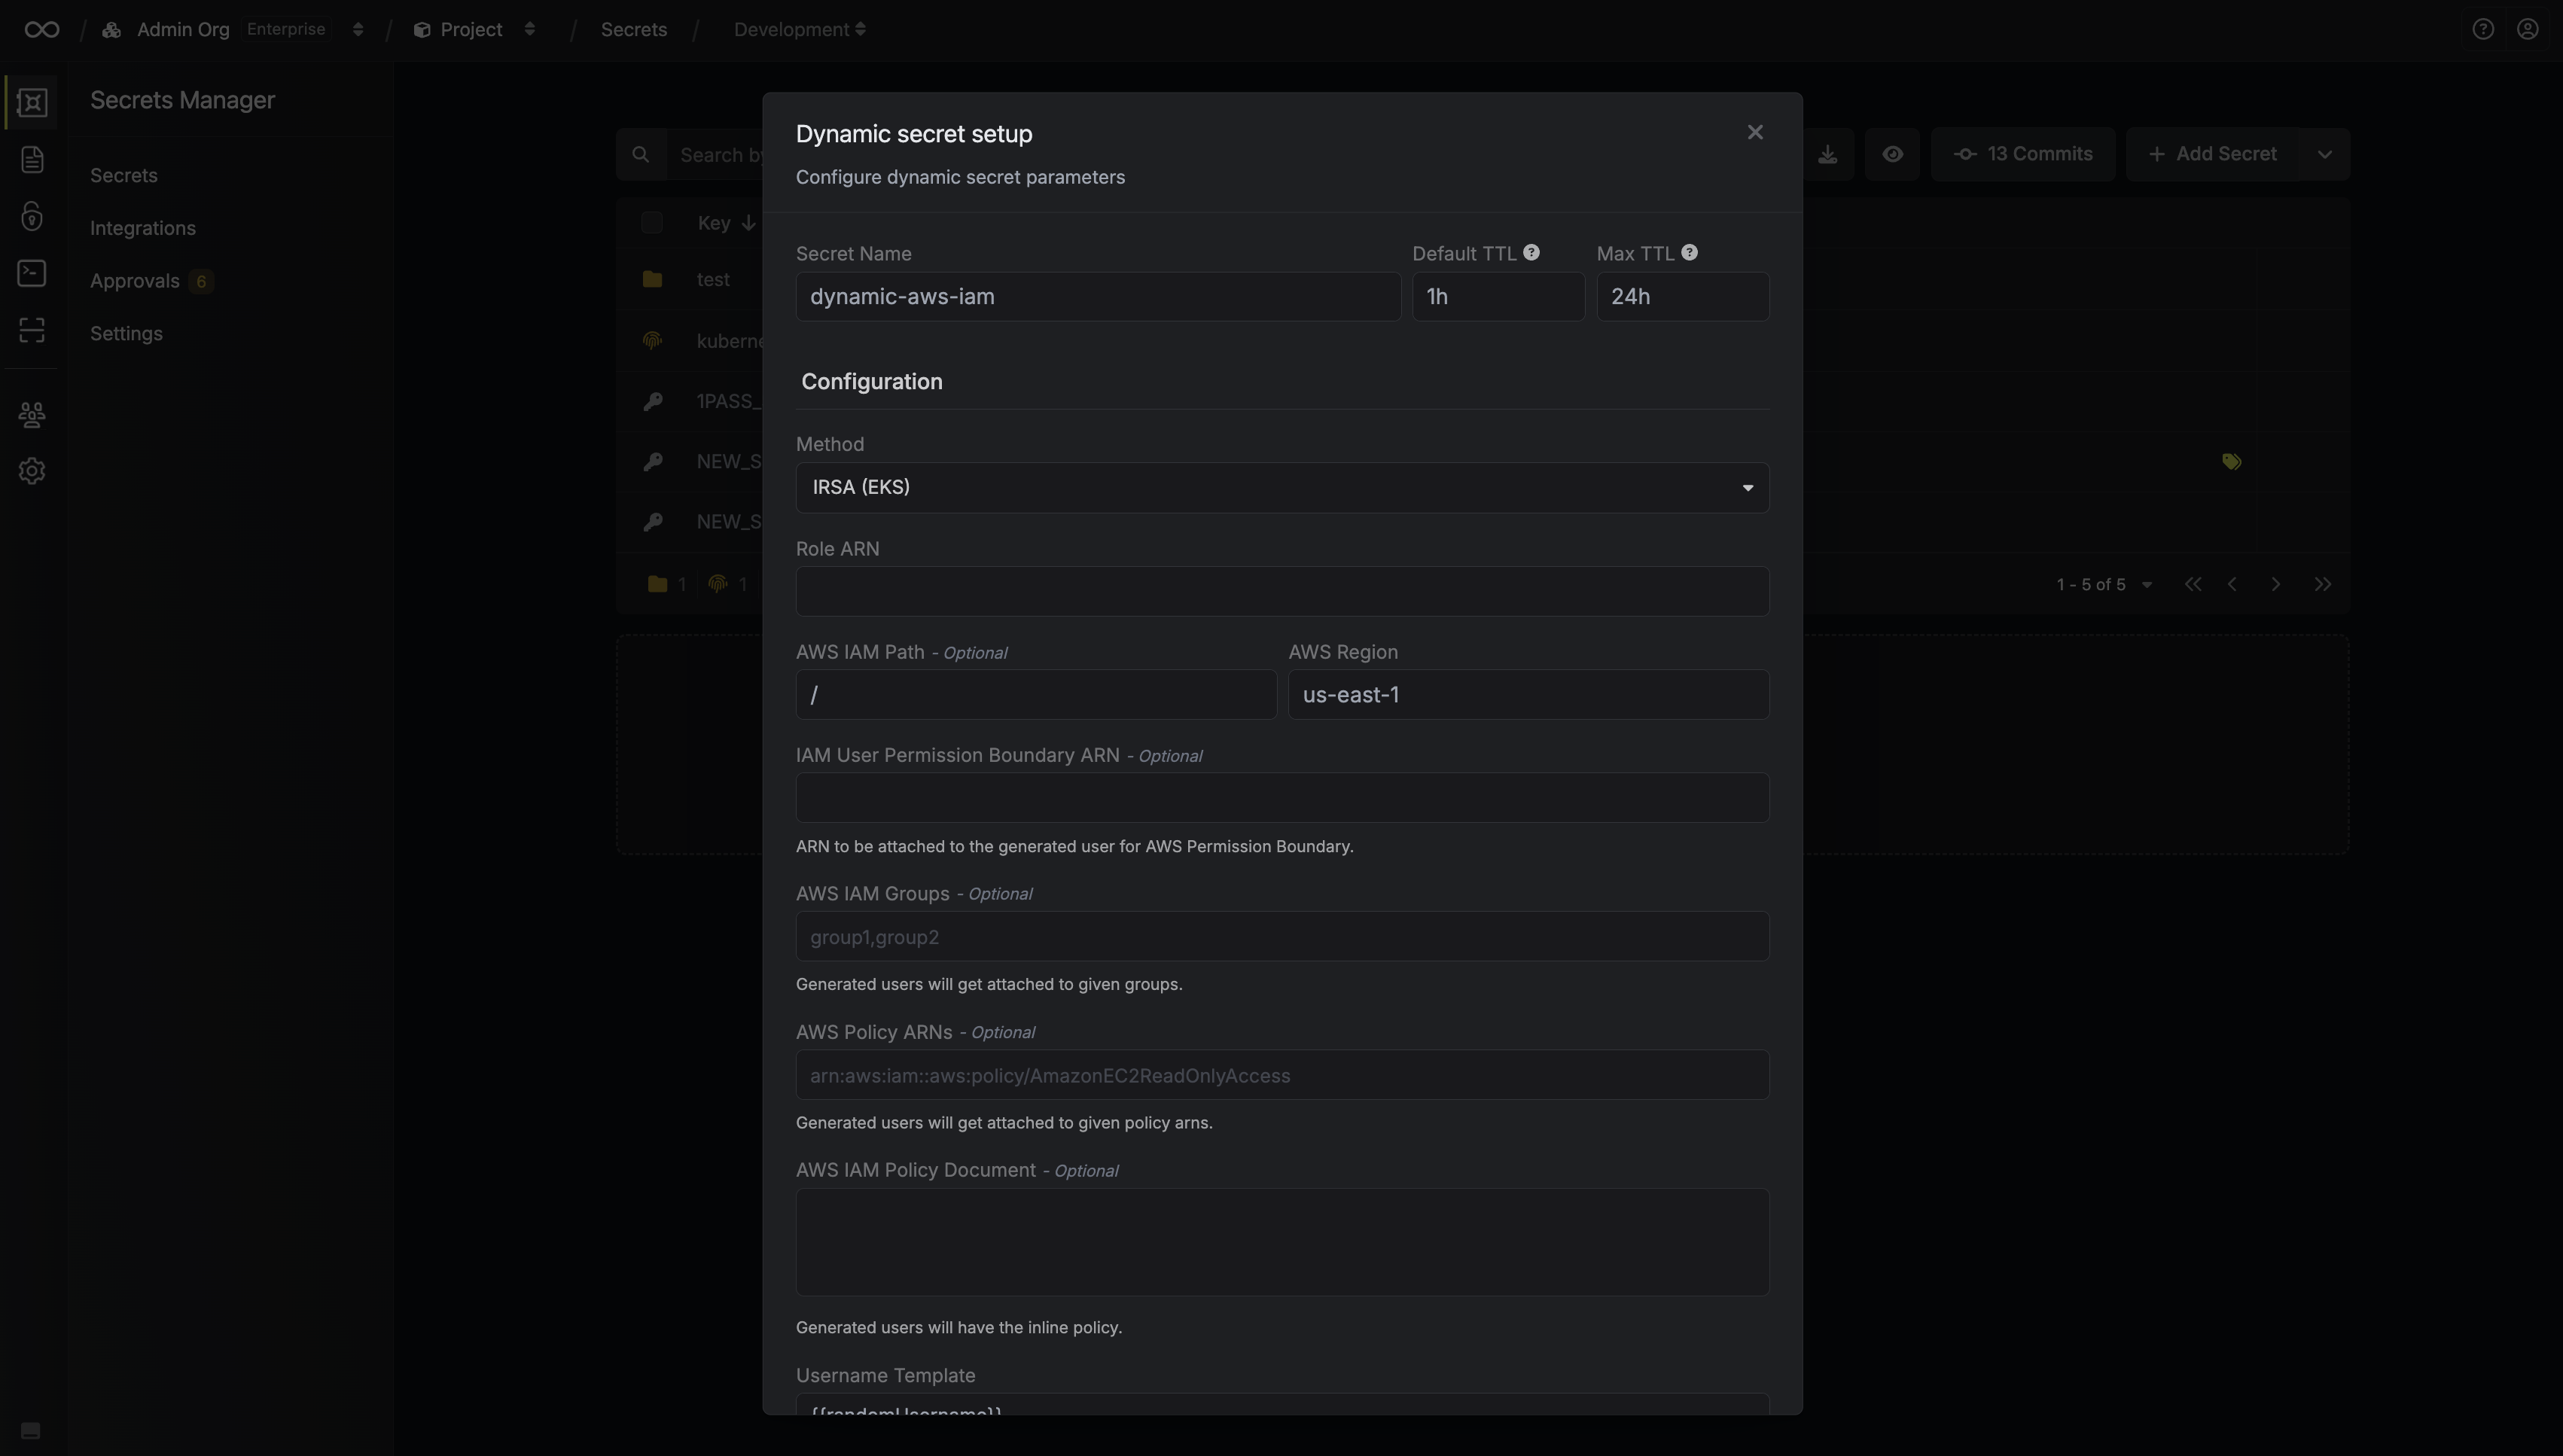 When generating these secrets, it's important to specify a Time-to-Live (TTL) duration. This will dictate how long the credentials are valid for.
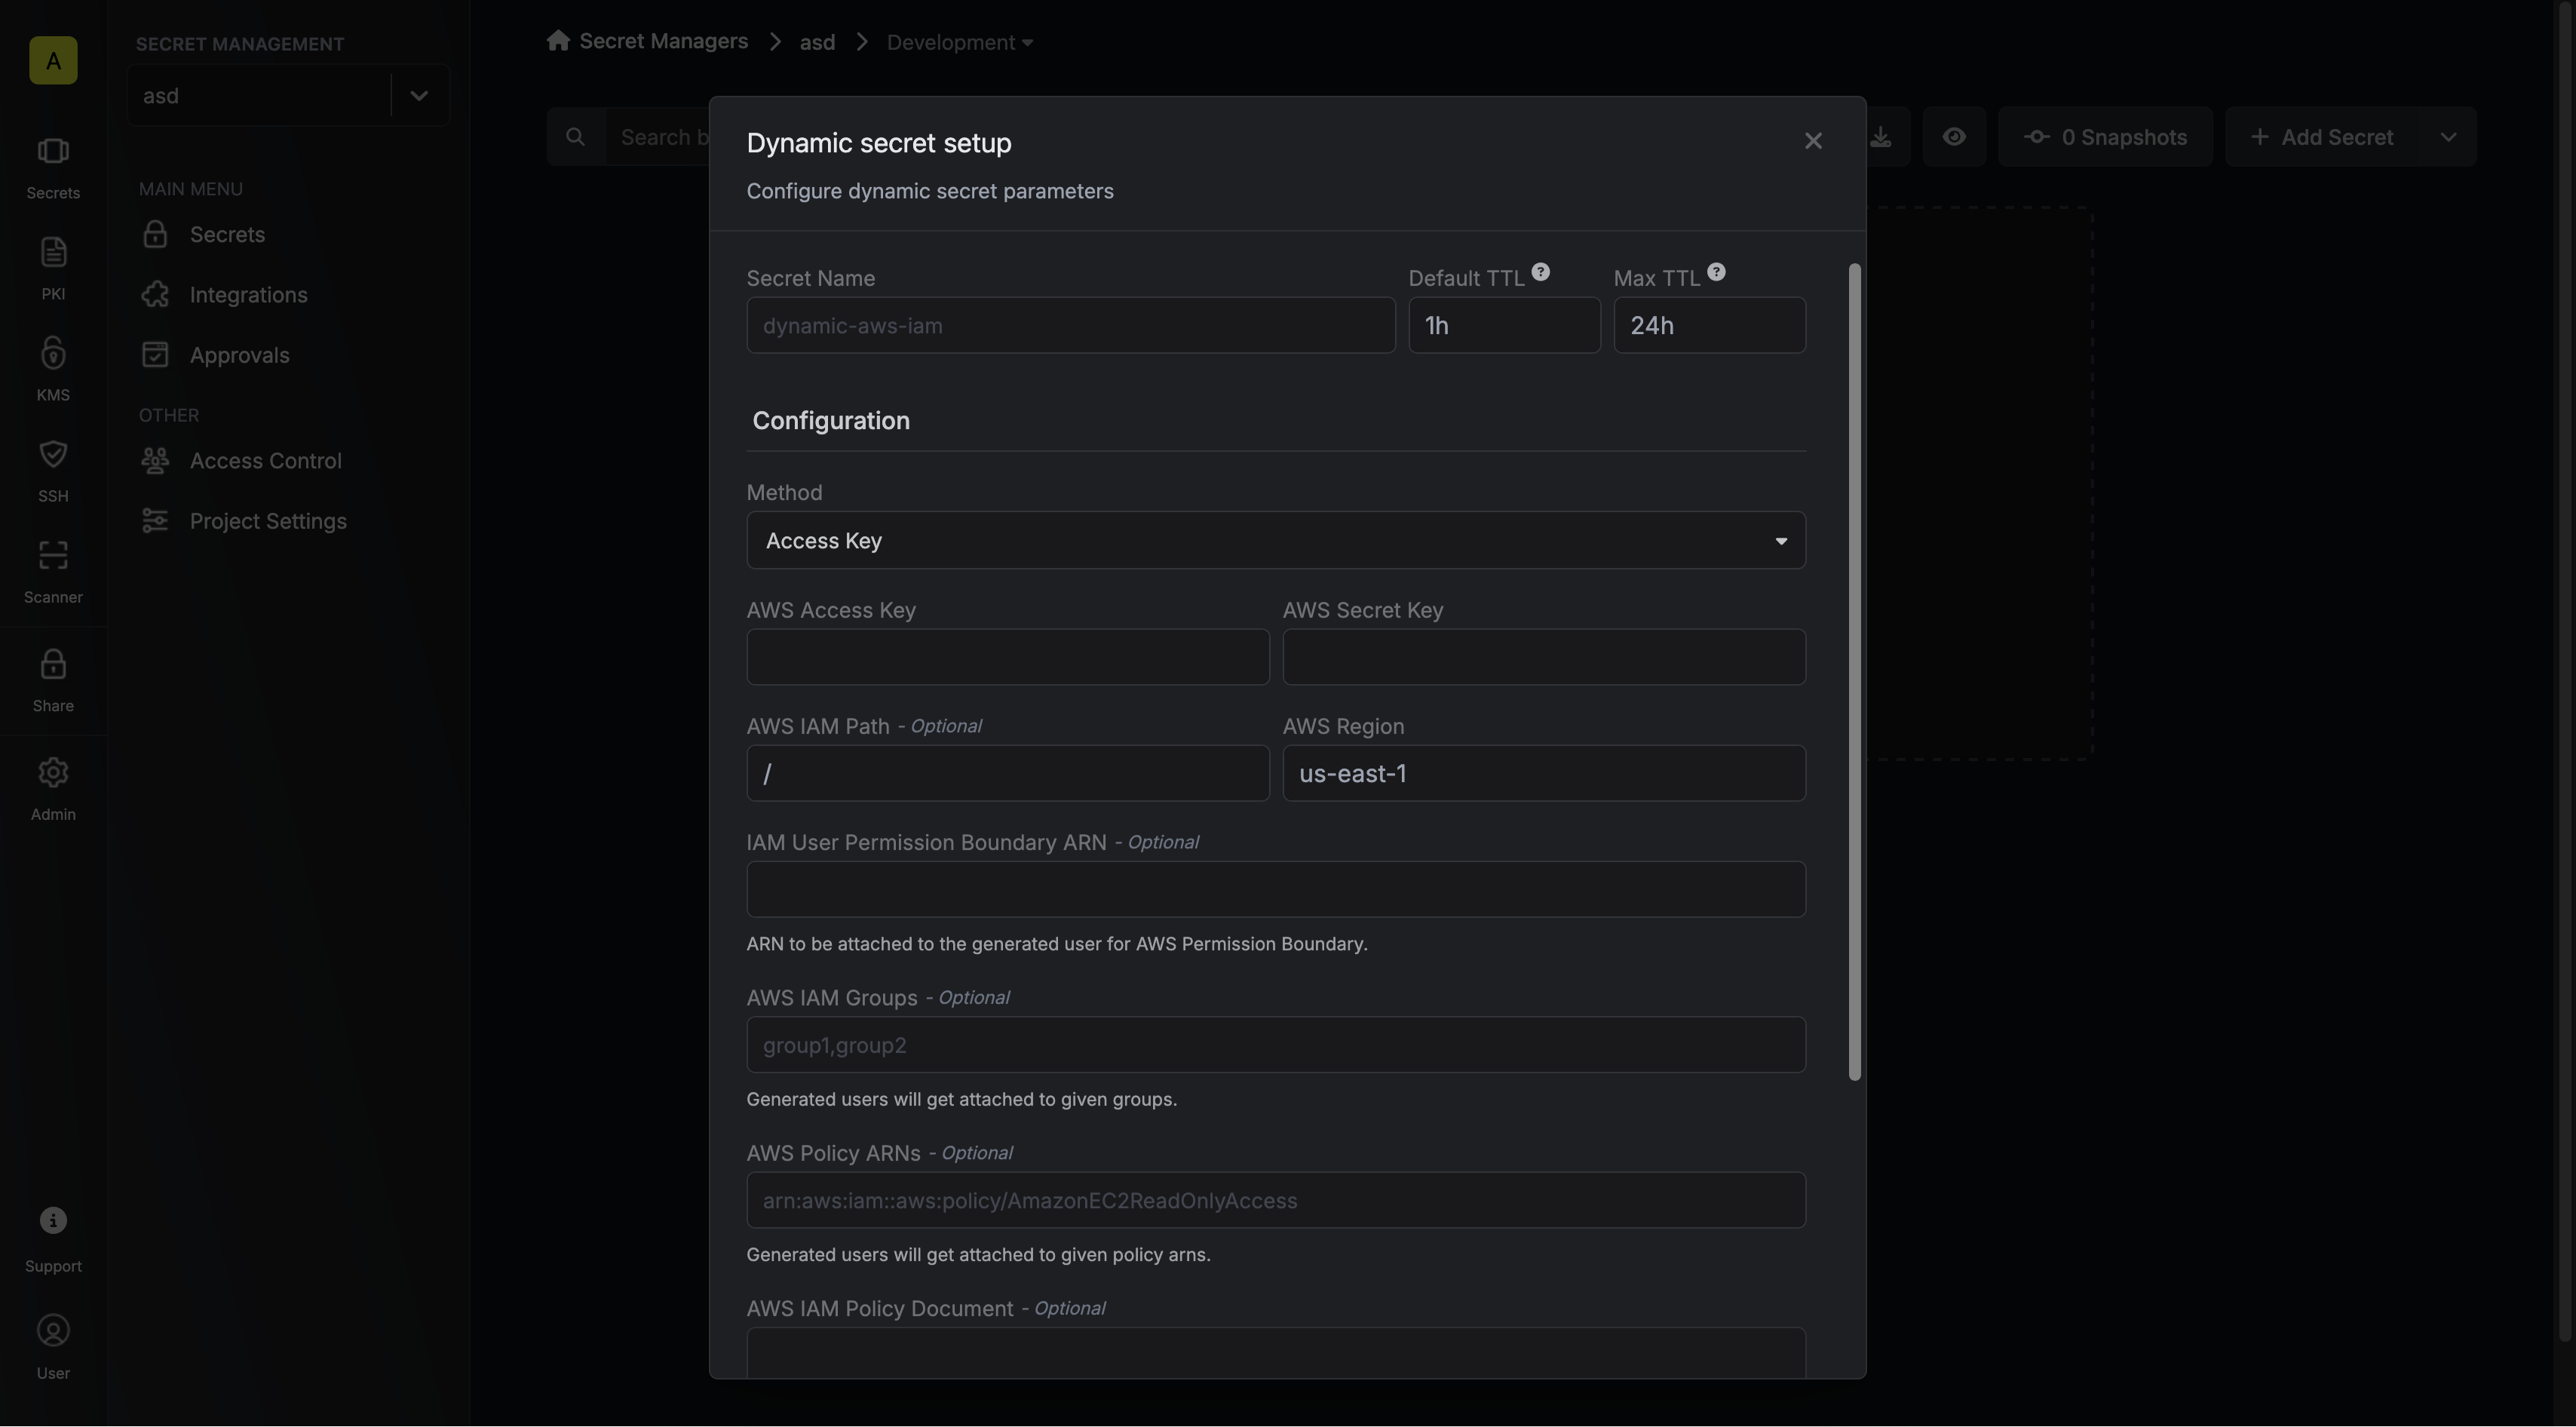 When generating these secrets, it's important to specify a Time-to-Live (TTL) duration. This will dictate how long the credentials are valid for.
## Renew Leases
To extend the life of the generated dynamic secret lease past its initial time to live, simply click on the **Renew** button as illustrated below.
When generating these secrets, it's important to specify a Time-to-Live (TTL) duration. This will dictate how long the credentials are valid for.
## Renew Leases
To extend the life of the generated dynamic secret lease past its initial time to live, simply click on the **Renew** button as illustrated below.
 Before you begin, you'll first need to choose a method of authentication with AWS from below.
2. Select **AWS Account** as the **Trusted Entity Type**.
3. Select **Another AWS Account** and provide the appropriate Infisical AWS Account ID: use **381492033652** for the **US region**, and **345594589636** for the **EU region**. This restricts the role to be assumed only by Infisical. If you are self-hosting, provide the AWS account number where Infisical is hosted.
Before you begin, you'll first need to choose a method of authentication with AWS from below.
2. Select **AWS Account** as the **Trusted Entity Type**.
3. Select **Another AWS Account** and provide the appropriate Infisical AWS Account ID: use **381492033652** for the **US region**, and **345594589636** for the **EU region**. This restricts the role to be assumed only by Infisical. If you are self-hosting, provide the AWS account number where Infisical is hosted.

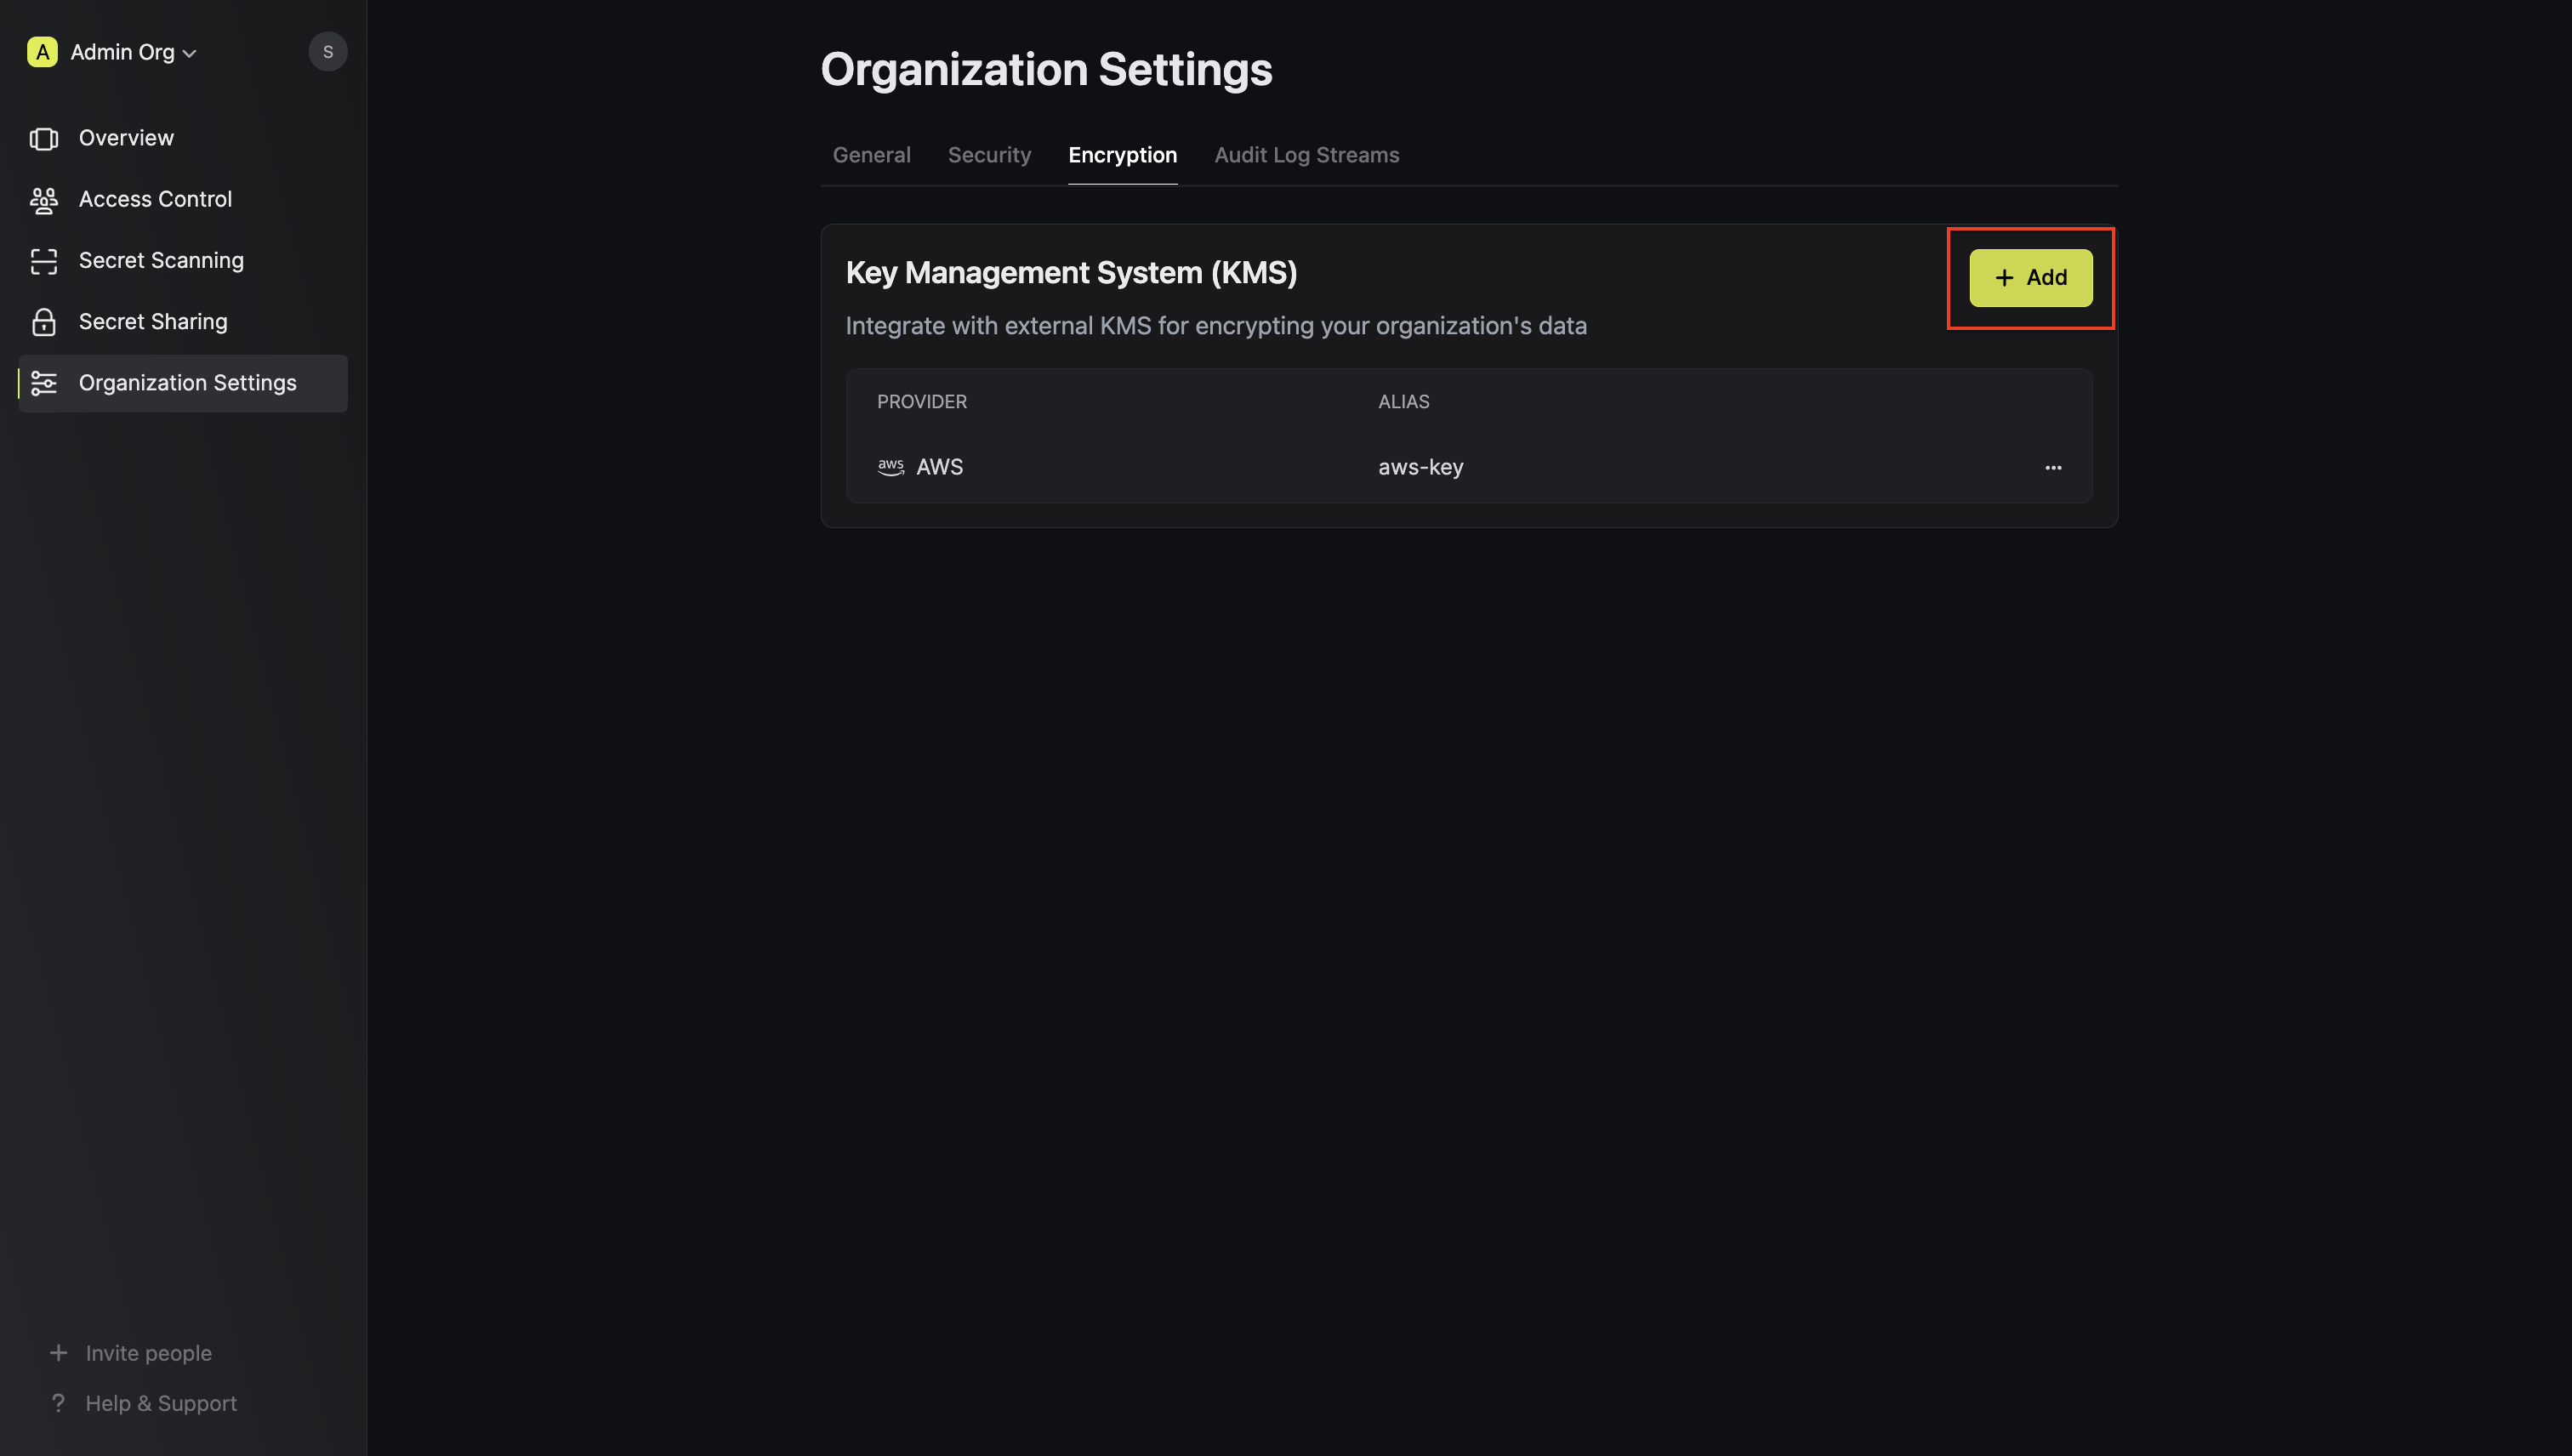 Click the 'Add' button to begin adding a new external KMS.
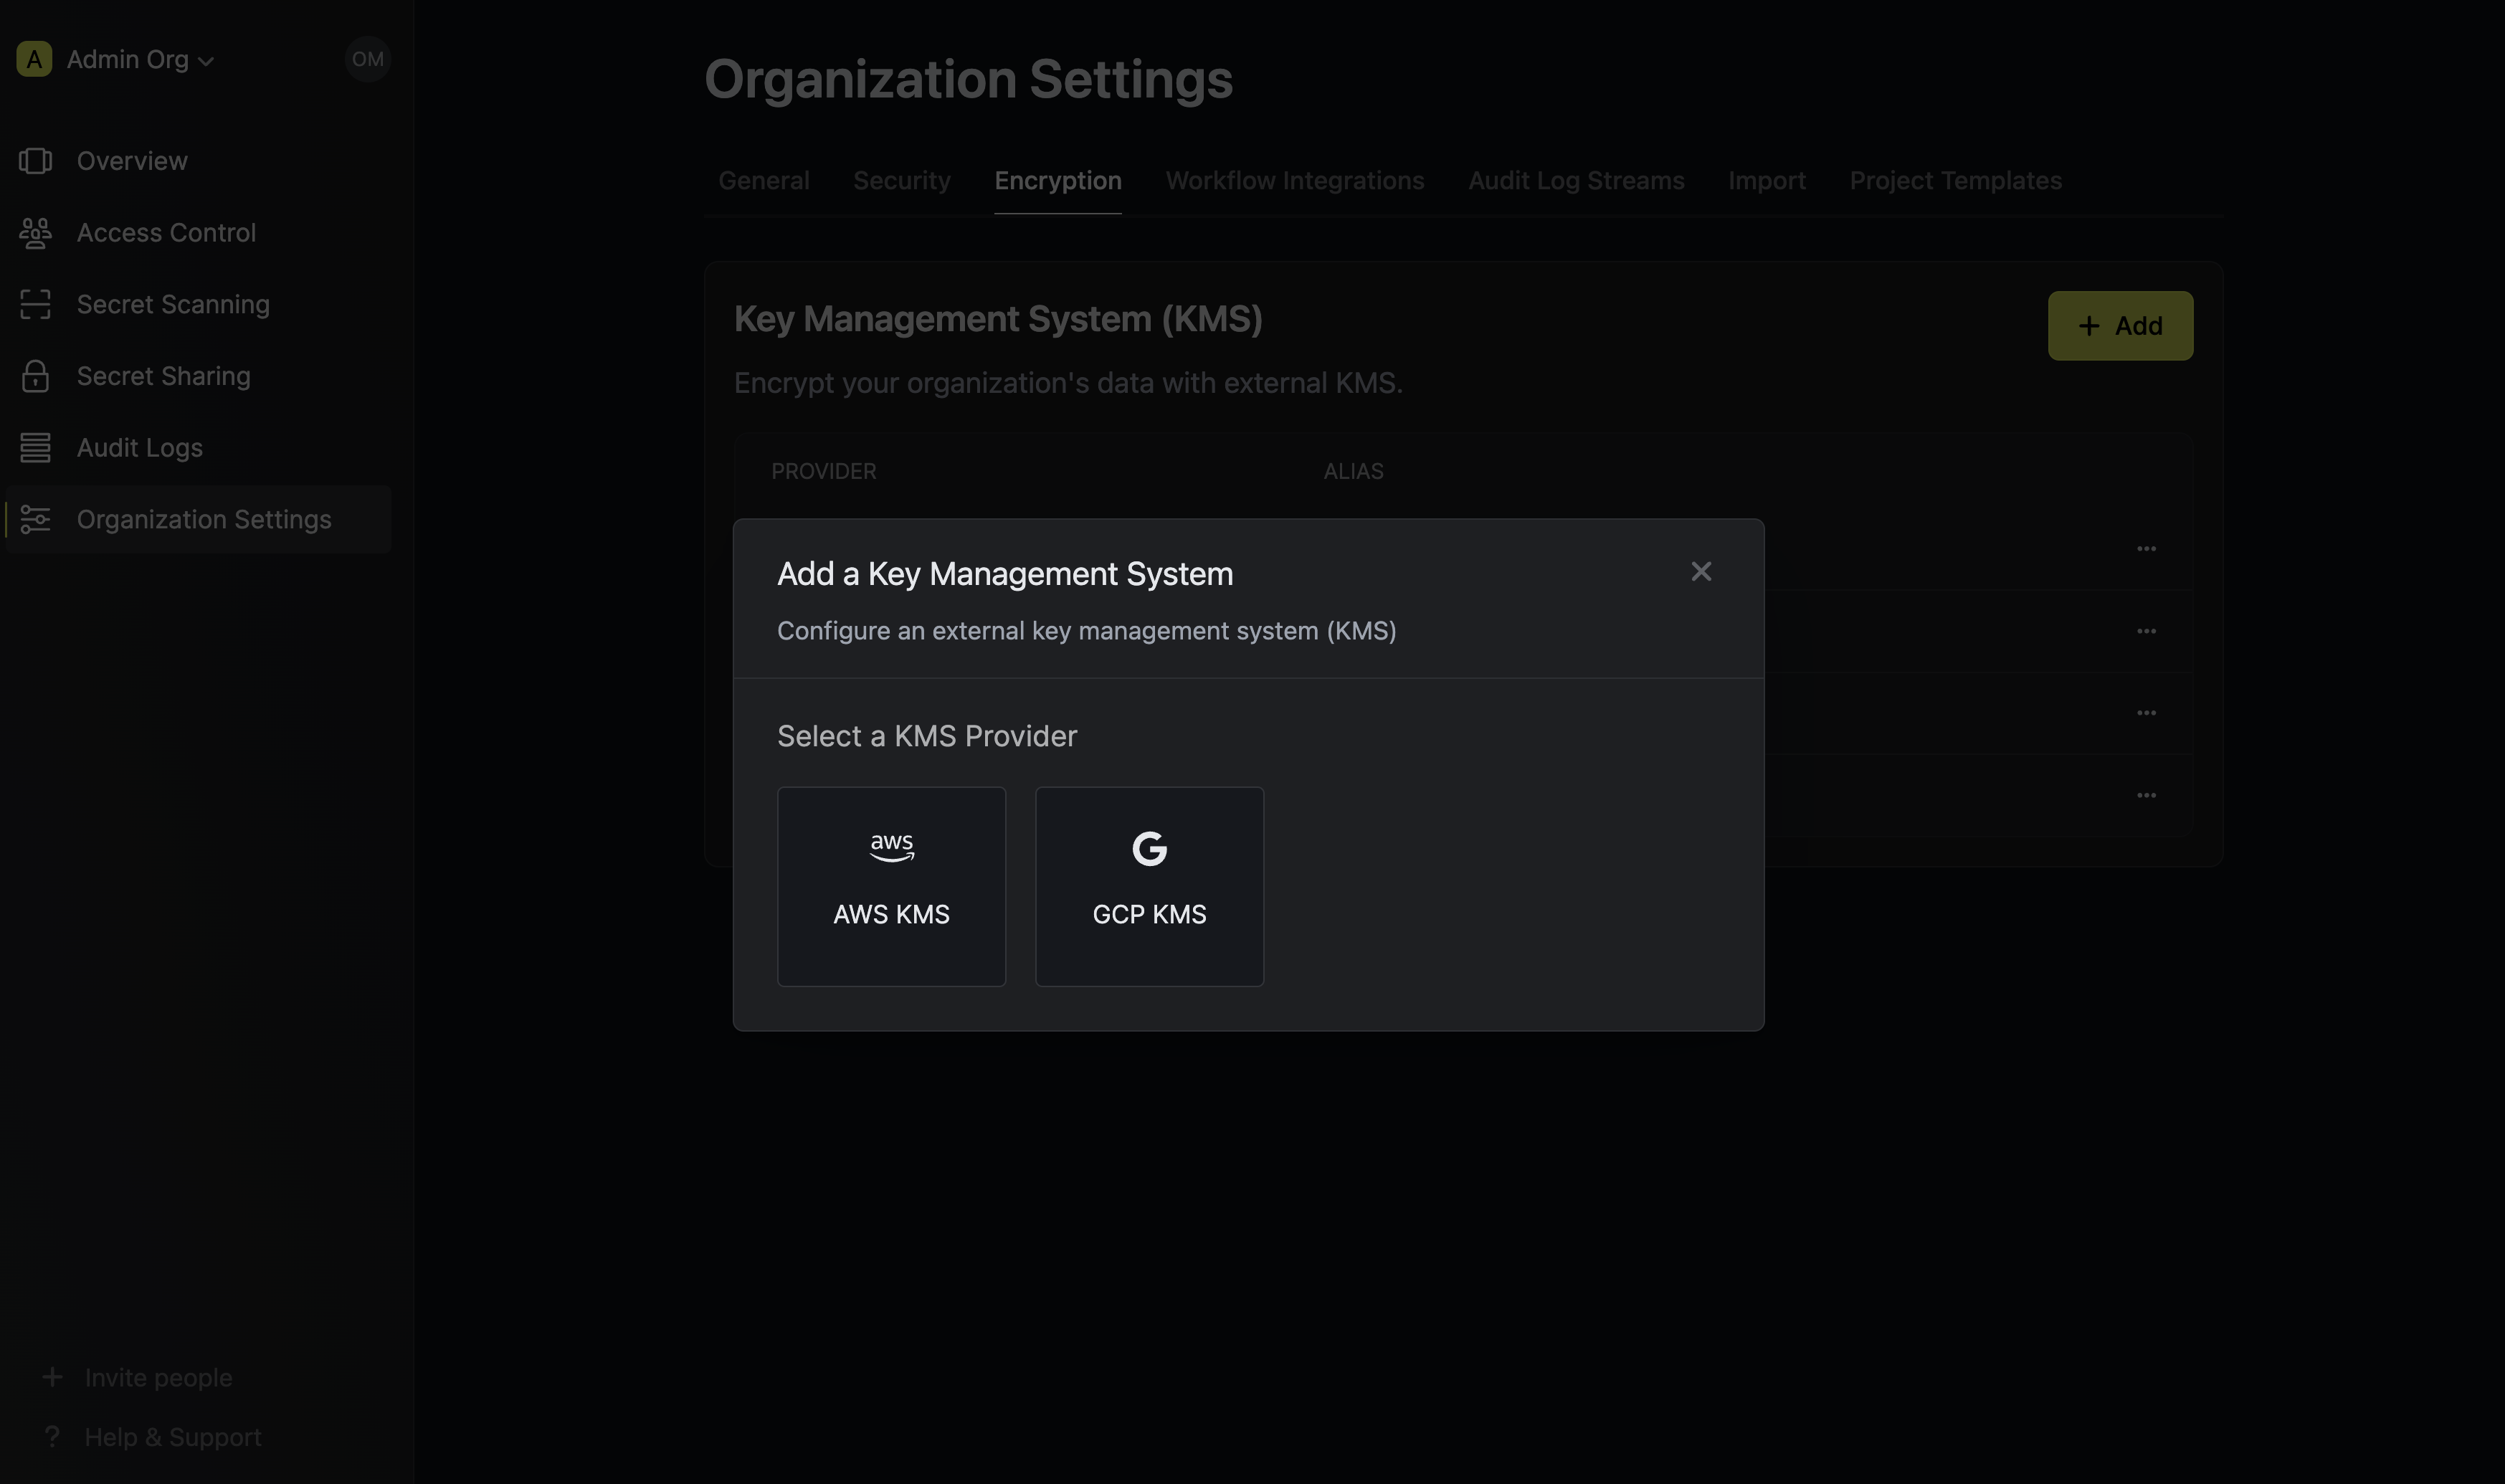 Choose 'AWS KMS' from the list of encryption providers.
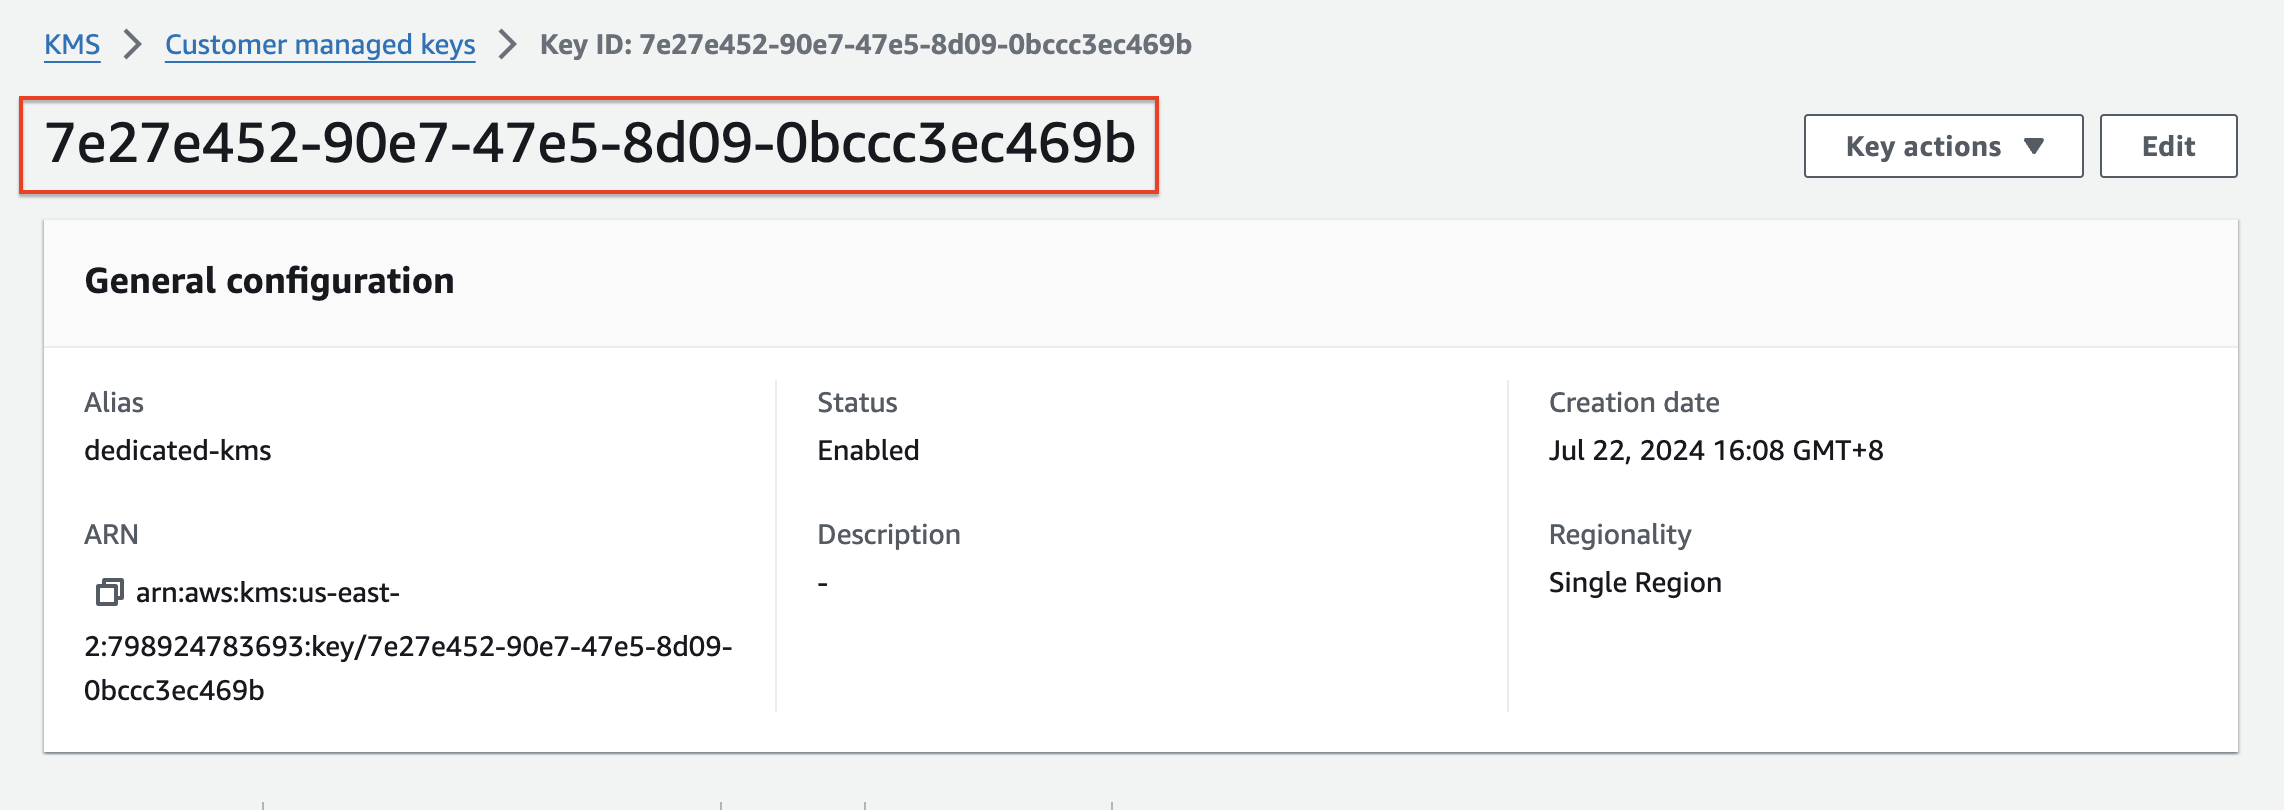
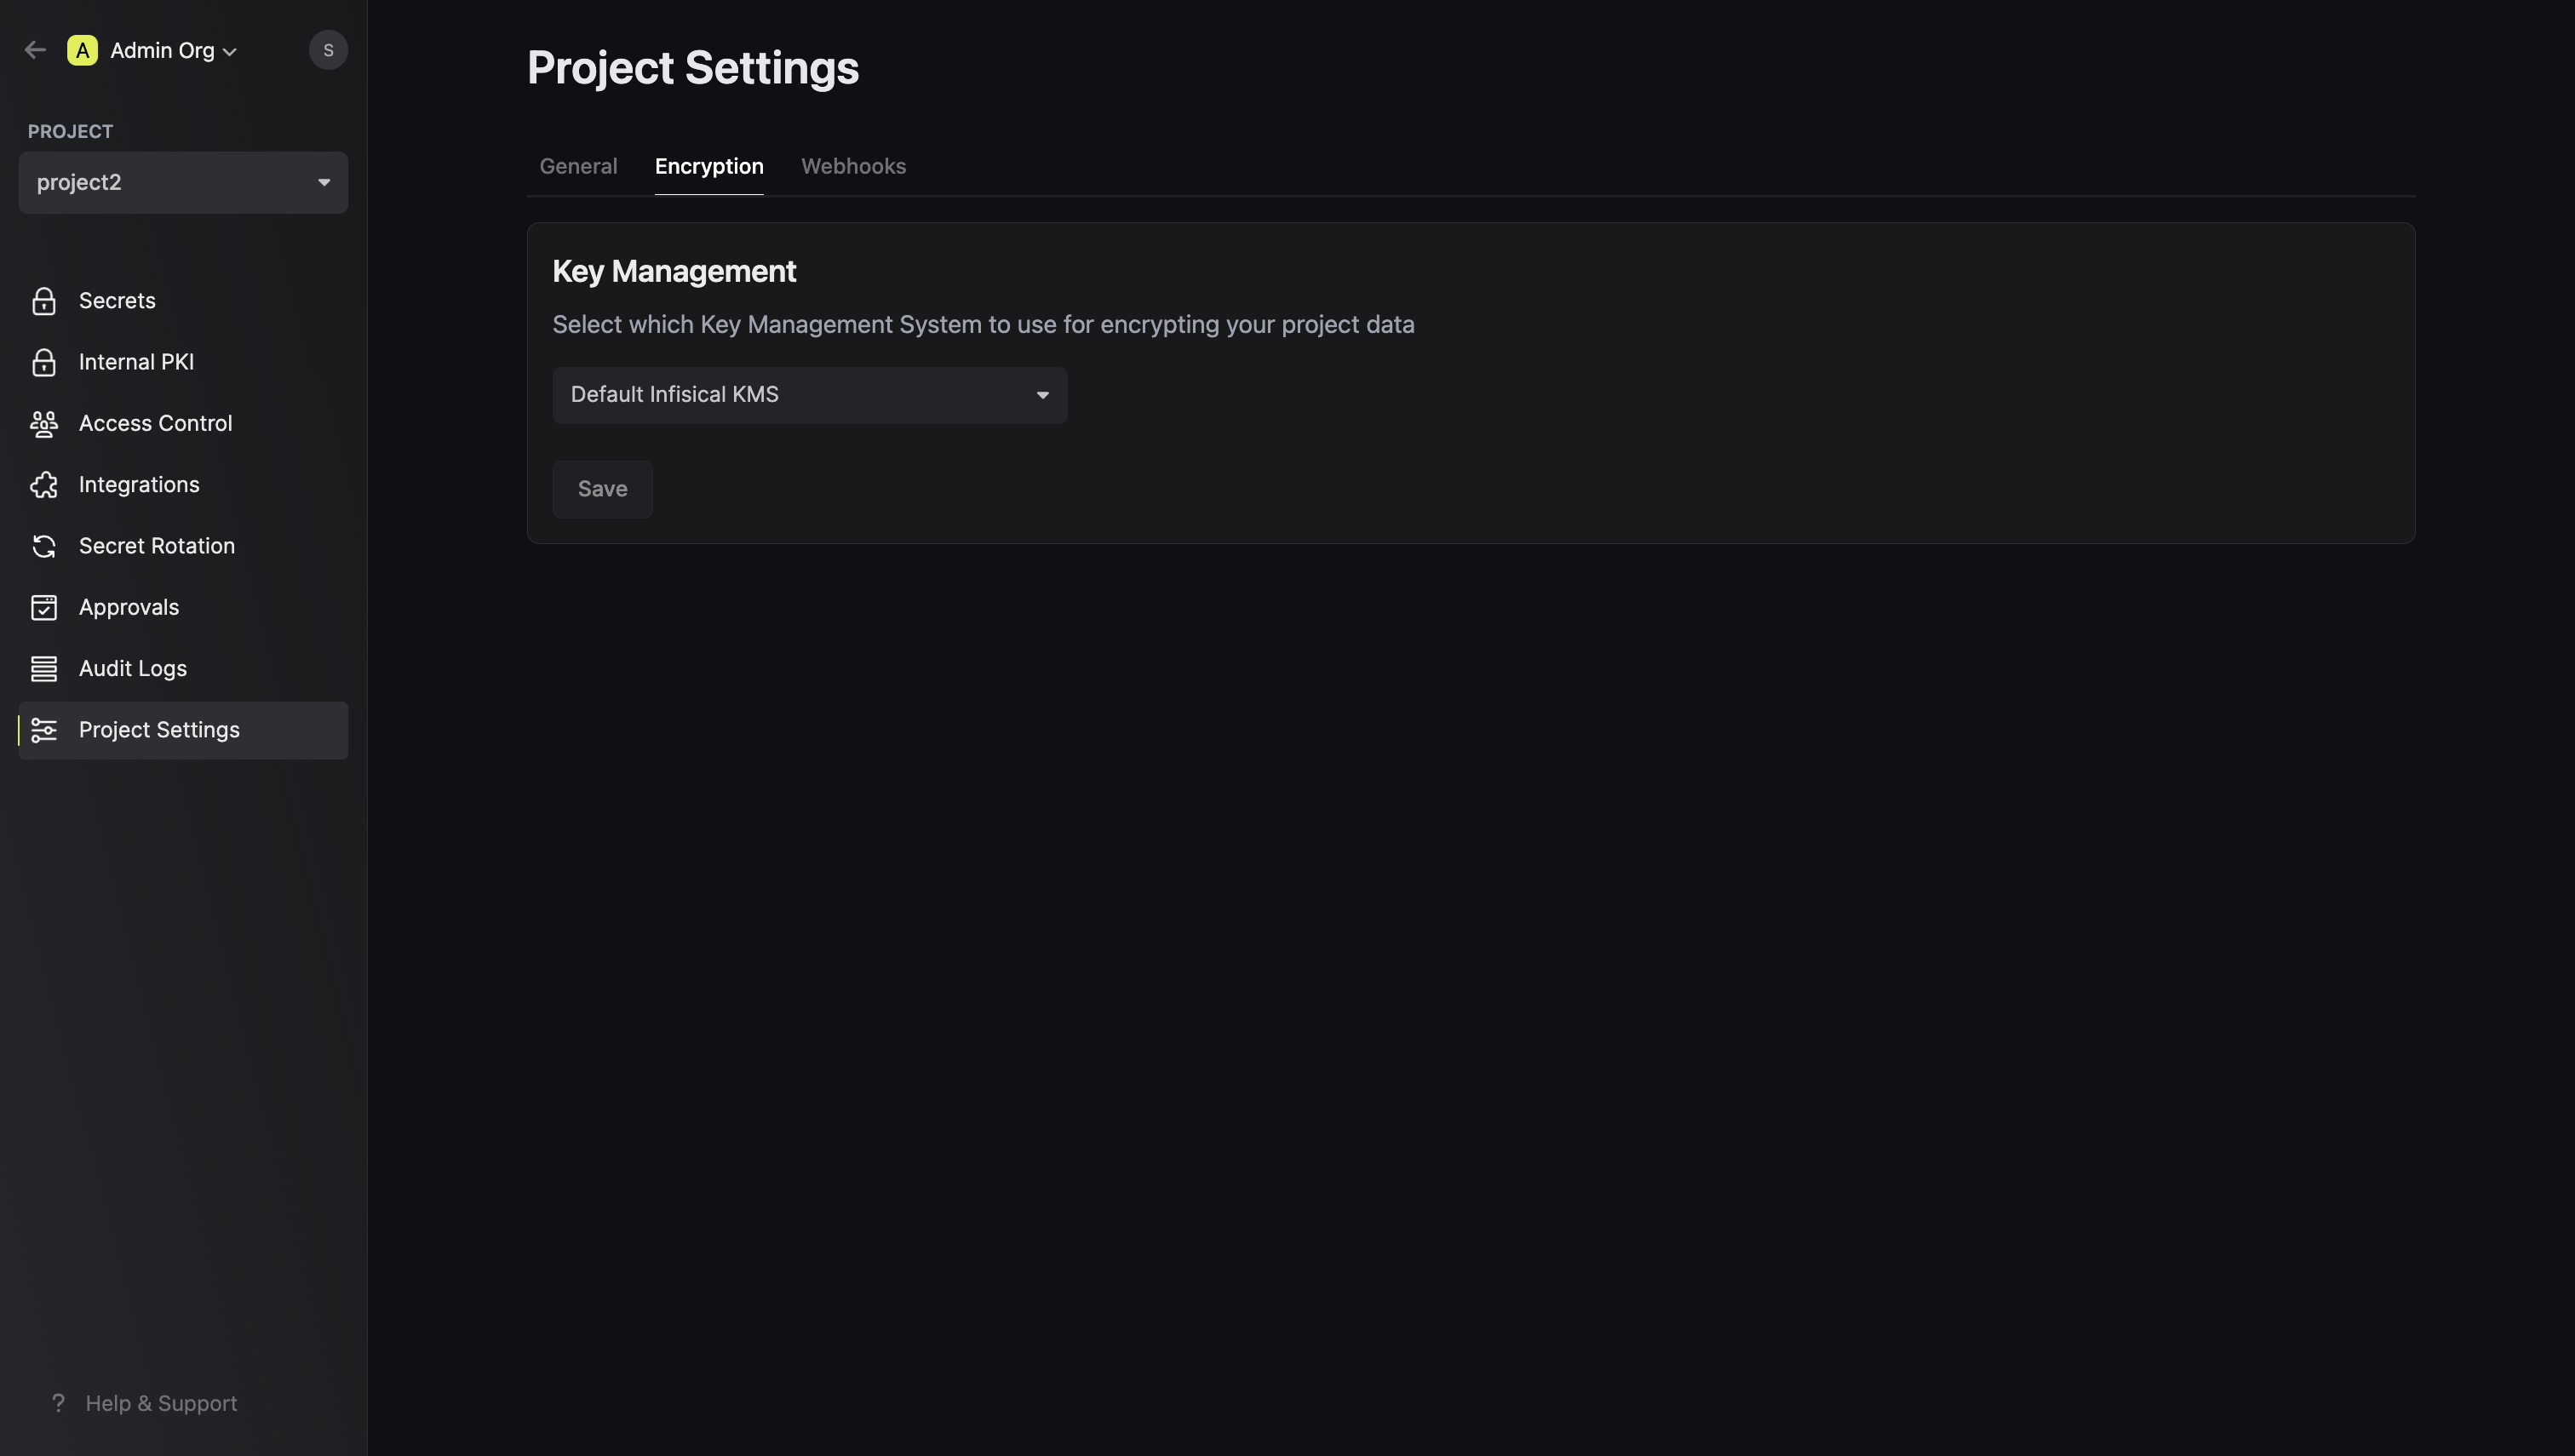
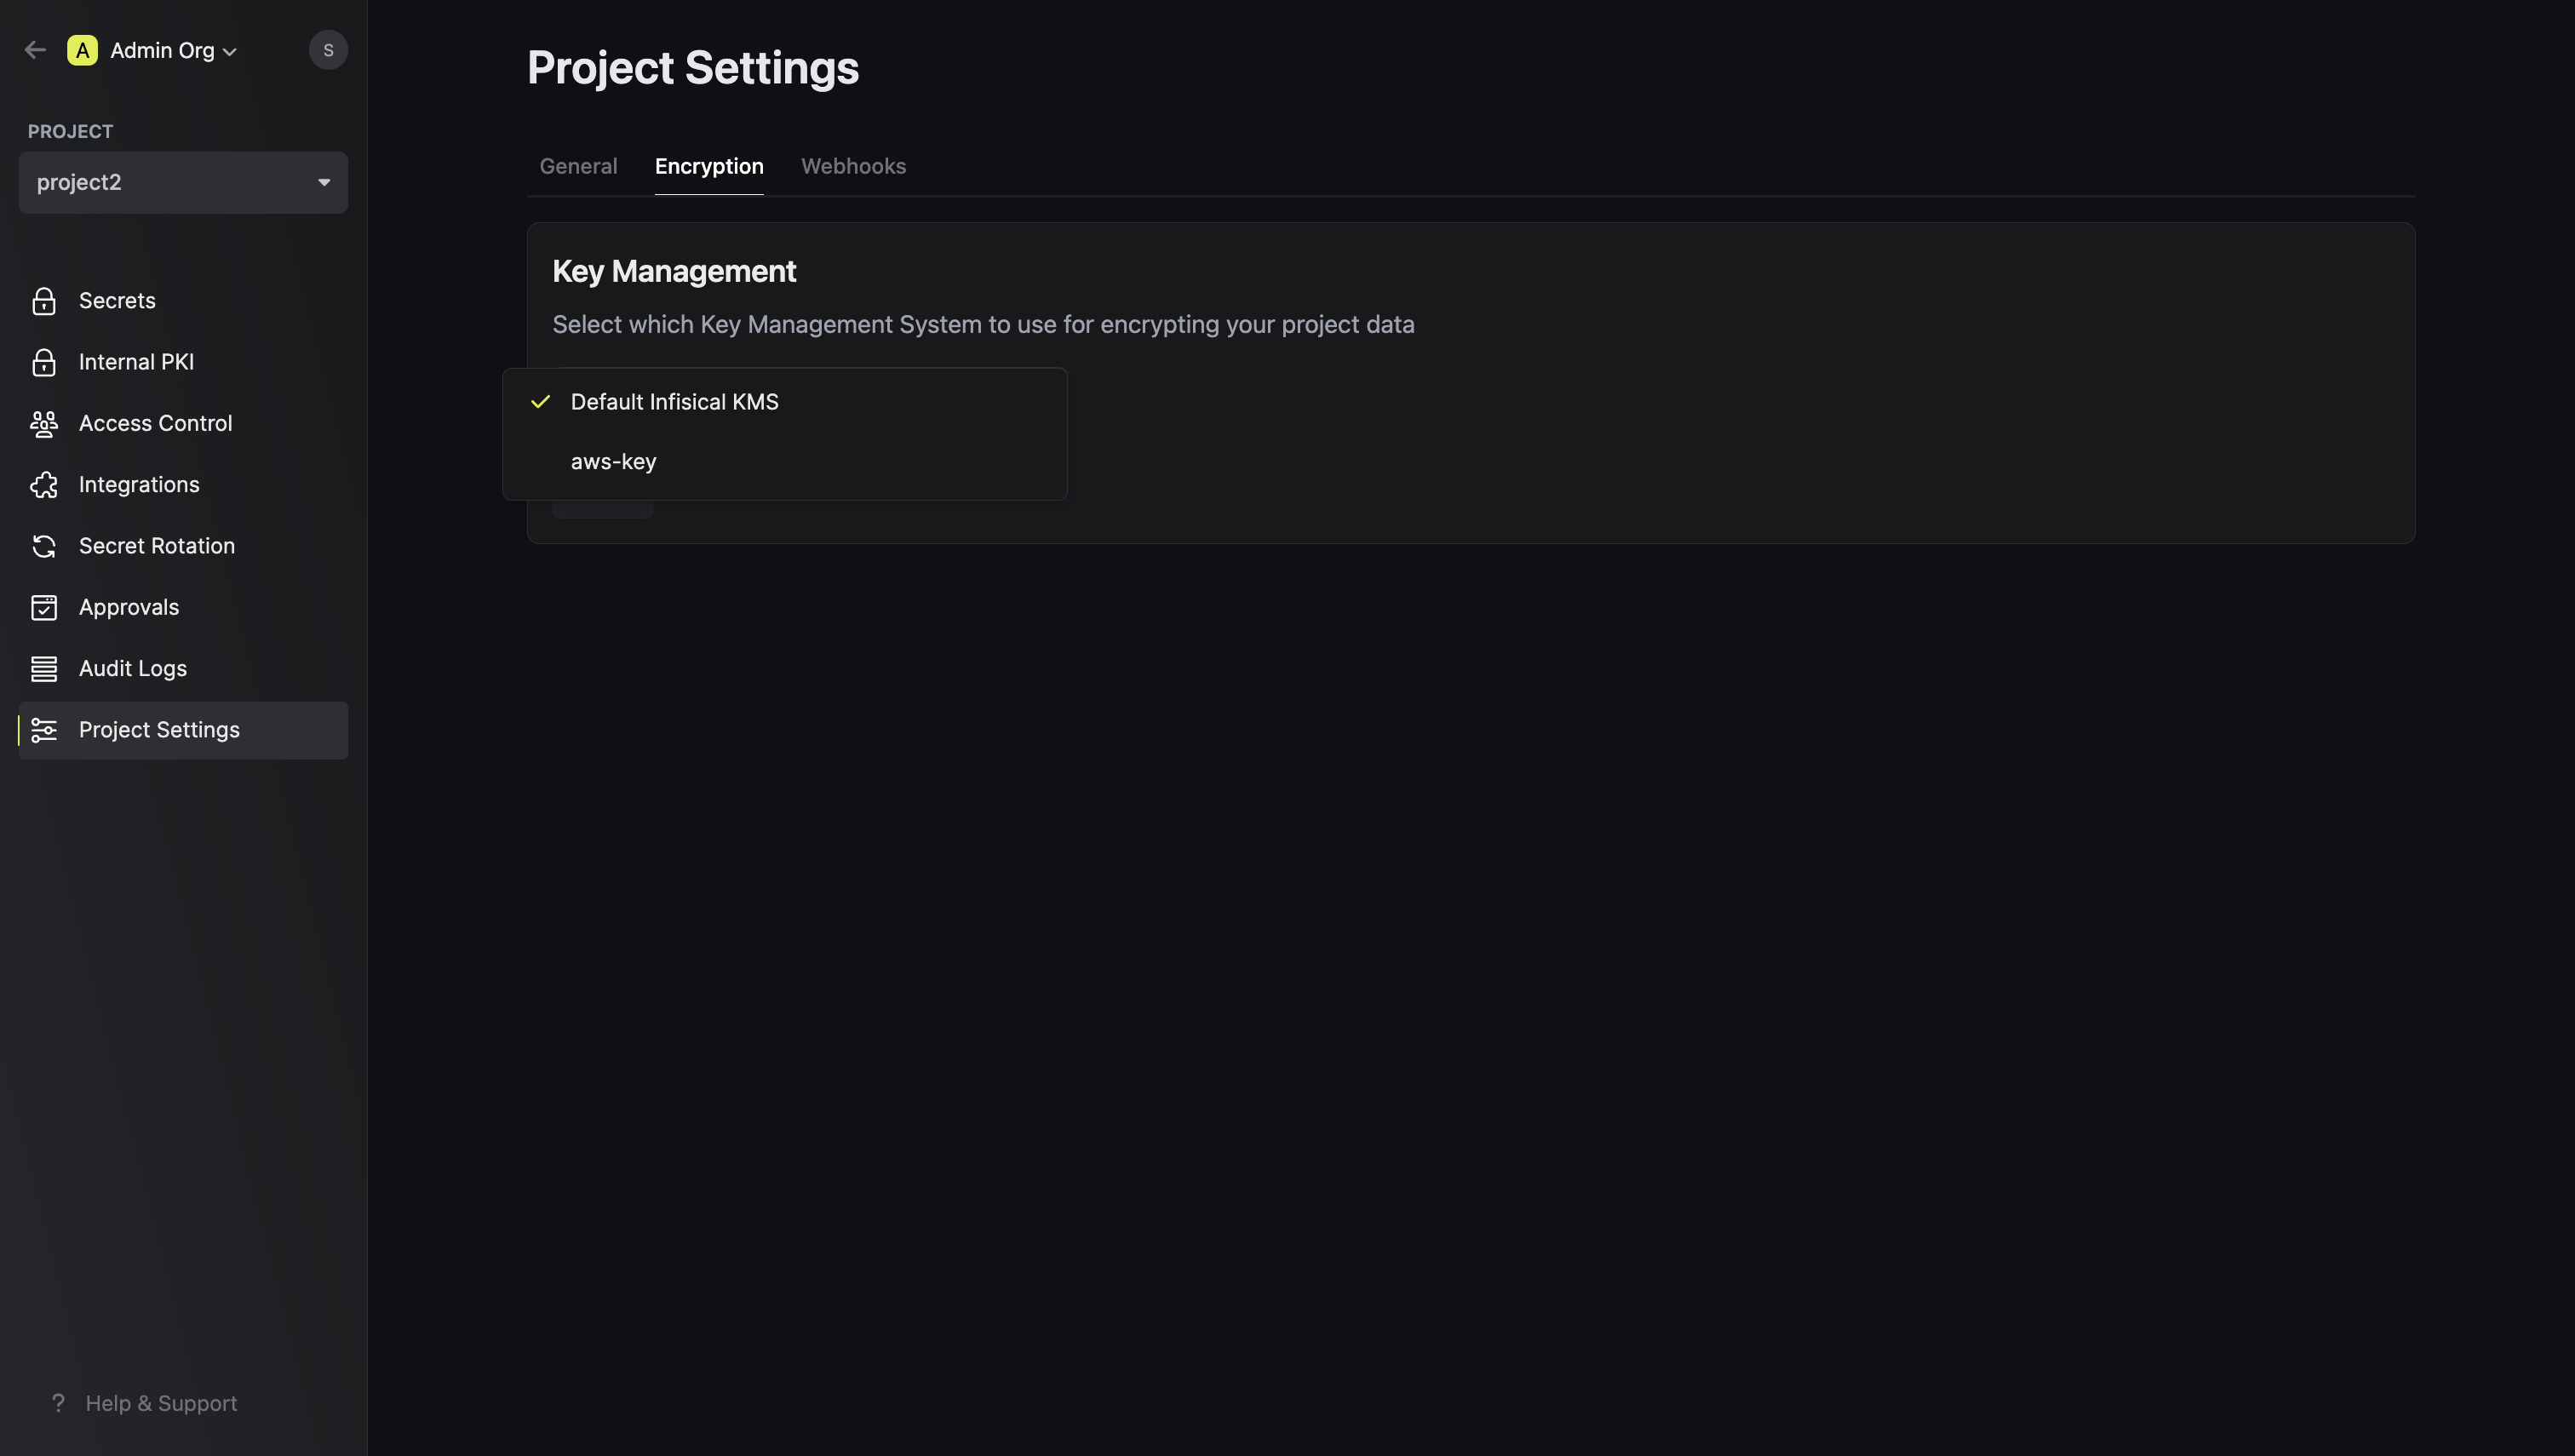 Choose the AWS KMS key you configured earlier.
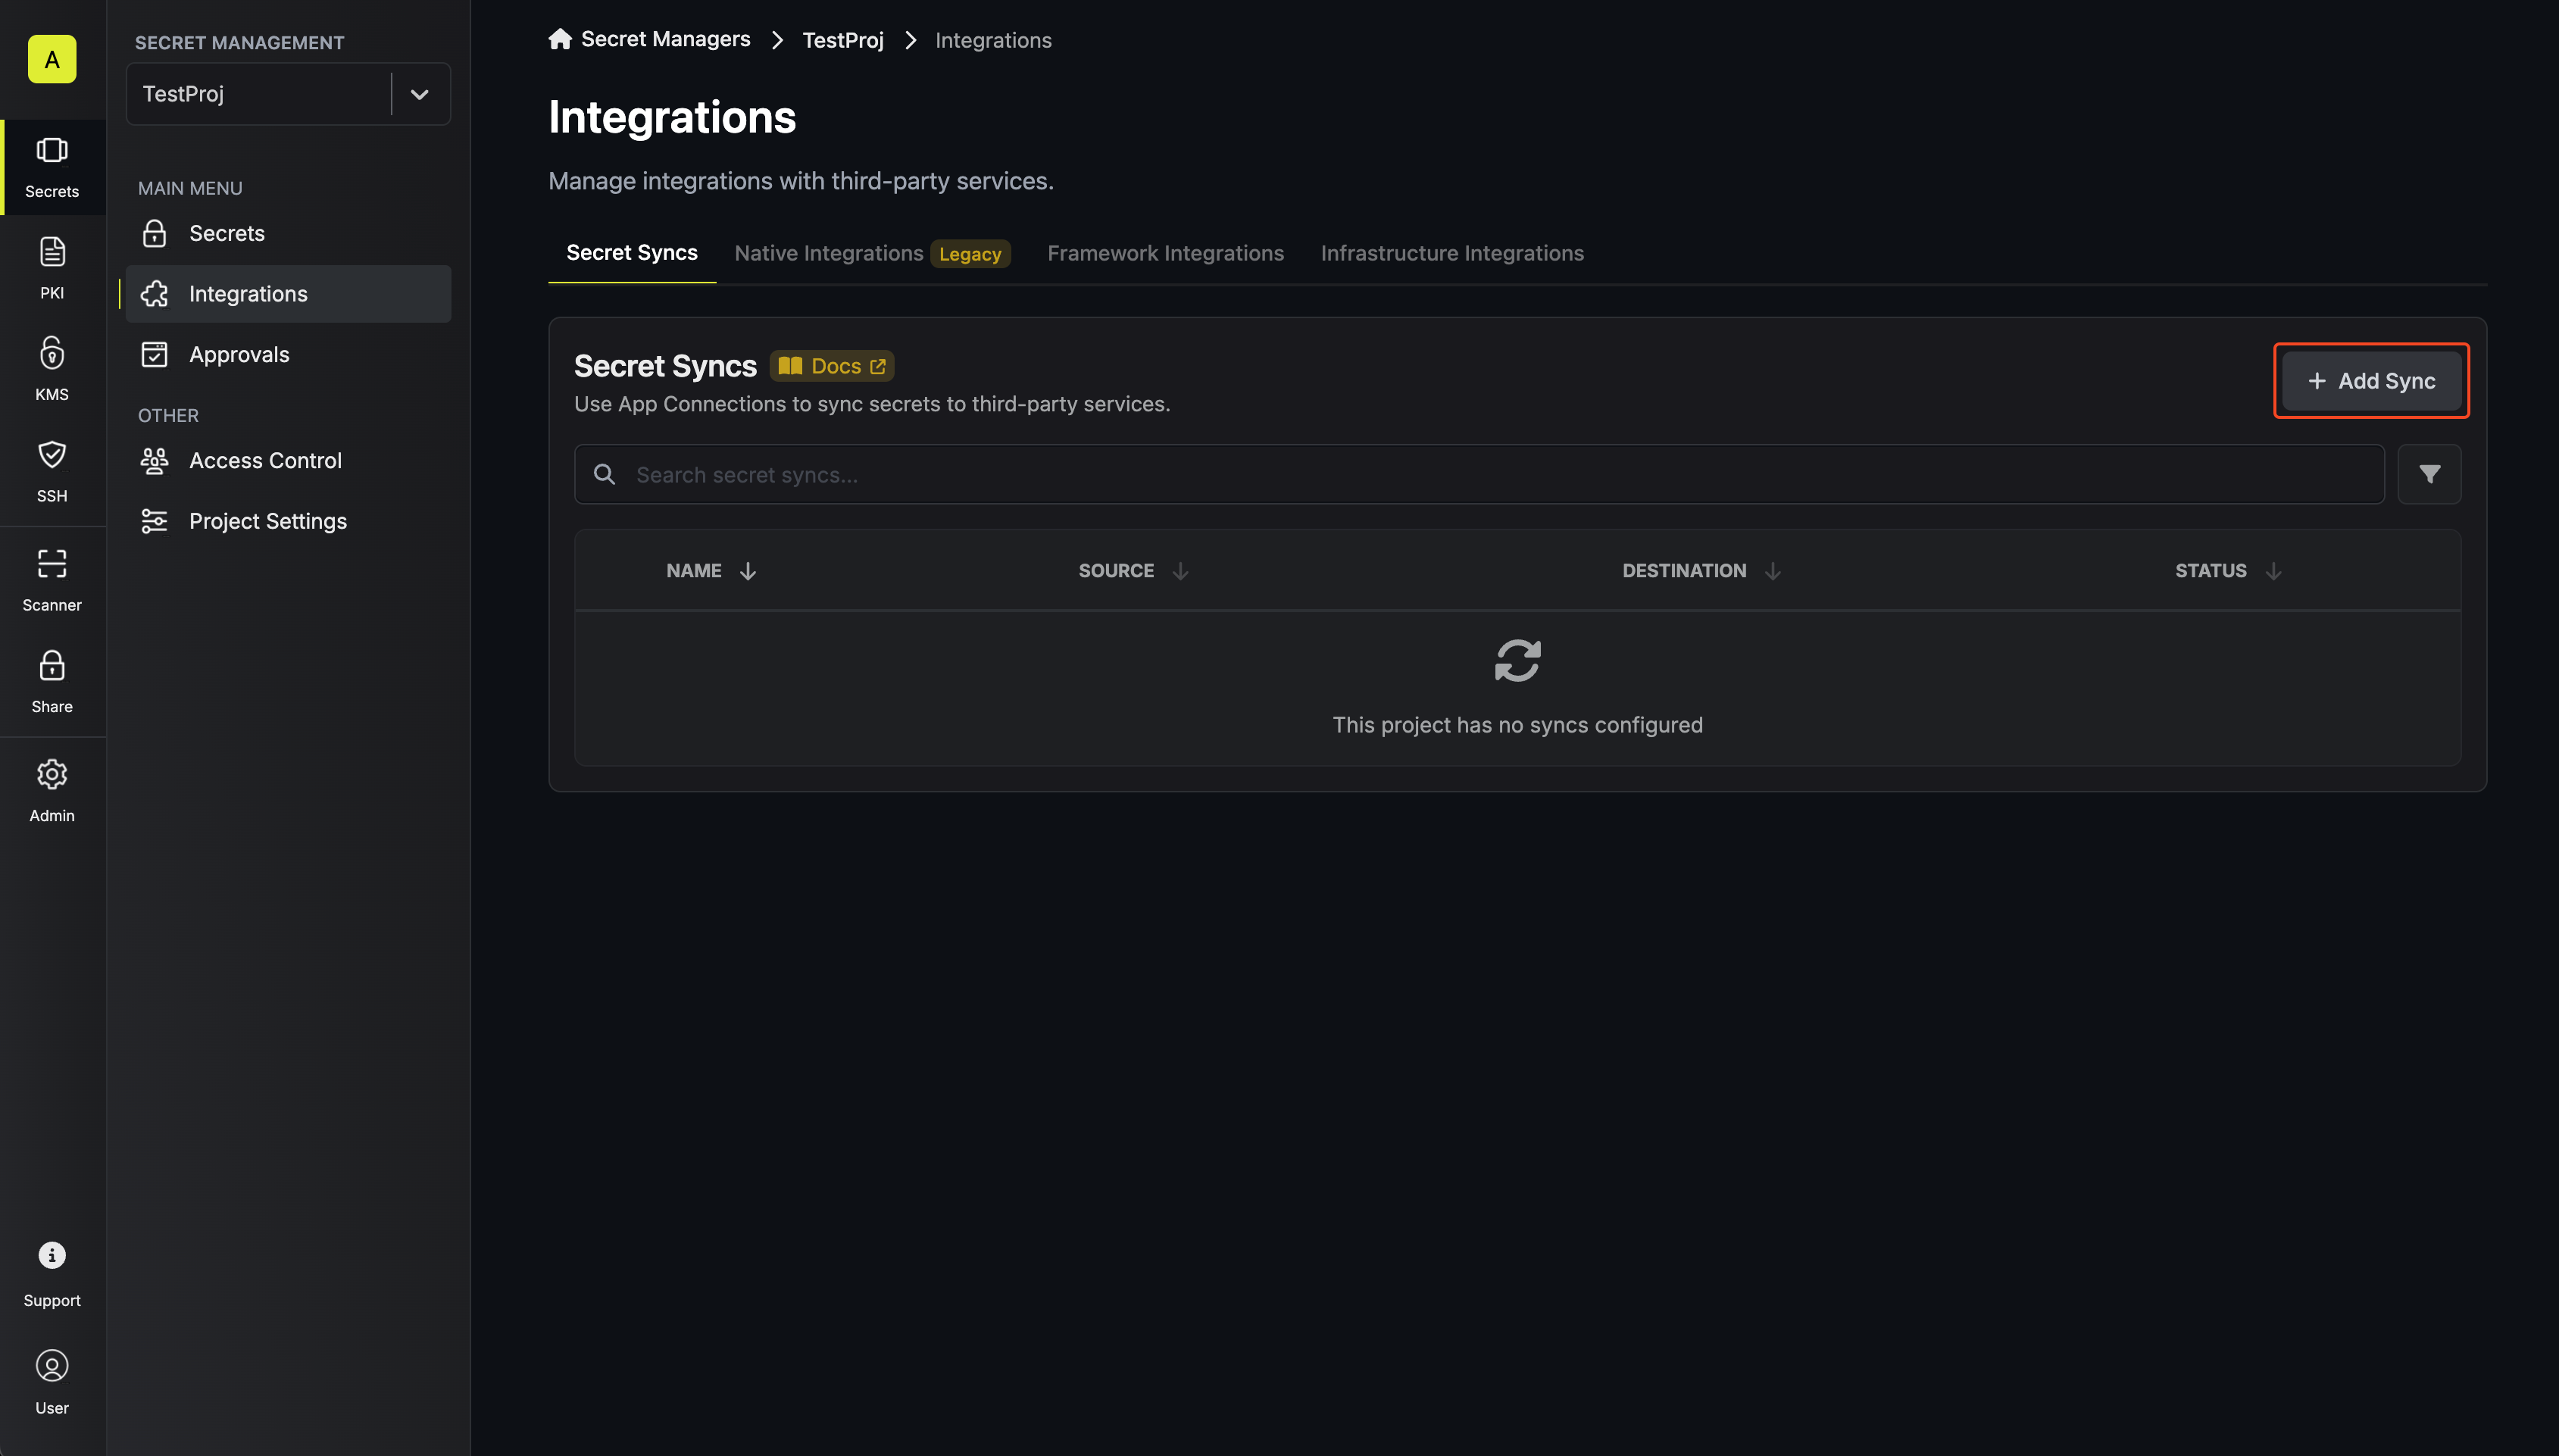 2. Select the **AWS Parameter Store** option.
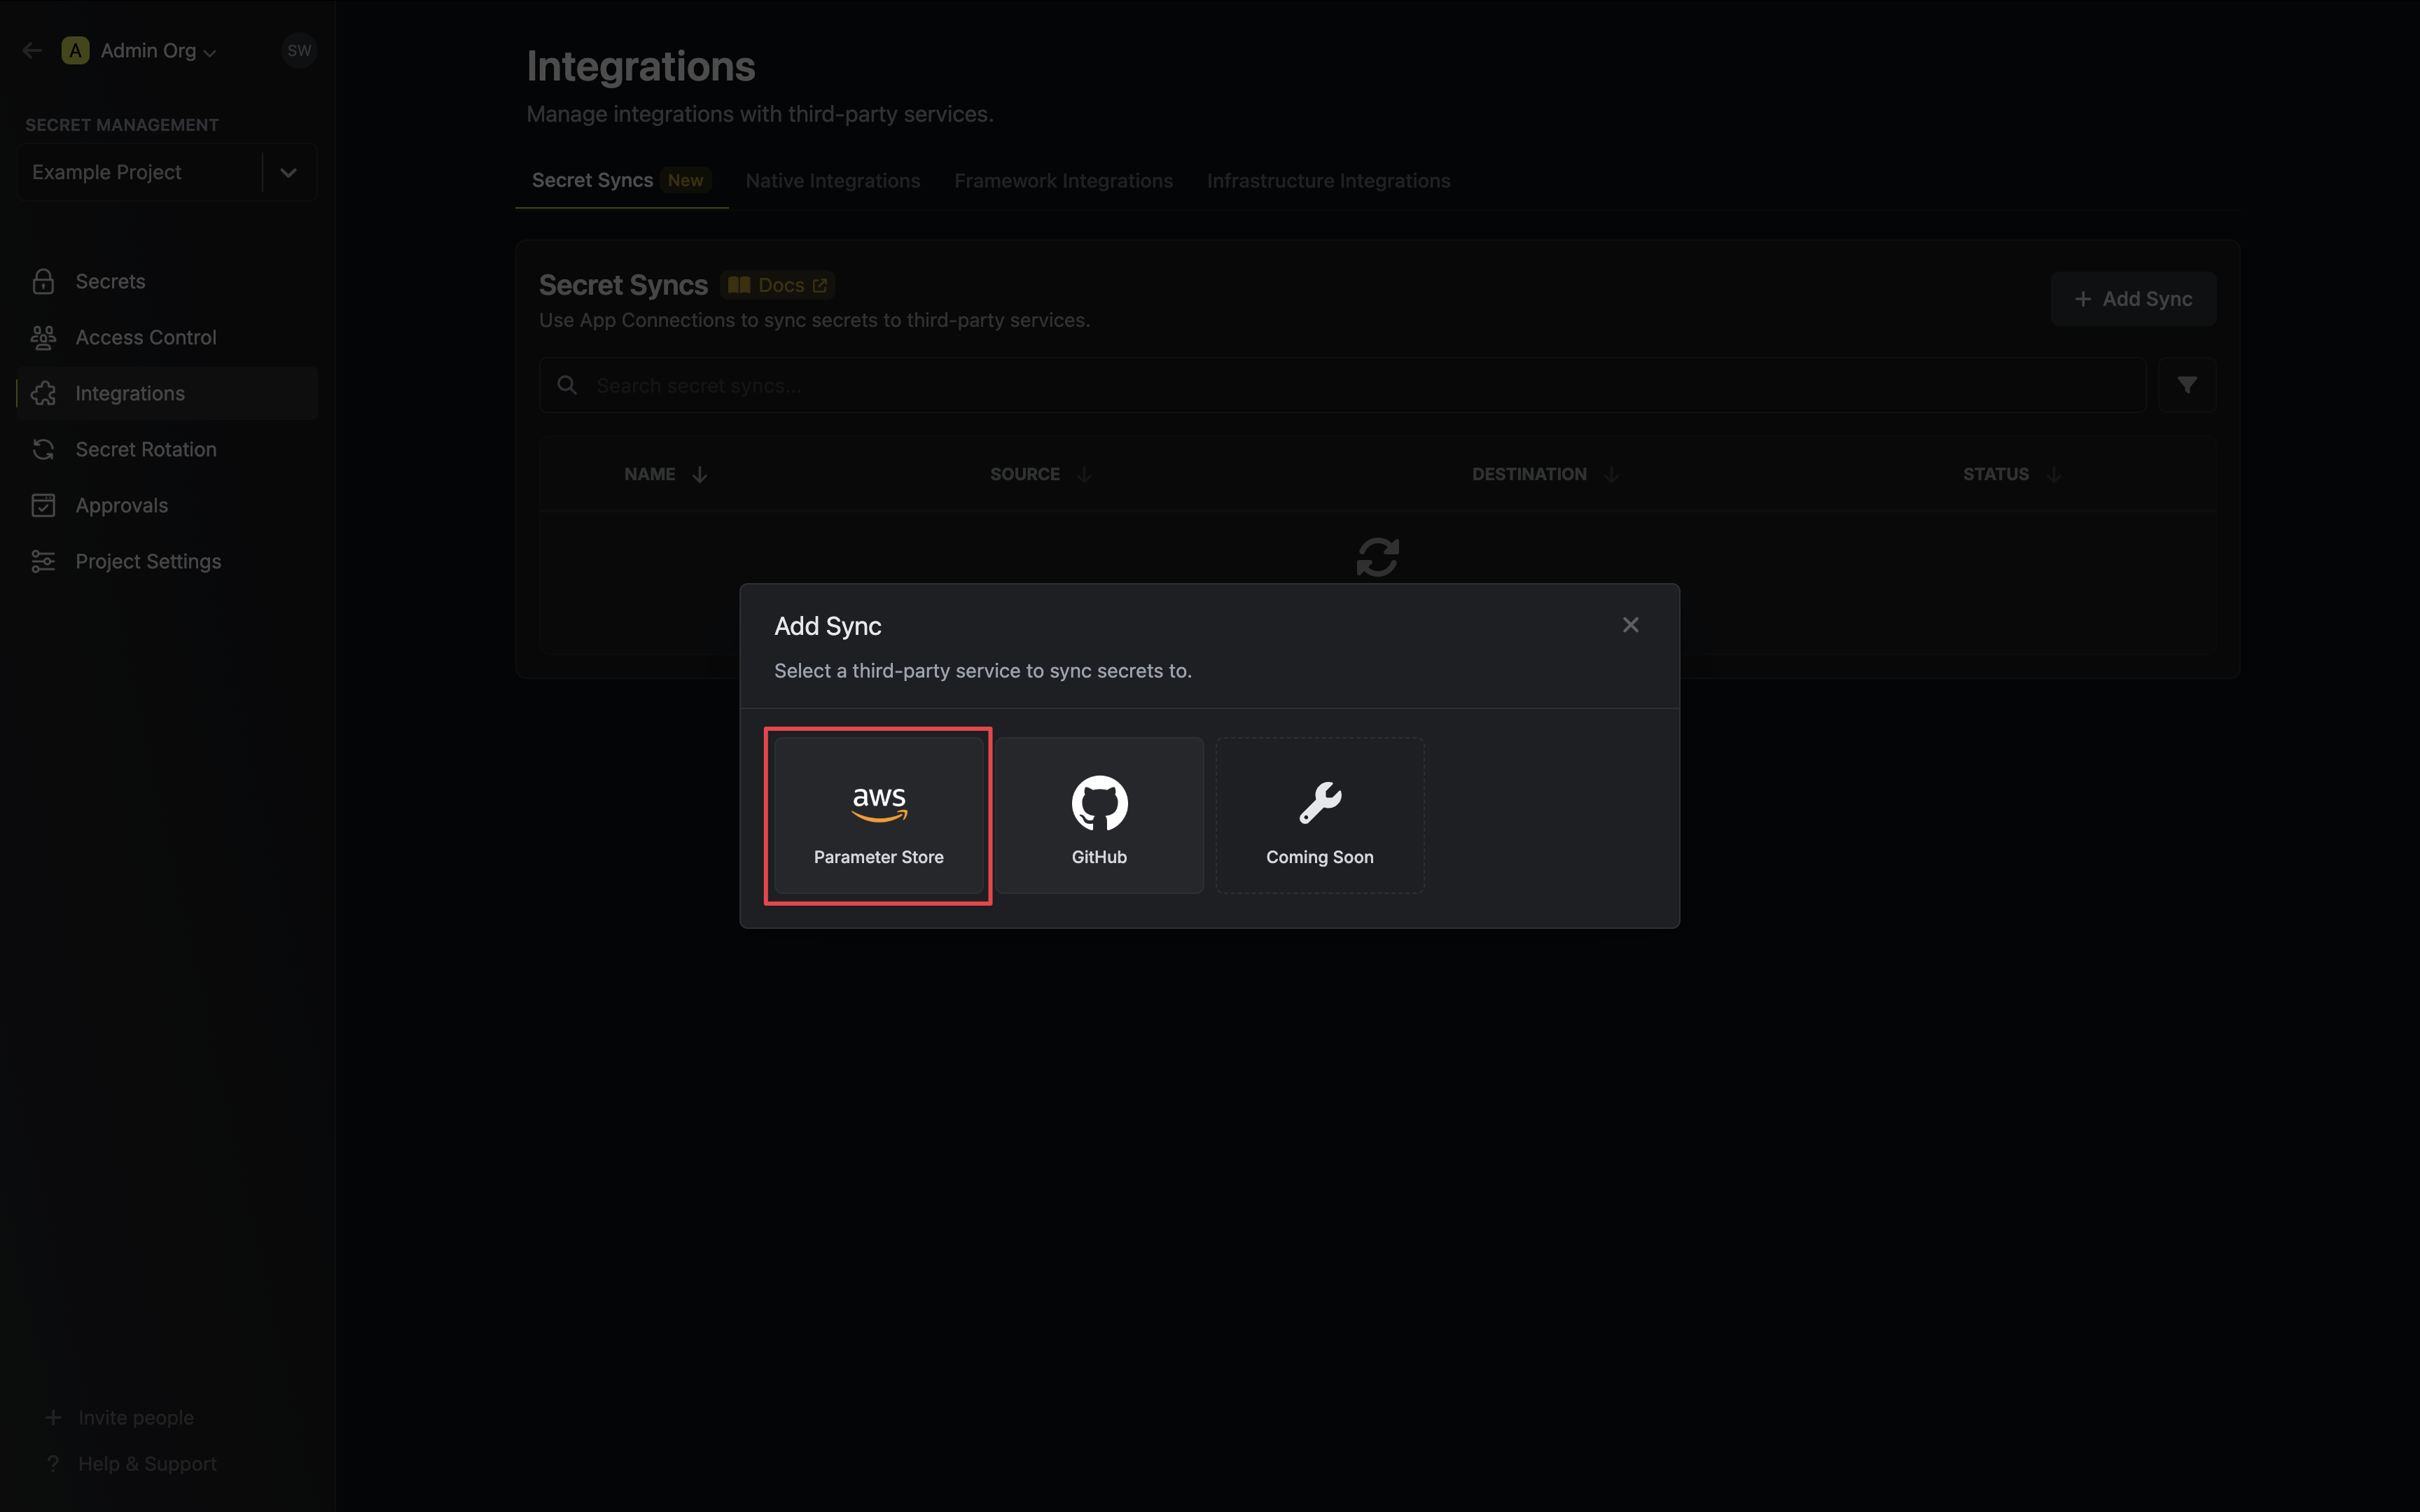 3. Configure the **Source** from where secrets should be retrieved, then click **Next**.
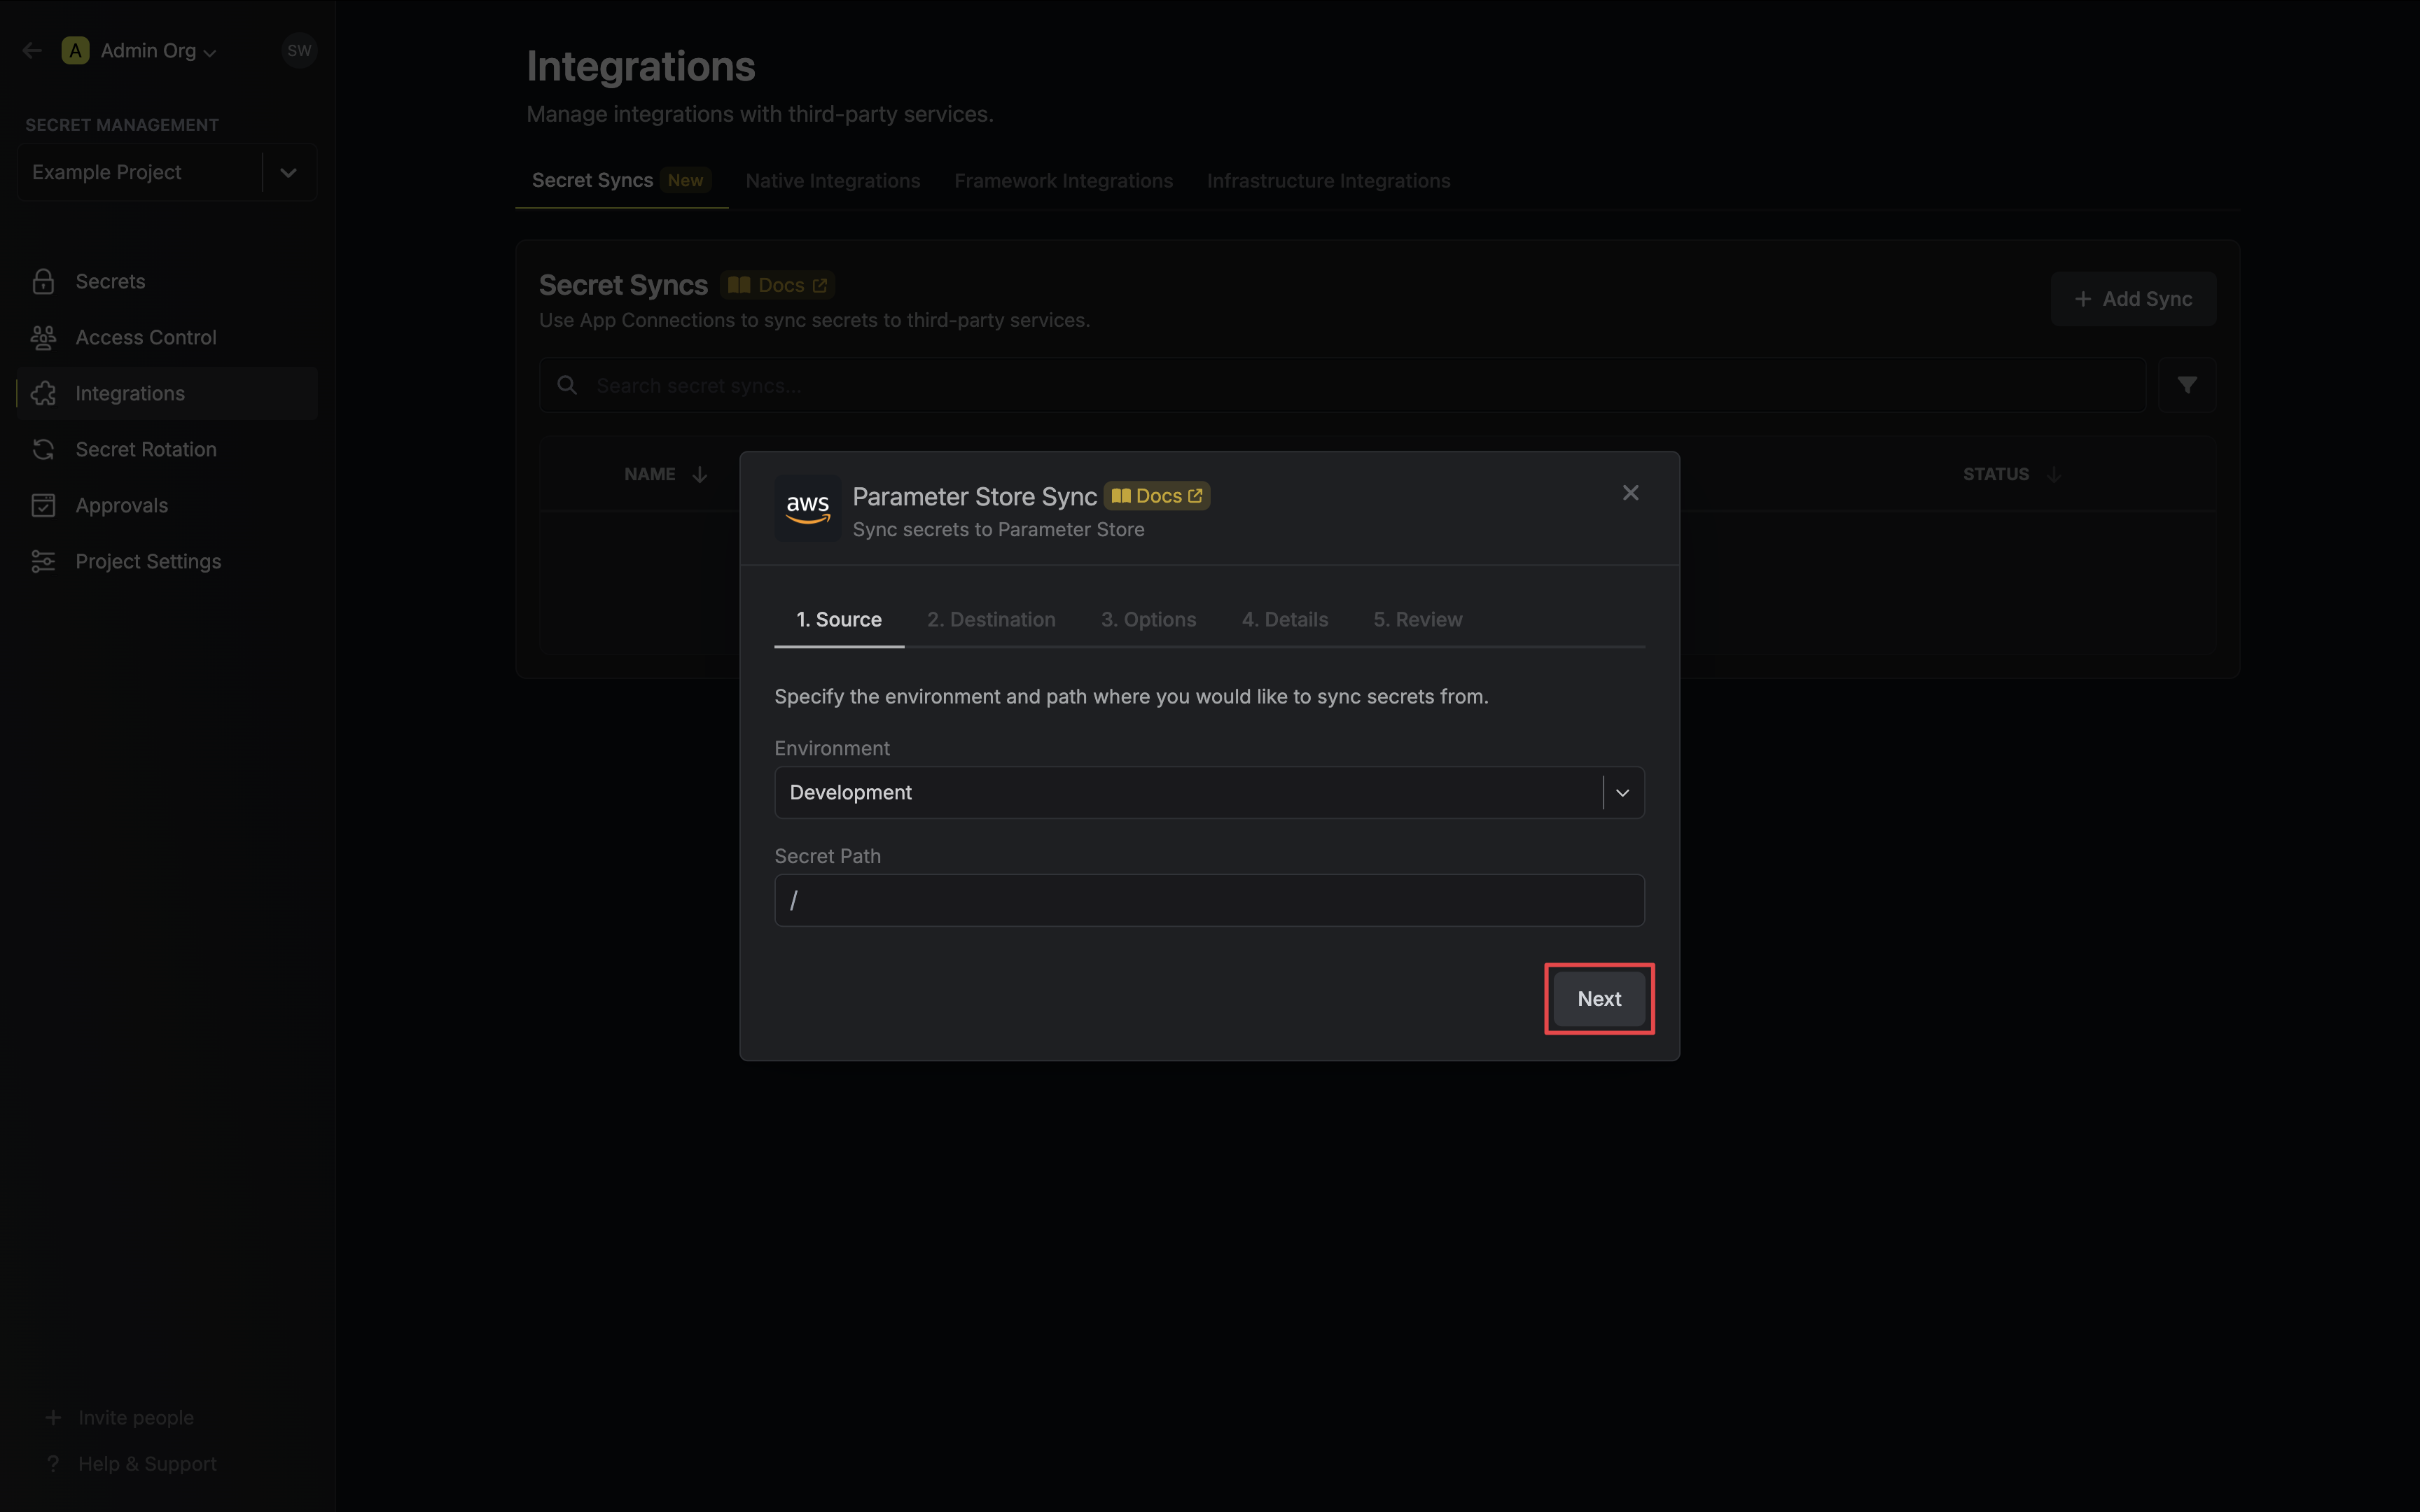 * **Environment**: The project environment to retrieve secrets from.
* **Secret Path**: The folder path to retrieve secrets from.
* **Environment**: The project environment to retrieve secrets from.
* **Secret Path**: The folder path to retrieve secrets from.
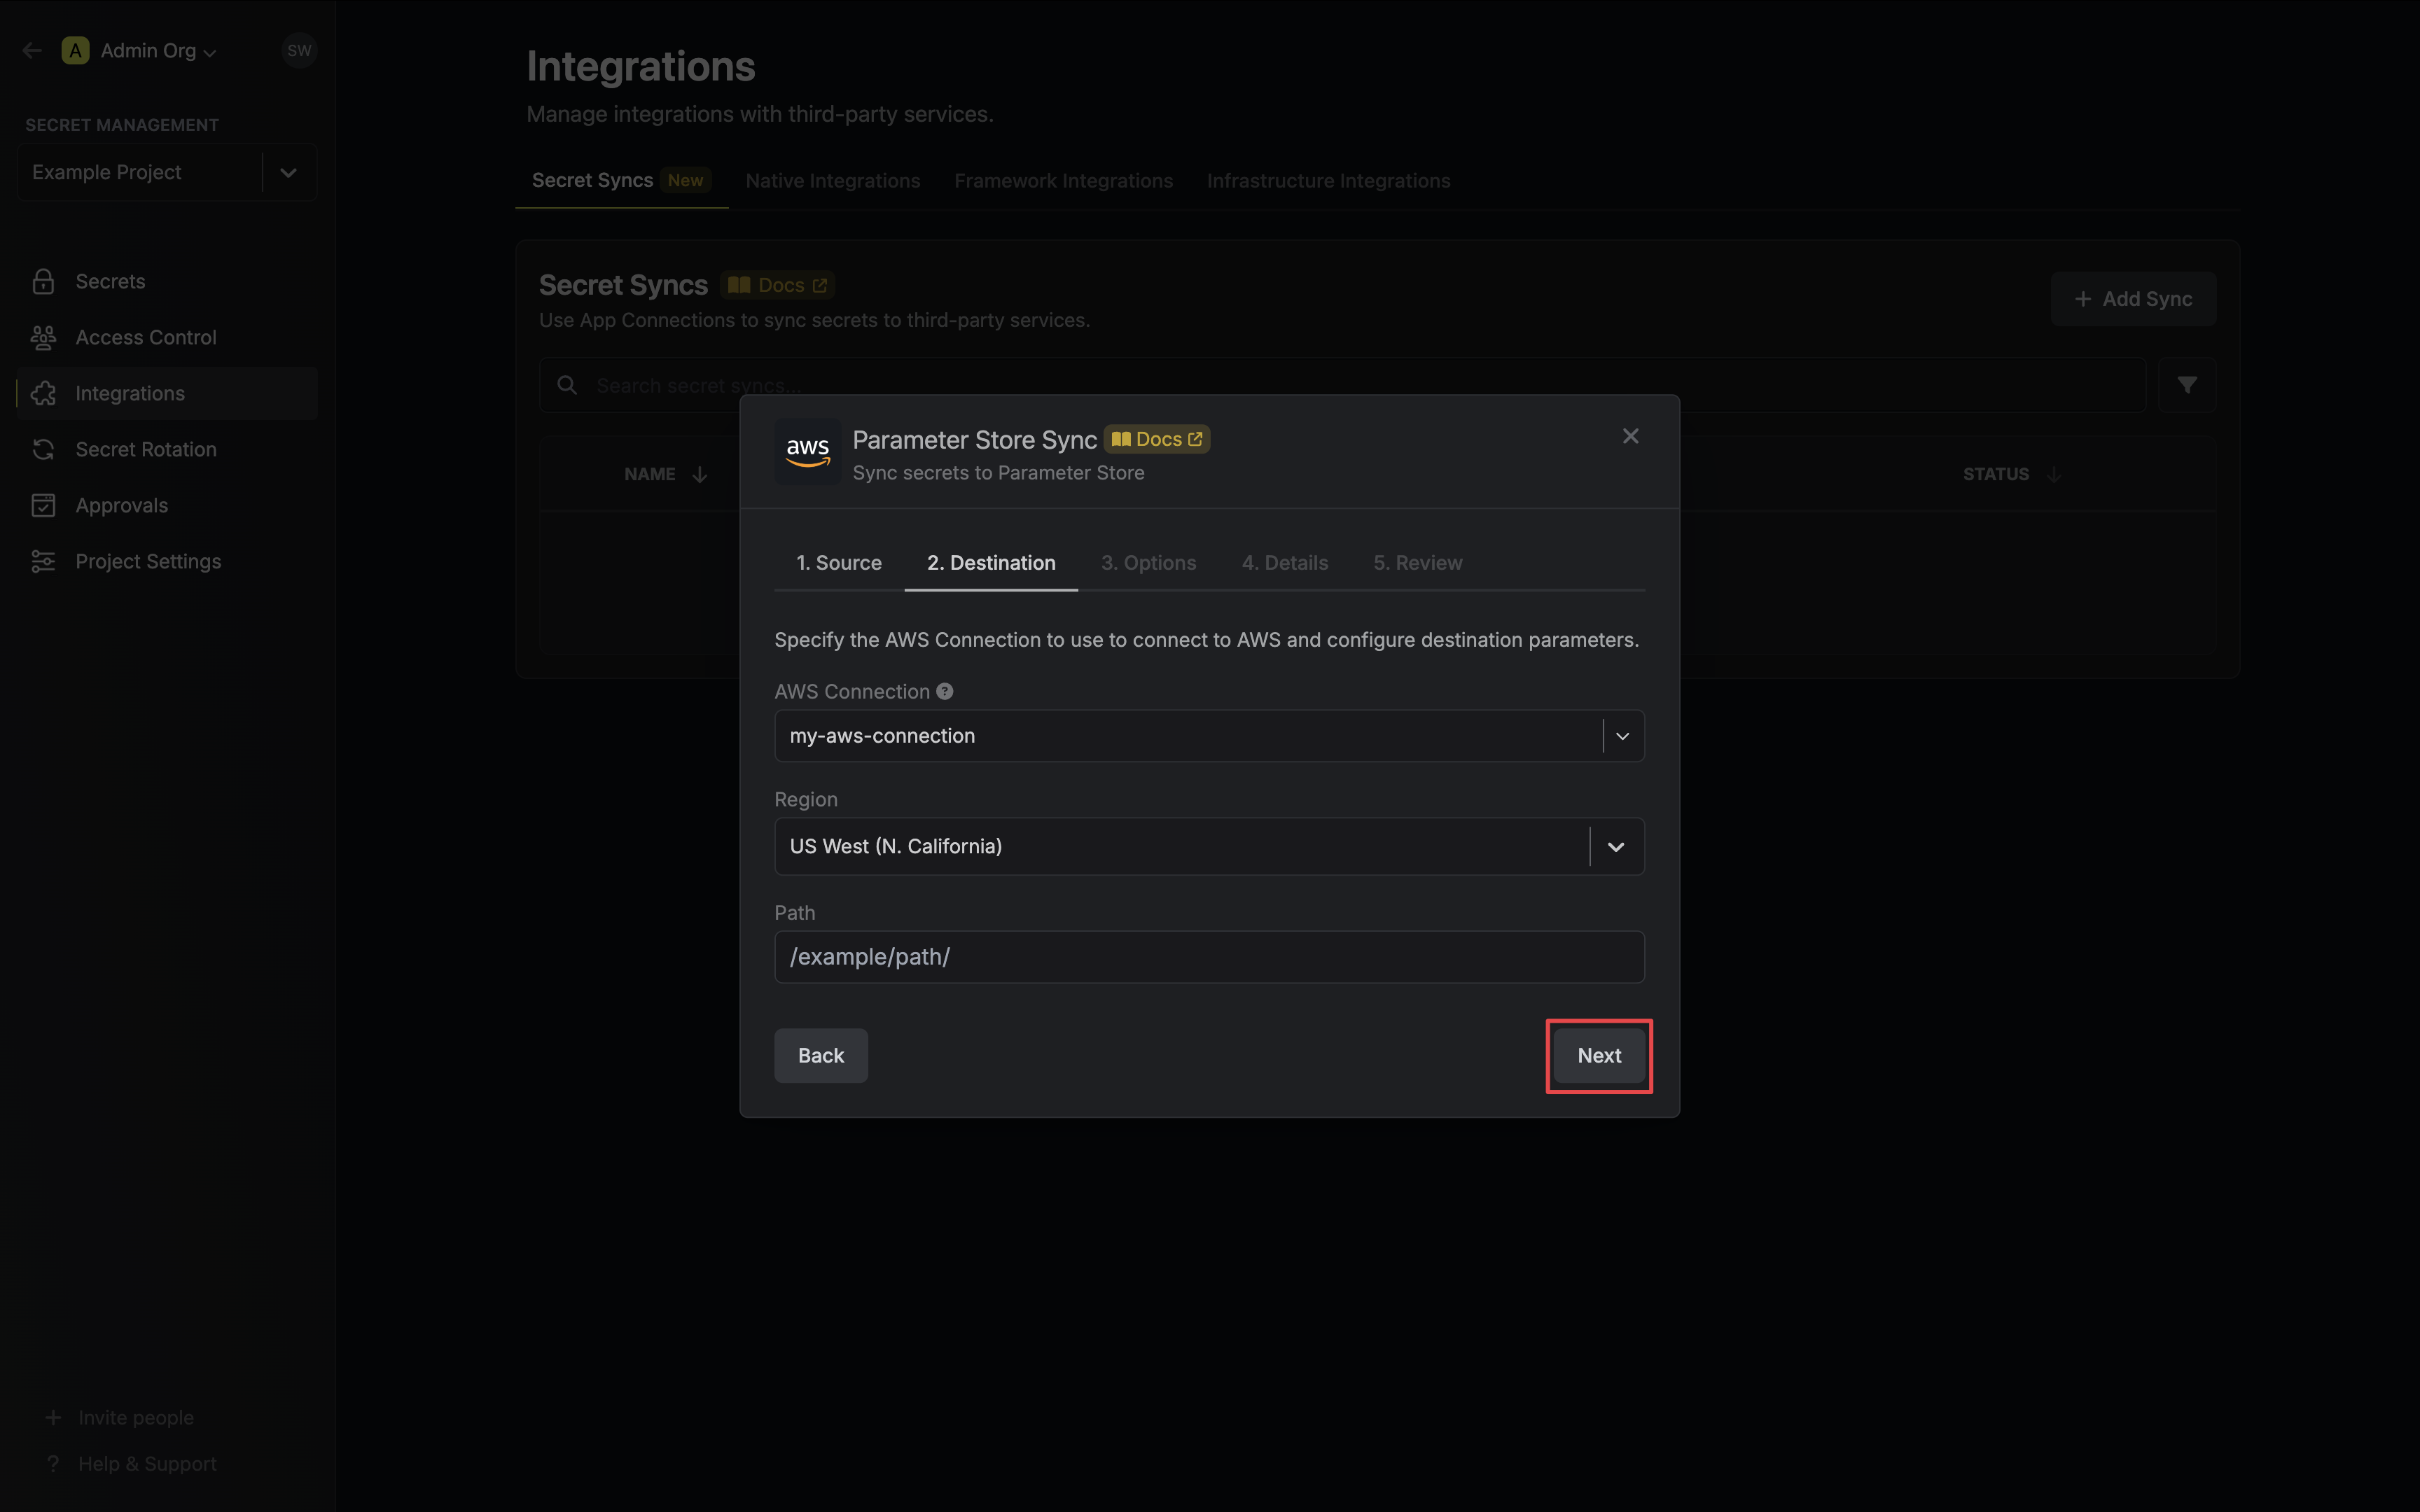 * **AWS Connection**: The AWS Connection to authenticate with.
* **Region**: The AWS region to deploy secrets to.
* **Path**: The AWS Parameter Store path to deploy secrets to.
5. Configure the **Sync Options** to specify how secrets should be synced, then click **Next**.
* **AWS Connection**: The AWS Connection to authenticate with.
* **Region**: The AWS region to deploy secrets to.
* **Path**: The AWS Parameter Store path to deploy secrets to.
5. Configure the **Sync Options** to specify how secrets should be synced, then click **Next**.
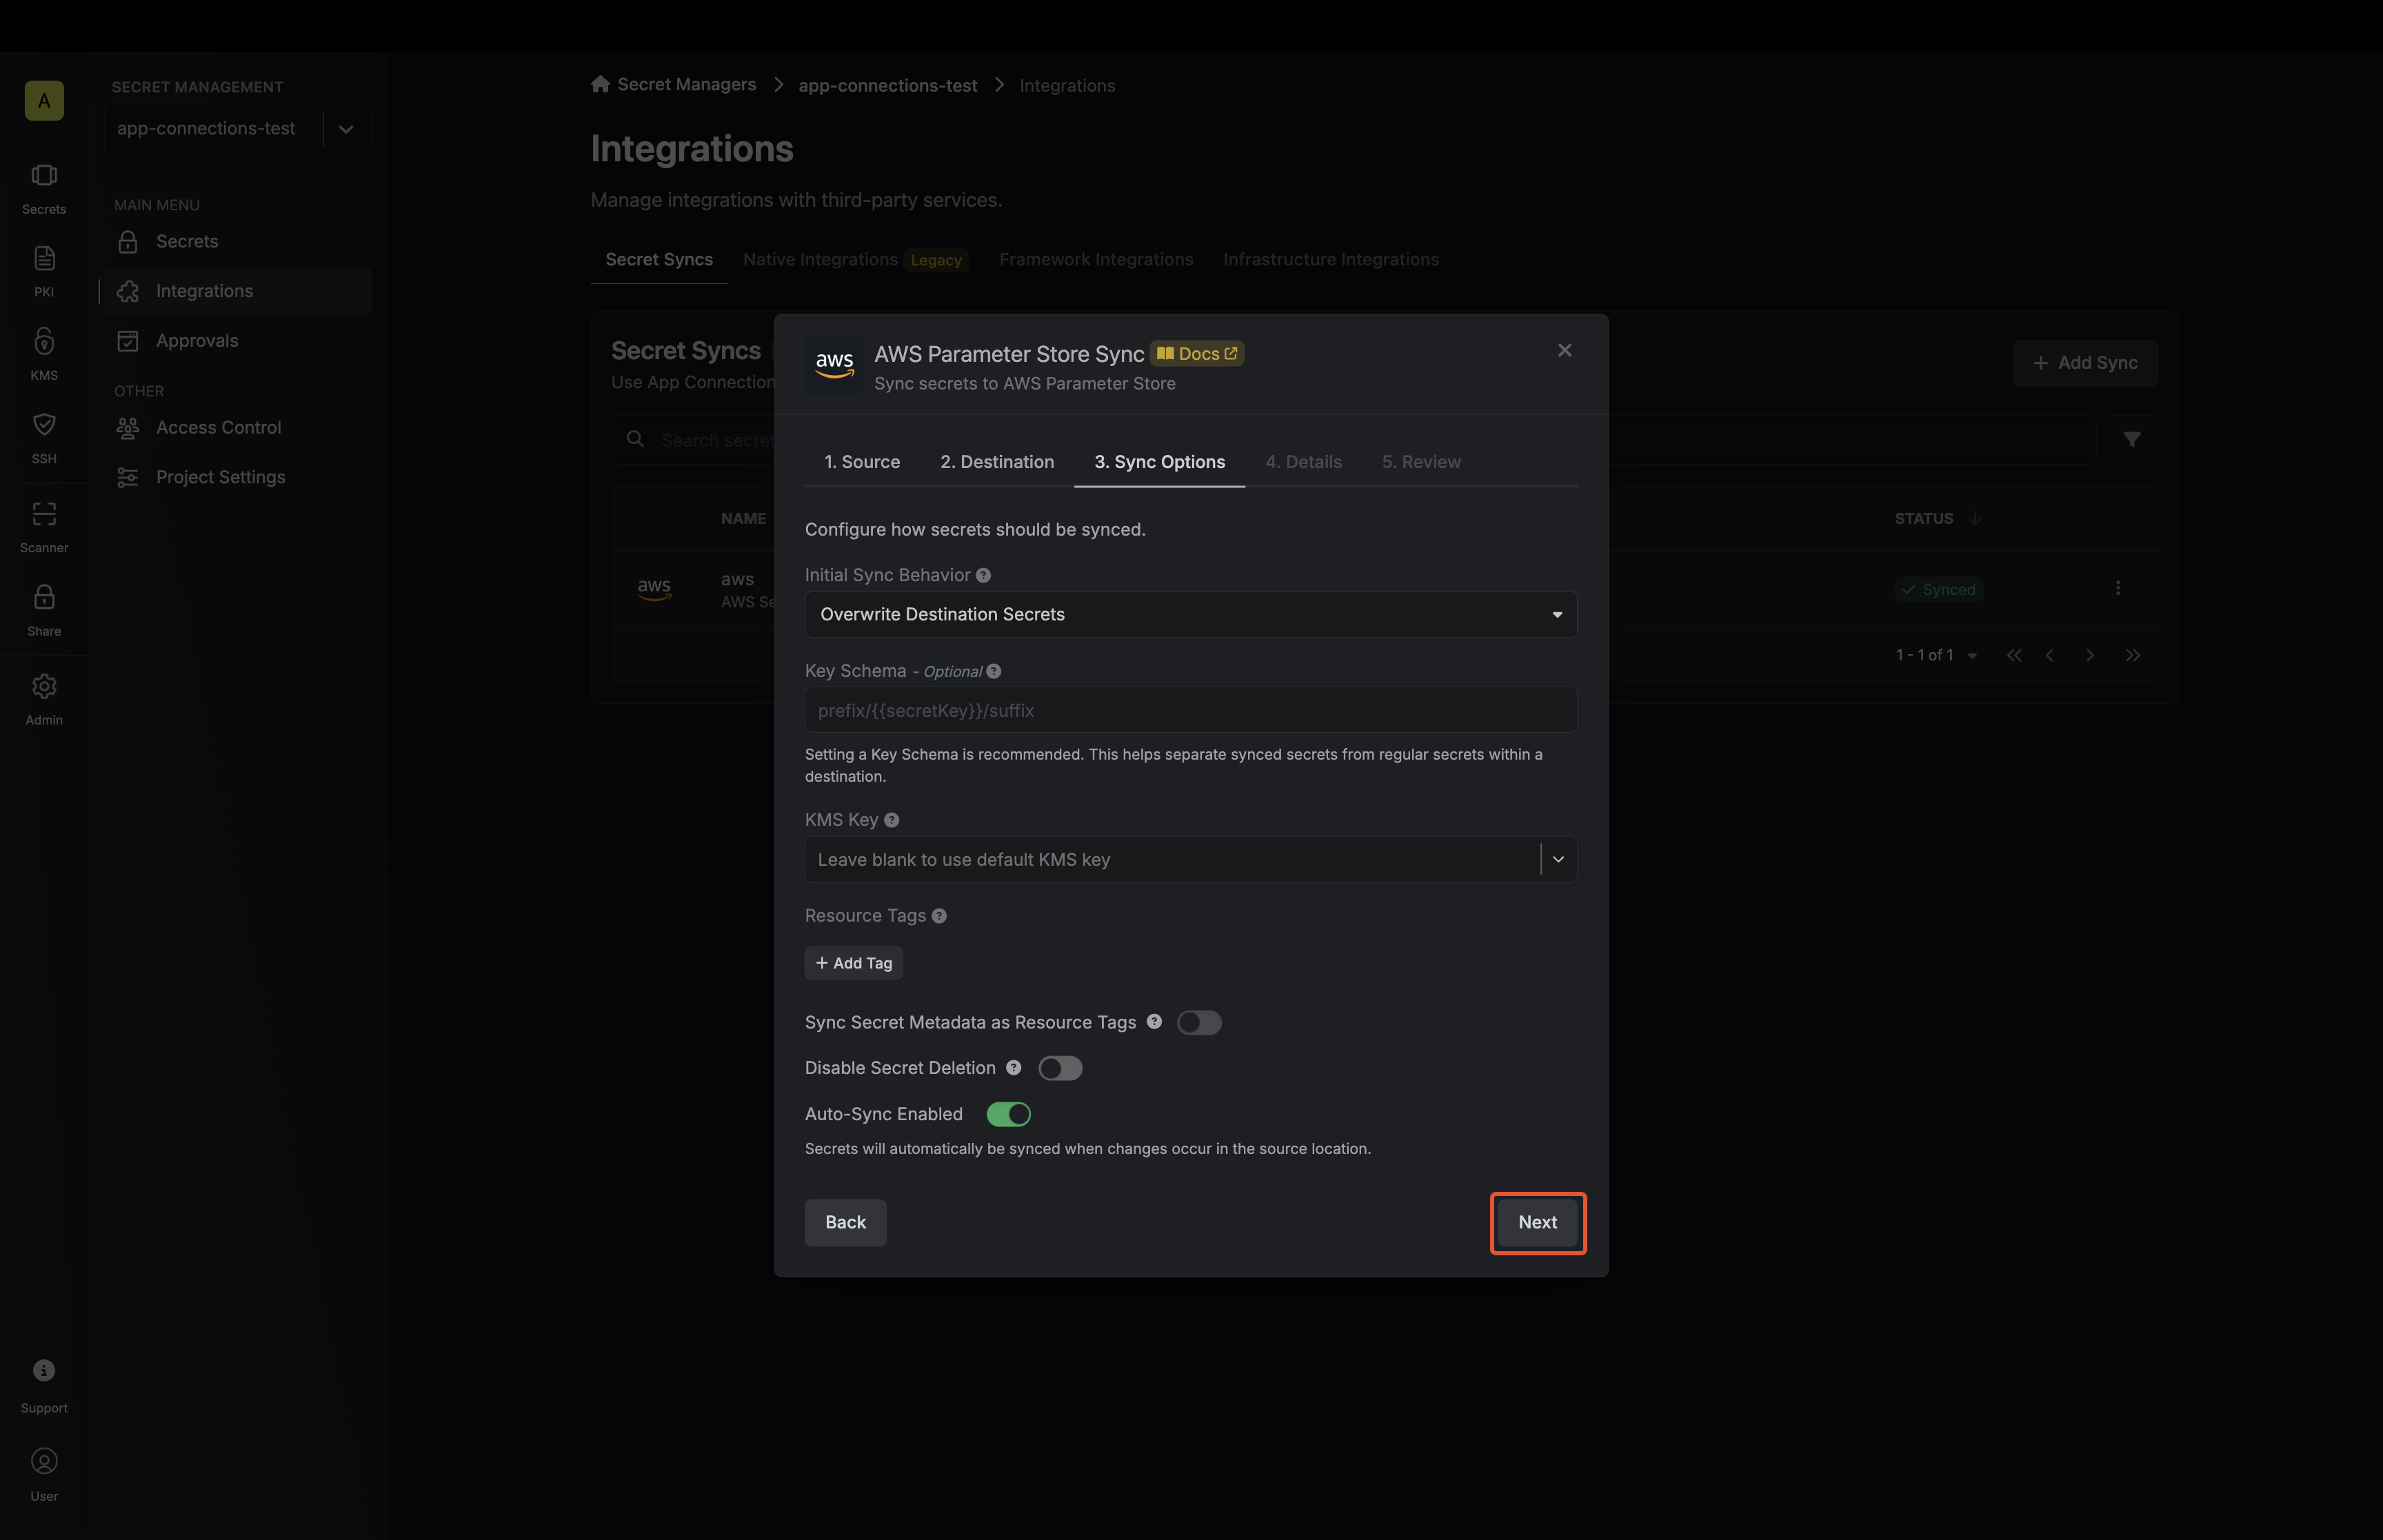 * **Initial Sync Behavior**: Determines how Infisical should resolve the initial sync.
* **Overwrite Destination Secrets**: Removes any secrets at the destination endpoint not present in Infisical.
* **Import Secrets (Prioritize Infisical)**: Imports secrets from the destination endpoint before syncing, prioritizing values from Infisical over Parameter Store when keys conflict.
* **Import Secrets (Prioritize AWS Parameter Store)**: Imports secrets from the destination endpoint before syncing, prioritizing values from Parameter Store over Infisical when keys conflict.
* **Key Schema**: Template that determines how secret names are transformed when syncing, using `{{secretKey}}` as a placeholder for the original secret name and `{{environment}}` for the environment.
* **Initial Sync Behavior**: Determines how Infisical should resolve the initial sync.
* **Overwrite Destination Secrets**: Removes any secrets at the destination endpoint not present in Infisical.
* **Import Secrets (Prioritize Infisical)**: Imports secrets from the destination endpoint before syncing, prioritizing values from Infisical over Parameter Store when keys conflict.
* **Import Secrets (Prioritize AWS Parameter Store)**: Imports secrets from the destination endpoint before syncing, prioritizing values from Parameter Store over Infisical when keys conflict.
* **Key Schema**: Template that determines how secret names are transformed when syncing, using `{{secretKey}}` as a placeholder for the original secret name and `{{environment}}` for the environment.
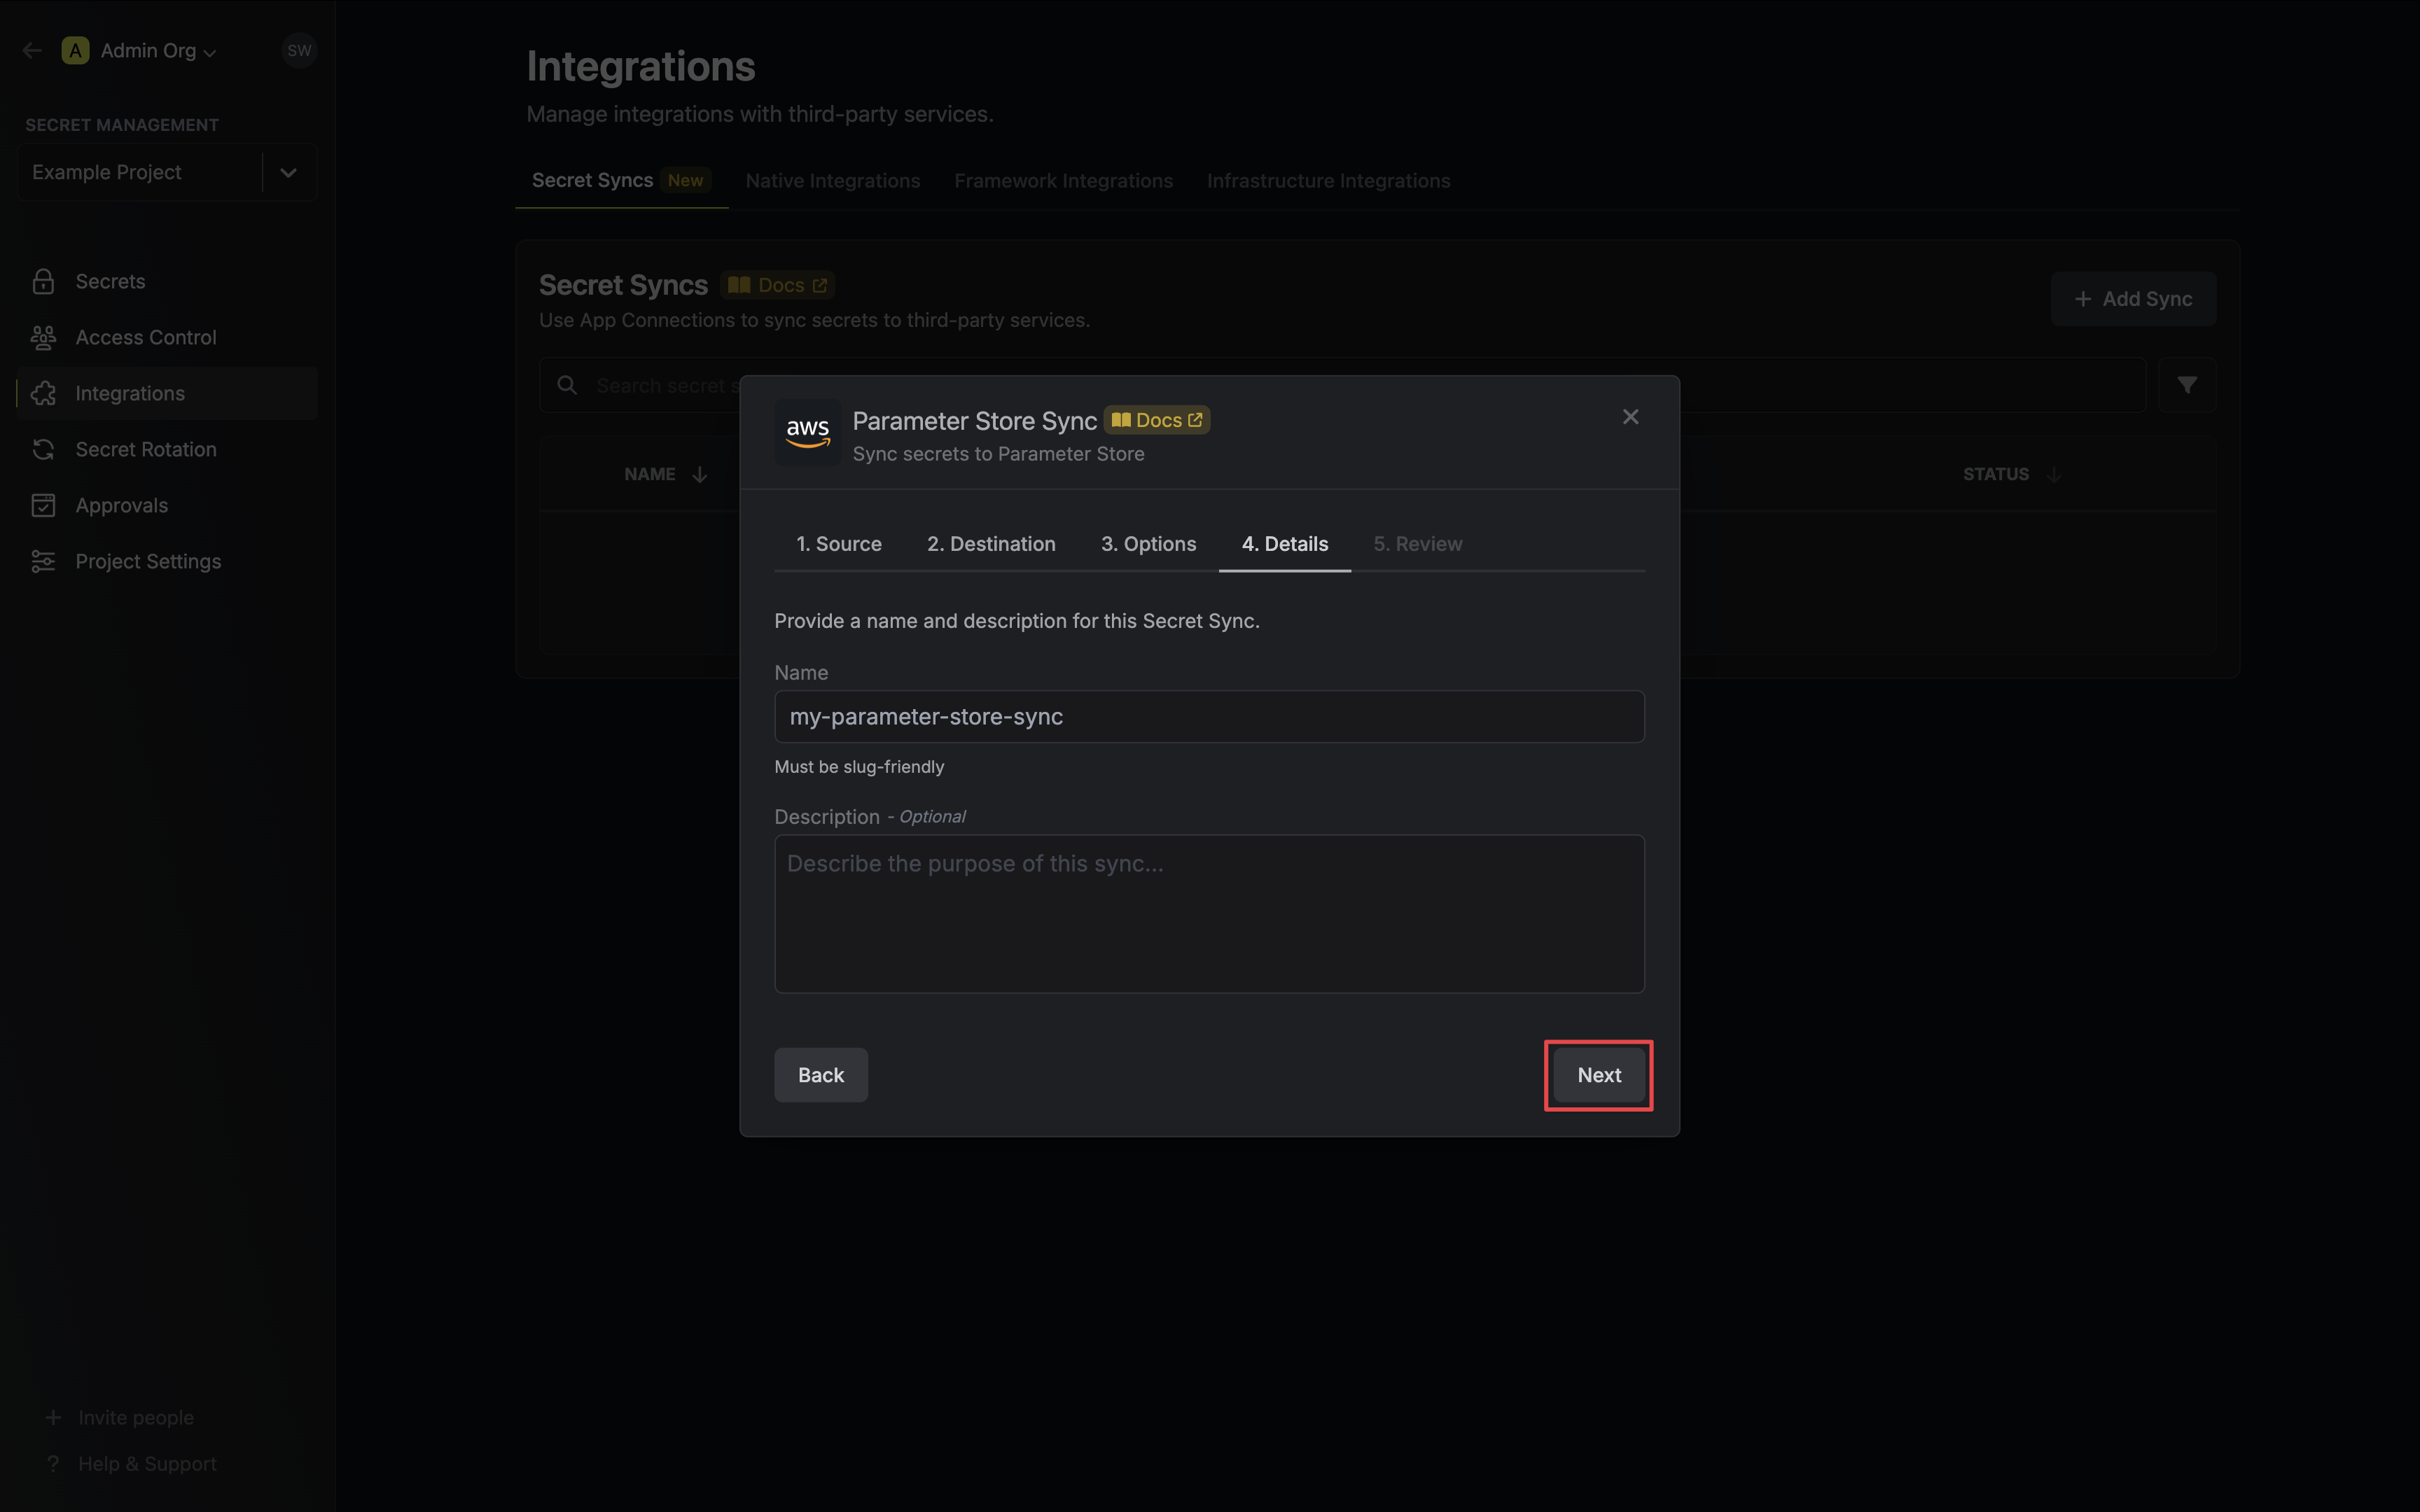 * **Name**: The name of your sync. Must be slug-friendly.
* **Description**: An optional description for your sync.
7. Review your Parameter Store Sync configuration, then click **Create Sync**.
* **Name**: The name of your sync. Must be slug-friendly.
* **Description**: An optional description for your sync.
7. Review your Parameter Store Sync configuration, then click **Create Sync**.
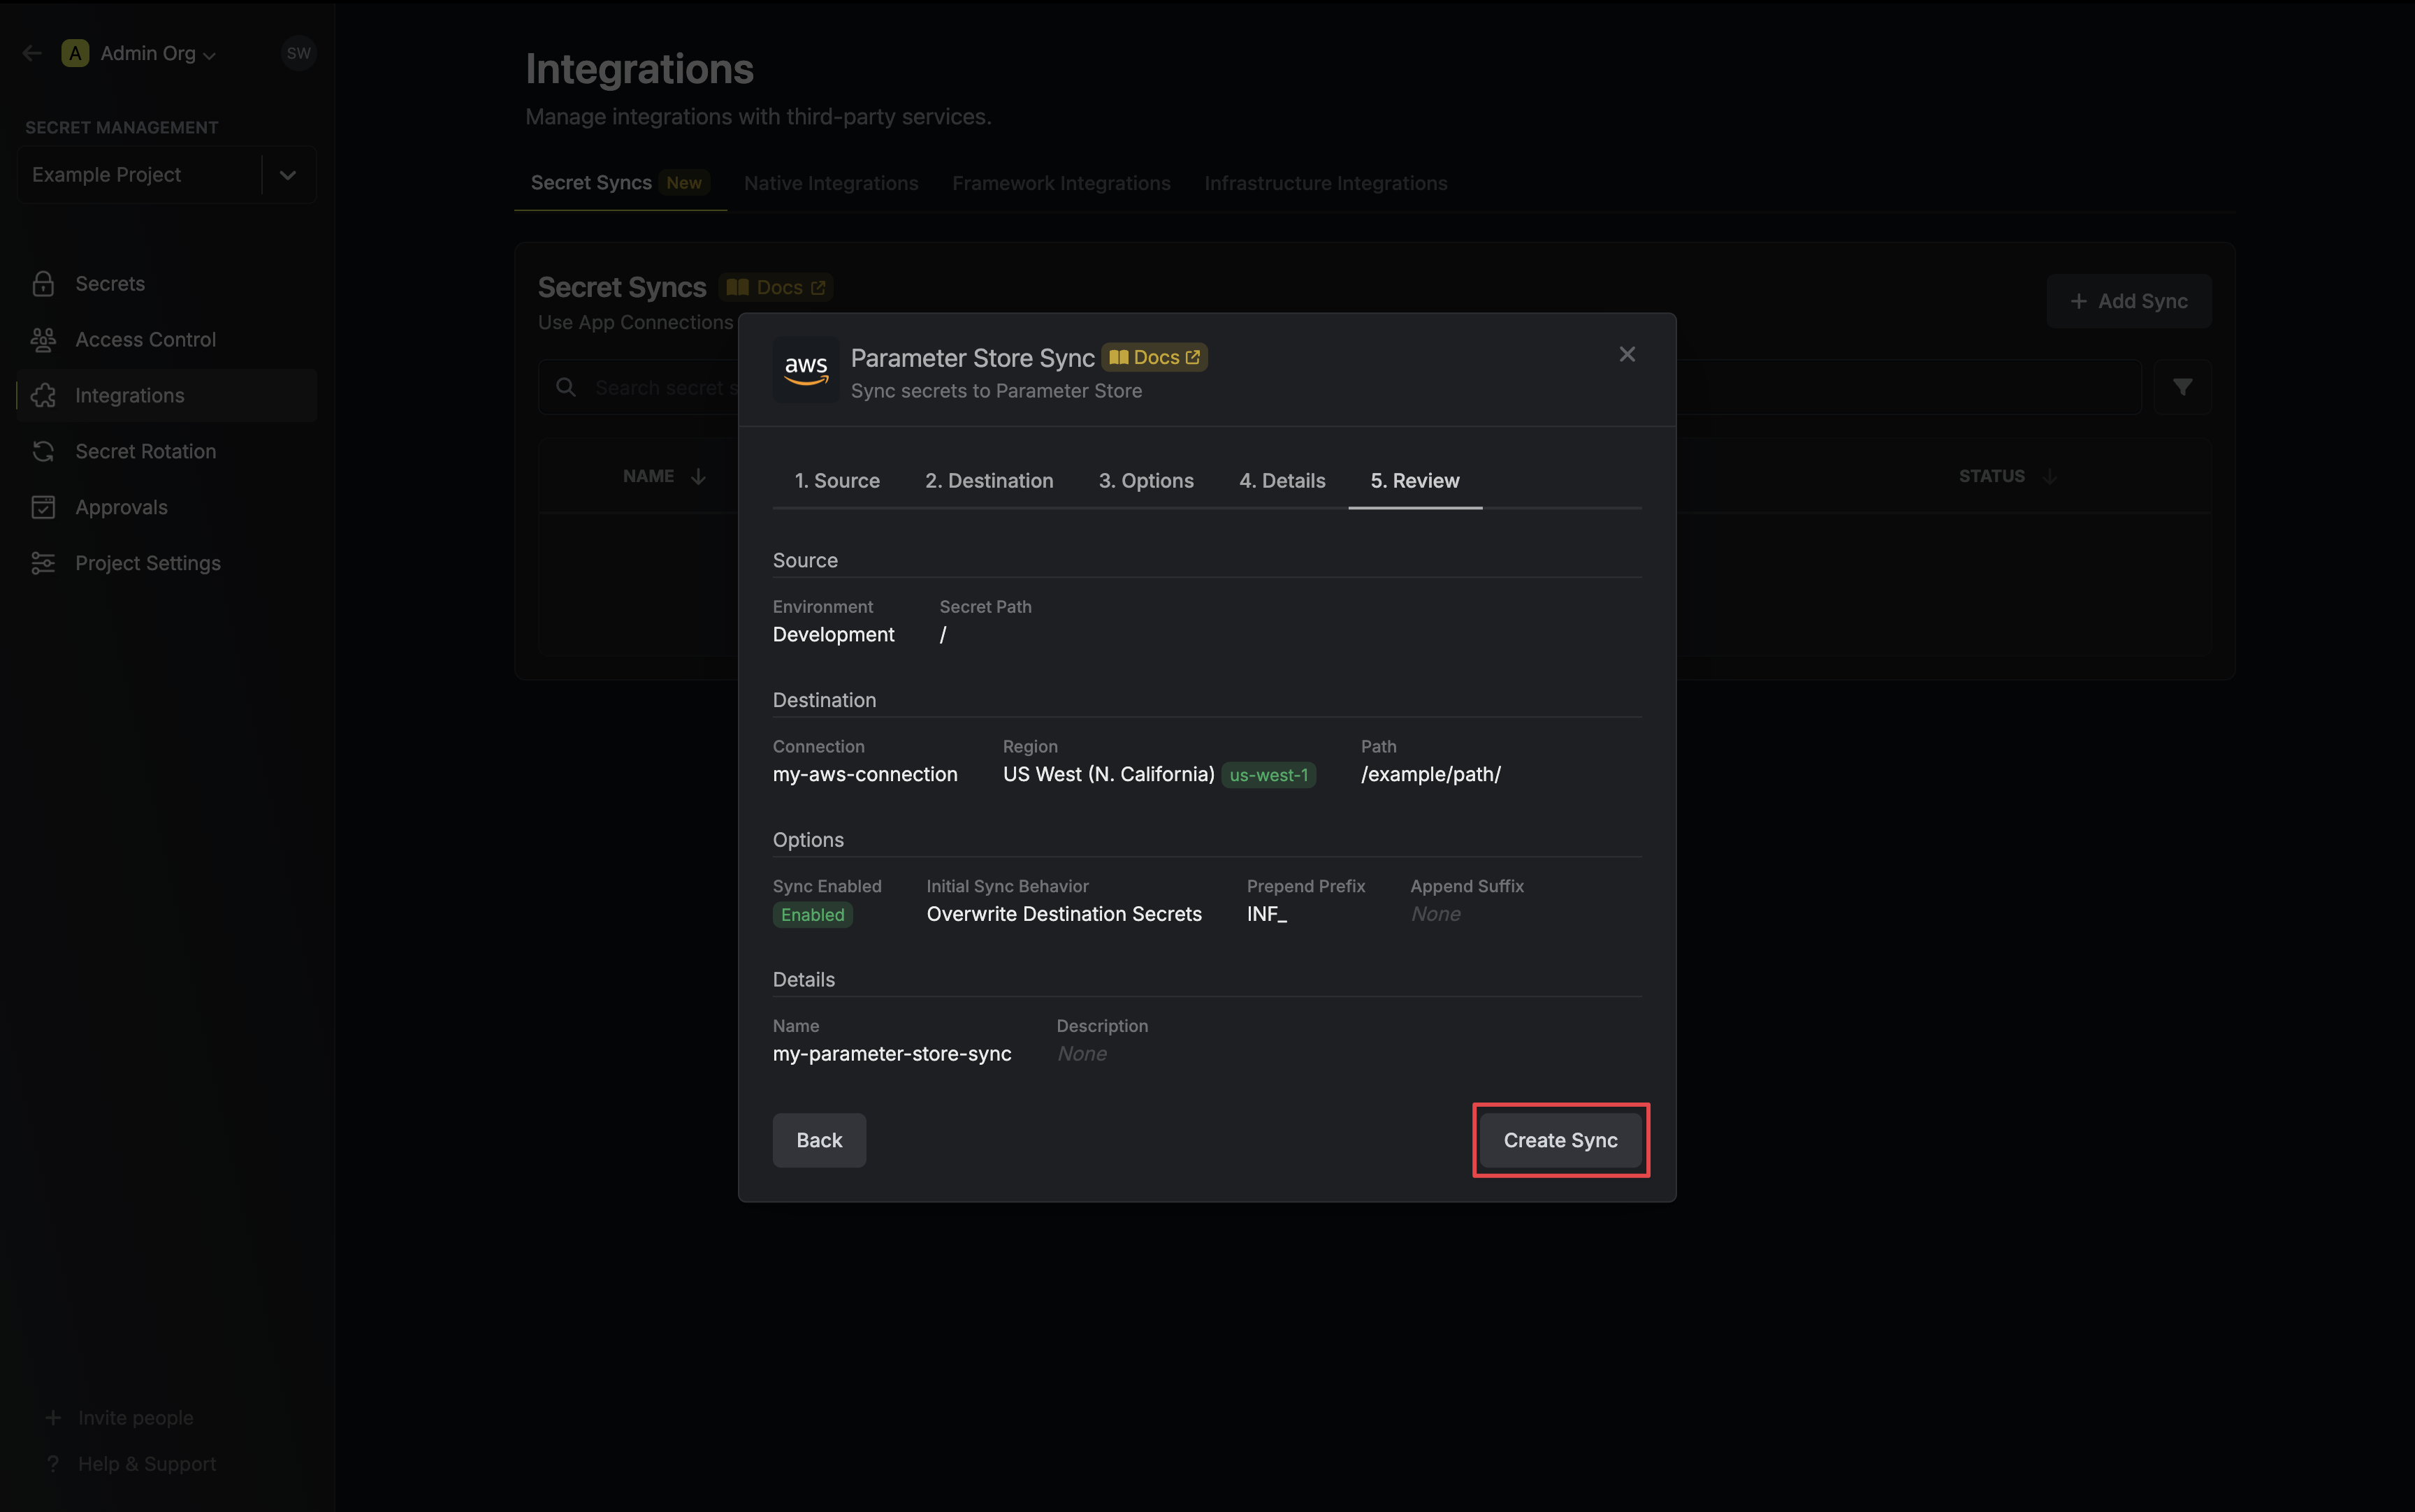 8. If enabled, your Parameter Store Sync will begin syncing your secrets to the destination endpoint.
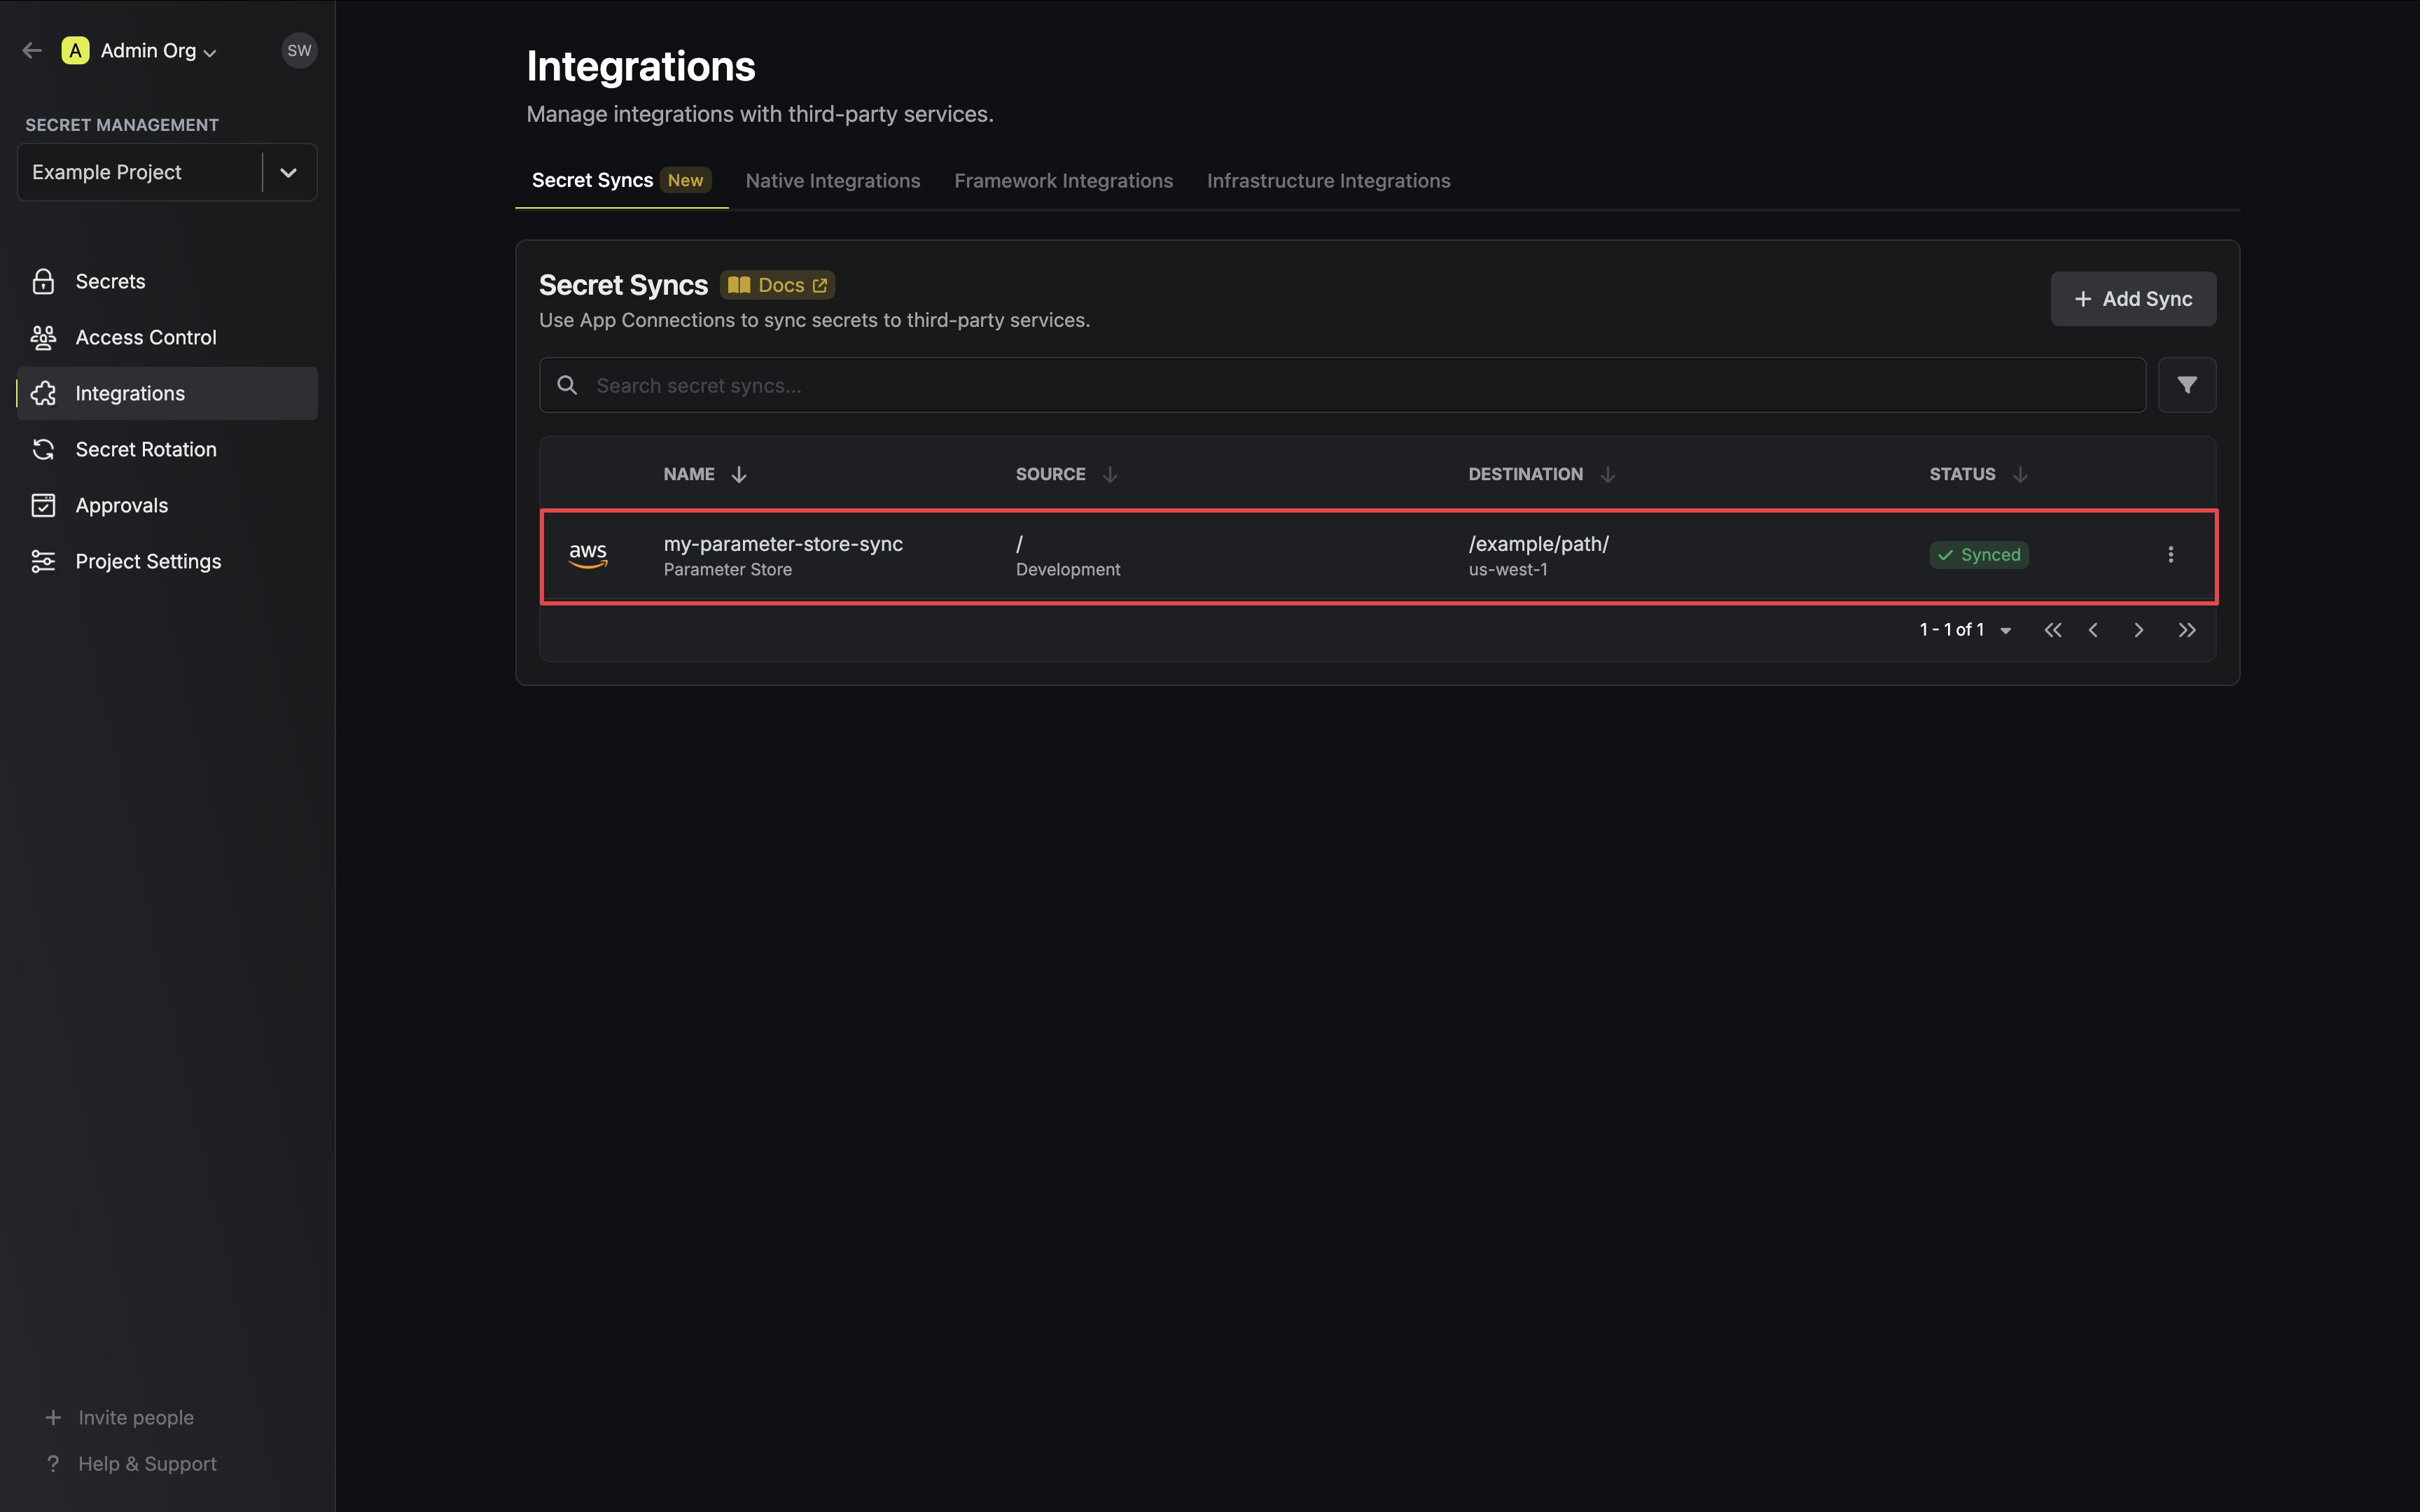 2. Select the **AWS Secrets Manager** option.
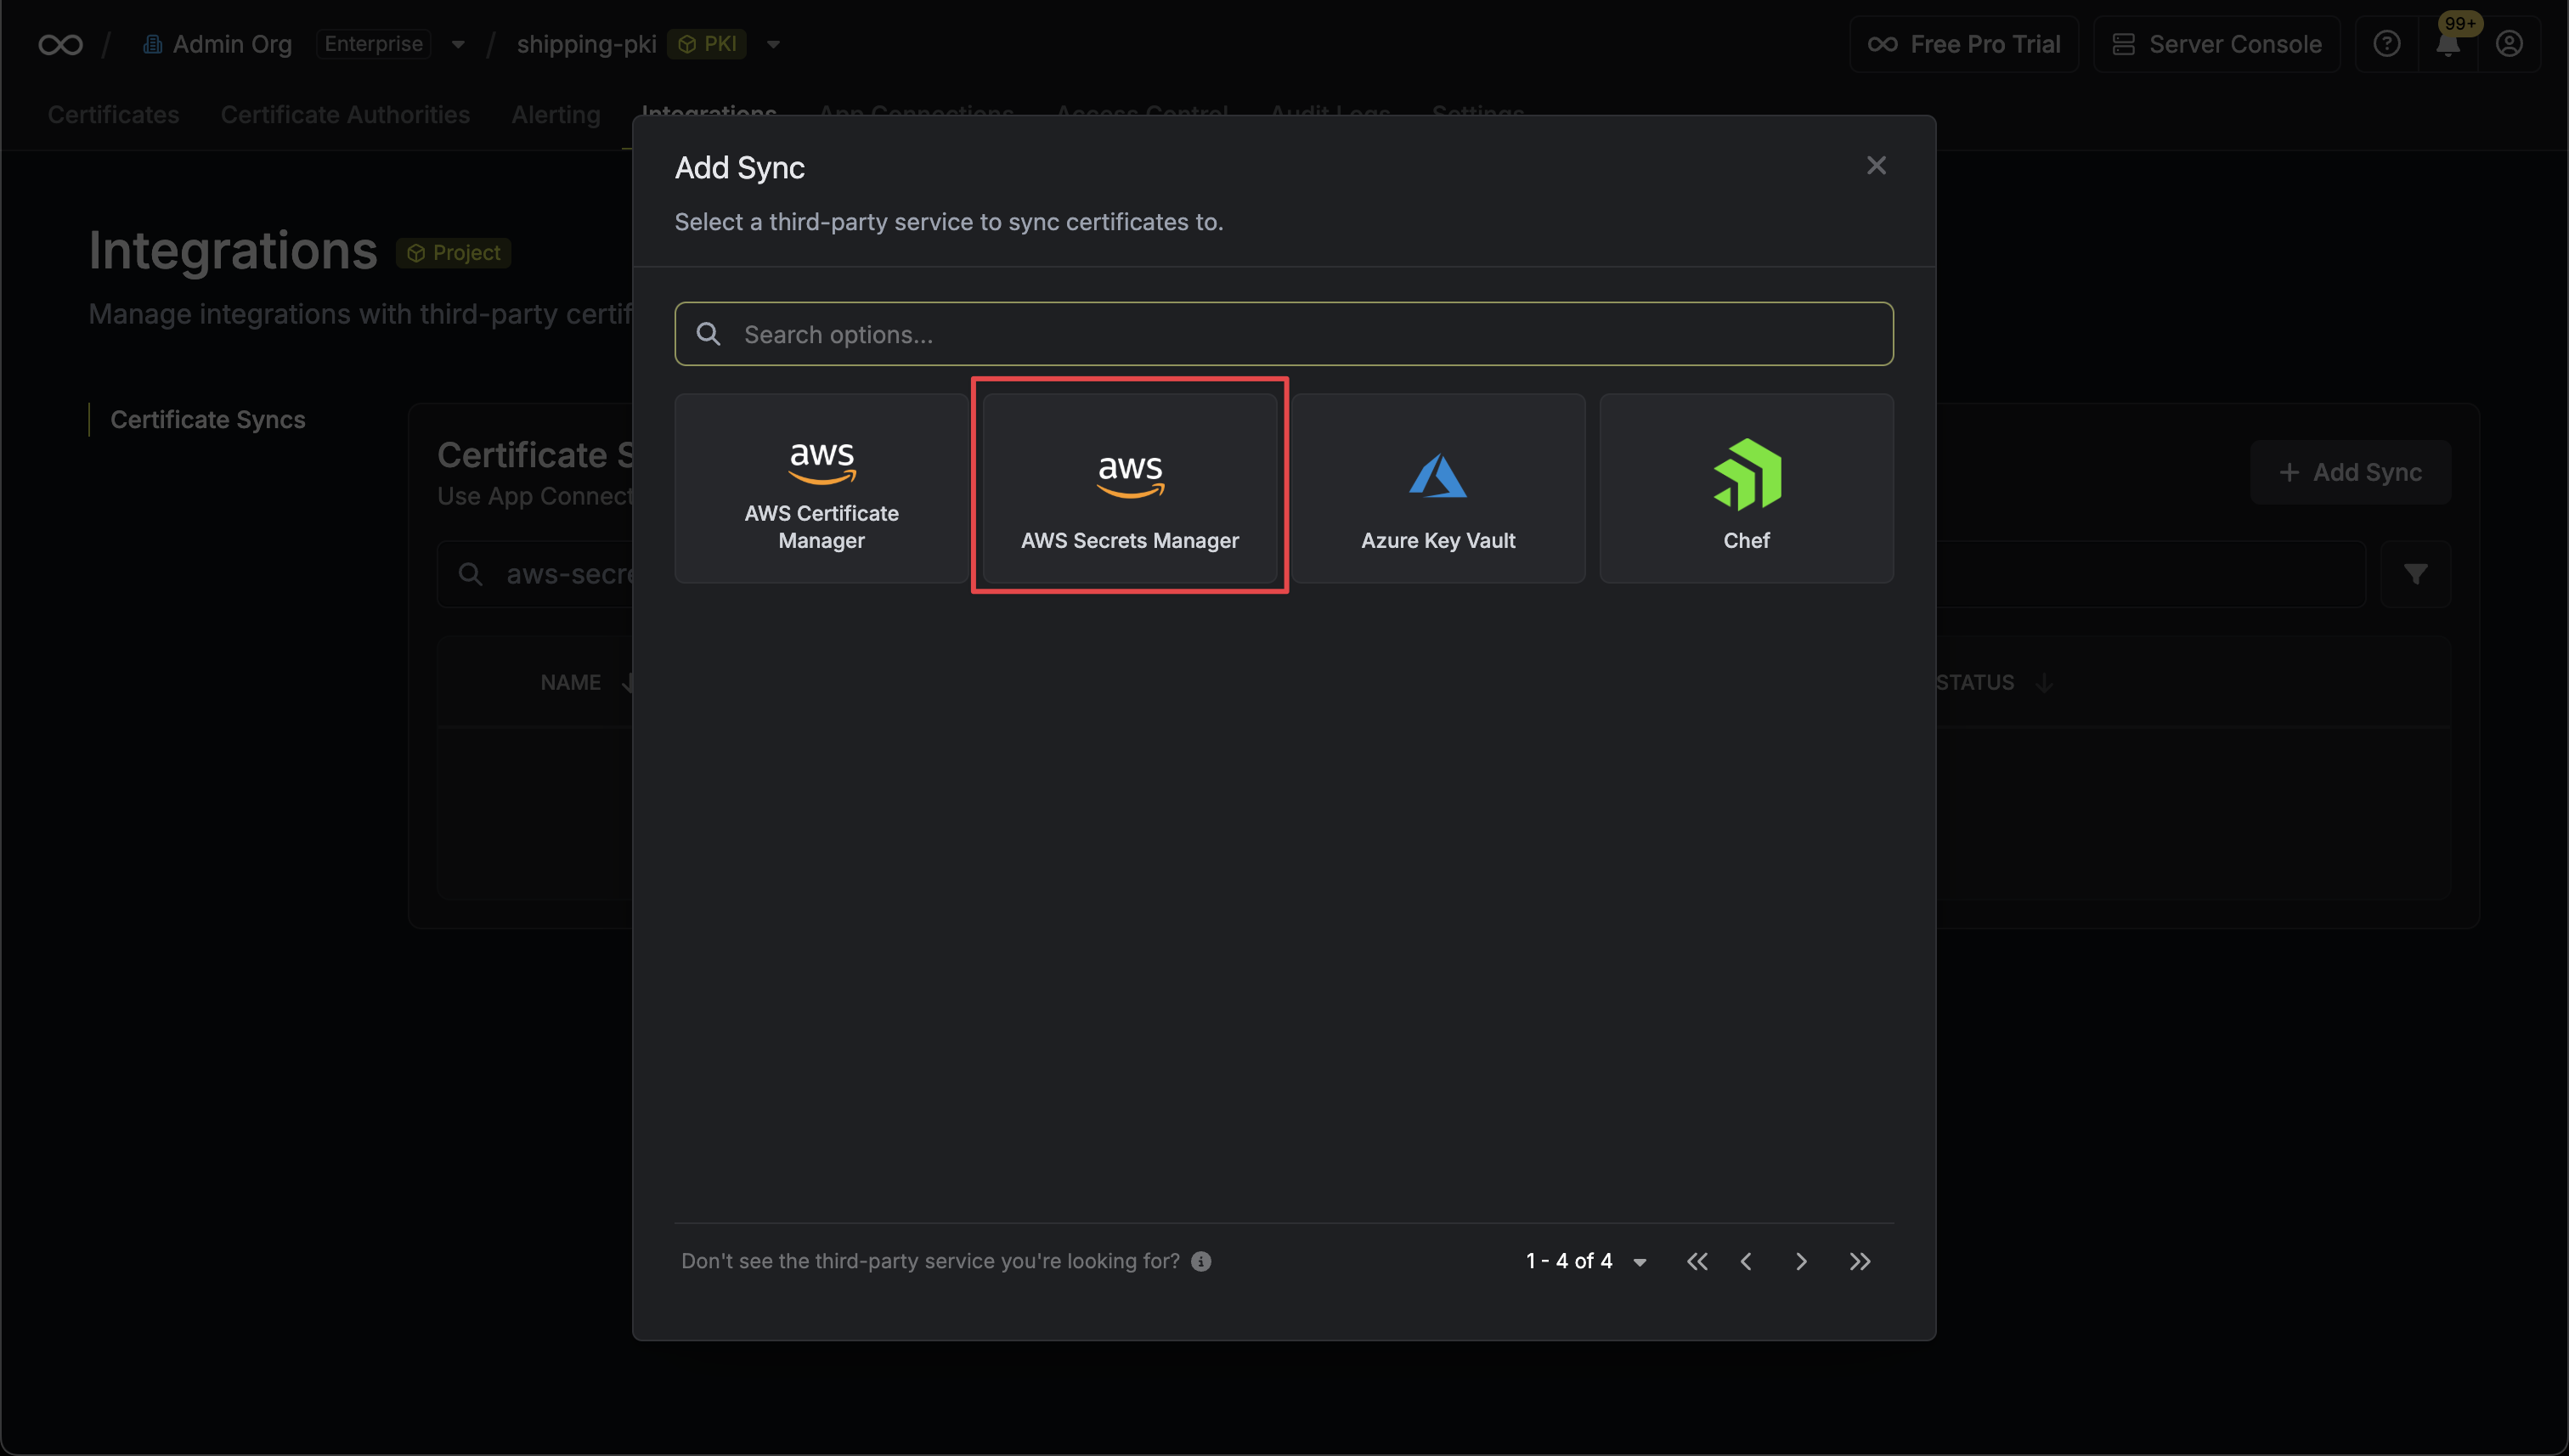 3. Configure the **Destination** to where certificates should be deployed, then click **Next**.
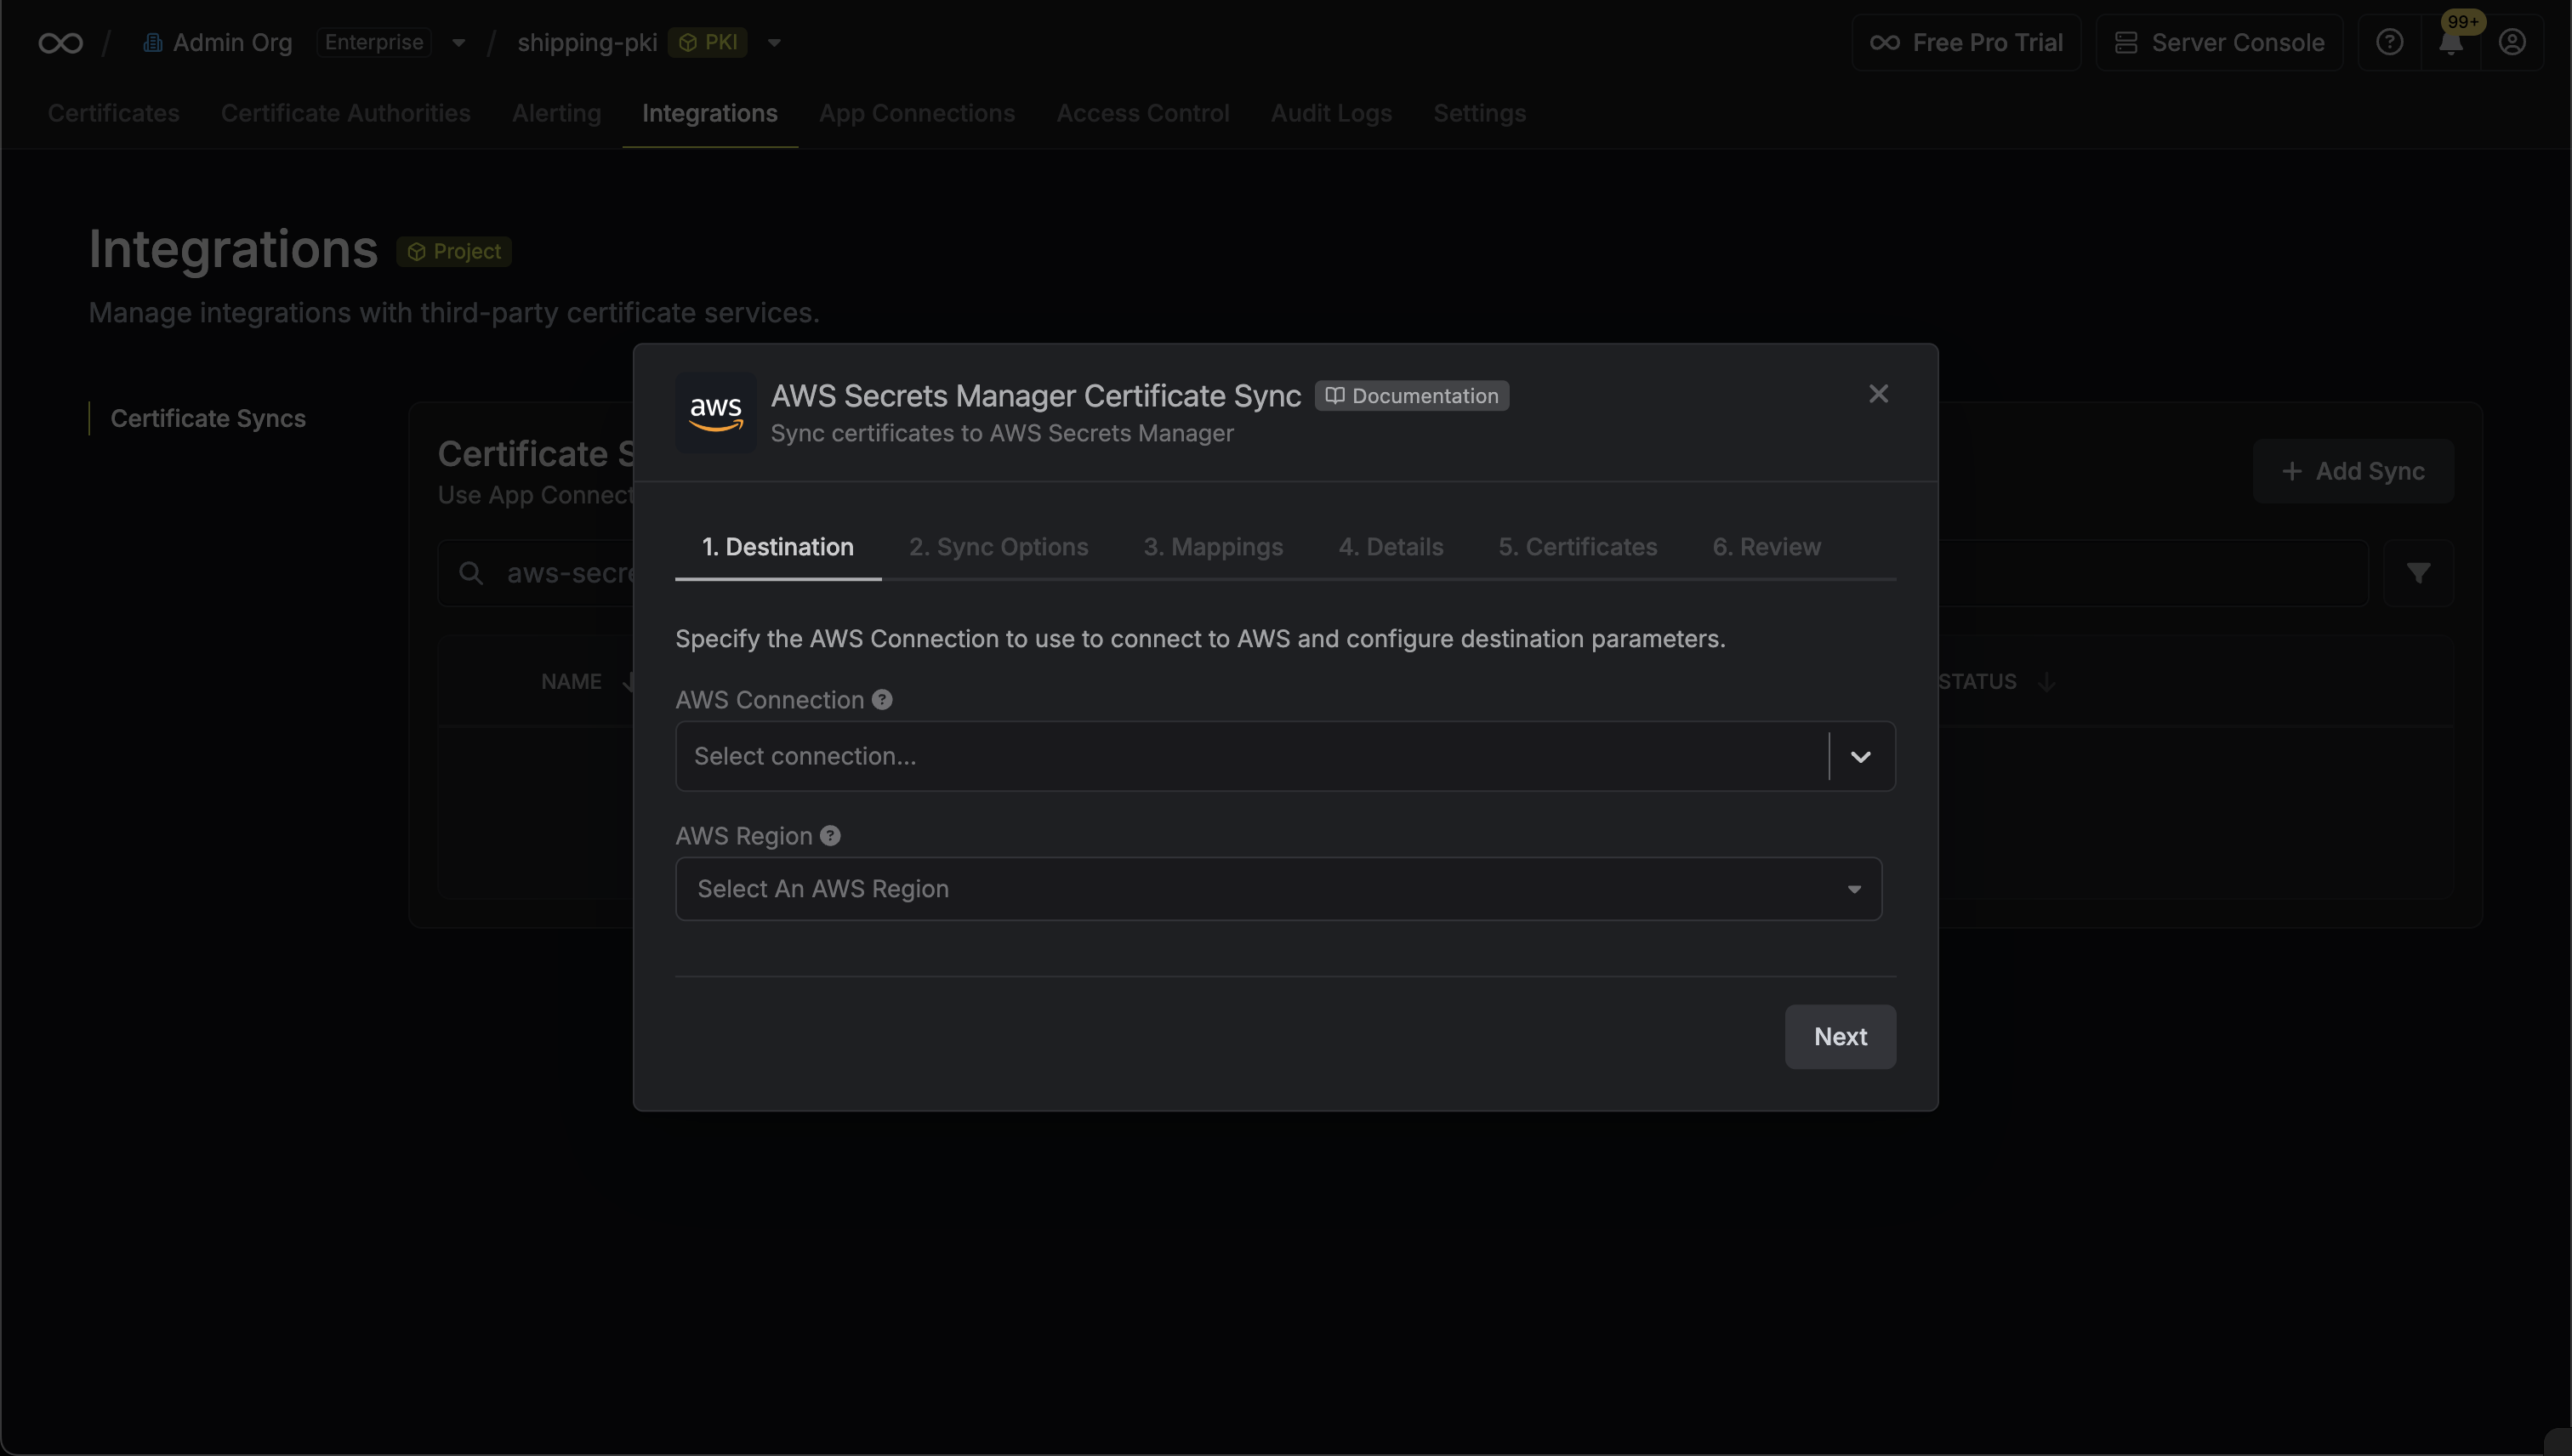 * **AWS Connection**: The AWS Connection to authenticate with.
* **Region**: The AWS region where secrets will be stored.
4. Configure the **Sync Options** to specify how certificates should be synced, then click **Next**.
* **AWS Connection**: The AWS Connection to authenticate with.
* **Region**: The AWS region where secrets will be stored.
4. Configure the **Sync Options** to specify how certificates should be synced, then click **Next**.
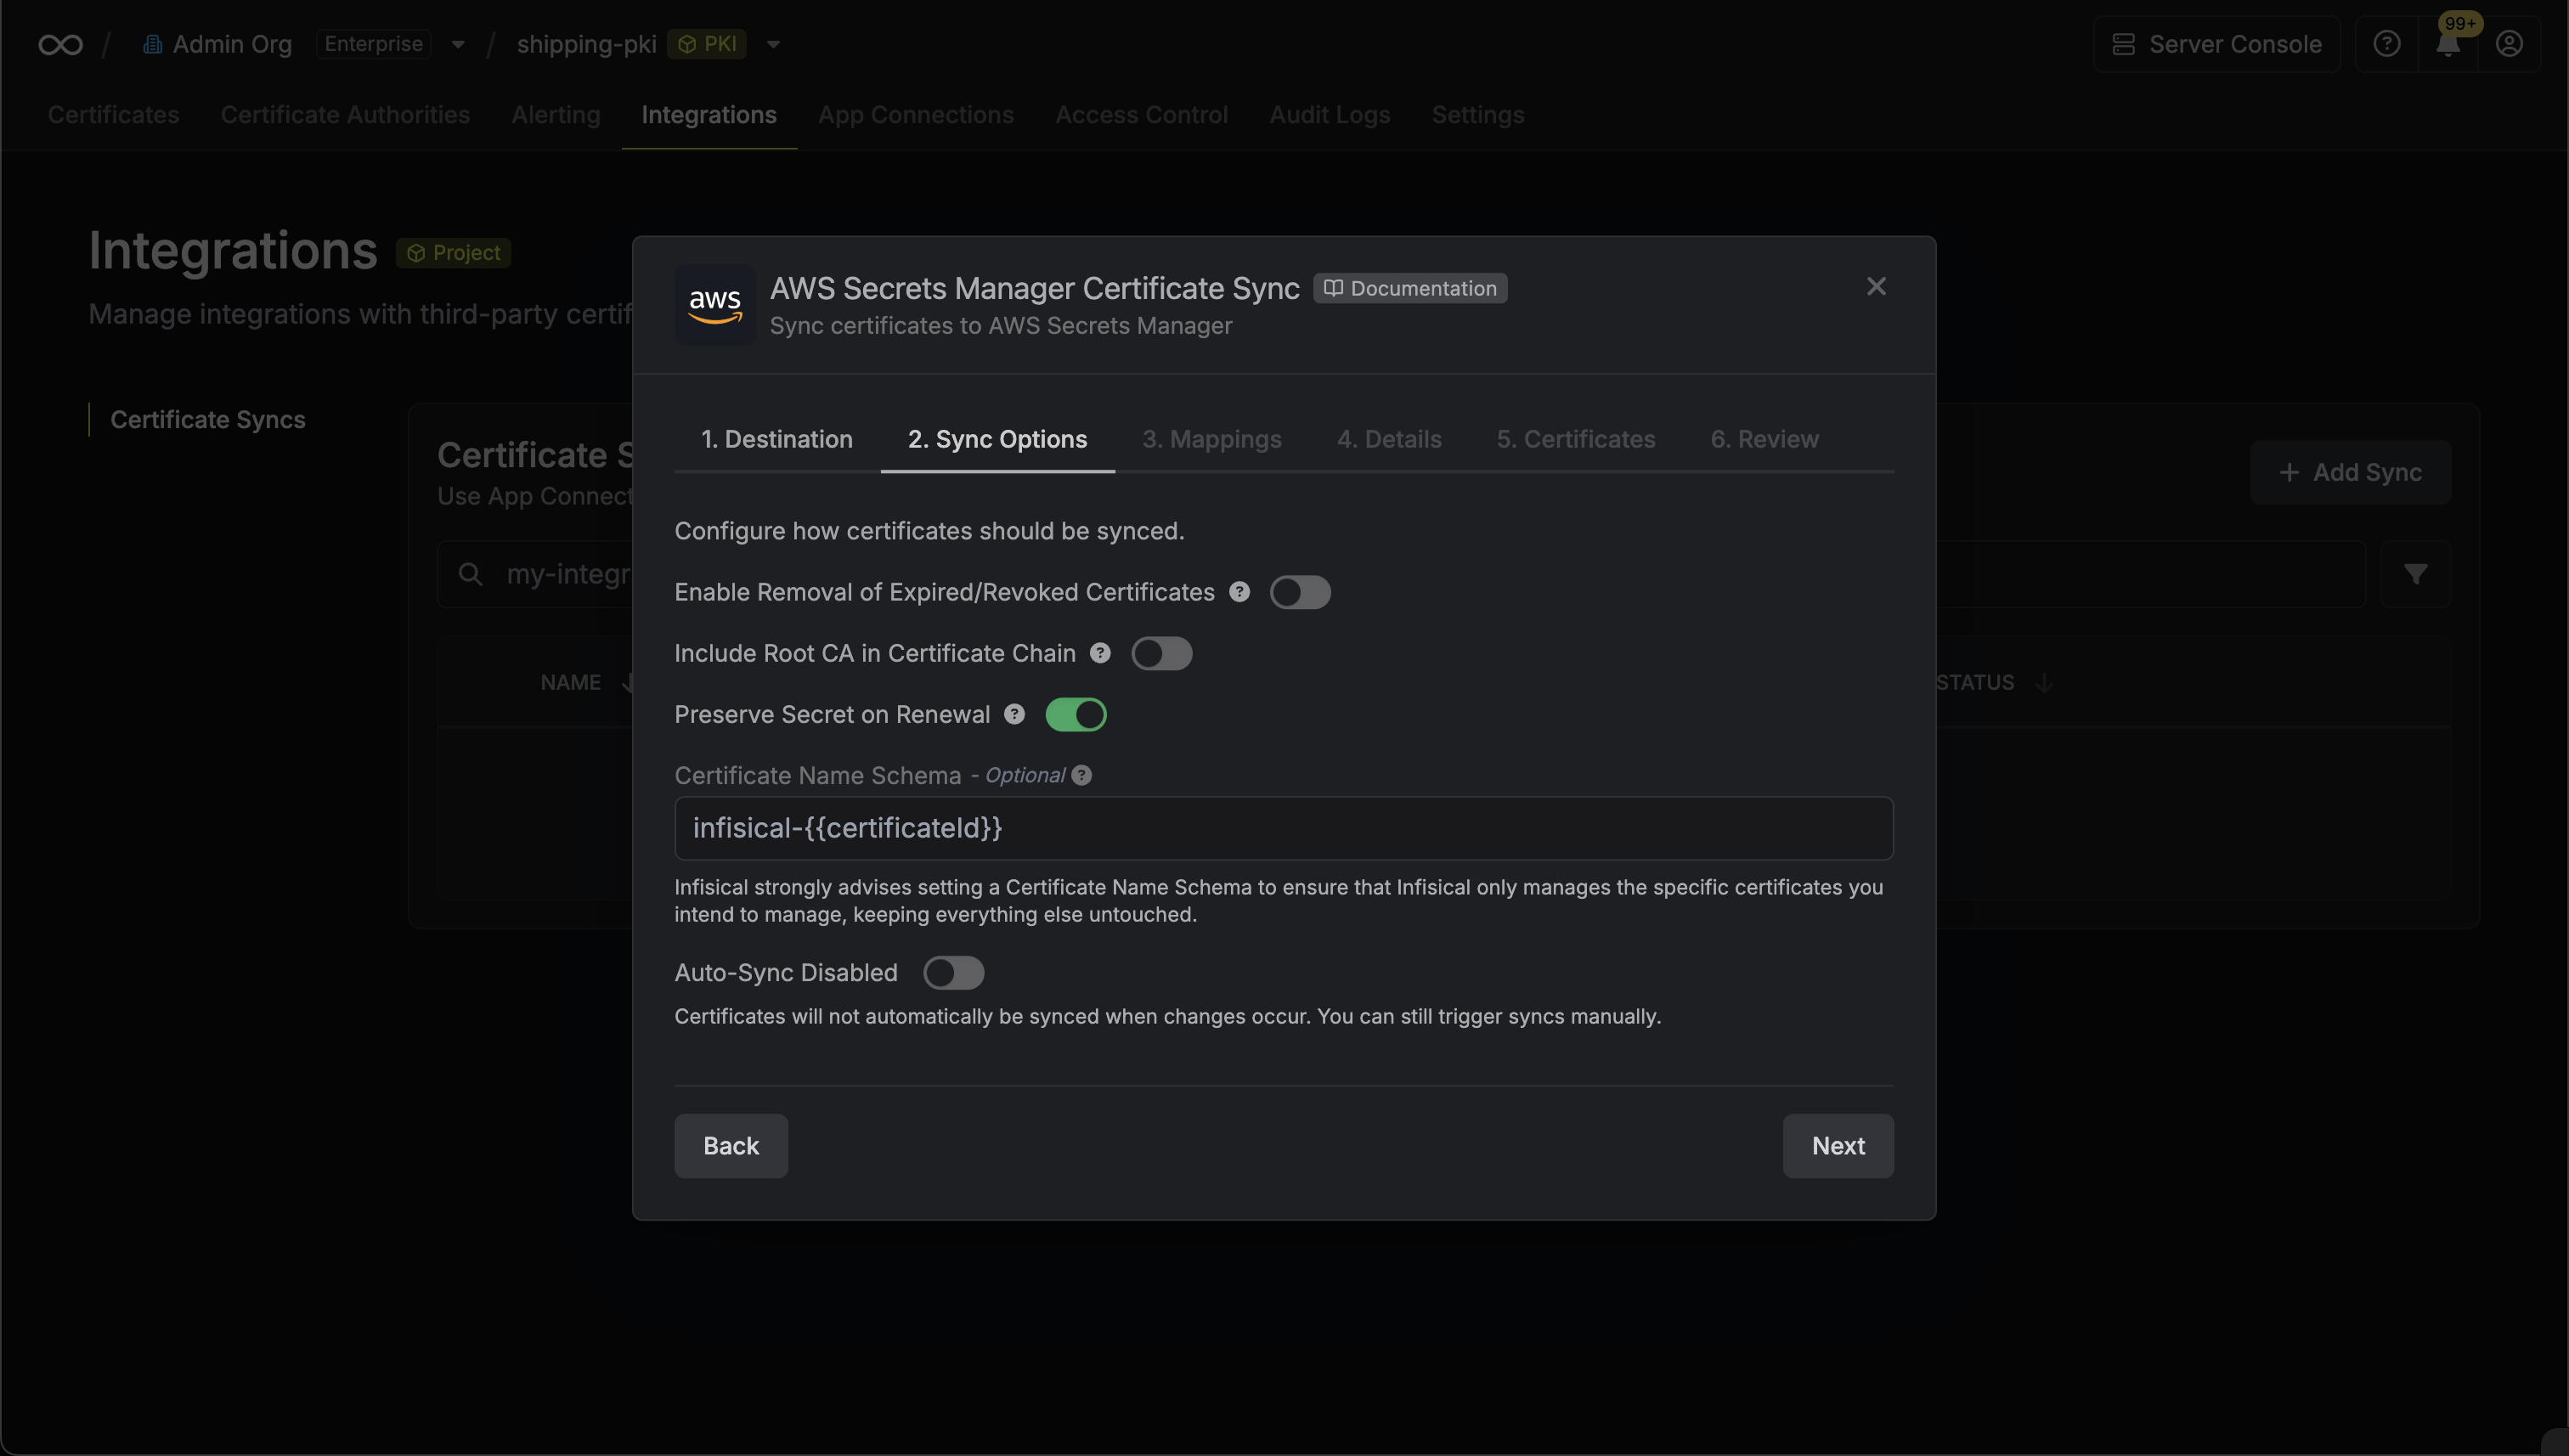 * **Enable Removal of Expired/Revoked Certificates**: If enabled, Infisical will remove certificates from the destination if they are no longer active in Infisical.
* **Preserve Secret on Renewal**: Only applies to certificate renewals. When a certificate is renewed in Infisical, this option controls how the renewed certificate is handled. If enabled, the renewed certificate will update the existing secret, preserving the same secret name. If disabled, the renewed certificate will be created as a new secret with a new name.
* **Include Root CA**: If enabled, the Root CA certificate will be included in the certificate chain when syncing to AWS Secrets Manager. If disabled, only intermediate certificates will be included.
* **Certificate Name Schema** (Optional): Customize how secret names are generated in AWS Secrets Manager. Use `{{certificateId}}` as a placeholder for the certificate ID.
* **Auto-Sync Enabled**: If enabled, certificates will automatically be synced when changes occur. Disable to enforce manual syncing only.
5. Configure the **Field Mappings** to customize how certificate data is stored in AWS Secrets Manager secrets, then click **Next**.
* **Enable Removal of Expired/Revoked Certificates**: If enabled, Infisical will remove certificates from the destination if they are no longer active in Infisical.
* **Preserve Secret on Renewal**: Only applies to certificate renewals. When a certificate is renewed in Infisical, this option controls how the renewed certificate is handled. If enabled, the renewed certificate will update the existing secret, preserving the same secret name. If disabled, the renewed certificate will be created as a new secret with a new name.
* **Include Root CA**: If enabled, the Root CA certificate will be included in the certificate chain when syncing to AWS Secrets Manager. If disabled, only intermediate certificates will be included.
* **Certificate Name Schema** (Optional): Customize how secret names are generated in AWS Secrets Manager. Use `{{certificateId}}` as a placeholder for the certificate ID.
* **Auto-Sync Enabled**: If enabled, certificates will automatically be synced when changes occur. Disable to enforce manual syncing only.
5. Configure the **Field Mappings** to customize how certificate data is stored in AWS Secrets Manager secrets, then click **Next**.
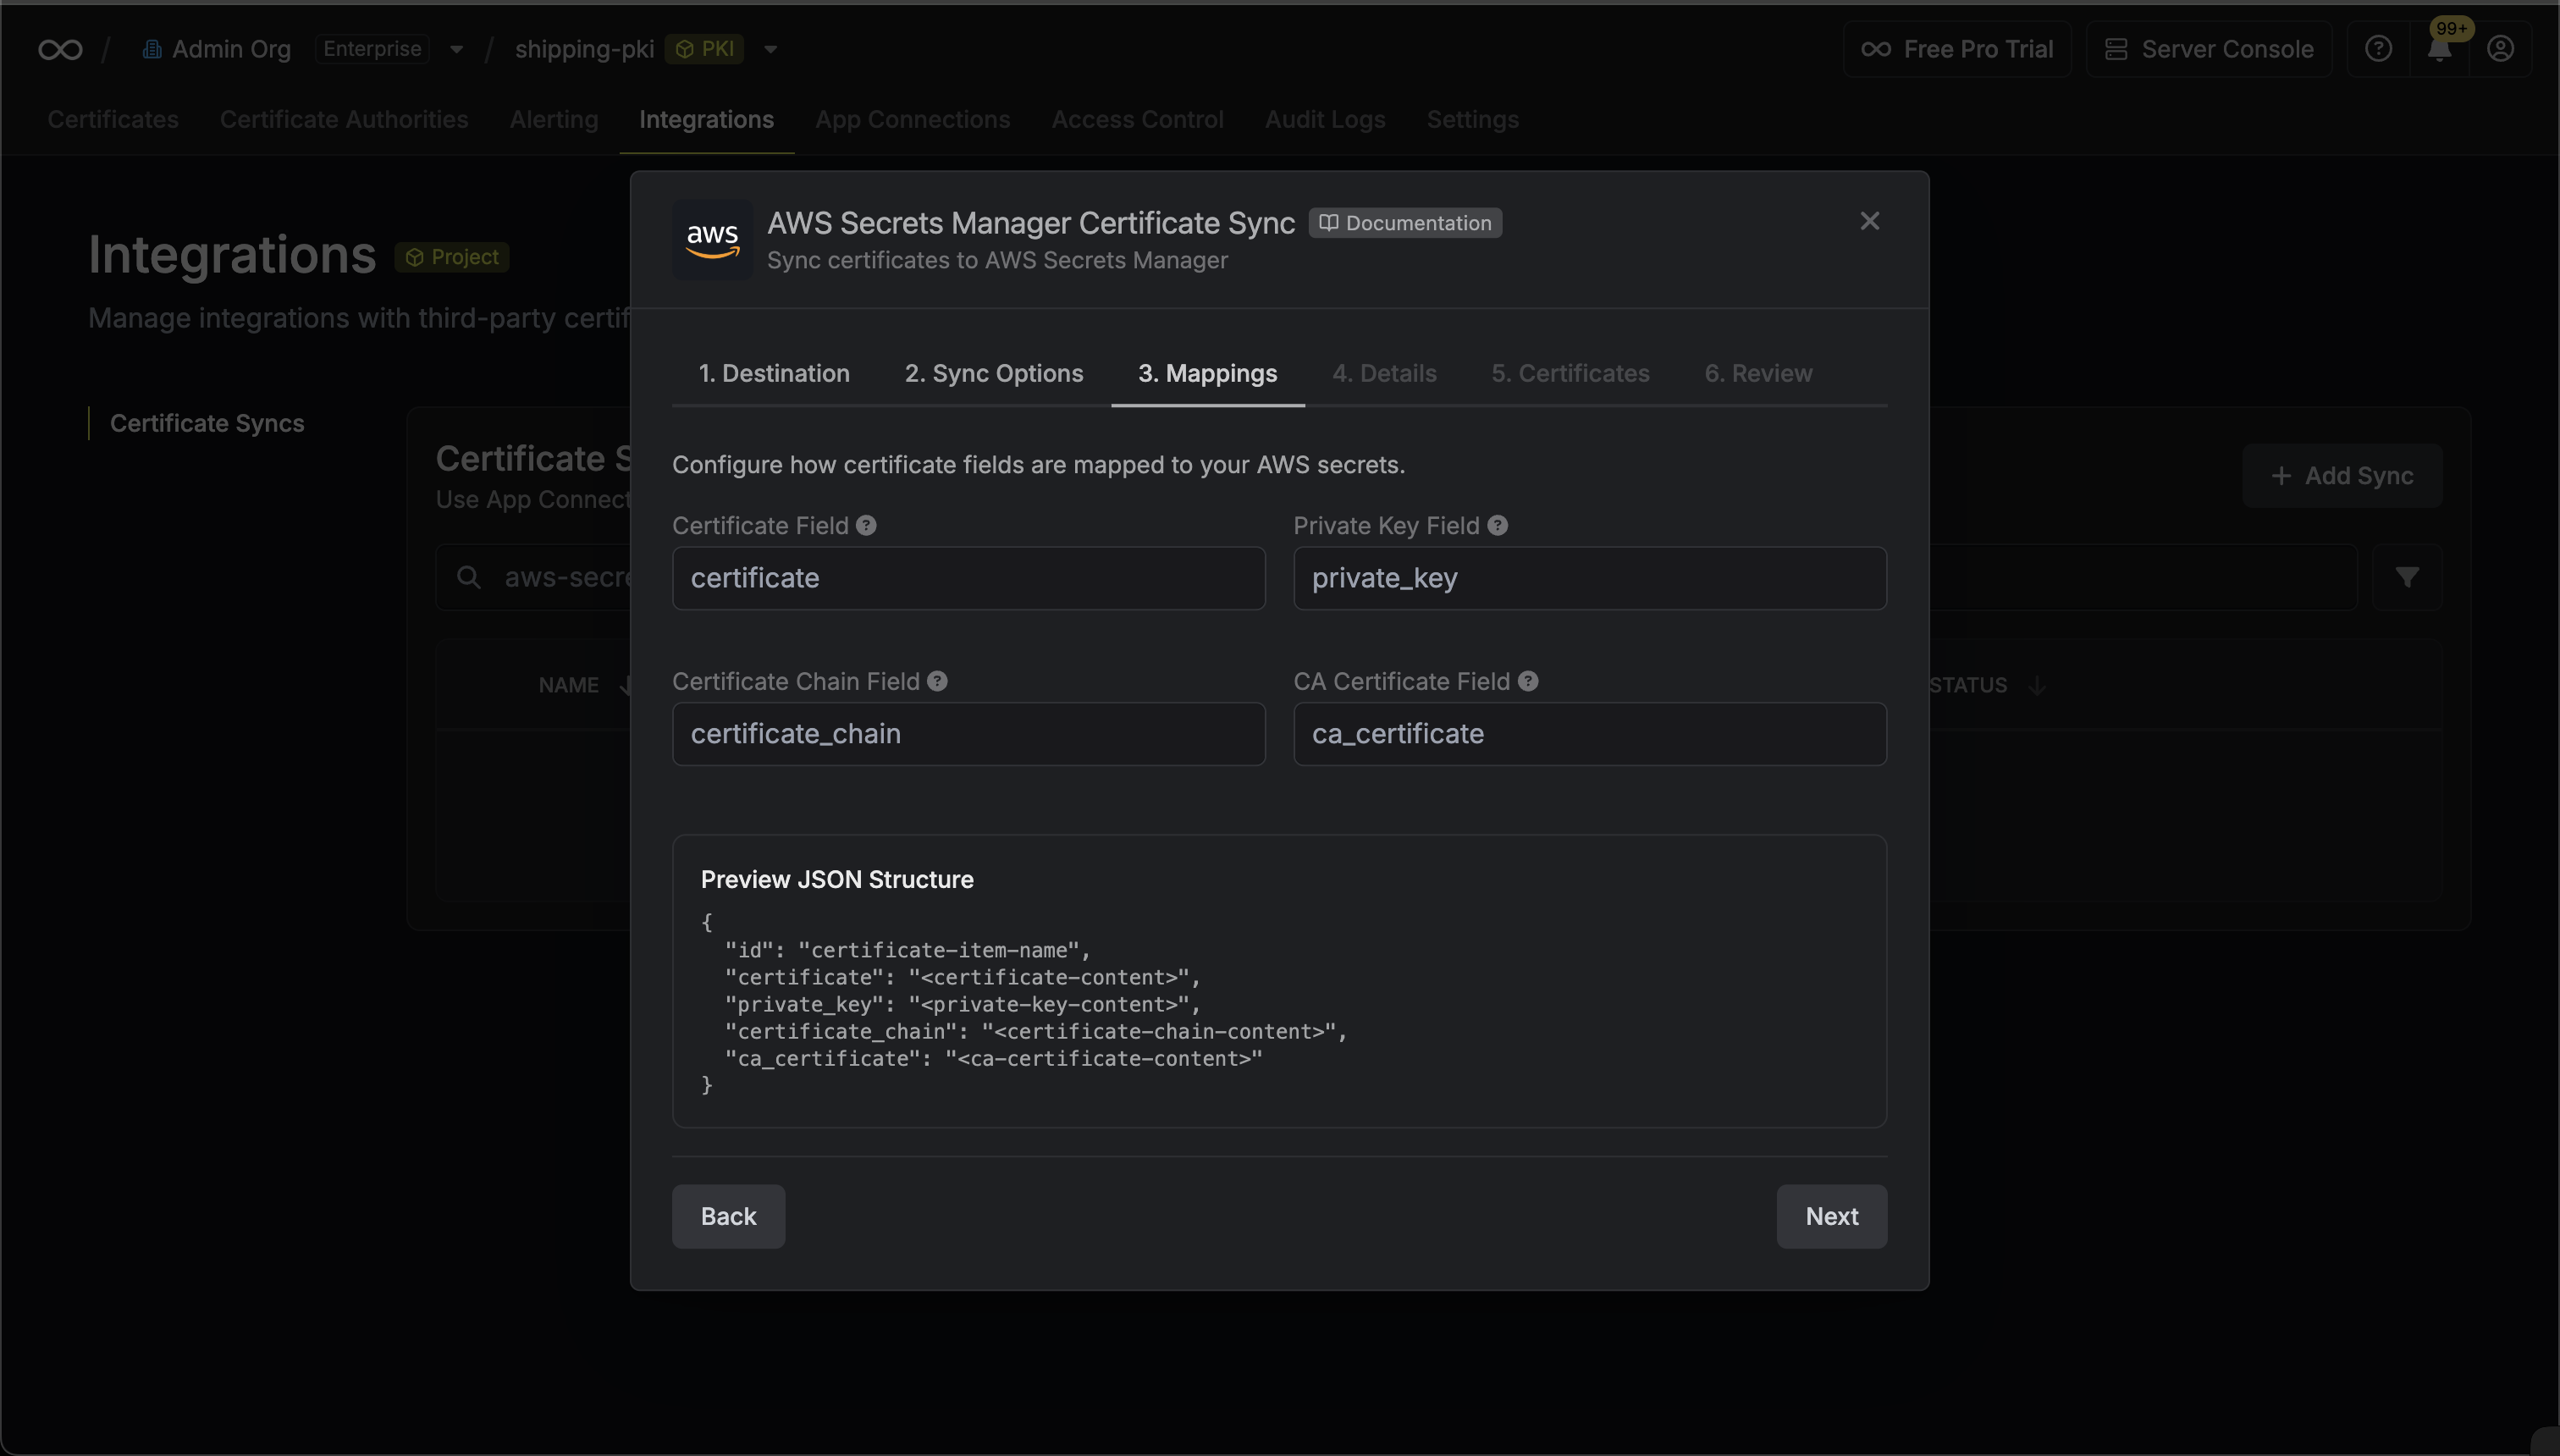 * **Certificate Field**: The field name where the certificate will be stored in the secret value (default: `certificate`)
* **Private Key Field**: The field name where the private key will be stored in the secret value (default: `private_key`)
* **Certificate Chain Field**: The field name where the full certificate chain excluding the root CA certificate will be stored (default: `certificate_chain`)
* **CA Certificate Field**: The field name where the root CA certificate will be stored (default: `ca_certificate`)
* **Certificate Field**: The field name where the certificate will be stored in the secret value (default: `certificate`)
* **Private Key Field**: The field name where the private key will be stored in the secret value (default: `private_key`)
* **Certificate Chain Field**: The field name where the full certificate chain excluding the root CA certificate will be stored (default: `certificate_chain`)
* **CA Certificate Field**: The field name where the root CA certificate will be stored (default: `ca_certificate`)
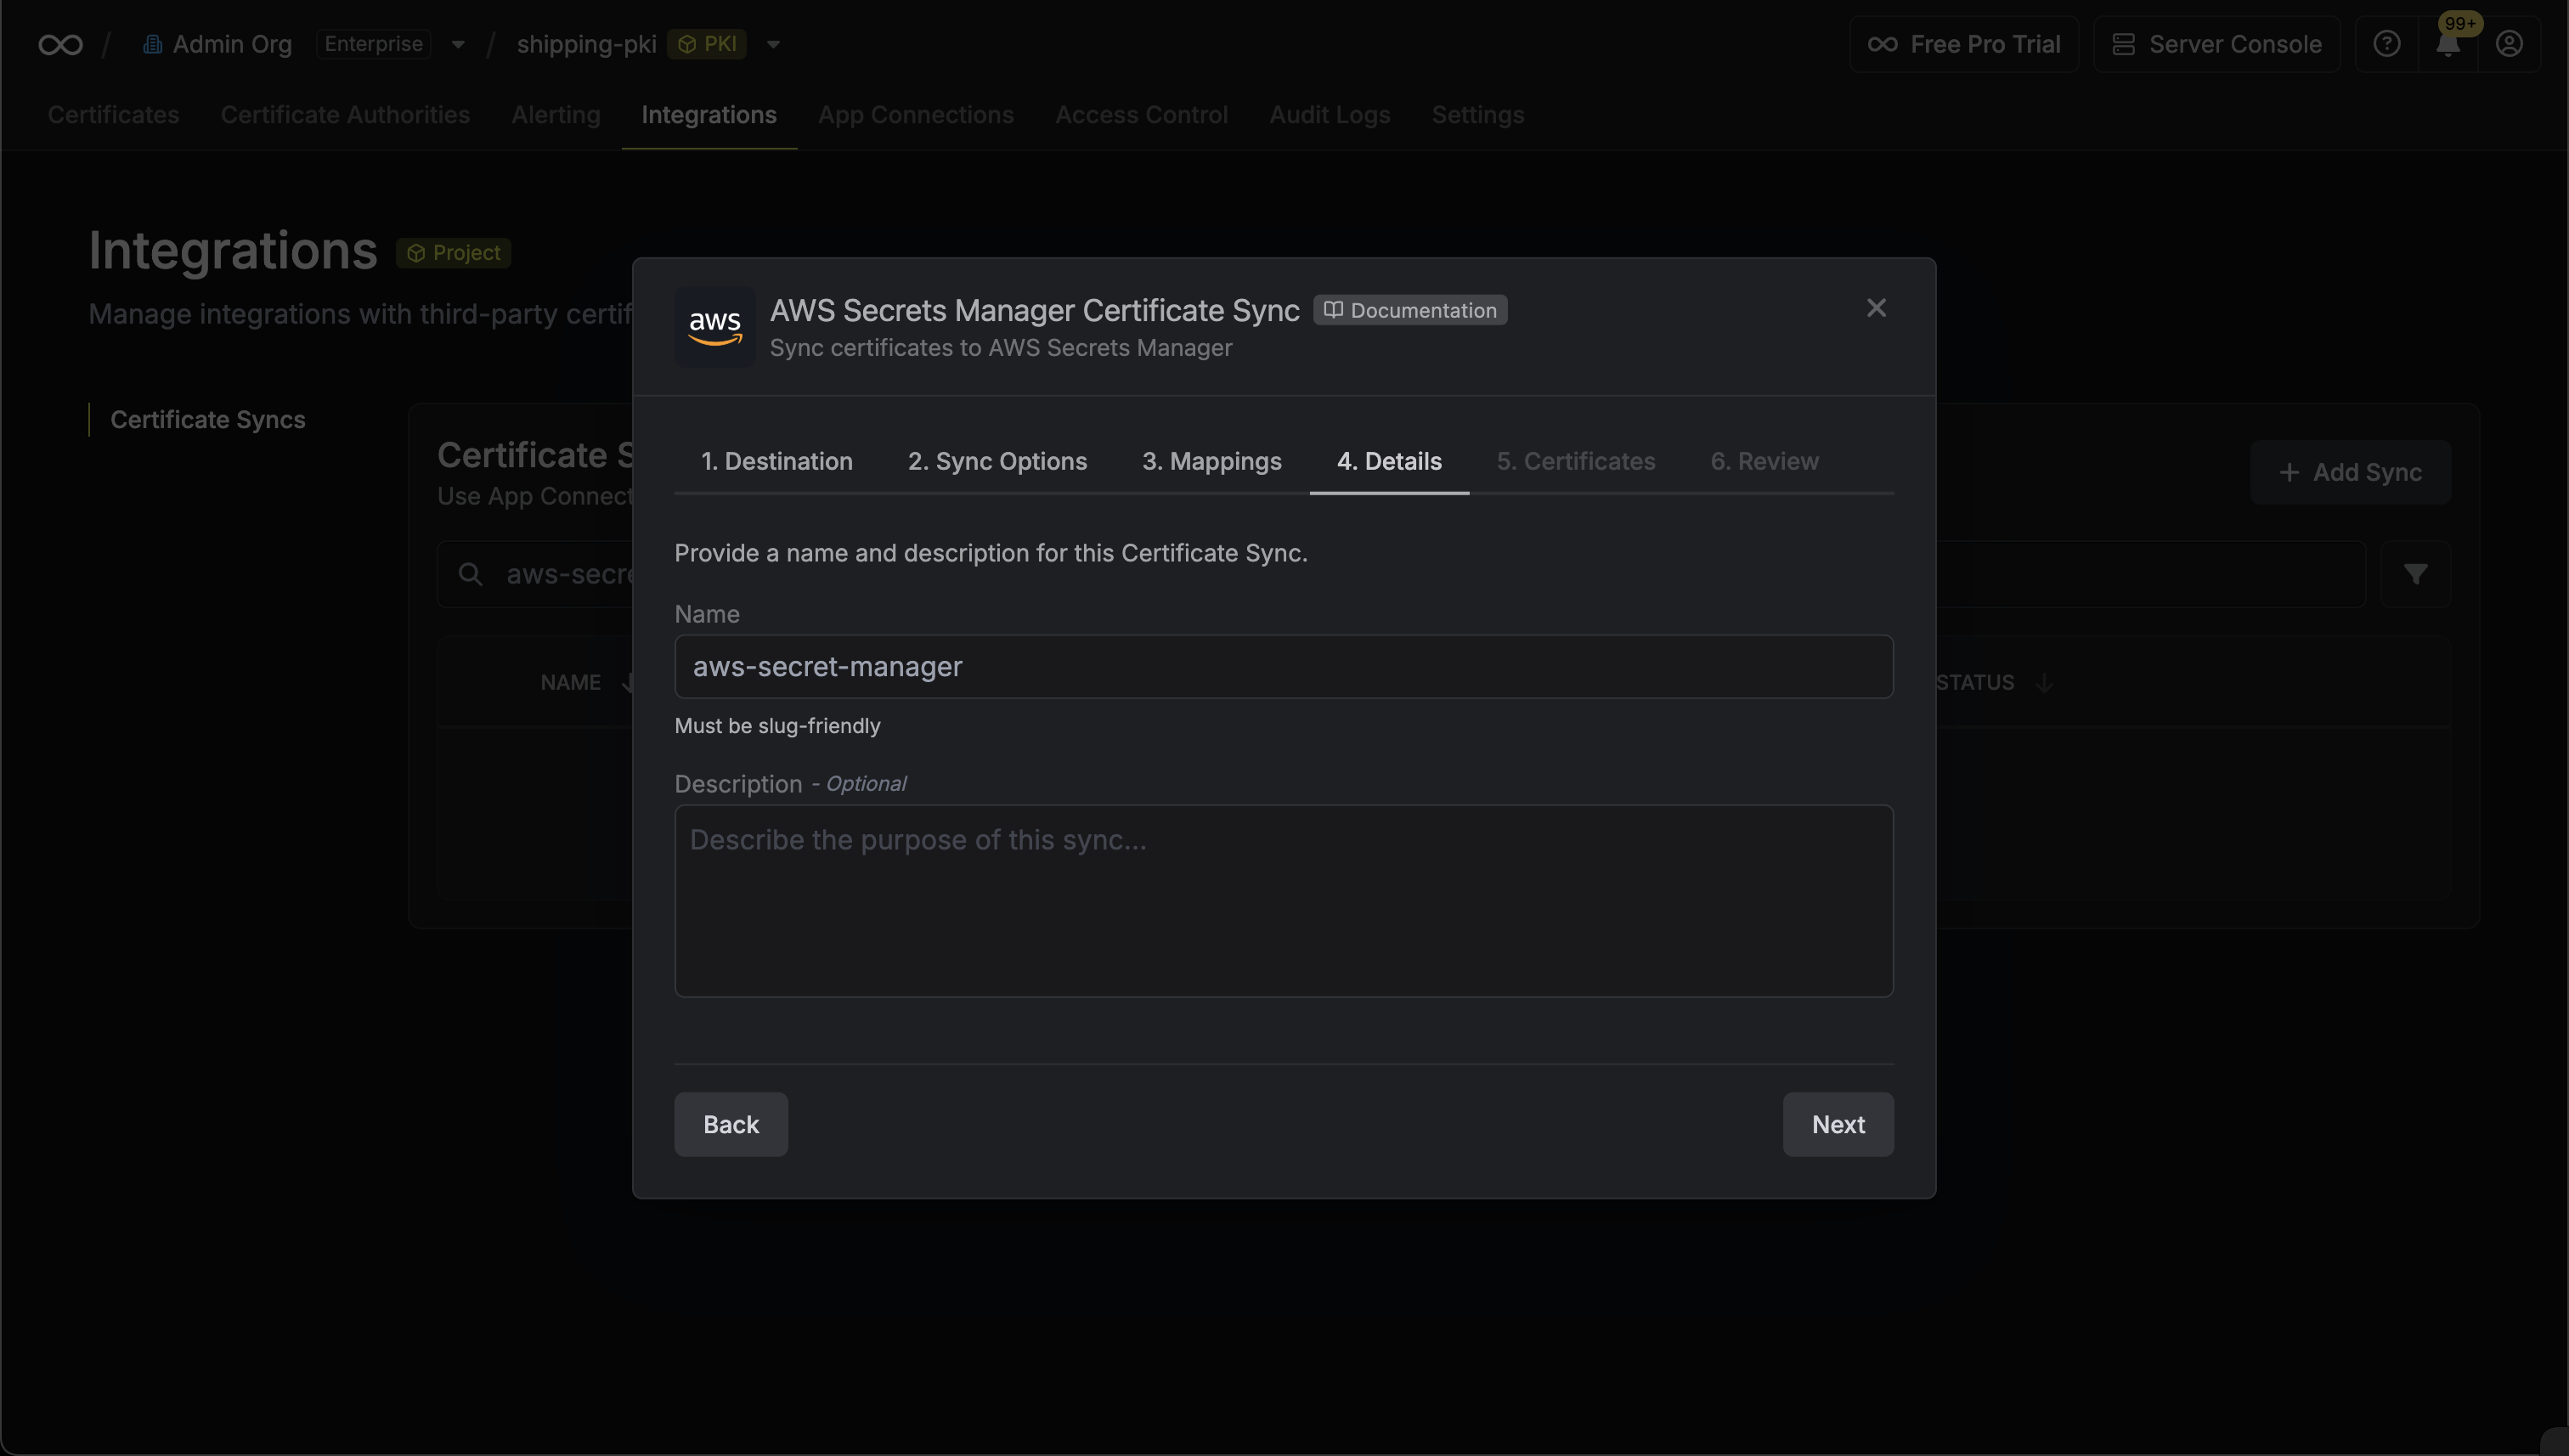 * **Name**: The name of your sync. Must be slug-friendly.
* **Description**: An optional description for your sync.
7. Select which certificates should be synced to AWS Secrets Manager.
* **Name**: The name of your sync. Must be slug-friendly.
* **Description**: An optional description for your sync.
7. Select which certificates should be synced to AWS Secrets Manager.
 8. Review your AWS Secrets Manager Certificate Sync configuration, then click **Create Sync**.
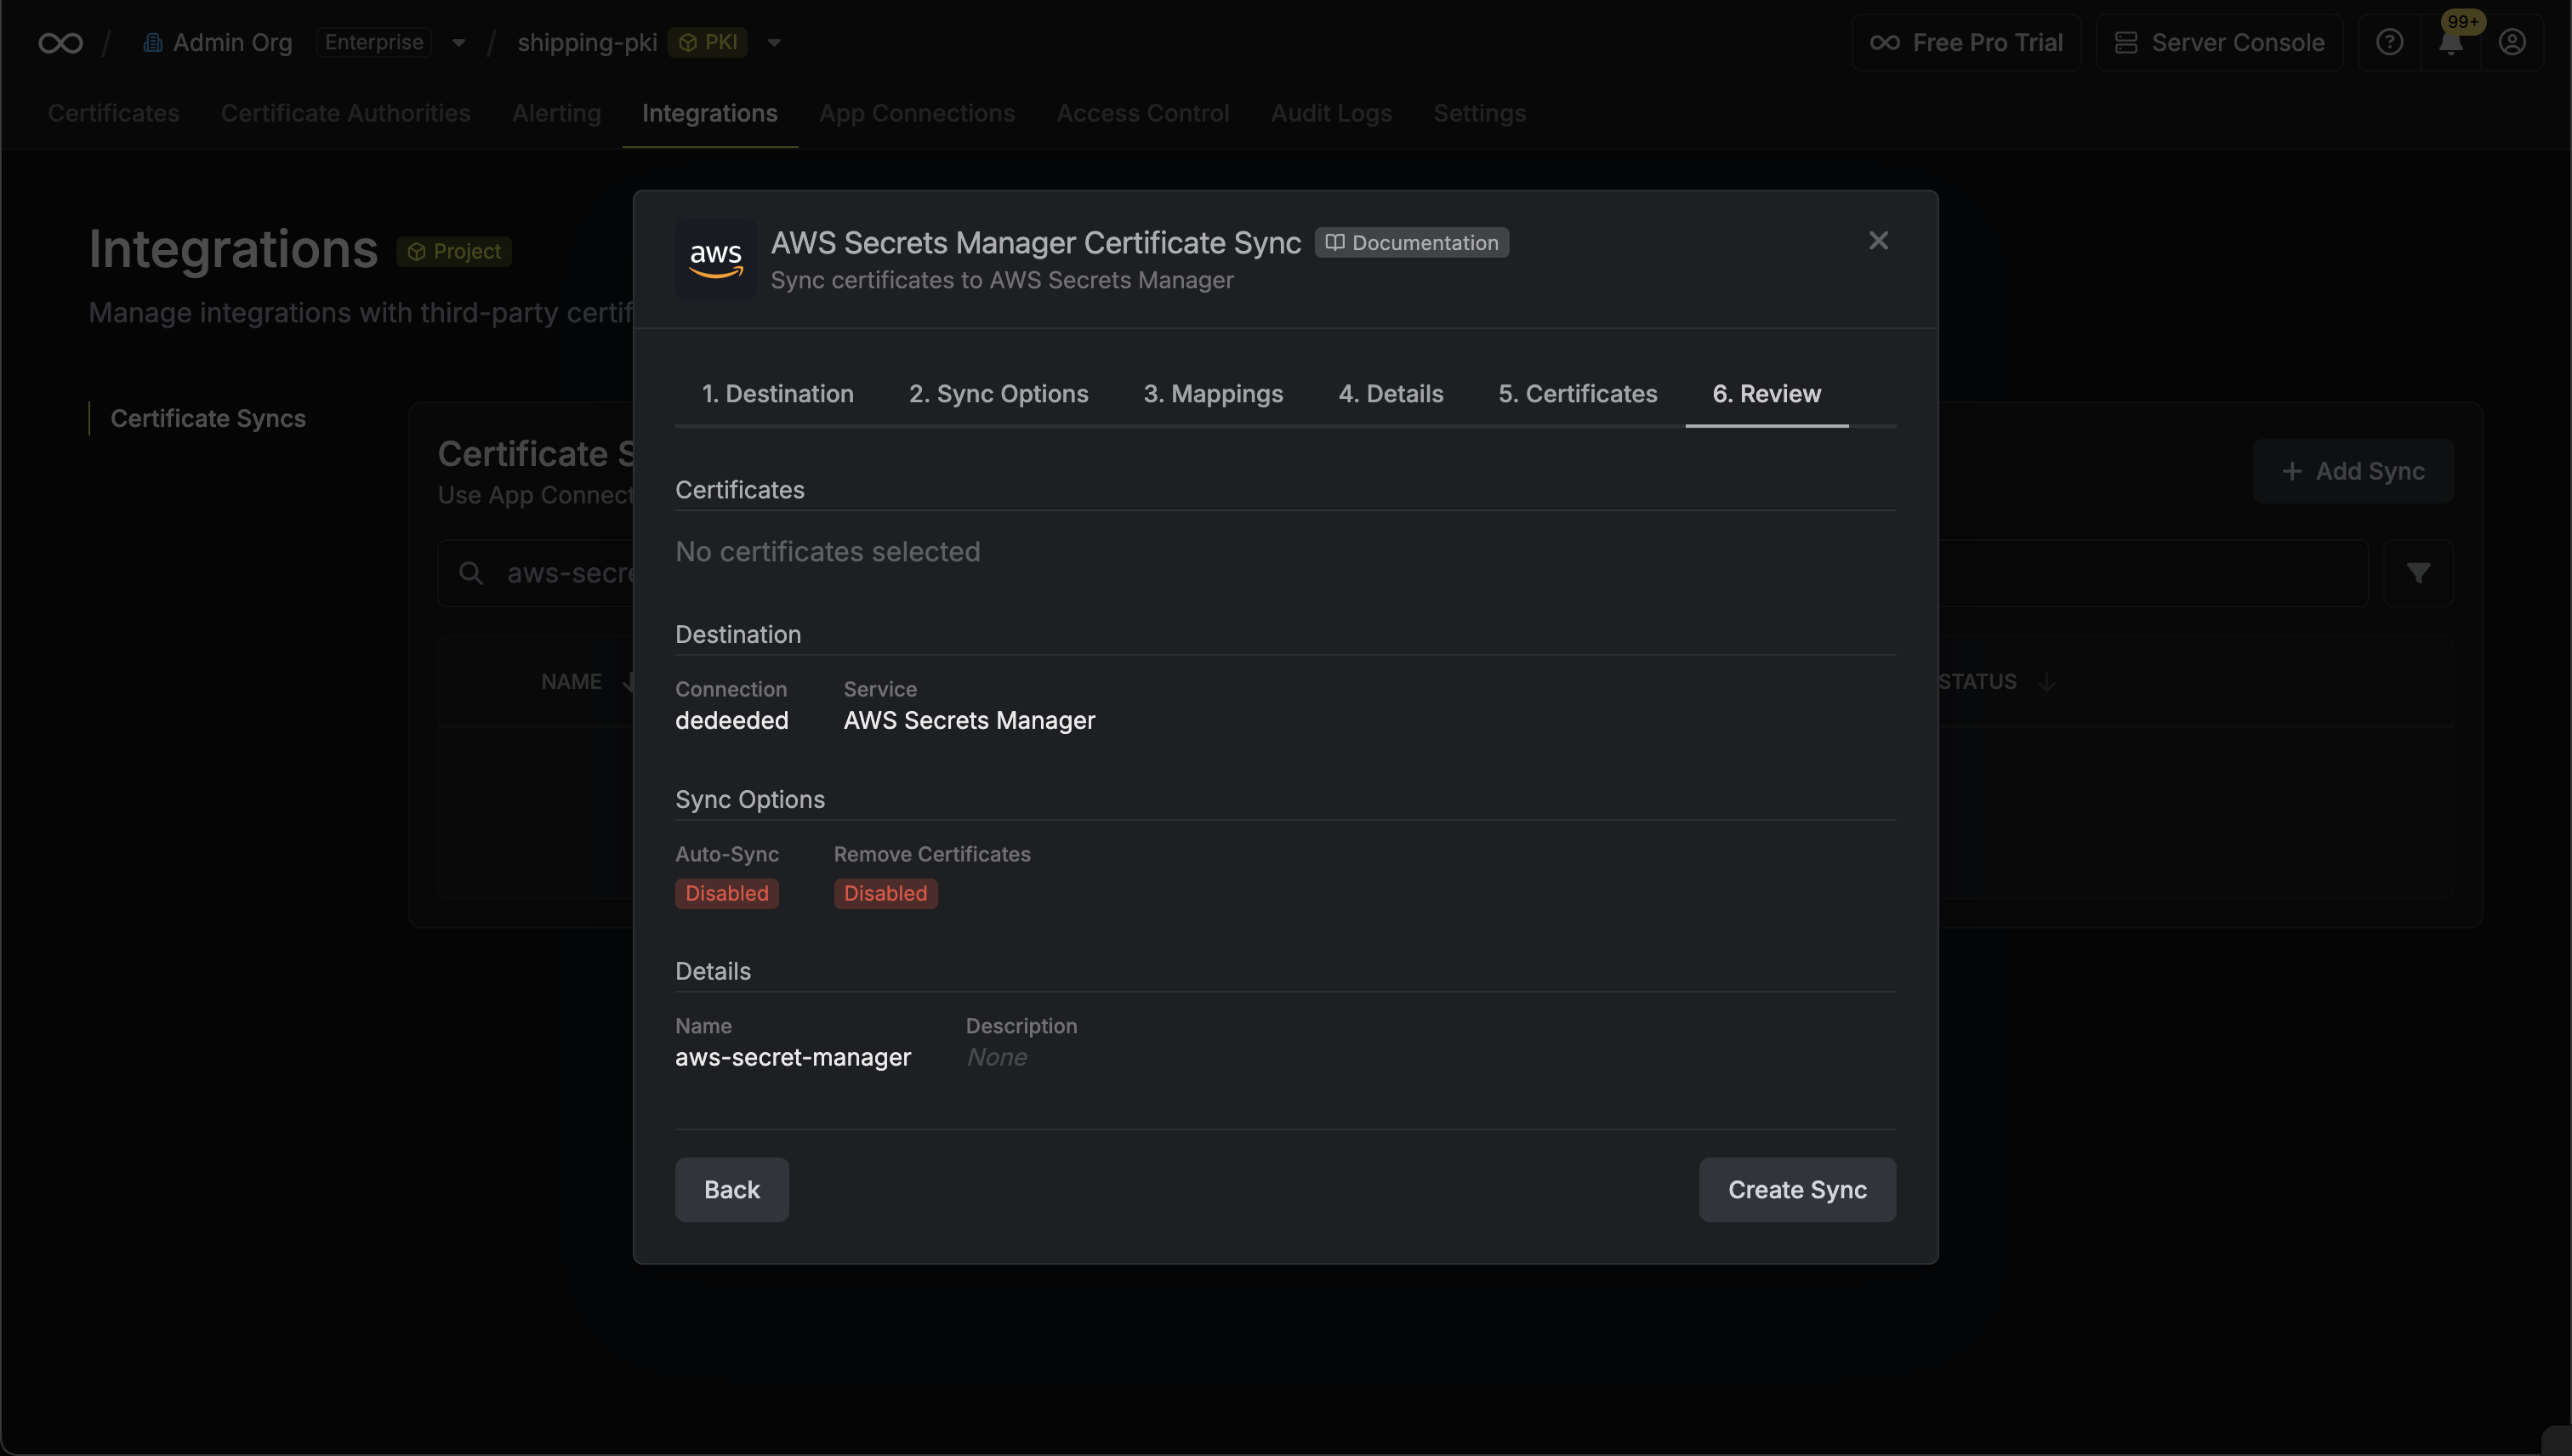 9. If enabled, your AWS Secrets Manager Certificate Sync will begin syncing your certificates to the destination endpoint.
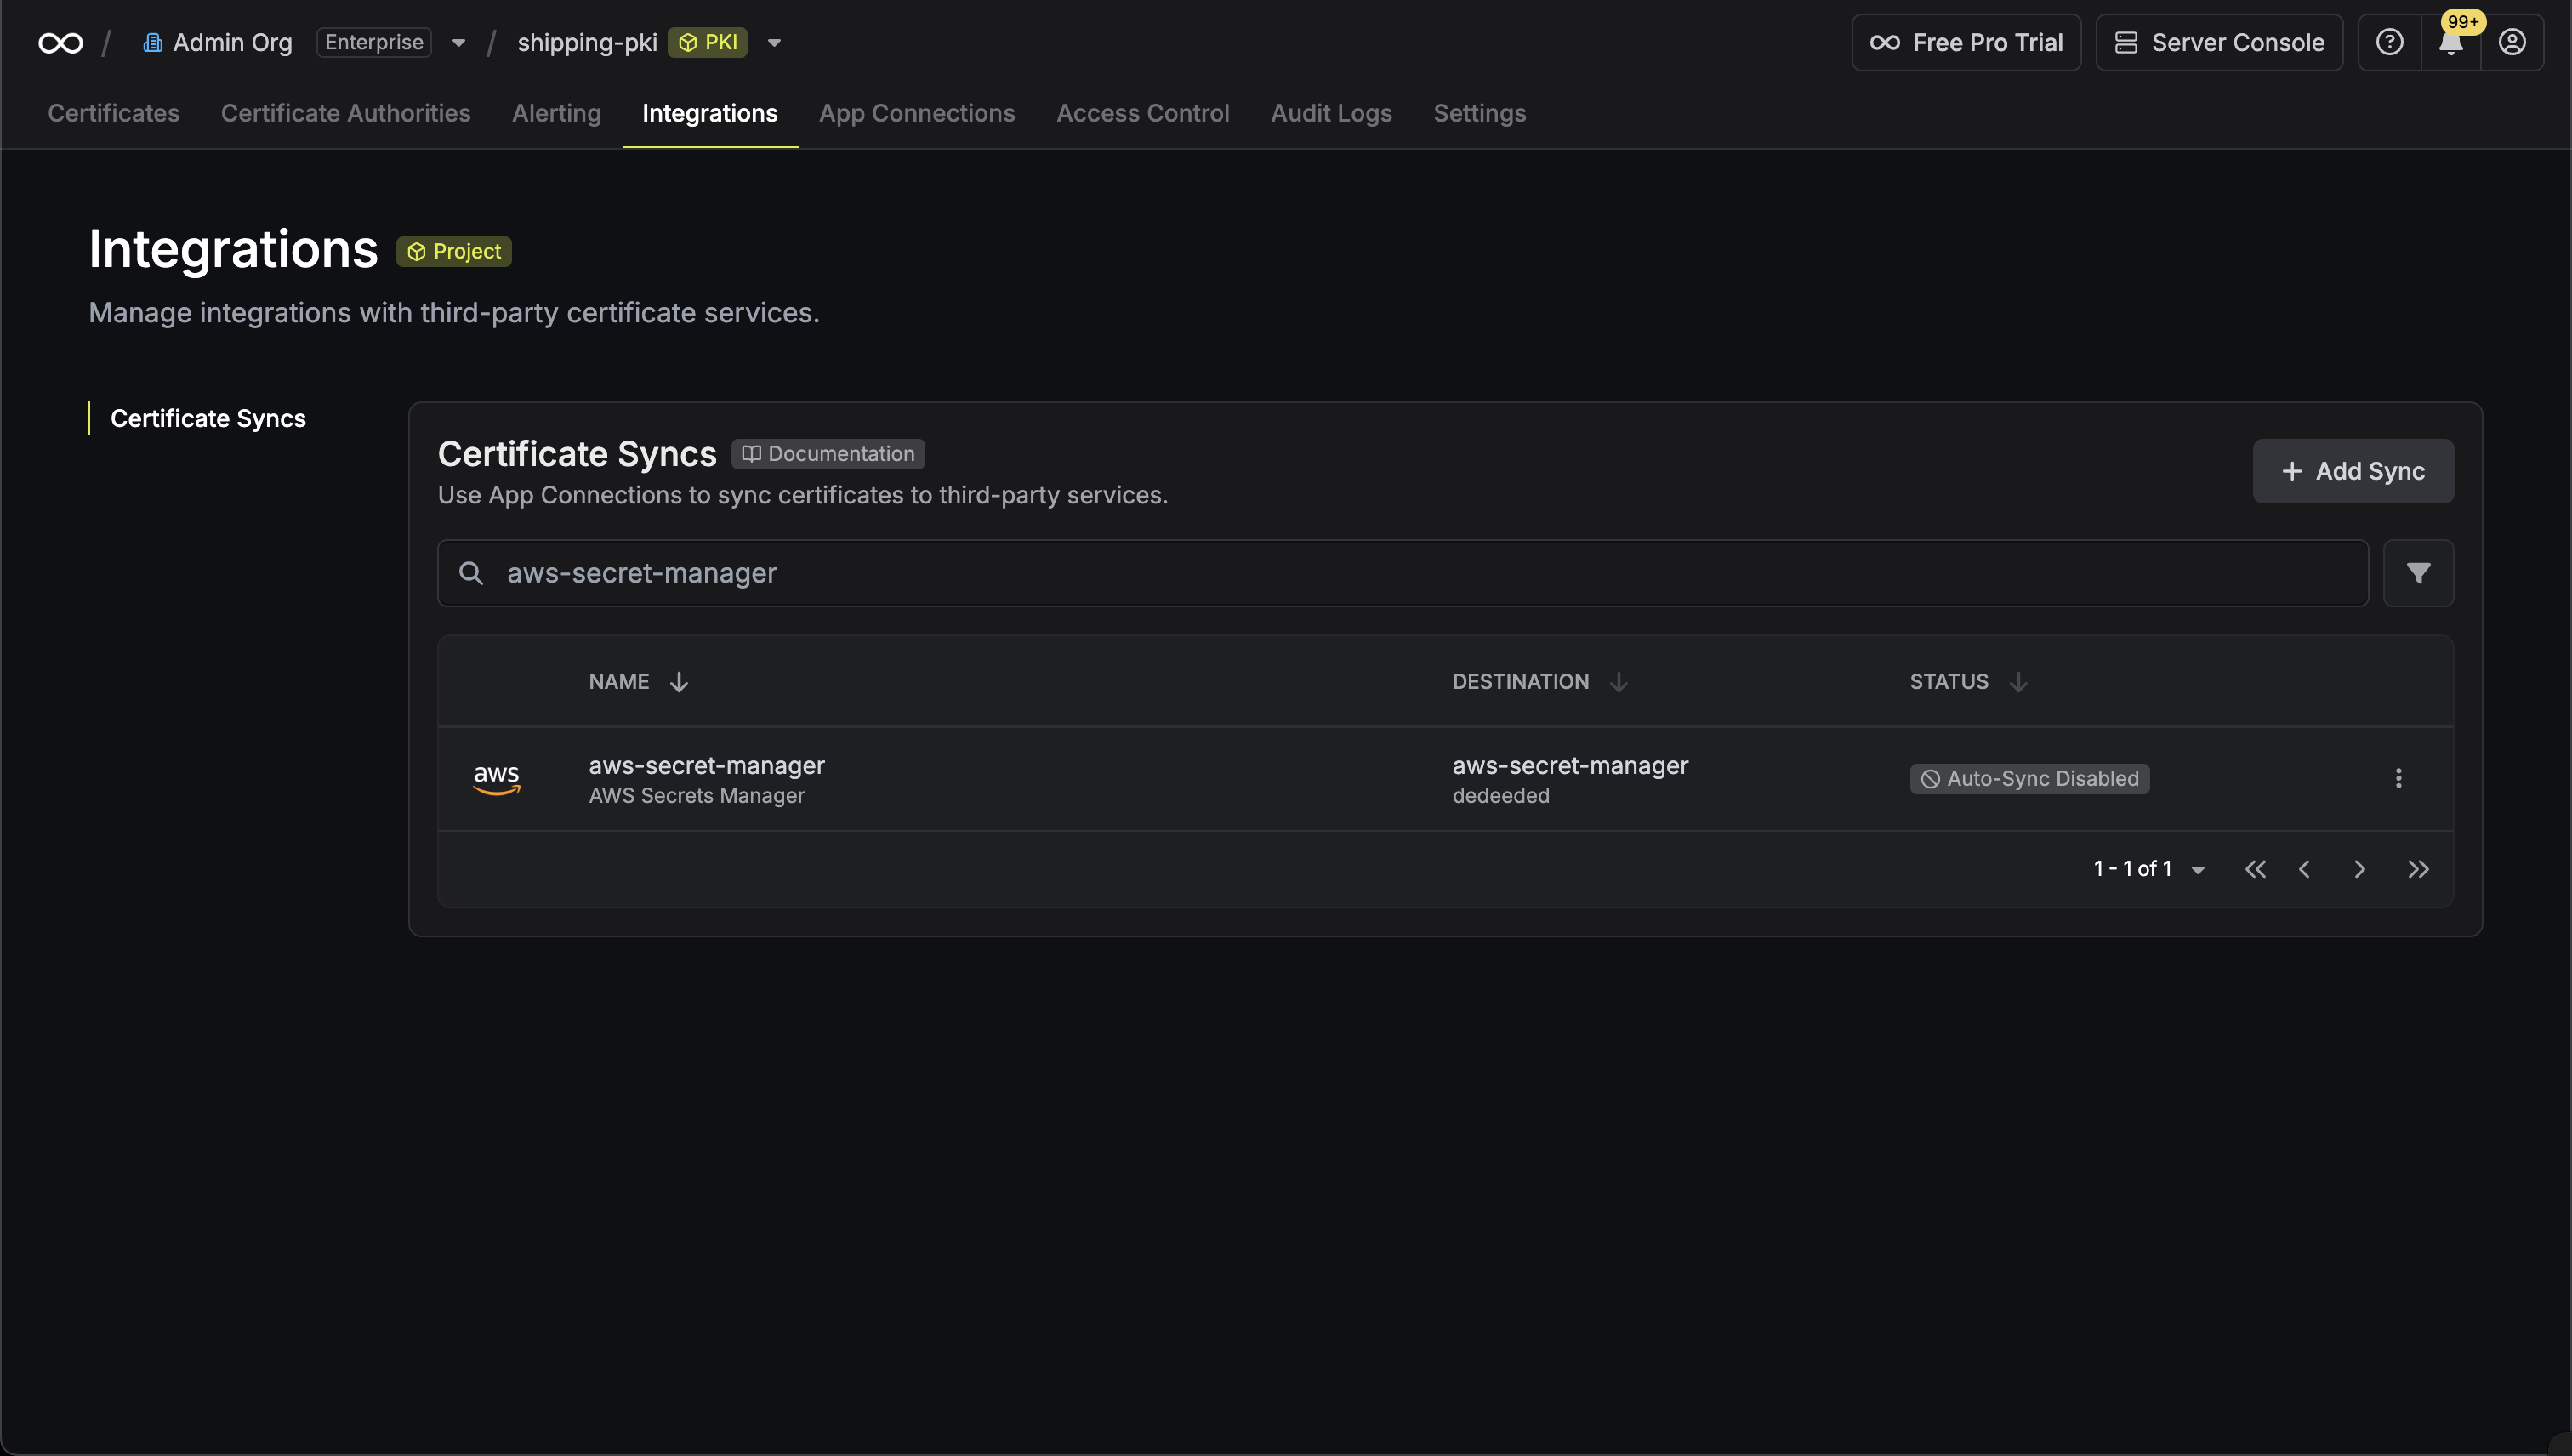 2. Select **AWS Account** as the **Trusted Entity Type**.
3. Select **Another AWS Account** and provide the appropriate Infisical AWS Account ID: use **381492033652** for the **US region**, and **345594589636** for the **EU region**. This restricts the role to be assumed only by Infisical. If self-hosting, provide your AWS account number instead.
2. Select **AWS Account** as the **Trusted Entity Type**.
3. Select **Another AWS Account** and provide the appropriate Infisical AWS Account ID: use **381492033652** for the **US region**, and **345594589636** for the **EU region**. This restricts the role to be assumed only by Infisical. If self-hosting, provide your AWS account number instead.
 Depending on your use case, add one or more of the following policies to your IAM Role:
 ```json theme={"dark"}
{
"Version": "2012-10-17",
"Statement": [
{
"Sid": "AllowSecretsManagerAccess",
"Effect": "Allow",
"Action": [
"secretsmanager:ListSecrets",
"secretsmanager:GetSecretValue",
"secretsmanager:BatchGetSecretValue",
"secretsmanager:CreateSecret",
"secretsmanager:UpdateSecret",
"secretsmanager:DeleteSecret",
"secretsmanager:DescribeSecret",
"secretsmanager:TagResource",
"secretsmanager:UntagResource",
"kms:ListAliases", // if you need to specify the KMS key
"kms:Encrypt", // if you need to specify the KMS key
"kms:Decrypt", // if you need to specify the KMS key
"kms:DescribeKey" // if you need to specify the KMS key
],
"Resource": "*"
}
]
}
```
```json theme={"dark"}
{
"Version": "2012-10-17",
"Statement": [
{
"Sid": "AllowSecretsManagerAccess",
"Effect": "Allow",
"Action": [
"secretsmanager:ListSecrets",
"secretsmanager:GetSecretValue",
"secretsmanager:BatchGetSecretValue",
"secretsmanager:CreateSecret",
"secretsmanager:UpdateSecret",
"secretsmanager:DeleteSecret",
"secretsmanager:DescribeSecret",
"secretsmanager:TagResource",
"secretsmanager:UntagResource",
"kms:ListAliases", // if you need to specify the KMS key
"kms:Encrypt", // if you need to specify the KMS key
"kms:Decrypt", // if you need to specify the KMS key
"kms:DescribeKey" // if you need to specify the KMS key
],
"Resource": "*"
}
]
}
```

 ```json theme={"dark"}
{
"Version": "2012-10-17",
"Statement": [
{
"Sid": "AllowSSMAccess",
"Effect": "Allow",
"Action": [
"ssm:PutParameter",
"ssm:GetParameters",
"ssm:GetParametersByPath",
"ssm:DescribeParameters",
"ssm:DeleteParameters",
"ssm:ListTagsForResource", // if you need to add tags to secrets
"ssm:AddTagsToResource", // if you need to add tags to secrets
"ssm:RemoveTagsFromResource", // if you need to add tags to secrets
"kms:ListAliases", // if you need to specify the KMS key
"kms:Encrypt", // if you need to specify the KMS key
"kms:Decrypt", // if you need to specify the KMS key
"kms:DescribeKey" // if you need to specify the KMS key
],
"Resource": "*"
}
]
}
```
```json theme={"dark"}
{
"Version": "2012-10-17",
"Statement": [
{
"Sid": "AllowSSMAccess",
"Effect": "Allow",
"Action": [
"ssm:PutParameter",
"ssm:GetParameters",
"ssm:GetParametersByPath",
"ssm:DescribeParameters",
"ssm:DeleteParameters",
"ssm:ListTagsForResource", // if you need to add tags to secrets
"ssm:AddTagsToResource", // if you need to add tags to secrets
"ssm:RemoveTagsFromResource", // if you need to add tags to secrets
"kms:ListAliases", // if you need to specify the KMS key
"kms:Encrypt", // if you need to specify the KMS key
"kms:Decrypt", // if you need to specify the KMS key
"kms:DescribeKey" // if you need to specify the KMS key
],
"Resource": "*"
}
]
}
```
 ```json theme={"dark"}
{
"Version": "2012-10-17",
"Statement": [
{
"Effect": "Allow",
"Action": [
"iam:ListAccessKeys",
"iam:CreateAccessKey",
"iam:UpdateAccessKey",
"iam:DeleteAccessKey",
"iam:ListUsers"
],
"Resource": "*"
}
]
}
```
2. Select the **AWS Connection** option.
```json theme={"dark"}
{
"Version": "2012-10-17",
"Statement": [
{
"Effect": "Allow",
"Action": [
"iam:ListAccessKeys",
"iam:CreateAccessKey",
"iam:UpdateAccessKey",
"iam:DeleteAccessKey",
"iam:ListUsers"
],
"Resource": "*"
}
]
}
```
2. Select the **AWS Connection** option.
 3. Select the **Assume Role** method option and provide the **AWS IAM Role ARN** obtained from the previous step and press **Connect to AWS**.
 4. Your **AWS Connection** is now available for use.

 Depending on your use case, add one or more of the following policies to your user:
```json theme={"dark"}
{
"Version": "2012-10-17",
"Statement": [
{
"Sid": "AllowSecretsManagerAccess",
"Effect": "Allow",
"Action": [
"secretsmanager:ListSecrets",
"secretsmanager:GetSecretValue",
"secretsmanager:BatchGetSecretValue",
"secretsmanager:CreateSecret",
"secretsmanager:UpdateSecret",
"secretsmanager:DeleteSecret",
"secretsmanager:DescribeSecret",
"secretsmanager:TagResource",
"secretsmanager:UntagResource",
"kms:ListAliases", // if you need to specify the KMS key
"kms:Encrypt", // if you need to specify the KMS key
"kms:Decrypt", // if you need to specify the KMS key
"kms:DescribeKey" // if you need to specify the KMS key
],
"Resource": "*"
}
]
}
```
```json theme={"dark"}
{
"Version": "2012-10-17",
"Statement": [
{
"Sid": "AllowSSMAccess",
"Effect": "Allow",
"Action": [
"ssm:PutParameter",
"ssm:GetParameters",
"ssm:GetParametersByPath",
"ssm:DescribeParameters",
"ssm:DeleteParameters",
"ssm:ListTagsForResource", // if you need to add tags to secrets
"ssm:AddTagsToResource", // if you need to add tags to secrets
"ssm:RemoveTagsFromResource", // if you need to add tags to secrets
"kms:ListAliases", // if you need to specify the KMS key
"kms:Encrypt", // if you need to specify the KMS key
"kms:Decrypt", // if you need to specify the KMS key
"kms:DescribeKey" // if you need to specify the KMS key
],
"Resource": "*"
}
]
}
```
```json theme={"dark"}
{
"Version": "2012-10-17",
"Statement": [
{
"Effect": "Allow",
"Action": [
"iam:ListAccessKeys",
"iam:CreateAccessKey",
"iam:UpdateAccessKey",
"iam:DeleteAccessKey",
"iam:ListUsers"
],
"Resource": "*"
}
]
}
```
2. Select the **AWS Connection** option.
3. Select the **Access Key** method option and provide the **Access Key ID** and **Secret Key** obtained from the previous step and press **Connect to AWS**.
Depending on your use case, add one or more of the following policies to your user:
```json theme={"dark"}
{
"Version": "2012-10-17",
"Statement": [
{
"Sid": "AllowSecretsManagerAccess",
"Effect": "Allow",
"Action": [
"secretsmanager:ListSecrets",
"secretsmanager:GetSecretValue",
"secretsmanager:BatchGetSecretValue",
"secretsmanager:CreateSecret",
"secretsmanager:UpdateSecret",
"secretsmanager:DeleteSecret",
"secretsmanager:DescribeSecret",
"secretsmanager:TagResource",
"secretsmanager:UntagResource",
"kms:ListAliases", // if you need to specify the KMS key
"kms:Encrypt", // if you need to specify the KMS key
"kms:Decrypt", // if you need to specify the KMS key
"kms:DescribeKey" // if you need to specify the KMS key
],
"Resource": "*"
}
]
}
```
```json theme={"dark"}
{
"Version": "2012-10-17",
"Statement": [
{
"Sid": "AllowSSMAccess",
"Effect": "Allow",
"Action": [
"ssm:PutParameter",
"ssm:GetParameters",
"ssm:GetParametersByPath",
"ssm:DescribeParameters",
"ssm:DeleteParameters",
"ssm:ListTagsForResource", // if you need to add tags to secrets
"ssm:AddTagsToResource", // if you need to add tags to secrets
"ssm:RemoveTagsFromResource", // if you need to add tags to secrets
"kms:ListAliases", // if you need to specify the KMS key
"kms:Encrypt", // if you need to specify the KMS key
"kms:Decrypt", // if you need to specify the KMS key
"kms:DescribeKey" // if you need to specify the KMS key
],
"Resource": "*"
}
]
}
```
```json theme={"dark"}
{
"Version": "2012-10-17",
"Statement": [
{
"Effect": "Allow",
"Action": [
"iam:ListAccessKeys",
"iam:CreateAccessKey",
"iam:UpdateAccessKey",
"iam:DeleteAccessKey",
"iam:ListUsers"
],
"Resource": "*"
}
]
}
```
2. Select the **AWS Connection** option.
3. Select the **Access Key** method option and provide the **Access Key ID** and **Secret Key** obtained from the previous step and press **Connect to AWS**.
 4. Your **AWS Connection** is now available for use.

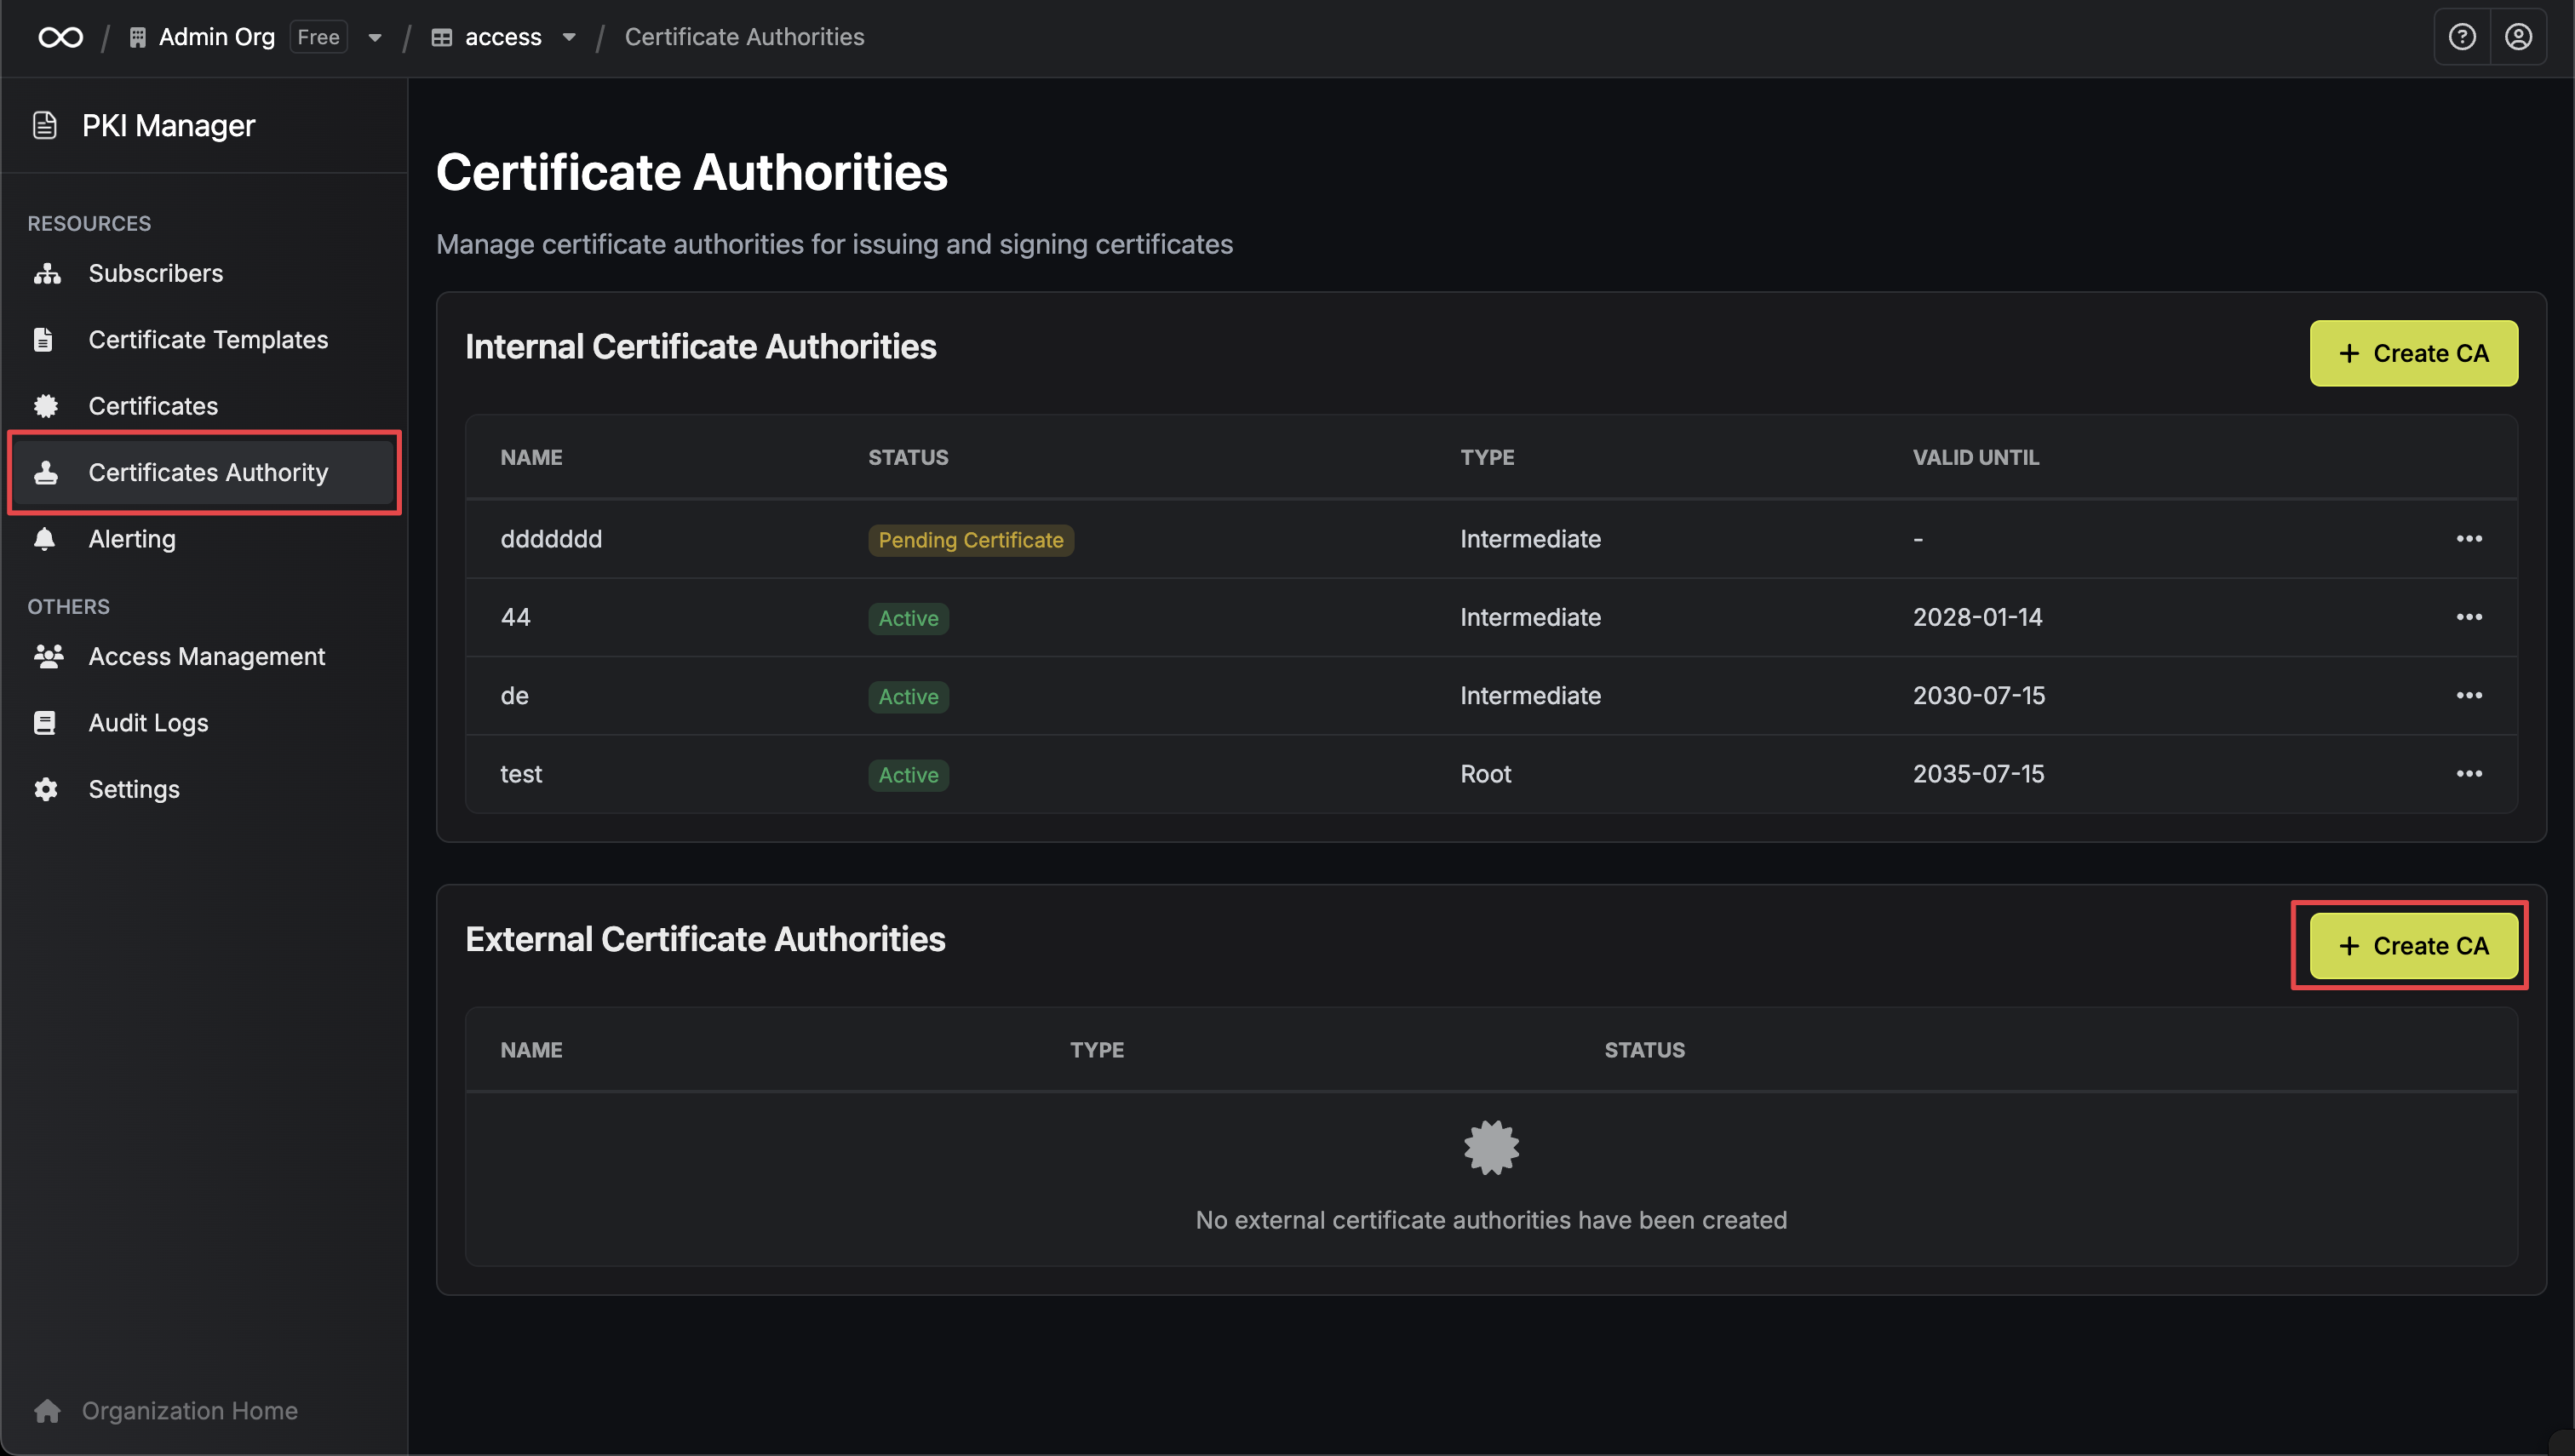
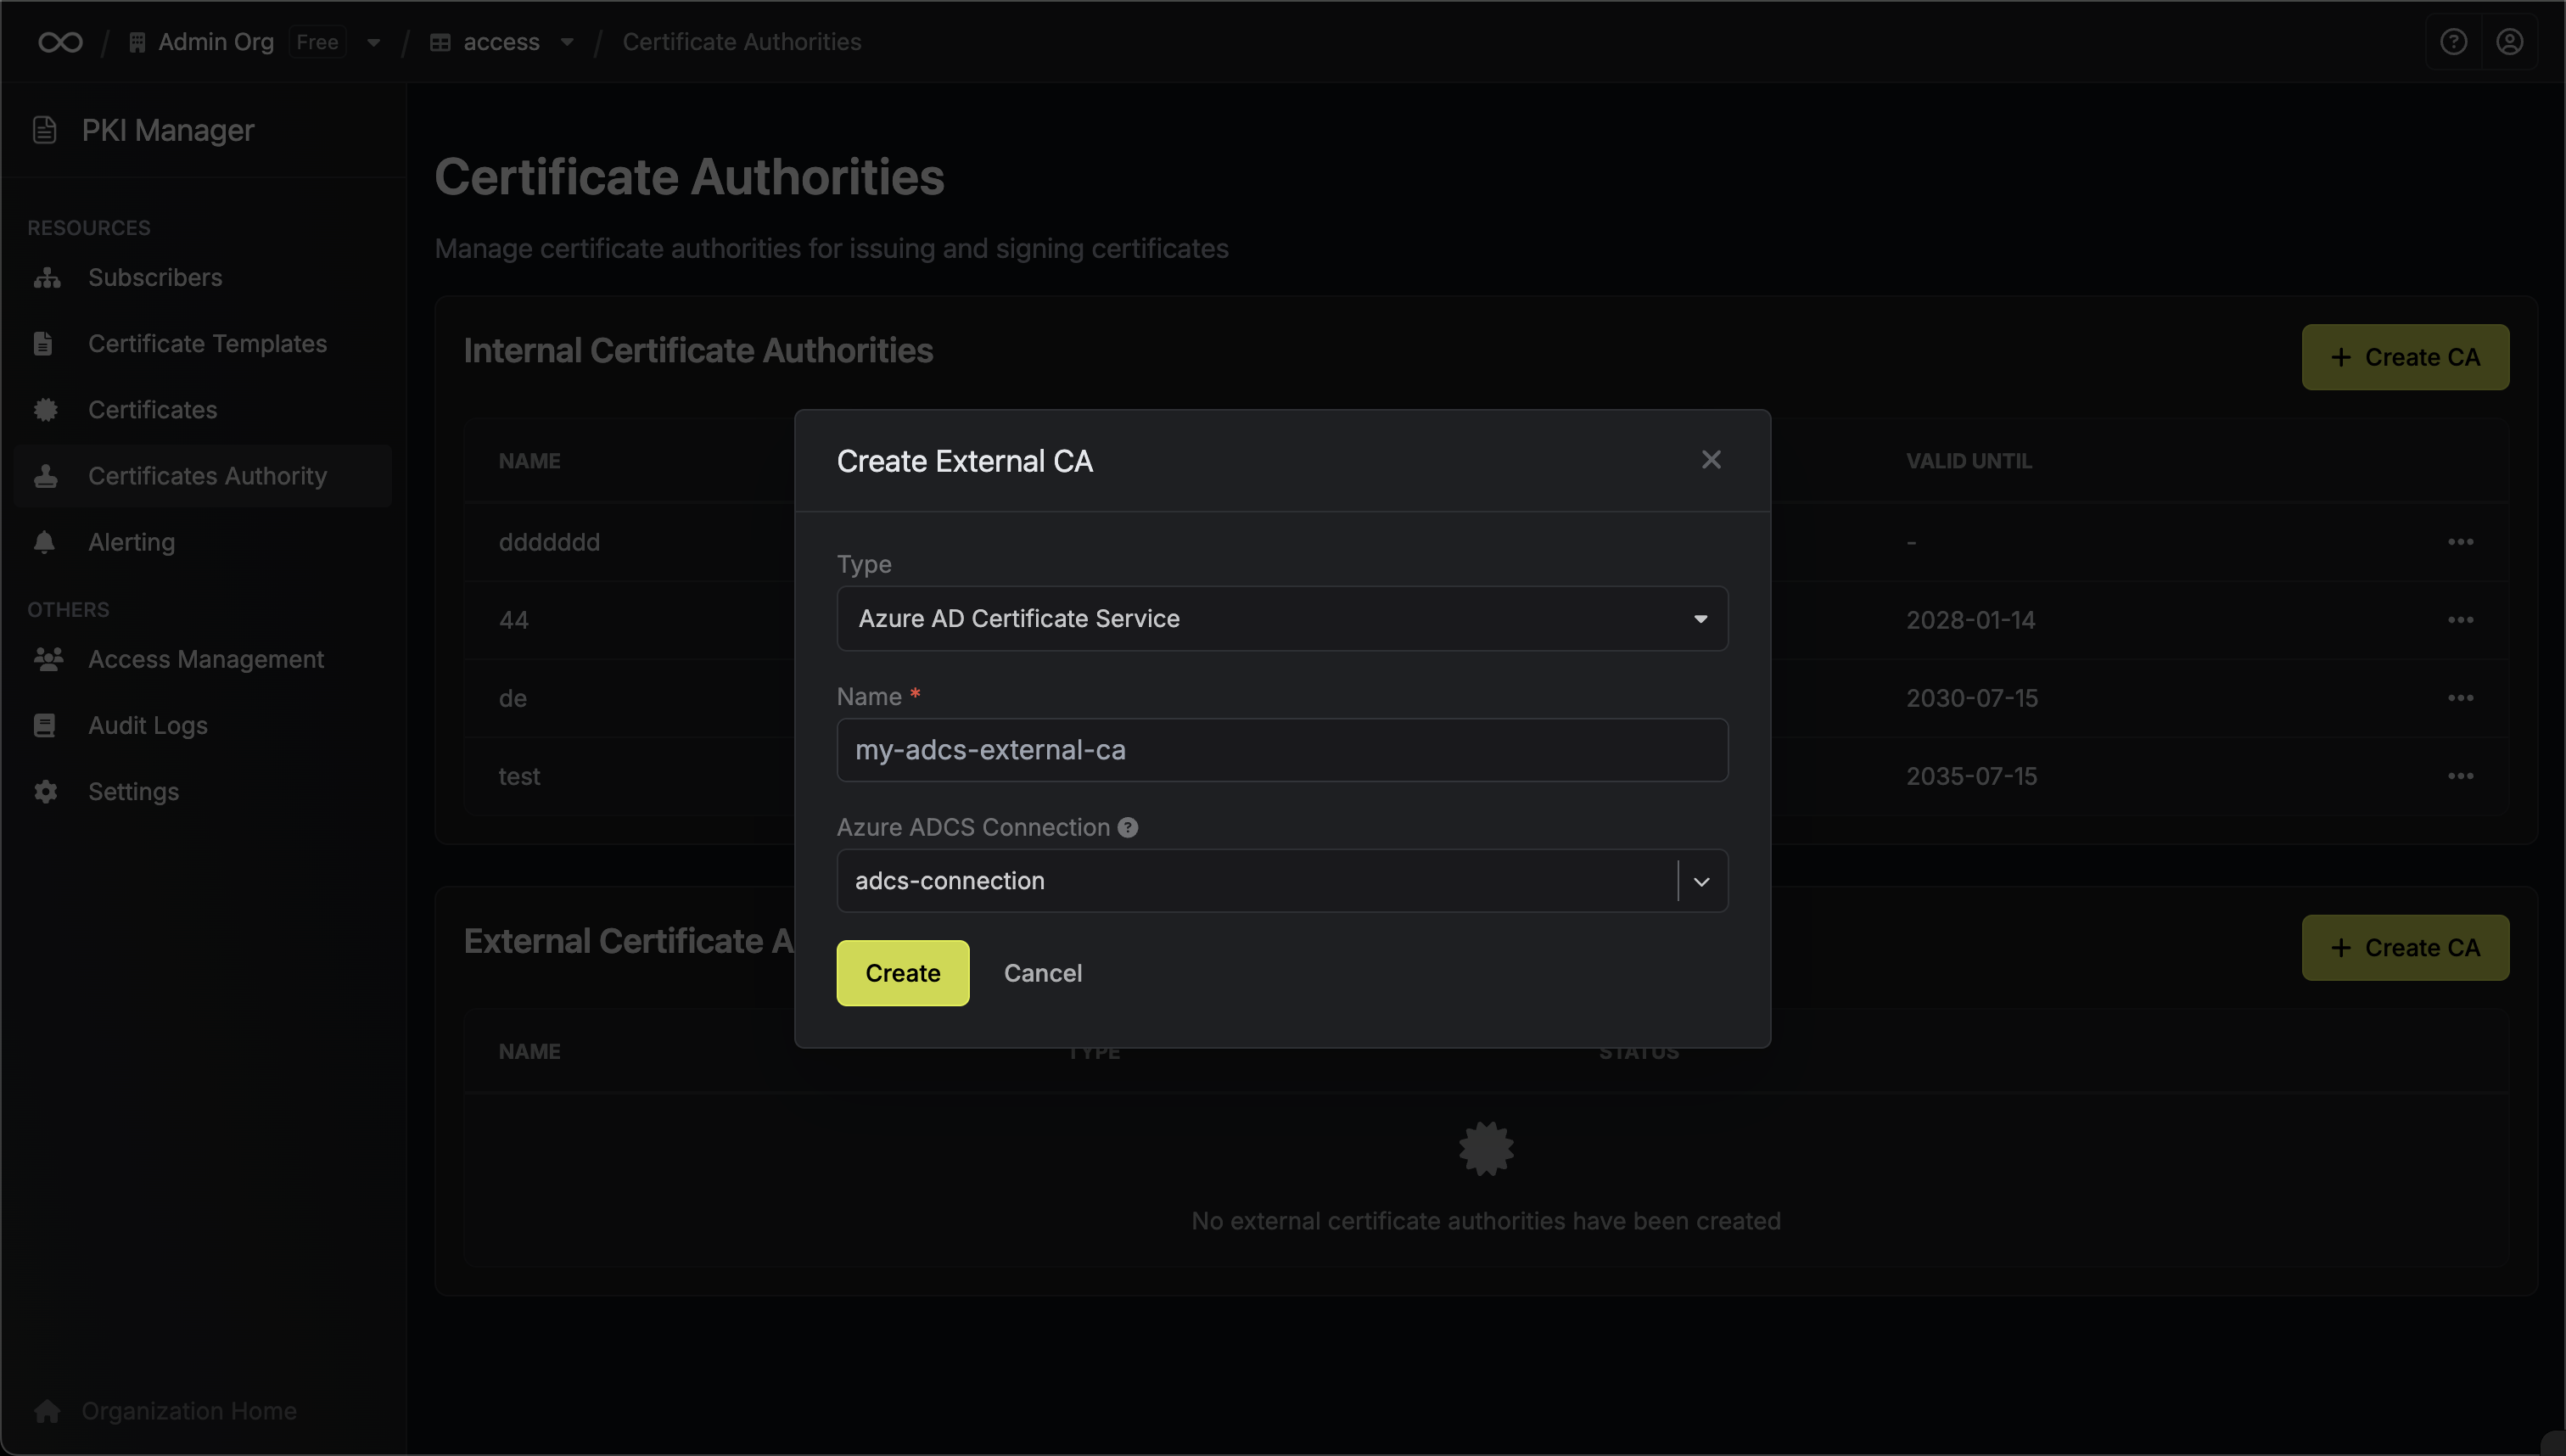

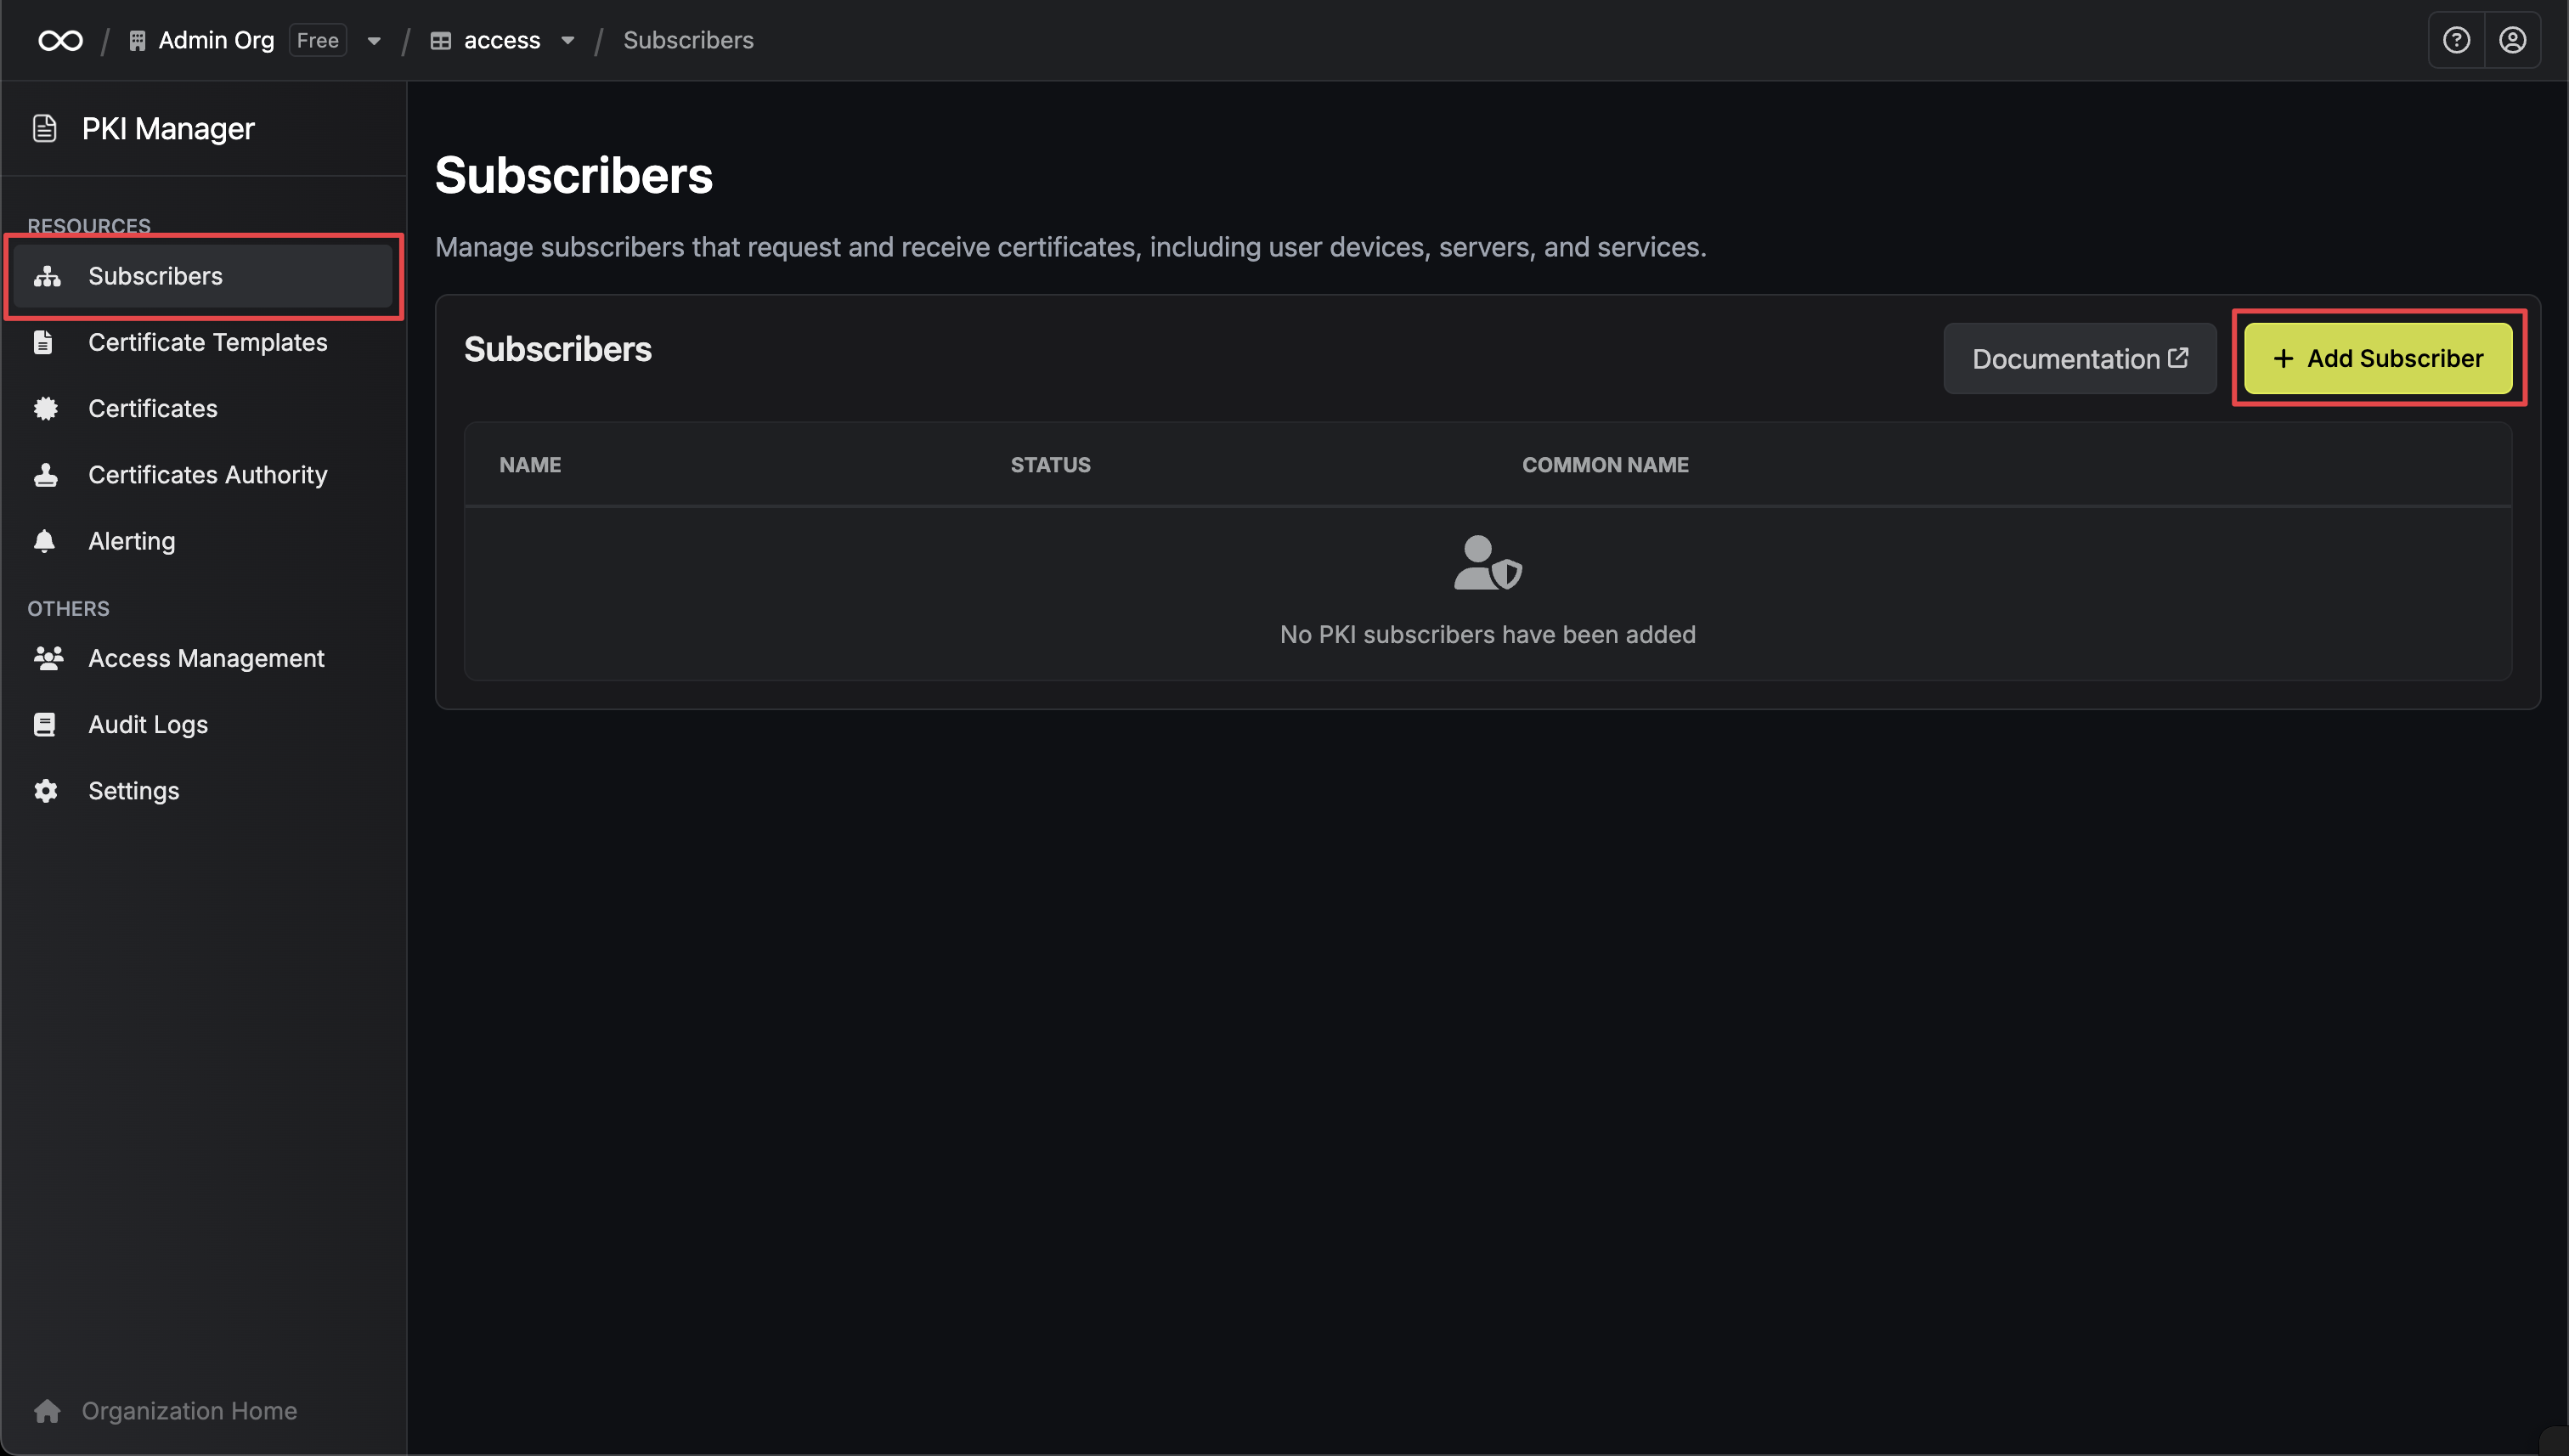
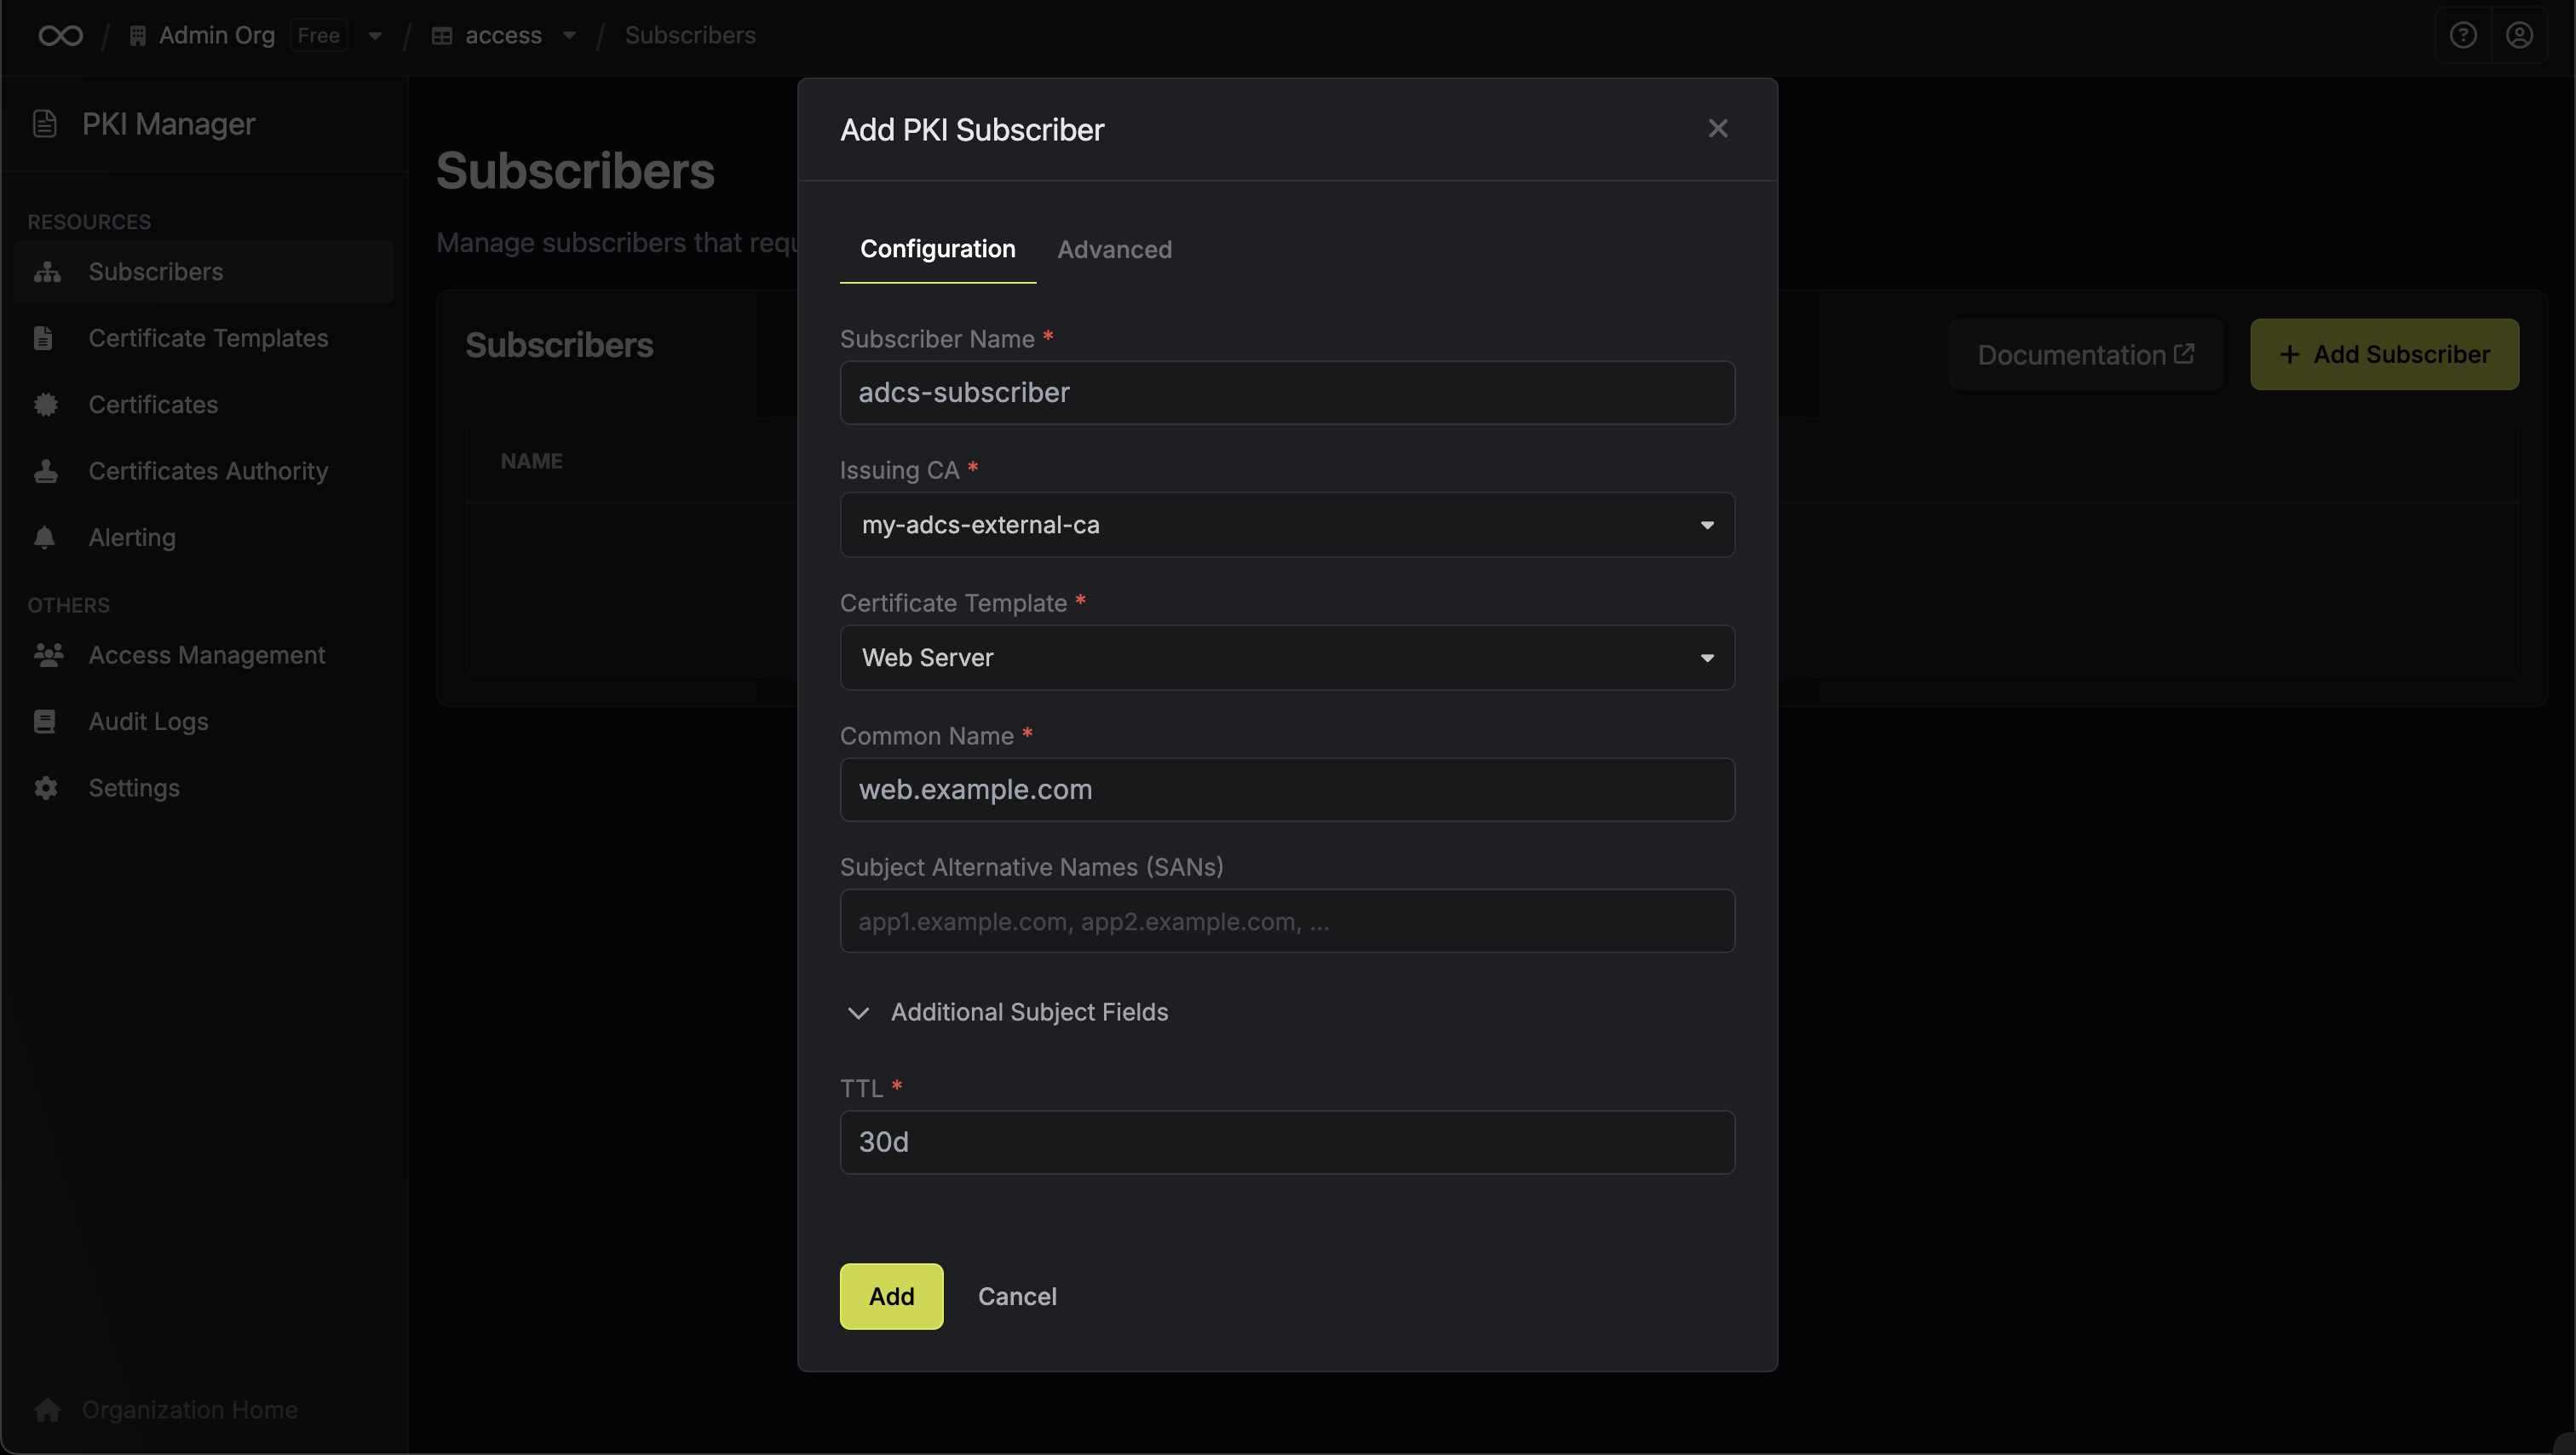
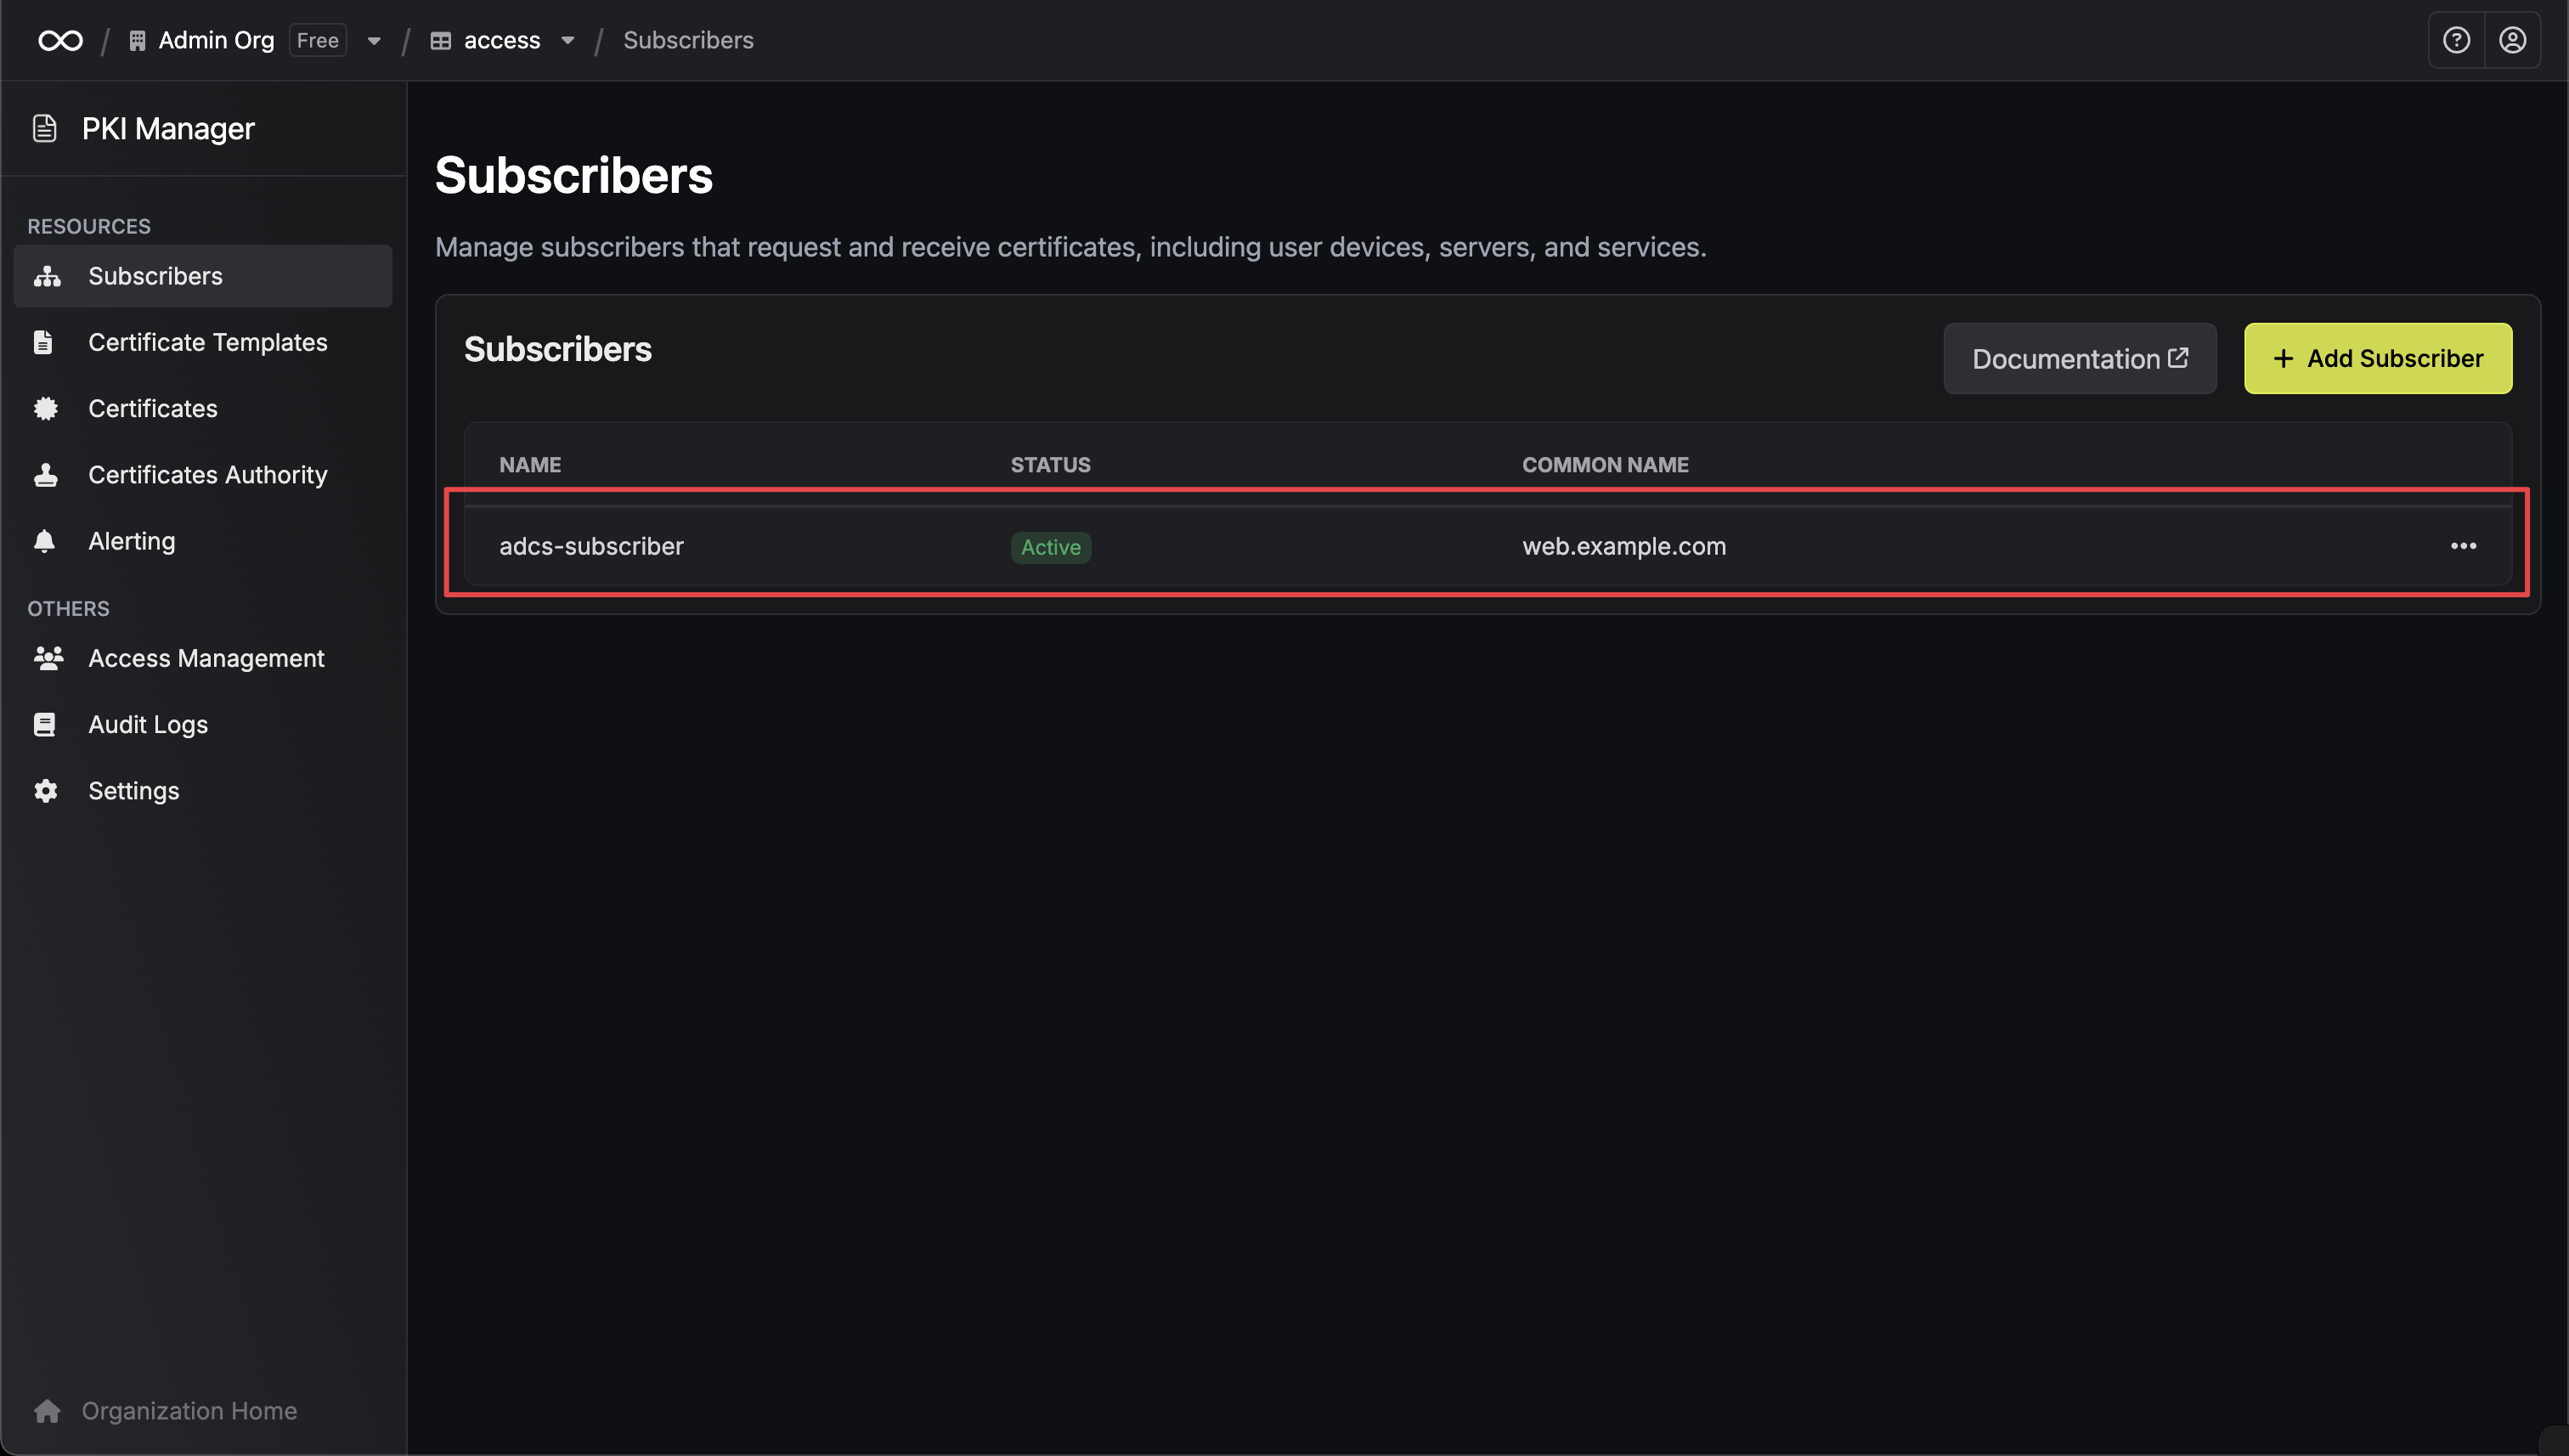
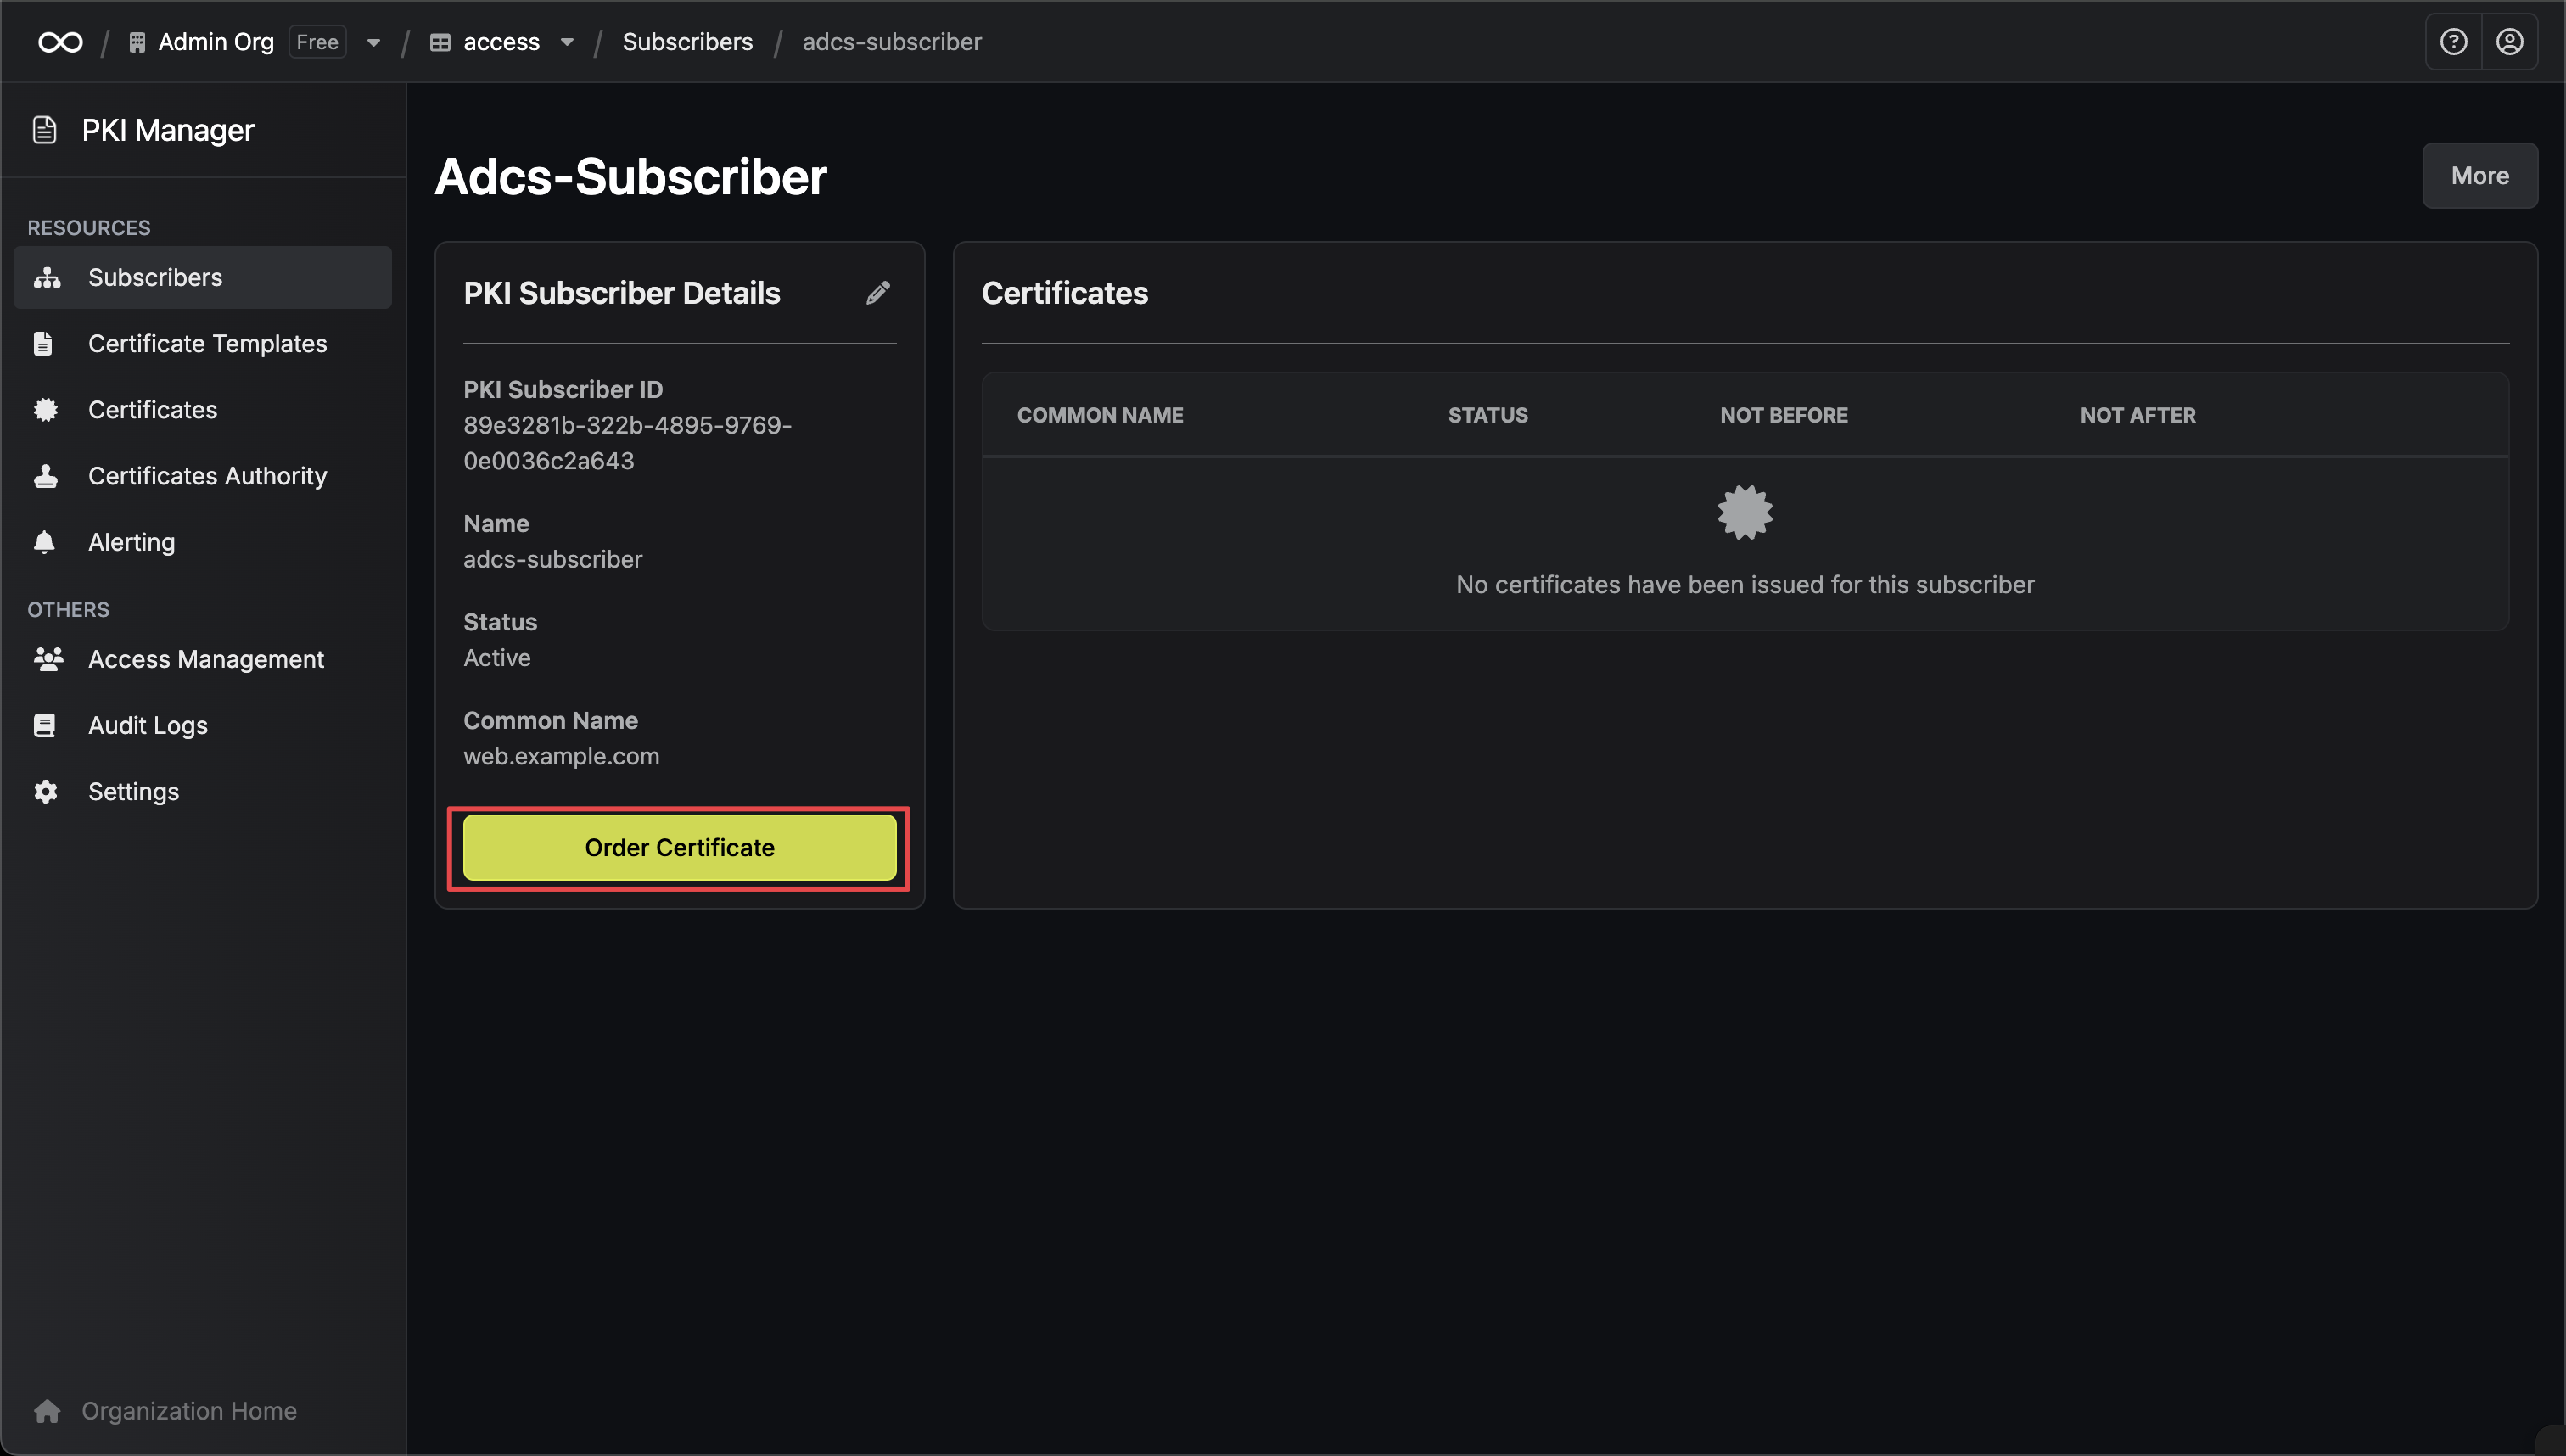
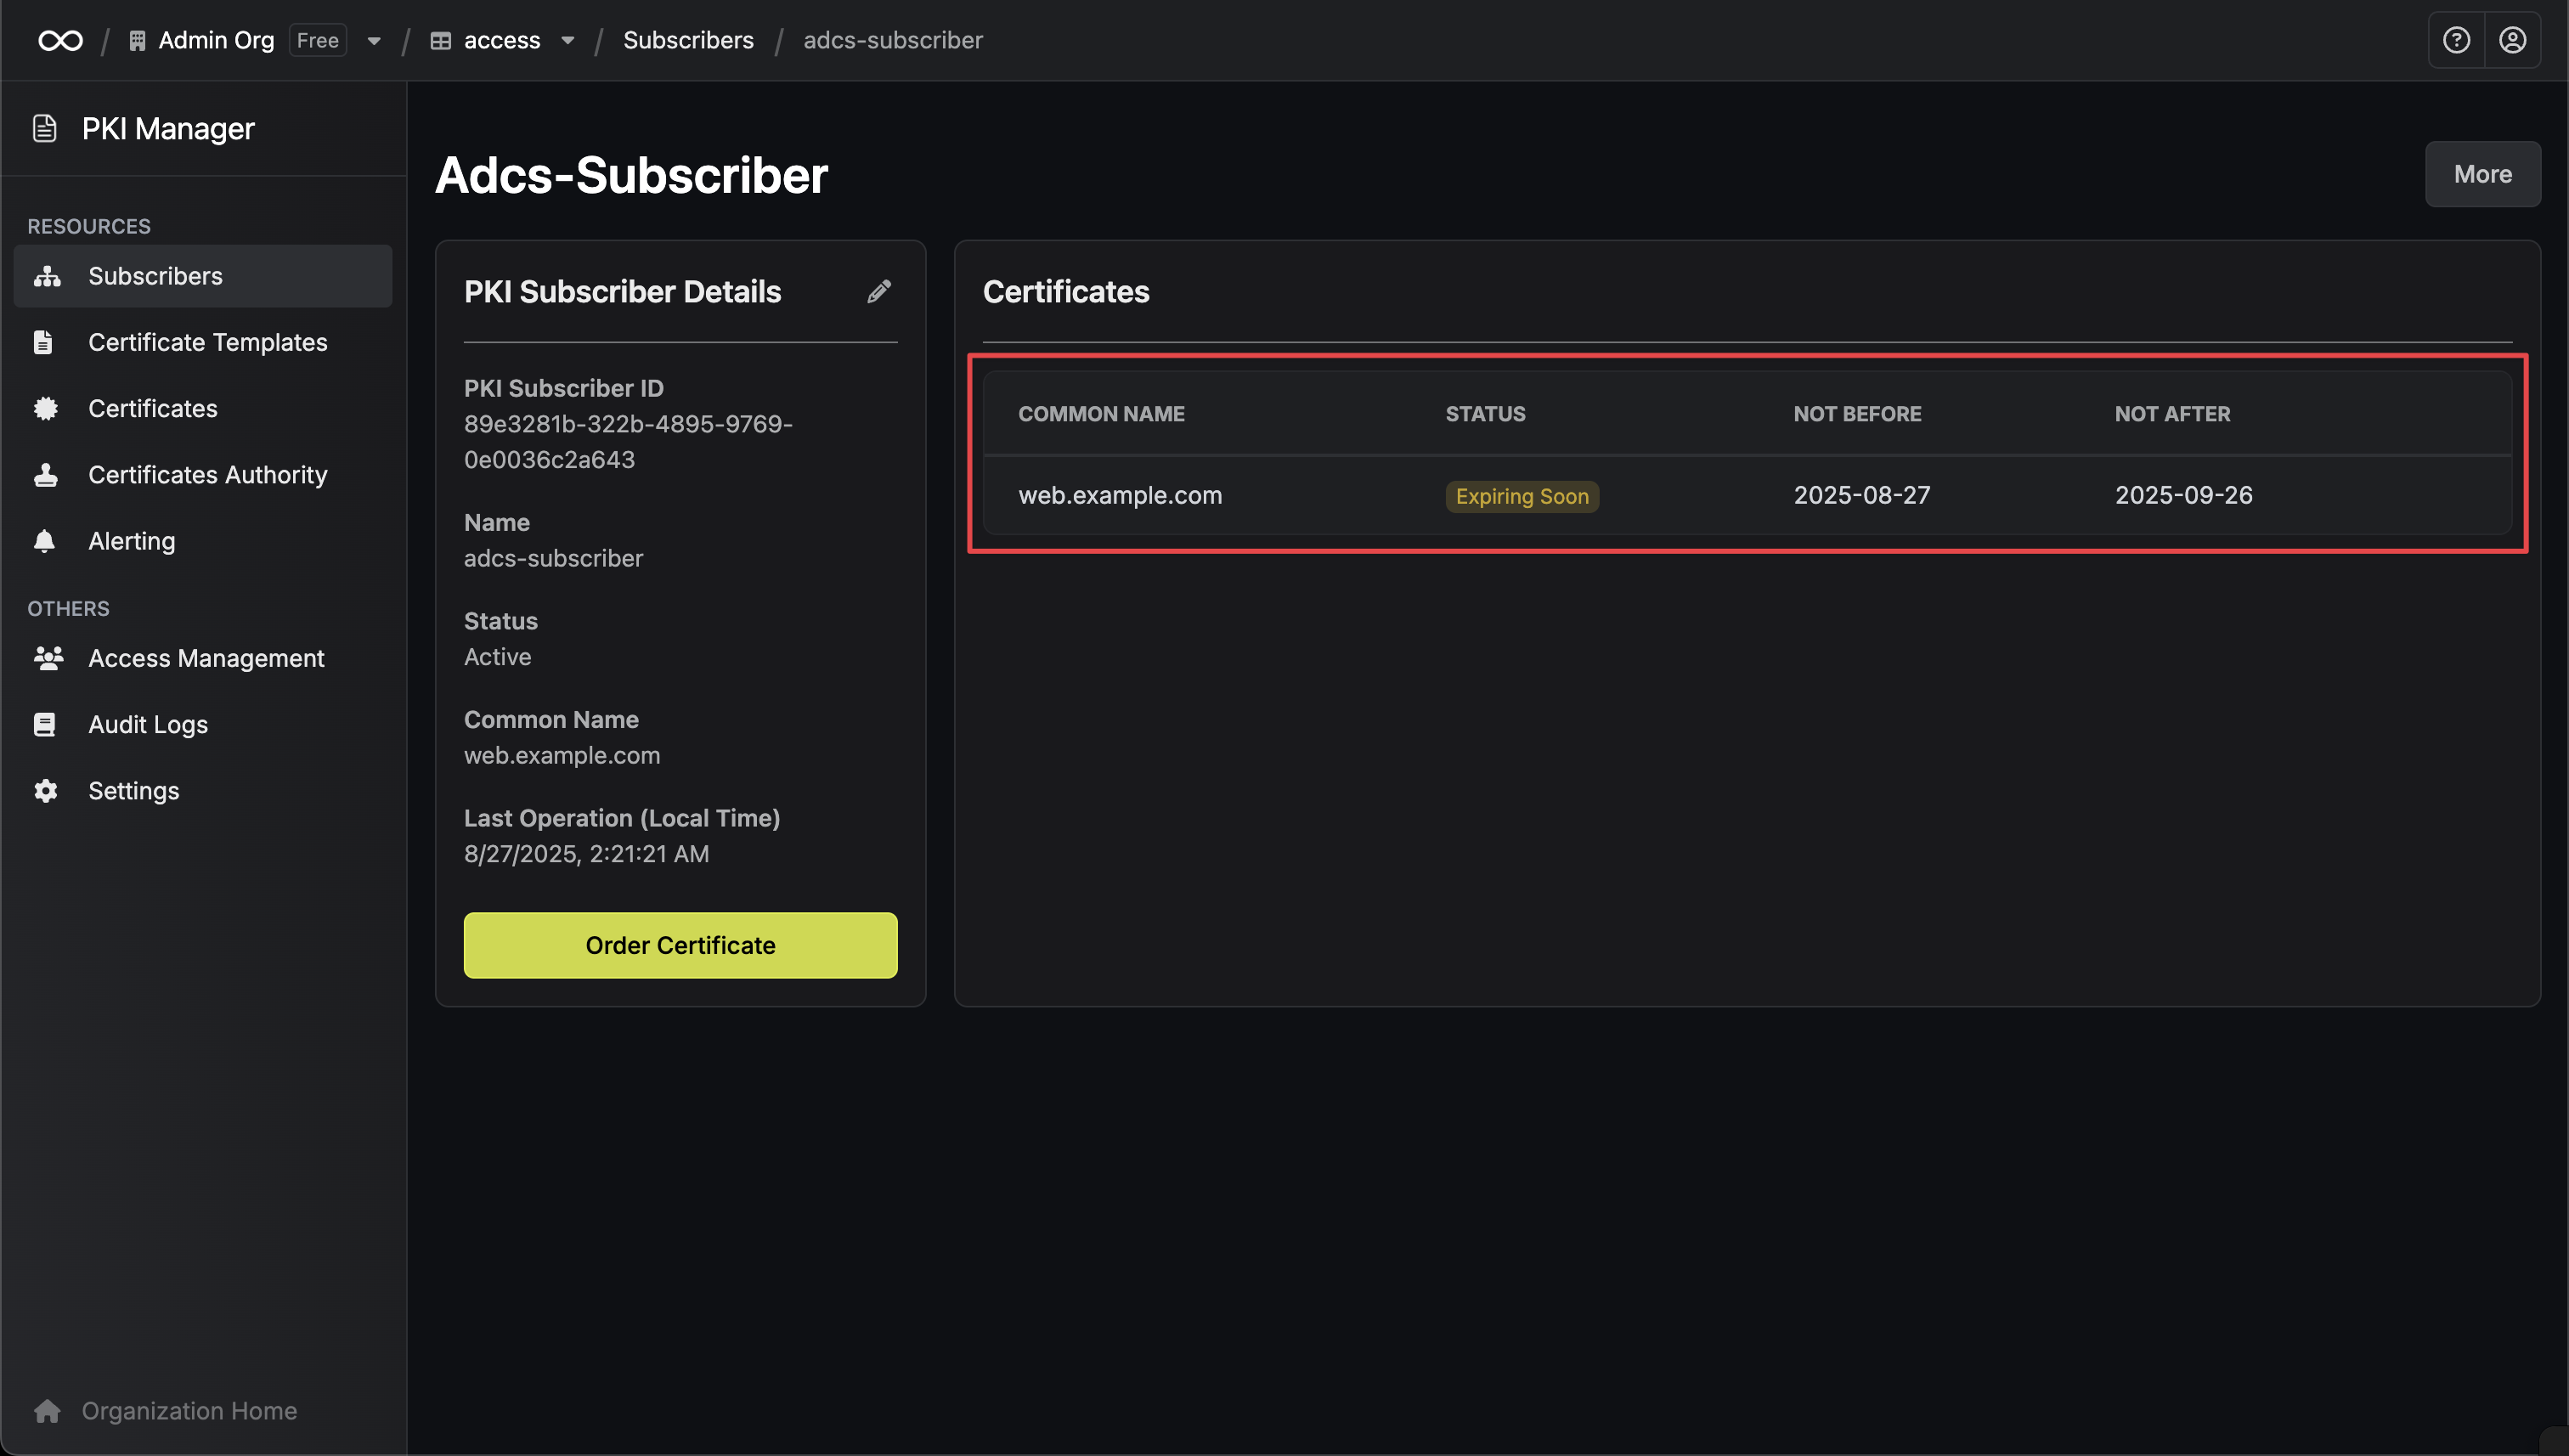
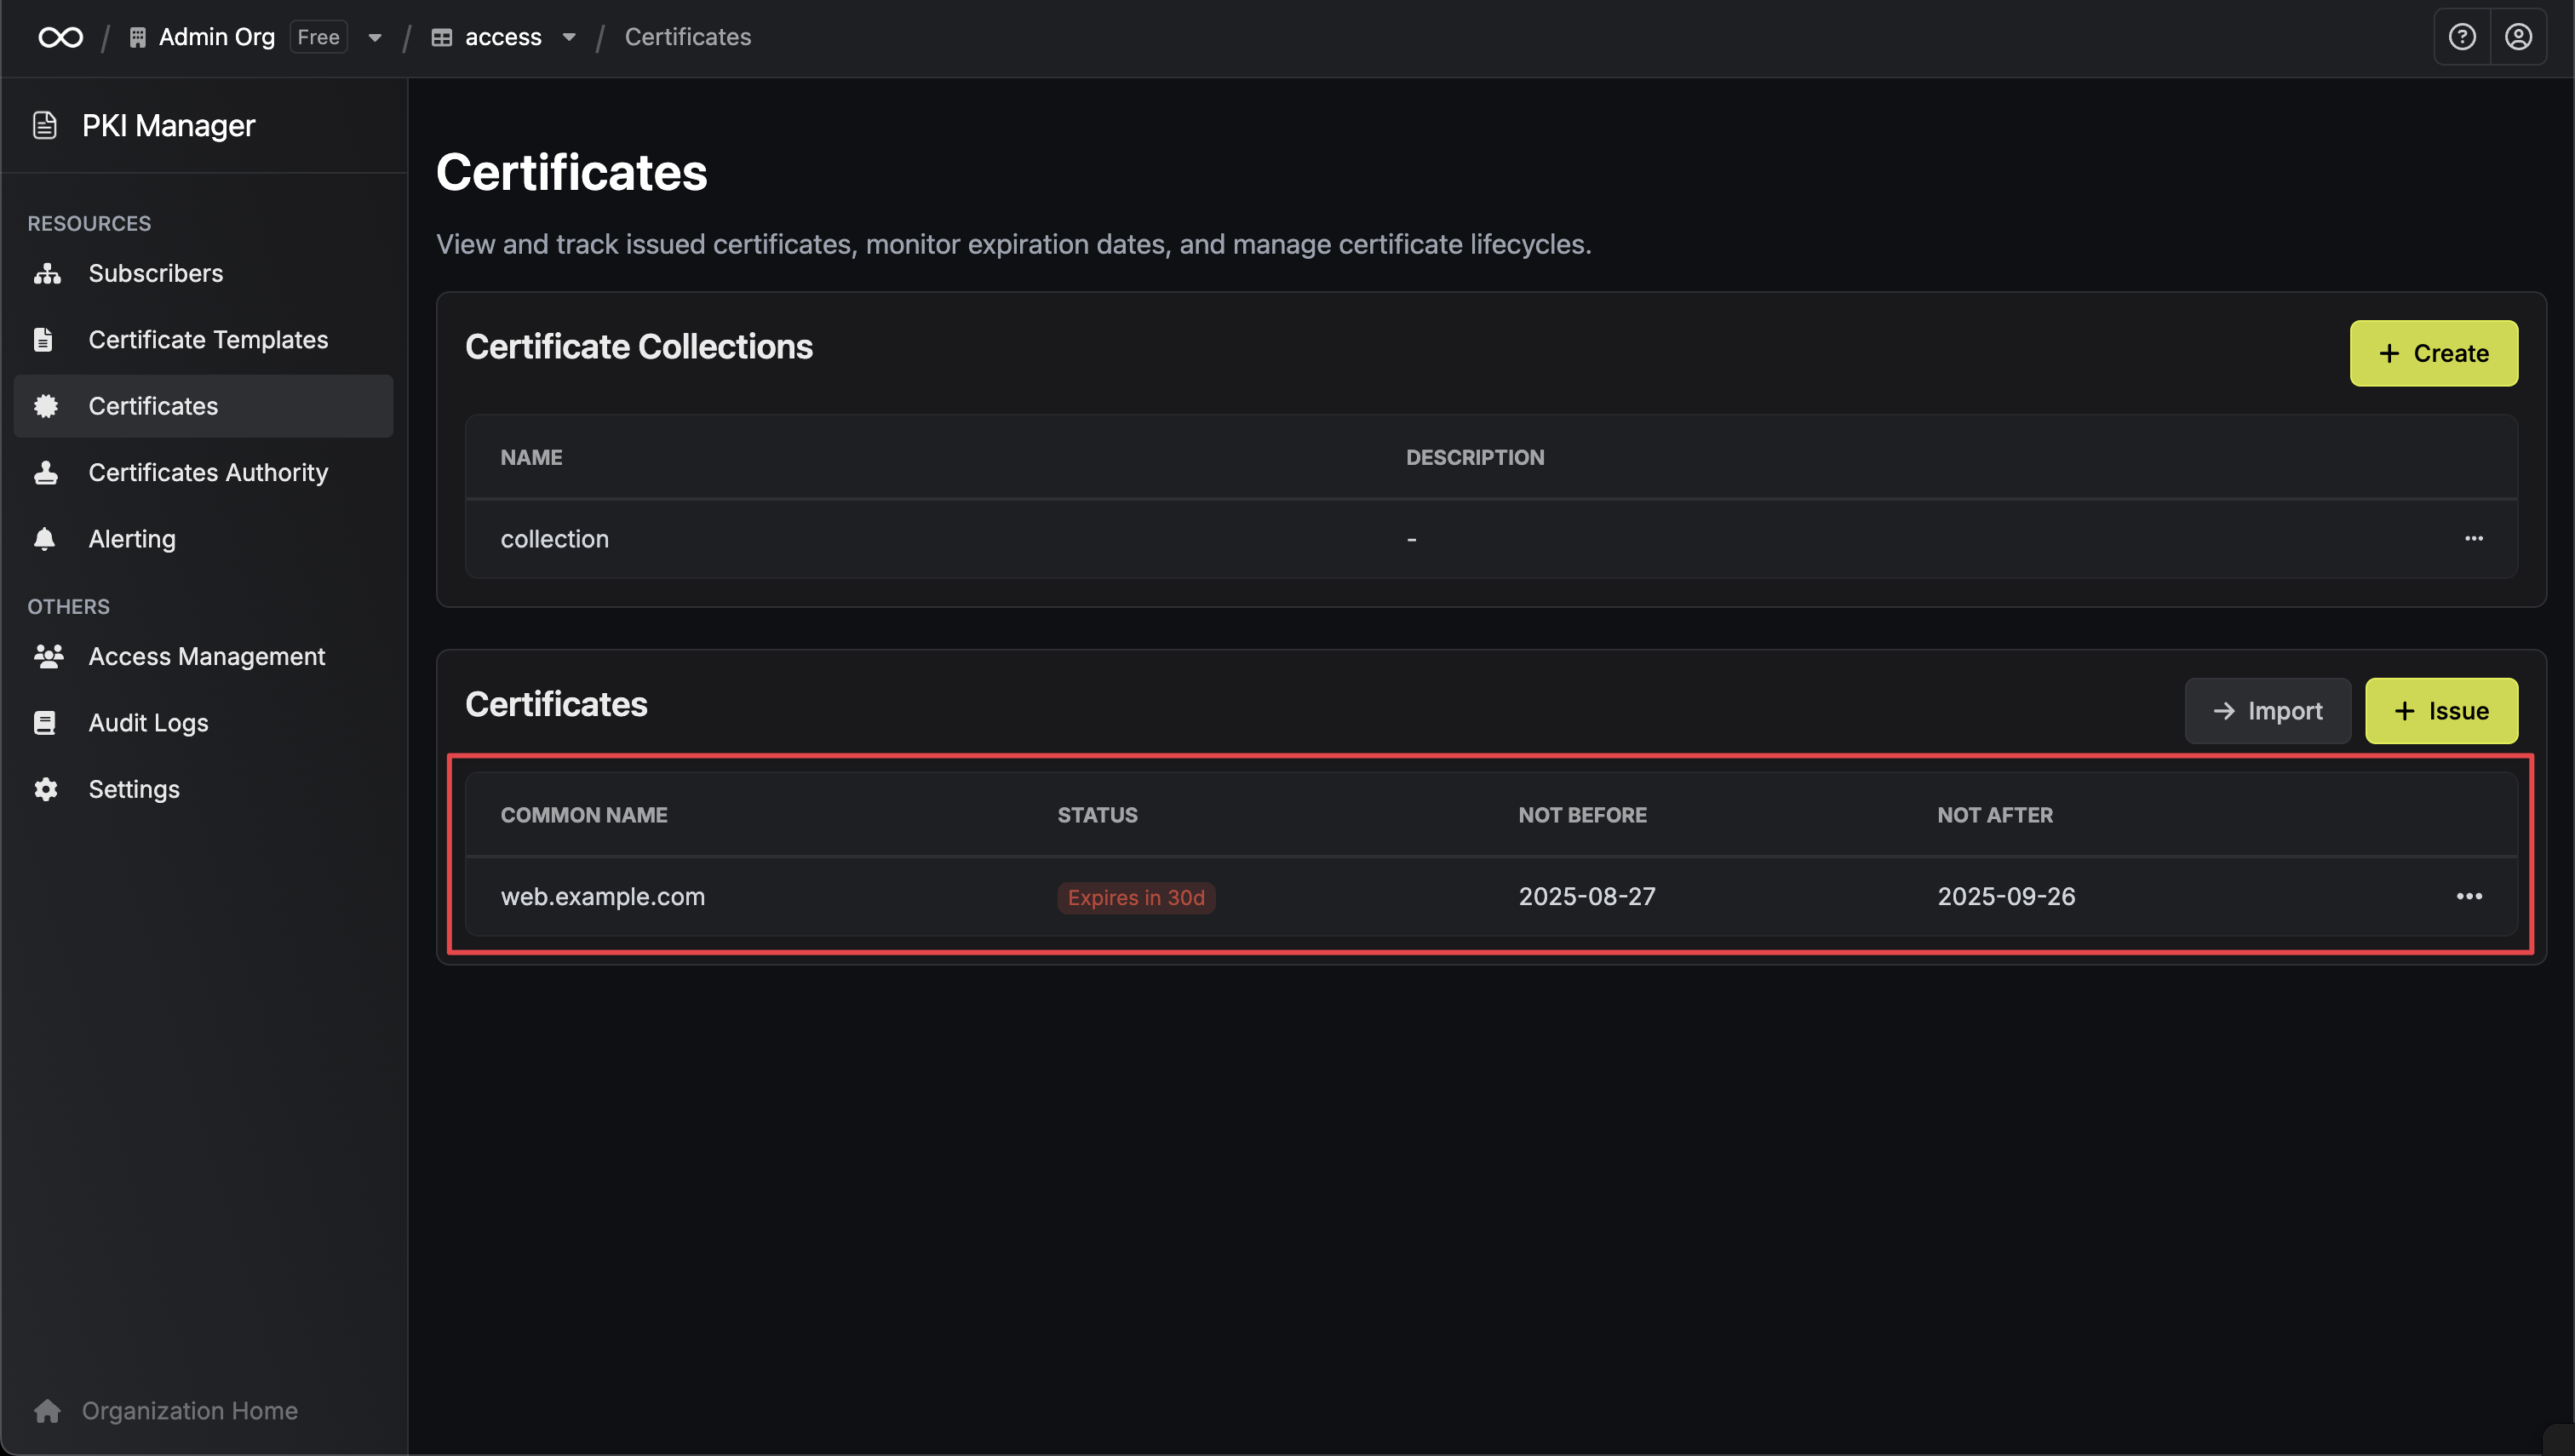
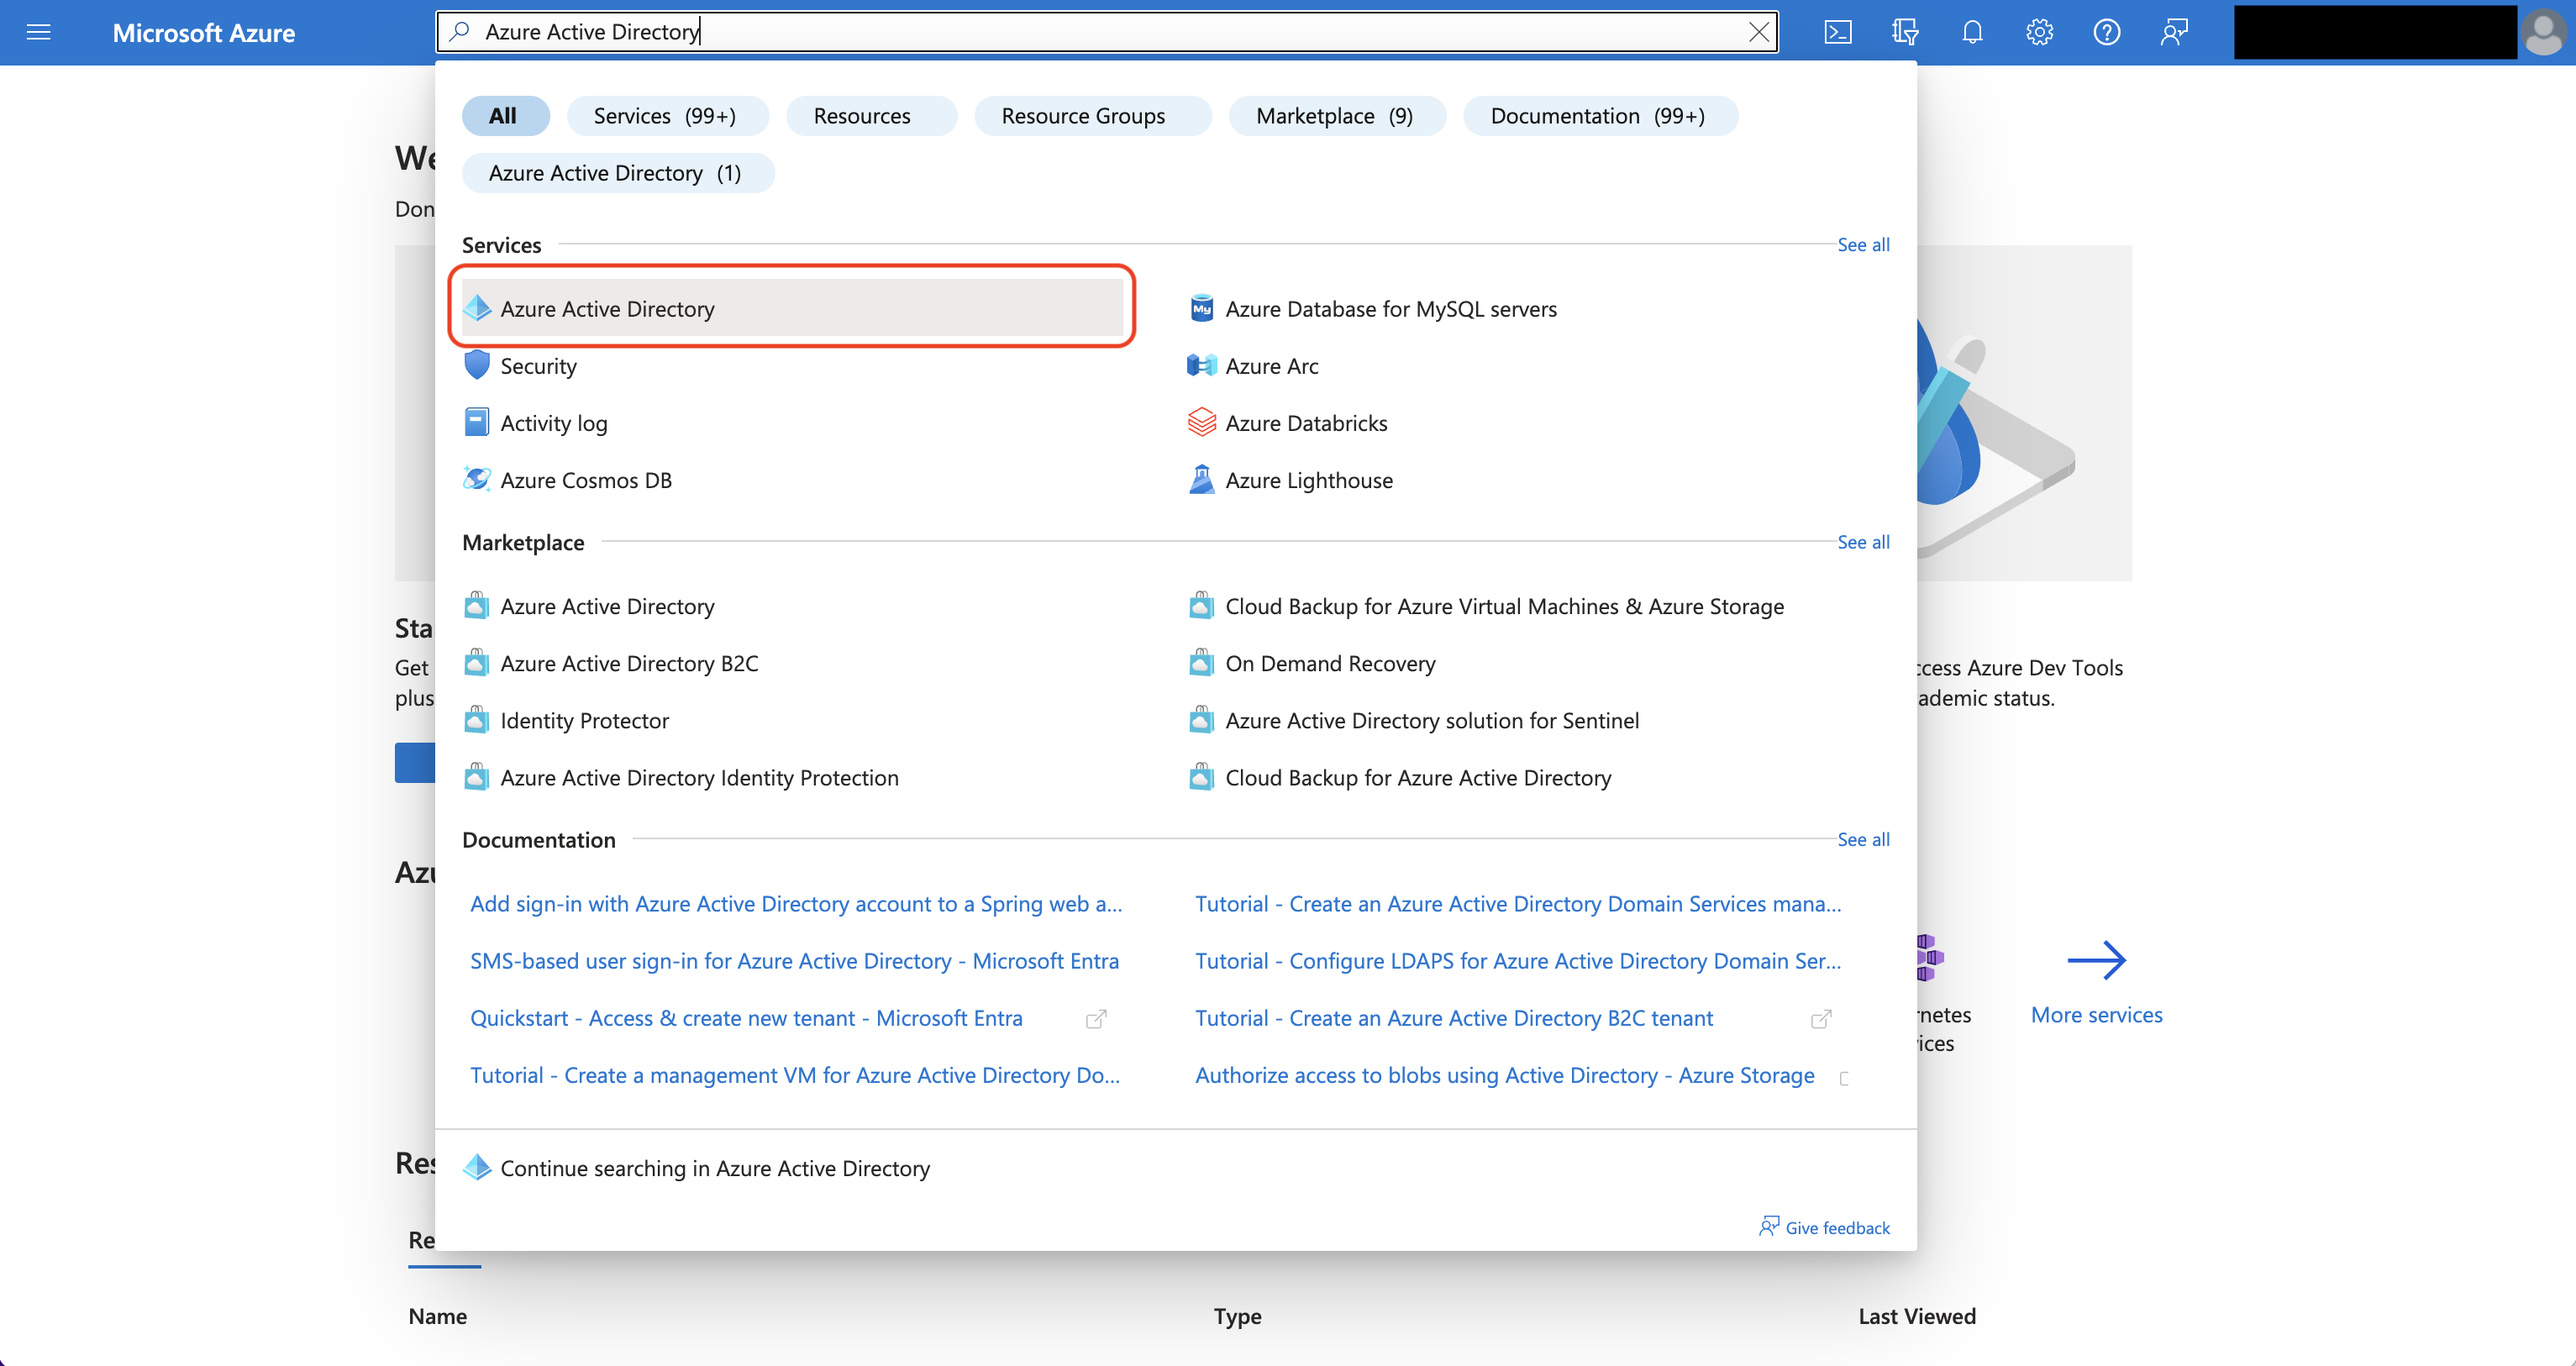
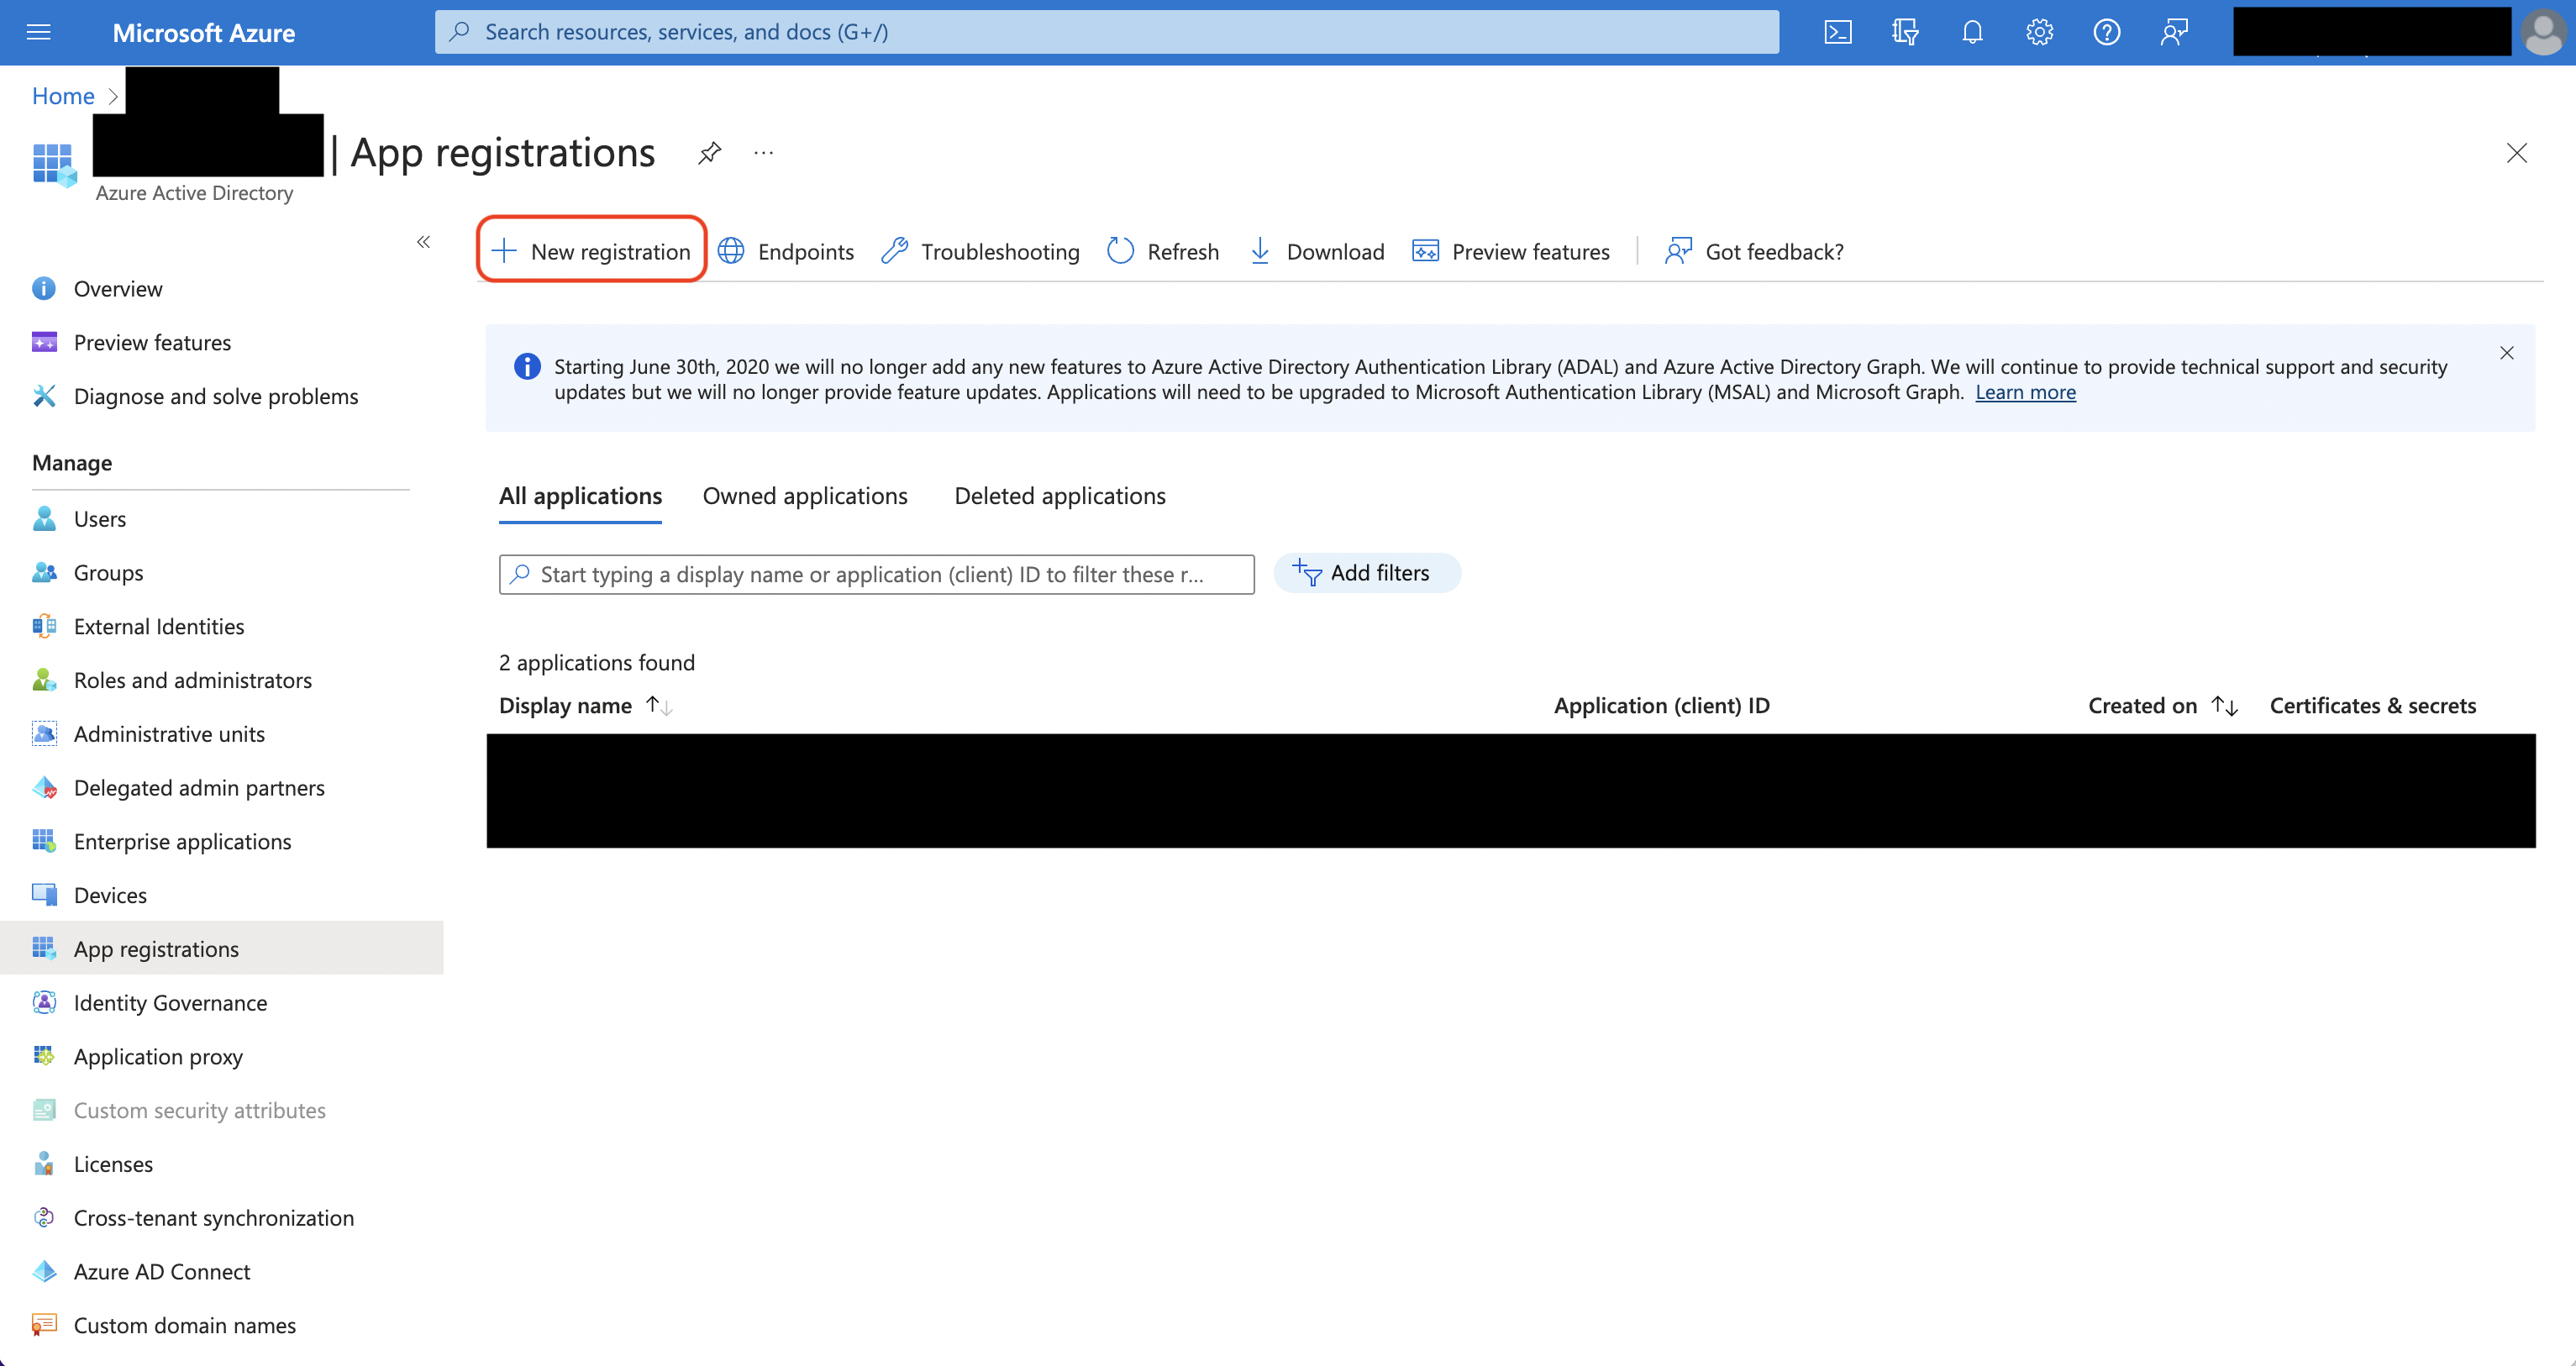 Create the application. As part of the form, set the **Redirect URI** to `https://your-domain.com/organization/app-connections/azure/oauth/callback`.

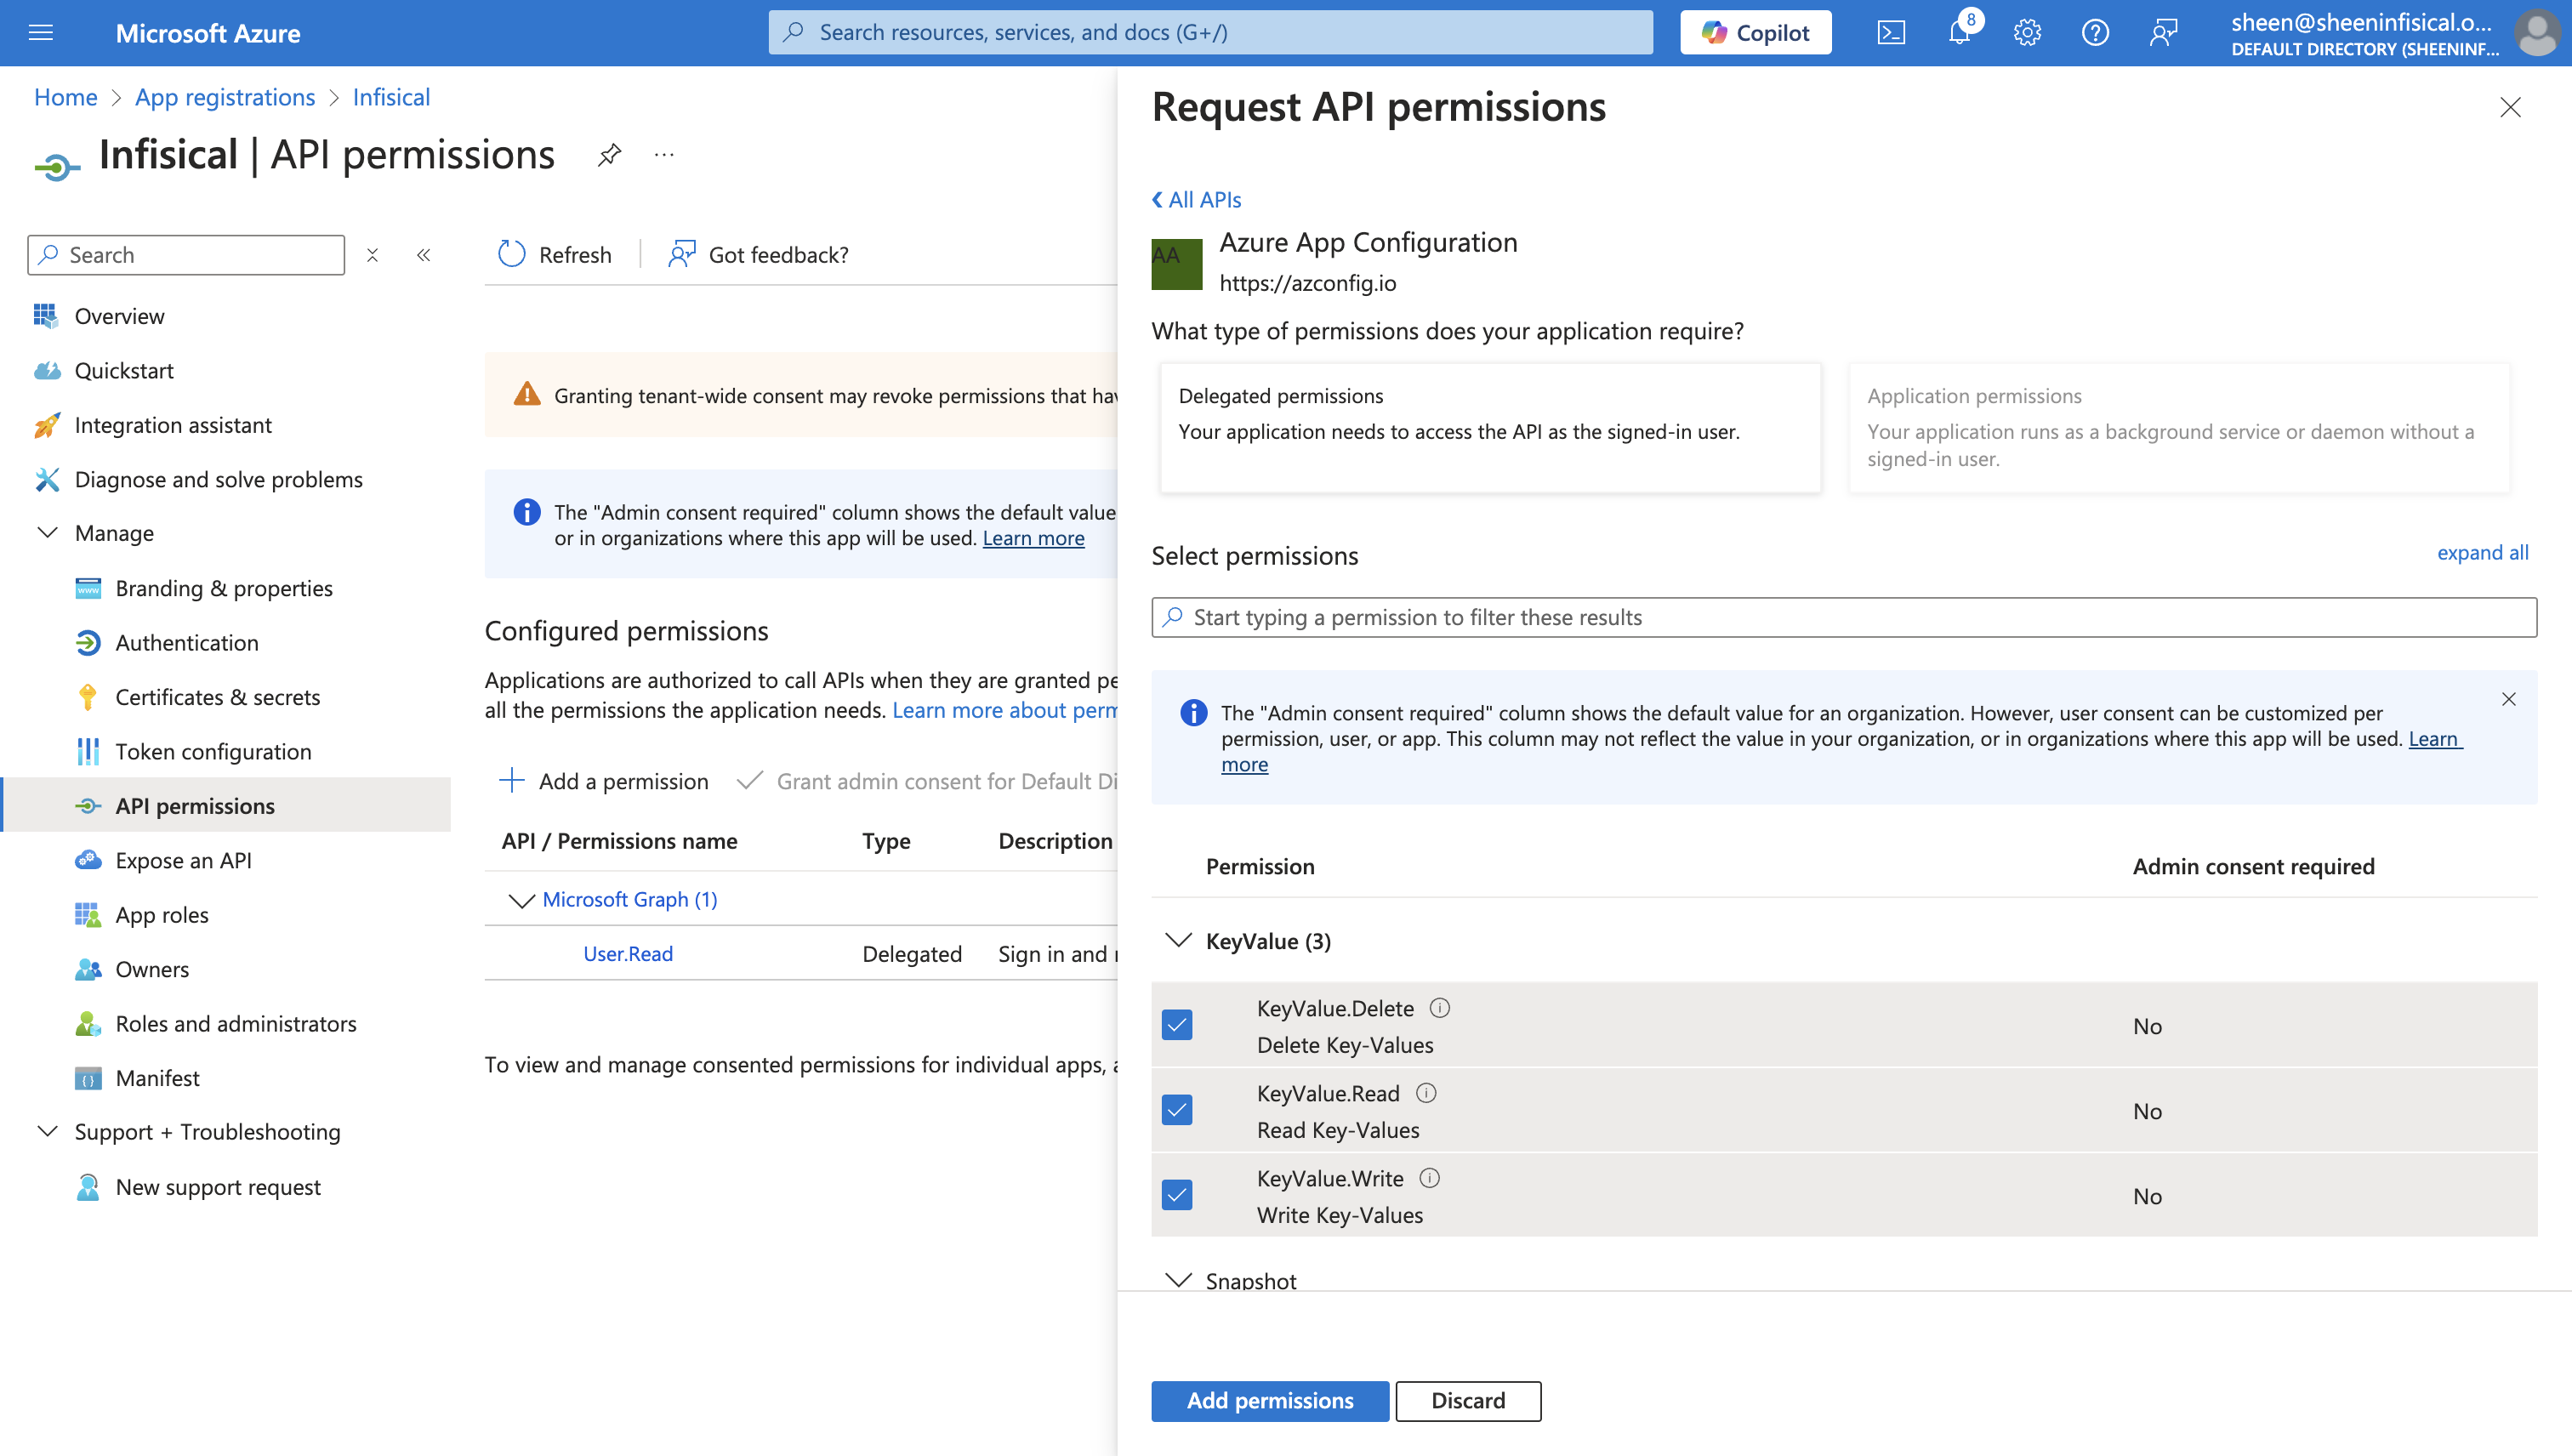
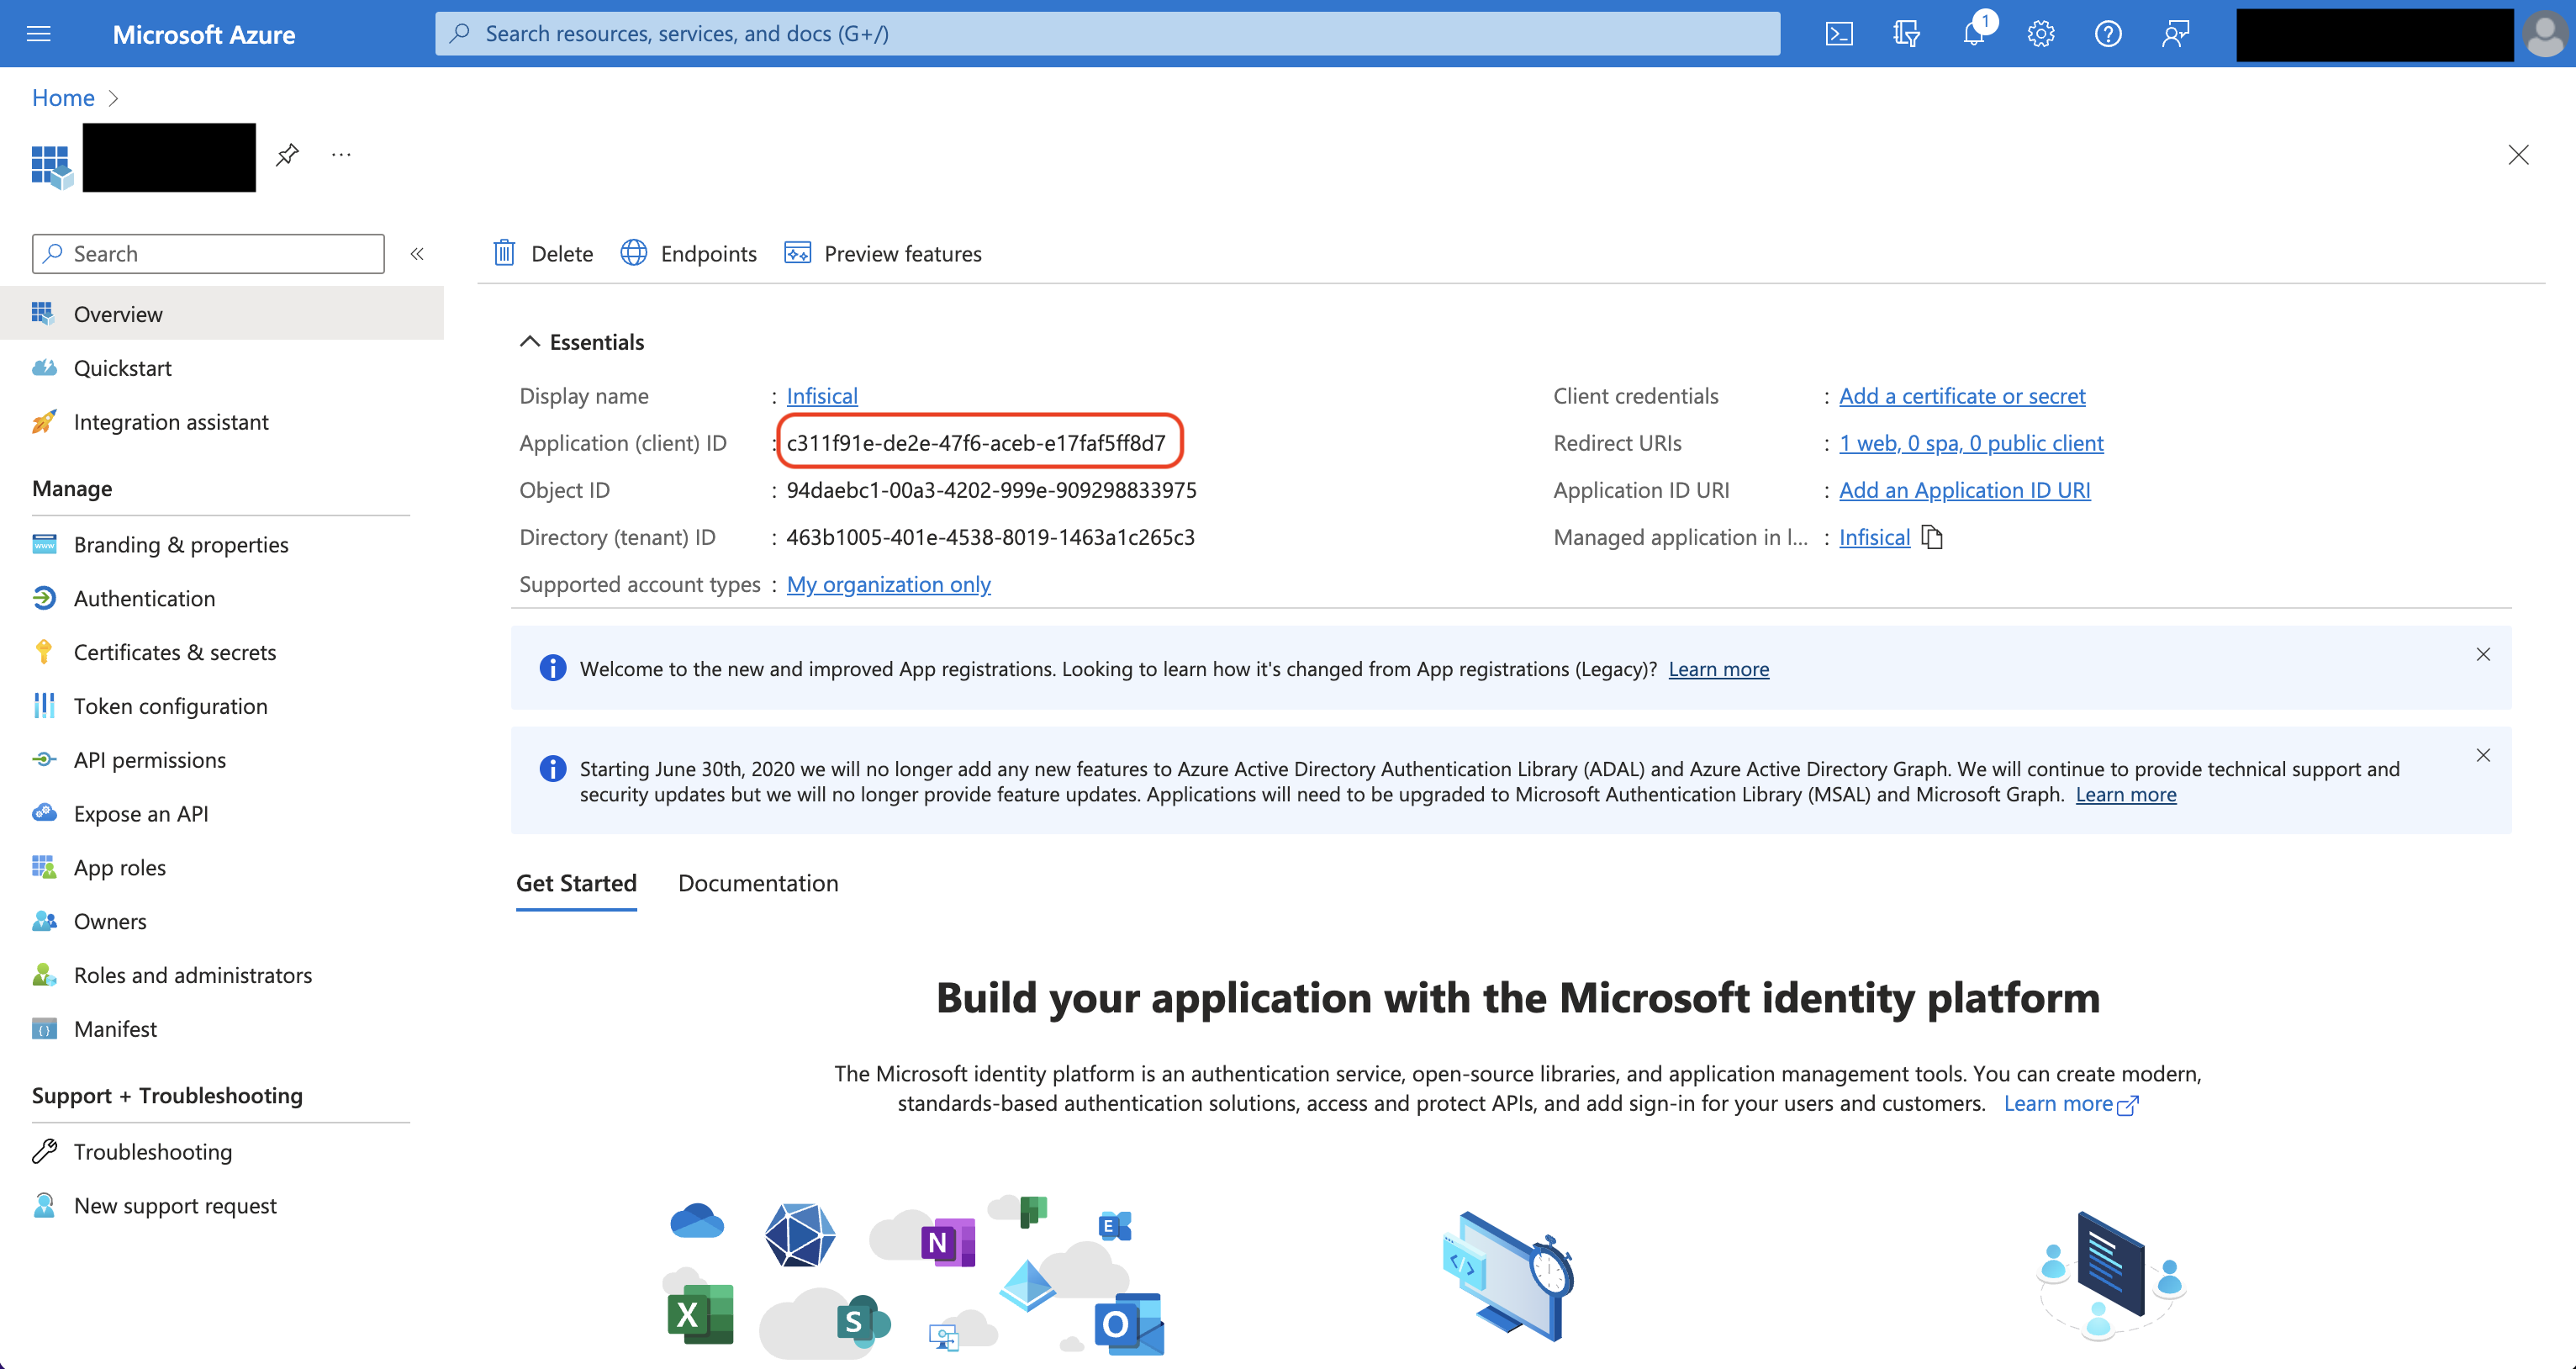
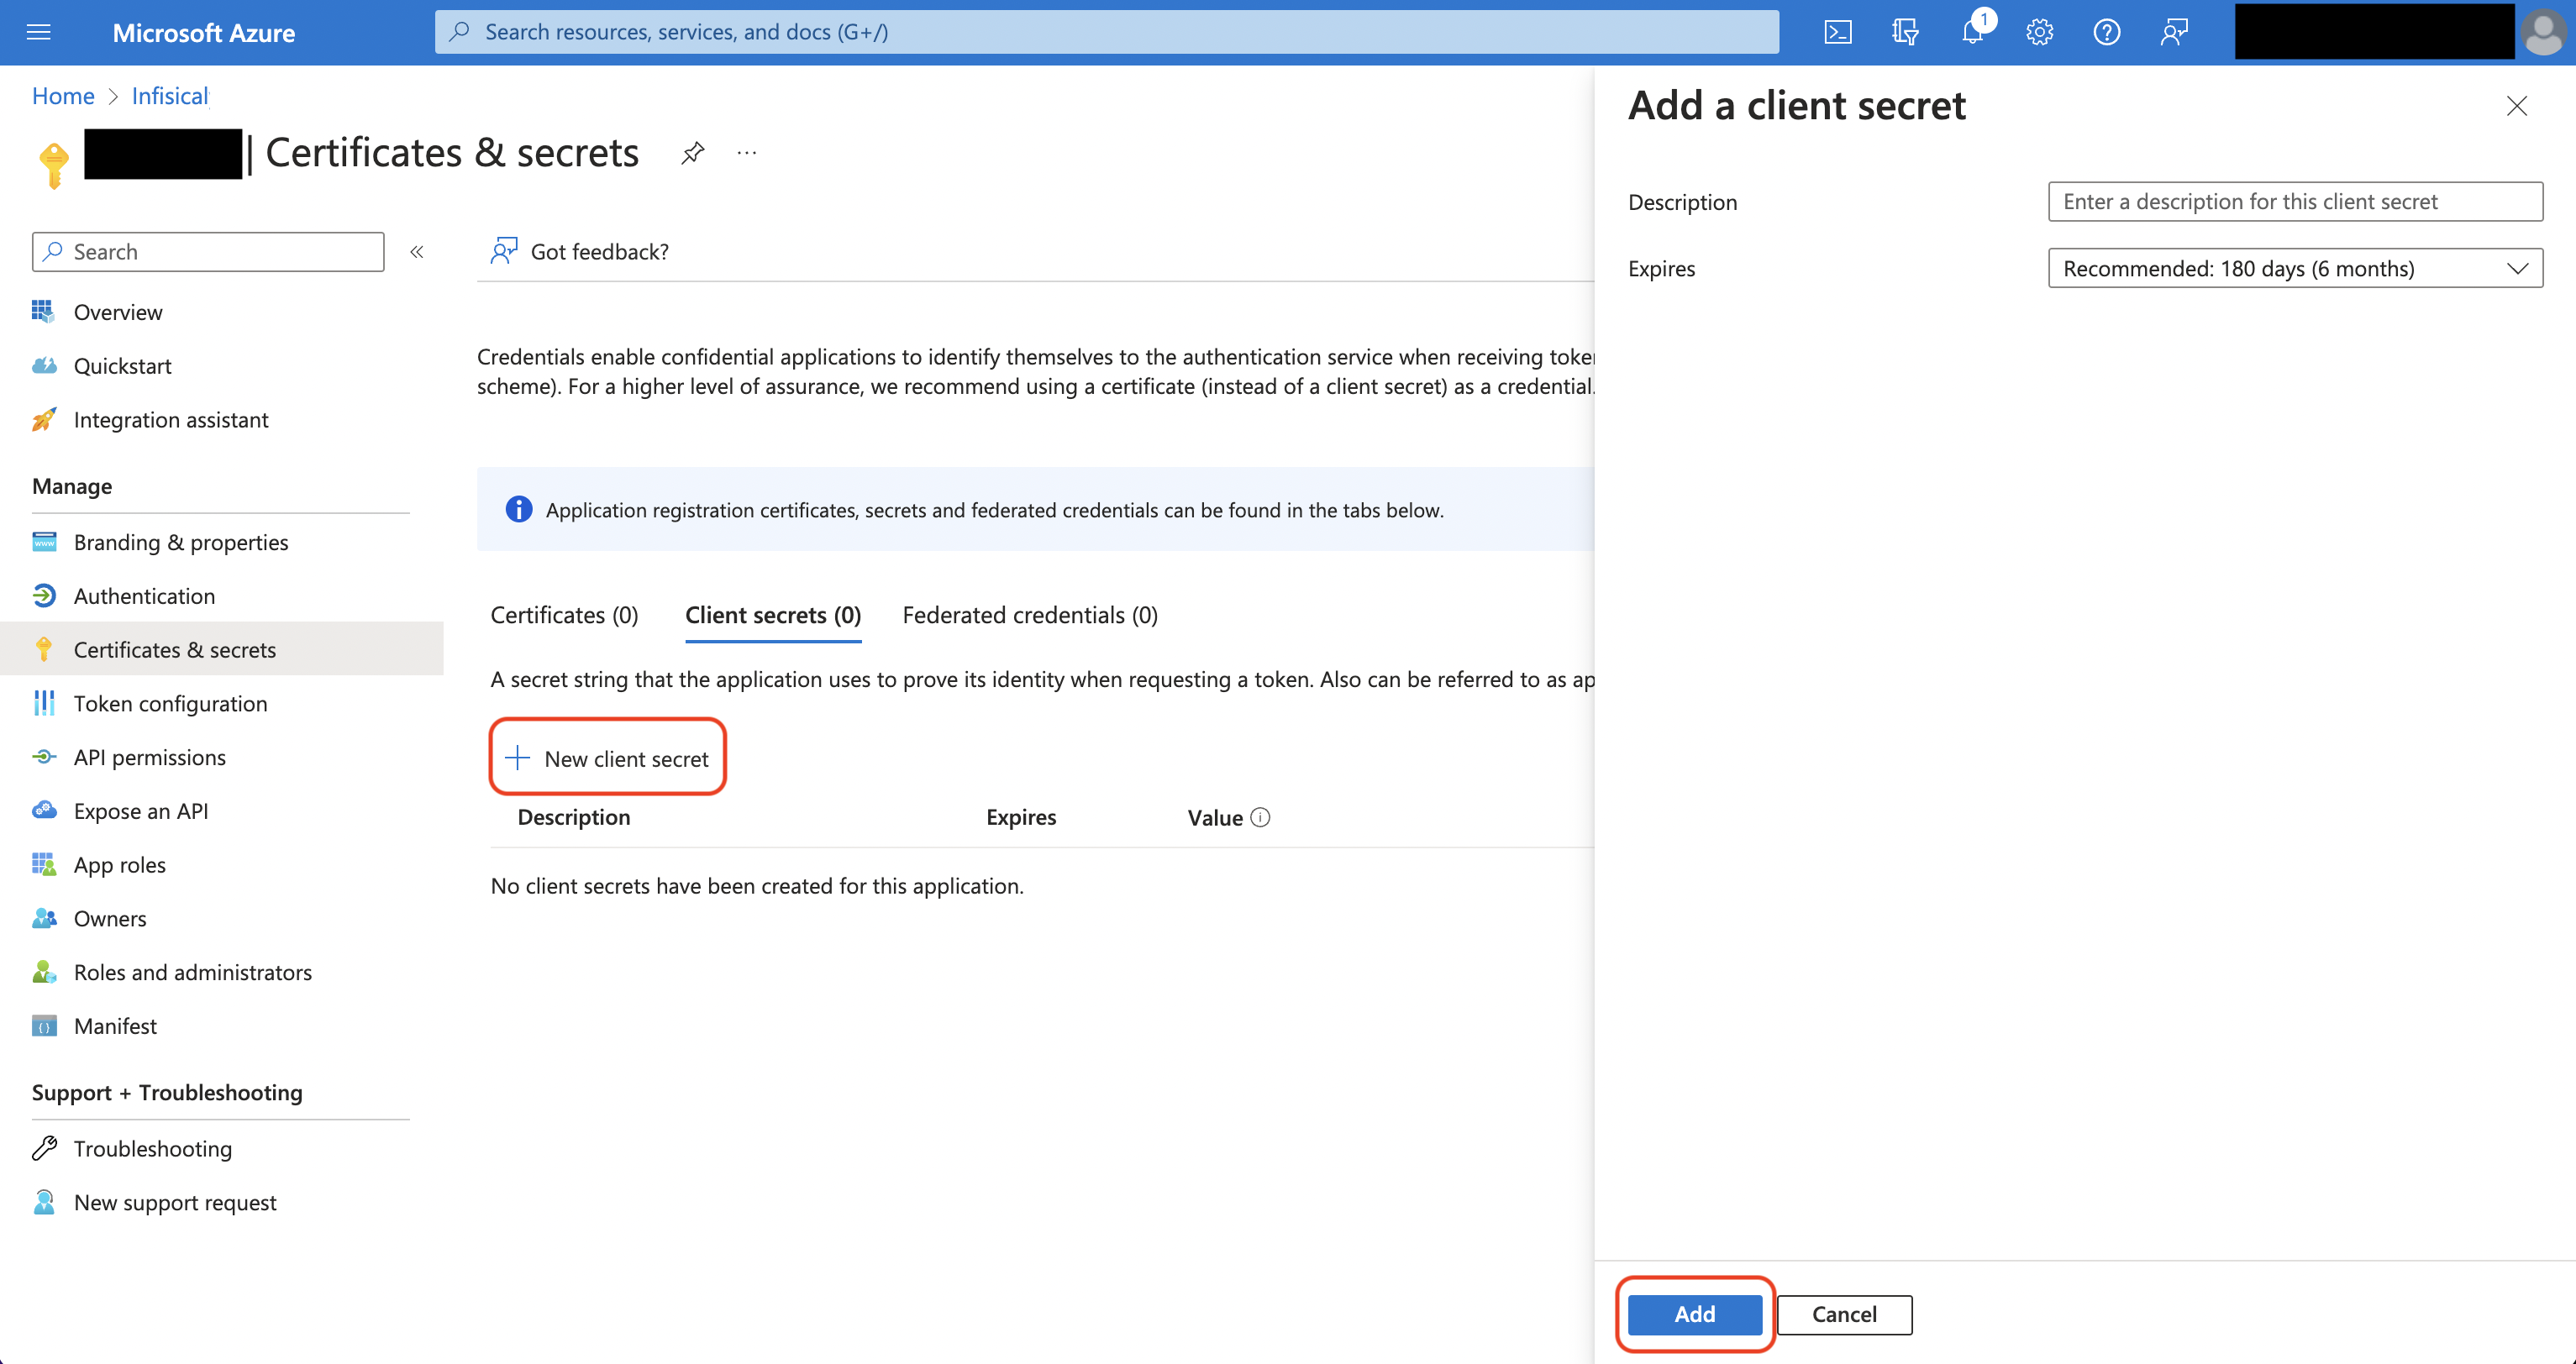
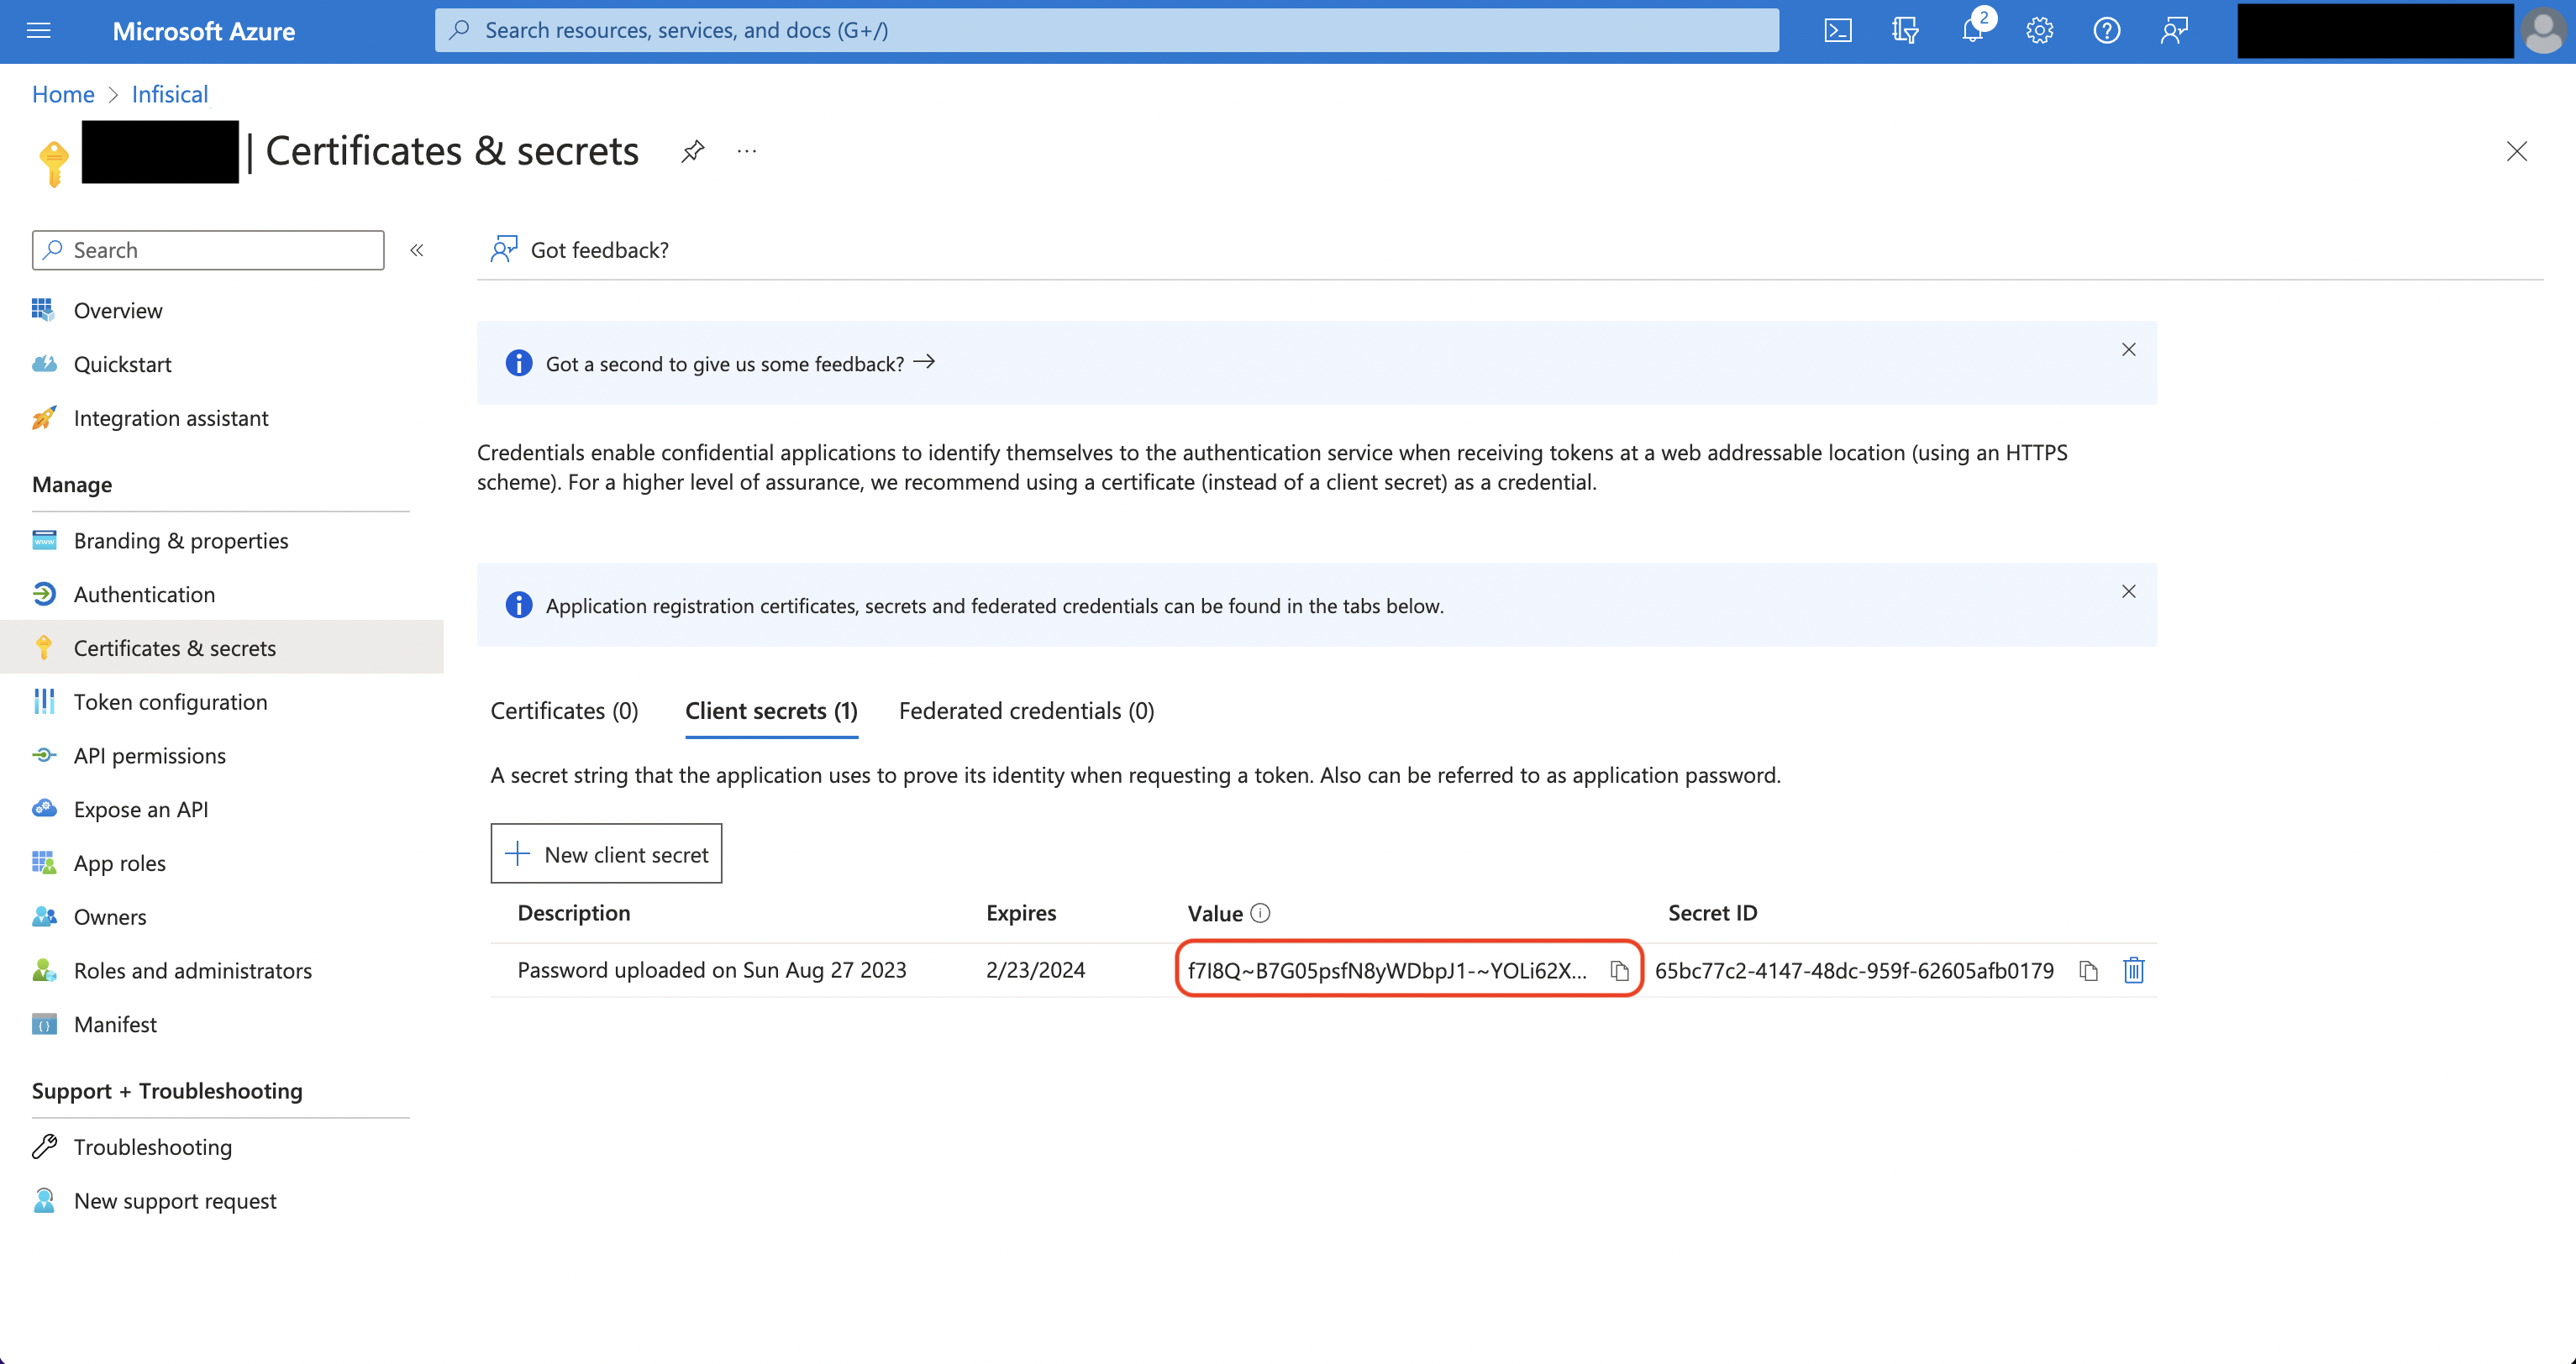 Back in your Infisical instance, add two new environment variables for the credentials of your Azure application.
* `INF_APP_CONNECTION_AZURE_APP_CONFIGURATION_CLIENT_ID`: The **Application (Client) ID** of your Azure application.
* `INF_APP_CONNECTION_AZURE_APP_CONFIGURATION_CLIENT_SECRET`: The **Client Secret** of your Azure application.
Once added, restart your Infisical instance and use the Azure App Configuration connection.
Back in your Infisical instance, add two new environment variables for the credentials of your Azure application.
* `INF_APP_CONNECTION_AZURE_APP_CONFIGURATION_CLIENT_ID`: The **Application (Client) ID** of your Azure application.
* `INF_APP_CONNECTION_AZURE_APP_CONFIGURATION_CLIENT_SECRET`: The **Client Secret** of your Azure application.
Once added, restart your Infisical instance and use the Azure App Configuration connection.

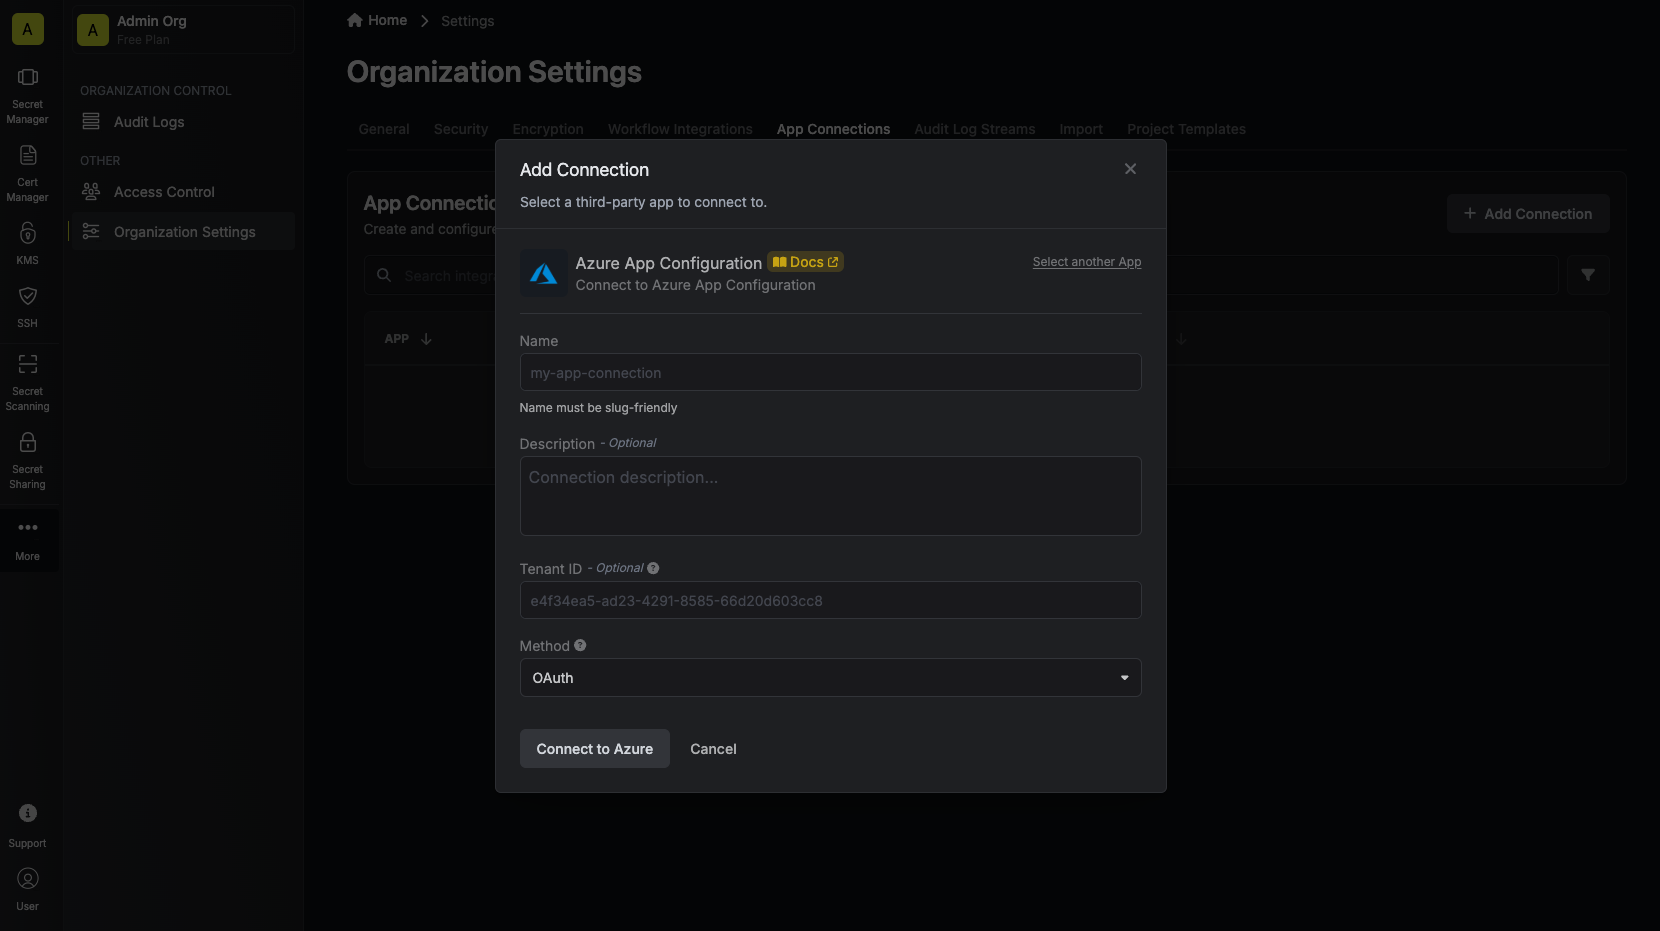
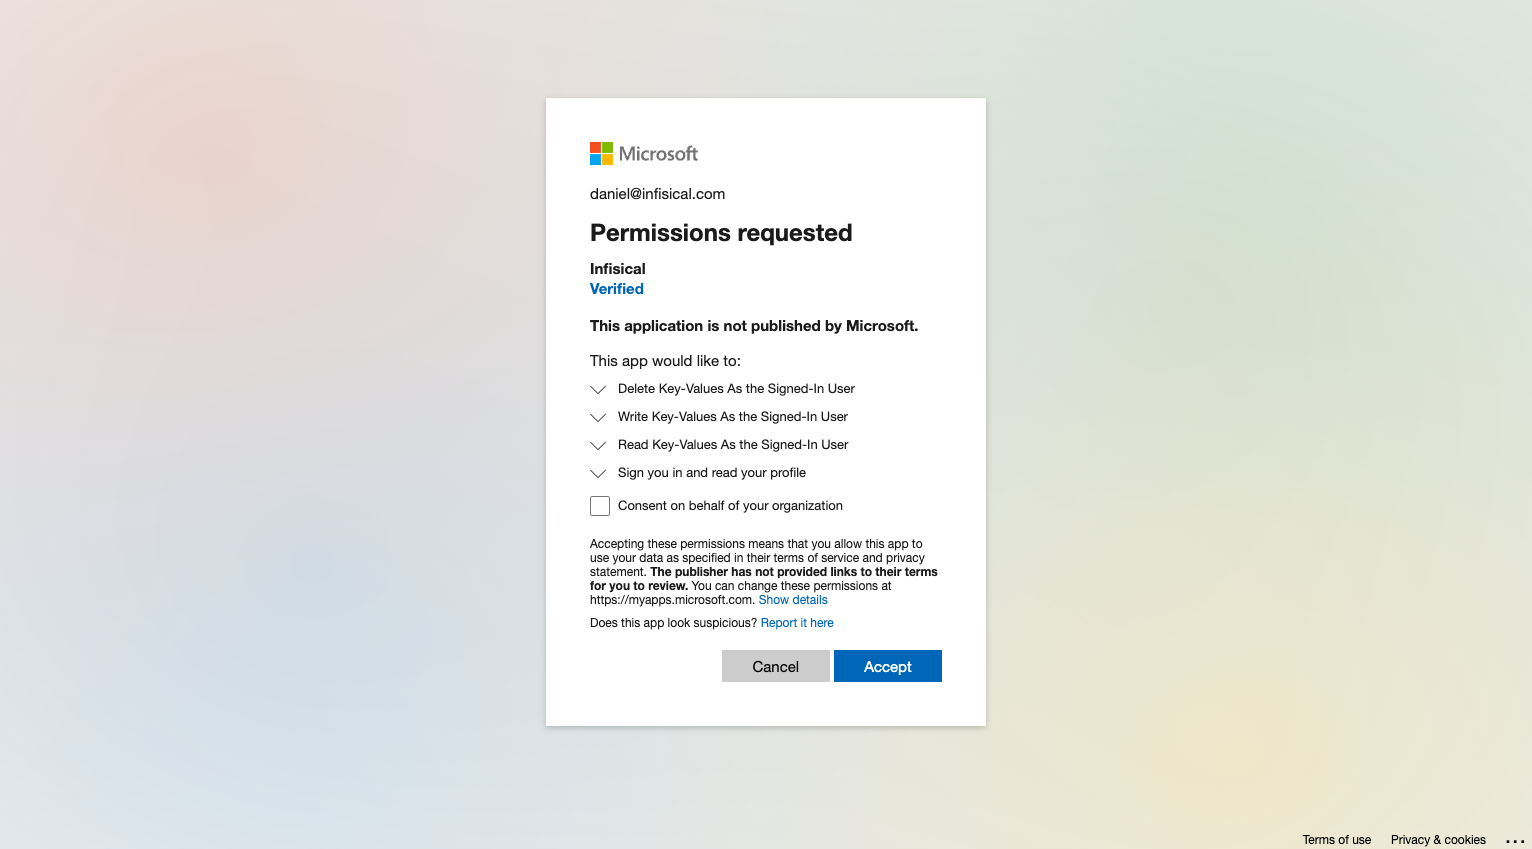
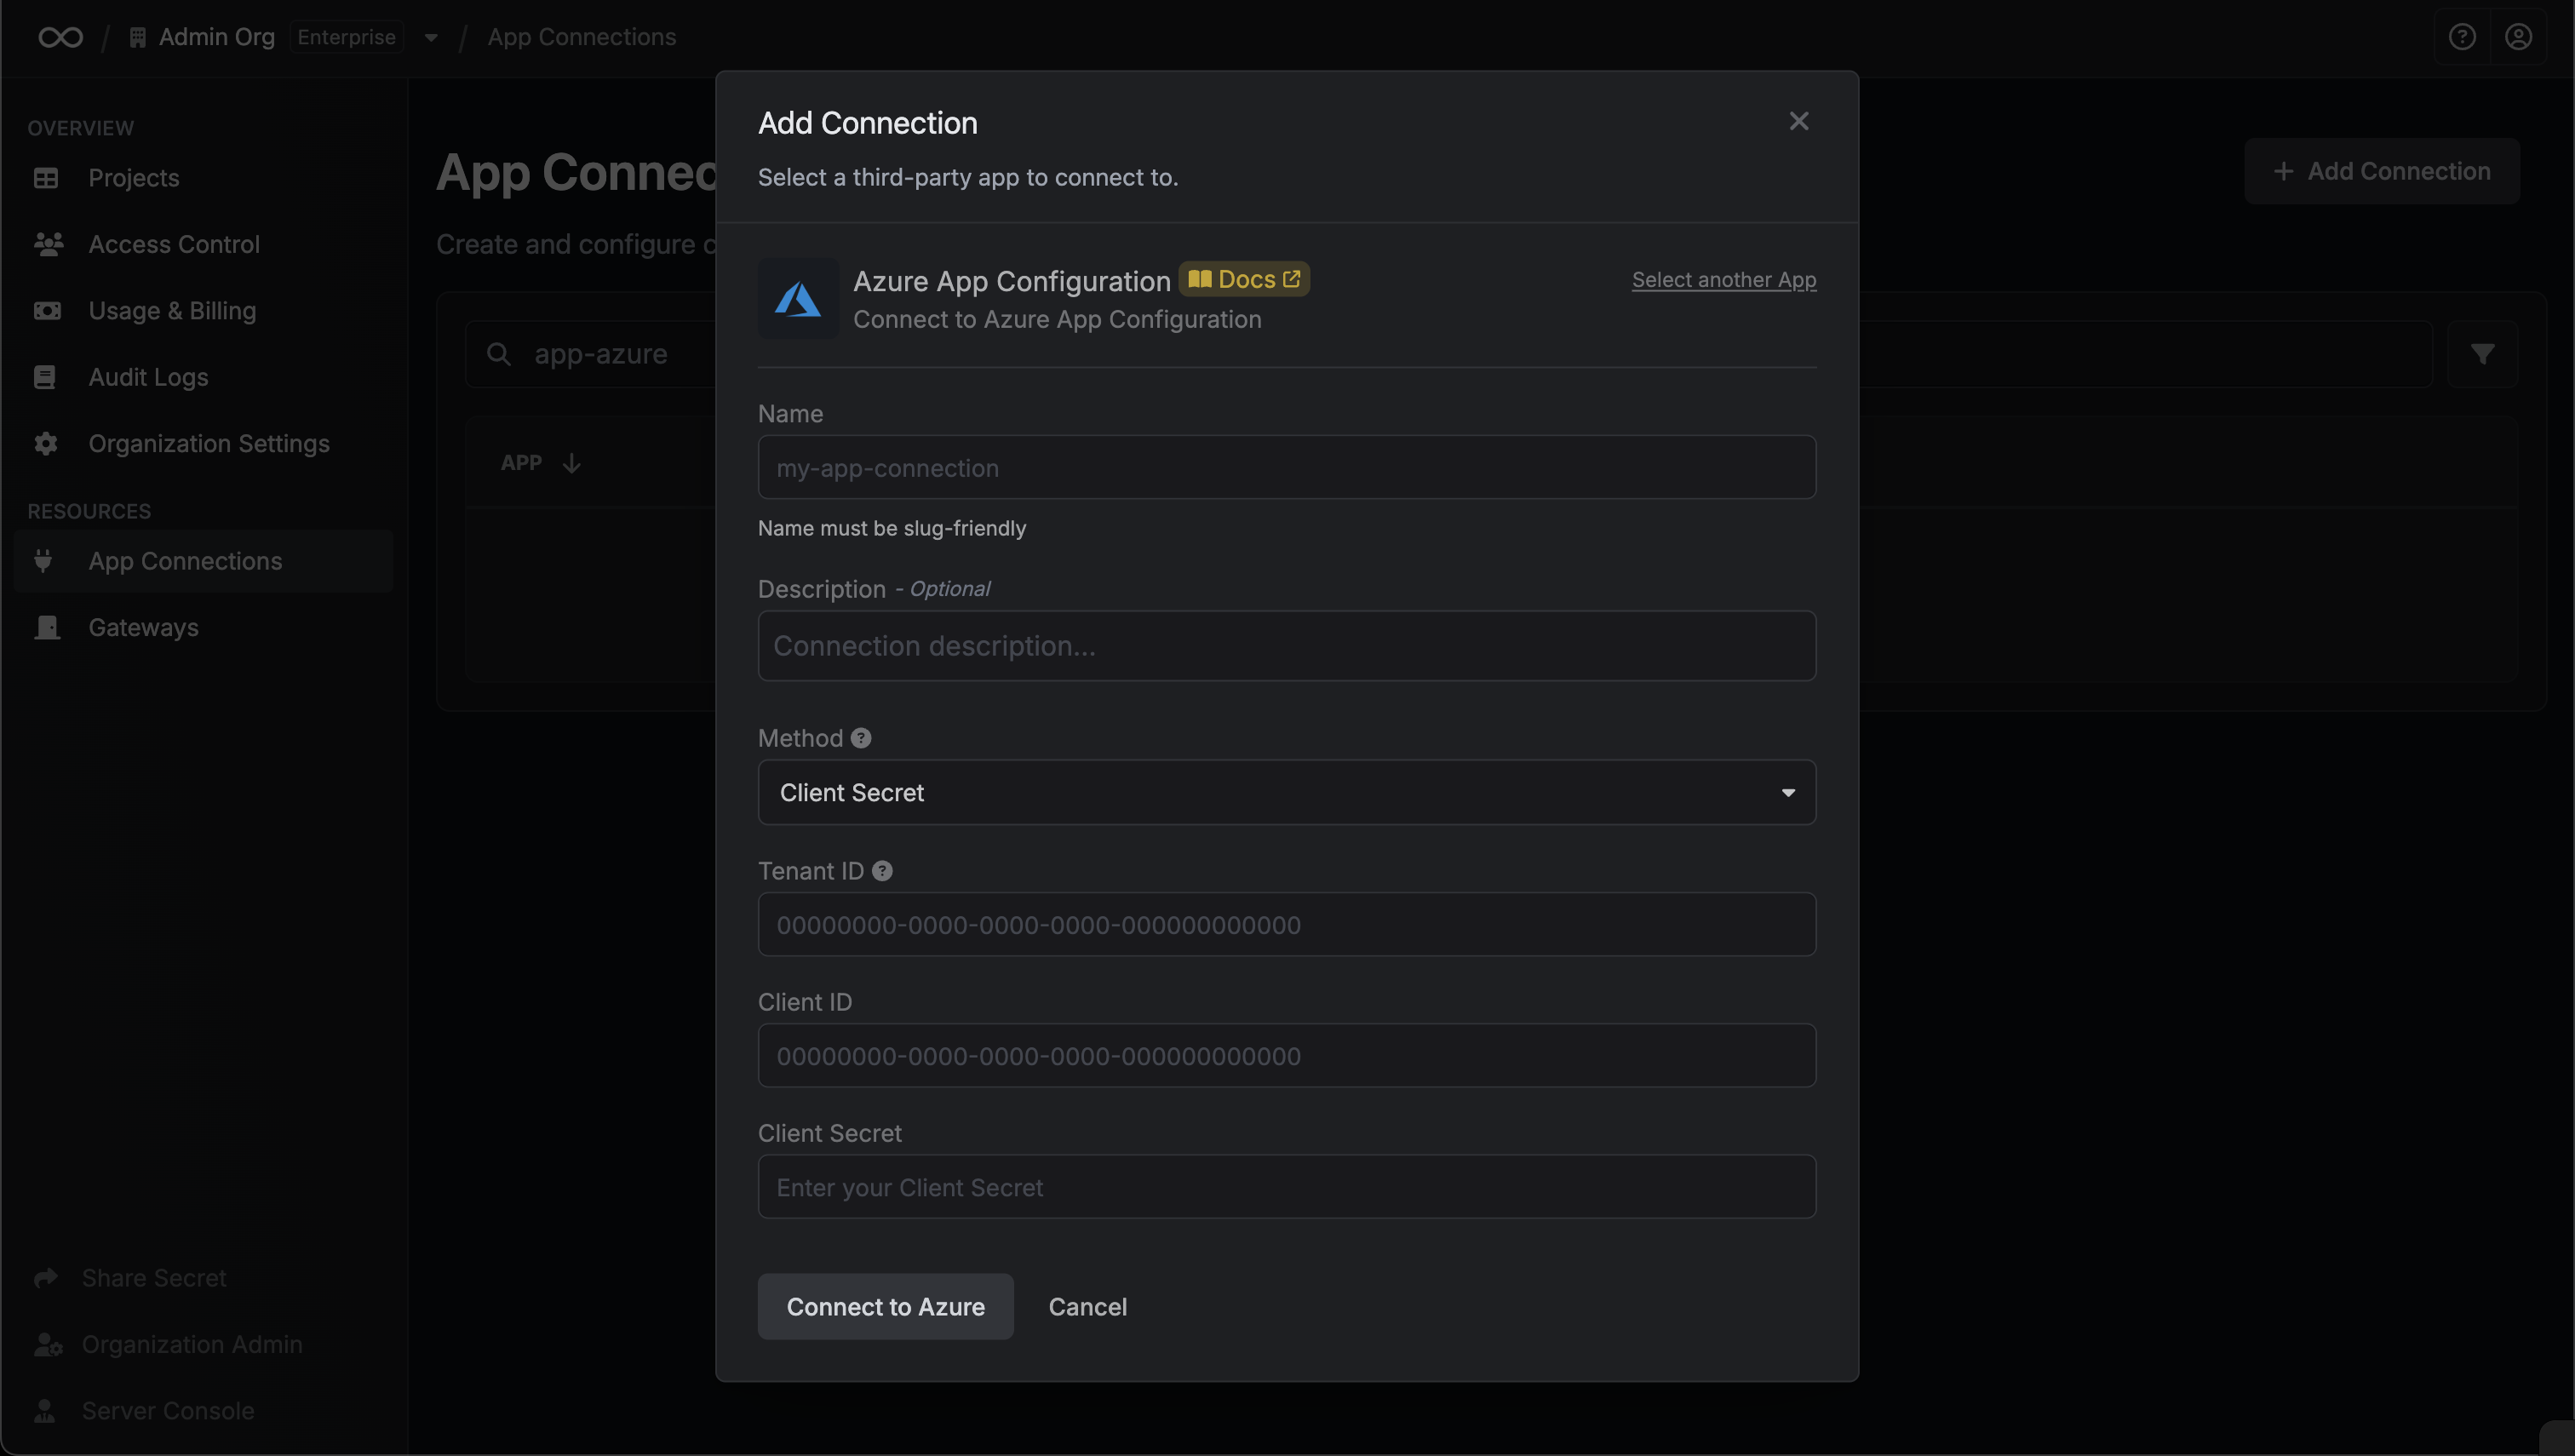
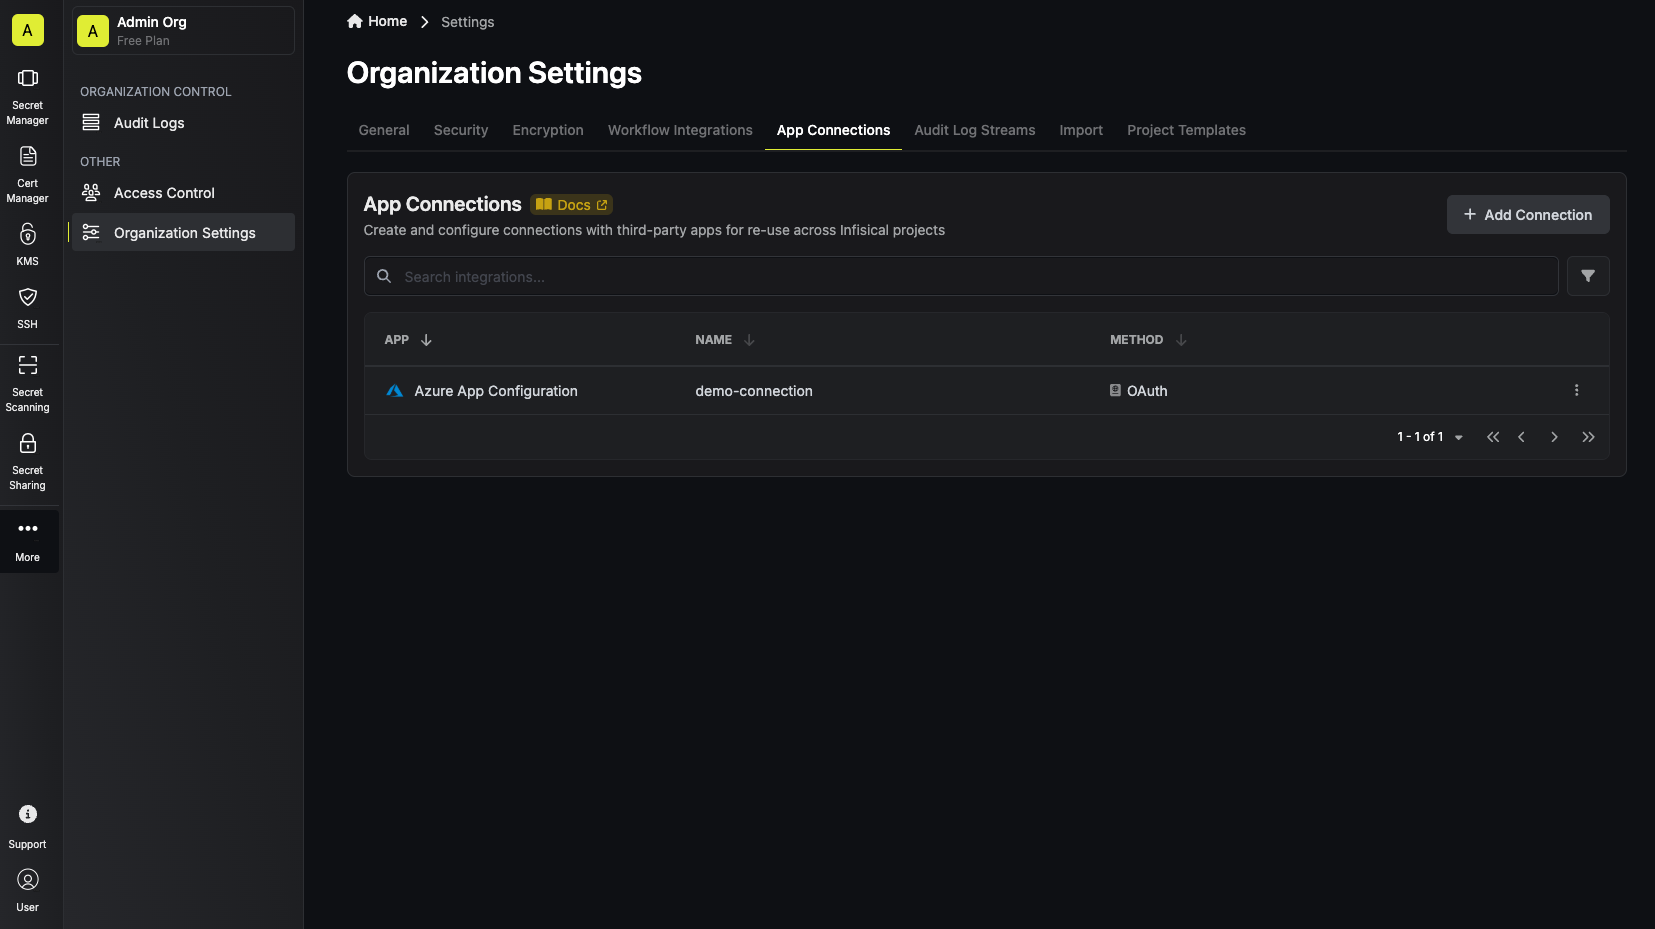 When creating an identity, you specify an organization level [role](/documentation/platform/access-controls/role-based-access-controls) for it to assume; you can configure roles in Organization Settings > Access Control > Organization Roles.
Now input a few details for your new identity. Here's some guidance for each field:
* Name (required): A friendly name for the identity.
* Role (required): A role from the **Organization Roles** tab for the identity to assume. The organization role assigned will determine what organization level resources this identity can have access to.
Once you've created an identity, you'll be redirected to a page where you can manage the identity.
Since the identity has been configured with Universal Auth by default, you should re-configure it to use Azure Auth instead. To do this, press to edit the **Authentication** section,
remove the existing Universal Auth configuration, and add a new Azure Auth configuration onto the identity.
When creating an identity, you specify an organization level [role](/documentation/platform/access-controls/role-based-access-controls) for it to assume; you can configure roles in Organization Settings > Access Control > Organization Roles.
Now input a few details for your new identity. Here's some guidance for each field:
* Name (required): A friendly name for the identity.
* Role (required): A role from the **Organization Roles** tab for the identity to assume. The organization role assigned will determine what organization level resources this identity can have access to.
Once you've created an identity, you'll be redirected to a page where you can manage the identity.
Since the identity has been configured with Universal Auth by default, you should re-configure it to use Azure Auth instead. To do this, press to edit the **Authentication** section,
remove the existing Universal Auth configuration, and add a new Azure Auth configuration onto the identity.
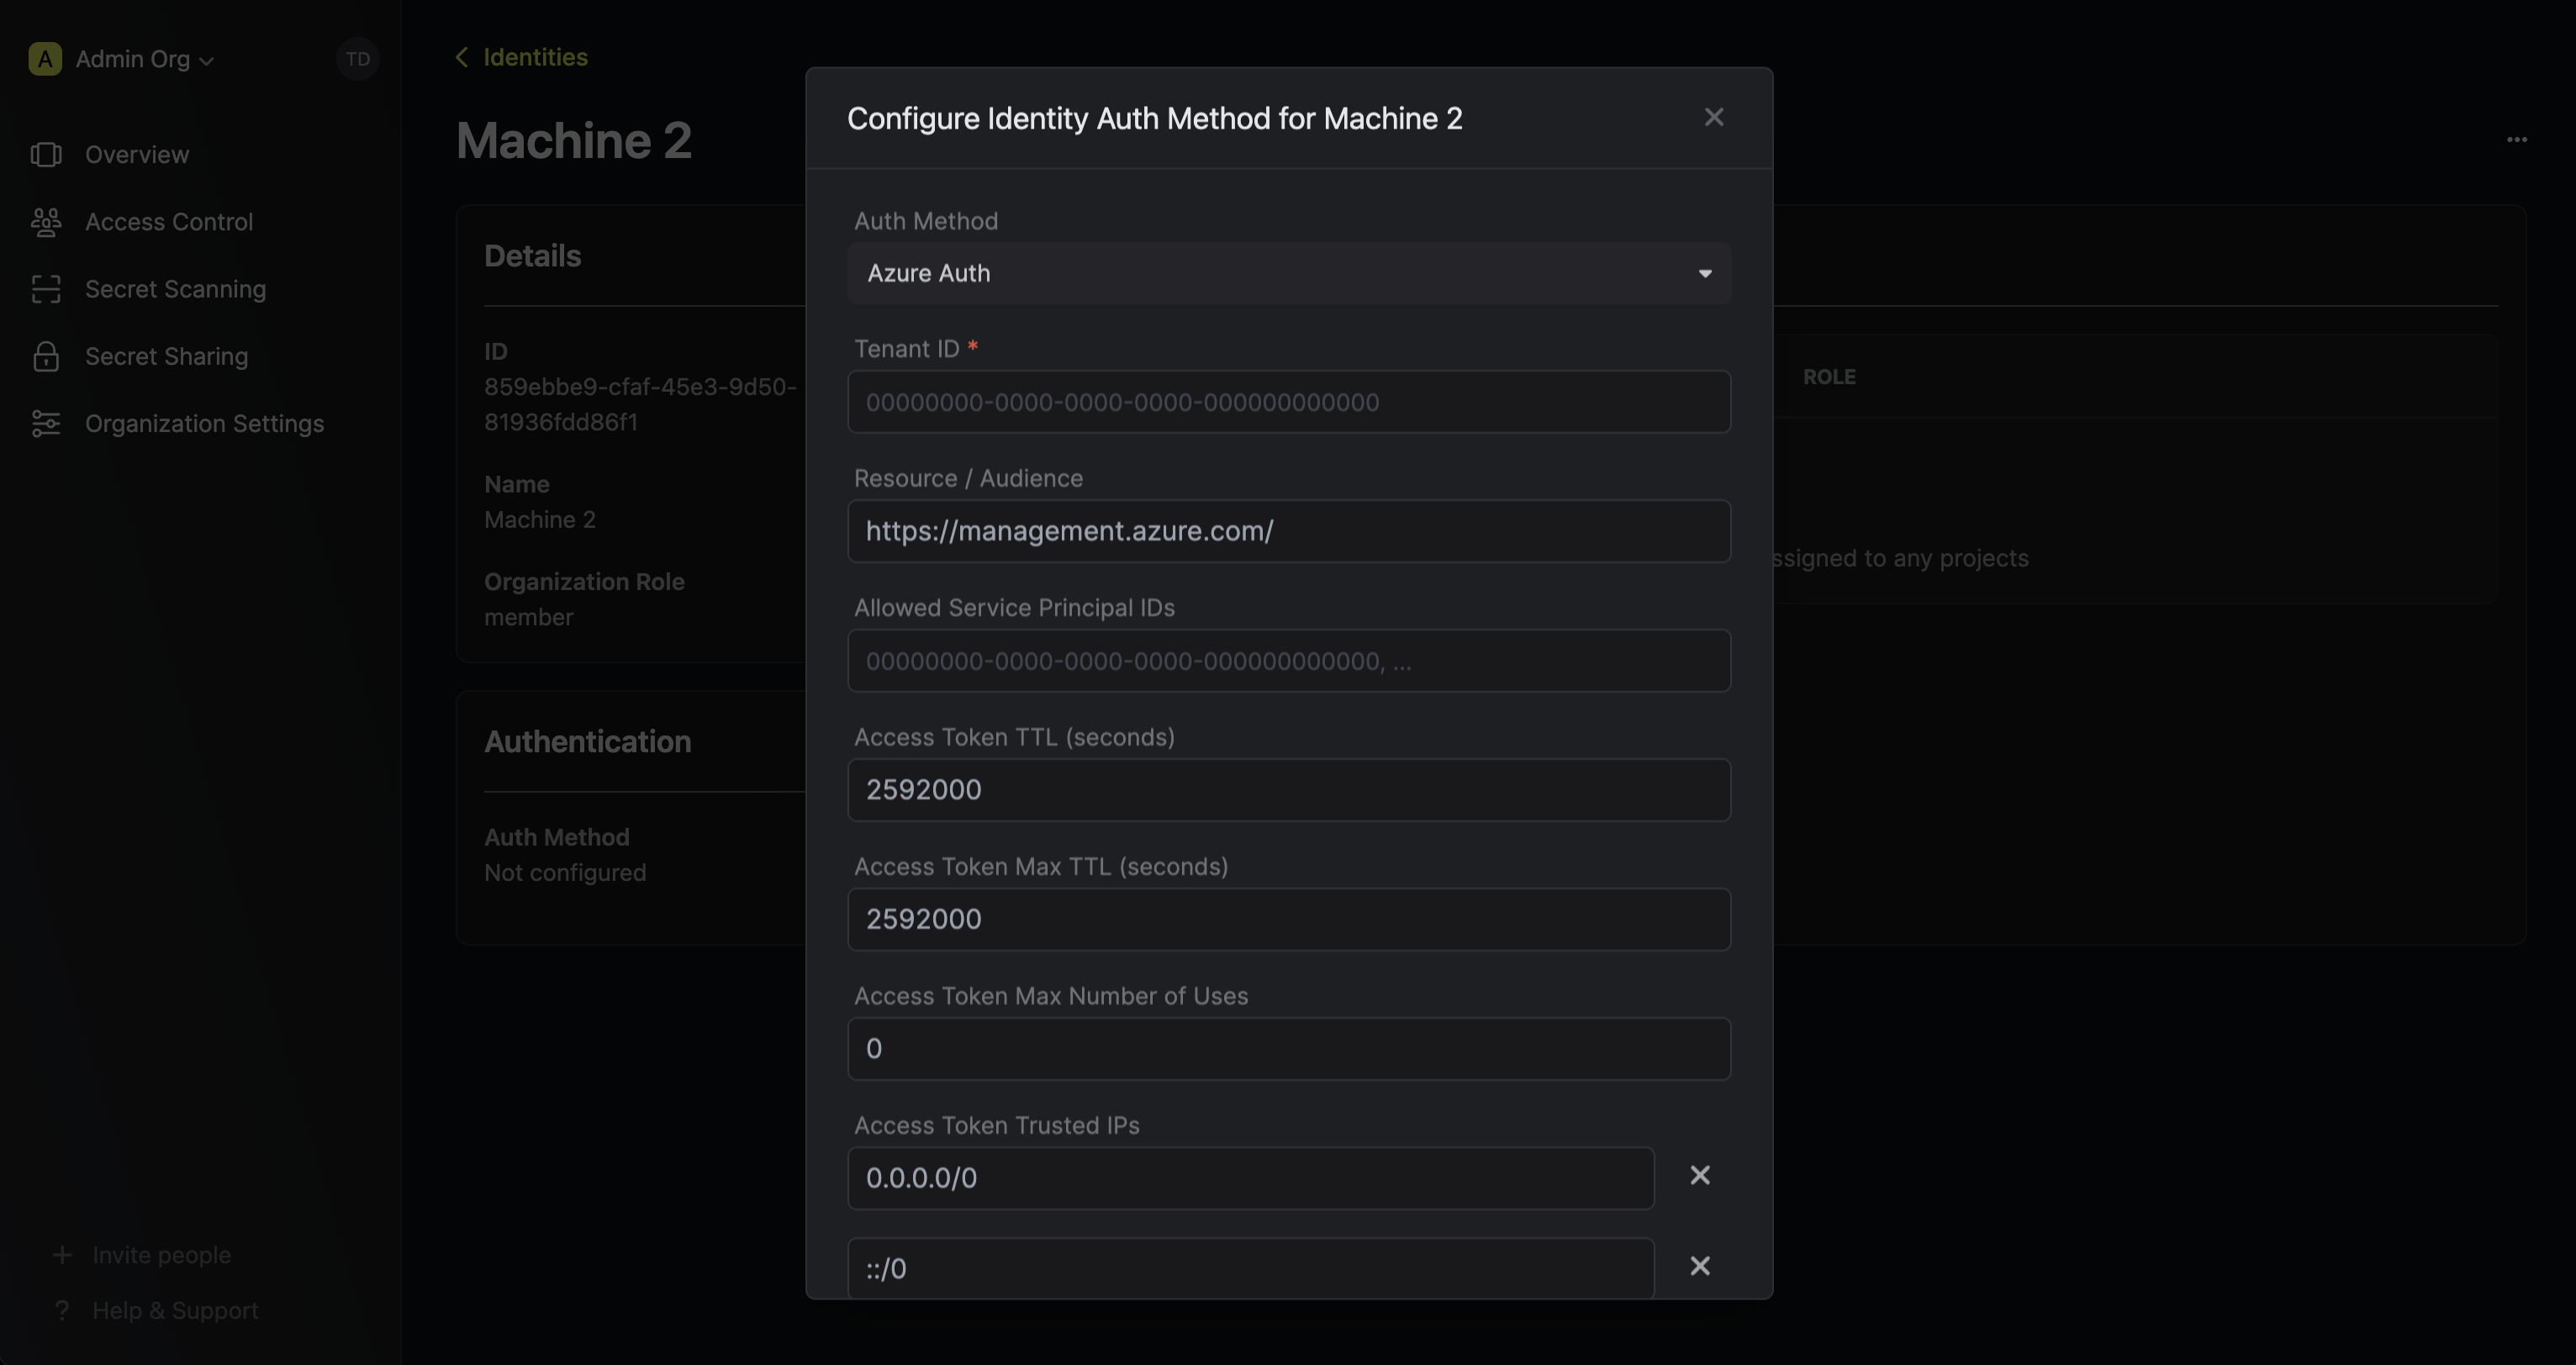 Here's some more guidance on each field:
* Tenant ID: The [tenant ID](https://learn.microsoft.com/en-us/entra/fundamentals/how-to-find-tenant) for the Azure AD organization.
* Resource / Audience: The resource URL for the application registered in Azure AD. The value is expected to match the `aud` claim of the access token JWT later used in the login operation against Infisical. See the [resource](https://learn.microsoft.com/en-us/entra/identity/managed-identities-azure-resources/how-to-use-vm-token#get-a-token-using-http) parameter for how the audience is set when requesting a JWT access token from the Azure Instance Metadata Service (IMDS) endpoint. In most cases, this value should be `https://management.azure.com/` which is the default.
* Allowed Service Principal IDs: A comma-separated list of Azure AD service principal IDs that are allowed to authenticate with Infisical.
* Access Token TTL (default is `2592000` equivalent to 30 days): The lifetime for an acccess token in seconds. This value will be referenced at renewal time.
* Access Token Max TTL (default is `2592000` equivalent to 30 days): The maximum lifetime for an acccess token in seconds. This value will be referenced at renewal time.
* Access Token Max Number of Uses (default is `0`): The maximum number of times that an access token can be used; a value of `0` implies infinite number of uses.
* Access Token Trusted IPs: The IPs or CIDR ranges that access tokens can be used from. By default, each token is given the `0.0.0.0/0`, allowing usage from any network address.
2. Select the **Azure Client Secret** option.
Here's some more guidance on each field:
* Tenant ID: The [tenant ID](https://learn.microsoft.com/en-us/entra/fundamentals/how-to-find-tenant) for the Azure AD organization.
* Resource / Audience: The resource URL for the application registered in Azure AD. The value is expected to match the `aud` claim of the access token JWT later used in the login operation against Infisical. See the [resource](https://learn.microsoft.com/en-us/entra/identity/managed-identities-azure-resources/how-to-use-vm-token#get-a-token-using-http) parameter for how the audience is set when requesting a JWT access token from the Azure Instance Metadata Service (IMDS) endpoint. In most cases, this value should be `https://management.azure.com/` which is the default.
* Allowed Service Principal IDs: A comma-separated list of Azure AD service principal IDs that are allowed to authenticate with Infisical.
* Access Token TTL (default is `2592000` equivalent to 30 days): The lifetime for an acccess token in seconds. This value will be referenced at renewal time.
* Access Token Max TTL (default is `2592000` equivalent to 30 days): The maximum lifetime for an acccess token in seconds. This value will be referenced at renewal time.
* Access Token Max Number of Uses (default is `0`): The maximum number of times that an access token can be used; a value of `0` implies infinite number of uses.
* Access Token Trusted IPs: The IPs or CIDR ranges that access tokens can be used from. By default, each token is given the `0.0.0.0/0`, allowing usage from any network address.
2. Select the **Azure Client Secret** option.
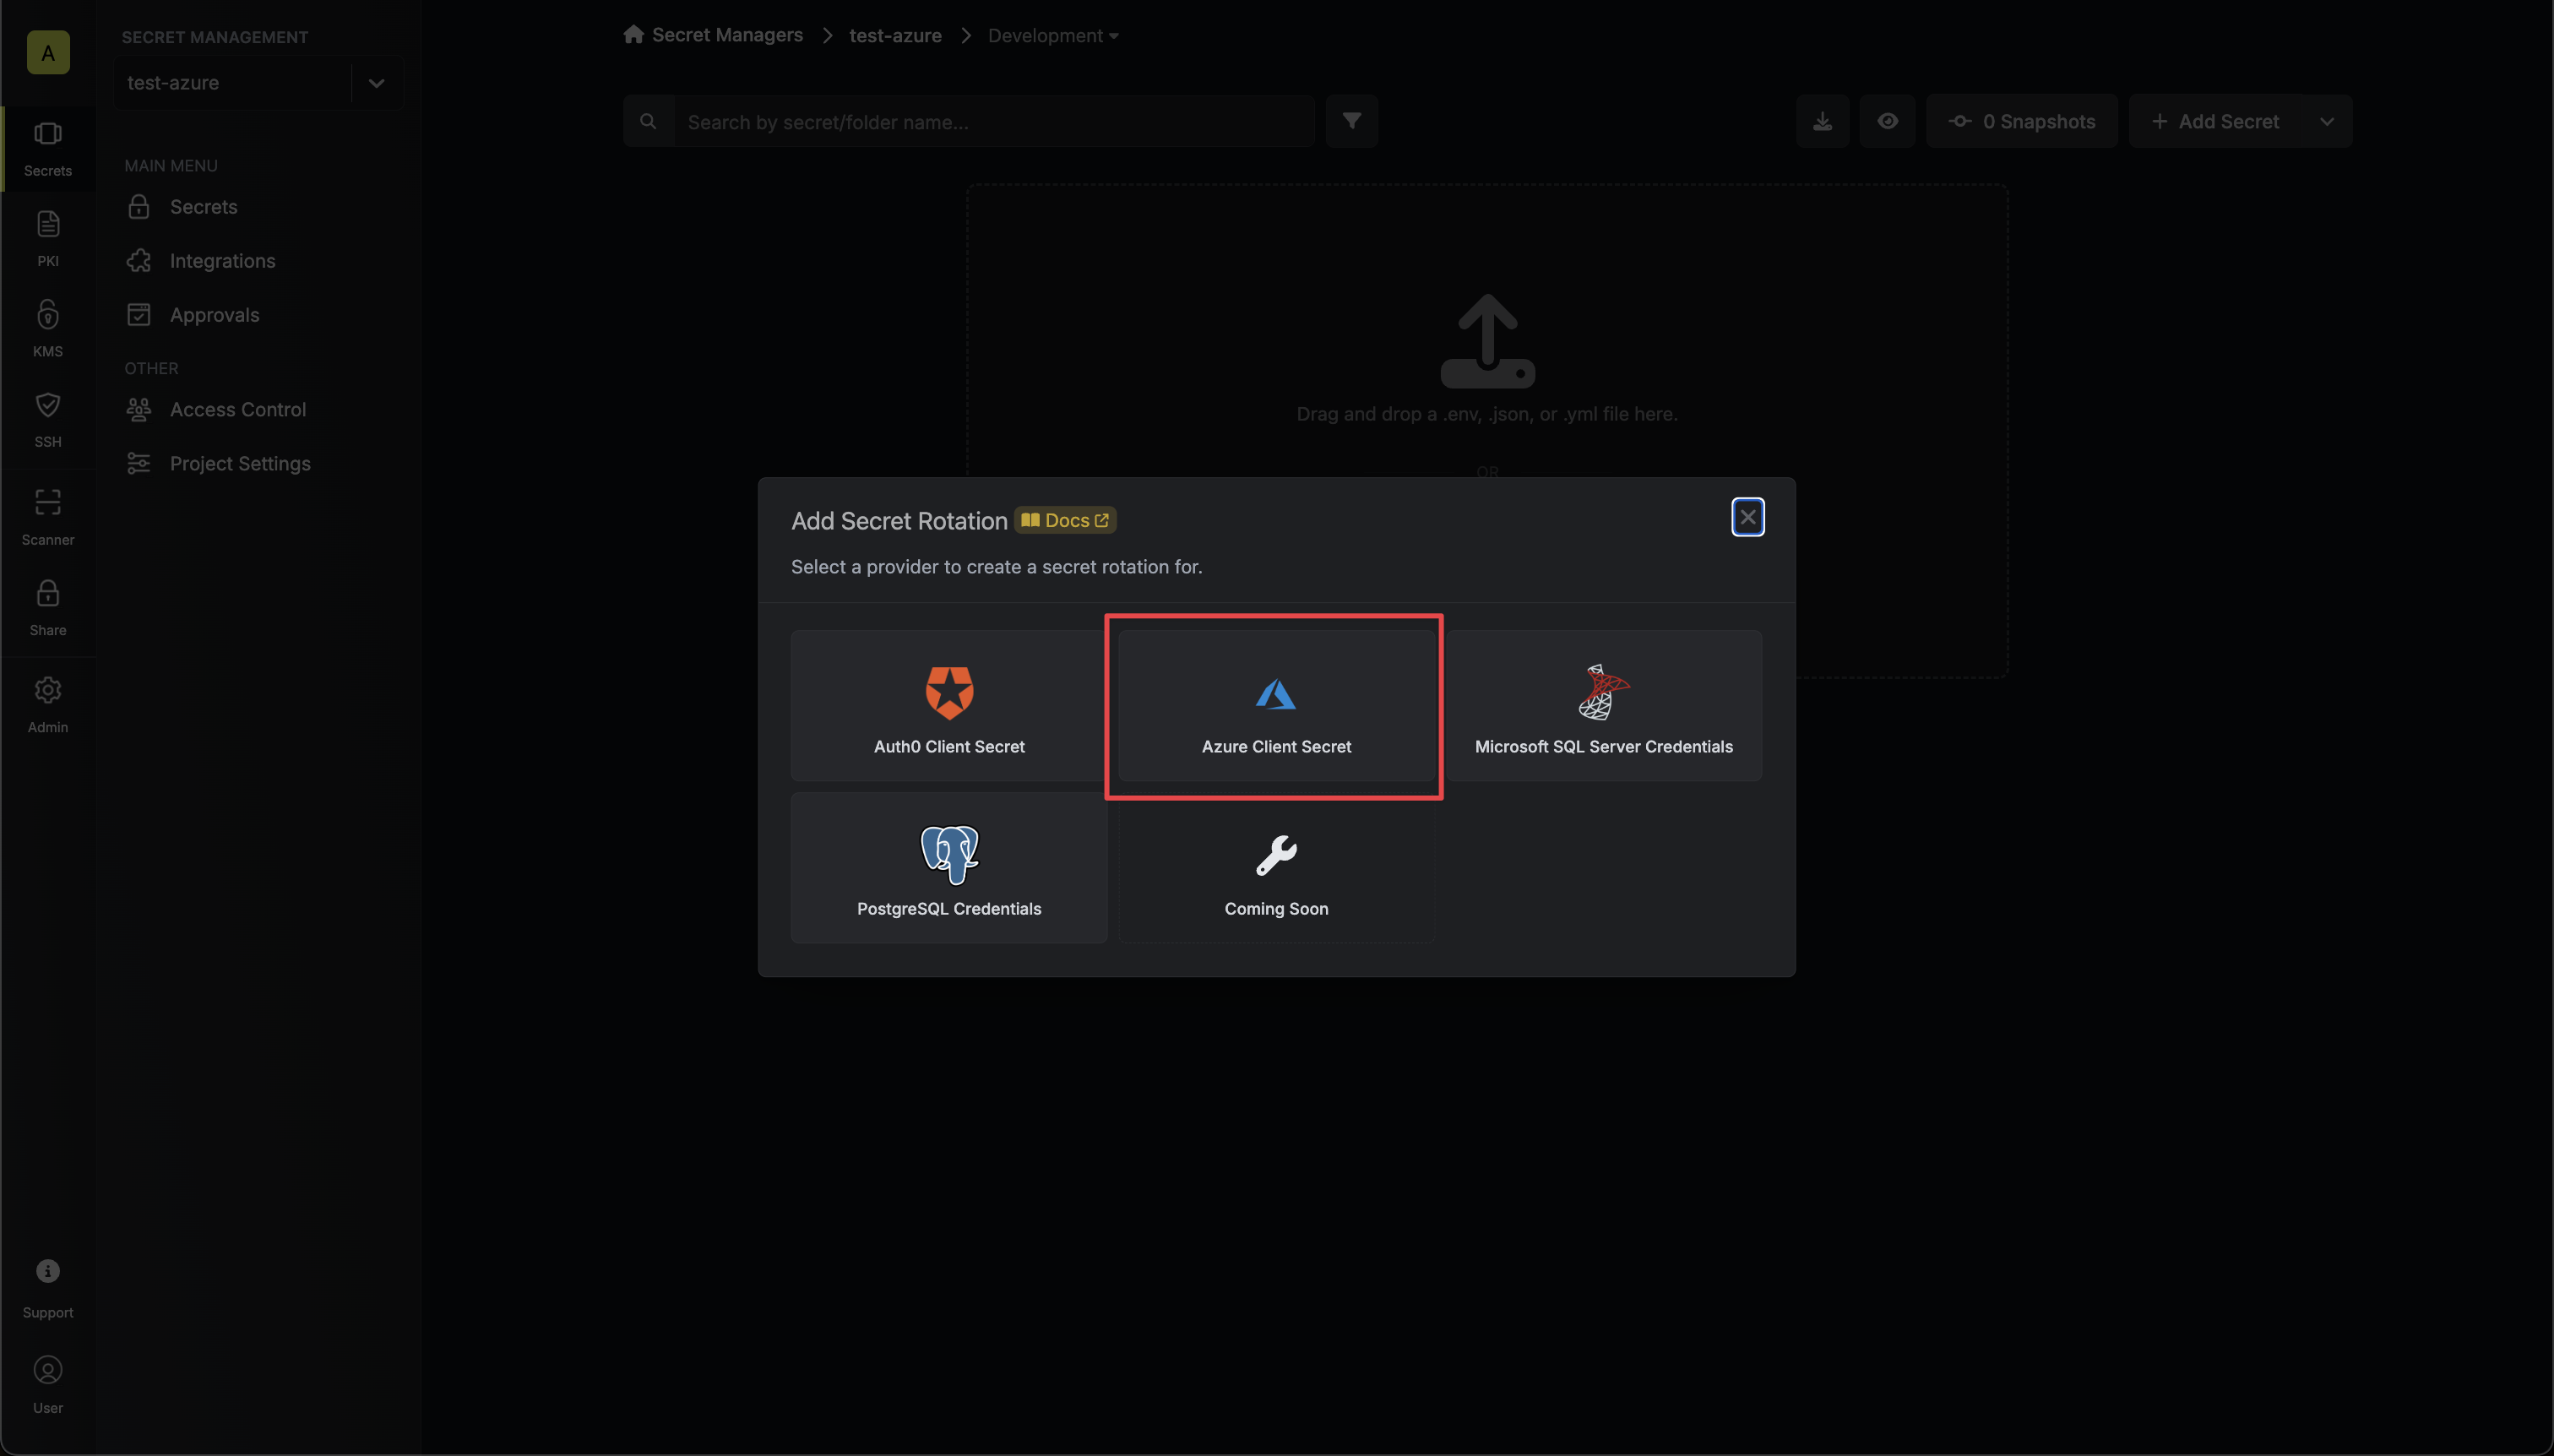 3. Select the **Azure Connection** to use and configure the rotation behavior. Then click **Next**.
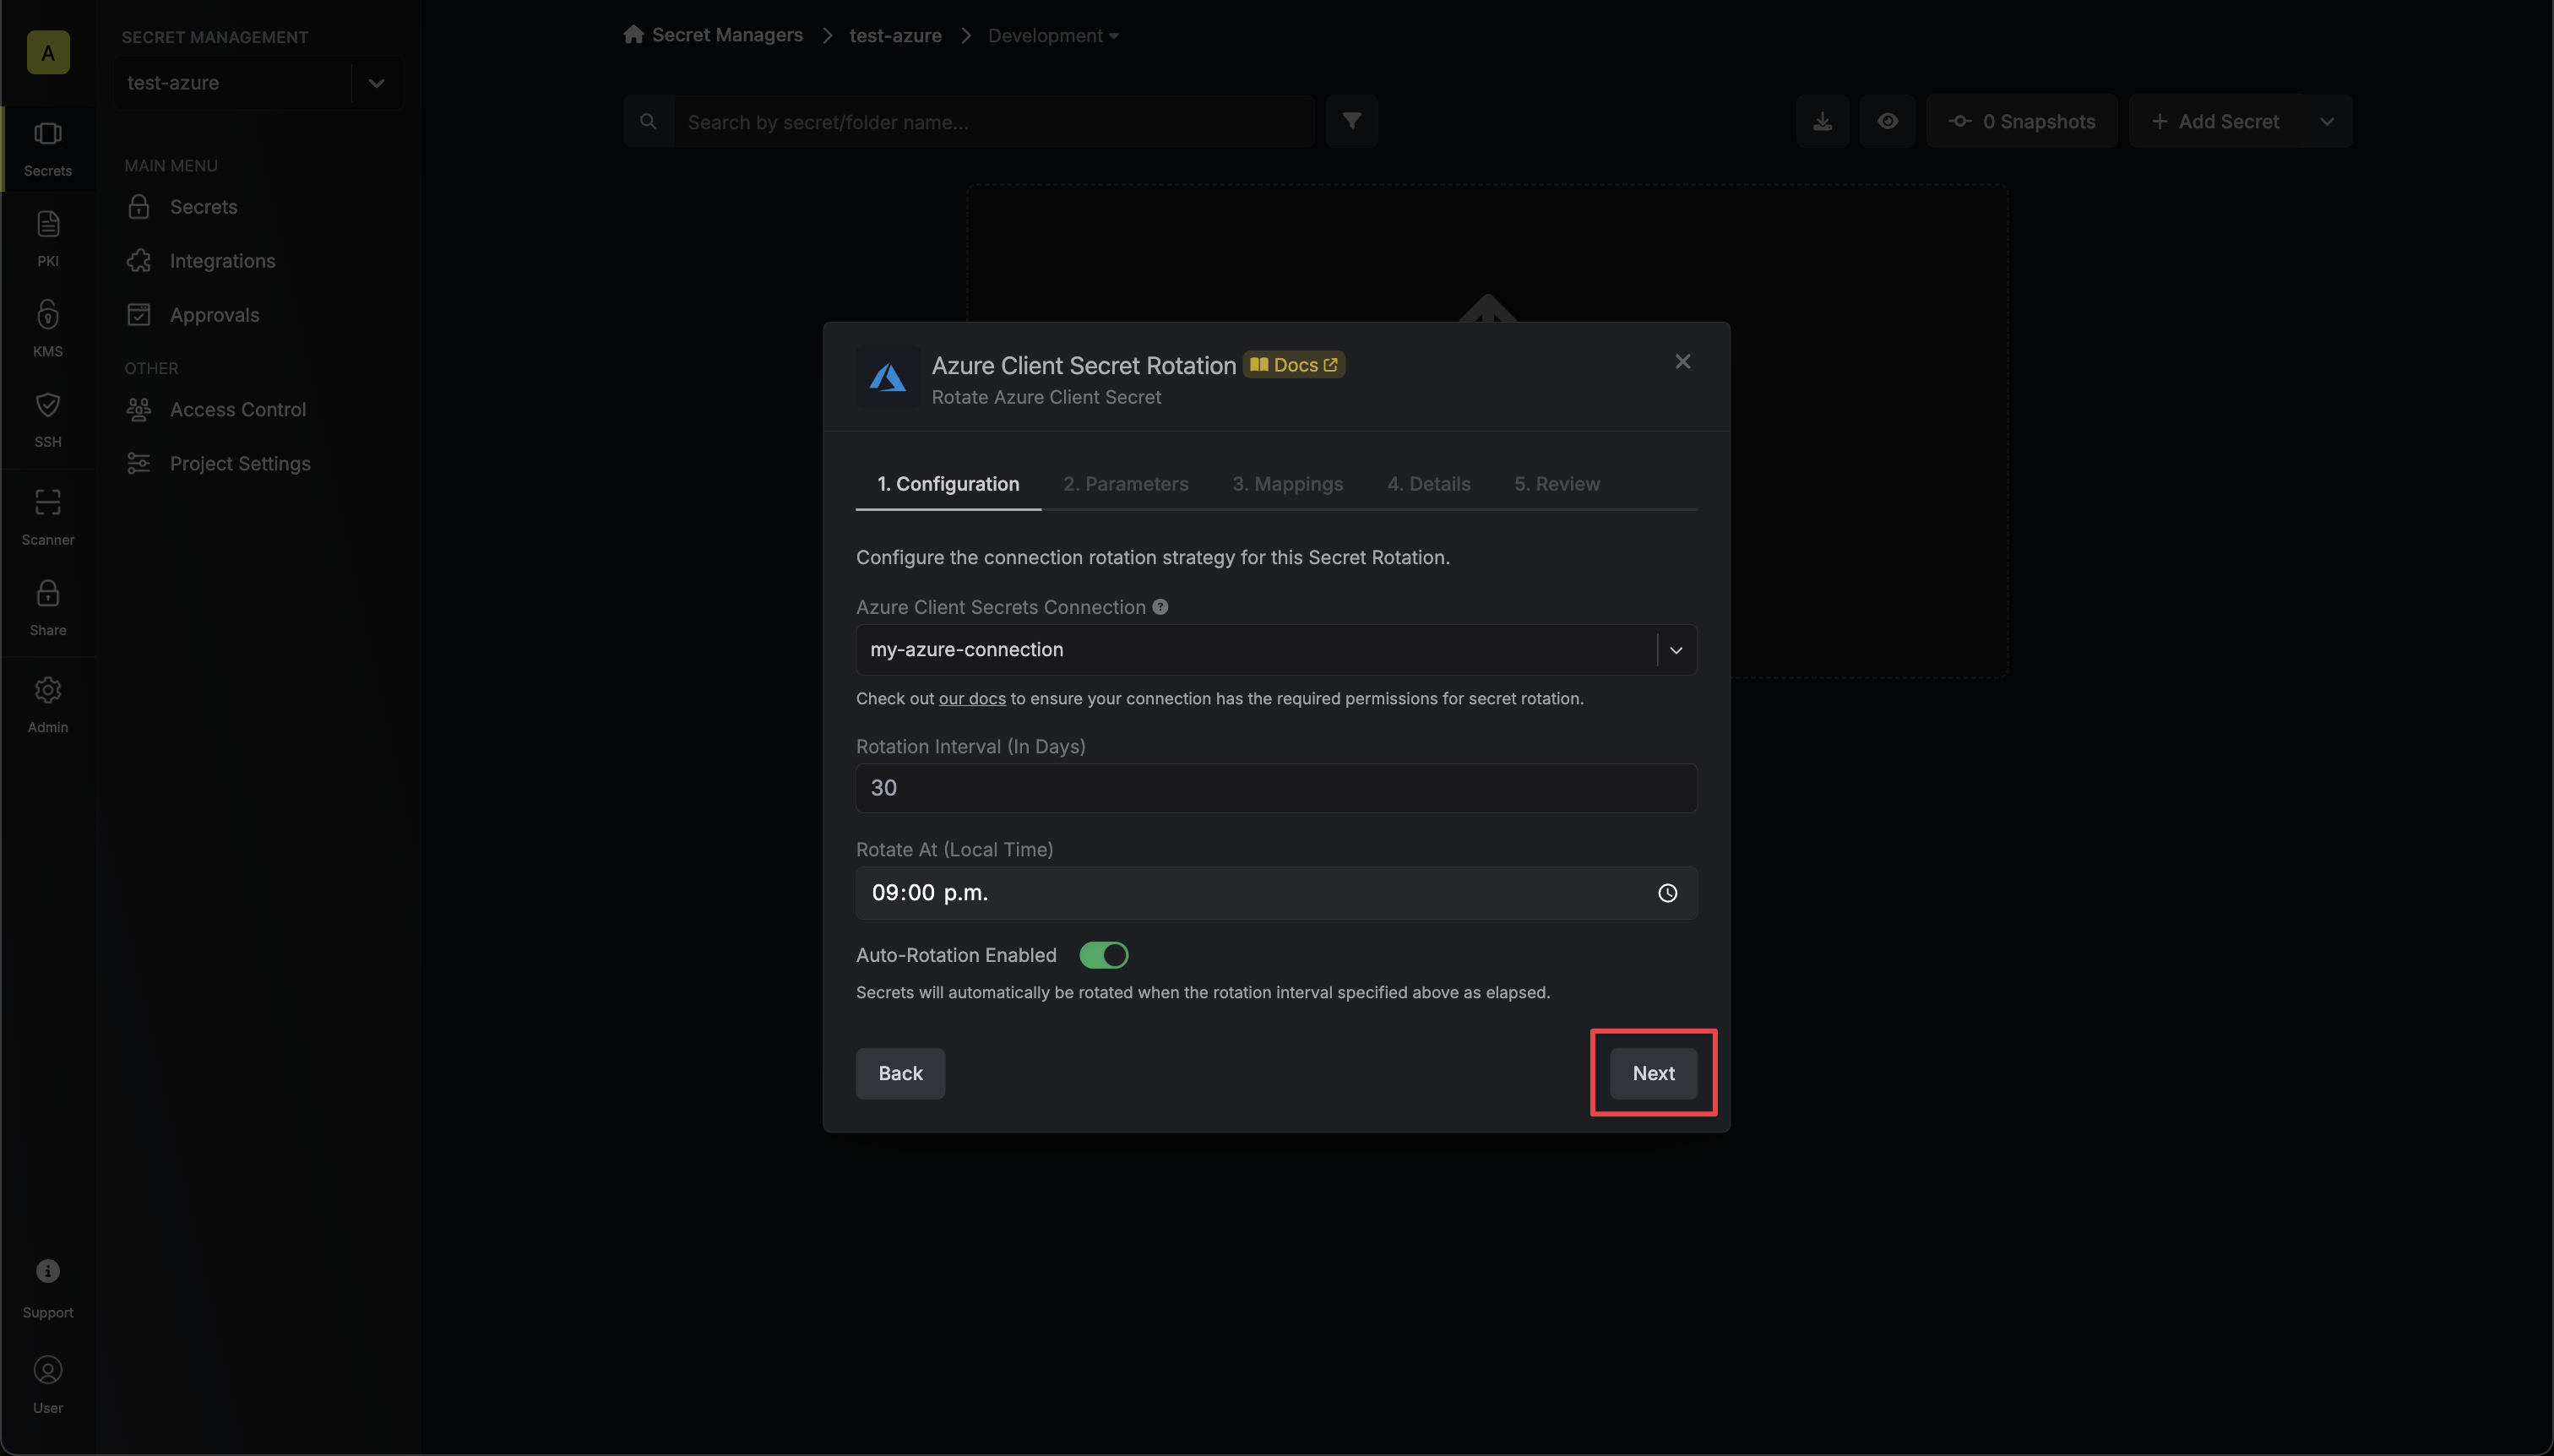 * **Azure Connection** - the connection that will perform the rotation of the specified application's Client Secret.
* **Rotation Interval** - the interval, in days, that once elapsed will trigger a rotation.
* **Rotate At** - the local time of day when rotation should occur once the interval has elapsed.
* **Auto-Rotation Enabled** - whether secrets should automatically be rotated once the rotation interval has elapsed. Disable this option to manually rotate secrets or pause secret rotation.
4. Select the Azure application whose Client Secret you want to rotate. Then click **Next**.
* **Azure Connection** - the connection that will perform the rotation of the specified application's Client Secret.
* **Rotation Interval** - the interval, in days, that once elapsed will trigger a rotation.
* **Rotate At** - the local time of day when rotation should occur once the interval has elapsed.
* **Auto-Rotation Enabled** - whether secrets should automatically be rotated once the rotation interval has elapsed. Disable this option to manually rotate secrets or pause secret rotation.
4. Select the Azure application whose Client Secret you want to rotate. Then click **Next**.
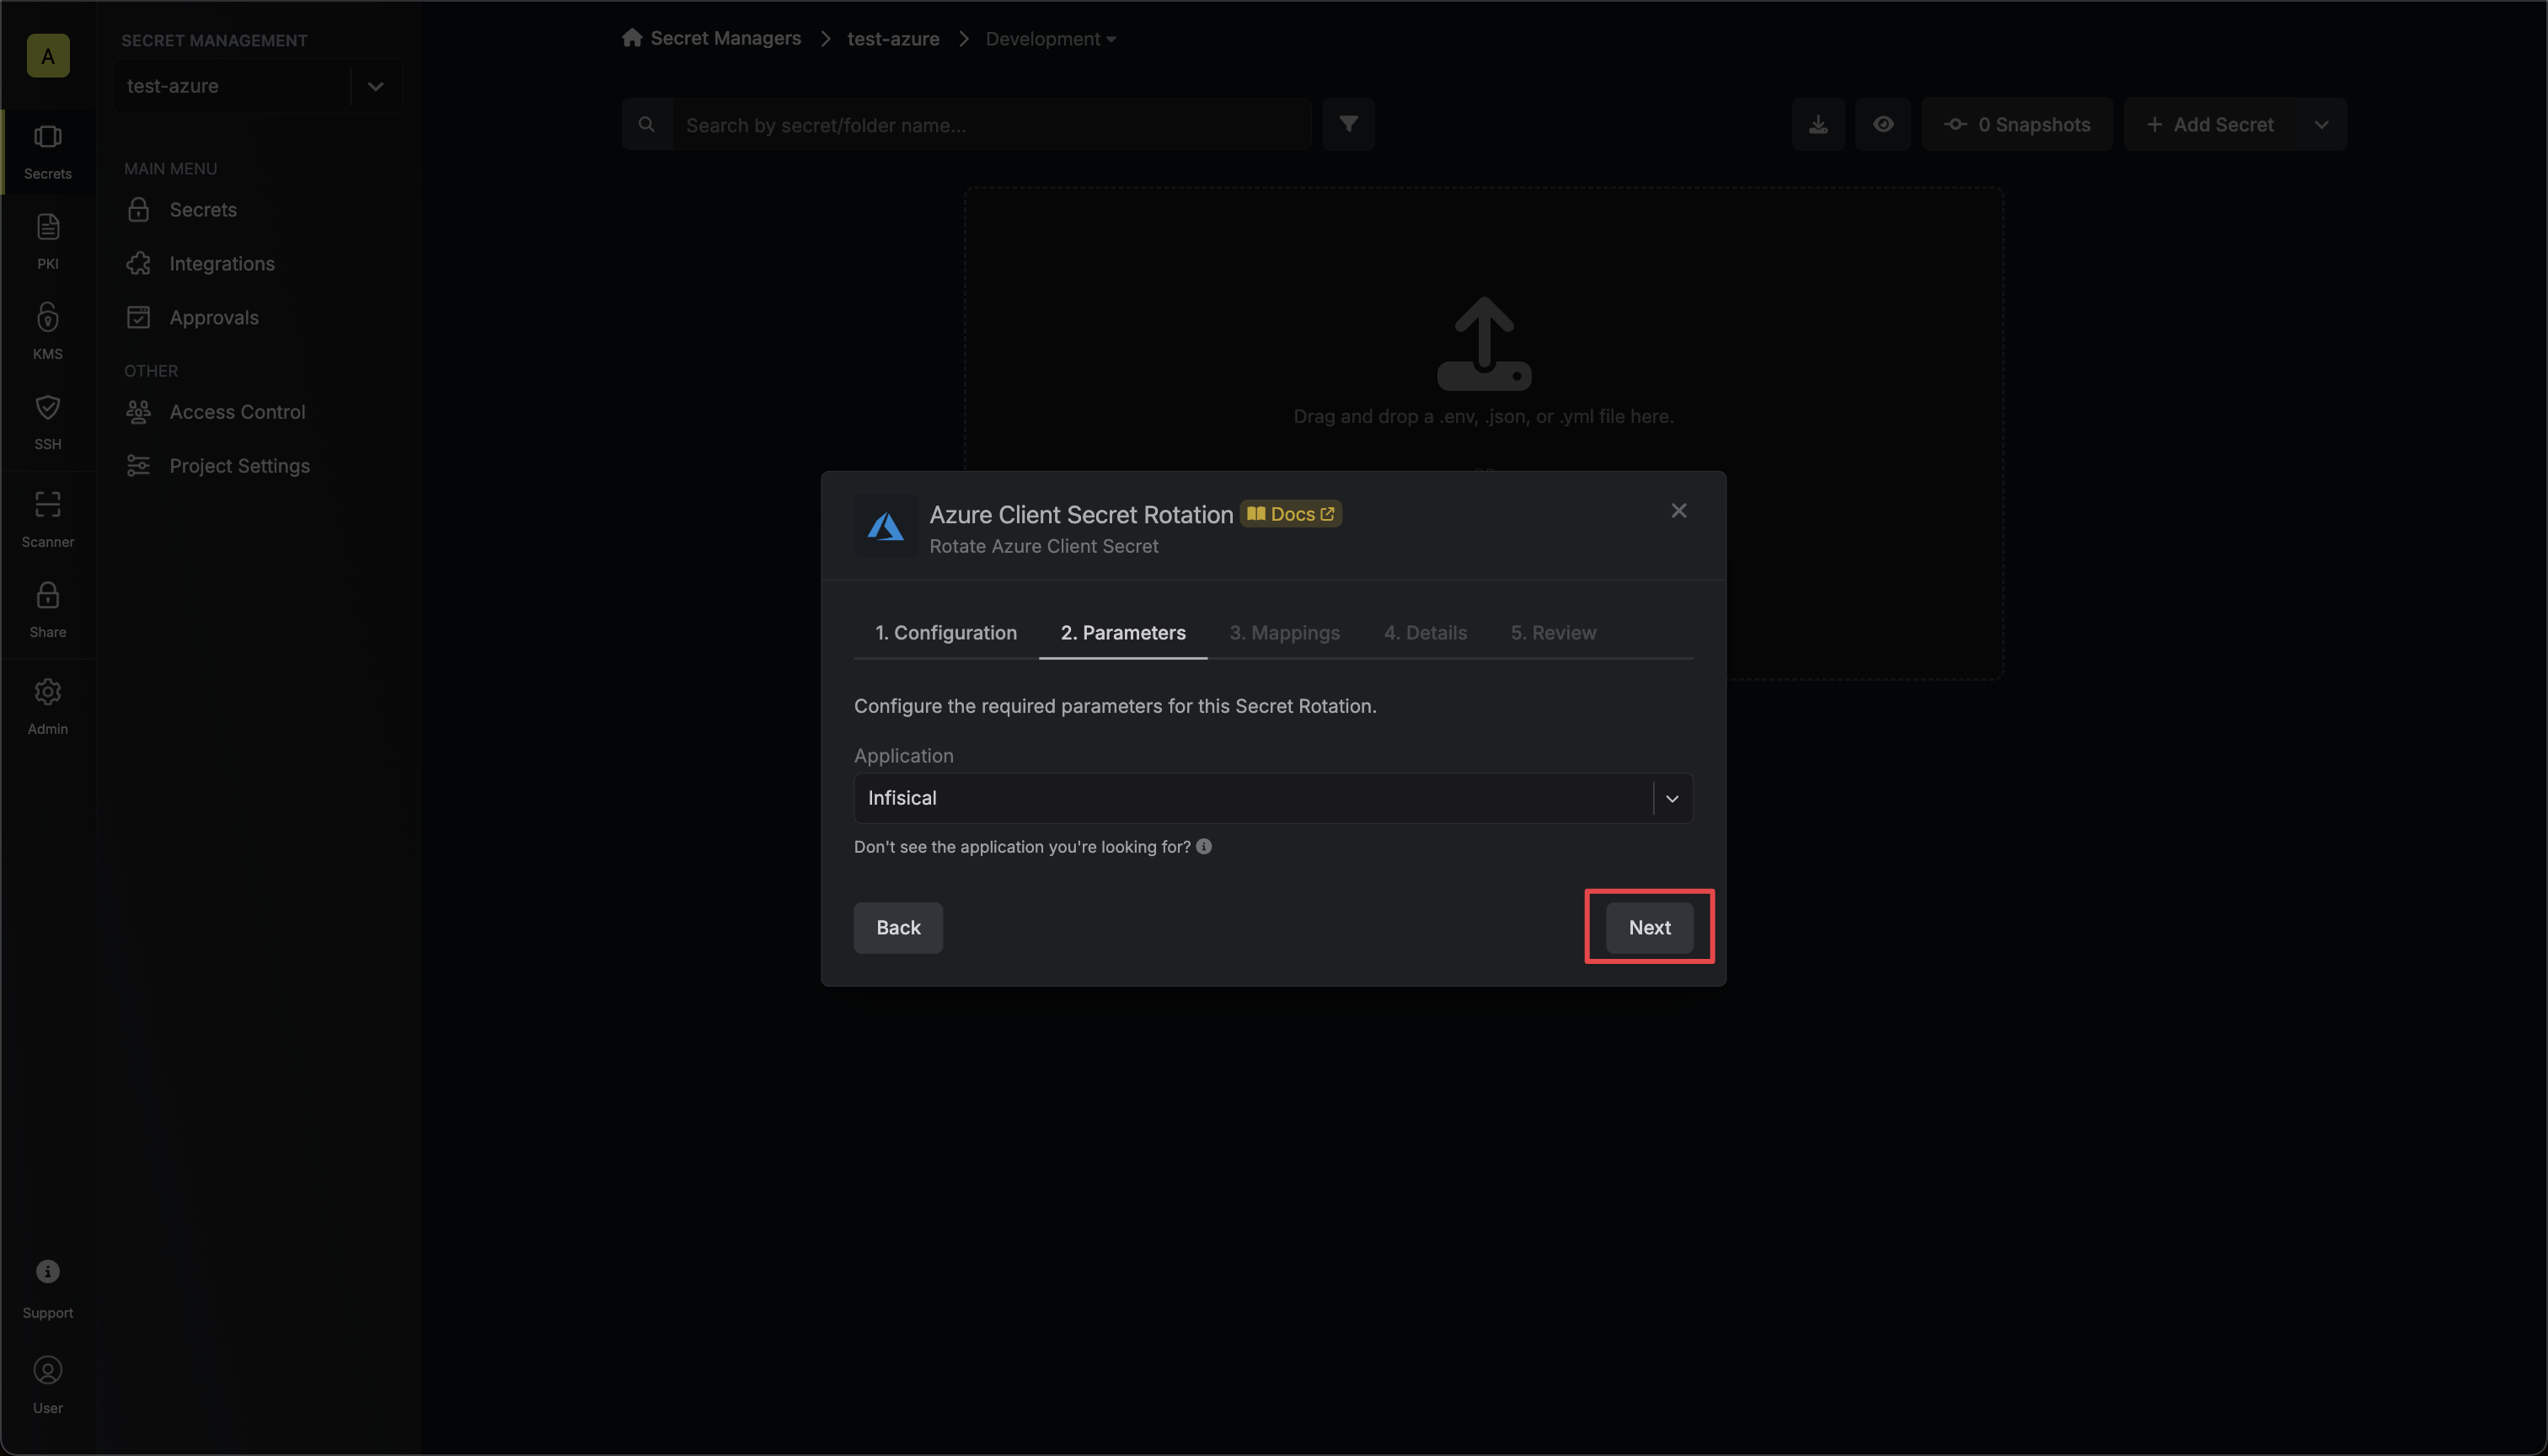 5. Specify the secret names that the client credentials should be mapped to. Then click **Next**.
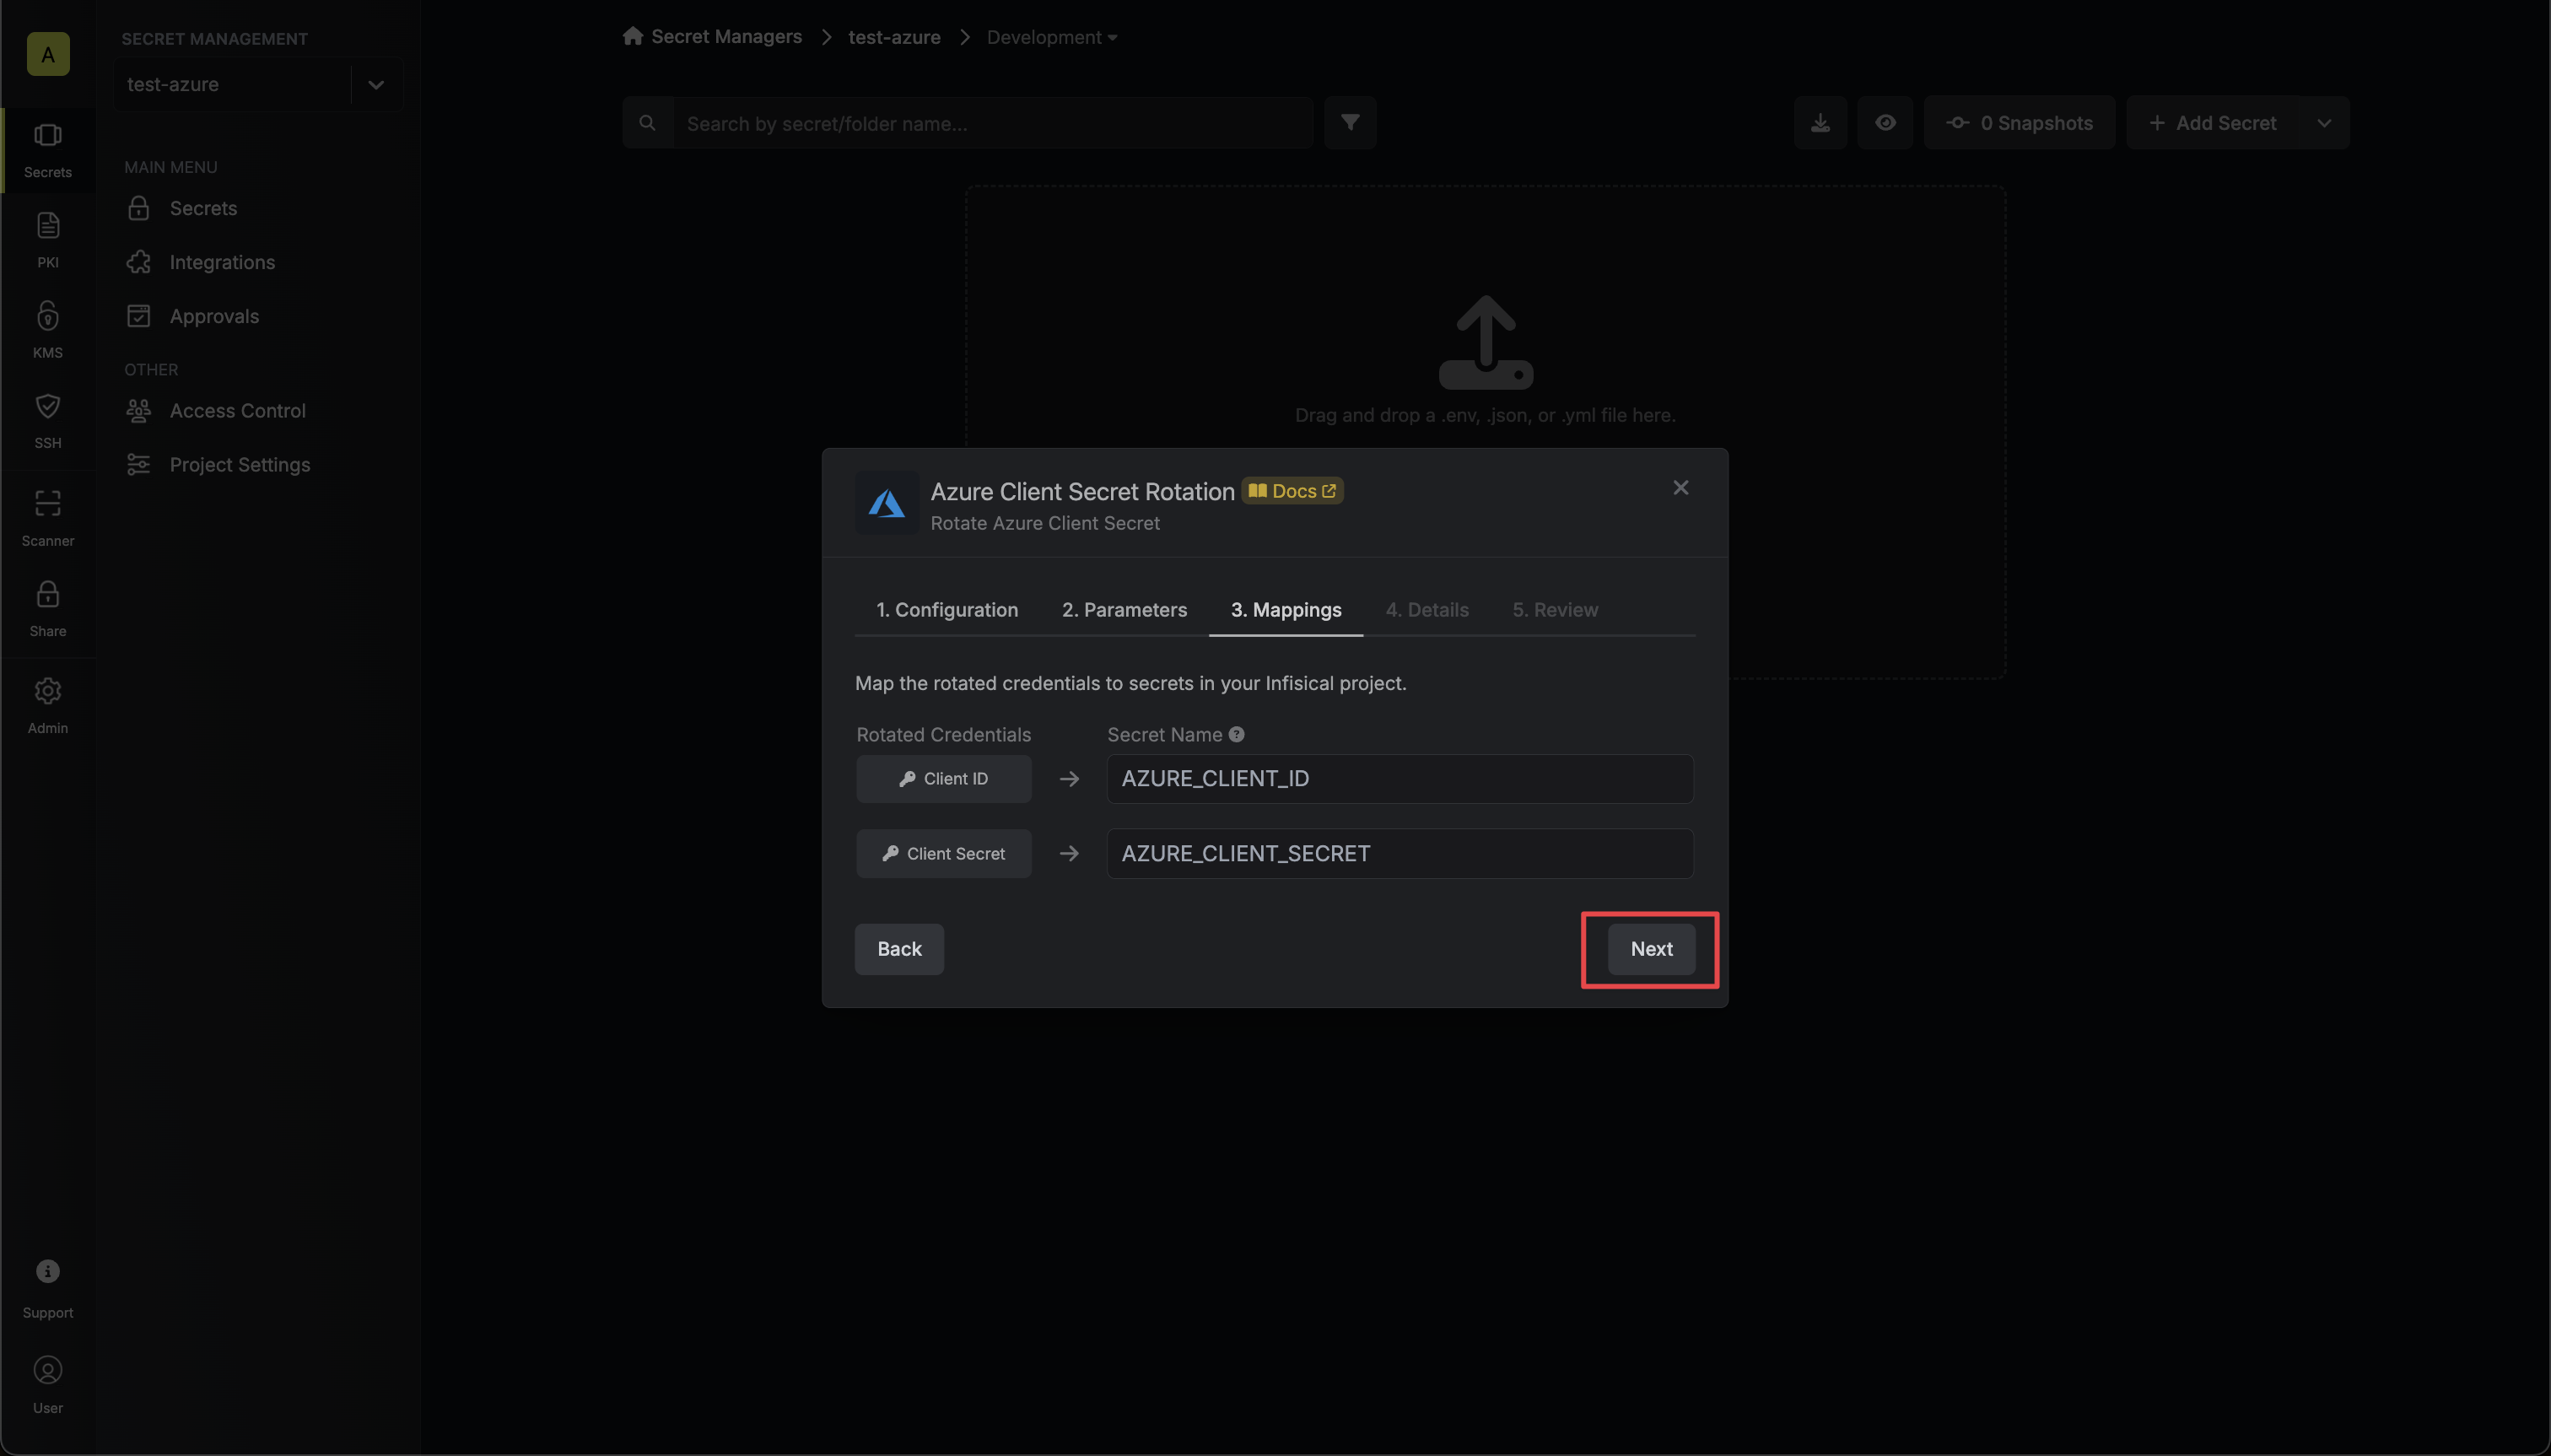 * **Client ID** - the name of the secret that the application Client ID will be mapped to.
* **Client Secret** - the name of the secret that the rotated Client Secret will be mapped to.
6. Give your rotation a name and description (optional). Then click **Next**.
* **Client ID** - the name of the secret that the application Client ID will be mapped to.
* **Client Secret** - the name of the secret that the rotated Client Secret will be mapped to.
6. Give your rotation a name and description (optional). Then click **Next**.
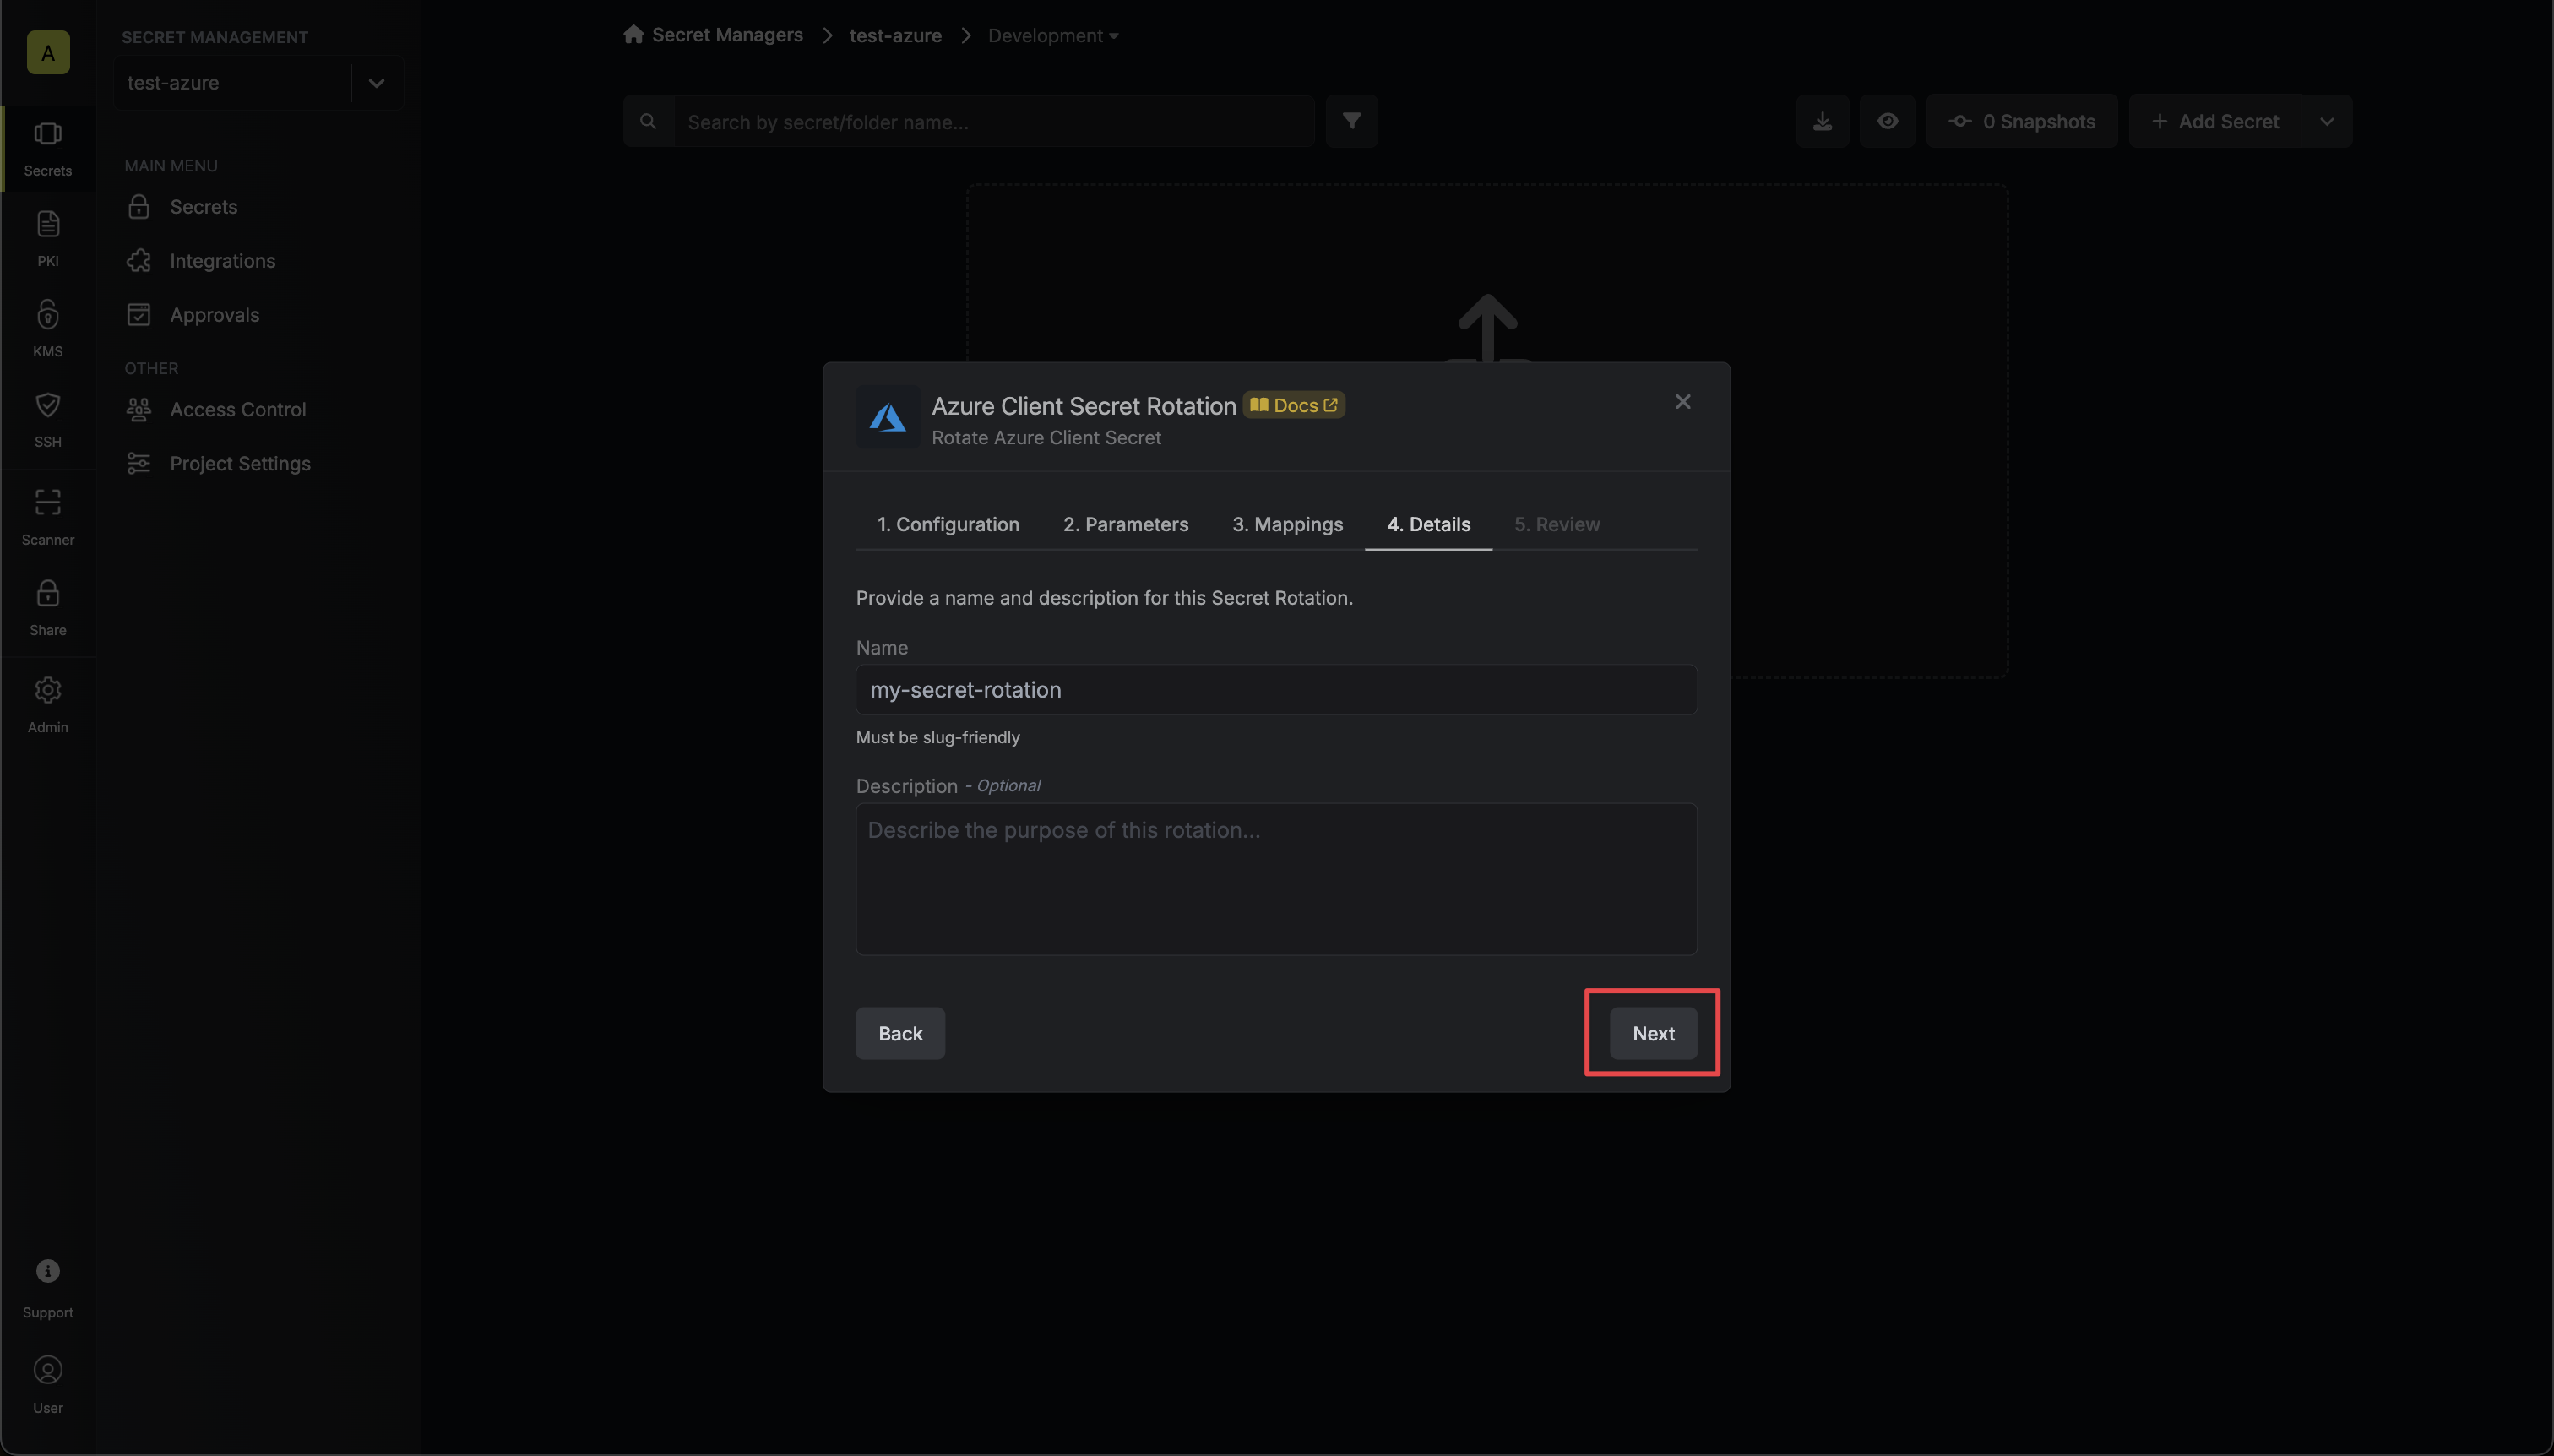 * **Name** - the name of the secret rotation configuration. Must be slug-friendly.
* **Description** (optional) - a description of this rotation configuration.
7. Review your configuration, then click **Create Secret Rotation**.
* **Name** - the name of the secret rotation configuration. Must be slug-friendly.
* **Description** (optional) - a description of this rotation configuration.
7. Review your configuration, then click **Create Secret Rotation**.
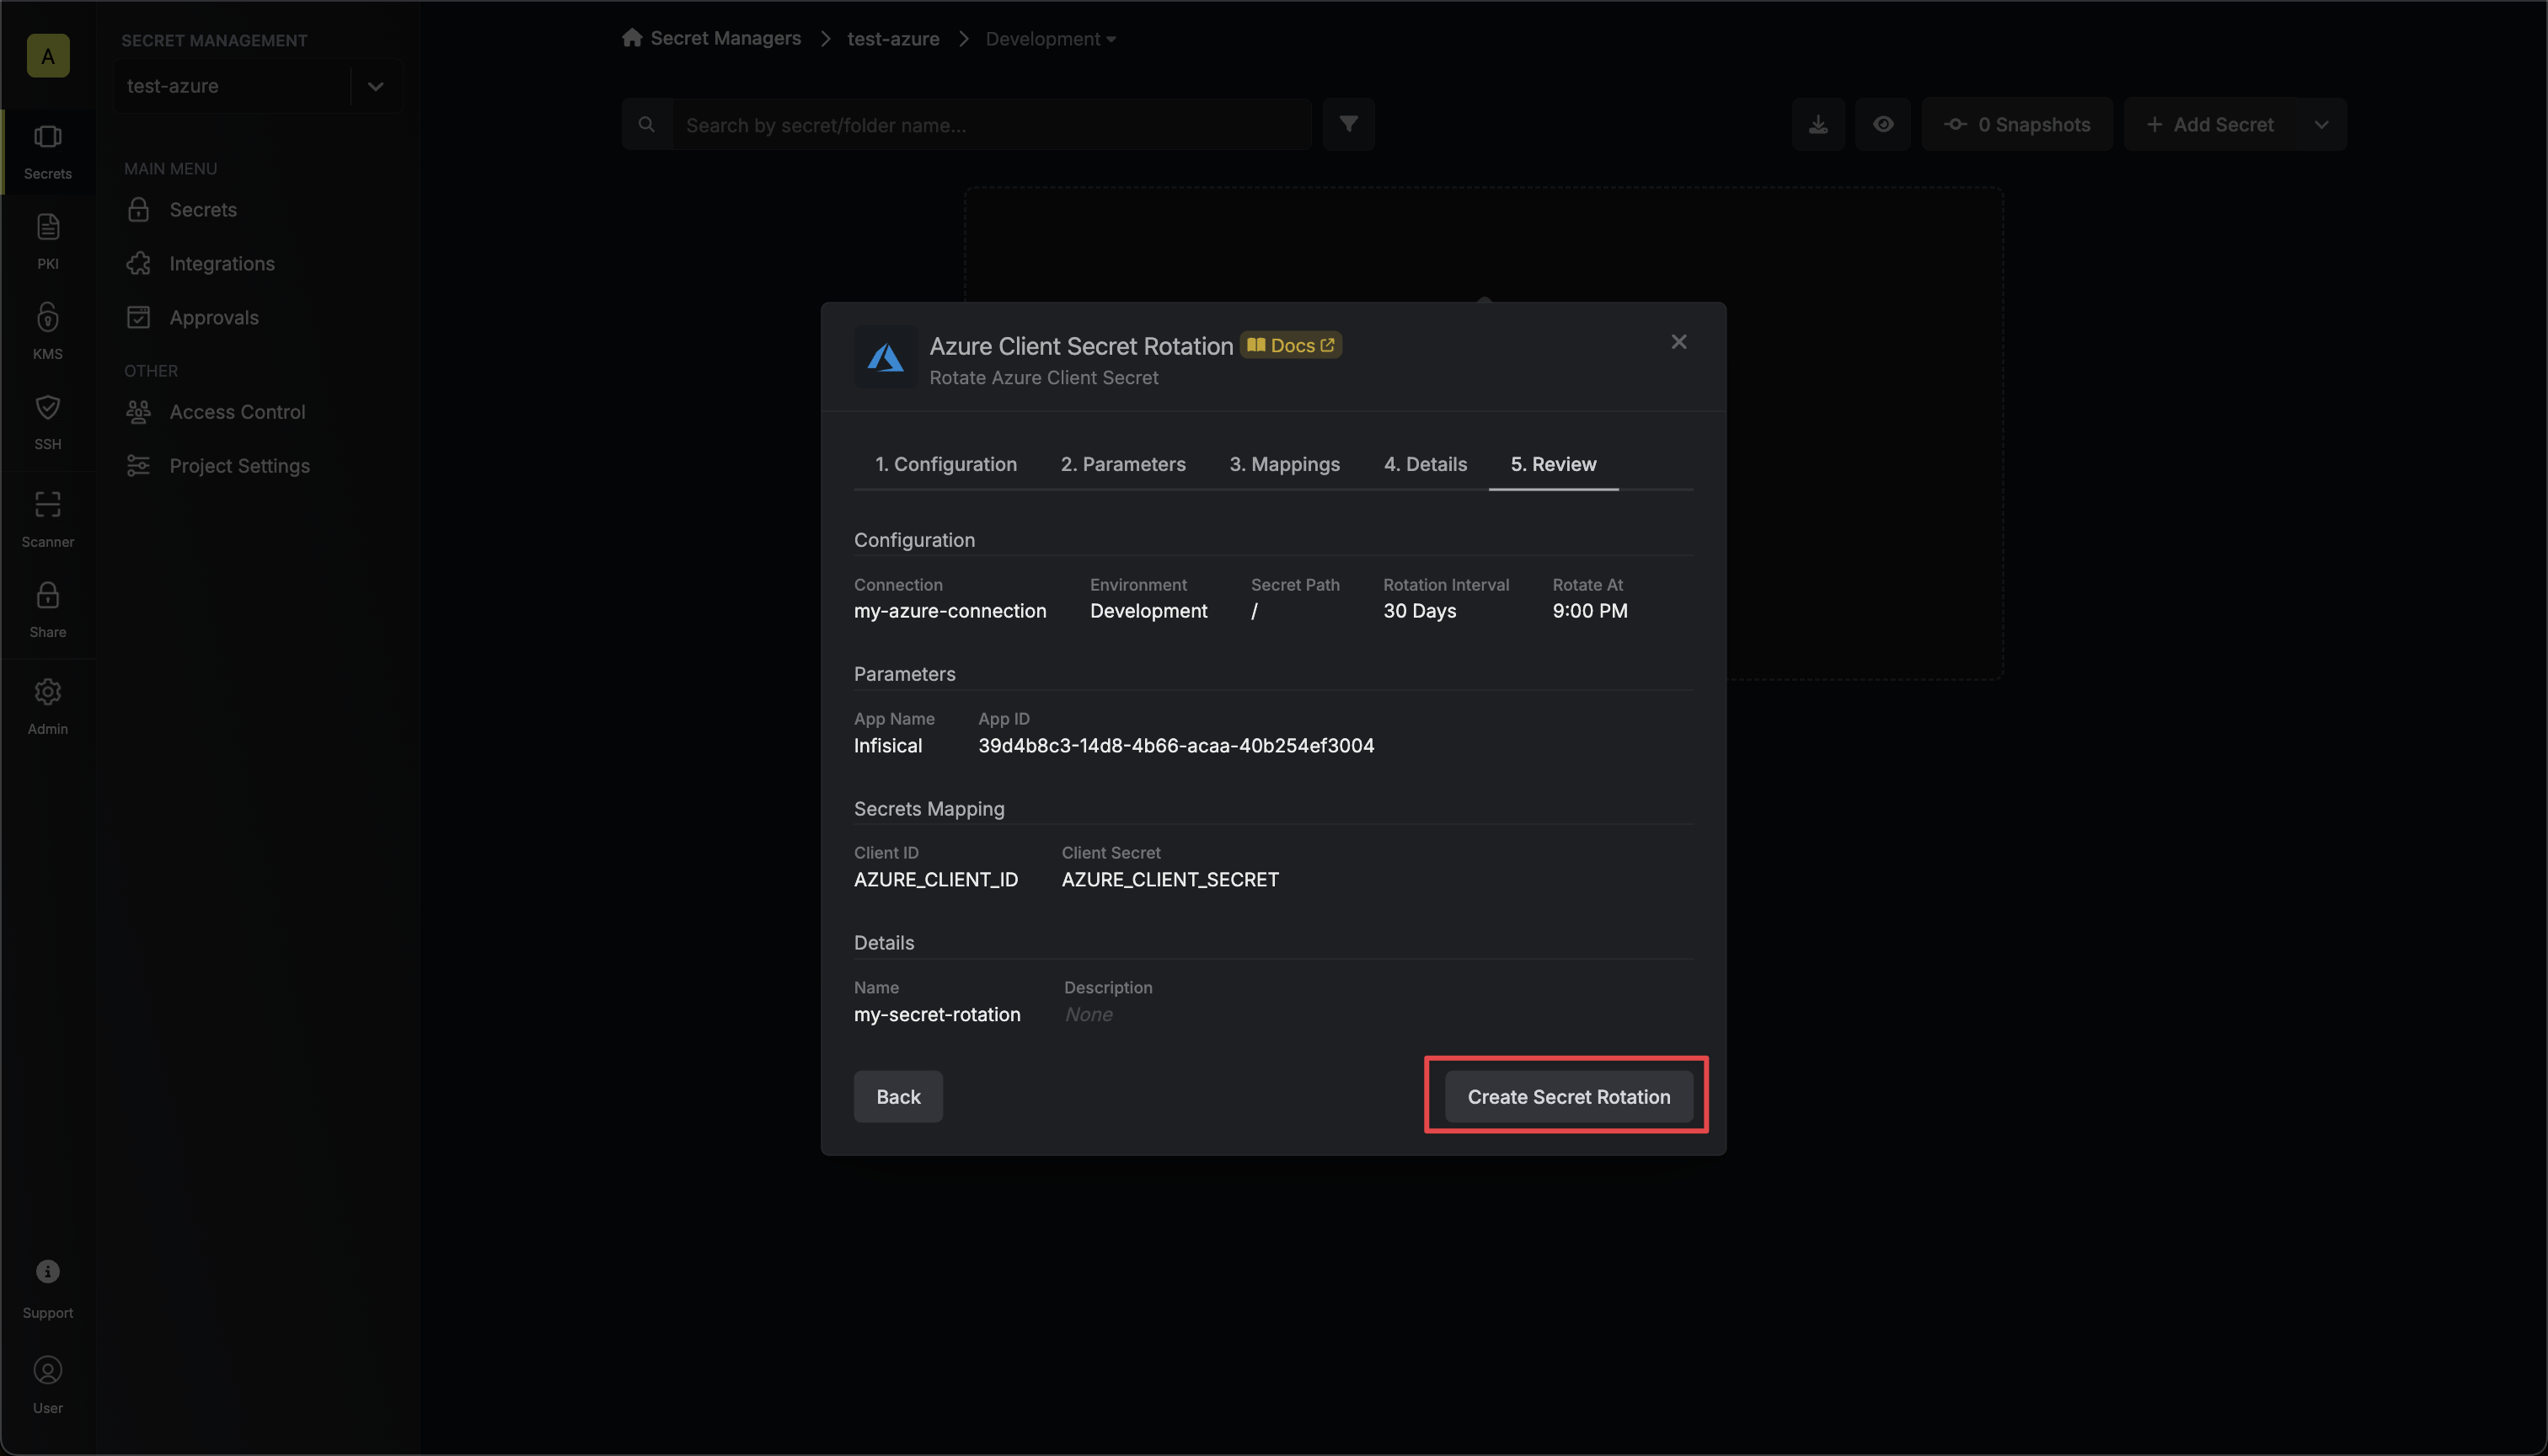 8. Your **Azure Client Secret** credentials are now available for use via the mapped secrets.

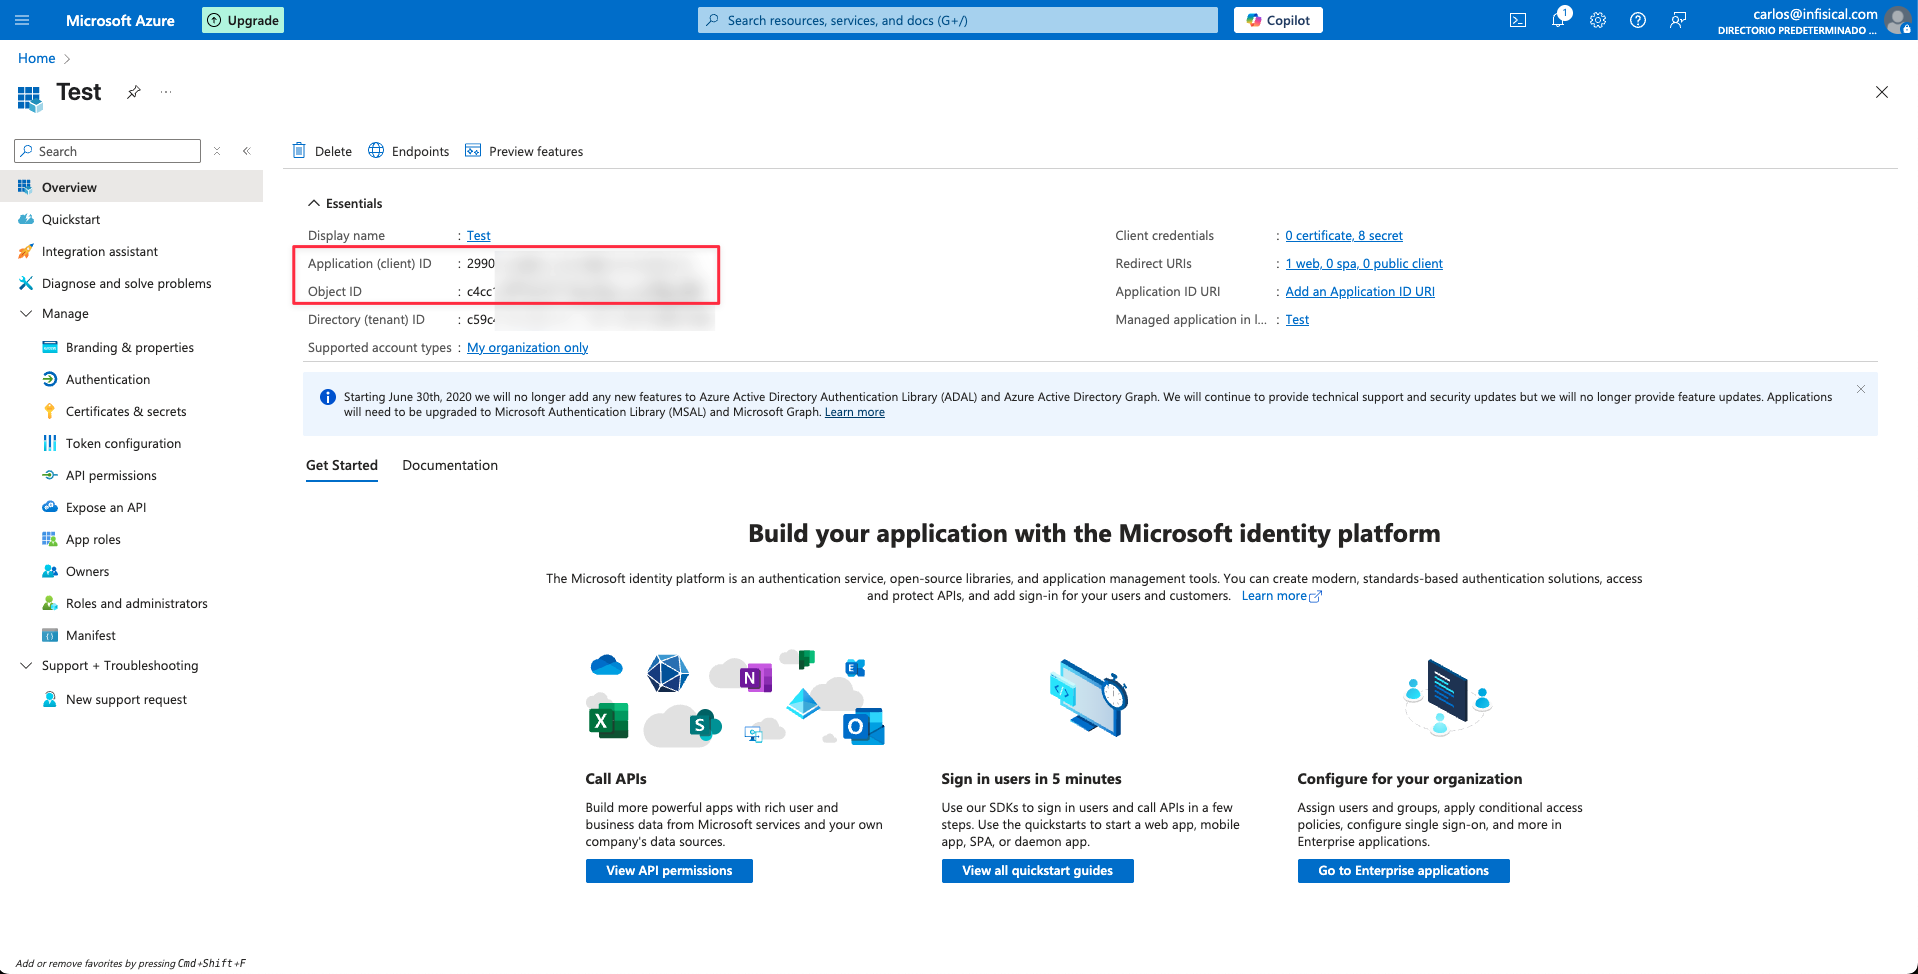 ### Sample request
```bash Request theme={"dark"}
curl --request POST \
--url https://us.infisical.com/api/v2/secret-rotations/azure-client-secret \
--header 'Content-Type: application/json' \
--data '{
"name": "my-azure-rotation",
"projectId": "3c90c3cc-0d44-4b50-8888-8dd25736052a",
"description": "my client secret rotation",
"connectionId": "3c90c3cc-0d44-4b50-8888-8dd25736052a",
"environment": "dev",
"secretPath": "/",
"isAutoRotationEnabled": true,
"rotationInterval": 30,
"rotateAtUtc": {
"hours": 0,
"minutes": 0
},
"parameters": {
"objectId": "...",
"clientId": "...",
"appName": "..."
},
"secretsMapping": {
"clientId": "AZURE_CLIENT_ID",
"clientSecret": "AZURE_CLIENT_SECRET"
}
}'
```
### Sample response
```bash Response theme={"dark"}
{
"secretRotation": {
"id": "3c90c3cc-0d44-4b50-8888-8dd25736052a",
"name": "my-azure-rotation",
"description": "my client secret rotation",
"secretsMapping": {
"clientId": "AZURE_CLIENT_ID",
"clientSecret": "AZURE_CLIENT_SECRET"
},
"isAutoRotationEnabled": true,
"activeIndex": 0,
"folderId": "3c90c3cc-0d44-4b50-8888-8dd25736052a",
"connectionId": "3c90c3cc-0d44-4b50-8888-8dd25736052a",
"createdAt": "2023-11-07T05:31:56Z",
"updatedAt": "2023-11-07T05:31:56Z",
"rotationInterval": 30,
"rotationStatus": "success",
"lastRotationAttemptedAt": "2023-11-07T05:31:56Z",
"lastRotatedAt": "2023-11-07T05:31:56Z",
"lastRotationJobId": "3c90c3cc-0d44-4b50-8888-8dd25736052a",
"nextRotationAt": "2023-11-07T05:31:56Z",
"connection": {
"app": "azure",
"name": "my-azure-connection",
"id": "3c90c3cc-0d44-4b50-8888-8dd25736052a"
},
"environment": {
"slug": "dev",
"name": "Development",
"id": "3c90c3cc-0d44-4b50-8888-8dd25736052a"
},
"projectId": "3c90c3cc-0d44-4b50-8888-8dd25736052a",
"folder": {
"id": "3c90c3cc-0d44-4b50-8888-8dd25736052a",
"path": "/"
},
"rotateAtUtc": {
"hours": 0,
"minutes": 0
},
"lastRotationMessage": null,
"type": "azure-client-secret",
"parameters": {
"objectId": "...",
"appName": "...",
"clientId": "..."
}
}
}
```
Create the application. As part of the form, set the **Redirect URI** to `https://your-domain.com/organization/app-connections/azure/oauth/callback`.
### Sample request
```bash Request theme={"dark"}
curl --request POST \
--url https://us.infisical.com/api/v2/secret-rotations/azure-client-secret \
--header 'Content-Type: application/json' \
--data '{
"name": "my-azure-rotation",
"projectId": "3c90c3cc-0d44-4b50-8888-8dd25736052a",
"description": "my client secret rotation",
"connectionId": "3c90c3cc-0d44-4b50-8888-8dd25736052a",
"environment": "dev",
"secretPath": "/",
"isAutoRotationEnabled": true,
"rotationInterval": 30,
"rotateAtUtc": {
"hours": 0,
"minutes": 0
},
"parameters": {
"objectId": "...",
"clientId": "...",
"appName": "..."
},
"secretsMapping": {
"clientId": "AZURE_CLIENT_ID",
"clientSecret": "AZURE_CLIENT_SECRET"
}
}'
```
### Sample response
```bash Response theme={"dark"}
{
"secretRotation": {
"id": "3c90c3cc-0d44-4b50-8888-8dd25736052a",
"name": "my-azure-rotation",
"description": "my client secret rotation",
"secretsMapping": {
"clientId": "AZURE_CLIENT_ID",
"clientSecret": "AZURE_CLIENT_SECRET"
},
"isAutoRotationEnabled": true,
"activeIndex": 0,
"folderId": "3c90c3cc-0d44-4b50-8888-8dd25736052a",
"connectionId": "3c90c3cc-0d44-4b50-8888-8dd25736052a",
"createdAt": "2023-11-07T05:31:56Z",
"updatedAt": "2023-11-07T05:31:56Z",
"rotationInterval": 30,
"rotationStatus": "success",
"lastRotationAttemptedAt": "2023-11-07T05:31:56Z",
"lastRotatedAt": "2023-11-07T05:31:56Z",
"lastRotationJobId": "3c90c3cc-0d44-4b50-8888-8dd25736052a",
"nextRotationAt": "2023-11-07T05:31:56Z",
"connection": {
"app": "azure",
"name": "my-azure-connection",
"id": "3c90c3cc-0d44-4b50-8888-8dd25736052a"
},
"environment": {
"slug": "dev",
"name": "Development",
"id": "3c90c3cc-0d44-4b50-8888-8dd25736052a"
},
"projectId": "3c90c3cc-0d44-4b50-8888-8dd25736052a",
"folder": {
"id": "3c90c3cc-0d44-4b50-8888-8dd25736052a",
"path": "/"
},
"rotateAtUtc": {
"hours": 0,
"minutes": 0
},
"lastRotationMessage": null,
"type": "azure-client-secret",
"parameters": {
"objectId": "...",
"appName": "...",
"clientId": "..."
}
}
}
```
Create the application. As part of the form, set the **Redirect URI** to `https://your-domain.com/organization/app-connections/azure/oauth/callback`.
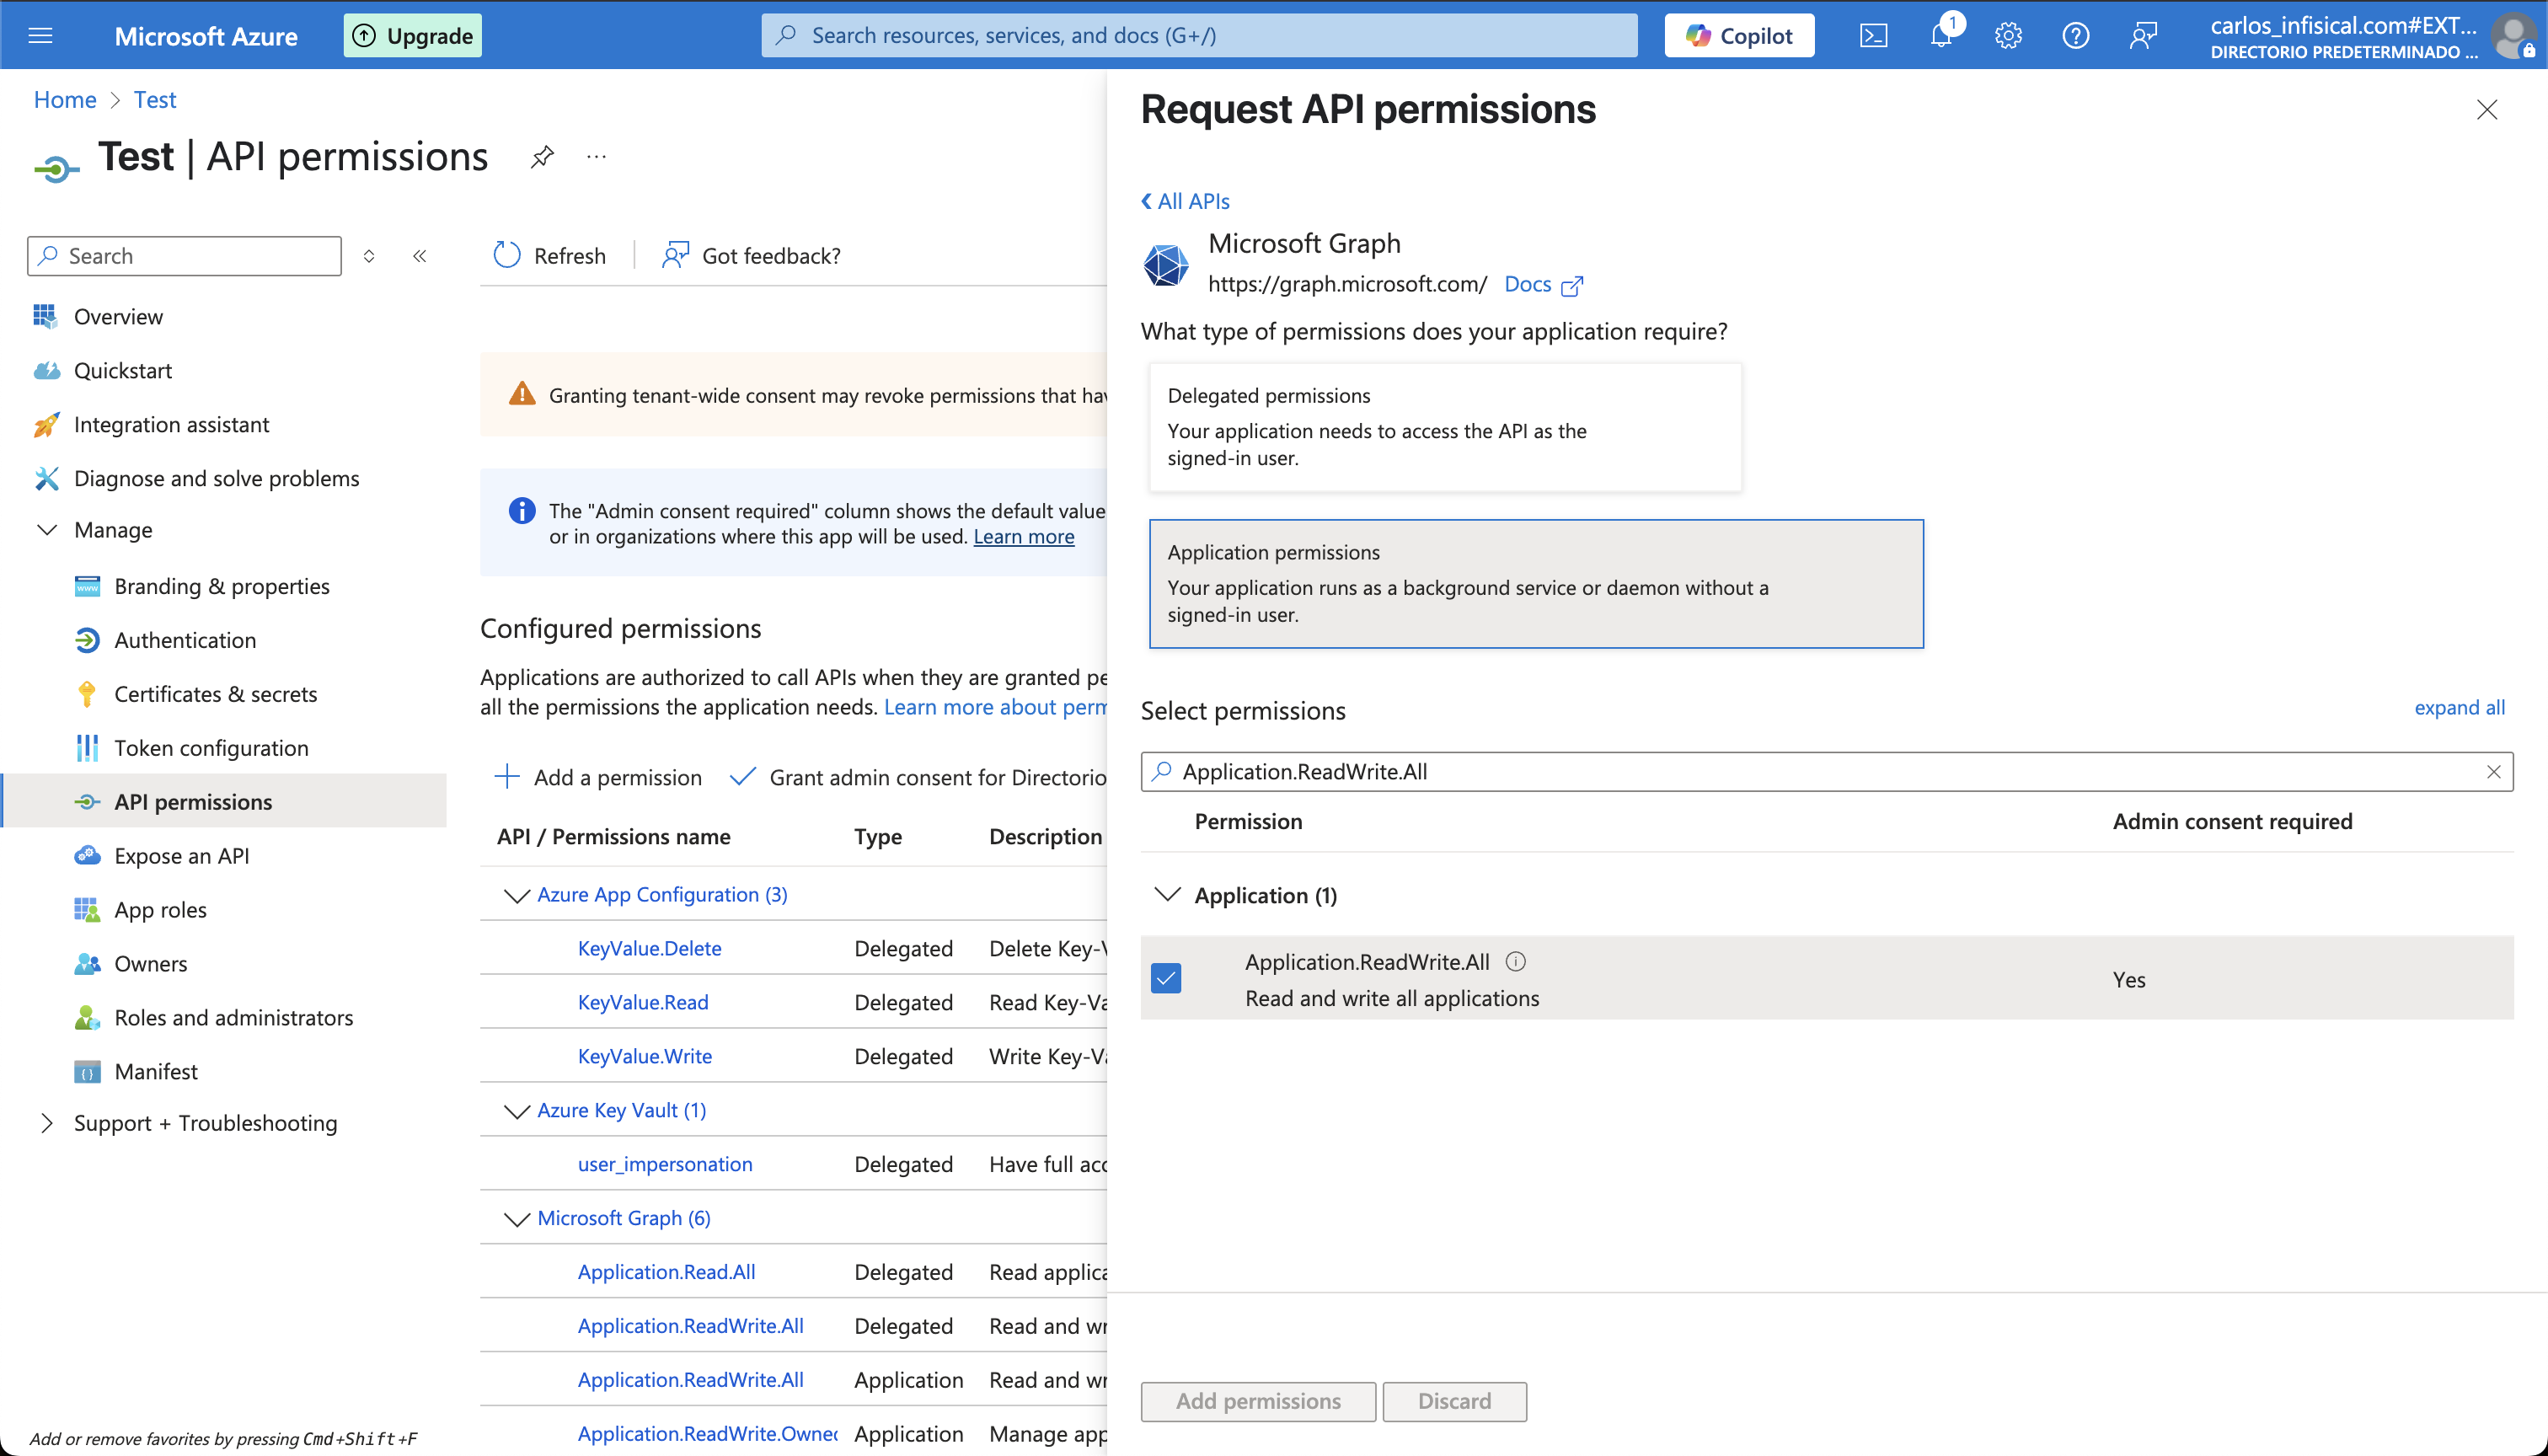
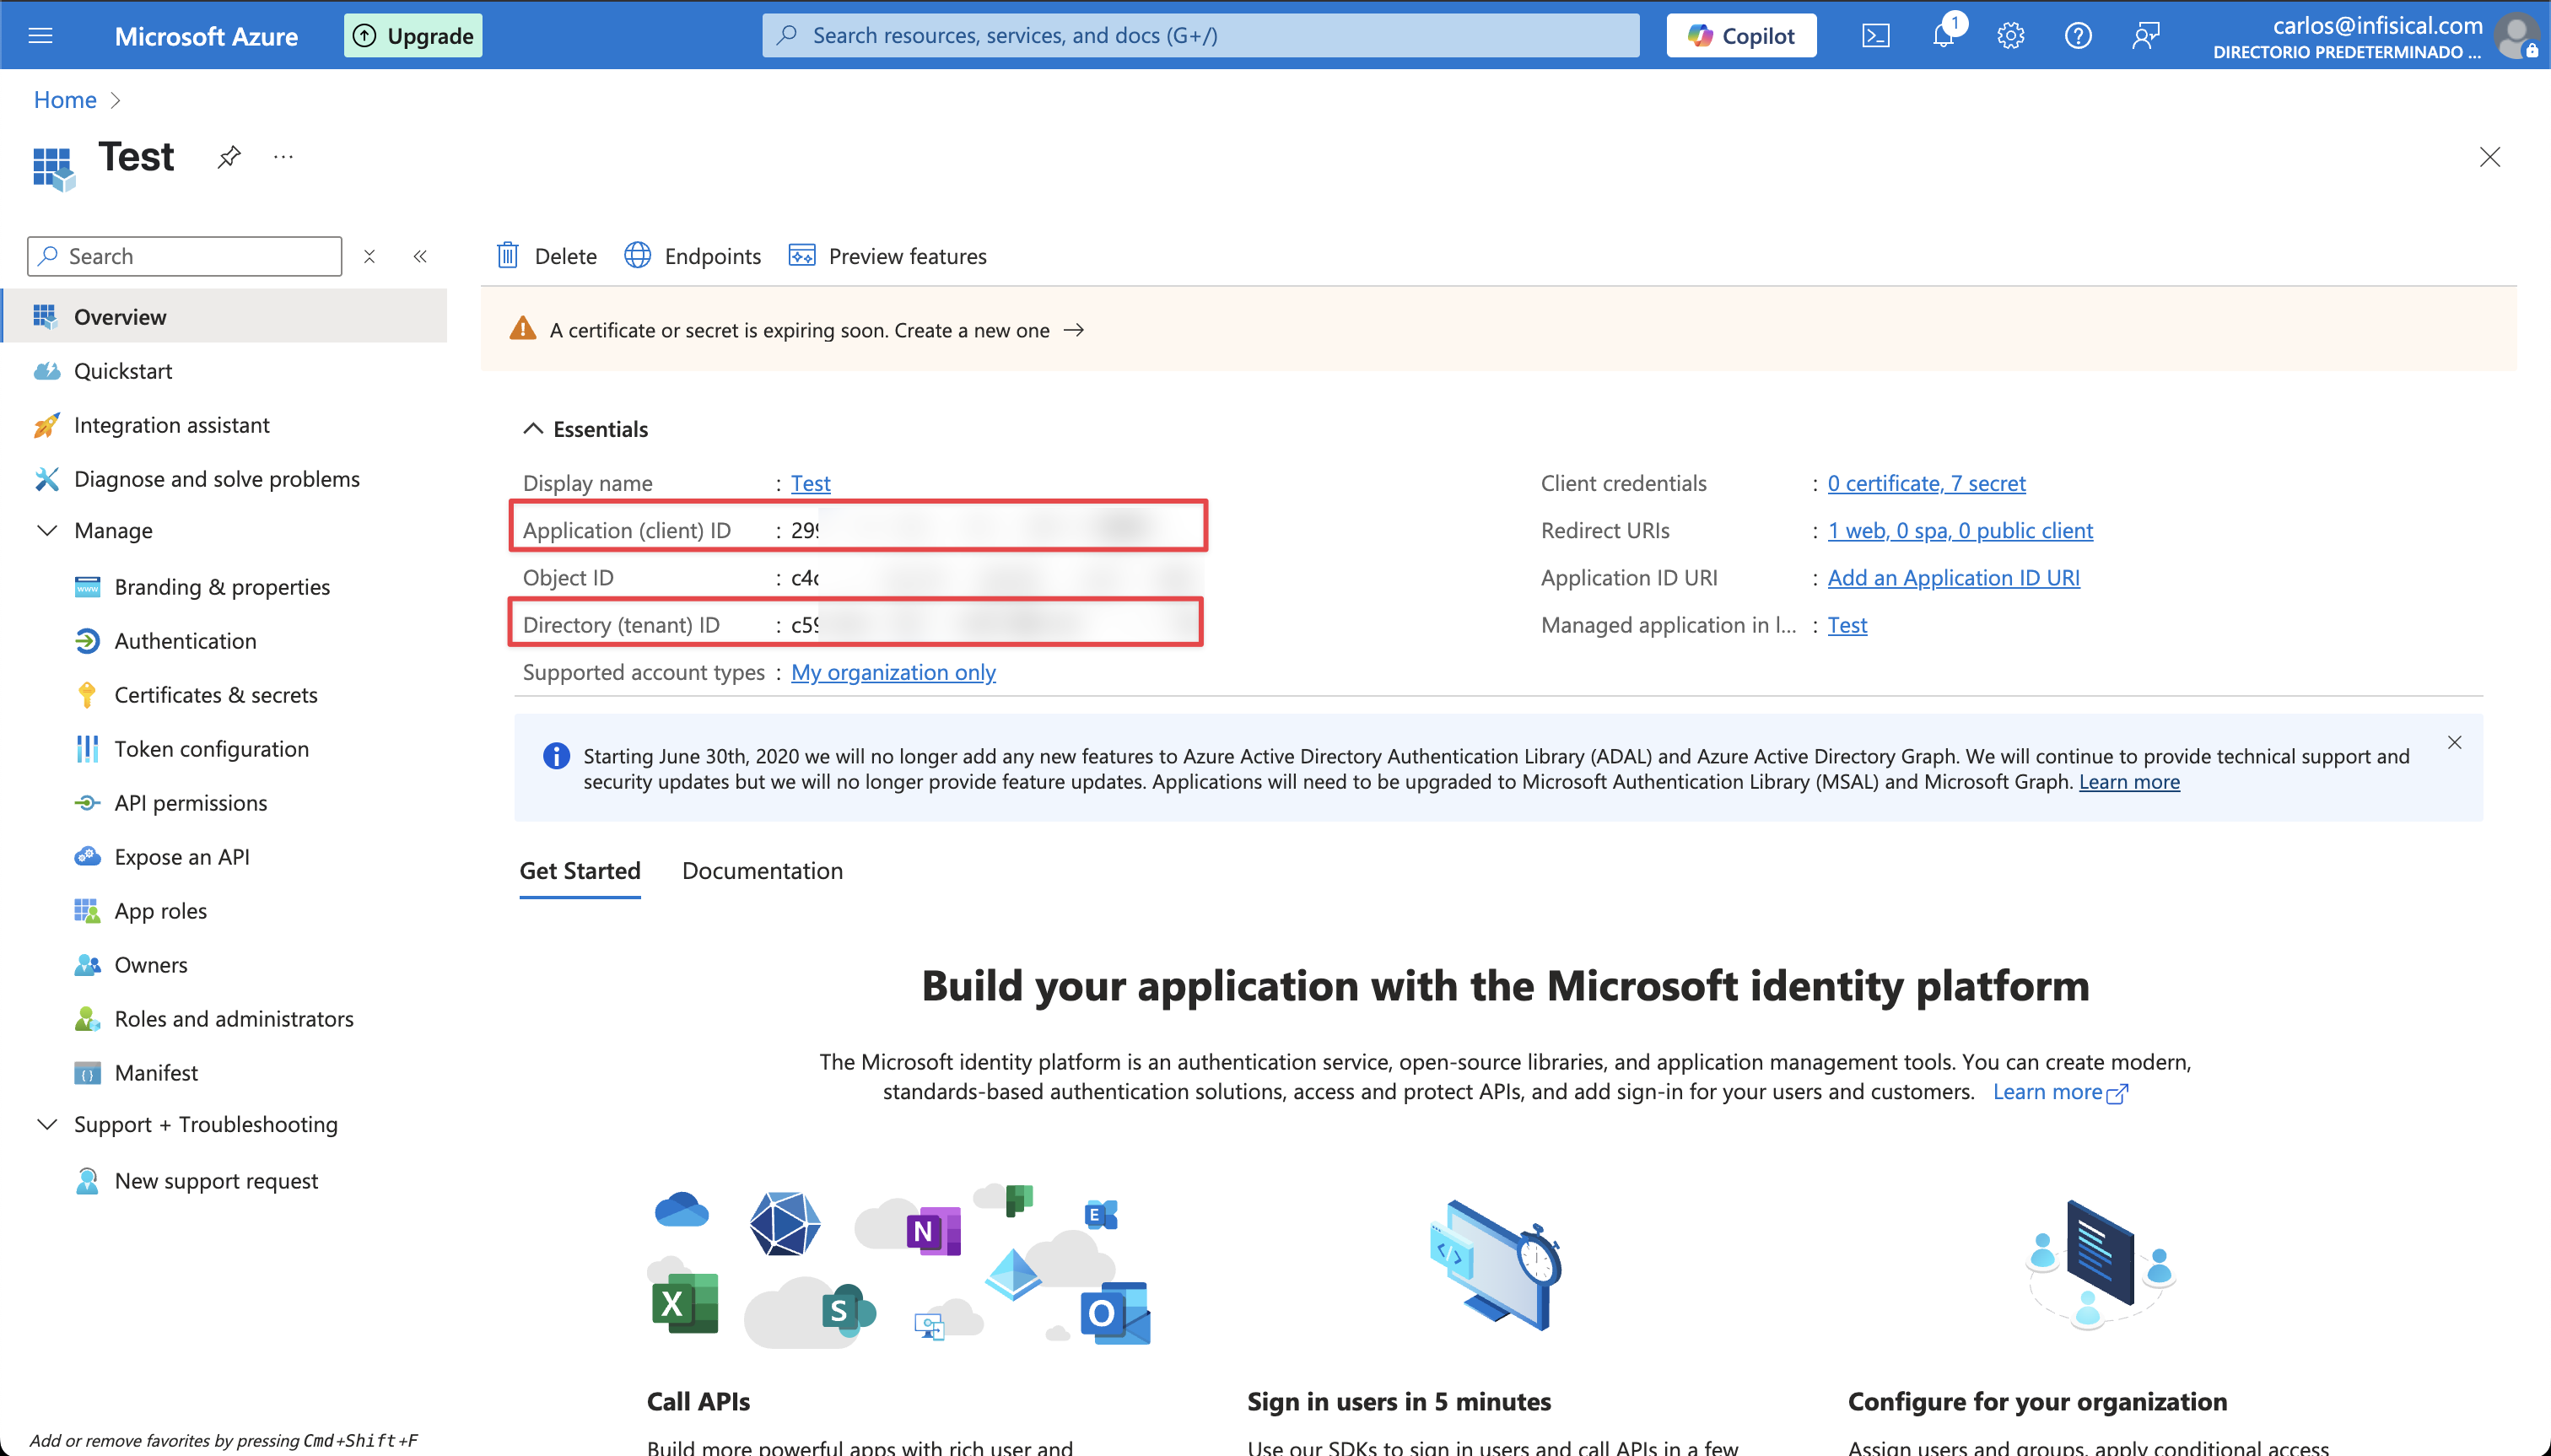 Back in your Infisical instance, add two new environment variables for the credentials of your Azure application.
* `INF_APP_CONNECTION_AZURE_CLIENT_SECRETS_CLIENT_ID`: The **Application (Client) ID** of your Azure application.
* `INF_APP_CONNECTION_AZURE_CLIENT_SECRETS_CLIENT_SECRET`: The **Client Secret** of your Azure application.
Once added, restart your Infisical instance and use the Azure Client Secrets connection.
Back in your Infisical instance, add two new environment variables for the credentials of your Azure application.
* `INF_APP_CONNECTION_AZURE_CLIENT_SECRETS_CLIENT_ID`: The **Application (Client) ID** of your Azure application.
* `INF_APP_CONNECTION_AZURE_CLIENT_SECRETS_CLIENT_SECRET`: The **Client Secret** of your Azure application.
Once added, restart your Infisical instance and use the Azure Client Secrets connection.

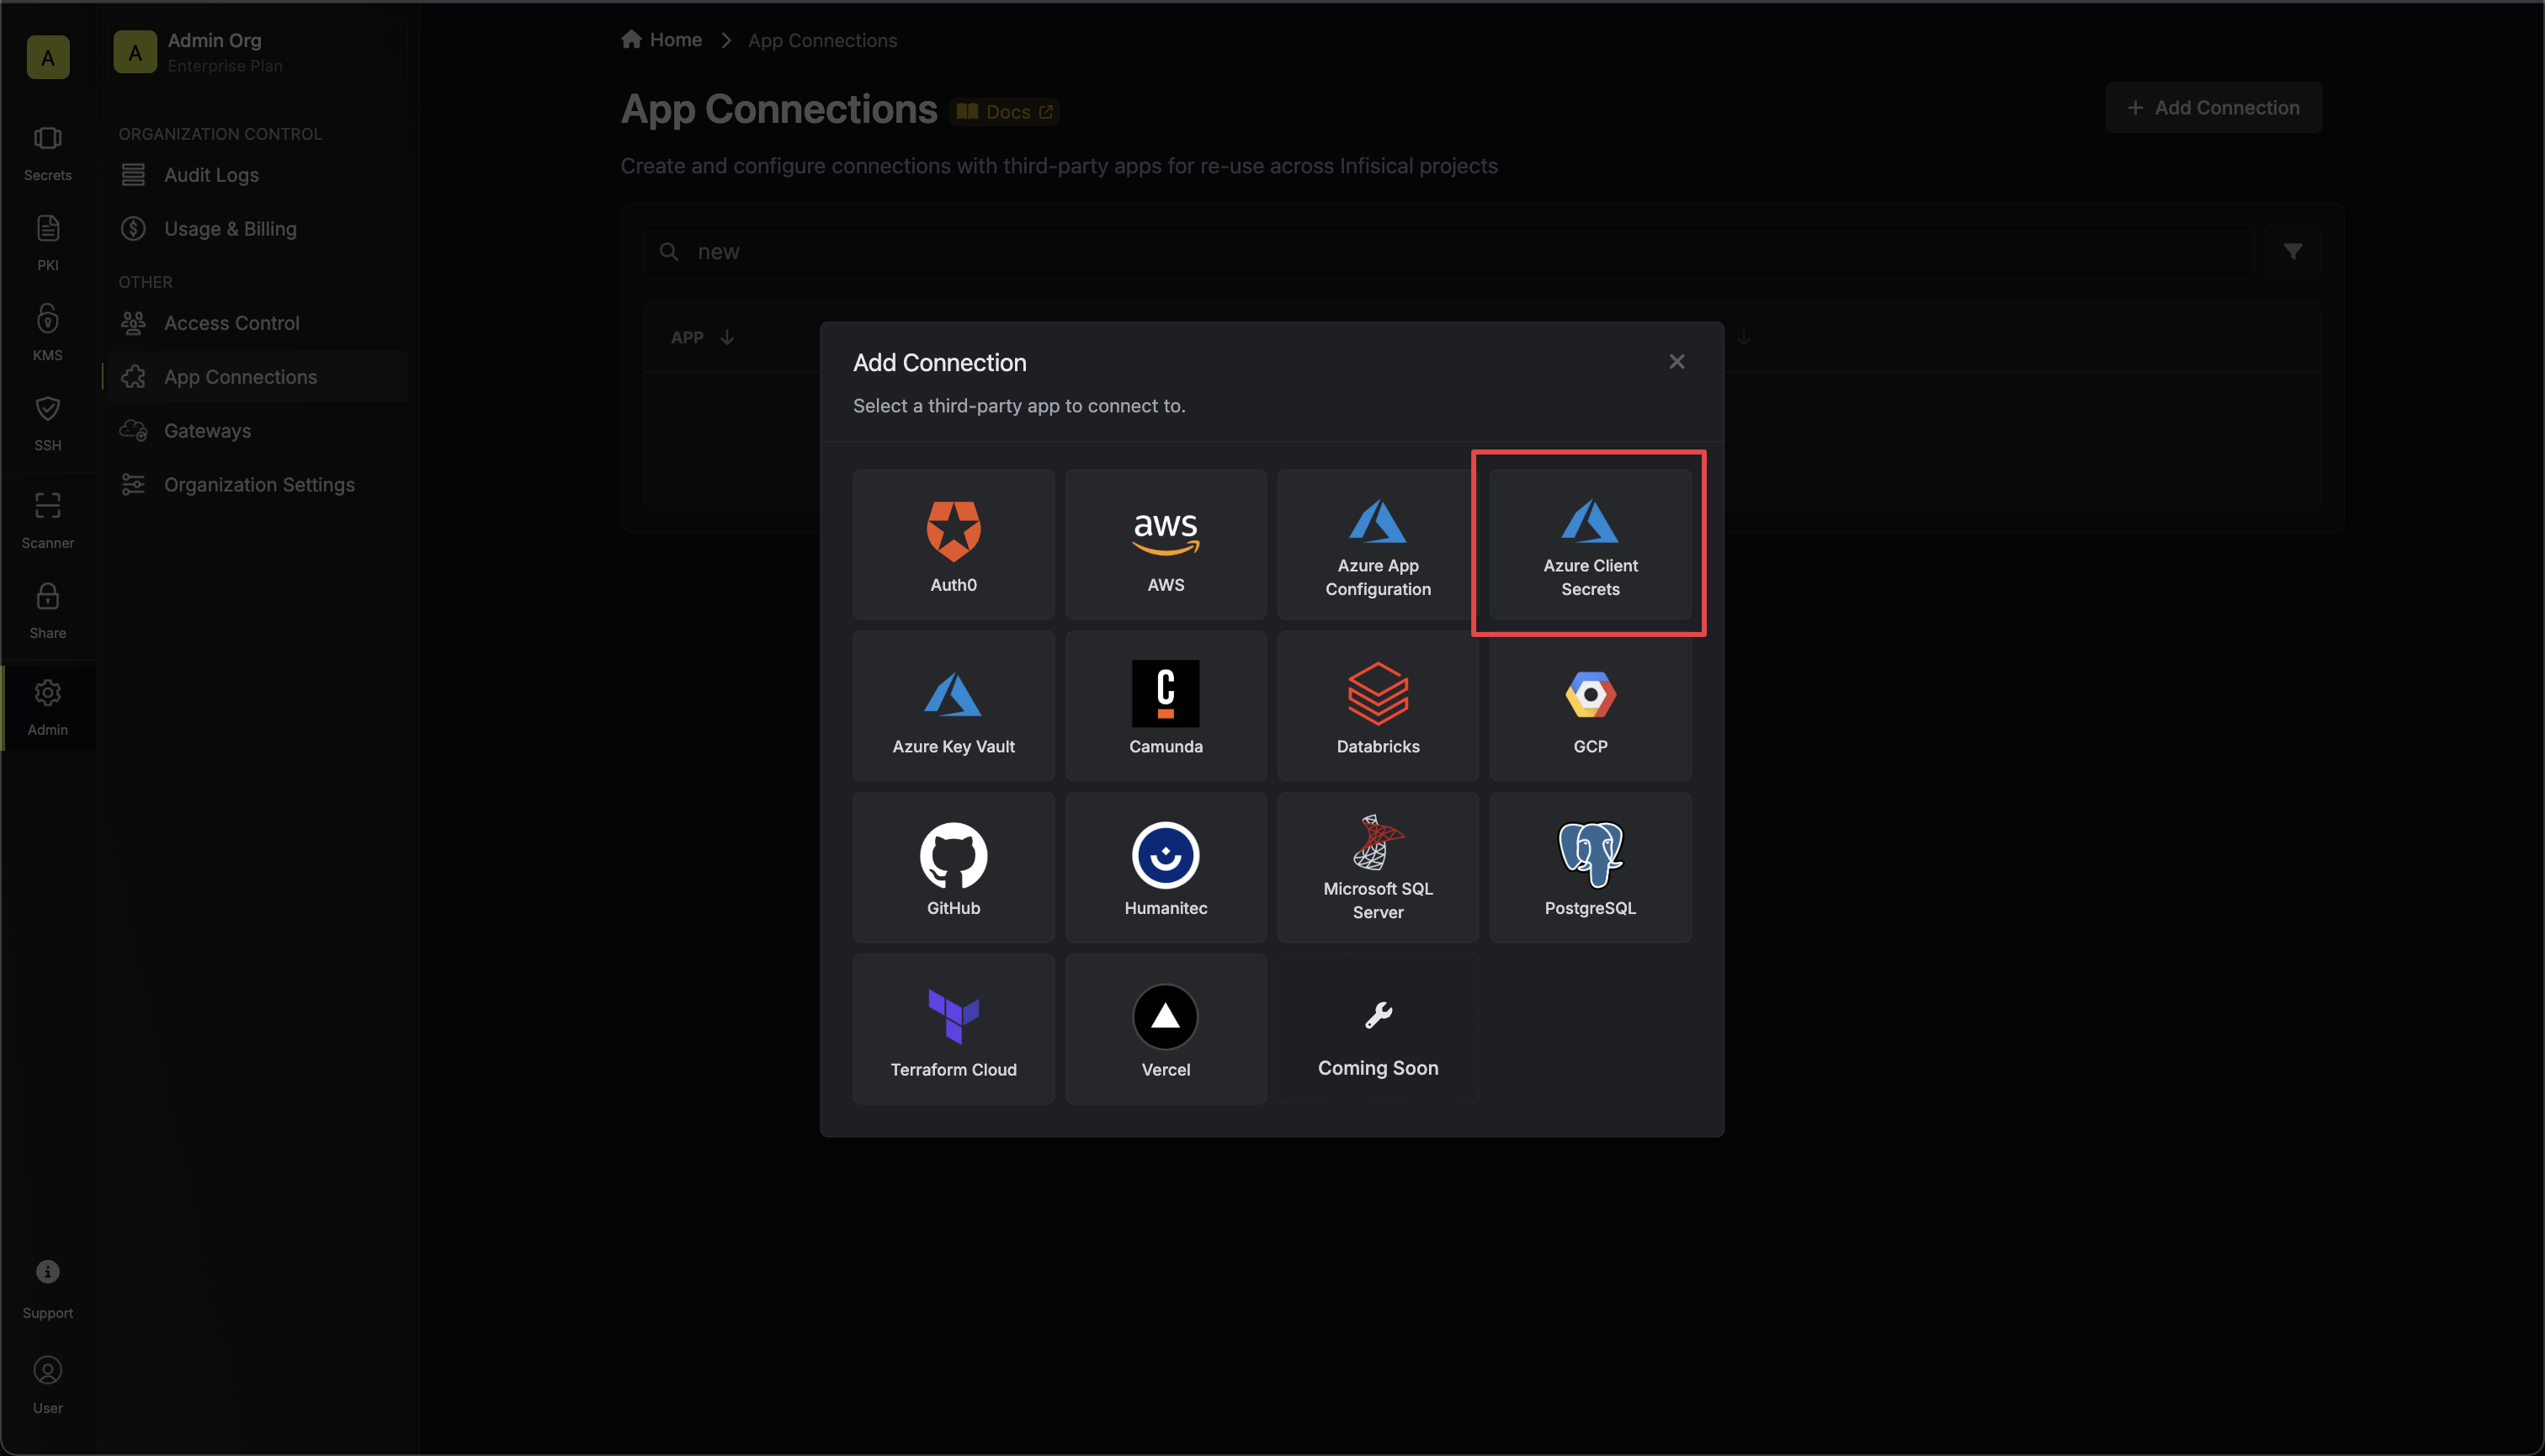
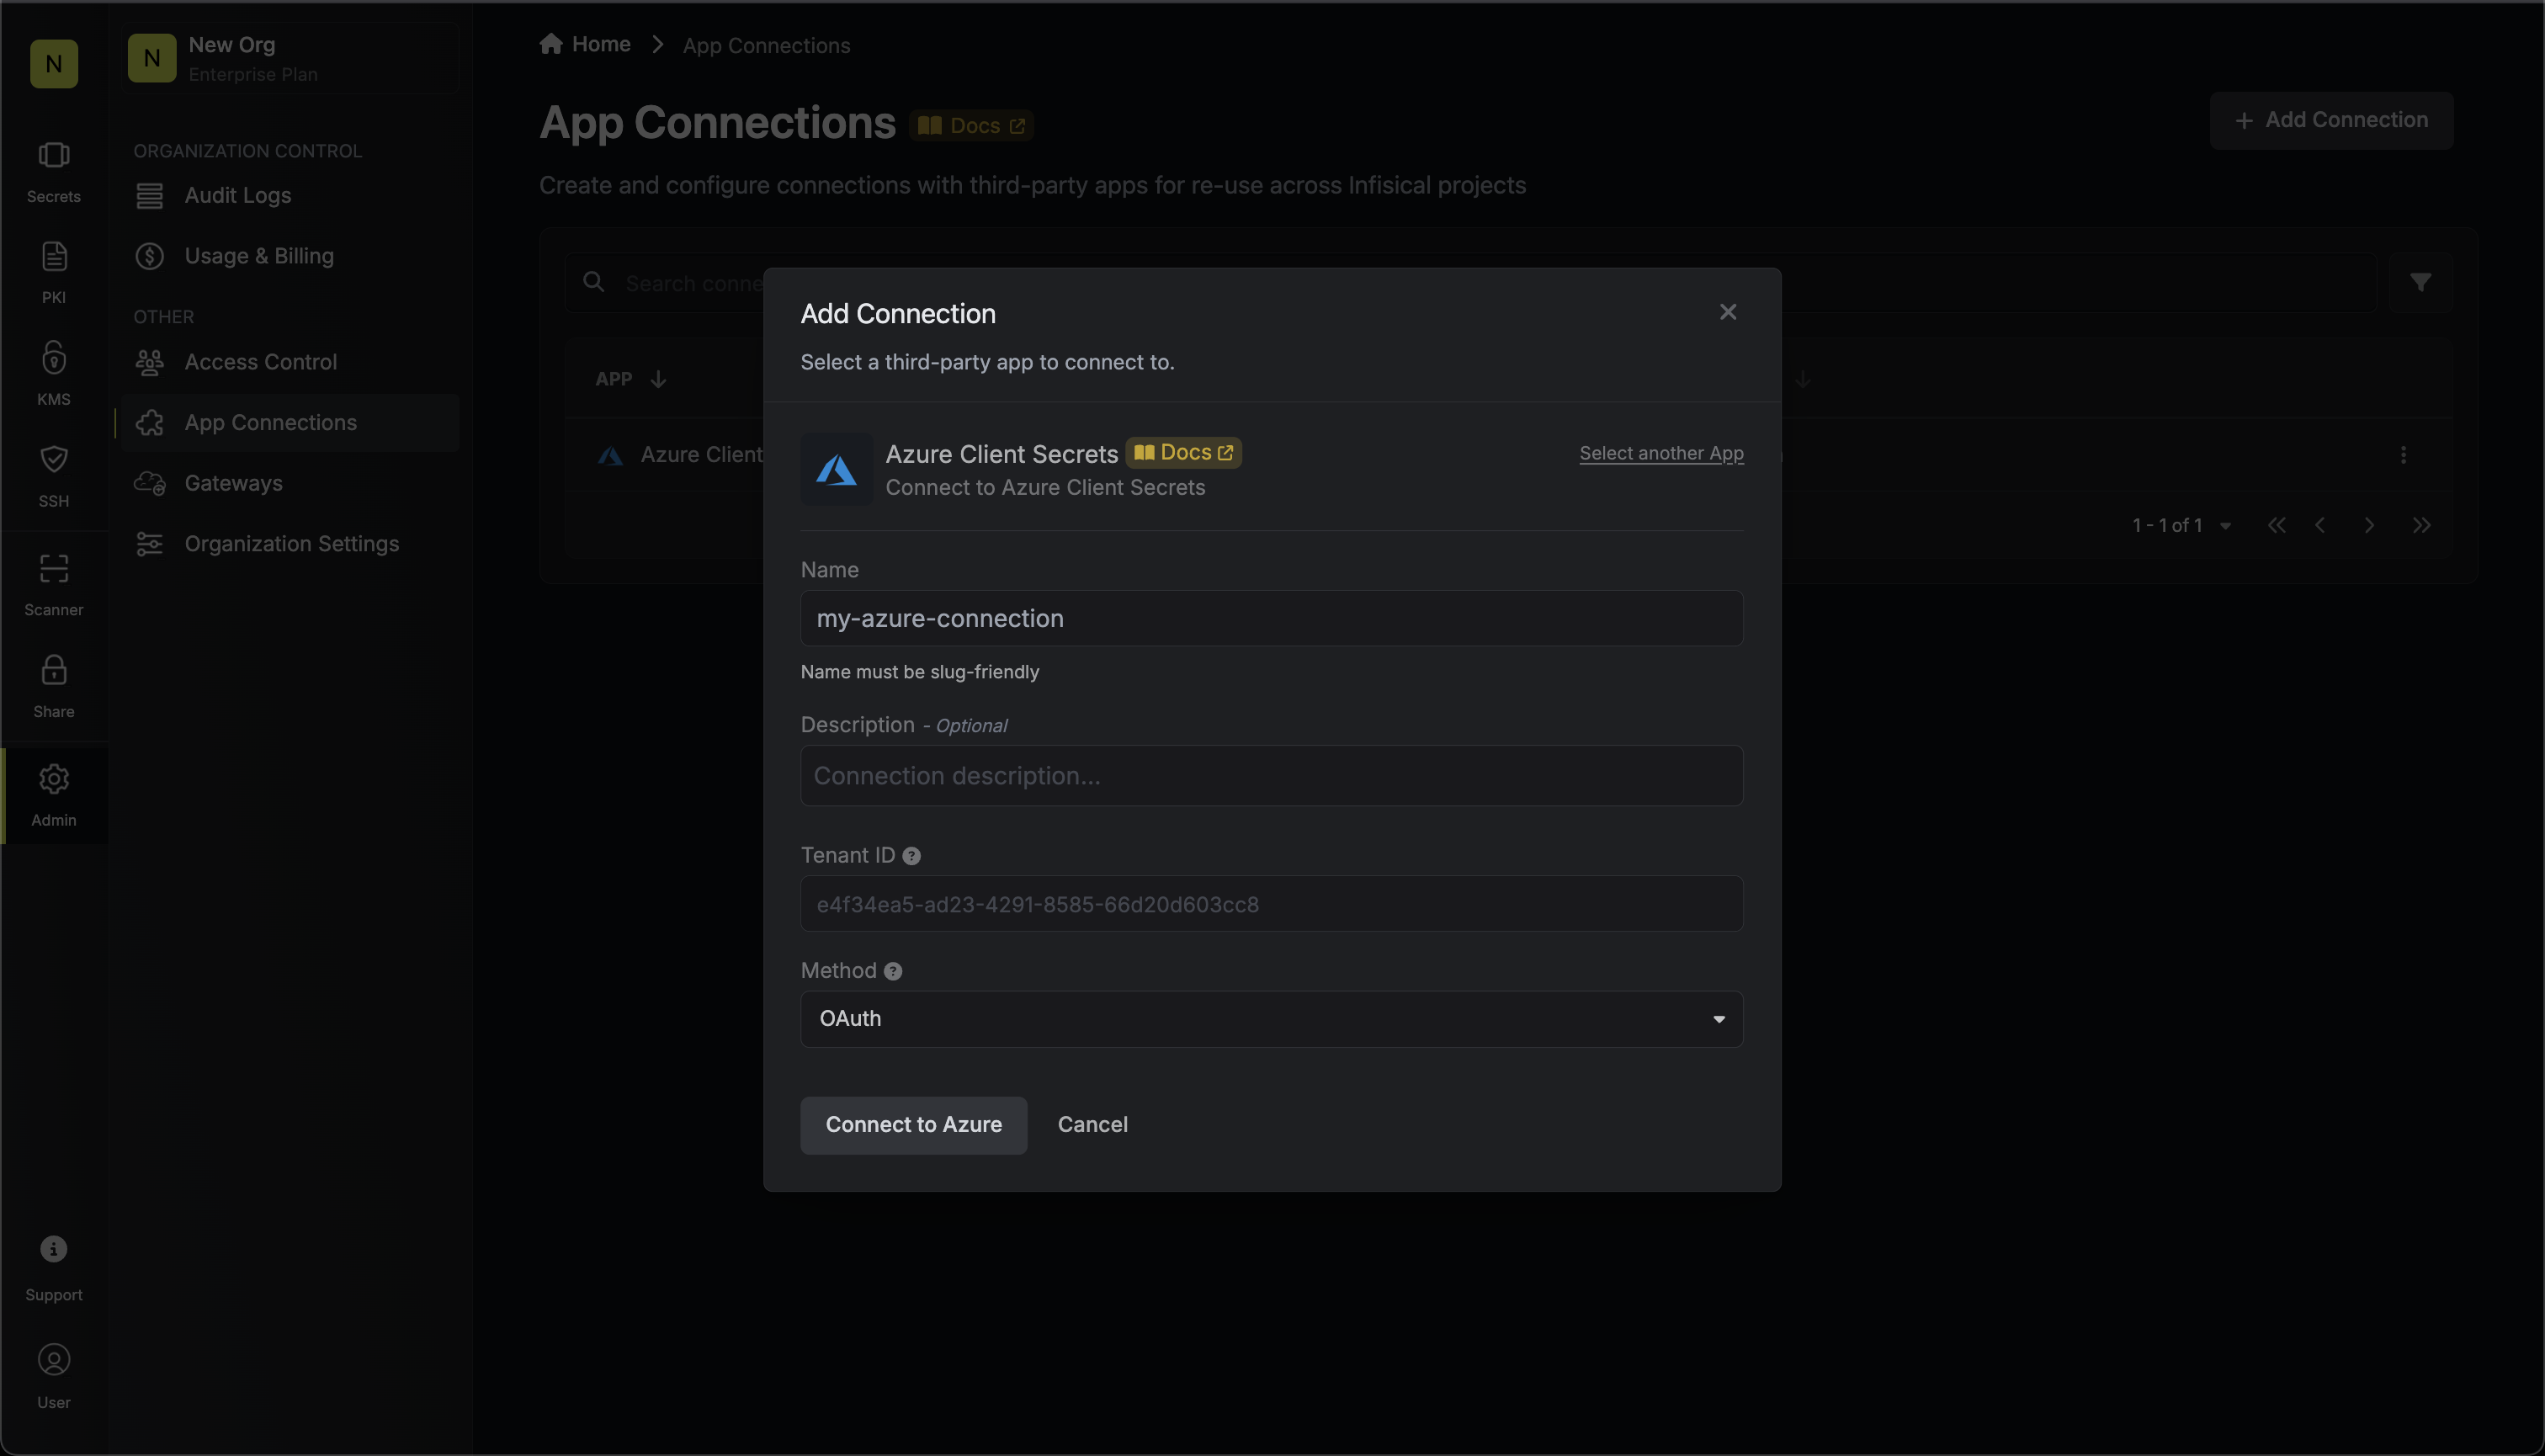
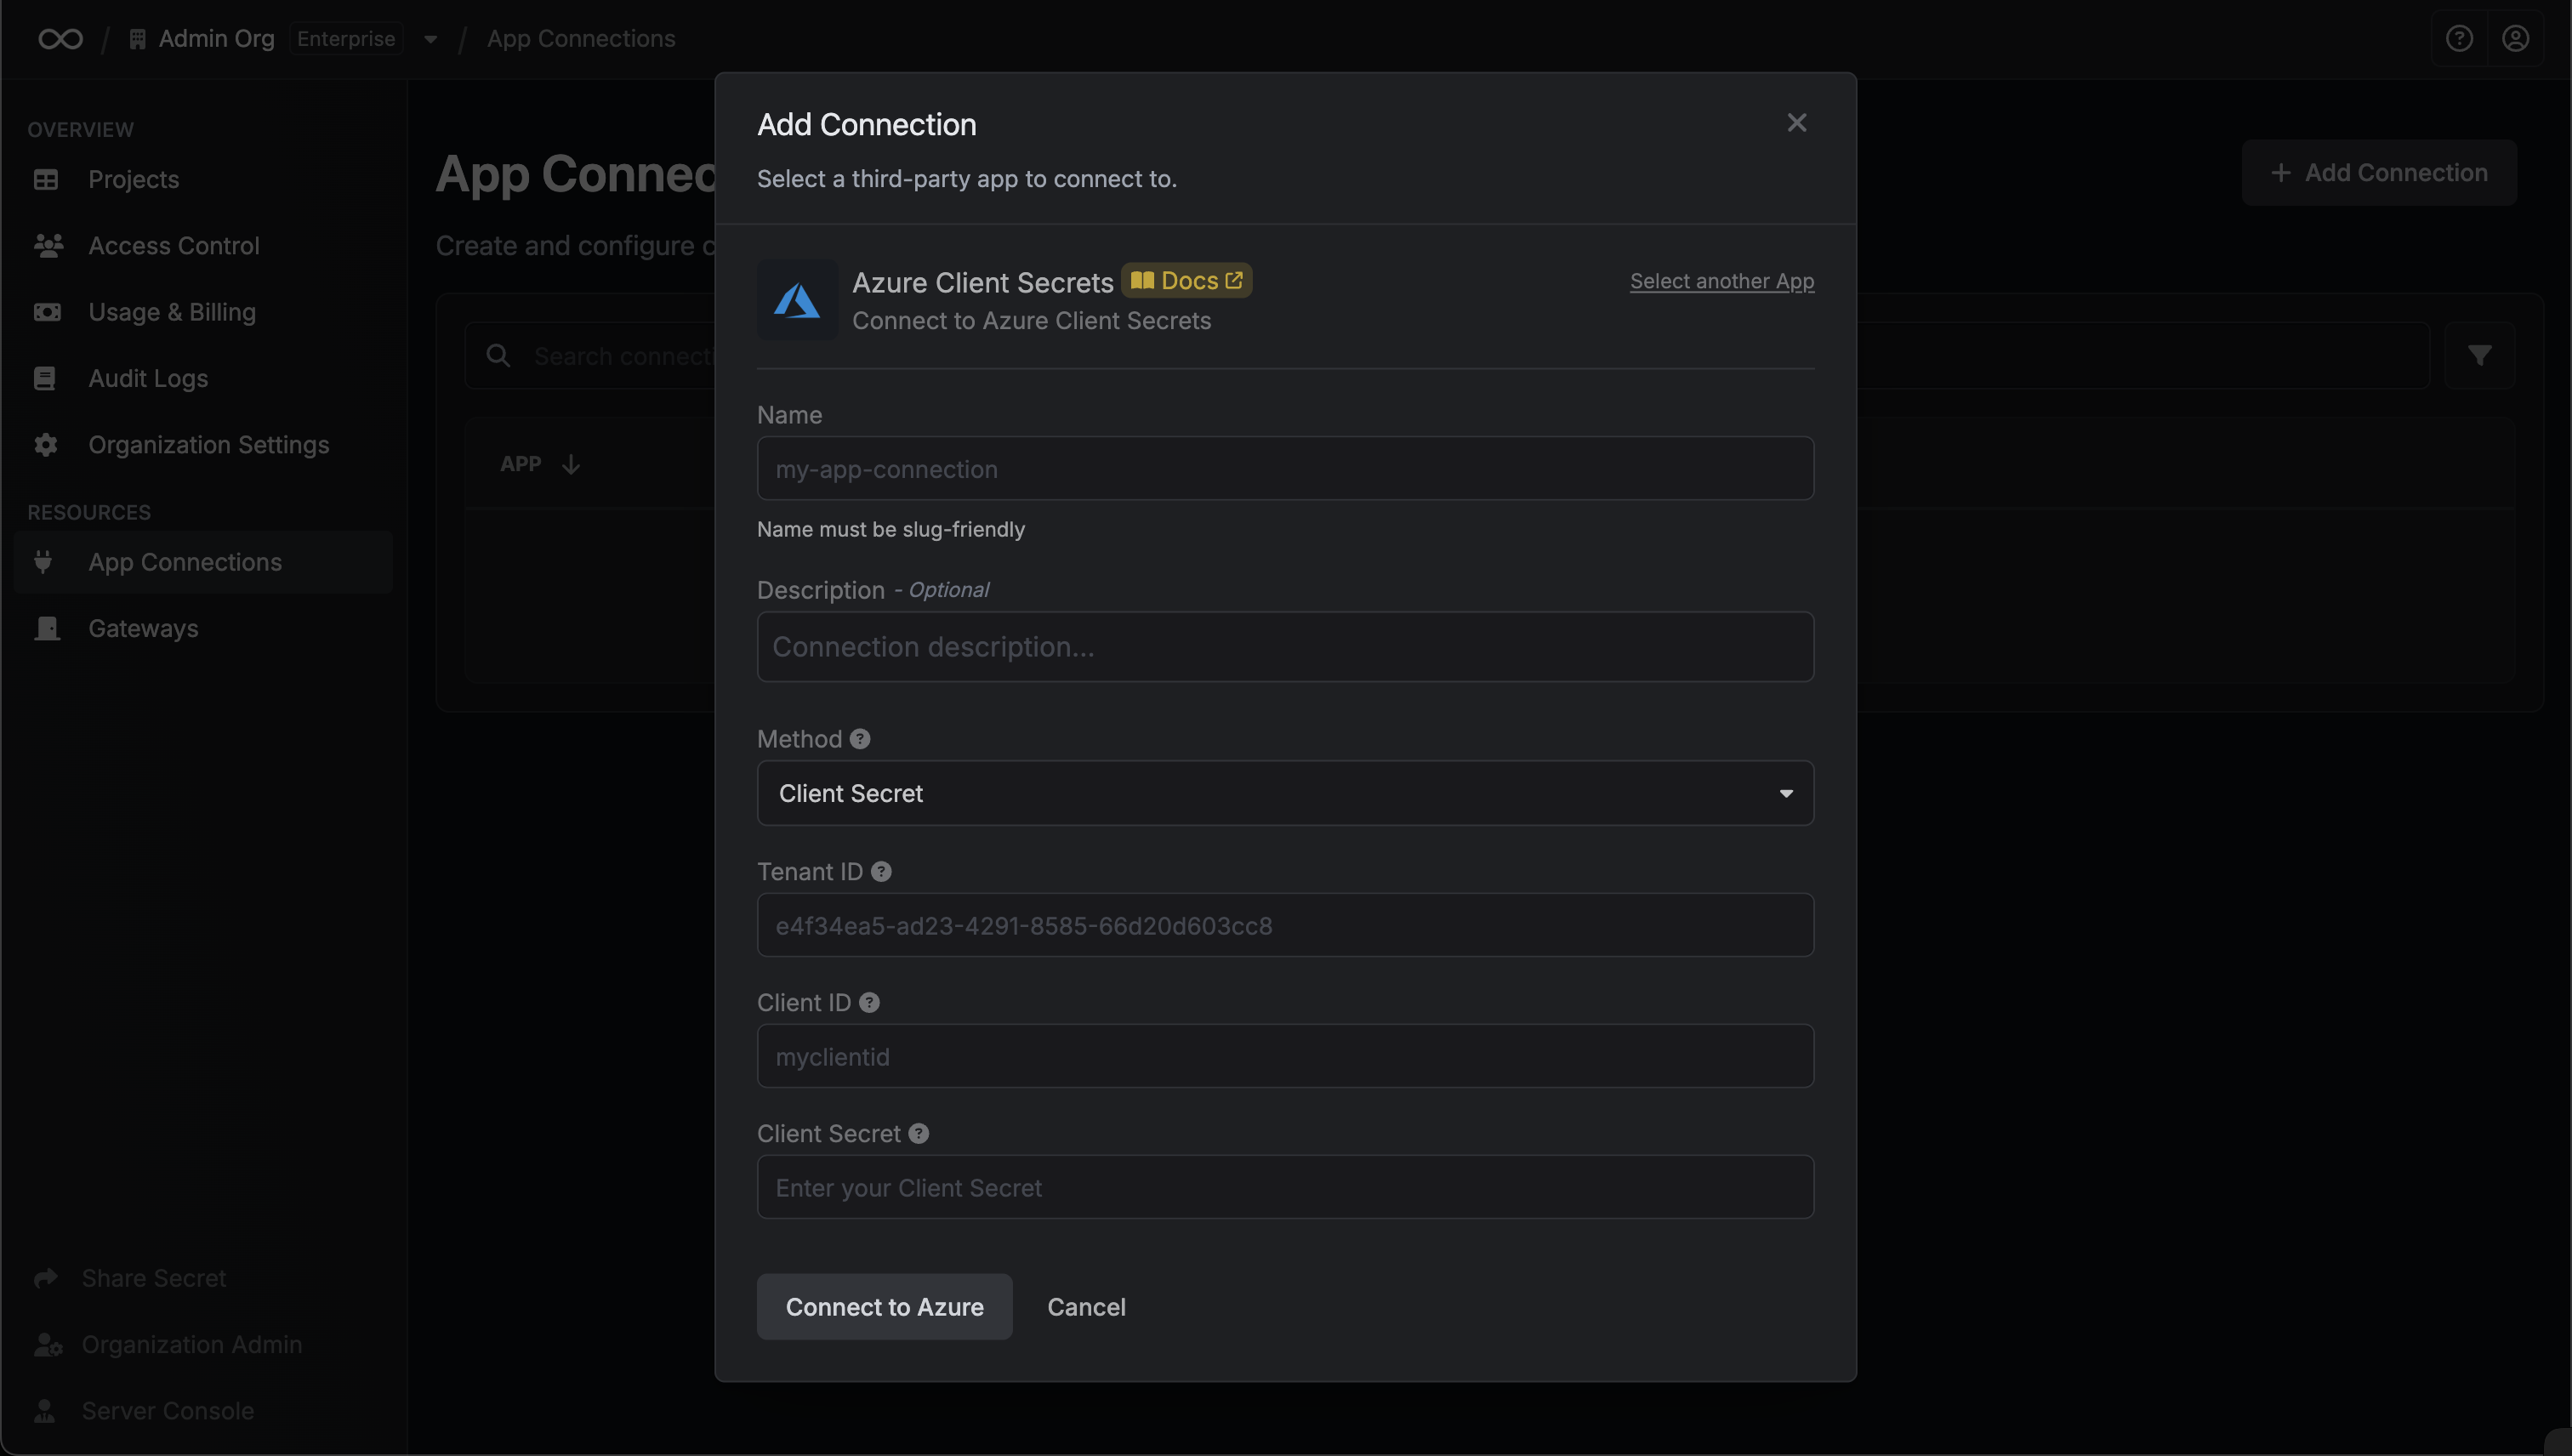
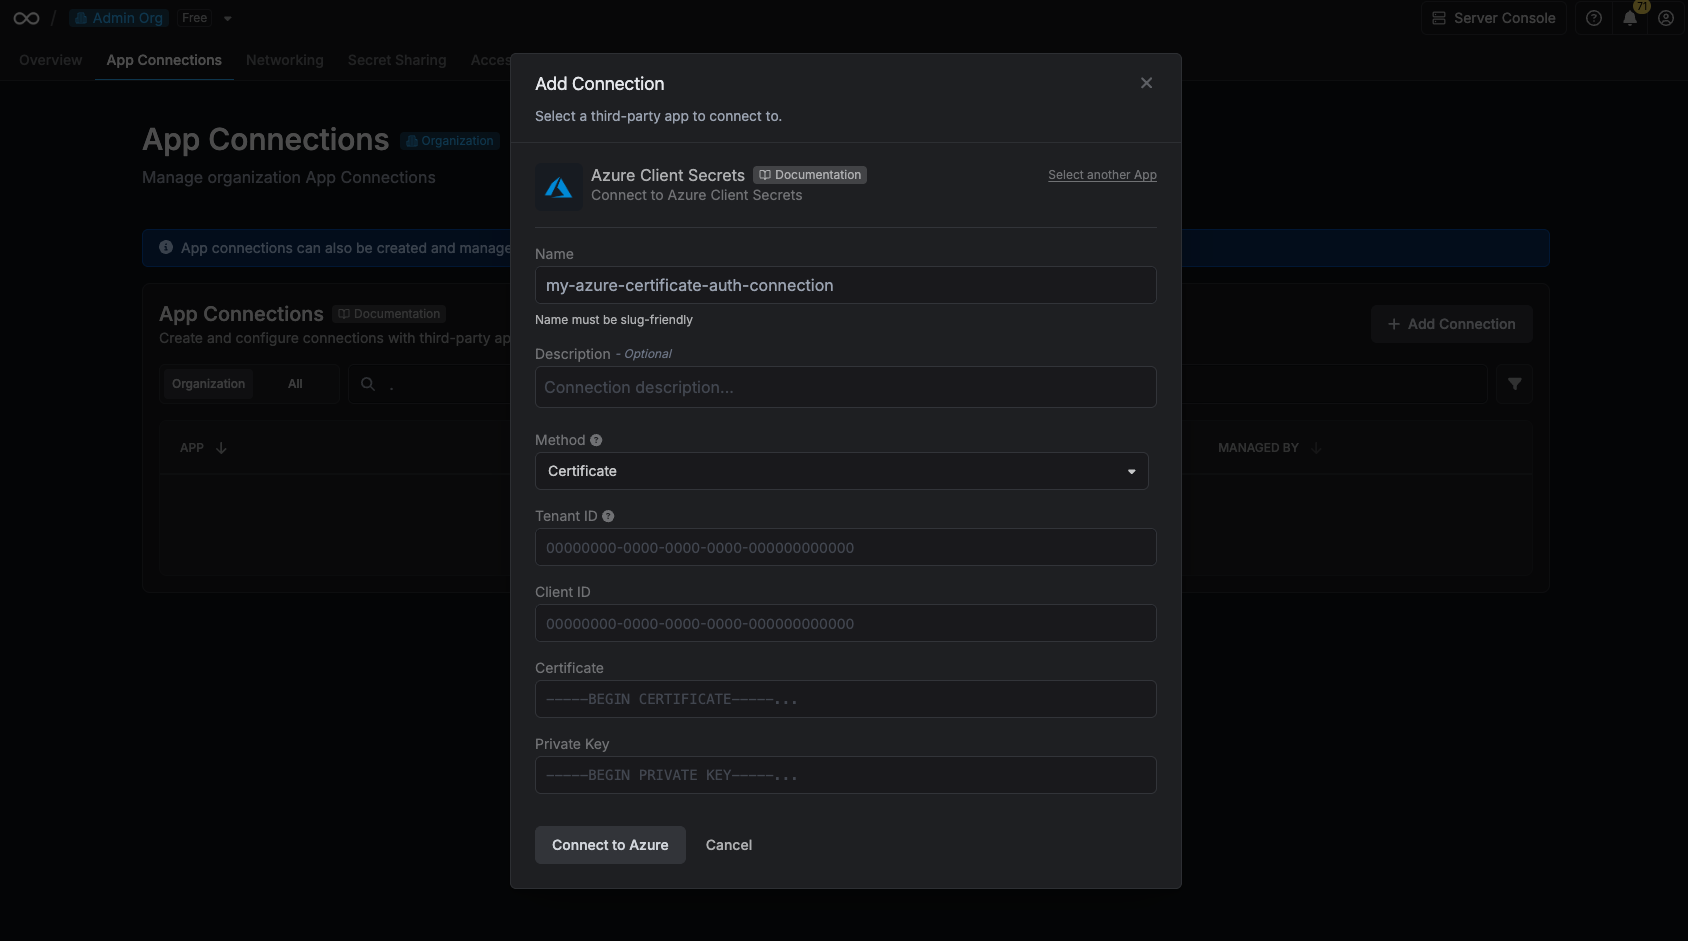
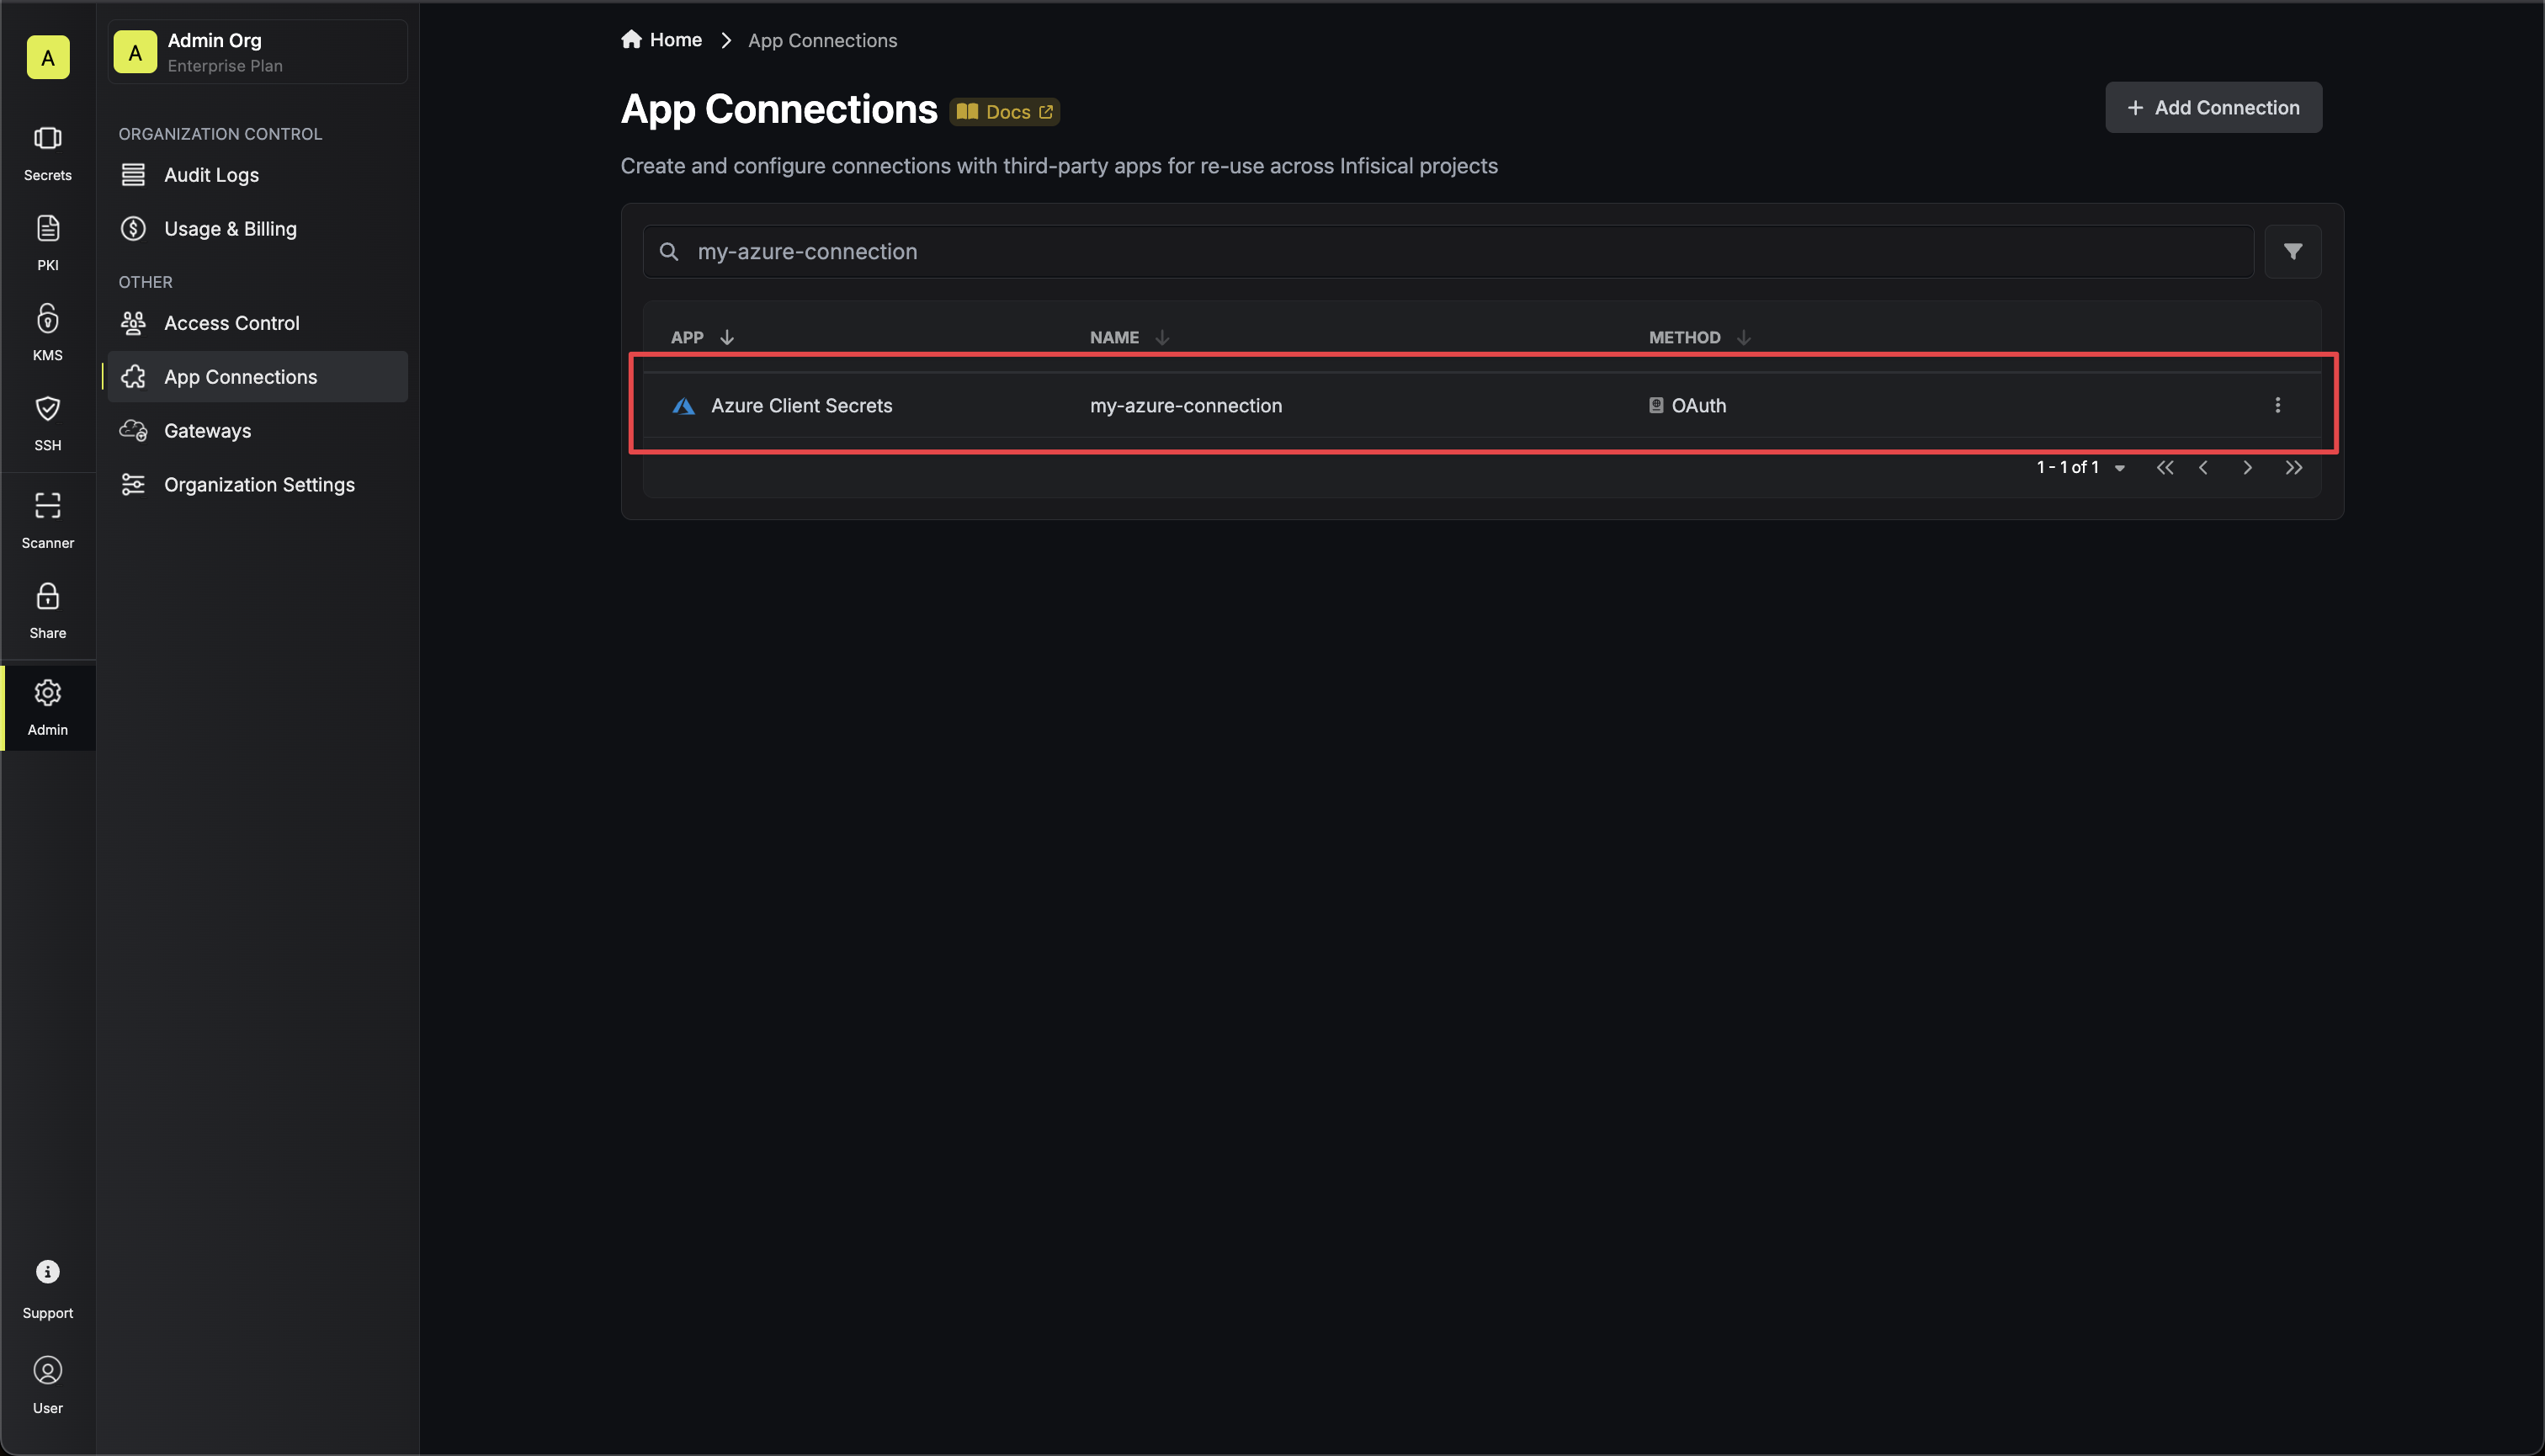 Create the application. As part of the form, set the **Redirect URI** to `https://your-domain.com/organization/app-connections/azure/oauth/callback`.
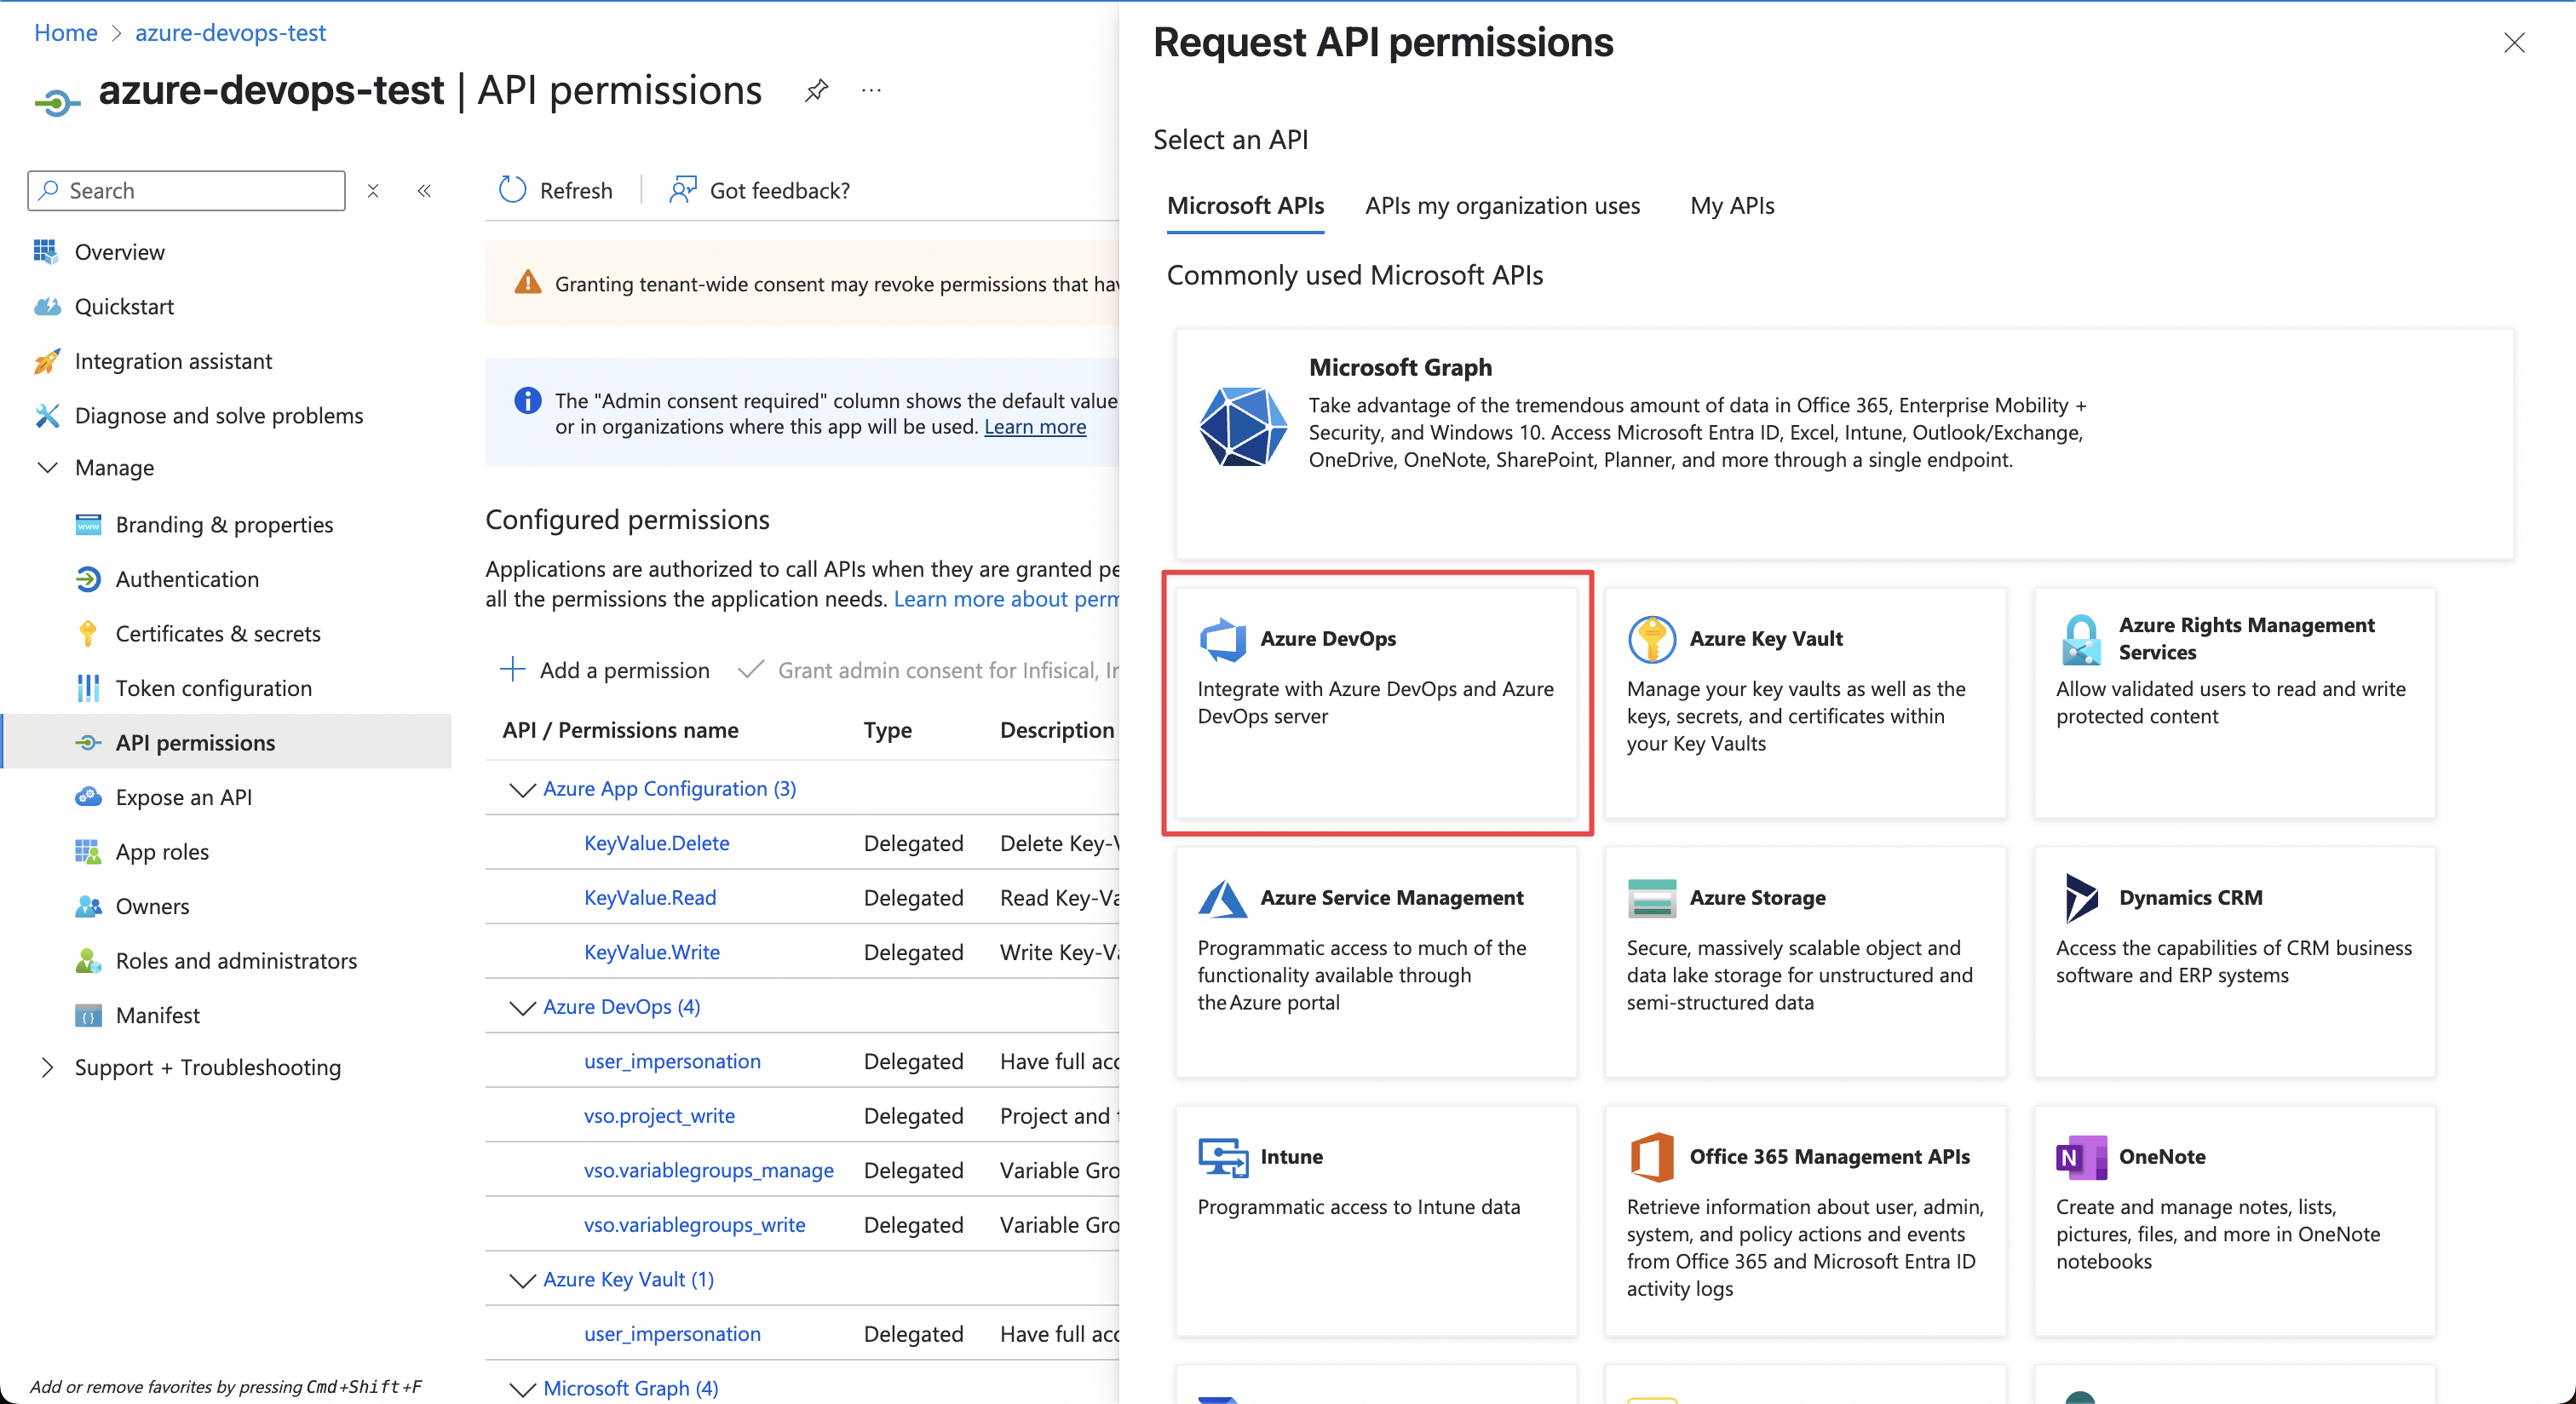 Back in your Infisical instance, add two new environment variables for the credentials of your Azure application.
* `INF_APP_CONNECTION_AZURE_DEVOPS_CLIENT_ID`: The **Application (Client) ID** of your Azure application.
* `INF_APP_CONNECTION_AZURE_DEVOPS_CLIENT_SECRET`: The **Client Secret** of your Azure application.
Once added, restart your Infisical instance and use the Azure Client Secrets connection.
Back in your Infisical instance, add two new environment variables for the credentials of your Azure application.
* `INF_APP_CONNECTION_AZURE_DEVOPS_CLIENT_ID`: The **Application (Client) ID** of your Azure application.
* `INF_APP_CONNECTION_AZURE_DEVOPS_CLIENT_SECRET`: The **Client Secret** of your Azure application.
Once added, restart your Infisical instance and use the Azure Client Secrets connection.
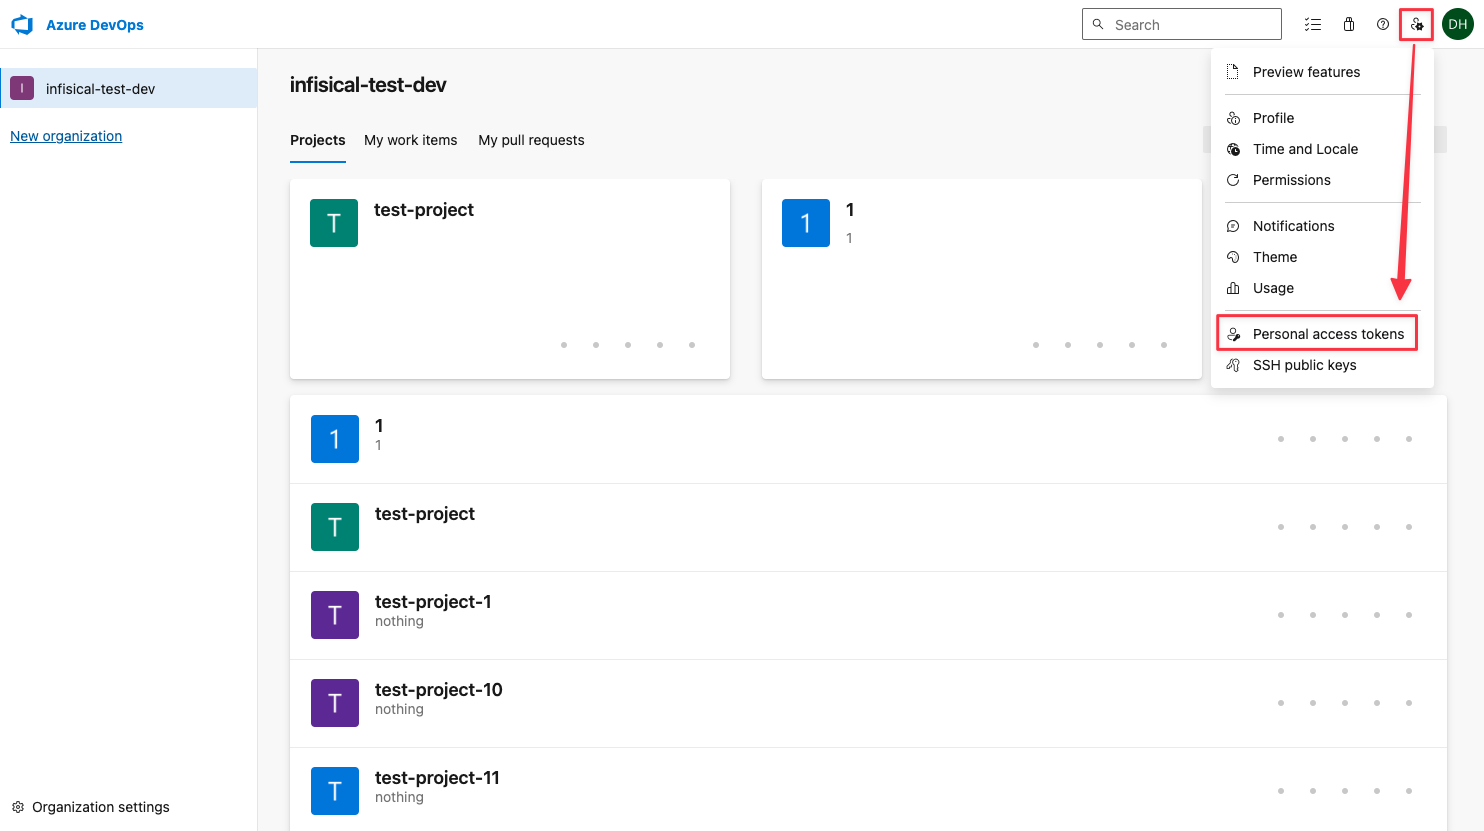
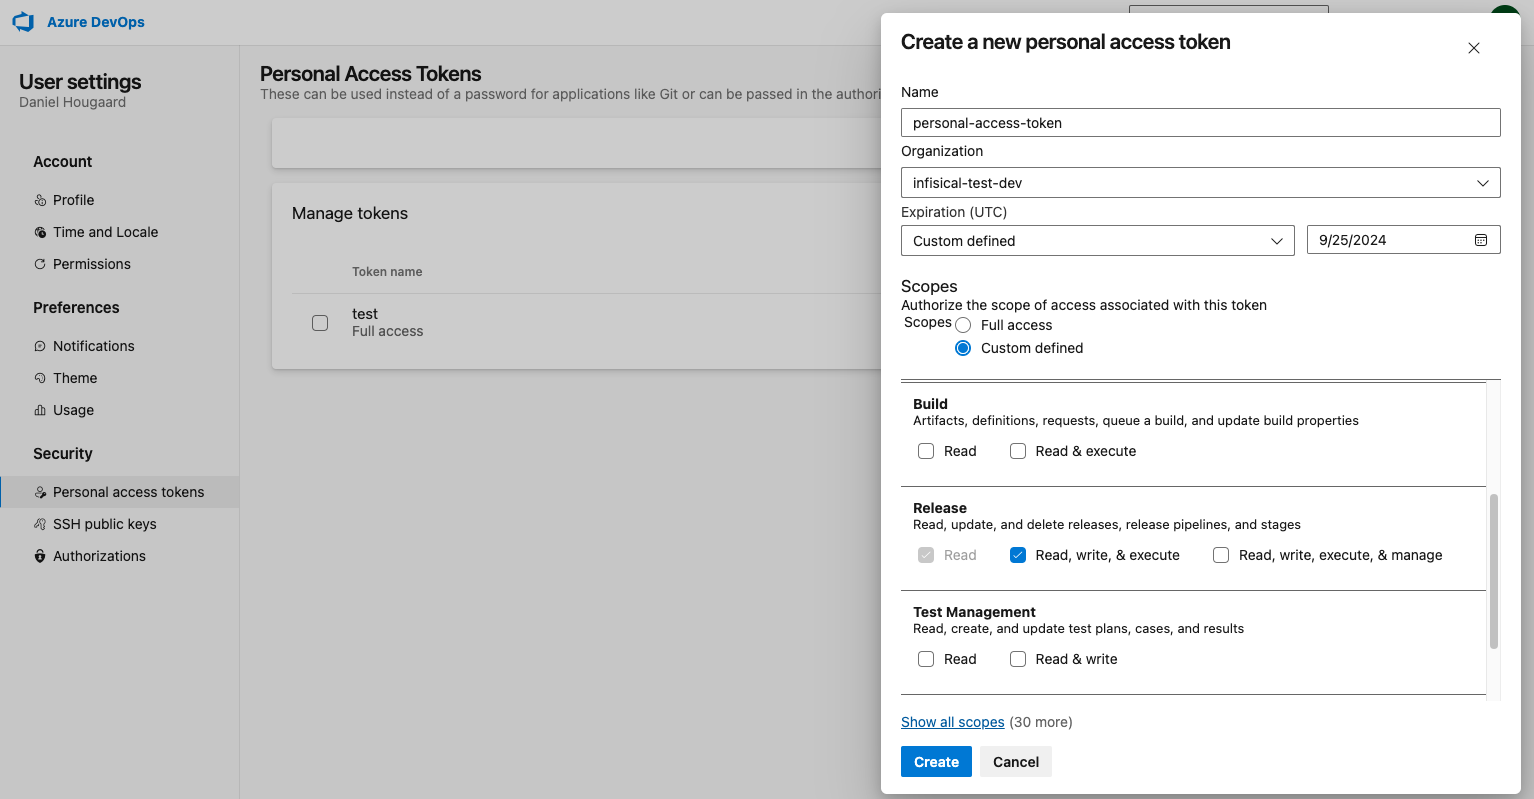
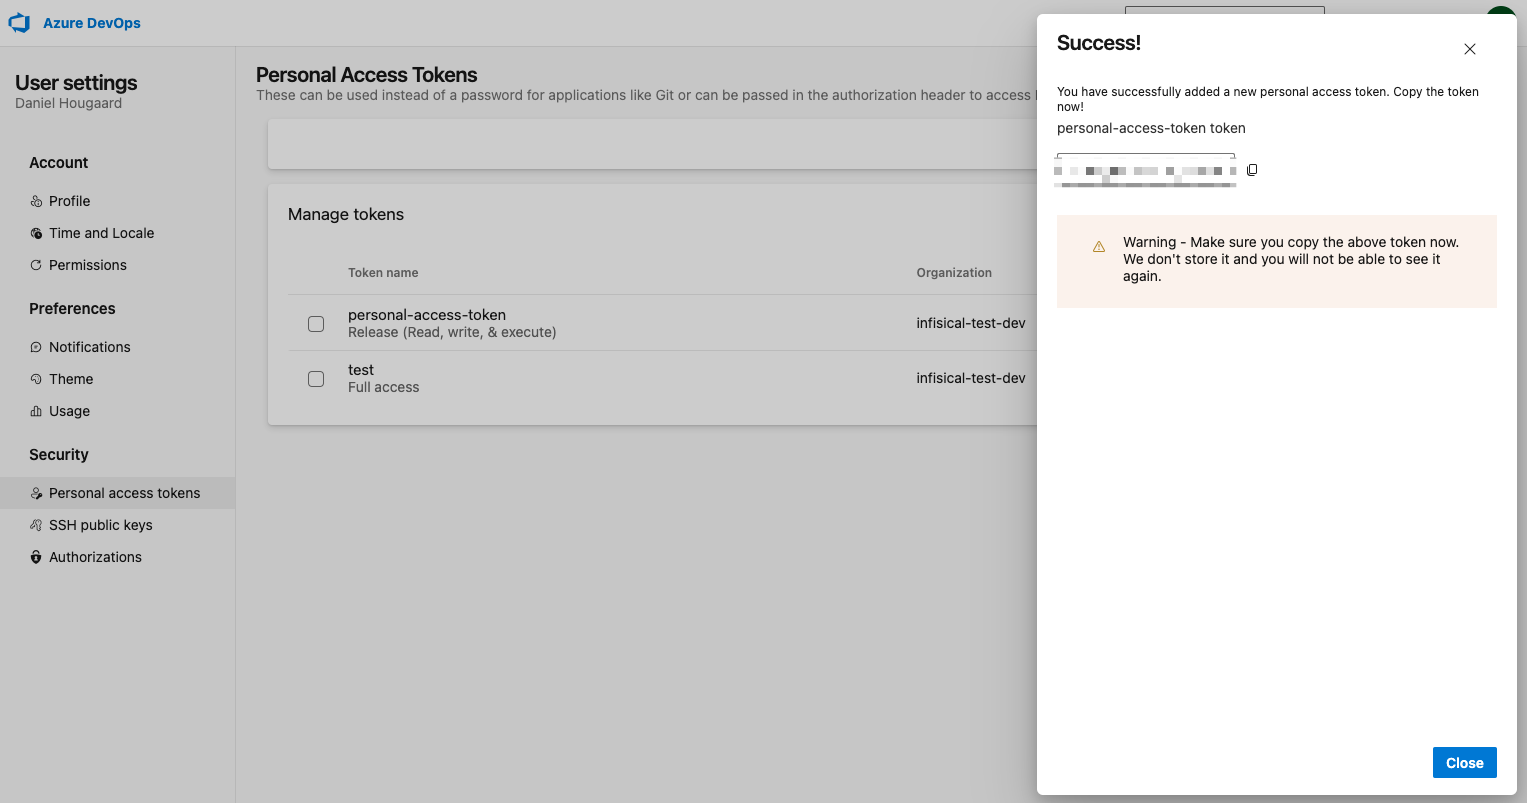
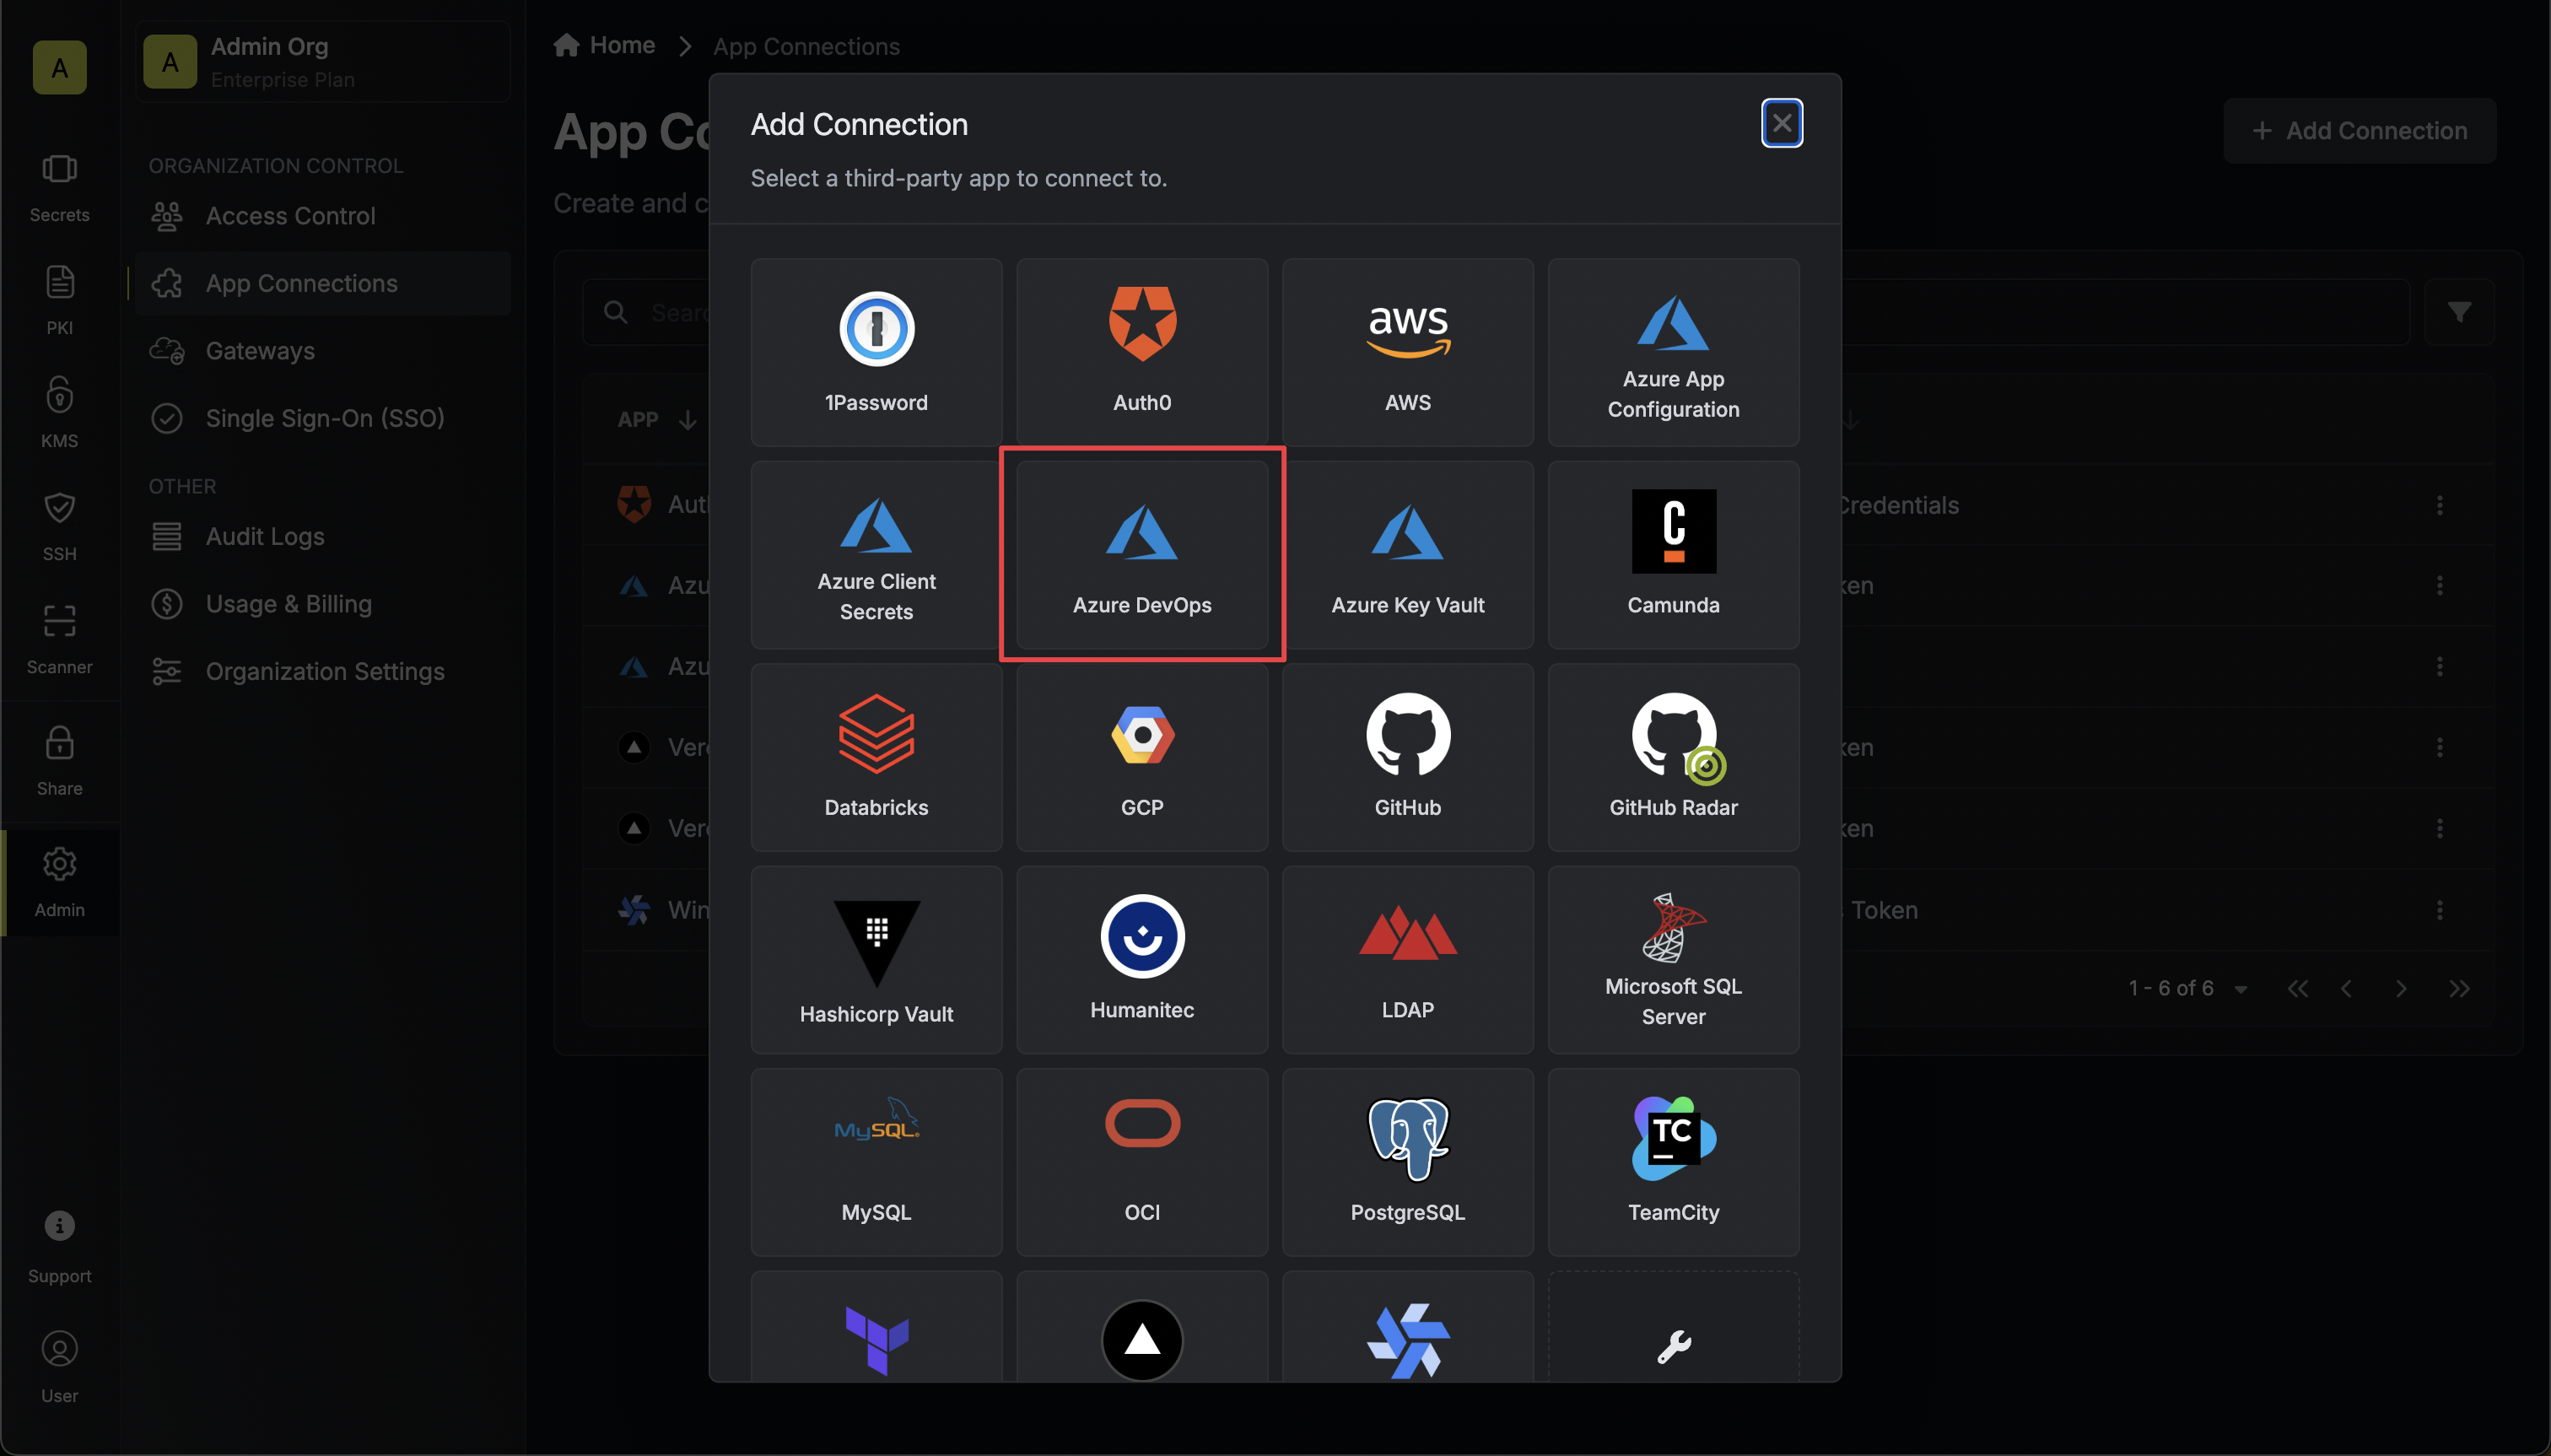
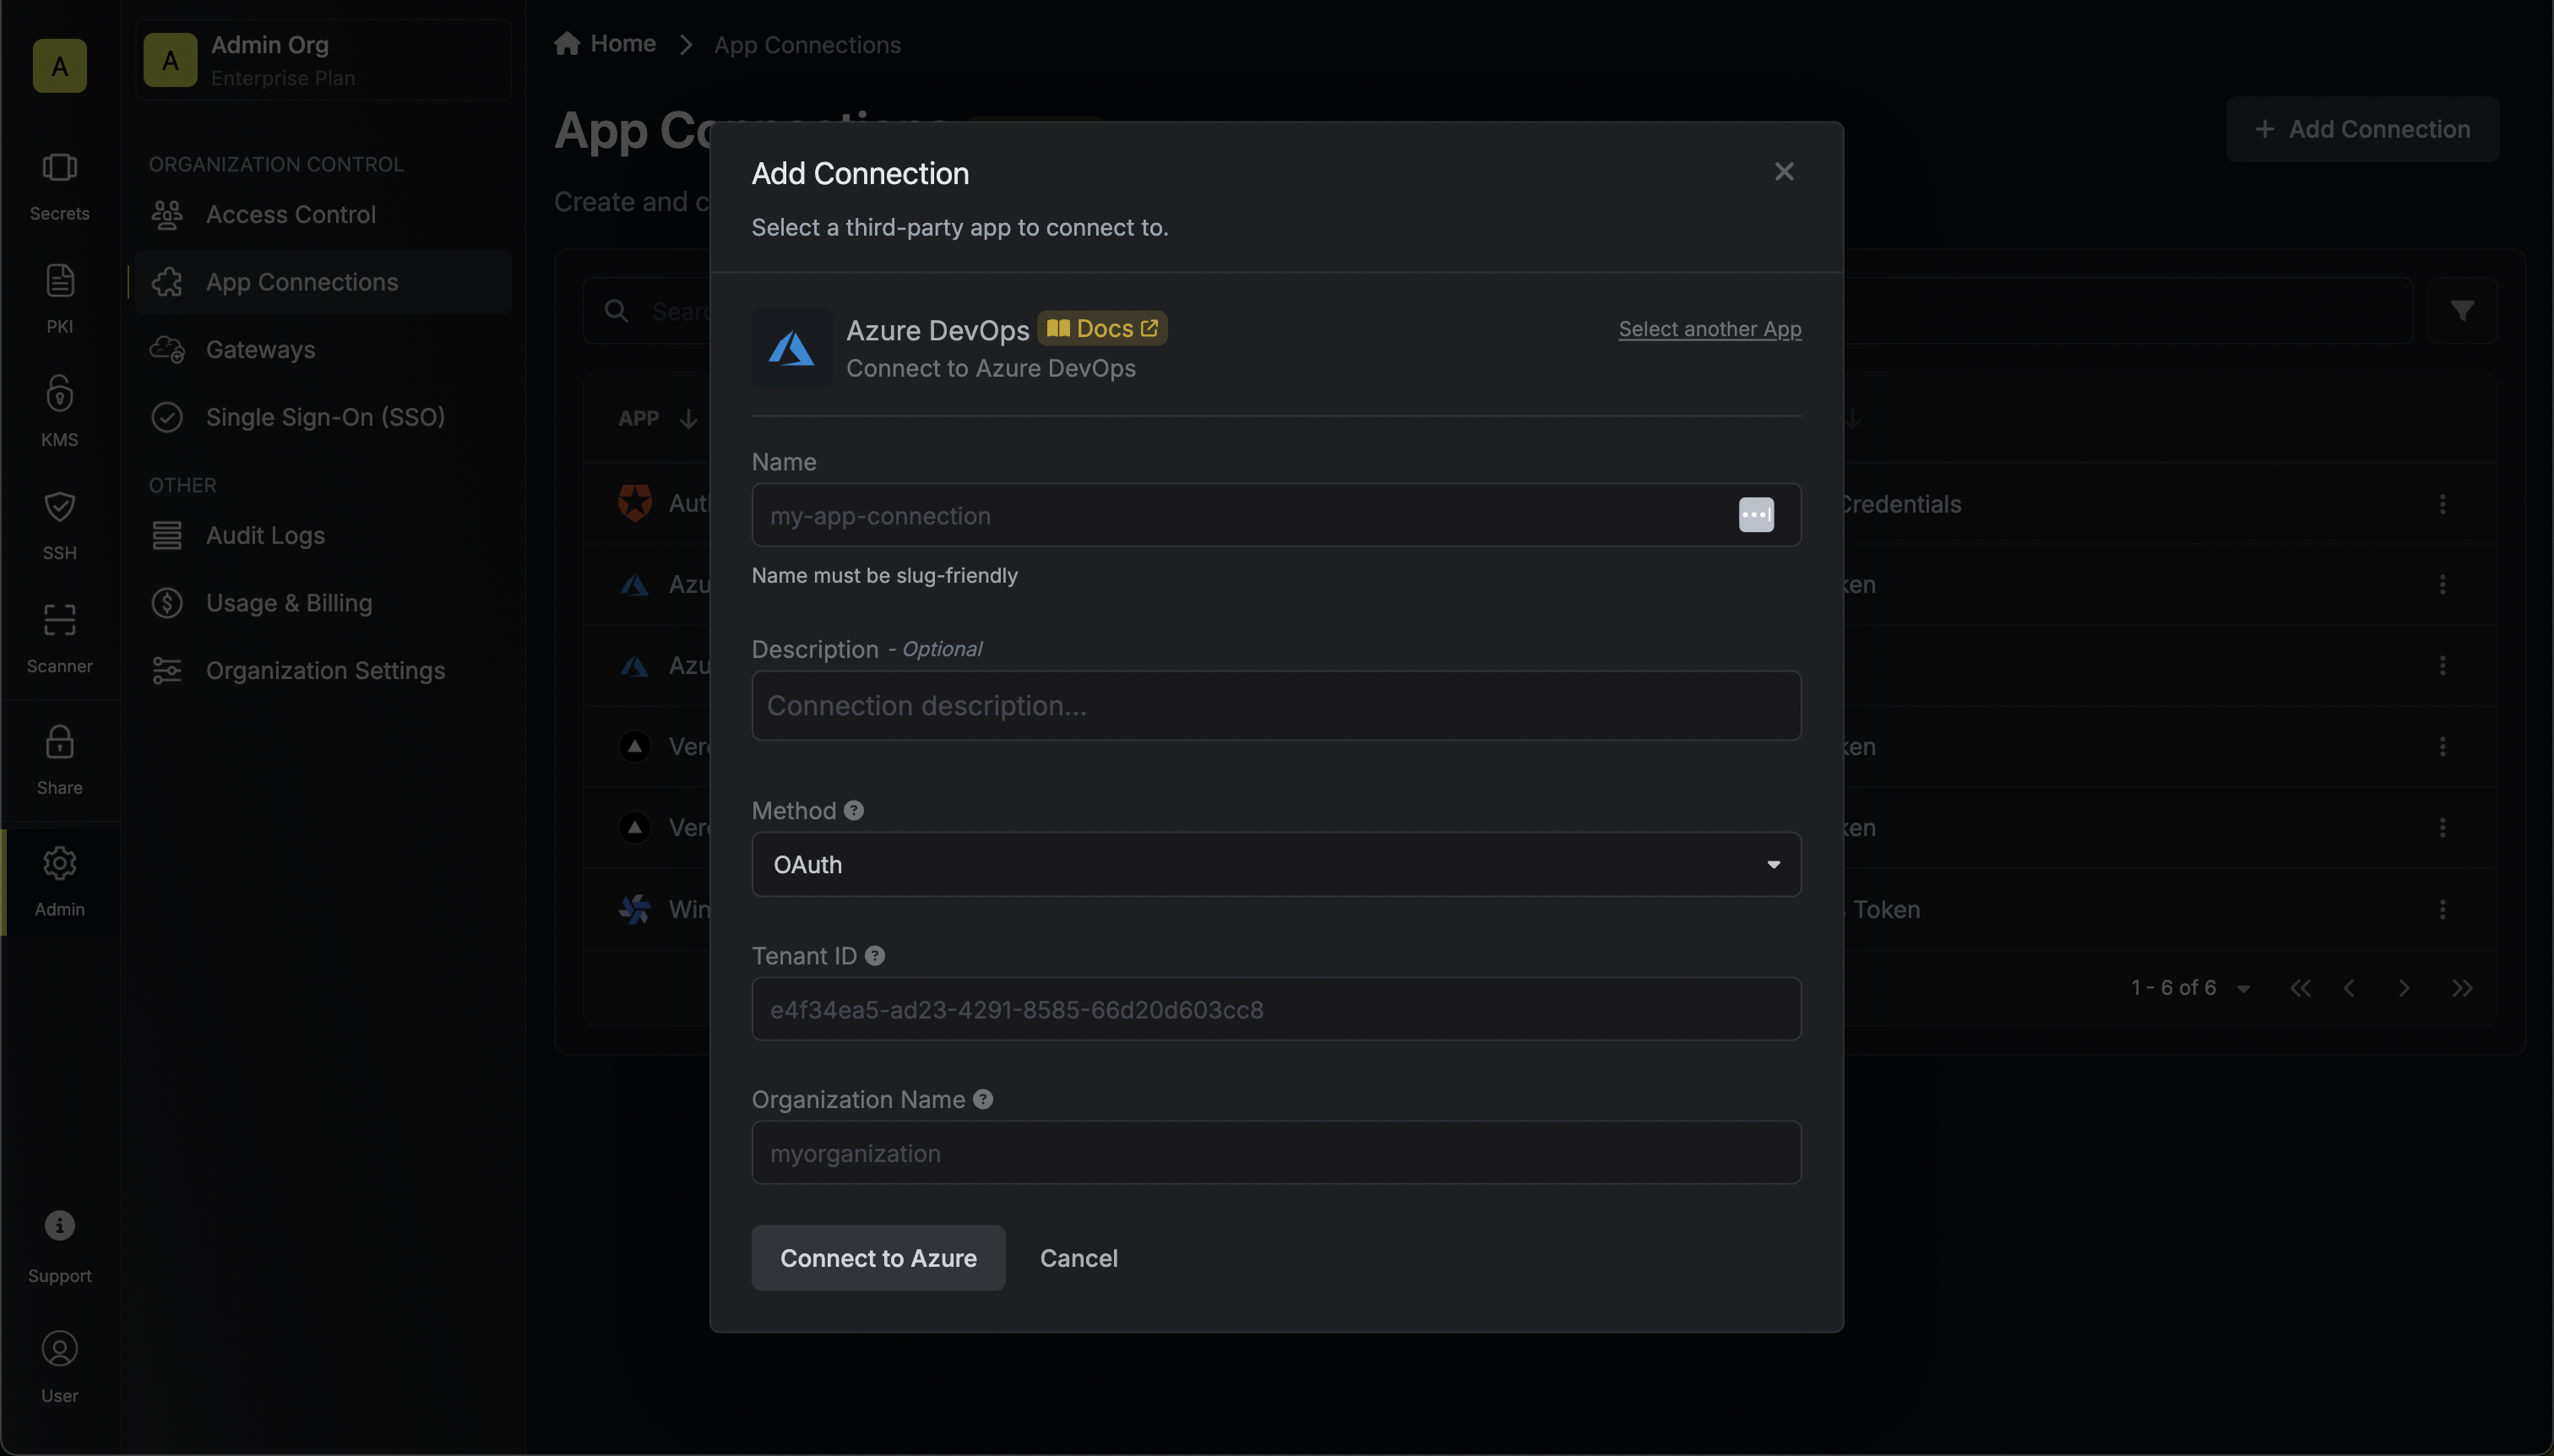
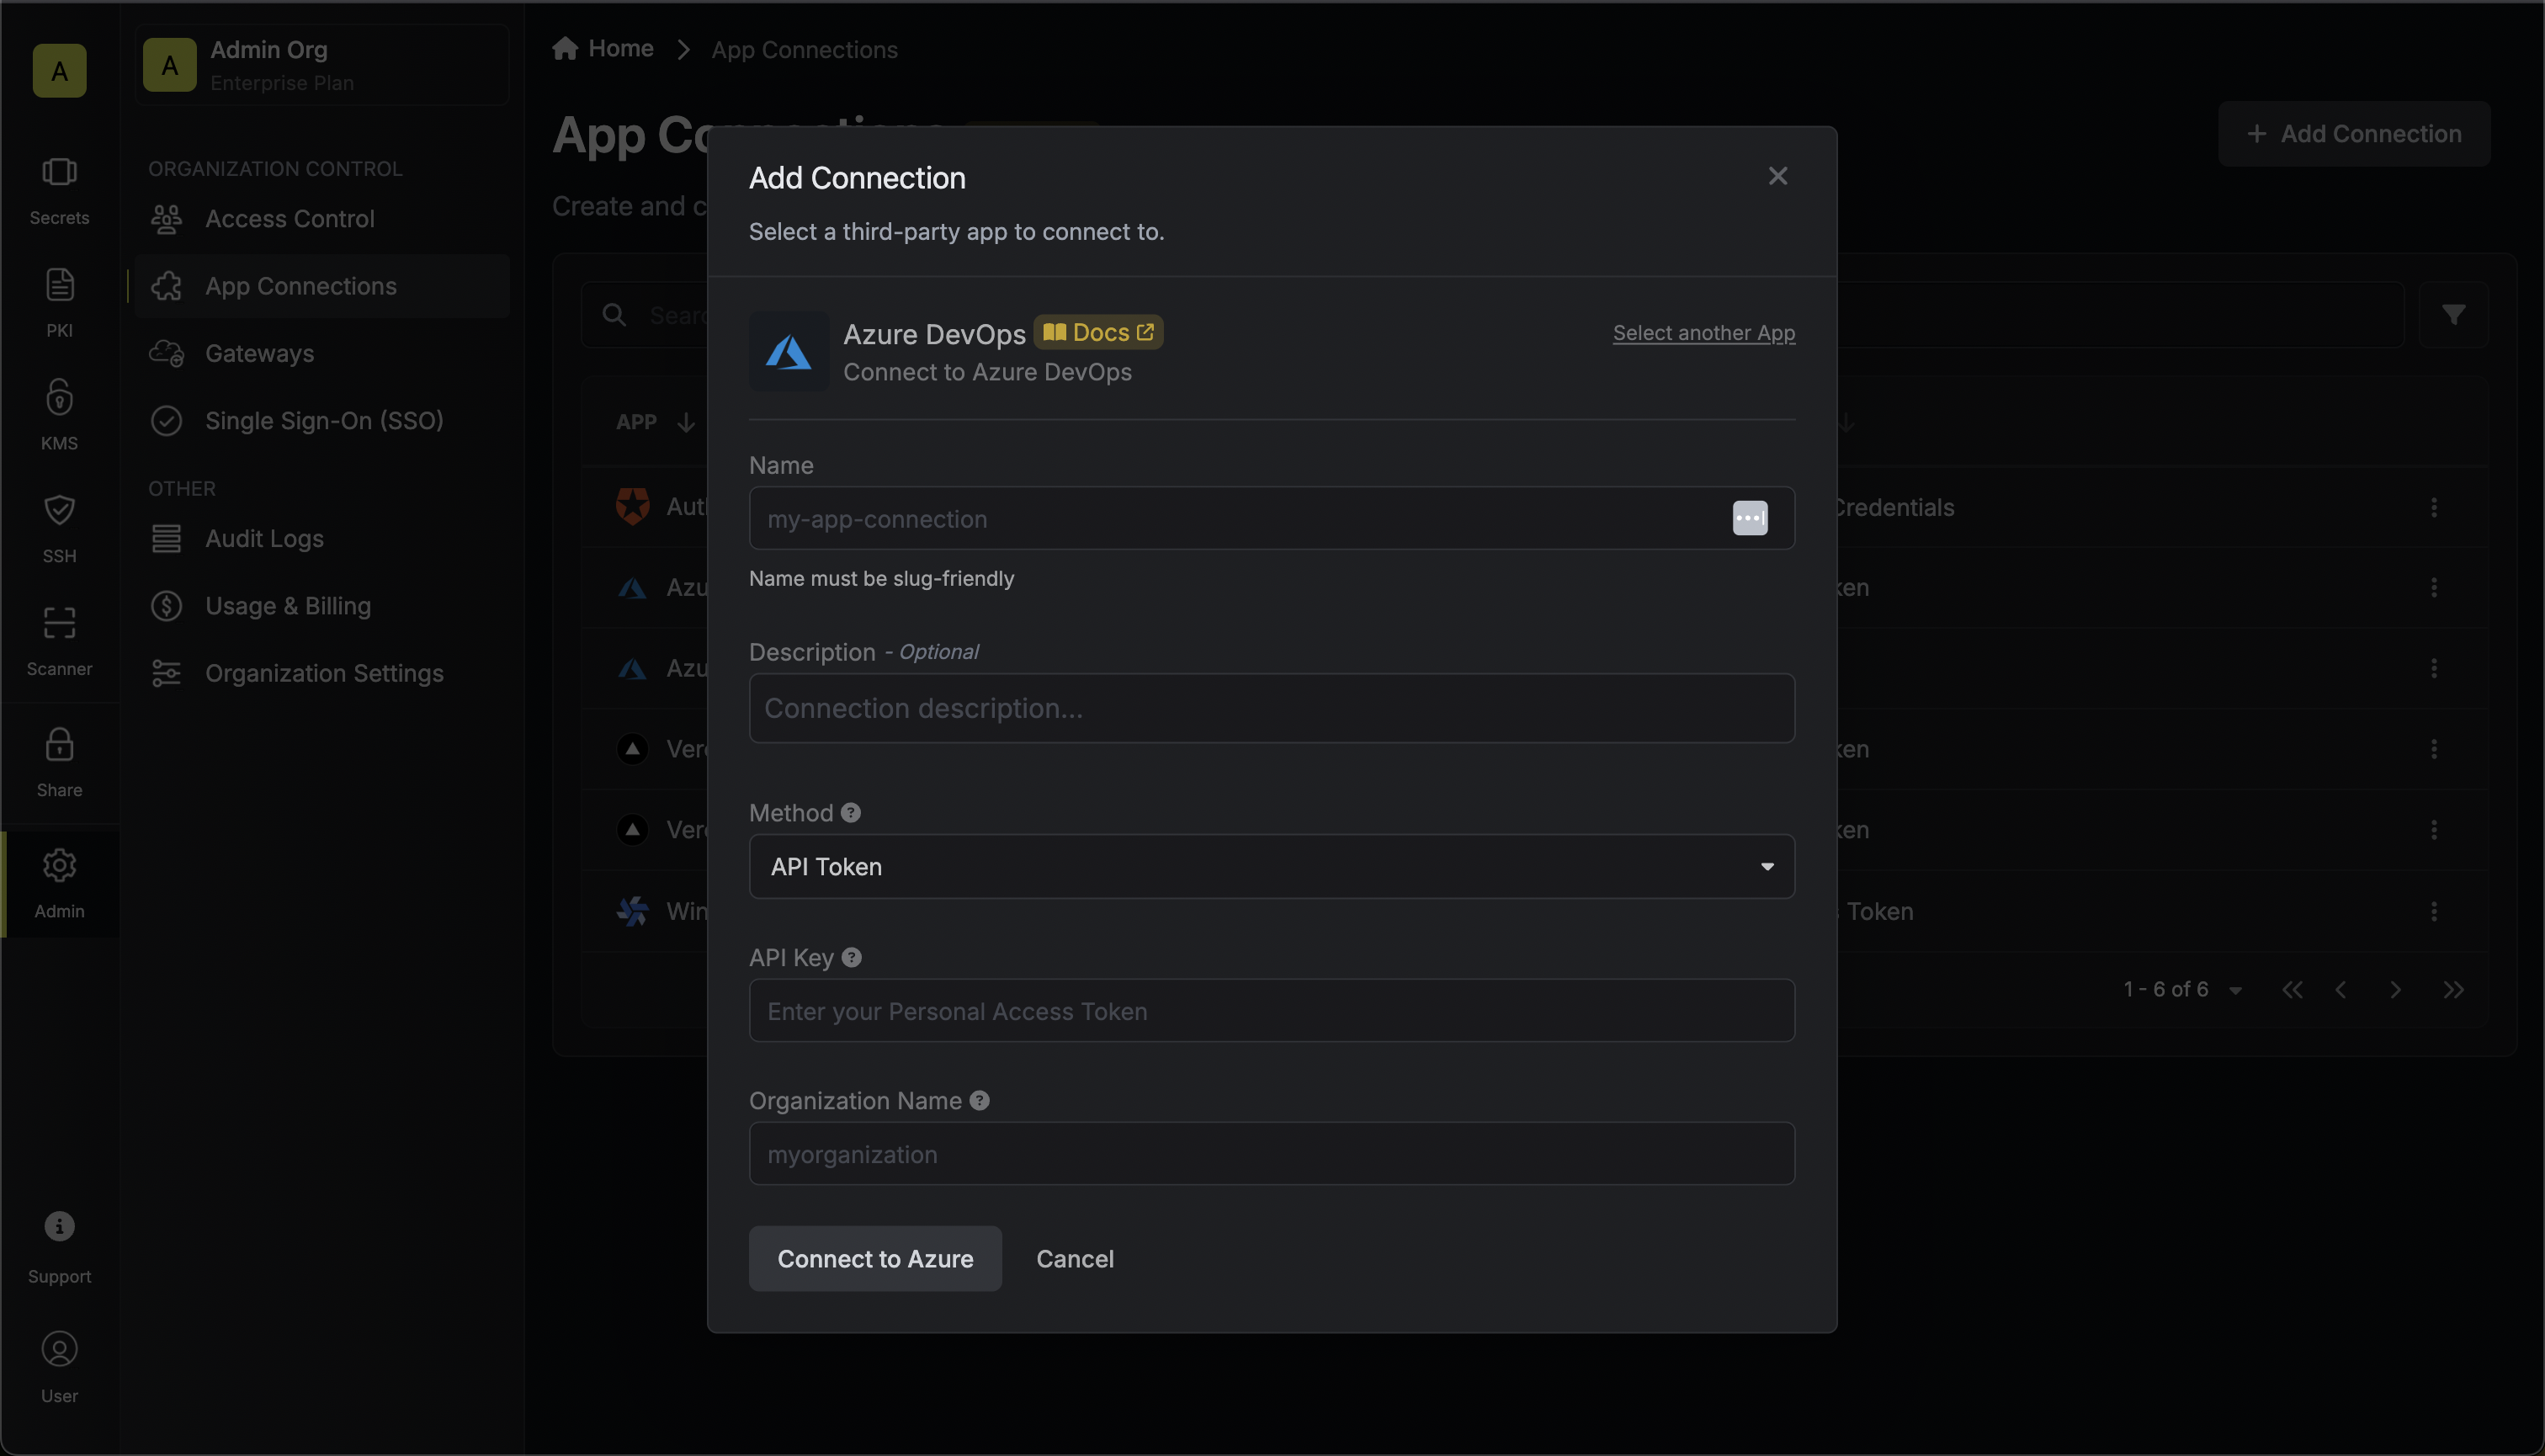
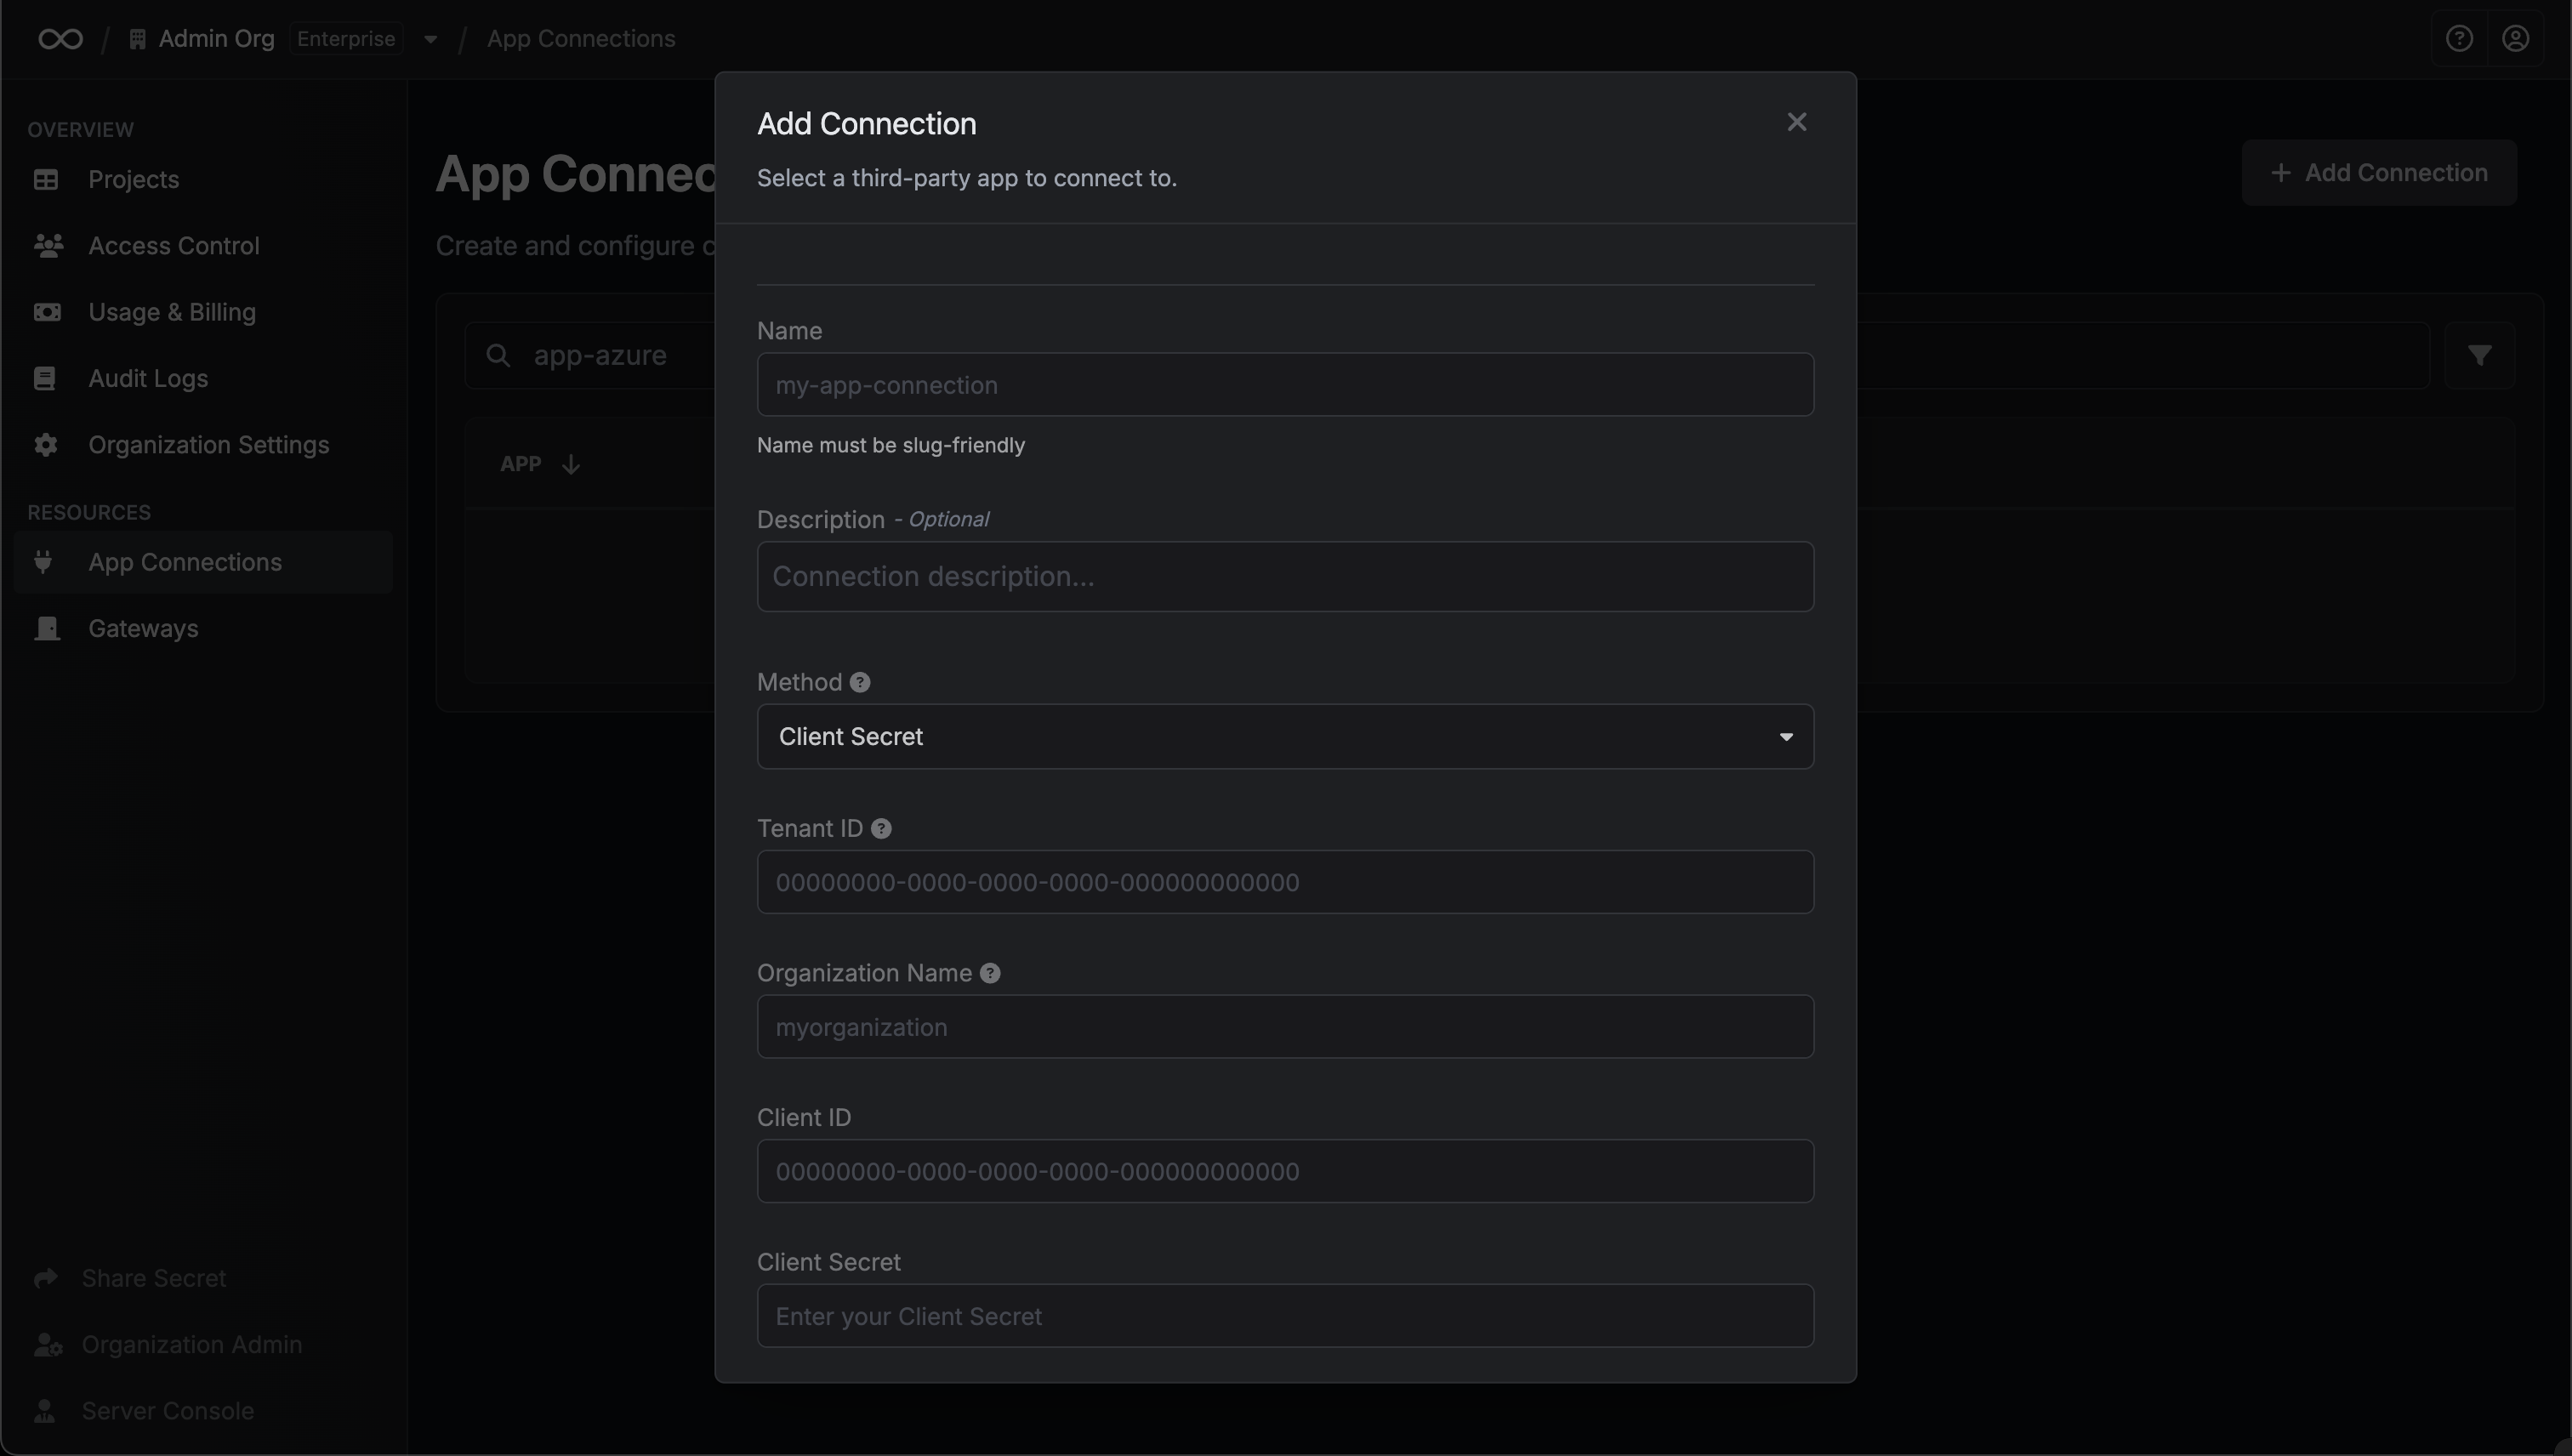
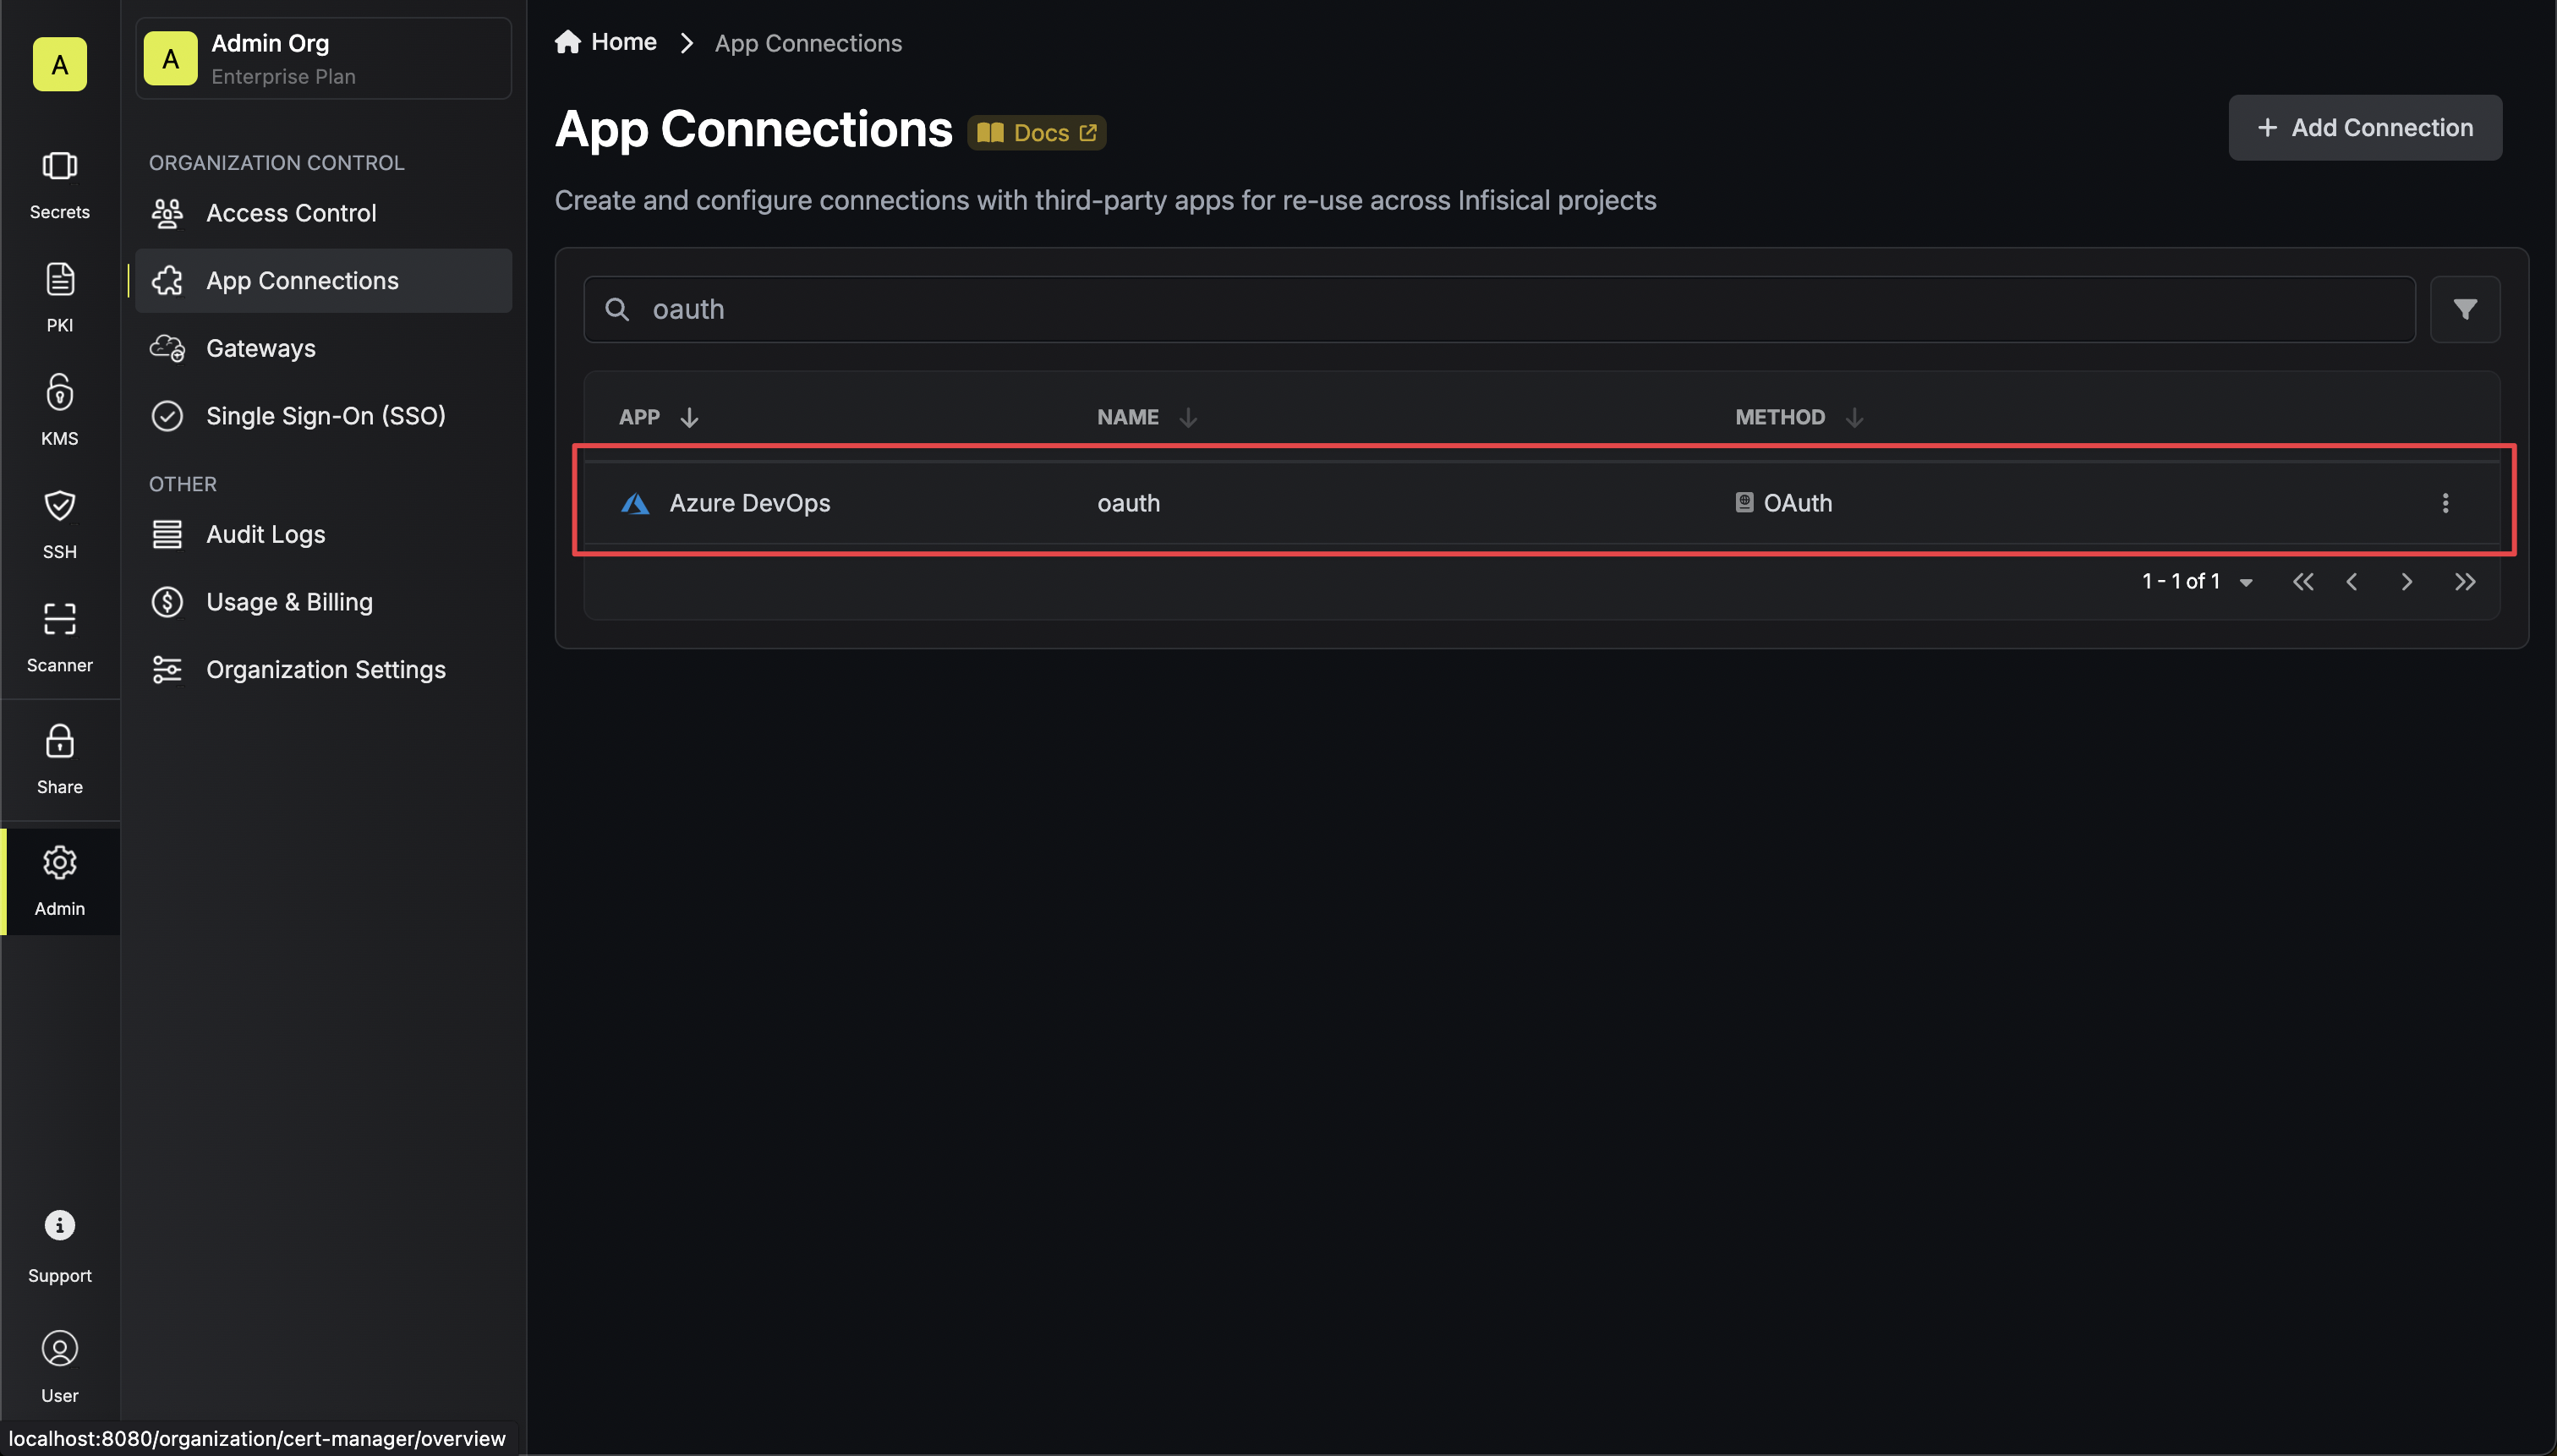
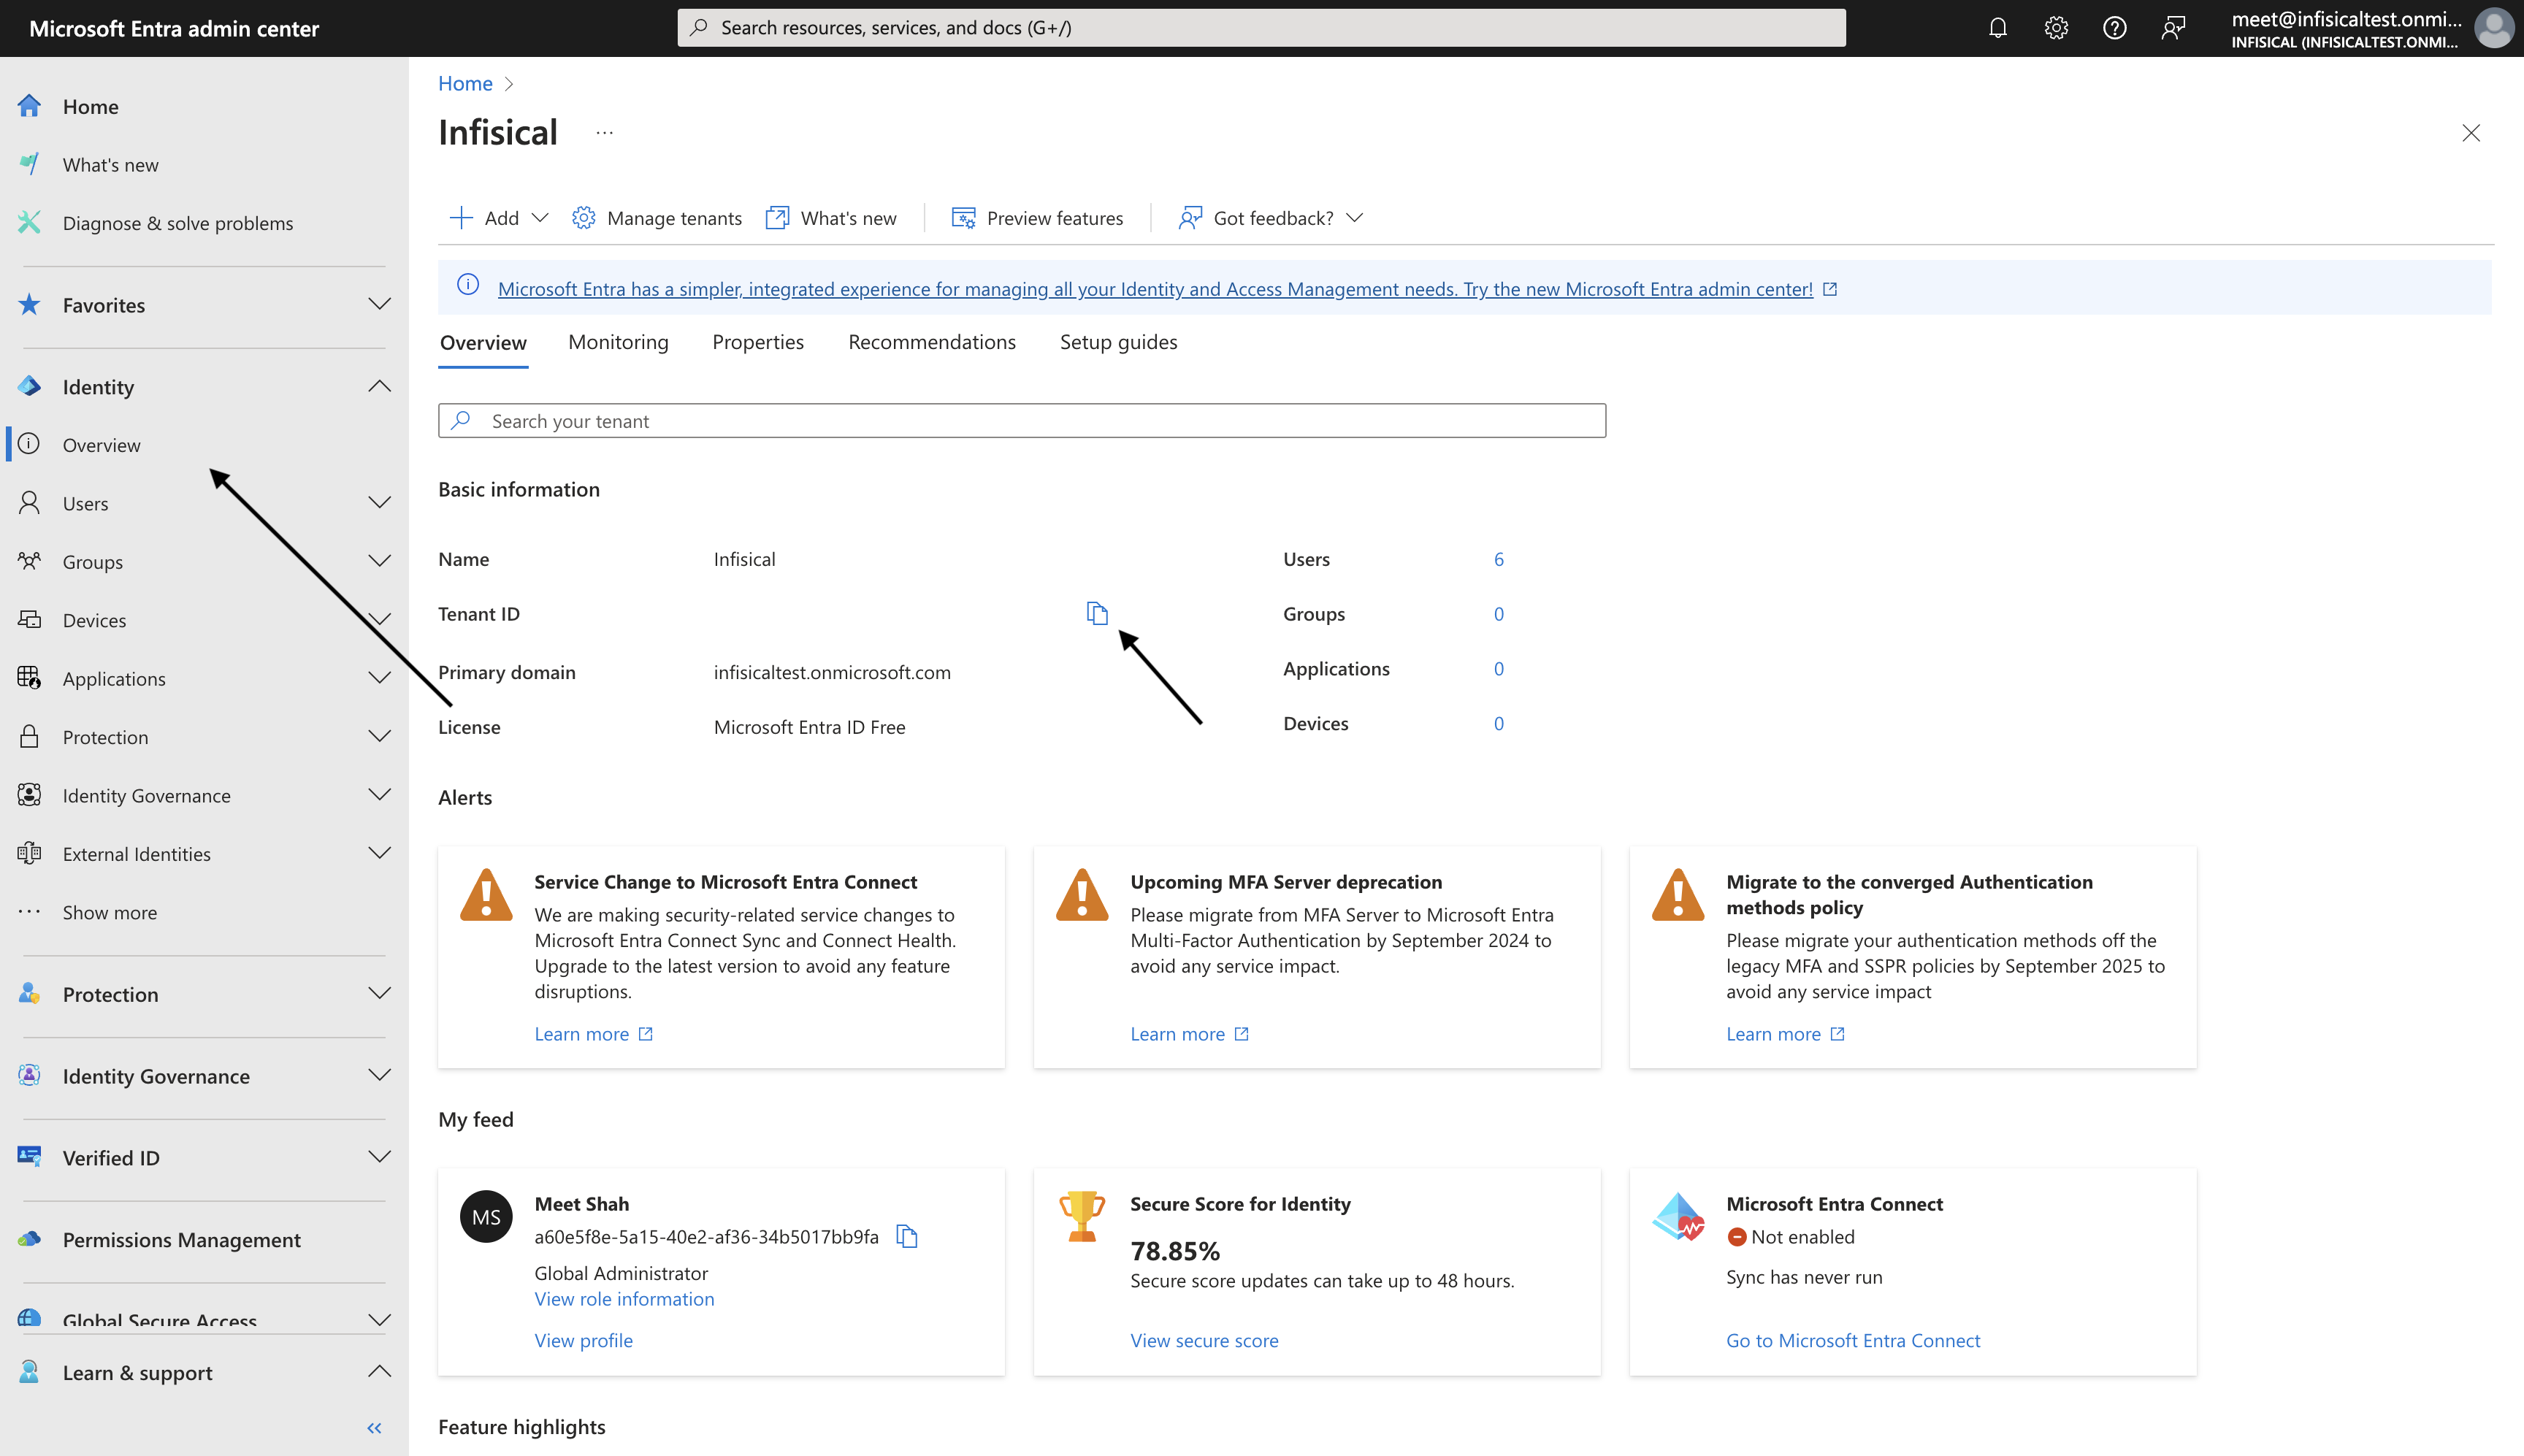
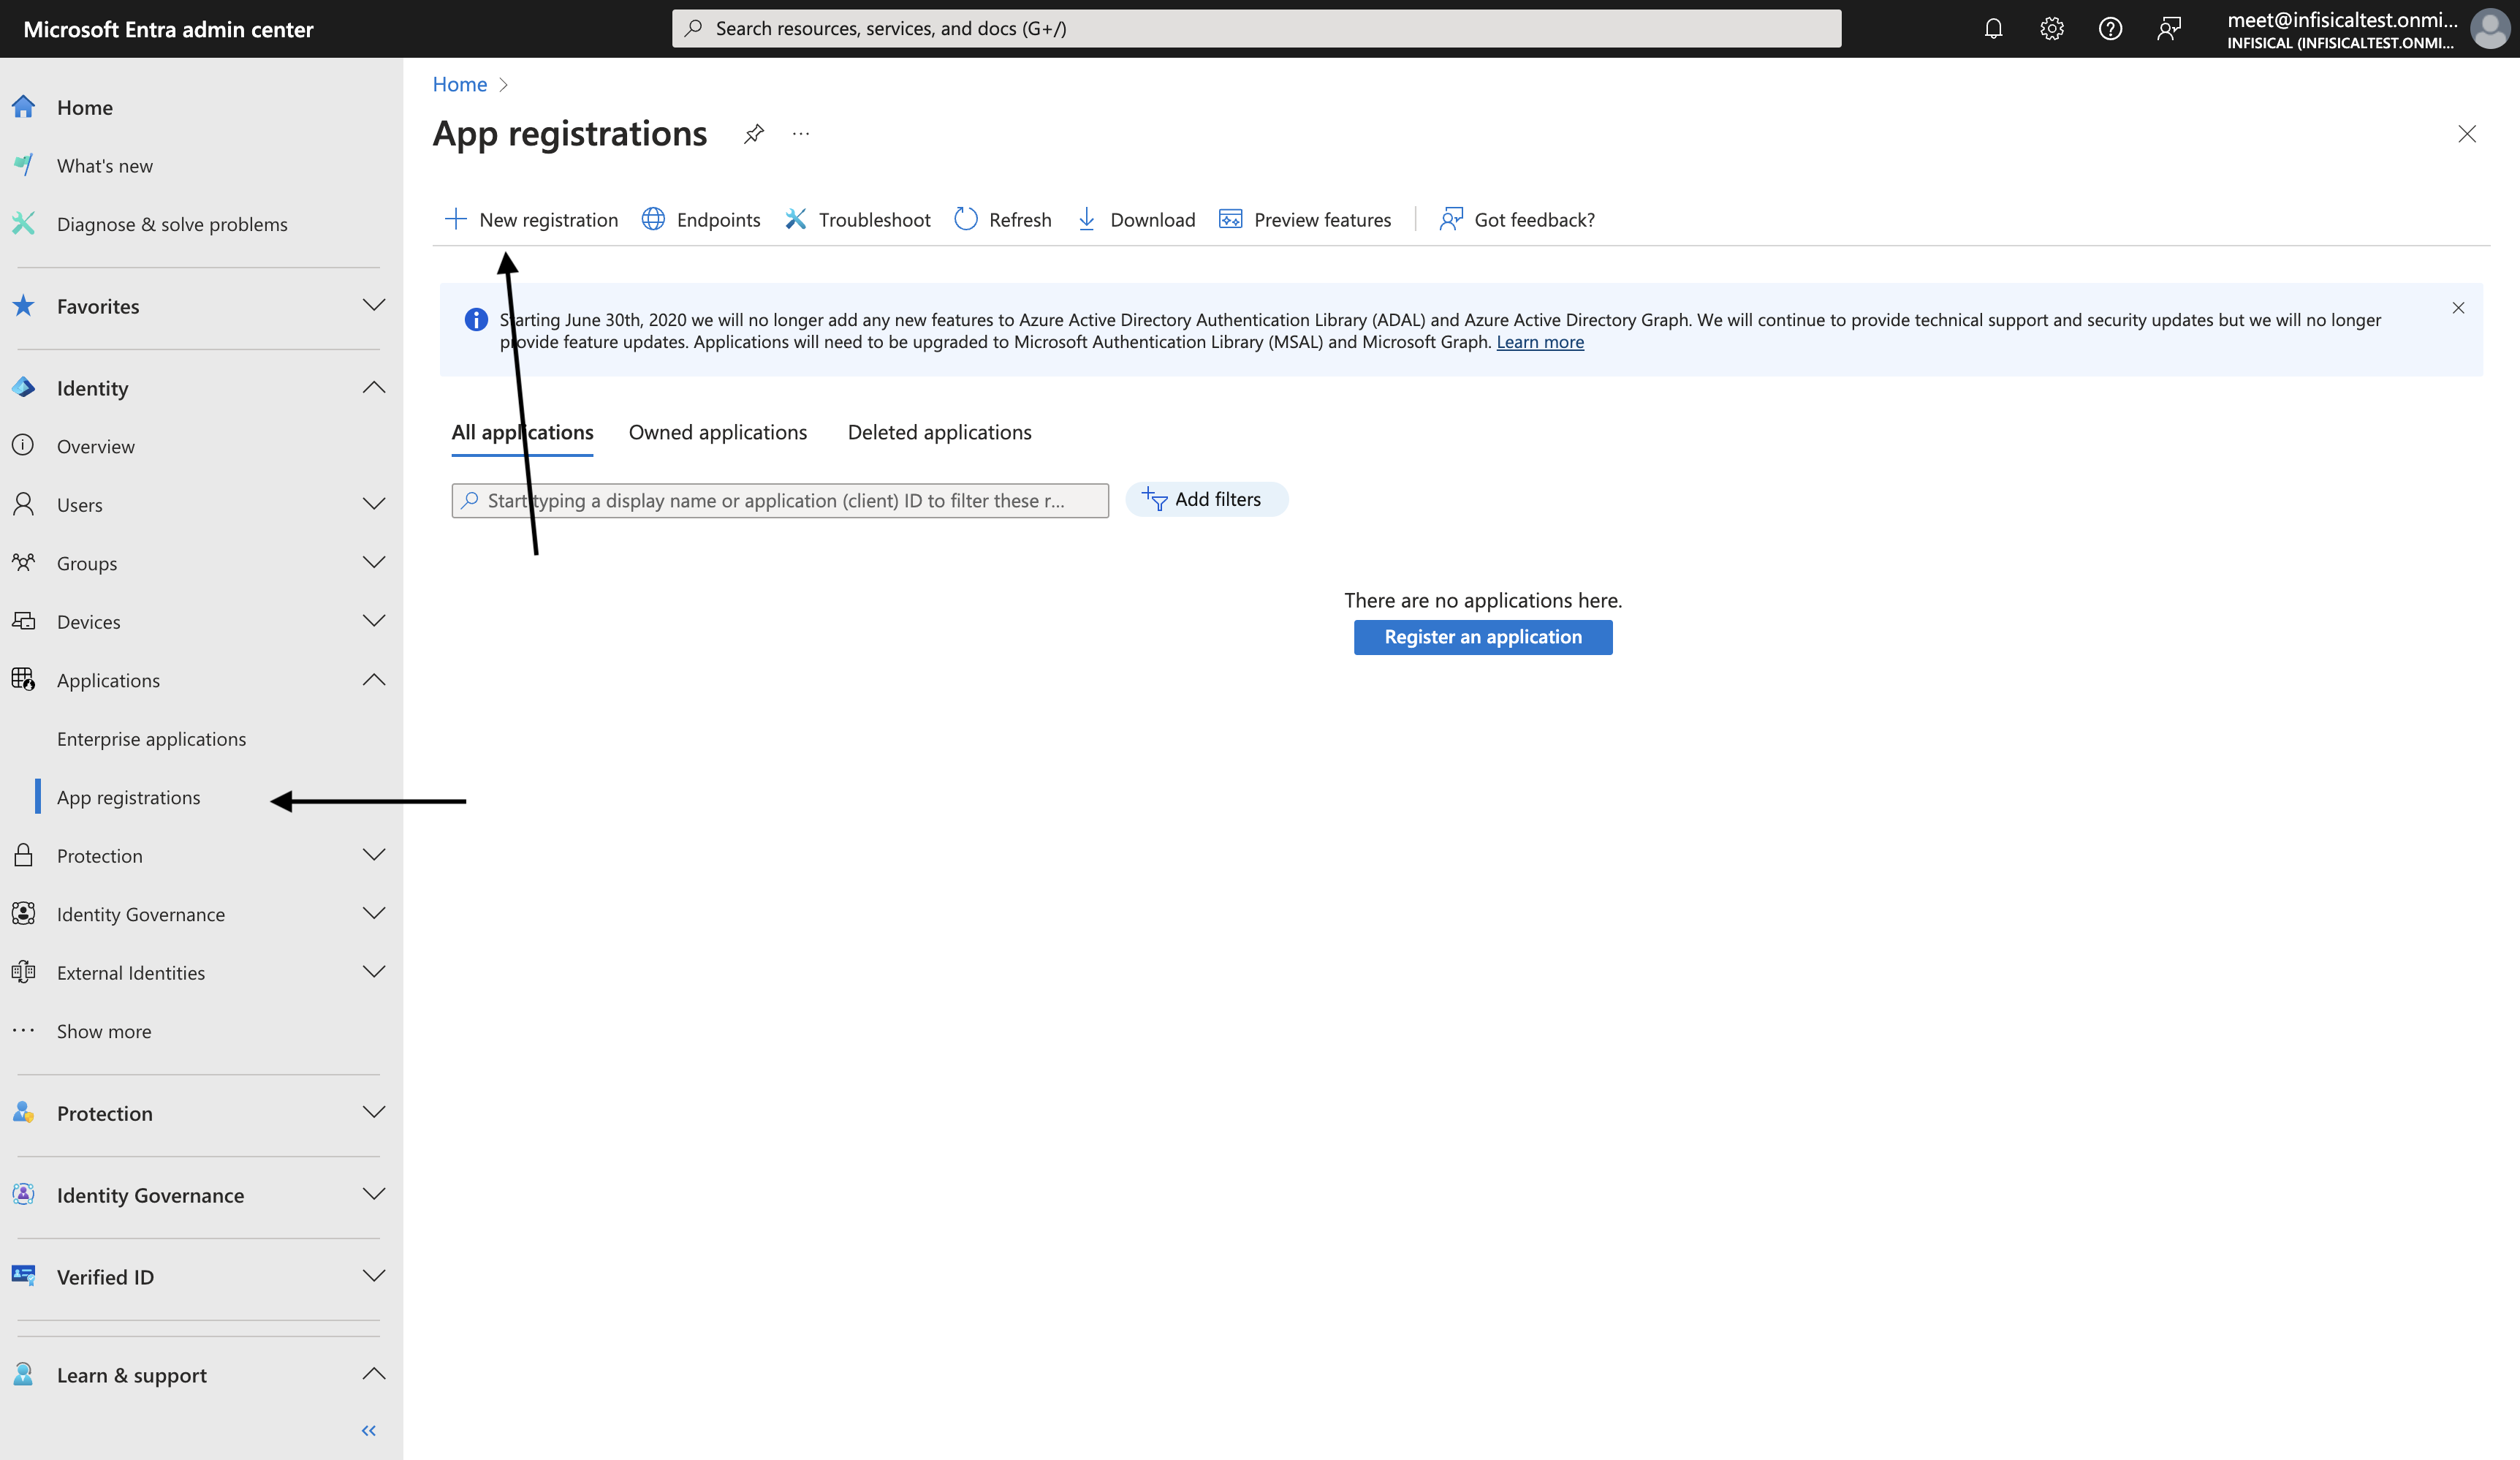
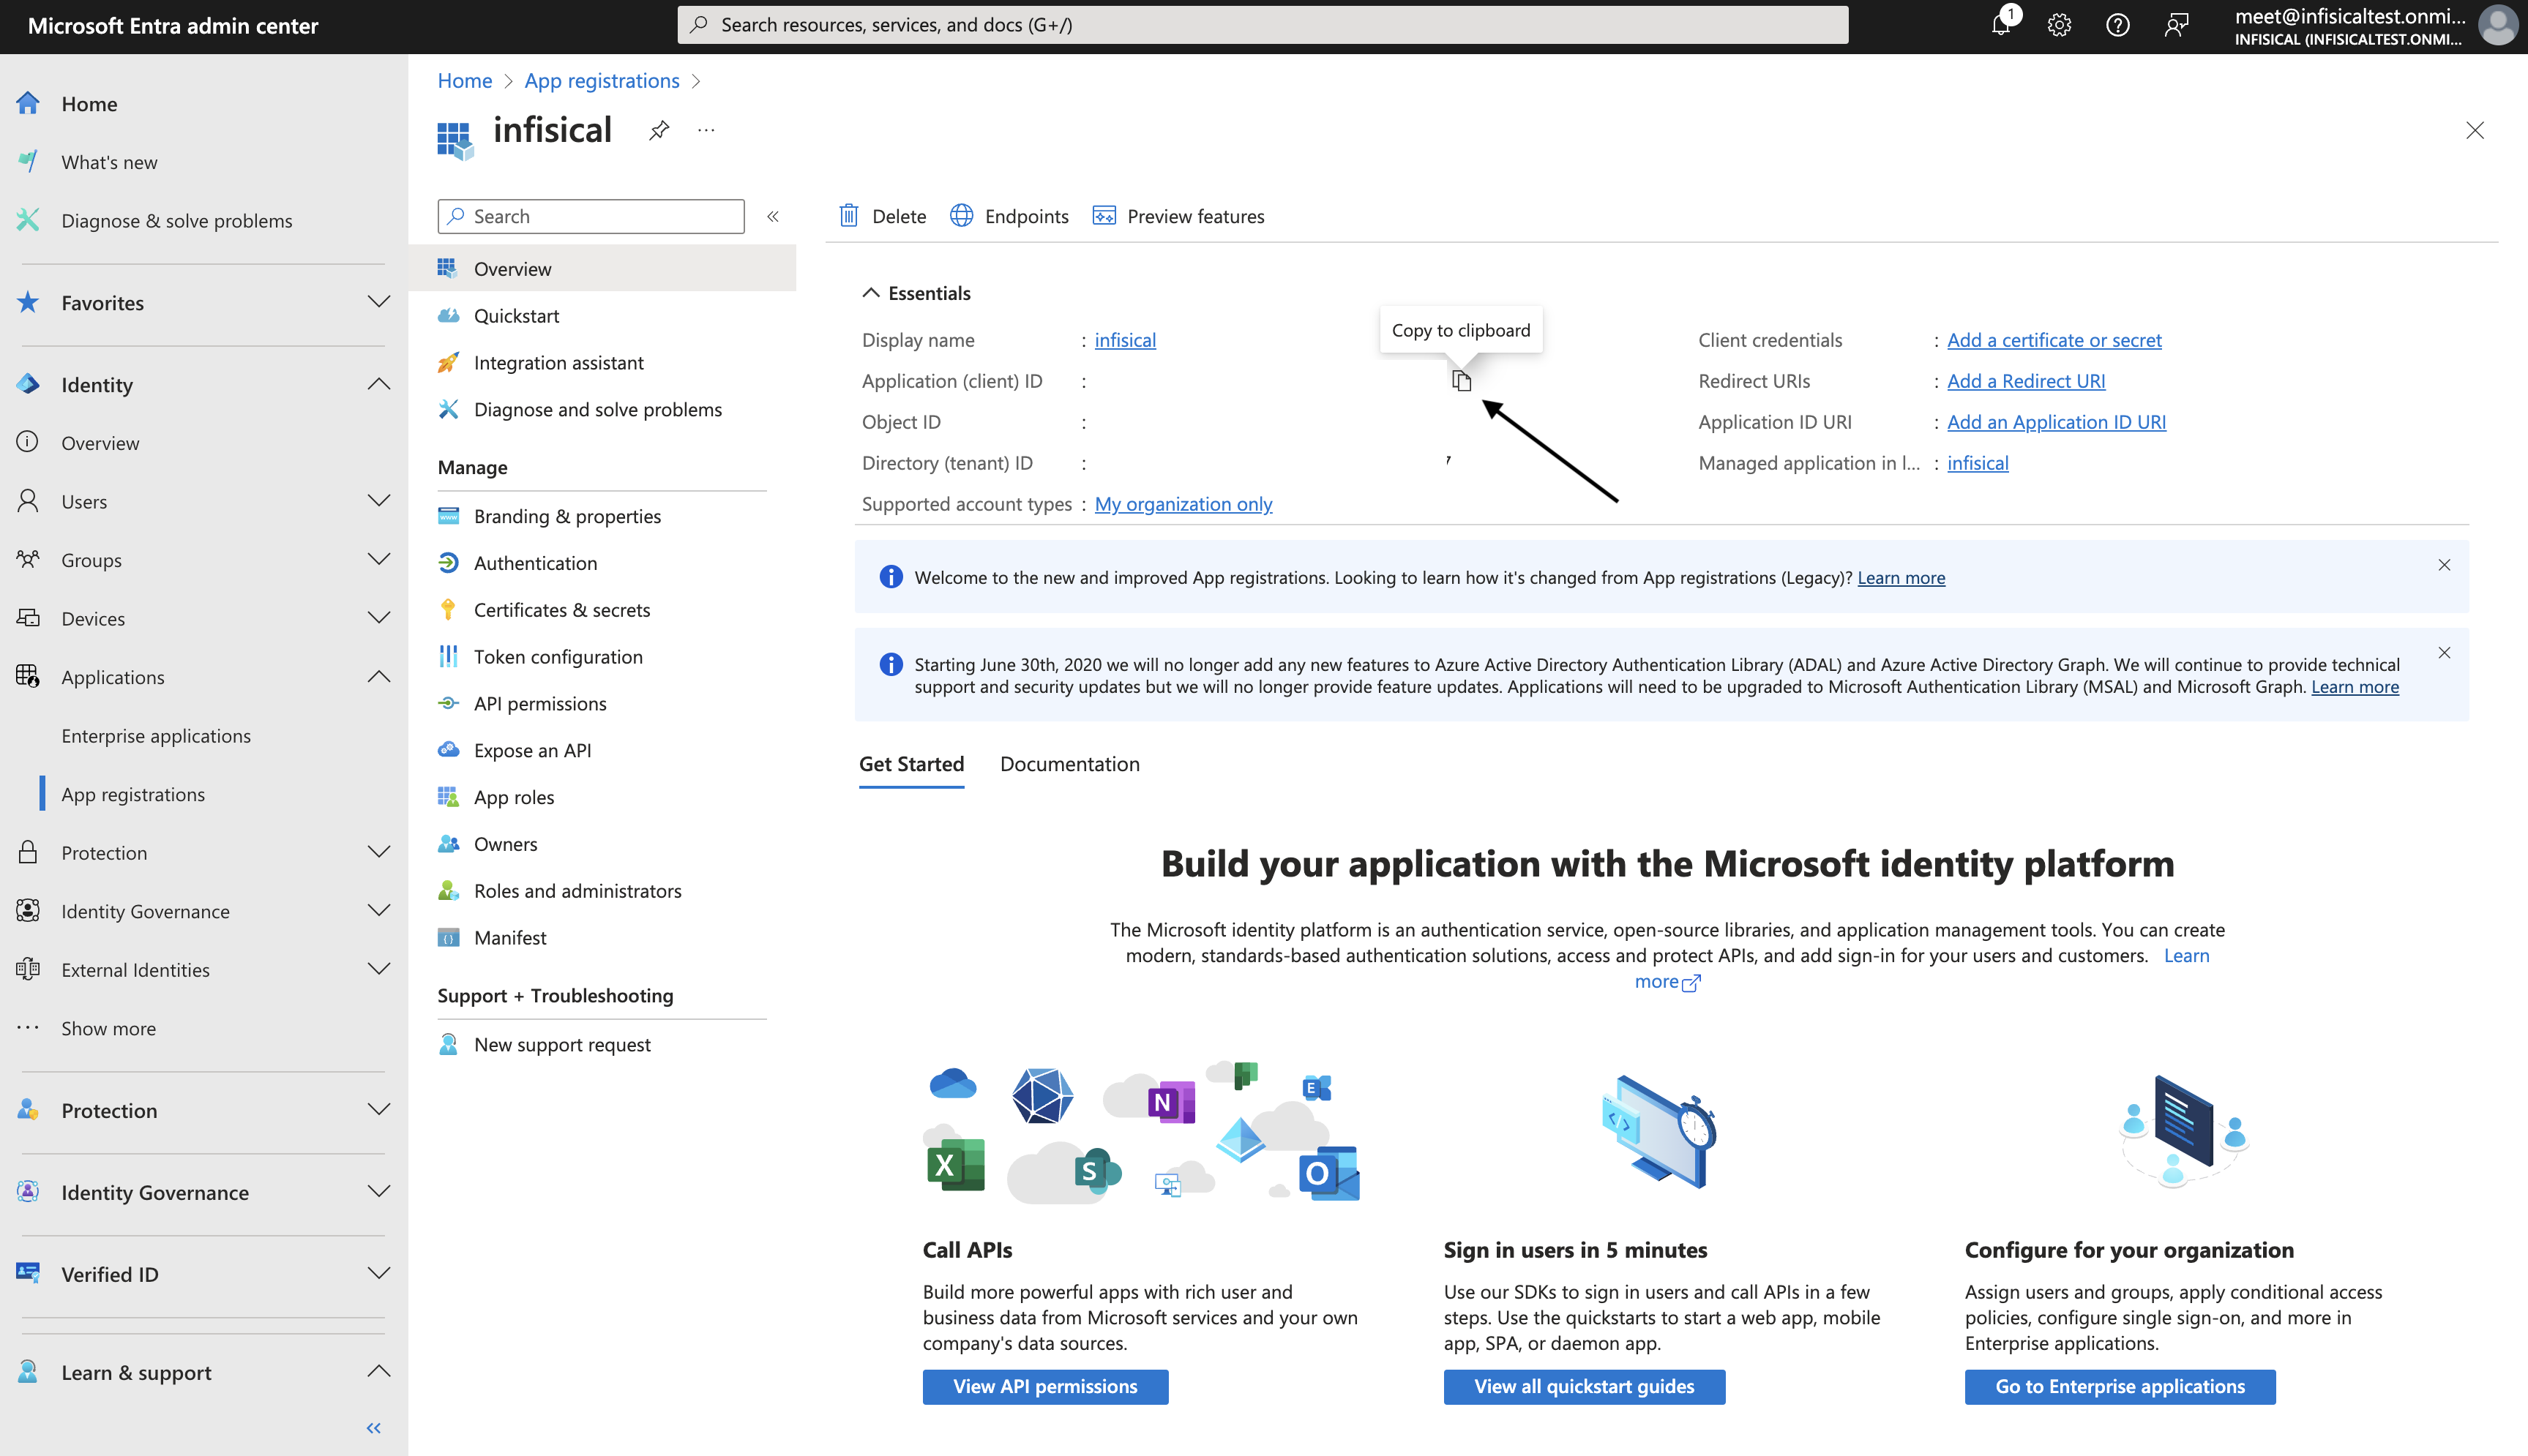
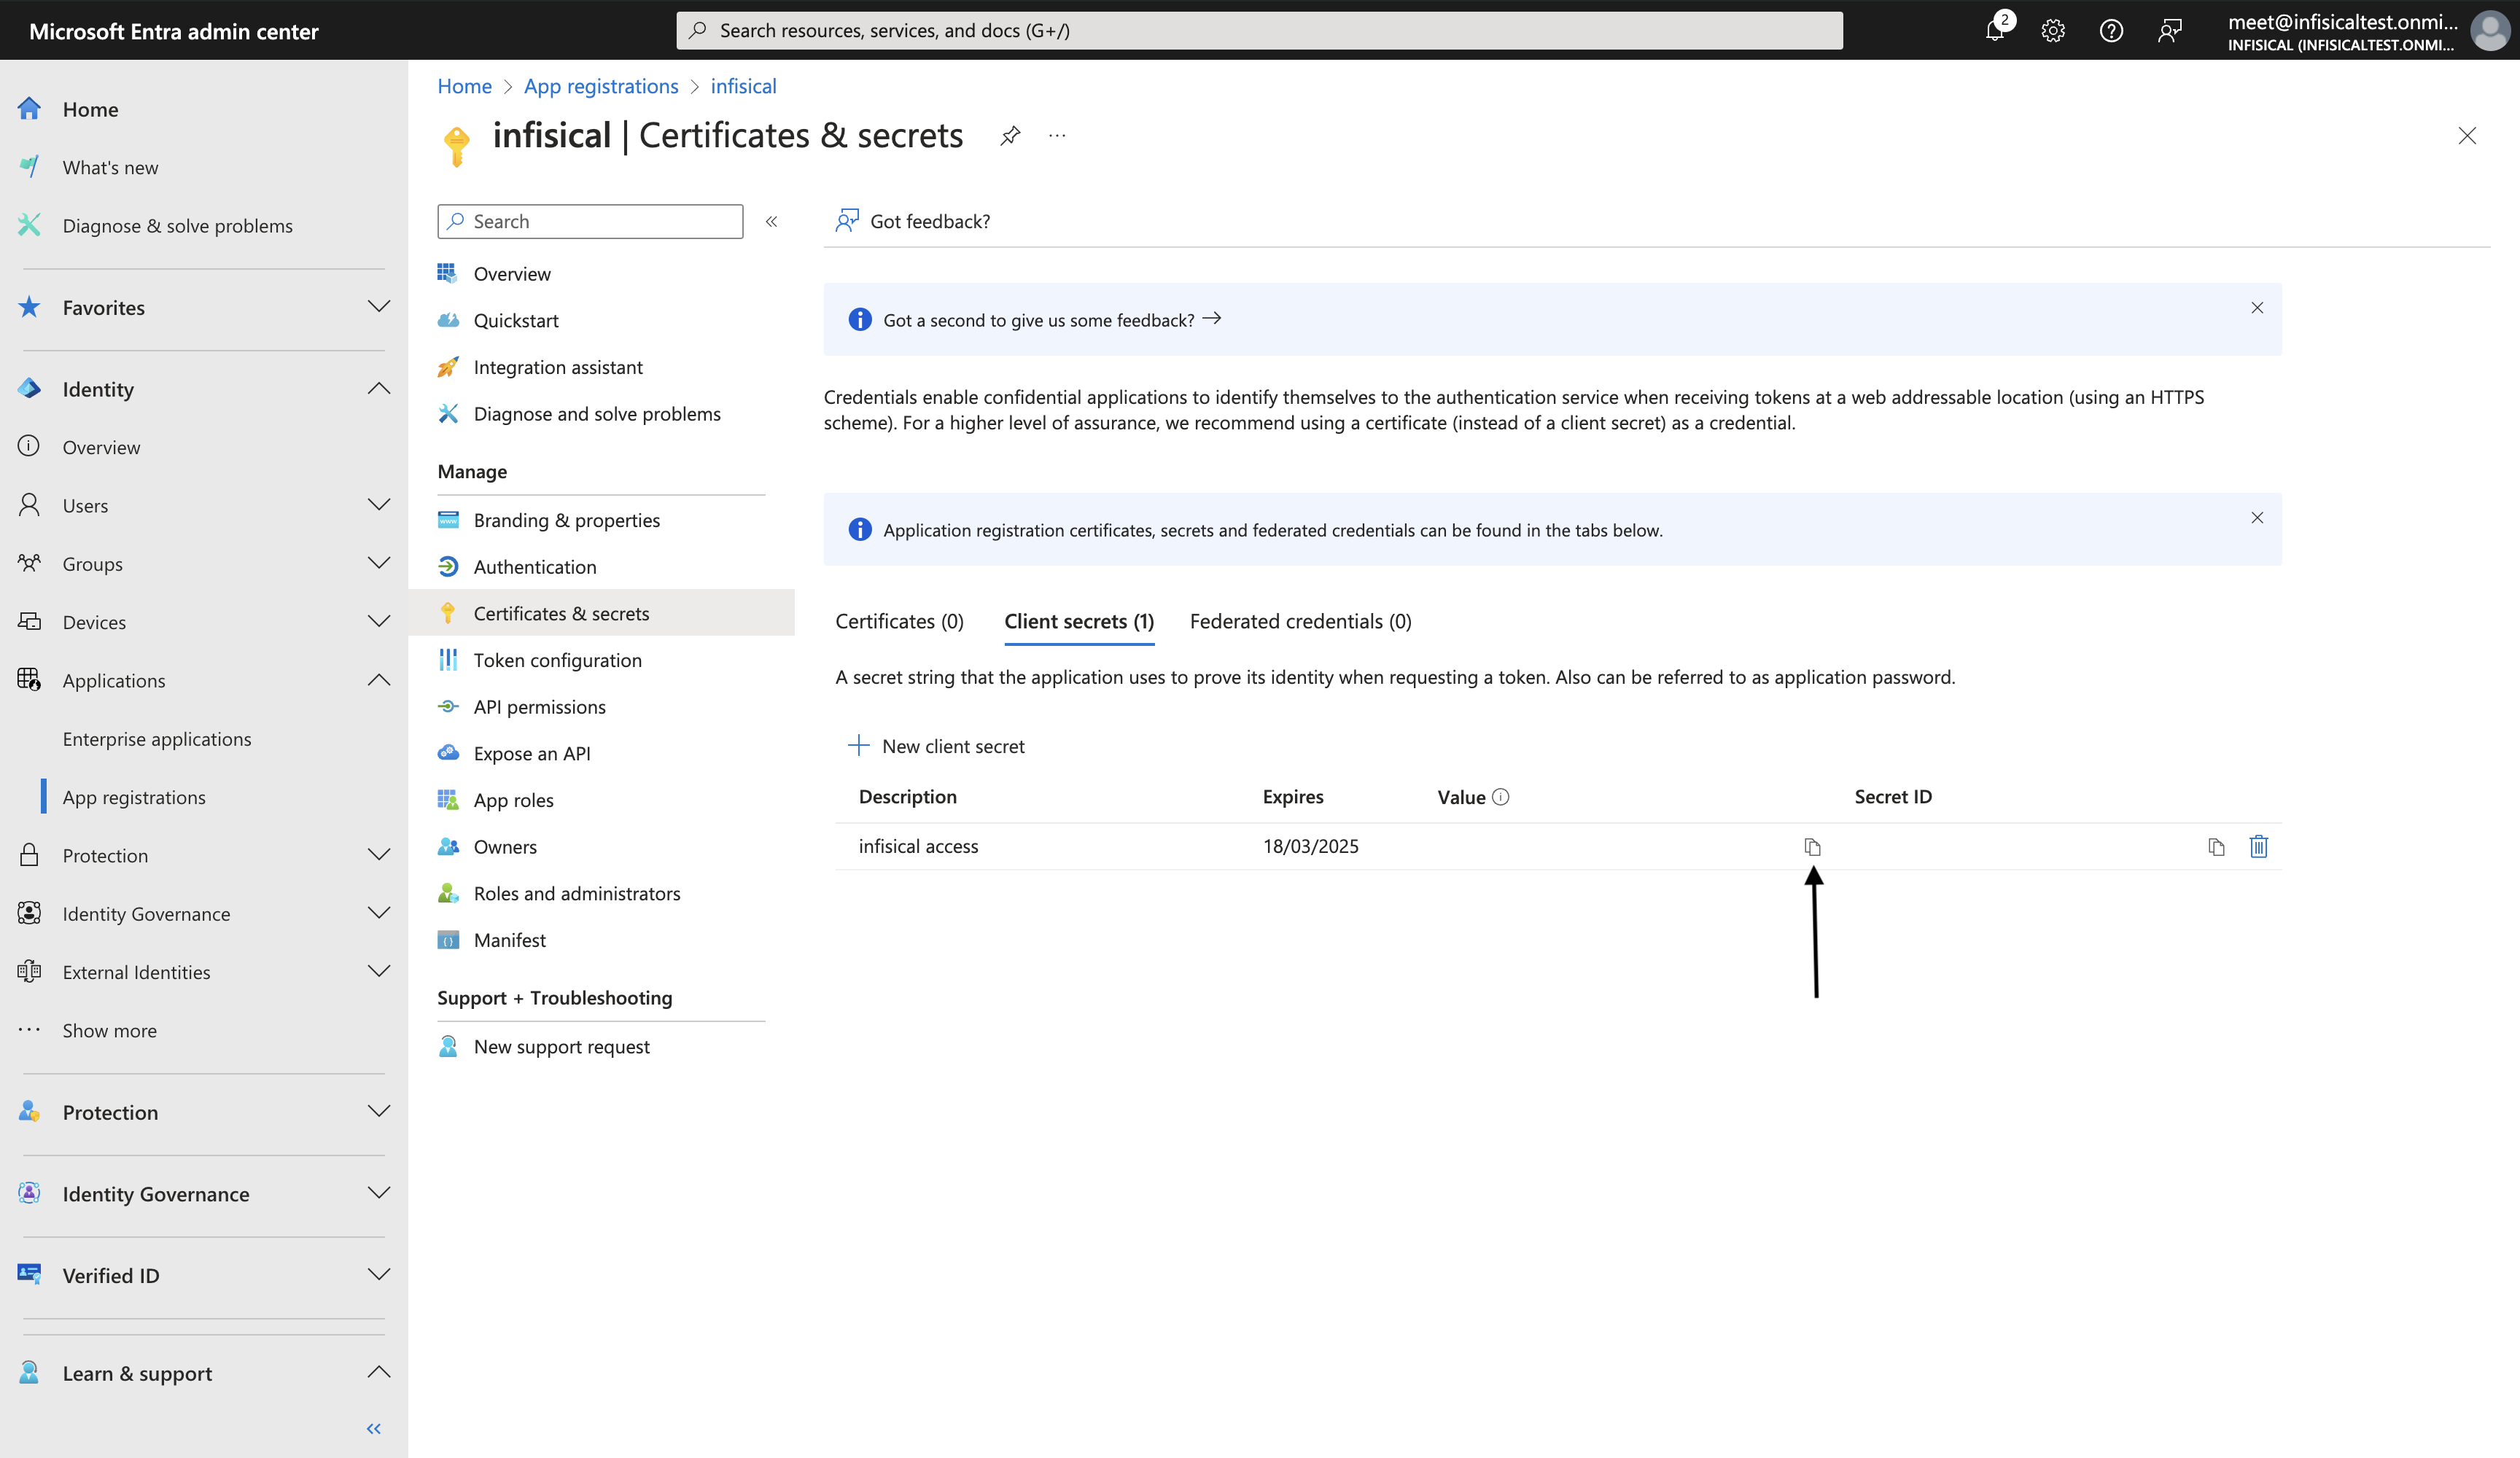
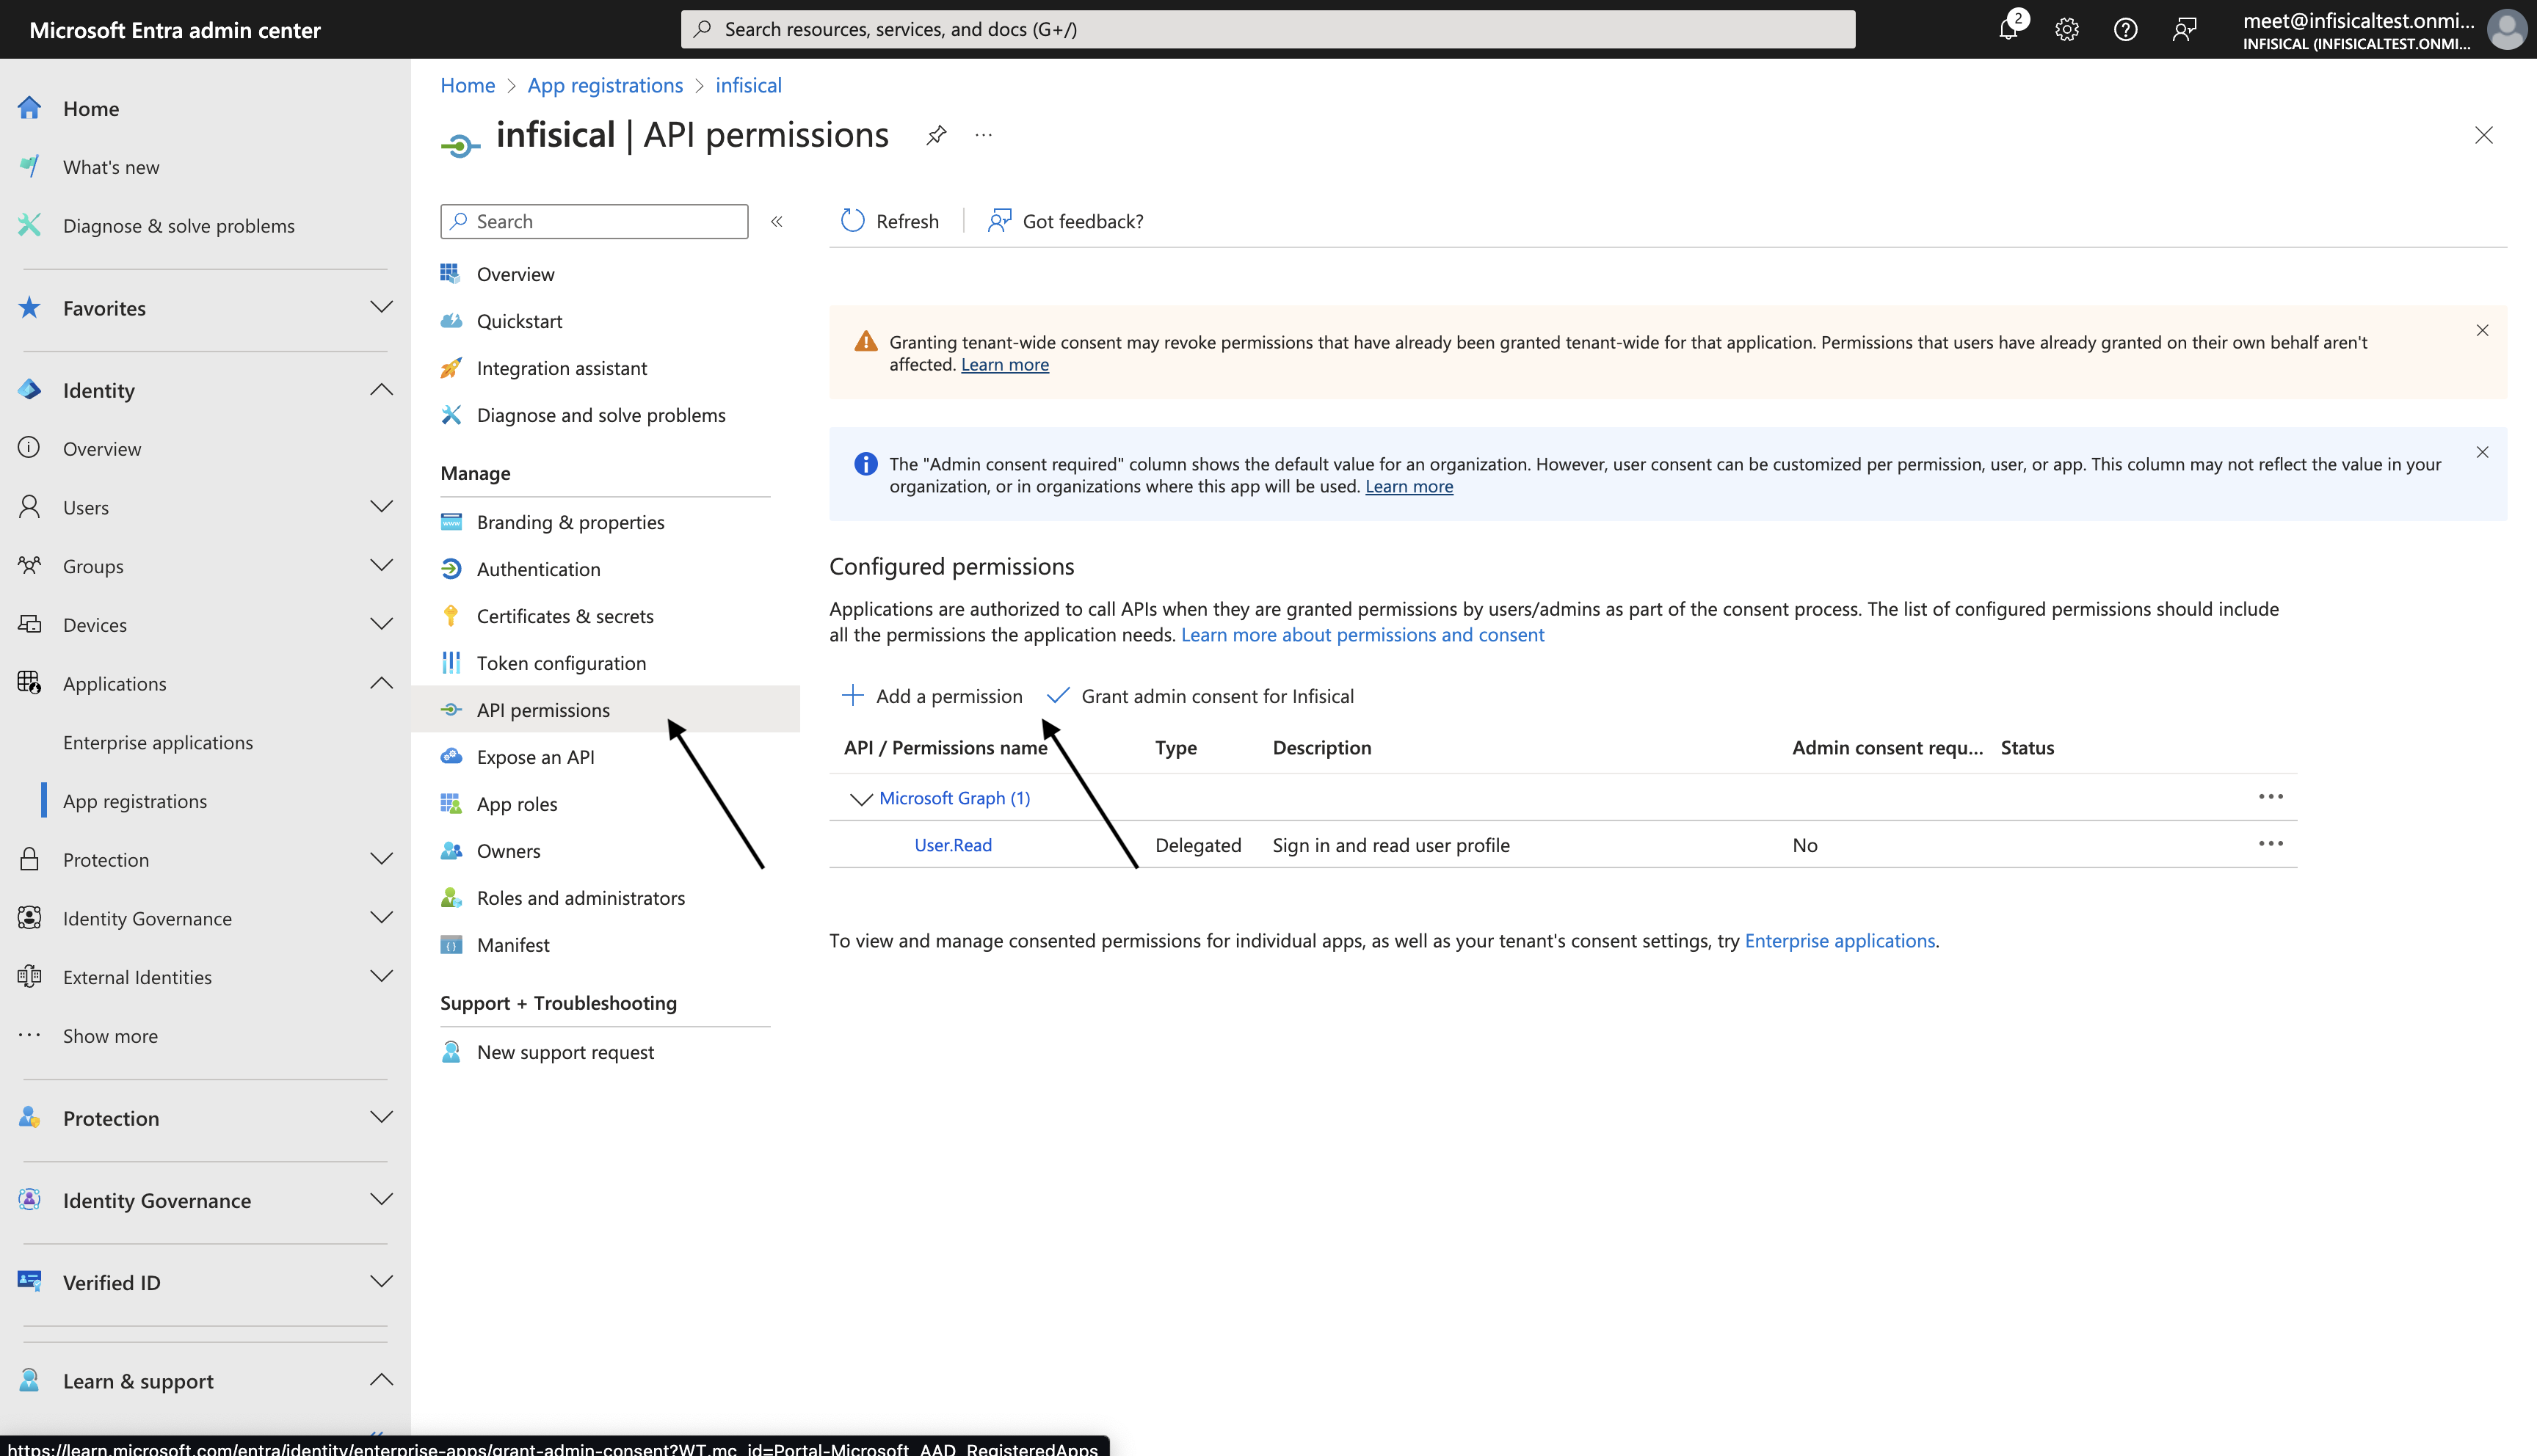
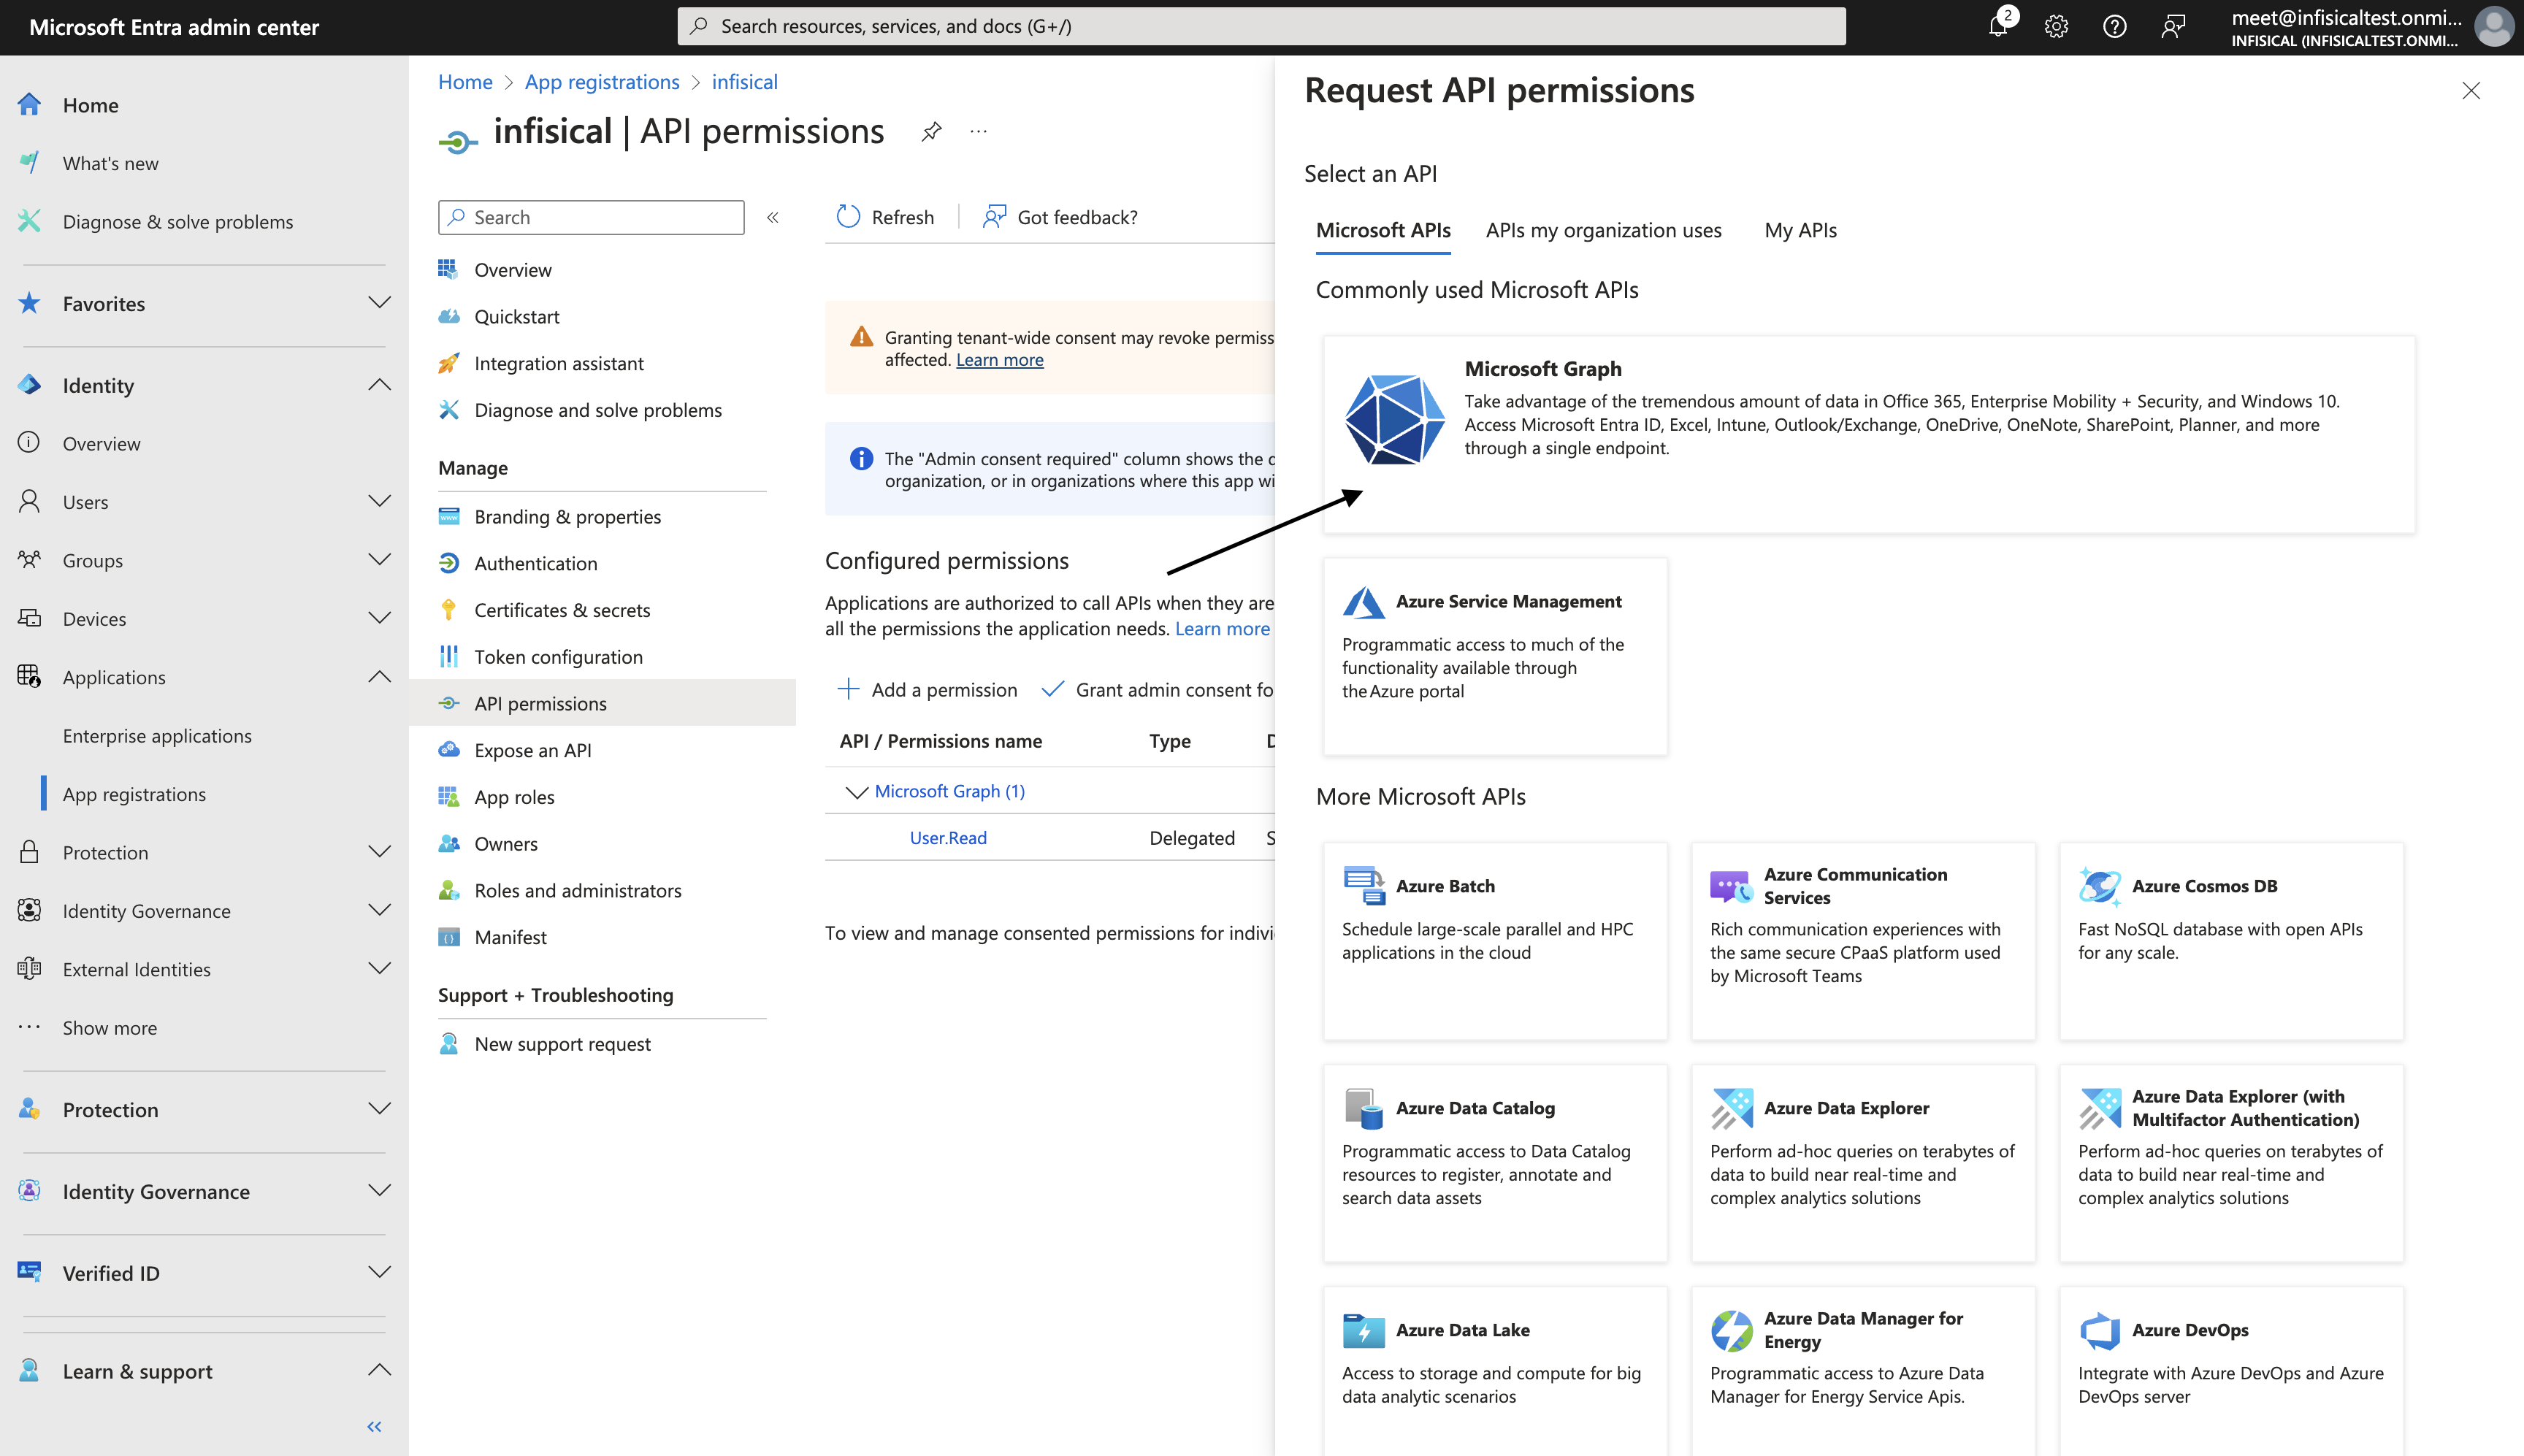

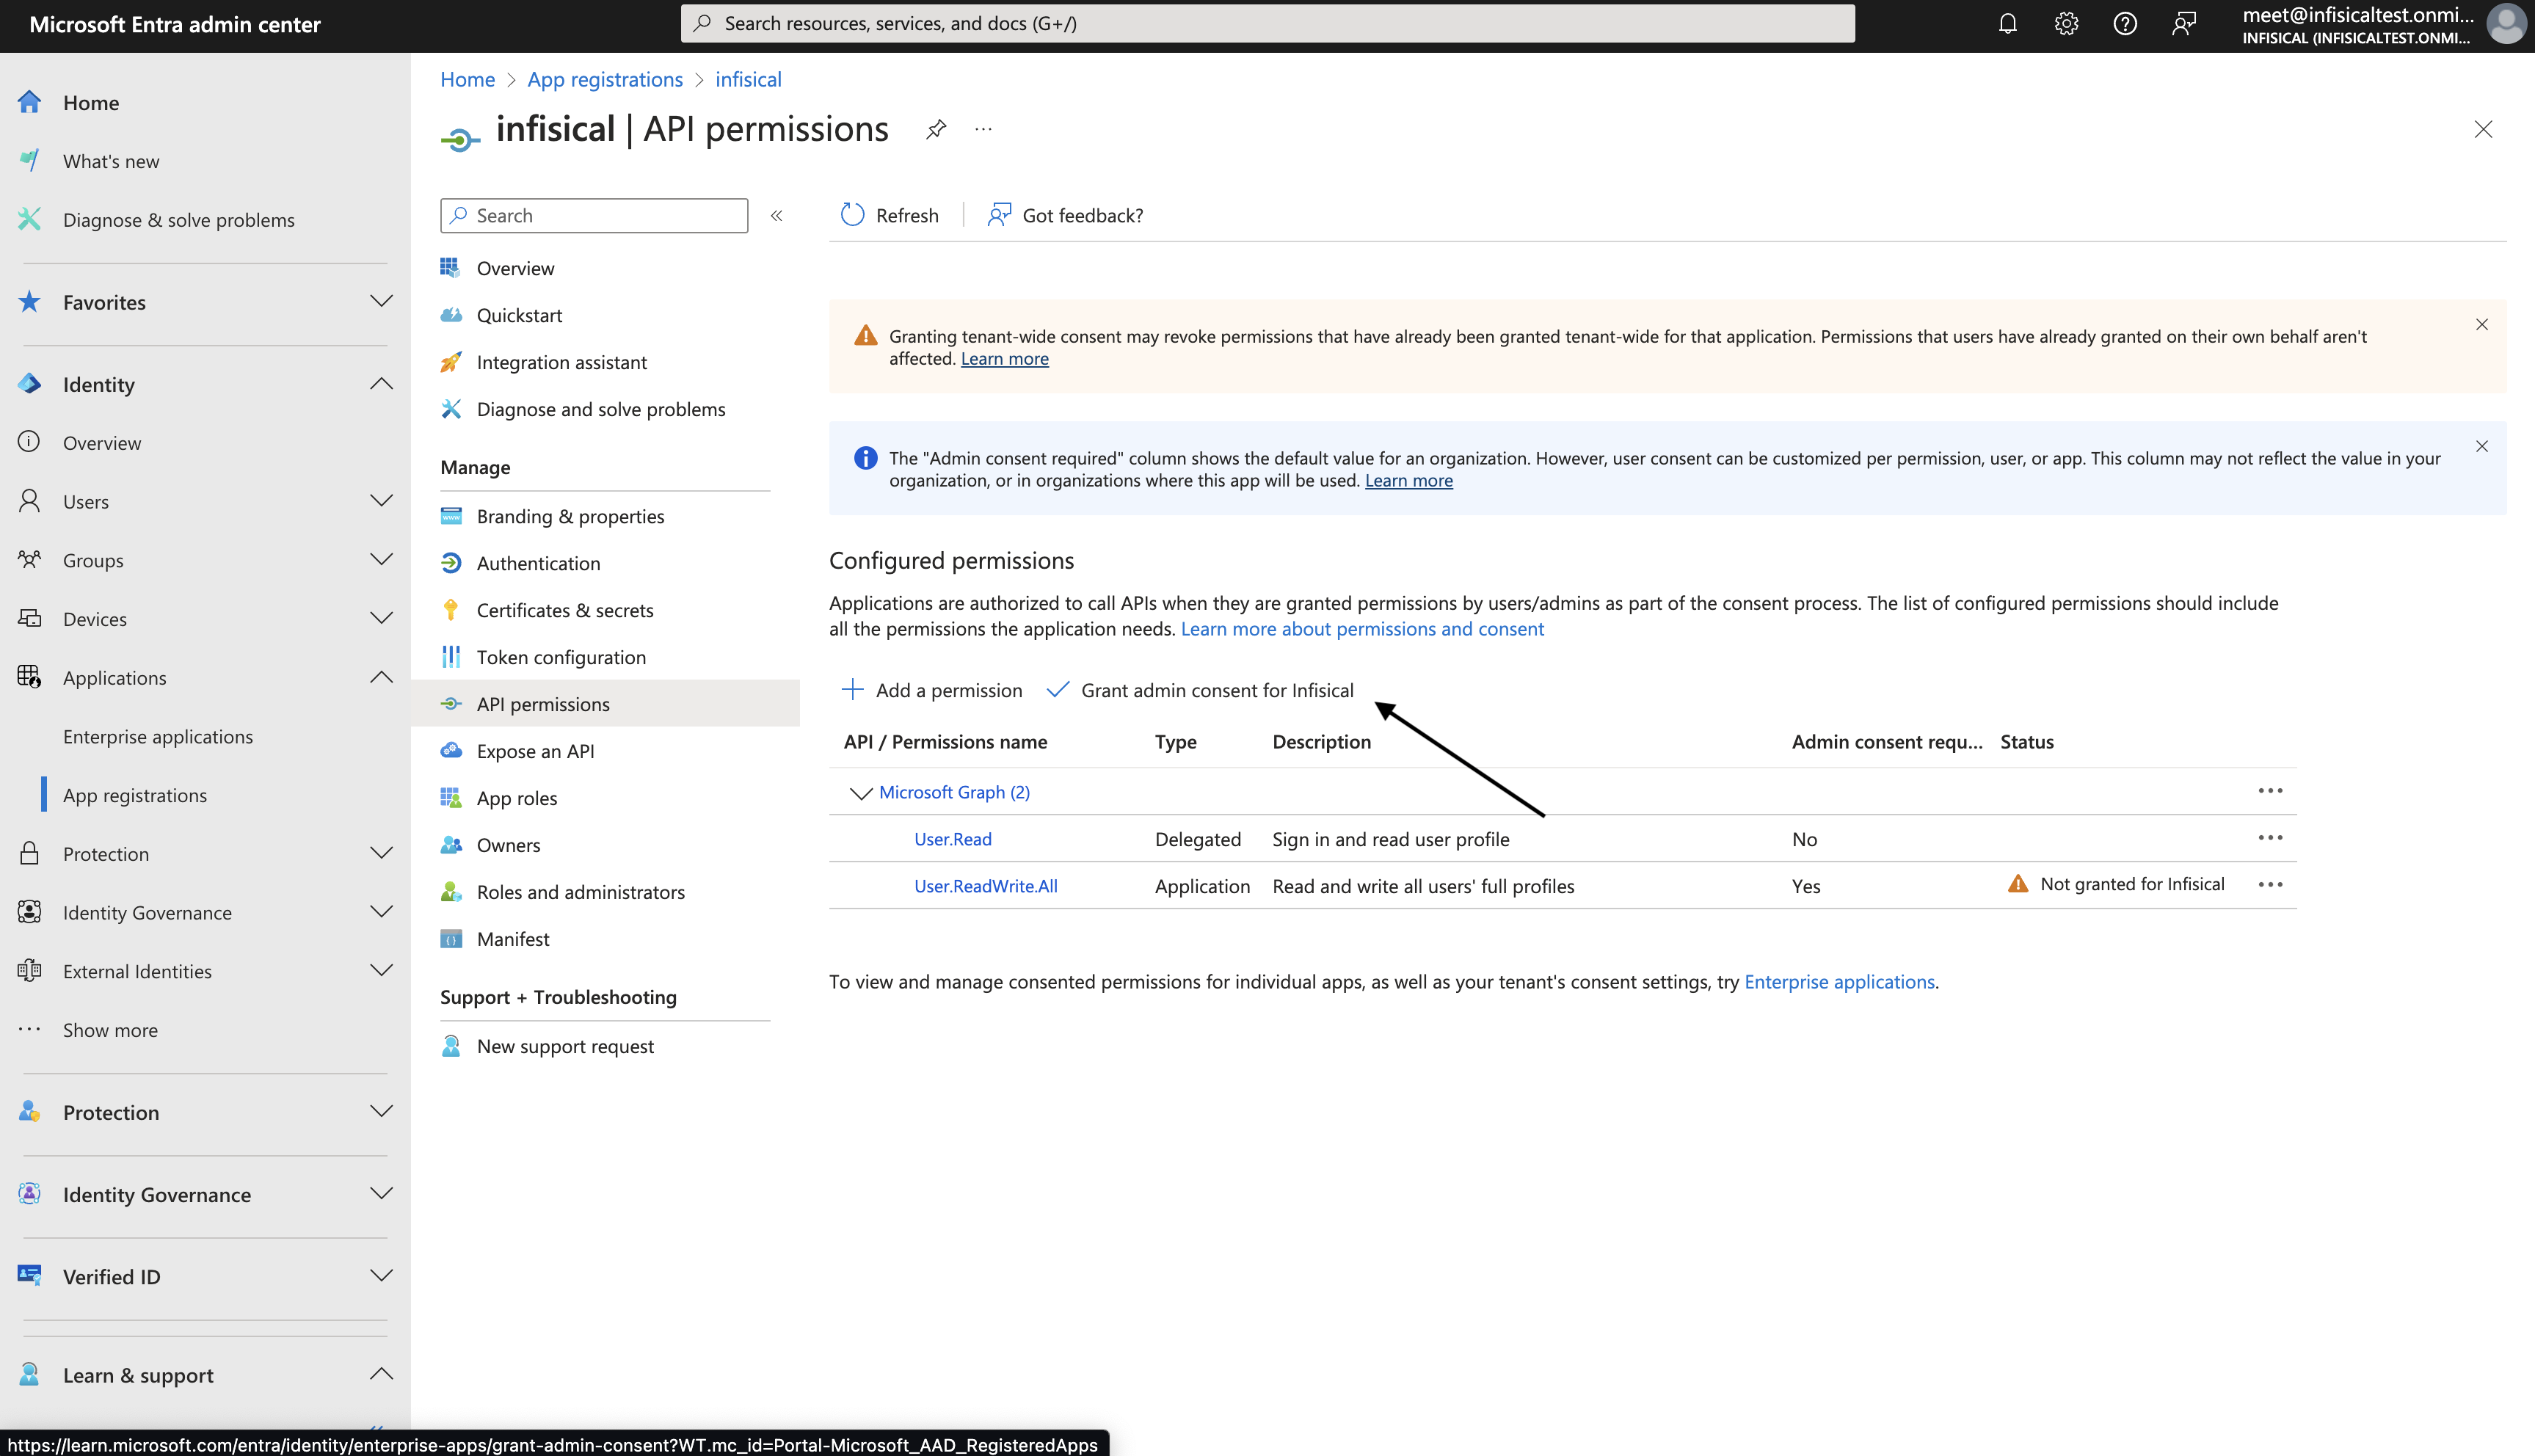
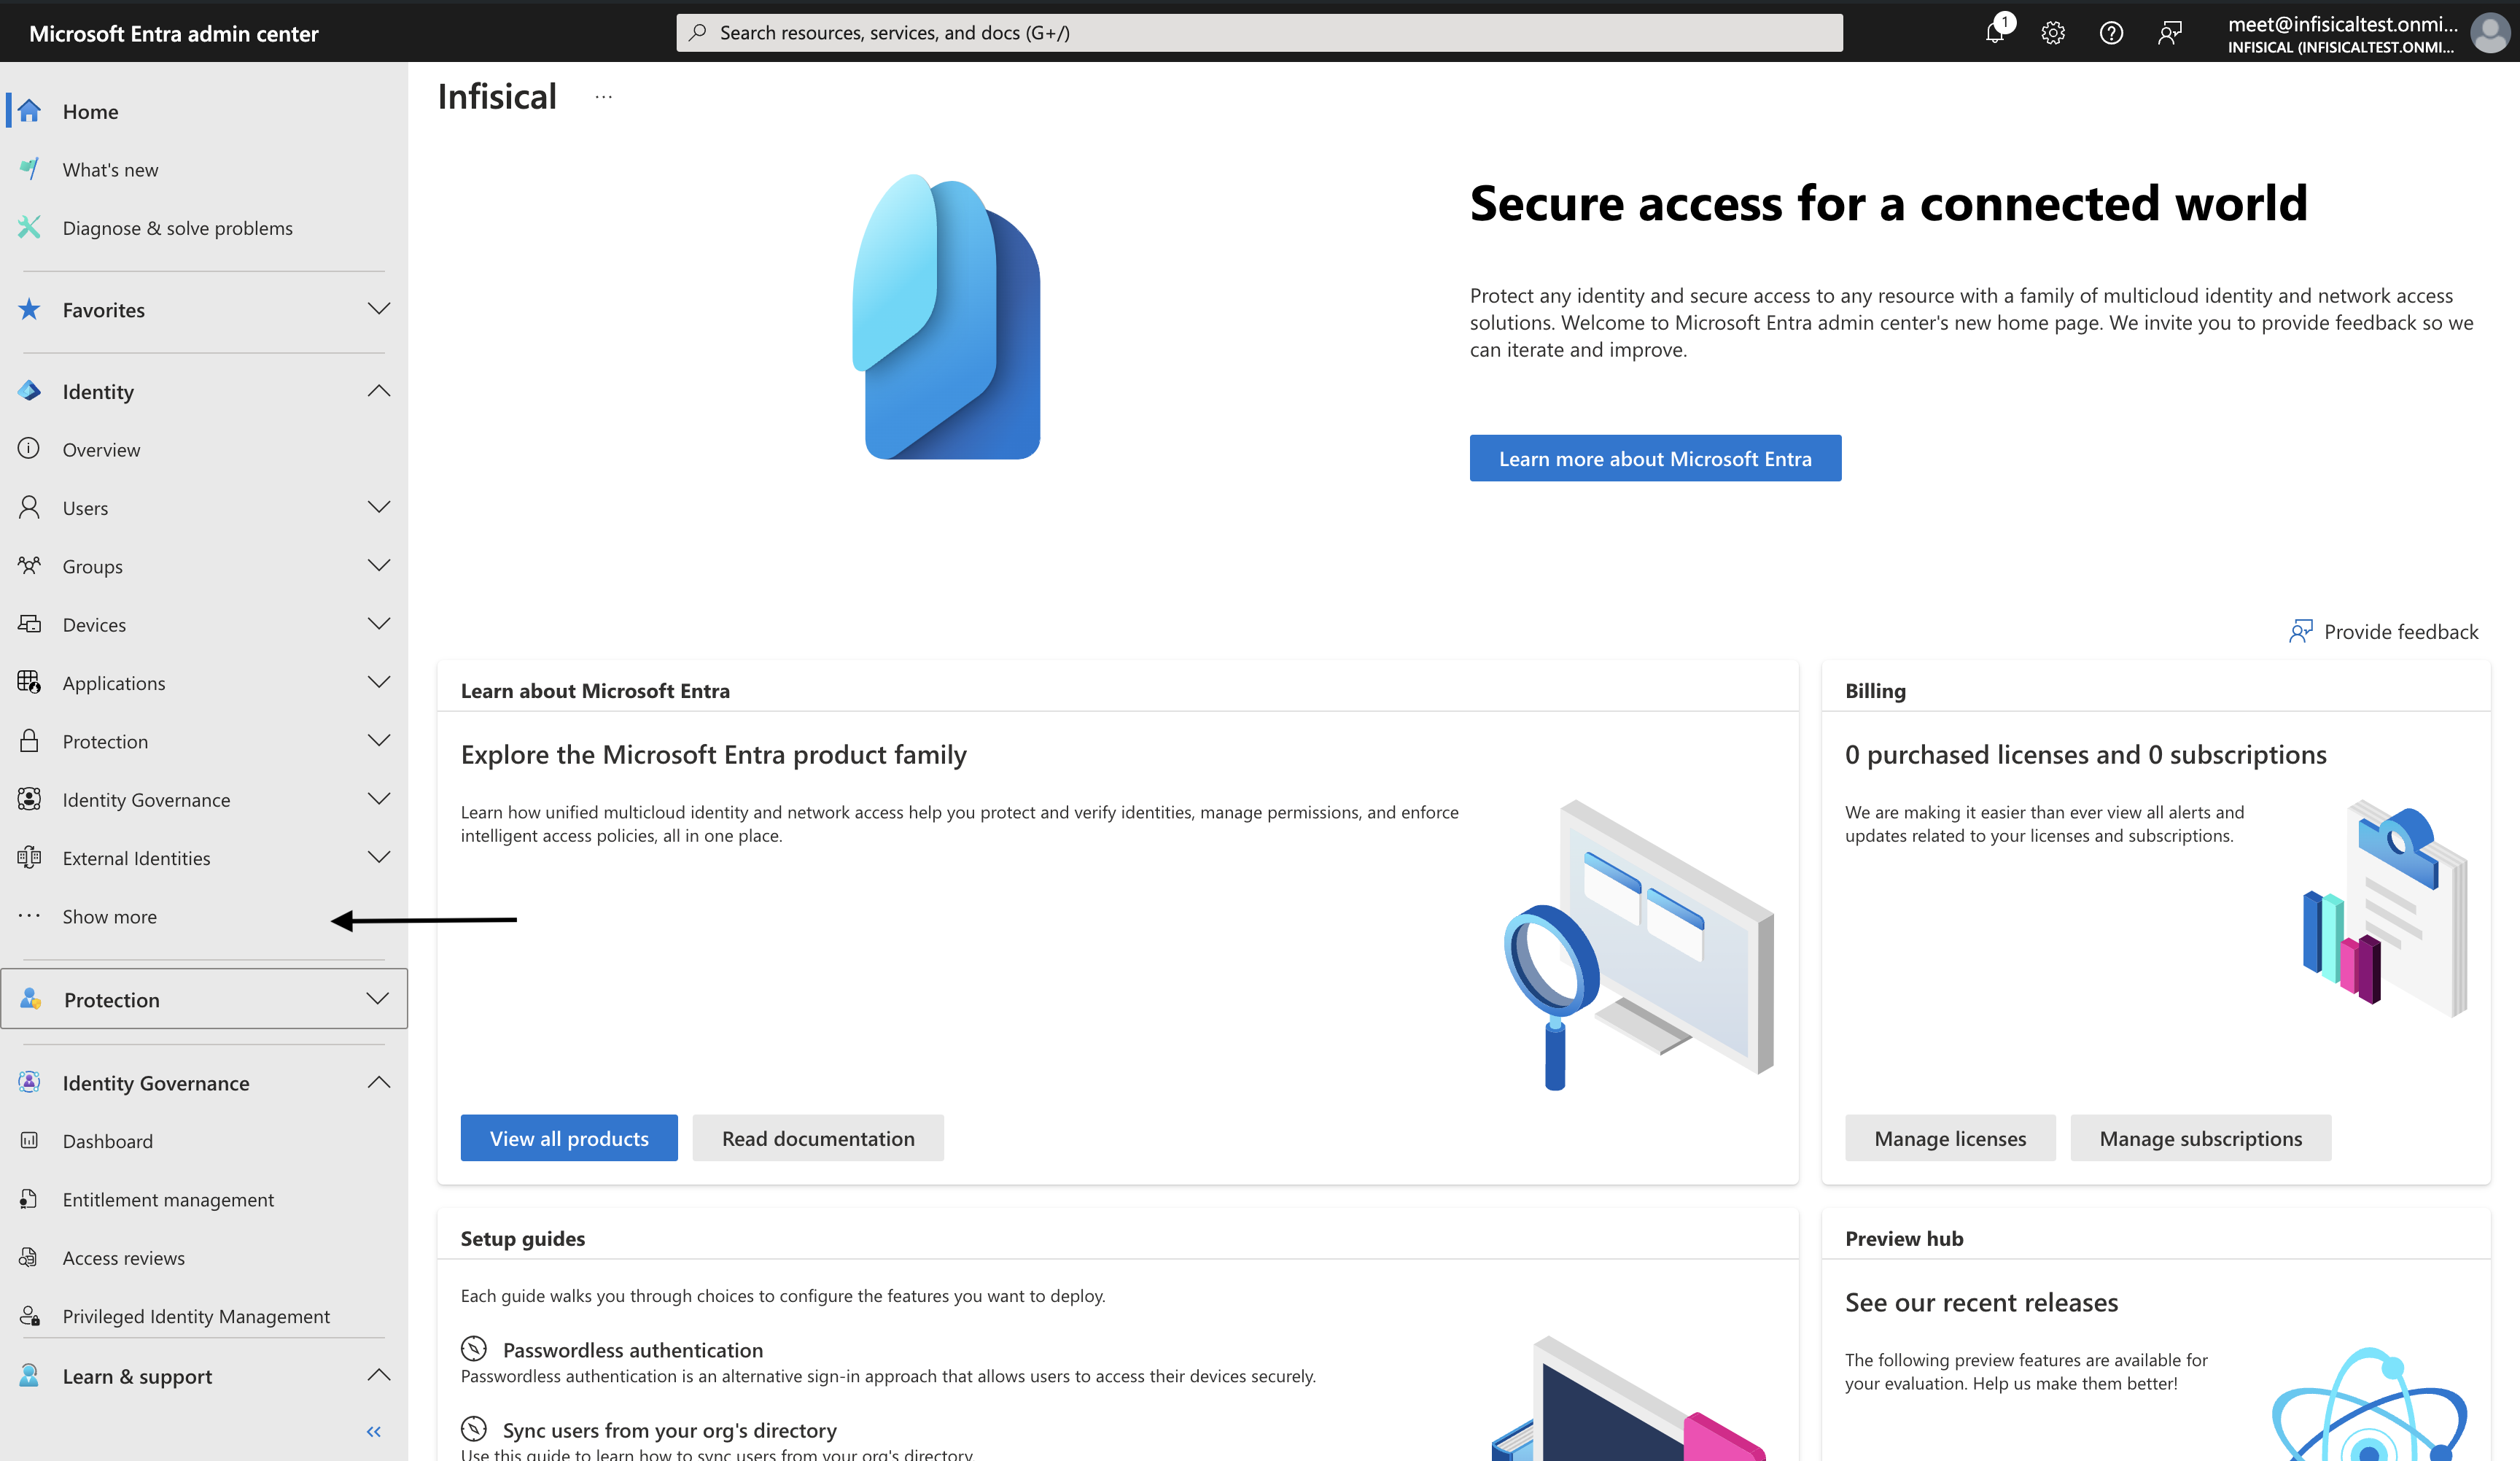
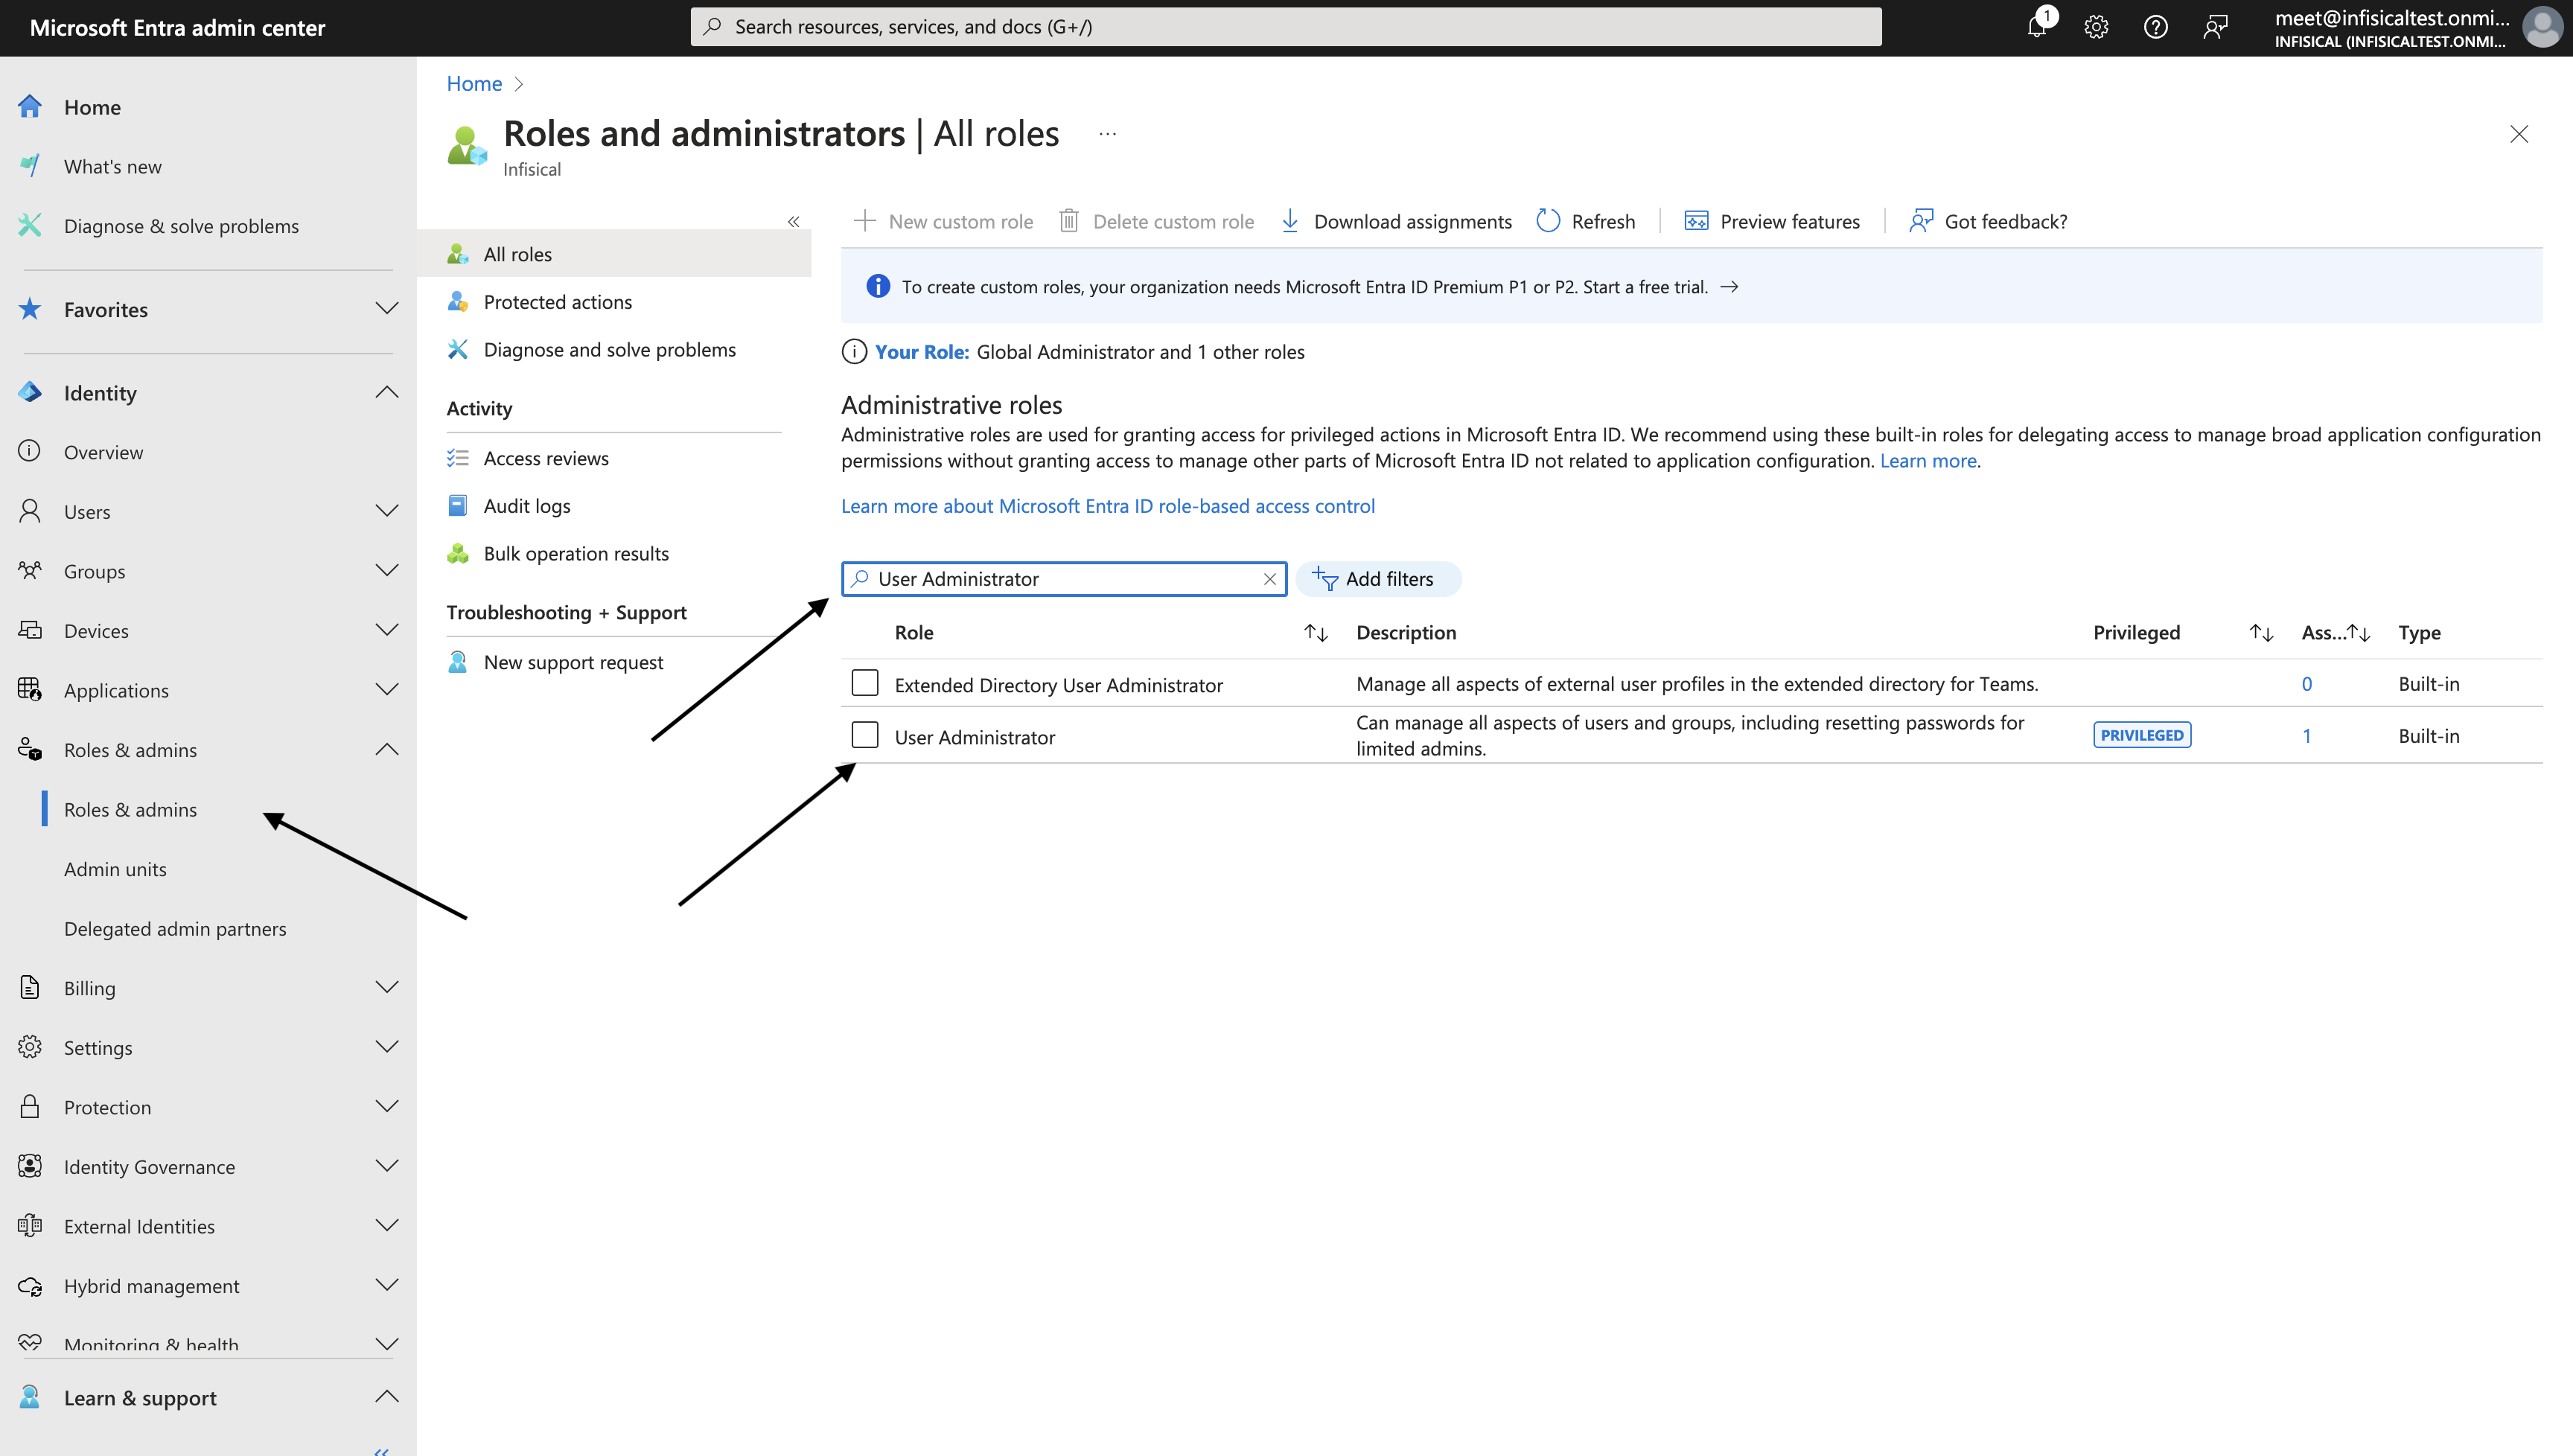
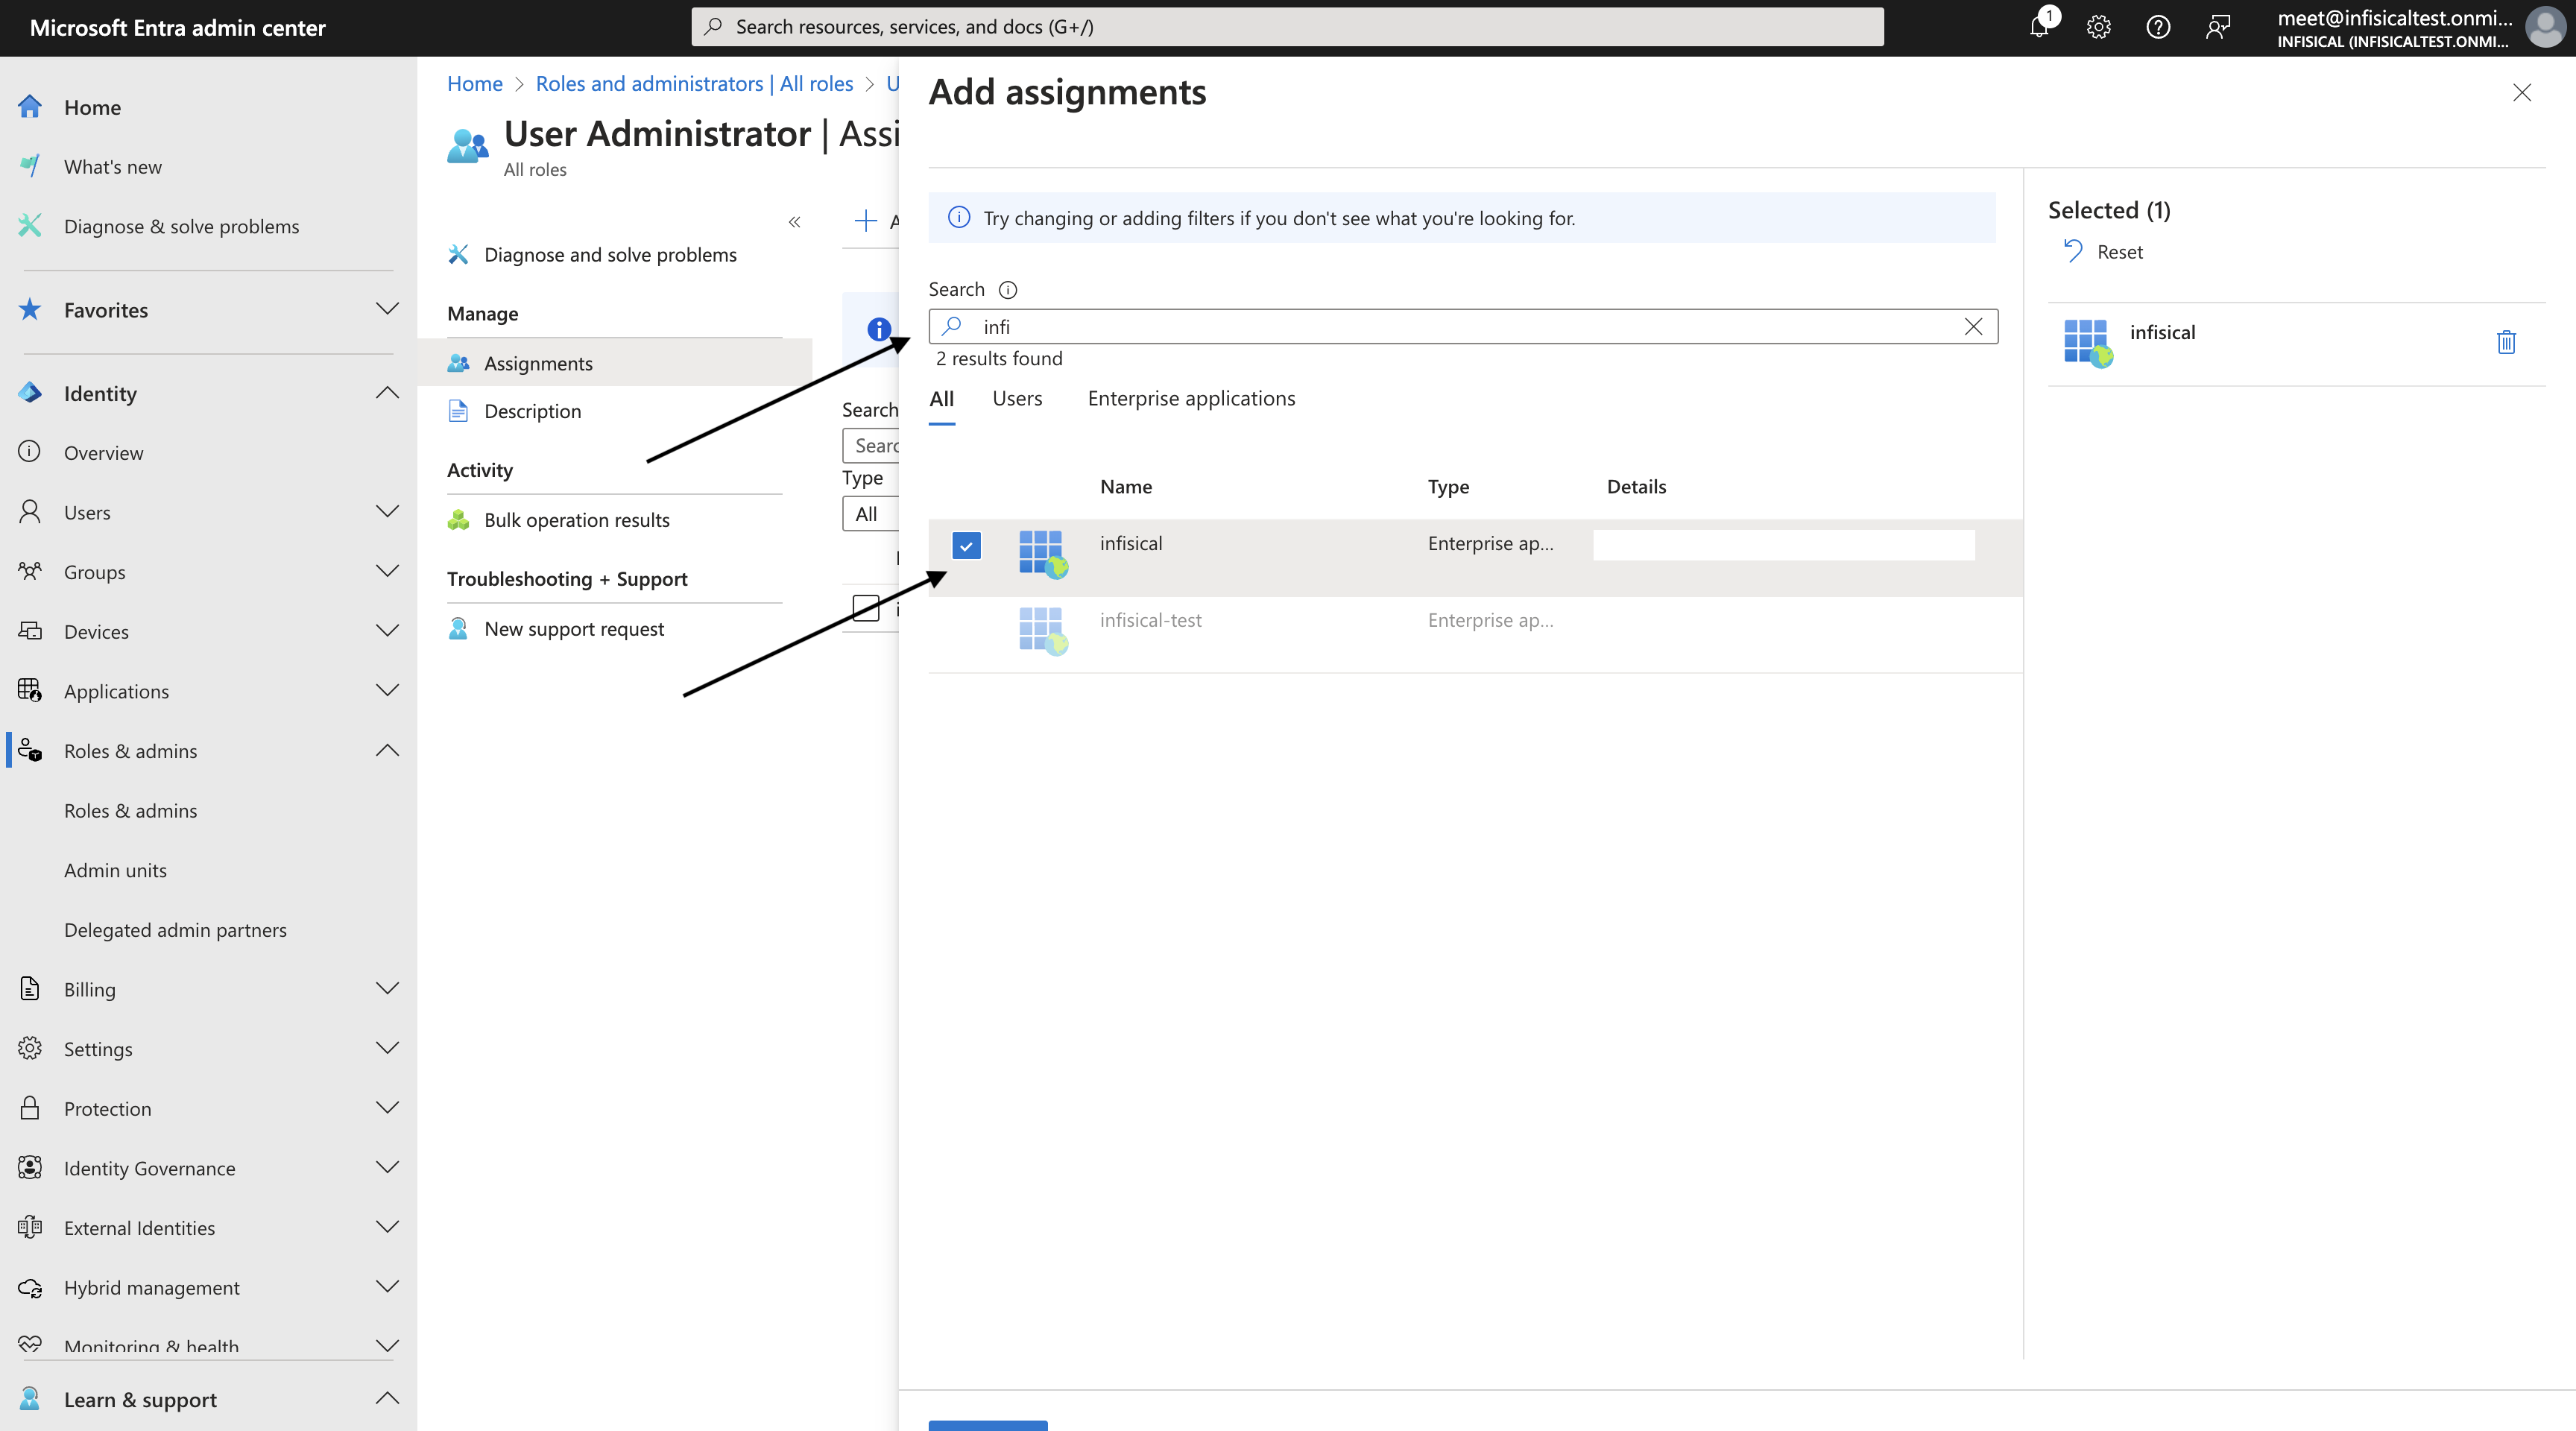
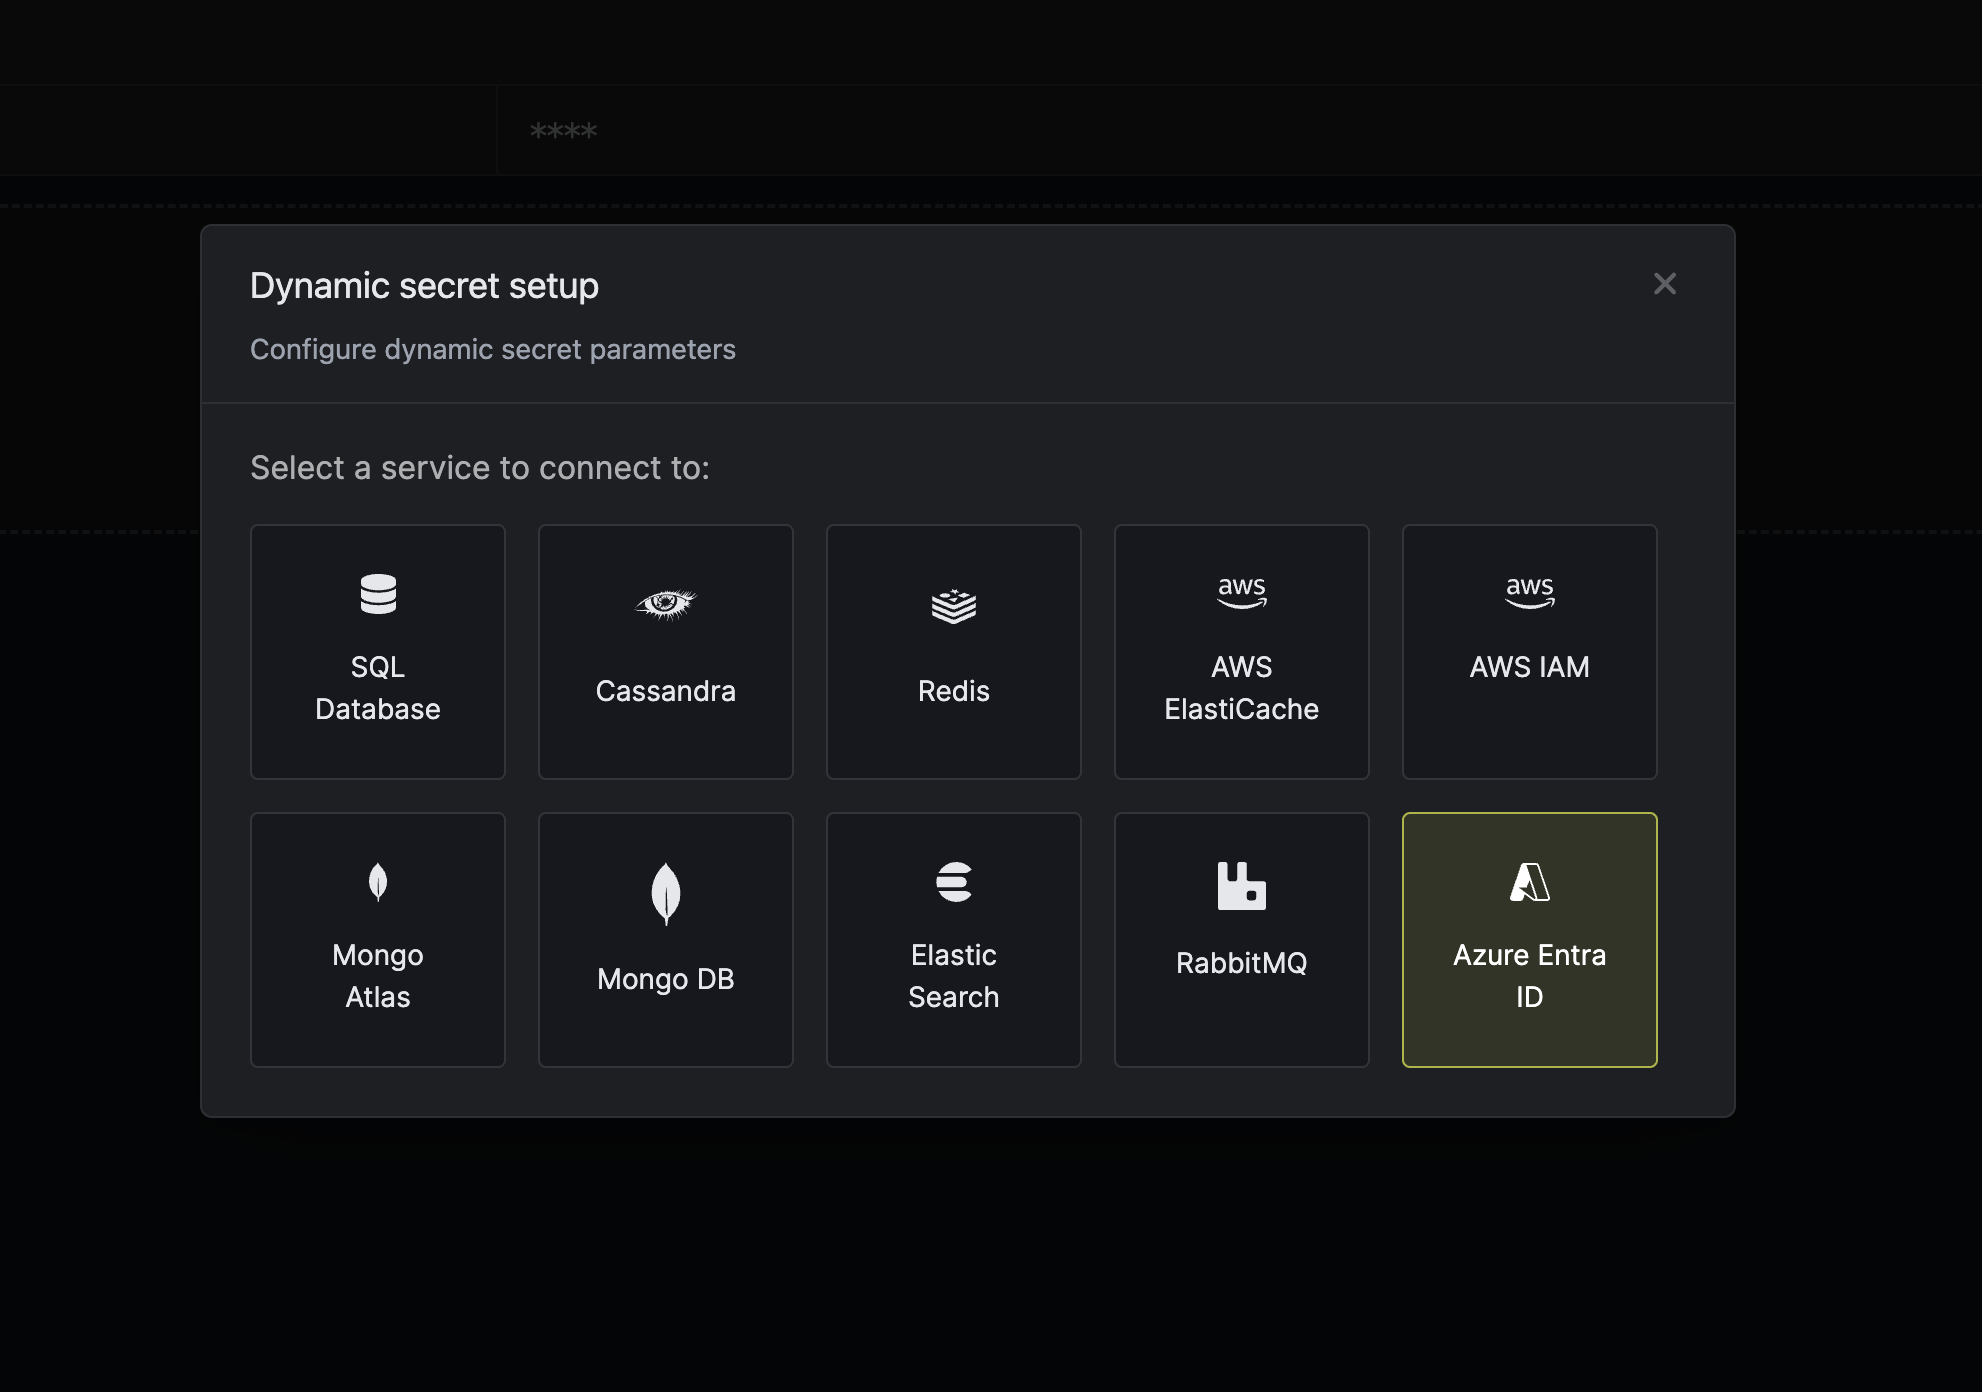 When generating these secrets, it's important to specify a Time-to-Live (TTL) duration. This will dictate how long the credentials are valid for.
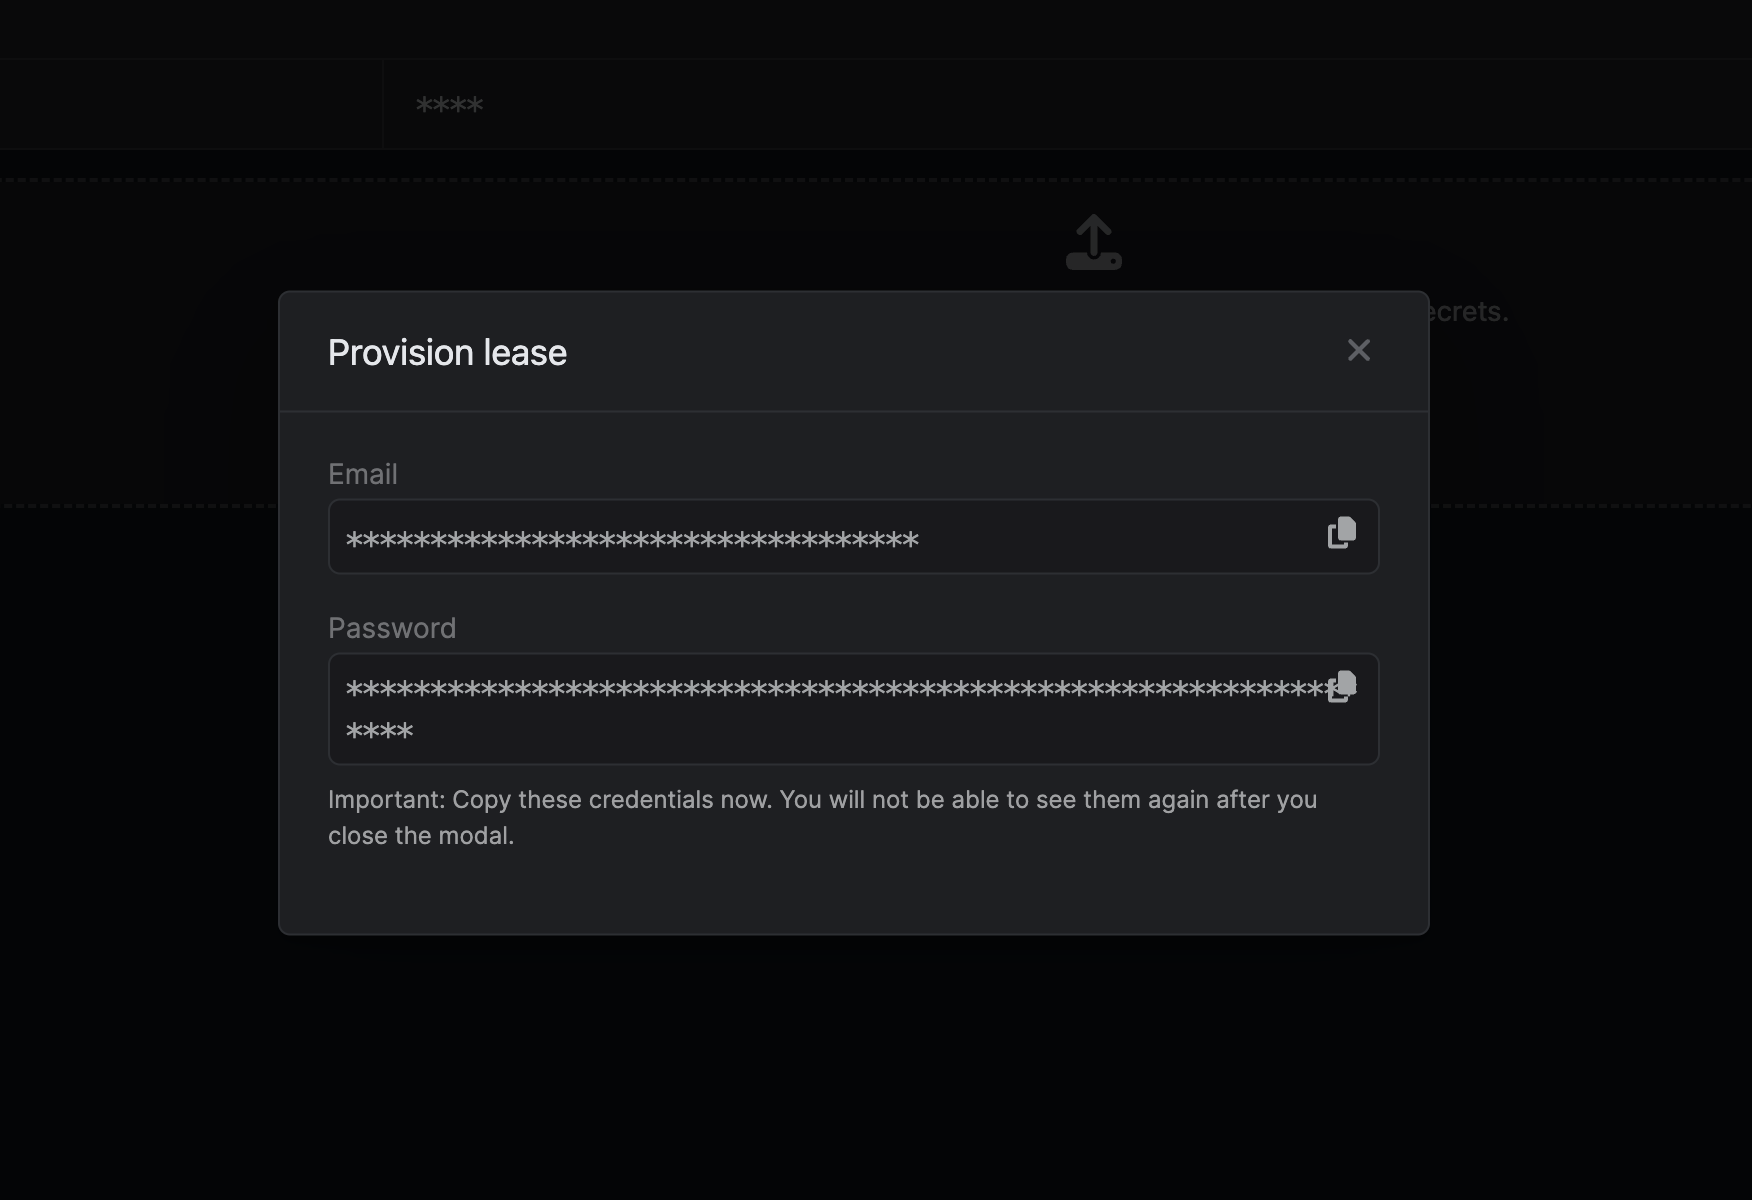 ## Renew Leases
To extend the life of the generated dynamic secret leases past its initial time to live, simply click on the **Renew** button as illustrated below.
2. Select the **Azure Key Vault** option.
## Renew Leases
To extend the life of the generated dynamic secret leases past its initial time to live, simply click on the **Renew** button as illustrated below.
2. Select the **Azure Key Vault** option.
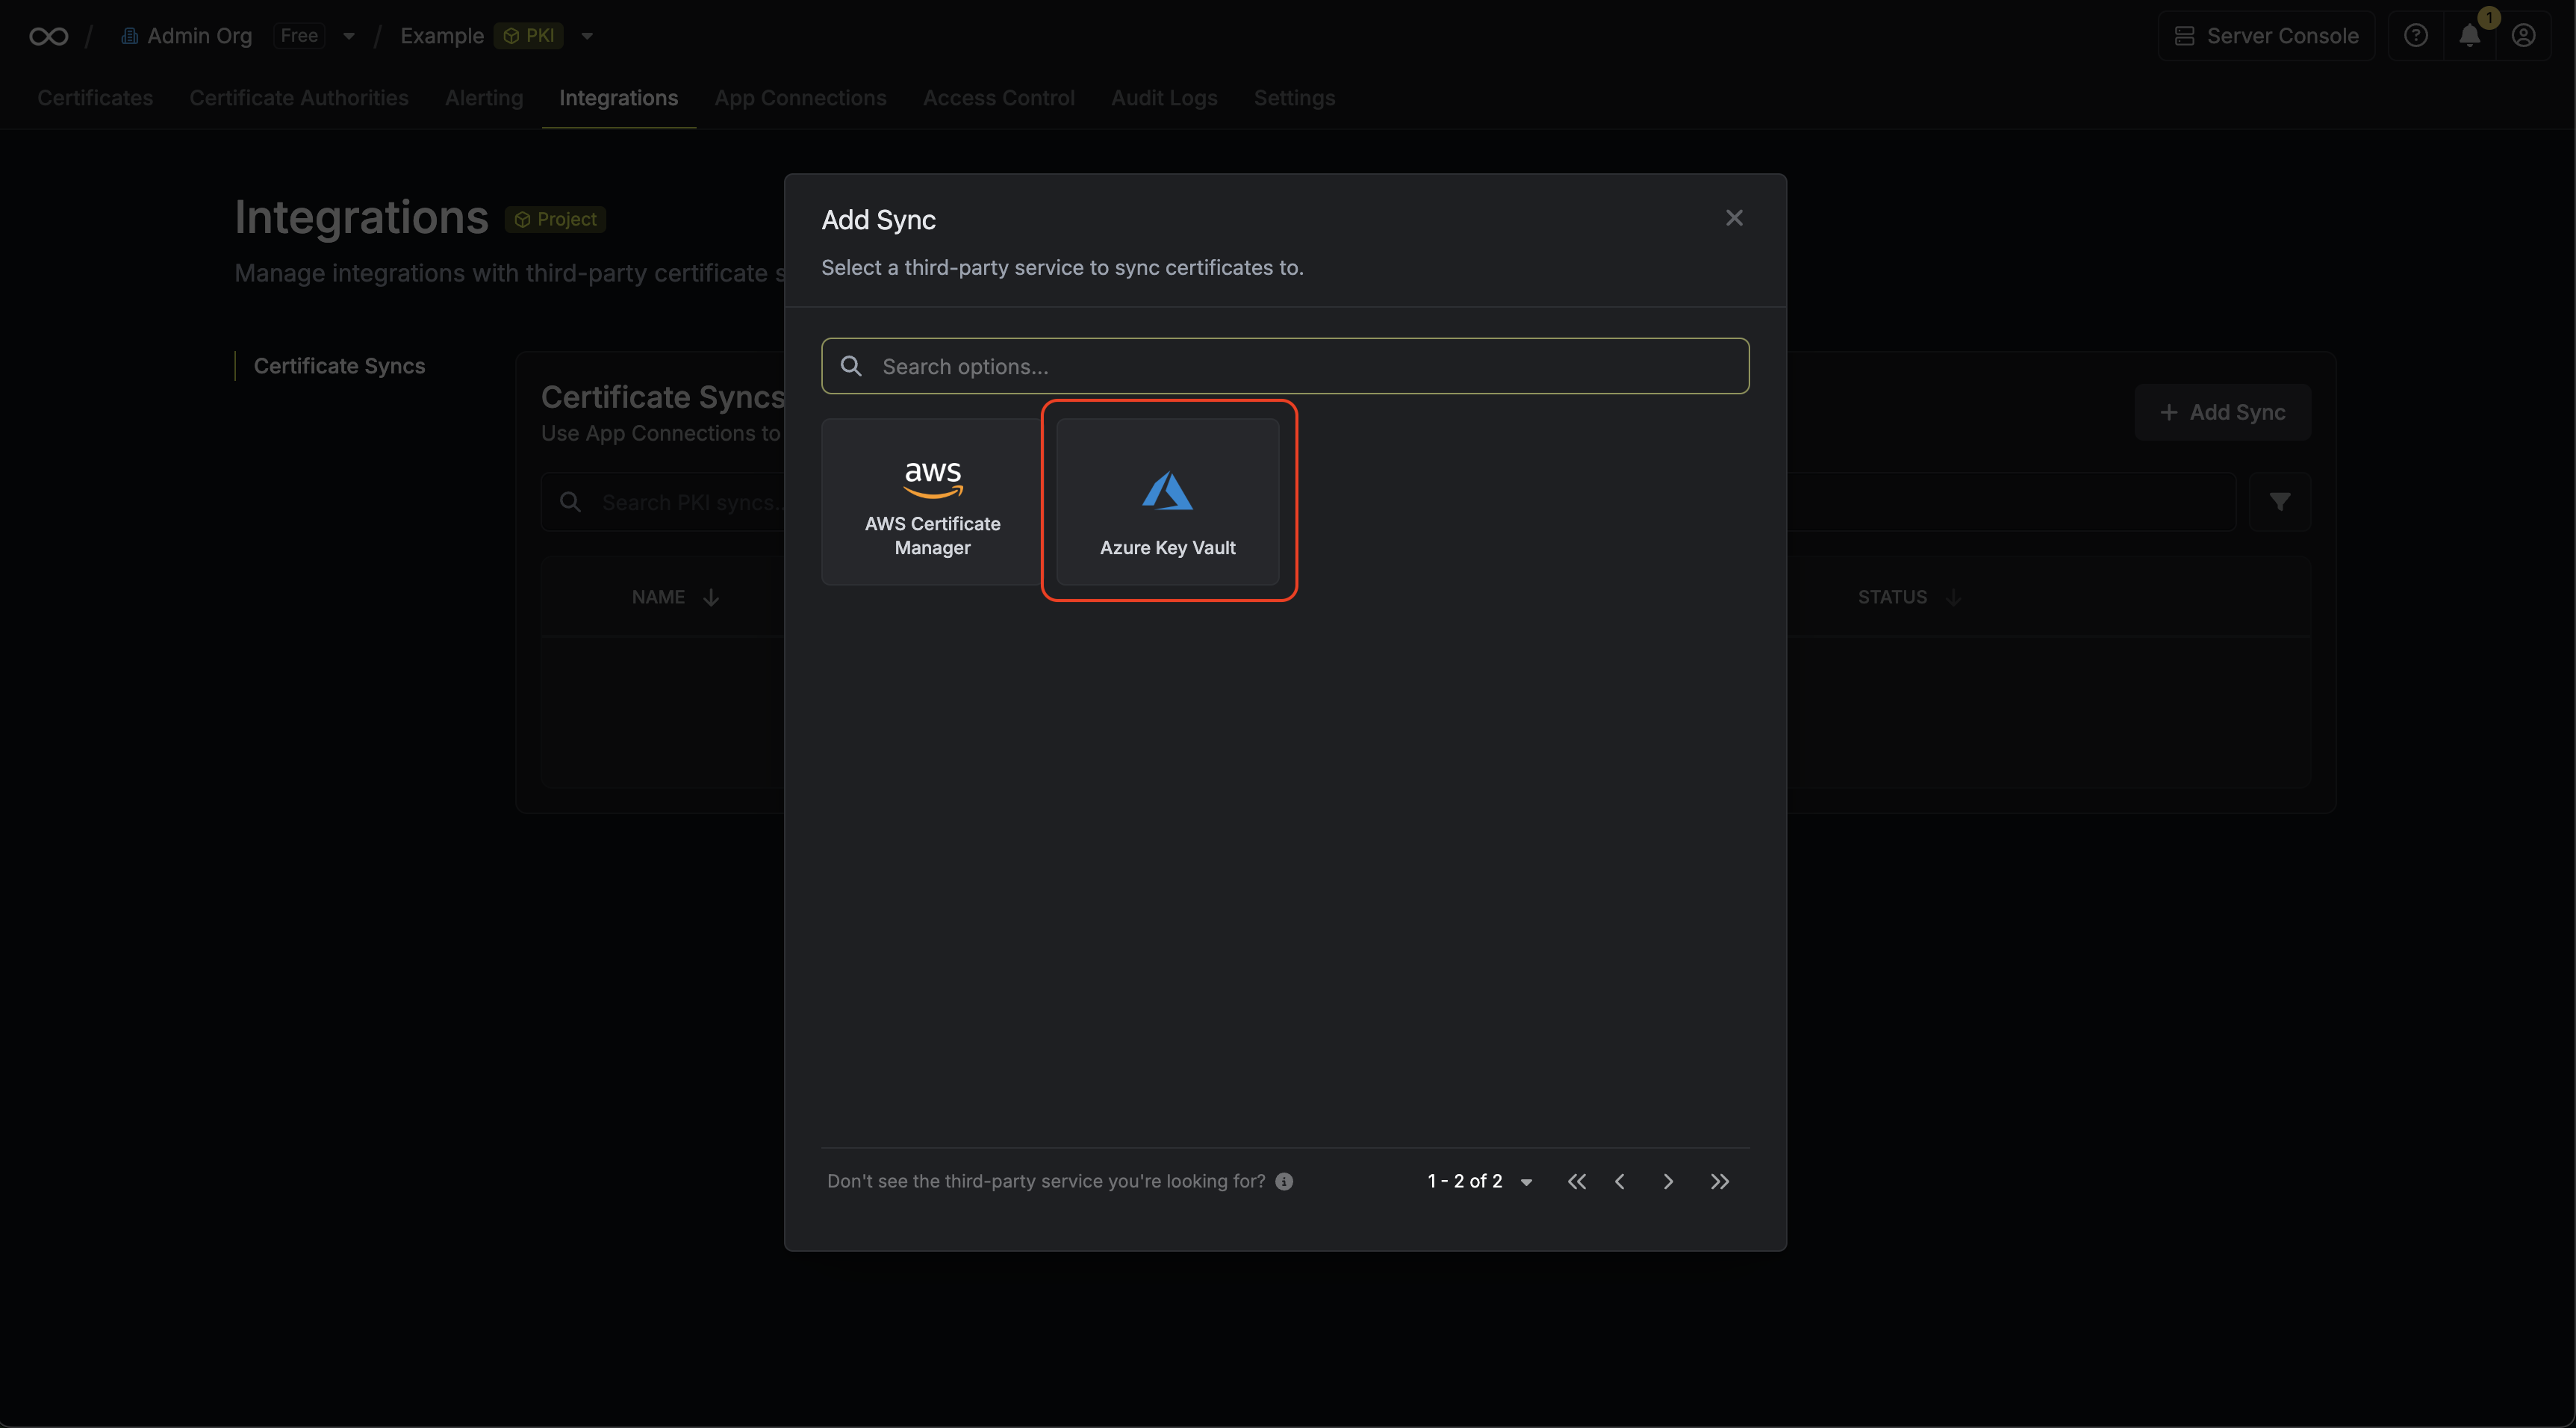 3. Configure the **Destination** to where certificates should be deployed, then click **Next**.
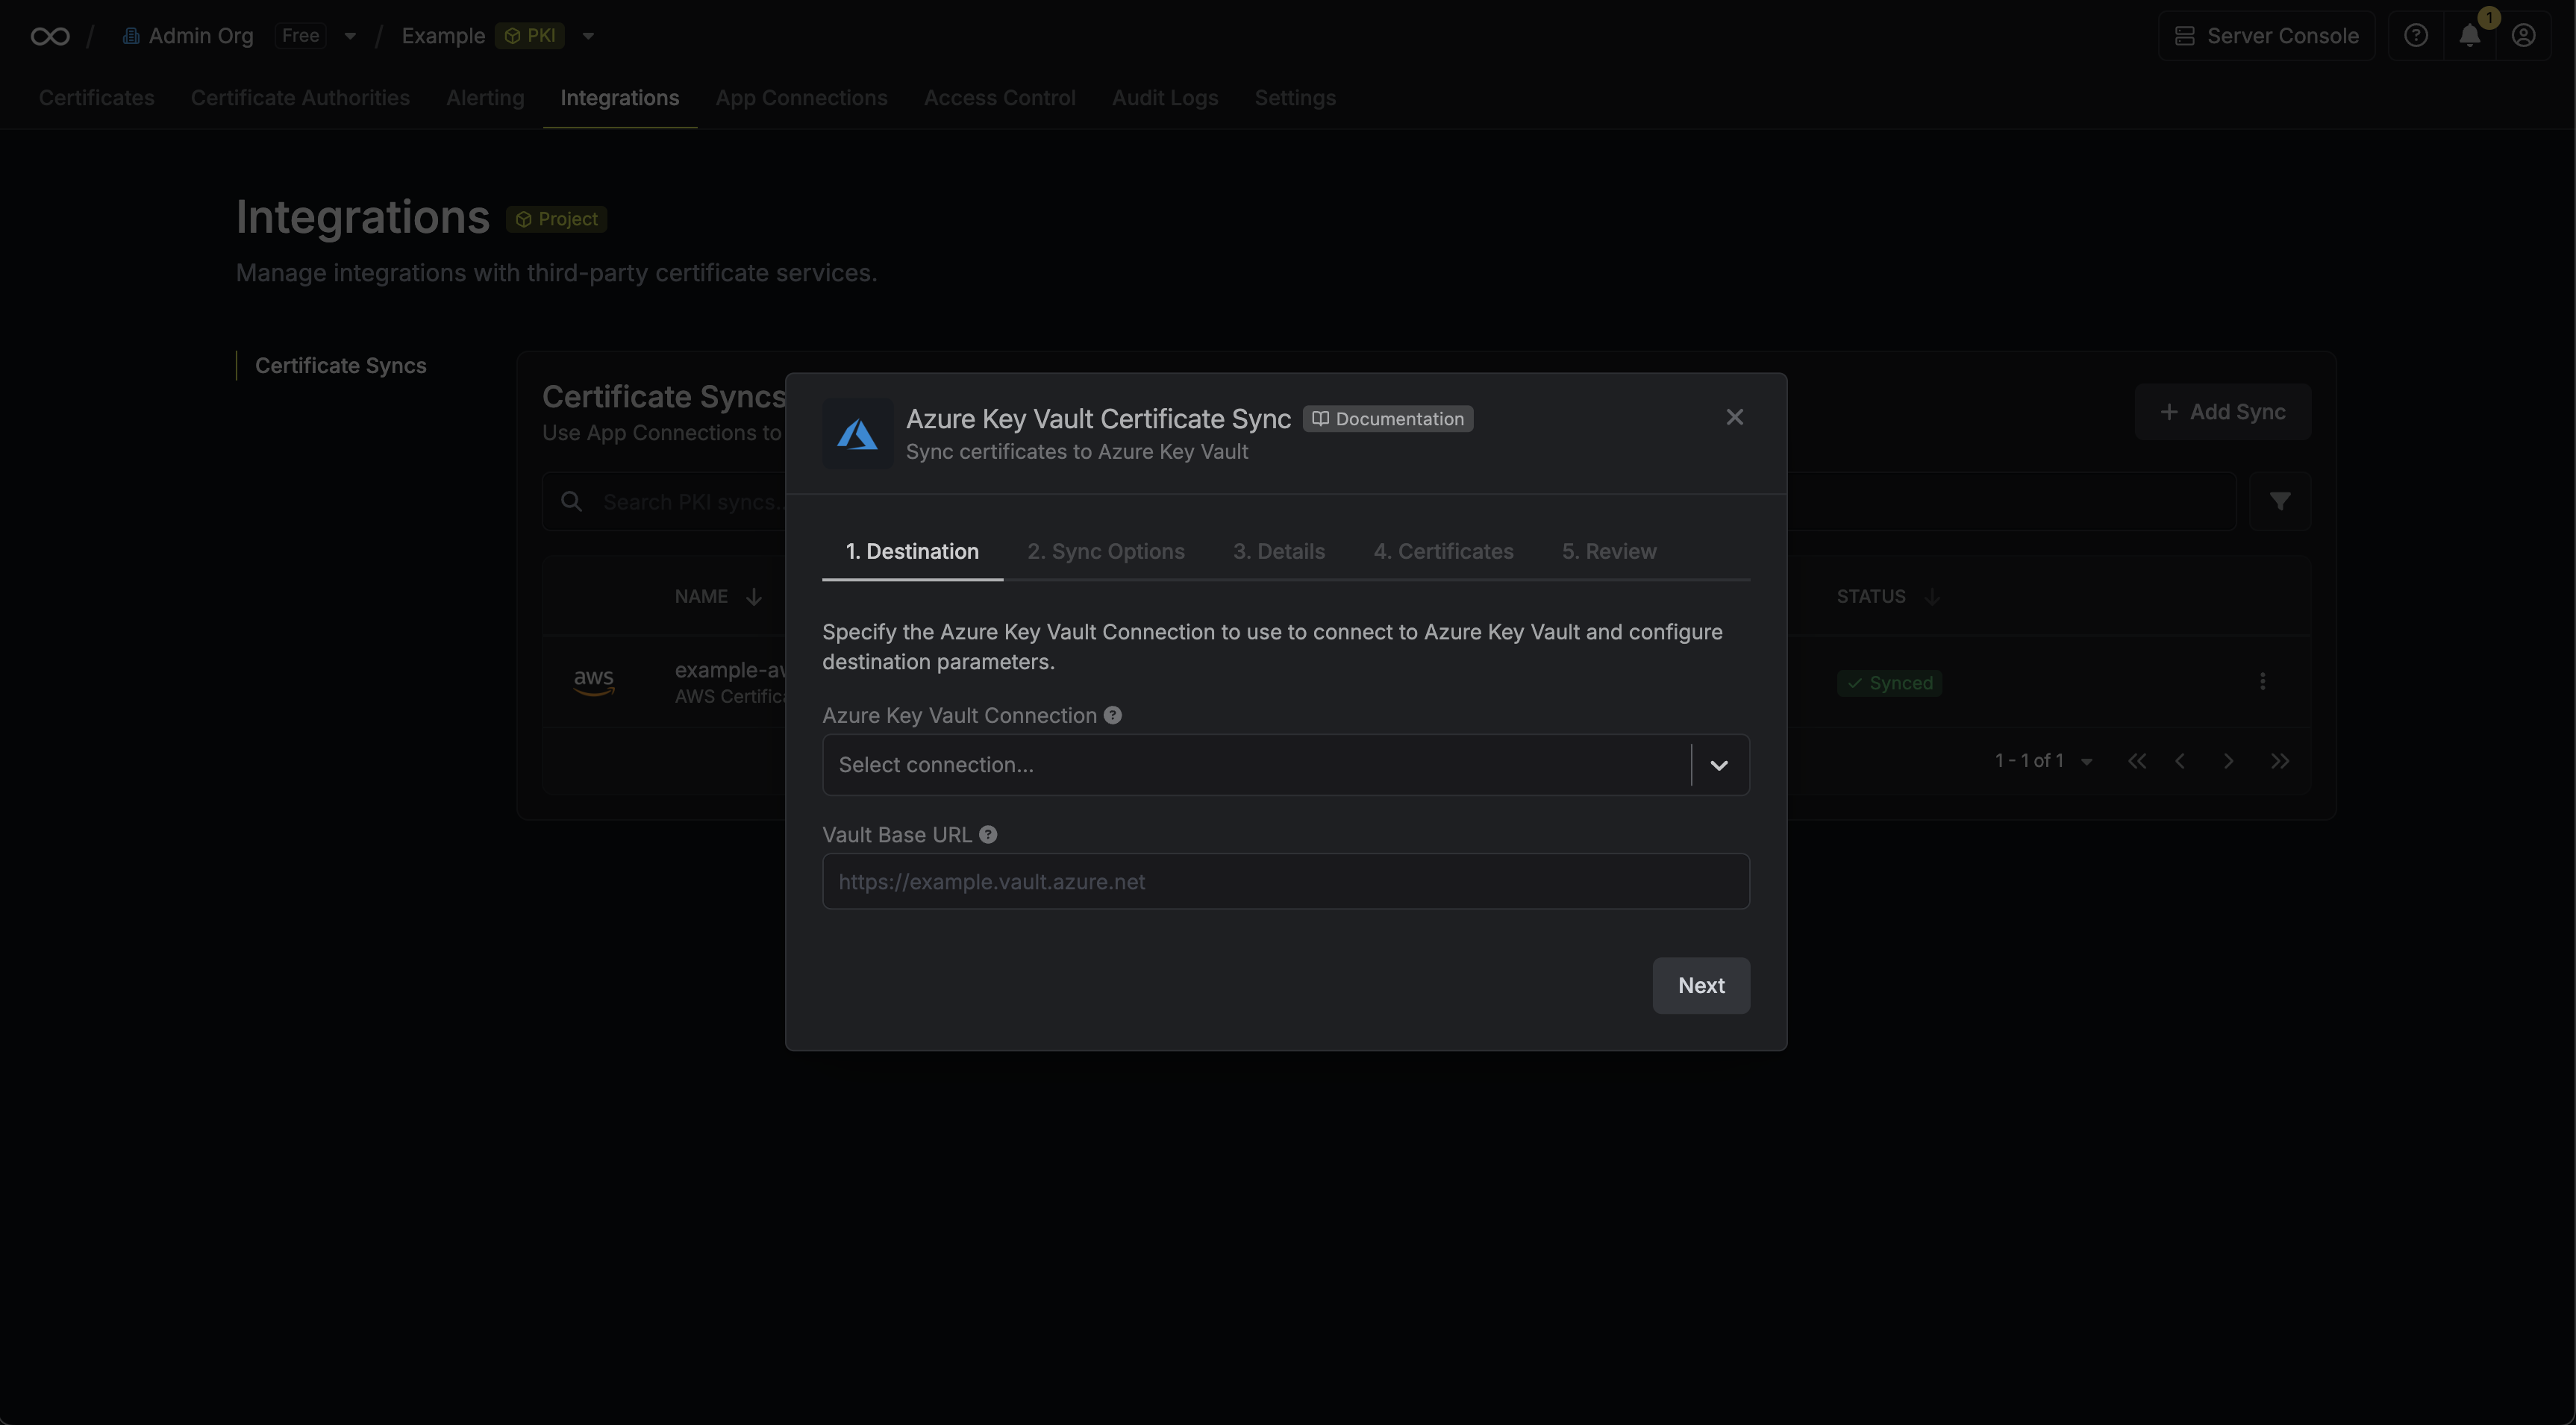 * **Azure Connection**: The Azure Connection to authenticate with.
* **Vault Base URL**: The URL of your Azure Key Vault.
4. Configure the **Sync Options** to specify how certificates should be synced, then click **Next**.
* **Azure Connection**: The Azure Connection to authenticate with.
* **Vault Base URL**: The URL of your Azure Key Vault.
4. Configure the **Sync Options** to specify how certificates should be synced, then click **Next**.
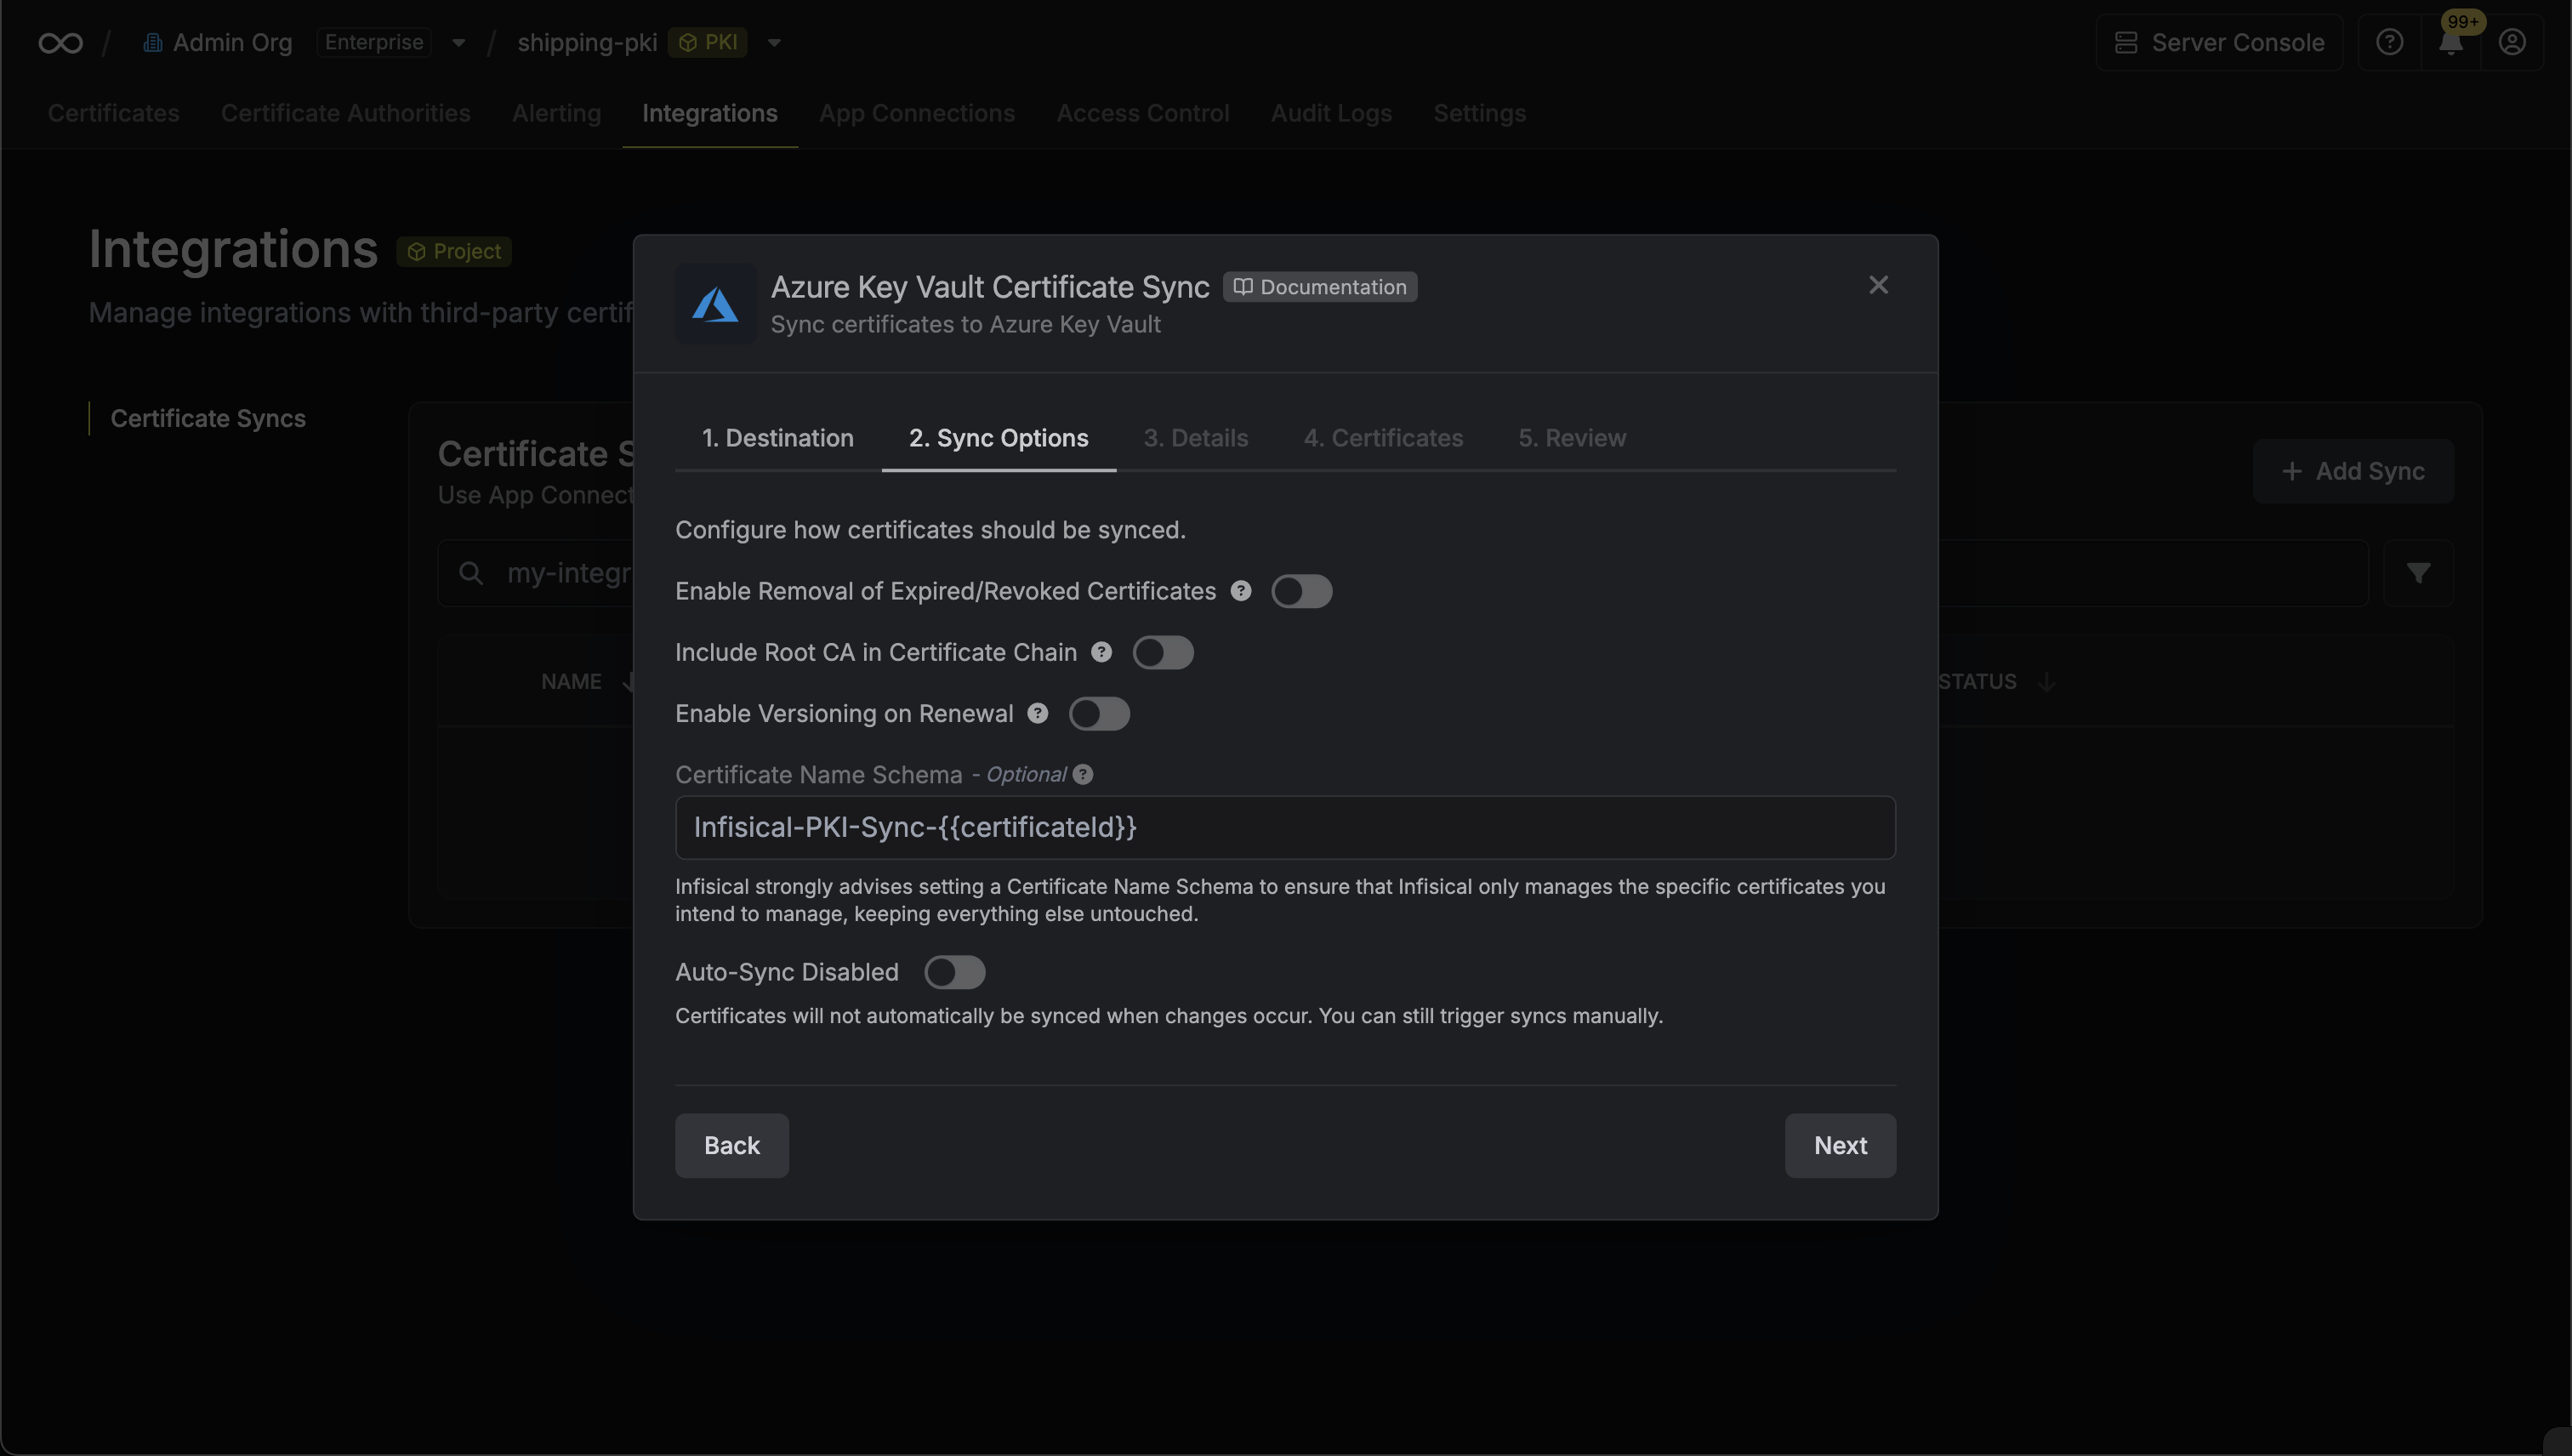 * **Enable Removal of Expired/Revoked Certificates**: If enabled, Infisical will remove certificates from the destination if they are no longer active in Infisical.
* **Enable Versioning on Renewal**: If enabled, Infisical will sync renewed certificates to the destination under a new version of the original synced certificate instead of creating a new certificate.
* **Include Root CA**: If enabled, the Root CA certificate will be included in the certificate chain when syncing to Azure Key Vault. If disabled, only intermediate certificates will be included.
* **Certificate Name Schema** (Optional): Customize how certificate names are generated in Azure Key Vault. Use `{{certificateId}}` as a placeholder for the certificate ID. If not specified, defaults to `Infisical-{{certificateId}}`.
* **Auto-Sync Enabled**: If enabled, certificates will automatically be synced when changes occur. Disable to enforce manual syncing only.
* **Enable Removal of Expired/Revoked Certificates**: If enabled, Infisical will remove certificates from the destination if they are no longer active in Infisical.
* **Enable Versioning on Renewal**: If enabled, Infisical will sync renewed certificates to the destination under a new version of the original synced certificate instead of creating a new certificate.
* **Include Root CA**: If enabled, the Root CA certificate will be included in the certificate chain when syncing to Azure Key Vault. If disabled, only intermediate certificates will be included.
* **Certificate Name Schema** (Optional): Customize how certificate names are generated in Azure Key Vault. Use `{{certificateId}}` as a placeholder for the certificate ID. If not specified, defaults to `Infisical-{{certificateId}}`.
* **Auto-Sync Enabled**: If enabled, certificates will automatically be synced when changes occur. Disable to enforce manual syncing only.
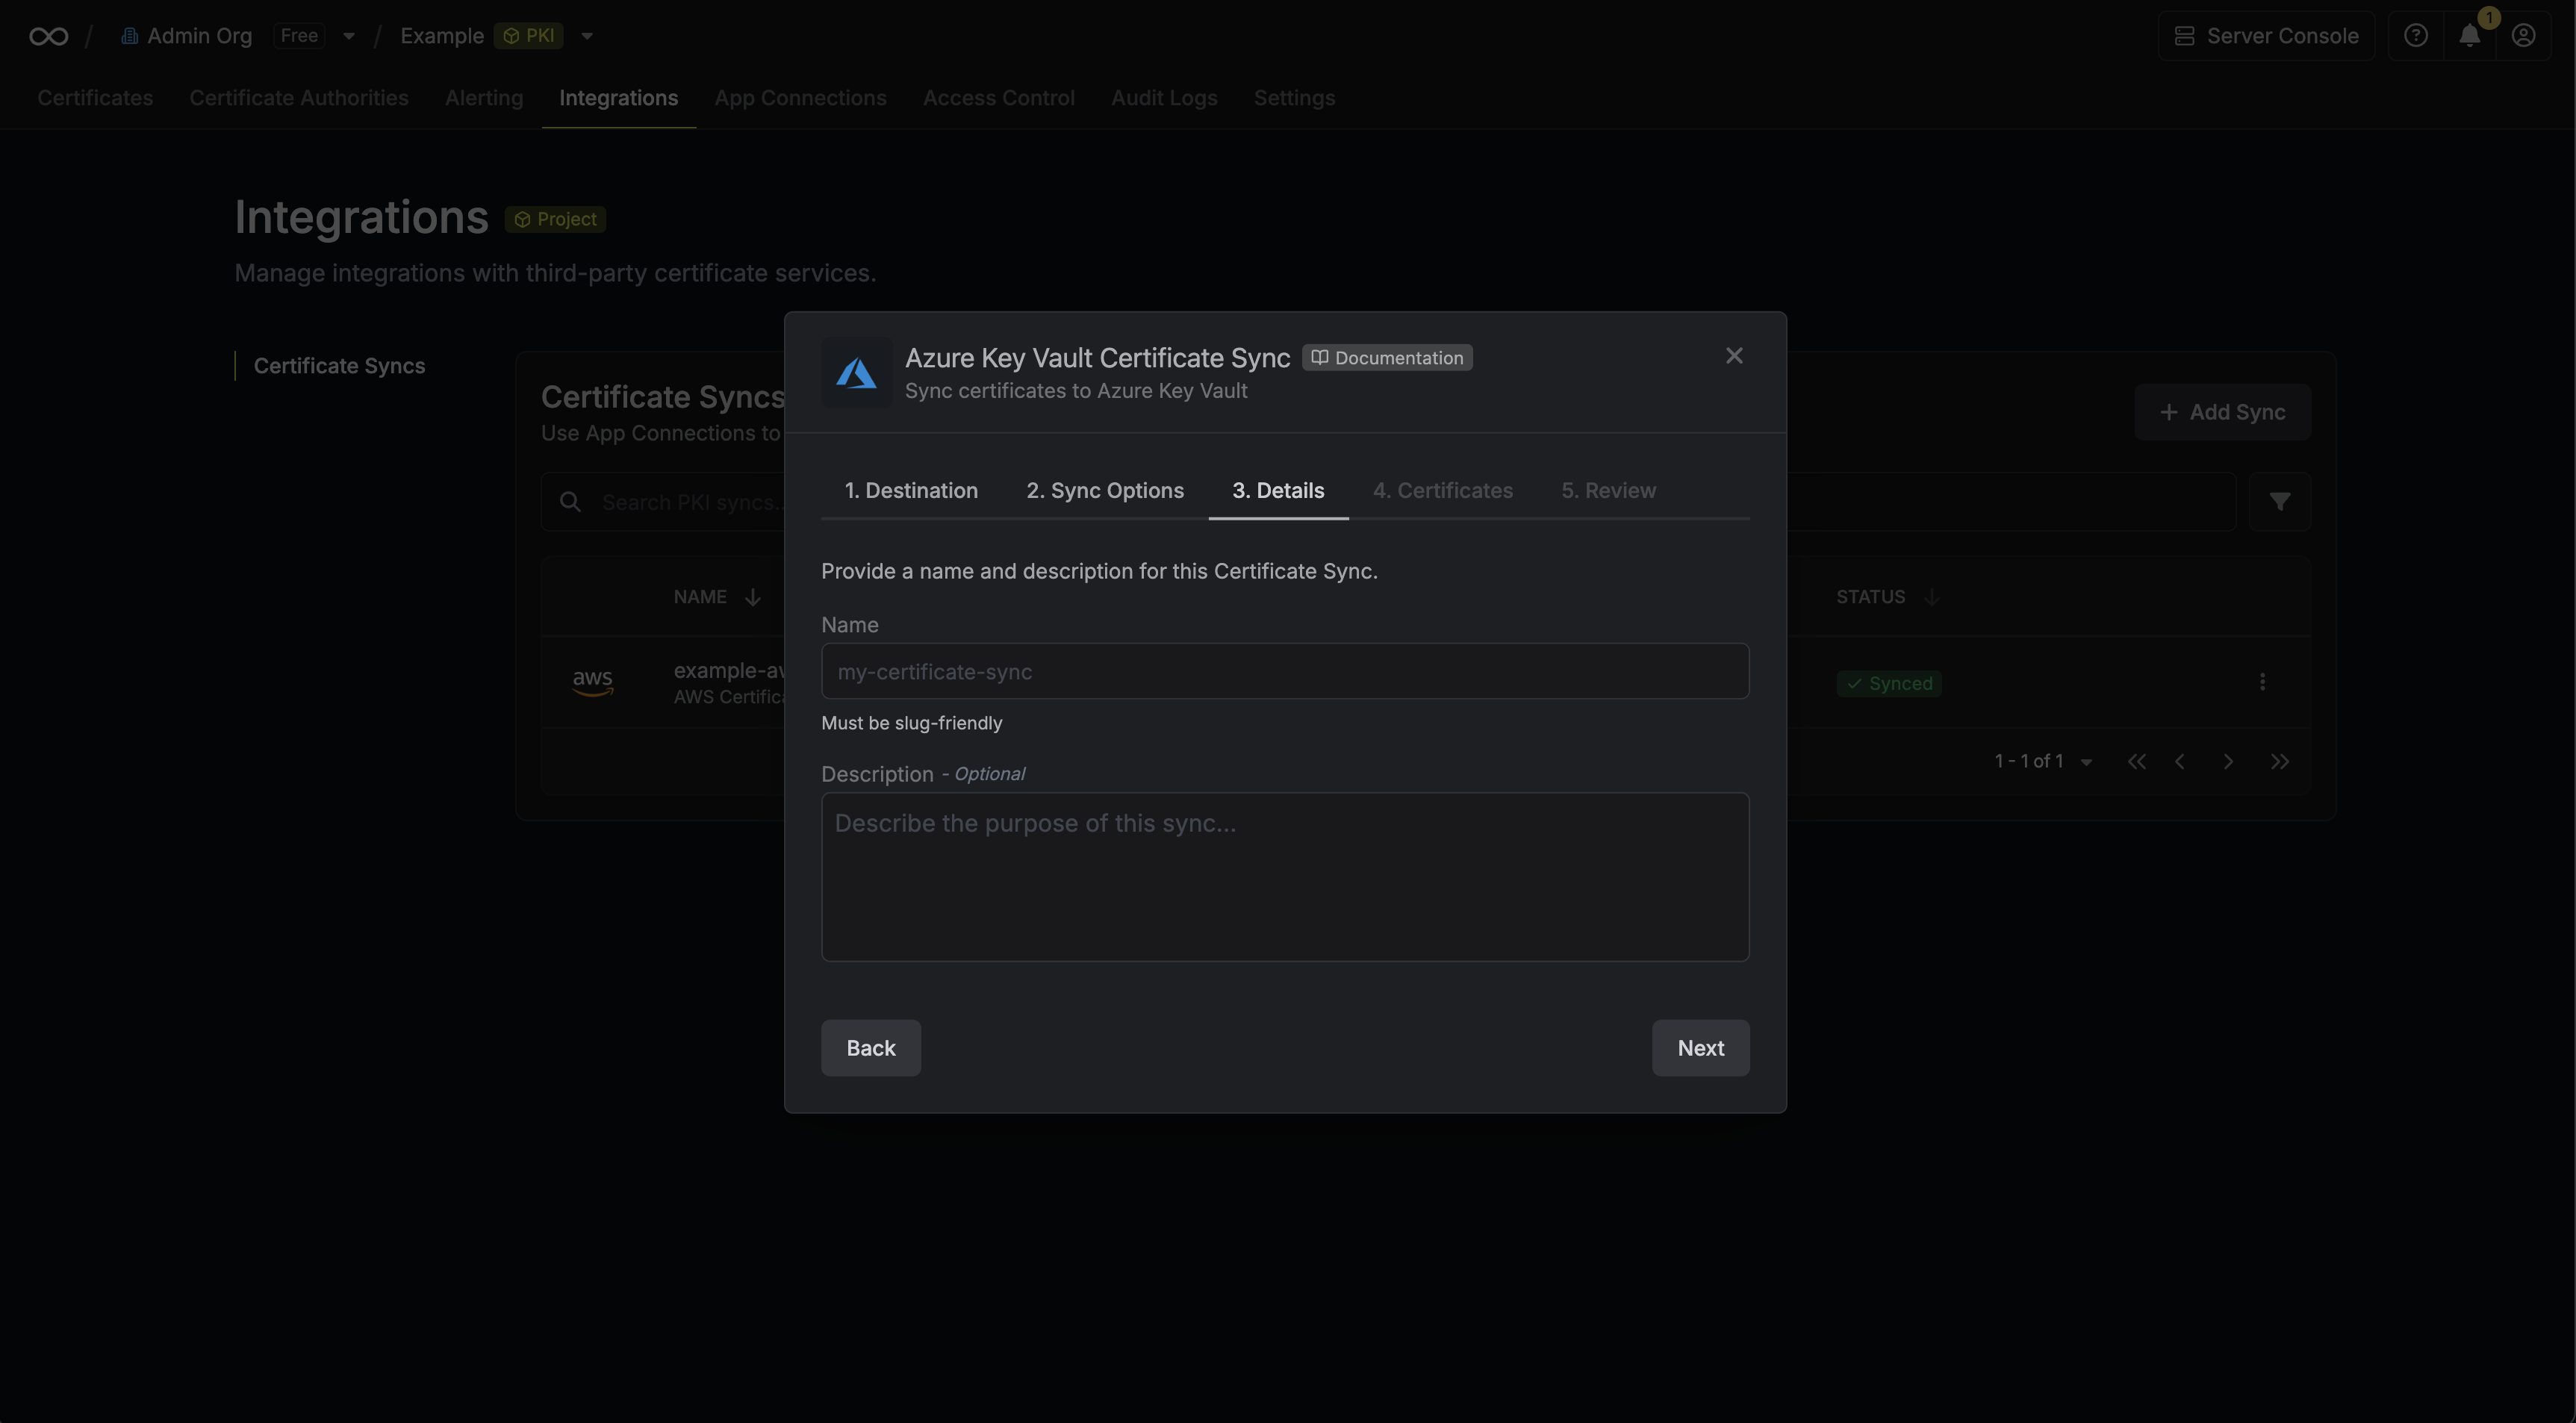 * **Name**: The name of your sync. Must be slug-friendly.
* **Description**: An optional description for your sync.
6. Select which certificates should be synced to Azure Key Vault.
* **Name**: The name of your sync. Must be slug-friendly.
* **Description**: An optional description for your sync.
6. Select which certificates should be synced to Azure Key Vault.
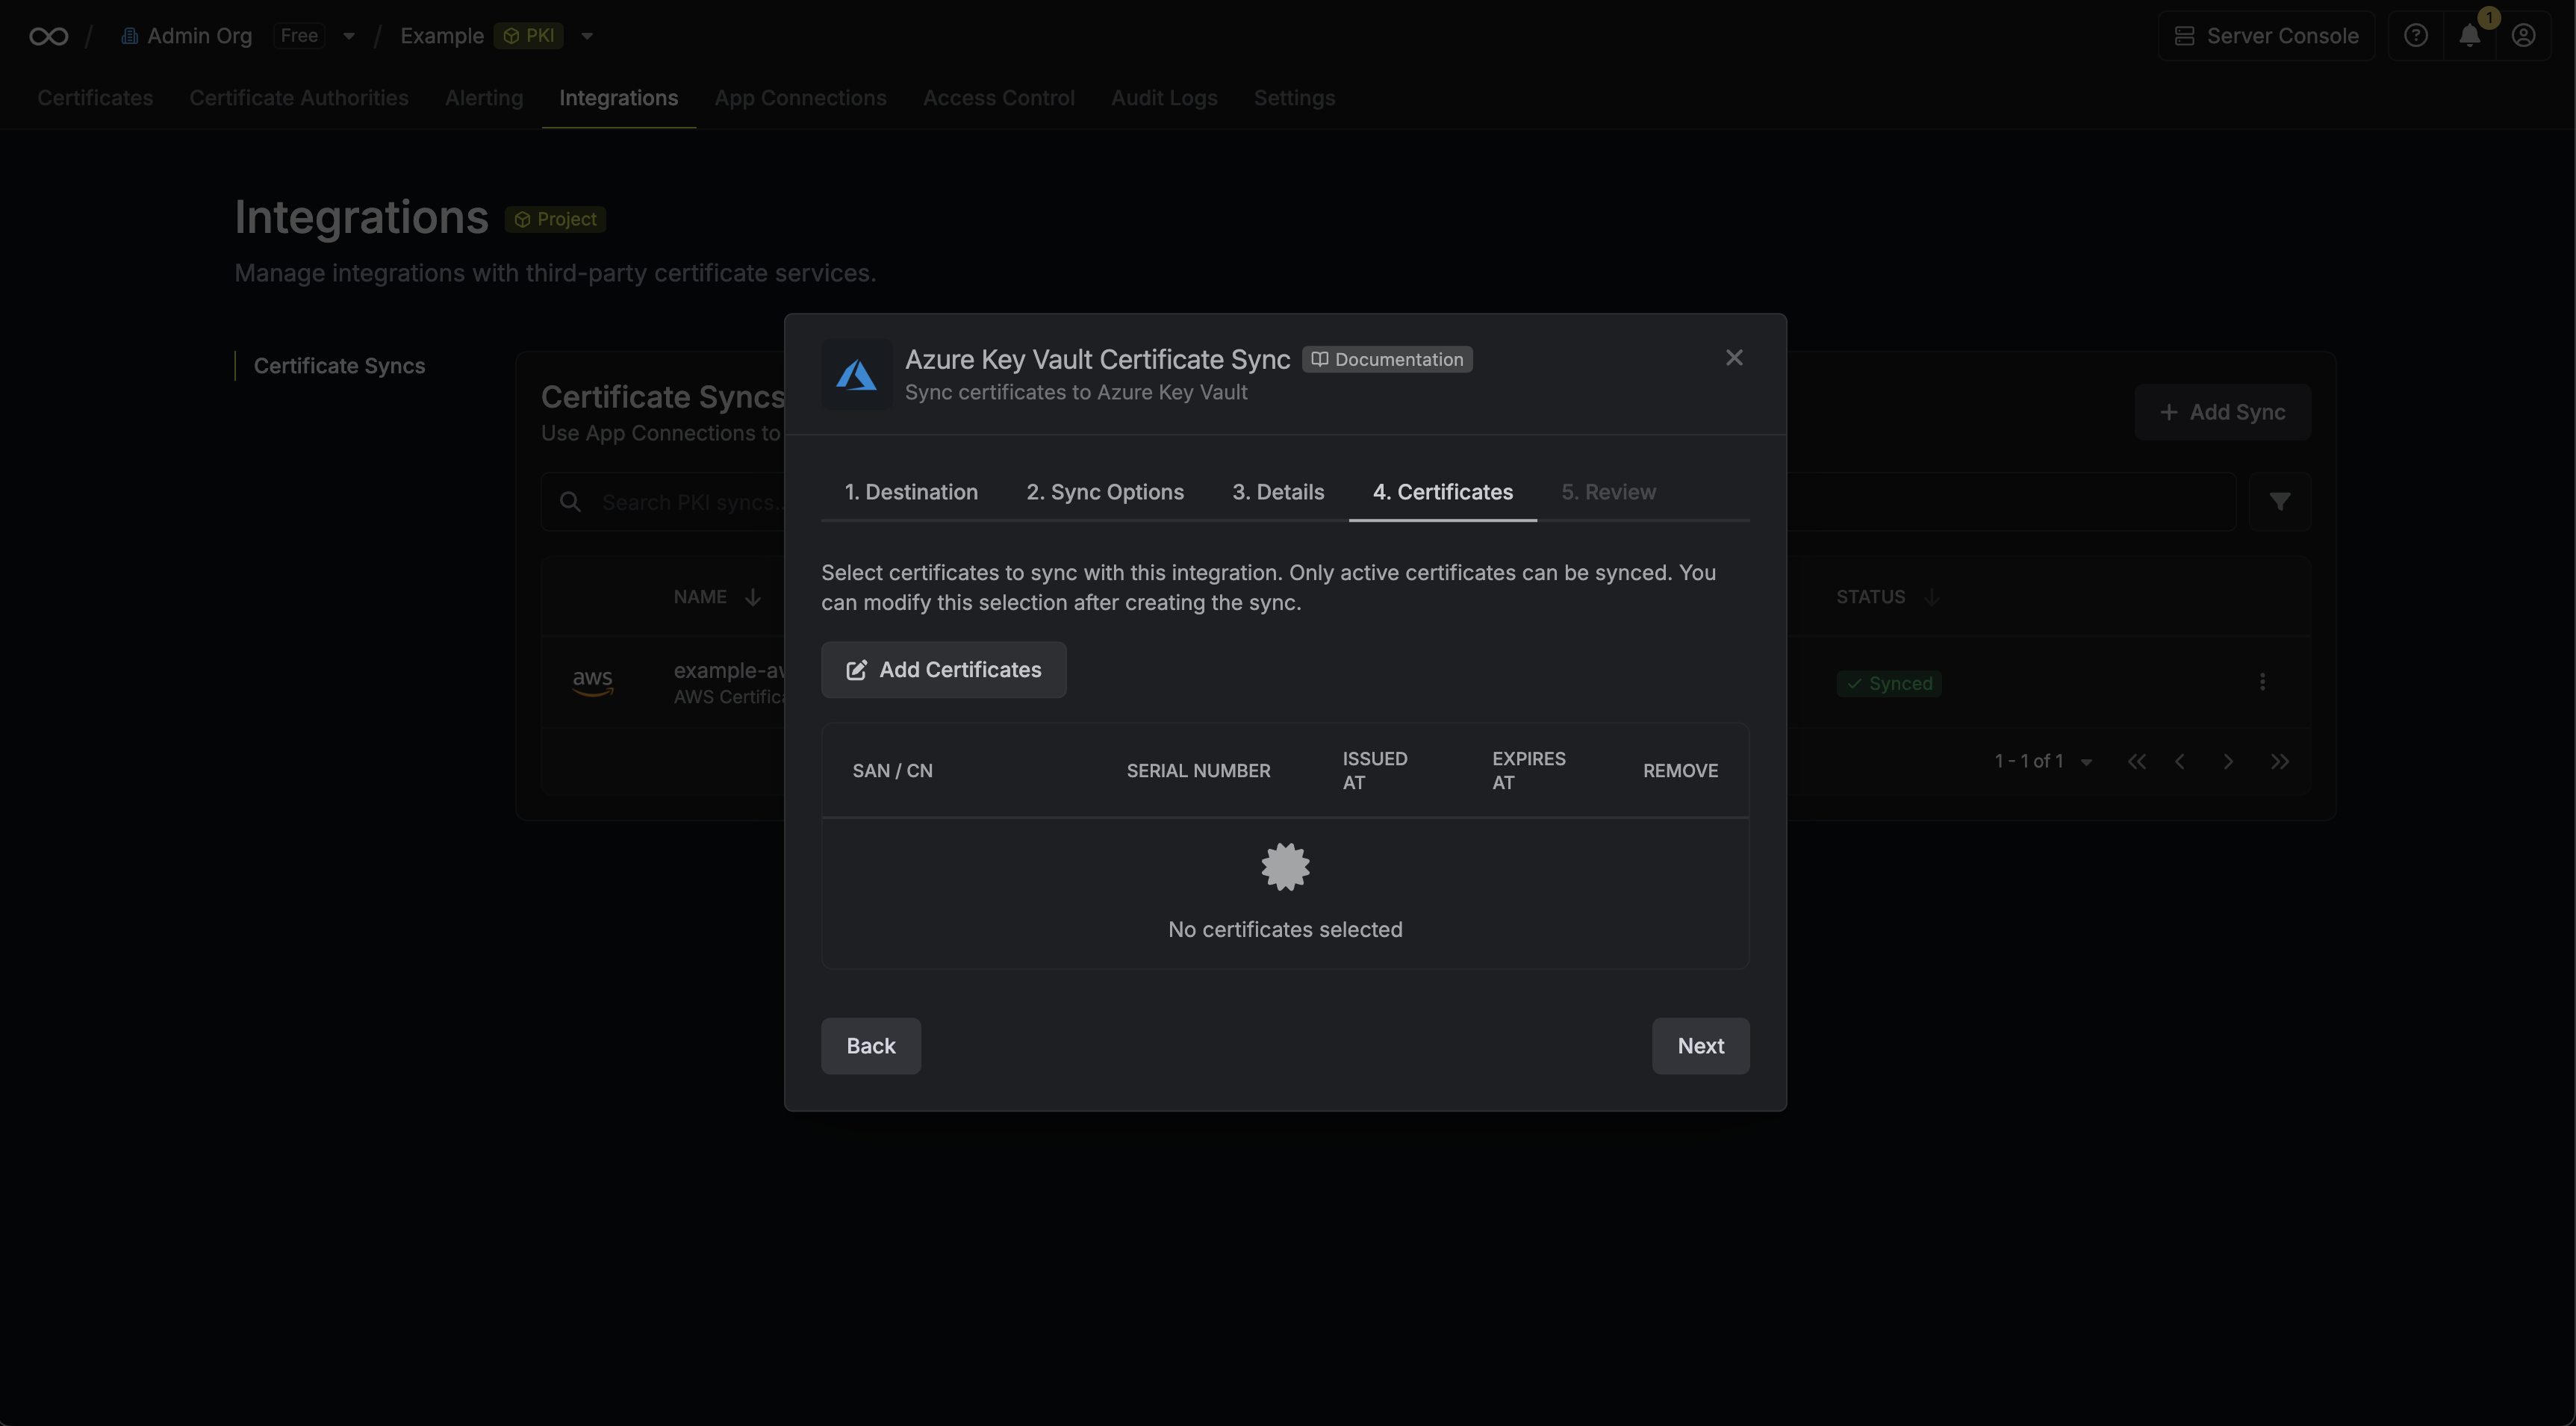 7. Review your Azure Key Vault Certificate Sync configuration, then click **Create Sync**.
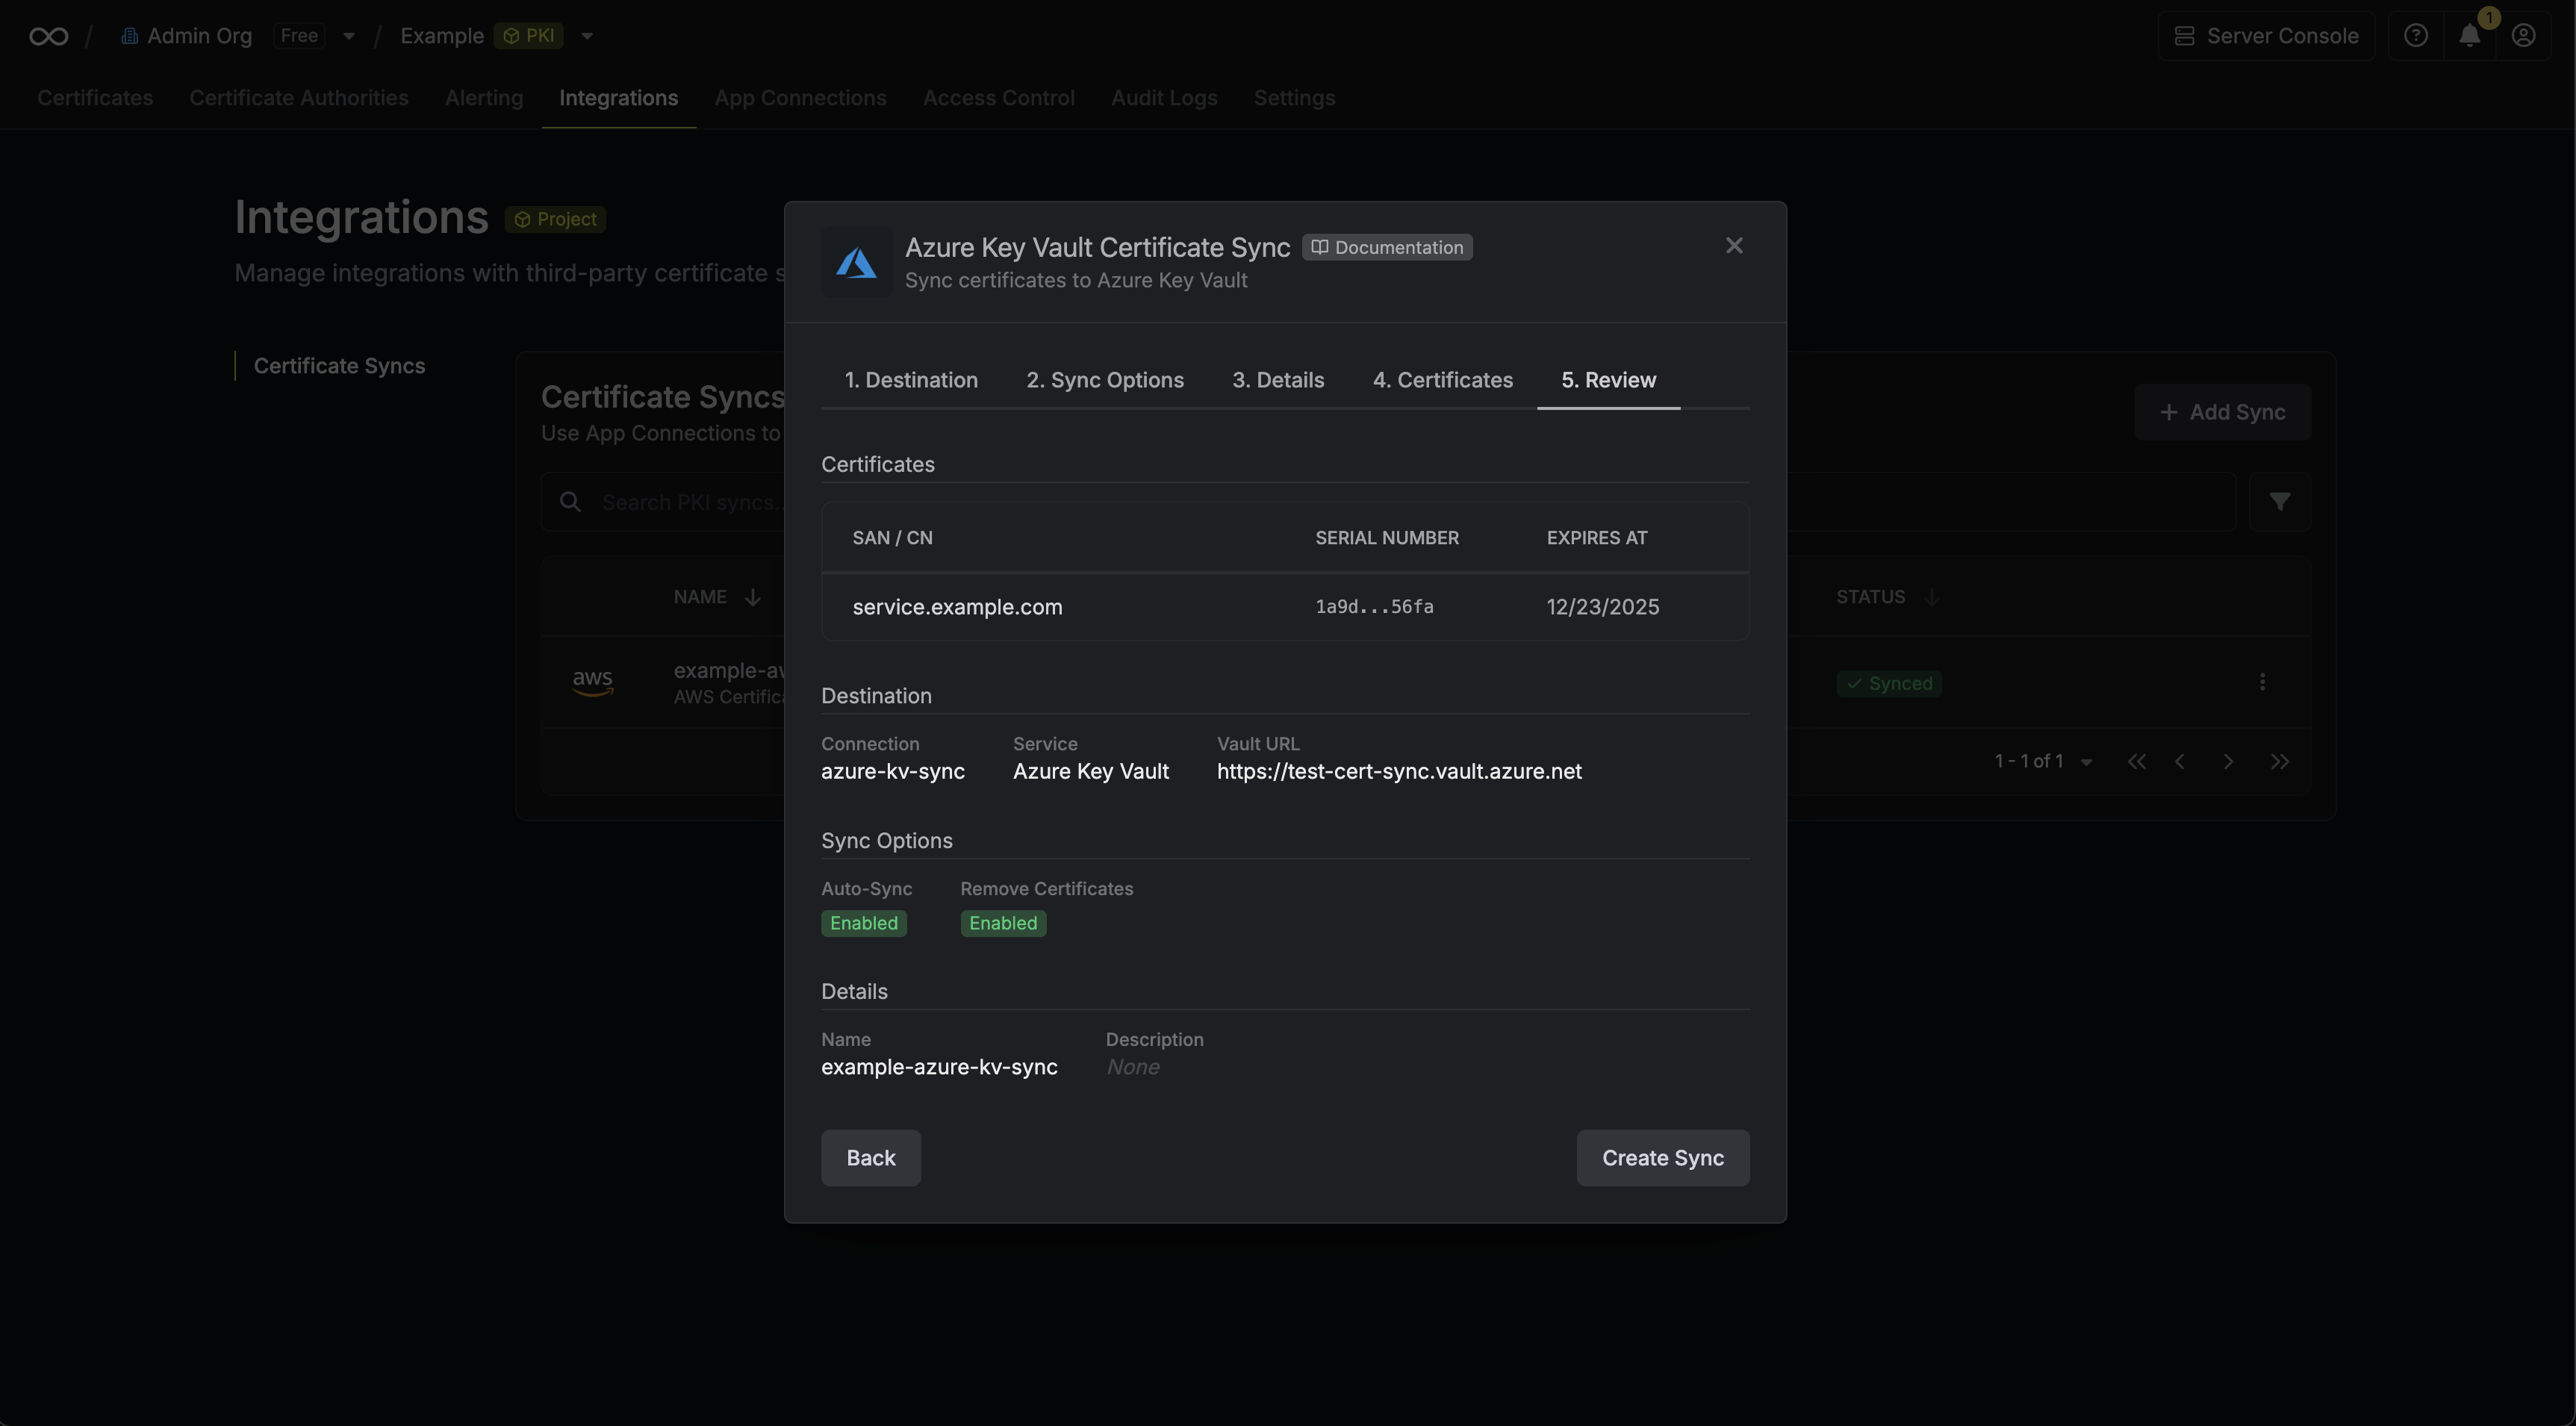 8. If enabled, your Azure Key Vault Certificate Sync will begin syncing your certificates to the destination endpoint.
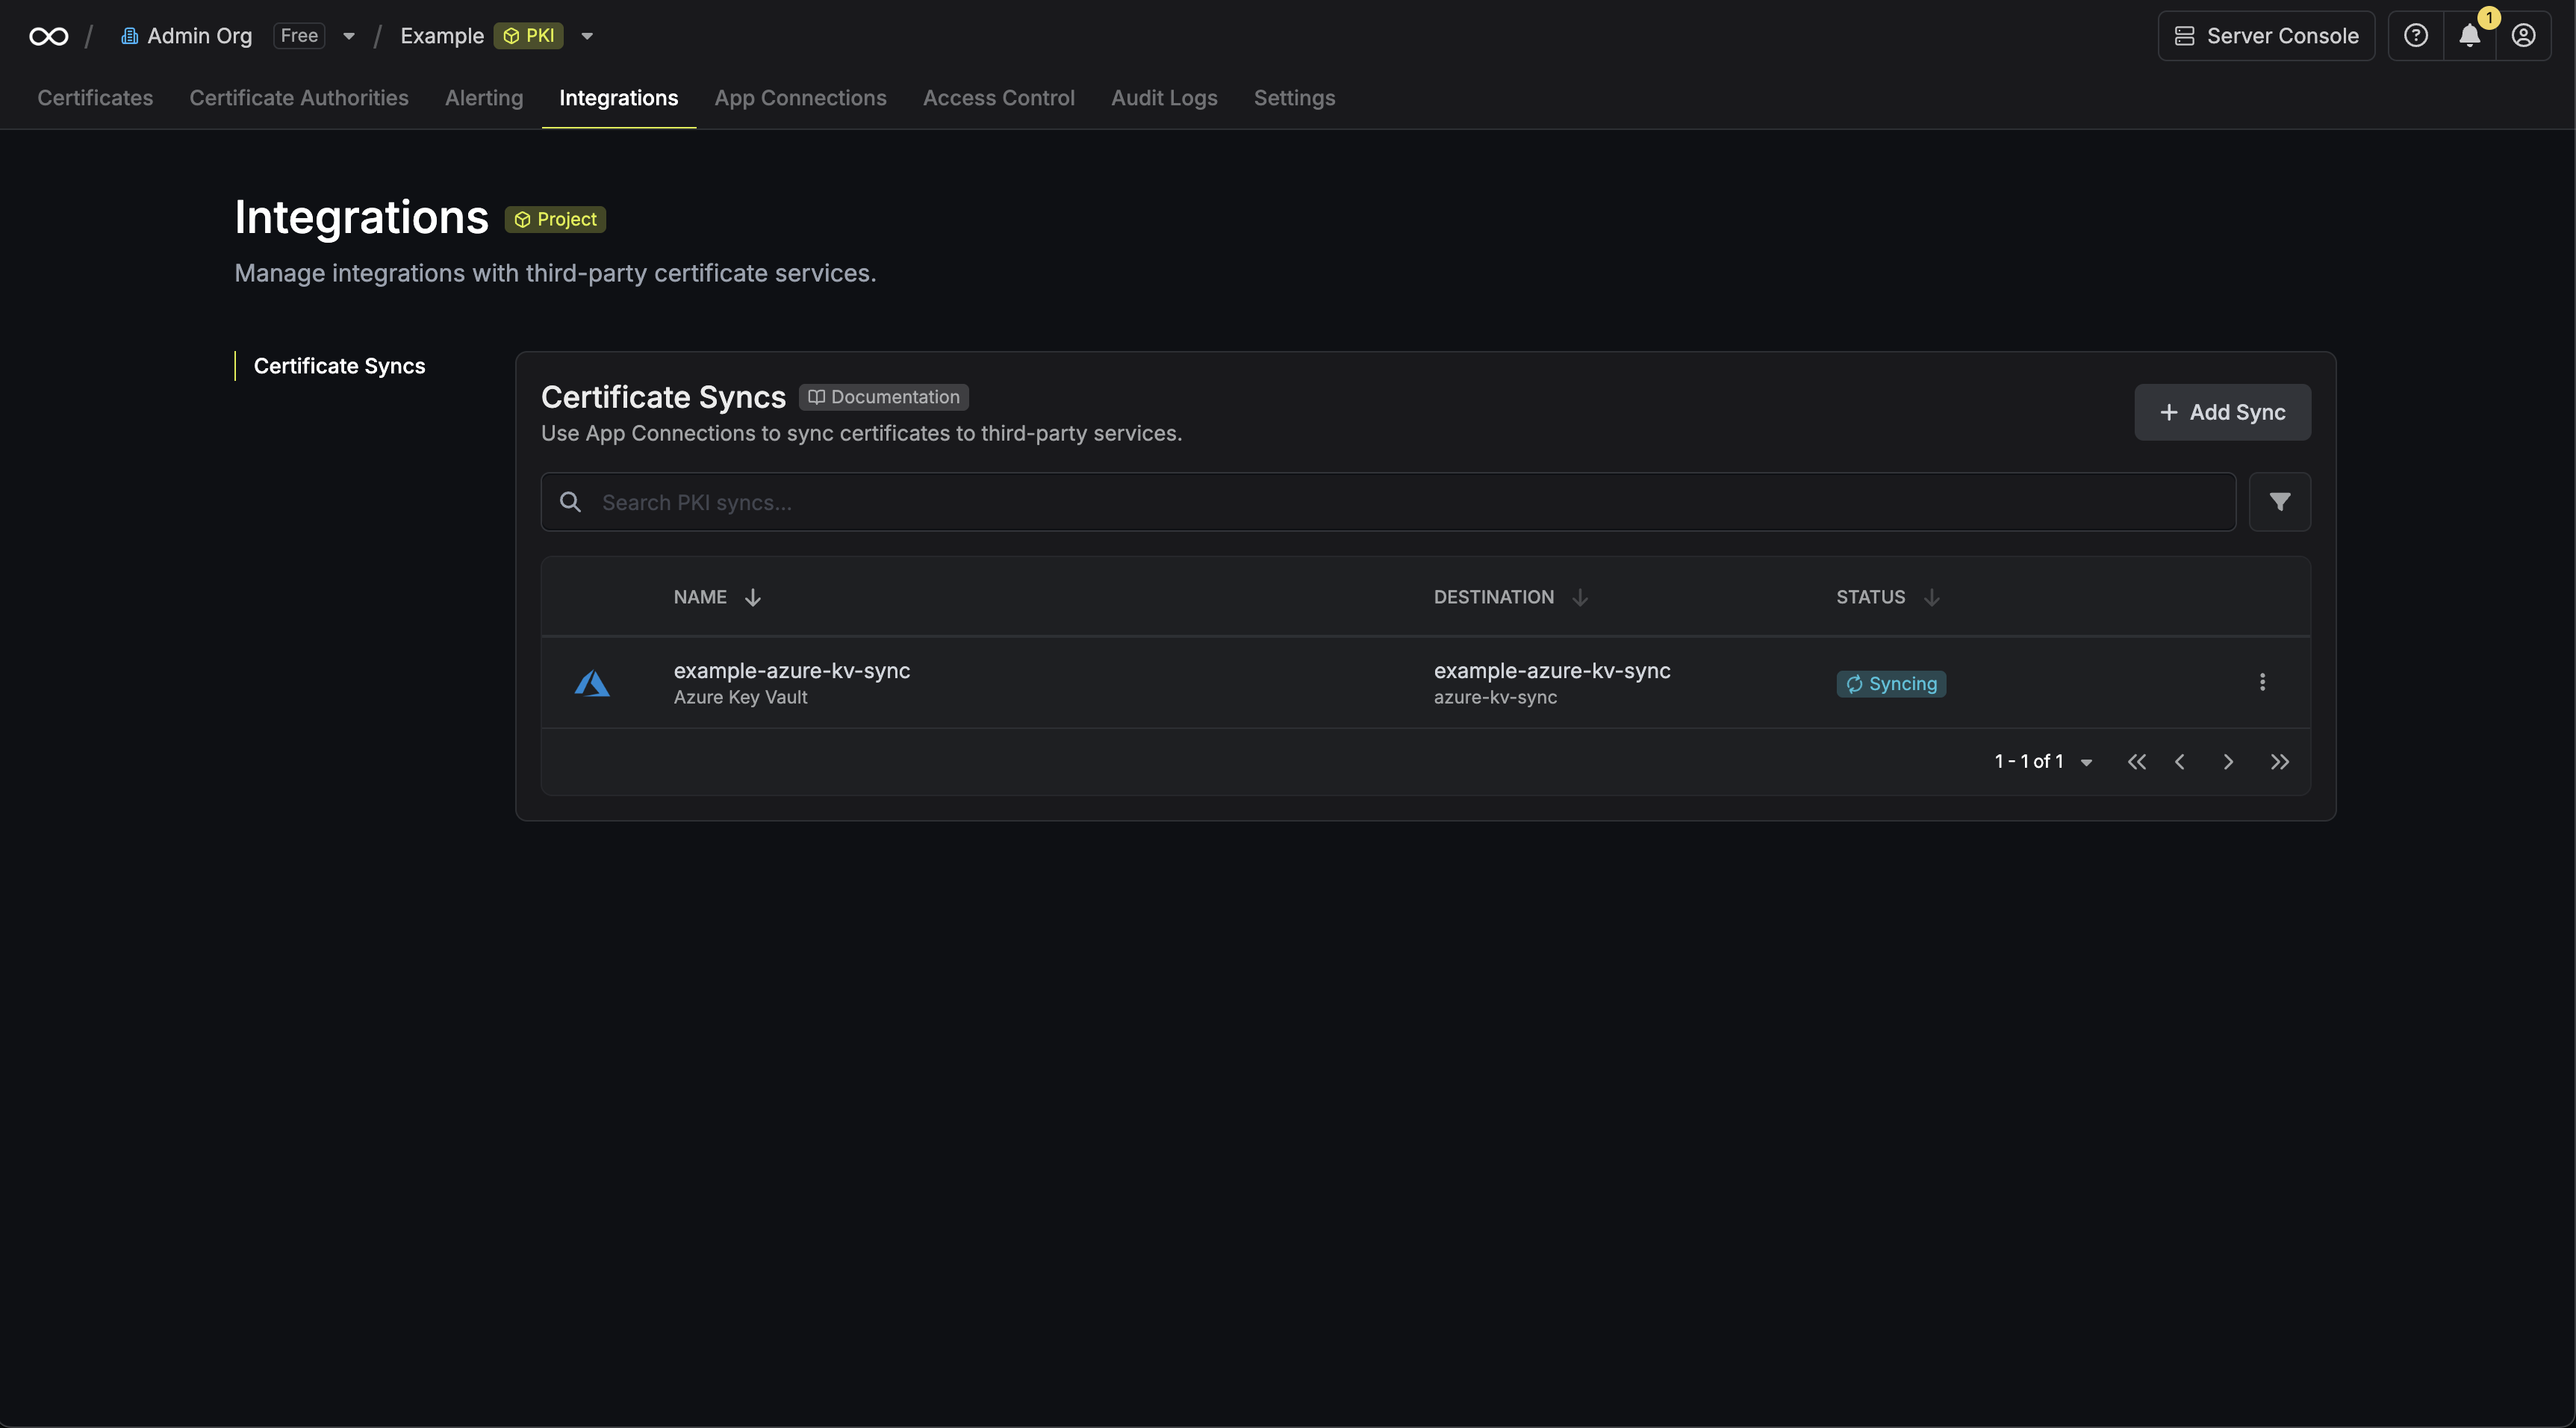
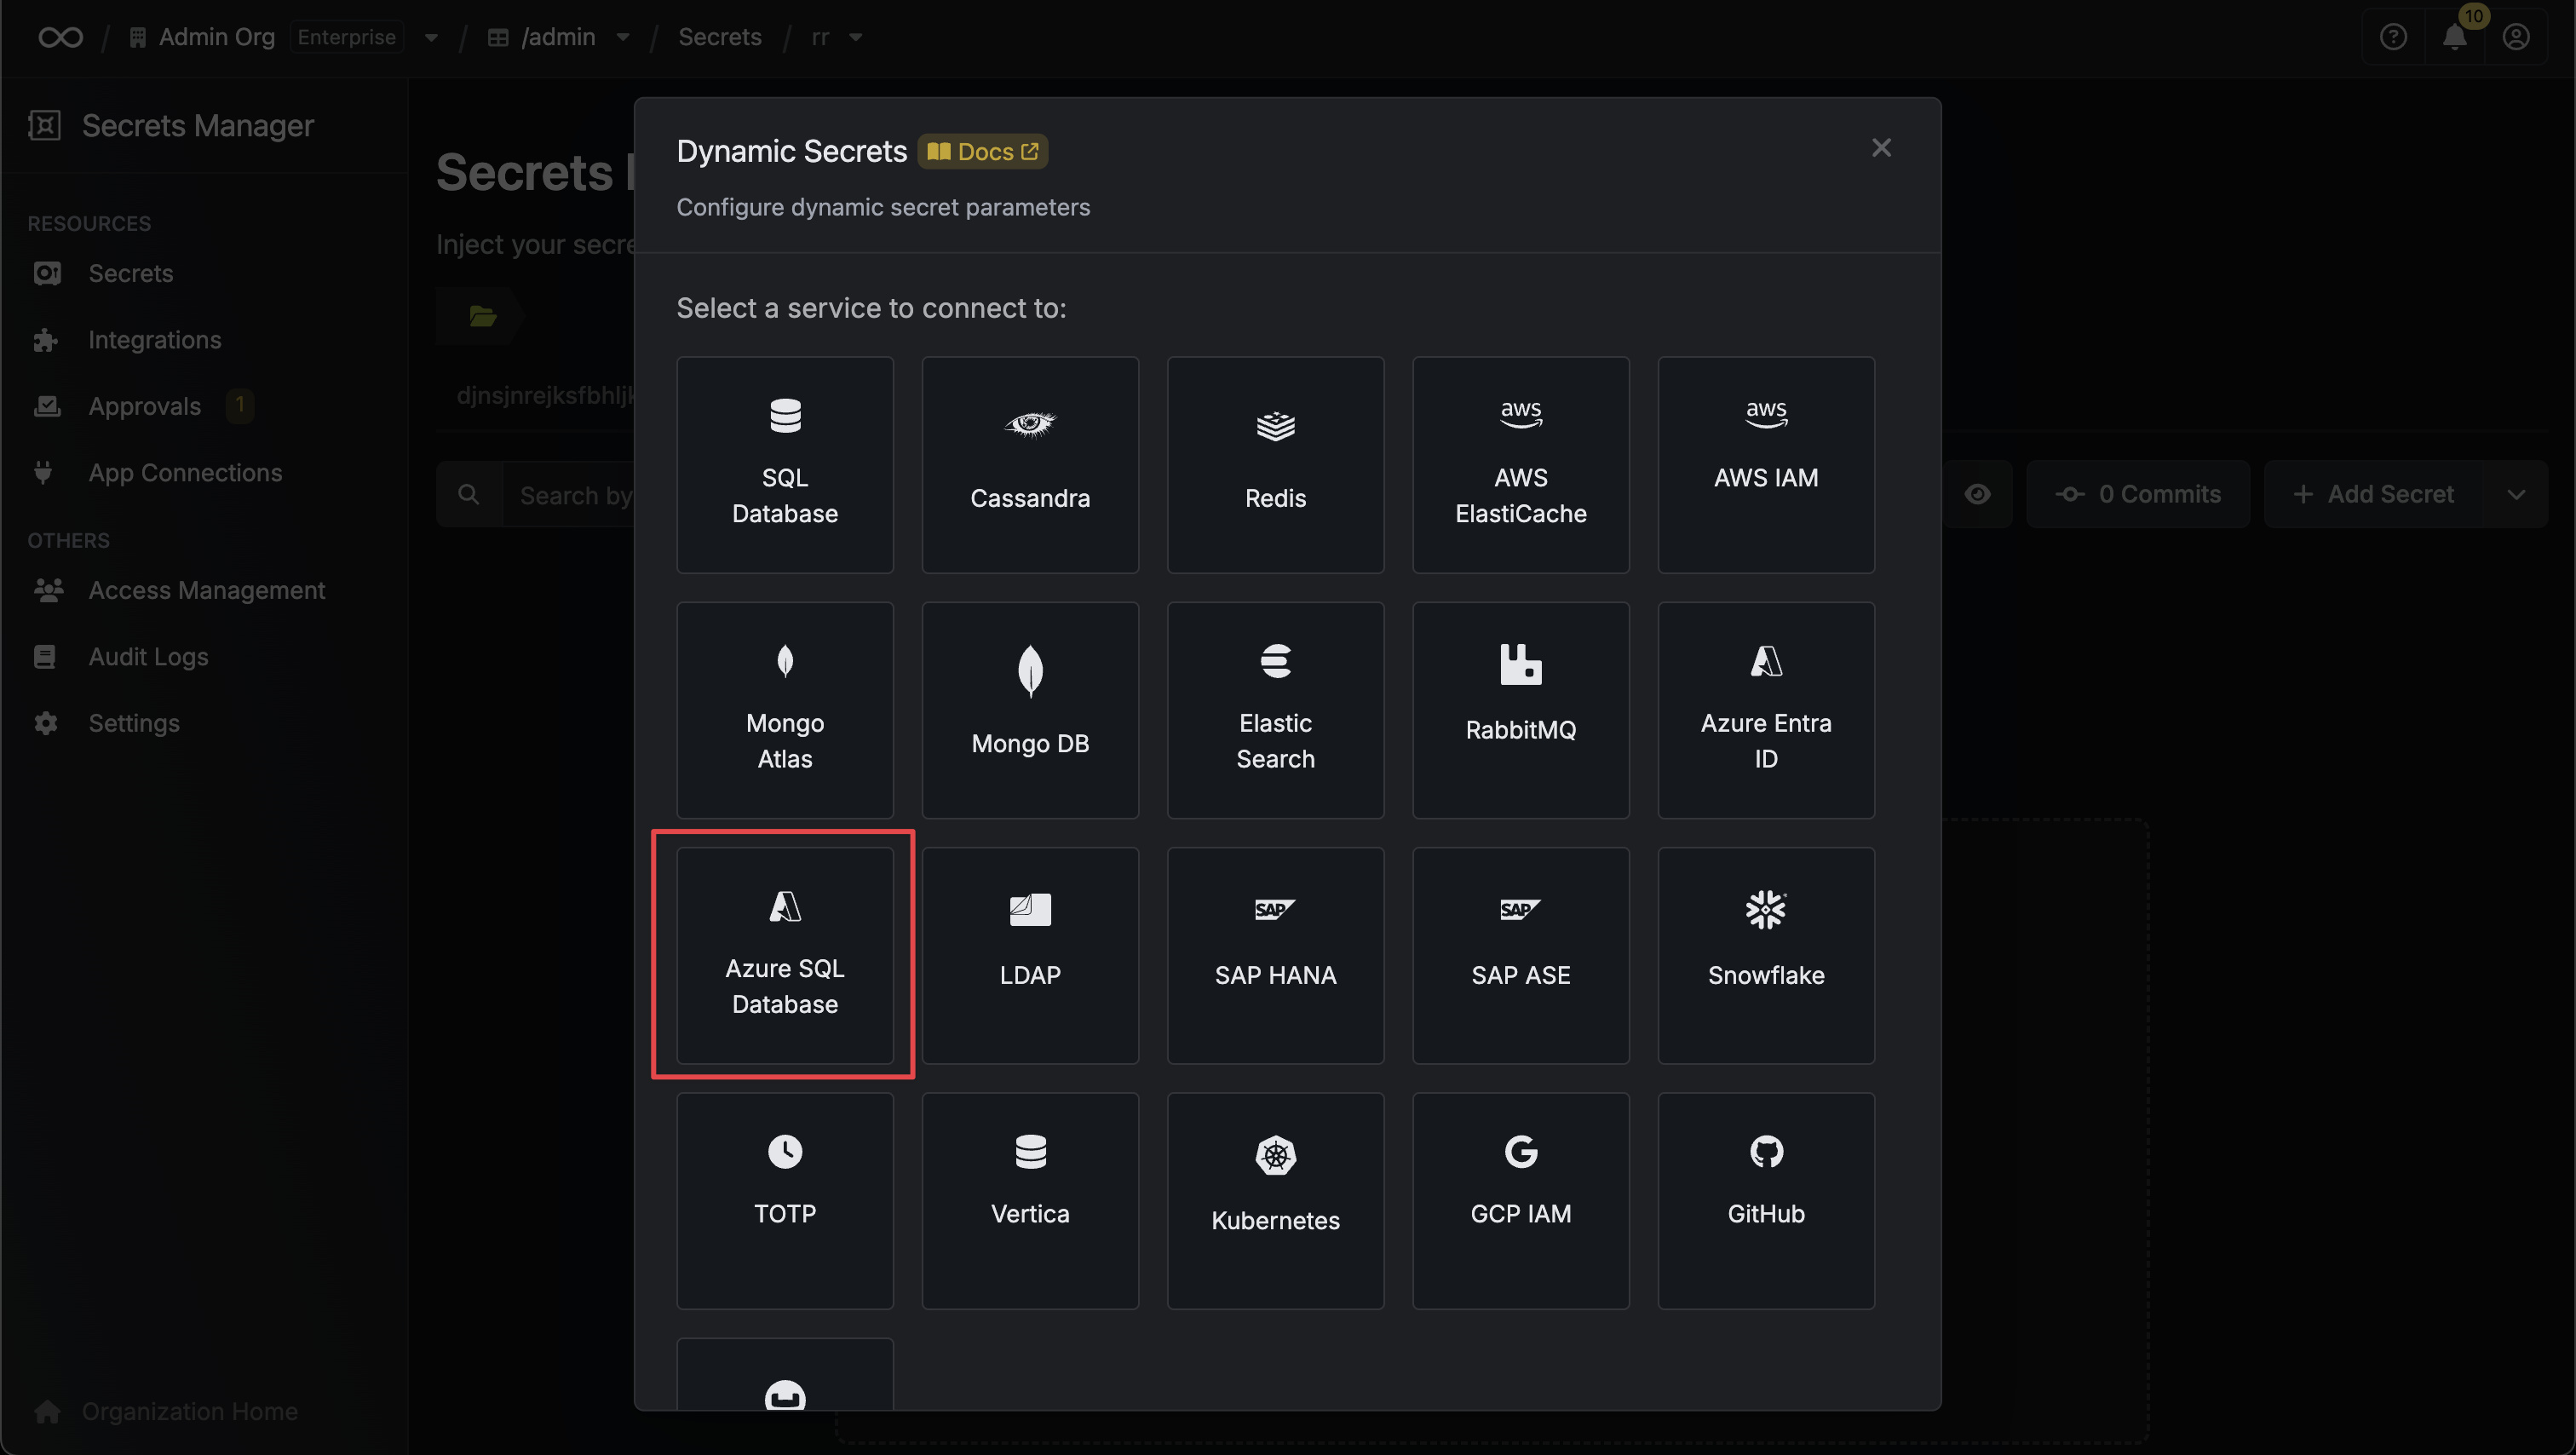
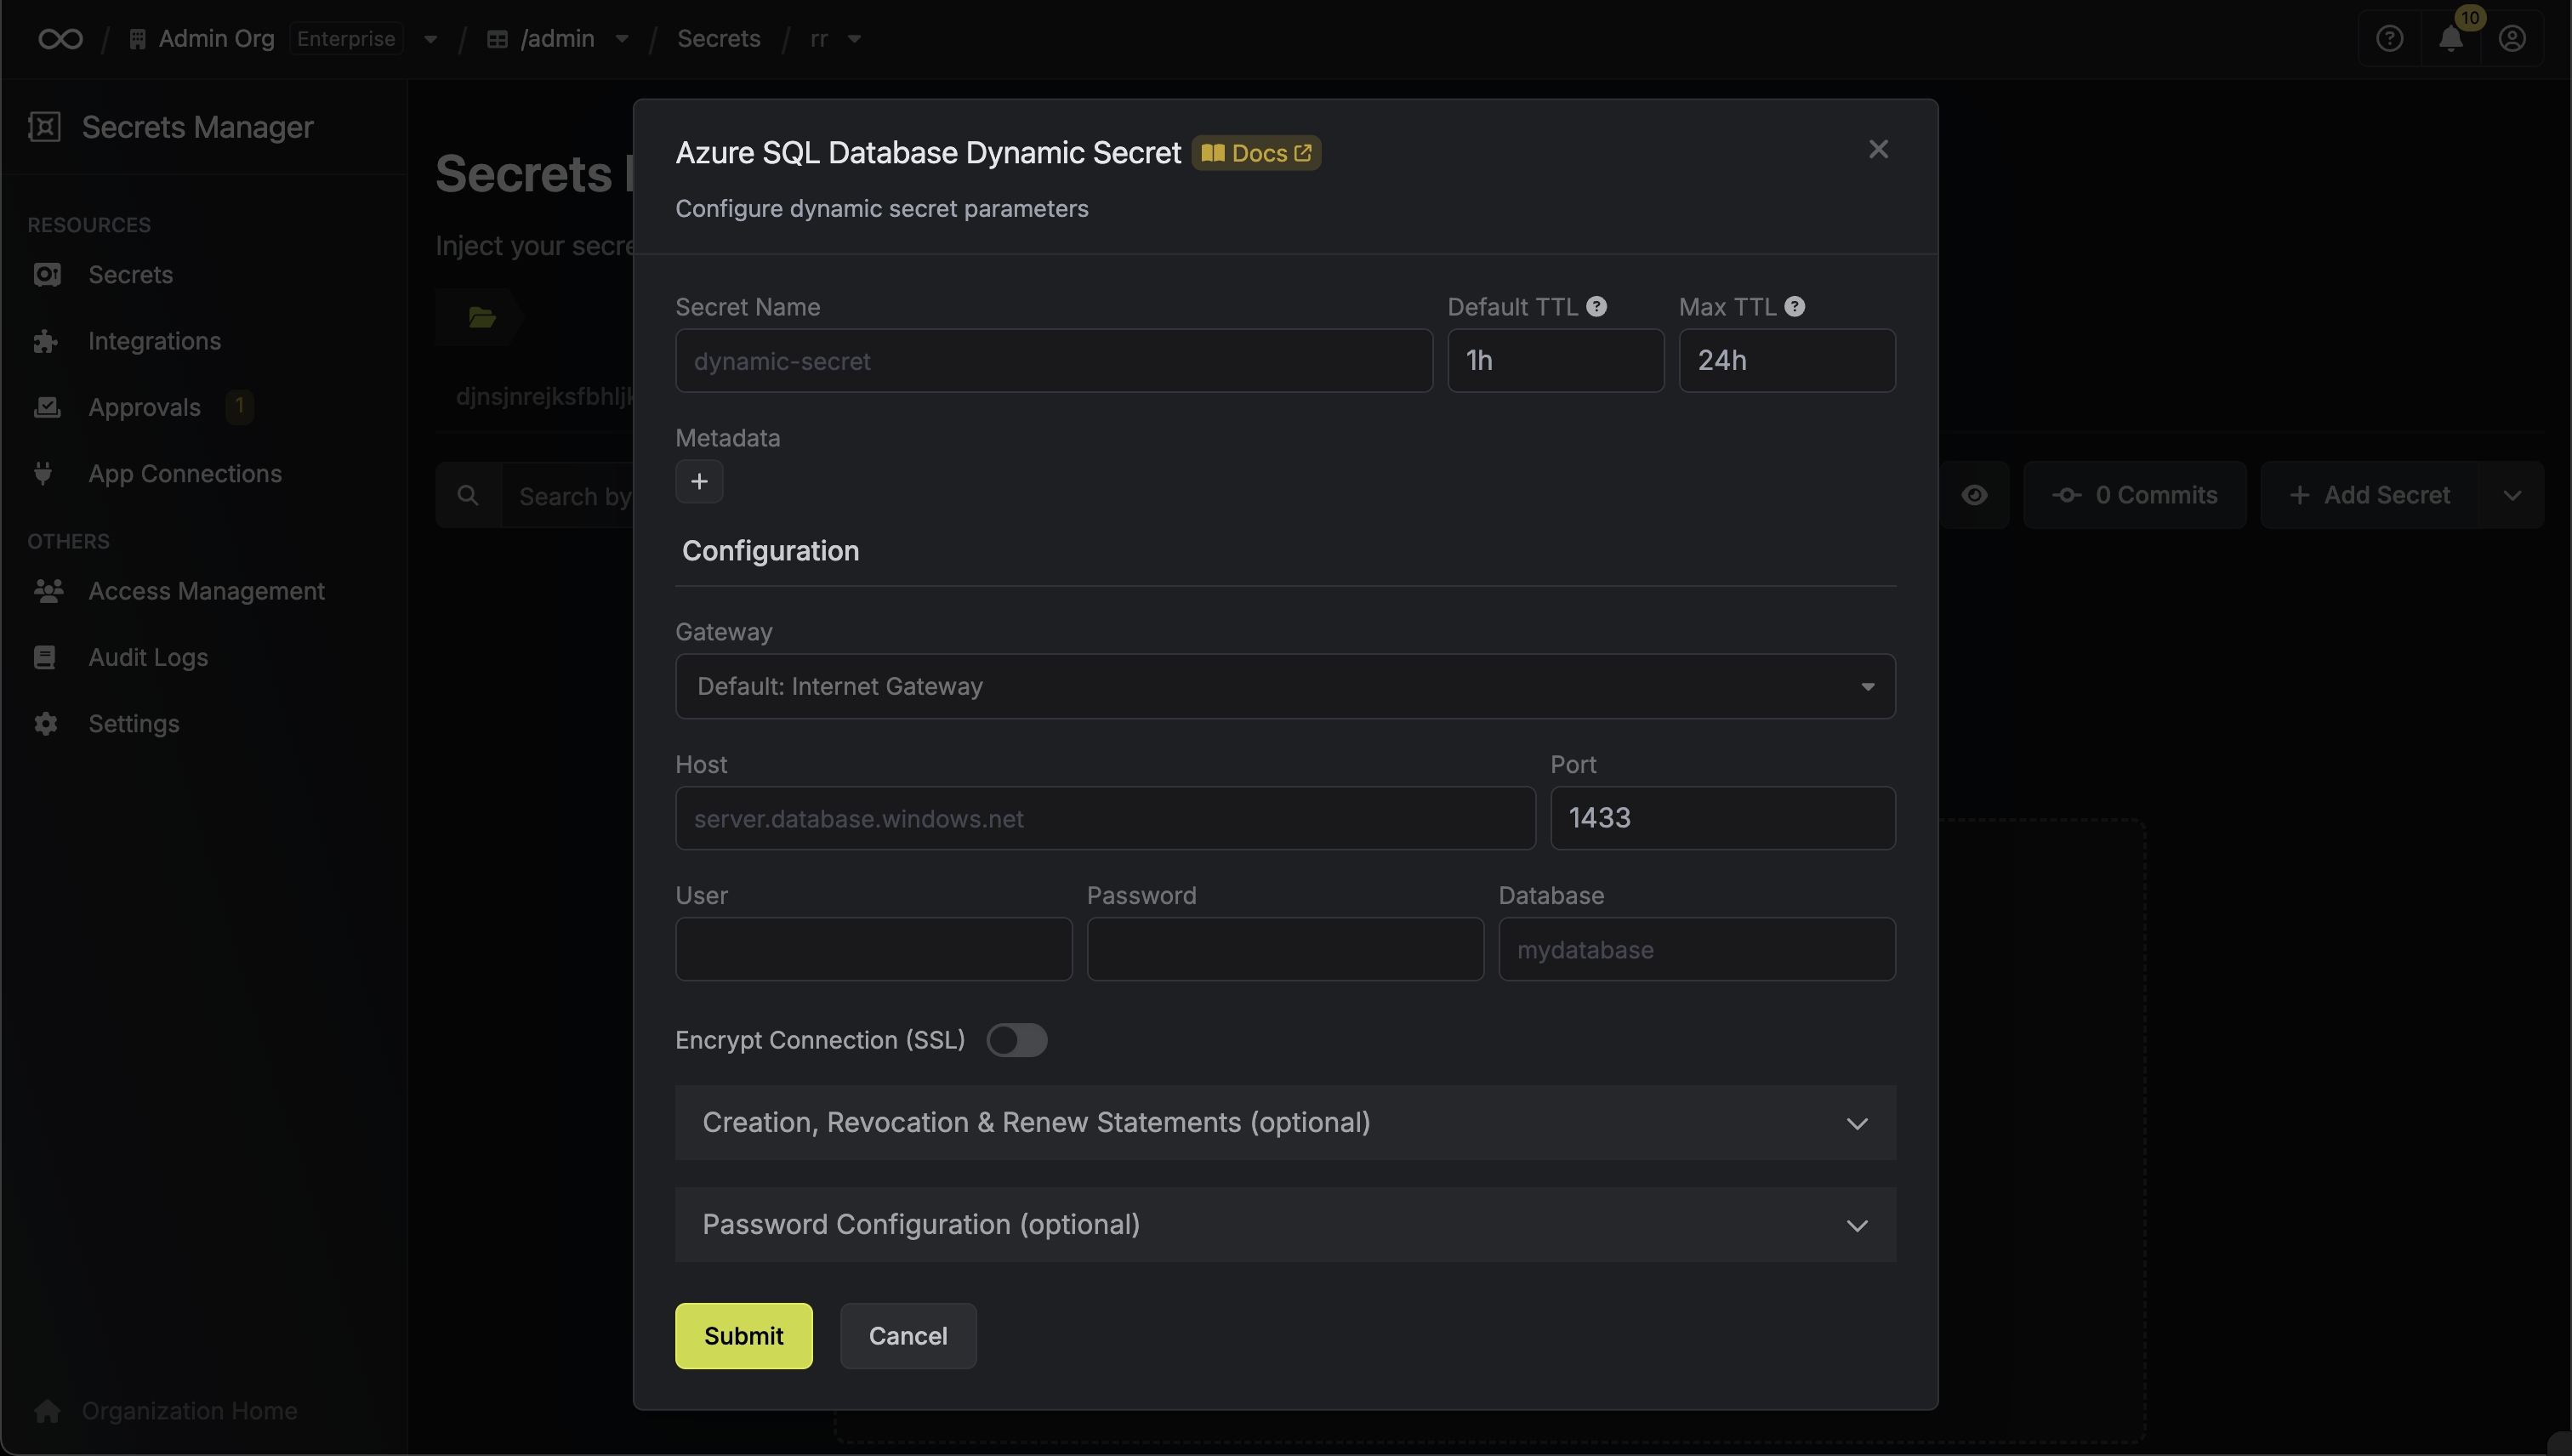
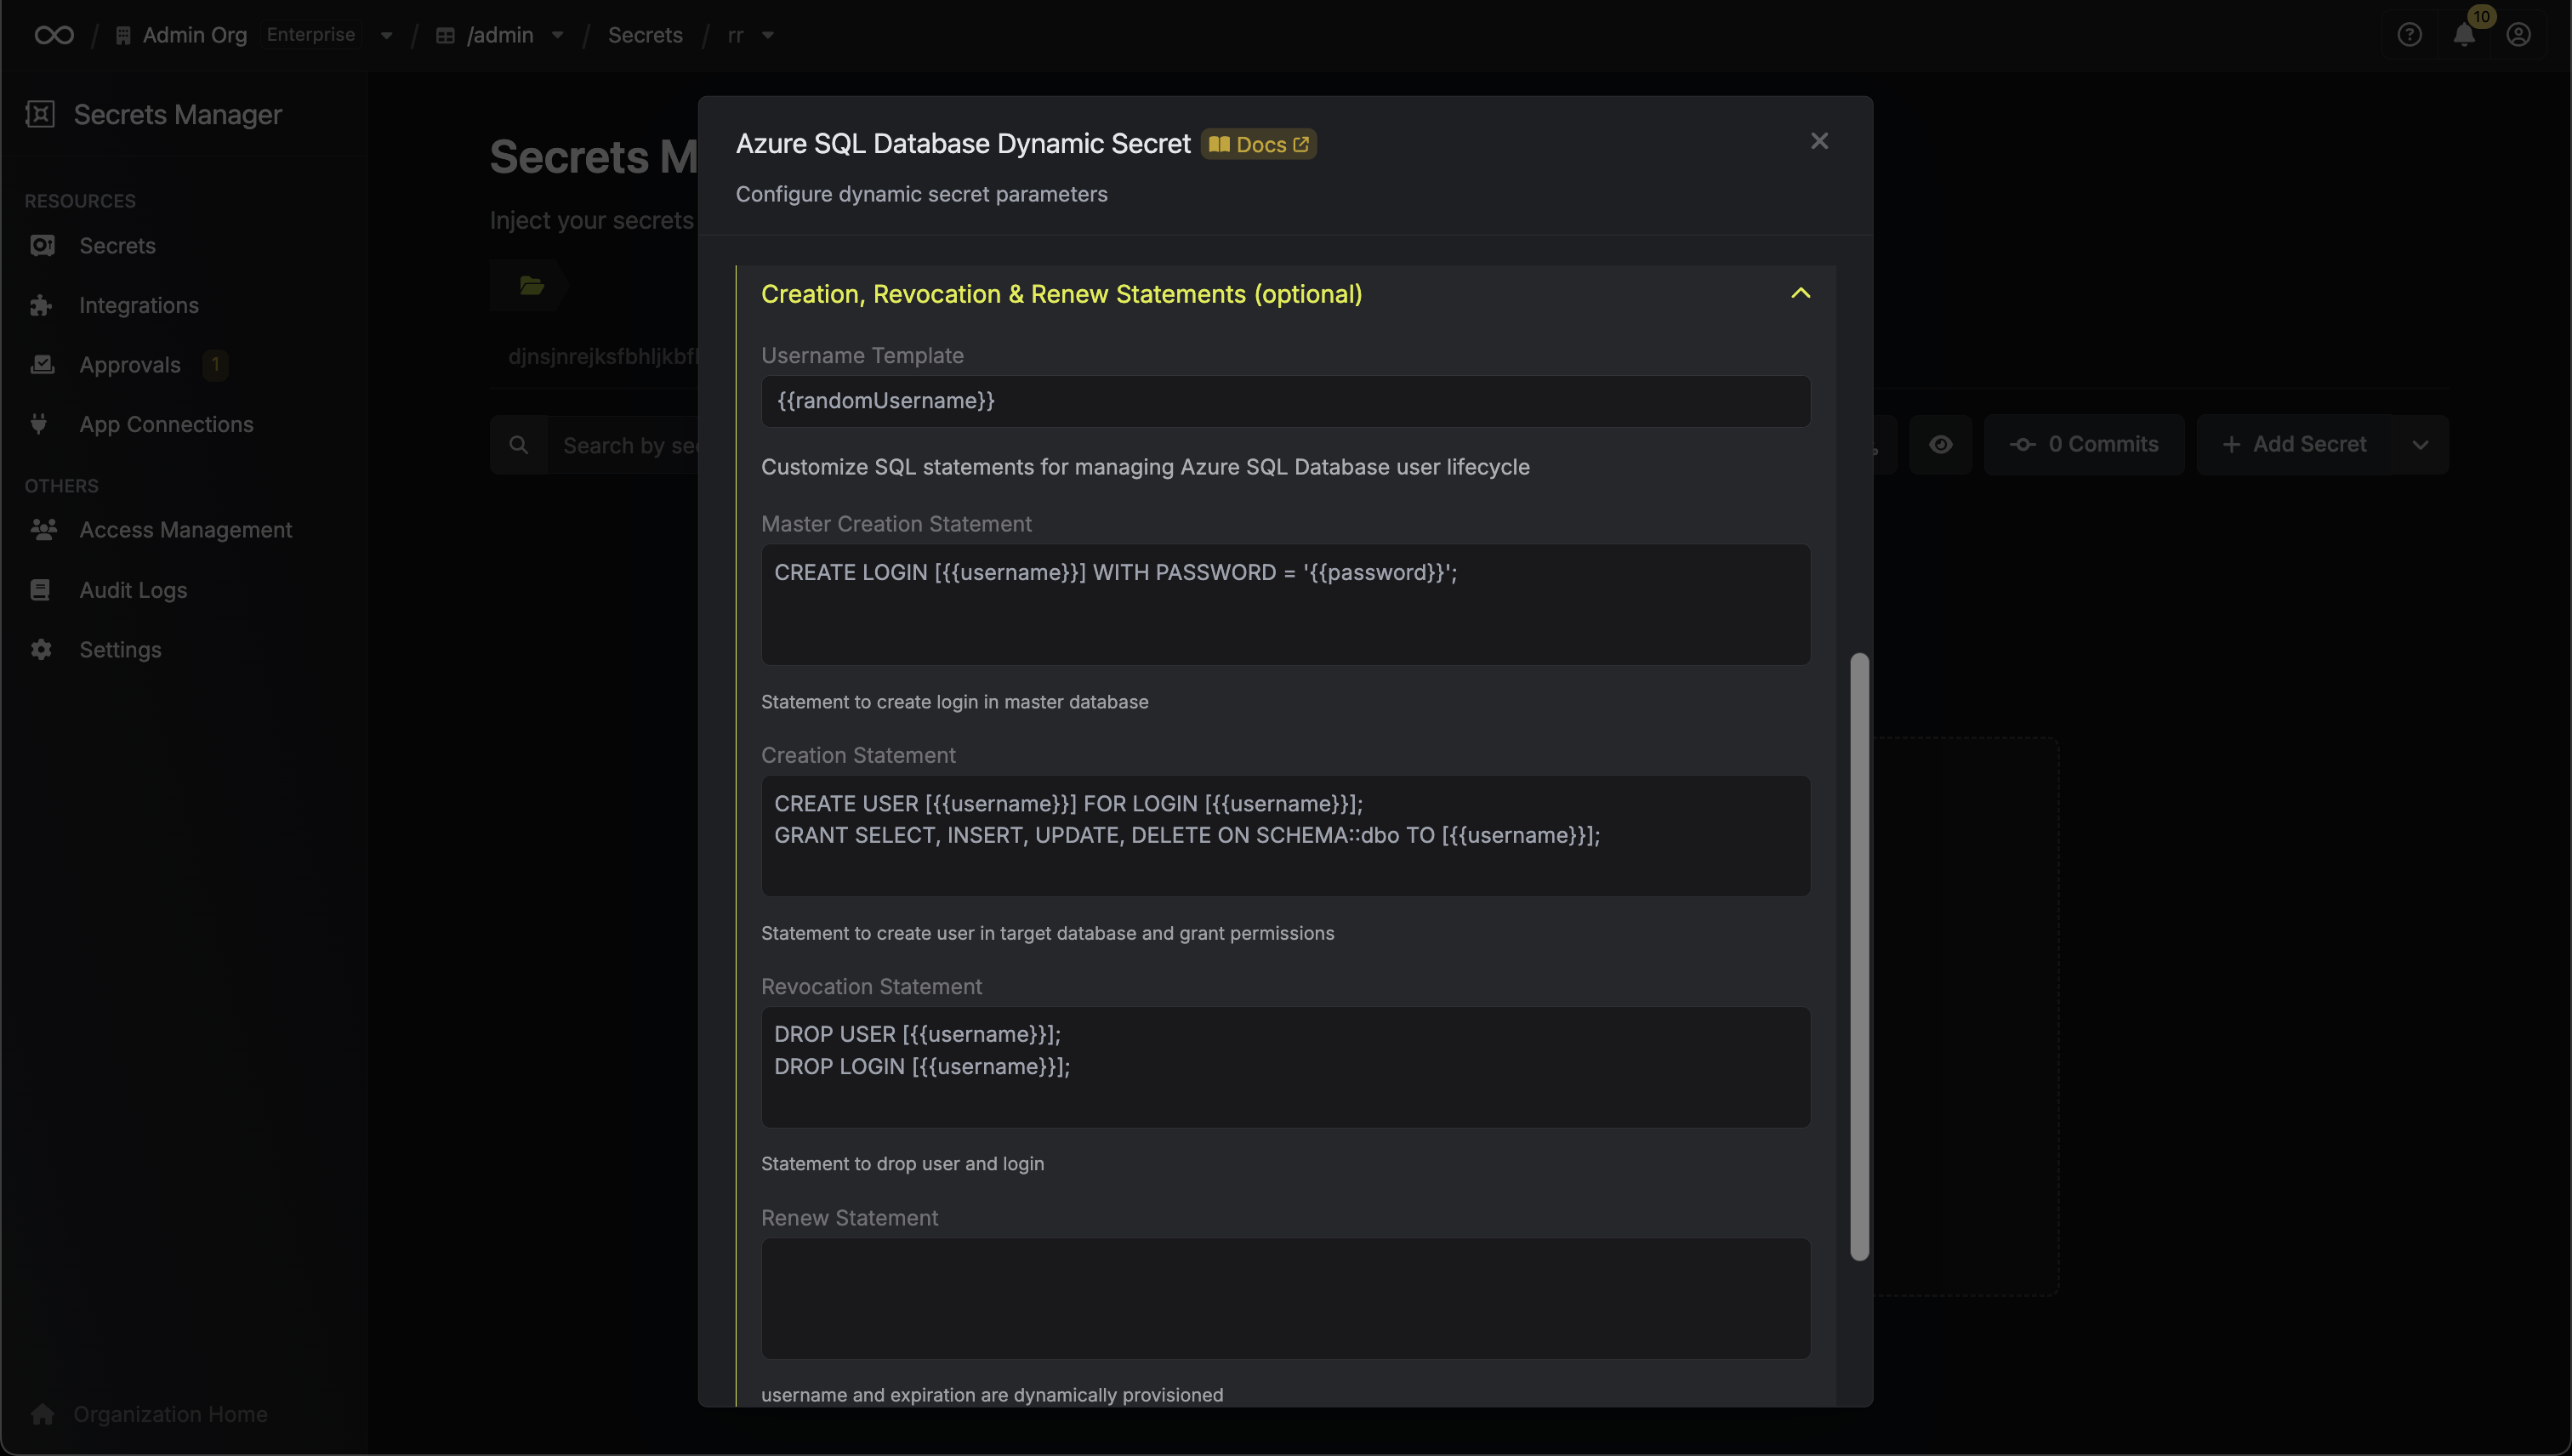 Azure SQL Database dynamic secrets use predefined SQL statements that follow Azure's security best practices:
When generating these secrets, it's important to specify a Time-to-Live (TTL) duration. This will dictate how long the credentials are valid for.
## Renew Leases
To extend the life of the generated dynamic secret leases past its initial time to live, simply click on the **Renew** button as illustrated below.
When creating an identity, you specify an organization level [role](/documentation/platform/access-controls/role-based-access-controls) for it to assume; you can configure roles in Organization Settings > Access Control > Organization Roles.
Now input a few details for your new identity. Here's some guidance for each field:
* Name (required): A friendly name for the identity.
* Role (required): A role from the **Organization Roles** tab for the identity to assume. The organization role assigned will determine what organization level resources this identity can have access to.
Once you've created an identity, you'll be redirected to a page where you can manage the identity.
Since the identity has been configured with Universal Auth by default, you should re-configure it to use OIDC Auth instead. To do this, press to edit the **Authentication** section,
remove the existing Universal Auth configuration, and add a new OIDC Auth configuration onto the identity.
Azure SQL Database dynamic secrets use predefined SQL statements that follow Azure's security best practices:
When generating these secrets, it's important to specify a Time-to-Live (TTL) duration. This will dictate how long the credentials are valid for.
## Renew Leases
To extend the life of the generated dynamic secret leases past its initial time to live, simply click on the **Renew** button as illustrated below.
When creating an identity, you specify an organization level [role](/documentation/platform/access-controls/role-based-access-controls) for it to assume; you can configure roles in Organization Settings > Access Control > Organization Roles.
Now input a few details for your new identity. Here's some guidance for each field:
* Name (required): A friendly name for the identity.
* Role (required): A role from the **Organization Roles** tab for the identity to assume. The organization role assigned will determine what organization level resources this identity can have access to.
Once you've created an identity, you'll be redirected to a page where you can manage the identity.
Since the identity has been configured with Universal Auth by default, you should re-configure it to use OIDC Auth instead. To do this, press to edit the **Authentication** section,
remove the existing Universal Auth configuration, and add a new OIDC Auth configuration onto the identity.
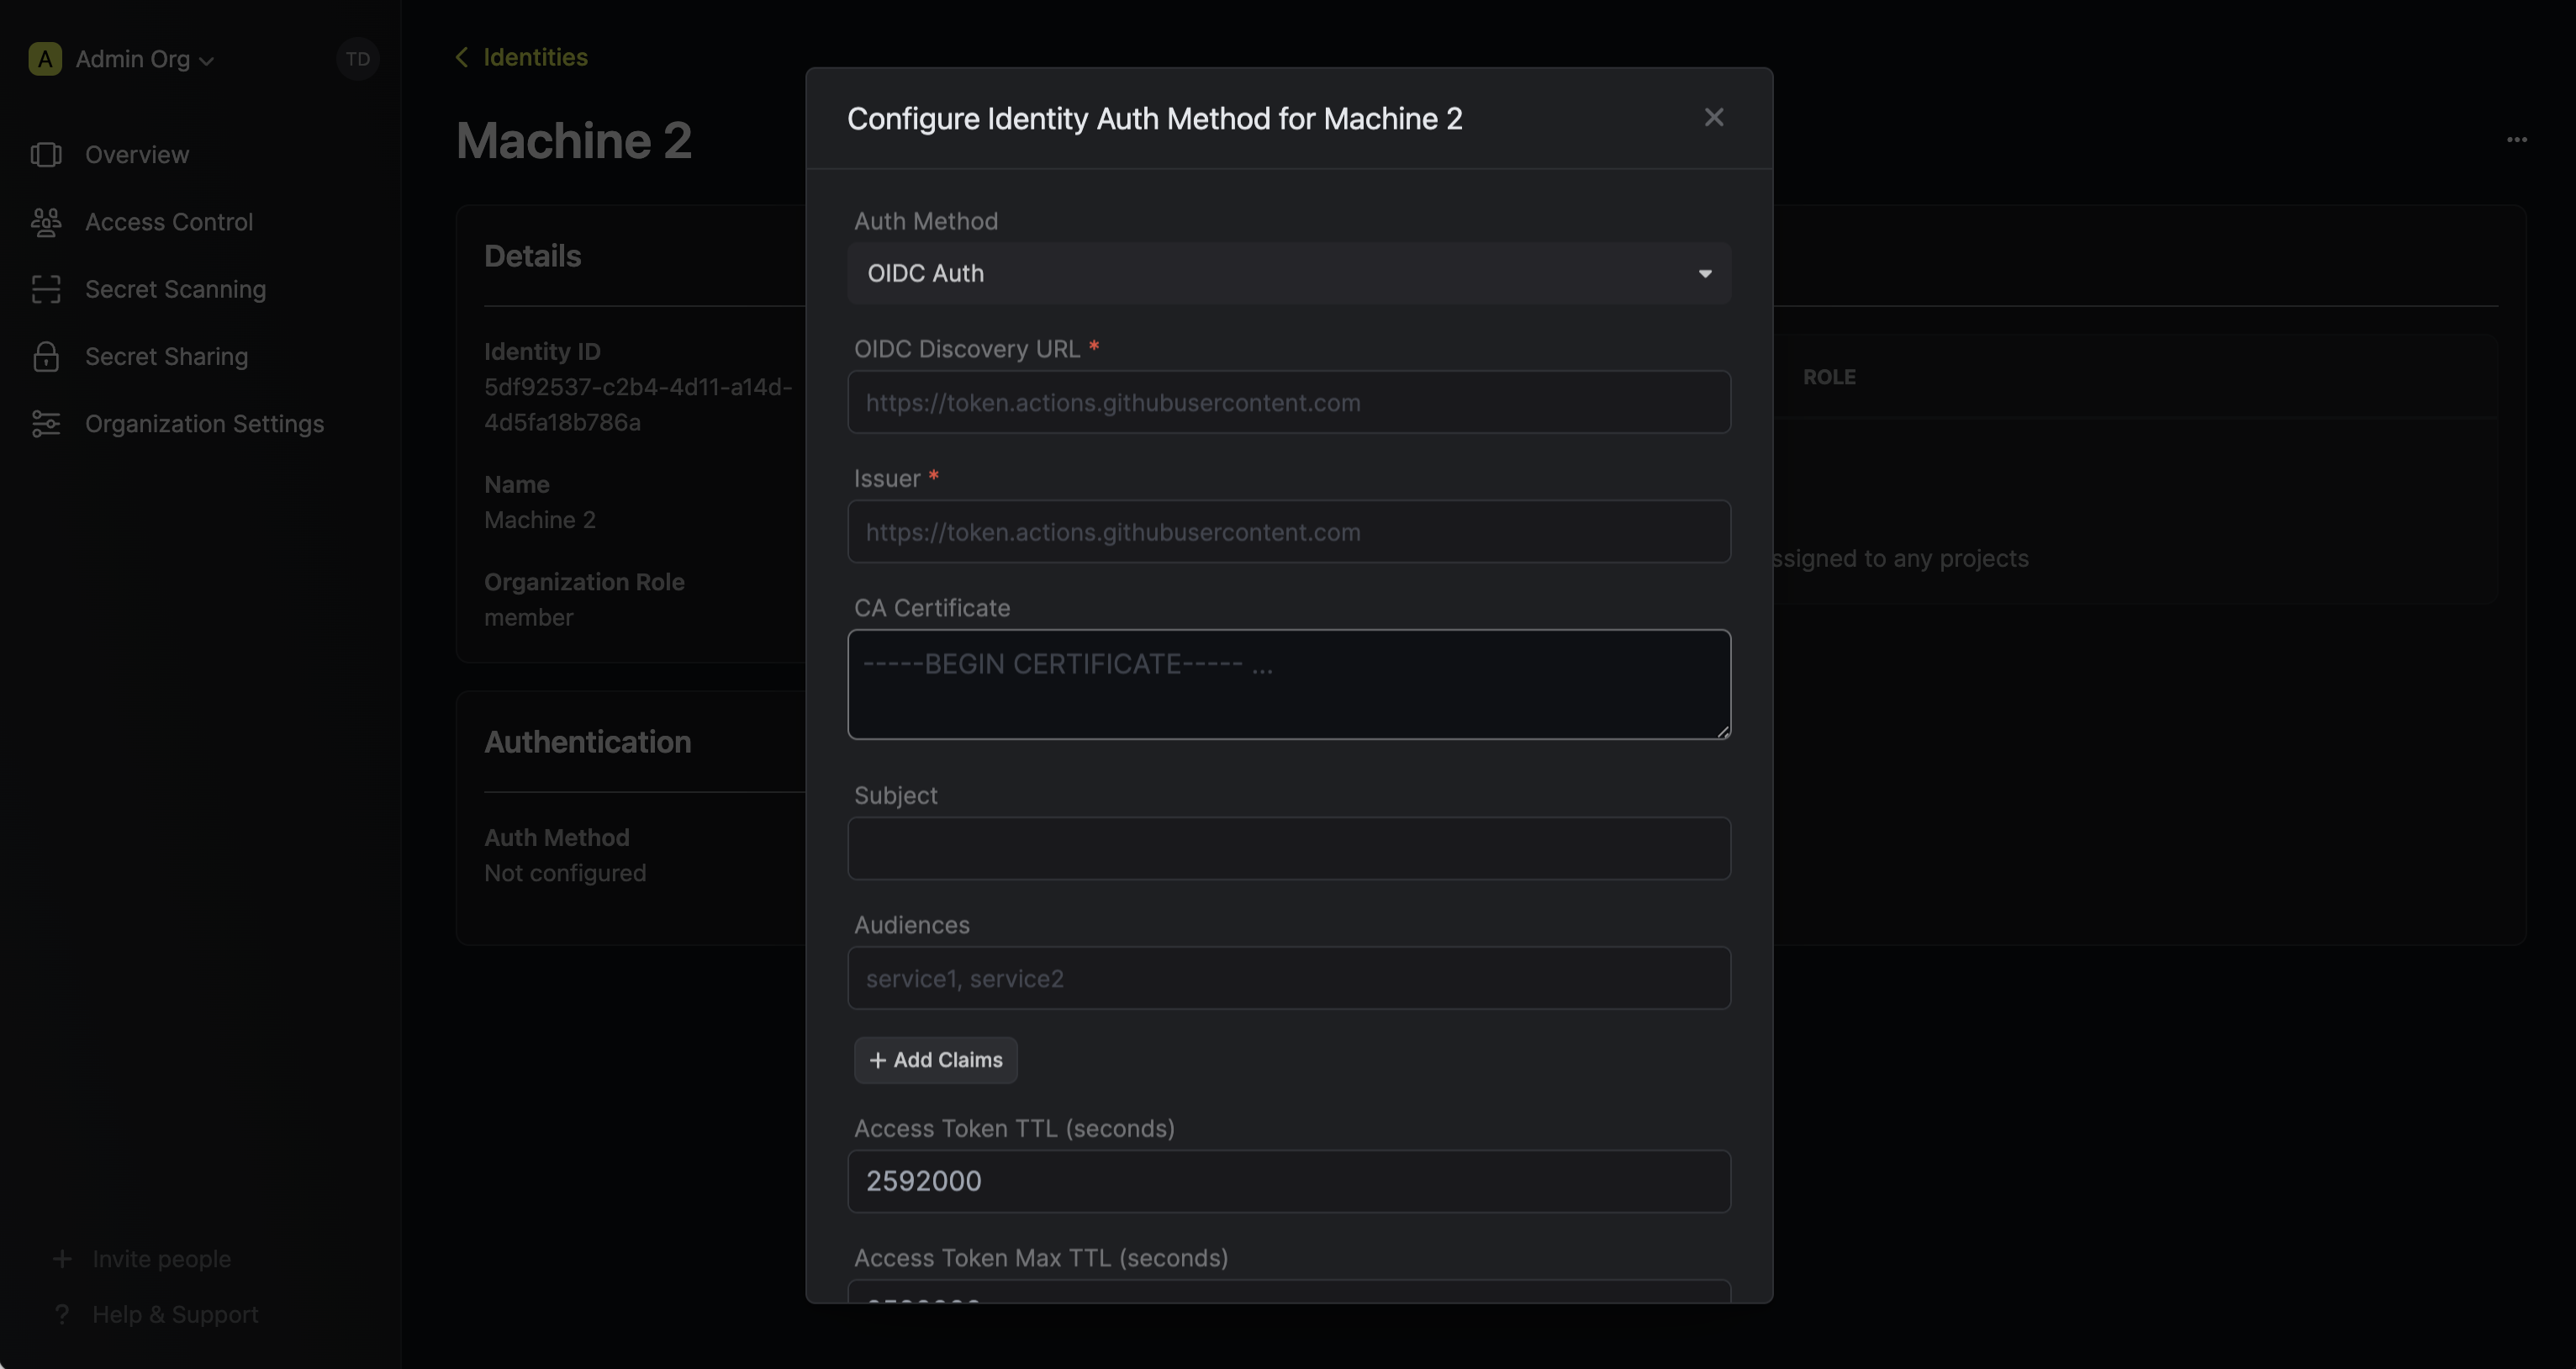
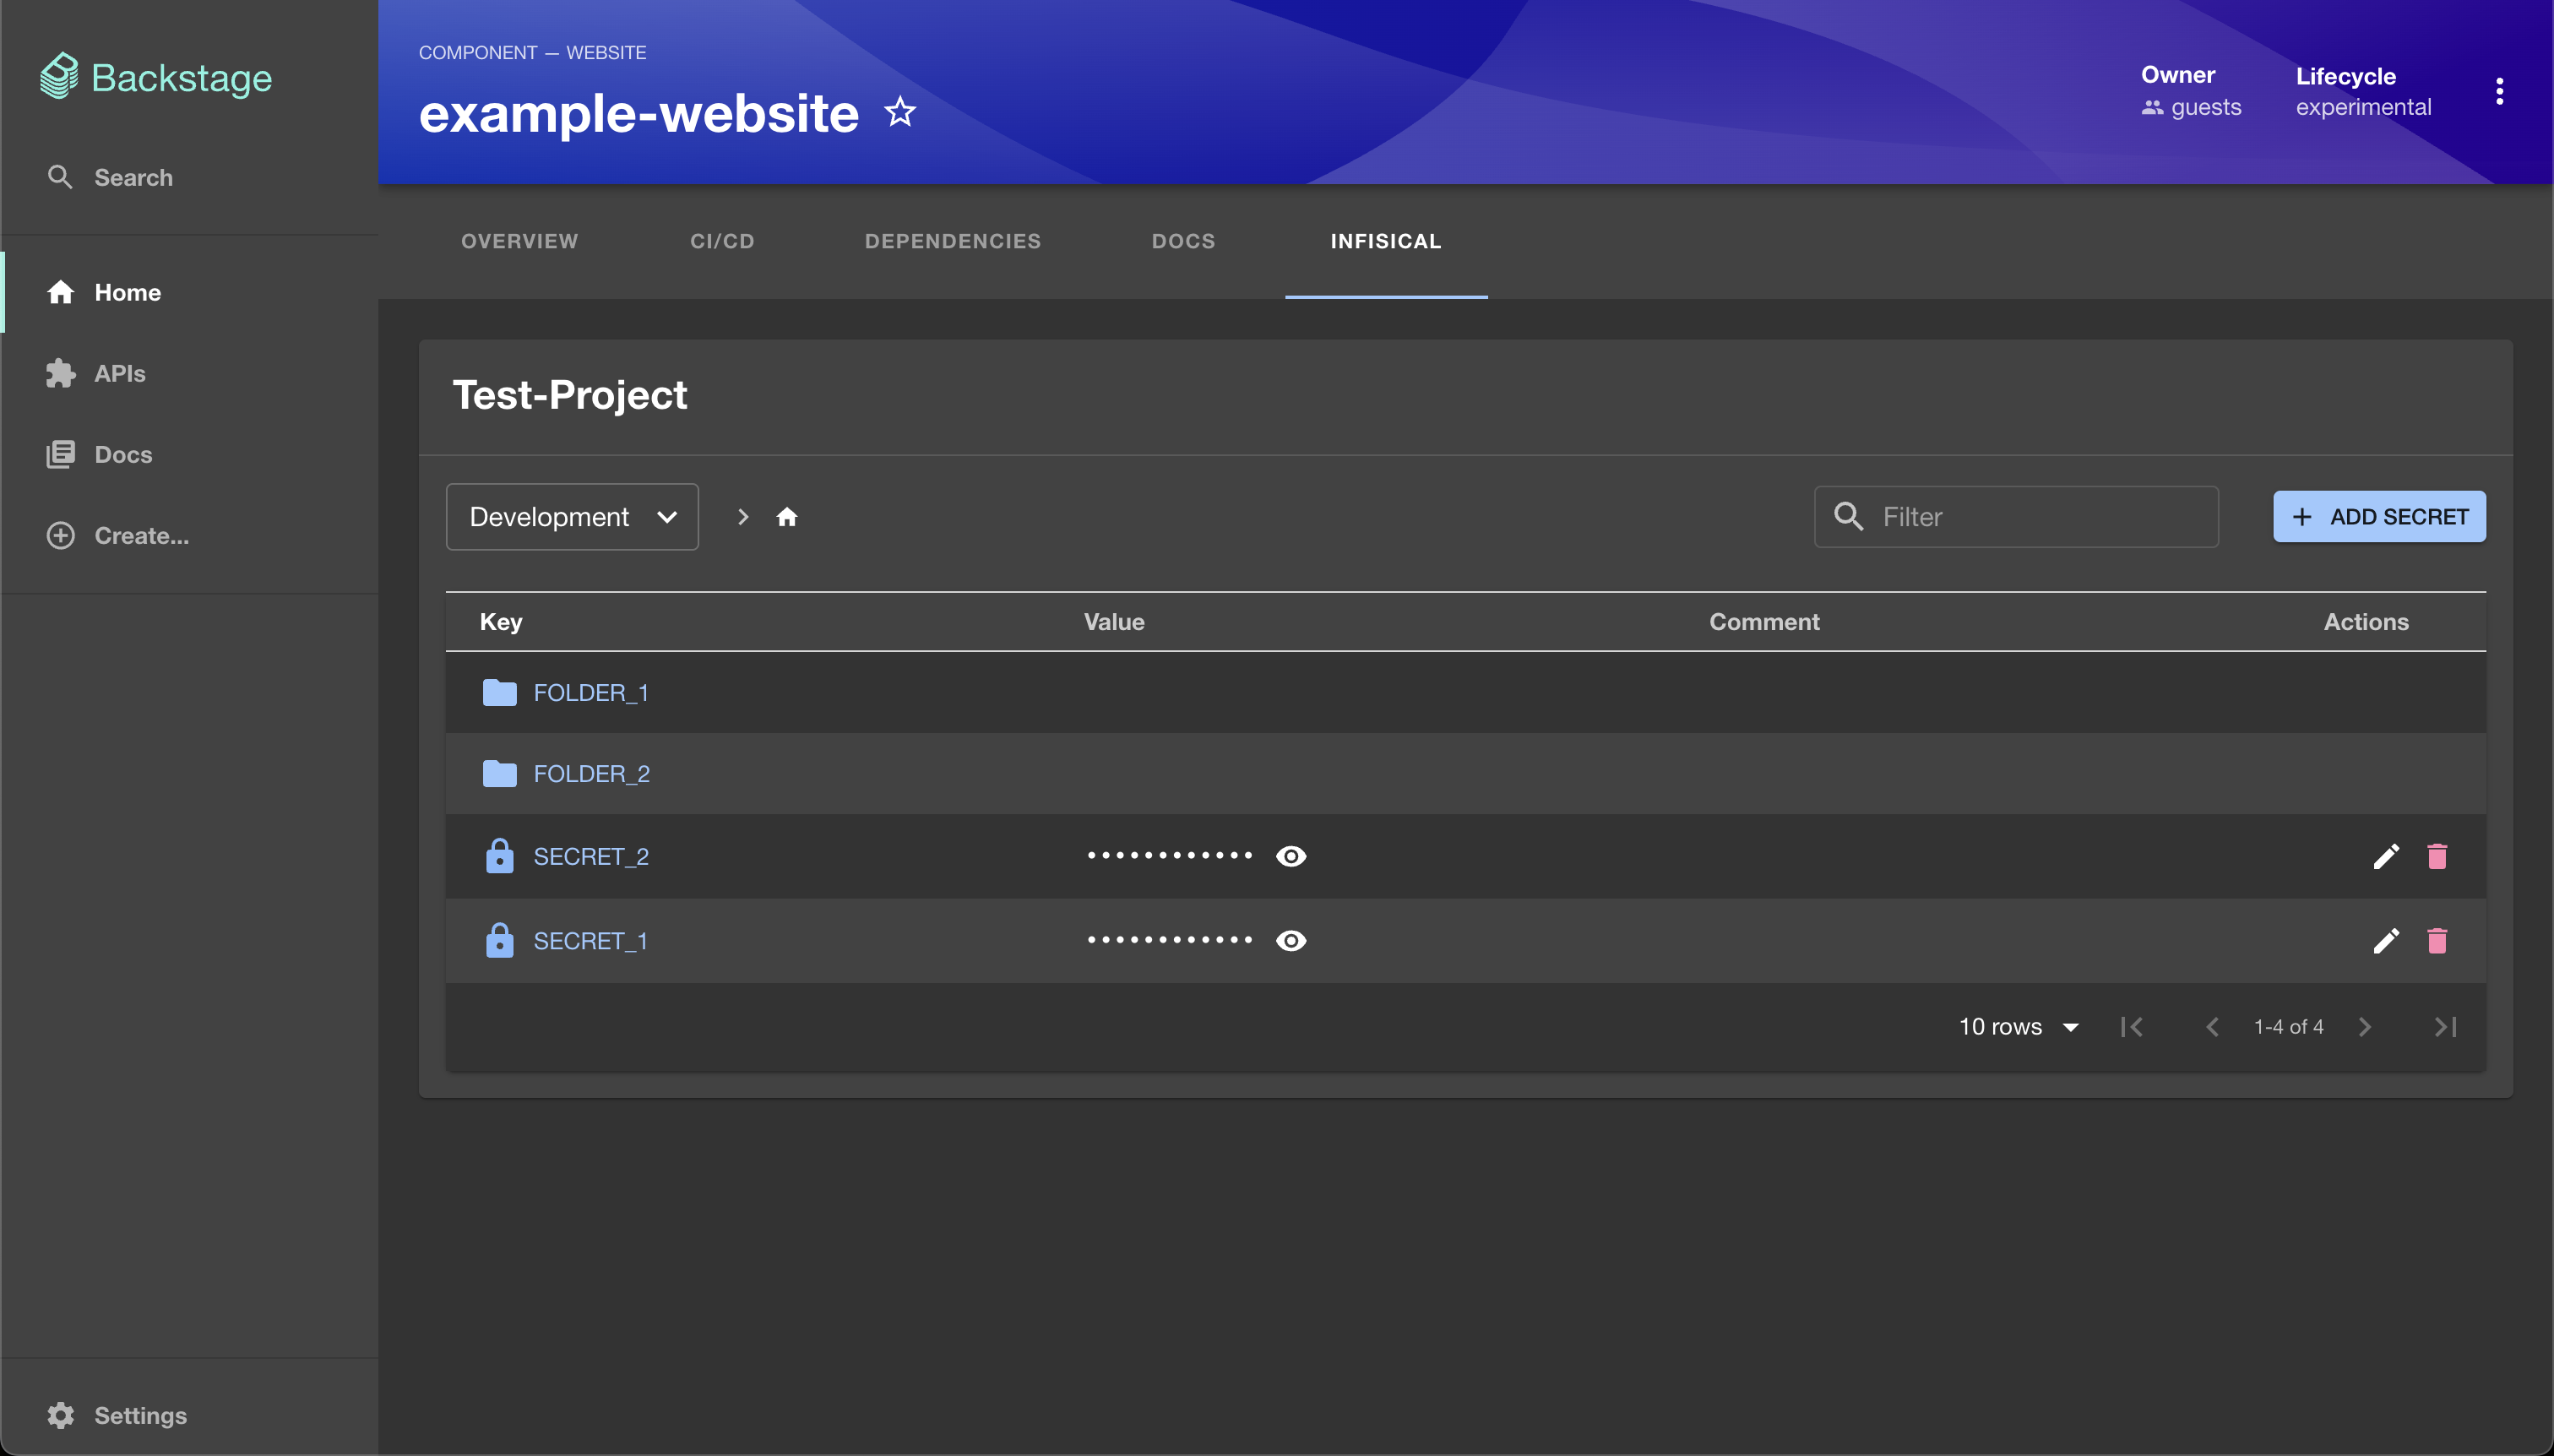 ---
# Source: https://infisical.com/docs/integrations/secret-syncs/bitbucket.md
# Source: https://infisical.com/docs/integrations/cicd/bitbucket.md
# Source: https://infisical.com/docs/integrations/app-connections/bitbucket.md
# Source: https://infisical.com/docs/documentation/platform/secret-scanning/bitbucket.md
> ## Documentation Index
> Fetch the complete documentation index at: https://infisical.com/docs/llms.txt
> Use this file to discover all available pages before exploring further.
# Bitbucket Secret Scanning
> Learn how to configure secret scanning for Bitbucket.
## Prerequisites
* Create a [Bitbucket Connection](/integrations/app-connections/bitbucket) with Secret Scanning permissions
## Create a Bitbucket Data Source in Infisical
---
# Source: https://infisical.com/docs/integrations/secret-syncs/bitbucket.md
# Source: https://infisical.com/docs/integrations/cicd/bitbucket.md
# Source: https://infisical.com/docs/integrations/app-connections/bitbucket.md
# Source: https://infisical.com/docs/documentation/platform/secret-scanning/bitbucket.md
> ## Documentation Index
> Fetch the complete documentation index at: https://infisical.com/docs/llms.txt
> Use this file to discover all available pages before exploring further.
# Bitbucket Secret Scanning
> Learn how to configure secret scanning for Bitbucket.
## Prerequisites
* Create a [Bitbucket Connection](/integrations/app-connections/bitbucket) with Secret Scanning permissions
## Create a Bitbucket Data Source in Infisical
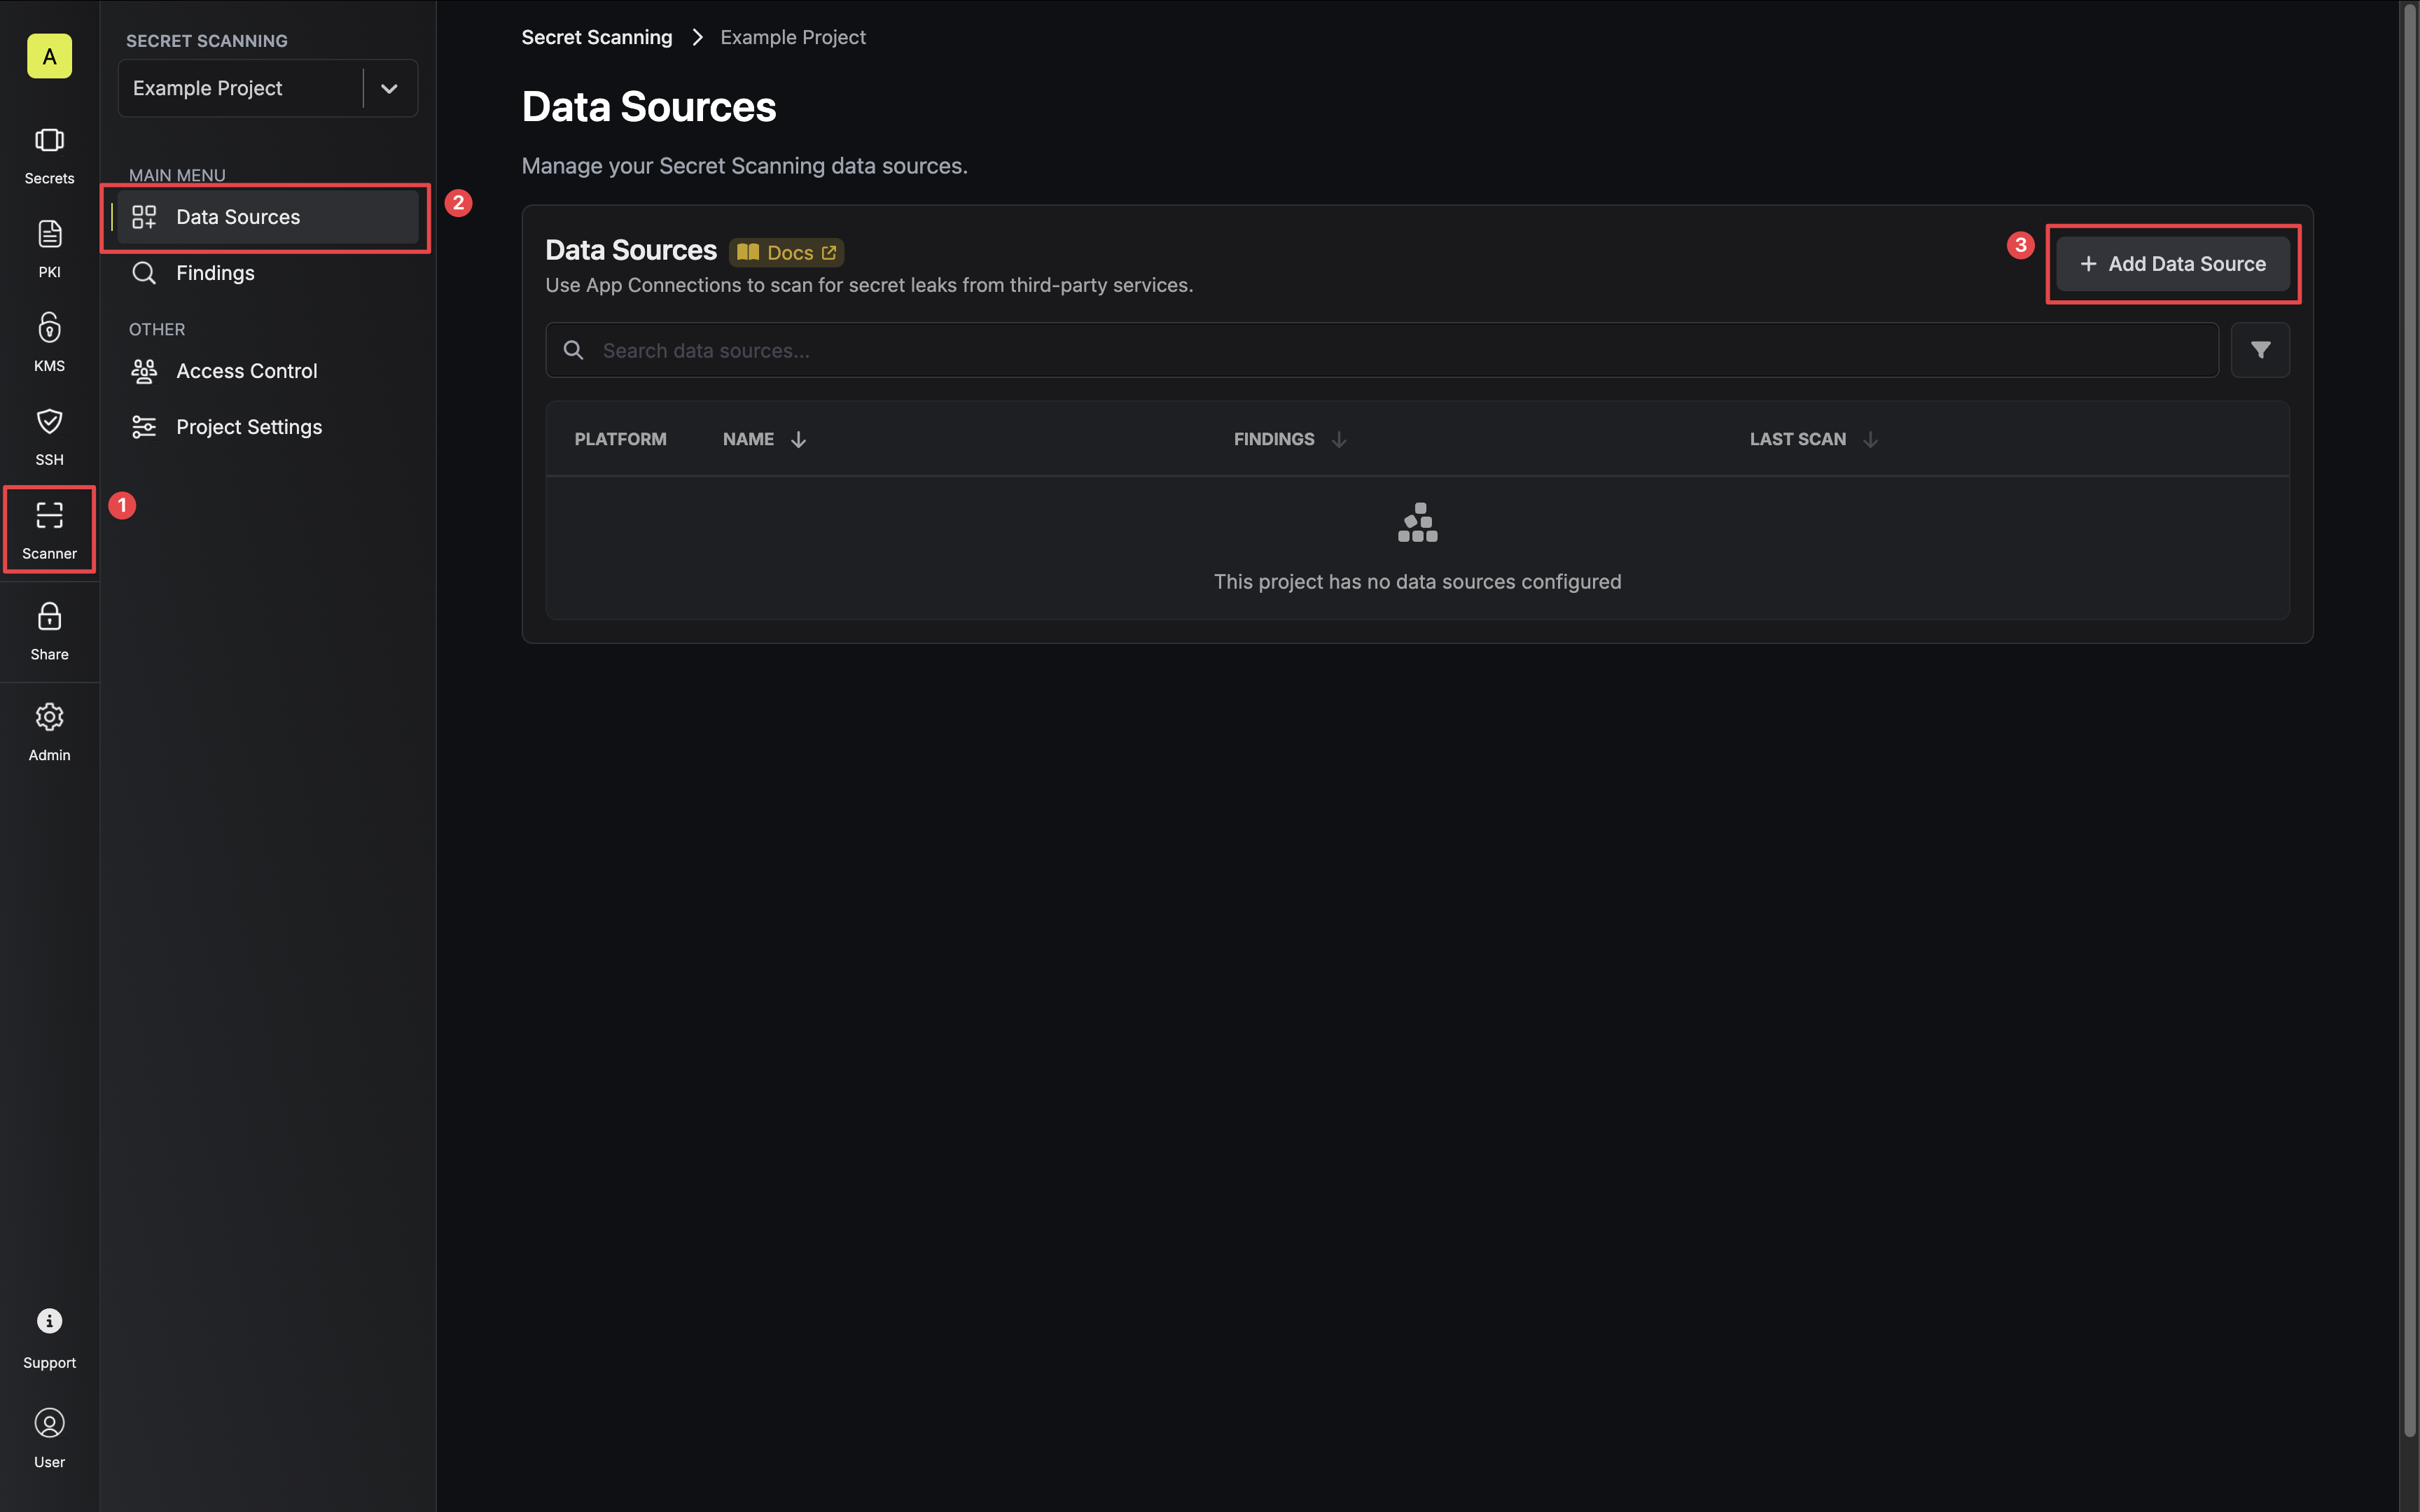 2. Select the **Bitbucket** option.
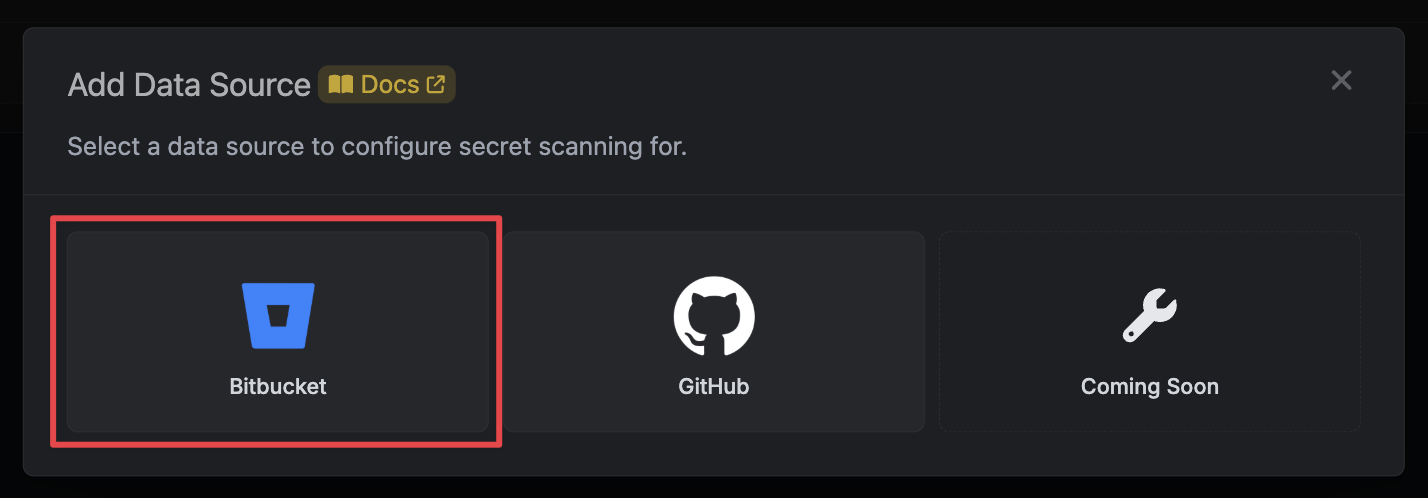 3. Configure which workspace and repositories you would like to scan. Then click **Next**.
 * **Bitbucket Connection** - the connection that has access to the repositories you want to scan.
* **Workspace** - the Bitbucket workspace to scan secrets in.
* **Scan Repositories** - select which repositories you would like to scan.
* **All Repositories** - Infisical will scan all repositories associated with your connection.
* **Select Repositories** - Infisical will scan the selected repositories.
* **Auto-Scan Enabled** - whether Infisical should automatically perform a scan when a push is made to configured repositories.
4. Give your data source a name and description (optional). Then click **Next**.
* **Bitbucket Connection** - the connection that has access to the repositories you want to scan.
* **Workspace** - the Bitbucket workspace to scan secrets in.
* **Scan Repositories** - select which repositories you would like to scan.
* **All Repositories** - Infisical will scan all repositories associated with your connection.
* **Select Repositories** - Infisical will scan the selected repositories.
* **Auto-Scan Enabled** - whether Infisical should automatically perform a scan when a push is made to configured repositories.
4. Give your data source a name and description (optional). Then click **Next**.
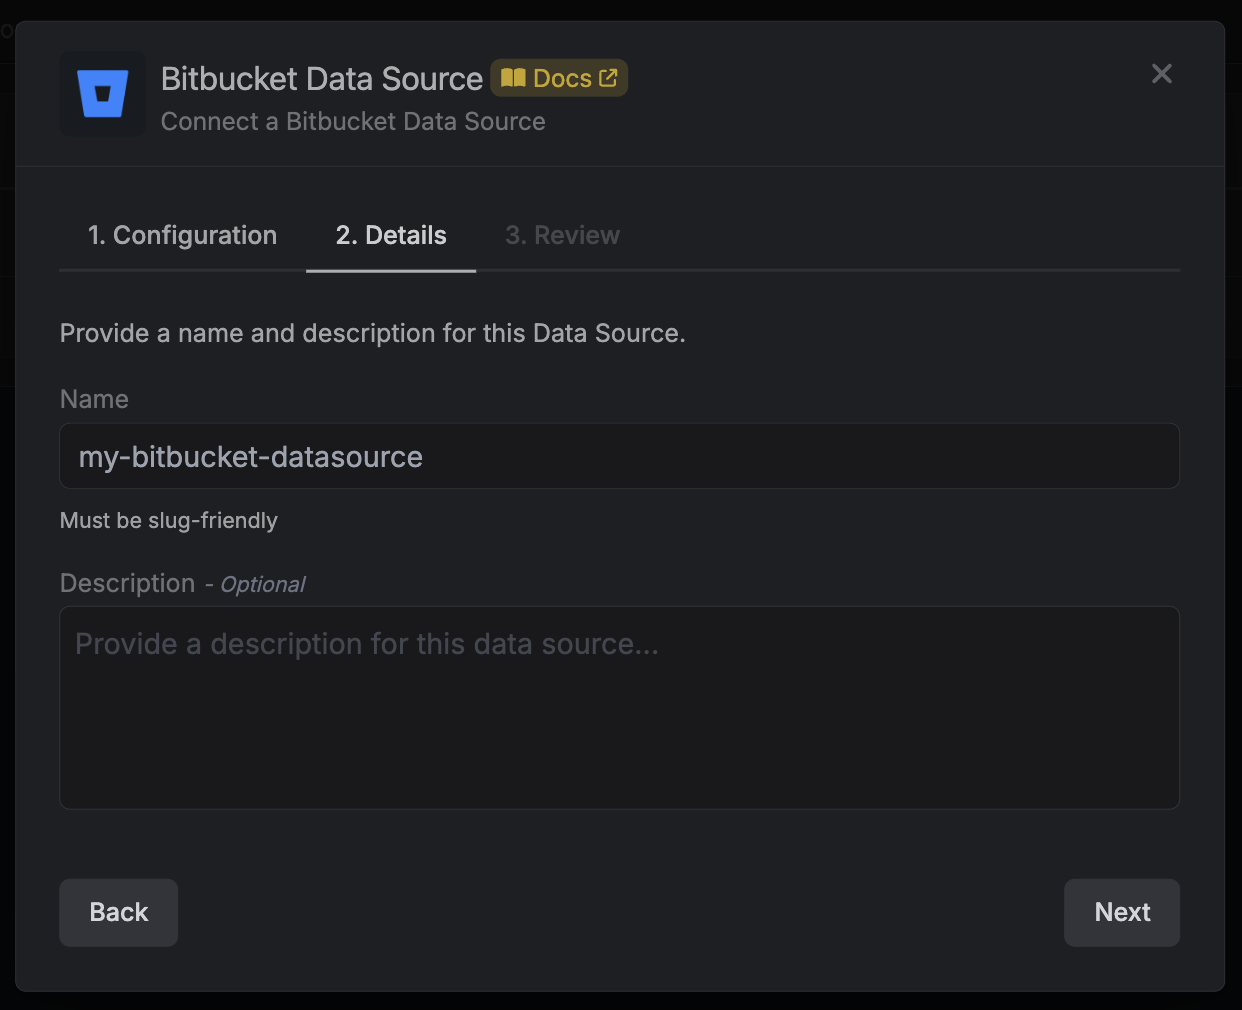 * **Name** - the name of the data source. Must be slug-friendly.
* **Description** (optional) - a description of this data source.
5. Review your data source, then click **Create Data Source**.
* **Name** - the name of the data source. Must be slug-friendly.
* **Description** (optional) - a description of this data source.
5. Review your data source, then click **Create Data Source**.
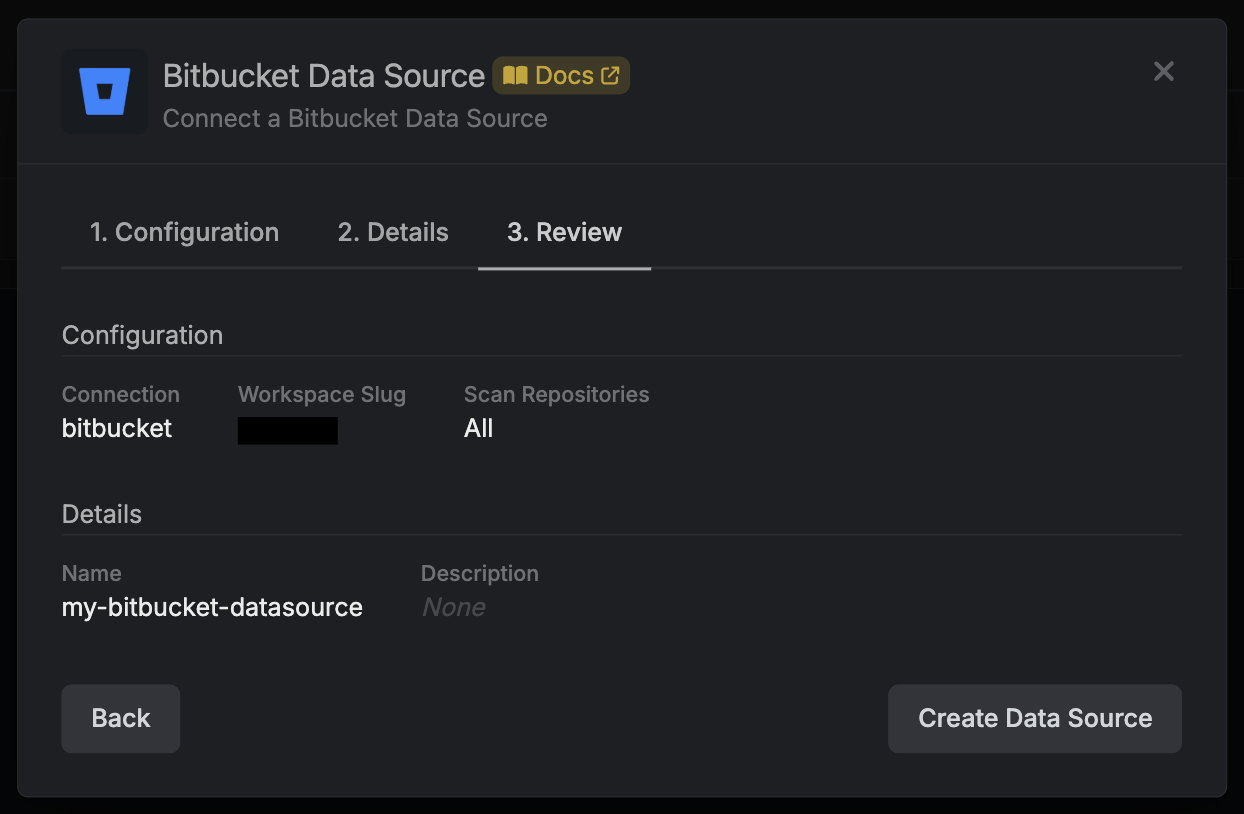 6. Your **Bitbucket Data Source** is now available and will begin a full scan if **Auto-Scan** is enabled.
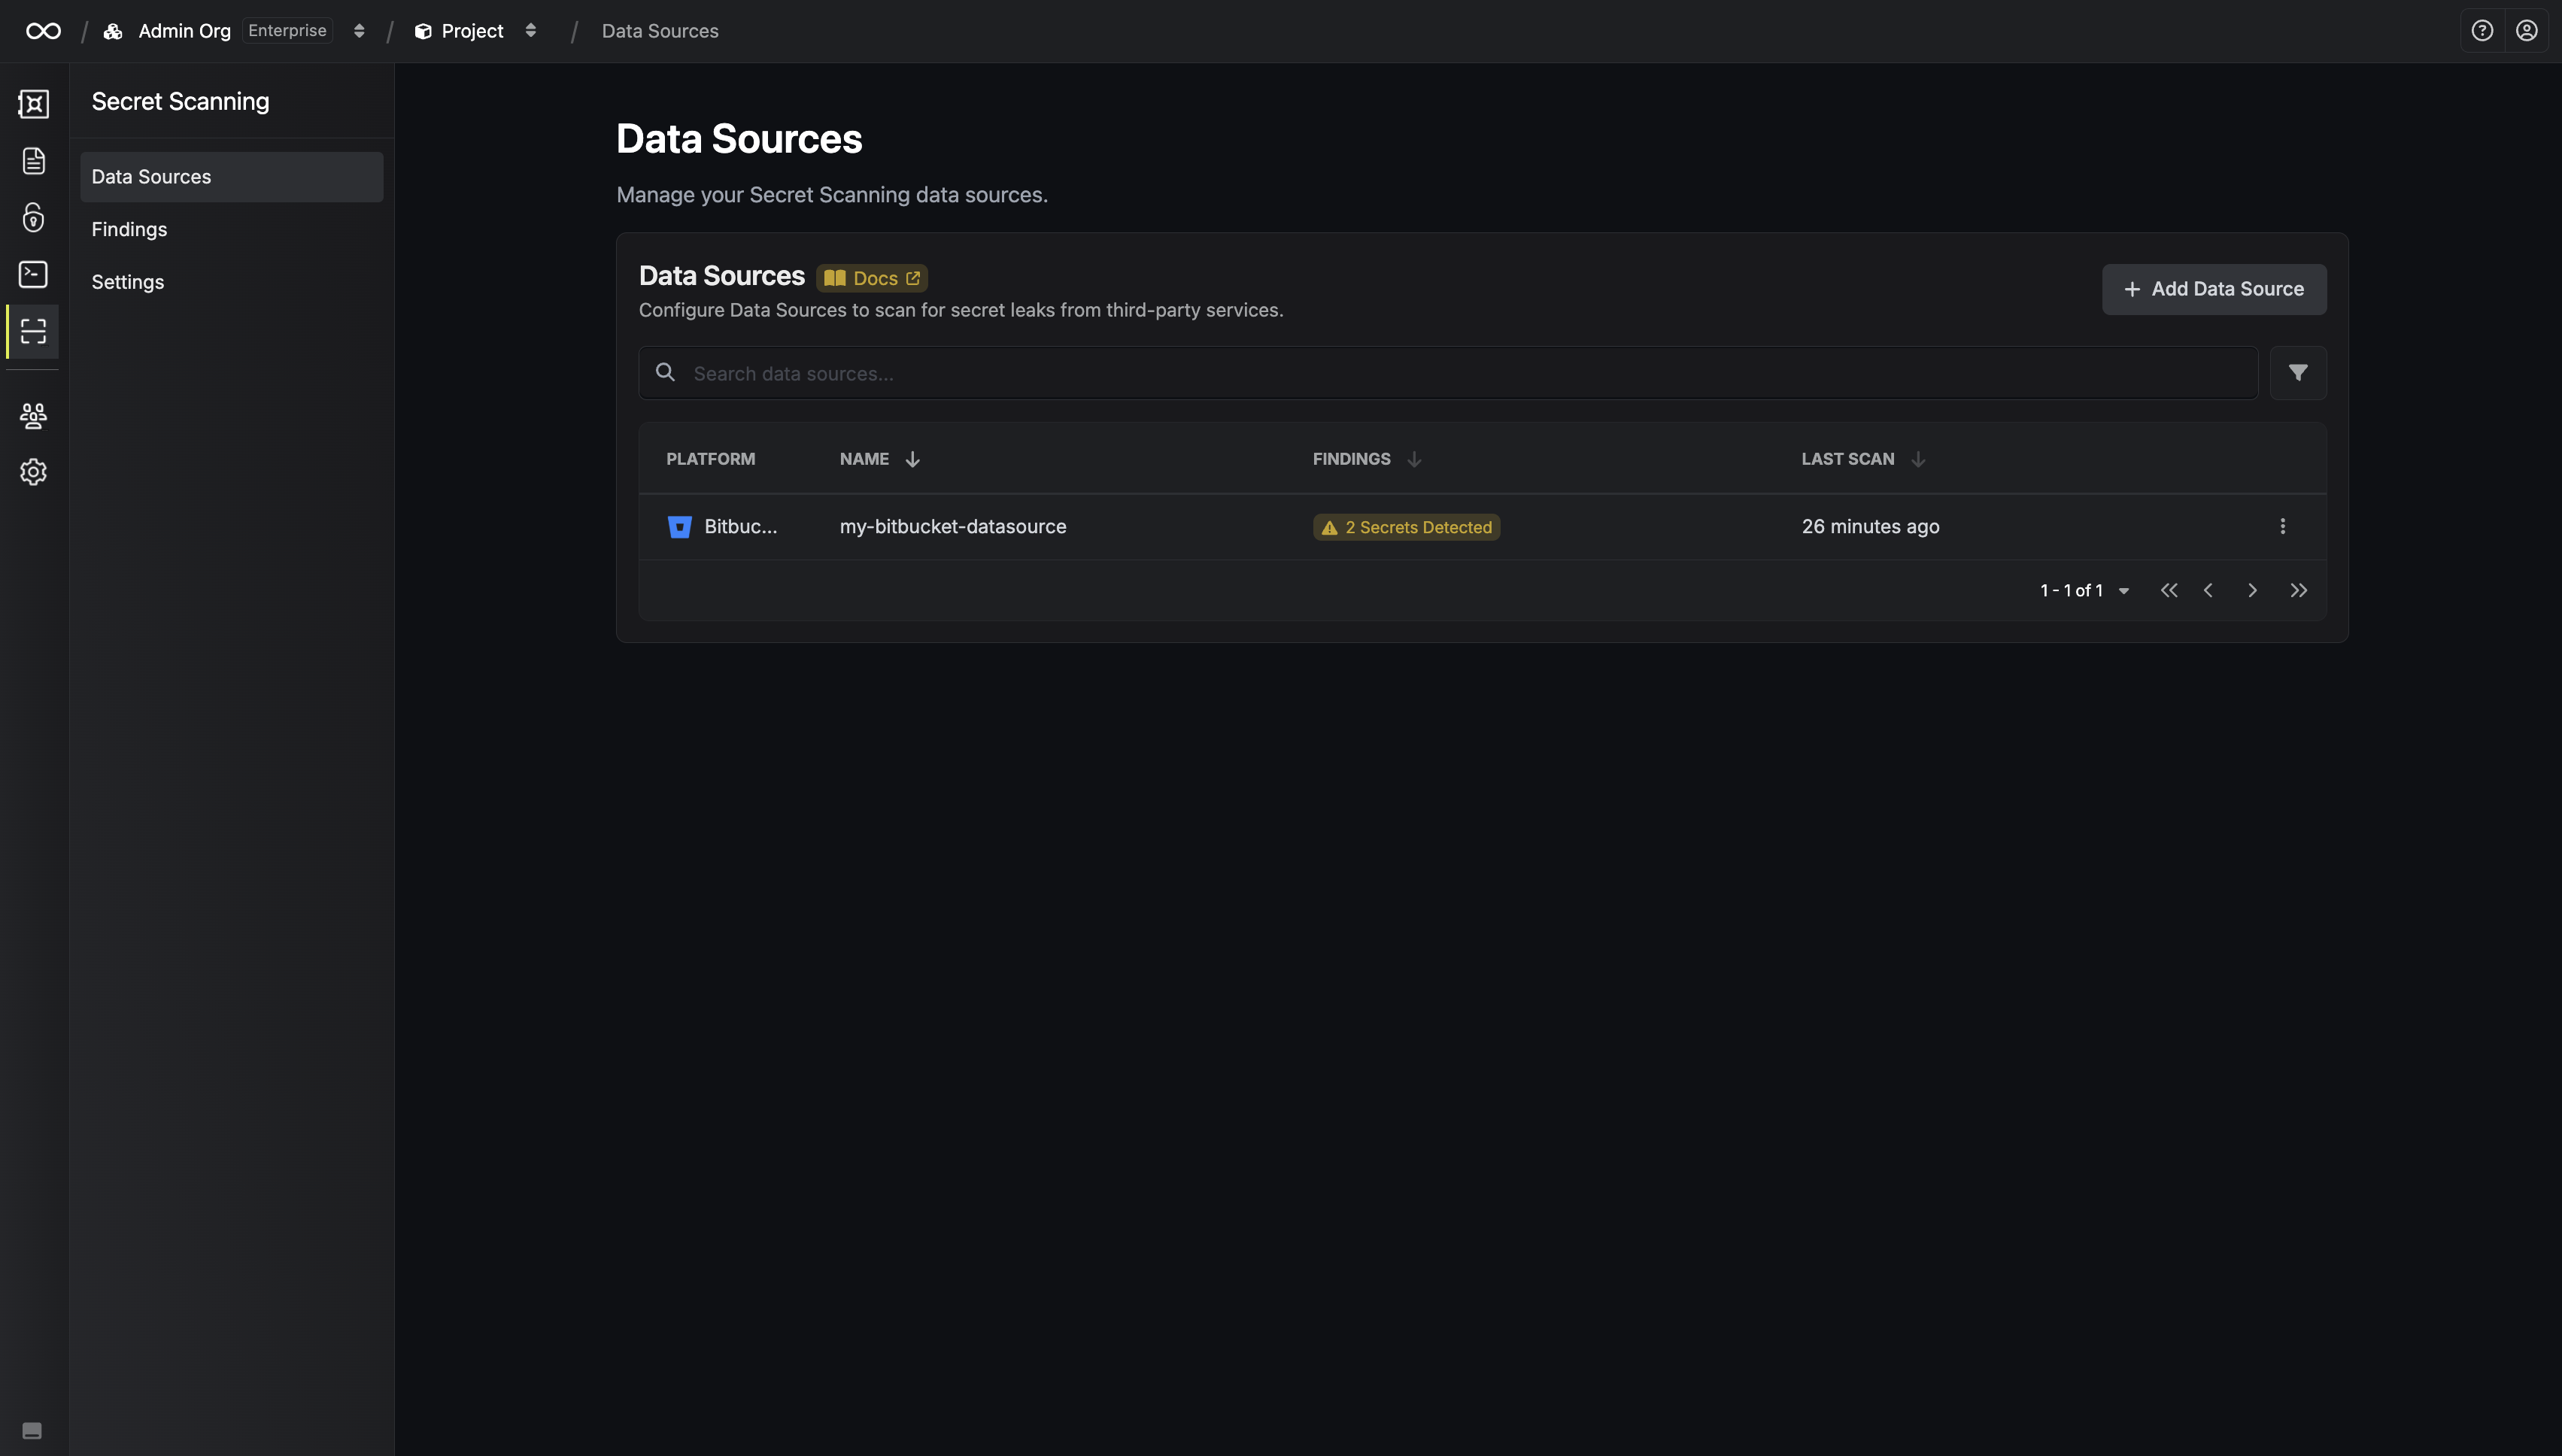 7. You can view repositories and scan results by clicking on your data source.
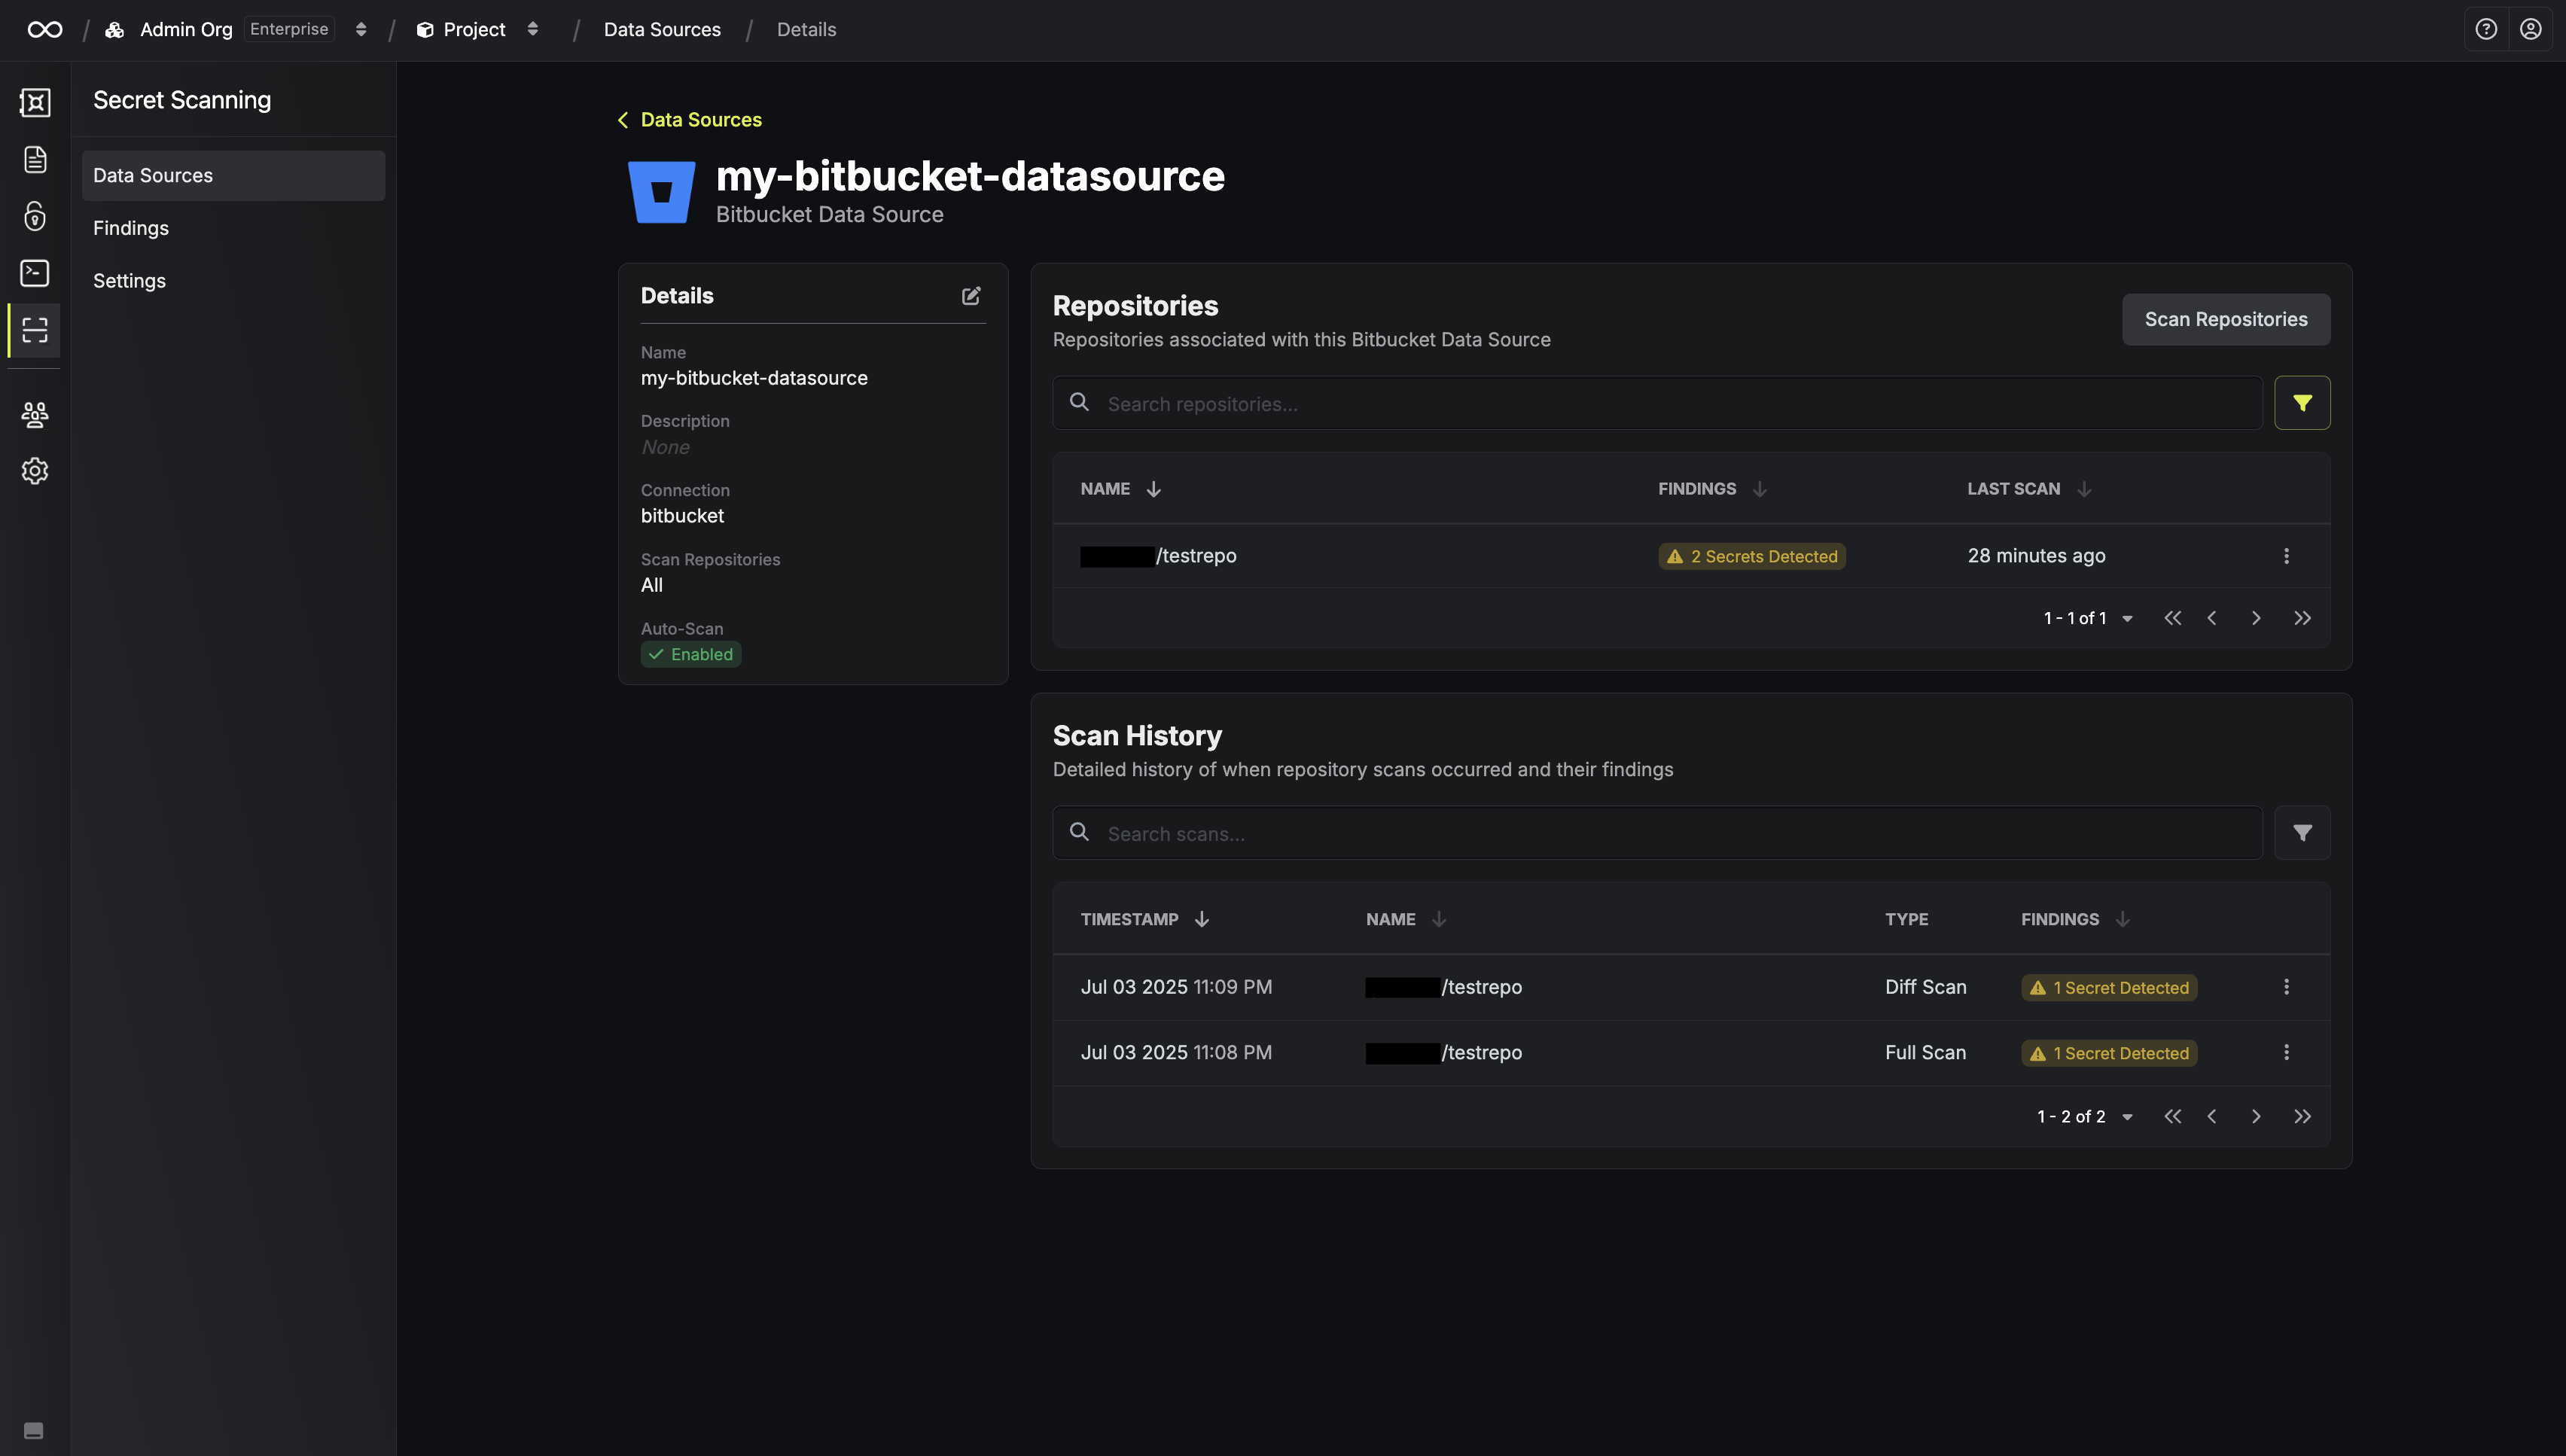 8. In addition, you can review any findings from the **Findings Page**.
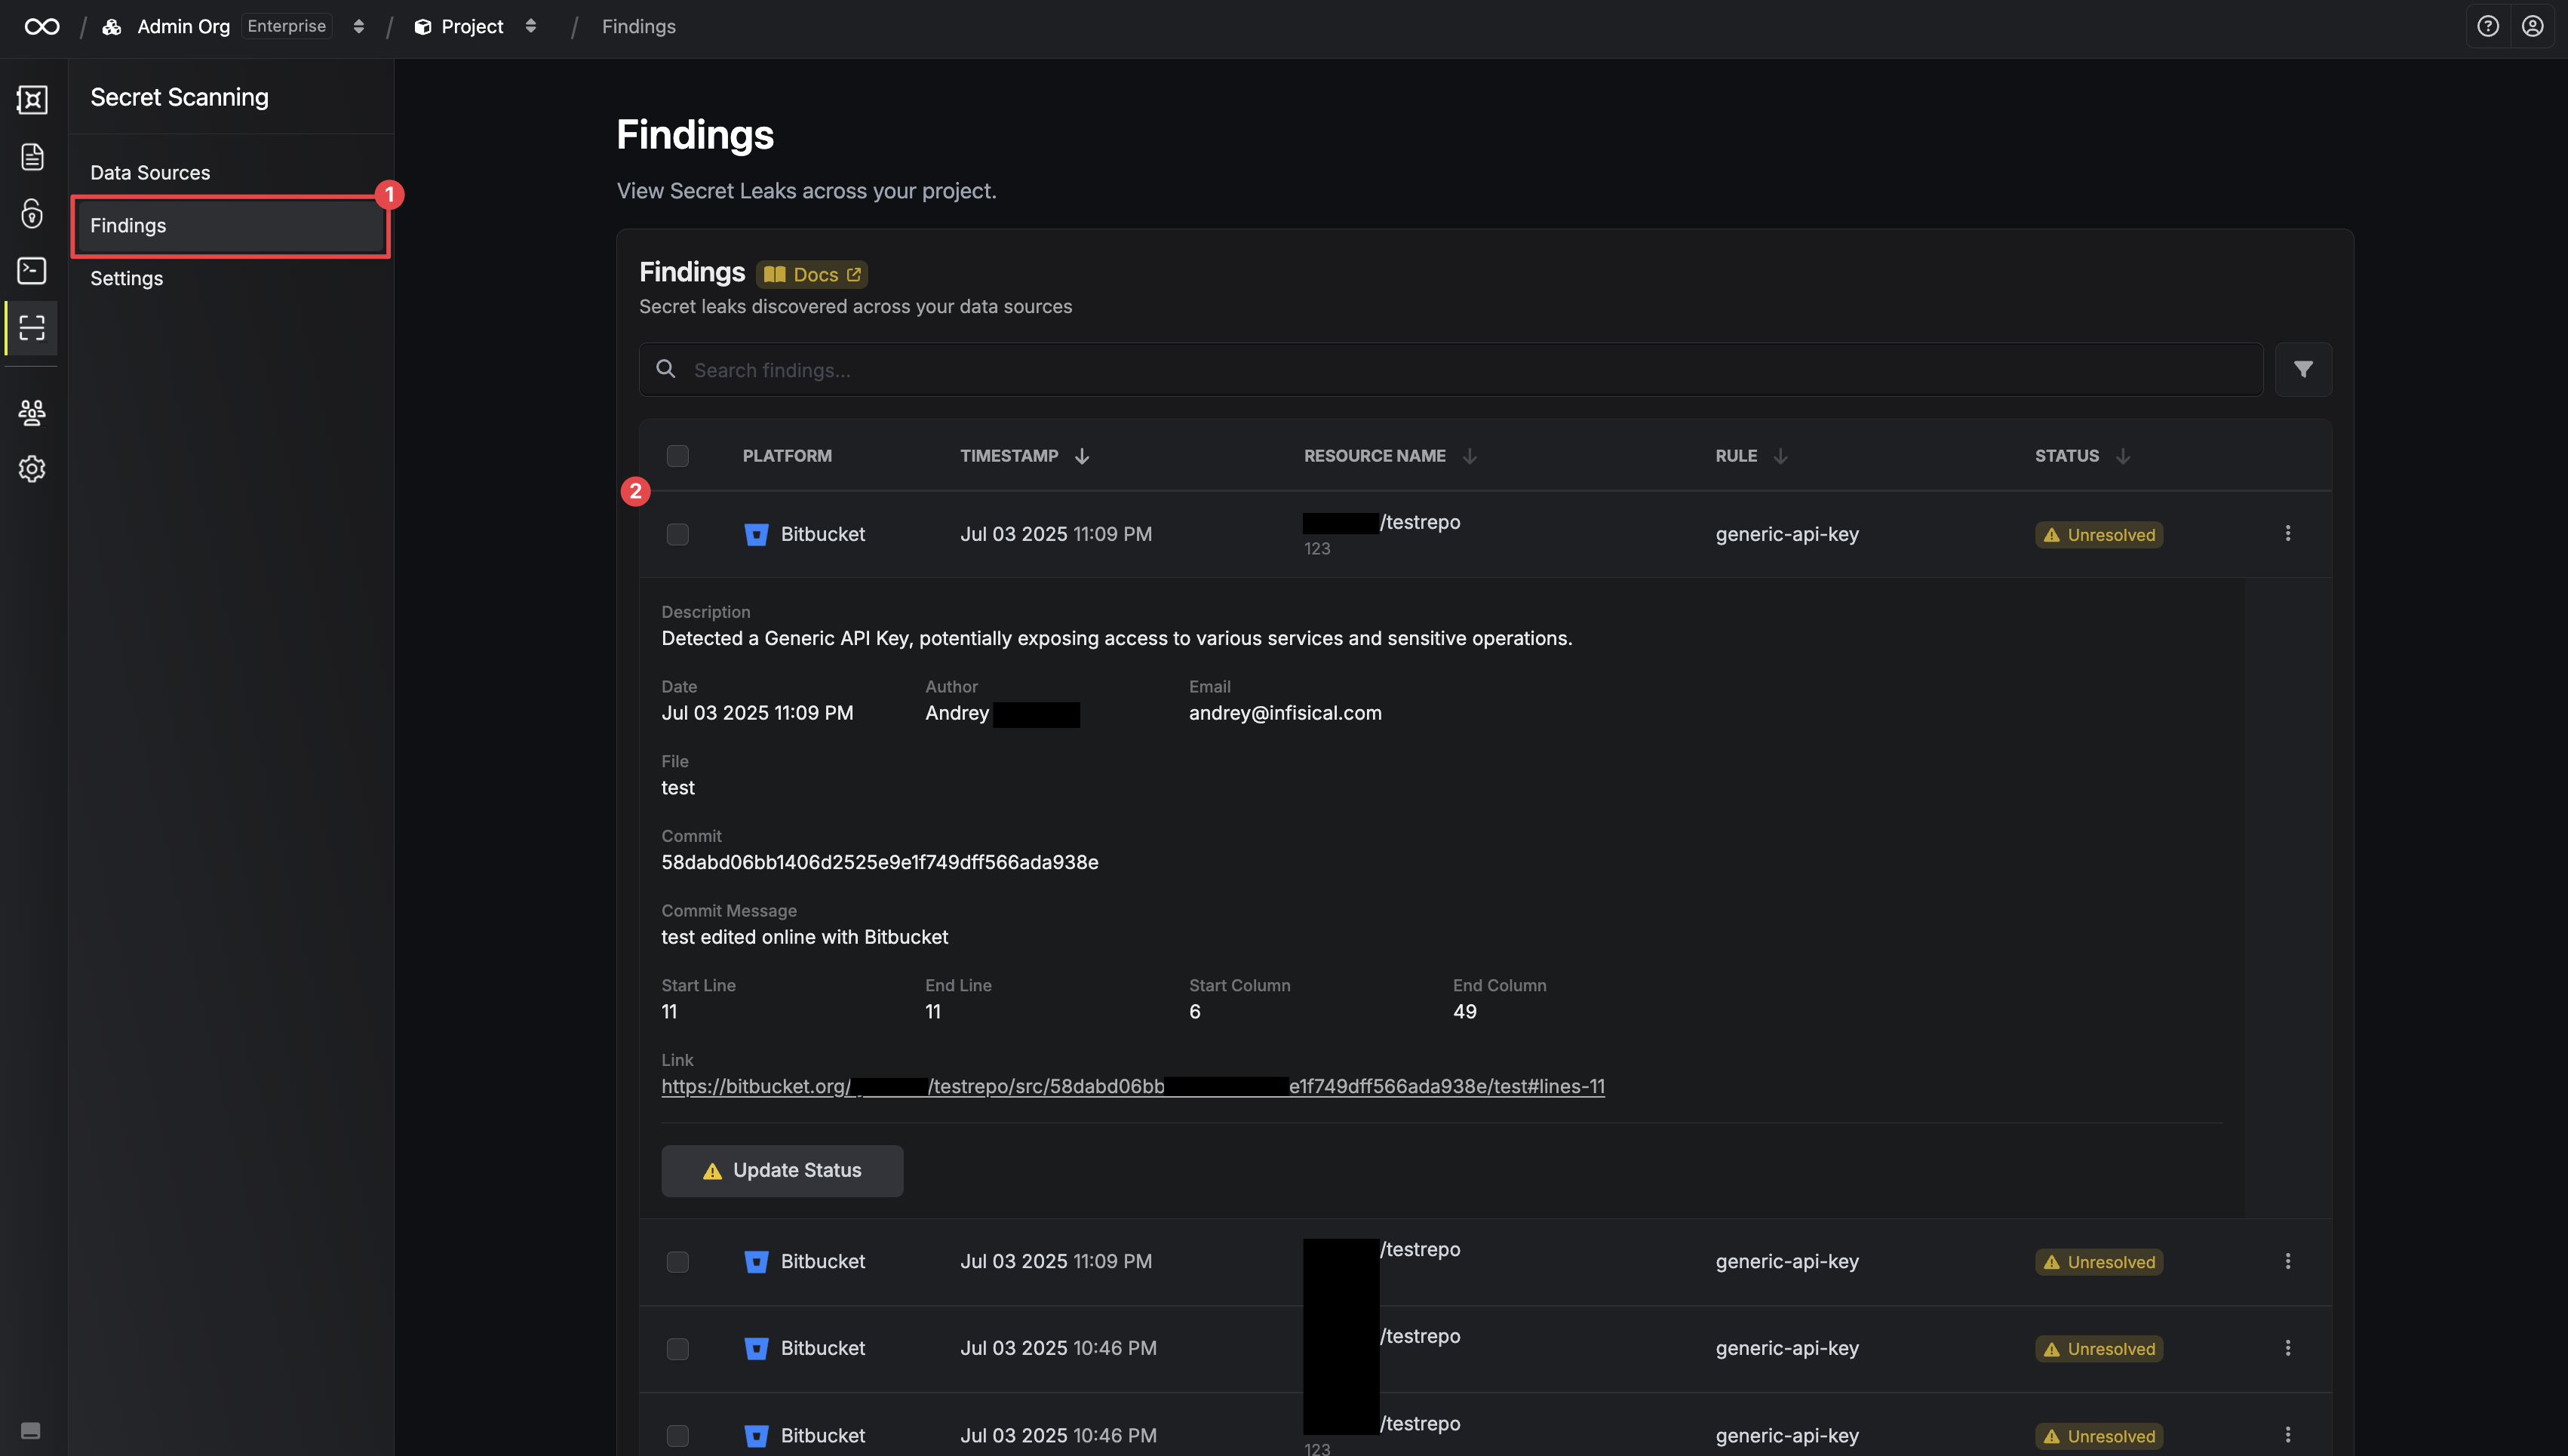
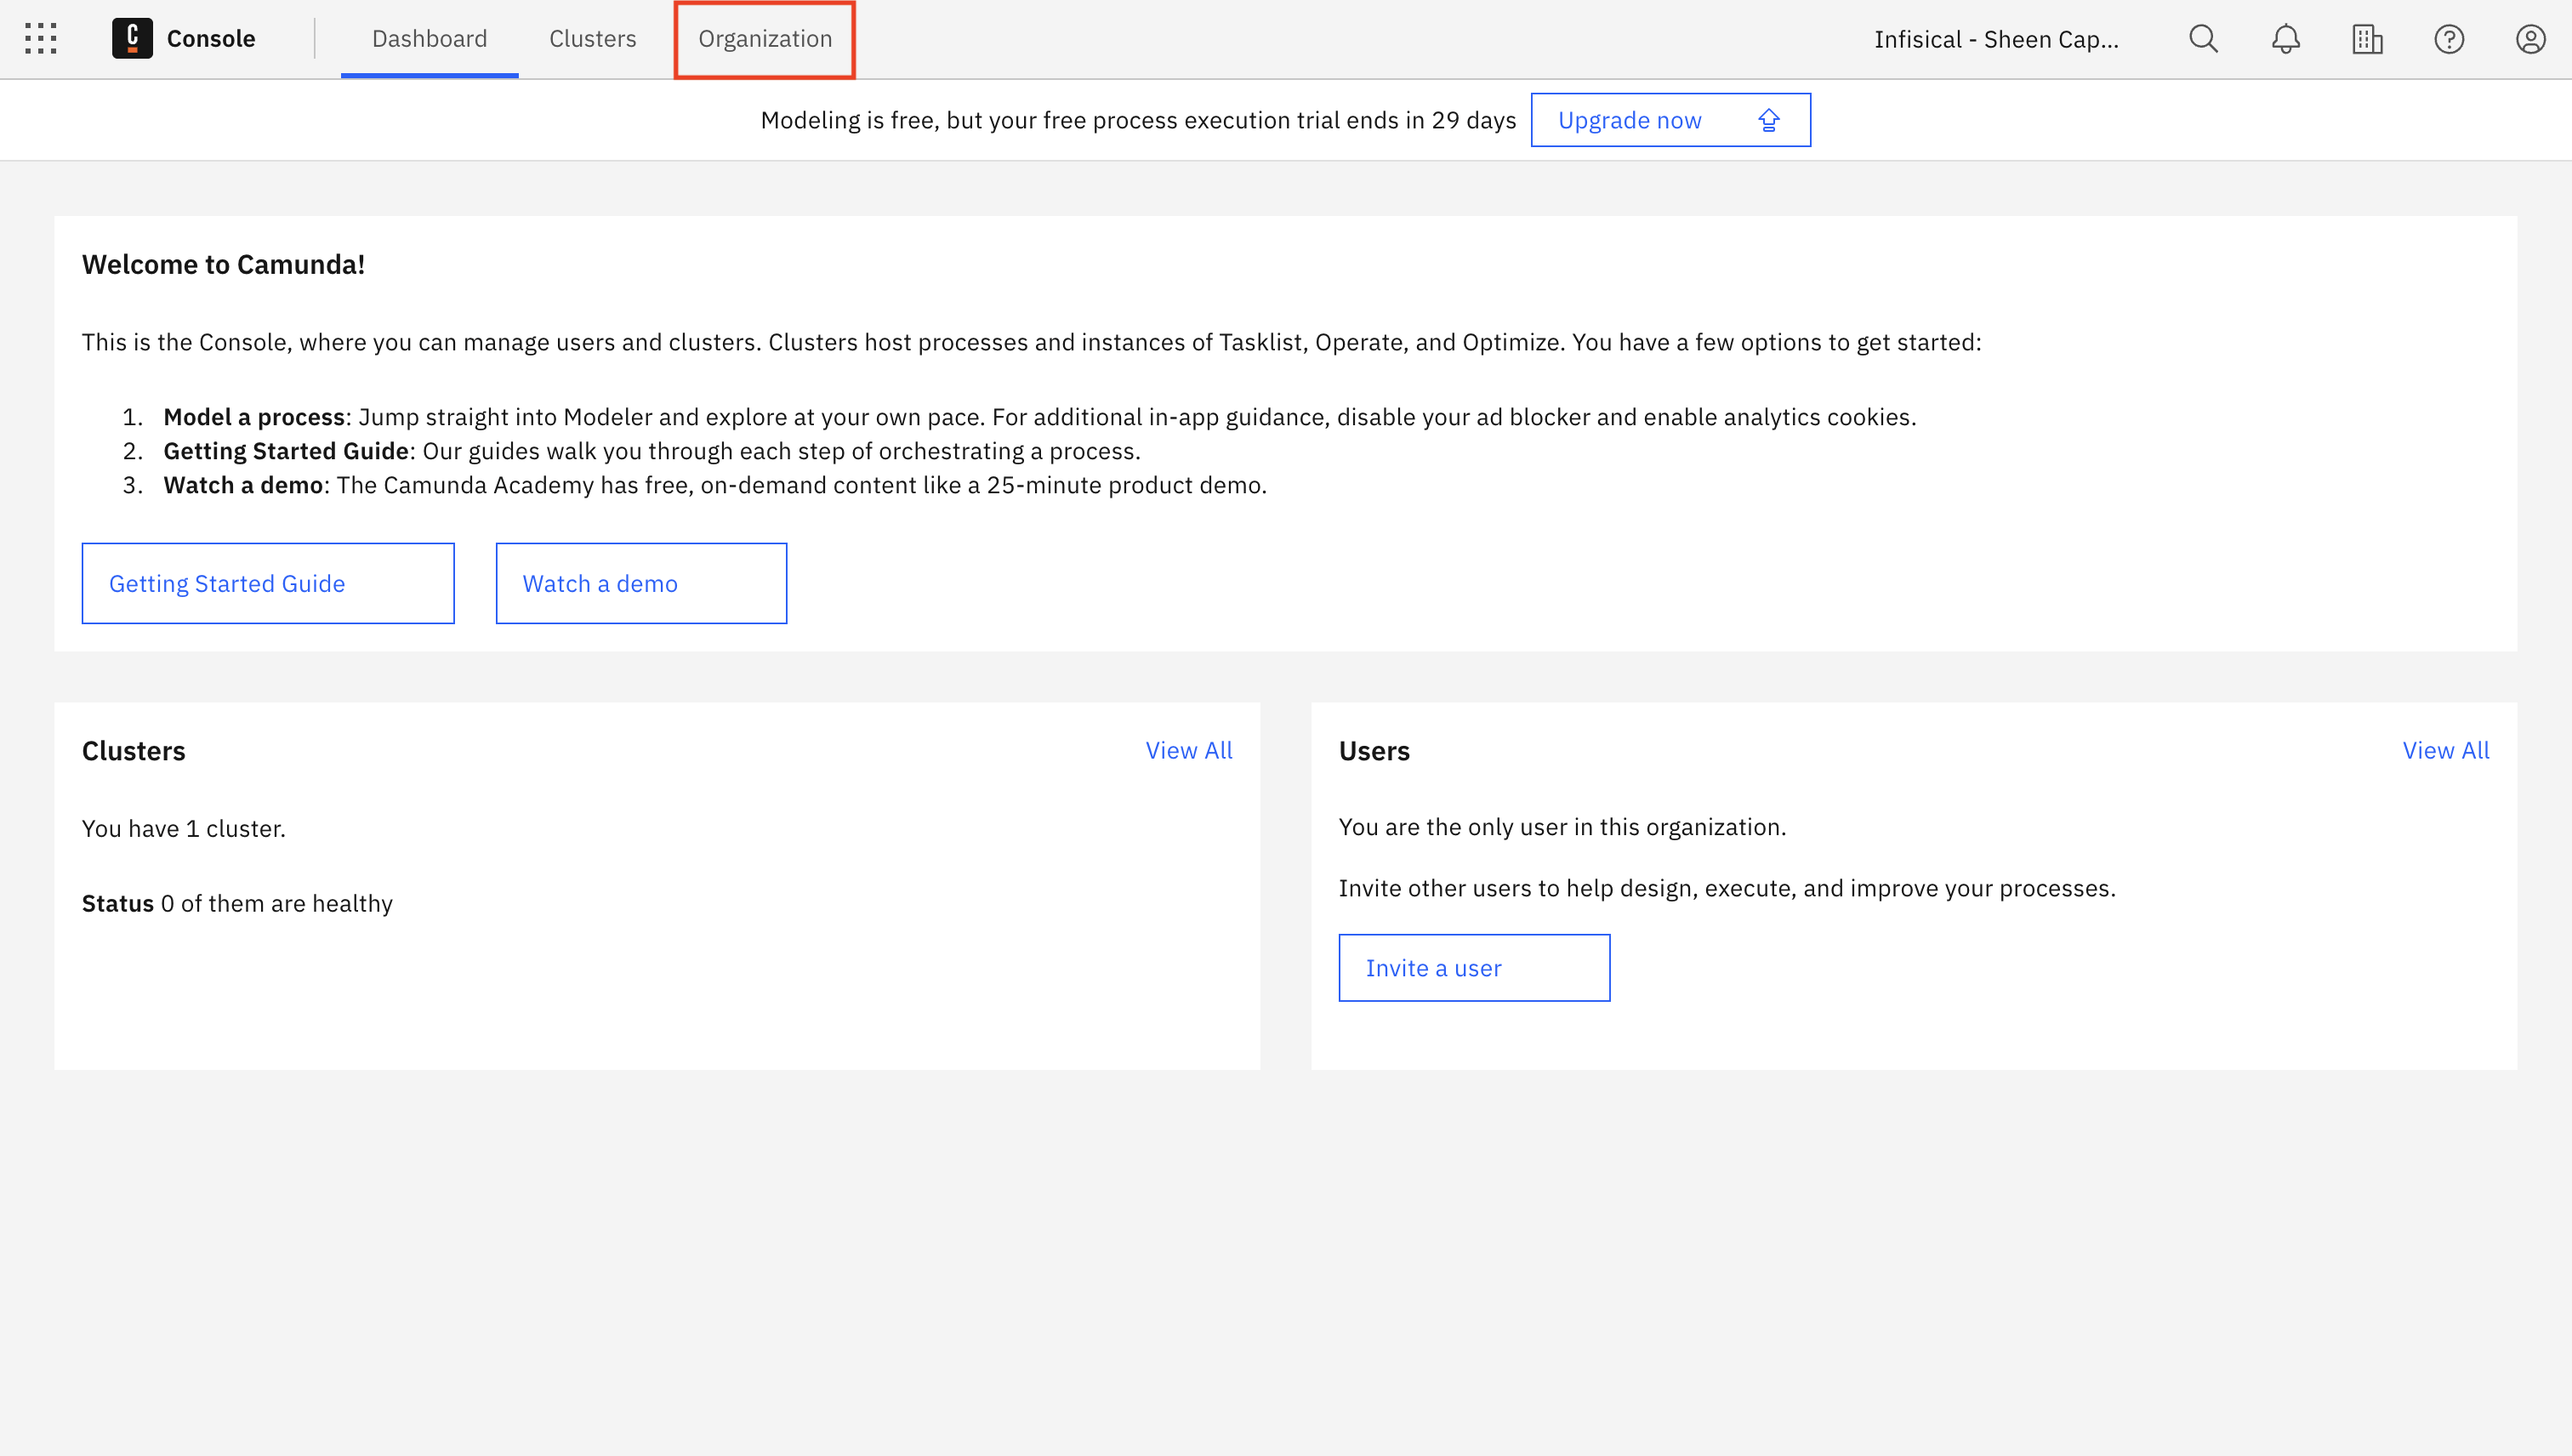
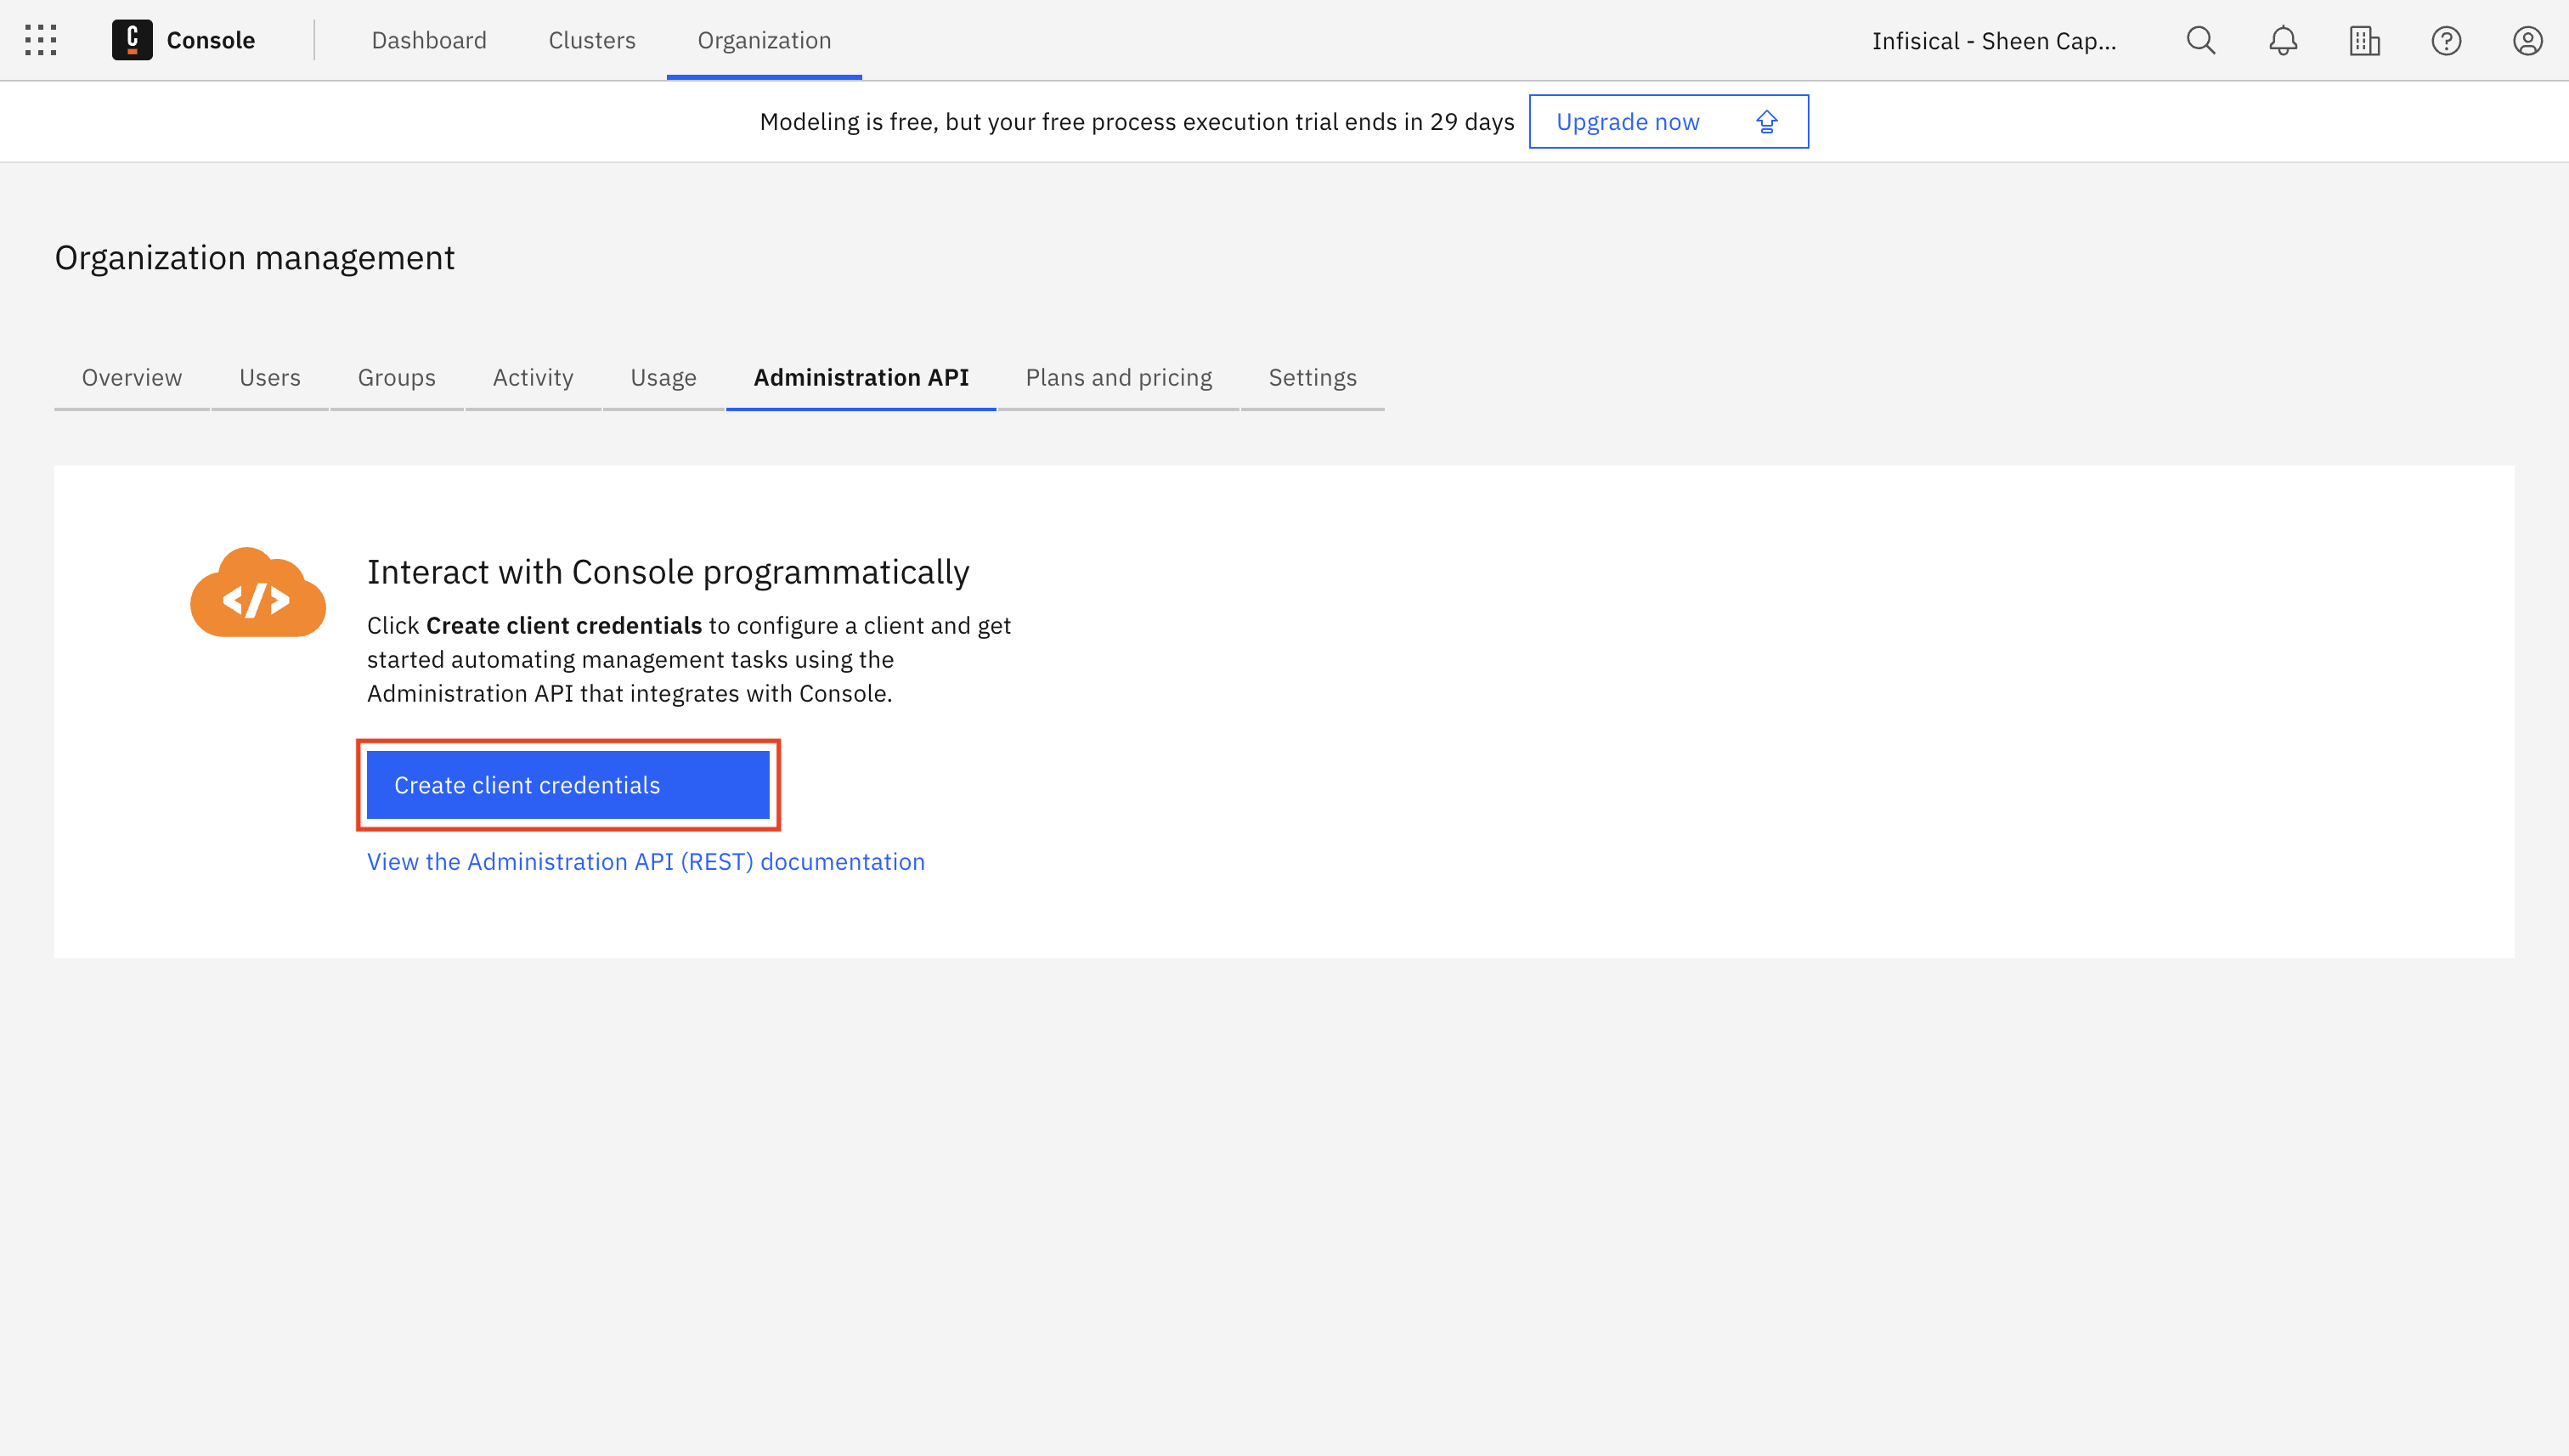
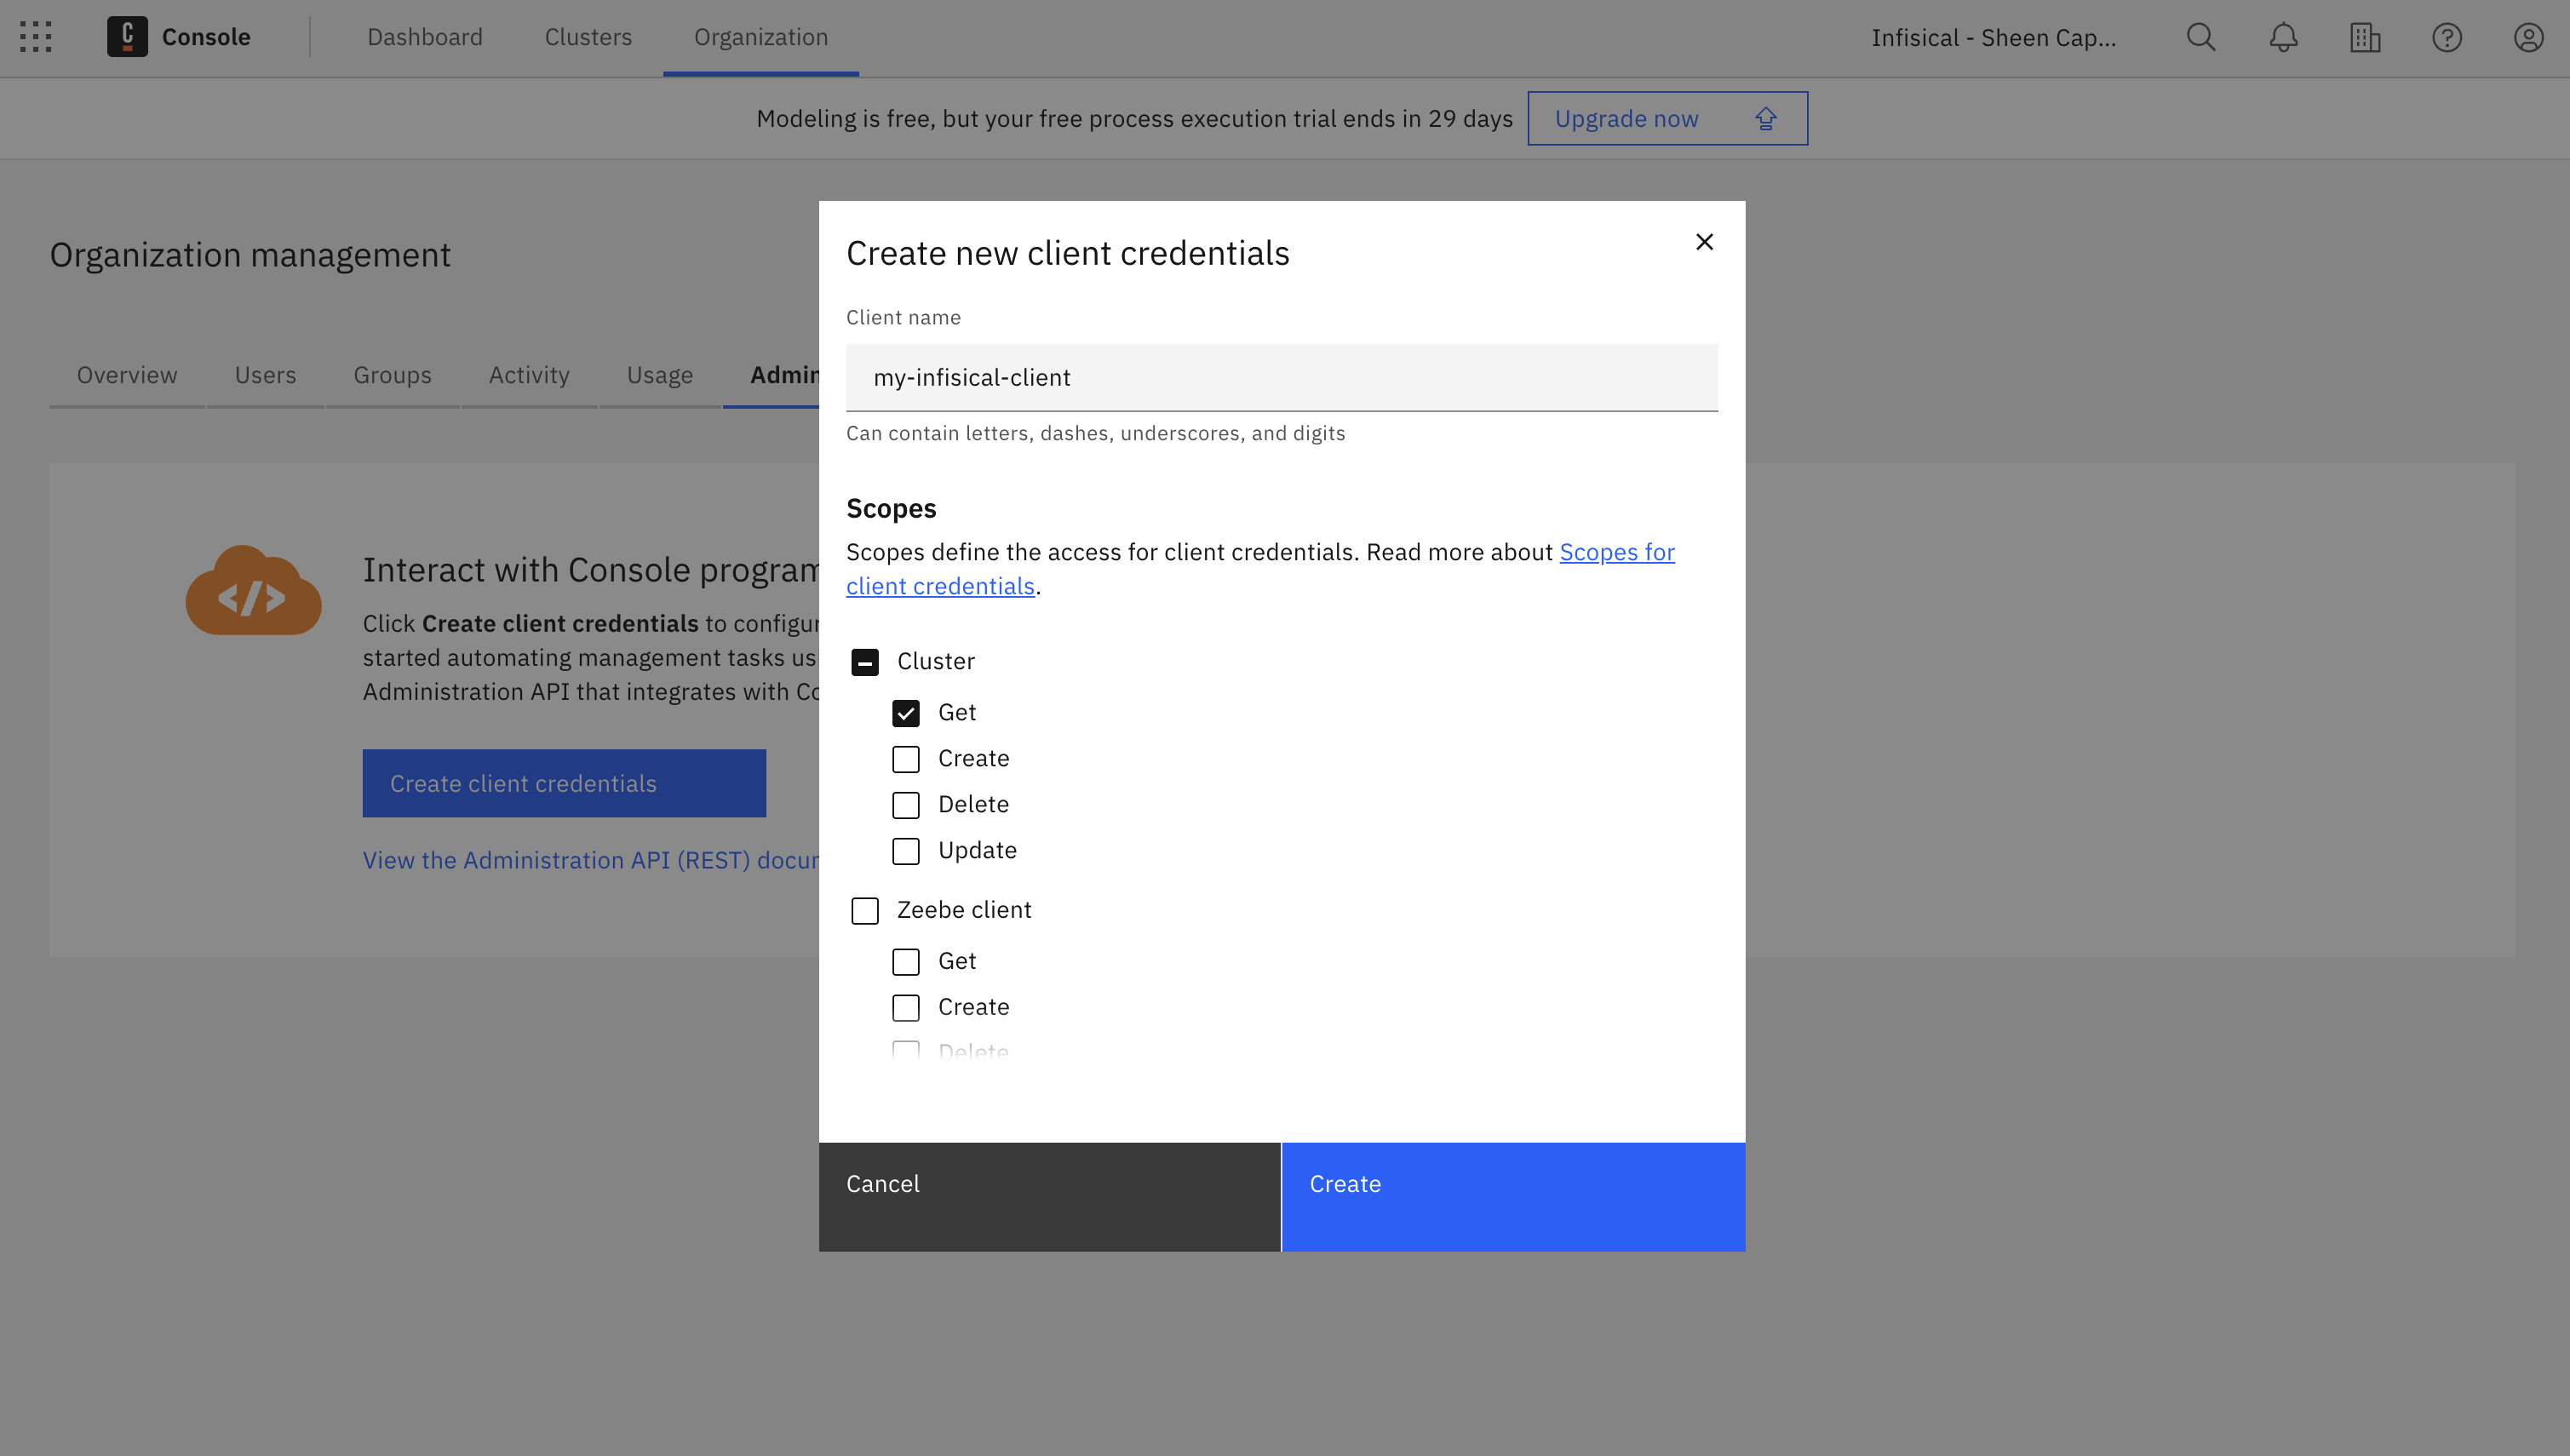
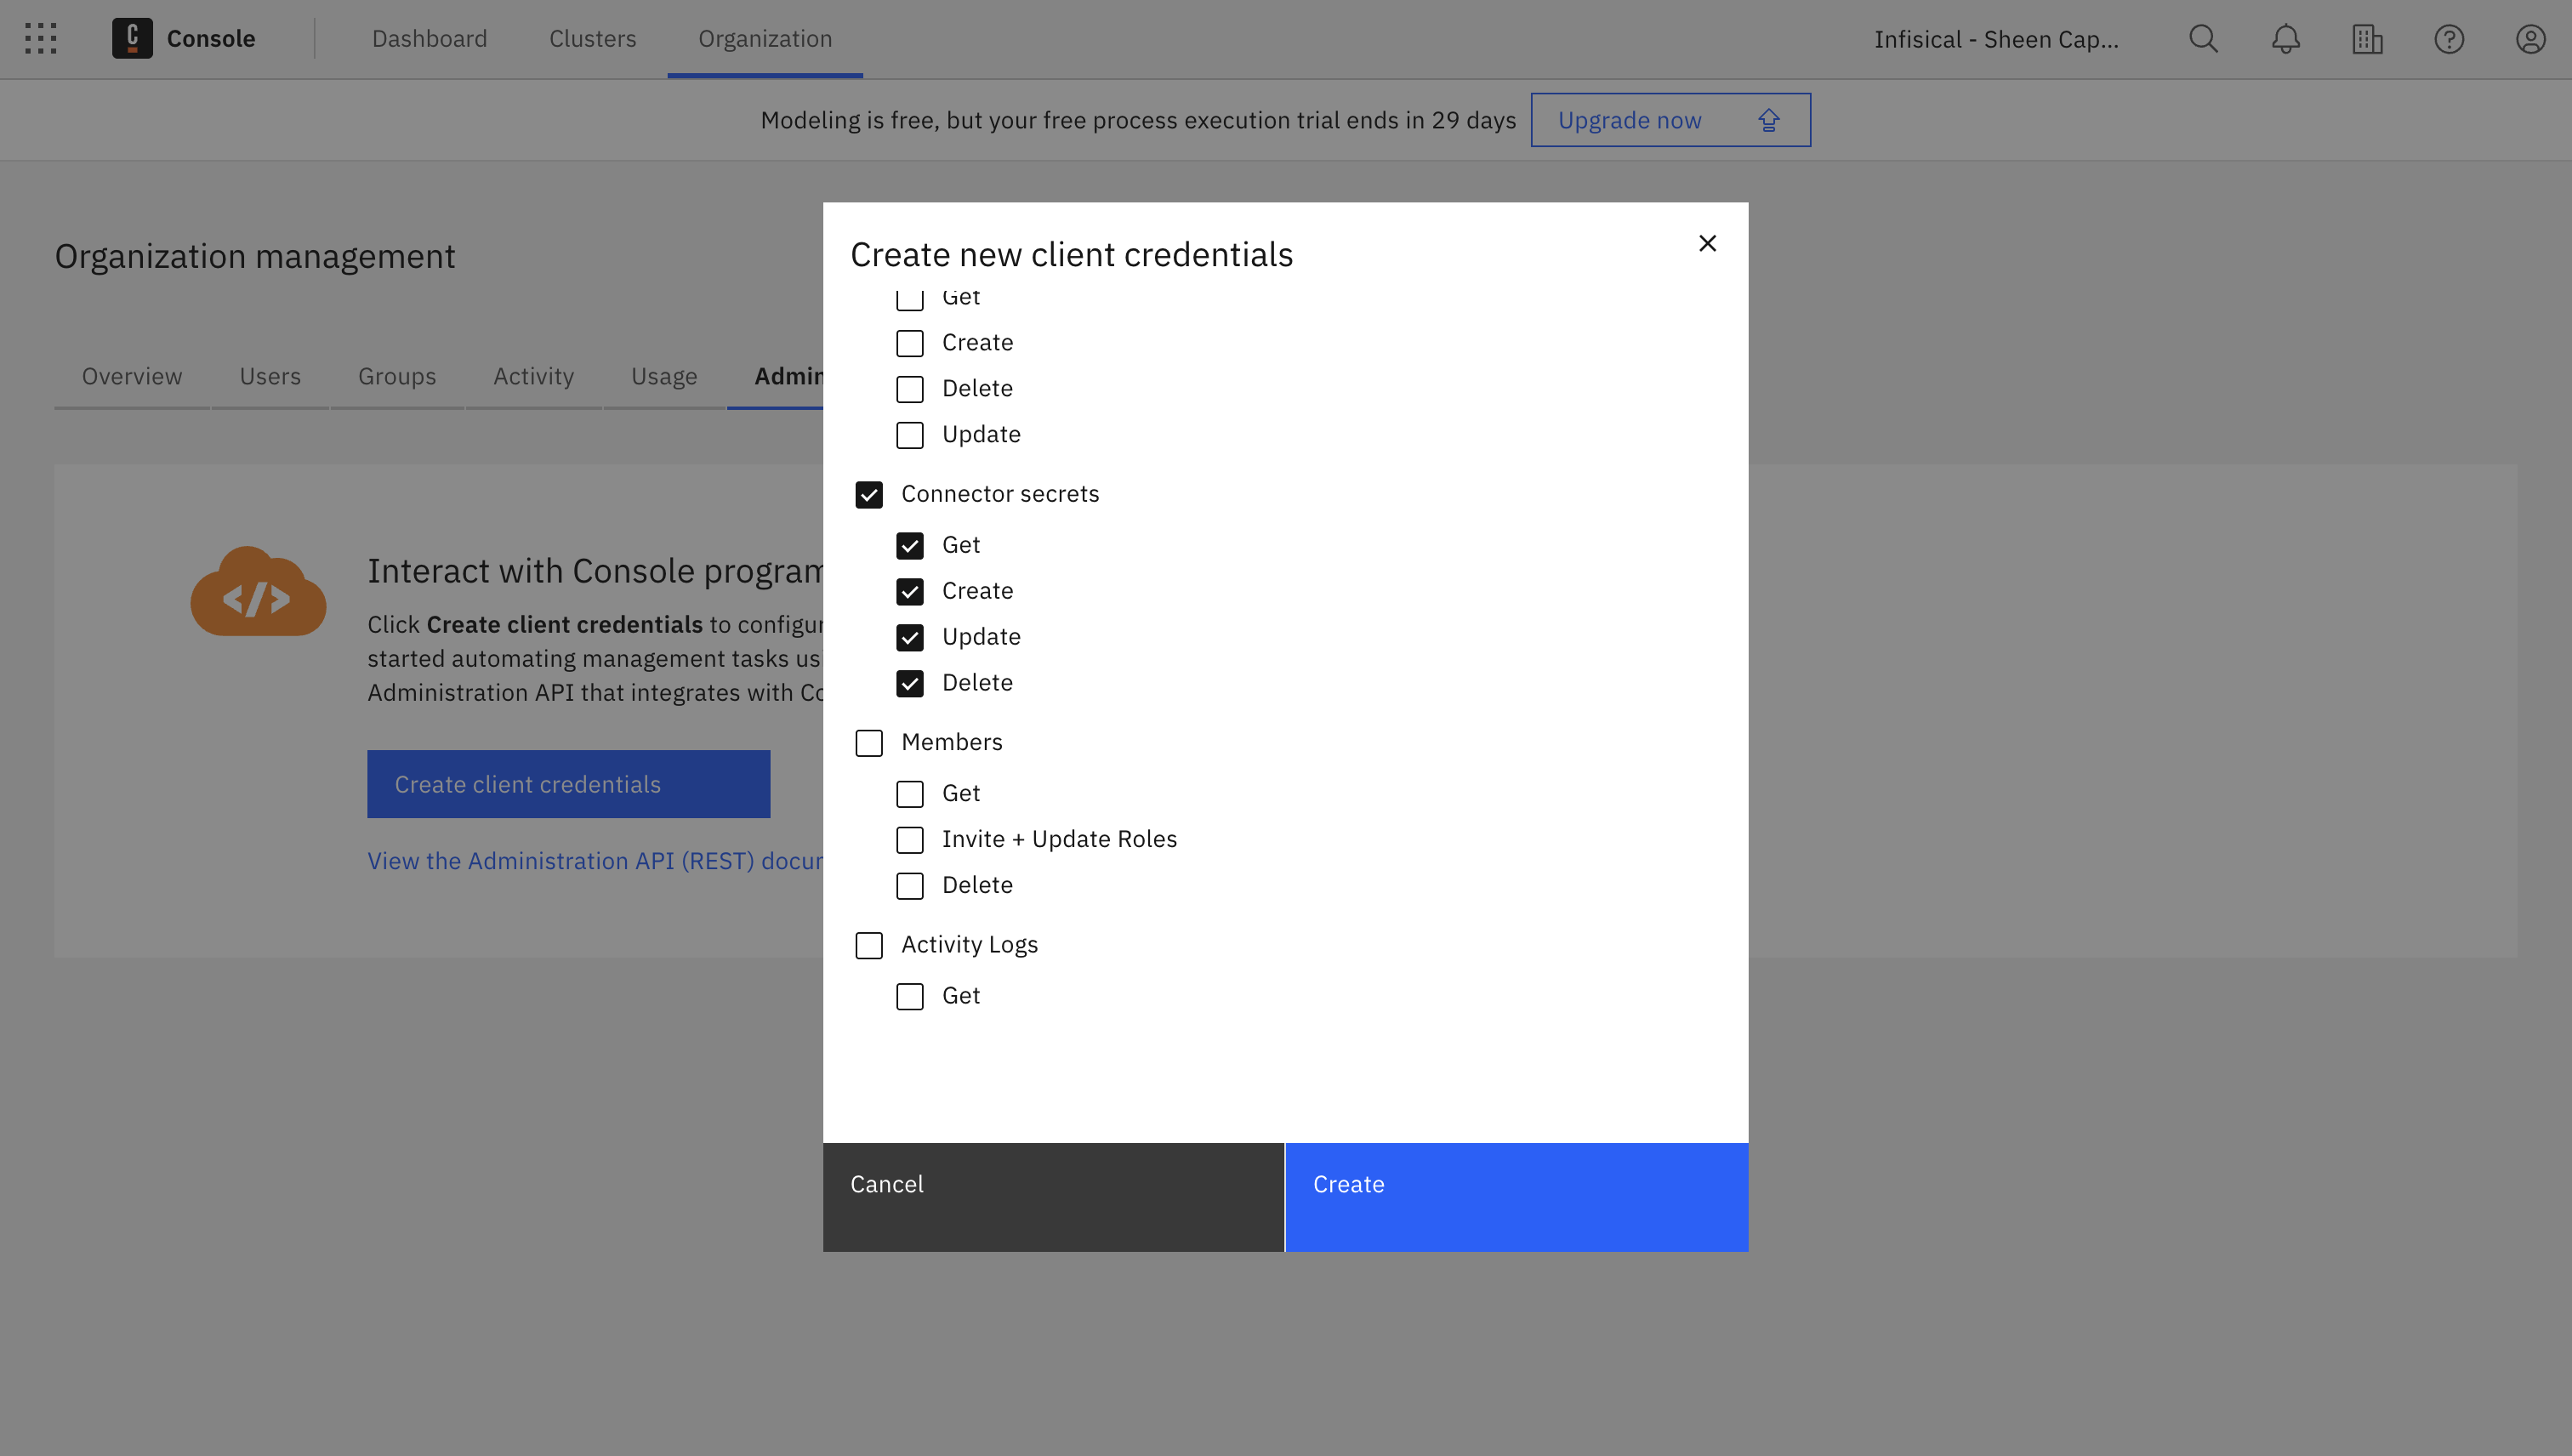
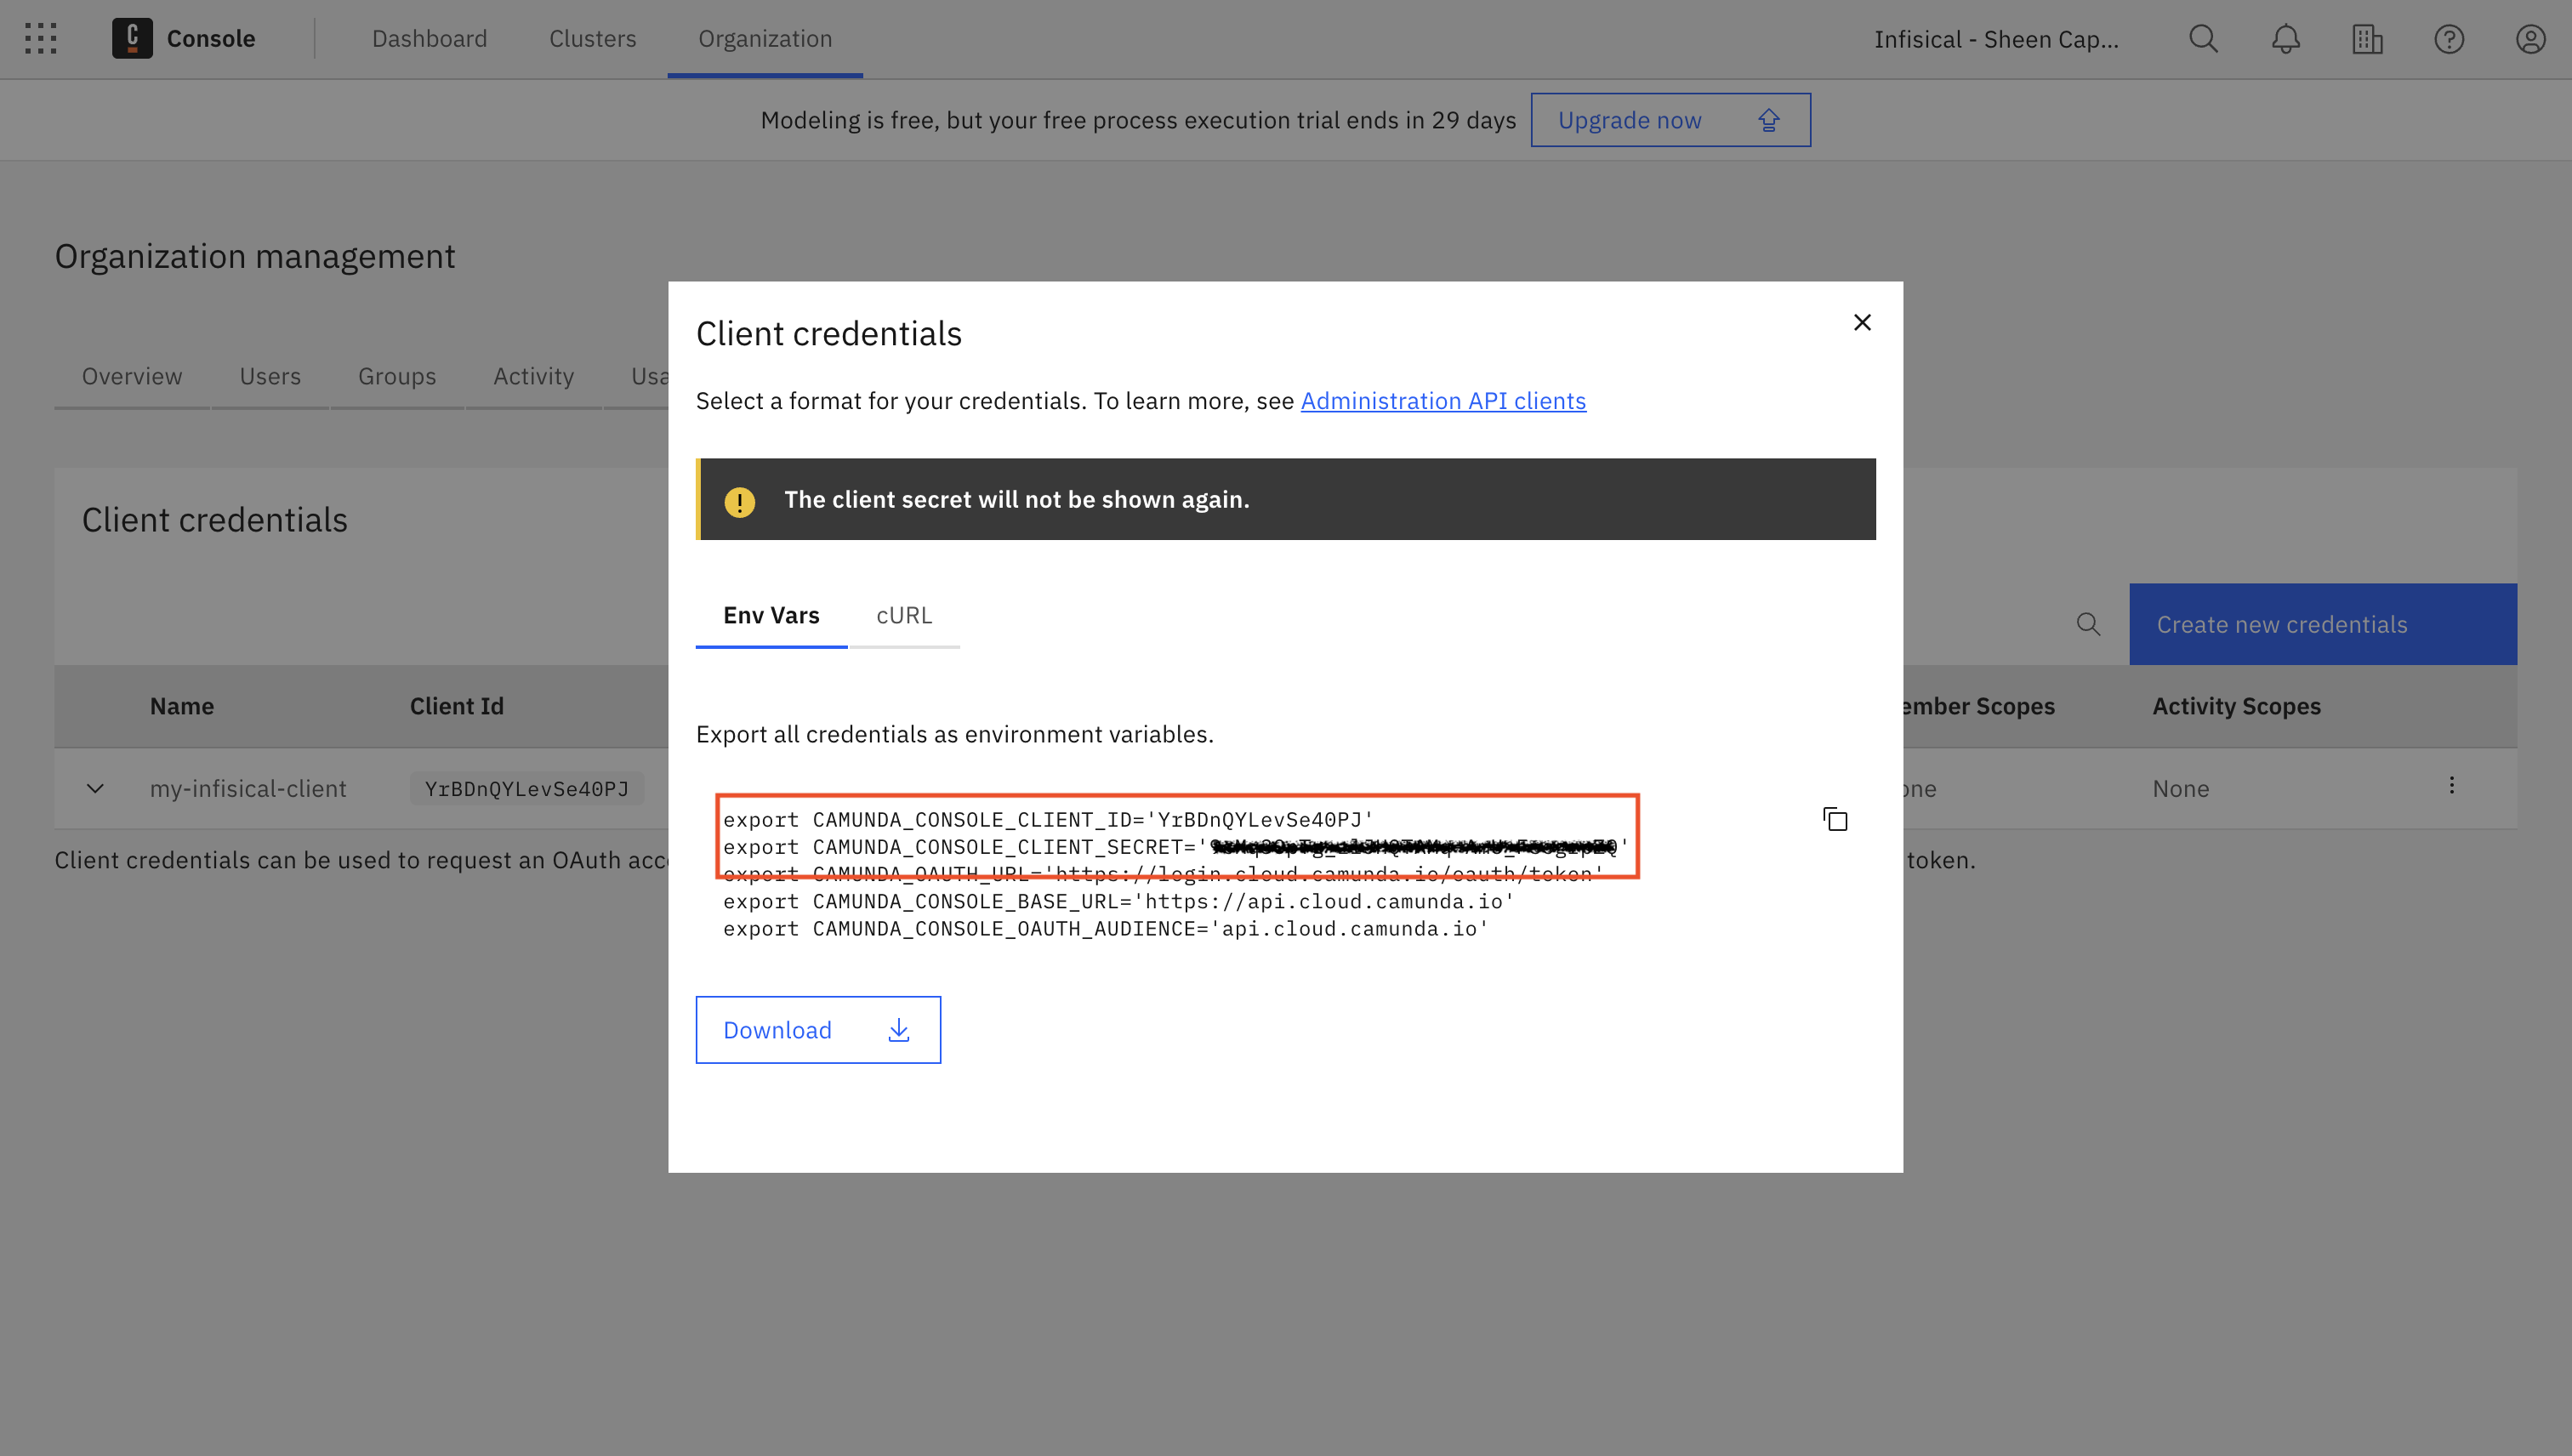

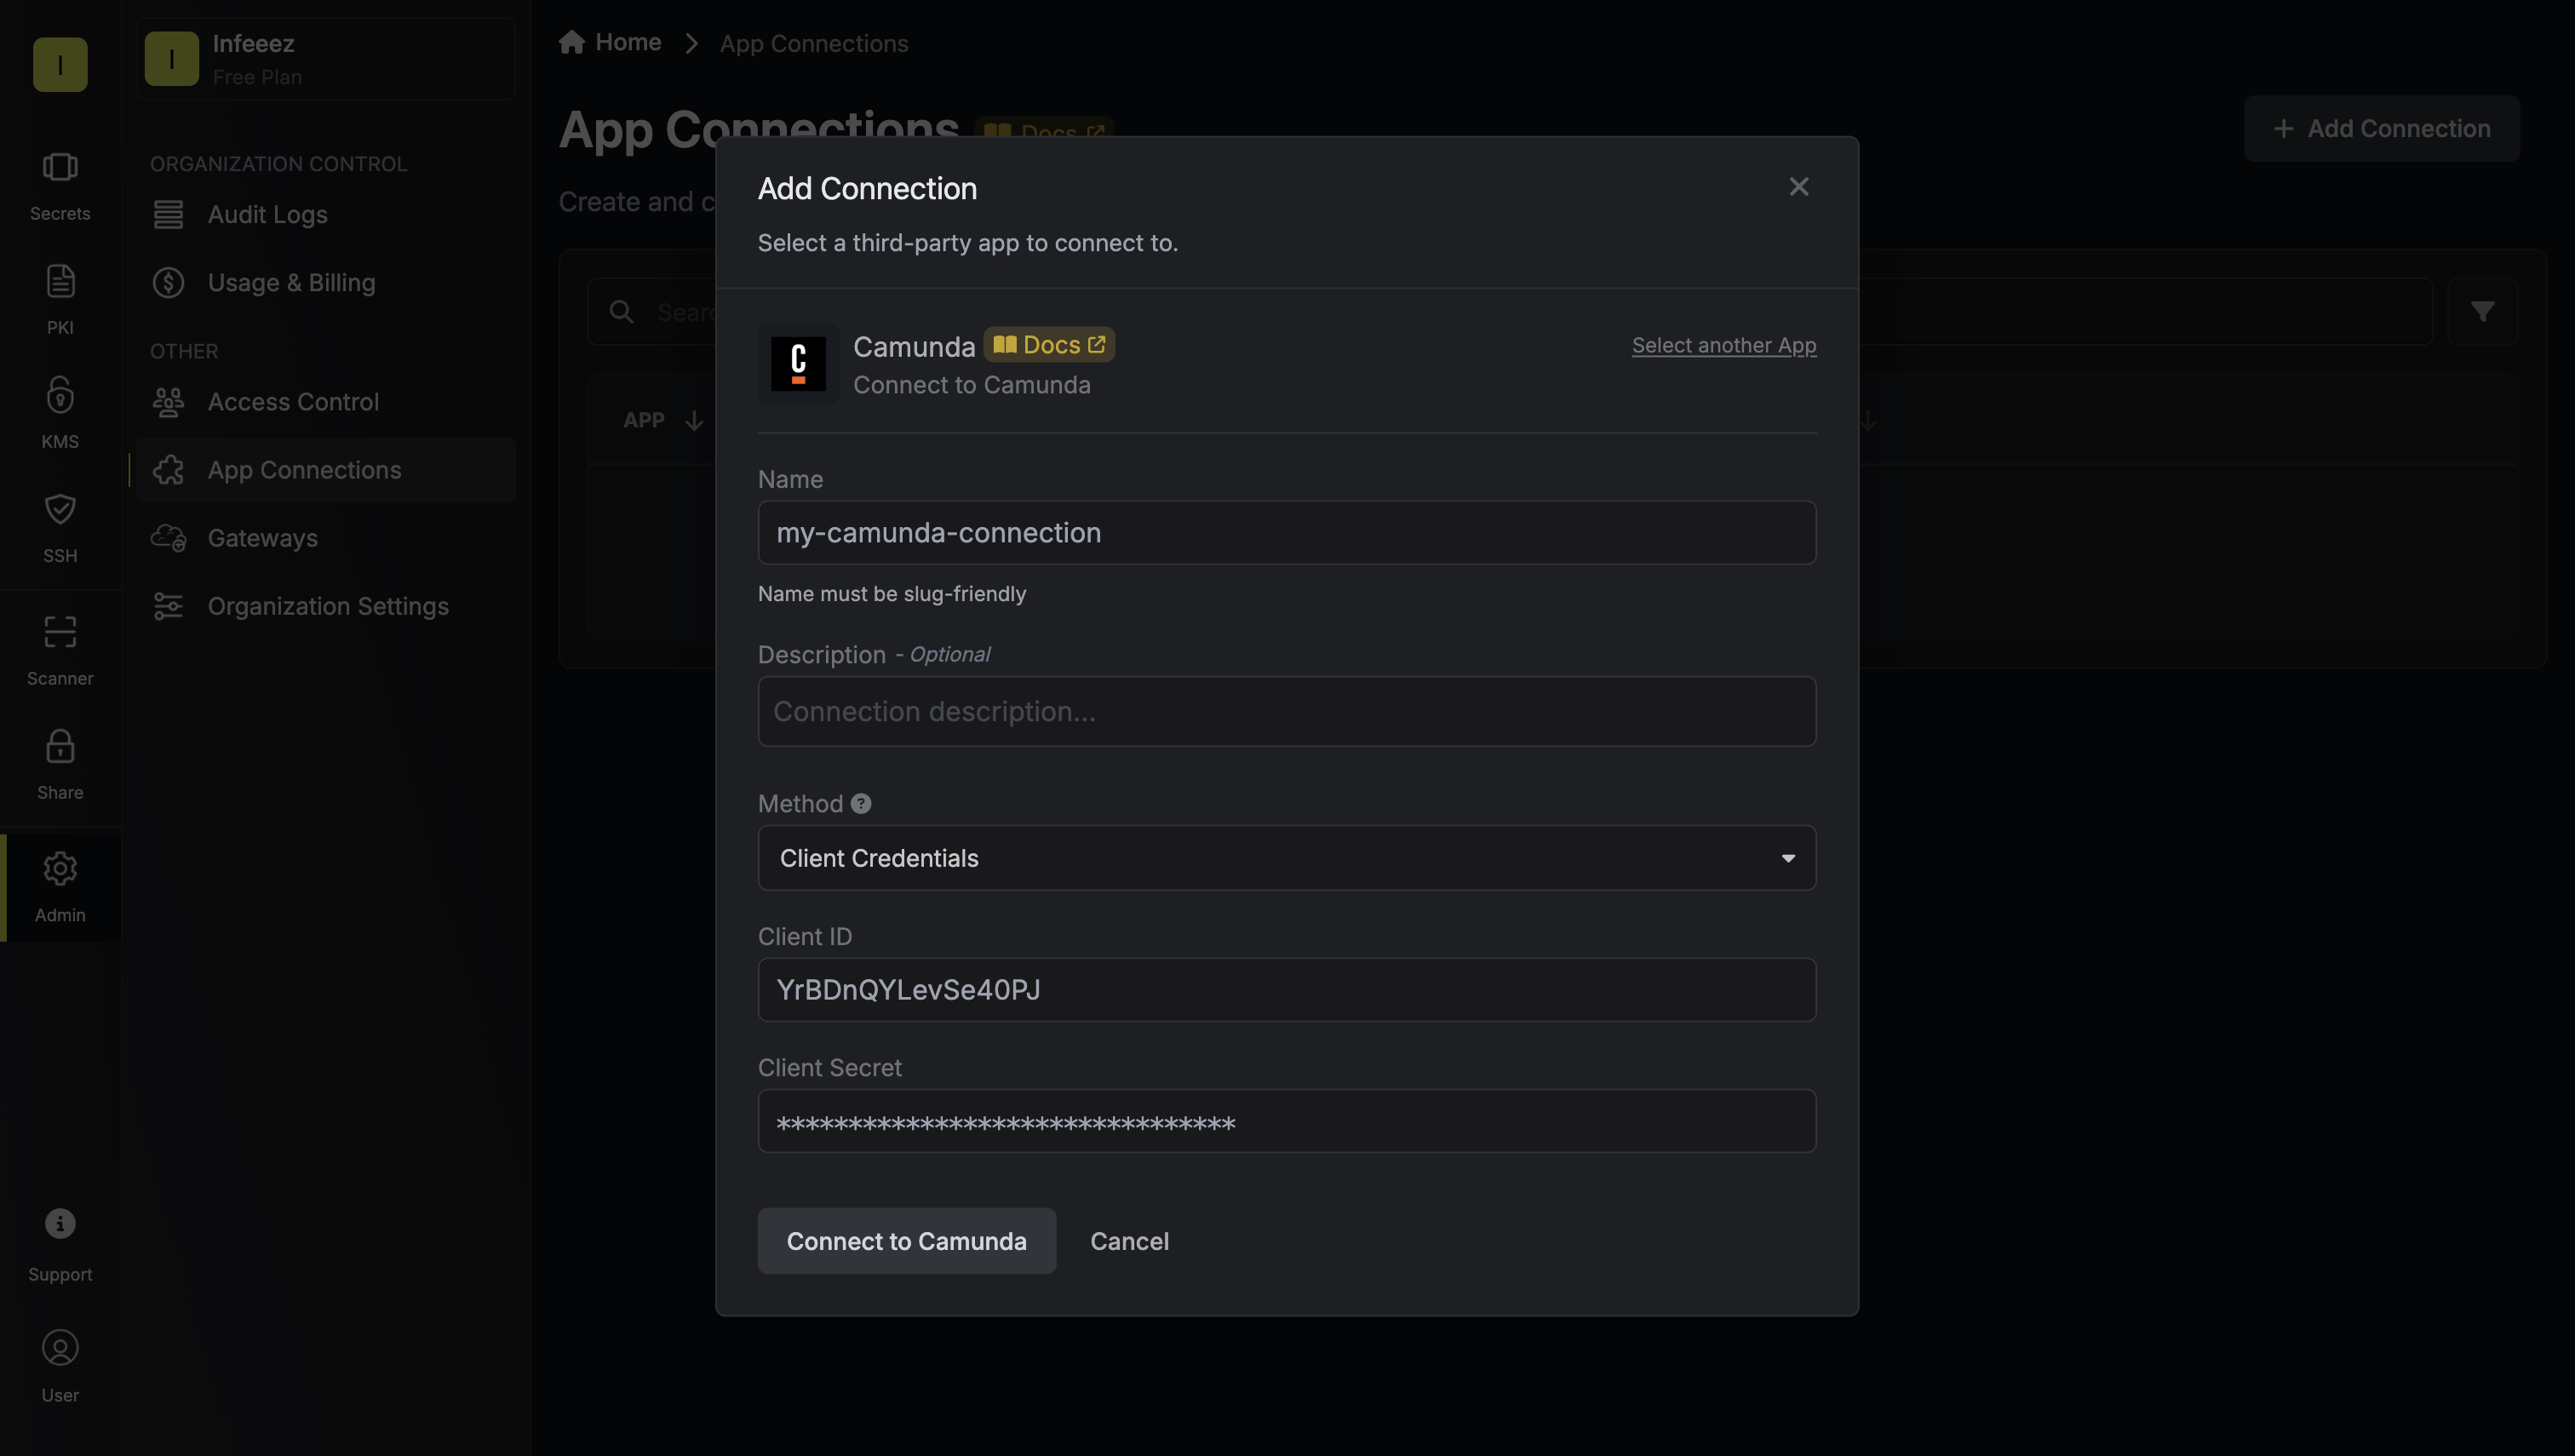
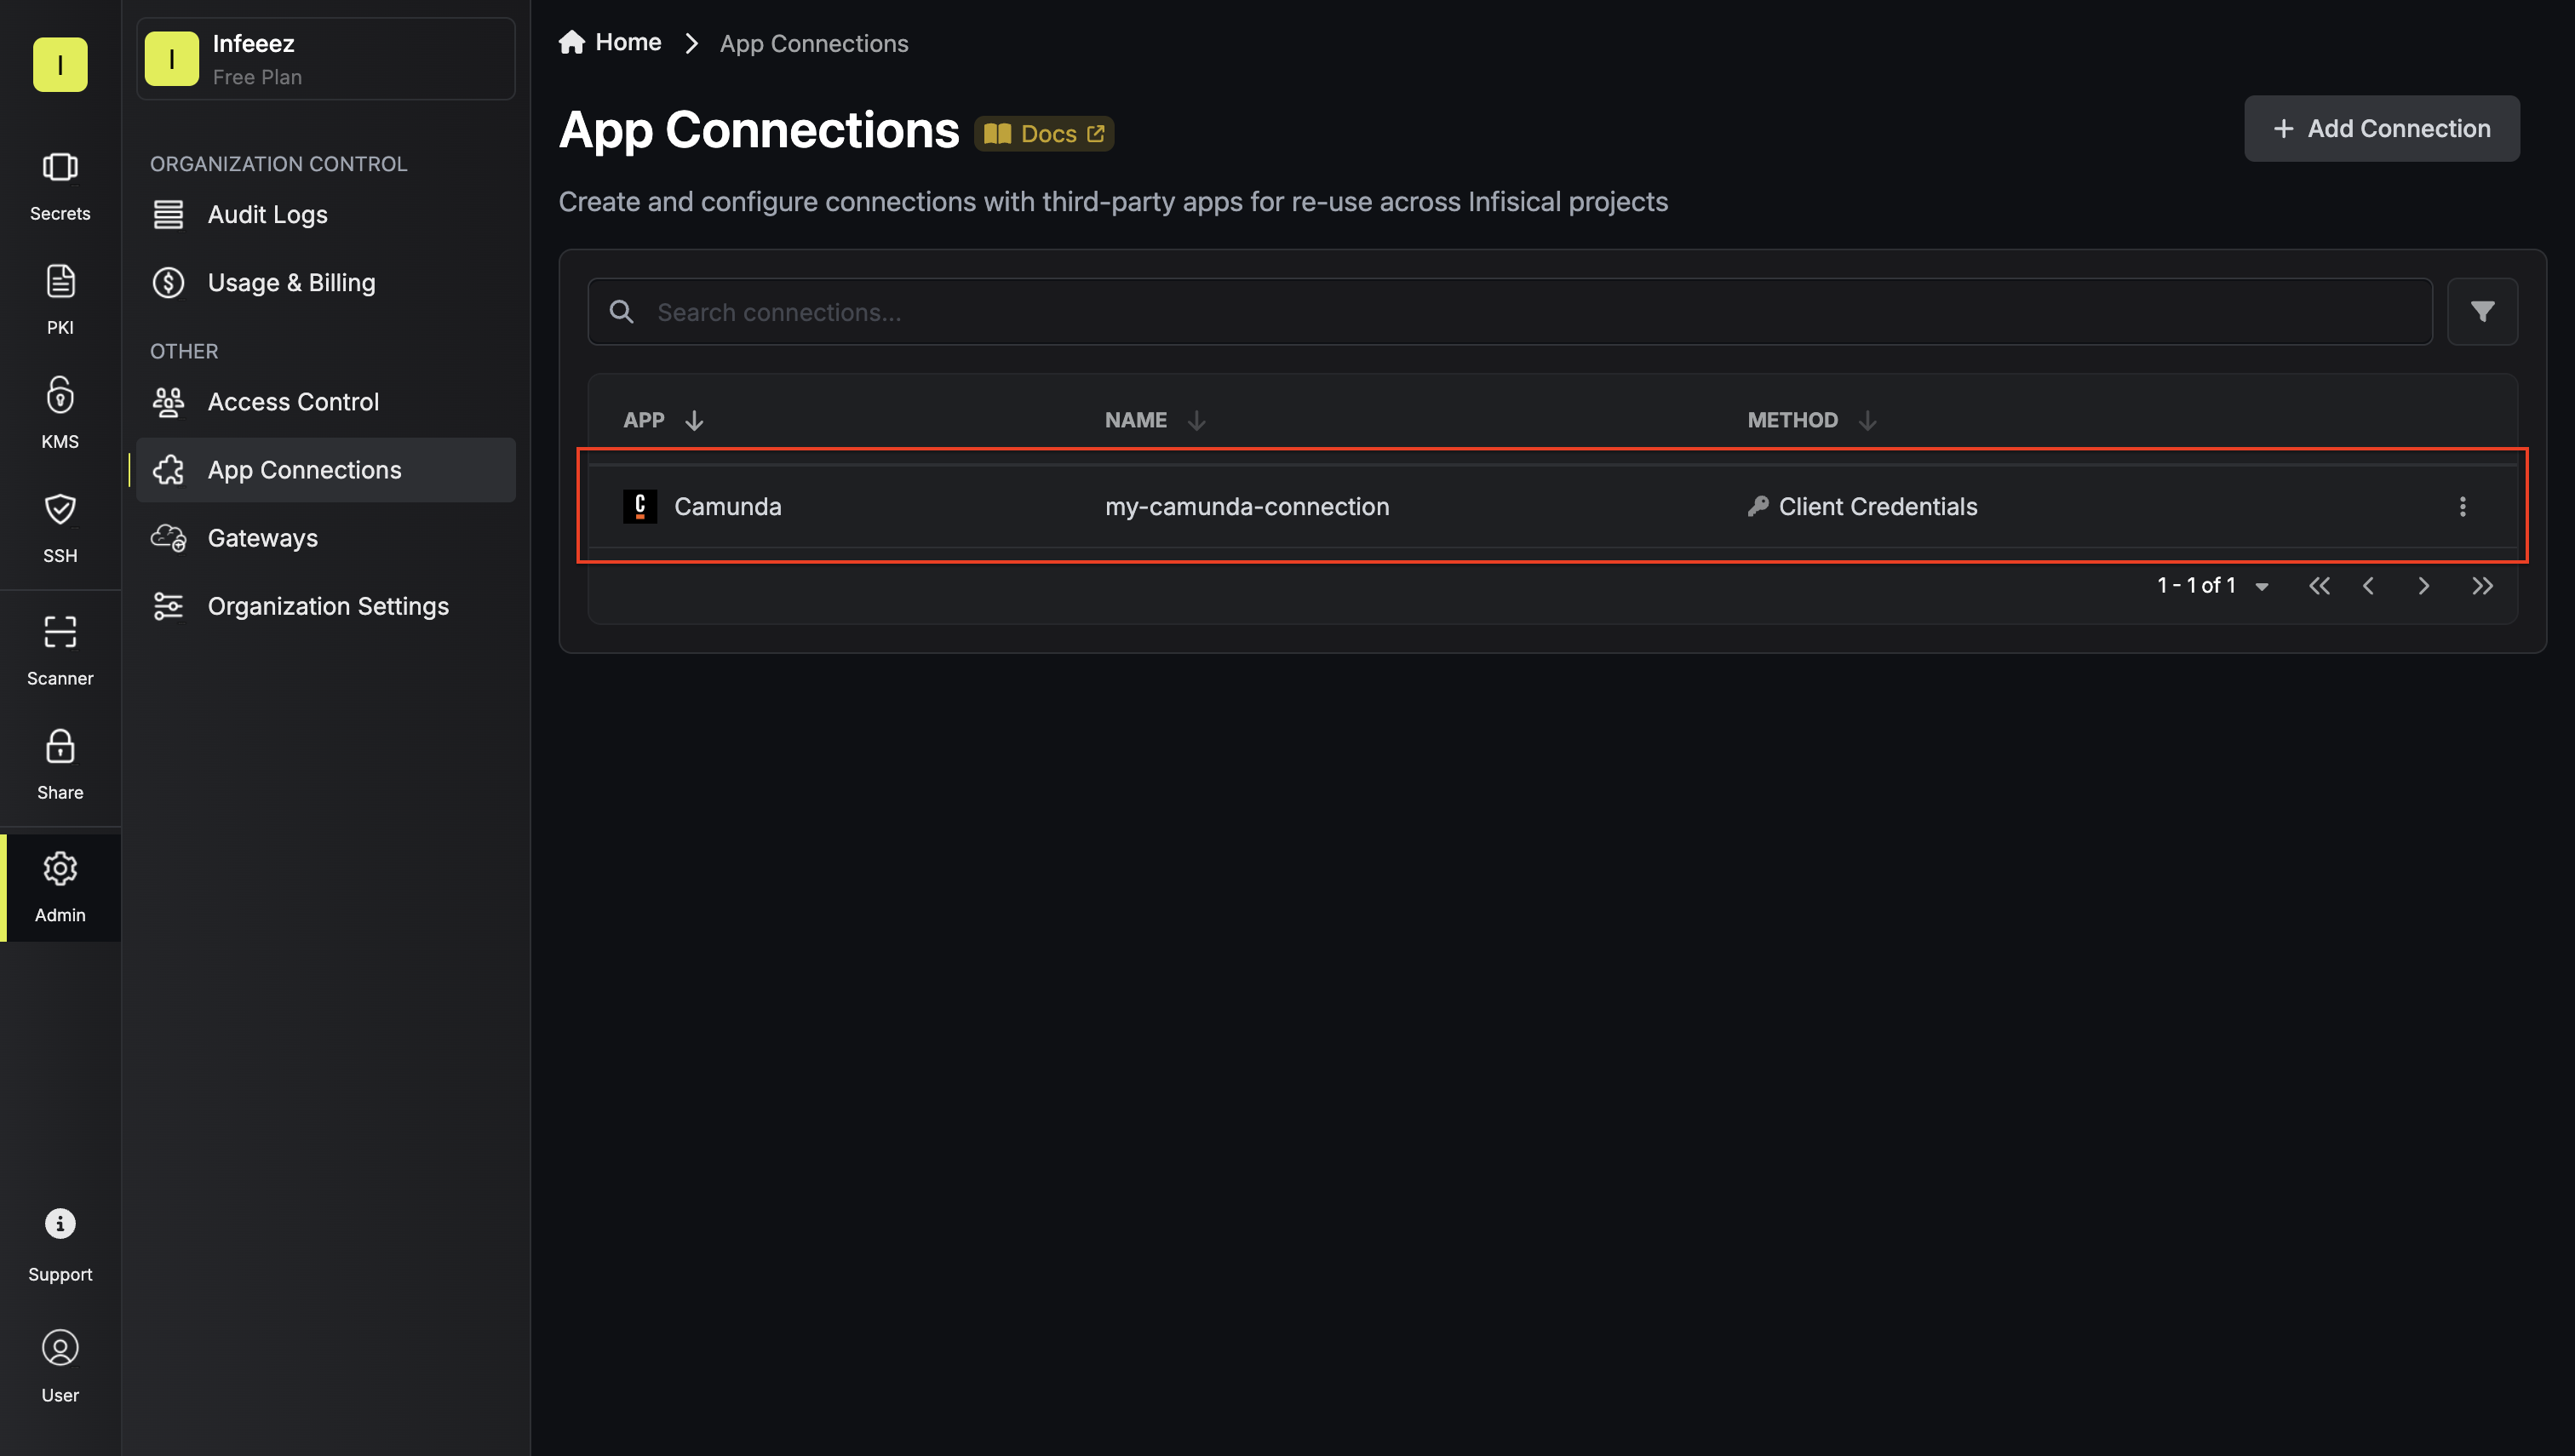
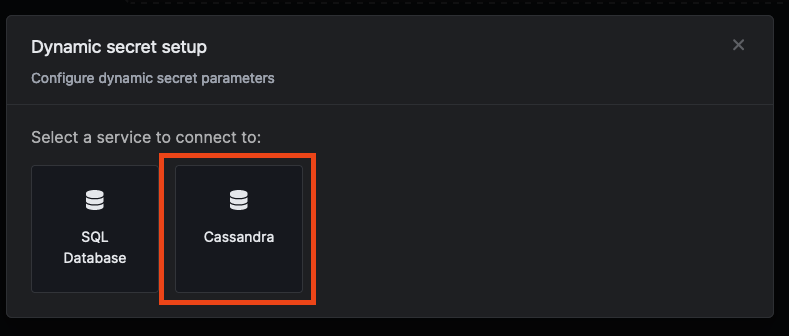
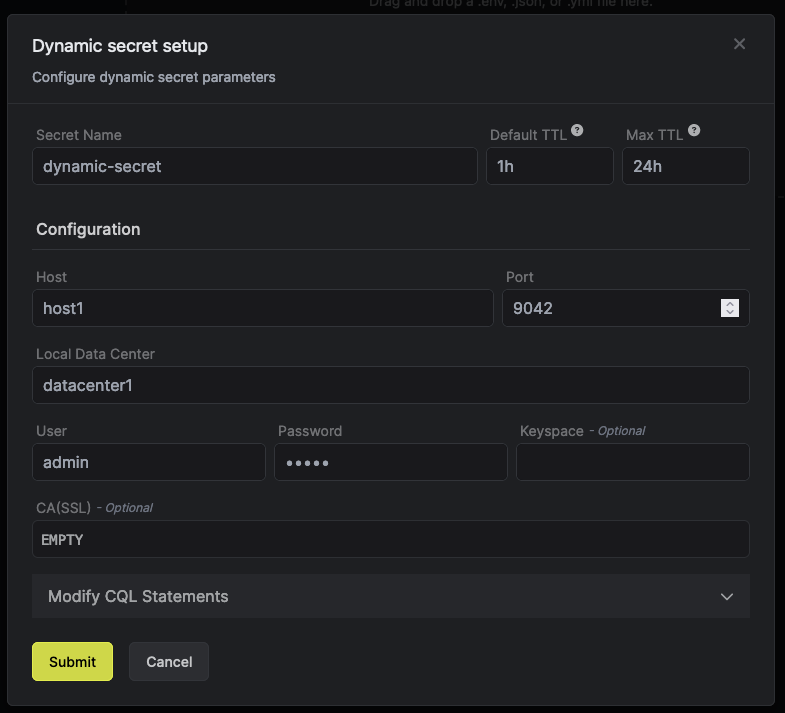
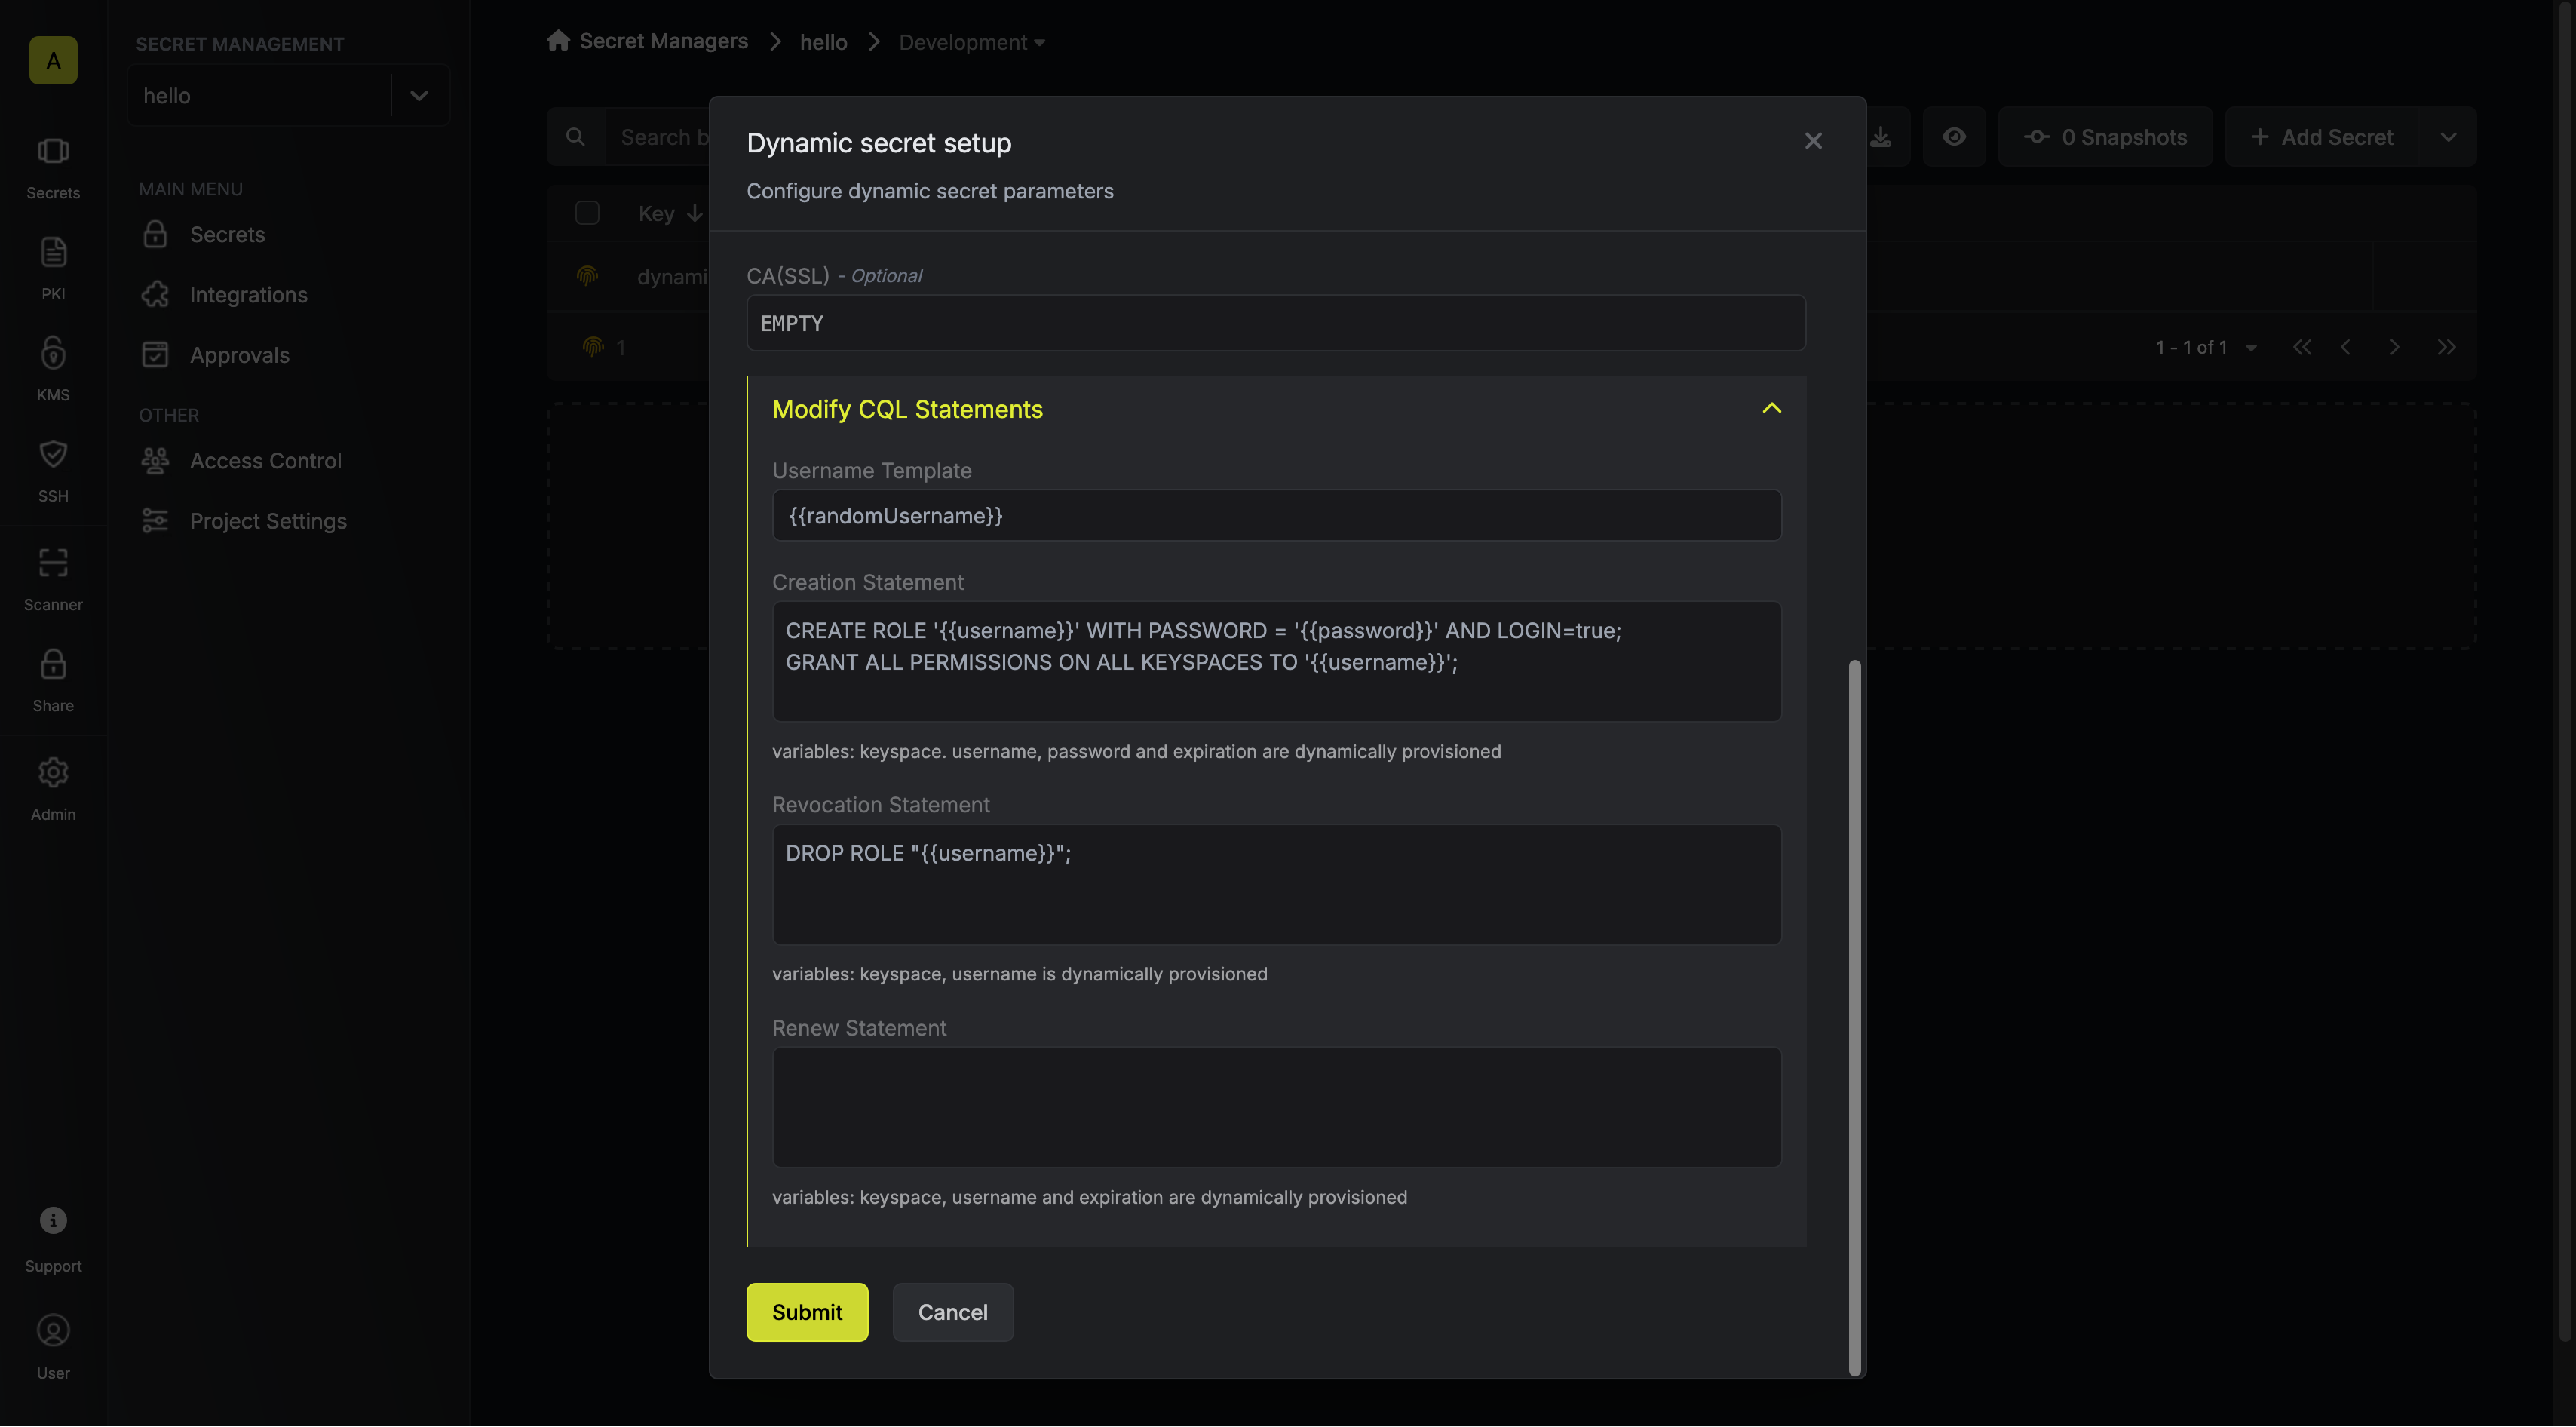 When generating these secrets, it's important to specify a Time-to-Live (TTL) duration. This will dictate how long the credentials are valid for.
## Renew Leases
To extend the life of the generated dynamic secret lease past its initial time to live, simply click on the **Renew** button as illustrated below.
When generating these secrets, it's important to specify a Time-to-Live (TTL) duration. This will dictate how long the credentials are valid for.
## Renew Leases
To extend the life of the generated dynamic secret lease past its initial time to live, simply click on the **Renew** button as illustrated below.
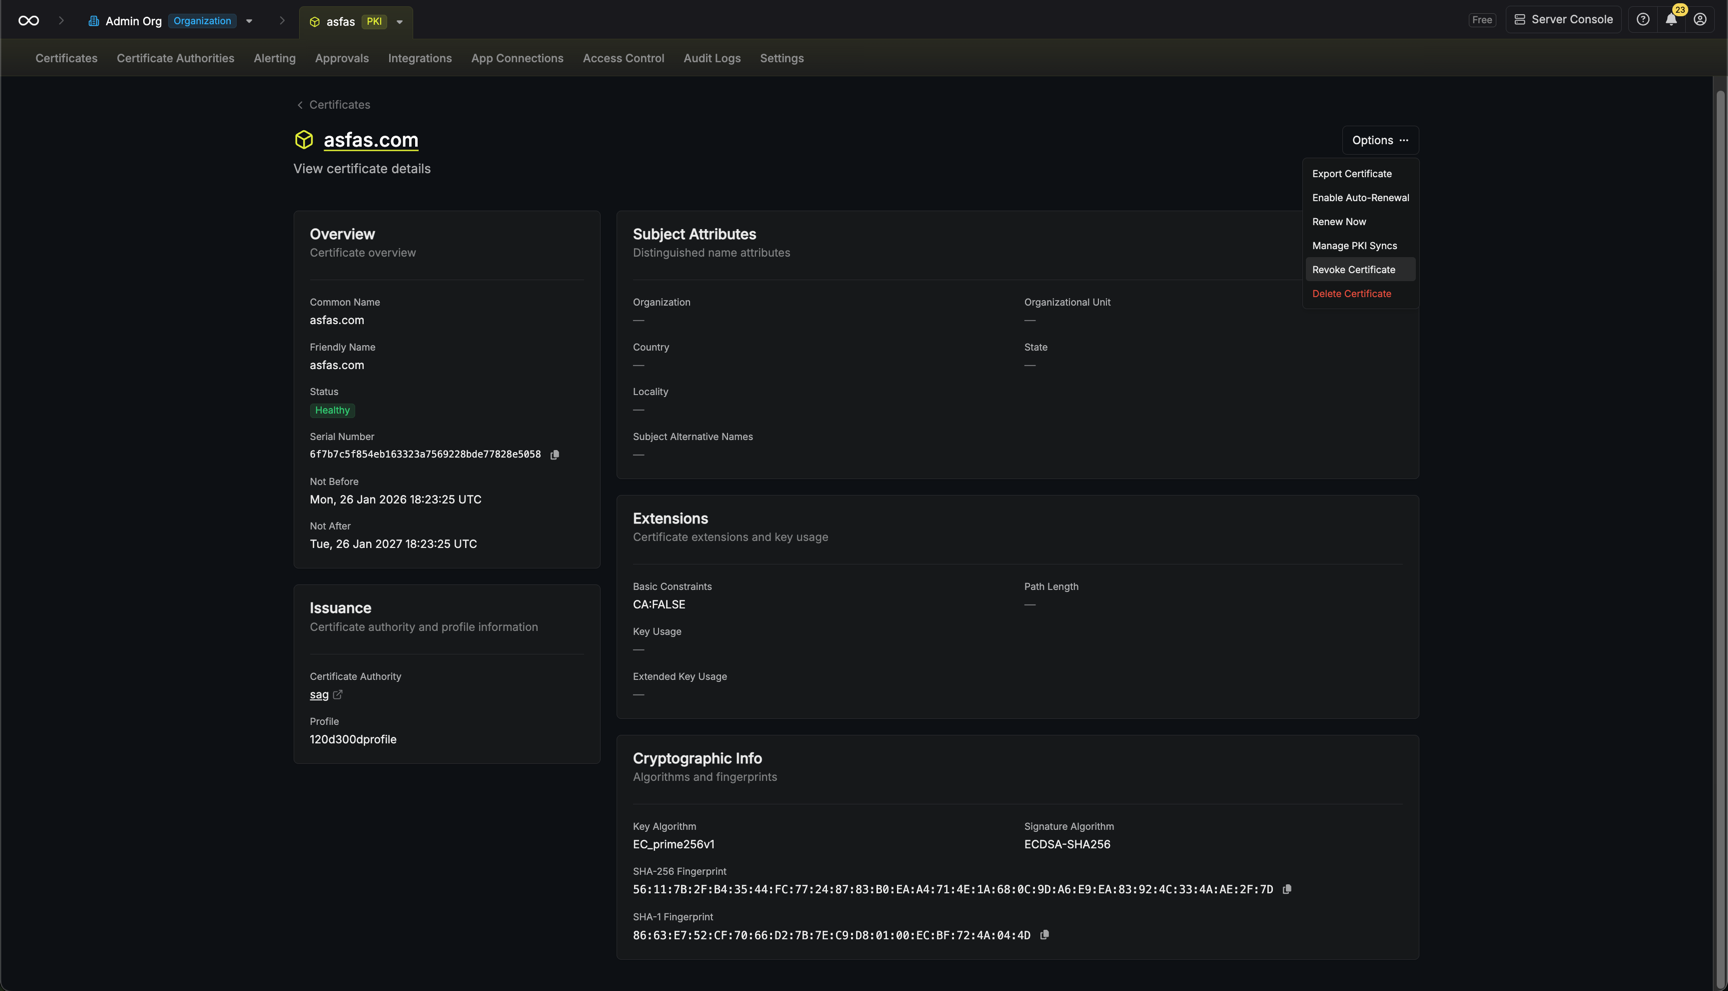 ### Certificate Information
The details page displays:
* **Overview**: Common name, friendly name, status badge, serial number, and validity period. Dates are shown in UTC with local time available on hover.
* **Issuance**: The issuing Certificate Authority (with link to CA details), certificate profile used, and renewal chain showing if the certificate was renewed from or has been renewed by another certificate.
* **Subject Attributes**: Full distinguished name components including Organization, Organizational Unit, Country, State, Locality, and Subject Alternative Names.
* **Extensions**: Basic constraints (CA flag and path length), Key Usage flags, and Extended Key Usage purposes.
* **Cryptographic Info**: Key algorithm, signature algorithm, and certificate fingerprints (SHA-256 and SHA-1).
### Managing Certificates
From the certificate details page, you can perform various actions using the **Options** dropdown menu:
* **Export Certificate**: Download the certificate in PEM or PKCS12 format
* **Enable/Manage Auto-Renewal**: Configure server-driven certificate renewal (available for API-enrolled certificates with server-generated keys)
* **Renew Now**: Manually trigger certificate renewal
* **Manage PKI Syncs**: Configure destinations to sync the certificate to cloud key stores
* **Revoke Certificate**: Revoke the certificate with a specified reason
* **Delete Certificate**: Permanently remove the certificate from the inventory
## Guide to Issuing Certificates
To [issue a certificate](/documentation/platform/pki/concepts/certificate-lifecycle#enrollment-request-%2F-issuance), you must first create a [certificate profile](/documentation/platform/pki/certificates/profiles) and a [certificate policy](/documentation/platform/pki/certificates/policies) to go along with it.
* Self-Signed Certificates: To issue a [self-signed certificate](https://en.wikipedia.org/wiki/Self-signed_certificate), you must configure the certificate profile to use the `Self-Signed` issuer type. You can then use the [API enrollment method](/documentation/platform/pki/enrollment-methods/api) to request a self-signed certificate against it.
* CA-Issued Certificates: To issue a certificate from a certificate authority, you must configure the certificate profile to use the `Certificate Authority` issuer type and select the [issuing CA](/documentation/platform/pki/ca/overview) to use. You can then use one of the [enrollment methods](/documentation/platform/pki/enrollment-methods/overview) to request a certificate against it.
Select the certificate profile and choose the **Request Method**:
* **Managed**: Infisical generates and manages the private key for you. Fill out the subject attributes, SANs, algorithms, and other certificate details.
* **CSR (Certificate Signing Request)**: Provide your own CSR when you need to manage your private key externally. The certificate will be issued using the subject information and public key contained in your CSR. See [Issue a Certificate with CSR](/documentation/platform/pki/guides/request-cert-csr) for more details.
When using the **CSR** method, paste your PEM-encoded Certificate Signing Request into the text area and specify the TTL:
### Certificate Information
The details page displays:
* **Overview**: Common name, friendly name, status badge, serial number, and validity period. Dates are shown in UTC with local time available on hover.
* **Issuance**: The issuing Certificate Authority (with link to CA details), certificate profile used, and renewal chain showing if the certificate was renewed from or has been renewed by another certificate.
* **Subject Attributes**: Full distinguished name components including Organization, Organizational Unit, Country, State, Locality, and Subject Alternative Names.
* **Extensions**: Basic constraints (CA flag and path length), Key Usage flags, and Extended Key Usage purposes.
* **Cryptographic Info**: Key algorithm, signature algorithm, and certificate fingerprints (SHA-256 and SHA-1).
### Managing Certificates
From the certificate details page, you can perform various actions using the **Options** dropdown menu:
* **Export Certificate**: Download the certificate in PEM or PKCS12 format
* **Enable/Manage Auto-Renewal**: Configure server-driven certificate renewal (available for API-enrolled certificates with server-generated keys)
* **Renew Now**: Manually trigger certificate renewal
* **Manage PKI Syncs**: Configure destinations to sync the certificate to cloud key stores
* **Revoke Certificate**: Revoke the certificate with a specified reason
* **Delete Certificate**: Permanently remove the certificate from the inventory
## Guide to Issuing Certificates
To [issue a certificate](/documentation/platform/pki/concepts/certificate-lifecycle#enrollment-request-%2F-issuance), you must first create a [certificate profile](/documentation/platform/pki/certificates/profiles) and a [certificate policy](/documentation/platform/pki/certificates/policies) to go along with it.
* Self-Signed Certificates: To issue a [self-signed certificate](https://en.wikipedia.org/wiki/Self-signed_certificate), you must configure the certificate profile to use the `Self-Signed` issuer type. You can then use the [API enrollment method](/documentation/platform/pki/enrollment-methods/api) to request a self-signed certificate against it.
* CA-Issued Certificates: To issue a certificate from a certificate authority, you must configure the certificate profile to use the `Certificate Authority` issuer type and select the [issuing CA](/documentation/platform/pki/ca/overview) to use. You can then use one of the [enrollment methods](/documentation/platform/pki/enrollment-methods/overview) to request a certificate against it.
Select the certificate profile and choose the **Request Method**:
* **Managed**: Infisical generates and manages the private key for you. Fill out the subject attributes, SANs, algorithms, and other certificate details.
* **CSR (Certificate Signing Request)**: Provide your own CSR when you need to manage your private key externally. The certificate will be issued using the subject information and public key contained in your CSR. See [Issue a Certificate with CSR](/documentation/platform/pki/guides/request-cert-csr) for more details.
When using the **CSR** method, paste your PEM-encoded Certificate Signing Request into the text area and specify the TTL:
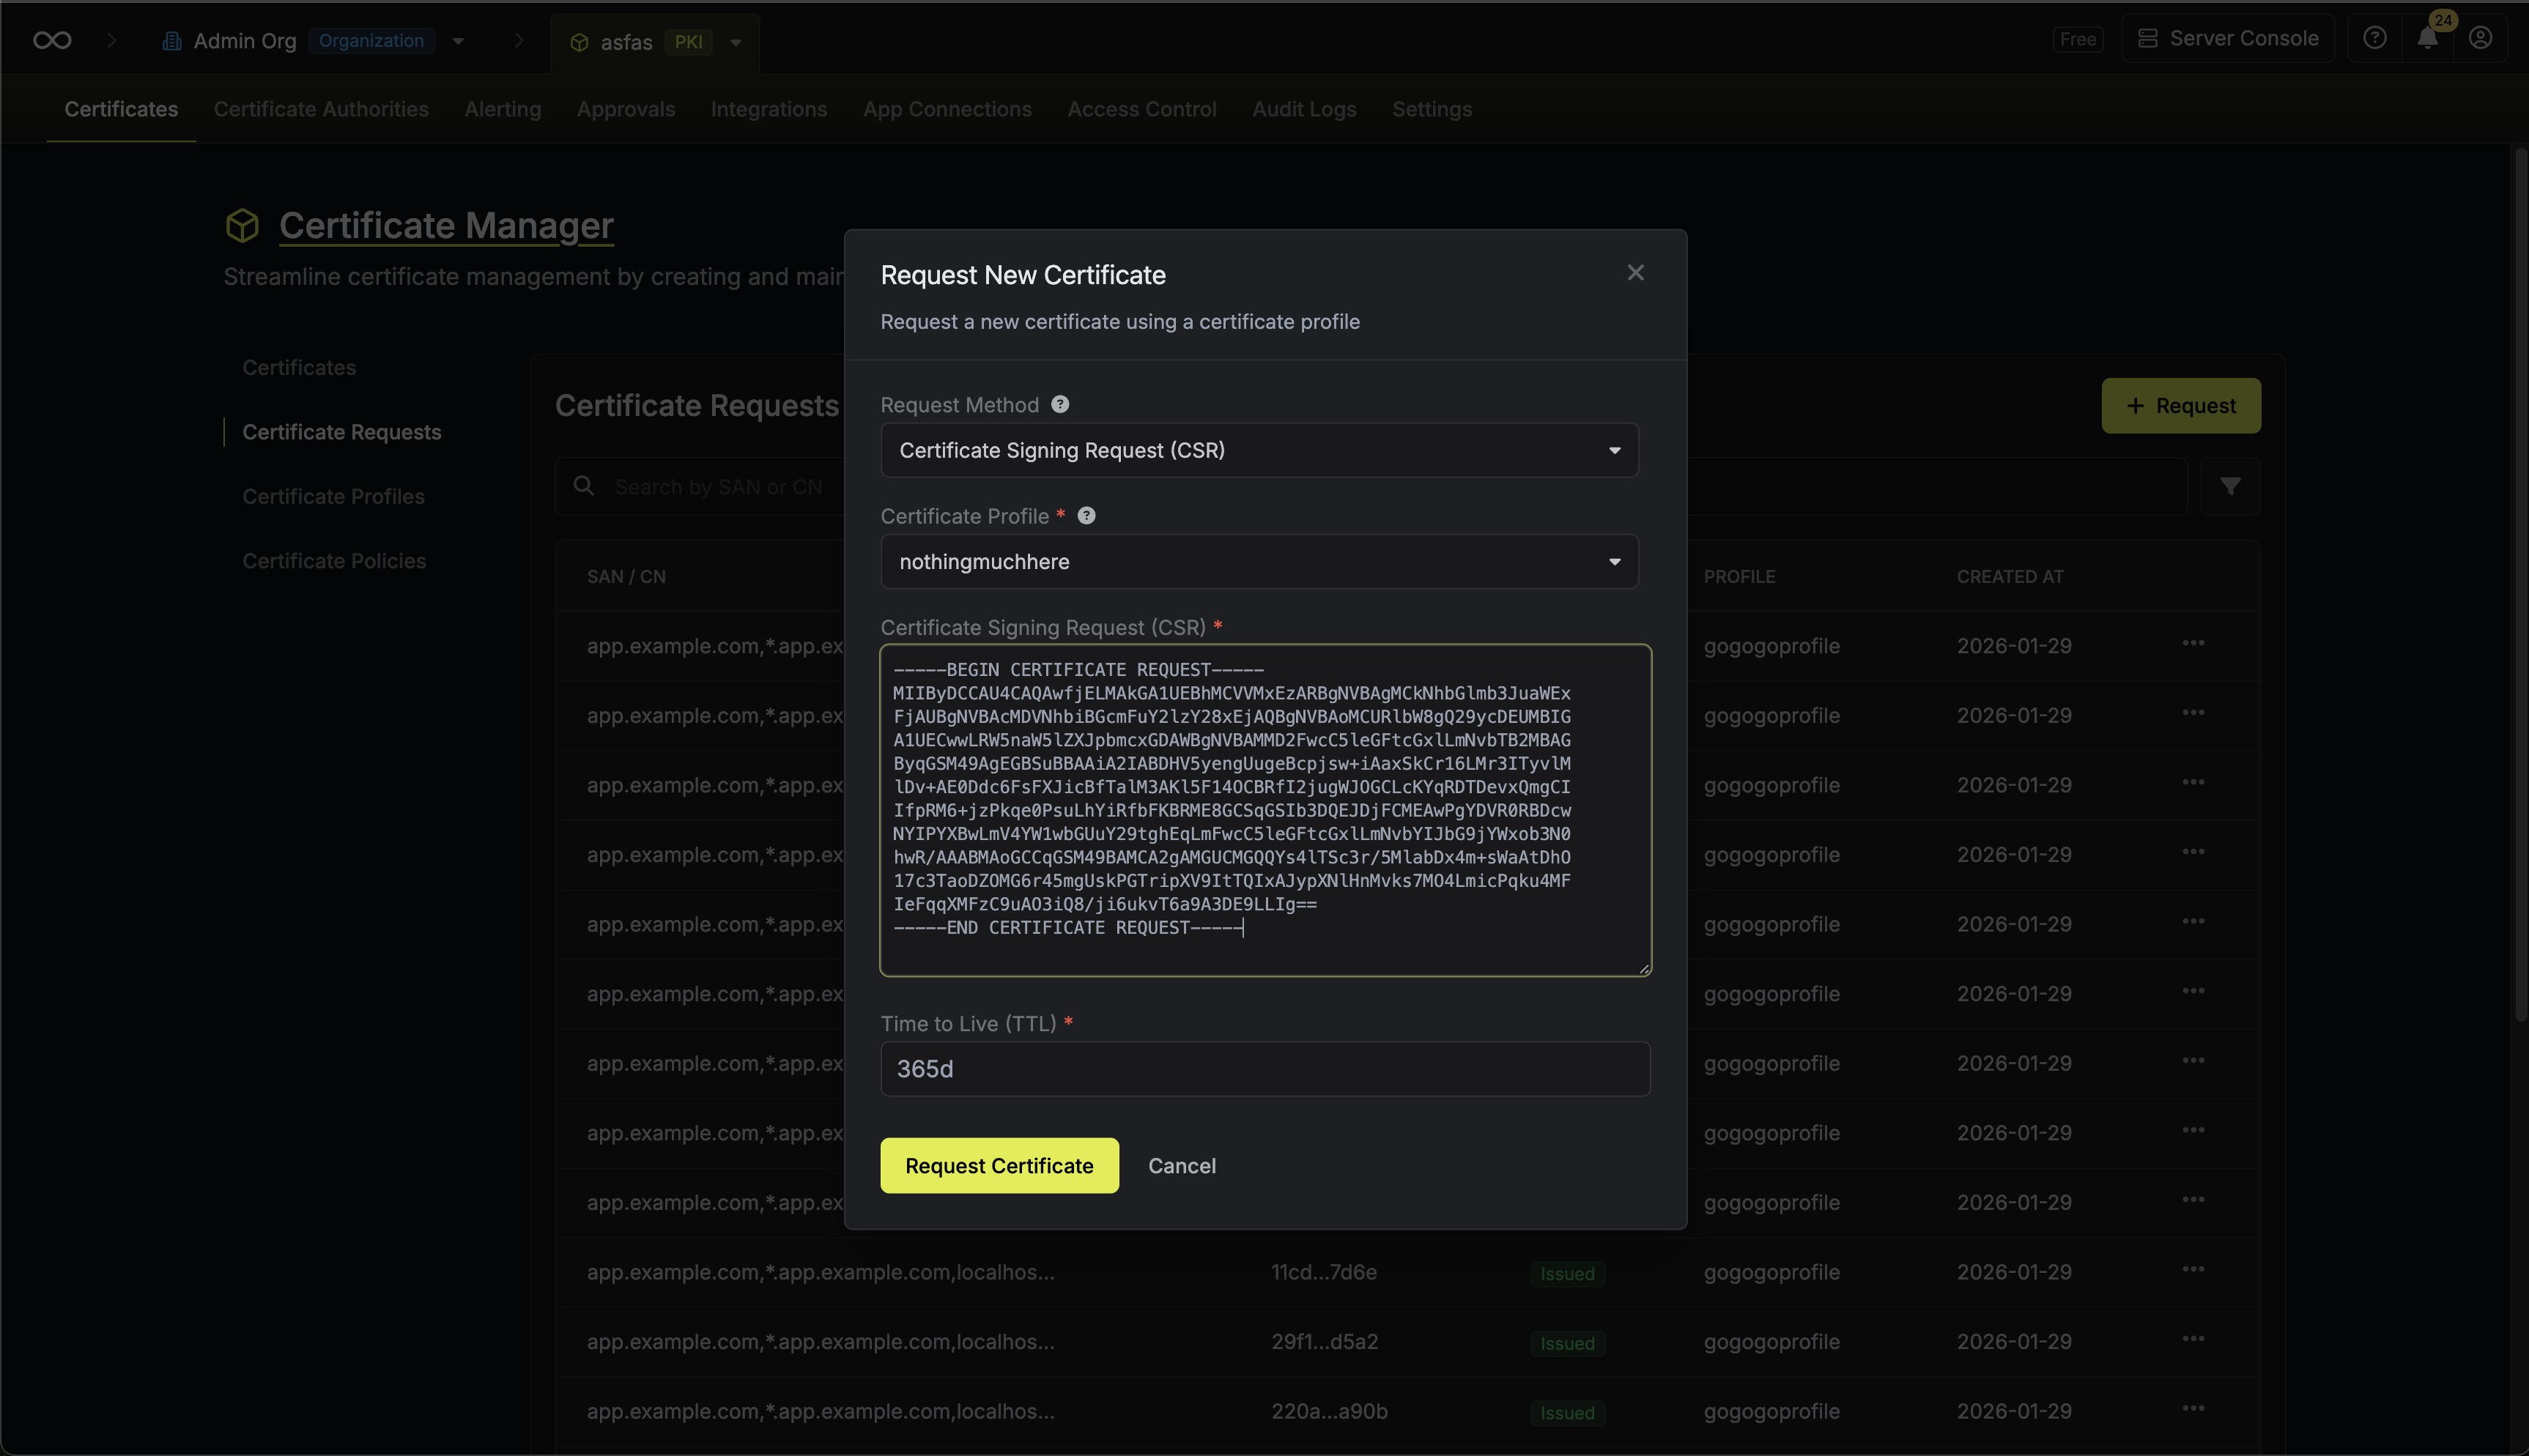
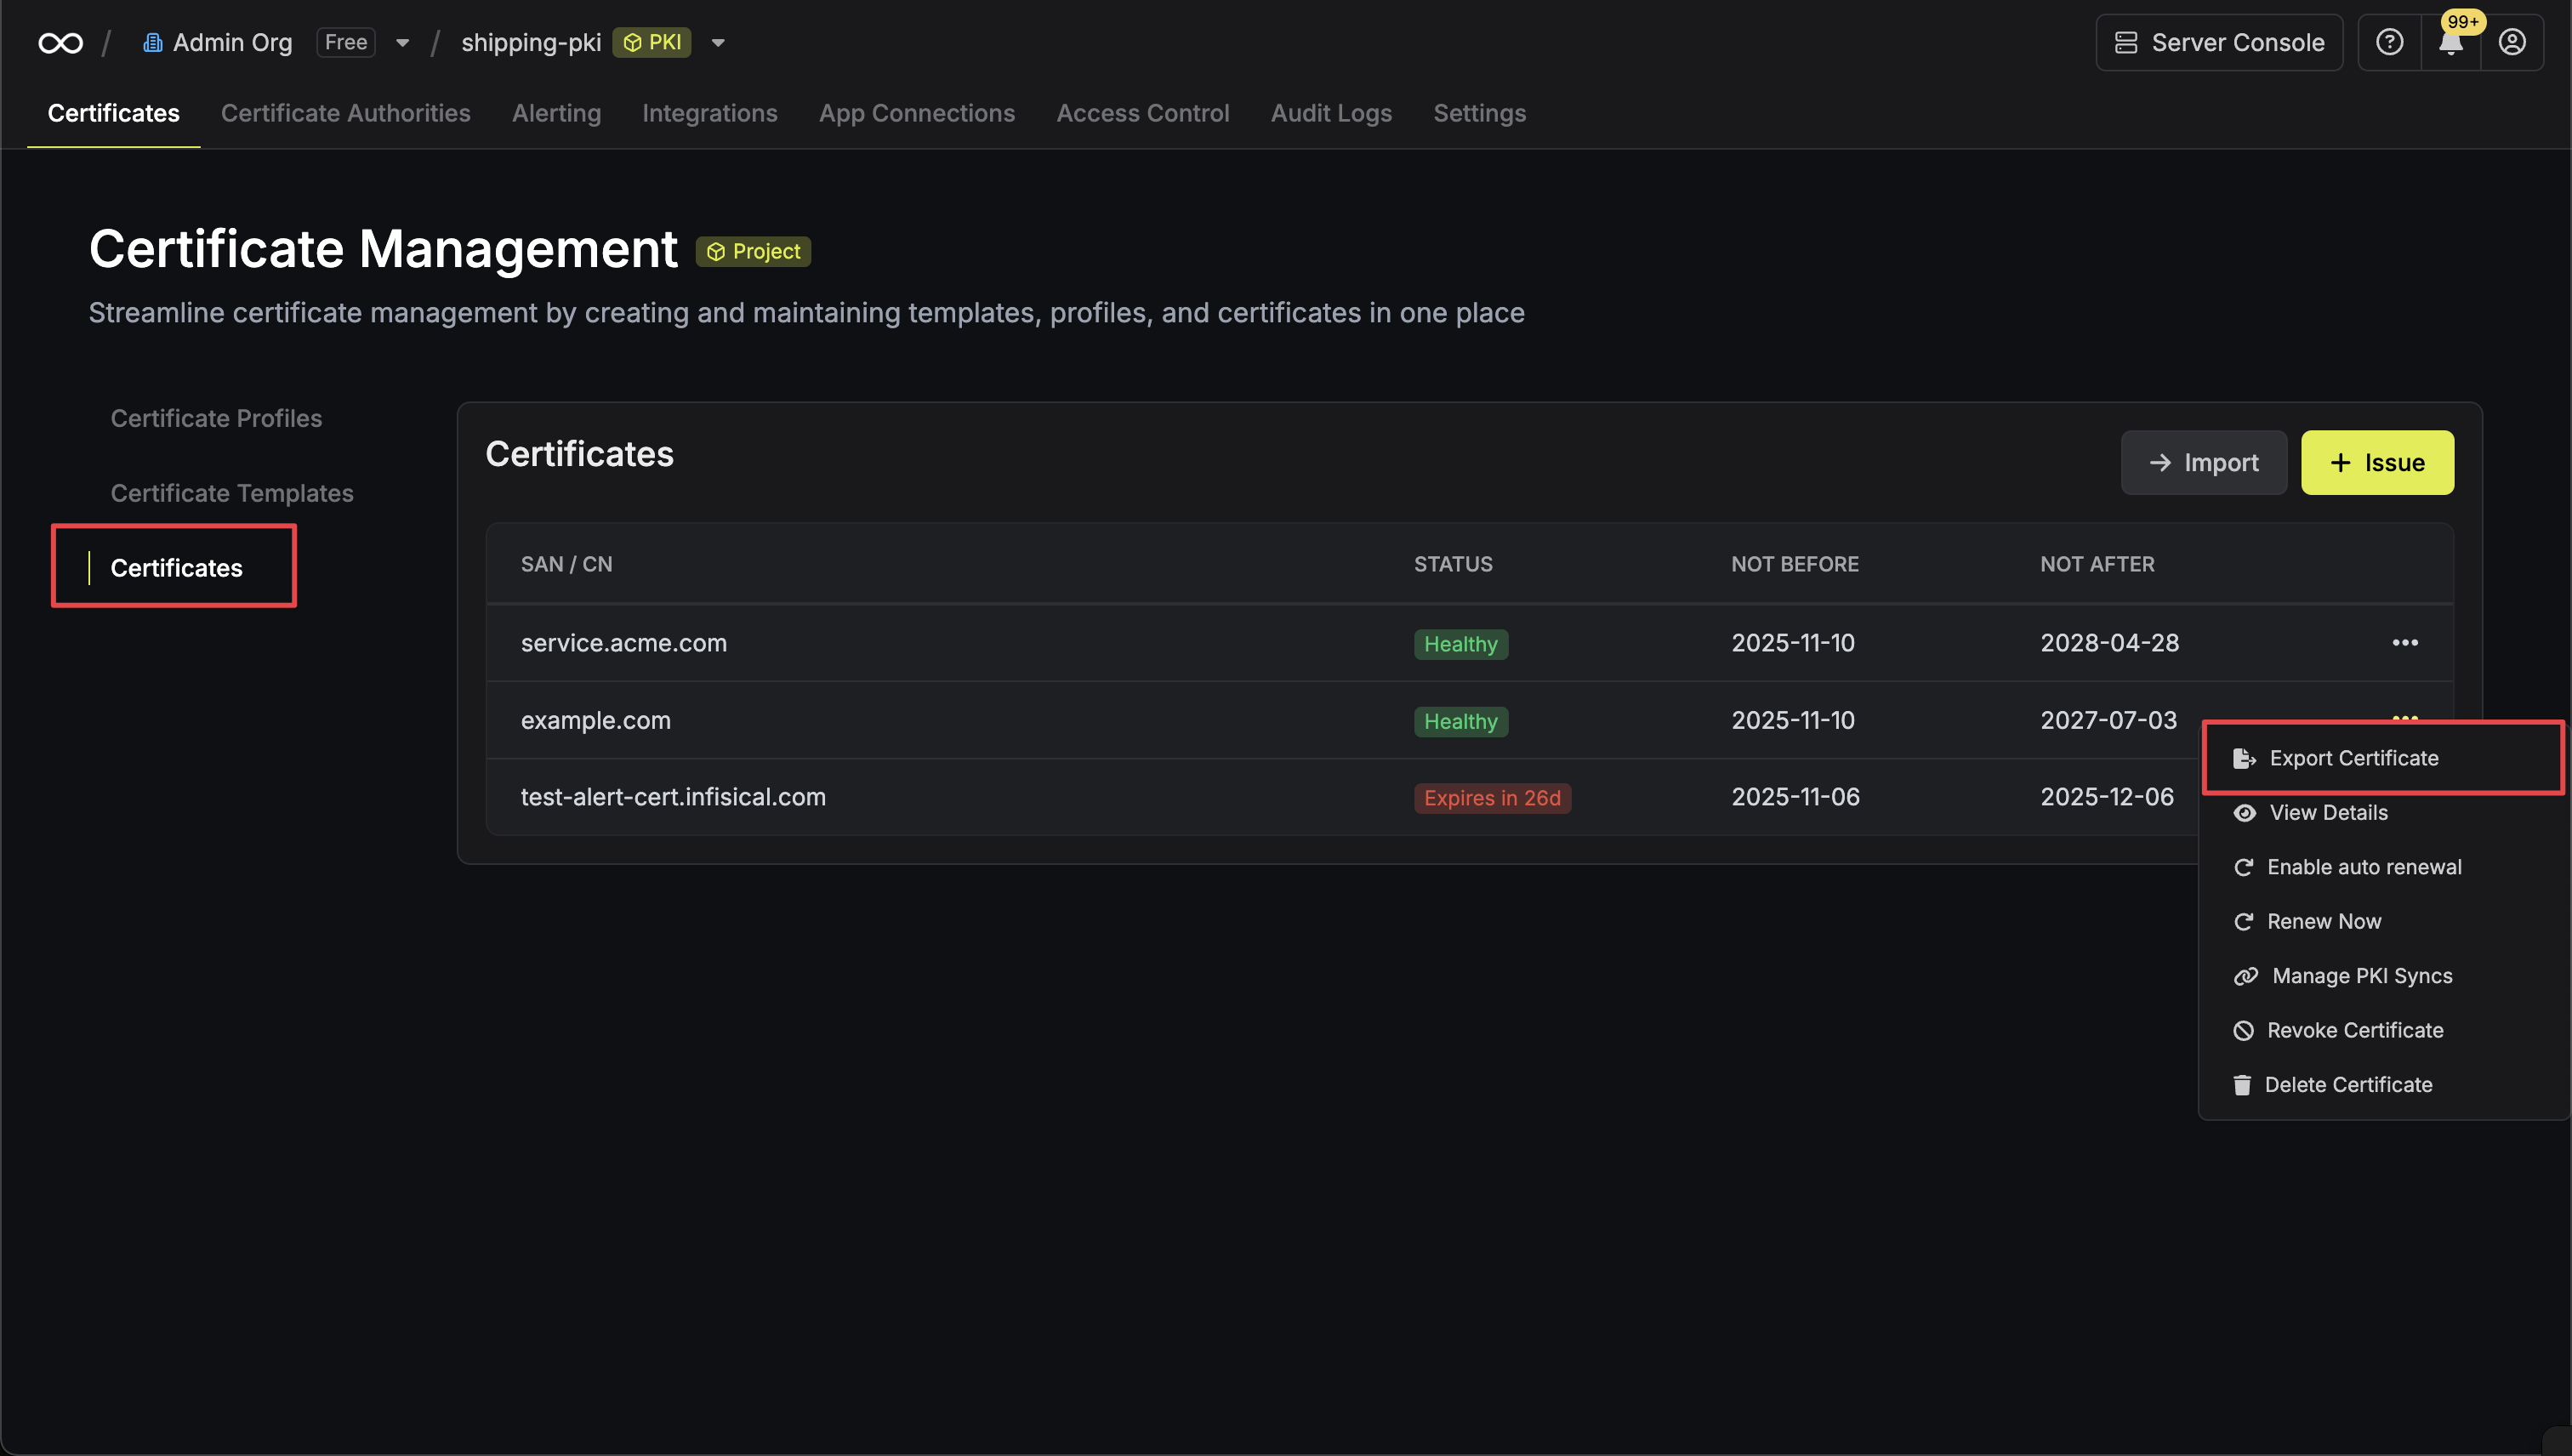
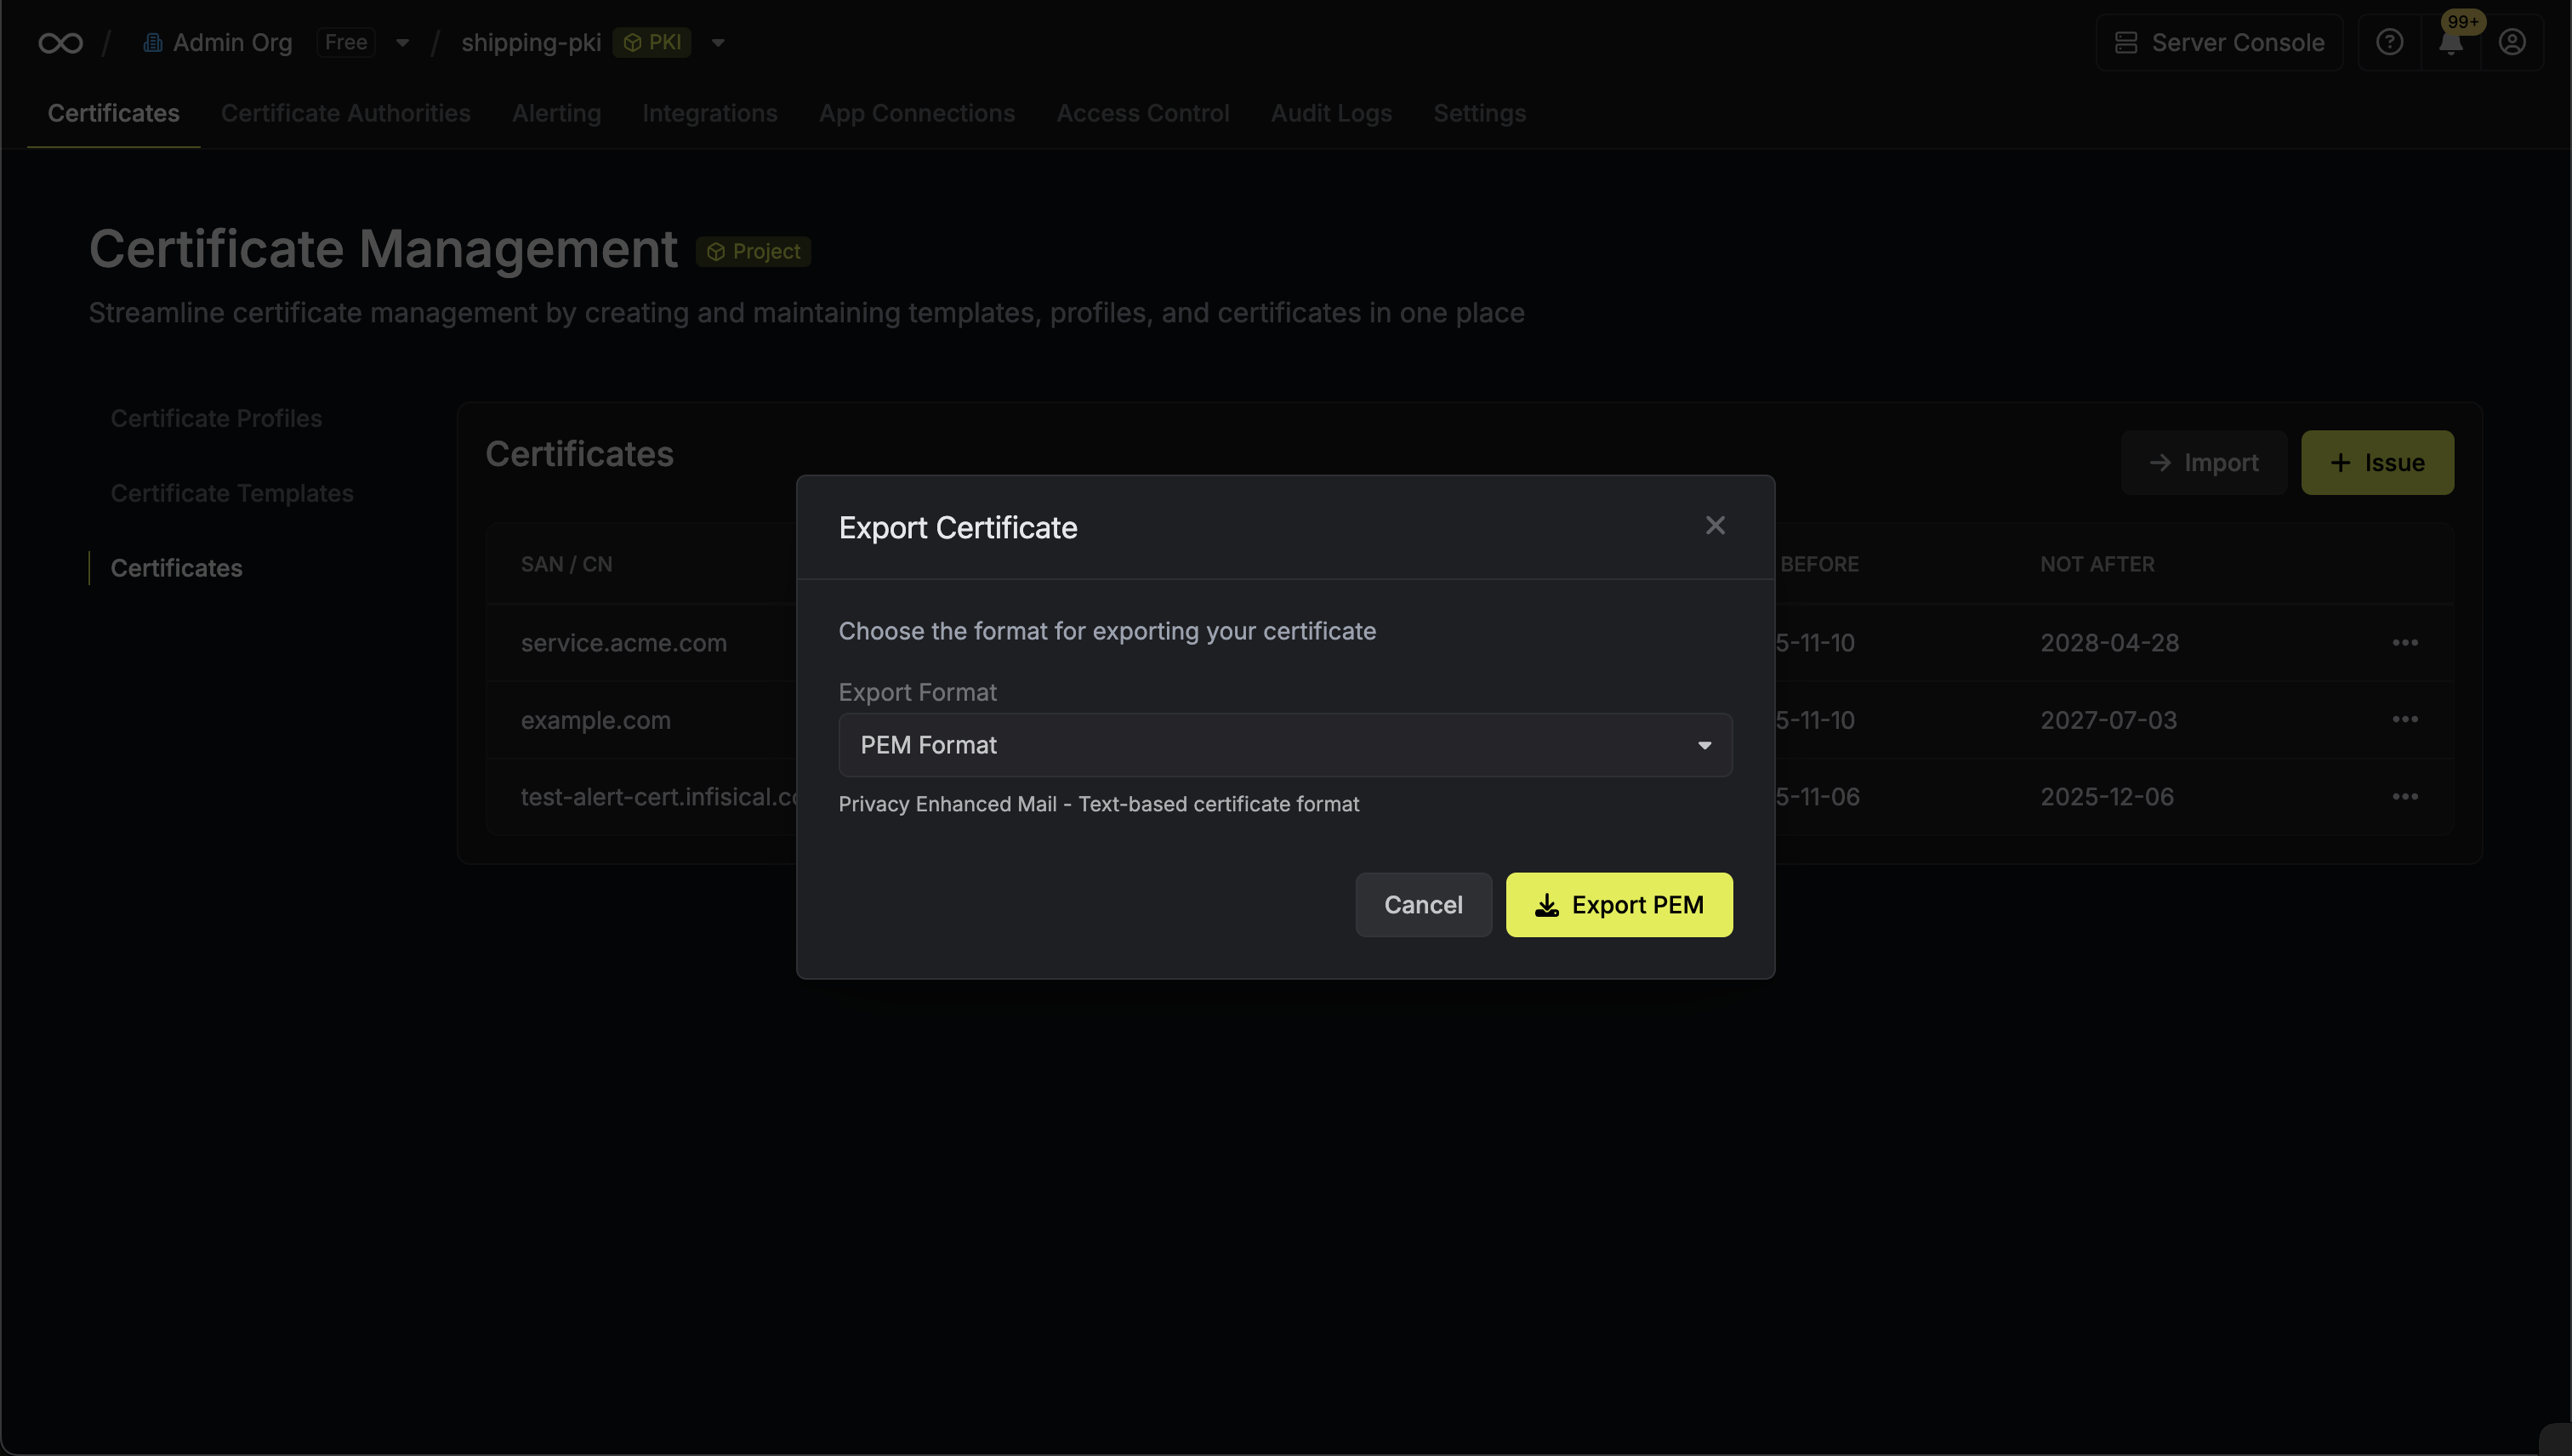 The PEM export modal will display the certificate details including:
* **Serial Number**: The unique identifier for the certificate
* **Certificate Body**: The X.509 certificate in PEM format
* **Certificate Chain**: The intermediate and root CA certificates
* **Private Key**: The private key associated with the certificate (if available)
The PEM export modal will display the certificate details including:
* **Serial Number**: The unique identifier for the certificate
* **Certificate Body**: The X.509 certificate in PEM format
* **Certificate Chain**: The intermediate and root CA certificates
* **Private Key**: The private key associated with the certificate (if available)
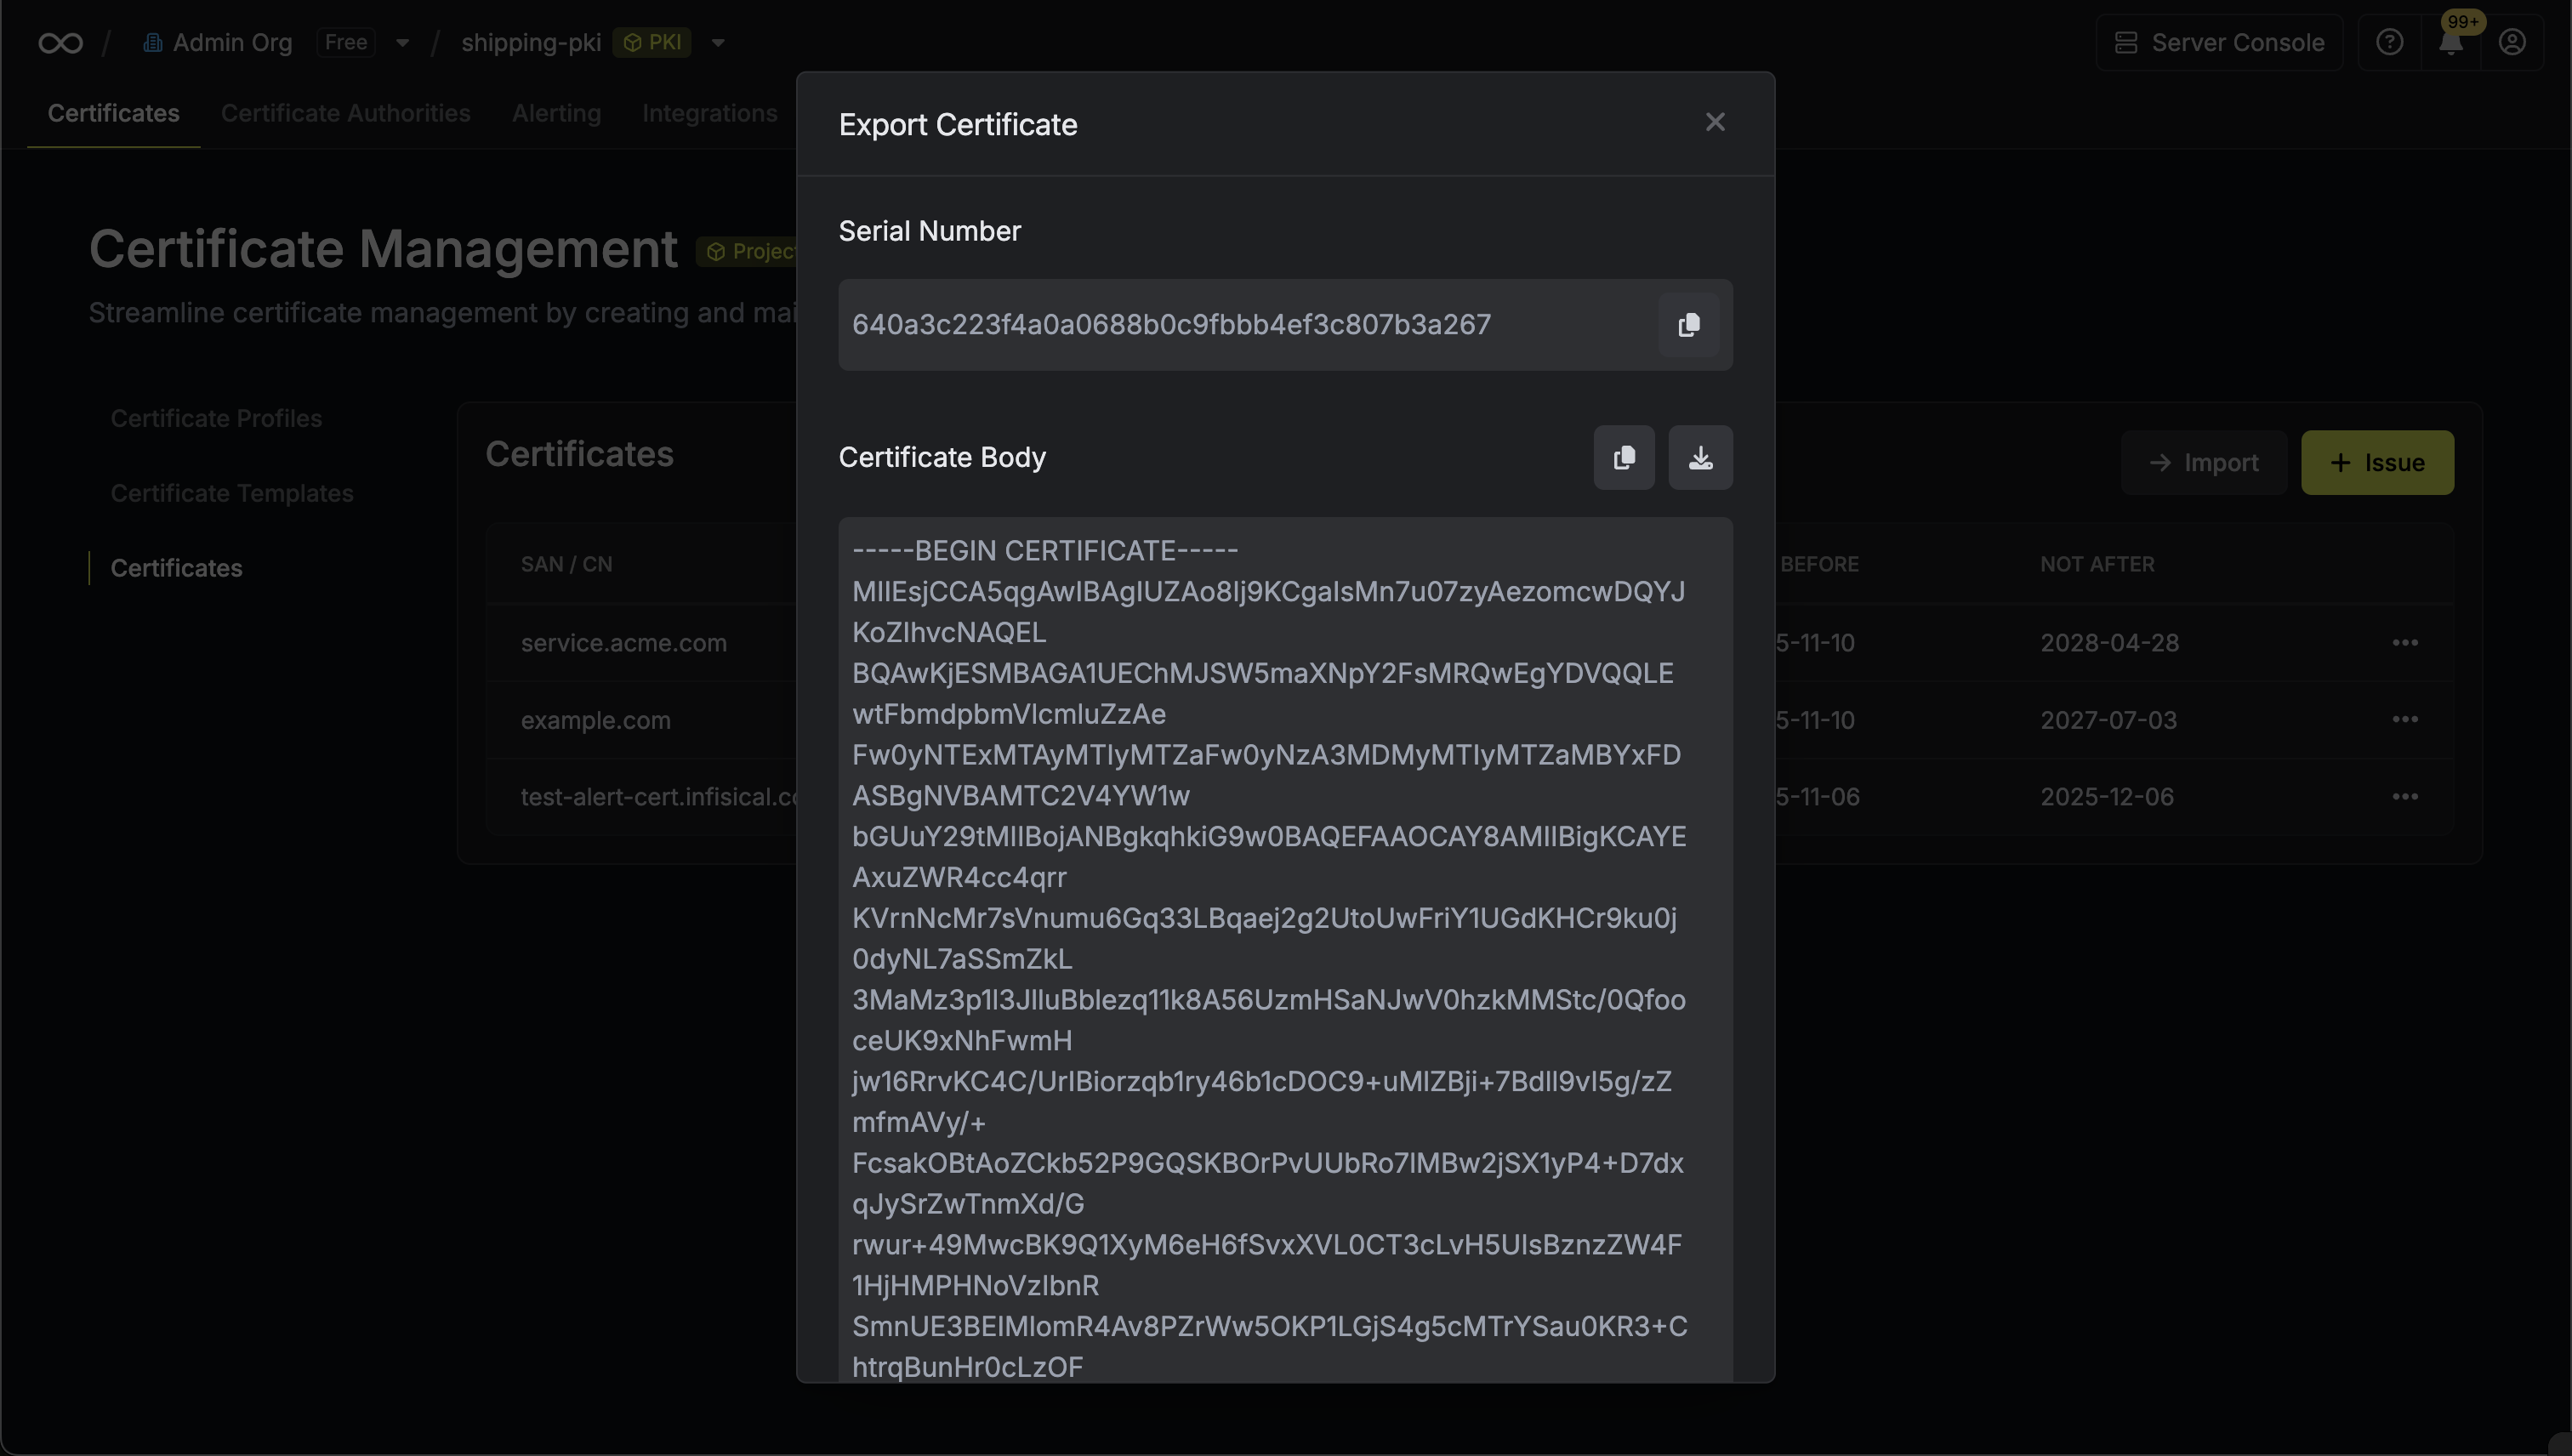 You can copy each component individually or use the **Copy All** button to copy the complete certificate bundle.
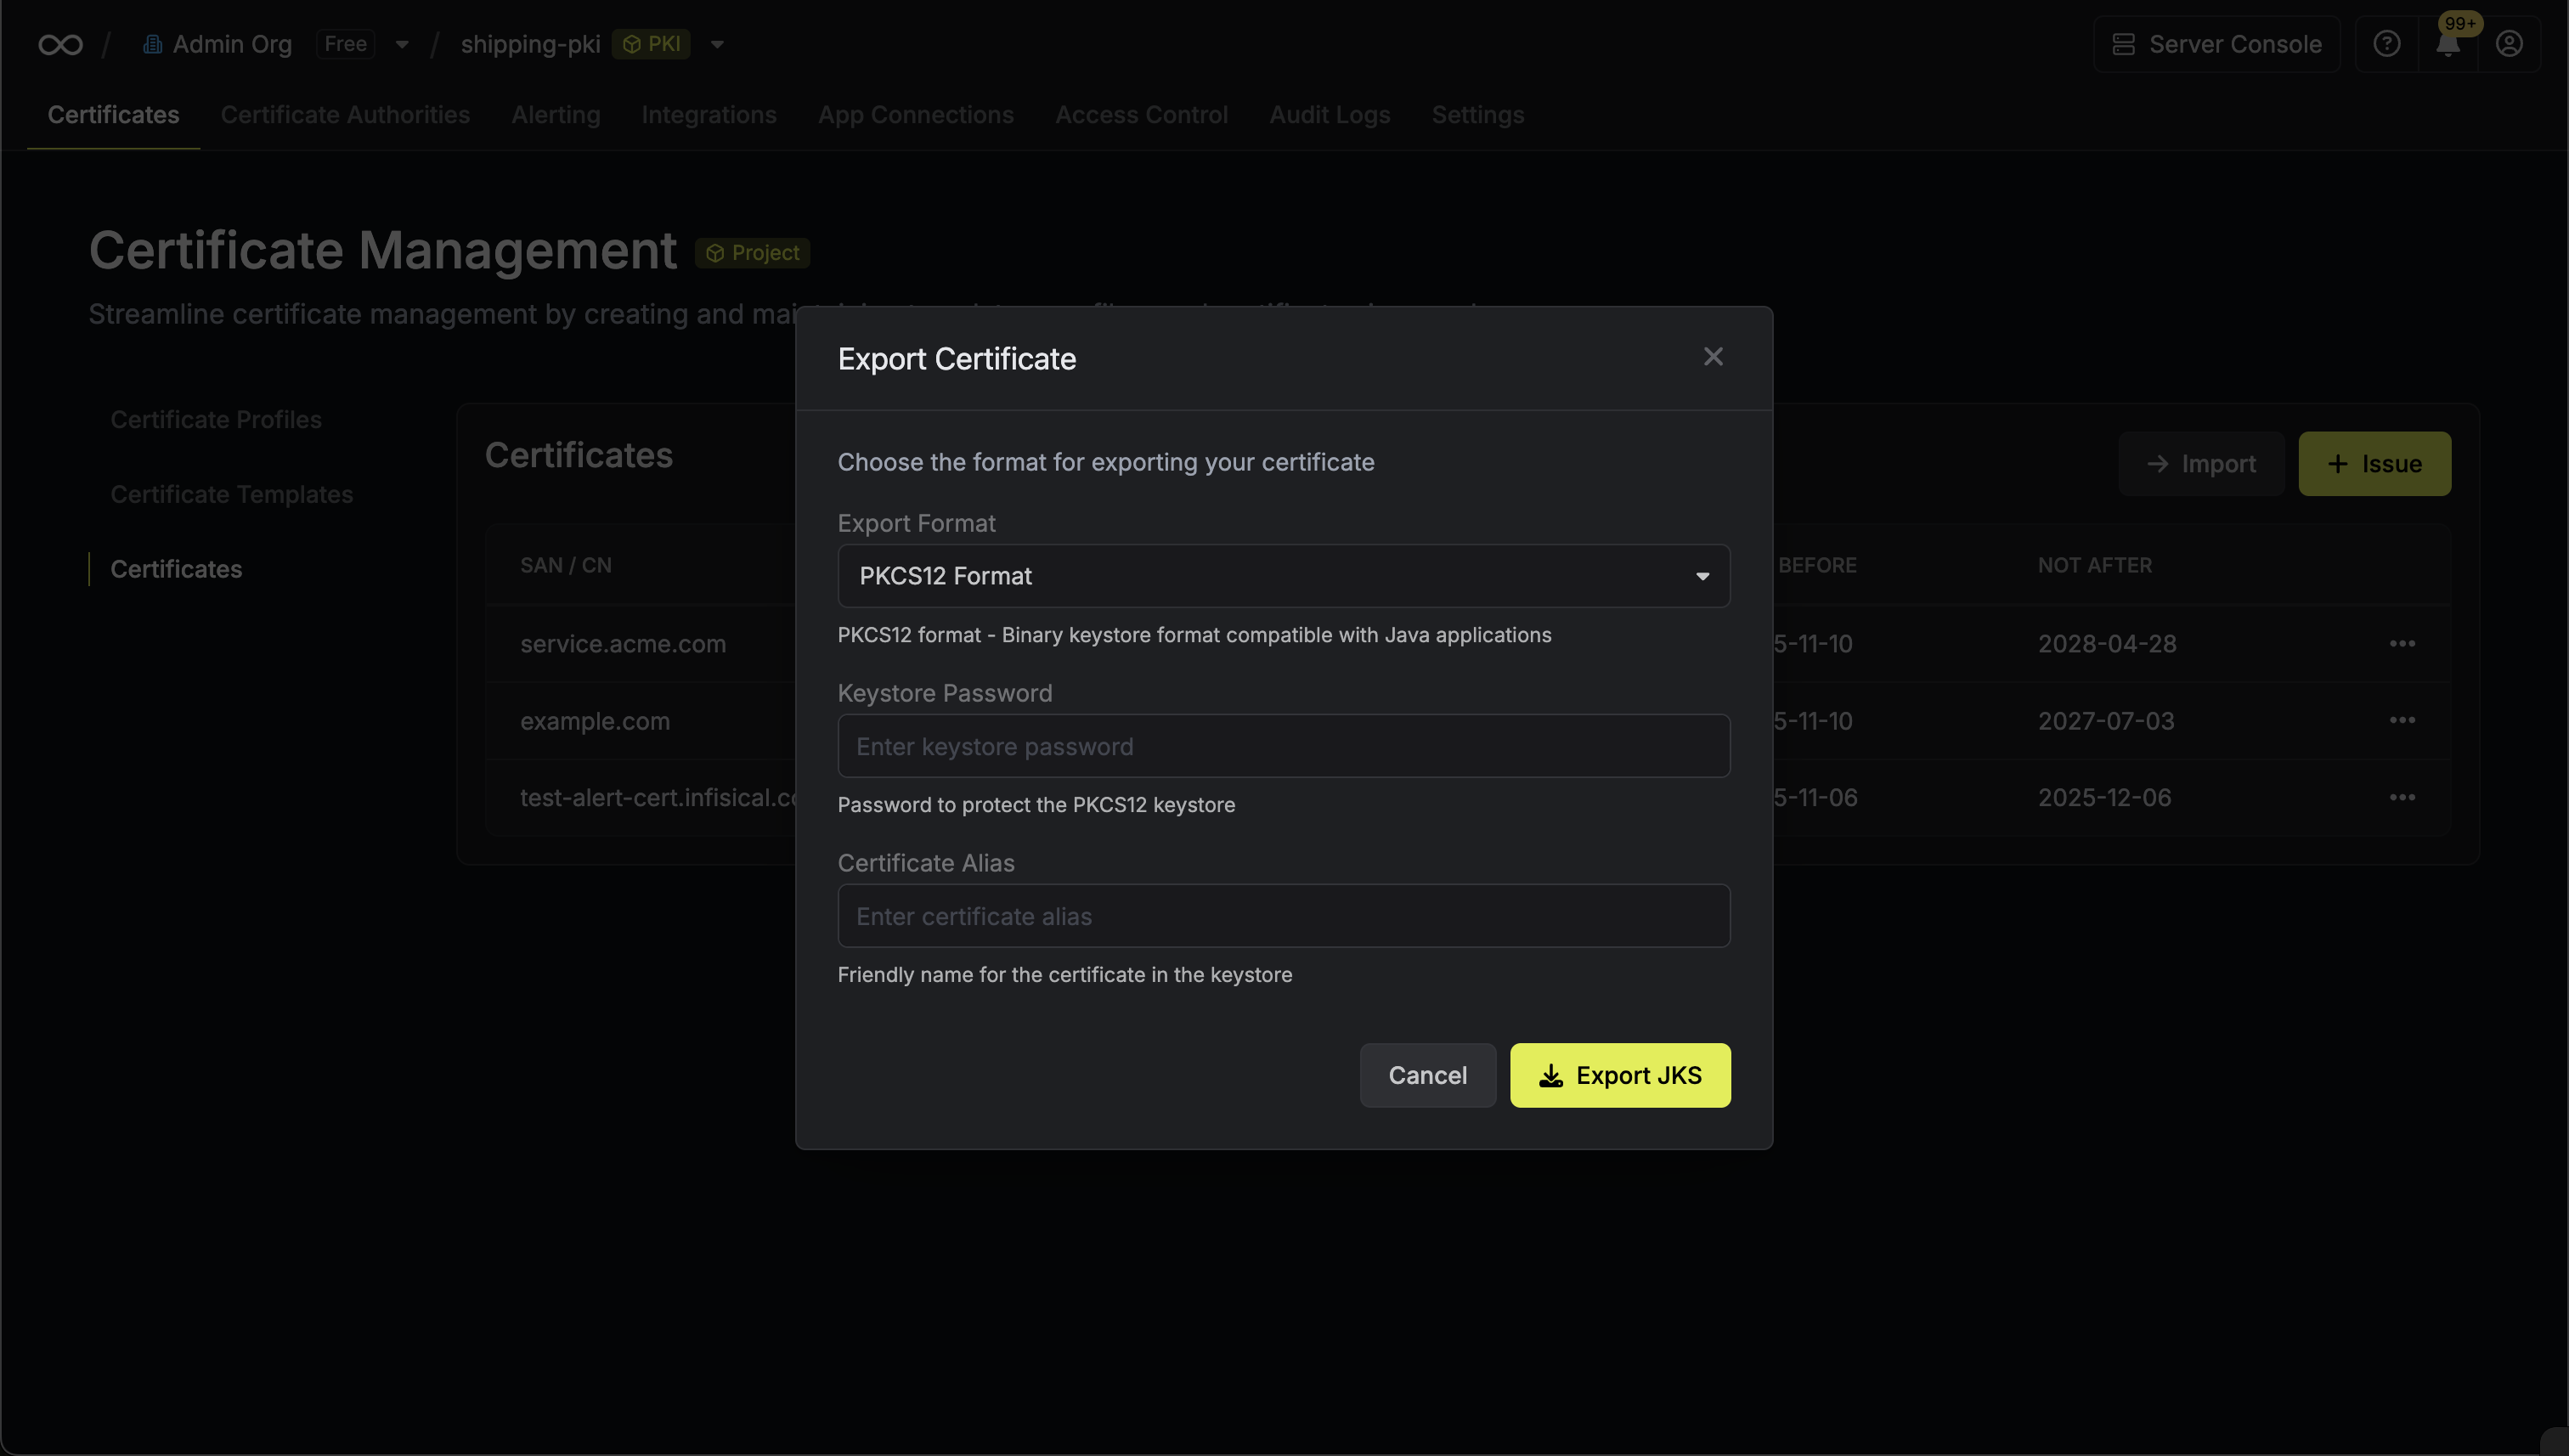 * **Password**: A secure password to protect the PKCS12 keystore
* **Alias**: A friendly name for the certificate within the keystore
Click **Export** to generate and download the `.p12` file containing the certificate, certificate chain, and private key.
* **Password**: A secure password to protect the PKCS12 keystore
* **Alias**: A friendly name for the certificate within the keystore
Click **Export** to generate and download the `.p12` file containing the certificate, certificate chain, and private key.
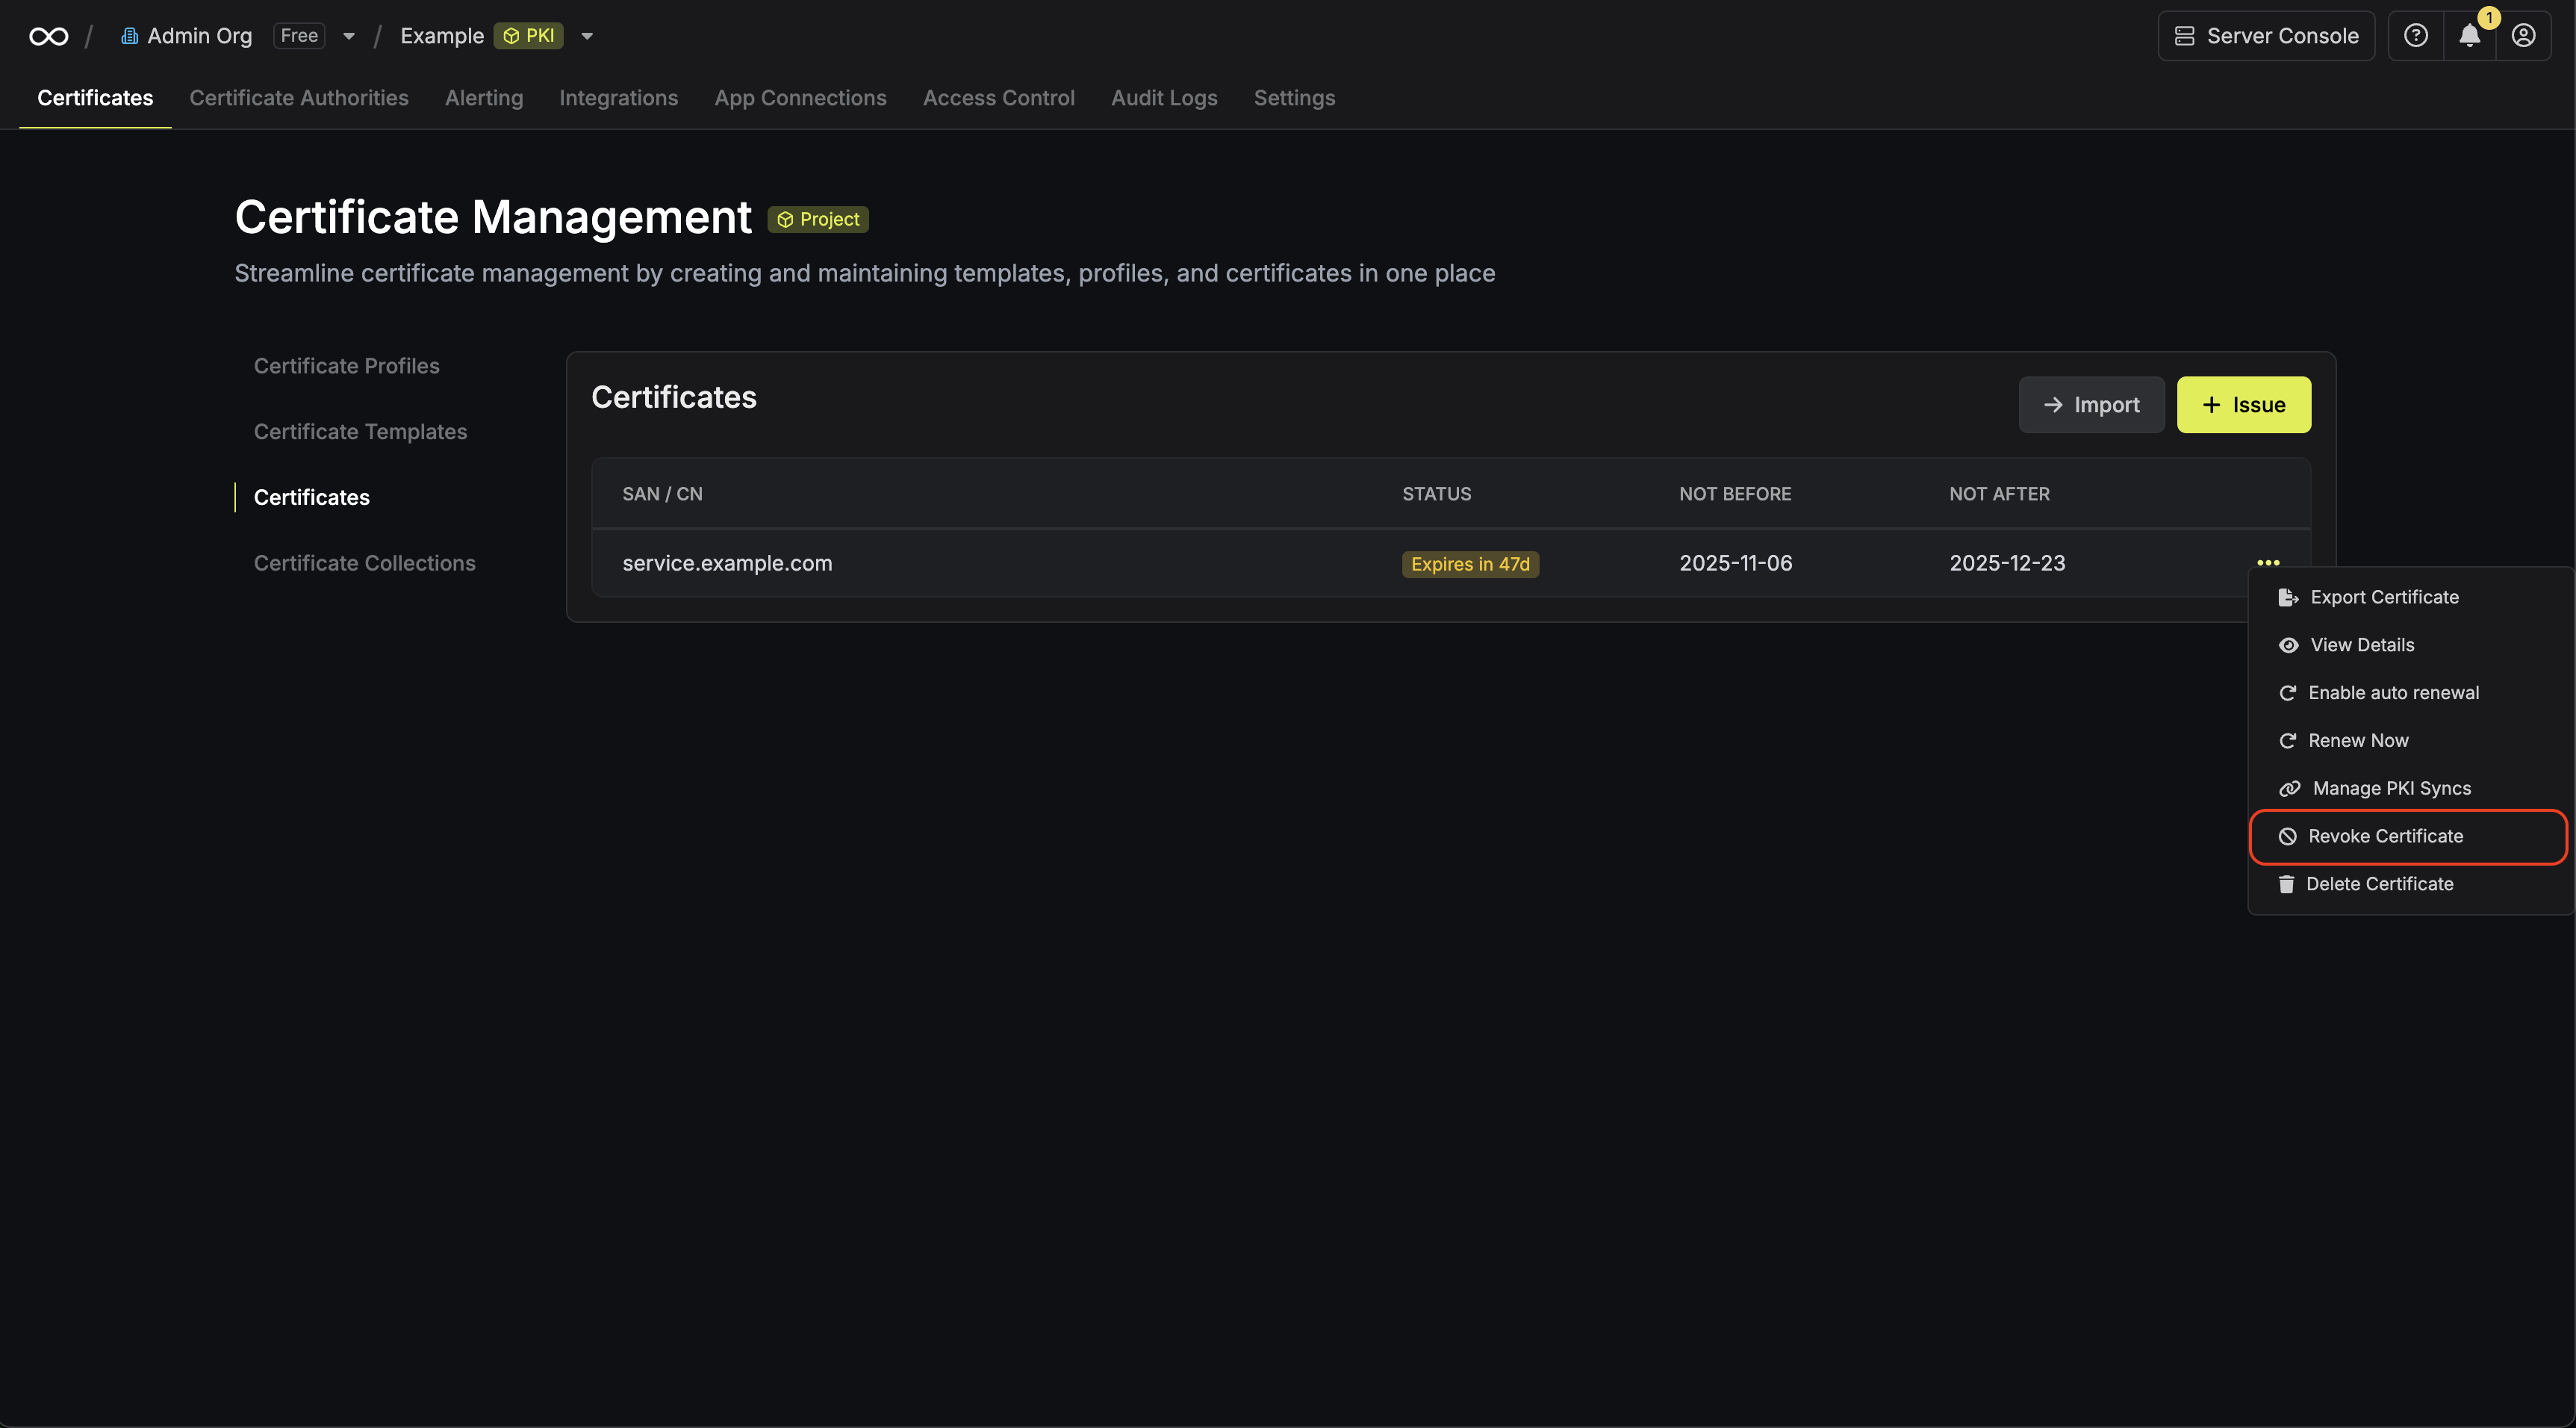
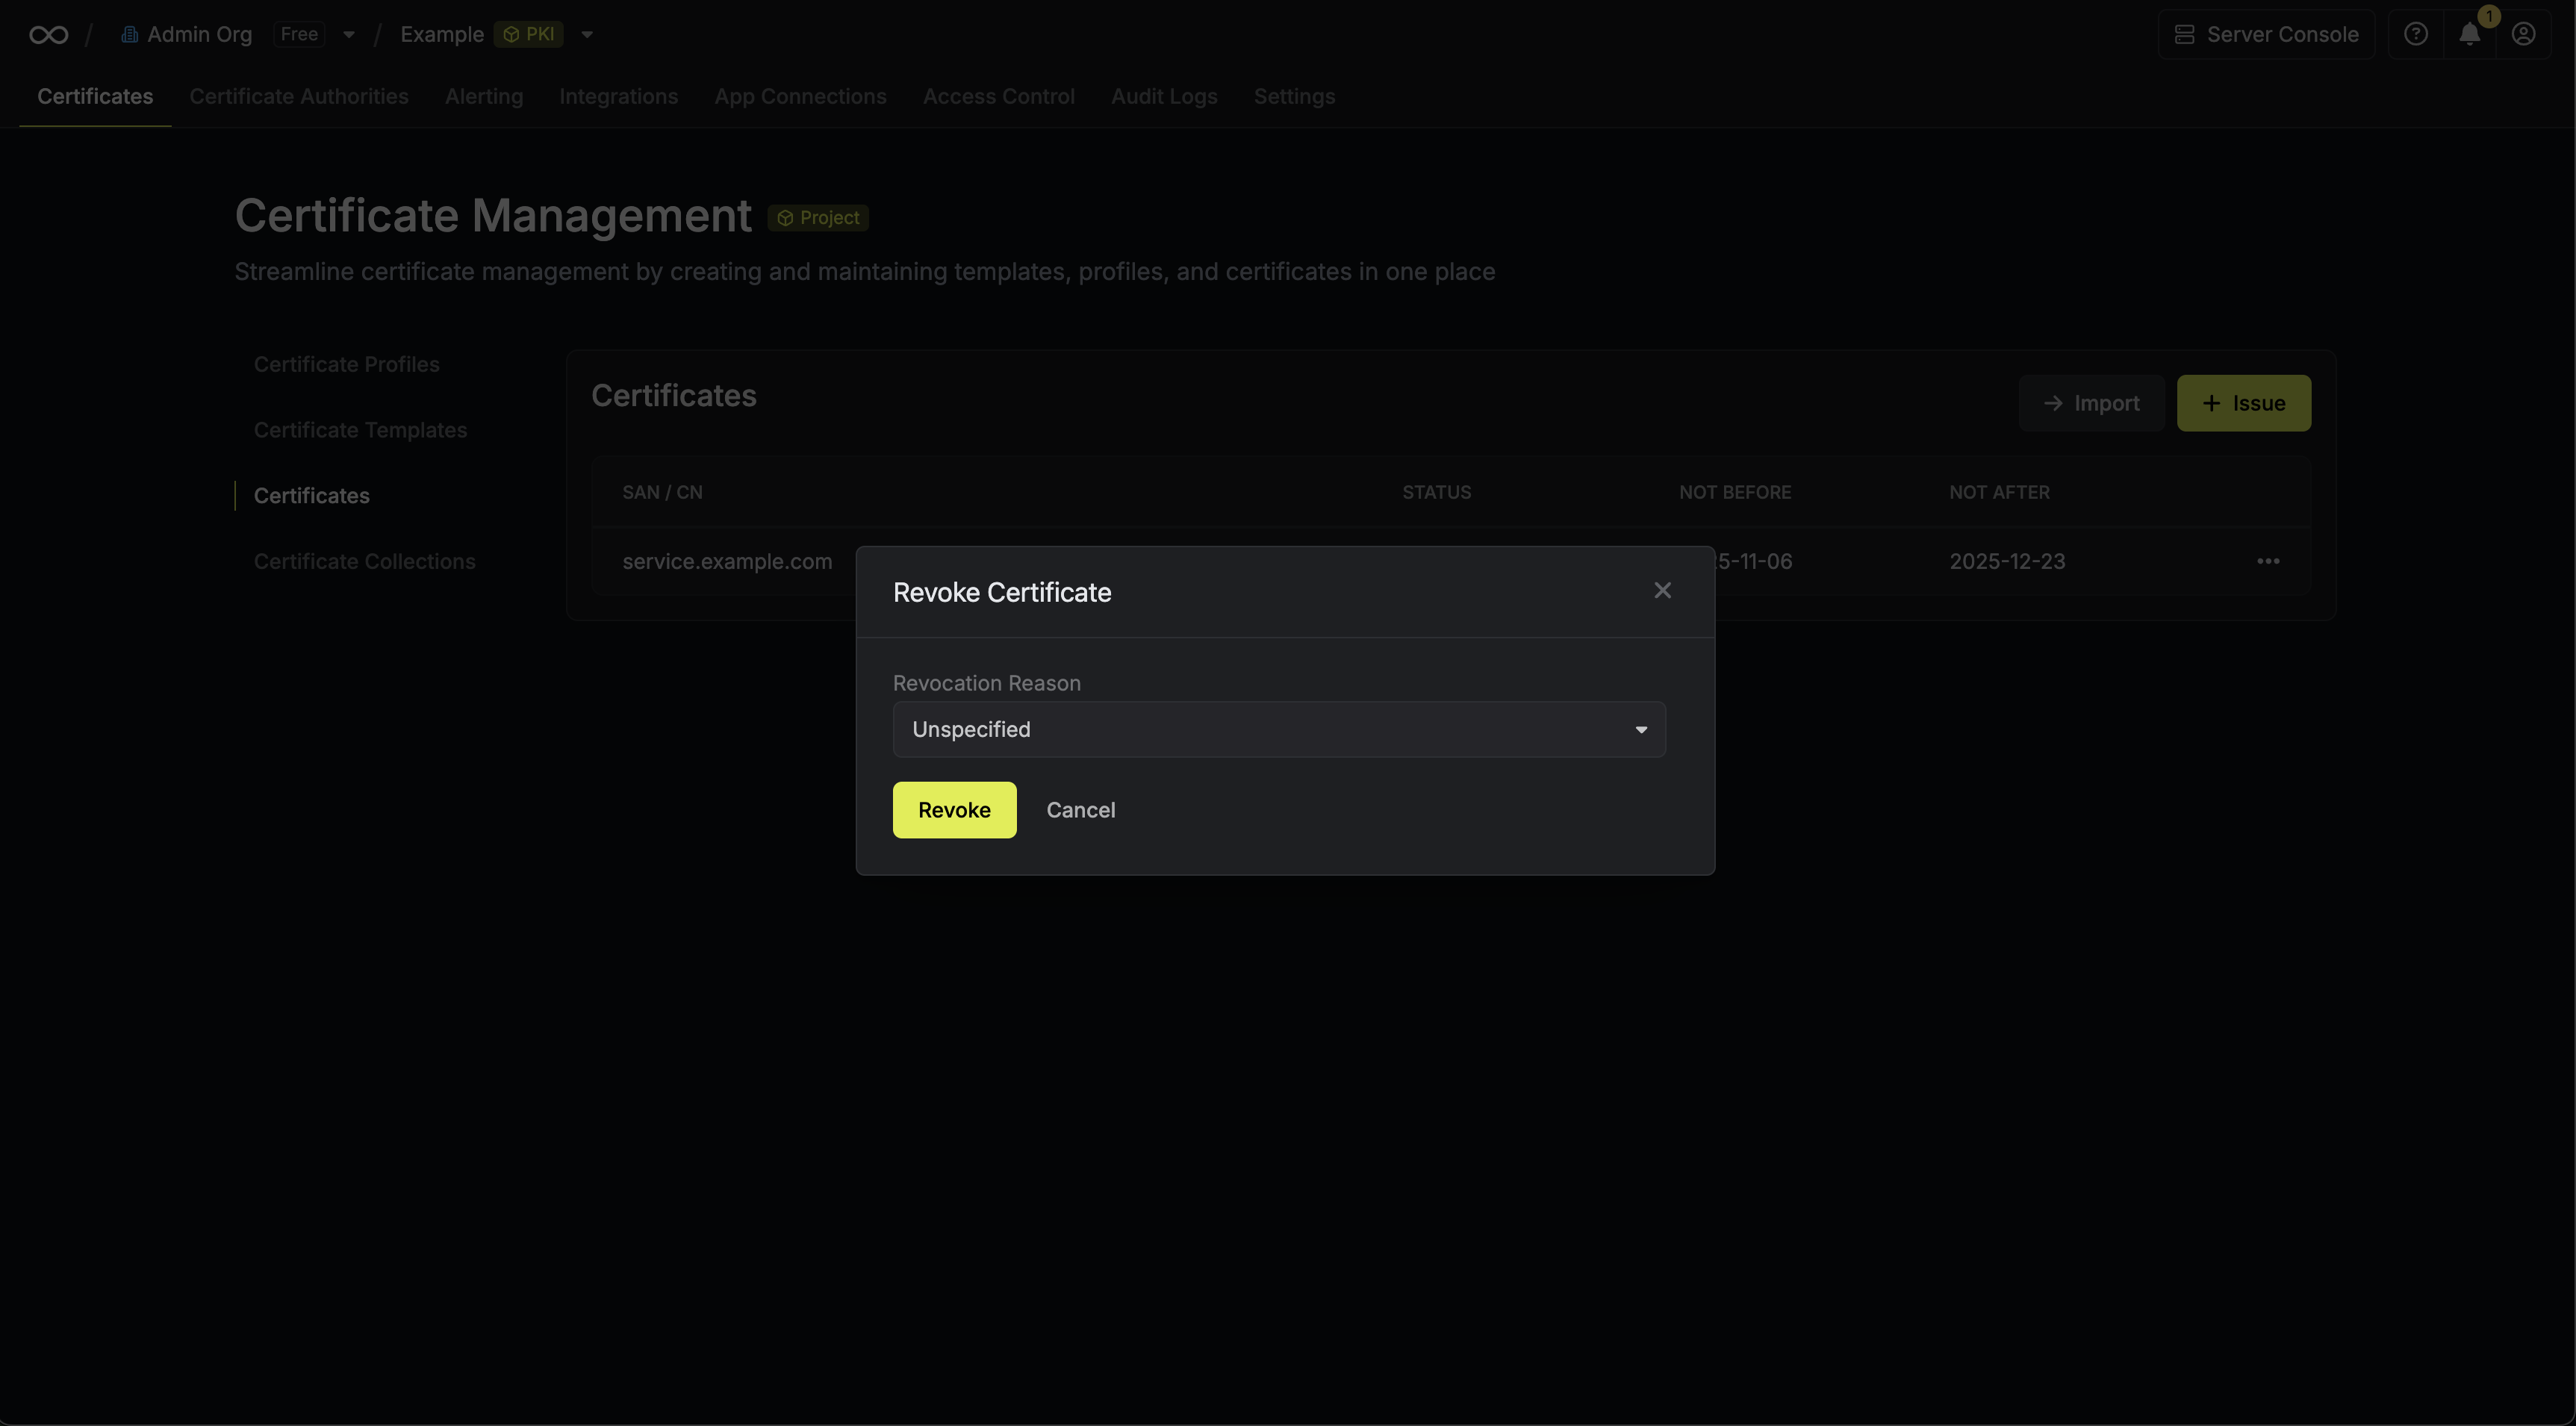
 To verify a certificate against the
downloaded CRL with OpenSSL, you can use the following command:
```bash theme={"dark"}
openssl verify -crl_check -CAfile chain.pem -CRLfile crl.pem cert.pem
```
Note that you can also obtain the CRL from the certificate itself by
referencing the CRL distribution point extension on the certificate.
To check a certificate against the CRL distribution point specified within it with OpenSSL, you can use the following command:
```bash theme={"dark"}
openssl verify -verbose -crl_check -crl_download -CAfile chain.pem cert.pem
```
To verify a certificate against the
downloaded CRL with OpenSSL, you can use the following command:
```bash theme={"dark"}
openssl verify -crl_check -CAfile chain.pem -CRLfile crl.pem cert.pem
```
Note that you can also obtain the CRL from the certificate itself by
referencing the CRL distribution point extension on the certificate.
To check a certificate against the CRL distribution point specified within it with OpenSSL, you can use the following command:
```bash theme={"dark"}
openssl verify -verbose -crl_check -crl_download -CAfile chain.pem cert.pem
```
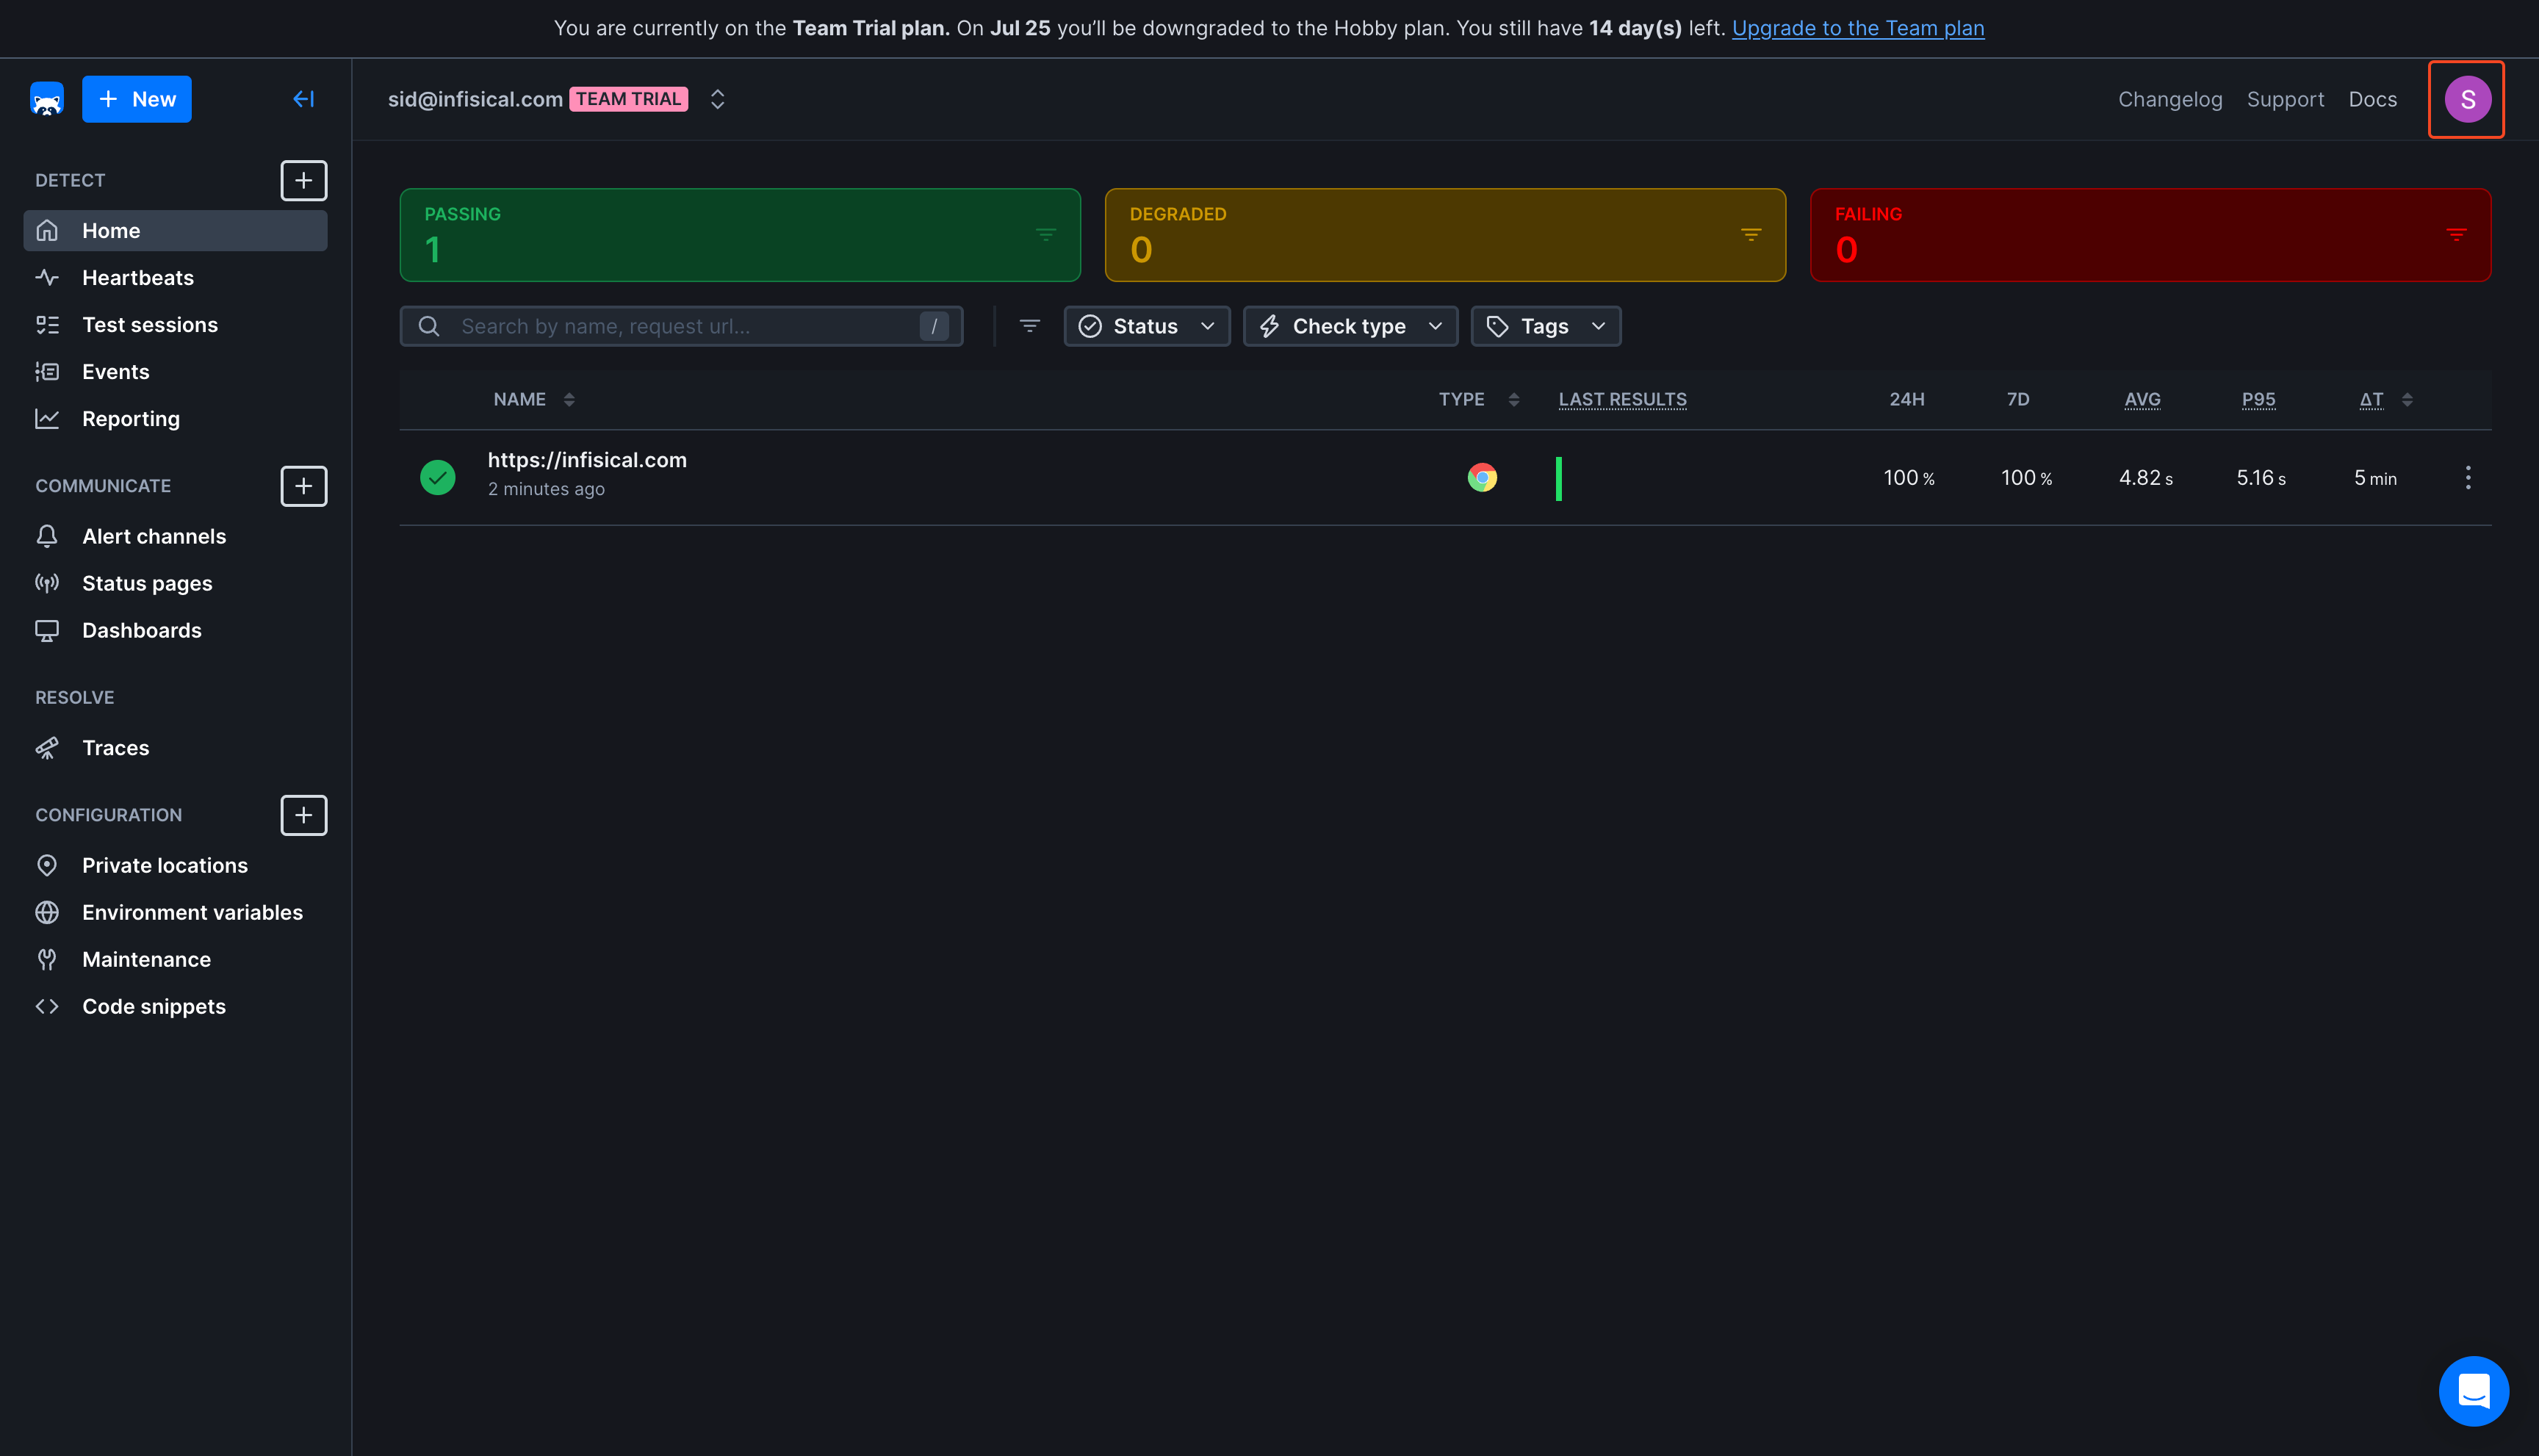
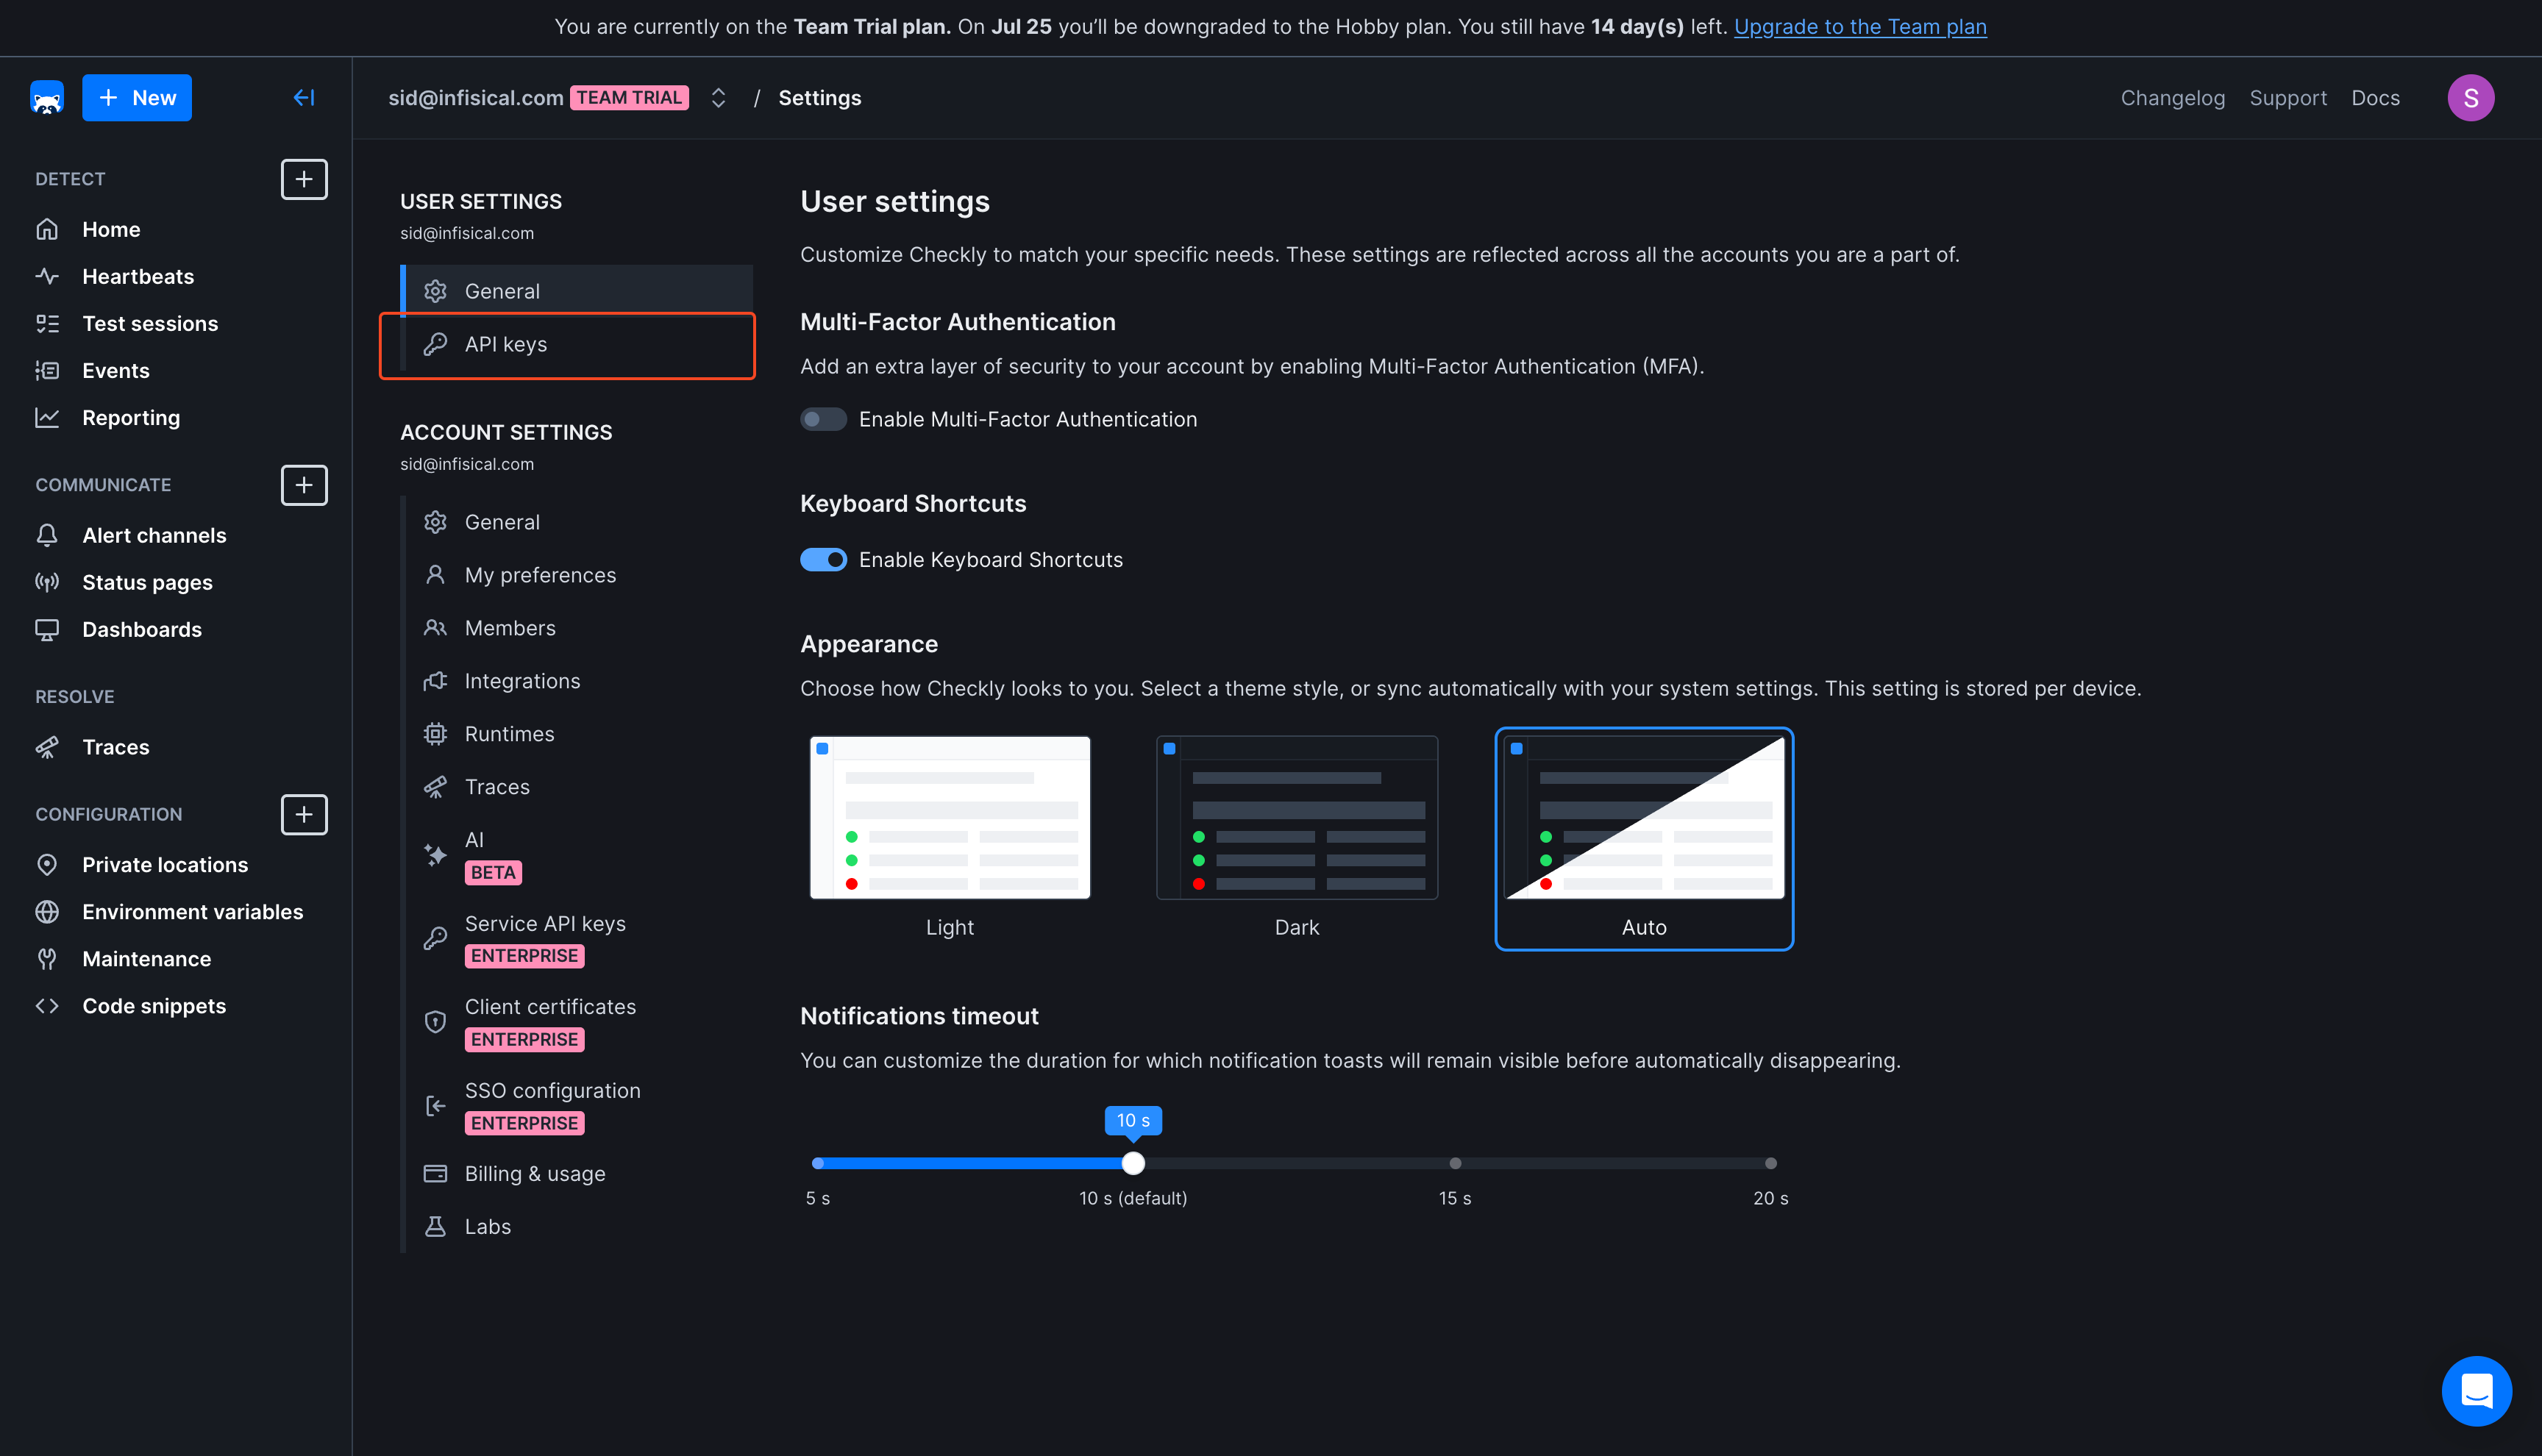
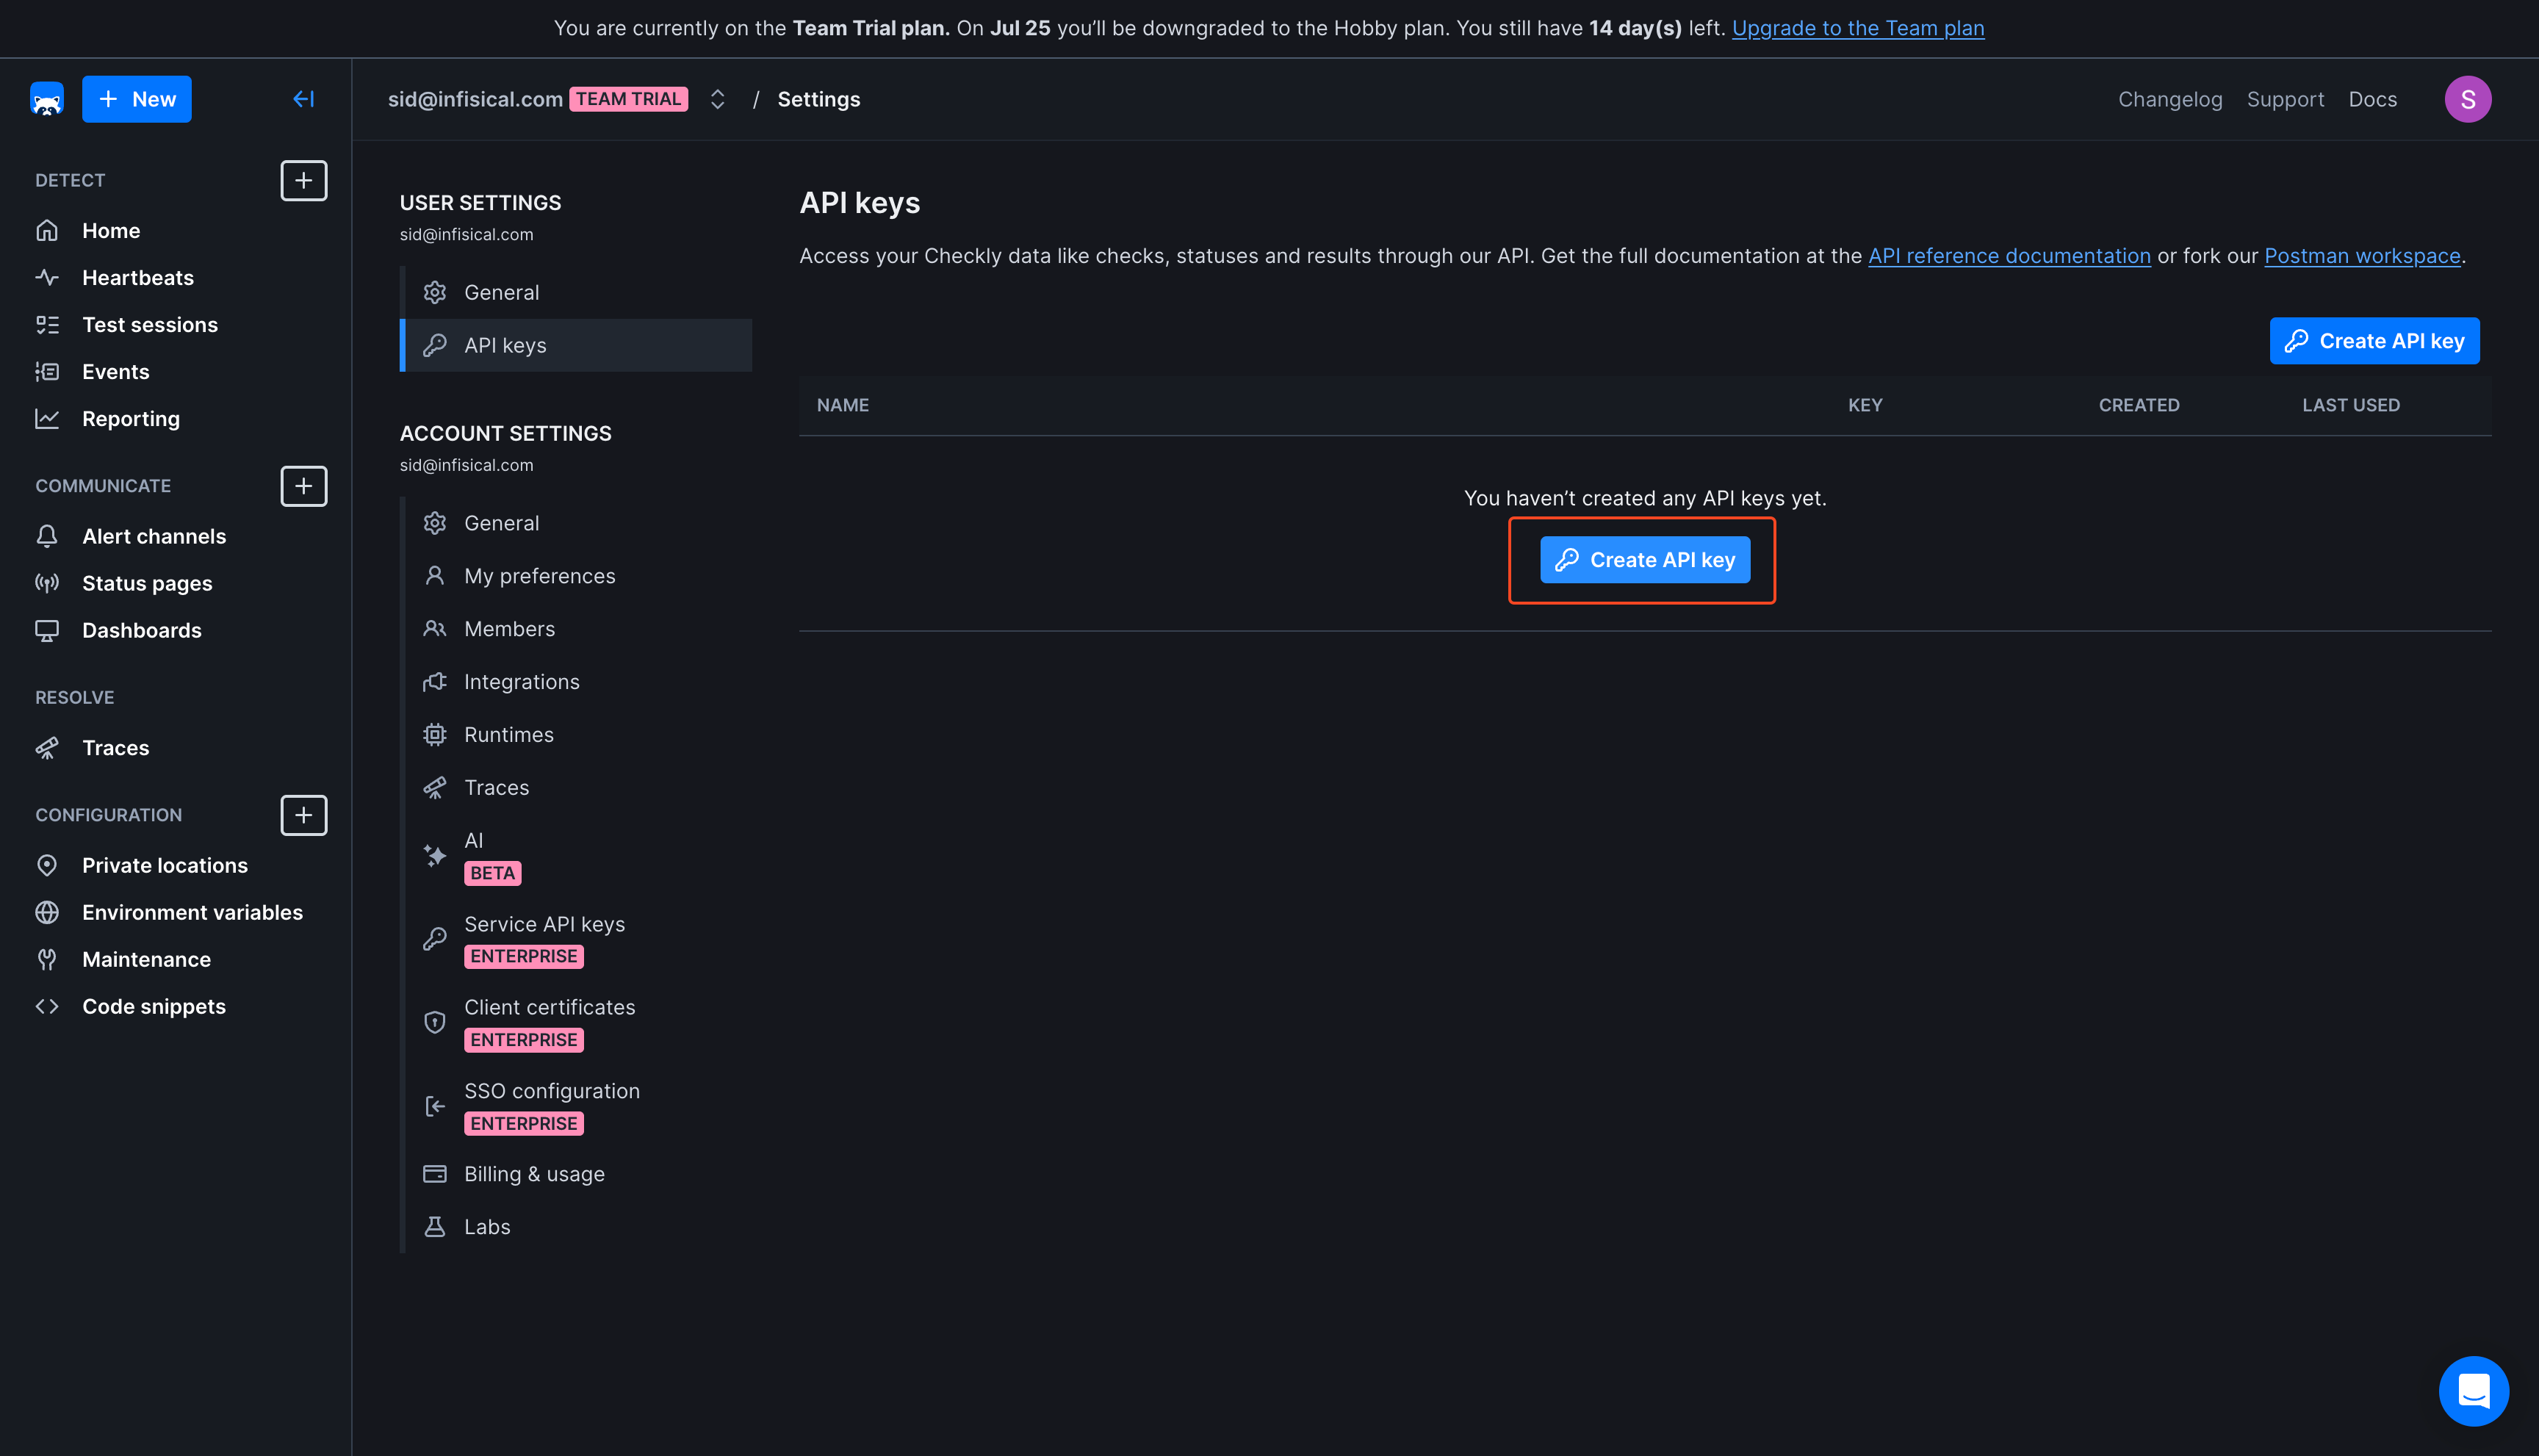
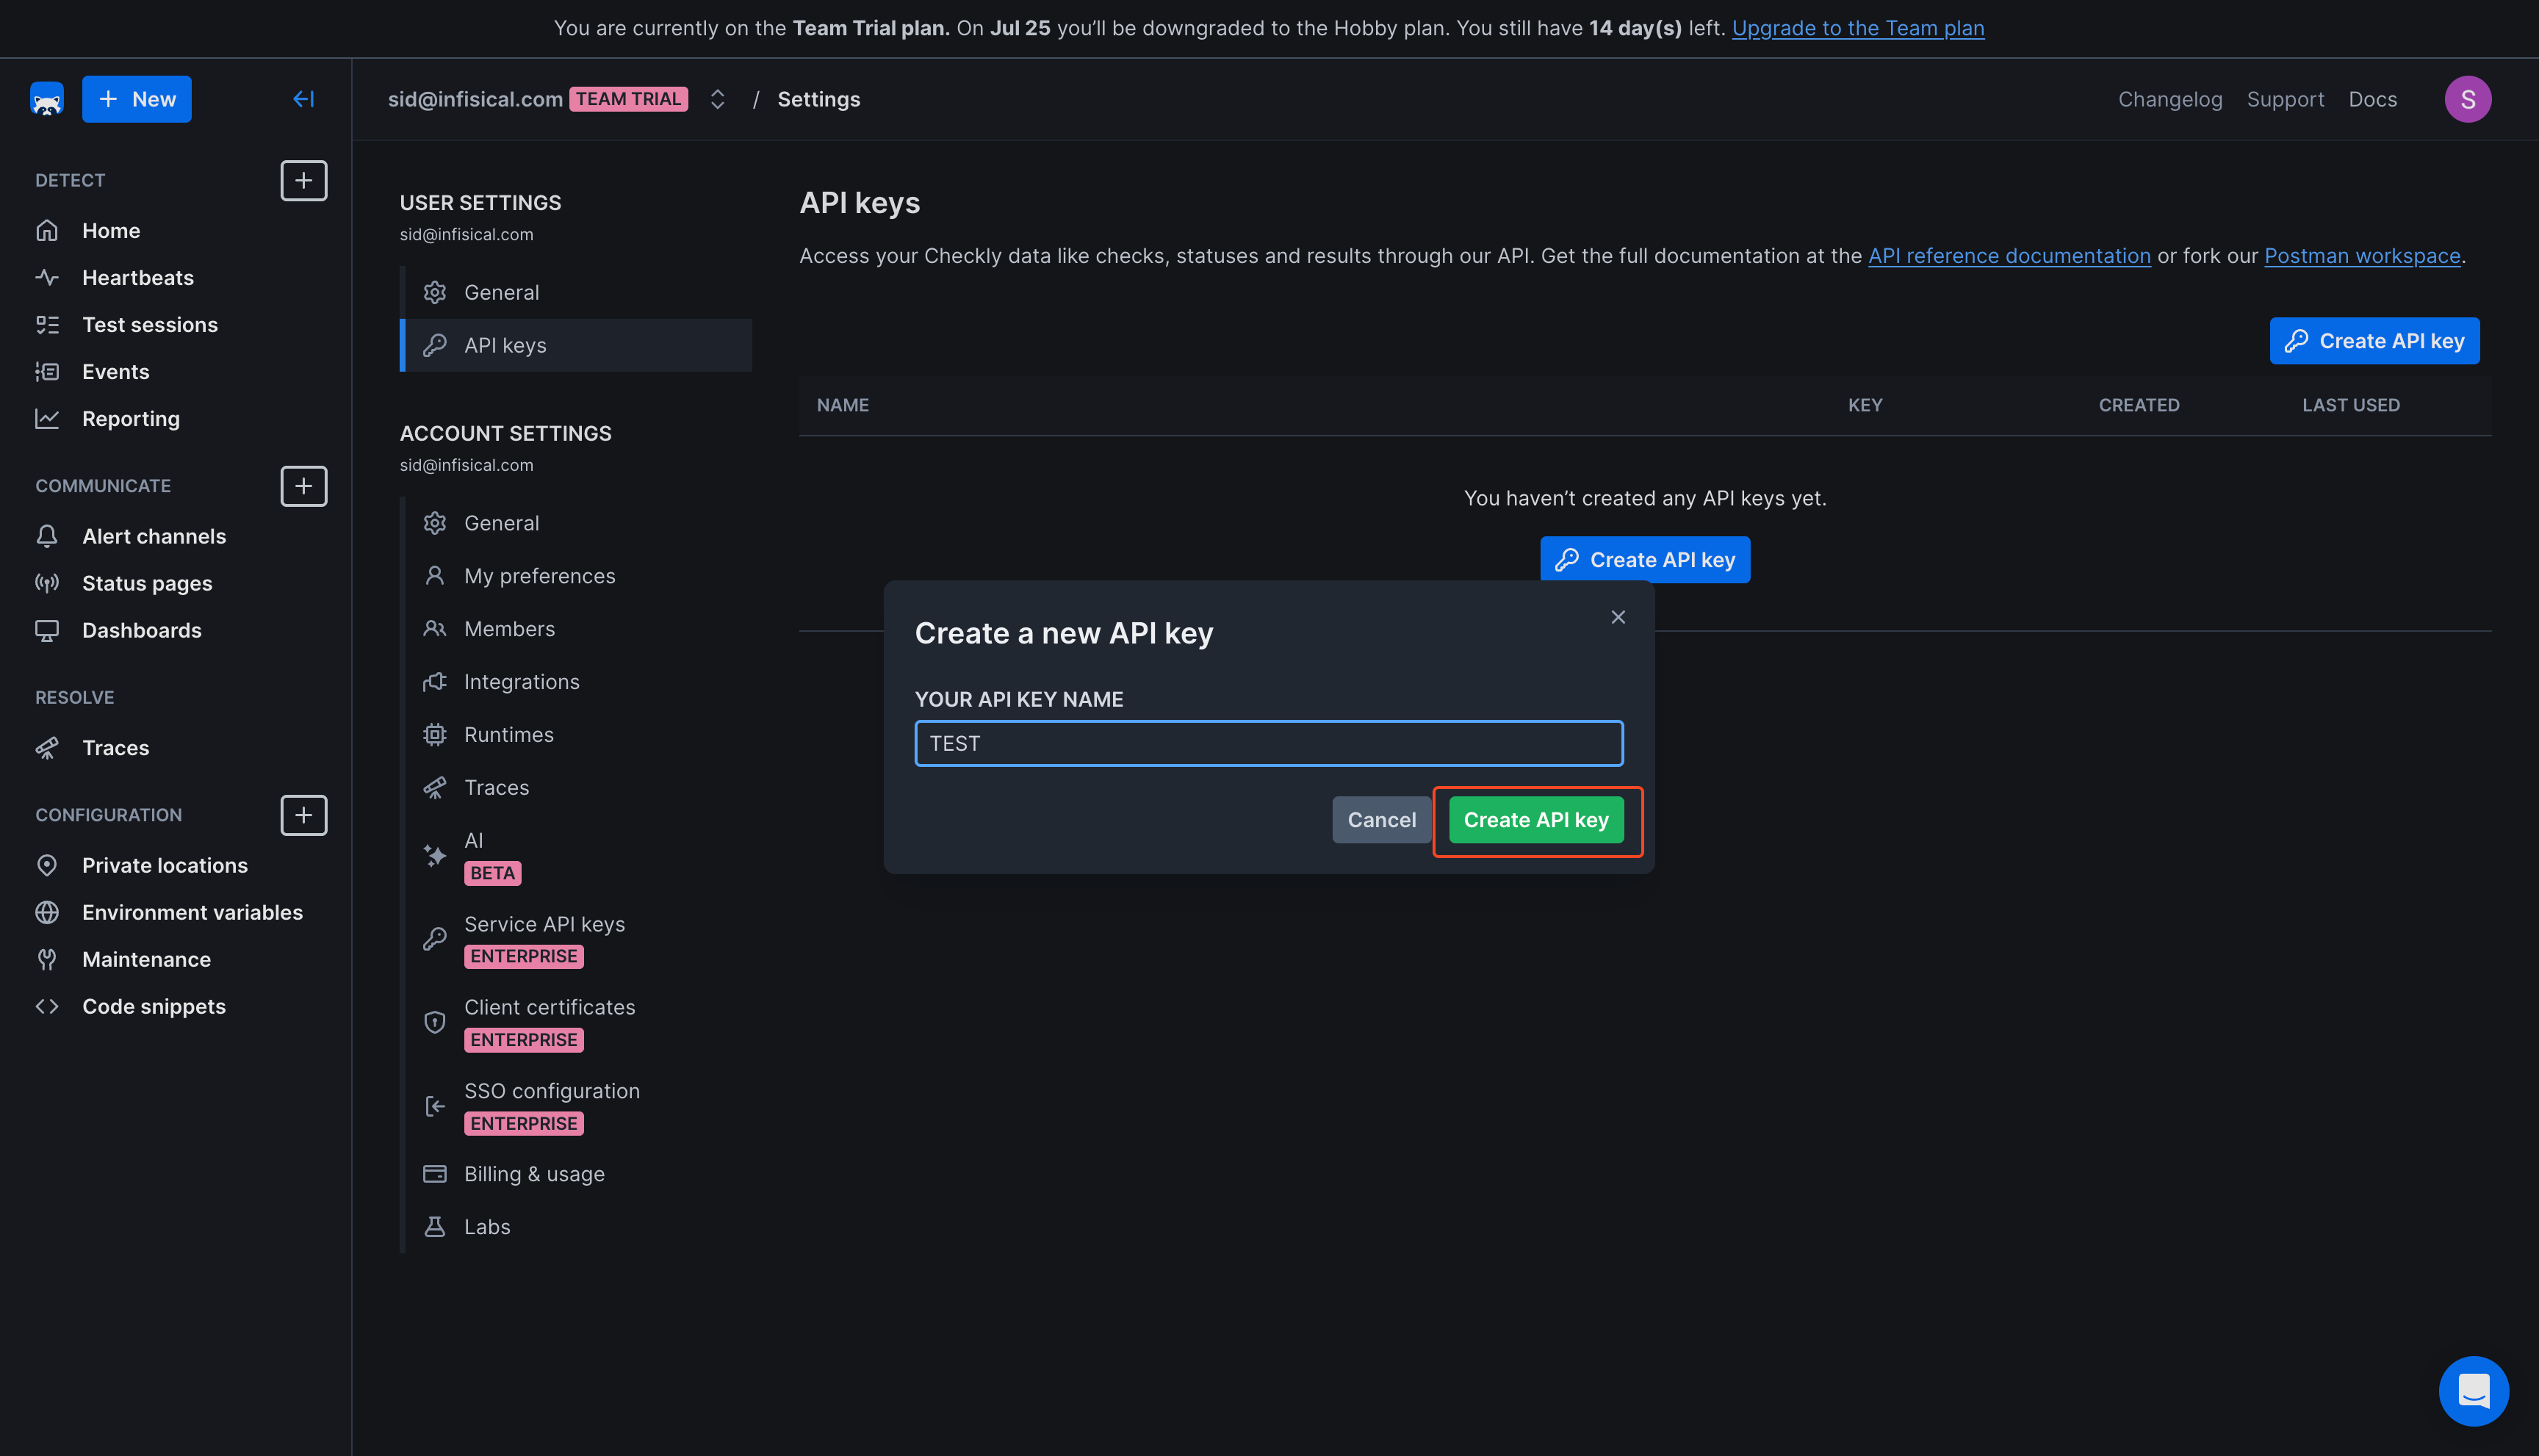
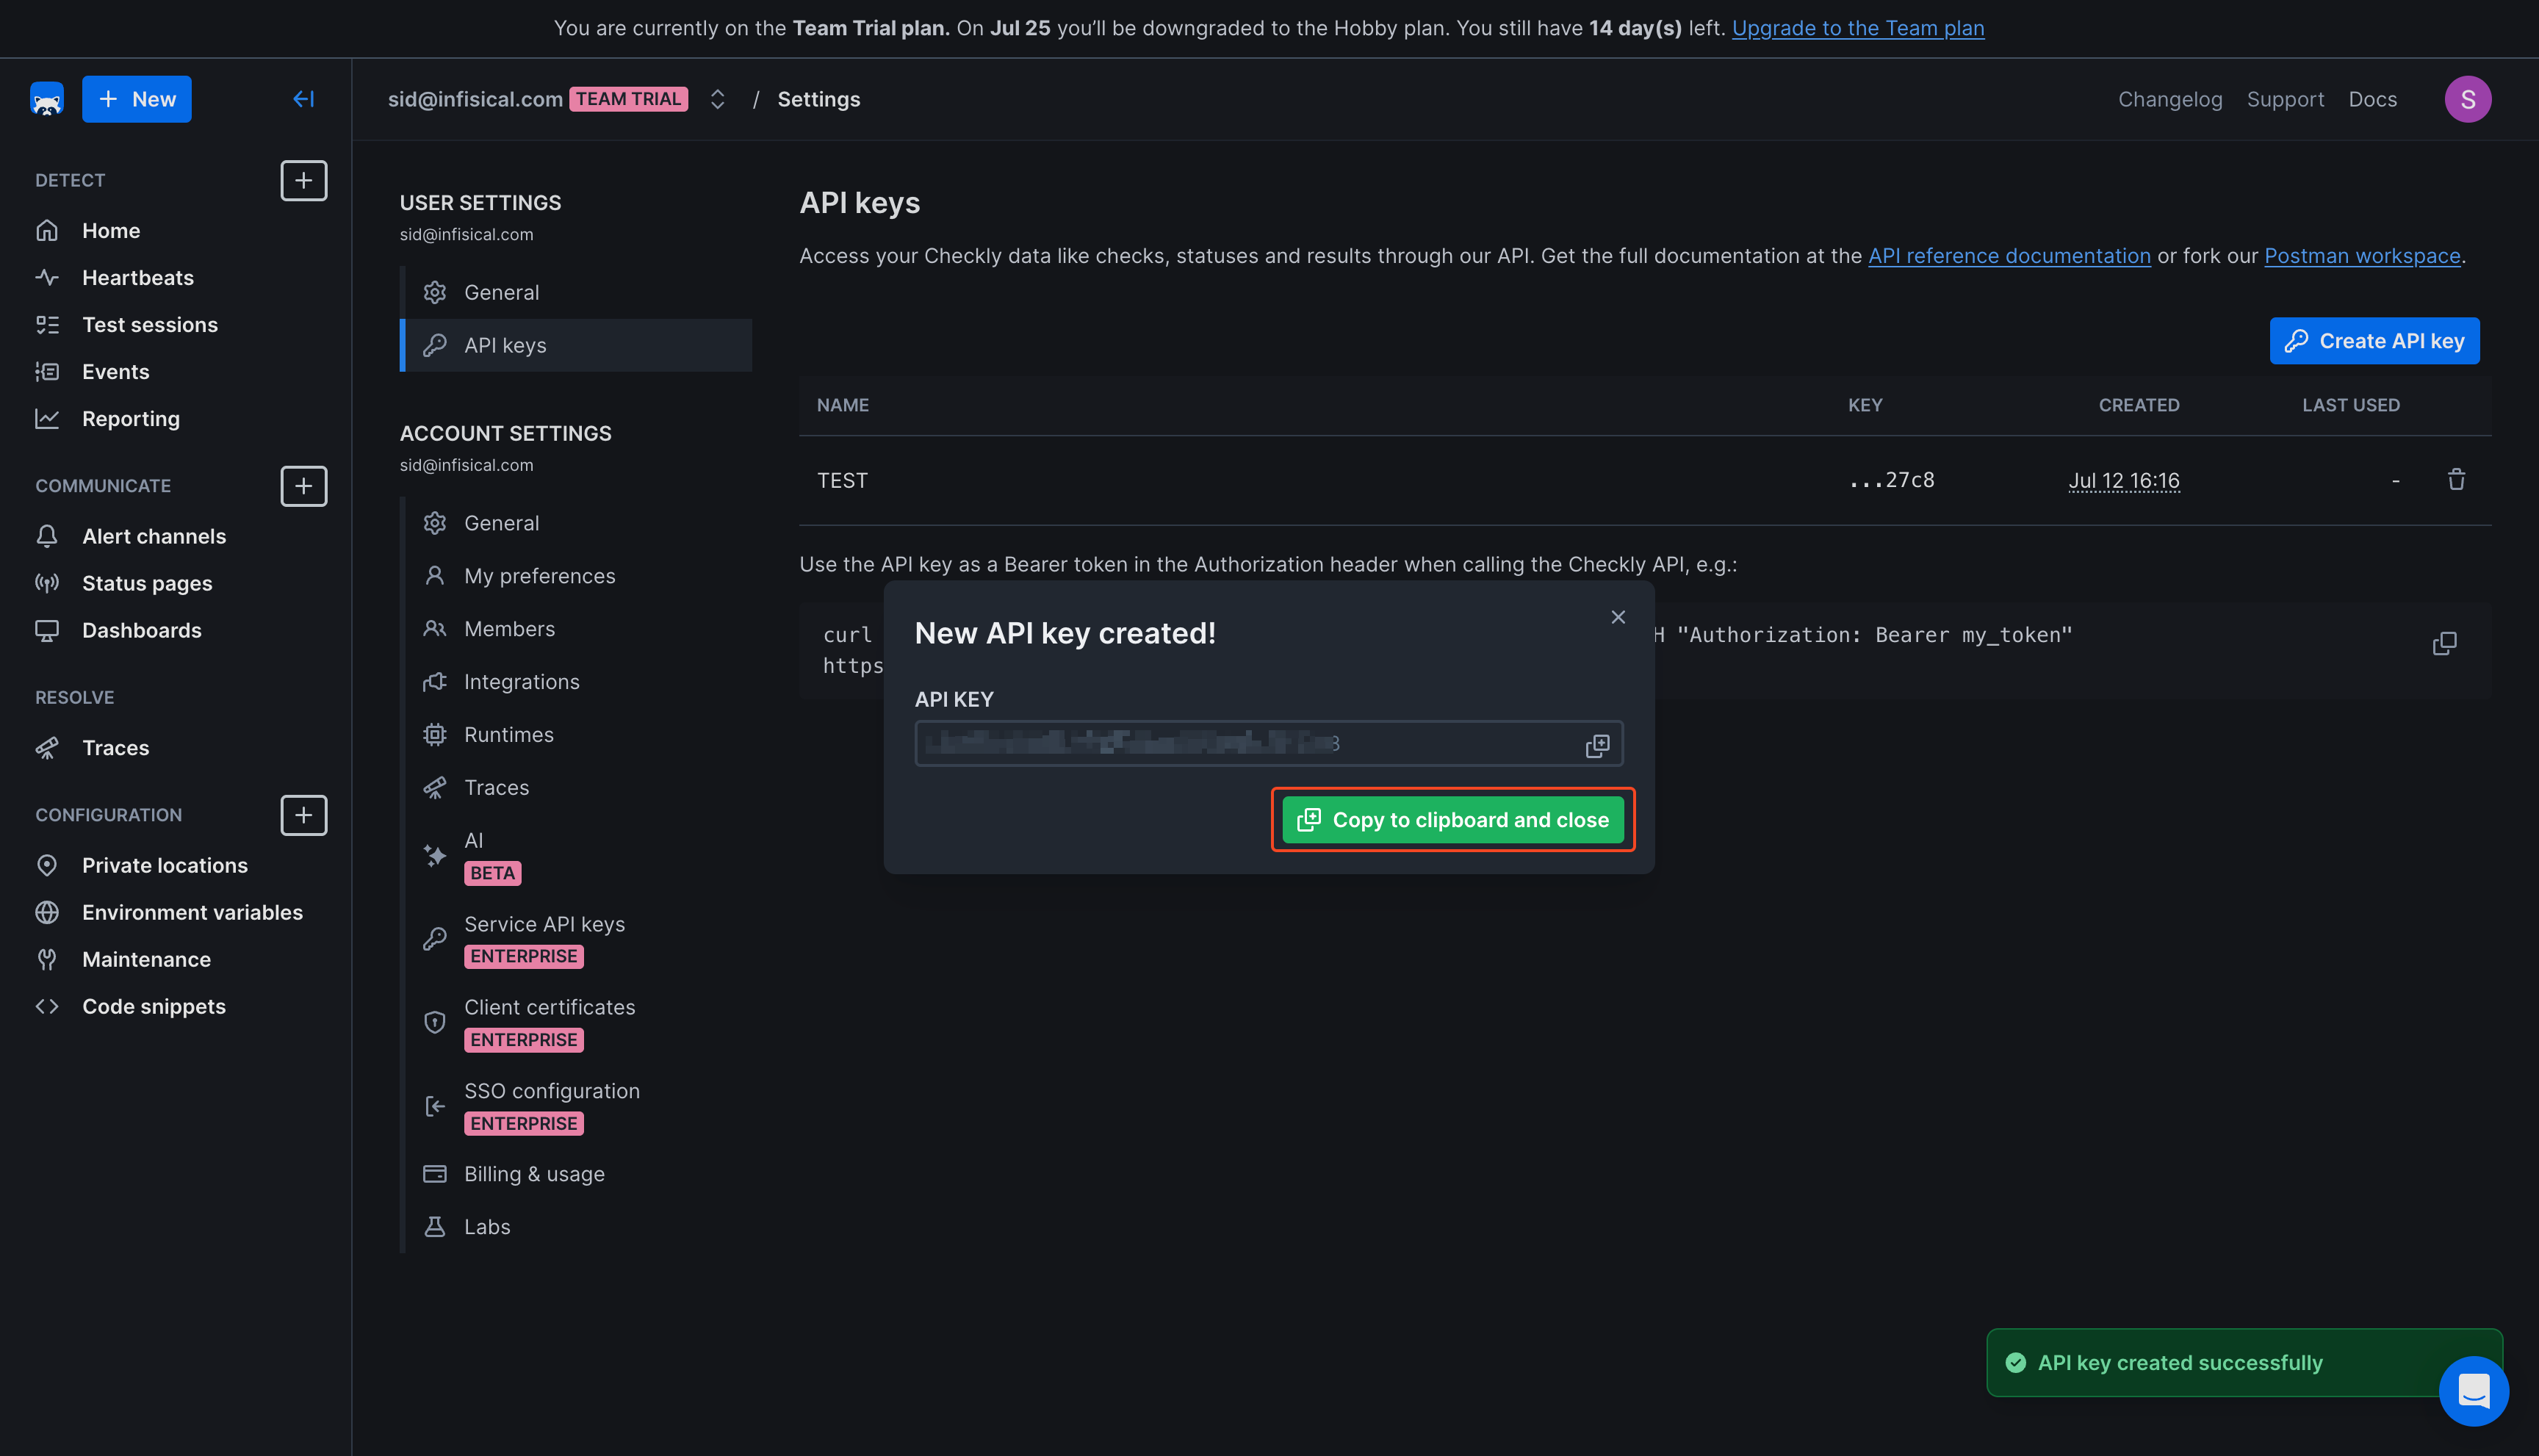
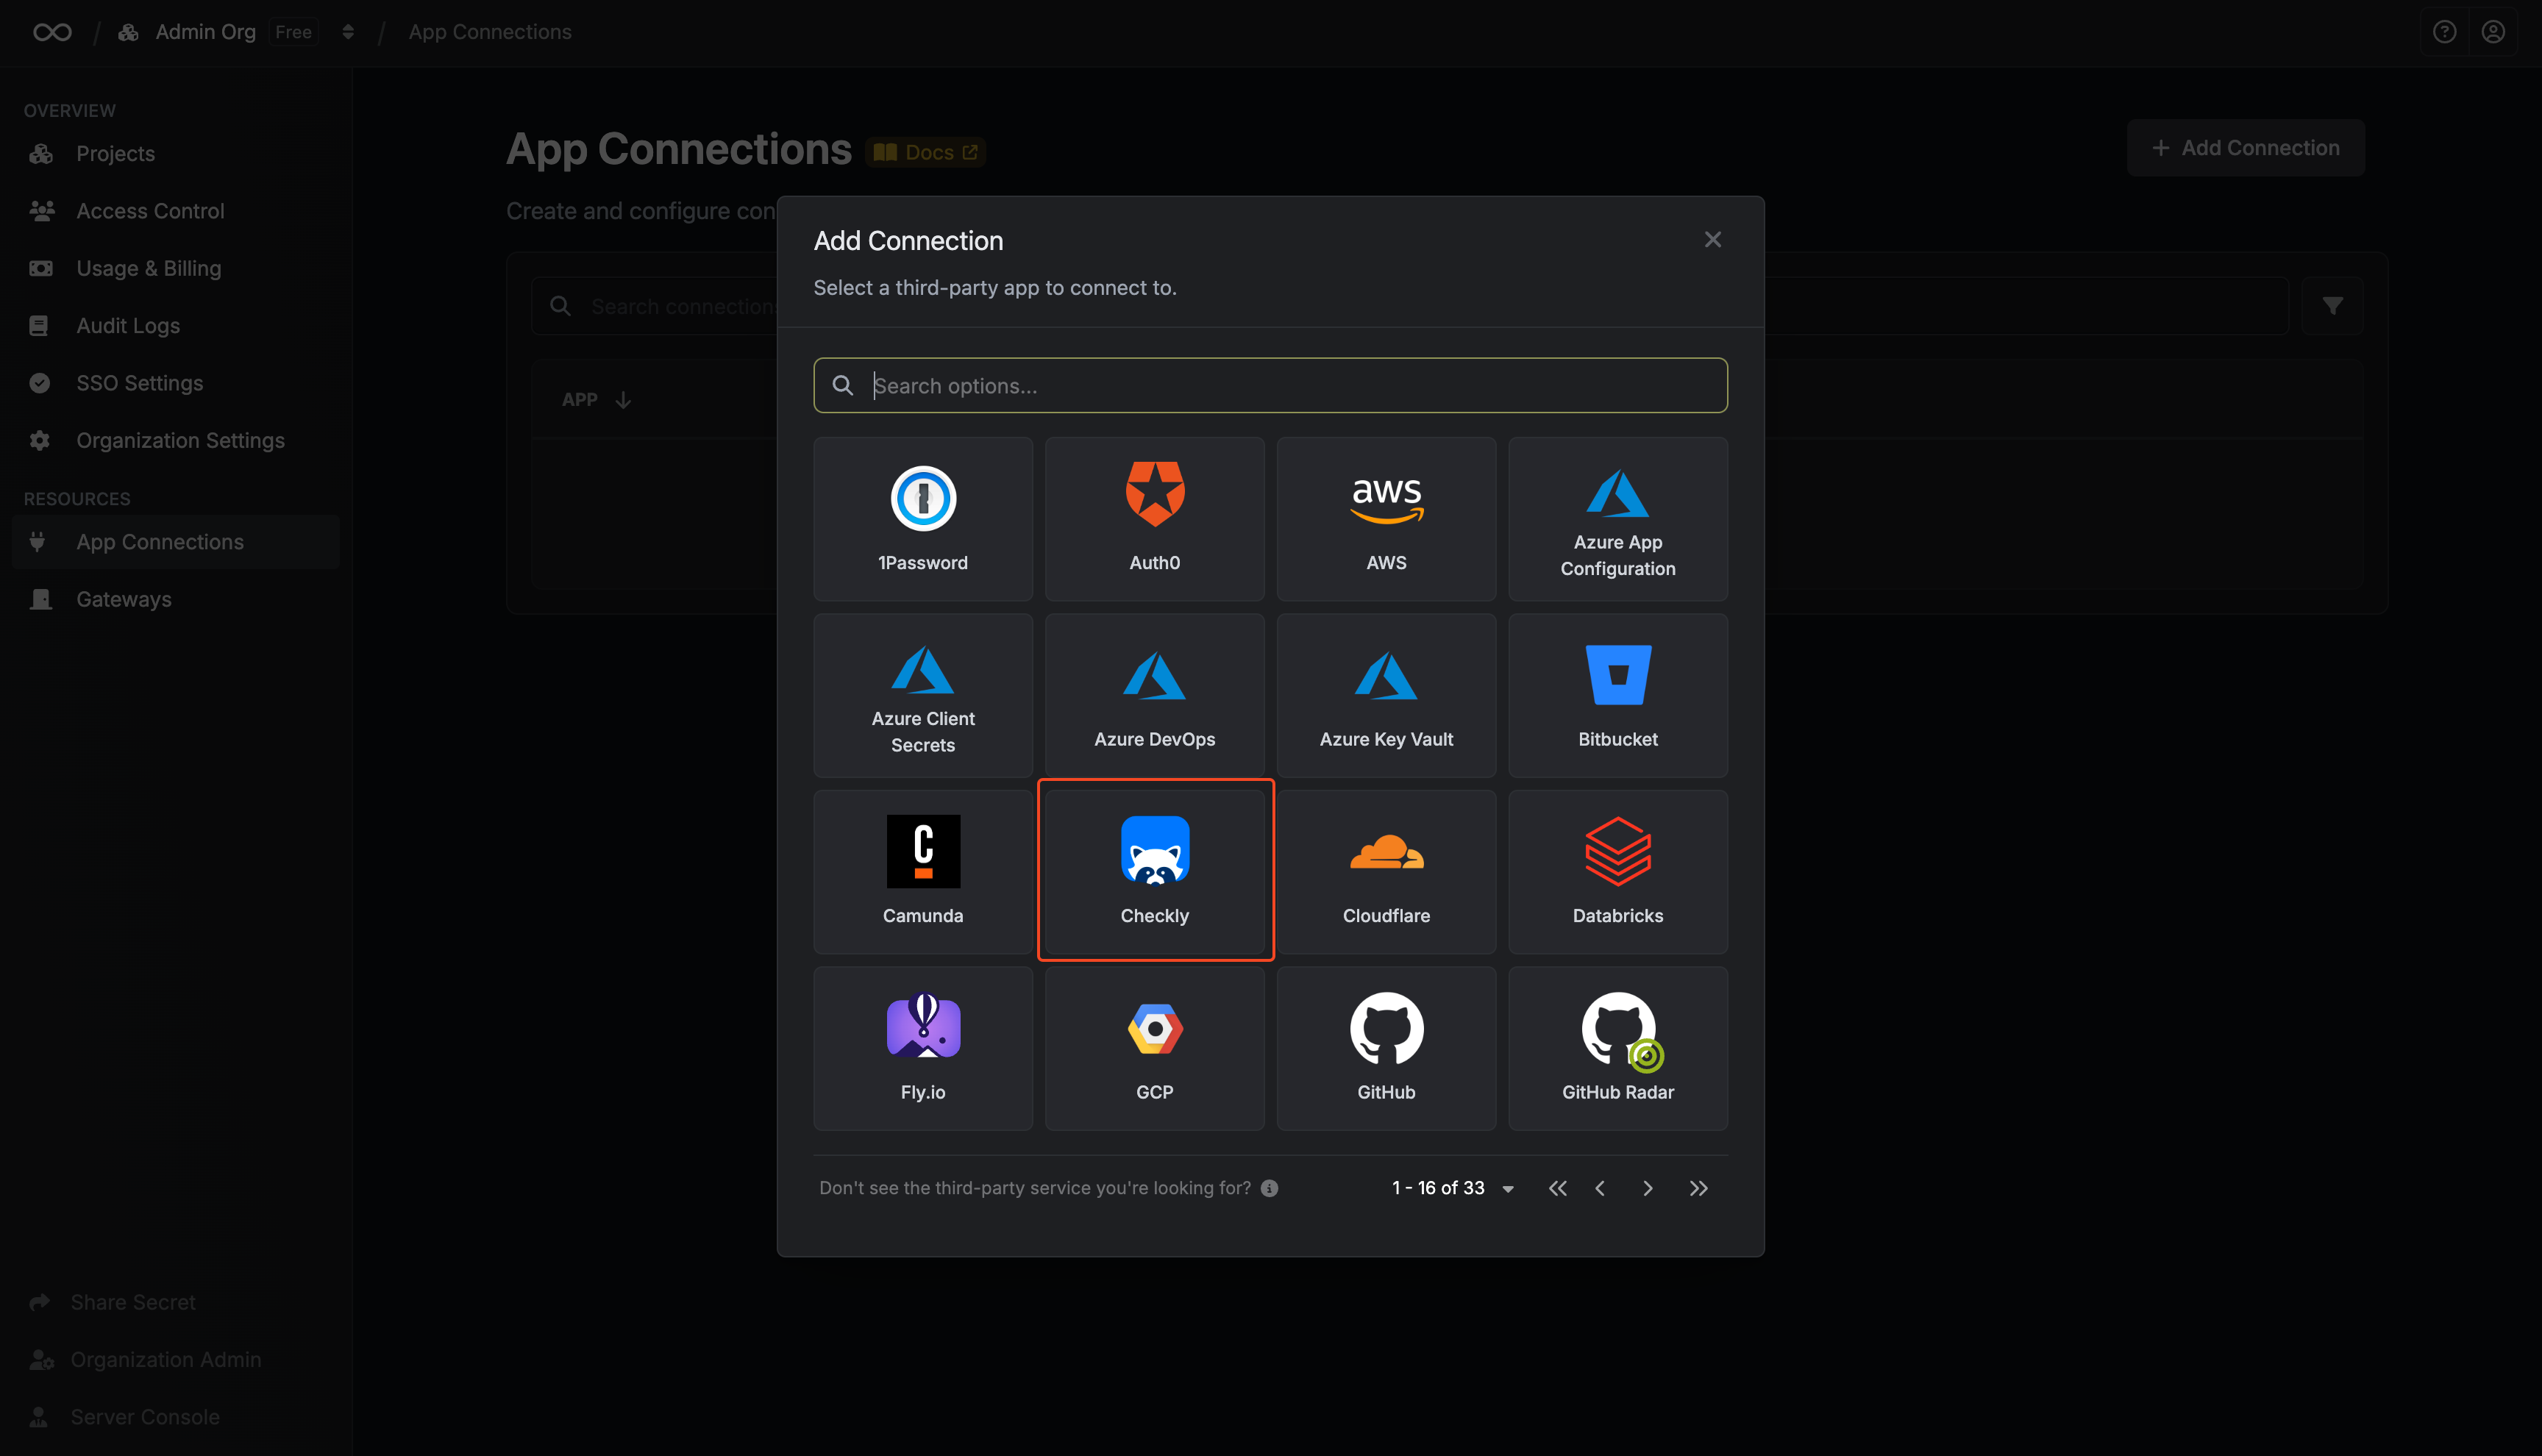
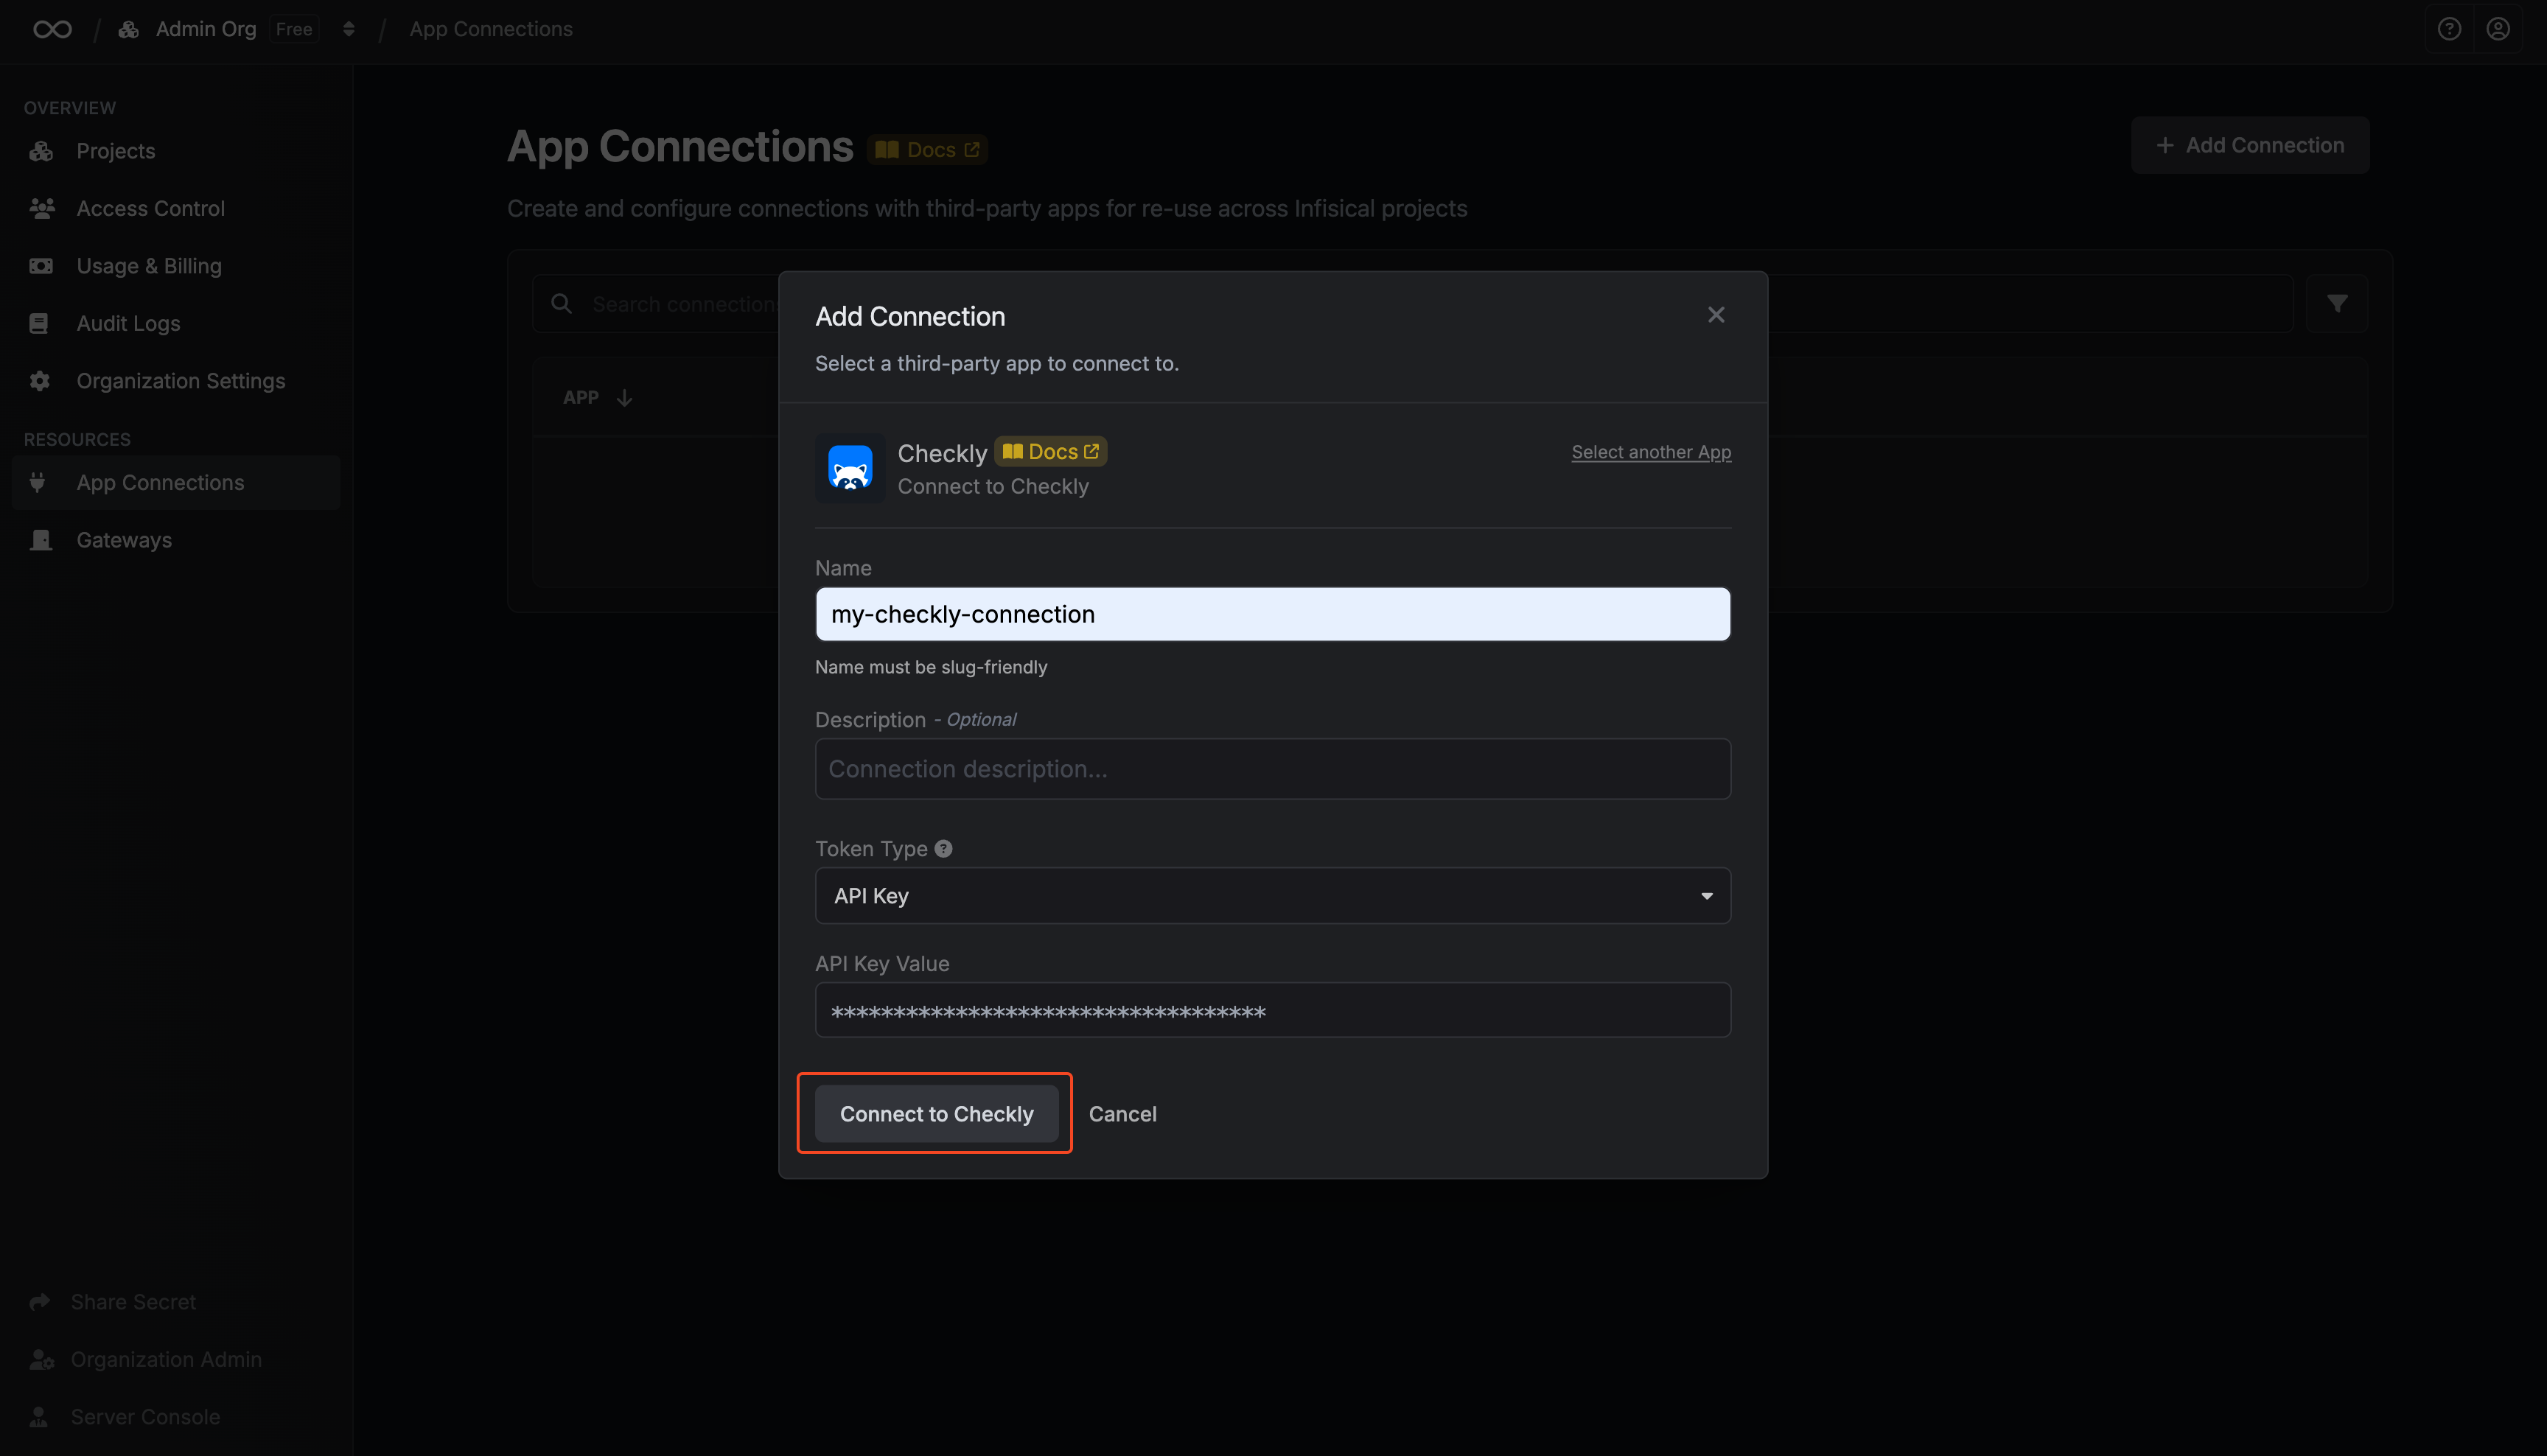
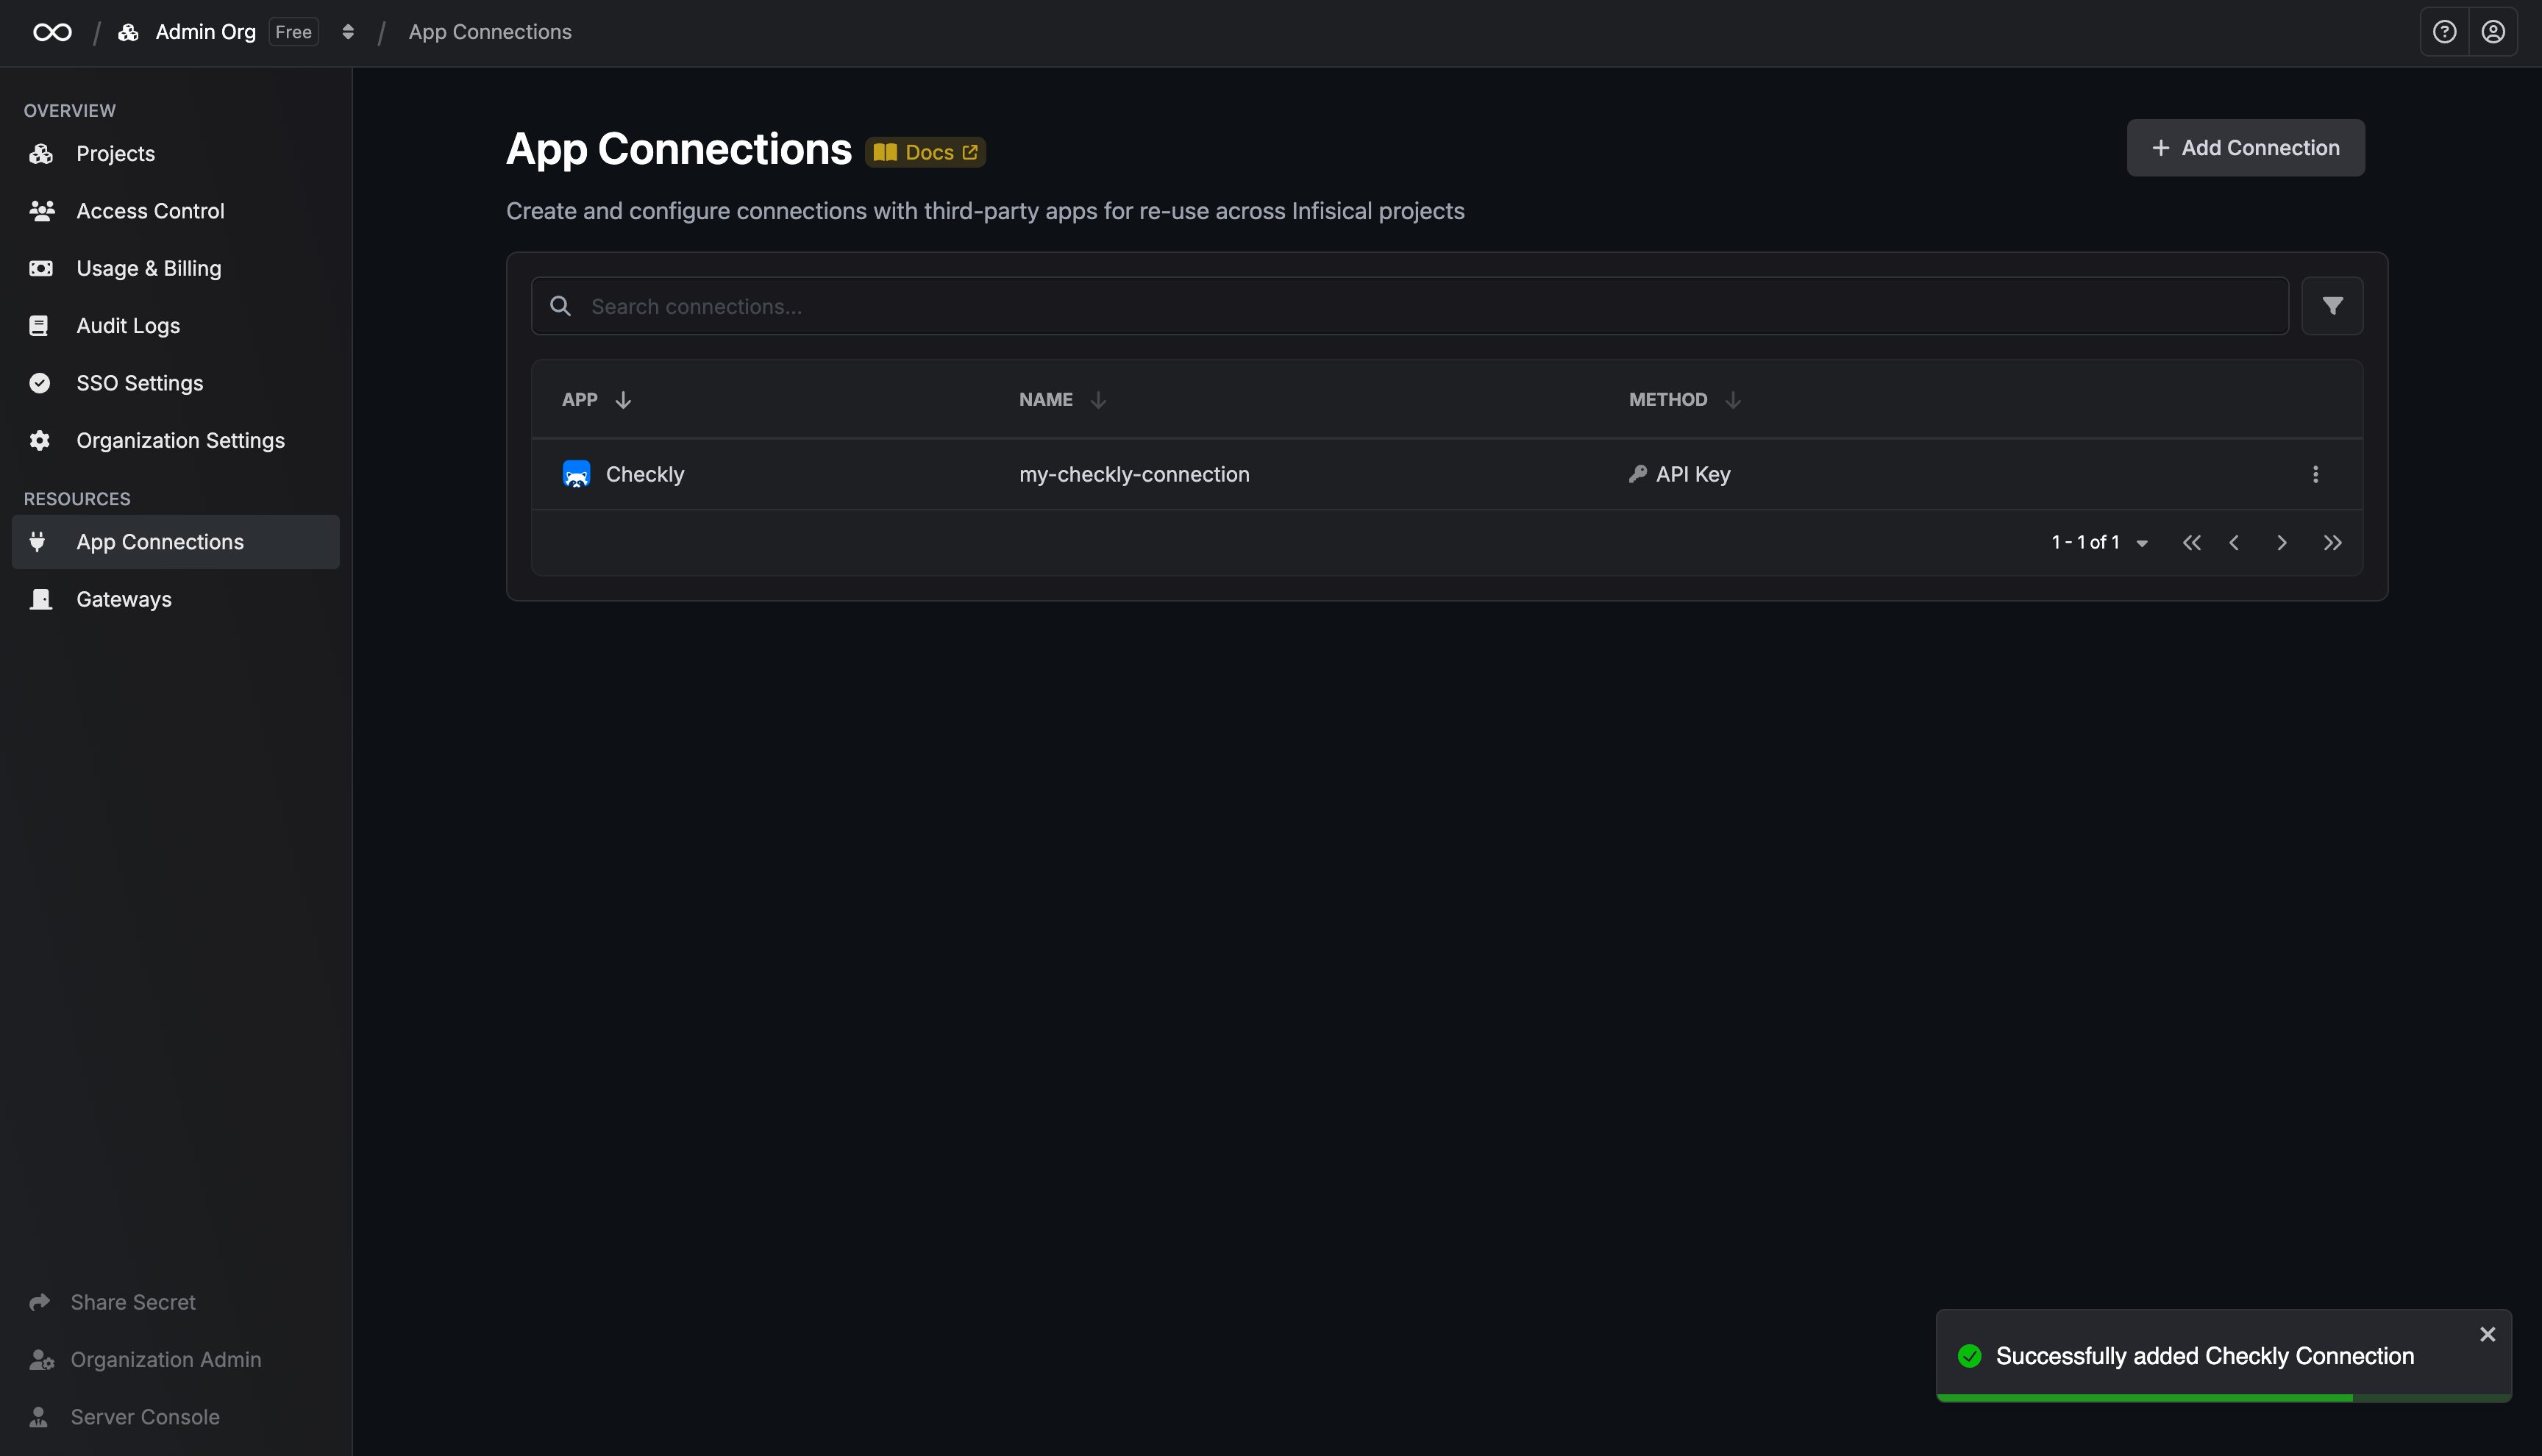 2. Select the **Chef** option.
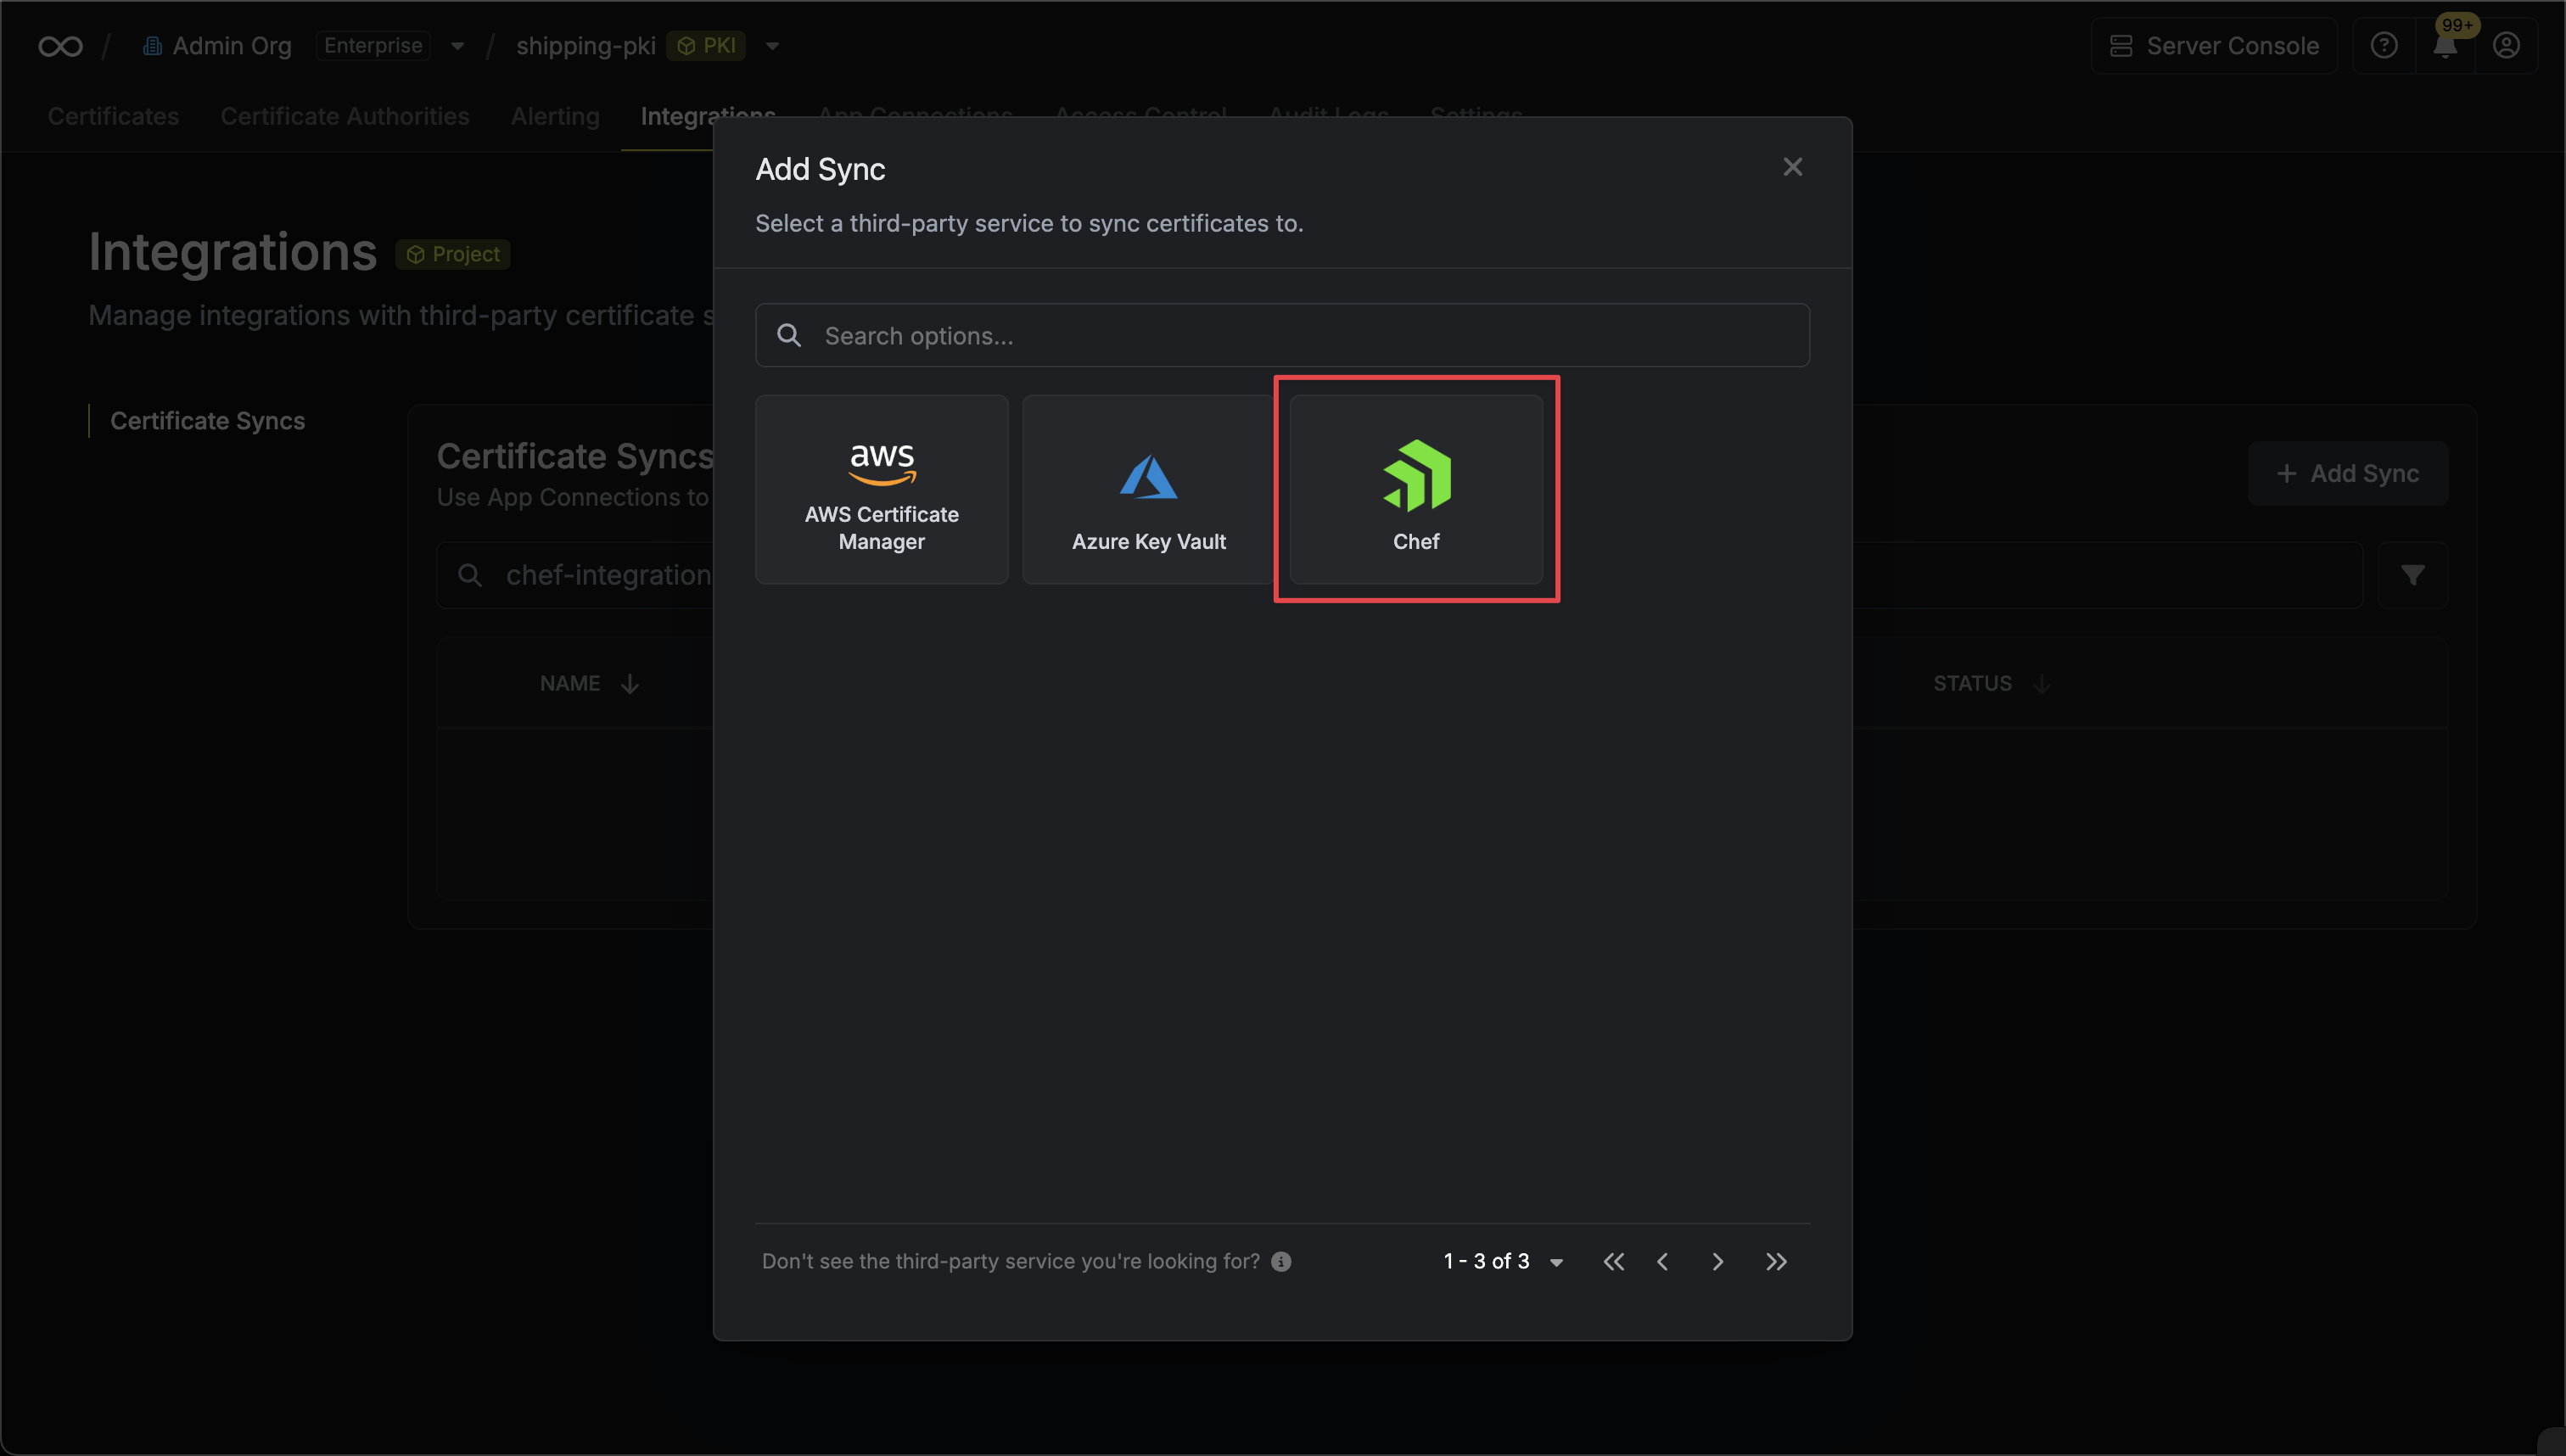 3. Configure the **Destination** to where certificates should be deployed, then click **Next**.
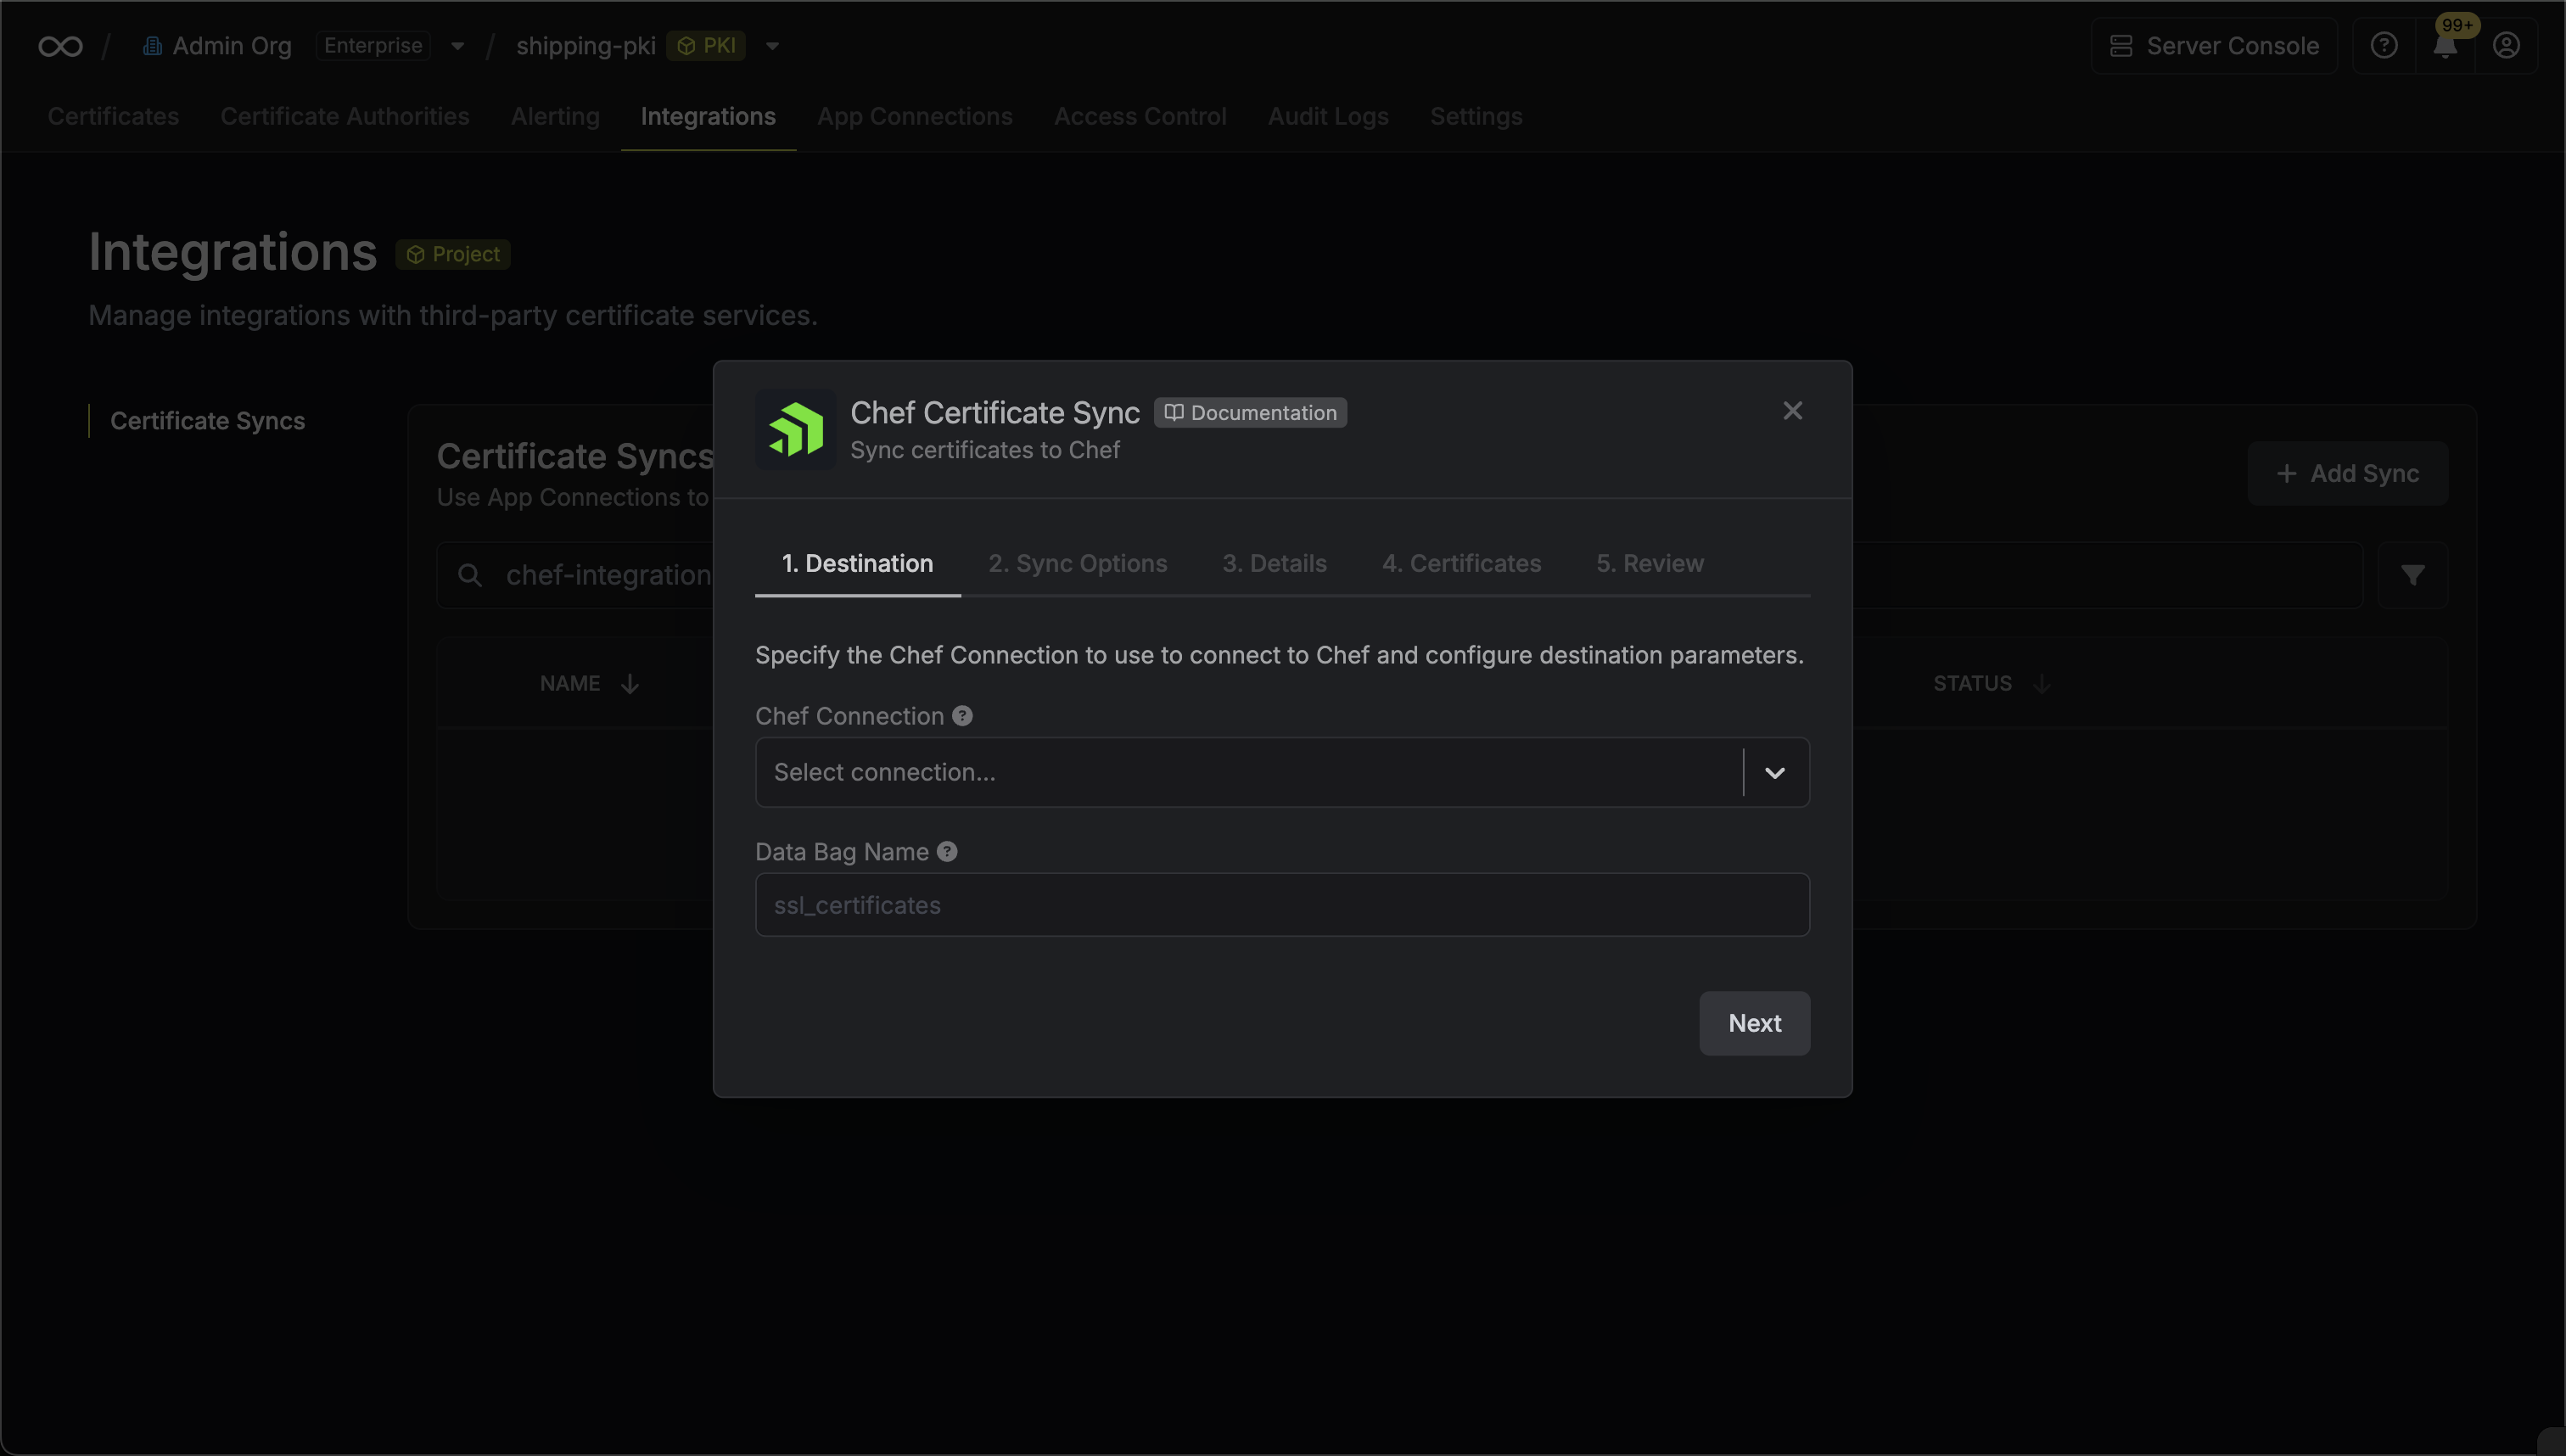 * **Chef Connection**: The Chef Connection to authenticate with.
* **Data Bag Name**: The name of the Chef data bag where certificates will be stored.
4. Configure the **Sync Options** to specify how certificates should be synced, then click **Next**.
* **Chef Connection**: The Chef Connection to authenticate with.
* **Data Bag Name**: The name of the Chef data bag where certificates will be stored.
4. Configure the **Sync Options** to specify how certificates should be synced, then click **Next**.
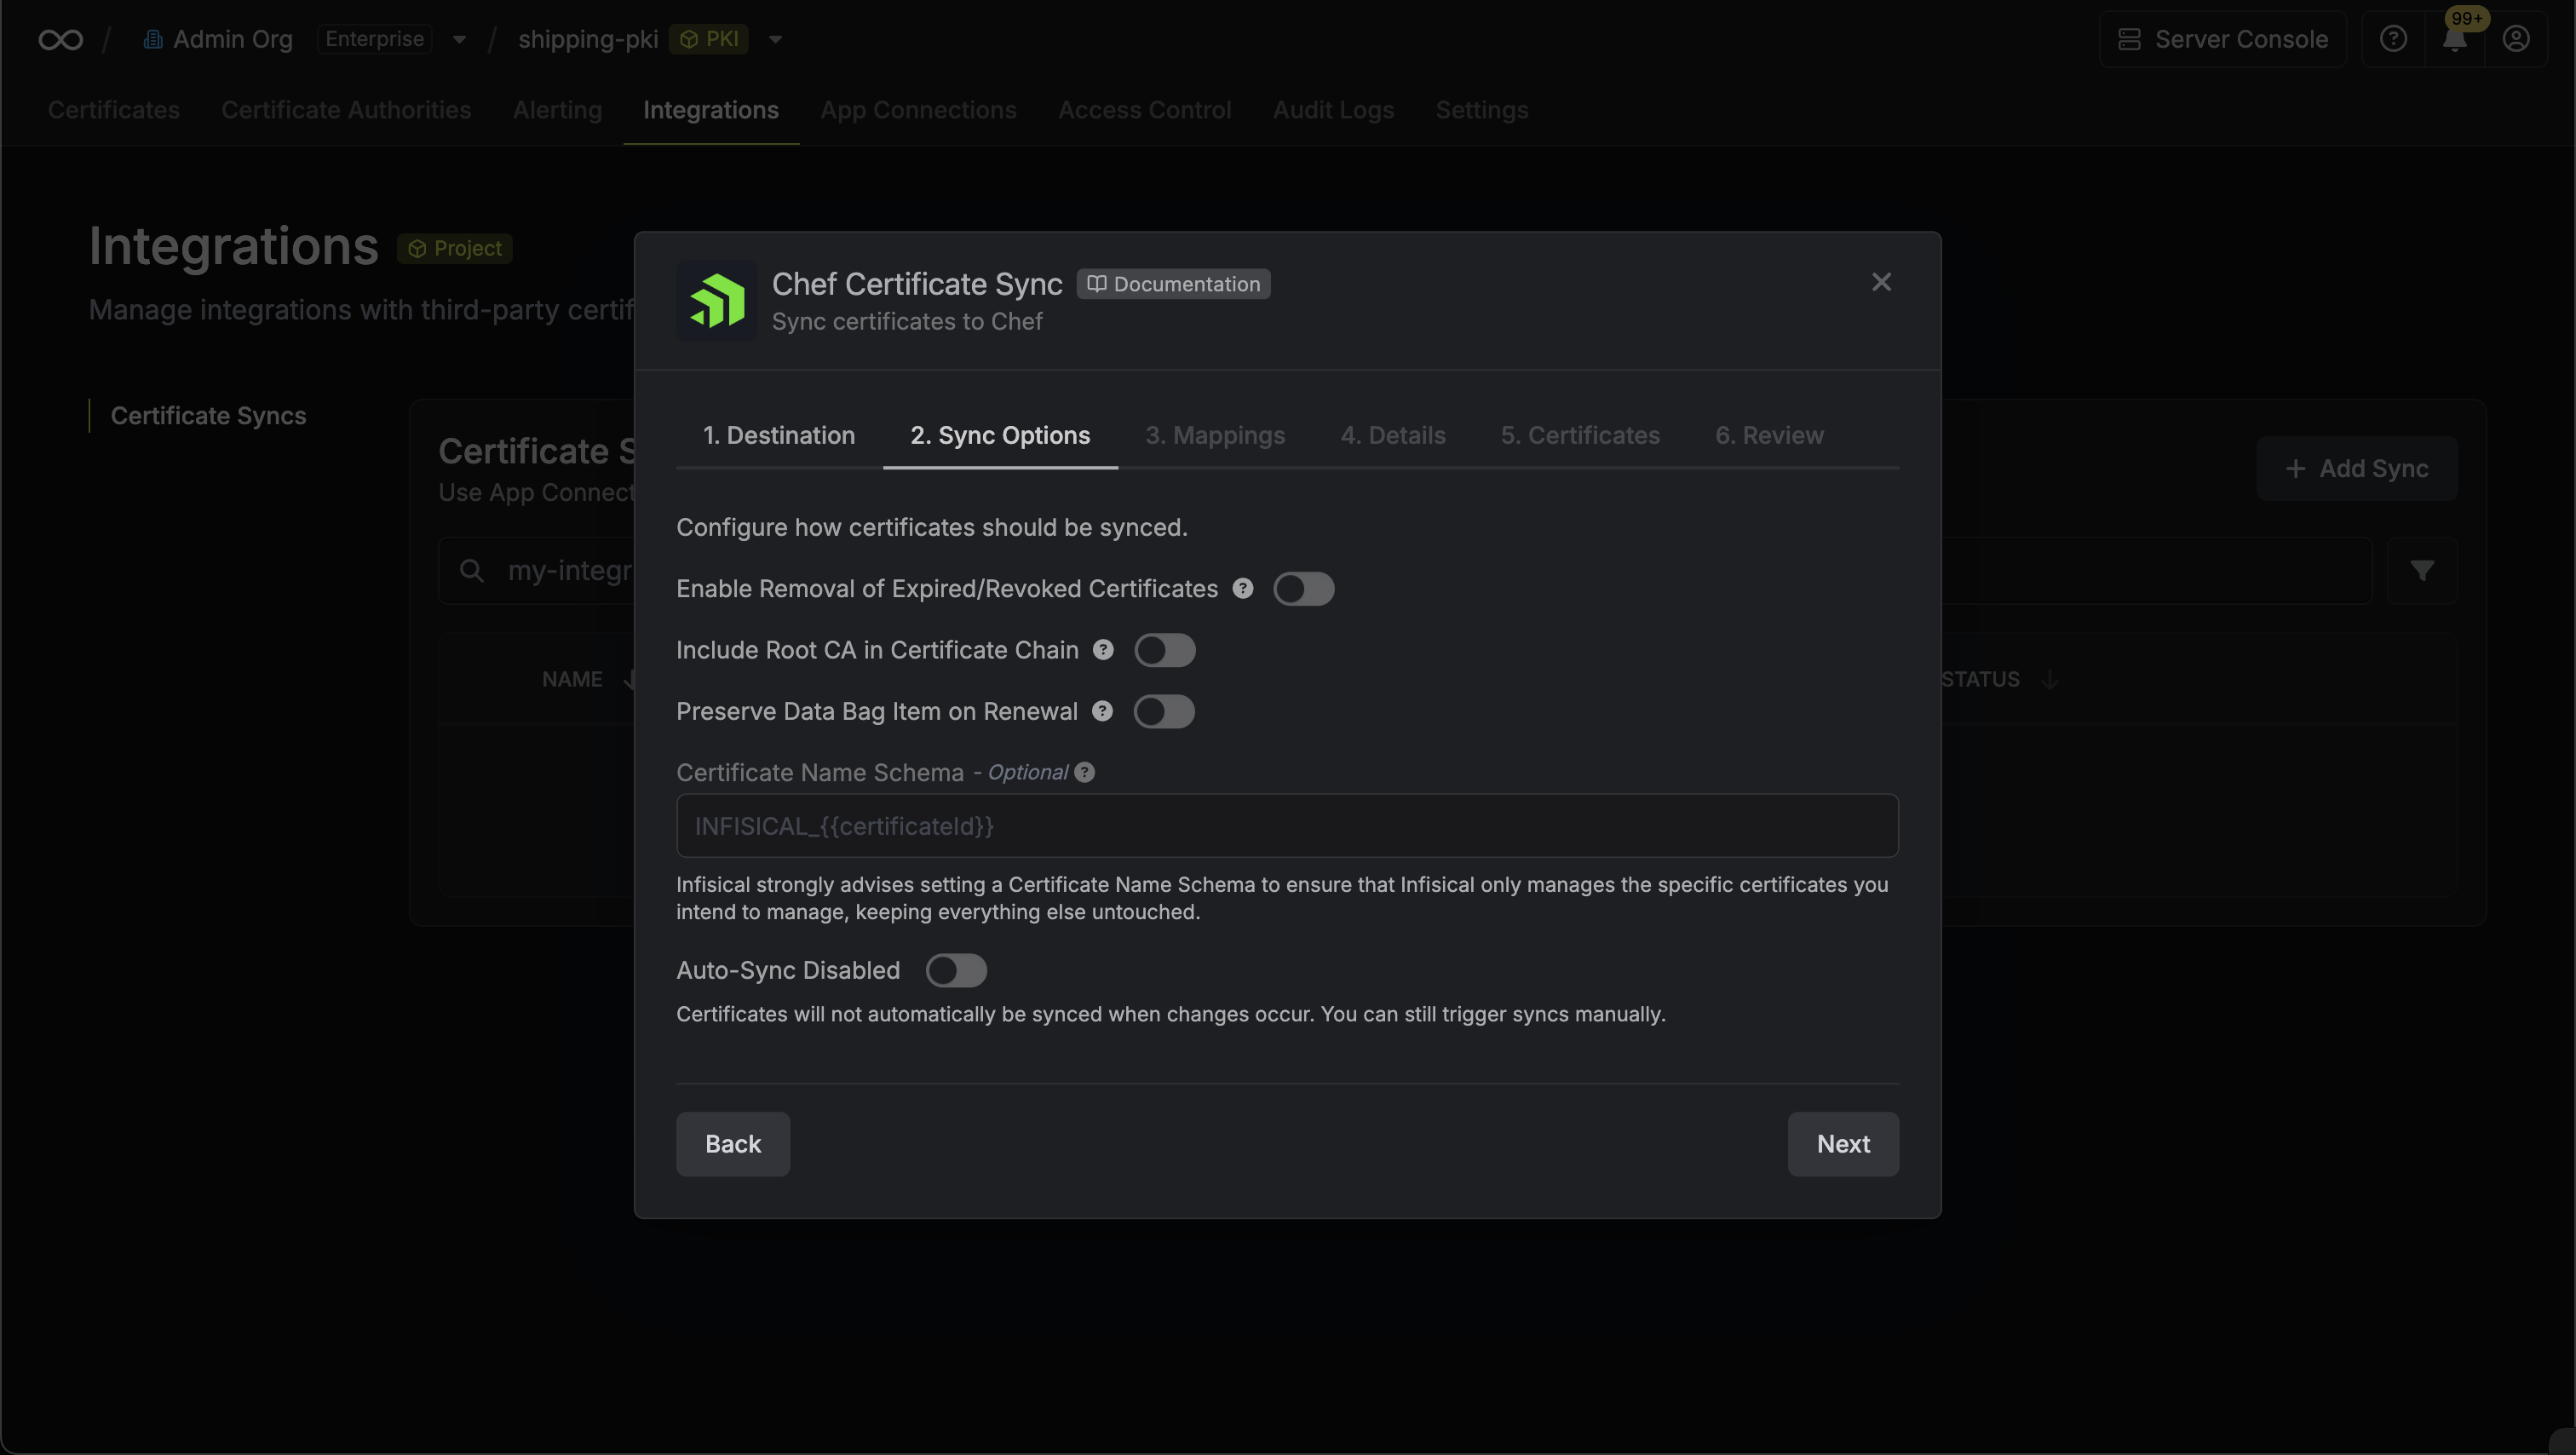 * **Enable Removal of Expired/Revoked Certificates**: If enabled, Infisical will remove certificates from the destination if they are no longer active in Infisical.
* **Preserve Data Bag Item on Renewal**: Only applies to certificate renewals. When a certificate is renewed in Infisical, this option controls how the renewed certificate is handled. If enabled, the renewed certificate will update the existing data bag item, preserving the same item name. If disabled, the renewed certificate will be created as a new data bag item with a new name.
* **Include Root CA**: If enabled, the Root CA certificate will be included in the certificate chain when syncing to Chef data bags. If disabled, only intermediate certificates will be included.
* **Certificate Name Schema** (Optional): Customize how certificate item names are generated in Chef data bags. Use `{{certificateId}}` as a placeholder for the certificate ID.
* **Auto-Sync Enabled**: If enabled, certificates will automatically be synced when changes occur. Disable to enforce manual syncing only.
5. Configure the **Field Mappings** to customize how certificate data is stored in Chef data bag items, then click **Next**.
* **Enable Removal of Expired/Revoked Certificates**: If enabled, Infisical will remove certificates from the destination if they are no longer active in Infisical.
* **Preserve Data Bag Item on Renewal**: Only applies to certificate renewals. When a certificate is renewed in Infisical, this option controls how the renewed certificate is handled. If enabled, the renewed certificate will update the existing data bag item, preserving the same item name. If disabled, the renewed certificate will be created as a new data bag item with a new name.
* **Include Root CA**: If enabled, the Root CA certificate will be included in the certificate chain when syncing to Chef data bags. If disabled, only intermediate certificates will be included.
* **Certificate Name Schema** (Optional): Customize how certificate item names are generated in Chef data bags. Use `{{certificateId}}` as a placeholder for the certificate ID.
* **Auto-Sync Enabled**: If enabled, certificates will automatically be synced when changes occur. Disable to enforce manual syncing only.
5. Configure the **Field Mappings** to customize how certificate data is stored in Chef data bag items, then click **Next**.
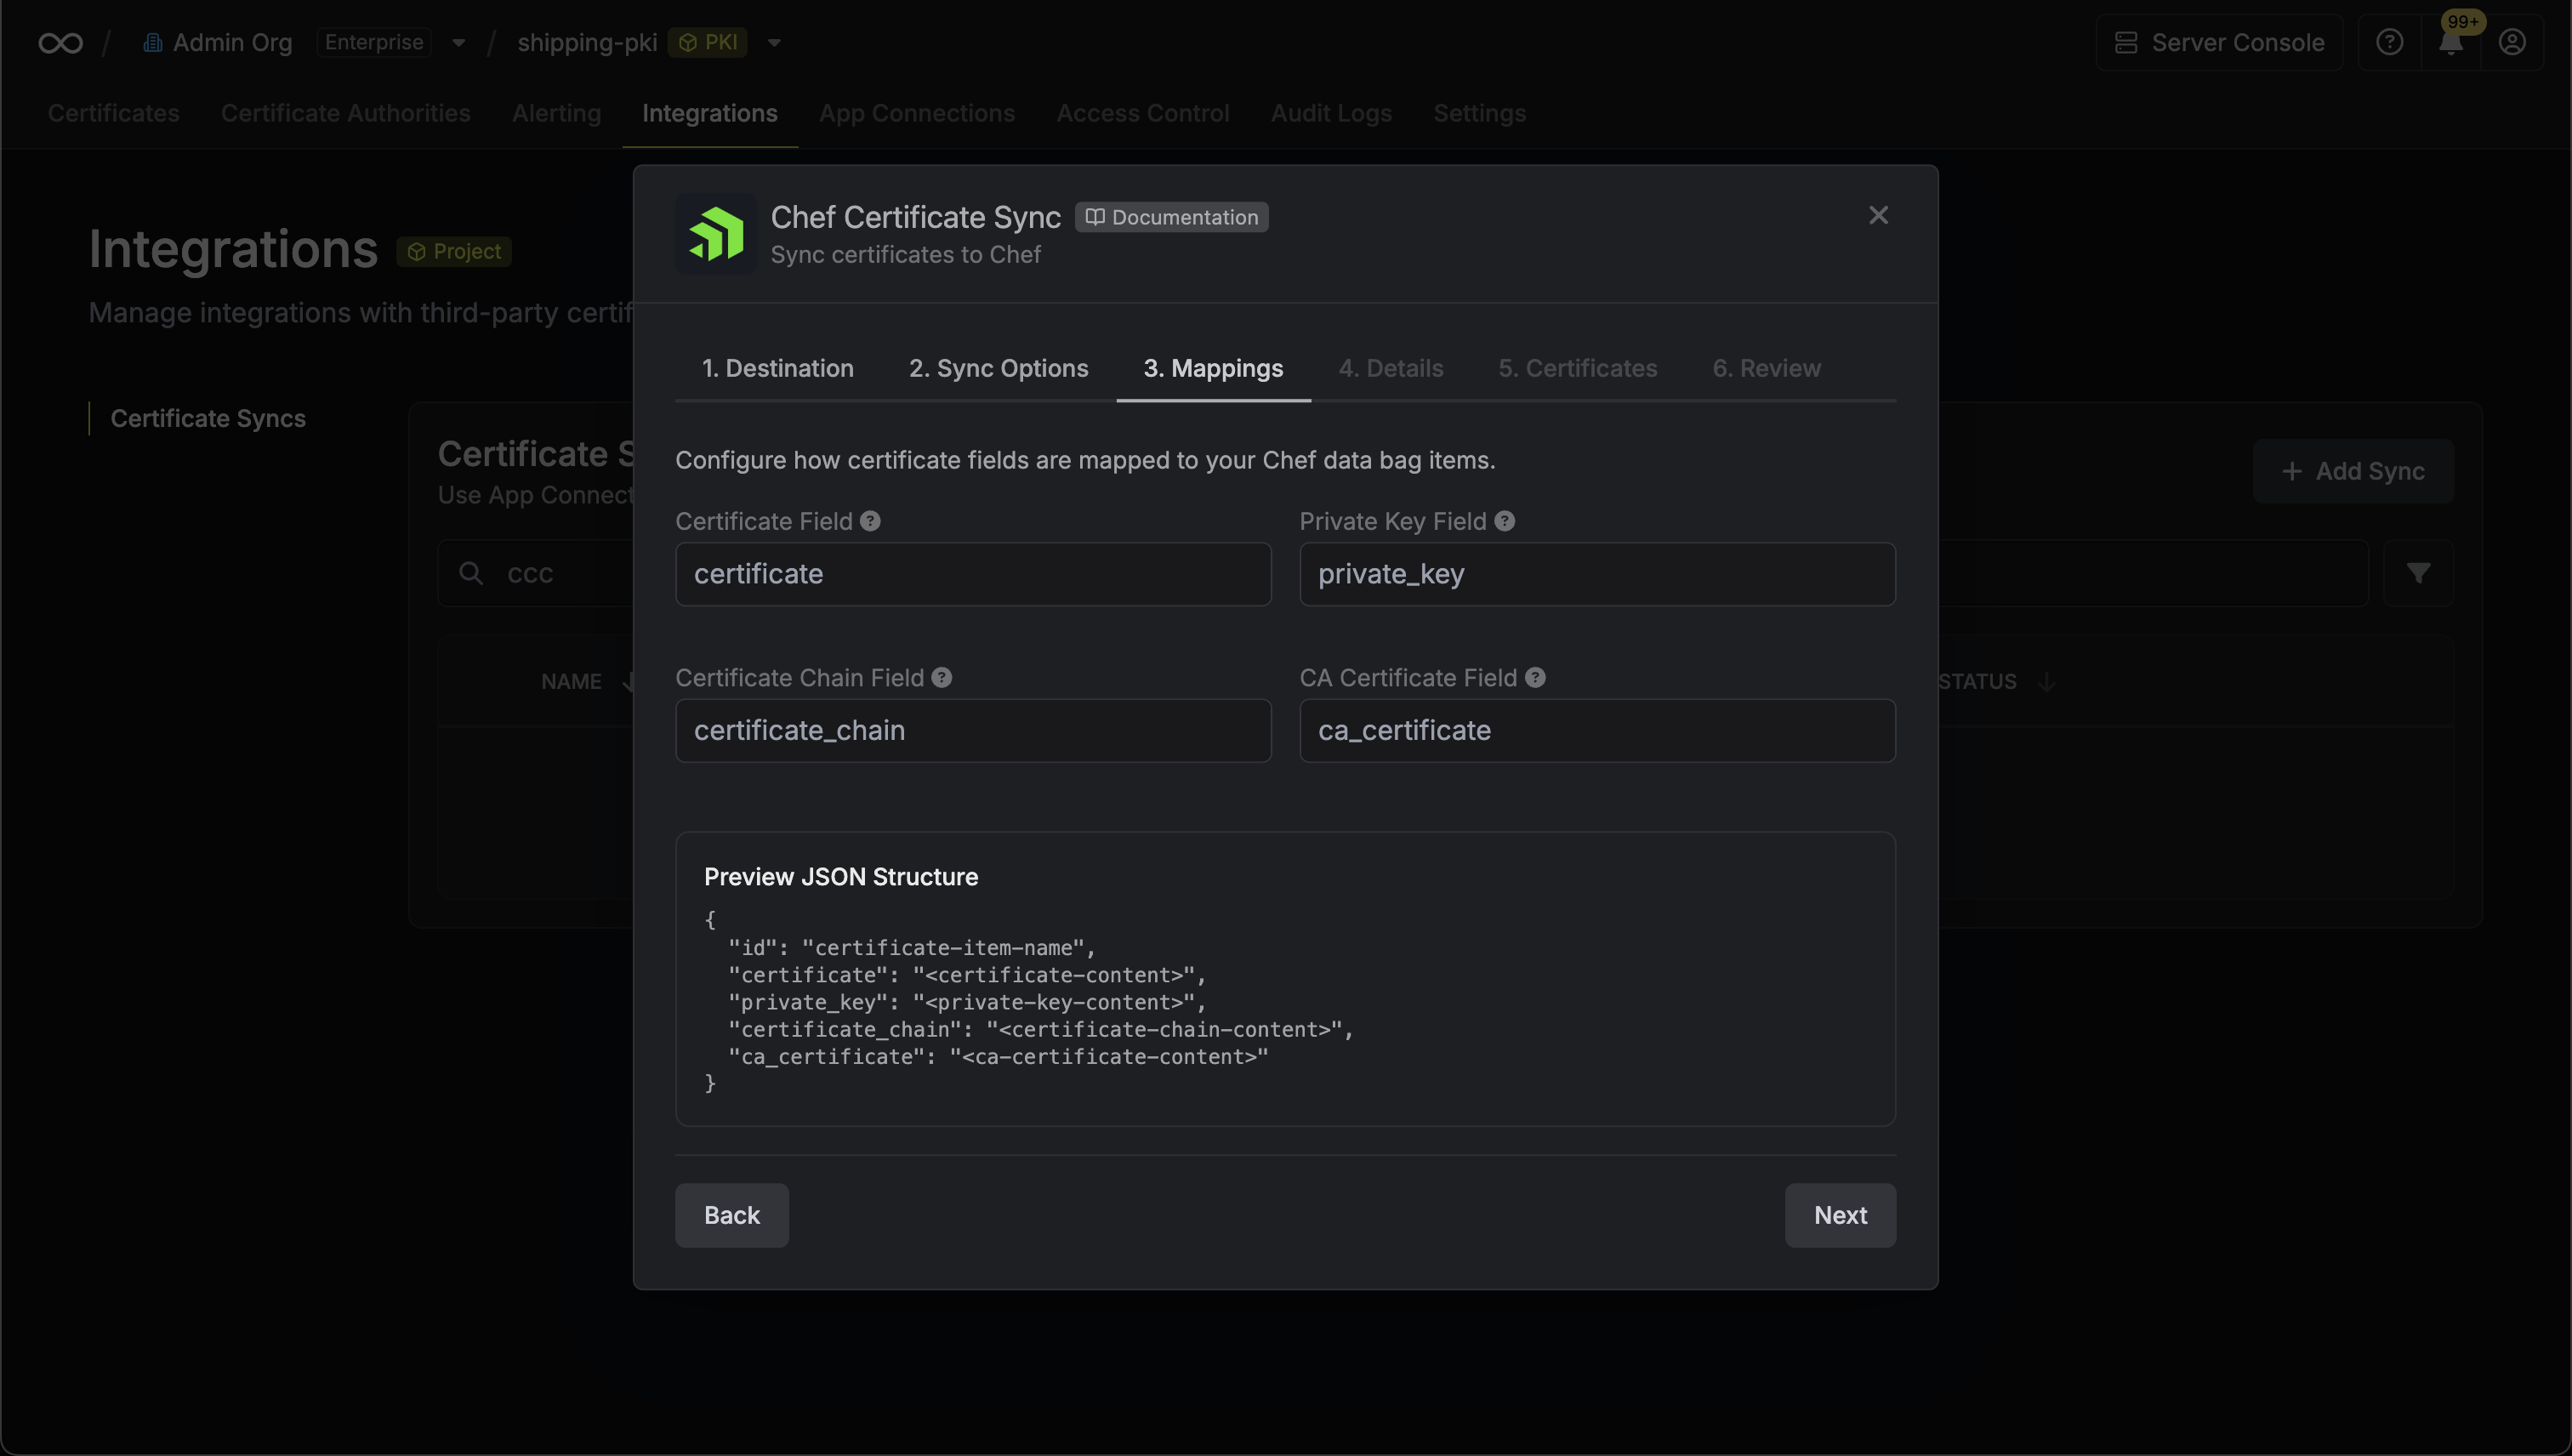 * **Certificate Field**: The field name where the certificate will be stored in the data bag item (default: `certificate`)
* **Private Key Field**: The field name where the private key will be stored in the data bag item (default: `private_key`)
* **Certificate Chain Field**: The field name where the full certificate chain excluding the root CA certificate will be stored (default: `certificate_chain`)
* **CA Certificate Field**: The field name where the root CA certificate will be stored (default: `ca_certificate`)
* **Certificate Field**: The field name where the certificate will be stored in the data bag item (default: `certificate`)
* **Private Key Field**: The field name where the private key will be stored in the data bag item (default: `private_key`)
* **Certificate Chain Field**: The field name where the full certificate chain excluding the root CA certificate will be stored (default: `certificate_chain`)
* **CA Certificate Field**: The field name where the root CA certificate will be stored (default: `ca_certificate`)
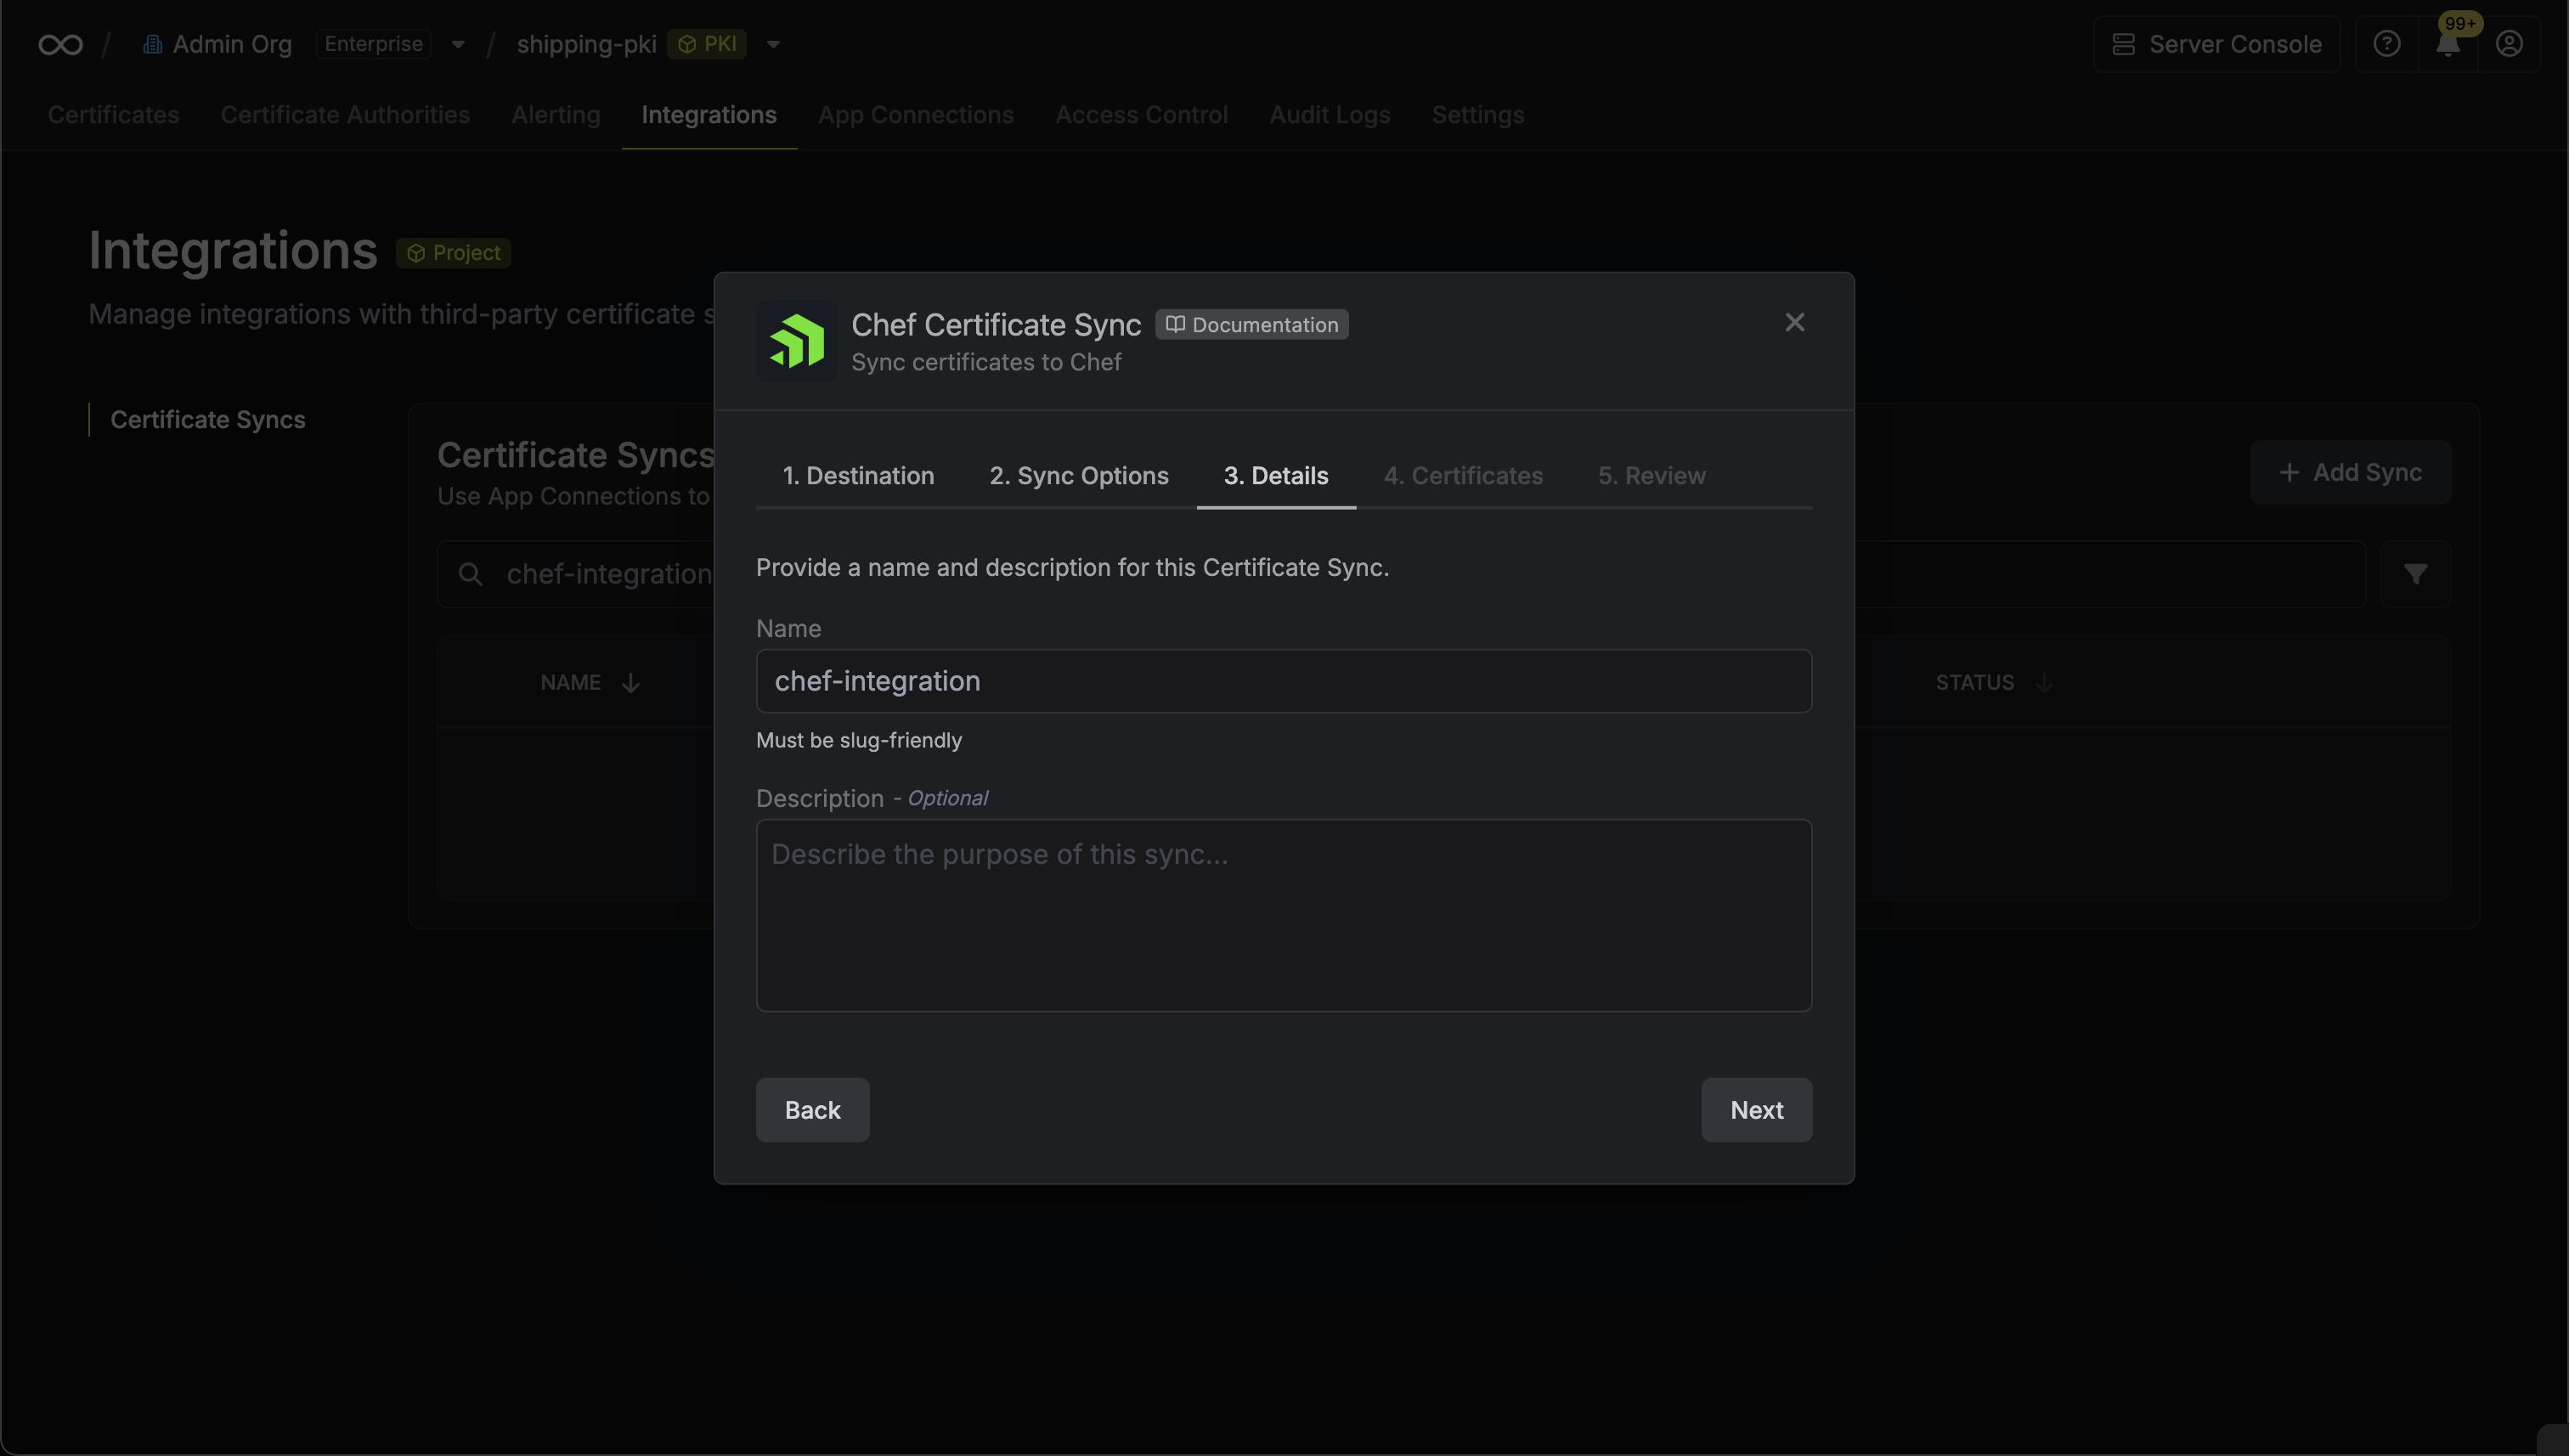 * **Name**: The name of your sync. Must be slug-friendly.
* **Description**: An optional description for your sync.
7. Select which certificates should be synced to Chef.
* **Name**: The name of your sync. Must be slug-friendly.
* **Description**: An optional description for your sync.
7. Select which certificates should be synced to Chef.
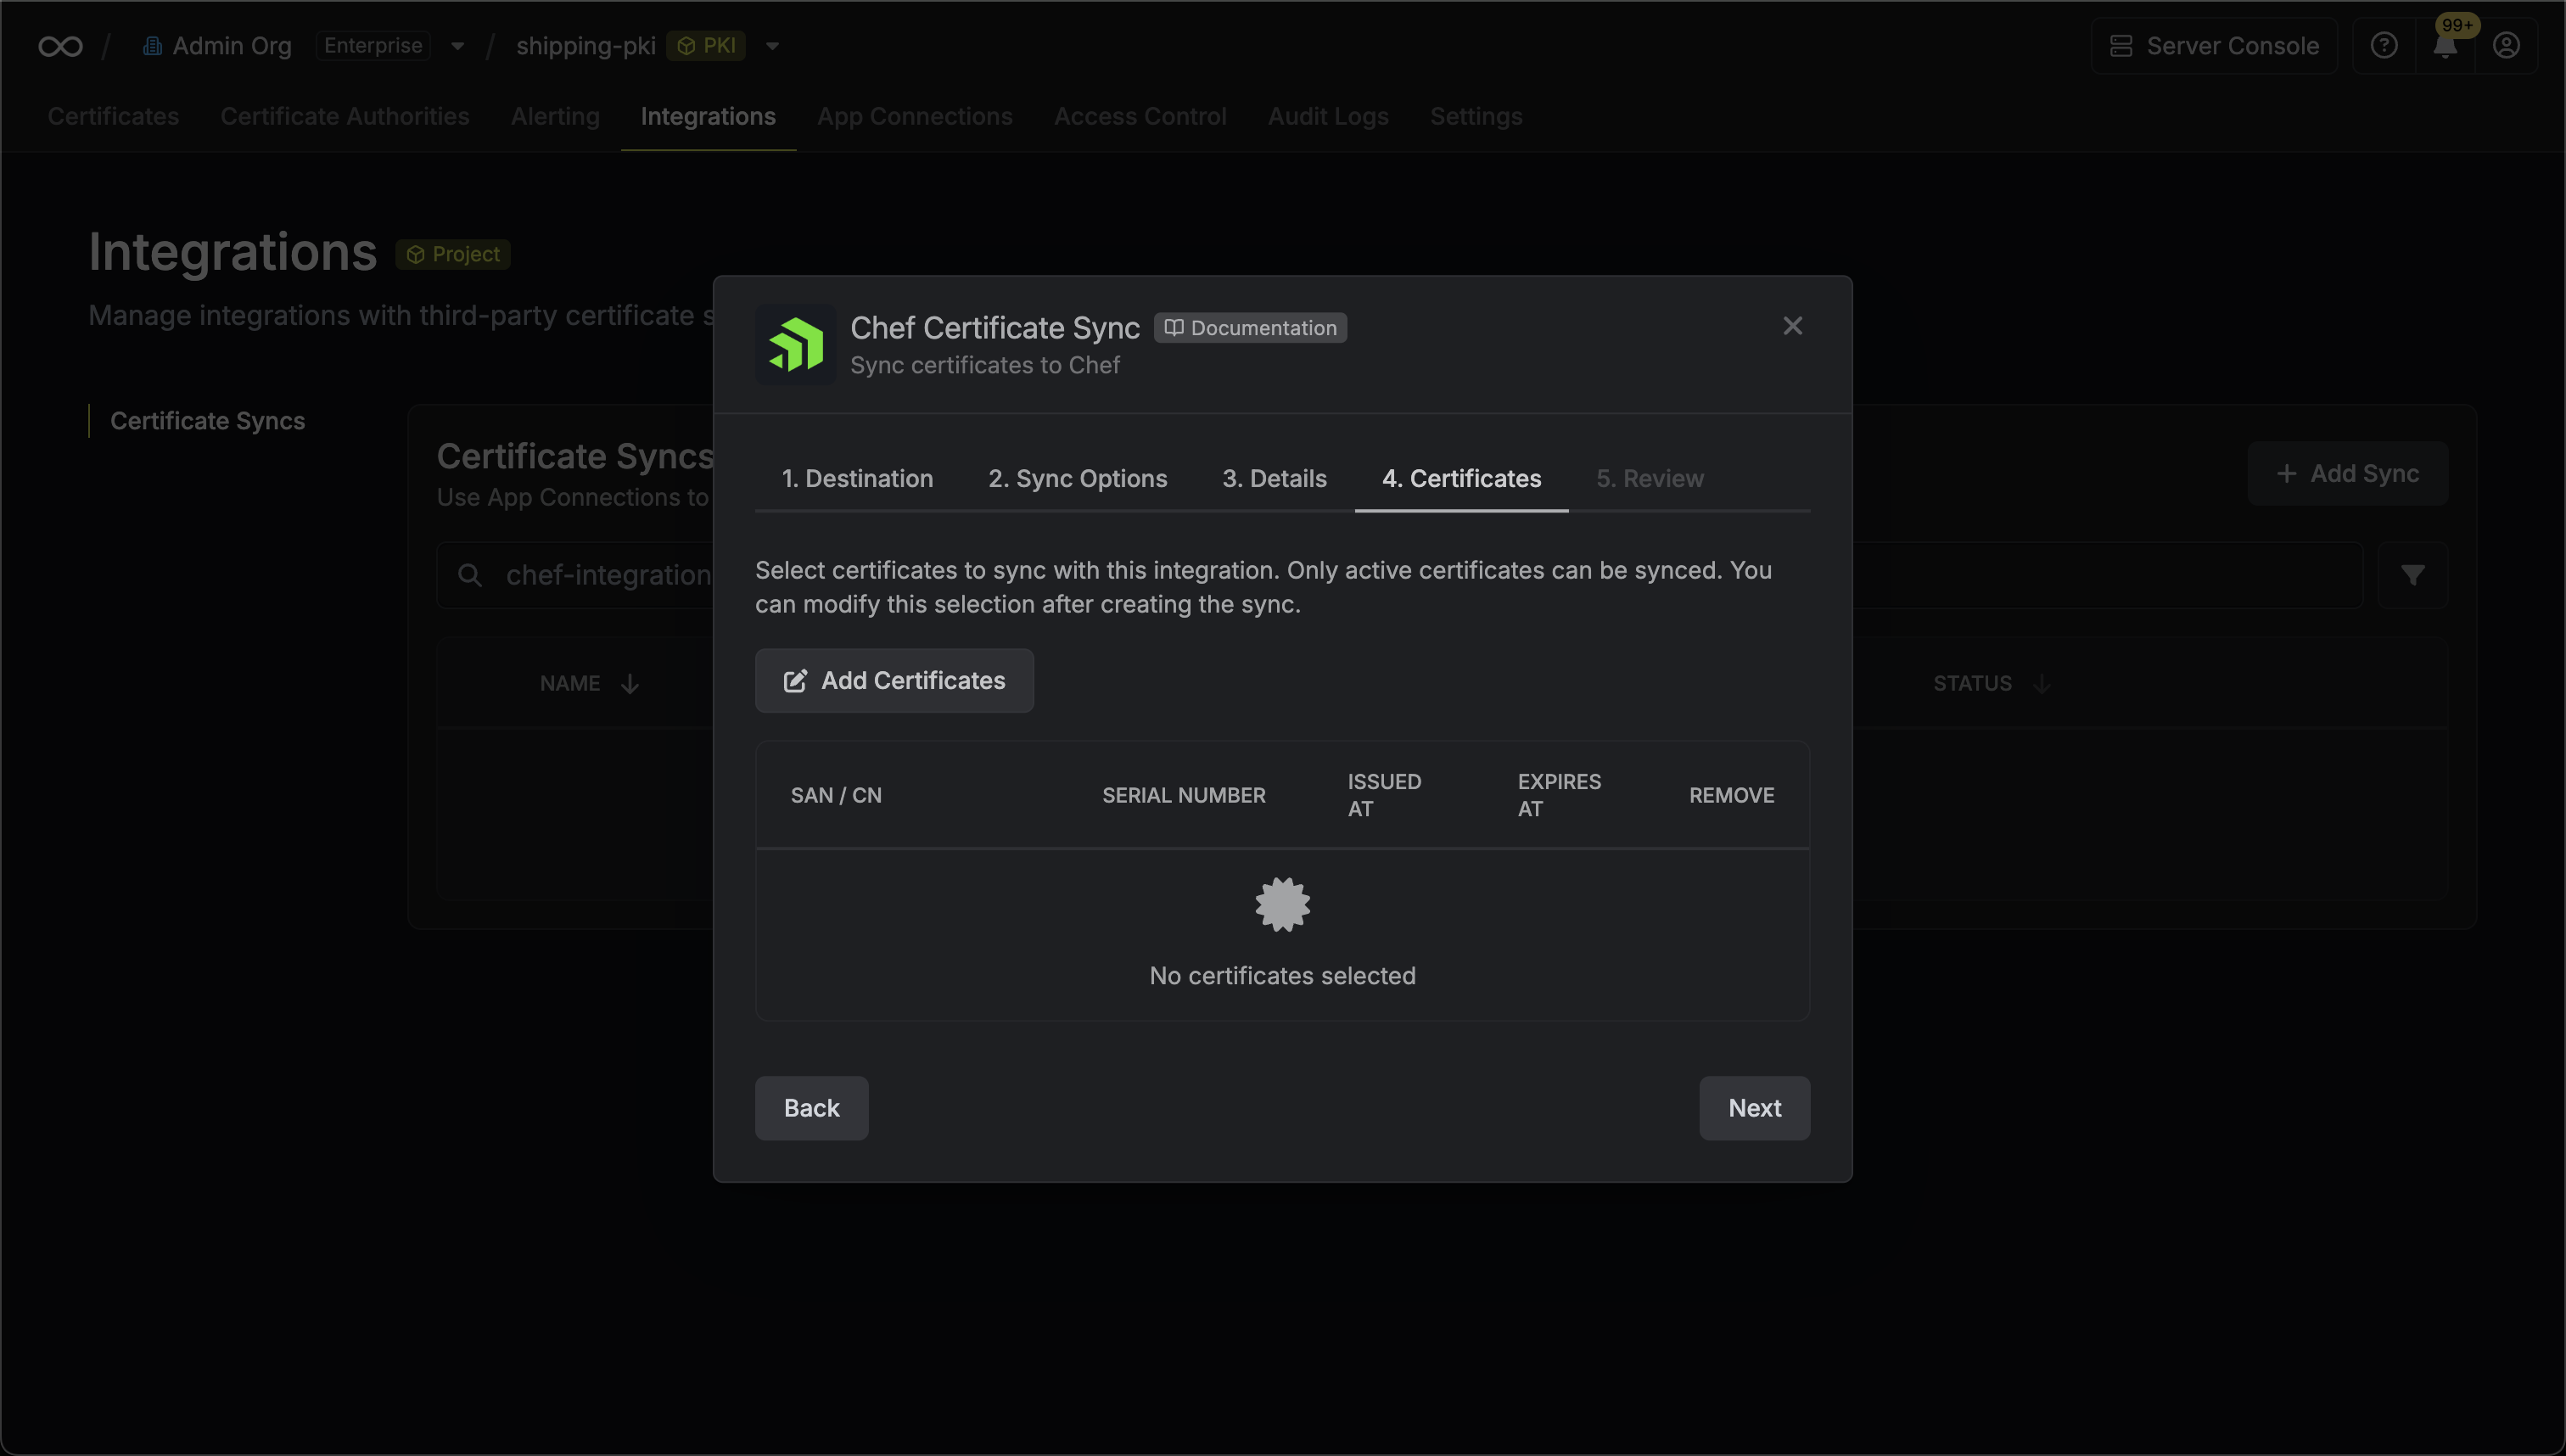 8. Review your Chef Certificate Sync configuration, then click **Create Sync**.
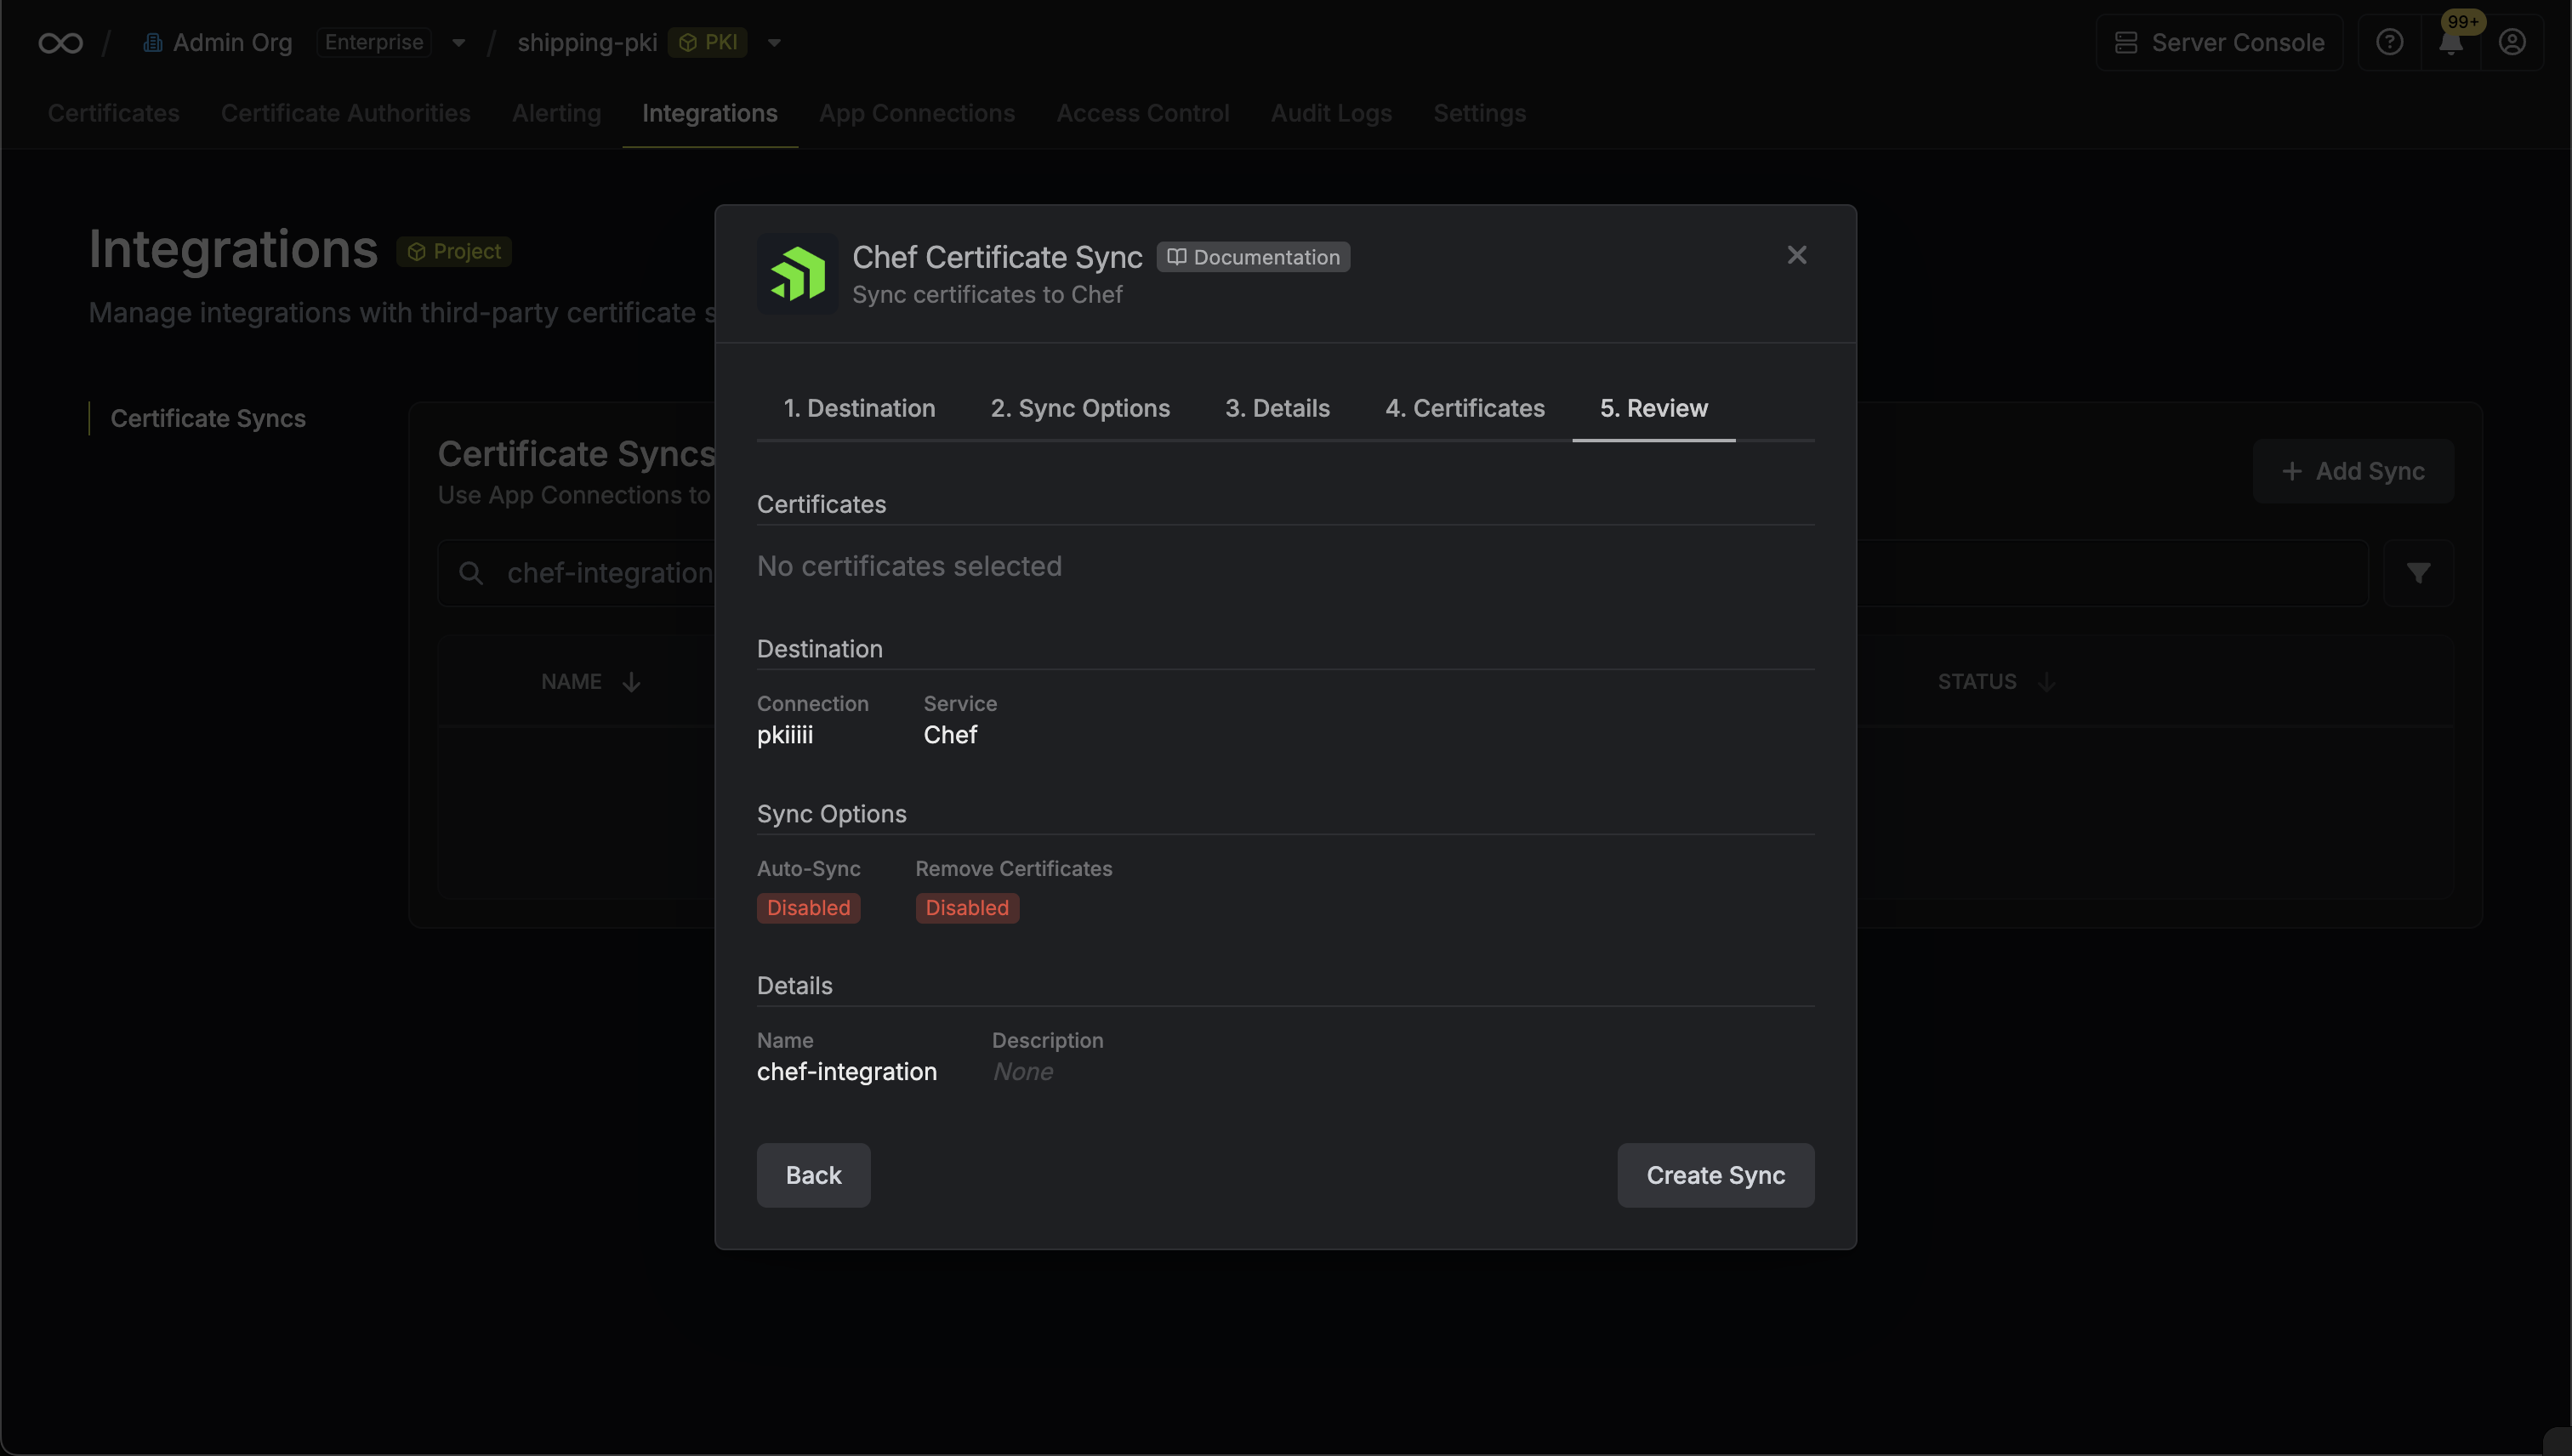 9. If enabled, your Chef Certificate Sync will begin syncing your certificates to the destination endpoint.
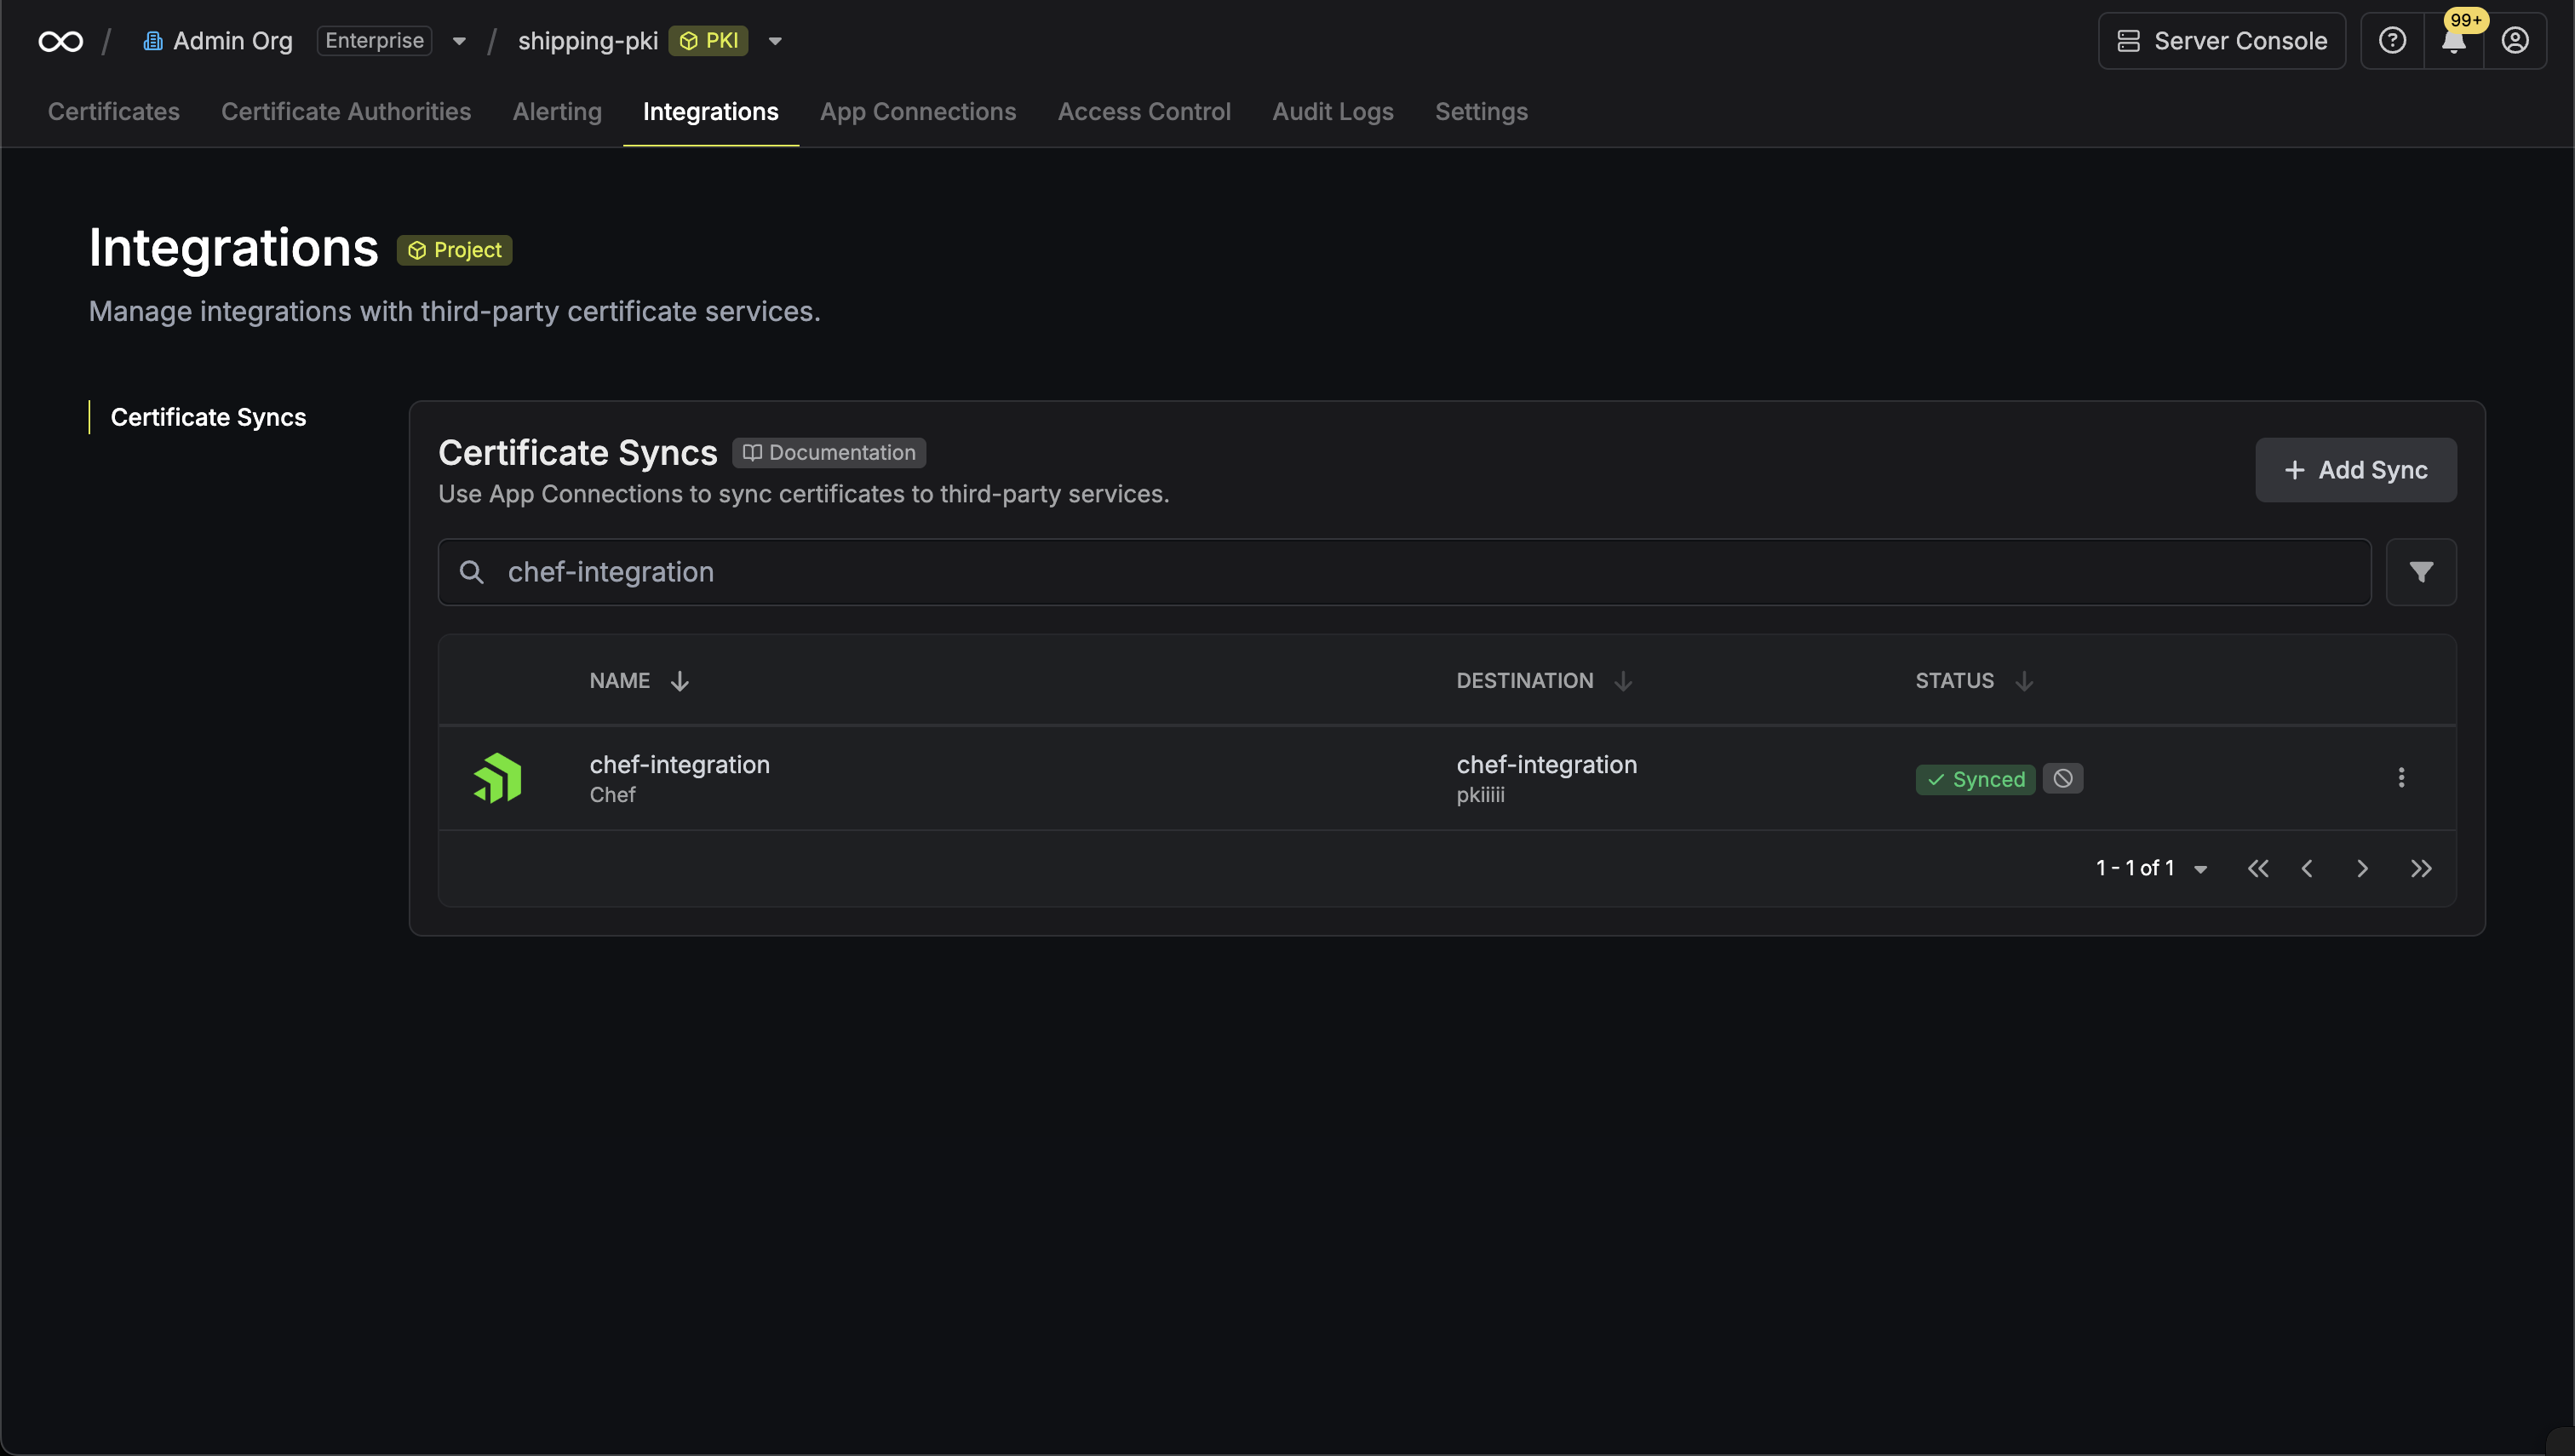 When creating an identity, you specify an organization level [role](/documentation/platform/access-controls/role-based-access-controls) for it to assume; you can configure roles in Organization Settings > Access Control > Organization Roles.
Now input a few details for your new identity. Here's some guidance for each field:
* Name (required): A friendly name for the identity.
* Role (required): A role from the **Organization Roles** tab for the identity to assume. The organization role assigned will determine what organization level resources this identity can have access to.
Once you've created an identity, you'll be redirected to a page where you can manage the identity.
Since the identity has been configured with Universal Auth by default, you should re-configure it to use OIDC Auth instead. To do this, press to edit the **Authentication** section,
remove the existing Universal Auth configuration, and add a new OIDC Auth configuration onto the identity.
When creating an identity, you specify an organization level [role](/documentation/platform/access-controls/role-based-access-controls) for it to assume; you can configure roles in Organization Settings > Access Control > Organization Roles.
Now input a few details for your new identity. Here's some guidance for each field:
* Name (required): A friendly name for the identity.
* Role (required): A role from the **Organization Roles** tab for the identity to assume. The organization role assigned will determine what organization level resources this identity can have access to.
Once you've created an identity, you'll be redirected to a page where you can manage the identity.
Since the identity has been configured with Universal Auth by default, you should re-configure it to use OIDC Auth instead. To do this, press to edit the **Authentication** section,
remove the existing Universal Auth configuration, and add a new OIDC Auth configuration onto the identity.
 ## Enter your Cloud 66 Access Token
In Cloud 66 Dashboard, click on the top right icon > Account Settings > Access Token
## Enter your Cloud 66 Access Token
In Cloud 66 Dashboard, click on the top right icon > Account Settings > Access Token
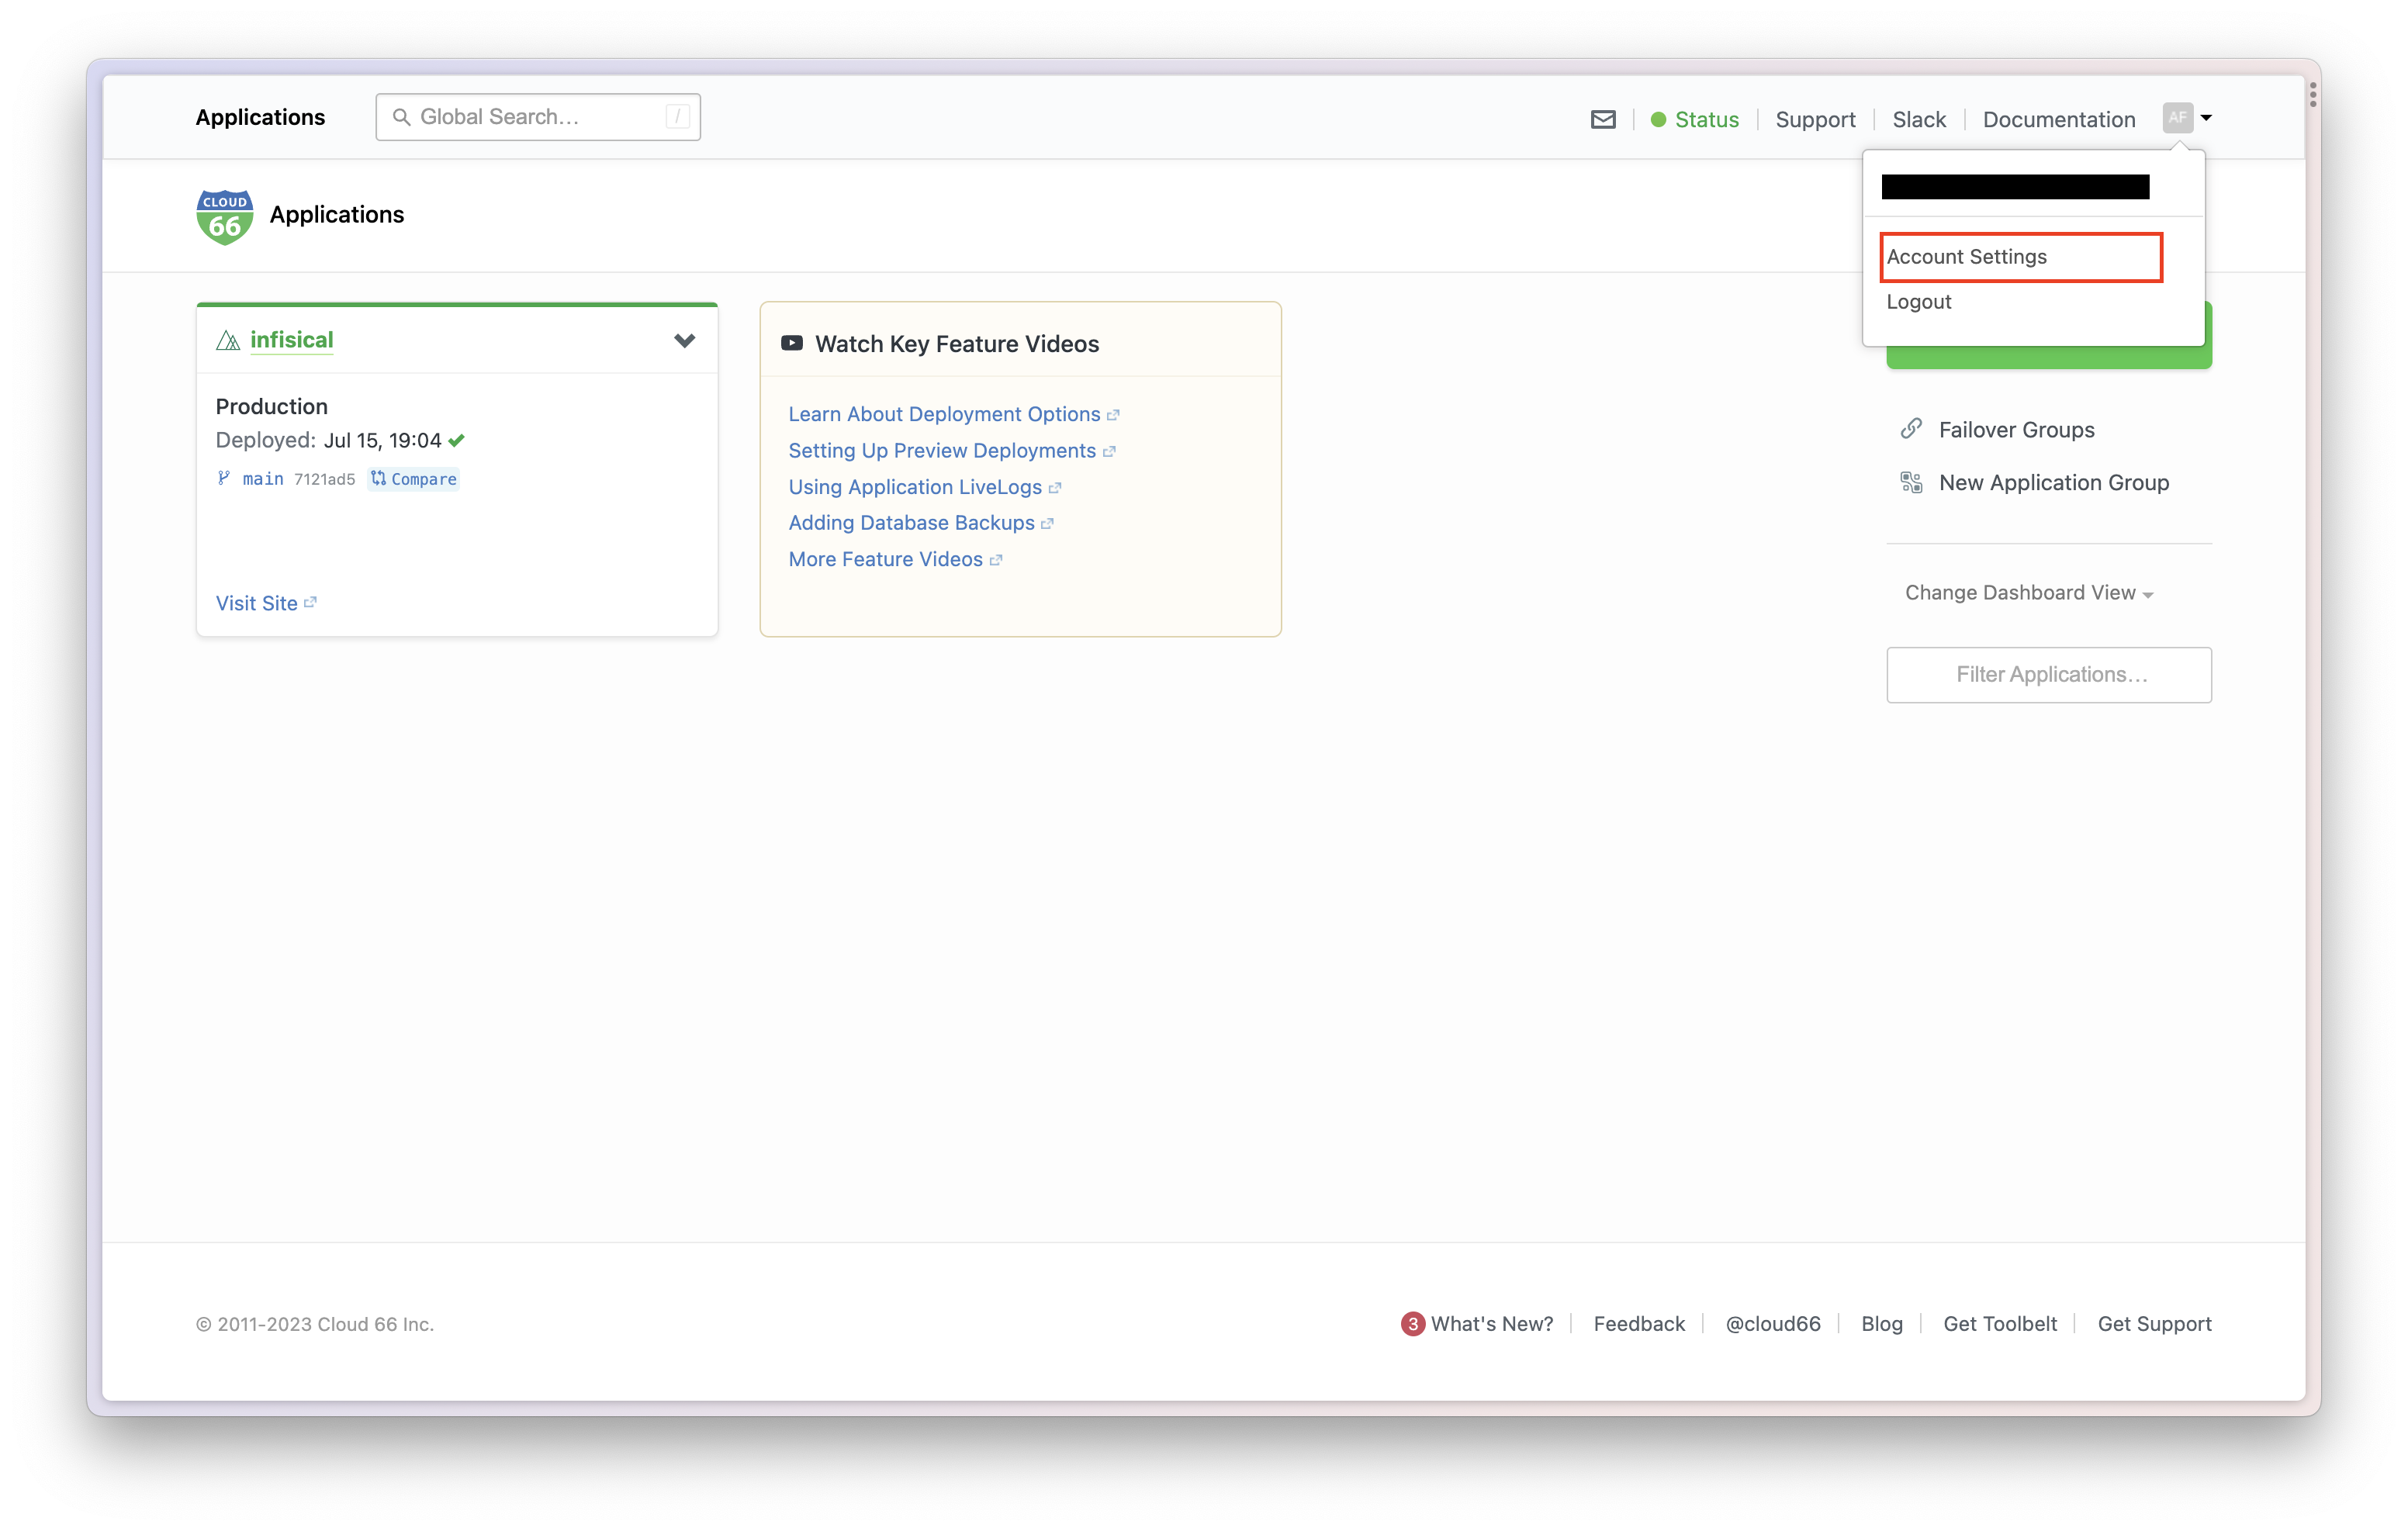
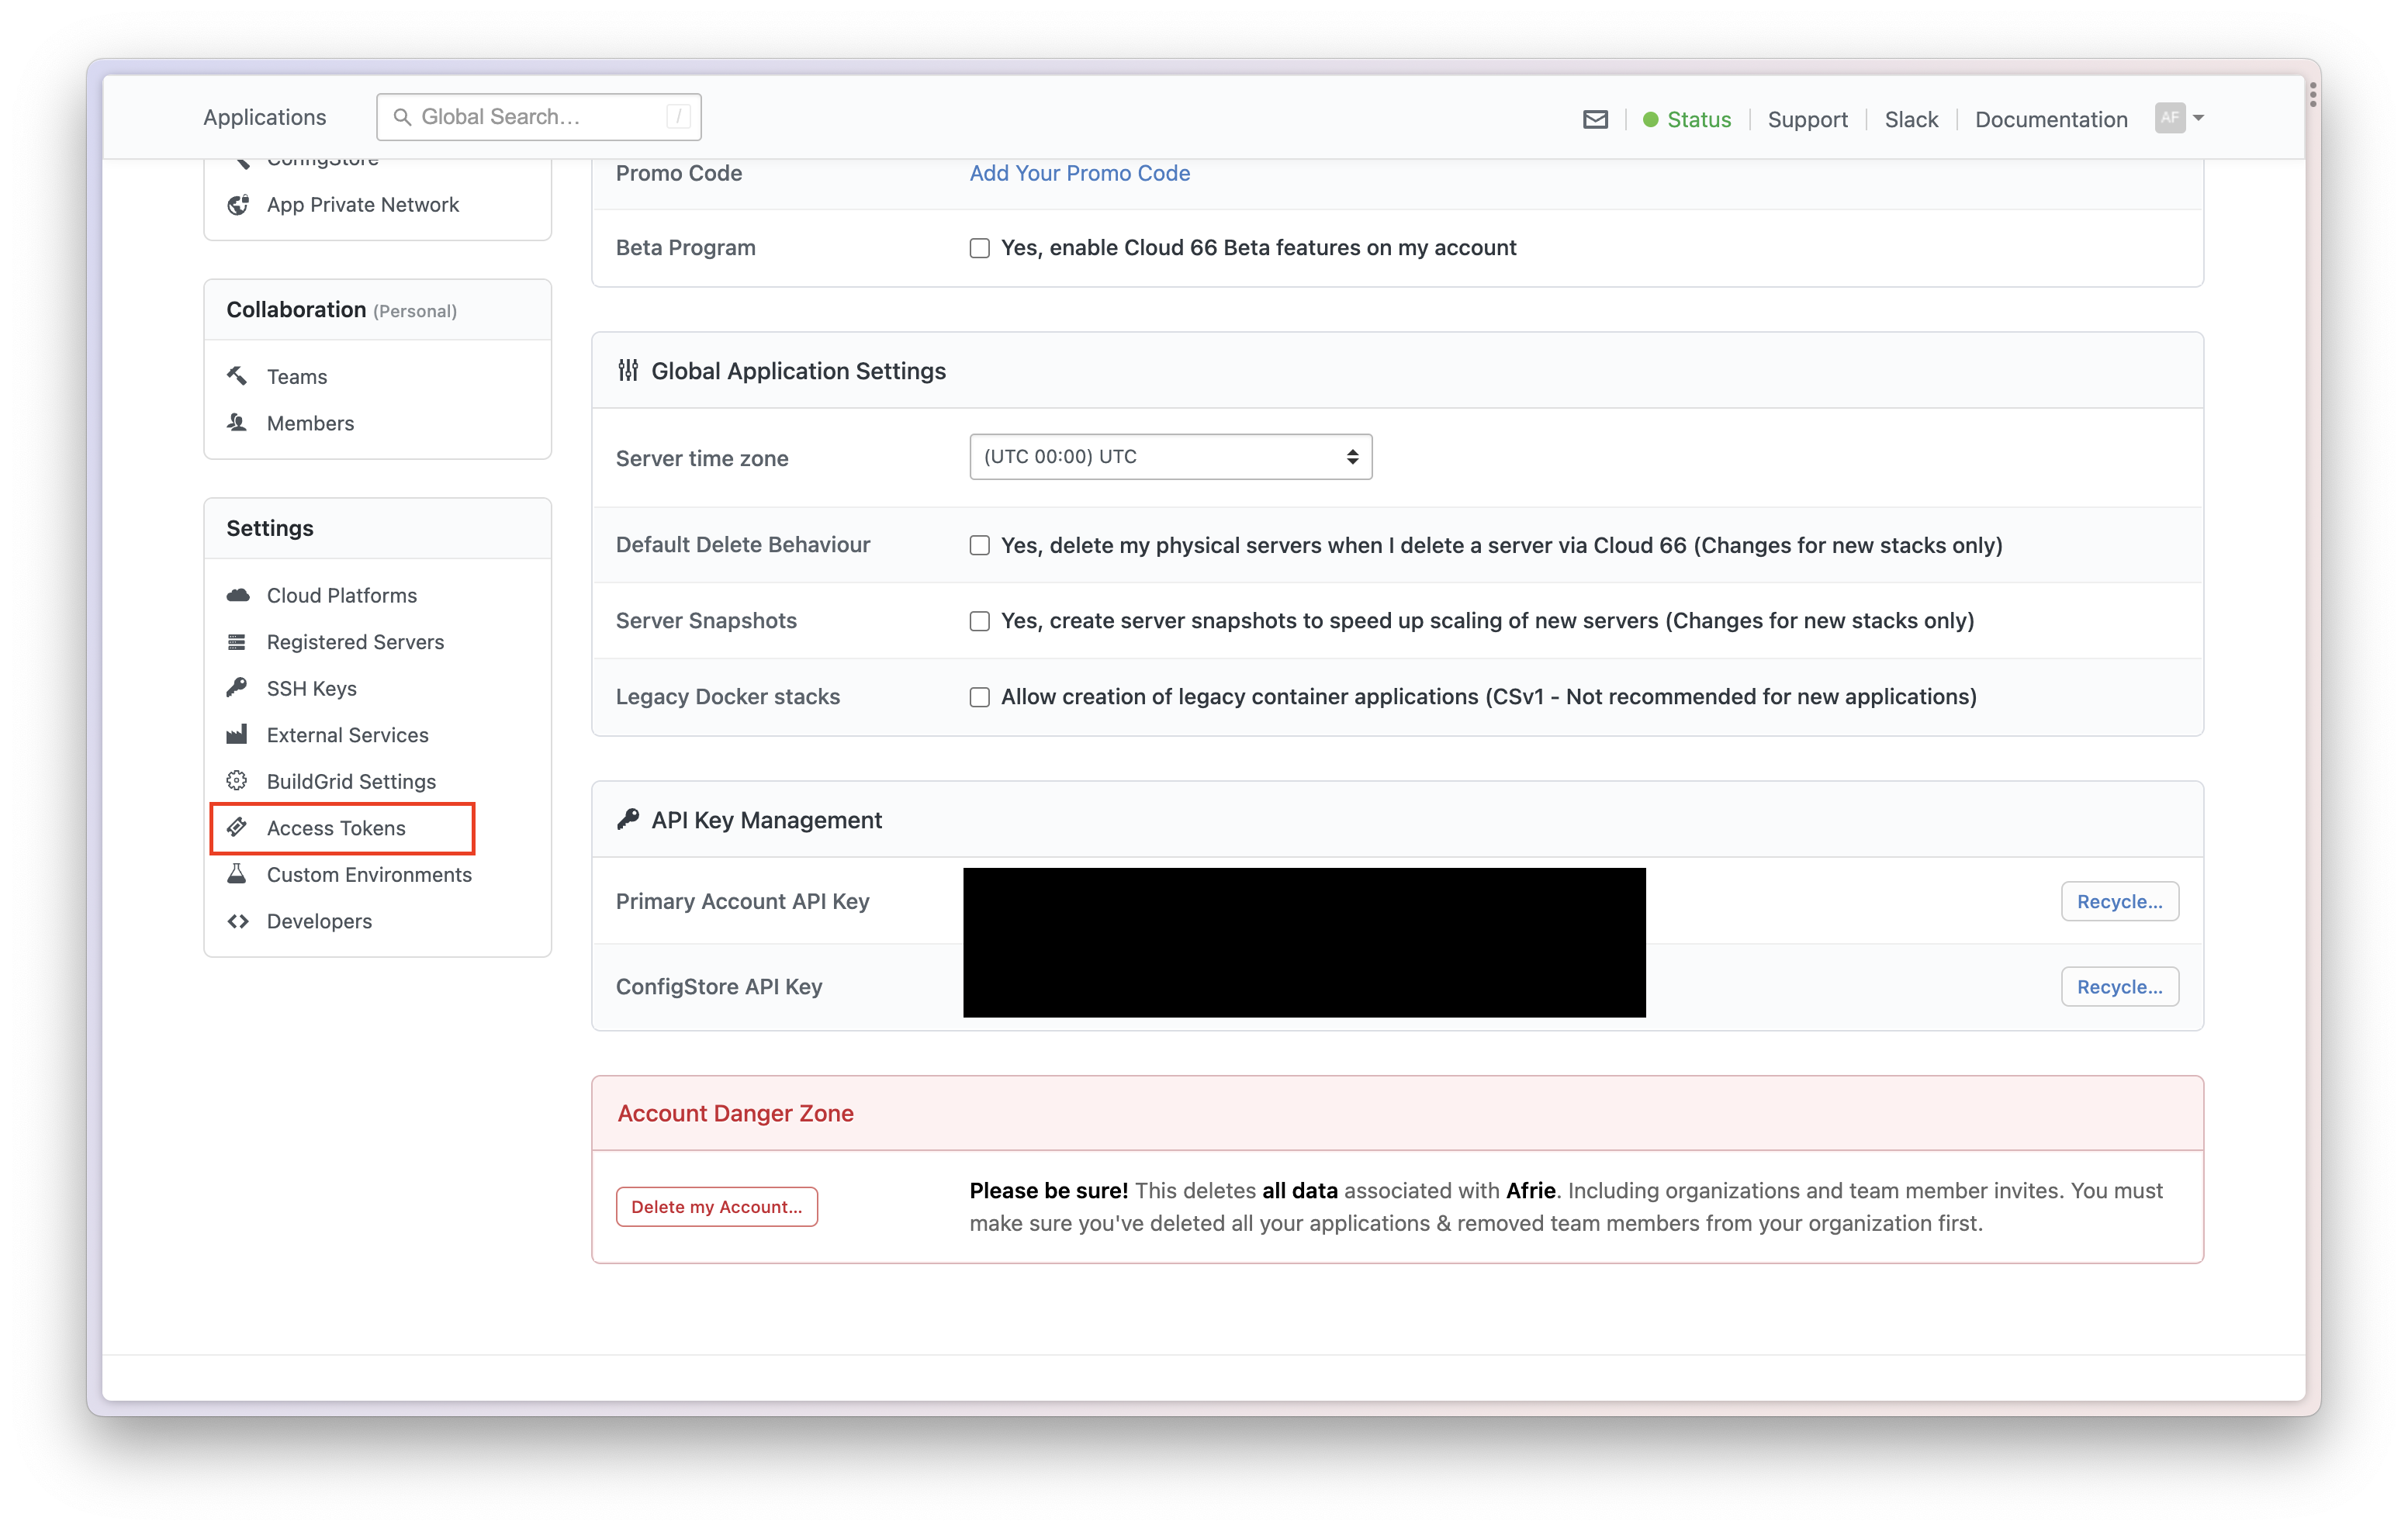 Create new Personal Access Token.
 Name it **infisical** and check **Public** and **Admin**. Then click "Create Token"
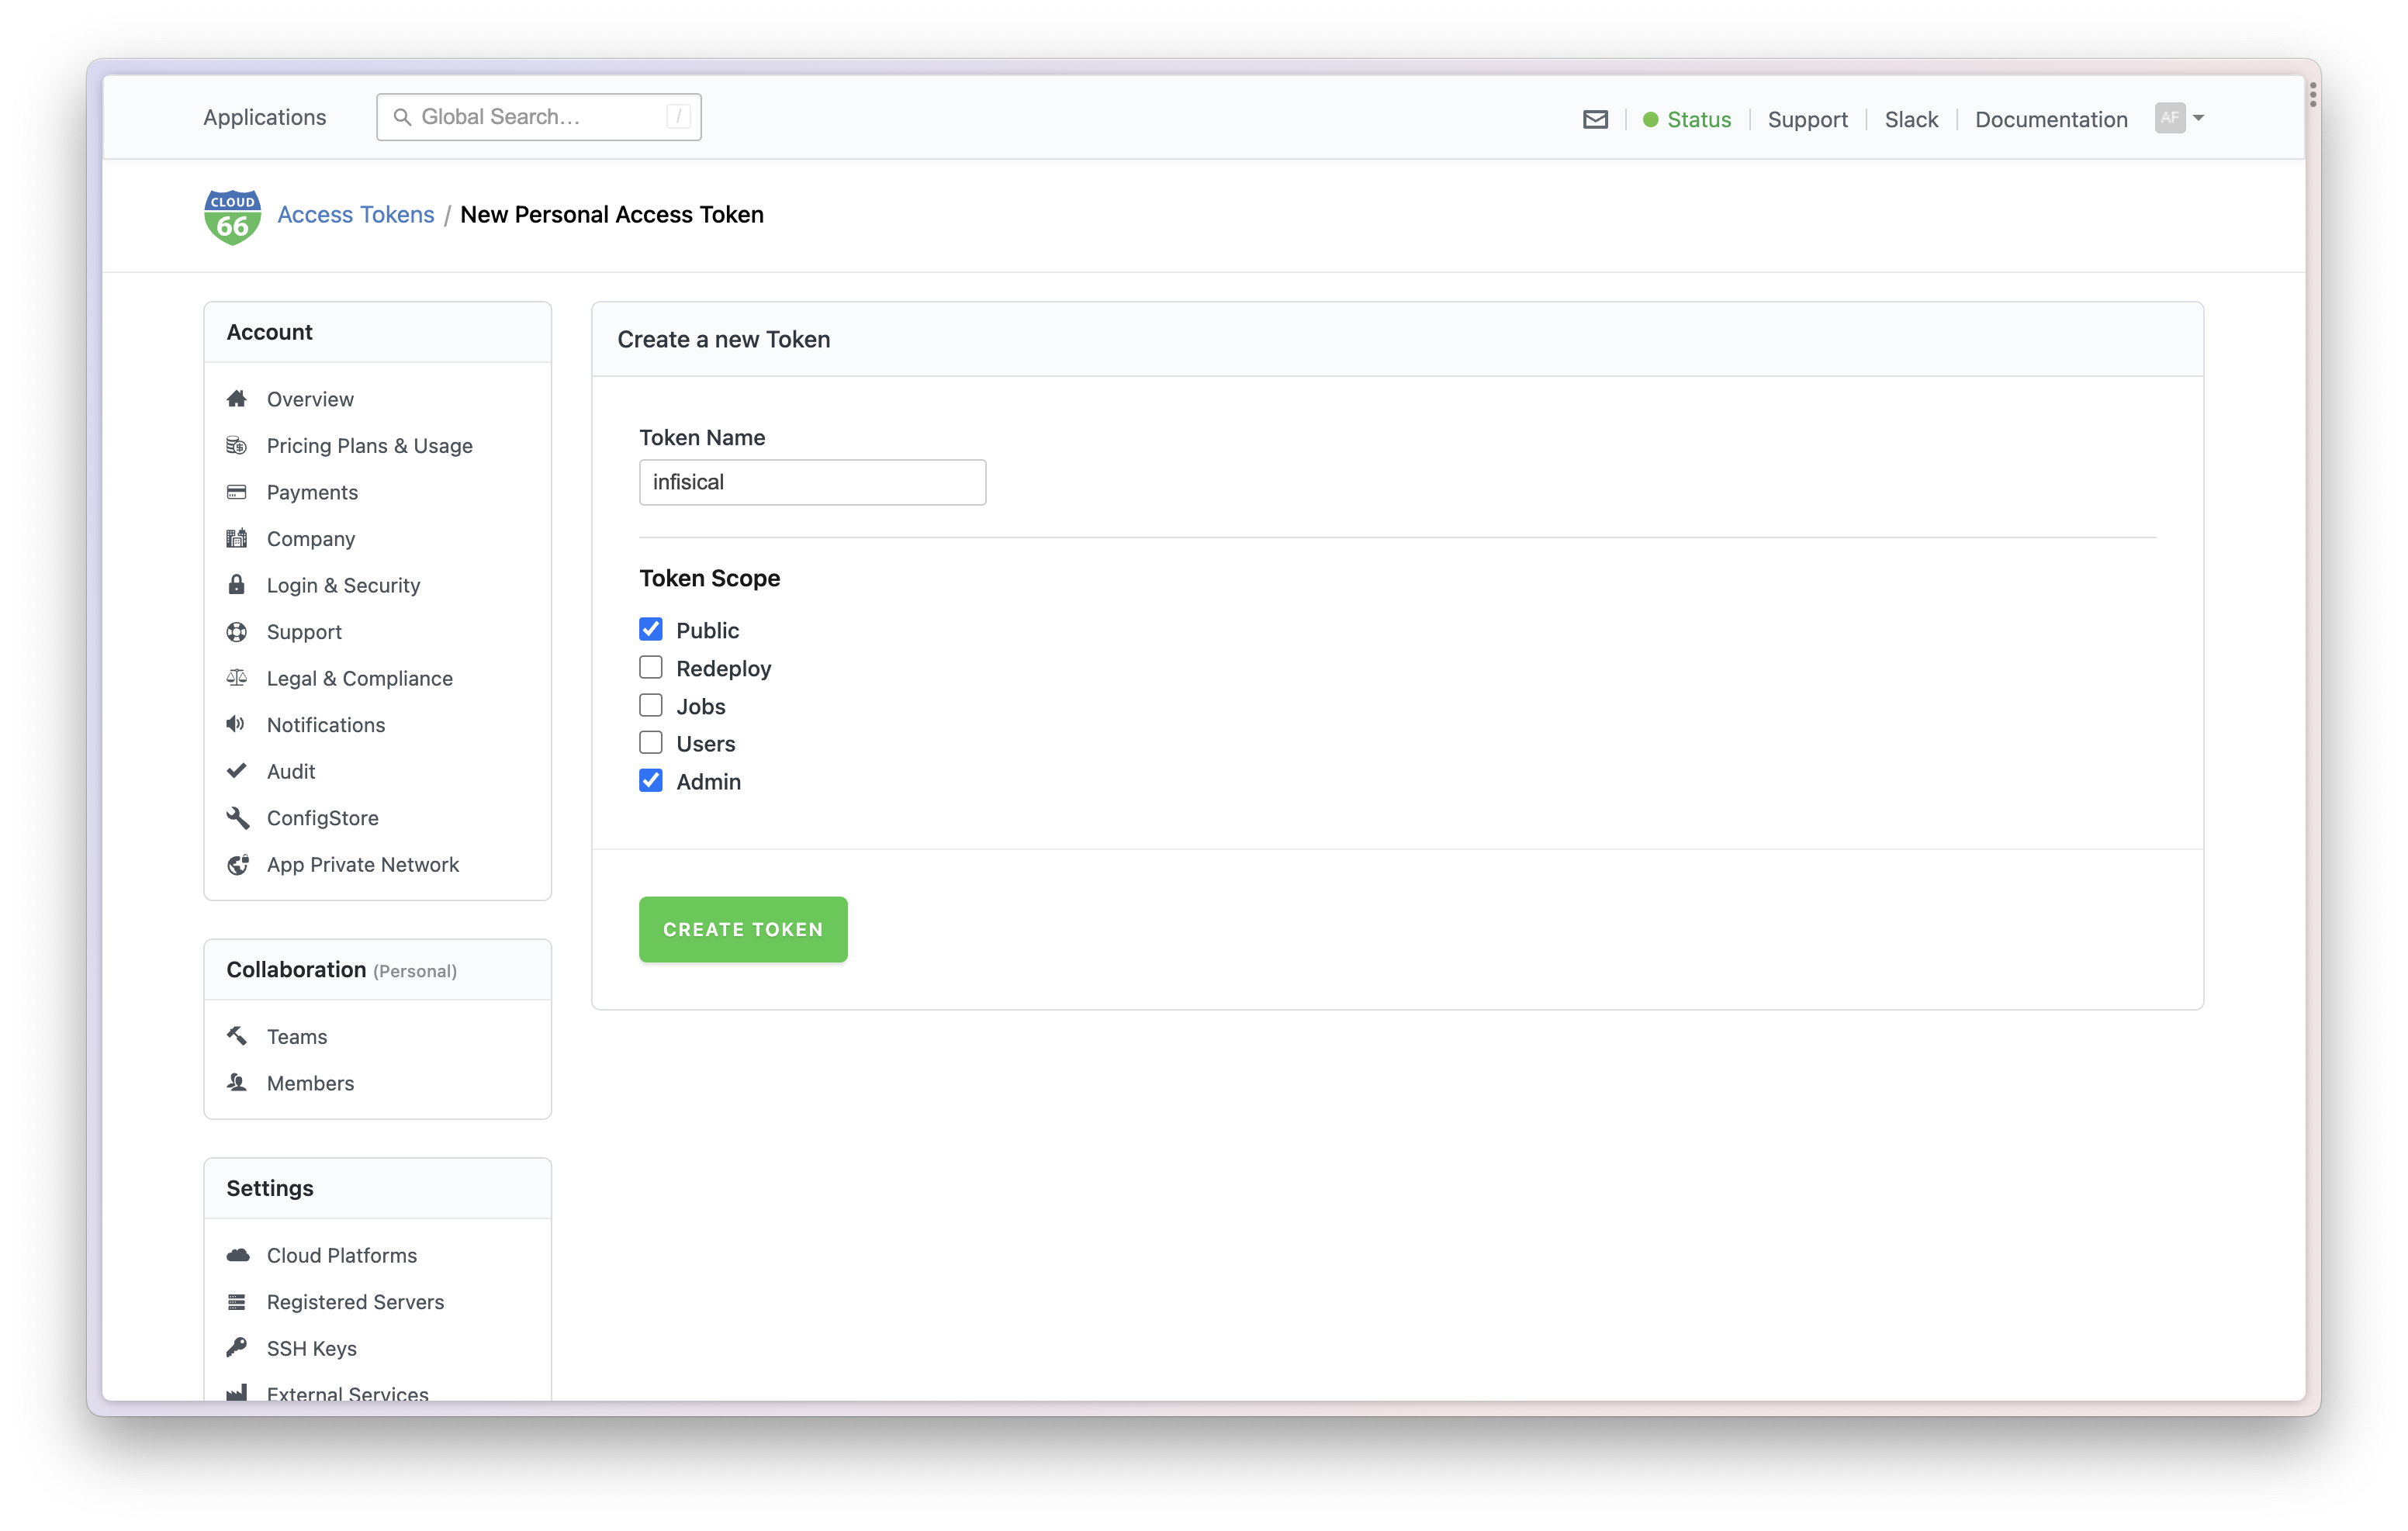 Copy and save your token.
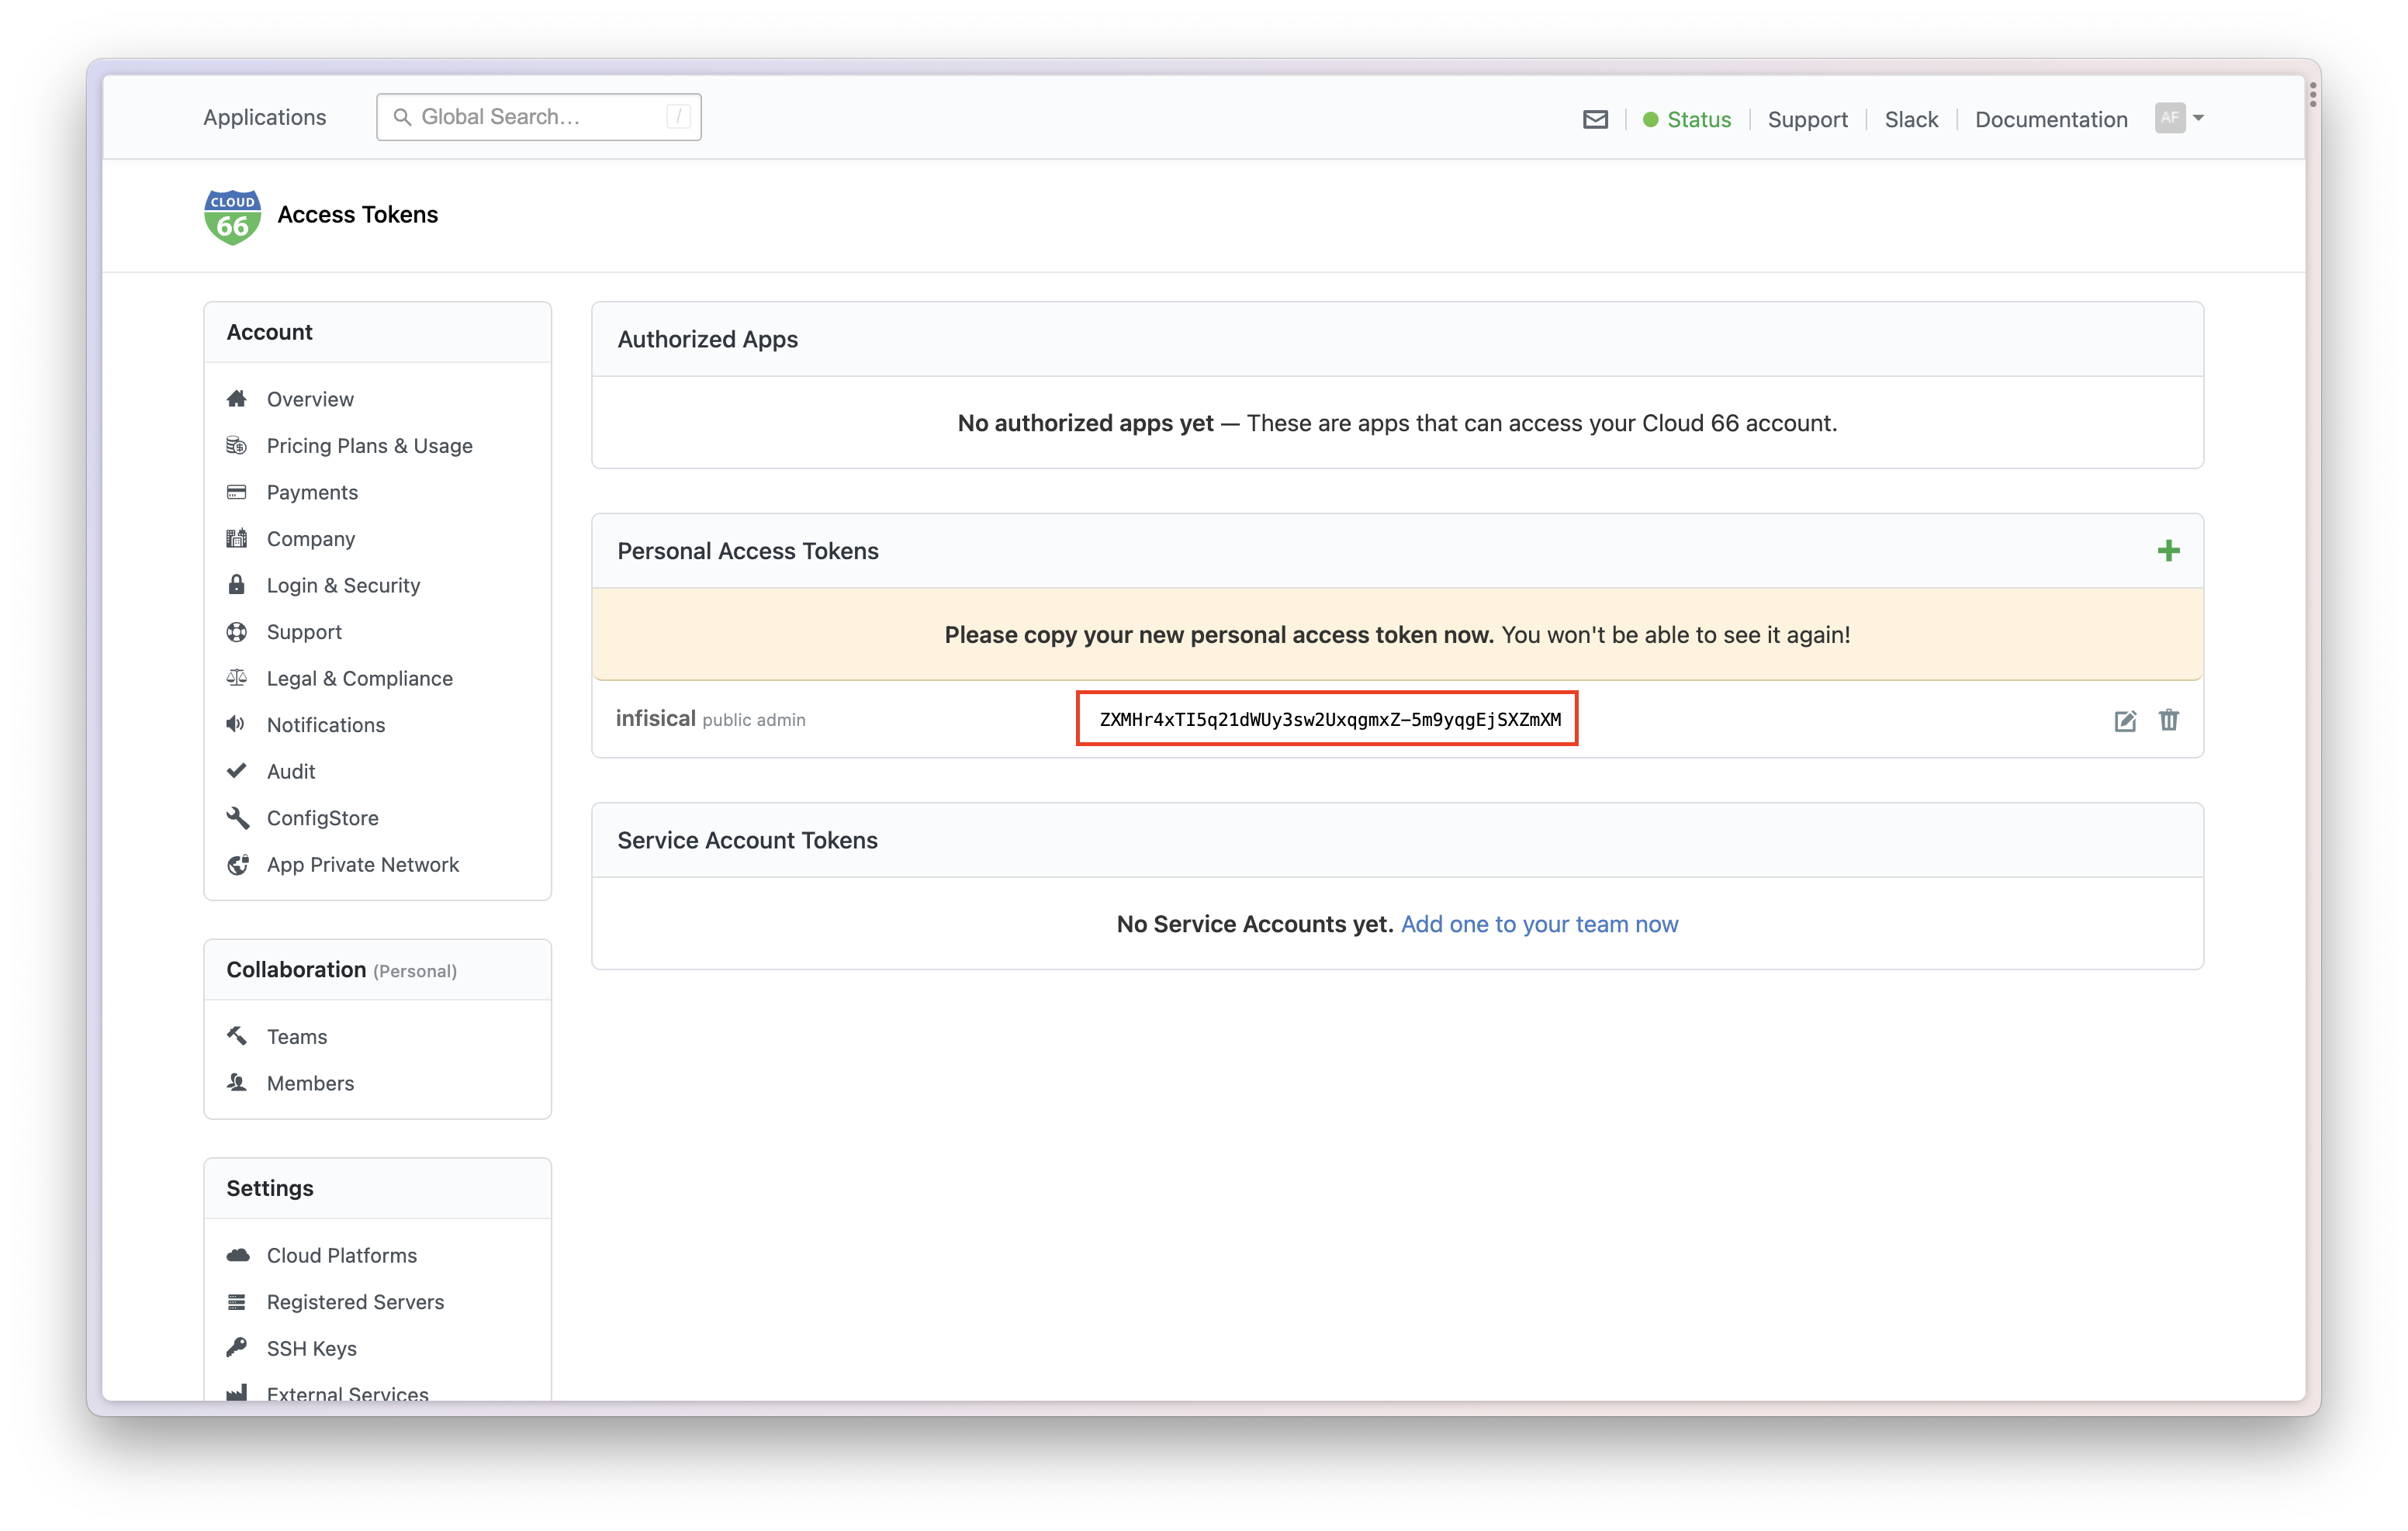 ### Go to Infisical Integration Page
Click on the Cloud 66 tile and enter your API token to grant Infisical access to your Cloud 66 account.
### Go to Infisical Integration Page
Click on the Cloud 66 tile and enter your API token to grant Infisical access to your Cloud 66 account.
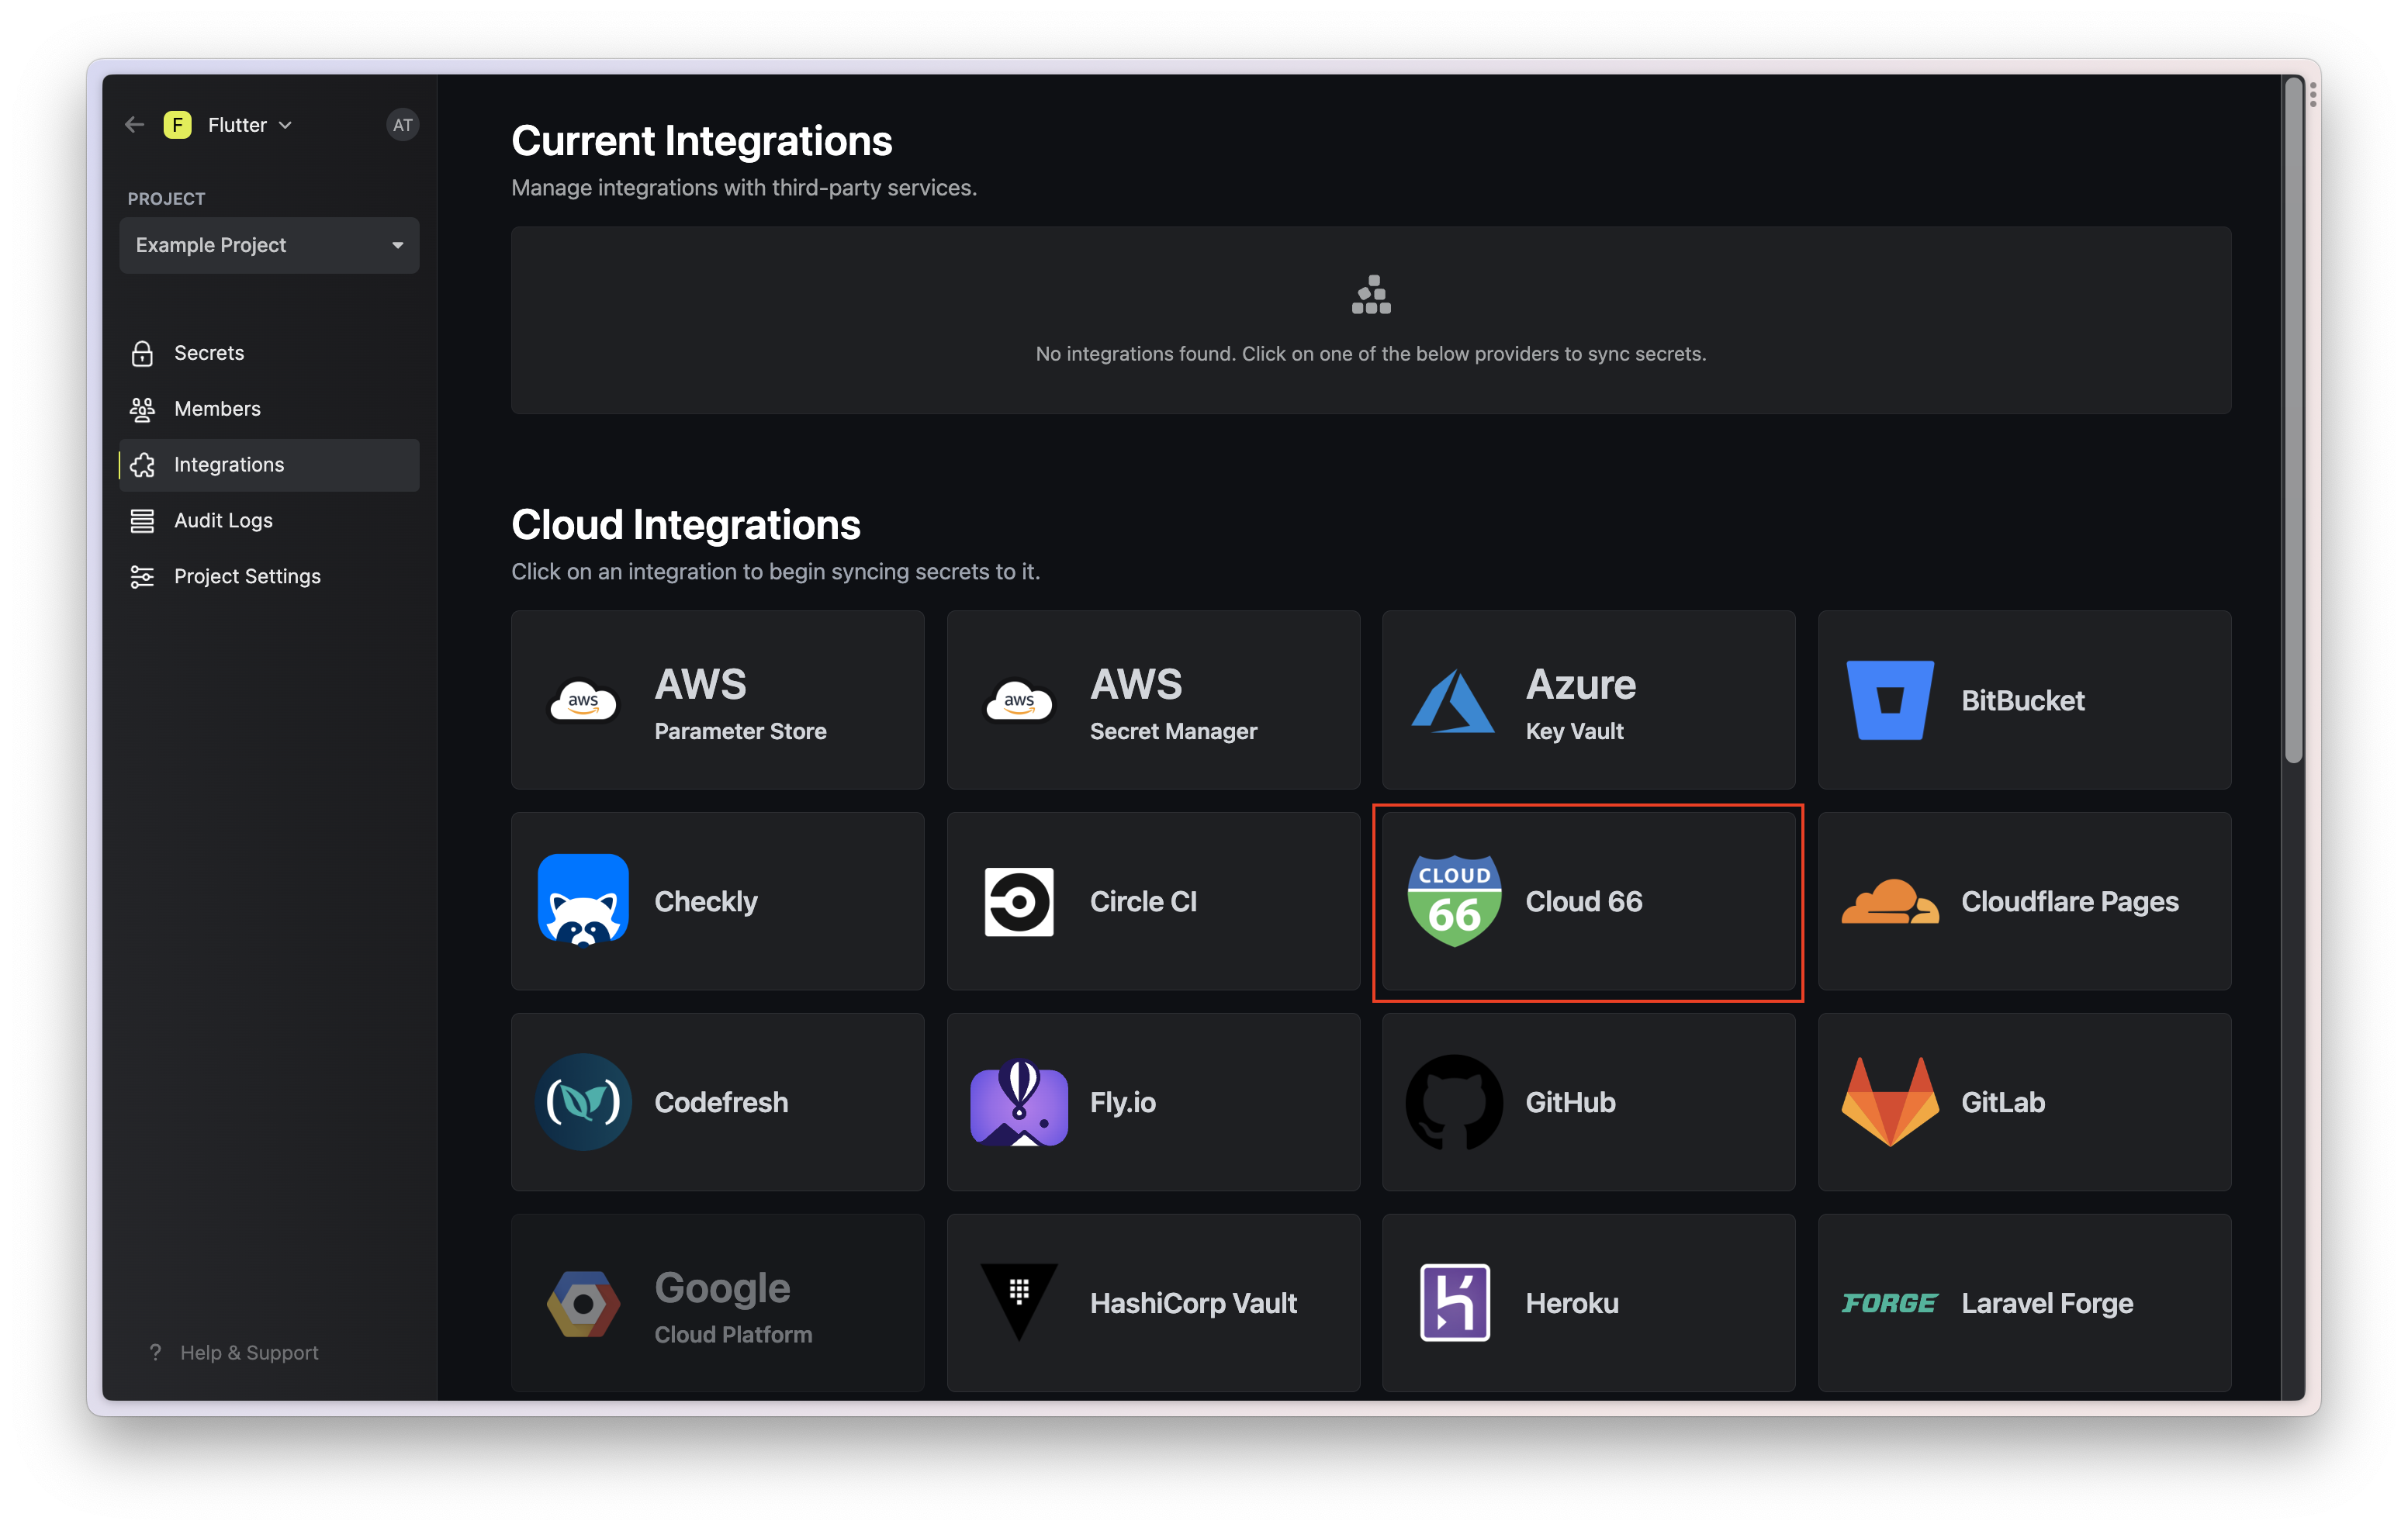 Enter your Cloud 66 Personal Access Token here. Then click "Connect to Cloud 66".
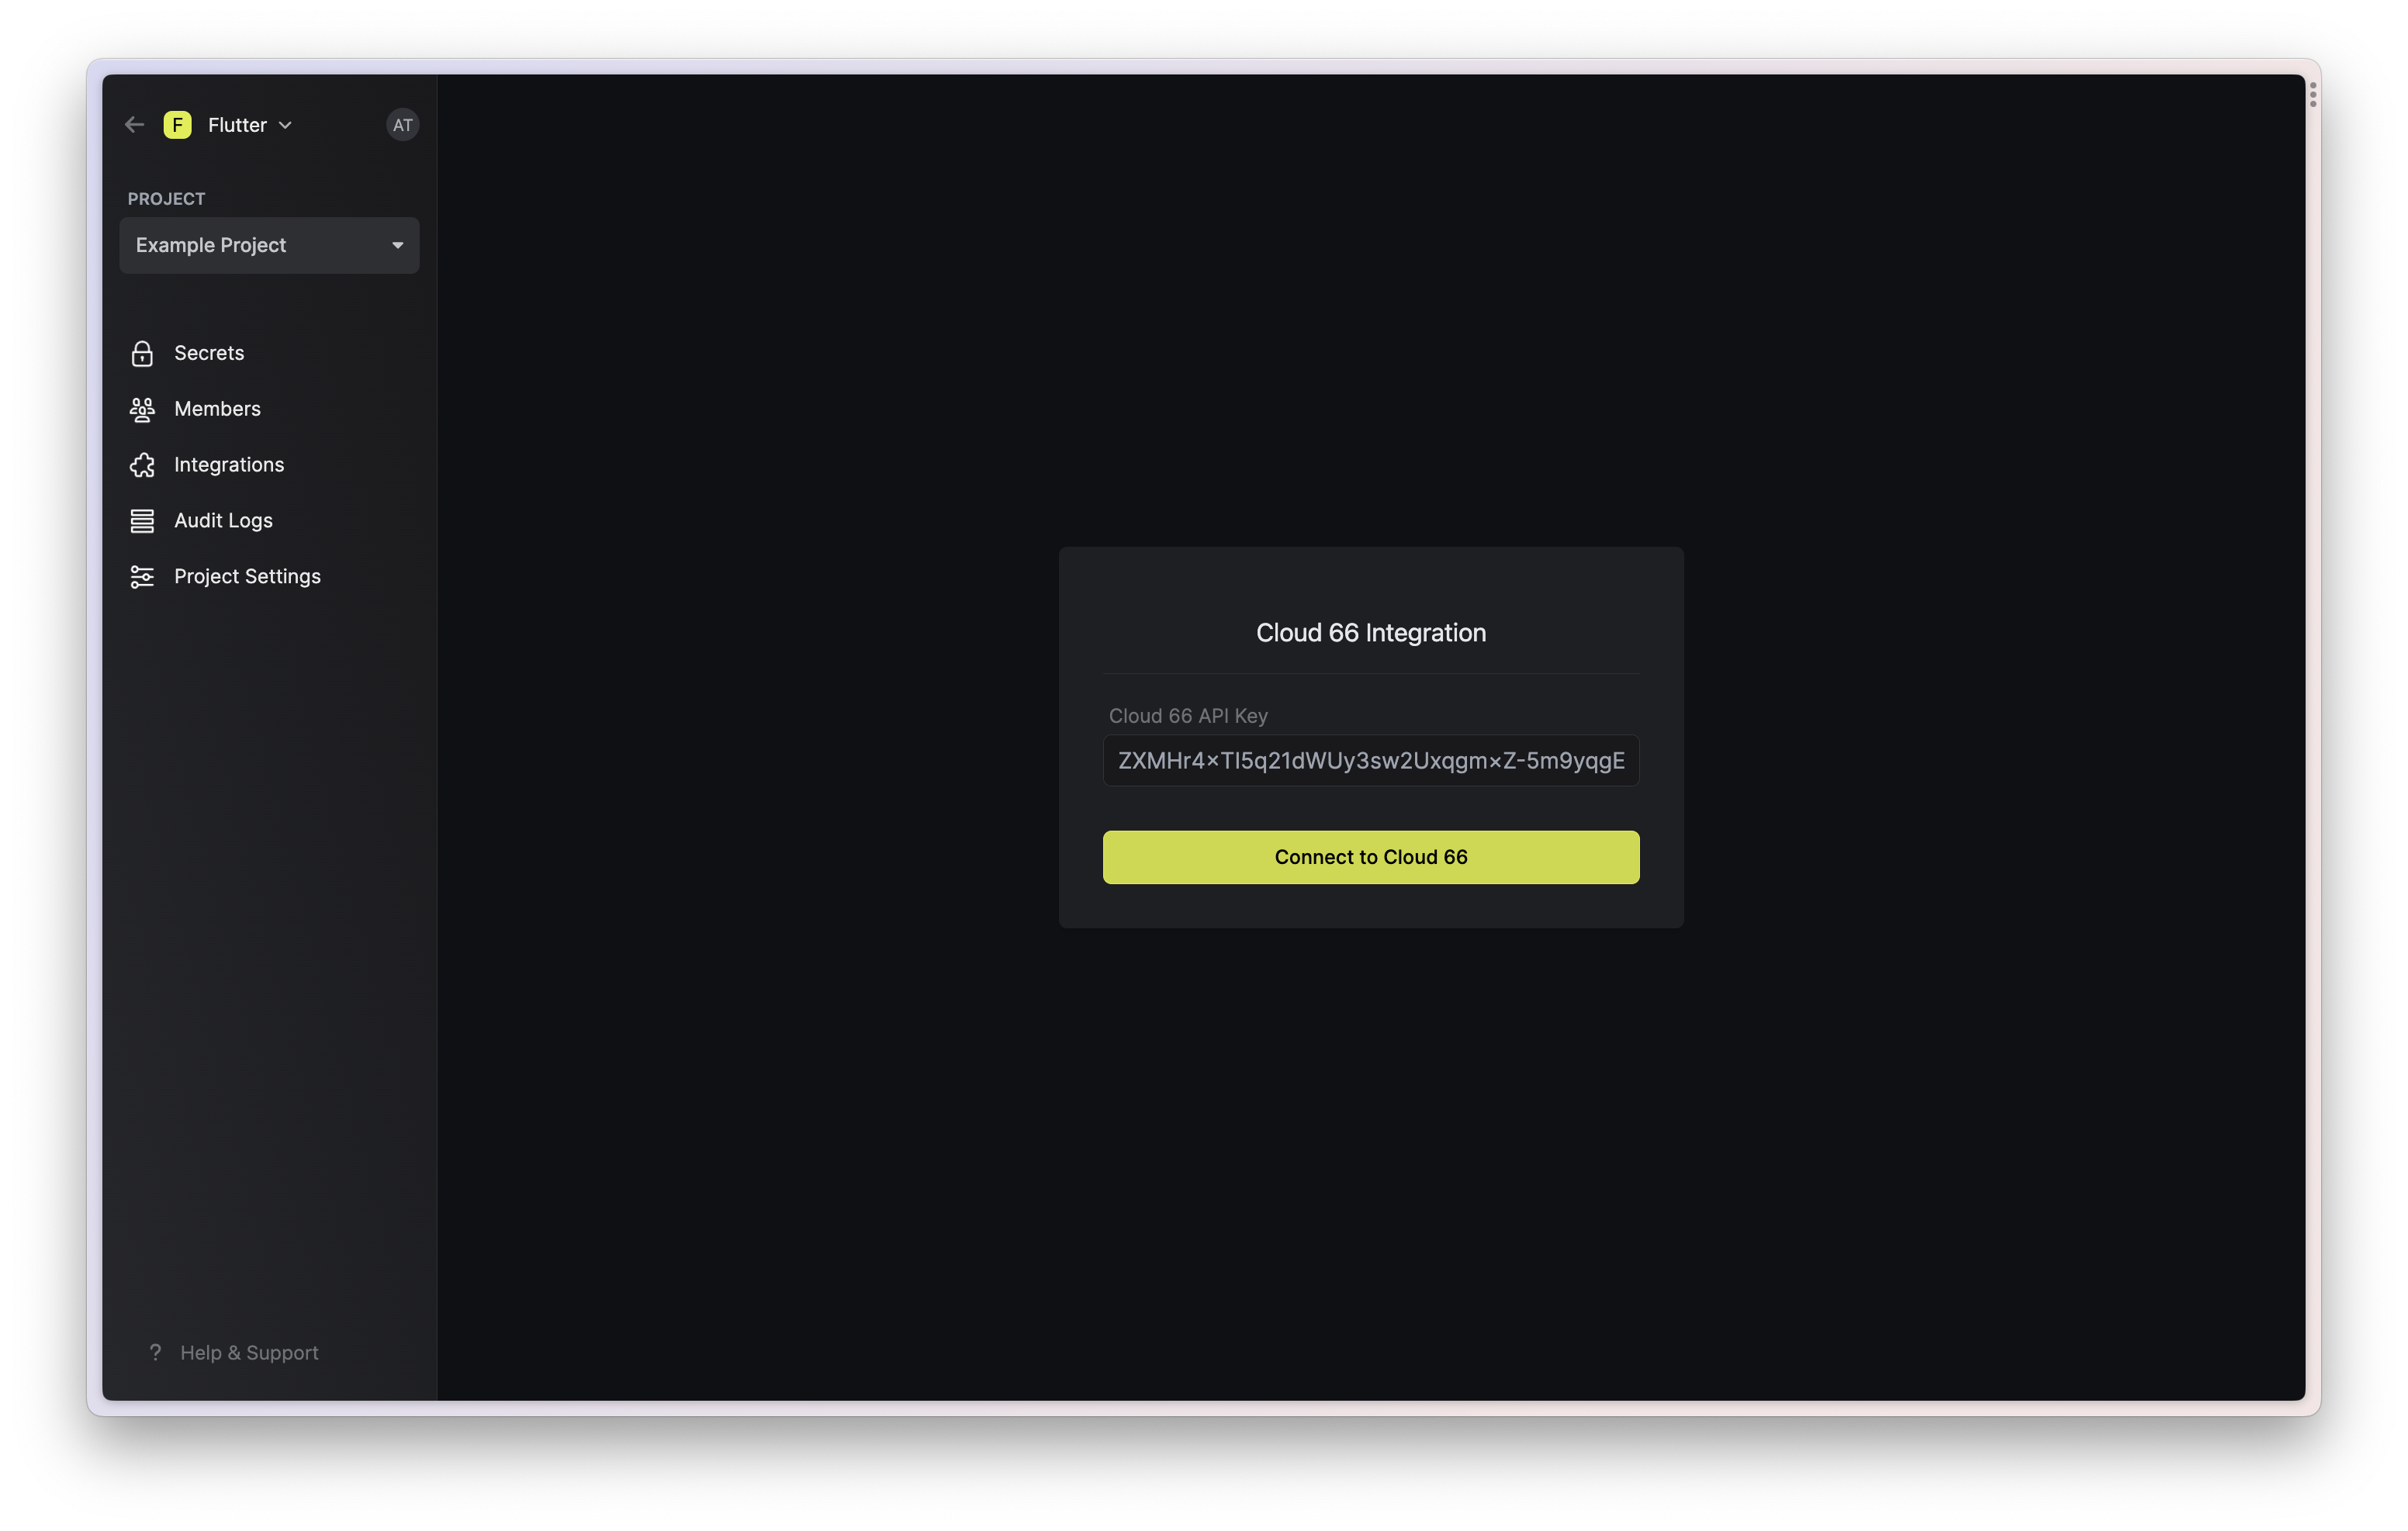 ## Start integration
Select which Infisical environment secrets you want to sync to which Cloud 66 stacks and press create integration to start syncing secrets to Cloud 66.
## Start integration
Select which Infisical environment secrets you want to sync to which Cloud 66 stacks and press create integration to start syncing secrets to Cloud 66.
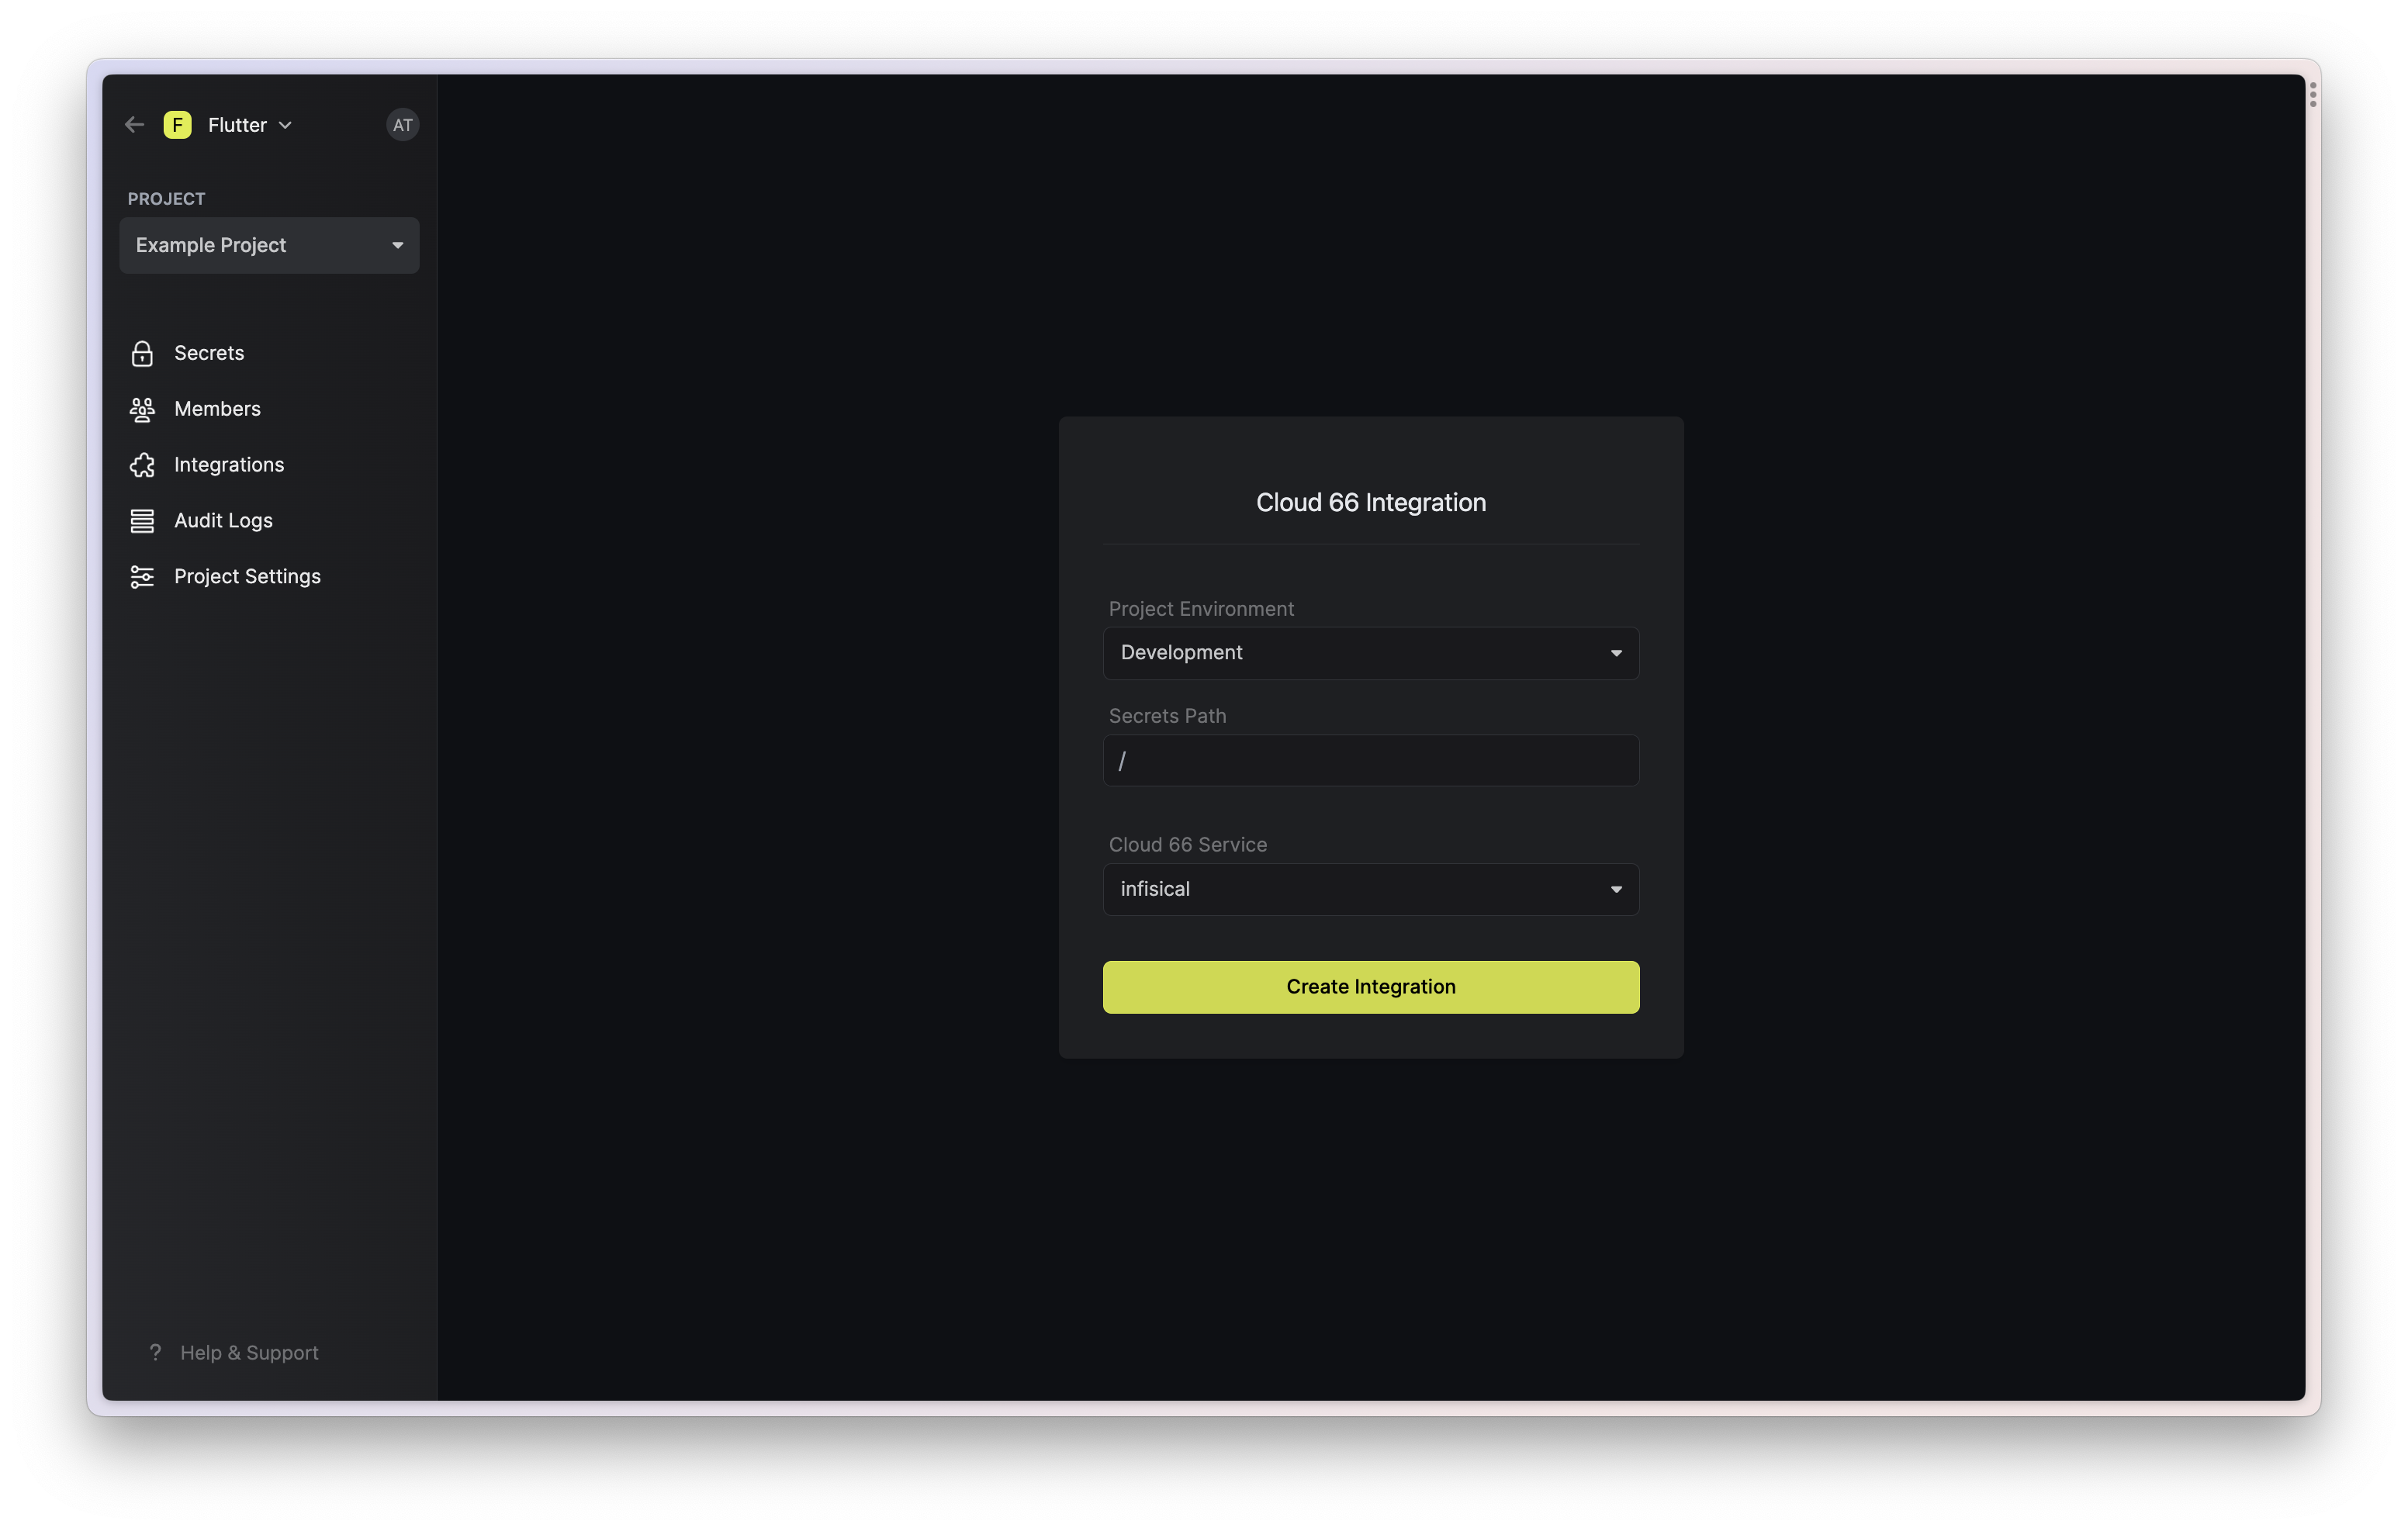
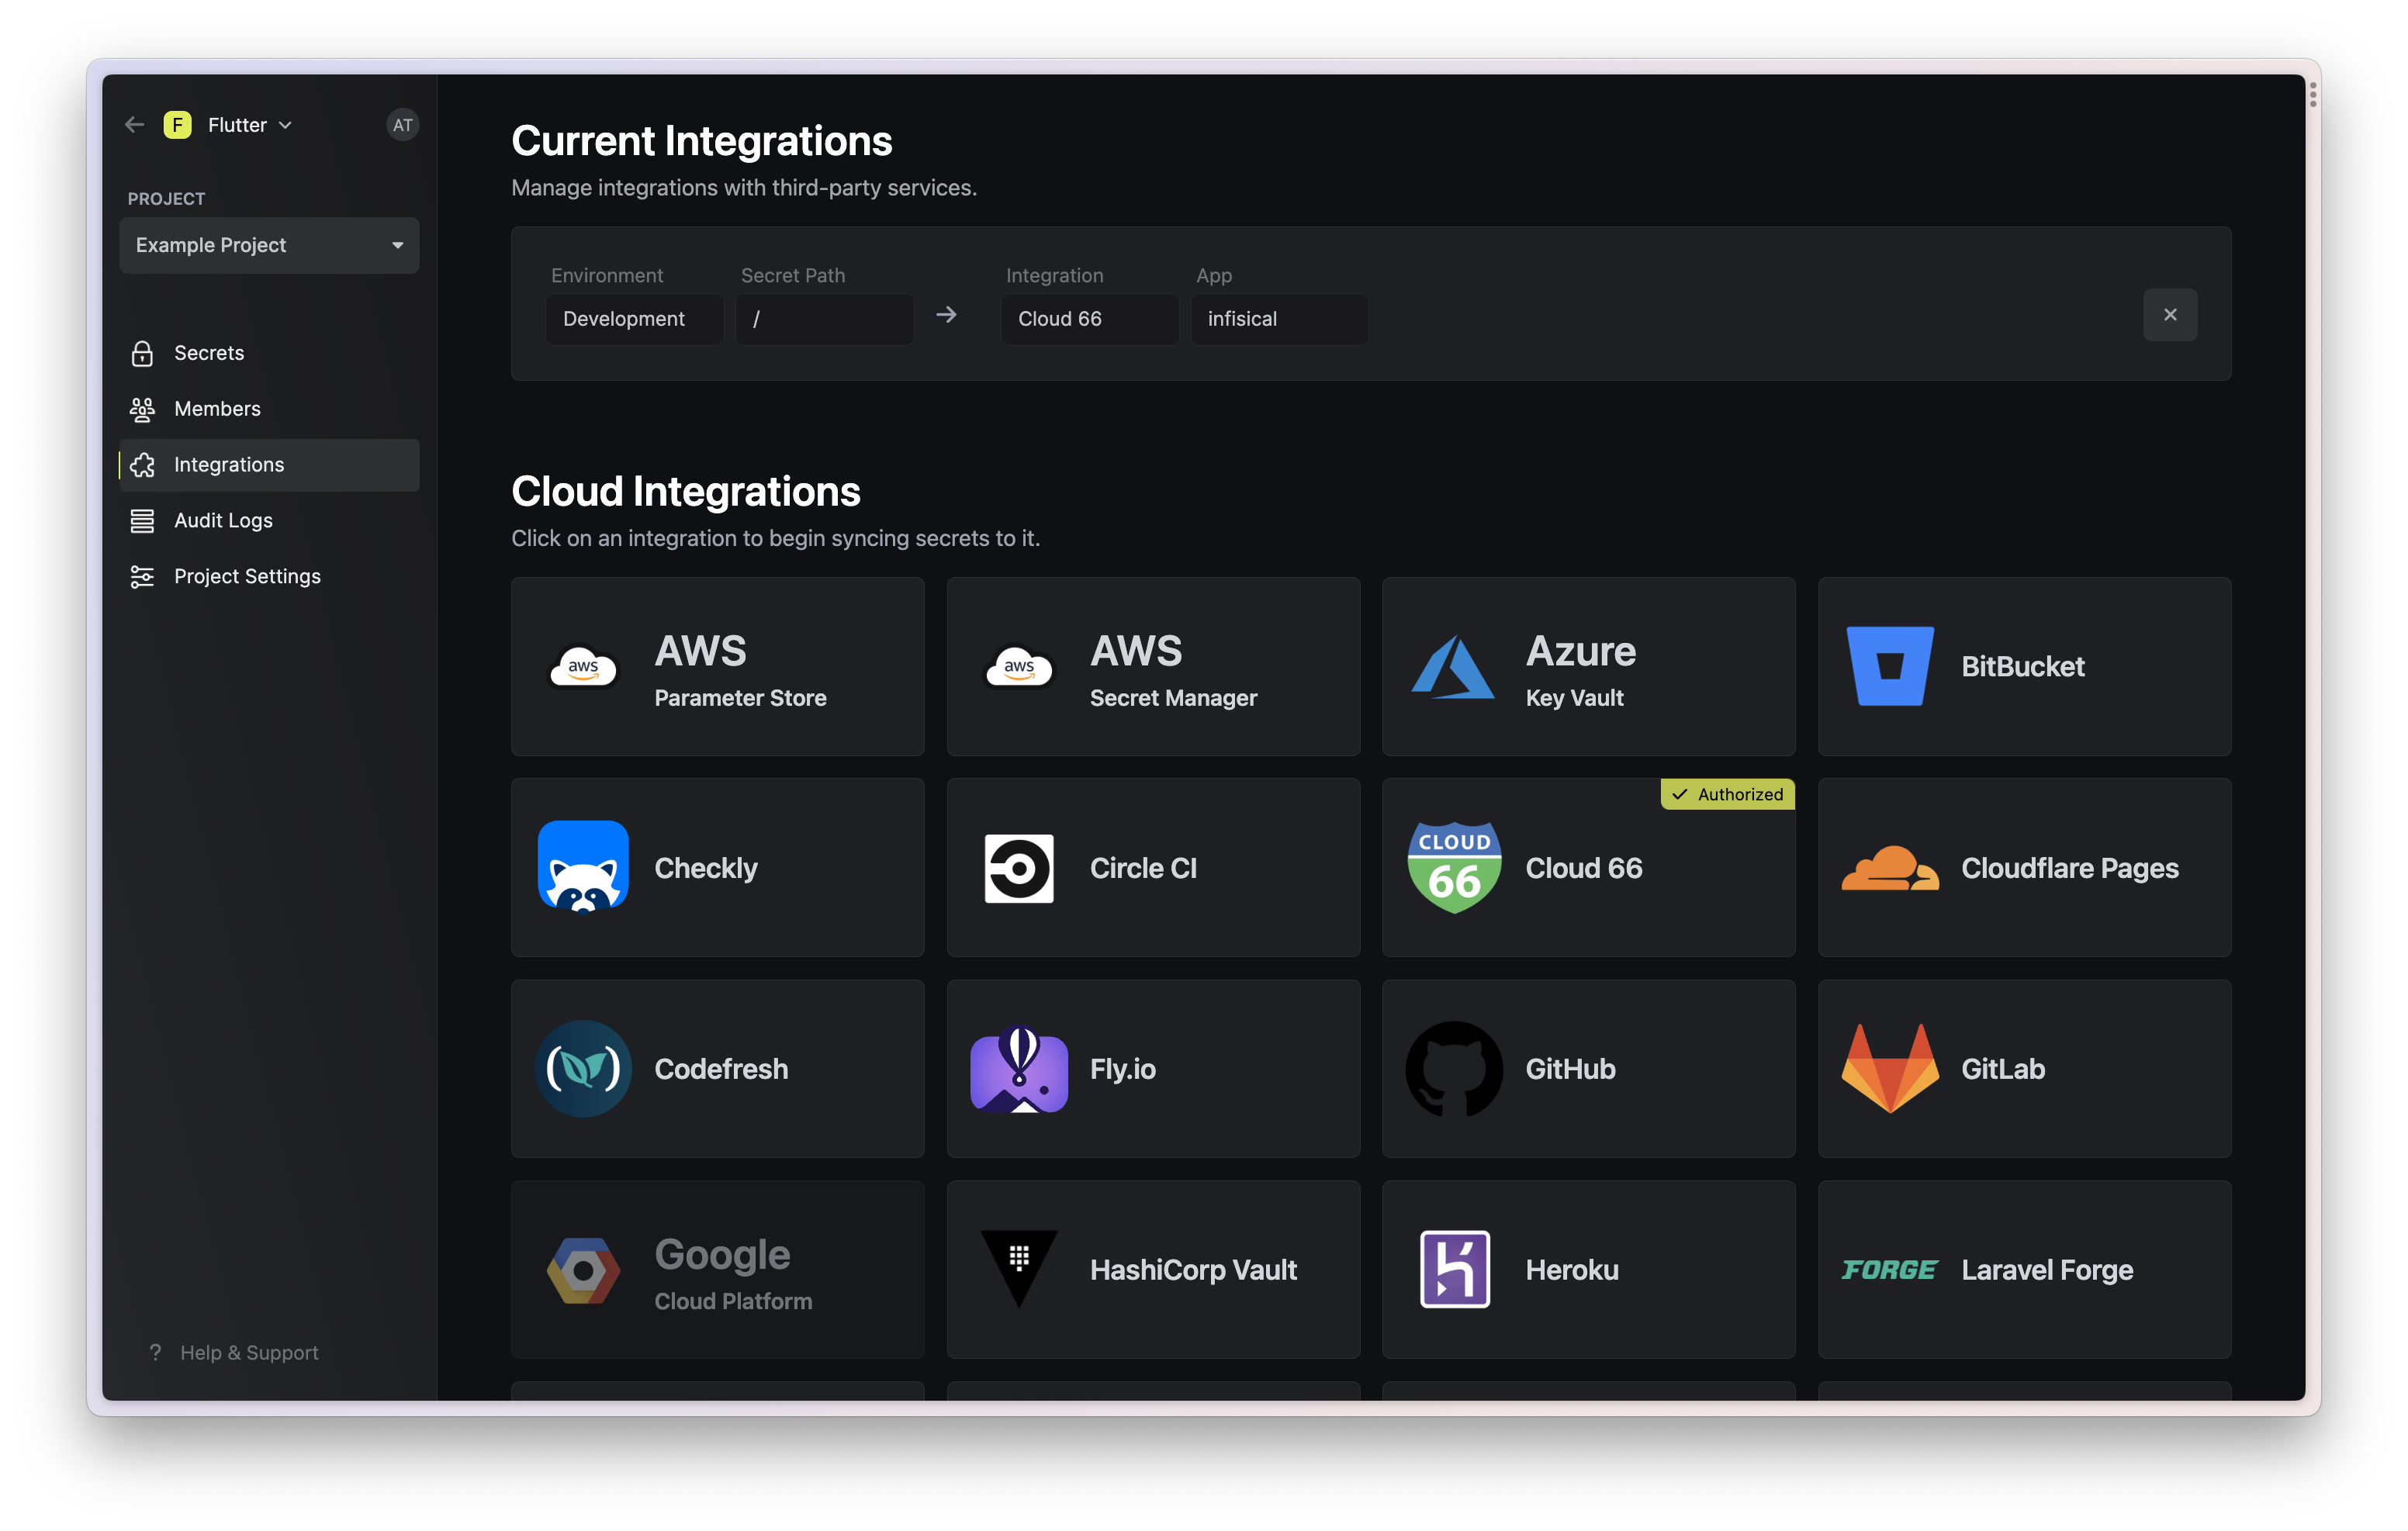 ---
# Source: https://infisical.com/docs/internals/architecture/cloud.md
> ## Documentation Index
> Fetch the complete documentation index at: https://infisical.com/docs/llms.txt
> Use this file to discover all available pages before exploring further.
# Infisical Cloud
> Architecture overview of Infisical's US and EU cloud deployments
This document provides an overview of Infisical's cloud architecture for our US and EU deployments, detailing the core components and how they interact to provide security and infrastructure services.
## Overview
Infisical Cloud operates on AWS infrastructure using containerized services deployed via Amazon ECS (Elastic Container Service). Our US and EU deployments use identical architectural patterns to ensure consistency and reliability across regions.
## Components
A typical Infisical Cloud deployment consists of the following components:
### Application Services
* **Infisical Core**: Main application server running the Infisical backend API
* **License API**: Dedicated API service for license management with separate RDS instance (shared between US/EU)
* **Application Load Balancer**: Routes incoming traffic to application containers with SSL termination and host-based routing
### Data Layer
* **Amazon RDS (PostgreSQL)**:
* **Main RDS Instance**: Primary database for secrets, users, and metadata (Multi-AZ, encryption enabled)
* **License API RDS Instance**: Dedicated database for license management services
* **Amazon ElastiCache (Redis)**:
* **Main Redis Cluster**: Multi-AZ replication group for core application caching and queuing
* **License API Redis**: Dedicated cache for license services
* Redis 7 engine with CloudWatch logging and snapshot backups
### Infrastructure
* **ECS Fargate**: Serverless container platform running application services
* **AWS Global Accelerator**: Global traffic routing and performance optimization
* **Cloudflare**: DNS management and routing
* **AWS SSM Parameter Store**: Stores application configuration and secrets
* **CloudWatch**: Centralized logging and monitoring
## System Layout
### Service Architecture
The Infisical application runs as multiple containerized services on ECS:
* **Main Server**: Auto-scaling containerized application services
* **License API**: Dedicated service with separate infrastructure (shared globally)
* **Monitoring**: AWS OTel Collector and Datadog Agent sidecars
Container images are pulled from Docker Hub and managed via GitHub Actions for deployments.
### Network Configuration
Services are deployed in private subnets with the following connectivity:
* External traffic → Application Load Balancer → ECS Services
* Main server exposes port 8080
* License API exposes port 4000 (portal.infisical.com, license.infisical.com)
* Service-to-service communication via AWS Service Connect
### Data Flow
1. **DNS resolution** via Cloudflare routes traffic to AWS Global Accelerator
2. **Global Accelerator** optimizes routing to the nearest AWS region
3. **Client requests** are routed through the Application Load Balancer to ECS containers
4. **Application logic** processes requests in the Infisical Core service
5. **Data persistence** occurs via encrypted connections to RDS
6. **Caching** utilizes ElastiCache for performance optimization
7. **Configuration** is retrieved from AWS SSM Parameter Store
## Regional Deployments
Each region operates in a separate AWS account, providing strong isolation boundaries for security, compliance, and operational independence.
### US Cloud (us.infisical.com or app.infisical.com)
* **AWS Account**: Dedicated US AWS account
* **Infrastructure**: ECS-based containerized deployment
* **Monitoring**: Integrated with Datadog for observability and security monitoring
### EU Cloud (eu.infisical.com)
* **AWS Account**: Dedicated EU AWS account
* **Infrastructure**: ECS-based containerized deployment
* **Monitoring**: Integrated with Datadog for observability and security monitoring
## Configuration Management
Application configuration and secrets are managed through AWS SSM Parameter Store, with deployment automation handled via GitHub Actions.
## Monitoring and Observability
### Logging
* **CloudWatch**: 365-day retention for application logs
* **Health Checks**: HTTP endpoint monitoring for service health
### Metrics
* **AWS OTel Collector**: Prometheus metrics collection
* **Datadog Agent**: Application performance monitoring and infrastructure metrics
## Container Management
* **Images**: `infisical/staging_infisical` and `infisical/license-api` from Docker Hub
* **Deployment**: Automated via GitHub Actions updating SSM parameter for image tags
* **Registry Access**: Docker Hub credentials stored in AWS Secrets Manager
* **Platform**: ECS Fargate serverless container platform
## Security Overview
### Data Protection
* **Encryption**: All secrets encrypted at rest and in transit
* **Network Isolation**: Services deployed in private subnets with controlled access
* **Authentication**: API tokens and service accounts for secure access
* **Audit Logging**: Comprehensive audit trails for all secret operations
### Network Architecture
* **VPC Design**: Dedicated VPC with public and private subnets across multiple Availability Zones
* **NAT Gateway**: Controlled outbound connectivity from private subnets
* **Load Balancing**: Application Load Balancer with SSL termination and health checks
* **Security Groups**: Restrictive firewall rules and controlled network access
* **High Availability**: Multi-AZ deployment with automatic failover
* **Network Monitoring**: VPC Flow Logs with 365-day retention for traffic analysis
---
# Source: https://infisical.com/docs/integrations/secret-syncs/cloudflare-pages.md
> ## Documentation Index
> Fetch the complete documentation index at: https://infisical.com/docs/llms.txt
> Use this file to discover all available pages before exploring further.
# Cloudflare Pages Sync
> Learn how to configure a Cloudflare Pages Sync for Infisical.
**Prerequisites:**
* Set up and add secrets to [Infisical Cloud](https://app.infisical.com)
* Create a [Cloudflare Connection](/integrations/app-connections/cloudflare)
2. Select the **Cloudflare Pages** option.
---
# Source: https://infisical.com/docs/internals/architecture/cloud.md
> ## Documentation Index
> Fetch the complete documentation index at: https://infisical.com/docs/llms.txt
> Use this file to discover all available pages before exploring further.
# Infisical Cloud
> Architecture overview of Infisical's US and EU cloud deployments
This document provides an overview of Infisical's cloud architecture for our US and EU deployments, detailing the core components and how they interact to provide security and infrastructure services.
## Overview
Infisical Cloud operates on AWS infrastructure using containerized services deployed via Amazon ECS (Elastic Container Service). Our US and EU deployments use identical architectural patterns to ensure consistency and reliability across regions.
## Components
A typical Infisical Cloud deployment consists of the following components:
### Application Services
* **Infisical Core**: Main application server running the Infisical backend API
* **License API**: Dedicated API service for license management with separate RDS instance (shared between US/EU)
* **Application Load Balancer**: Routes incoming traffic to application containers with SSL termination and host-based routing
### Data Layer
* **Amazon RDS (PostgreSQL)**:
* **Main RDS Instance**: Primary database for secrets, users, and metadata (Multi-AZ, encryption enabled)
* **License API RDS Instance**: Dedicated database for license management services
* **Amazon ElastiCache (Redis)**:
* **Main Redis Cluster**: Multi-AZ replication group for core application caching and queuing
* **License API Redis**: Dedicated cache for license services
* Redis 7 engine with CloudWatch logging and snapshot backups
### Infrastructure
* **ECS Fargate**: Serverless container platform running application services
* **AWS Global Accelerator**: Global traffic routing and performance optimization
* **Cloudflare**: DNS management and routing
* **AWS SSM Parameter Store**: Stores application configuration and secrets
* **CloudWatch**: Centralized logging and monitoring
## System Layout
### Service Architecture
The Infisical application runs as multiple containerized services on ECS:
* **Main Server**: Auto-scaling containerized application services
* **License API**: Dedicated service with separate infrastructure (shared globally)
* **Monitoring**: AWS OTel Collector and Datadog Agent sidecars
Container images are pulled from Docker Hub and managed via GitHub Actions for deployments.
### Network Configuration
Services are deployed in private subnets with the following connectivity:
* External traffic → Application Load Balancer → ECS Services
* Main server exposes port 8080
* License API exposes port 4000 (portal.infisical.com, license.infisical.com)
* Service-to-service communication via AWS Service Connect
### Data Flow
1. **DNS resolution** via Cloudflare routes traffic to AWS Global Accelerator
2. **Global Accelerator** optimizes routing to the nearest AWS region
3. **Client requests** are routed through the Application Load Balancer to ECS containers
4. **Application logic** processes requests in the Infisical Core service
5. **Data persistence** occurs via encrypted connections to RDS
6. **Caching** utilizes ElastiCache for performance optimization
7. **Configuration** is retrieved from AWS SSM Parameter Store
## Regional Deployments
Each region operates in a separate AWS account, providing strong isolation boundaries for security, compliance, and operational independence.
### US Cloud (us.infisical.com or app.infisical.com)
* **AWS Account**: Dedicated US AWS account
* **Infrastructure**: ECS-based containerized deployment
* **Monitoring**: Integrated with Datadog for observability and security monitoring
### EU Cloud (eu.infisical.com)
* **AWS Account**: Dedicated EU AWS account
* **Infrastructure**: ECS-based containerized deployment
* **Monitoring**: Integrated with Datadog for observability and security monitoring
## Configuration Management
Application configuration and secrets are managed through AWS SSM Parameter Store, with deployment automation handled via GitHub Actions.
## Monitoring and Observability
### Logging
* **CloudWatch**: 365-day retention for application logs
* **Health Checks**: HTTP endpoint monitoring for service health
### Metrics
* **AWS OTel Collector**: Prometheus metrics collection
* **Datadog Agent**: Application performance monitoring and infrastructure metrics
## Container Management
* **Images**: `infisical/staging_infisical` and `infisical/license-api` from Docker Hub
* **Deployment**: Automated via GitHub Actions updating SSM parameter for image tags
* **Registry Access**: Docker Hub credentials stored in AWS Secrets Manager
* **Platform**: ECS Fargate serverless container platform
## Security Overview
### Data Protection
* **Encryption**: All secrets encrypted at rest and in transit
* **Network Isolation**: Services deployed in private subnets with controlled access
* **Authentication**: API tokens and service accounts for secure access
* **Audit Logging**: Comprehensive audit trails for all secret operations
### Network Architecture
* **VPC Design**: Dedicated VPC with public and private subnets across multiple Availability Zones
* **NAT Gateway**: Controlled outbound connectivity from private subnets
* **Load Balancing**: Application Load Balancer with SSL termination and health checks
* **Security Groups**: Restrictive firewall rules and controlled network access
* **High Availability**: Multi-AZ deployment with automatic failover
* **Network Monitoring**: VPC Flow Logs with 365-day retention for traffic analysis
---
# Source: https://infisical.com/docs/integrations/secret-syncs/cloudflare-pages.md
> ## Documentation Index
> Fetch the complete documentation index at: https://infisical.com/docs/llms.txt
> Use this file to discover all available pages before exploring further.
# Cloudflare Pages Sync
> Learn how to configure a Cloudflare Pages Sync for Infisical.
**Prerequisites:**
* Set up and add secrets to [Infisical Cloud](https://app.infisical.com)
* Create a [Cloudflare Connection](/integrations/app-connections/cloudflare)
2. Select the **Cloudflare Pages** option.
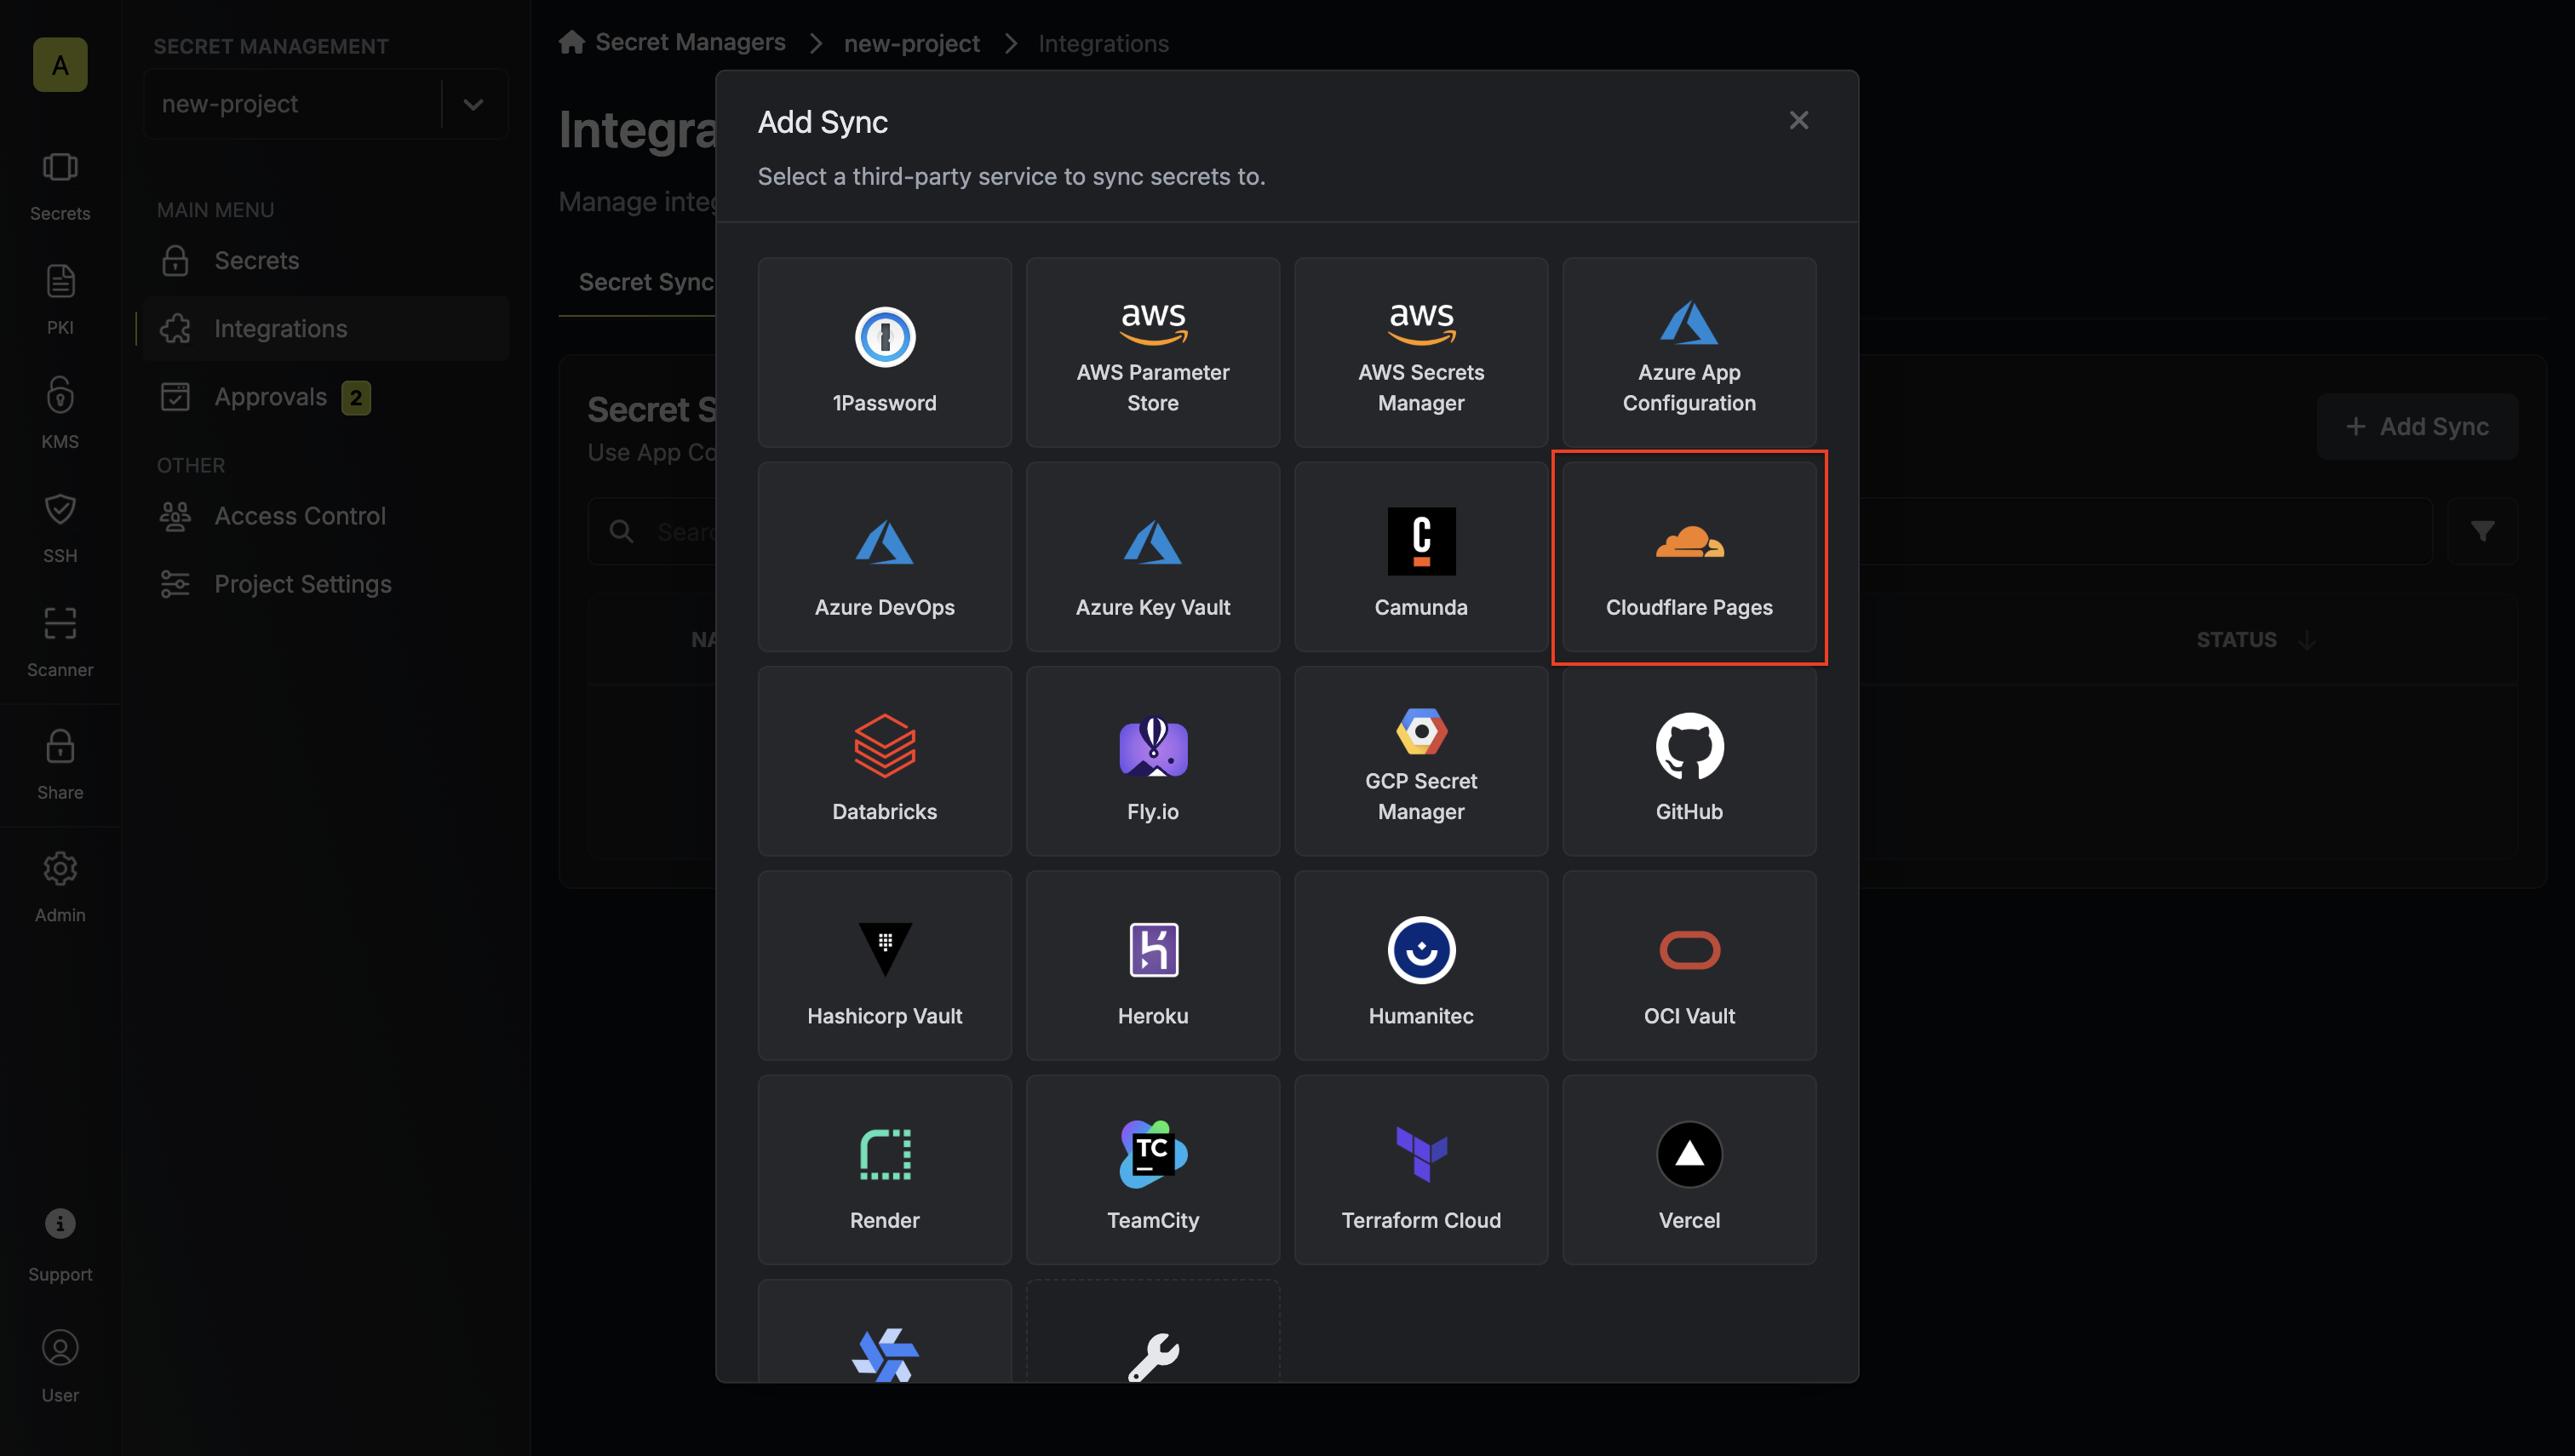 3. Configure the **Source** from where secrets should be retrieved, then click **Next**.
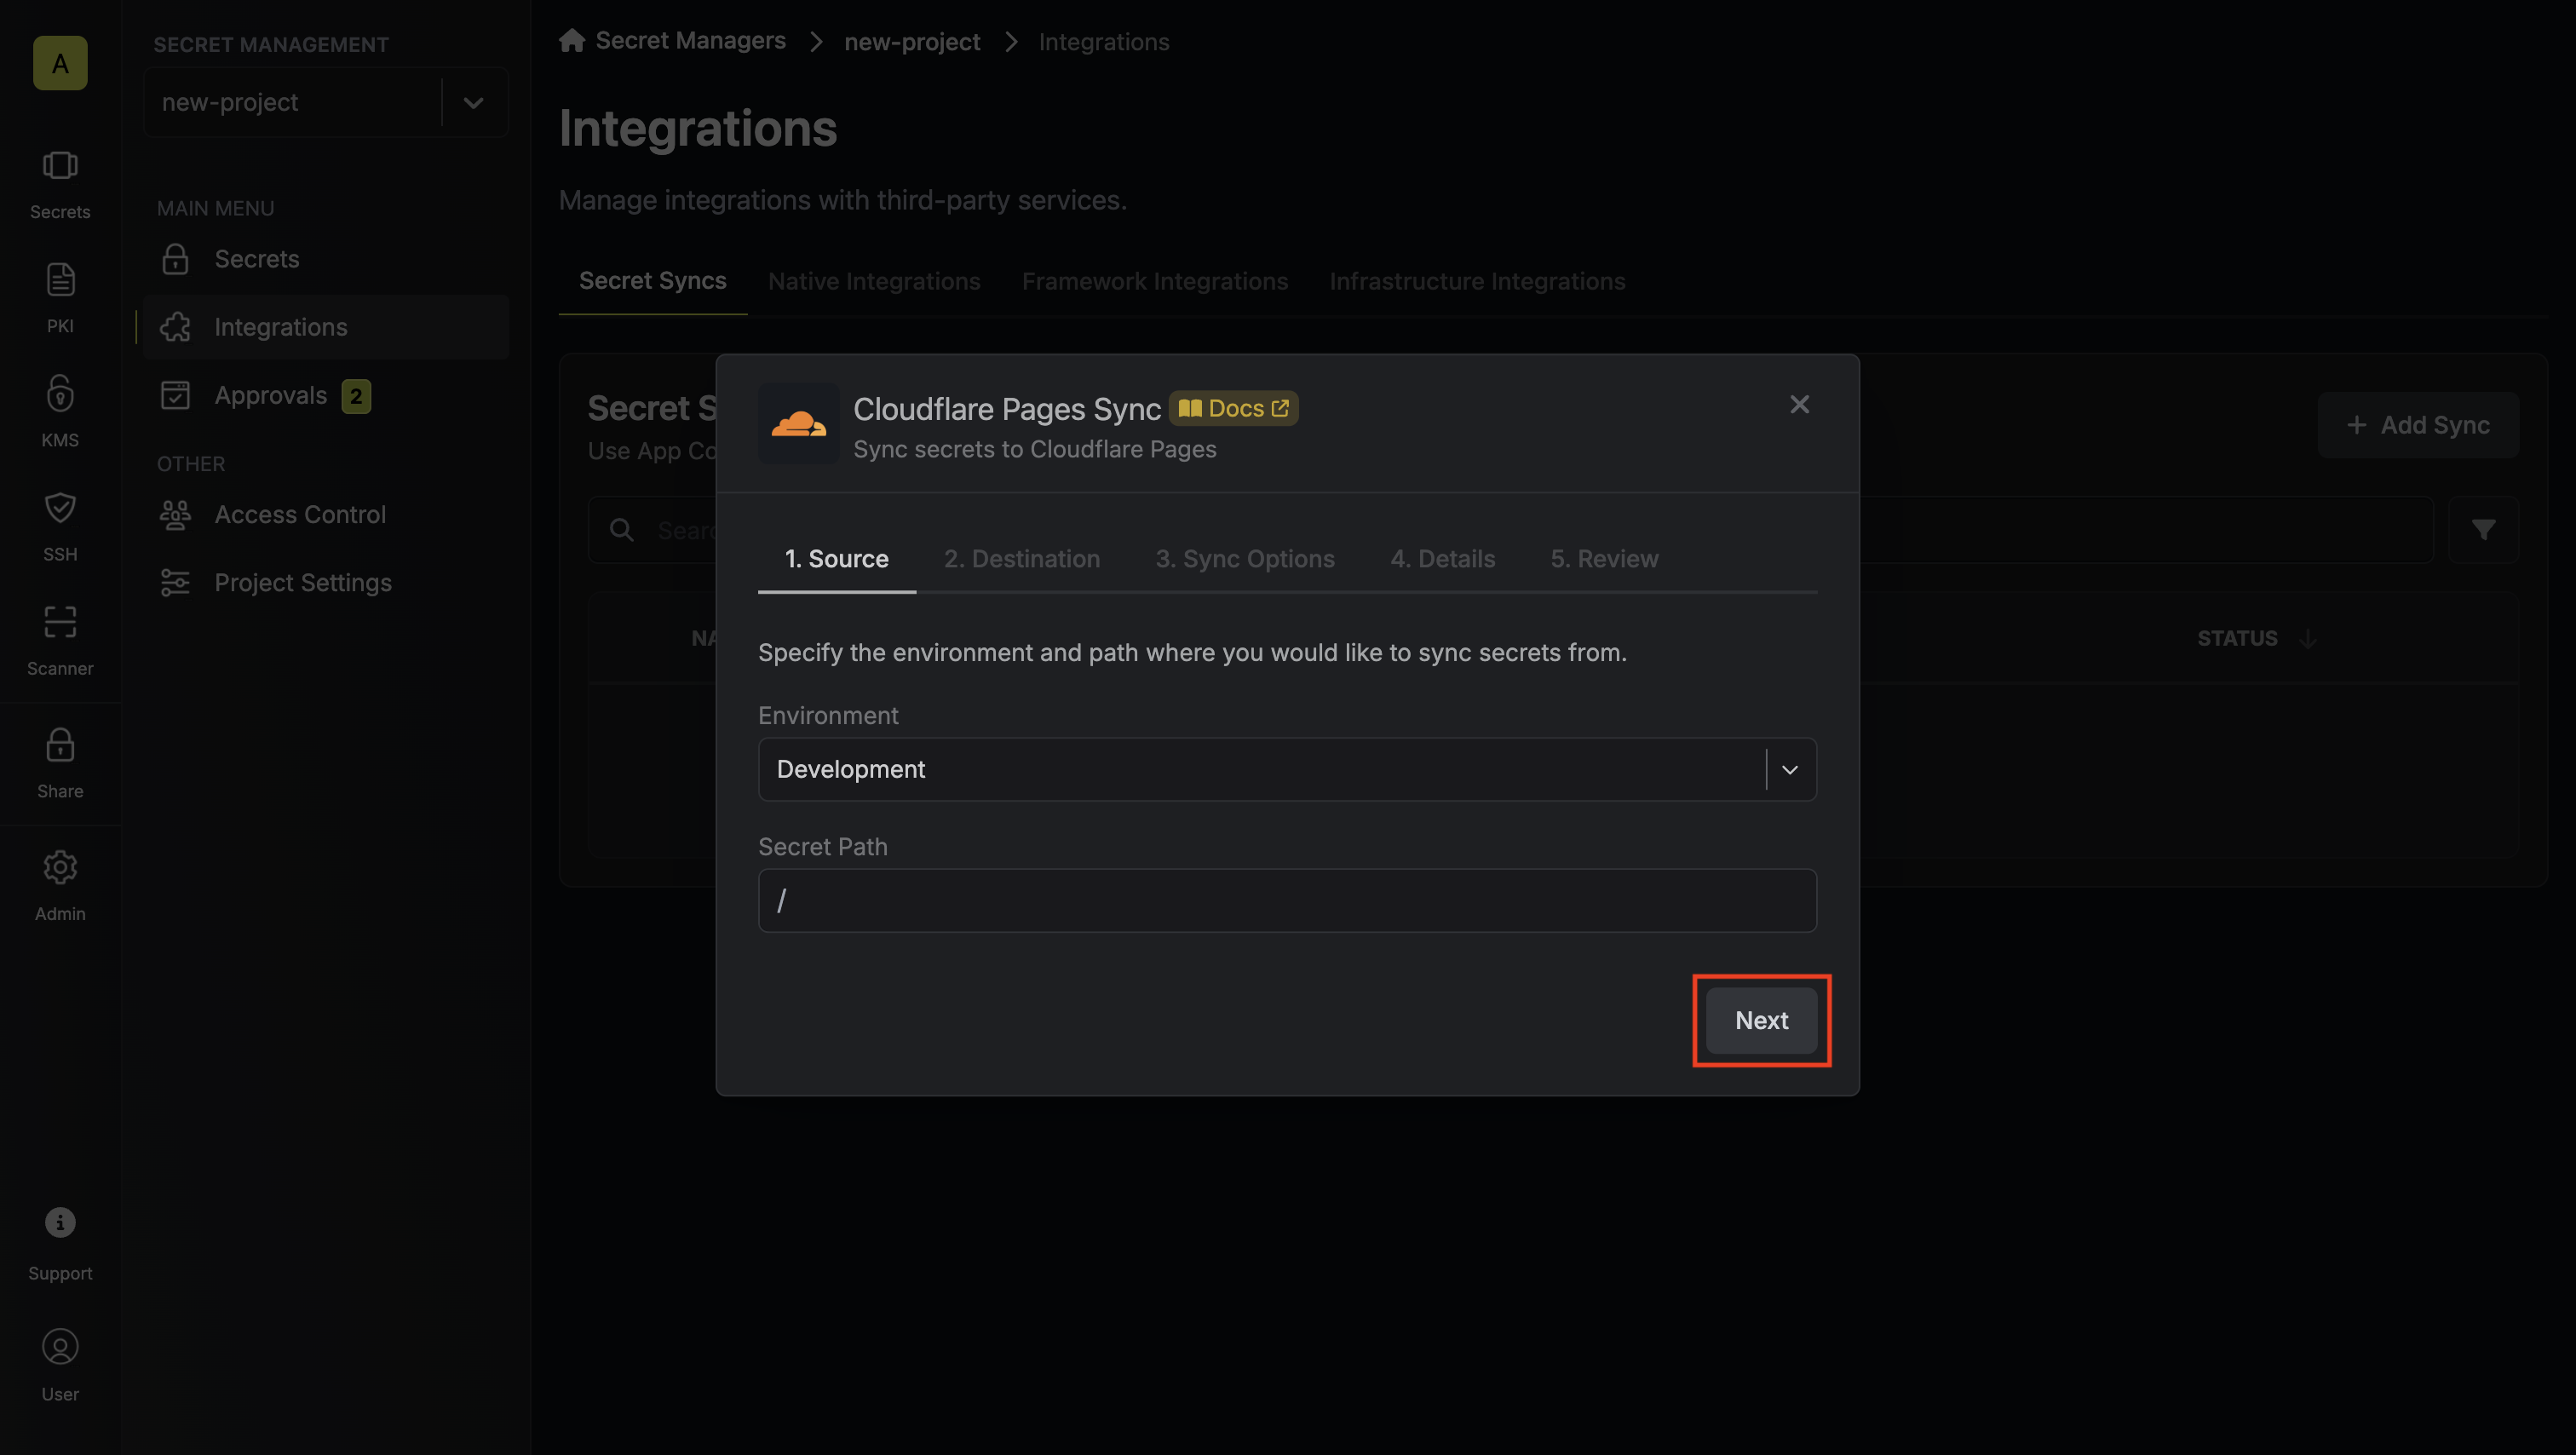 * **Environment**: The project environment to retrieve secrets from.
* **Secret Path**: The folder path to retrieve secrets from.
* **Environment**: The project environment to retrieve secrets from.
* **Secret Path**: The folder path to retrieve secrets from.
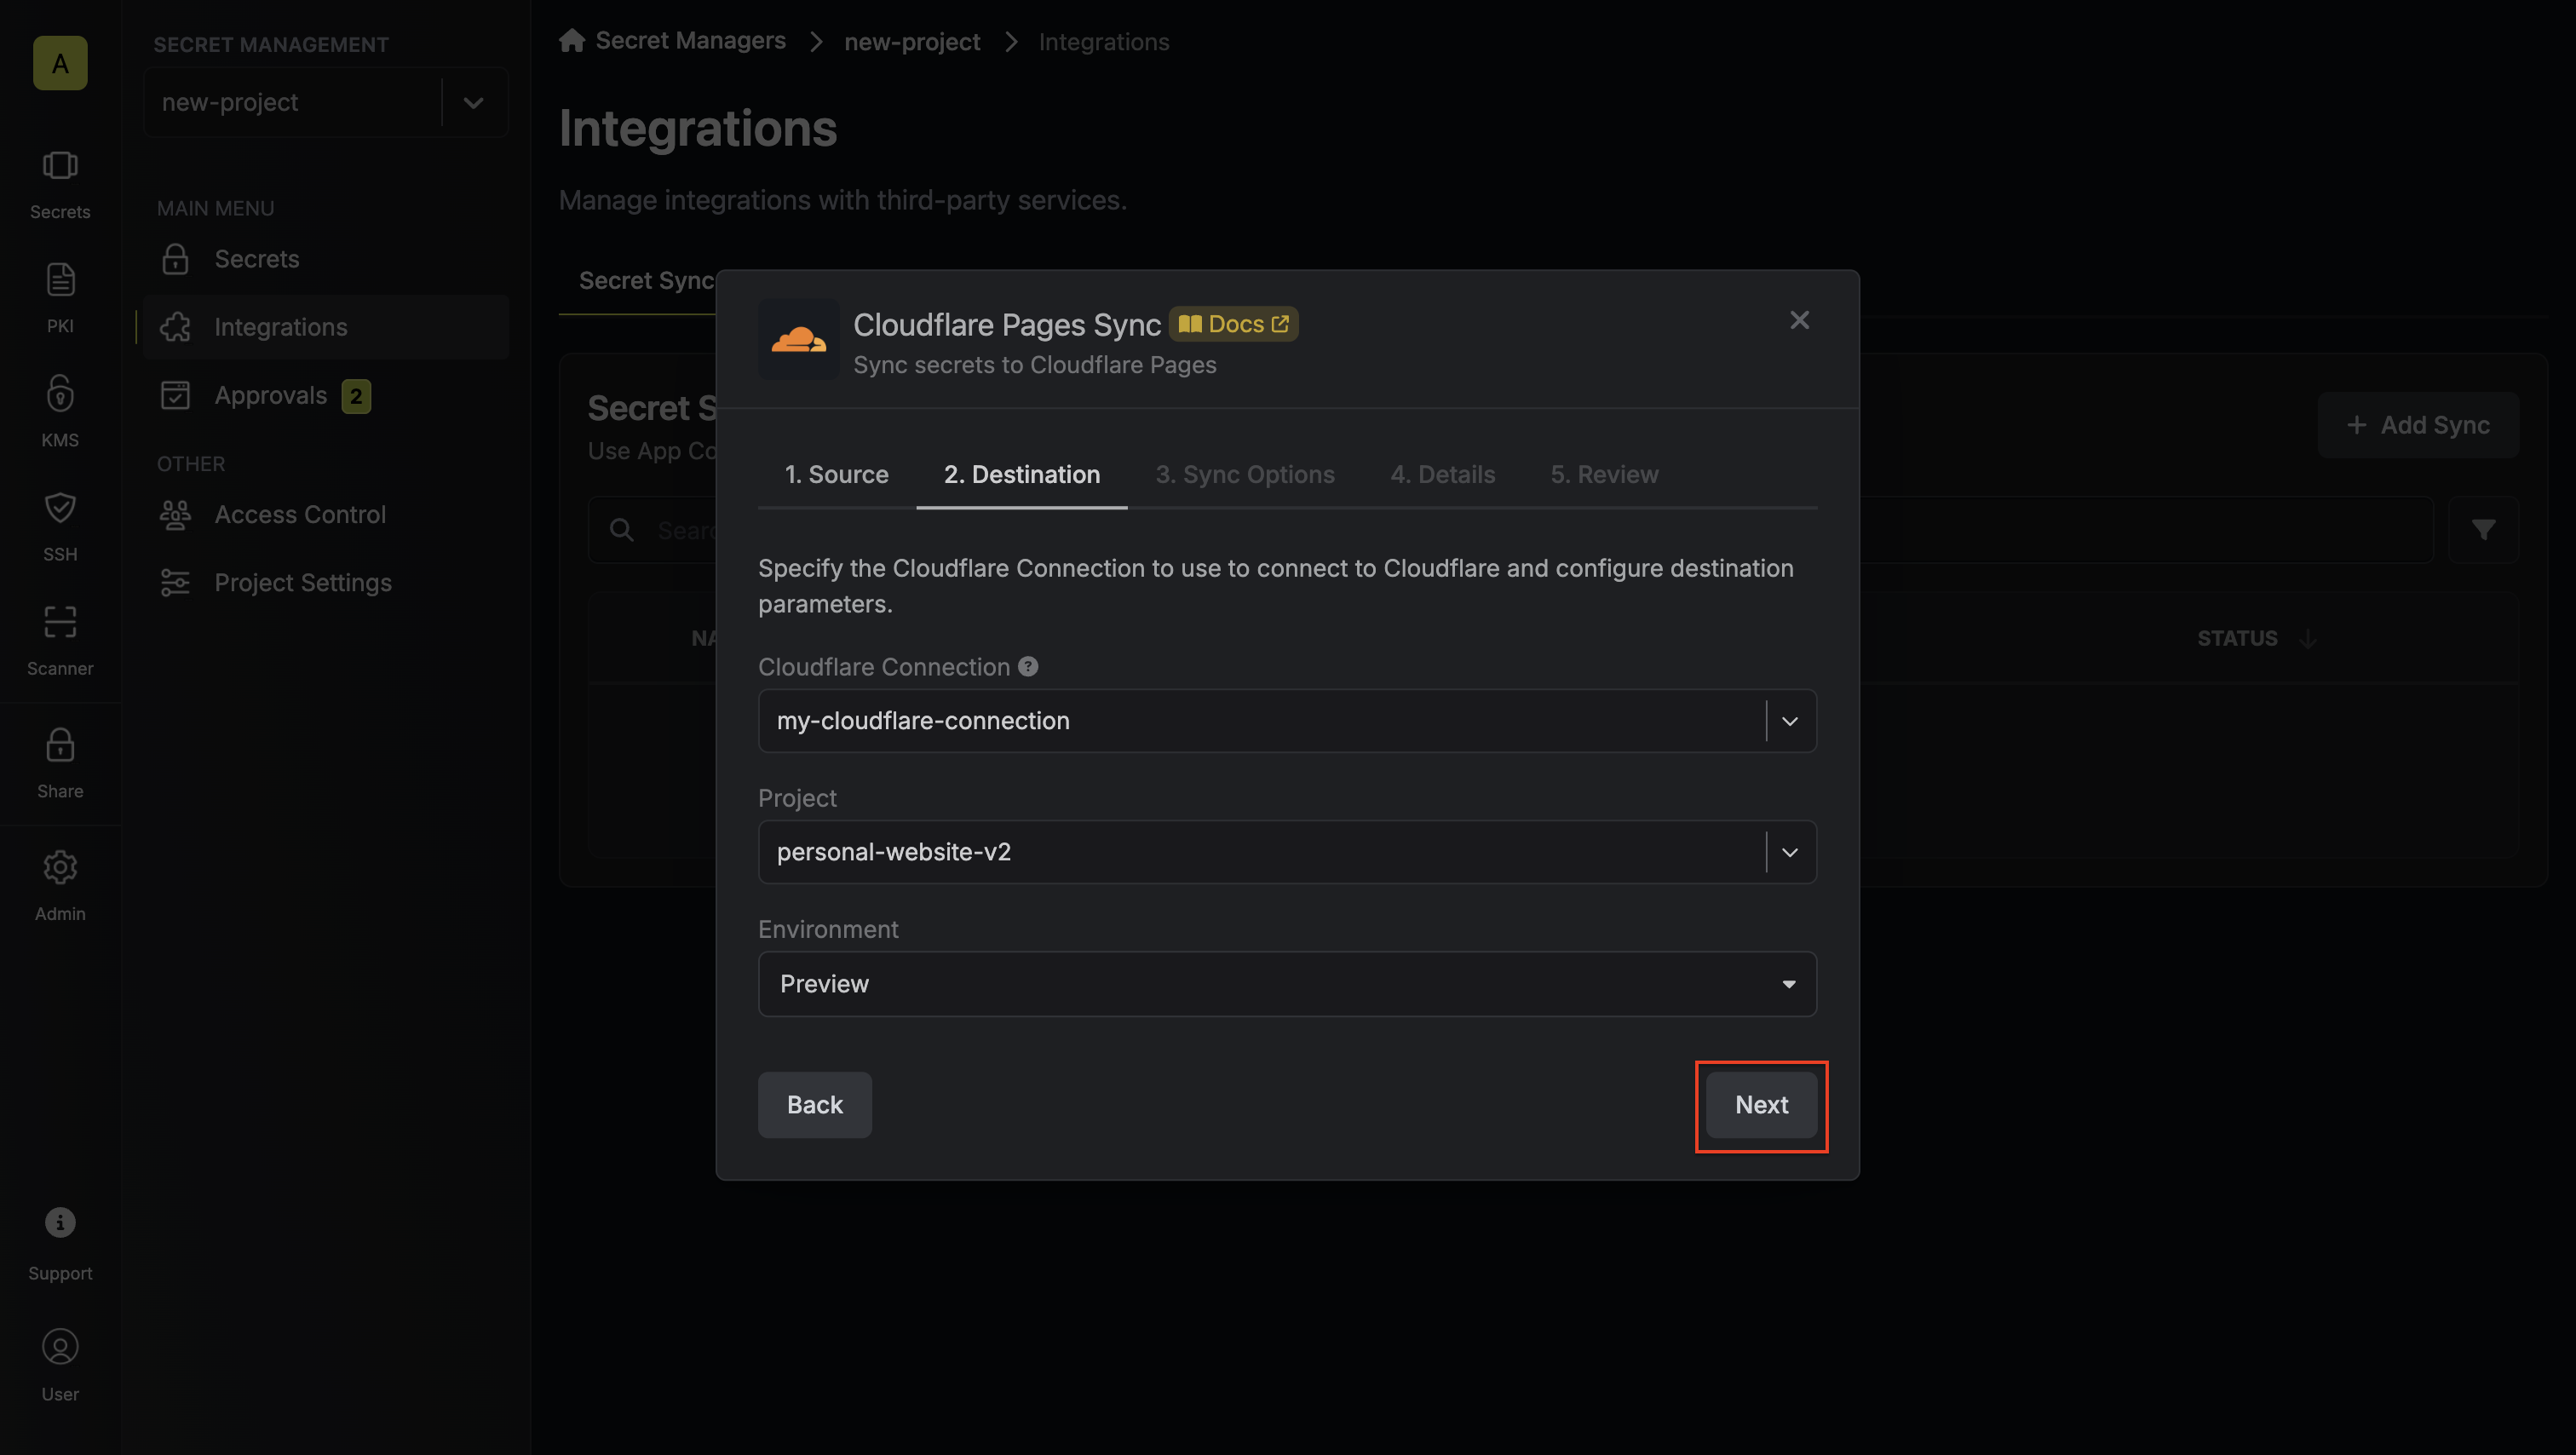 * **Cloudflare Connection**: The Cloudflare Connection to authenticate with.
* **Cloudflare Pages Project**: Choose the Cloudflare Pages project you want to sync secrets to.
* **Environment**: Select the deployment environment (preview or production).
5. Configure the **Sync Options** to specify how secrets should be synced, then click **Next**.
* **Cloudflare Connection**: The Cloudflare Connection to authenticate with.
* **Cloudflare Pages Project**: Choose the Cloudflare Pages project you want to sync secrets to.
* **Environment**: Select the deployment environment (preview or production).
5. Configure the **Sync Options** to specify how secrets should be synced, then click **Next**.
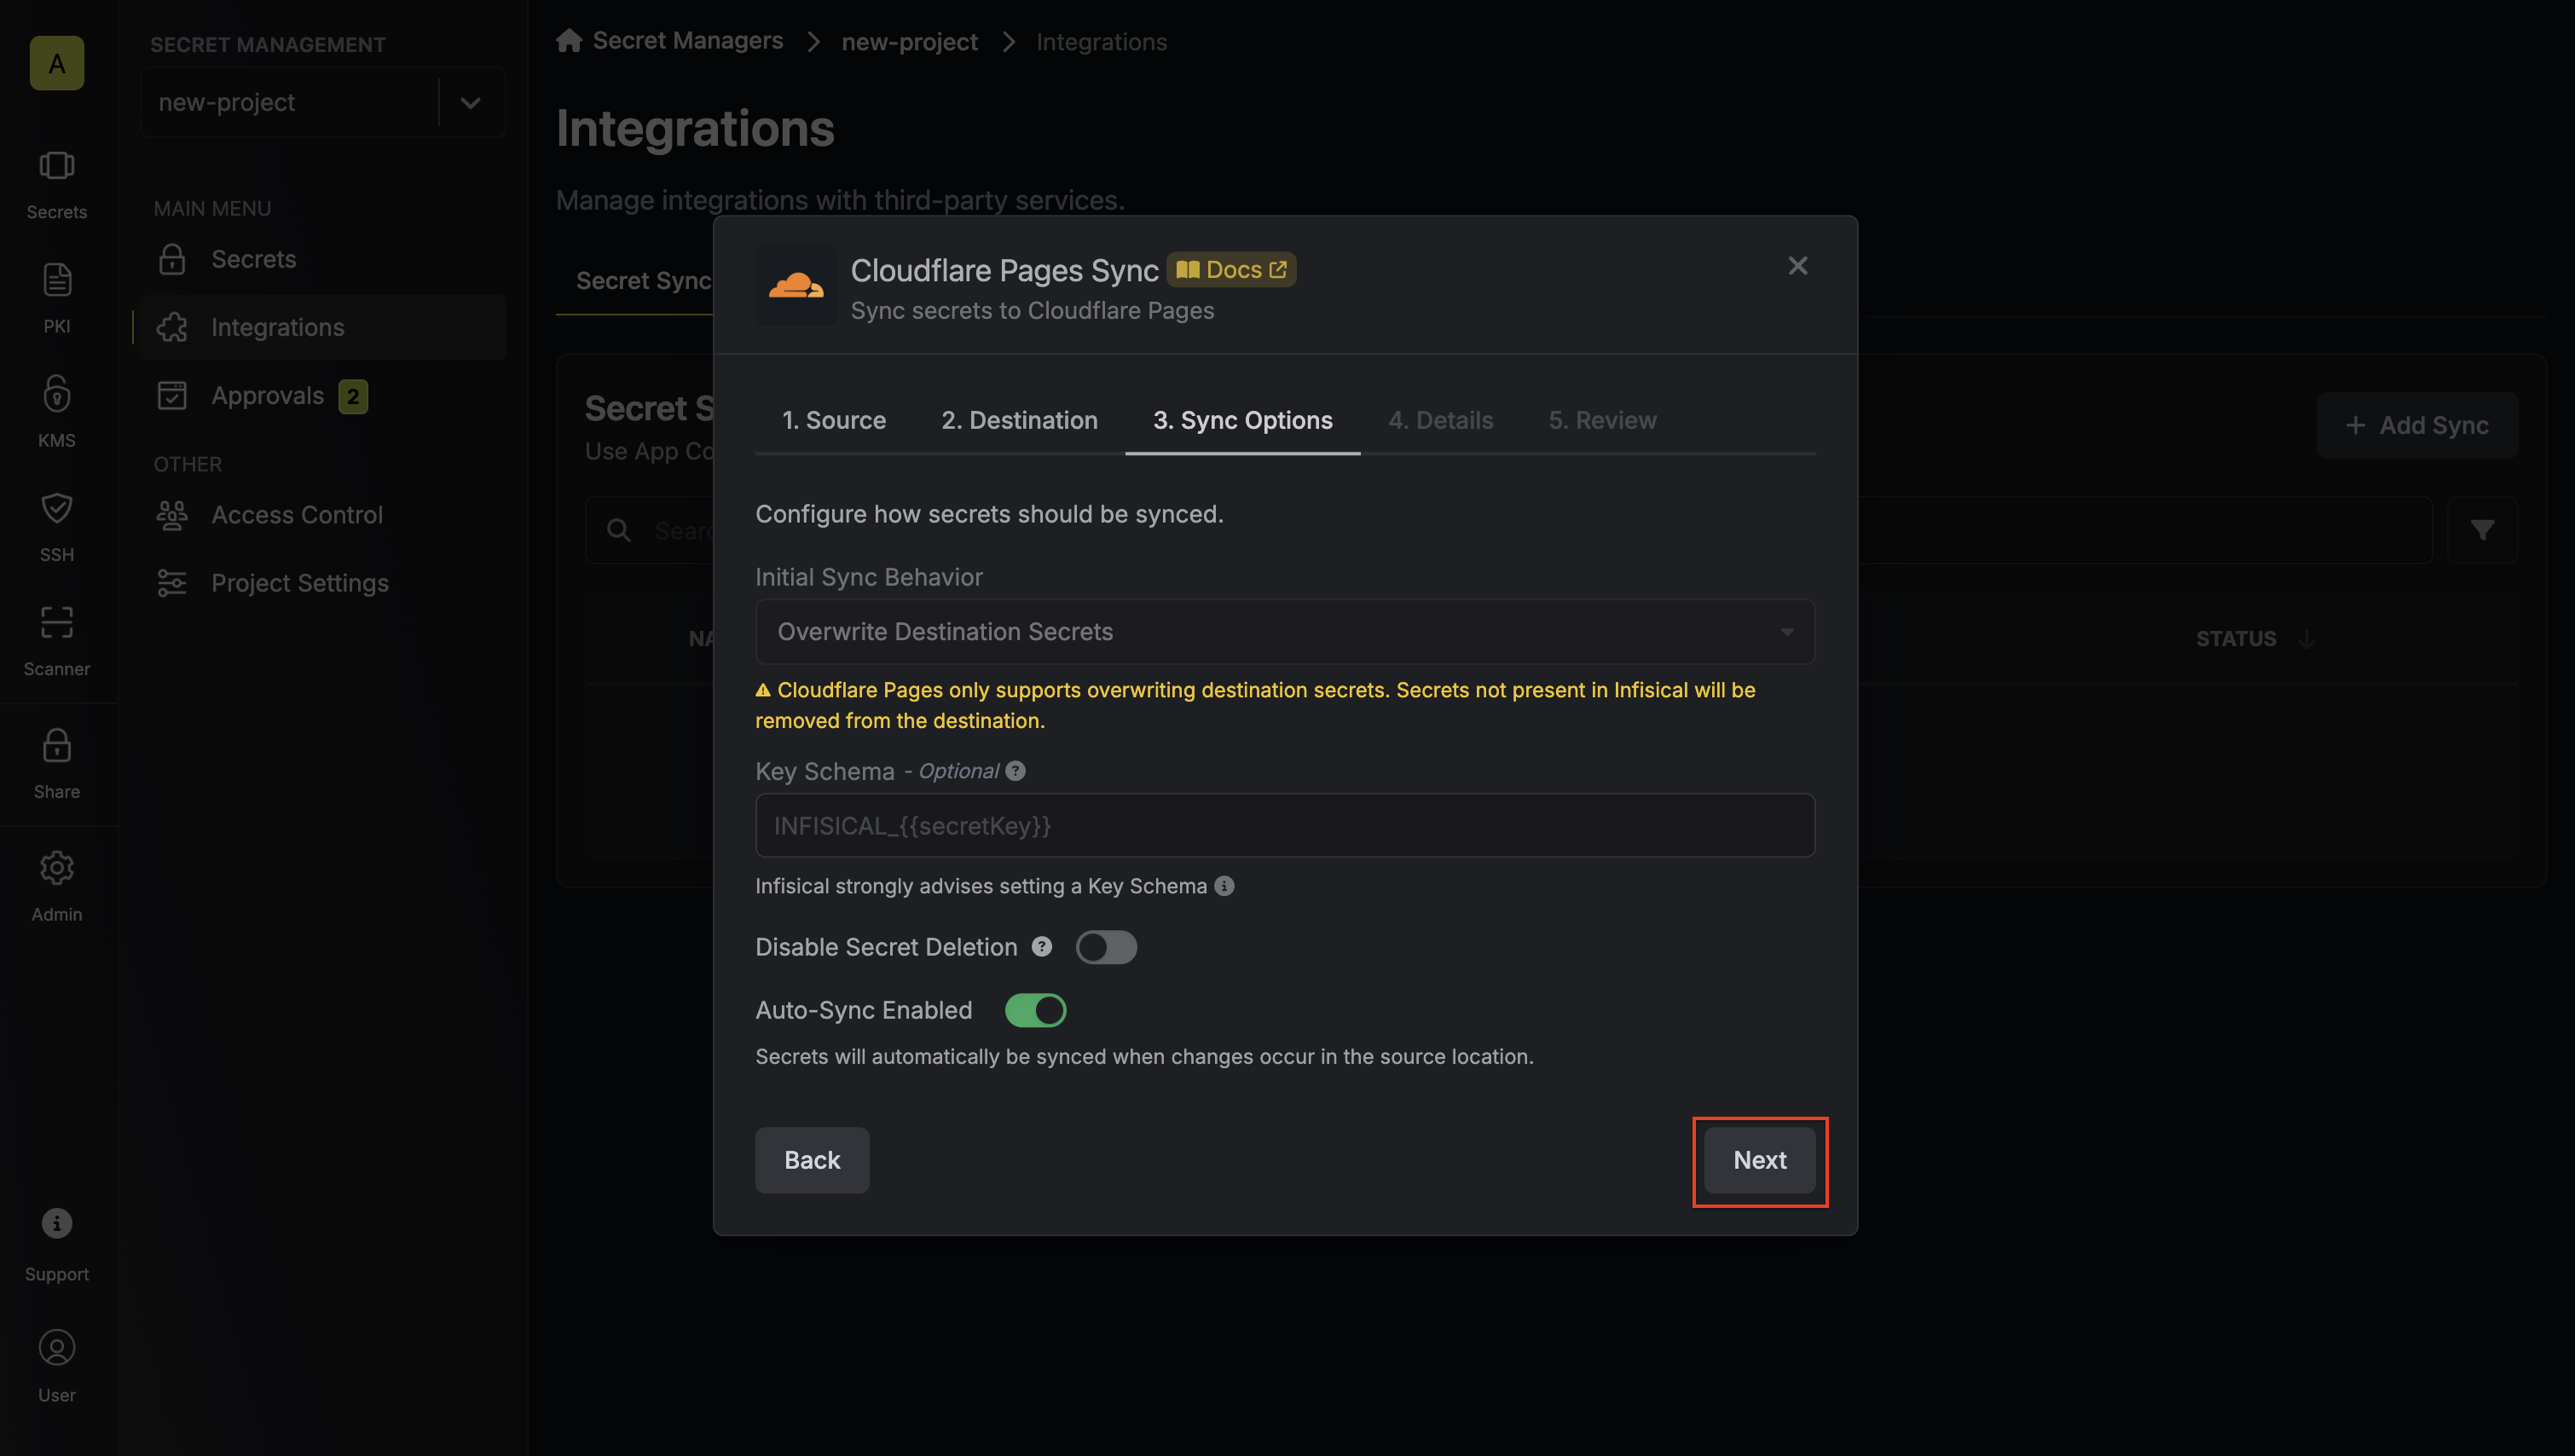 * **Initial Sync Behavior**: Determines how Infisical should resolve the initial sync.
* **Overwrite Destination Secrets**: Removes any secrets at the destination endpoint not present in Infisical.
* **Key Schema**: Template that determines how secret names are transformed when syncing, using `{{secretKey}}` as a placeholder for the original secret name and `{{environment}}` for the environment.
* **Auto-Sync Enabled**: If enabled, secrets will automatically be synced from the source location when changes occur. Disable to enforce manual syncing only.
* **Disable Secret Deletion**: If enabled, Infisical will not remove secrets from the sync destination. Enable this option if you intend to manage some secrets manually outside of Infisical.
6. Configure the **Details** of your Cloudflare Pages Sync, then click **Next**.
* **Initial Sync Behavior**: Determines how Infisical should resolve the initial sync.
* **Overwrite Destination Secrets**: Removes any secrets at the destination endpoint not present in Infisical.
* **Key Schema**: Template that determines how secret names are transformed when syncing, using `{{secretKey}}` as a placeholder for the original secret name and `{{environment}}` for the environment.
* **Auto-Sync Enabled**: If enabled, secrets will automatically be synced from the source location when changes occur. Disable to enforce manual syncing only.
* **Disable Secret Deletion**: If enabled, Infisical will not remove secrets from the sync destination. Enable this option if you intend to manage some secrets manually outside of Infisical.
6. Configure the **Details** of your Cloudflare Pages Sync, then click **Next**.
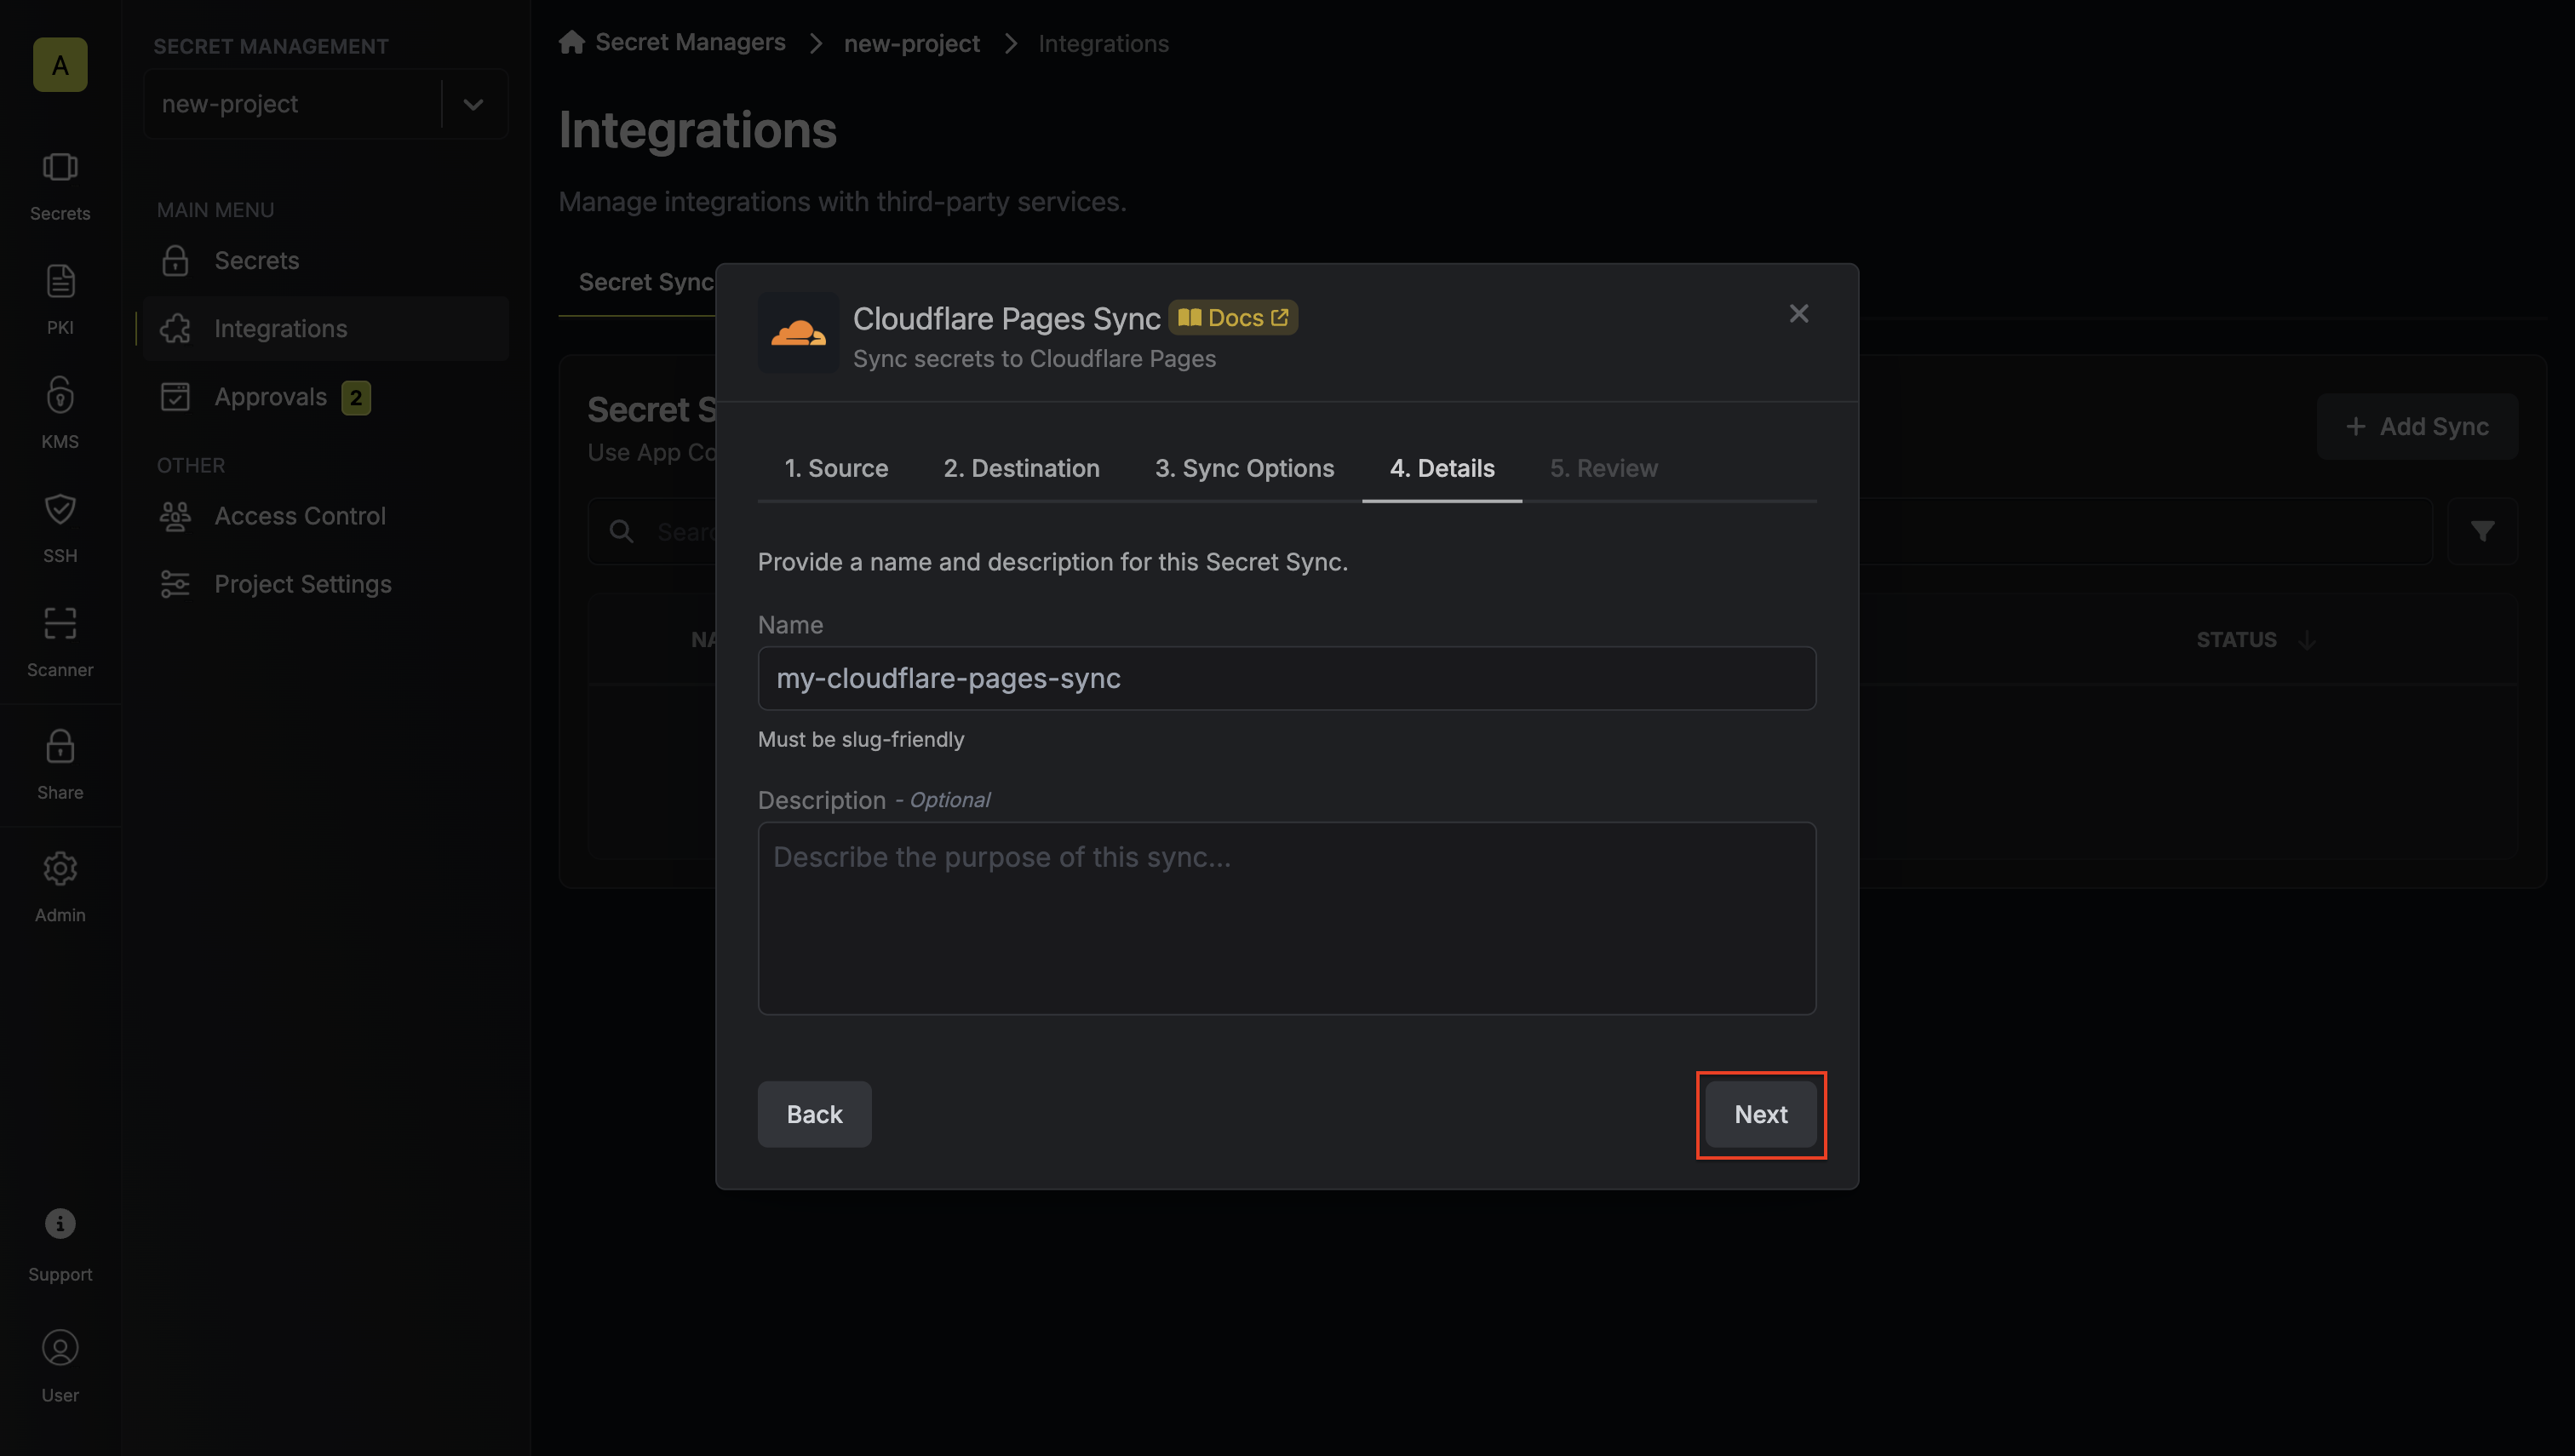 * **Name**: The name of your sync. Must be slug-friendly.
* **Description**: An optional description for your sync.
7. Review your Cloudflare Pages Sync configuration, then click **Create Sync**.
* **Name**: The name of your sync. Must be slug-friendly.
* **Description**: An optional description for your sync.
7. Review your Cloudflare Pages Sync configuration, then click **Create Sync**.
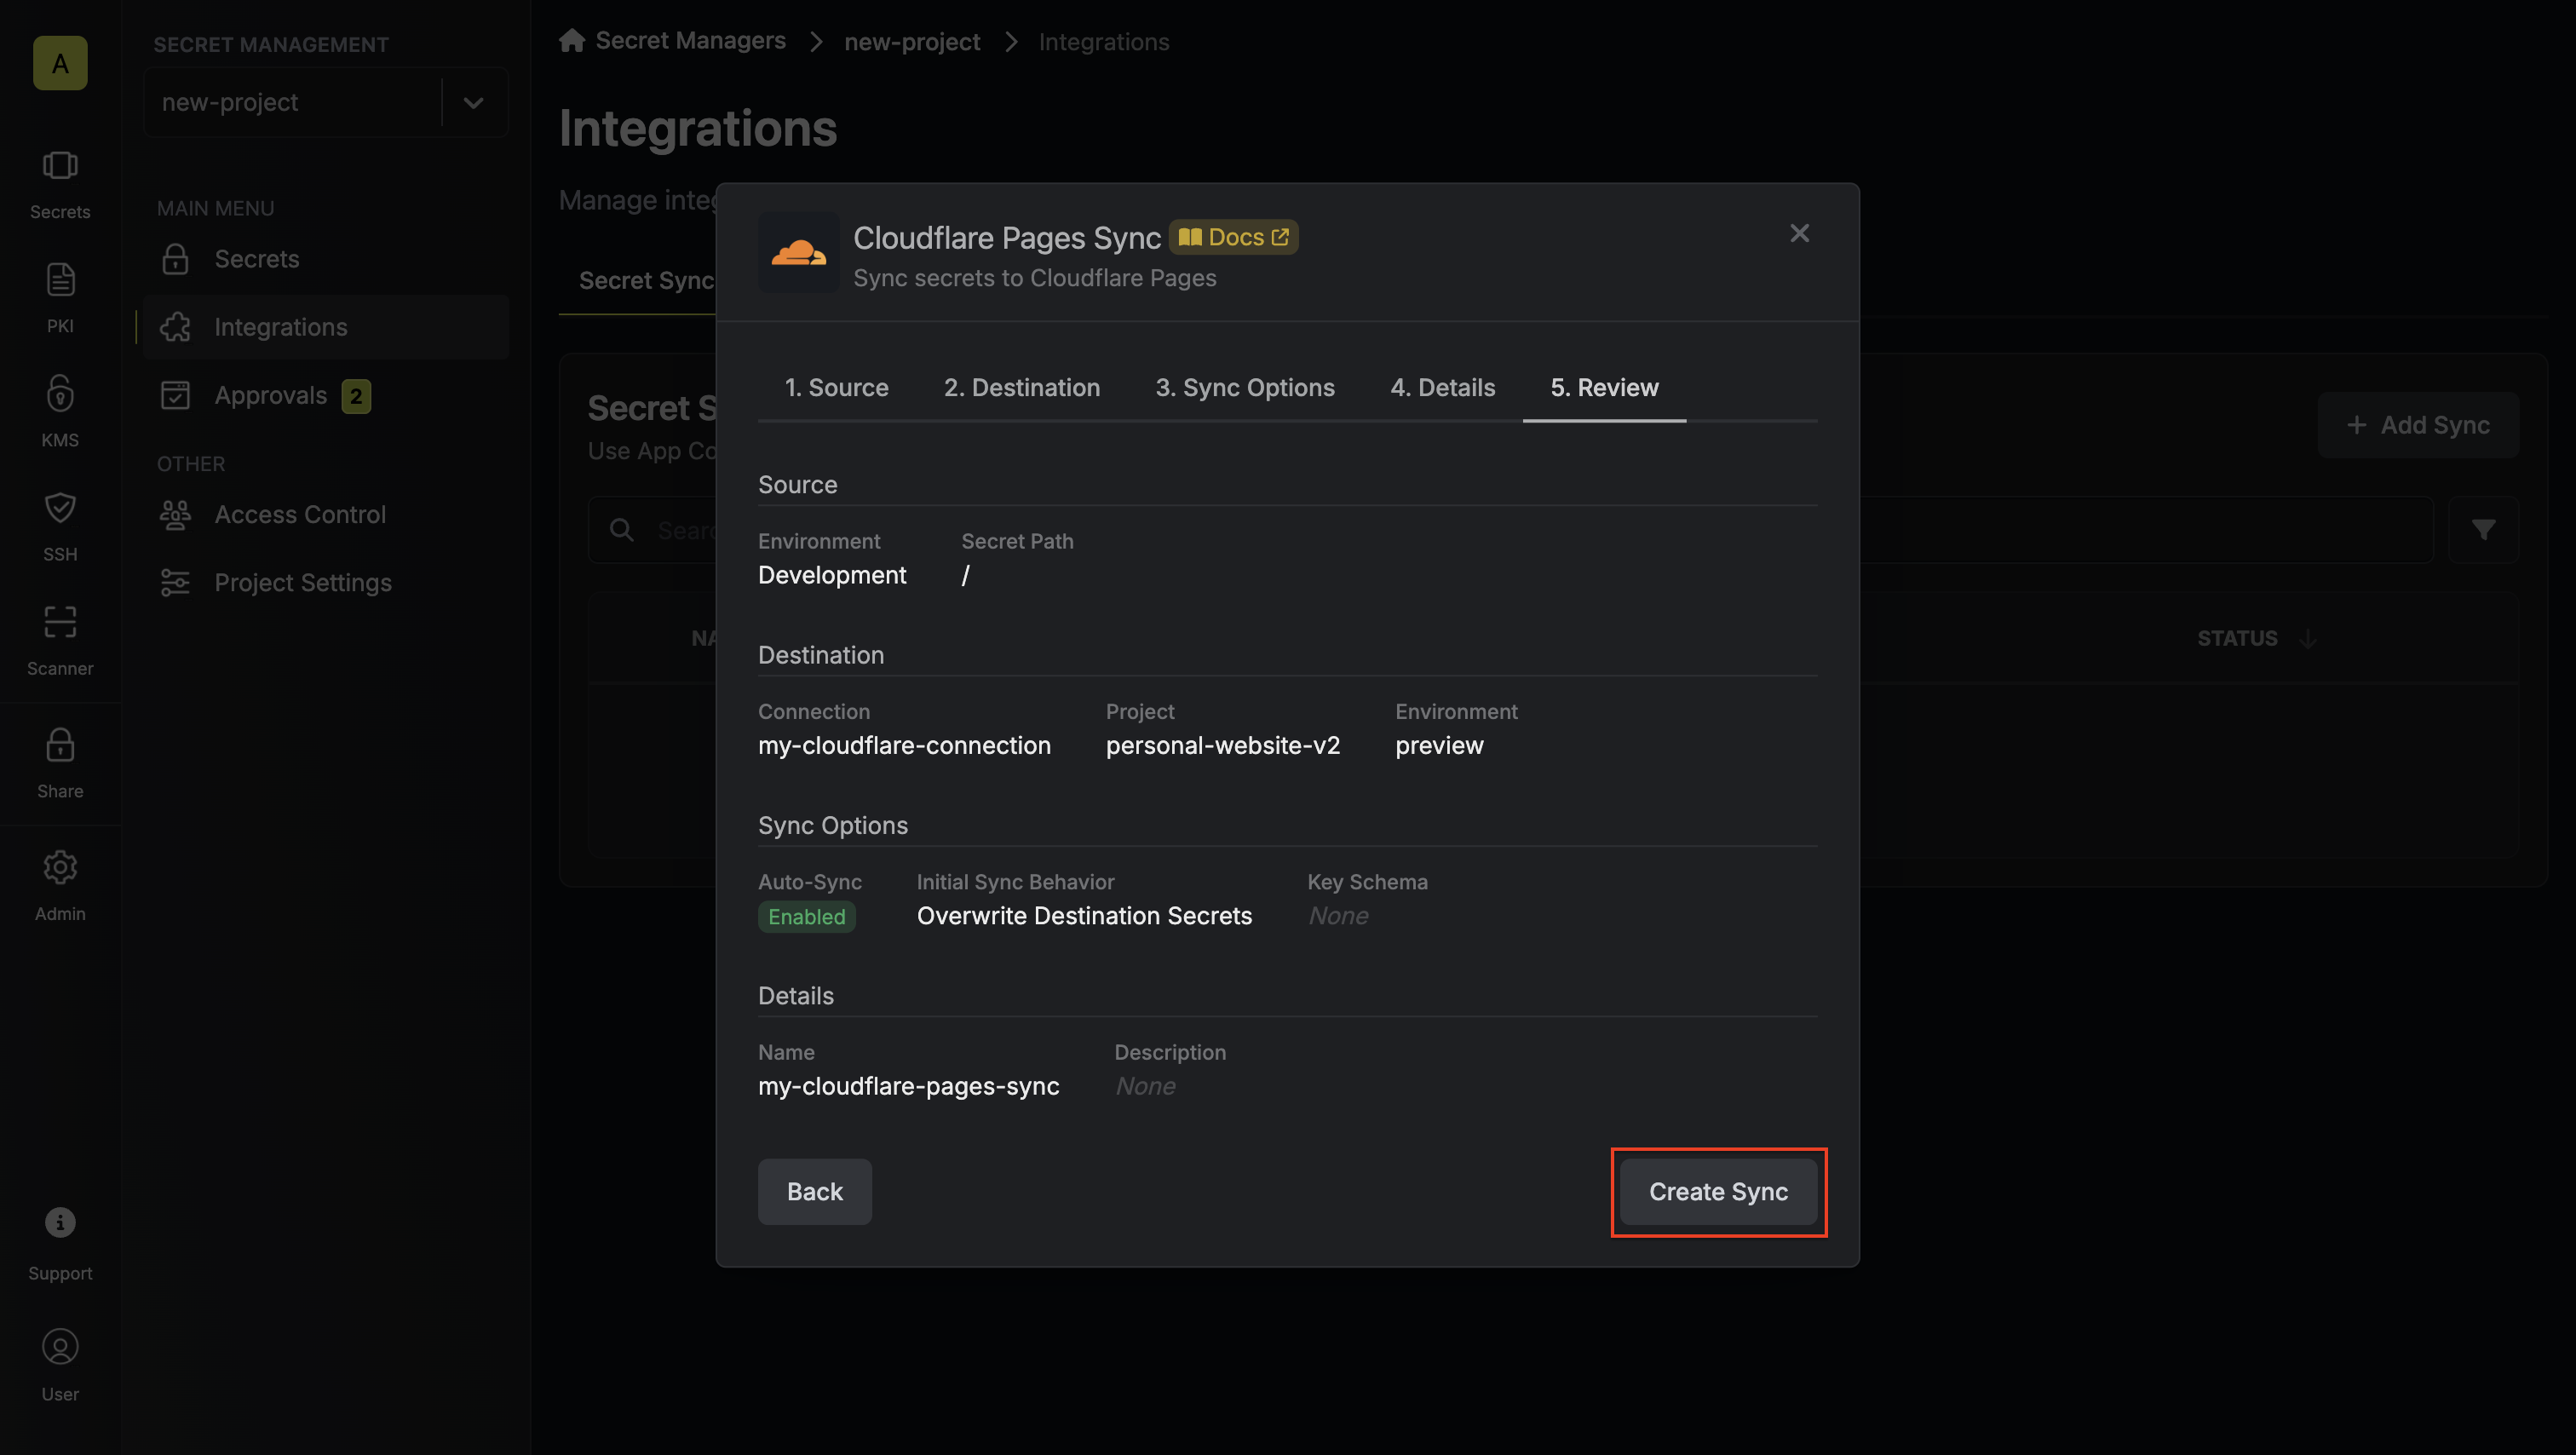 8. If enabled, your Cloudflare Pages Sync will begin syncing your secrets to the destination endpoint.
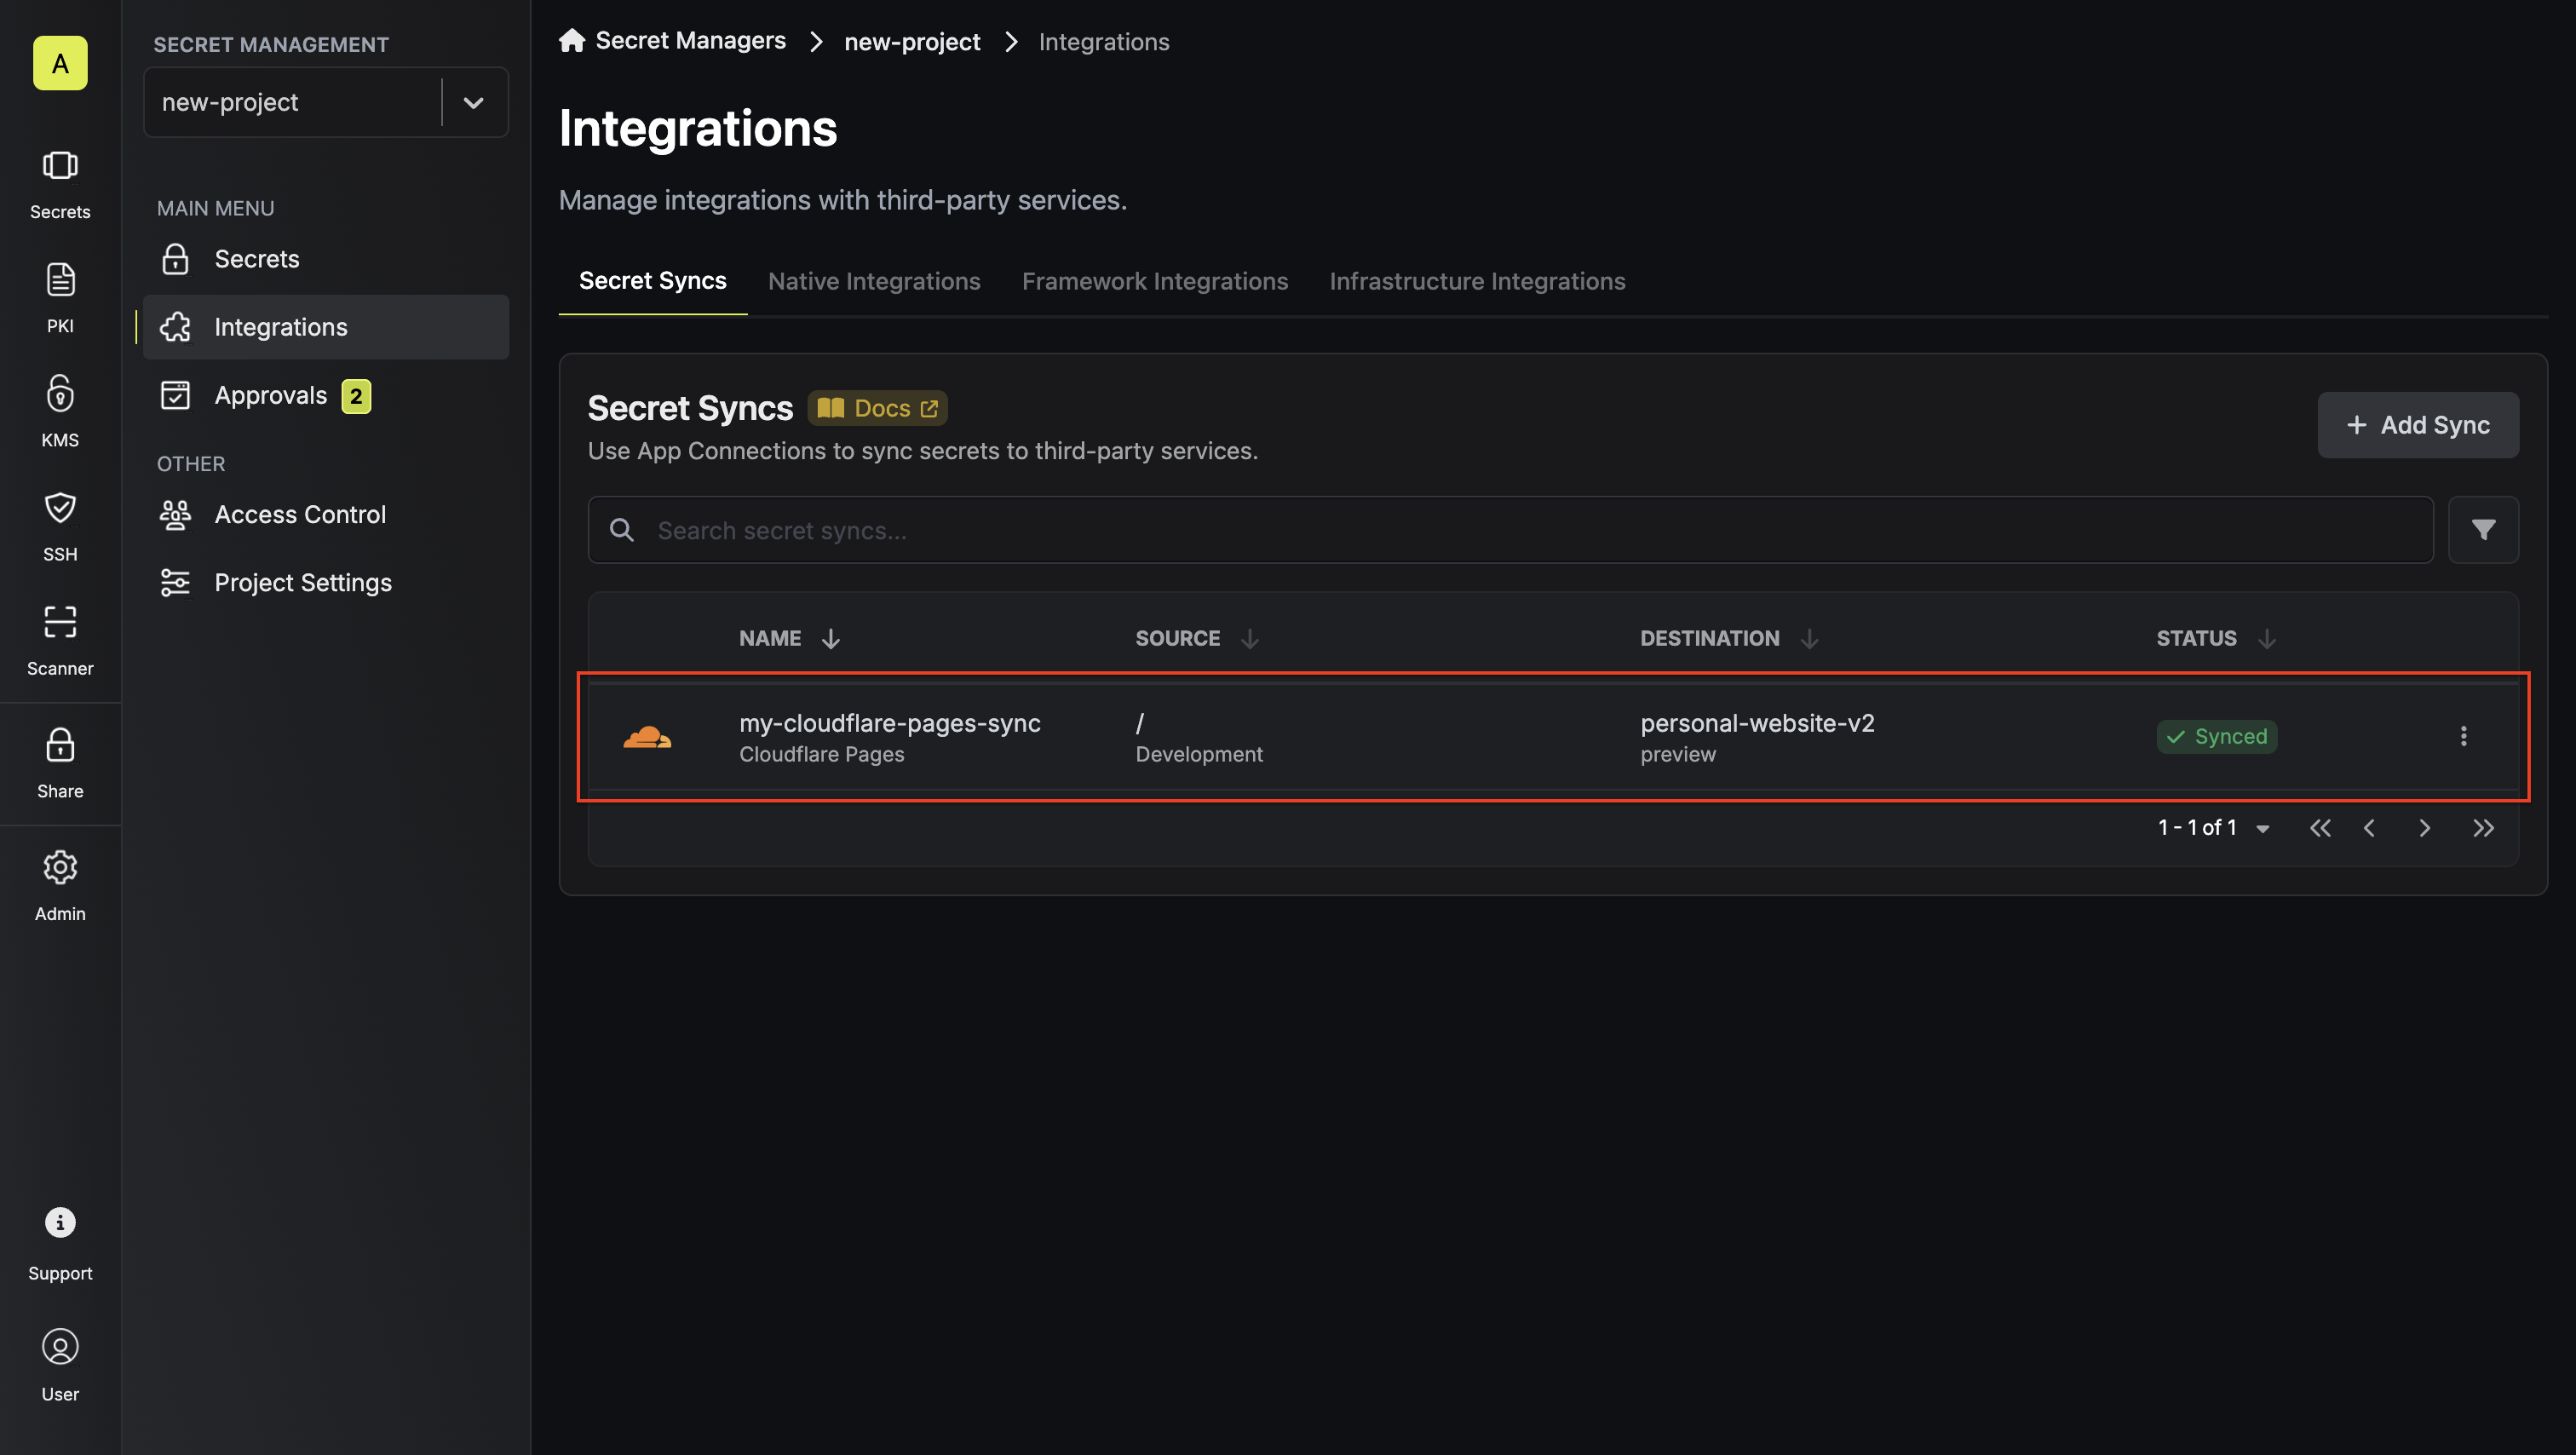 2. Select the **Cloudflare Workers** option.
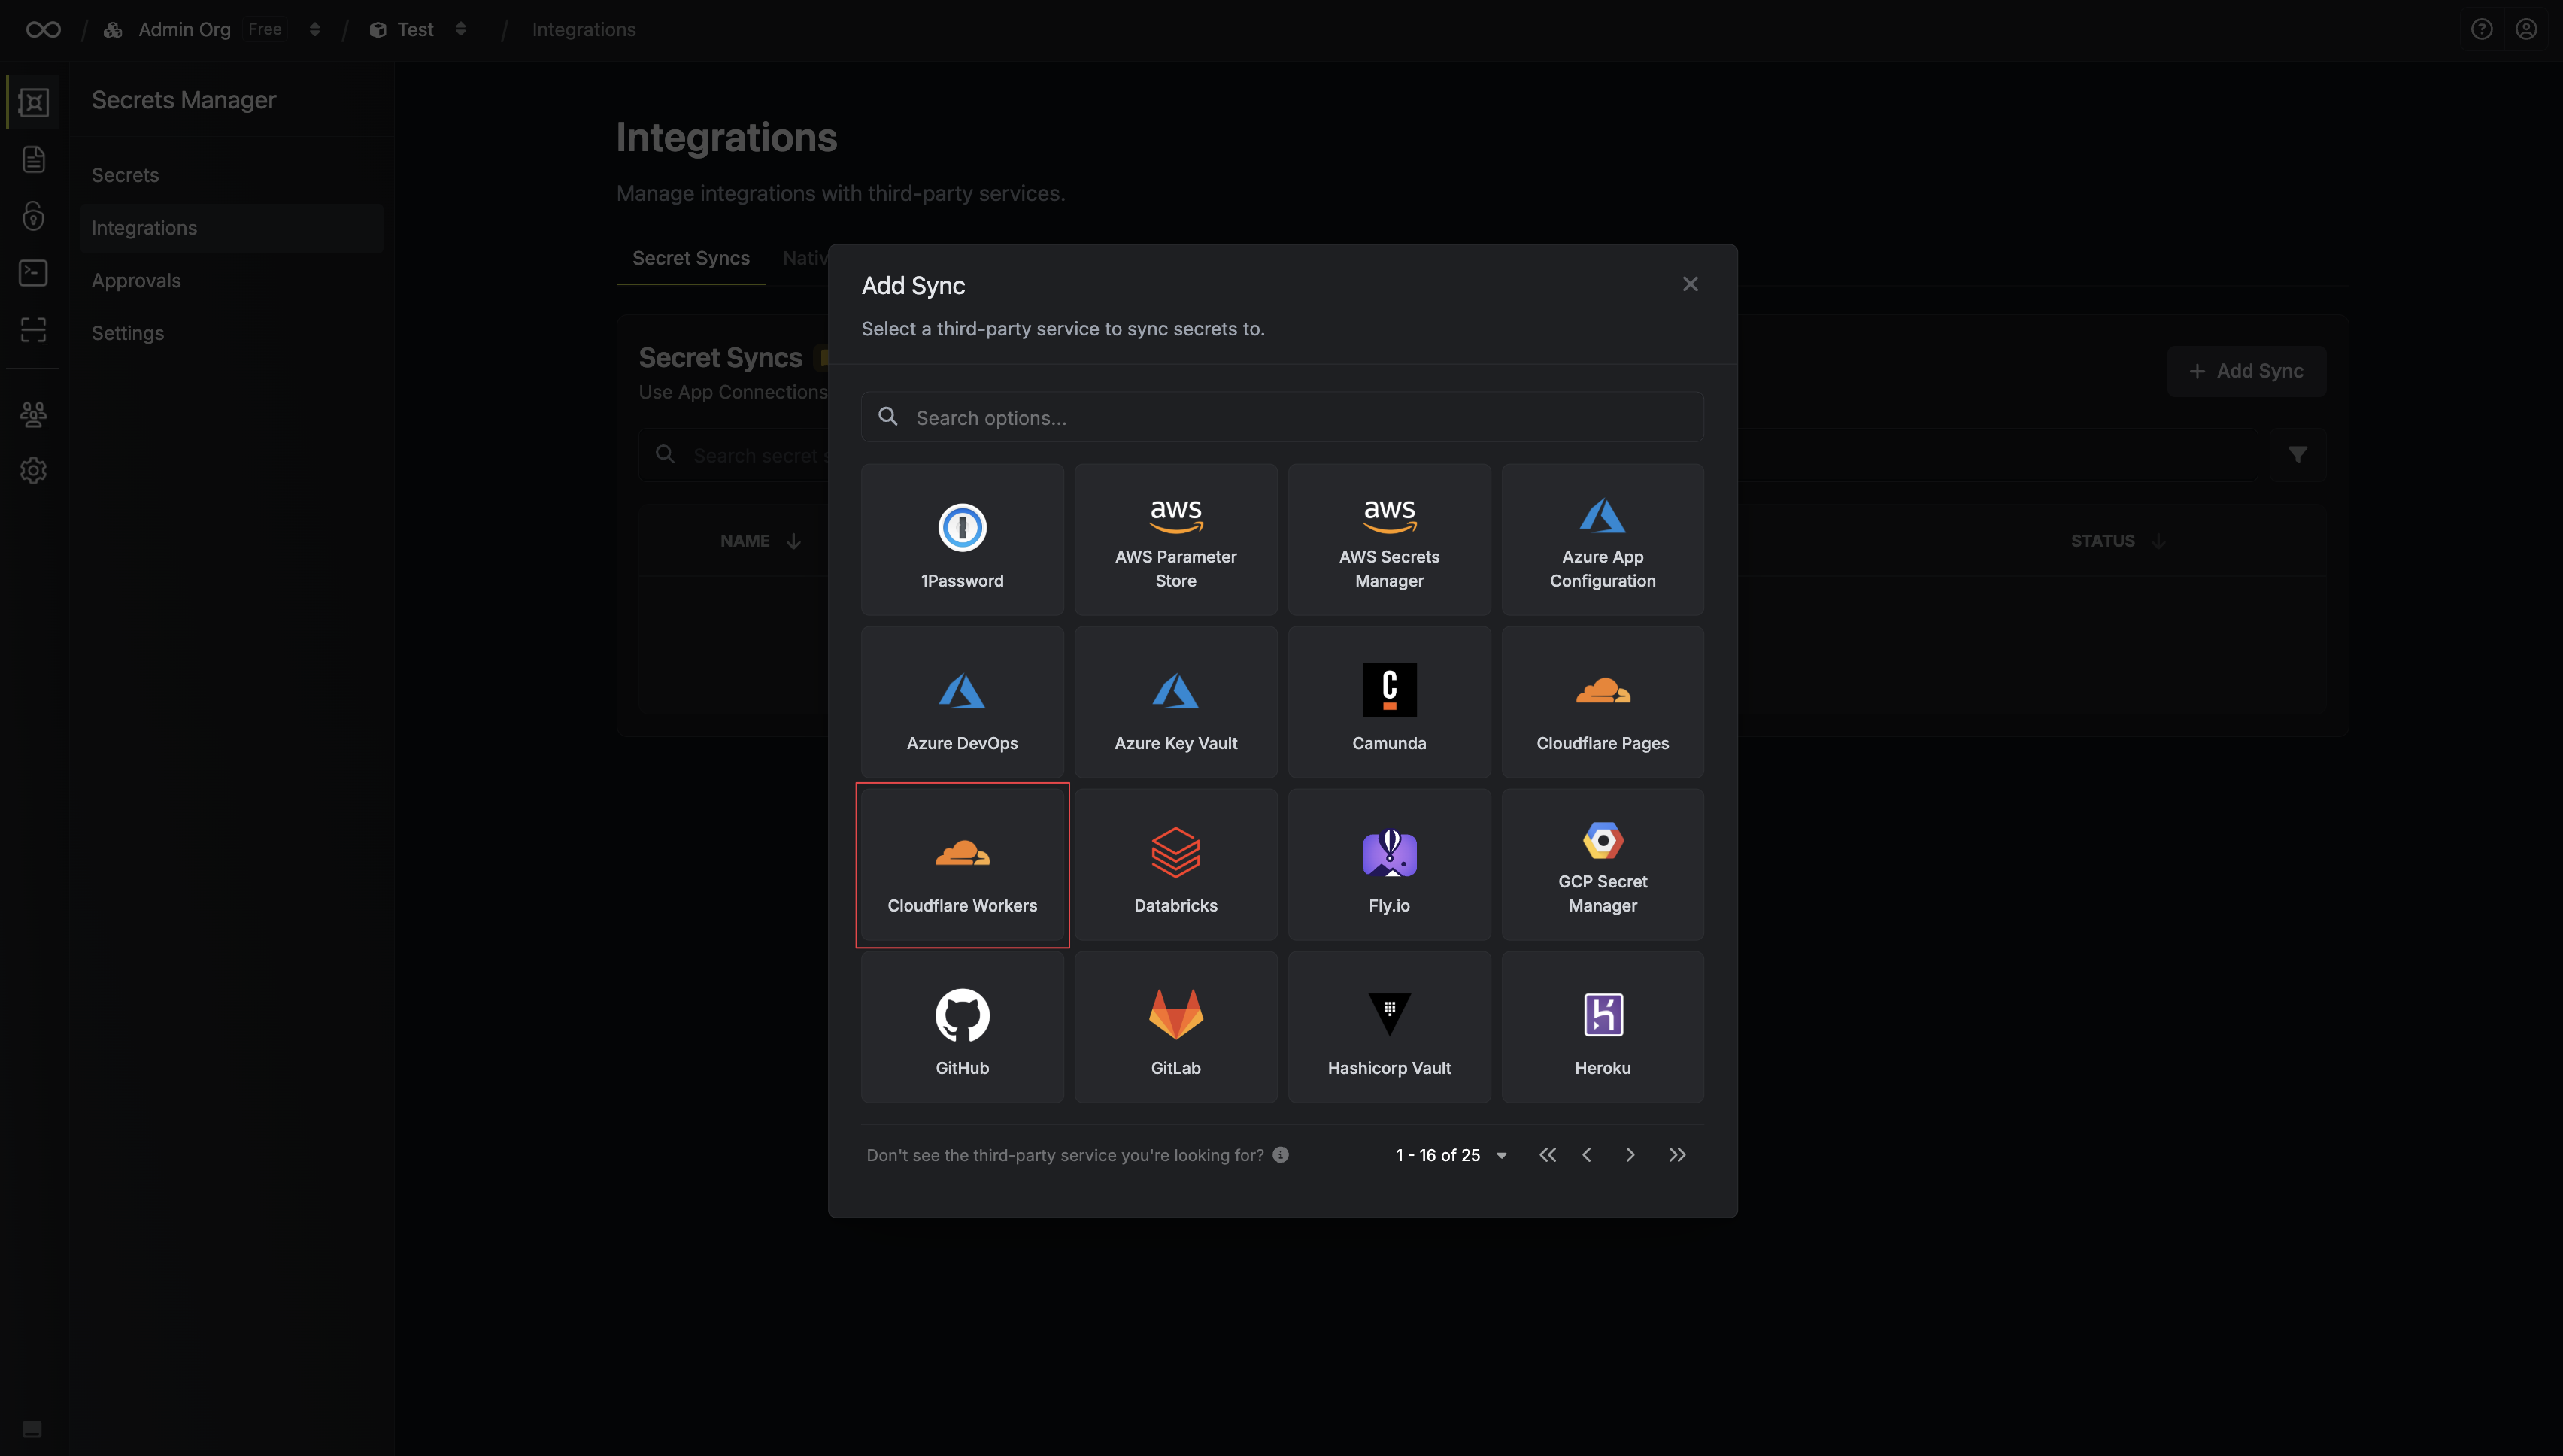 3. Configure the **Source** from where secrets should be retrieved, then click **Next**.
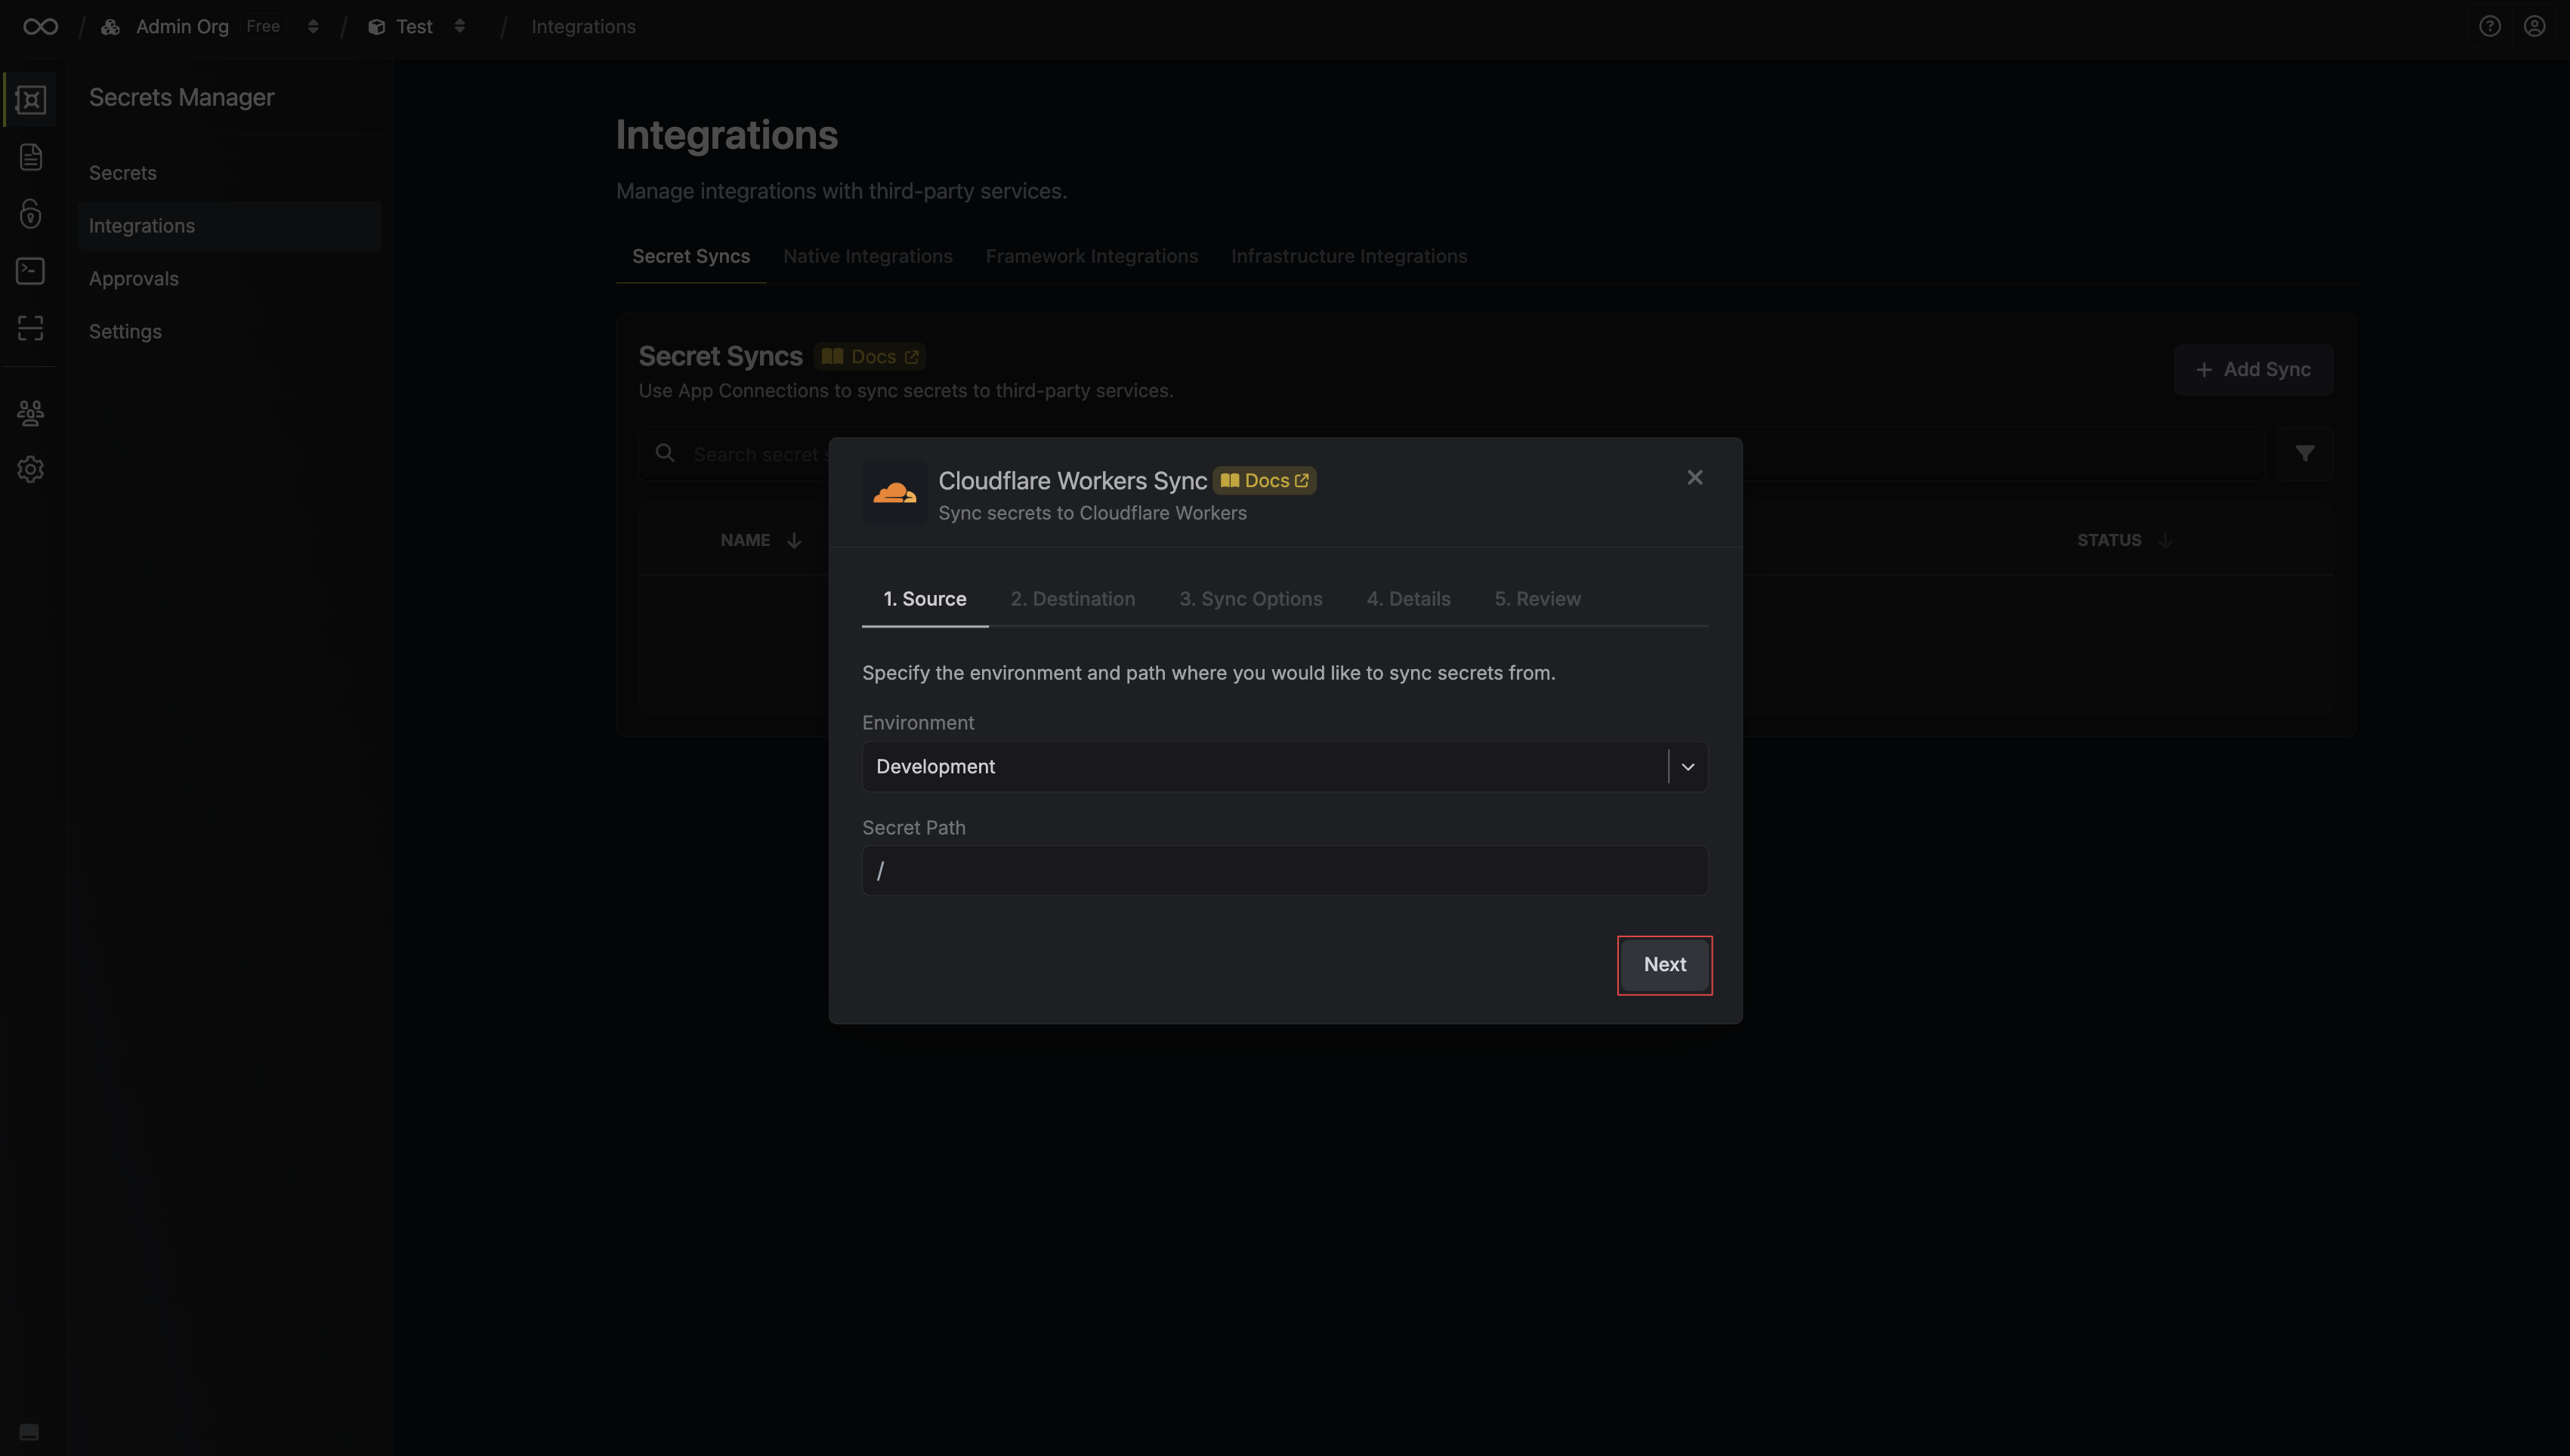 * **Environment**: The project environment to retrieve secrets from.
* **Secret Path**: The folder path to retrieve secrets from.
* **Environment**: The project environment to retrieve secrets from.
* **Secret Path**: The folder path to retrieve secrets from.
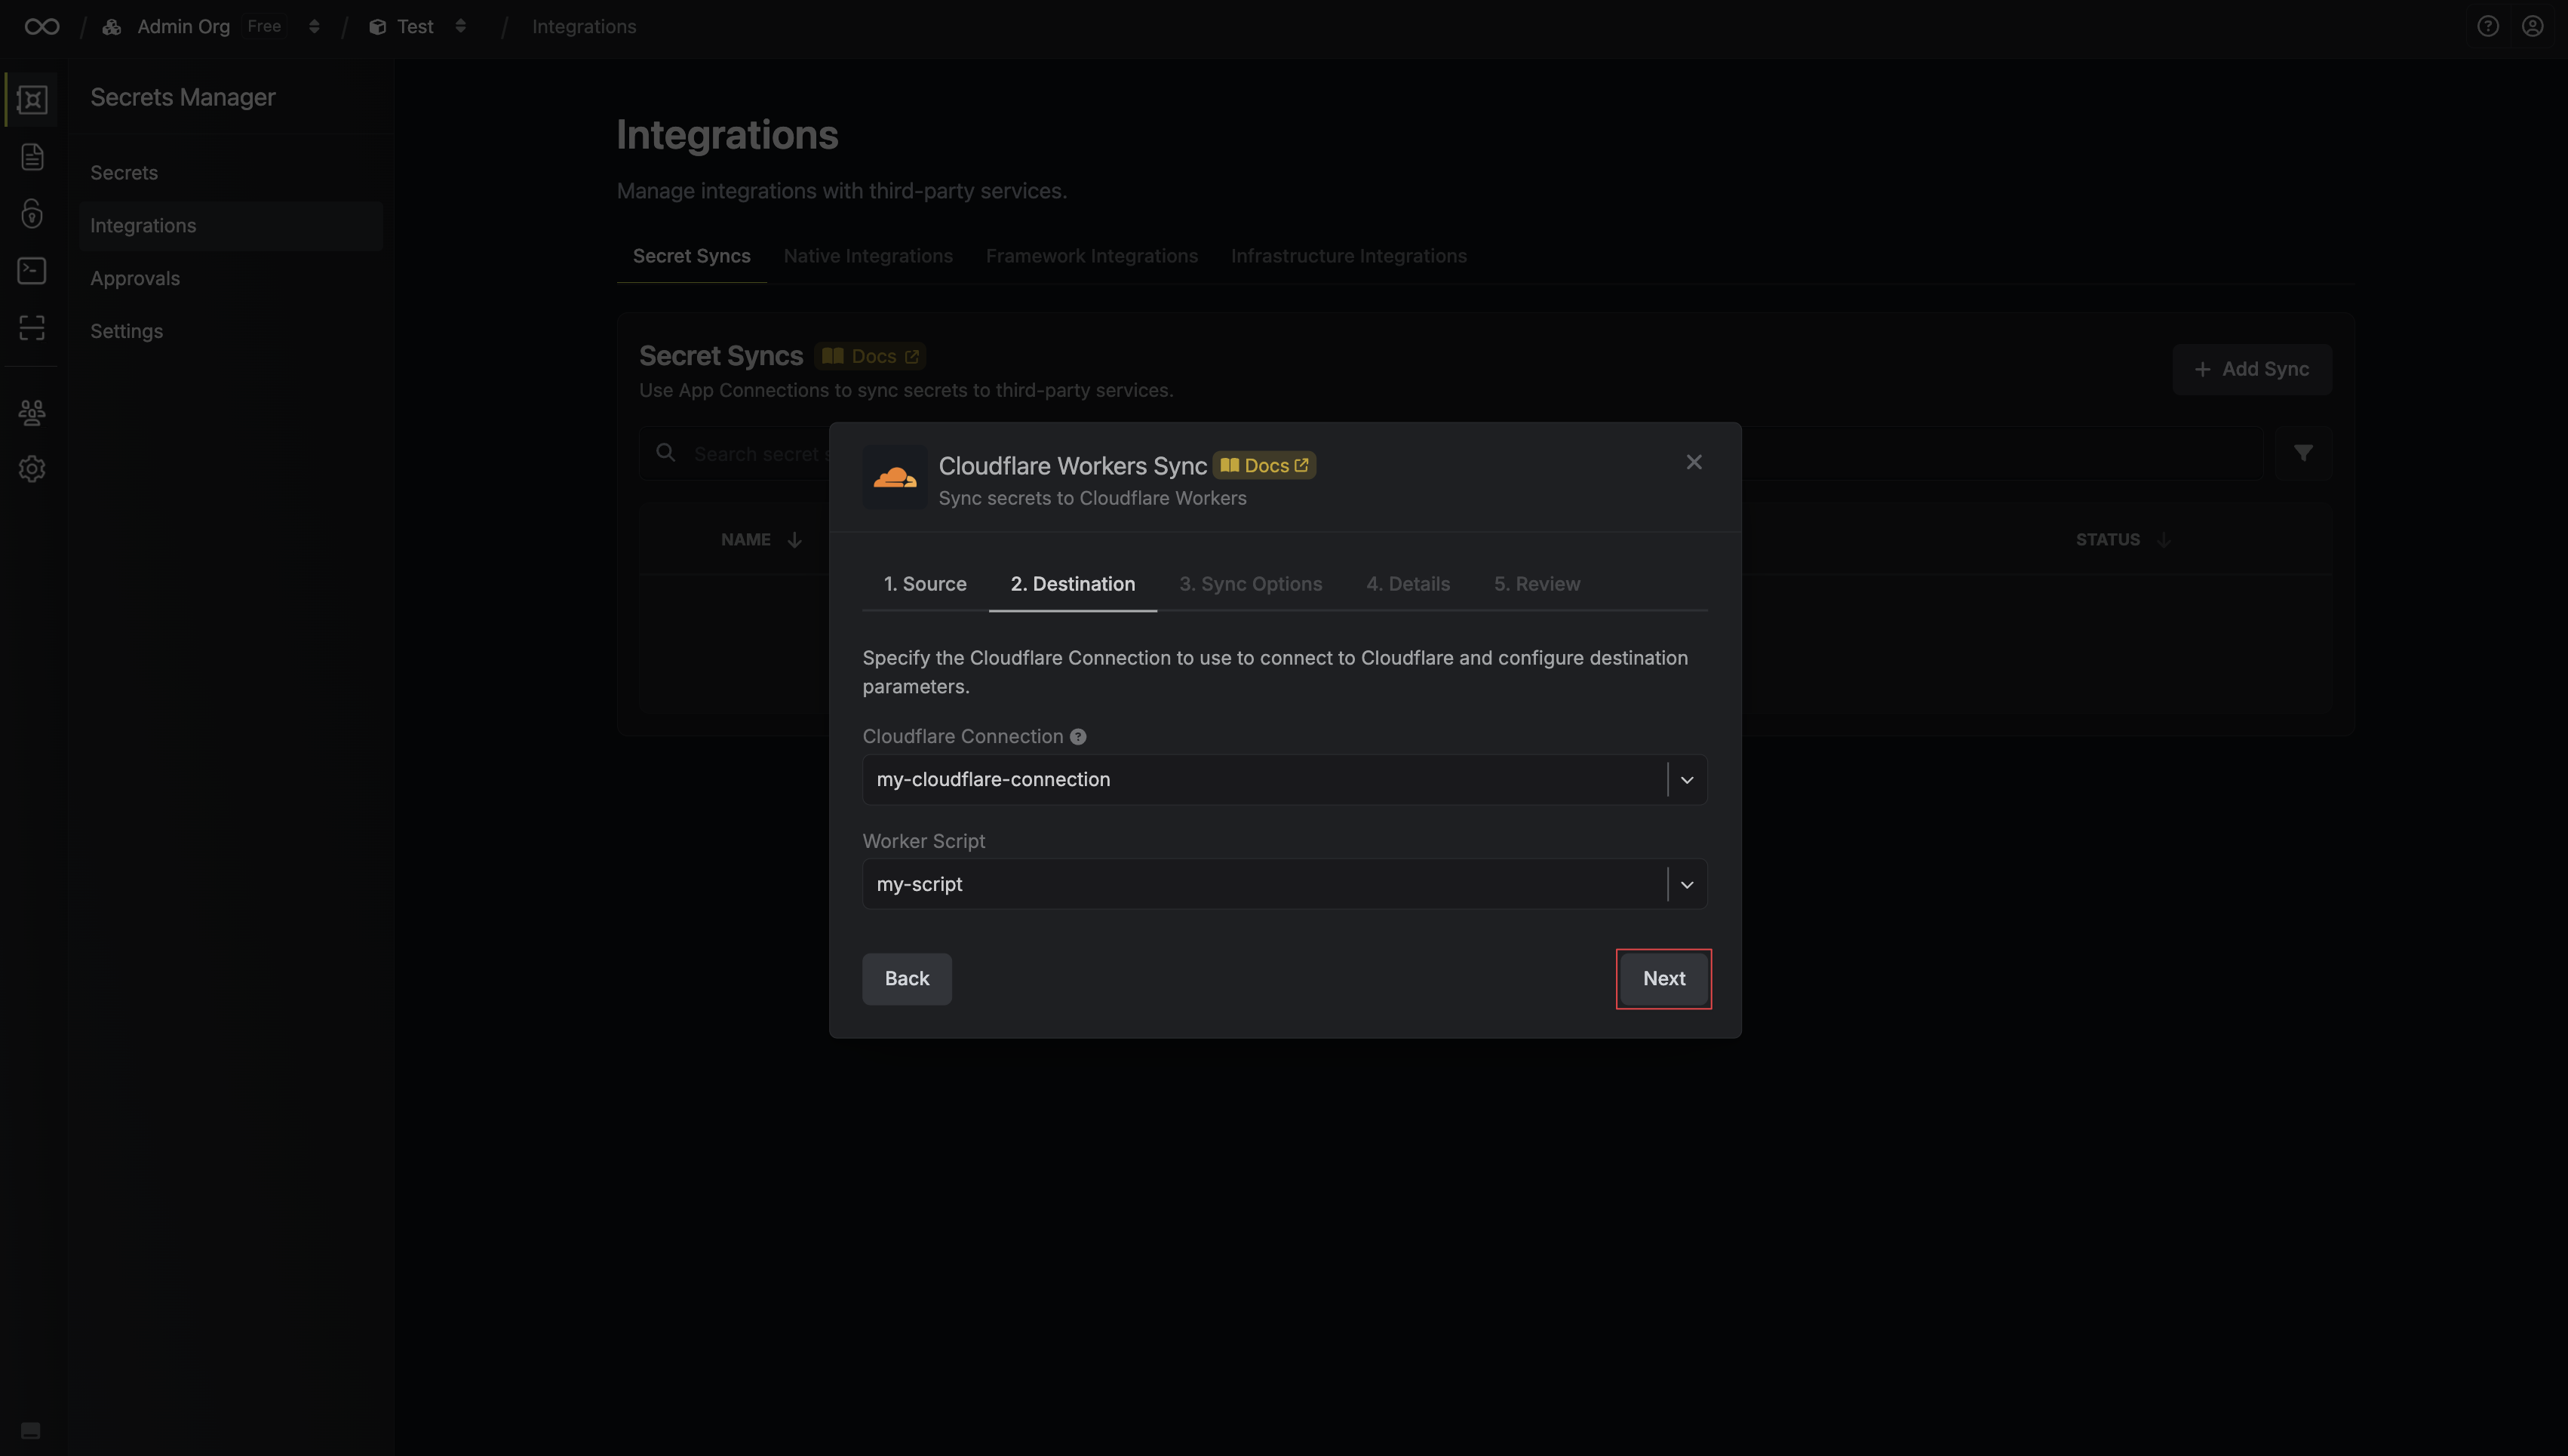 * **Cloudflare Connection**: The Cloudflare Connection to authenticate with.
* **Cloudflare Workers Script**: Choose the Cloudflare Workers script you want to sync secrets to.
5. Configure the **Sync Options** to specify how secrets should be synced, then click **Next**.
* **Cloudflare Connection**: The Cloudflare Connection to authenticate with.
* **Cloudflare Workers Script**: Choose the Cloudflare Workers script you want to sync secrets to.
5. Configure the **Sync Options** to specify how secrets should be synced, then click **Next**.
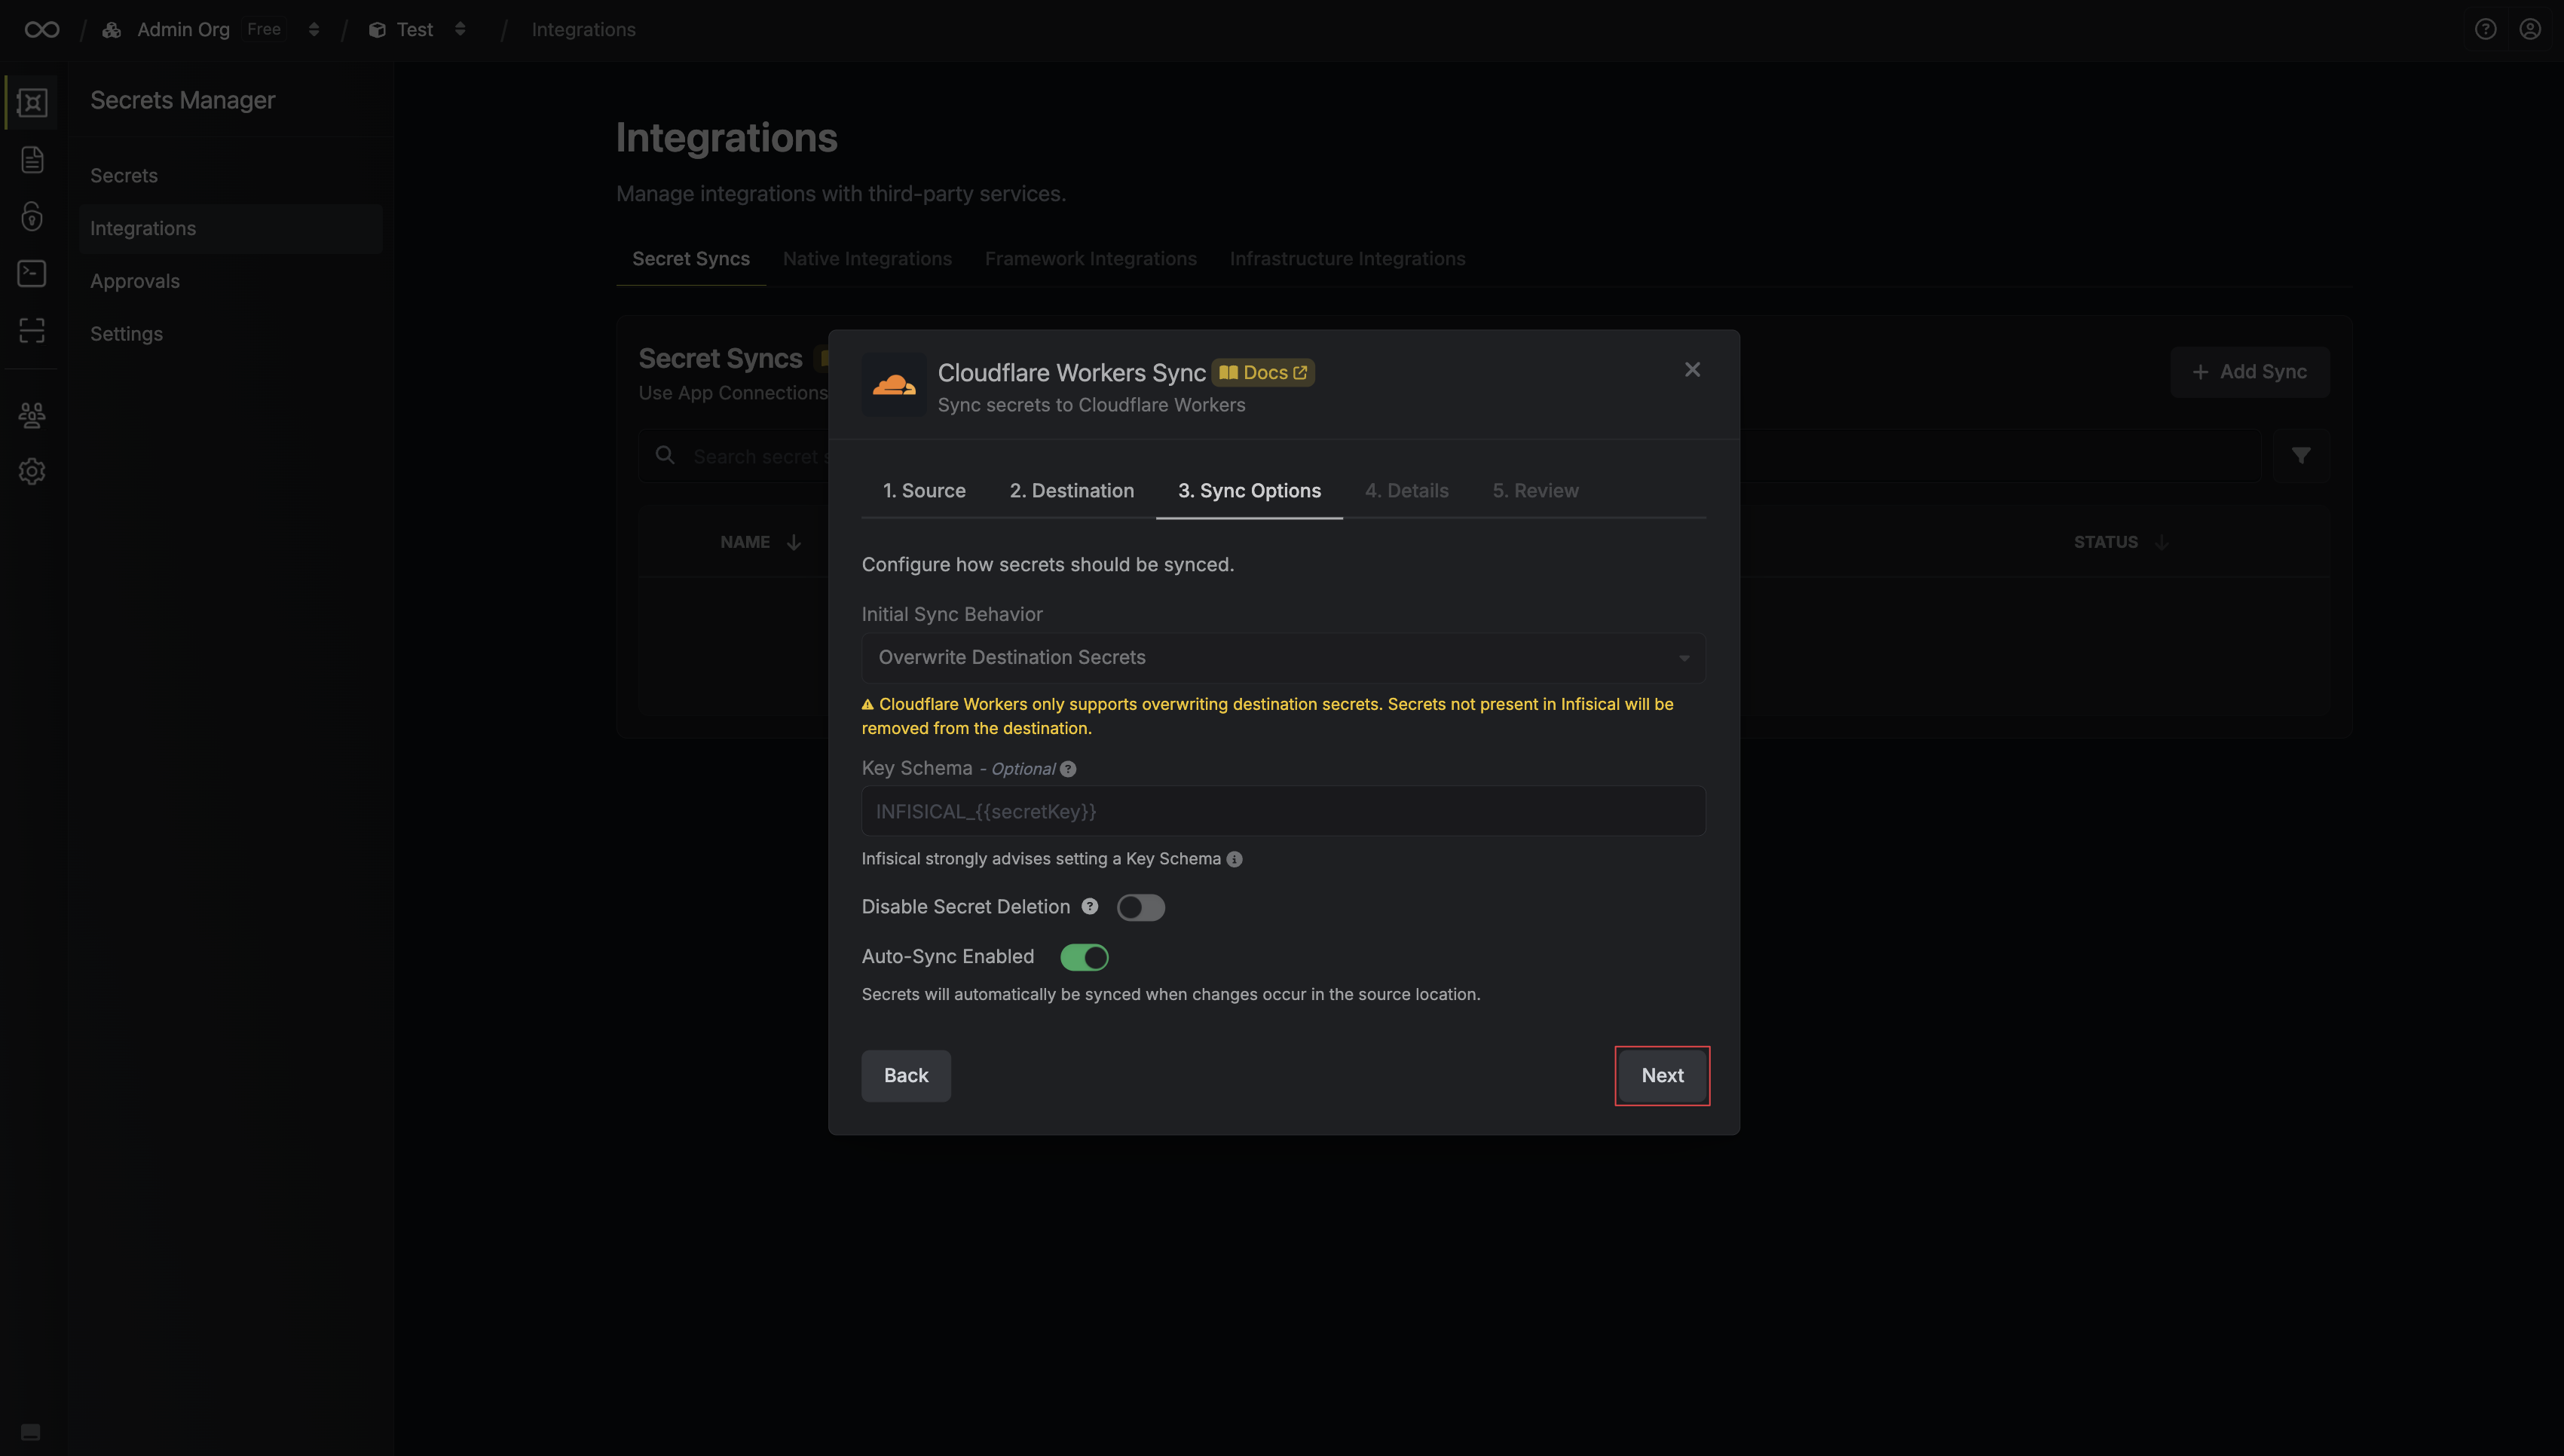 * **Initial Sync Behavior**: Determines how Infisical should resolve the initial sync.
* **Overwrite Destination Secrets**: Removes any secrets at the destination endpoint not present in Infisical.
* **Key Schema**: Template that determines how secret names are transformed when syncing, using `{{secretKey}}` as a placeholder for the original secret name and `{{environment}}` for the environment.
* **Auto-Sync Enabled**: If enabled, secrets will automatically be synced from the source location when changes occur. Disable to enforce manual syncing only.
* **Disable Secret Deletion**: If enabled, Infisical will not remove secrets from the sync destination. Enable this option if you intend to manage some secrets manually outside of Infisical.
6. Configure the **Details** of your Cloudflare Workers Sync, then click **Next**.
* **Initial Sync Behavior**: Determines how Infisical should resolve the initial sync.
* **Overwrite Destination Secrets**: Removes any secrets at the destination endpoint not present in Infisical.
* **Key Schema**: Template that determines how secret names are transformed when syncing, using `{{secretKey}}` as a placeholder for the original secret name and `{{environment}}` for the environment.
* **Auto-Sync Enabled**: If enabled, secrets will automatically be synced from the source location when changes occur. Disable to enforce manual syncing only.
* **Disable Secret Deletion**: If enabled, Infisical will not remove secrets from the sync destination. Enable this option if you intend to manage some secrets manually outside of Infisical.
6. Configure the **Details** of your Cloudflare Workers Sync, then click **Next**.
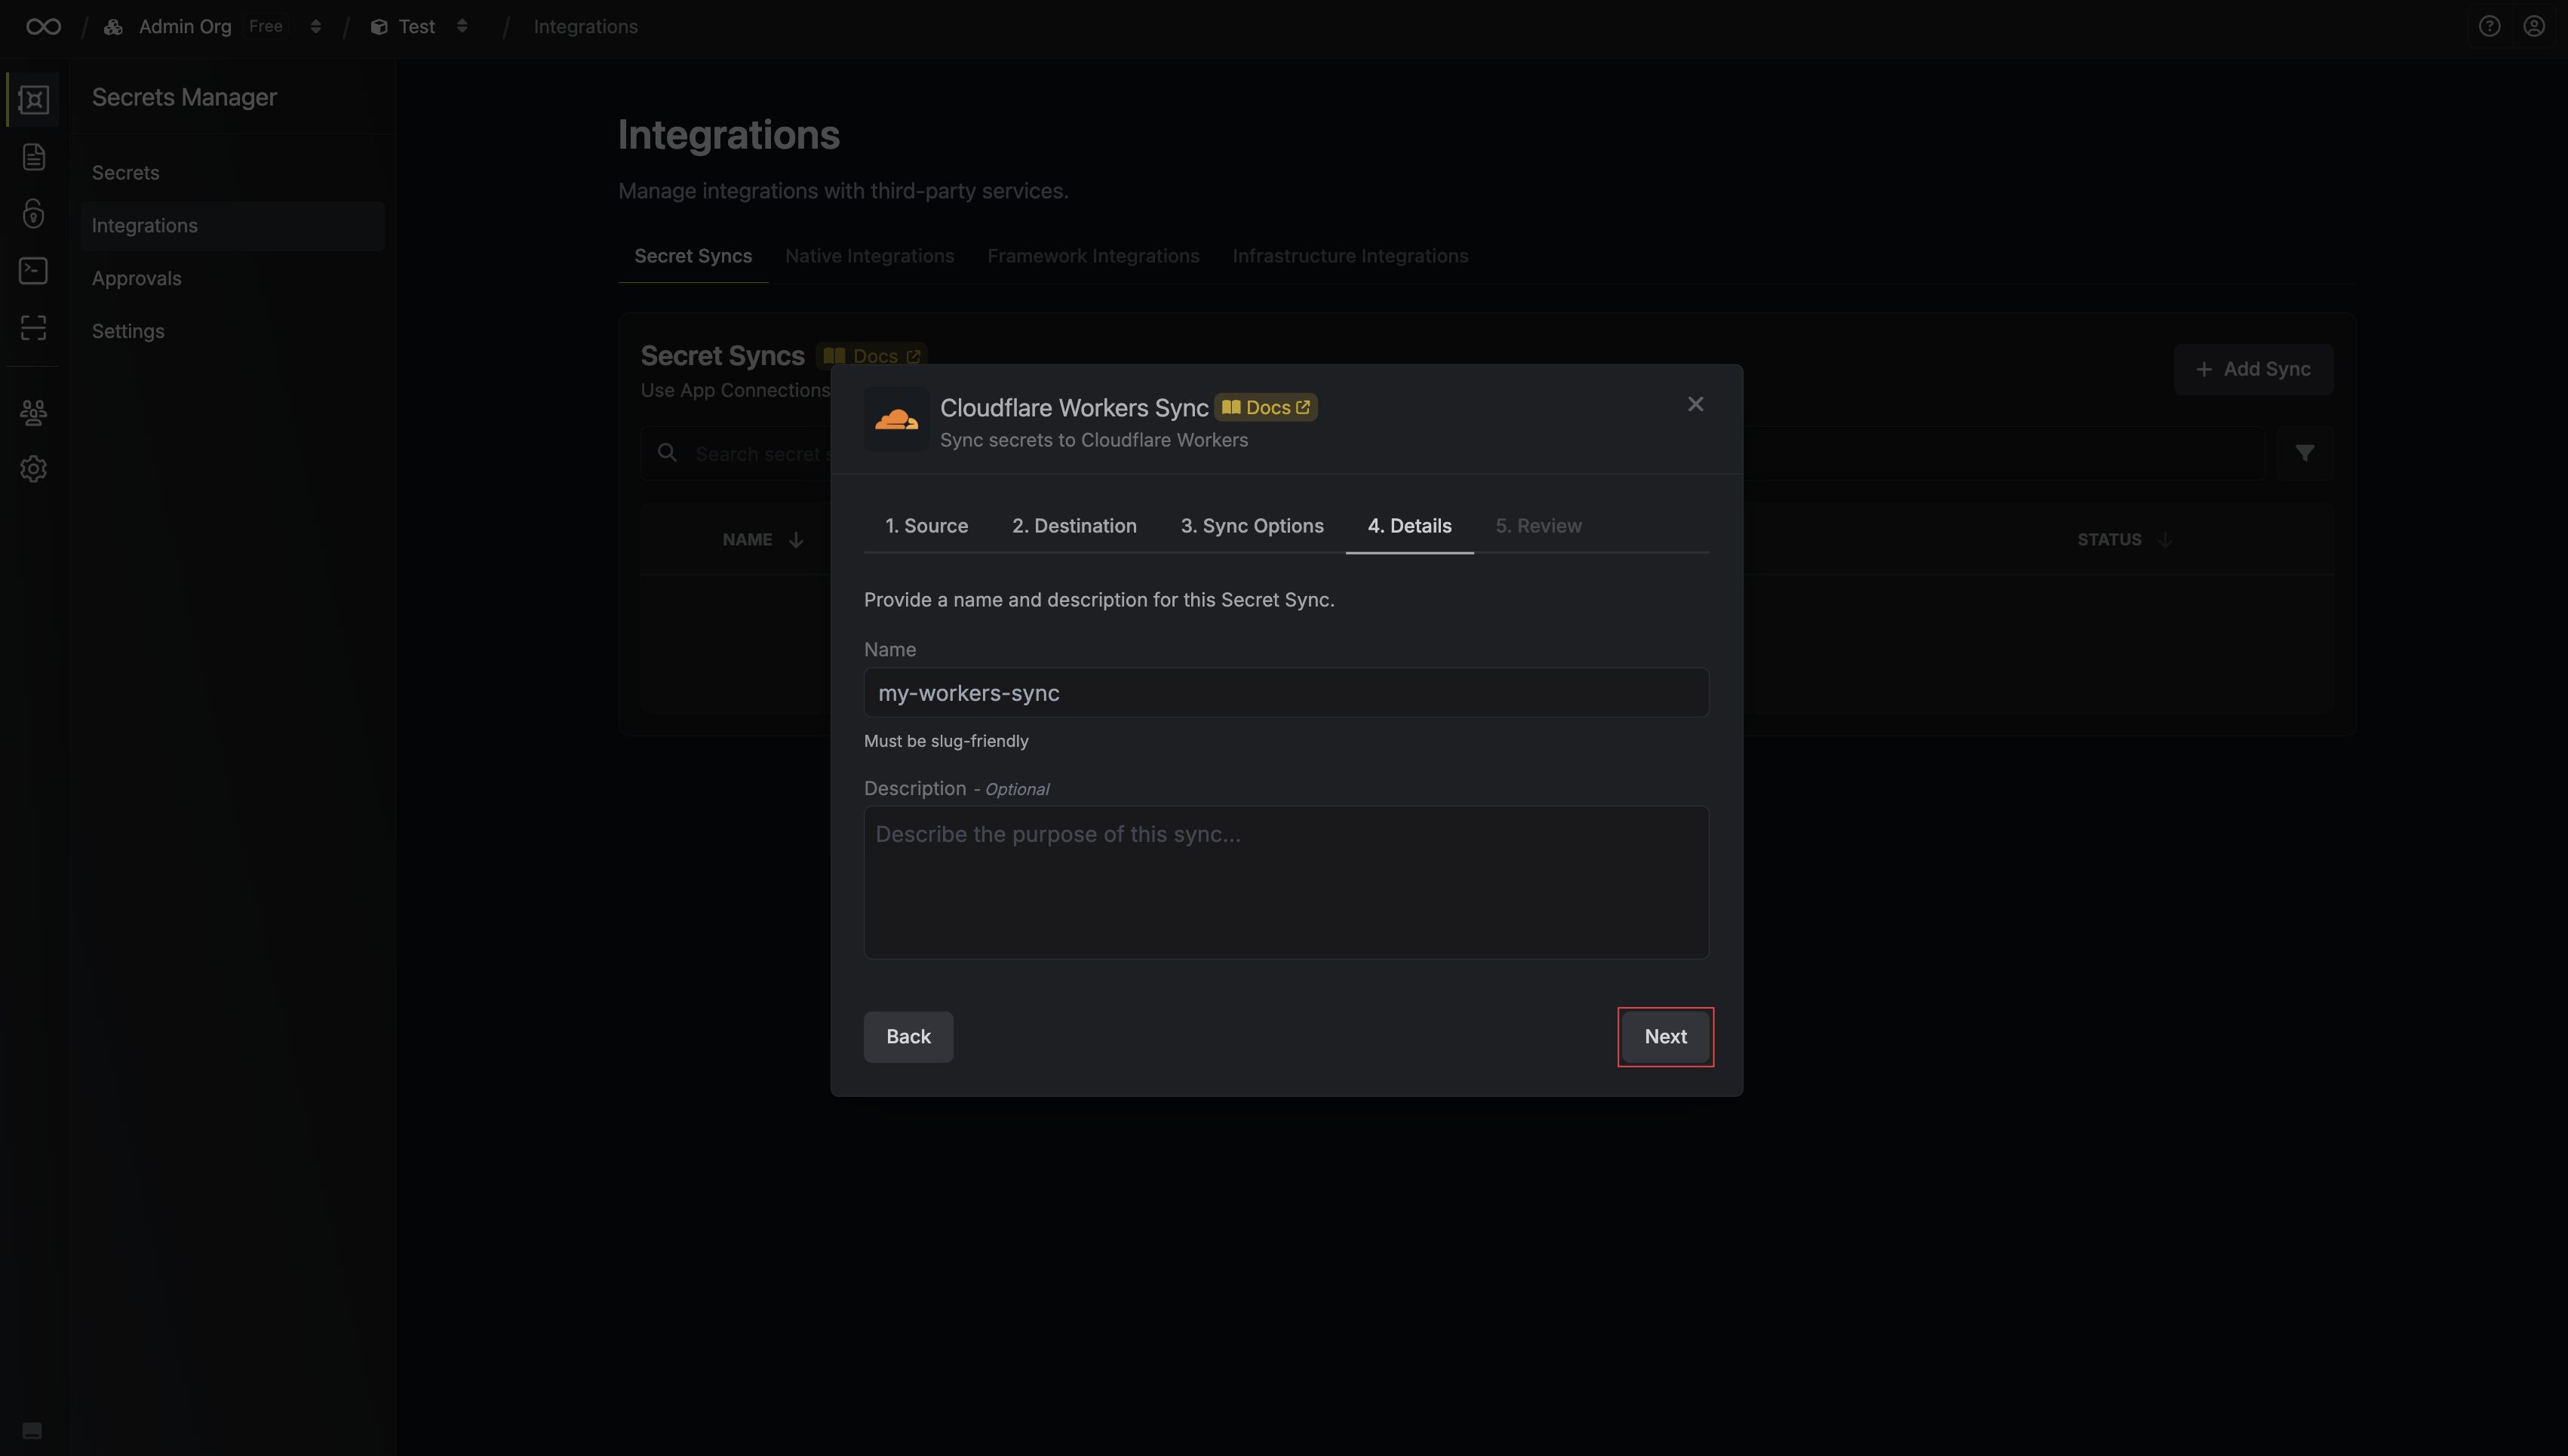 * **Name**: The name of your sync. Must be slug-friendly.
* **Description**: An optional description for your sync.
7. Review your Cloudflare Workers Sync configuration, then click **Create Sync**.
* **Name**: The name of your sync. Must be slug-friendly.
* **Description**: An optional description for your sync.
7. Review your Cloudflare Workers Sync configuration, then click **Create Sync**.
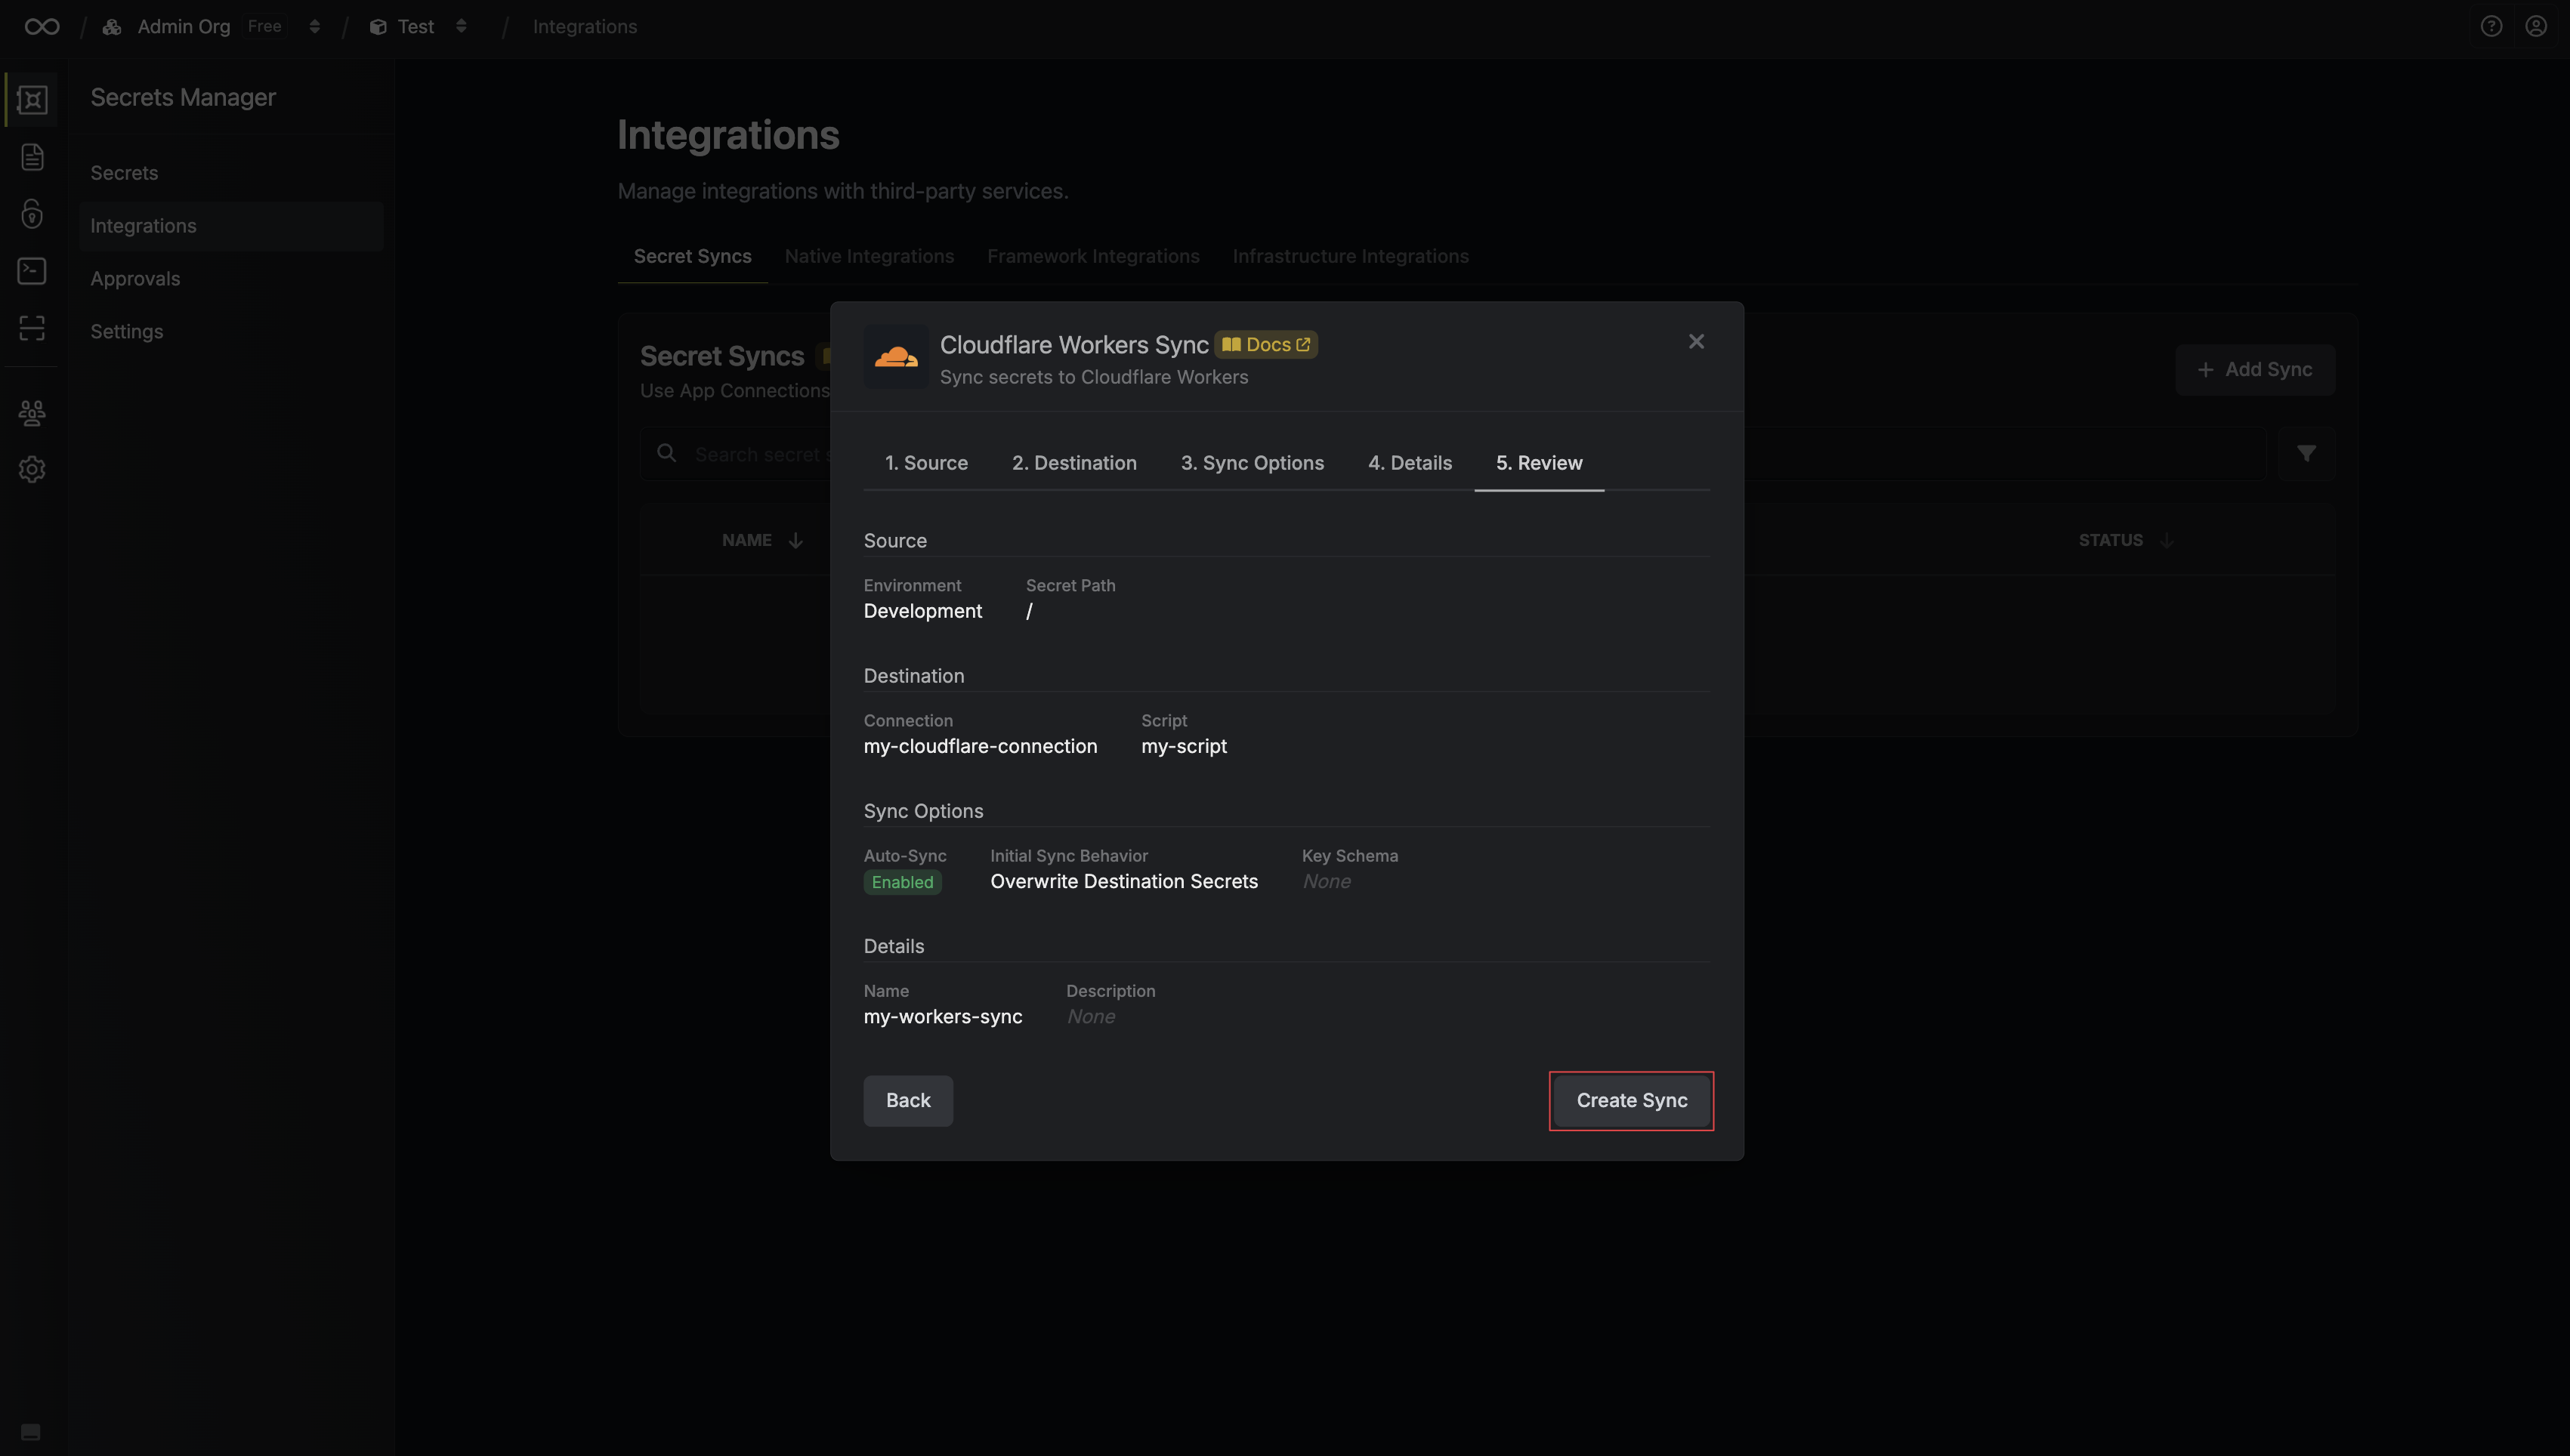 8. If enabled, your Cloudflare Workers Sync will begin syncing your secrets to the destination endpoint.
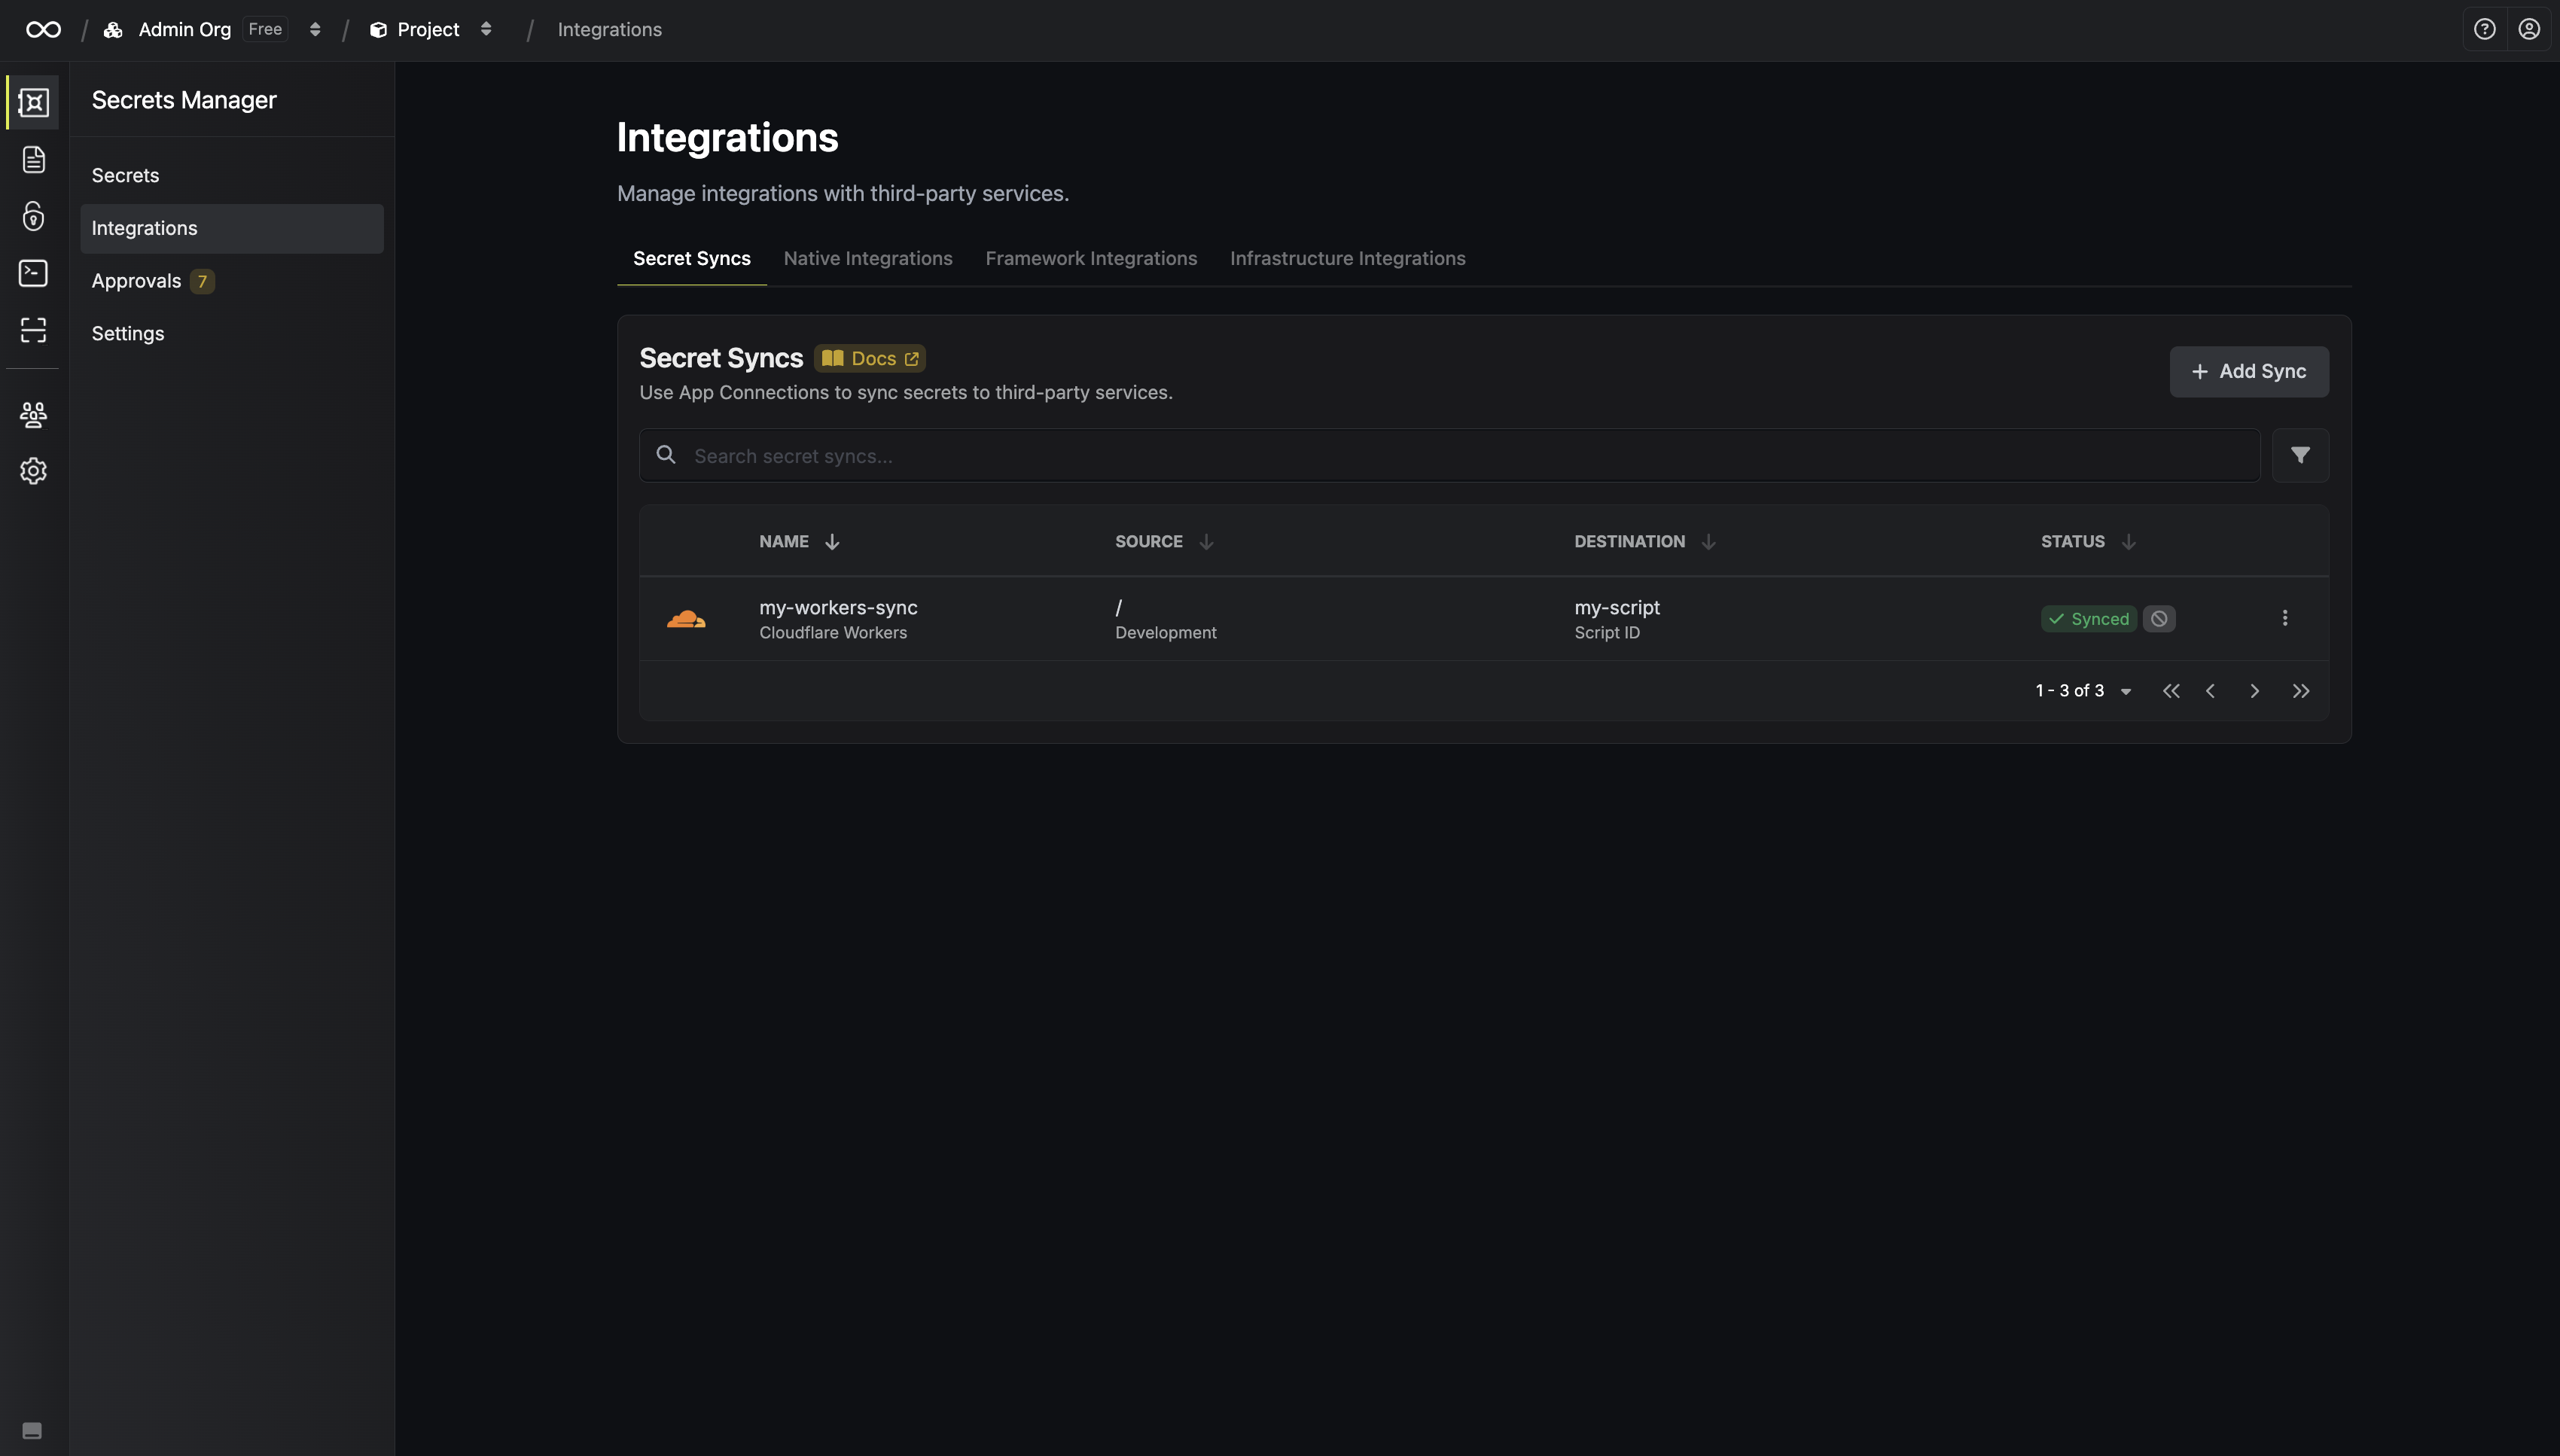
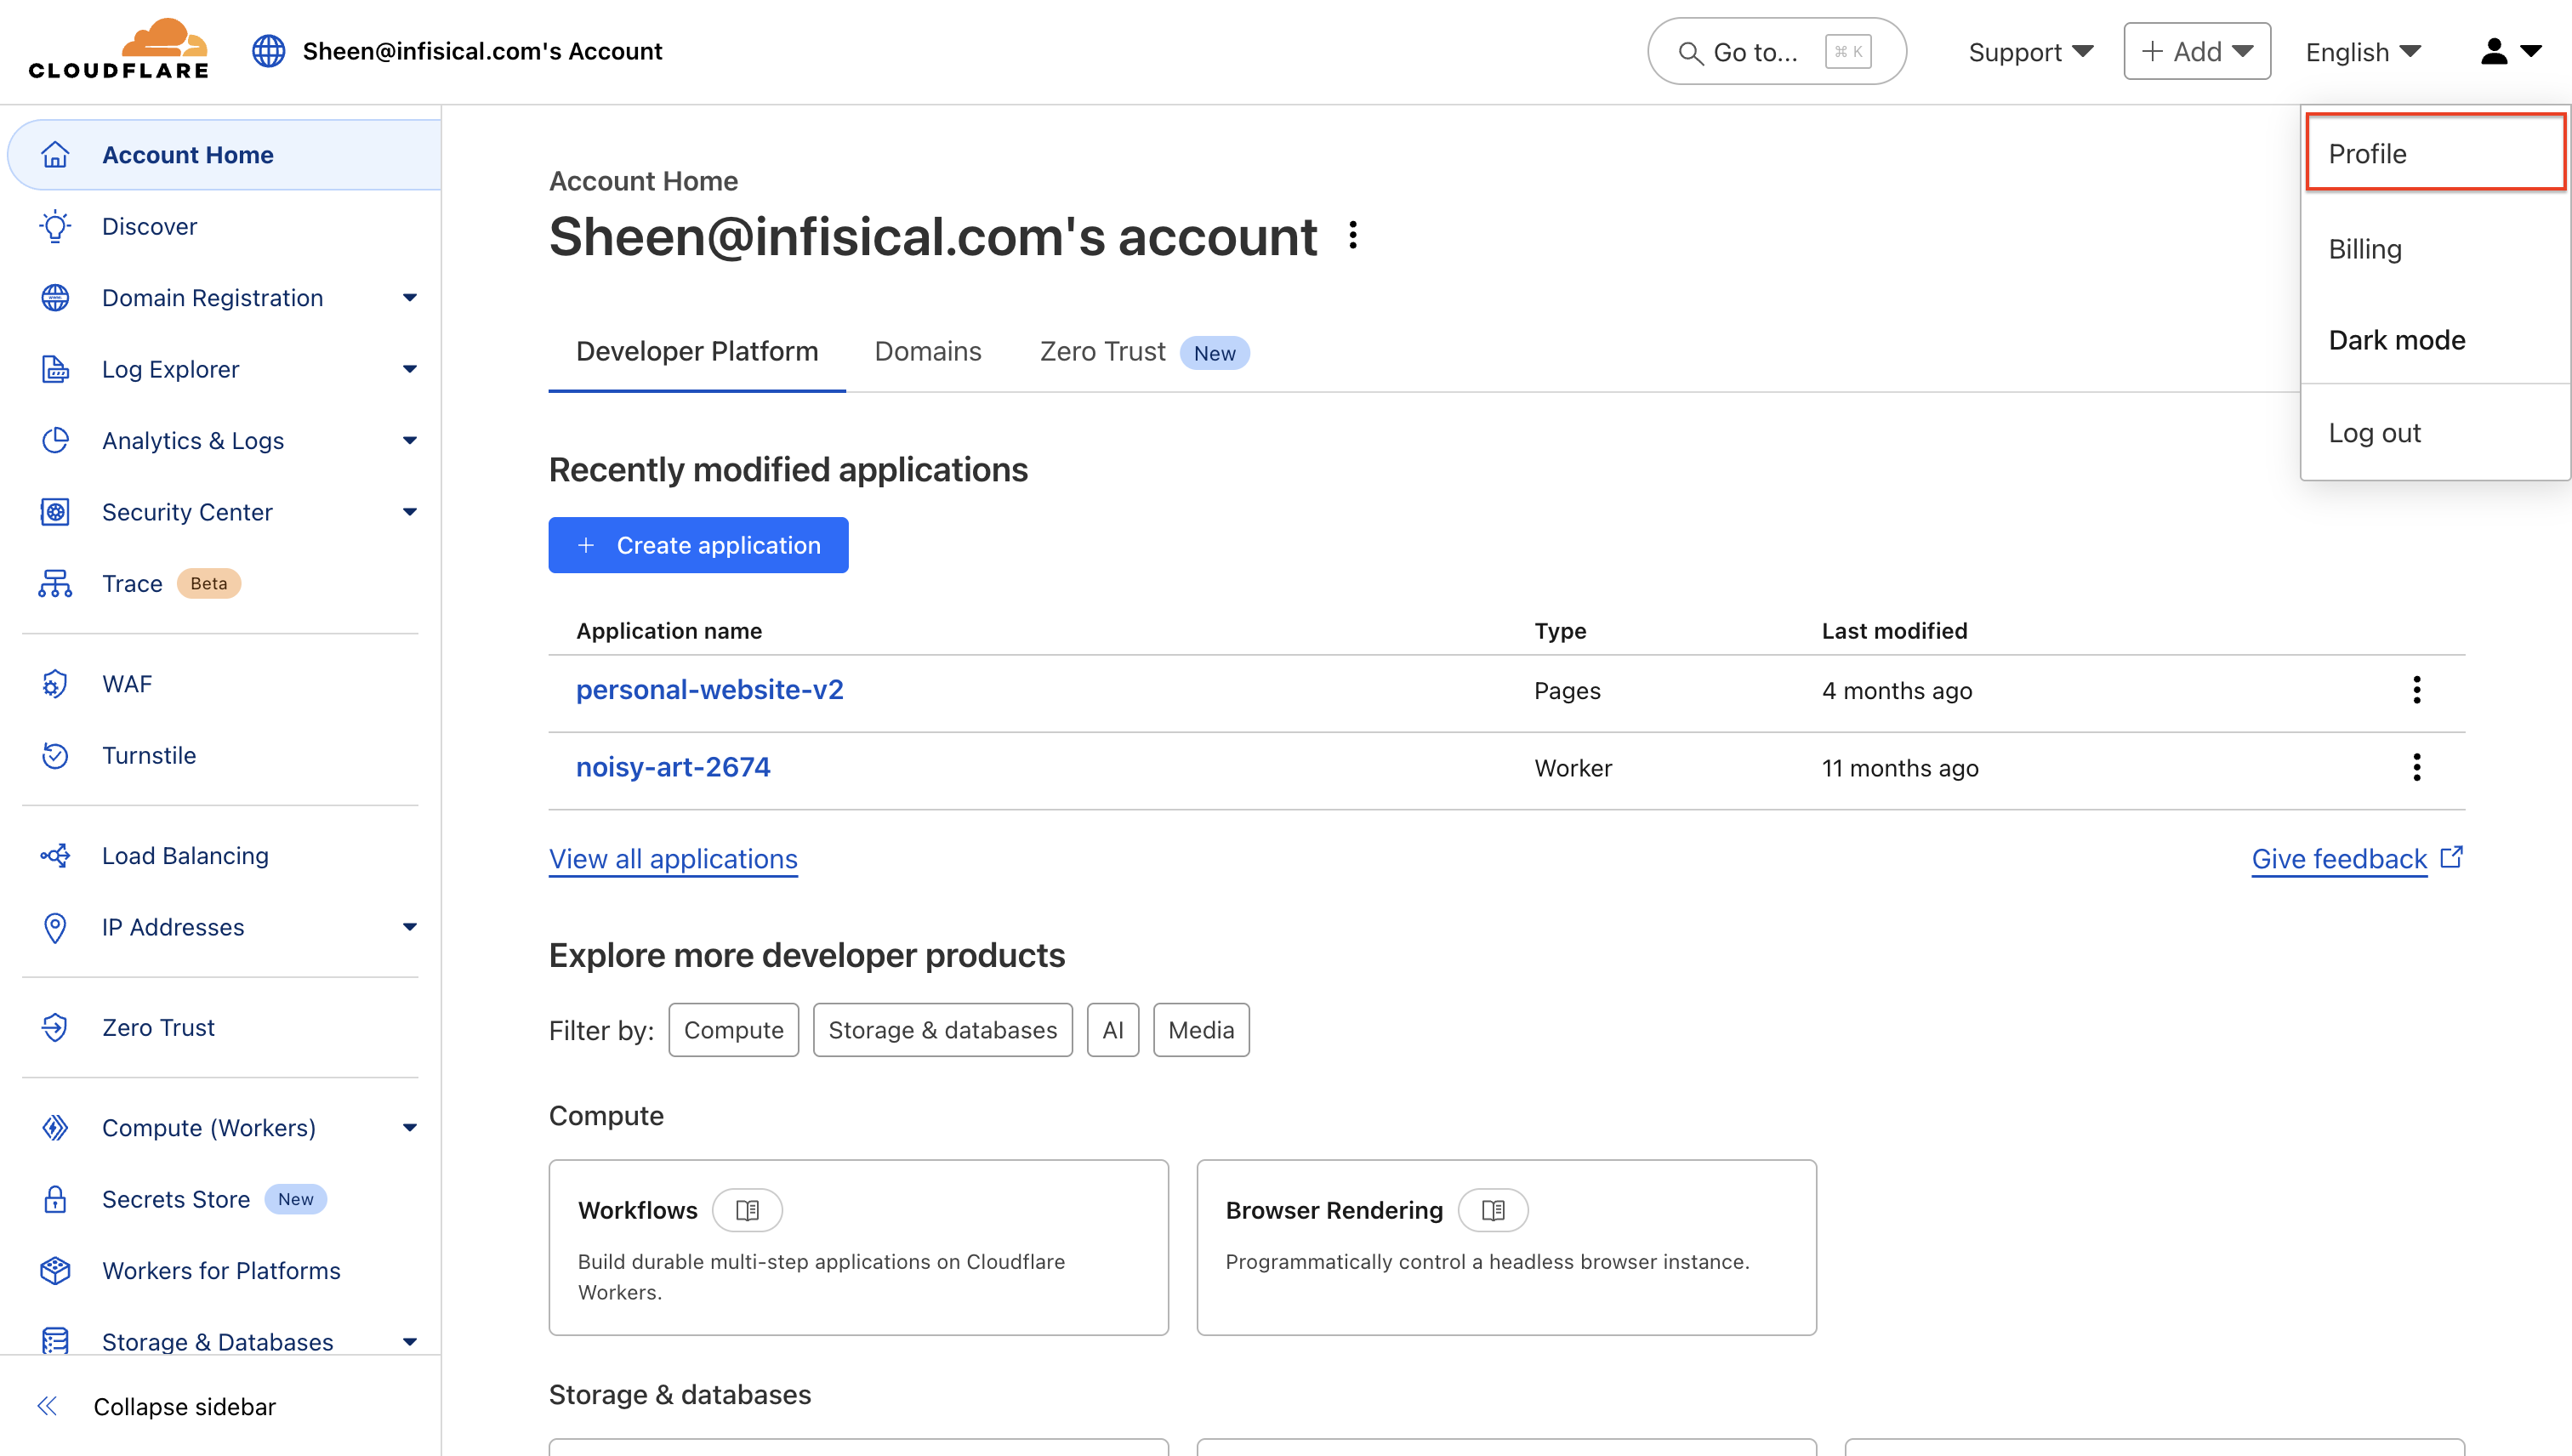 Click **API Tokens > Create Token** to generate a new API token.
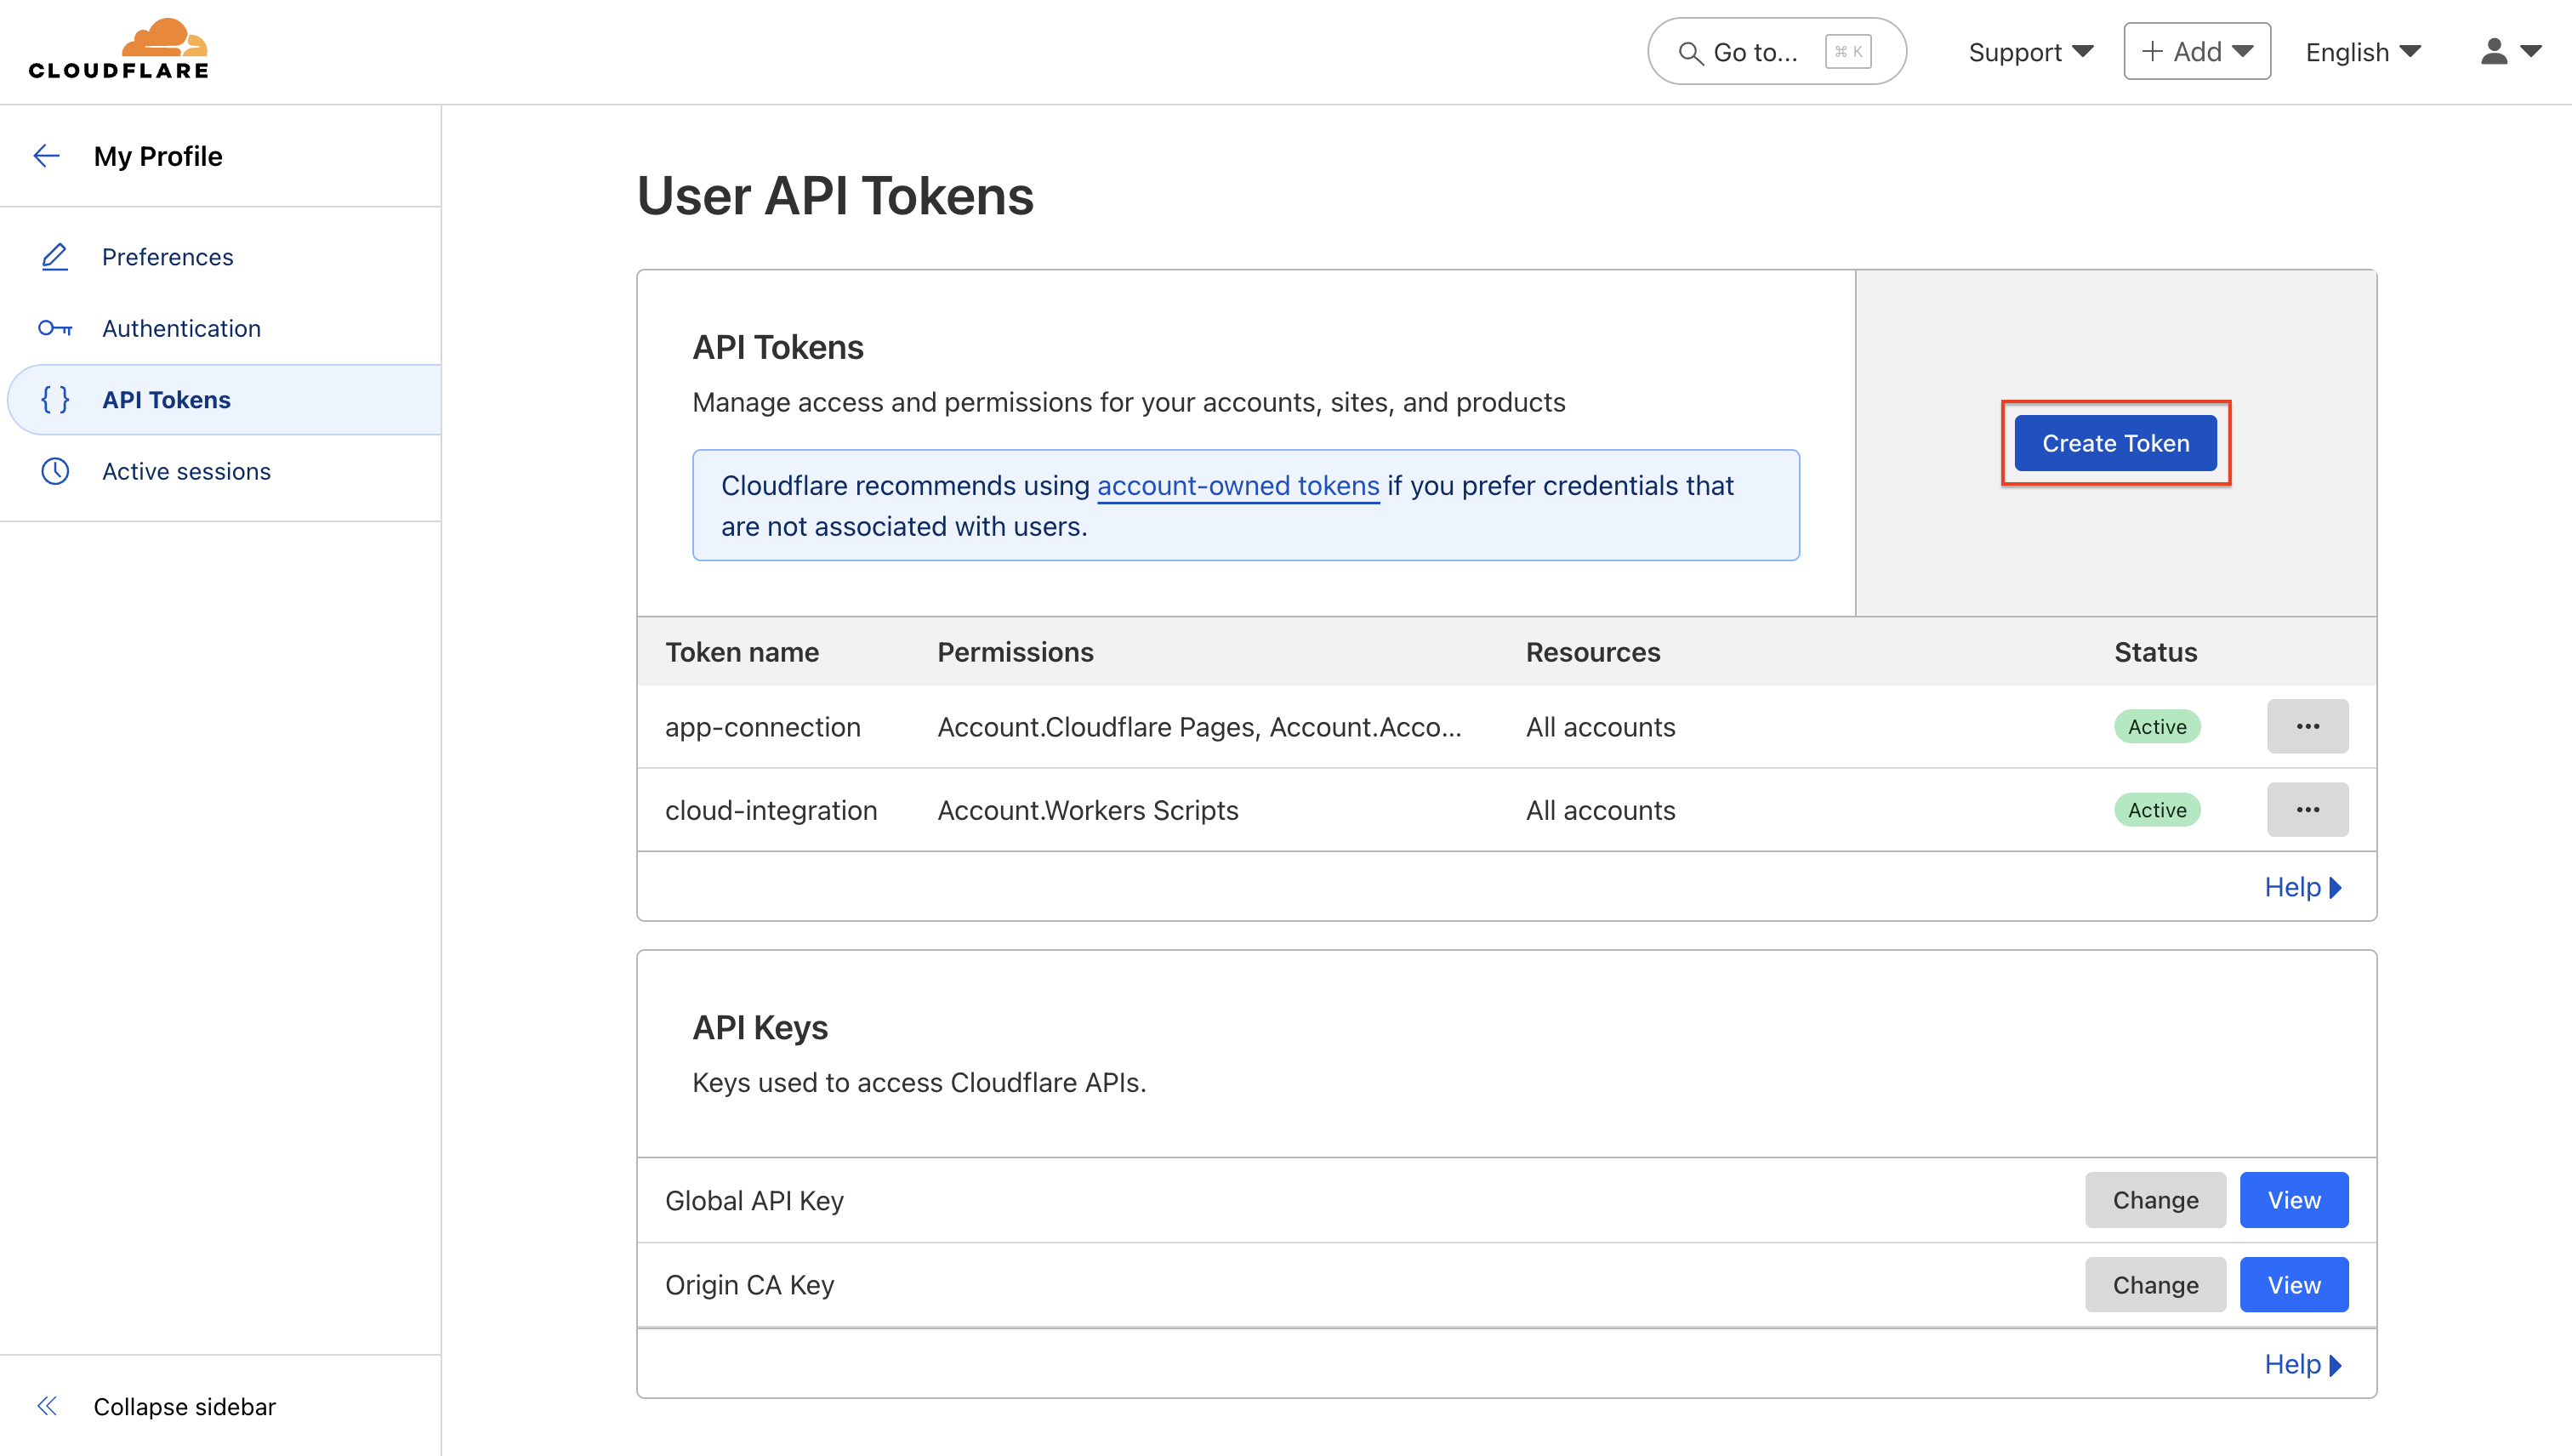
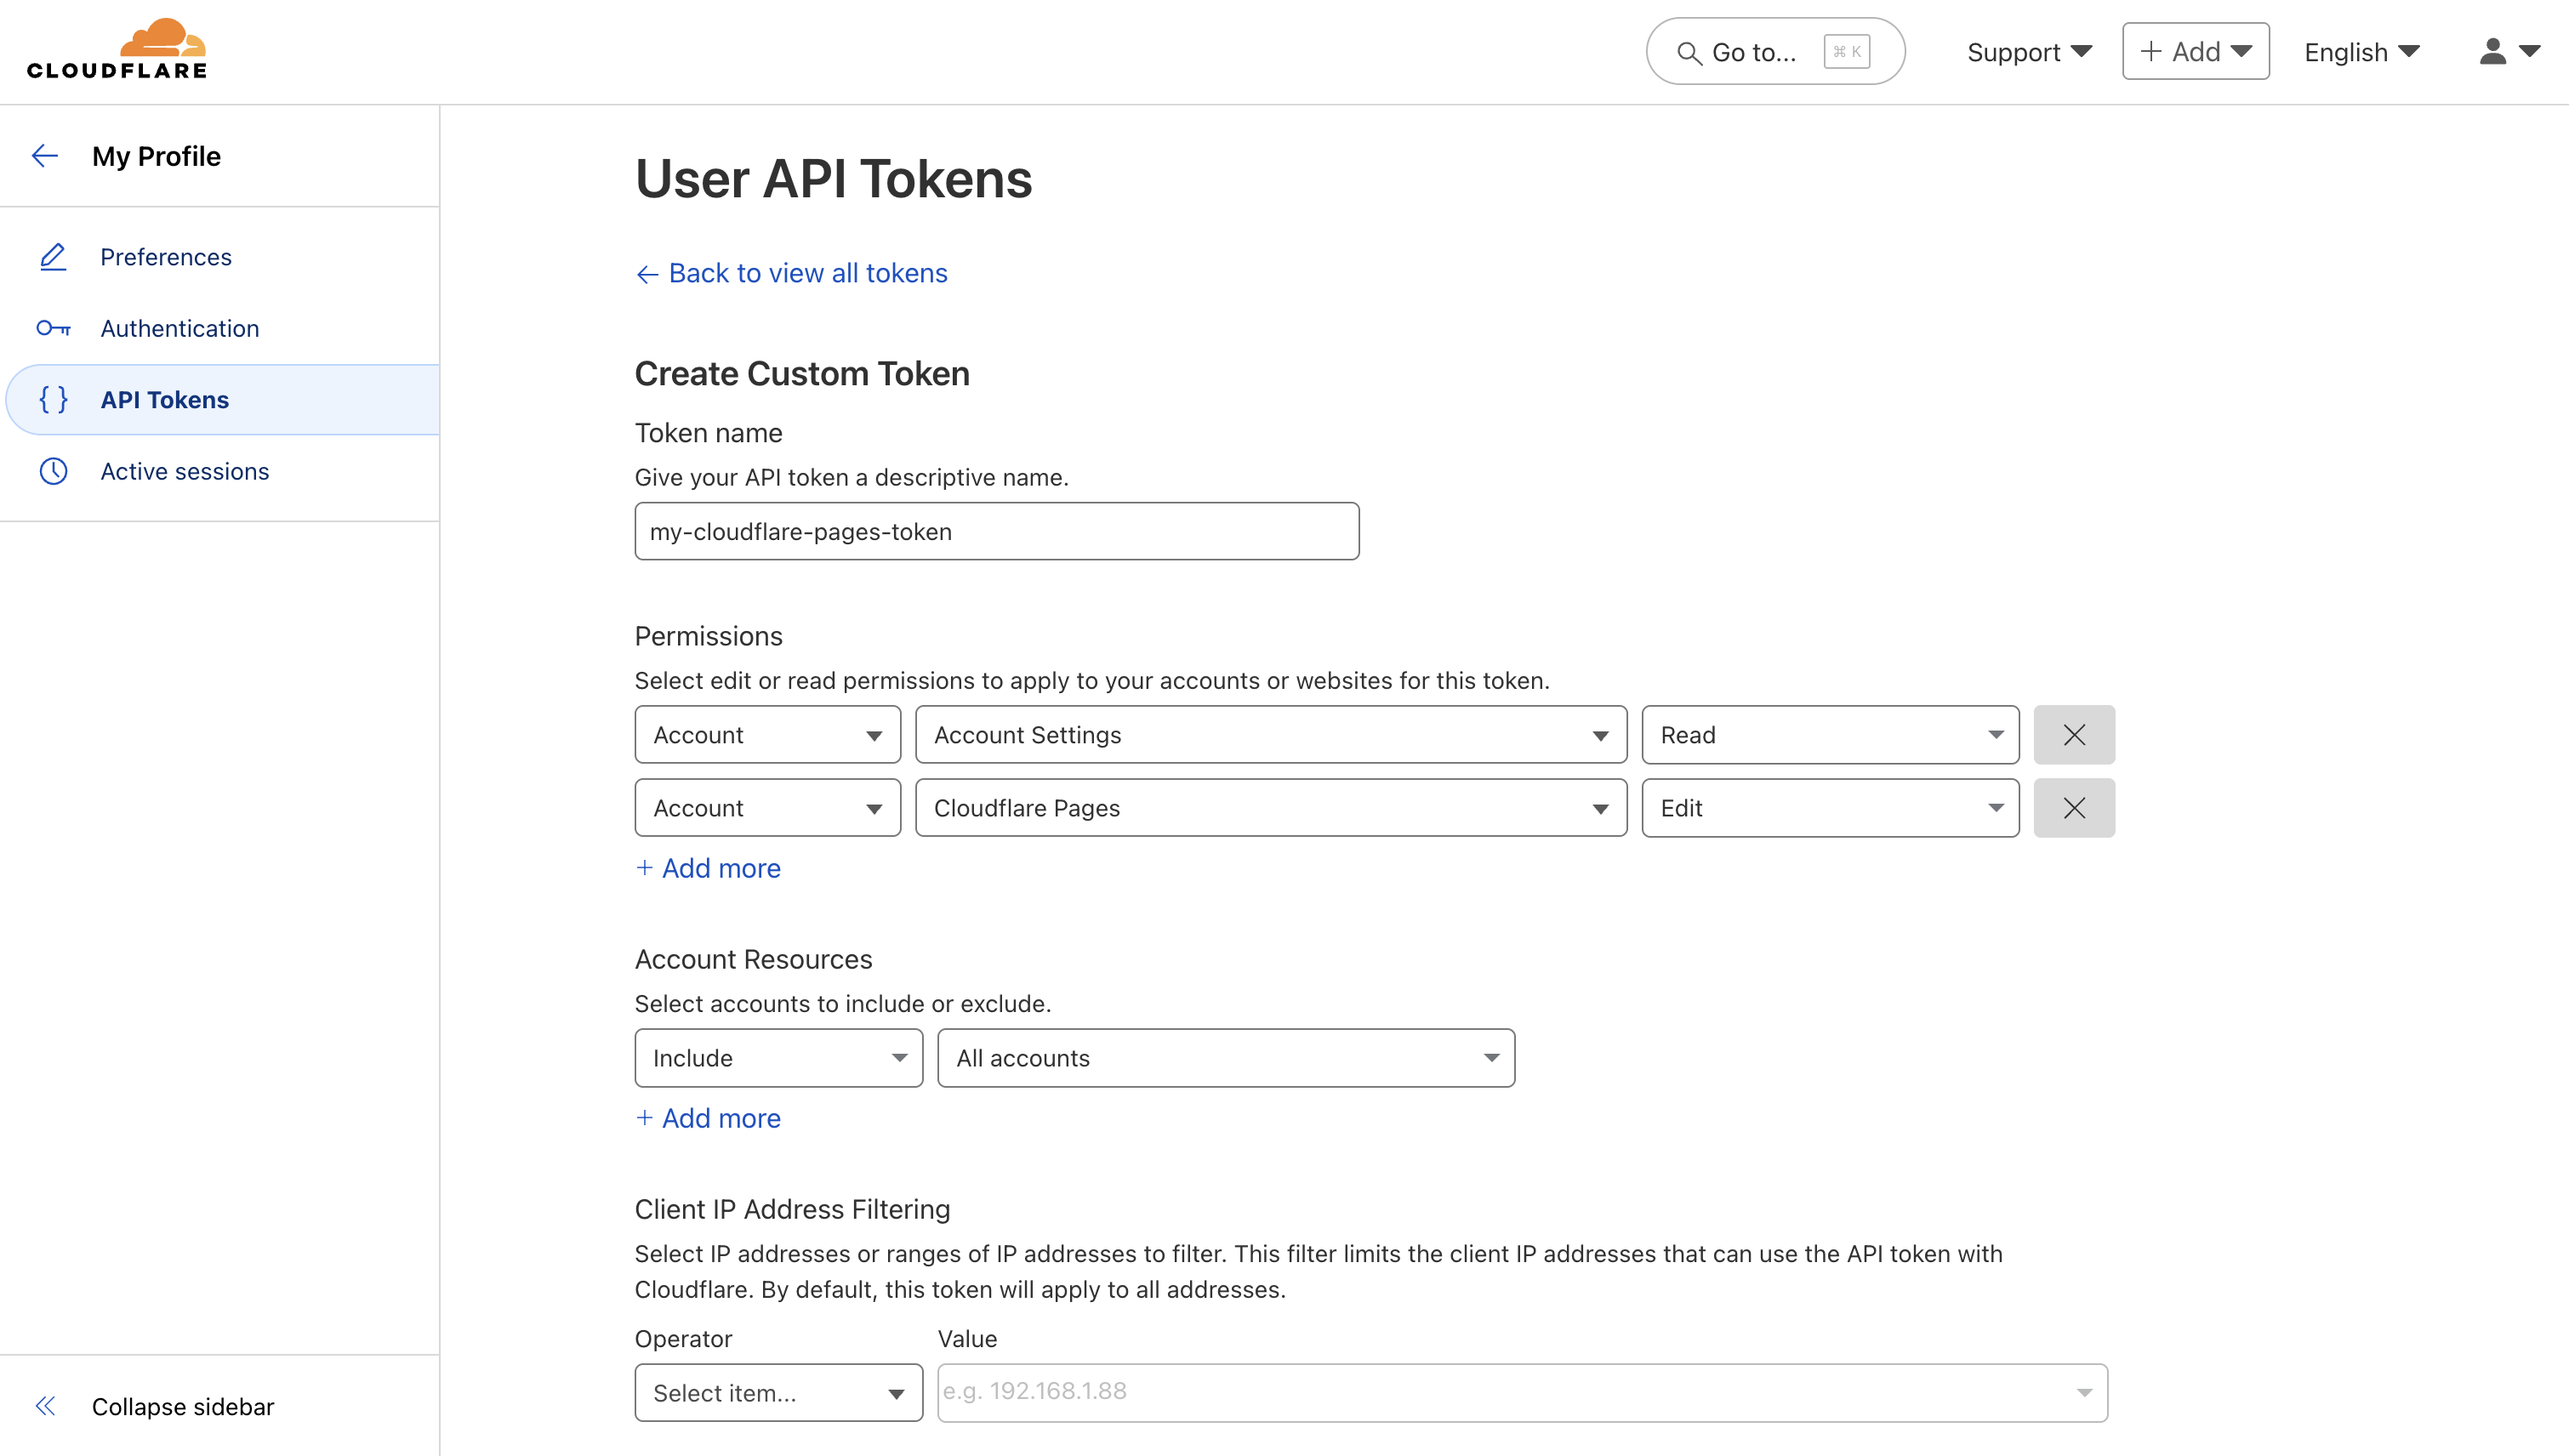 **Required Permissions:**
* **Account** - **Cloudflare Pages** - **Edit**
* **Account** - **Account Settings** - **Read**
Add these permissions to your API token and click **Continue to summary**, then **Create Token** to generate your API token.
**Required Permissions:**
* **Account** - **Cloudflare Pages** - **Edit**
* **Account** - **Account Settings** - **Read**
Add these permissions to your API token and click **Continue to summary**, then **Create Token** to generate your API token.
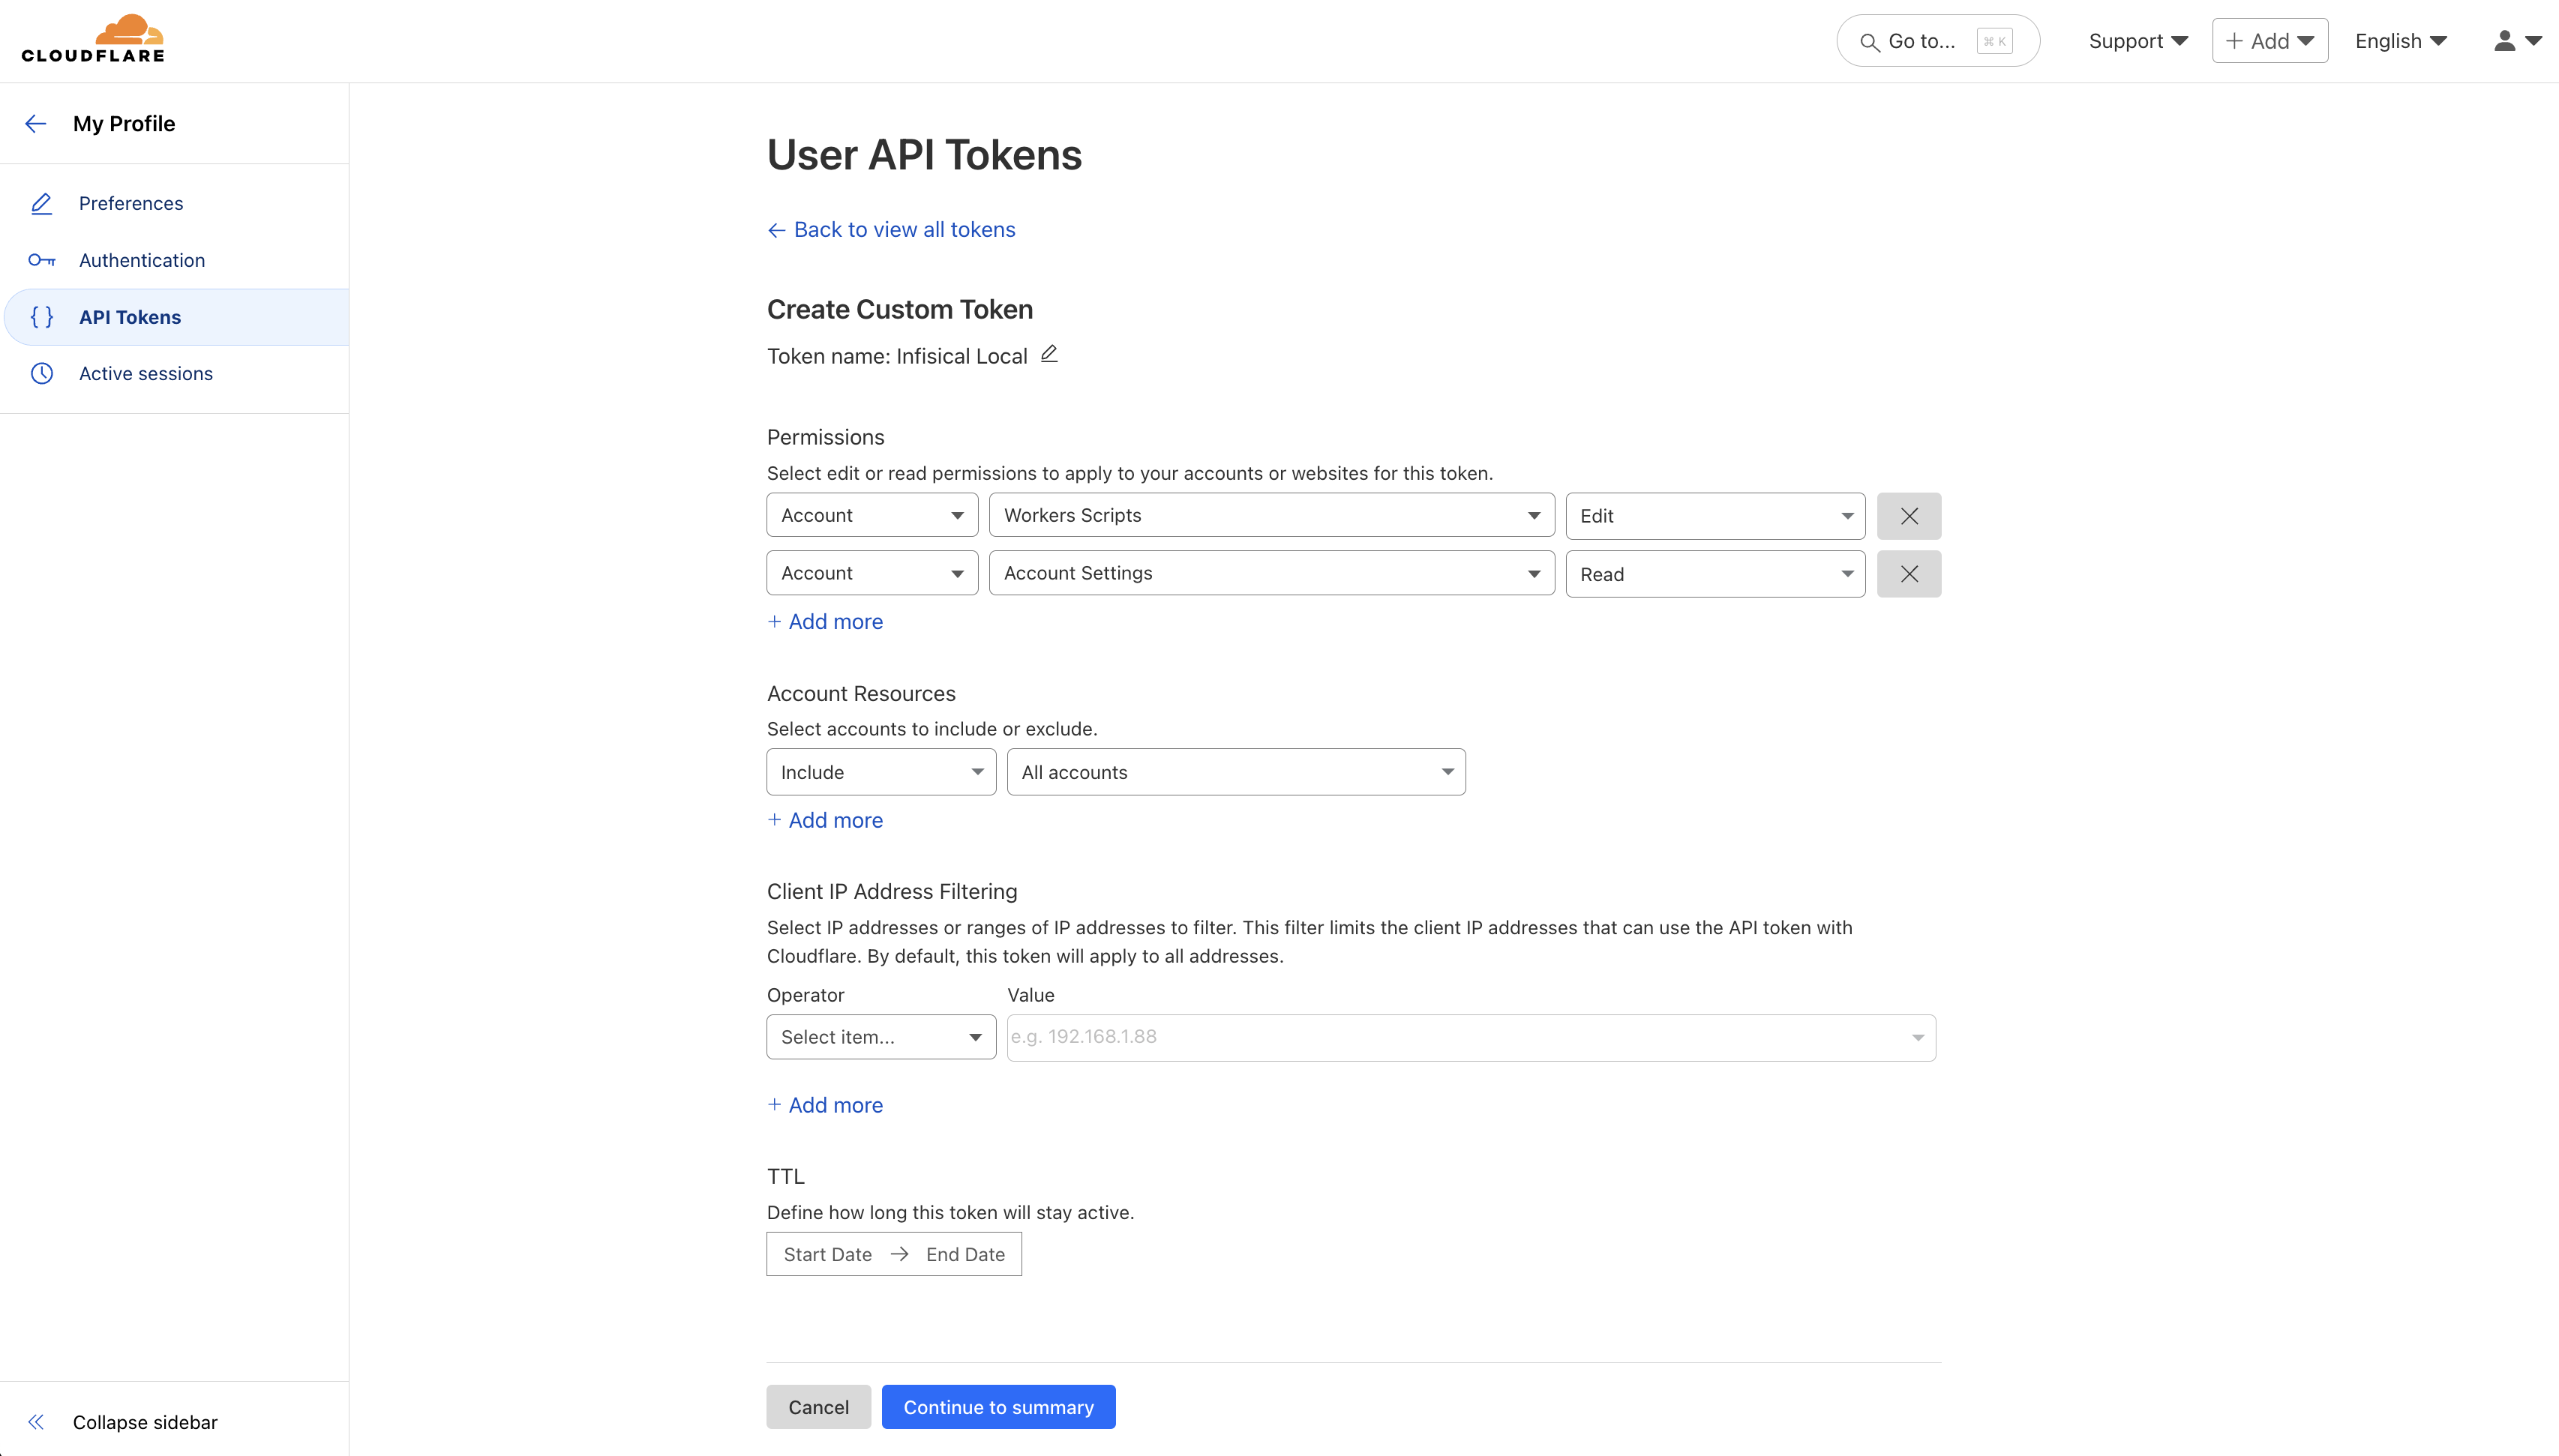 **Required Permissions:**
* **Account** - **Workers Scripts** - **Edit**
* **Account** - **Account Settings** - **Read**
Add these permissions to your API token and click **Continue to summary**, then **Create Token** to generate your API token.
**Required Permissions:**
* **Account** - **Workers Scripts** - **Edit**
* **Account** - **Account Settings** - **Read**
Add these permissions to your API token and click **Continue to summary**, then **Create Token** to generate your API token.
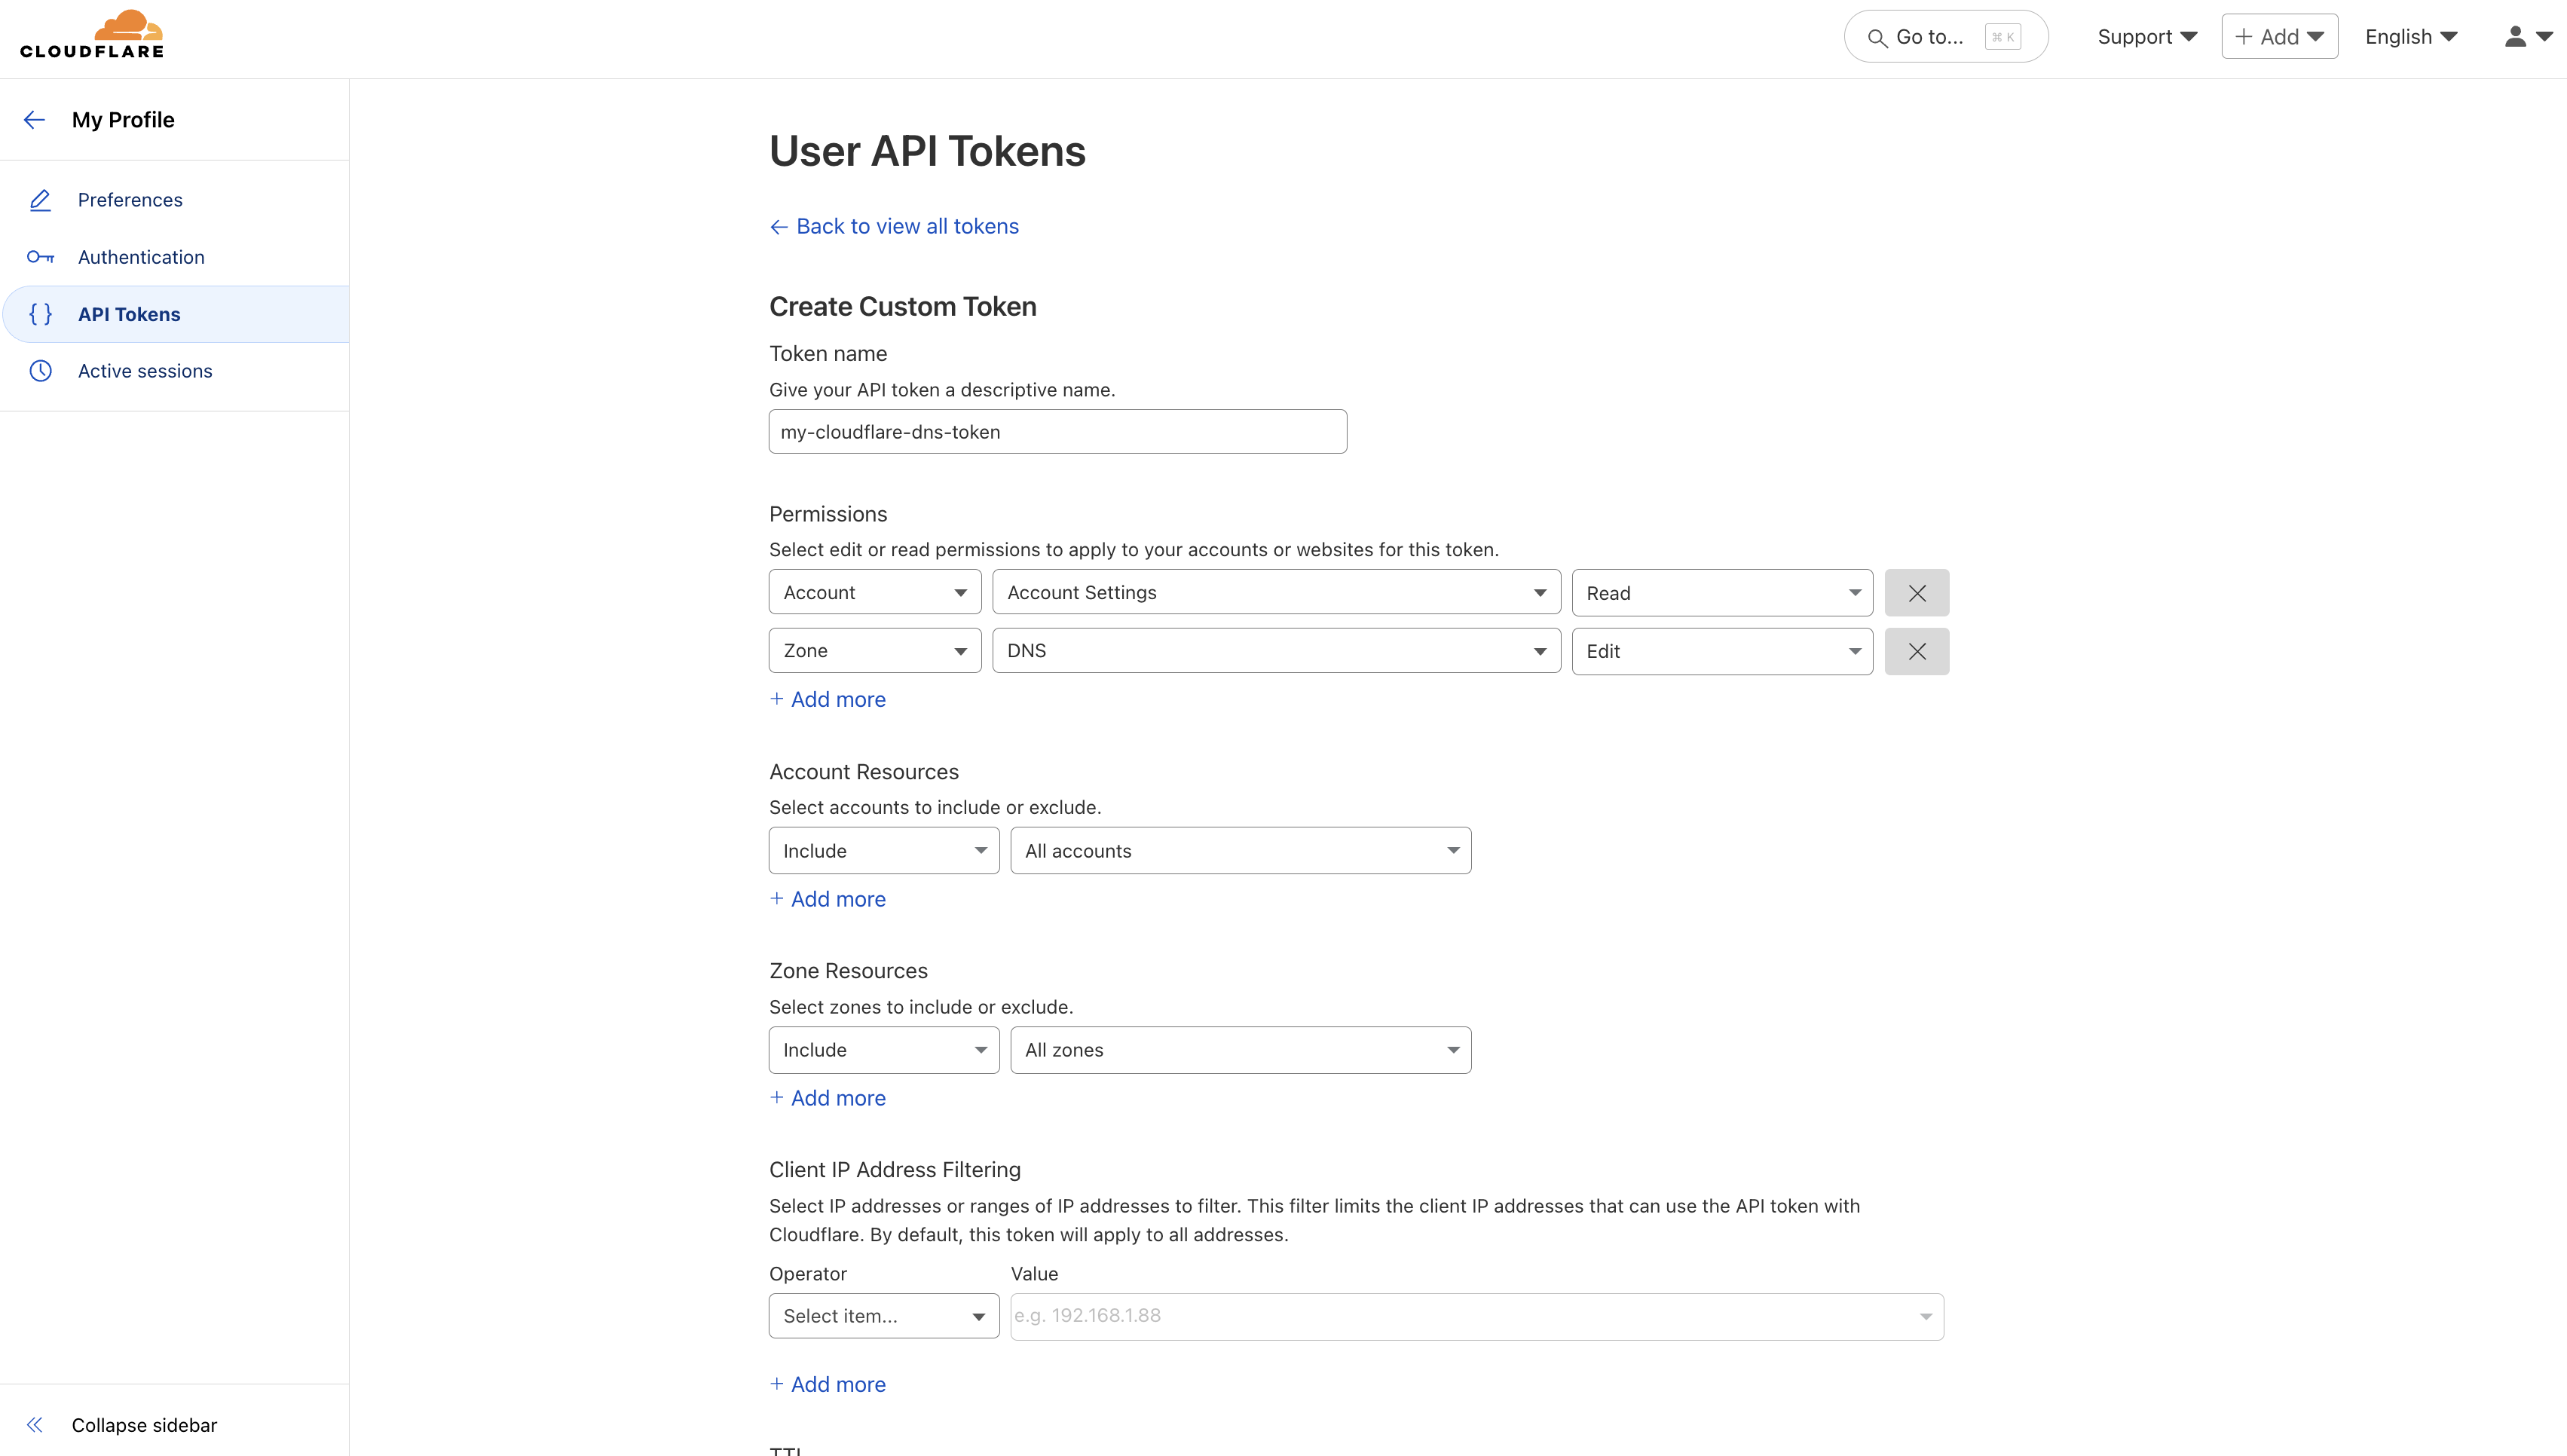 **Required Permissions:**
* **Account** - **Account Settings** - **Read**
* **Zone** - **DNS** - **Edit**
Add these permissions to your API token and click **Continue to summary**, then **Create Token** to generate your API token.
**Required Permissions:**
* **Account** - **Account Settings** - **Read**
* **Zone** - **DNS** - **Edit**
Add these permissions to your API token and click **Continue to summary**, then **Create Token** to generate your API token.
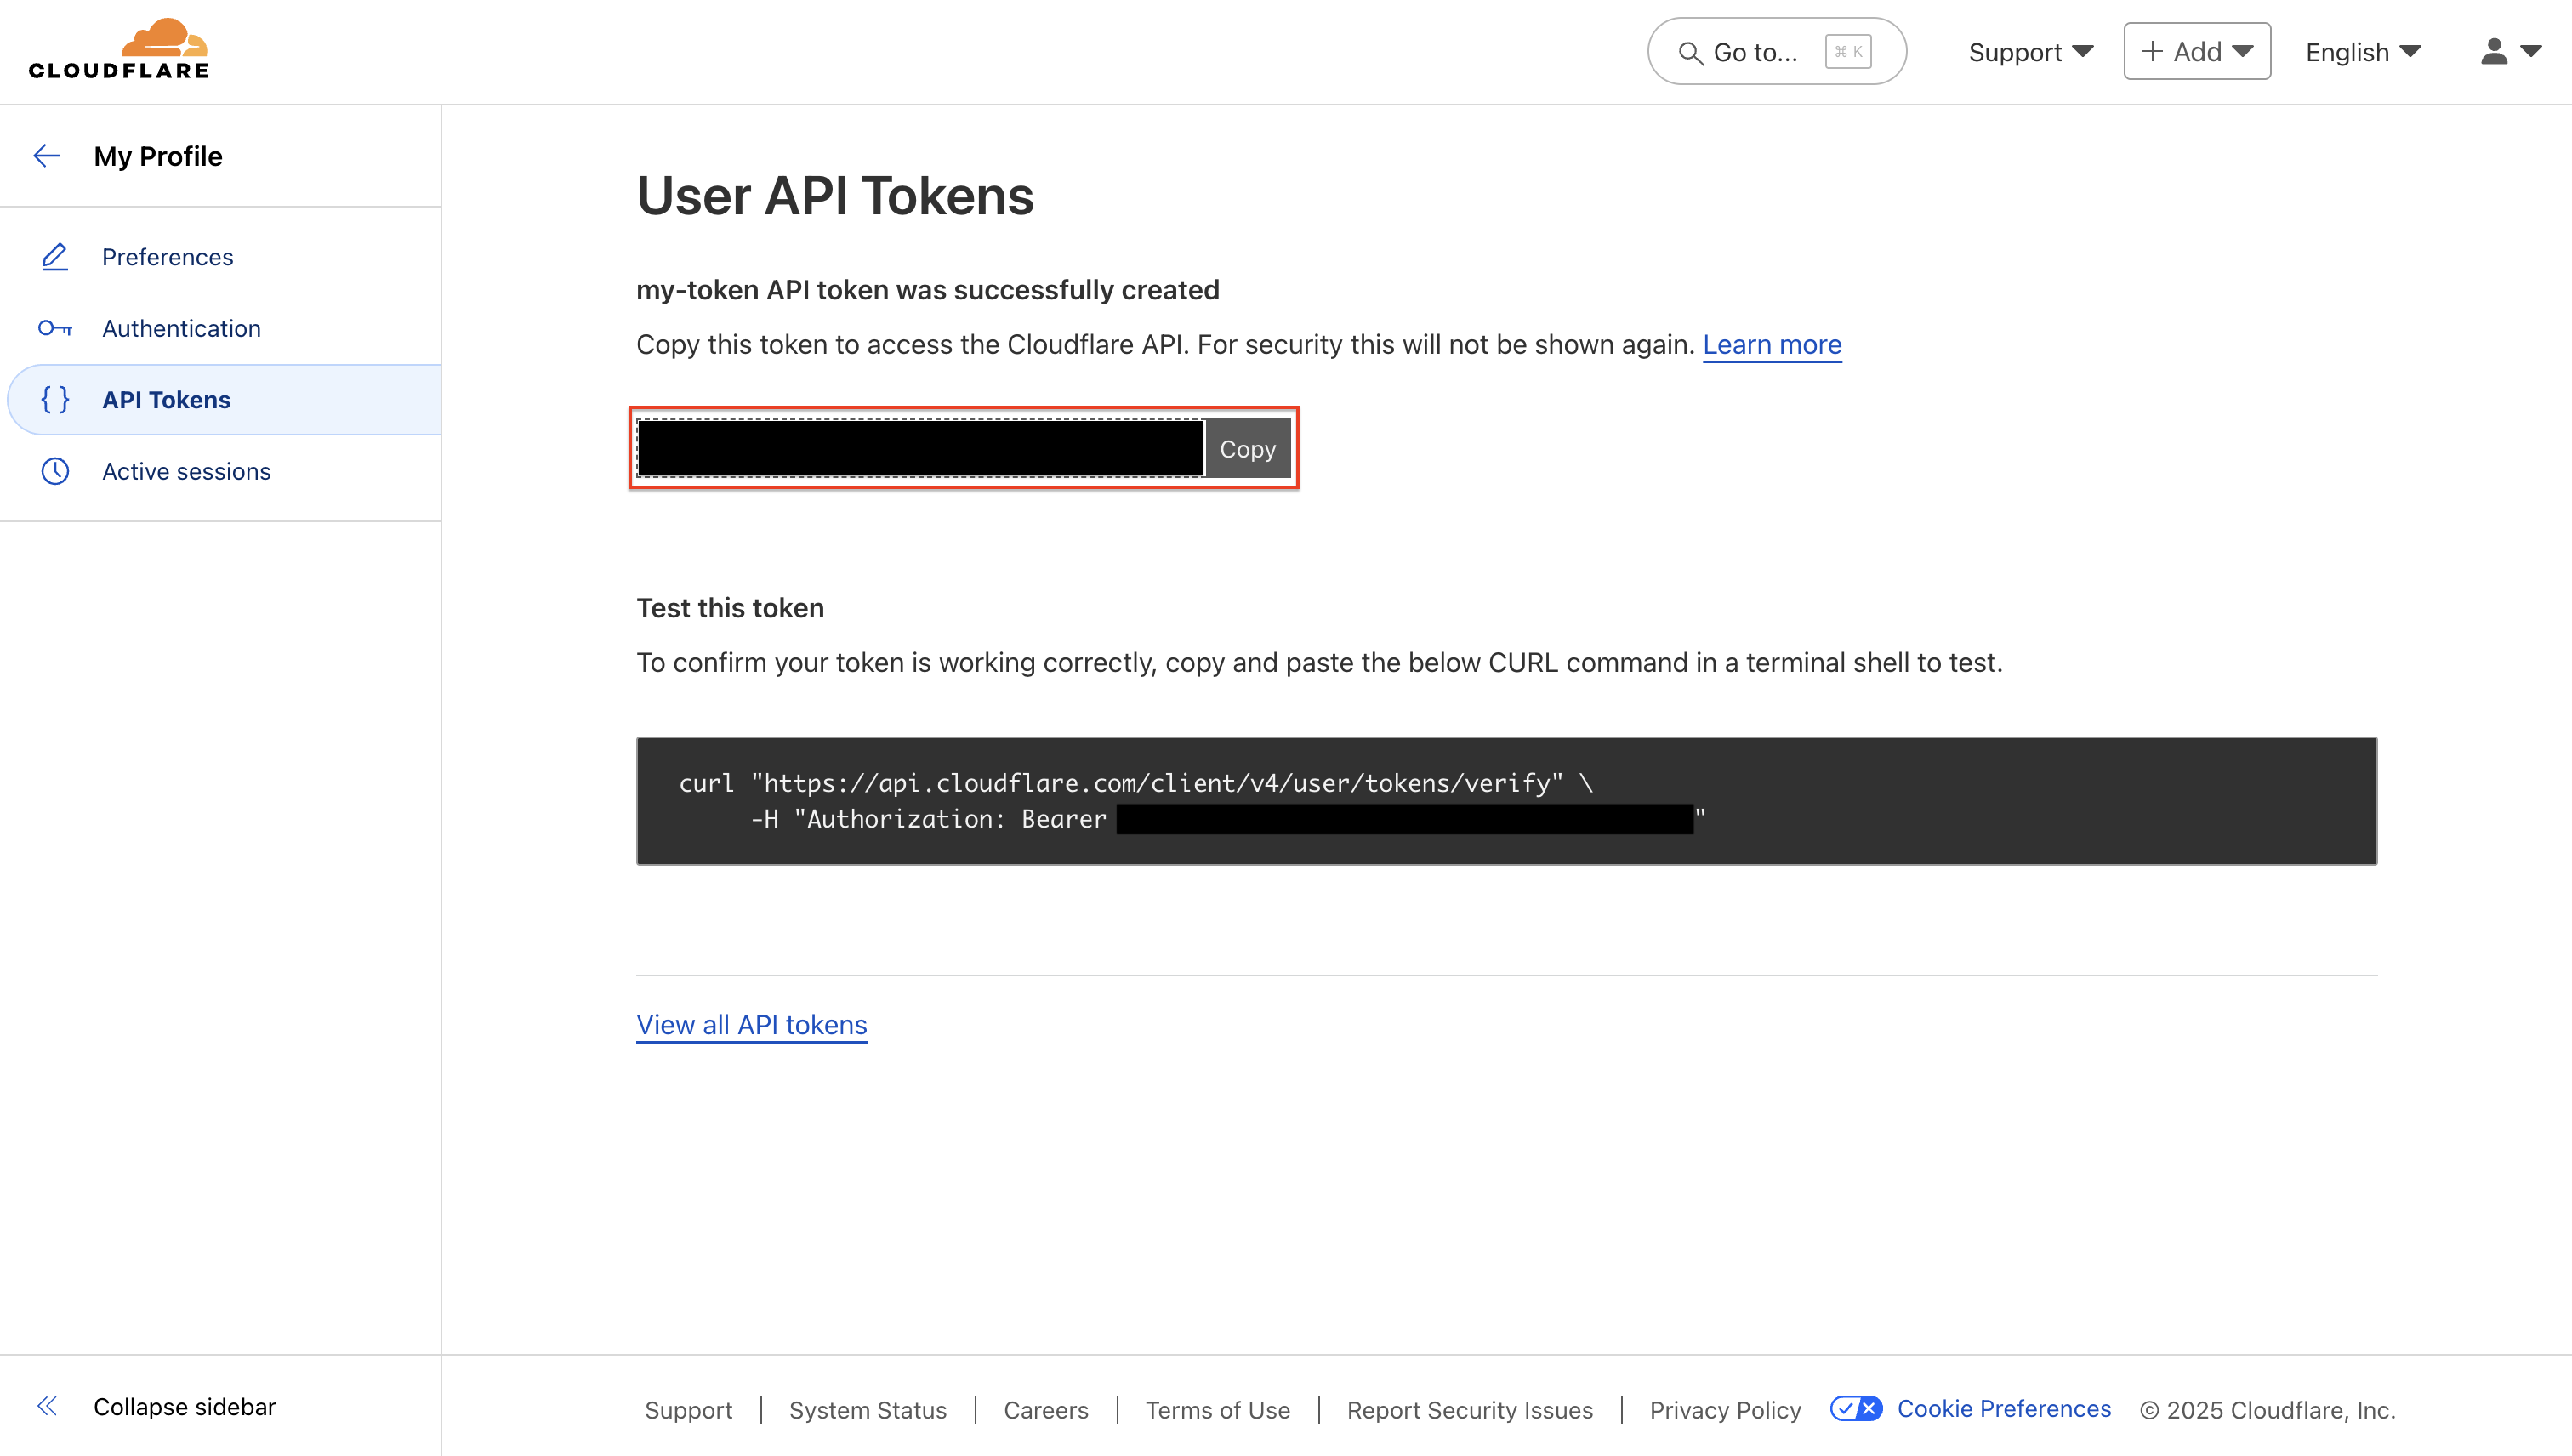
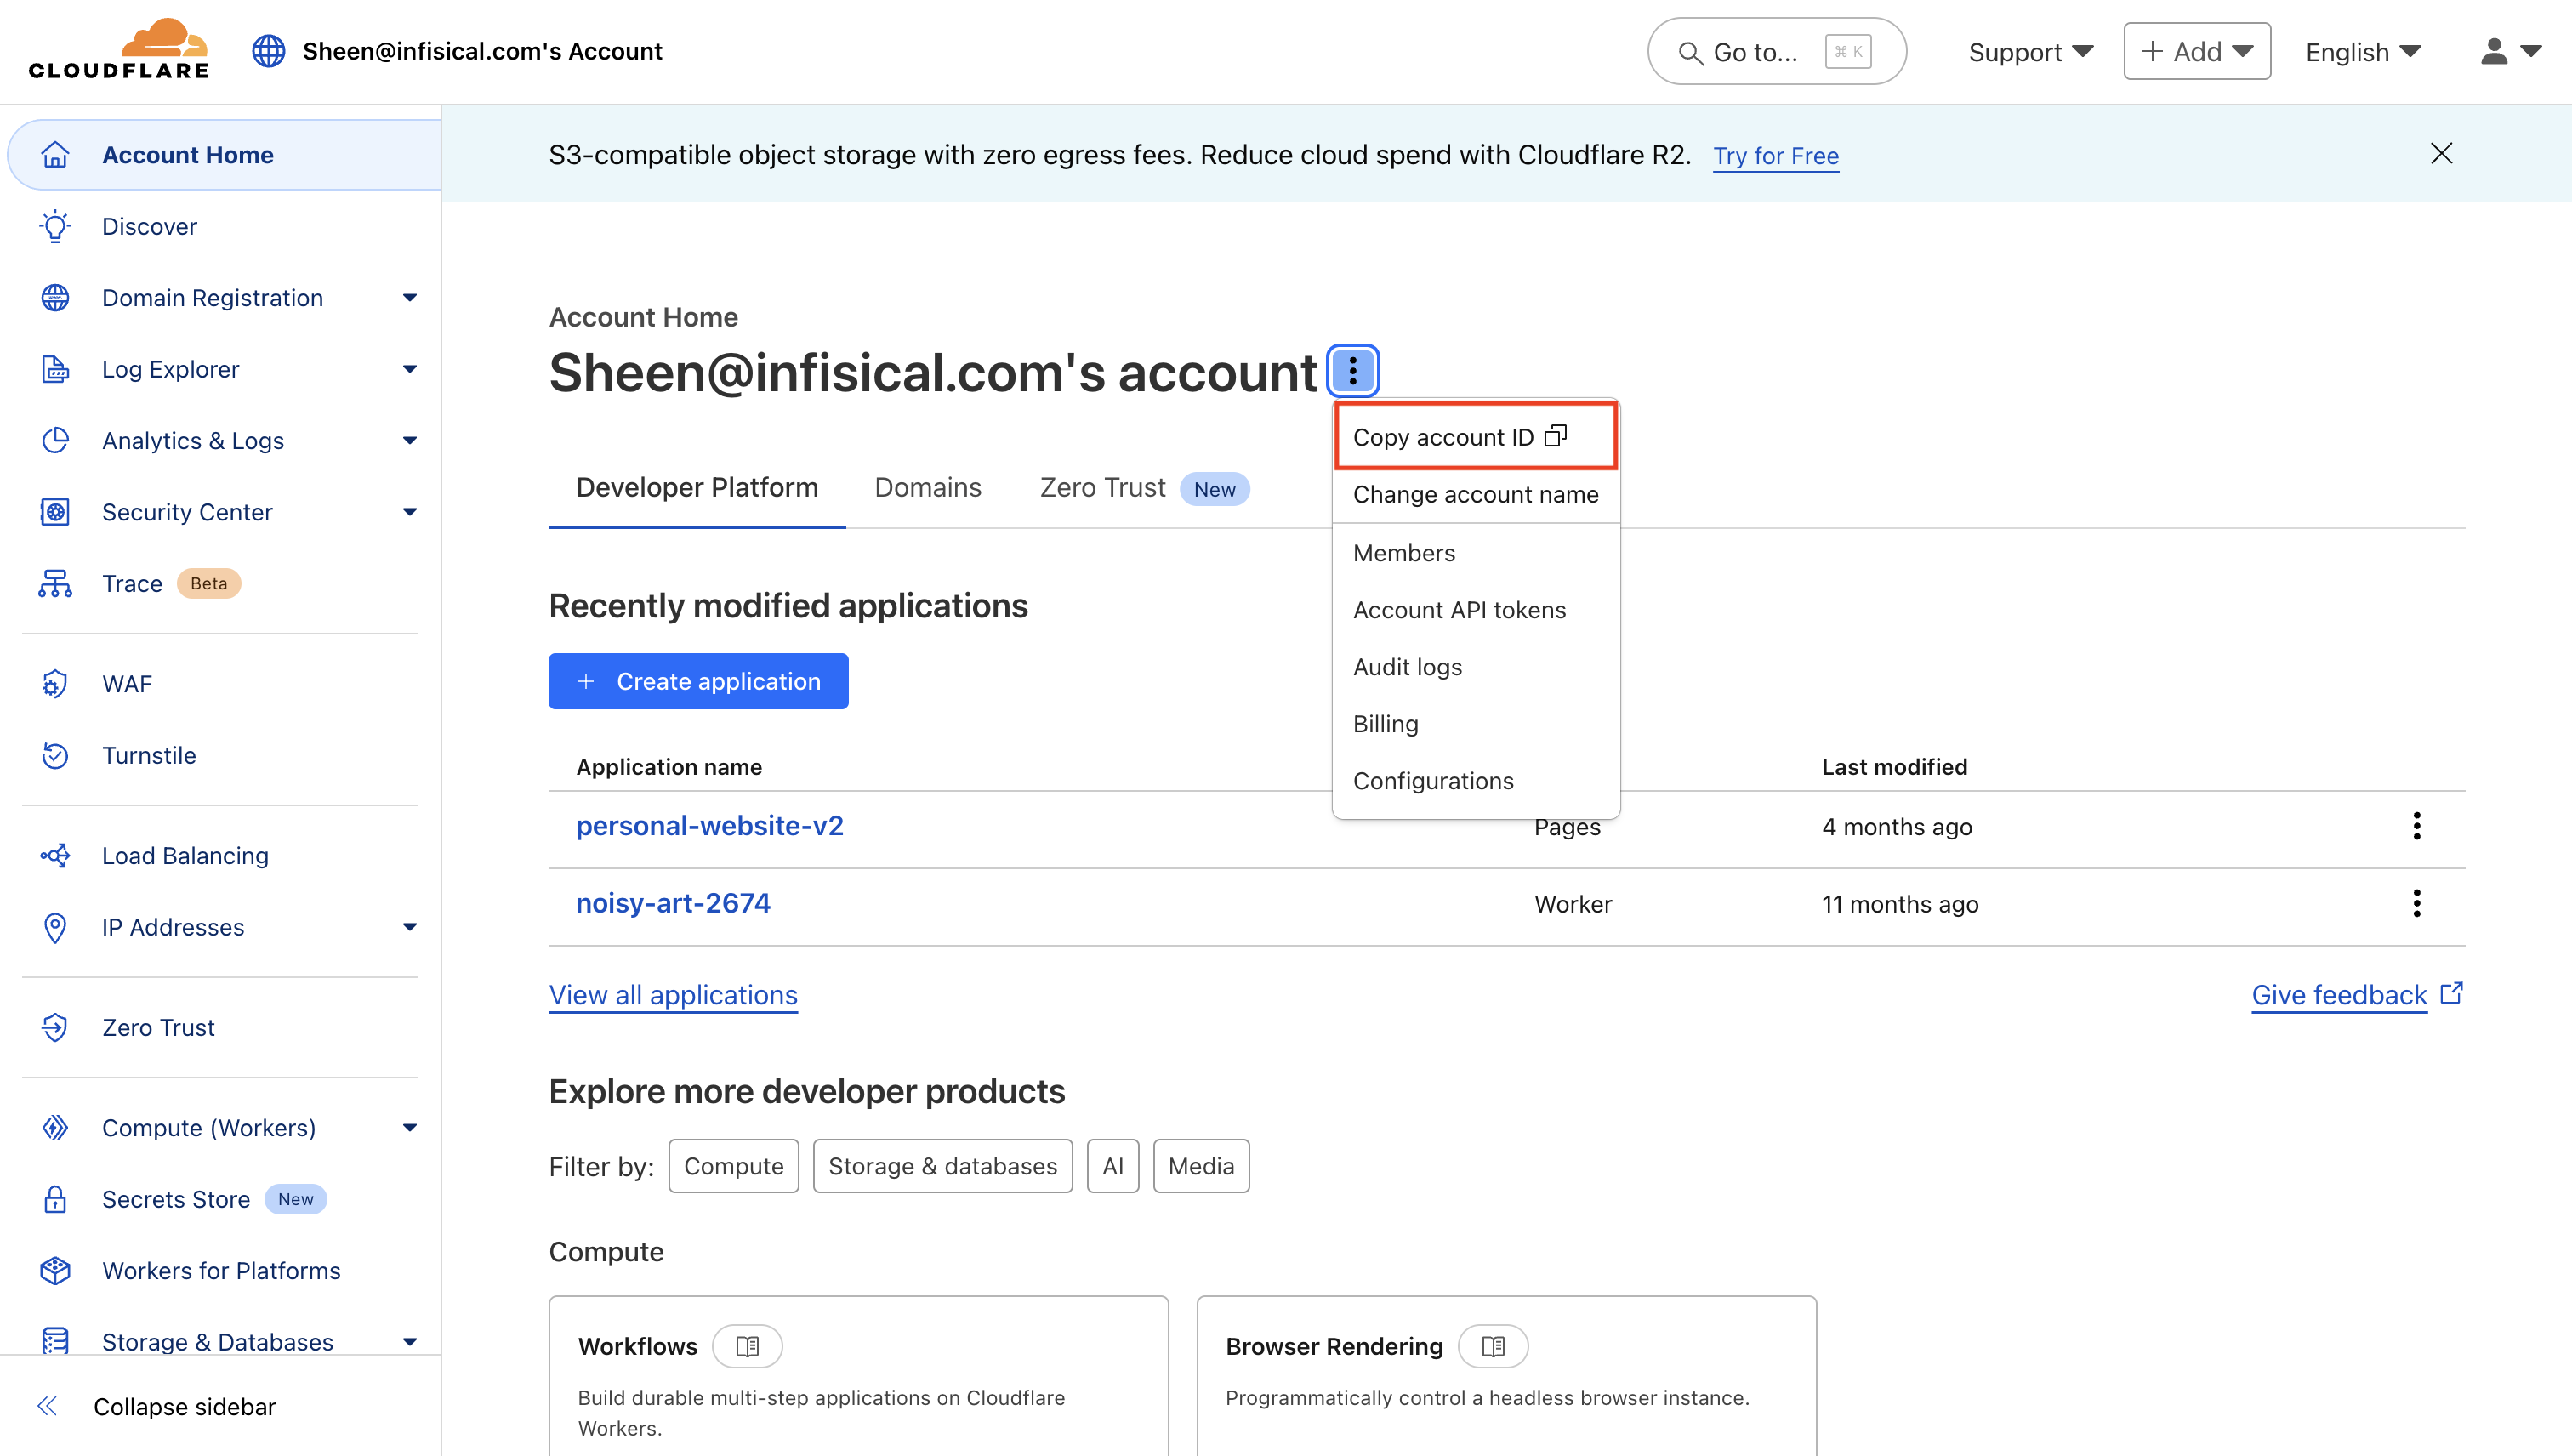 Save your Account ID for use in the next step.
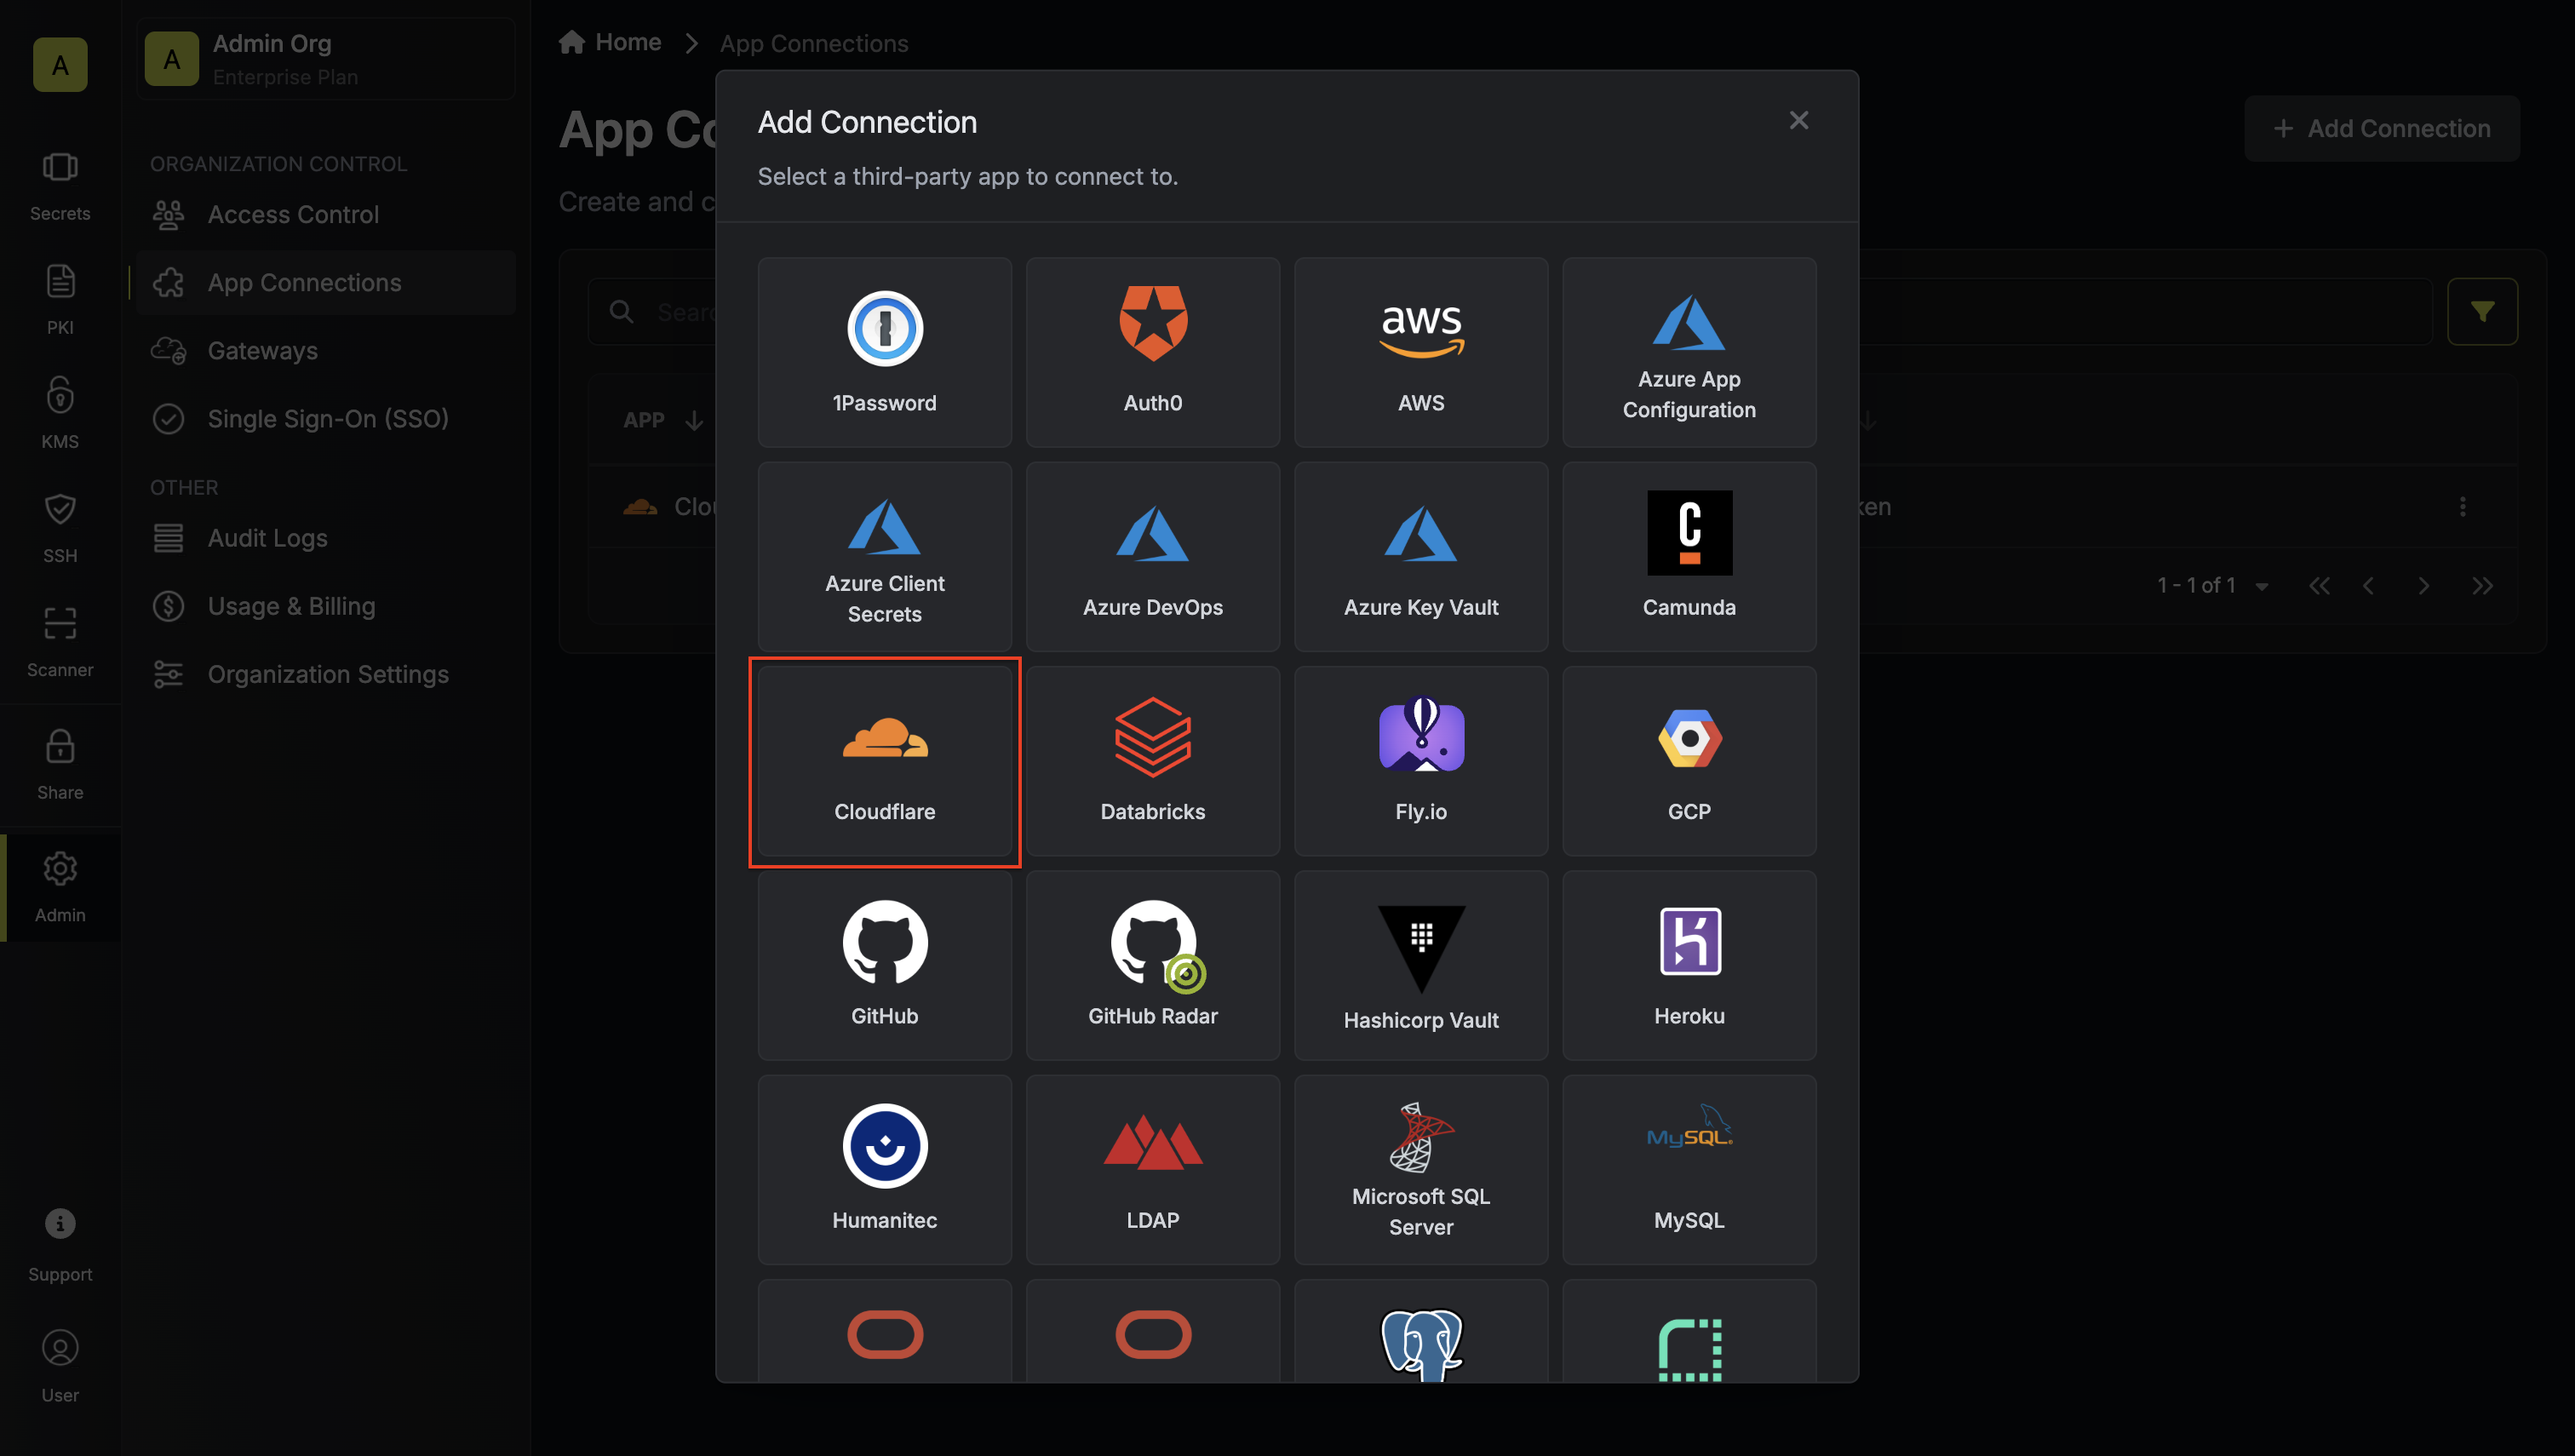
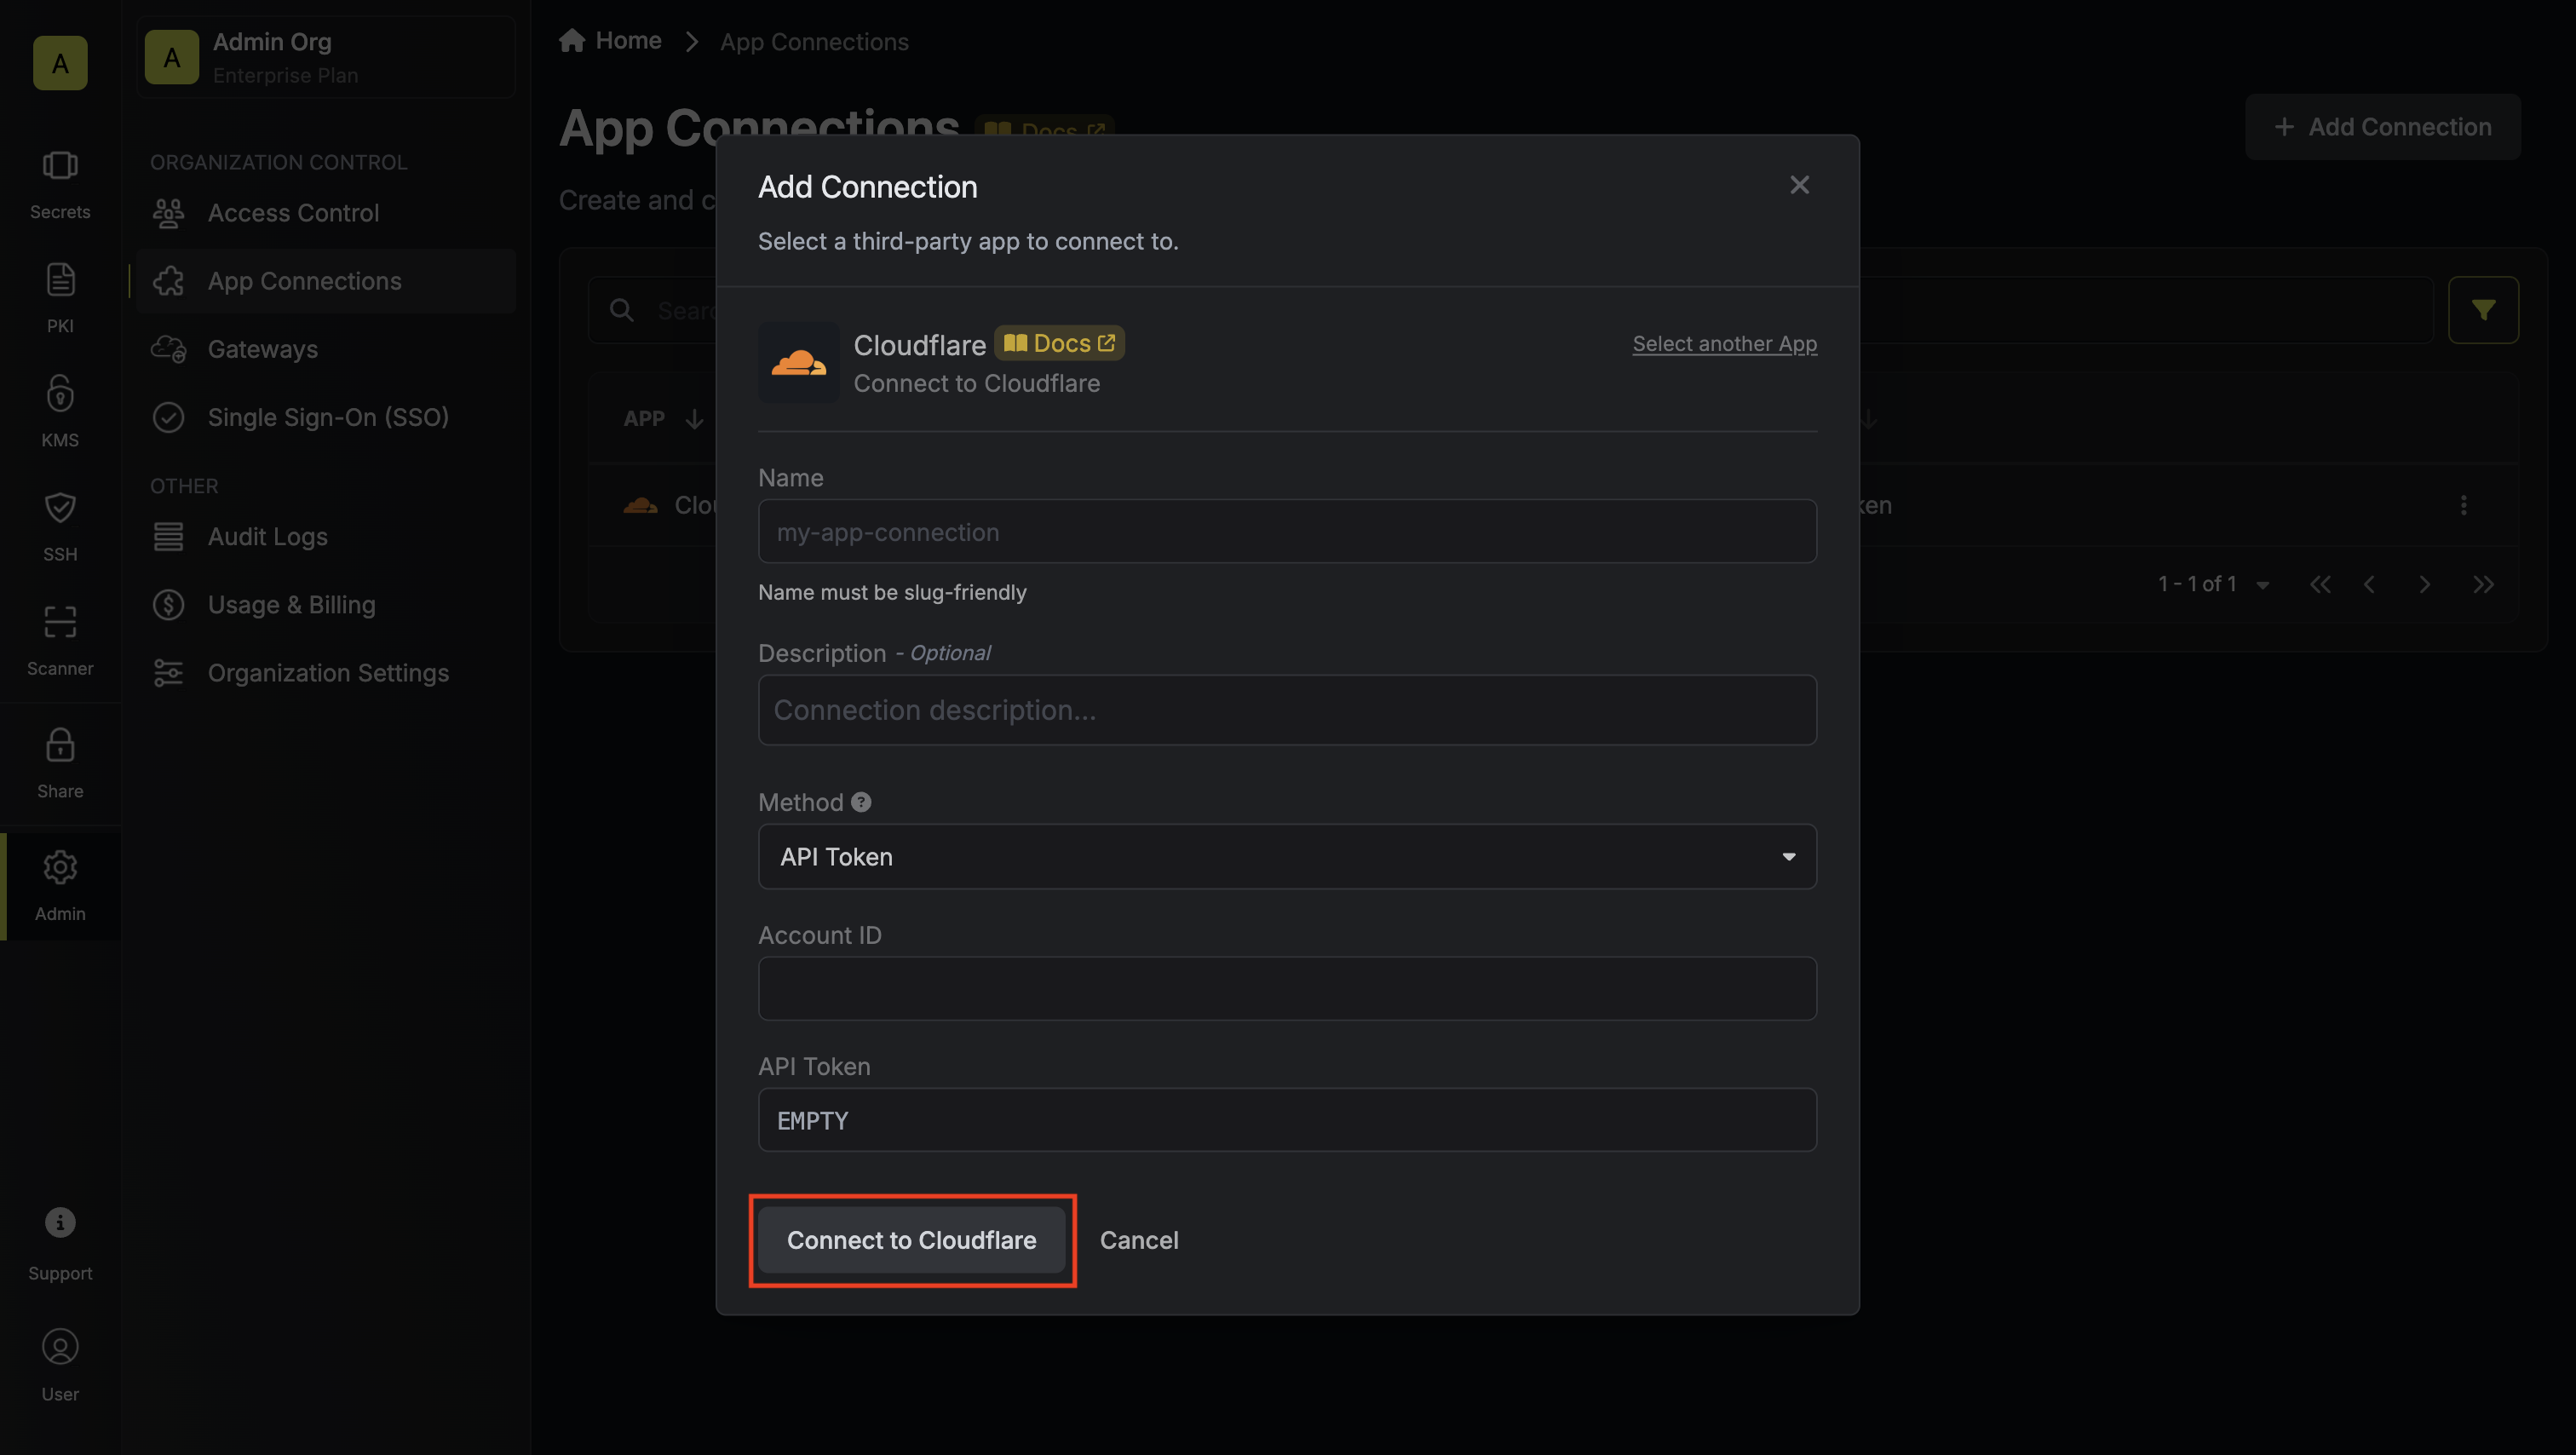
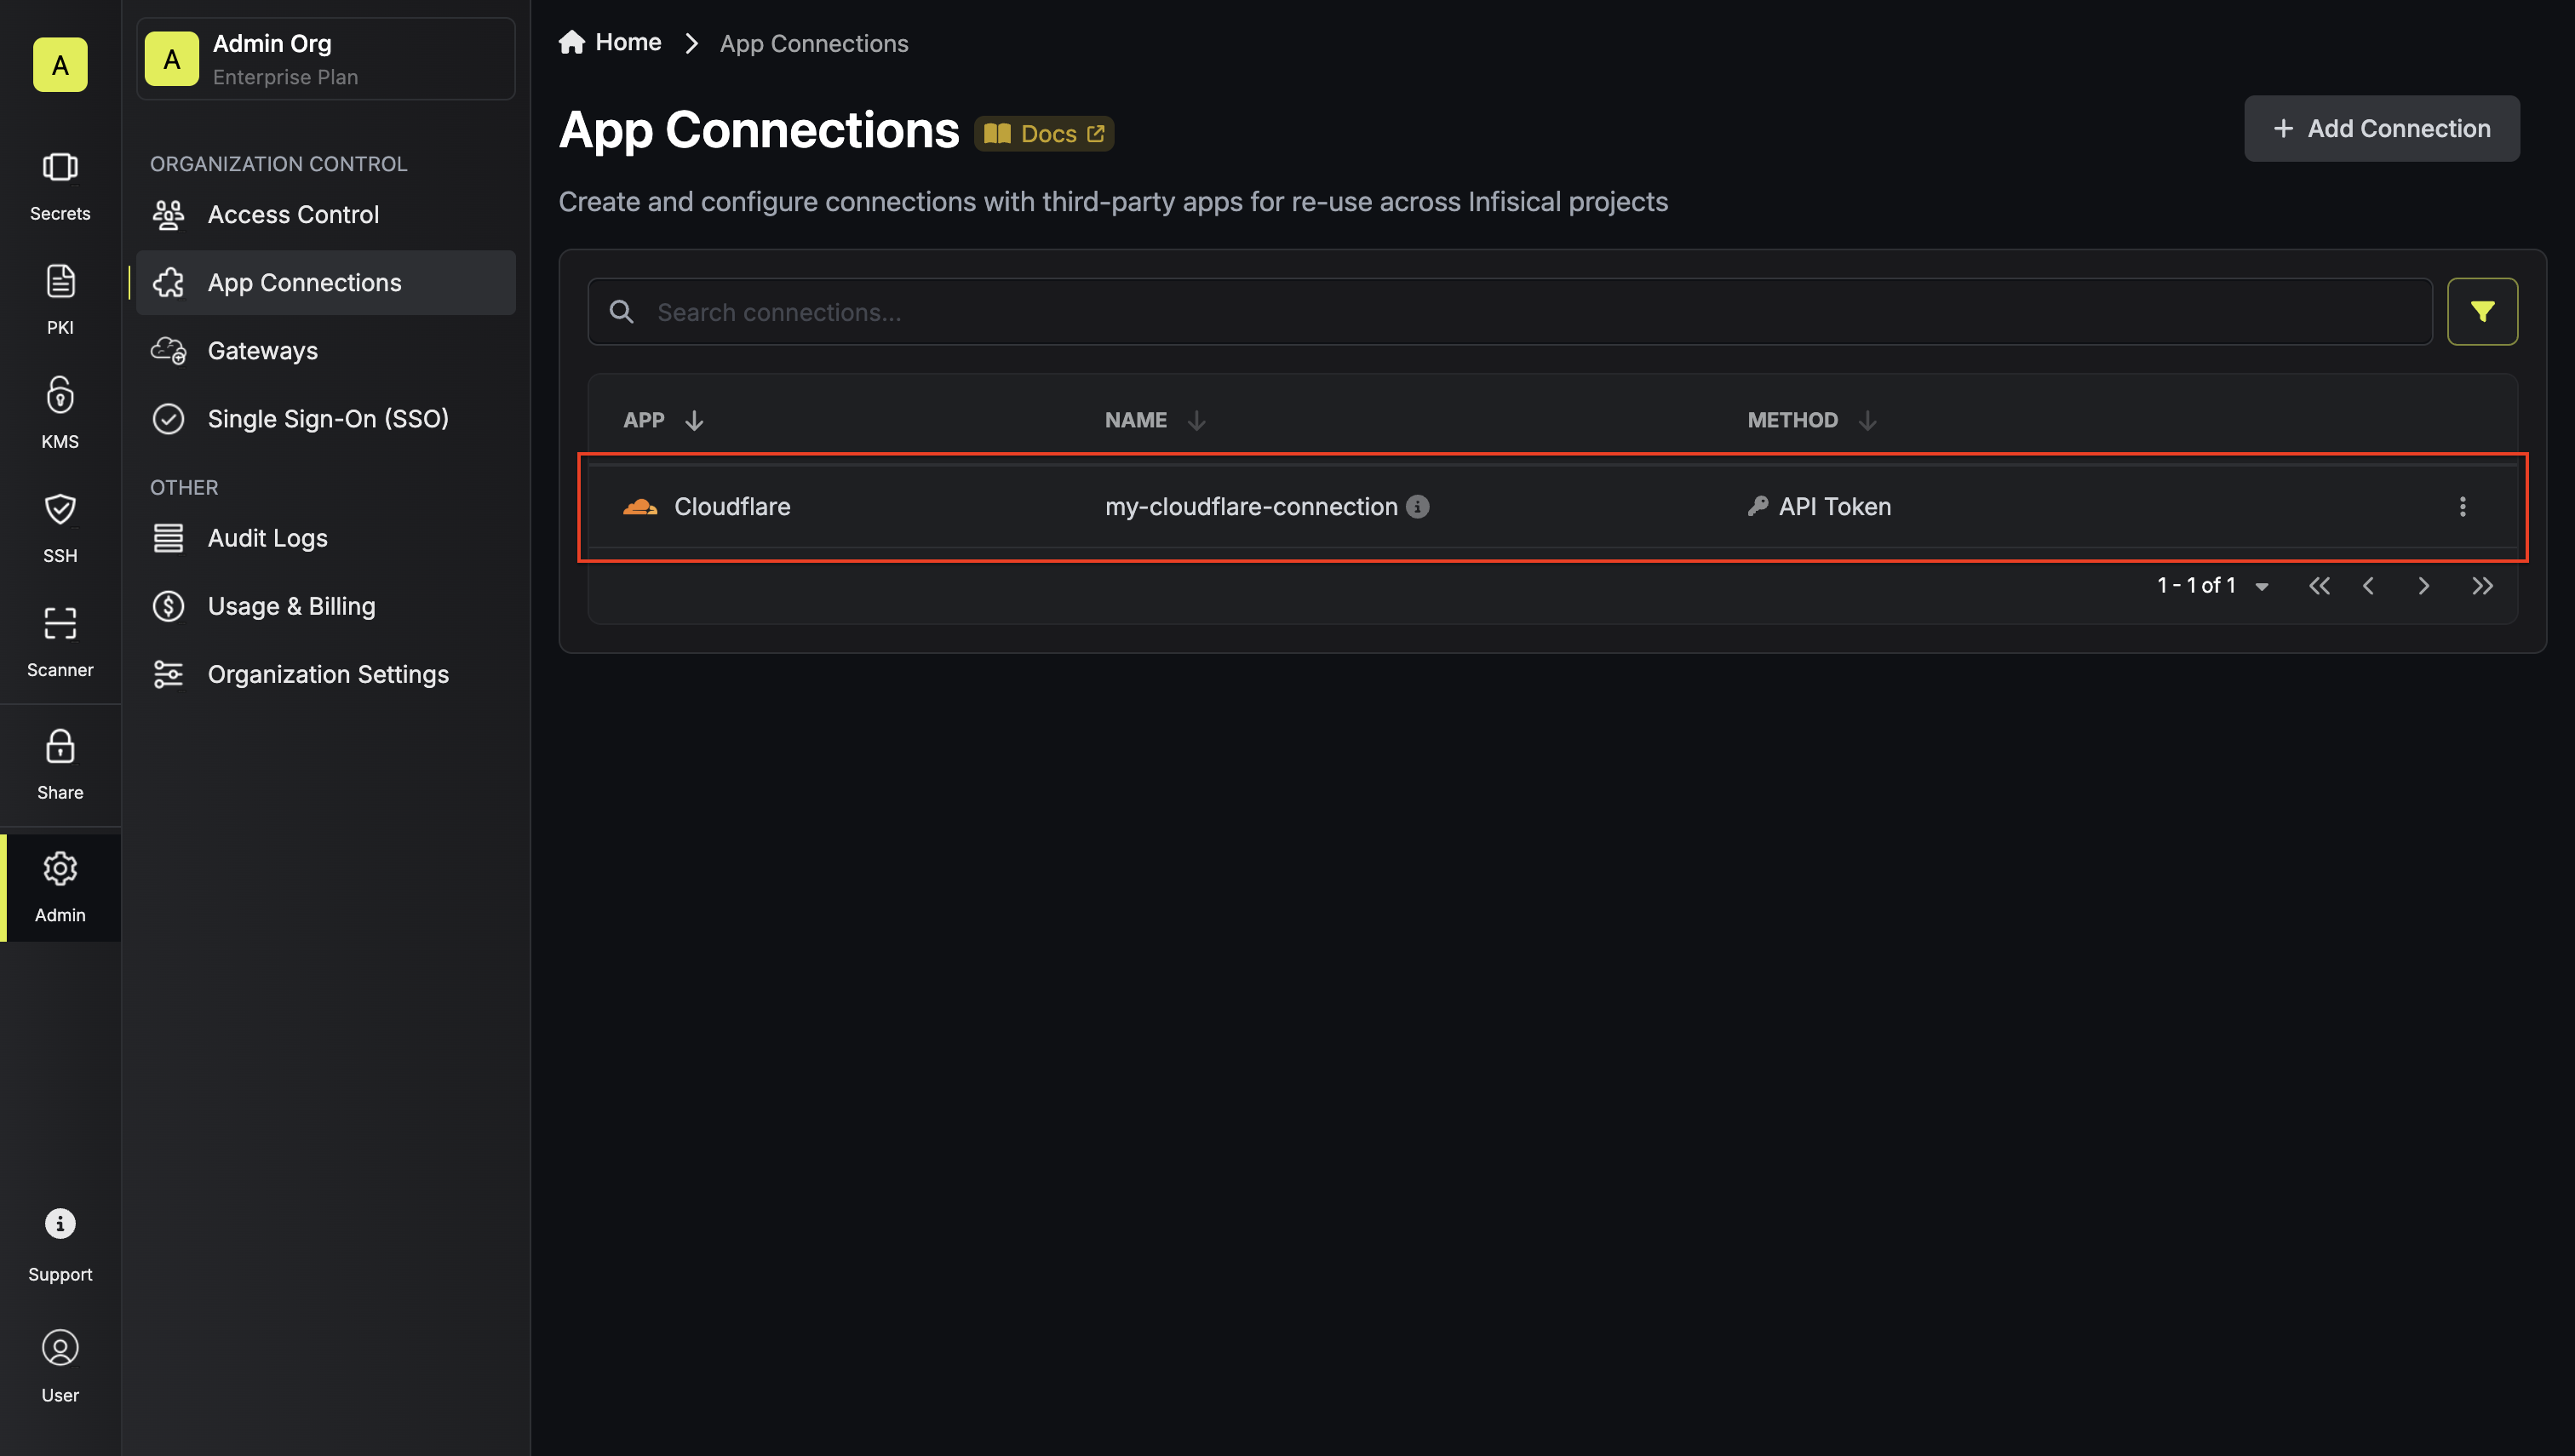
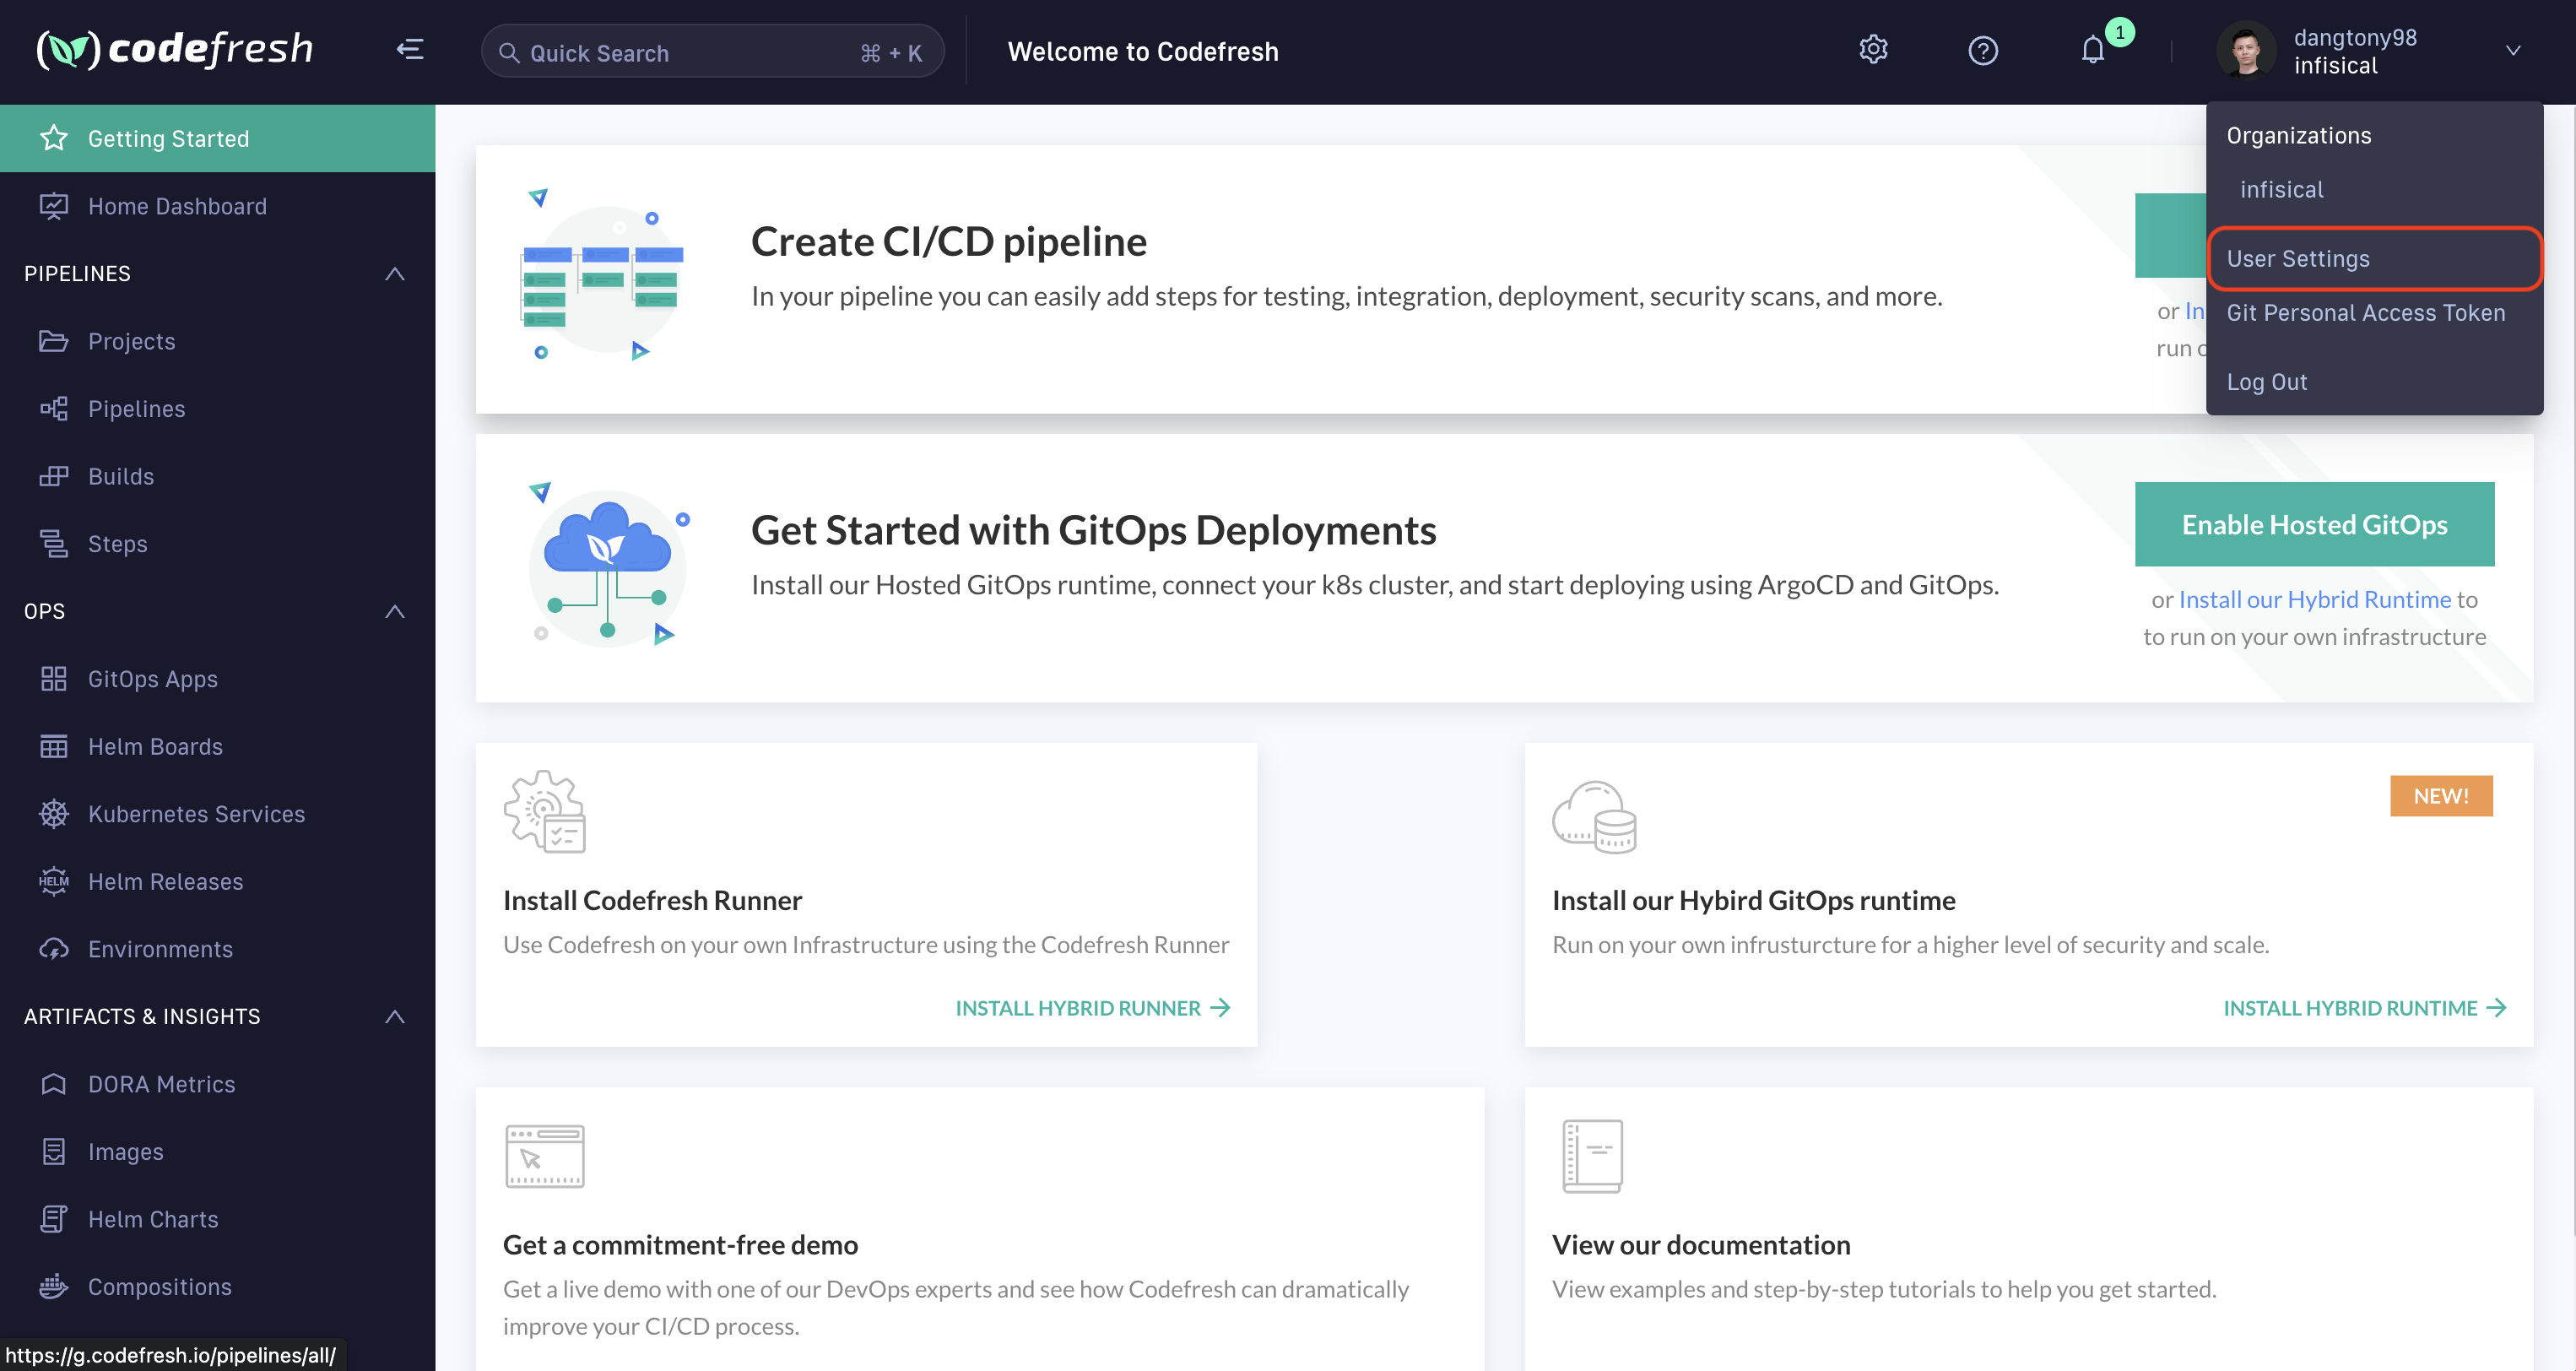
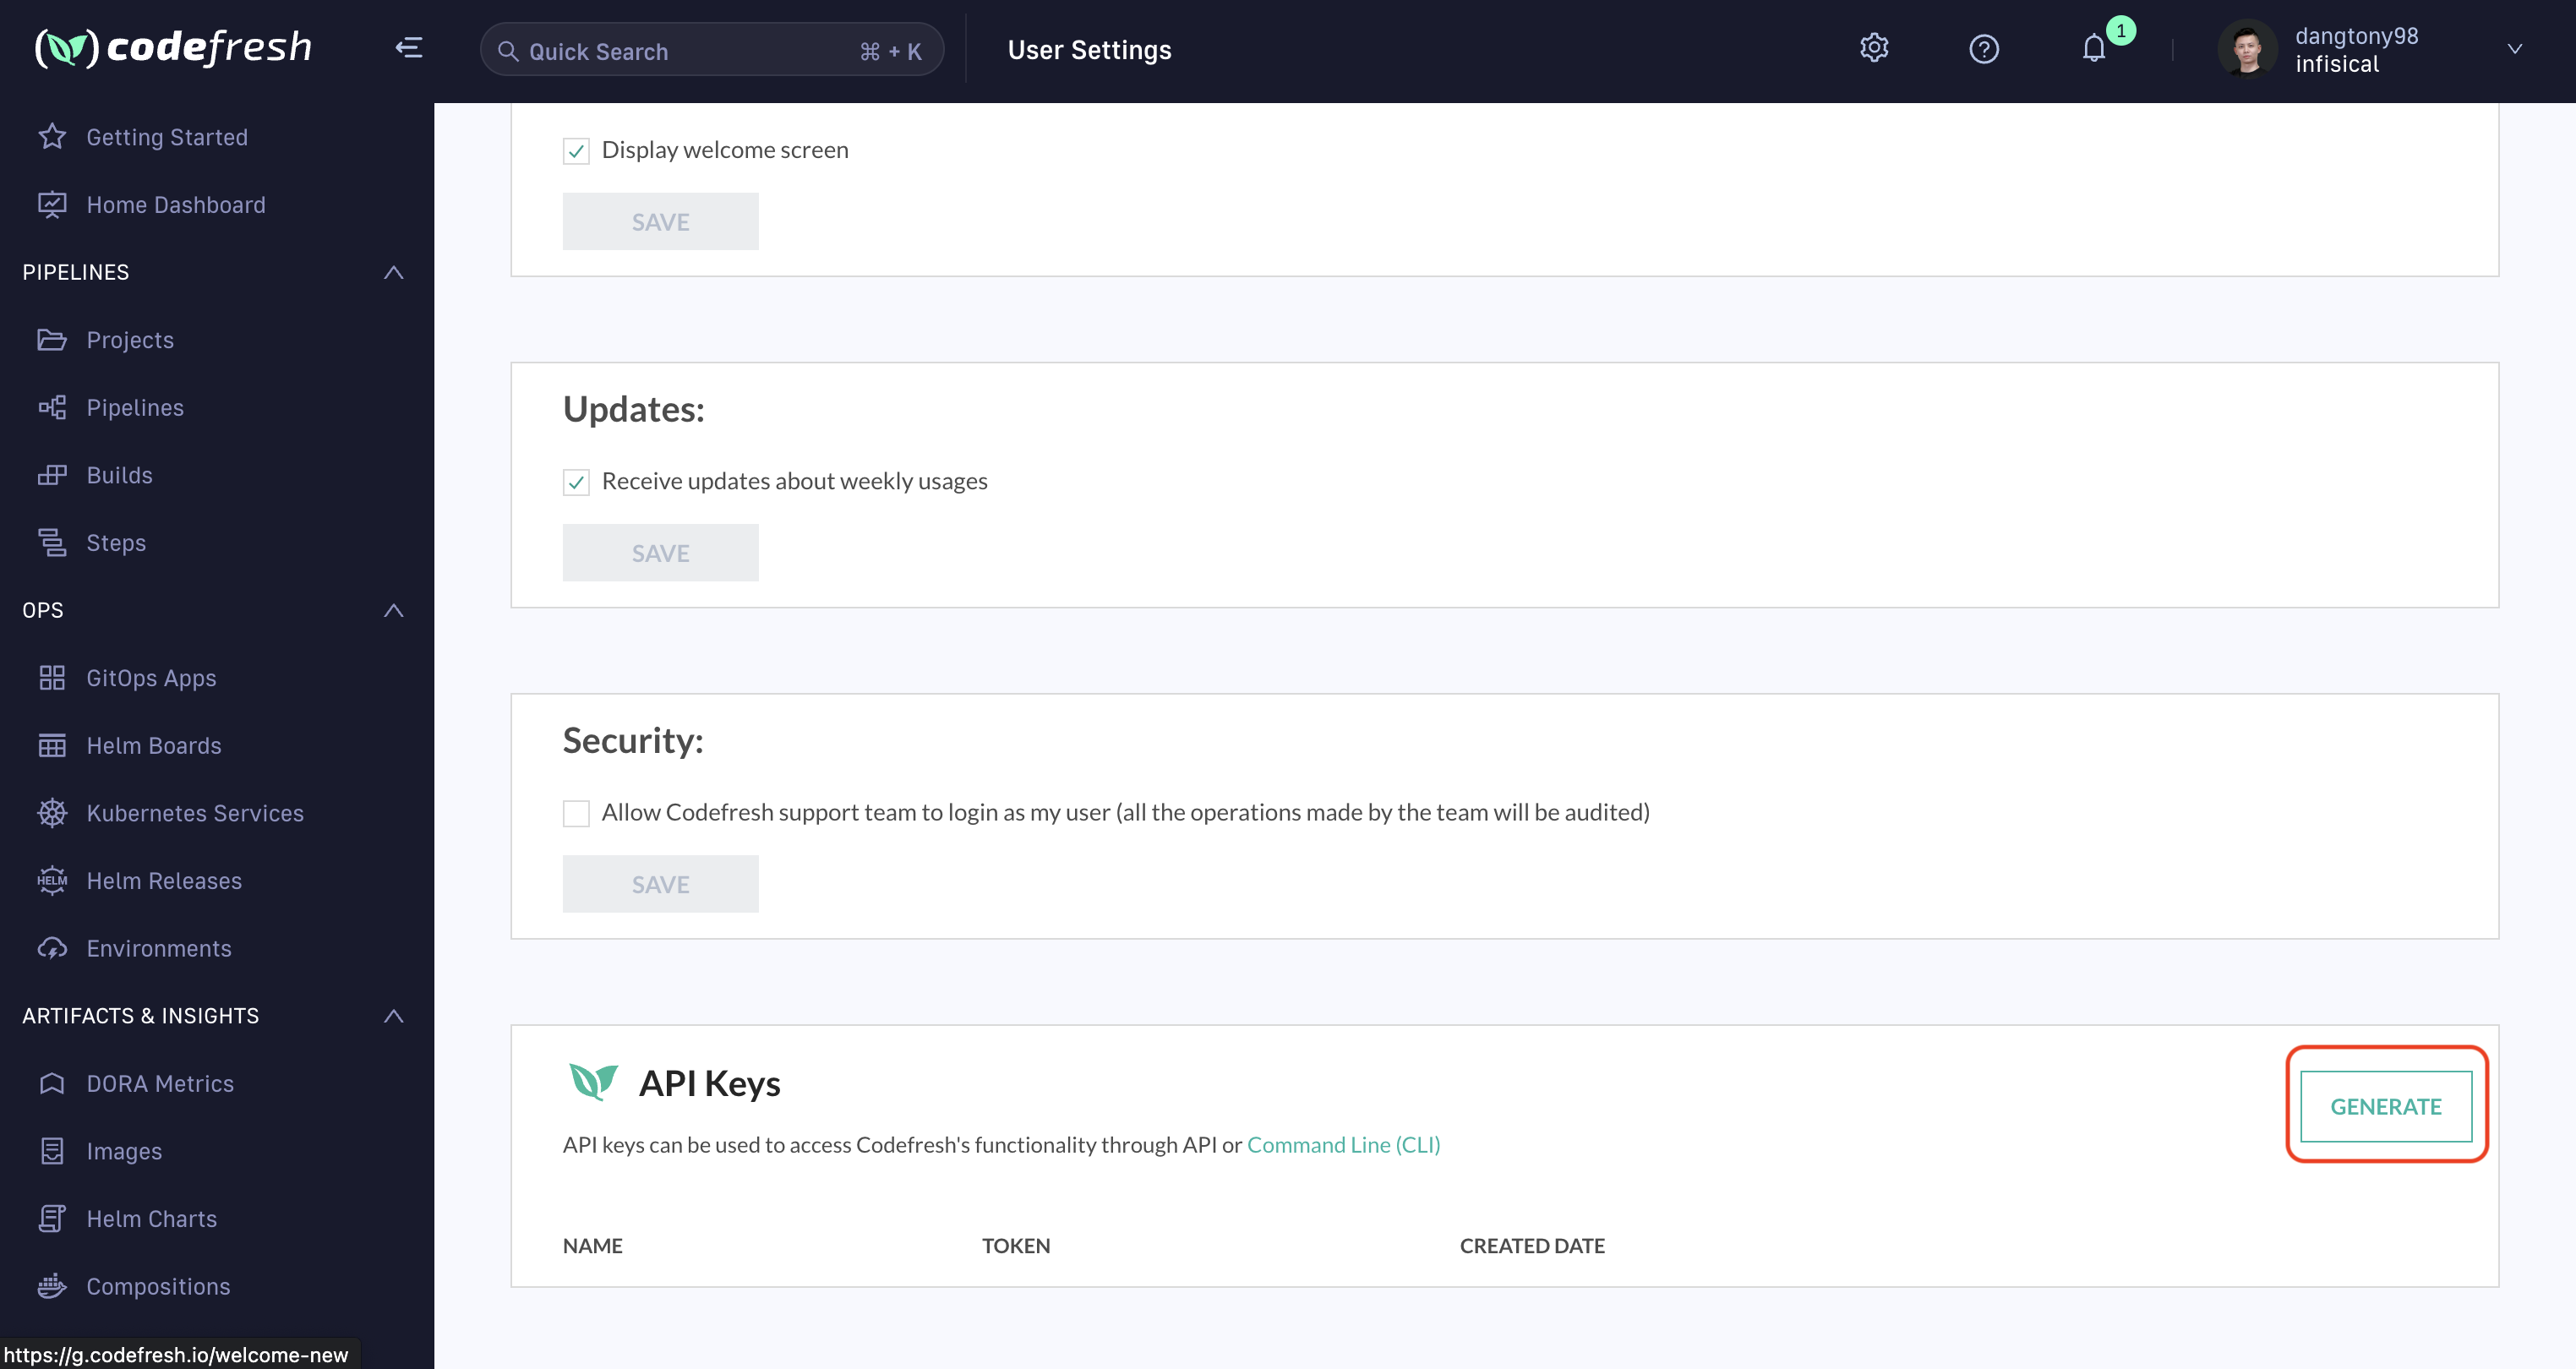 Navigate to your project's integrations tab in Infisical.
Press on the Codefresh tile and input your Codefresh API key to grant Infisical access to your Codefresh account.
Navigate to your project's integrations tab in Infisical.
Press on the Codefresh tile and input your Codefresh API key to grant Infisical access to your Codefresh account.

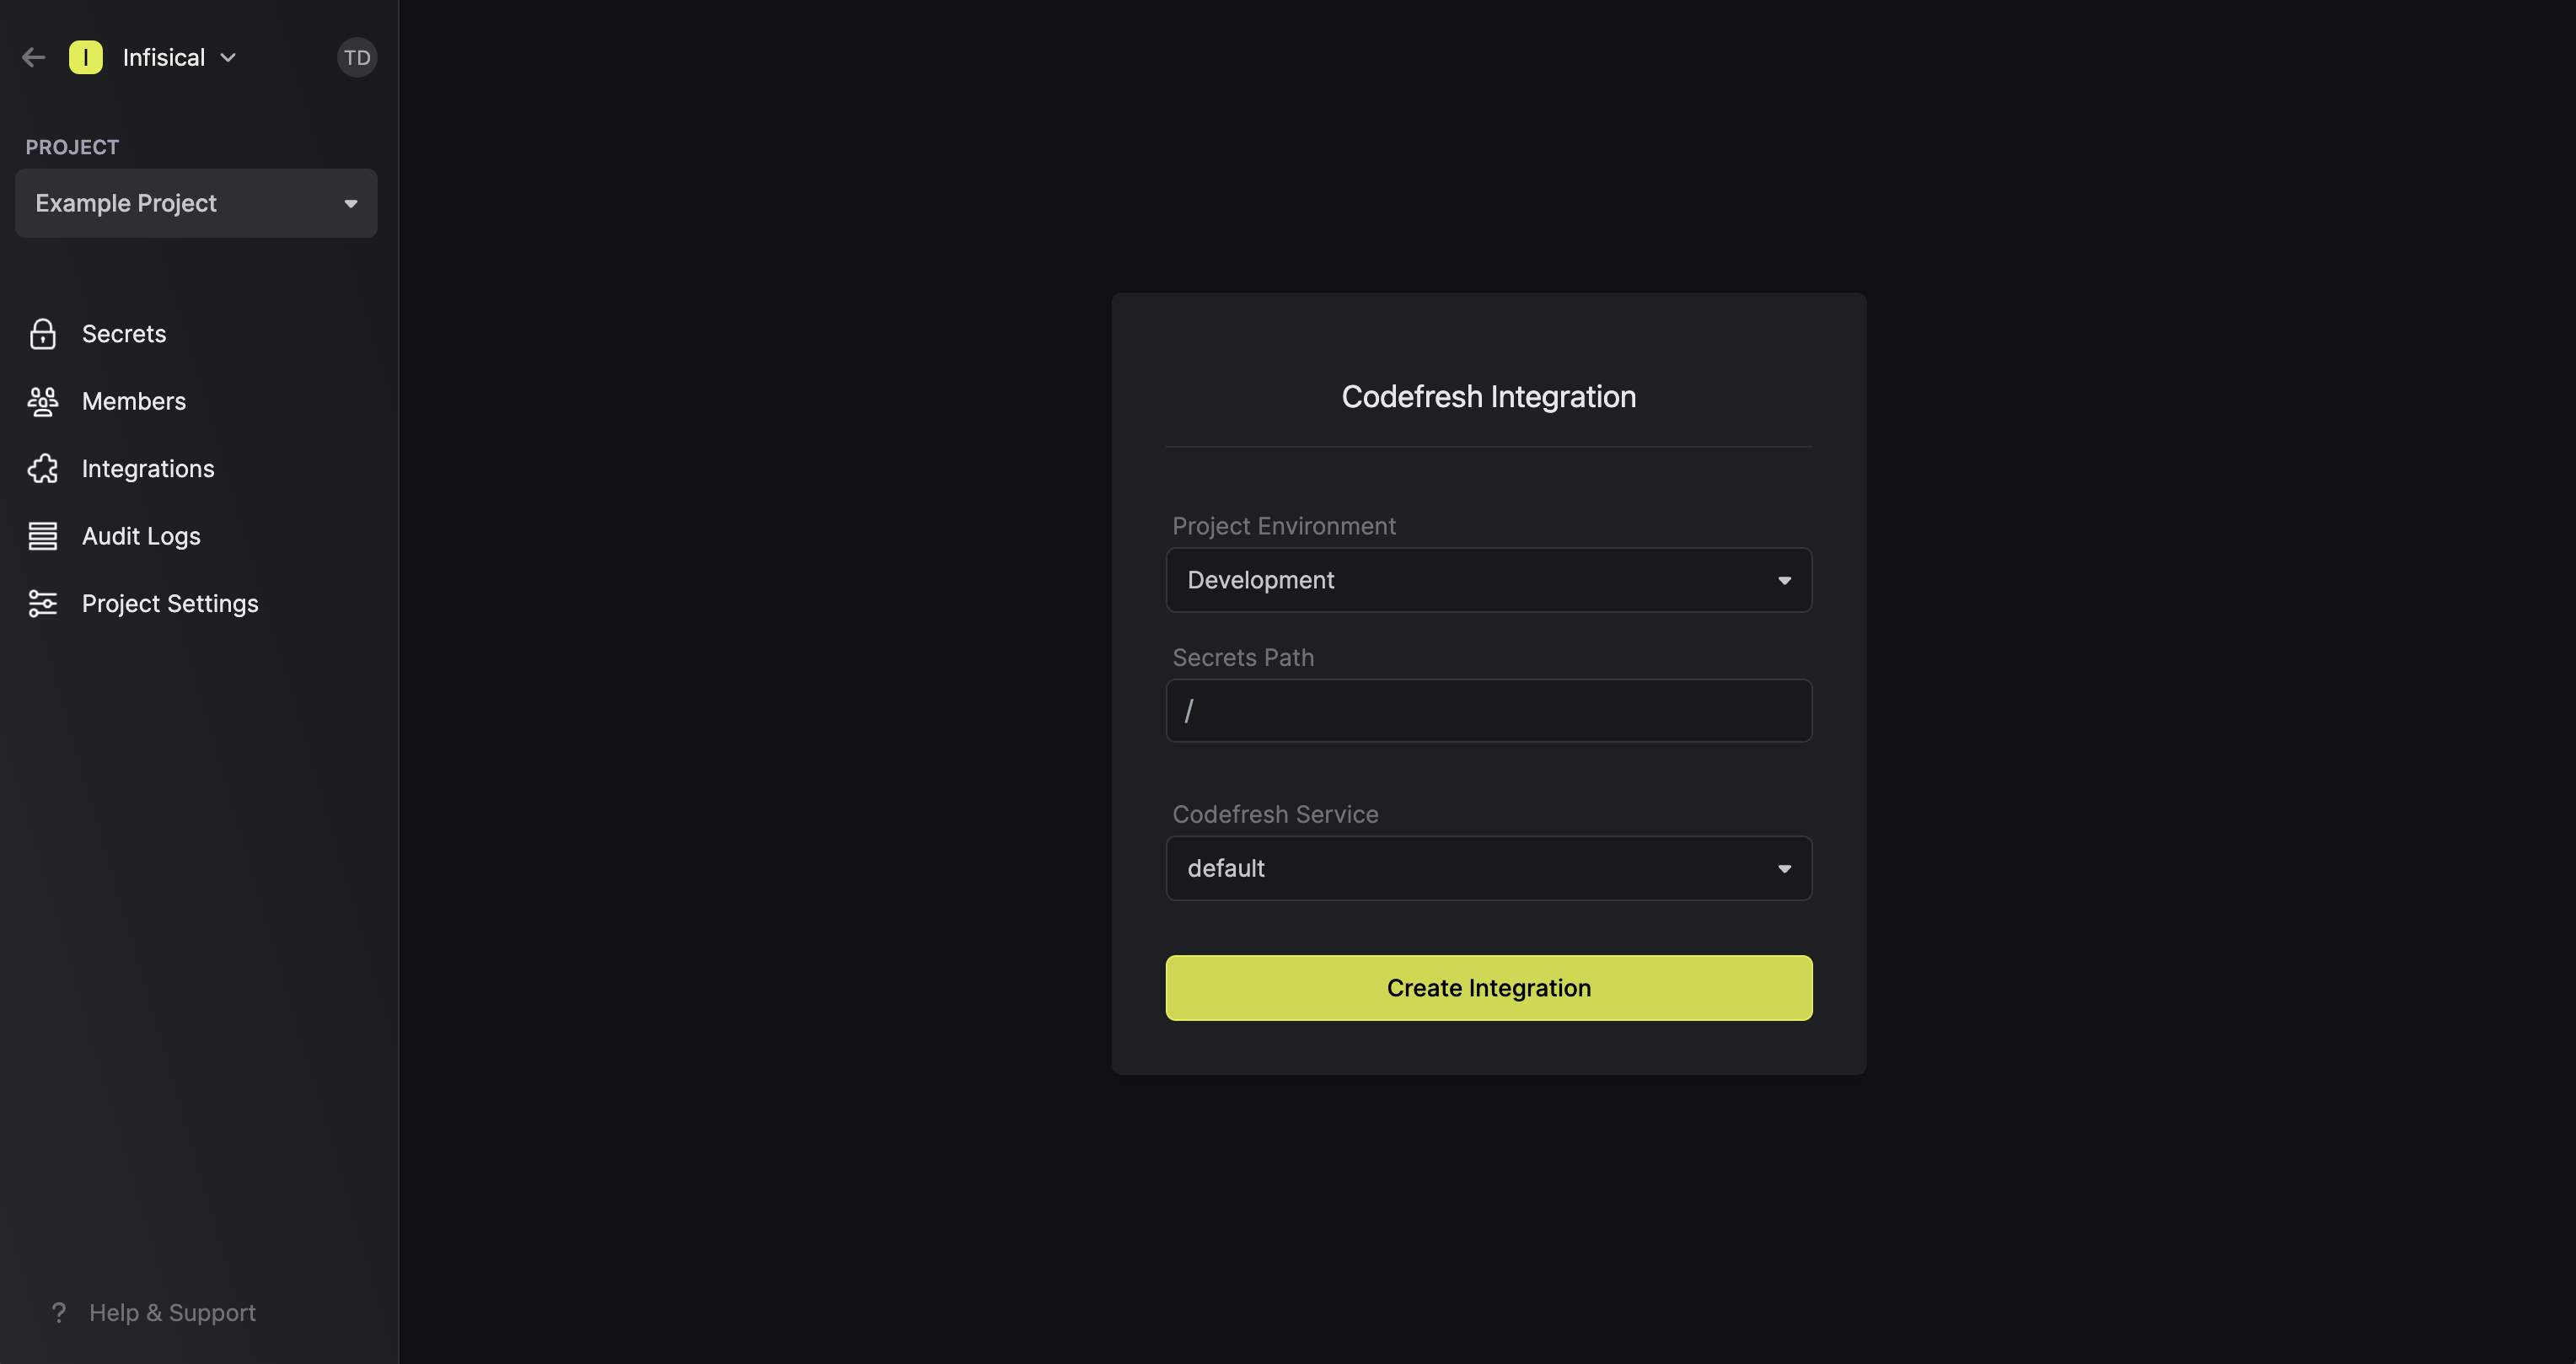
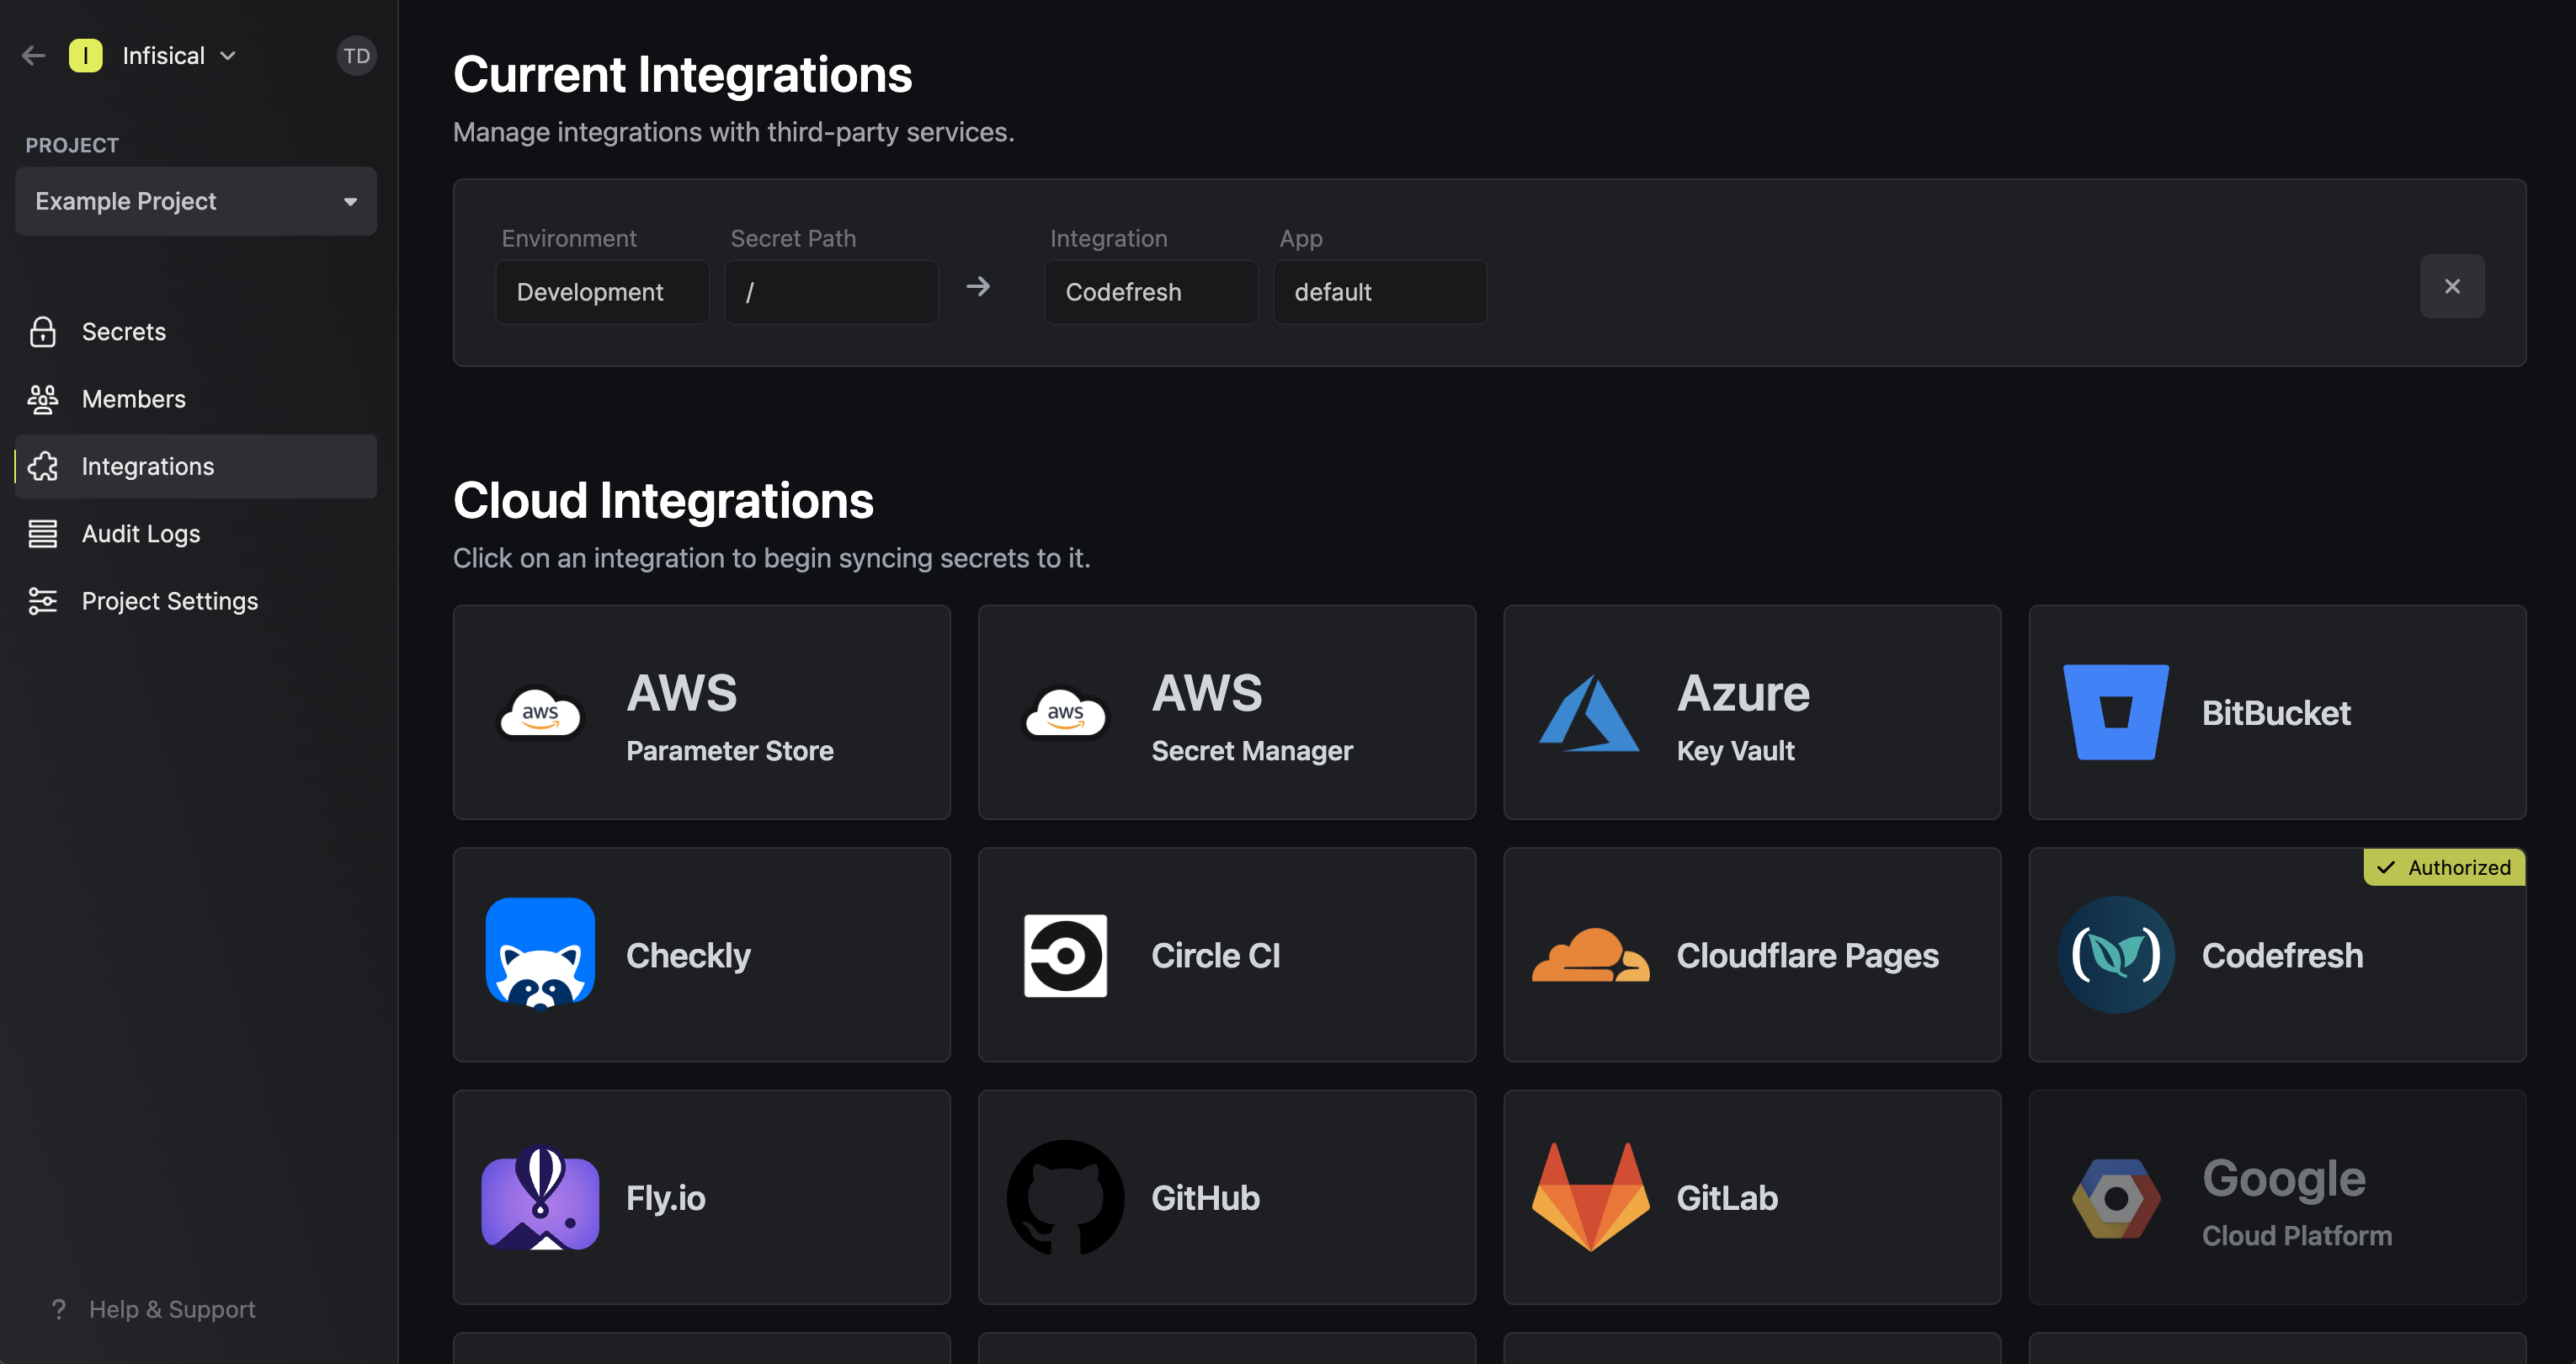
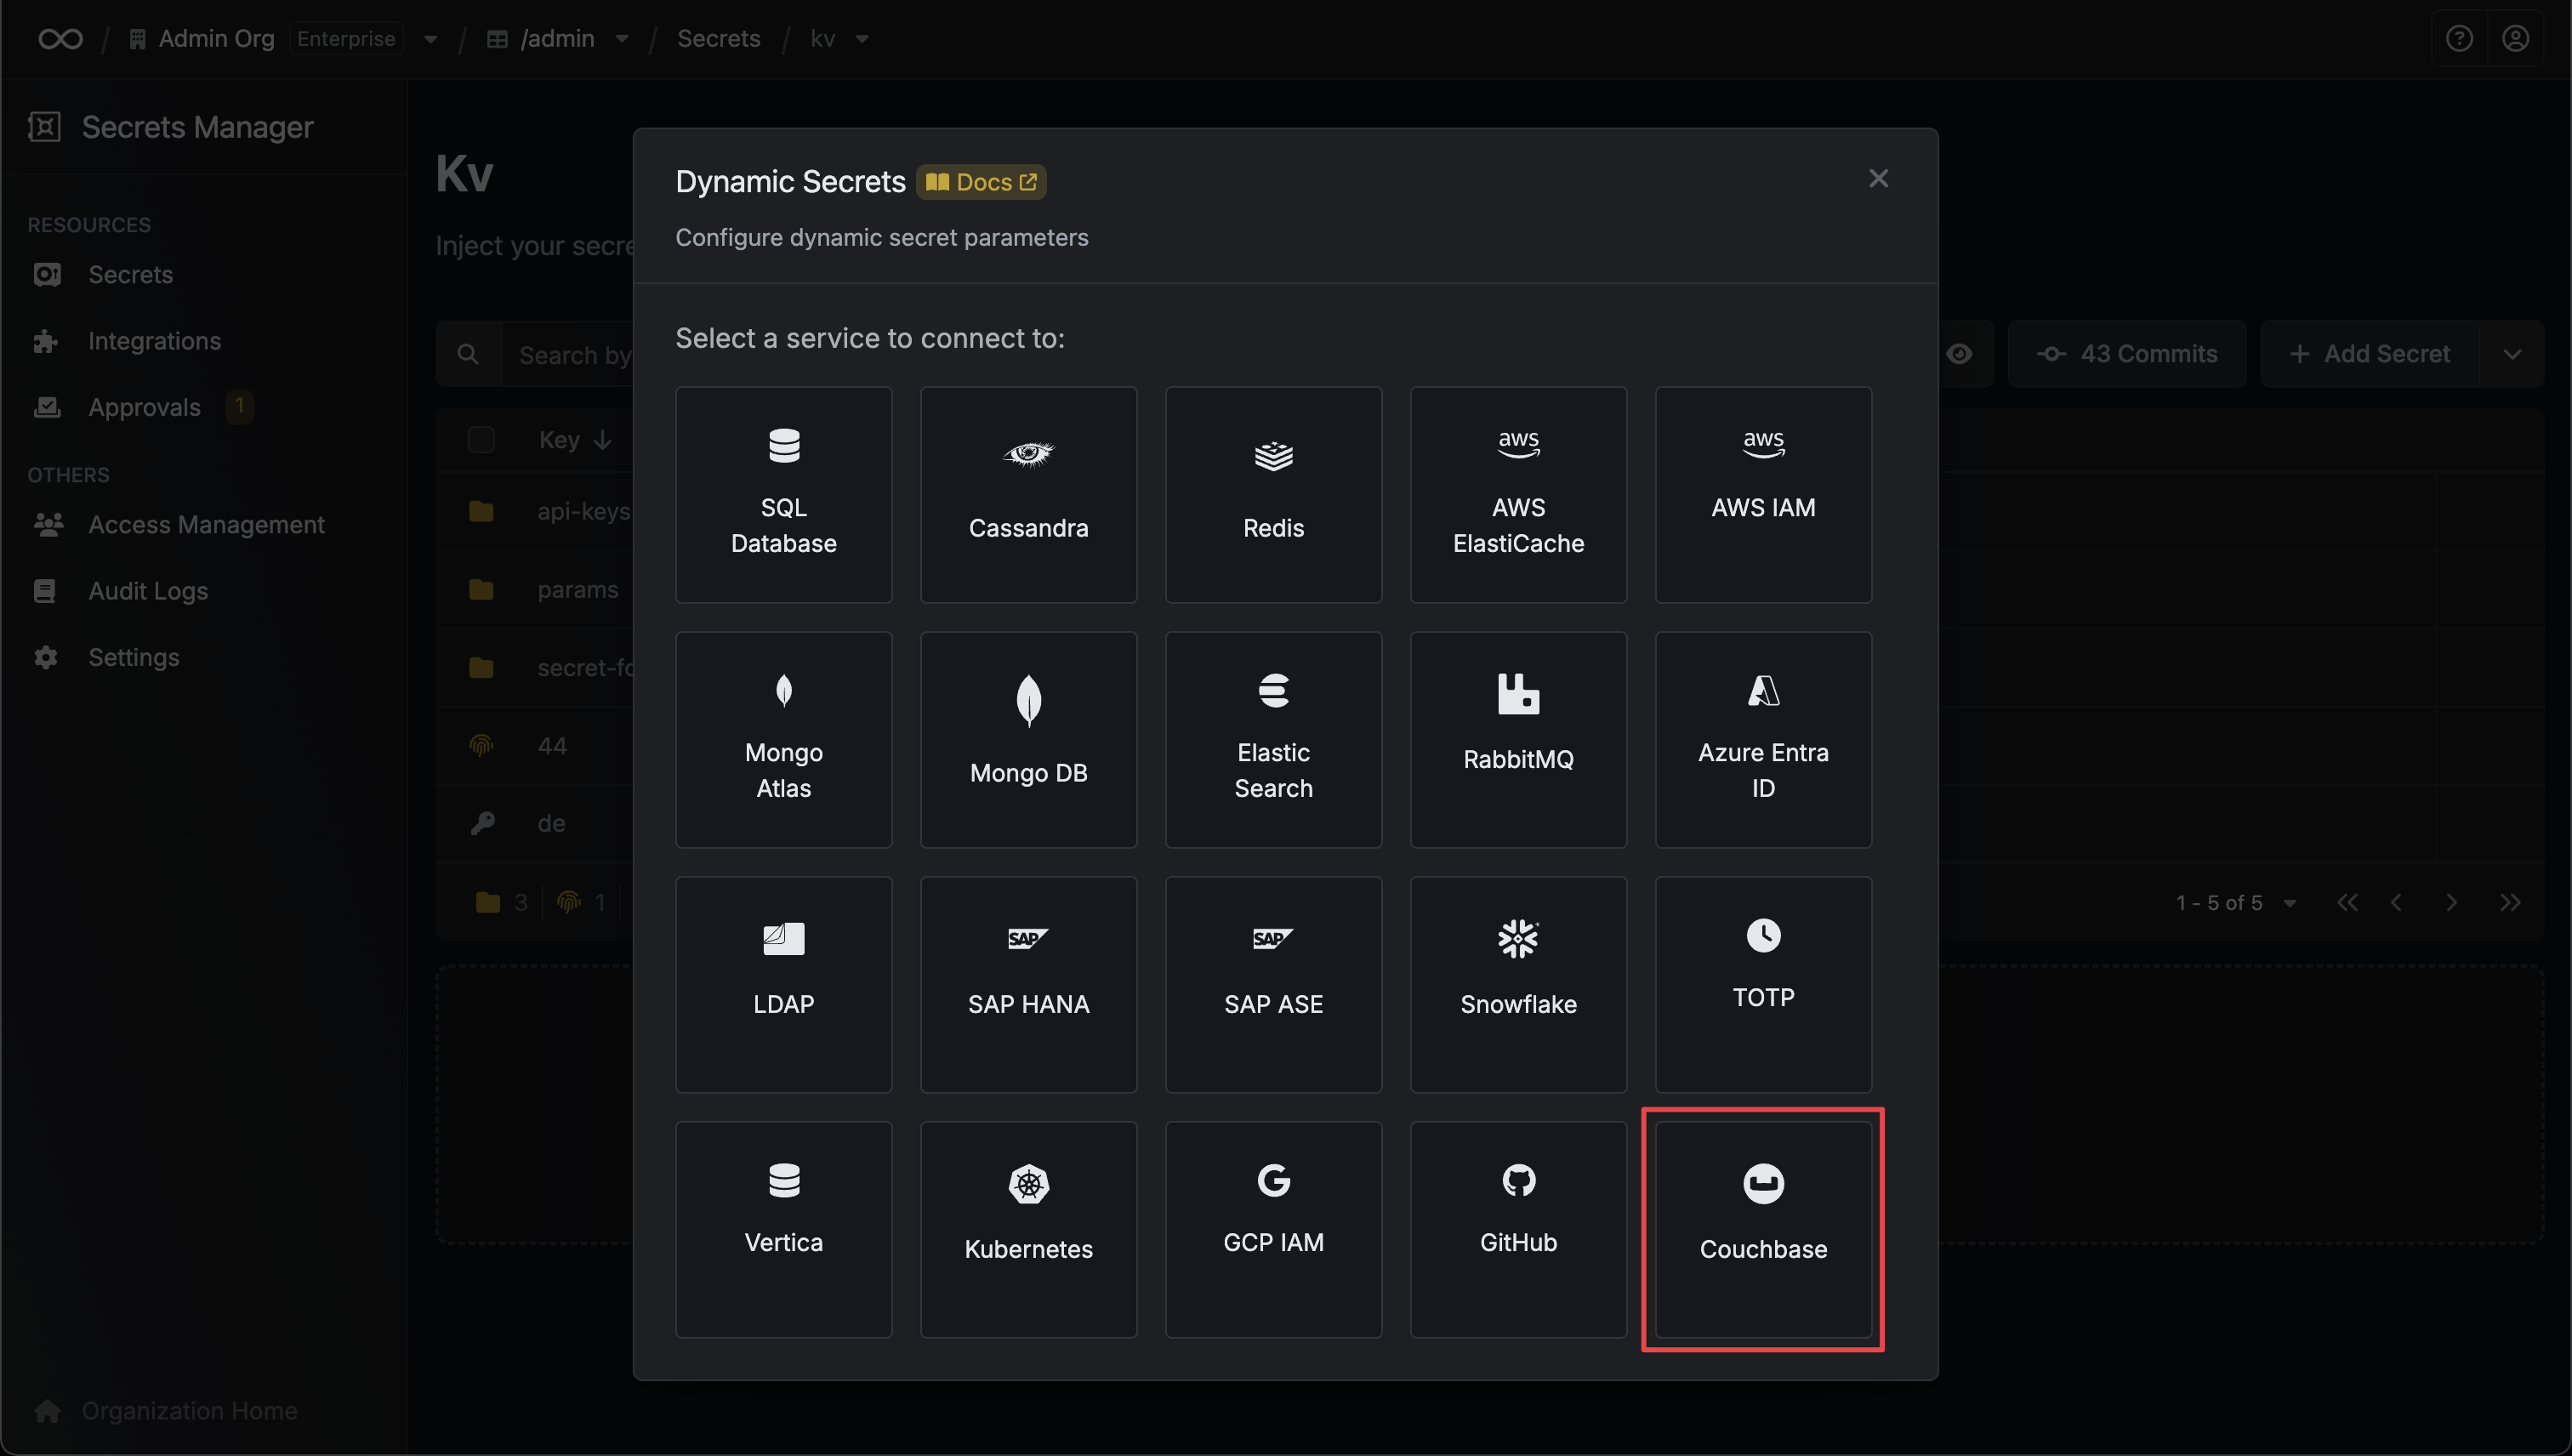
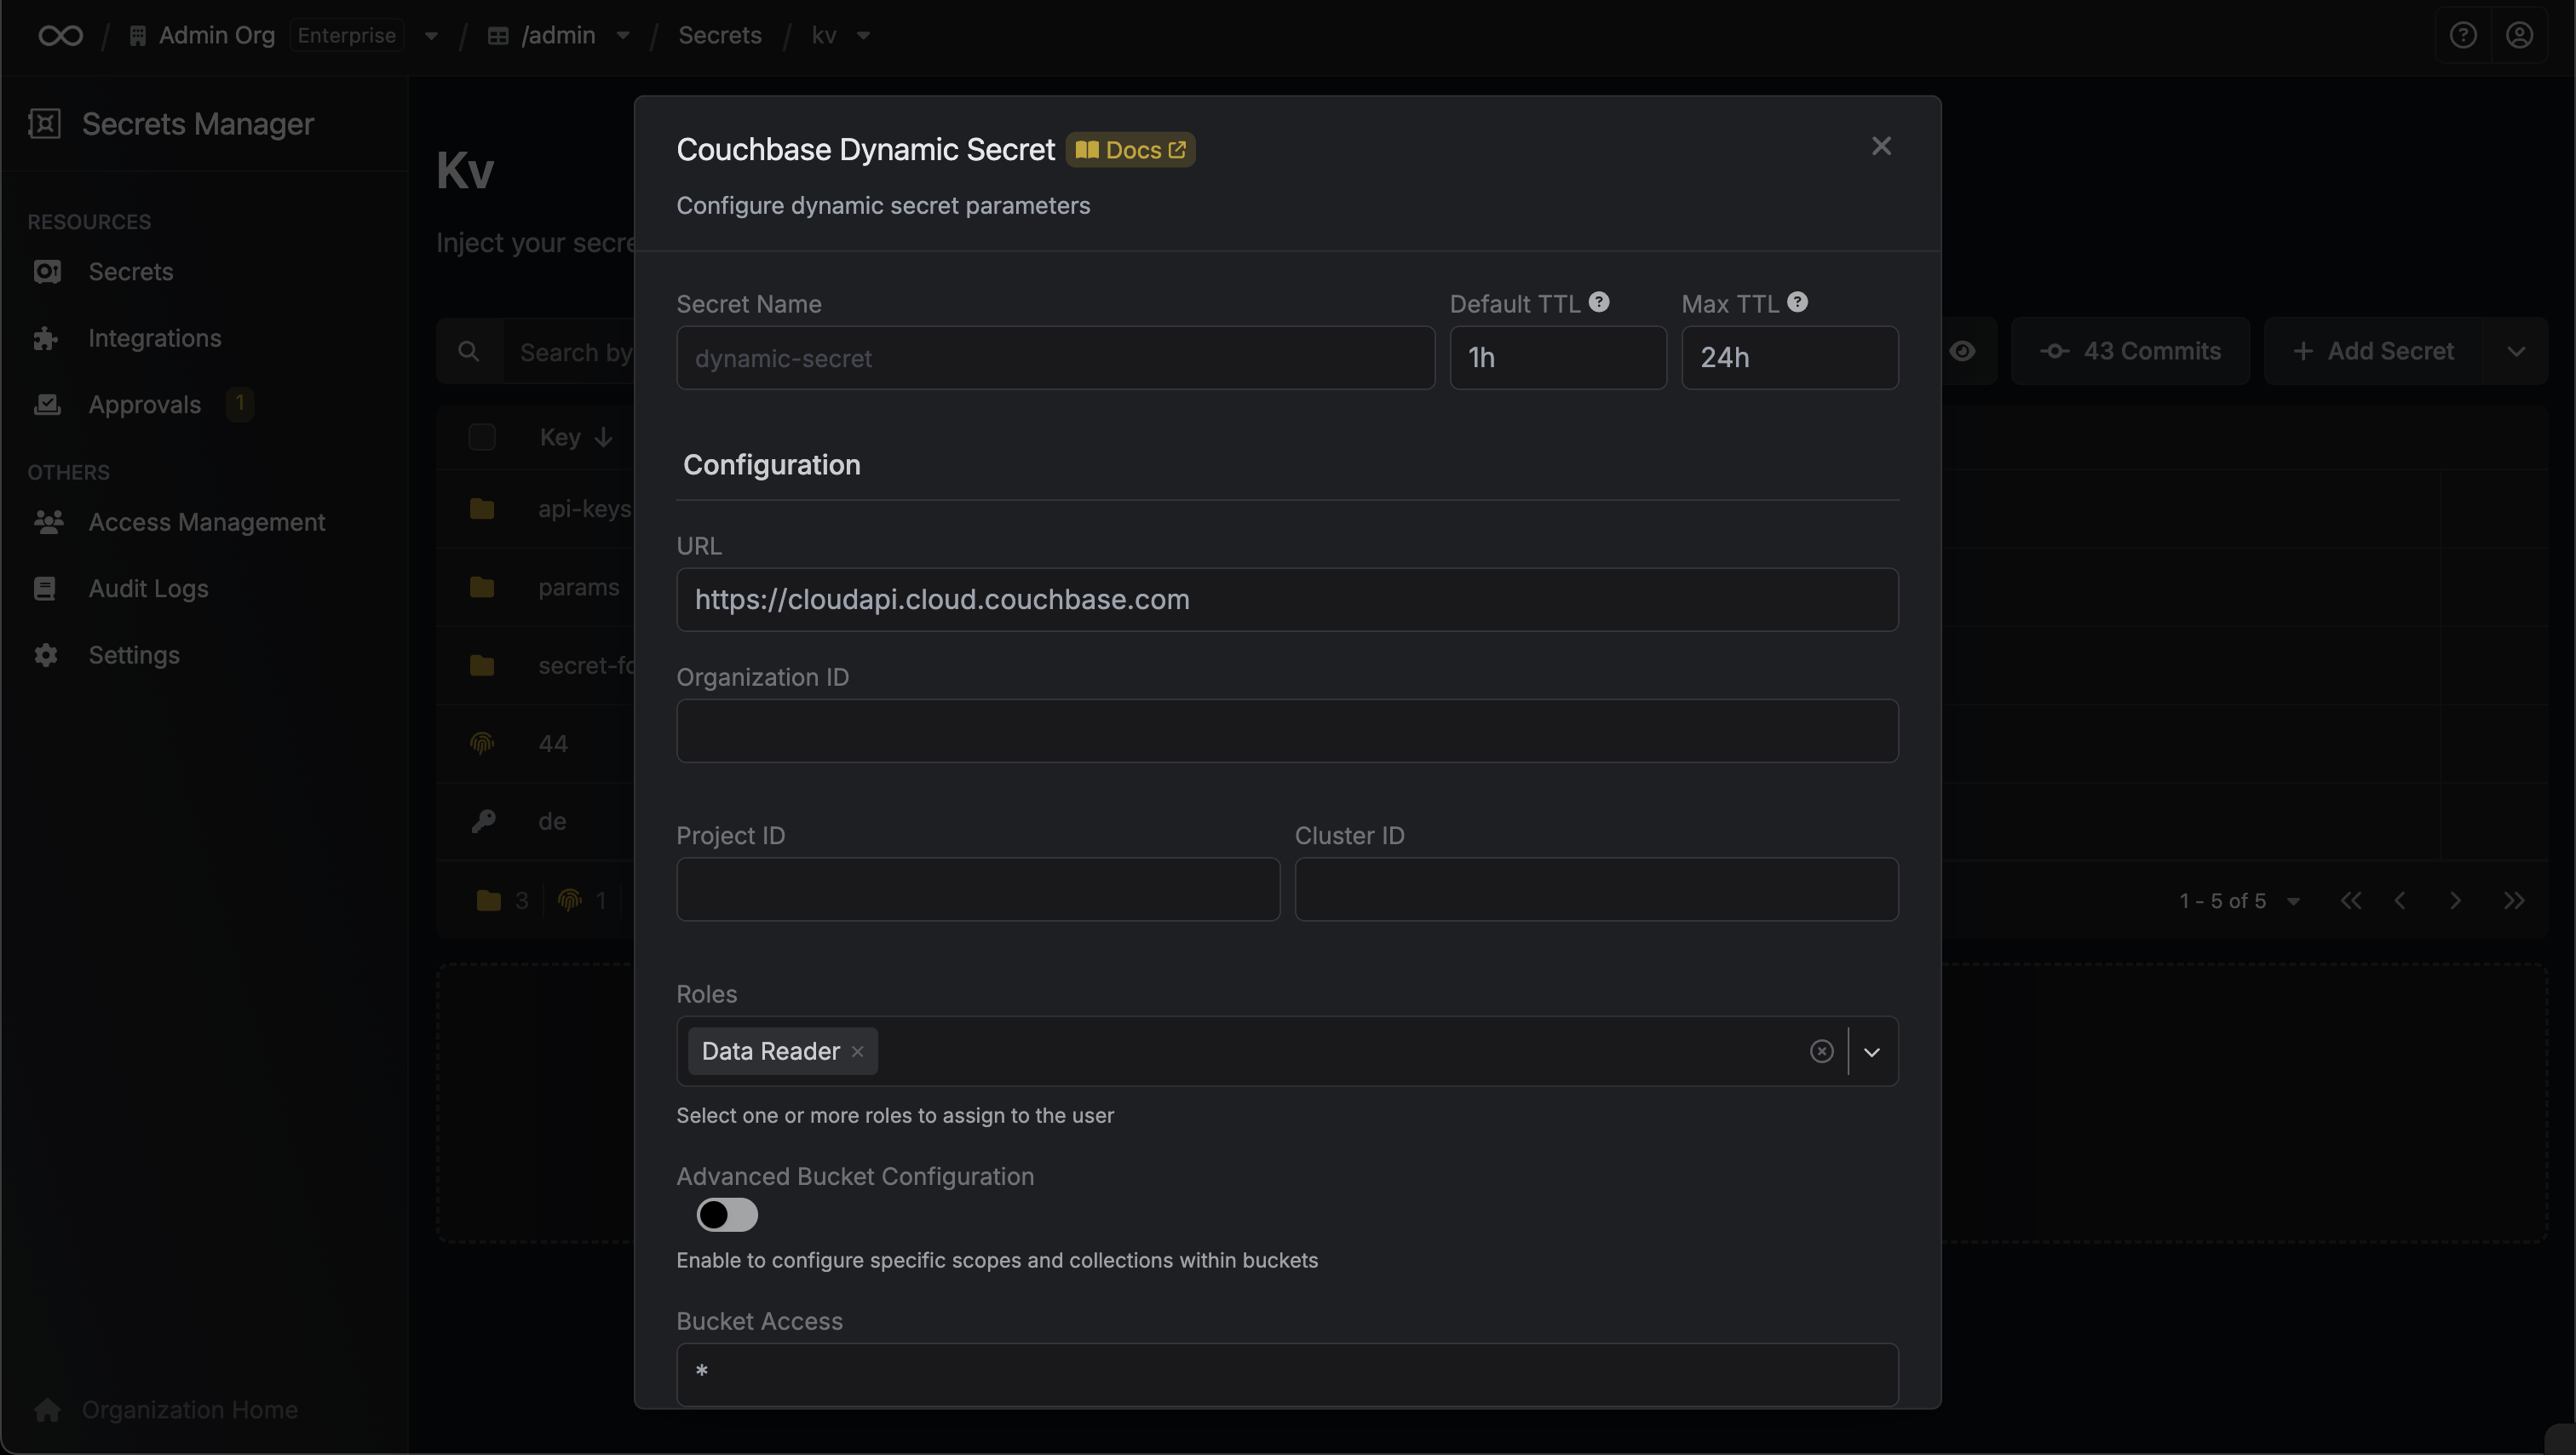
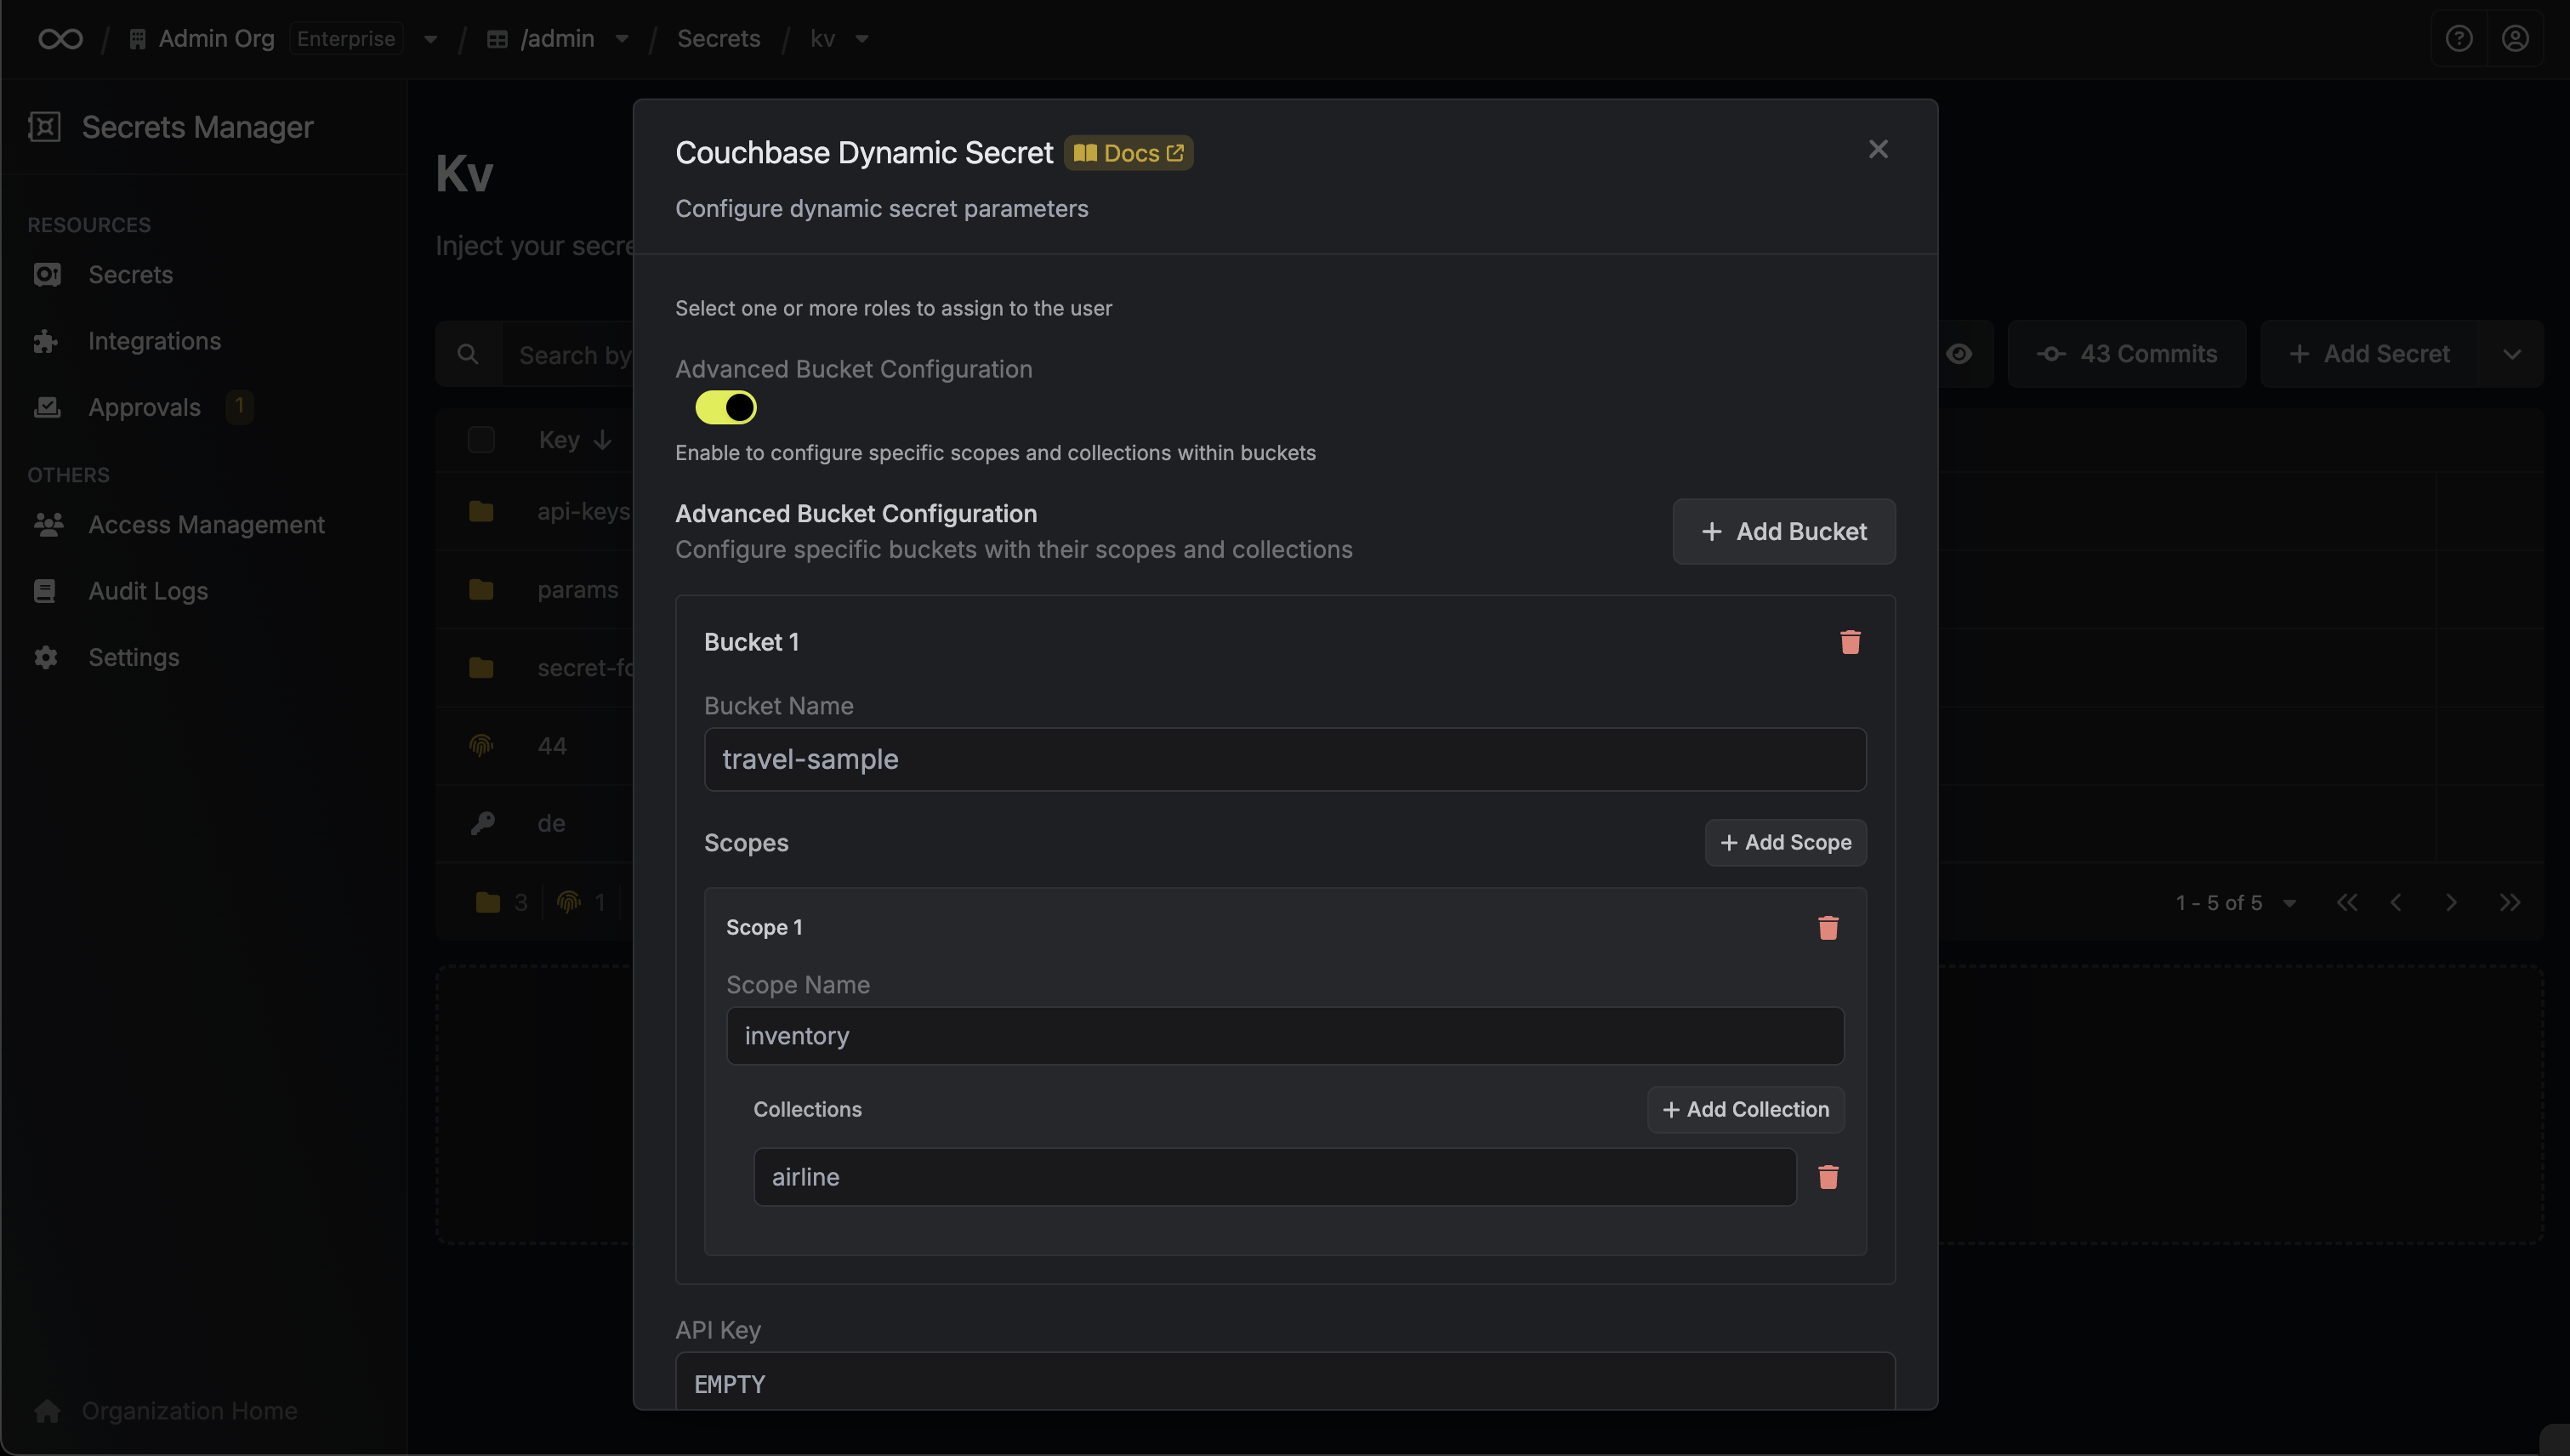
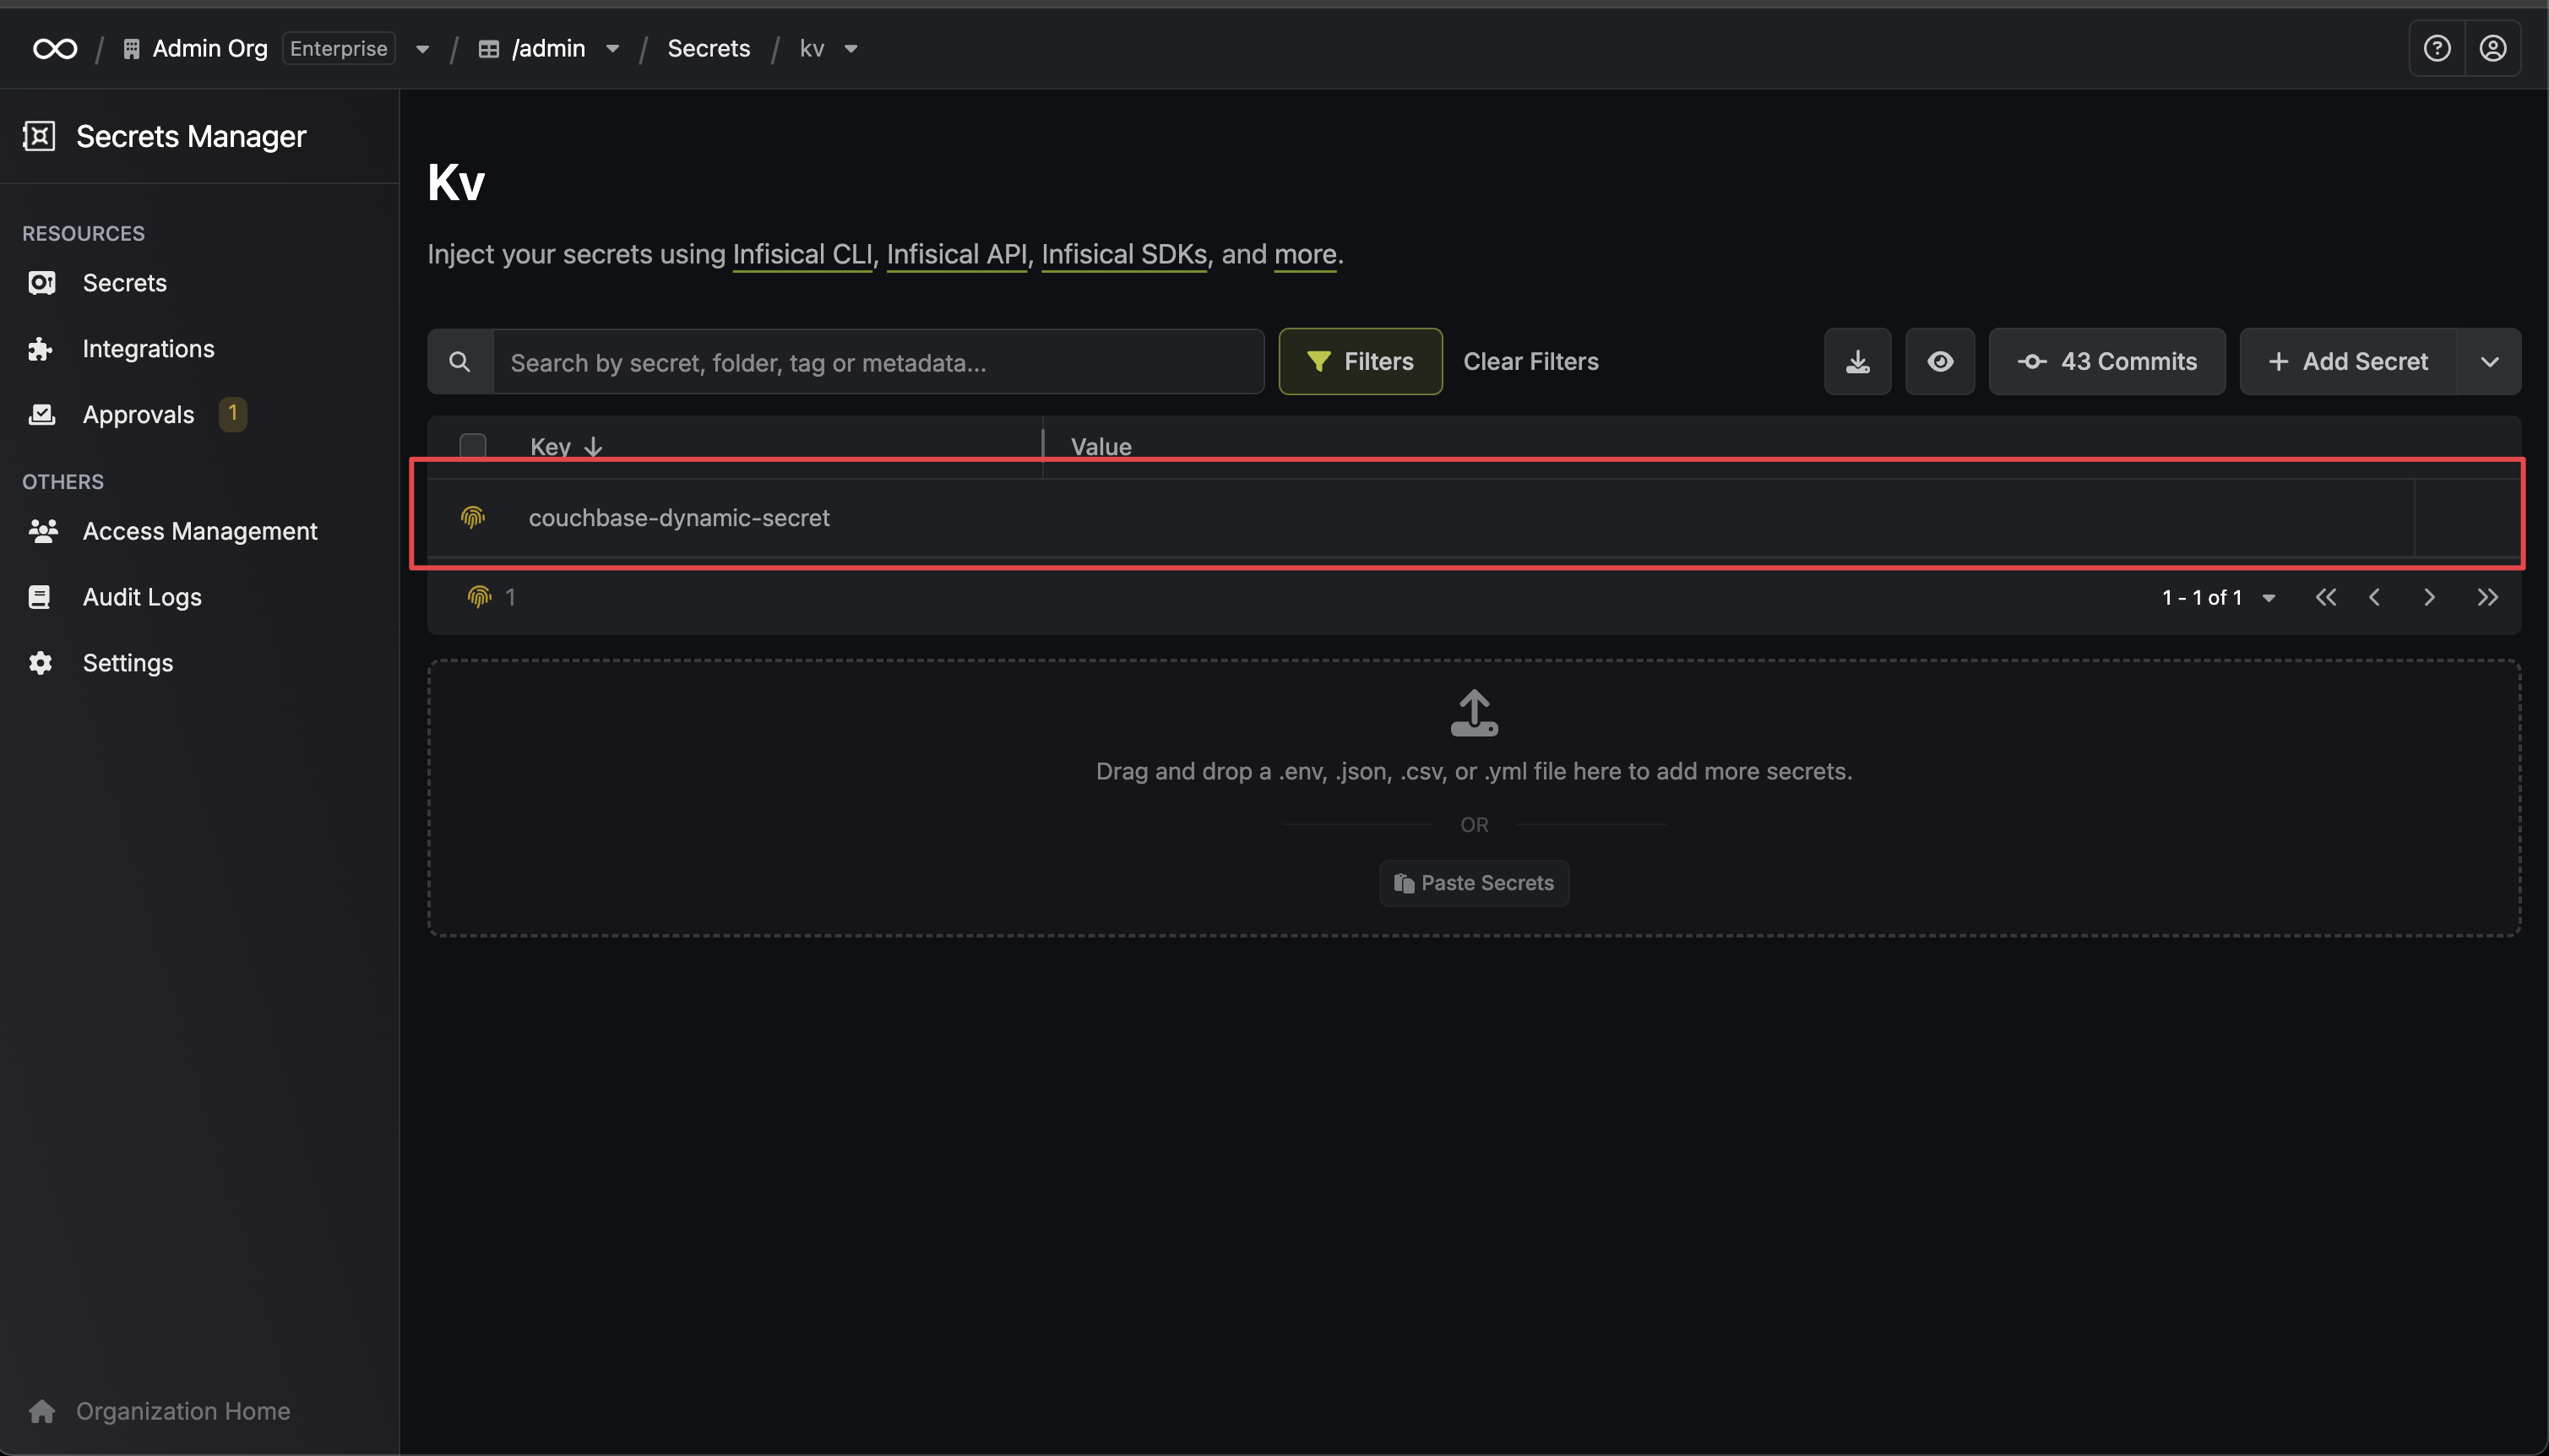 When generating these secrets, it's important to specify a Time-to-Live (TTL) duration. This will dictate how long the credentials are valid for.
## Renew Leases
To extend the life of the generated dynamic secret leases past its initial time to live, simply click on the **Renew** button as illustrated below.
When generating these secrets, it's important to specify a Time-to-Live (TTL) duration. This will dictate how long the credentials are valid for.
## Renew Leases
To extend the life of the generated dynamic secret leases past its initial time to live, simply click on the **Renew** button as illustrated below.
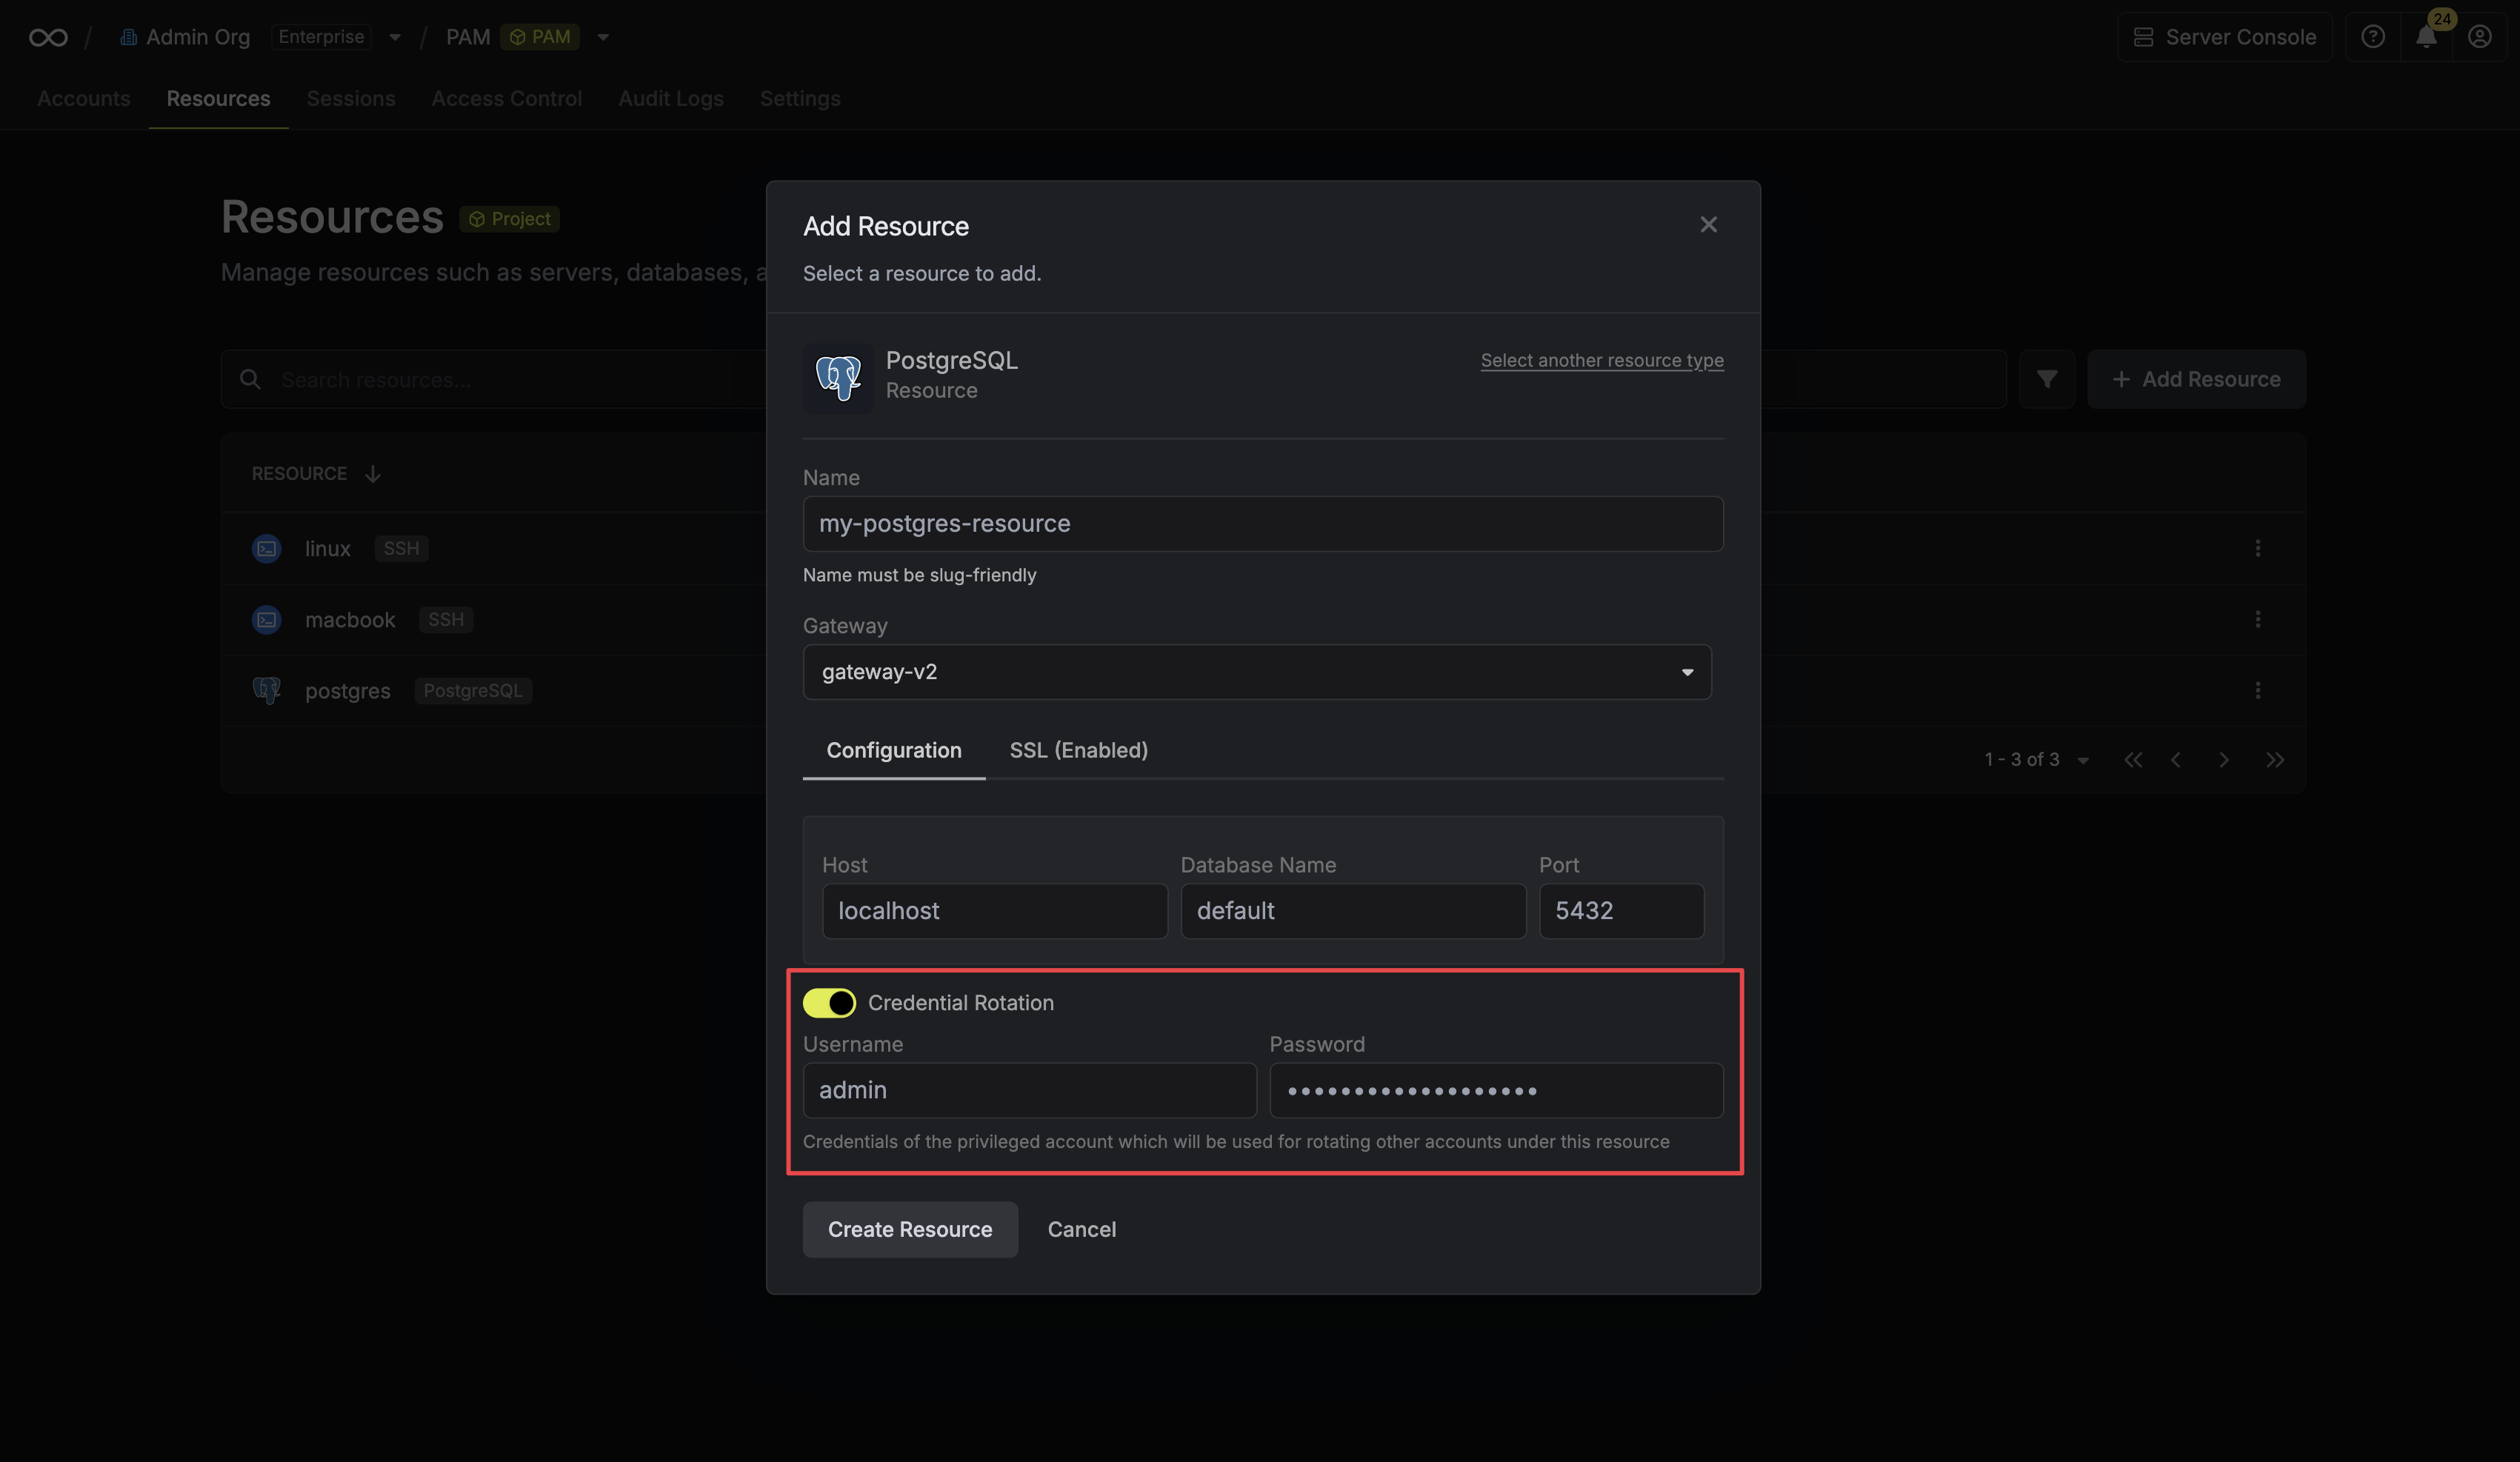
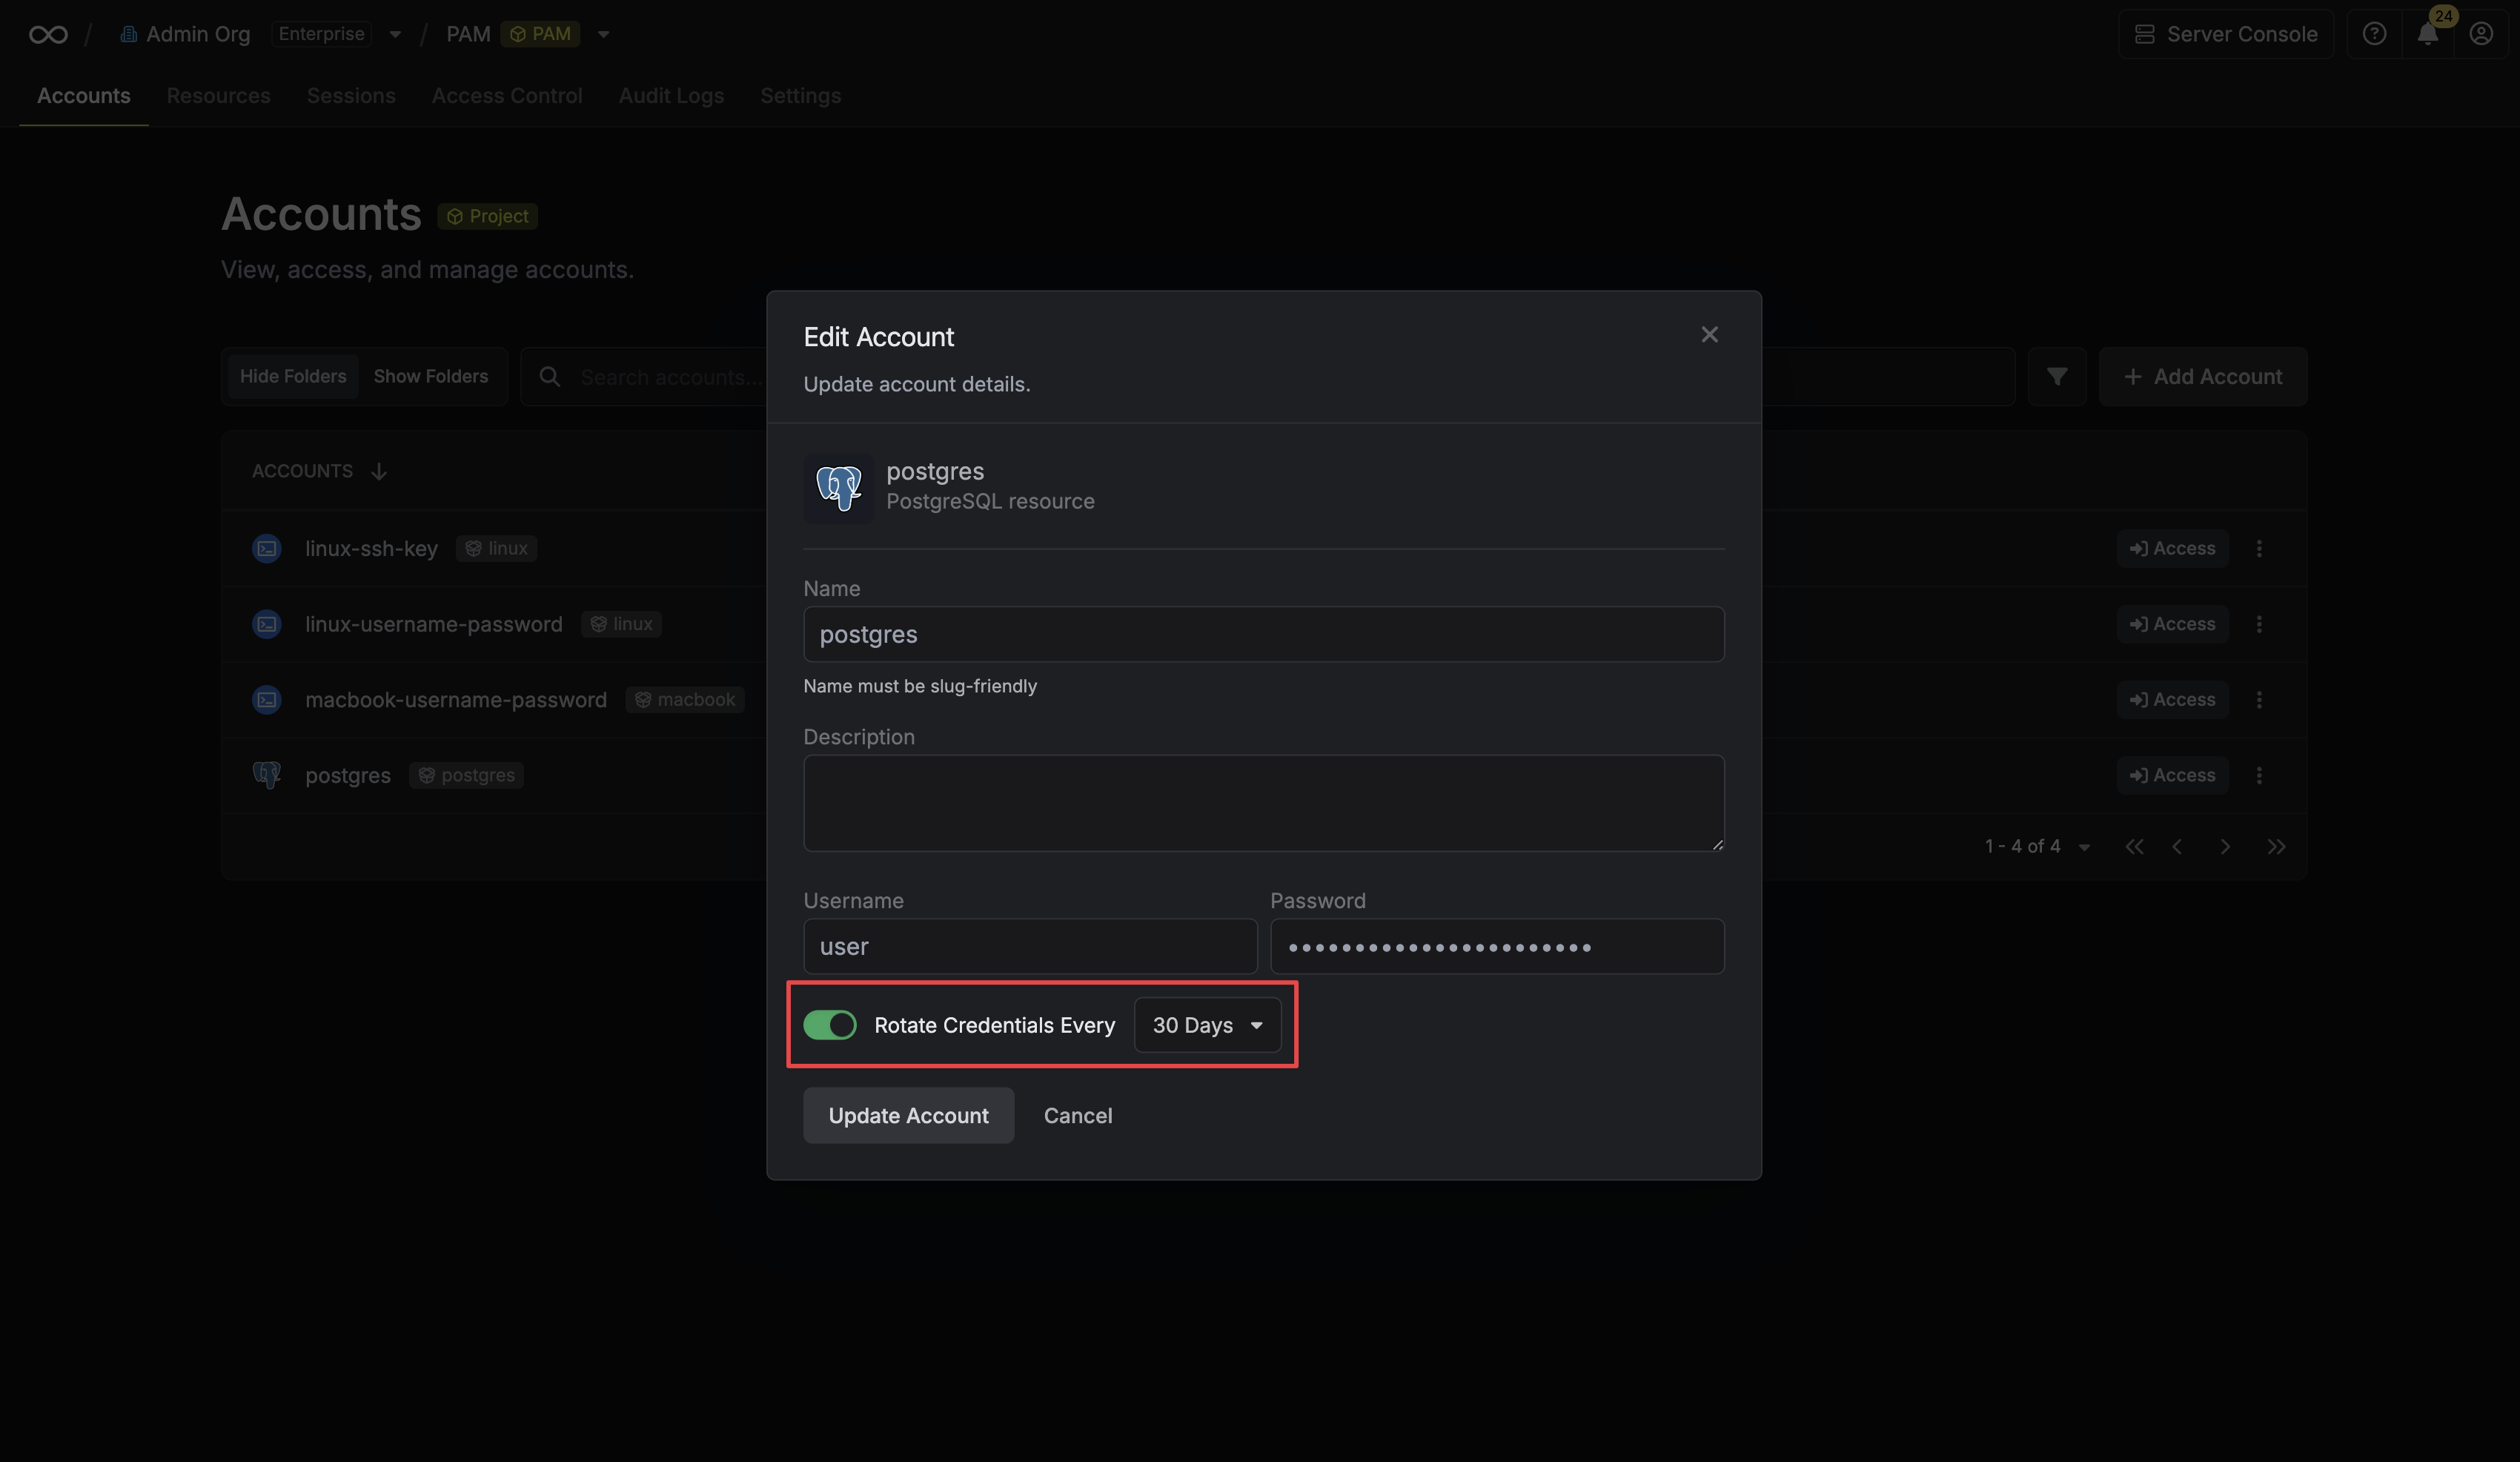 2. Select the **Databricks Service Principal Secret** option.
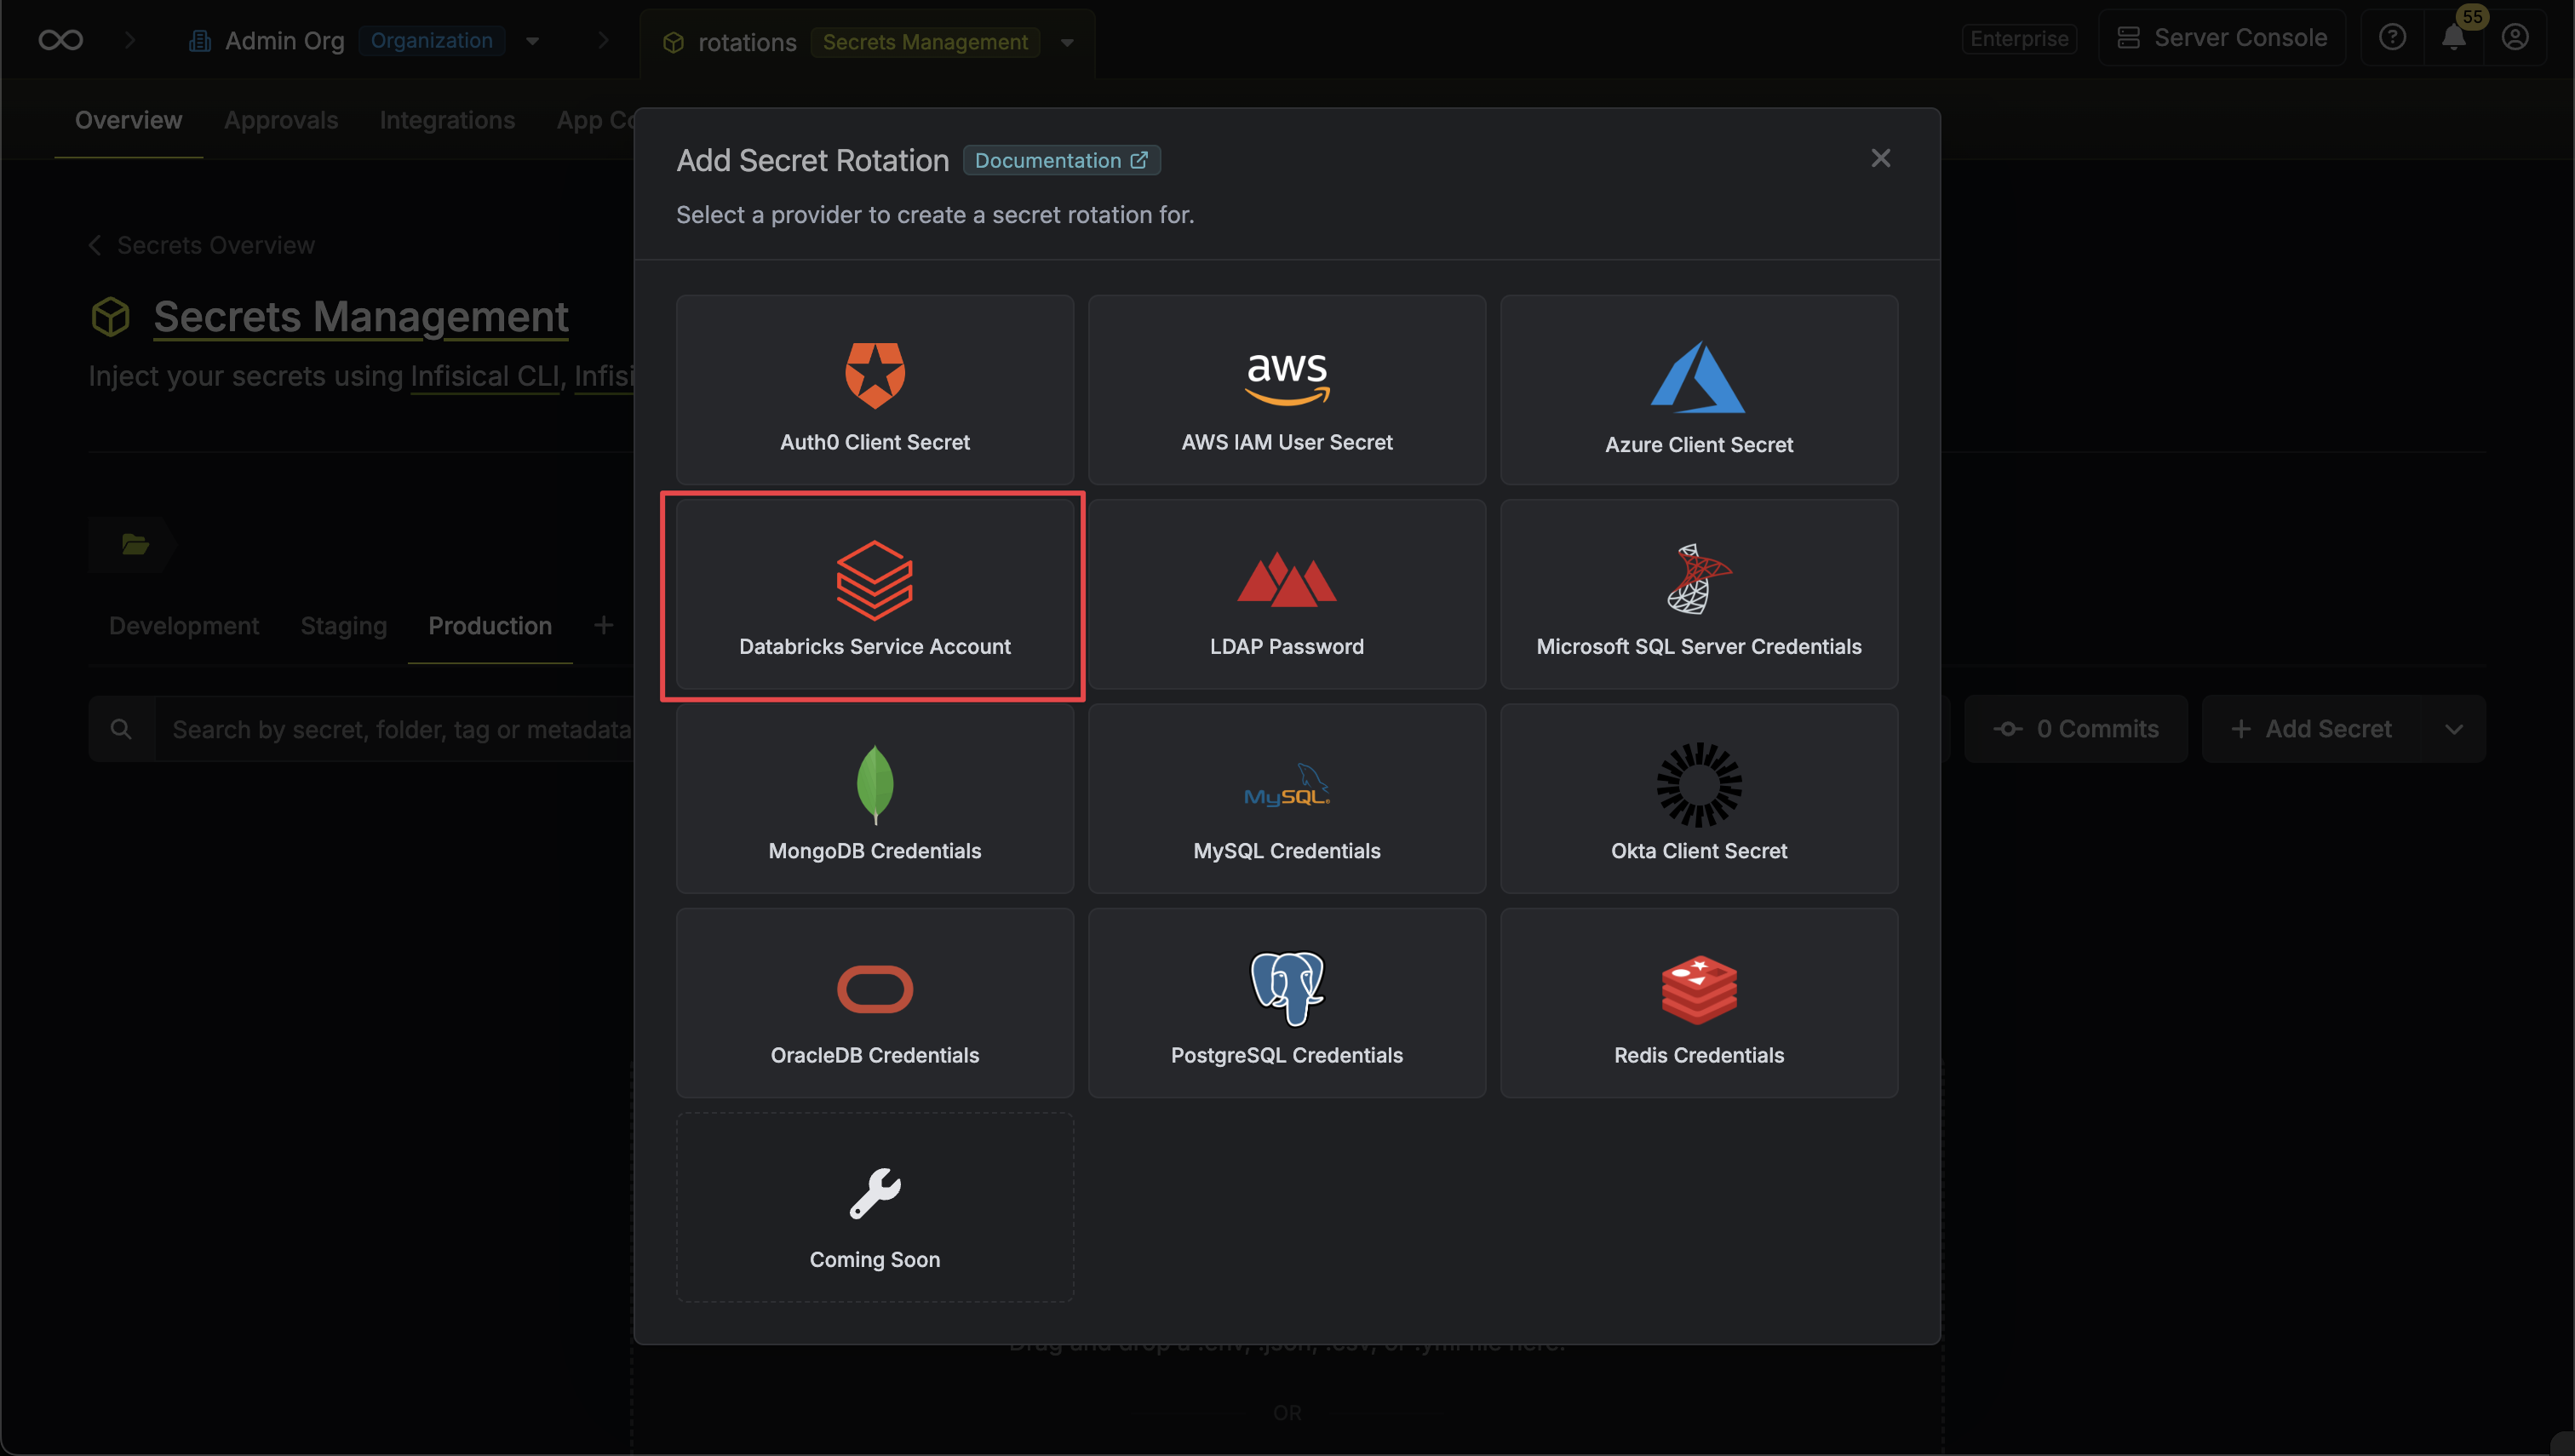 3. Select the **Databricks Connection** to use and configure the rotation behavior. Then click **Next**.
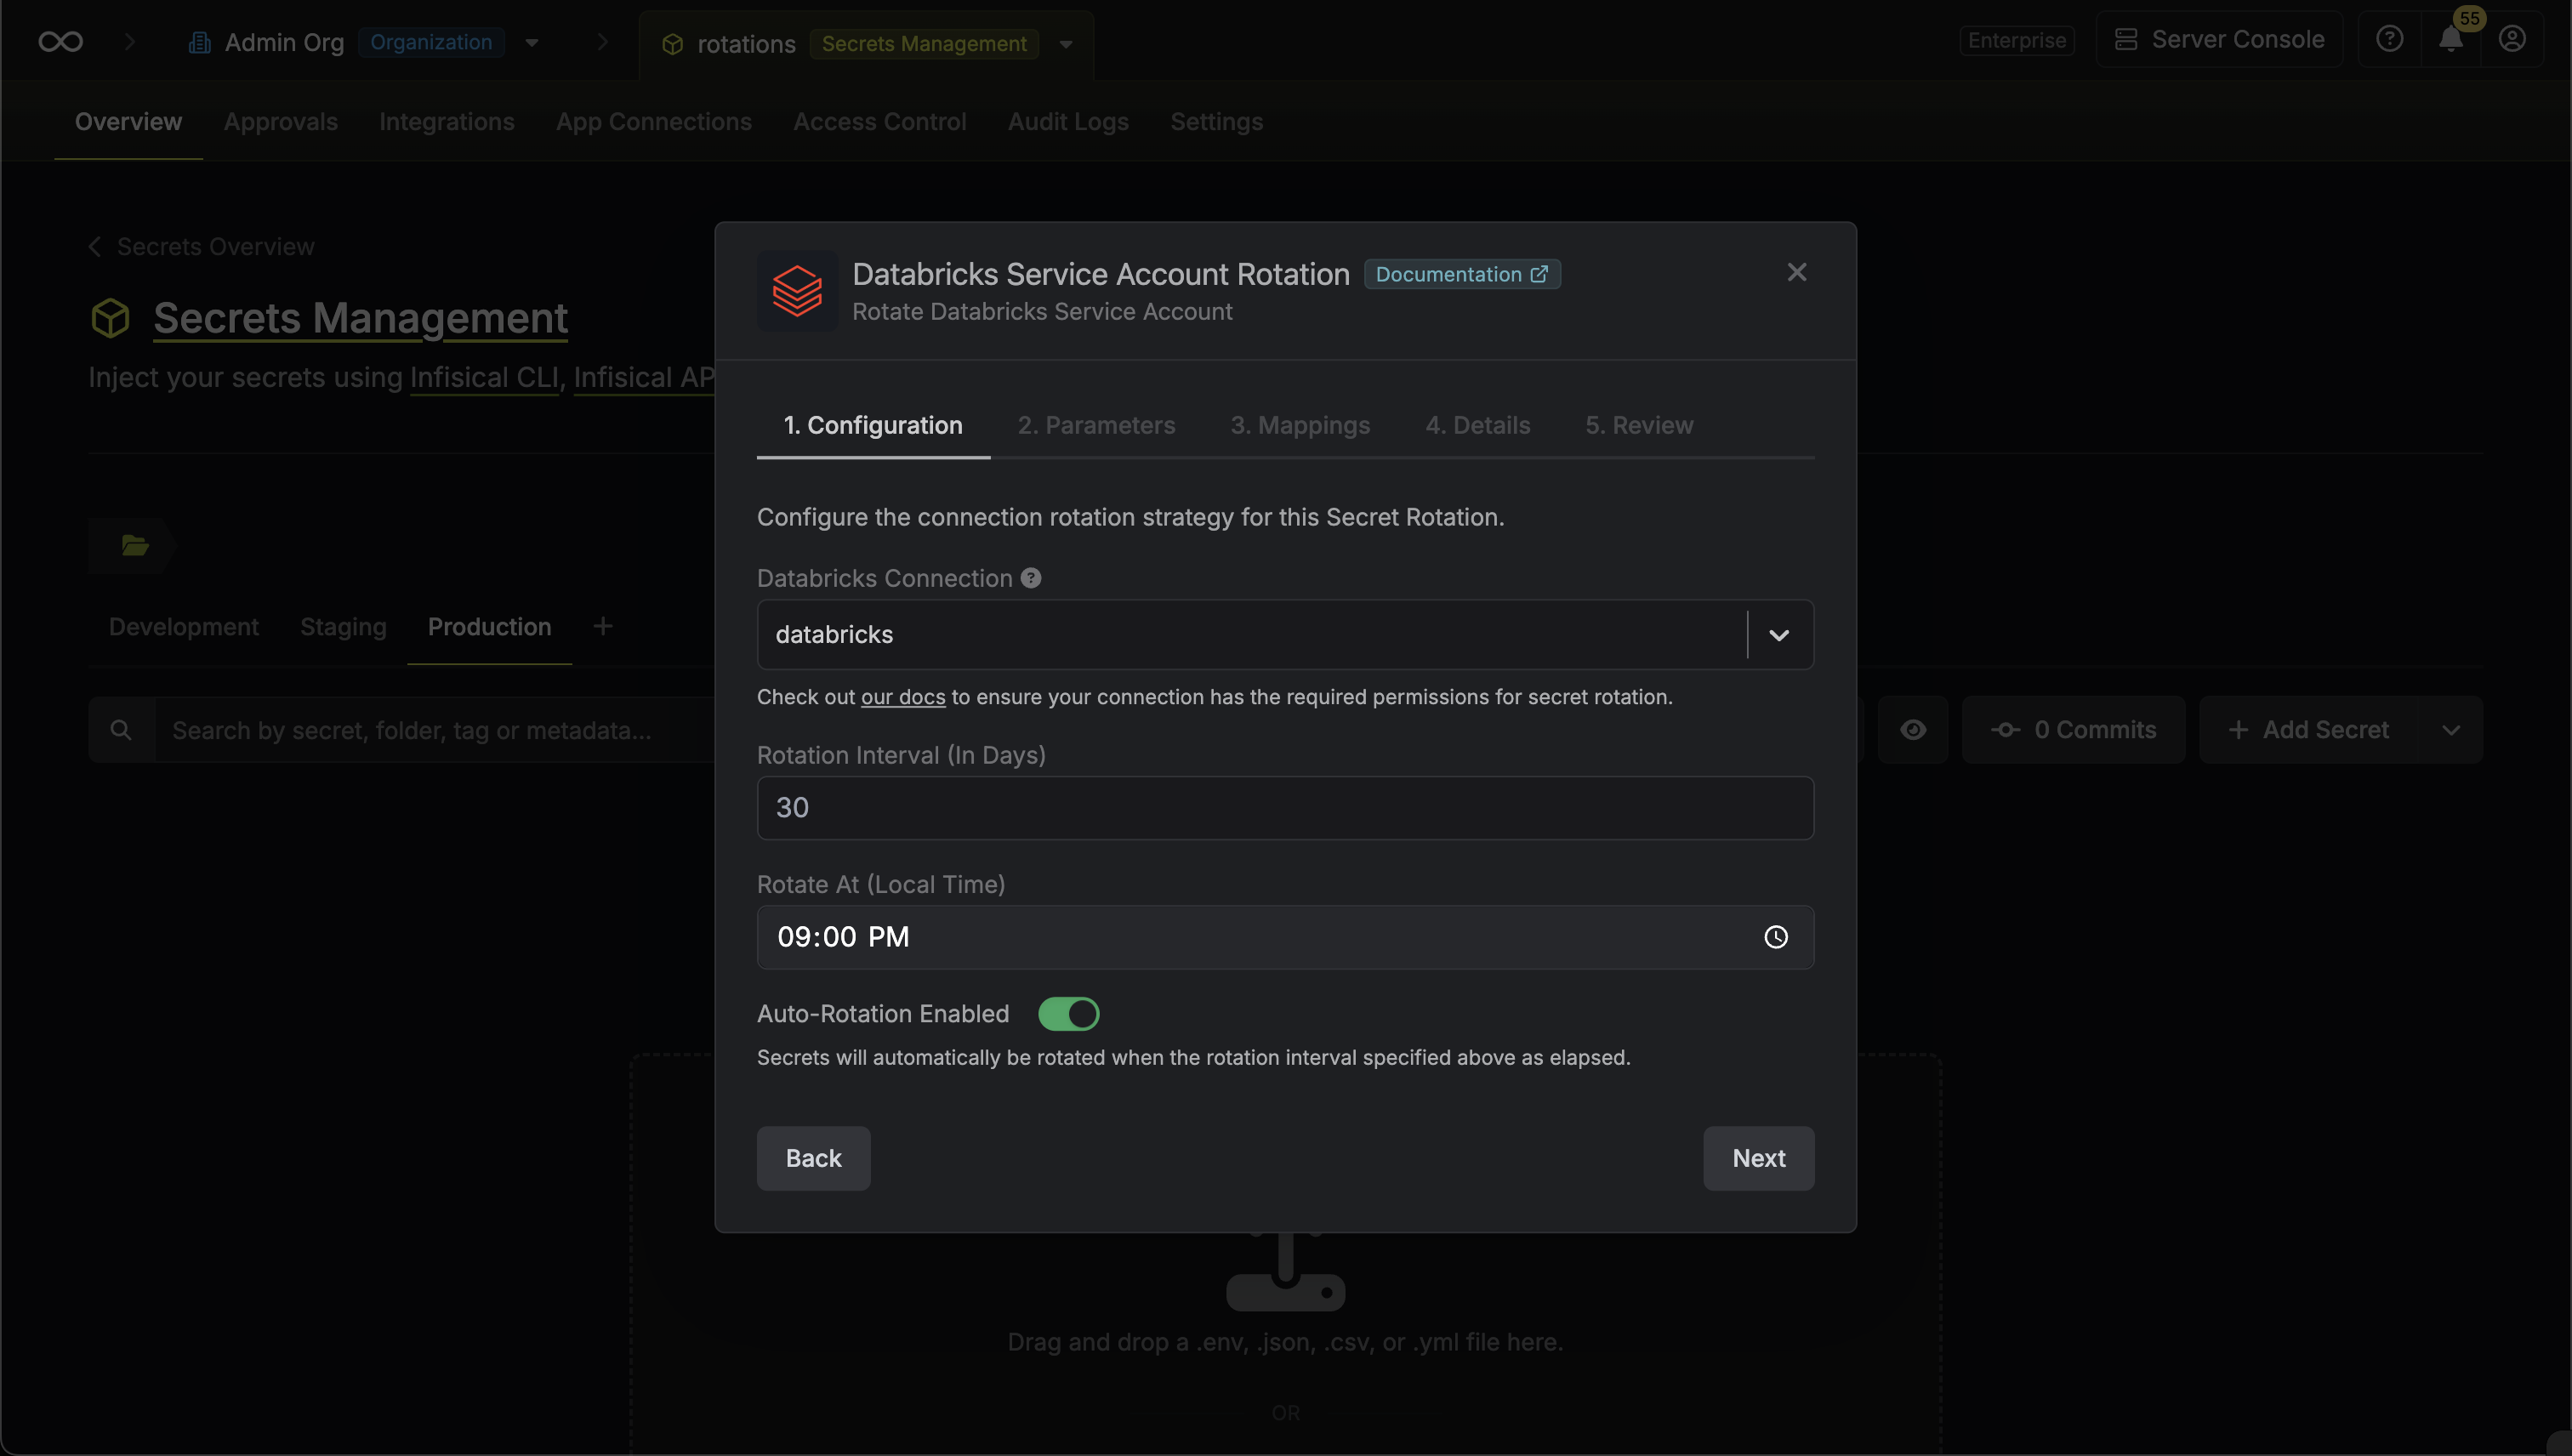 * **Databricks Connection** - the connection that will perform the rotation of the specified service principal's OAuth secret.
* **Rotation Interval** - the interval, in days, that once elapsed will trigger a rotation.
* **Rotate At** - the local time of day when rotation should occur once the interval has elapsed.
* **Auto-Rotation Enabled** - whether secrets should automatically be rotated once the rotation interval has elapsed. Disable this option to manually rotate secrets or pause secret rotation.
4. Select the Databricks service principal whose OAuth secret you want to rotate. Then click **Next**.
* **Databricks Connection** - the connection that will perform the rotation of the specified service principal's OAuth secret.
* **Rotation Interval** - the interval, in days, that once elapsed will trigger a rotation.
* **Rotate At** - the local time of day when rotation should occur once the interval has elapsed.
* **Auto-Rotation Enabled** - whether secrets should automatically be rotated once the rotation interval has elapsed. Disable this option to manually rotate secrets or pause secret rotation.
4. Select the Databricks service principal whose OAuth secret you want to rotate. Then click **Next**.
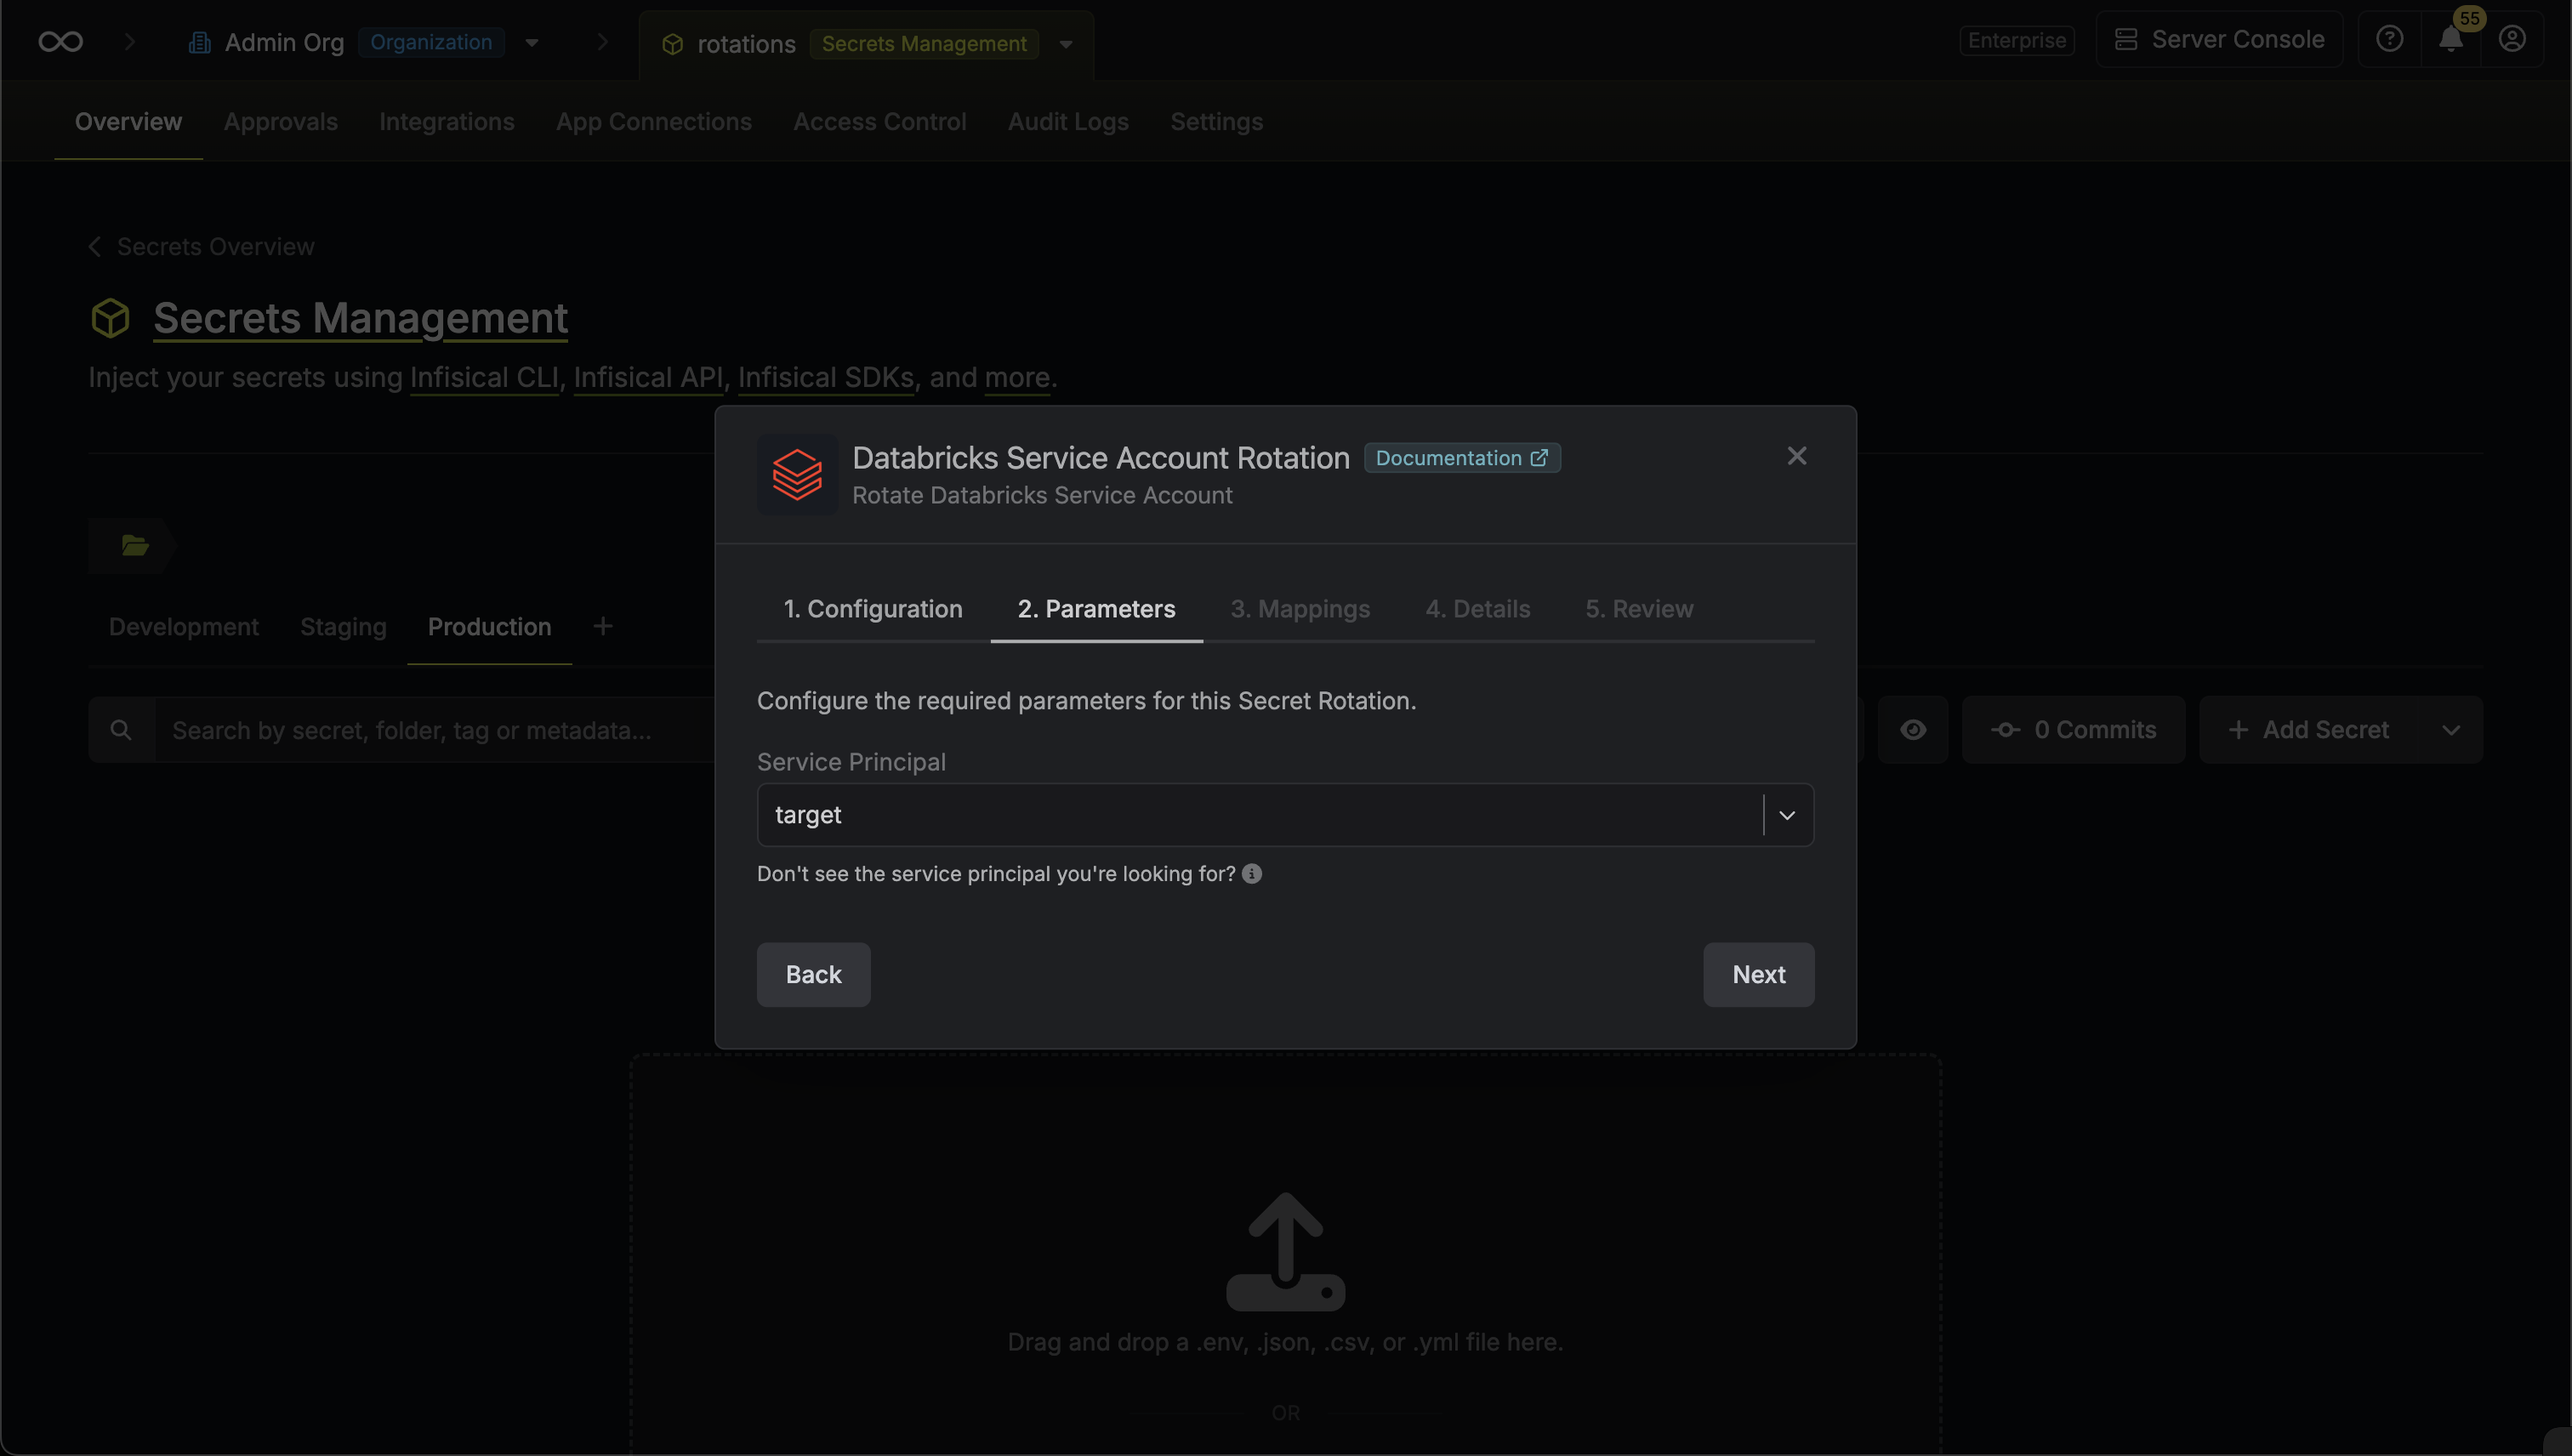 5. Specify the secret names that the client credentials should be mapped to. Then click **Next**.
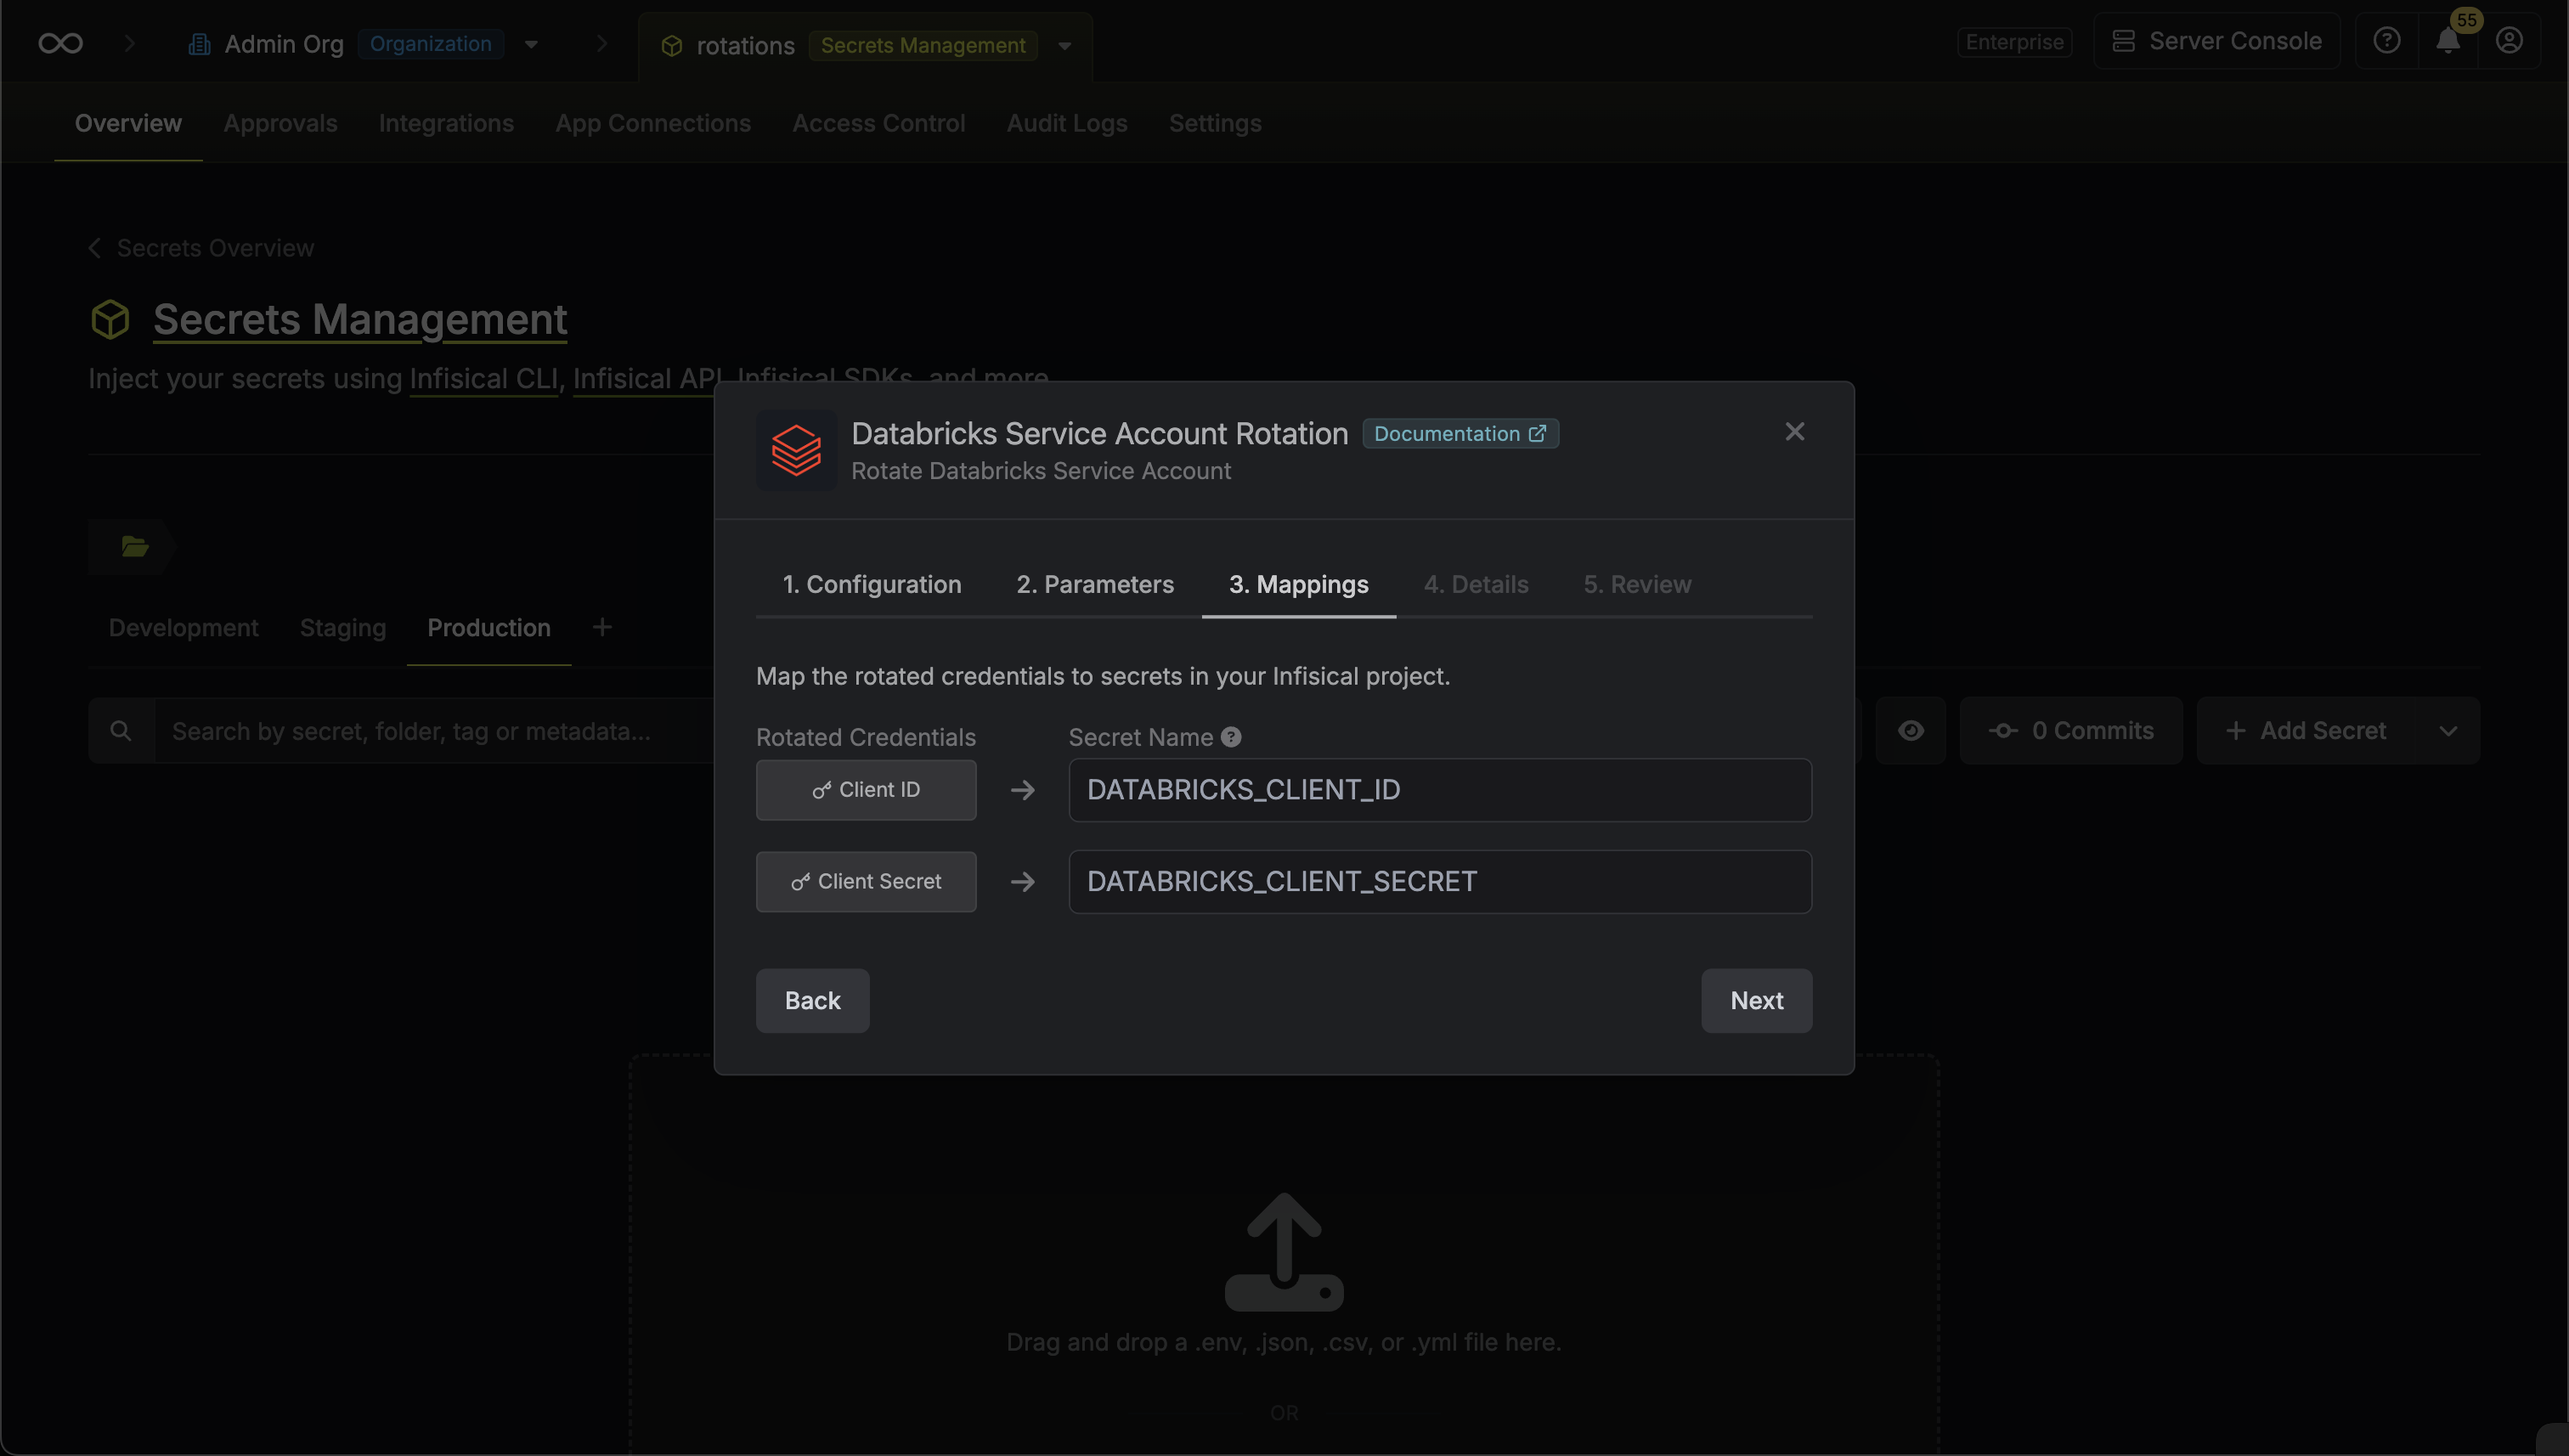 * **Client ID** - the name of the secret that the service principal Client ID will be mapped to.
* **Client Secret** - the name of the secret that the rotated OAuth Client Secret will be mapped to.
6. Give your rotation a name and description (optional). Then click **Next**.
* **Client ID** - the name of the secret that the service principal Client ID will be mapped to.
* **Client Secret** - the name of the secret that the rotated OAuth Client Secret will be mapped to.
6. Give your rotation a name and description (optional). Then click **Next**.
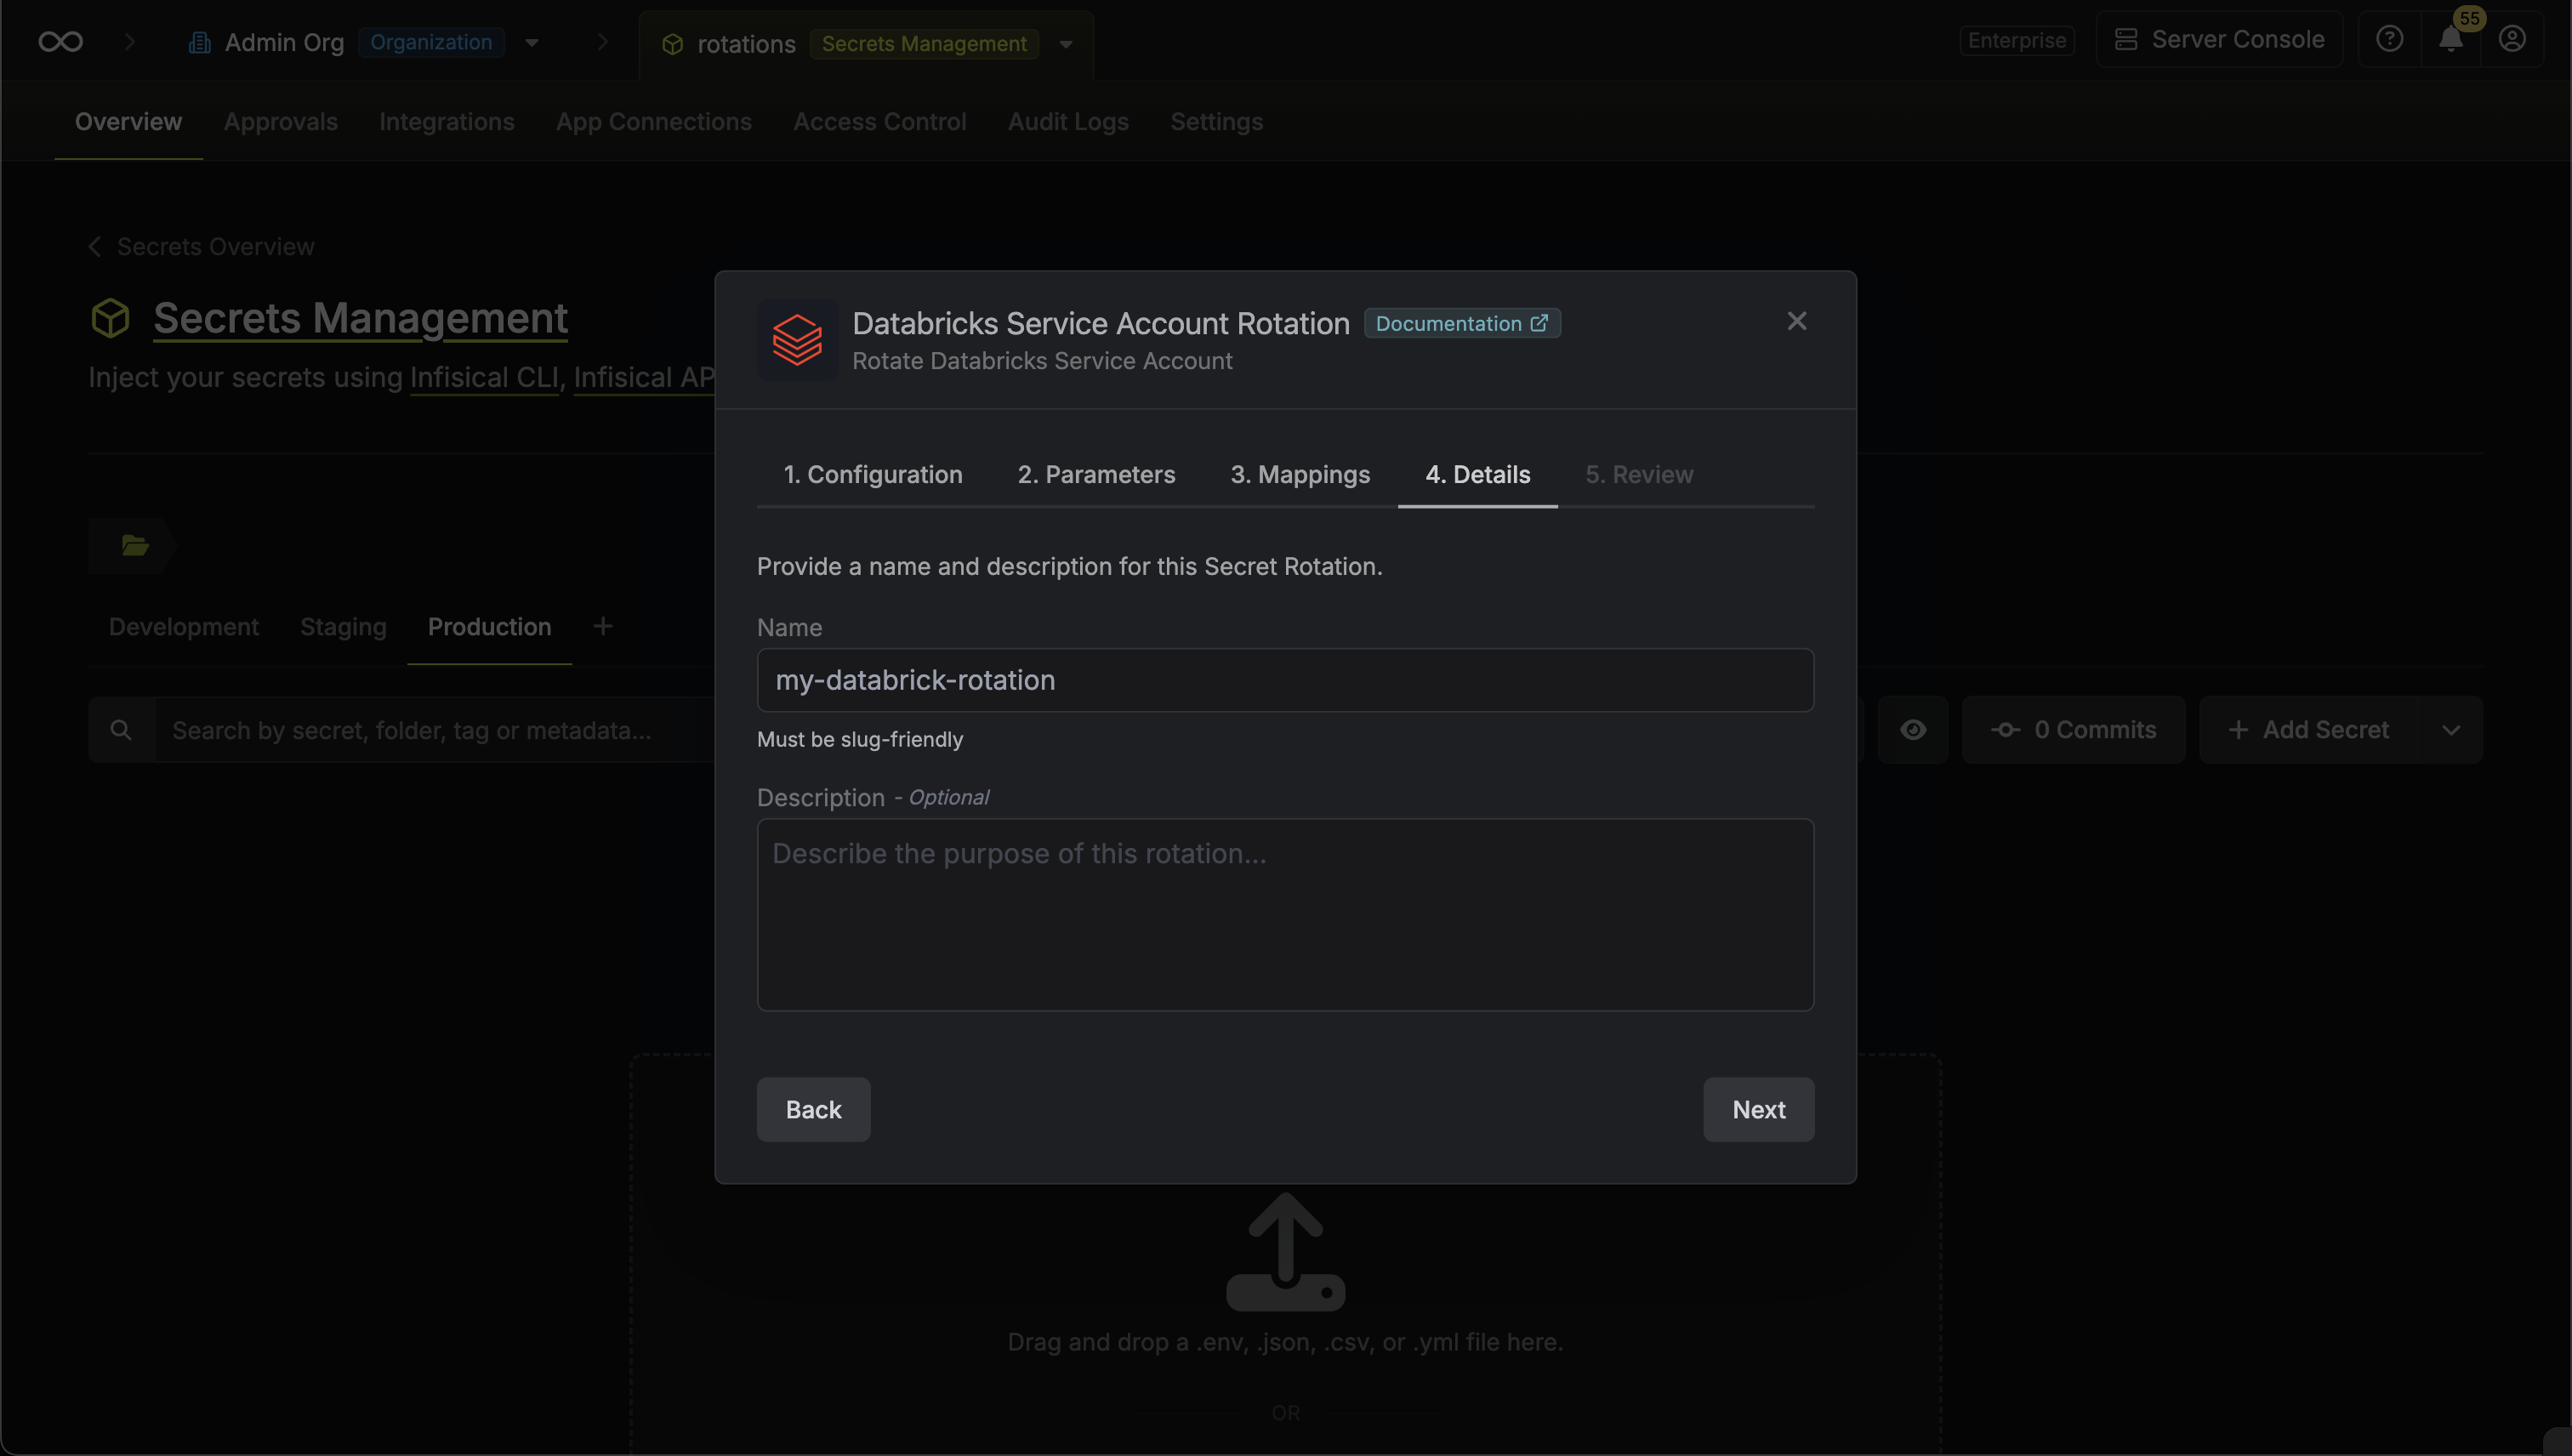 * **Name** - the name of the secret rotation configuration. Must be slug-friendly.
* **Description** (optional) - a description of this rotation configuration.
7. Review your configuration, then click **Create Secret Rotation**.
* **Name** - the name of the secret rotation configuration. Must be slug-friendly.
* **Description** (optional) - a description of this rotation configuration.
7. Review your configuration, then click **Create Secret Rotation**.
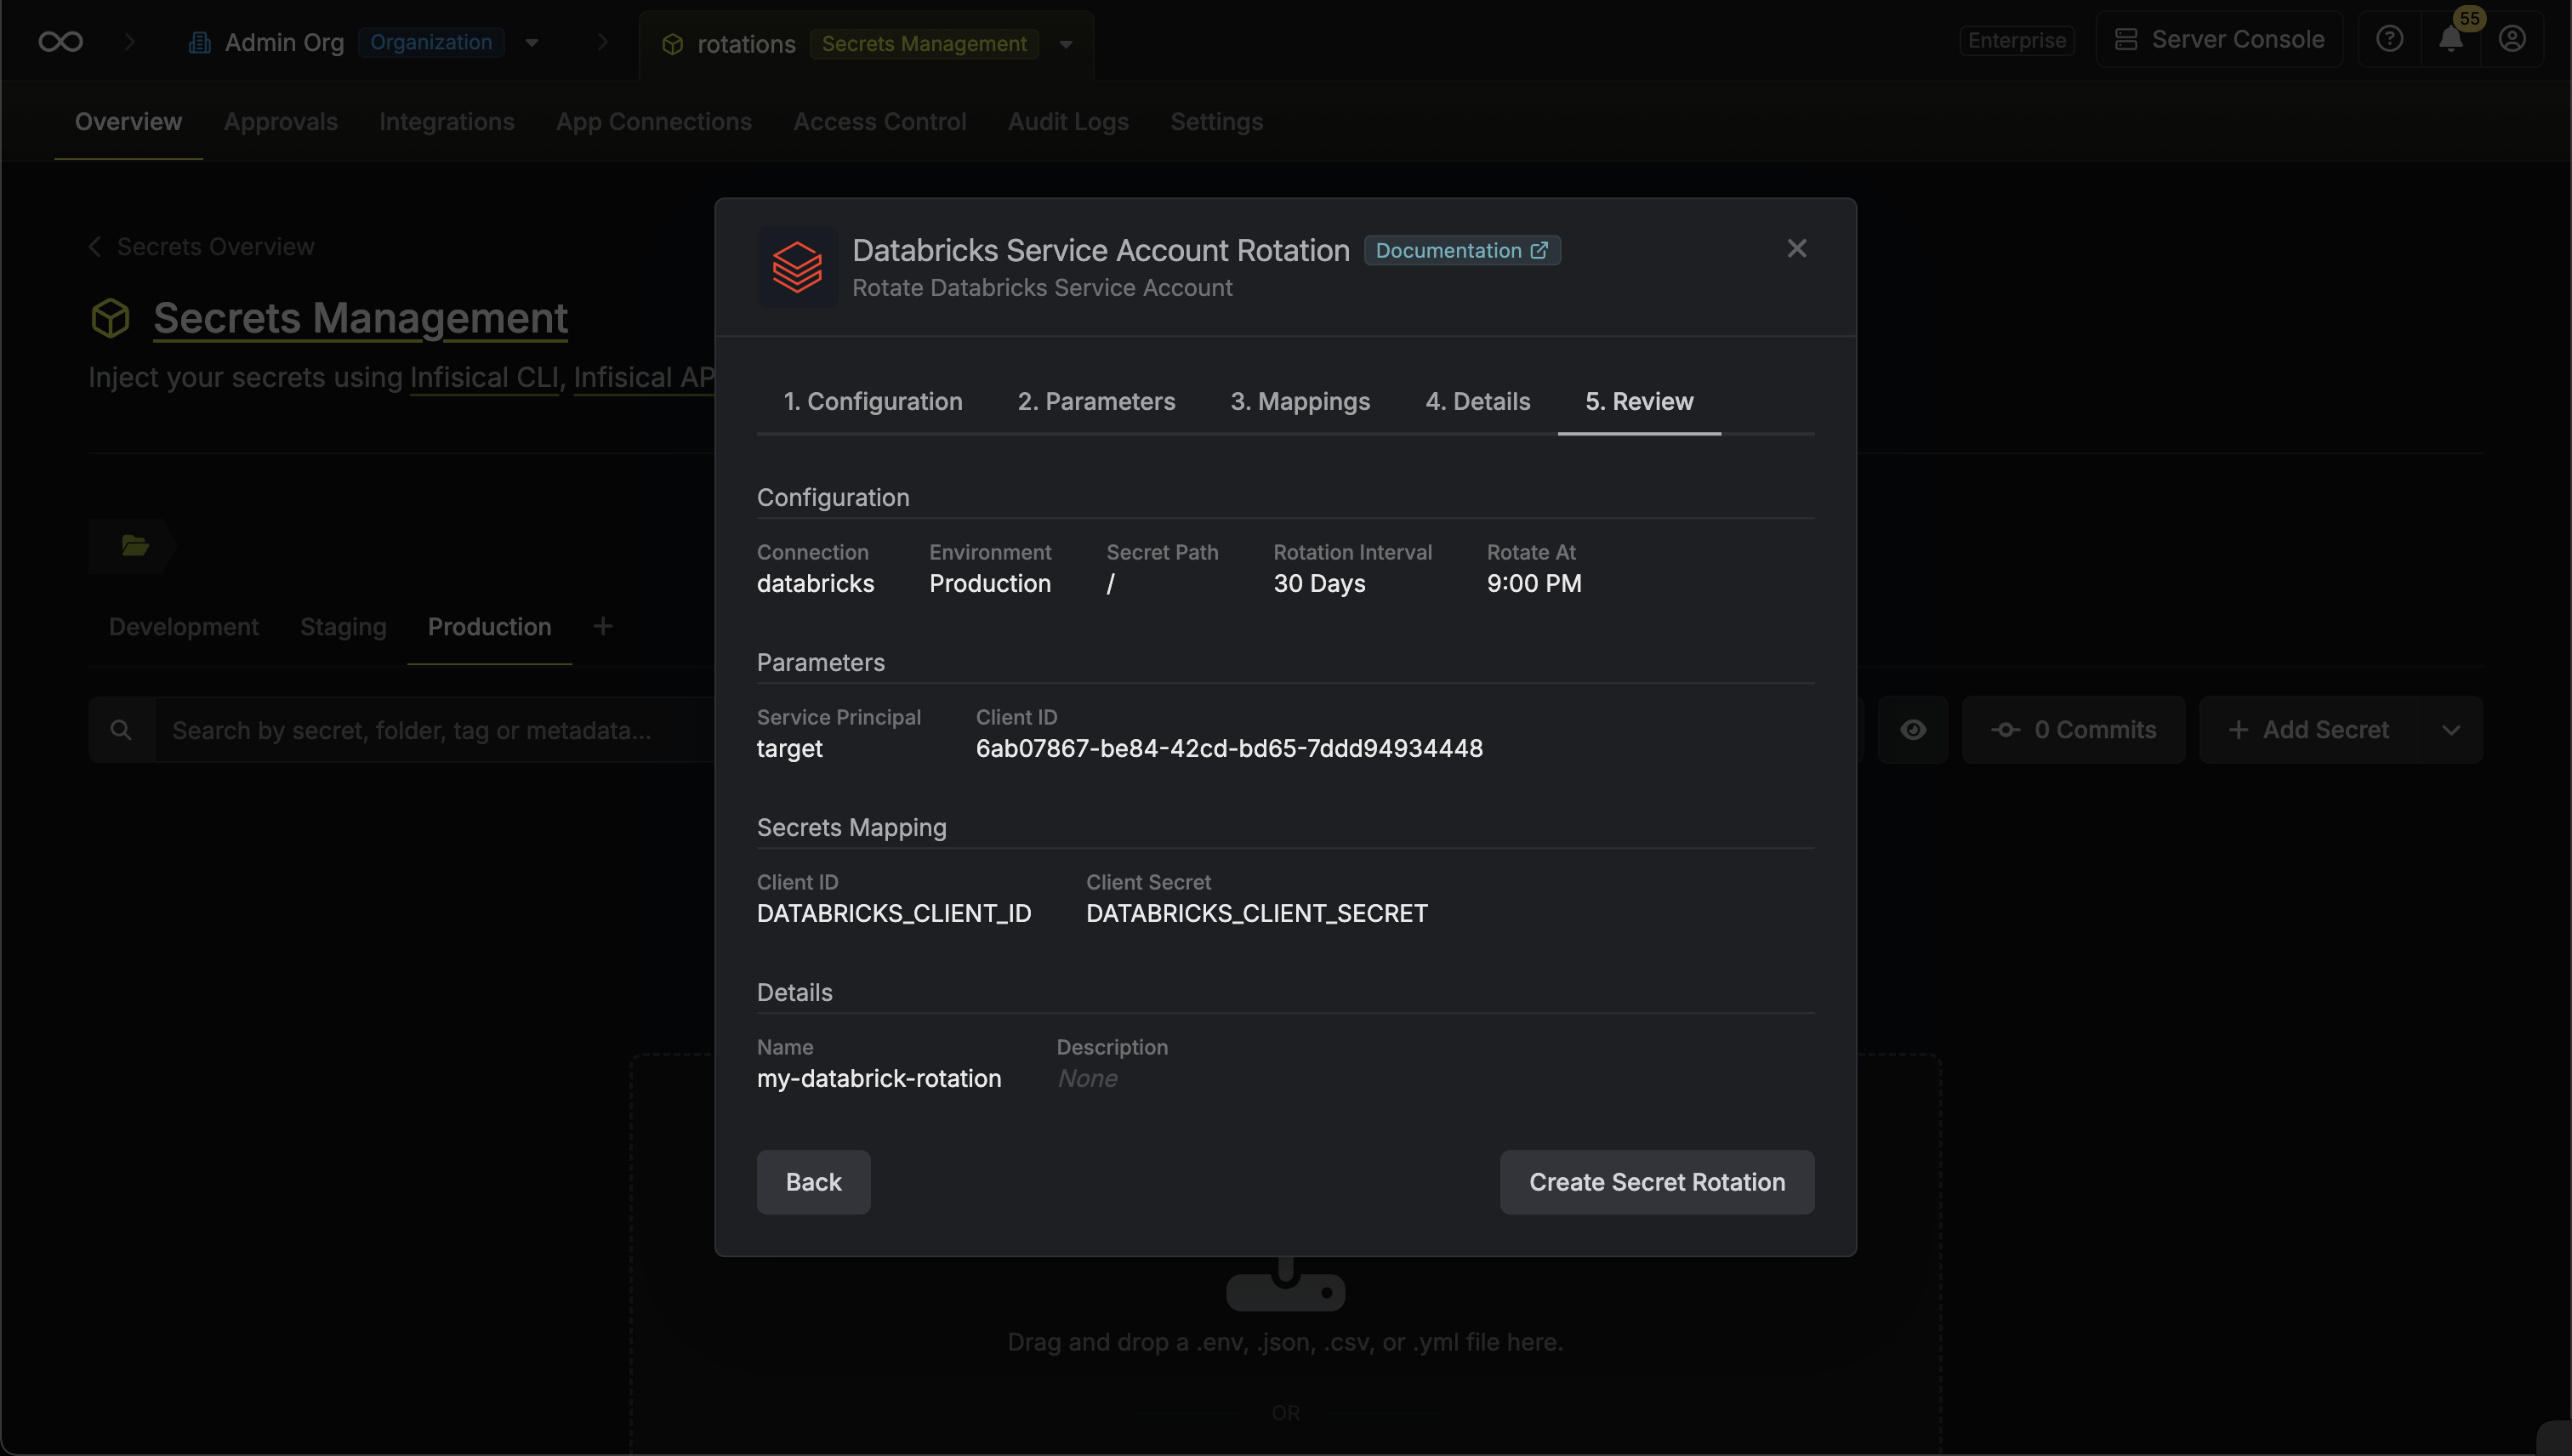 8. Your **Databricks Service Principal Secret** credentials are now available for use via the mapped secrets.
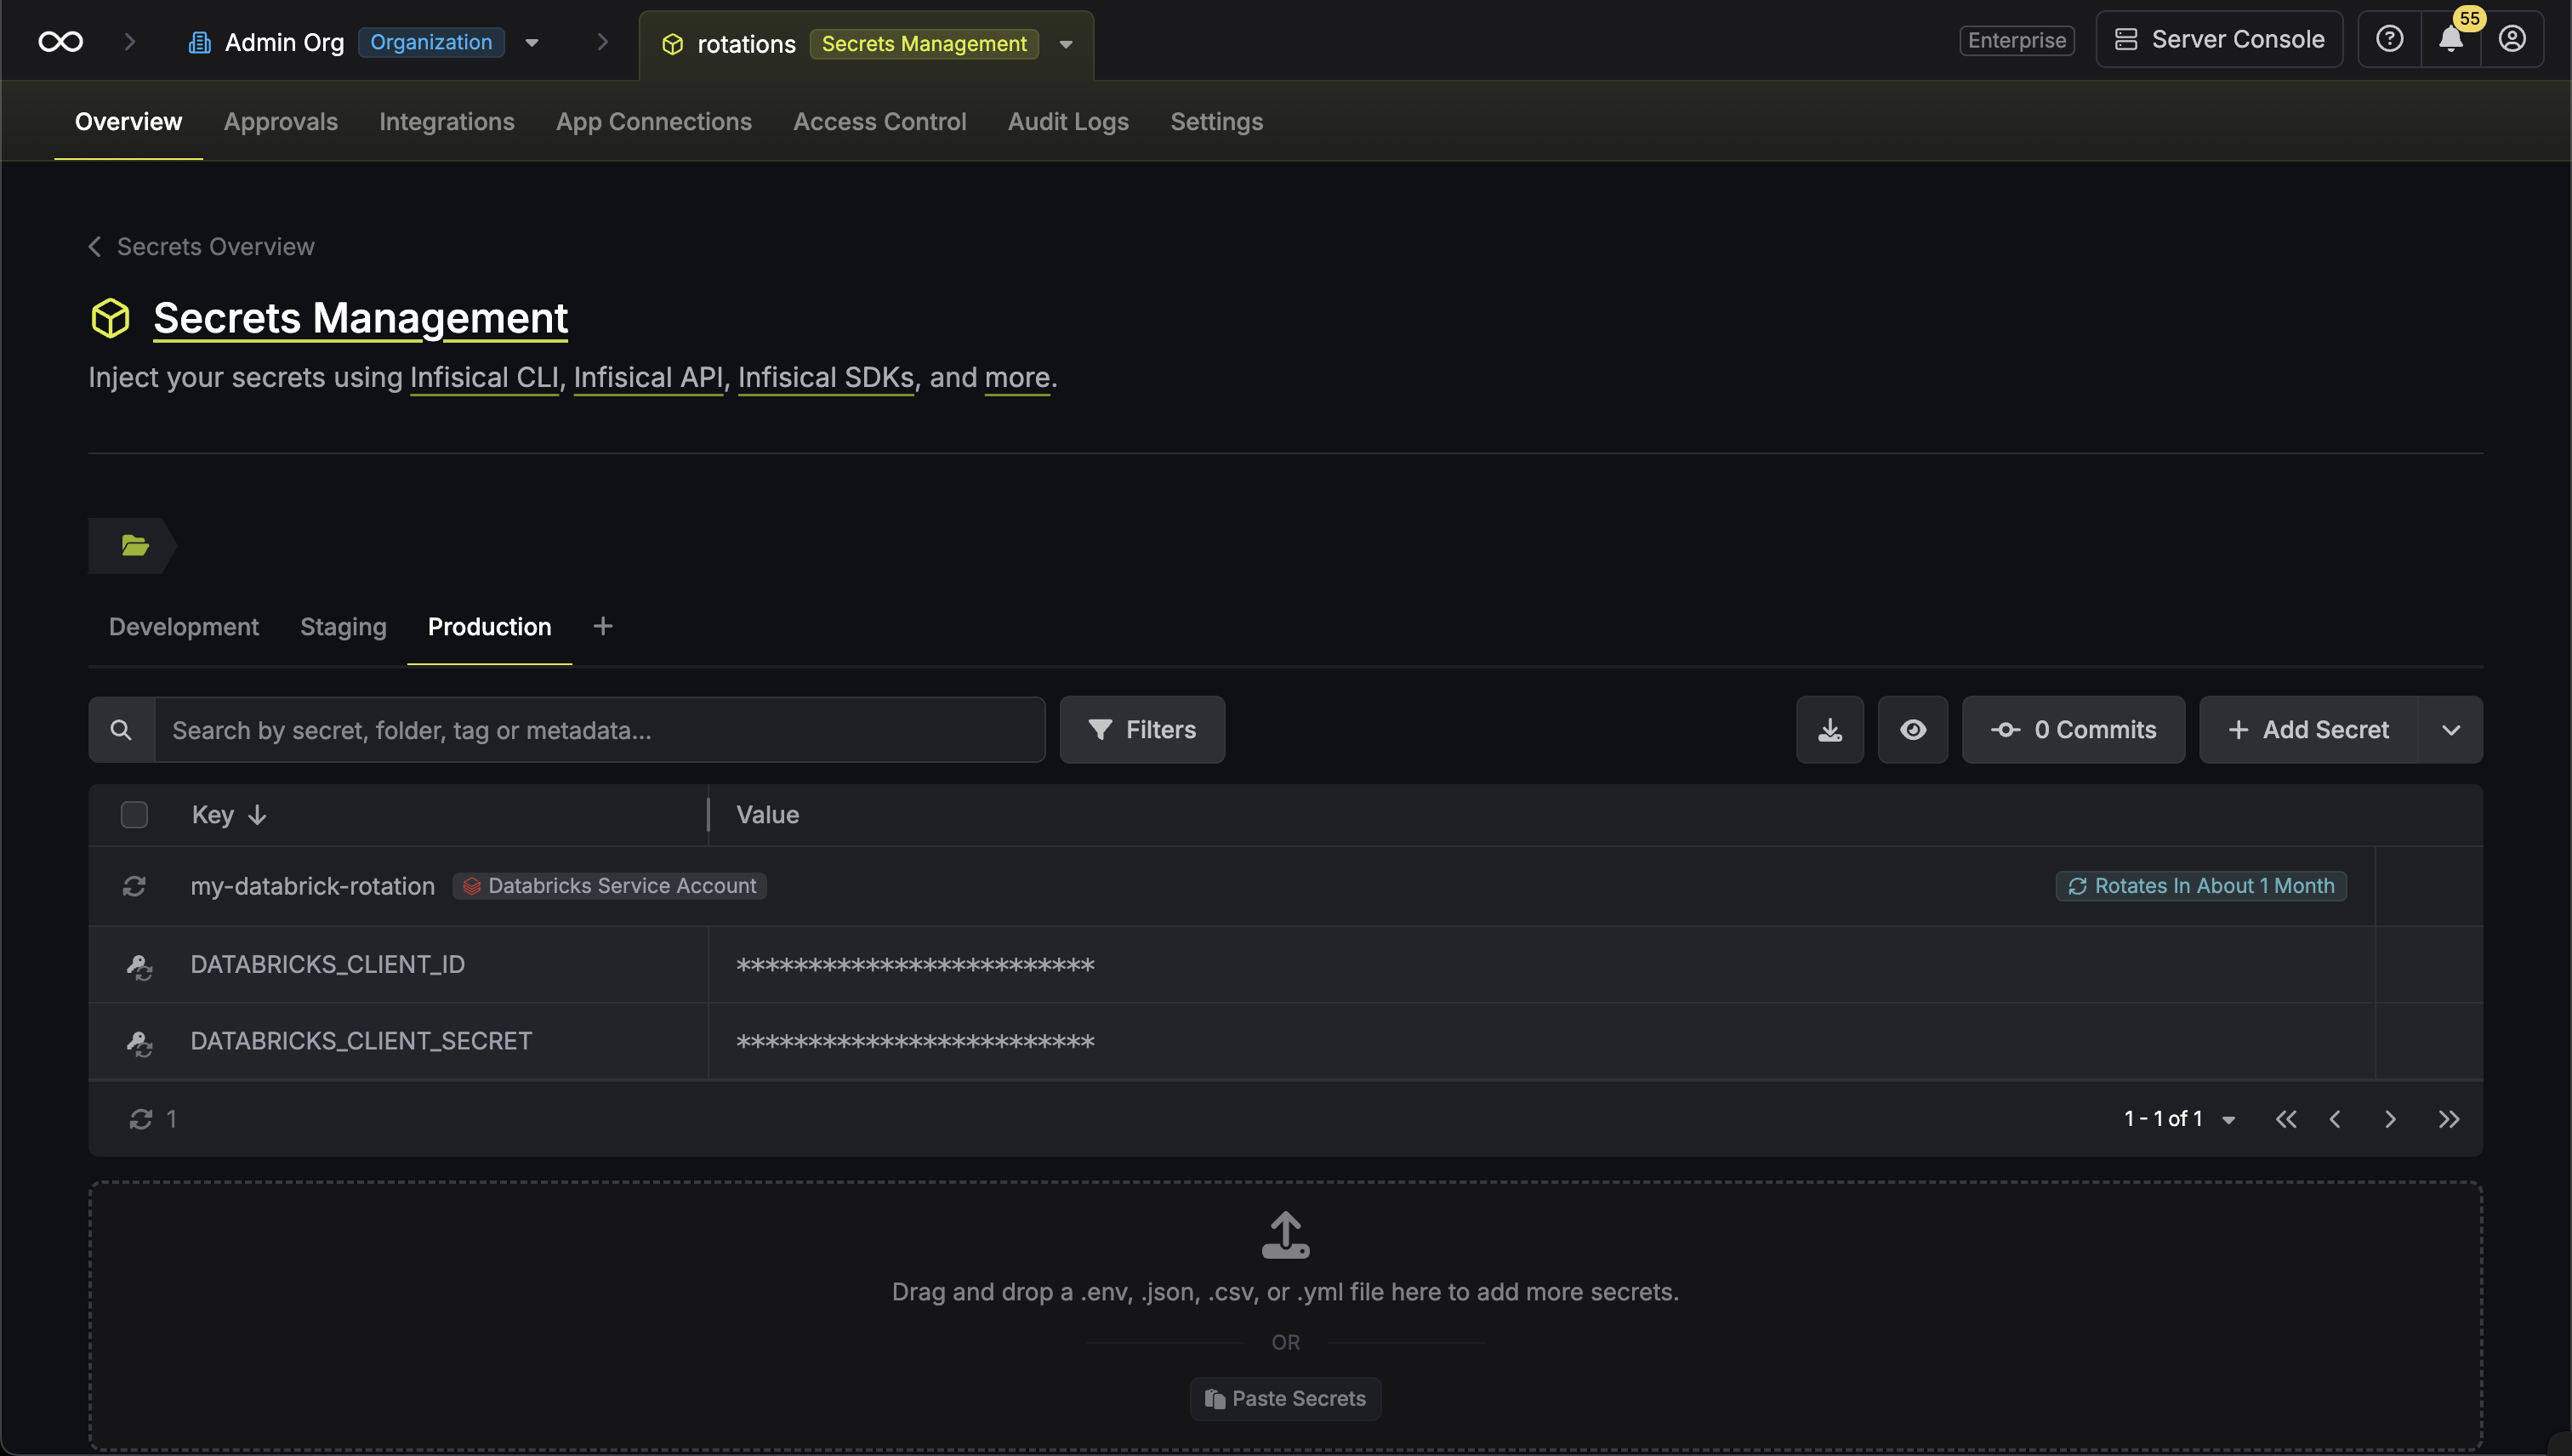
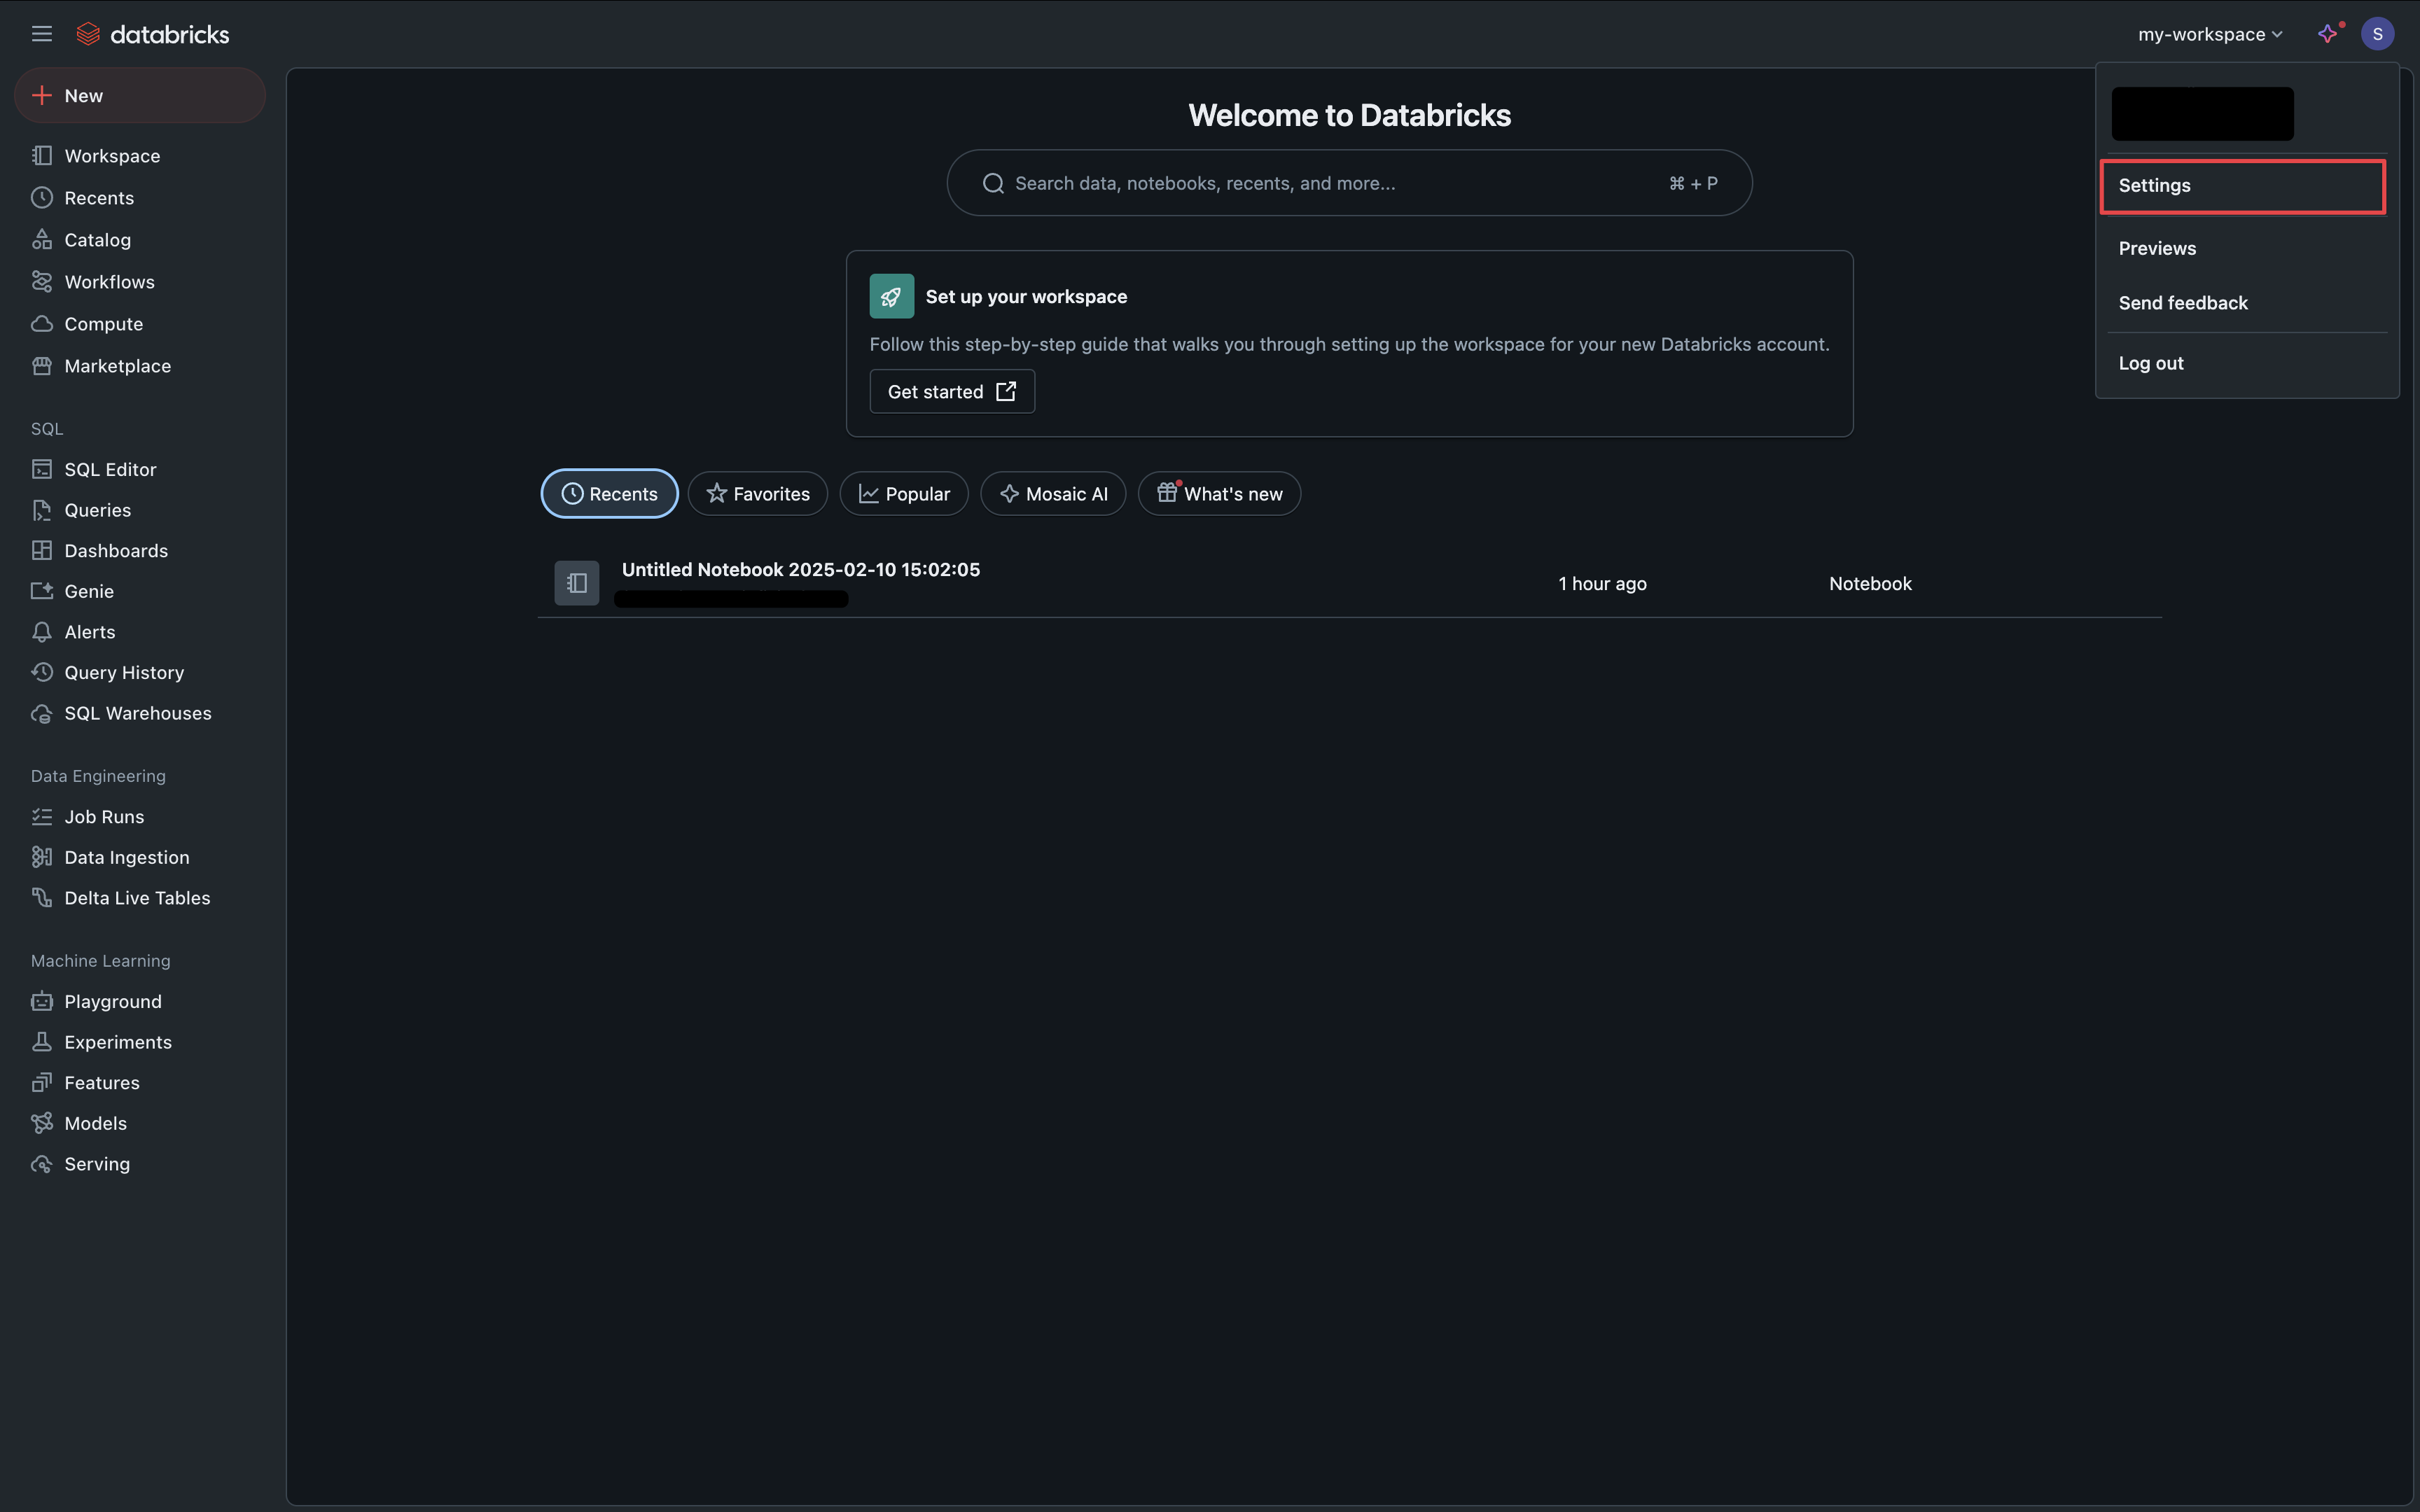
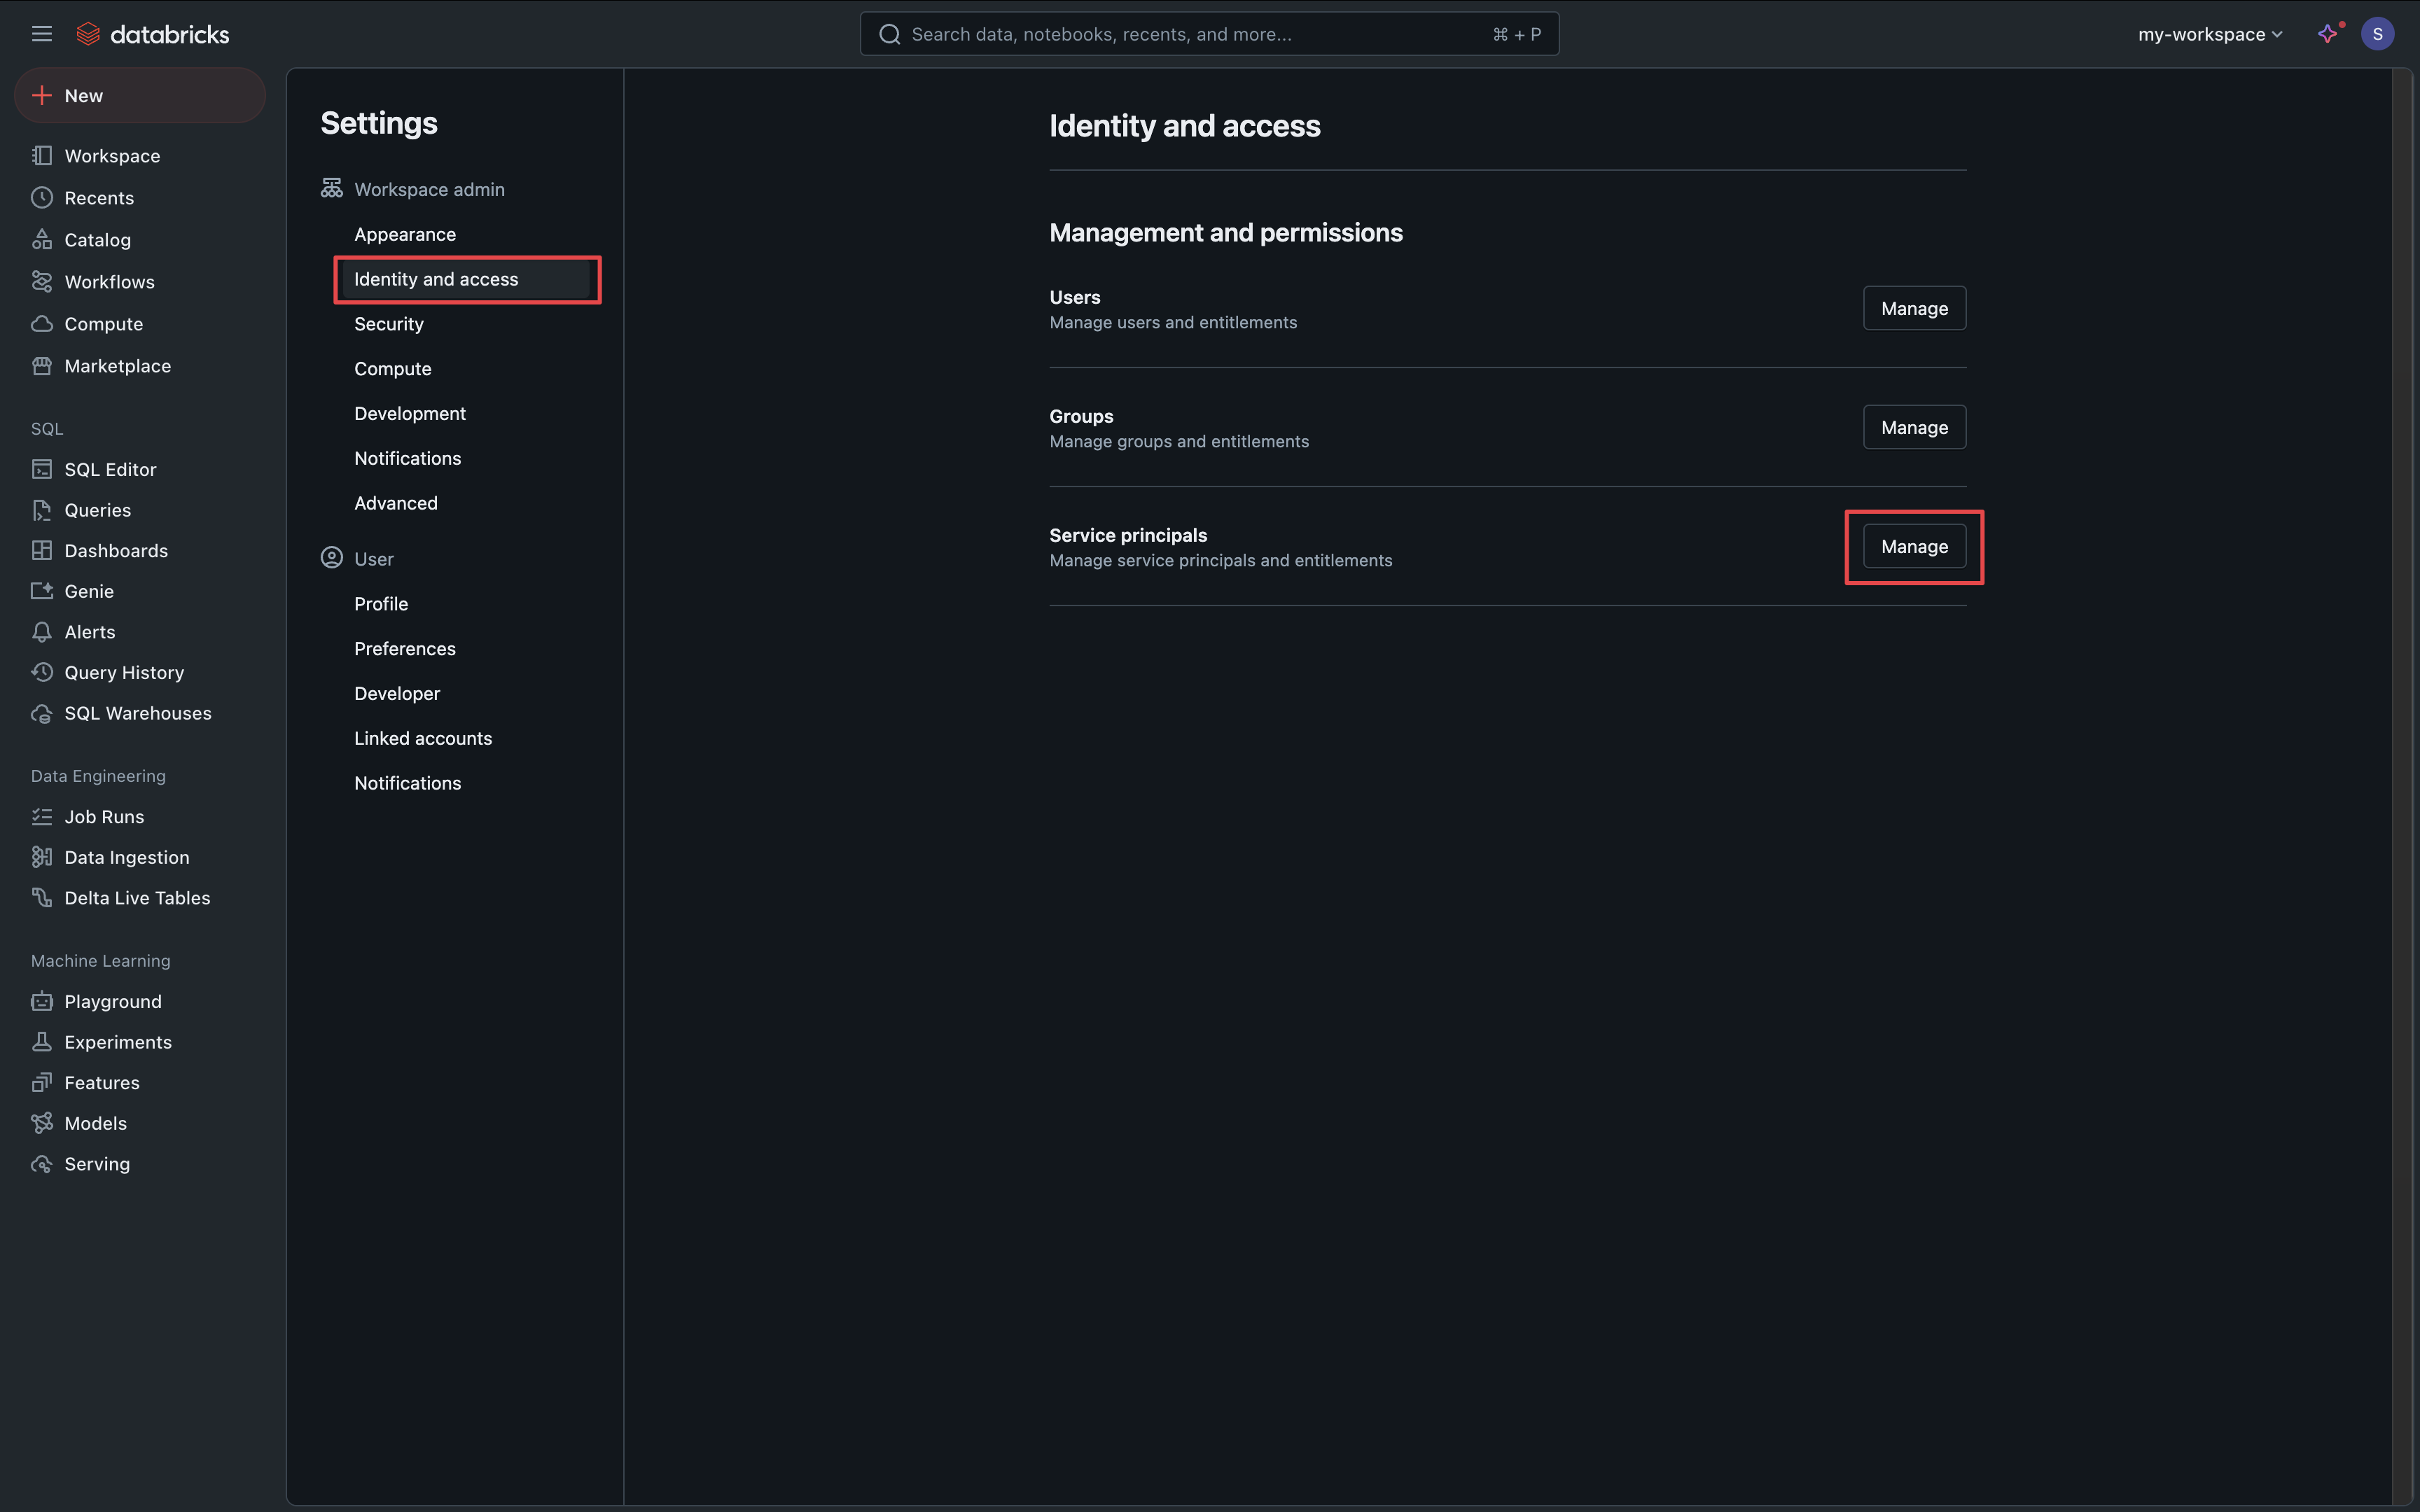
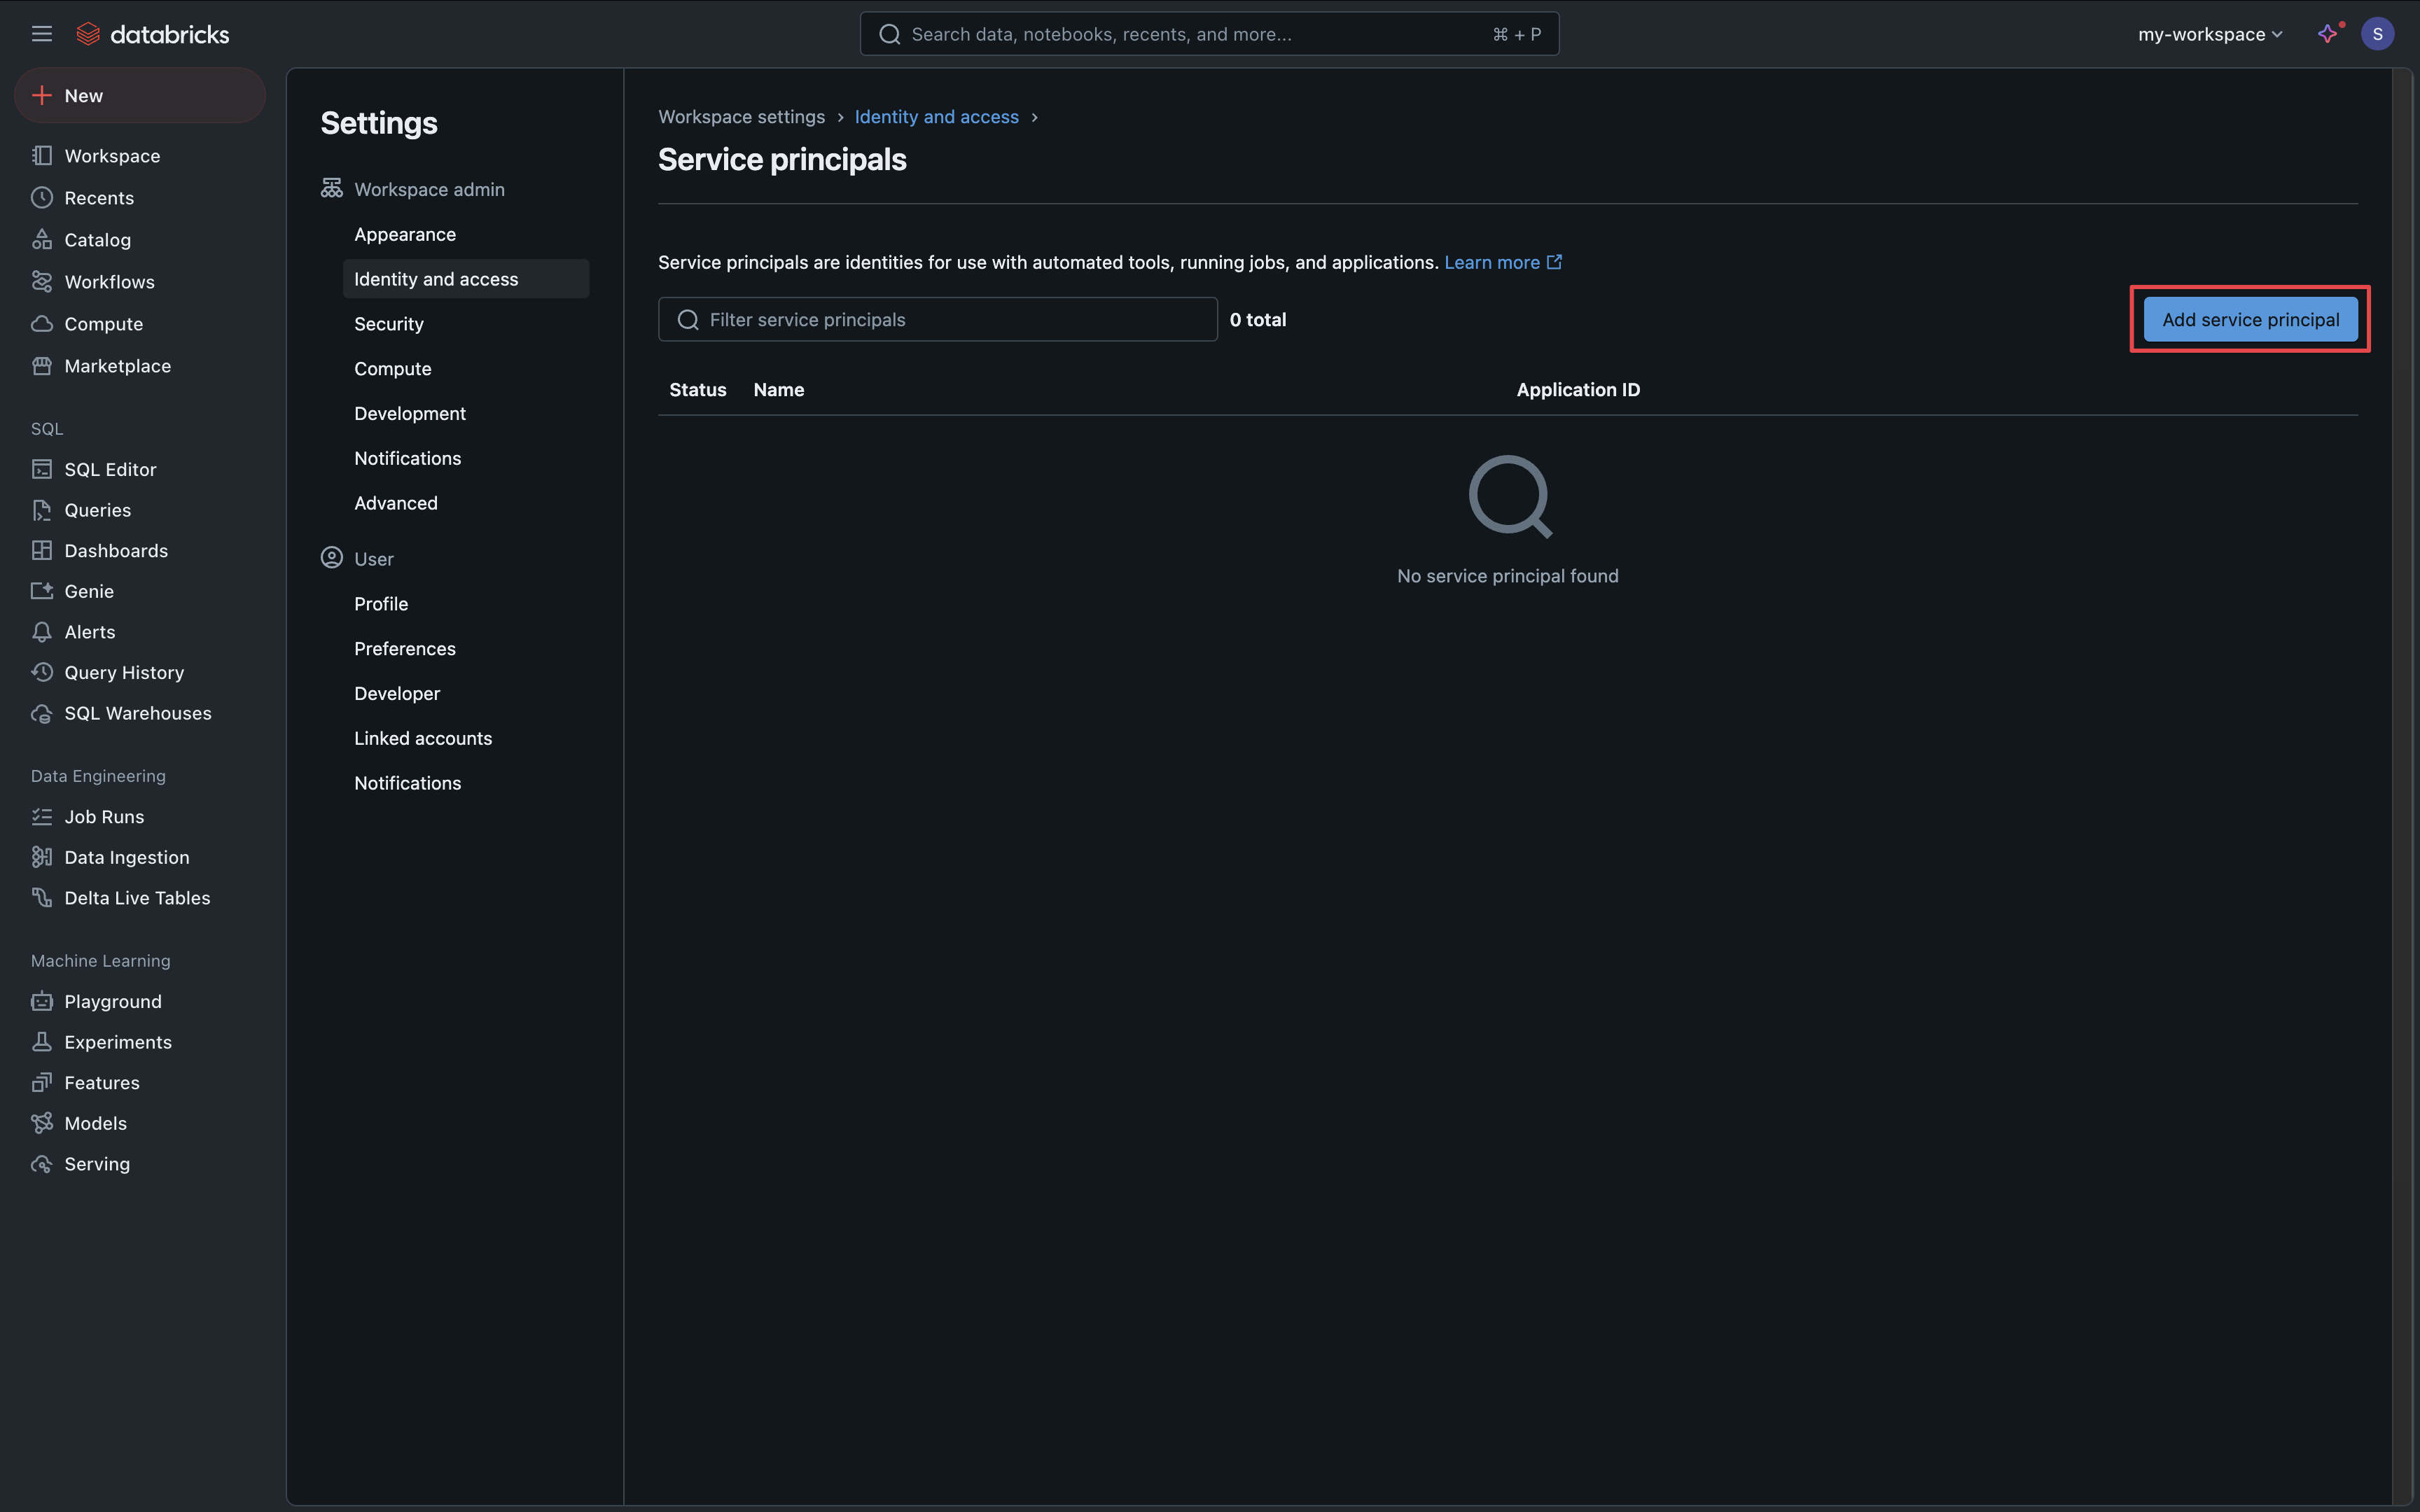
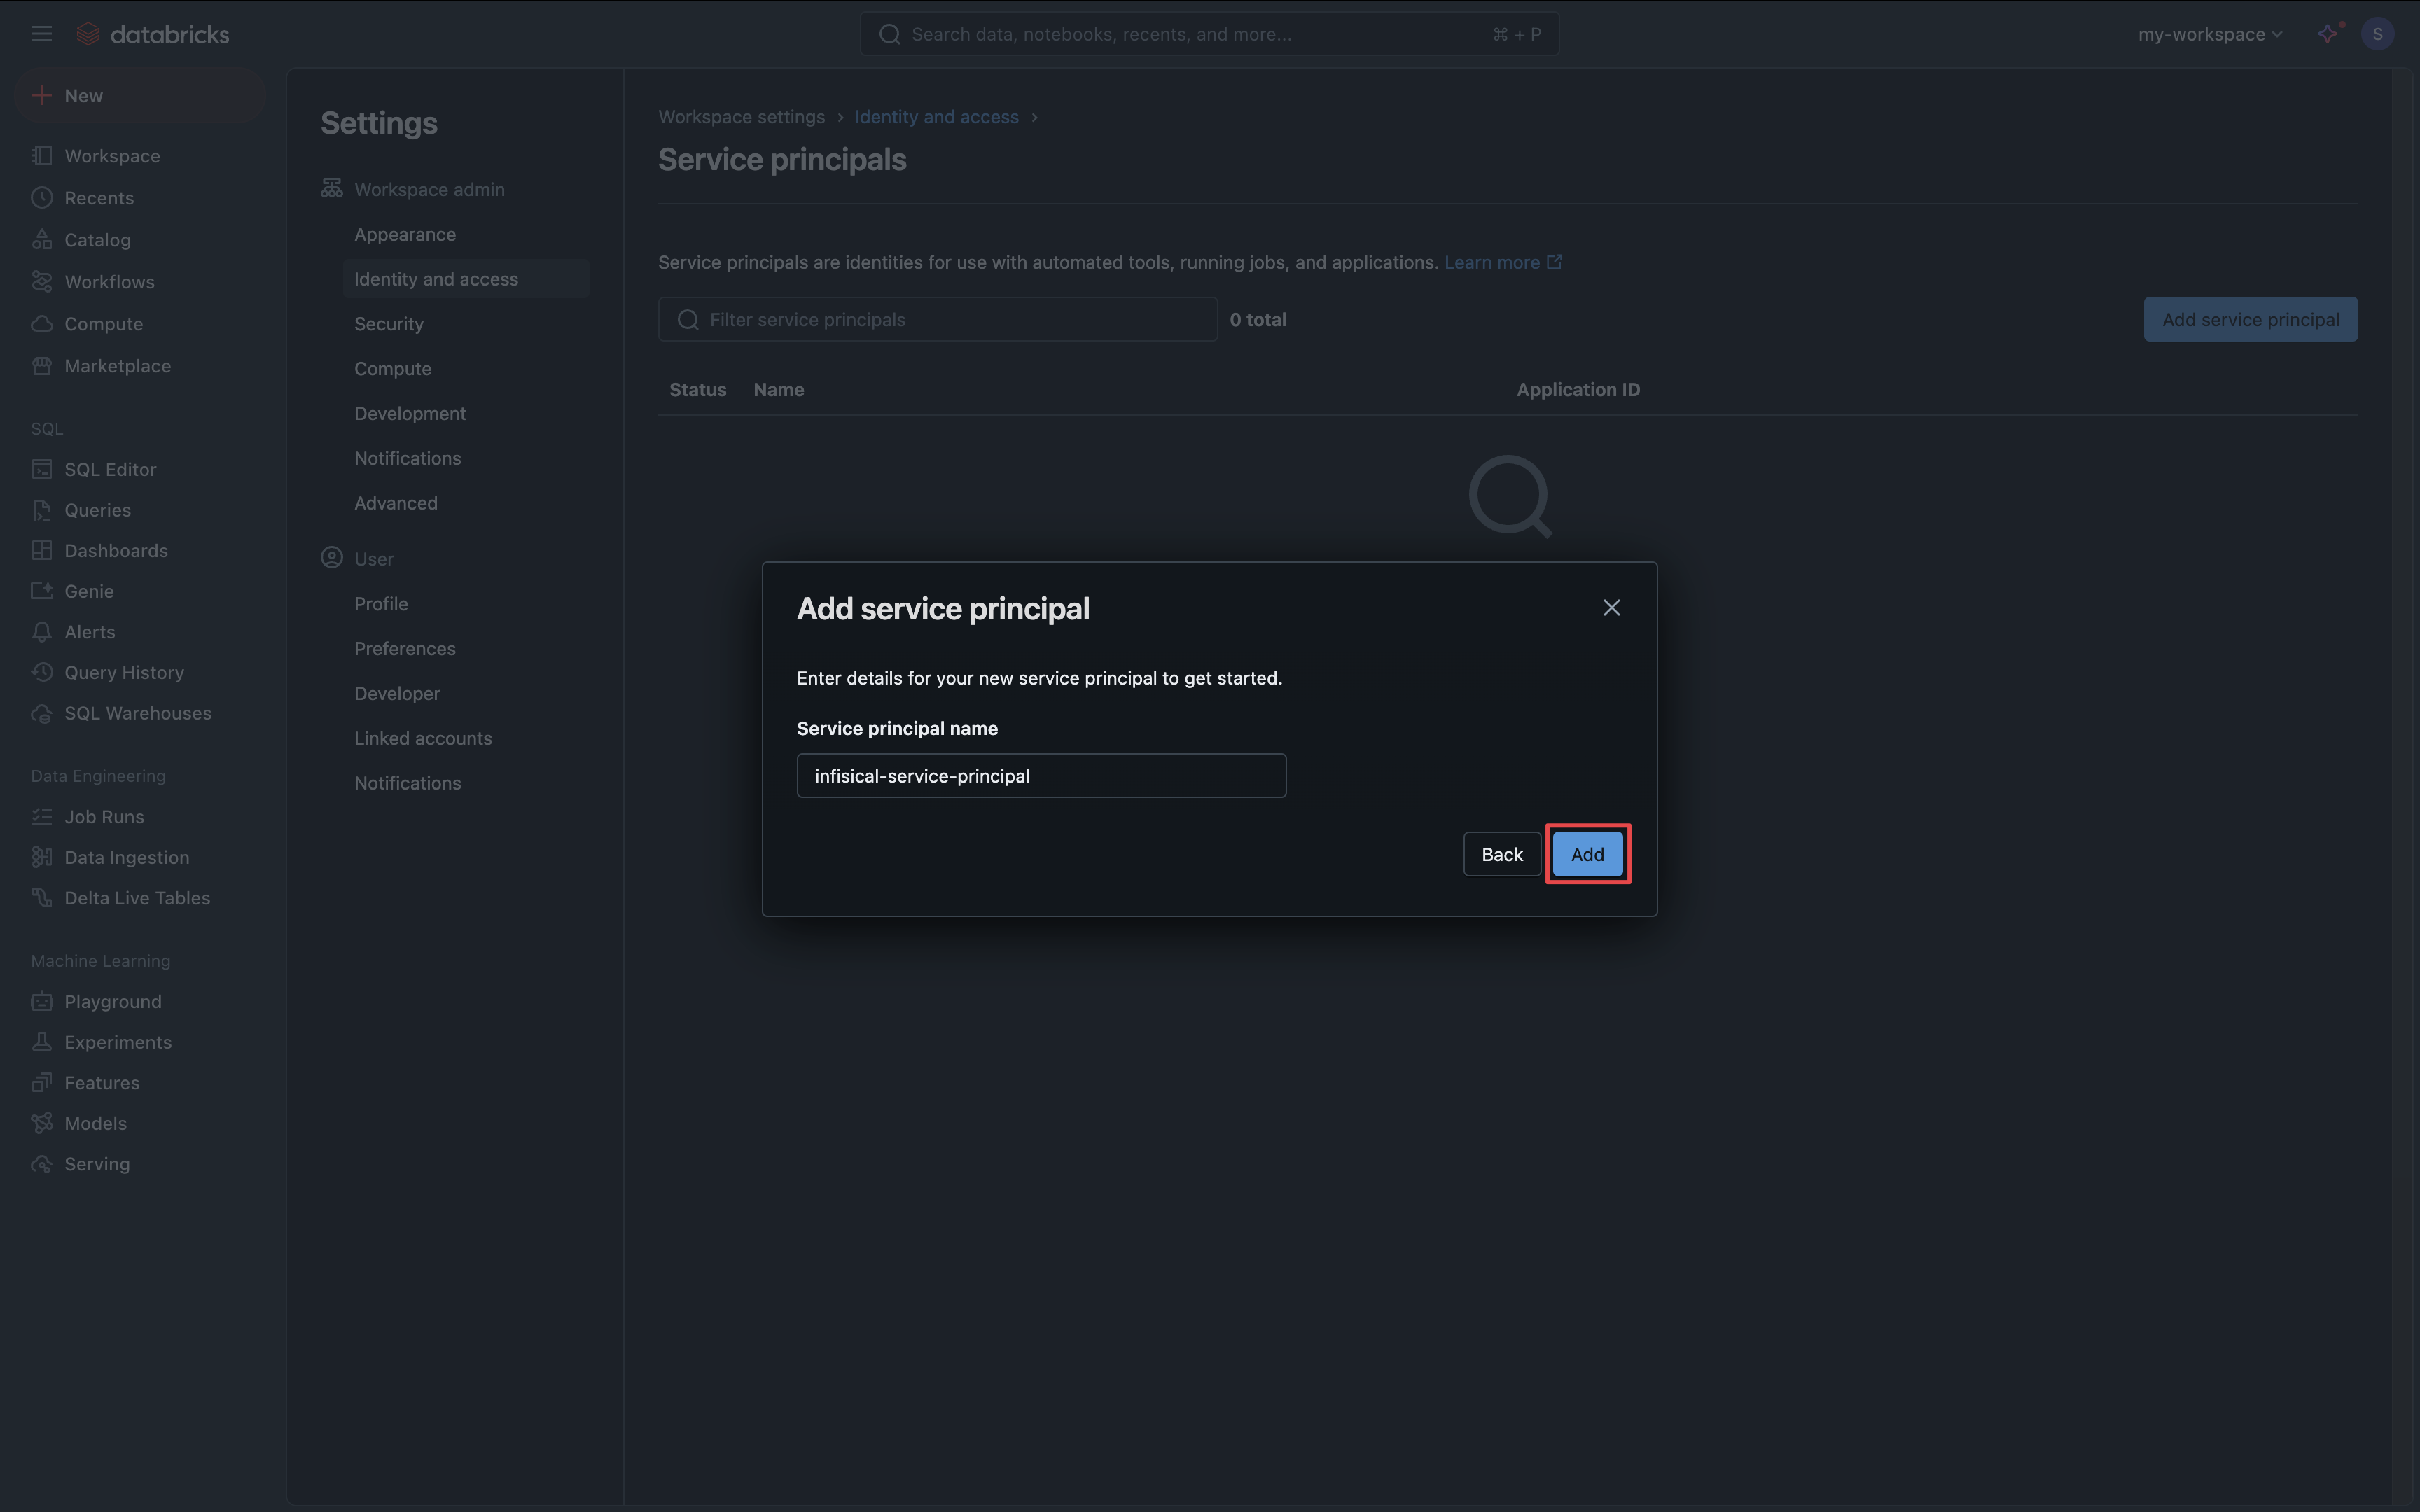
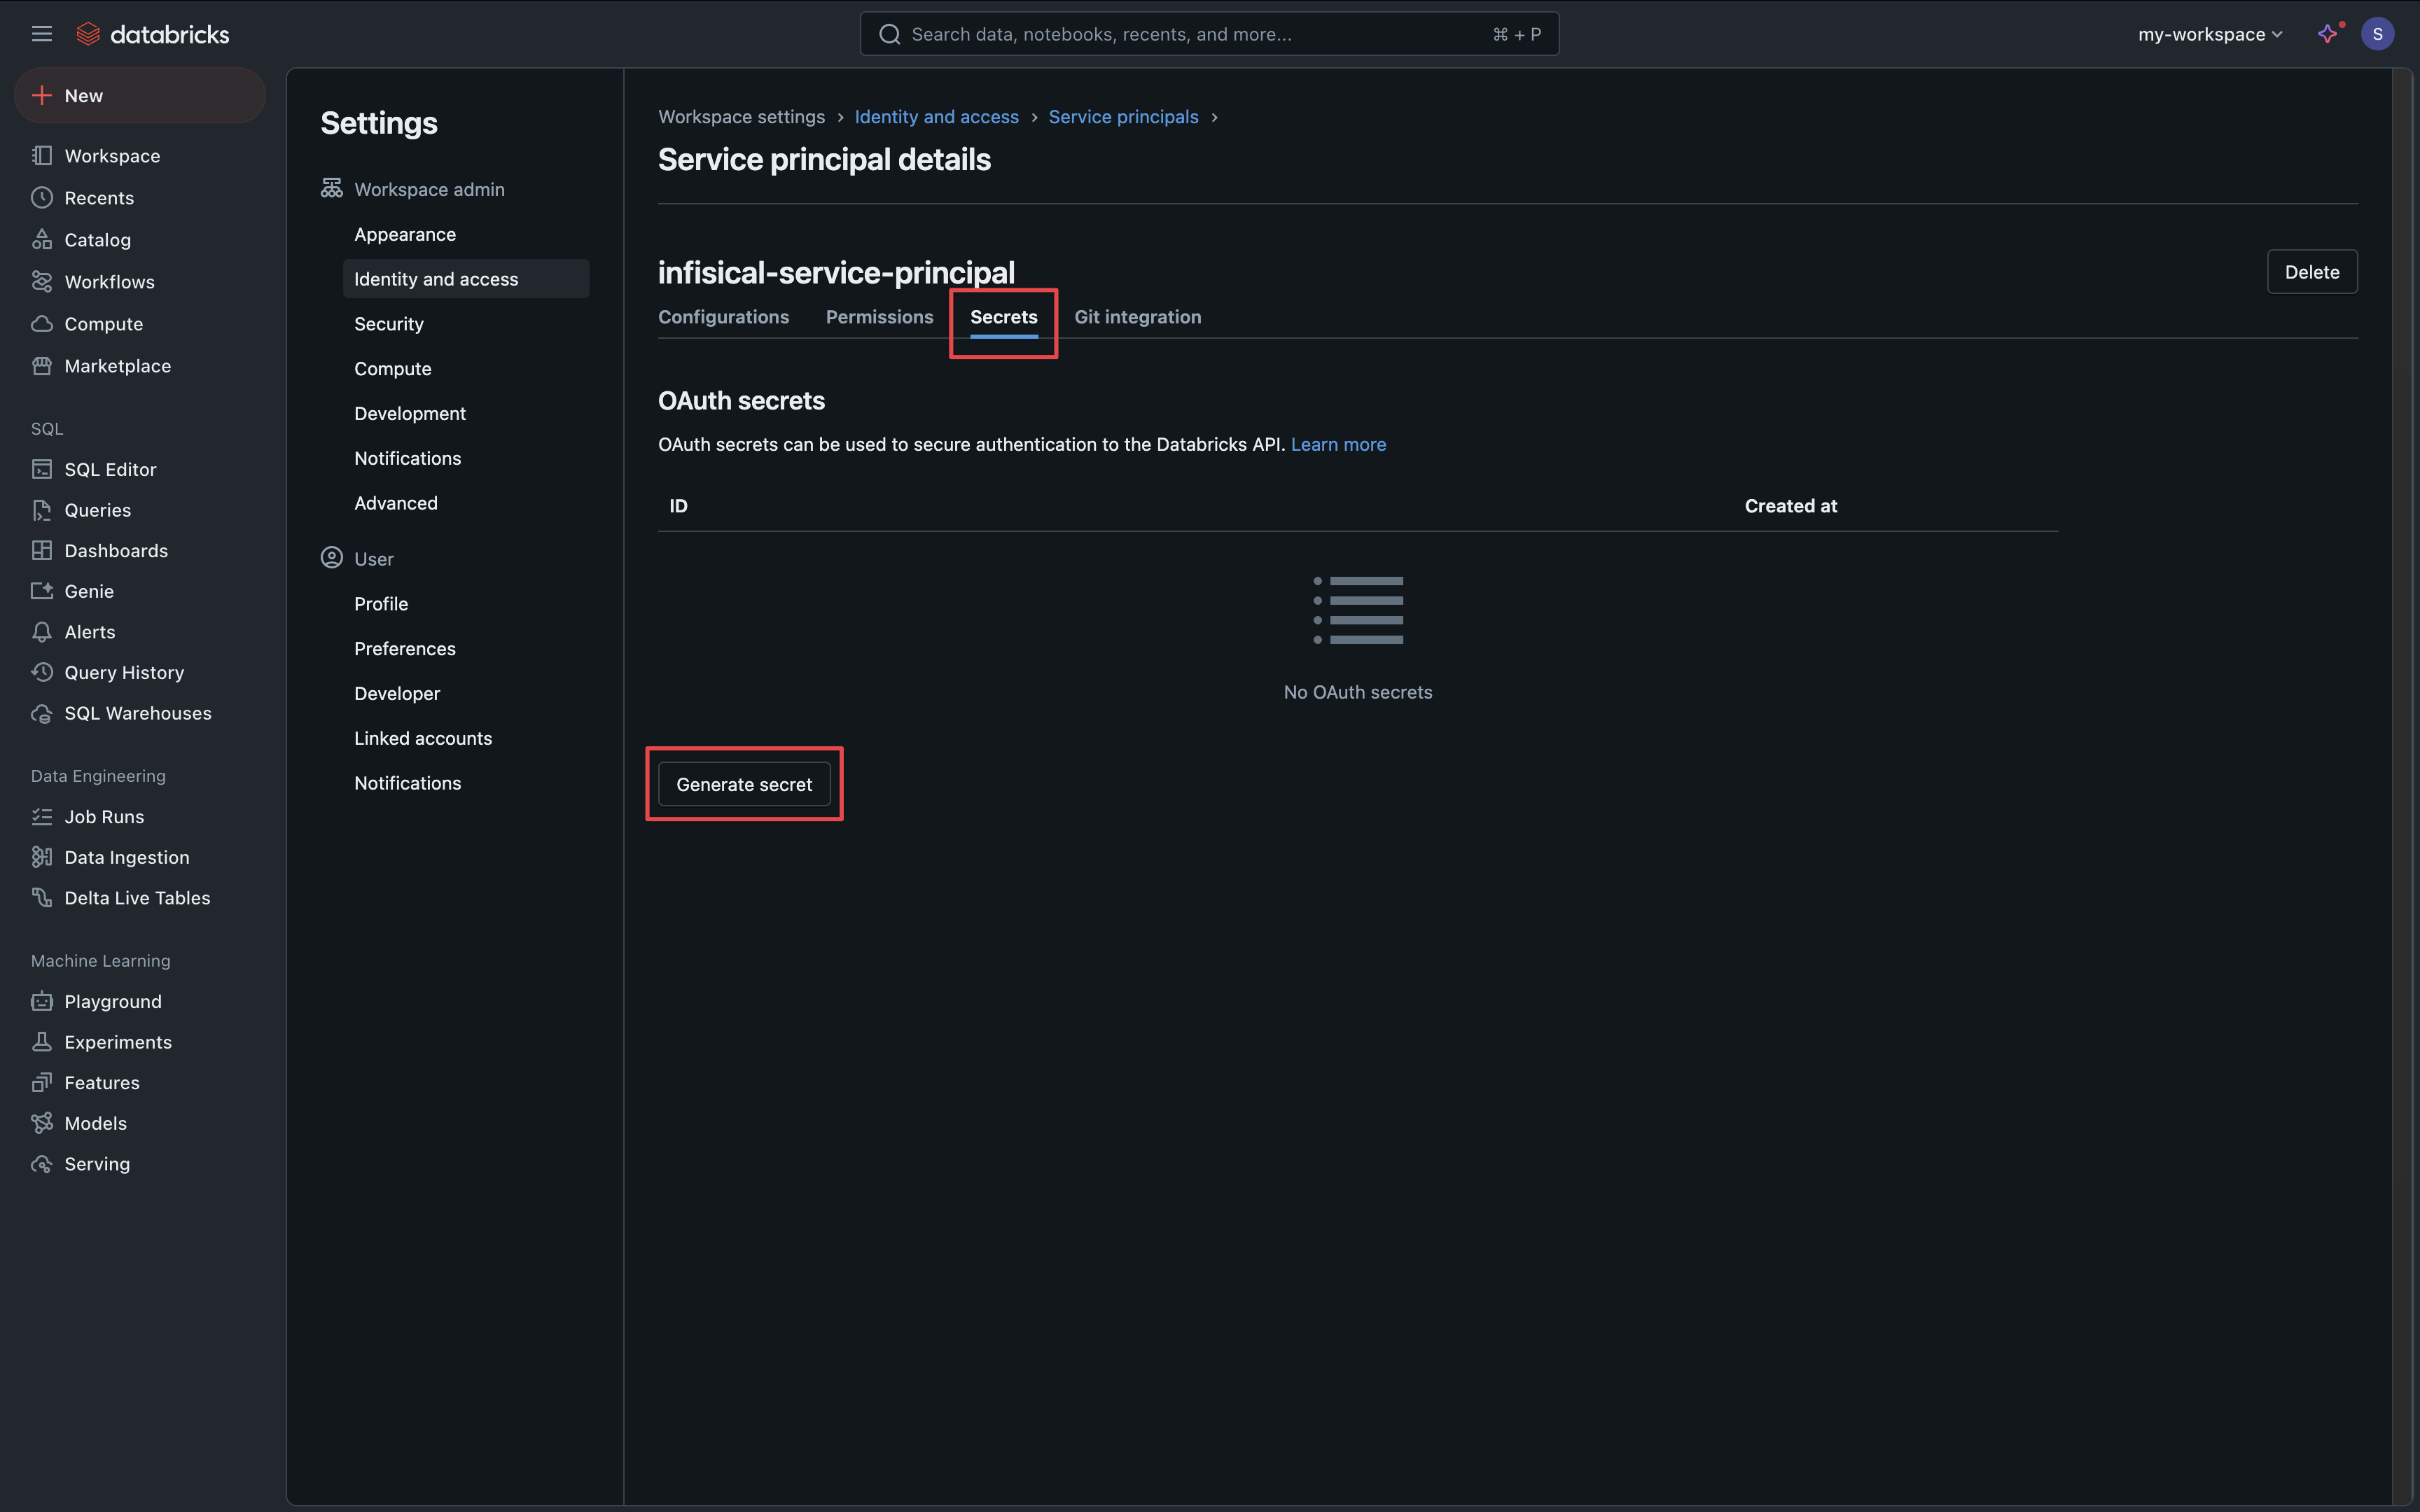
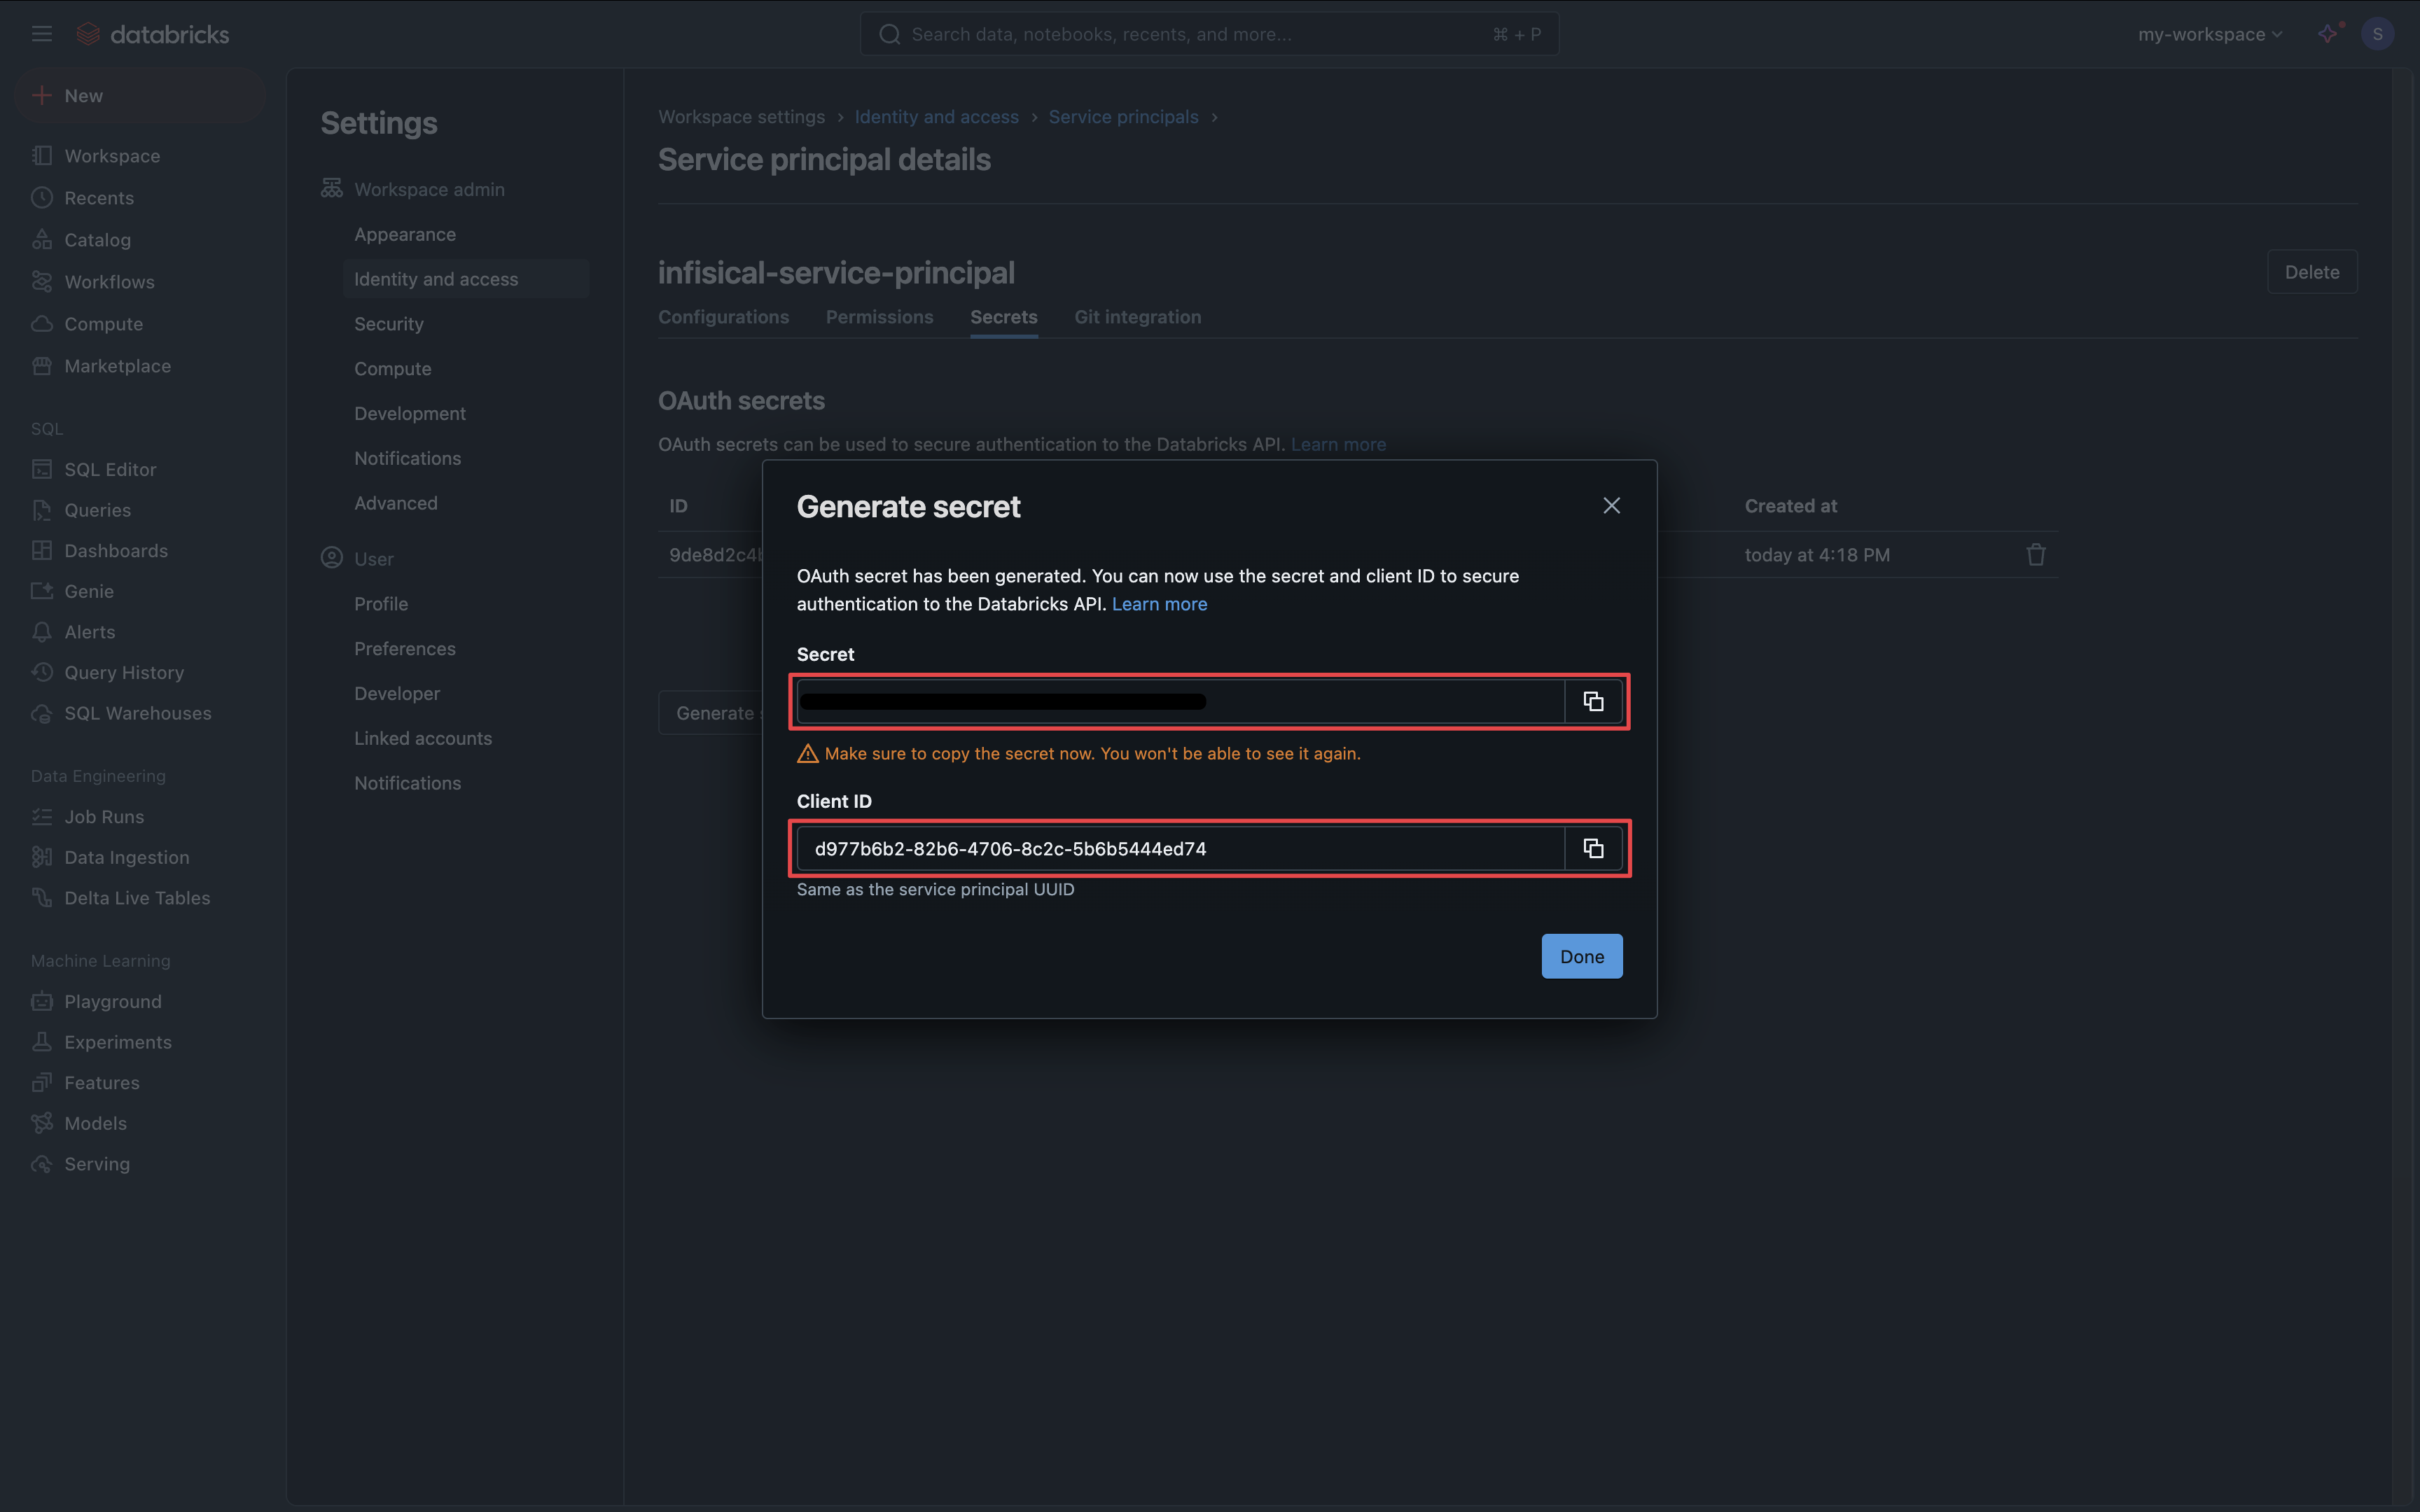
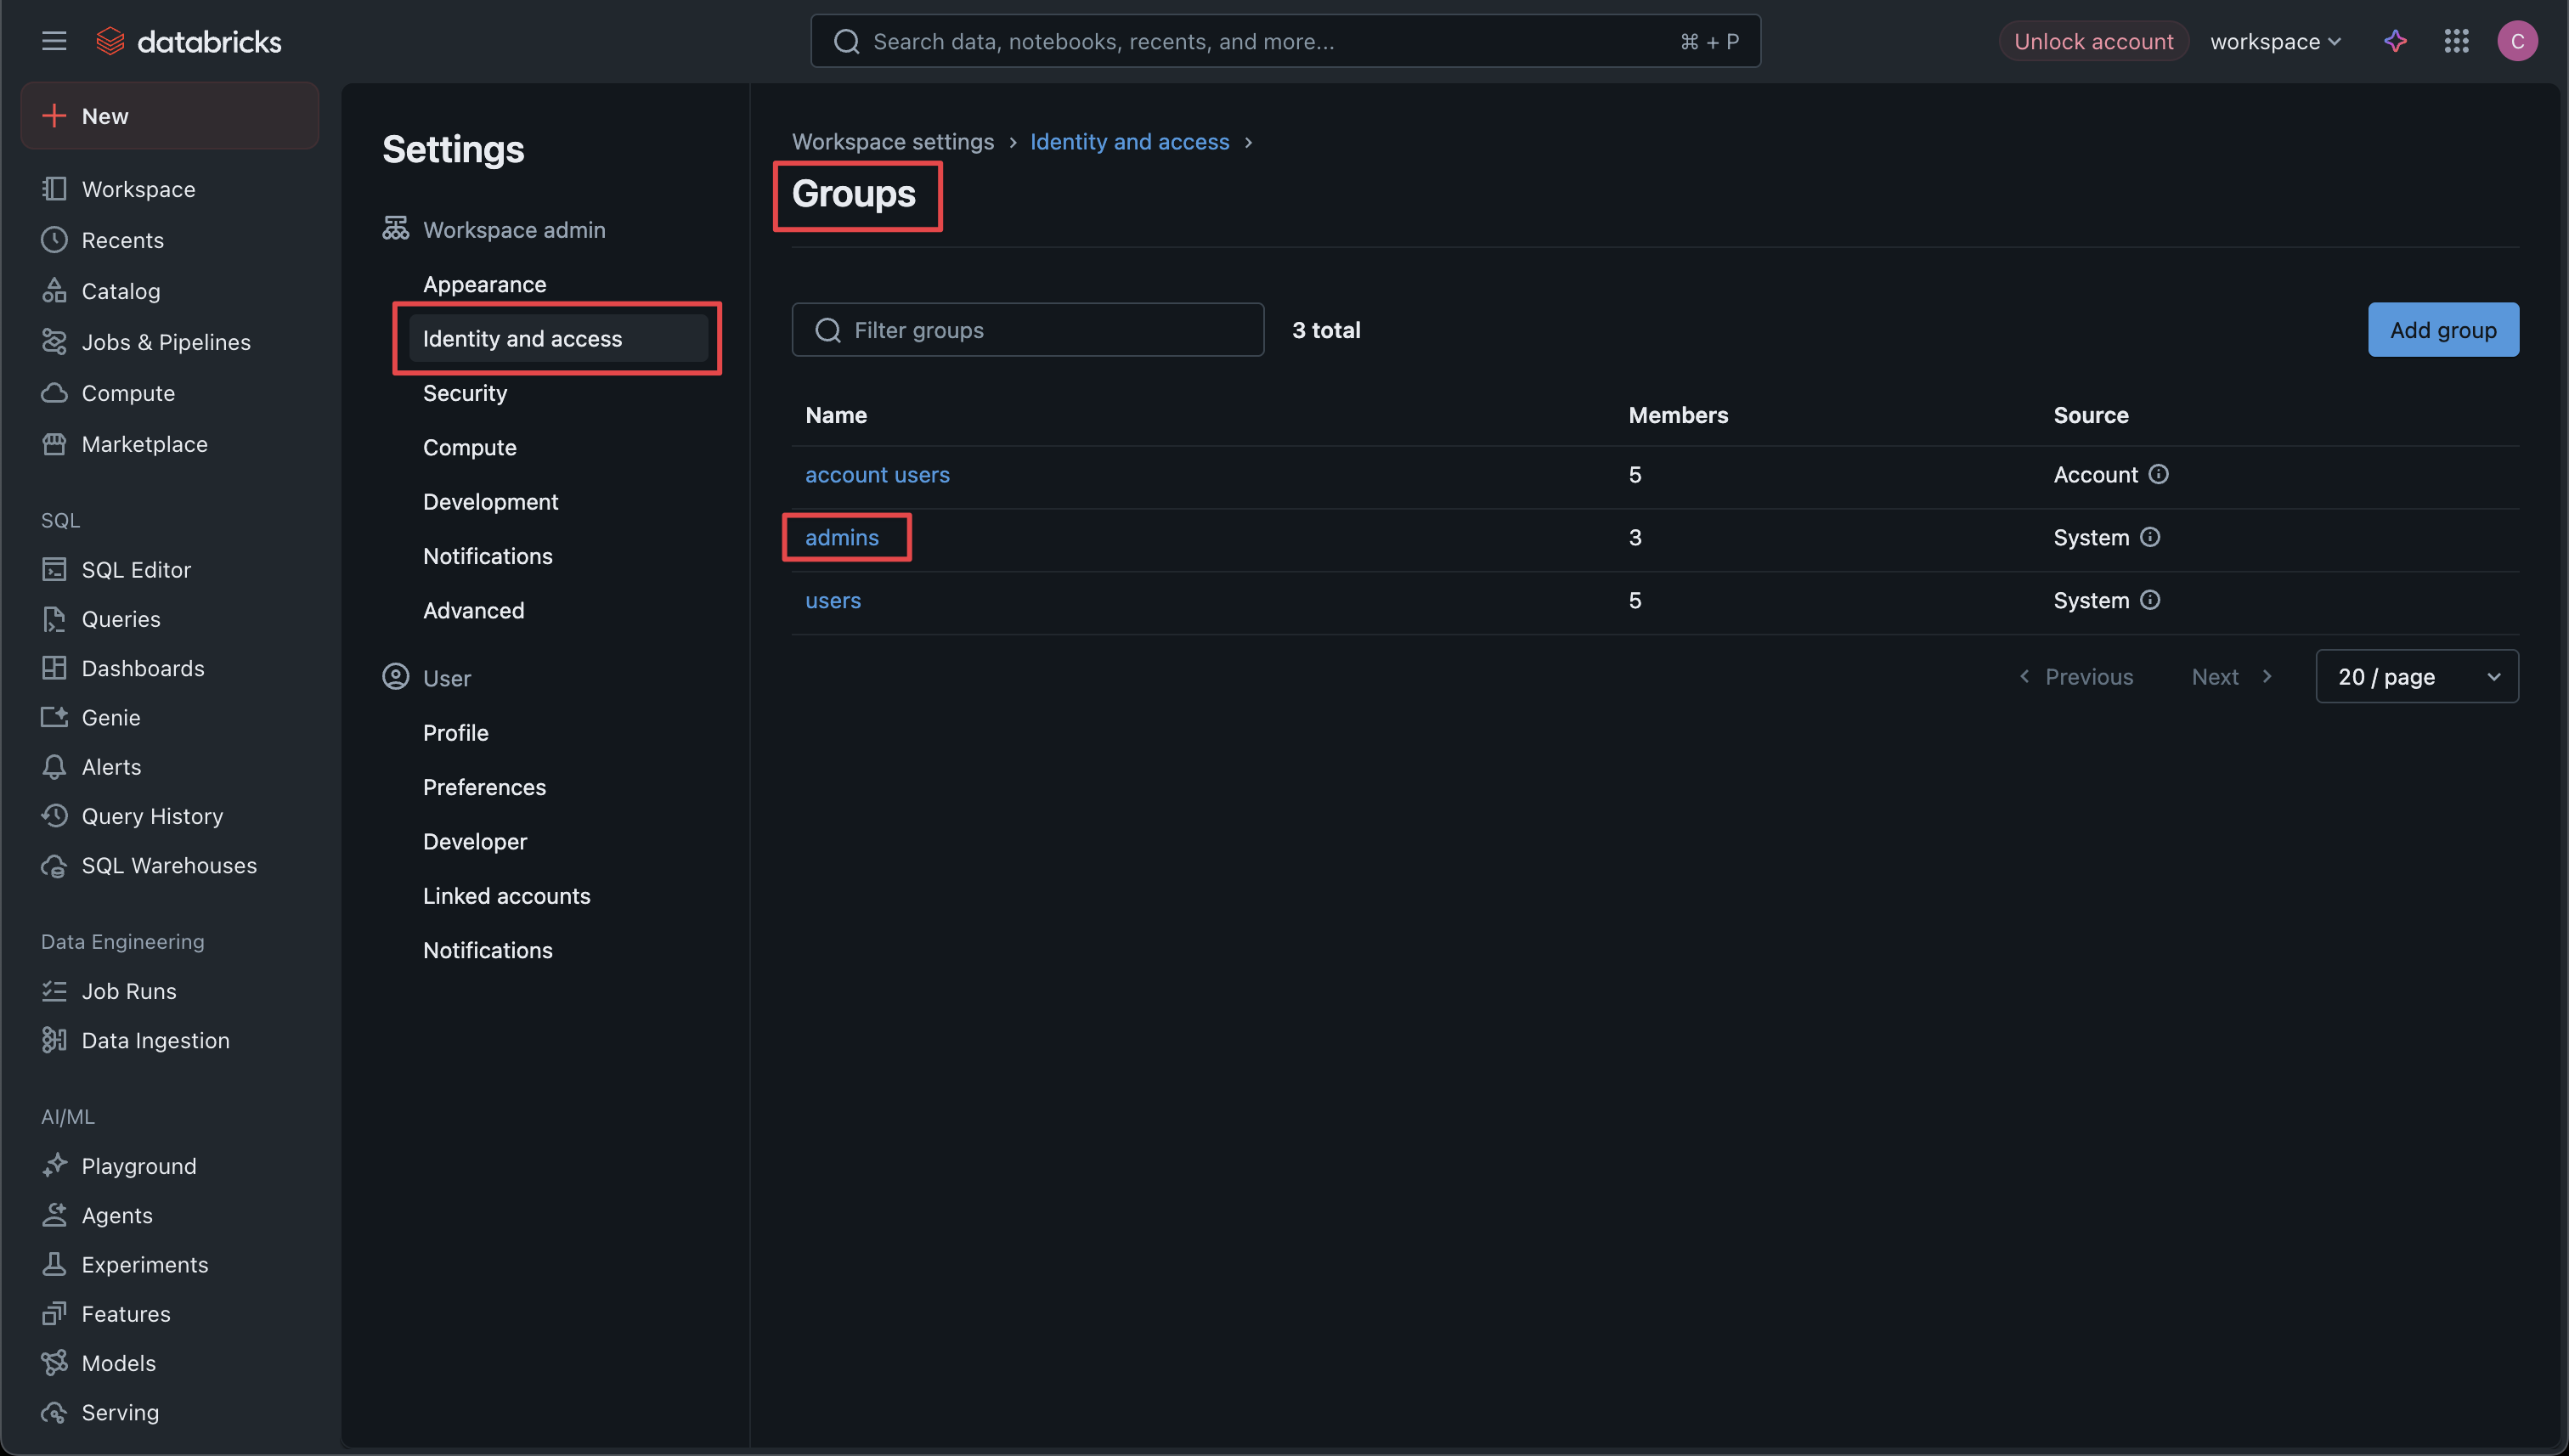 Click **Add** and select the service principal you created for Infisical to add it to the admin group.
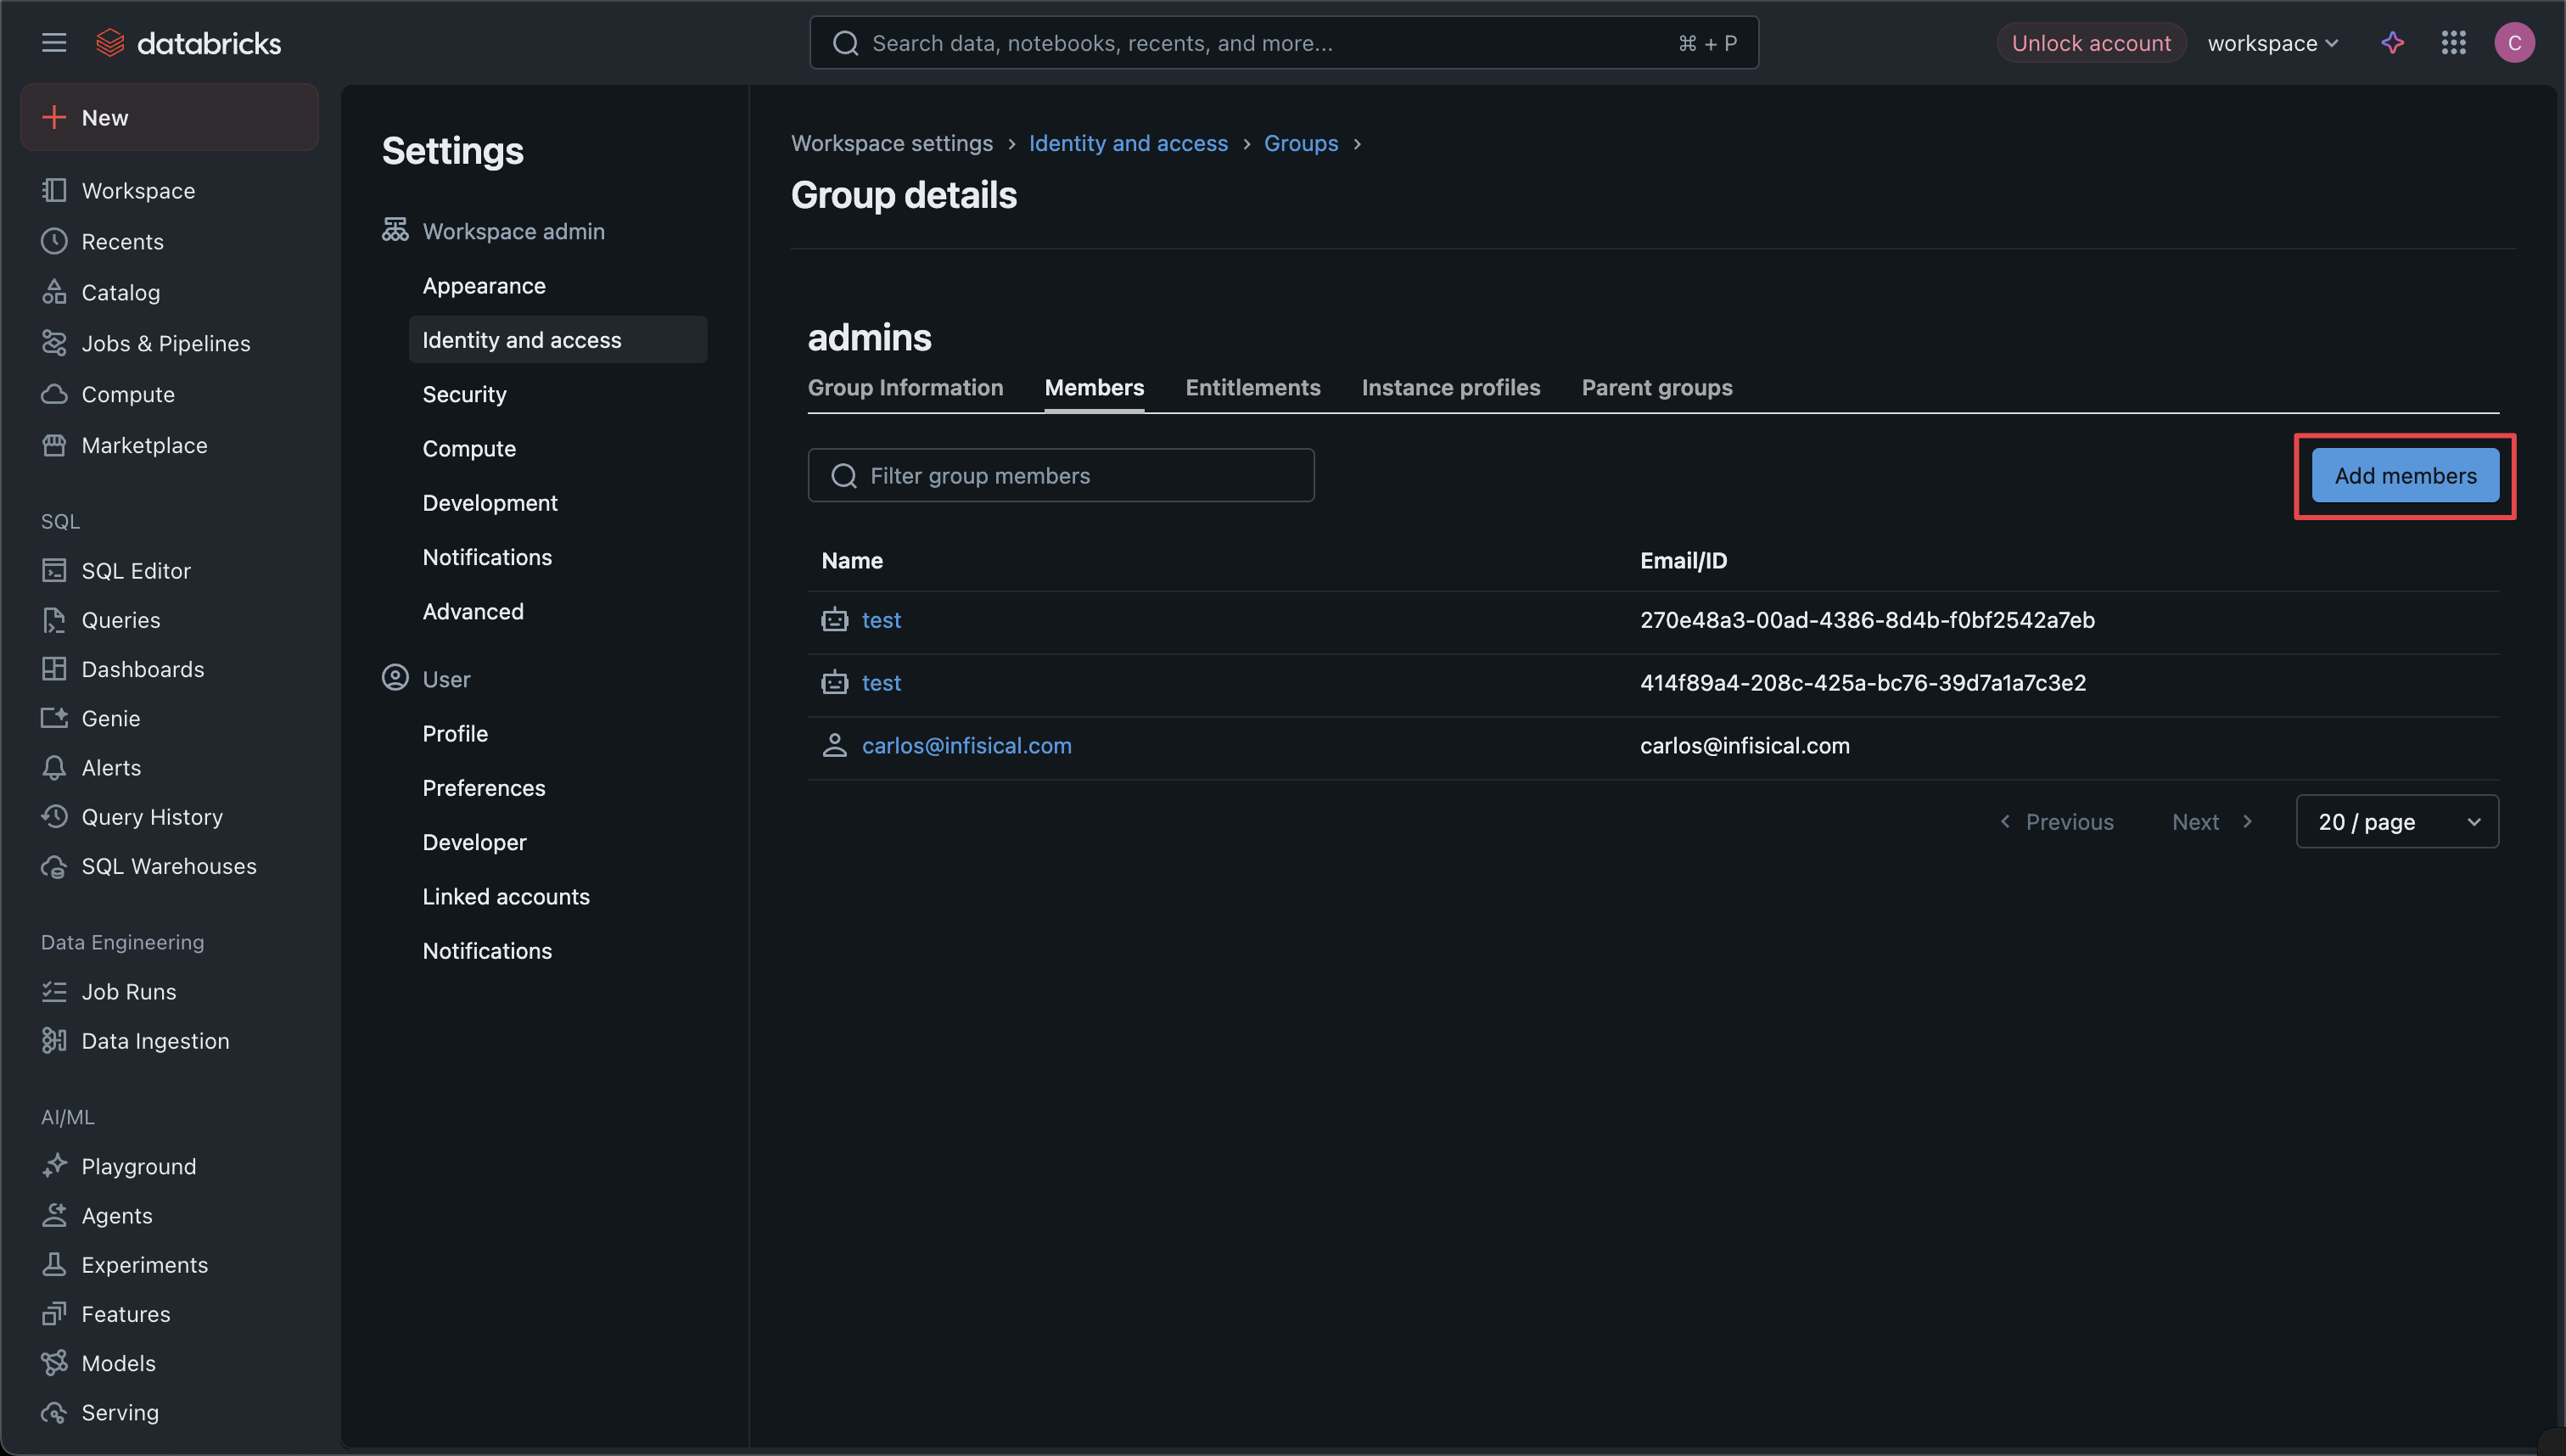
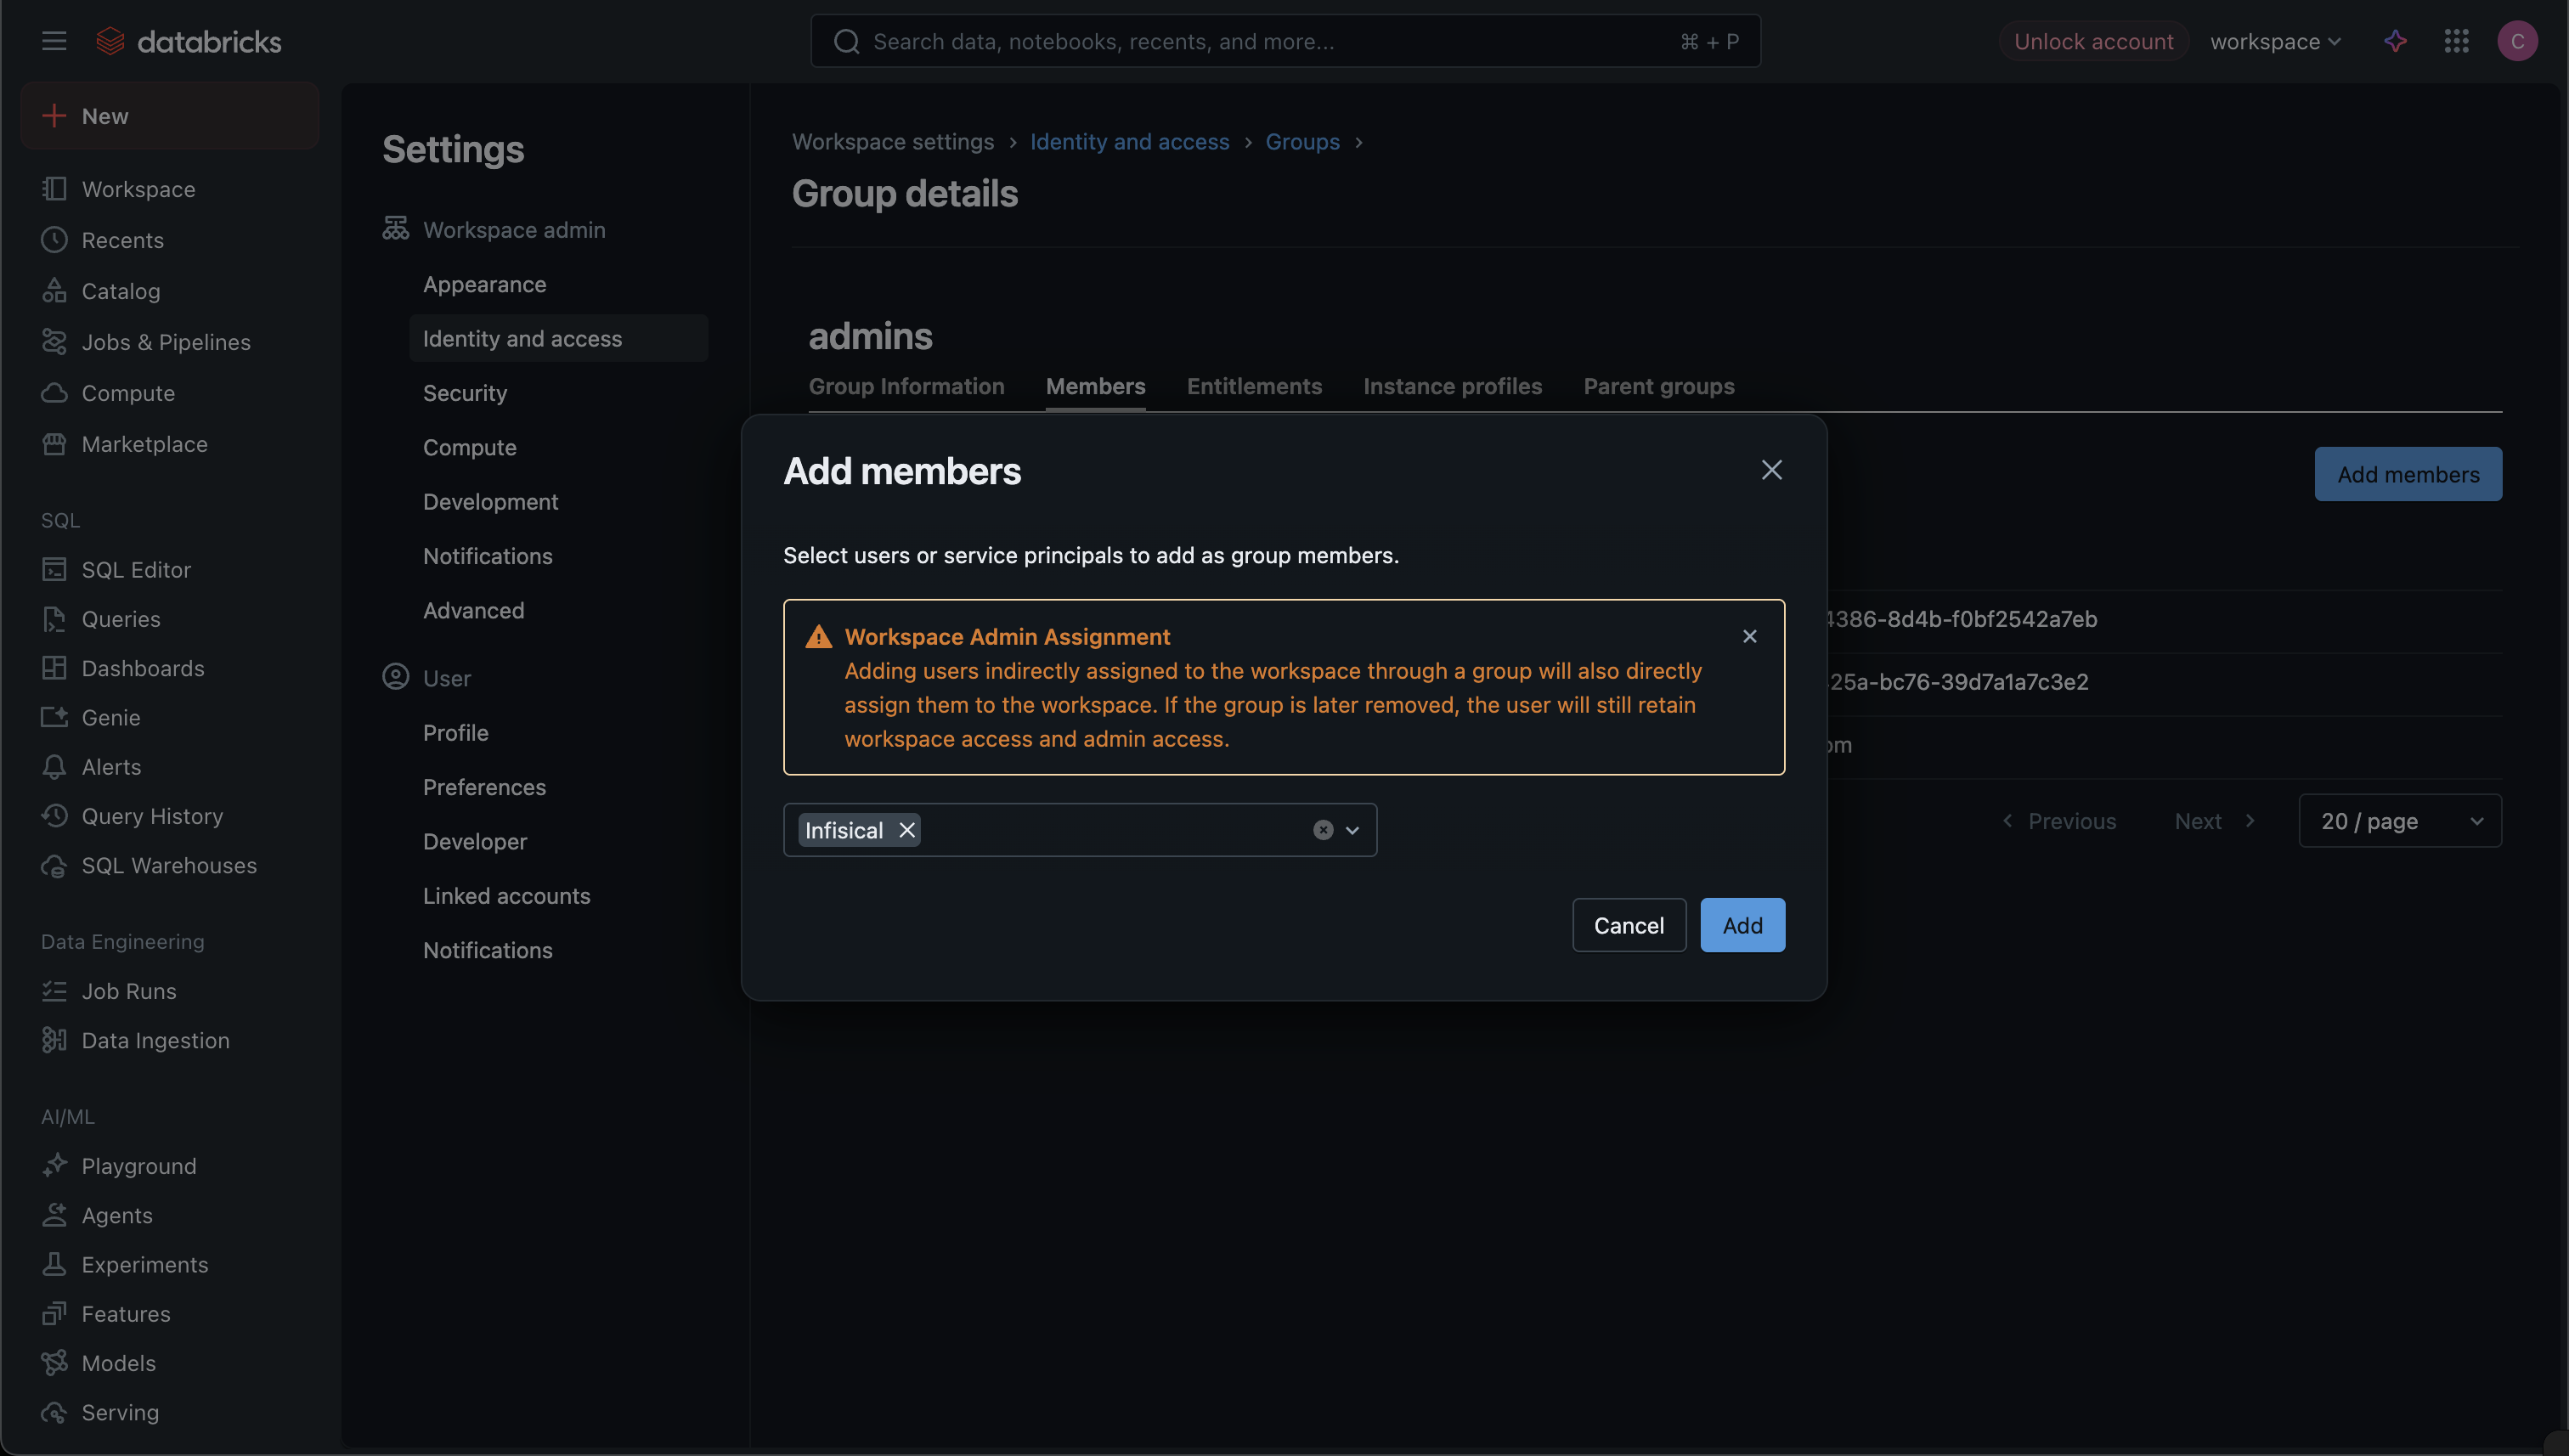
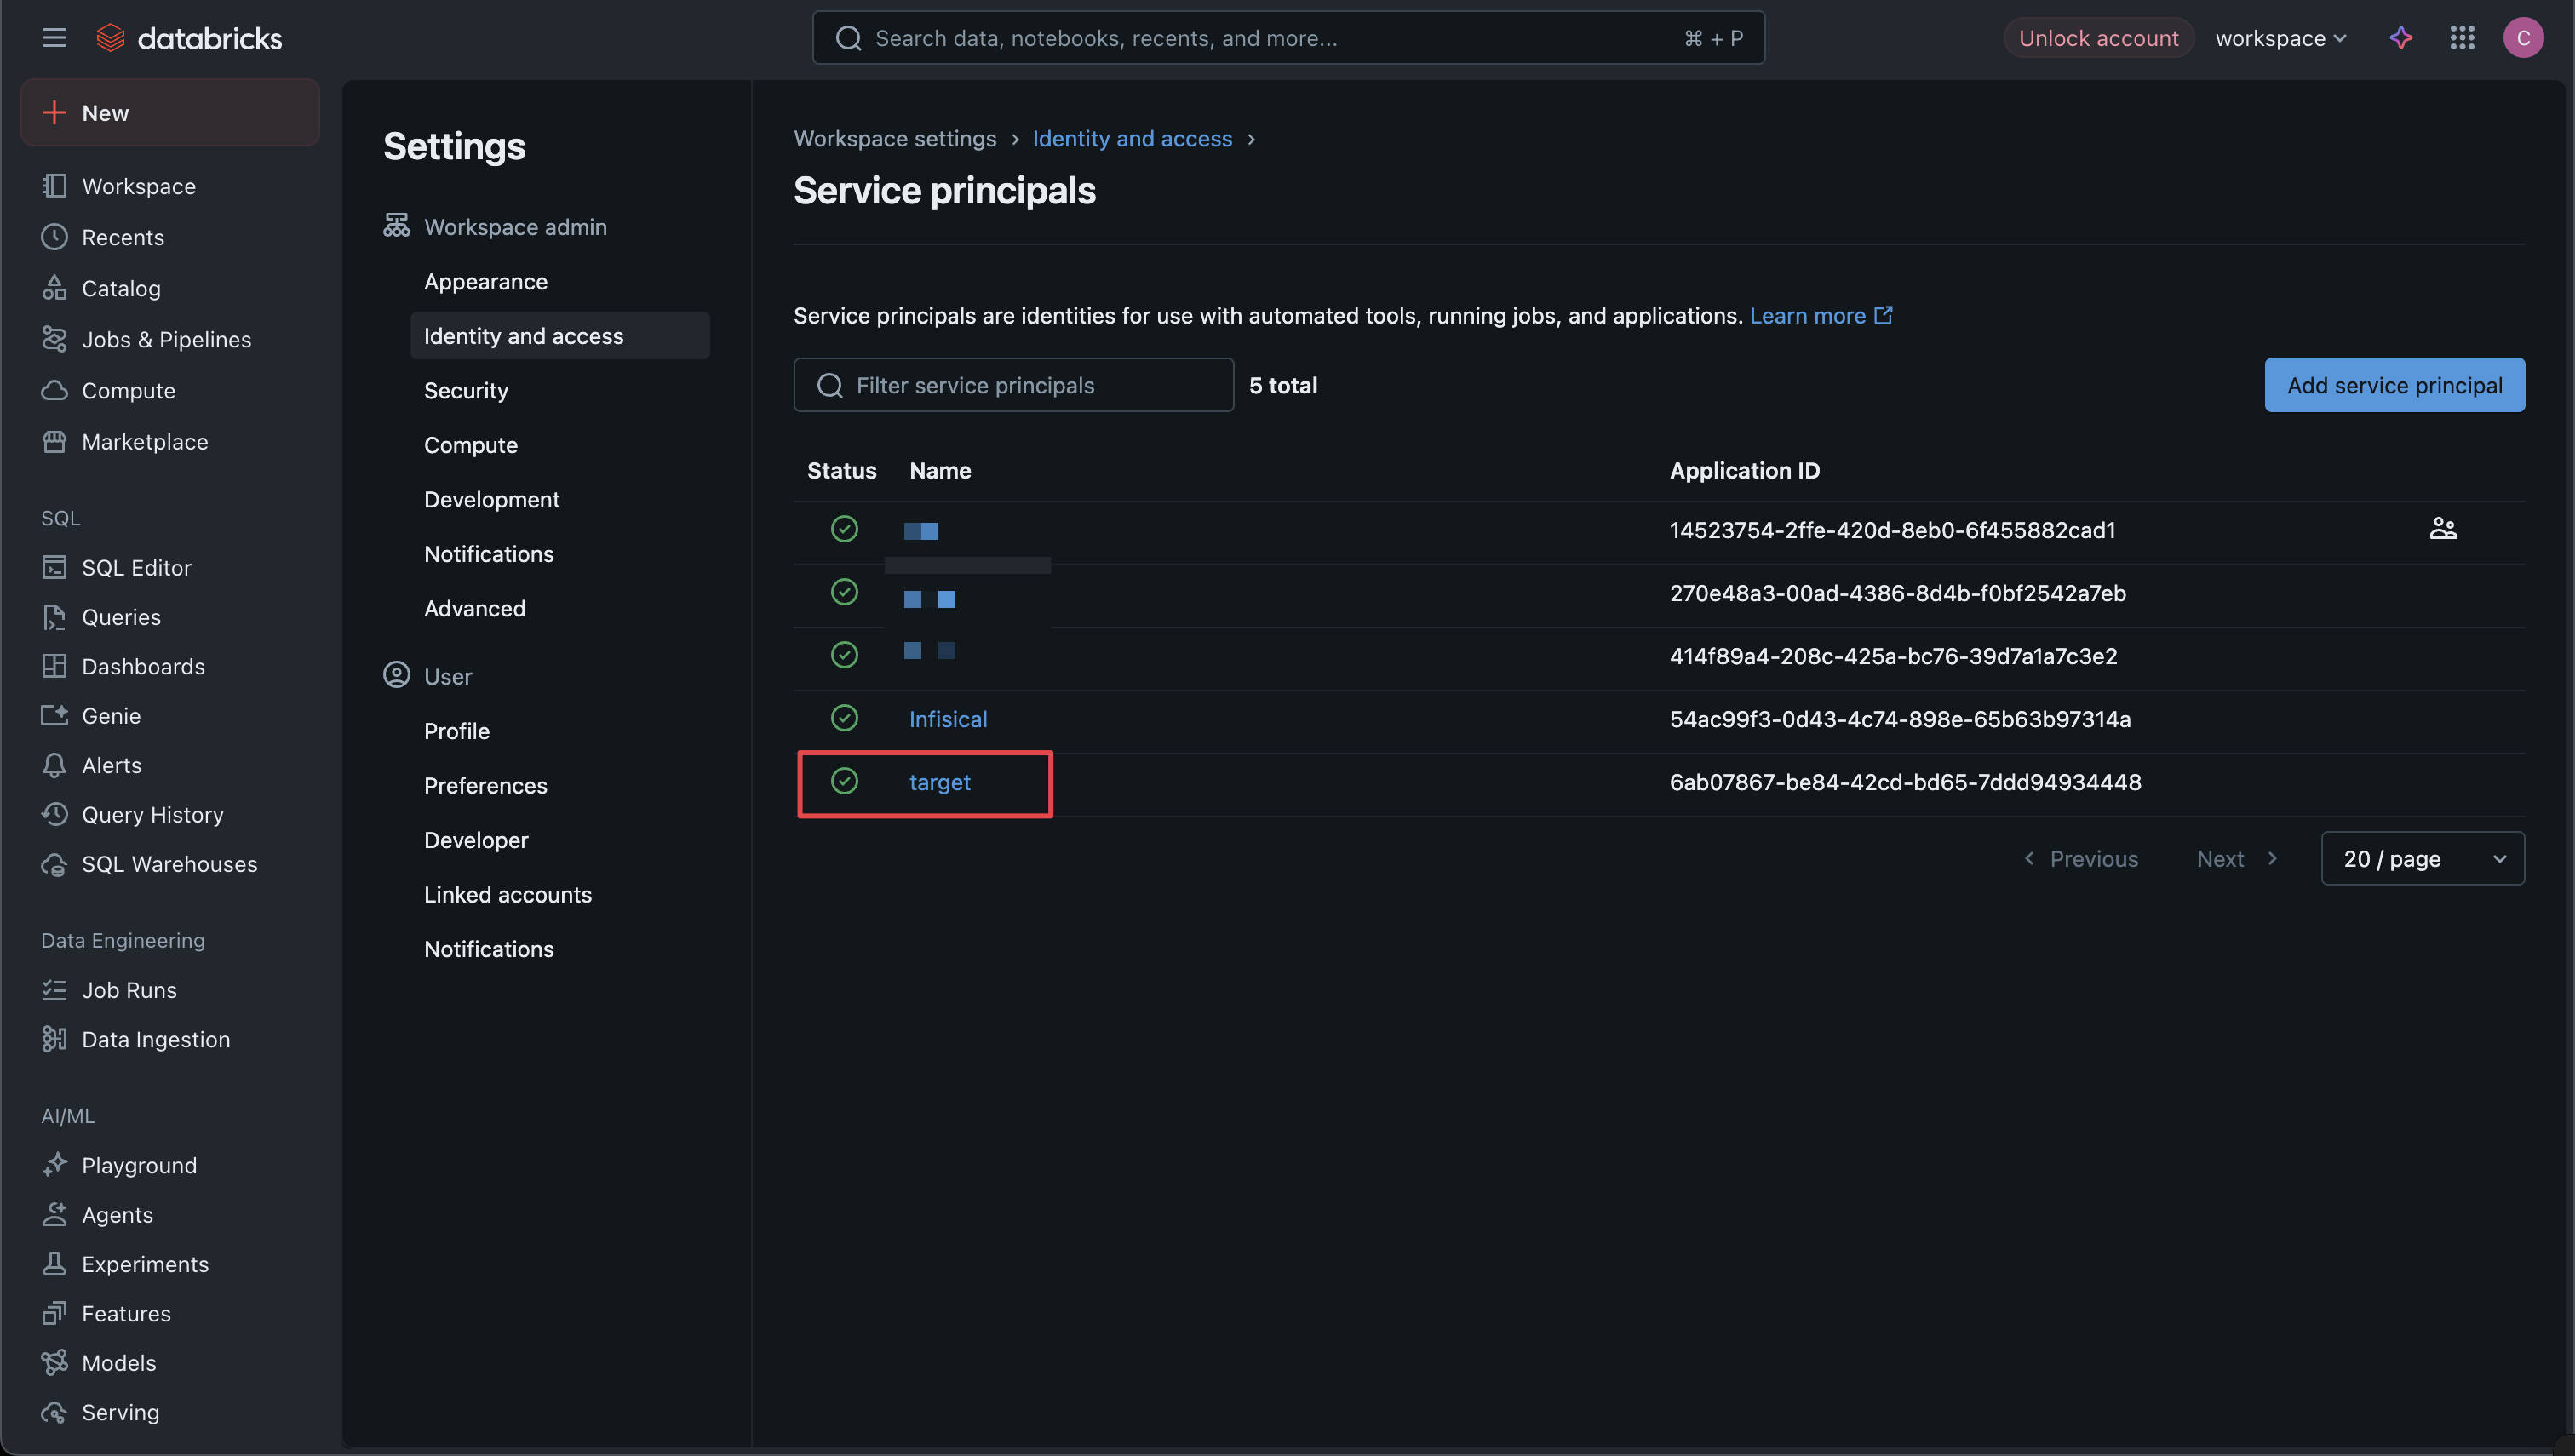
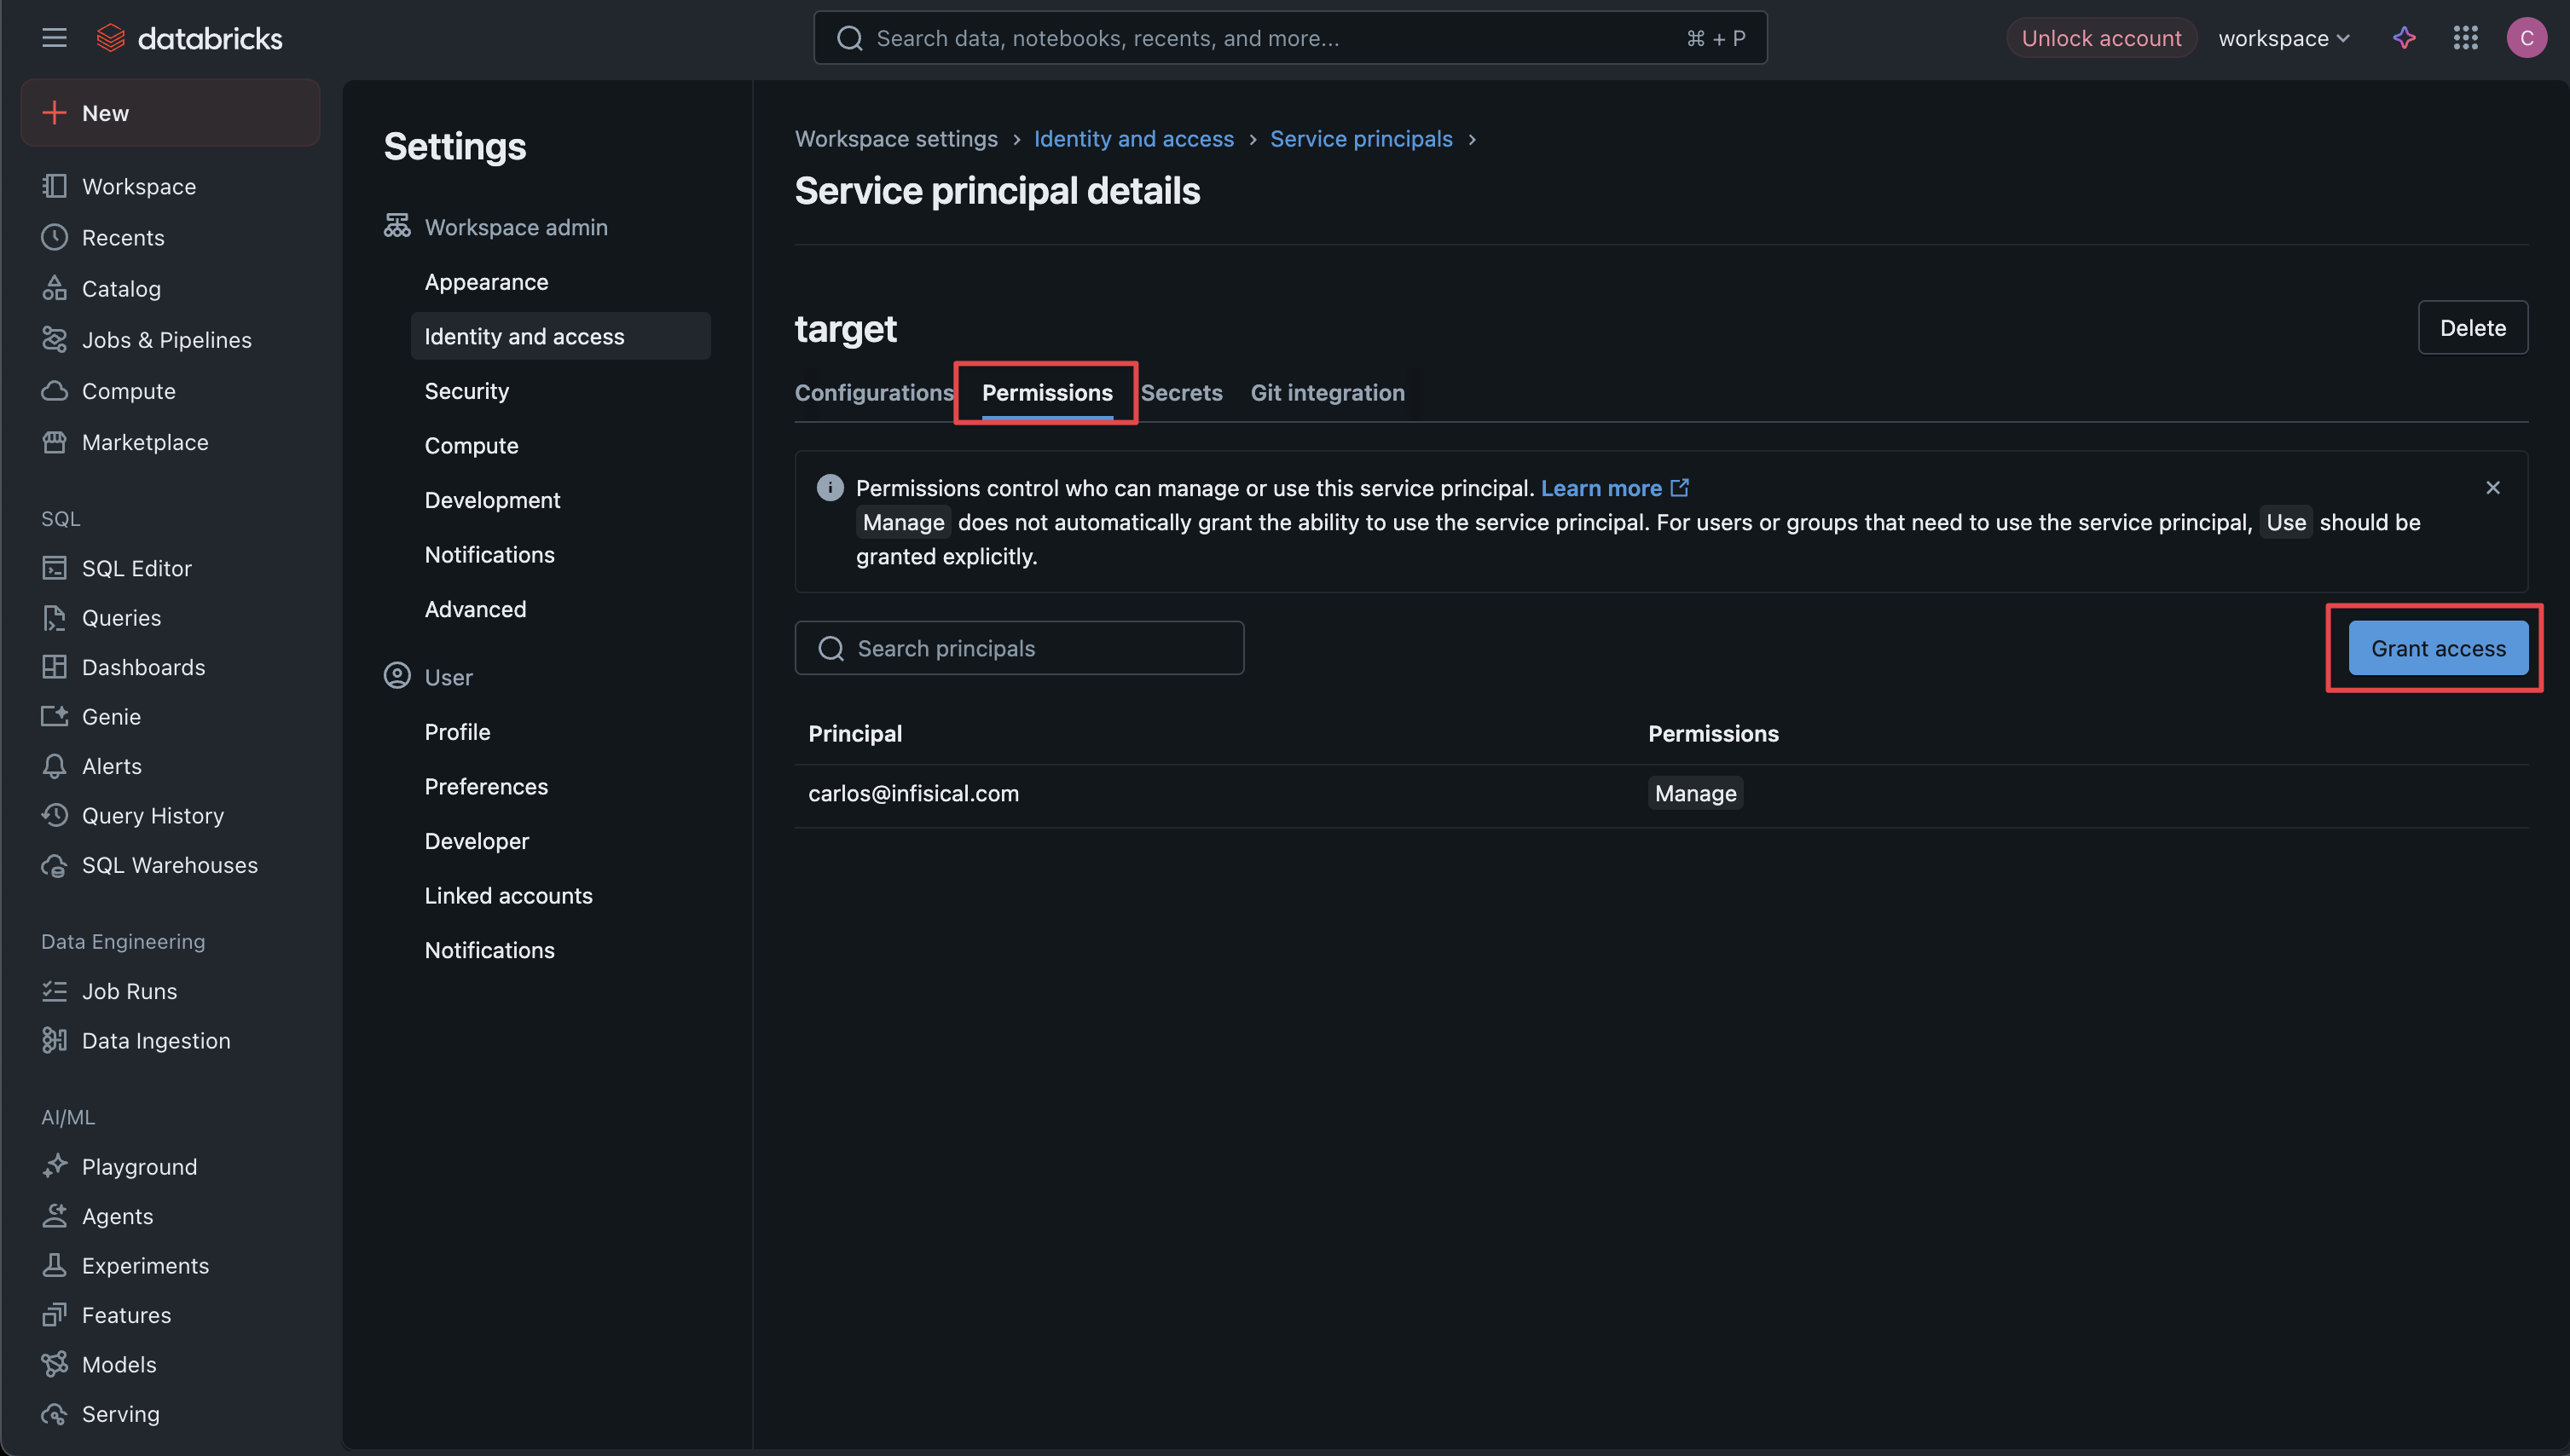
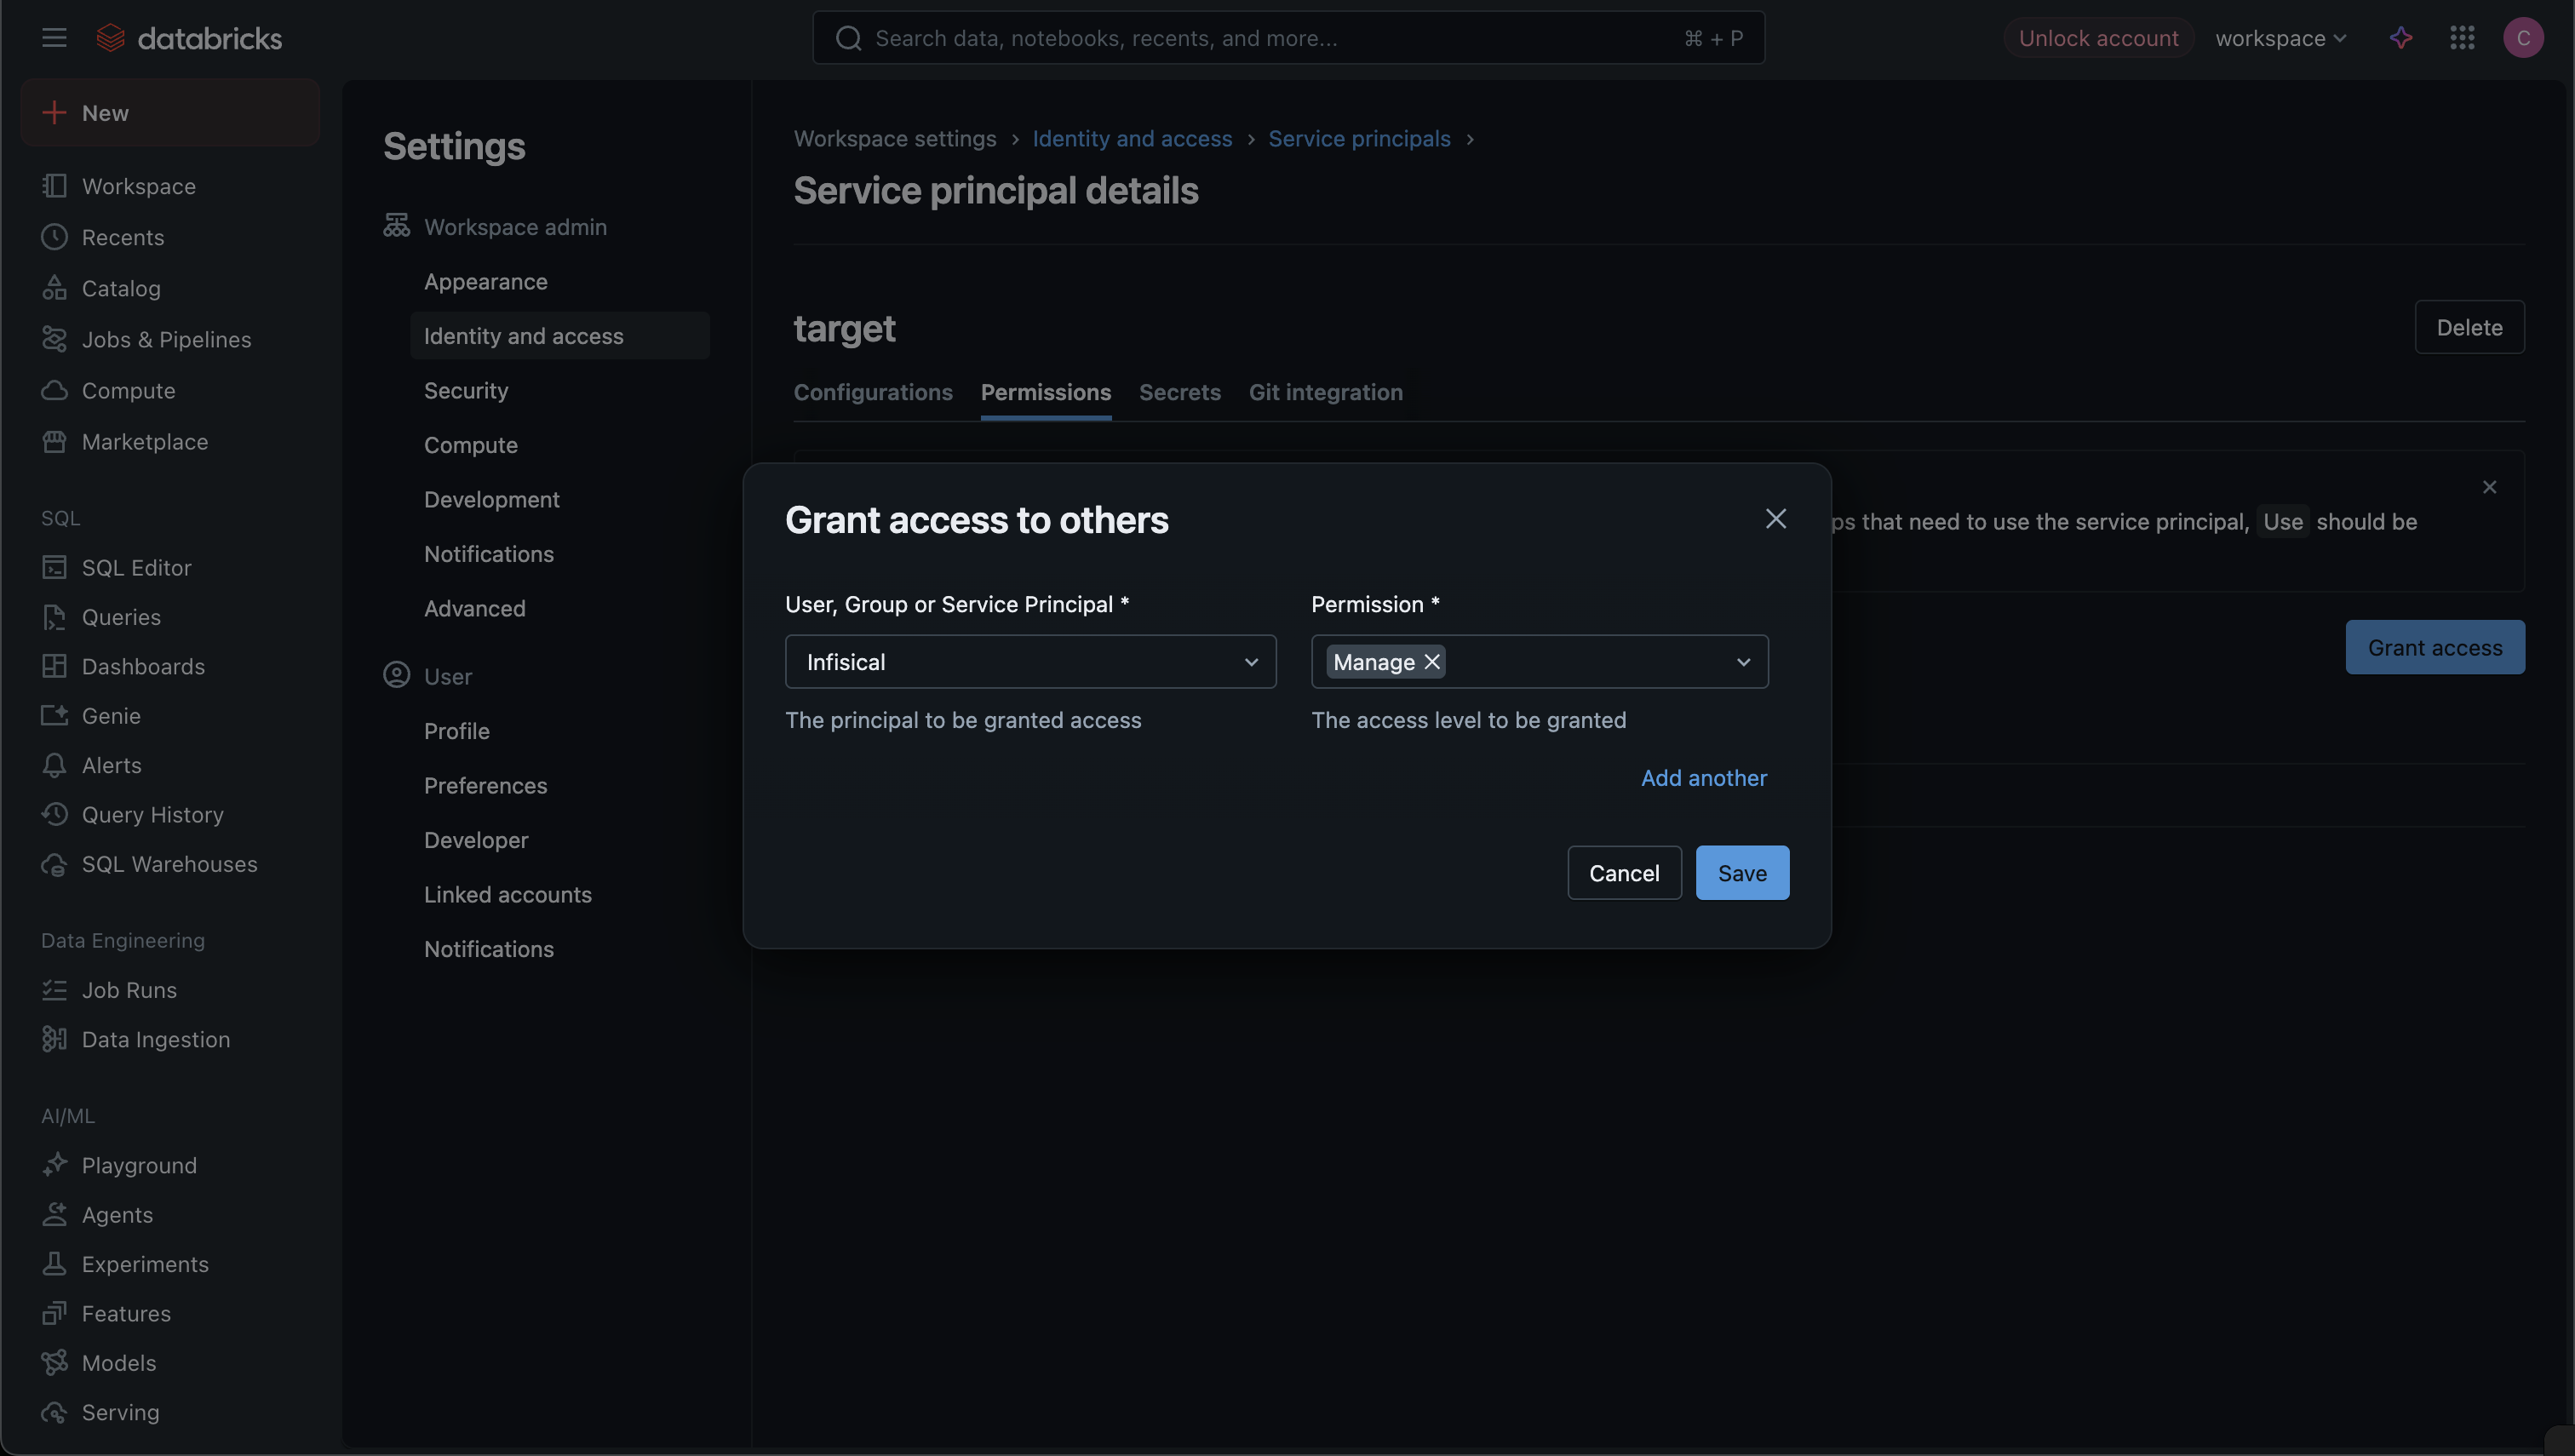
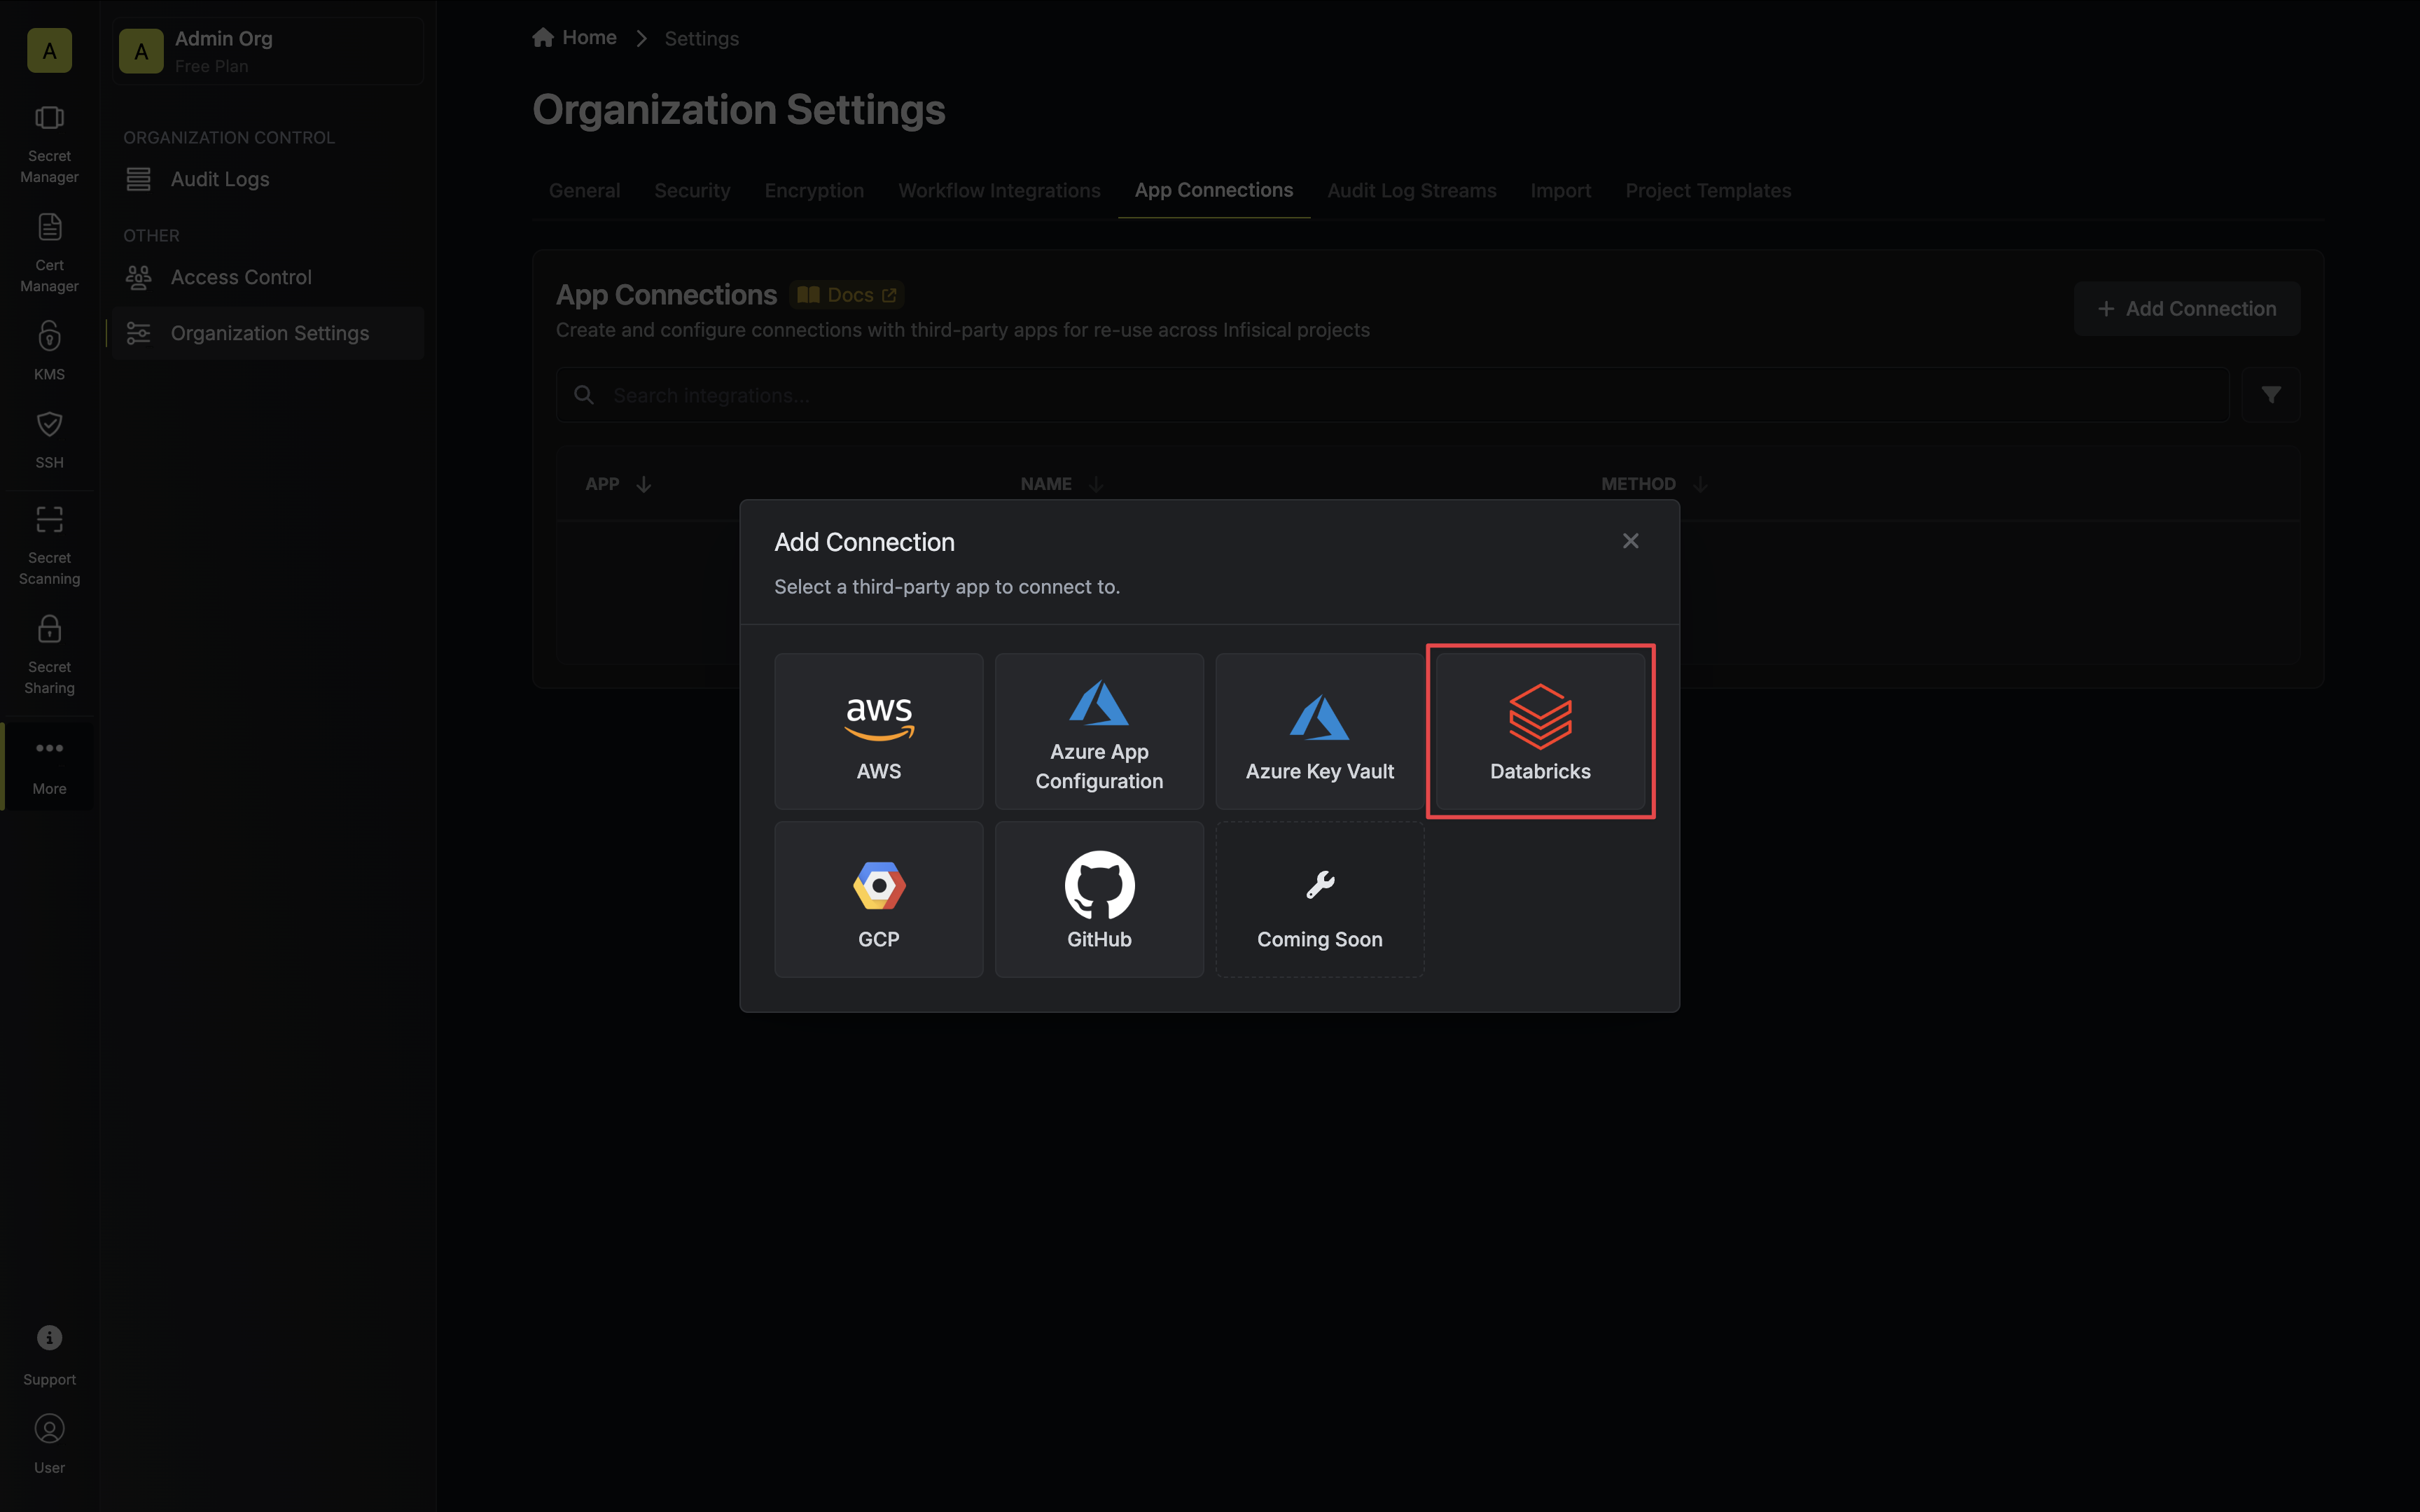
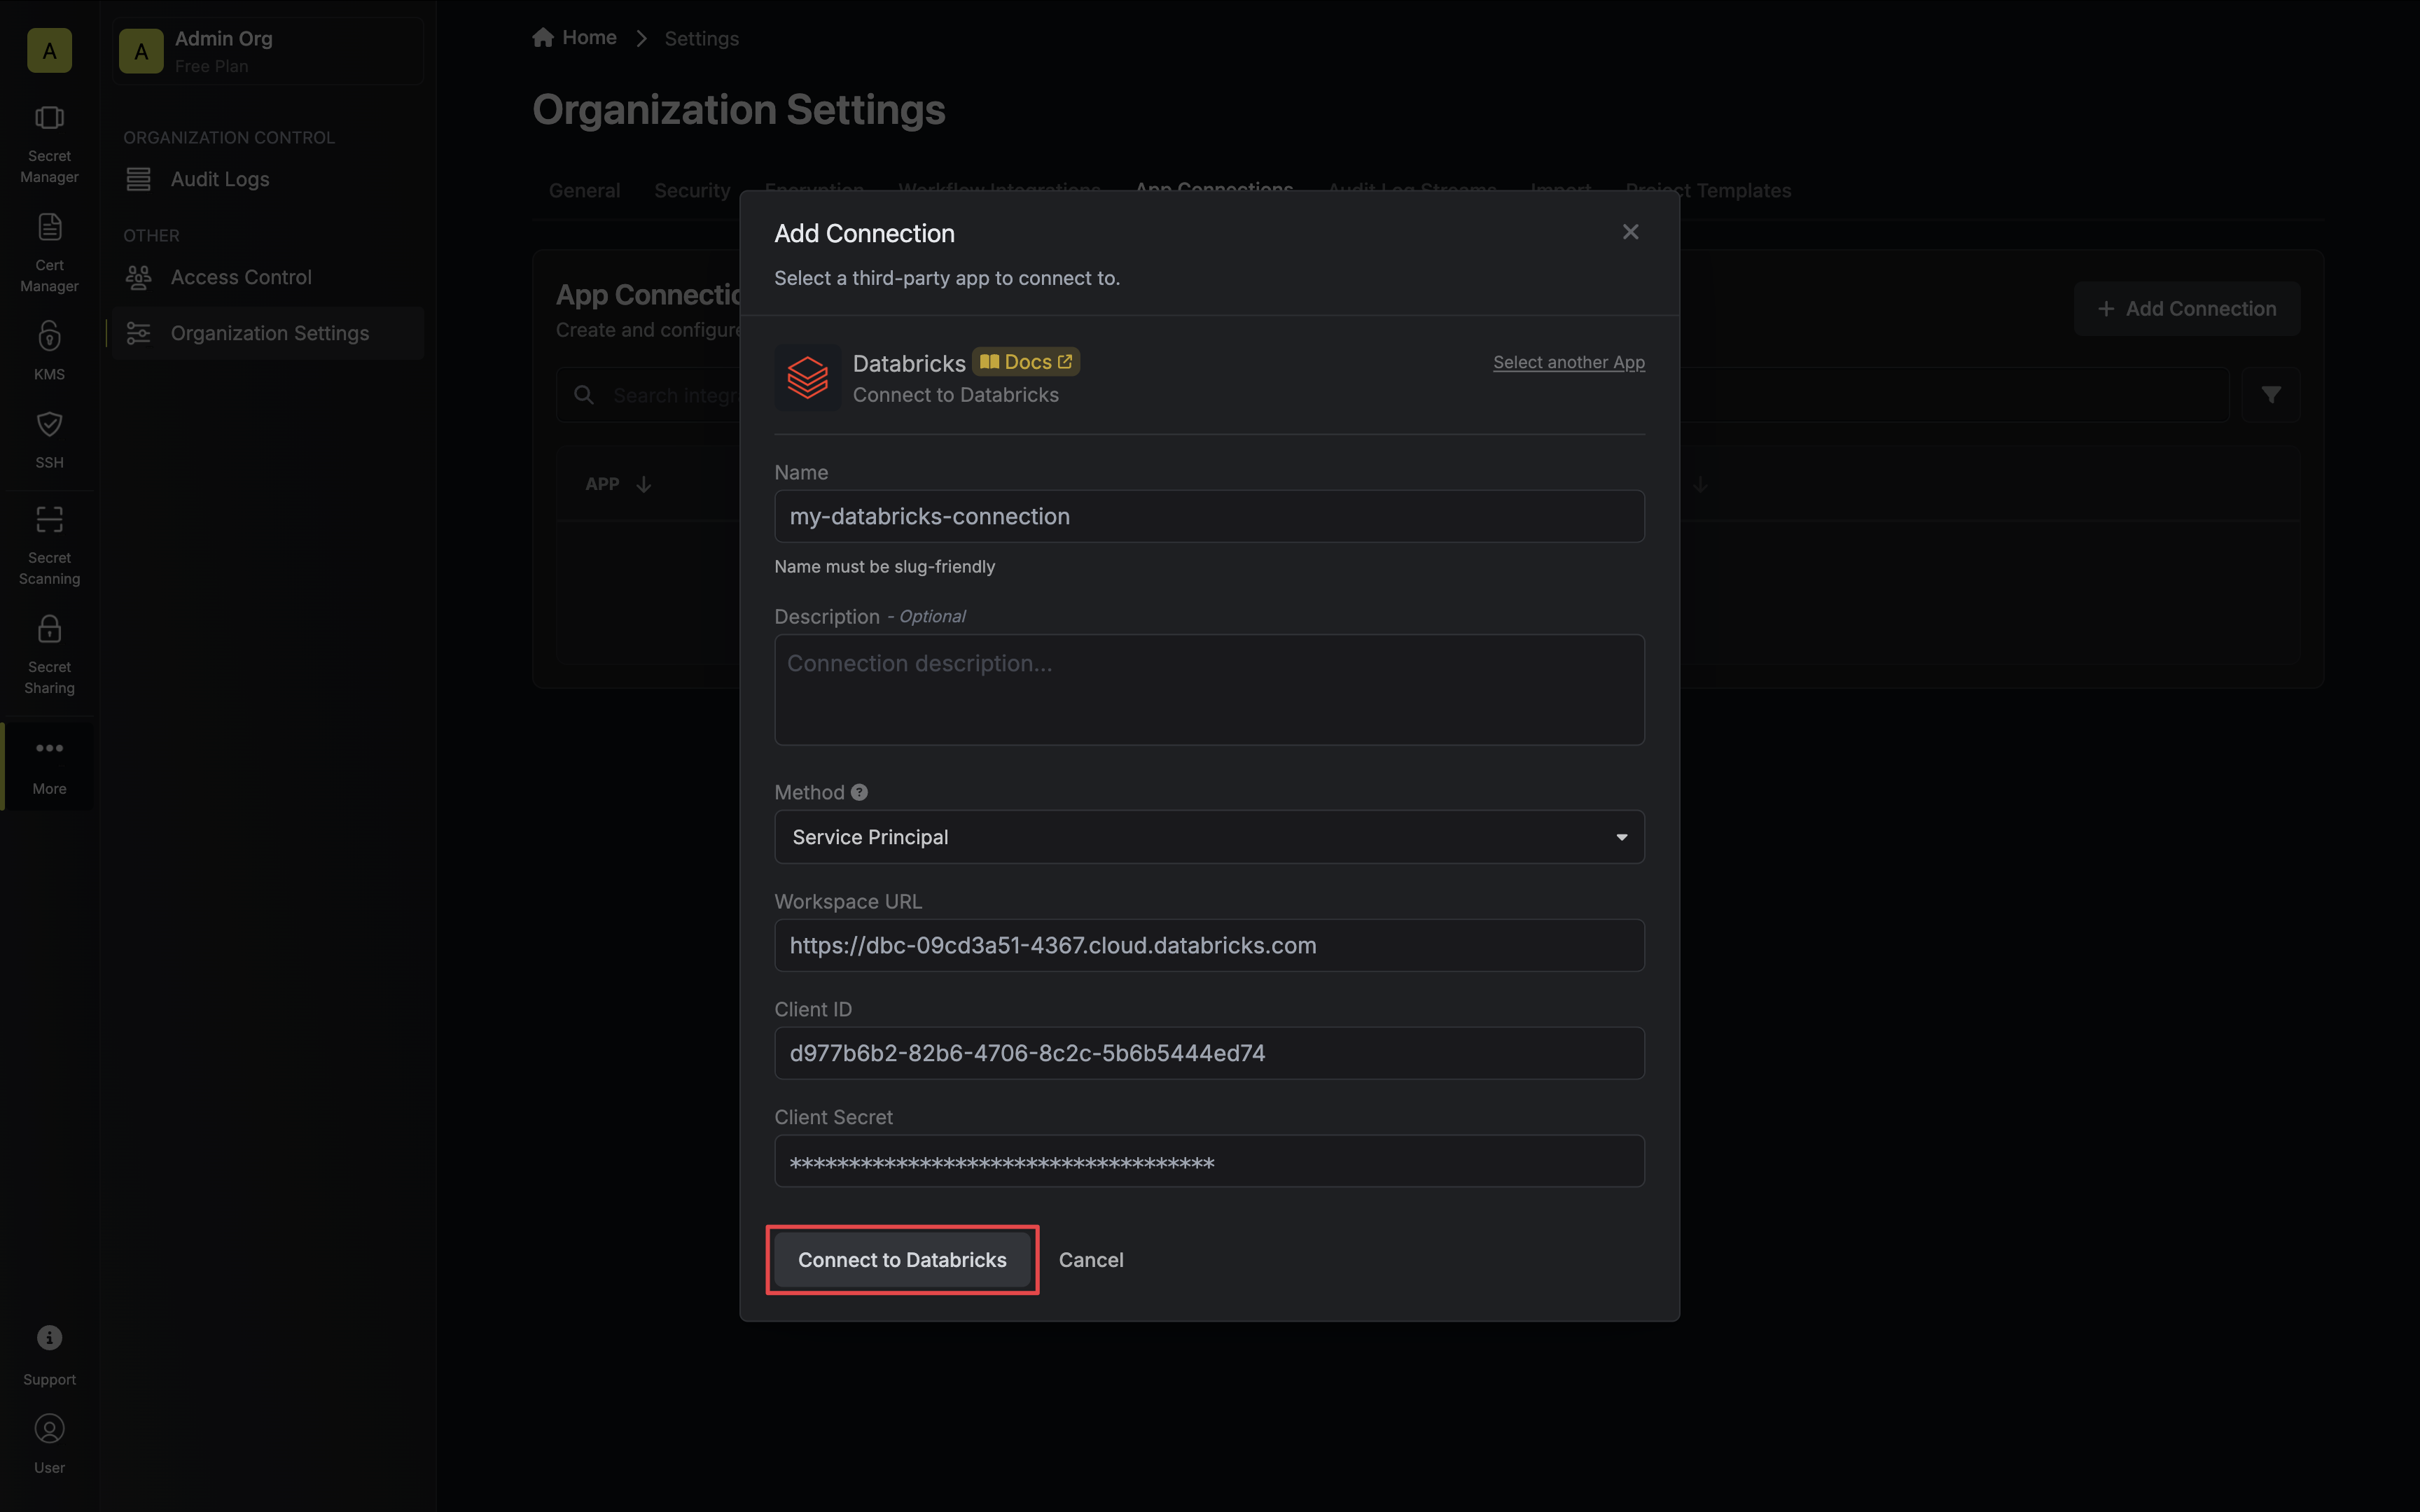
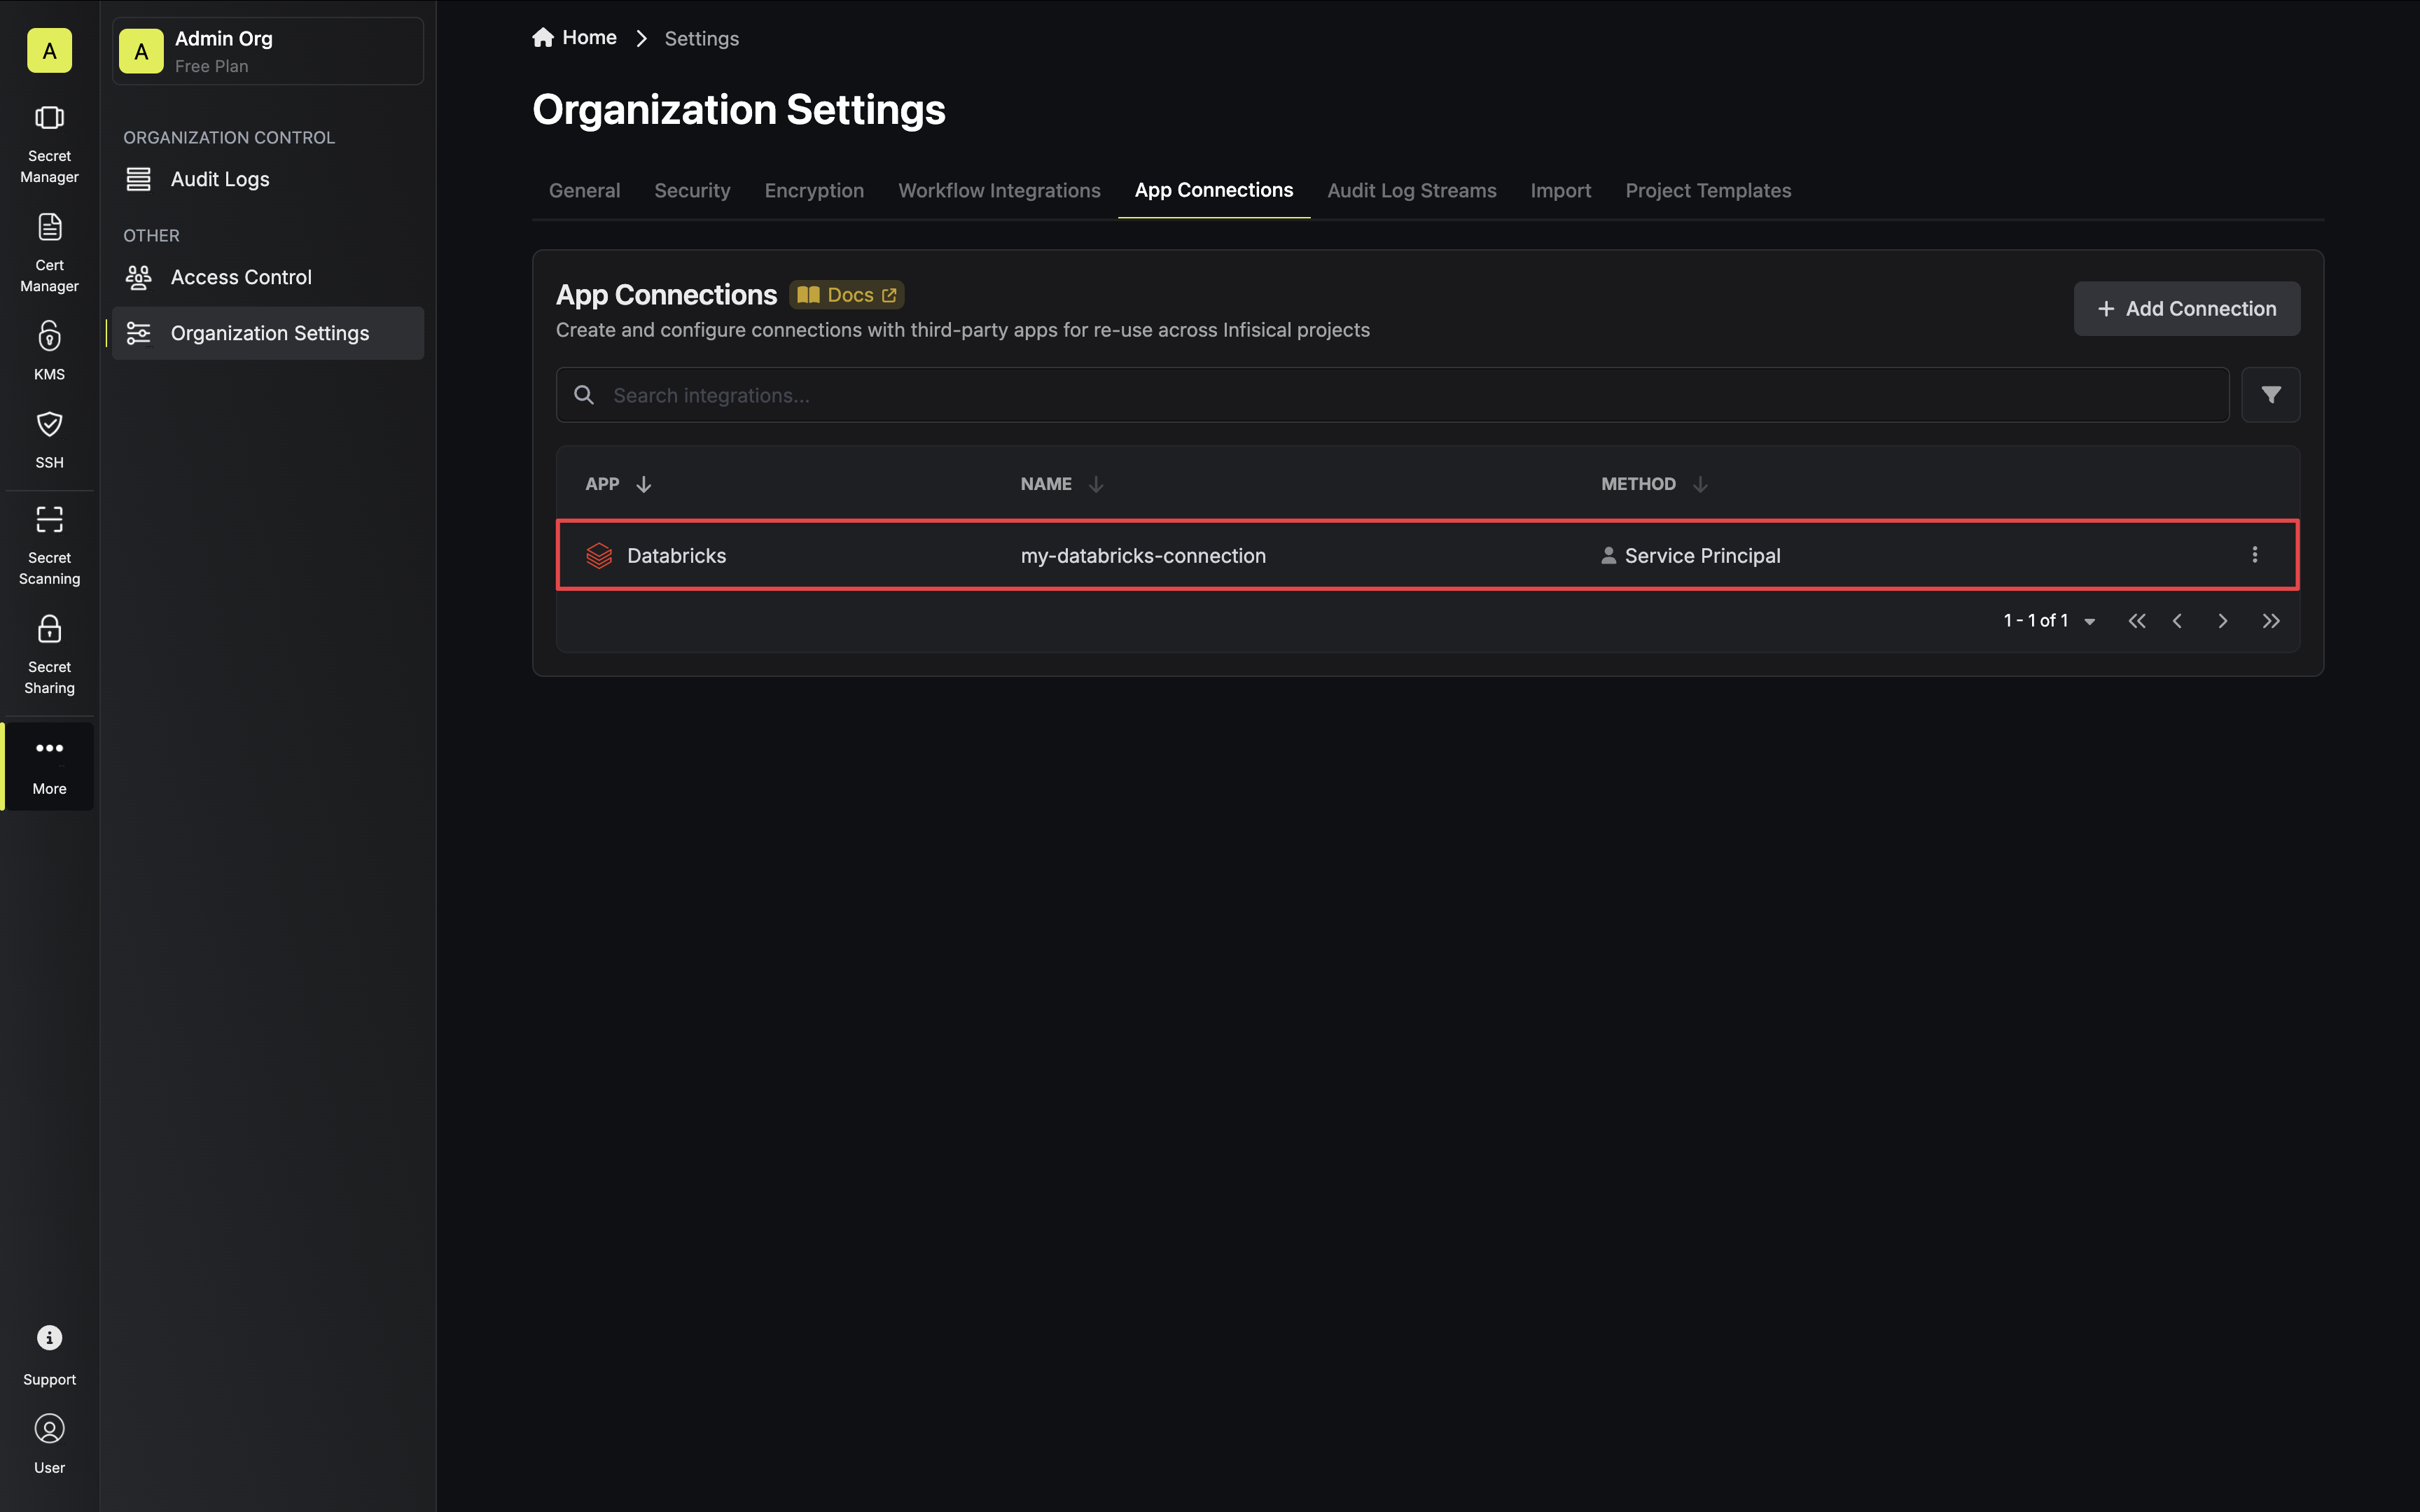
By default, Infisical Cloud is a secure, multi-tenant service. For enterprises with stricter isolation or regulatory needs, dedicated cloud instances are available.
Contact [sales@infisical.com](mailto:sales@infisical.com) to learn more.
The open-source core is available under the MIT license. Additional enterprise features and support are available with a commercial license.
Contact [sales@infisical.com](mailto:sales@infisical.com) to learn more.
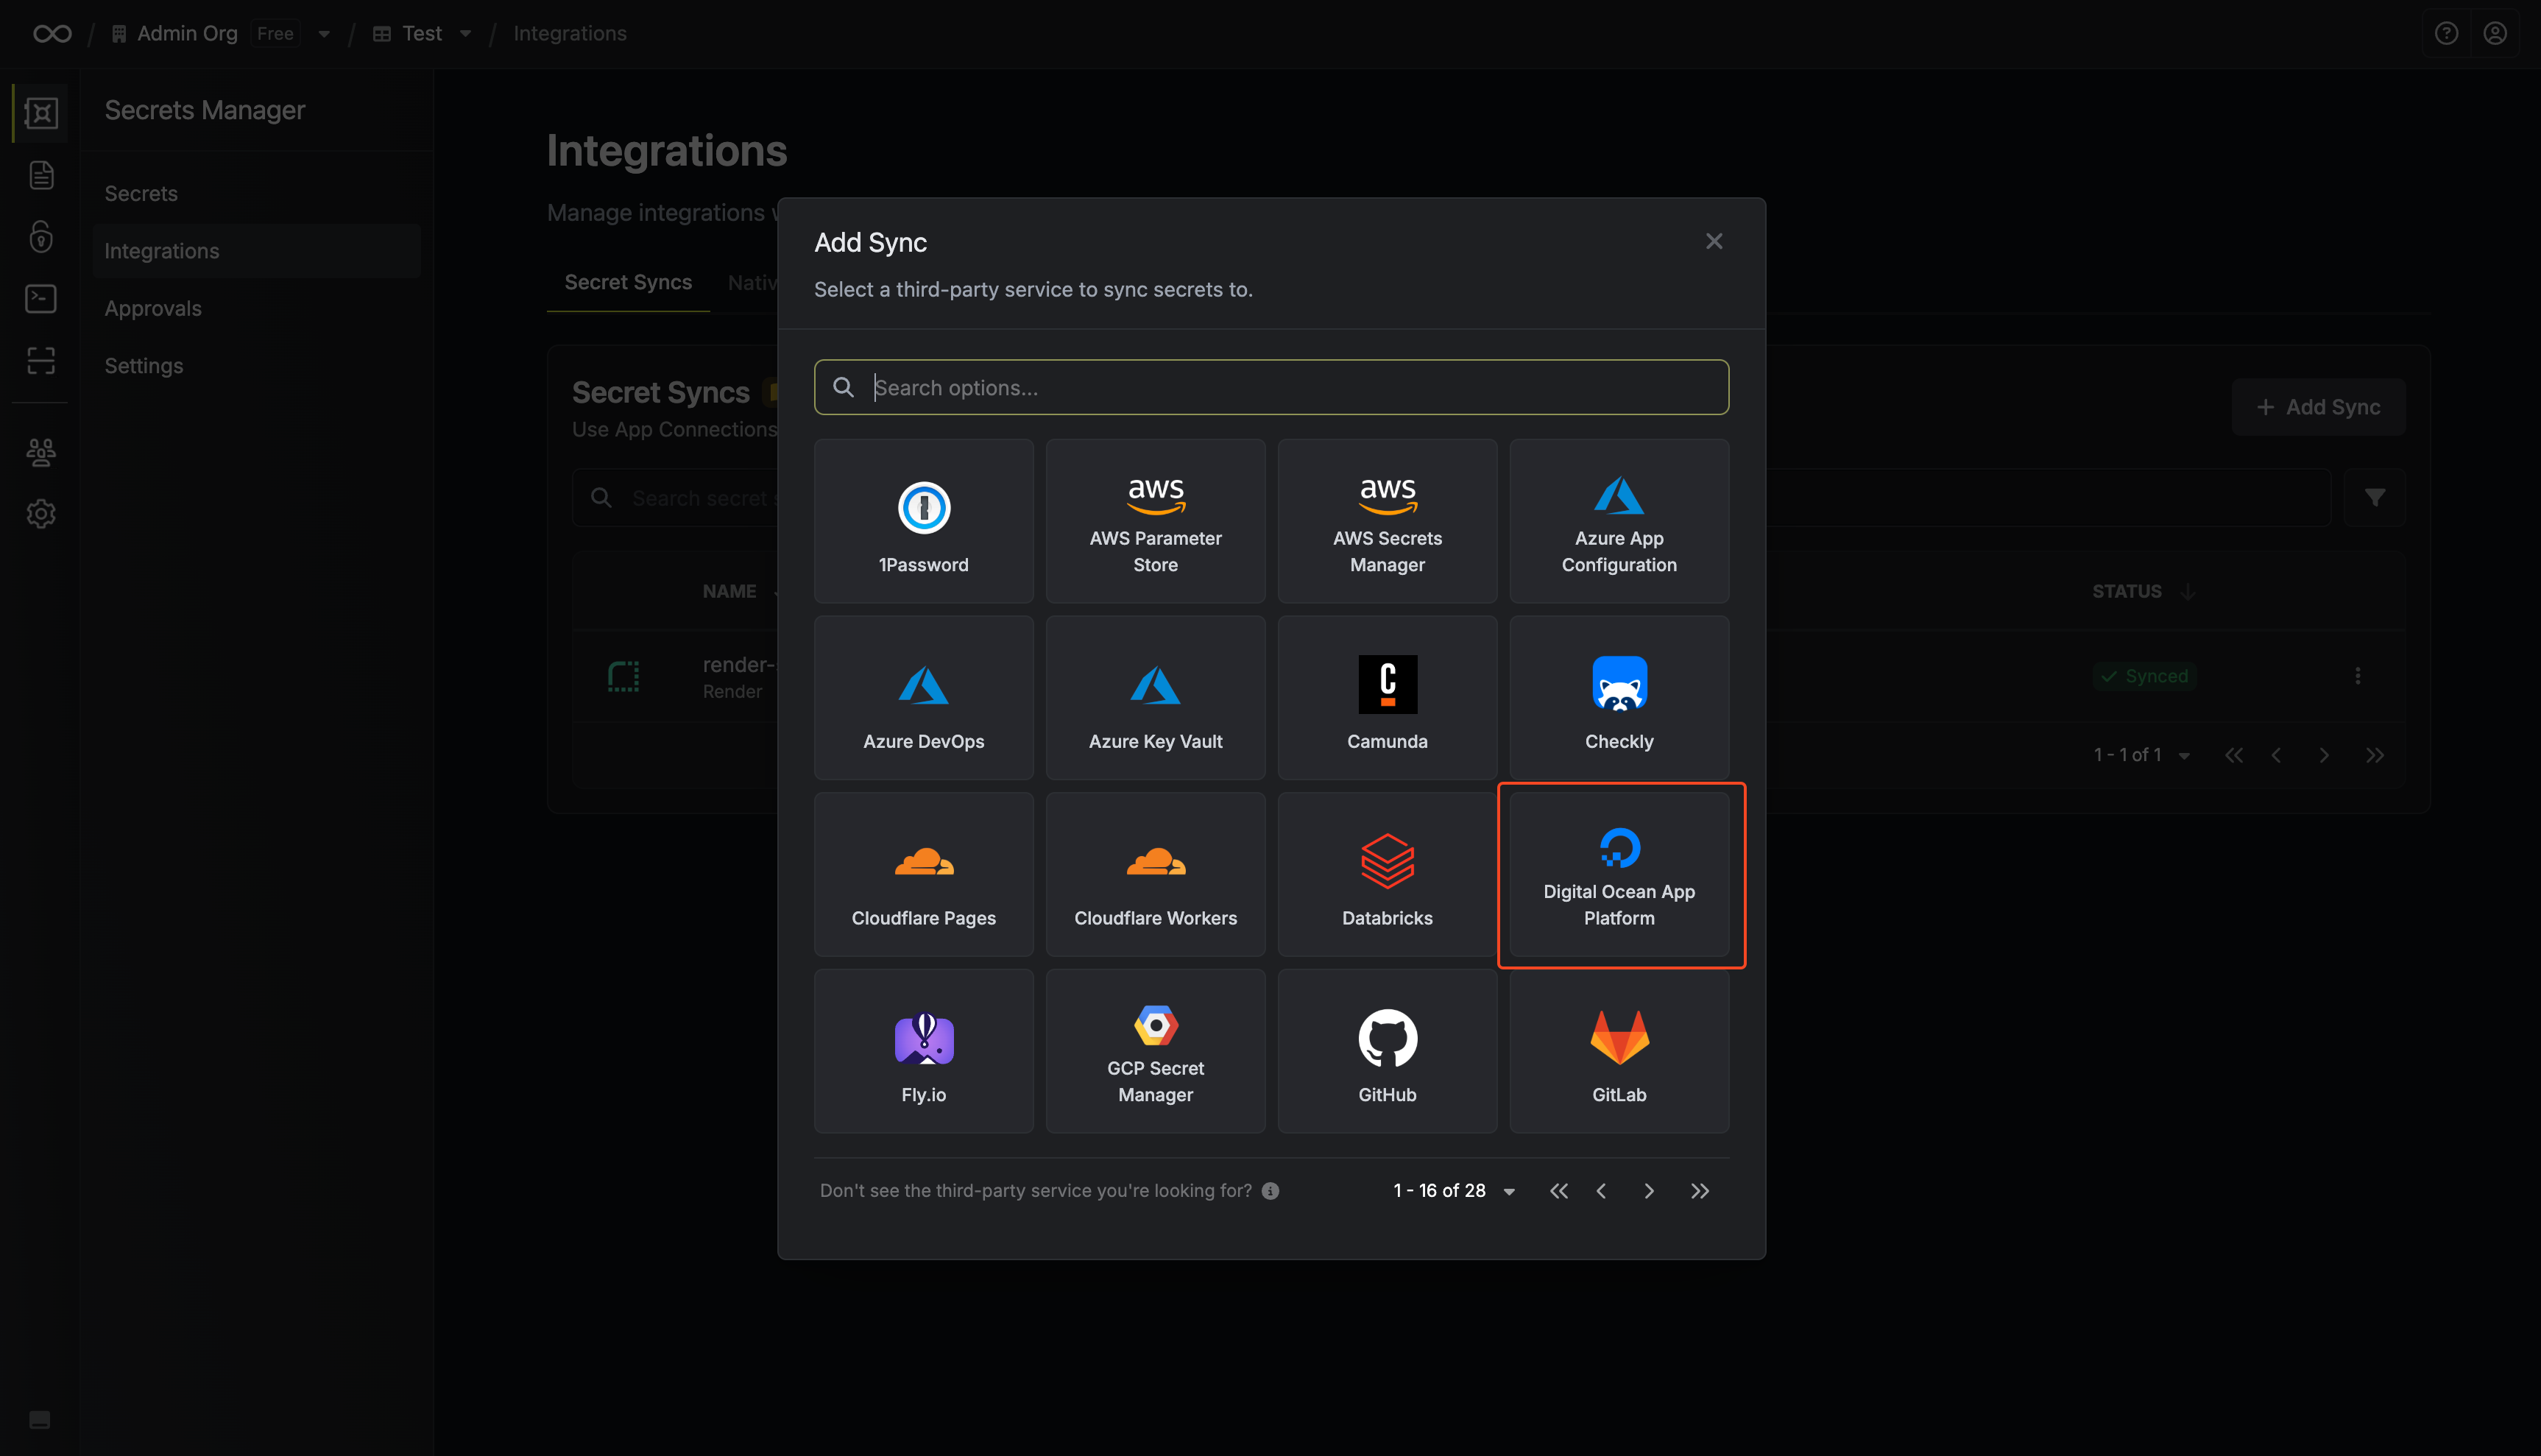
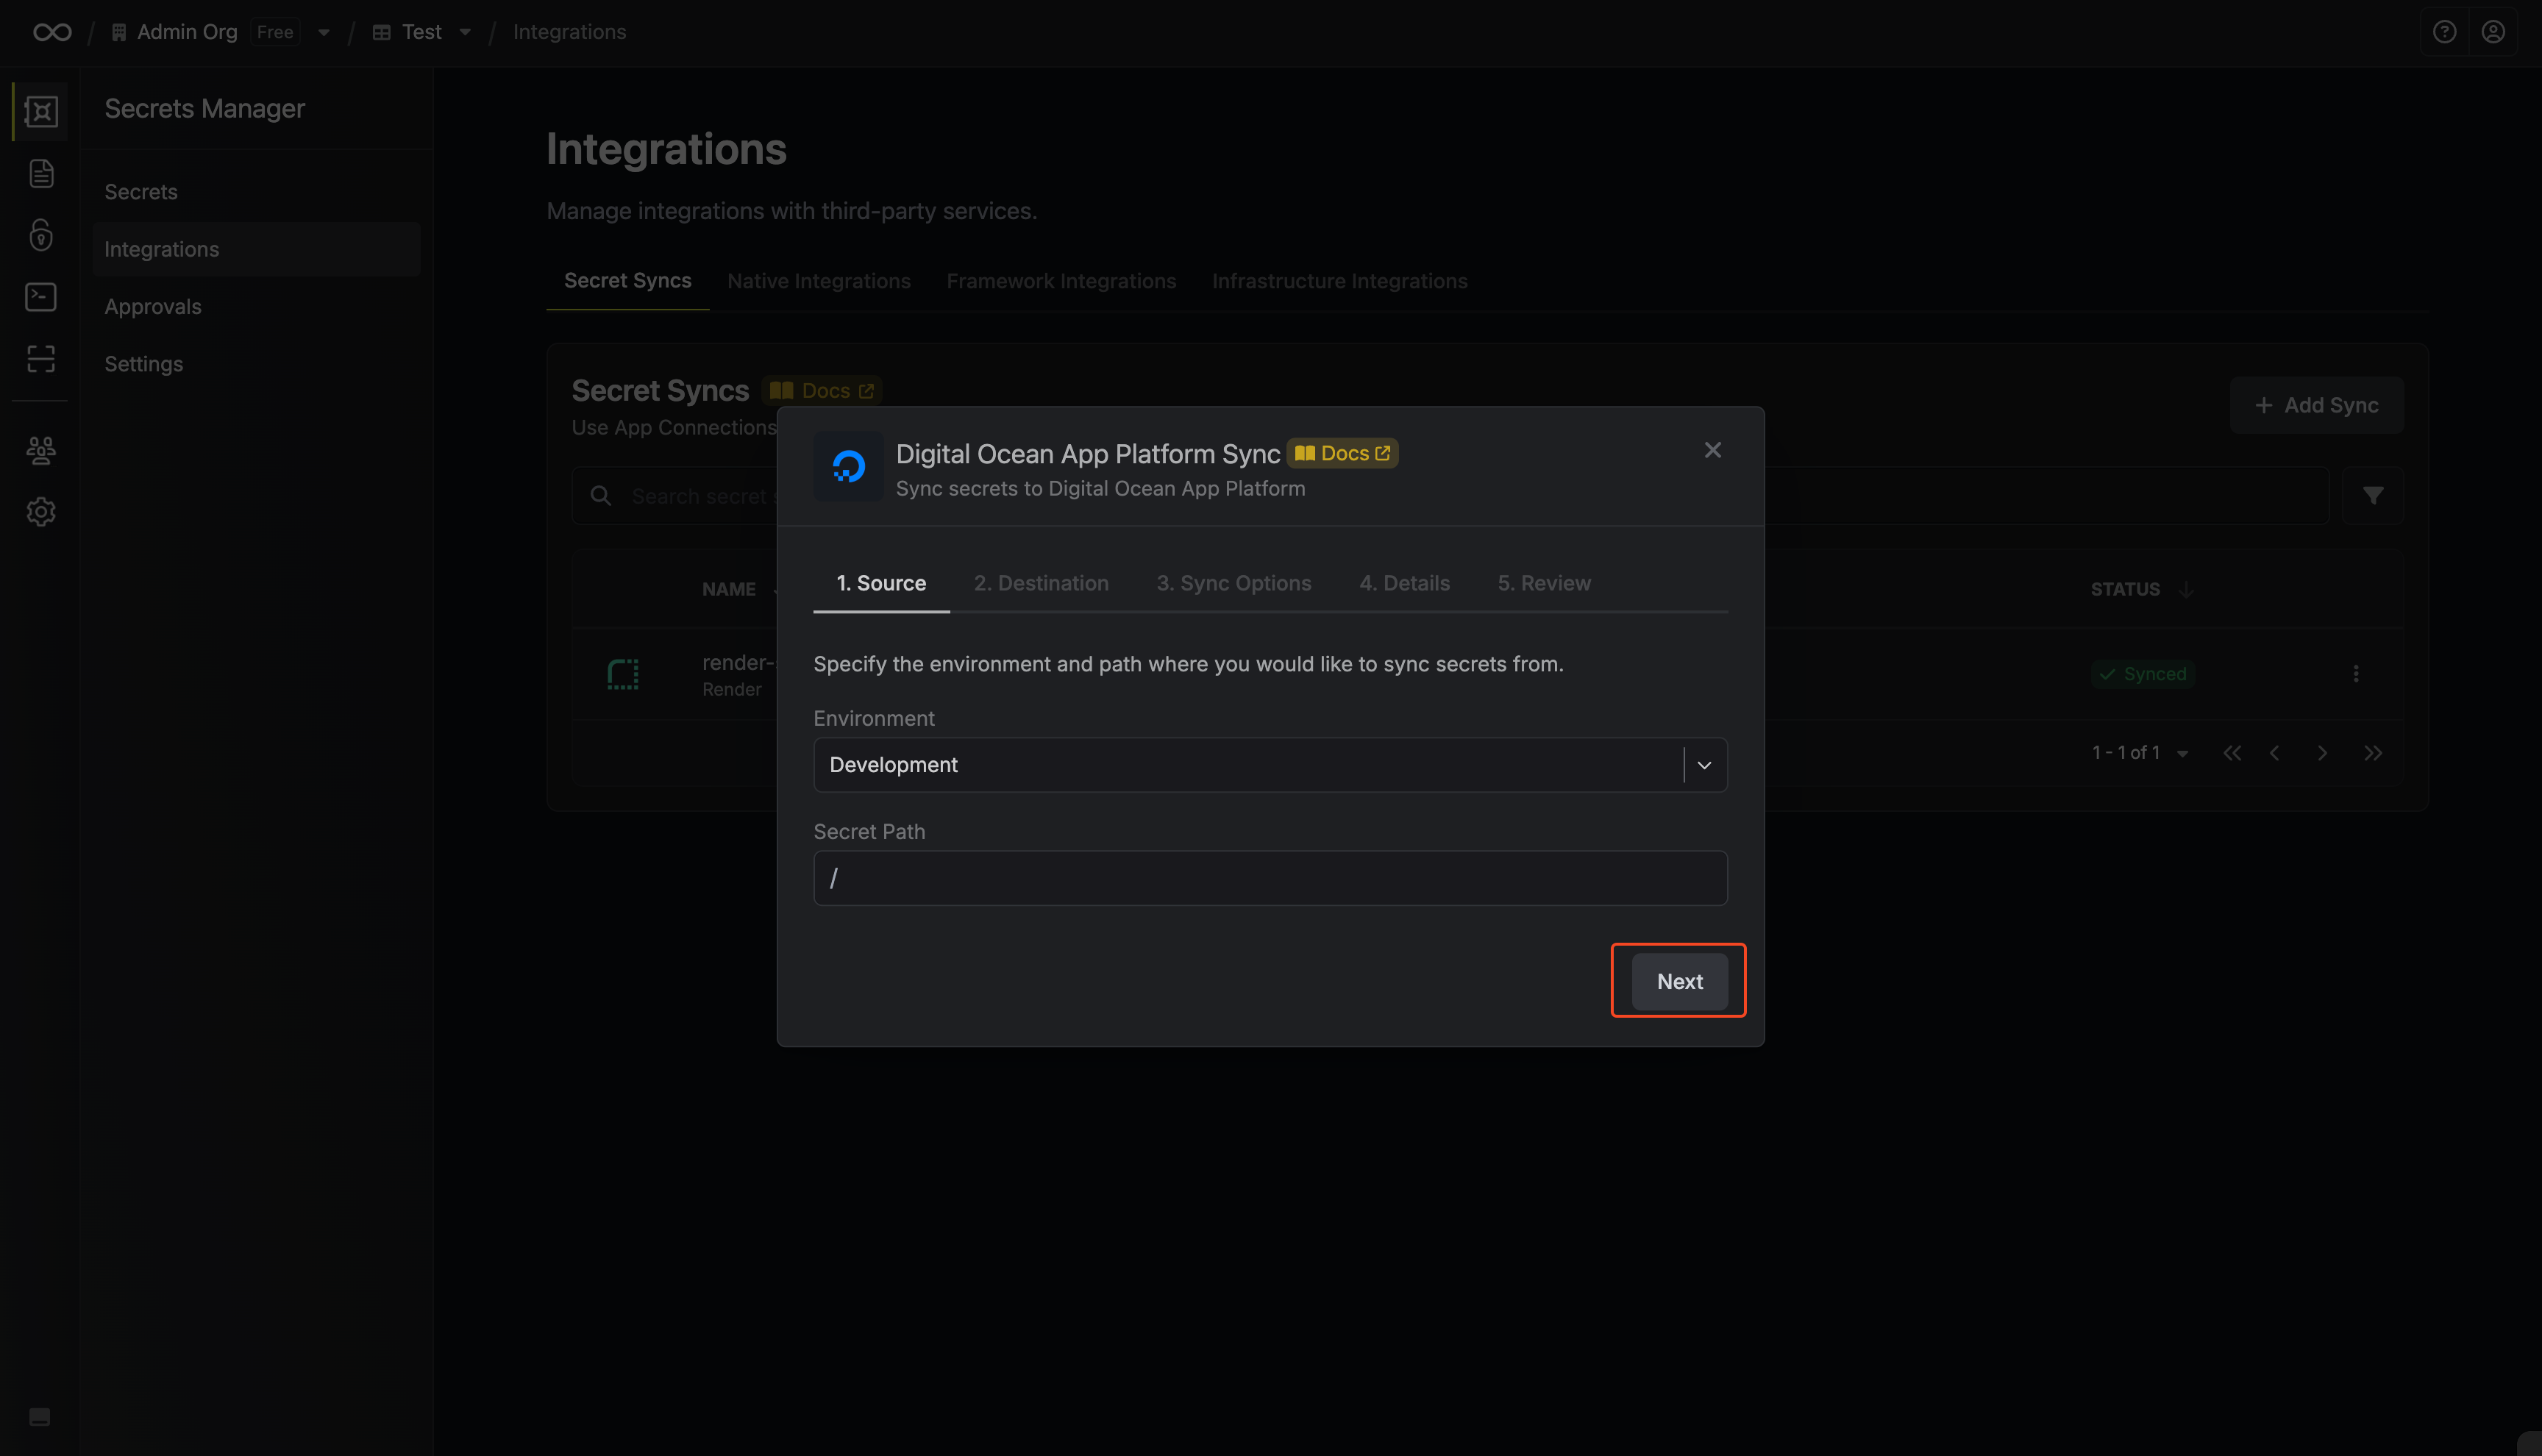 * **Environment**: The project environment to retrieve secrets from.
* **Secret Path**: The folder path to retrieve secrets from.
* **Environment**: The project environment to retrieve secrets from.
* **Secret Path**: The folder path to retrieve secrets from.
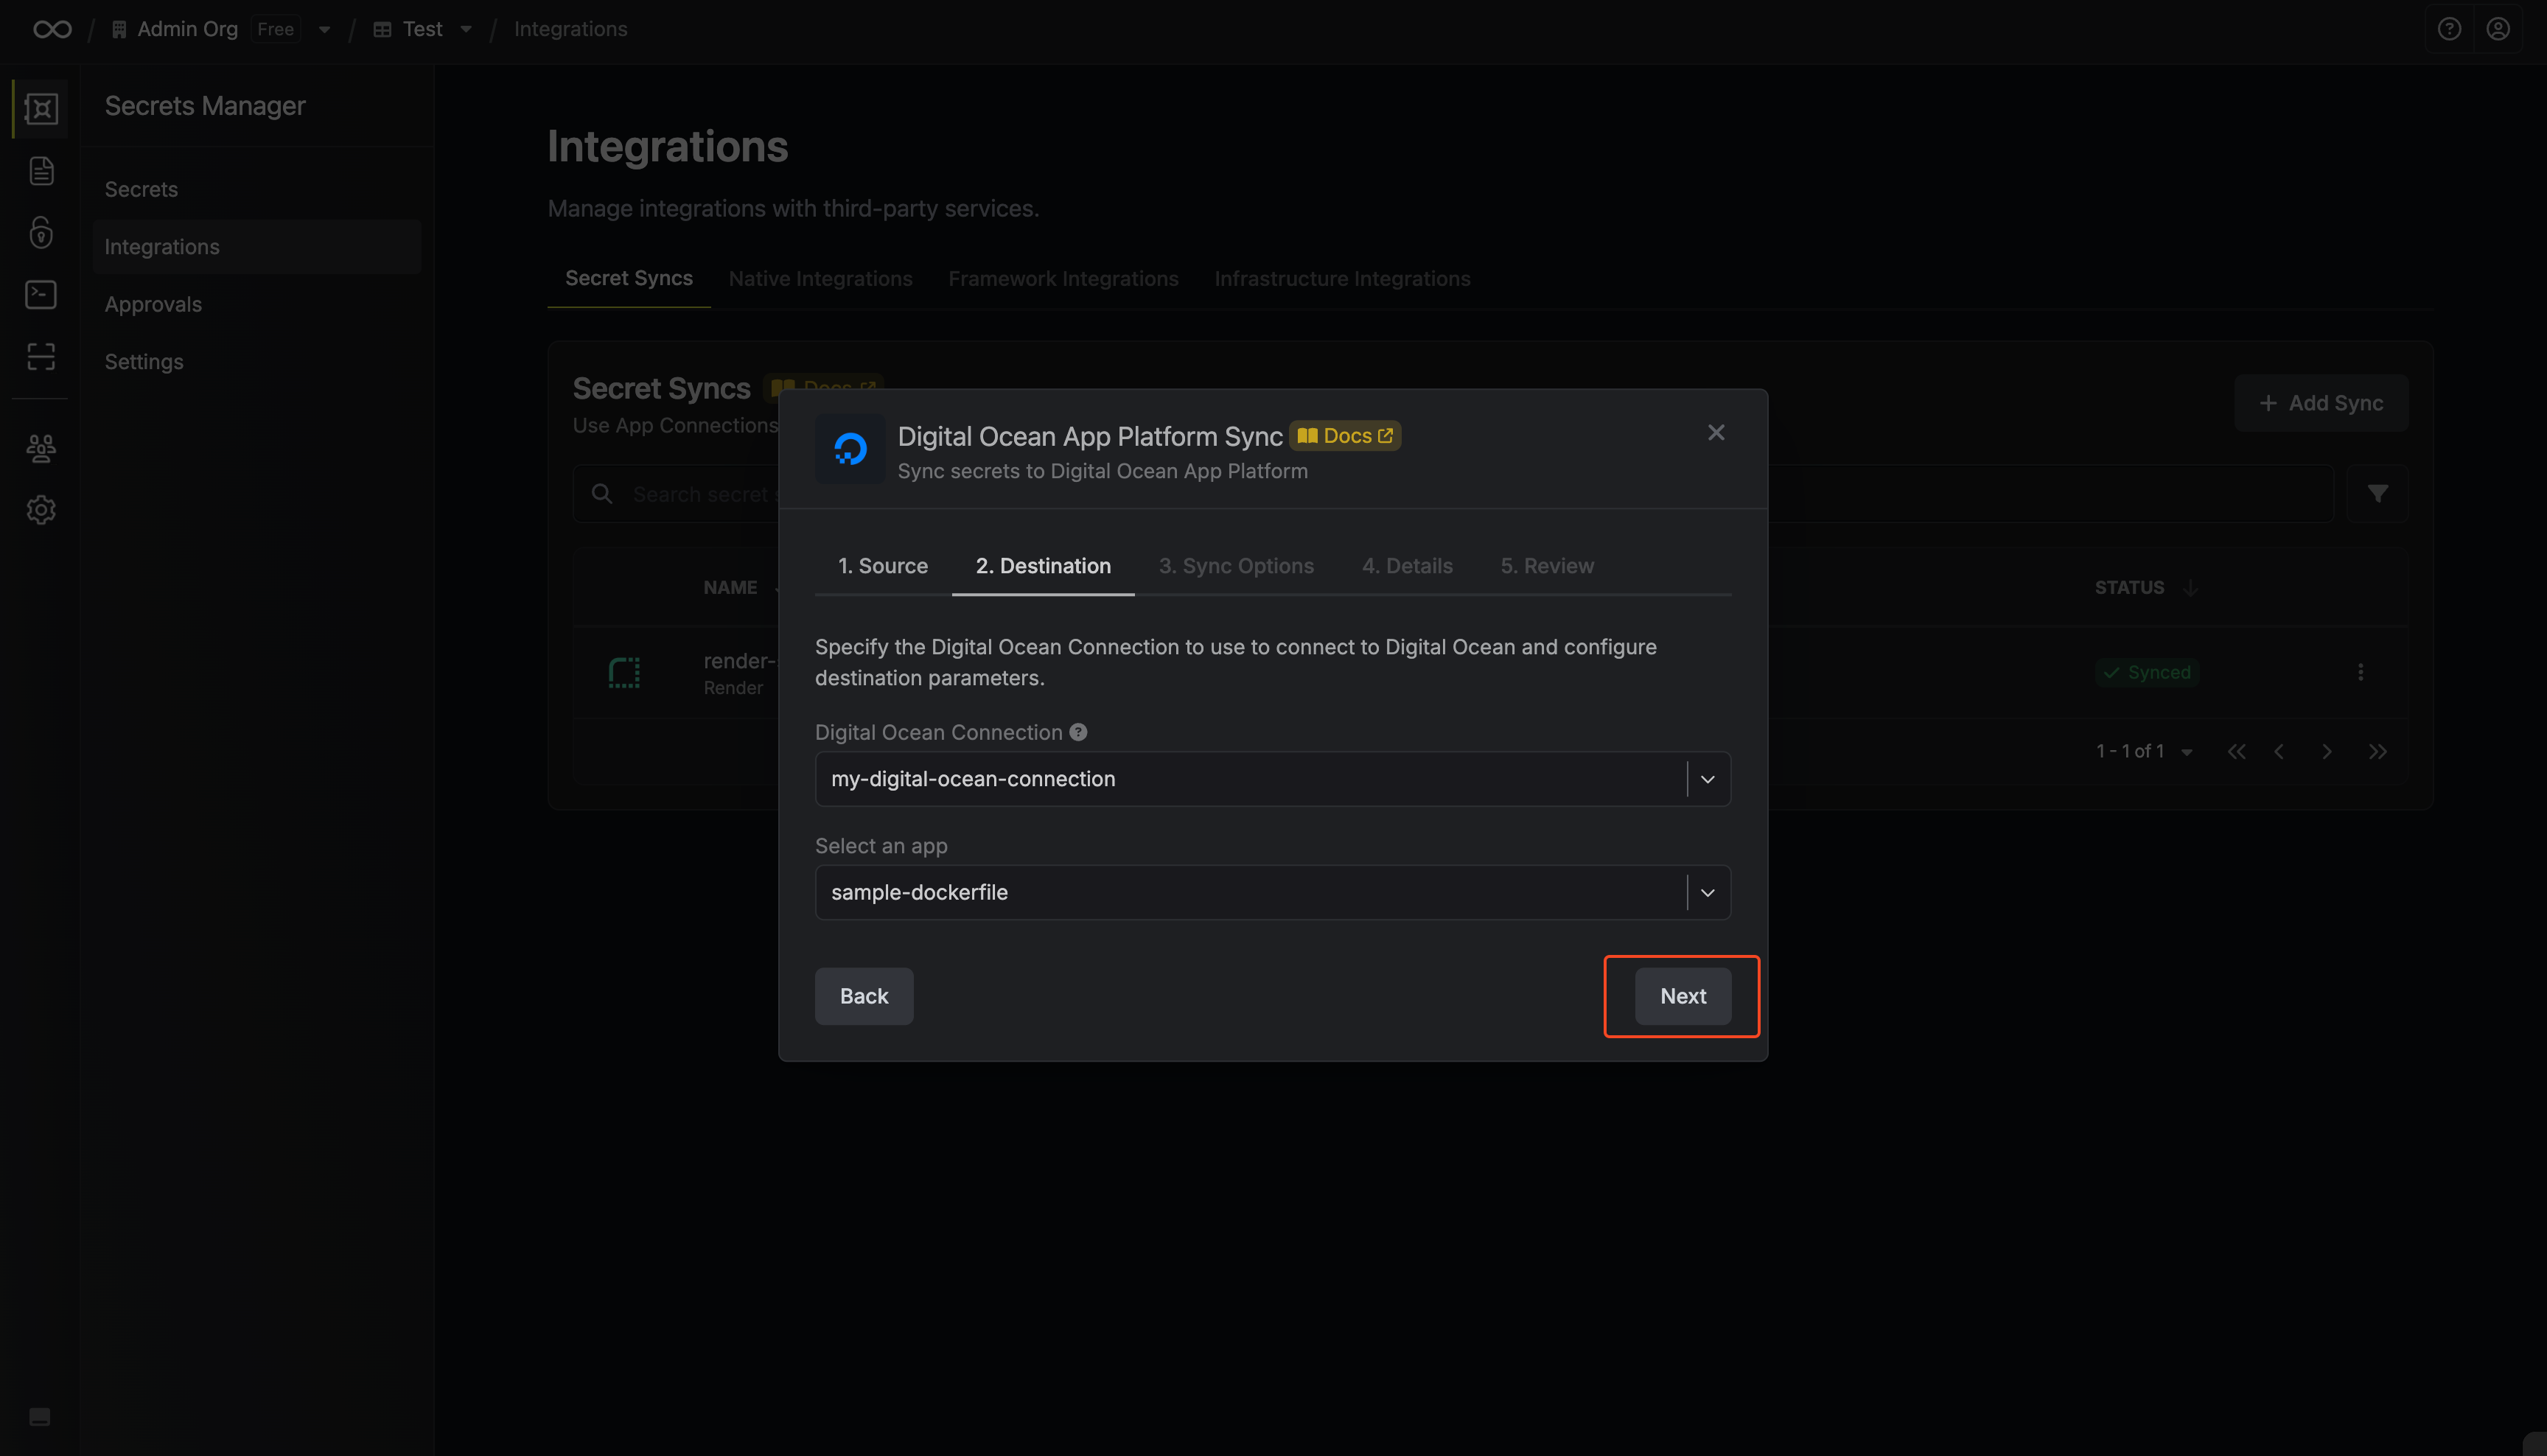 * **DigitalOcean Connection**: The DigitalOcean Connection to authenticate with.
* **App**: The App Platform app to sync secrets to.
* **DigitalOcean Connection**: The DigitalOcean Connection to authenticate with.
* **App**: The App Platform app to sync secrets to.
 * **Initial Sync Behavior**: Determines how Infisical should resolve the initial sync.
* **Overwrite Destination Secrets**: Removes any secrets at the destination endpoint not present in Infisical.
* **Initial Sync Behavior**: Determines how Infisical should resolve the initial sync.
* **Overwrite Destination Secrets**: Removes any secrets at the destination endpoint not present in Infisical.
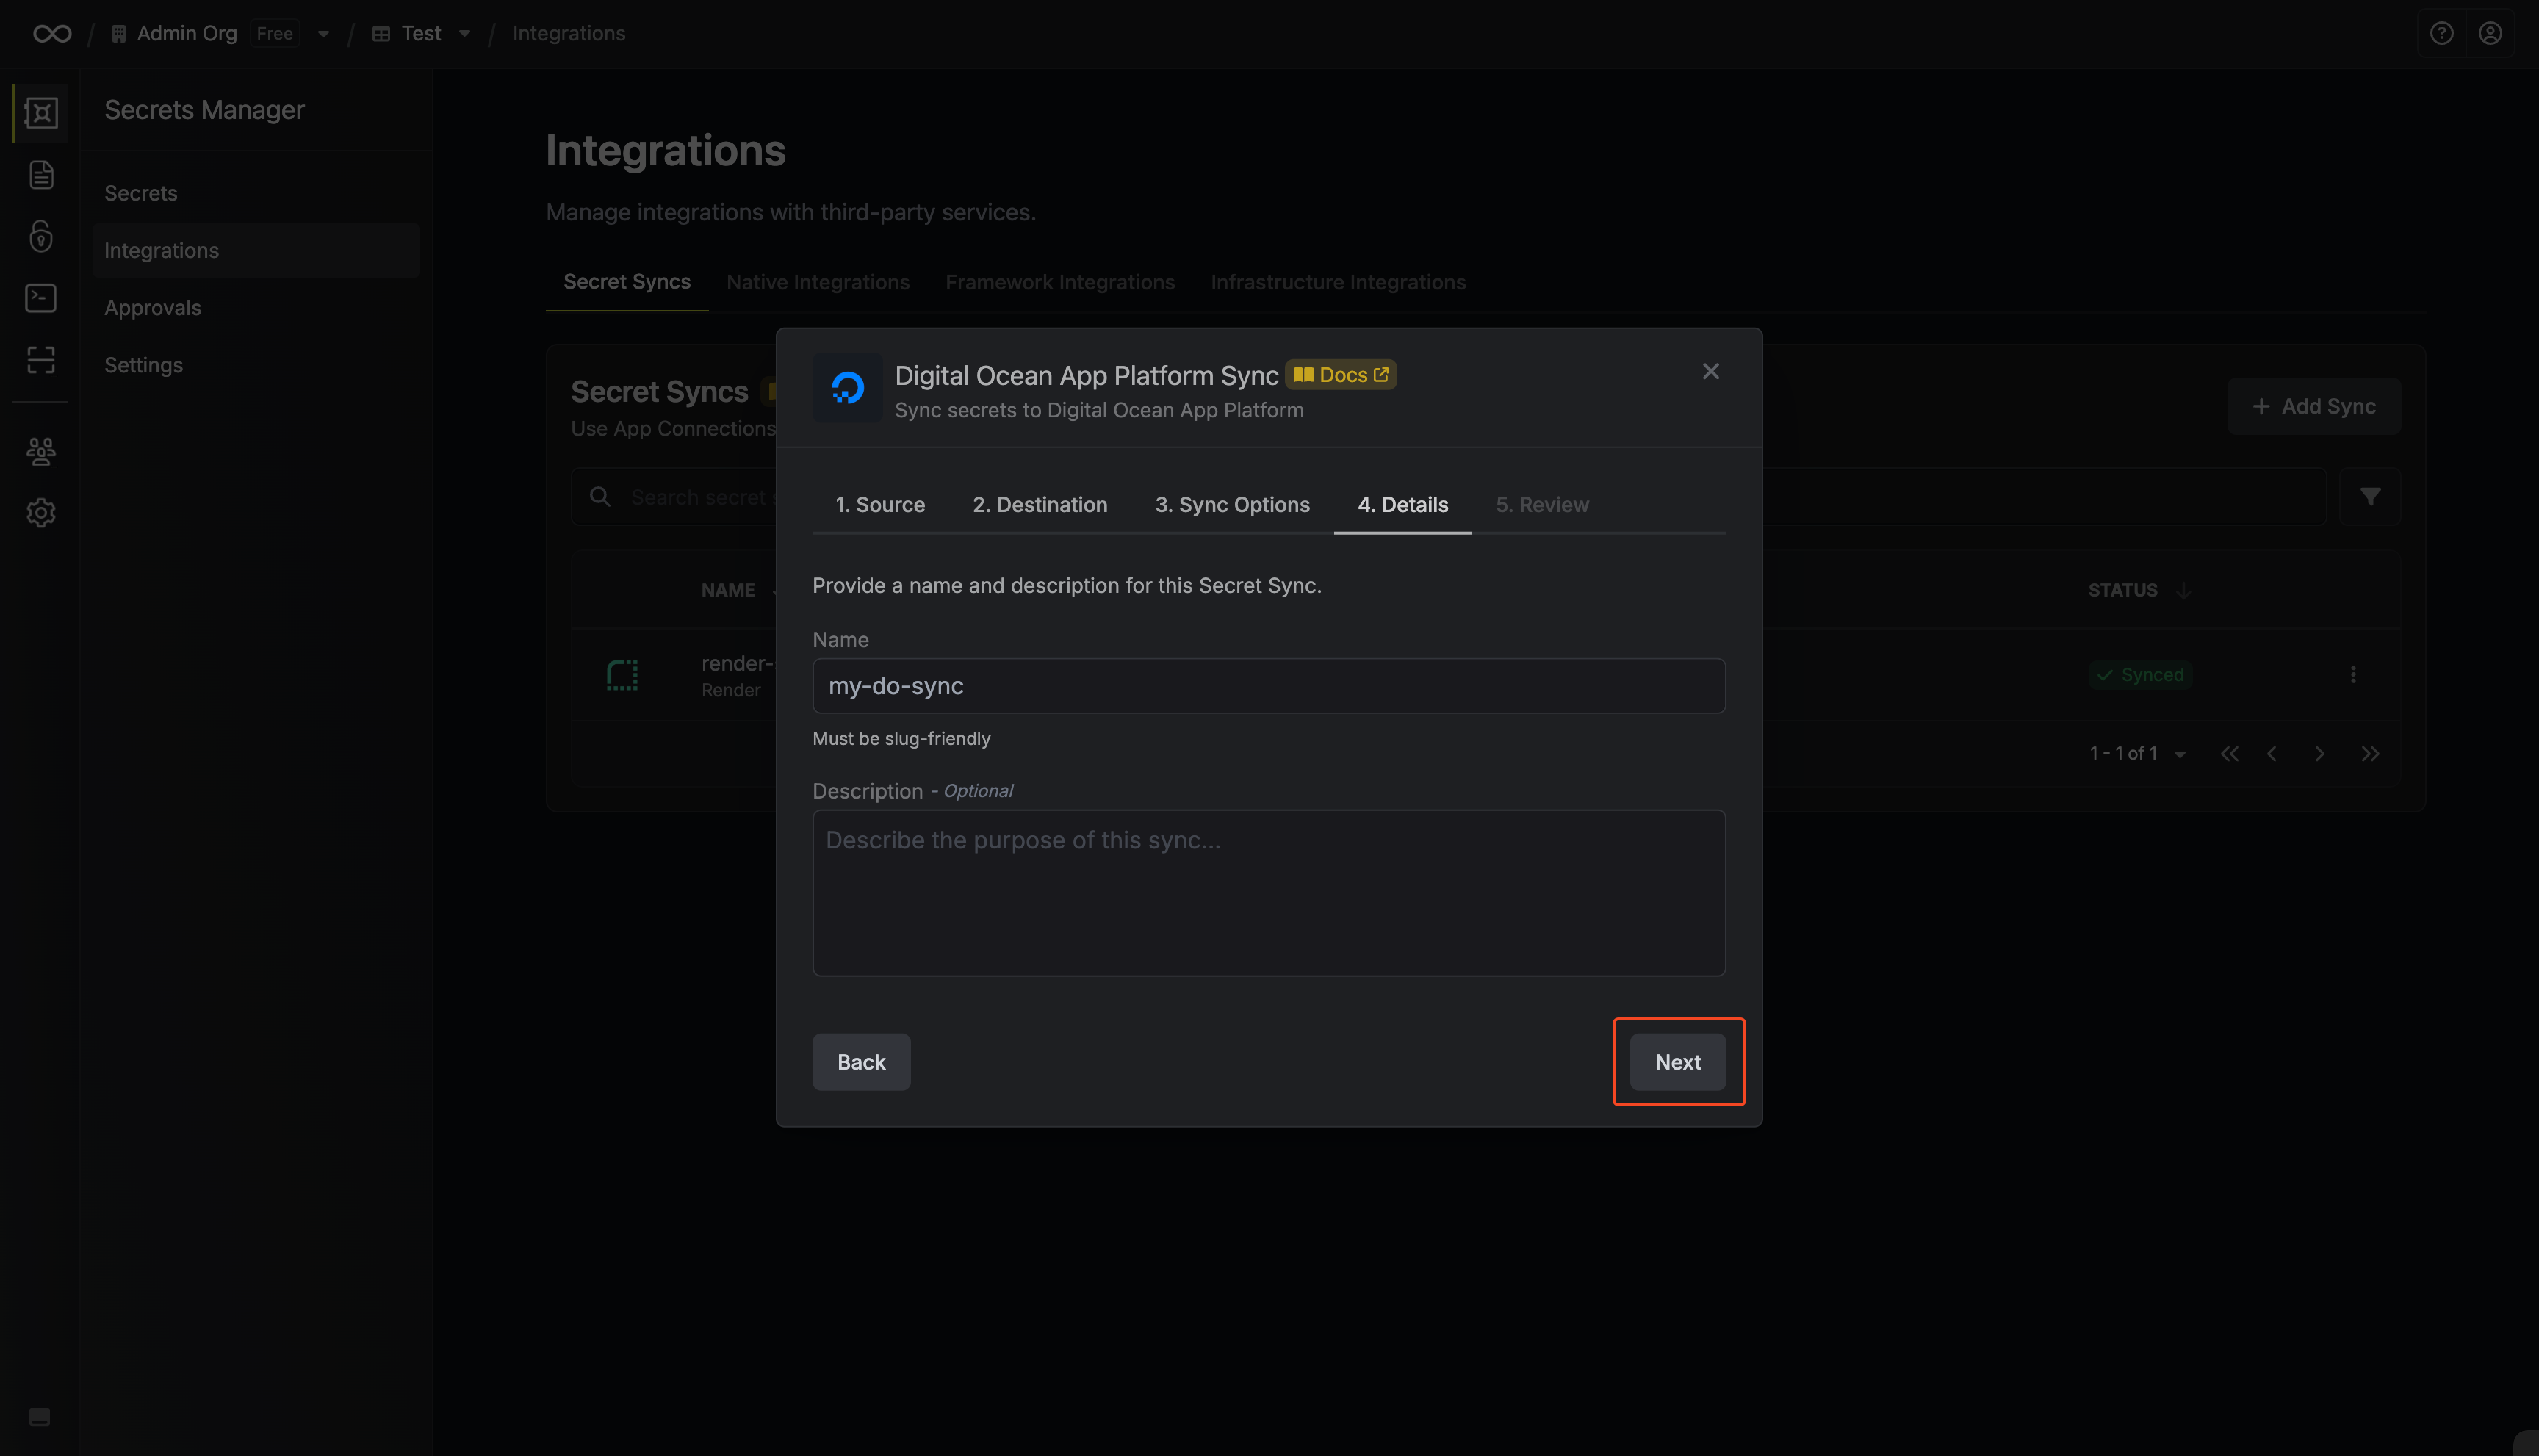 * **Name**: The name of your sync. Must be slug-friendly.
* **Description**: An optional description for your sync.
* **Name**: The name of your sync. Must be slug-friendly.
* **Description**: An optional description for your sync.
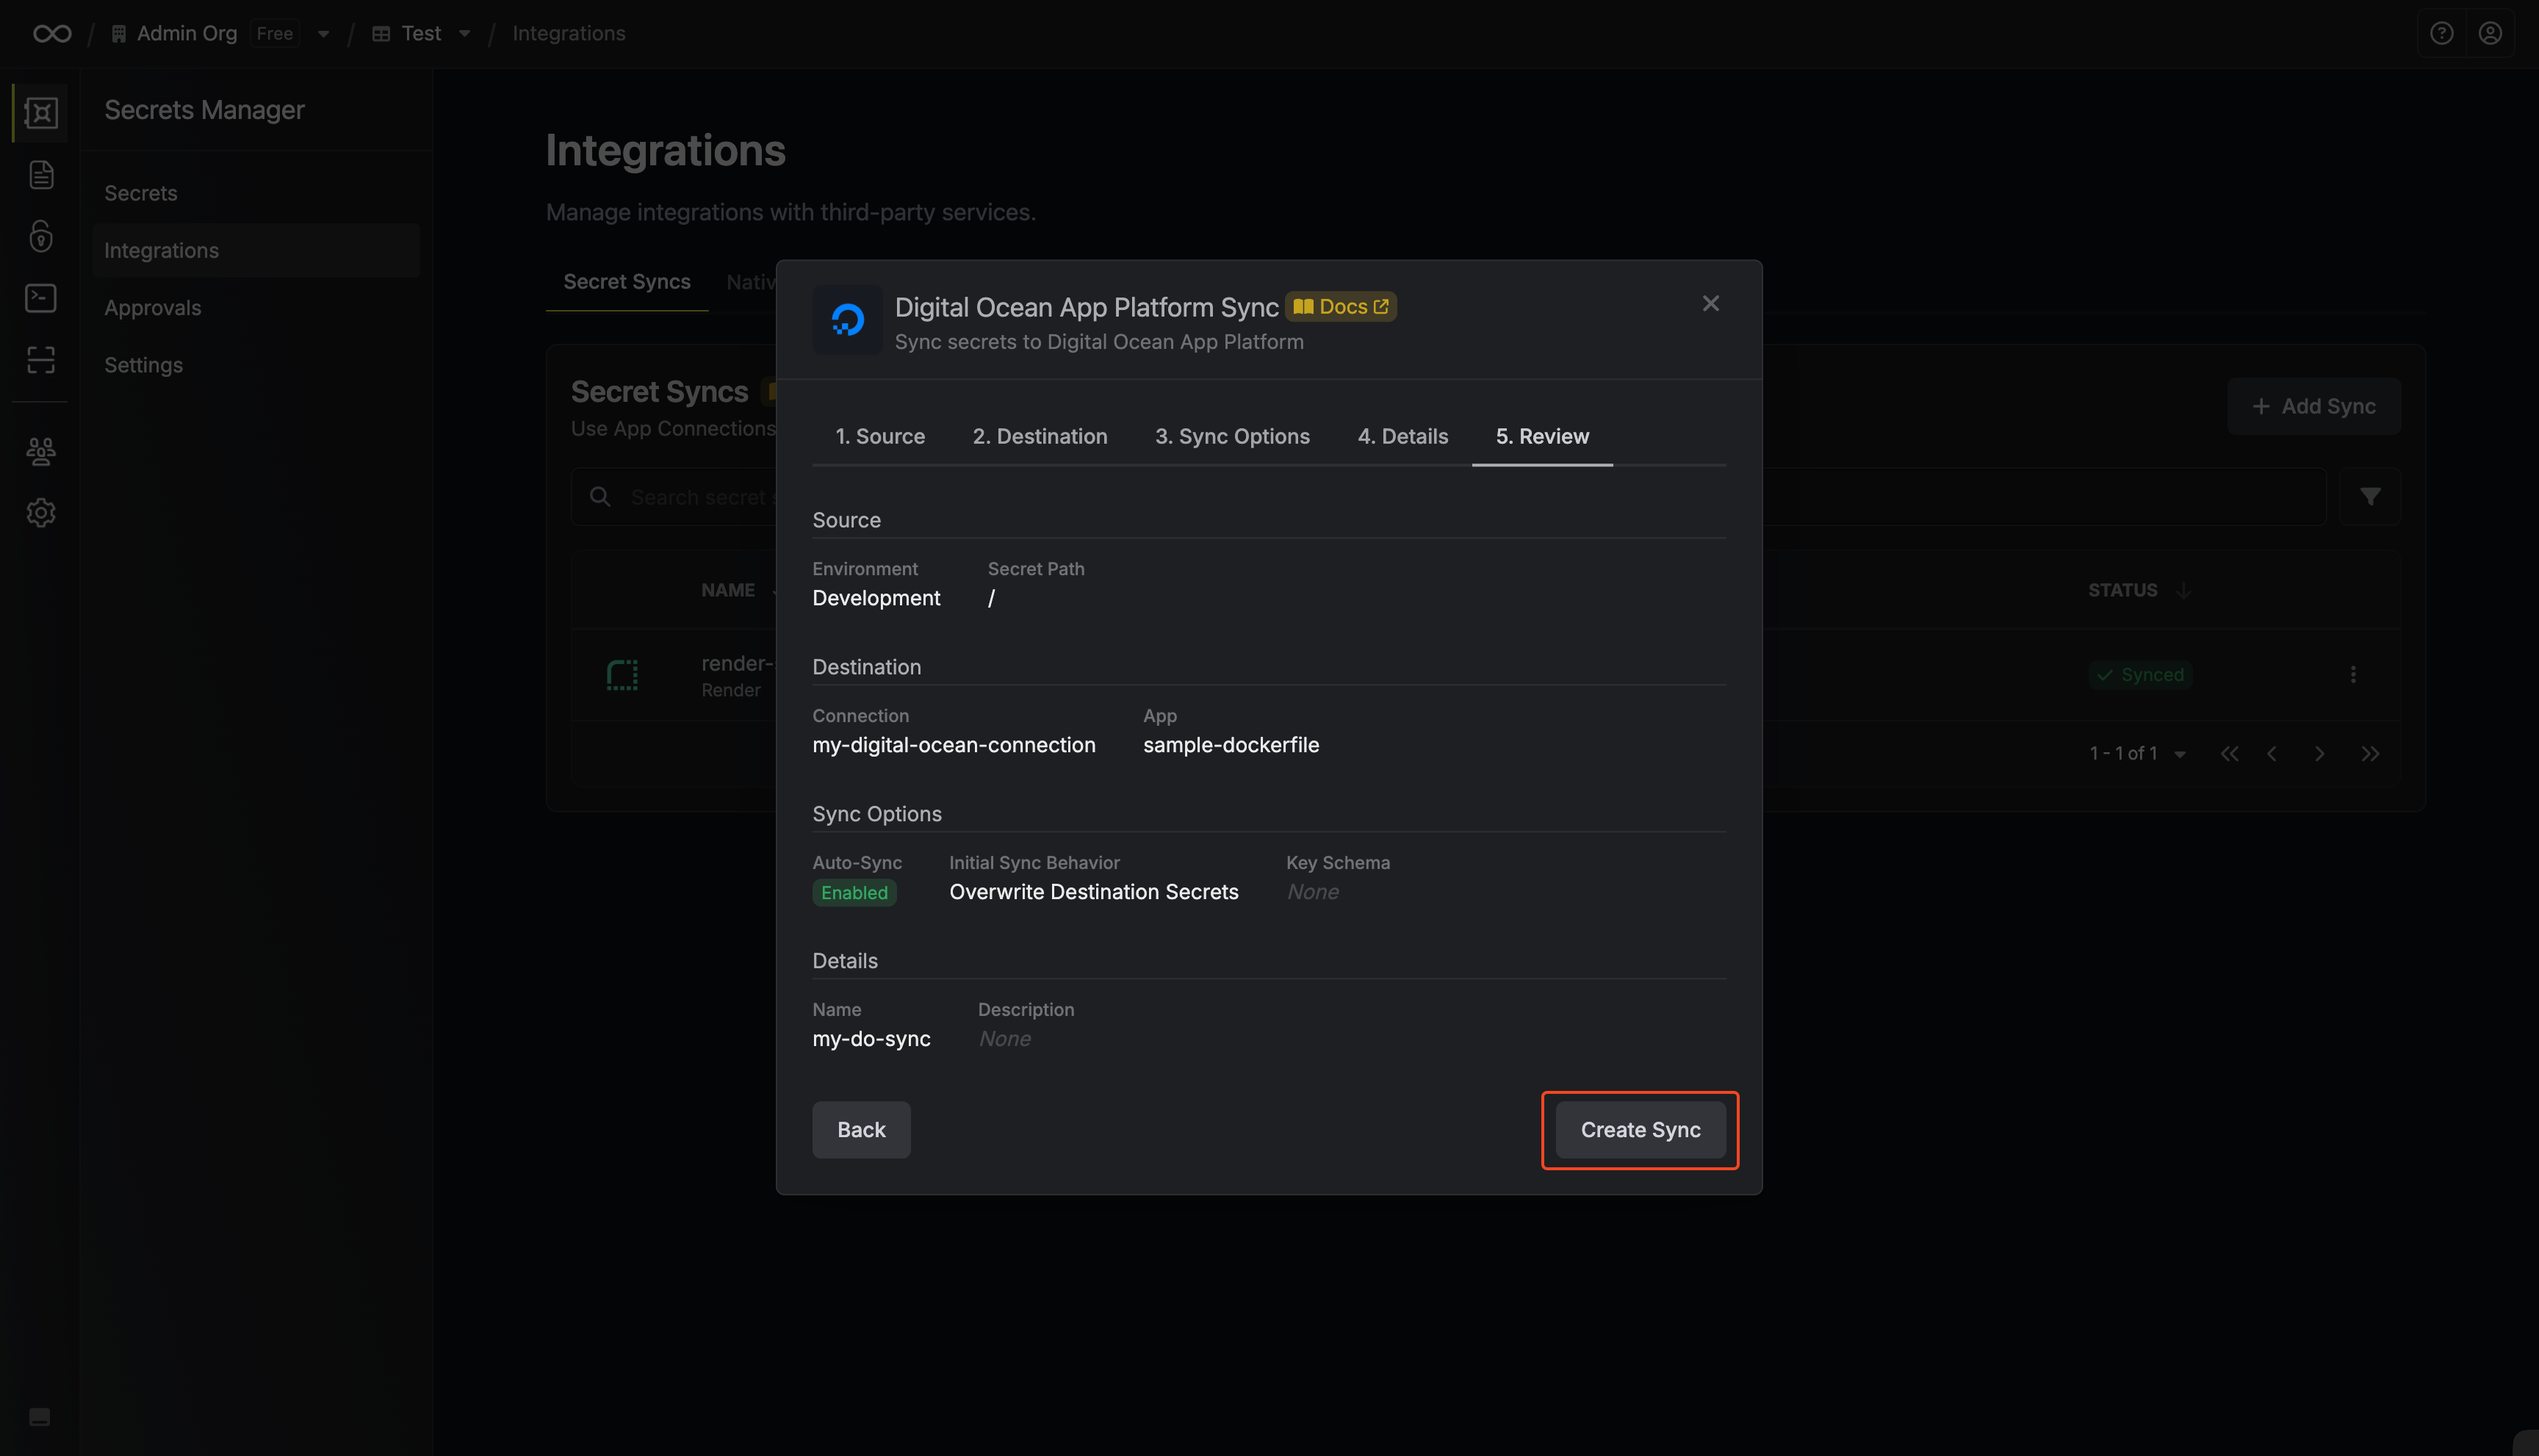
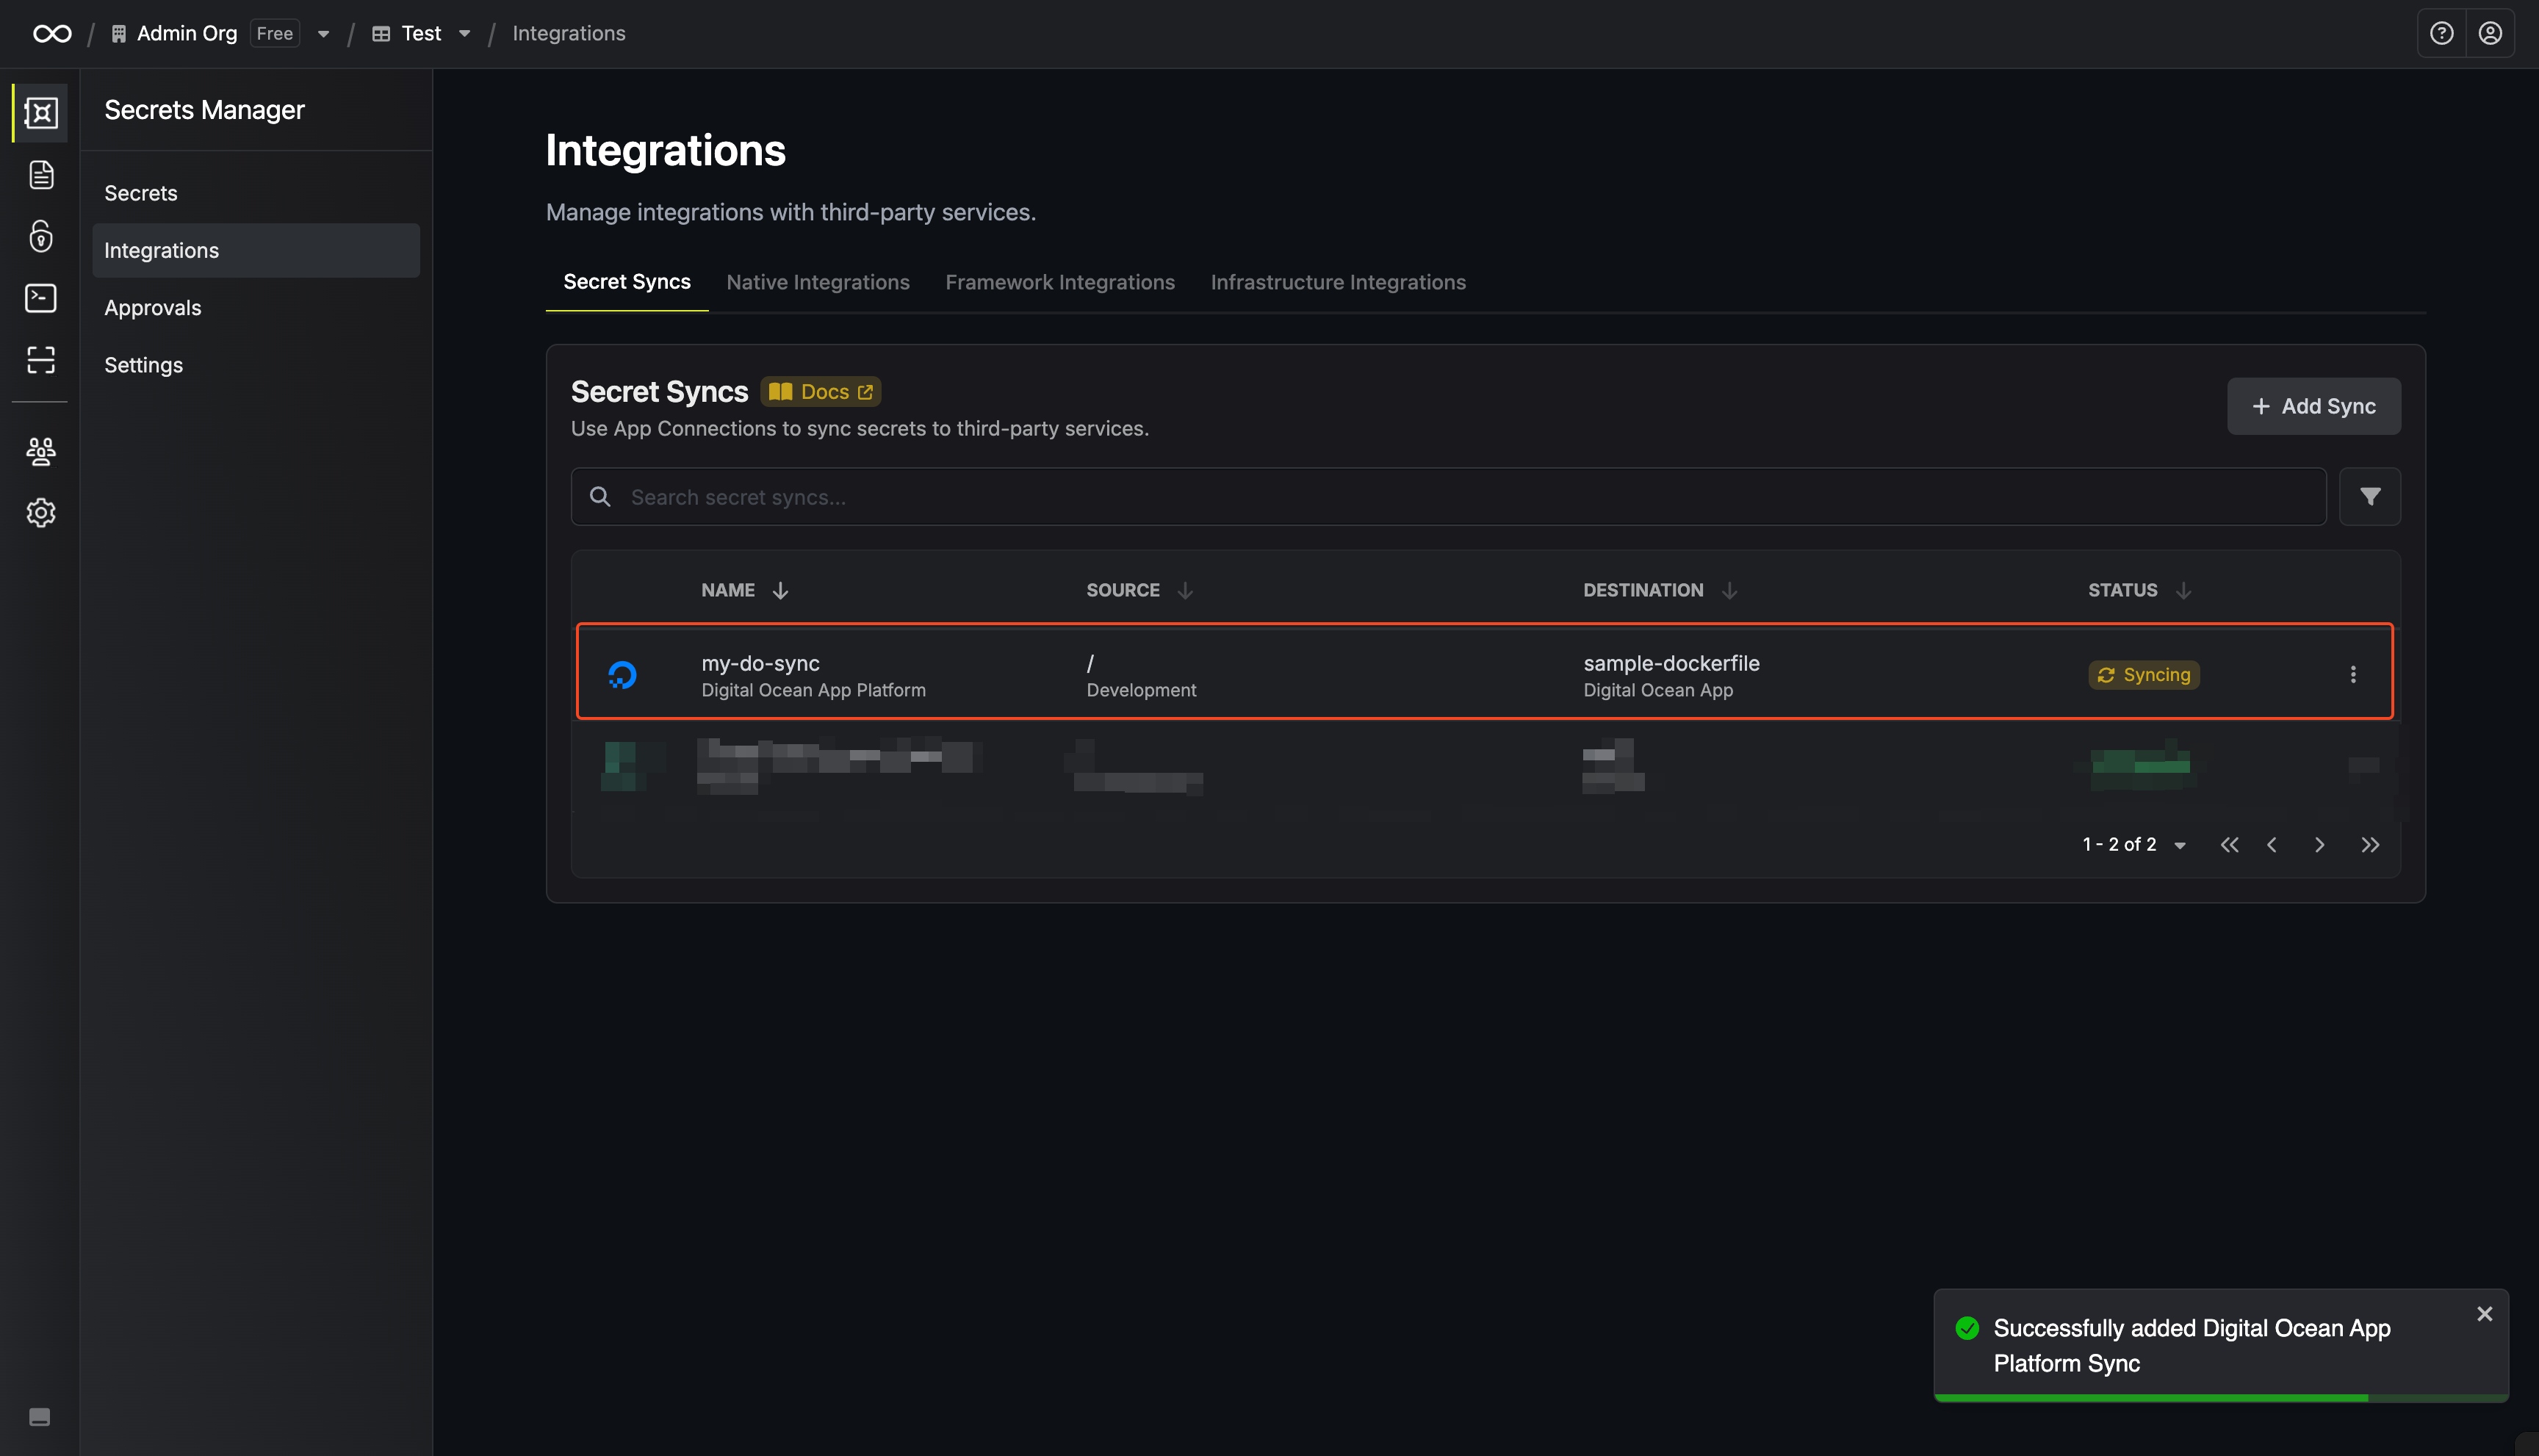
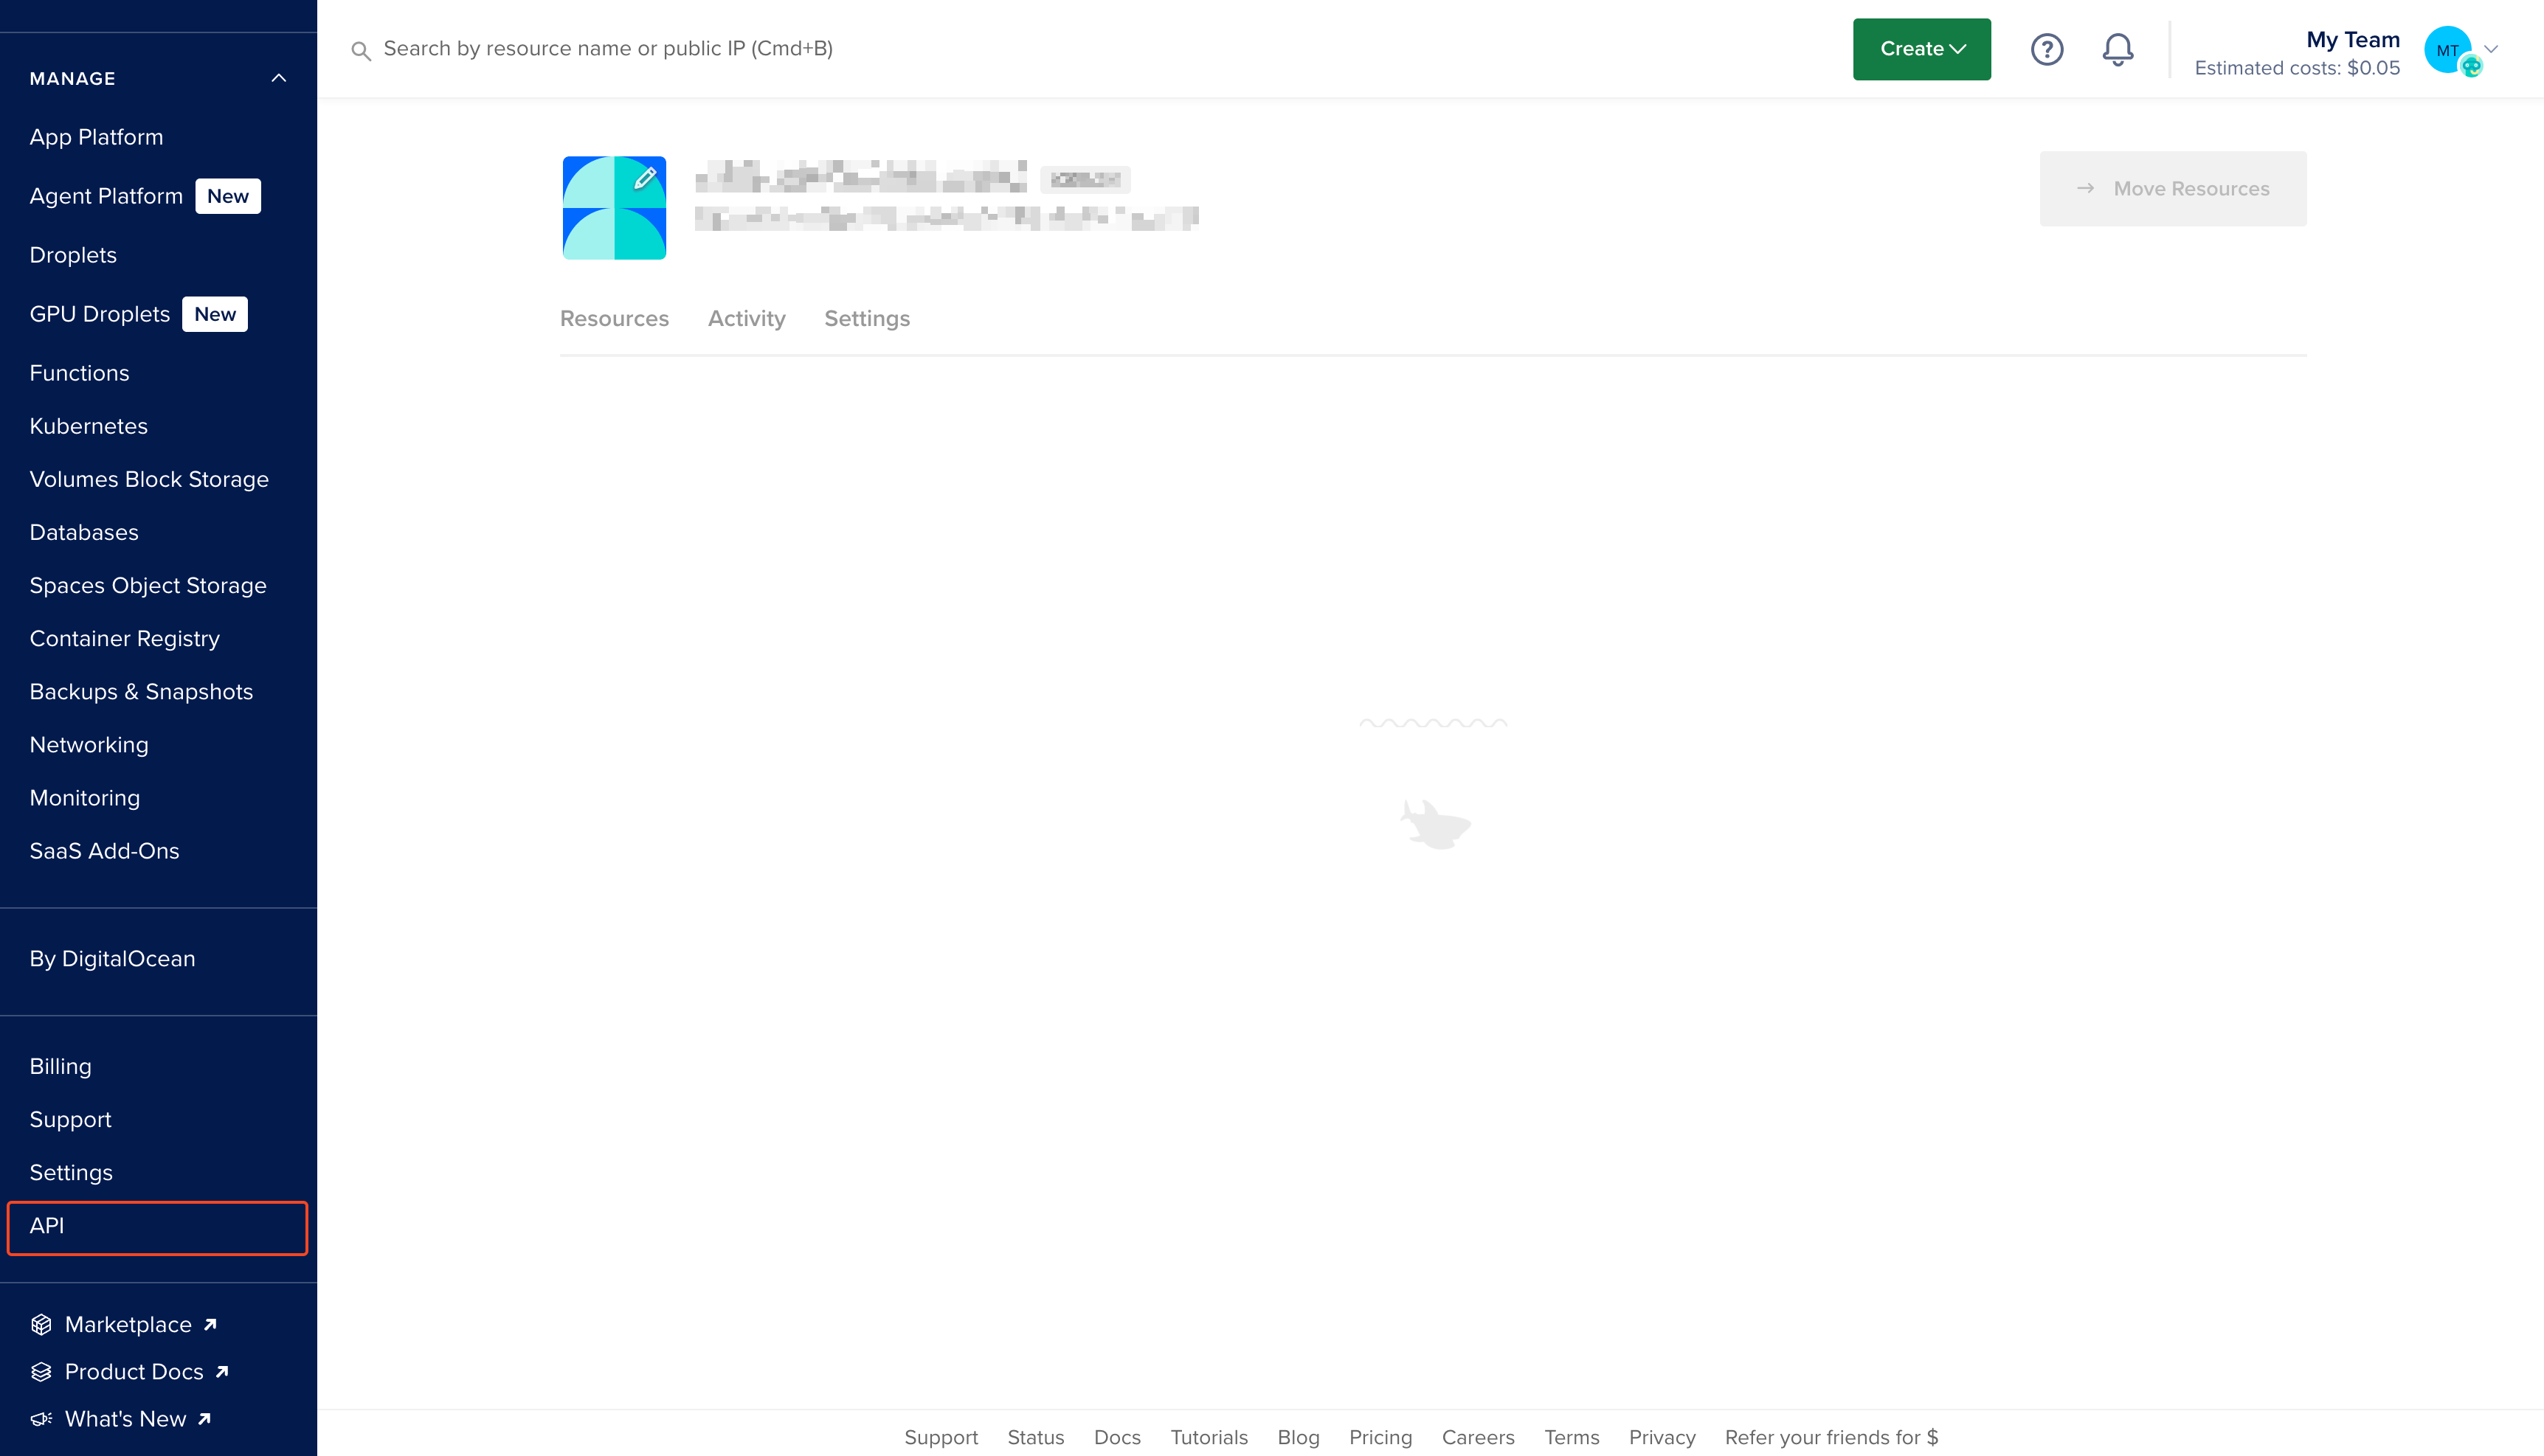
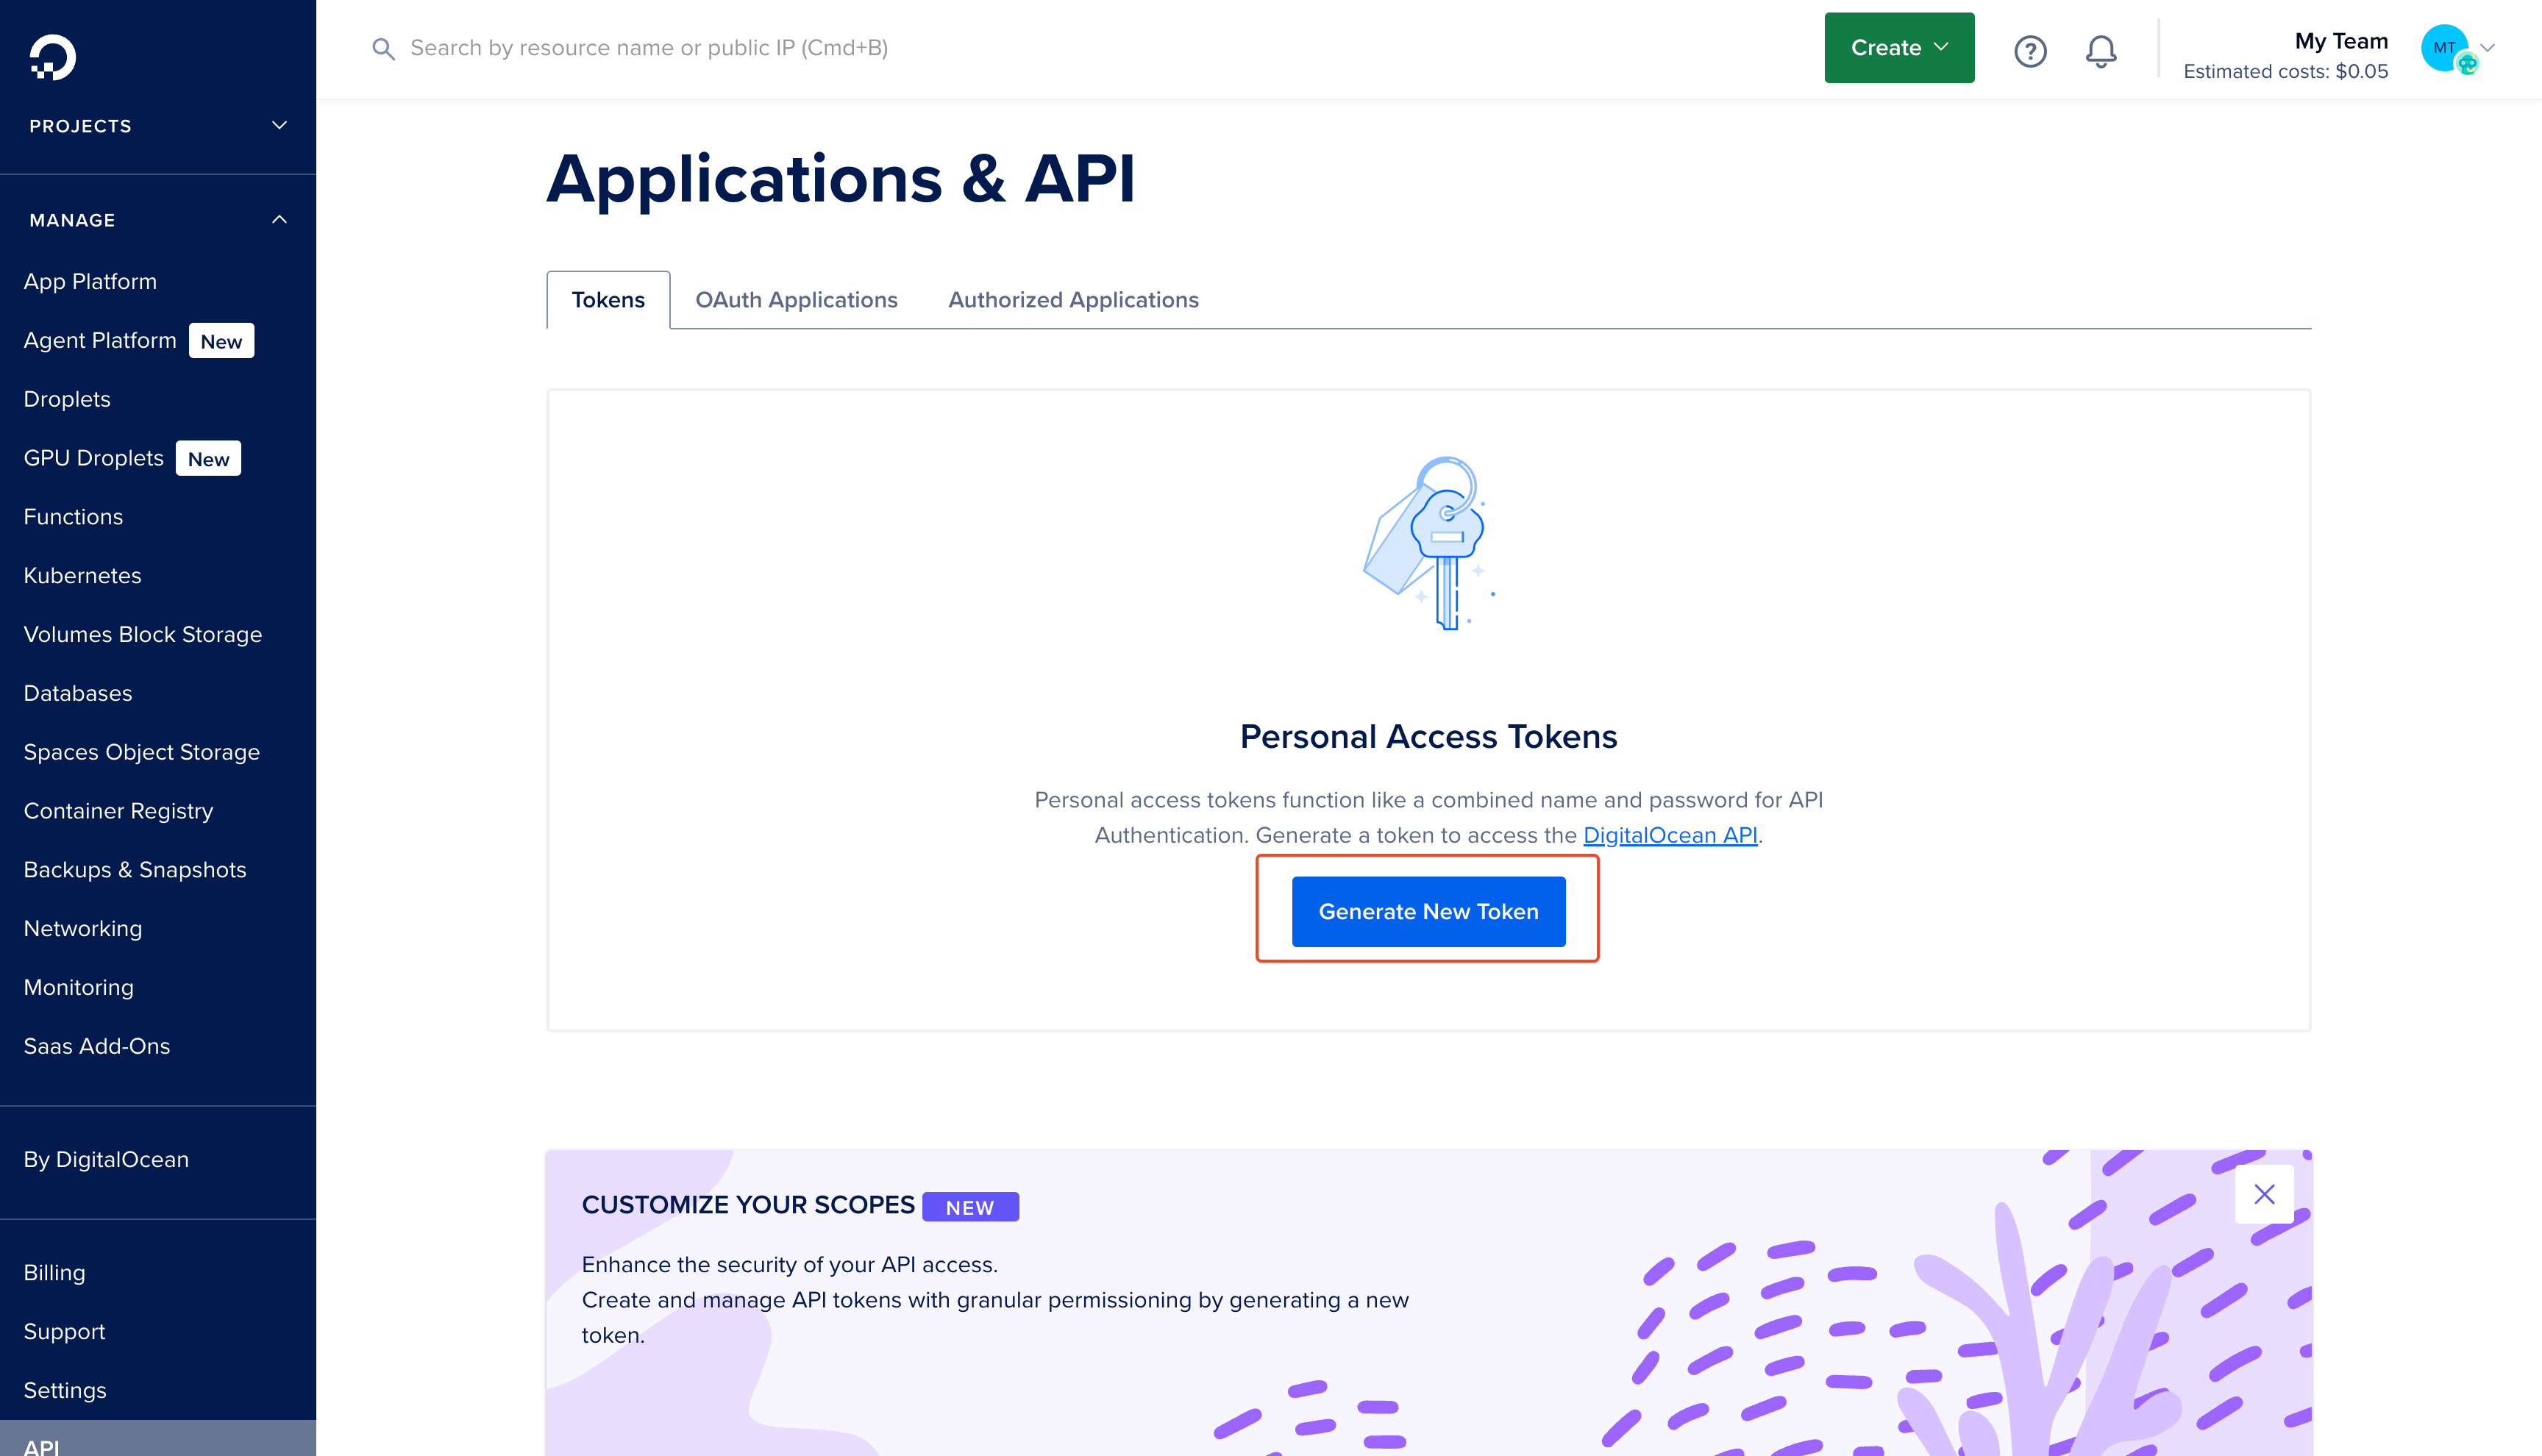
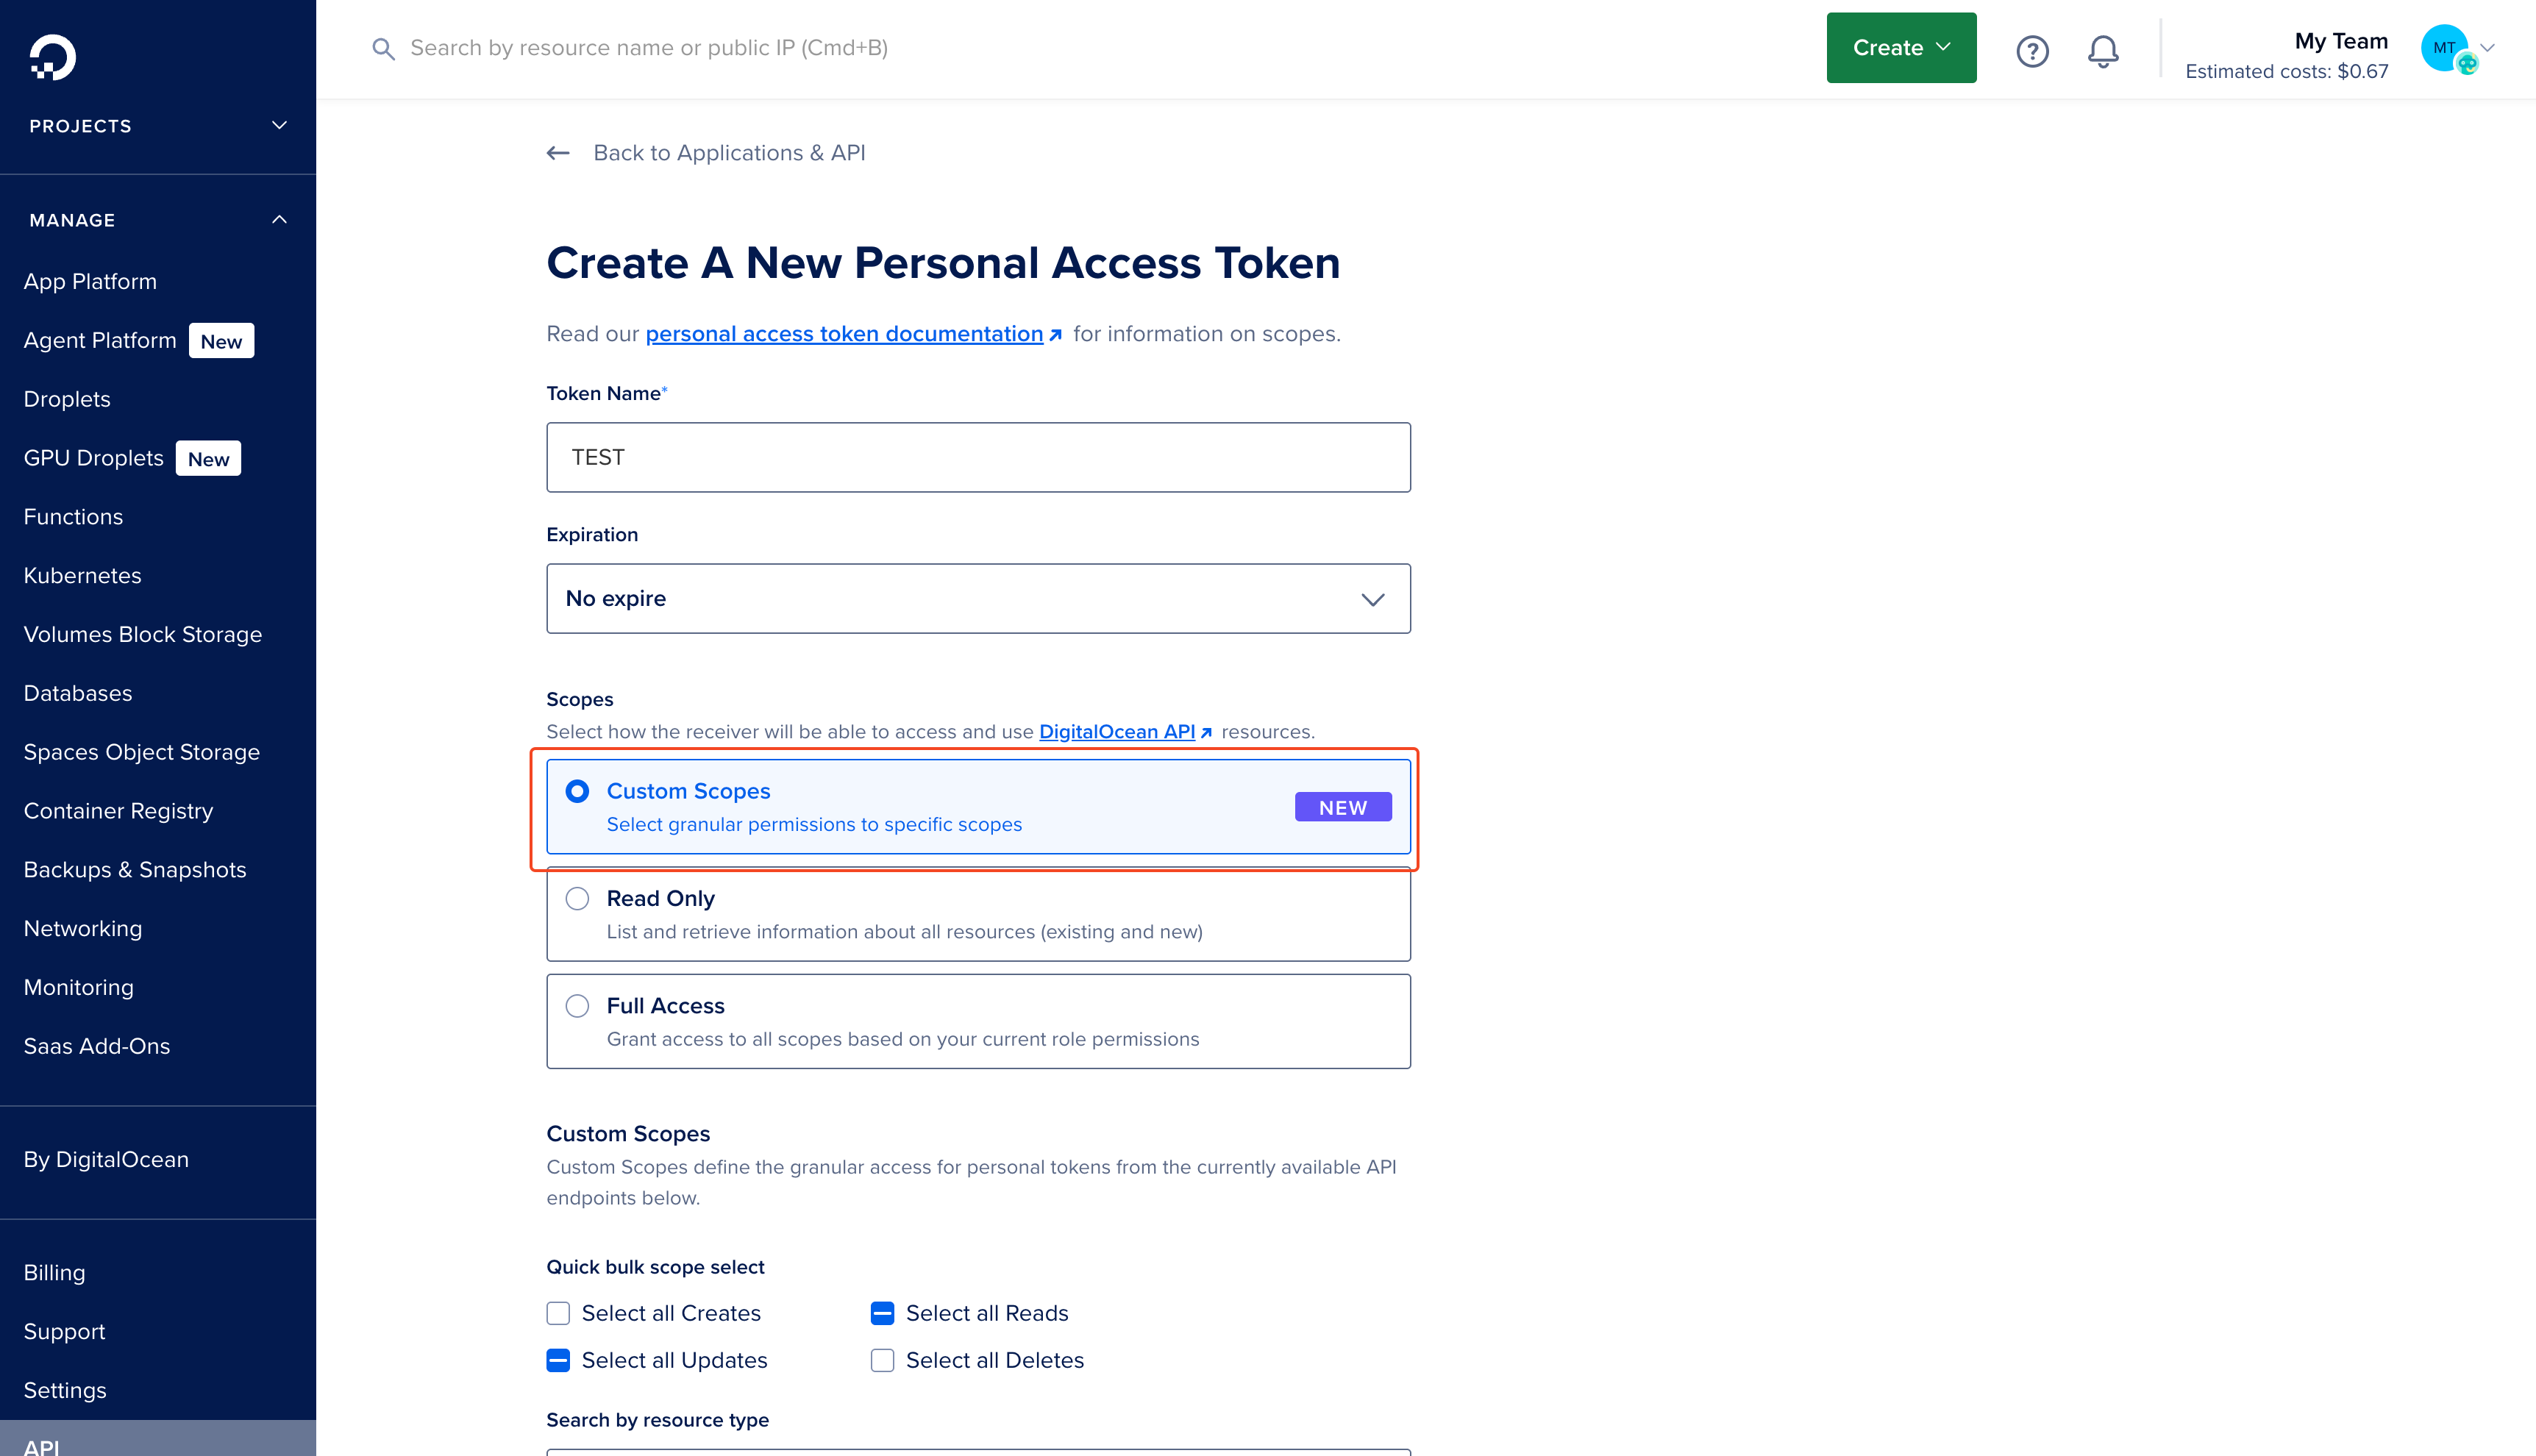

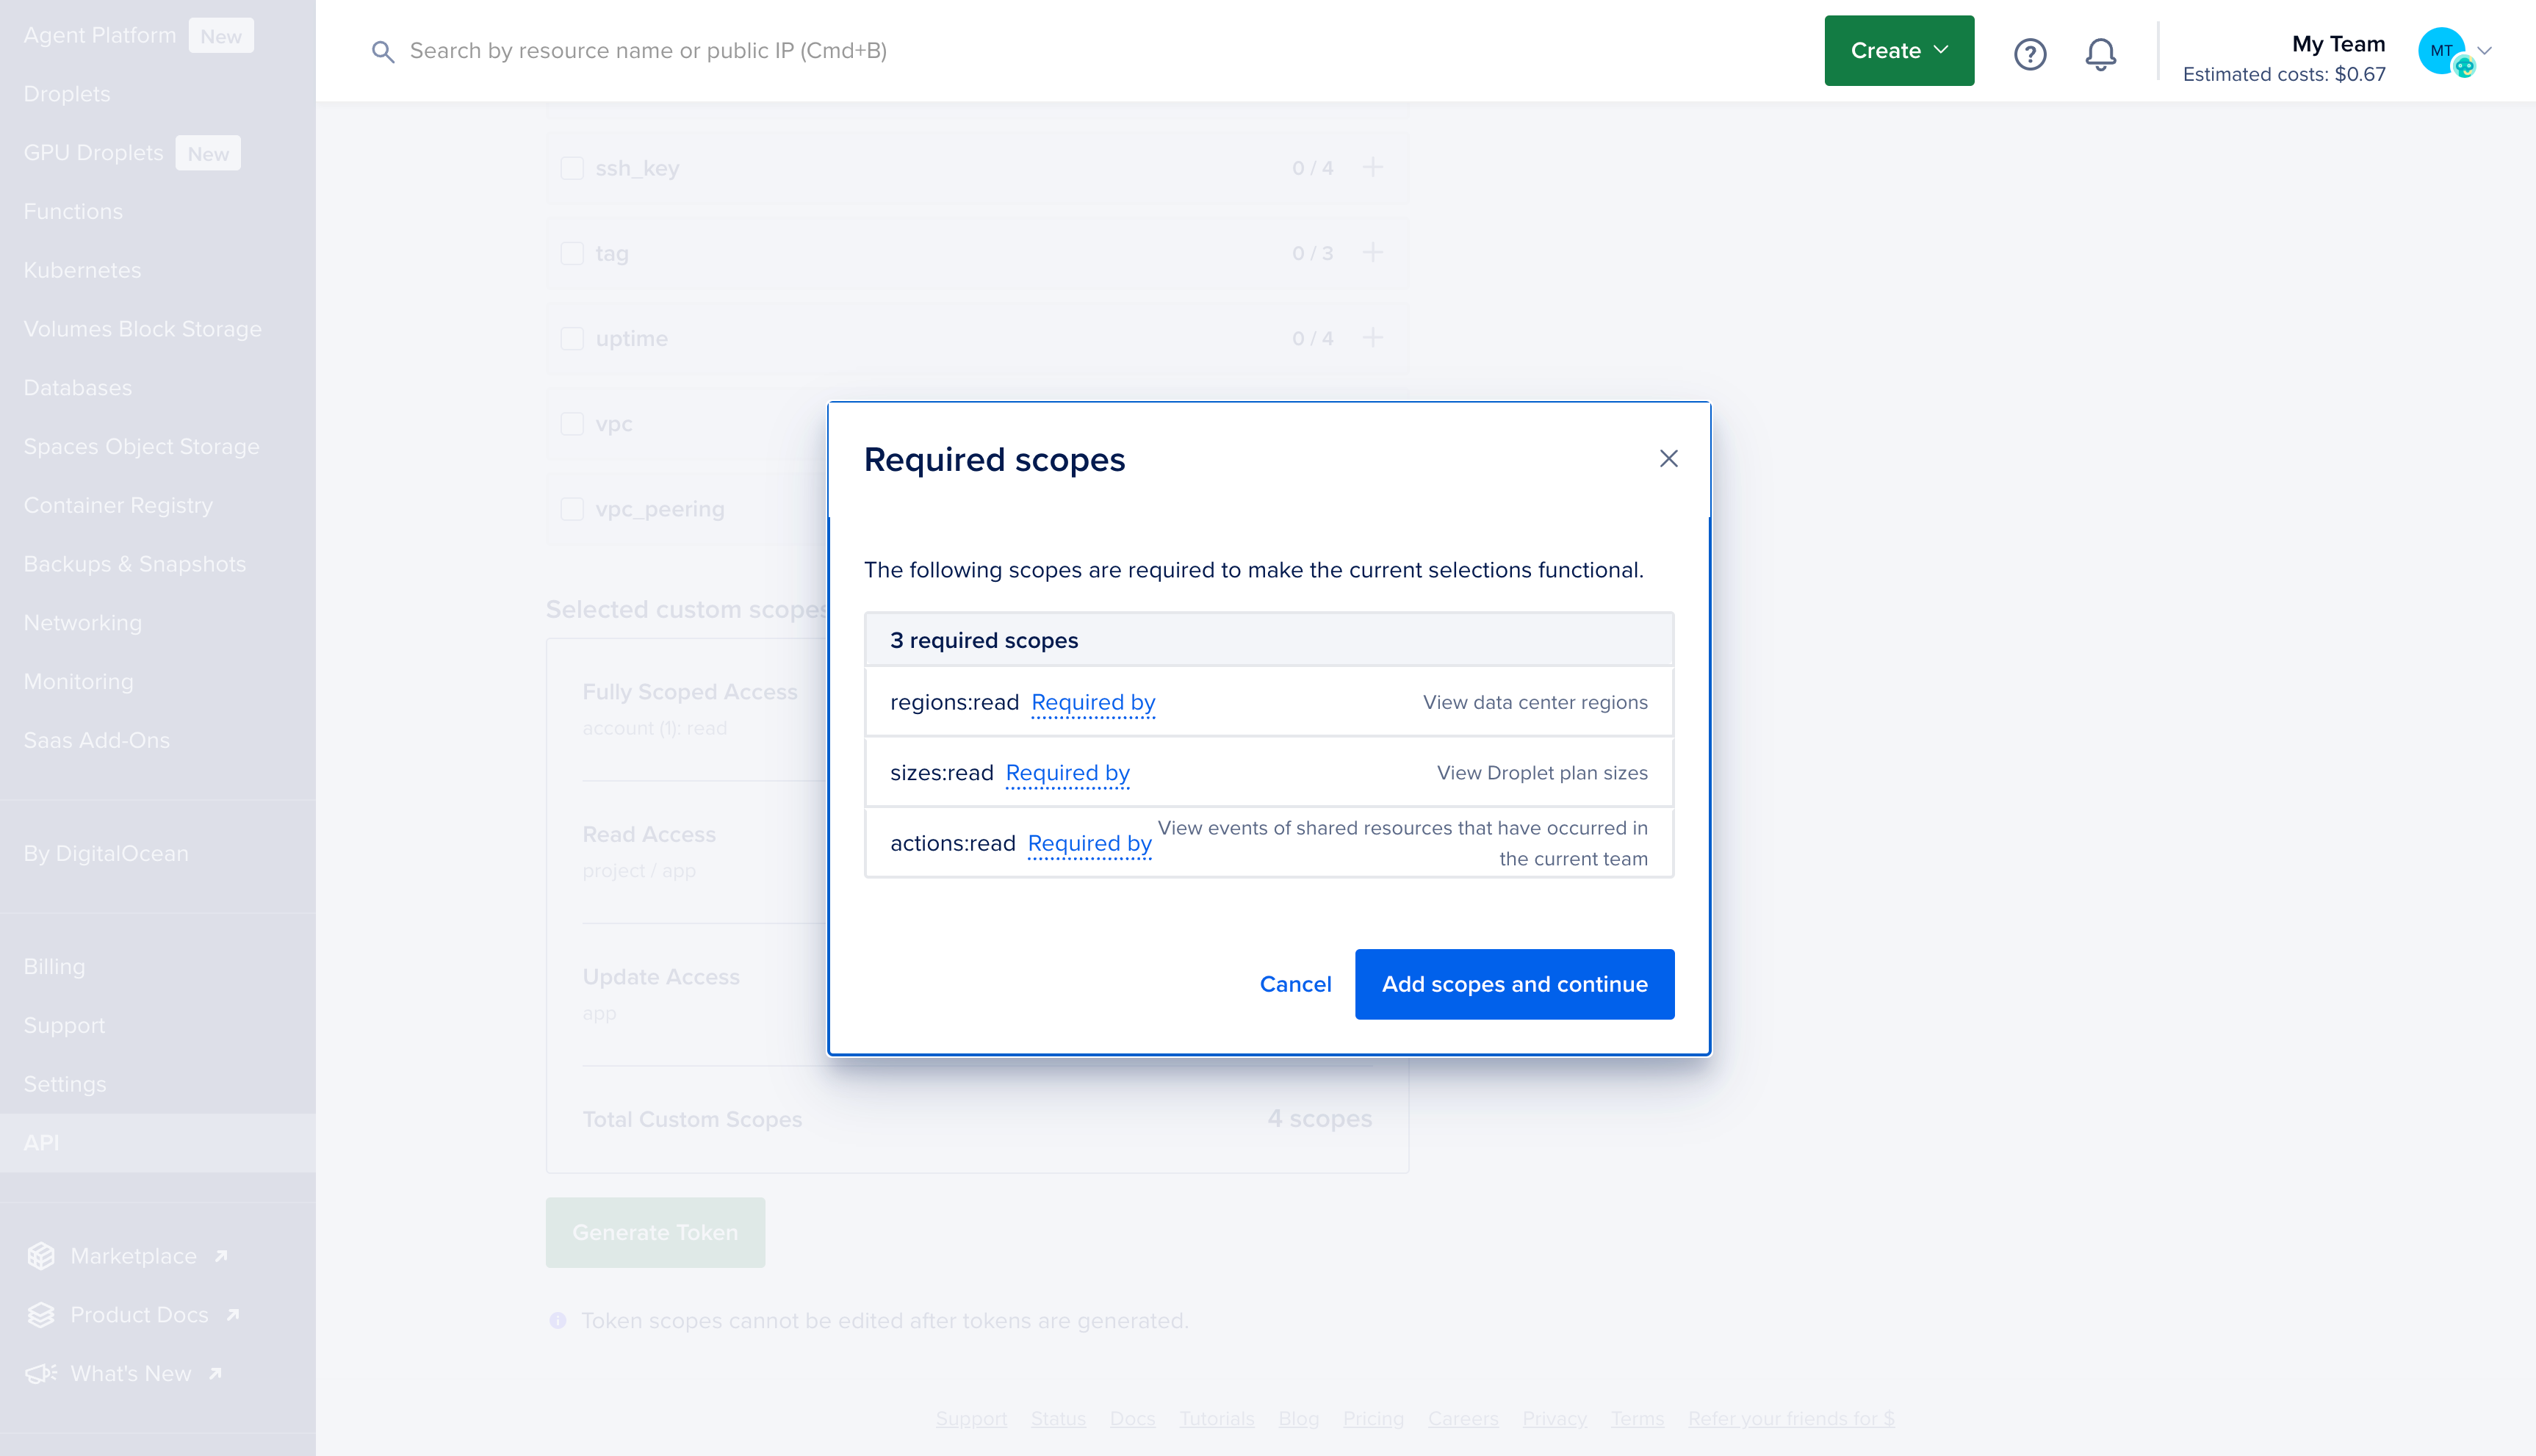
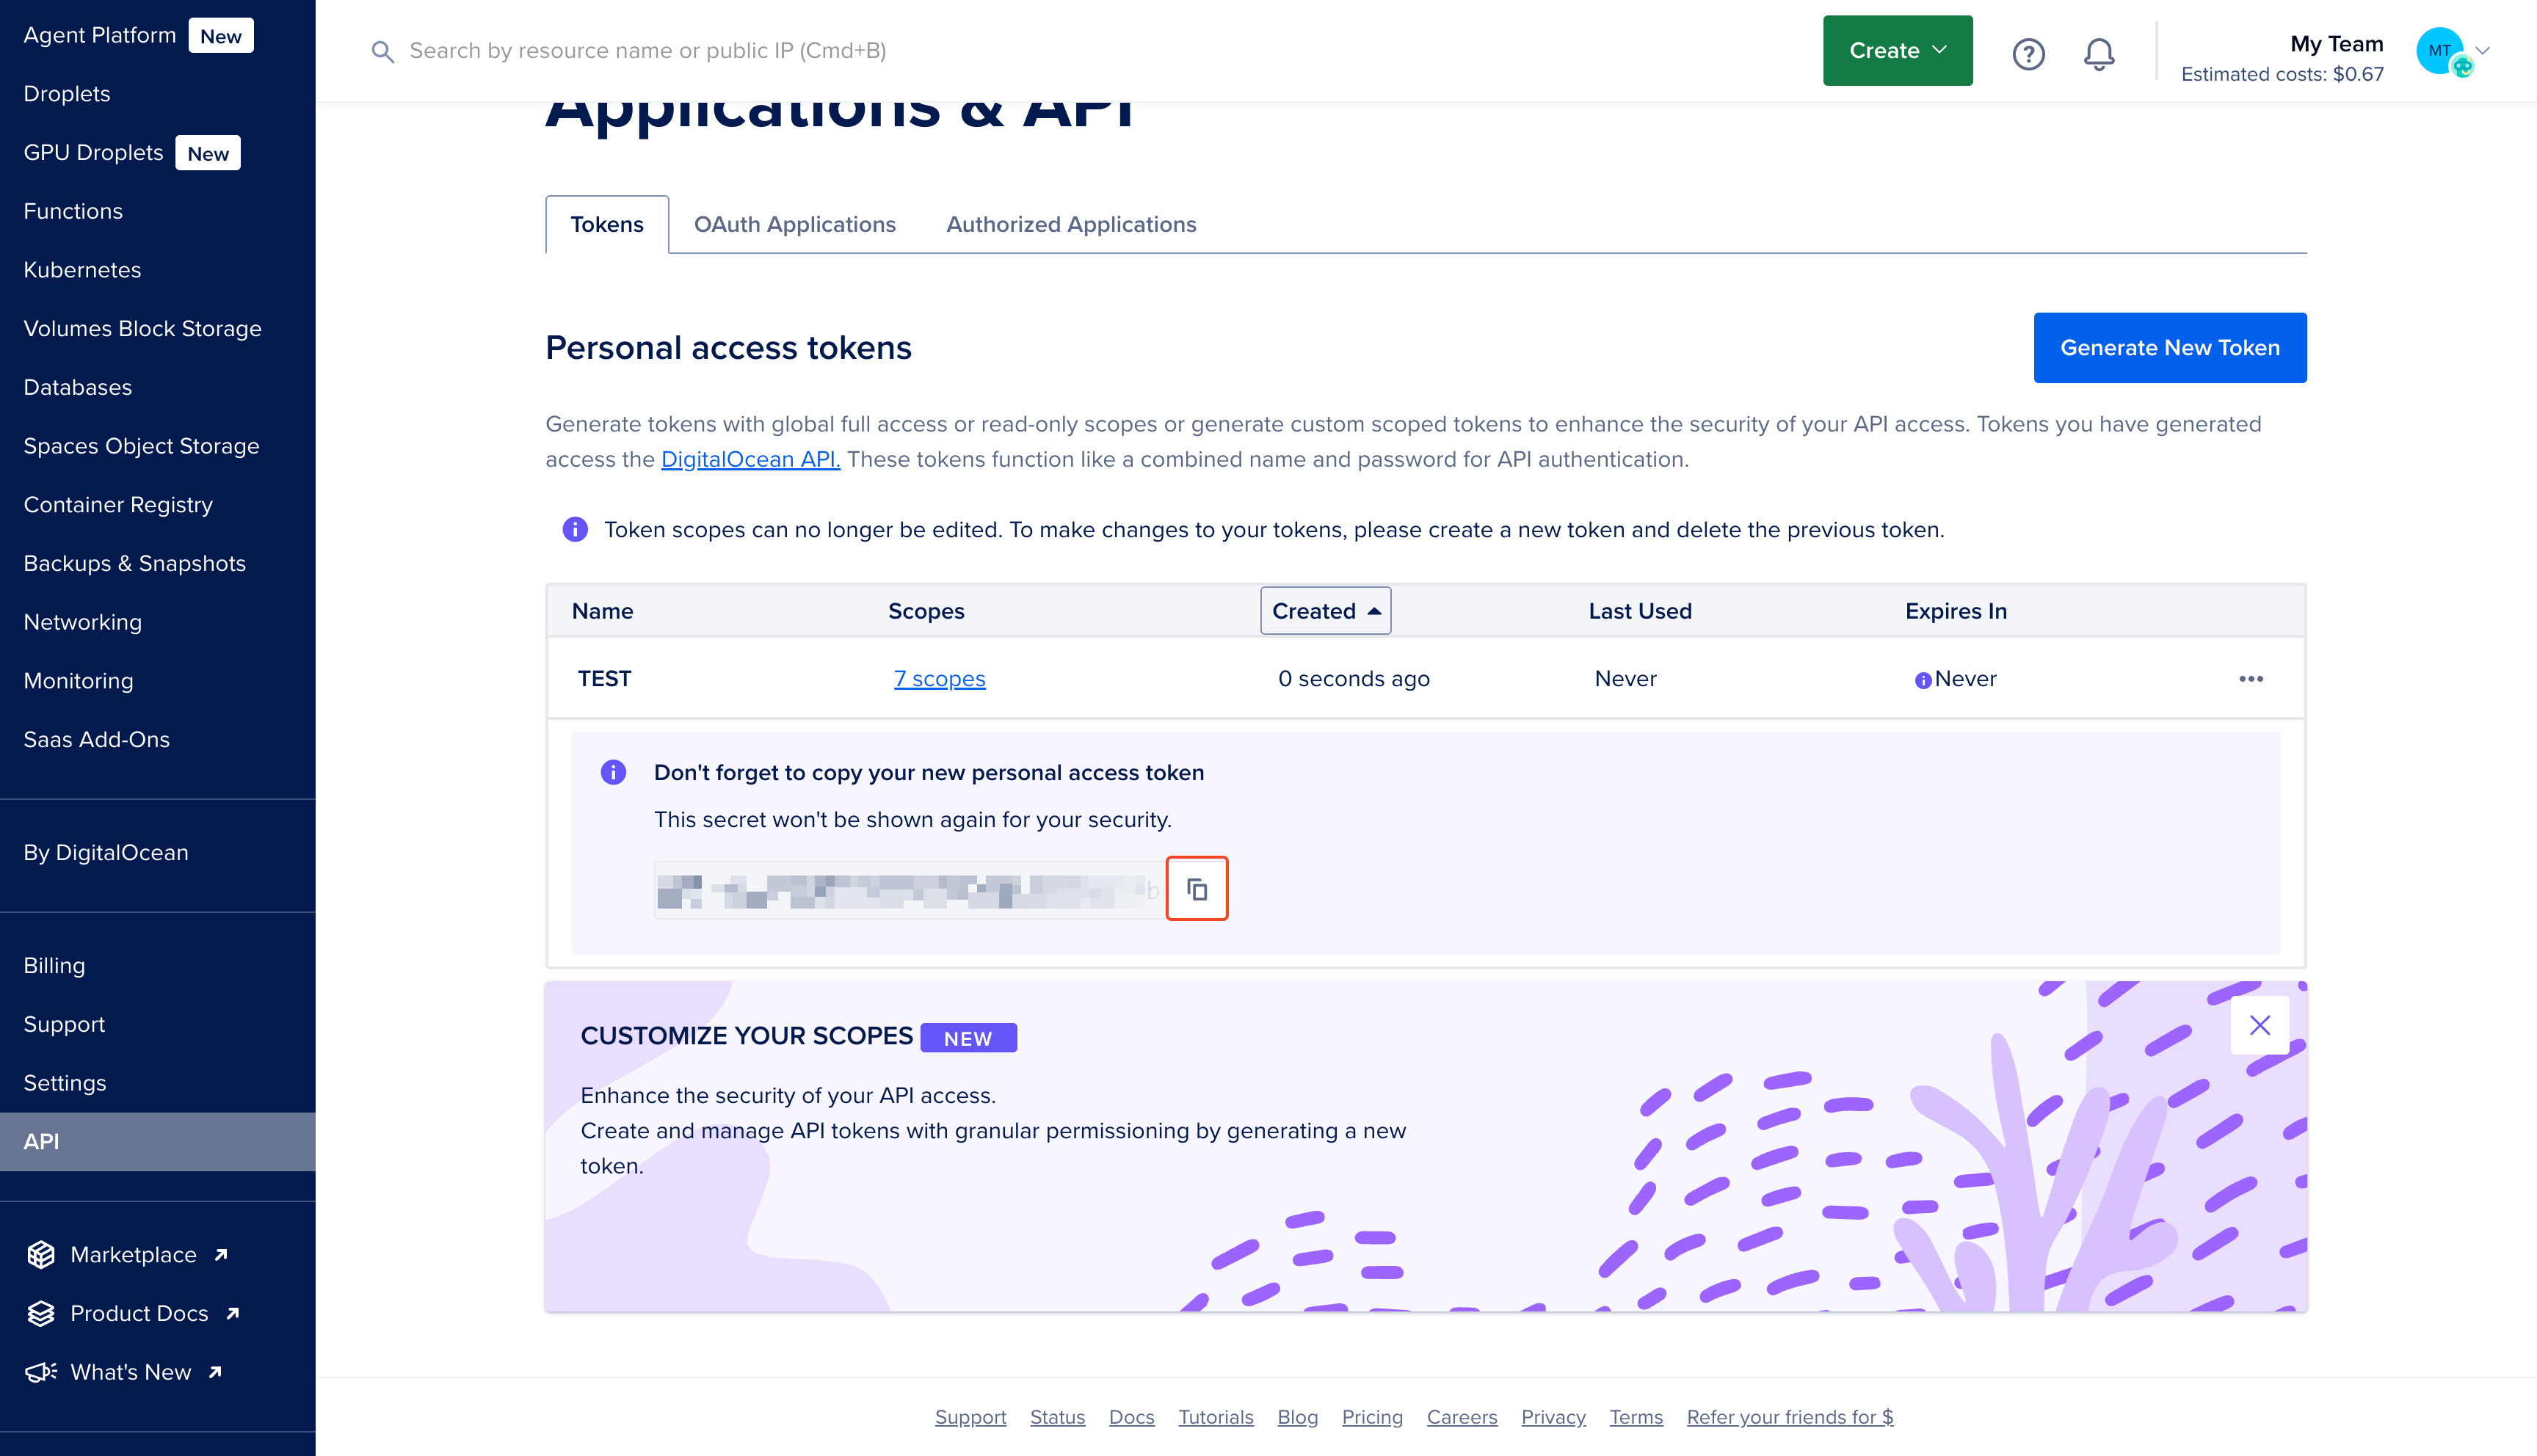
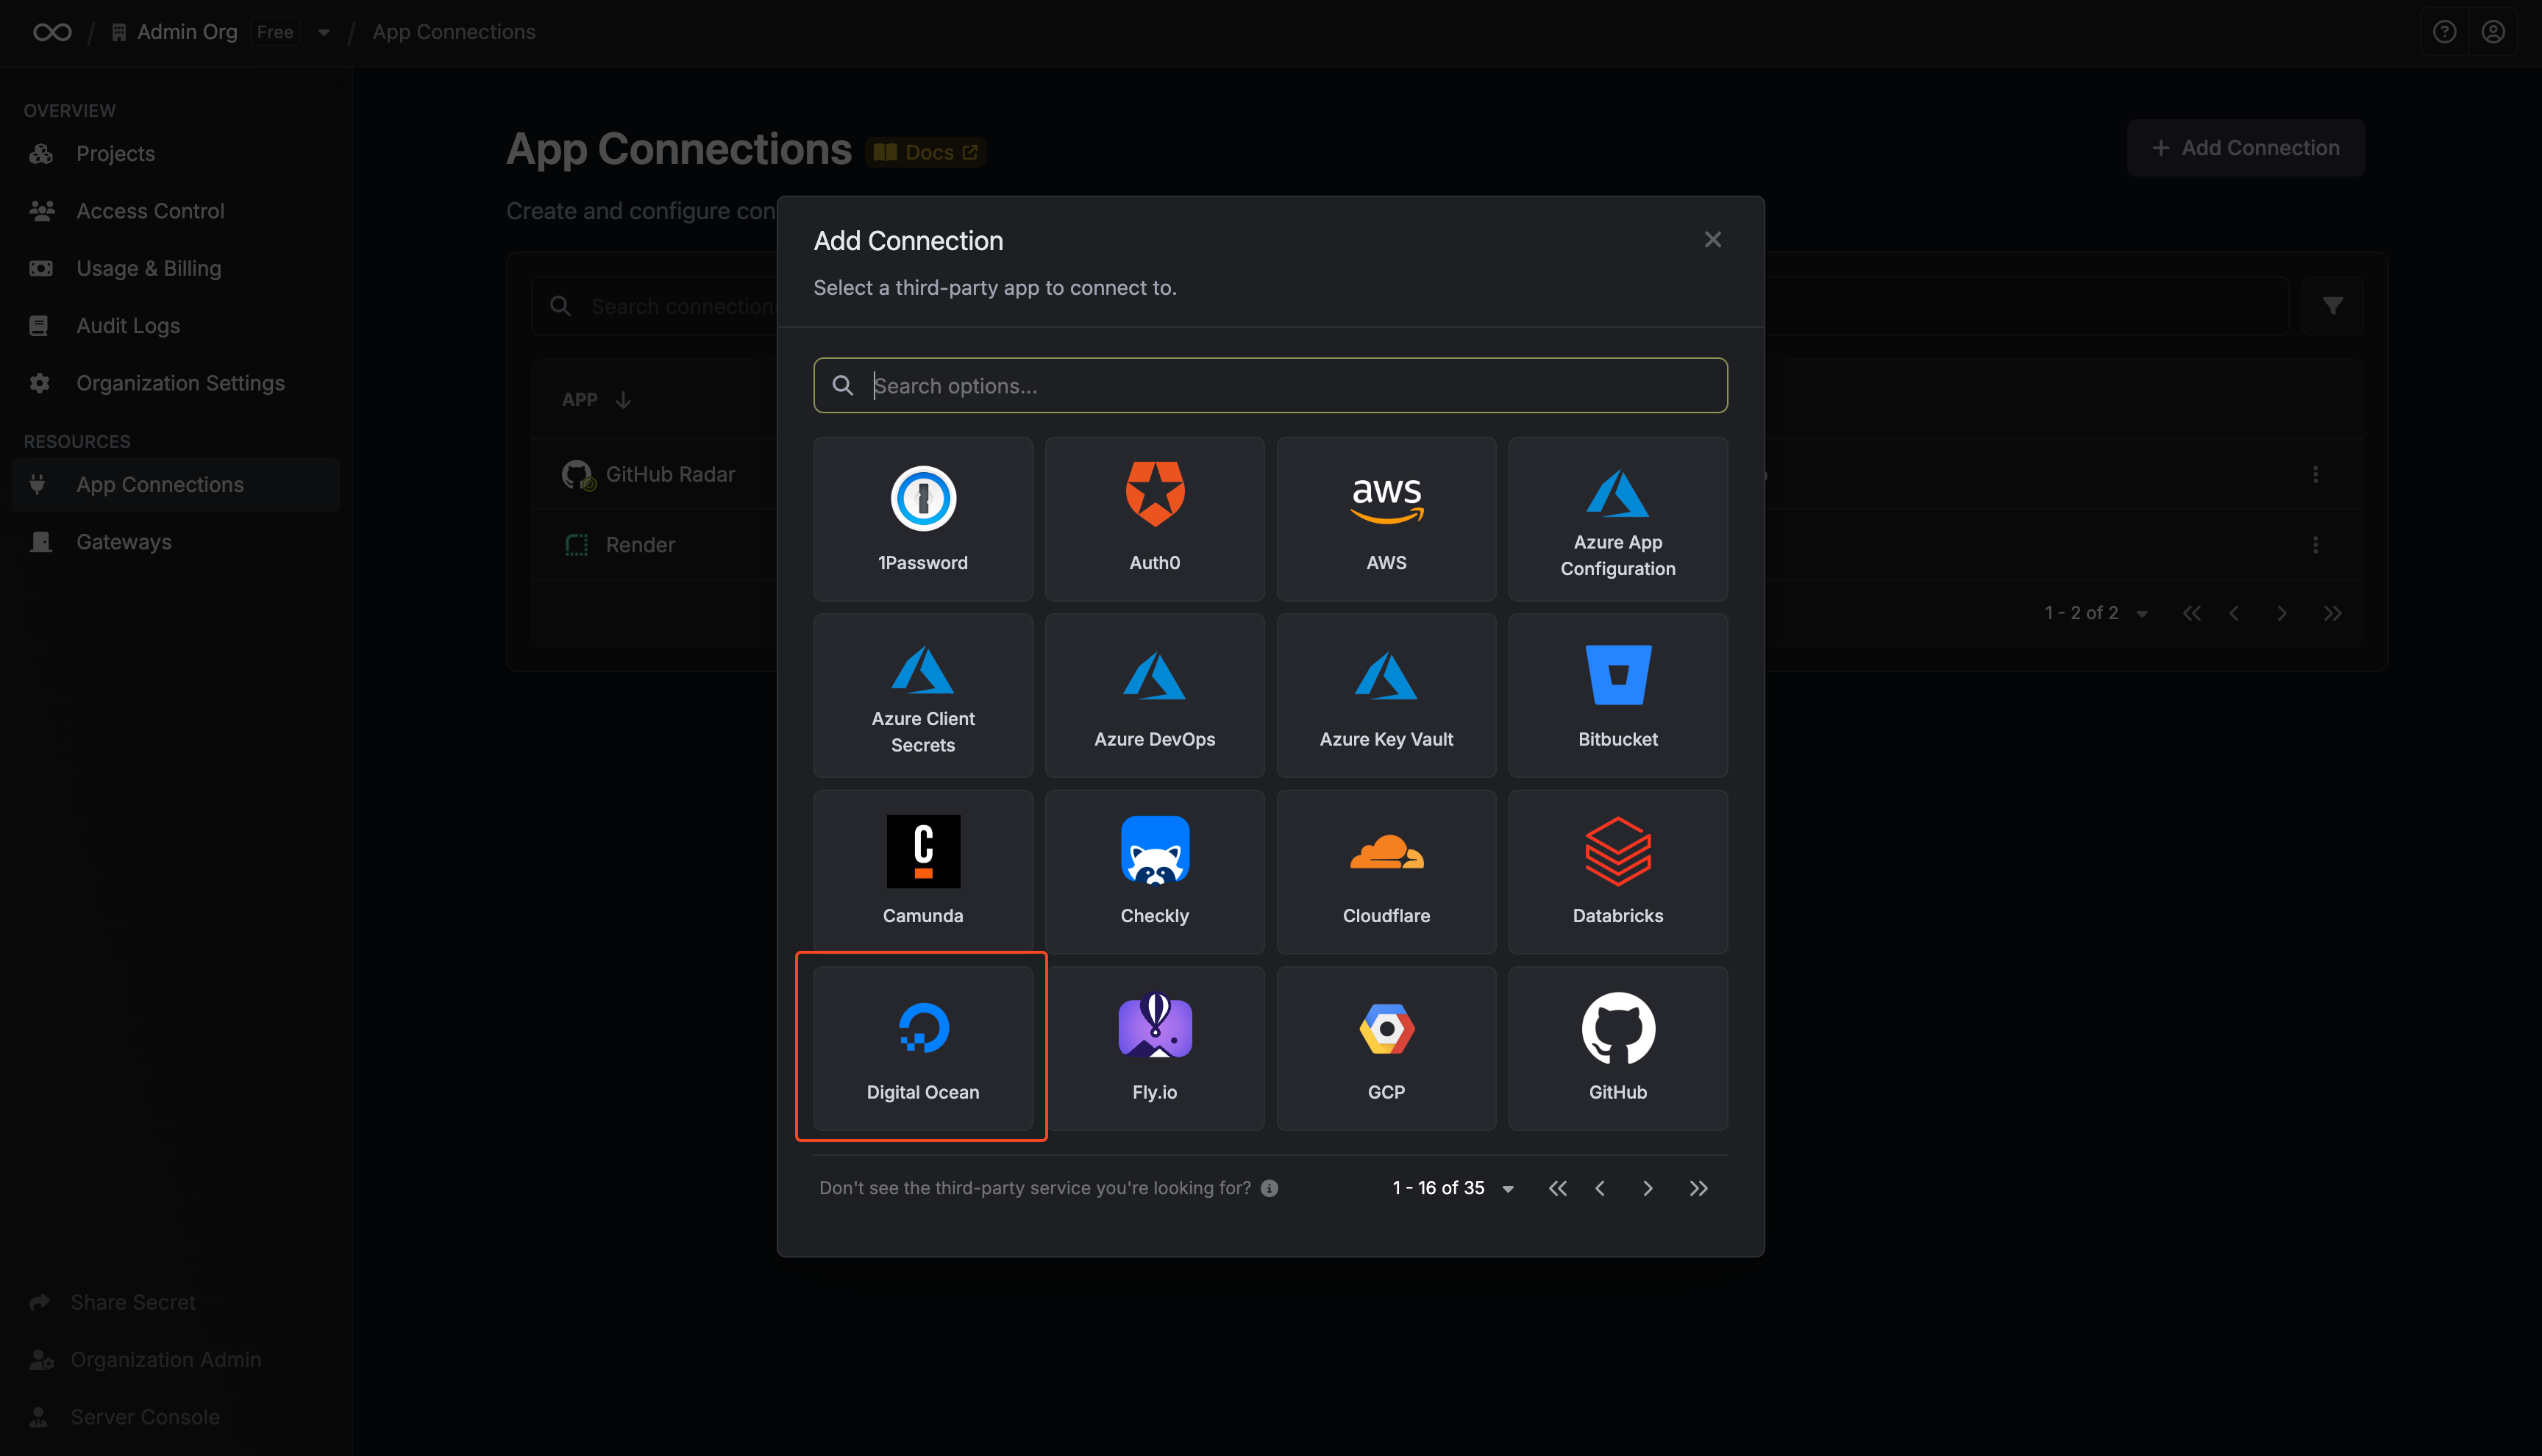
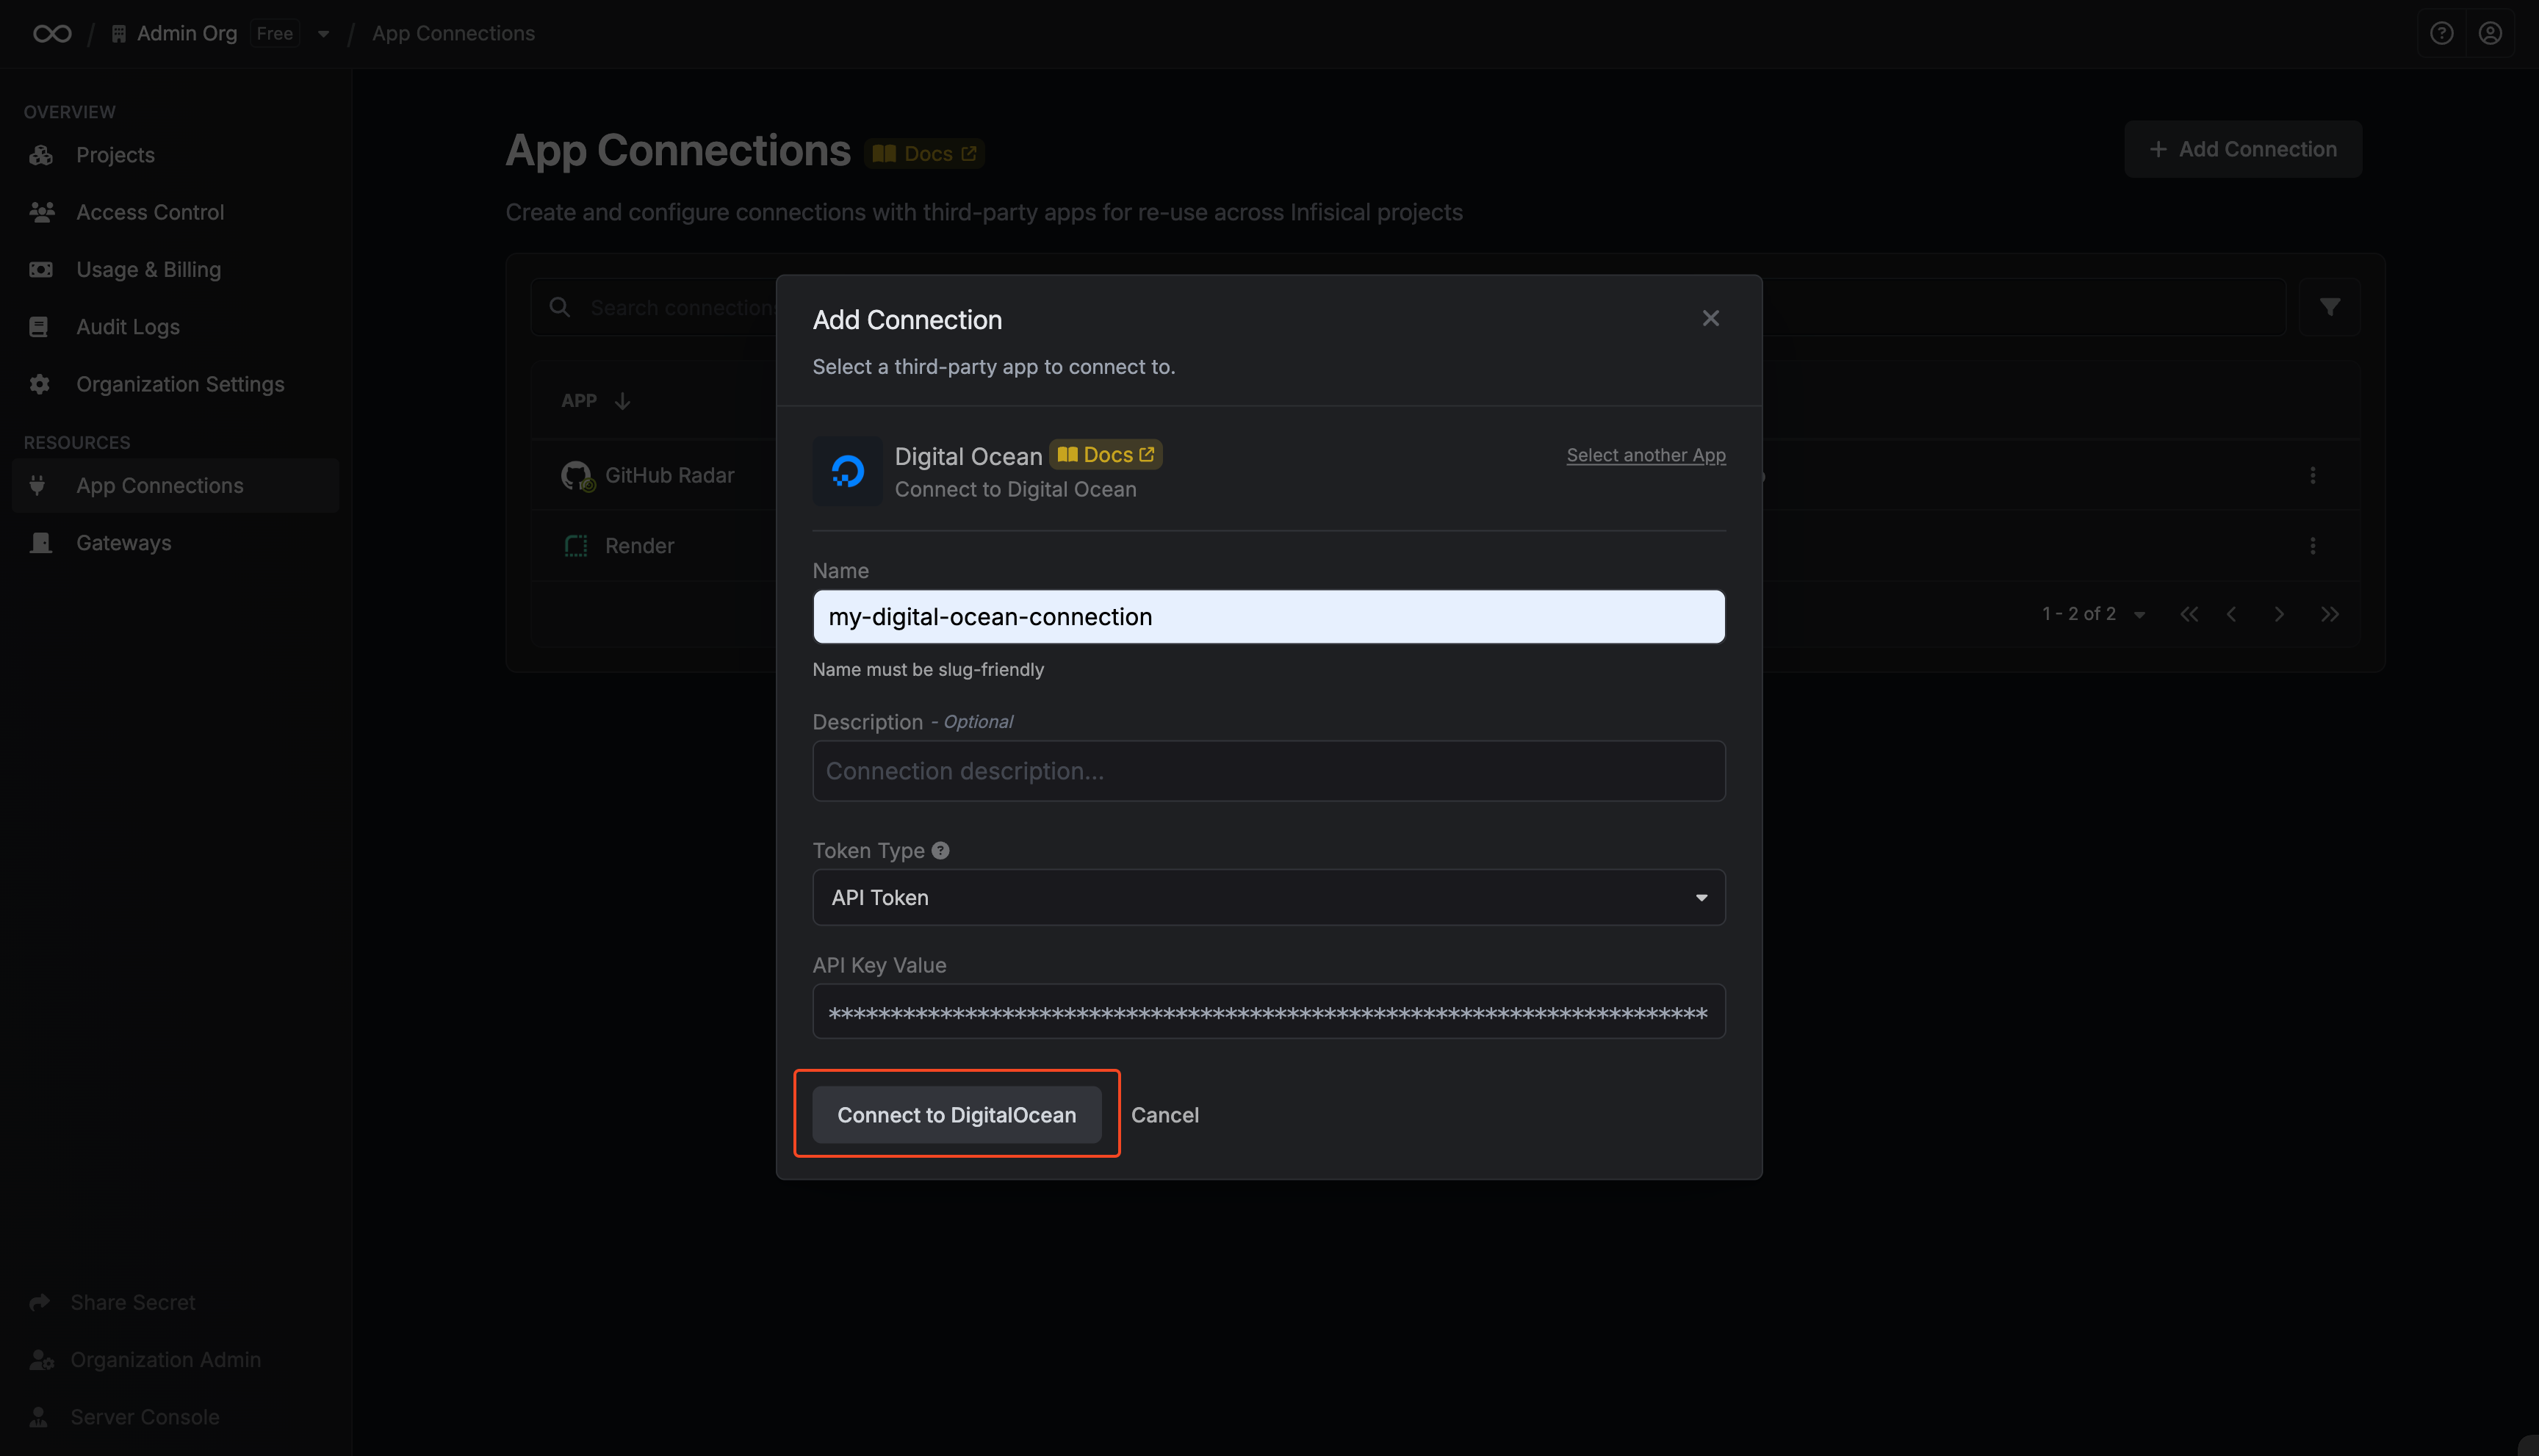
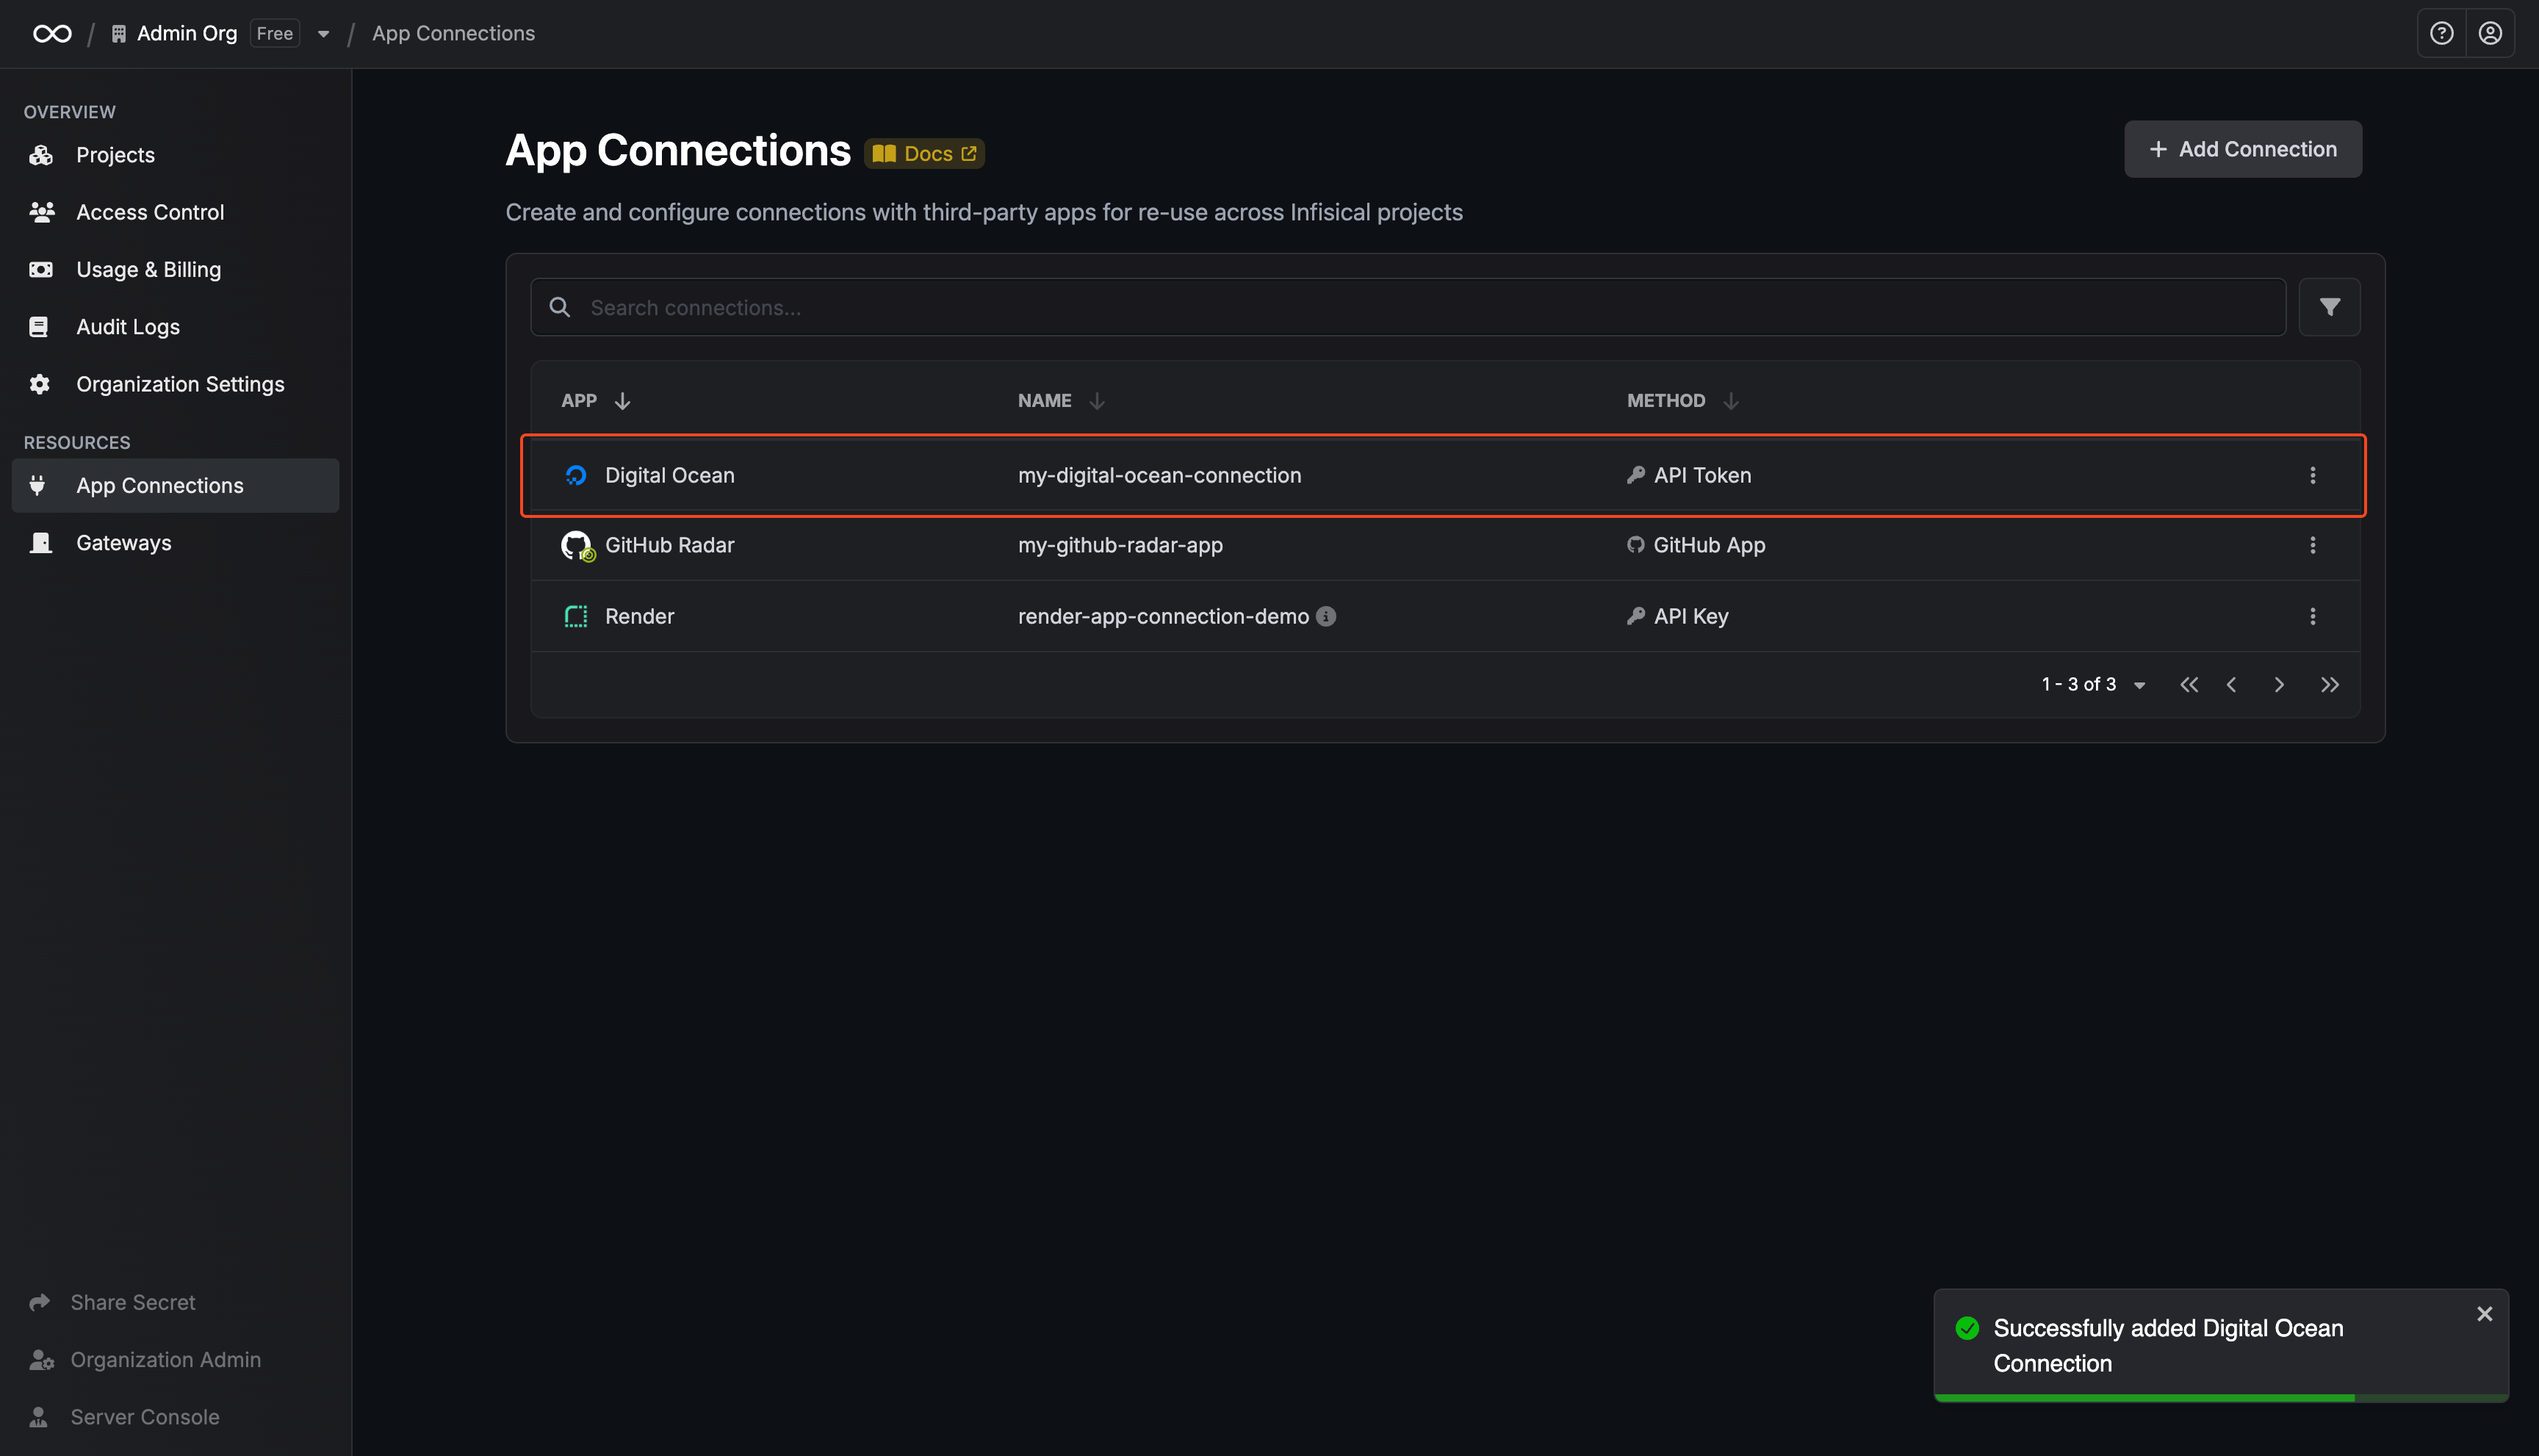
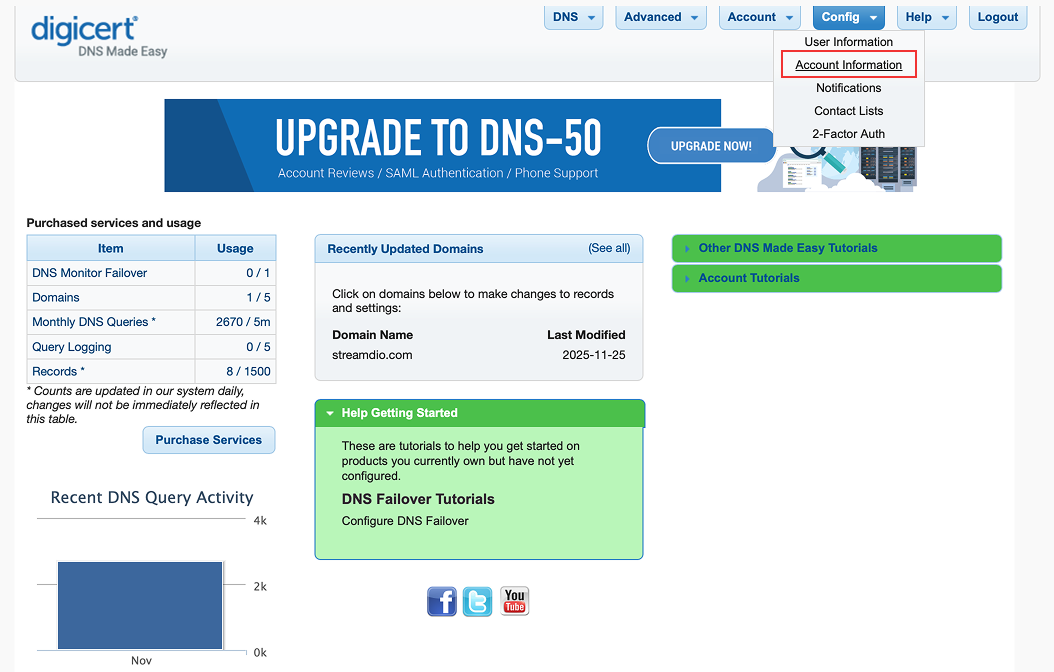 If your **API Key** and **Secret Key** are already available, proceed to step 2.
Otherwise, check the **Generate New API Credentials** then click the **Save** button to generate the new API credentials.
If your **API Key** and **Secret Key** are already available, proceed to step 2.
Otherwise, check the **Generate New API Credentials** then click the **Save** button to generate the new API credentials.
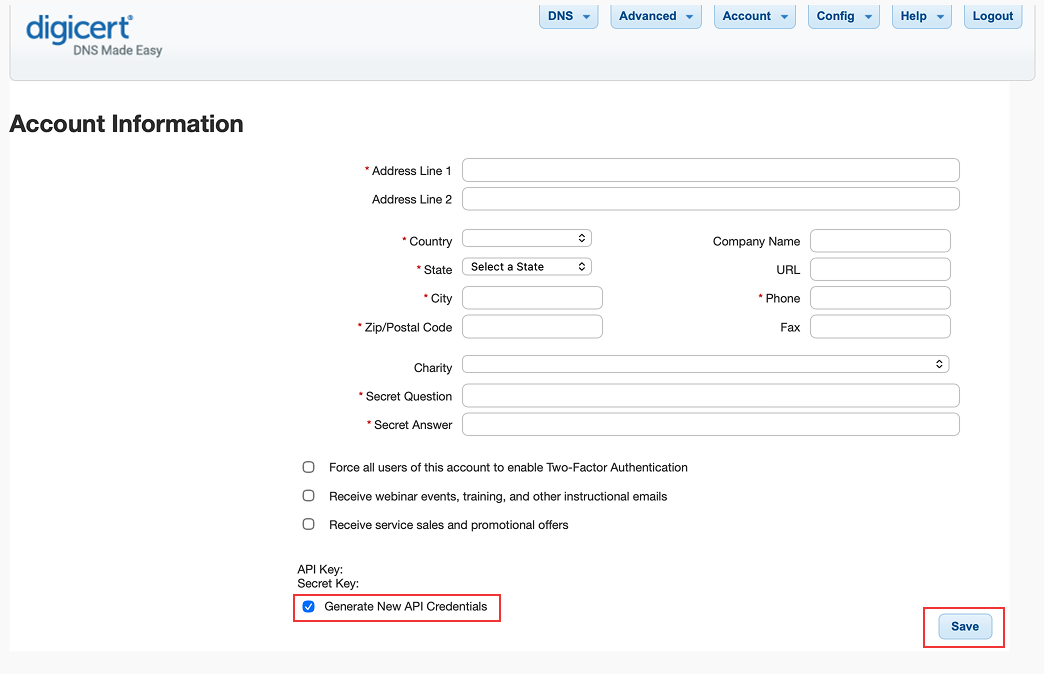
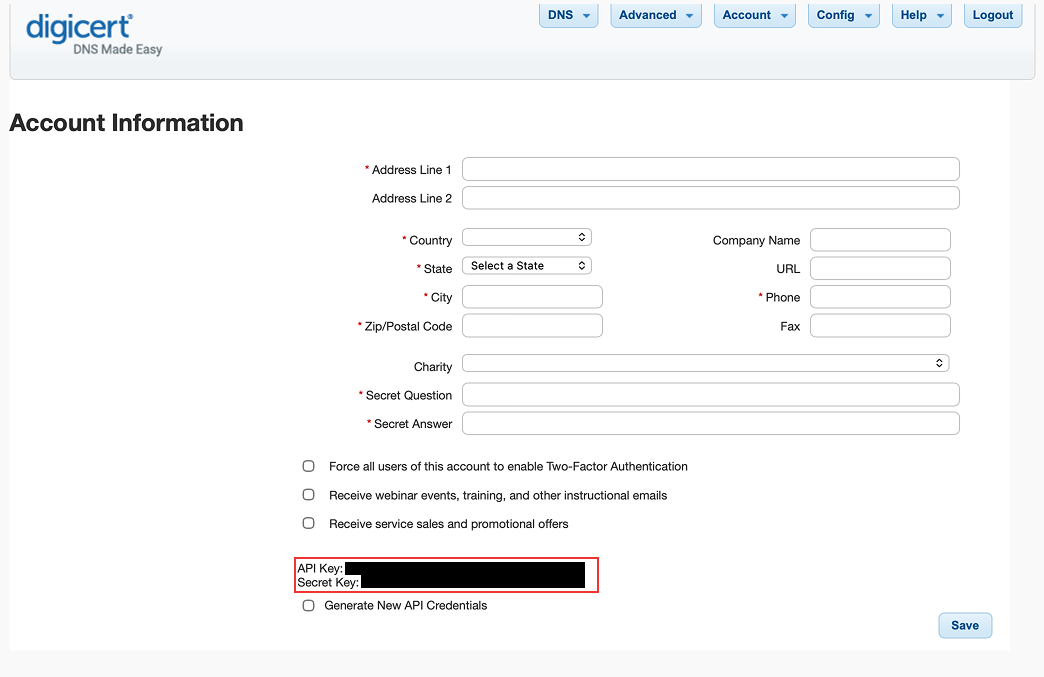
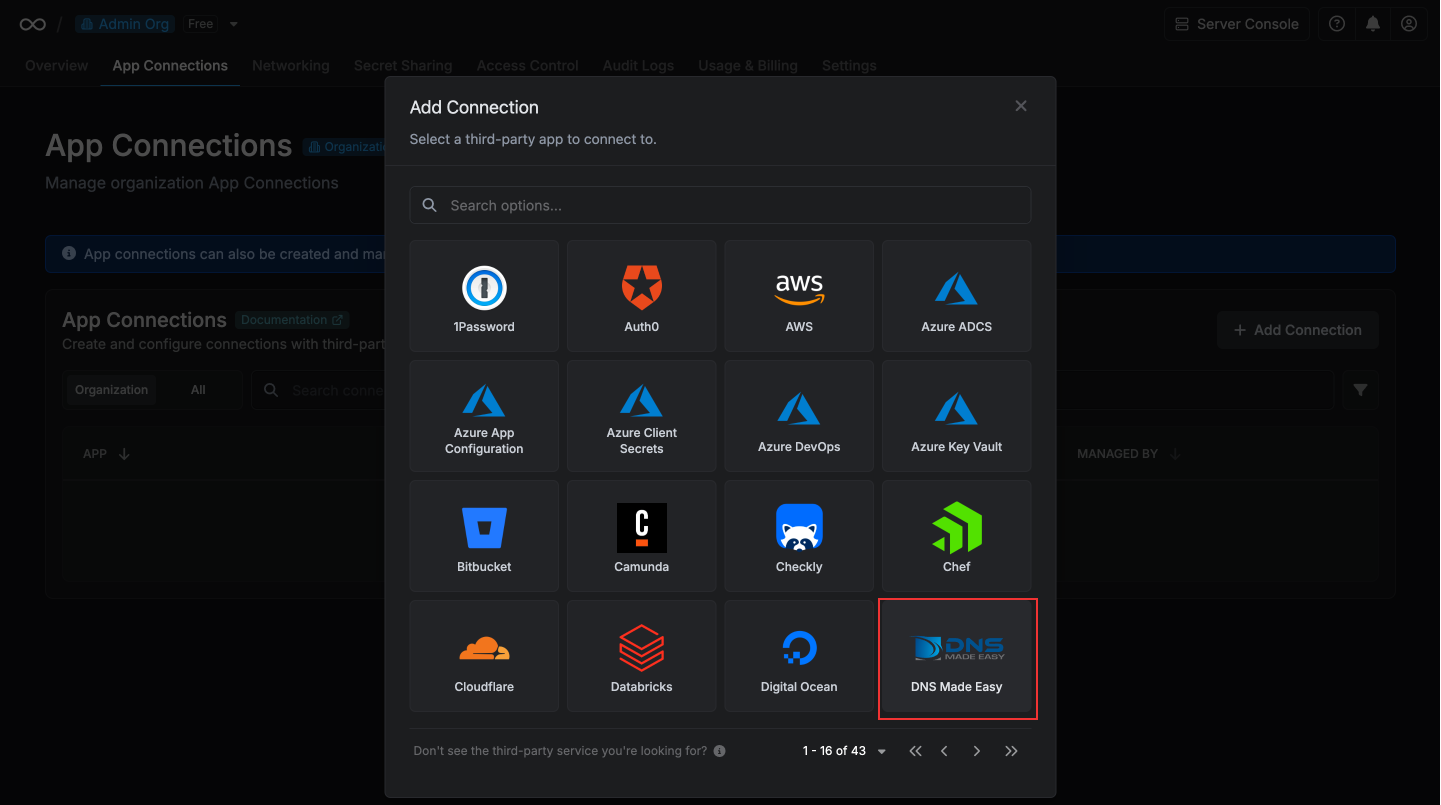
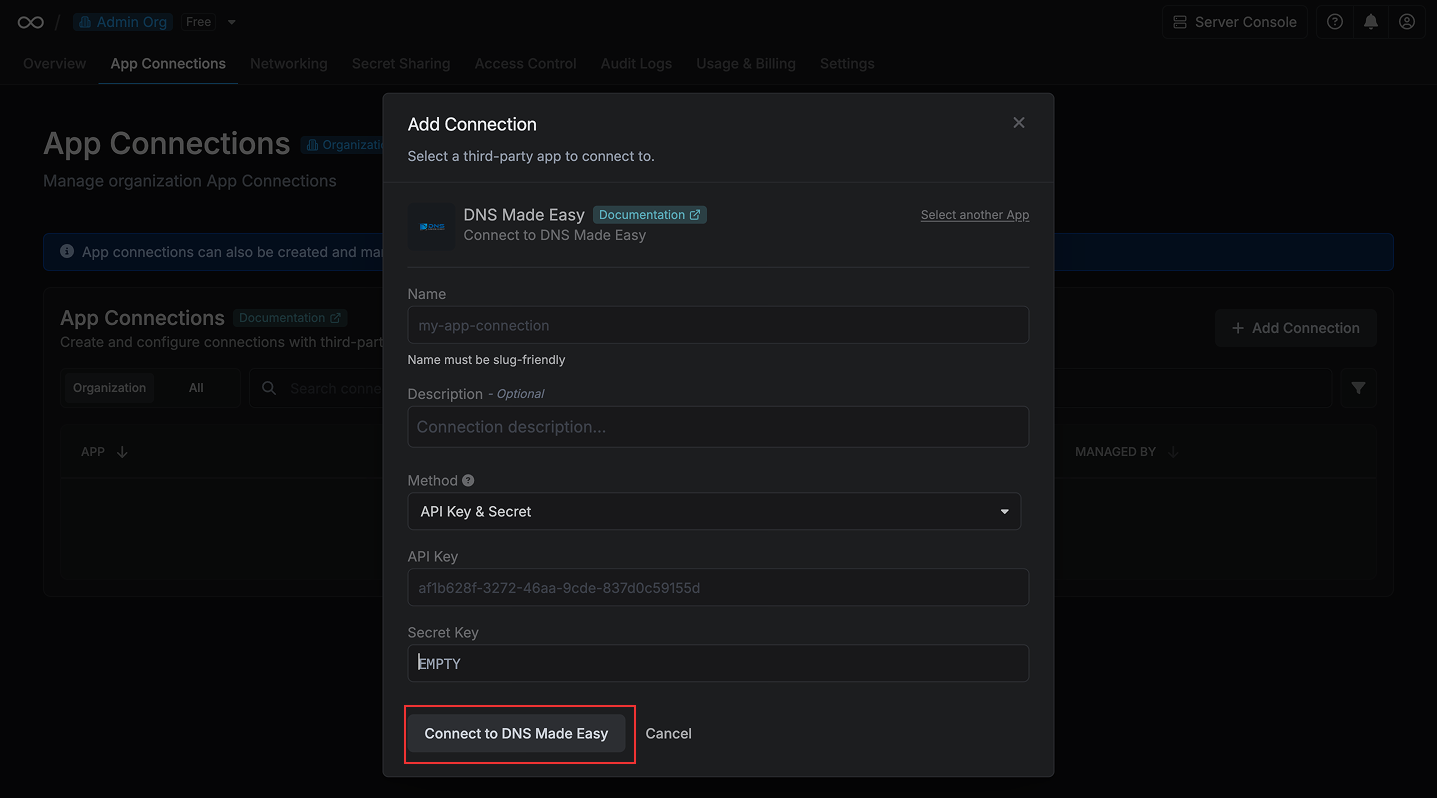
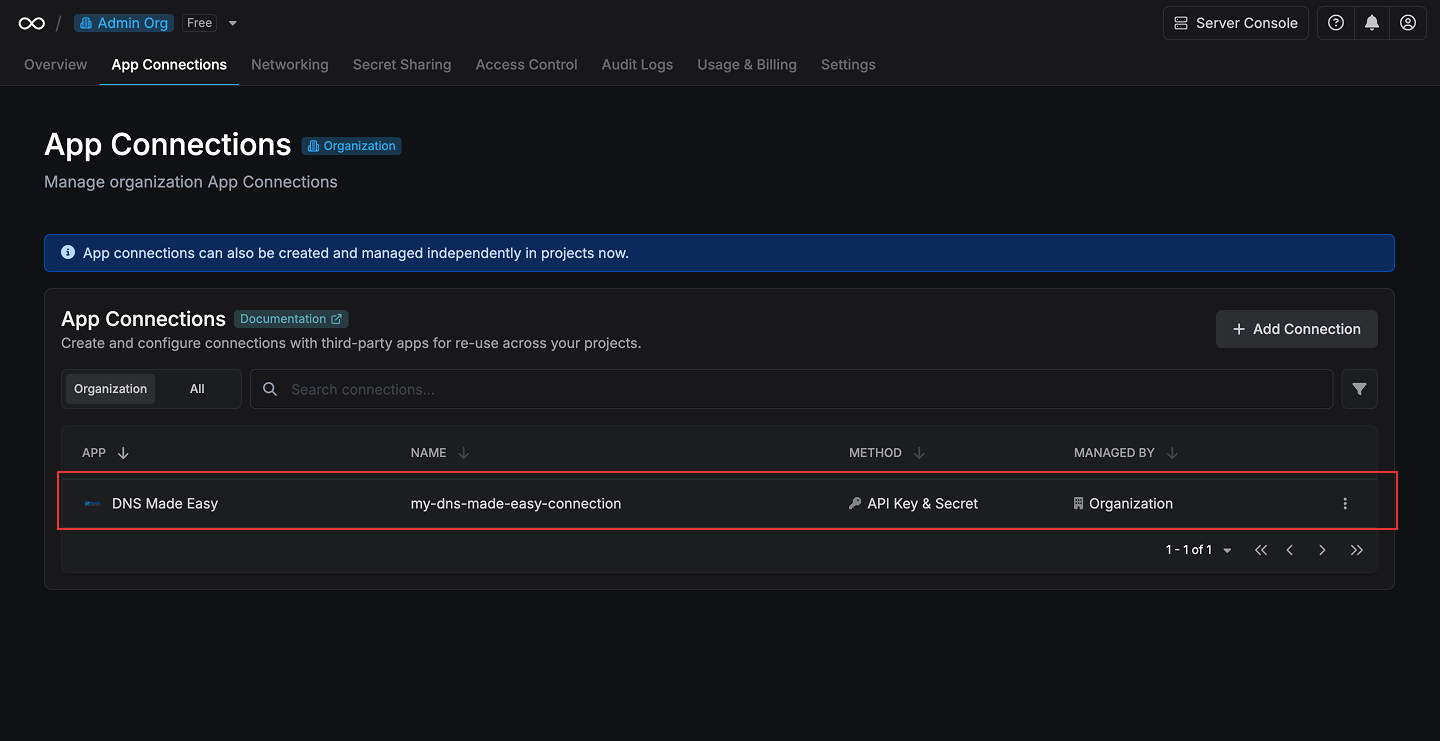
Here are the secrets that have been fetched from Infisical and stored in your volume mount
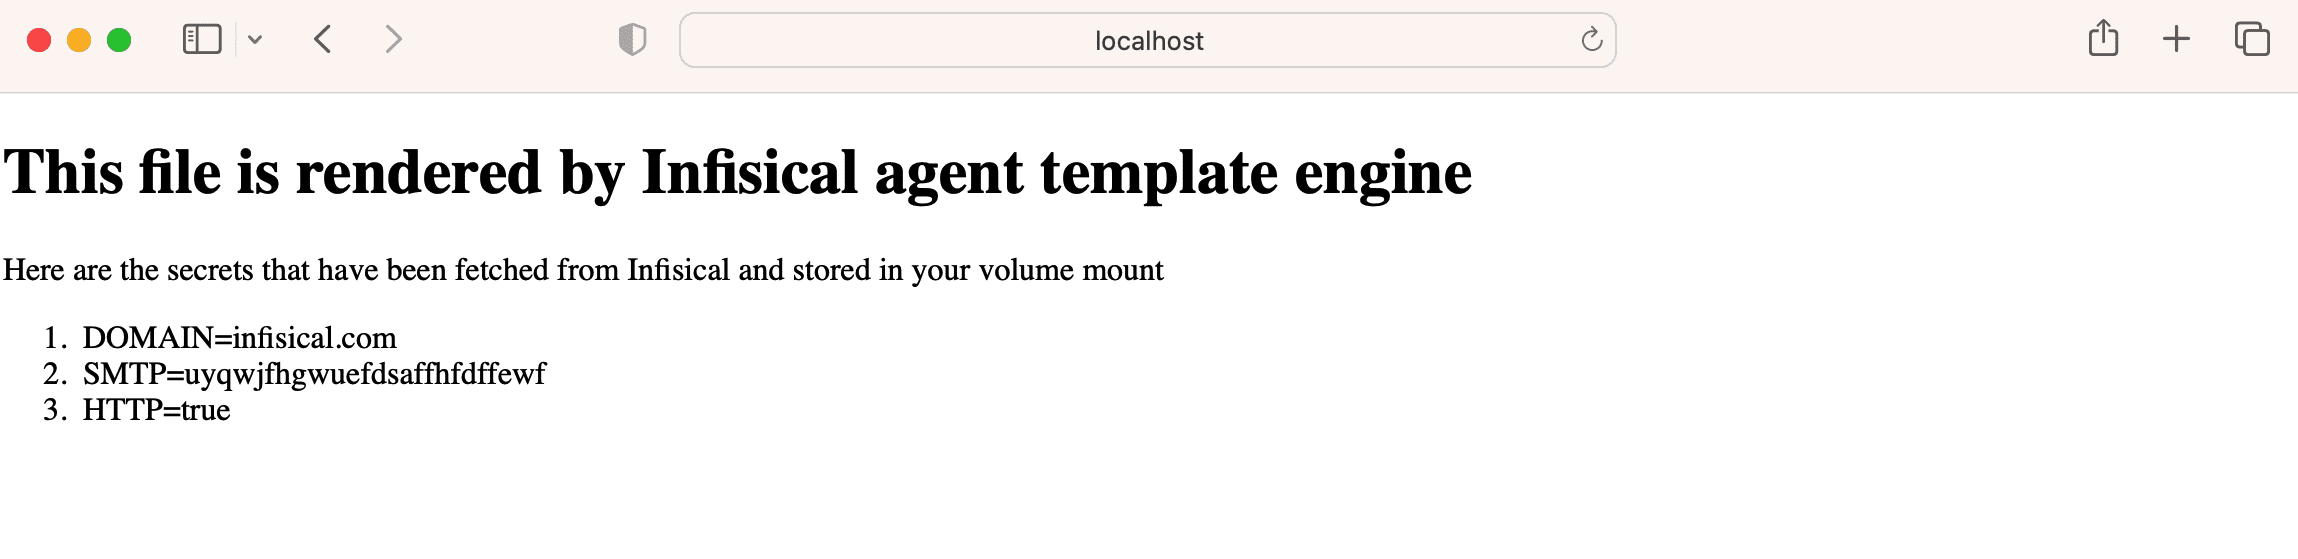
 To view the health of services in your Infisical cluster, visit port `
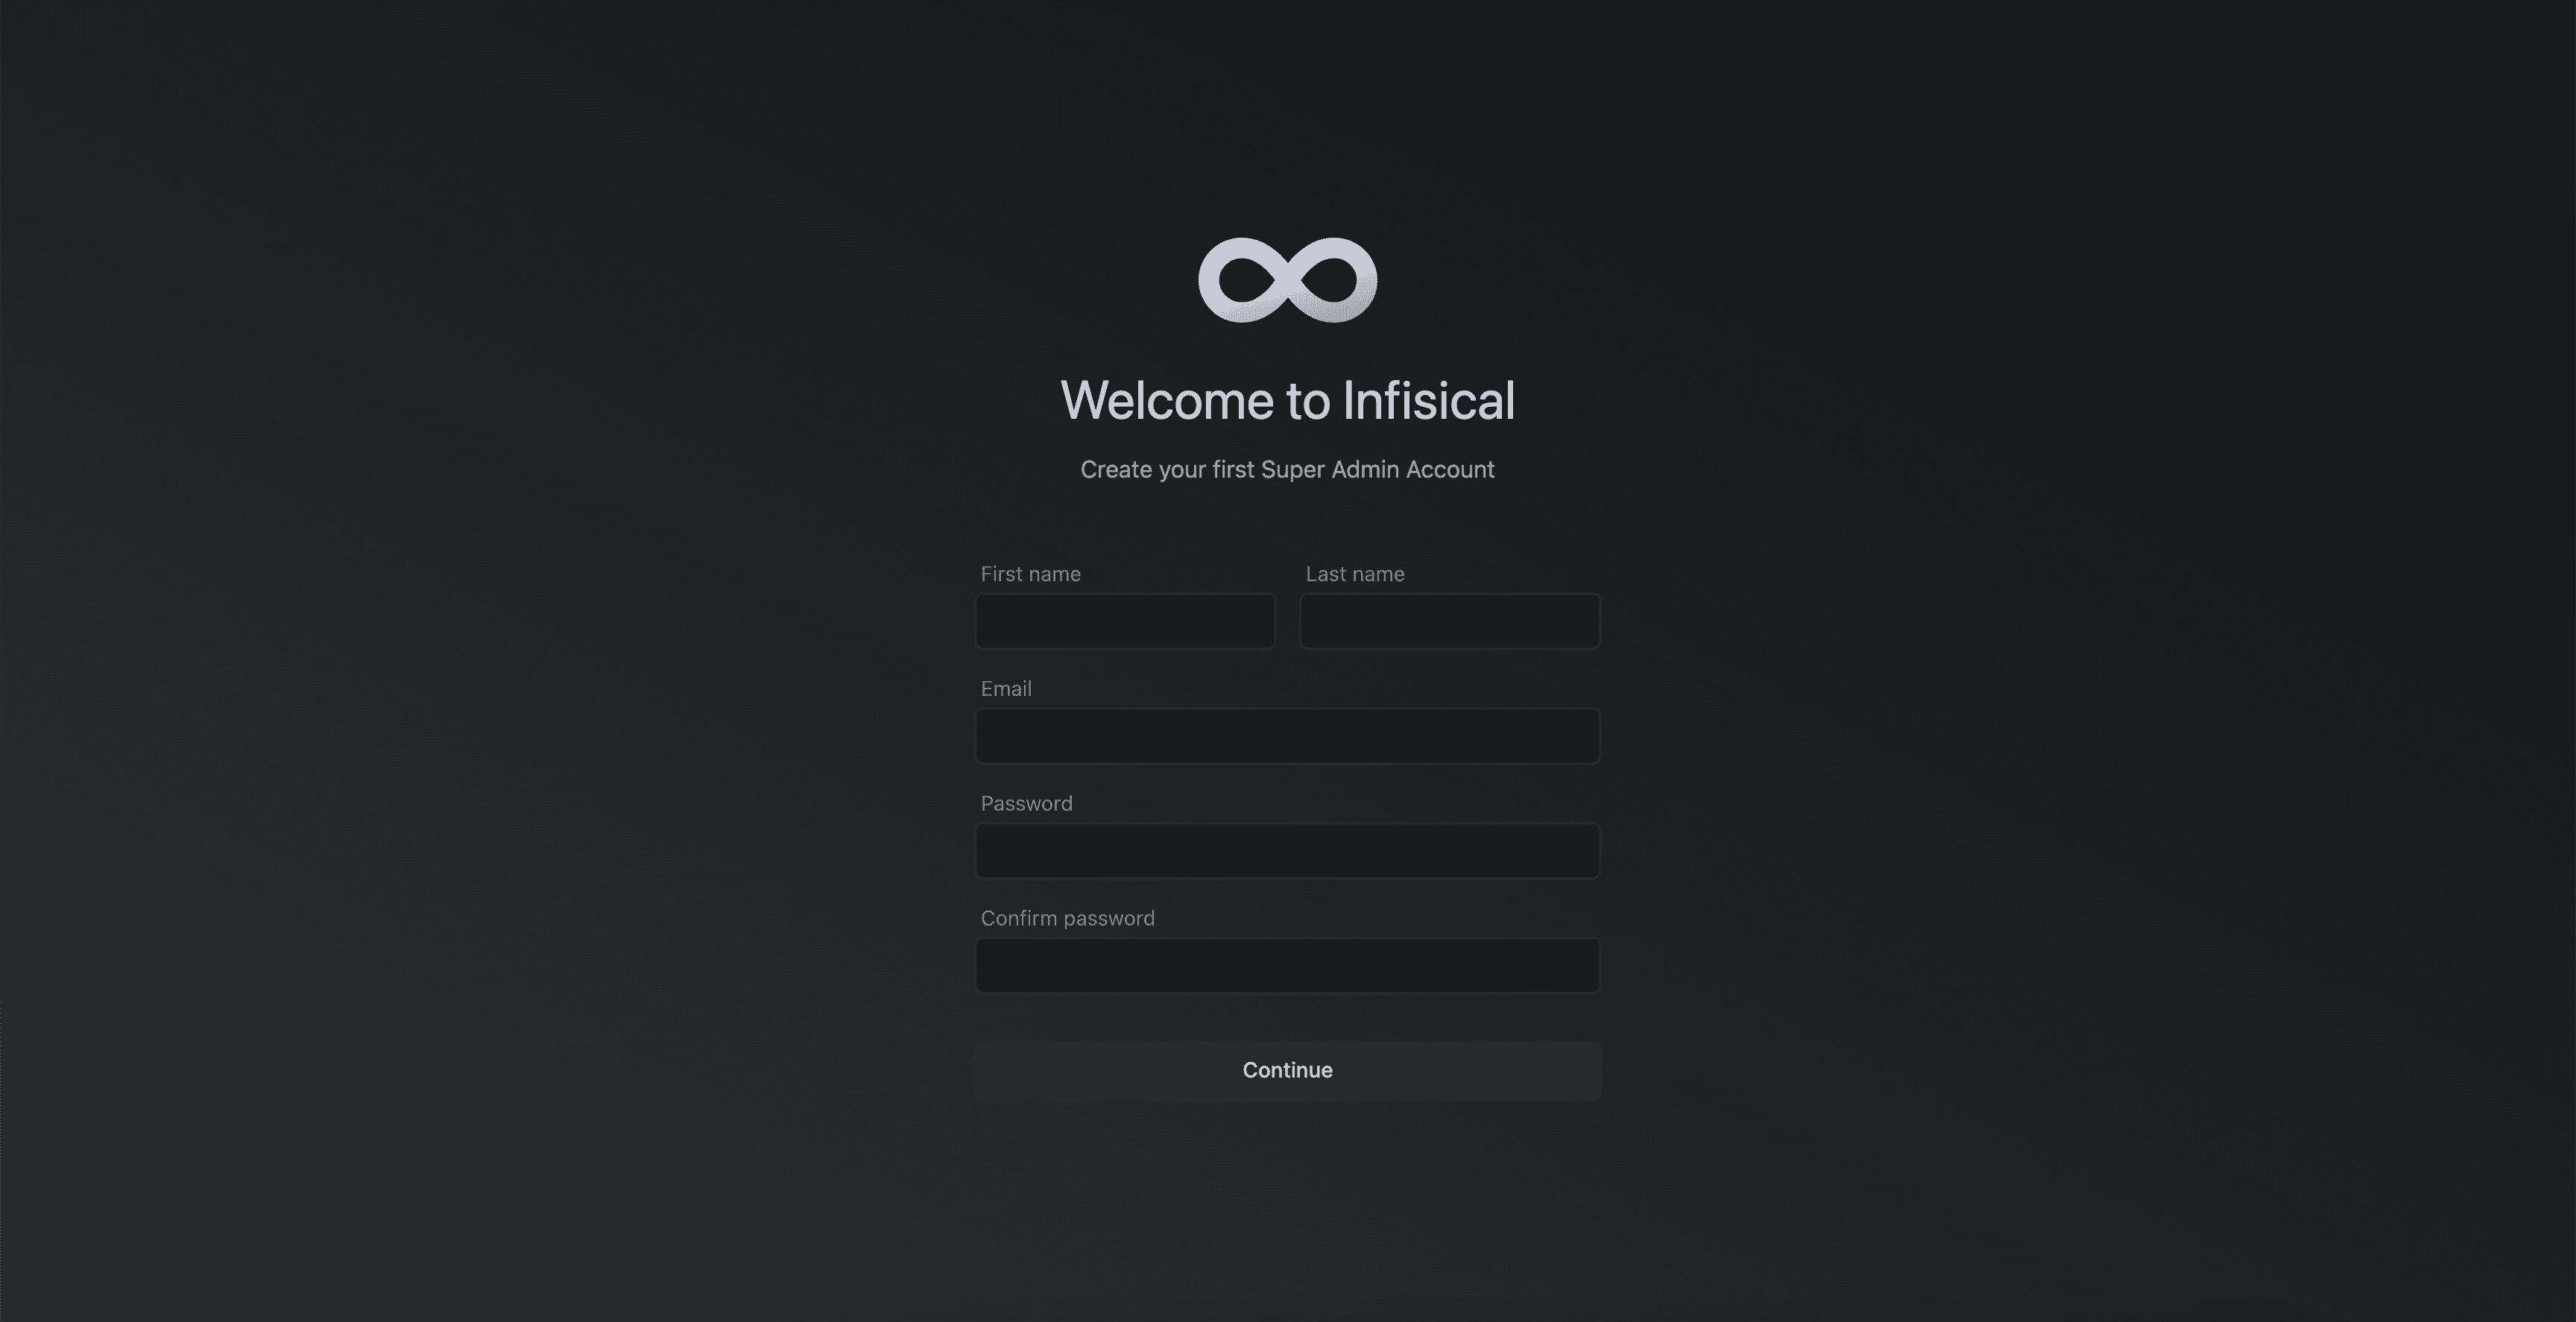 Once all expected services are up and running, visit `
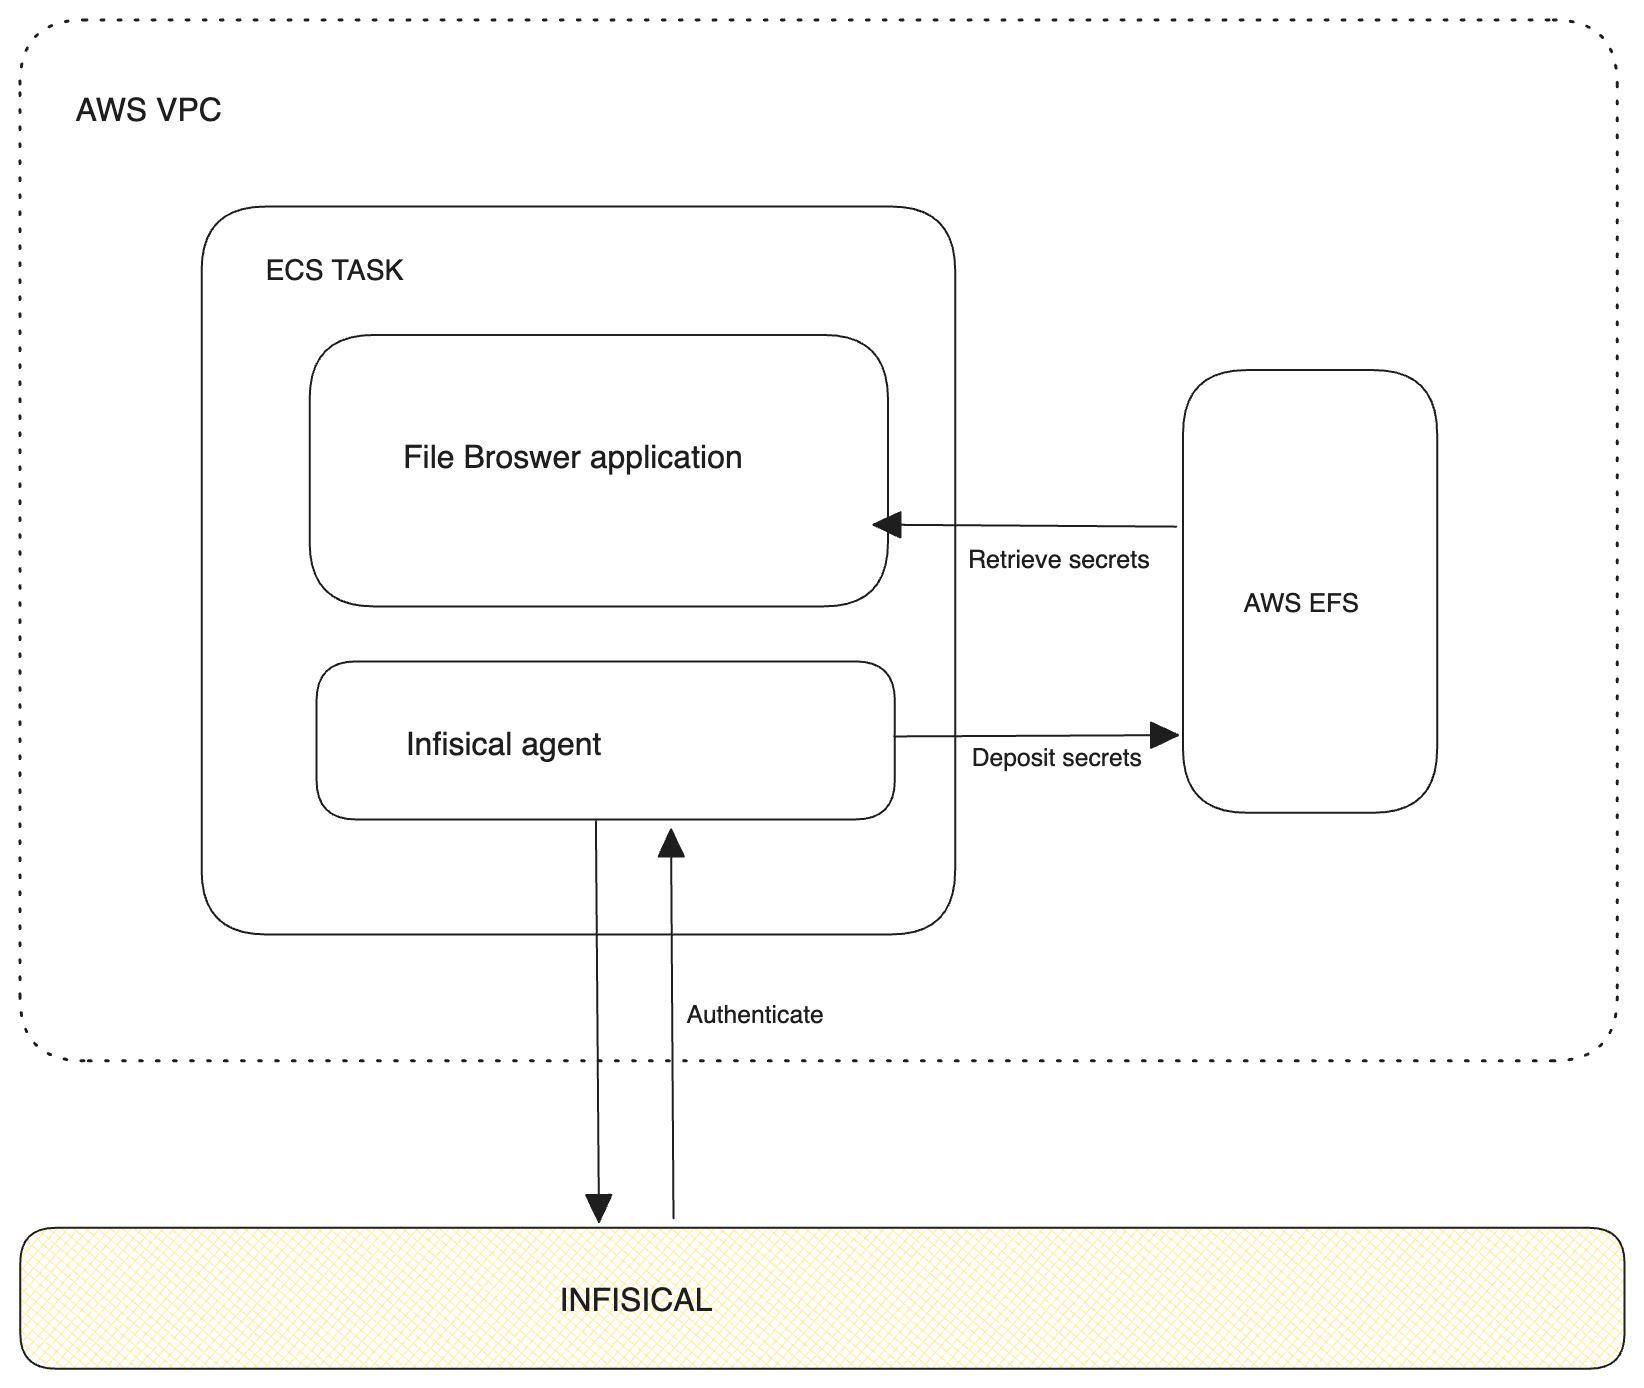 This guide will go over the steps needed to access secrets stored in Infisical from Amazon Elastic Container Service (ECS).
At a high level, the steps involve setting up an ECS task with an [Infisical Agent](/integrations/platforms/infisical-agent) as a sidecar container. This sidecar container uses [AWS Auth](/documentation/platform/identities/aws-auth) to authenticate with Infisical to fetch secrets/access tokens.
Once the secrets/access tokens are retrieved, they are then stored in a shared [Amazon Elastic File System](https://aws.amazon.com/efs/) (EFS) volume. This volume is then made accessible to your application and all of its replicas.
This guide primarily focuses on integrating Infisical Cloud with Amazon ECS on AWS Fargate and Amazon EFS.
However, the principles and steps can be adapted for use with any instance of Infisical (on premise or cloud) and different ECS launch configurations.
## Prerequisites
This guide requires the following prerequisites:
* Infisical account
* Git installed
* Terraform v1.0 or later installed
* Access to AWS credentials
* Understanding of [Infisical Agent](/integrations/platforms/infisical-agent)
## What we will deploy
For this demonstration, we'll deploy the [File Browser](https://github.com/filebrowser/filebrowser) application on our ECS cluster.
Although this guide focuses on File Browser, the principles outlined here can be applied to any application of your choice.
File Browser plays a key role in this context because it enables us to view all files attached to a specific volume.
This feature is important for our demonstration, as it allows us to verify whether the Infisical agent is depositing the expected files into the designated file volume and if those files are accessible to the application.
This guide will go over the steps needed to access secrets stored in Infisical from Amazon Elastic Container Service (ECS).
At a high level, the steps involve setting up an ECS task with an [Infisical Agent](/integrations/platforms/infisical-agent) as a sidecar container. This sidecar container uses [AWS Auth](/documentation/platform/identities/aws-auth) to authenticate with Infisical to fetch secrets/access tokens.
Once the secrets/access tokens are retrieved, they are then stored in a shared [Amazon Elastic File System](https://aws.amazon.com/efs/) (EFS) volume. This volume is then made accessible to your application and all of its replicas.
This guide primarily focuses on integrating Infisical Cloud with Amazon ECS on AWS Fargate and Amazon EFS.
However, the principles and steps can be adapted for use with any instance of Infisical (on premise or cloud) and different ECS launch configurations.
## Prerequisites
This guide requires the following prerequisites:
* Infisical account
* Git installed
* Terraform v1.0 or later installed
* Access to AWS credentials
* Understanding of [Infisical Agent](/integrations/platforms/infisical-agent)
## What we will deploy
For this demonstration, we'll deploy the [File Browser](https://github.com/filebrowser/filebrowser) application on our ECS cluster.
Although this guide focuses on File Browser, the principles outlined here can be applied to any application of your choice.
File Browser plays a key role in this context because it enables us to view all files attached to a specific volume.
This feature is important for our demonstration, as it allows us to verify whether the Infisical agent is depositing the expected files into the designated file volume and if those files are accessible to the application.
 Since our EFS volume is mounted to the path of the file browser application, we should see the access token and rendered secret file we defined via the agent config file.
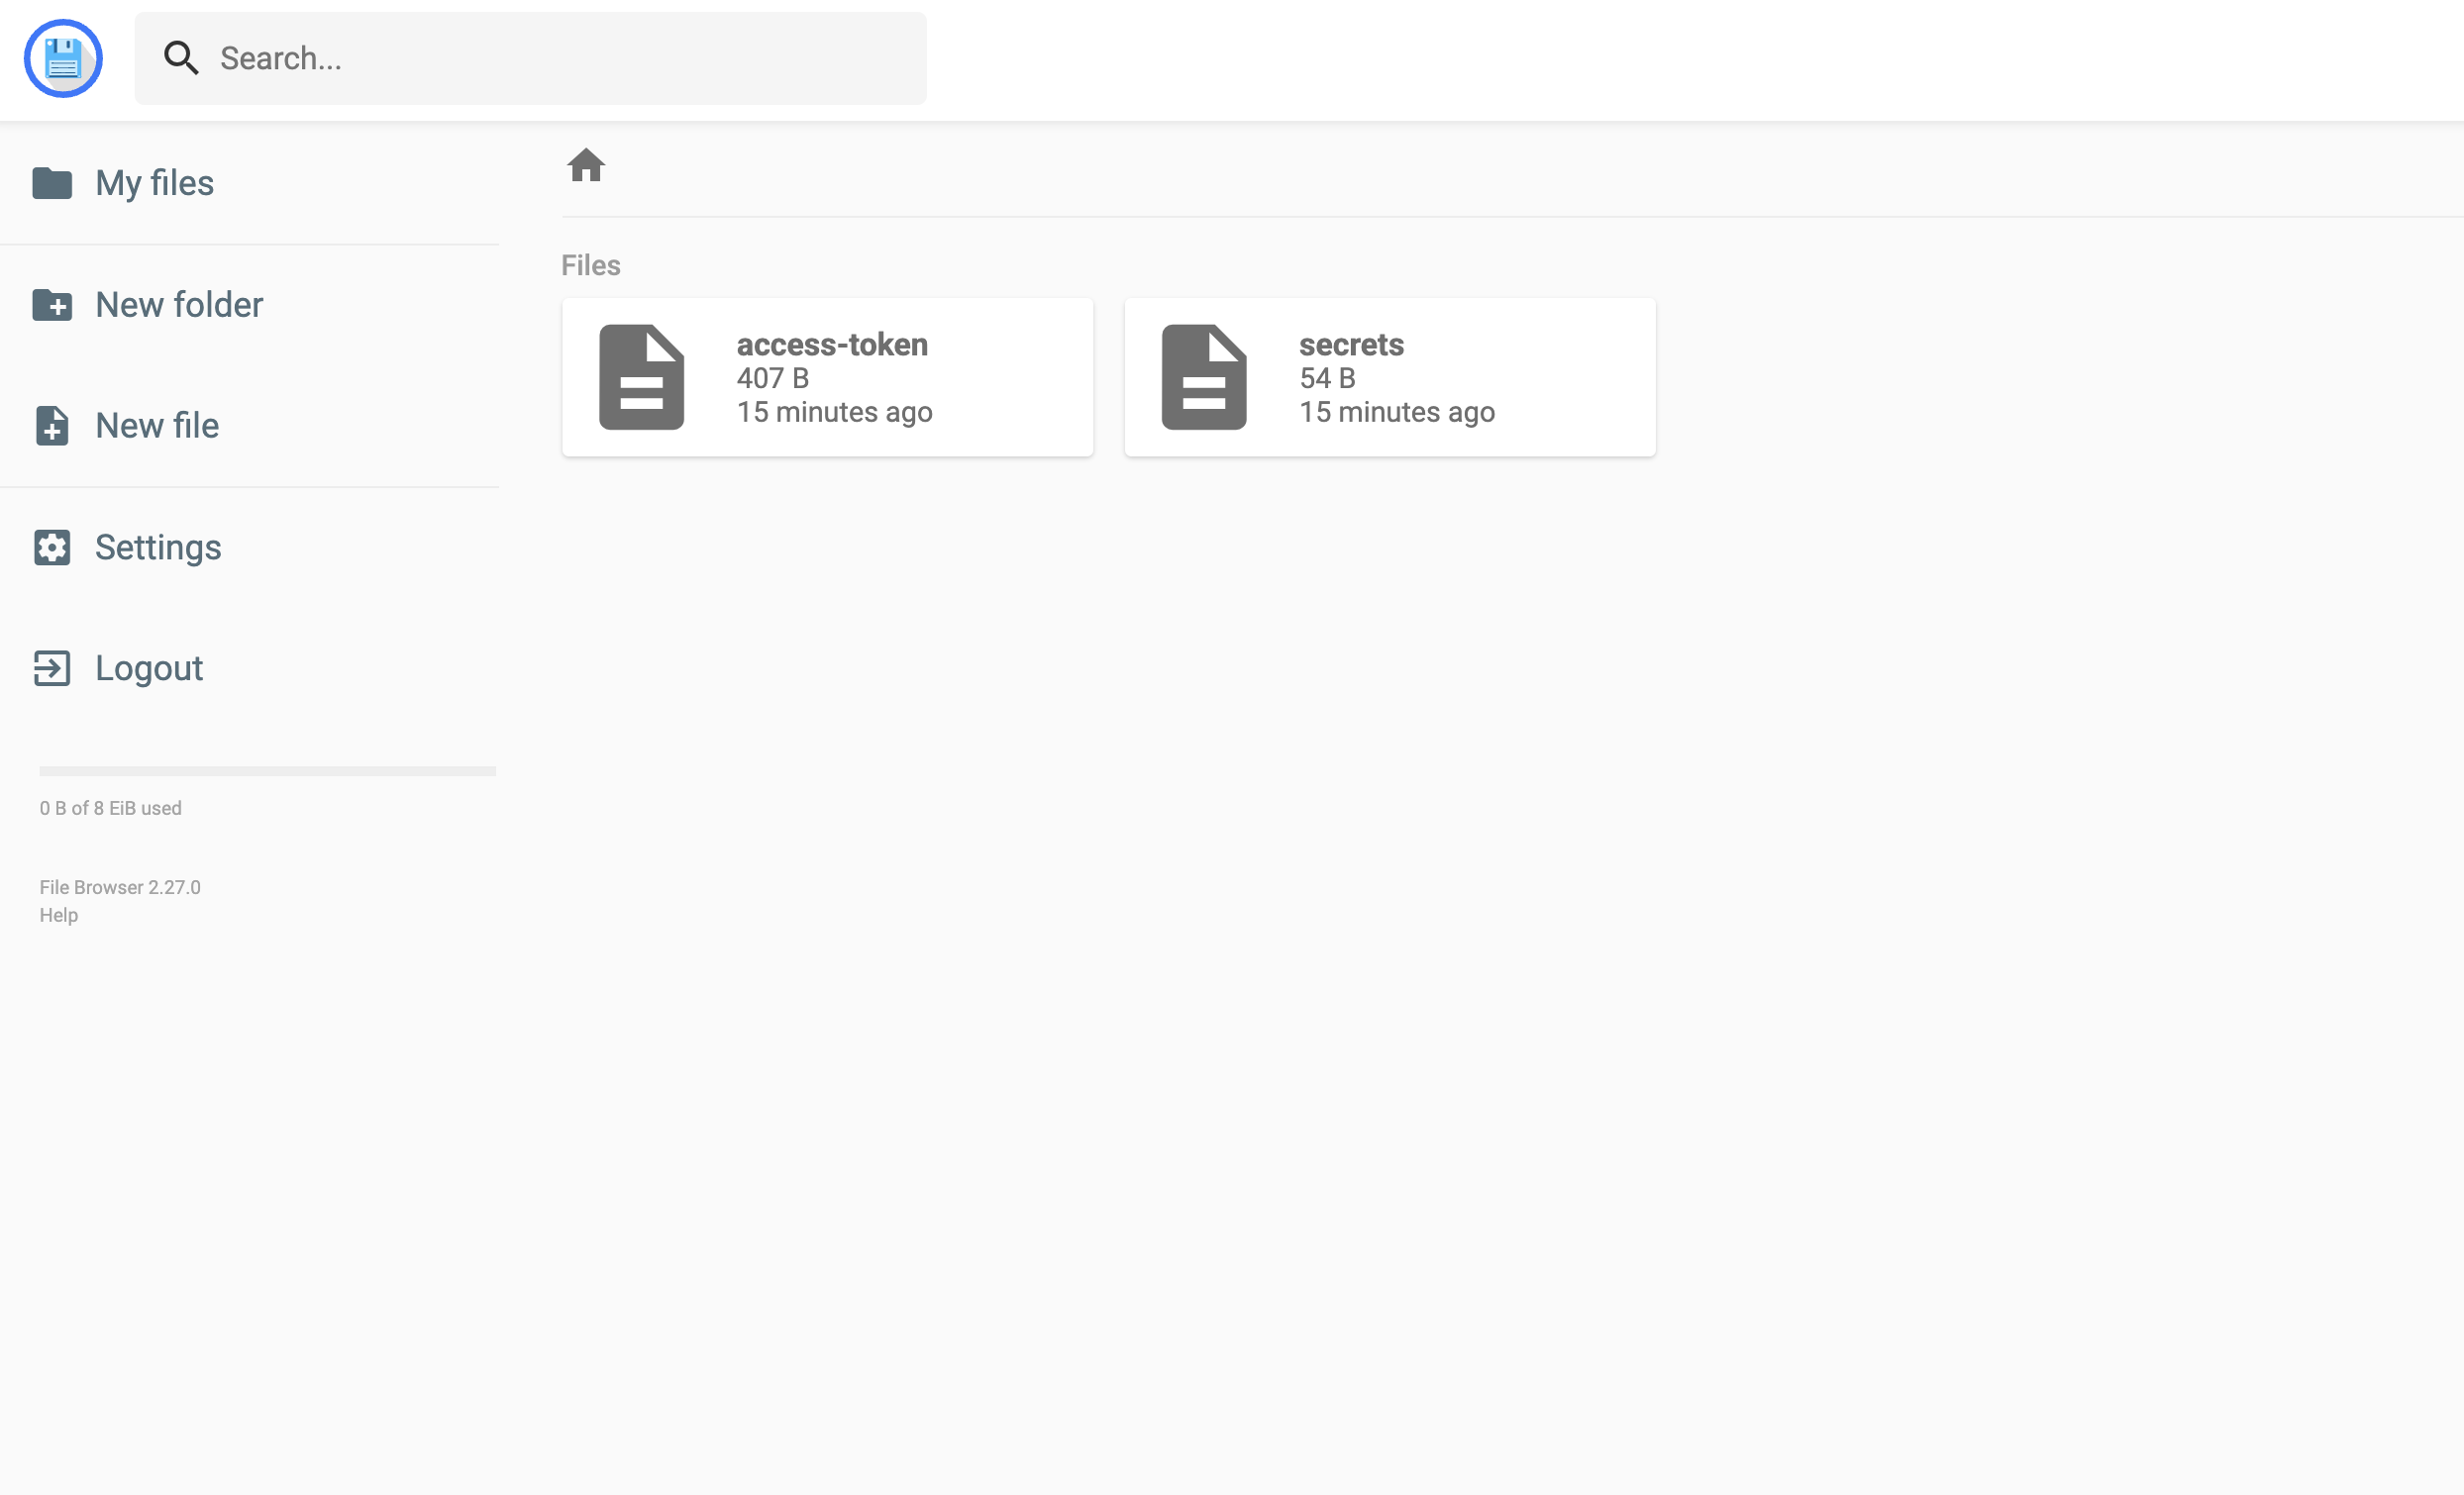 As expected, two files are present: `access-token` and `secrets`.
The `access-token` file should hold a valid `Bearer` token, which can be used to make HTTP requests to Infisical.
The `secrets` file should contain secrets, formatted according to the specifications in our secret template file (presented in key=value format).
As expected, two files are present: `access-token` and `secrets`.
The `access-token` file should hold a valid `Bearer` token, which can be used to make HTTP requests to Infisical.
The `secrets` file should contain secrets, formatted according to the specifications in our secret template file (presented in key=value format).
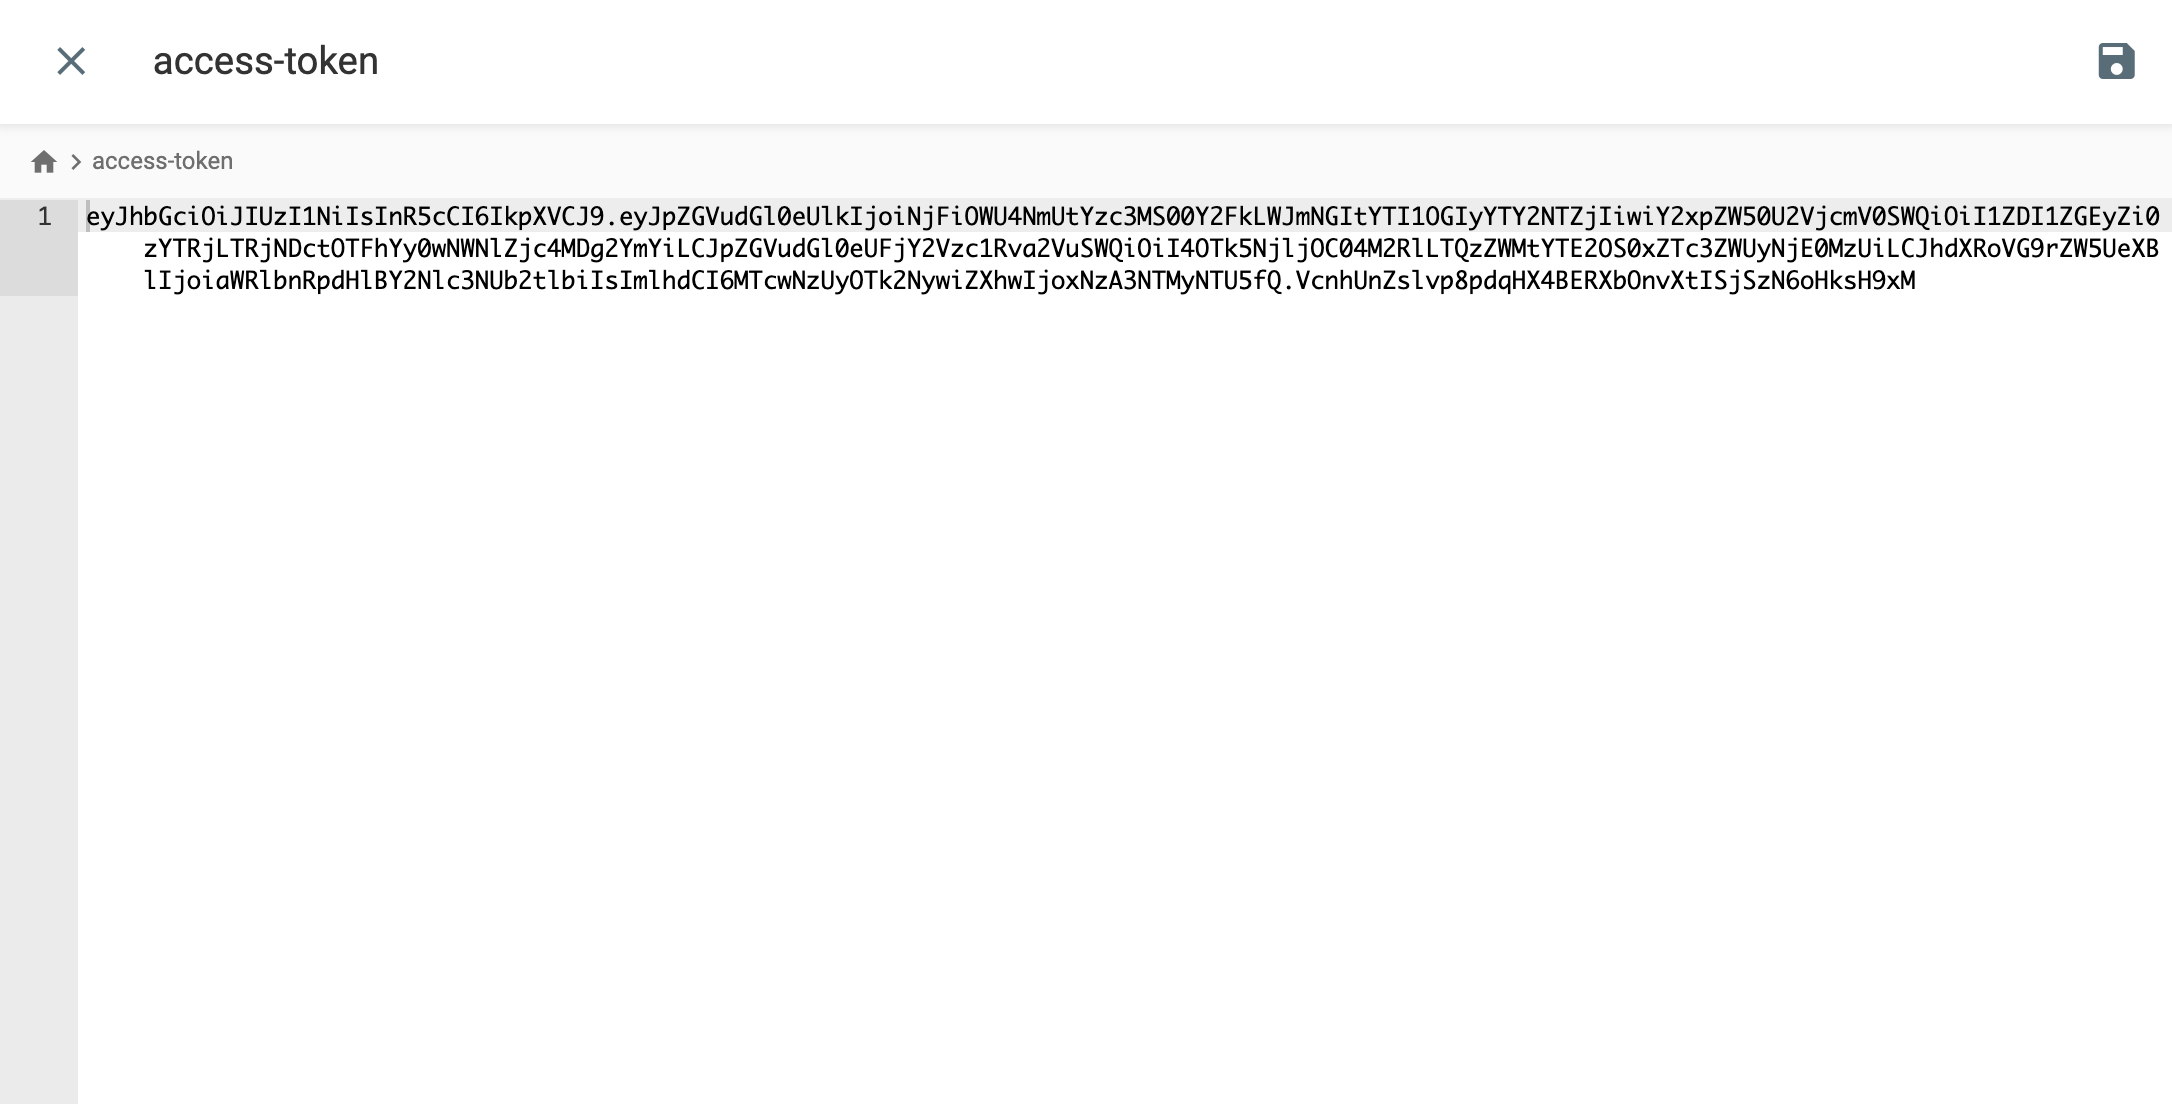
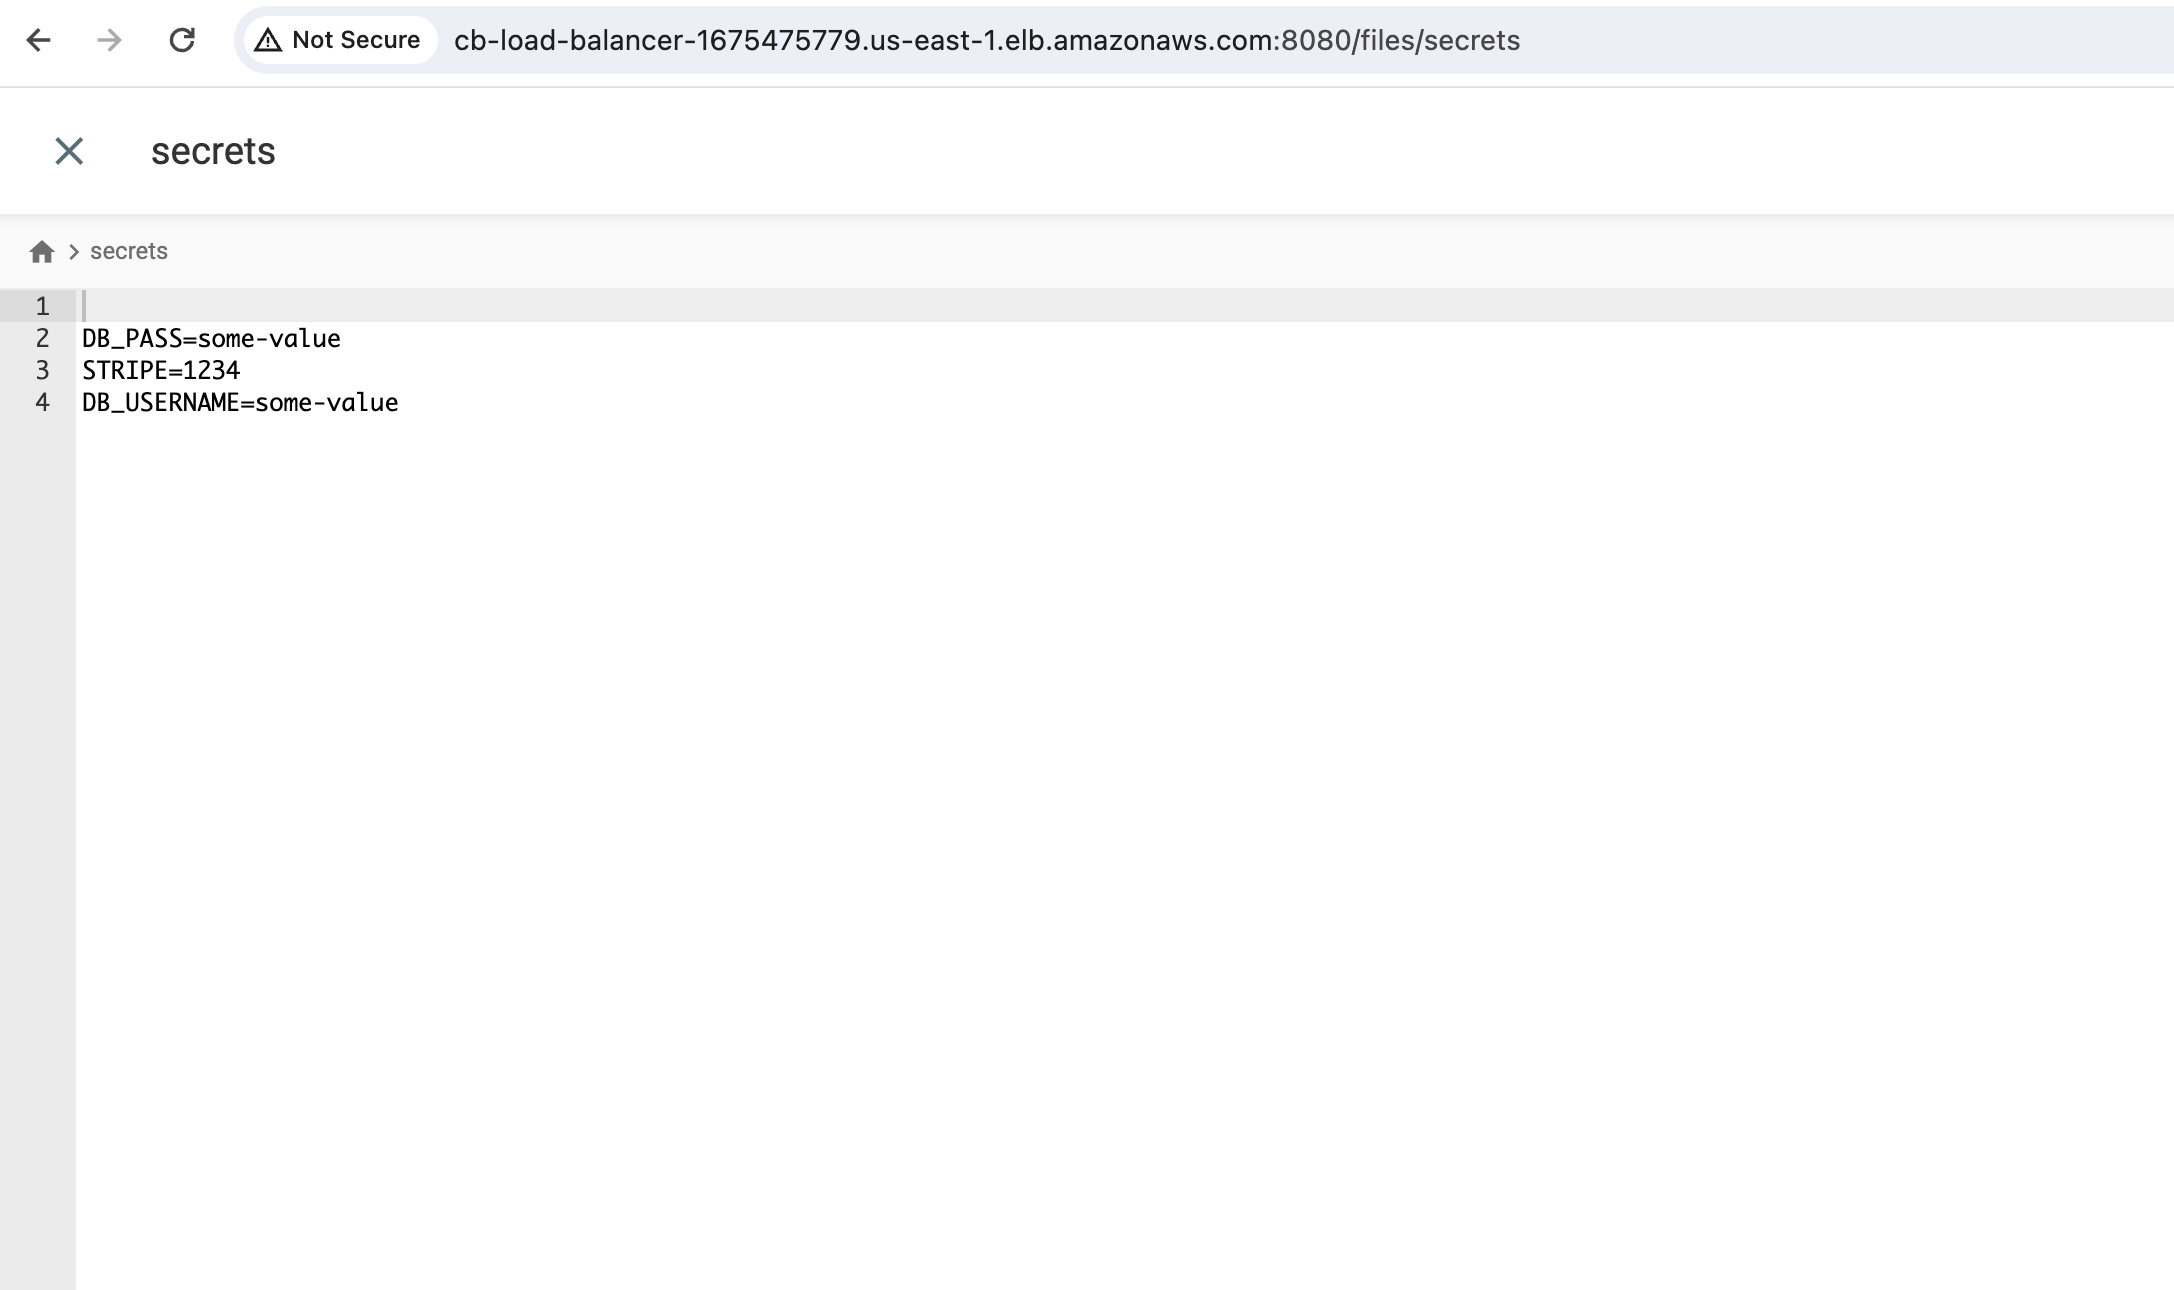 ---
# Source: https://infisical.com/docs/self-hosting/ee.md
> ## Documentation Index
> Fetch the complete documentation index at: https://infisical.com/docs/llms.txt
> Use this file to discover all available pages before exploring further.
# Infisical Enterprise
> Find out how to activate Infisical Enterprise edition (EE) features.
While most features in Infisical are free to use, others are paid and require purchasing an enterprise license to use them.
This guide walks through how you can use these paid features on a self-hosted instance of Infisical.
---
# Source: https://infisical.com/docs/self-hosting/ee.md
> ## Documentation Index
> Fetch the complete documentation index at: https://infisical.com/docs/llms.txt
> Use this file to discover all available pages before exploring further.
# Infisical Enterprise
> Find out how to activate Infisical Enterprise edition (EE) features.
While most features in Infisical are free to use, others are paid and require purchasing an enterprise license to use them.
This guide walks through how you can use these paid features on a self-hosted instance of Infisical.

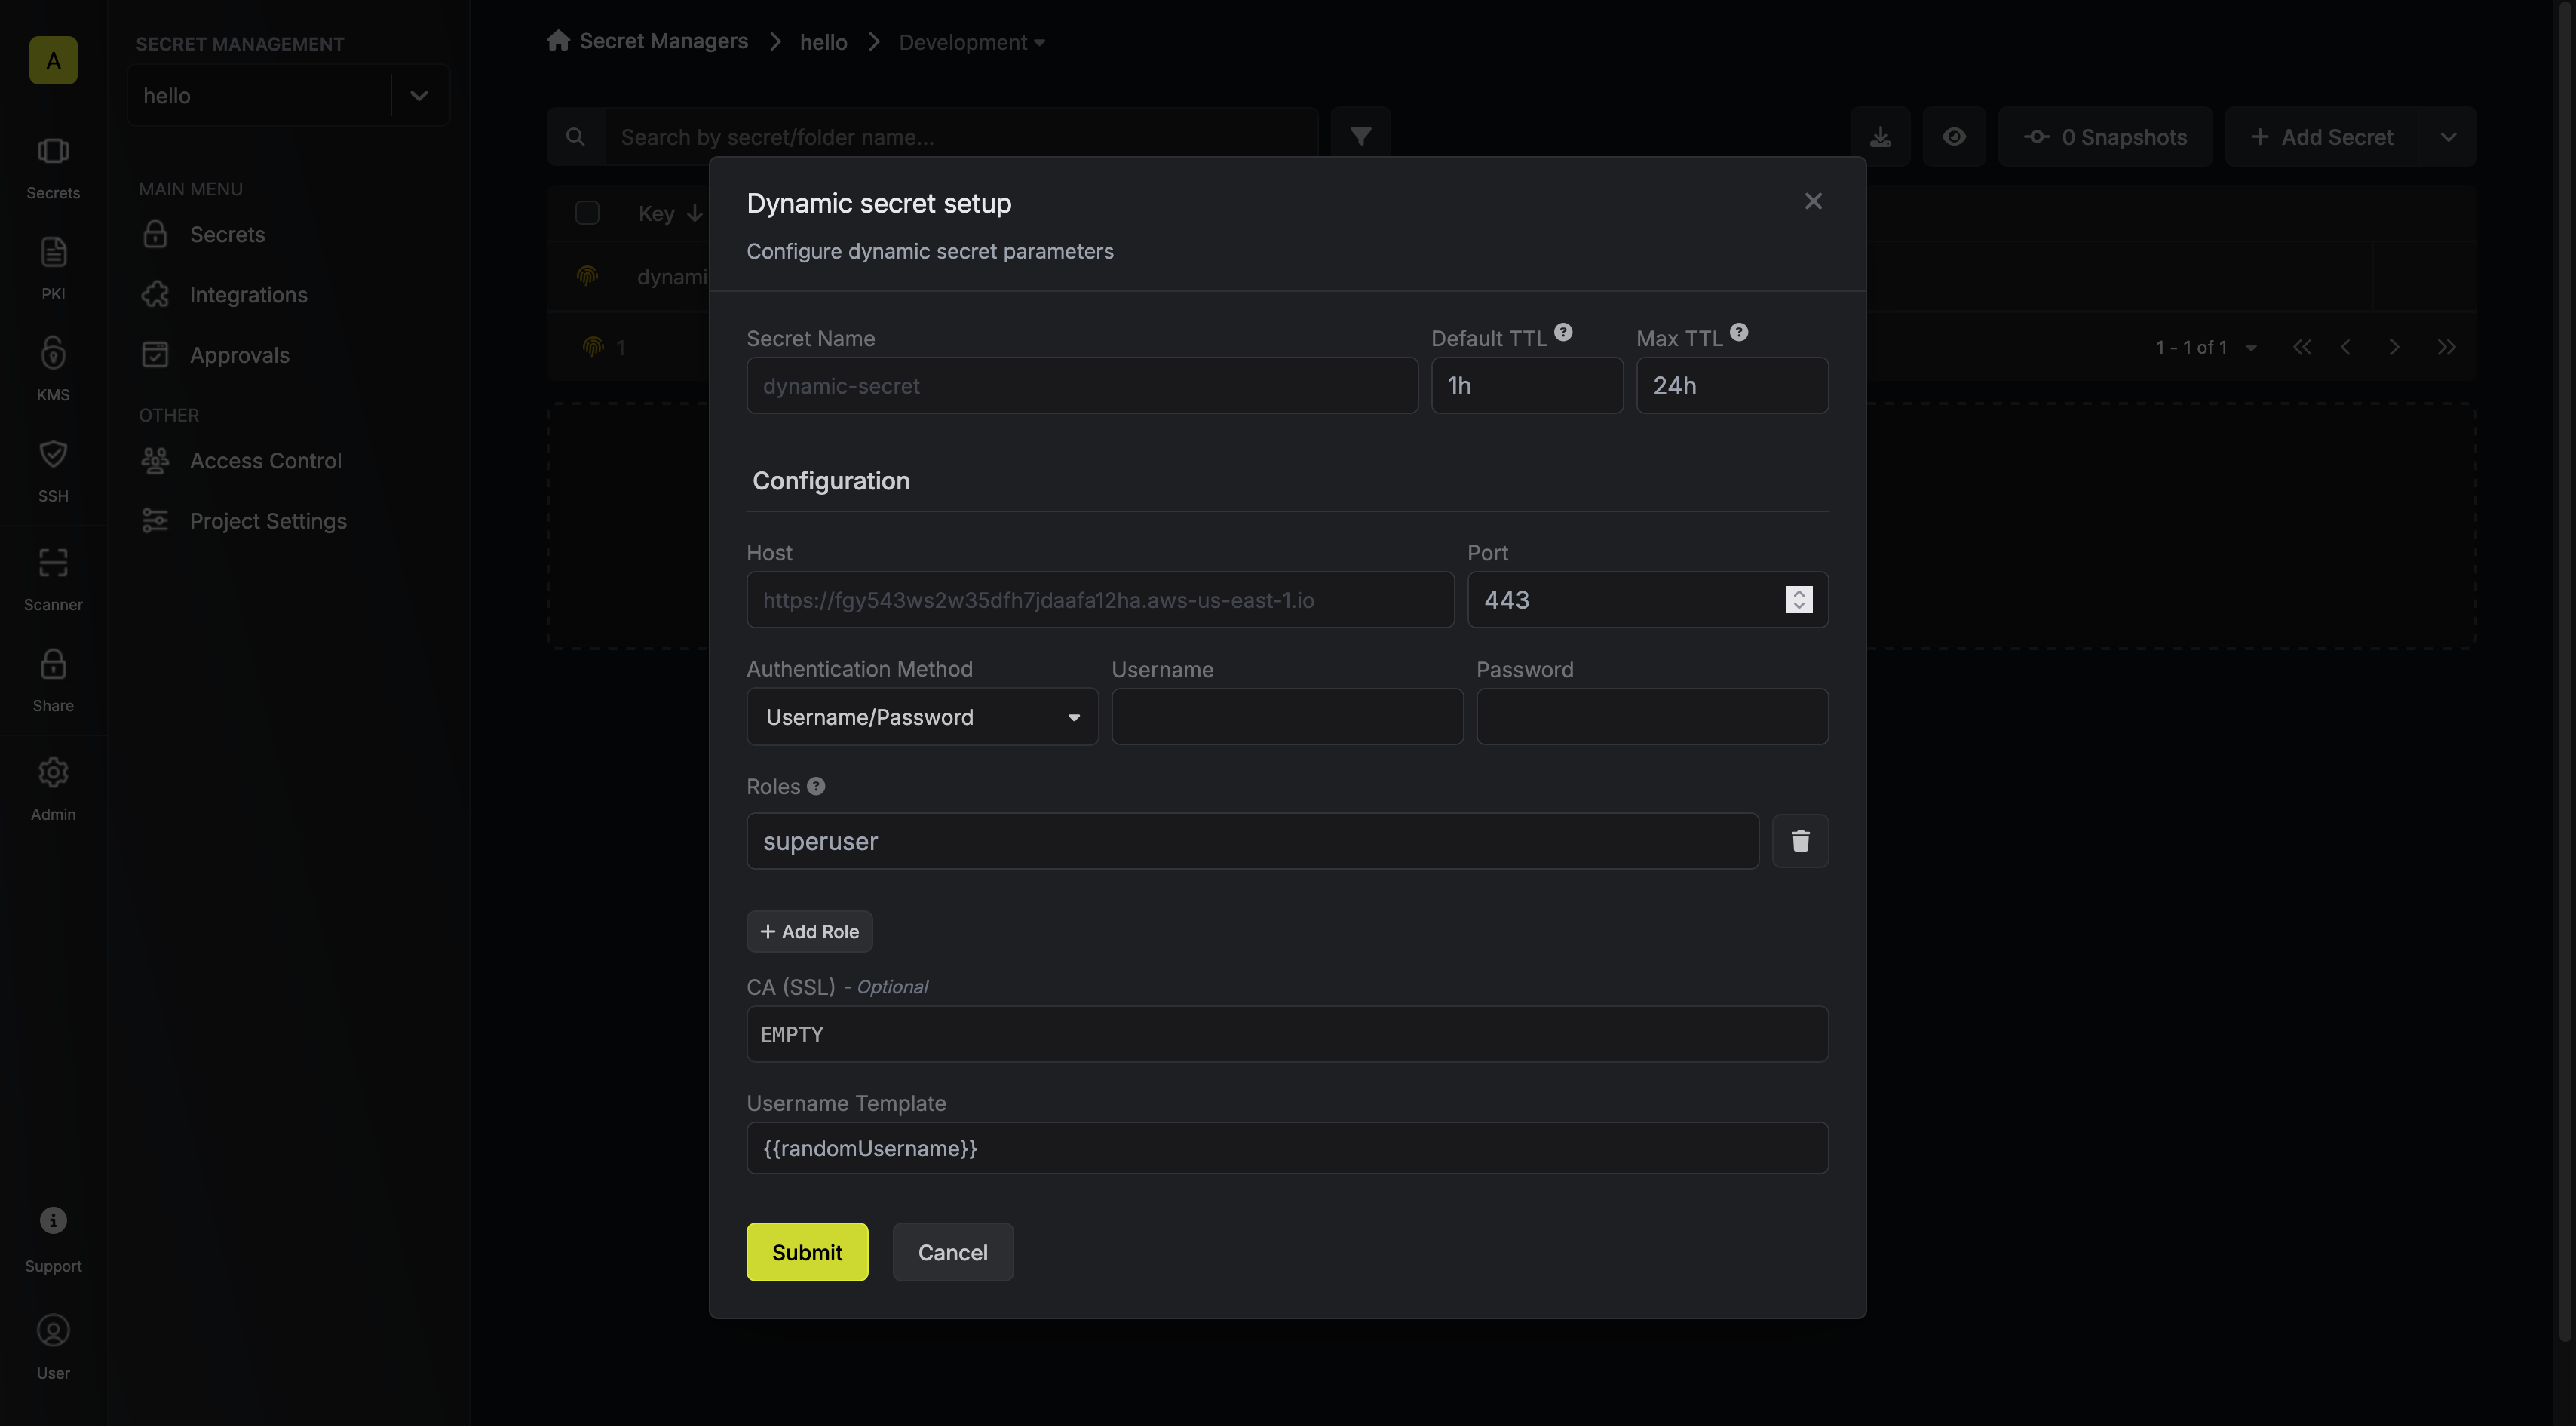 When generating these secrets, it's important to specify a Time-to-Live (TTL) duration. This will dictate how long the credentials are valid for.
## Renew Leases
To extend the life of the generated dynamic secret leases past its initial time to live, simply click on the **Renew** button as illustrated below.
When generating these secrets, it's important to specify a Time-to-Live (TTL) duration. This will dictate how long the credentials are valid for.
## Renew Leases
To extend the life of the generated dynamic secret leases past its initial time to live, simply click on the **Renew** button as illustrated below.
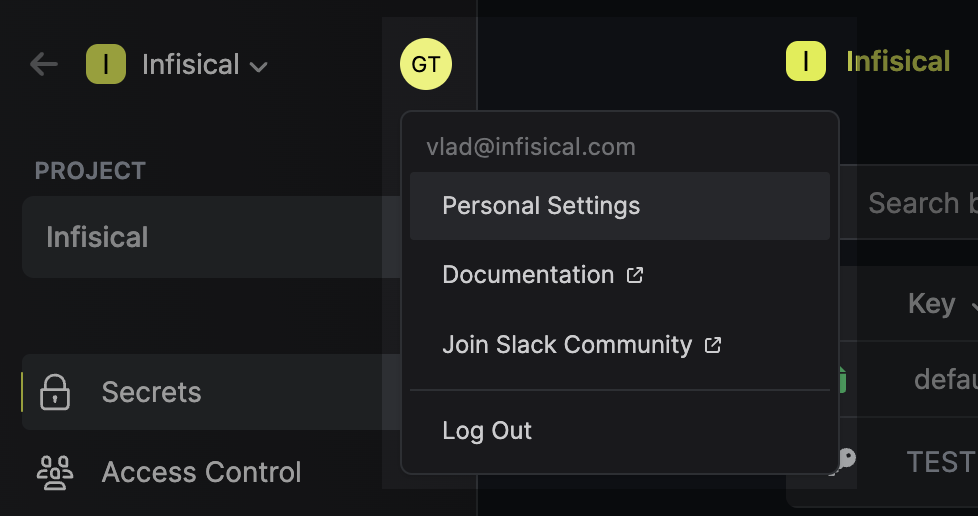 2. Scroll down to the `Emergency Kit` section.
3. Enter your current password and click `Save`.
### Change Password
You can update your account password at any time:
1. Open the `Personal Settings` menu.
2. Navigate to the `Authentication` tab.
2. Scroll down to the `Emergency Kit` section.
3. Enter your current password and click `Save`.
### Change Password
You can update your account password at any time:
1. Open the `Personal Settings` menu.
2. Navigate to the `Authentication` tab.
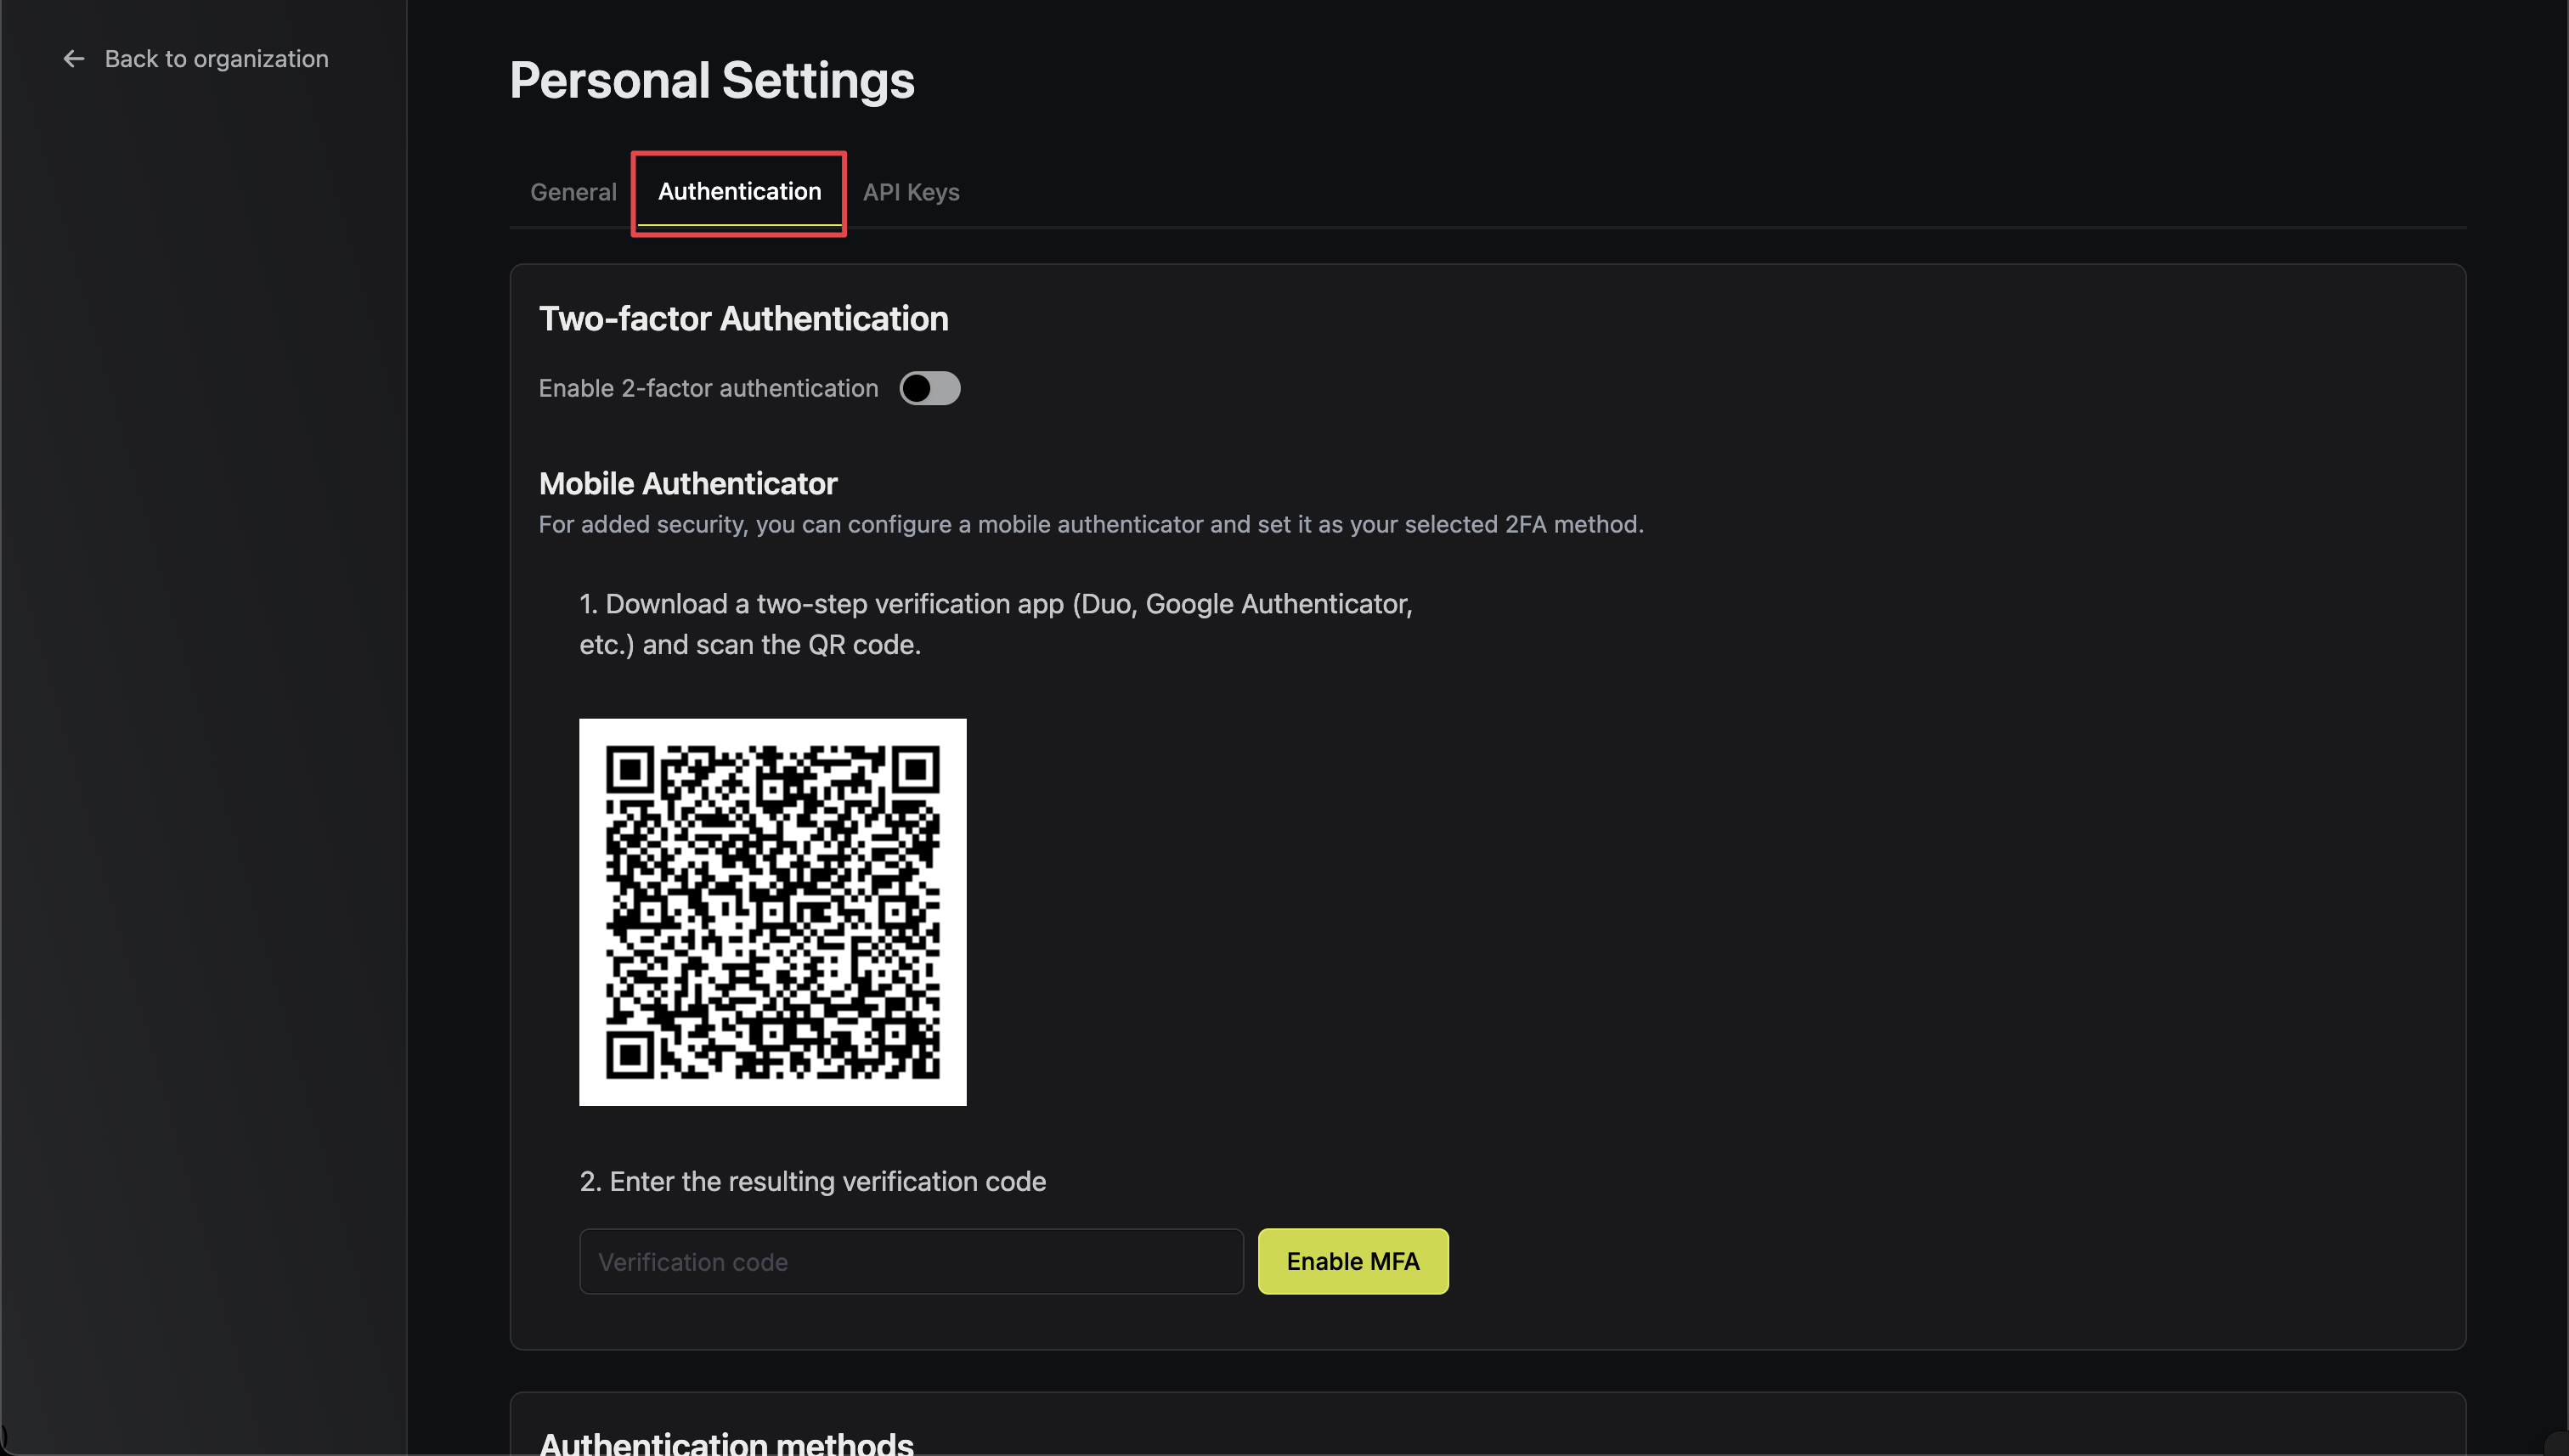 3. In the `Change Password` section, enter your current password and new password.
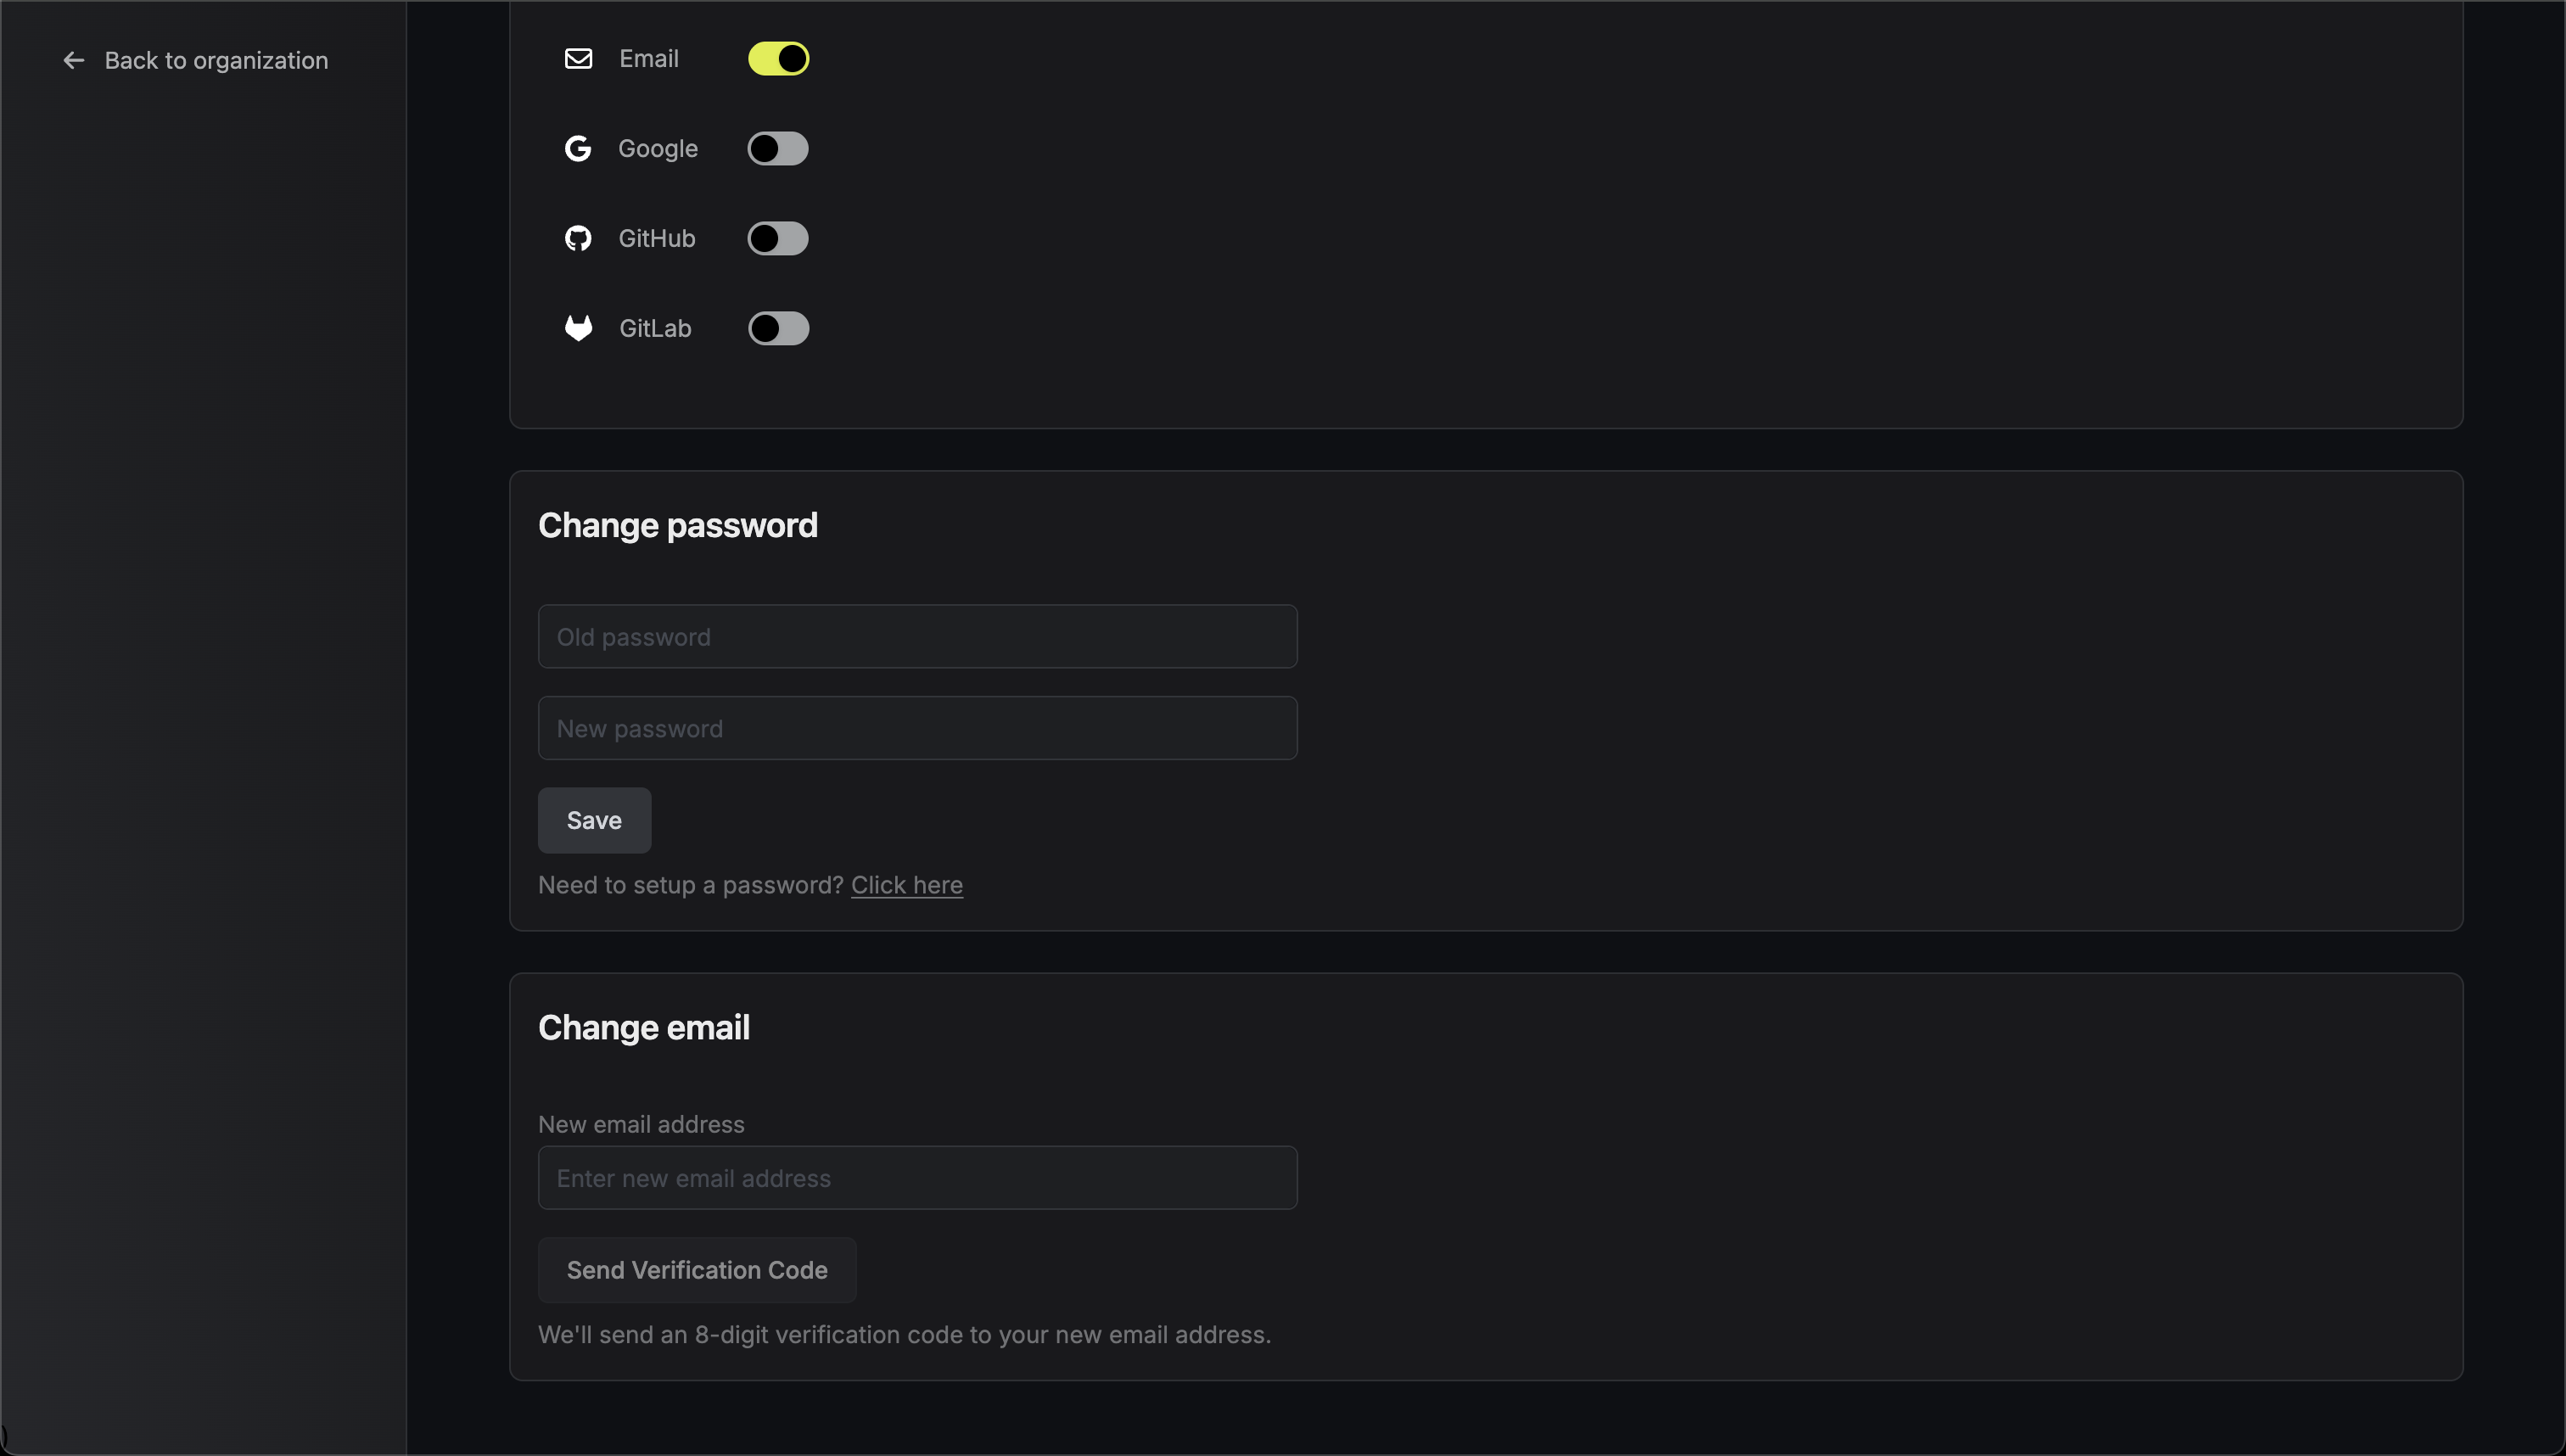 4. Click `Save` to save your new password.
### Change Email
You can update your account email address:
1. Open the `Personal Settings` menu.
2. Navigate to the `Authentication` tab.
3. In the `Change Email` section, enter your new email address.
4\. Click `Send Verification Code` to receive an 6-digit verification code at your new email address.
5\. Check your new email inbox and enter the verification code.
4. Click `Save` to save your new password.
### Change Email
You can update your account email address:
1. Open the `Personal Settings` menu.
2. Navigate to the `Authentication` tab.
3. In the `Change Email` section, enter your new email address.
4\. Click `Send Verification Code` to receive an 6-digit verification code at your new email address.
5\. Check your new email inbox and enter the verification code.
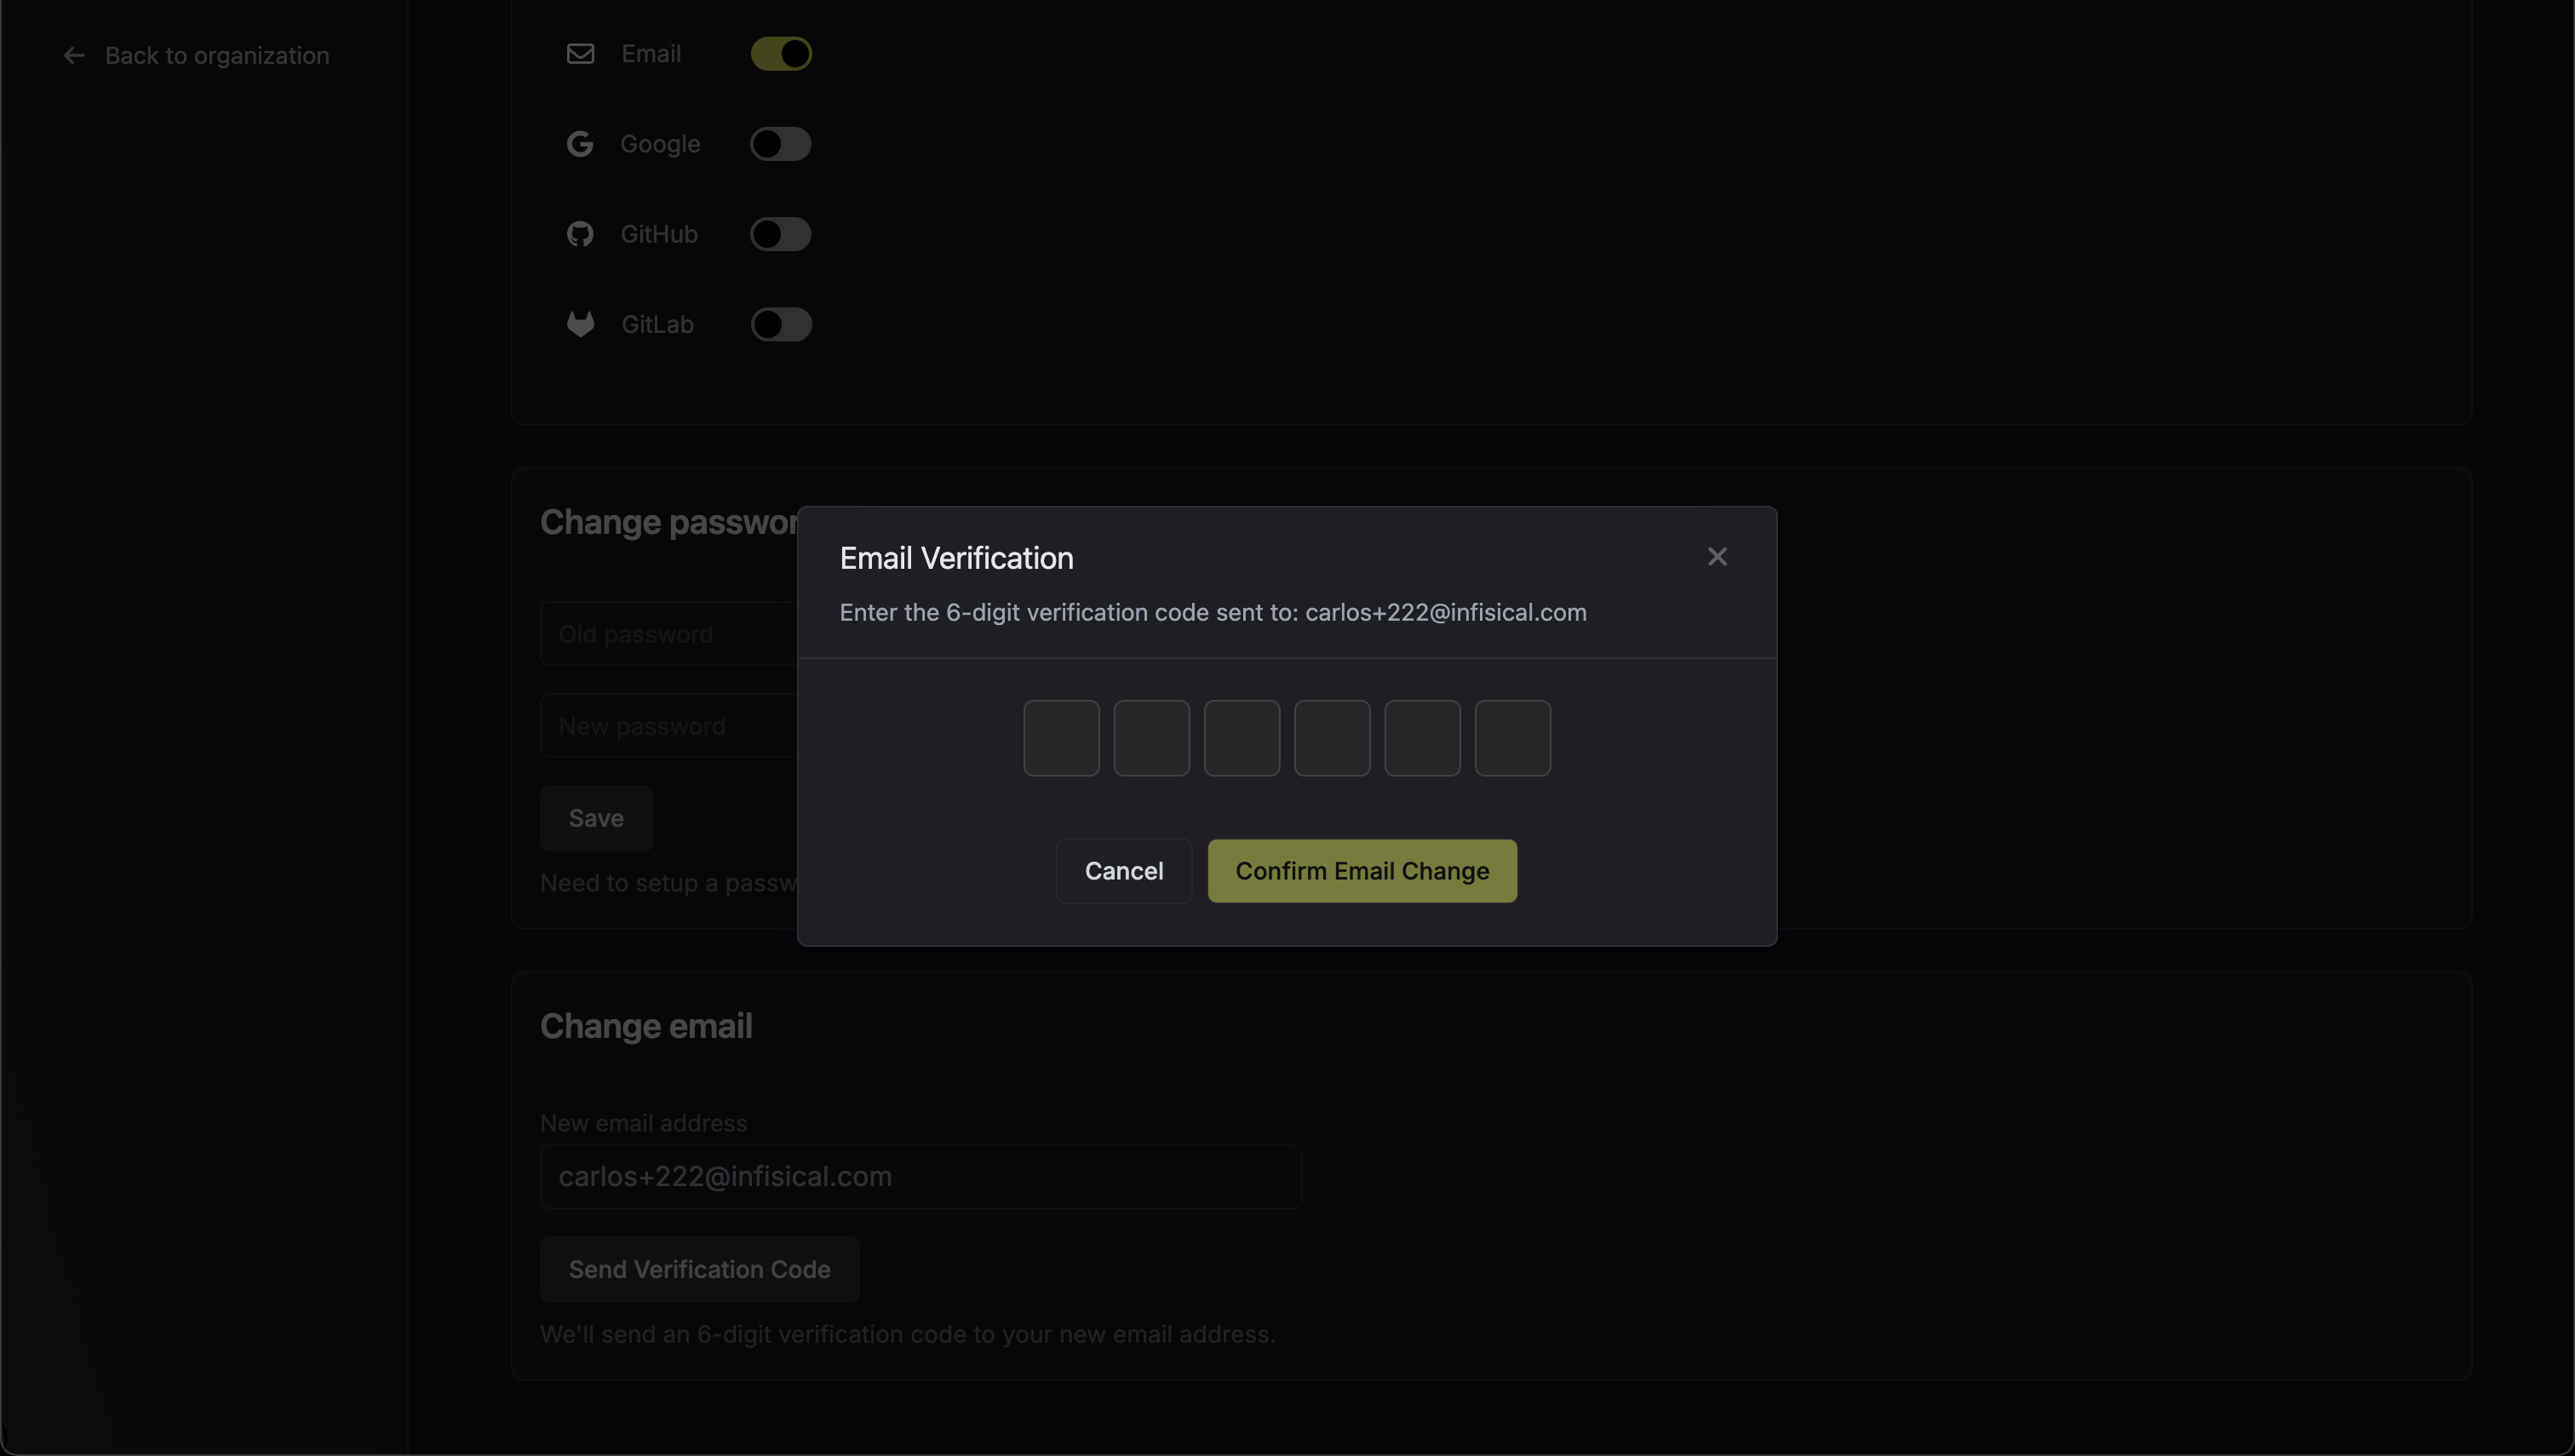 6\. Click `Confirm Email Change` to complete the process.
7\. You will be logged out and need to sign in again with your new email address.
6\. Click `Confirm Email Change` to complete the process.
7\. You will be logged out and need to sign in again with your new email address.
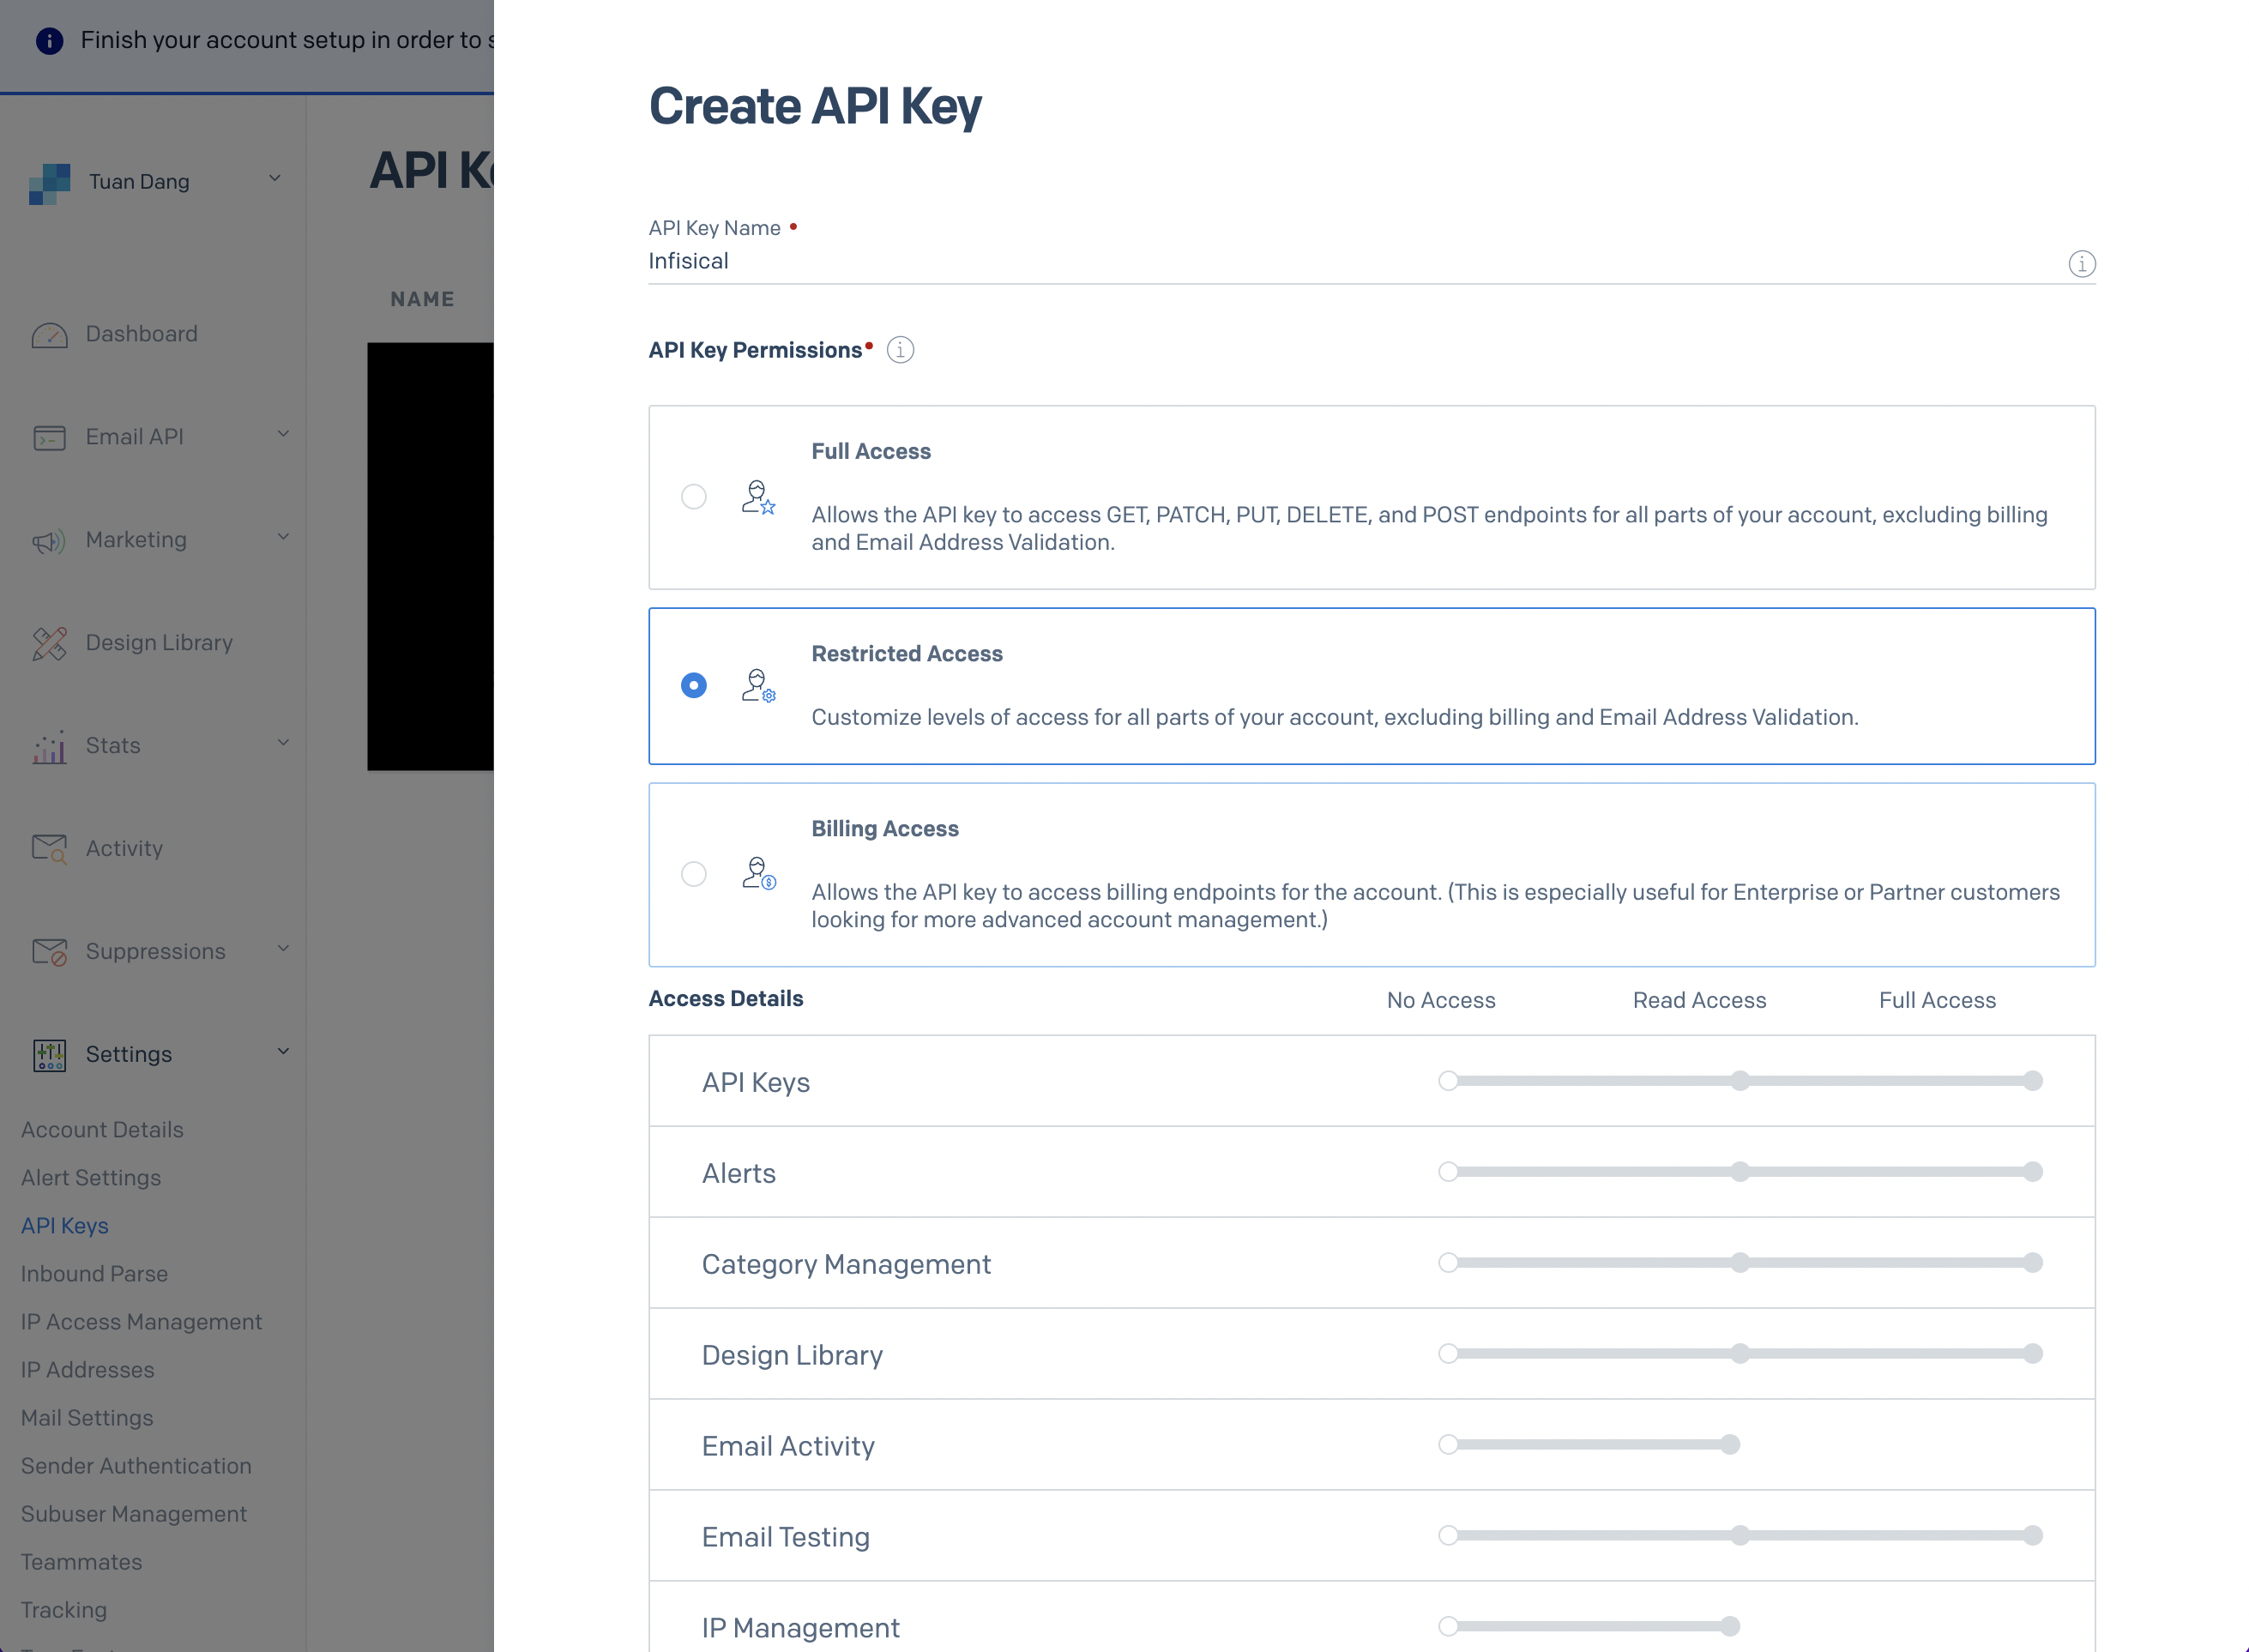
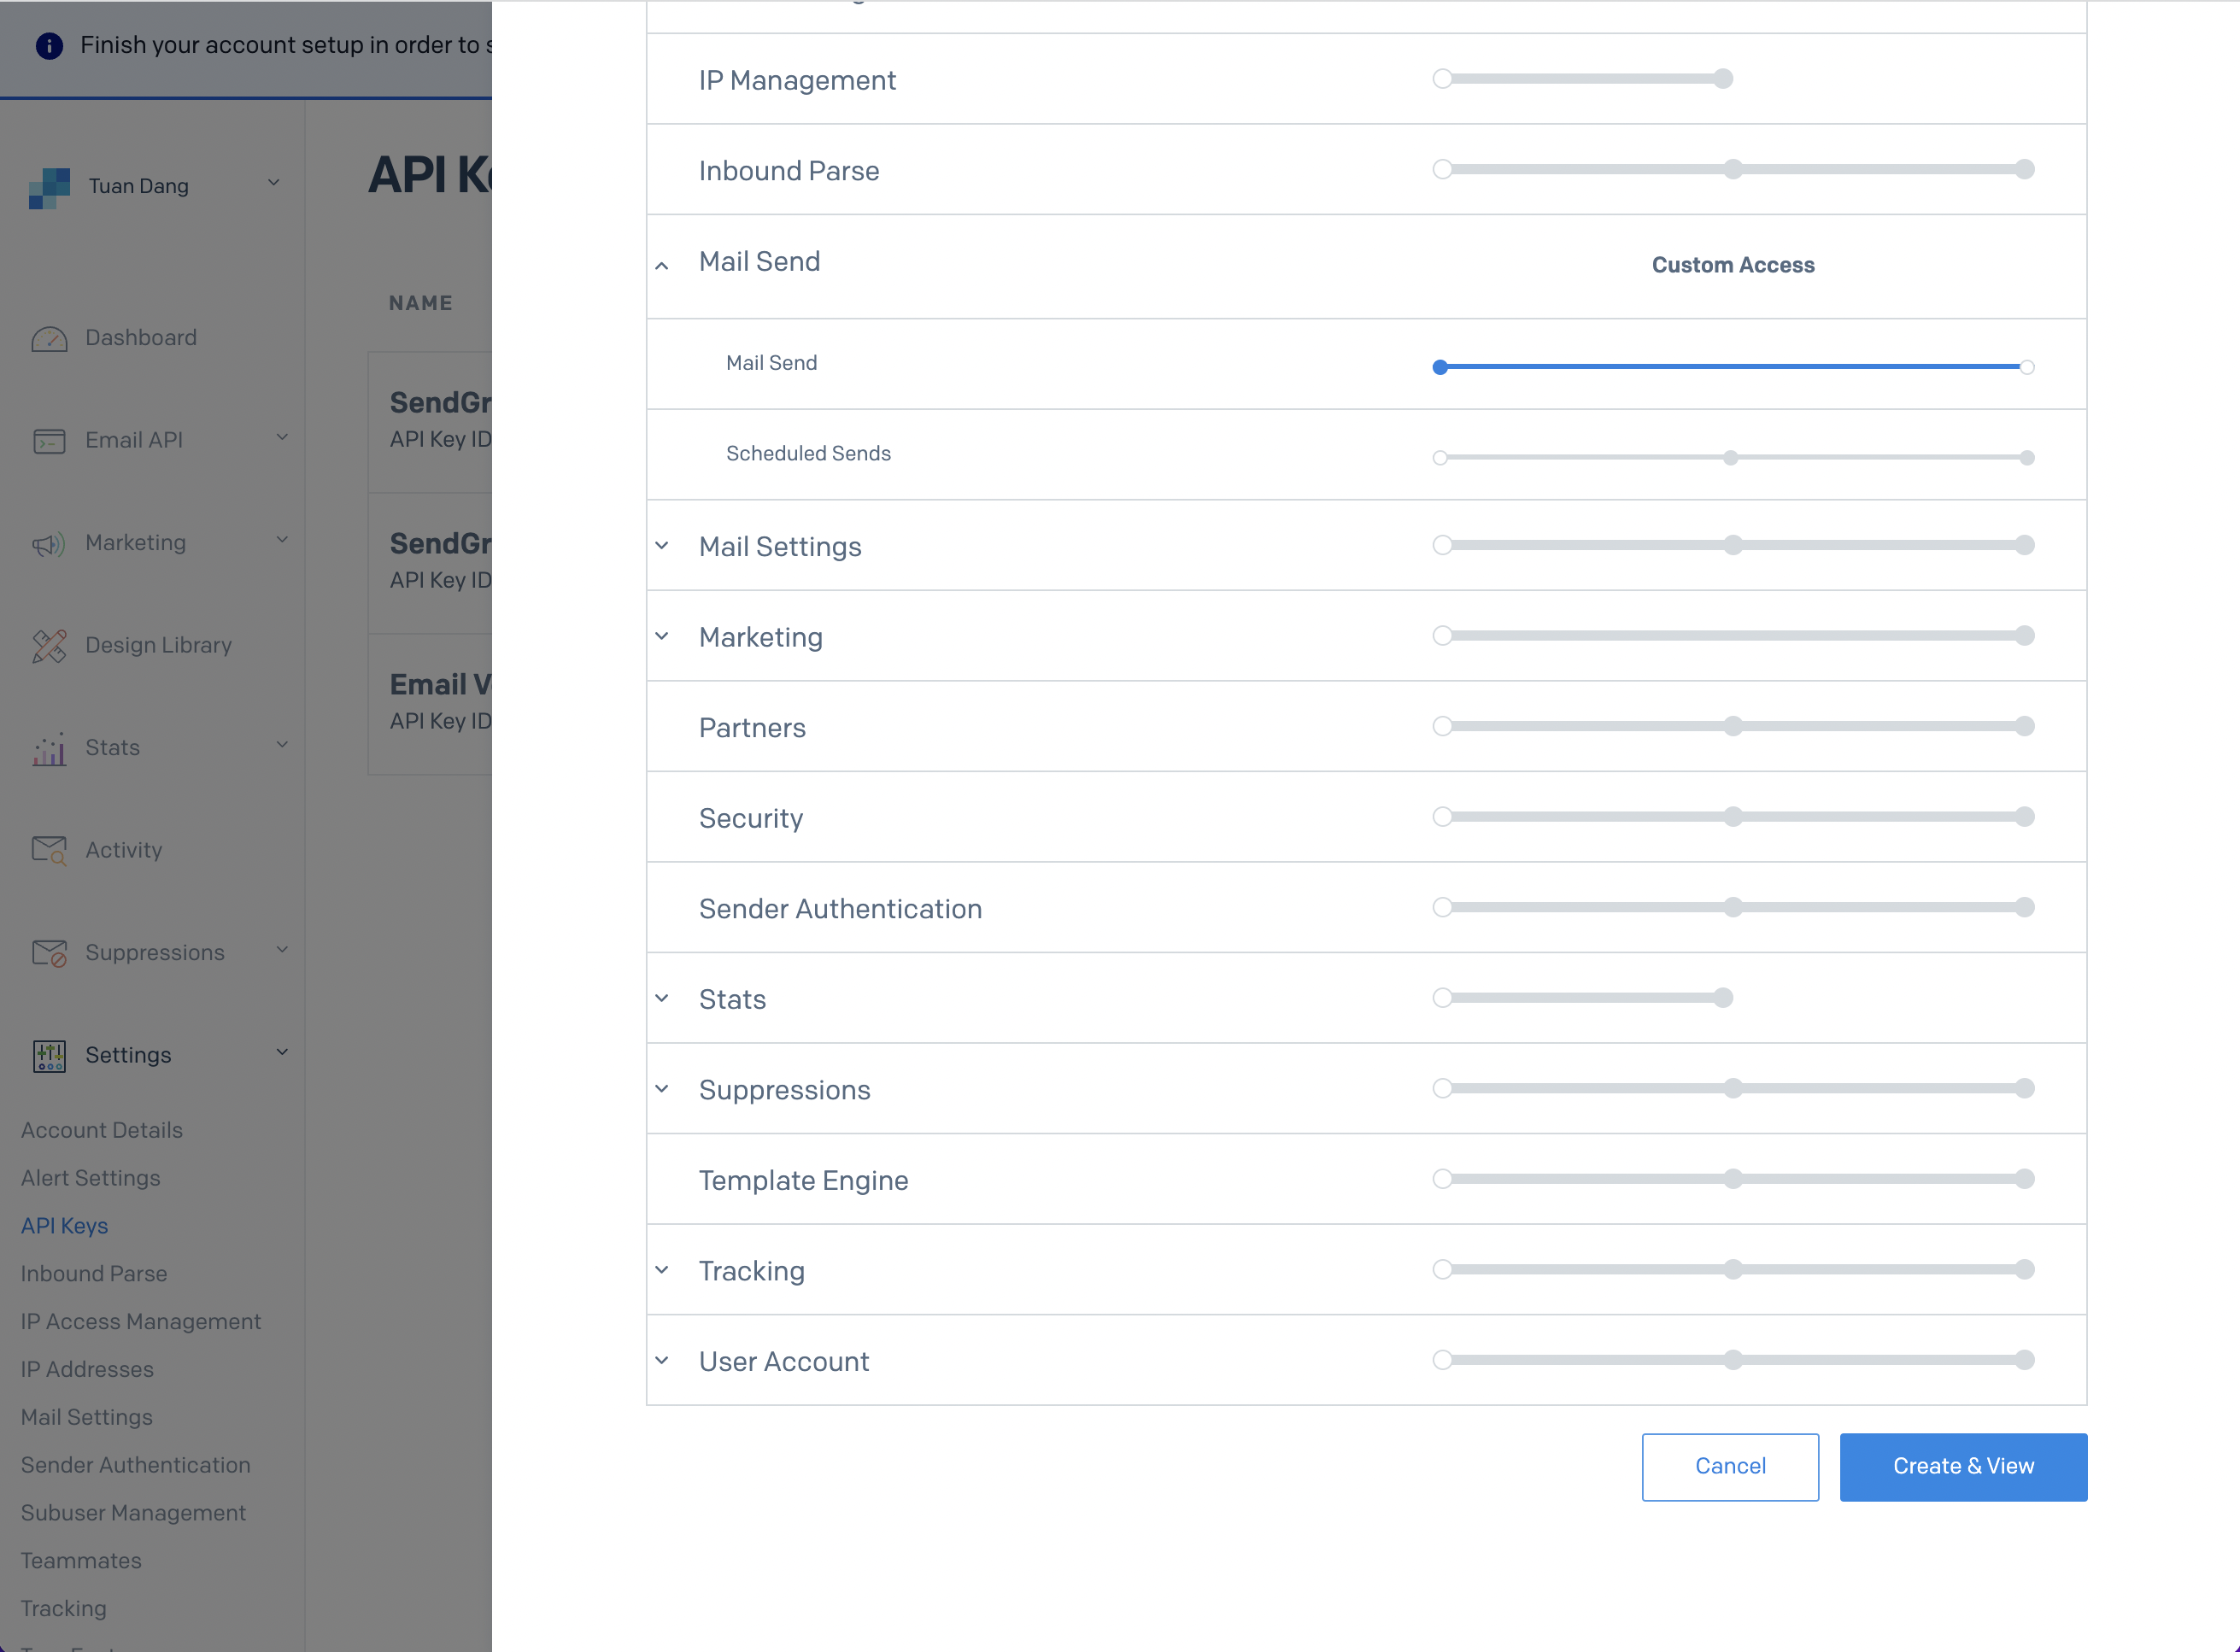 4. With the API Key, you can now set your SMTP environment variables:
```
SMTP_HOST=smtp.sendgrid.net
SMTP_USERNAME=apikey
SMTP_PASSWORD=SG.rqFsfjxYPiqE1lqZTgD_lz7x8IVLx # your SendGrid API Key from step above
SMTP_PORT=587
SMTP_FROM_ADDRESS=hey@example.com # your email address being used to send out emails
SMTP_FROM_NAME=Infisical
```
4. With the API Key, you can now set your SMTP environment variables:
```
SMTP_HOST=smtp.sendgrid.net
SMTP_USERNAME=apikey
SMTP_PASSWORD=SG.rqFsfjxYPiqE1lqZTgD_lz7x8IVLx # your SendGrid API Key from step above
SMTP_PORT=587
SMTP_FROM_ADDRESS=hey@example.com # your email address being used to send out emails
SMTP_FROM_NAME=Infisical
```
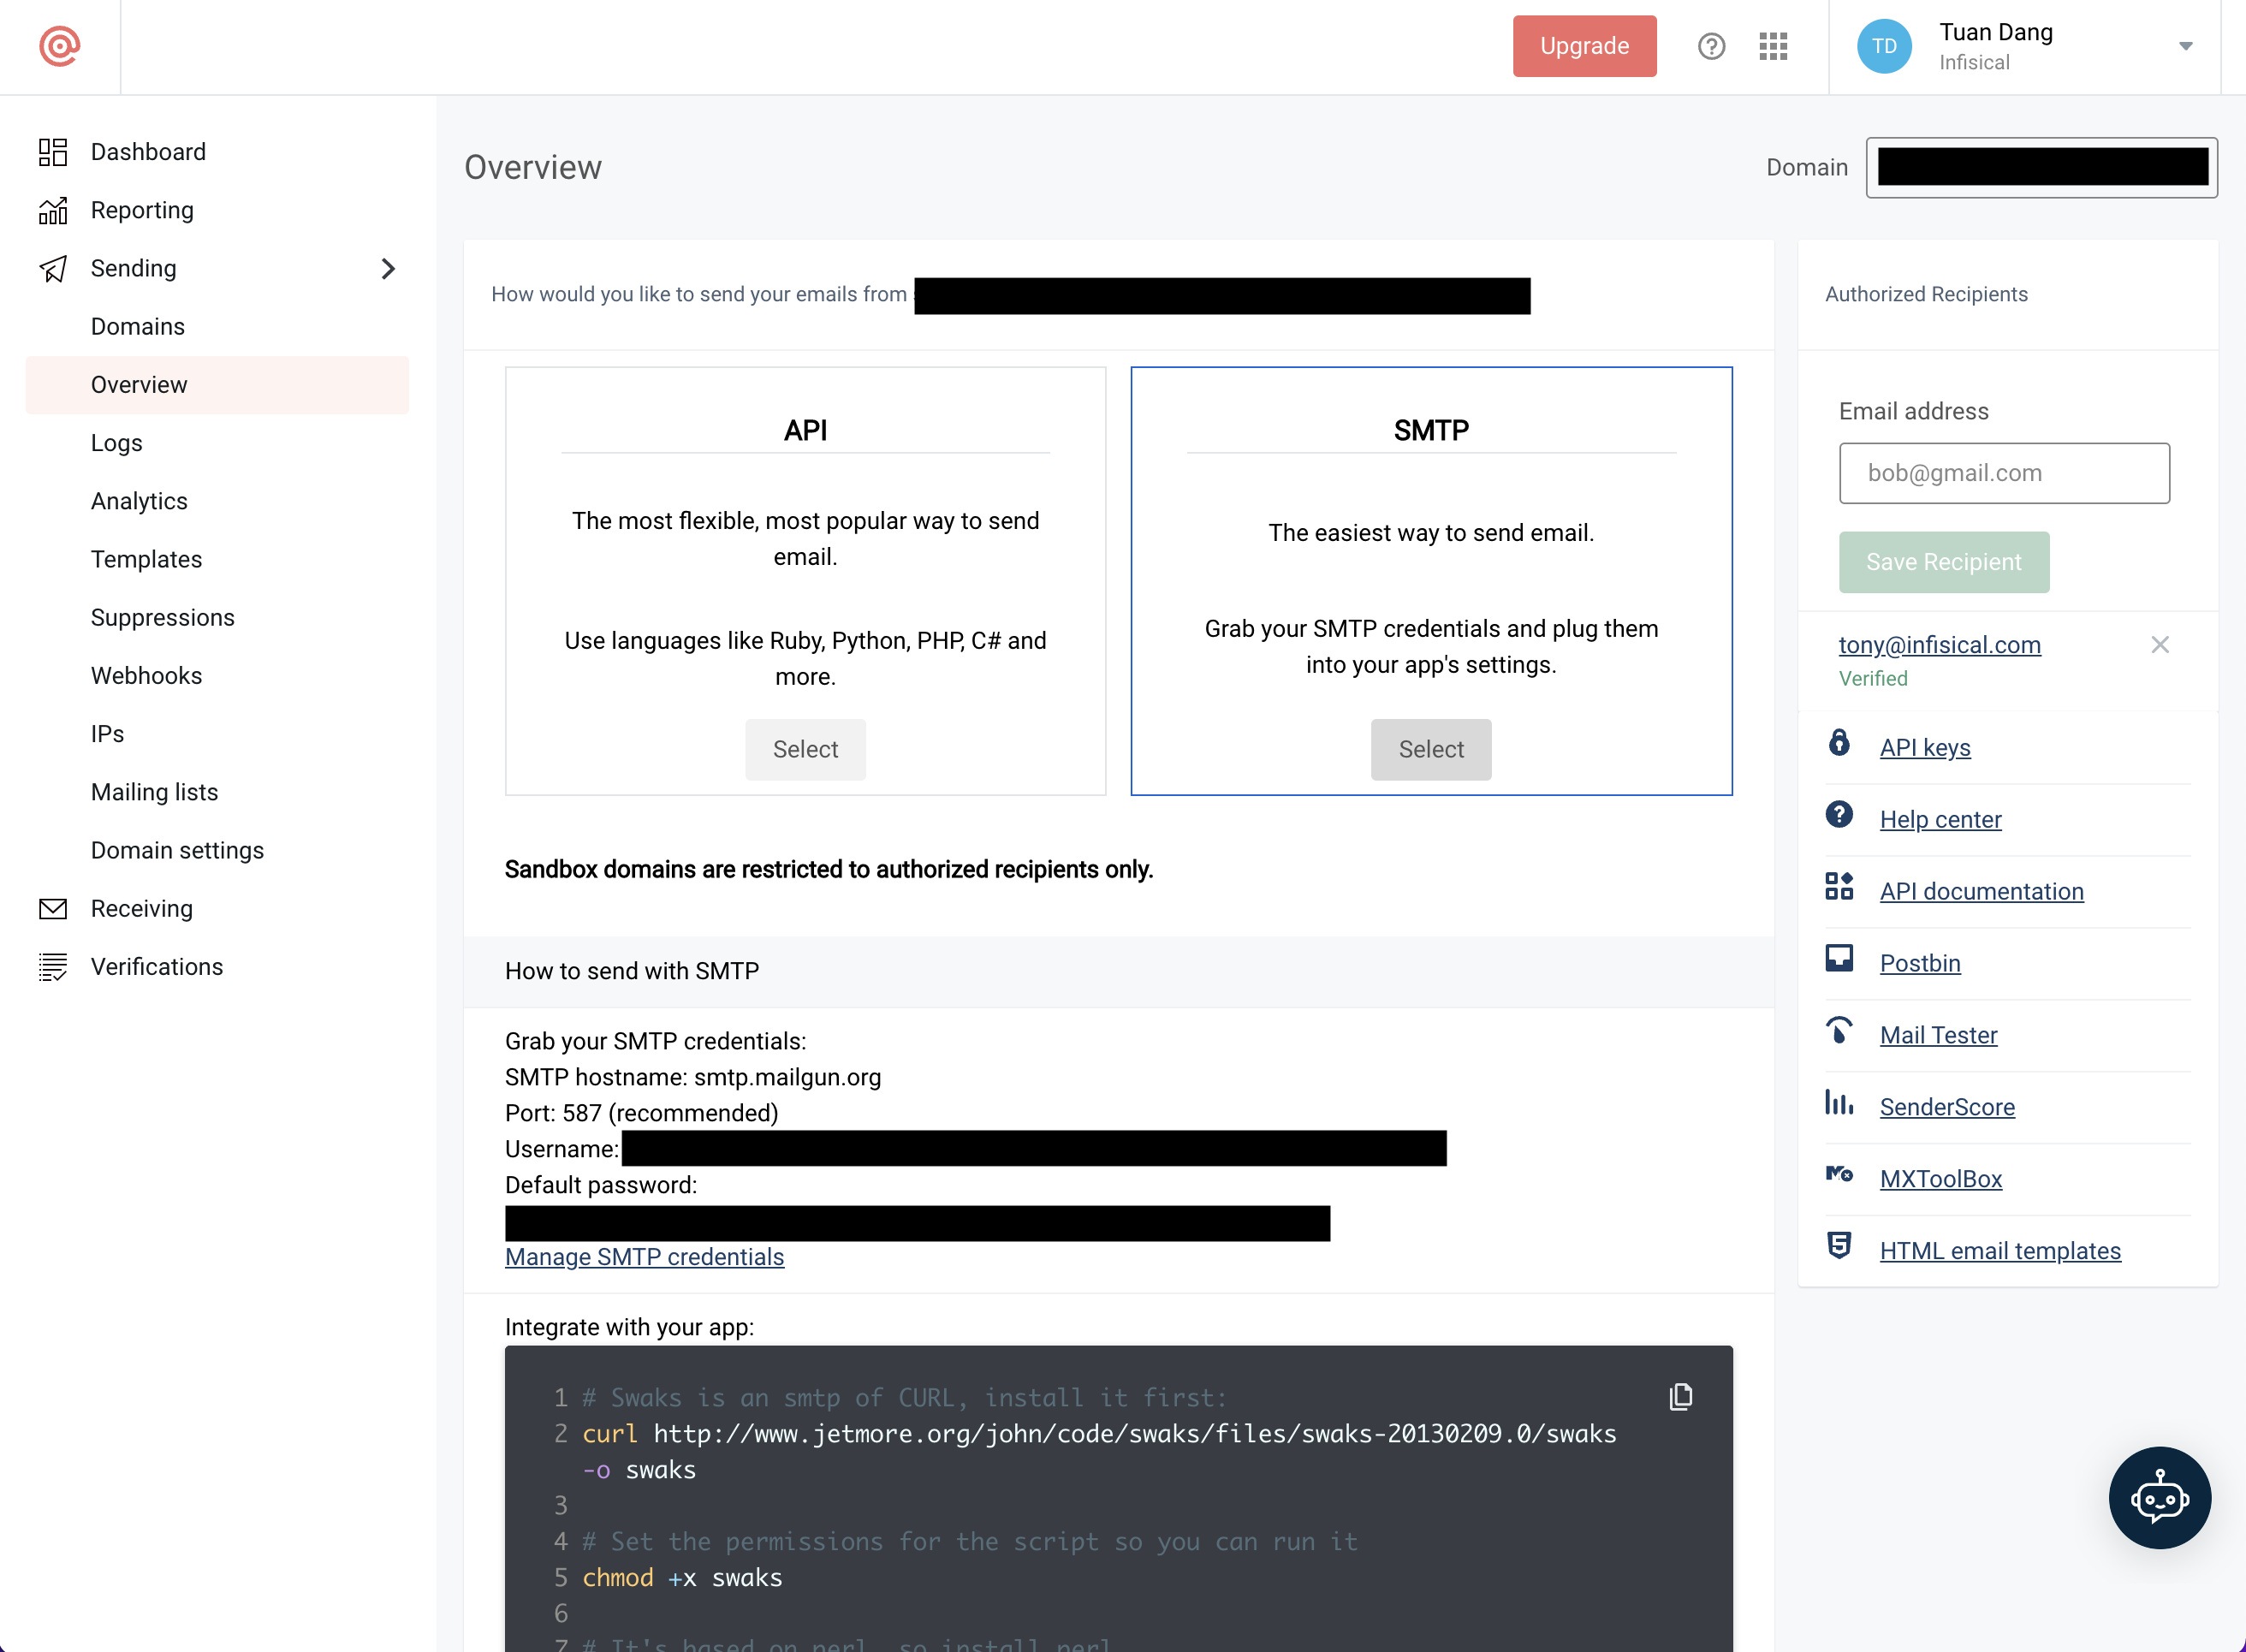 3. With your Mailgun credentials, you can now set up your SMTP environment variables:
```
SMTP_HOST=smtp.mailgun.org # obtained from credentials page
SMTP_USERNAME=postmaster@example.mailgun.org # obtained from credentials page
SMTP_PASSWORD=password # obtained from credentials page
SMTP_PORT=587
SMTP_FROM_ADDRESS=hey@example.com # your email address being used to send out emails
SMTP_FROM_NAME=Infisical
```
3. With your Mailgun credentials, you can now set up your SMTP environment variables:
```
SMTP_HOST=smtp.mailgun.org # obtained from credentials page
SMTP_USERNAME=postmaster@example.mailgun.org # obtained from credentials page
SMTP_PASSWORD=password # obtained from credentials page
SMTP_PORT=587
SMTP_FROM_ADDRESS=hey@example.com # your email address being used to send out emails
SMTP_FROM_NAME=Infisical
```

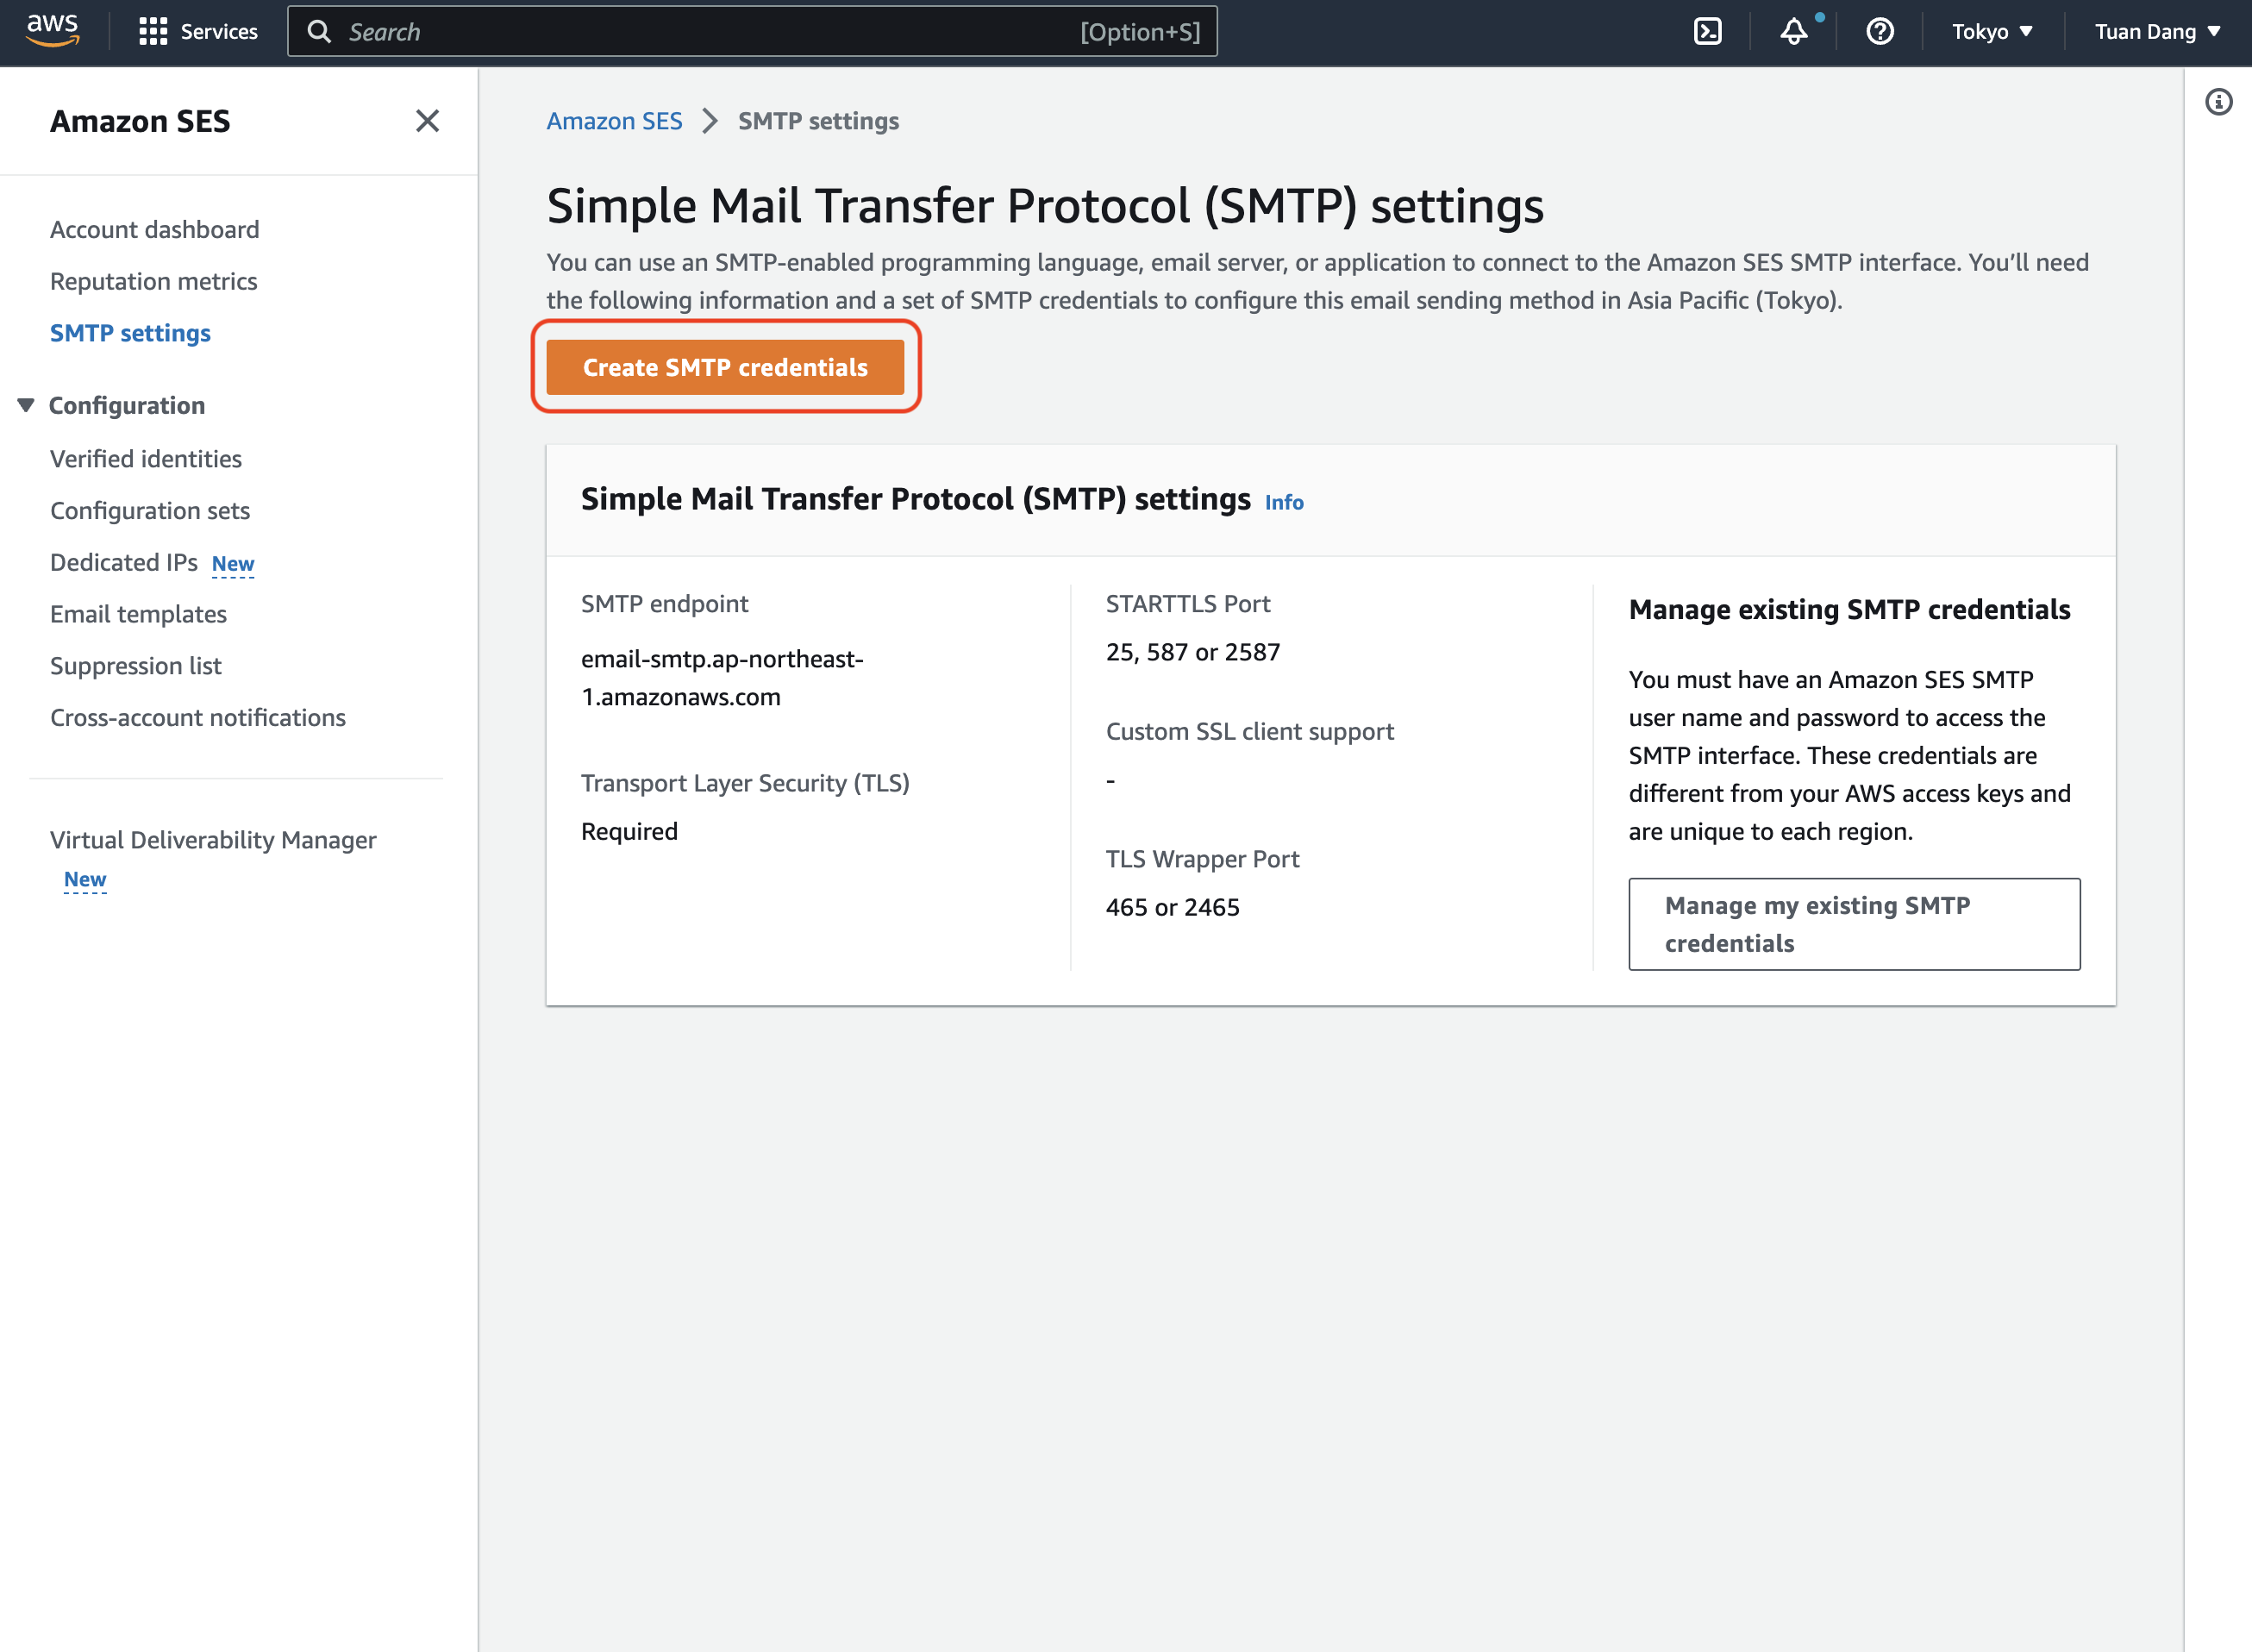
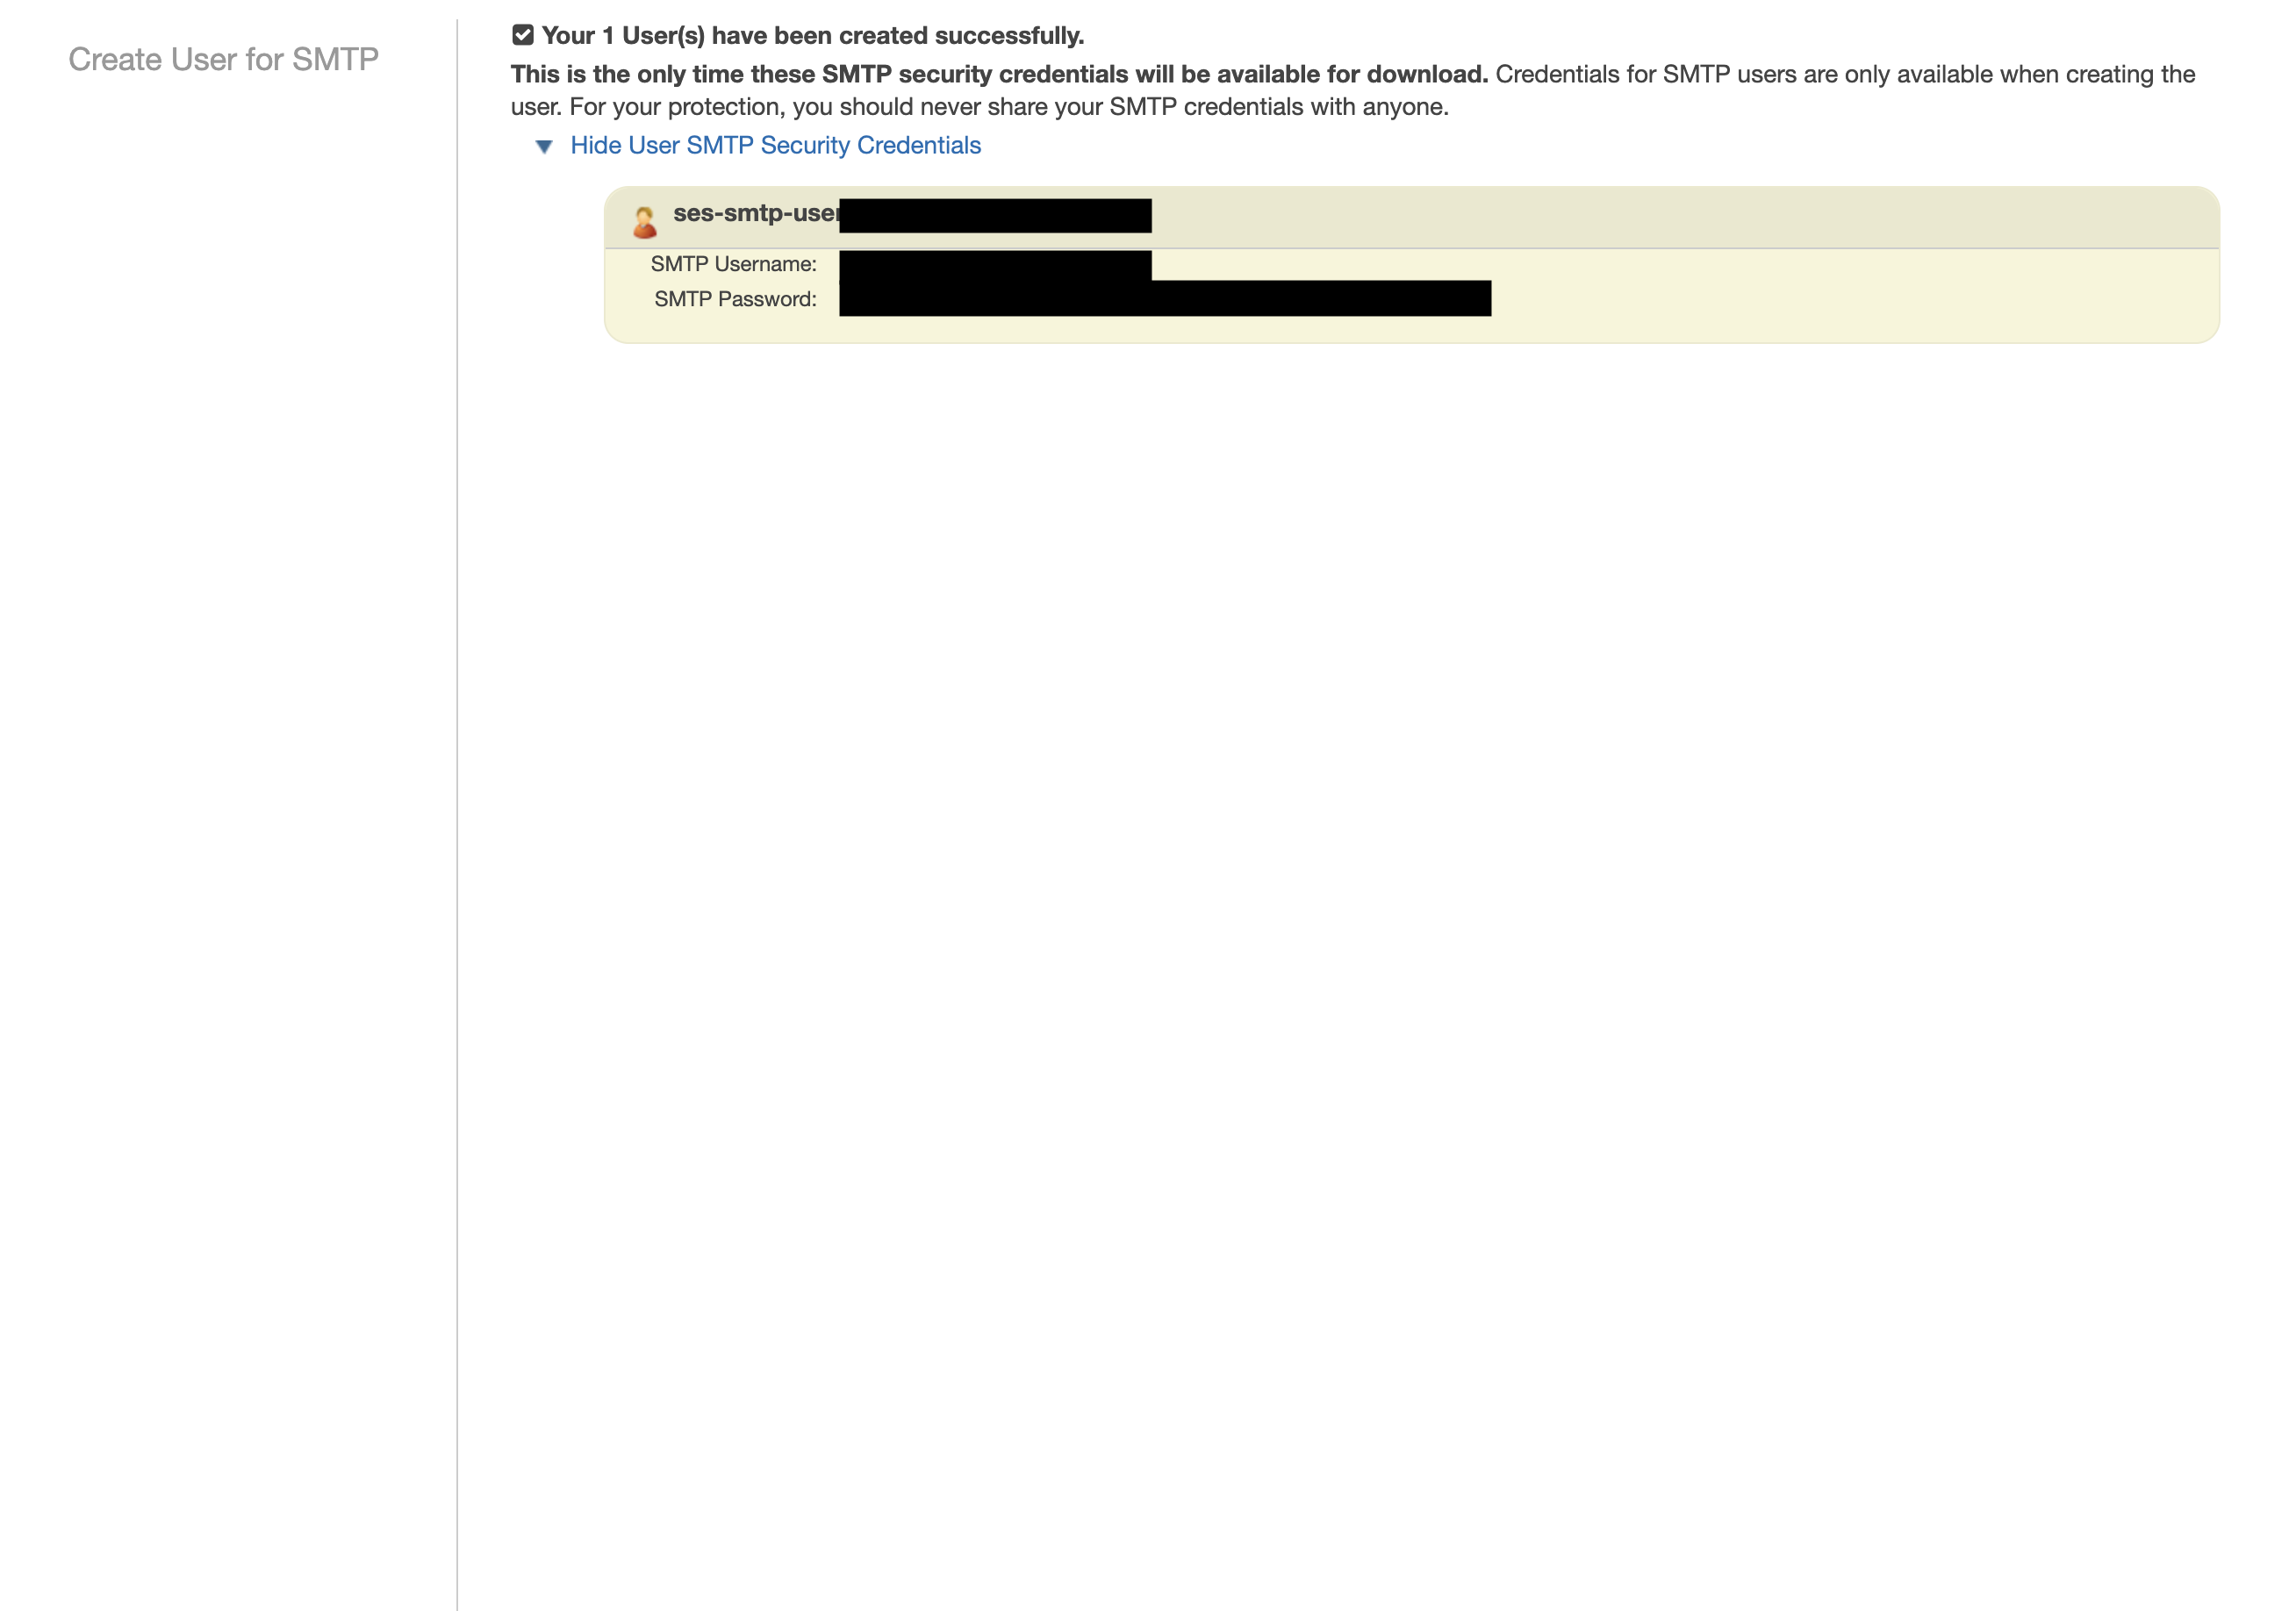
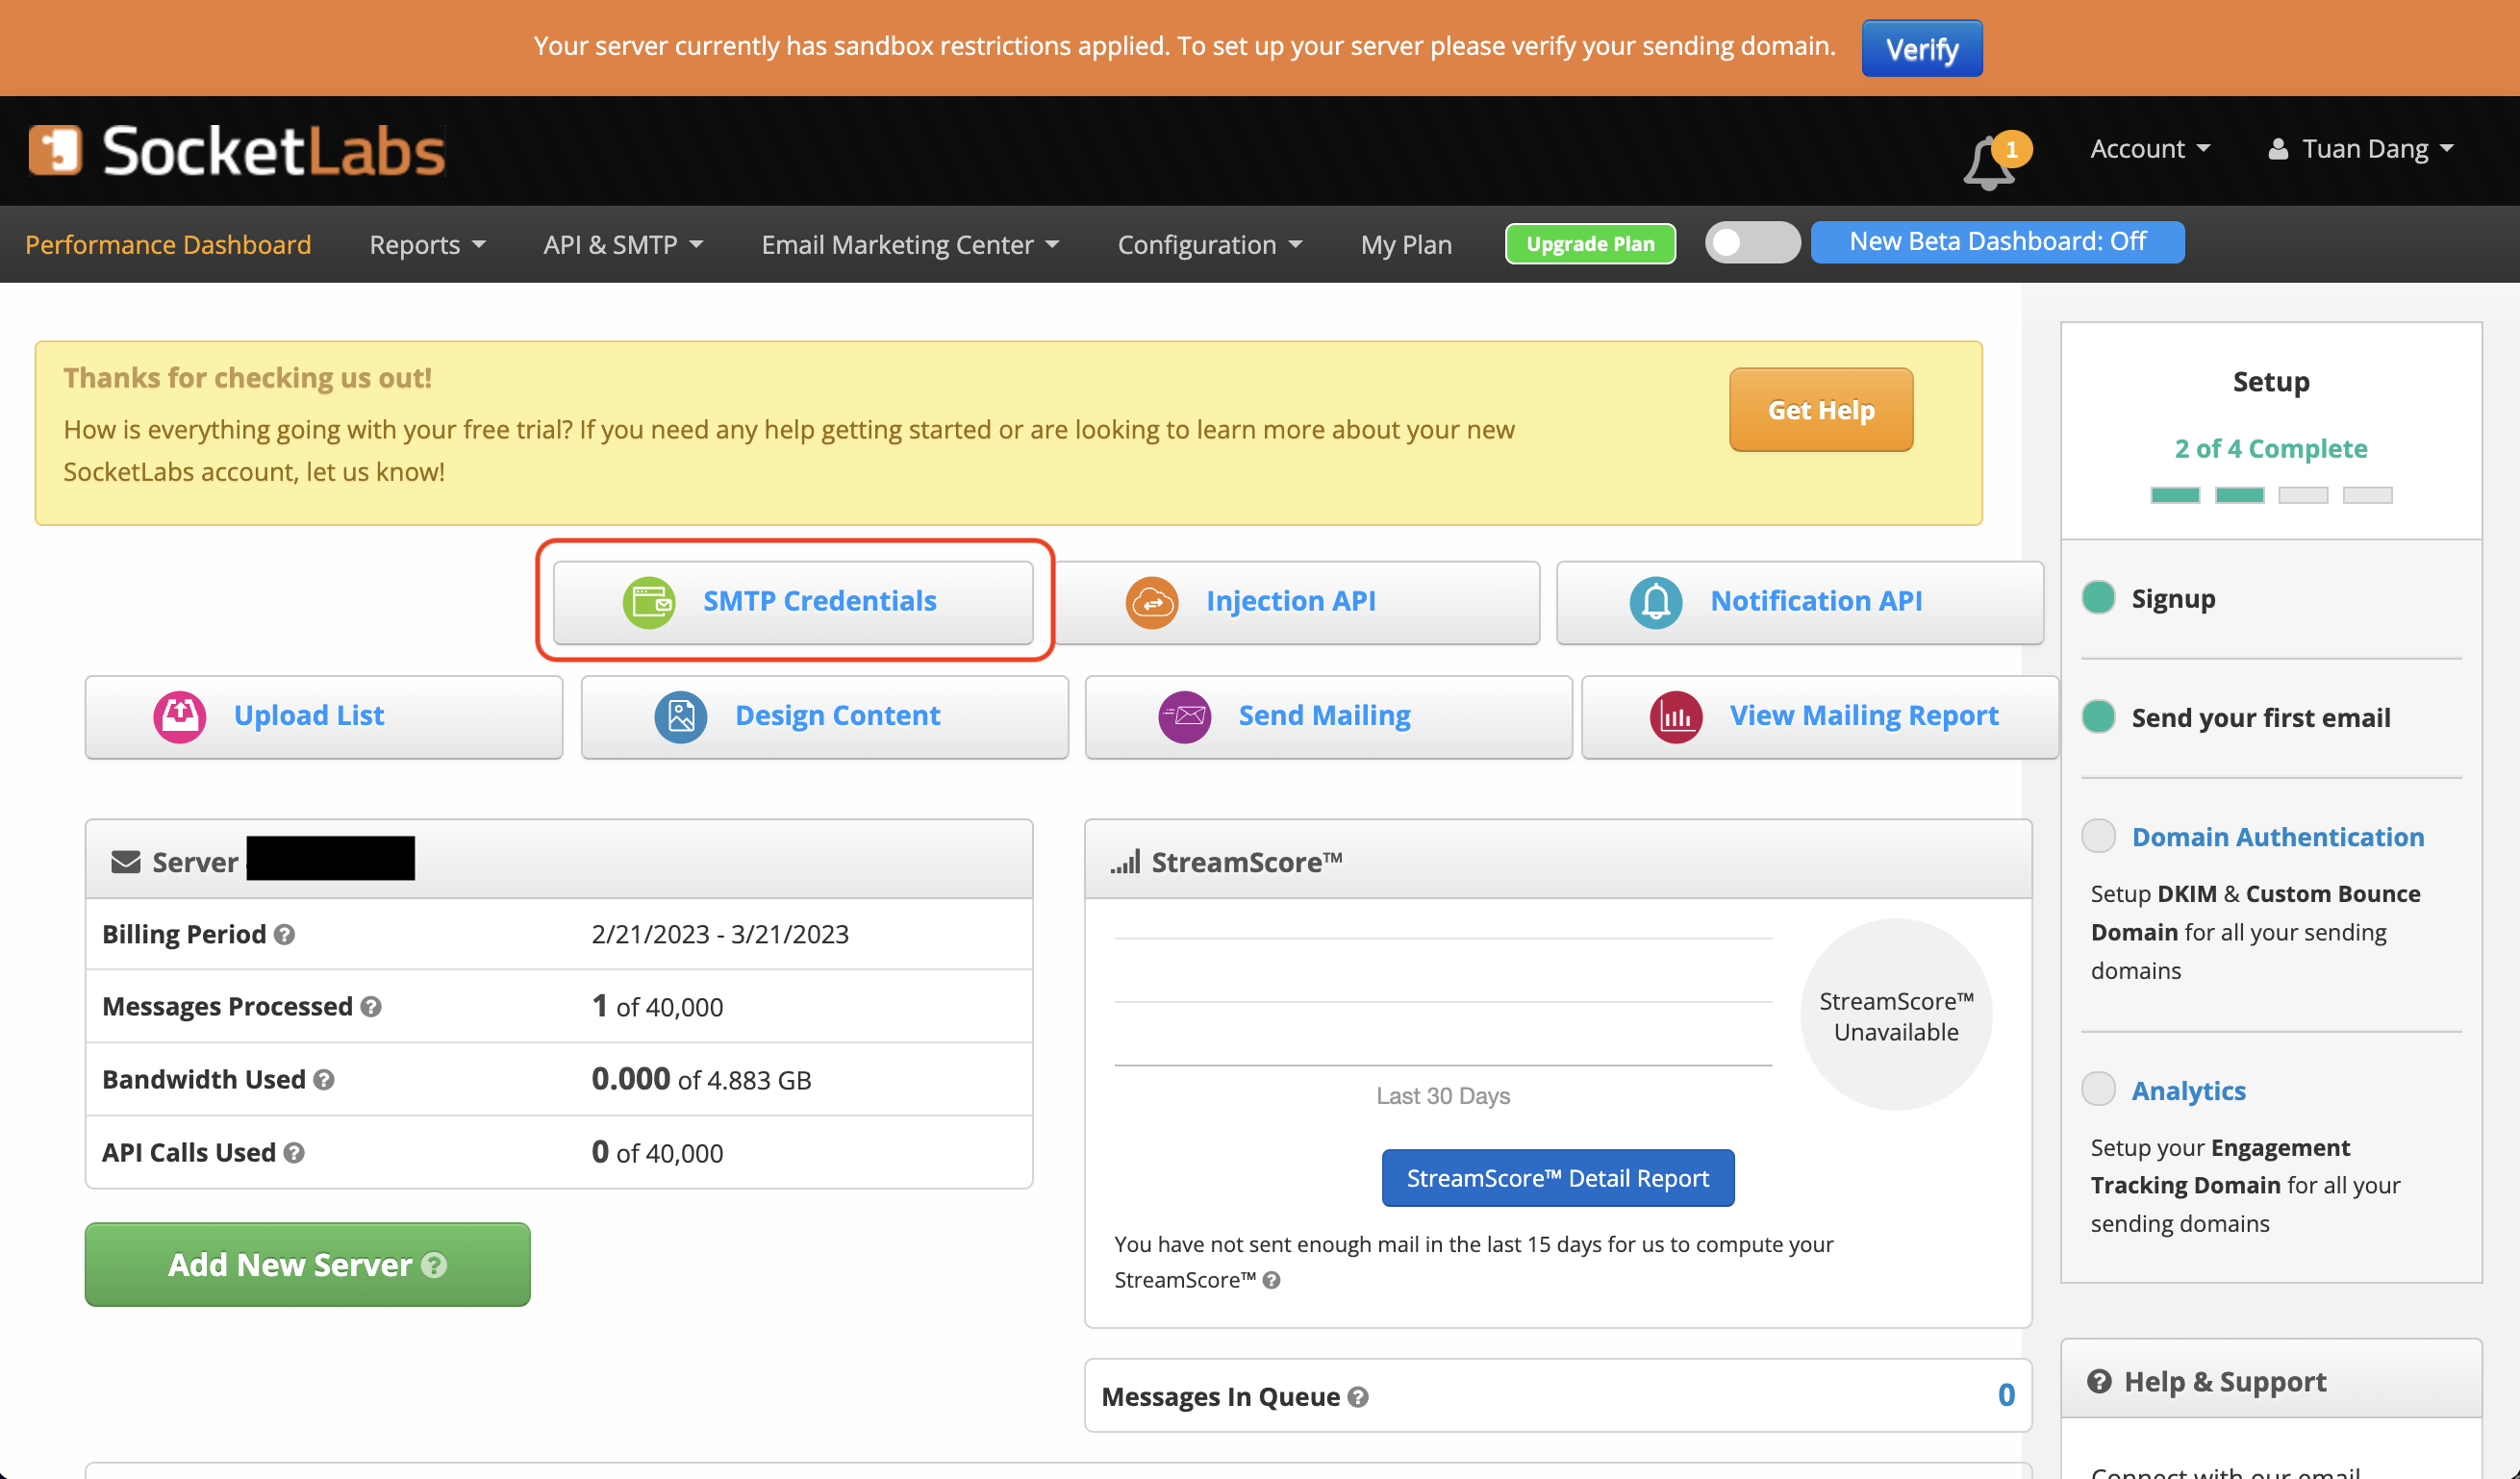
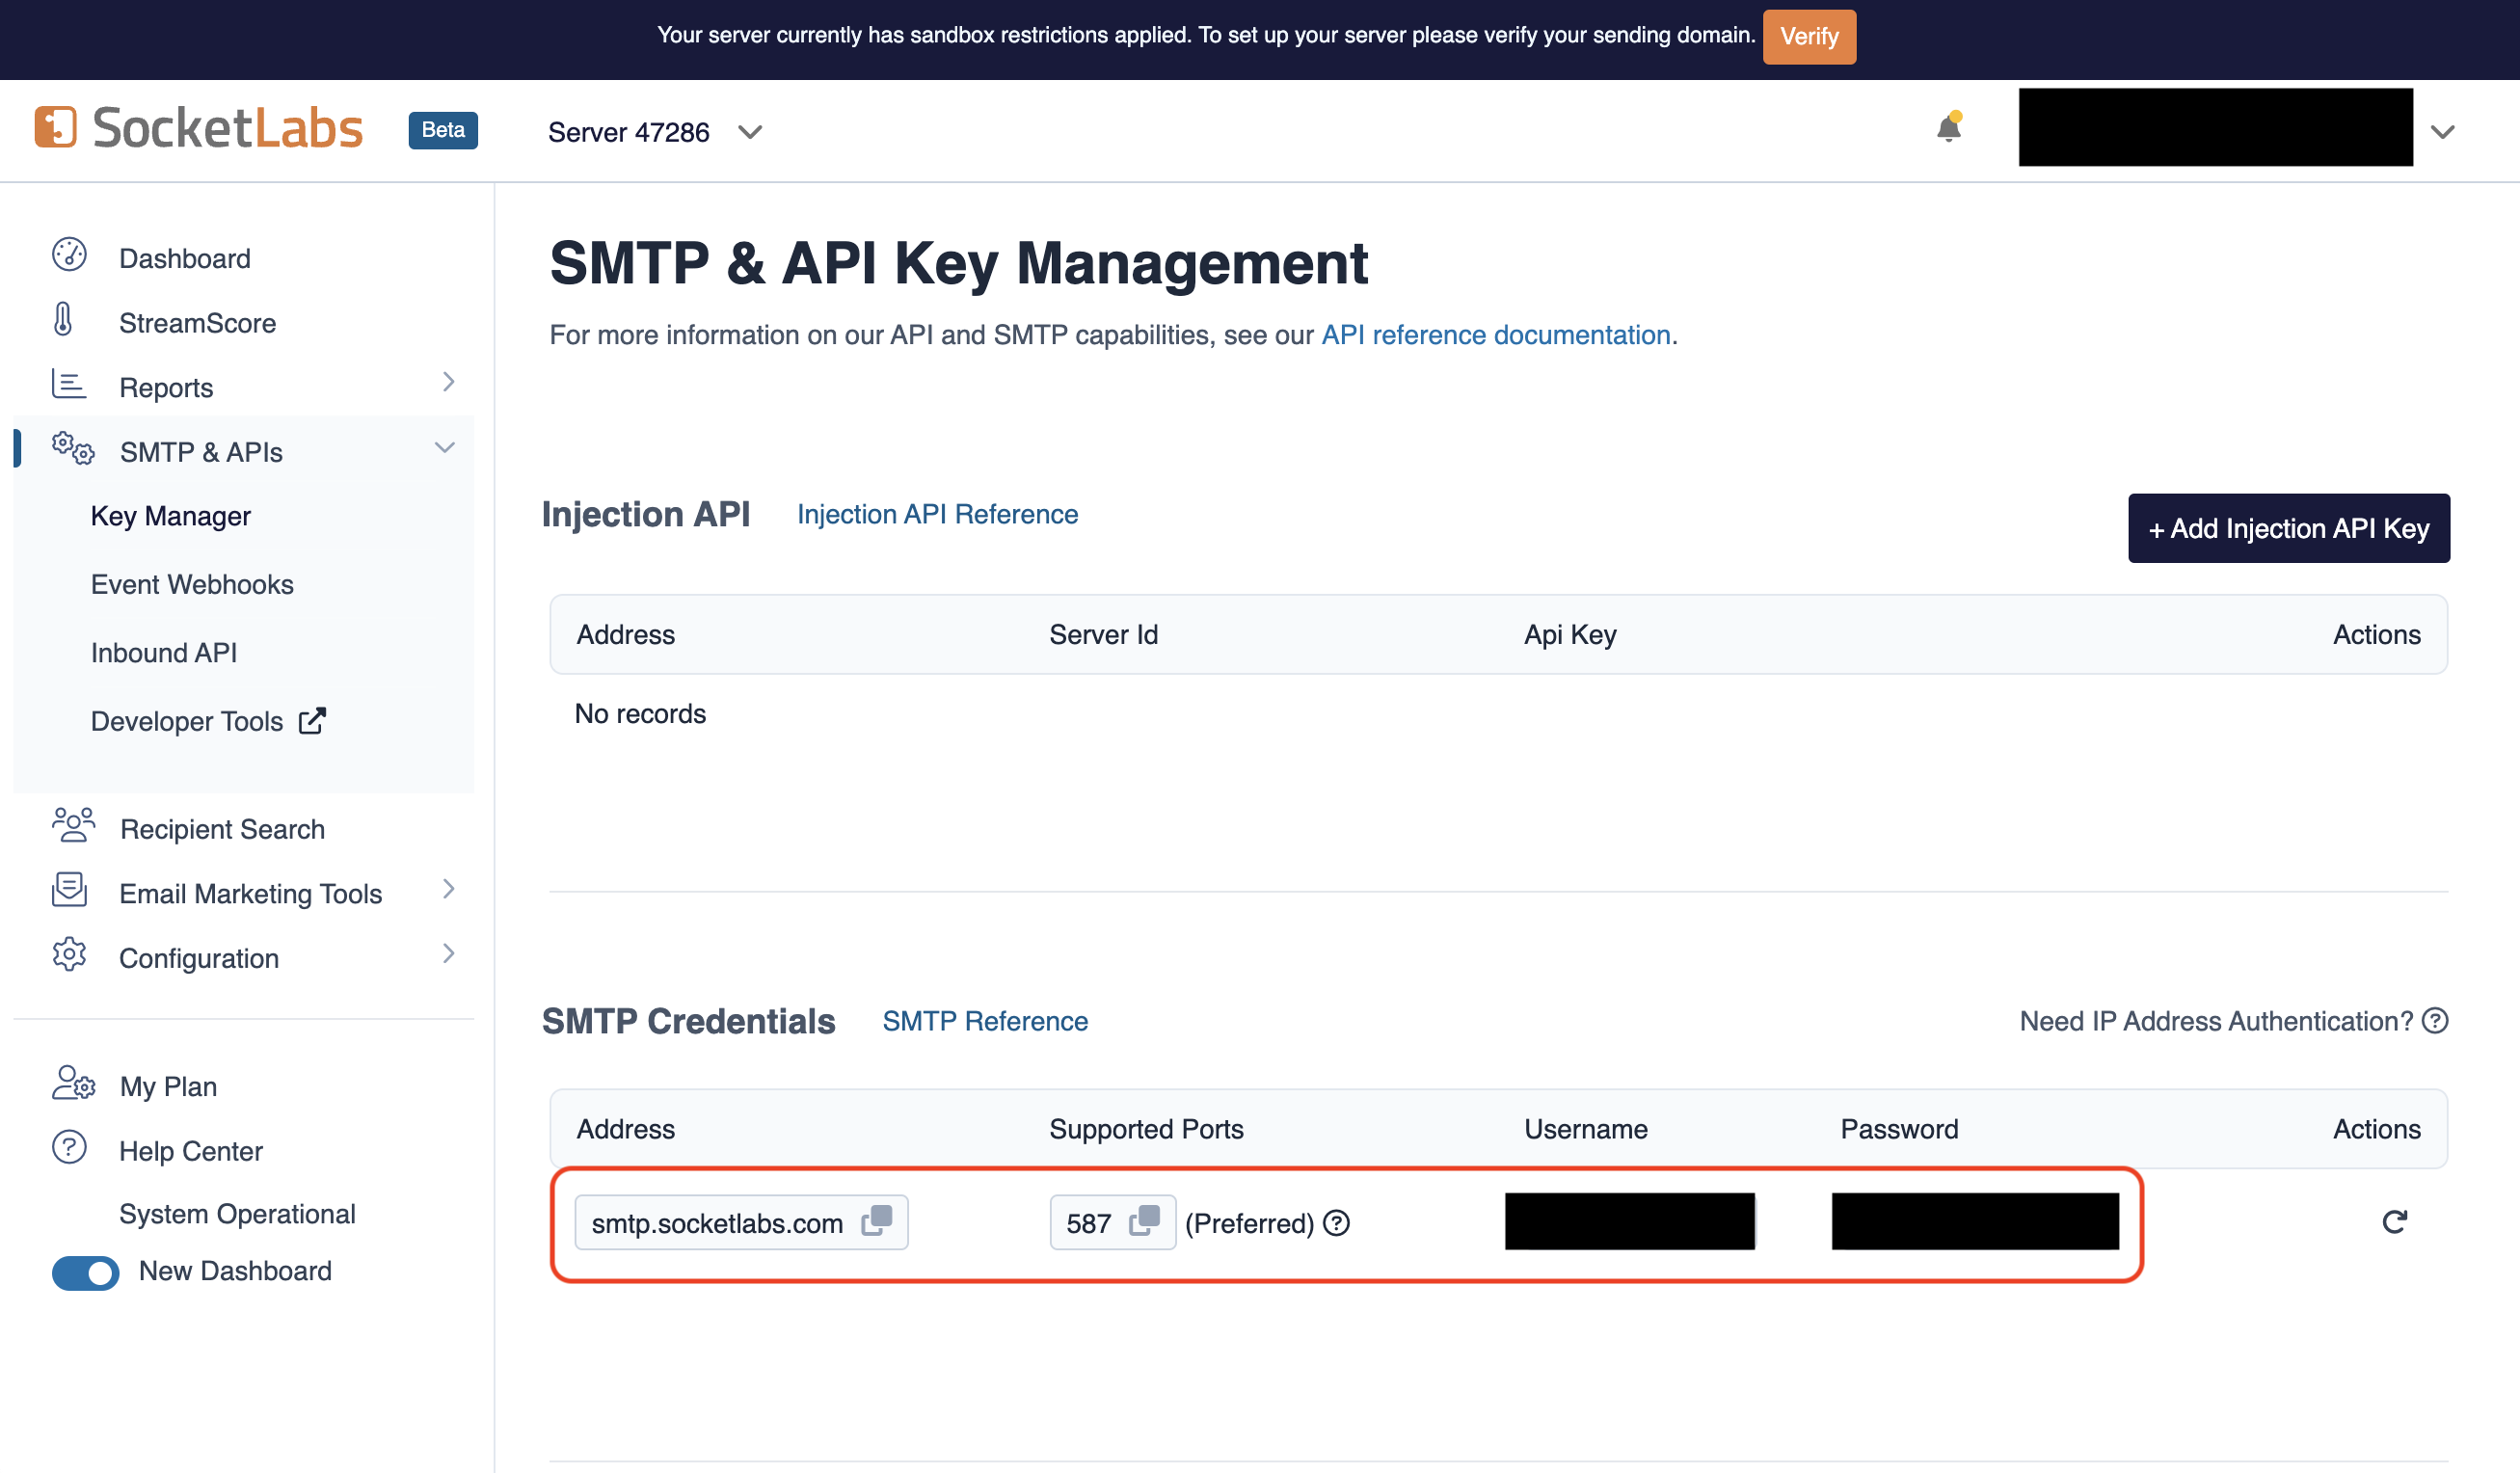 3. With your SocketLabs SMTP credentials, you can now set up your SMTP environment variables:
```
SMTP_HOST=smtp.socketlabs.com
SMTP_USERNAME=username # obtained from your credentials
SMTP_PASSWORD=password # obtained from your credentials
SMTP_PORT=587
SMTP_FROM_ADDRESS=hey@example.com # your email address being used to send out emails
SMTP_FROM_NAME=Infisical
```
{" "}
3. With your SocketLabs SMTP credentials, you can now set up your SMTP environment variables:
```
SMTP_HOST=smtp.socketlabs.com
SMTP_USERNAME=username # obtained from your credentials
SMTP_PASSWORD=password # obtained from your credentials
SMTP_PORT=587
SMTP_FROM_ADDRESS=hey@example.com # your email address being used to send out emails
SMTP_FROM_NAME=Infisical
```
{" "}
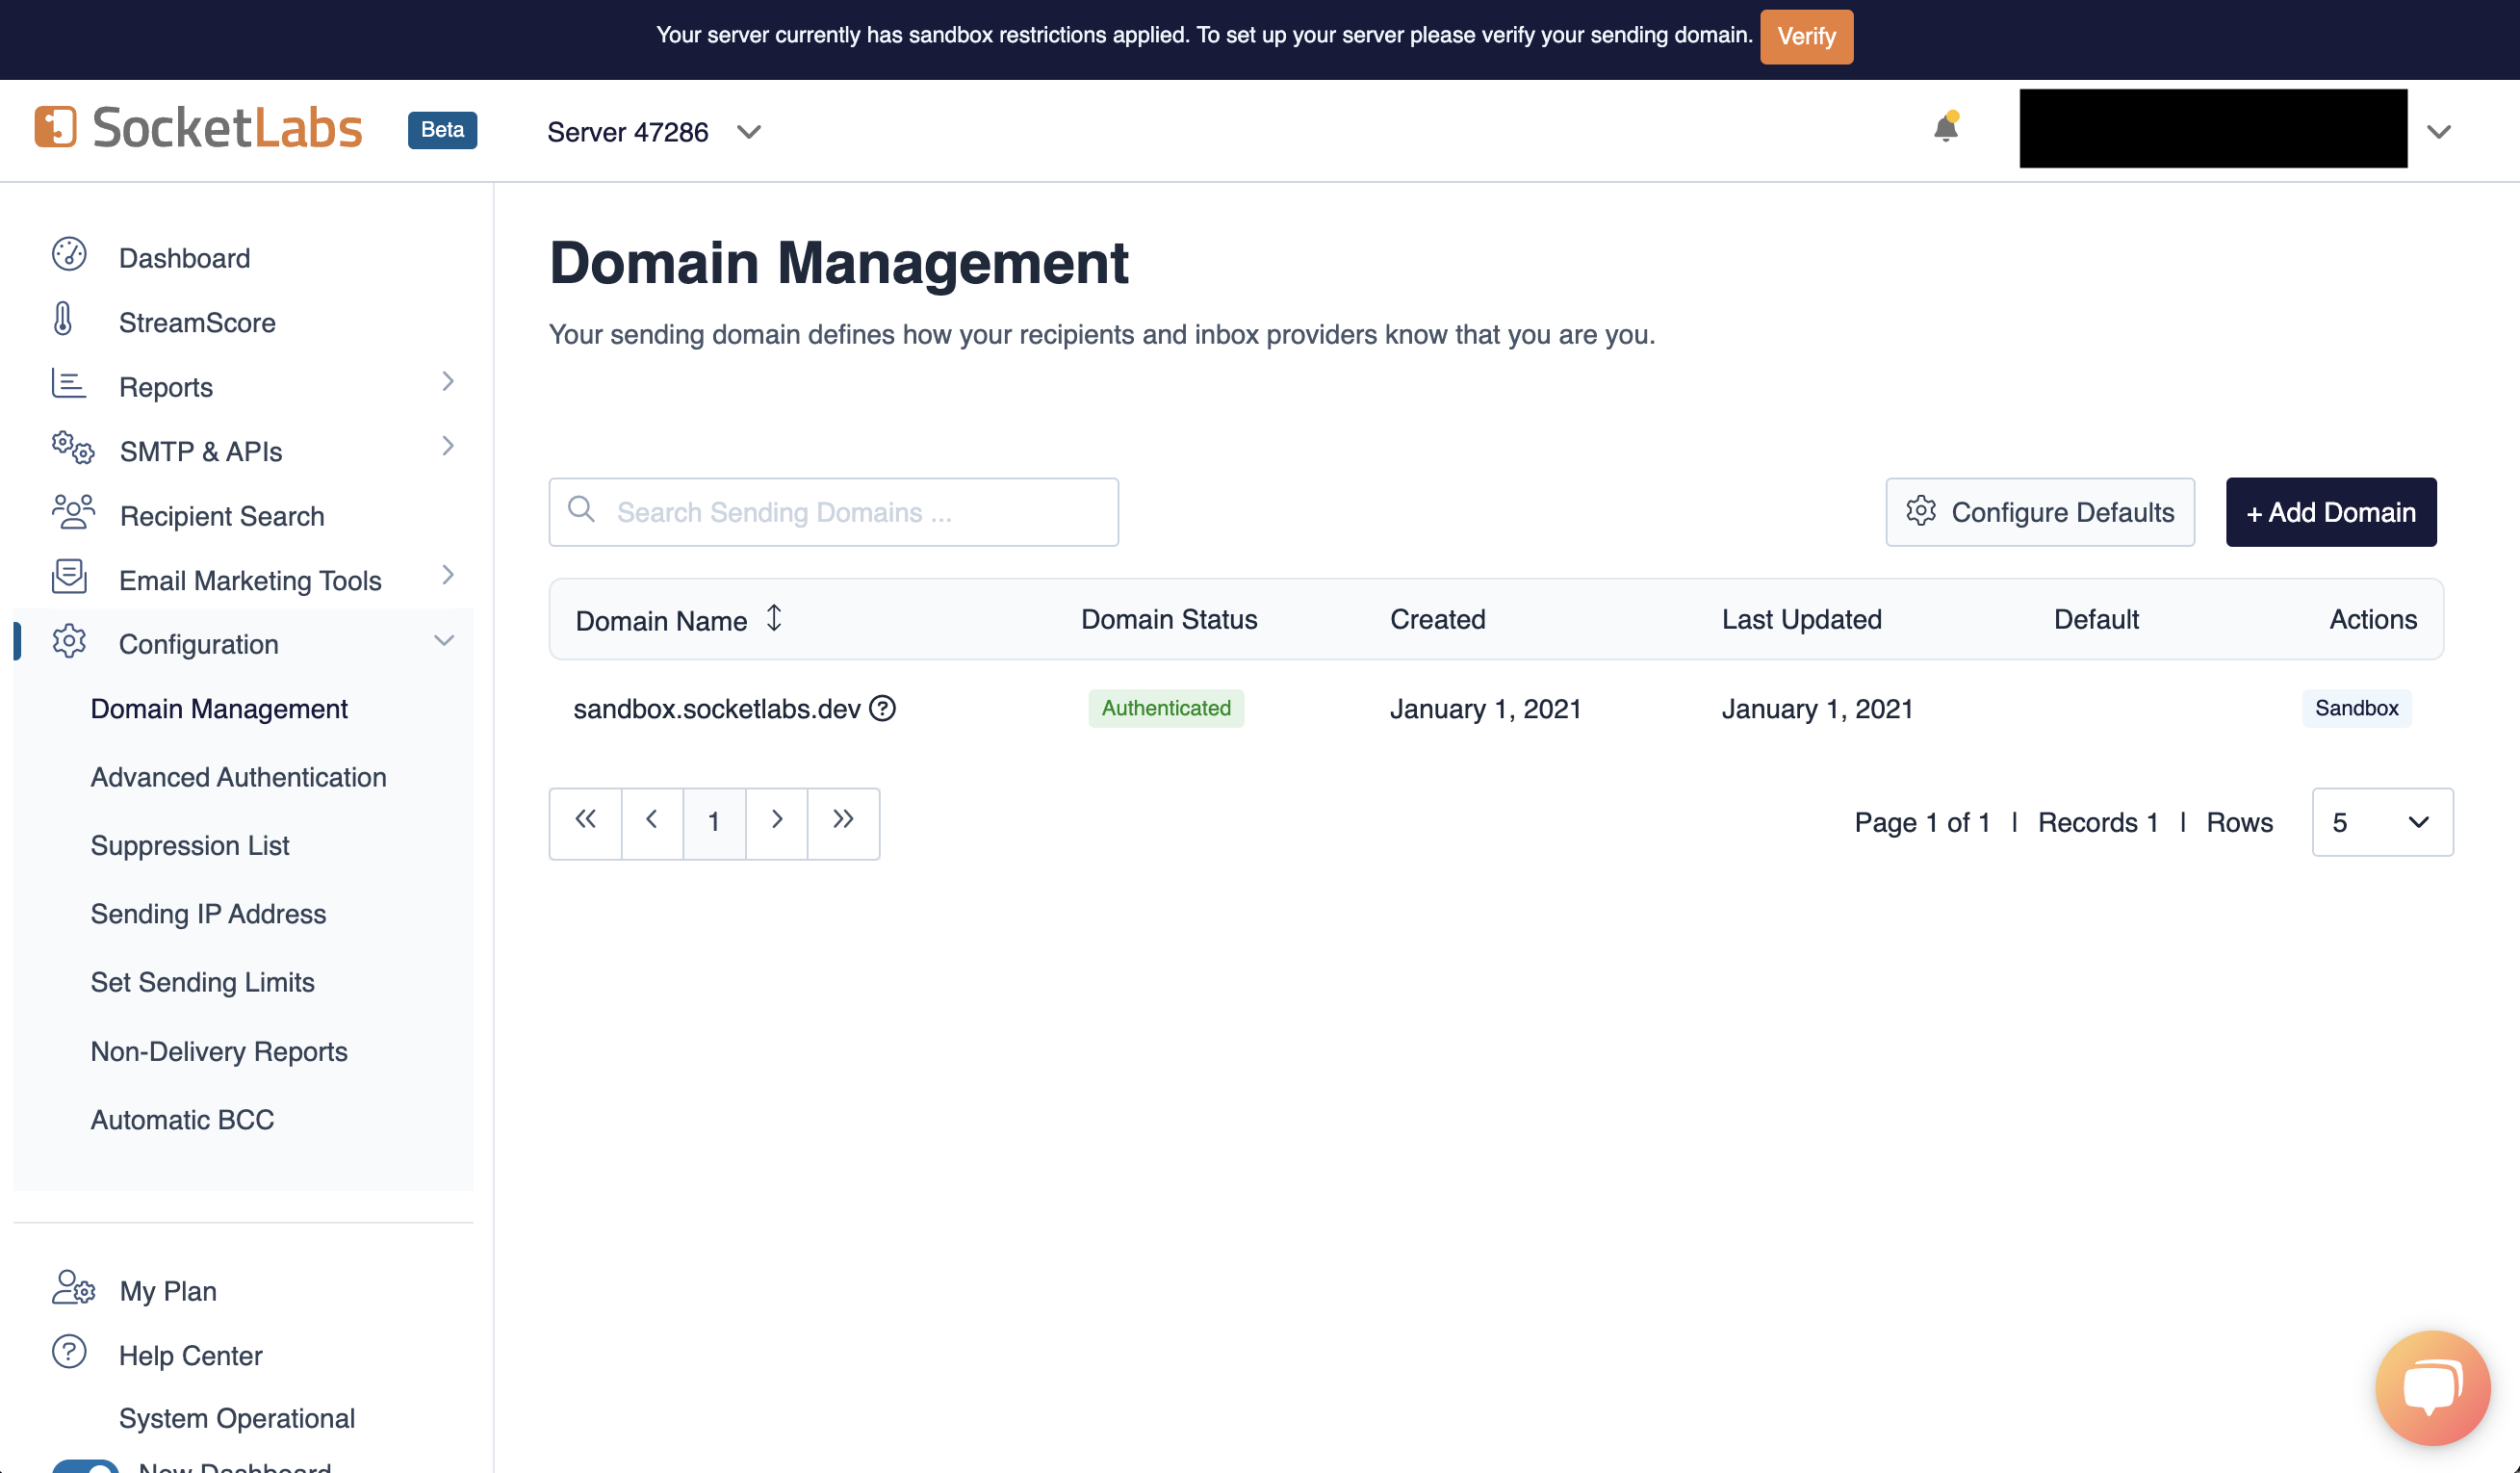
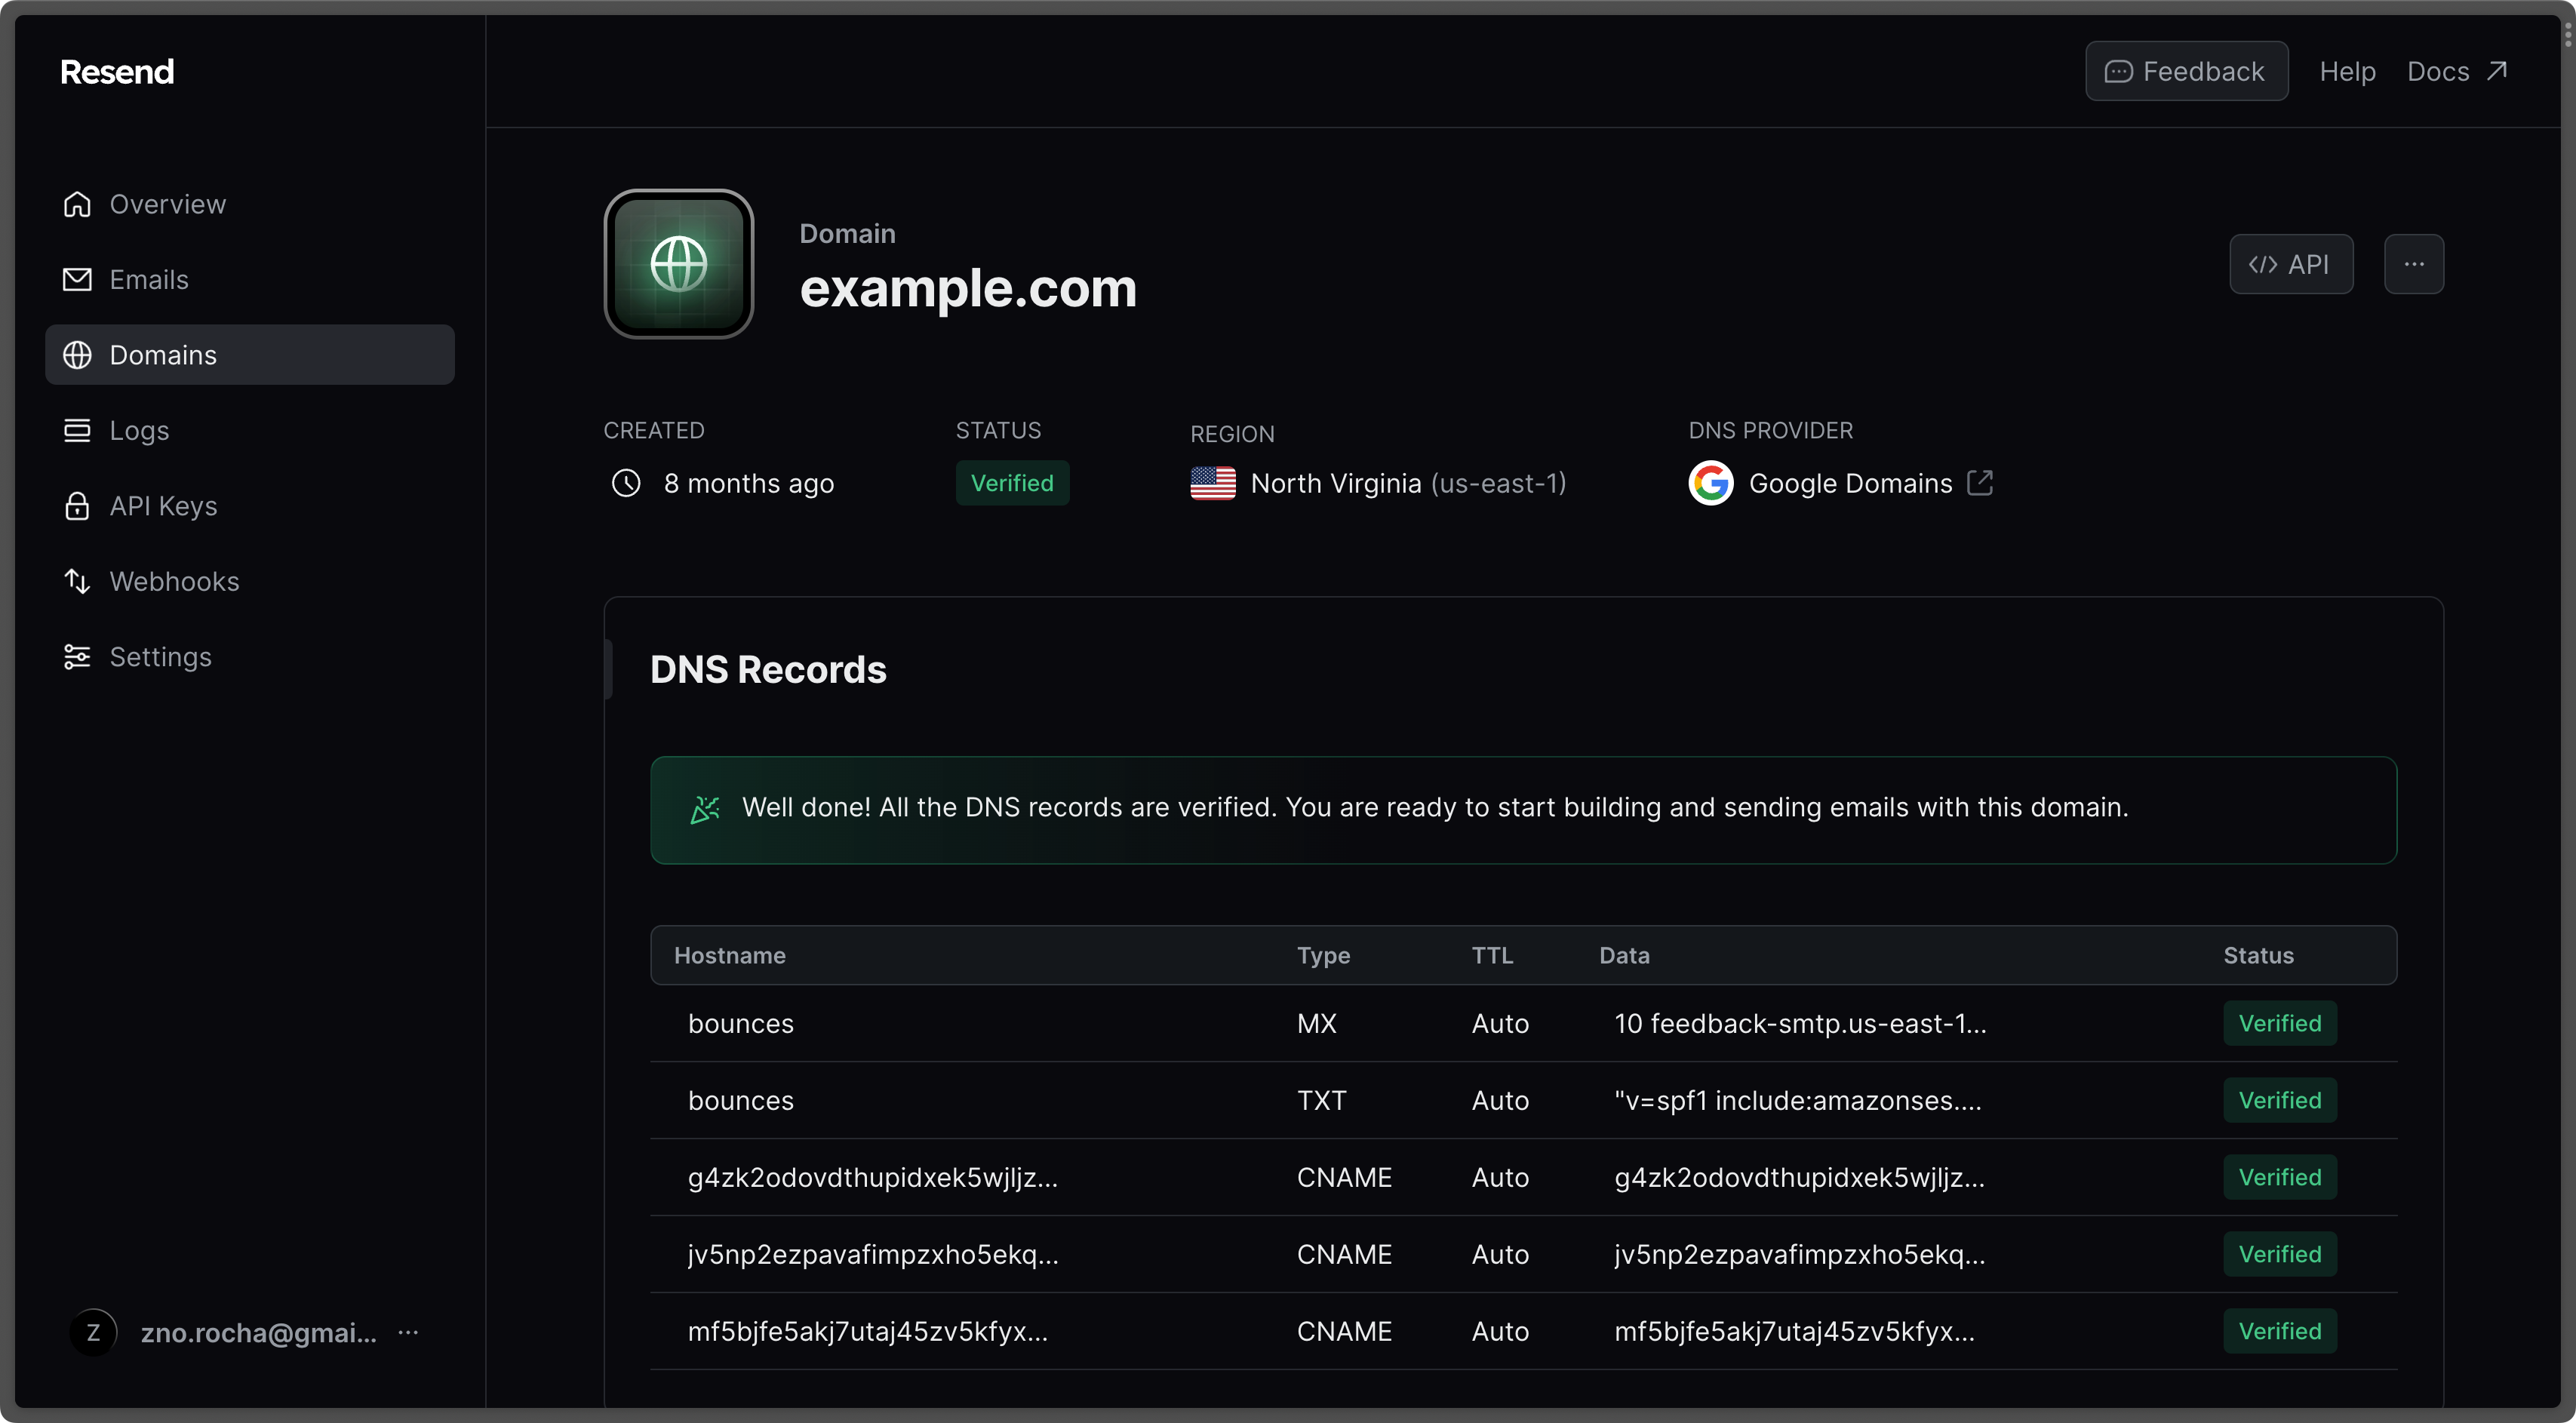 3. Create an [API Key](https://resend.com/api-keys).
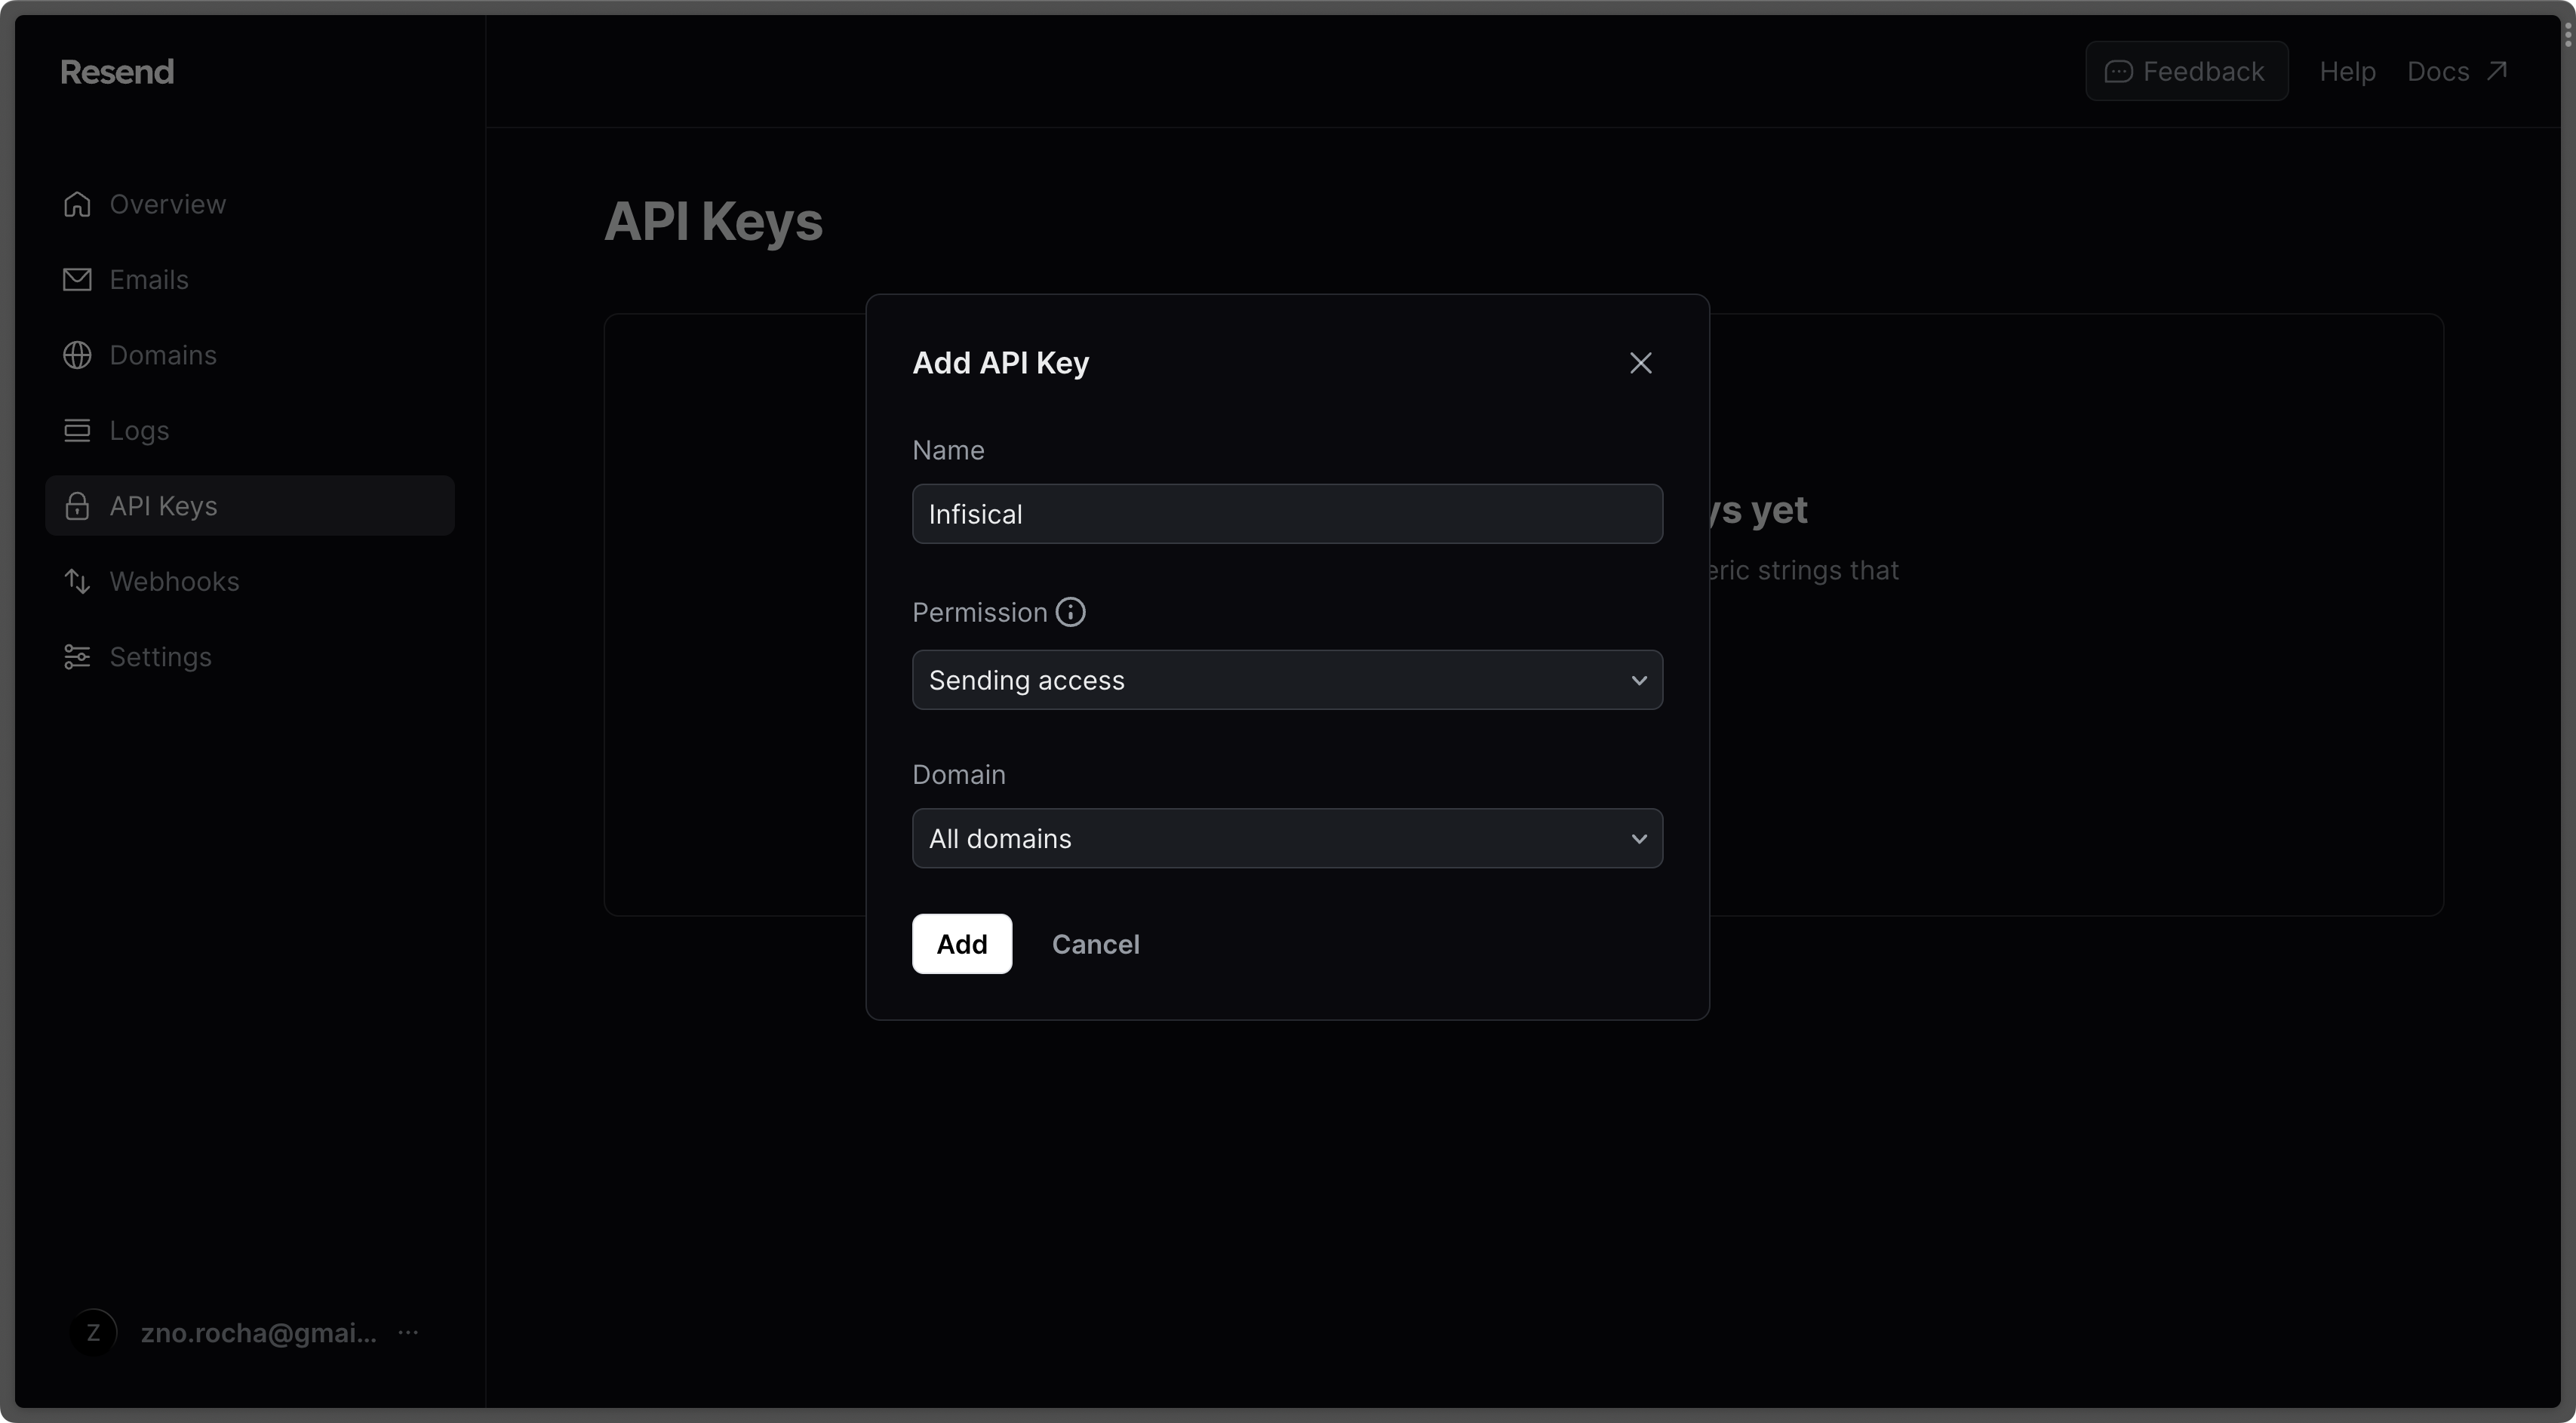 4. Go to the [SMTP page](https://resend.com/settings/smtp) and copy the values.
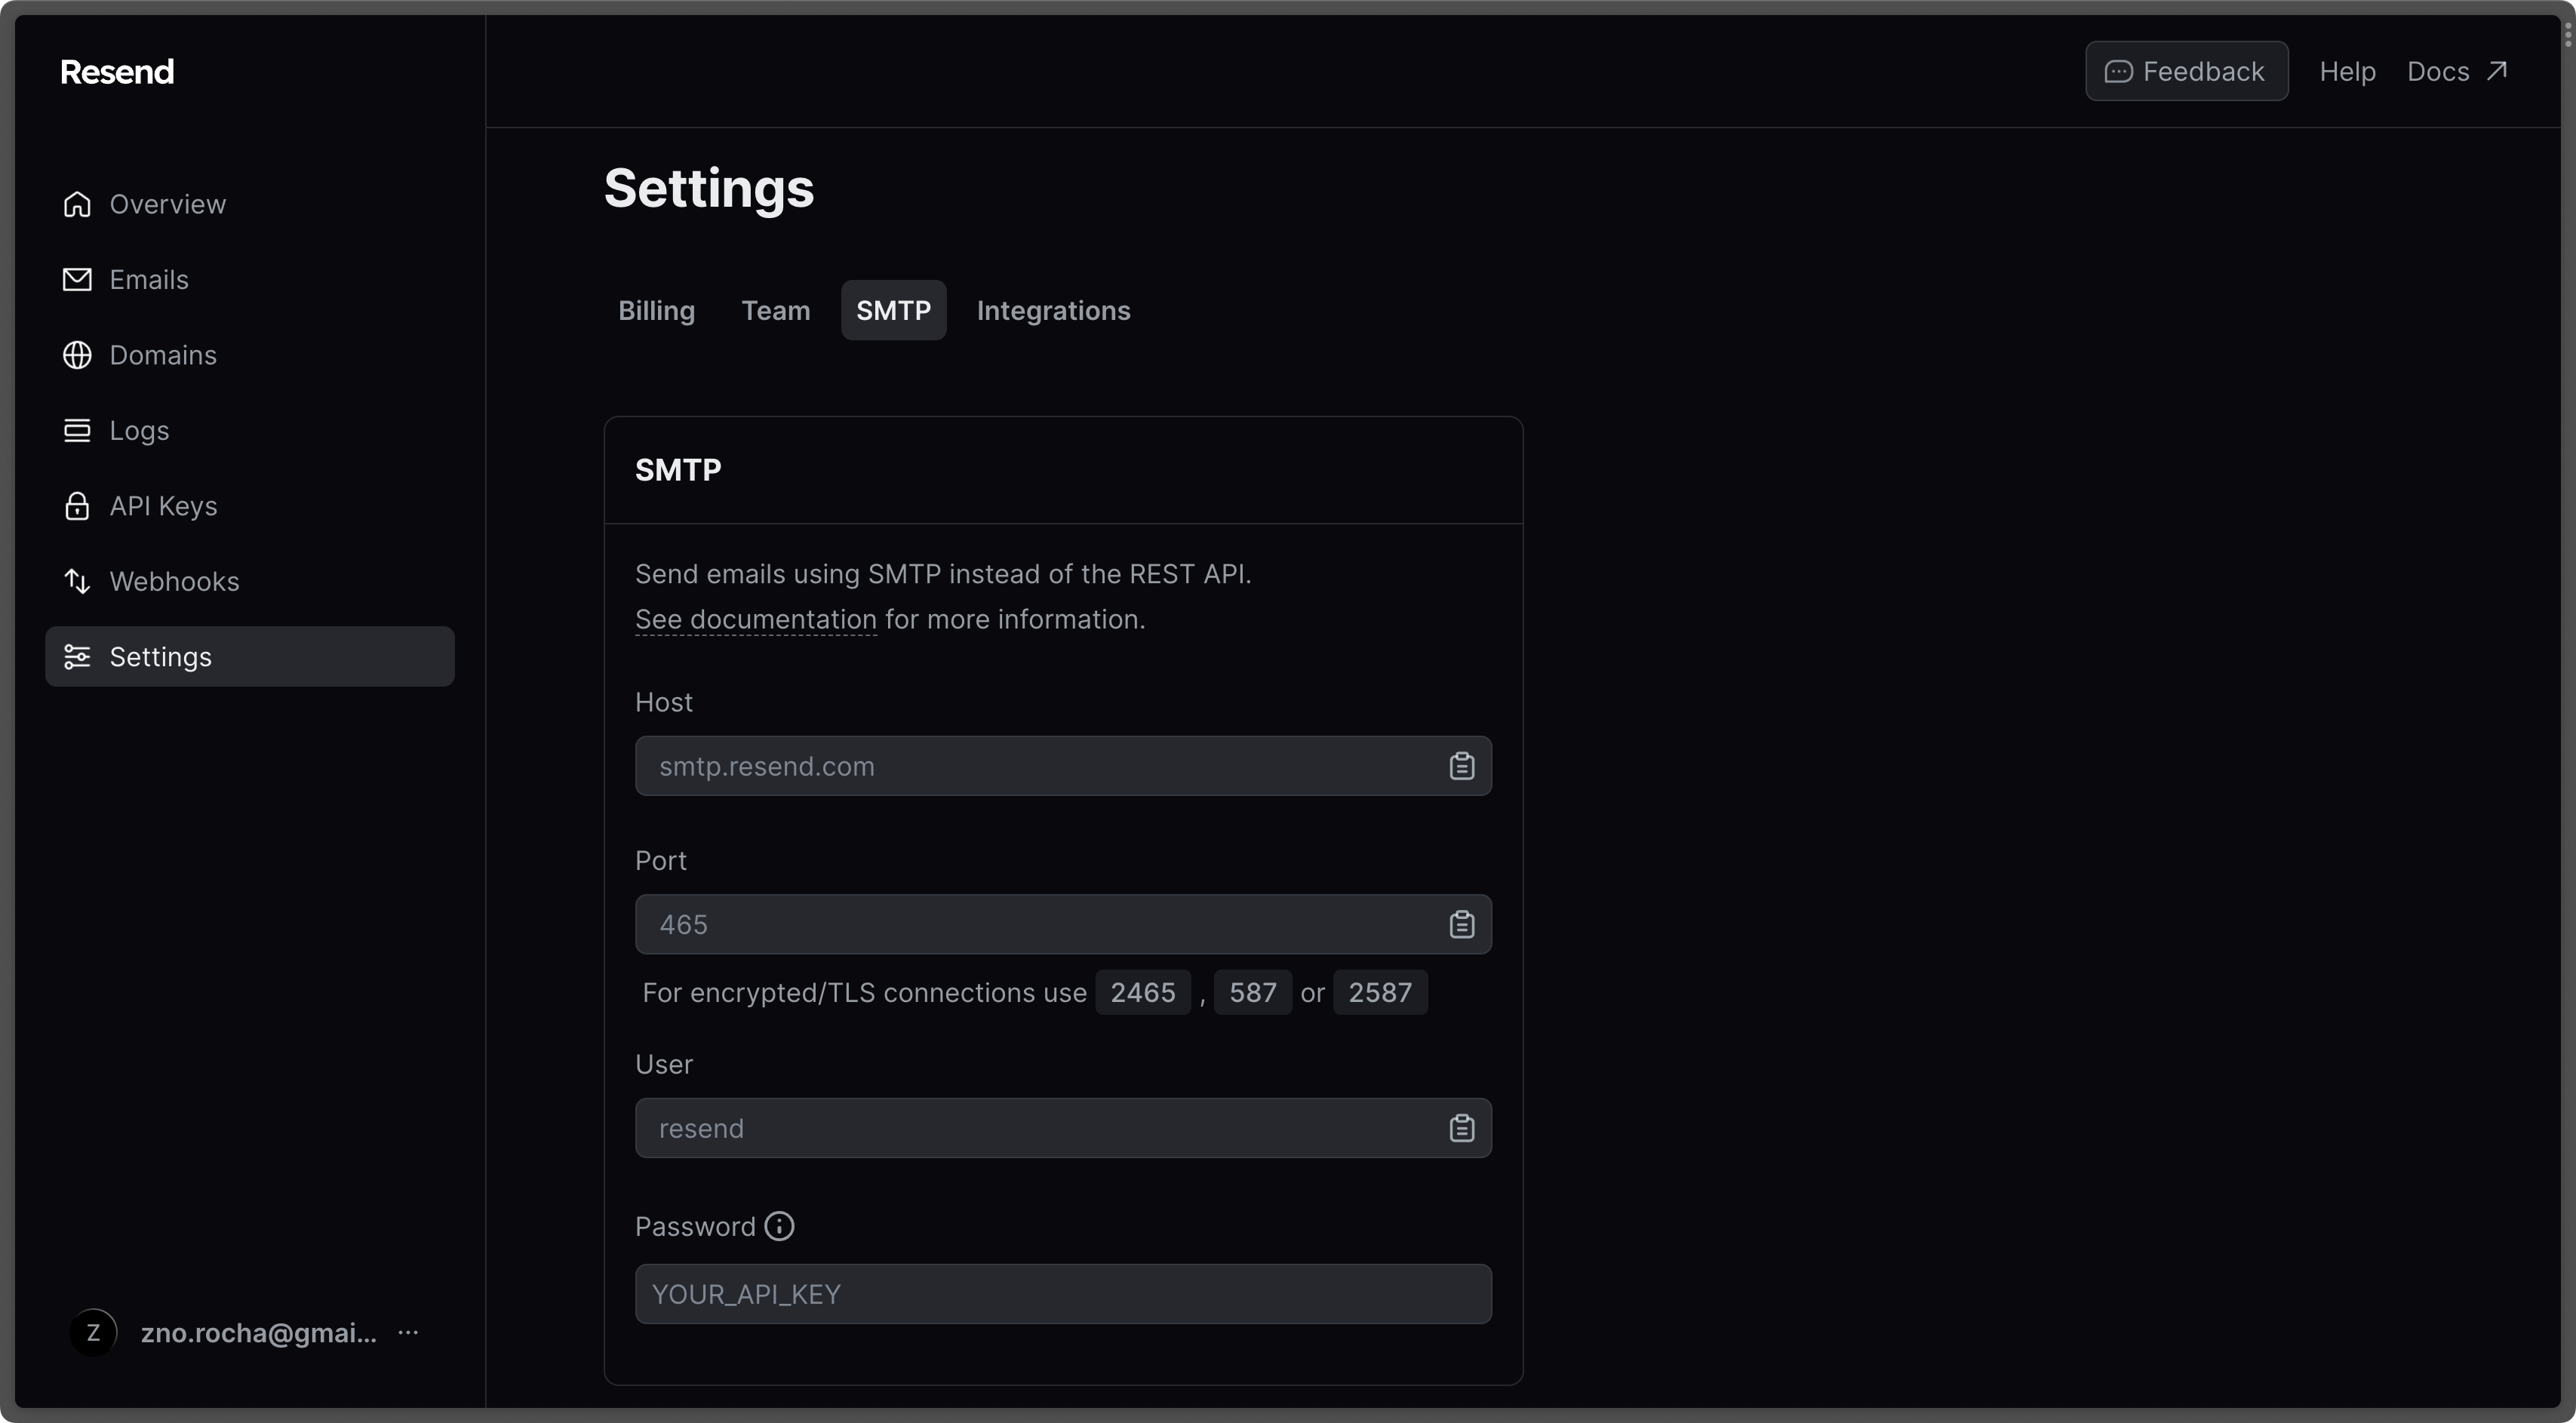 5. With the API Key, you can now set your SMTP environment variables variables:
```
SMTP_HOST=smtp.resend.com
SMTP_USERNAME=resend
SMTP_PASSWORD=YOUR_API_KEY
SMTP_PORT=587
SMTP_FROM_ADDRESS=hey@example.com # your email address being used to send out emails
SMTP_FROM_NAME=Infisical
```
5. With the API Key, you can now set your SMTP environment variables variables:
```
SMTP_HOST=smtp.resend.com
SMTP_USERNAME=resend
SMTP_PASSWORD=YOUR_API_KEY
SMTP_PORT=587
SMTP_FROM_ADDRESS=hey@example.com # your email address being used to send out emails
SMTP_FROM_NAME=Infisical
```
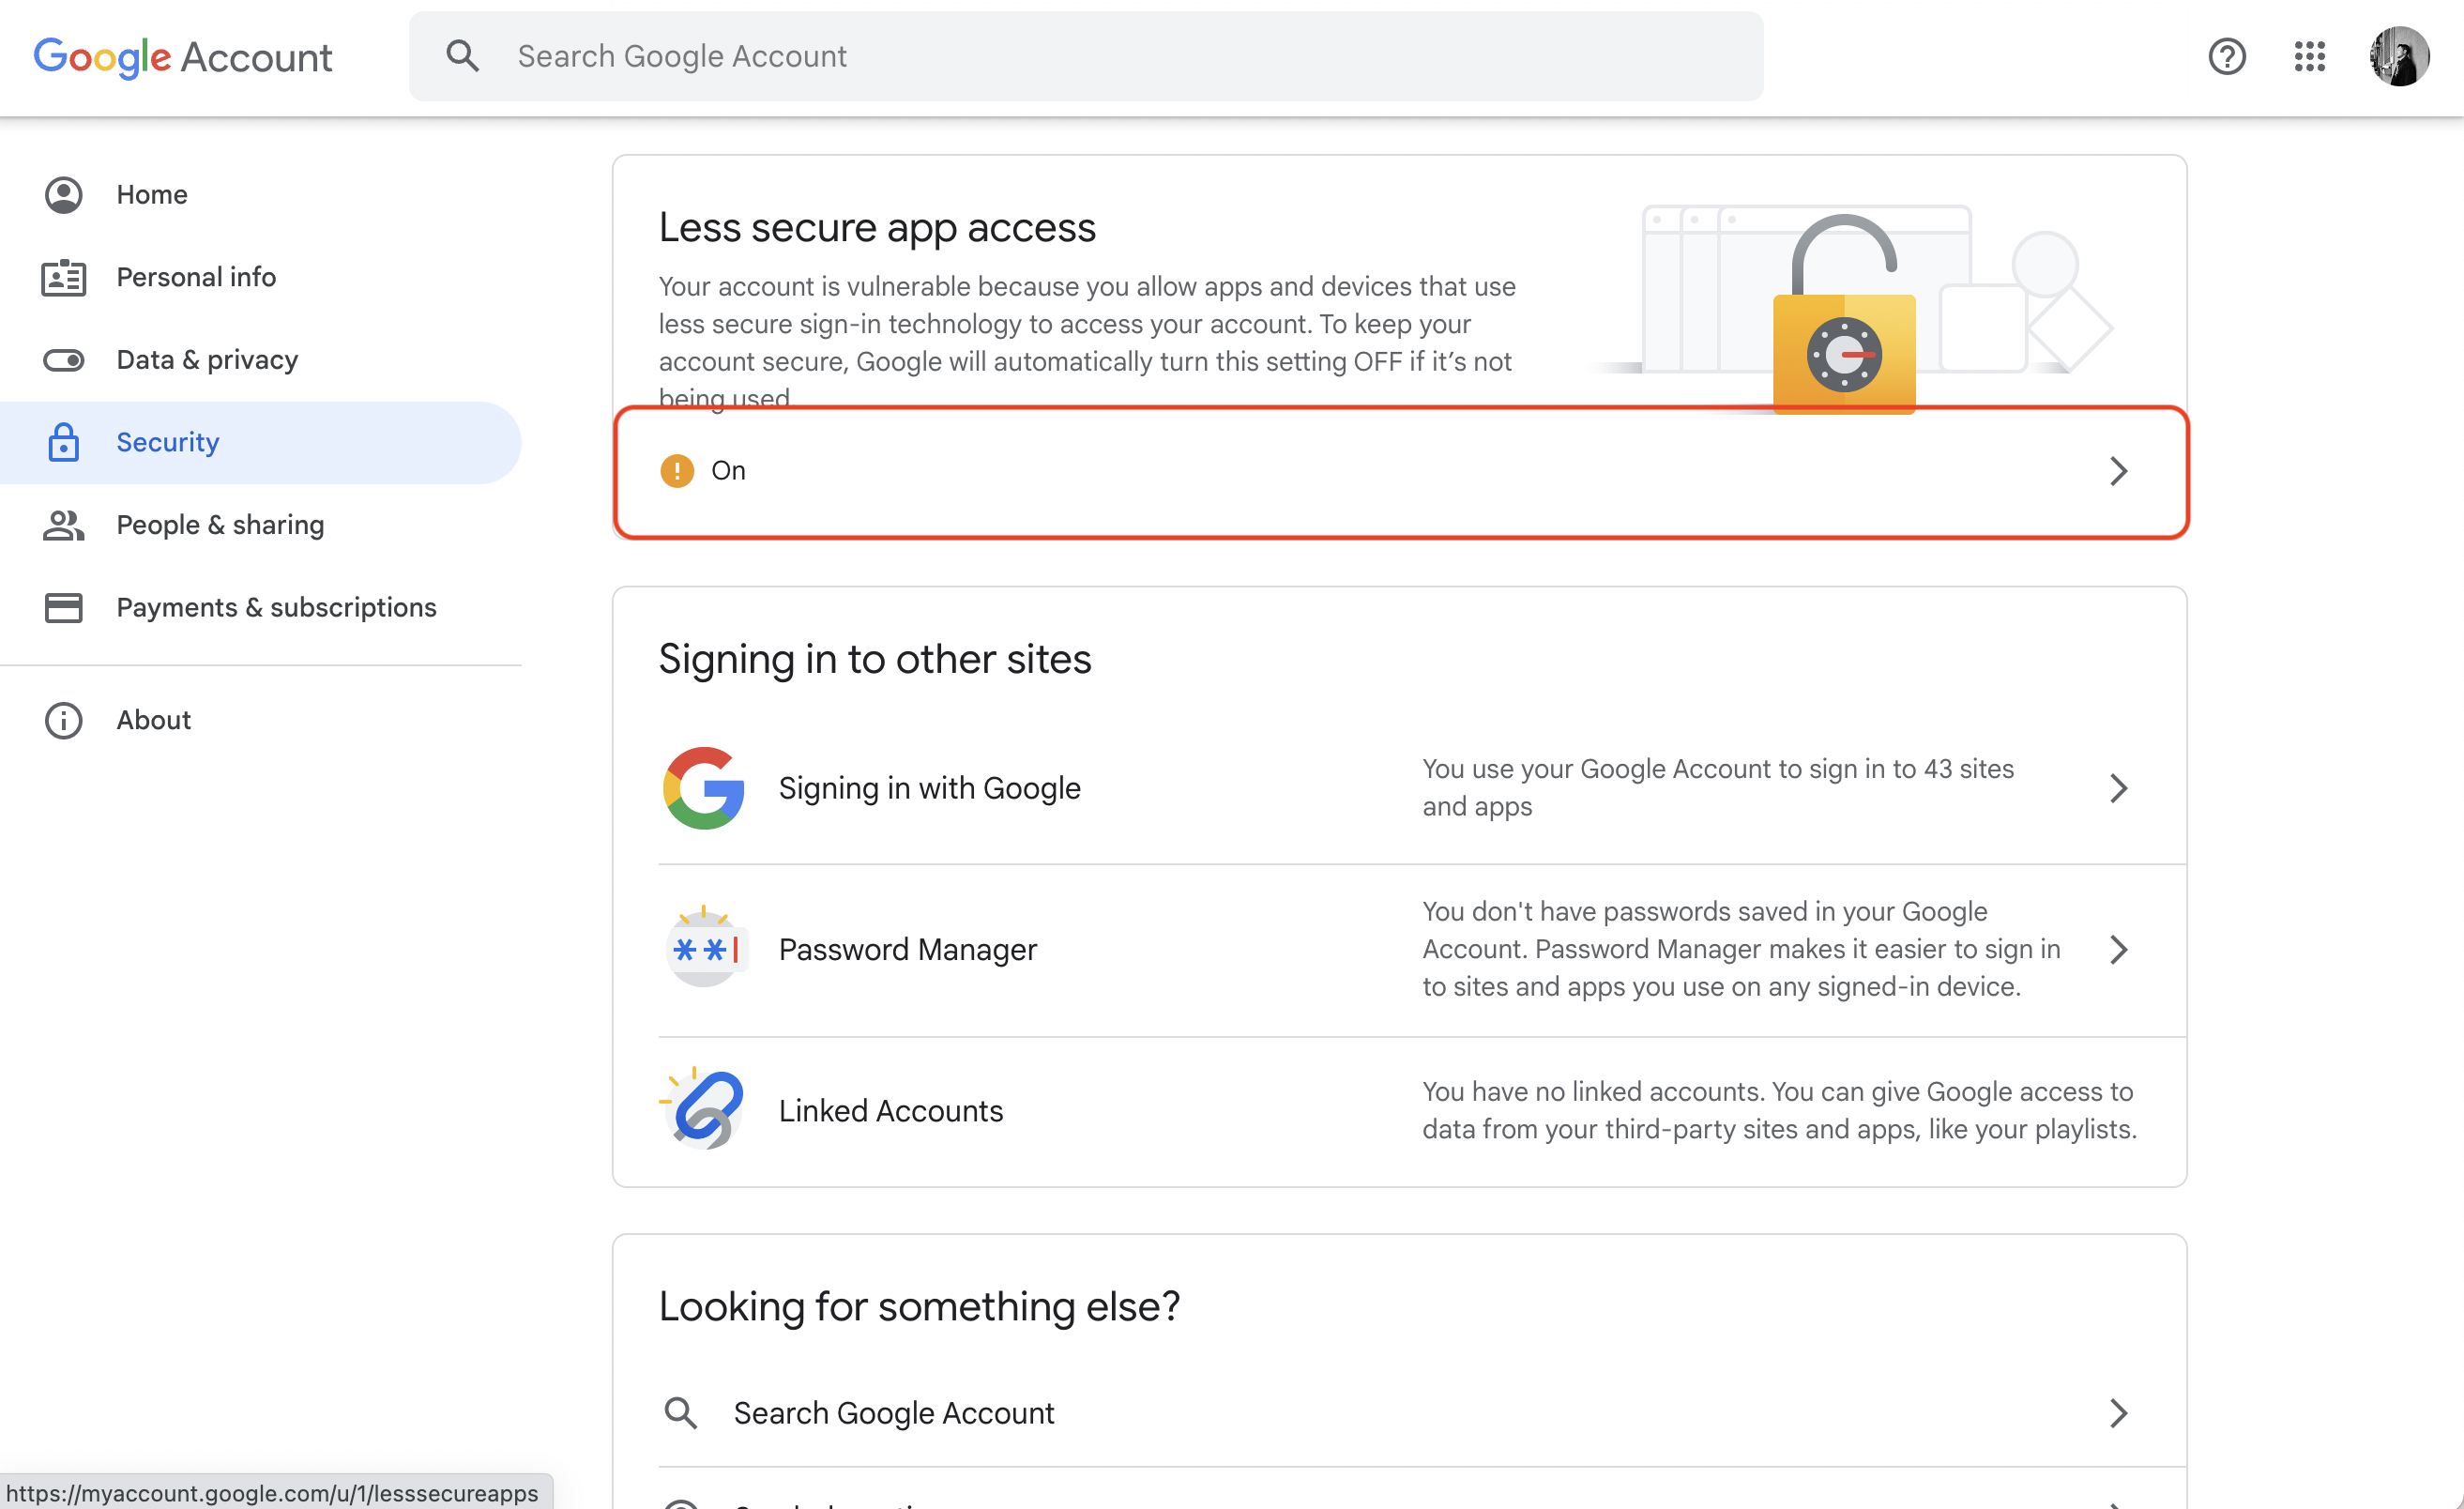 With your Gmail username and password, you can set your SMTP environment variables:
```
SMTP_HOST=smtp.gmail.com
SMTP_USERNAME=hey@gmail.com # your email
SMTP_PASSWORD=password # your password
SMTP_PORT=587
SMTP_FROM_ADDRESS=hey@gmail.com
SMTP_FROM_NAME=Infisical
```
With your Gmail username and password, you can set your SMTP environment variables:
```
SMTP_HOST=smtp.gmail.com
SMTP_USERNAME=hey@gmail.com # your email
SMTP_PASSWORD=password # your password
SMTP_PORT=587
SMTP_FROM_ADDRESS=hey@gmail.com
SMTP_FROM_NAME=Infisical
```
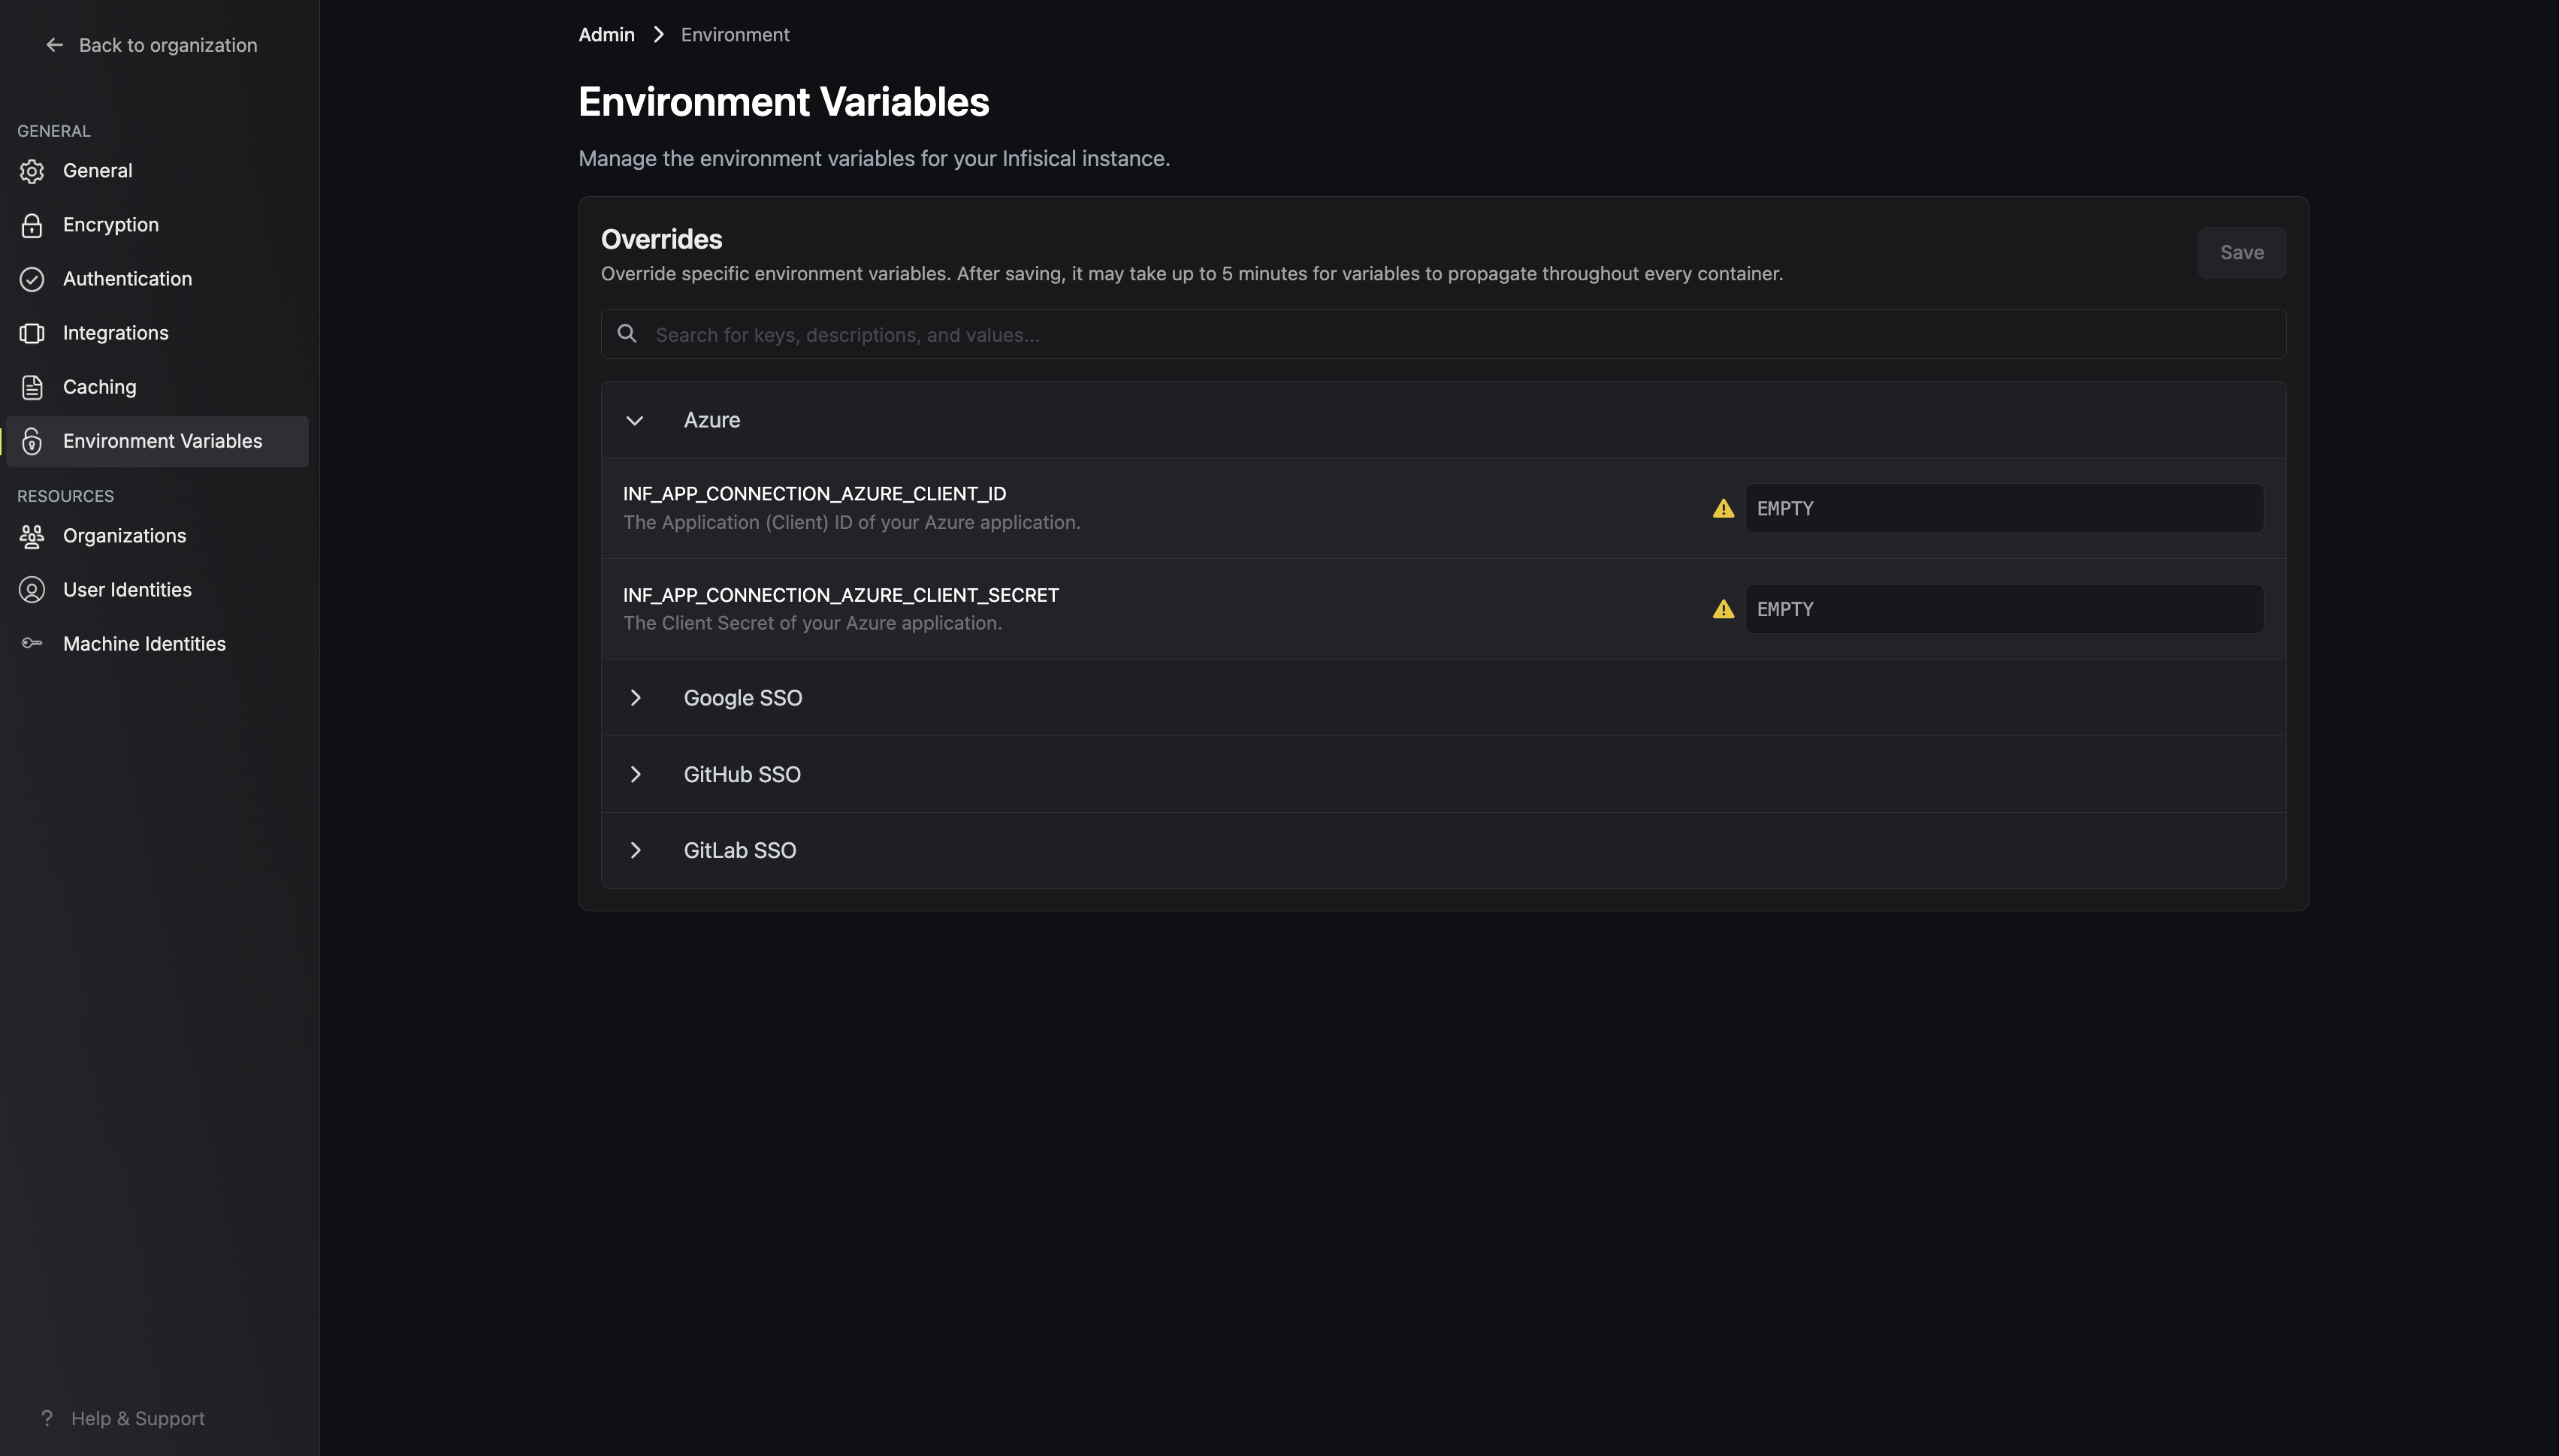 ---
# Source: https://infisical.com/docs/documentation/platform/external-migrations/envkey.md
> ## Documentation Index
> Fetch the complete documentation index at: https://infisical.com/docs/llms.txt
> Use this file to discover all available pages before exploring further.
# Migrating from EnvKey to Infisical
> Learn how to migrate secrets from EnvKey to Infisical.
## Migrating from EnvKey
---
# Source: https://infisical.com/docs/documentation/platform/external-migrations/envkey.md
> ## Documentation Index
> Fetch the complete documentation index at: https://infisical.com/docs/llms.txt
> Use this file to discover all available pages before exploring further.
# Migrating from EnvKey to Infisical
> Learn how to migrate secrets from EnvKey to Infisical.
## Migrating from EnvKey
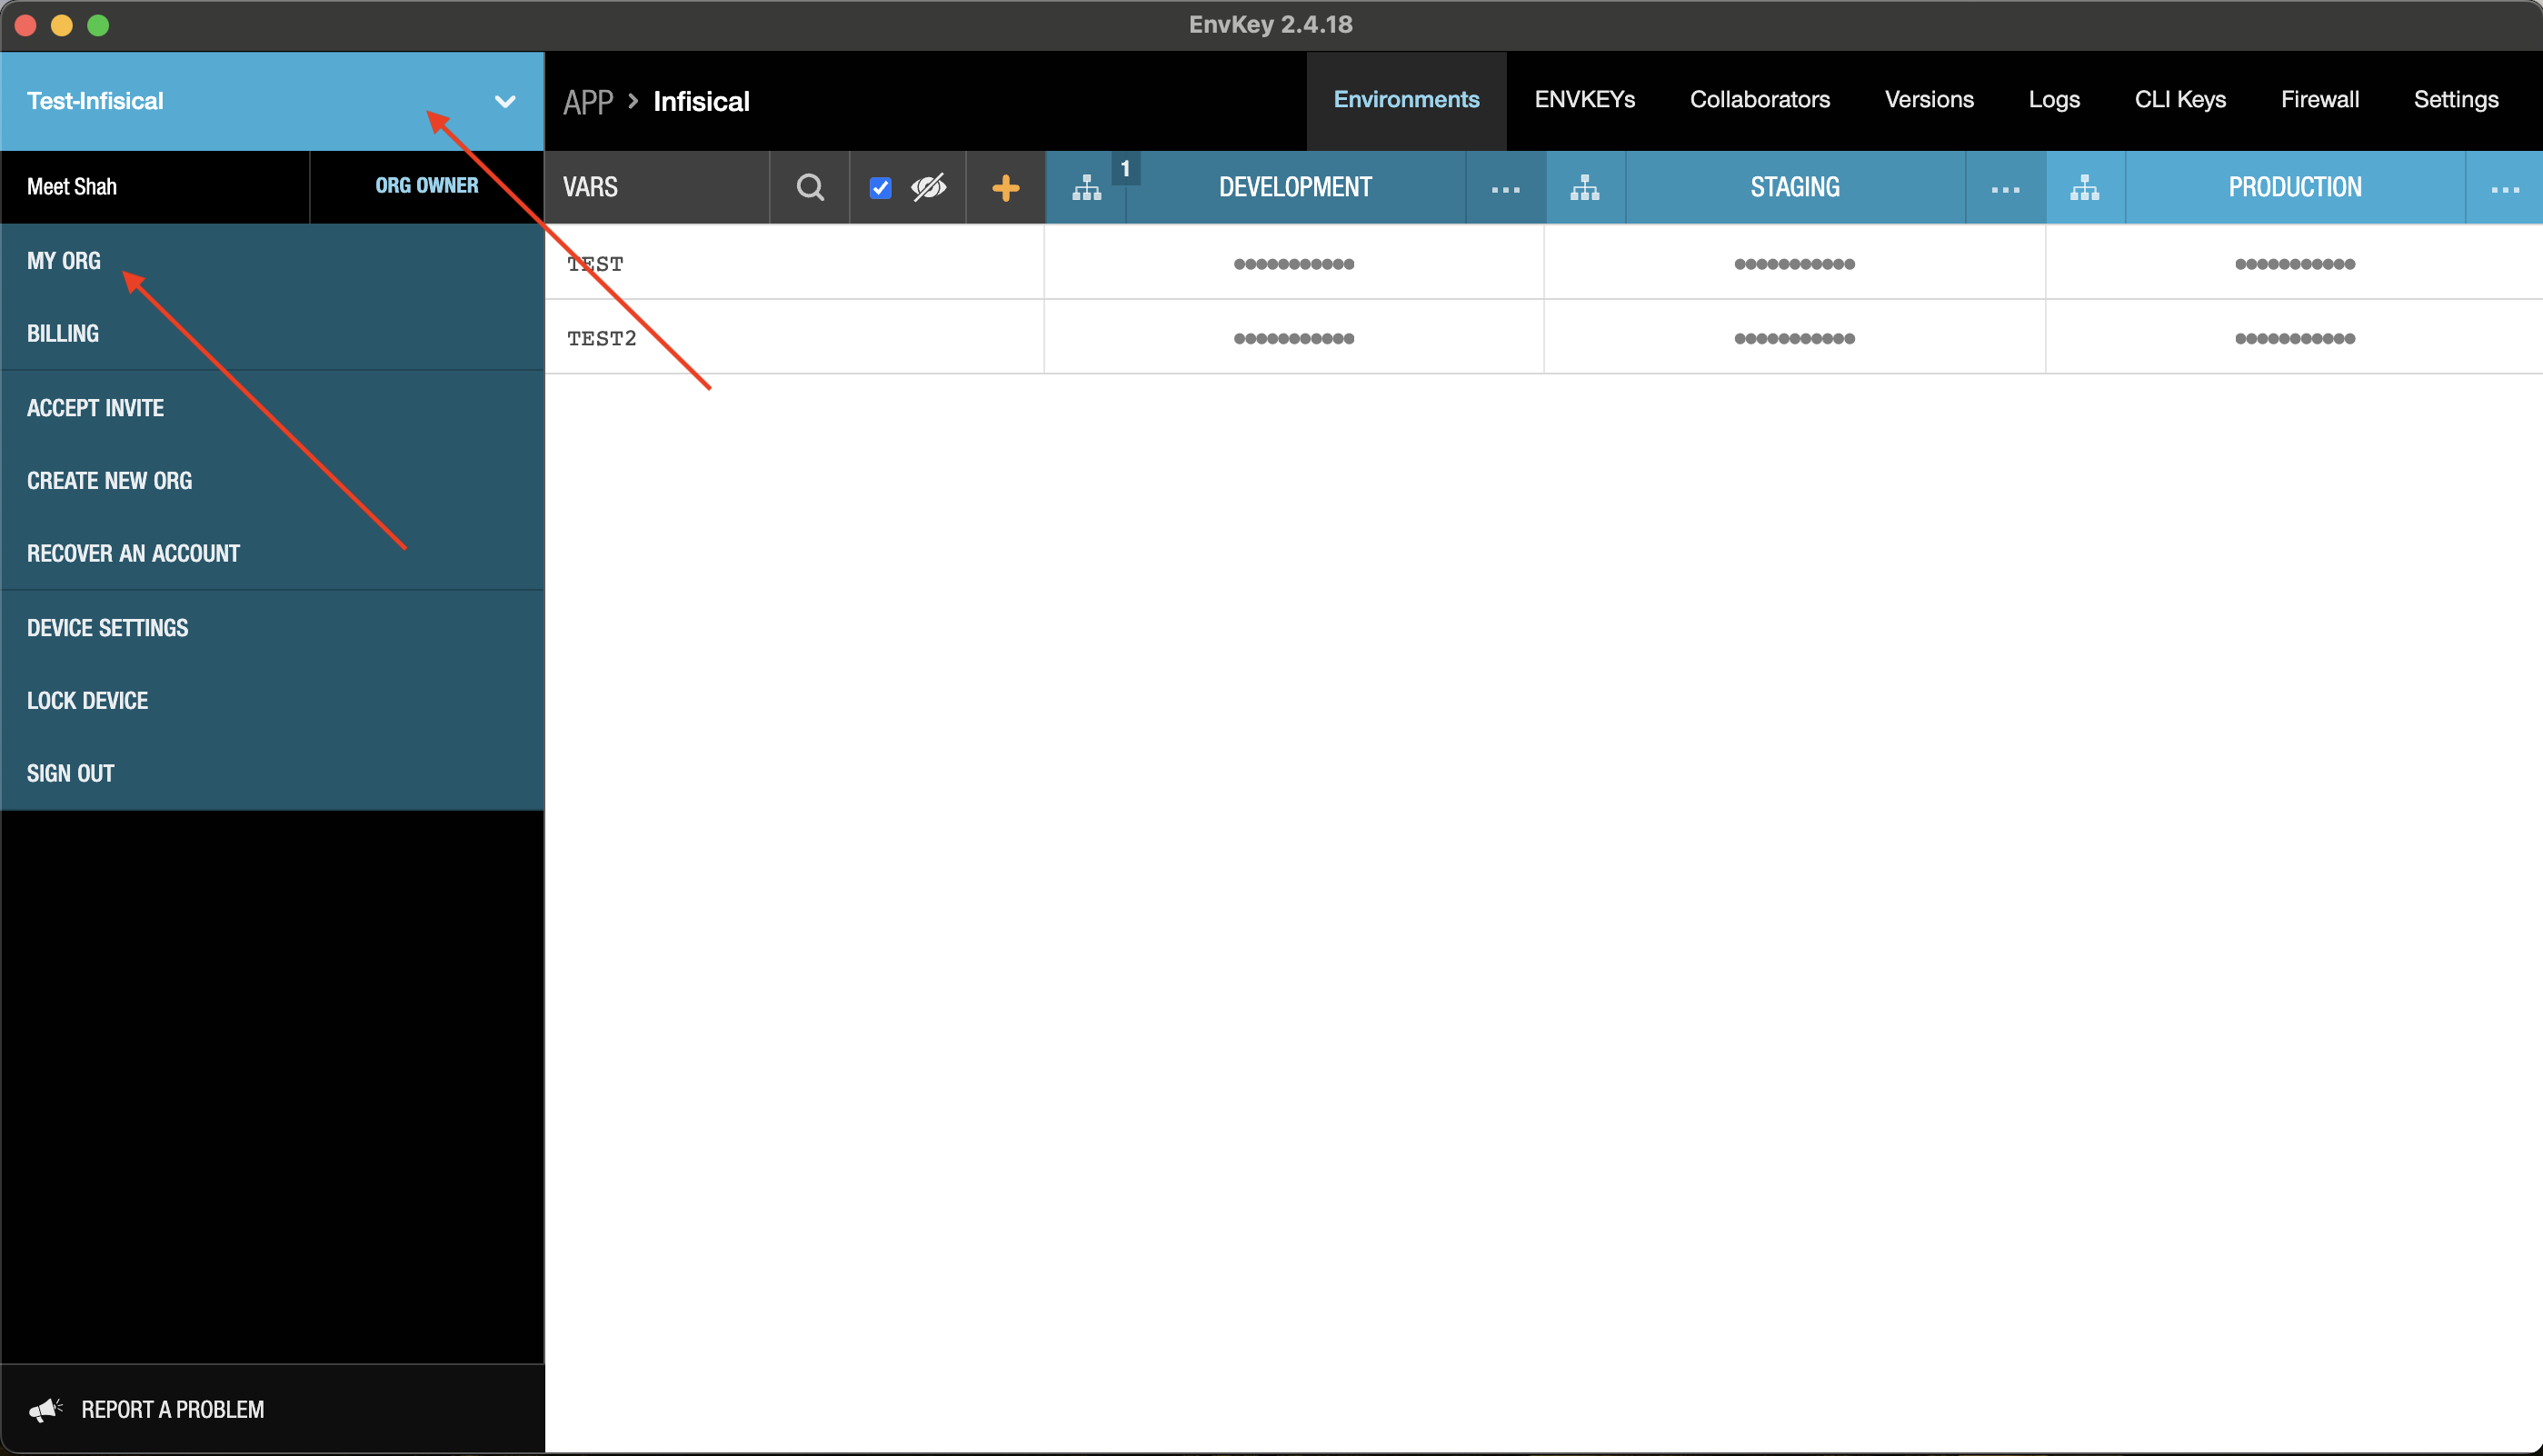
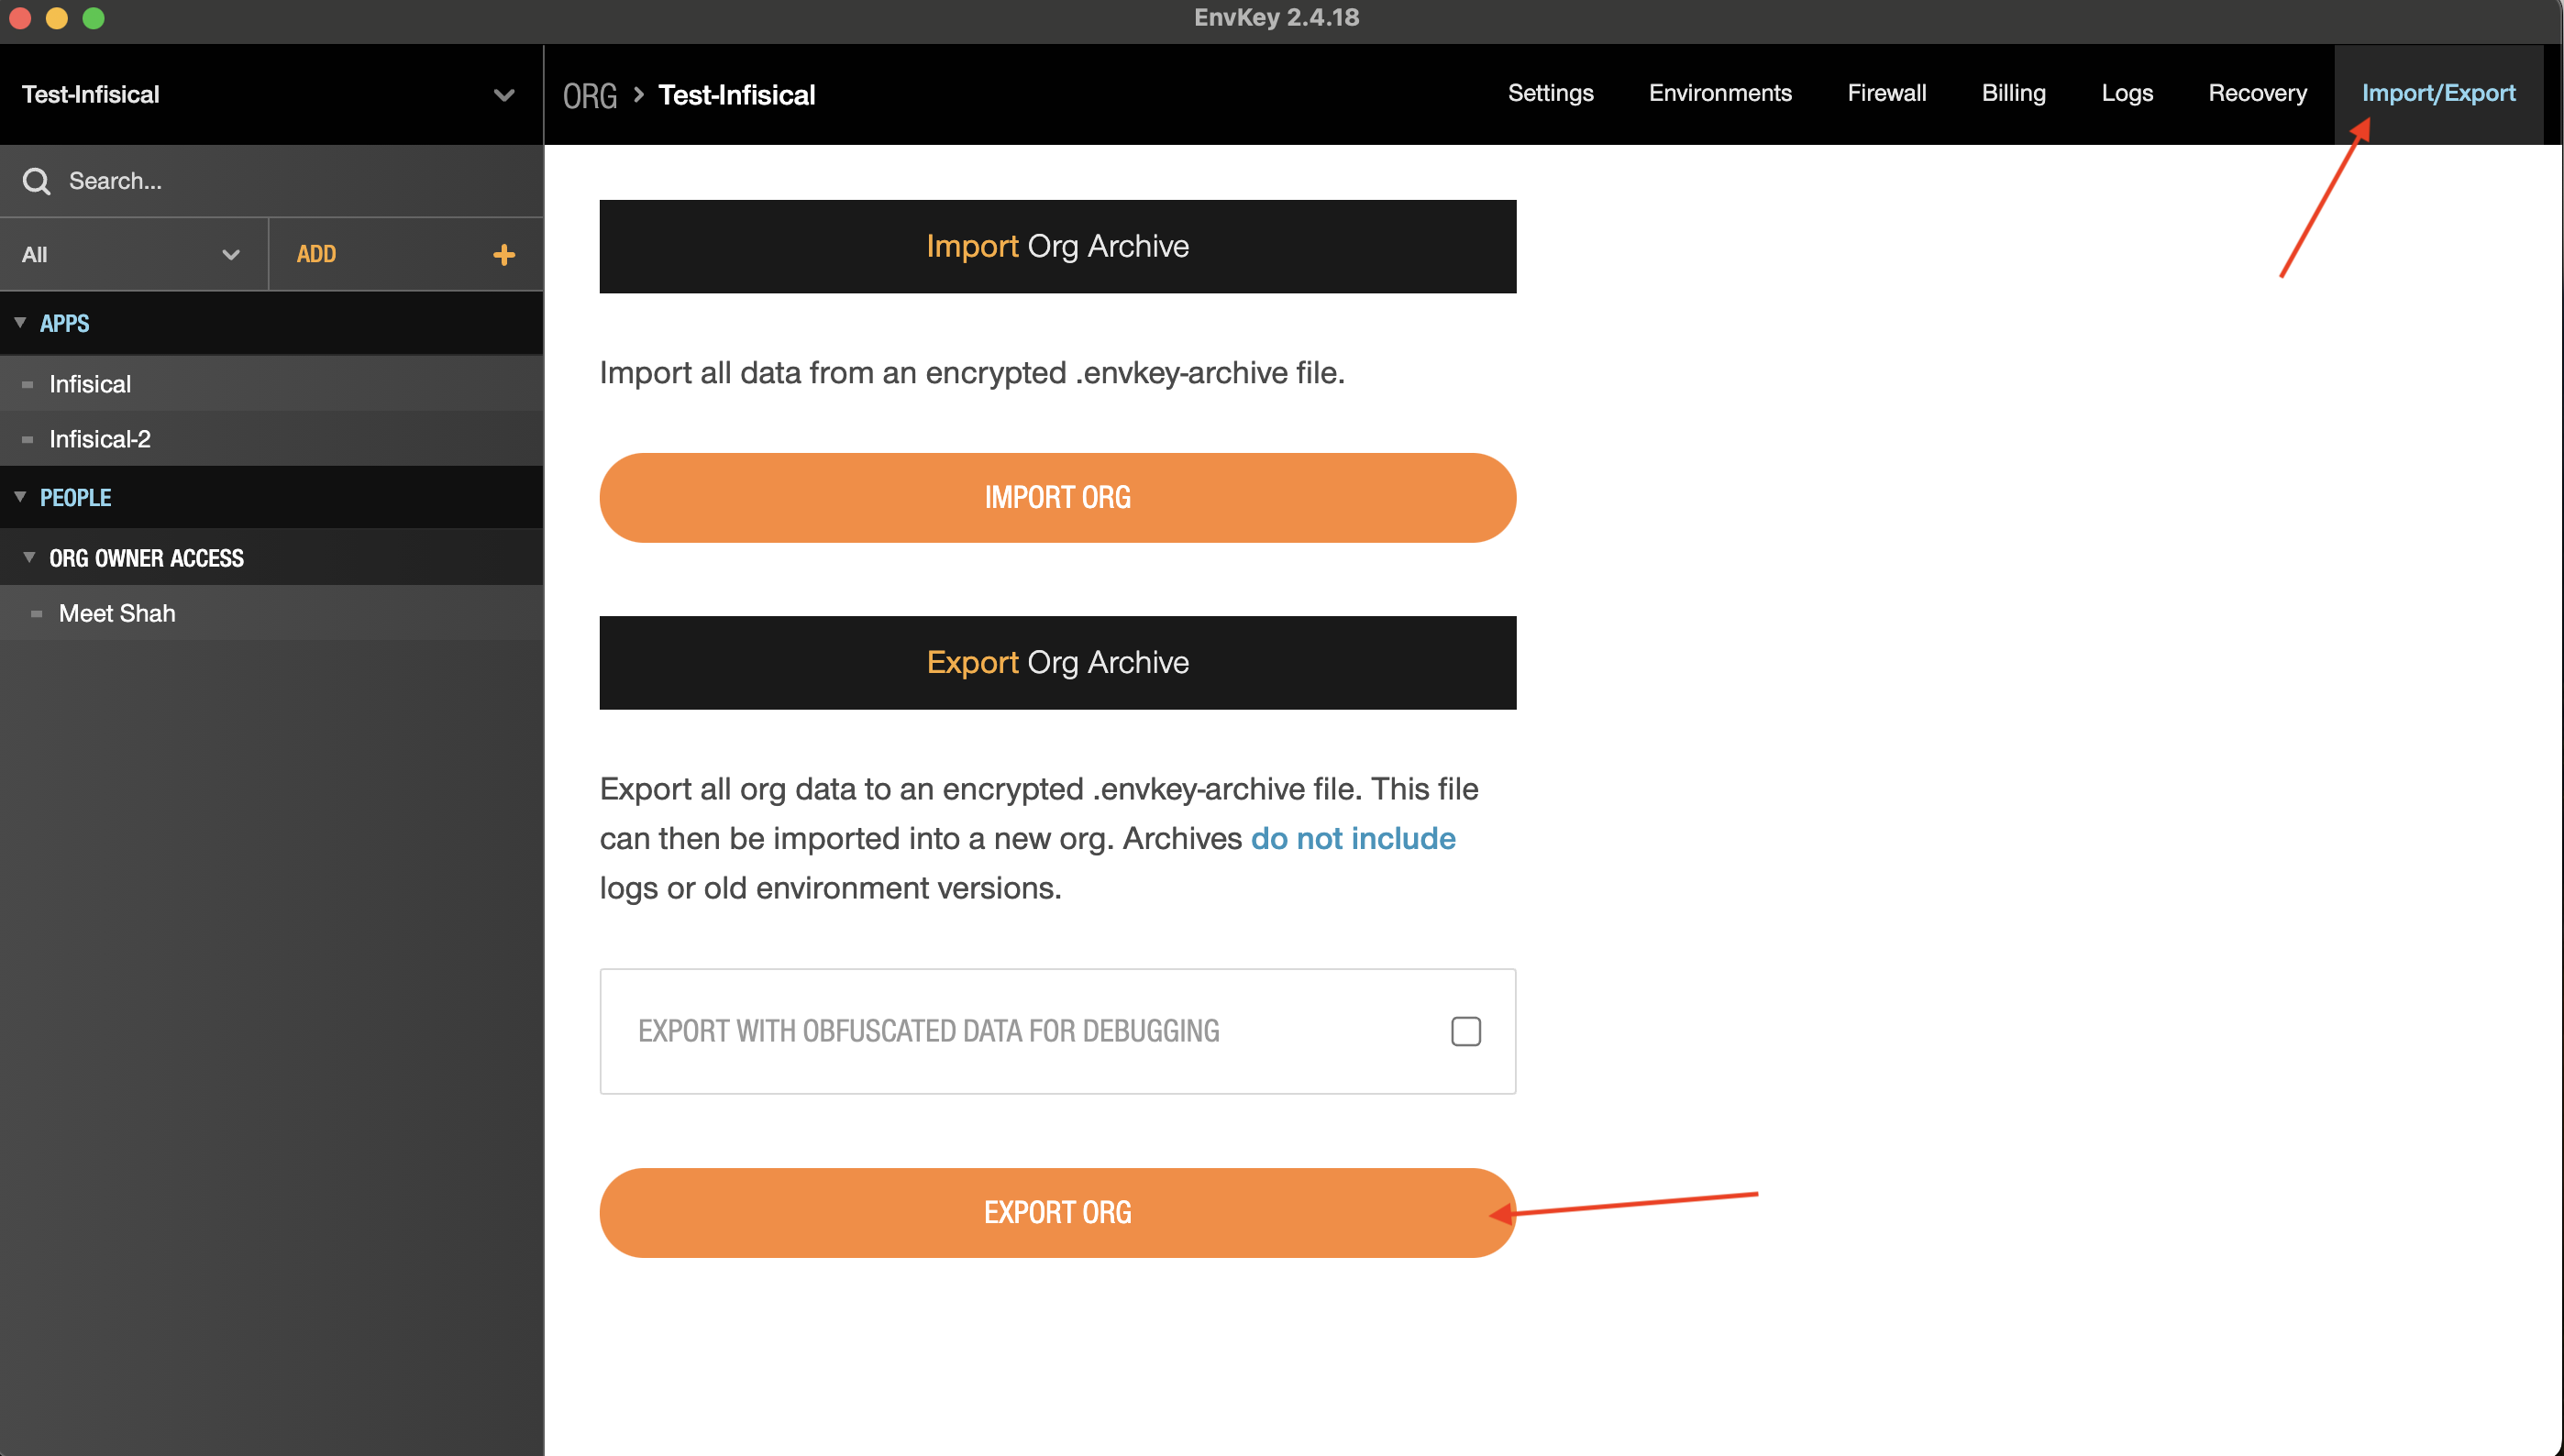
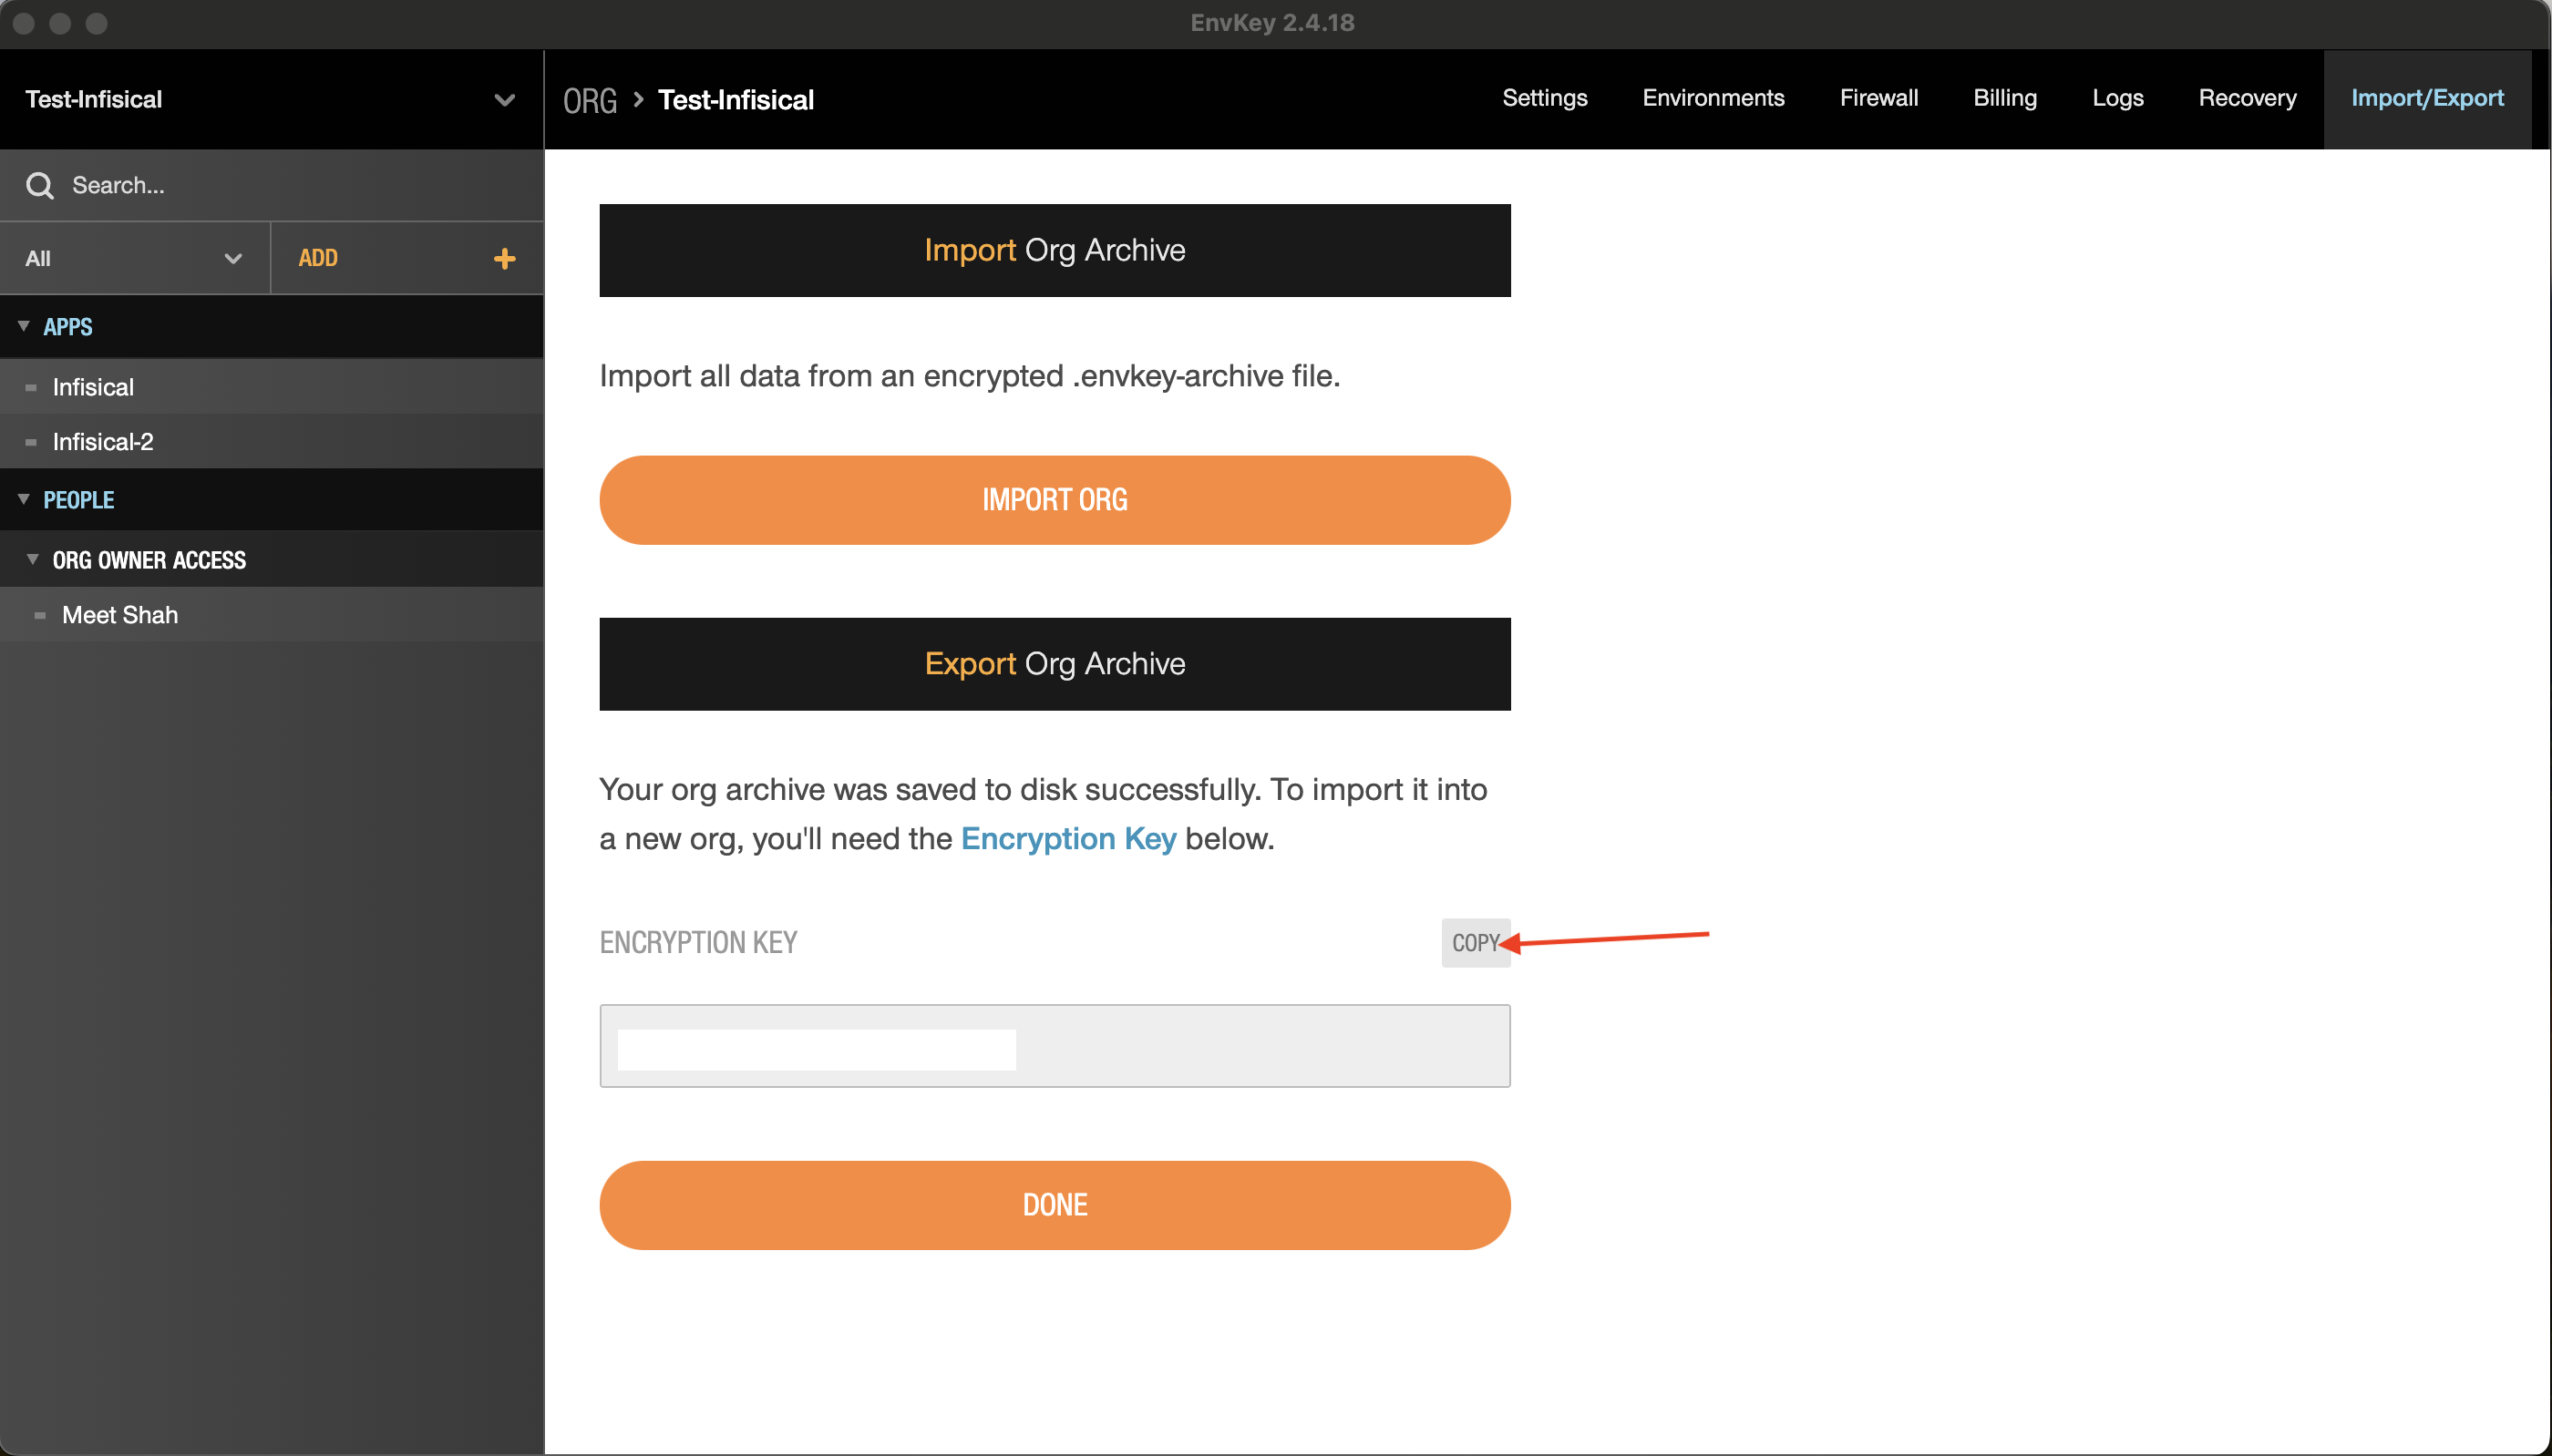
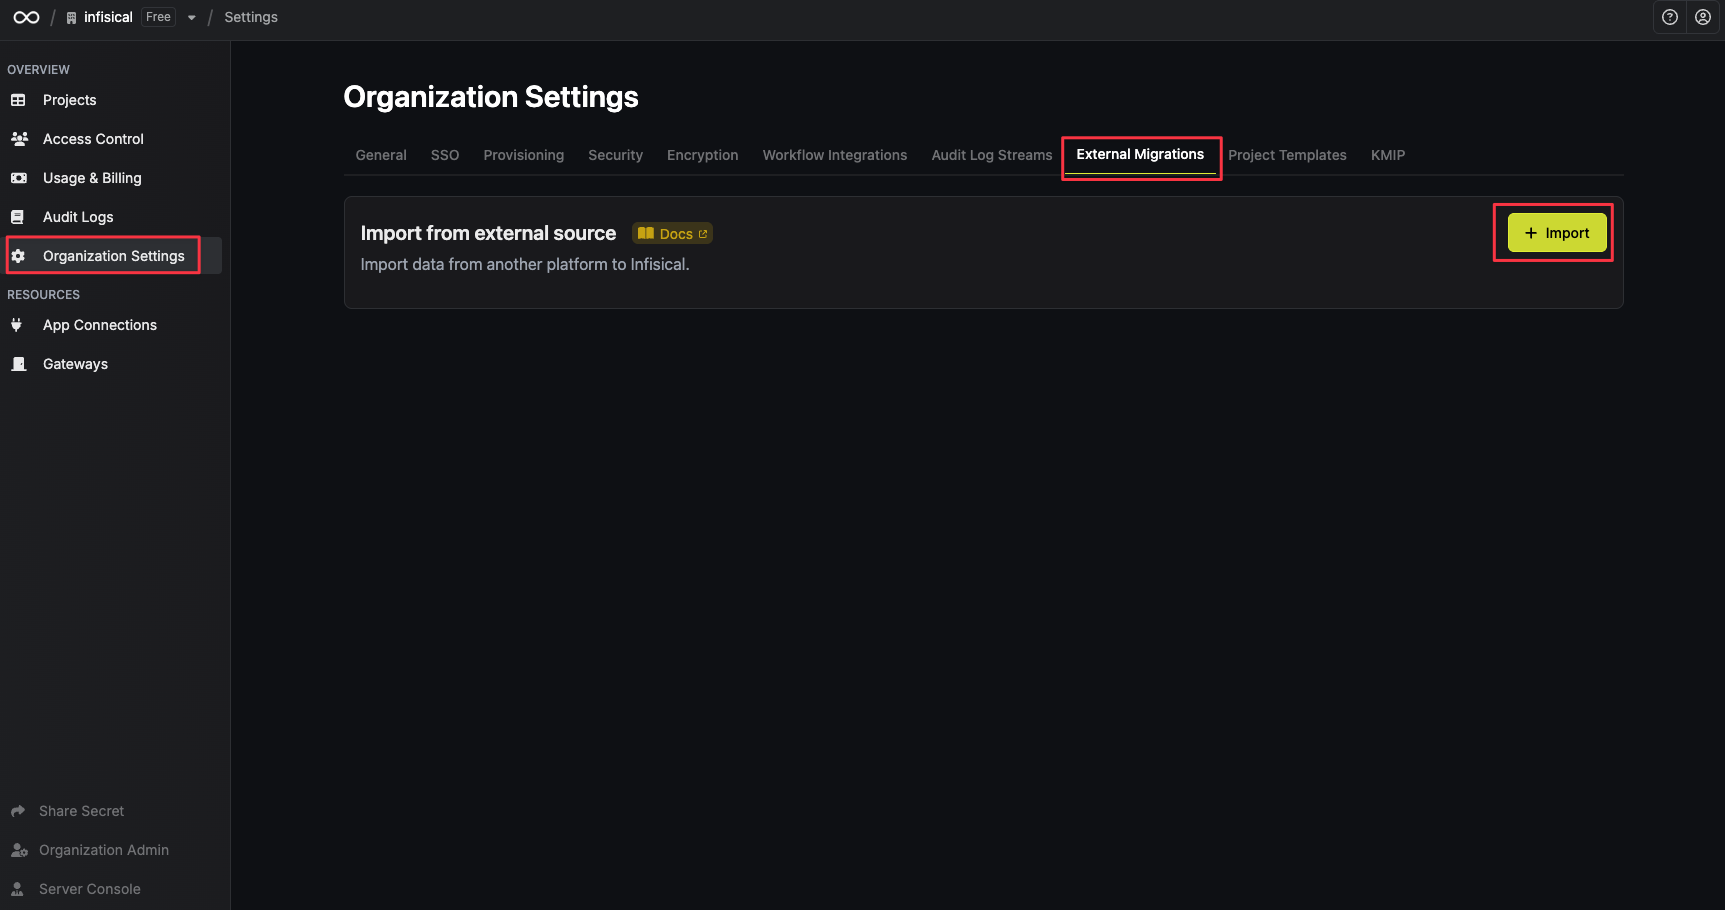
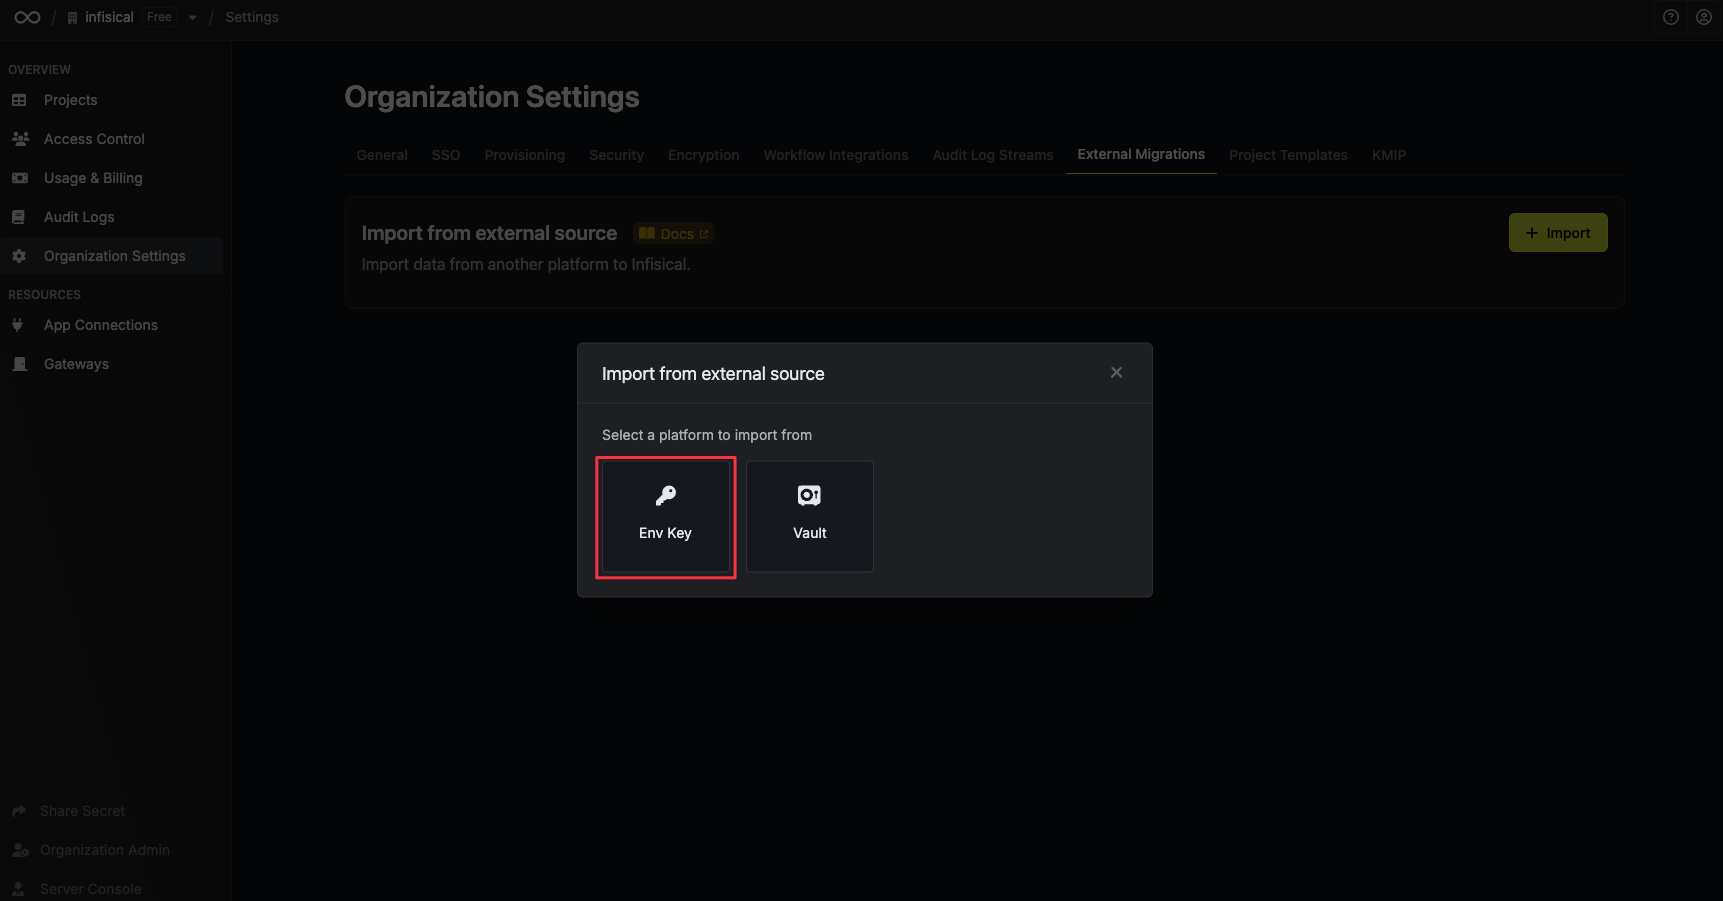
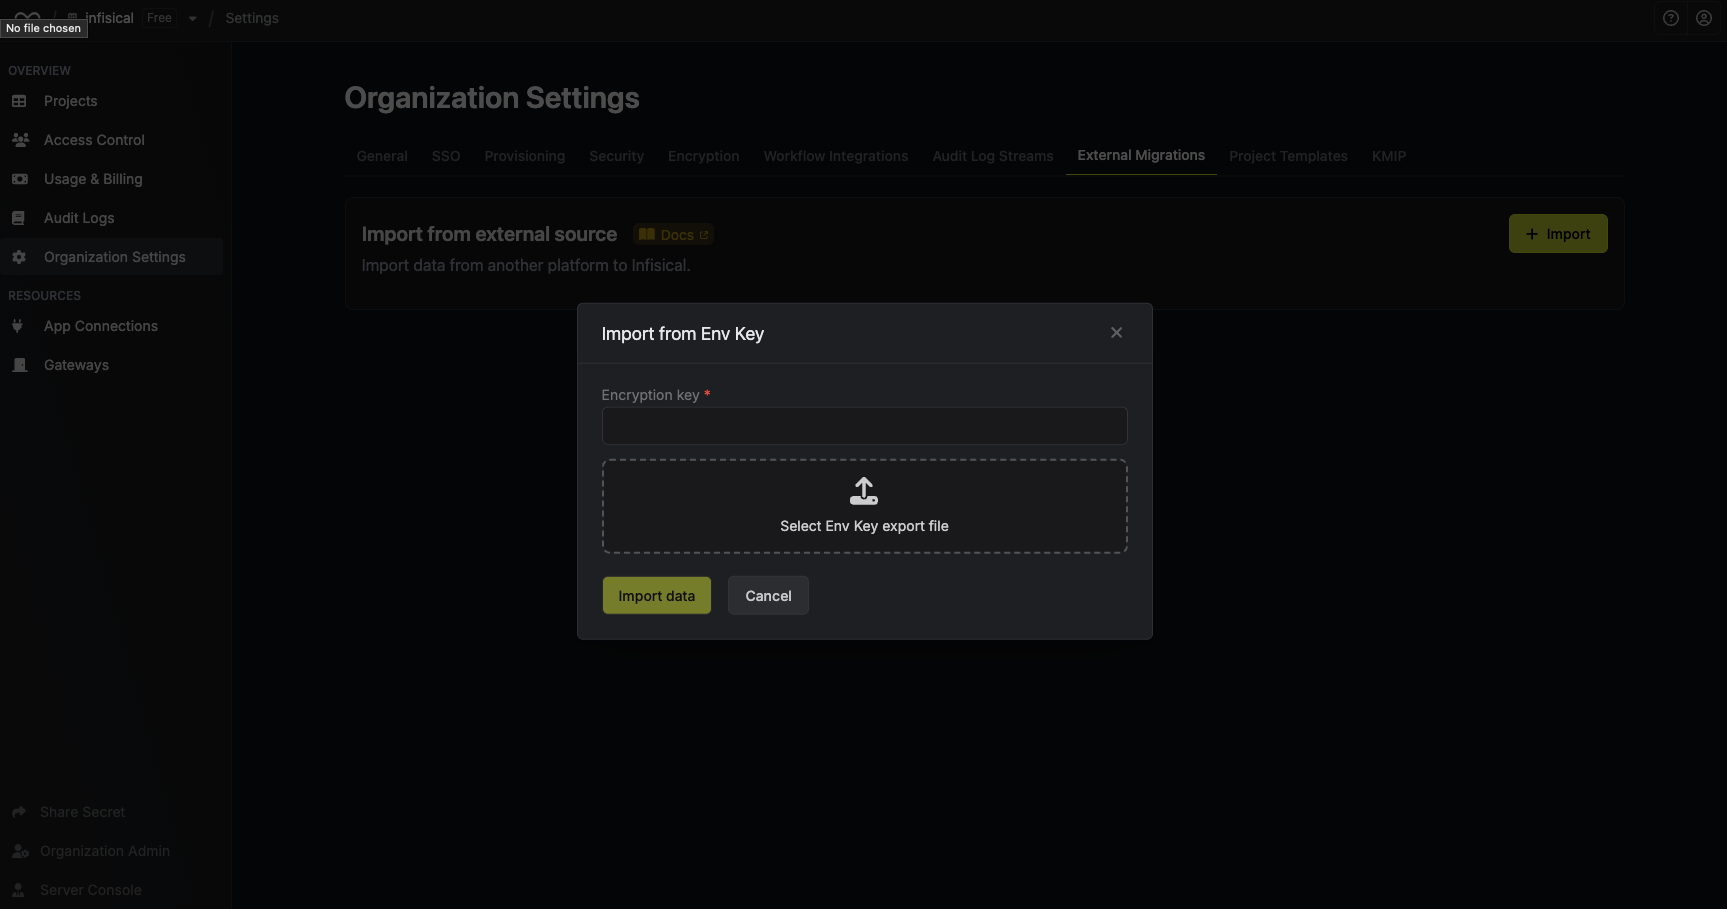
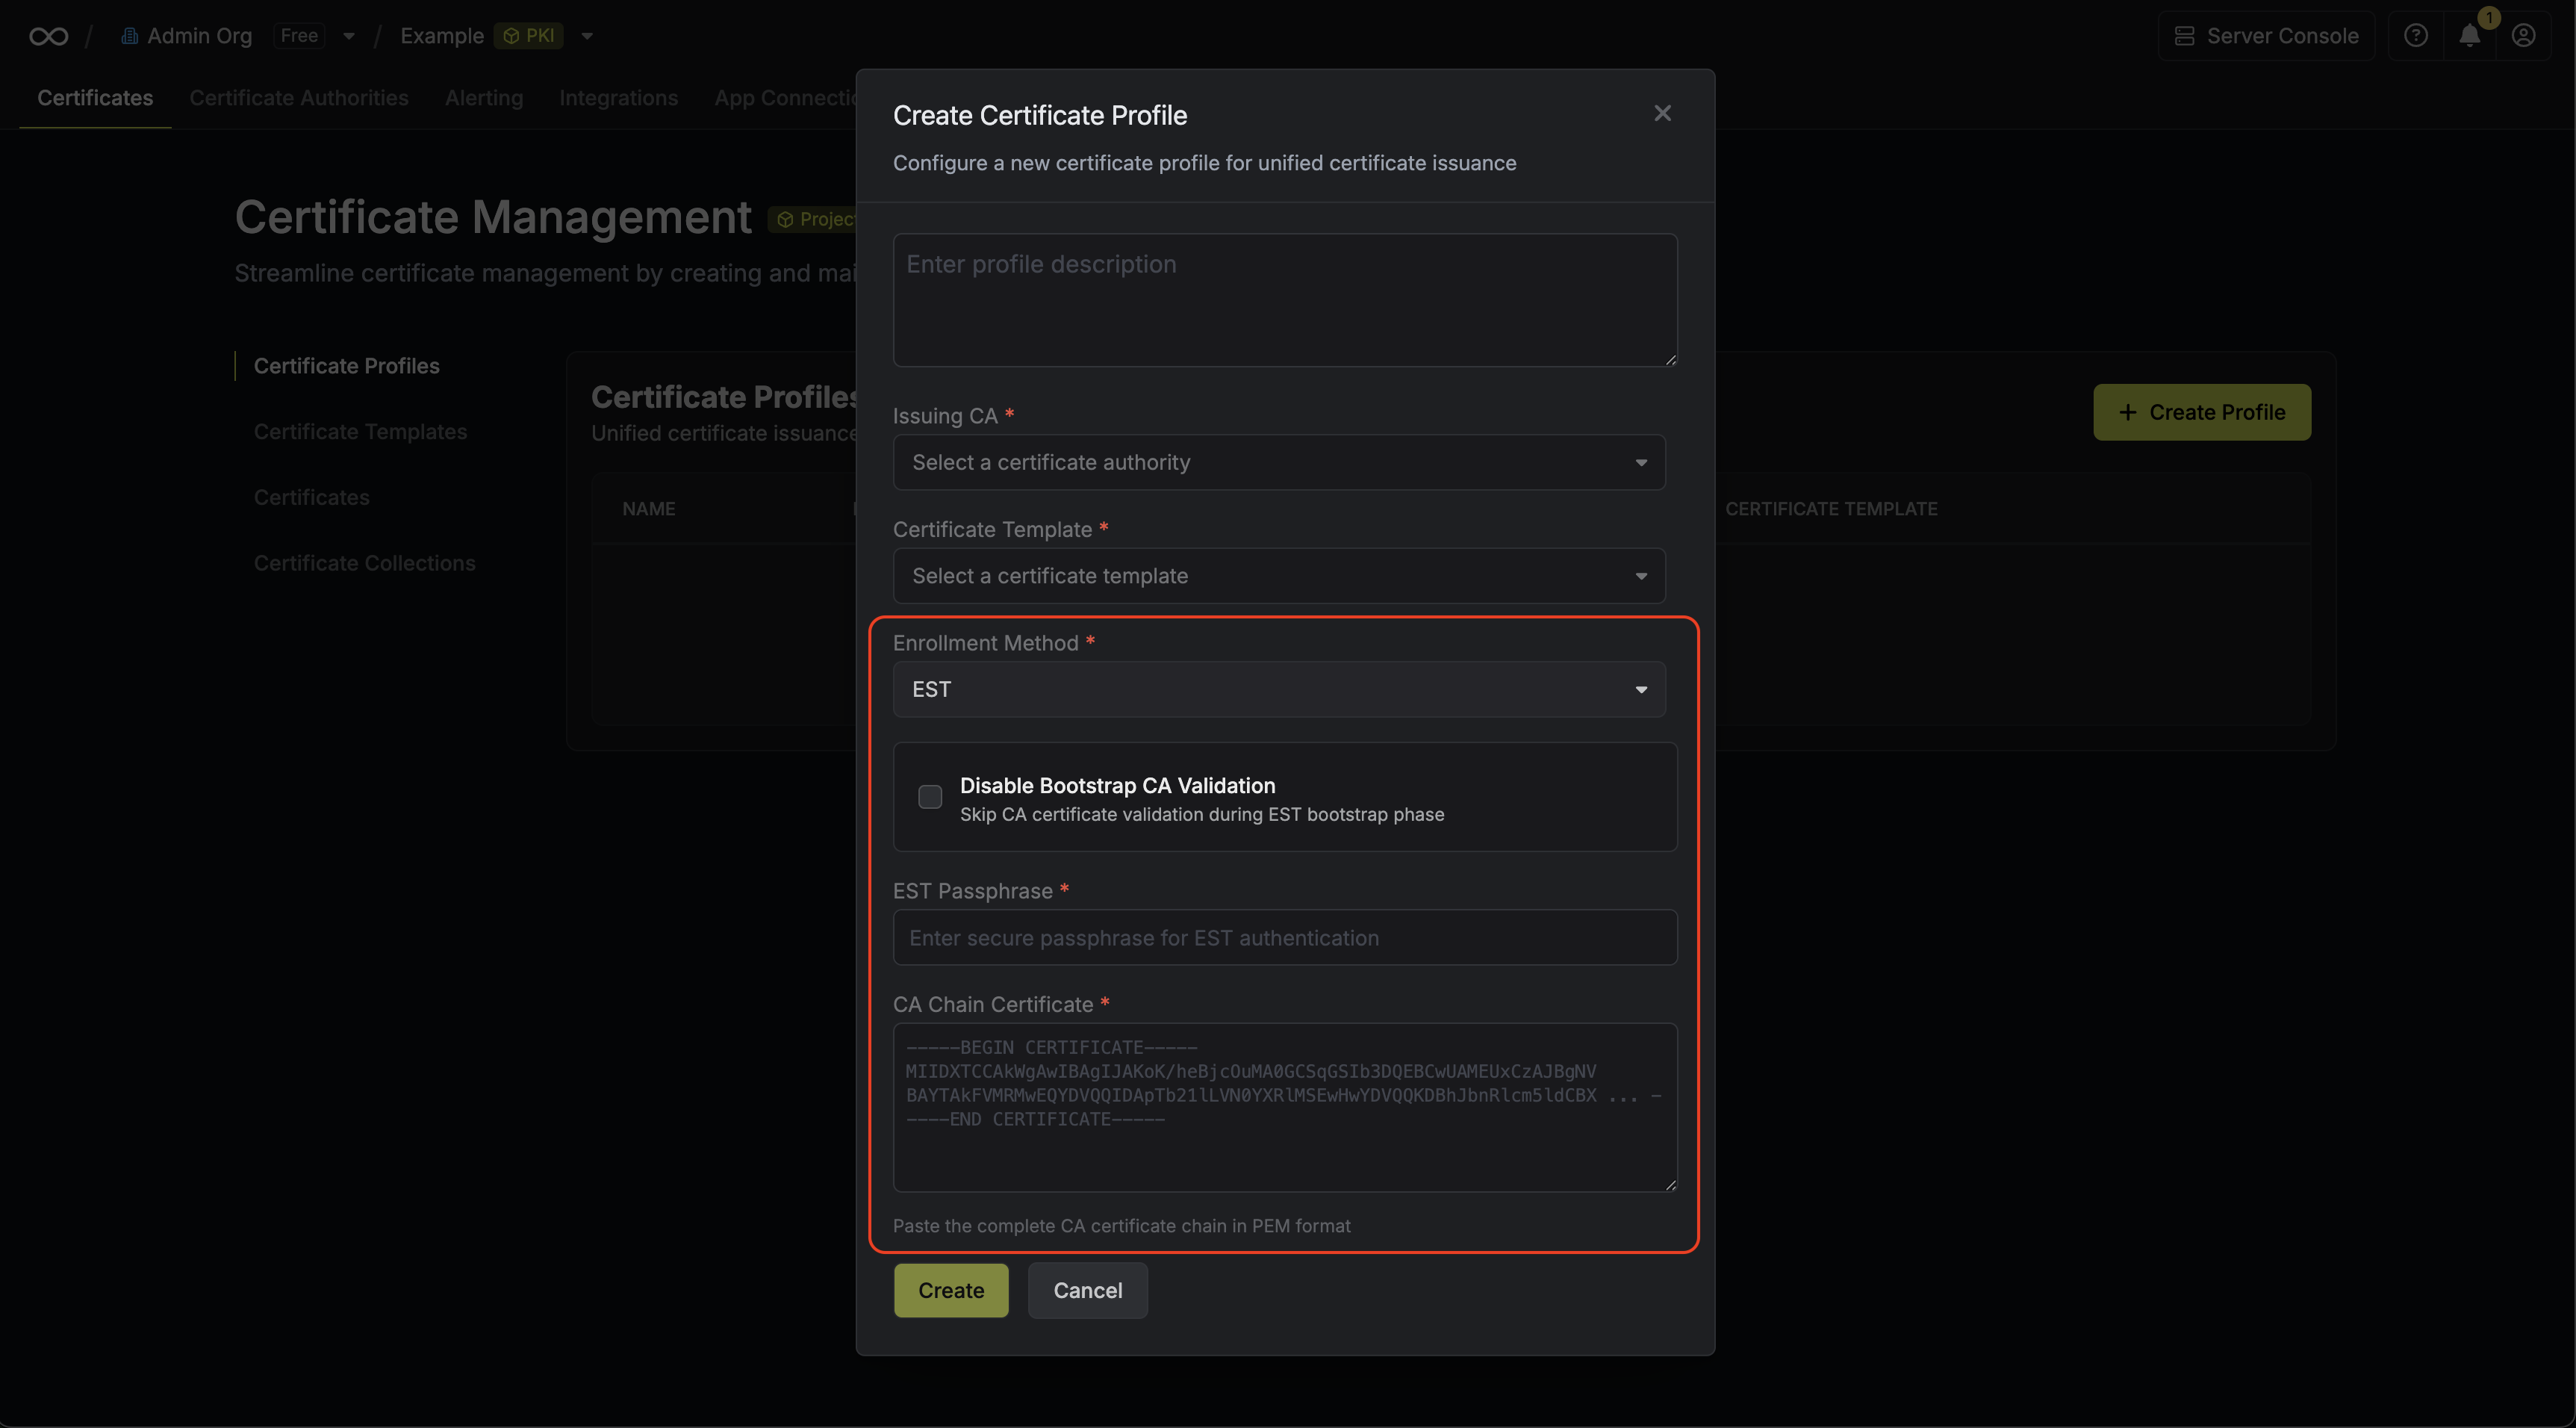 Here's some guidance on each EST-specific configuration field:
* Disable Bootstrap CA Validation: Enable this if your devices are not configured with a bootstrap certificate.
* EST Passphrase: This is also used to authenticate your devices with Infisical's EST server. When configuring the clients, use the value defined here as the EST password.
* CA Chain Certificate: This is the certificate chain used to validate your devices' manufacturing/pre-installed certificates. This will be used to authenticate your devices with Infisical's EST server.
Here's some guidance on each EST-specific configuration field:
* Disable Bootstrap CA Validation: Enable this if your devices are not configured with a bootstrap certificate.
* EST Passphrase: This is also used to authenticate your devices with Infisical's EST server. When configuring the clients, use the value defined here as the EST password.
* CA Chain Certificate: This is the certificate chain used to validate your devices' manufacturing/pre-installed certificates. This will be used to authenticate your devices with Infisical's EST server.
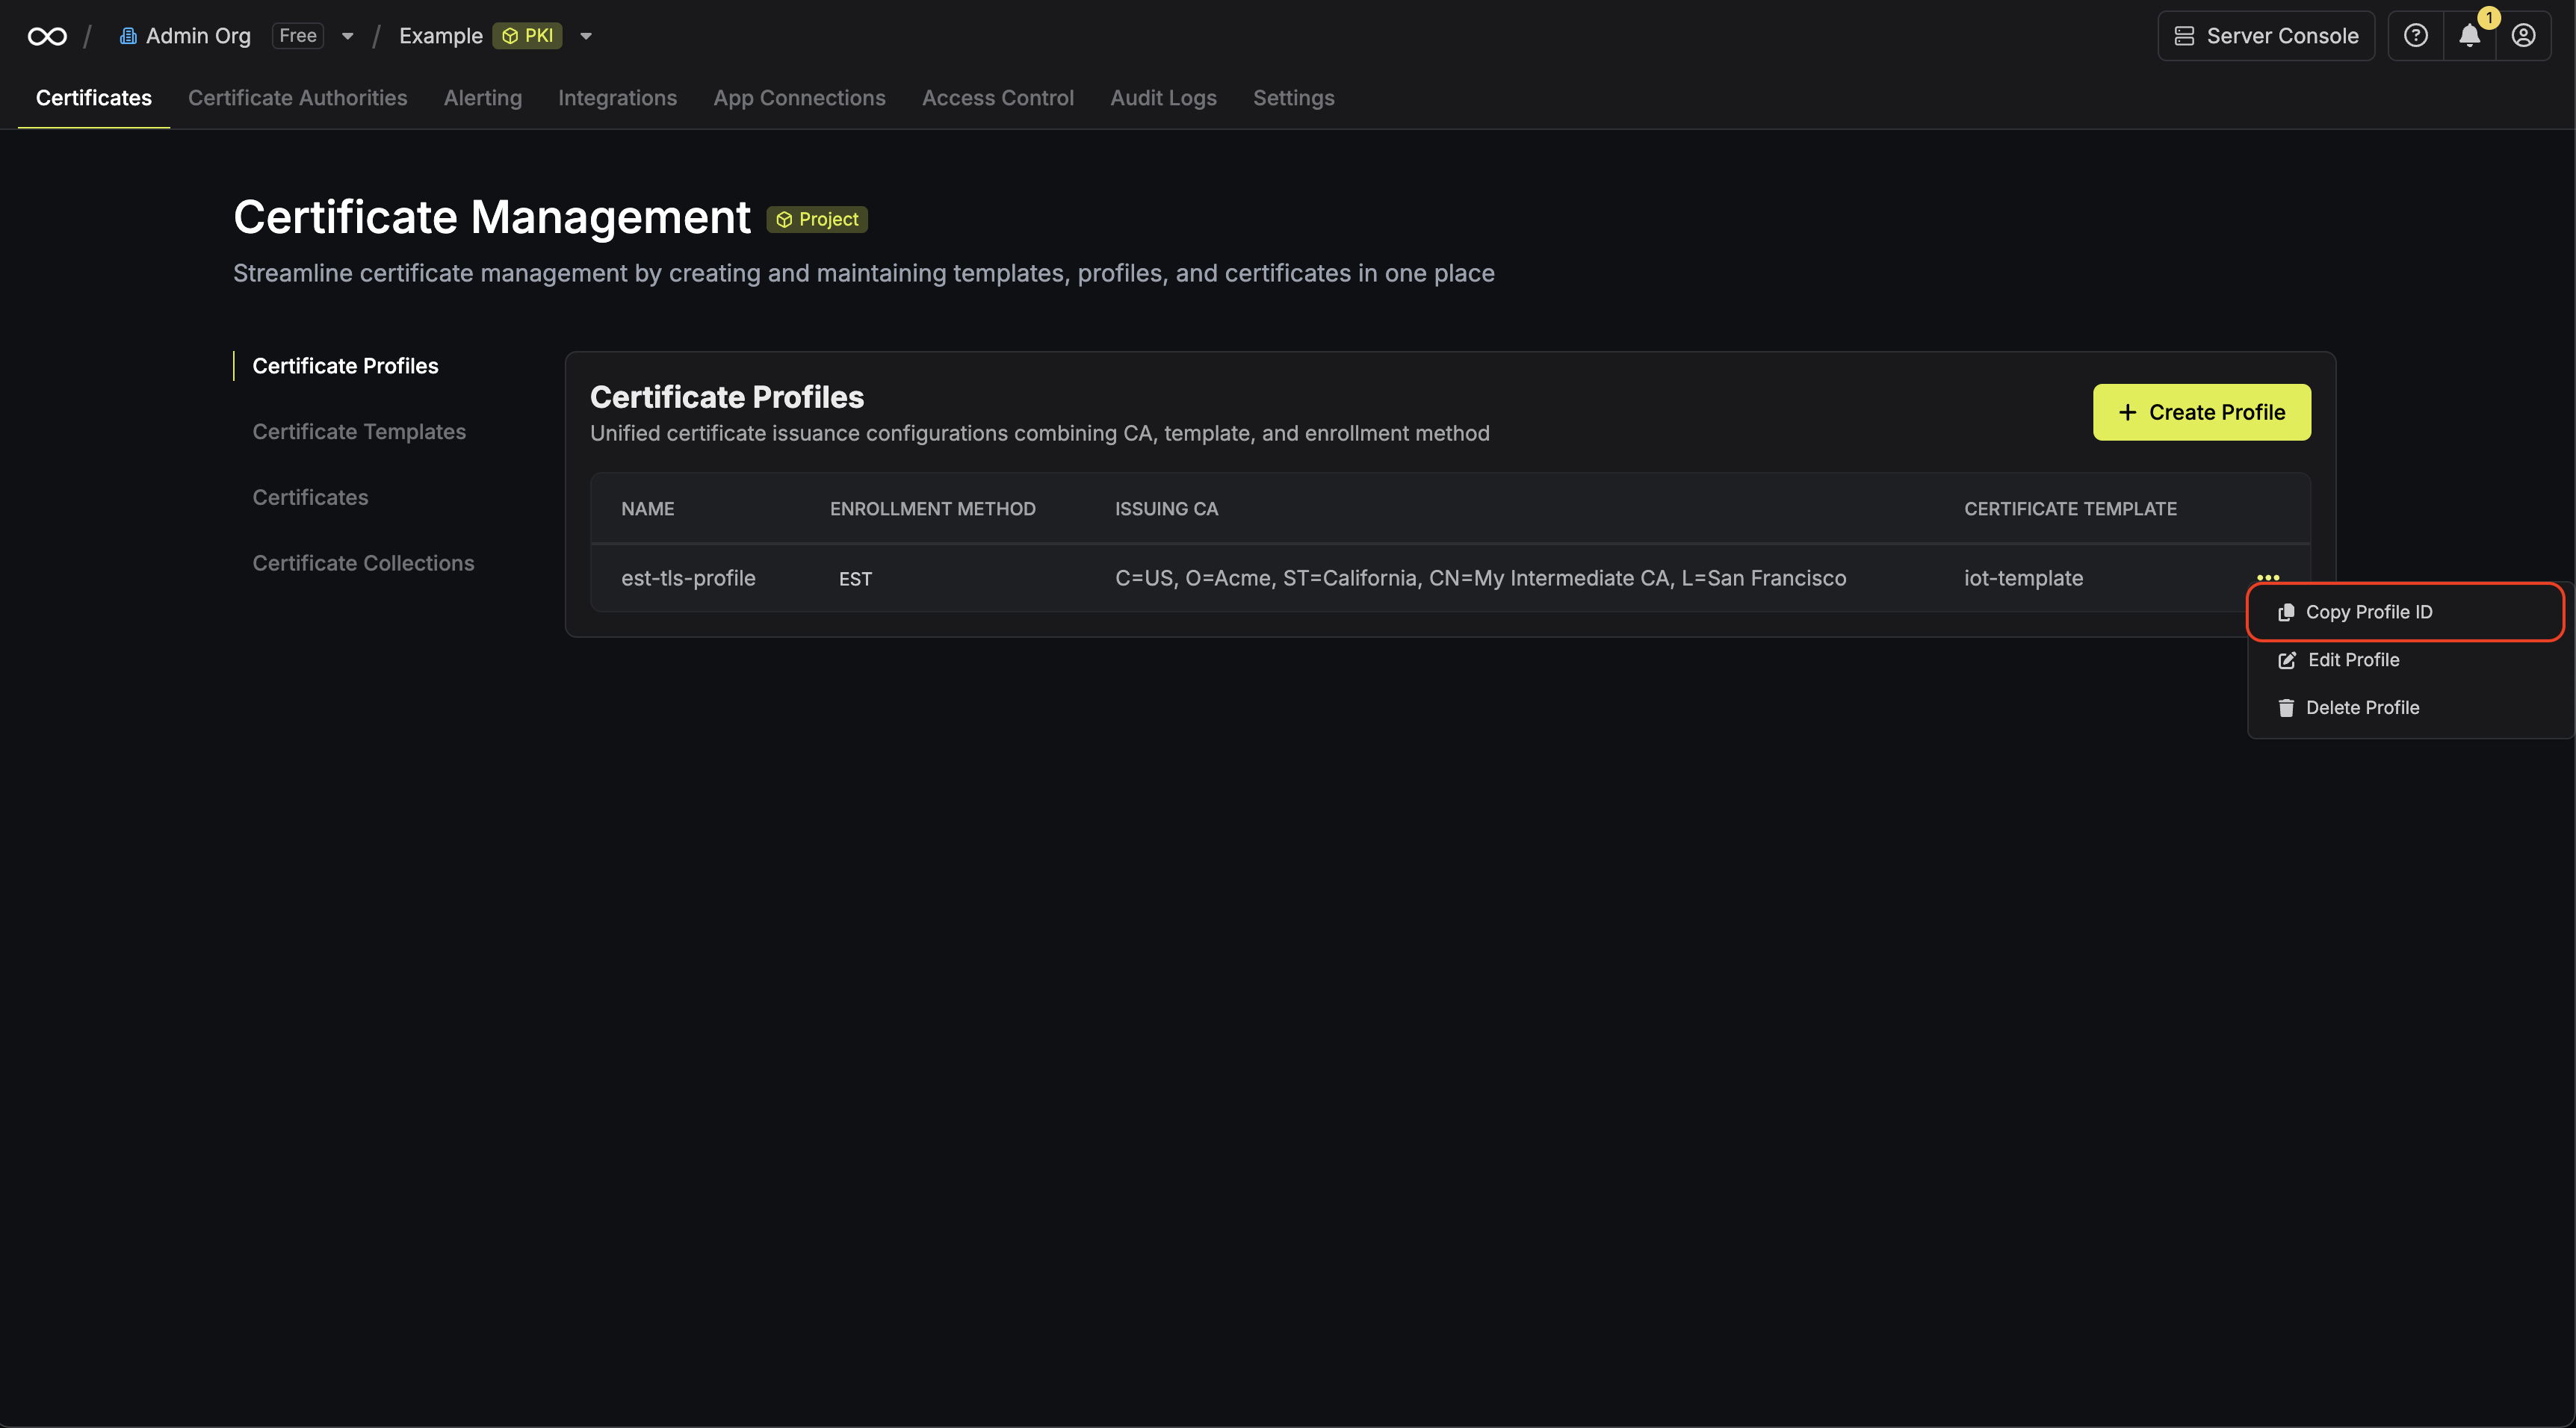 The complete URL structure of the supported EST endpoints may look like the following:
* [https://app.infisical.com:8443/.well-known/est/\{profile\_id}/cacerts](https://app.infisical.com:8443/.well-known/est/\{profile_id}/cacerts)
* [https://app.infisical.com:8443/.well-known/est/\{profile\_id}/simpleenroll](https://app.infisical.com:8443/.well-known/est/\{profile_id}/simpleenroll)
* [https://app.infisical.com:8443/.well-known/est/\{profile\_id}/simplereenroll](https://app.infisical.com:8443/.well-known/est/\{profile_id}/simplereenroll)
The complete URL structure of the supported EST endpoints may look like the following:
* [https://app.infisical.com:8443/.well-known/est/\{profile\_id}/cacerts](https://app.infisical.com:8443/.well-known/est/\{profile_id}/cacerts)
* [https://app.infisical.com:8443/.well-known/est/\{profile\_id}/simpleenroll](https://app.infisical.com:8443/.well-known/est/\{profile_id}/simpleenroll)
* [https://app.infisical.com:8443/.well-known/est/\{profile\_id}/simplereenroll](https://app.infisical.com:8443/.well-known/est/\{profile_id}/simplereenroll)
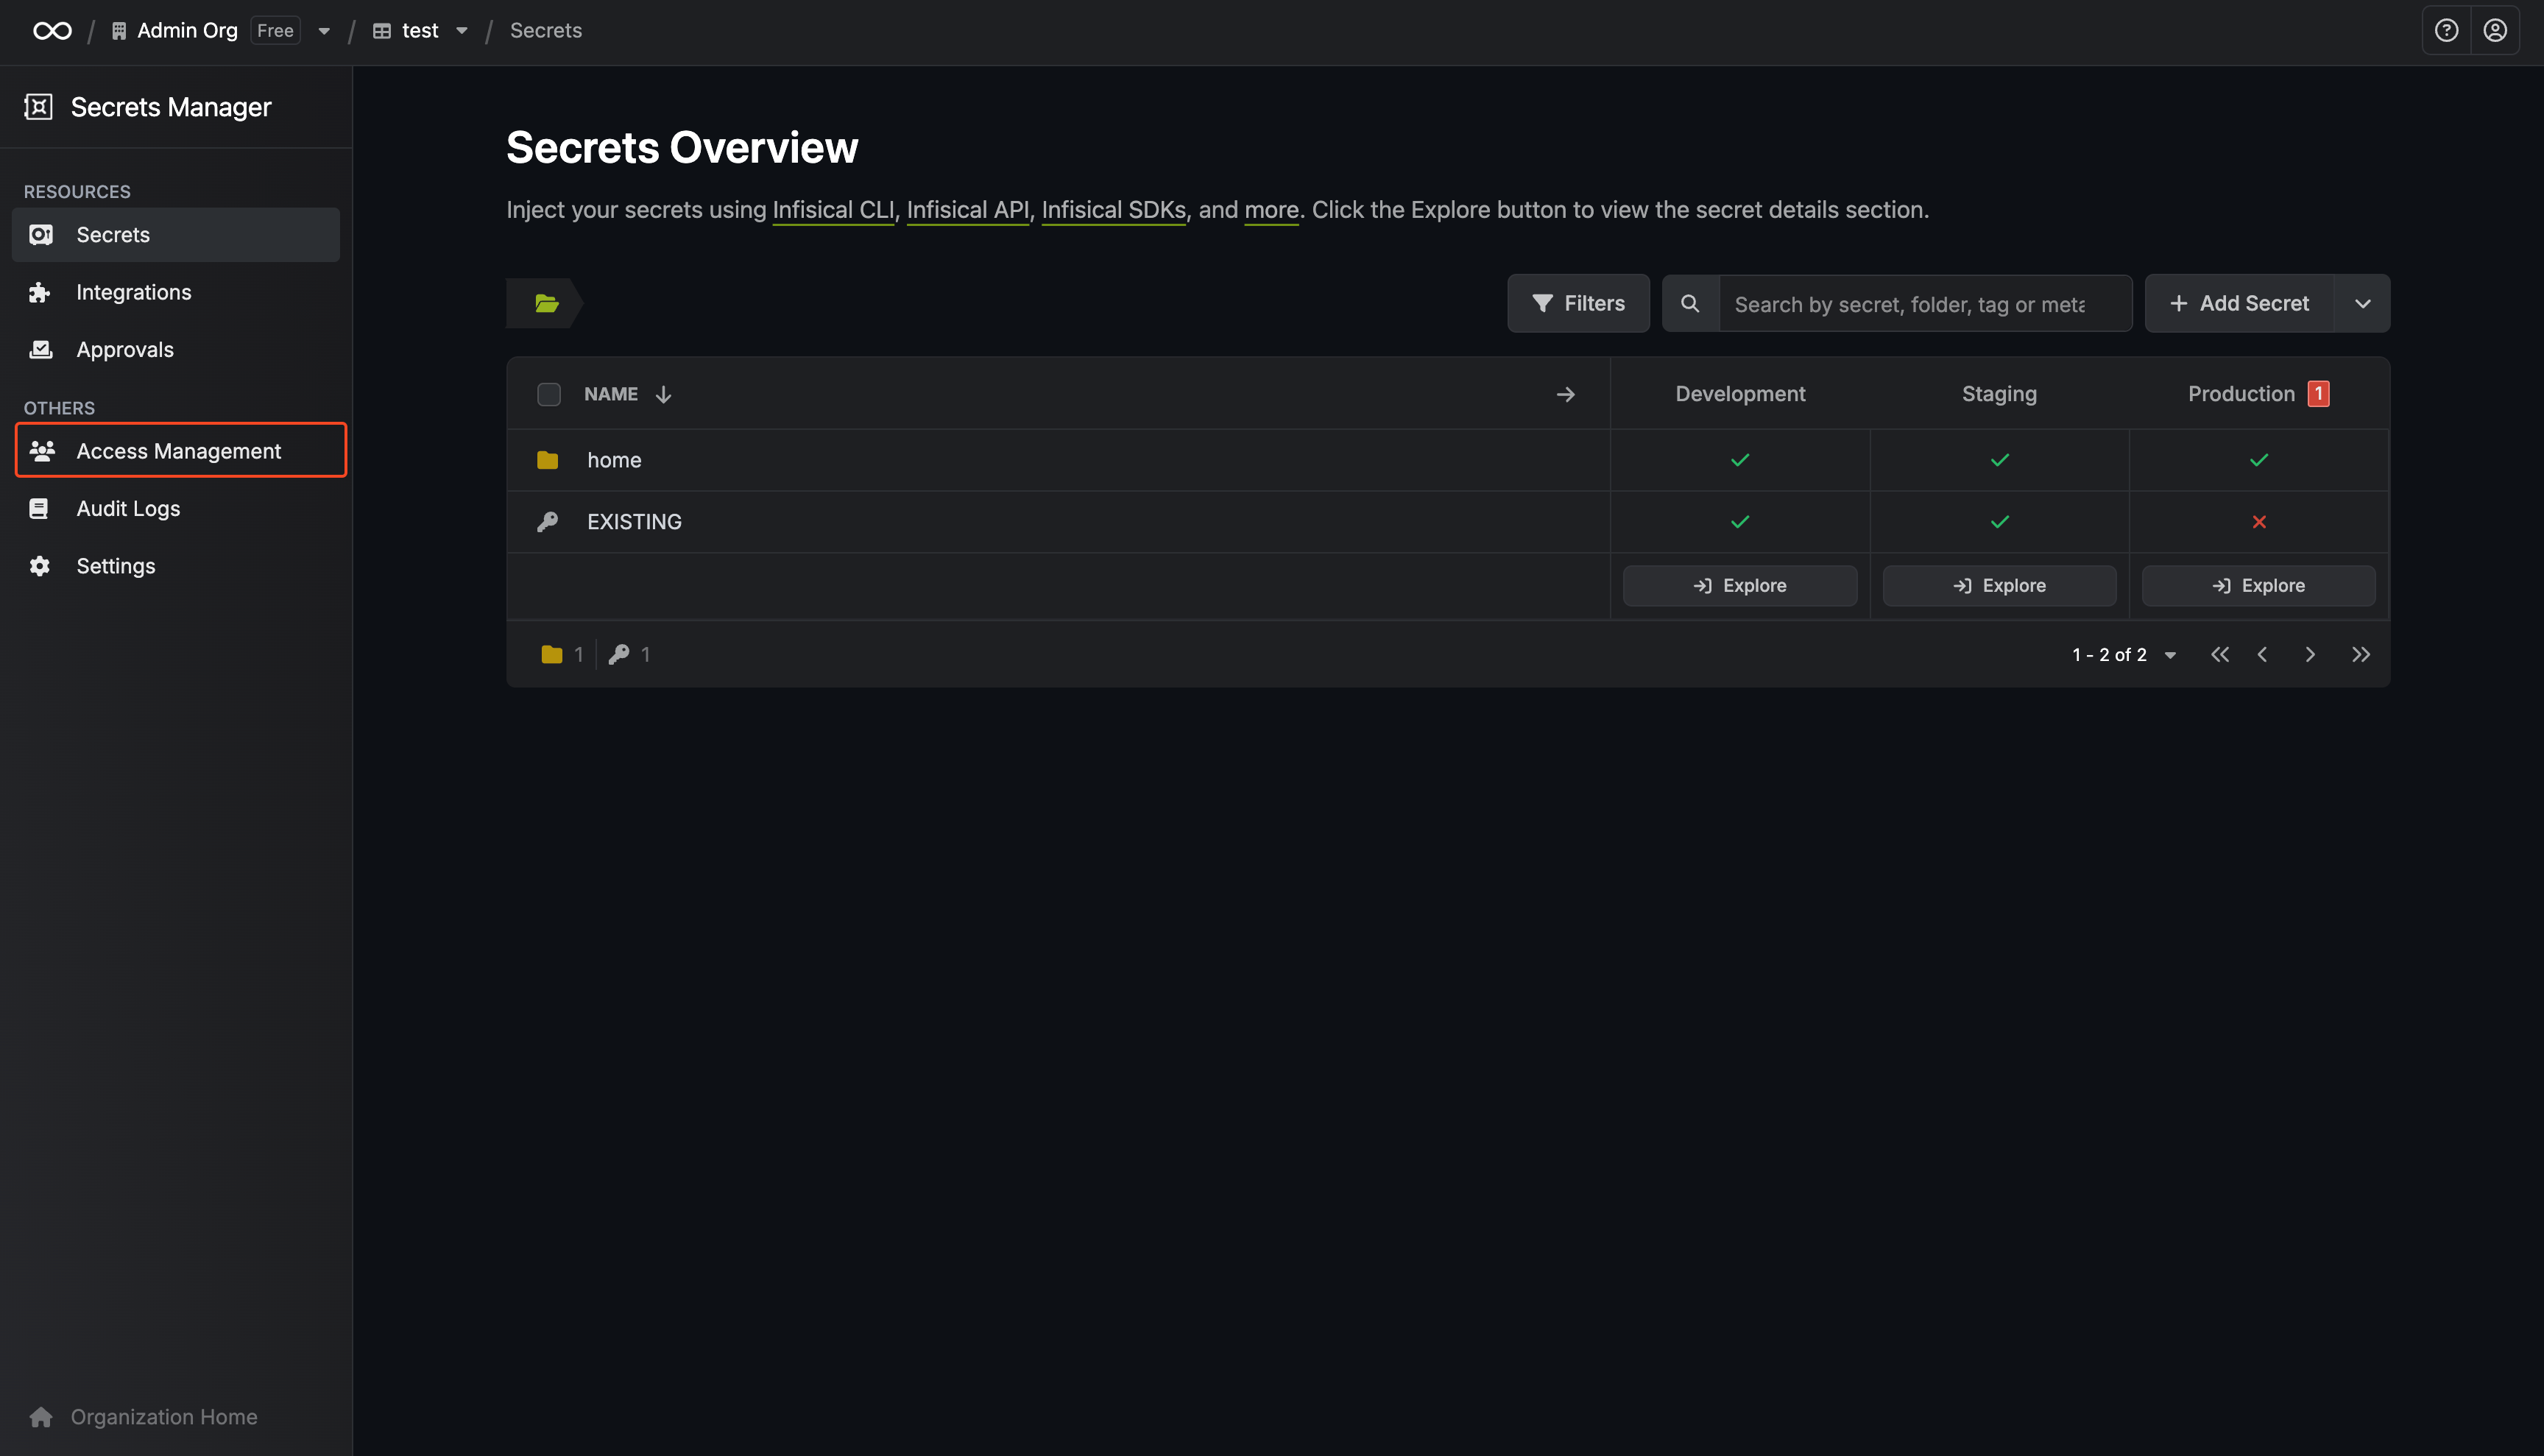
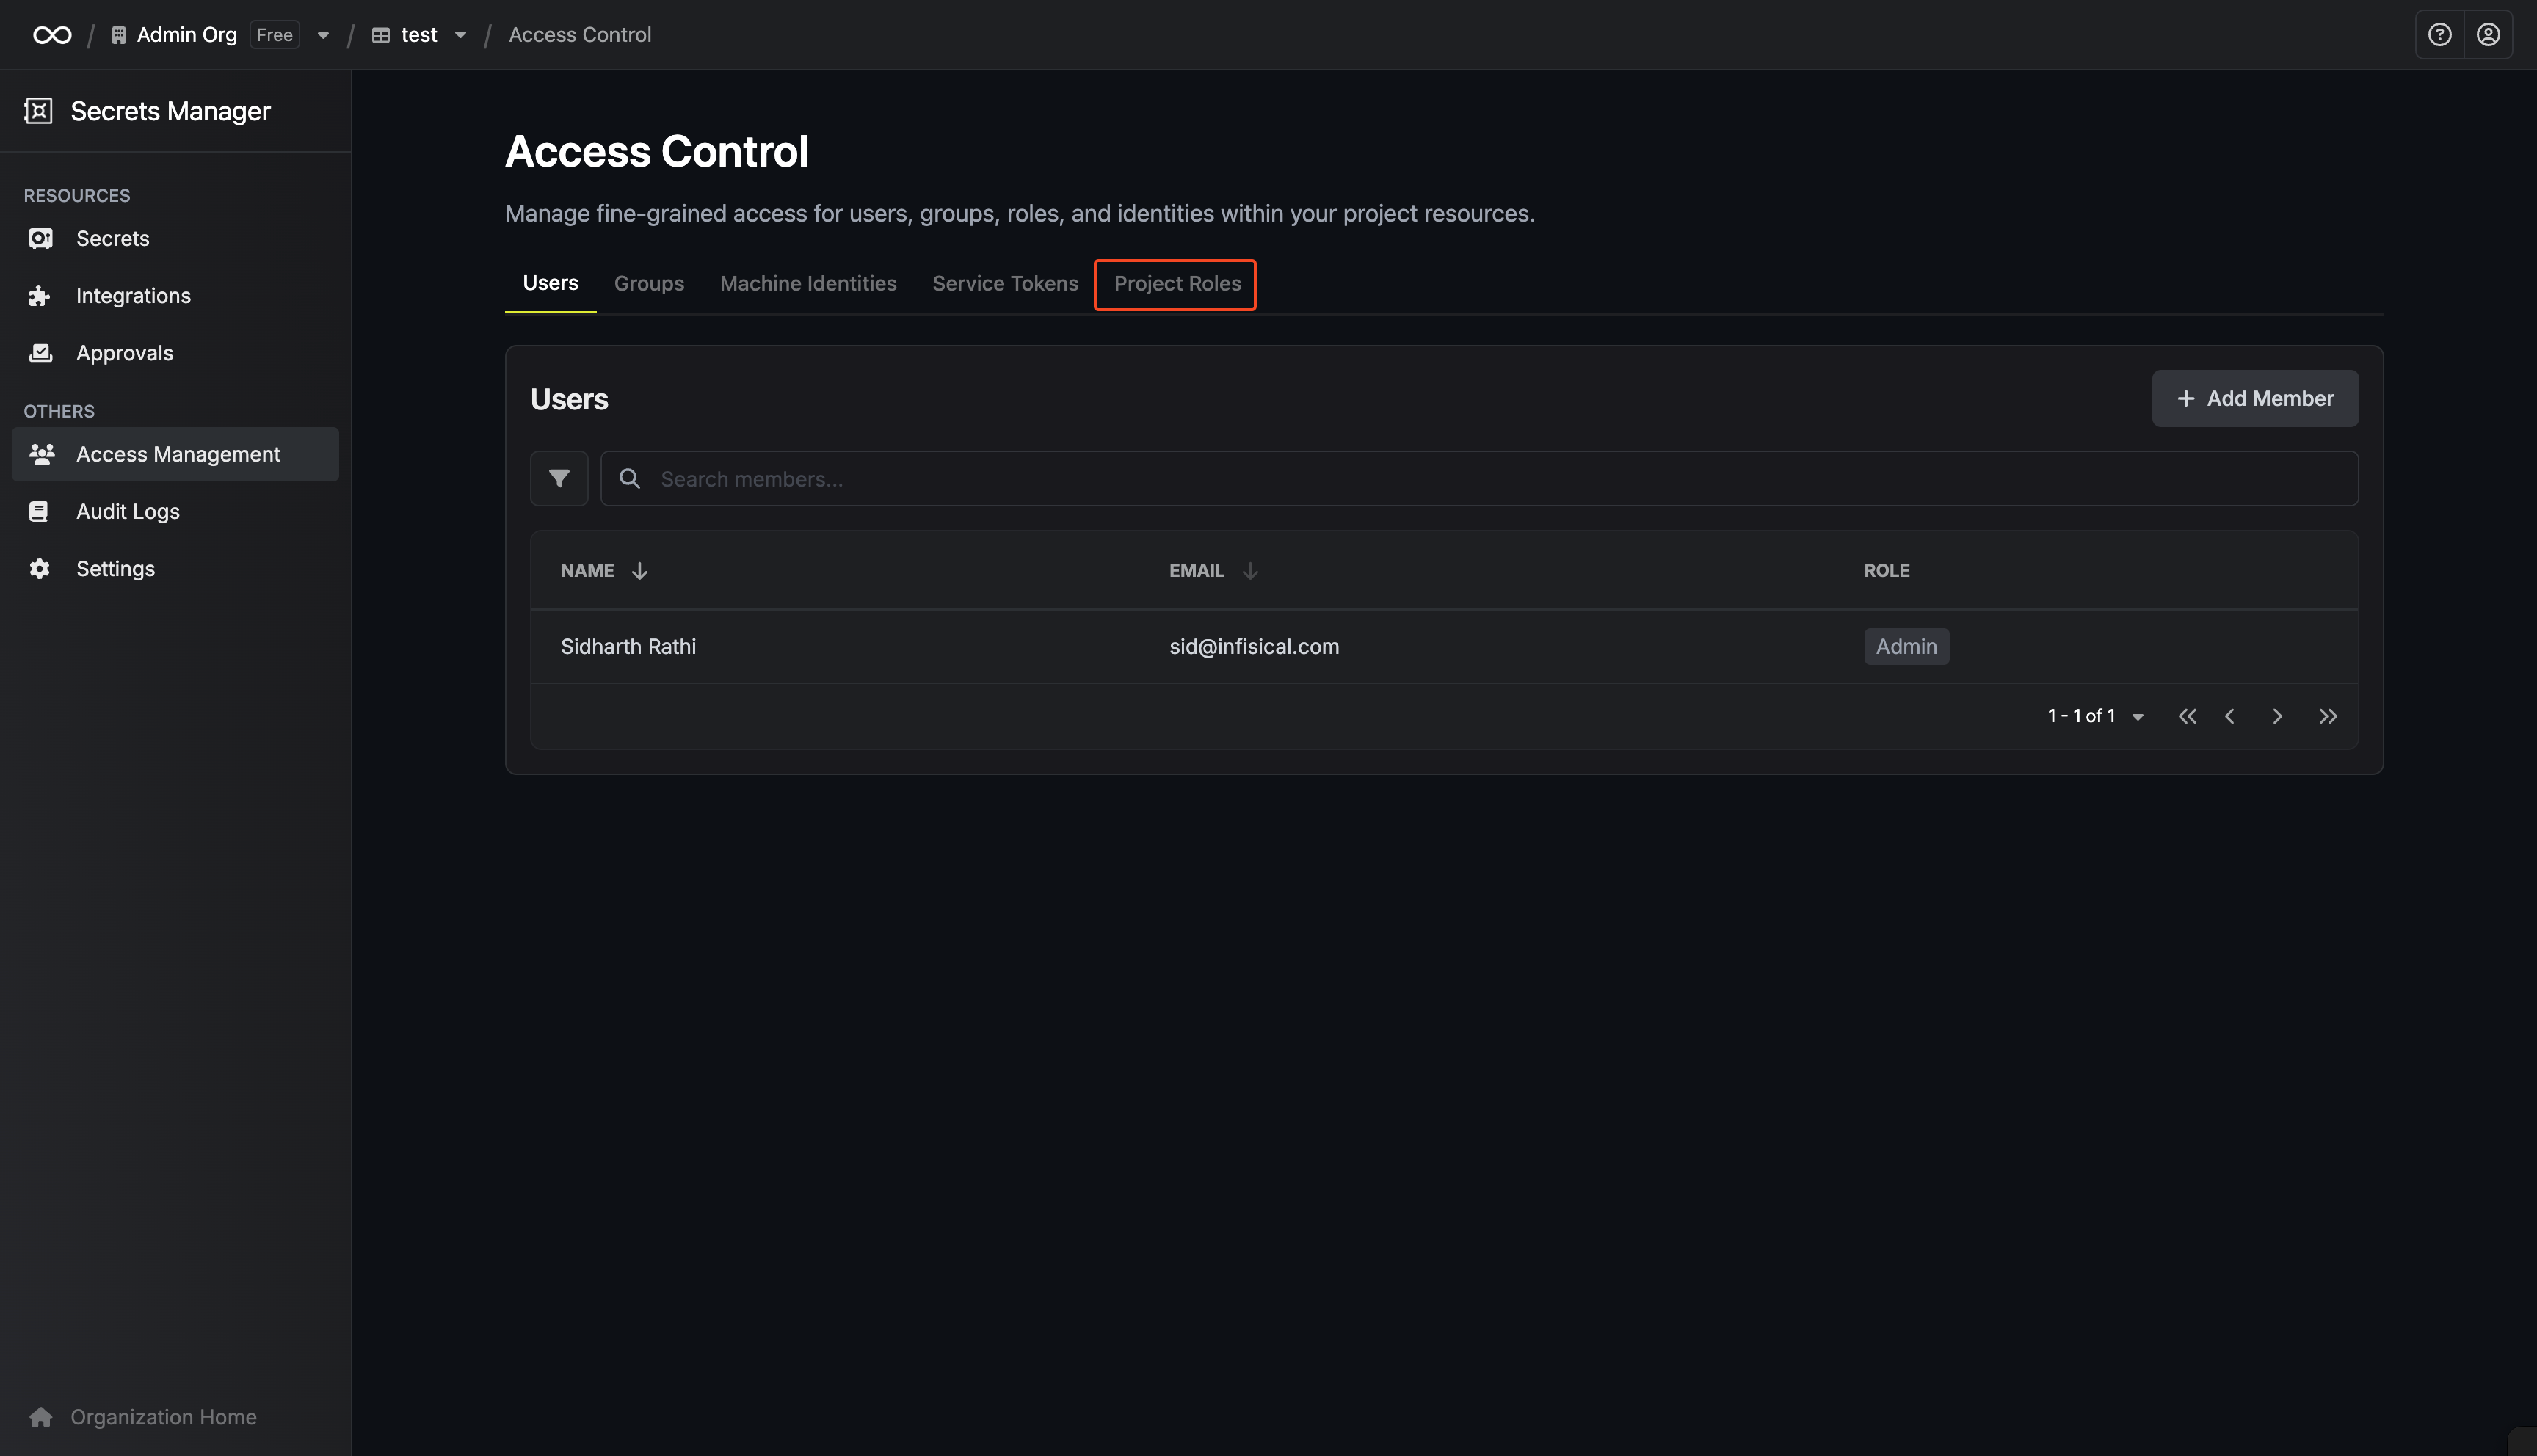 Go to **Access Management** and select **Project Roles**.
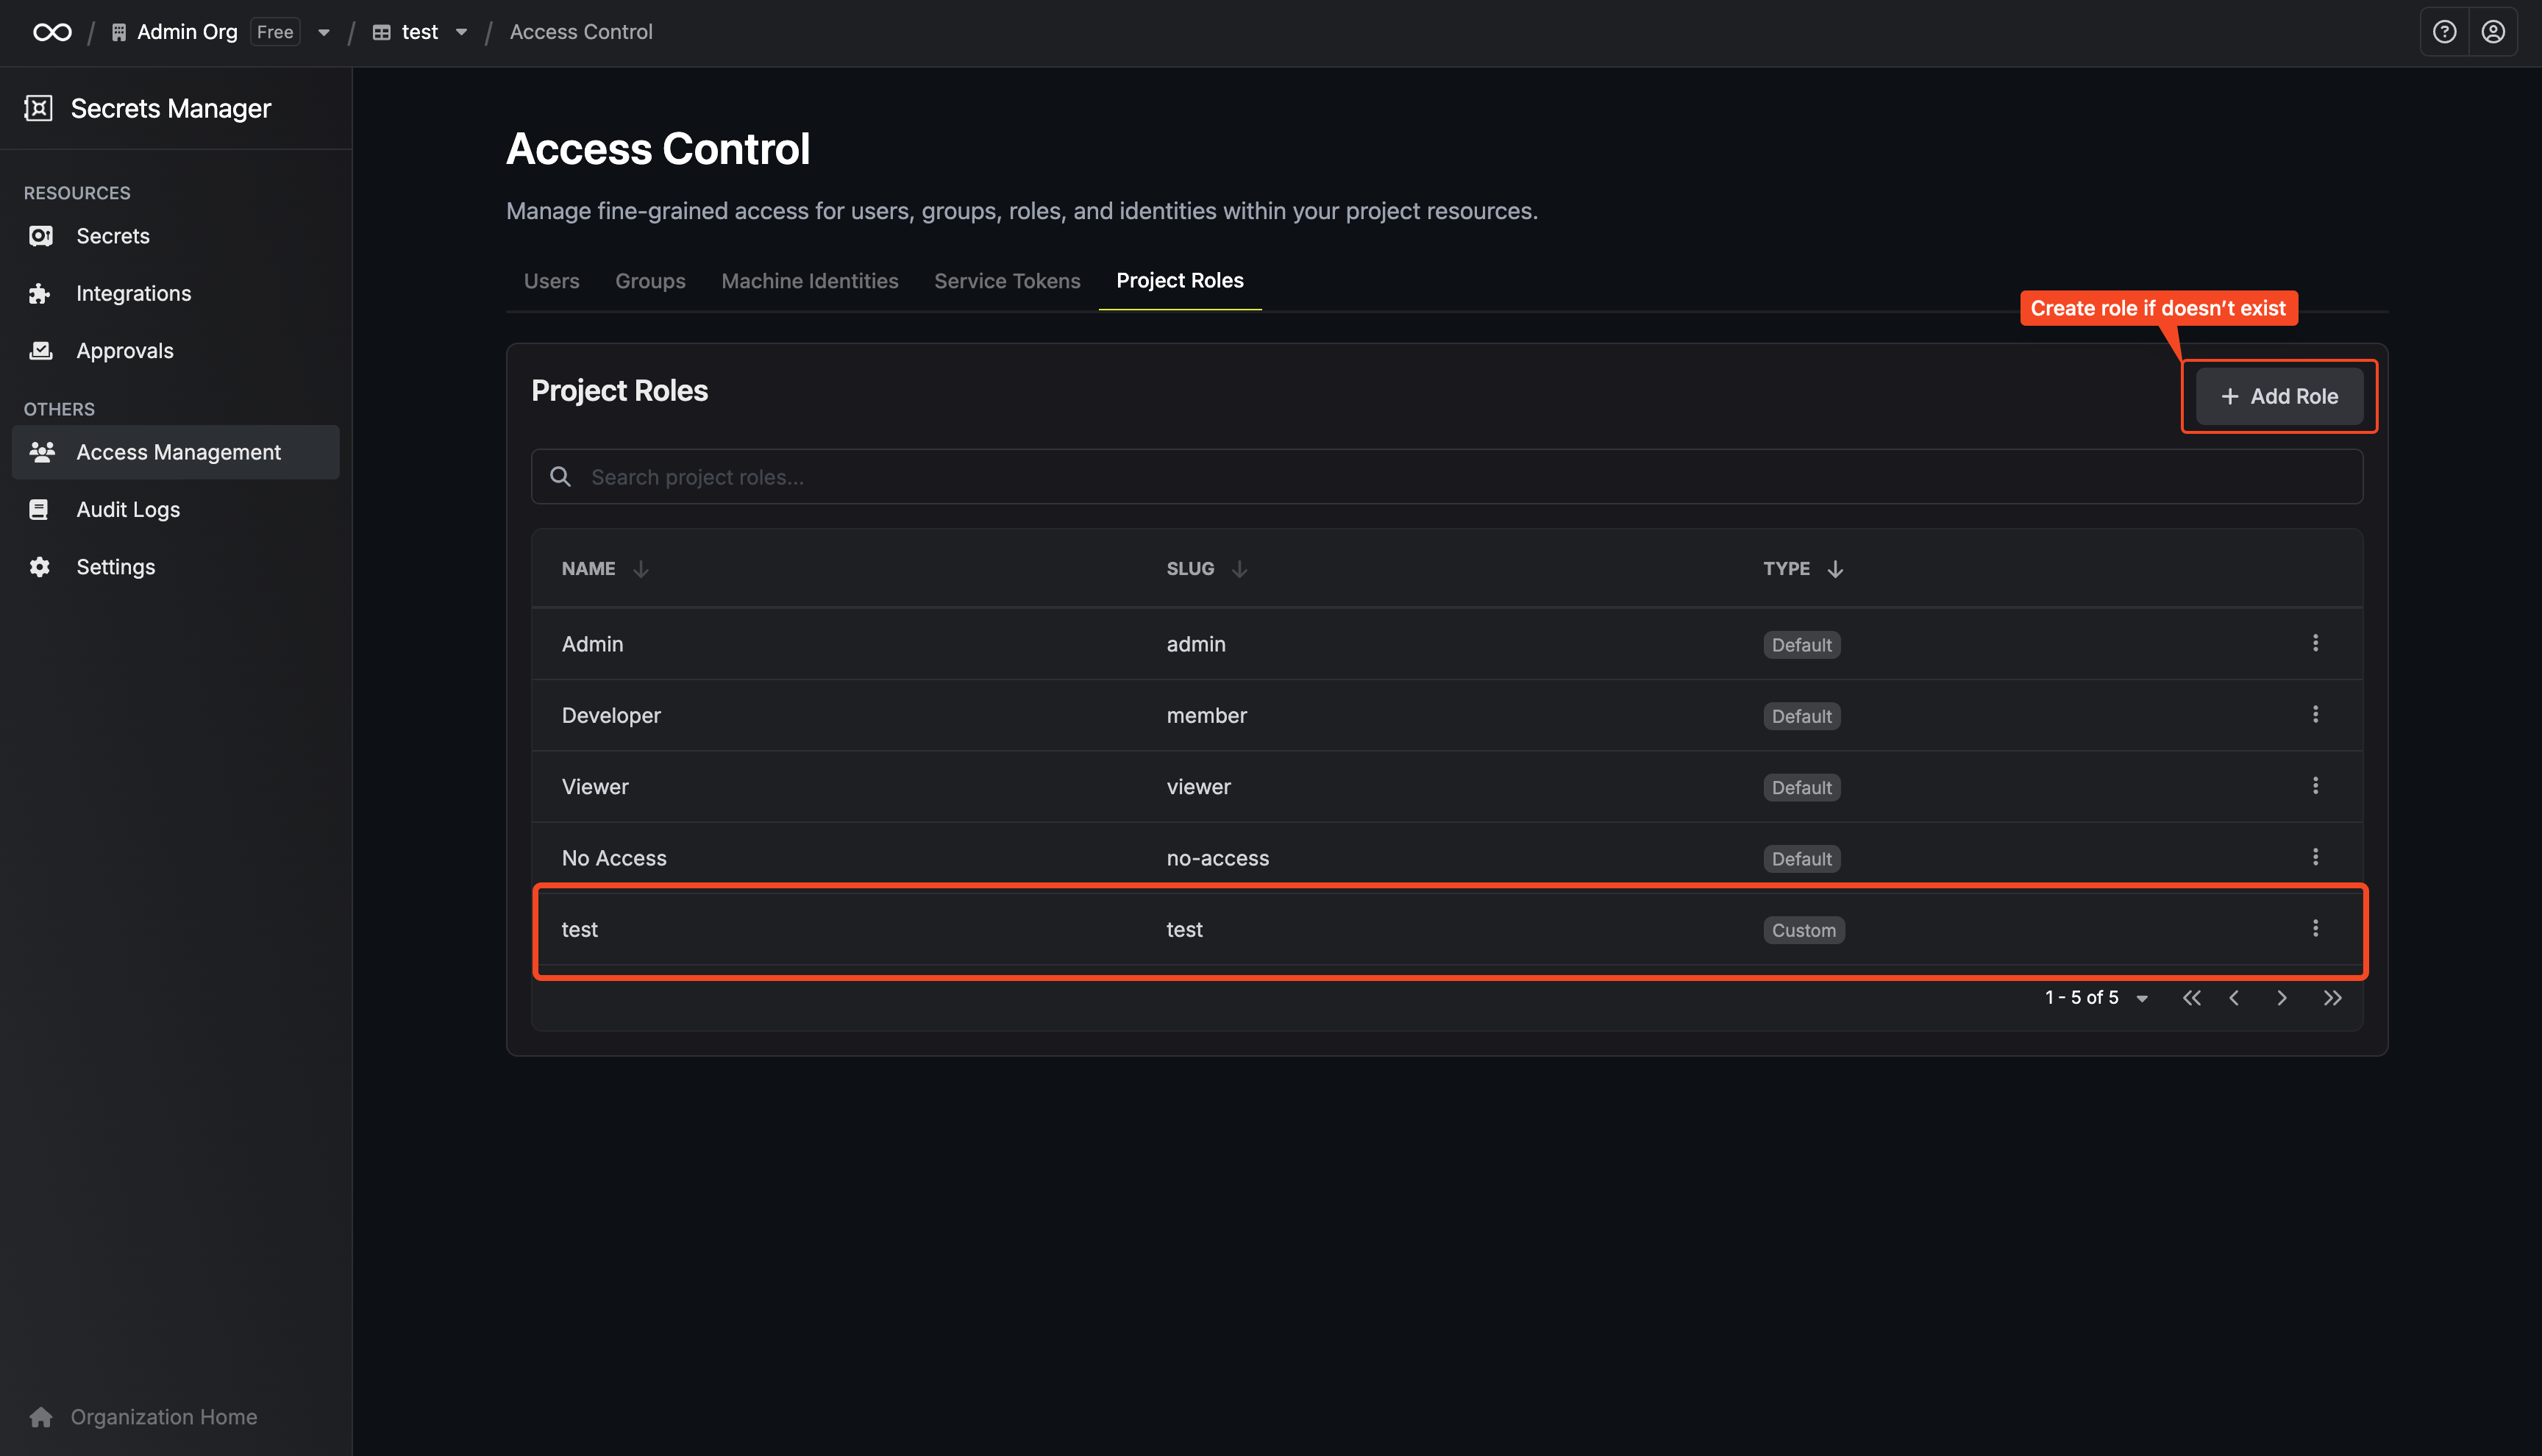 Create a new role for event subscriptions, or edit an existing one.
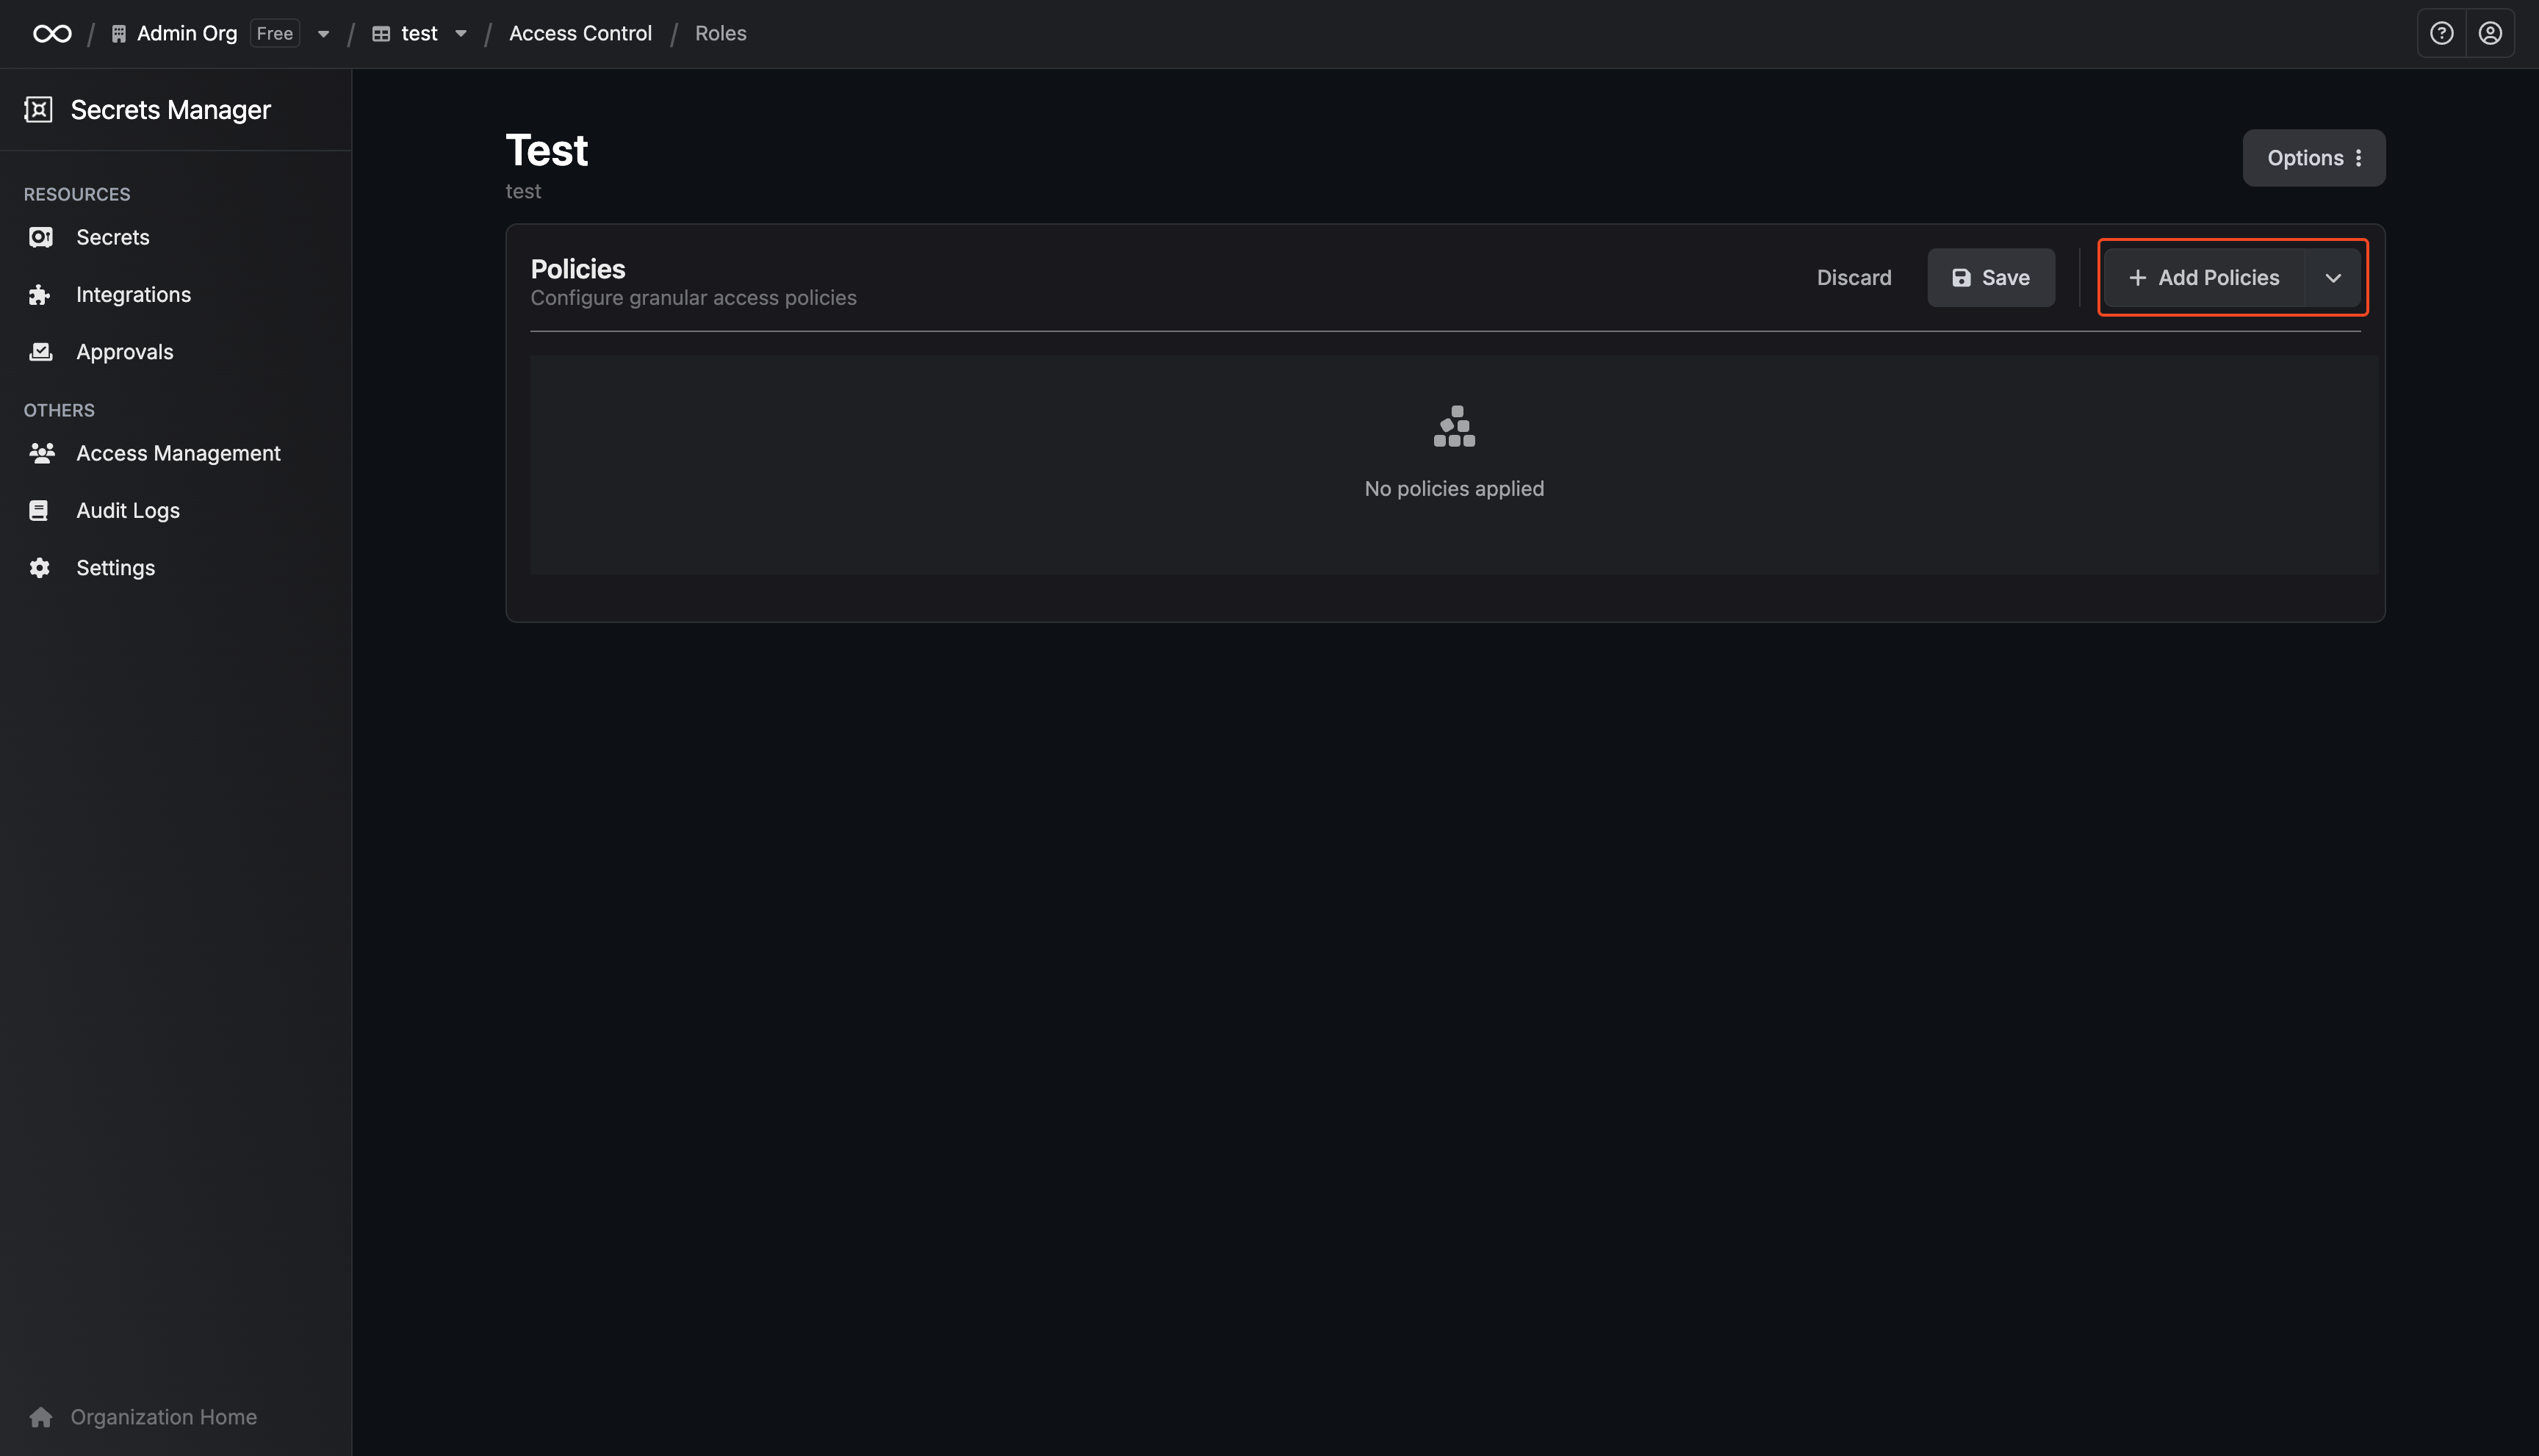 Select the resources the role should have access to.
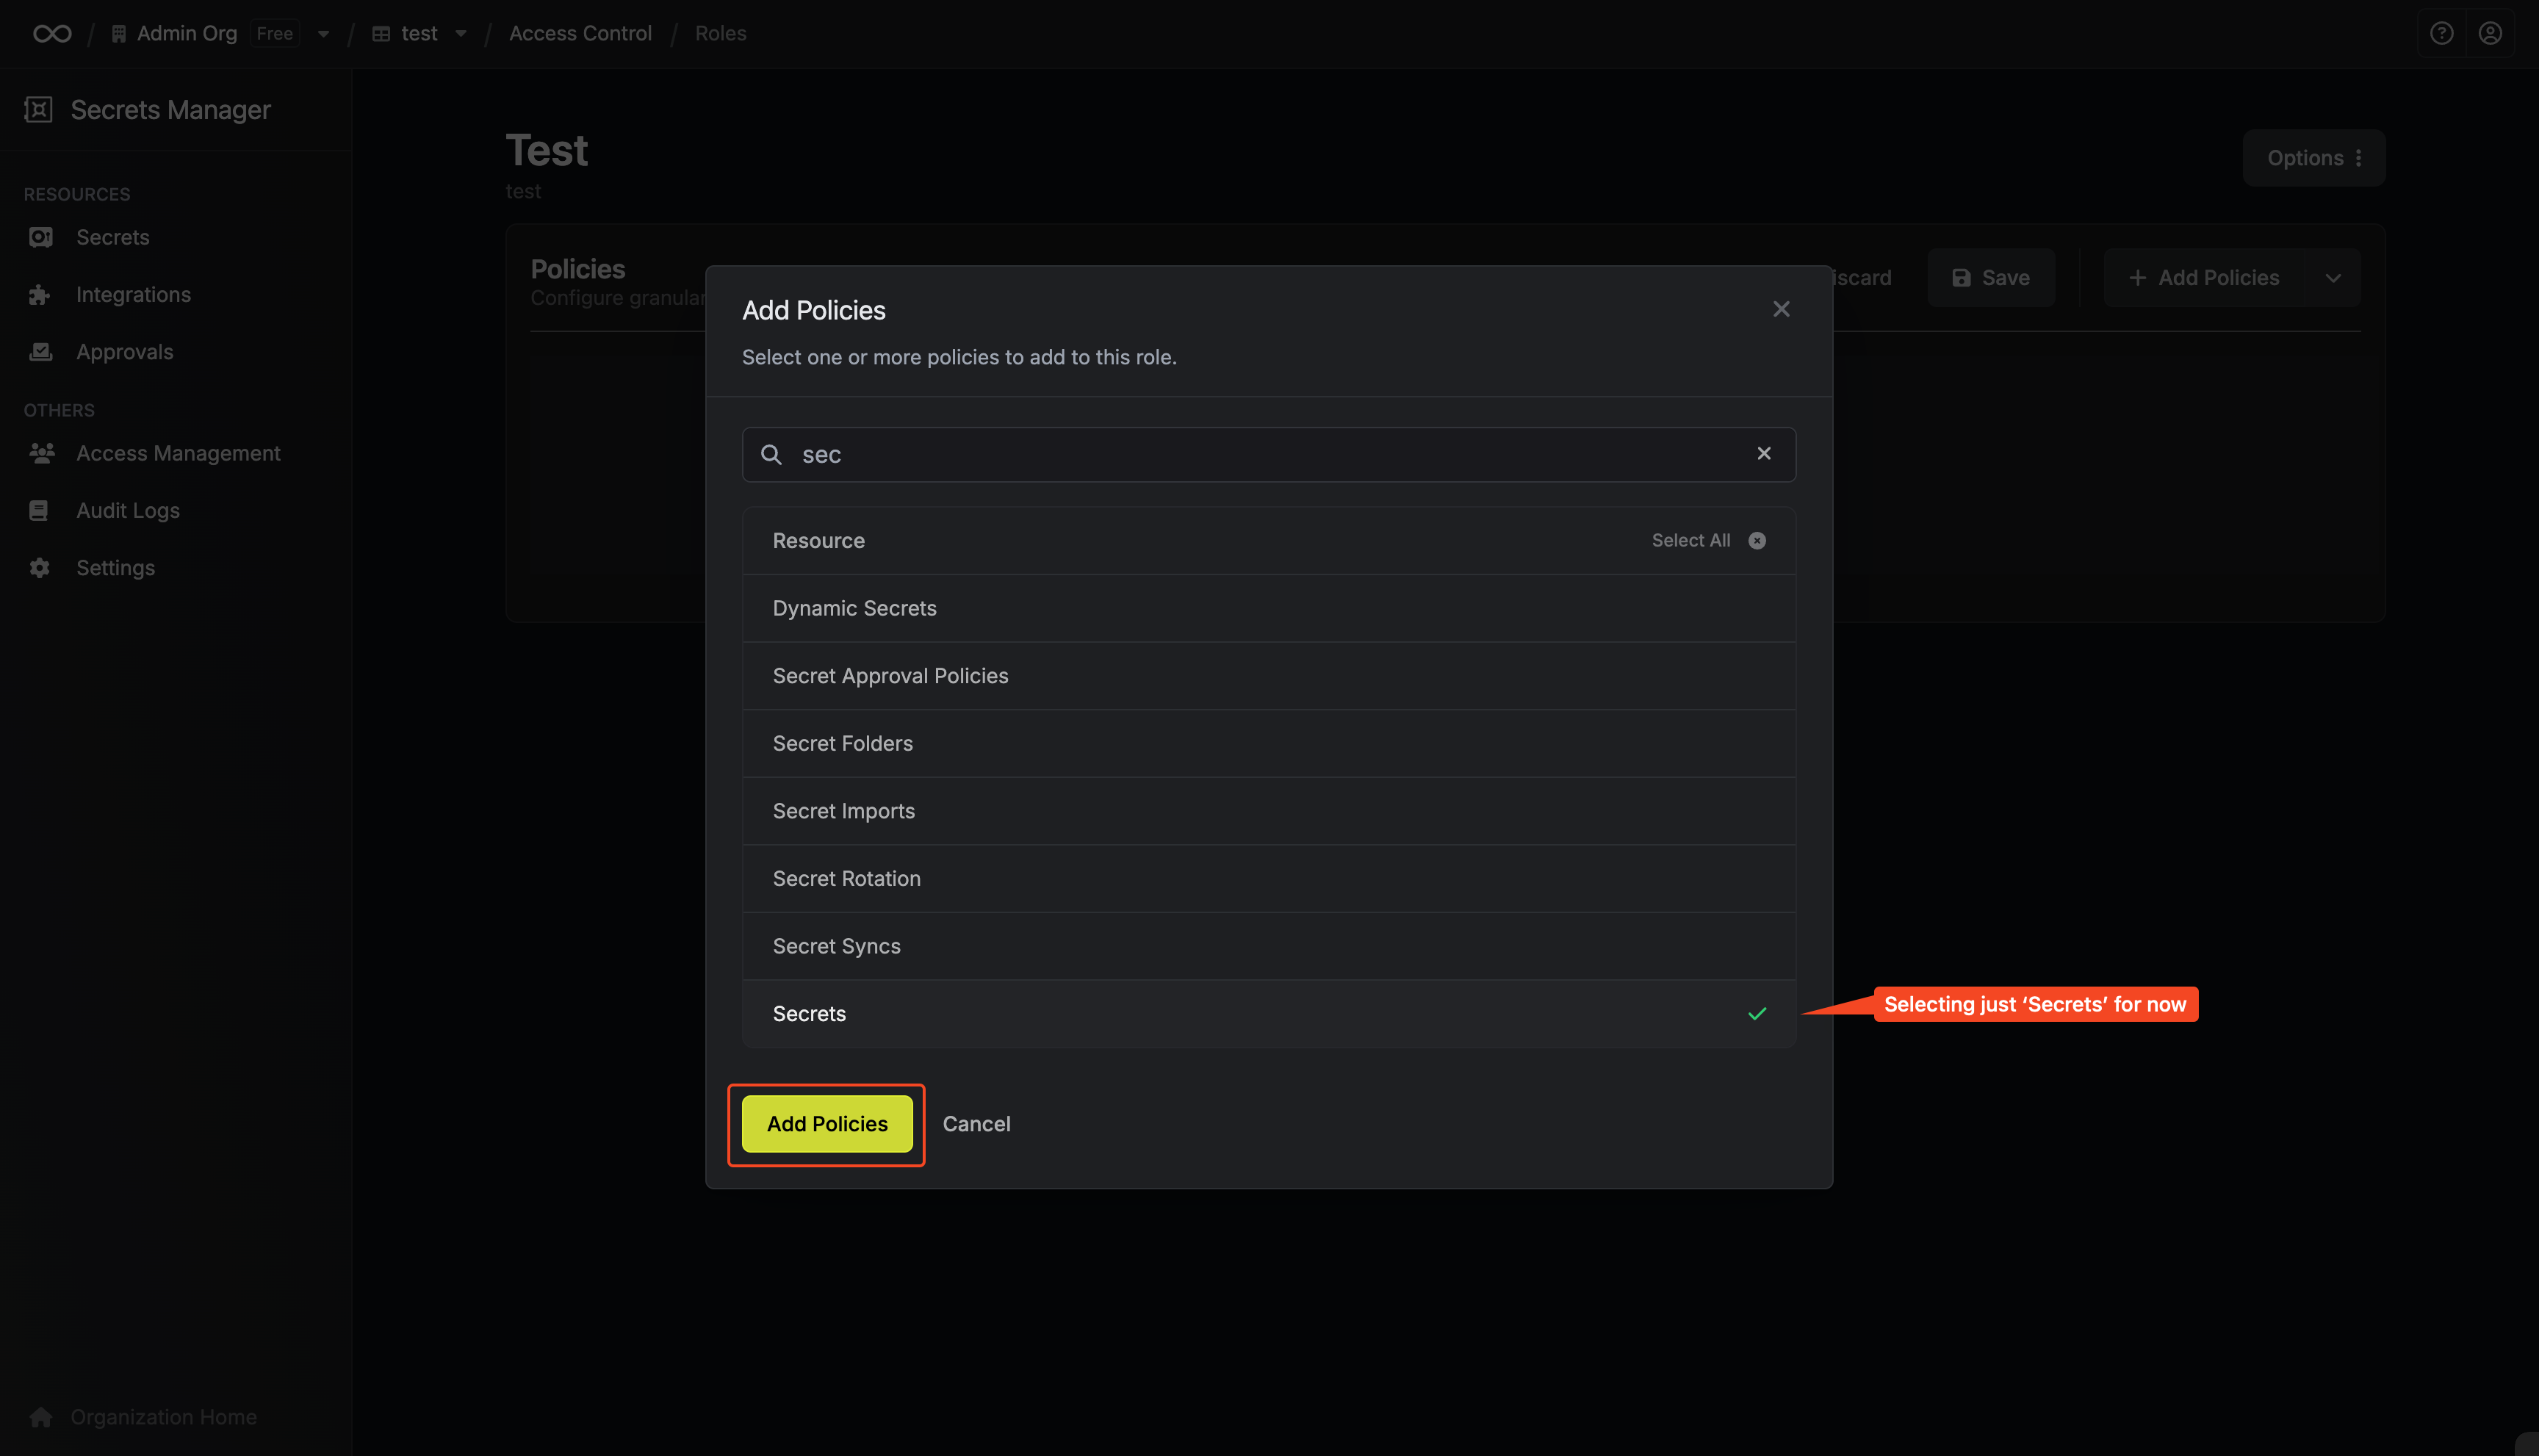
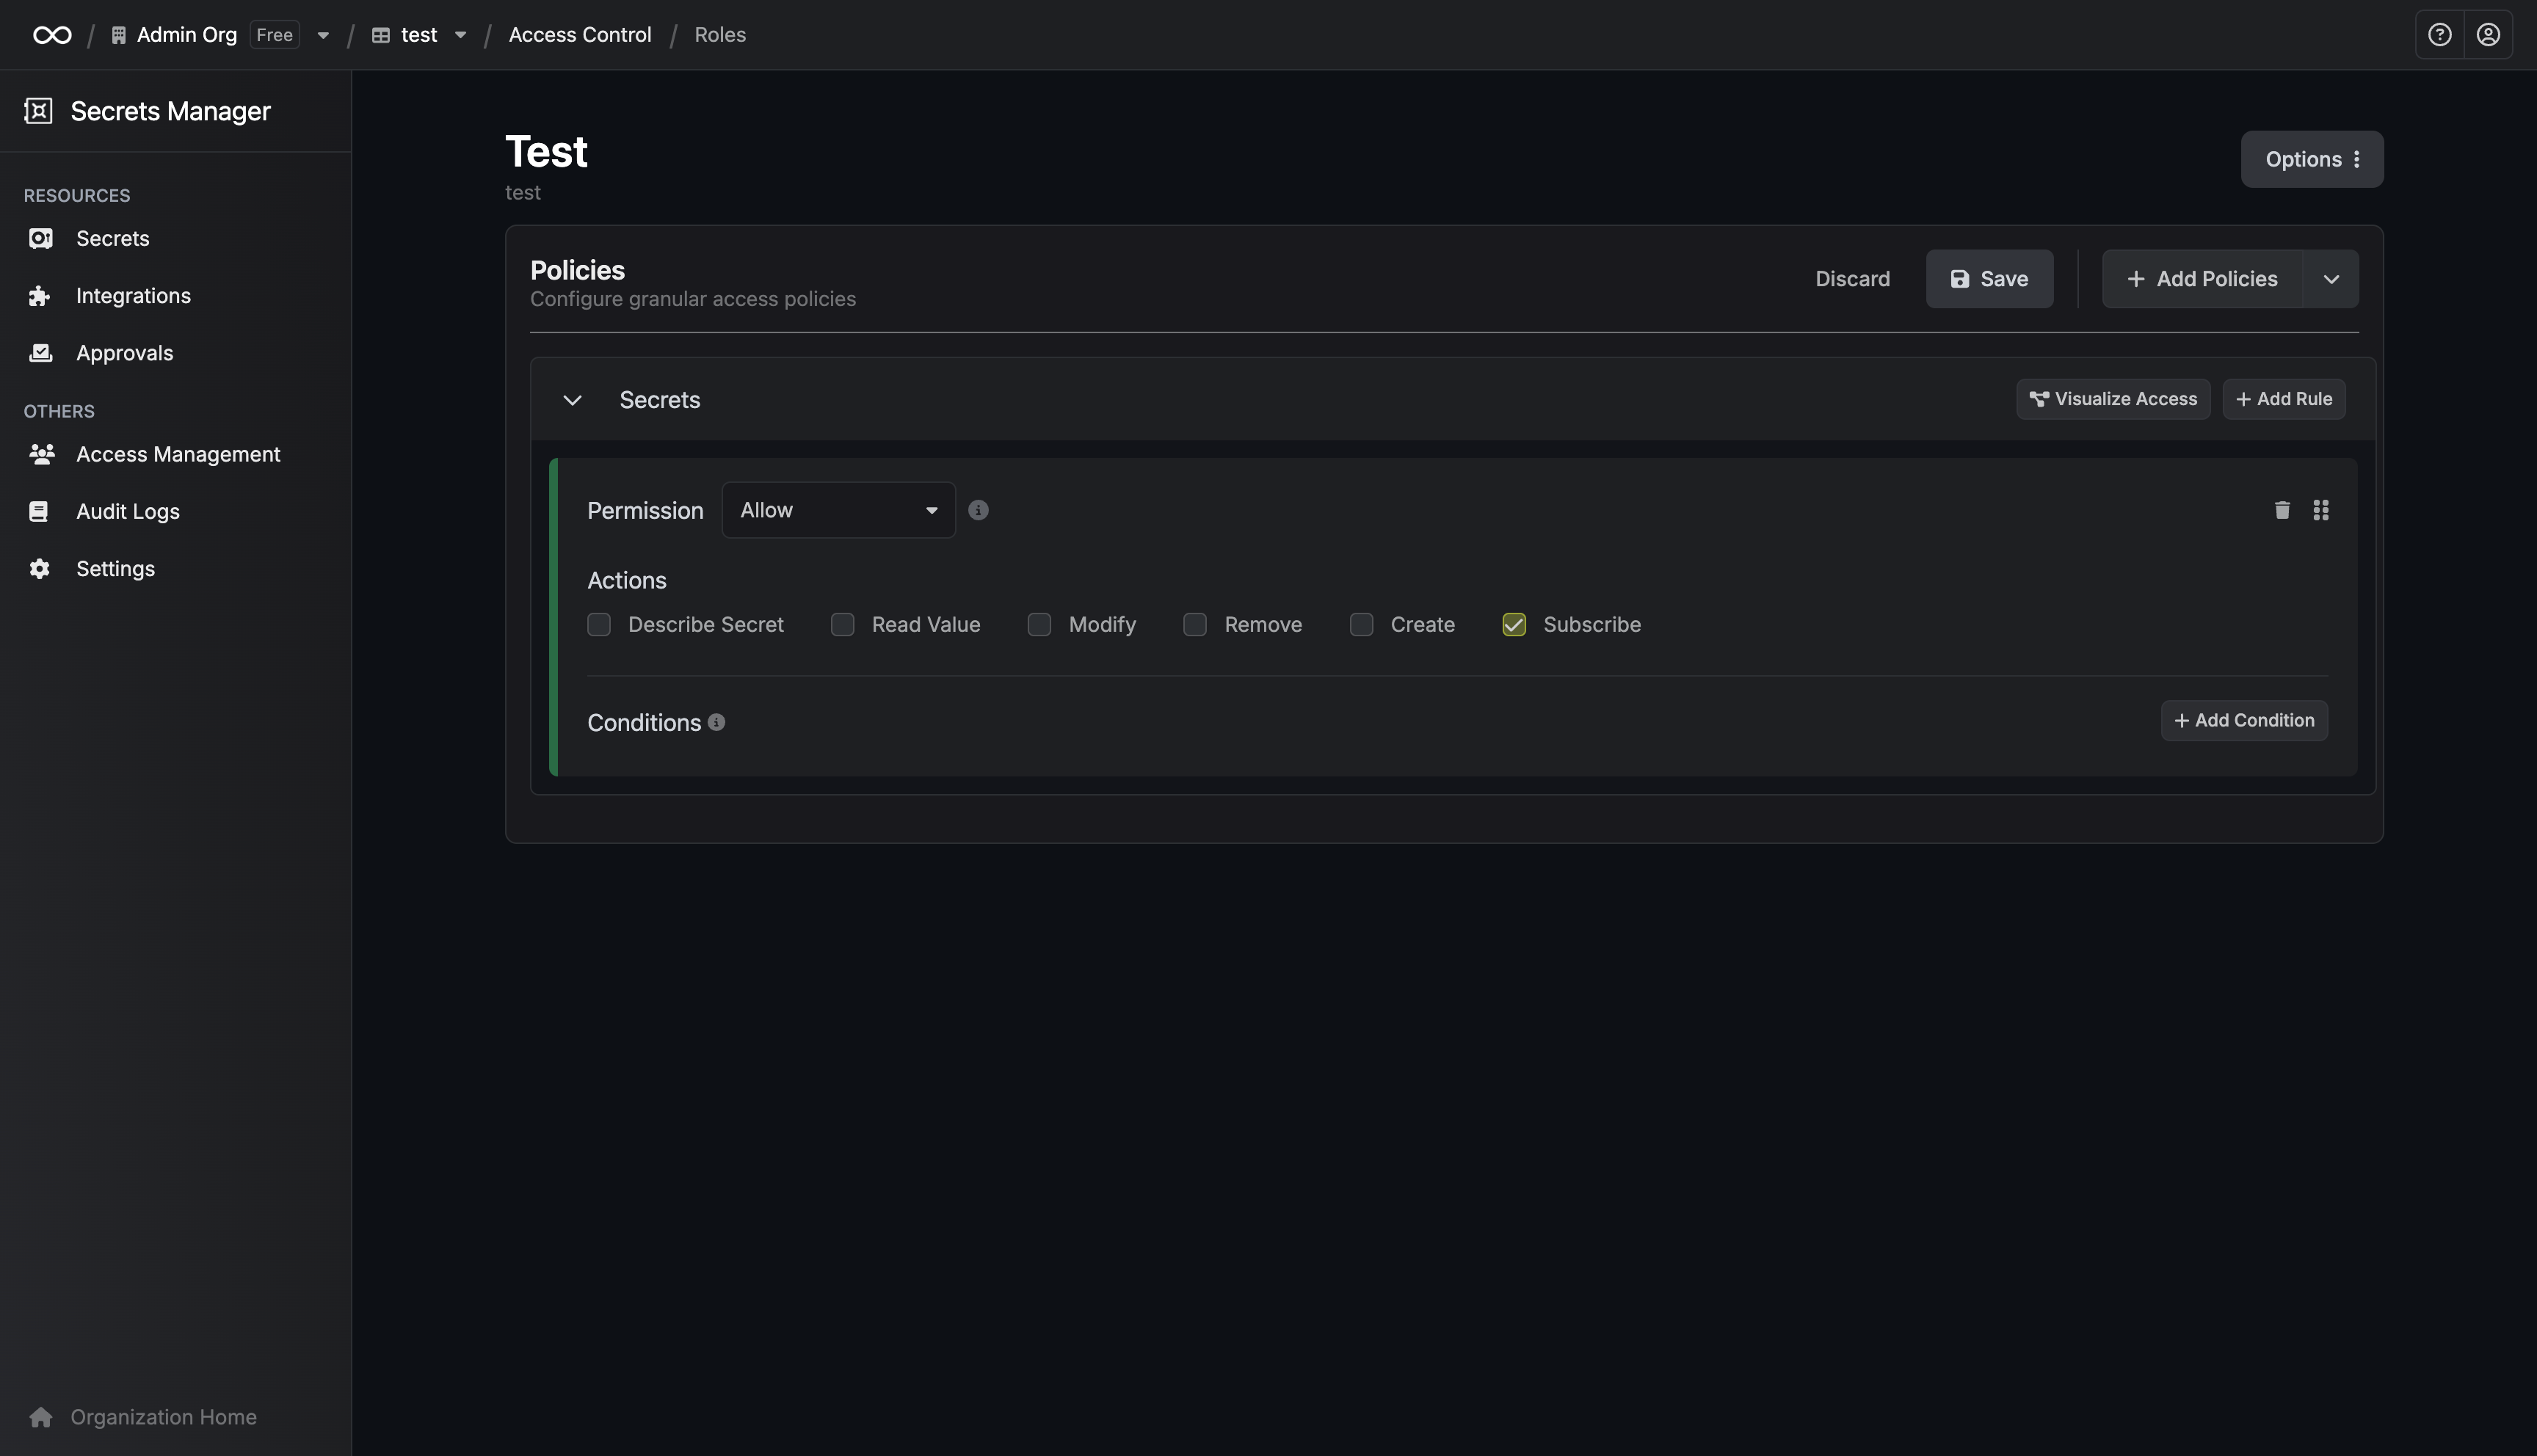 Enable the actions corresponding to the events you want to receive (e.g., read, create, update, delete).
 This allows you to receive only the events relevant to your use case, reducing noise and improving efficiency.
## Getting Started
Event Subscriptions are currently available via the [Events API](/api-reference/endpoints/events). Support for SDKs, Kubernetes Operator, and other integrations is coming soon.
### Prerequisites
You need an authentication token from a machine identity. Follow the [machine identities documentation](/documentation/platform/identities/machine-identities#authentication-methods) to set up authentication.
### Subscribing to Events
To subscribe to events, make a request to the events endpoint with your project ID and optional filters.
This allows you to receive only the events relevant to your use case, reducing noise and improving efficiency.
## Getting Started
Event Subscriptions are currently available via the [Events API](/api-reference/endpoints/events). Support for SDKs, Kubernetes Operator, and other integrations is coming soon.
### Prerequisites
You need an authentication token from a machine identity. Follow the [machine identities documentation](/documentation/platform/identities/machine-identities#authentication-methods) to set up authentication.
### Subscribing to Events
To subscribe to events, make a request to the events endpoint with your project ID and optional filters.
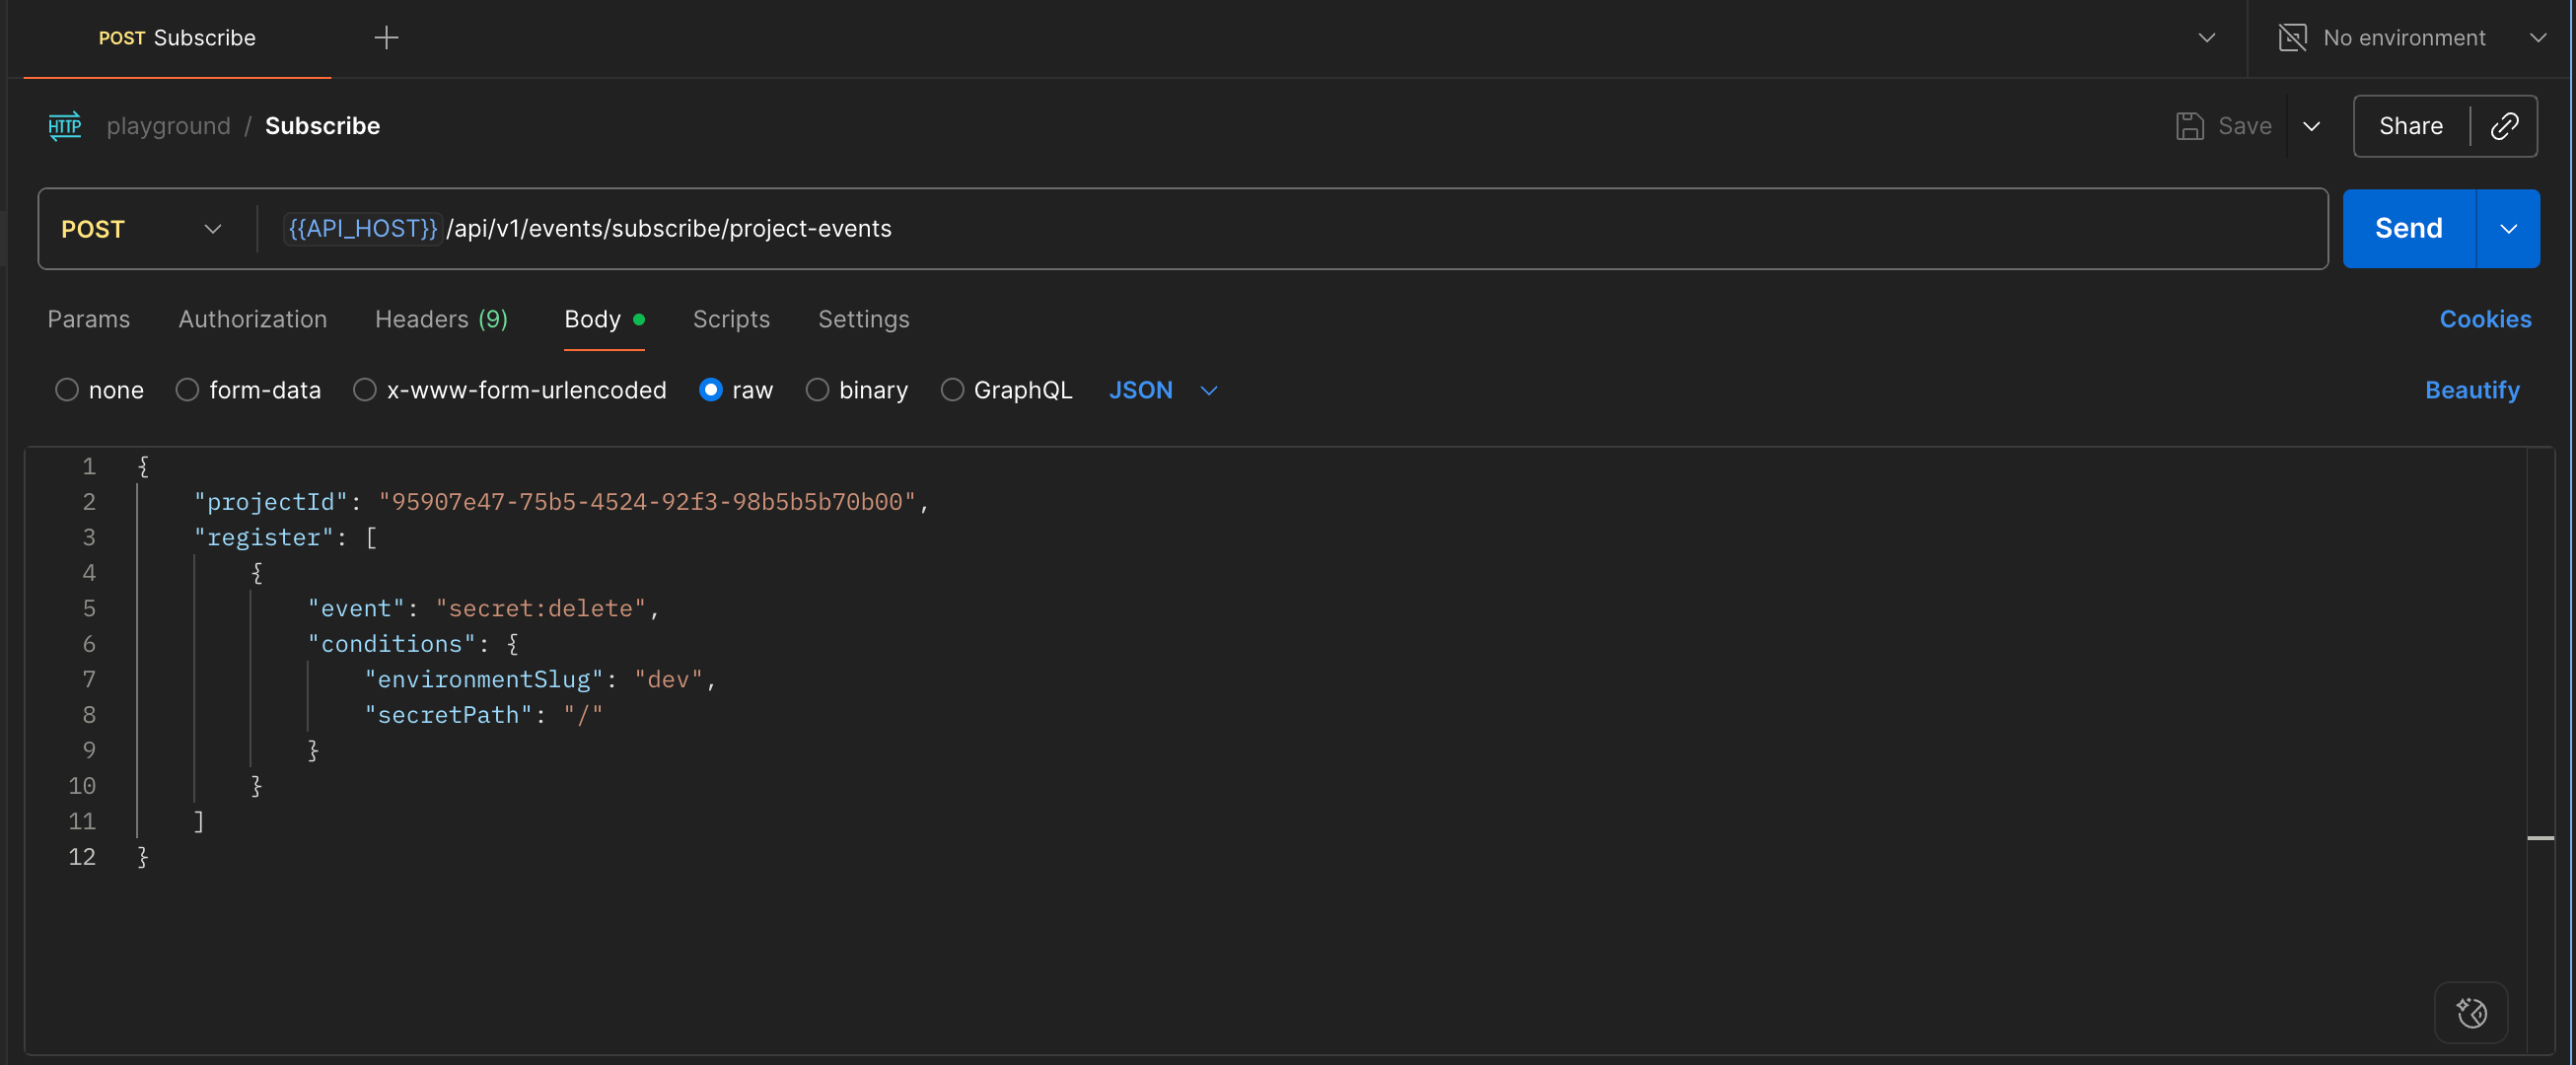 #### Request Parameters
| Parameter | Type | Description |
| --------------------------------------- | ------ | ------------------------------------------------------ |
| `projectId` | string | The ID of the project to subscribe to |
| `register` | array | List of event filters |
| `register[].conditions` | object | Optional conditions to filter events |
| `register[].conditions.environmentSlug` | string | Filter by environment (e.g., `dev`, `staging`, `prod`) |
| `register[].conditions.secretPath` | string | Filter by secret path (e.g., `/api/keys`) |
The endpoint responds with `Content-Type: text/event-stream` to initiate an SSE connection. In the cURL example below, we use the `-N` flag to keep the connection open to receive incoming events from Infisical.
```bash theme={"dark"}
curl -X POST -N --location \
'https://app.infisical.com/api/v1/events/subscribe/project-events' \
--header 'Content-Type: application/json' \
--header "Authorization: Bearer
#### Request Parameters
| Parameter | Type | Description |
| --------------------------------------- | ------ | ------------------------------------------------------ |
| `projectId` | string | The ID of the project to subscribe to |
| `register` | array | List of event filters |
| `register[].conditions` | object | Optional conditions to filter events |
| `register[].conditions.environmentSlug` | string | Filter by environment (e.g., `dev`, `staging`, `prod`) |
| `register[].conditions.secretPath` | string | Filter by secret path (e.g., `/api/keys`) |
The endpoint responds with `Content-Type: text/event-stream` to initiate an SSE connection. In the cURL example below, we use the `-N` flag to keep the connection open to receive incoming events from Infisical.
```bash theme={"dark"}
curl -X POST -N --location \
'https://app.infisical.com/api/v1/events/subscribe/project-events' \
--header 'Content-Type: application/json' \
--header "Authorization: Bearer 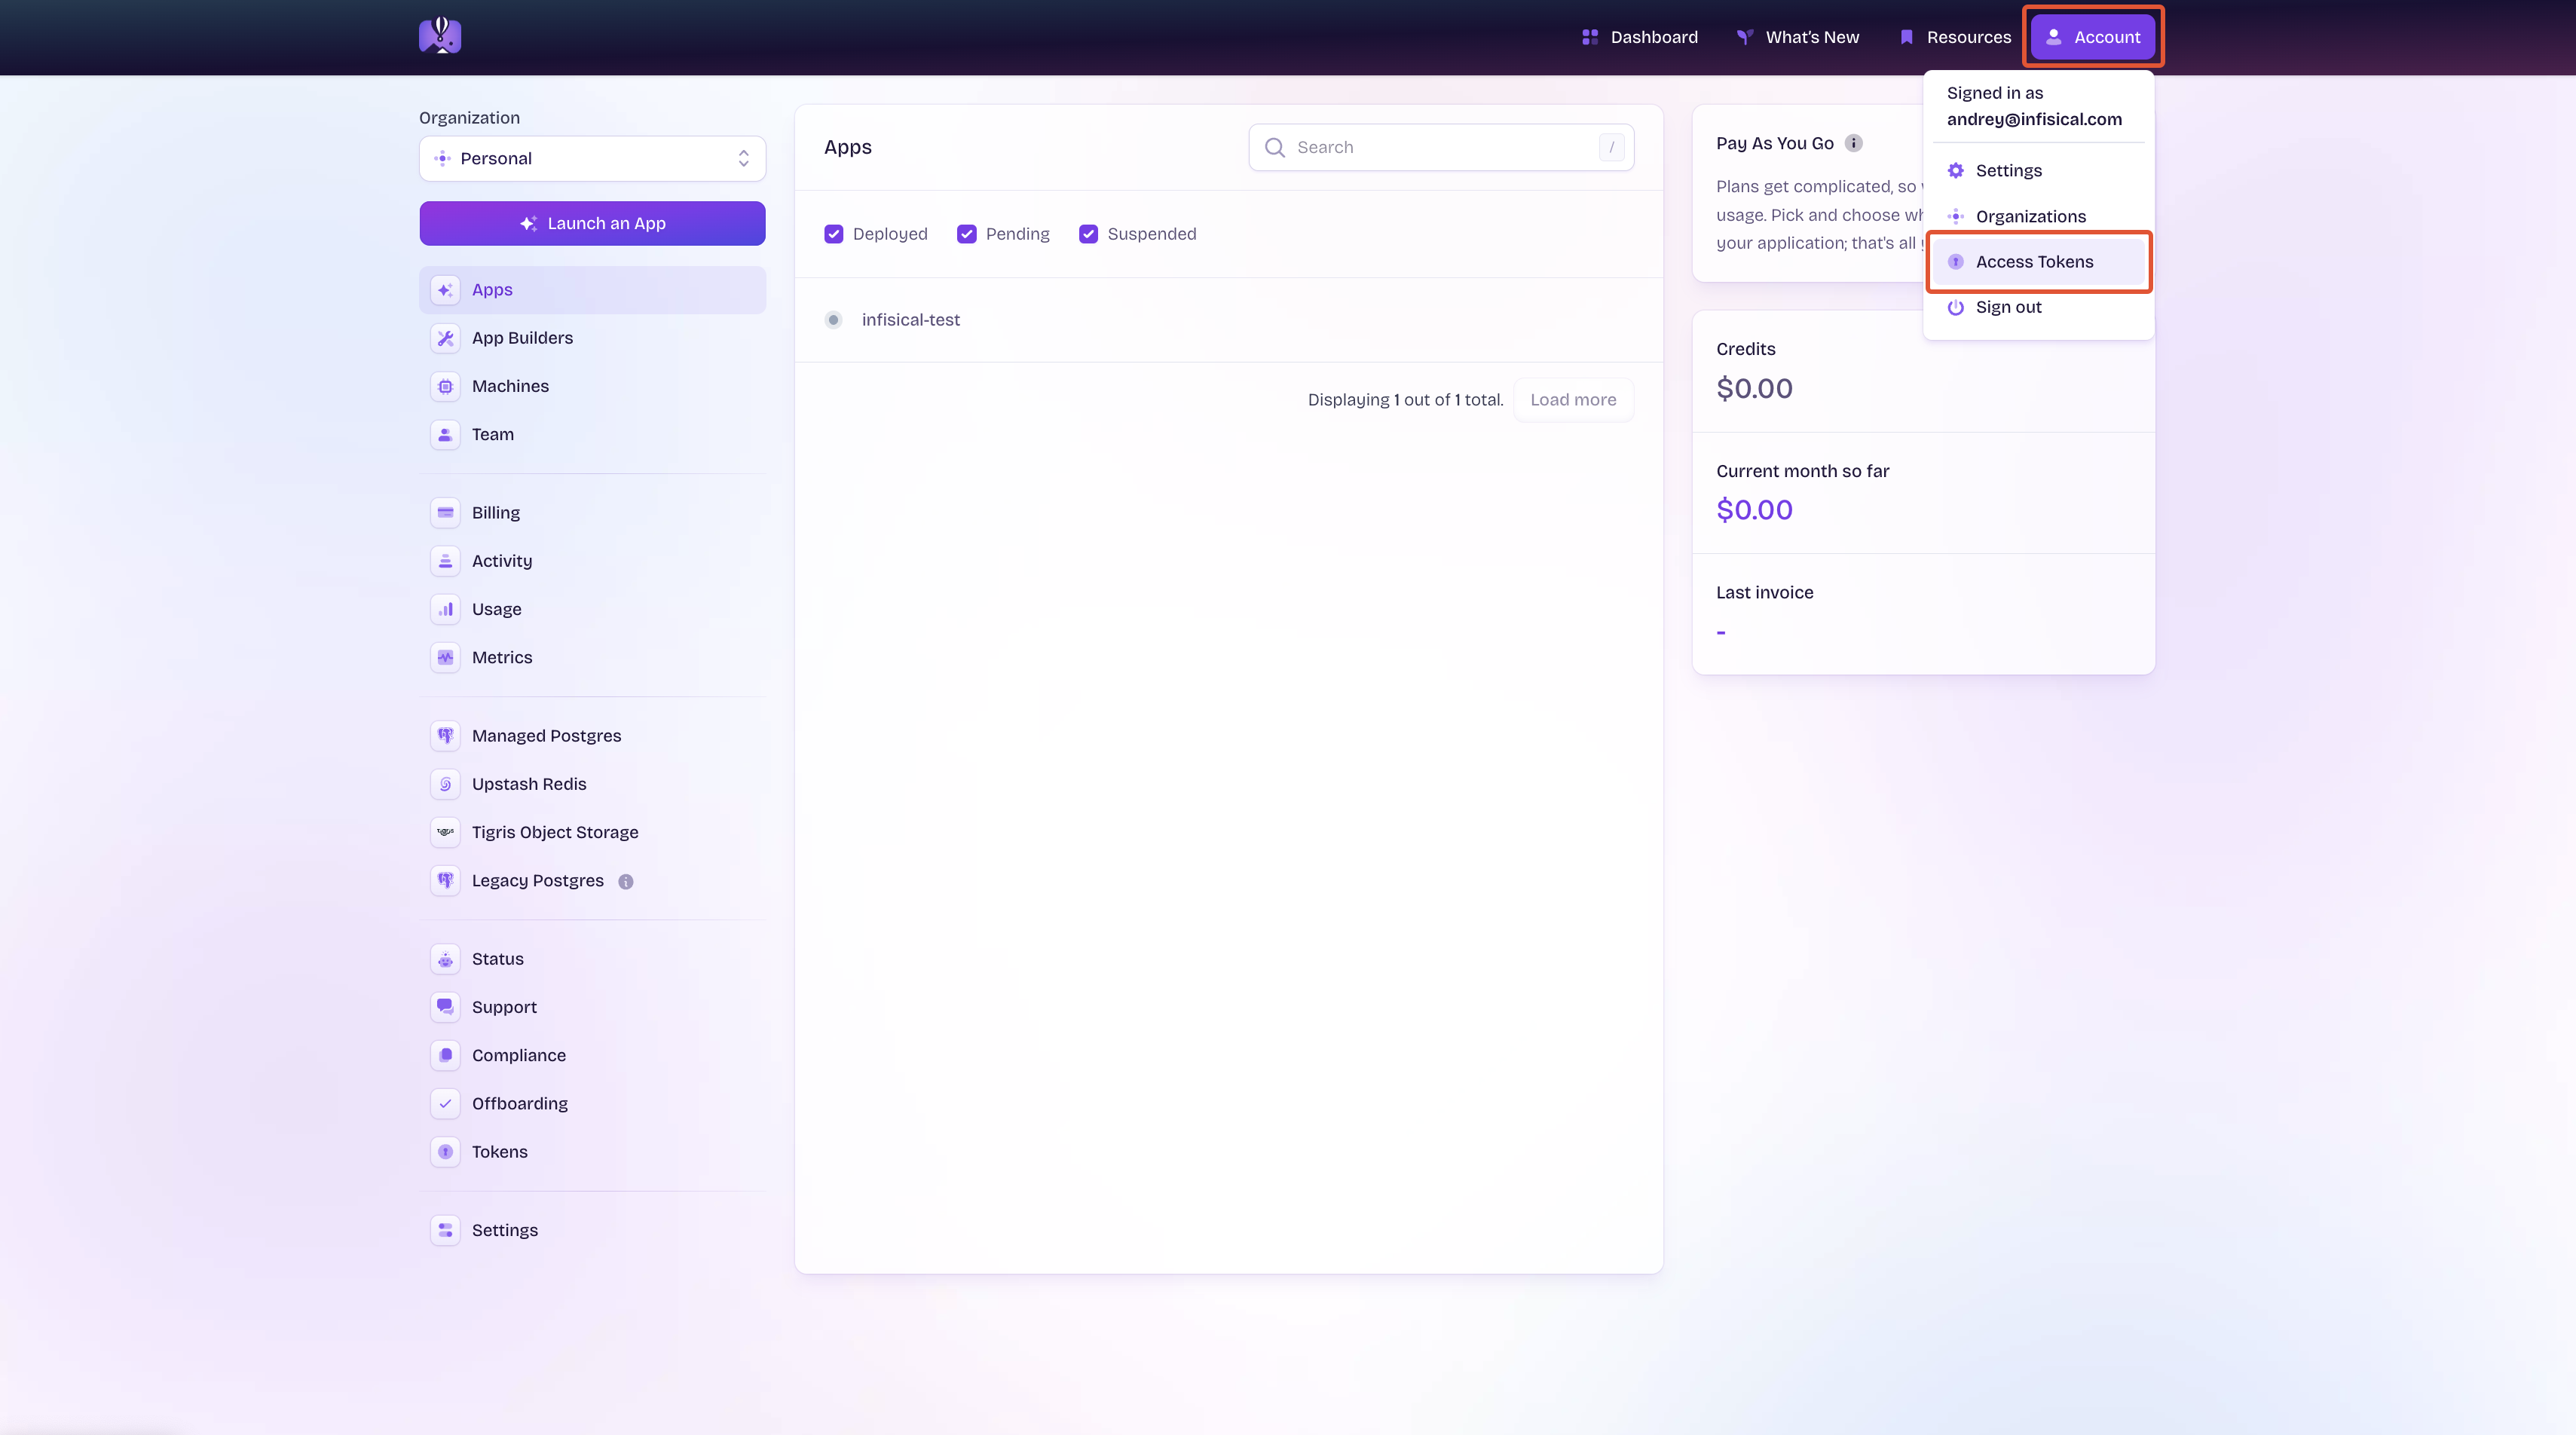
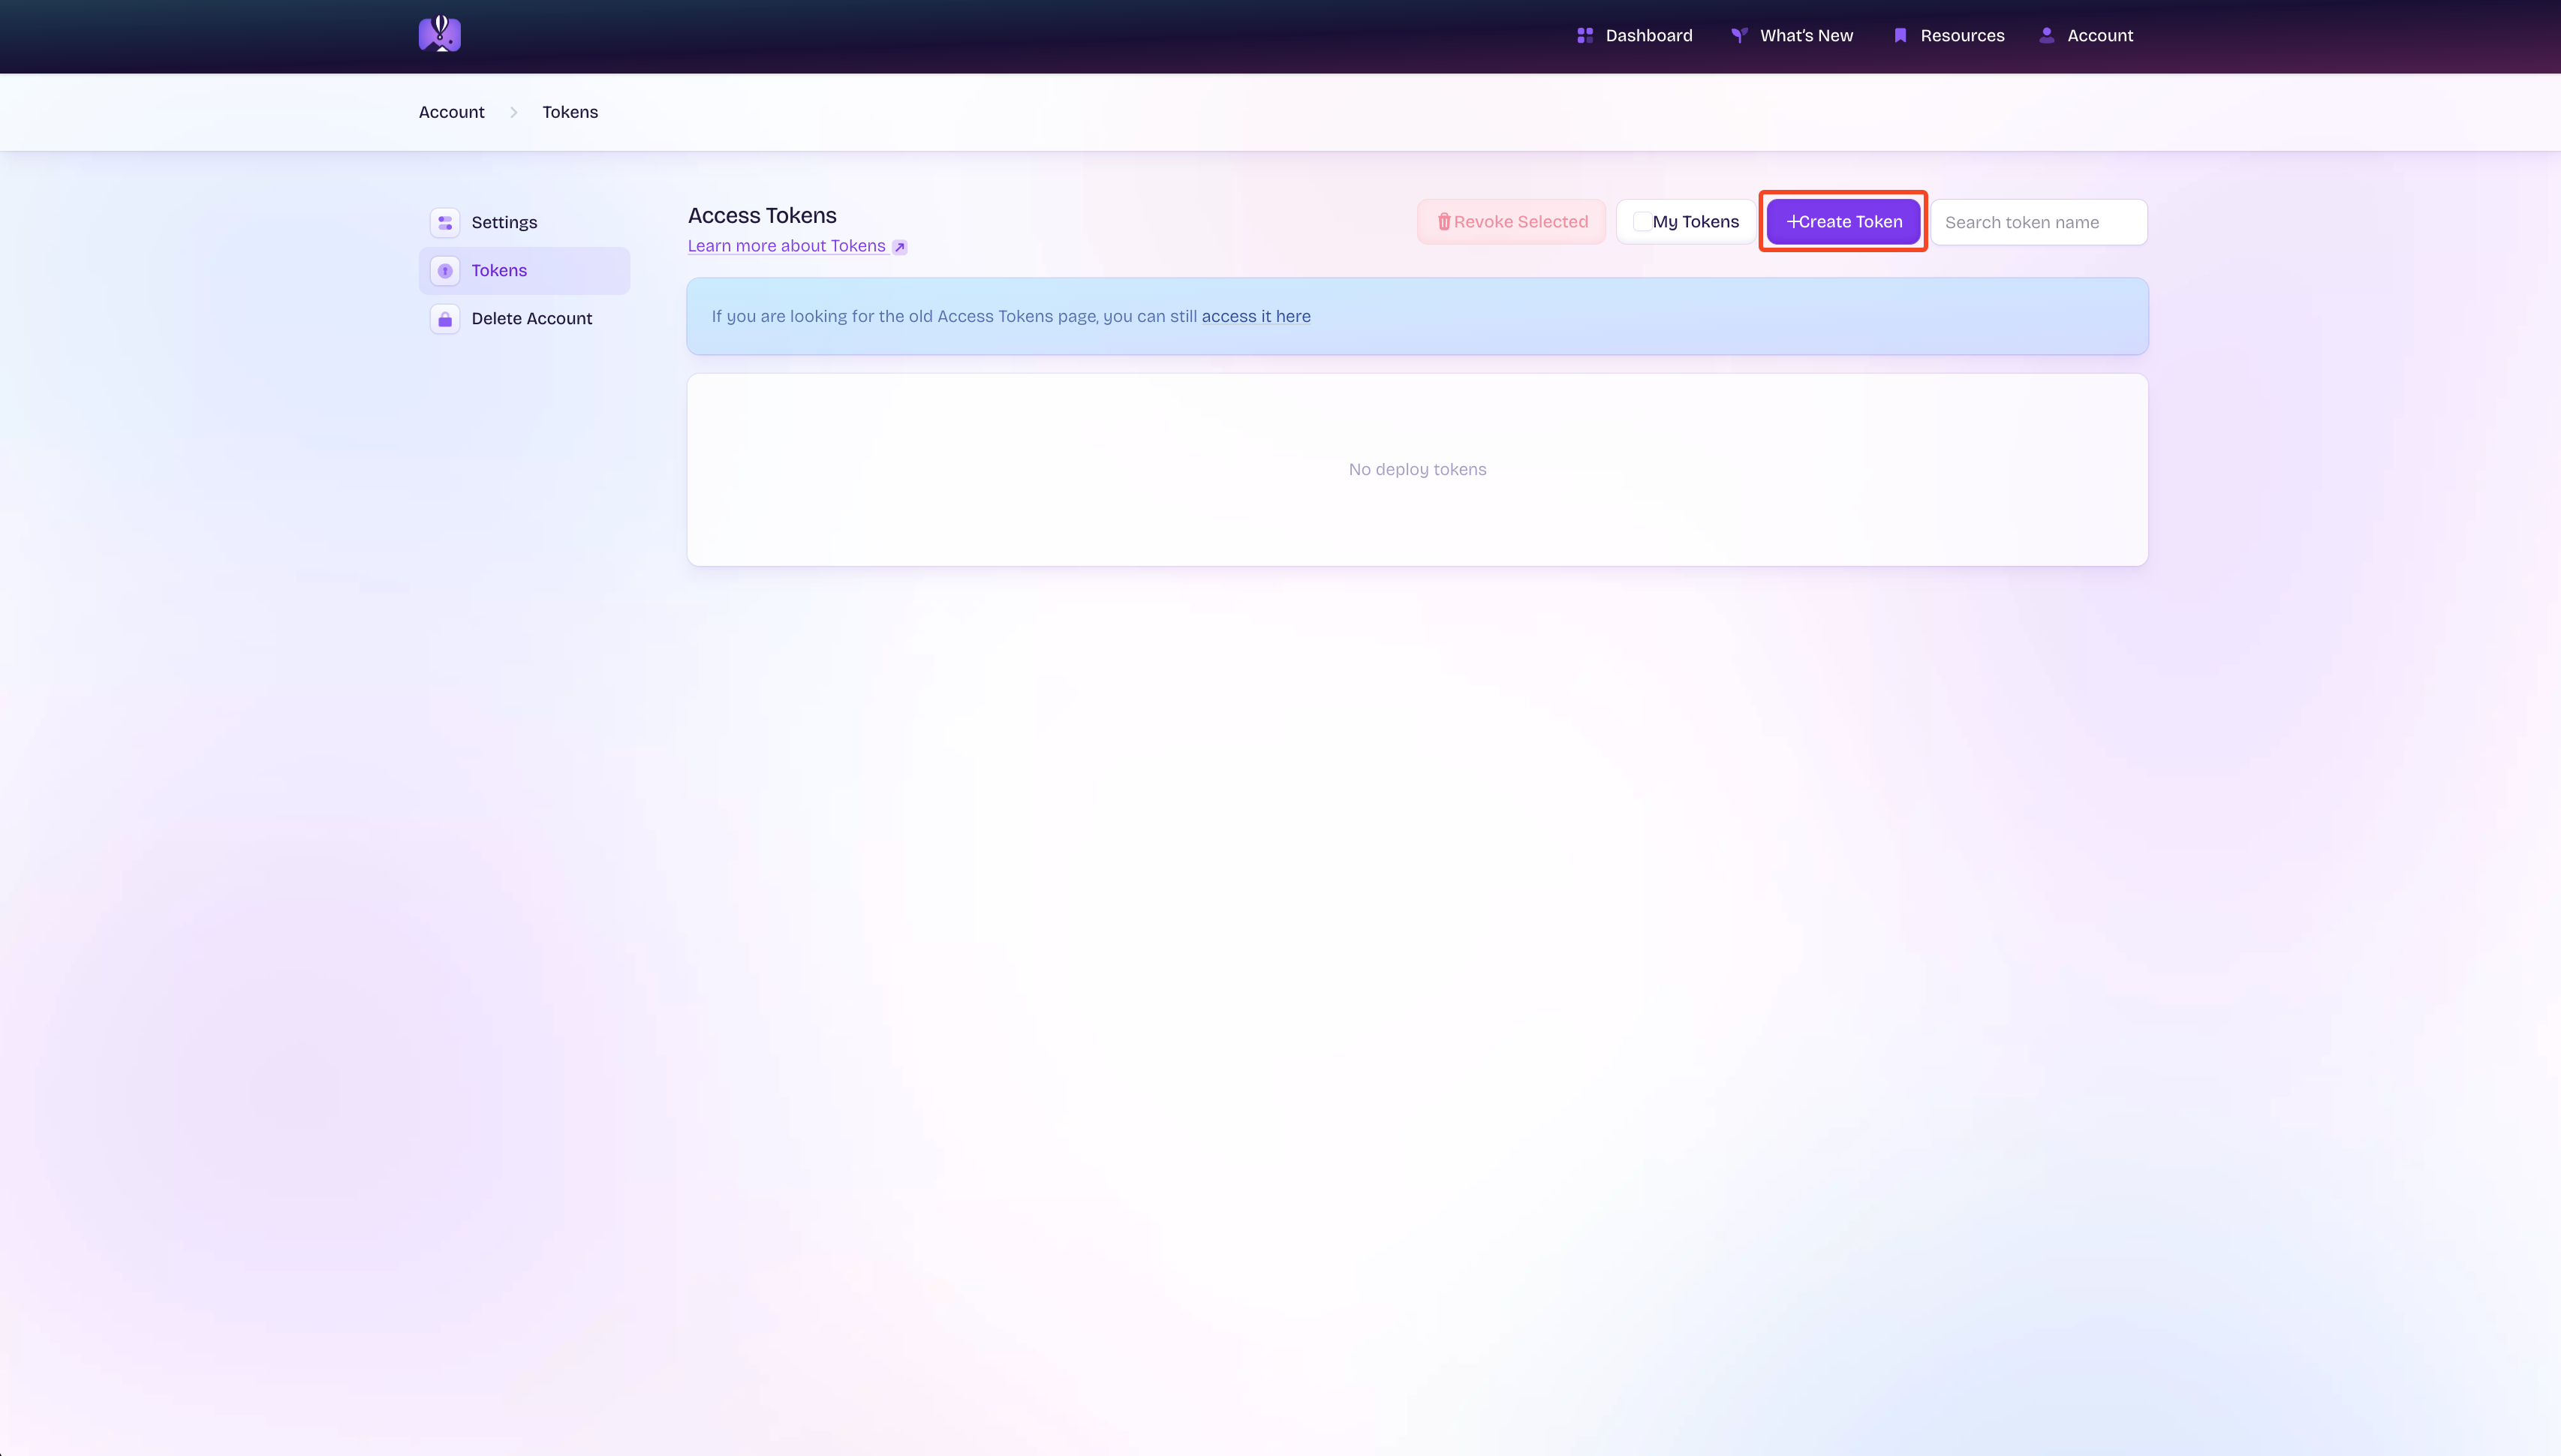
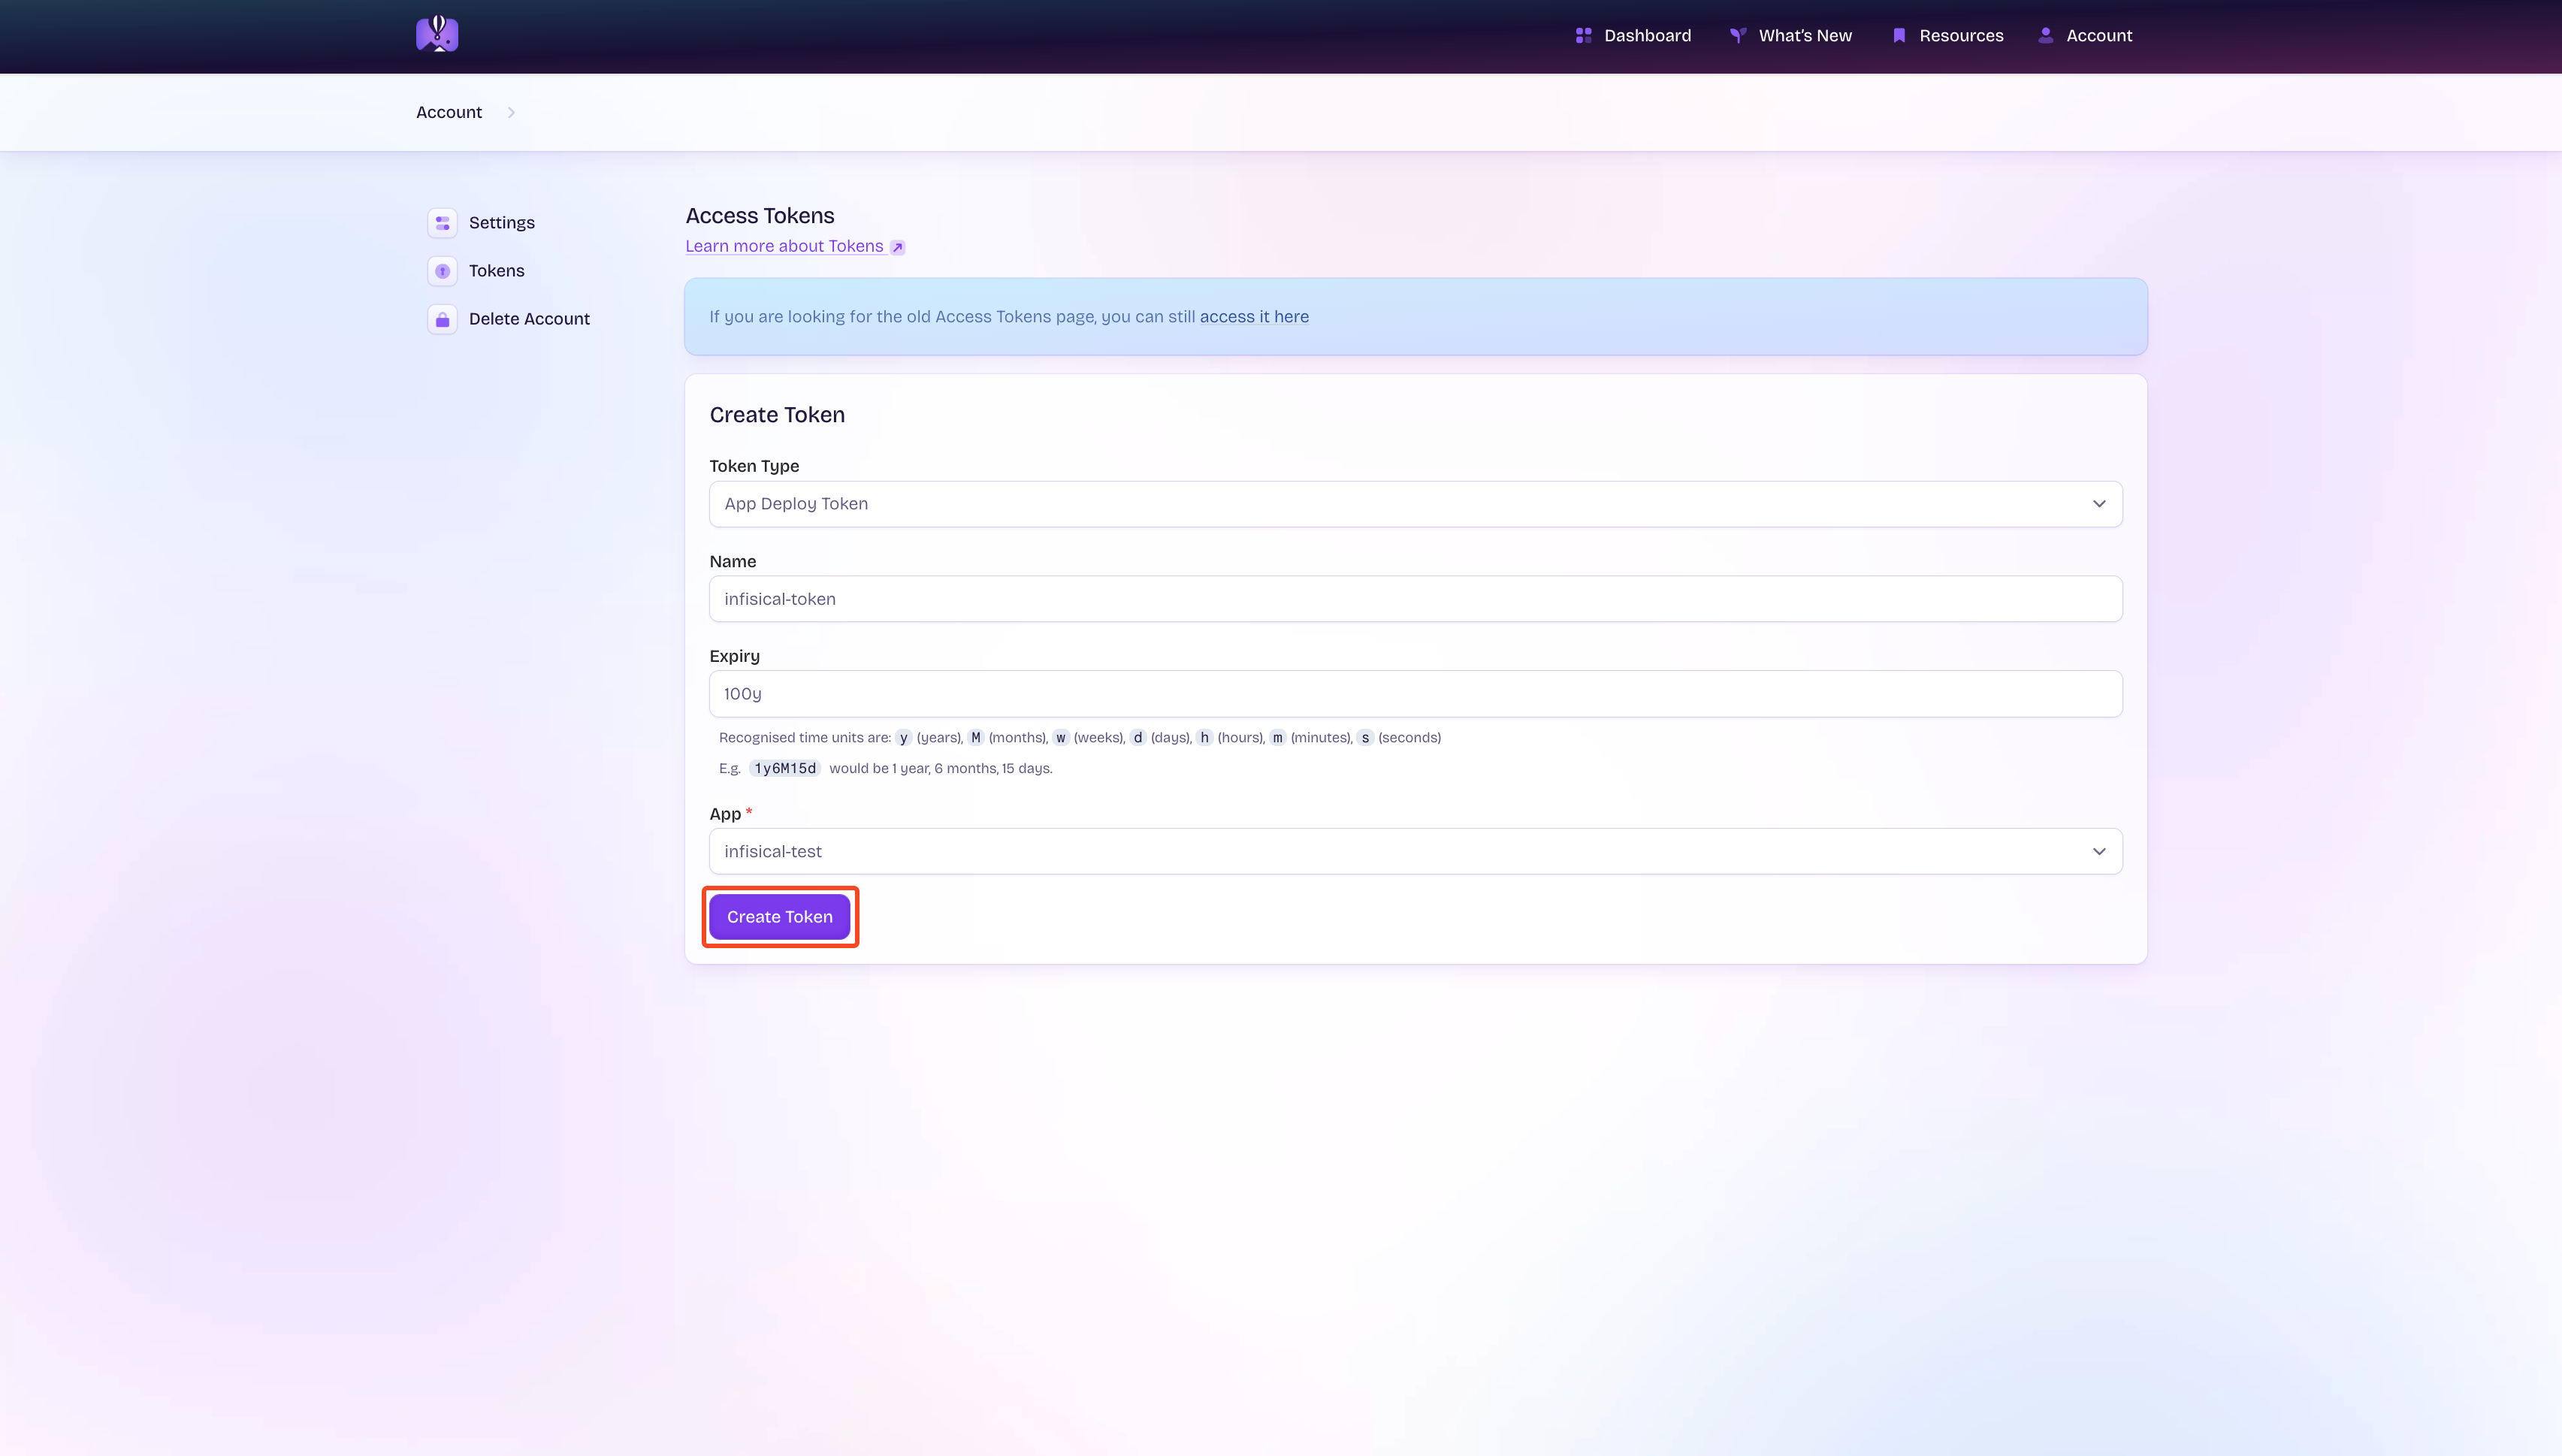
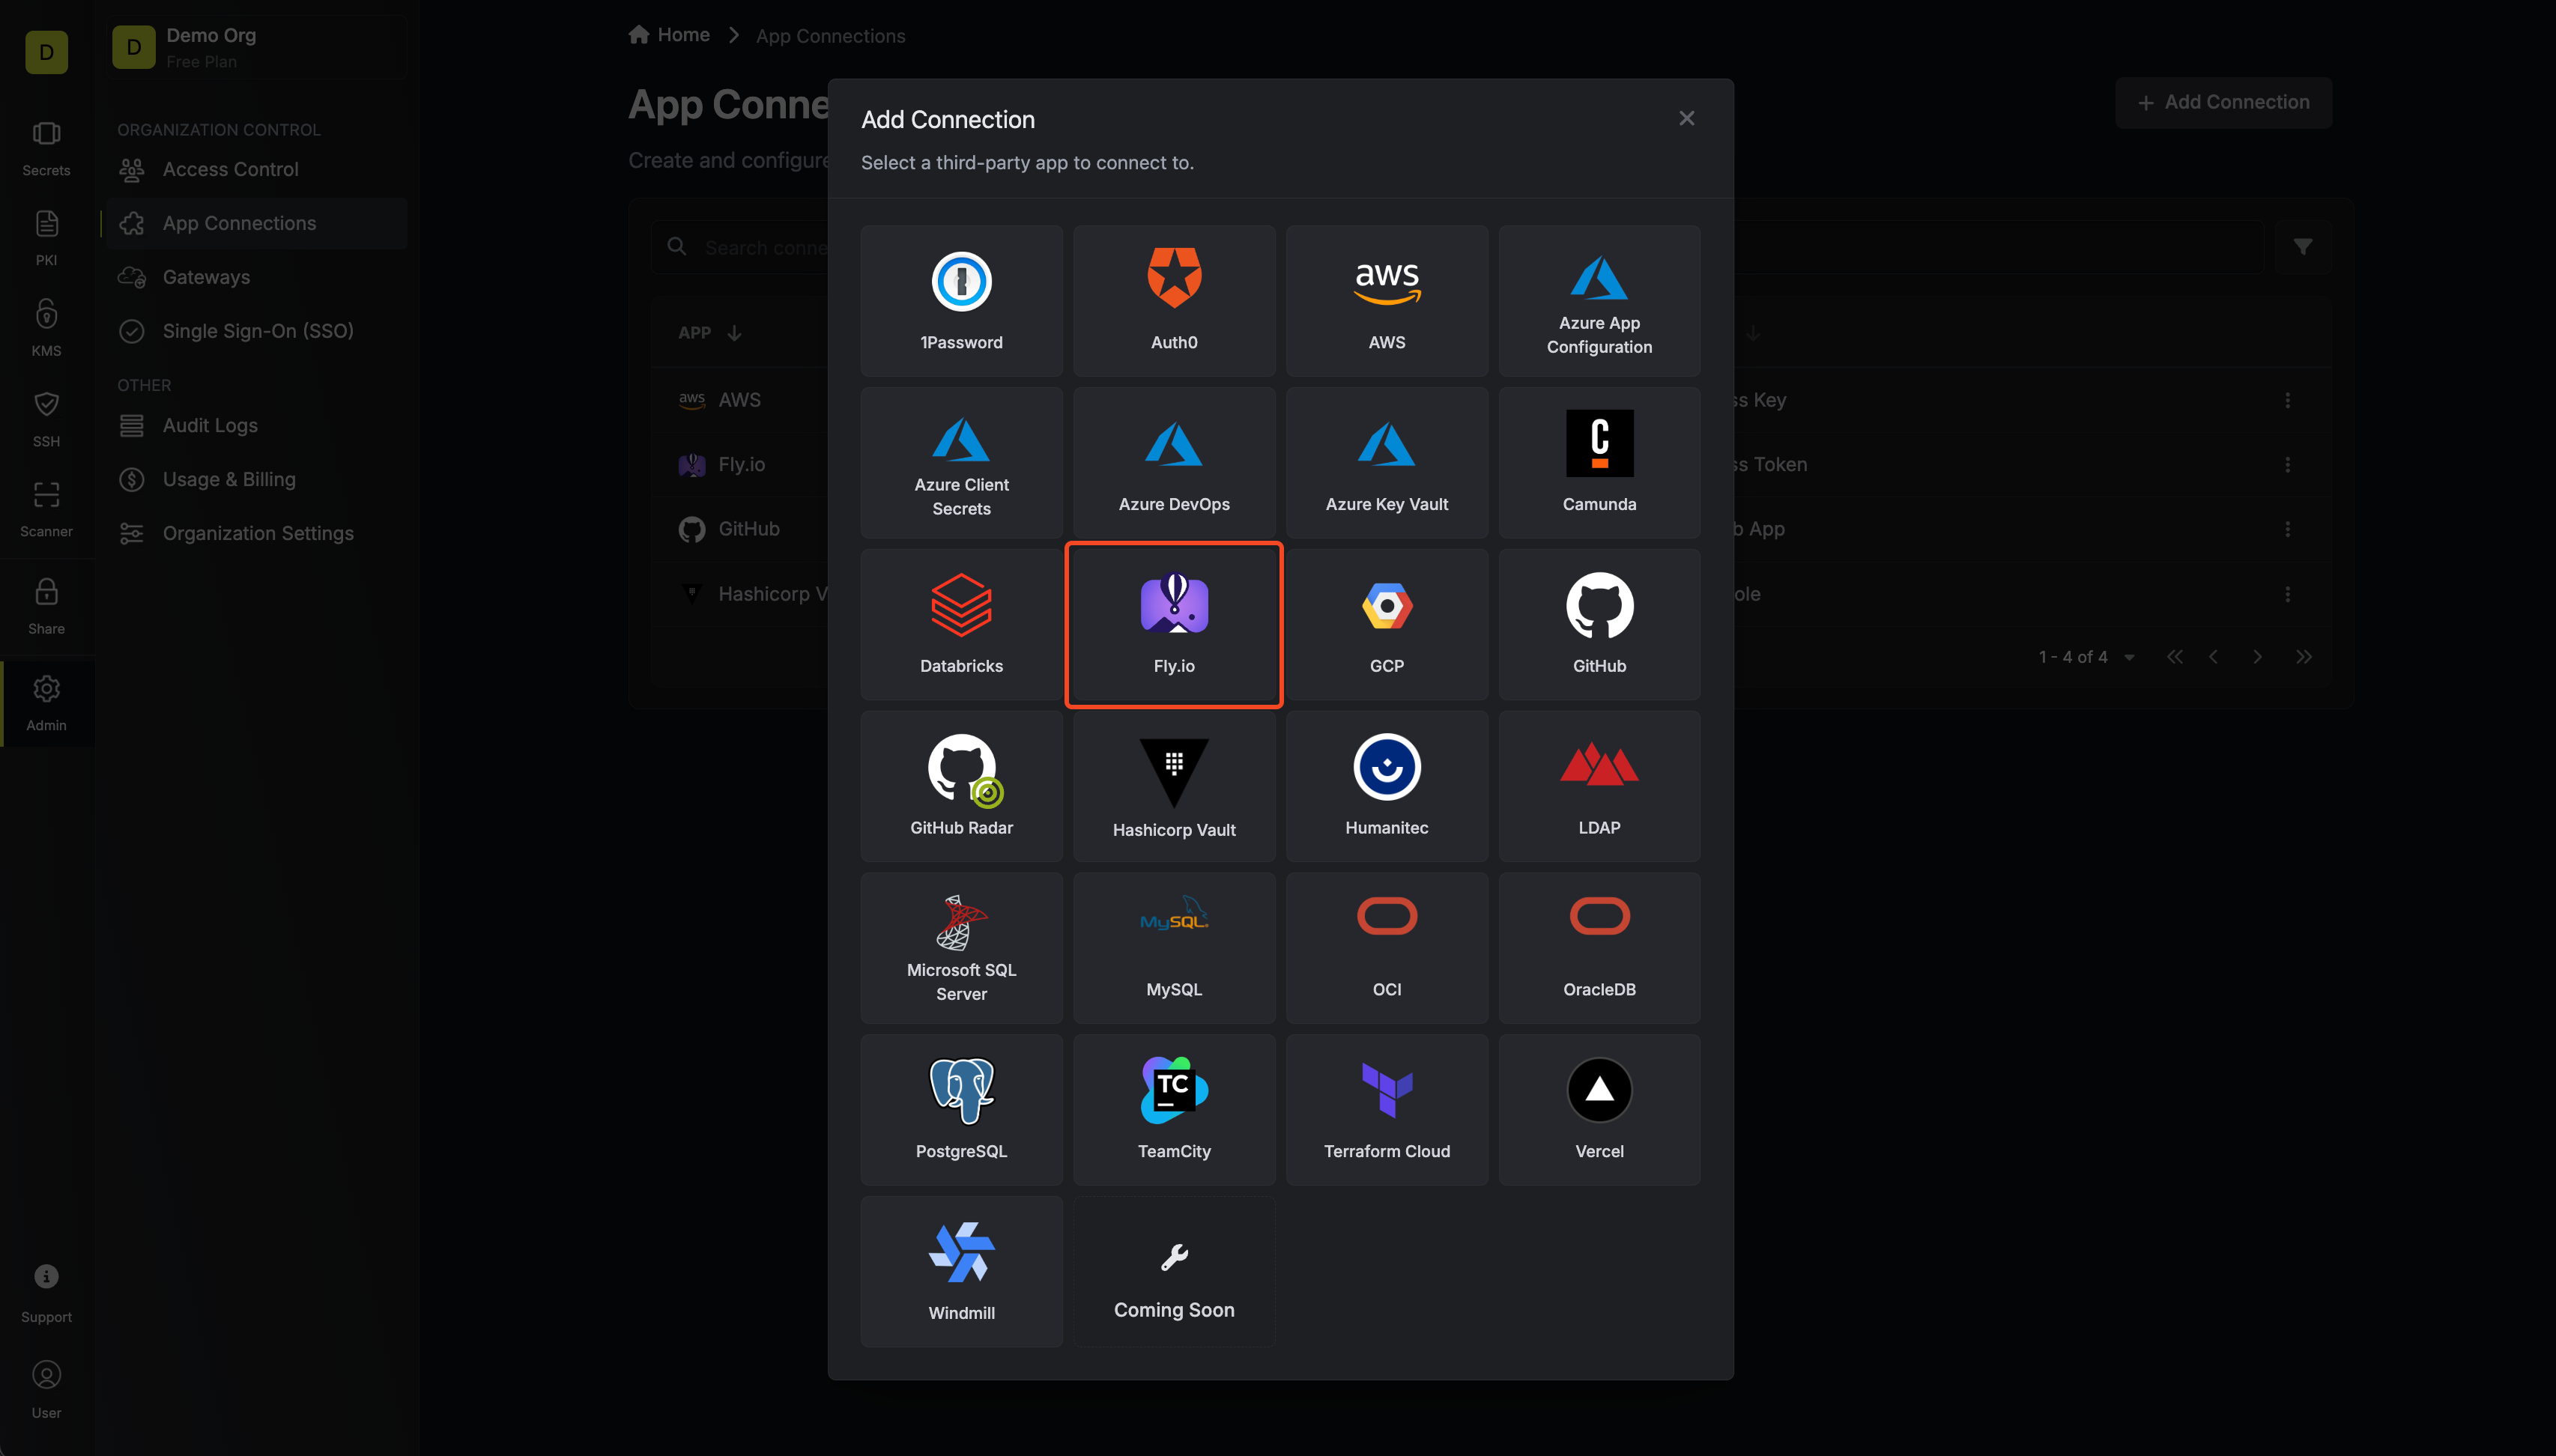
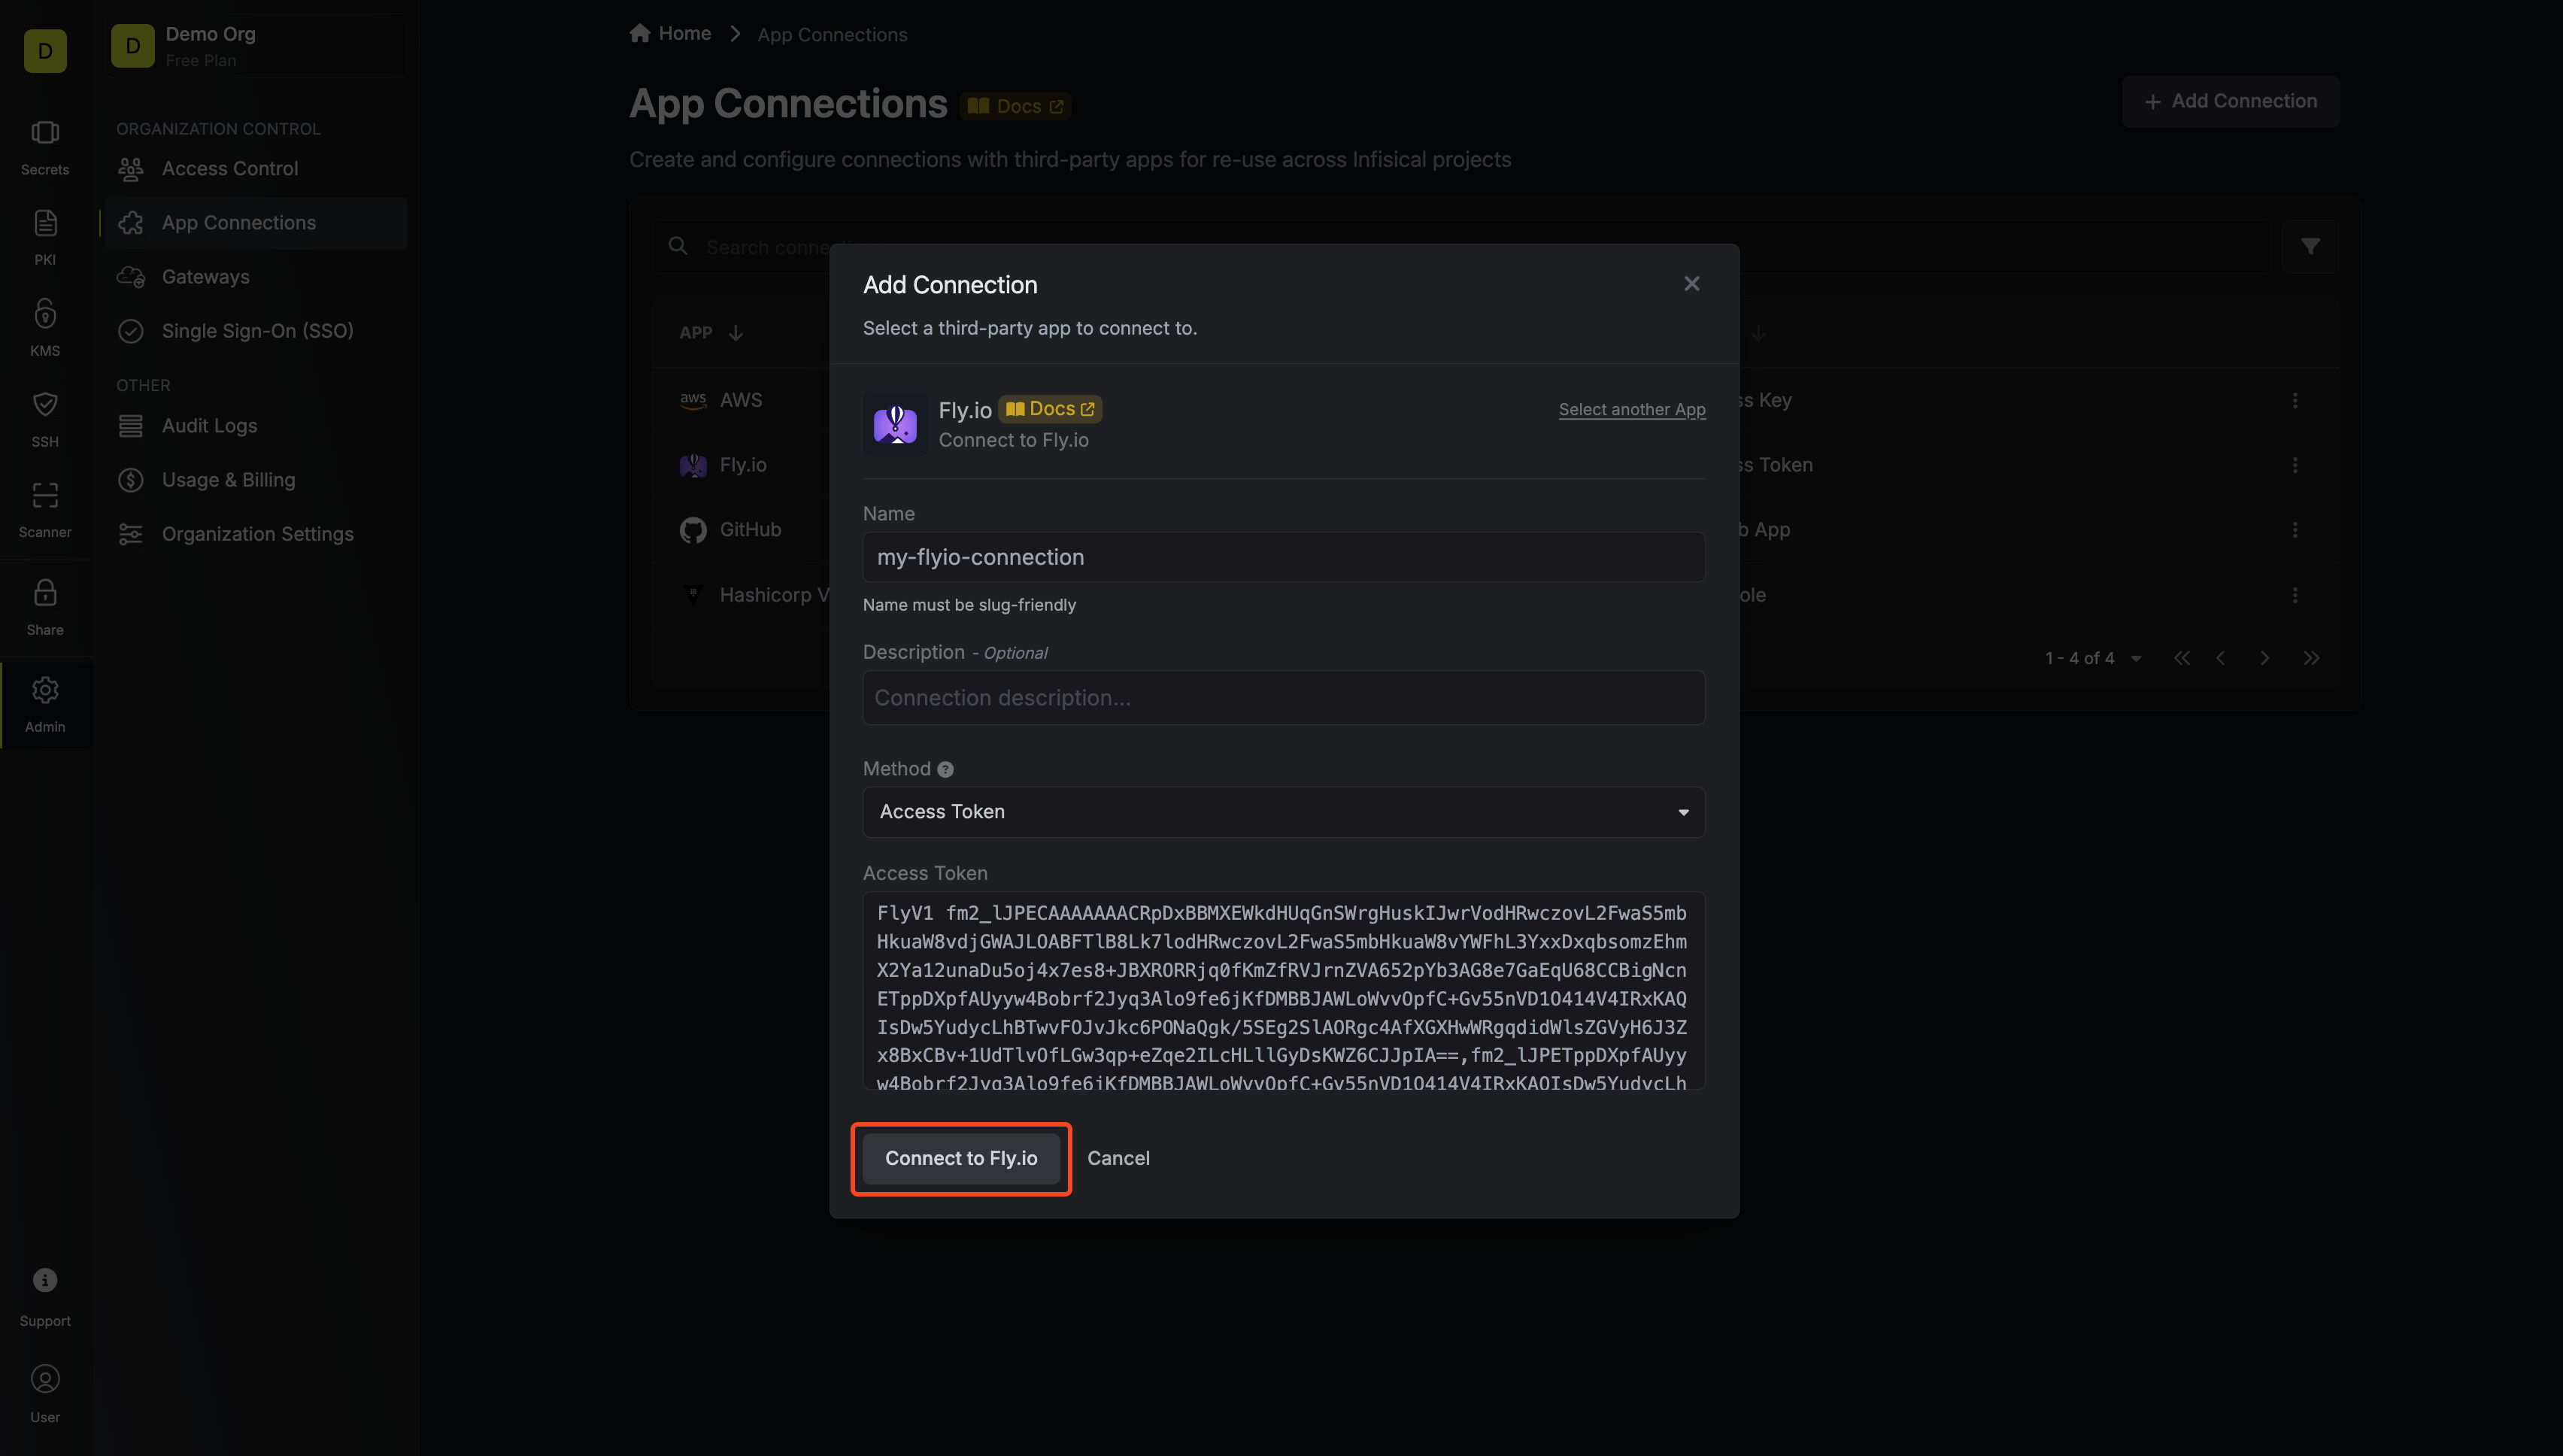

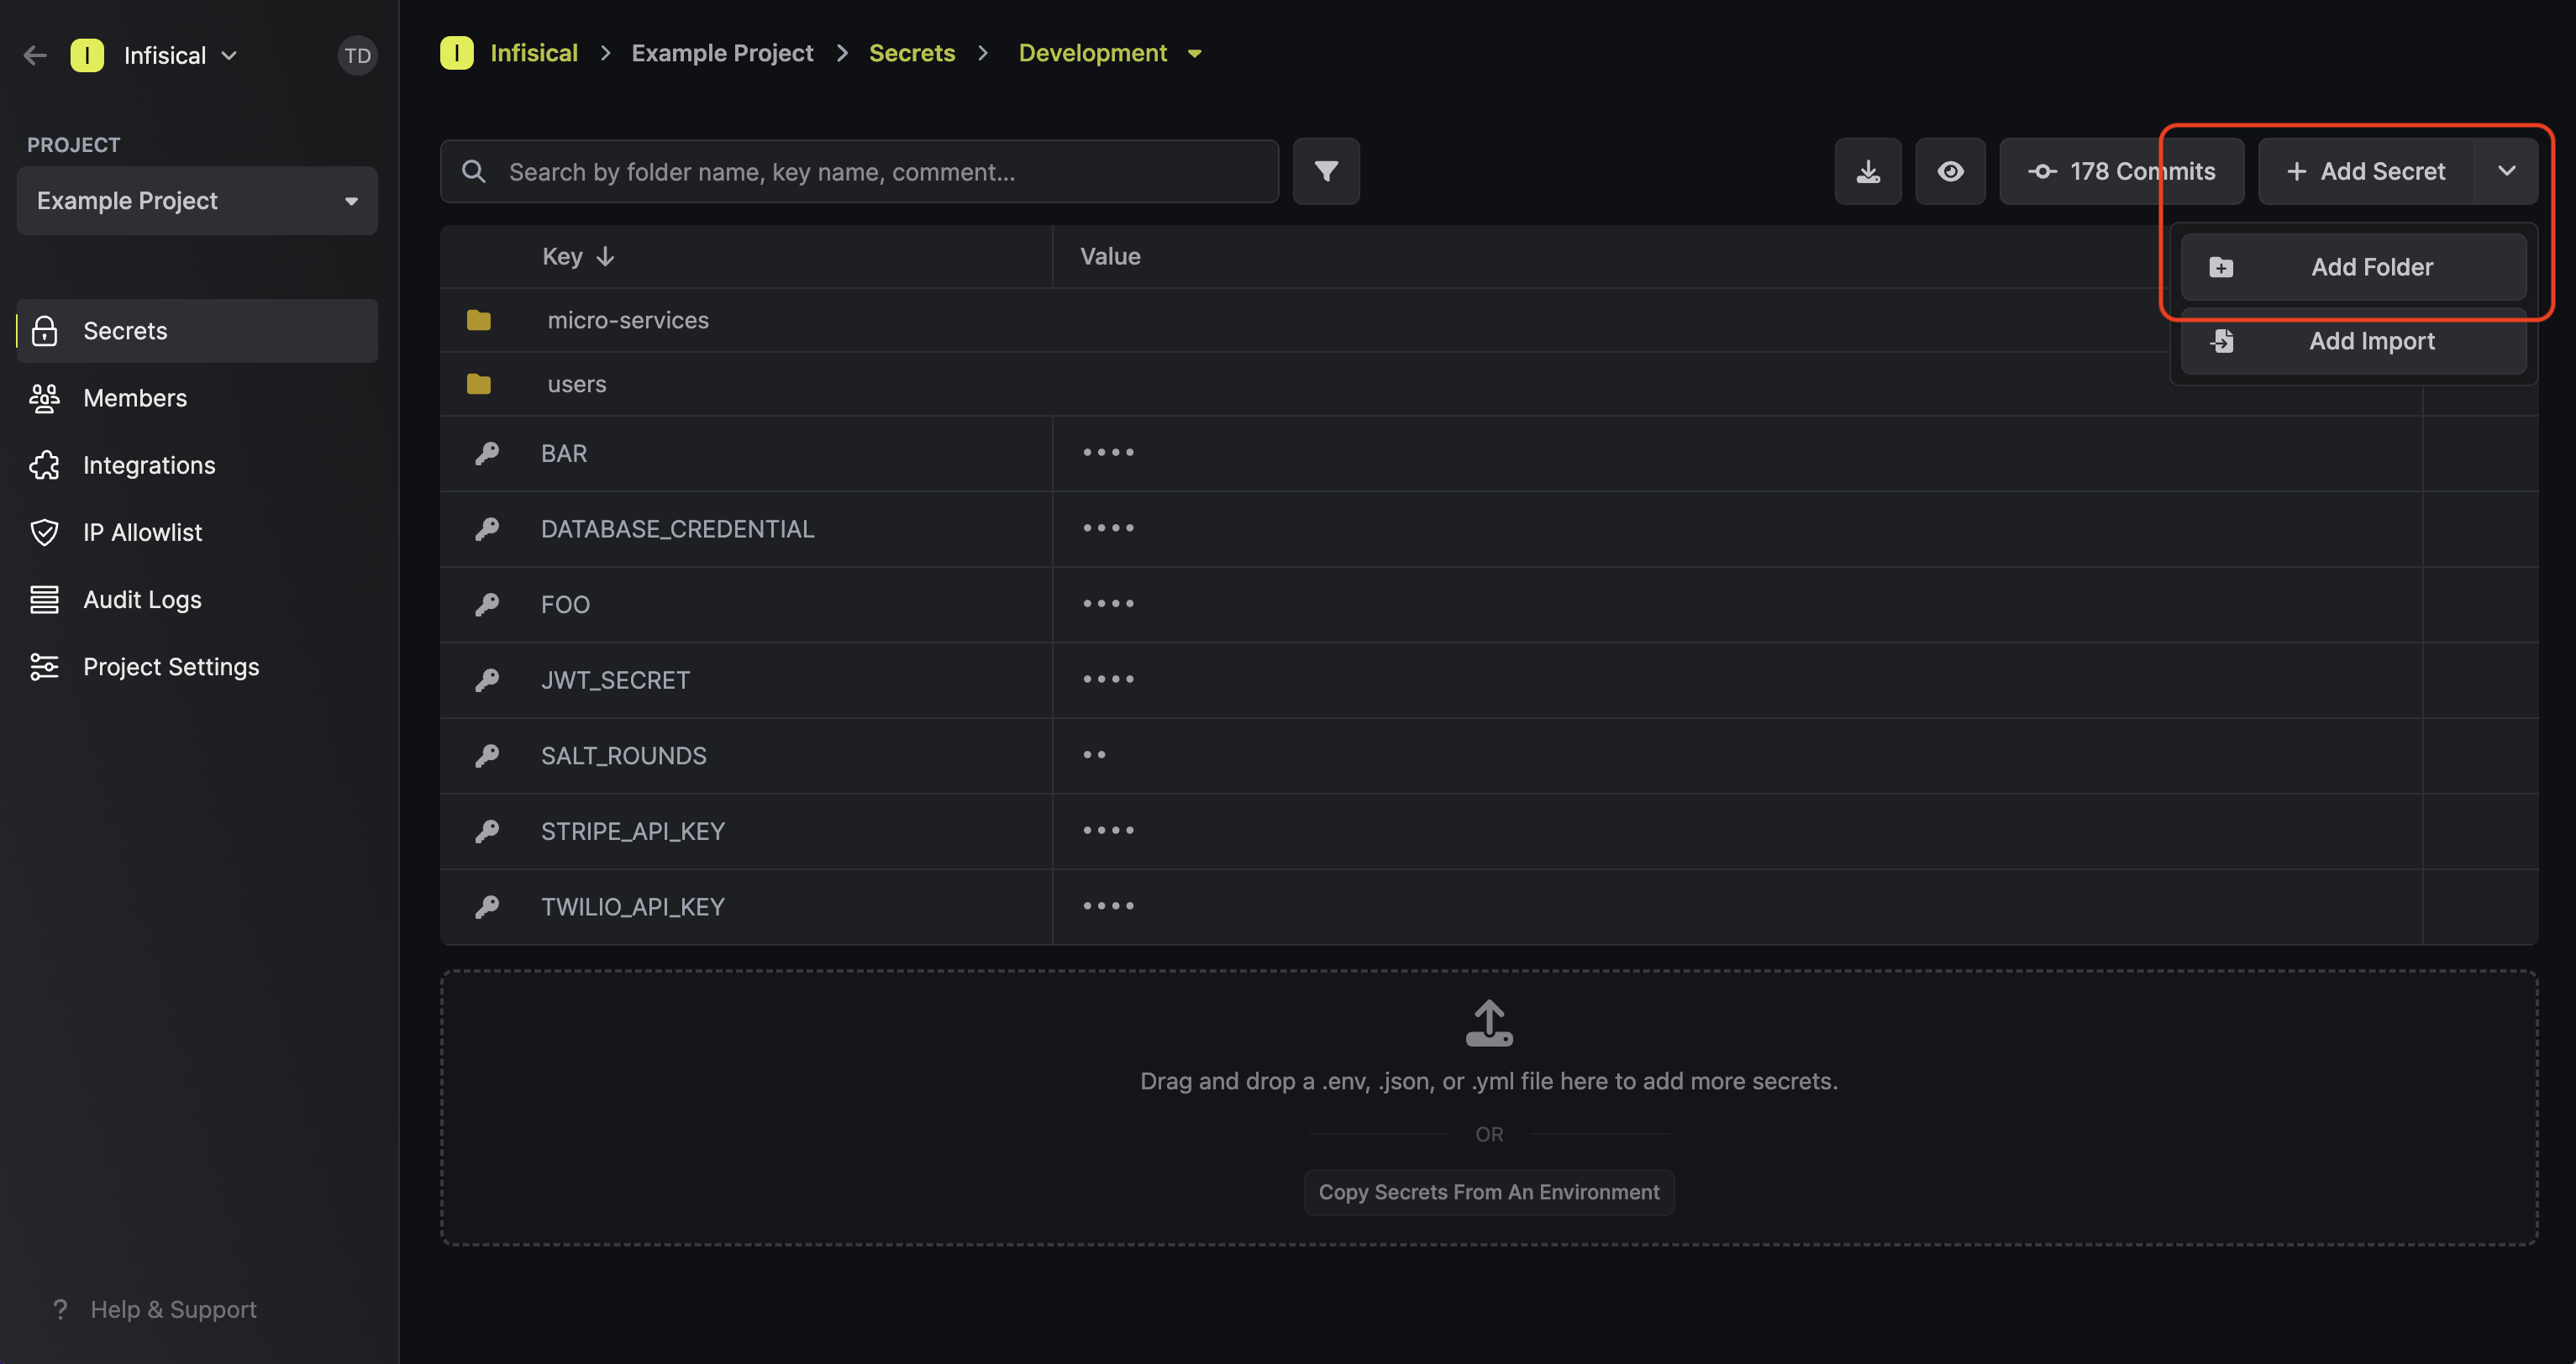 To delete a folder, hover over it and press the **X** button that appears on the right side.
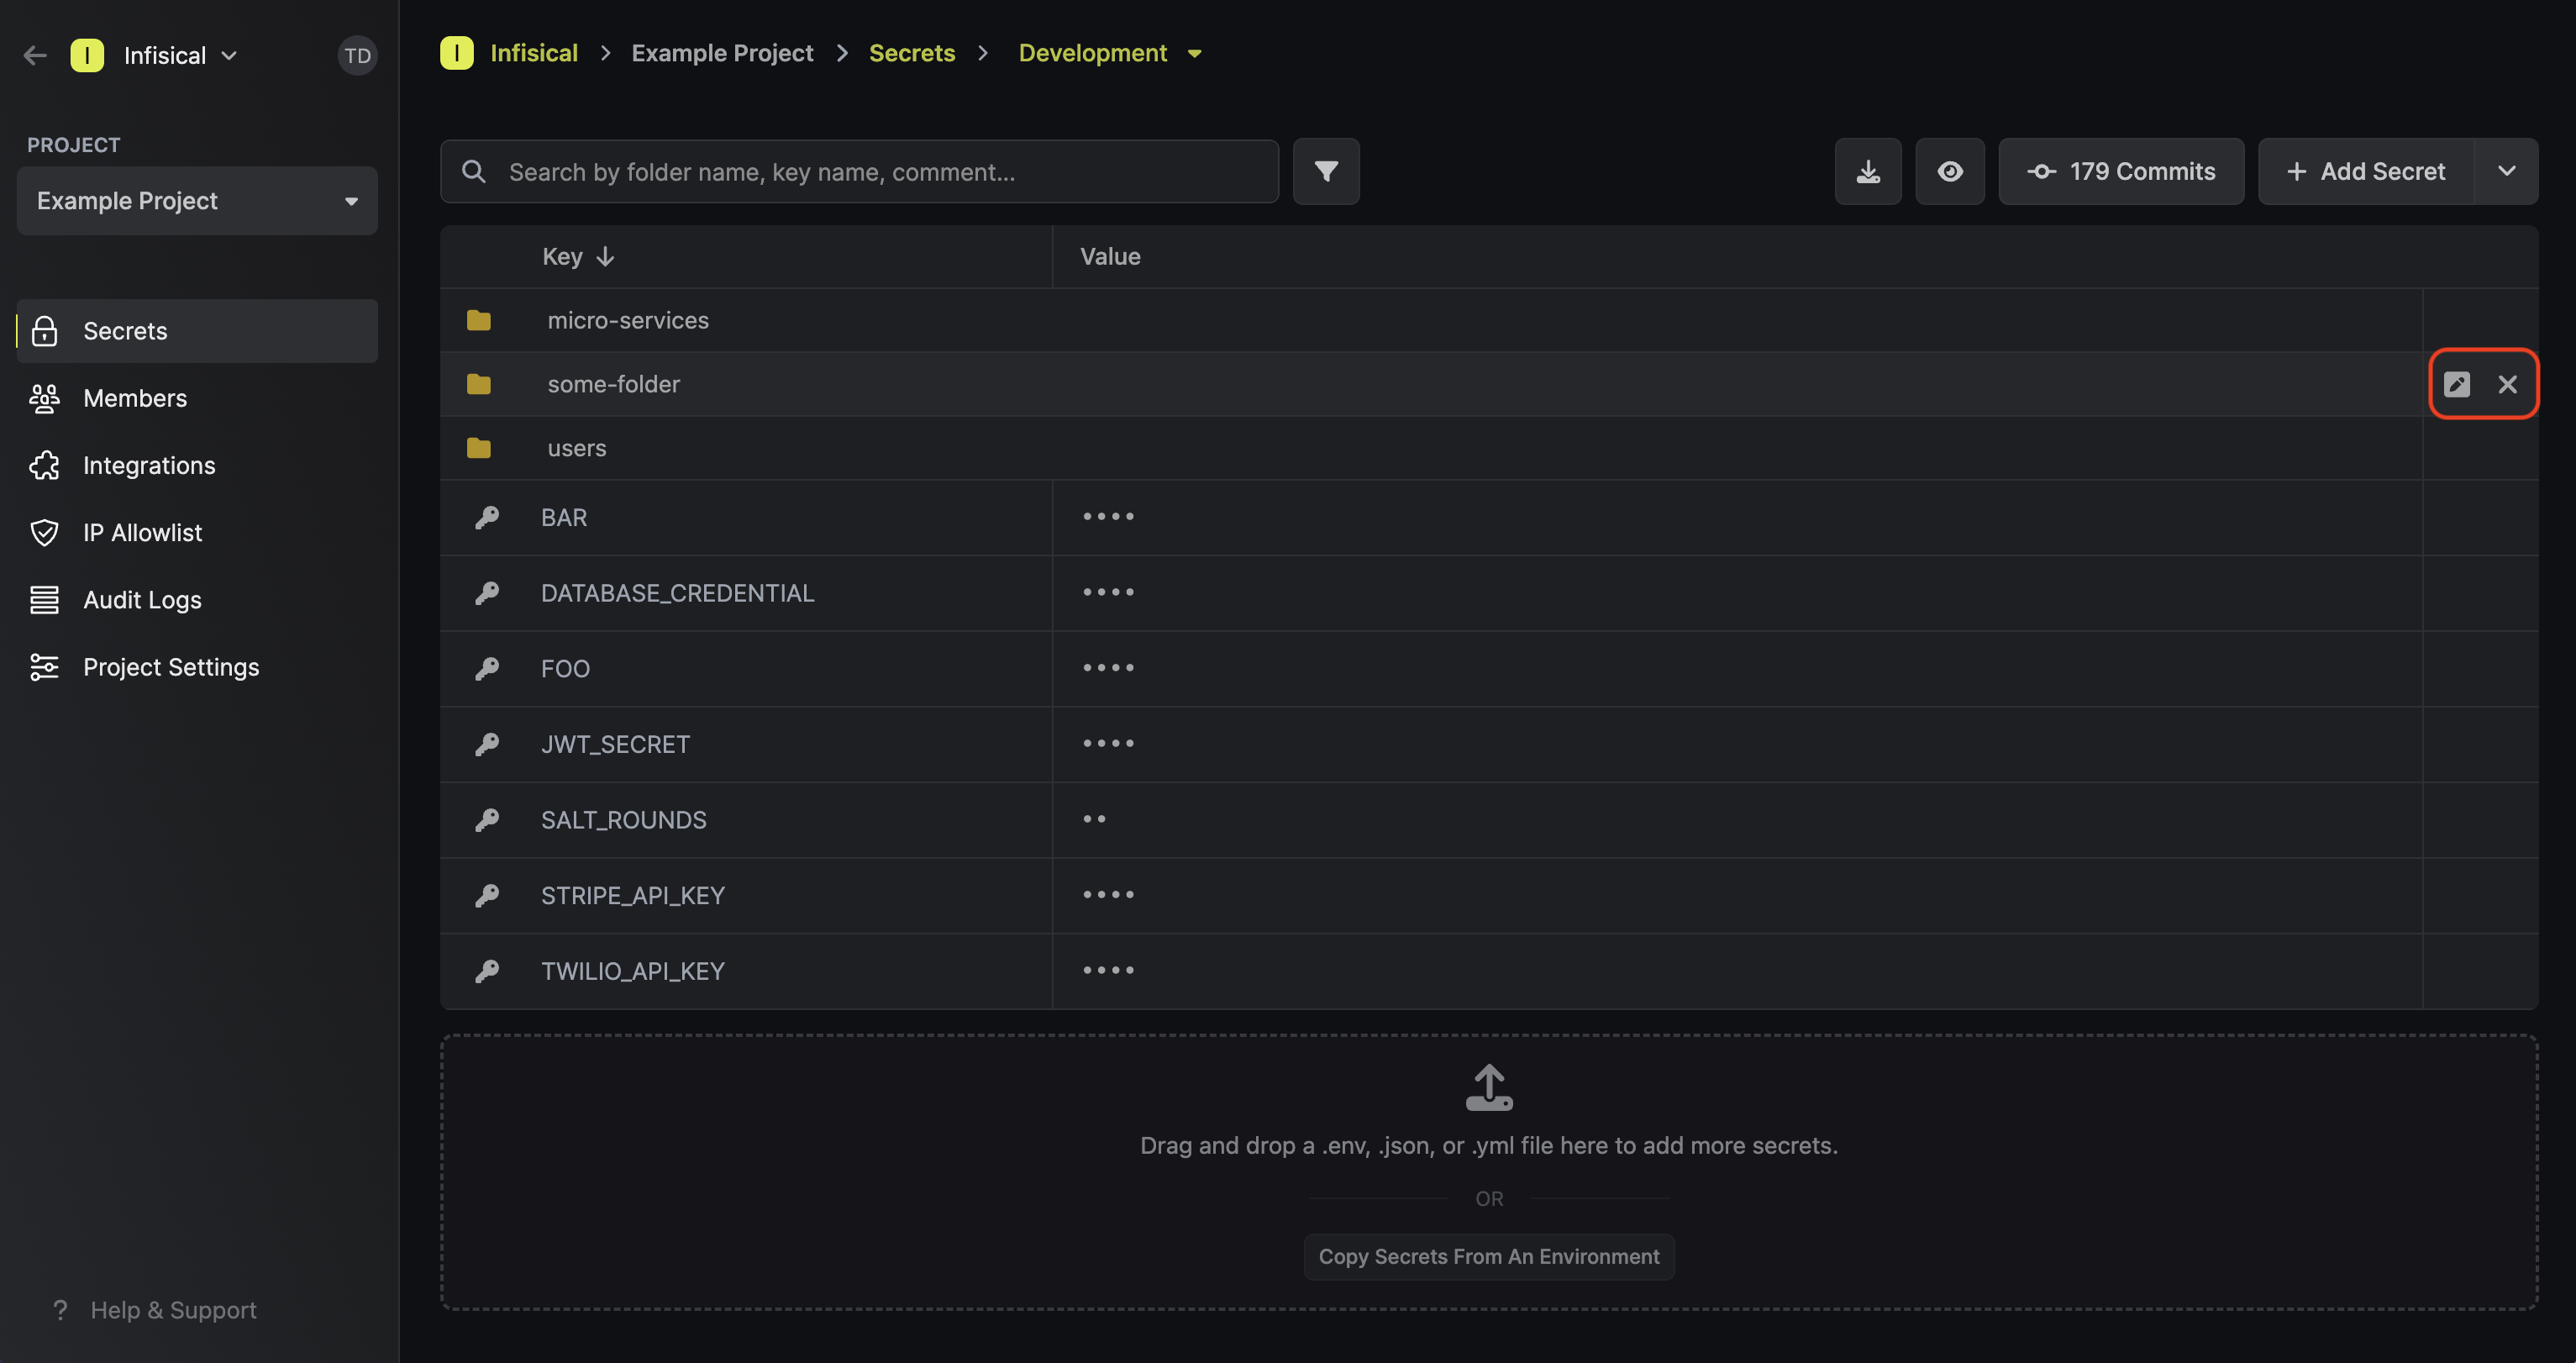 ### Comparing folders
It's possible to compare the contents of folders across environments in the **Secrets Overview** page.
When you click on a folder, the table will display the items within it across environments.
In the image below, you can see that the **Development** environment is the only one that contains items
in the `/users` folder, being other folders `/user-a`, `/user-b`, ... `/user-f`.
### Comparing folders
It's possible to compare the contents of folders across environments in the **Secrets Overview** page.
When you click on a folder, the table will display the items within it across environments.
In the image below, you can see that the **Development** environment is the only one that contains items
in the `/users` folder, being other folders `/user-a`, `/user-b`, ... `/user-f`.
 ### Replicating Folder Contents
If you want to copy secrets or folders from one path to another, you can utilize the **Replicate Secrets** functionality located in the **Add Secret** dropdown.
### Replicating Folder Contents
If you want to copy secrets or folders from one path to another, you can utilize the **Replicate Secrets** functionality located in the **Add Secret** dropdown.
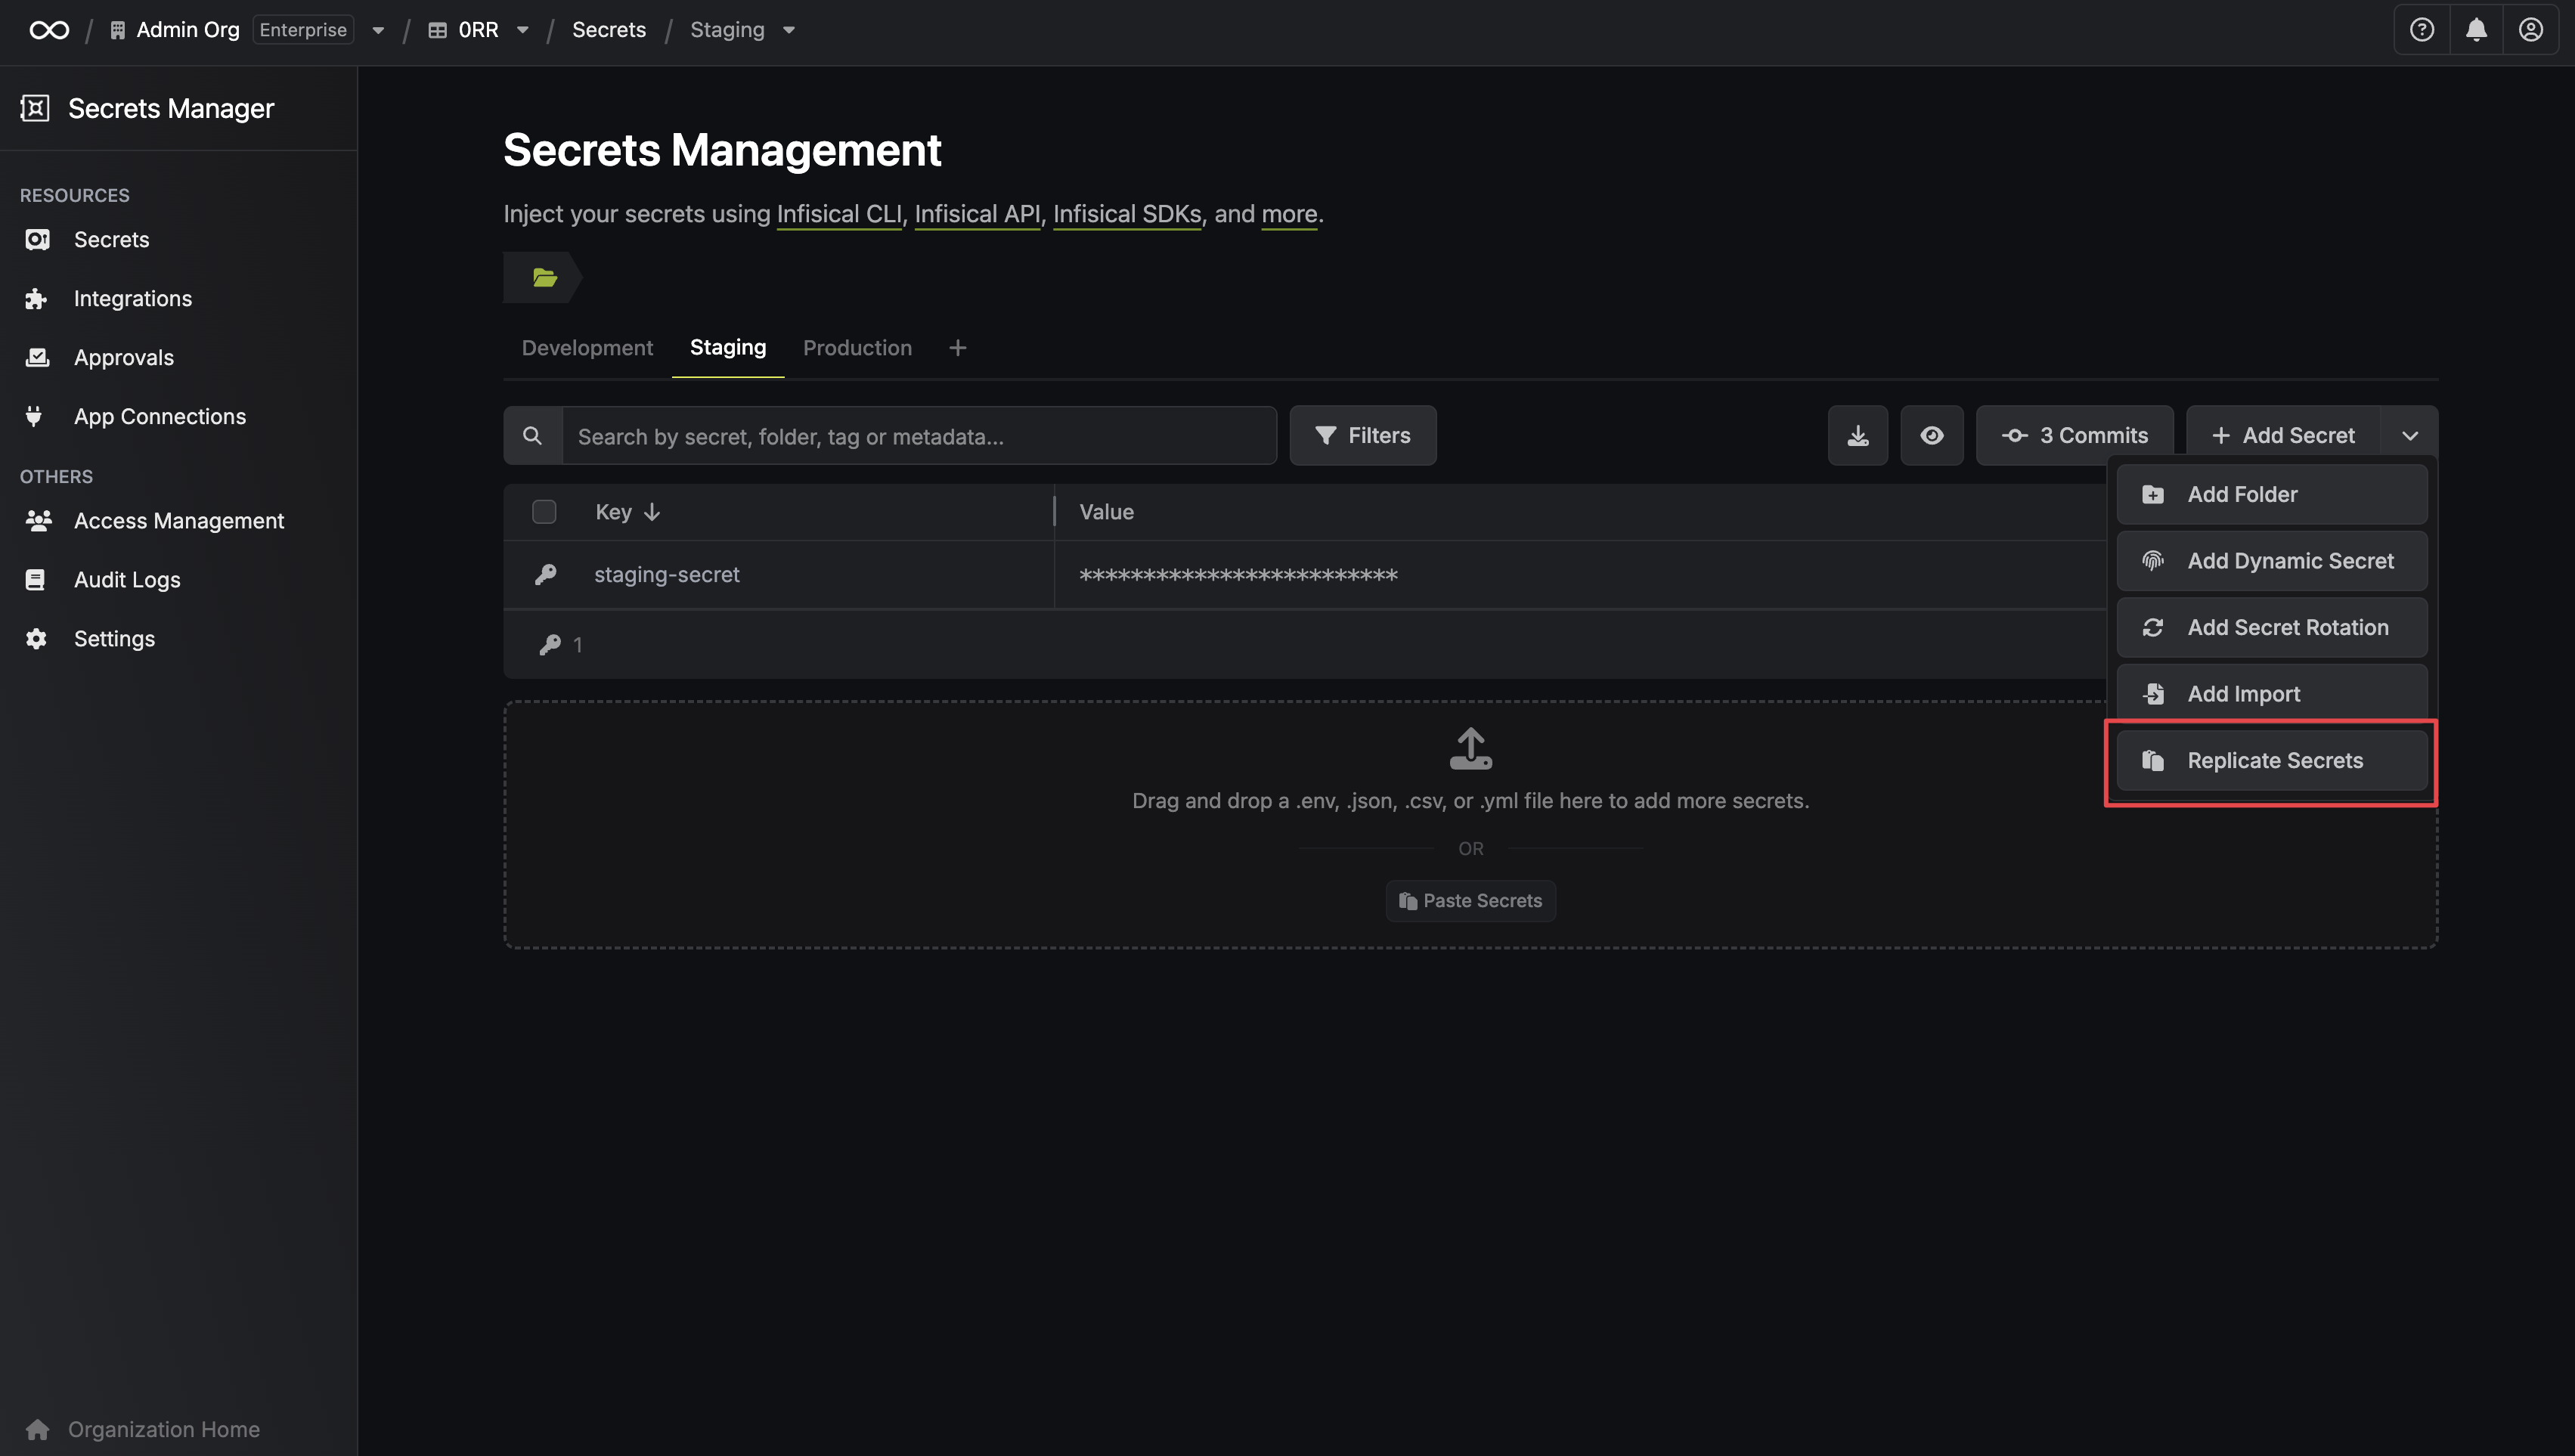
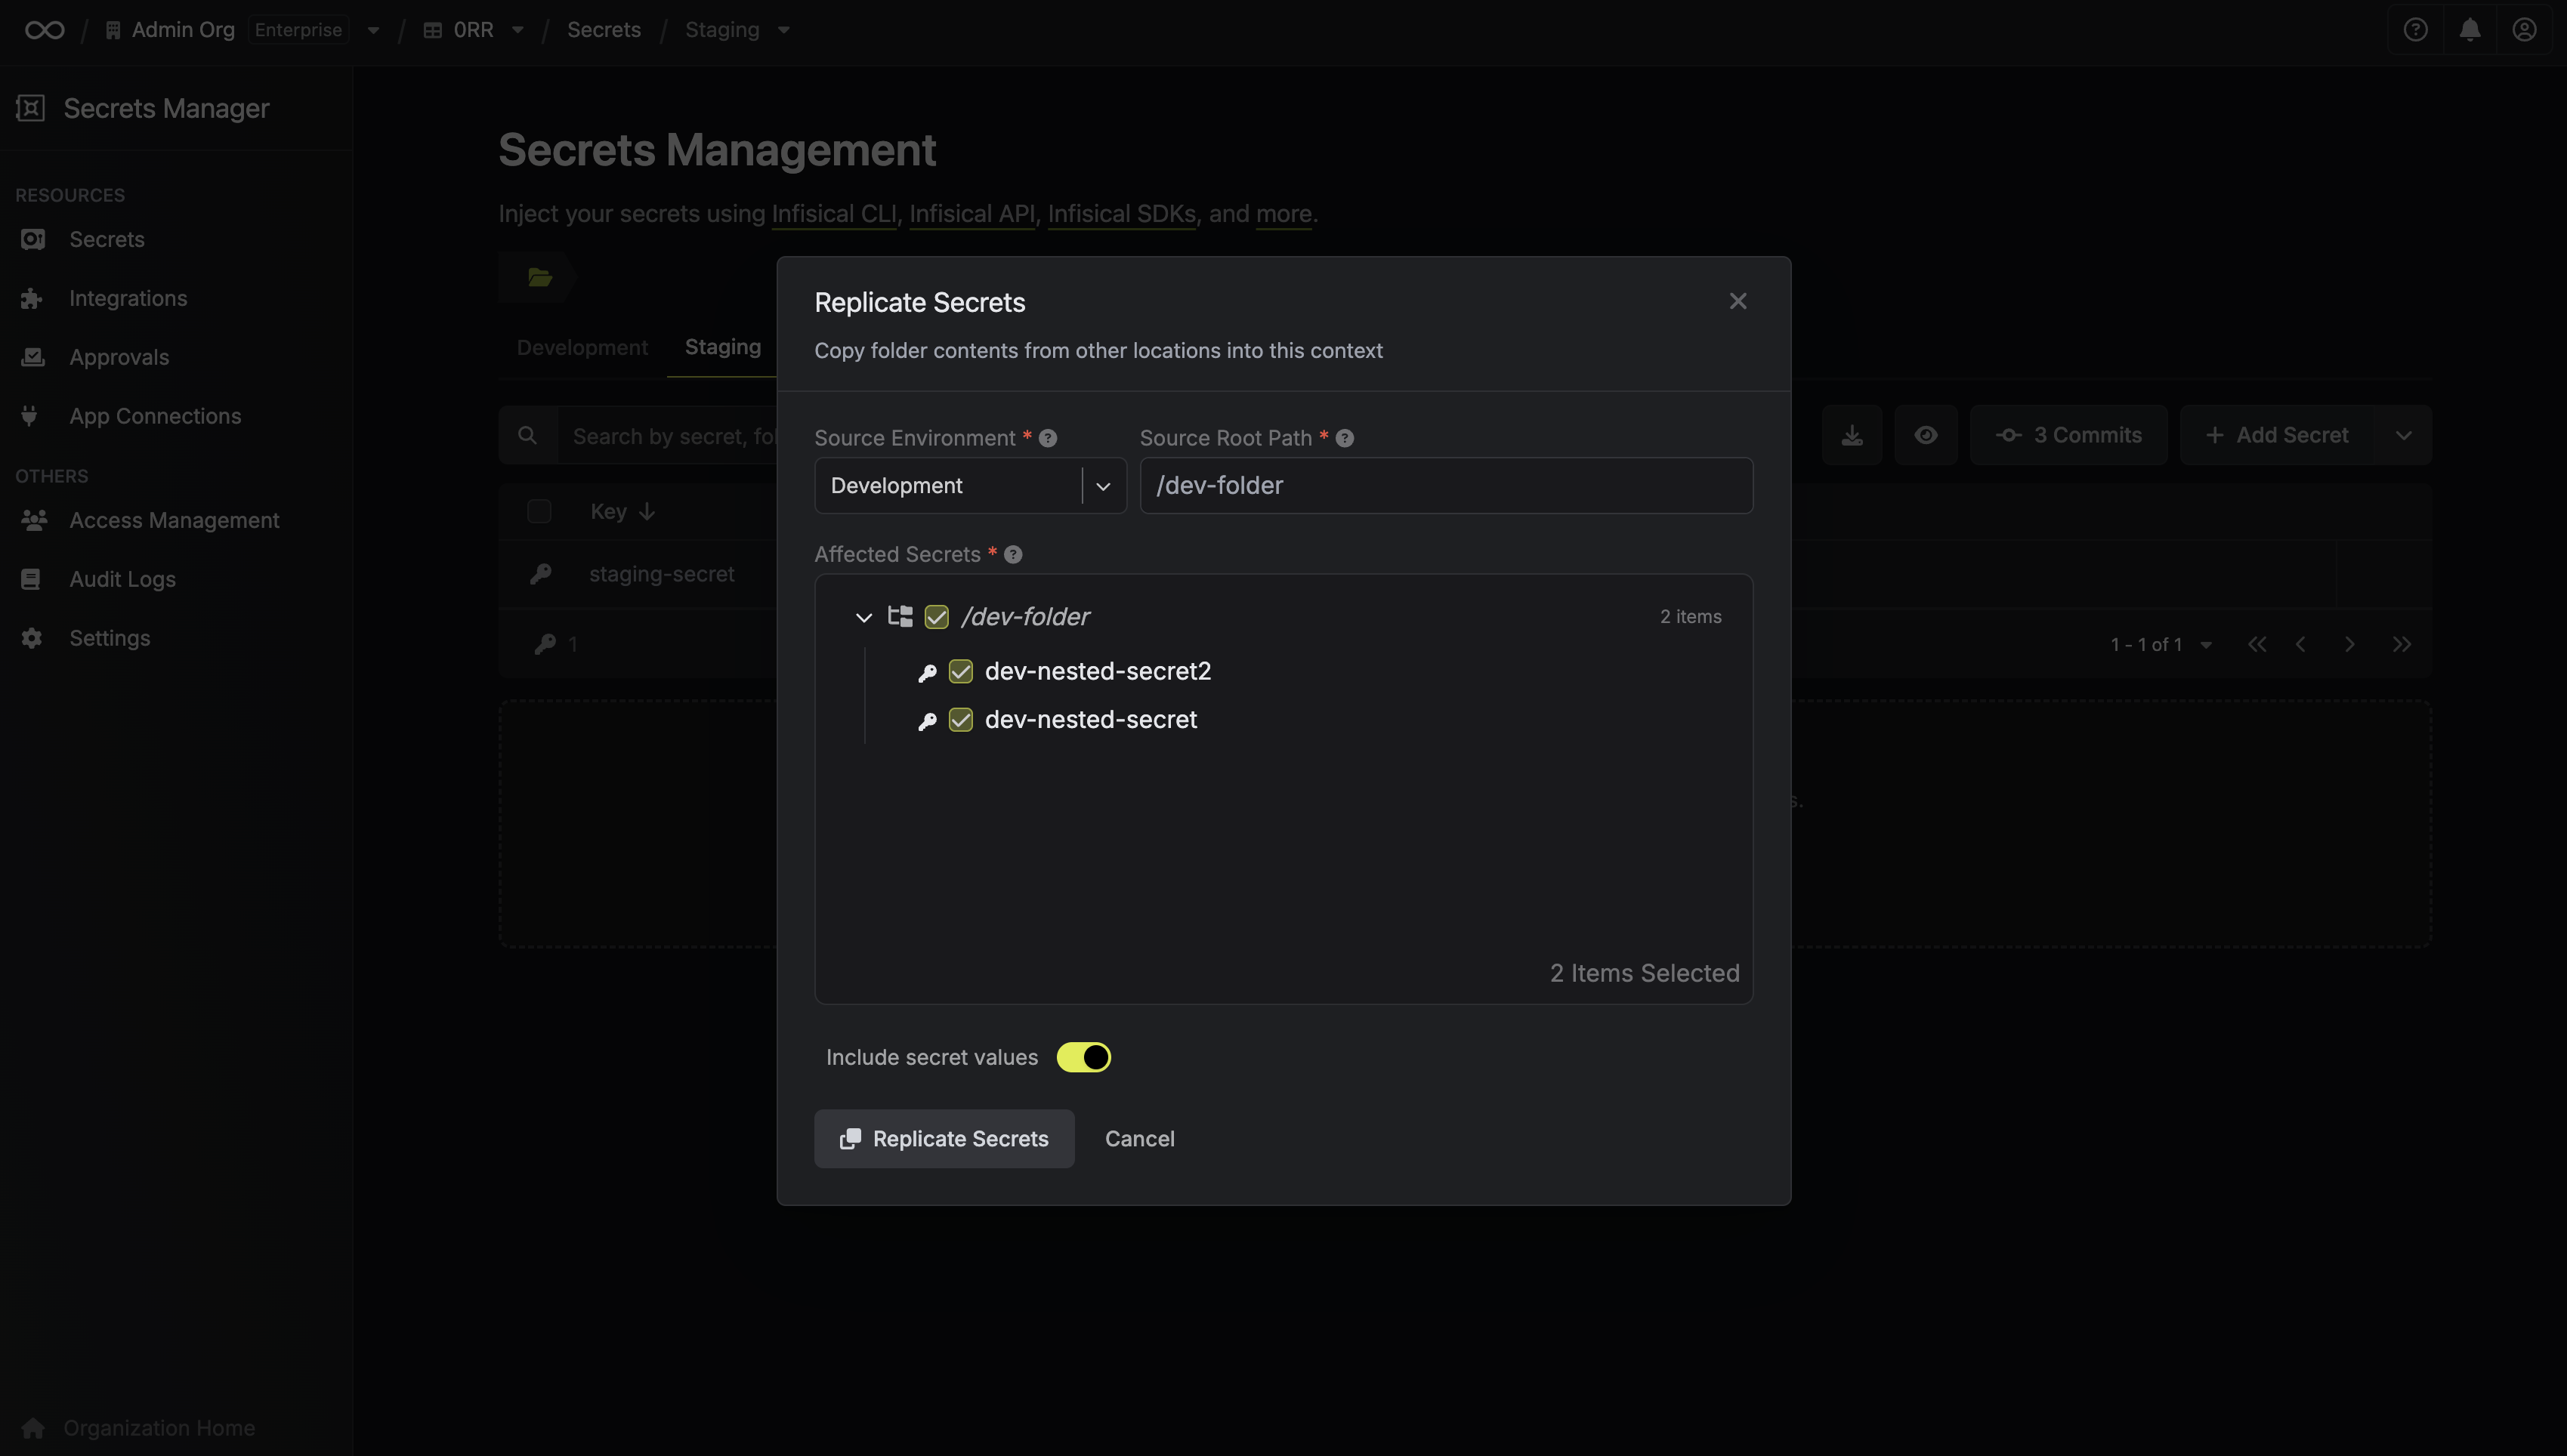 First, select the **Source Environment** and the **Source Root Path** you want to copy secrets *from*. In the example provided, we select `/dev-folder` as the source root path from the Development environment. This means any secrets within `/dev-folder` from Development will be replicated. By default, these secrets are copied into the *currently active* folder/path in your target environment (e.g., the root folder of your Staging environment in this scenario).
As a final step, you can select the specific secrets you wish to copy and then click **Replicate Secrets**.
First, select the **Source Environment** and the **Source Root Path** you want to copy secrets *from*. In the example provided, we select `/dev-folder` as the source root path from the Development environment. This means any secrets within `/dev-folder` from Development will be replicated. By default, these secrets are copied into the *currently active* folder/path in your target environment (e.g., the root folder of your Staging environment in this scenario).
As a final step, you can select the specific secrets you wish to copy and then click **Replicate Secrets**.
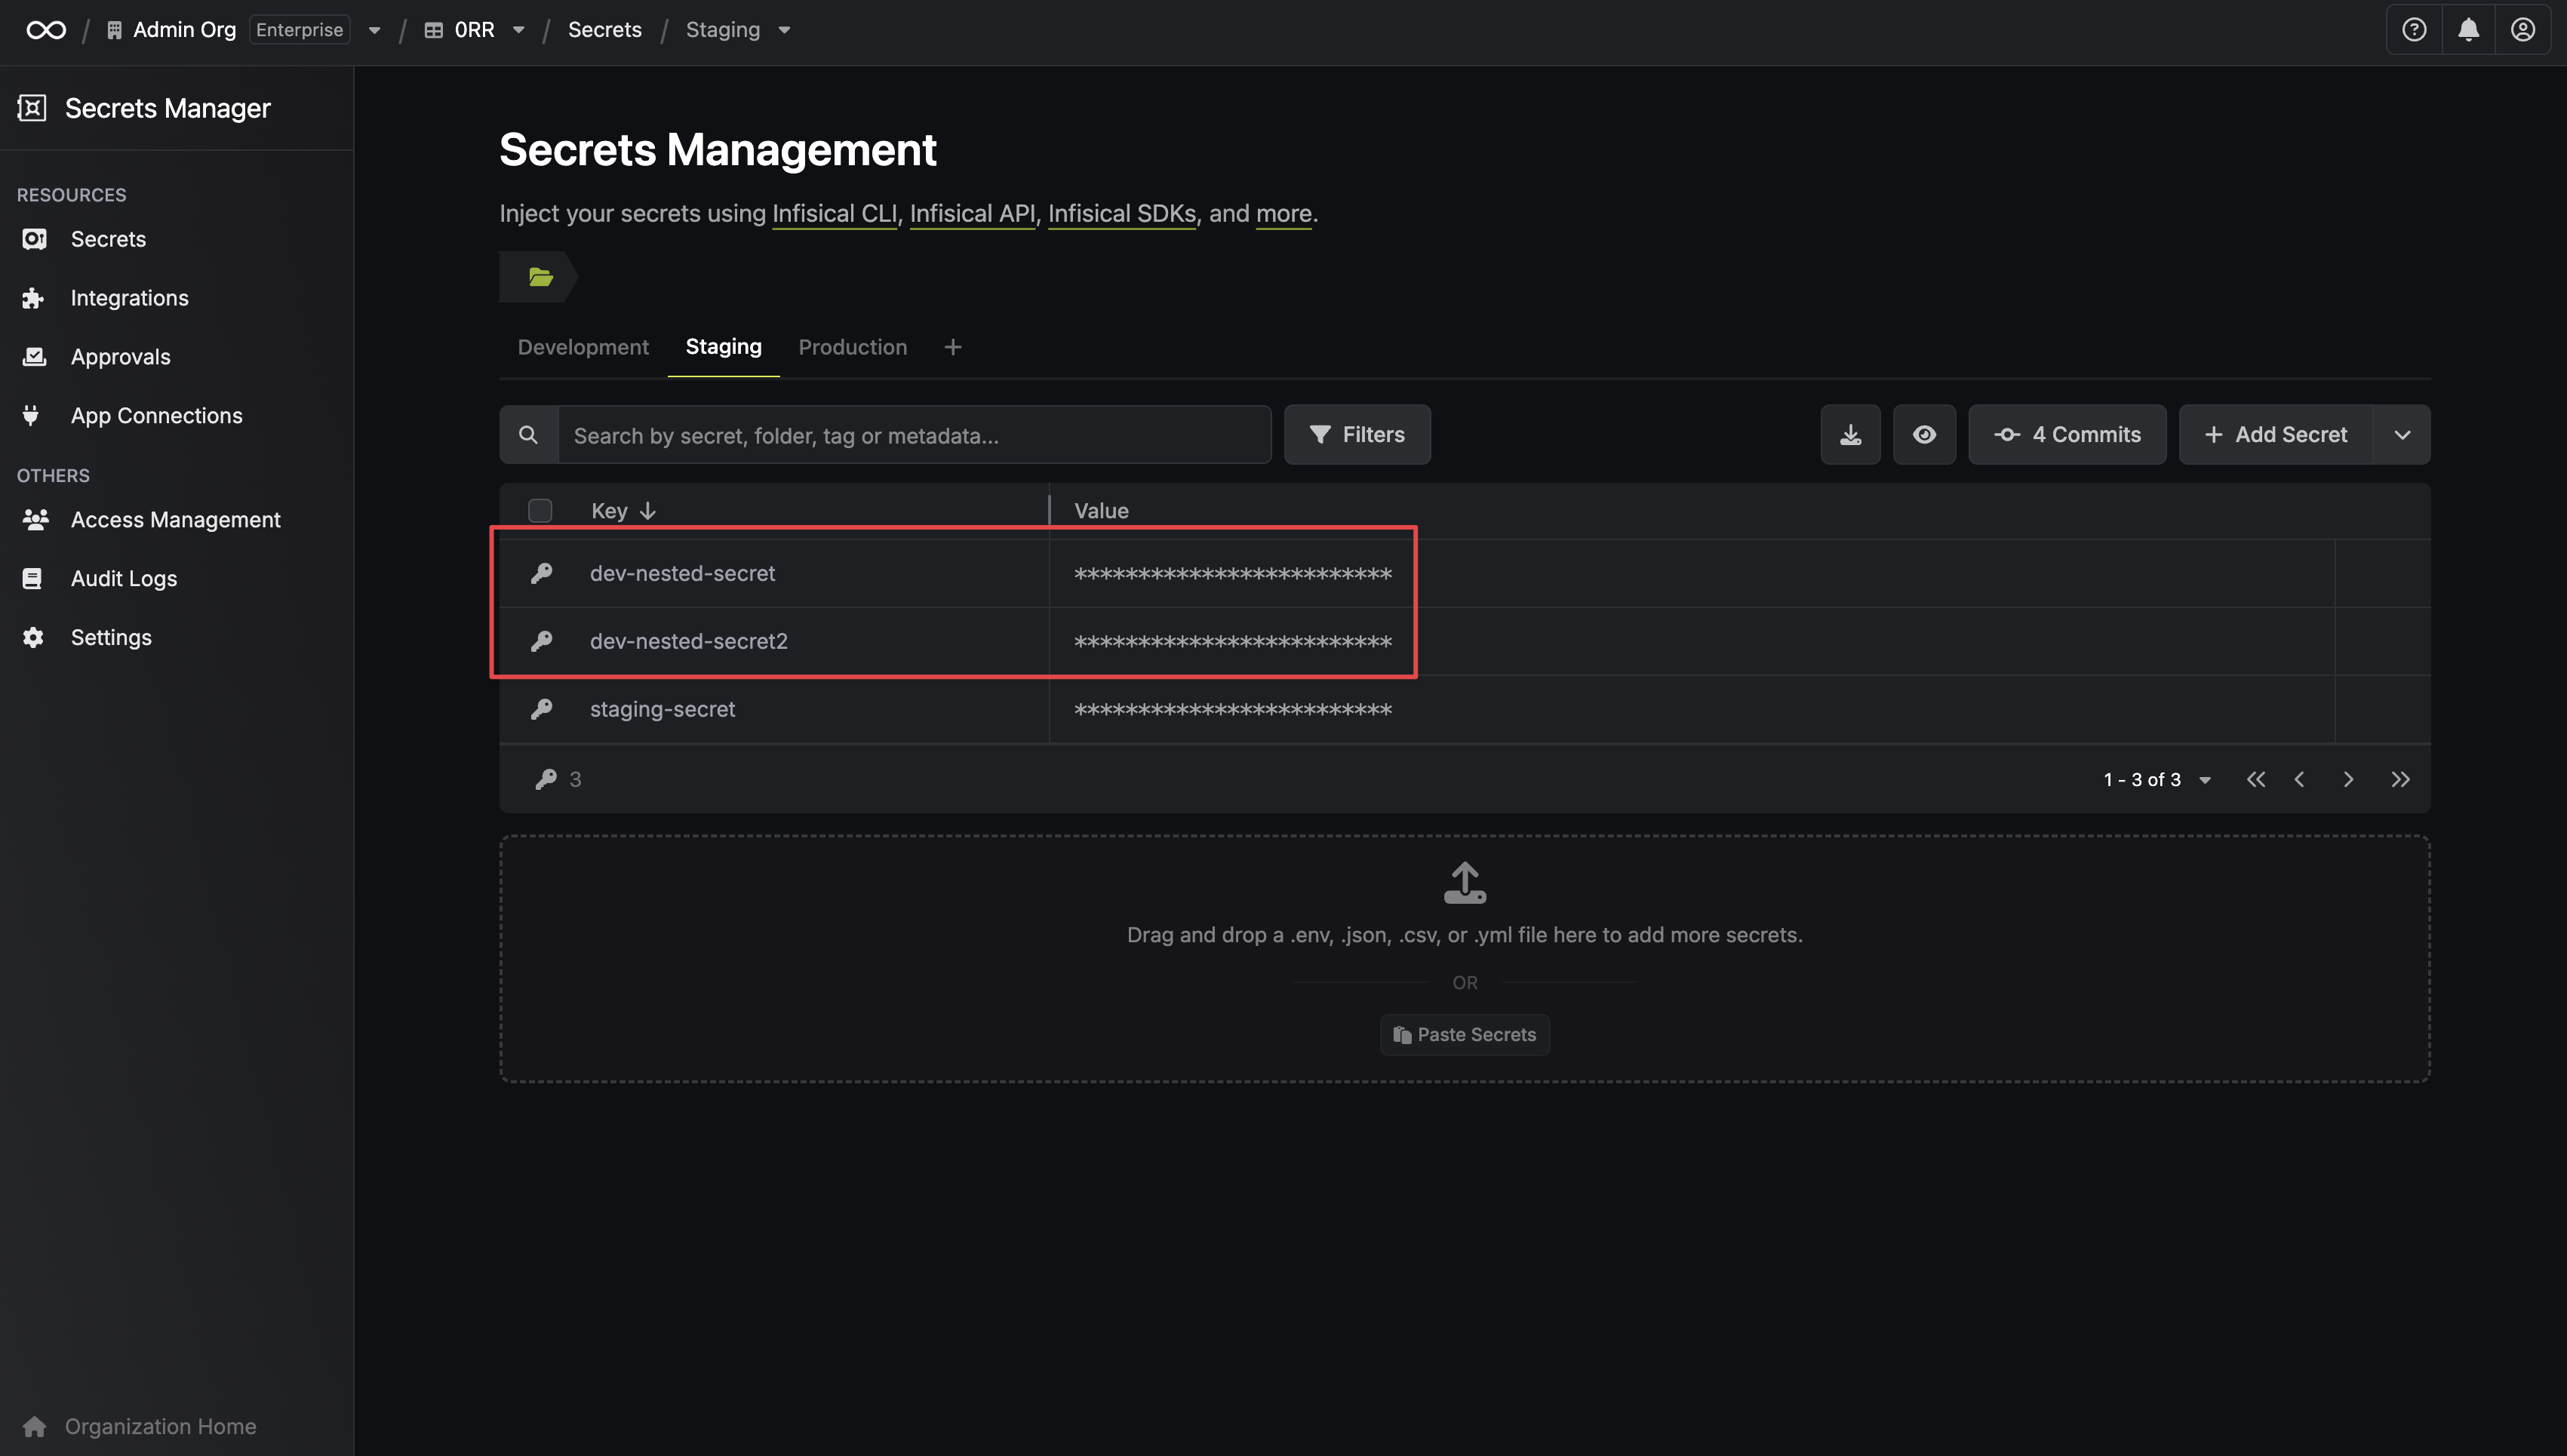 The result shows two secrets successfully copied from the `/dev-folder` in the Development environment into the root folder of the Staging environment.
{filteredIntegrations.length} framework integration{filteredIntegrations.length !== 1 ? 's' : ''} found {searchTerm && ` for "${searchTerm}"`}
{integration.description}
No framework integrations found matching your criteria
{searchTerm &&Try adjusting your search terms or filters
}
When creating an identity, you specify an organization level [role](/documentation/platform/access-controls/role-based-access-controls) for it to assume; you can configure roles in Organization Settings > Access Control > Organization Roles.
Now input a few details for your new identity. Here's some guidance for each field:
* Name (required): A friendly name for the identity.
* Role (required): A role from the **Organization Roles** tab for the identity to assume. The organization role assigned will determine what organization level resources this identity can have access to.
Once you've created an identity, you'll be redirected to a page where you can manage the identity.
Since the identity has been configured with Universal Auth by default, you should re-configure it to use GCP Auth instead. To do this, press to edit the **Authentication** section,
remove the existing Universal Auth configuration, and add a new GCP Auth configuration onto the identity; set the **Type** field to **GCP ID Token Auth**.
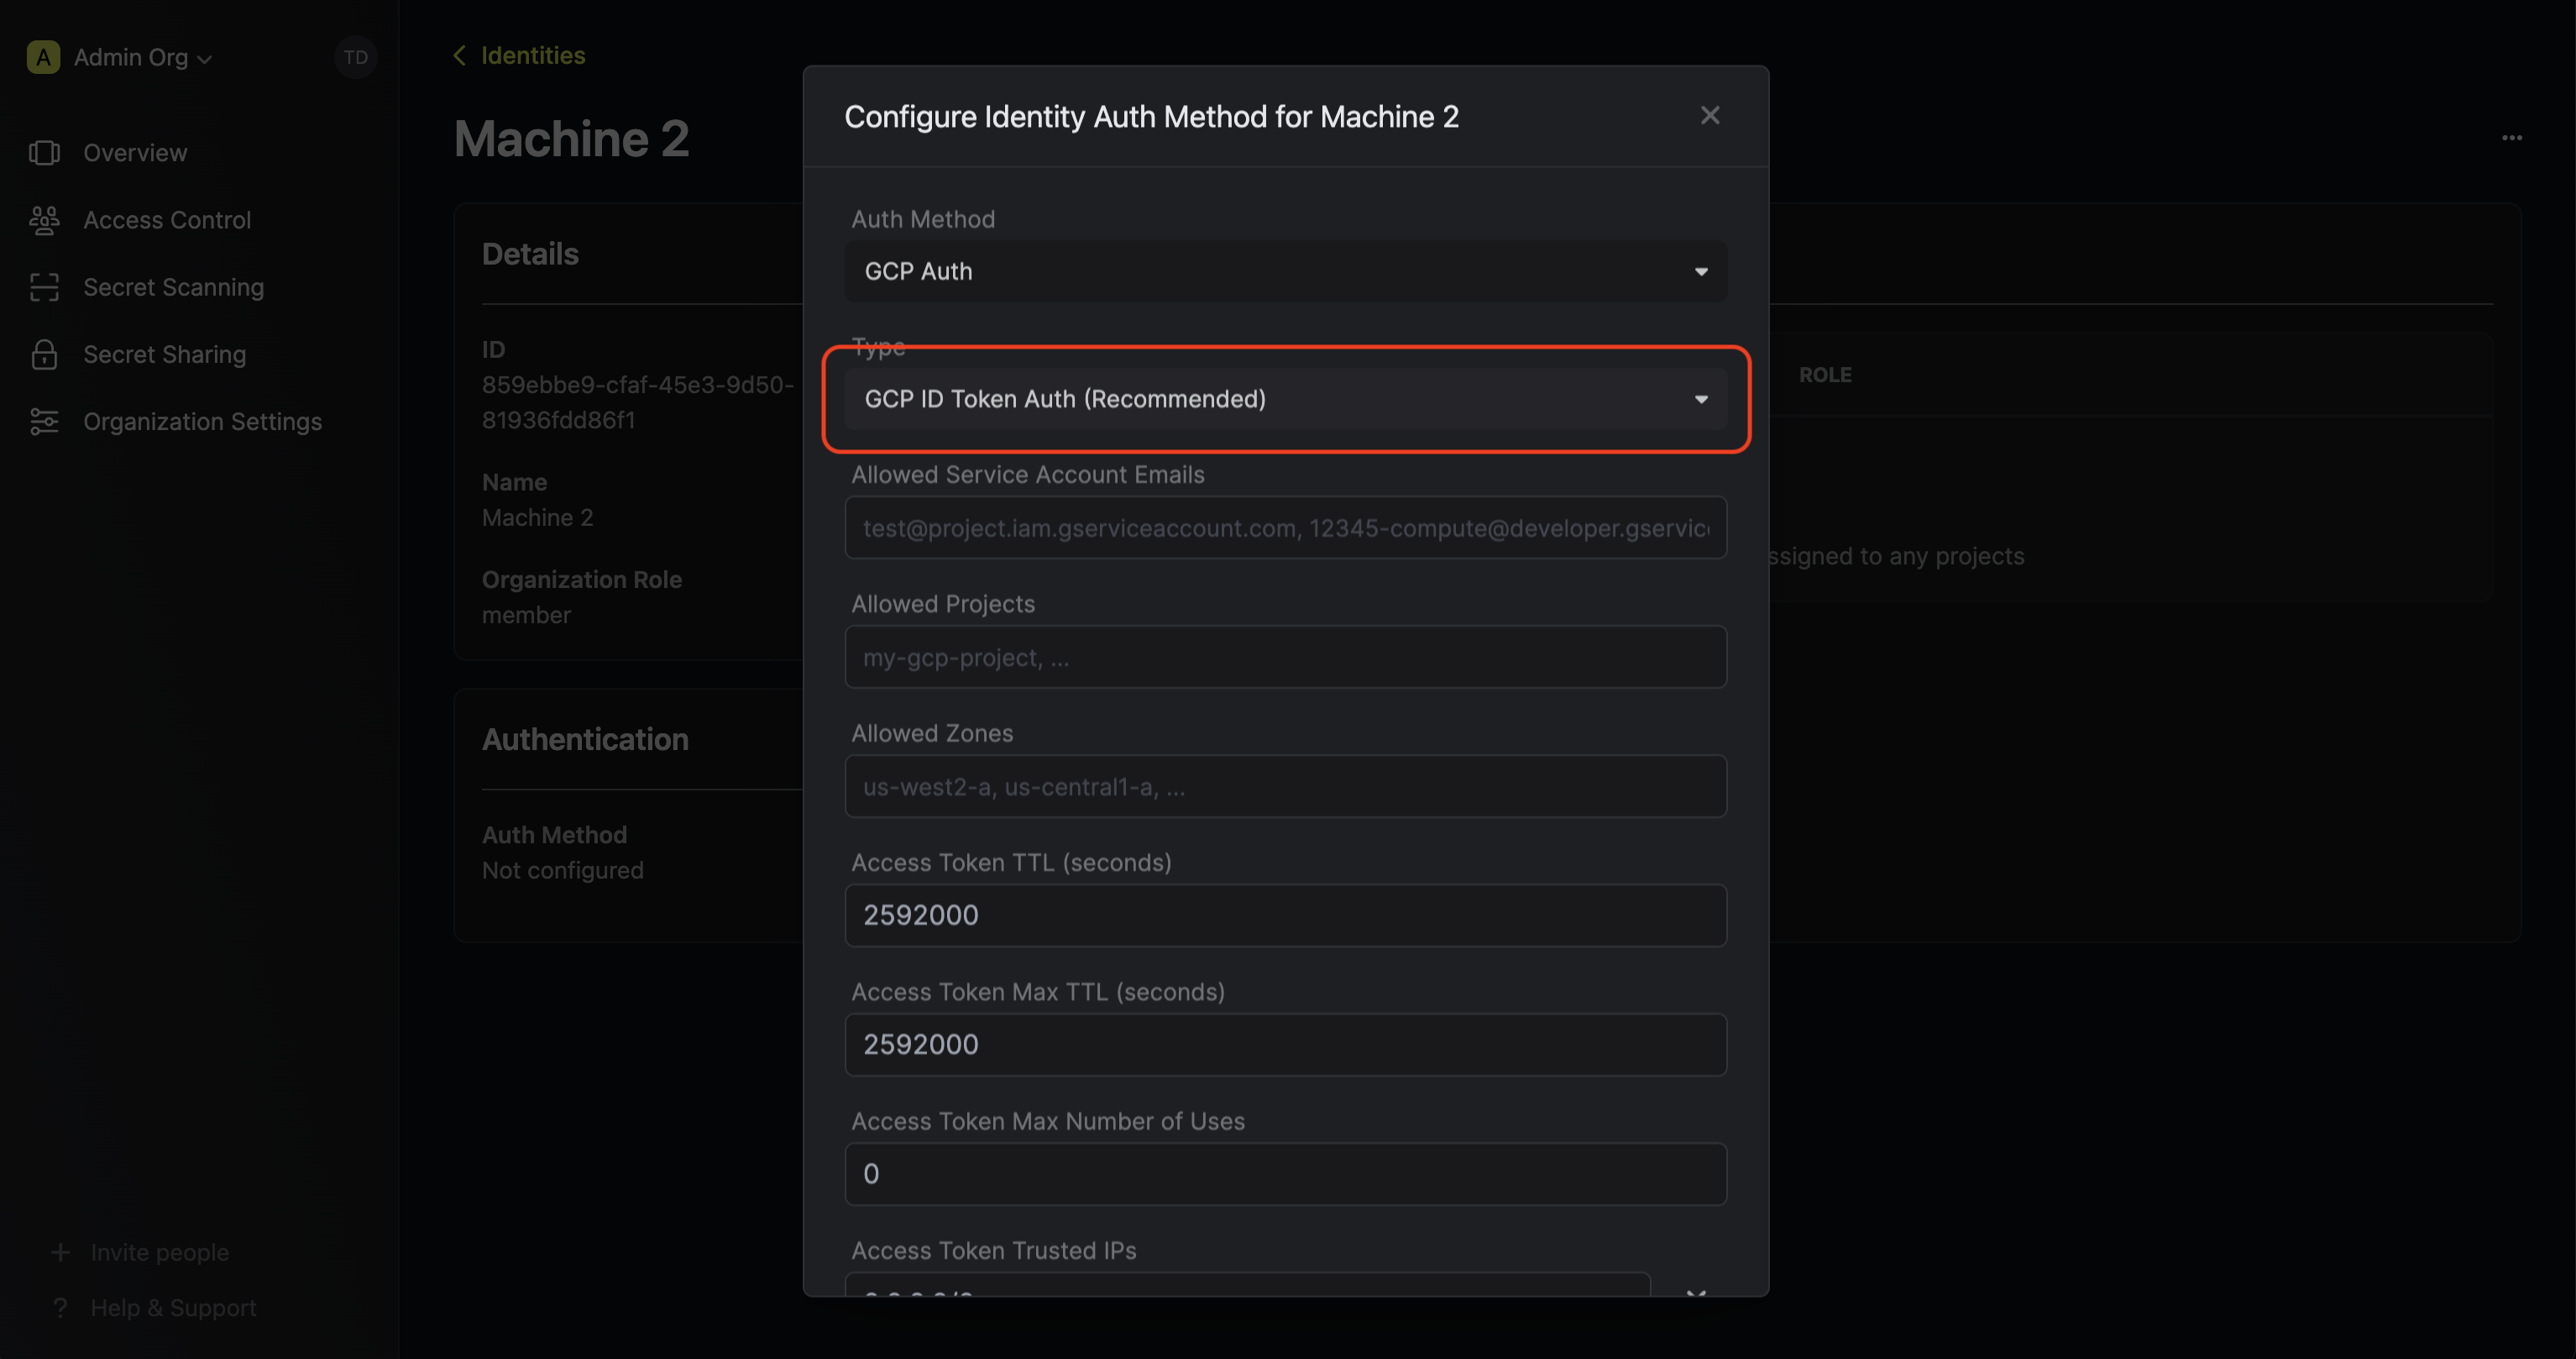 Here's some more guidance on each field:
* Allowed Service Account Emails: A comma-separated list of trusted service account emails corresponding to the GCE resource(s) allowed to authenticate with Infisical; this could be something like `test@project.iam.gserviceaccount.com`, `12345-compute@developer.gserviceaccount.com`, etc.
* Allowed Projects: A comma-separated list of trusted GCP projects that the GCE instance must belong to authenticate with Infisical. Note that this validation property will only work for GCE instances.
* Allowed Zones: A comma-separated list of trusted zones that the GCE instances must belong to authenticate with Infisical; this should be the fully-qualified zone name in the format `
When creating an identity, you specify an organization level [role](/documentation/platform/access-controls/role-based-access-controls) for it to assume; you can configure roles in Organization Settings > Access Control > Organization Roles.
Now input a few details for your new identity. Here's some guidance for each field:
* Name (required): A friendly name for the identity.
* Role (required): A role from the **Organization Roles** tab for the identity to assume. The organization role assigned will determine what organization level resources this identity can have access to.
Once you've created an identity, you'll be redirected to a page where you can manage the identity.
Since the identity has been configured with Universal Auth by default, you should re-configure it to use GCP Auth instead. To do this, press to edit the **Authentication** section,
remove the existing Universal Auth configuration, and add a new GCP Auth configuration onto the identity; set the **Type** field to **GCP IAM Auth**.
Here's some more guidance on each field:
* Allowed Service Account Emails: A comma-separated list of trusted service account emails corresponding to the GCE resource(s) allowed to authenticate with Infisical; this could be something like `test@project.iam.gserviceaccount.com`, `12345-compute@developer.gserviceaccount.com`, etc.
* Allowed Projects: A comma-separated list of trusted GCP projects that the GCE instance must belong to authenticate with Infisical. Note that this validation property will only work for GCE instances.
* Allowed Zones: A comma-separated list of trusted zones that the GCE instances must belong to authenticate with Infisical; this should be the fully-qualified zone name in the format `
When creating an identity, you specify an organization level [role](/documentation/platform/access-controls/role-based-access-controls) for it to assume; you can configure roles in Organization Settings > Access Control > Organization Roles.
Now input a few details for your new identity. Here's some guidance for each field:
* Name (required): A friendly name for the identity.
* Role (required): A role from the **Organization Roles** tab for the identity to assume. The organization role assigned will determine what organization level resources this identity can have access to.
Once you've created an identity, you'll be redirected to a page where you can manage the identity.
Since the identity has been configured with Universal Auth by default, you should re-configure it to use GCP Auth instead. To do this, press to edit the **Authentication** section,
remove the existing Universal Auth configuration, and add a new GCP Auth configuration onto the identity; set the **Type** field to **GCP IAM Auth**.
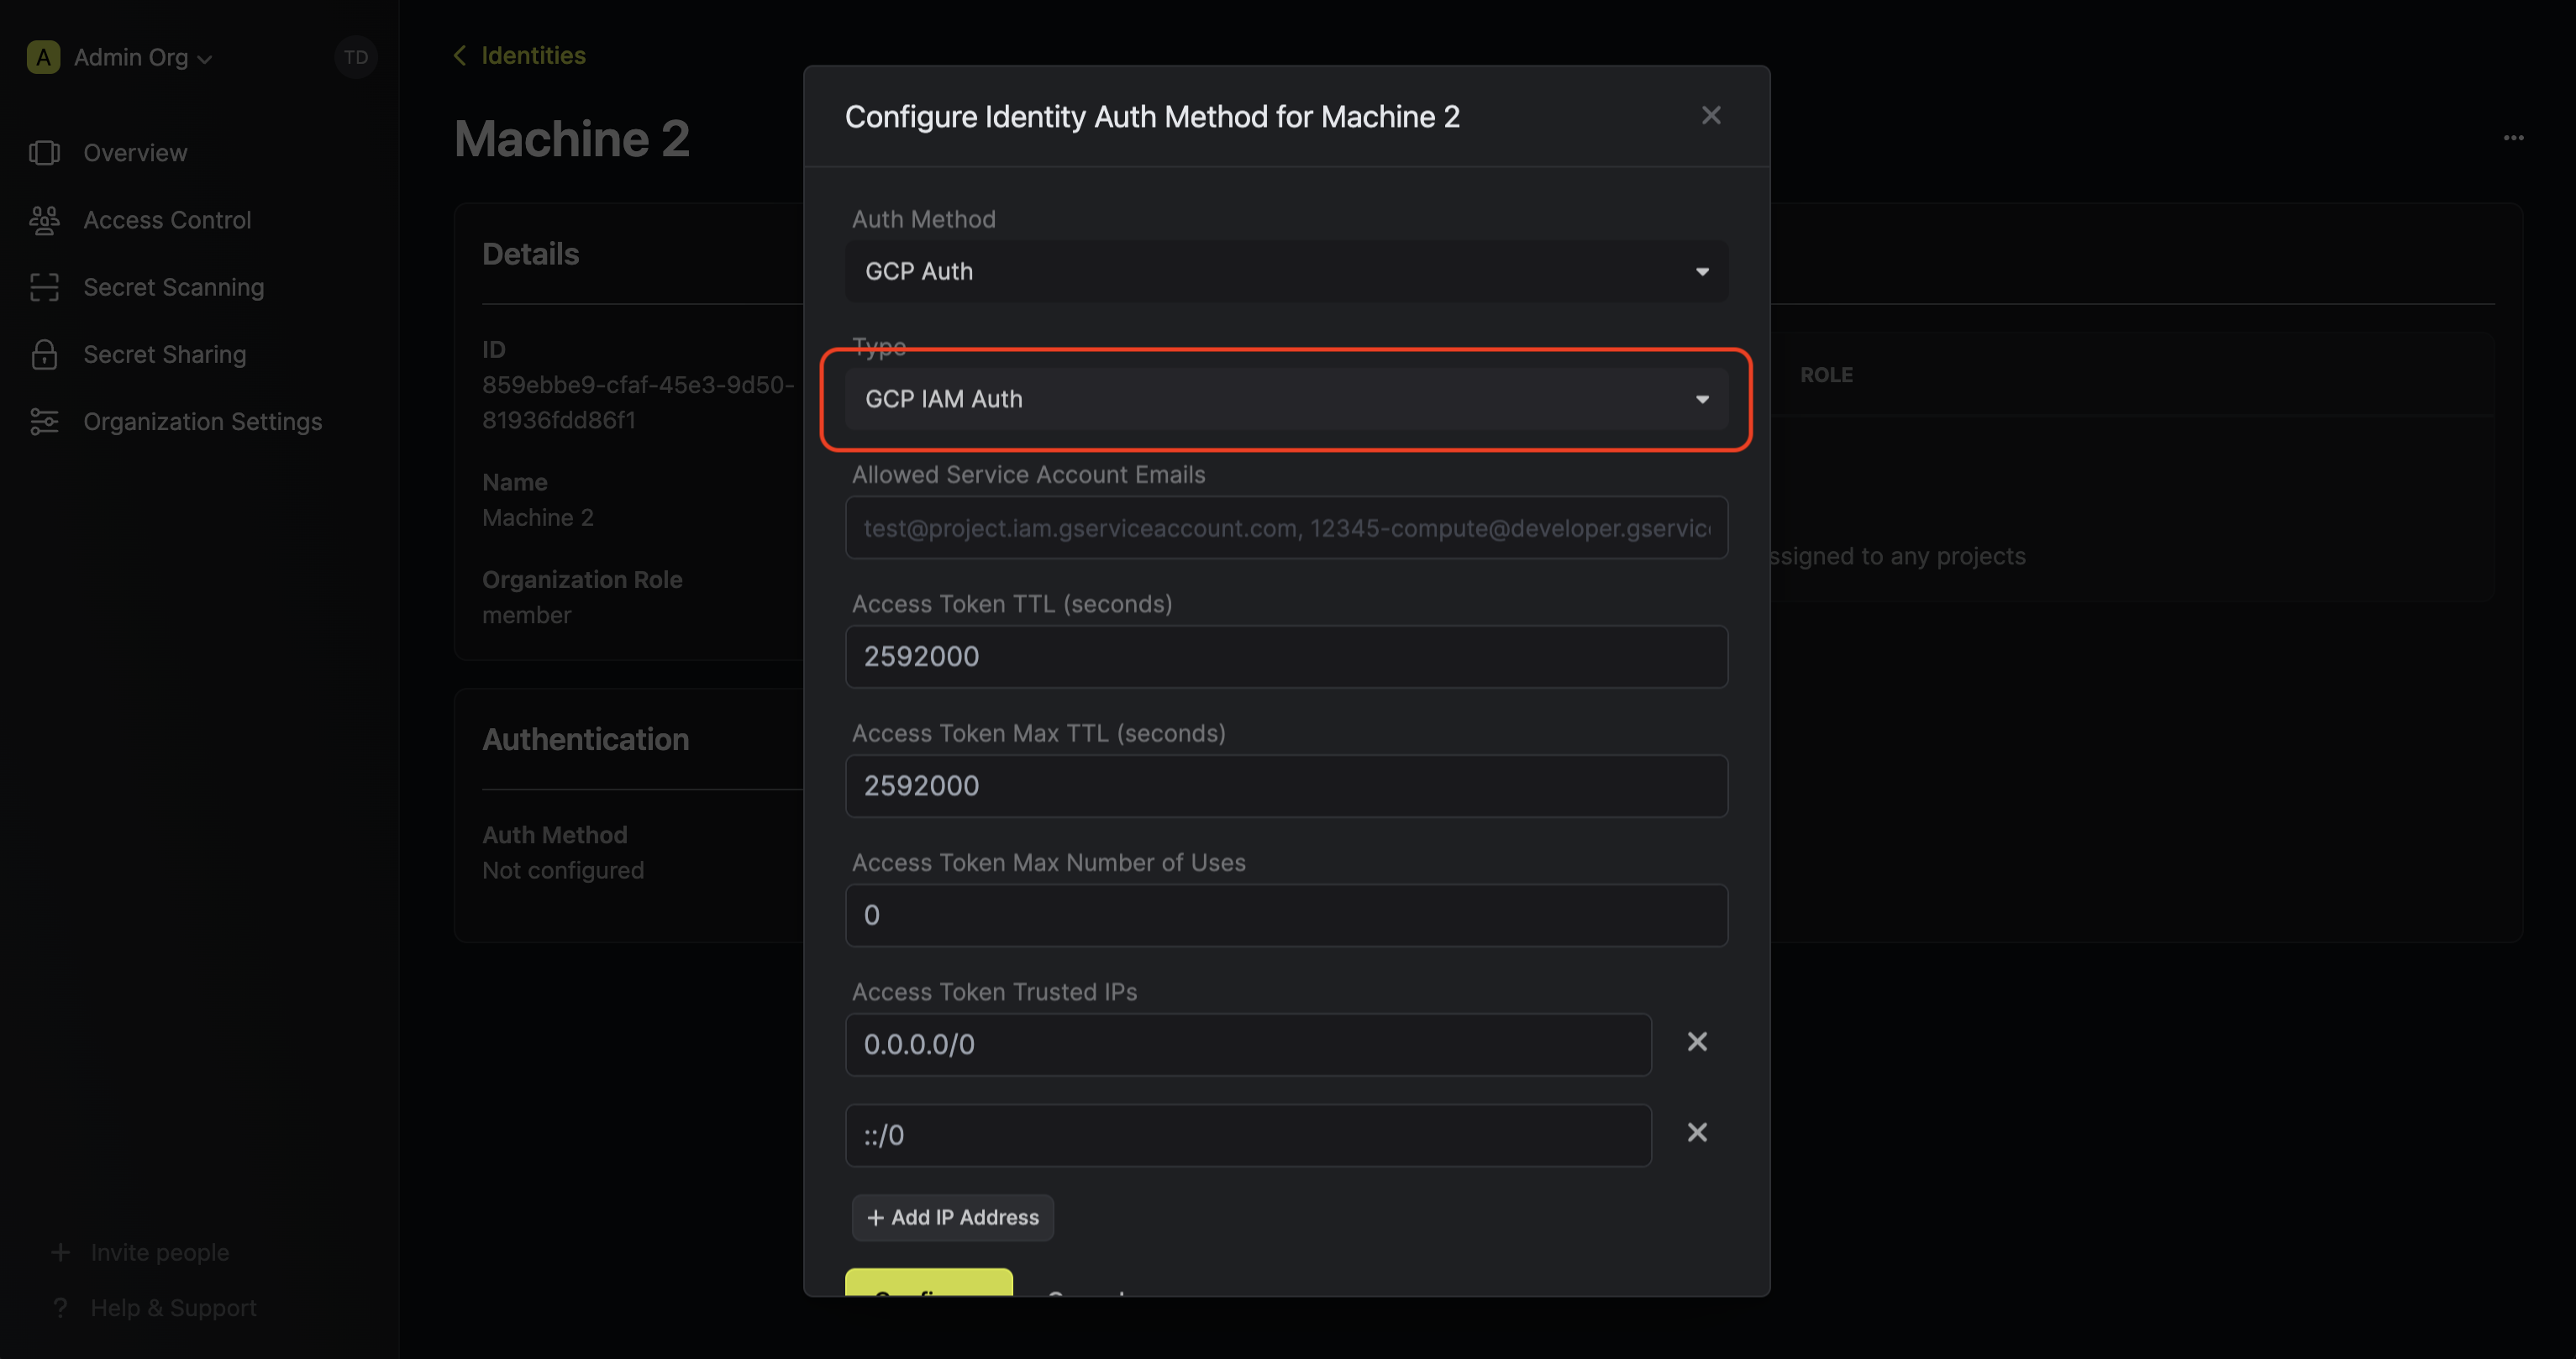 Here's some more guidance on each field:
* Allowed Service Account Emails: A comma-separated list of trusted IAM service account emails that are allowed to authenticate with Infisical; this could be something like `test@project.iam.gserviceaccount.com`, `12345-compute@developer.gserviceaccount.com`, etc.
* Access Token TTL (default is `2592000` equivalent to 30 days): The lifetime for an acccess token in seconds. This value will be referenced at renewal time.
* Access Token Max TTL (default is `2592000` equivalent to 30 days): The maximum lifetime for an acccess token in seconds. This value will be referenced at renewal time.
* Access Token Max Number of Uses (default is `0`): The maximum number of times that an access token can be used; a value of `0` implies infinite number of uses.
* Access Token Trusted IPs: The IPs or CIDR ranges that access tokens can be used from. By default, each token is given the `0.0.0.0/0`, allowing usage from any network address.
Here's some more guidance on each field:
* Allowed Service Account Emails: A comma-separated list of trusted IAM service account emails that are allowed to authenticate with Infisical; this could be something like `test@project.iam.gserviceaccount.com`, `12345-compute@developer.gserviceaccount.com`, etc.
* Access Token TTL (default is `2592000` equivalent to 30 days): The lifetime for an acccess token in seconds. This value will be referenced at renewal time.
* Access Token Max TTL (default is `2592000` equivalent to 30 days): The maximum lifetime for an acccess token in seconds. This value will be referenced at renewal time.
* Access Token Max Number of Uses (default is `0`): The maximum number of times that an access token can be used; a value of `0` implies infinite number of uses.
* Access Token Trusted IPs: The IPs or CIDR ranges that access tokens can be used from. By default, each token is given the `0.0.0.0/0`, allowing usage from any network address.

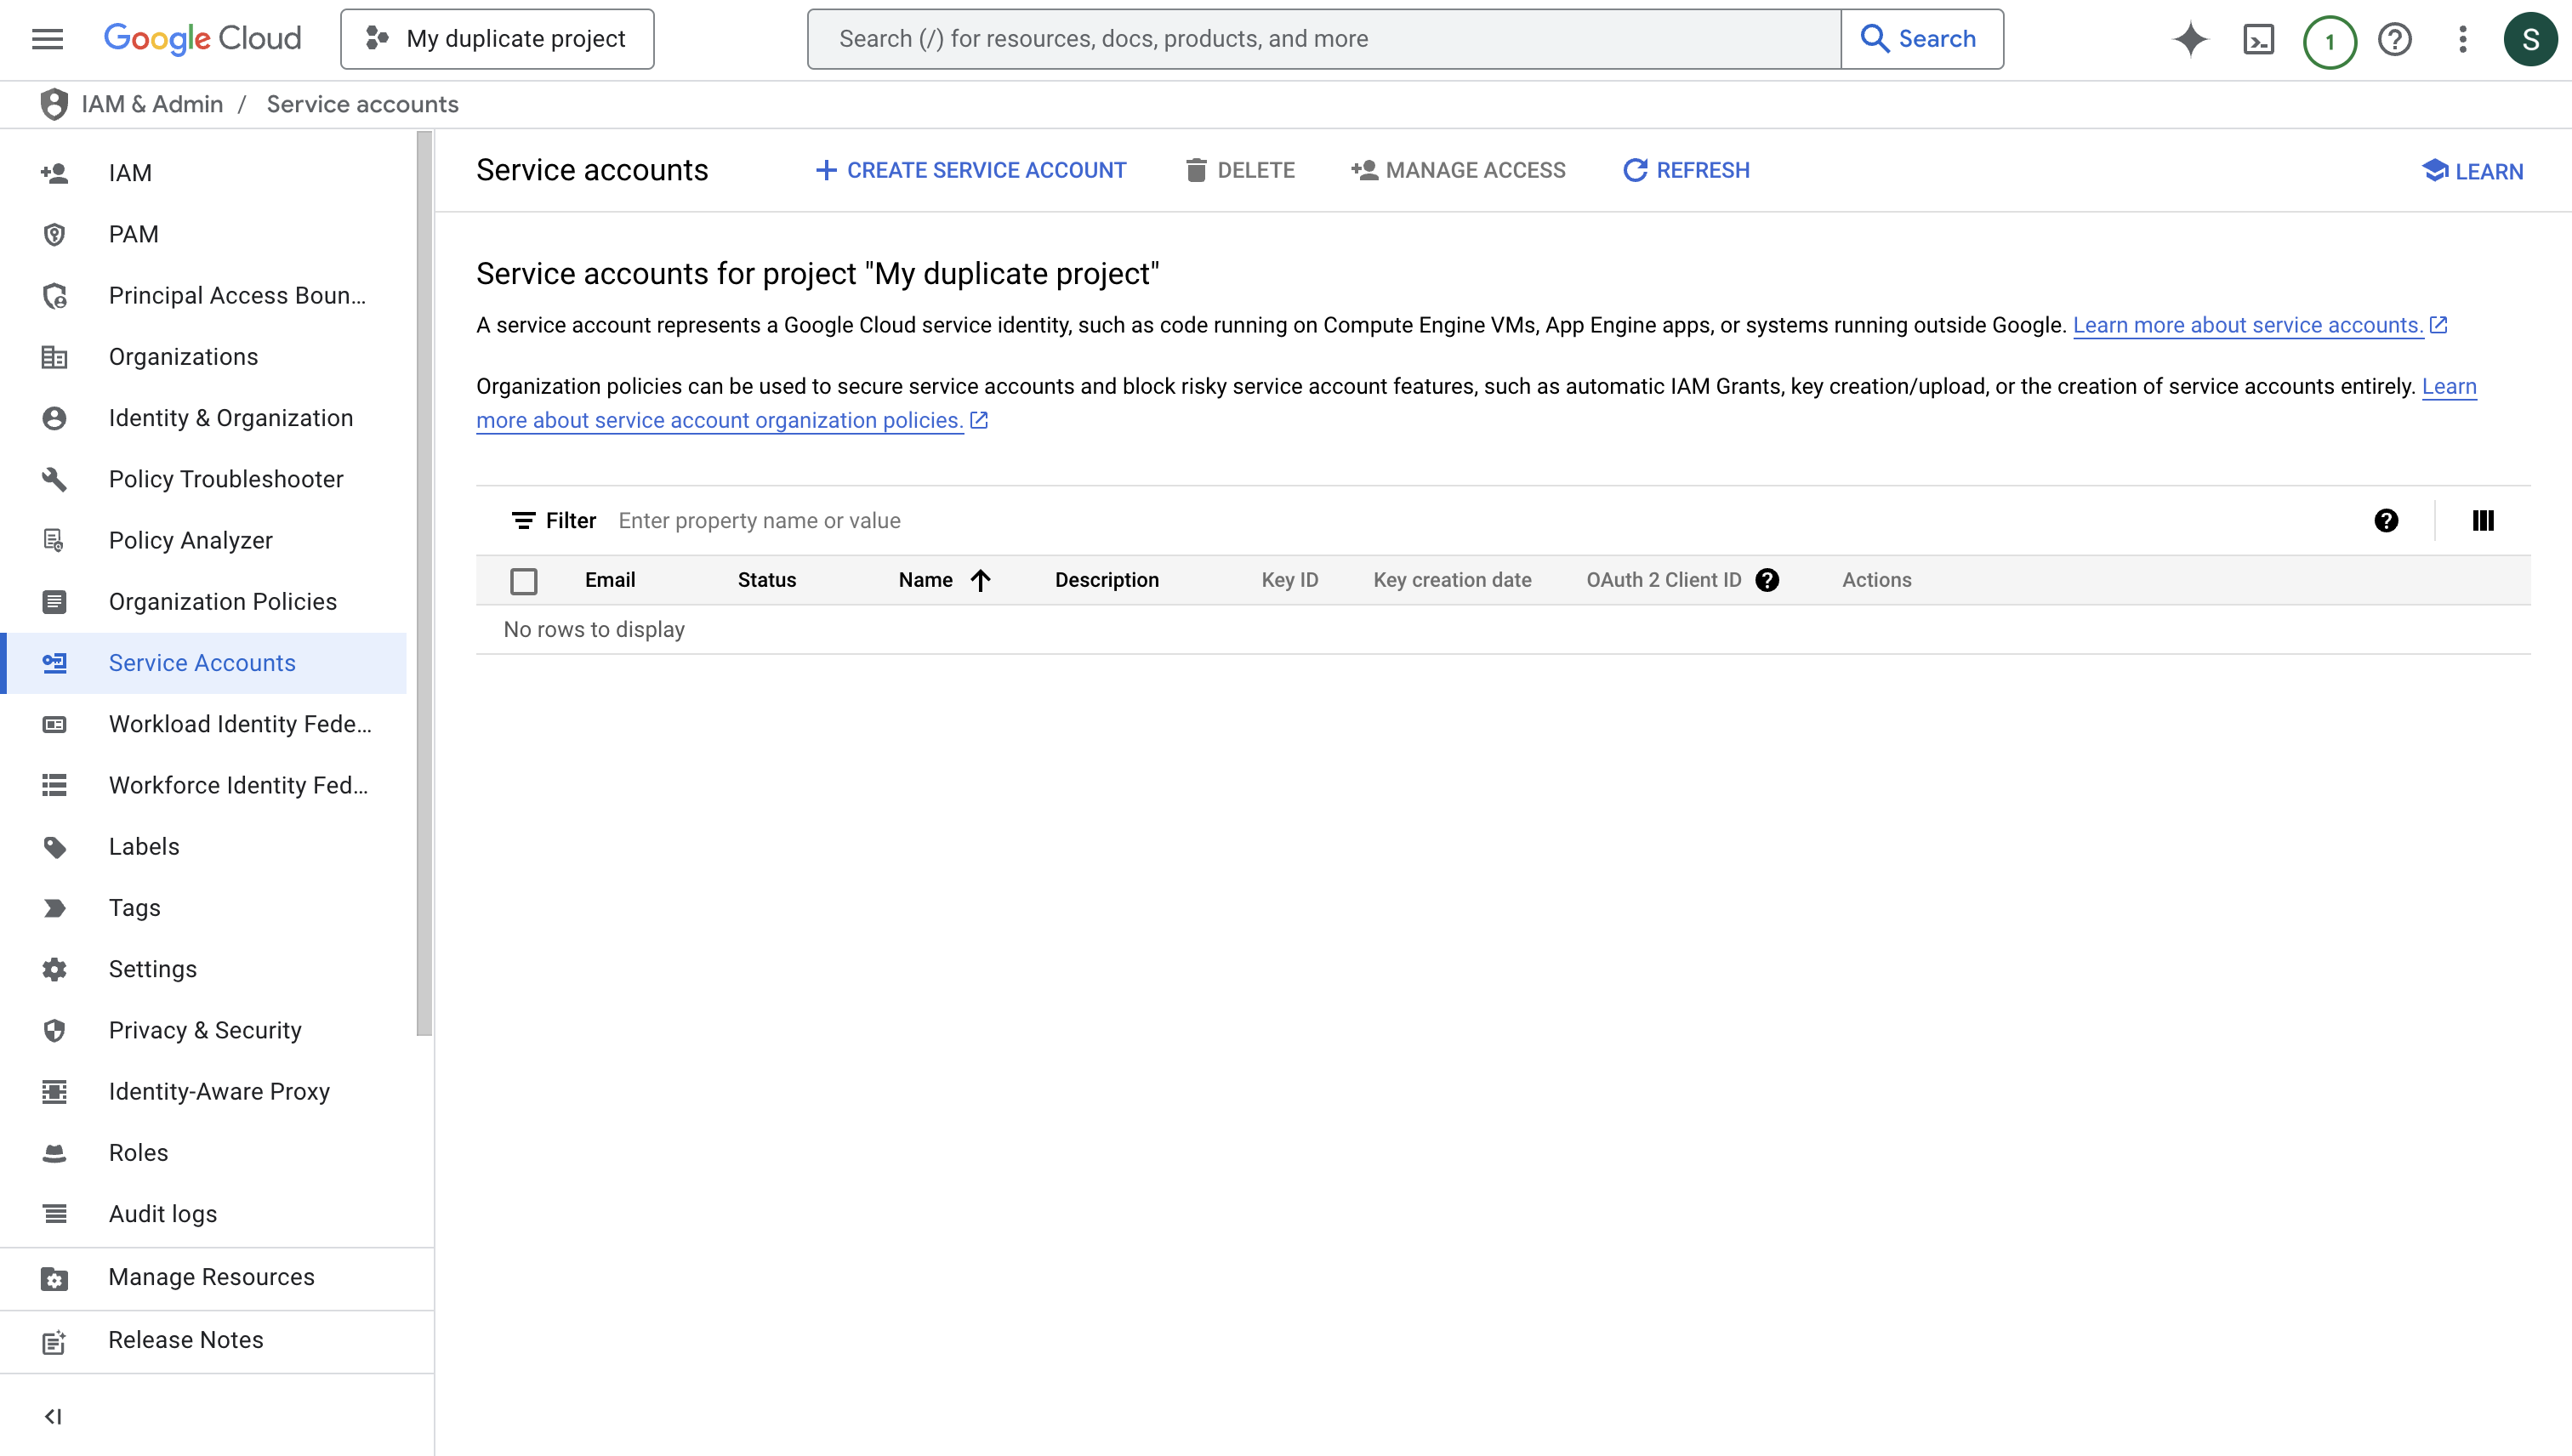
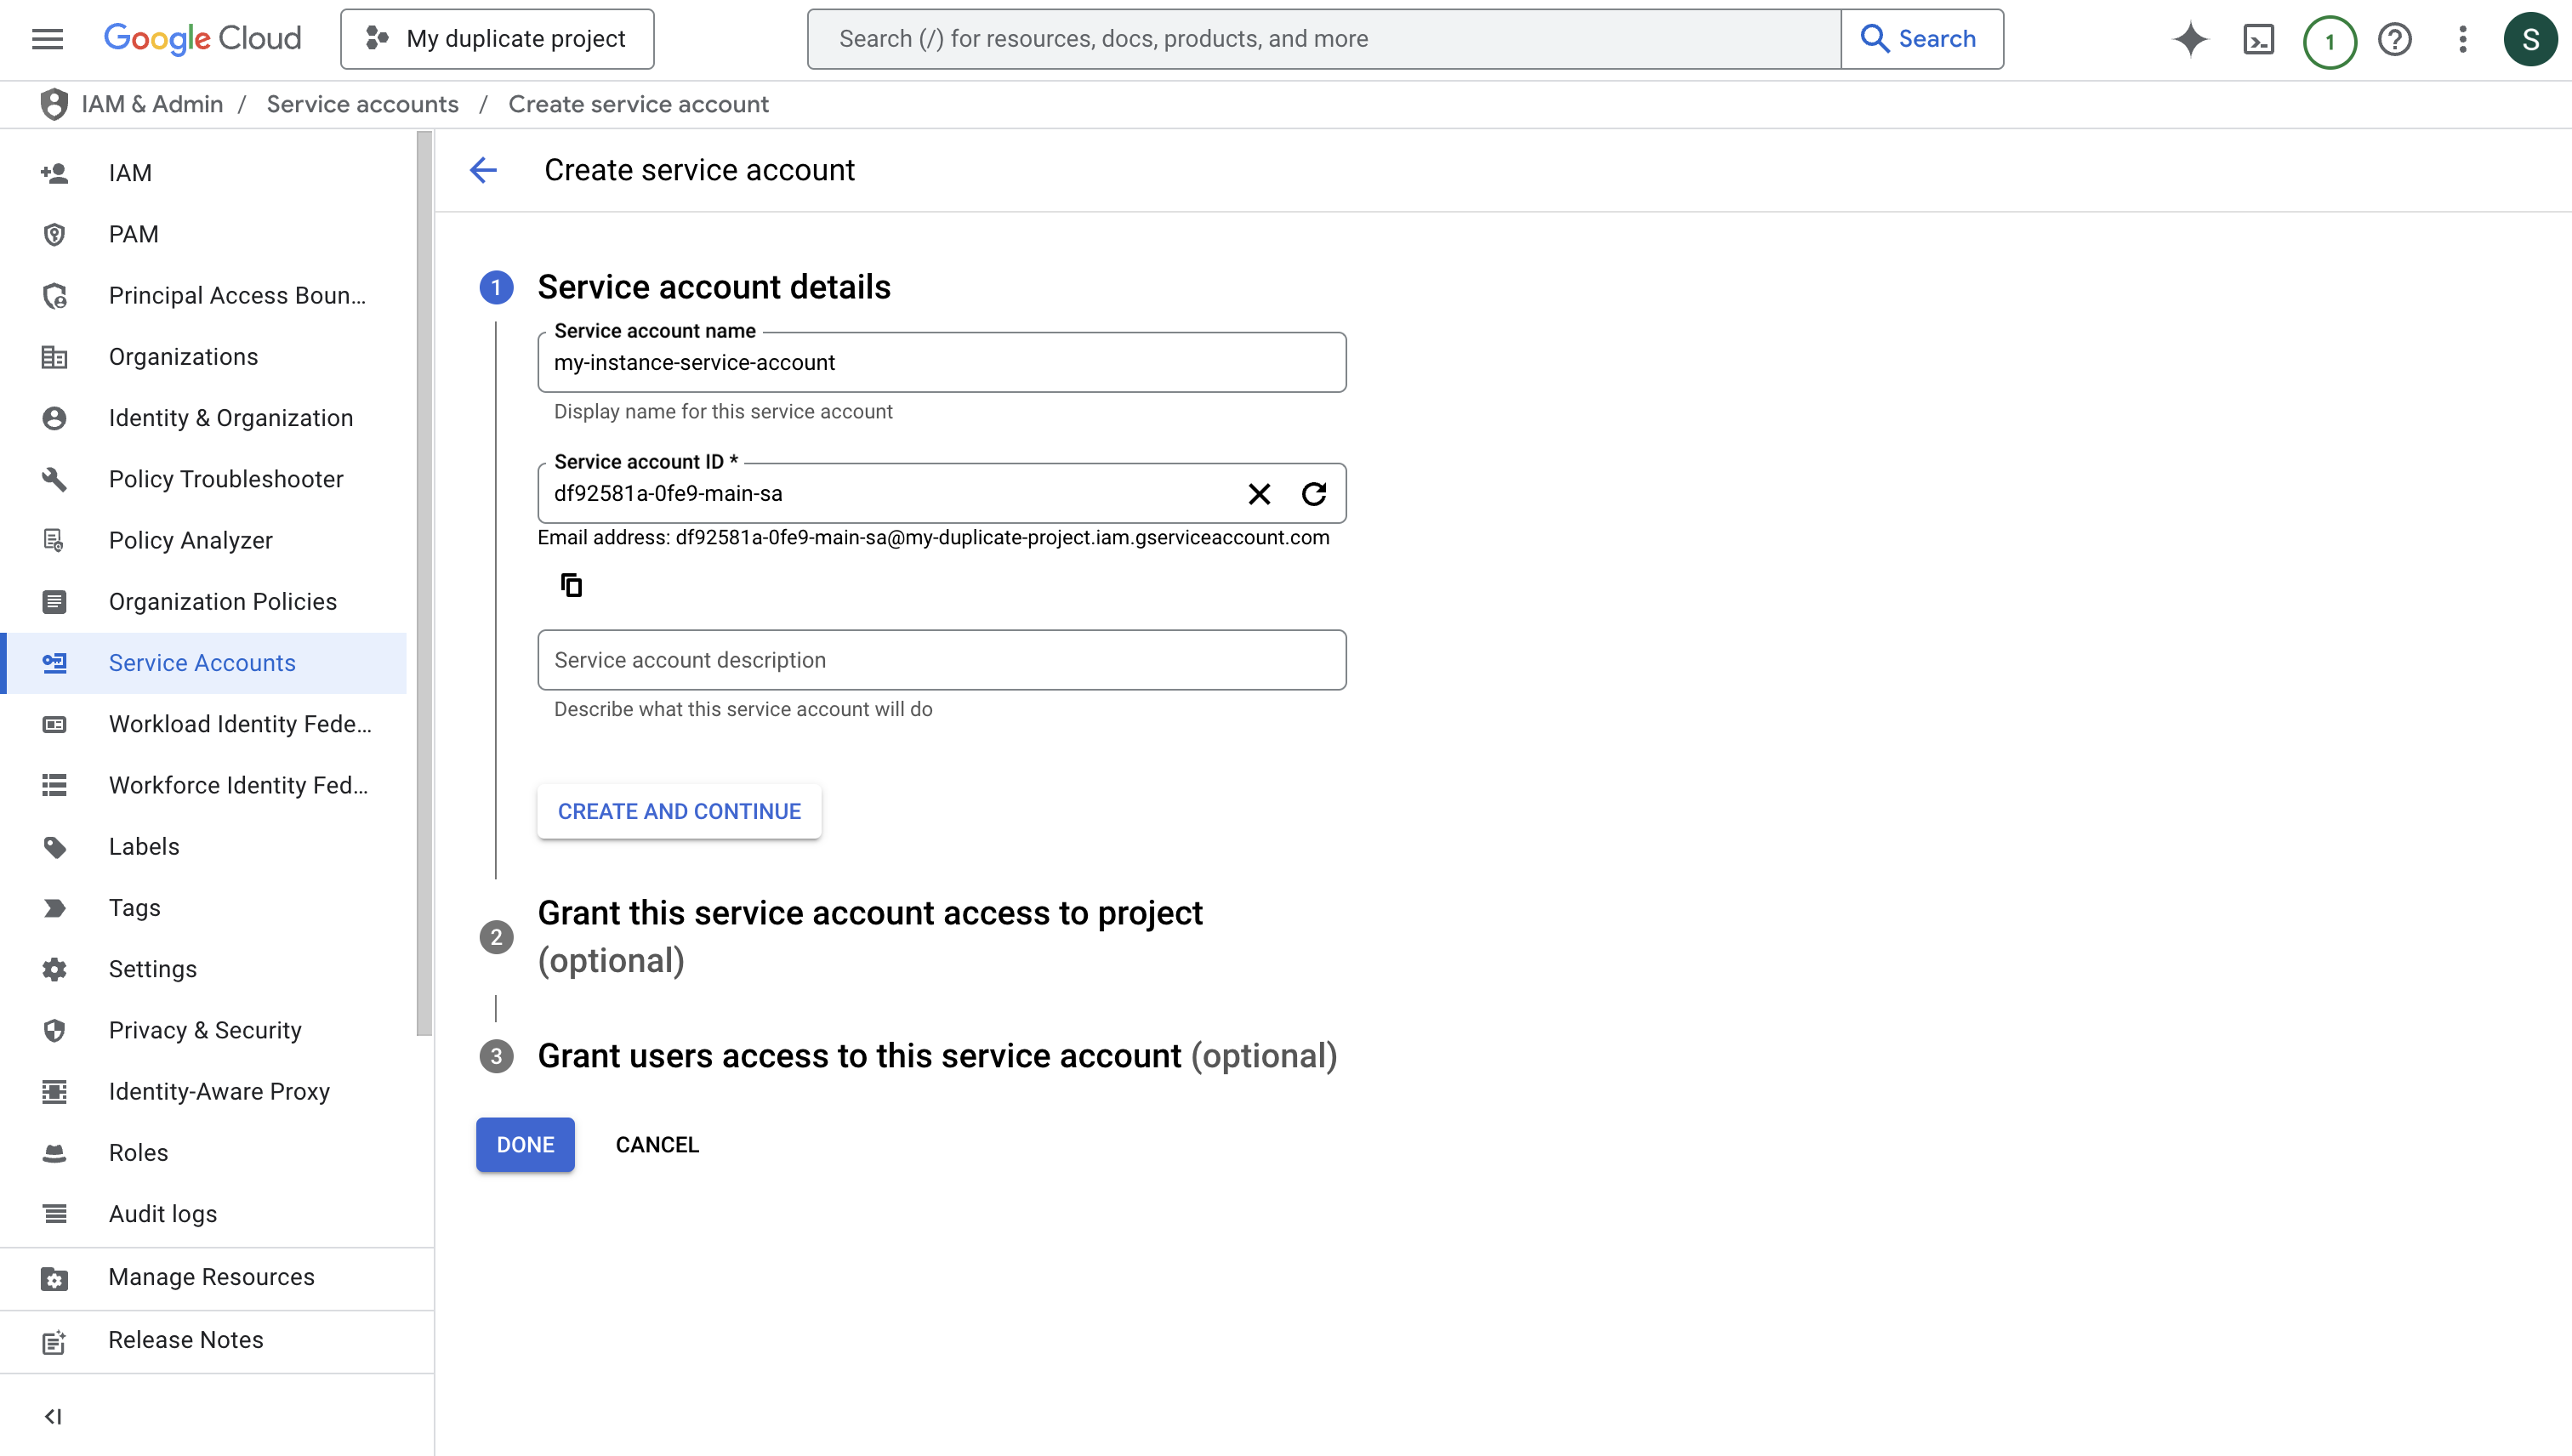 Press "DONE" after creating the service account.
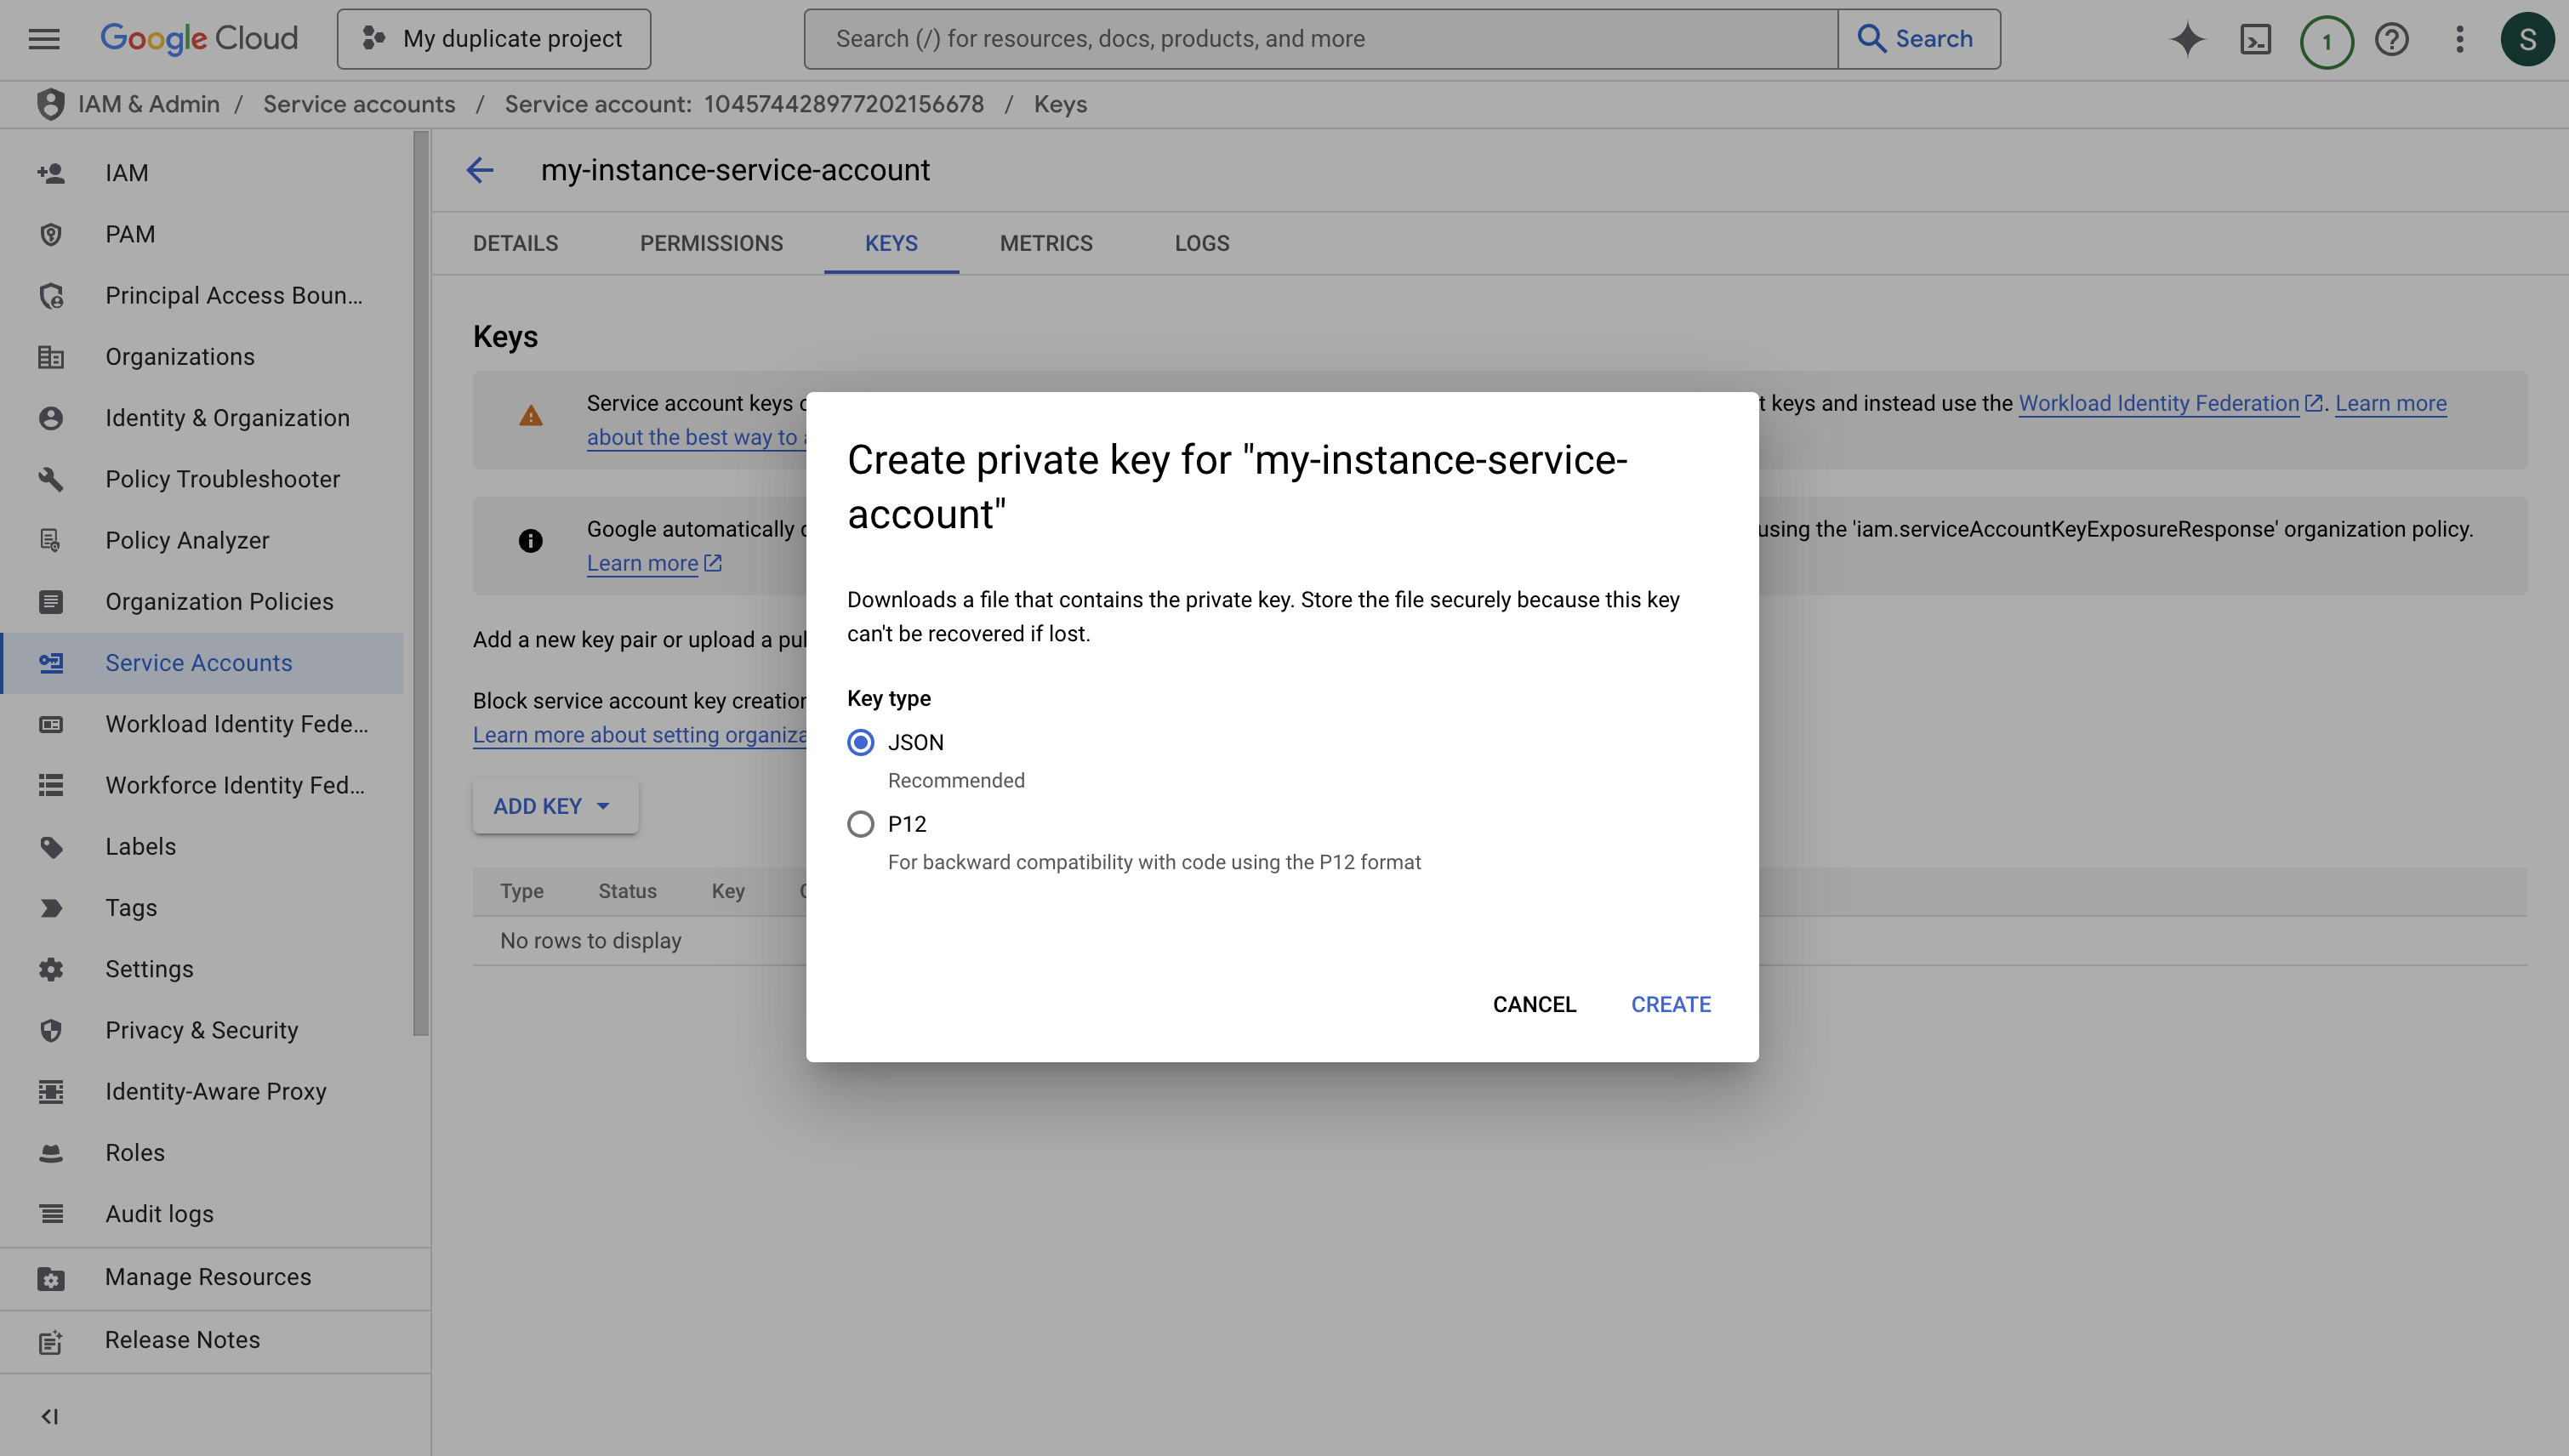
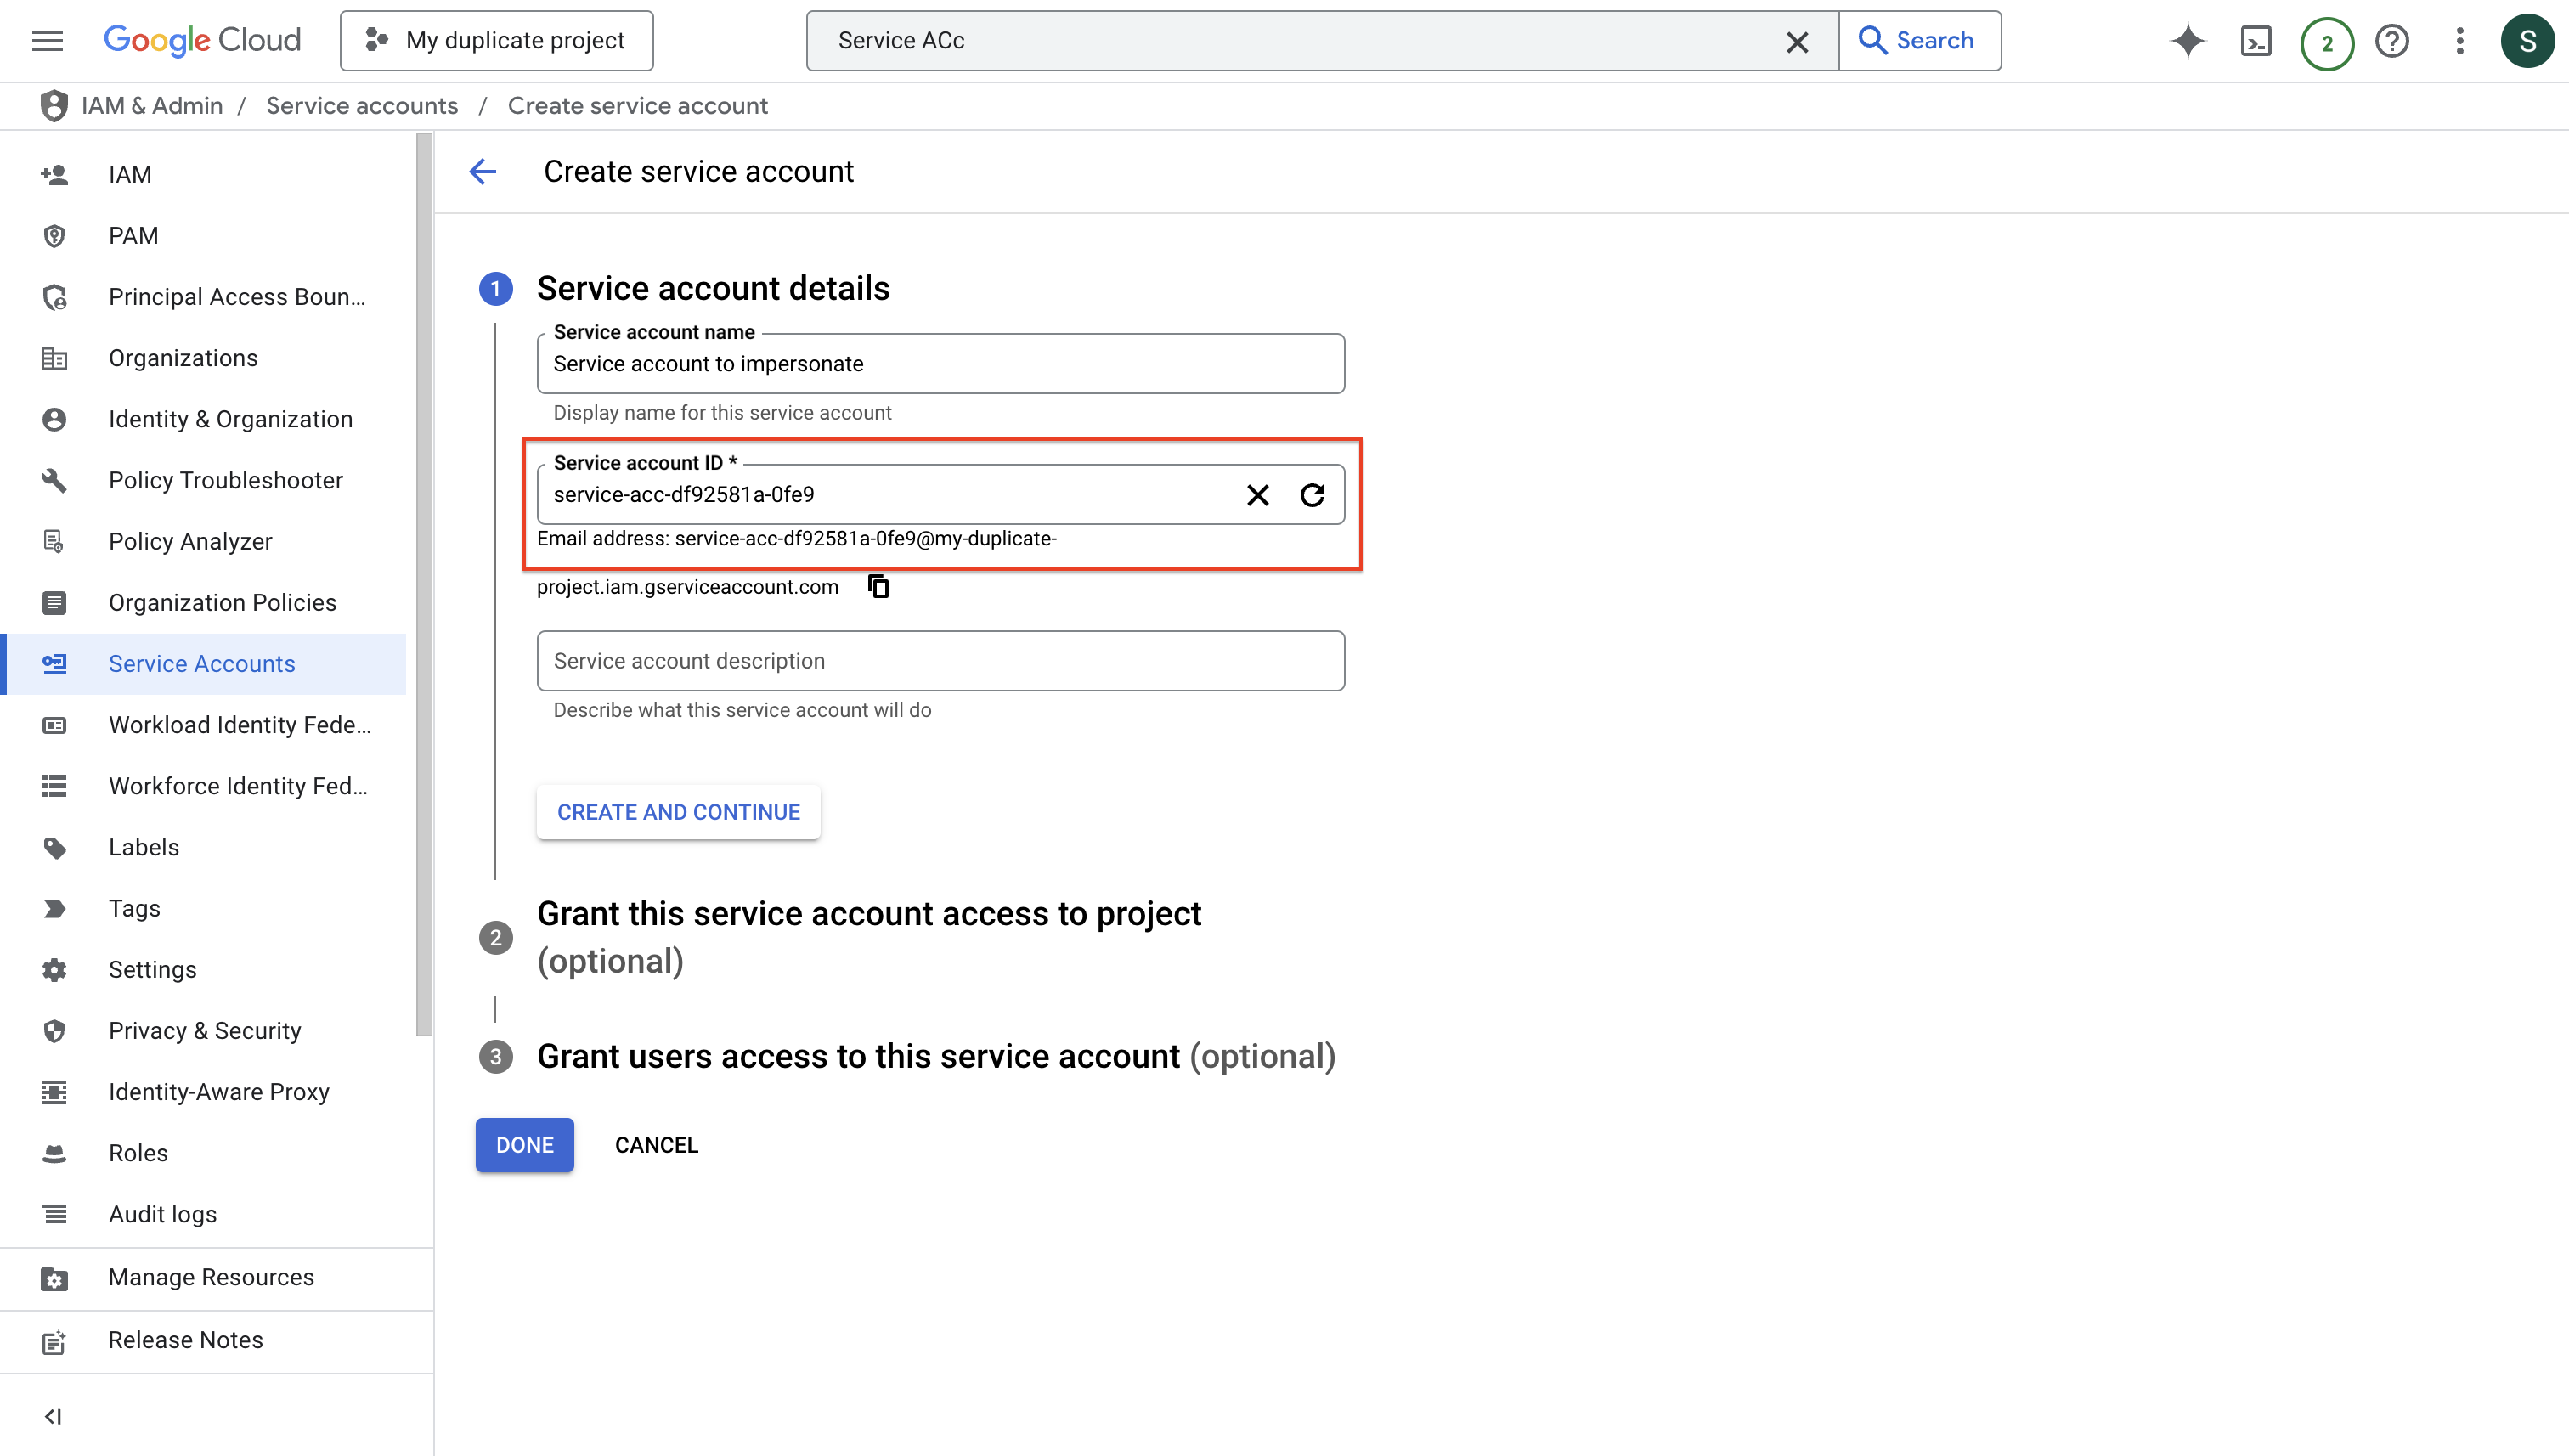
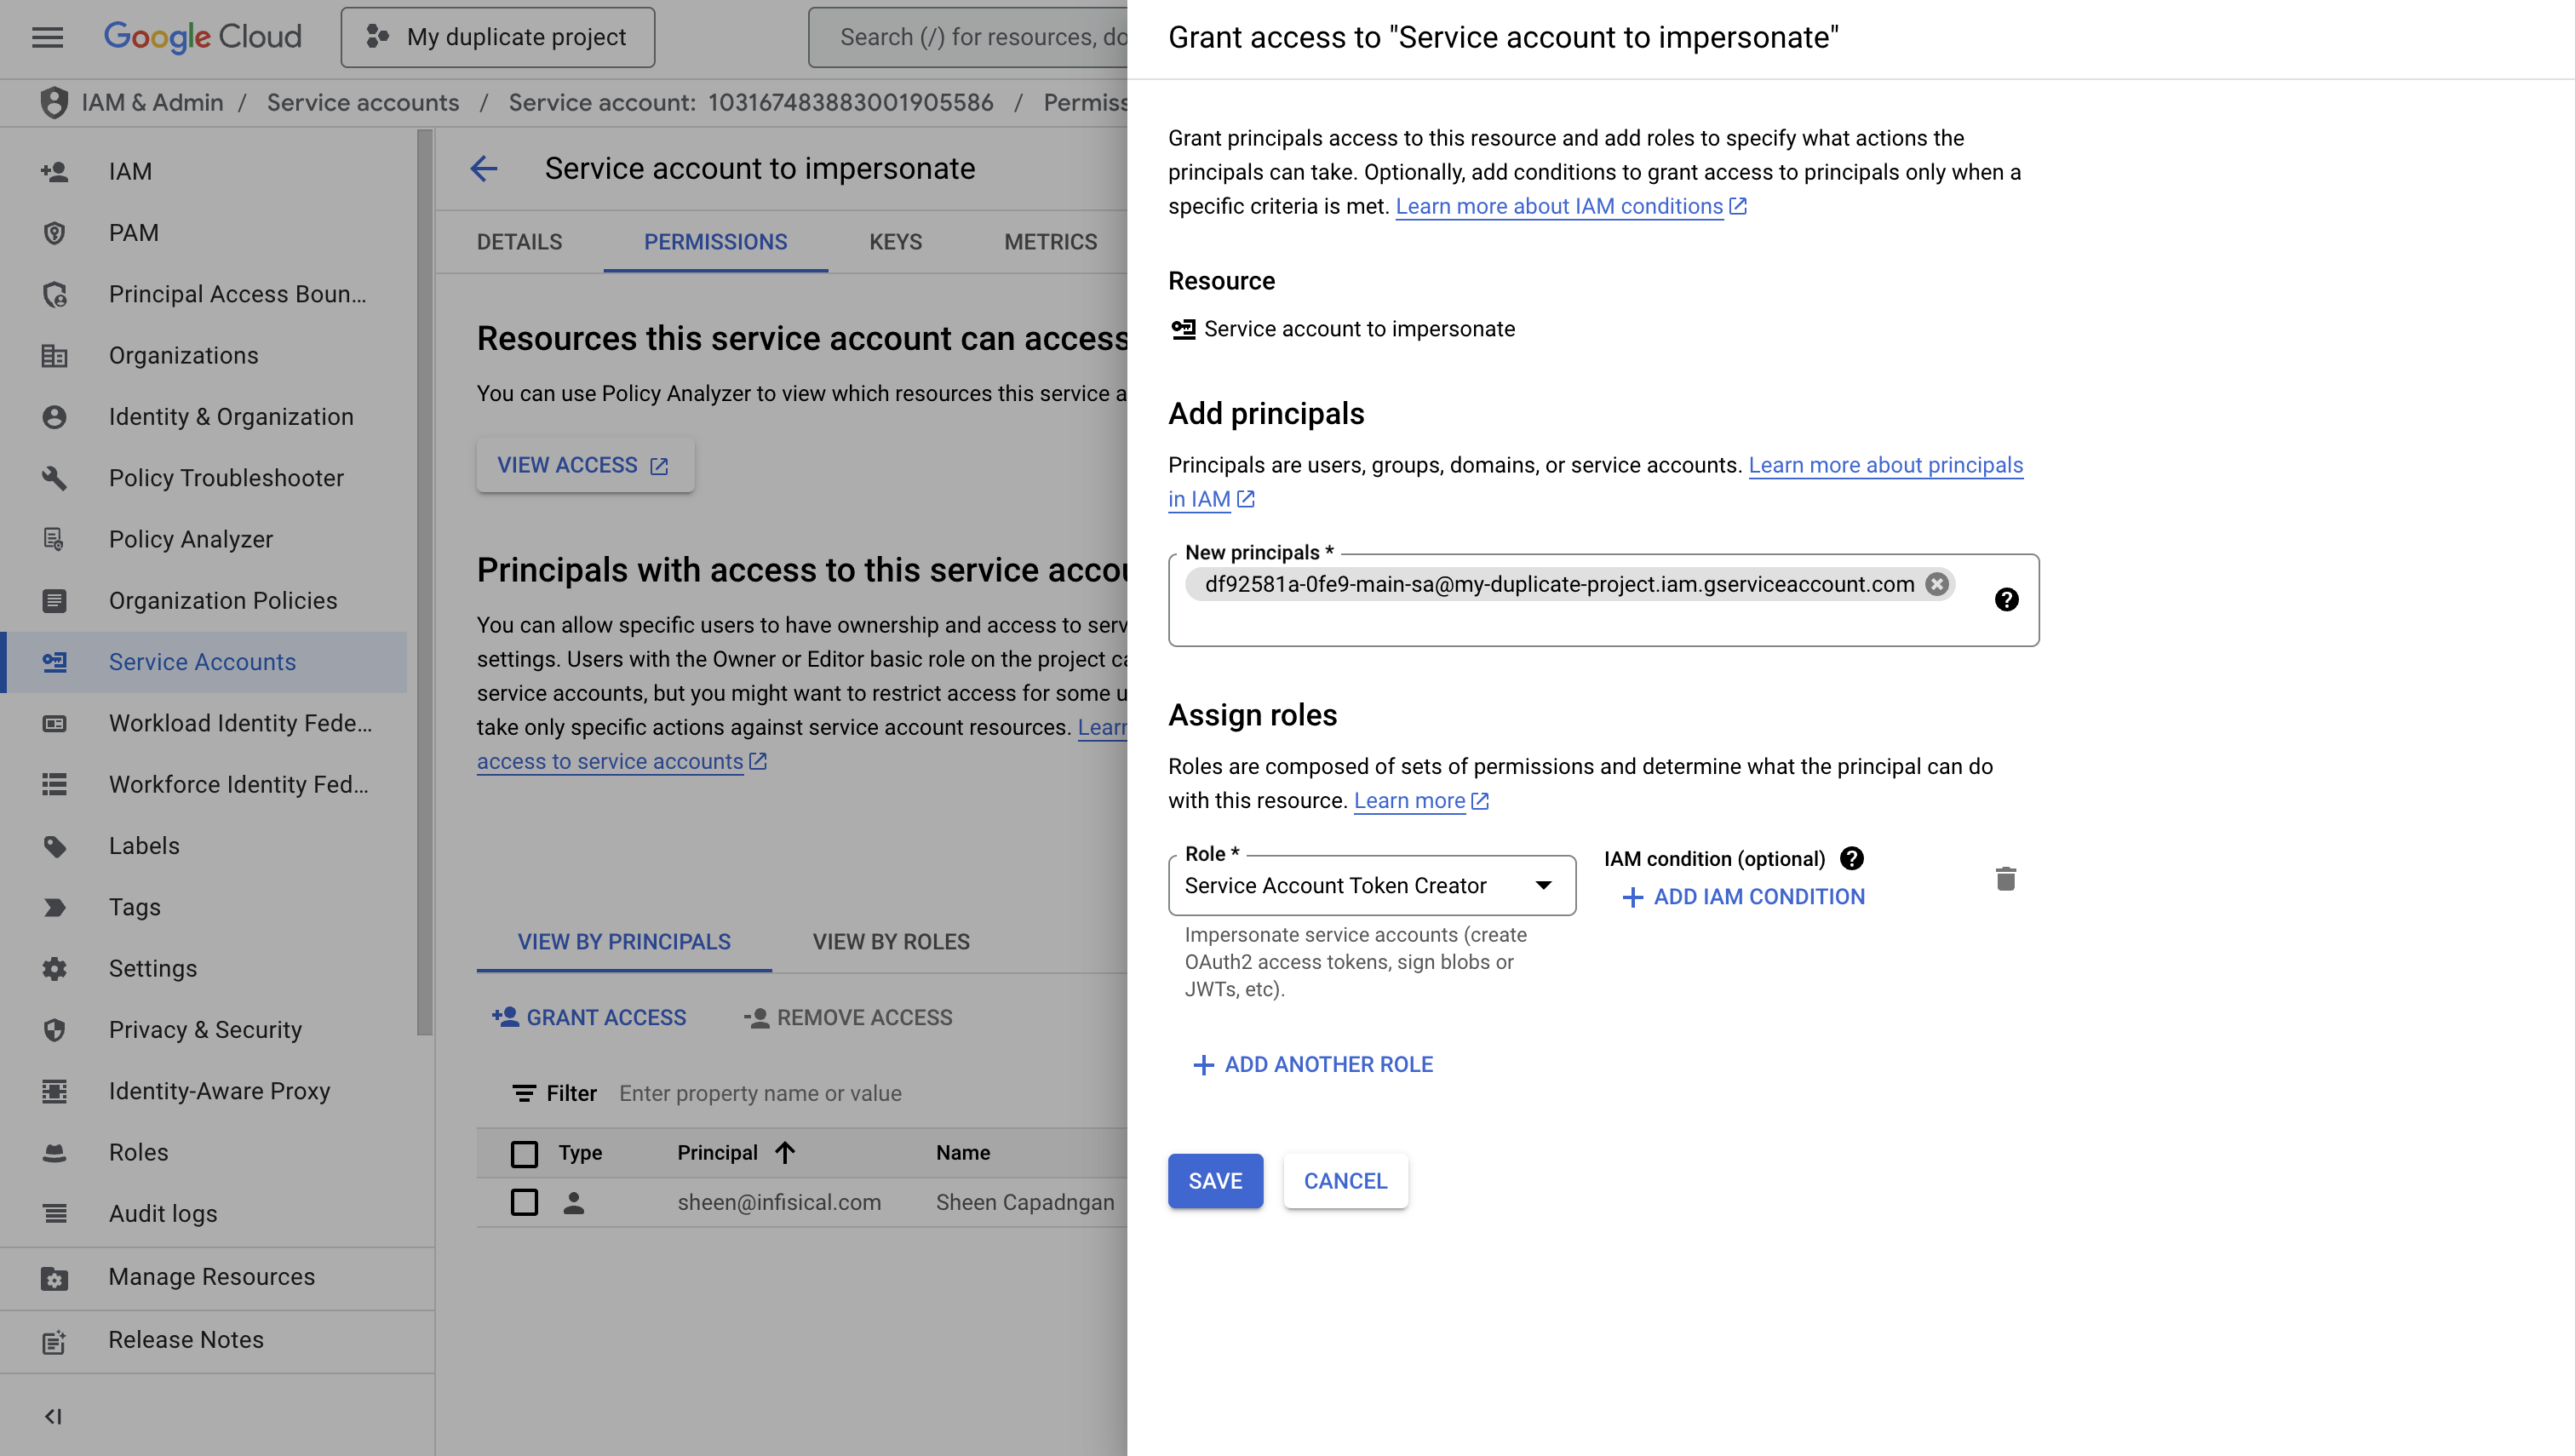
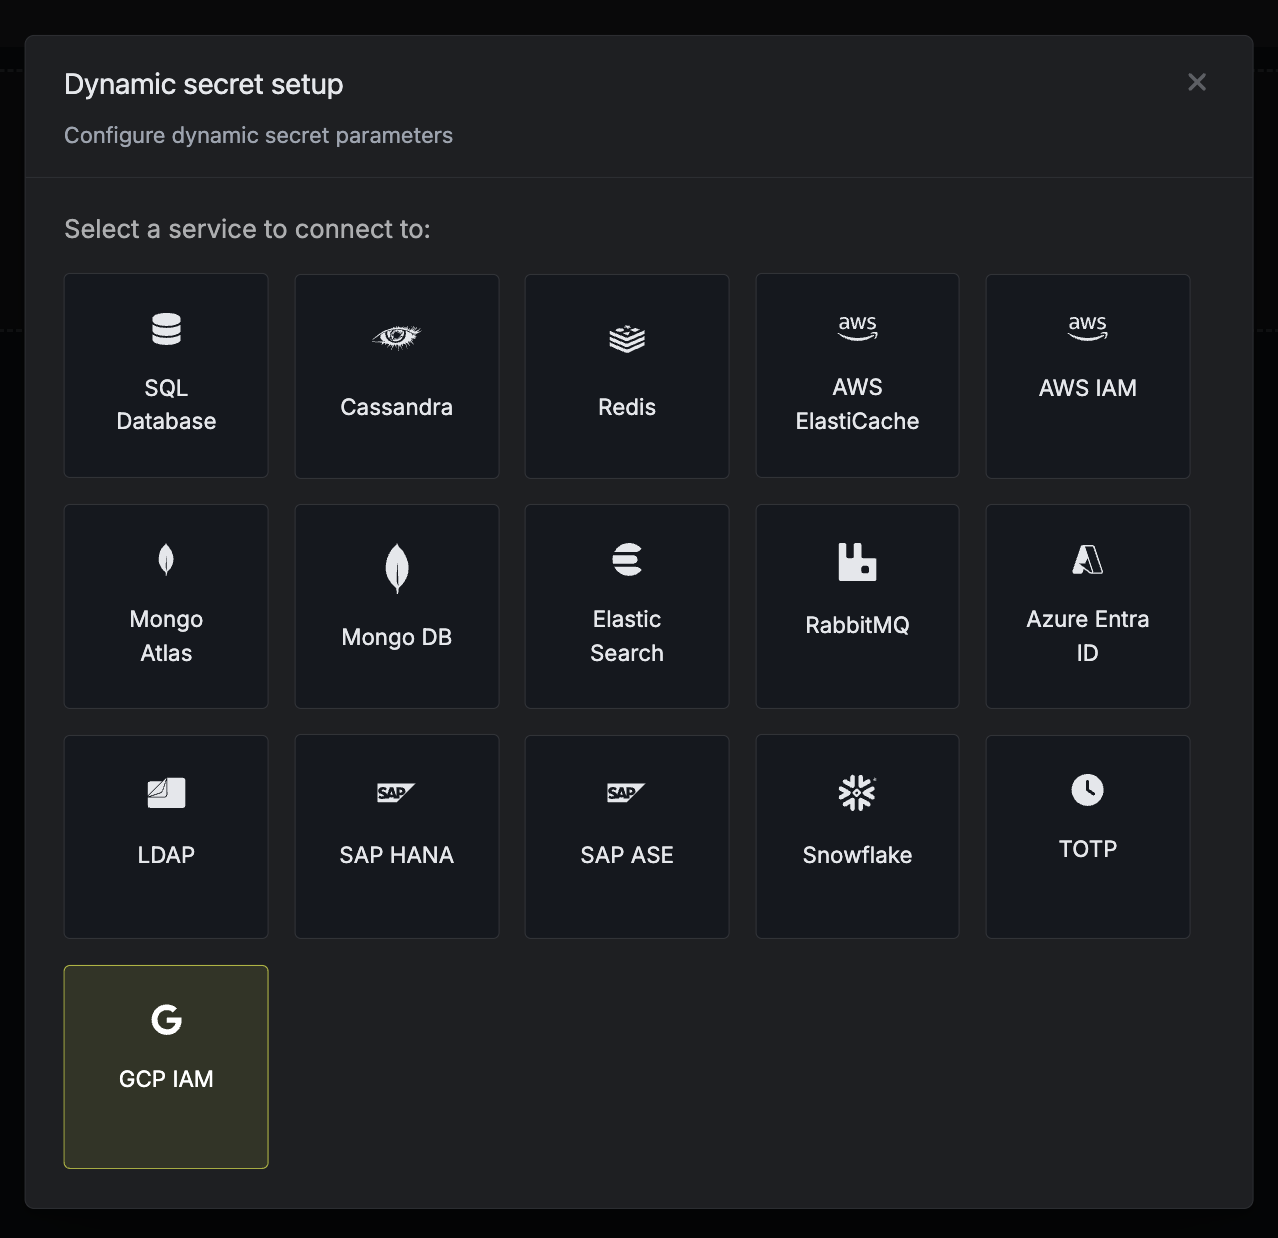 When generating these secrets, it's important to specify a Time-to-Live (TTL) duration. This will dictate how long the credentials are valid for.
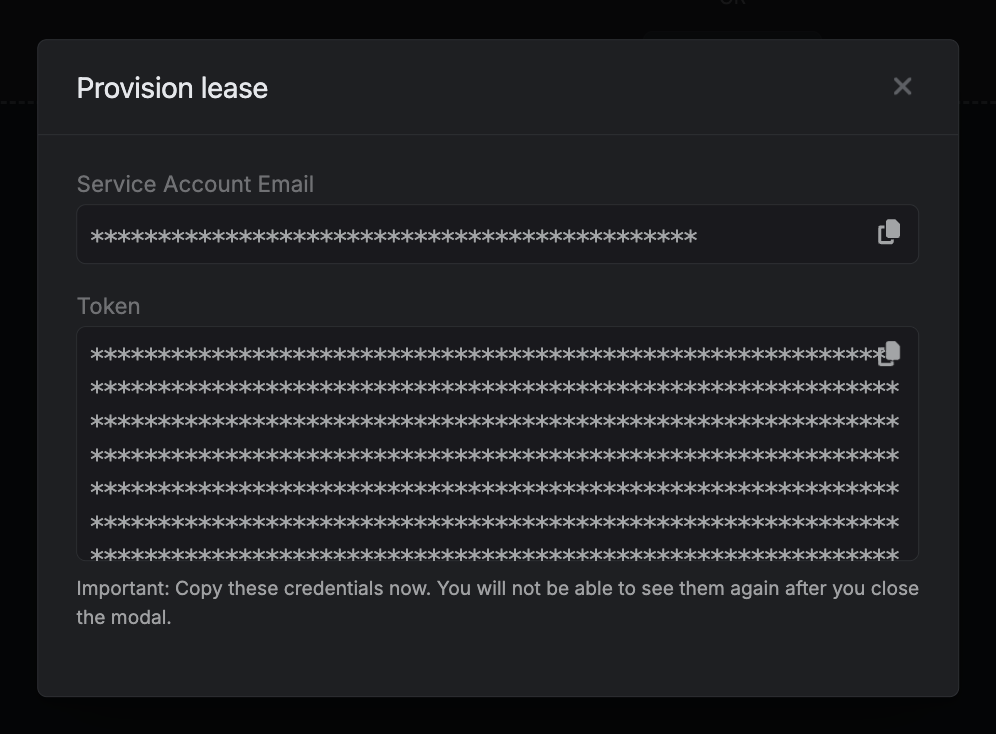 ## Renew Leases
To extend the life of the generated dynamic secret leases past its initial time to live, simply click on the **Renew** button as illustrated below.
## Renew Leases
To extend the life of the generated dynamic secret leases past its initial time to live, simply click on the **Renew** button as illustrated below.
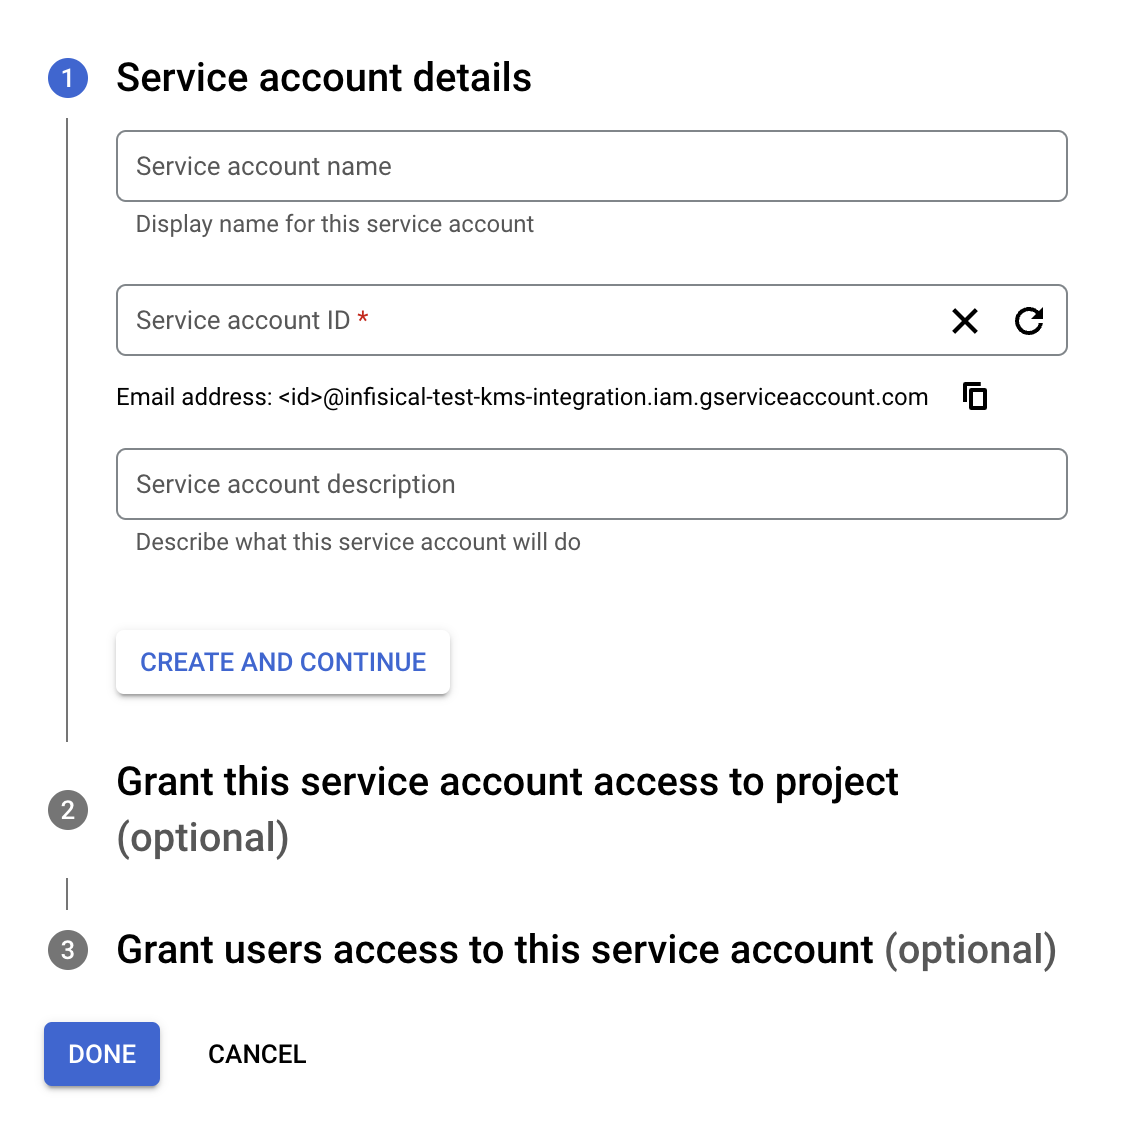 2. Give the service account a suitable **name** and **description**. Then click **Create and Continue**.
3. Under **Grant this service account access to project**, click **Select a role** and select the
**Cloud KMS Viewer** and **Cloud KMS CryptoKey Encrypter/Decrypter**\* roles, then click **Continue**.
2. Give the service account a suitable **name** and **description**. Then click **Create and Continue**.
3. Under **Grant this service account access to project**, click **Select a role** and select the
**Cloud KMS Viewer** and **Cloud KMS CryptoKey Encrypter/Decrypter**\* roles, then click **Continue**.
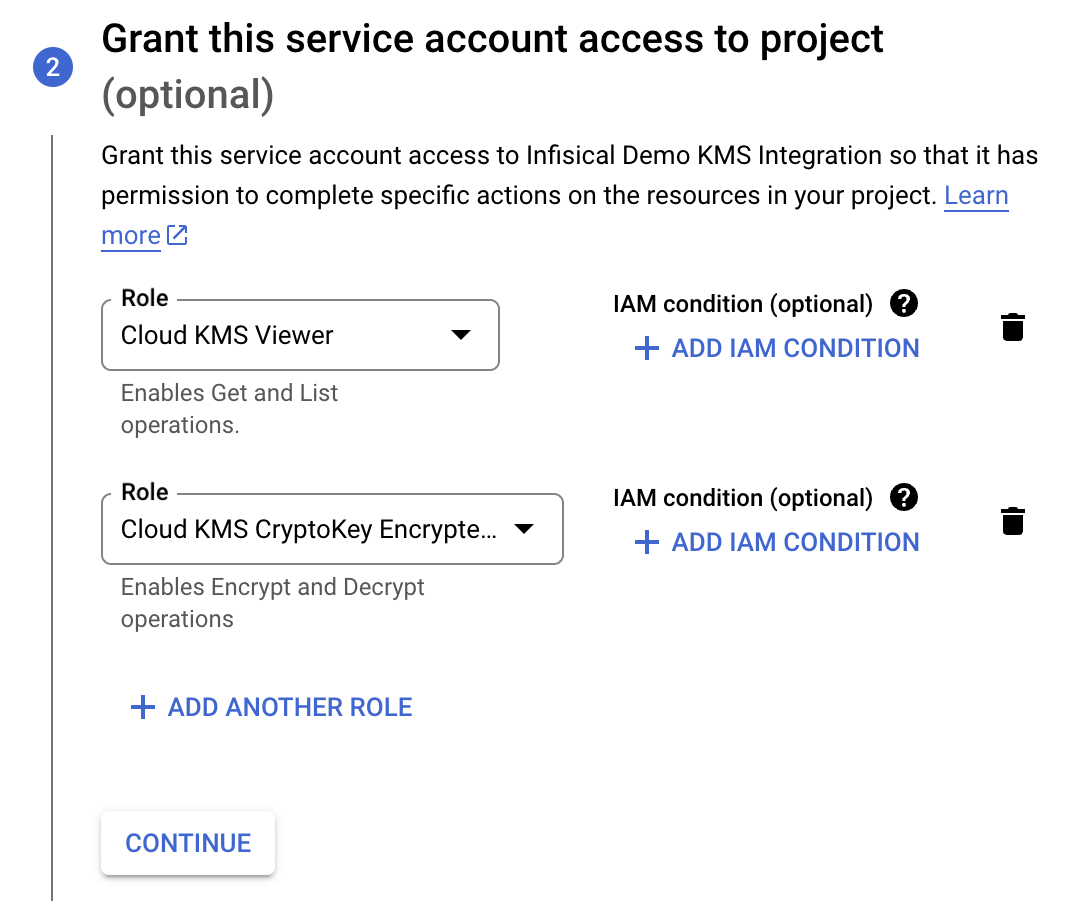 4. You can skip the **Grant users access to this service account** options.
5. Click Done.
6. You should see the service account in the list of service accounts. Click it to view the service account details.
7. Select the **Keys** tab, click **Add Key**, select **Create new key**, select **JSON** as the key type, then click **Create**.
8. You will be prompted to download a JSON file that we will need later on.
4. You can skip the **Grant users access to this service account** options.
5. Click Done.
6. You should see the service account in the list of service accounts. Click it to view the service account details.
7. Select the **Keys** tab, click **Add Key**, select **Create new key**, select **JSON** as the key type, then click **Create**.
8. You will be prompted to download a JSON file that we will need later on.
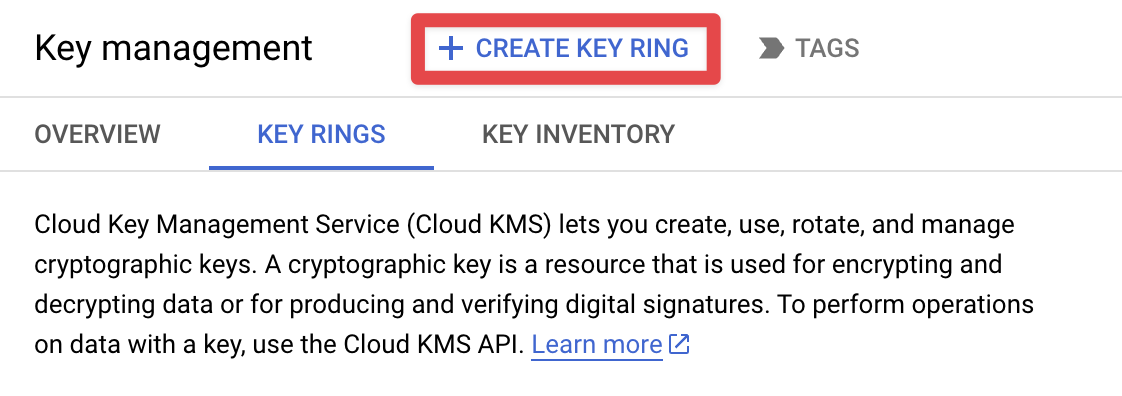 3. Give the key ring a **Name** and select a **Region**, then click **Create**.
Click the 'Add' button to begin adding a new external KMS.
Choose 'GCP KMS' from the list of encryption providers.
3. Give the key ring a **Name** and select a **Region**, then click **Create**.
Click the 'Add' button to begin adding a new external KMS.
Choose 'GCP KMS' from the list of encryption providers.
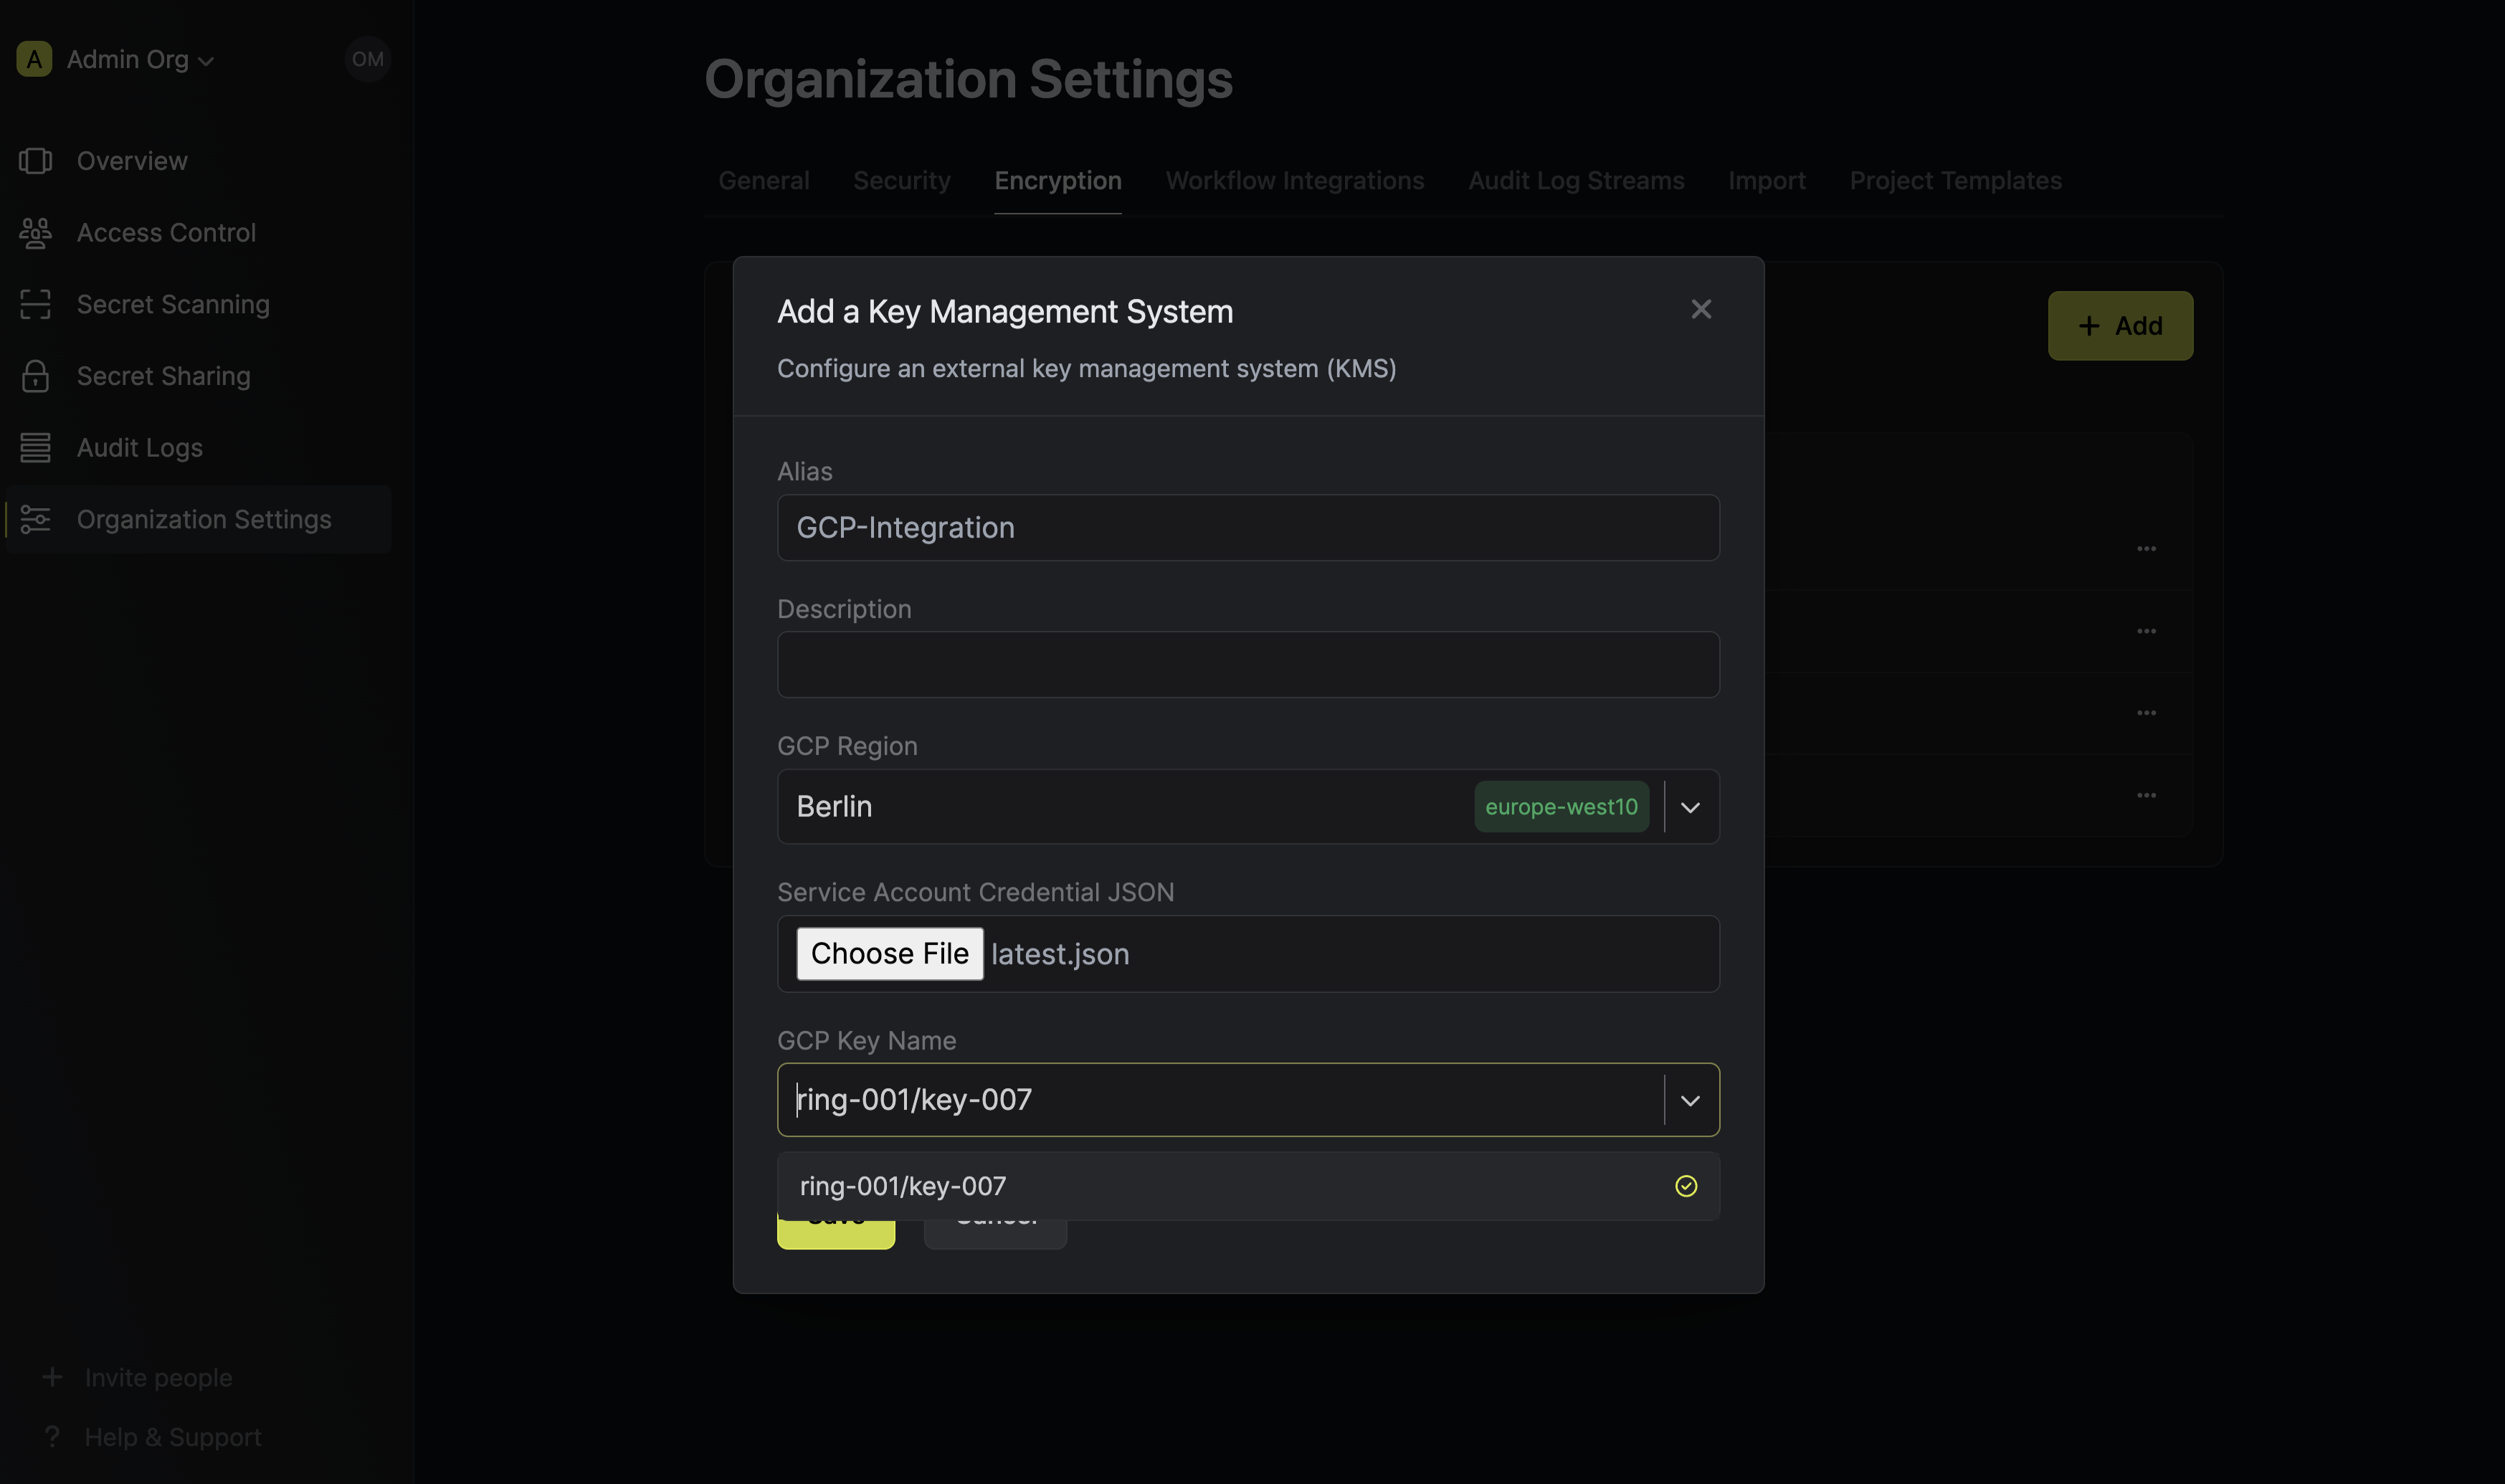 Selecting GCP as the provider will require you input the following fields.

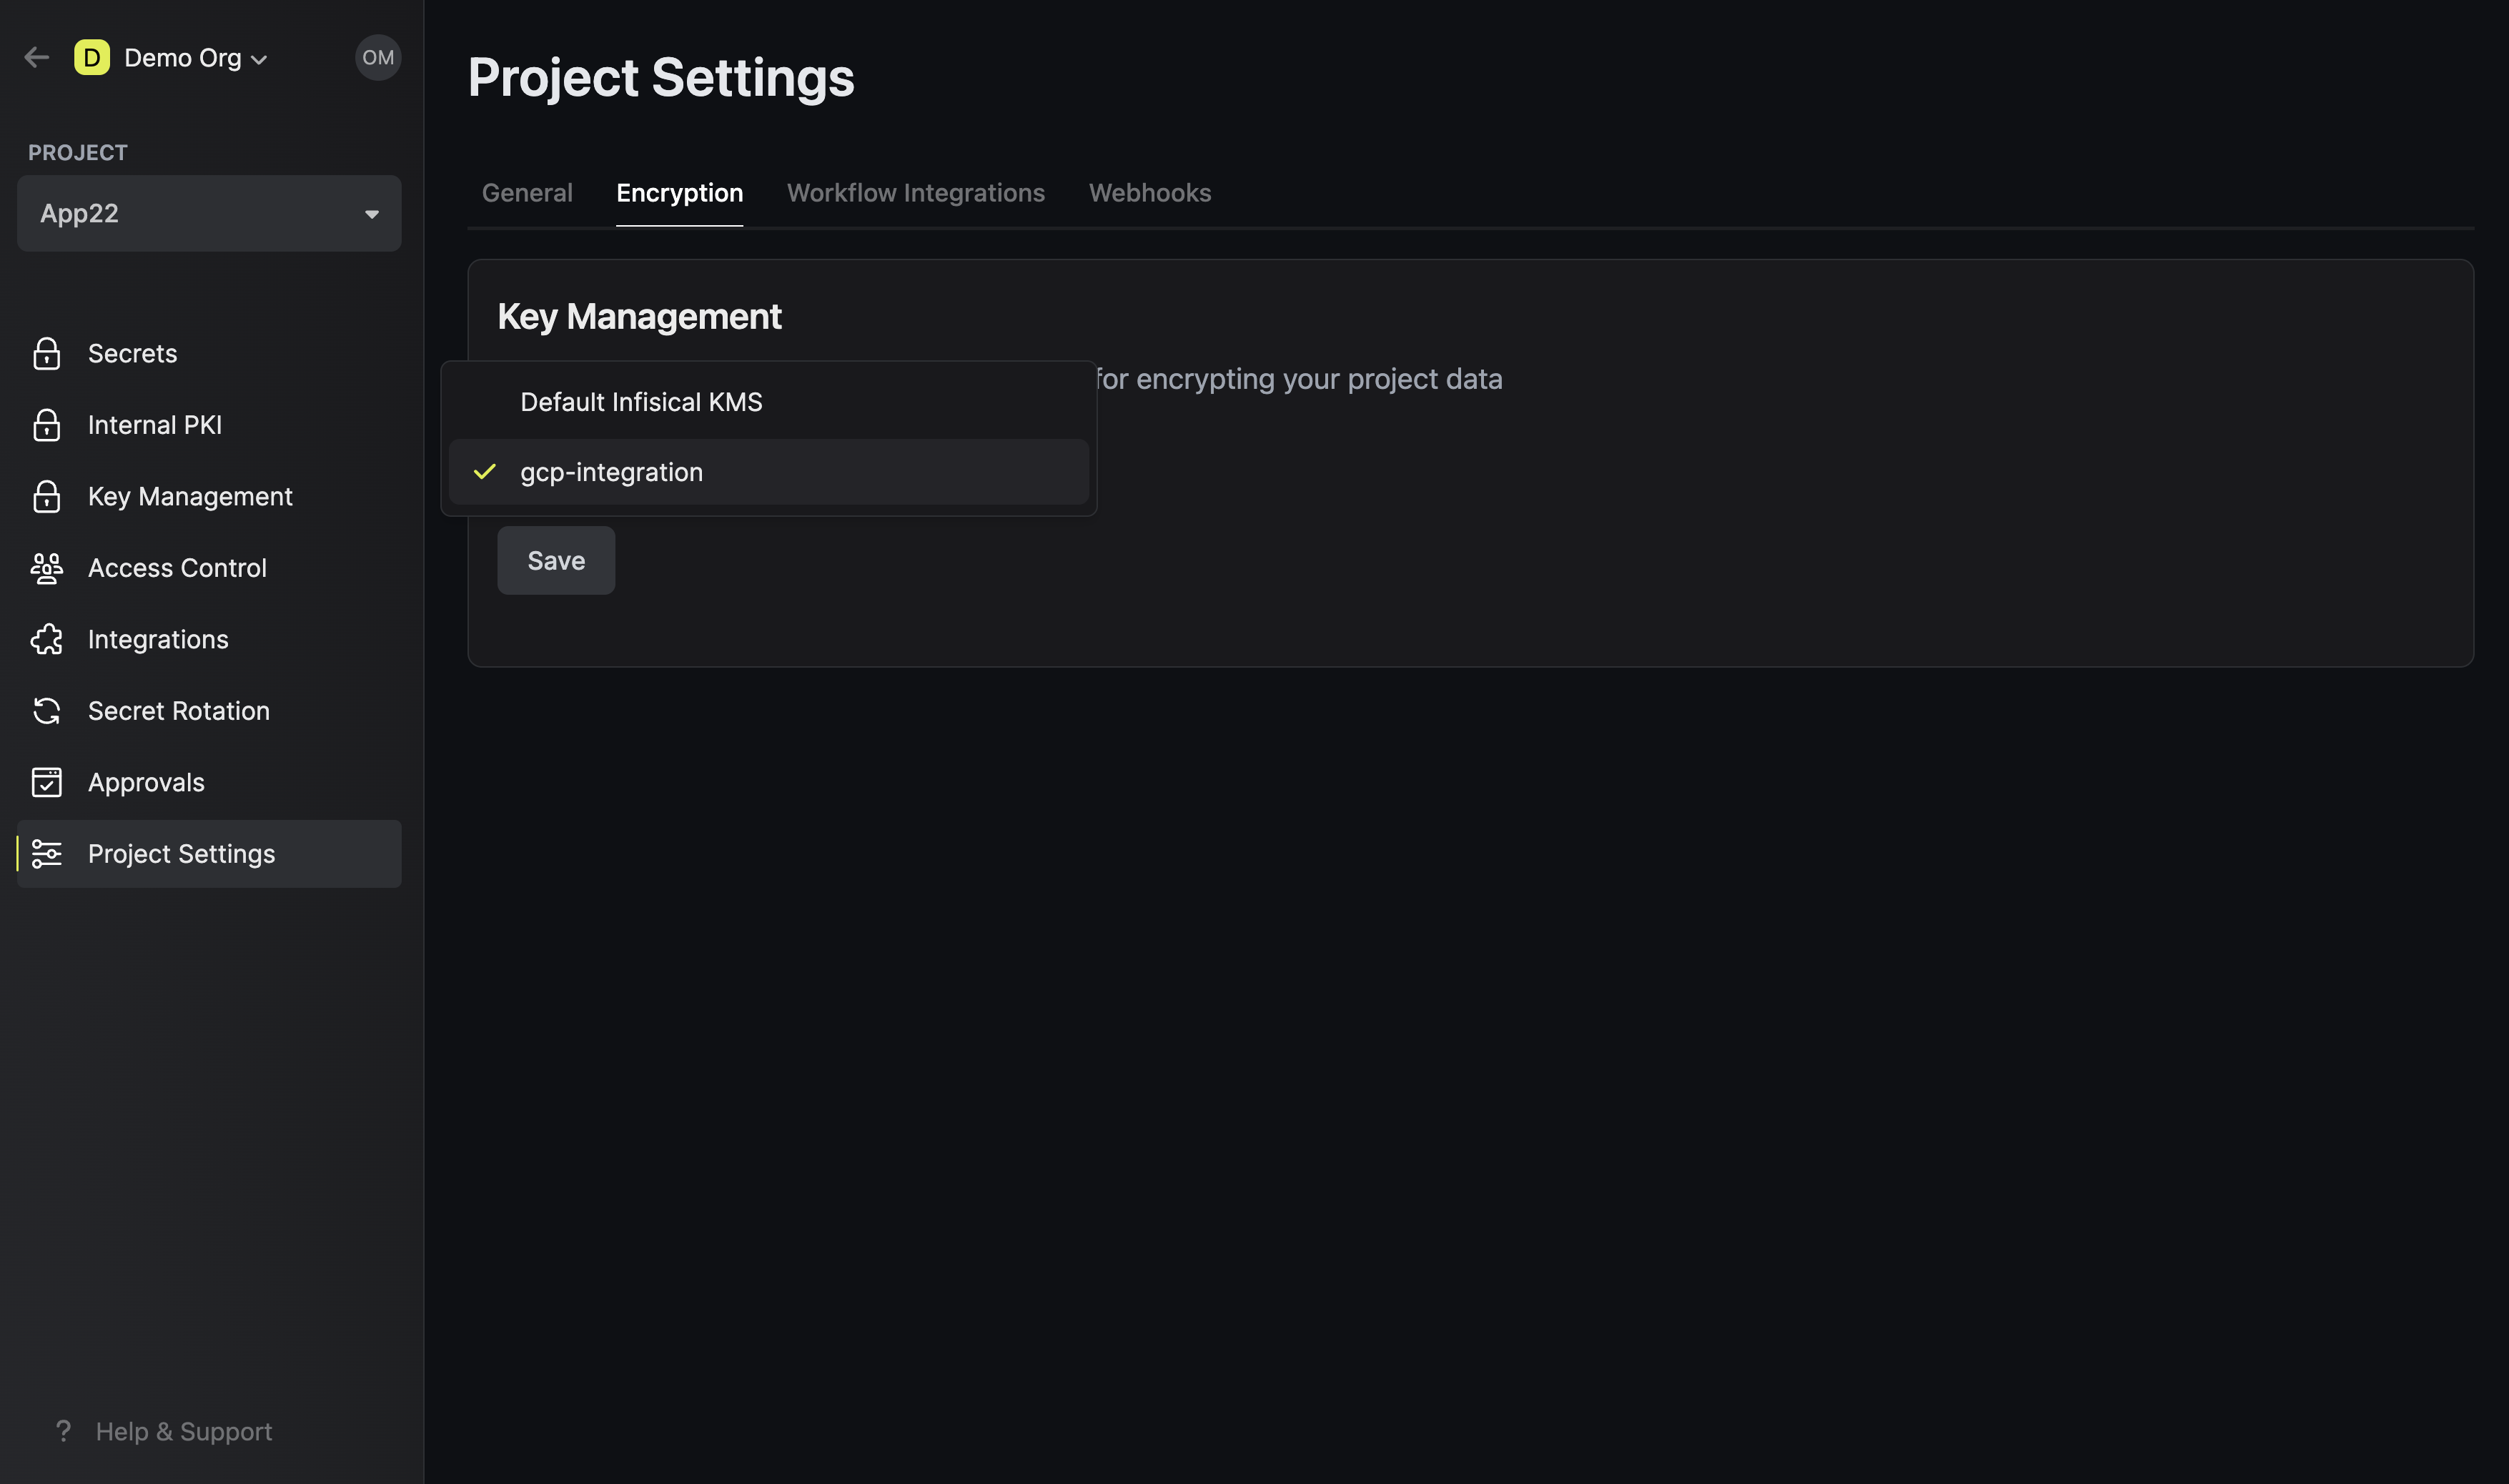 Choose the GCP KMS key you configured earlier.
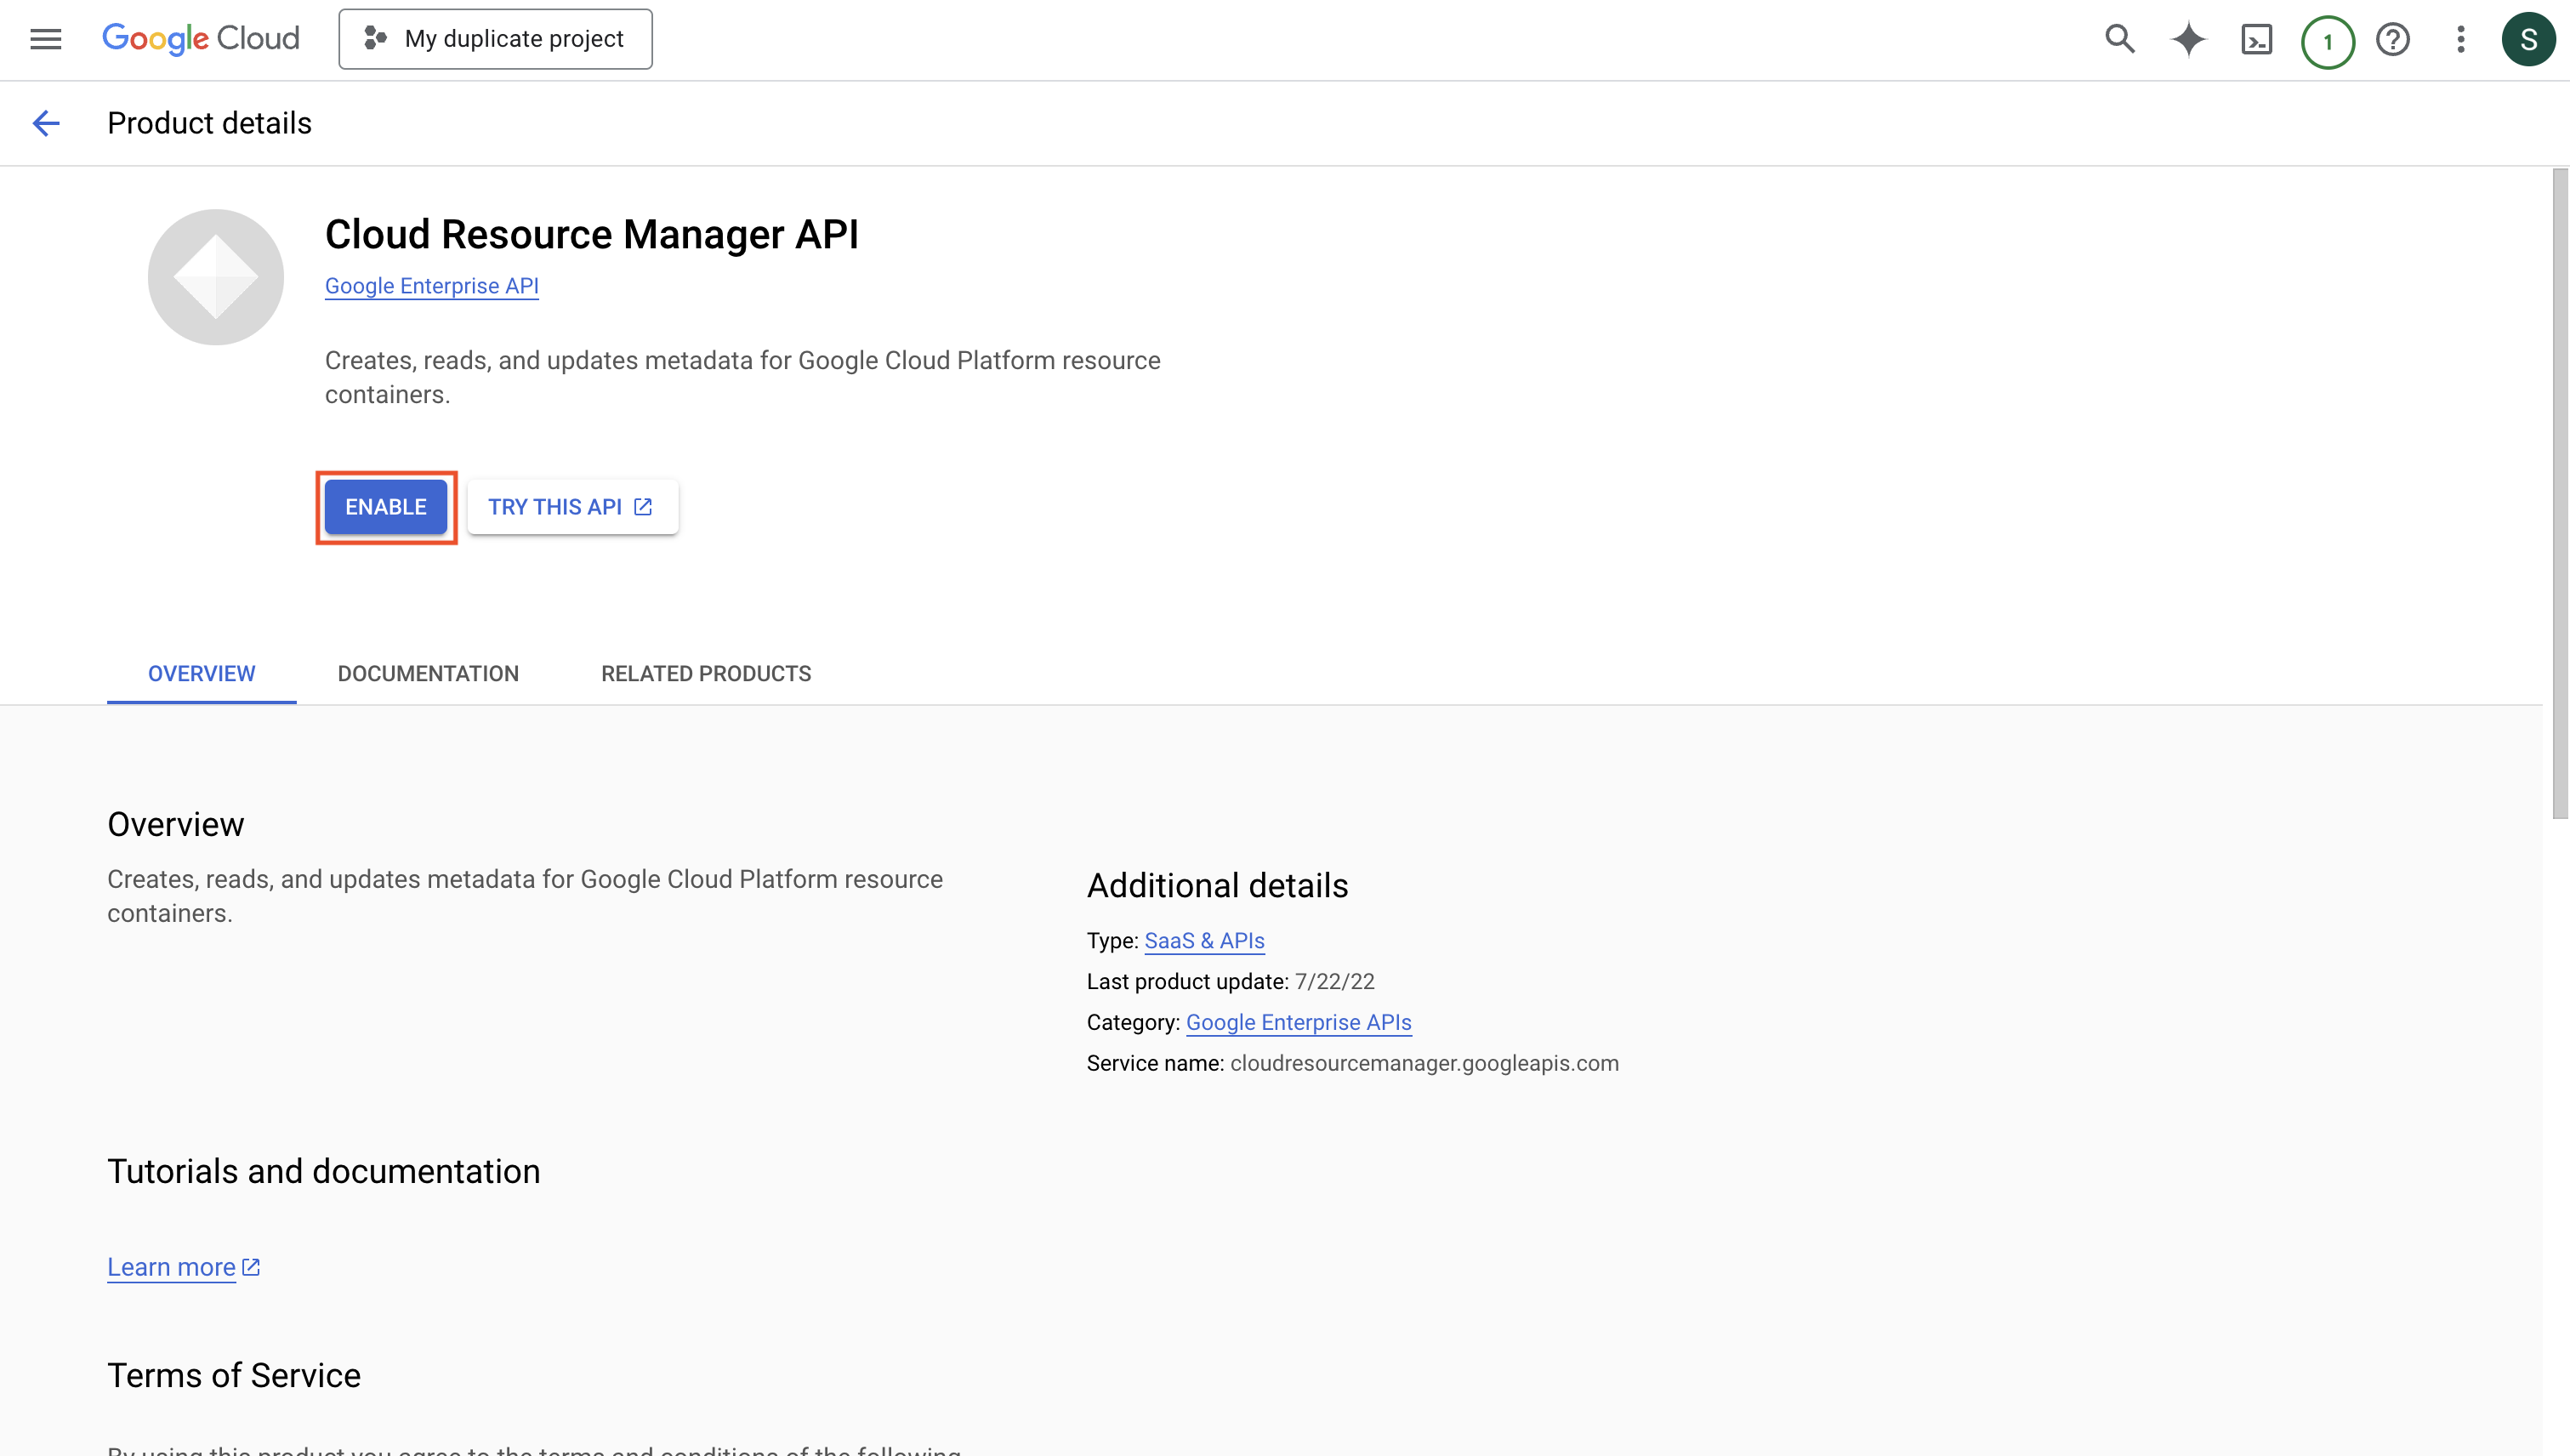
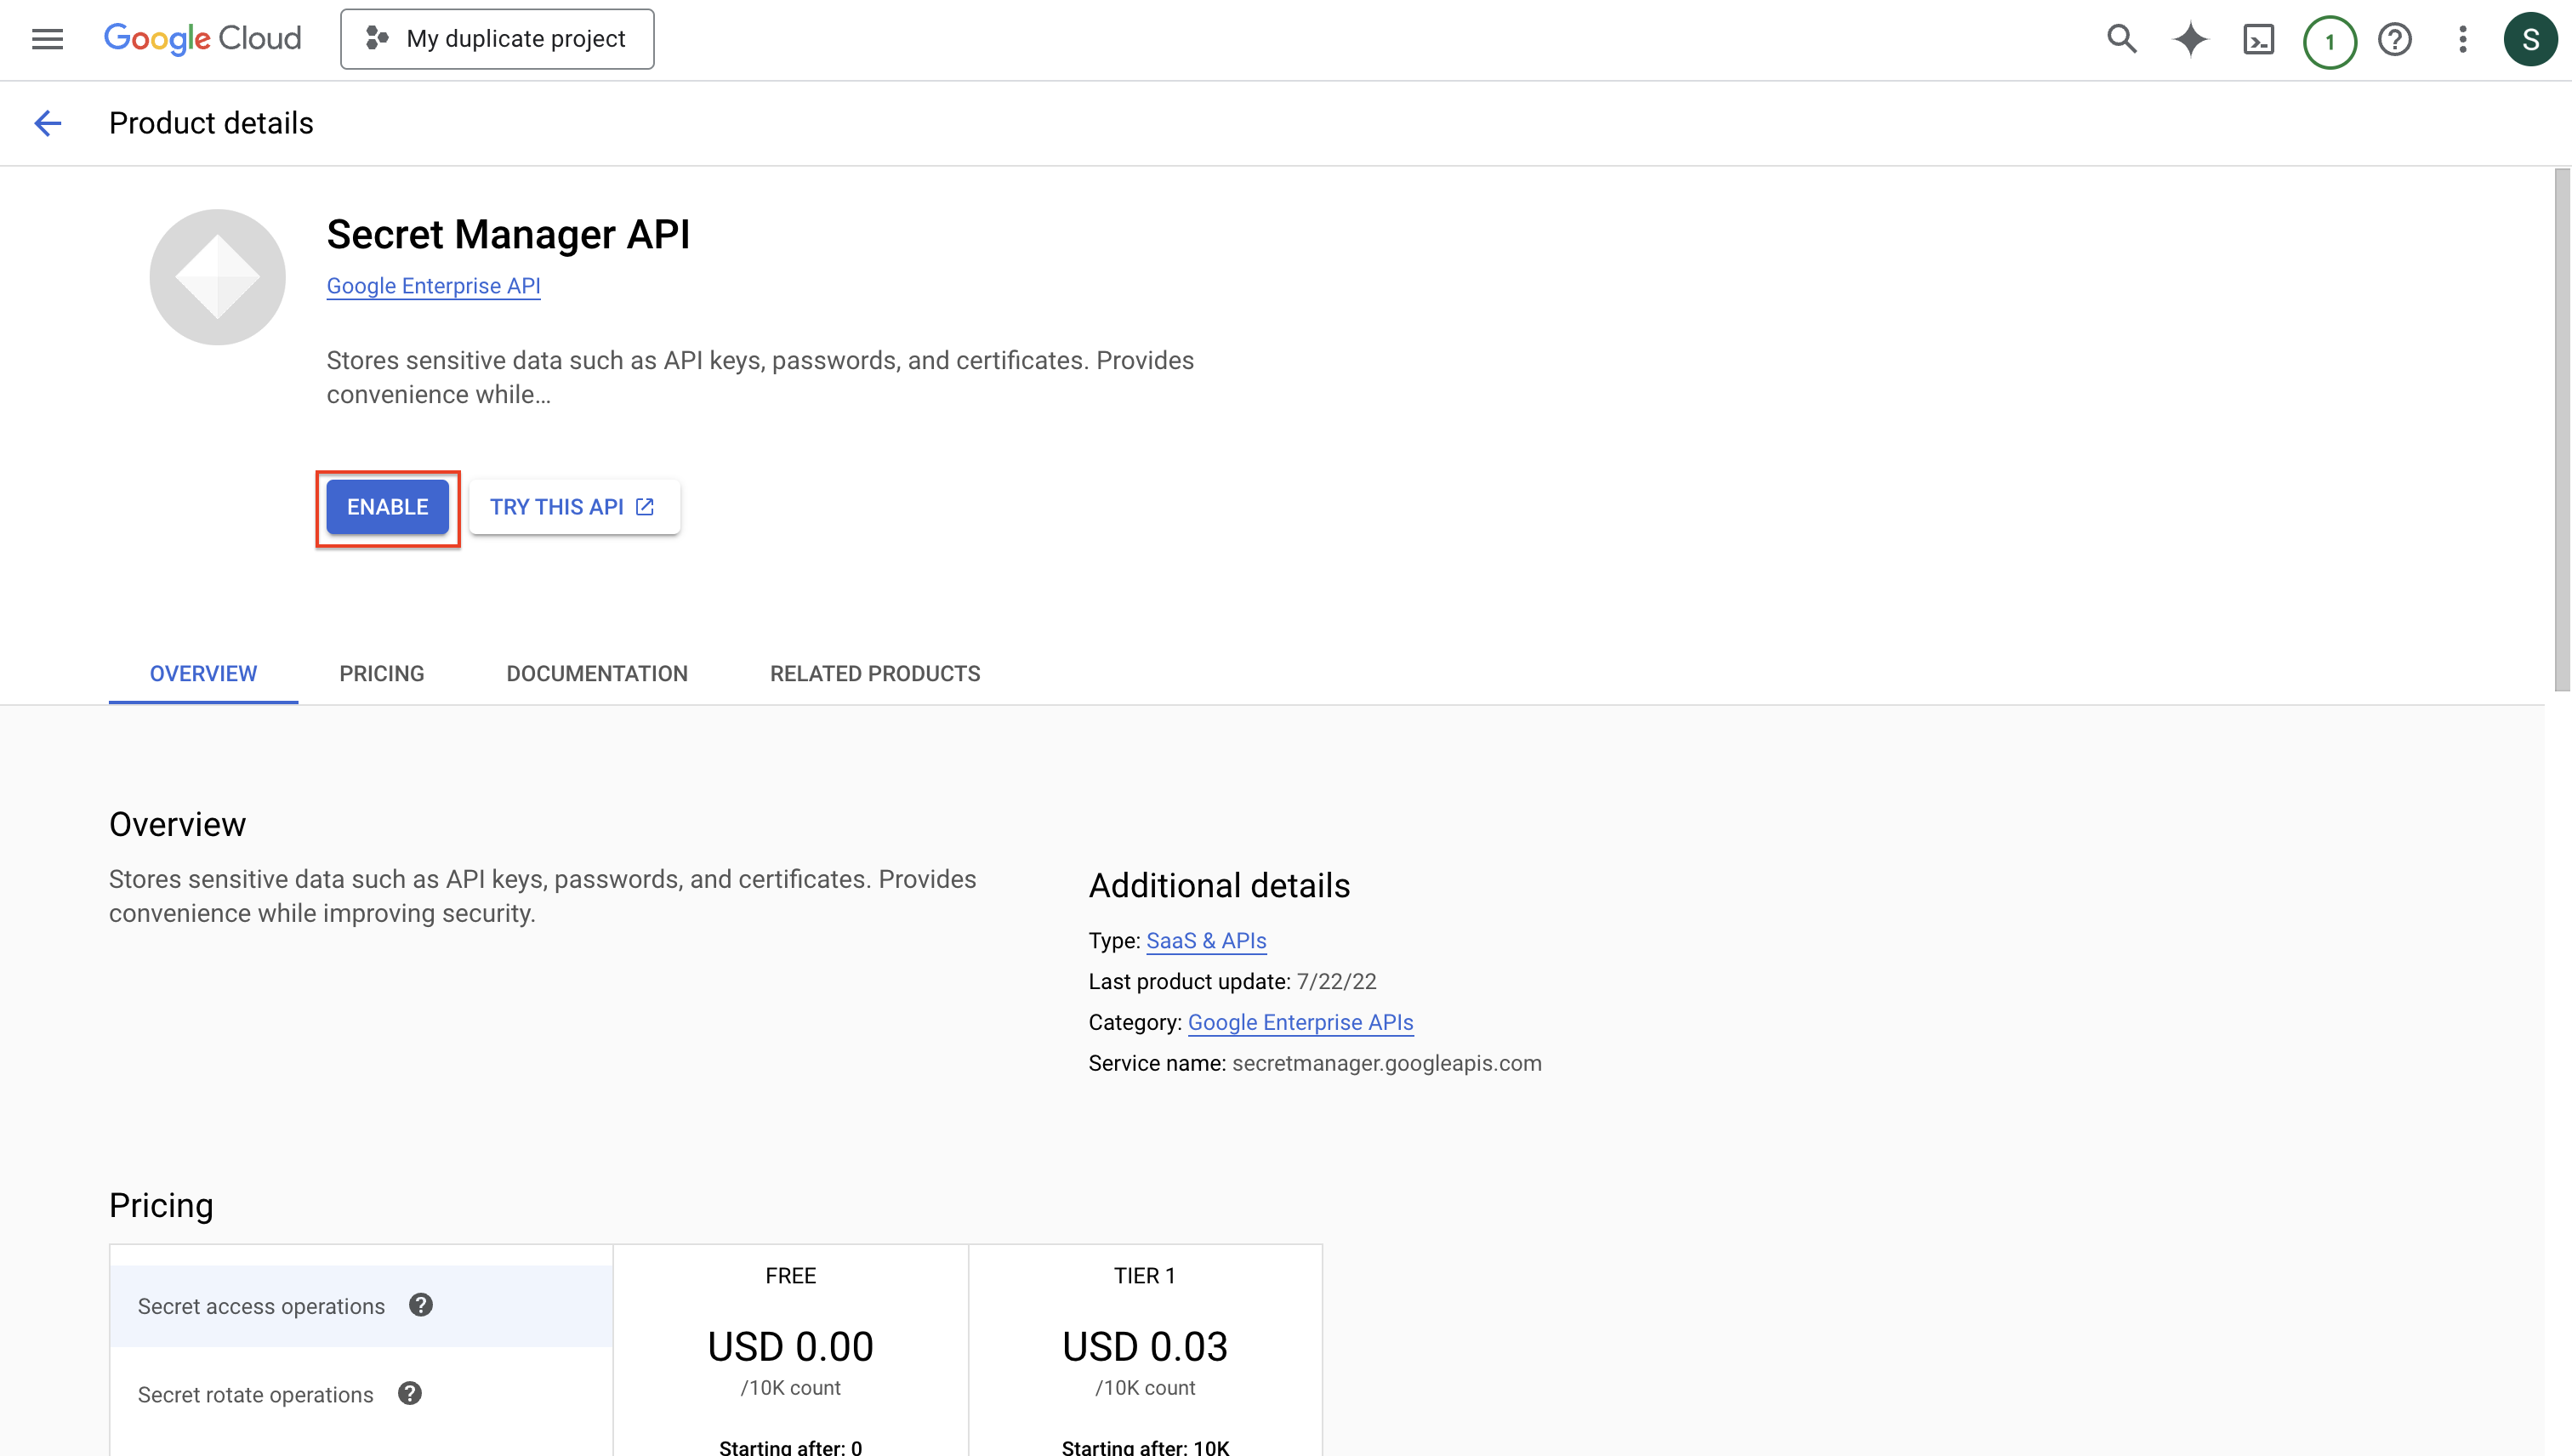
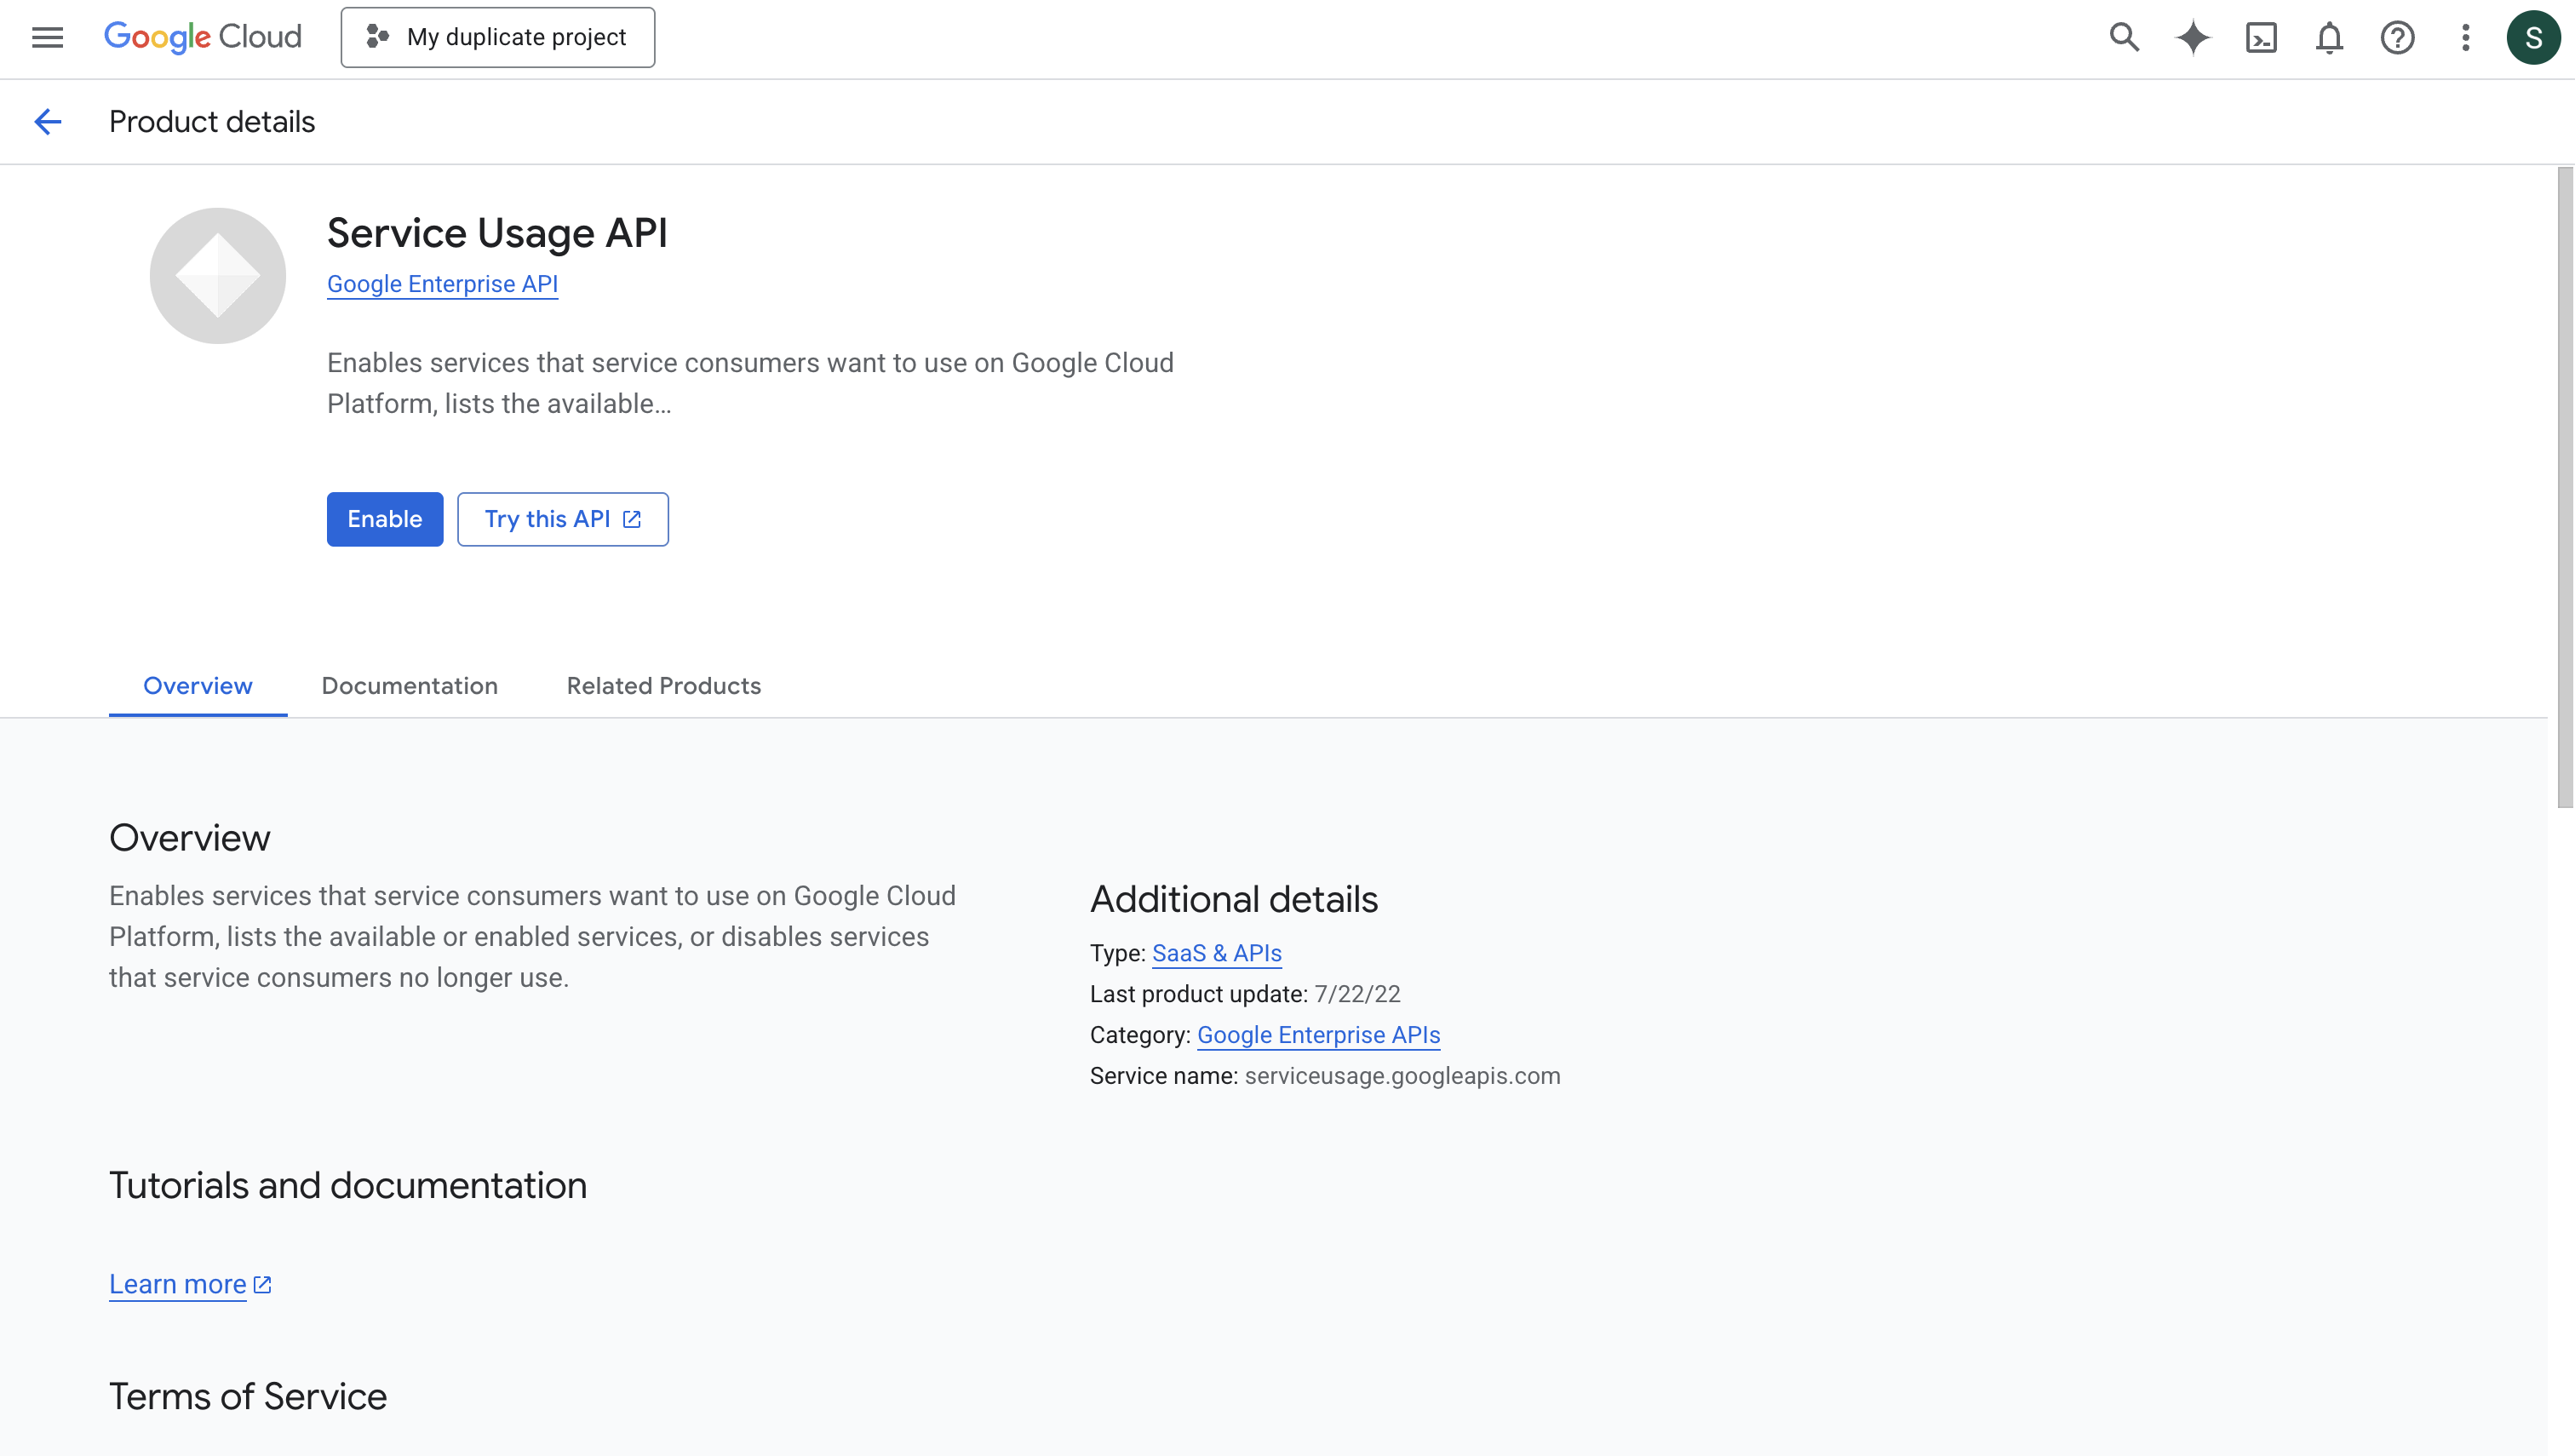 * Ensure your network security policies allow incoming requests from Infisical to this secret sync provider, if network restrictions apply.
2. Select the **GCP Secret Manager** option.
* Ensure your network security policies allow incoming requests from Infisical to this secret sync provider, if network restrictions apply.
2. Select the **GCP Secret Manager** option.
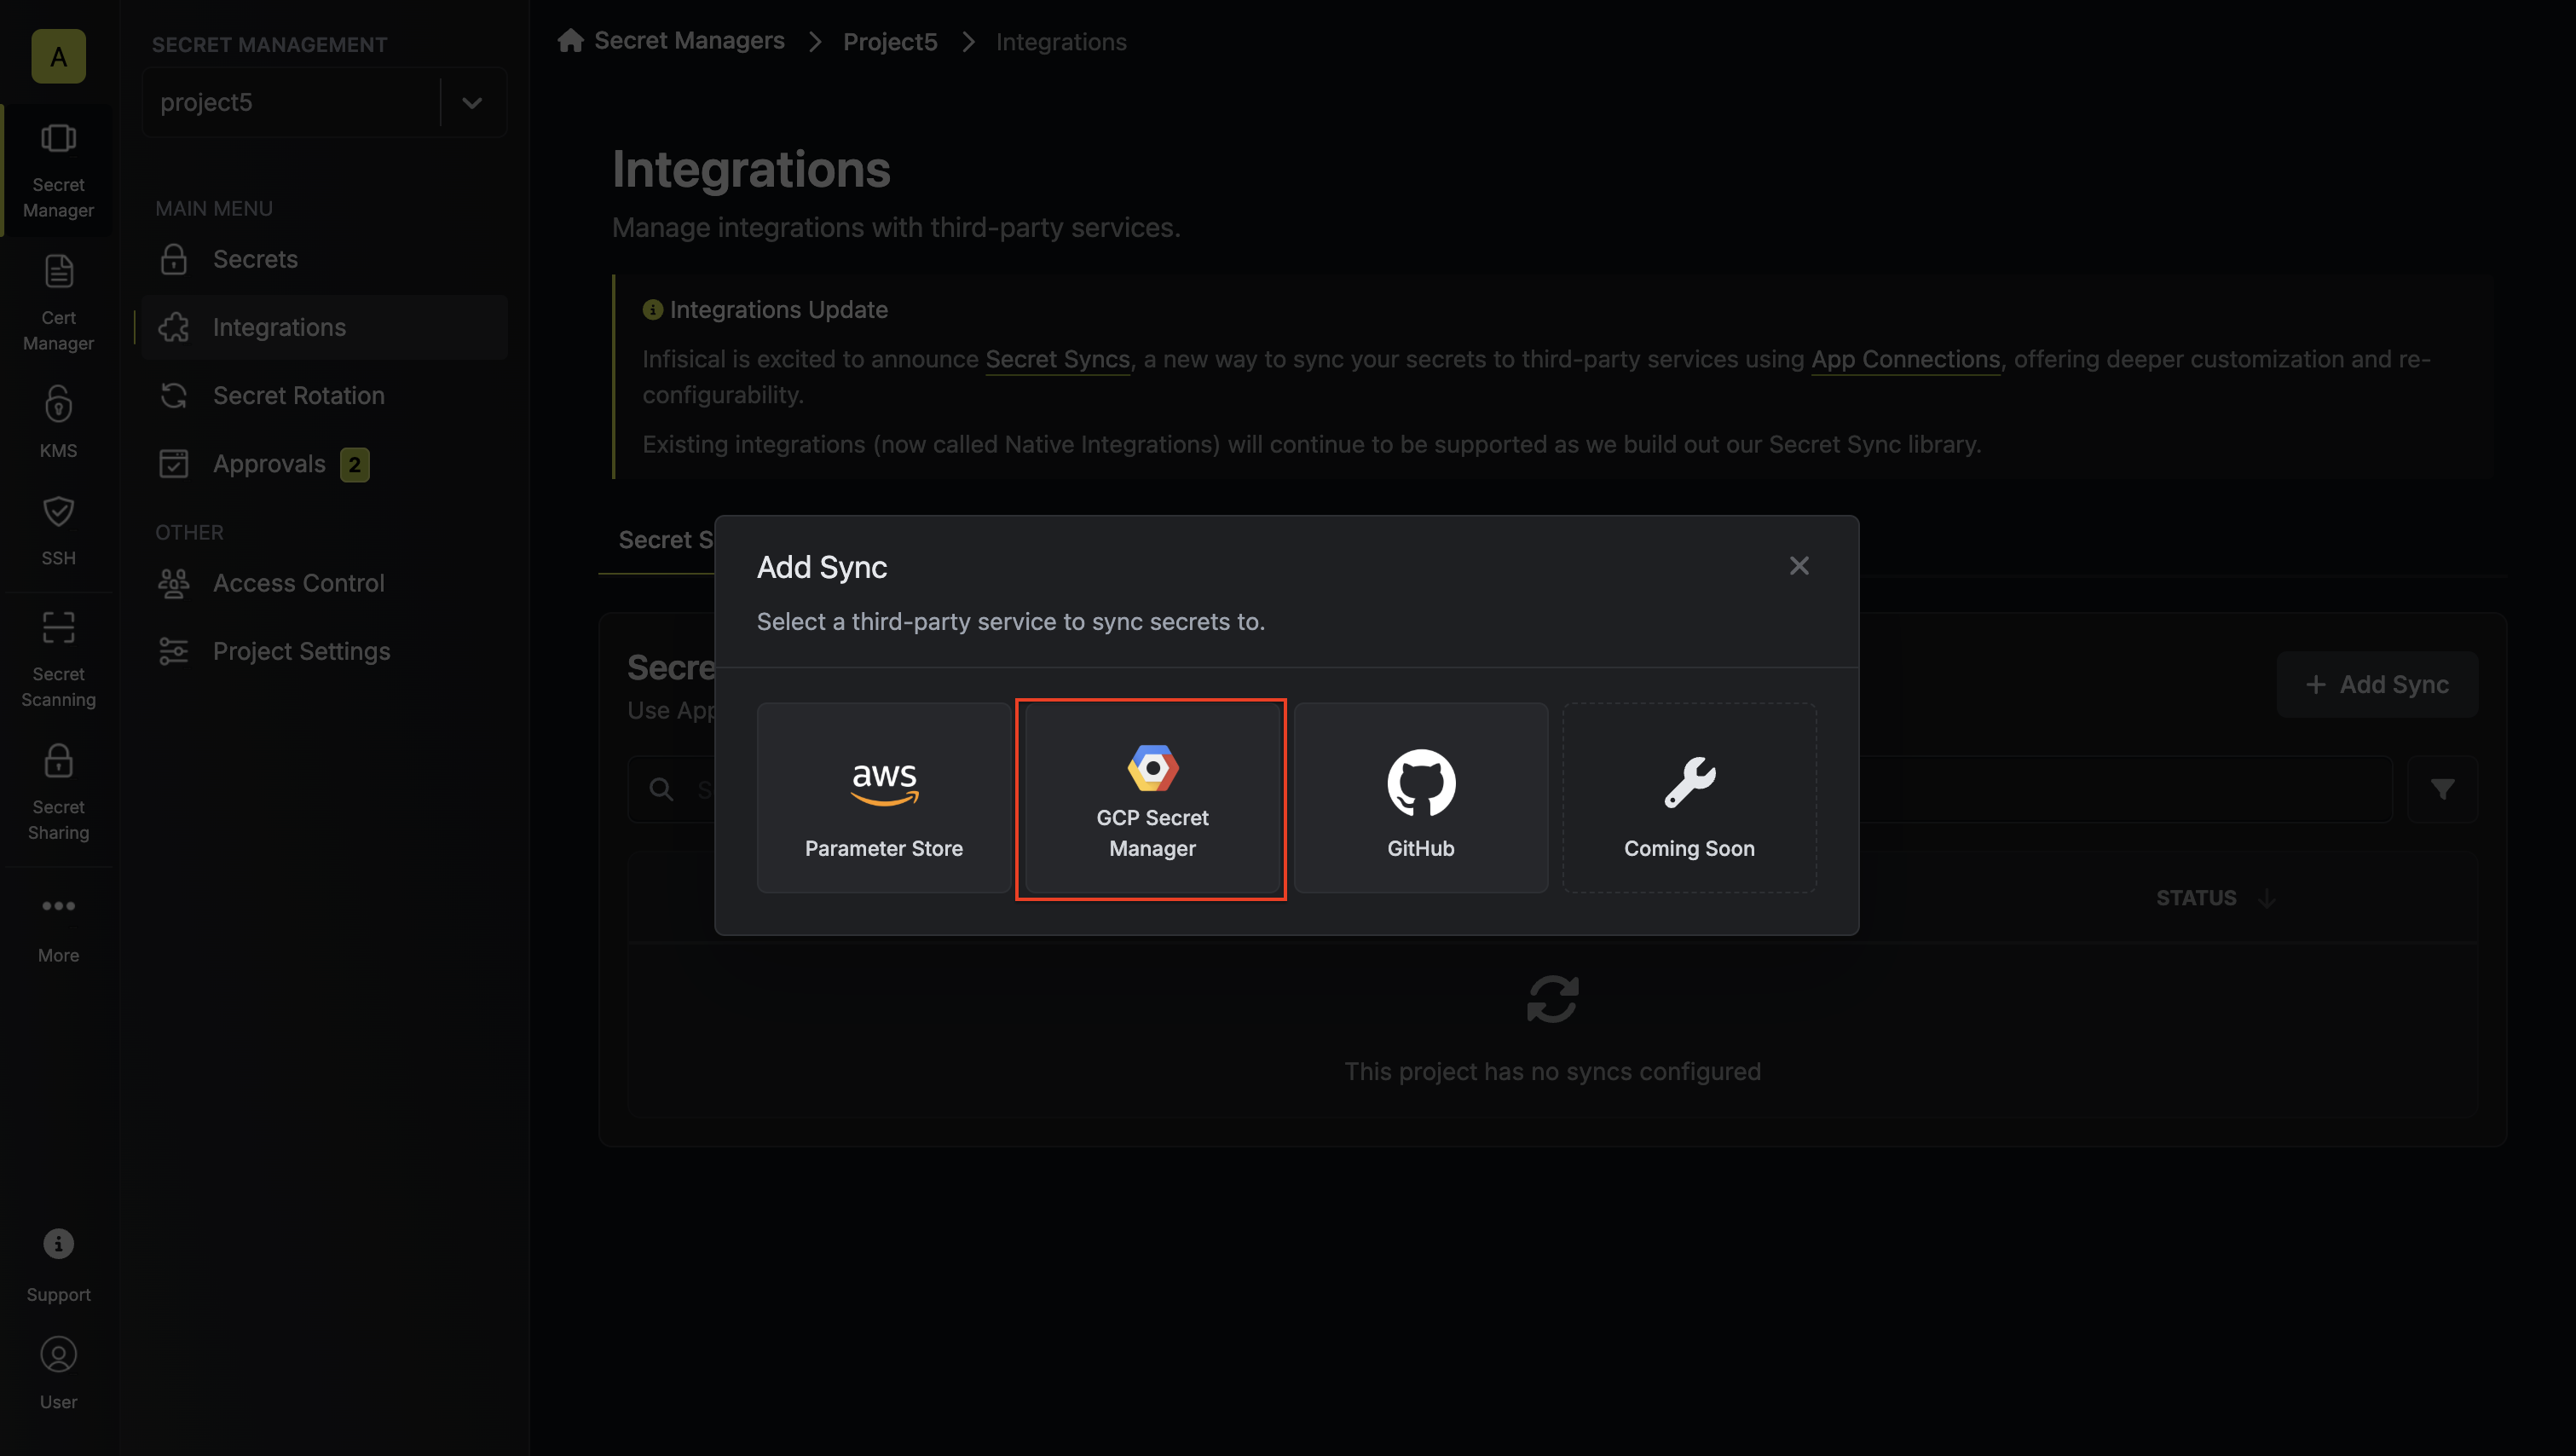 3. Configure the **Source** from where secrets should be retrieved, then click **Next**.
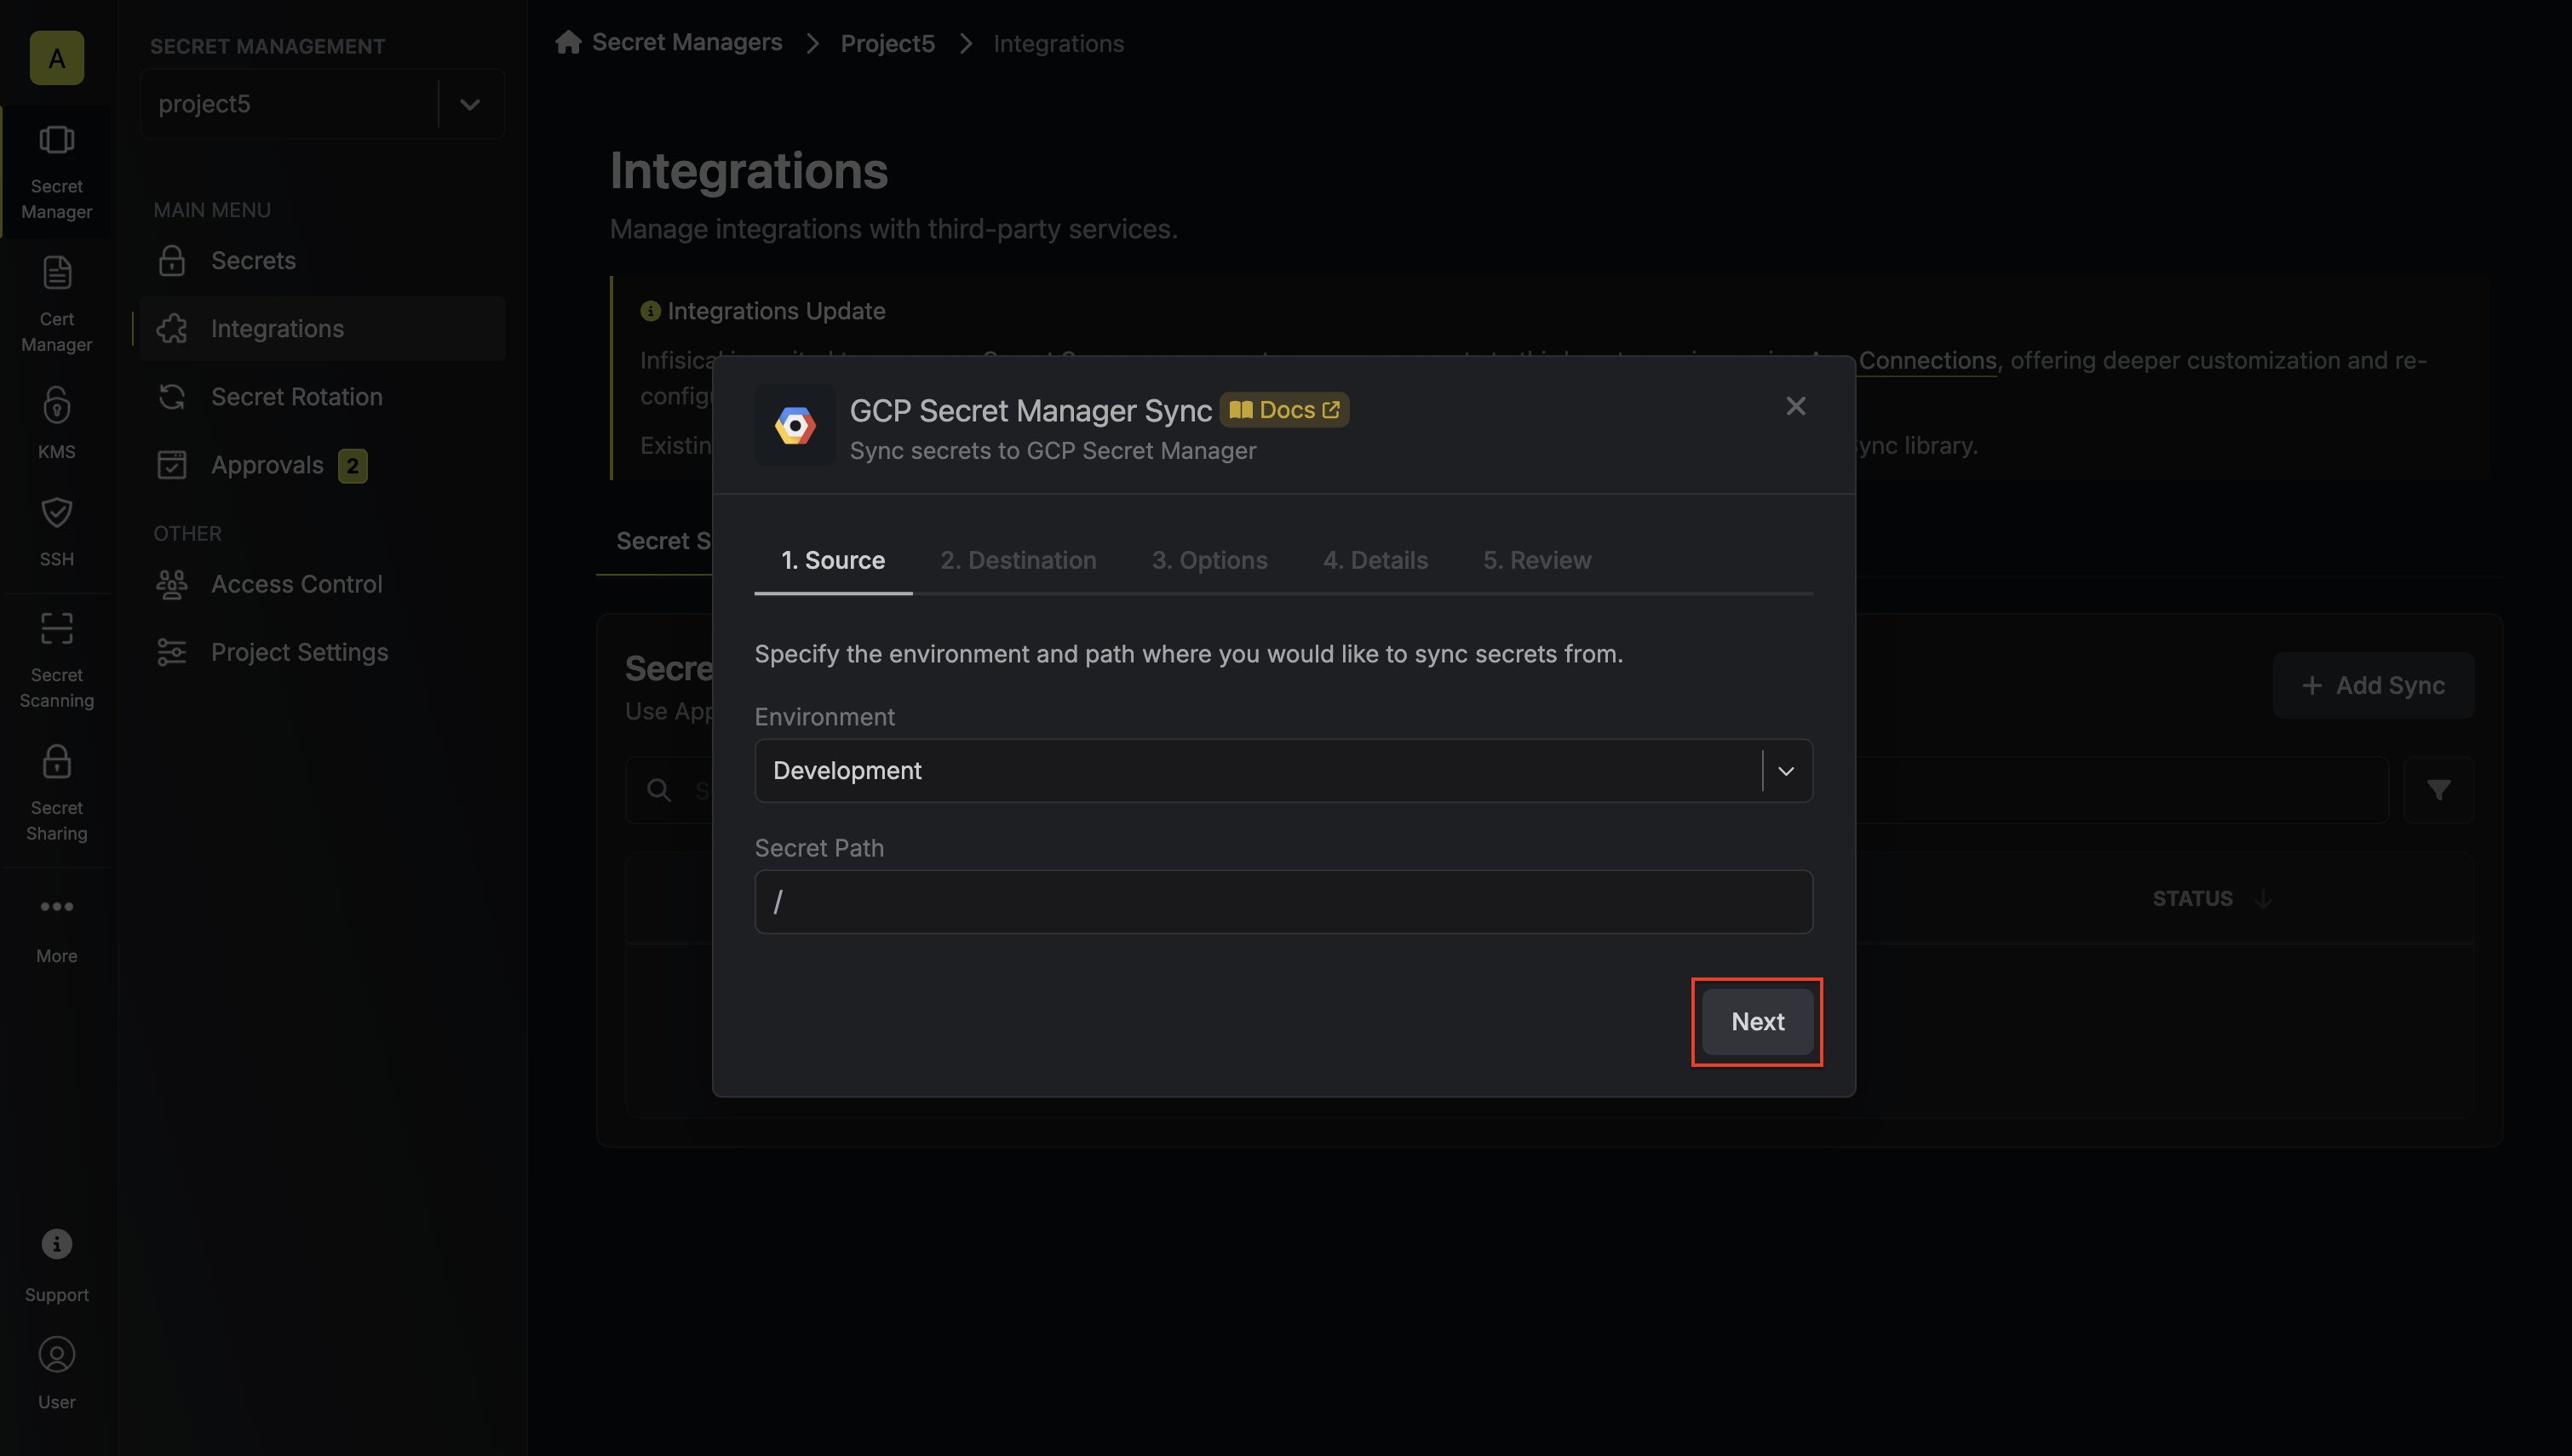 * **Environment**: The project environment to retrieve secrets from.
* **Secret Path**: The folder path to retrieve secrets from.
* **Environment**: The project environment to retrieve secrets from.
* **Secret Path**: The folder path to retrieve secrets from.
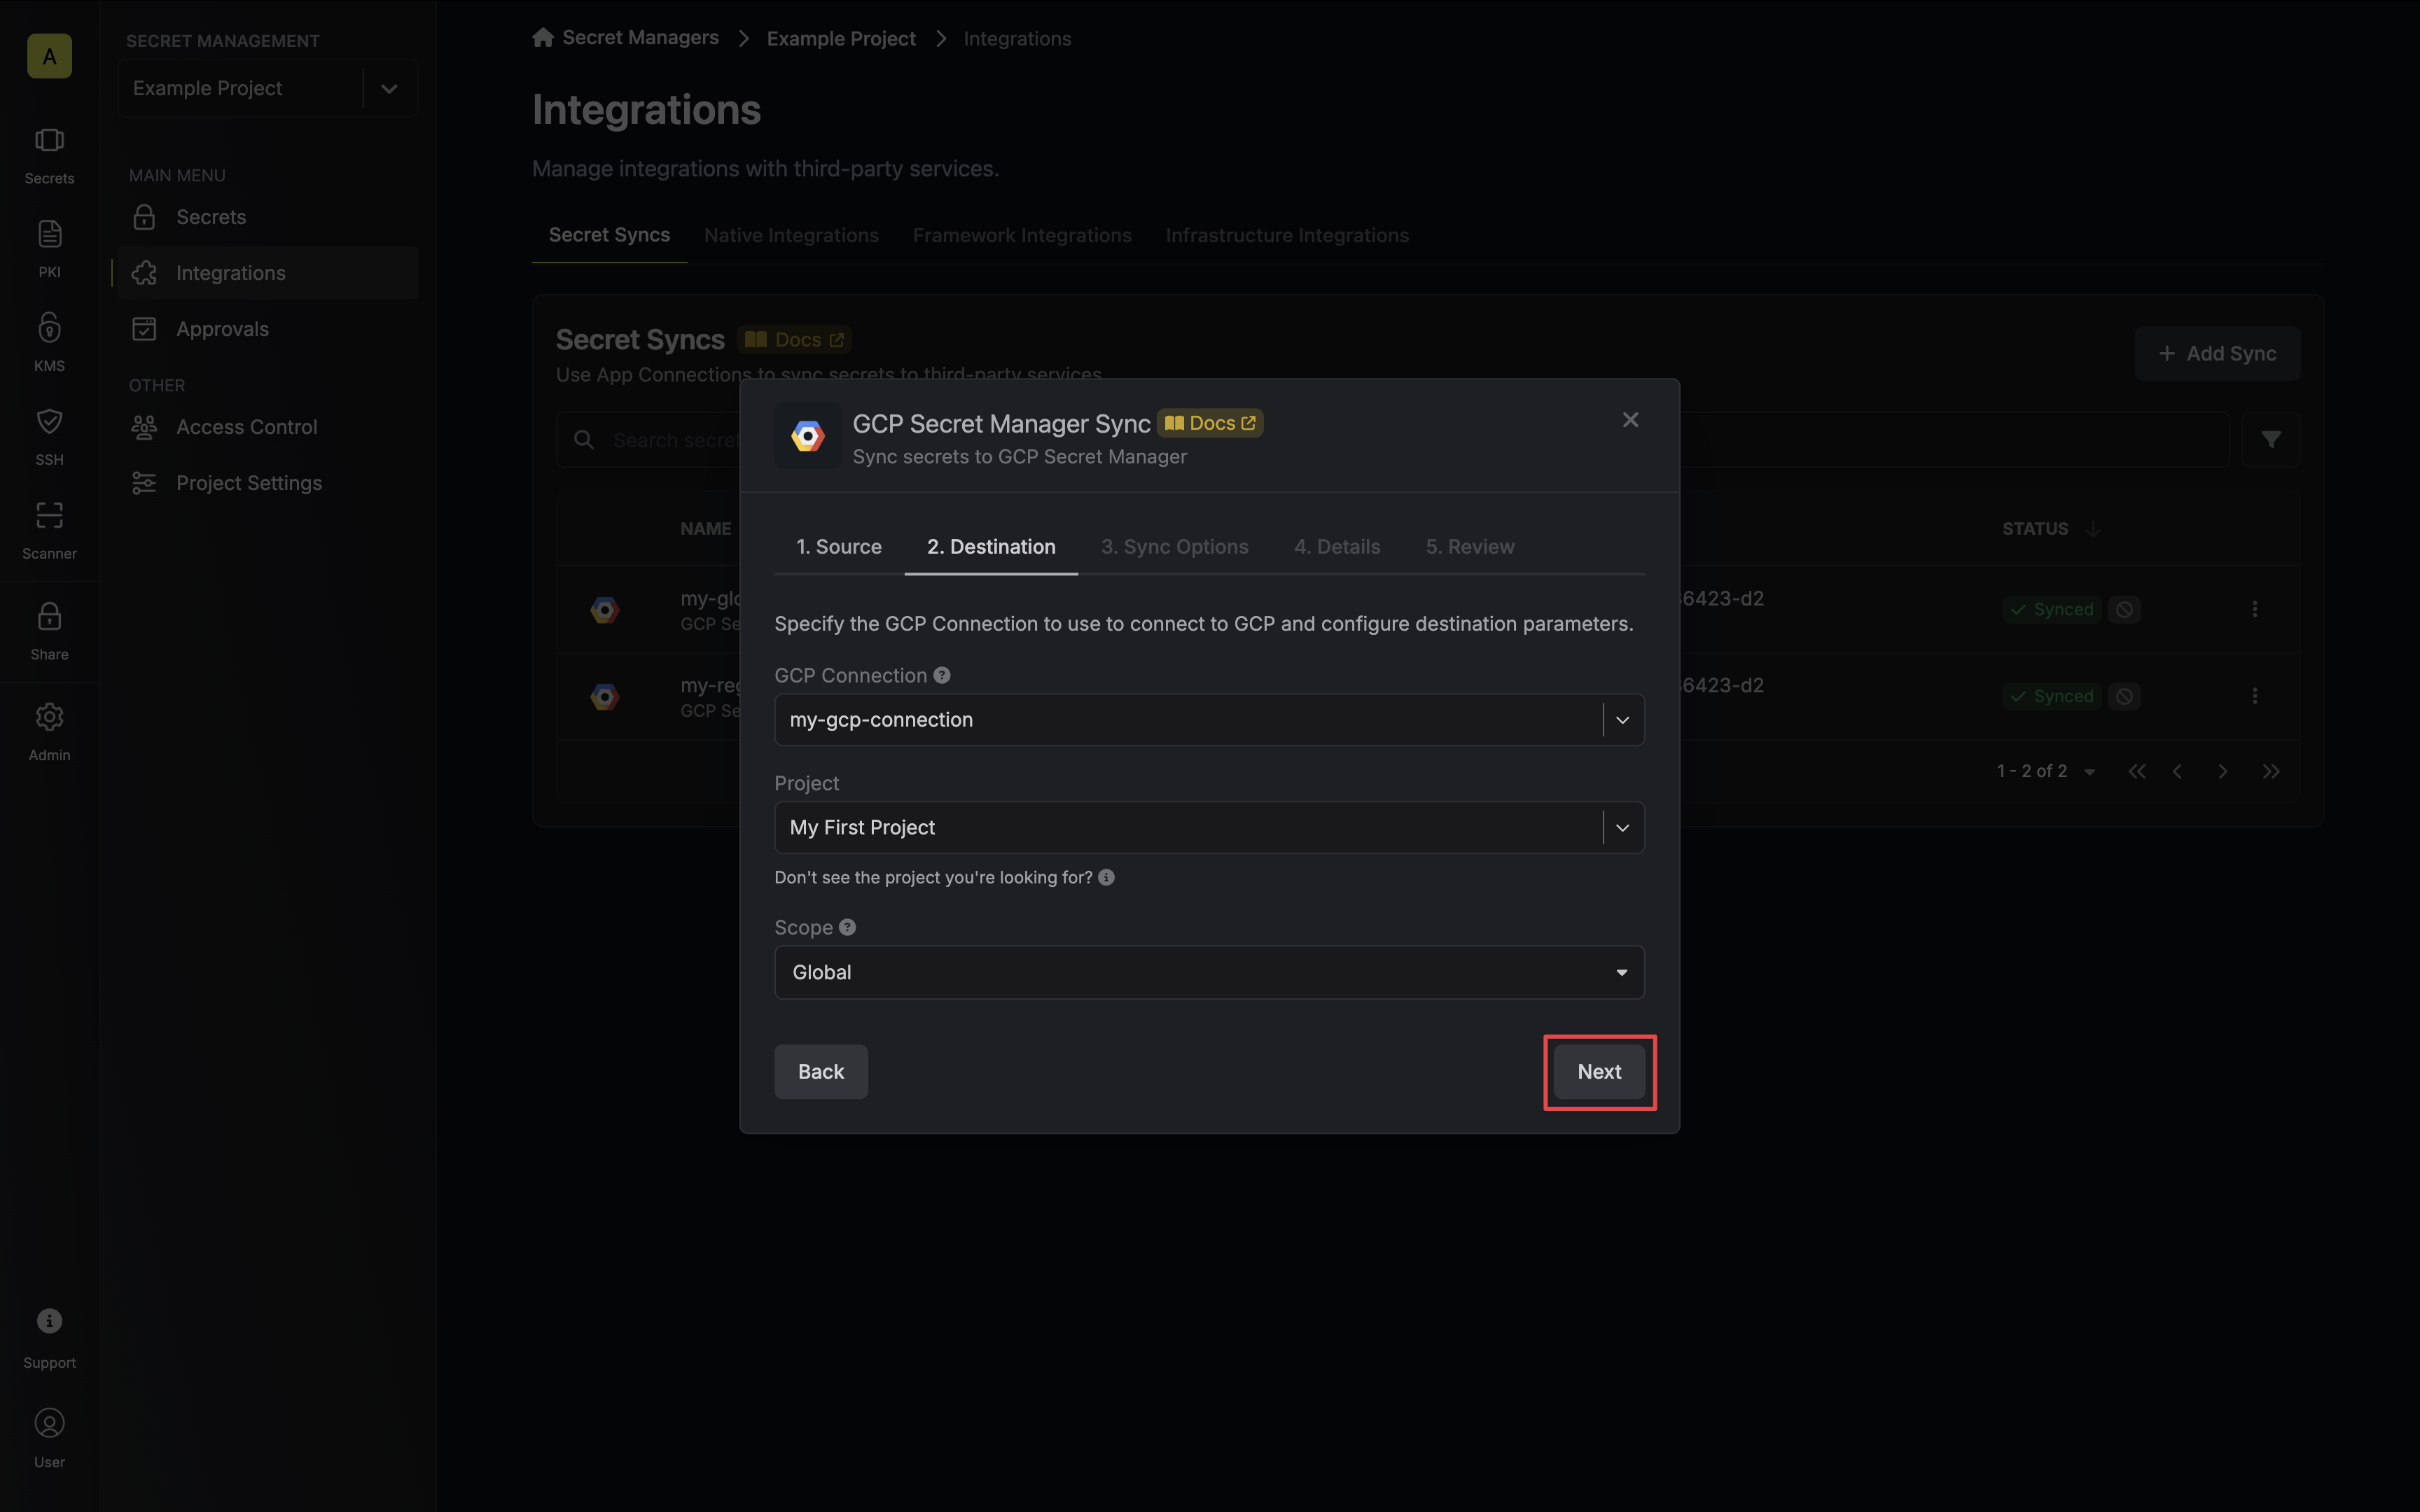 * **GCP Connection**: The GCP Connection to authenticate with.
* **Project**: The GCP project to sync with.
* **Scope**: The GCP project scope that secrets should be synced to:
* **Global**: Secrets will be synced globally; available to all project regions.
* **Region**: Secrets will be synced to the specified region.
5. Configure the **Sync Options** to specify how secrets should be synced, then click **Next**.
* **GCP Connection**: The GCP Connection to authenticate with.
* **Project**: The GCP project to sync with.
* **Scope**: The GCP project scope that secrets should be synced to:
* **Global**: Secrets will be synced globally; available to all project regions.
* **Region**: Secrets will be synced to the specified region.
5. Configure the **Sync Options** to specify how secrets should be synced, then click **Next**.
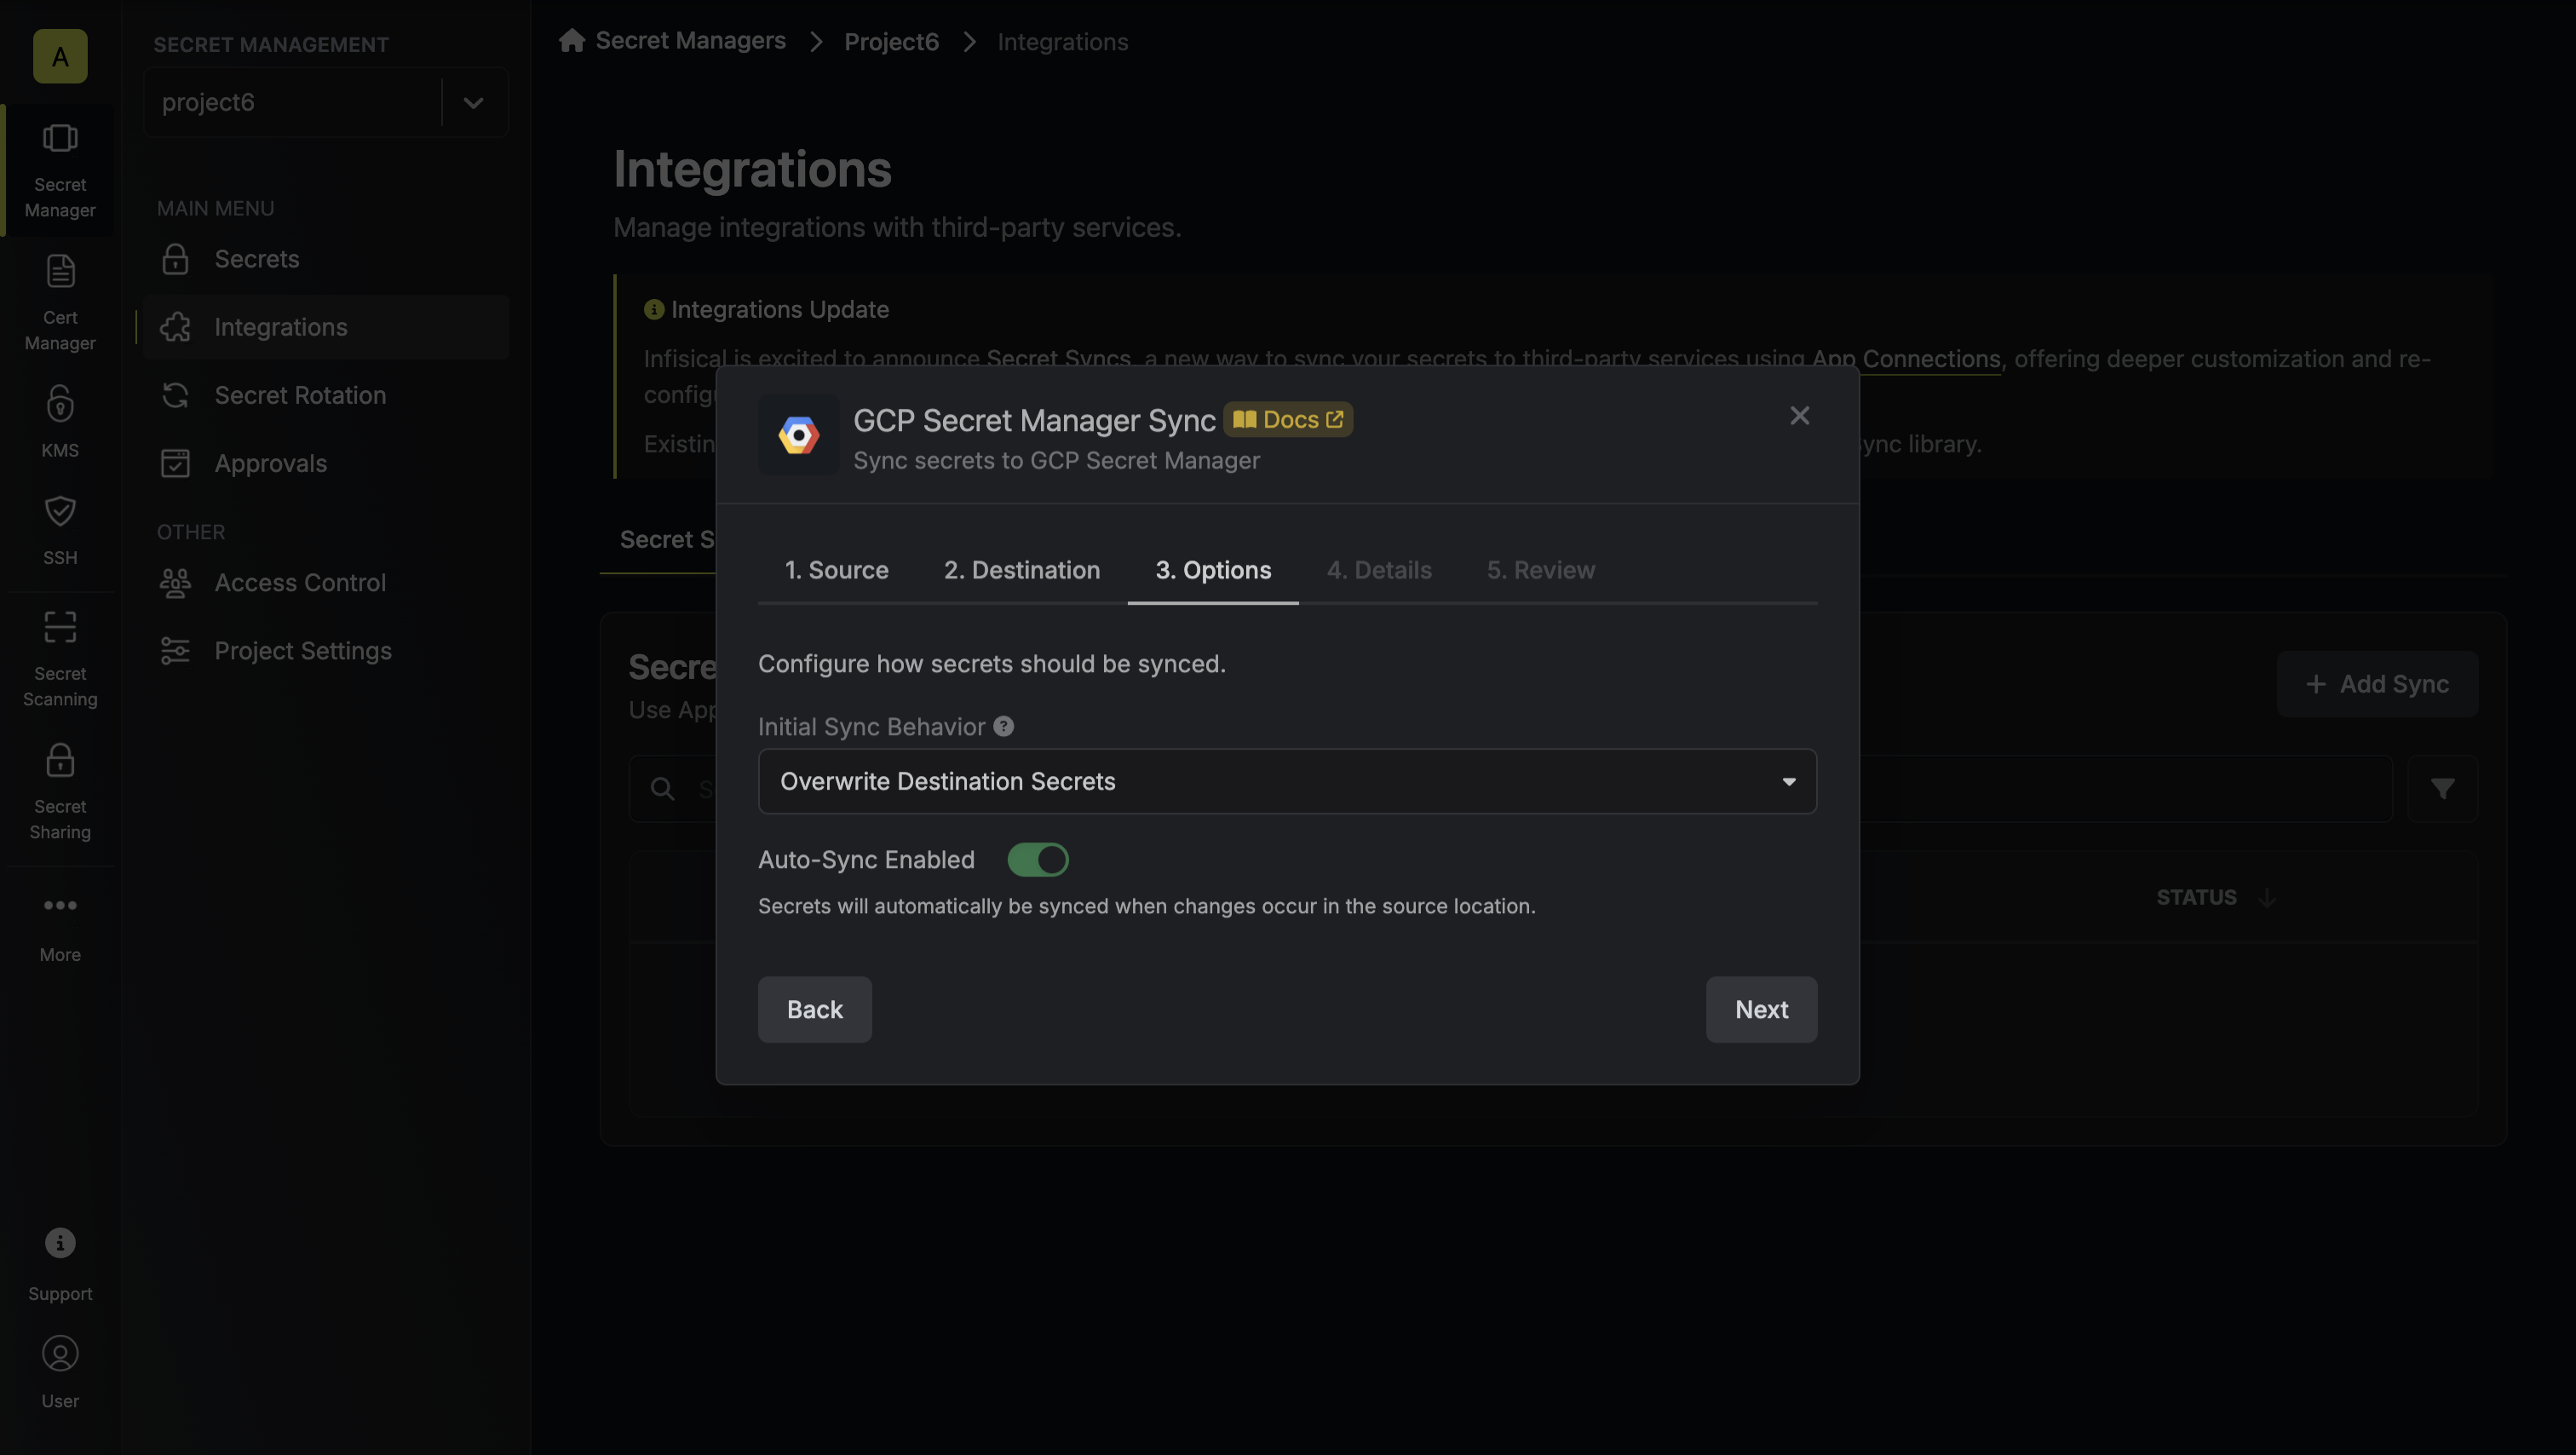 * **Initial Sync Behavior**: Determines how Infisical should resolve the initial sync.
* **Overwrite Destination Secrets**: Removes any secrets at the destination endpoint not present in Infisical.
* **Import Secrets (Prioritize Infisical)**: Imports secrets from the destination endpoint before syncing, prioritizing values from Infisical over GCP Secret Manager when keys conflict.
* **Import Secrets (Prioritize GCP Secret Manager)**: Imports secrets from the destination endpoint before syncing, prioritizing values from GCP Secret Manager over Infisical when keys conflict.
* **Key Schema**: Template that determines how secret names are transformed when syncing, using `{{secretKey}}` as a placeholder for the original secret name and `{{environment}}` for the environment.
* **Initial Sync Behavior**: Determines how Infisical should resolve the initial sync.
* **Overwrite Destination Secrets**: Removes any secrets at the destination endpoint not present in Infisical.
* **Import Secrets (Prioritize Infisical)**: Imports secrets from the destination endpoint before syncing, prioritizing values from Infisical over GCP Secret Manager when keys conflict.
* **Import Secrets (Prioritize GCP Secret Manager)**: Imports secrets from the destination endpoint before syncing, prioritizing values from GCP Secret Manager over Infisical when keys conflict.
* **Key Schema**: Template that determines how secret names are transformed when syncing, using `{{secretKey}}` as a placeholder for the original secret name and `{{environment}}` for the environment.
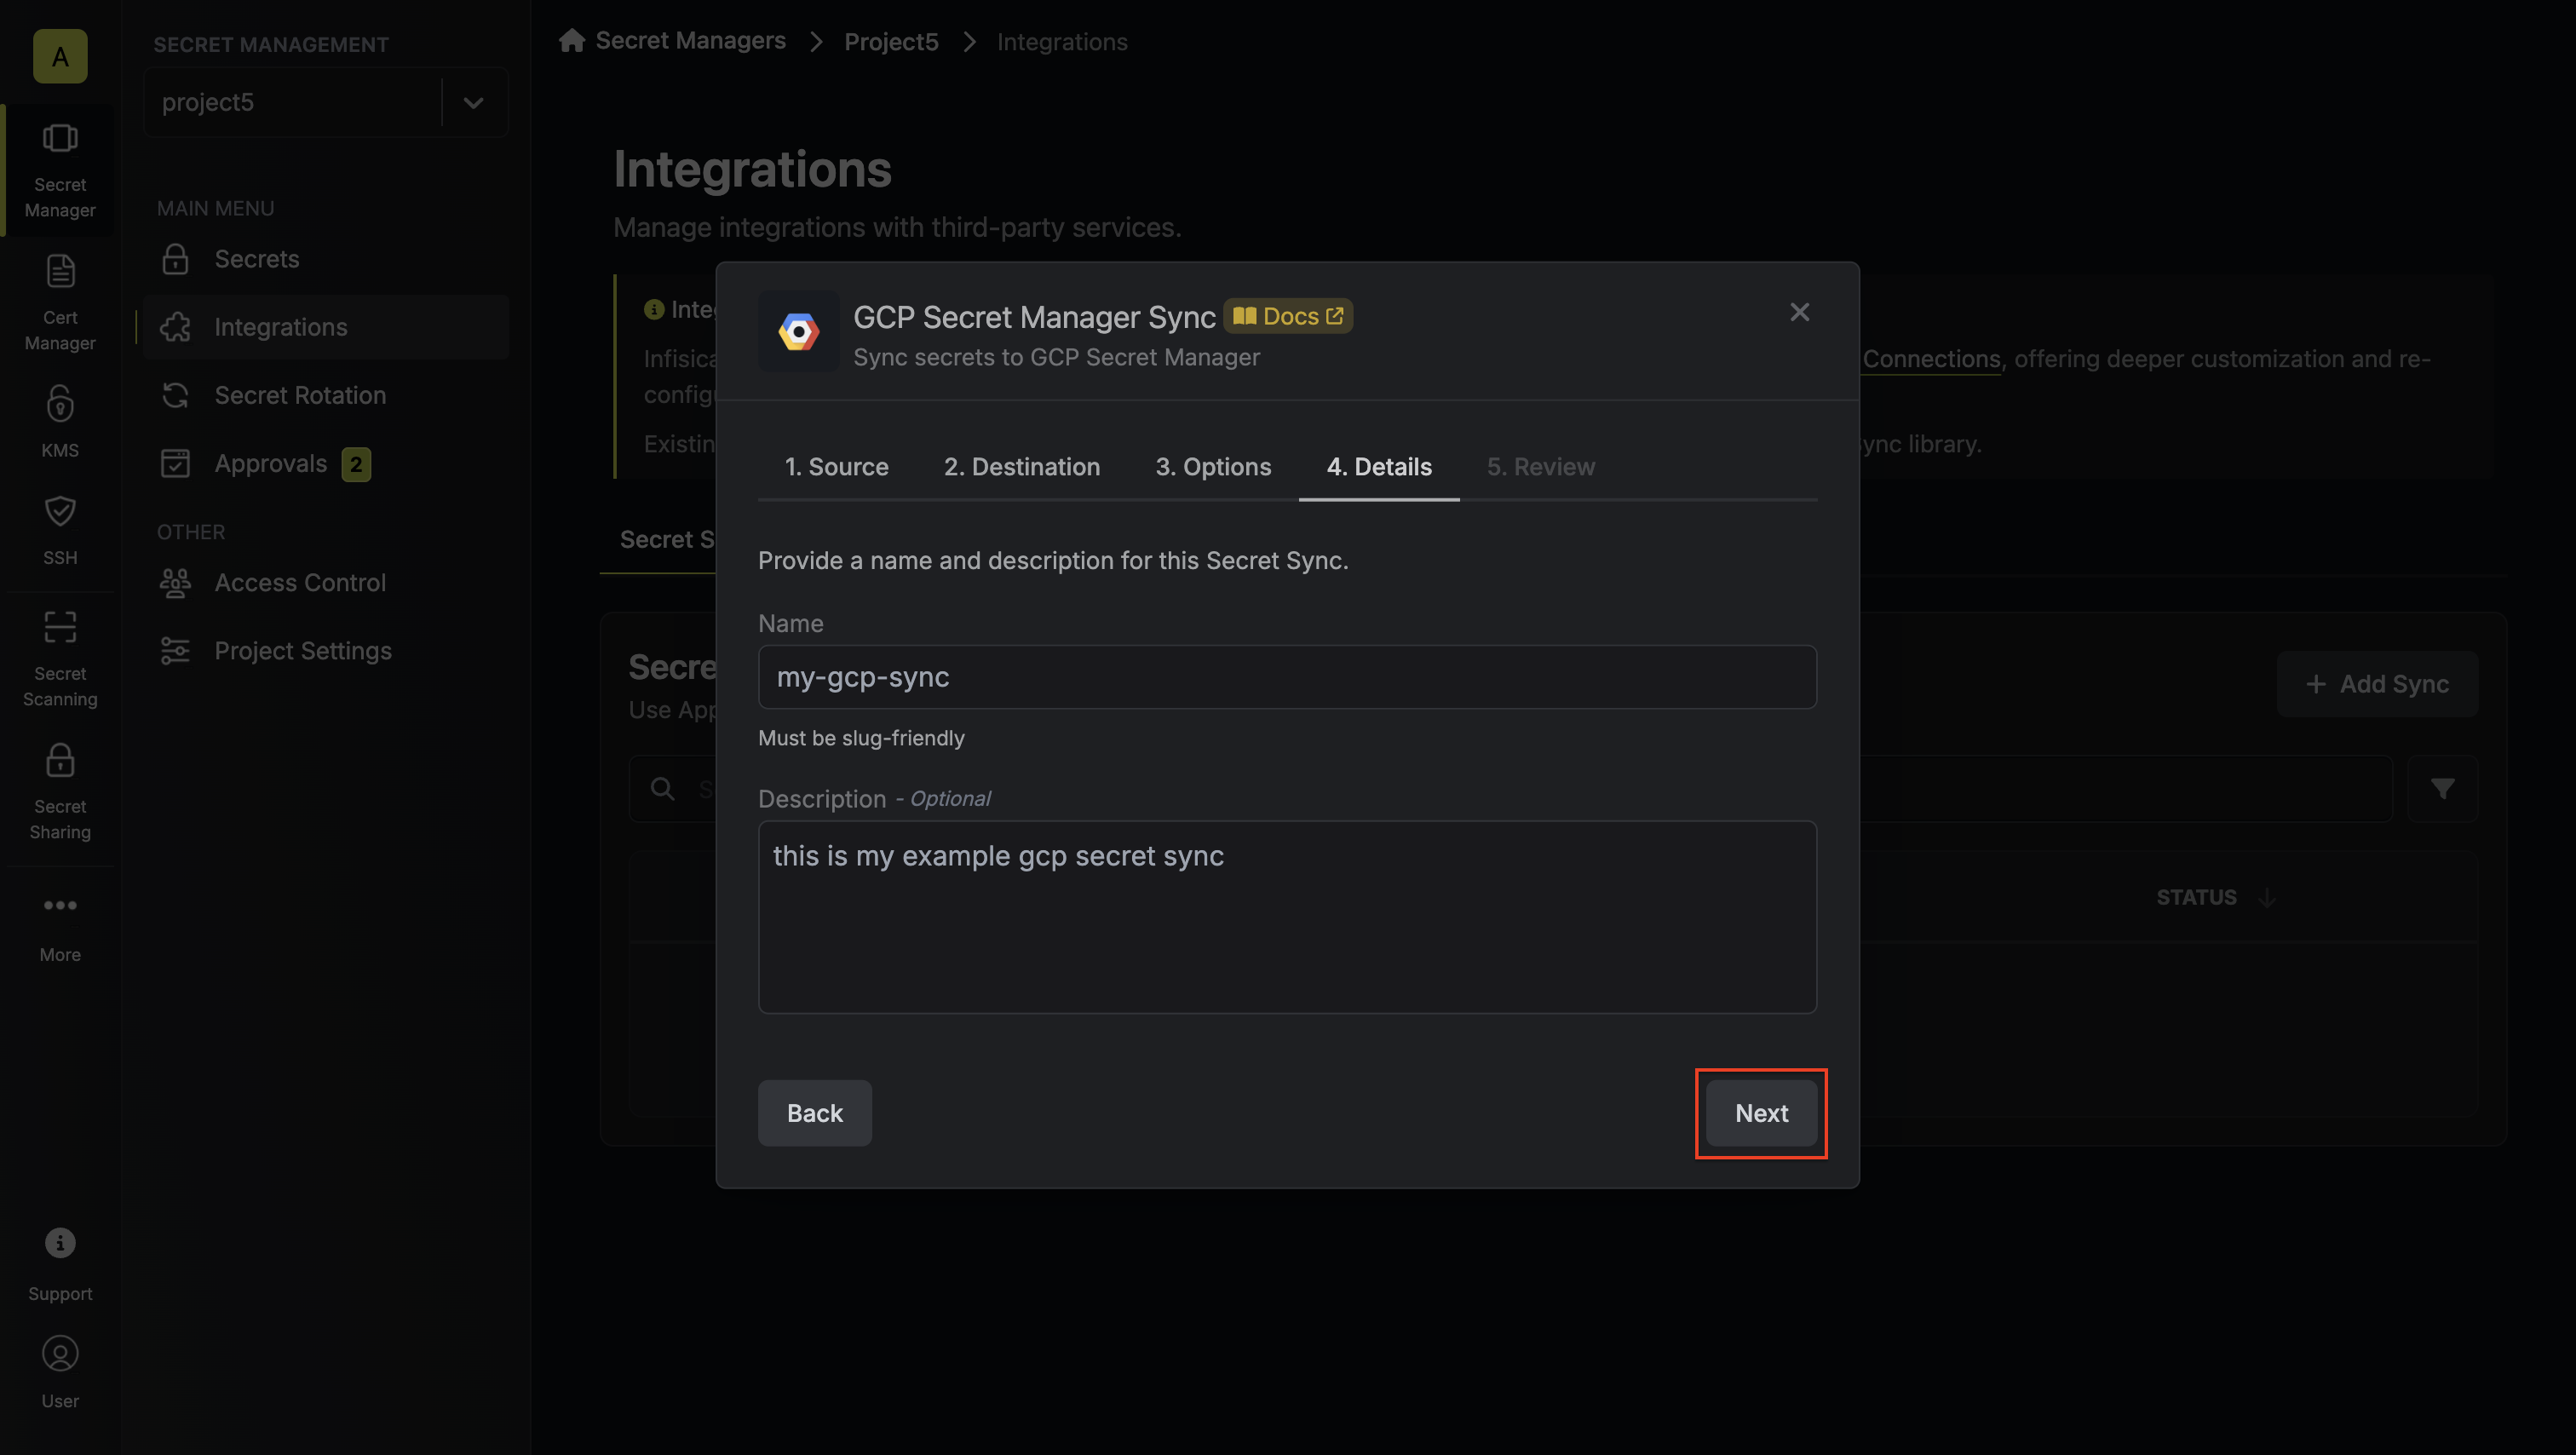 * **Name**: The name of your sync. Must be slug-friendly.
* **Description**: An optional description for your sync.
7. Review your Secret Manager Sync configuration, then click **Create Sync**.
* **Name**: The name of your sync. Must be slug-friendly.
* **Description**: An optional description for your sync.
7. Review your Secret Manager Sync configuration, then click **Create Sync**.
 8. If enabled, your GCP Secret Manager Sync will begin syncing your secrets to the destination endpoint.
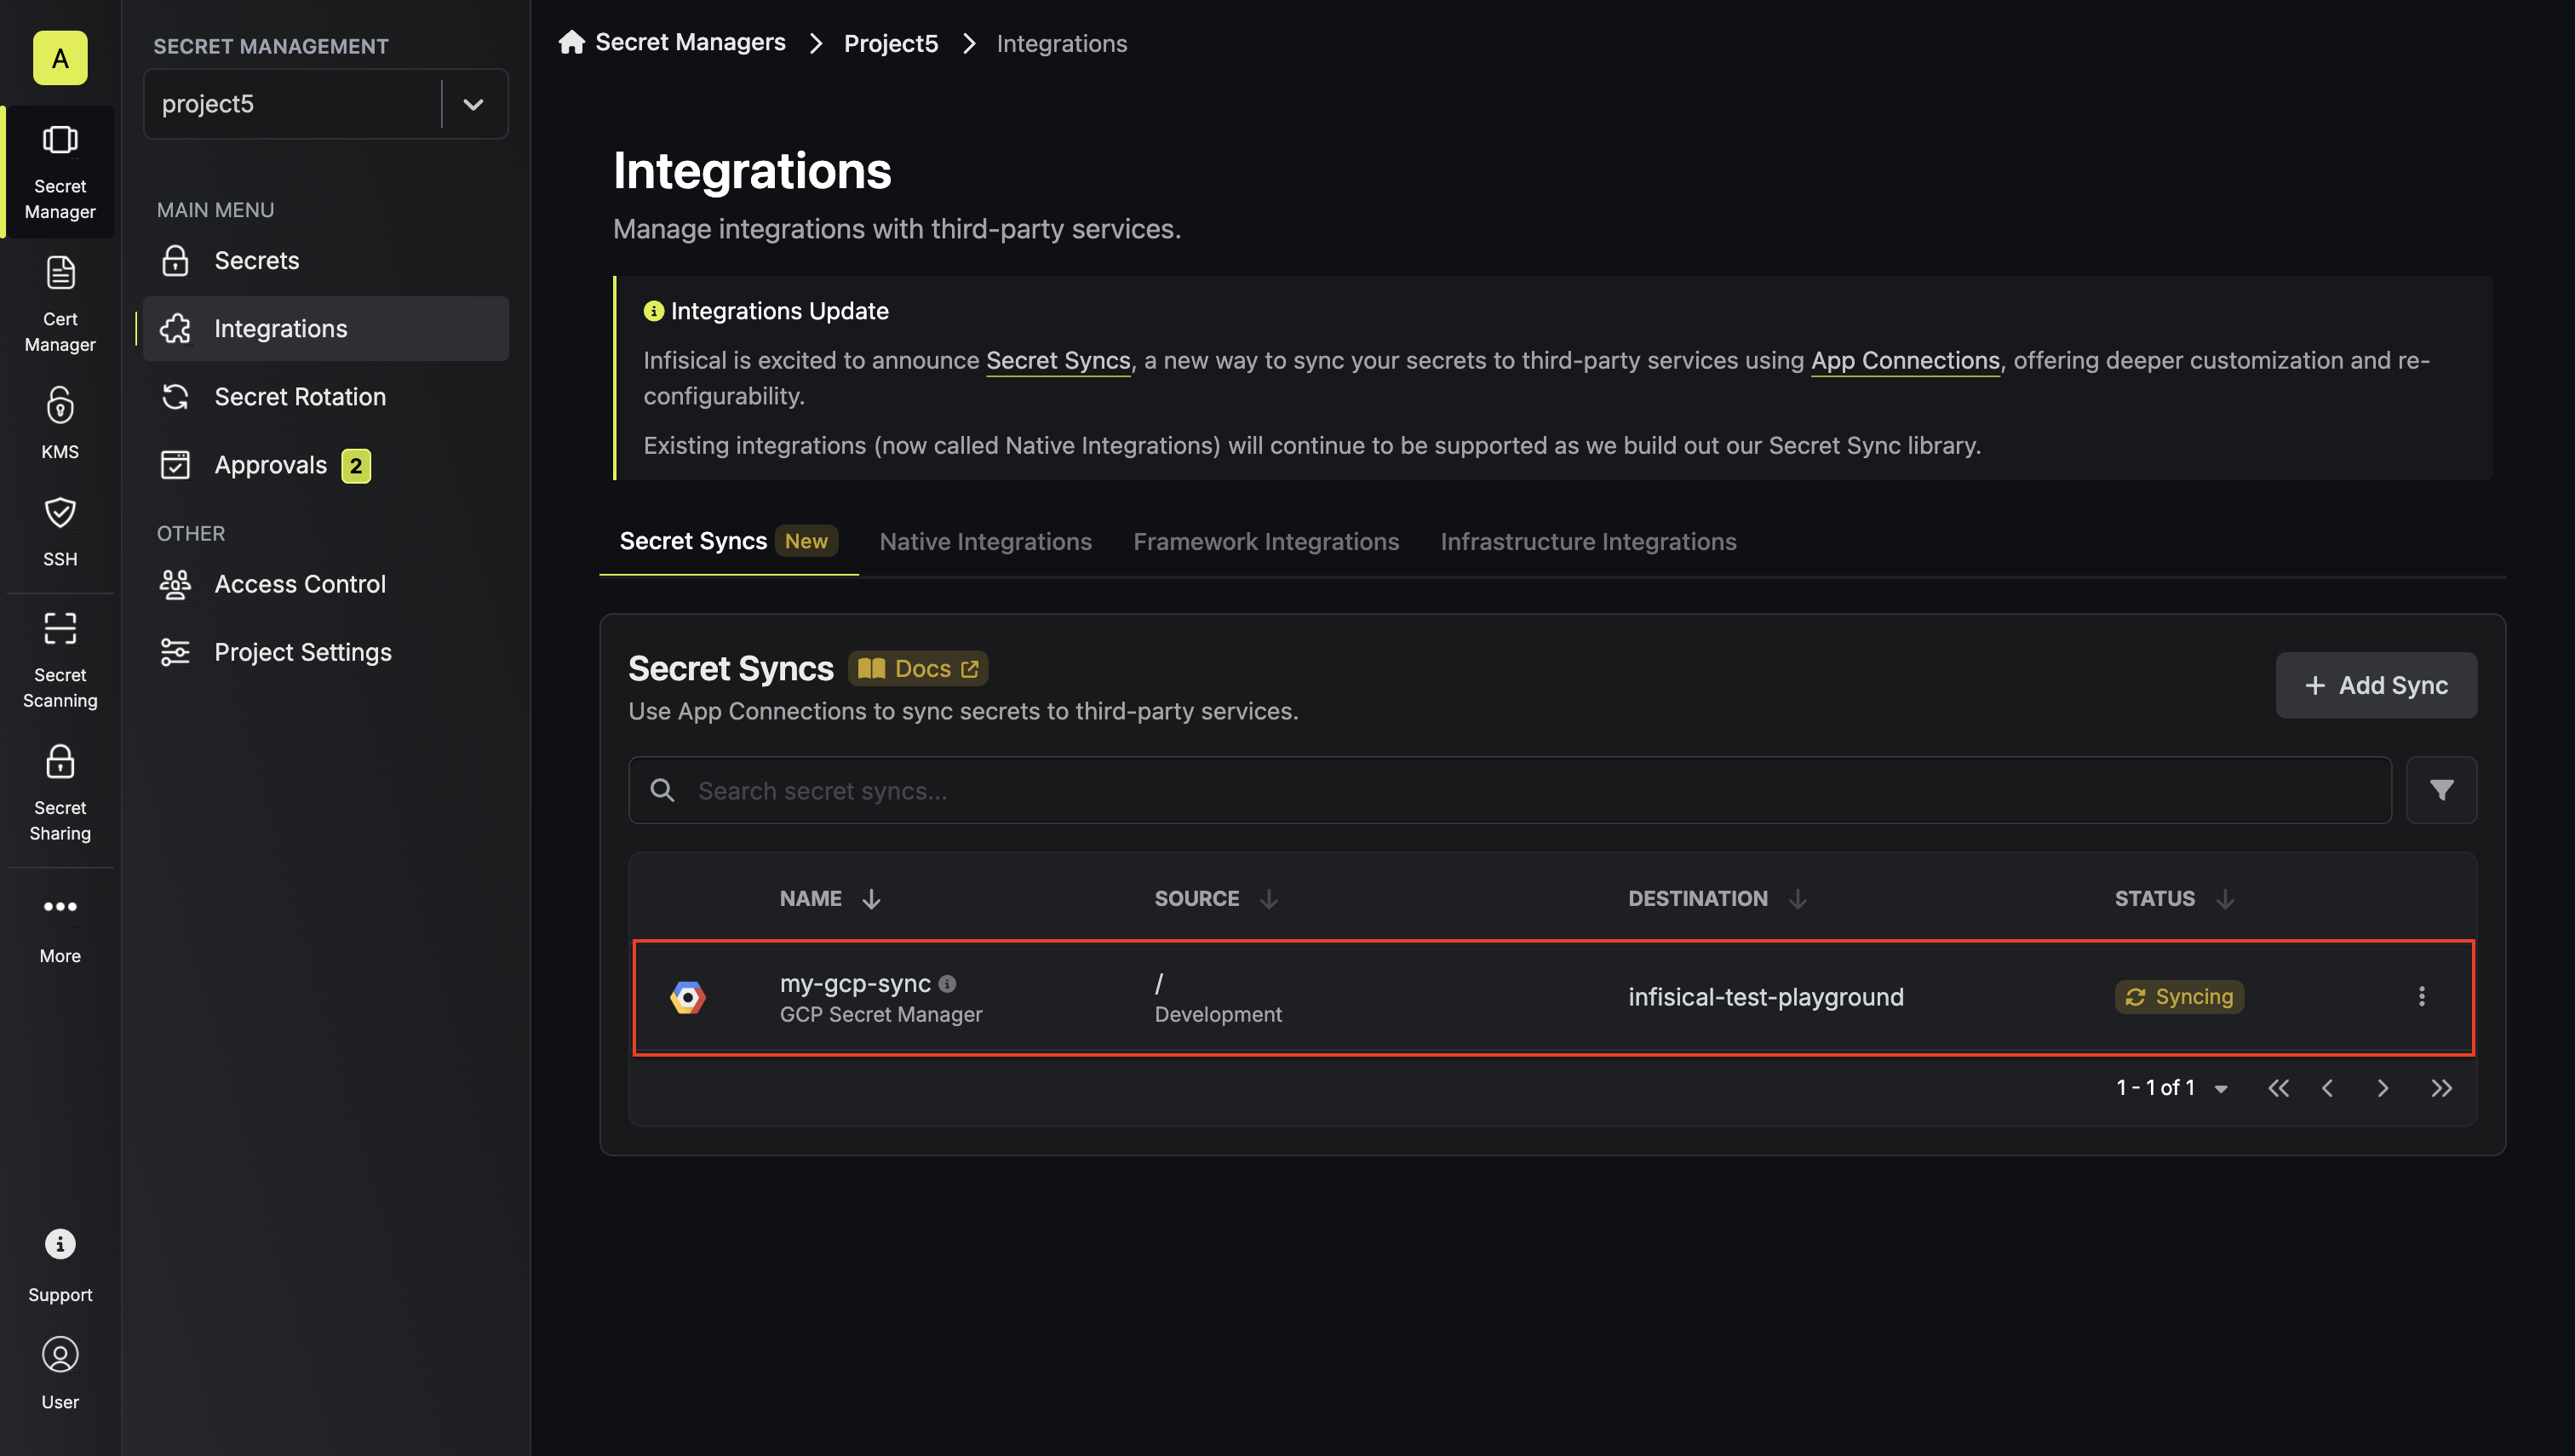 To enable via command line, run the following command, replacing `projectId` with your GCP project ID:
```bash theme={"dark"}
gcloud services enable iamcredentials.googleapis.com --project=projectId
```
Verify the API is enabled by running:
```bash theme={"dark"}
gcloud services list --enabled --project=projectId | grep iamcredentials
```
Press "DONE" after creating the service account.
To enable via command line, run the following command, replacing `projectId` with your GCP project ID:
```bash theme={"dark"}
gcloud services enable iamcredentials.googleapis.com --project=projectId
```
Verify the API is enabled by running:
```bash theme={"dark"}
gcloud services list --enabled --project=projectId | grep iamcredentials
```
Press "DONE" after creating the service account.
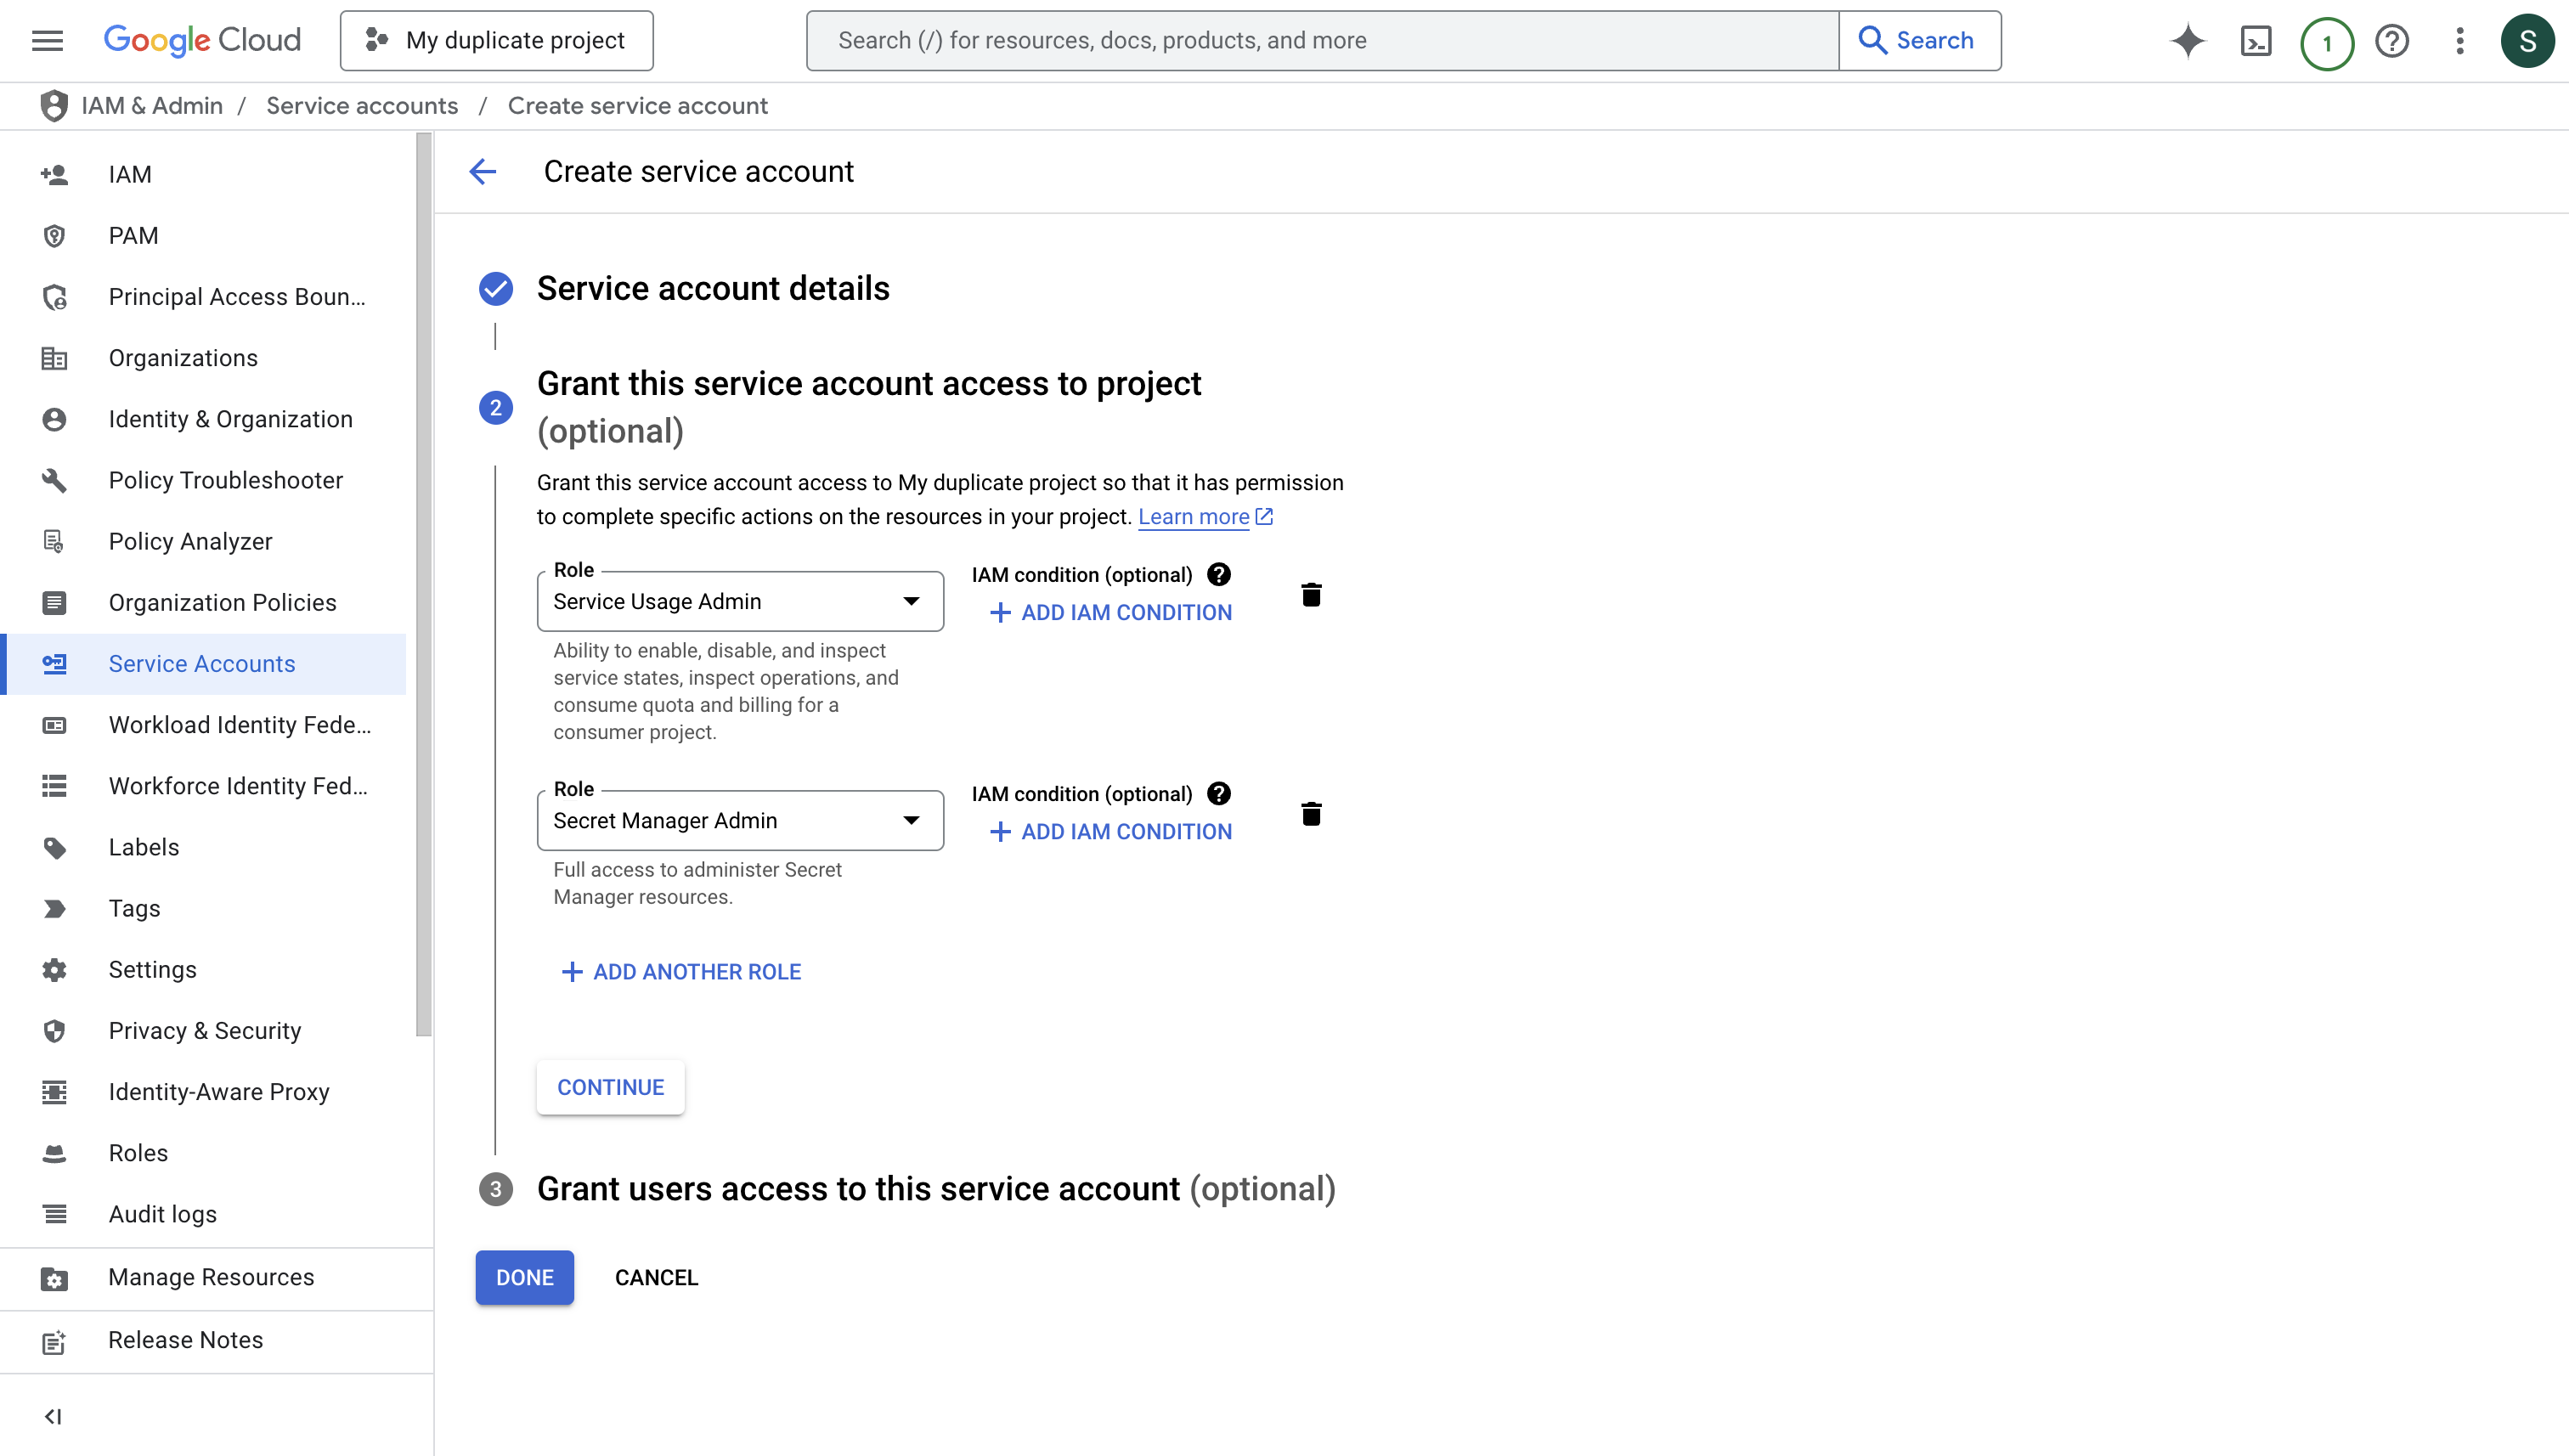
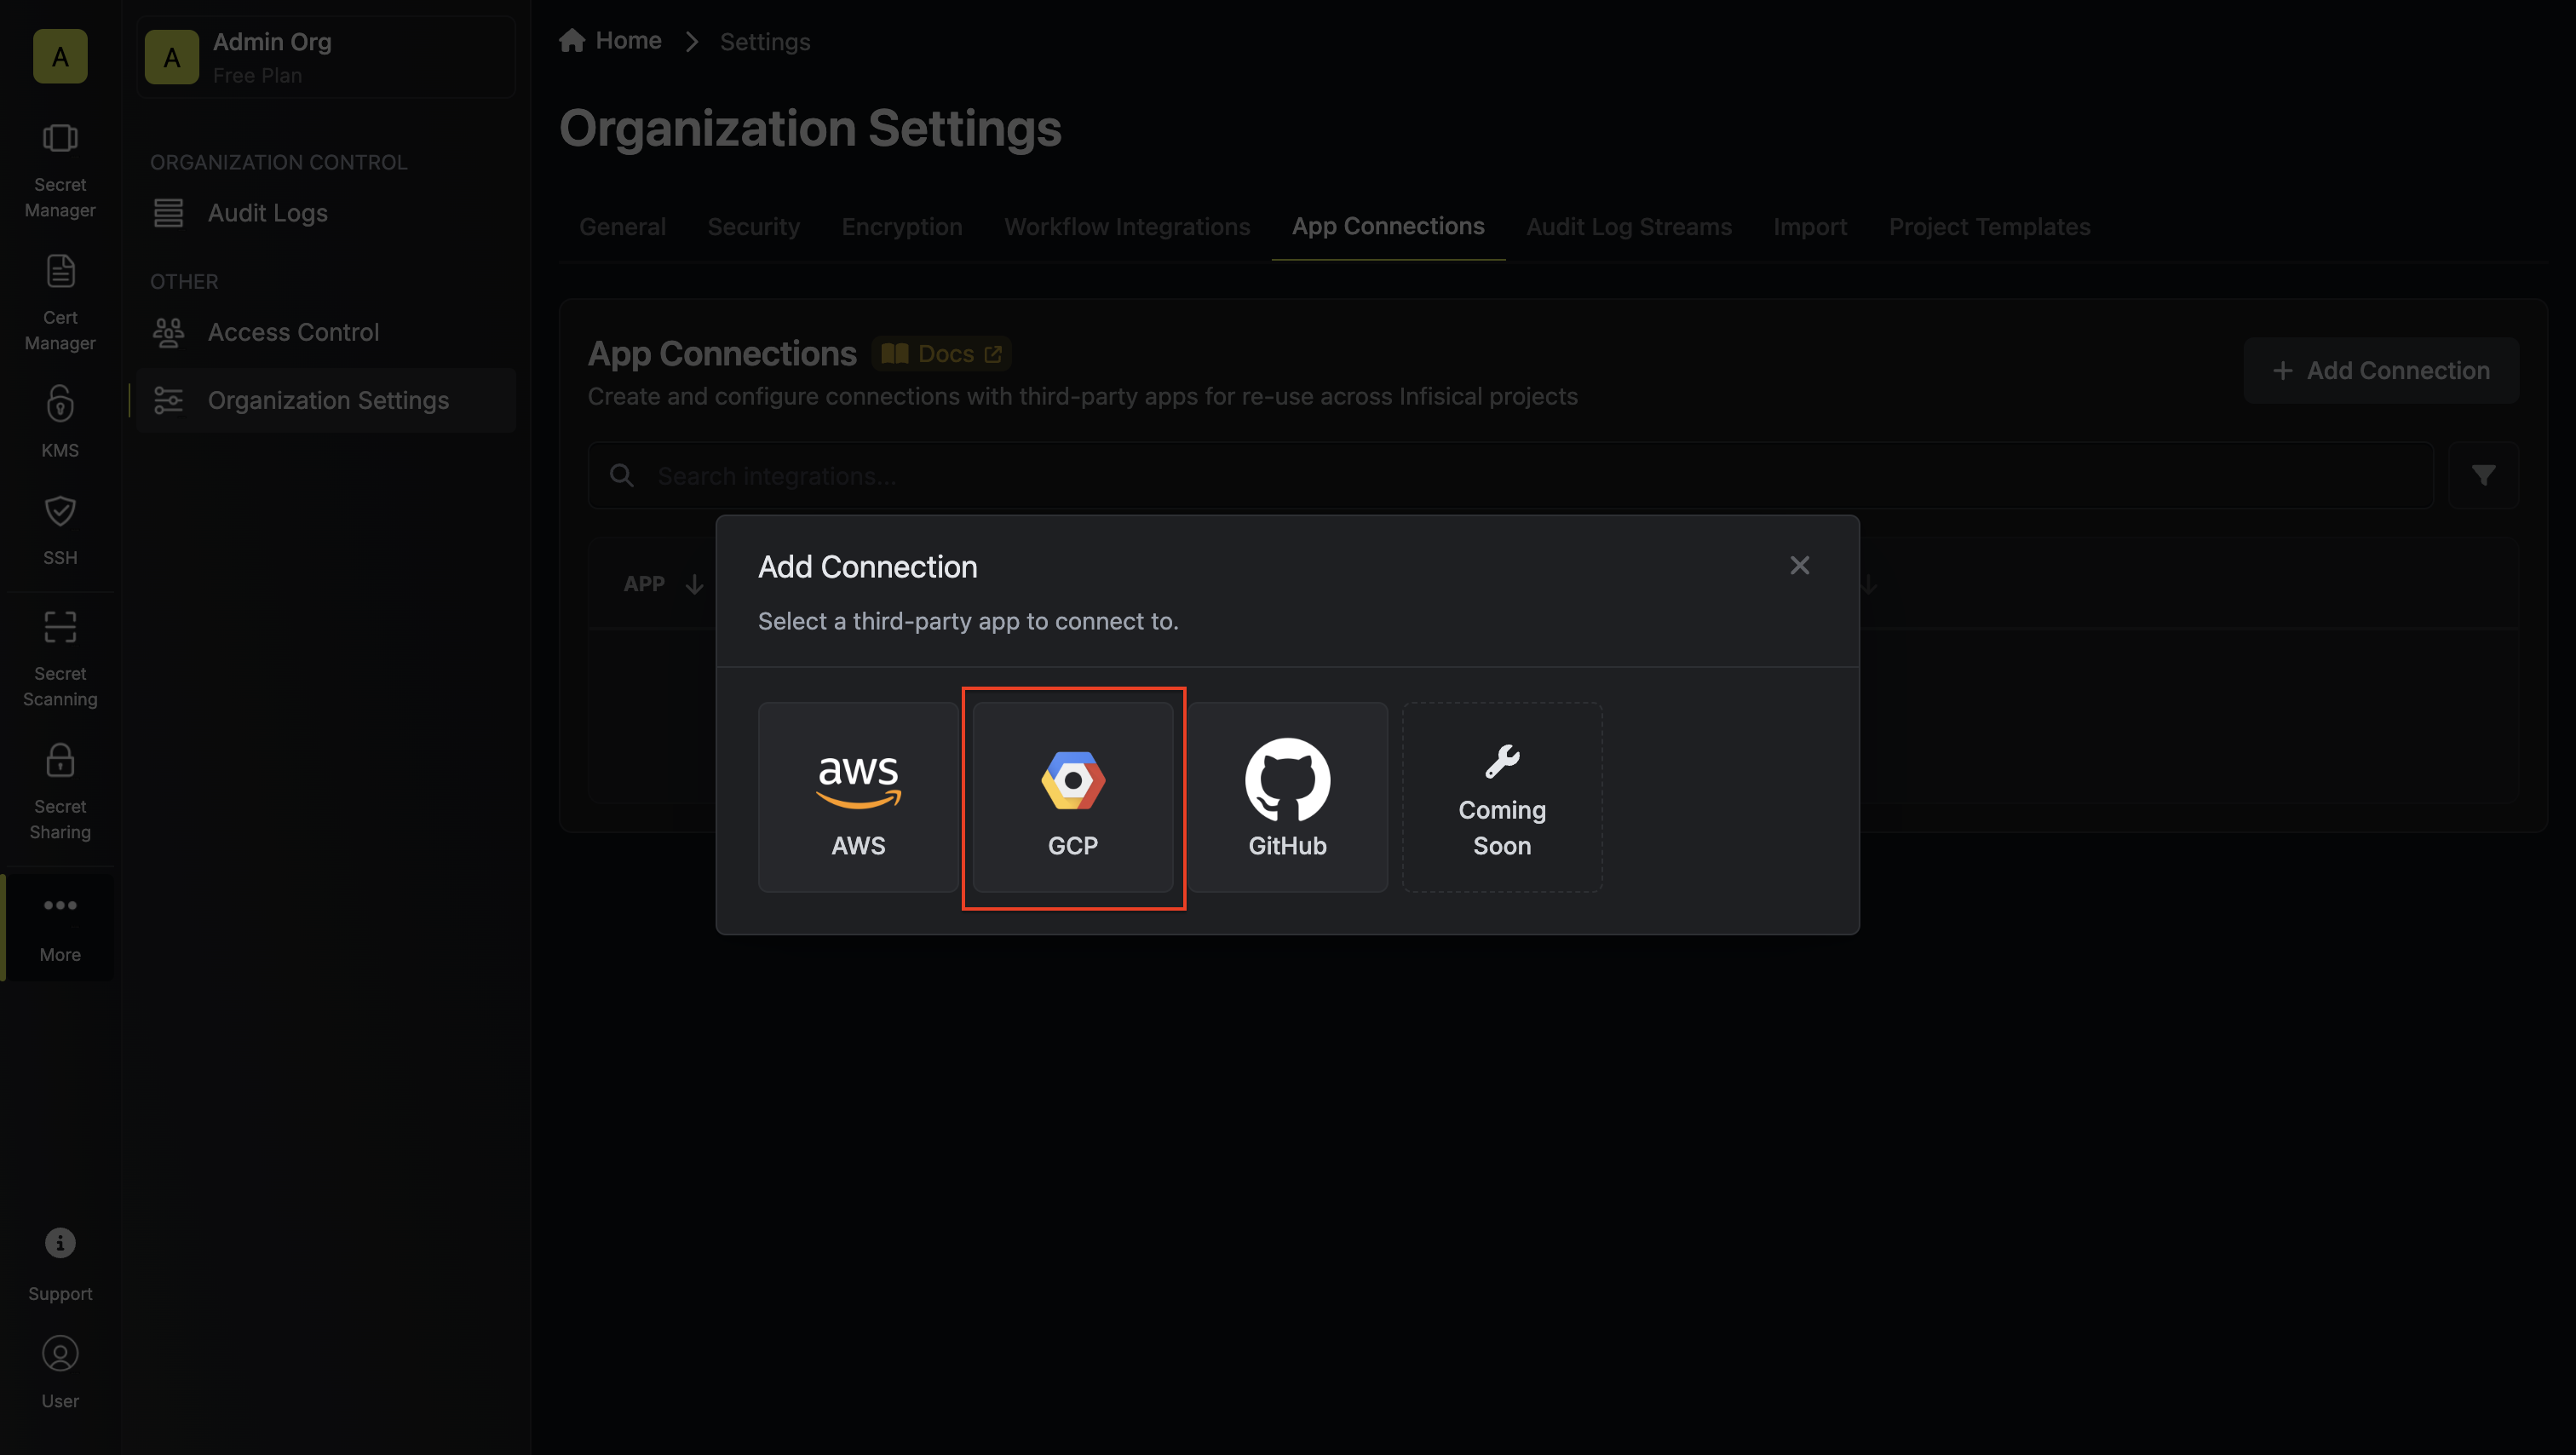
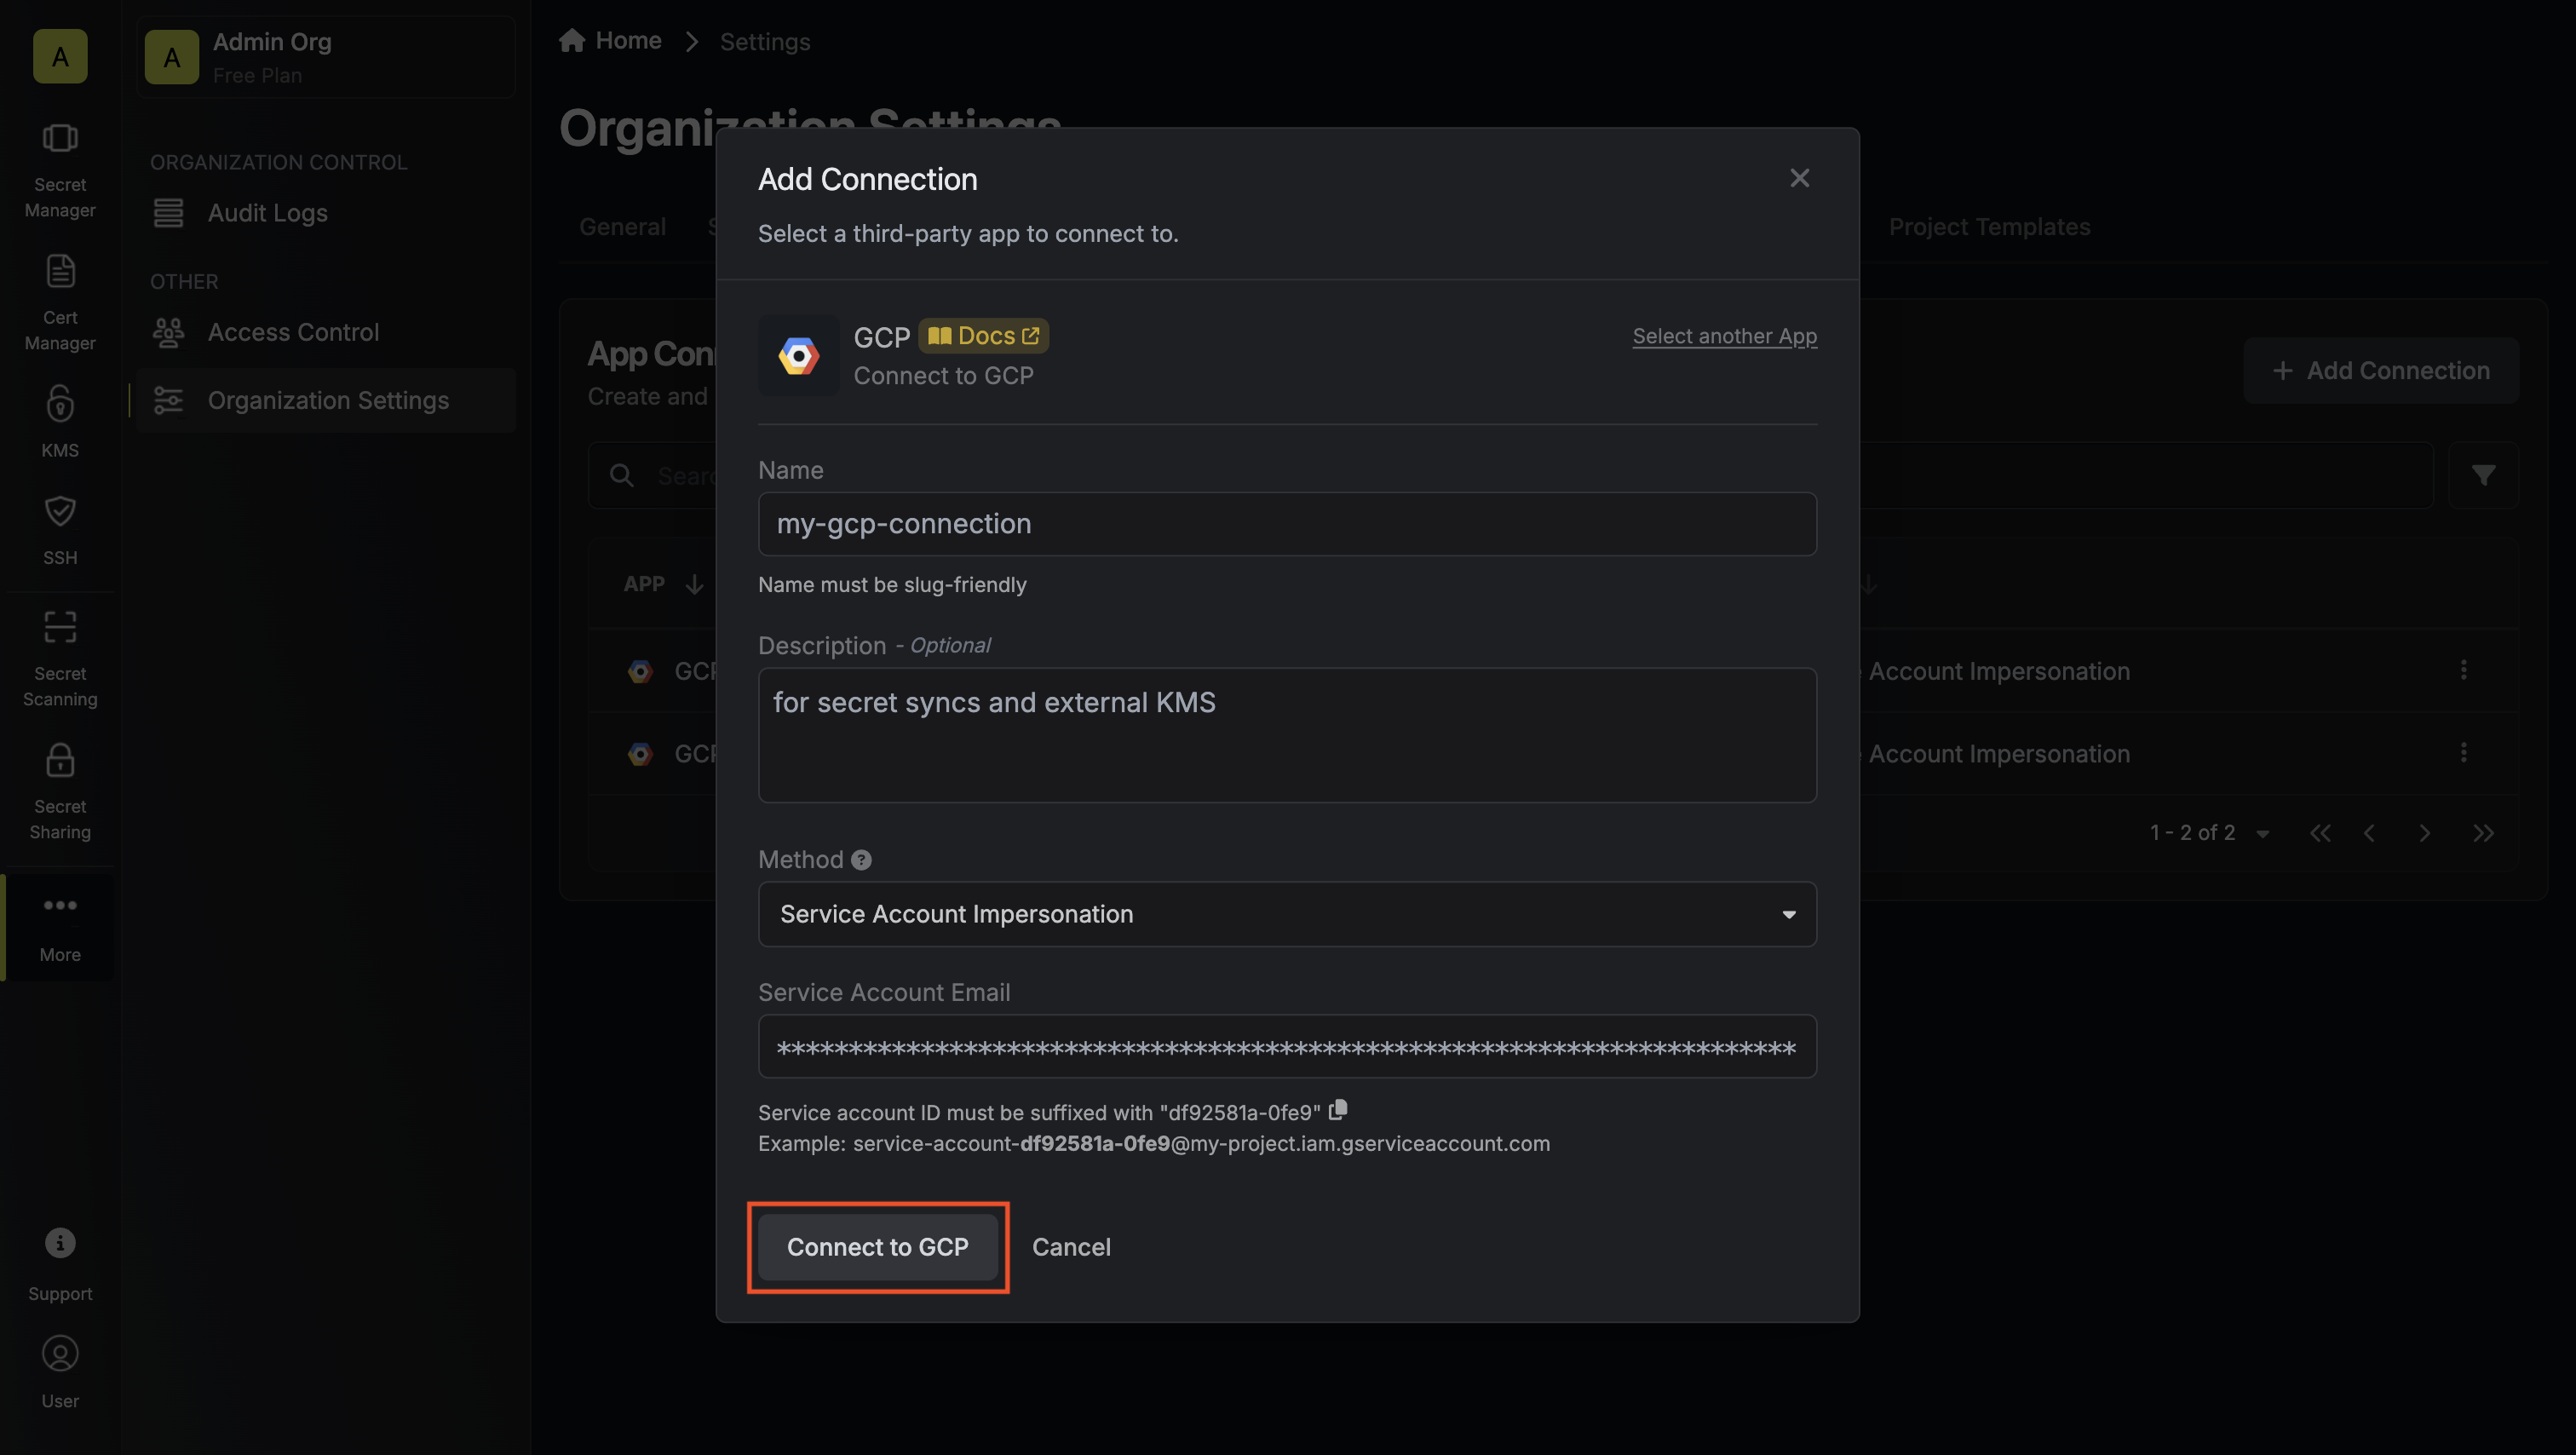

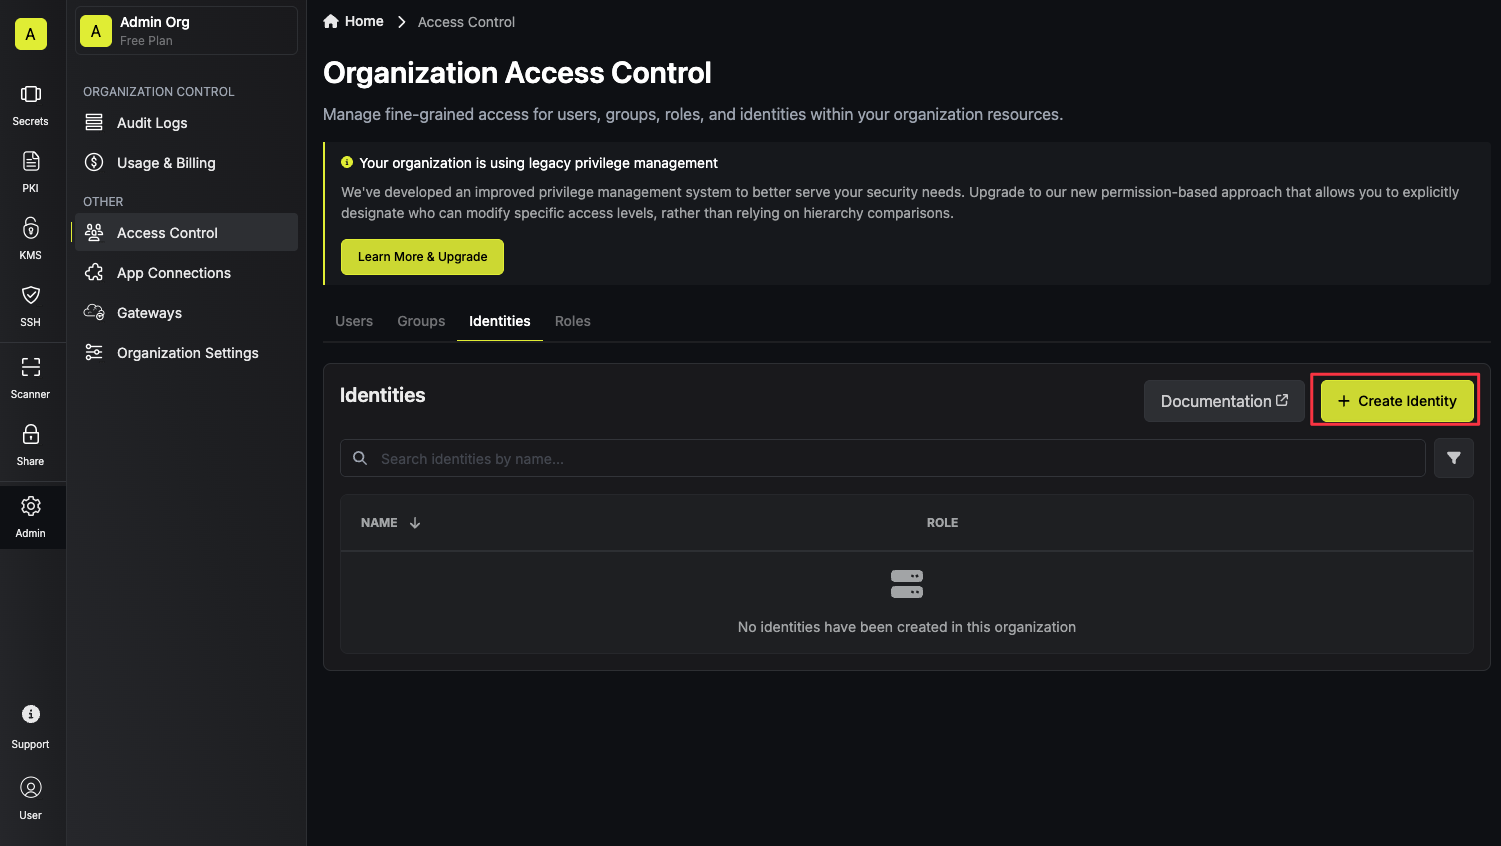 When creating an identity, you specify an organization level role for it to assume; you can configure roles in Organization Settings > Access Control > Organization Roles.
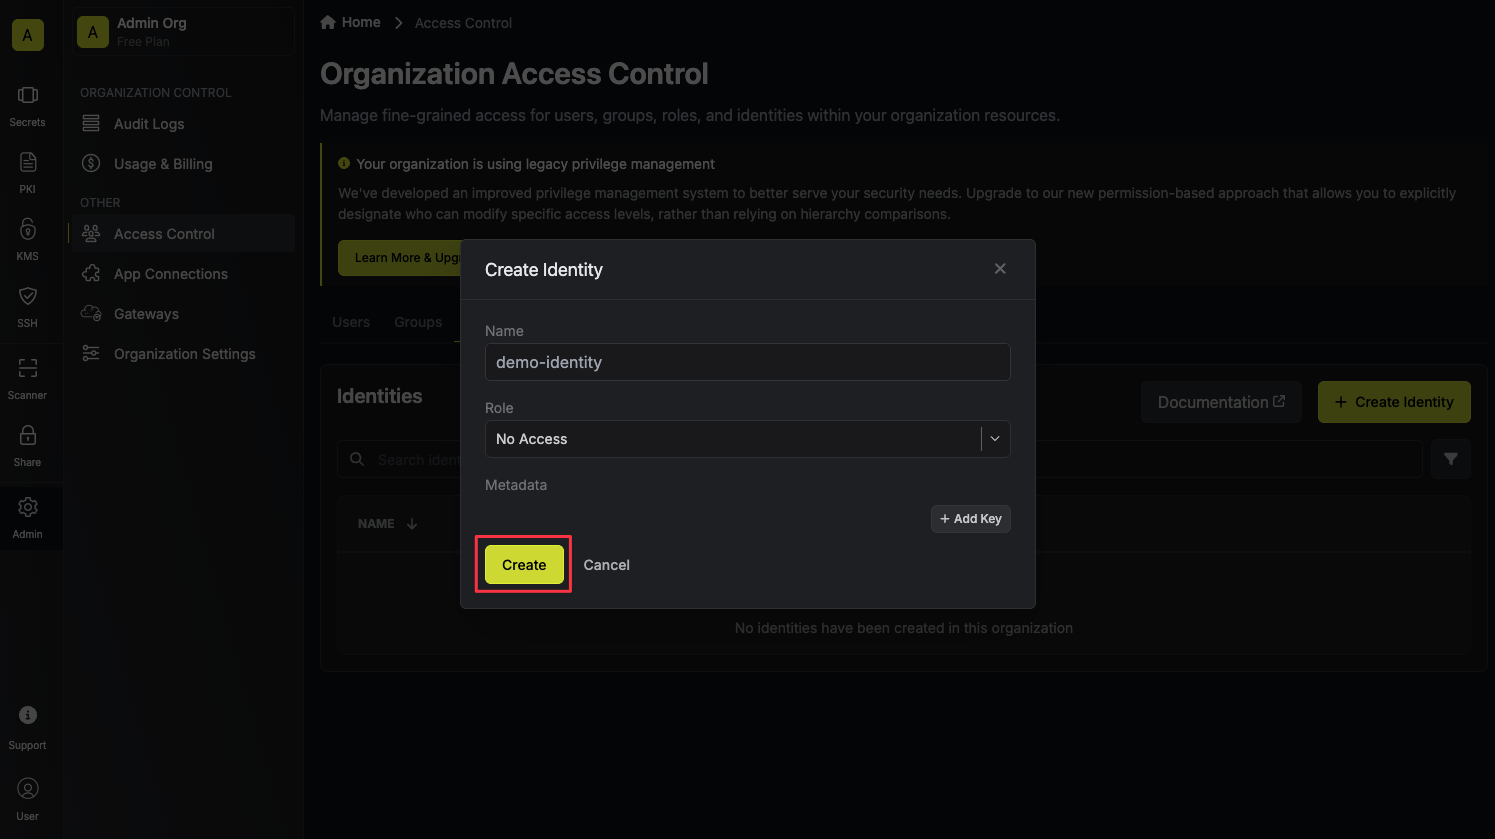 Now input a few details for your new identity. Here's some guidance for each field:
* Name (required): A friendly name for the identity.
* Role (required): A role from the Organization Roles tab for the identity to assume. The organization role assigned will determine what organization level resources this identity can have access to.
Once you've created an identity, you'll be redirected to a page where you can manage the identity.
Now input a few details for your new identity. Here's some guidance for each field:
* Name (required): A friendly name for the identity.
* Role (required): A role from the Organization Roles tab for the identity to assume. The organization role assigned will determine what organization level resources this identity can have access to.
Once you've created an identity, you'll be redirected to a page where you can manage the identity.
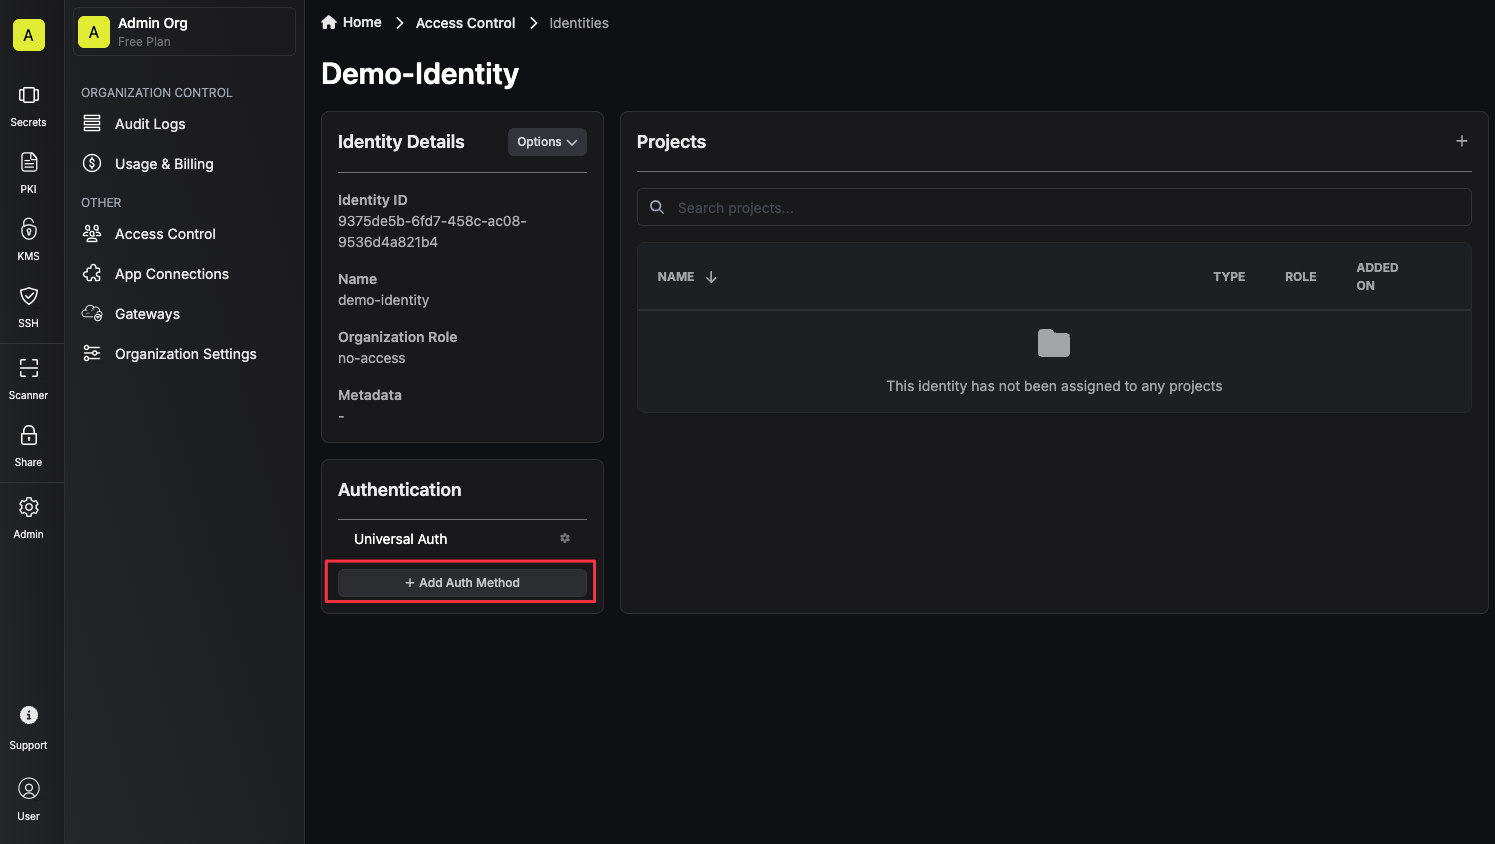 Now select **LDAP Auth** from the list of available auth methods for the identity.
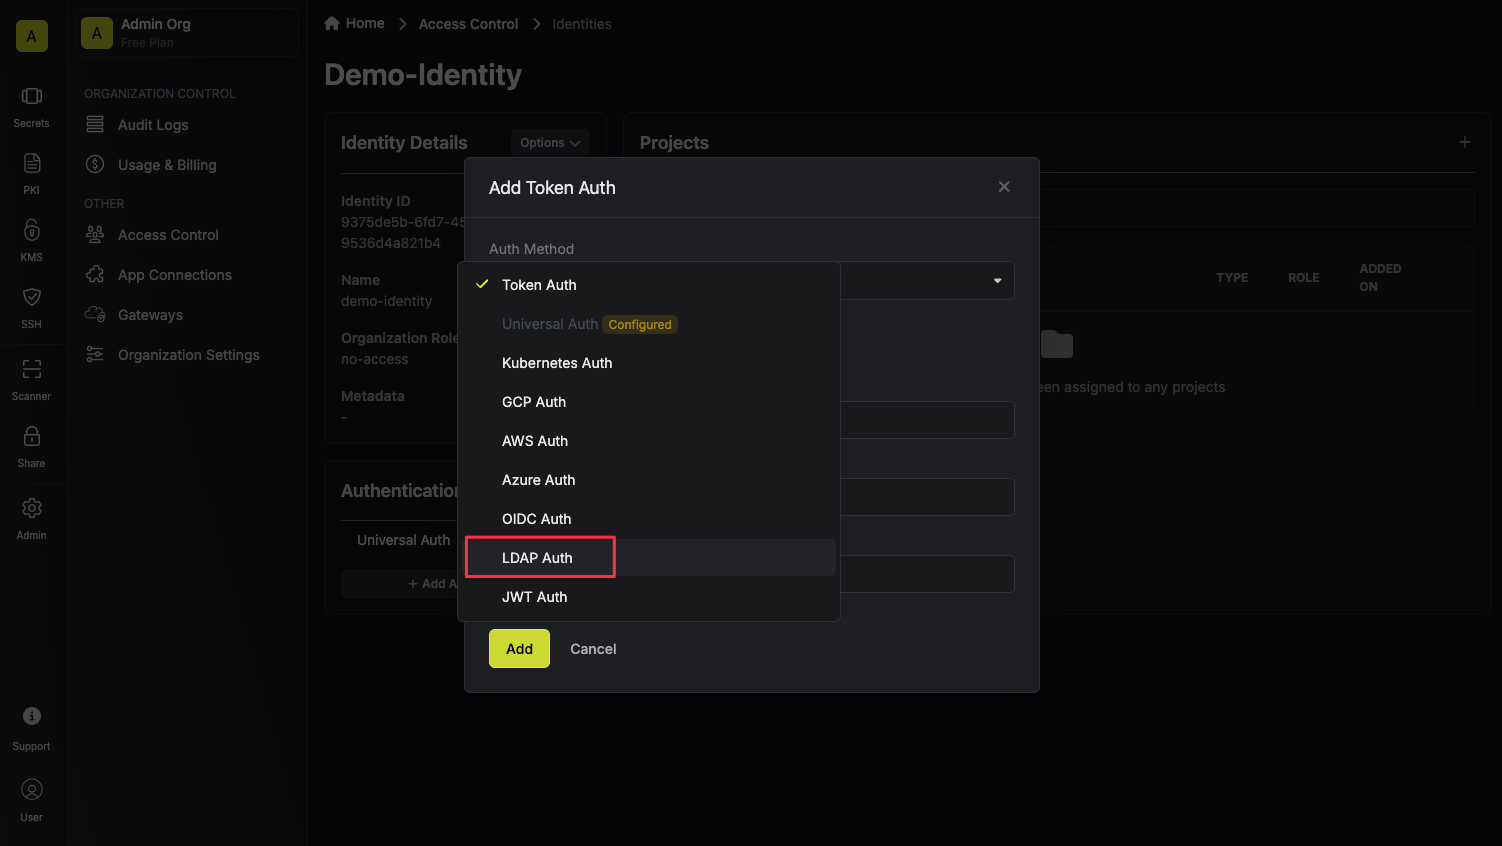 After selecting **LDAP Auth**, you'll see the form you need to fill out to configure LDAP auth for your identity. The following fields are available:
**Configuration Tab**
* `URL`: The LDAP server to connect to such as `ldap://ldap.your-org.com`, `ldaps://ldap.myorg.com:636` *(for connection over SSL/TLS)*, etc.
* `Bind DN`: The DN to bind to the LDAP server with.
* `Bind Pass`: The password to bind to the LDAP server with.
* `Search Base / DN`: Base DN under which to perform user search such as `ou=Users,dc=acme,dc=com`.
* `User Search Filter`: Template used to construct the LDAP user search filter such as `(uid={{username}})`; use literal `{{username}}` to have the given username used in the search. The default is `(uid={{username}})` which is compatible with several common directory schemas.
* `Required Attributes`: A key/value pair of attributes that must be present in the LDAP user entry for them to be authenticated. As an example, if you set key `uid` to value `user1,user2,user3`, then only users with `uid` of `user1`, `user2`, or `user3` will be able to login with this identity. Each value is a comma separated list of attributes.
* `Access Token TTL` *(default is 2592000 equivalent to 30 days)*: The lifetime for an access token in seconds. This value will be referenced at renewal time.
* `Access Token Max TTL` *(default is 2592000 equivalent to 30 days)*: The maximum lifetime for an access token in seconds. This value will be referenced at renewal time.
* `Access Token Max Number of Uses` *(default is 0)*: The maximum number of times that an access token can be used; a value of 0 implies infinite number of uses.
**Lockout Tab**
* `Lockout` *(enabled by default)*: The lockout feature will temporarily block login attempts after X consecutive login failures.
* `Lockout Threshold` *(default is 3)*: The amount of times login must fail before locking the identity auth method.
* `Lockout Duration` *(default is 5 minutes)*: How long an identity auth method lockout lasts.
* `Lockout Counter Reset` *(default is 30 seconds)*: How long to wait from the most recent failed login until resetting the lockout counter.
**Advanced Tab**
* `CA Certificate`: The CA certificate to use when verifying the LDAP server certificate. This field is optional but recommended.
* `Access Token Trusted IPs`: The IPs or CIDR ranges that access tokens can be used from. By default, each token is given the 0.0.0.0/0, allowing usage from any network address.
Once you've filled out the form, press **Add** to save your changes.
After selecting **LDAP Auth**, you'll see the form you need to fill out to configure LDAP auth for your identity. The following fields are available:
**Configuration Tab**
* `URL`: The LDAP server to connect to such as `ldap://ldap.your-org.com`, `ldaps://ldap.myorg.com:636` *(for connection over SSL/TLS)*, etc.
* `Bind DN`: The DN to bind to the LDAP server with.
* `Bind Pass`: The password to bind to the LDAP server with.
* `Search Base / DN`: Base DN under which to perform user search such as `ou=Users,dc=acme,dc=com`.
* `User Search Filter`: Template used to construct the LDAP user search filter such as `(uid={{username}})`; use literal `{{username}}` to have the given username used in the search. The default is `(uid={{username}})` which is compatible with several common directory schemas.
* `Required Attributes`: A key/value pair of attributes that must be present in the LDAP user entry for them to be authenticated. As an example, if you set key `uid` to value `user1,user2,user3`, then only users with `uid` of `user1`, `user2`, or `user3` will be able to login with this identity. Each value is a comma separated list of attributes.
* `Access Token TTL` *(default is 2592000 equivalent to 30 days)*: The lifetime for an access token in seconds. This value will be referenced at renewal time.
* `Access Token Max TTL` *(default is 2592000 equivalent to 30 days)*: The maximum lifetime for an access token in seconds. This value will be referenced at renewal time.
* `Access Token Max Number of Uses` *(default is 0)*: The maximum number of times that an access token can be used; a value of 0 implies infinite number of uses.
**Lockout Tab**
* `Lockout` *(enabled by default)*: The lockout feature will temporarily block login attempts after X consecutive login failures.
* `Lockout Threshold` *(default is 3)*: The amount of times login must fail before locking the identity auth method.
* `Lockout Duration` *(default is 5 minutes)*: How long an identity auth method lockout lasts.
* `Lockout Counter Reset` *(default is 30 seconds)*: How long to wait from the most recent failed login until resetting the lockout counter.
**Advanced Tab**
* `CA Certificate`: The CA certificate to use when verifying the LDAP server certificate. This field is optional but recommended.
* `Access Token Trusted IPs`: The IPs or CIDR ranges that access tokens can be used from. By default, each token is given the 0.0.0.0/0, allowing usage from any network address.
Once you've filled out the form, press **Add** to save your changes.
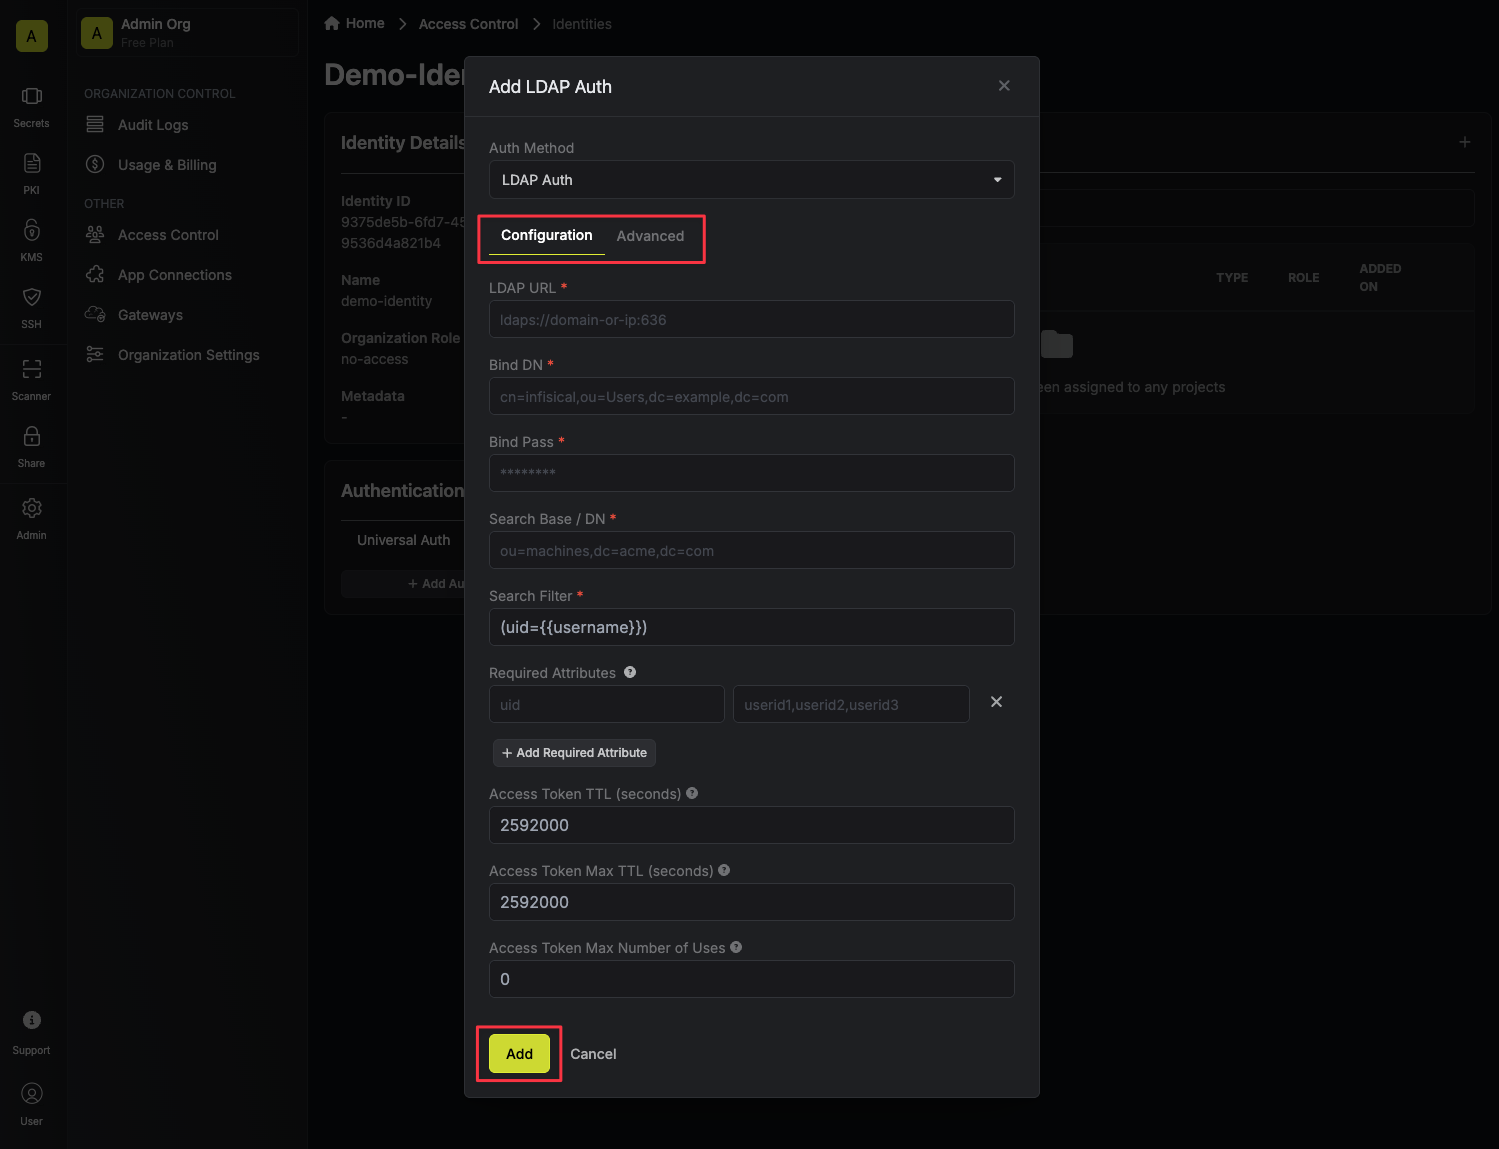
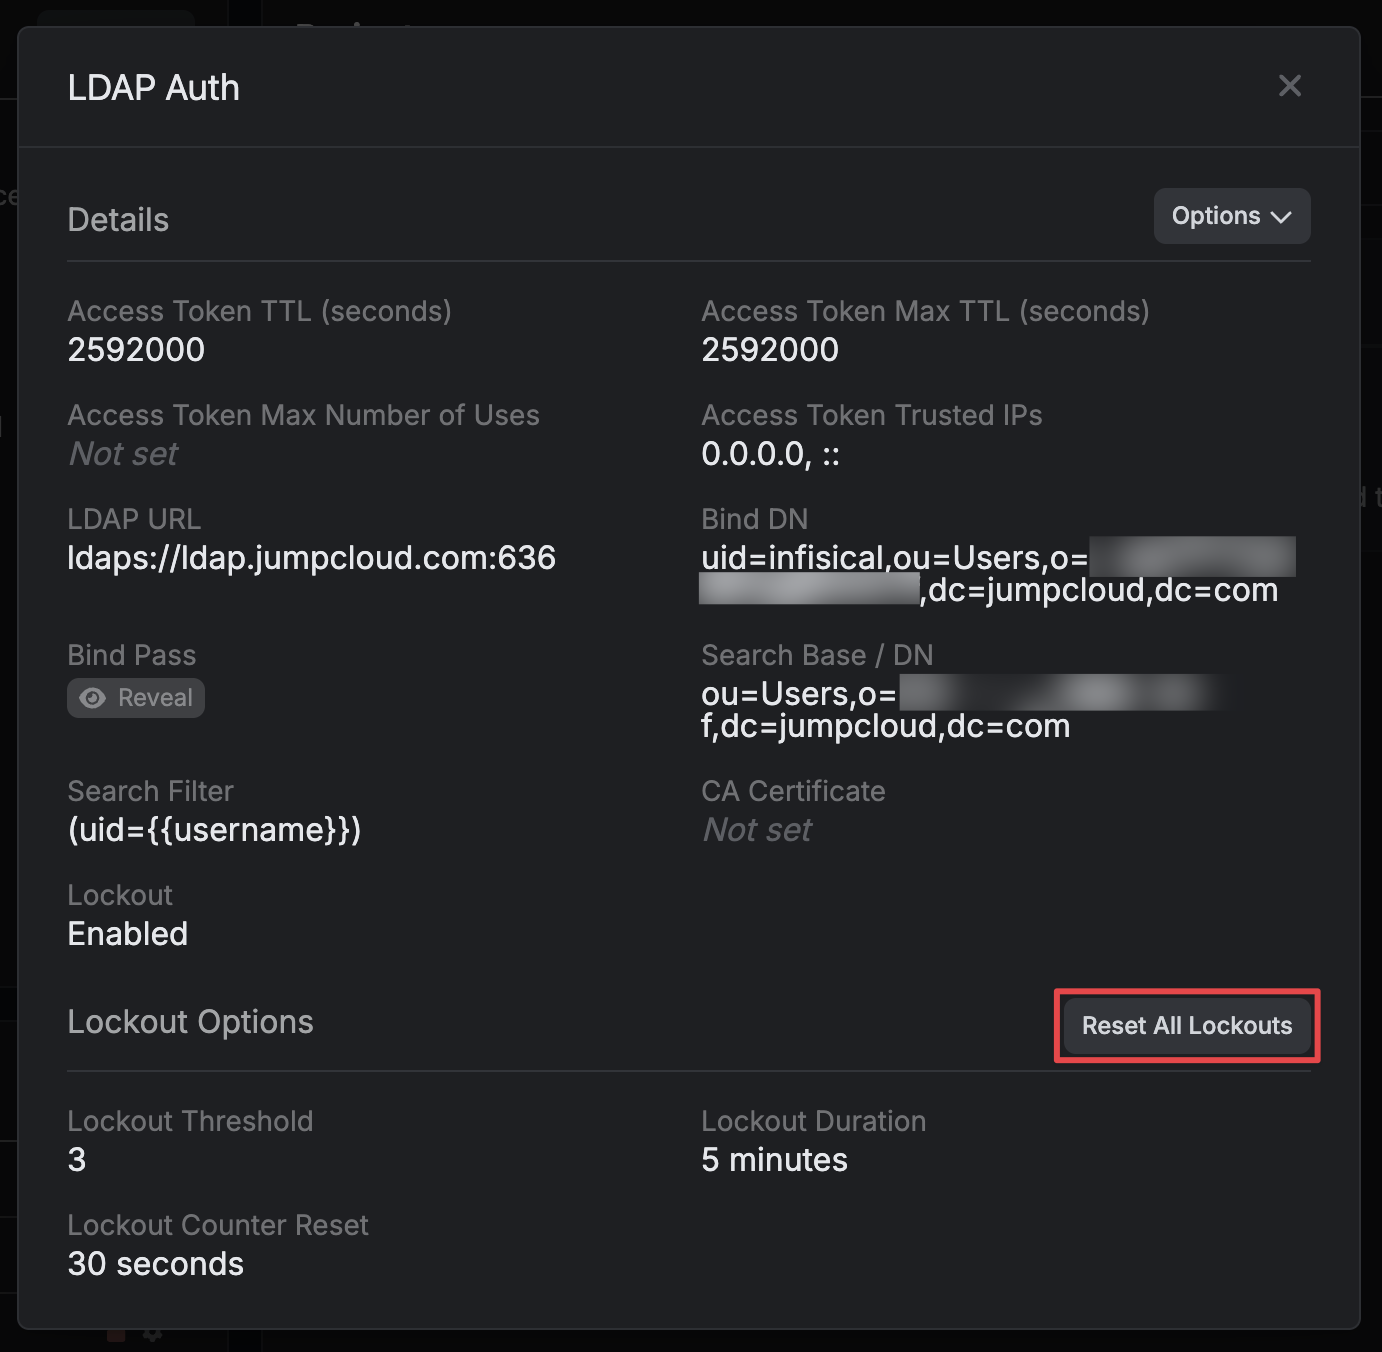
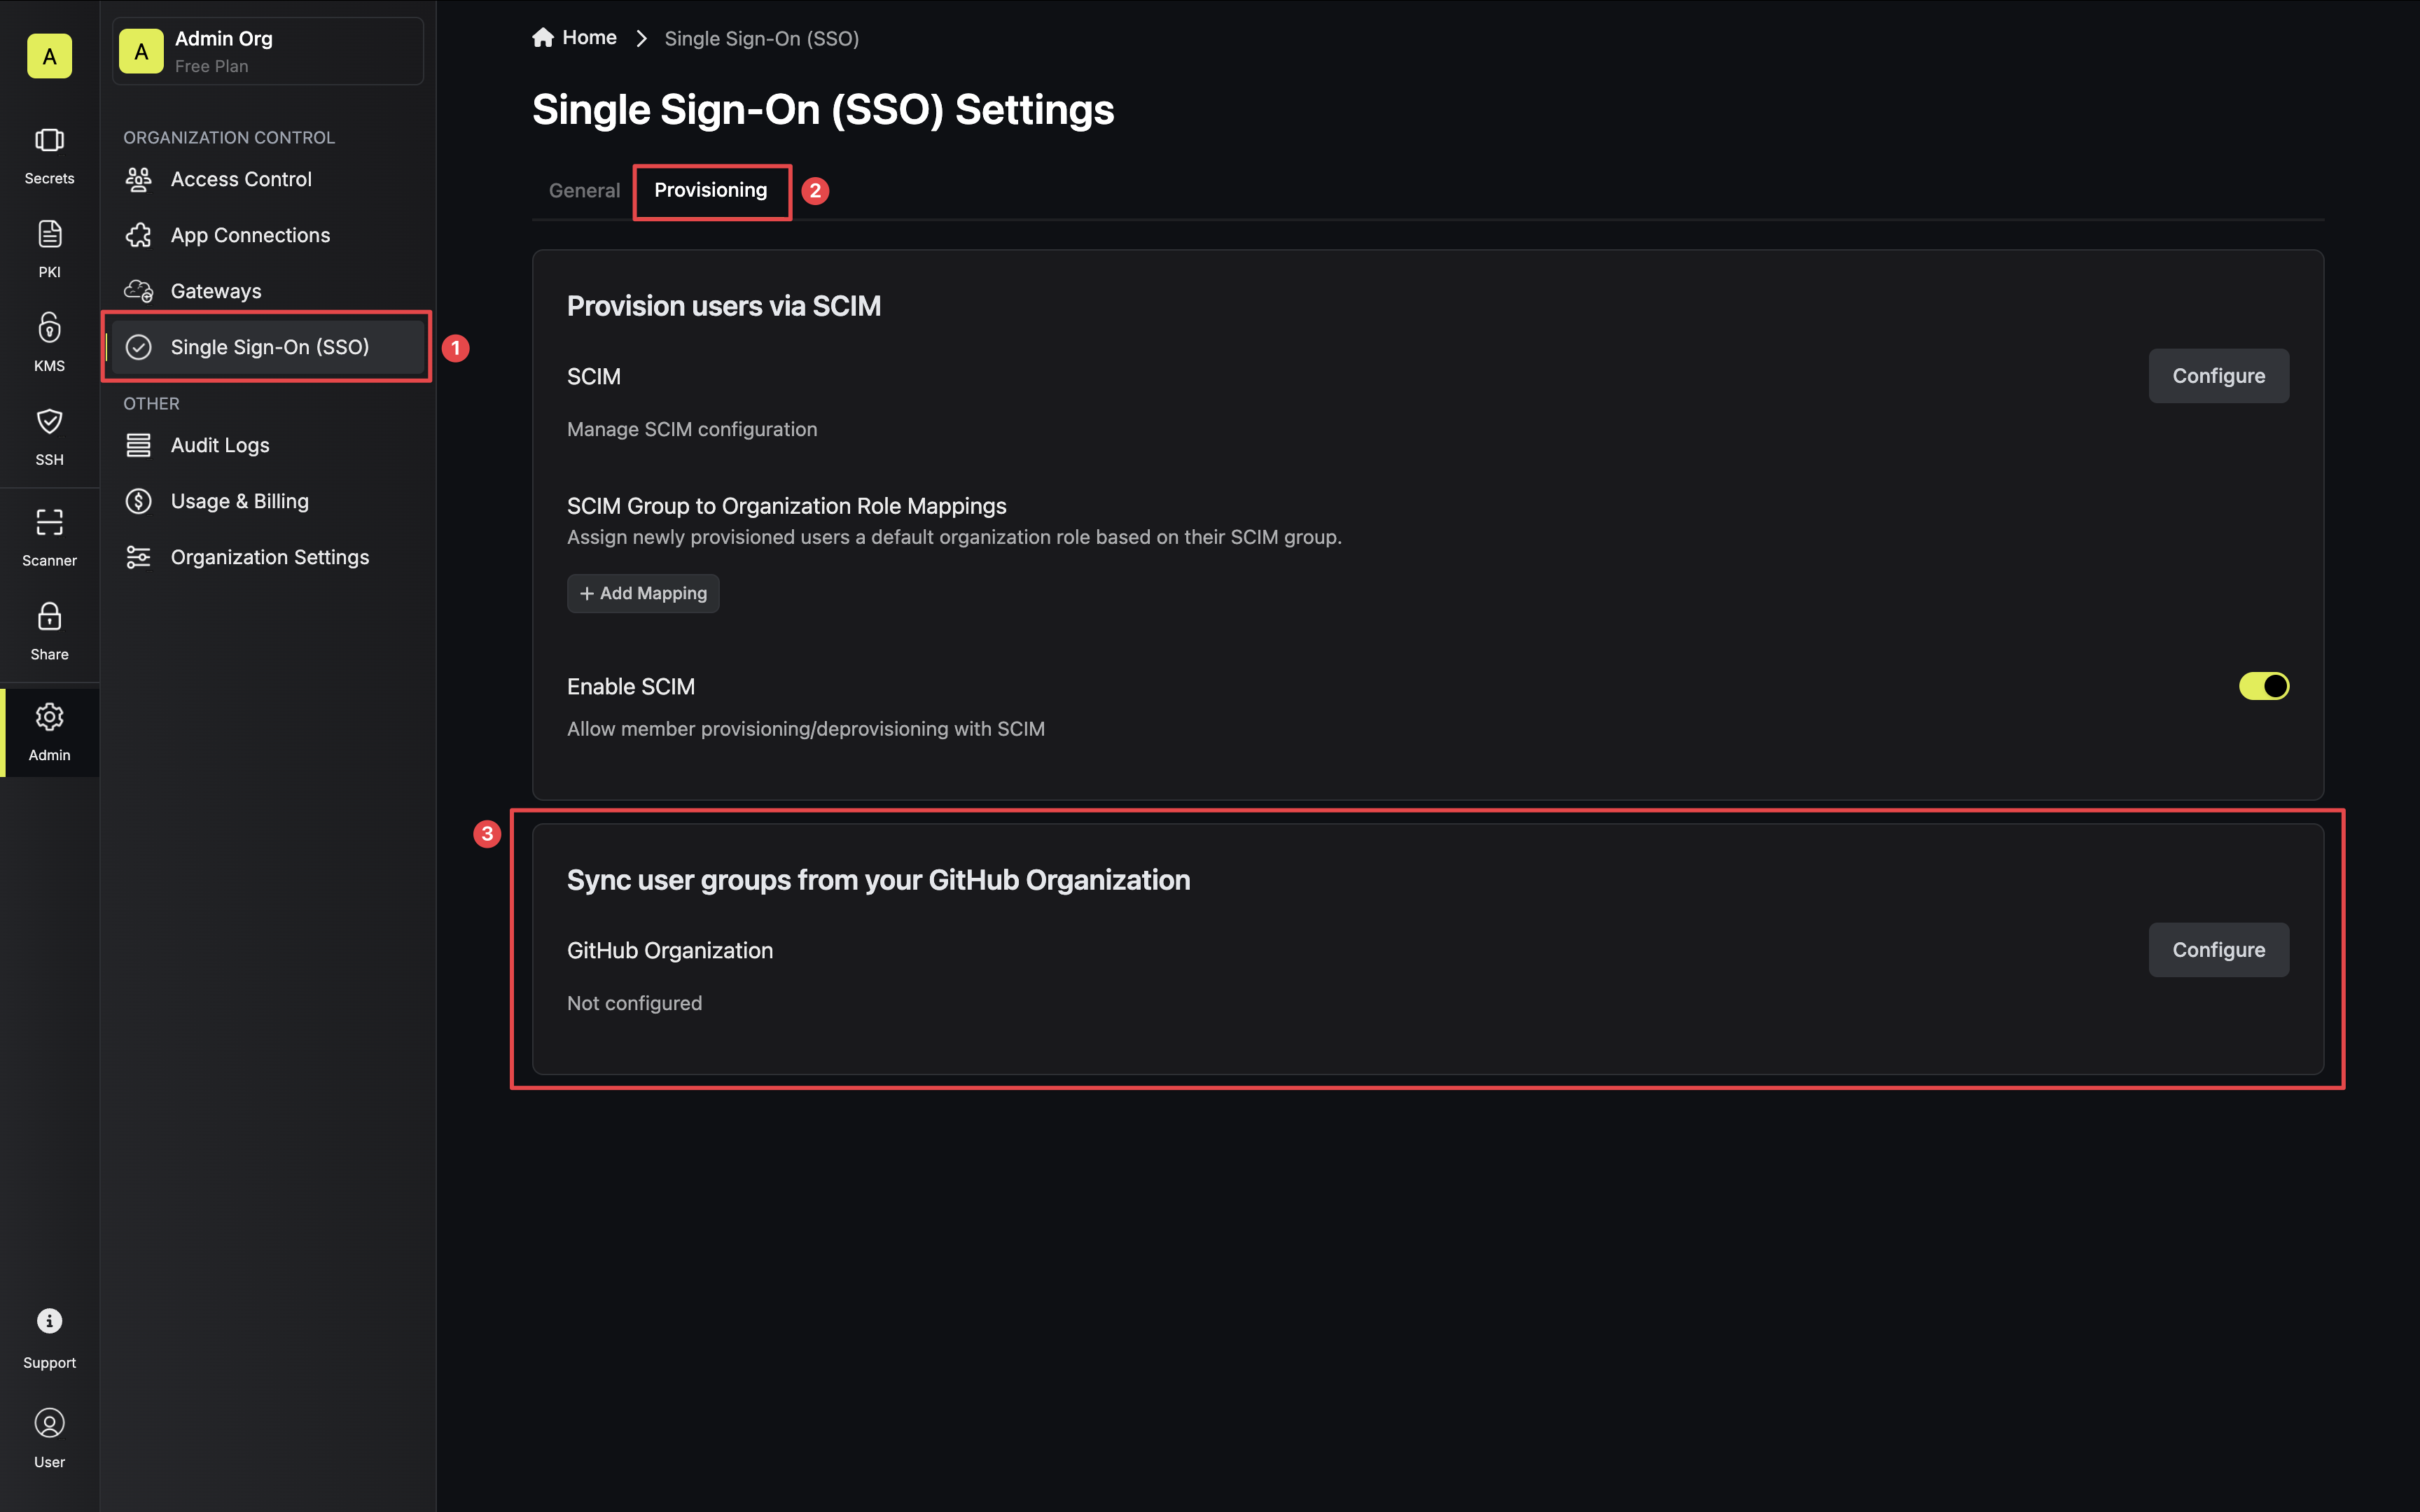 2. Click the **Configure** button and provide the name of your GitHub Organization.
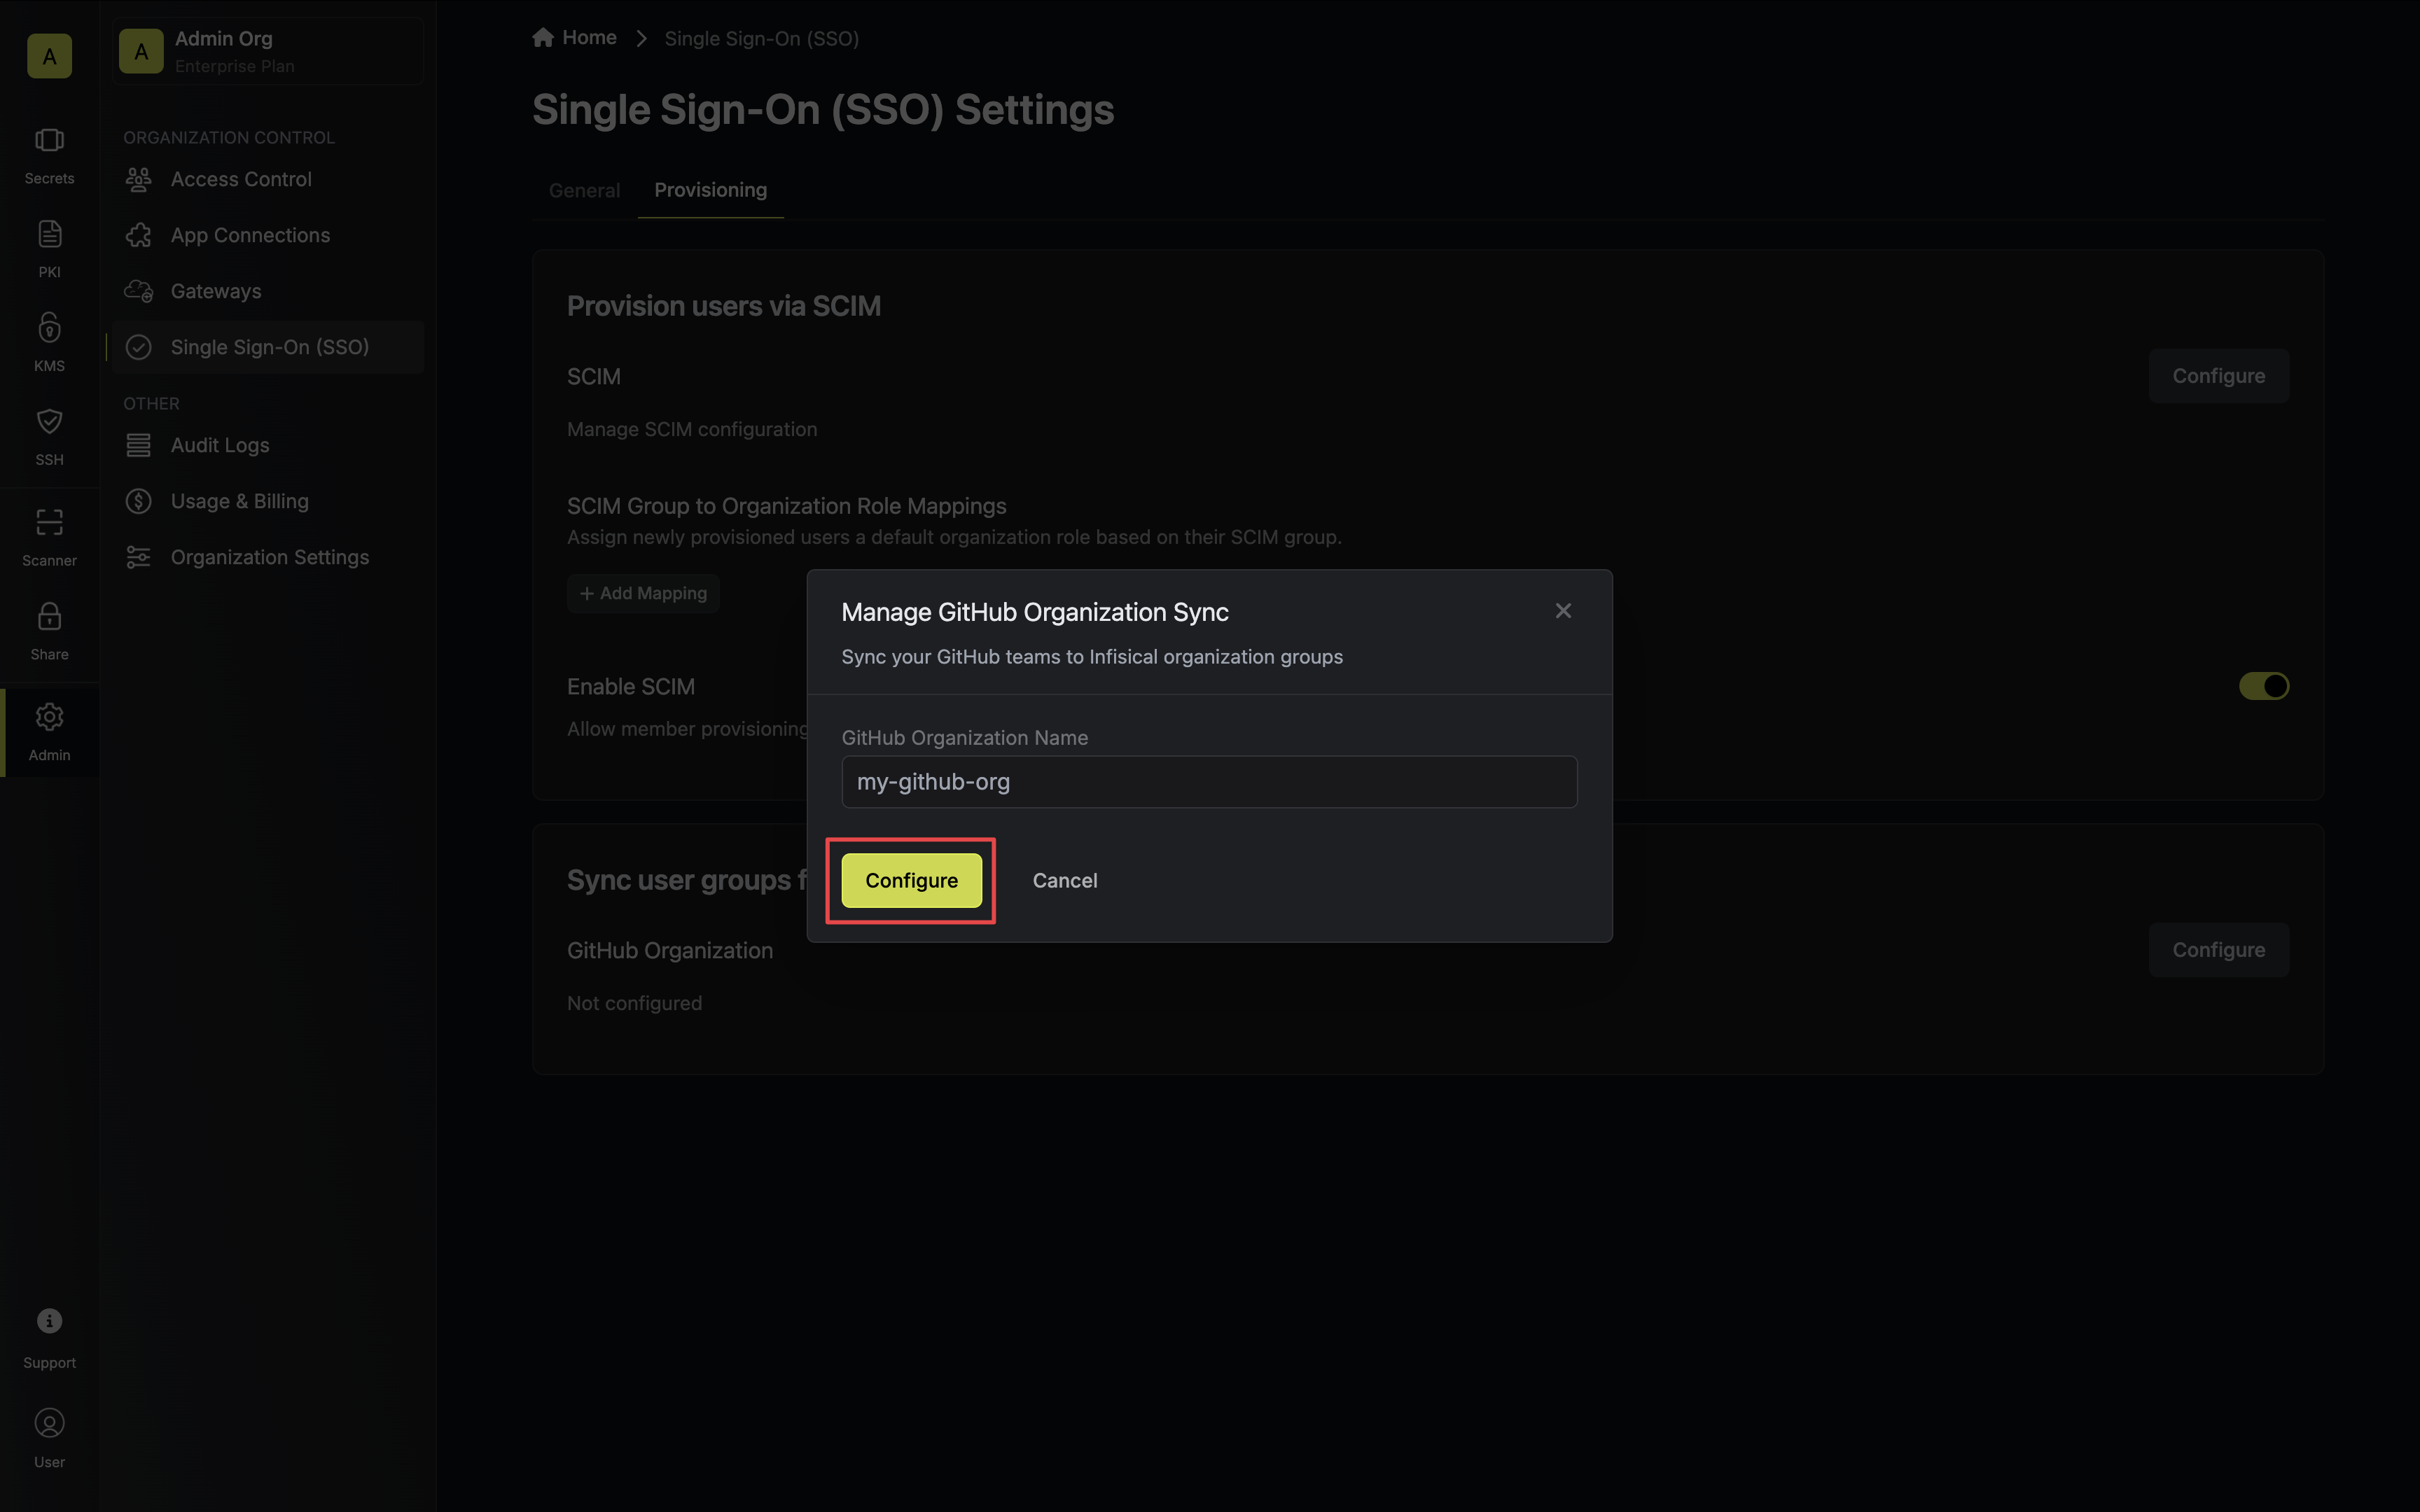
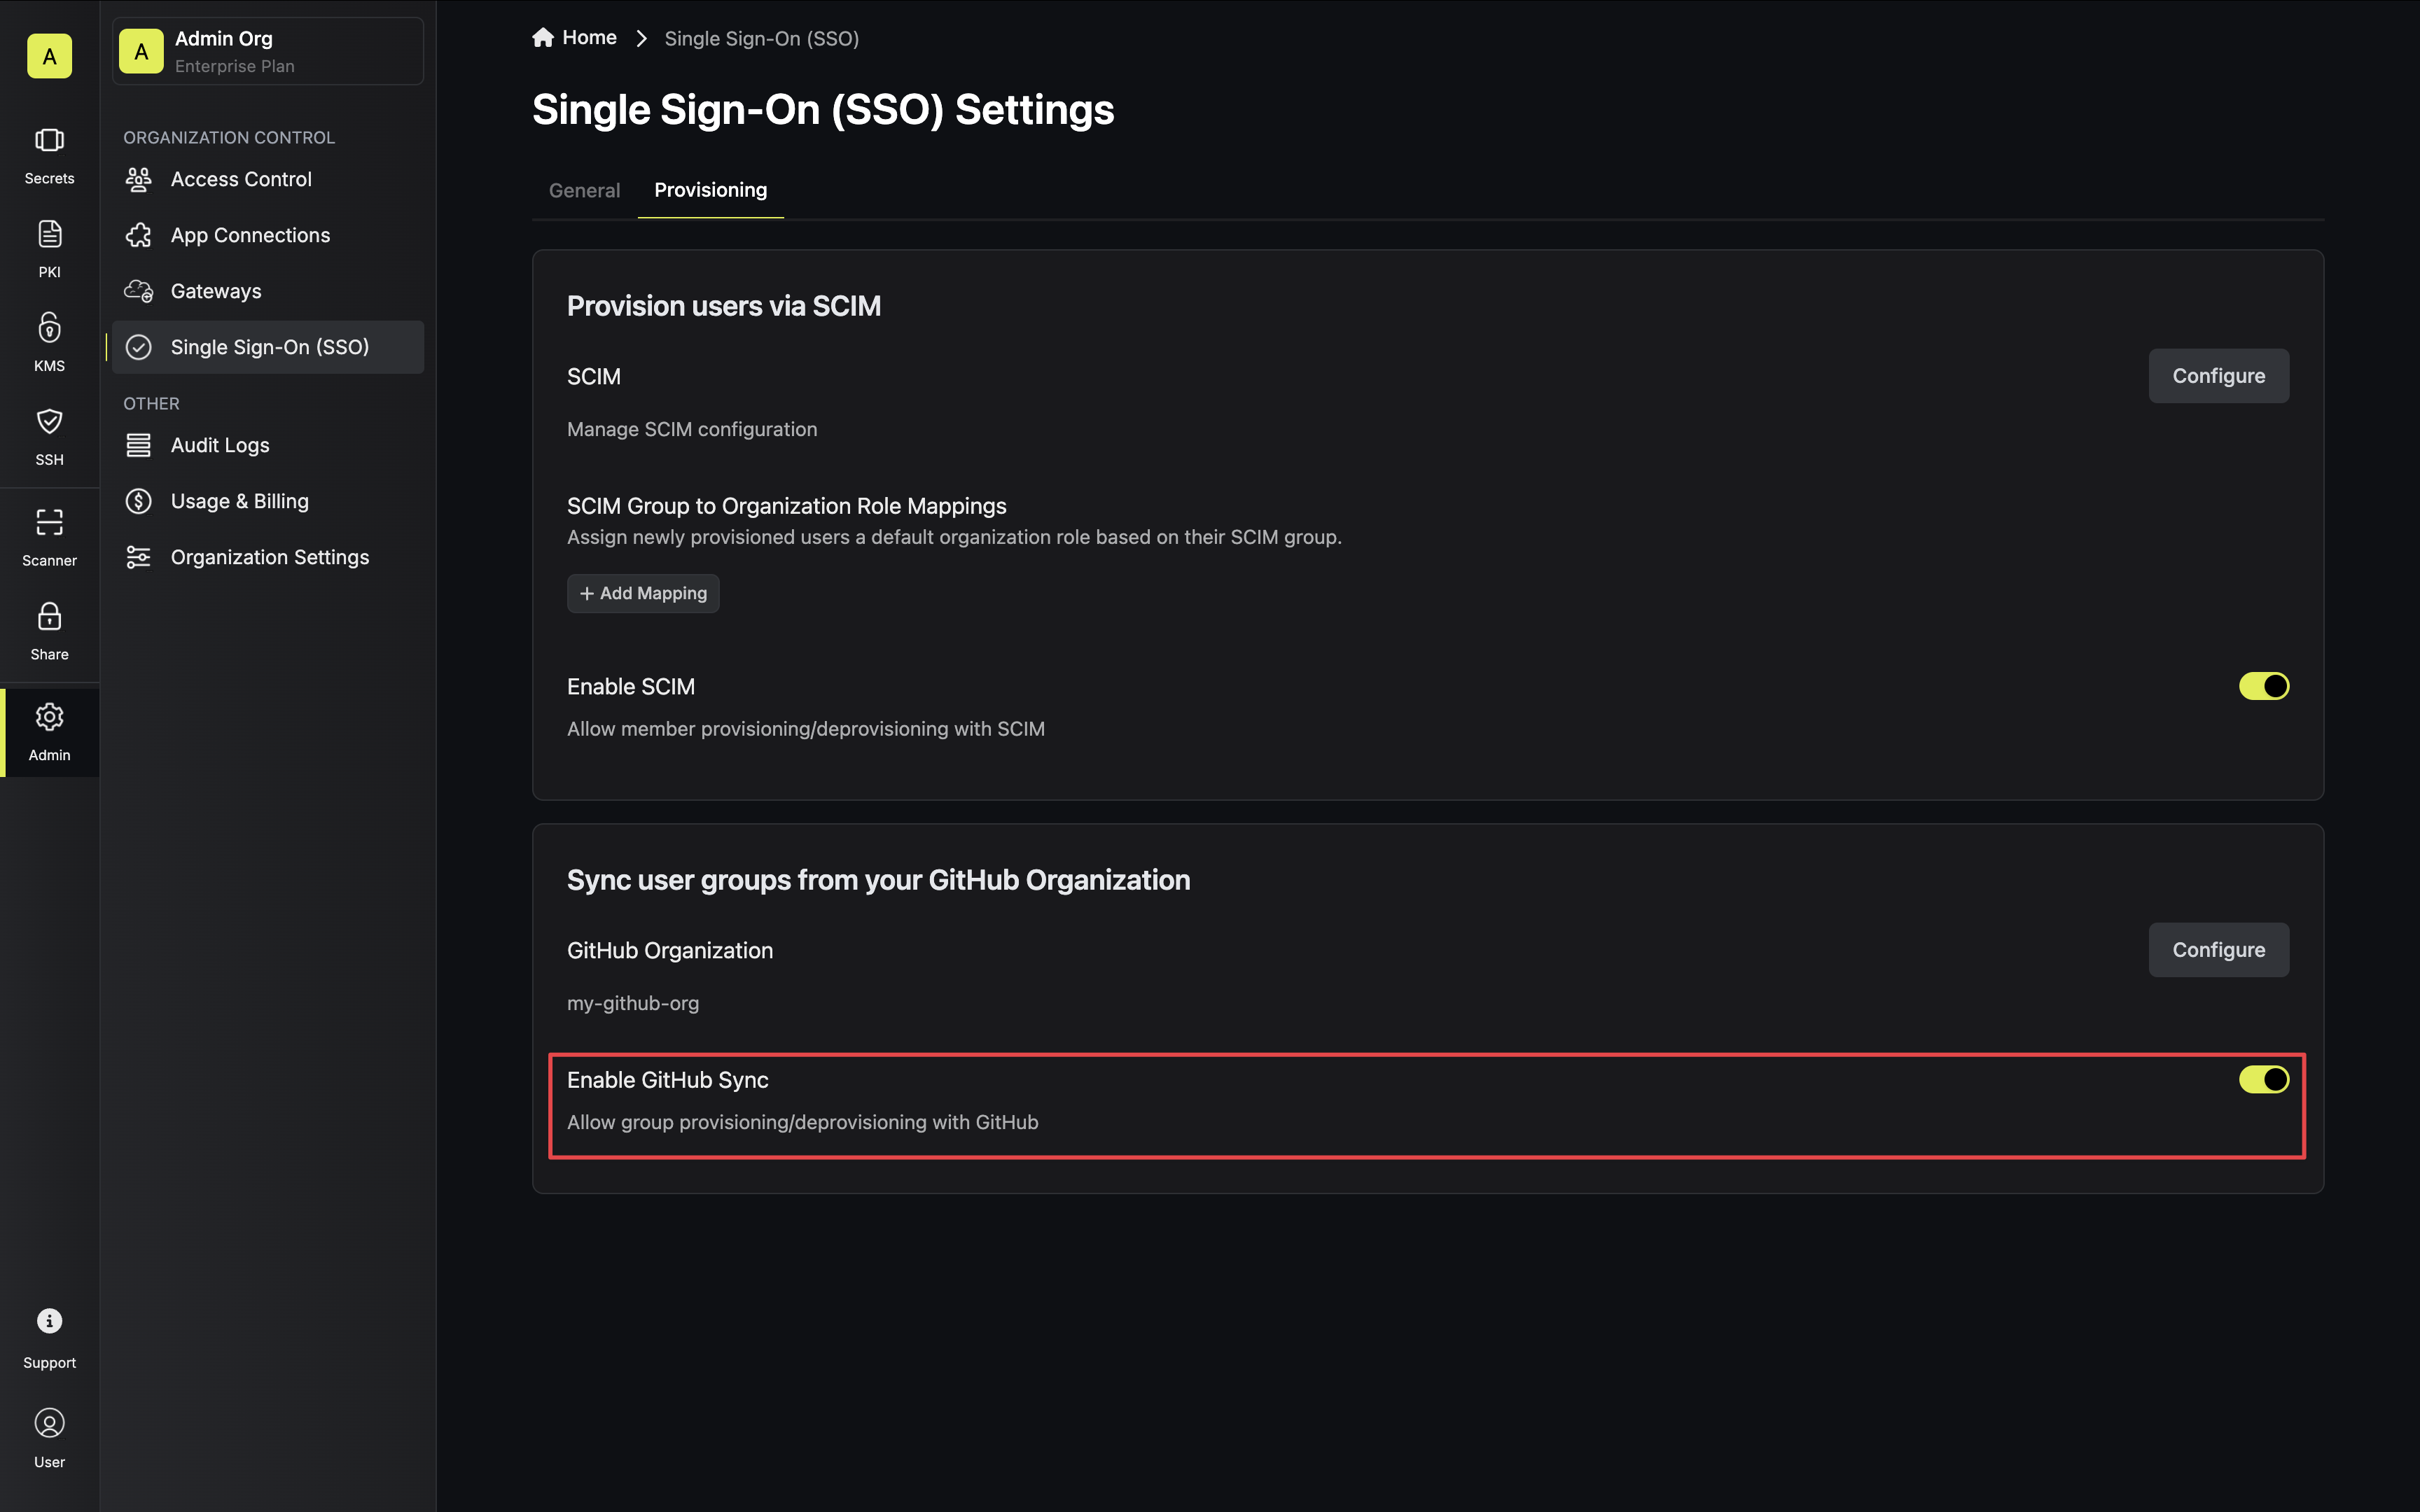
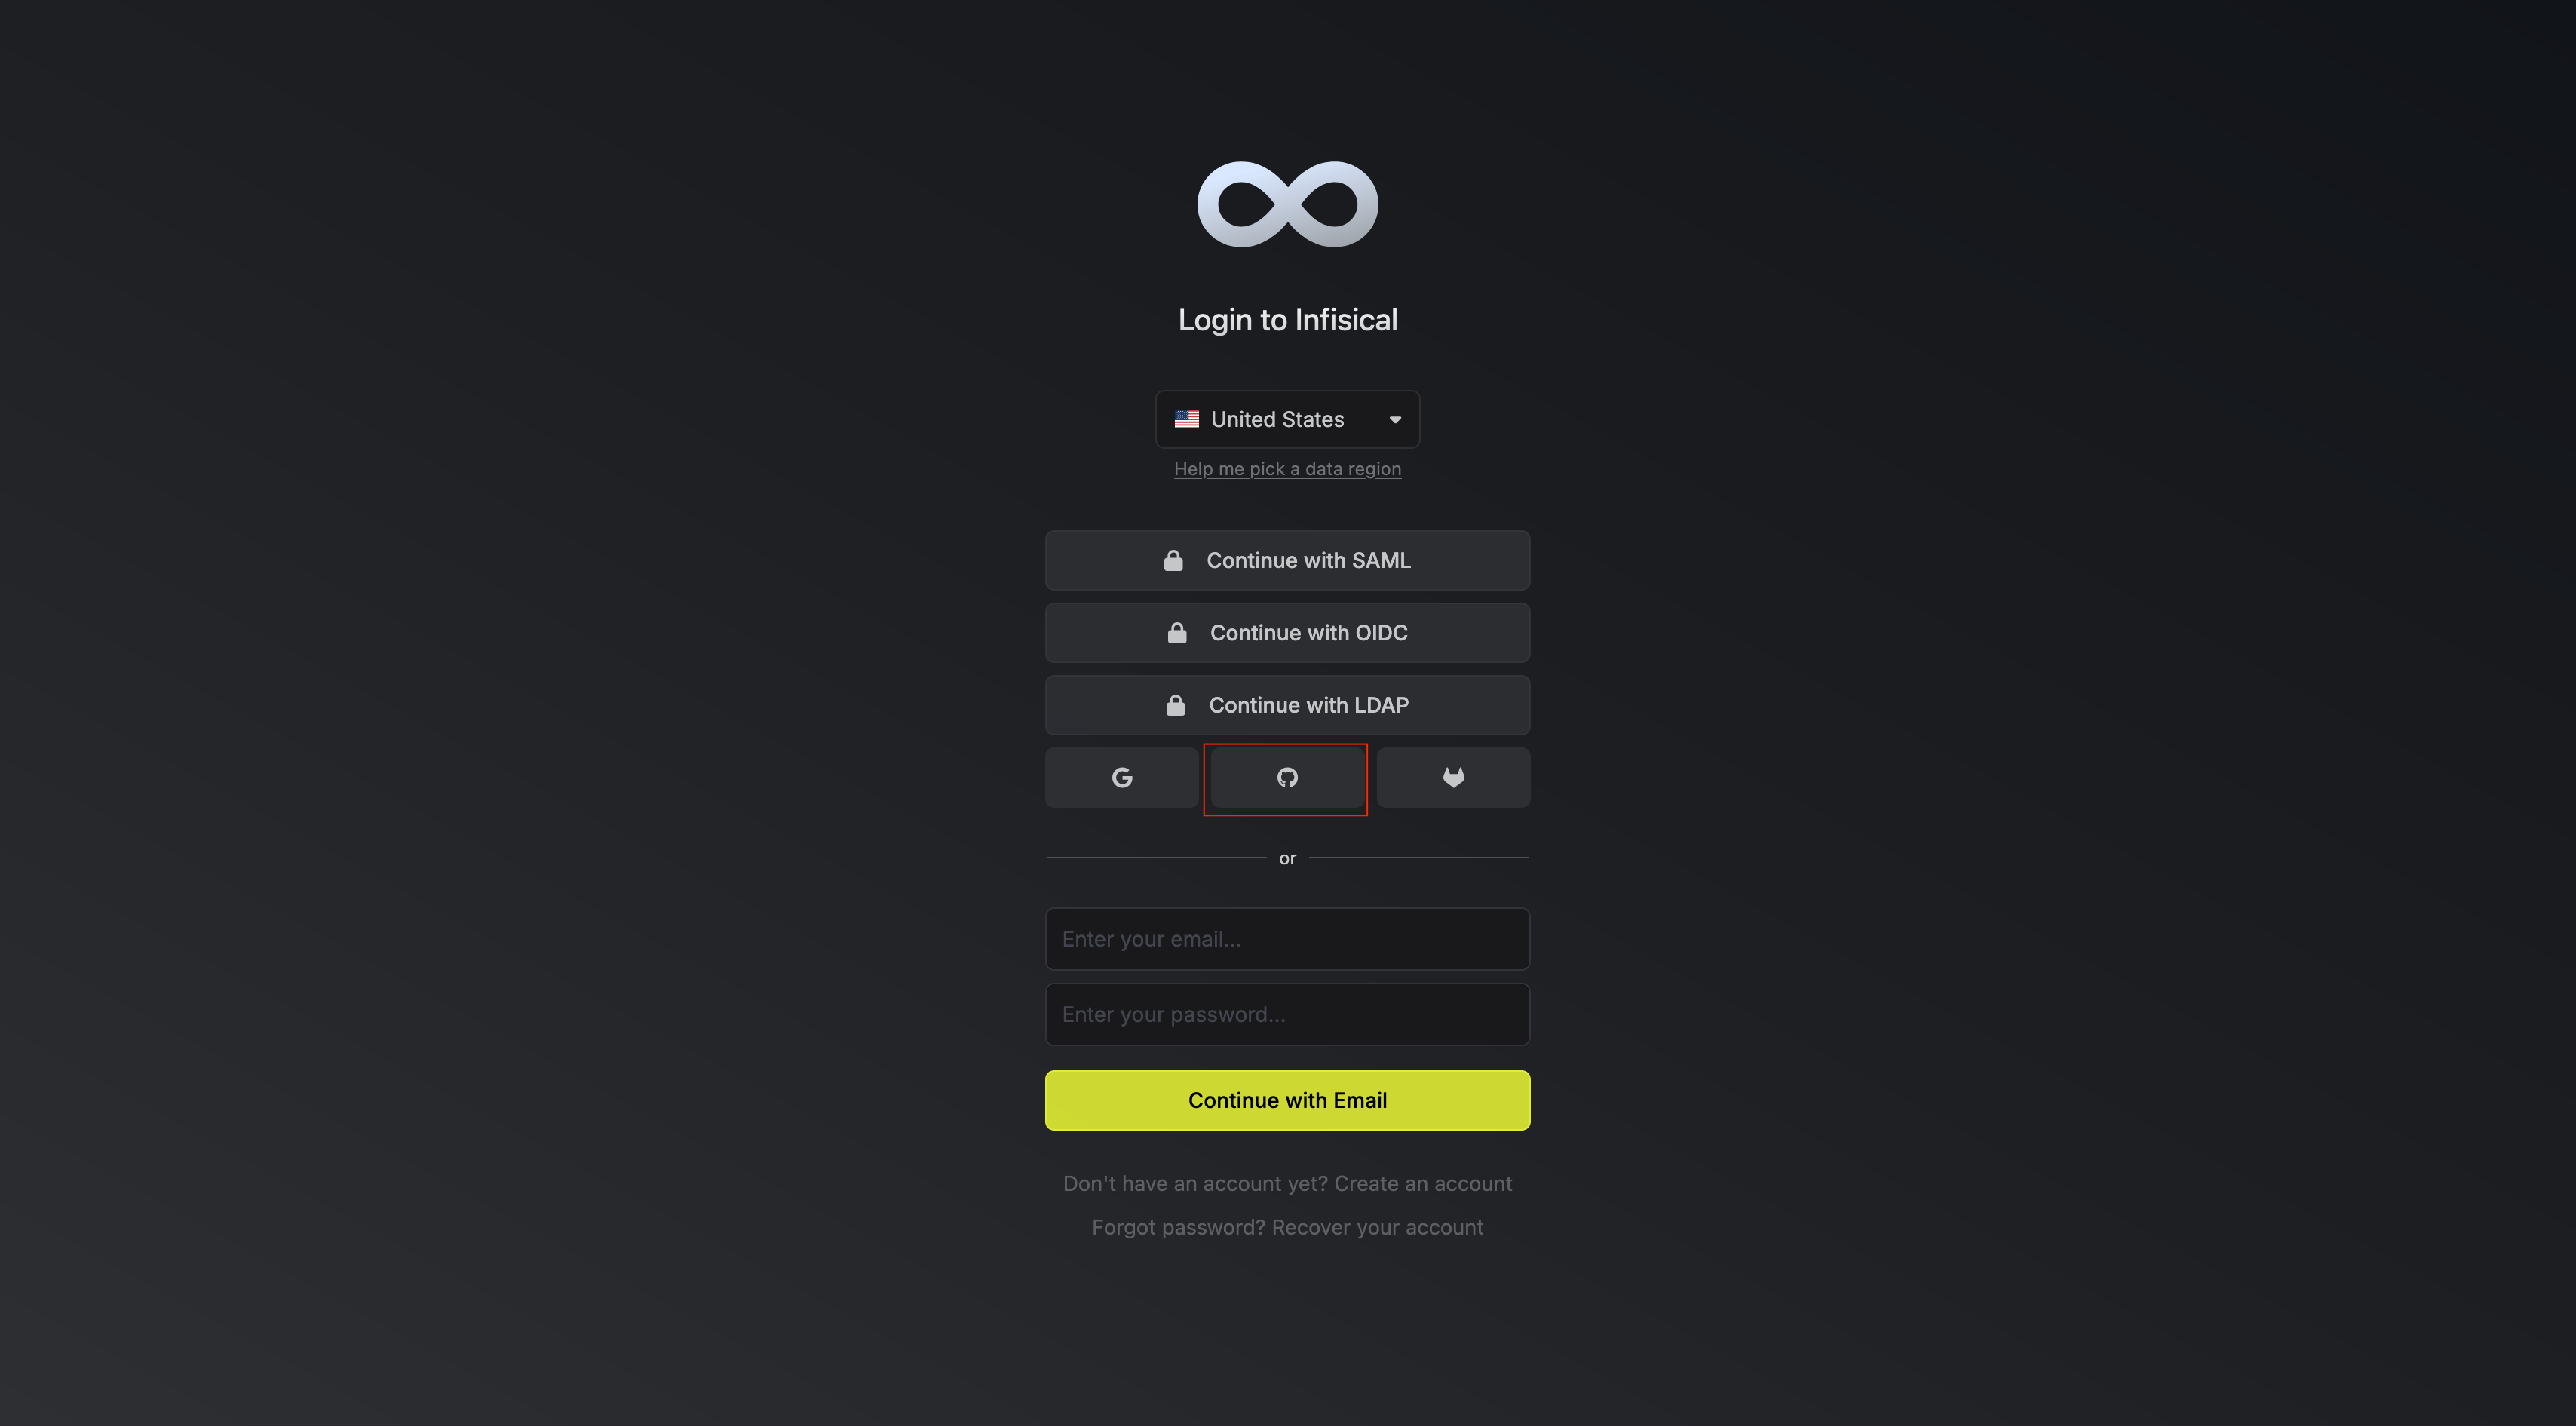 2. Select the organization you have connected.
3. Grant access to Infisical oauth application to your configured organization. Infisical shown here is an organization, just for walkthrough.
2. Select the organization you have connected.
3. Grant access to Infisical oauth application to your configured organization. Infisical shown here is an organization, just for walkthrough.
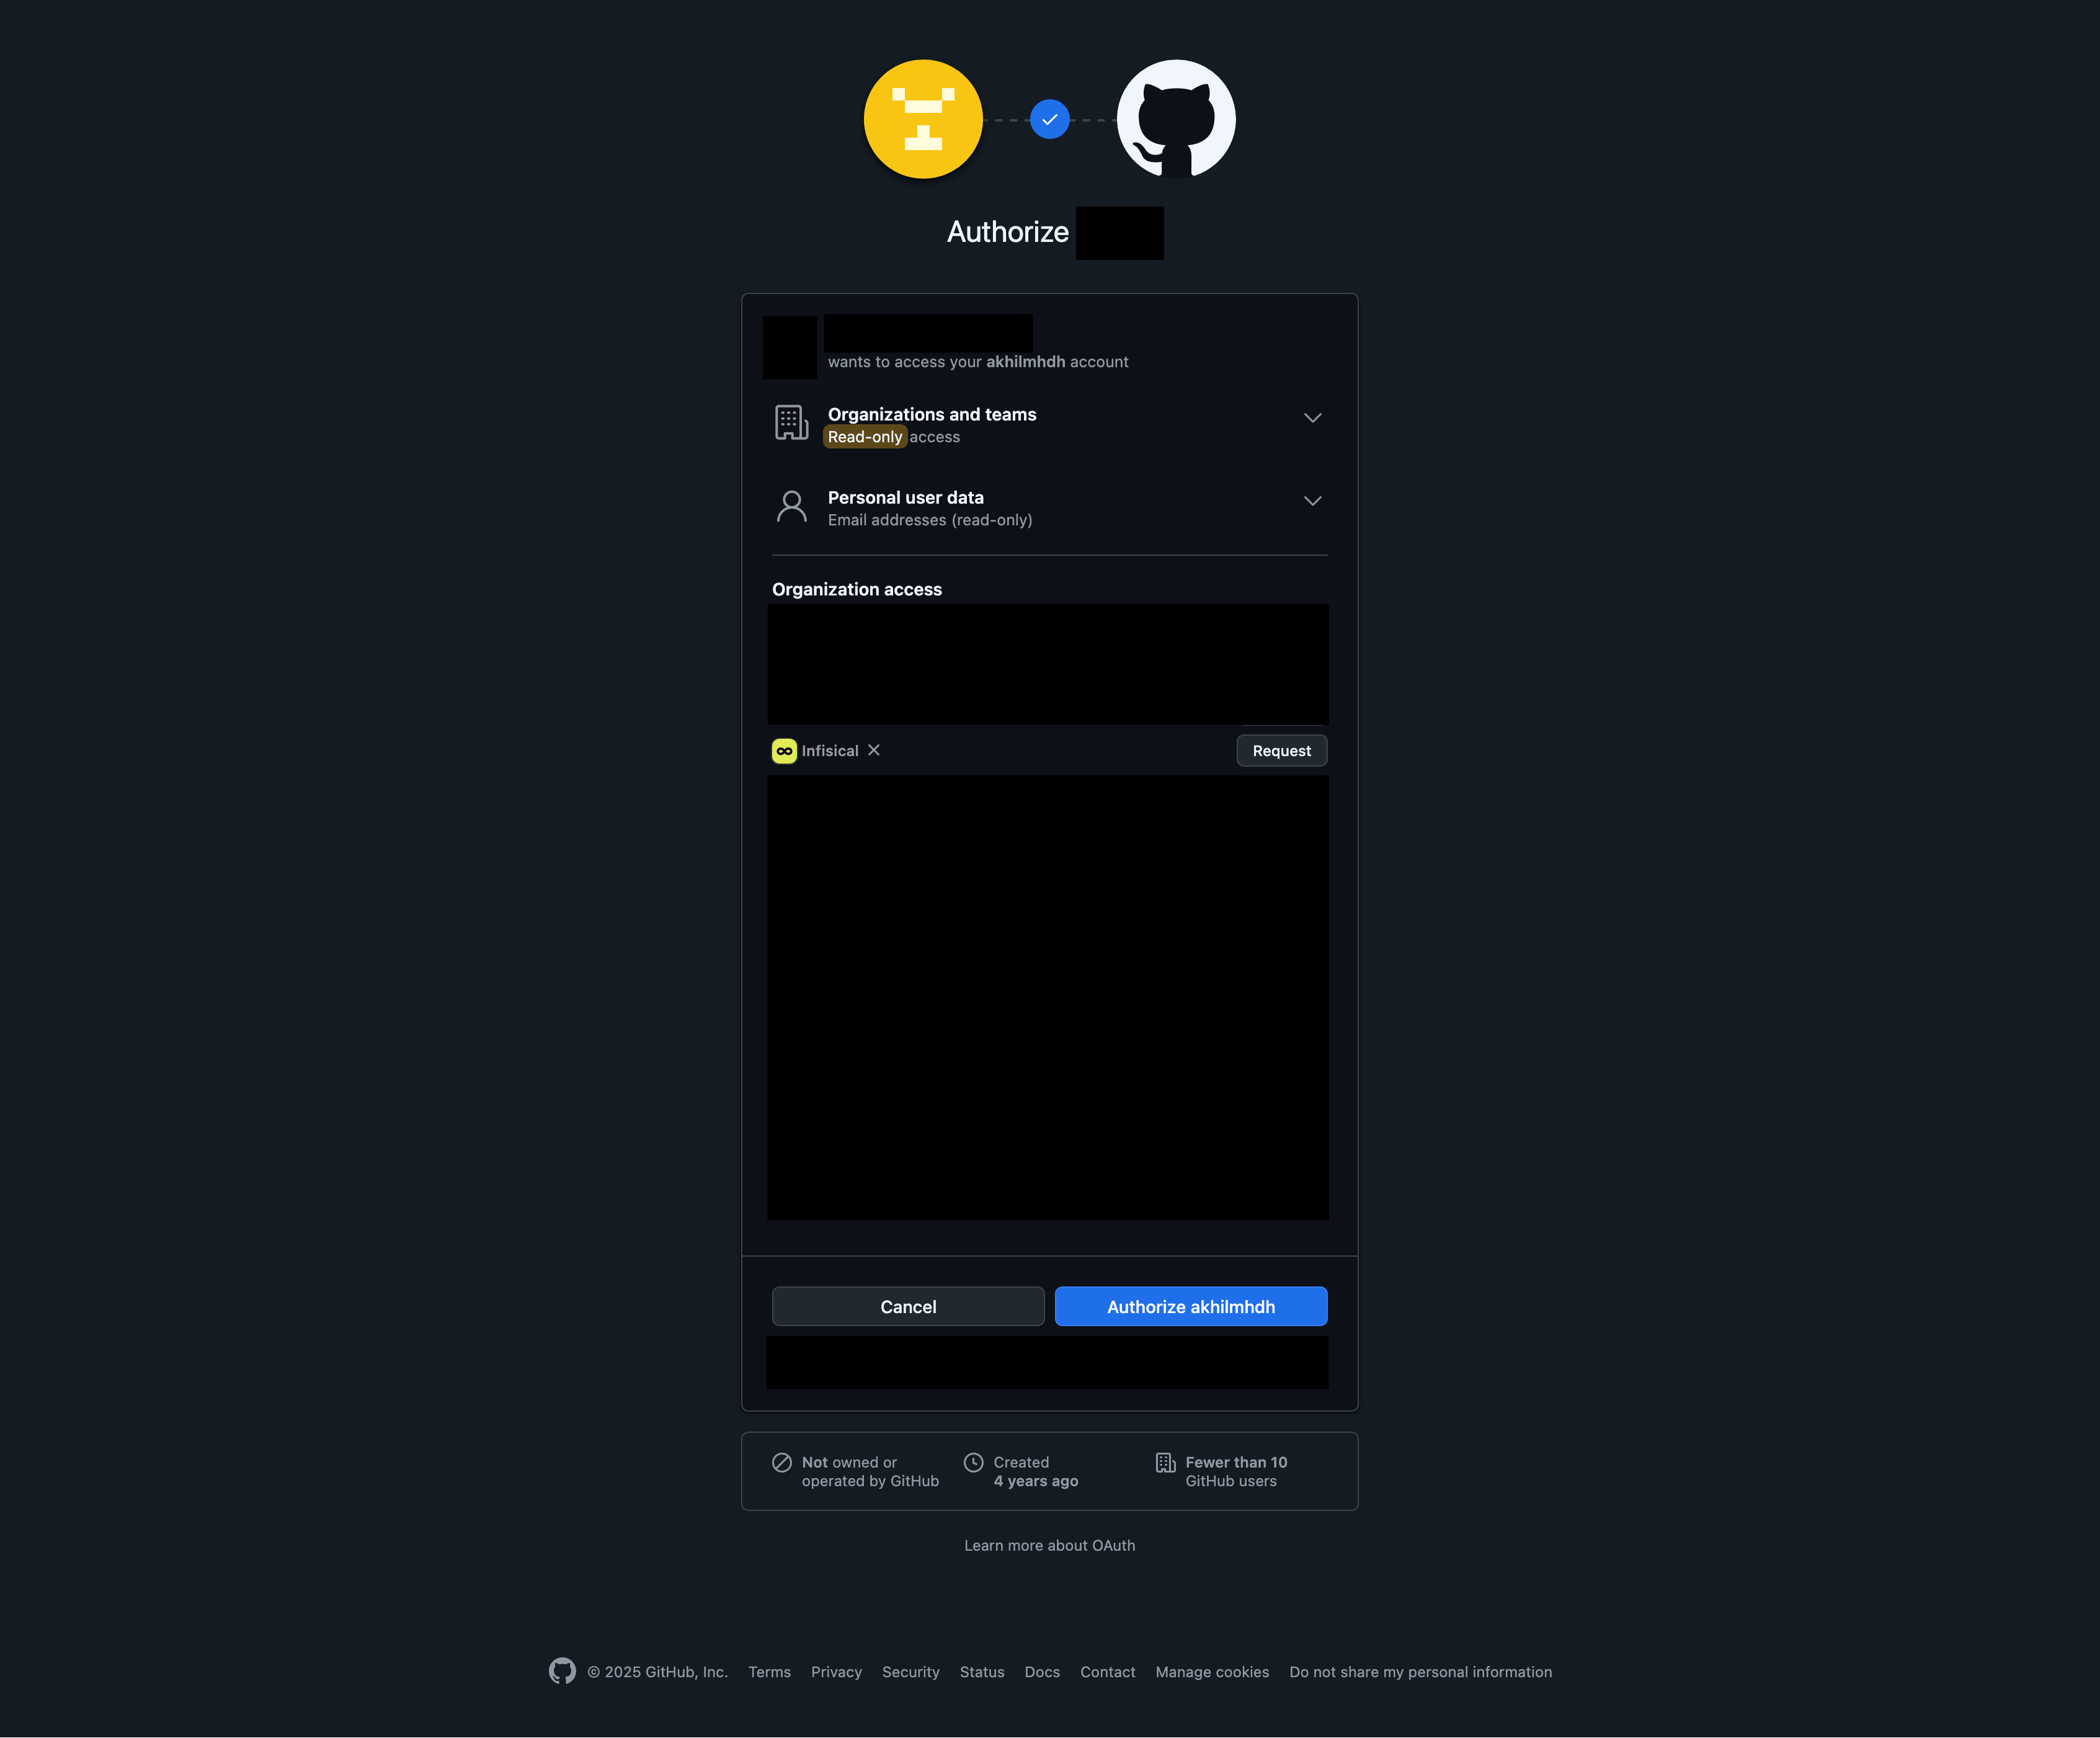
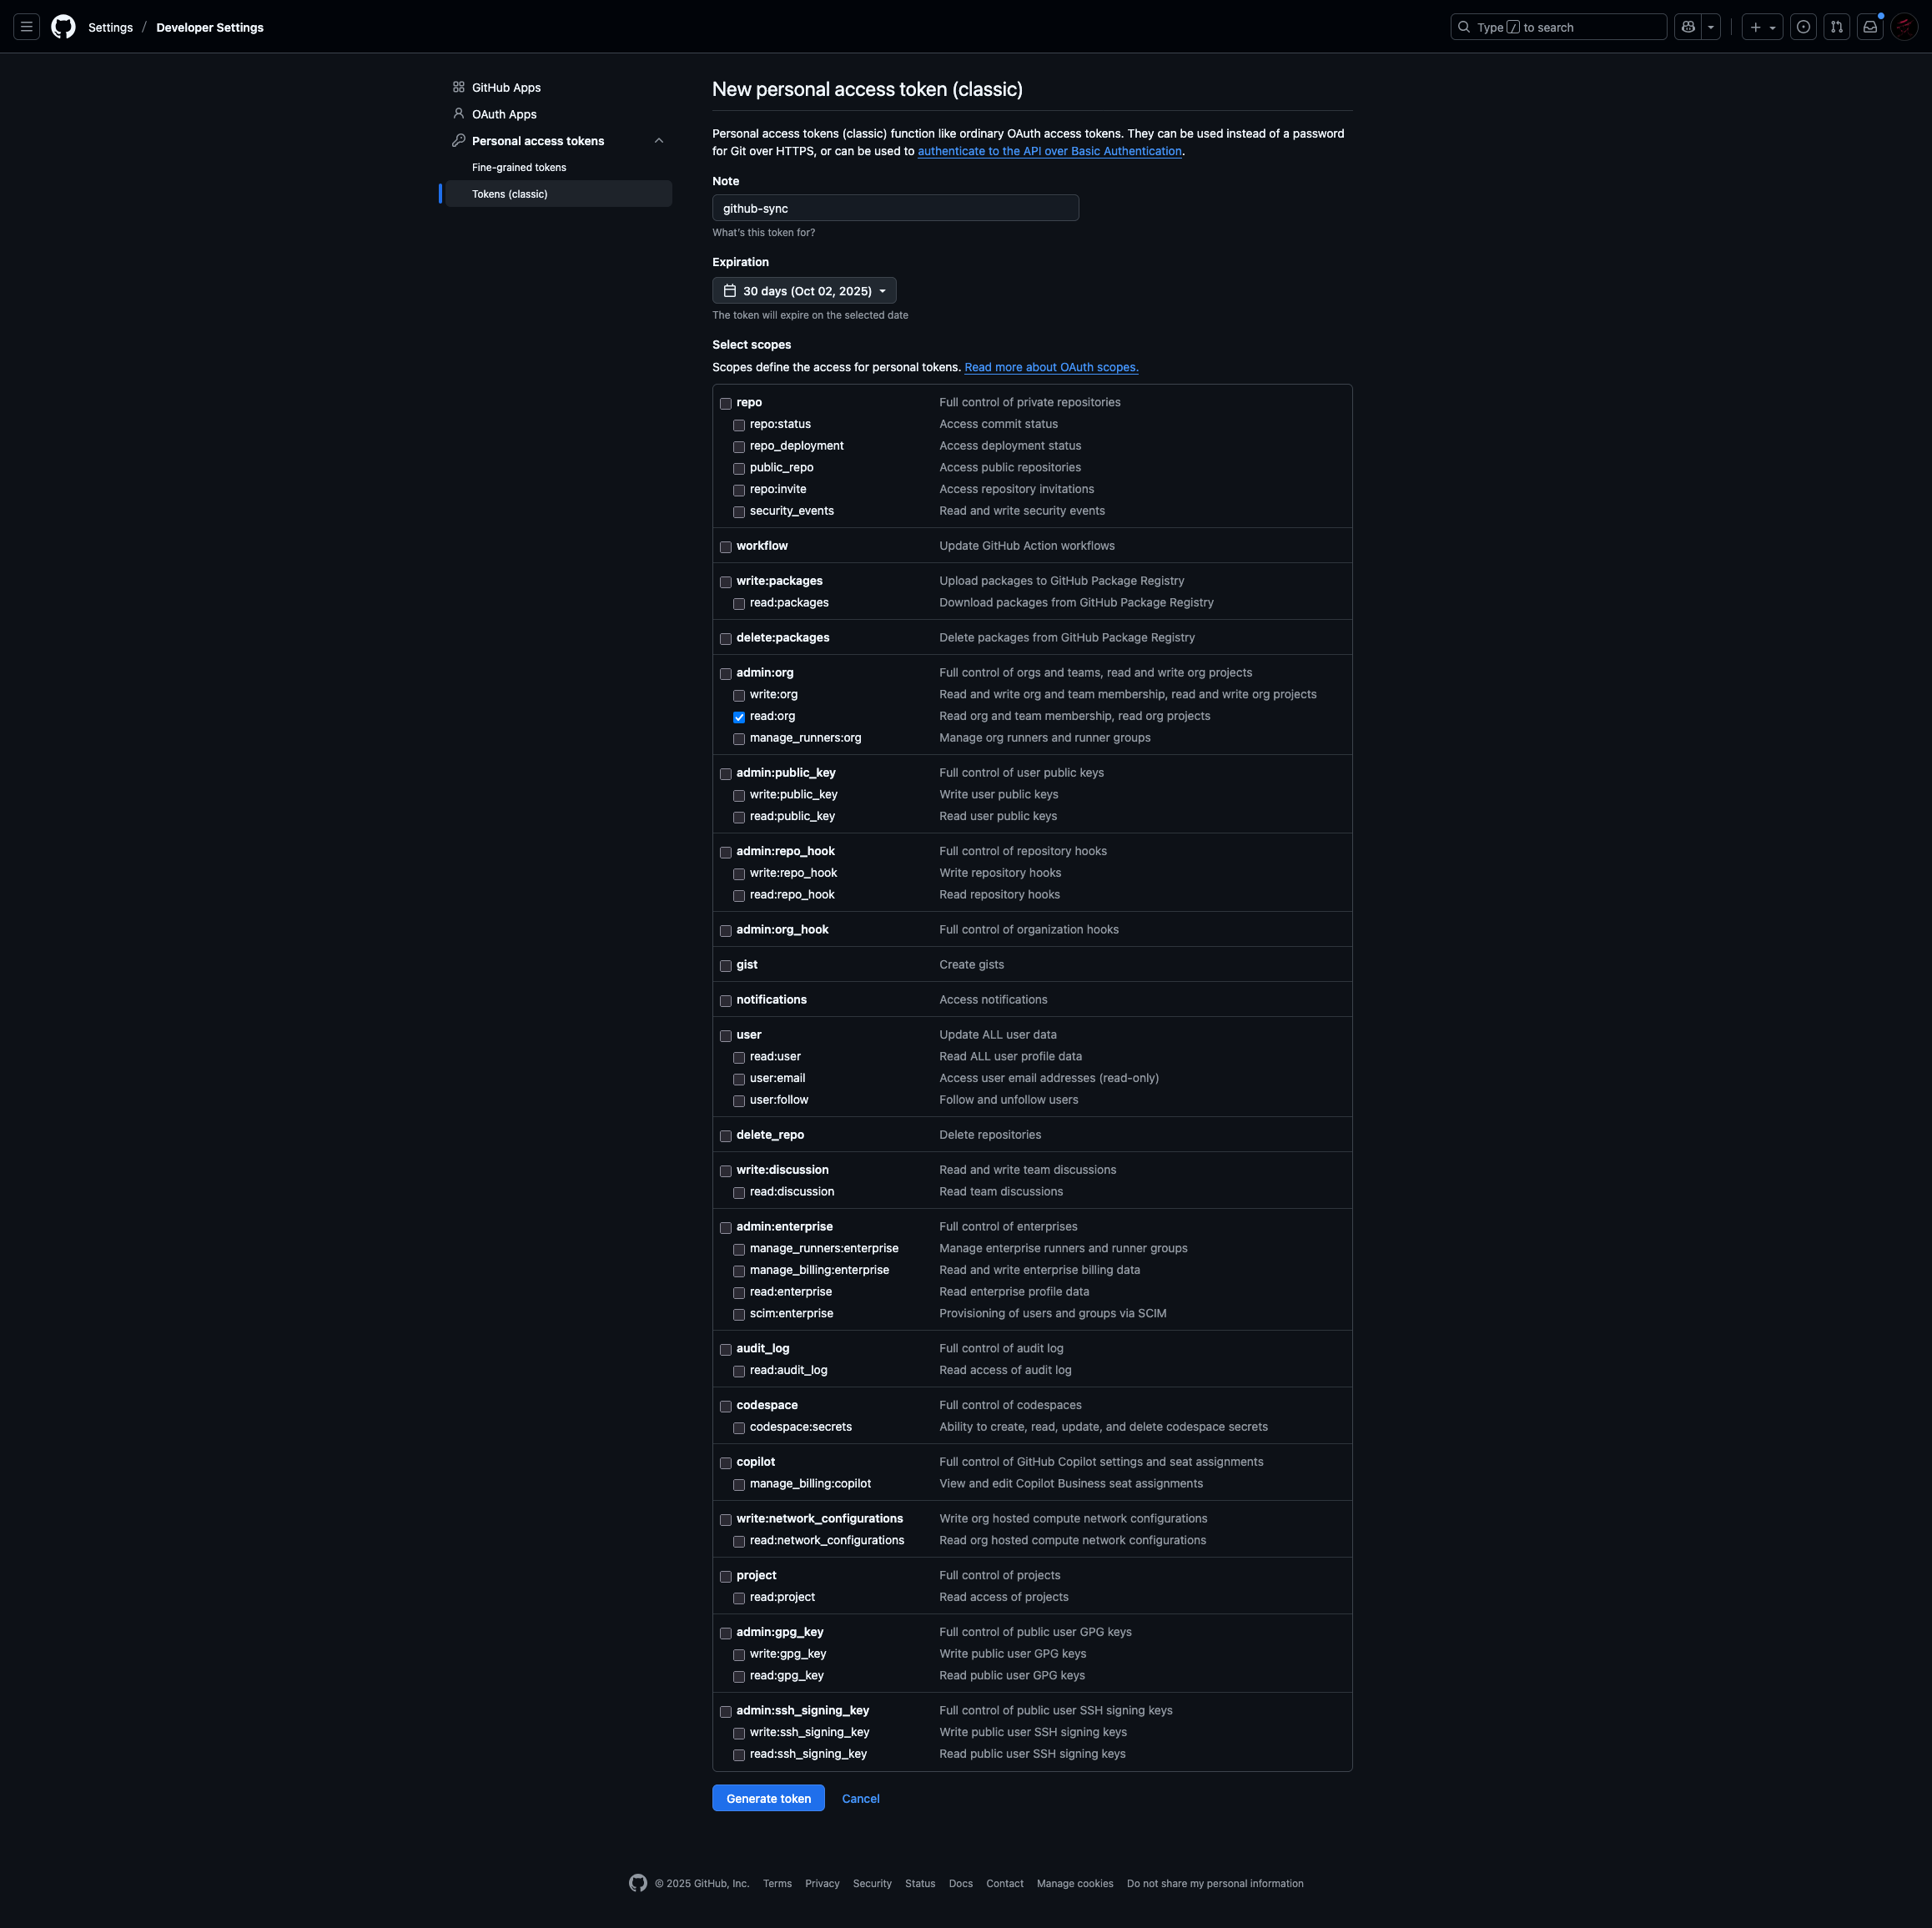
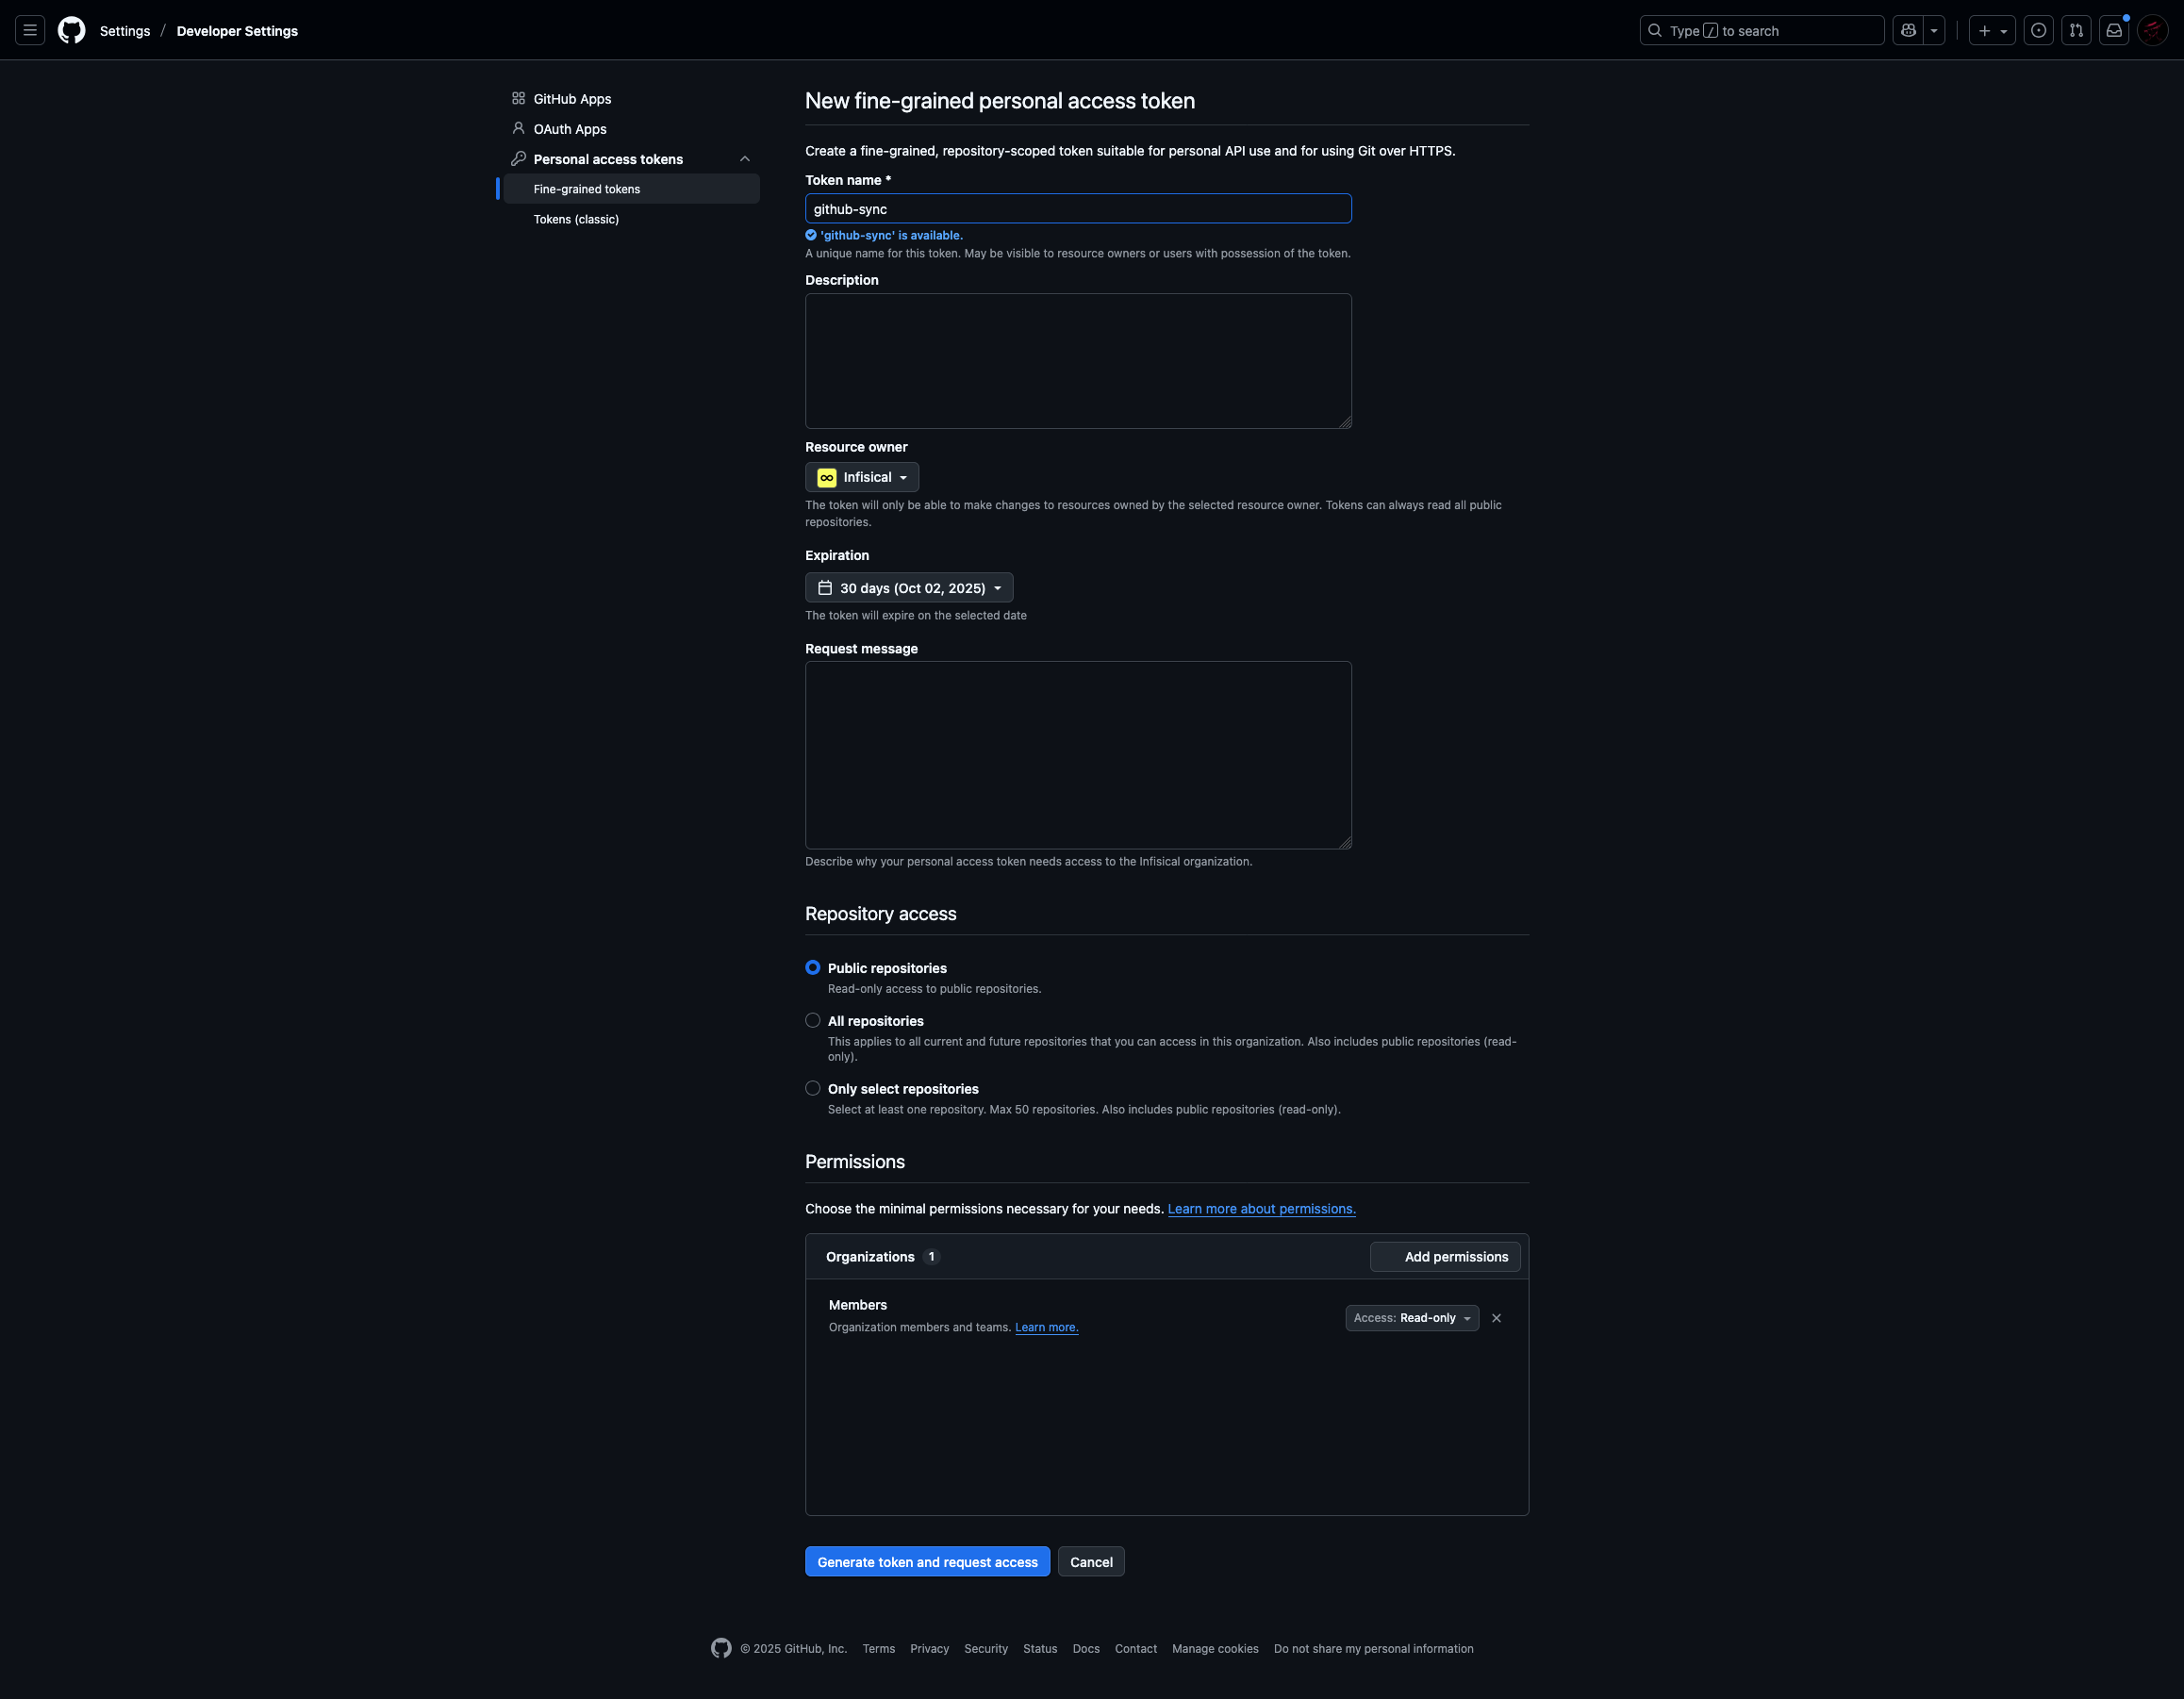
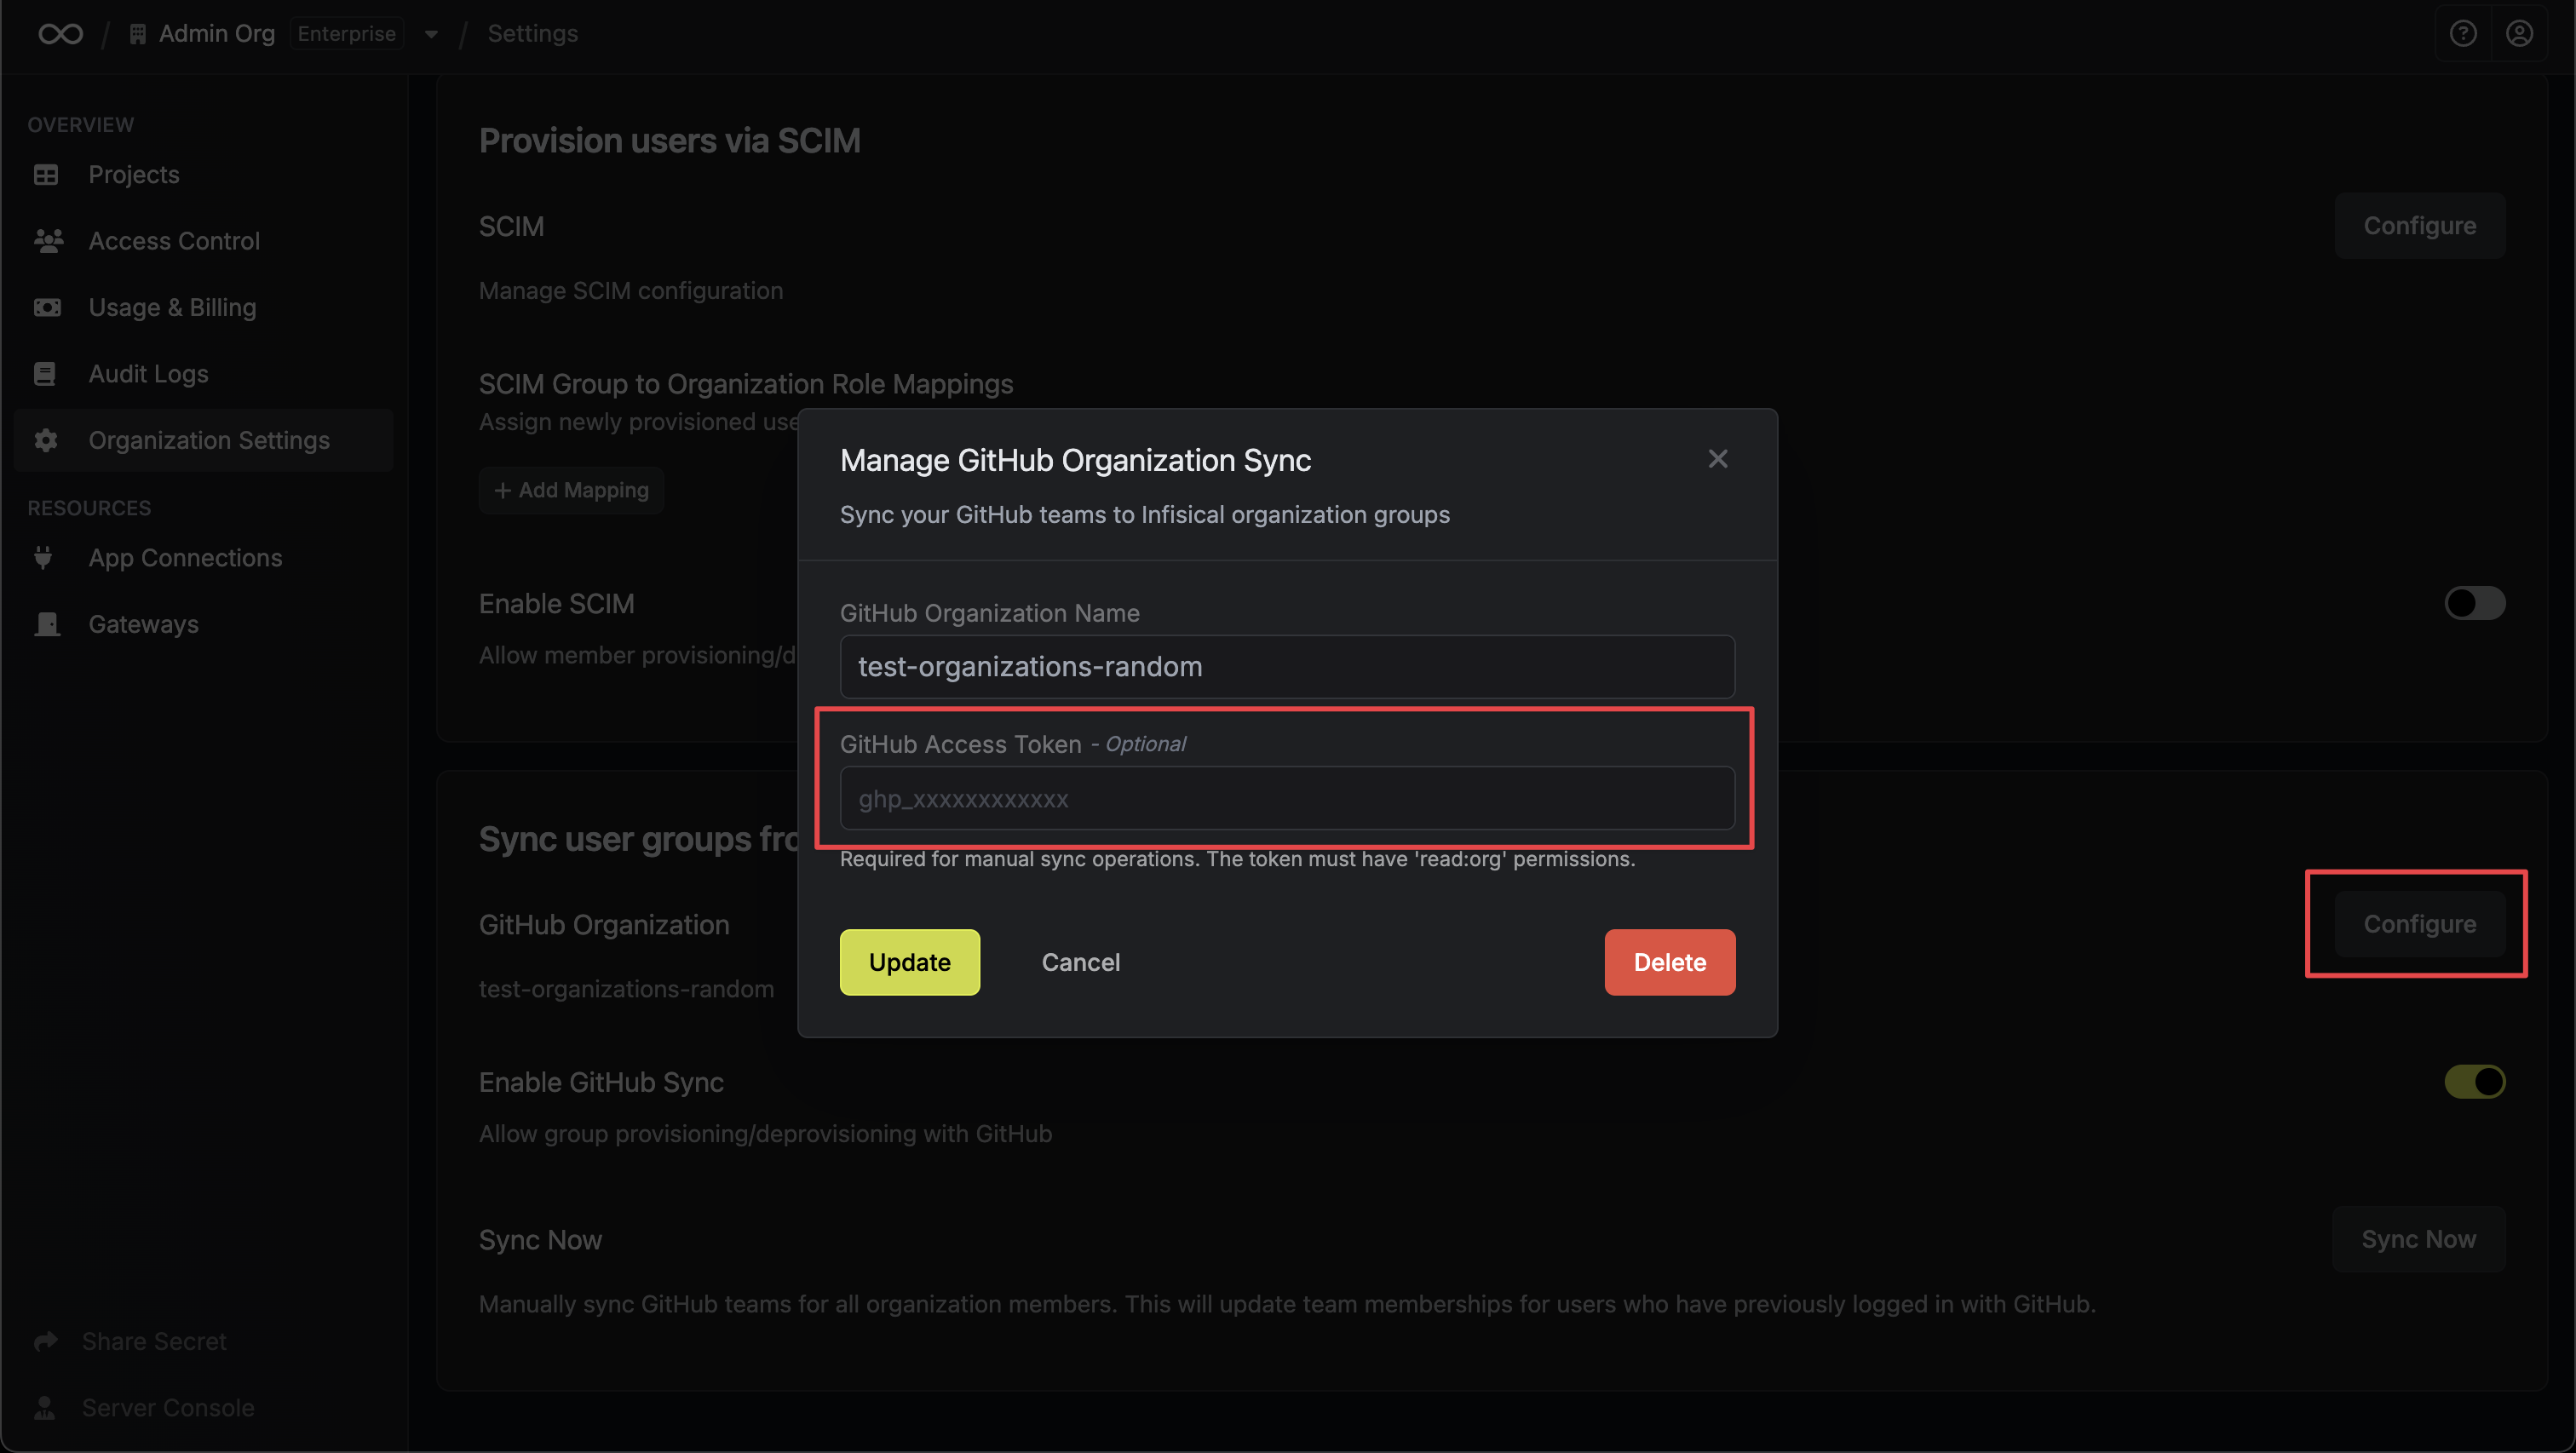
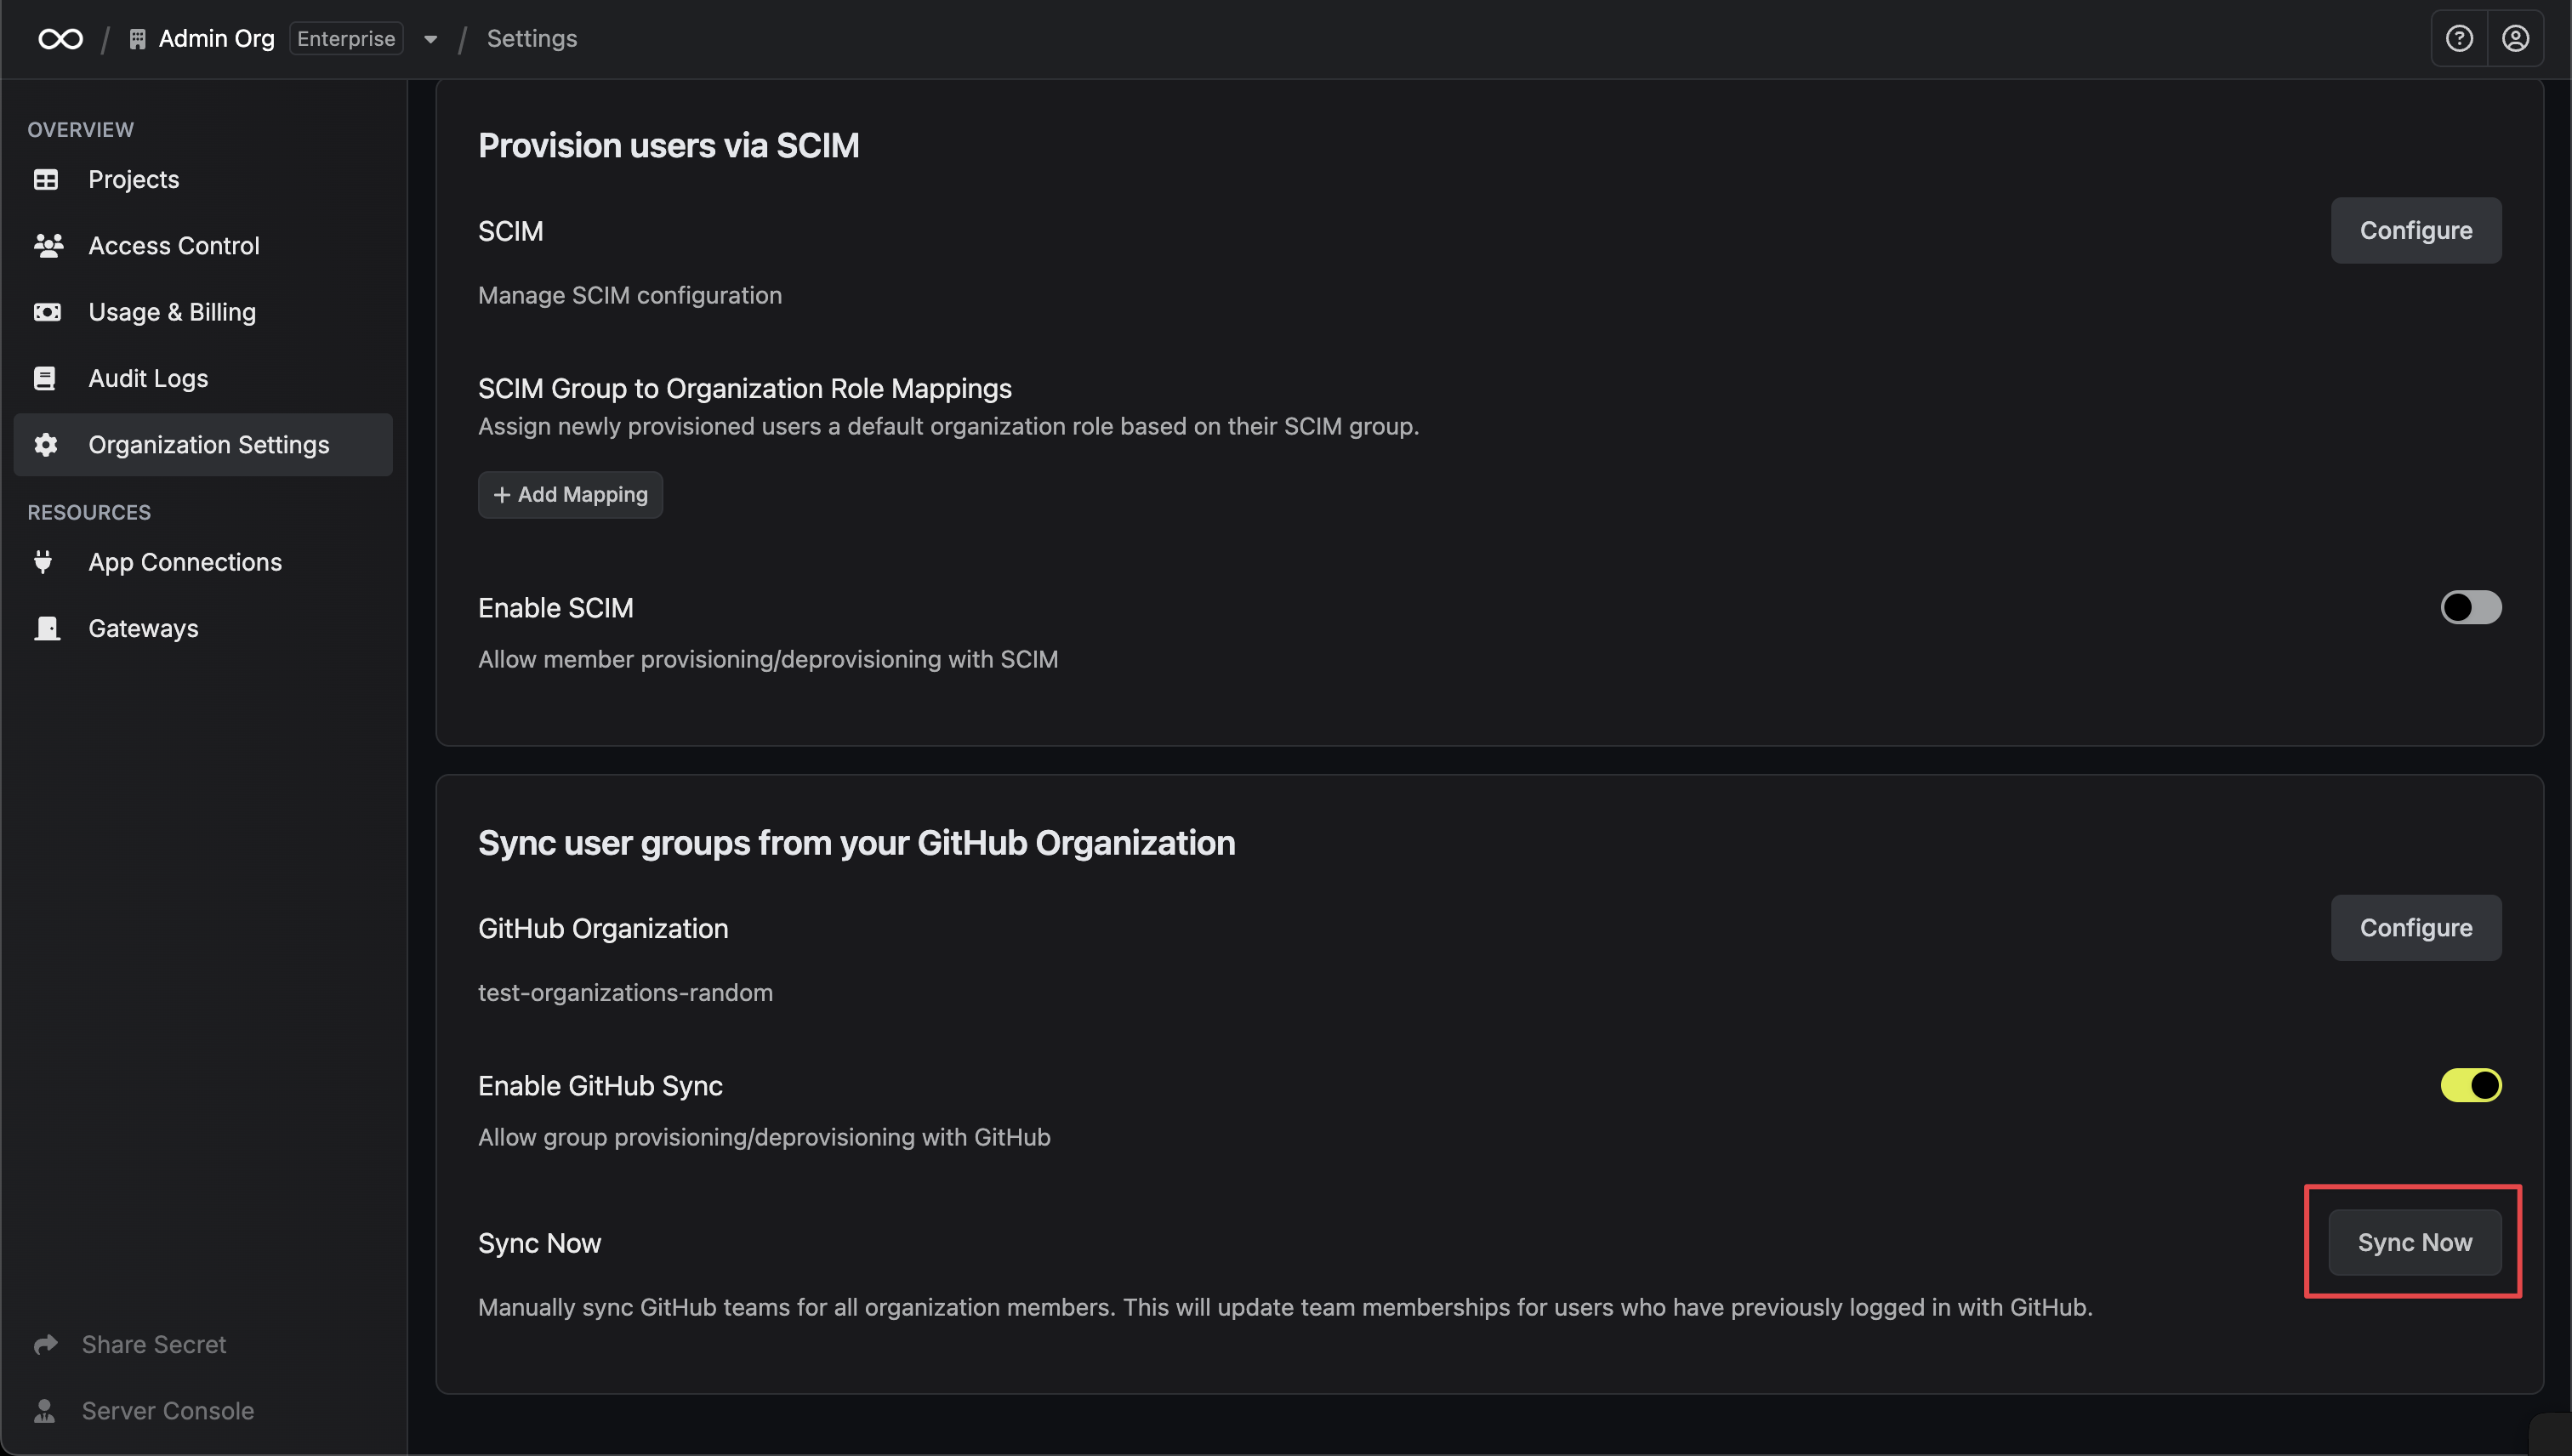 The sync operation will process all organization members who have previously logged in with GitHub and update their team memberships accordingly.
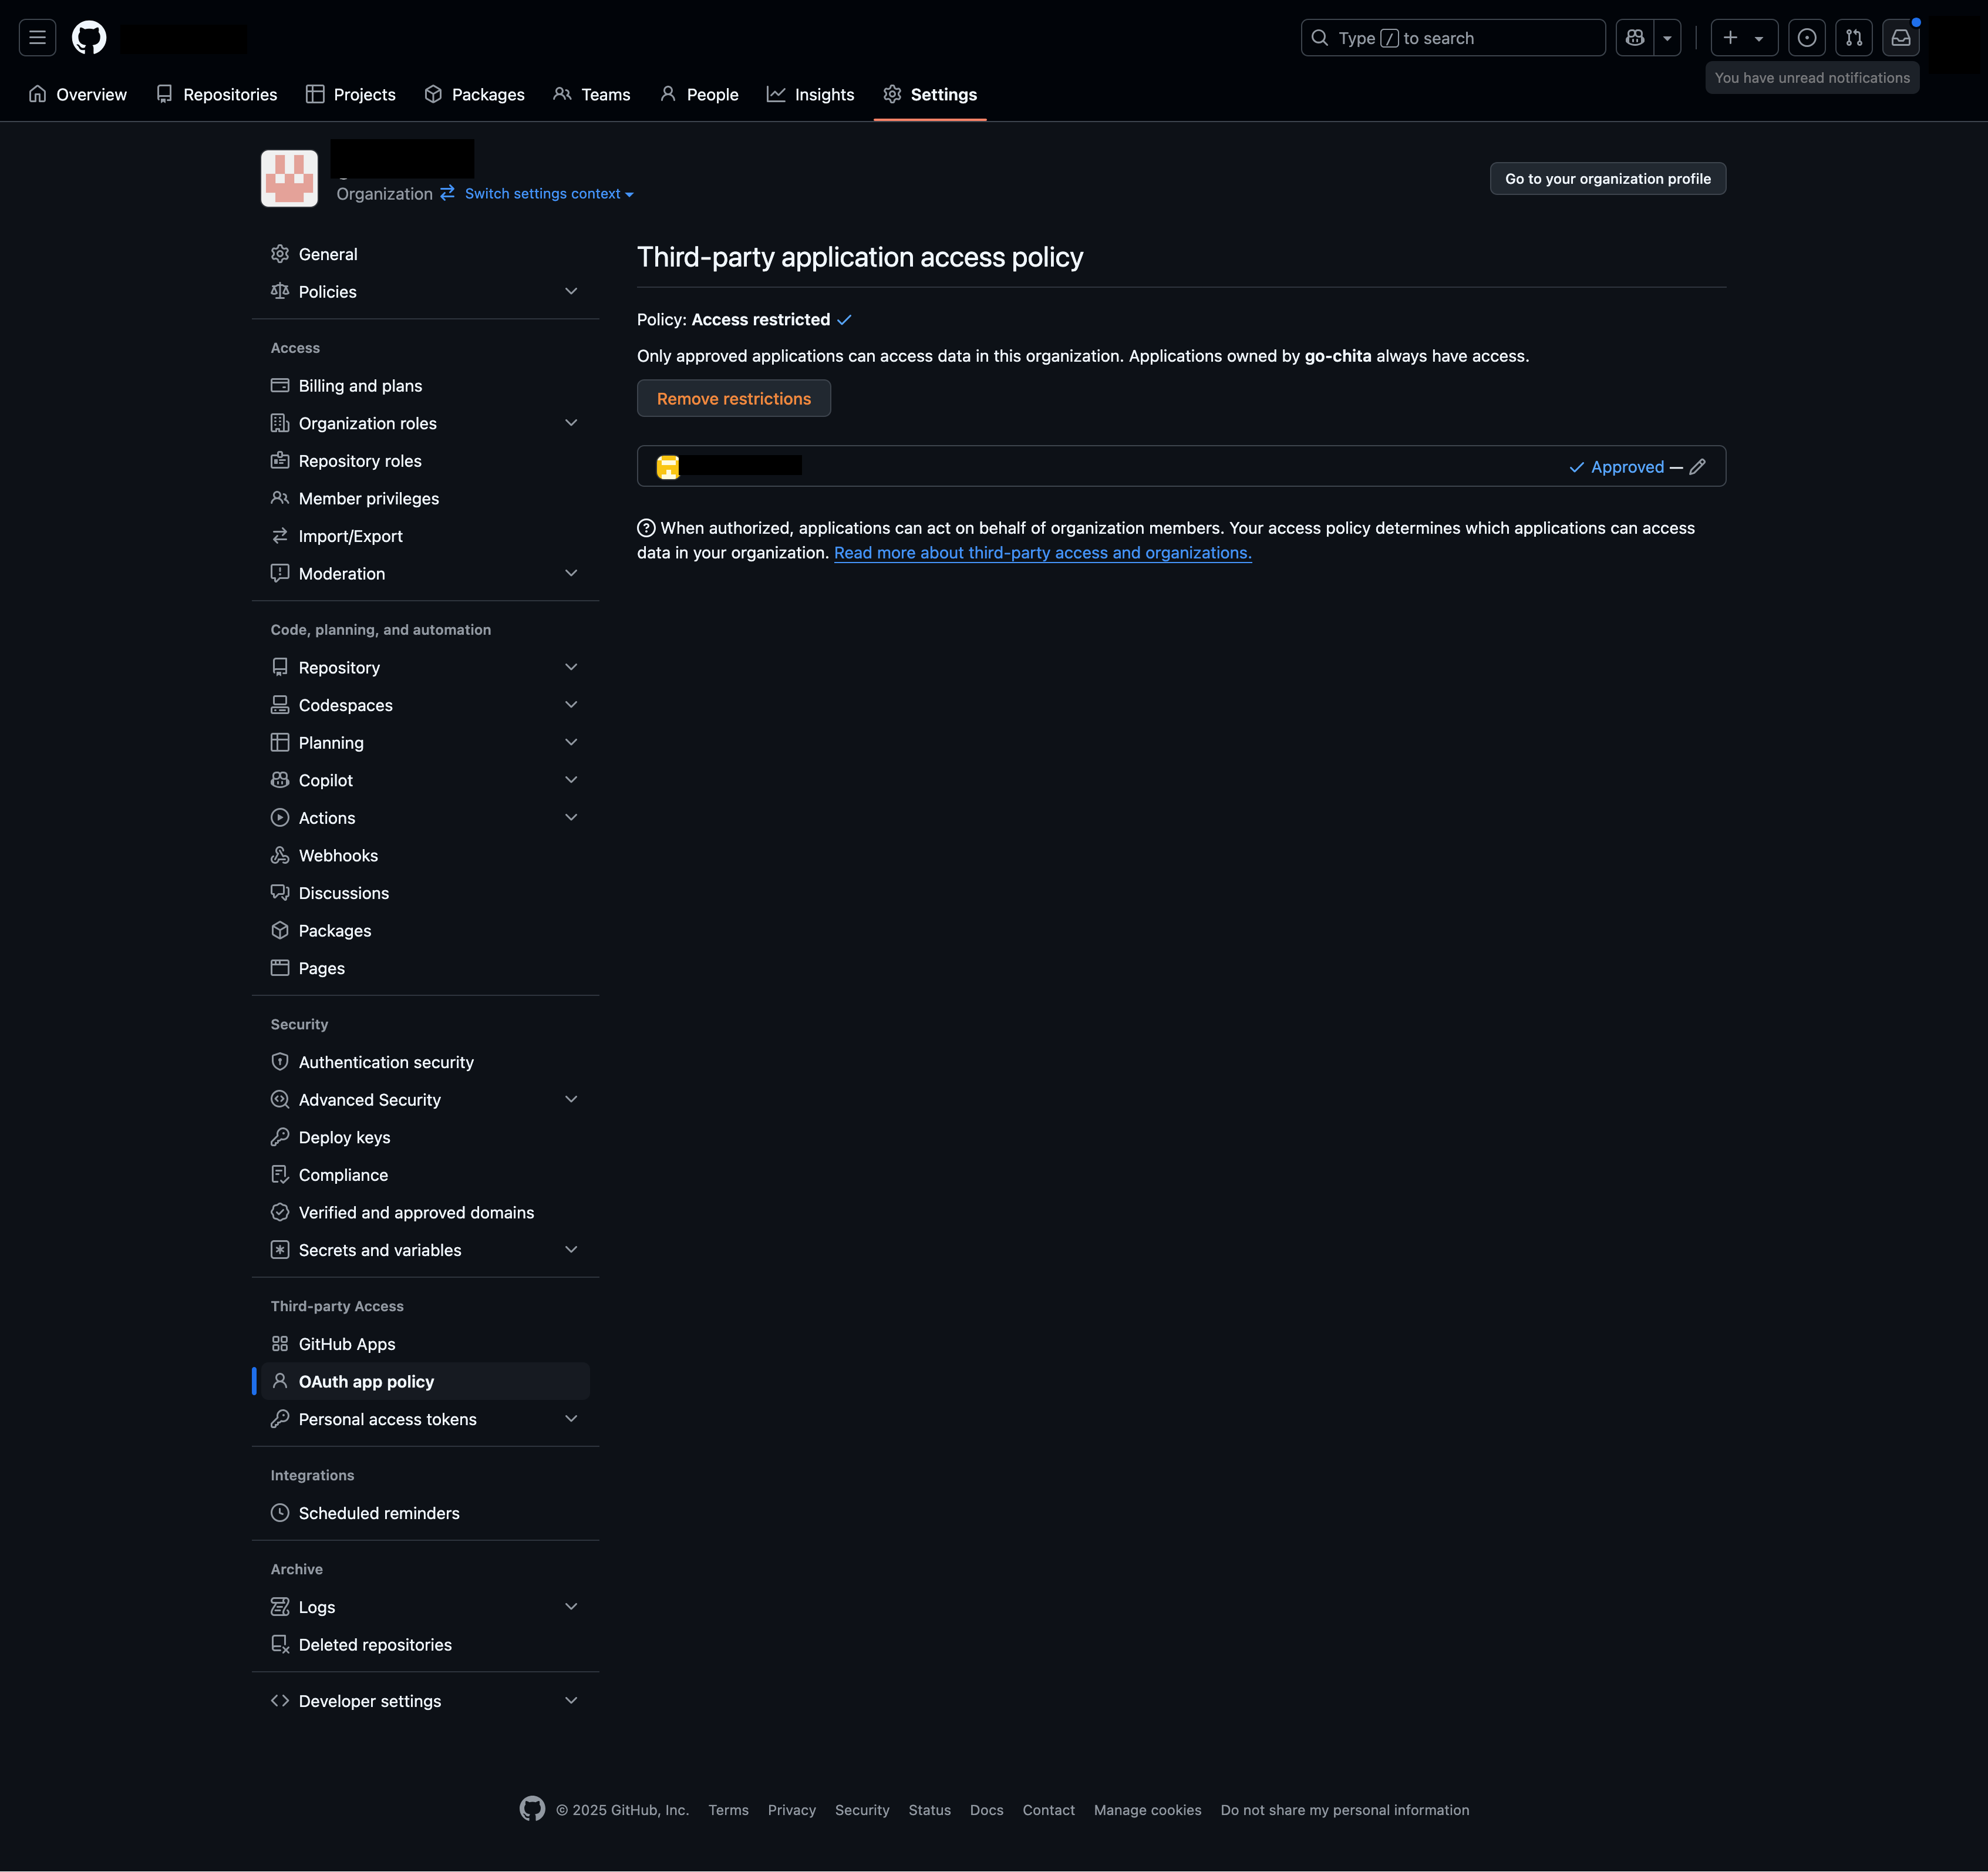
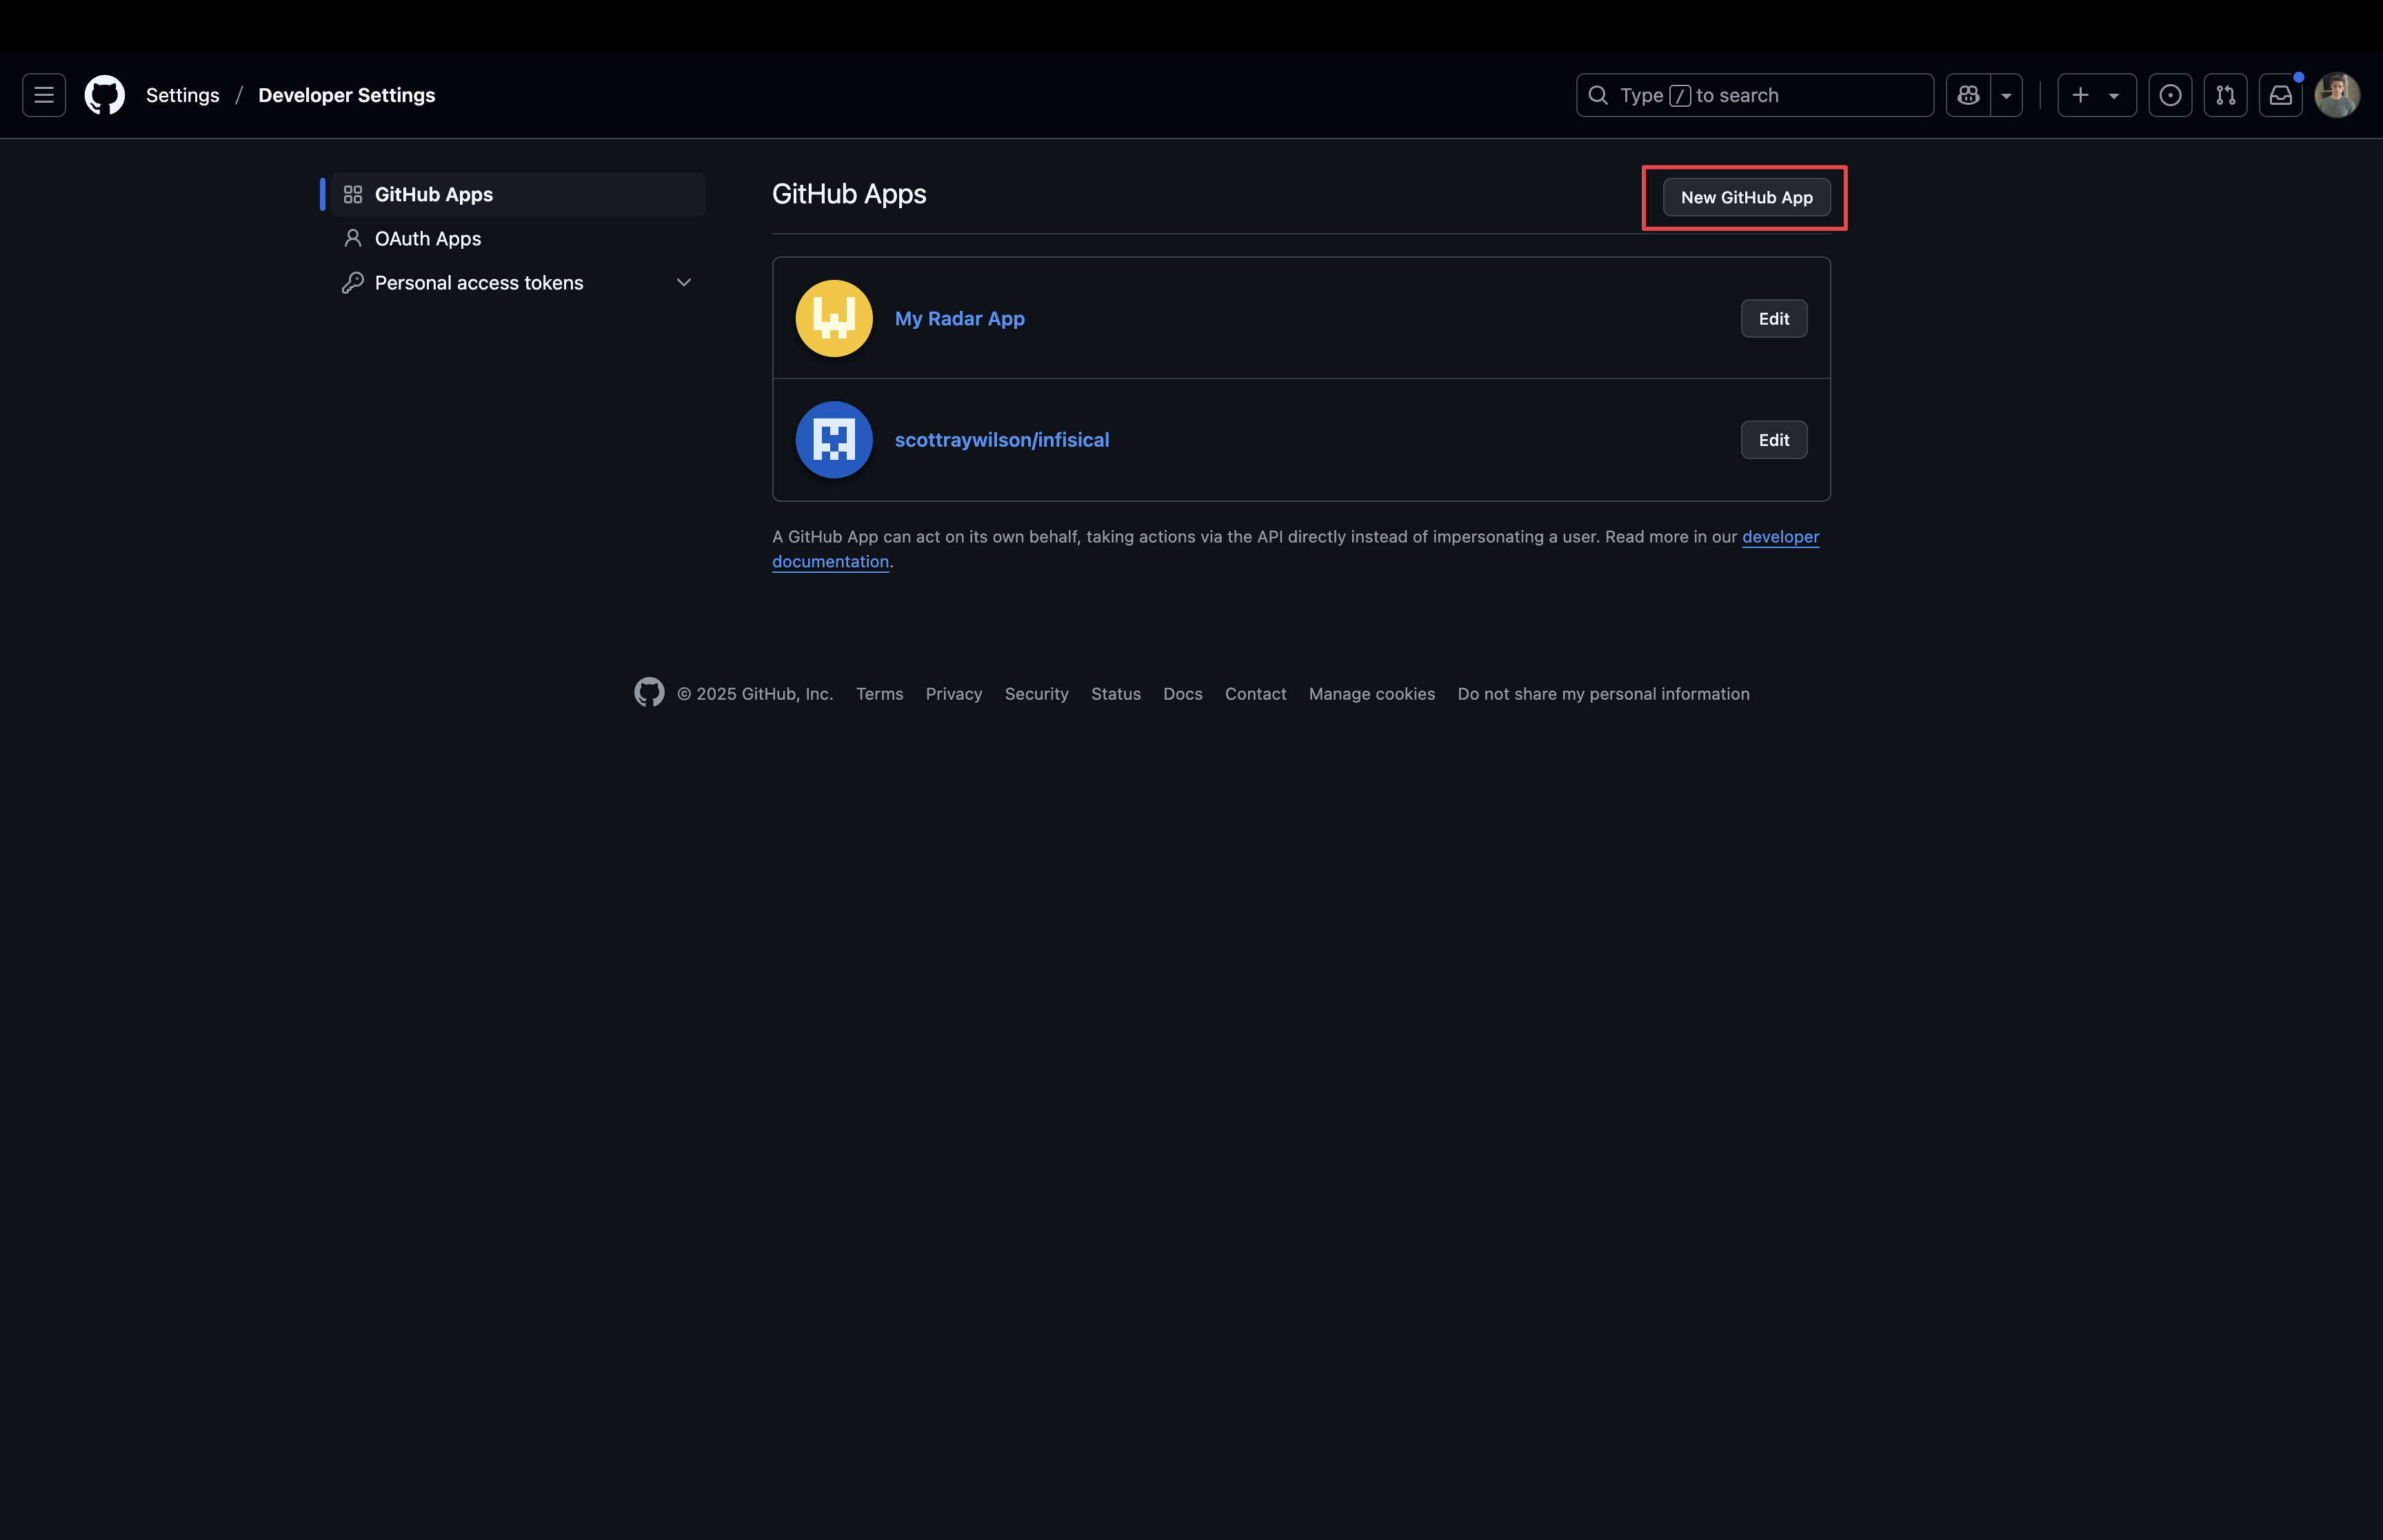 Configure the following fields:
1. **Name** - give your app a name
2. **Homepage URL** - your self-hosted domain (i.e. `https://your-domain.com`)
3. **Callback URL** - the callback URL for your domain (i.e. `https://your-domain.com/organization/app-connections/github-radar/oauth/callback`)
4. **User Authorization** - enable request user authorization on app installation
Configure the following fields:
1. **Name** - give your app a name
2. **Homepage URL** - your self-hosted domain (i.e. `https://your-domain.com`)
3. **Callback URL** - the callback URL for your domain (i.e. `https://your-domain.com/organization/app-connections/github-radar/oauth/callback`)
4. **User Authorization** - enable request user authorization on app installation
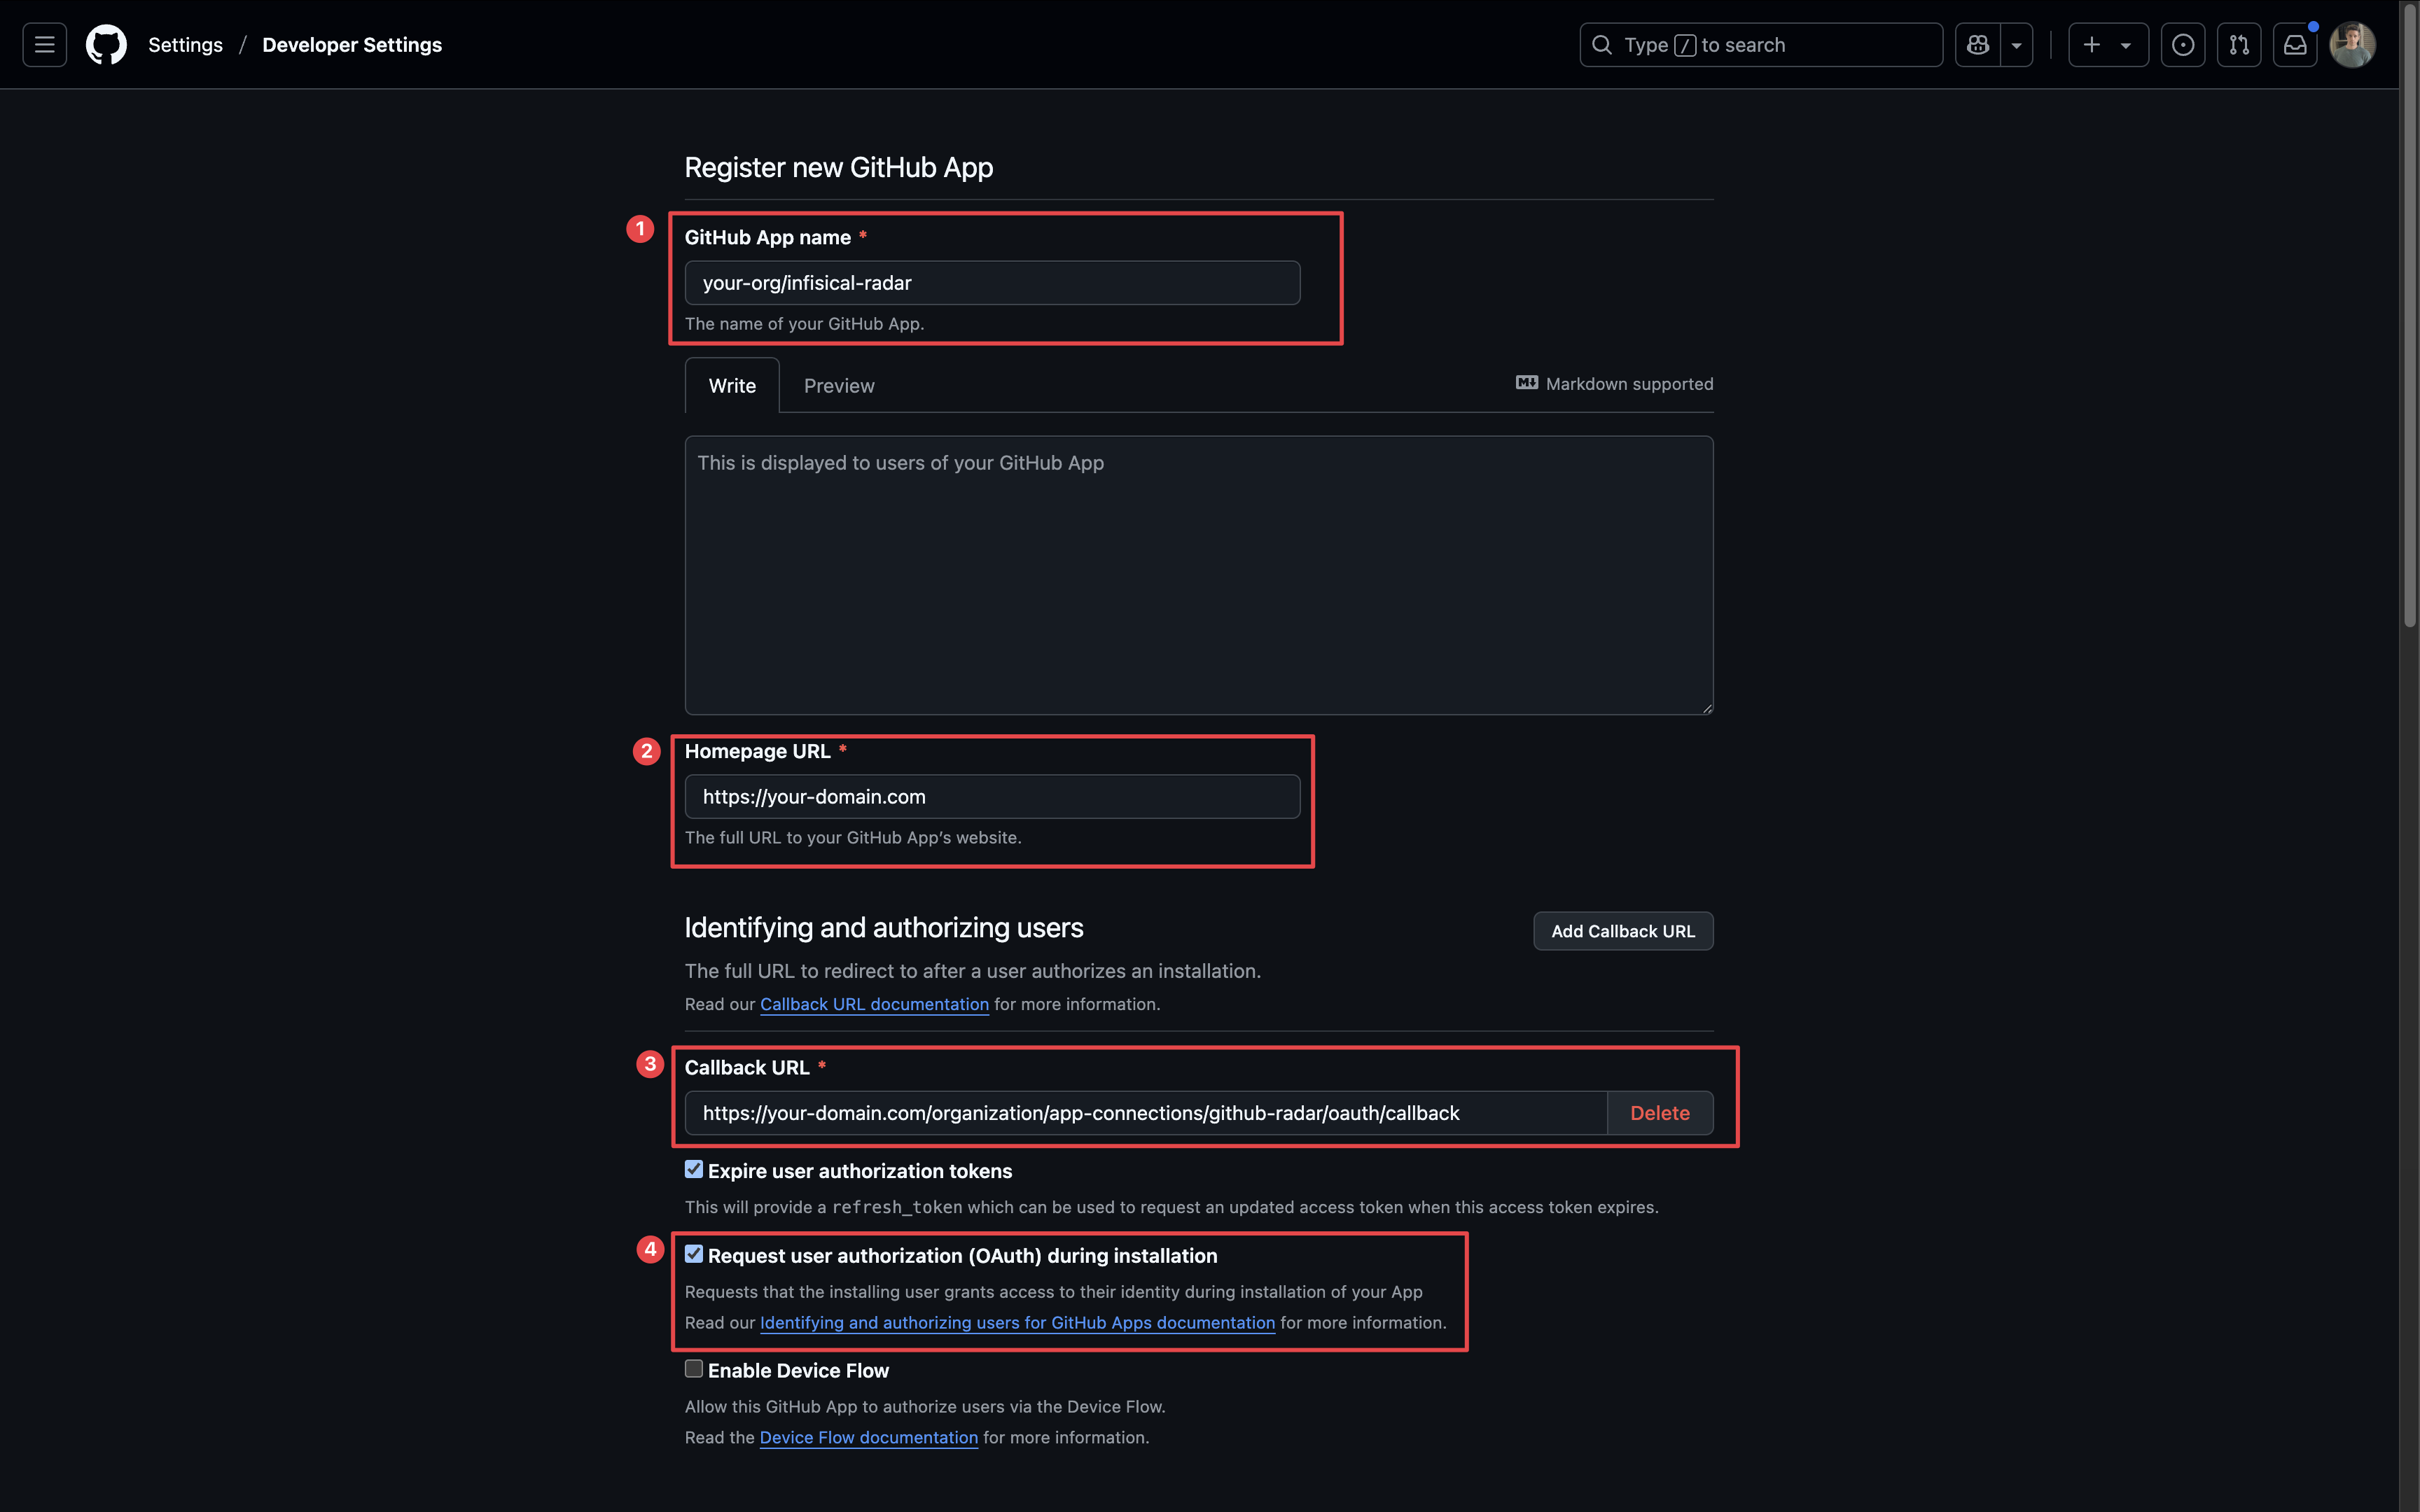 Enable and configure the Webhook fields:
* **Webhook URL** - the webhook URL for your domain (i.e. `https://your-domain.com/secret-scanning/webhooks/github`)
* **Webhook Secret** - a strong, generated secret to verify webhook payloads
* **SSL Verification** - enable SSL verification
Enable and configure the Webhook fields:
* **Webhook URL** - the webhook URL for your domain (i.e. `https://your-domain.com/secret-scanning/webhooks/github`)
* **Webhook Secret** - a strong, generated secret to verify webhook payloads
* **SSL Verification** - enable SSL verification
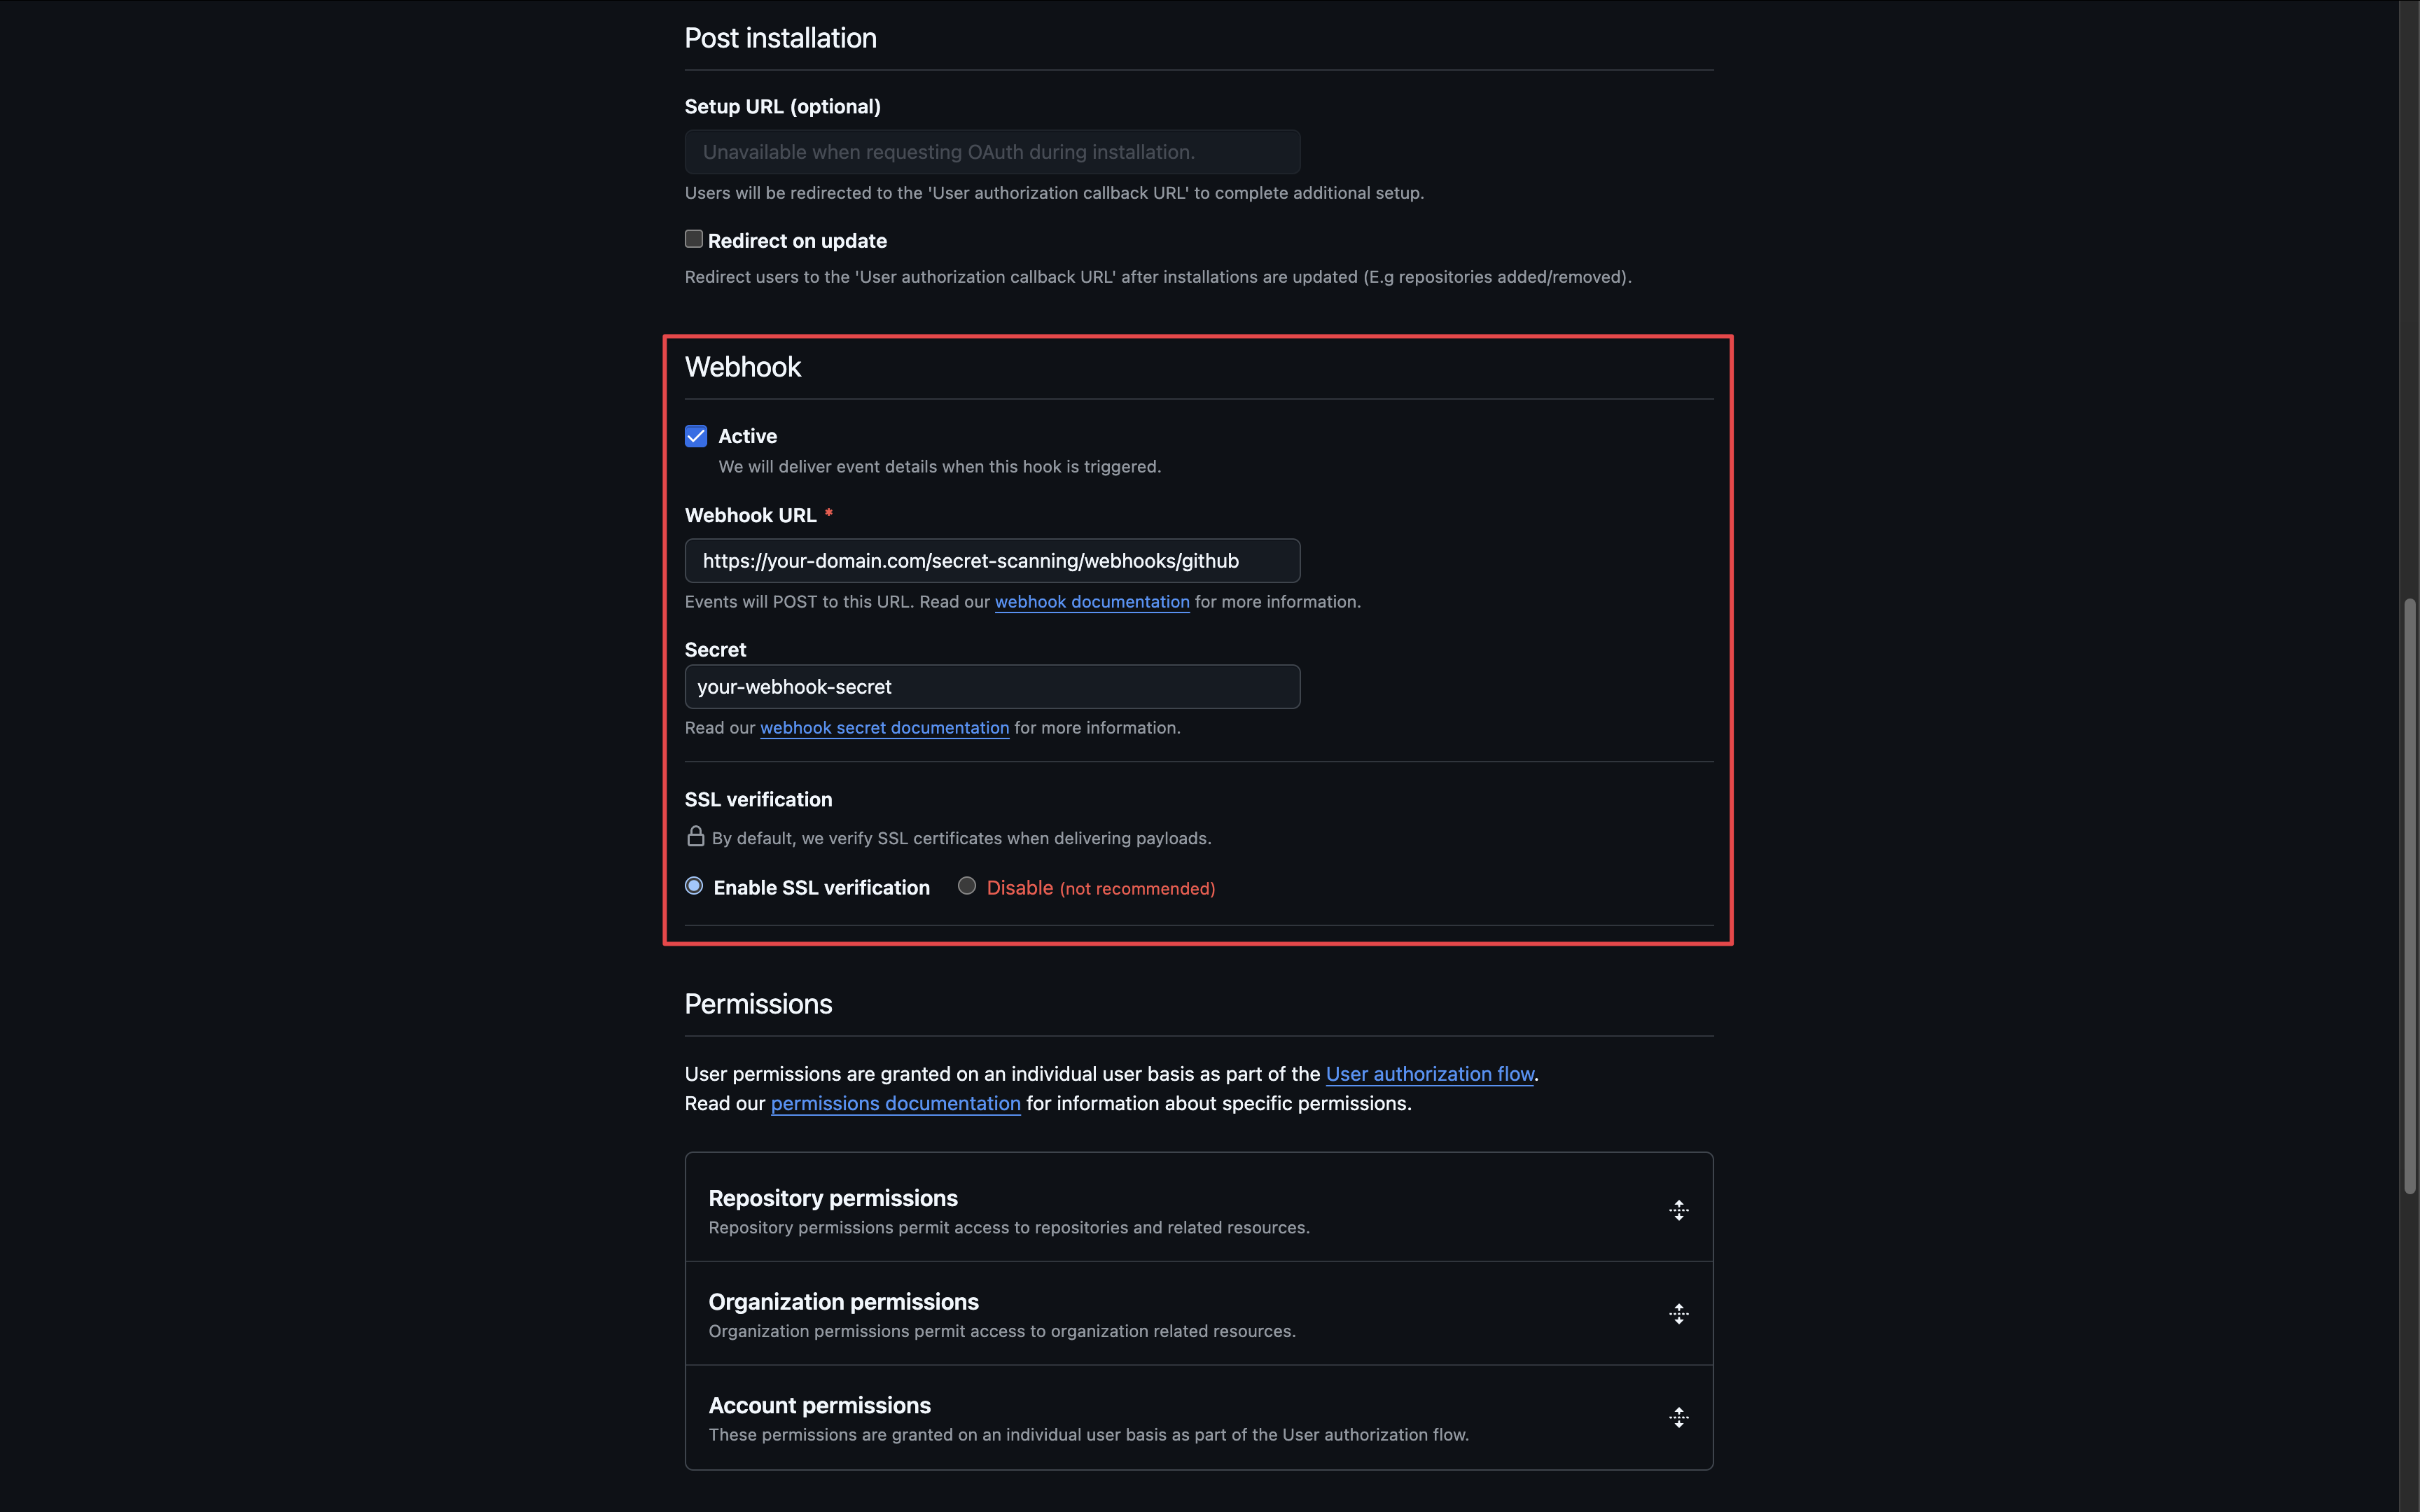 Set the following repository permissions:
* **Contents**: `Read-only`
* **Metadata**: `Read-only`
Set the following repository permissions:
* **Contents**: `Read-only`
* **Metadata**: `Read-only`
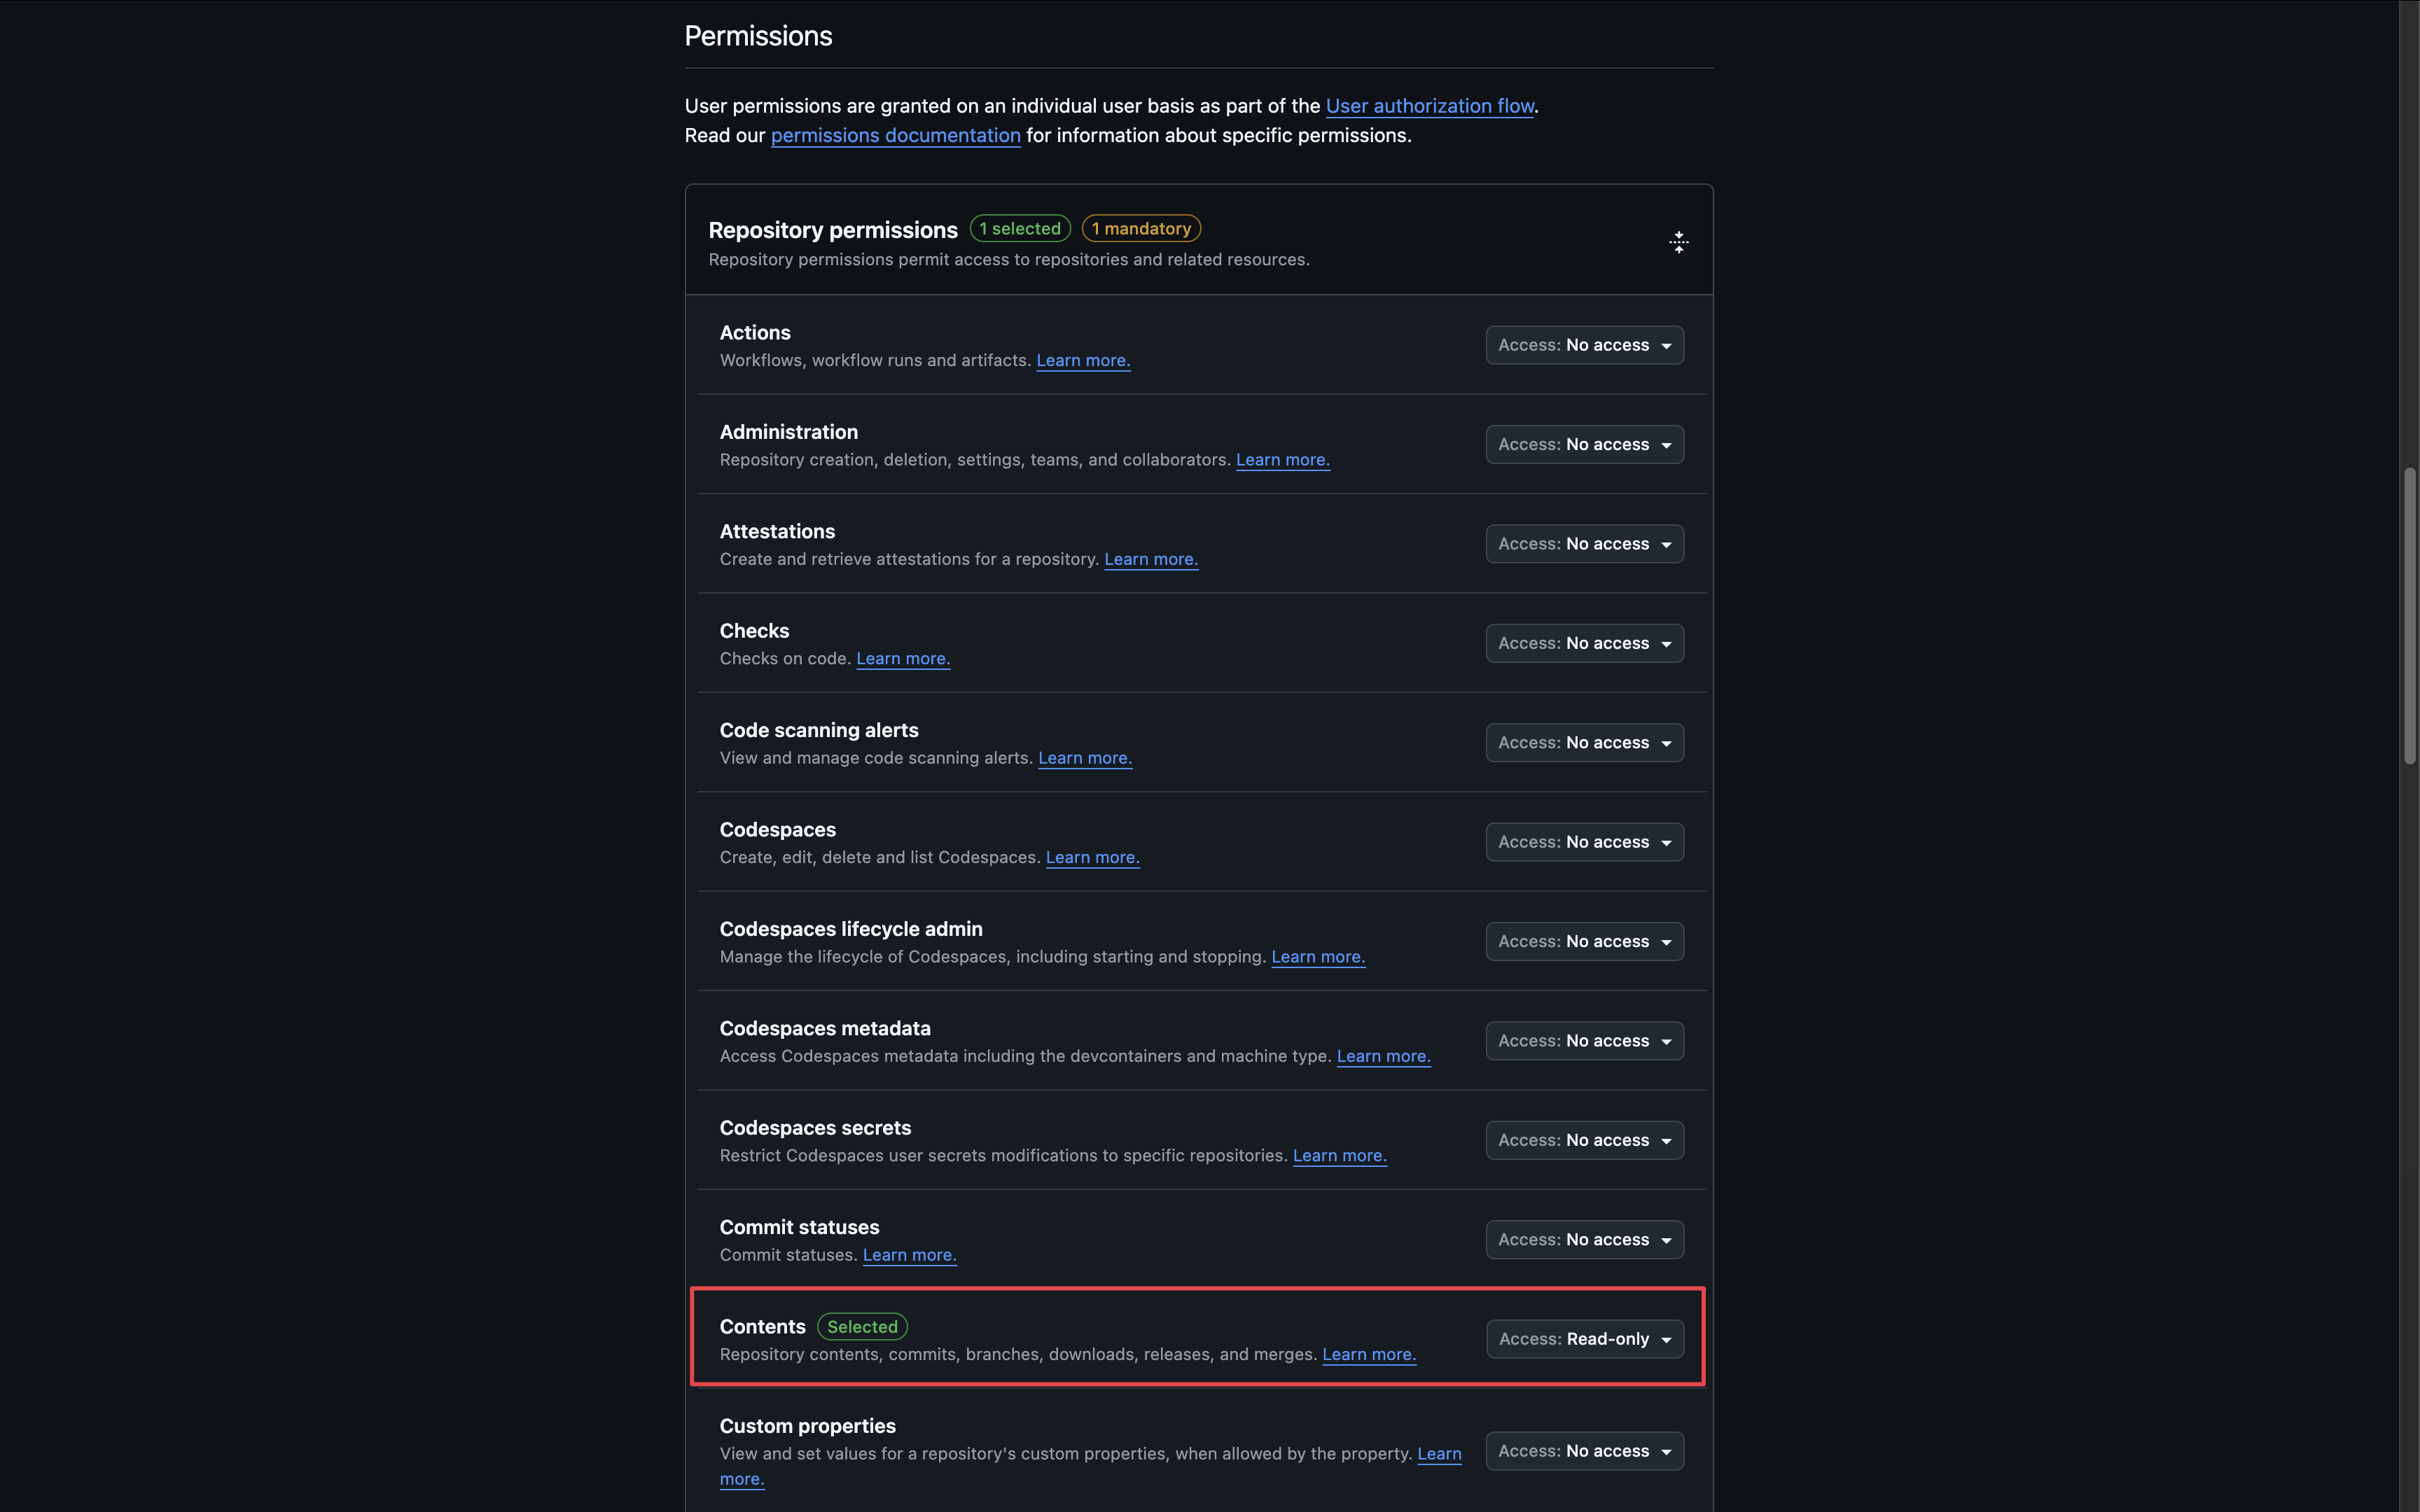
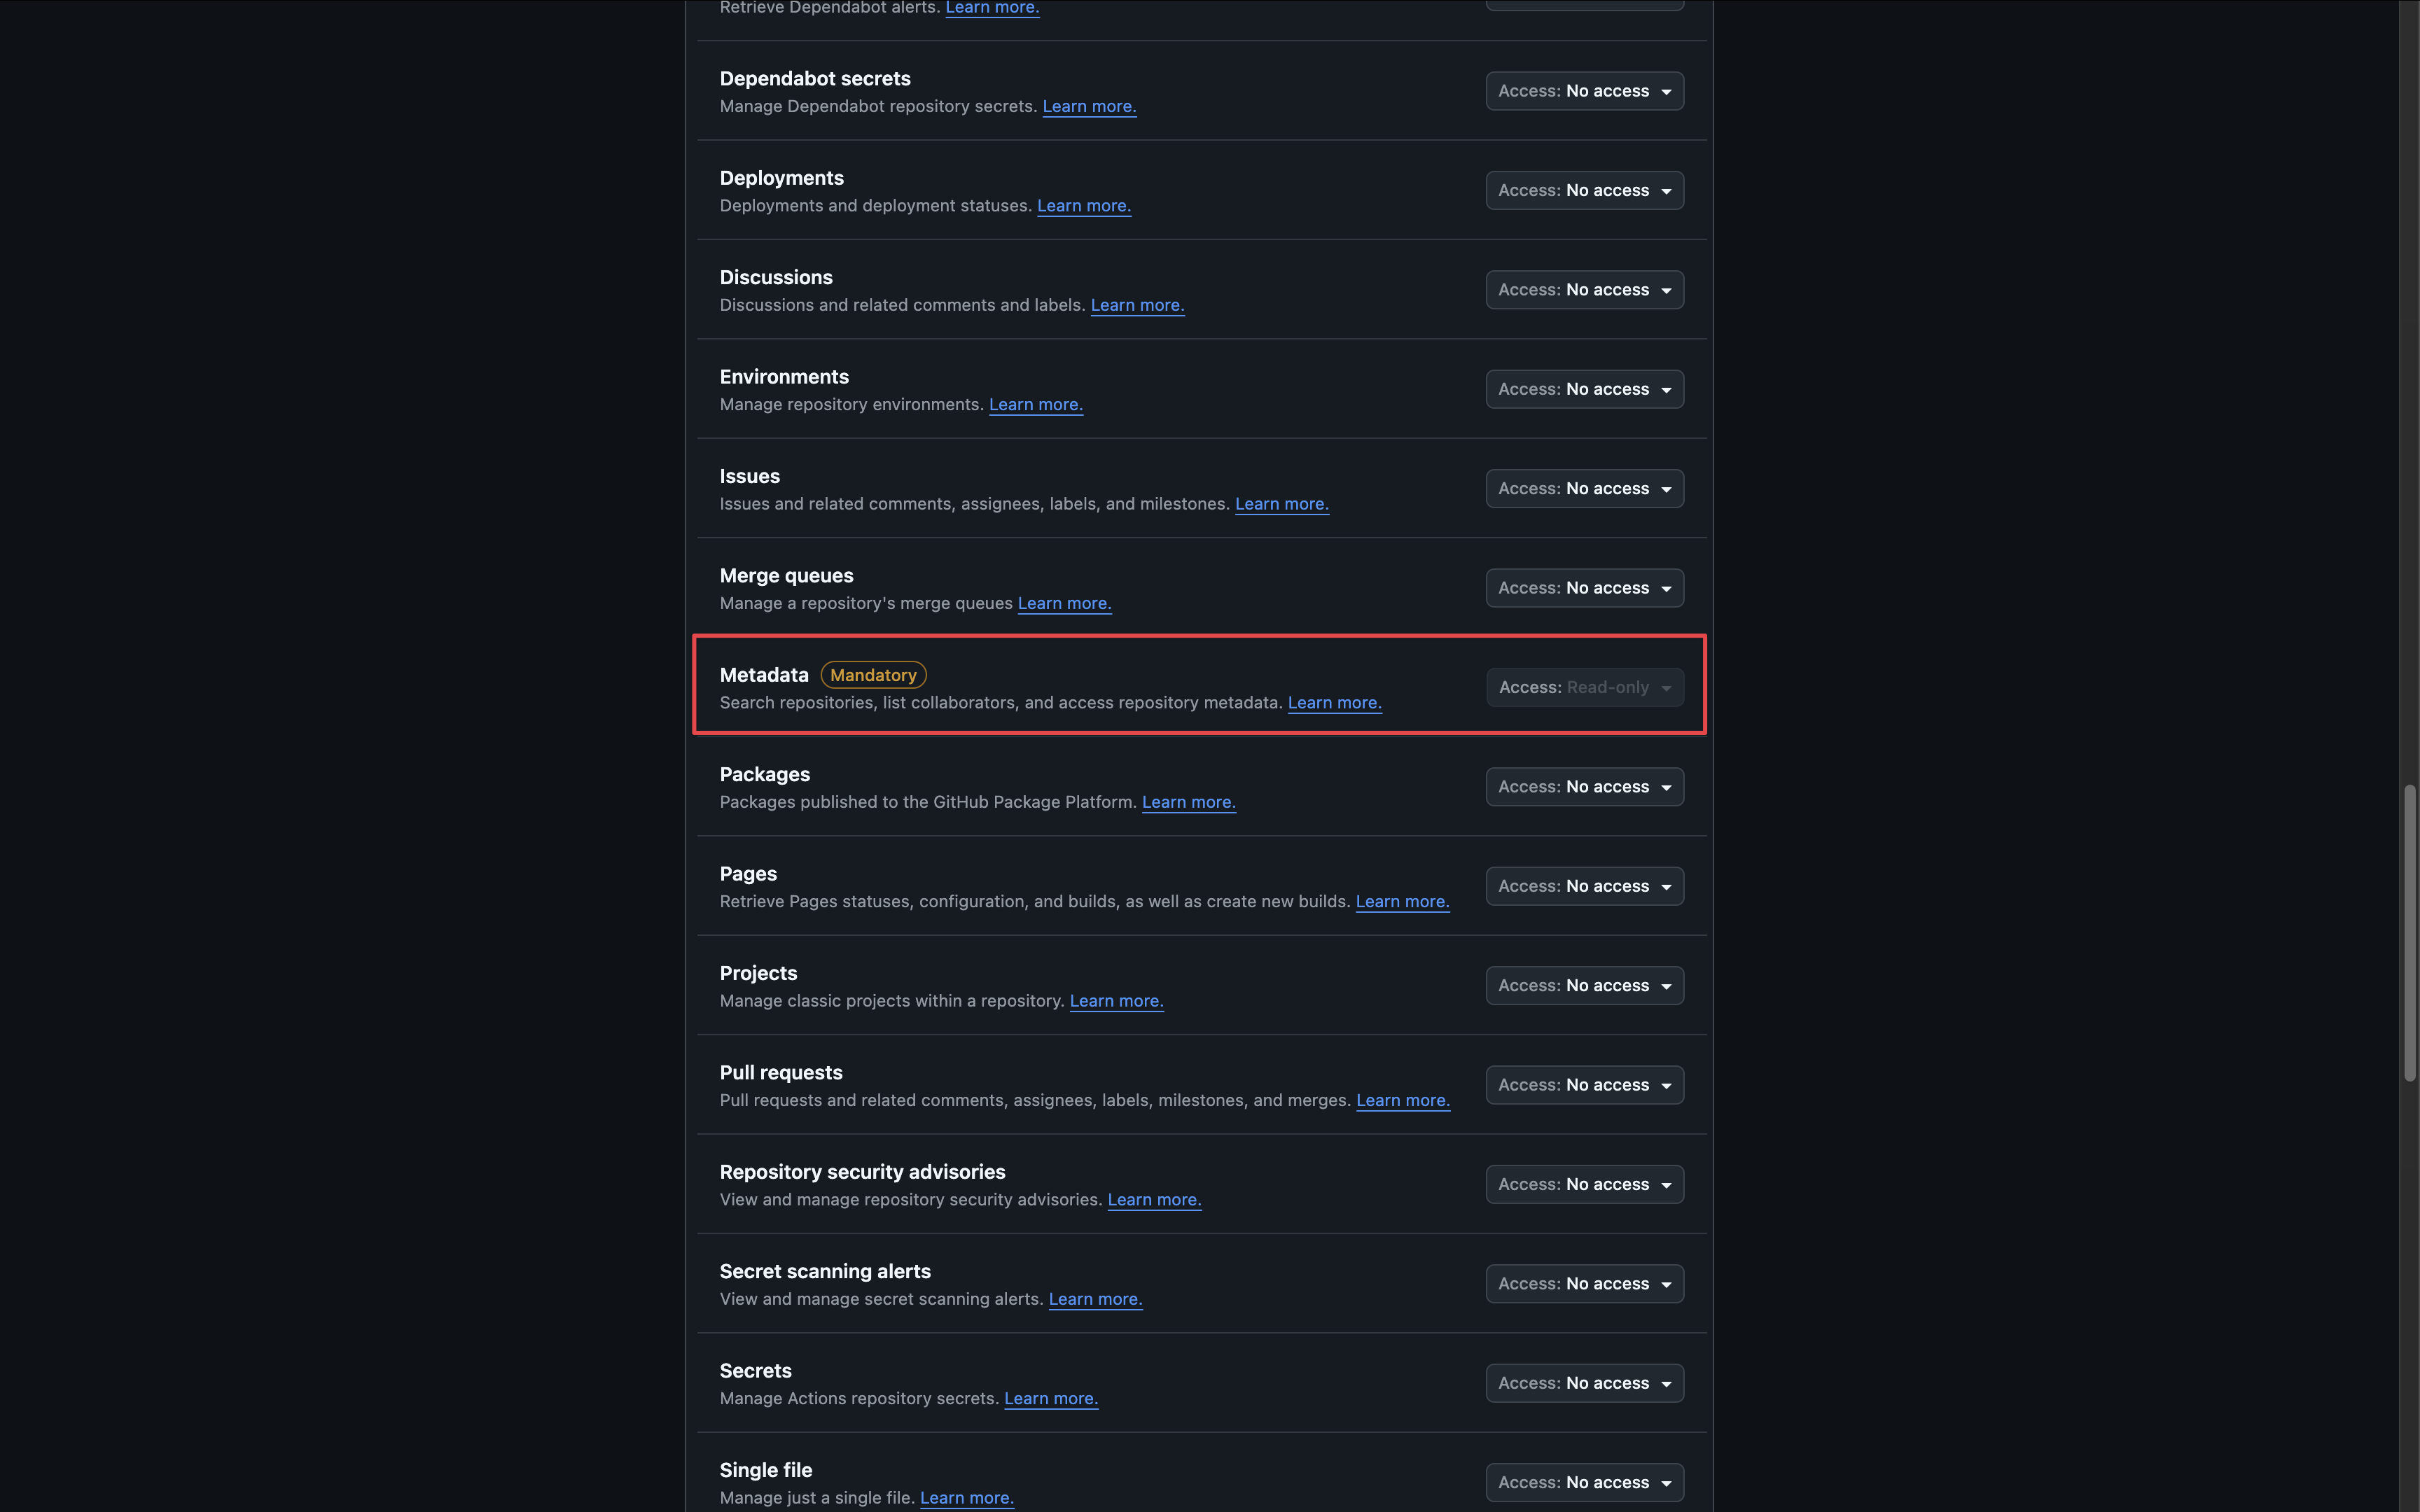 Subscribe to the following events:
* **Push**
Subscribe to the following events:
* **Push**
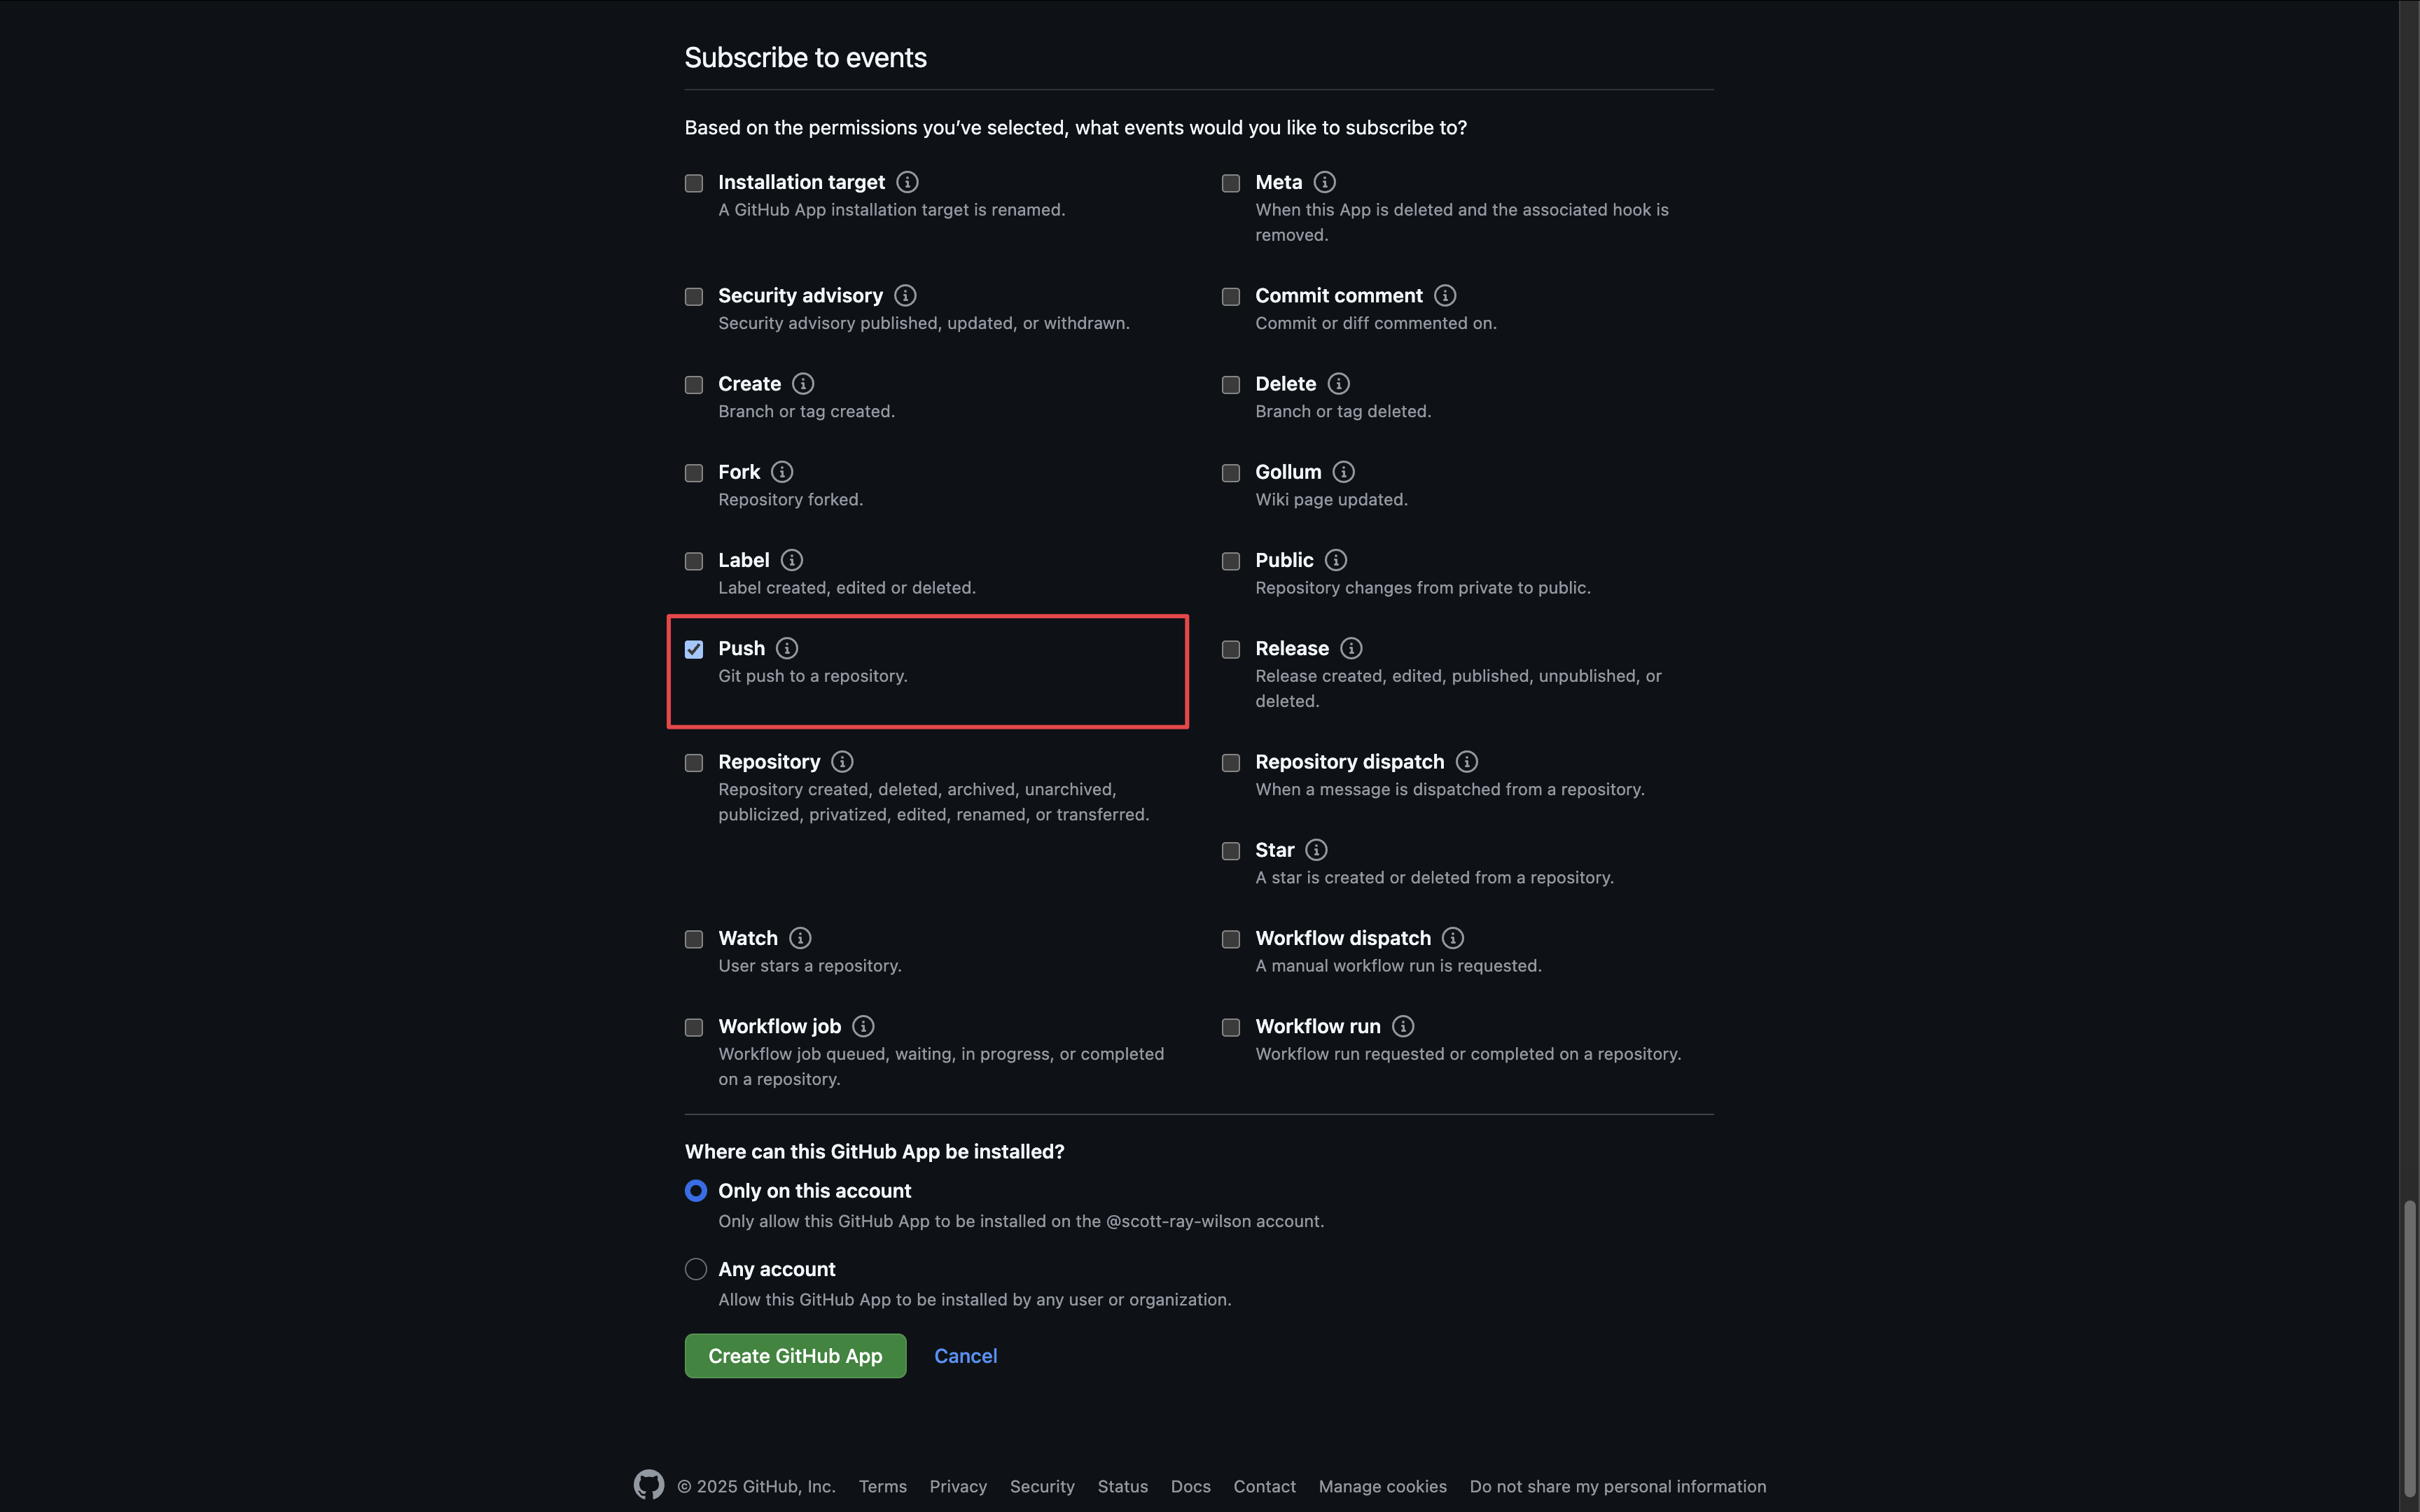 Create the Github application.
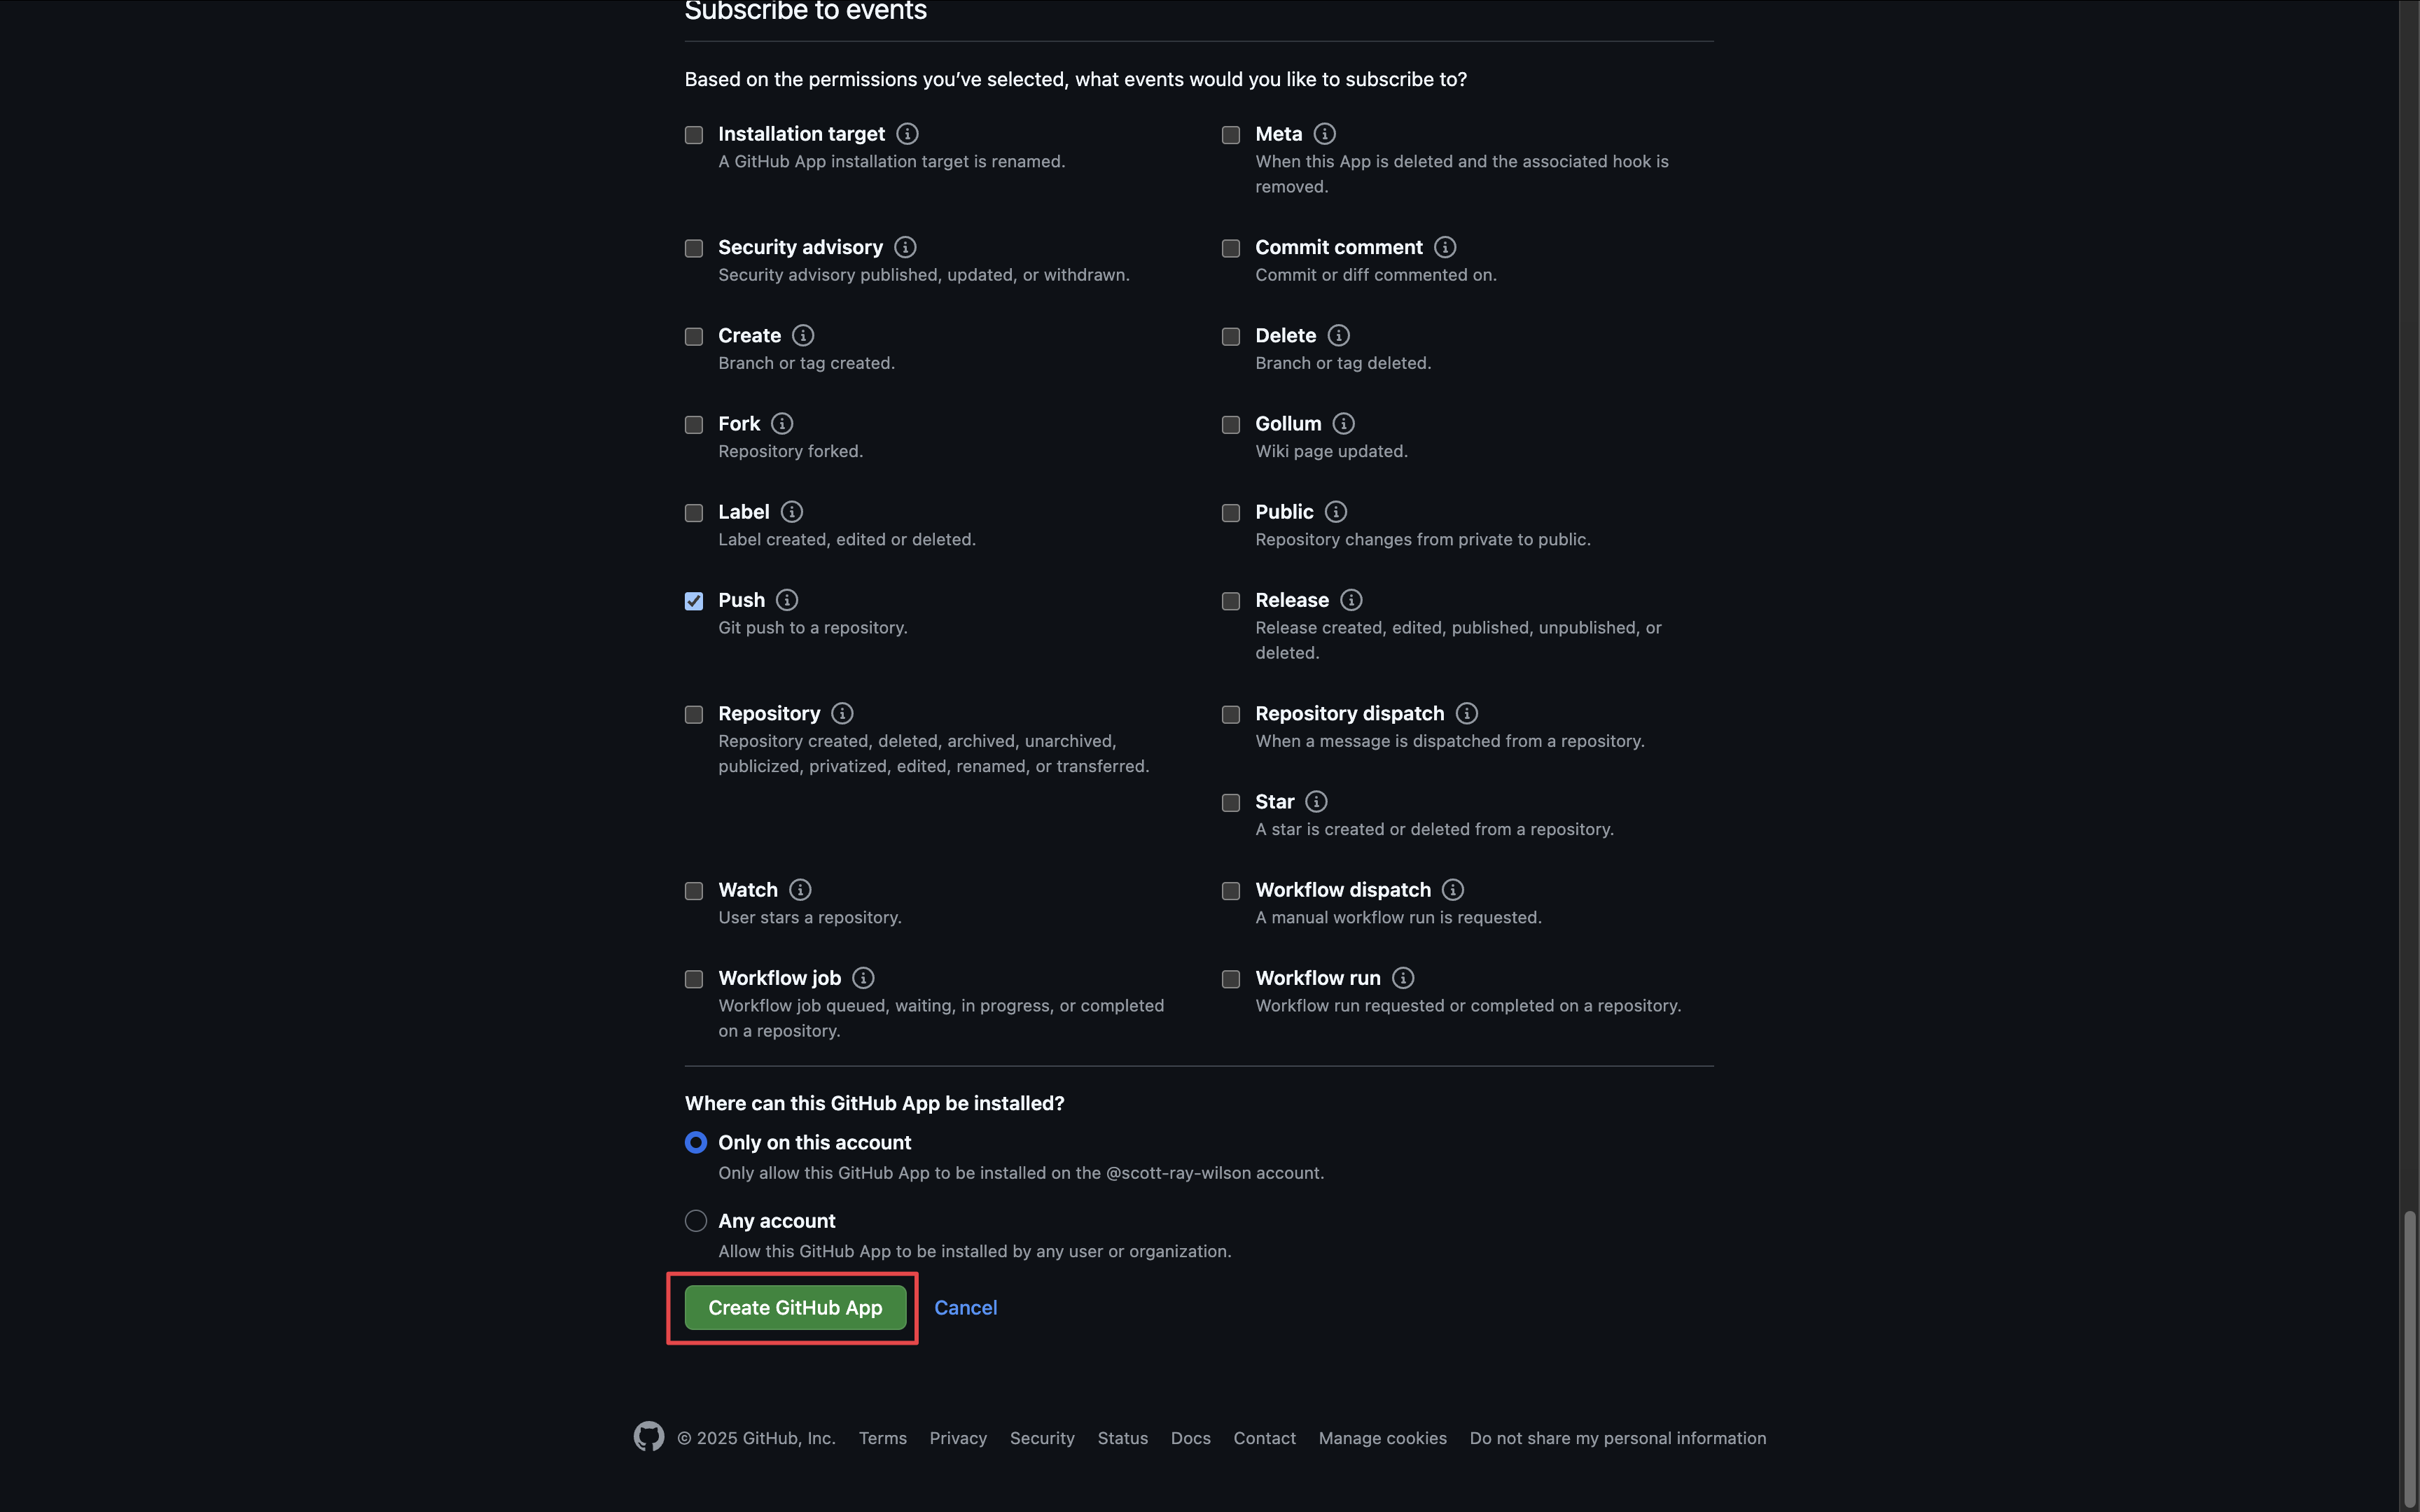
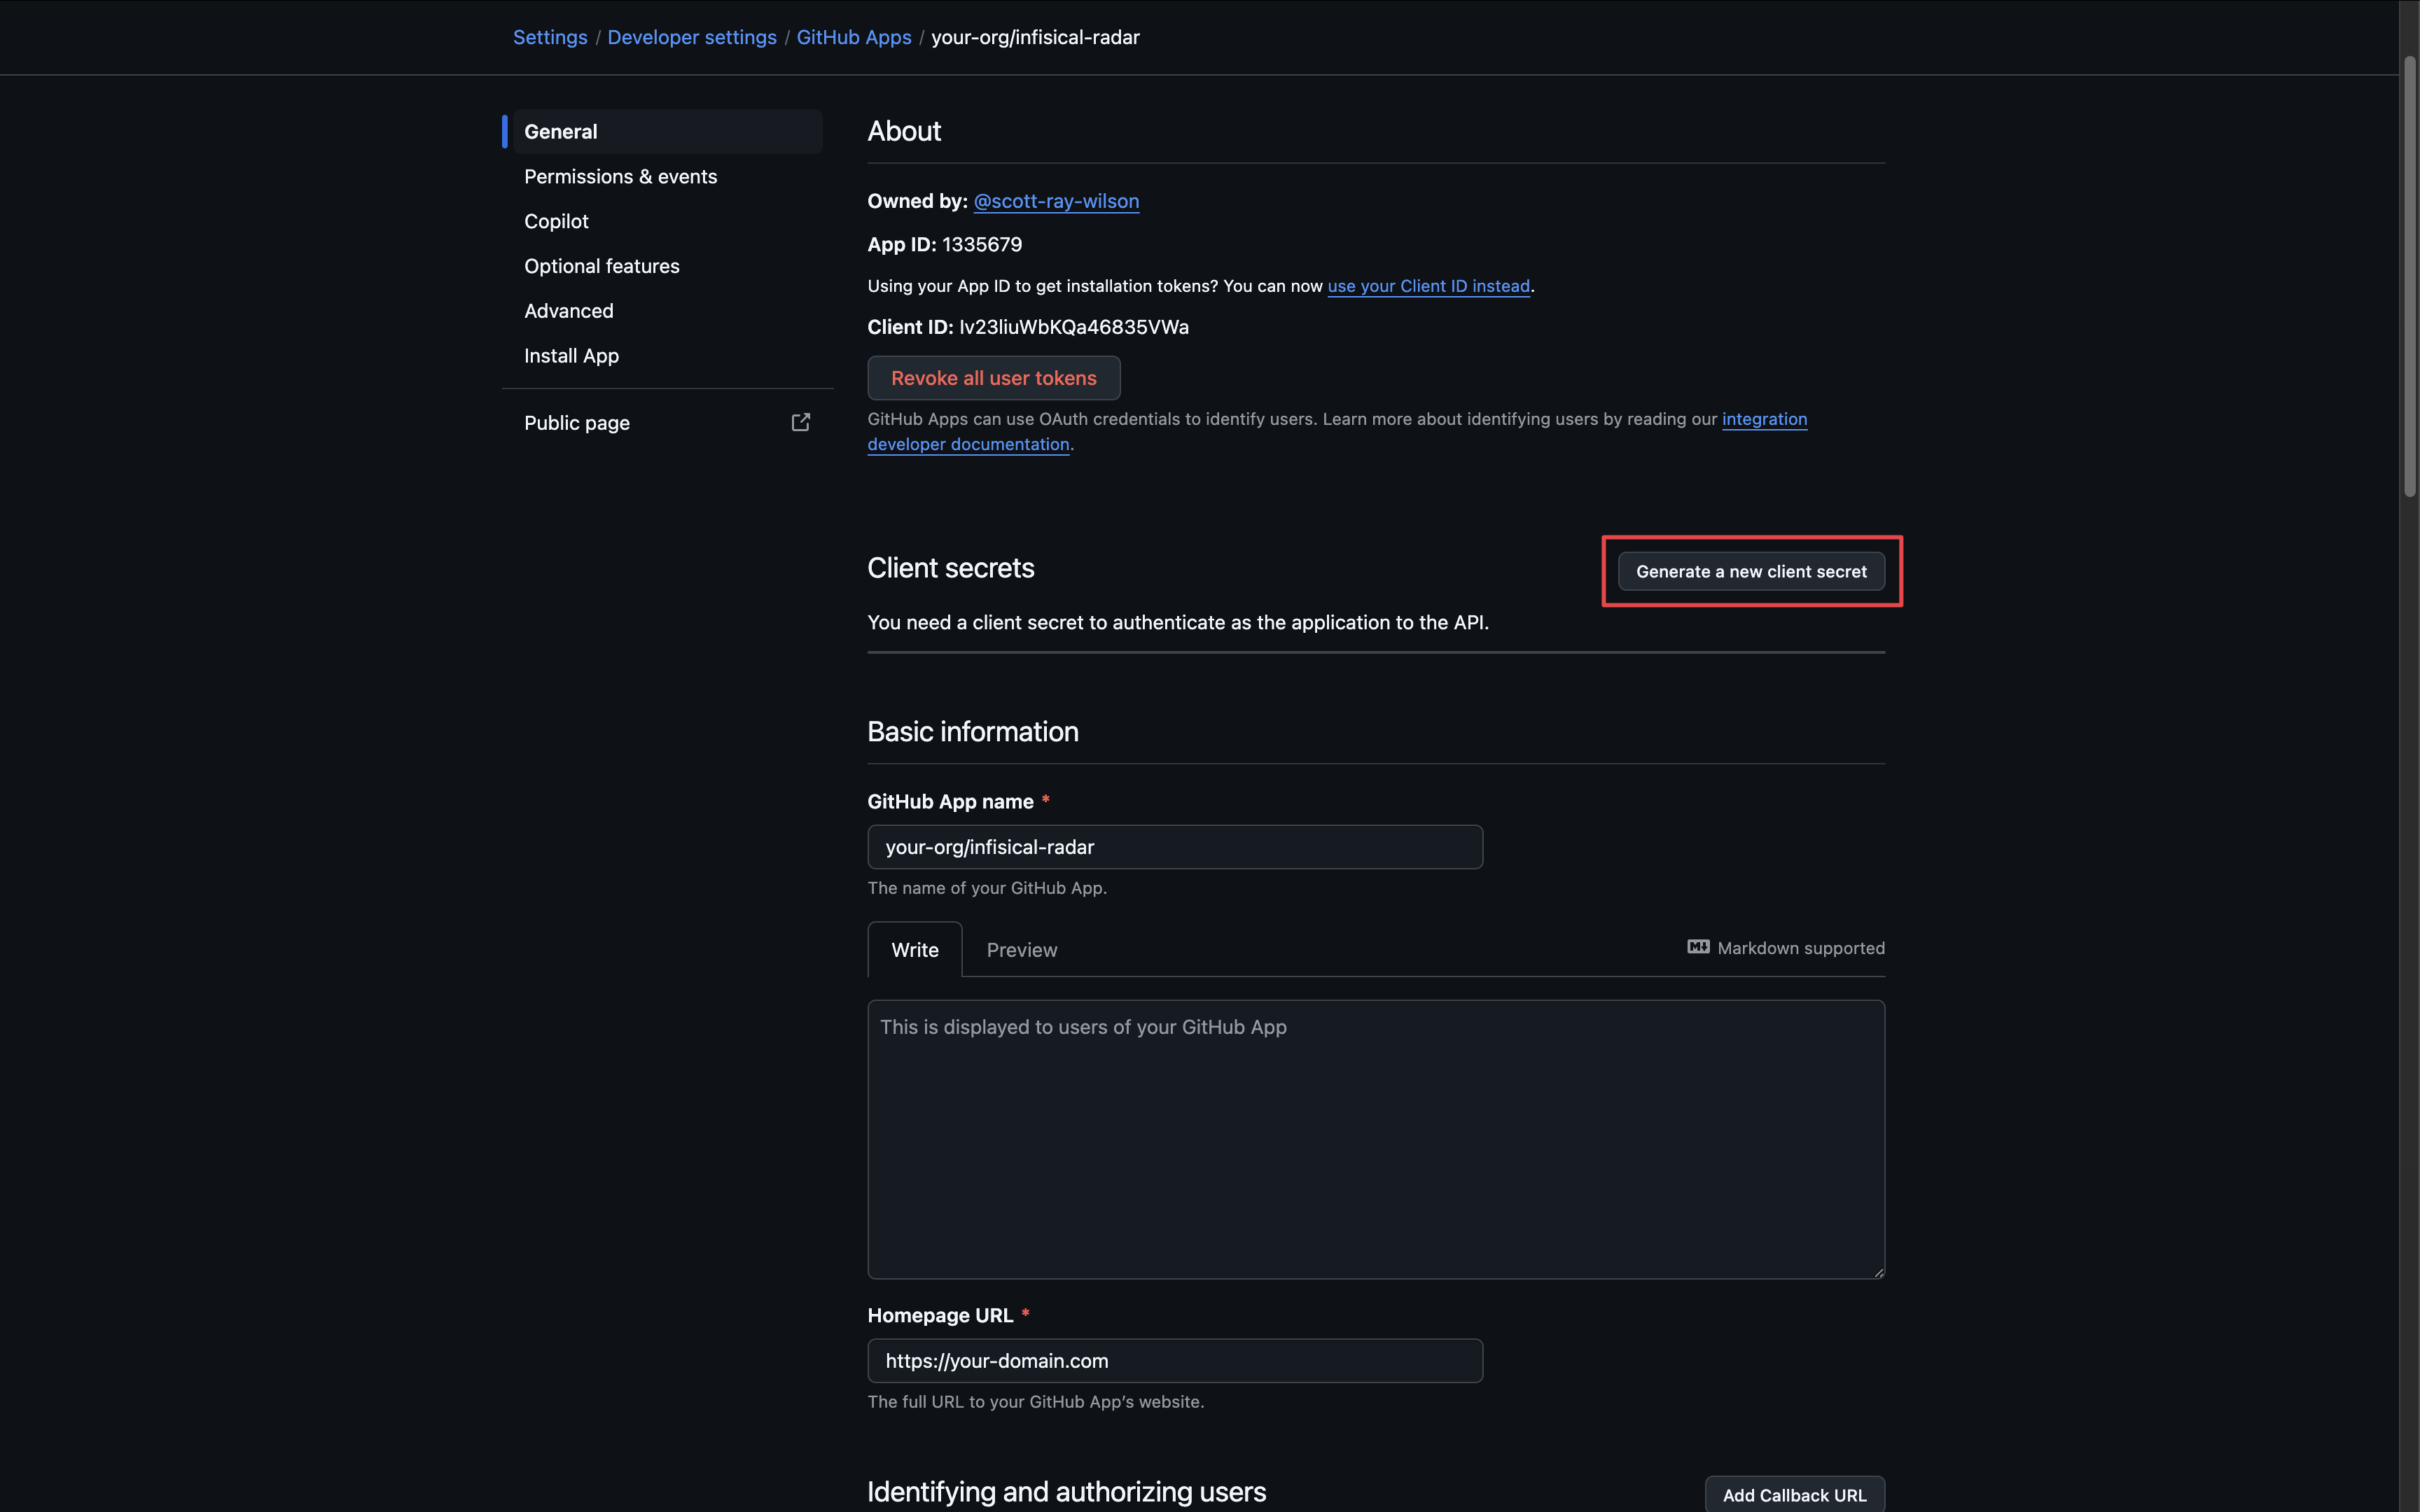 Generate a new **Private Key** for your Github application.
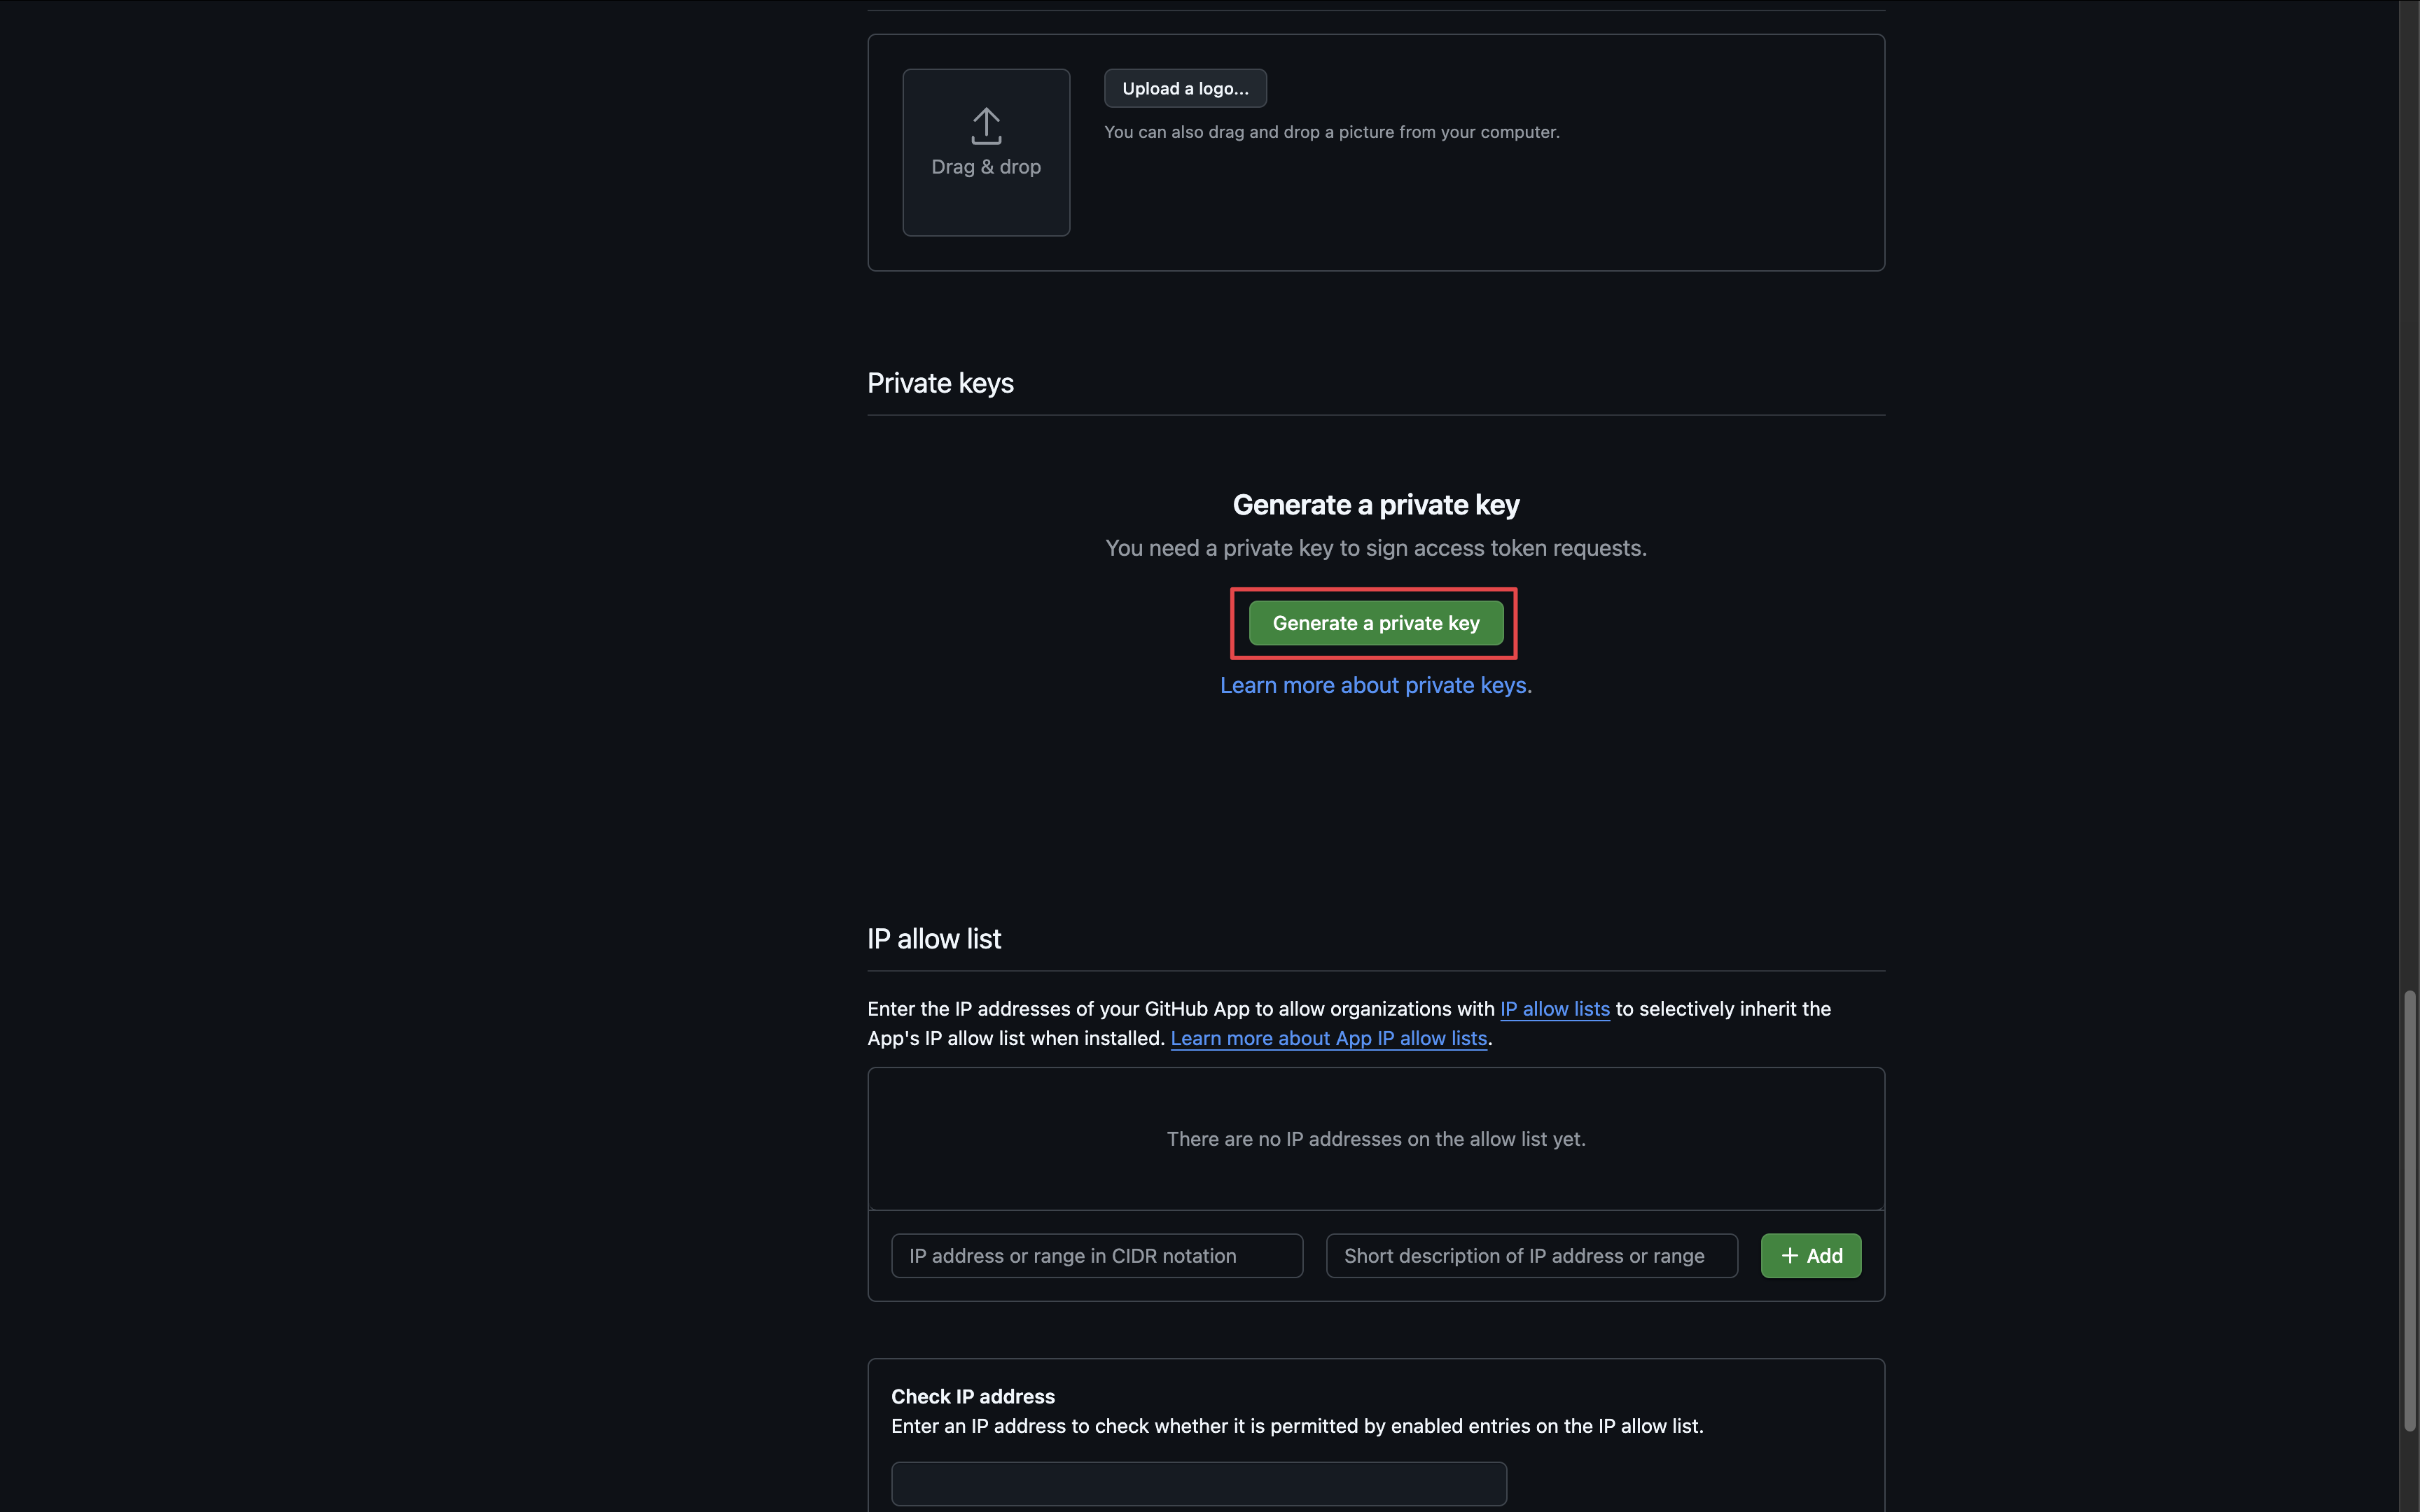 Obtain the following credentials:
1. **Slug** - the slug of your application found in the URL
2. **App ID** - the ID of your application
3. **Client ID** - the client ID of your application
4. **Client Secret** - the client secret generated above
5. **Private Key** - the contents of the private key .pem file generated above
6. **Webhook Secret** - the secret generated in the previous step when configuring the webhook
Obtain the following credentials:
1. **Slug** - the slug of your application found in the URL
2. **App ID** - the ID of your application
3. **Client ID** - the client ID of your application
4. **Client Secret** - the client secret generated above
5. **Private Key** - the contents of the private key .pem file generated above
6. **Webhook Secret** - the secret generated in the previous step when configuring the webhook
 Back in your Infisical instance, add the six new environment variables for the credentials of your GitHub Radar application:
* `INF_APP_CONNECTION_GITHUB_RADAR_APP_CLIENT_ID`: The **Client ID** of your GitHub application.
* `INF_APP_CONNECTION_GITHUB_RADAR_APP_CLIENT_SECRET`: The **Client Secret** of your GitHub application.
* `INF_APP_CONNECTION_GITHUB_RADAR_APP_SLUG`: The **Slug** of your GitHub application. This is the one found in the URL.
* `INF_APP_CONNECTION_GITHUB_RADAR_APP_ID`: The **App ID** of your GitHub application.
* `INF_APP_CONNECTION_GITHUB_RADAR_APP_PRIVATE_KEY`: The **Private Key** of your GitHub application.
* `INF_APP_CONNECTION_GITHUB_RADAR_APP_WEBHOOK_SECRET`: The **Webhook Secret** of your GitHub application.
Once added, restart your Infisical instance and use the GitHub integration via app authentication.
Back in your Infisical instance, add the six new environment variables for the credentials of your GitHub Radar application:
* `INF_APP_CONNECTION_GITHUB_RADAR_APP_CLIENT_ID`: The **Client ID** of your GitHub application.
* `INF_APP_CONNECTION_GITHUB_RADAR_APP_CLIENT_SECRET`: The **Client Secret** of your GitHub application.
* `INF_APP_CONNECTION_GITHUB_RADAR_APP_SLUG`: The **Slug** of your GitHub application. This is the one found in the URL.
* `INF_APP_CONNECTION_GITHUB_RADAR_APP_ID`: The **App ID** of your GitHub application.
* `INF_APP_CONNECTION_GITHUB_RADAR_APP_PRIVATE_KEY`: The **Private Key** of your GitHub application.
* `INF_APP_CONNECTION_GITHUB_RADAR_APP_WEBHOOK_SECRET`: The **Webhook Secret** of your GitHub application.
Once added, restart your Infisical instance and use the GitHub integration via app authentication.
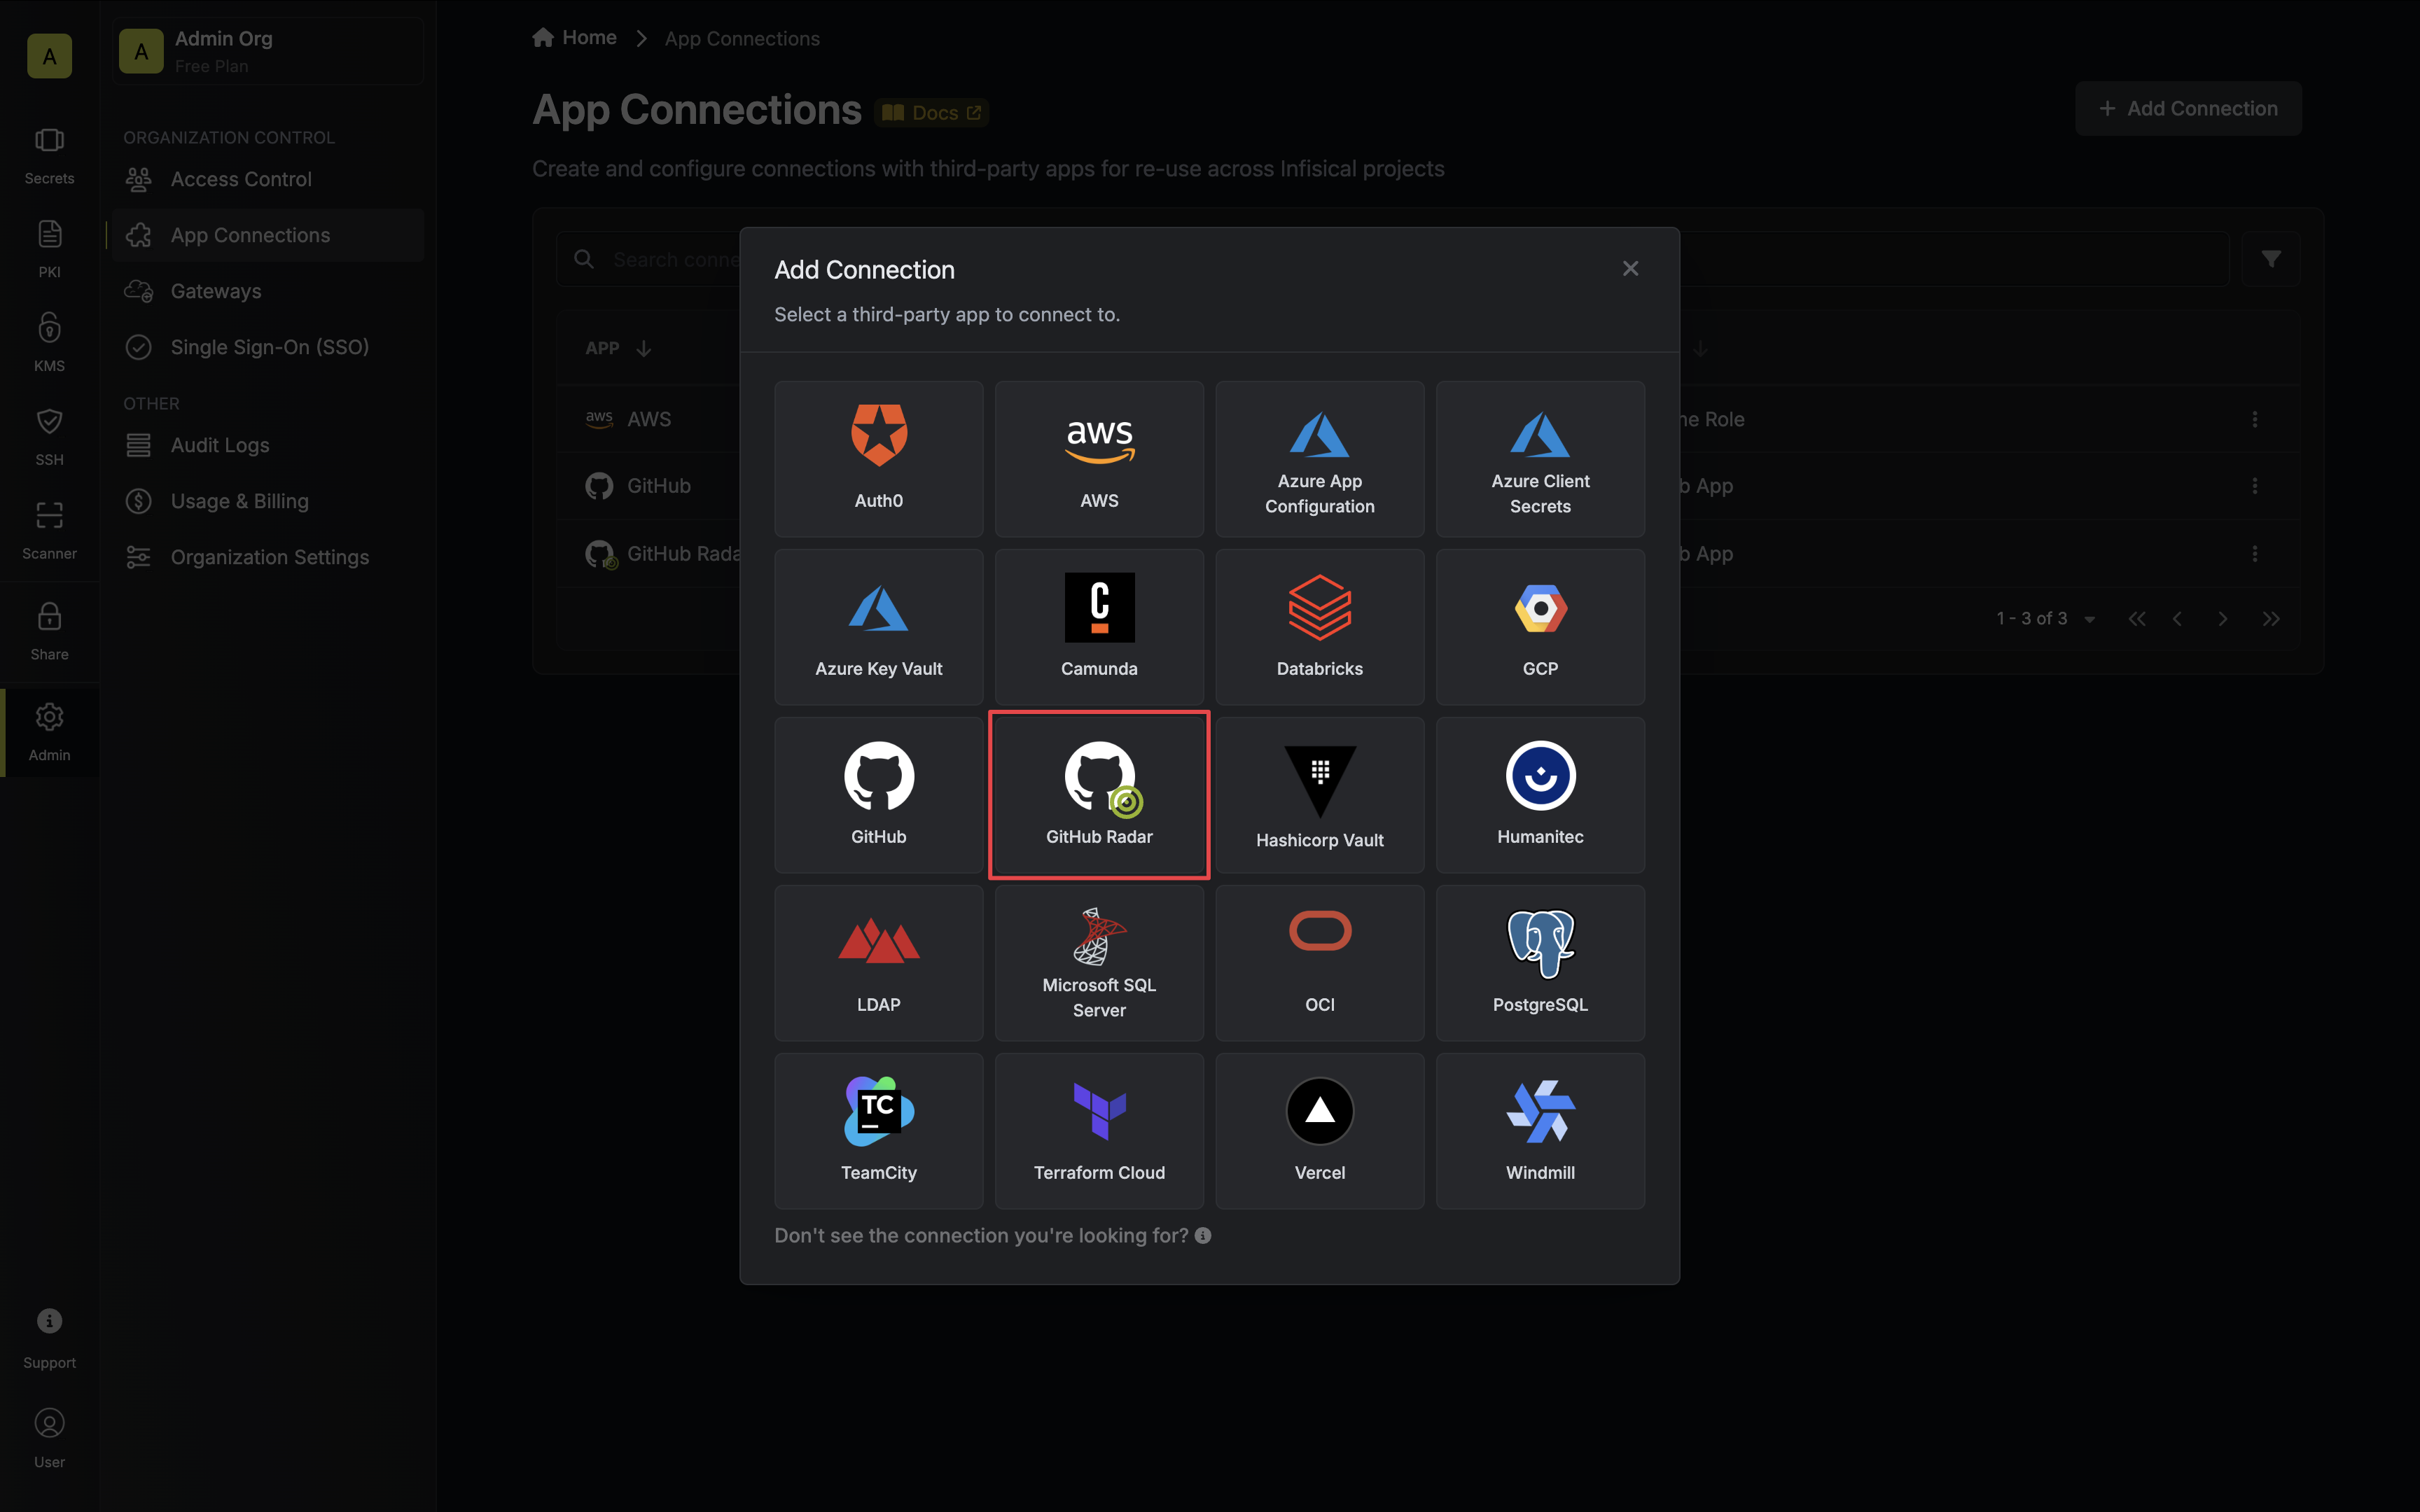
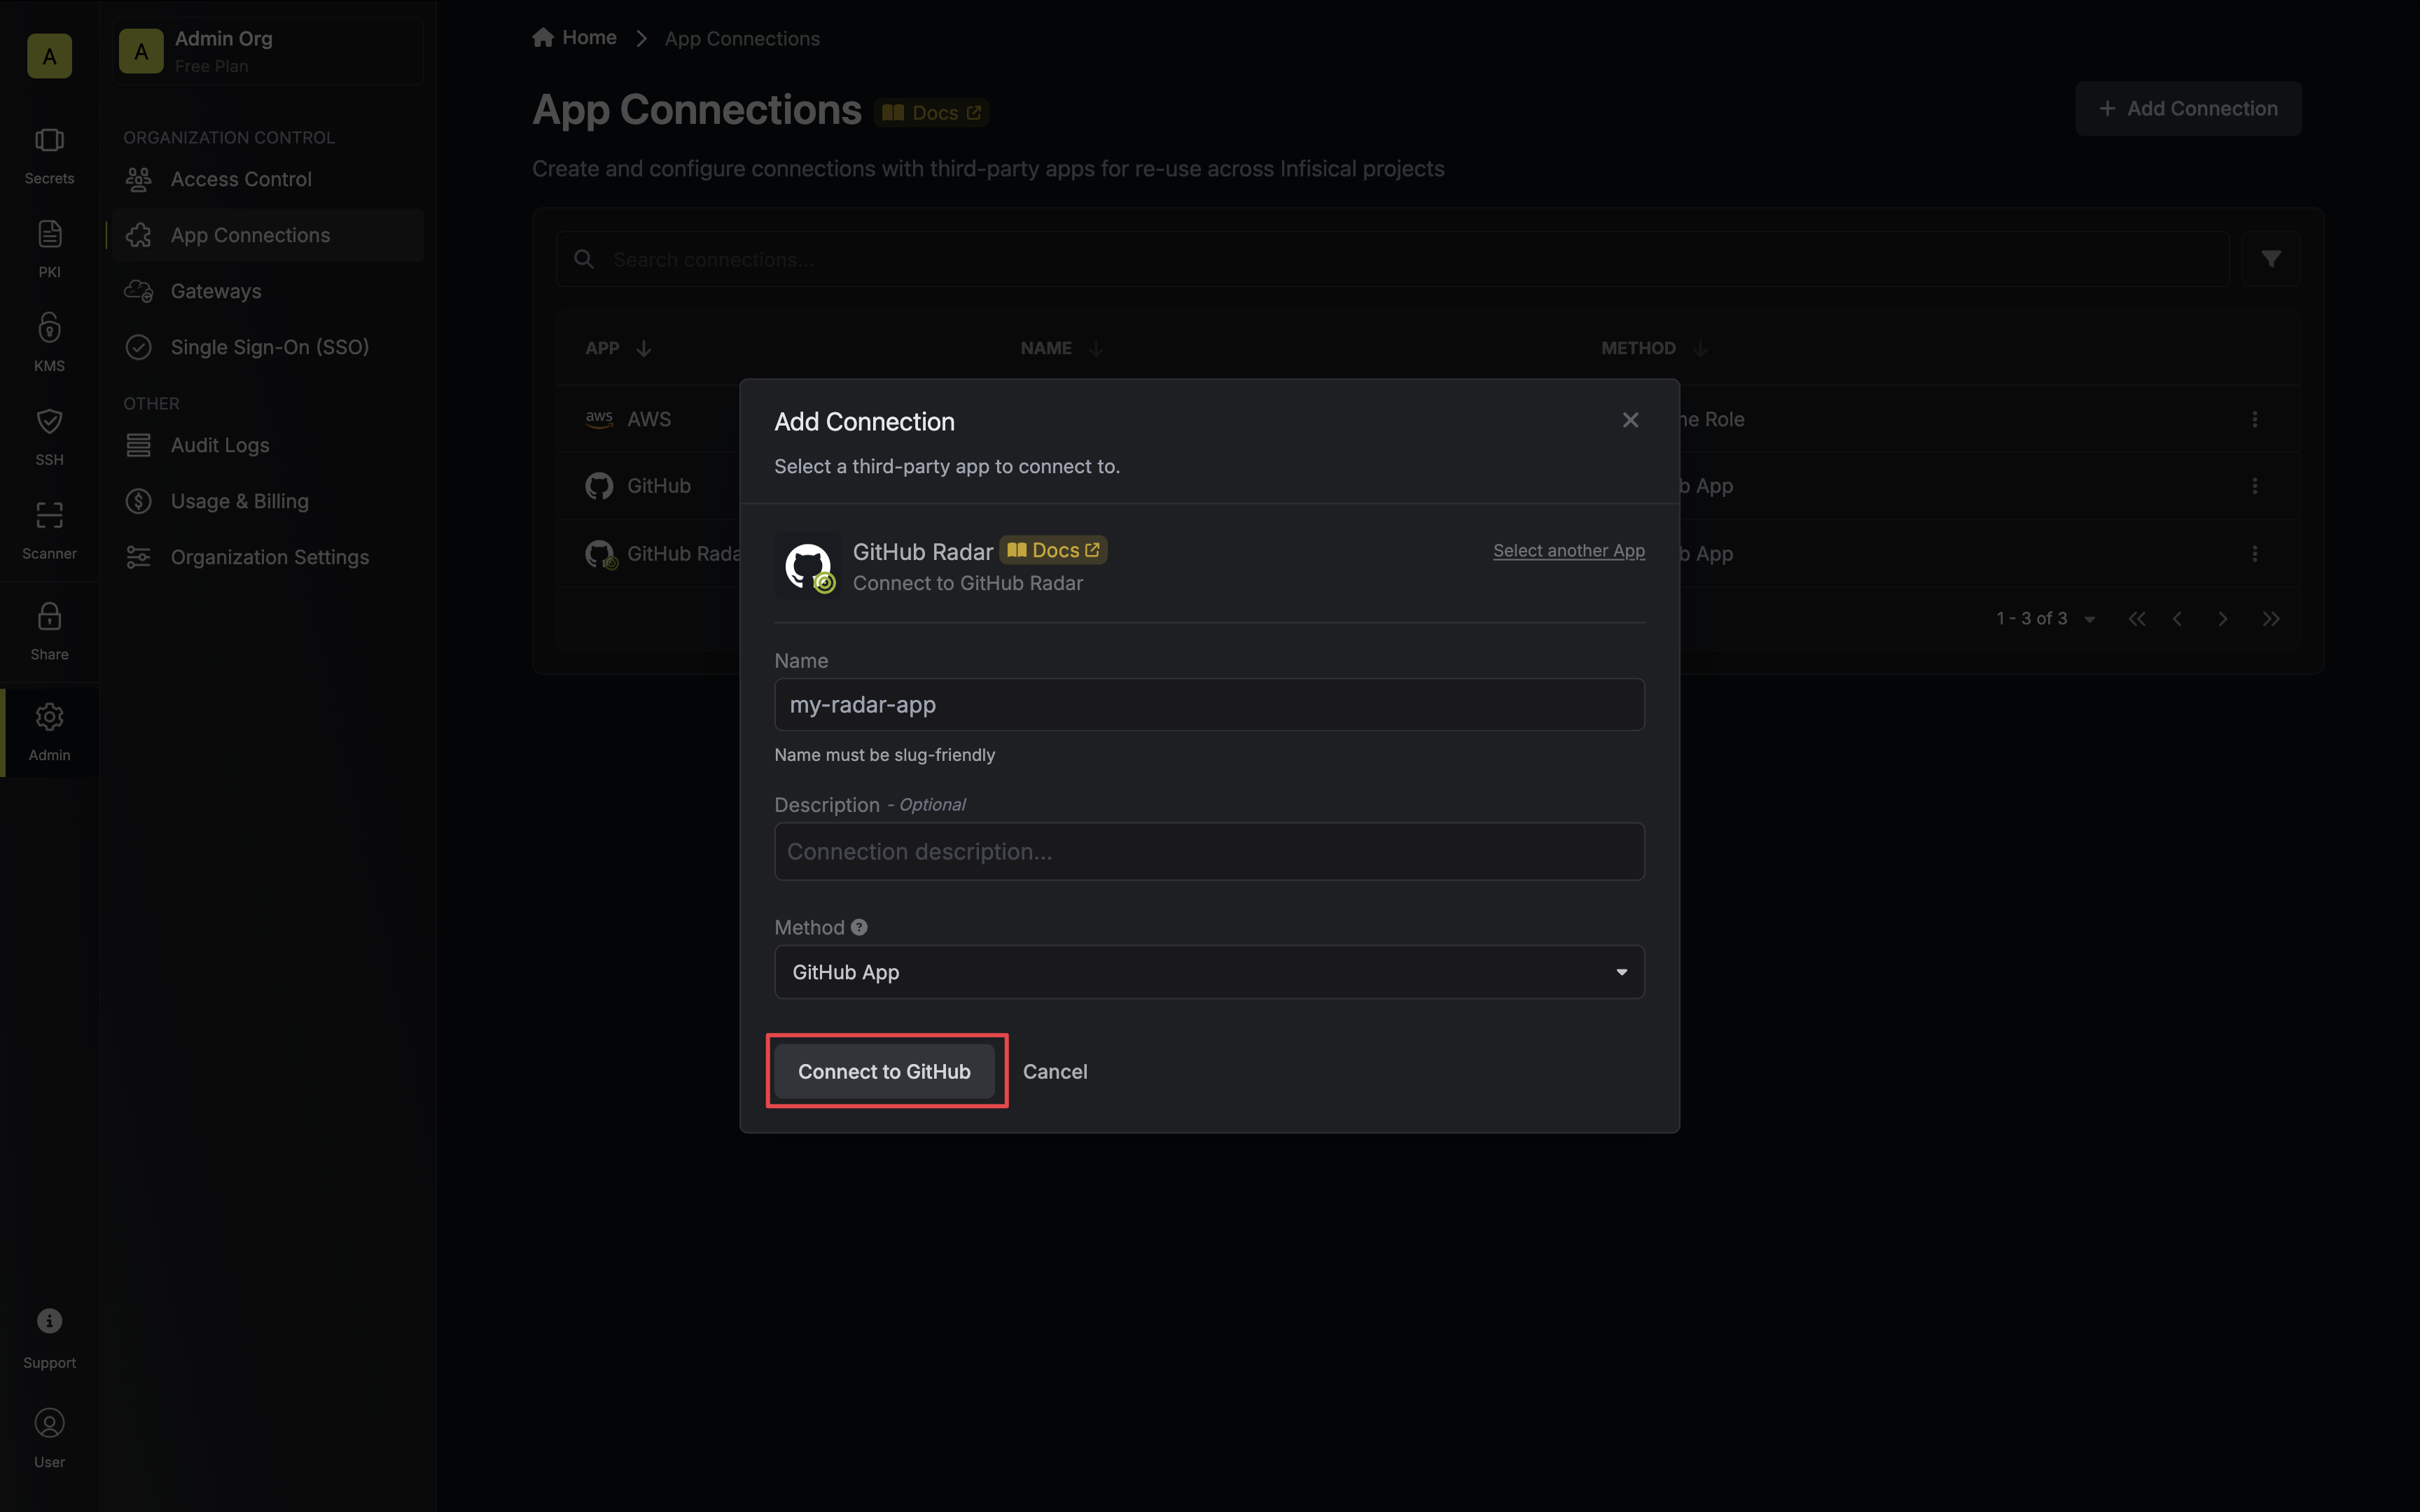
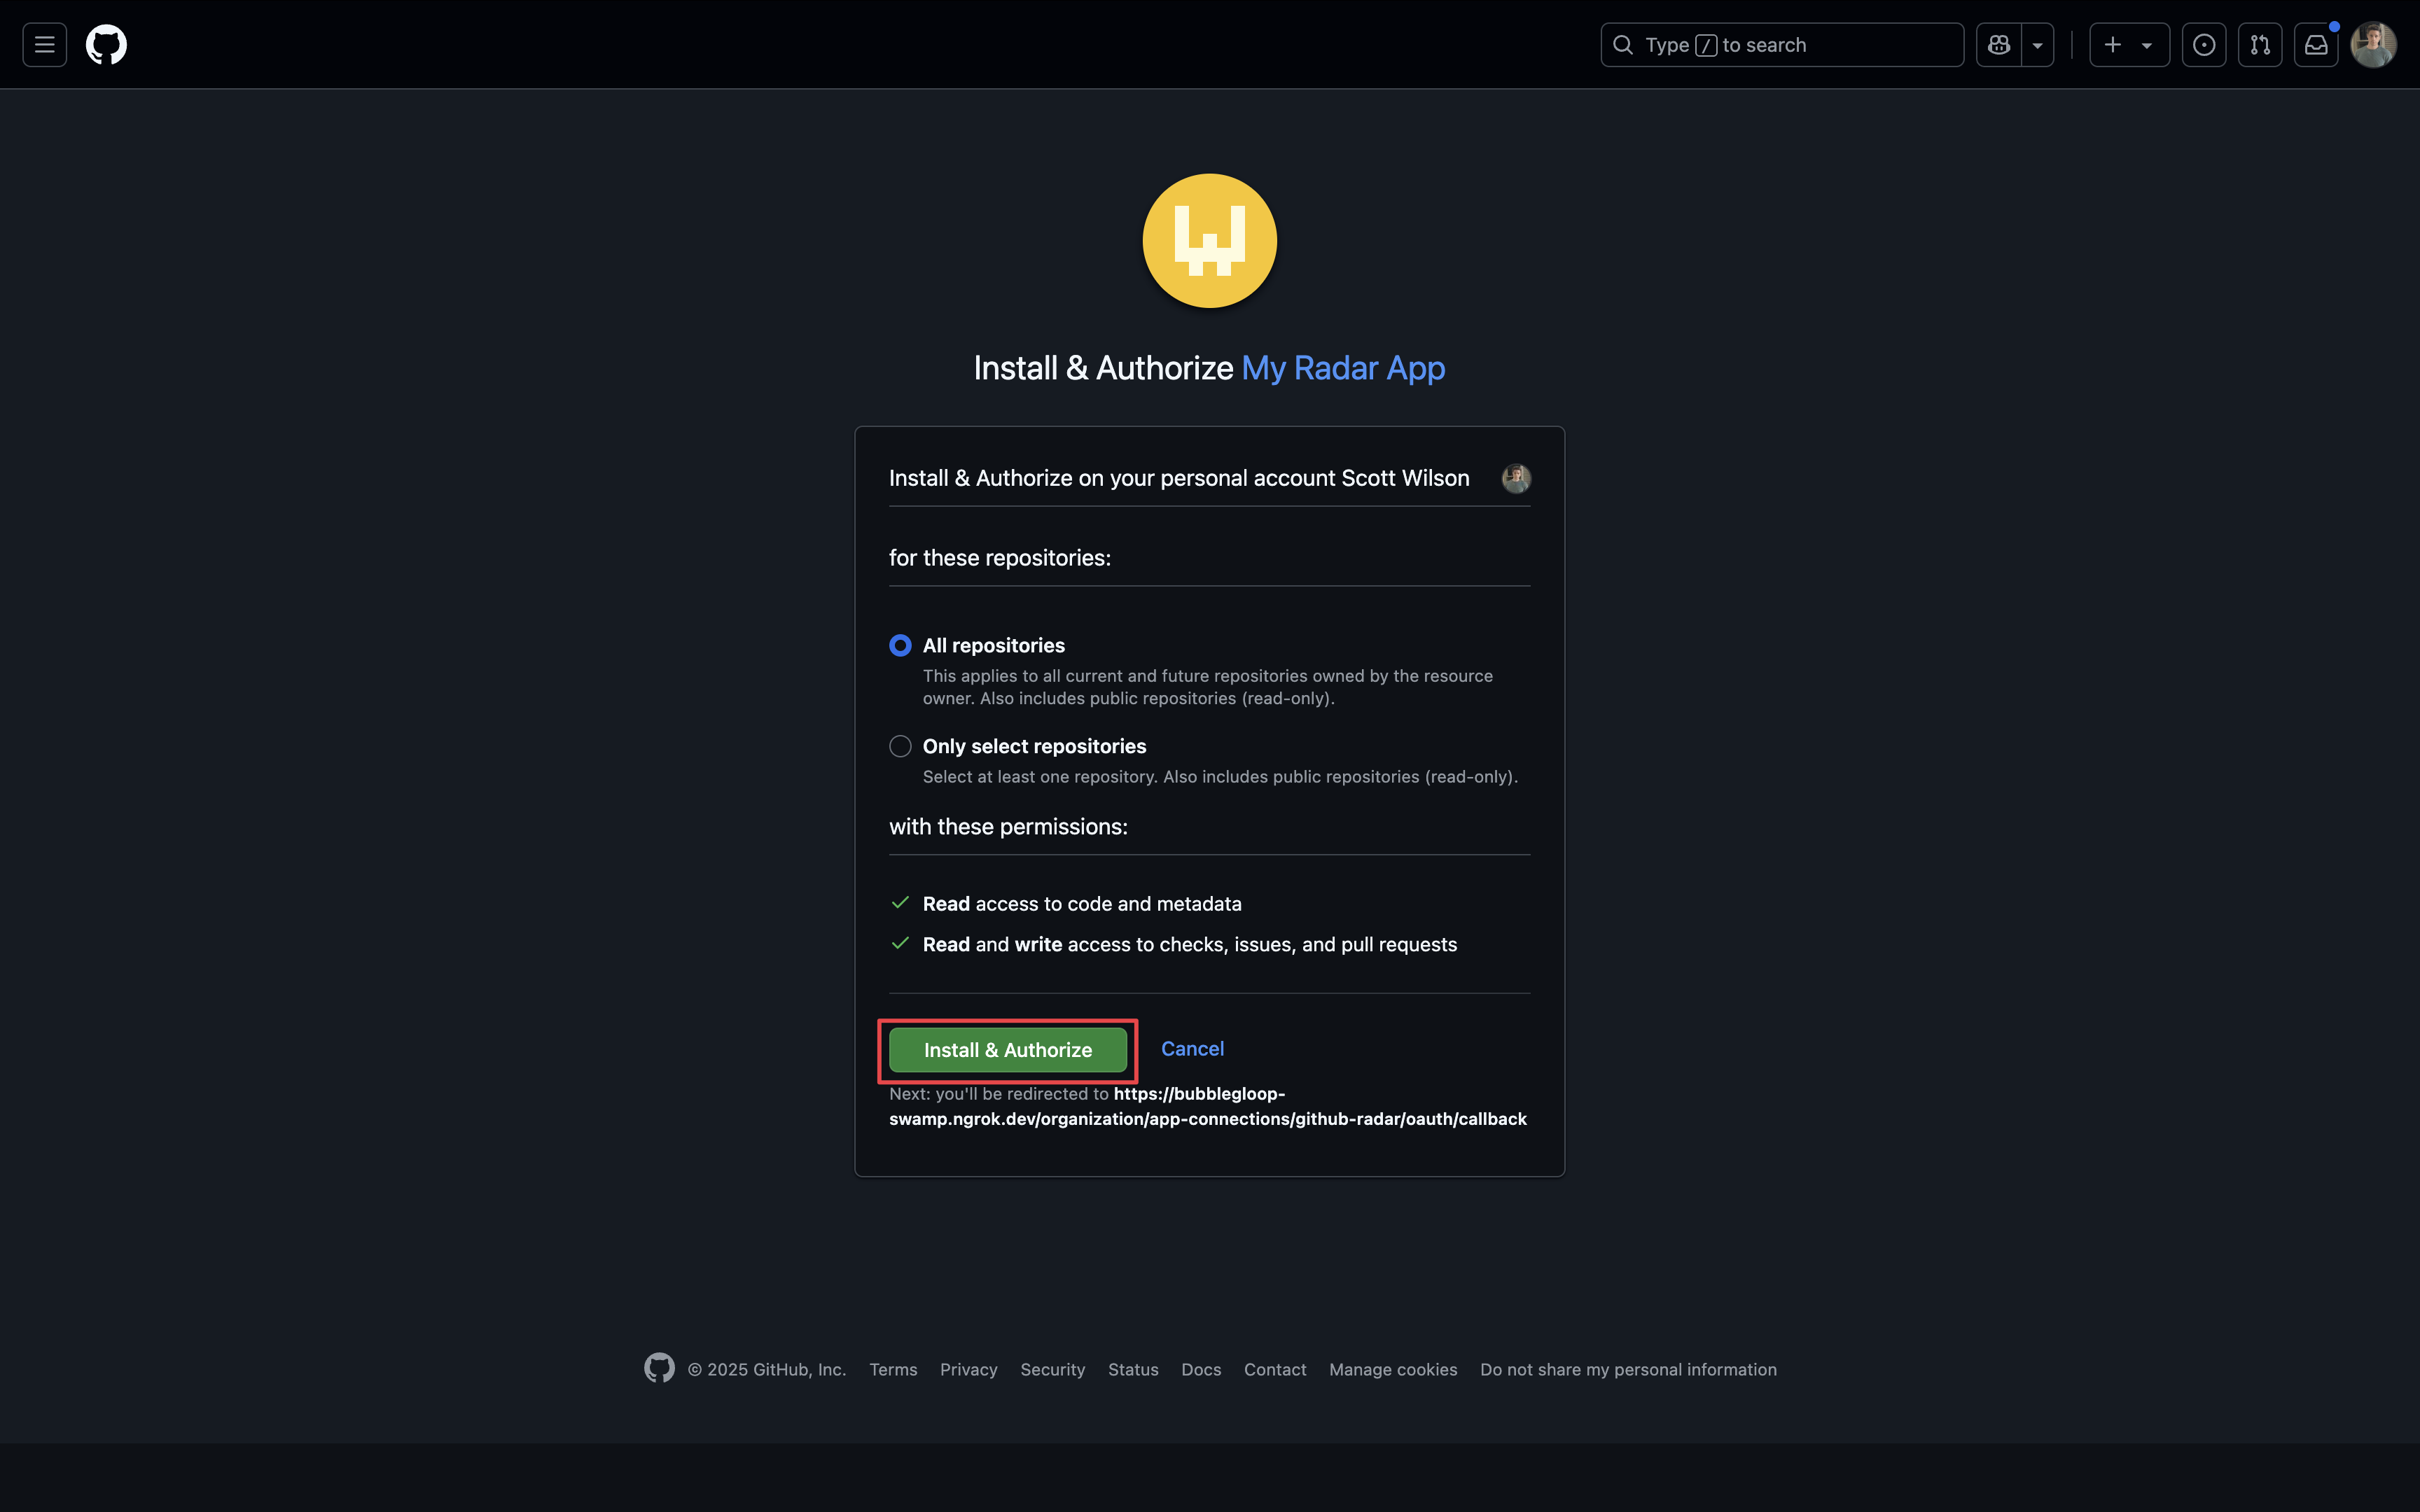
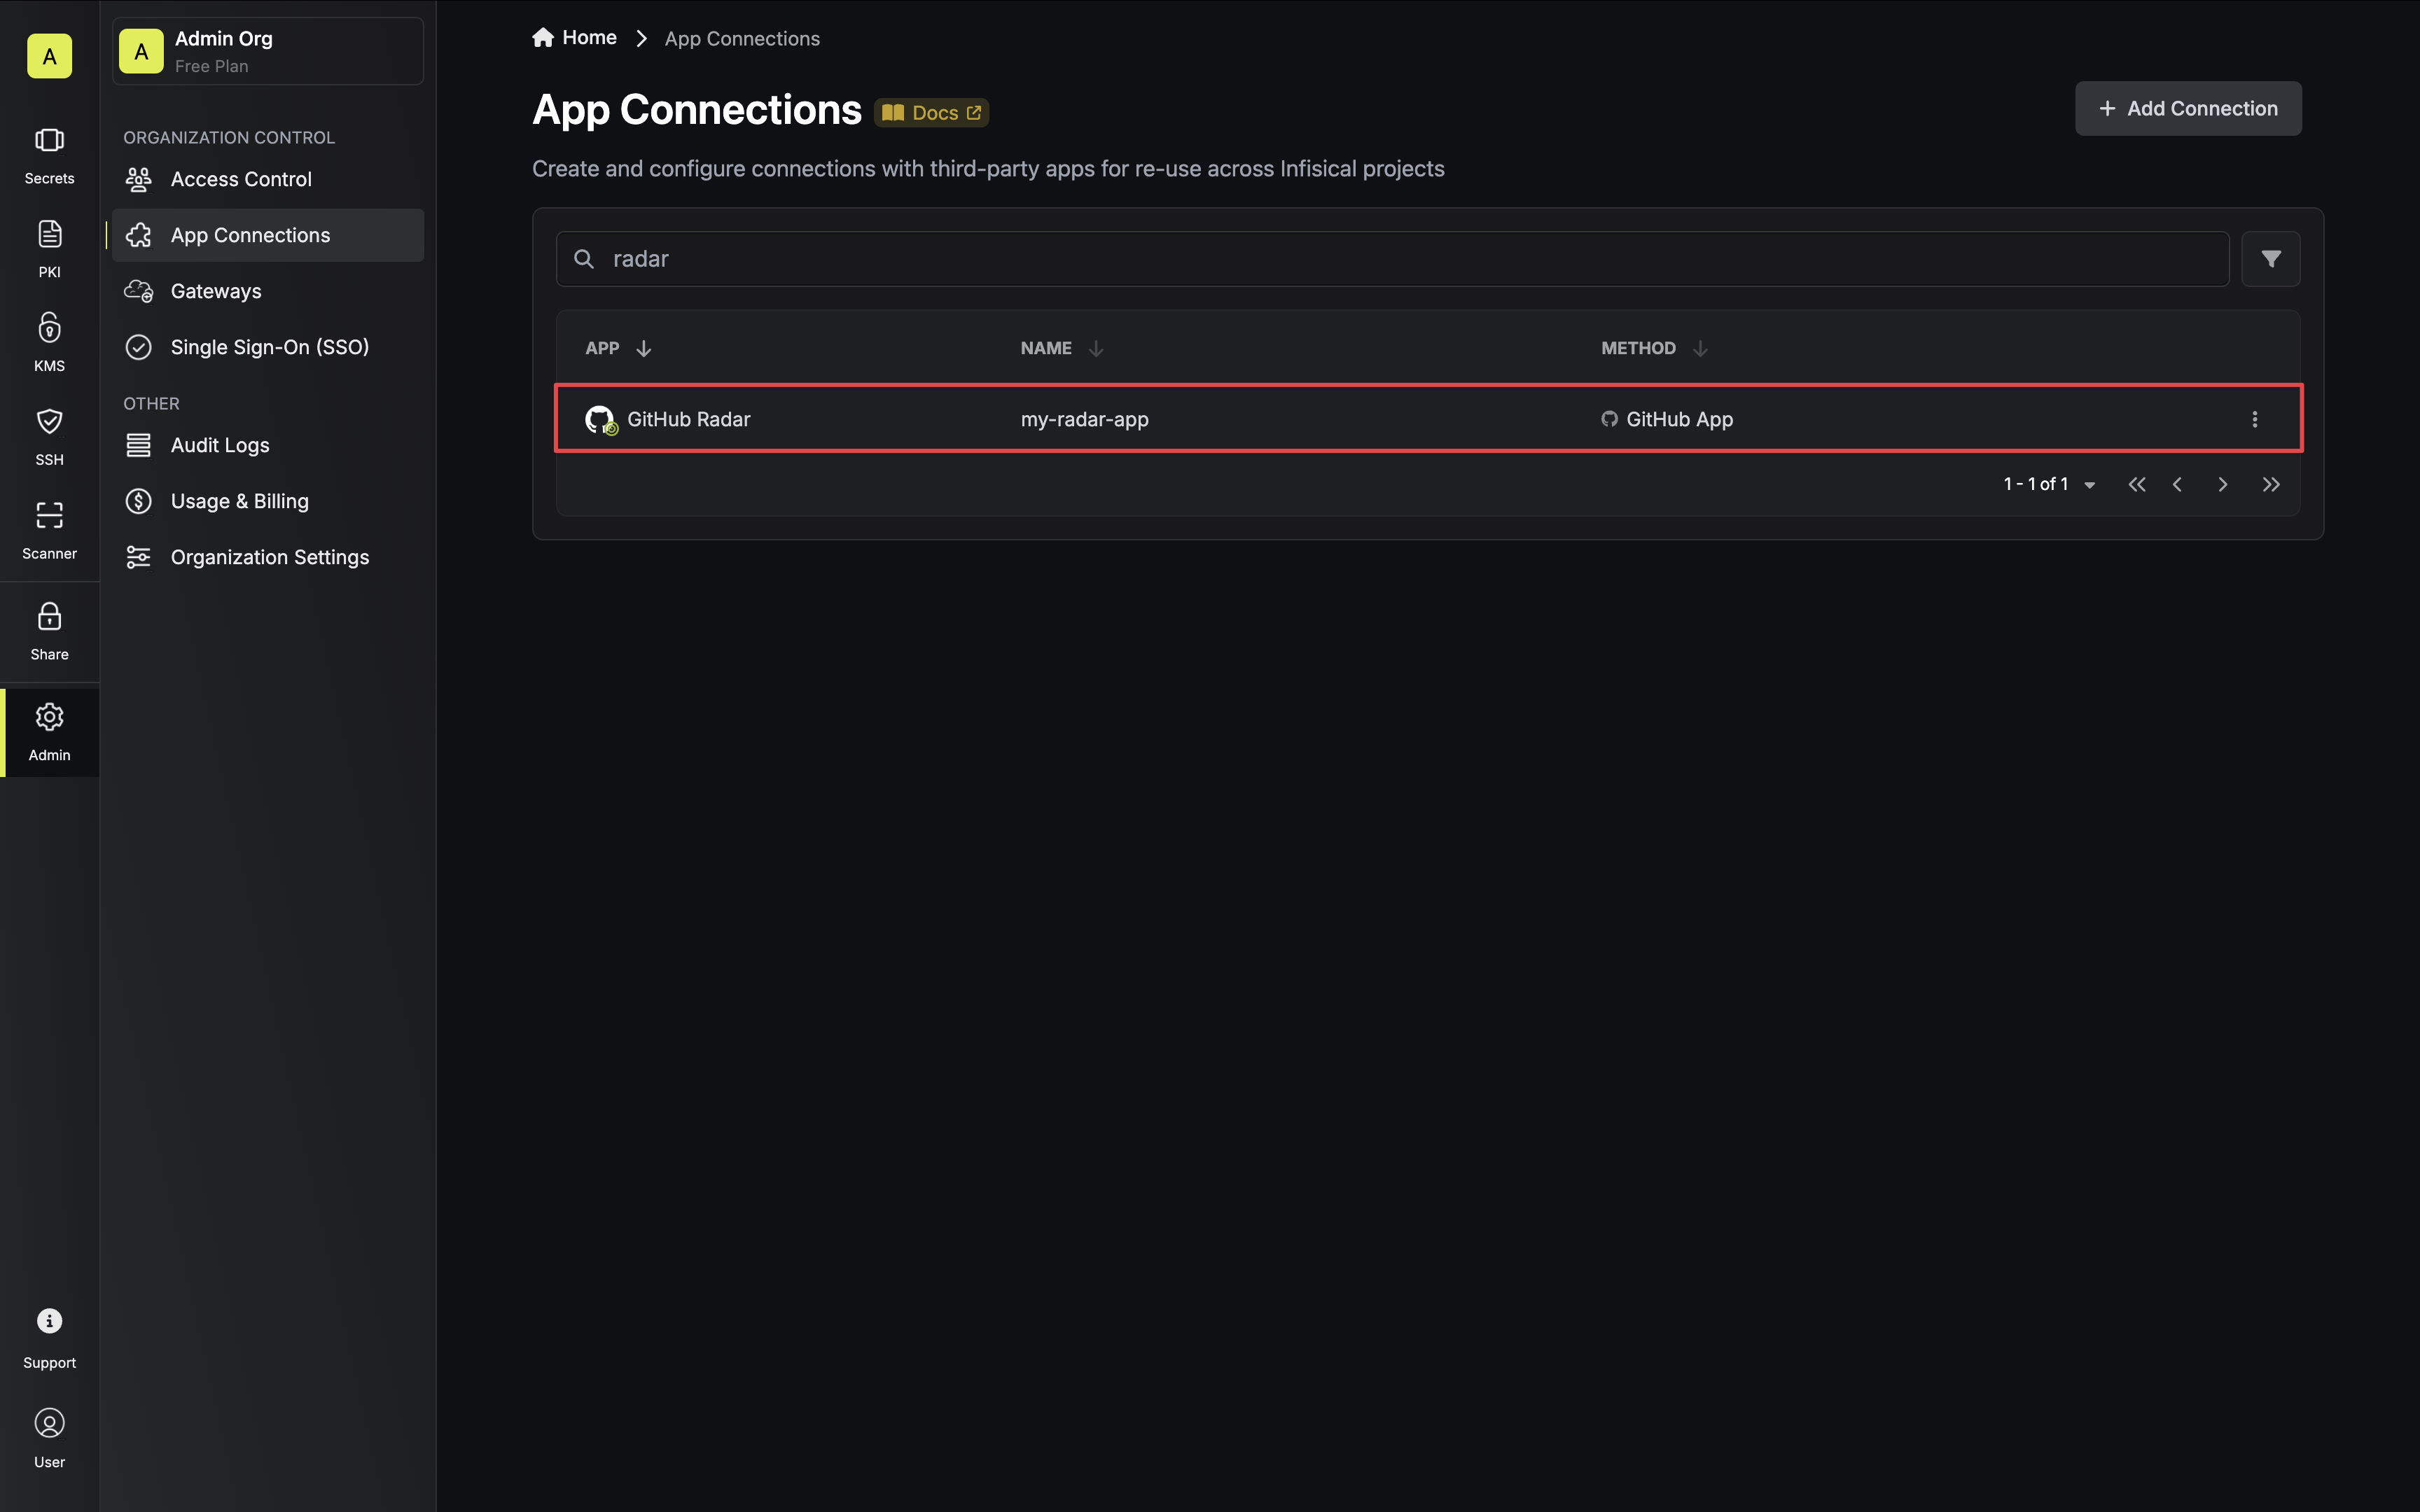
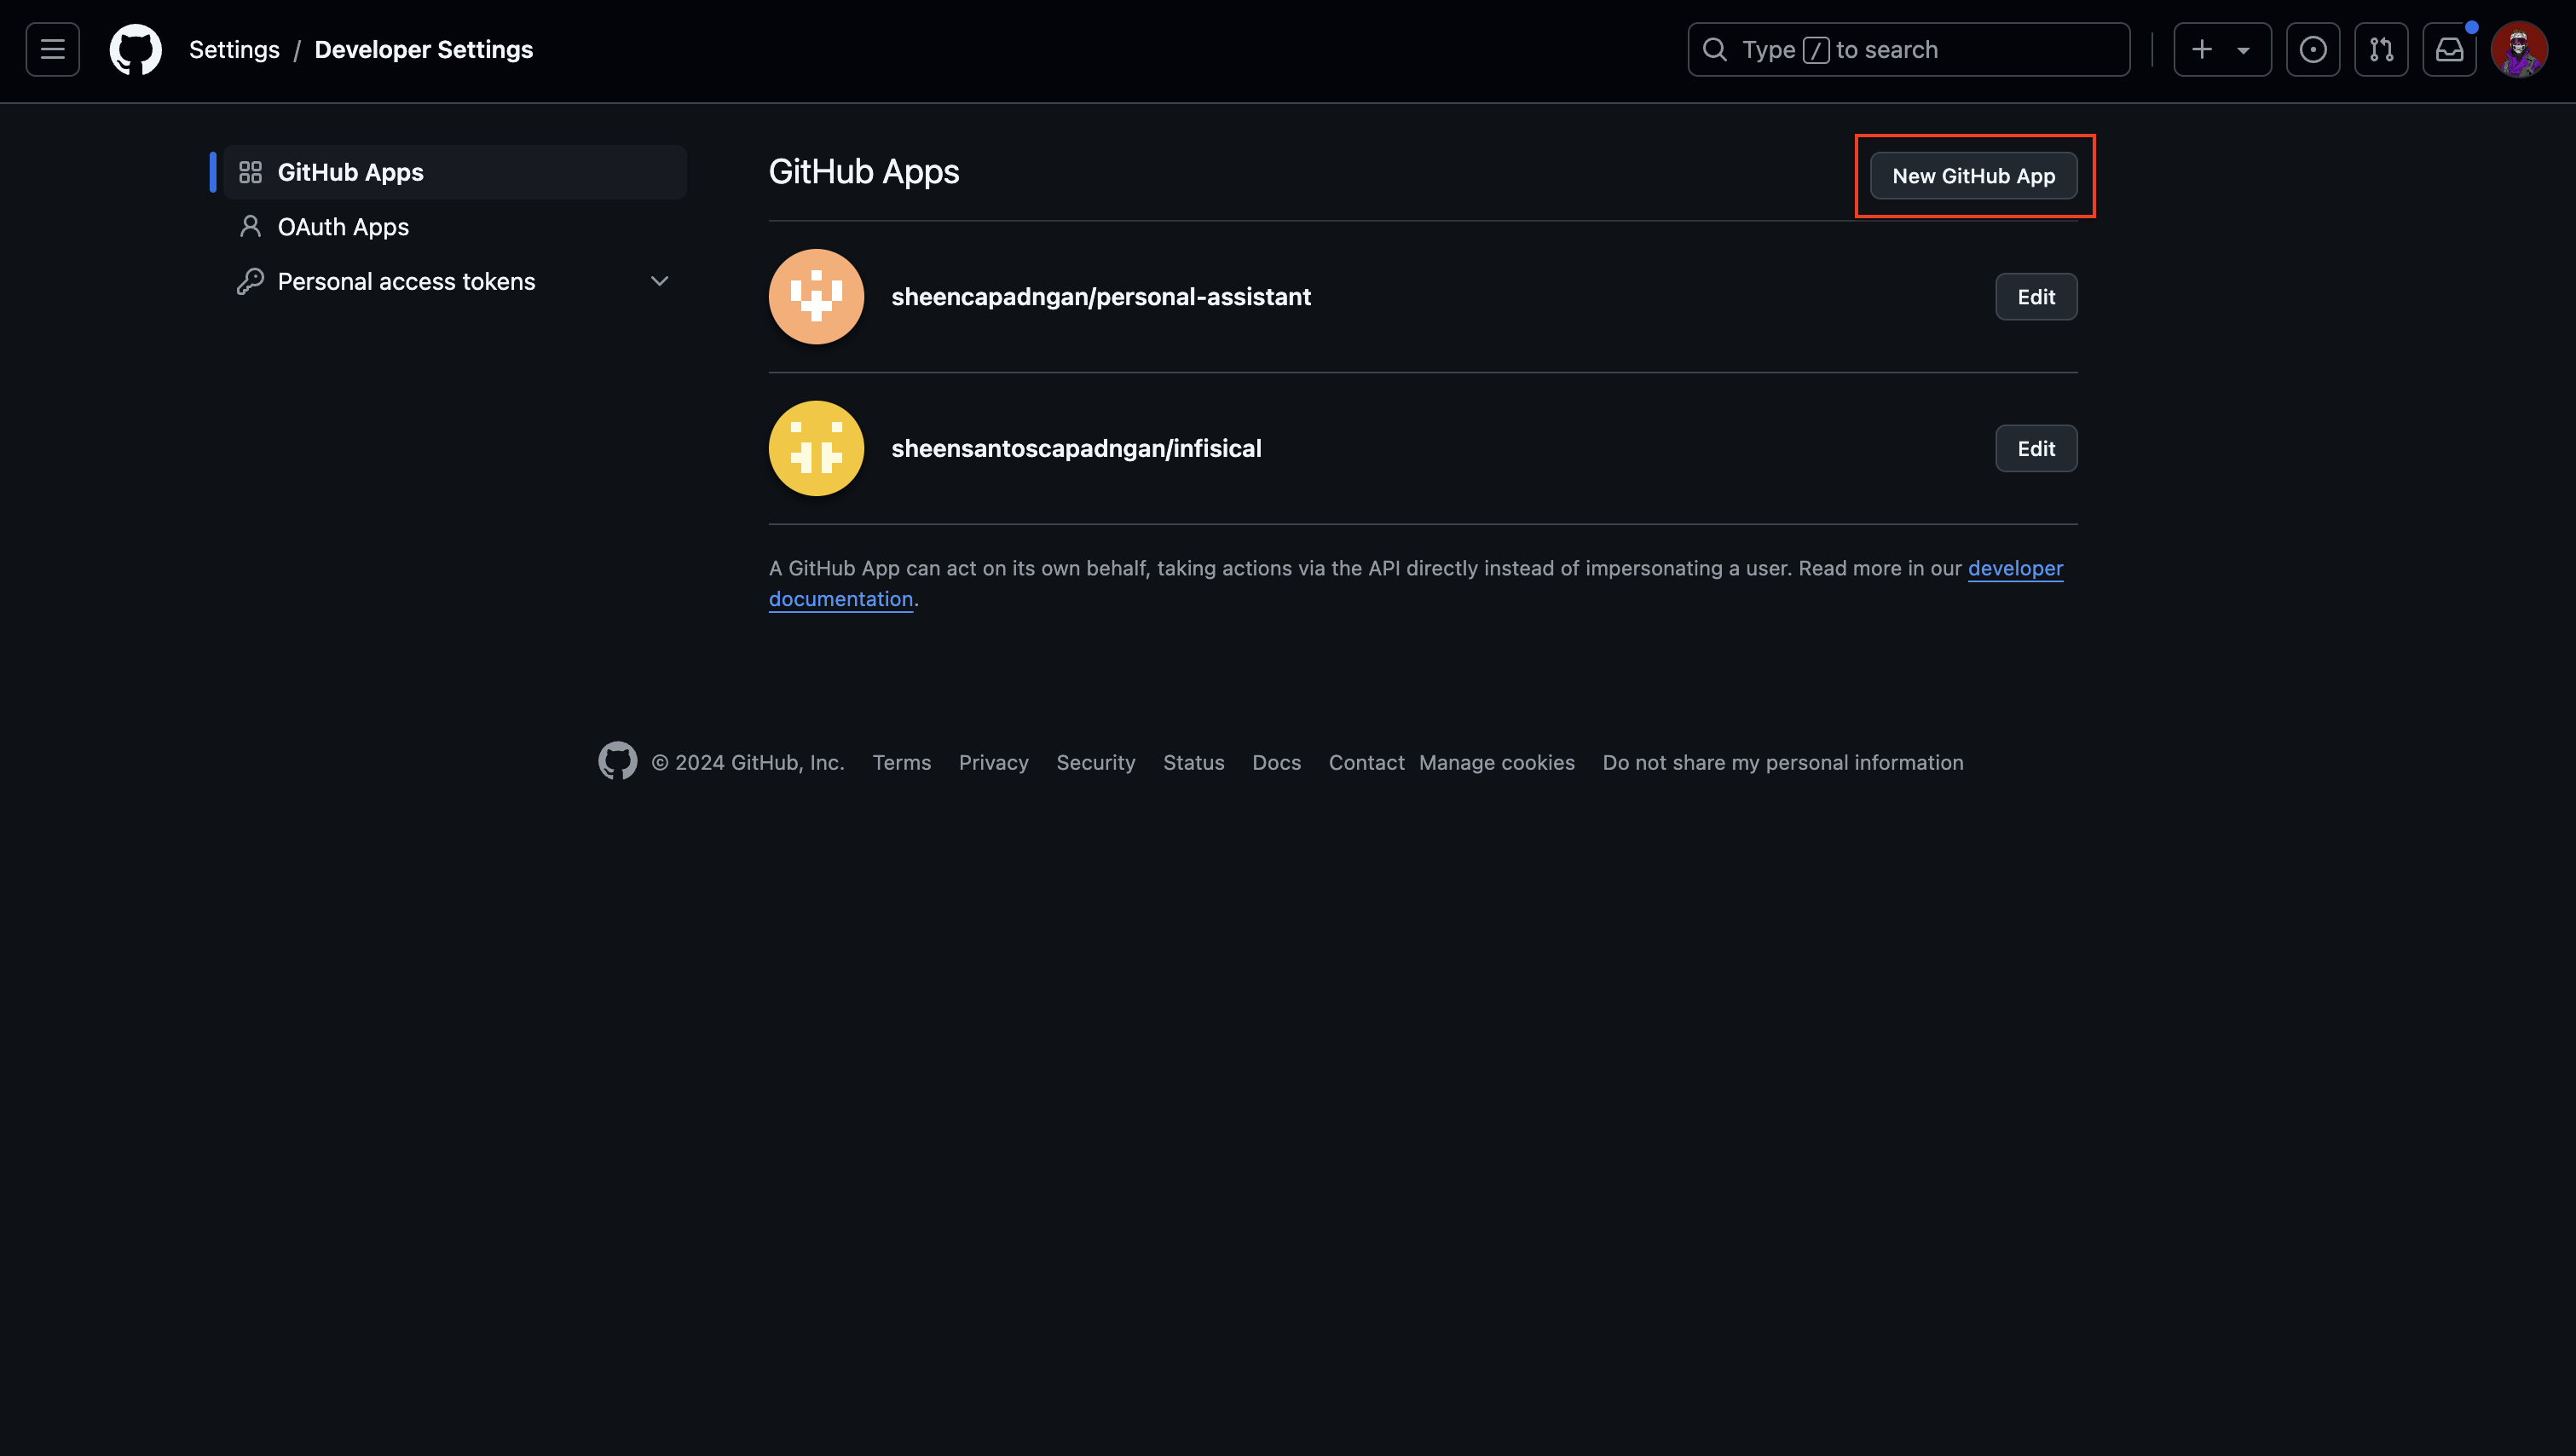 Give the application a name and a homepage URL. These values do not need to be anything specific.
Disable webhook by unchecking the Active checkbox.
Give the application a name and a homepage URL. These values do not need to be anything specific.
Disable webhook by unchecking the Active checkbox.
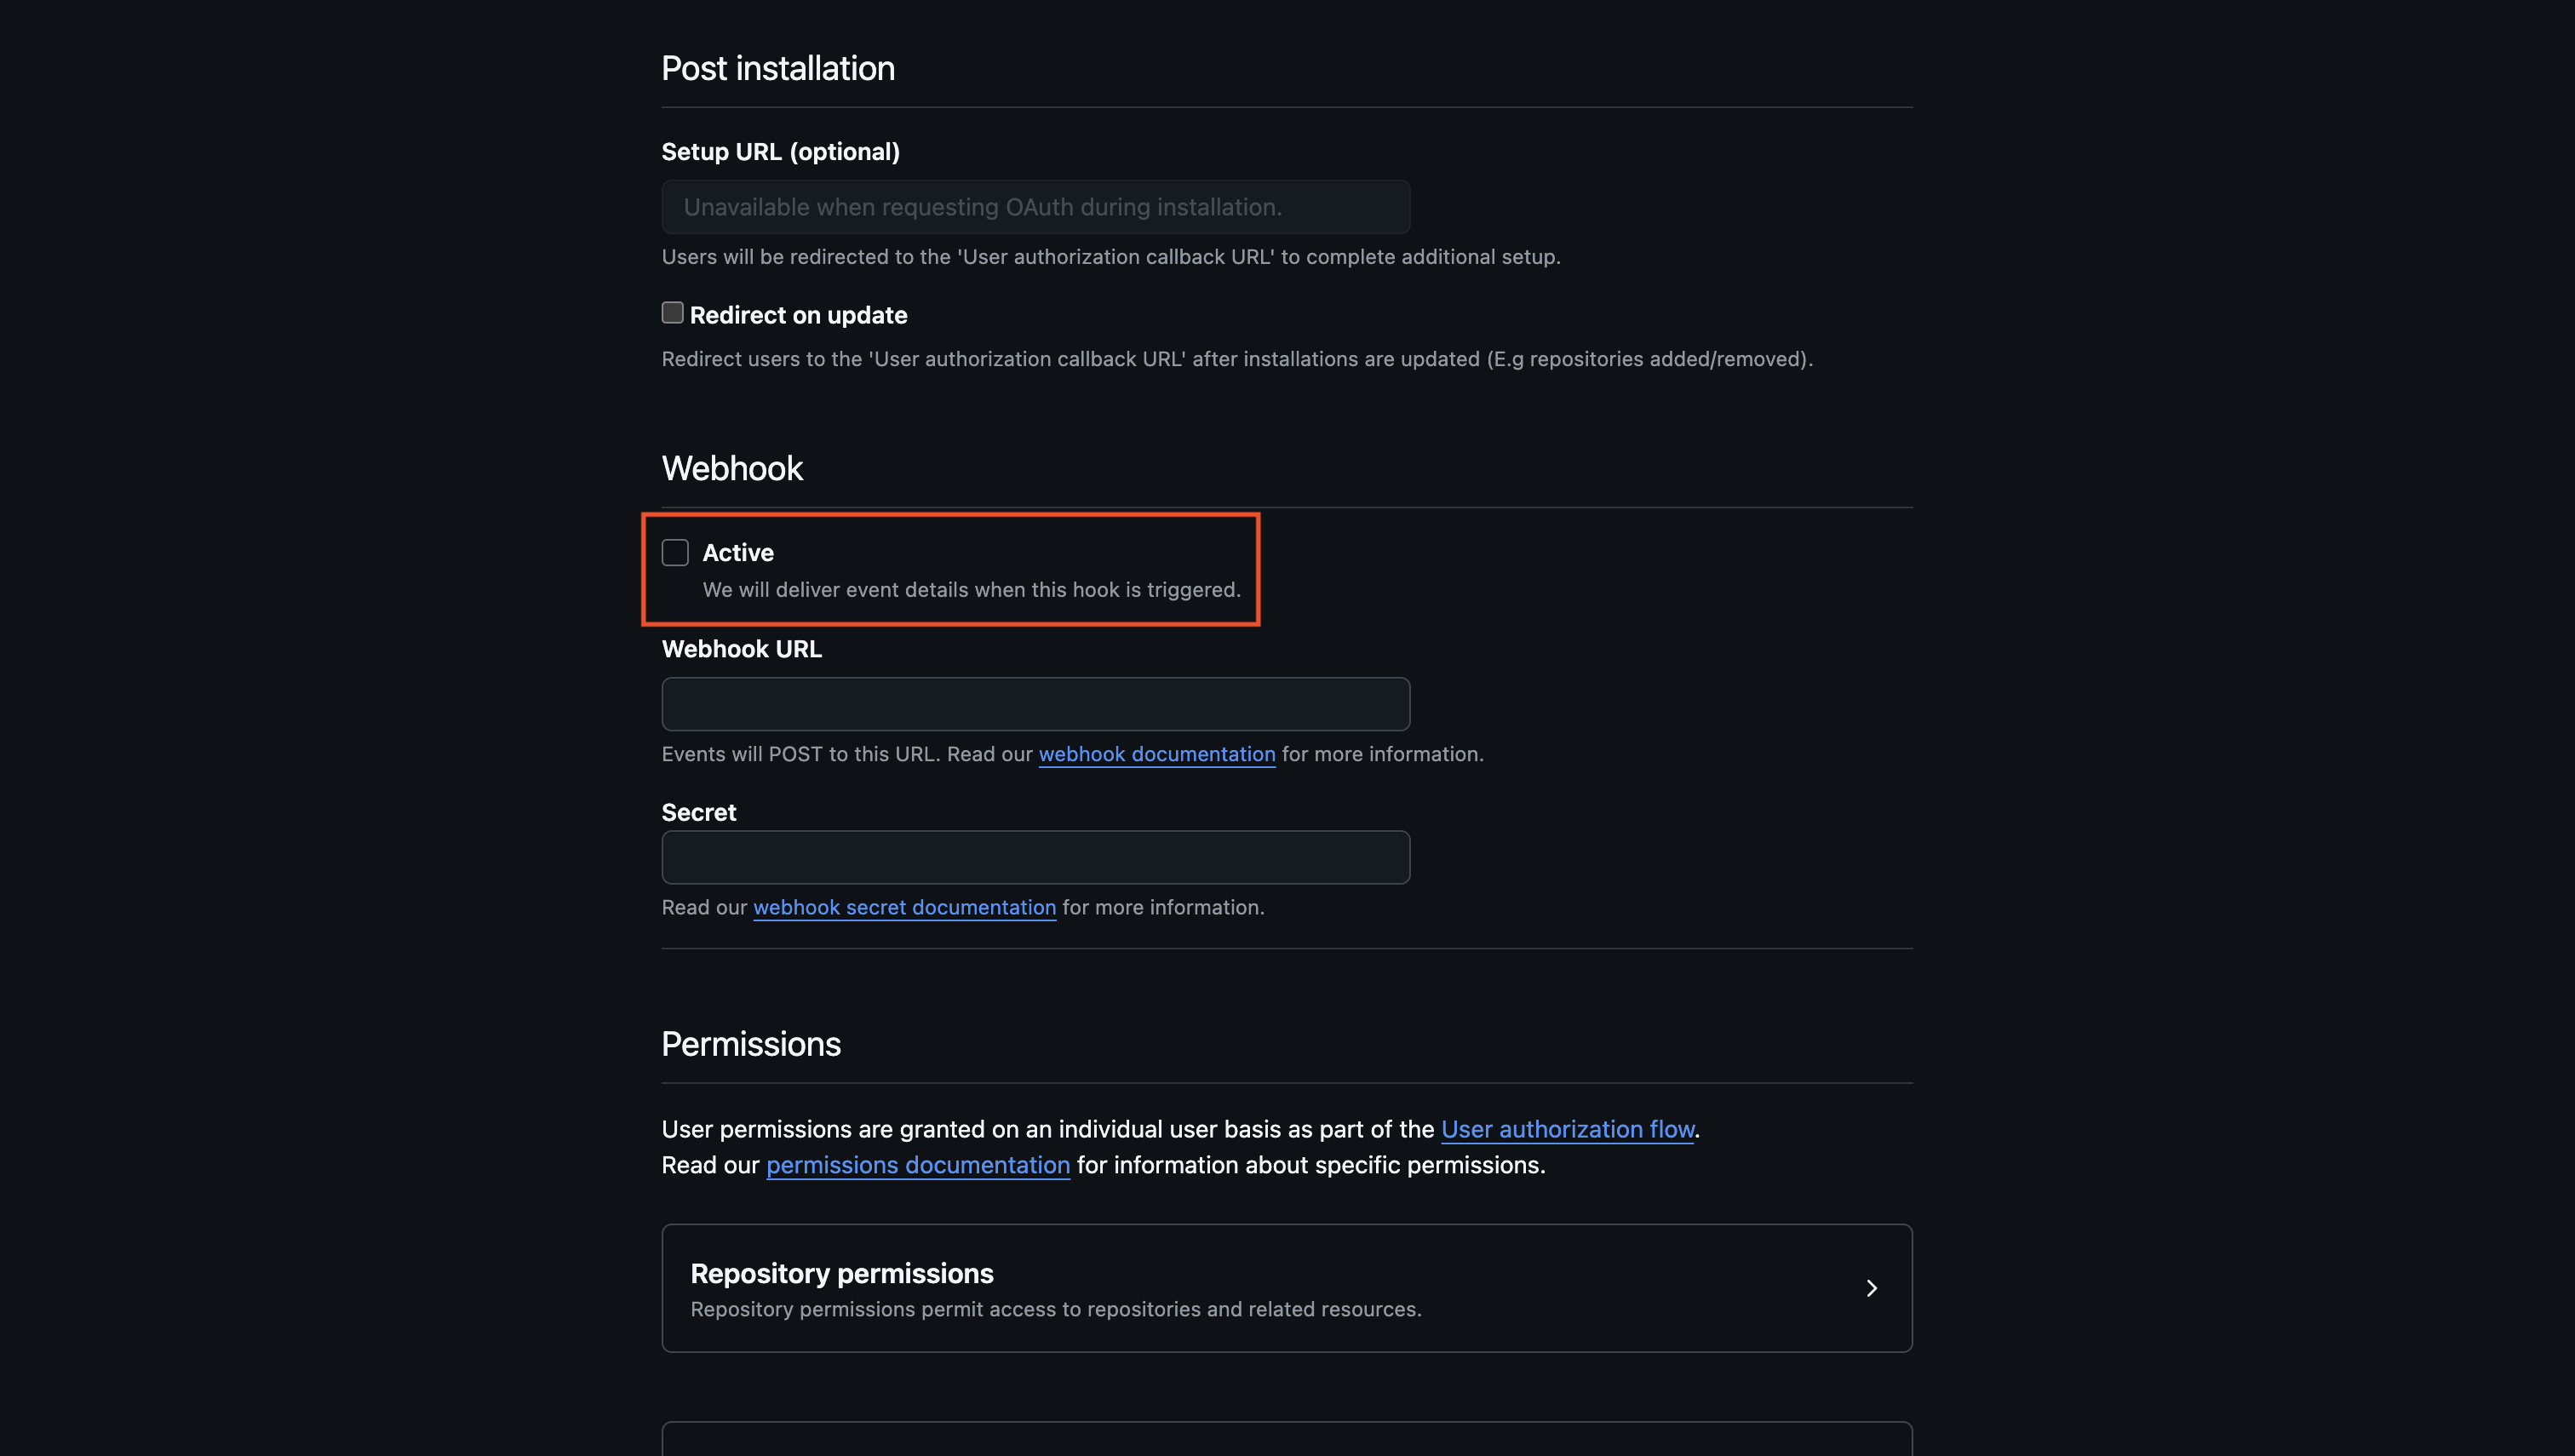 Configure the app's permissions to grant the necessary access for the dynamic secret's short-lived tokens based on your use case.
Create the GitHub Application.
Configure the app's permissions to grant the necessary access for the dynamic secret's short-lived tokens based on your use case.
Create the GitHub Application.

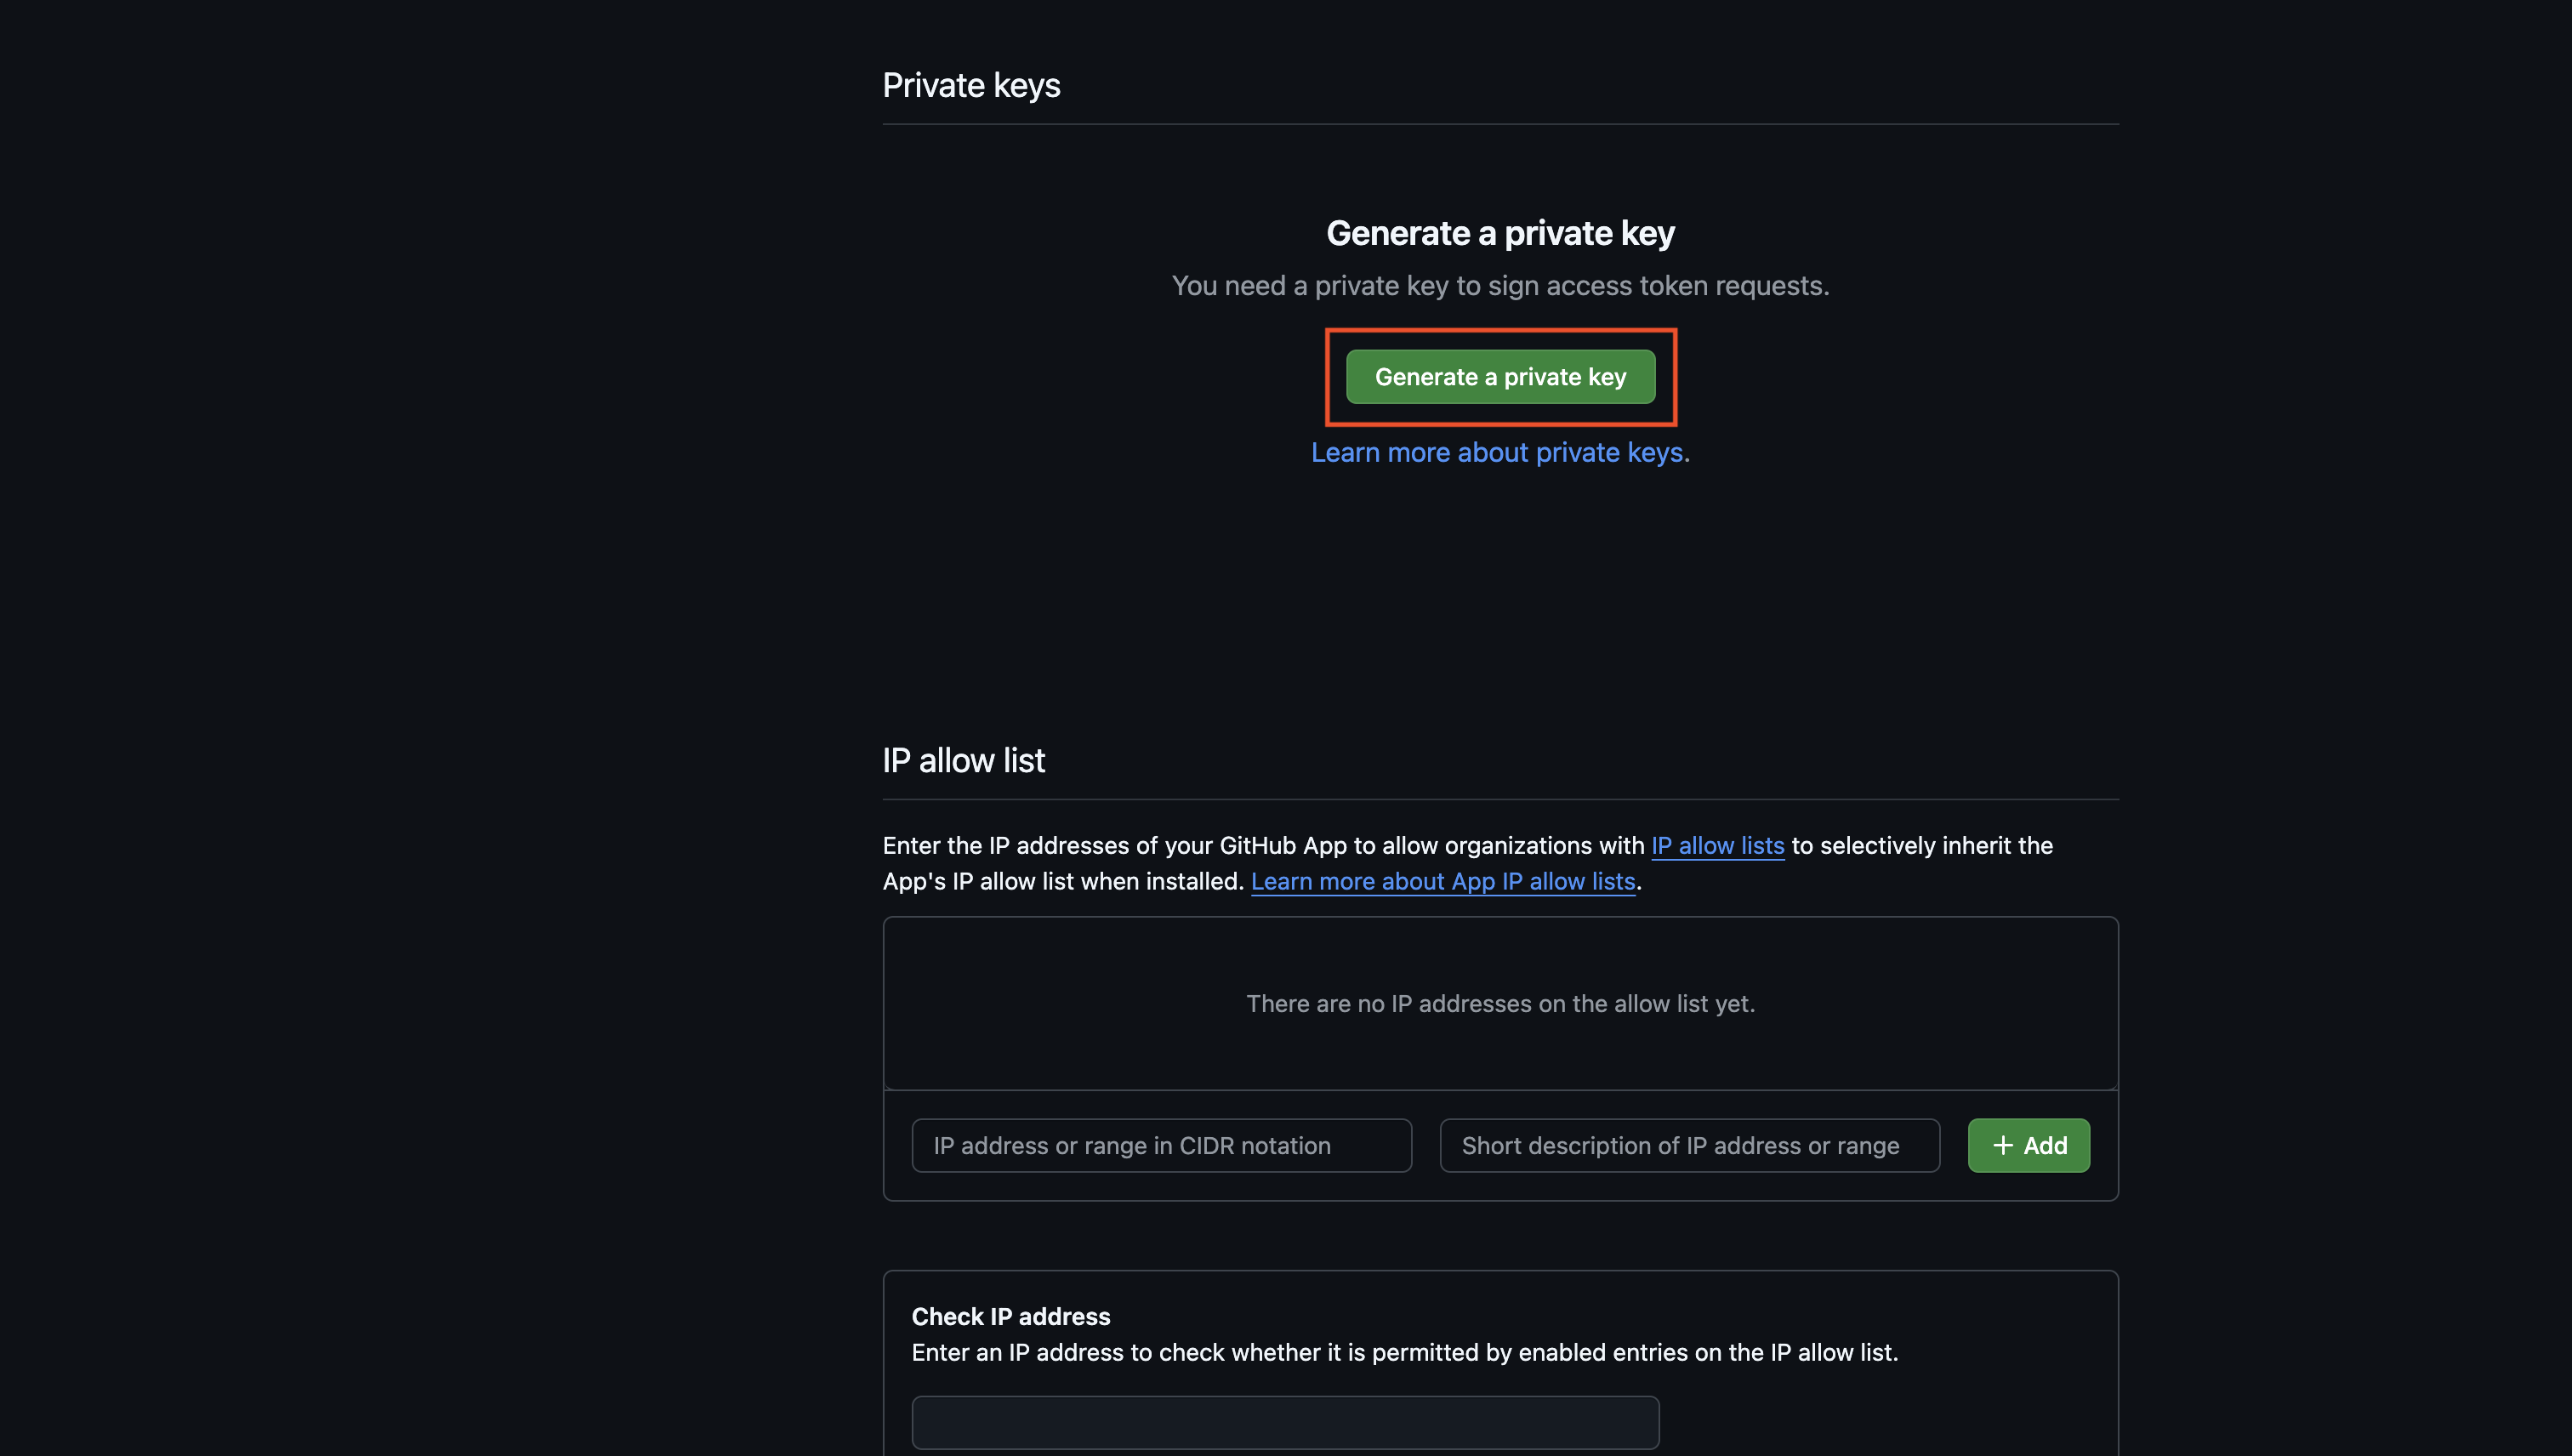 Save these for later steps.
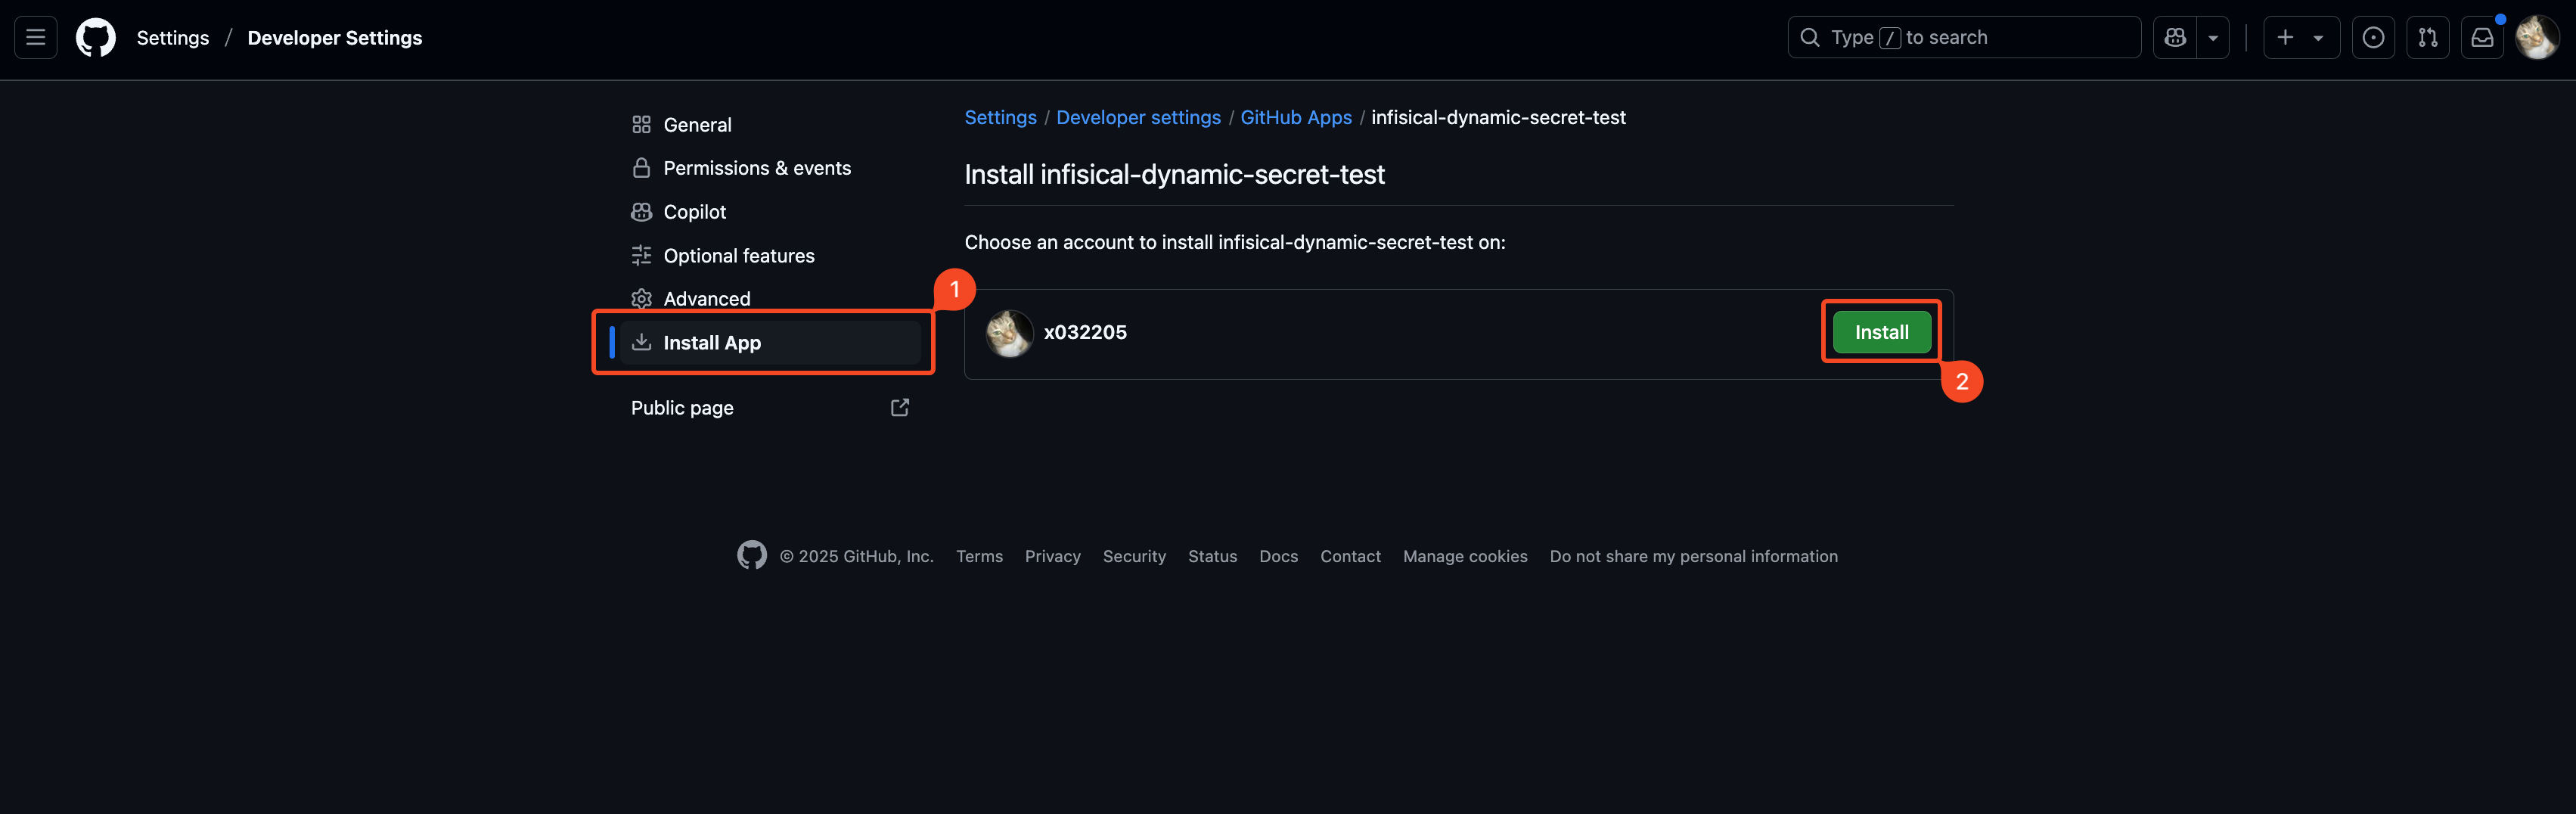
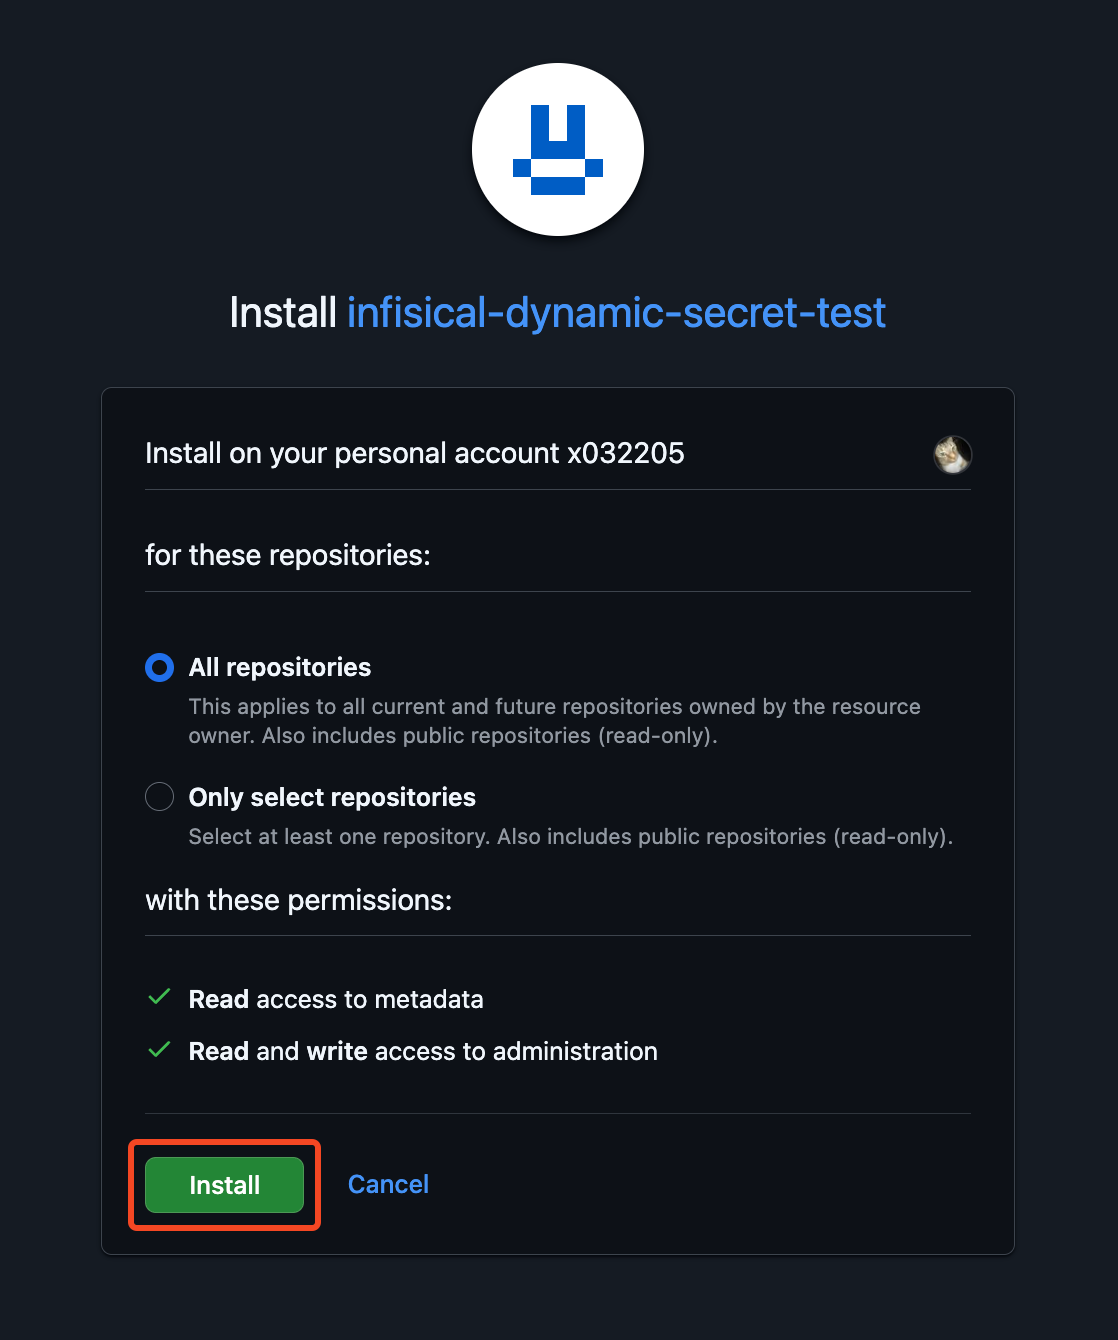 Once you've installed the app, **copy the installation ID** from the URL and save it for later steps.
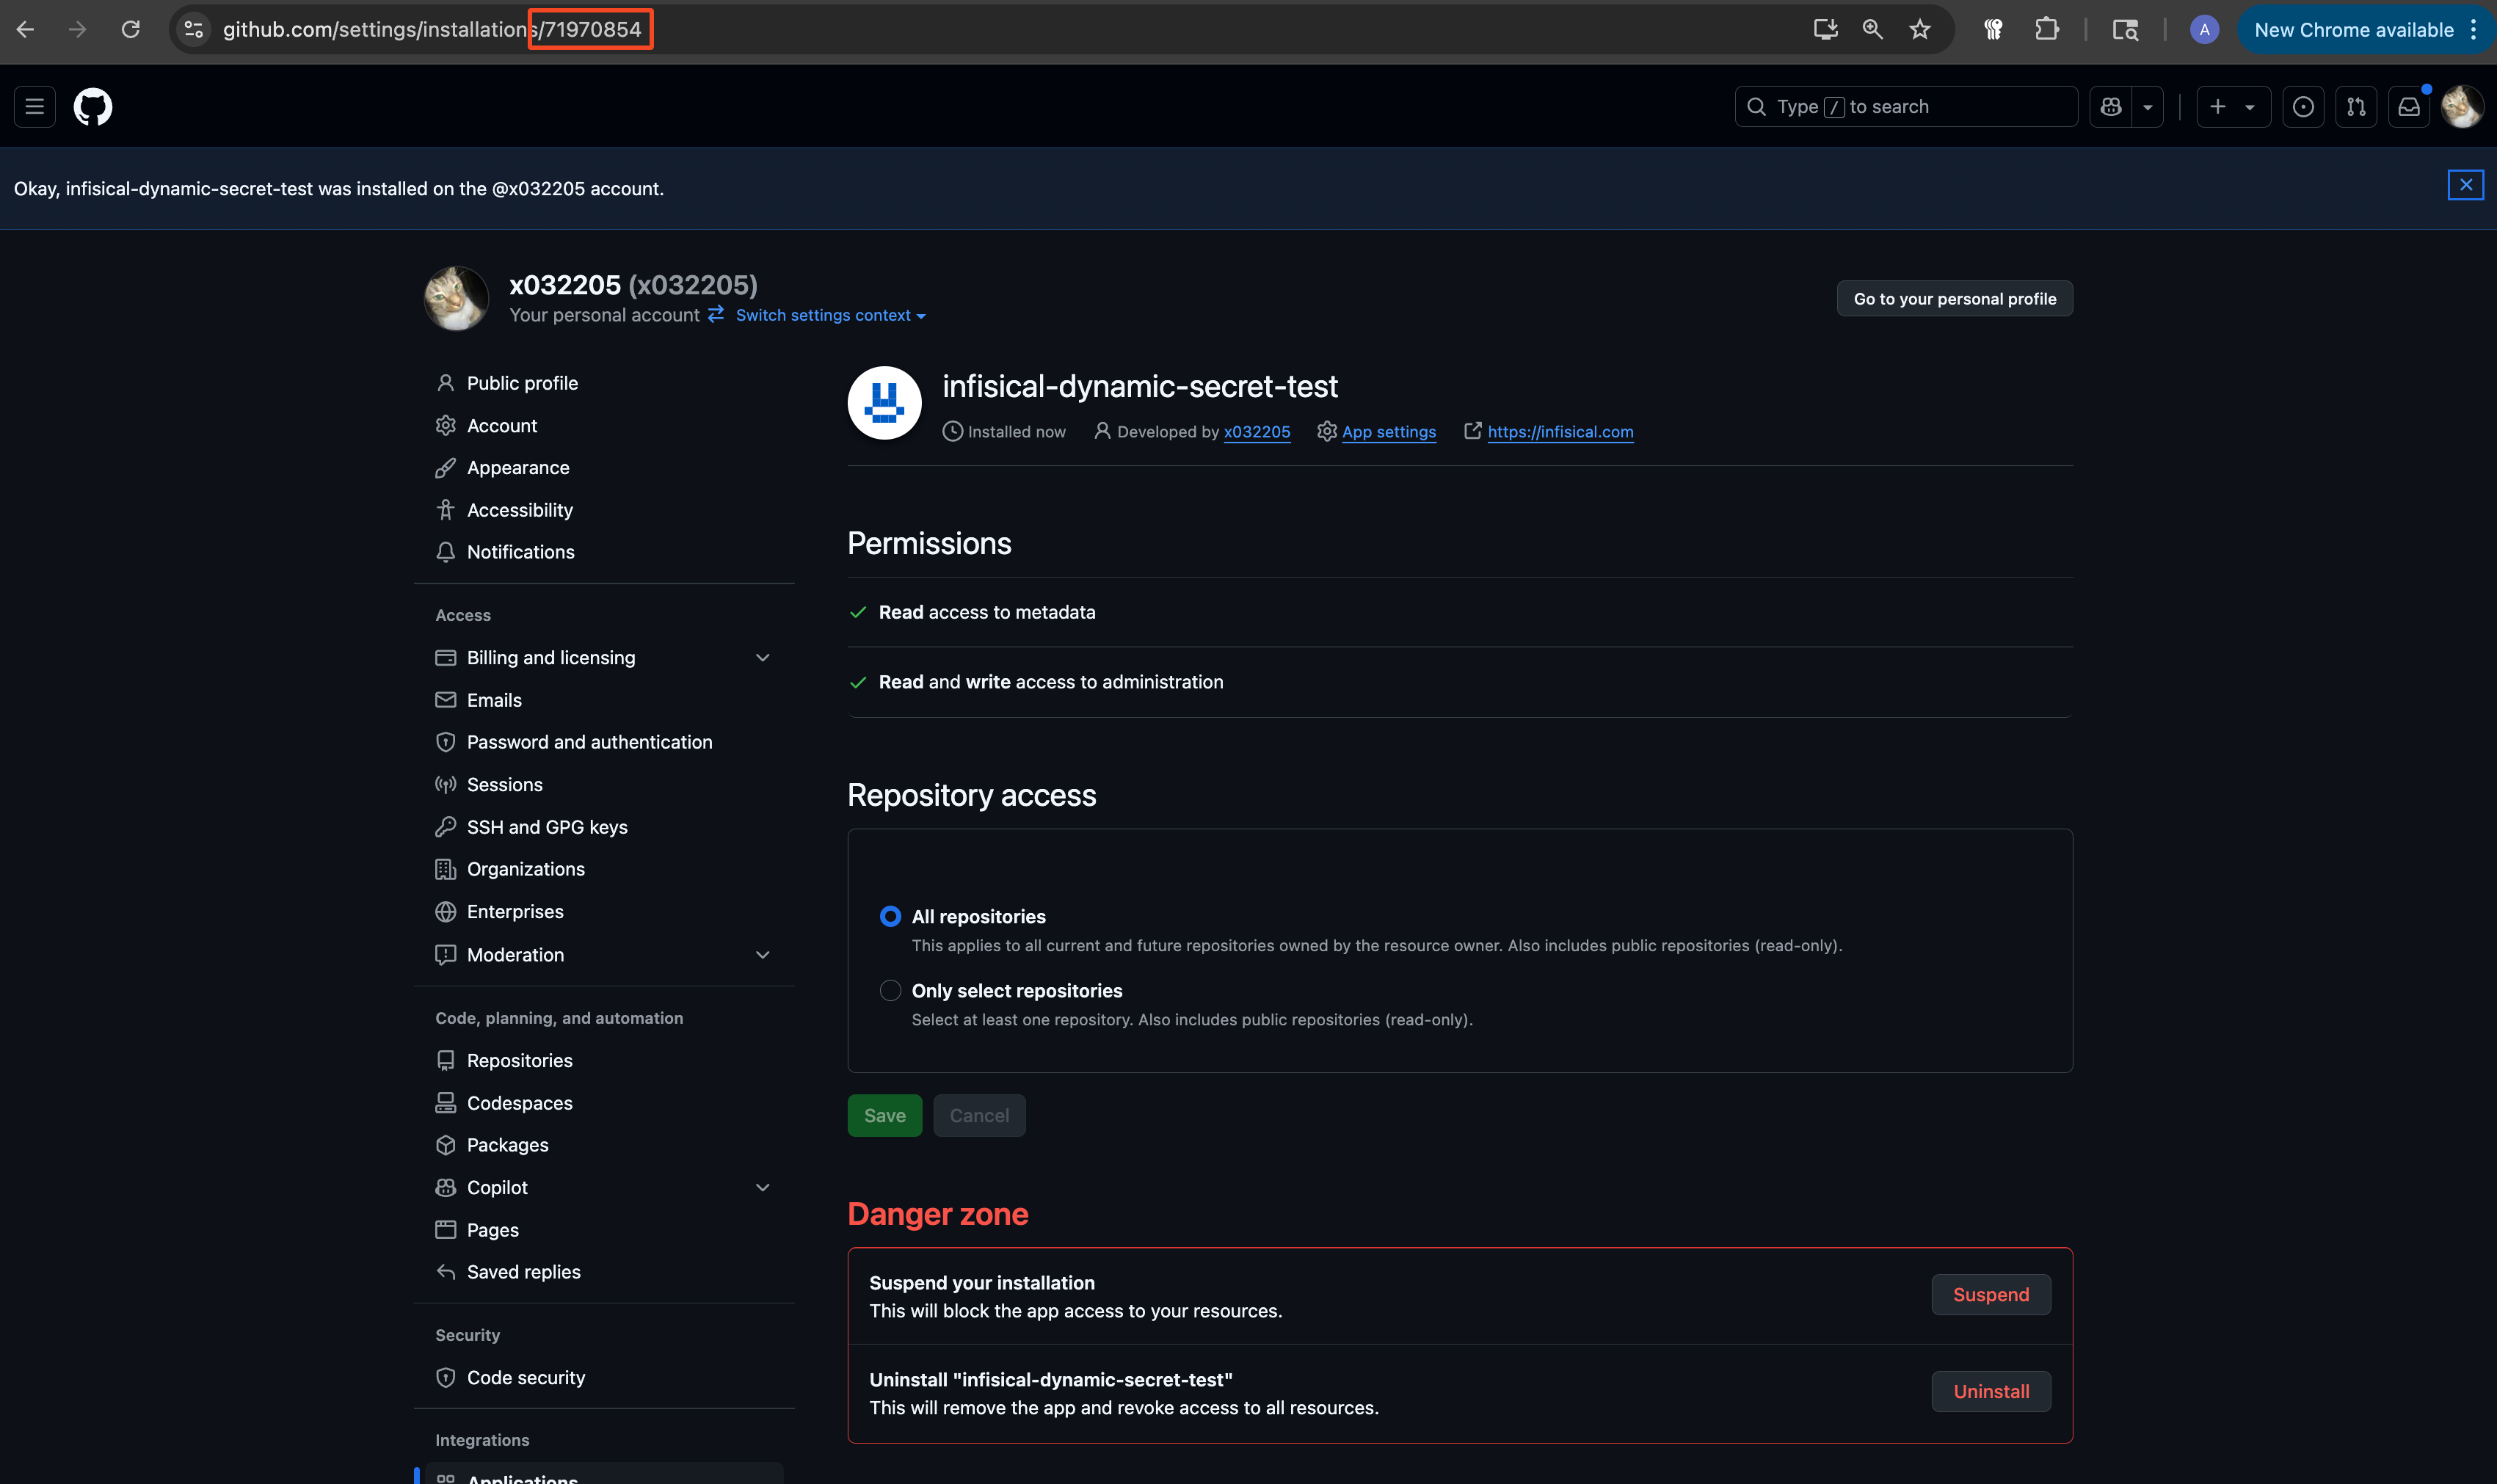
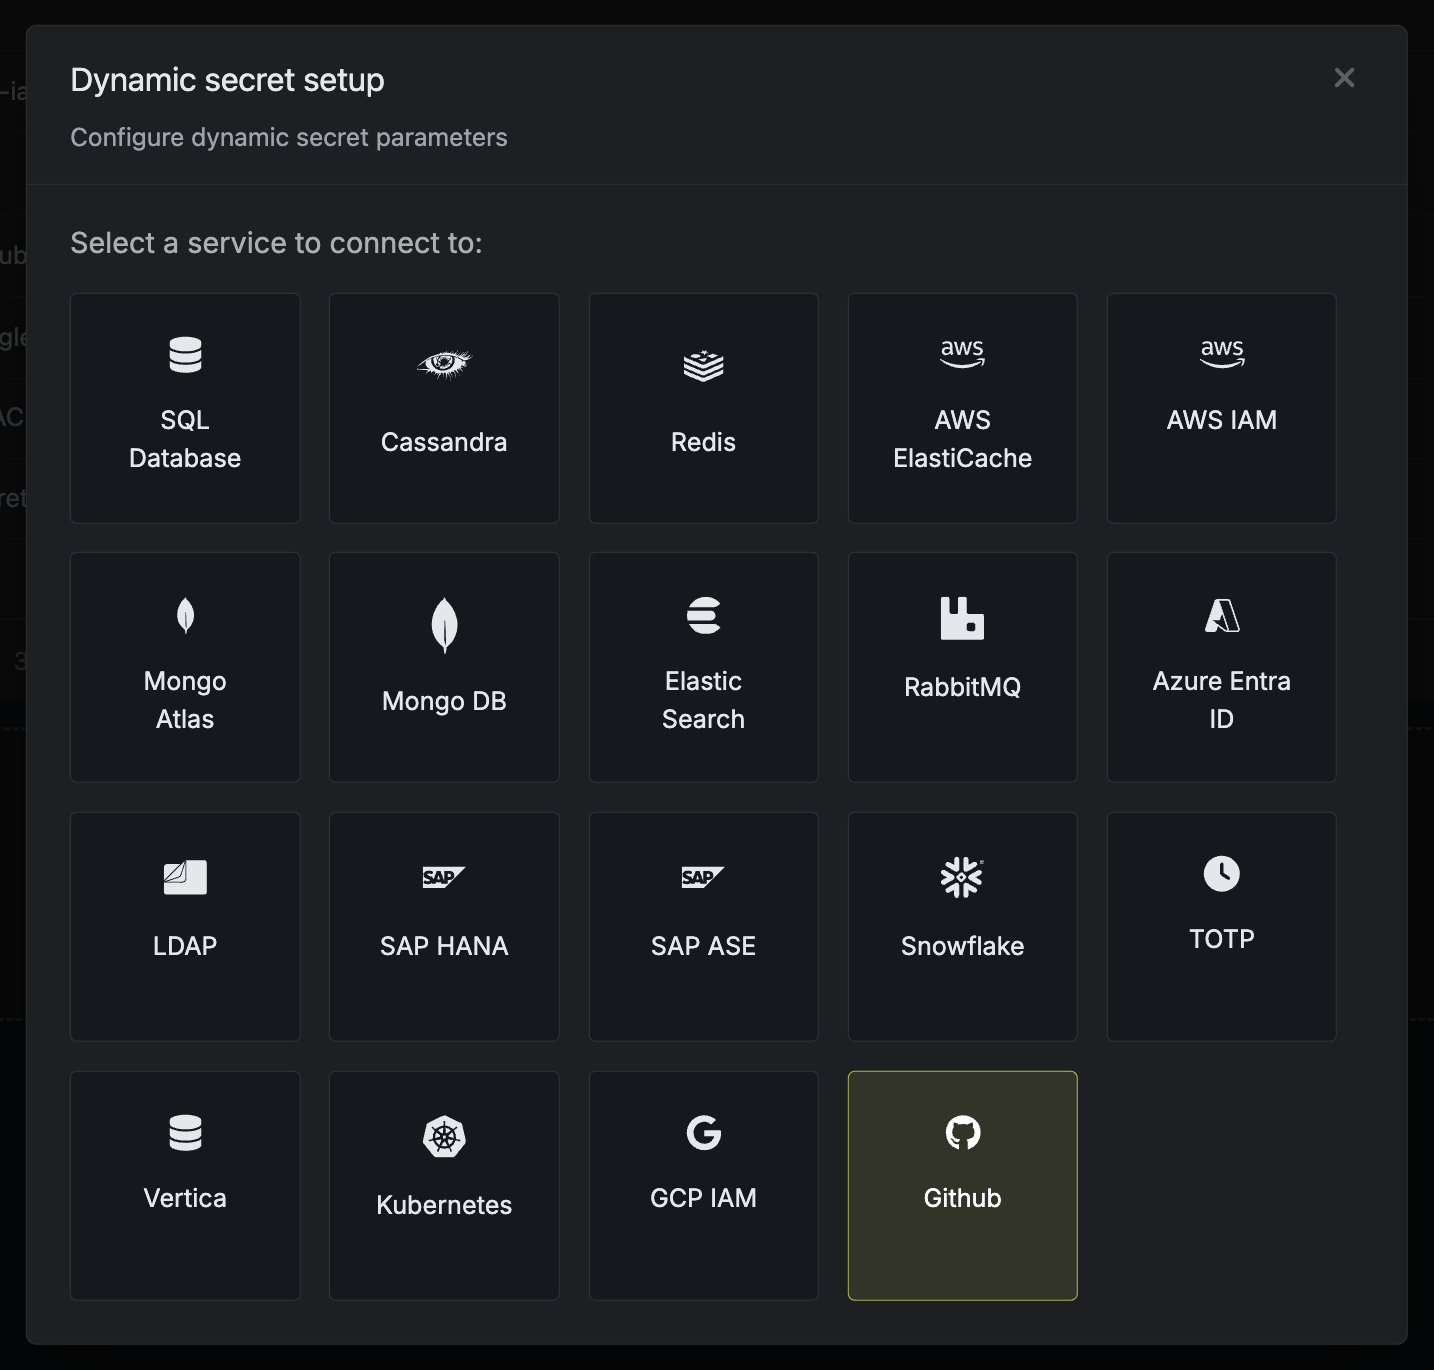 When generating these secrets, the TTL will be fixed to 1 hour.
Once you click the `Submit` button, a new secret lease will be generated and the credentials from it will be shown to you.
When generating these secrets, the TTL will be fixed to 1 hour.
Once you click the `Submit` button, a new secret lease will be generated and the credentials from it will be shown to you.
 When creating an identity, you specify an organization level [role](/documentation/platform/access-controls/role-based-access-controls) for it to assume; you can configure roles in Organization Settings > Access Control > Organization Roles.
Now input a few details for your new identity. Here's some guidance for each field:
* Name (required): A friendly name for the identity.
* Role (required): A role from the **Organization Roles** tab for the identity to assume. The organization role assigned will determine what organization level resources this identity can have access to.
Once you've created an identity, you'll be redirected to a page where you can manage the identity.
Since the identity has been configured with Universal Auth by default, you should re-configure it to use OIDC Auth instead. To do this, press to edit the **Authentication** section,
remove the existing Universal Auth configuration, and add a new OIDC Auth configuration onto the identity.
When creating an identity, you specify an organization level [role](/documentation/platform/access-controls/role-based-access-controls) for it to assume; you can configure roles in Organization Settings > Access Control > Organization Roles.
Now input a few details for your new identity. Here's some guidance for each field:
* Name (required): A friendly name for the identity.
* Role (required): A role from the **Organization Roles** tab for the identity to assume. The organization role assigned will determine what organization level resources this identity can have access to.
Once you've created an identity, you'll be redirected to a page where you can manage the identity.
Since the identity has been configured with Universal Auth by default, you should re-configure it to use OIDC Auth instead. To do this, press to edit the **Authentication** section,
remove the existing Universal Auth configuration, and add a new OIDC Auth configuration onto the identity.