
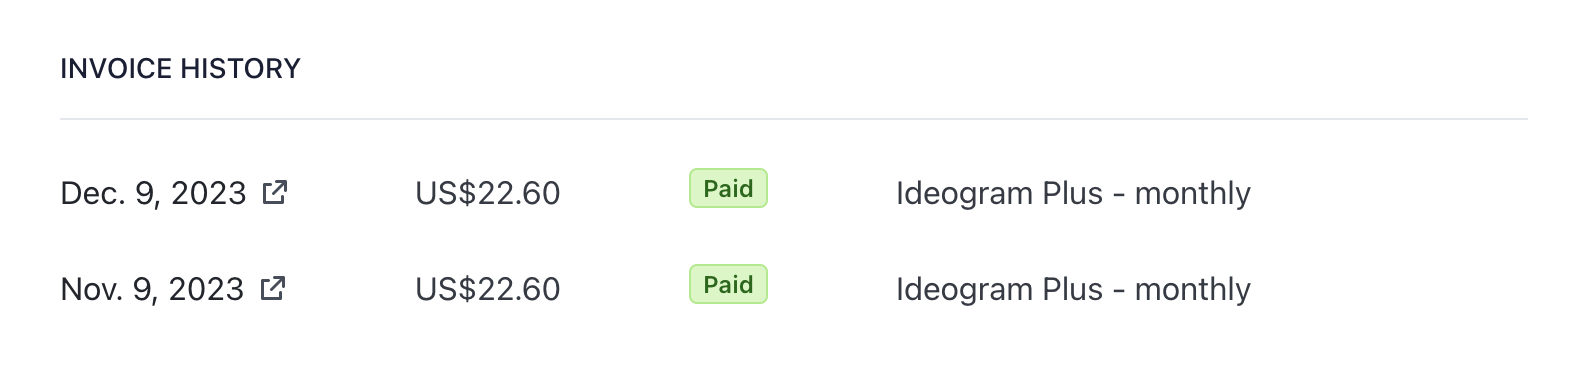
| Goal | Suggested Combo |
|---|---|
| Rapid visual exploration | Short prompt → Magic Prompt → Random Style |
| Style transfer | Clear prompt → Reference Style (upload reference) |
| Polish an almost‑perfect image | Existing image → Remix (tweak one word) |
| Learn how to phrase | Inspiring image → Describe → edit → generate |
 located at the bottom of the [Navigation Sidebar](https://docs.ideogram.ai/using-ideogram/ui-overview/ui-components/navigation-bar) on a desktop computer, or at the bottom-right corner on mobile or the iOS app.
***
## User Menu
Below is a view of the [User Menu](https://docs.ideogram.ai/using-ideogram/ui-overview/ui-components/user-menu) — *click the link to see a detailed description.*
located at the bottom of the [Navigation Sidebar](https://docs.ideogram.ai/using-ideogram/ui-overview/ui-components/navigation-bar) on a desktop computer, or at the bottom-right corner on mobile or the iOS app.
***
## User Menu
Below is a view of the [User Menu](https://docs.ideogram.ai/using-ideogram/ui-overview/ui-components/user-menu) — *click the link to see a detailed description.*


Aspect ratio dropdown showing the available format options.

Aspect Ratio preview with the slider control and custom entry fields.

Number of images, Model, and Render speed menu.
| Plans and pricing | Free Plan | Basic Plan - ⚠️ Legacy | Plus Plan | Pro Plan | Team Plan |
|---|---|---|---|---|---|
| Monthly Price | Free | $8 USD per month | $20 USD per month | $60 USD per month | $30 USD per month per member (Minimum 2) |
| Annual Price (save up to 20%) | Free | $84 USD ($7 USD/month) | $180 USD ($15 USD/month) | $504 USD ($42 USD/month) | $240 USD ($20 USD/month per member, min. 2) |
| Priority credits * | – | 400 credits/month (up to 3,200 images/month **) | 1,000 credits/month (up to 8,000 images/month **) | 3,500 credits/month (up to 28,000 images/month **) | 1,500 credits/month per member (up to 12,000 images/month per member **) |
| Slow credits * | 10 credits/week ‡ (Up to 40 images/week) | 100 credits/day (Up to 800 images/day **) | Unlimited | Unlimited | Unlimited |
| Priority credits * top-up | – | $4 USD / 100 credits | $4 USD / 150 credits | $4 USD / 250 credits | $4 USD / 250 credits per member |
| Concurrent generations in queues † | 1 (up to 4 images) | 2 (up to 8 images) | 8 (up to 32 images) | 32 (up to 128 images) | 32 (up to 128 images) |
| Usage rights | We do not restrict your rights in your output. | We do not restrict your rights in your output. | We do not restrict your rights in your output. | We do not restrict your rights in your output. | We do not restrict your rights in your output. |
| Features & tools | Free Plan | Basic Plan - ⚠️ Legacy | Plus Plan | Pro Plan | Team Plan |
|---|---|---|---|---|---|
| Private generation | – | – | ✓ | ✓ | ✓ |
| Search images | ✓ Own images only | ✓ Own + site wide | ✓ Own + site wide | ✓ Own + site wide | ✓ Own + site wide |
| Delete images | – | – | ✓ | ✓ | ✓ |
| Image upload | – | – | ✓ | ✓ | ✓ |
| Image download ‡ | JPG only | PNG and JPG | PNG and JPG | PNG and JPG | PNG and JPG |
| Remix | ✓ | ✓ | ✓ | ✓ | ✓ |
| Magic Prompt | ✓ | ✓ | ✓ | ✓ | ✓ |
| Rendering | Default | Turbo, Default, Quality | Turbo, Default, Quality | Turbo, Default, Quality | Turbo, Default, Quality |
| Style | ✓ | ✓ | ✓ | ✓ | ✓ |
| Style Reference | – | – | ✓ | ✓ | ✓ |
| Character Reference | Trial – 10 uses | Trial – 10 uses | ✓ | ✓ | ✓ |
| Tile (v1.0) | – | ✓ | ✓ | ✓ | ✓ |
| Negative Prompt | – | ✓ | ✓ | ✓ | ✓ |
| Seed Number | – | ✓ | ✓ | ✓ | ✓ |
| Aspect Ratios | ✓ Presets only | ✓ Presets + Custom | ✓ Presets + Custom | ✓ Presets + Custom | ✓ Presets + Custom |
| Color Palettes | ✓ Presets only | ✓ Presets only | ✓ Presets + Custom | ✓ Presets + Custom | ✓ Presets + Custom |
| Describe | ✓ (1 priority credit) | ✓ | ✓ | ✓ | ✓ |
| Editor | – | ✓ | ✓ | ✓ | ✓ |
| Canvas | 2 canvases | Unlimited | Unlimited | Unlimited | Unlimited |
| Magic Fill | – | – | ✓ | ✓ | ✓ |
| Extend | – | – | ✓ | ✓ | ✓ |
| Upscale | – | ✓ | ✓ | ✓ | ✓ |
| Background removal | – | ✓ | ✓ | ✓ | ✓ |
| Batch Generation with CSV upload | – | – | – | ✓ | ✓ |
| Priority access to new features and improvements | – | ✓ | ✓ | ✓ | ✓ |
Ideogram 3.0 / 3.0m
Generate - Remix
Canvas: Generate - Remix
Turbo
Default
Quality
2 credits / 4 images
4 credits / 4 images
6 credits / 4 images
Ideogram 2a
Generate - Remix
Turbo
Default
Quality
0.5 credit / 4 images
1 credit / 4 images
1.5 credits / 4 images
Ideogram 2.0
Generate - Remix
Canvas: Magic Fill - Extend - Generate - Remix
Turbo
Default
Quality
1 credit / 4 images
2 credits / 4 images
3 credits / 4 images
Ideogram 1.0
Generate - Remix
Turbo
Default
Quality

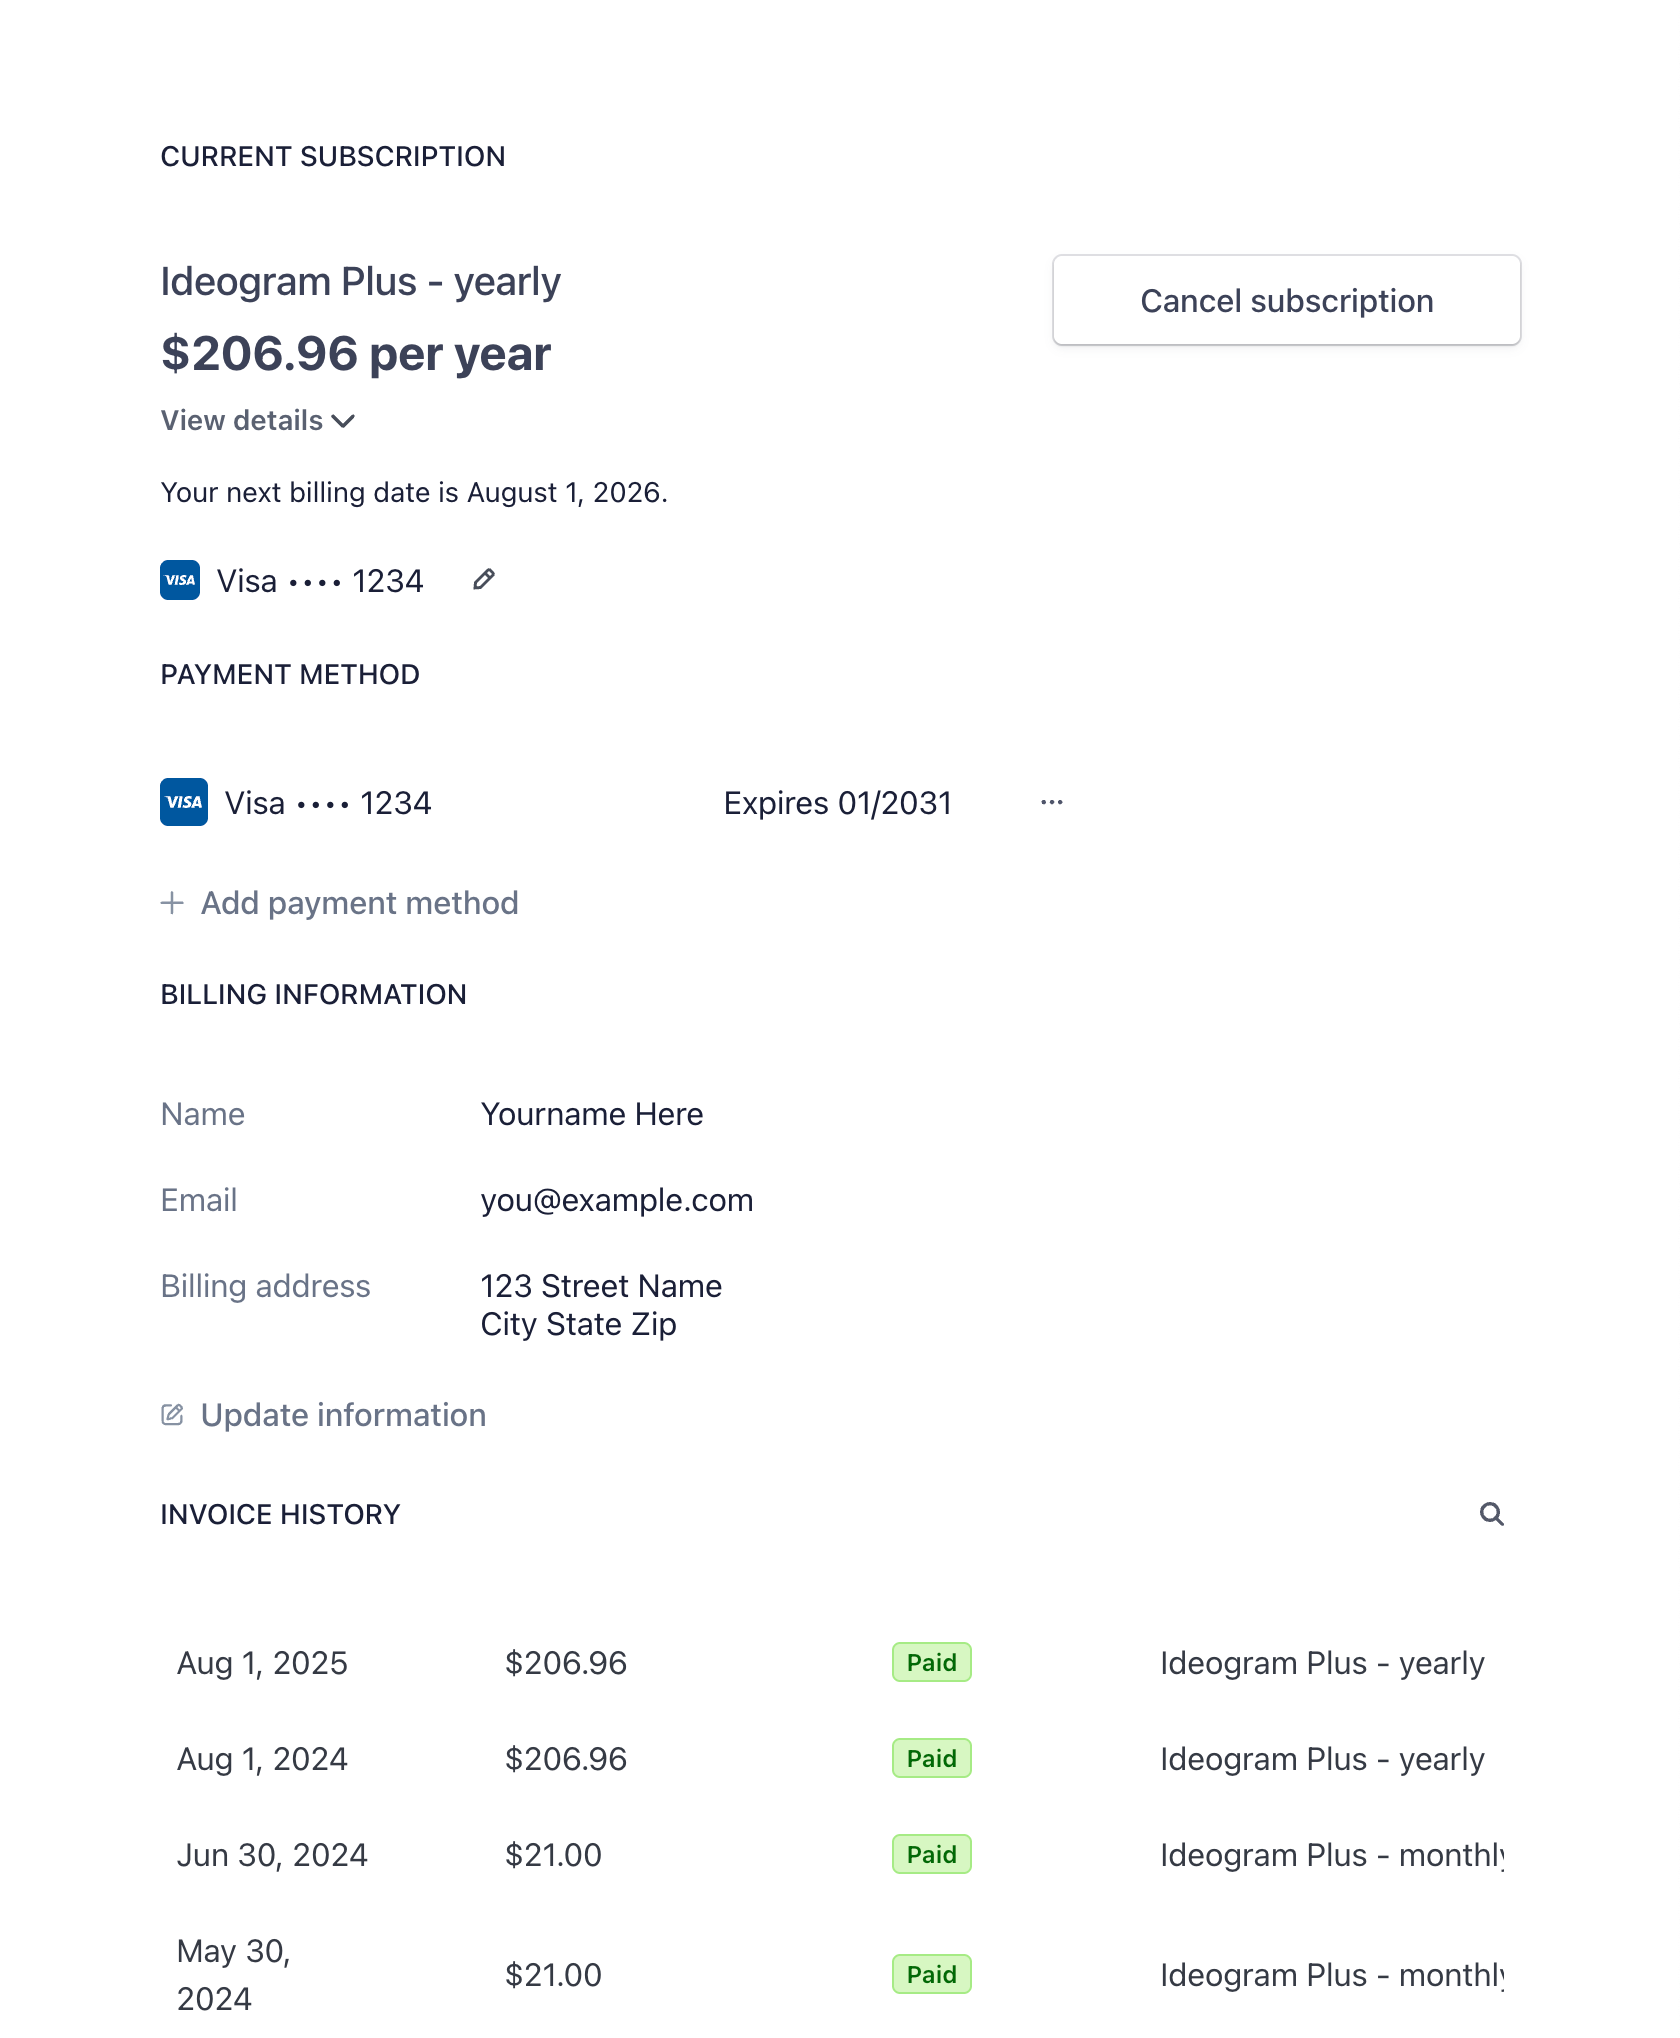
The Top up option in the Profile panel.


The Profile panel.

The pricing page as seen from a Free Plan user.


Batch Generation interface showing upload and status areas.

Example of an error message during file upload.

Batch Generation interface showing uploaded file details and Replace option.

Notification shown when Batch Generation completes successfully.


The Download icon is located at the right end of the status row.
| Column | Valid values | Default |
|---|---|---|
prompt | Any text *Required | — |
visibility | public, private *Required | — |
aspect_ratio | Predefined aspect ratio, (e.g., 16:9). See Aspect Ratios | 1:1 |
magic_prompt | on, off | on |
model | 3.0, 2.0, 2a, 1.0 | 2.0 |
num_images | Any whole number from 1 to 4 | 4 |
seed_number | Any whole number from 0 to 2147483647 | — |
rendering | default, turbo, quality | default |
negative_prompt | Any keywords separated by commas | — |
style | 3.0: 2.0: | auto |
color_palette | Up to five (5) hexadecimal RGB values separated with spaces. Ex.: or any preset Color palette name: Only available in Model 2.0 or later. | — |


The left-side panel.

The bottom-right panel.

Zooming options.

Panel for generated image set (4 images).

Panel for a single image.

More menu.


The right-side image details panel.

The Options icon, usually located at the right of the Prompt Box.

Rendering options available.

The masking option for Magic Fill and Extend.


A generation window


The download context frame placed and resized.

Options available when downloading an image.


The original image to be modified.

Masked areas and the small generation window.

The resulting image from the Magic Fill.

Popup showing your Character References.
Character thumbnail in the Prompt Box.


Options to add a Character Reference using Camera, Upload, or Creations.

*Prompt Box on the Character Page showing a selected Character Reference.*

Style selection interface showing Auto, Realistic, and Fiction options.

Original image.

Generated with the Fiction style.

Generated with the Realistic style.

Default mask highlighting the face and hair.

Generated image using the default mask.

Modified mask excluding hair.

Result showing new hairstyle with uniform color.

Default mask excluding pendant area.

Generated image showing altered pendant design.

Modified mask including pendant.

Generated image with original pendant preserved.


Image to Remix.

Character reference.

Result using Remix.

Result with prompt only.
Original image.

Magic Fill mask, Character and prompt.

Result of Character and Magic Fill.

Color Palette menu showing preset options and the Custom section.
| No color palette |  | |
| Using the Ultramarine color palette |  |
| Using the Ember color palette |  | |
| Using the Jungle color palette |  |

Defining custom colors using hexadecimal values.

Defining custom colors using the color picker.
 | Normal prompt using v2.0 Design style. | |
 | Using v2.0 Design style with a two-color custom color palette: #000000 #f1c859 |  |
 |  | |
 |  | |
 |  |
| Title | Number of Slow credits / Week | Number of Generations | |
|---|---|---|---|
| Elite Creator | 500 | ||
| Top Creator | 200 | ||
| Leading Creator | 100 |

Remix dropdown.

Character Reference dropdown.
Original photo.
Generated with v3.0, Realistic style, using Describe 3.0.
Generated with v2.0, Realistic style, using Describe 3.0.
Generated with v3.0, Realistic style, using Describe 2.0.
Generated with v2.0, Realistic style, using Describe 2.0.
Original drone photo.
Image generated with v3.0, General style, using Describe 3.0.
Image generated with v2.0, General style, using Describe 3.0.
Image generated with v3.0, General style, using Describe 2.0.
Image generated with v2.0, General style, using Describe 2.0.


Let's zoom in on the butterfly's wing to compare both image details.
In this animation, notice the presence of compression artifacts on the JPEG image compared to the PNG one.

Select individual images or entire sets of four images (like shown above) by dragging.

When viewing images in grid view, selecting an image will download all the images generated with the prompt, not just the cover image.


Location of the Editor icon.

The top toolbar of the Editor

The bottom toolbar of the Editor

The bottom toolbar when using the Crop Tool

Basic drawing representing the subject, colour and composition of the elements of the prompt.


Original image.
Placement of the original image within the frame and the empty space left around it.

Image selection in the bottom menu.

Final image.

Original image.

The generation window is resized horizontally into a banner-like format, with the image strategically placed for a well-balanced composition.
The final image.

The original image to be modified.


The resulting image after extending it on the left and changing a part of the original image.
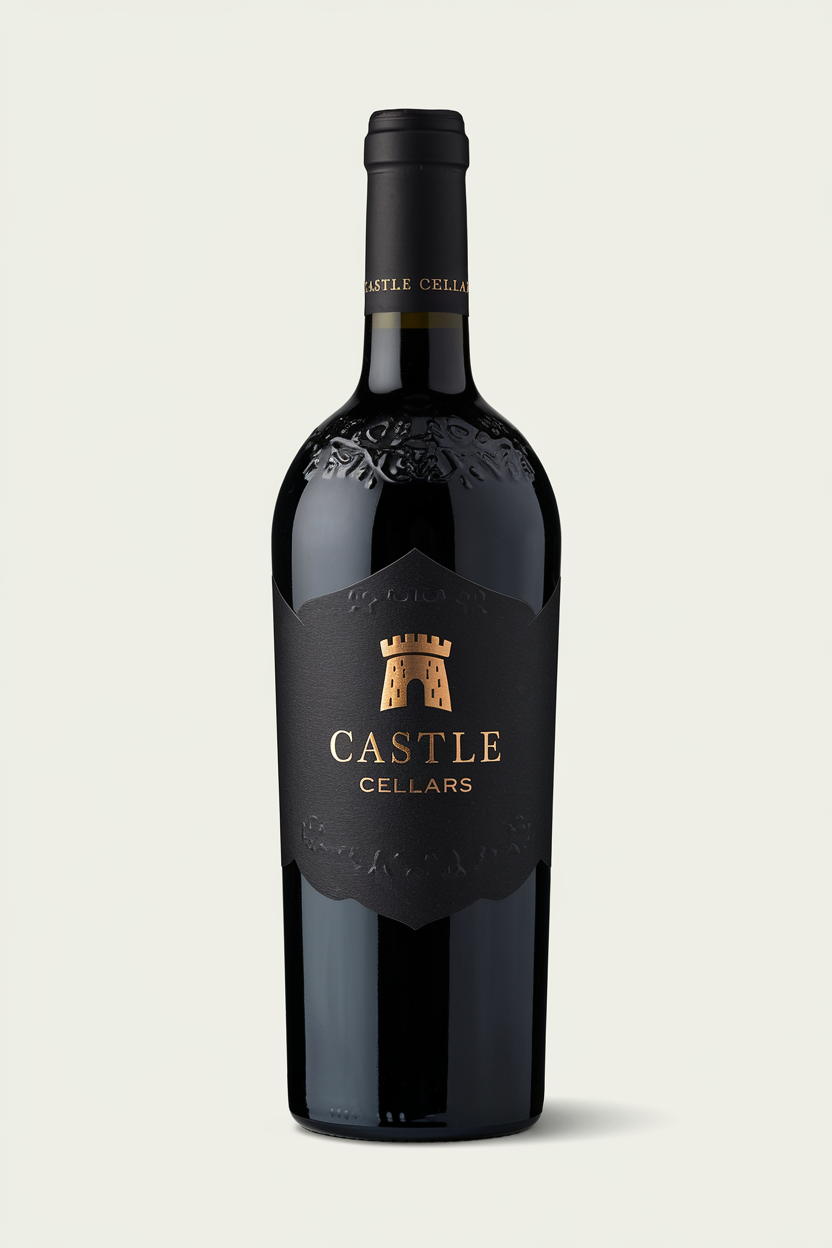
The original wine bottle image.
Background removed and bottle placed in the generation window.

The final image of the bottle integrated into the decor.
Original image.
The generation window adjusted to overlap the original image and extend on the right side.
Final image as caricature.
... a cartoon character showing the same woman as if she was a schoolgirl. Style used: General
... a 3D character depicting the same woman as a chibi character. Style used: 3D
... a kid's coloring book page showing the same woman as if she was a mermaid. Style used: Realistic
... a pop art poster depicting the same woman as a pop art comic character. Style used: Design

The available options when using Generate in Canvas.
The four generated images will appear directly on the canvas.

You can make a selection using the generation window.

The available options when using Generate in Canvas.

The four generated images will appear directly on the canvas.

The Ideogram user interface on desktop platforms.

The Ideogram user interface on mobile platforms.

You can see the previews while the images are being generated.

A preview of your images are available in high-quality when generation is complete.

Options available for generated images


Options available in the More menu.


You need to accept the Developer API Agreement and Policy before continuing with the signup process.


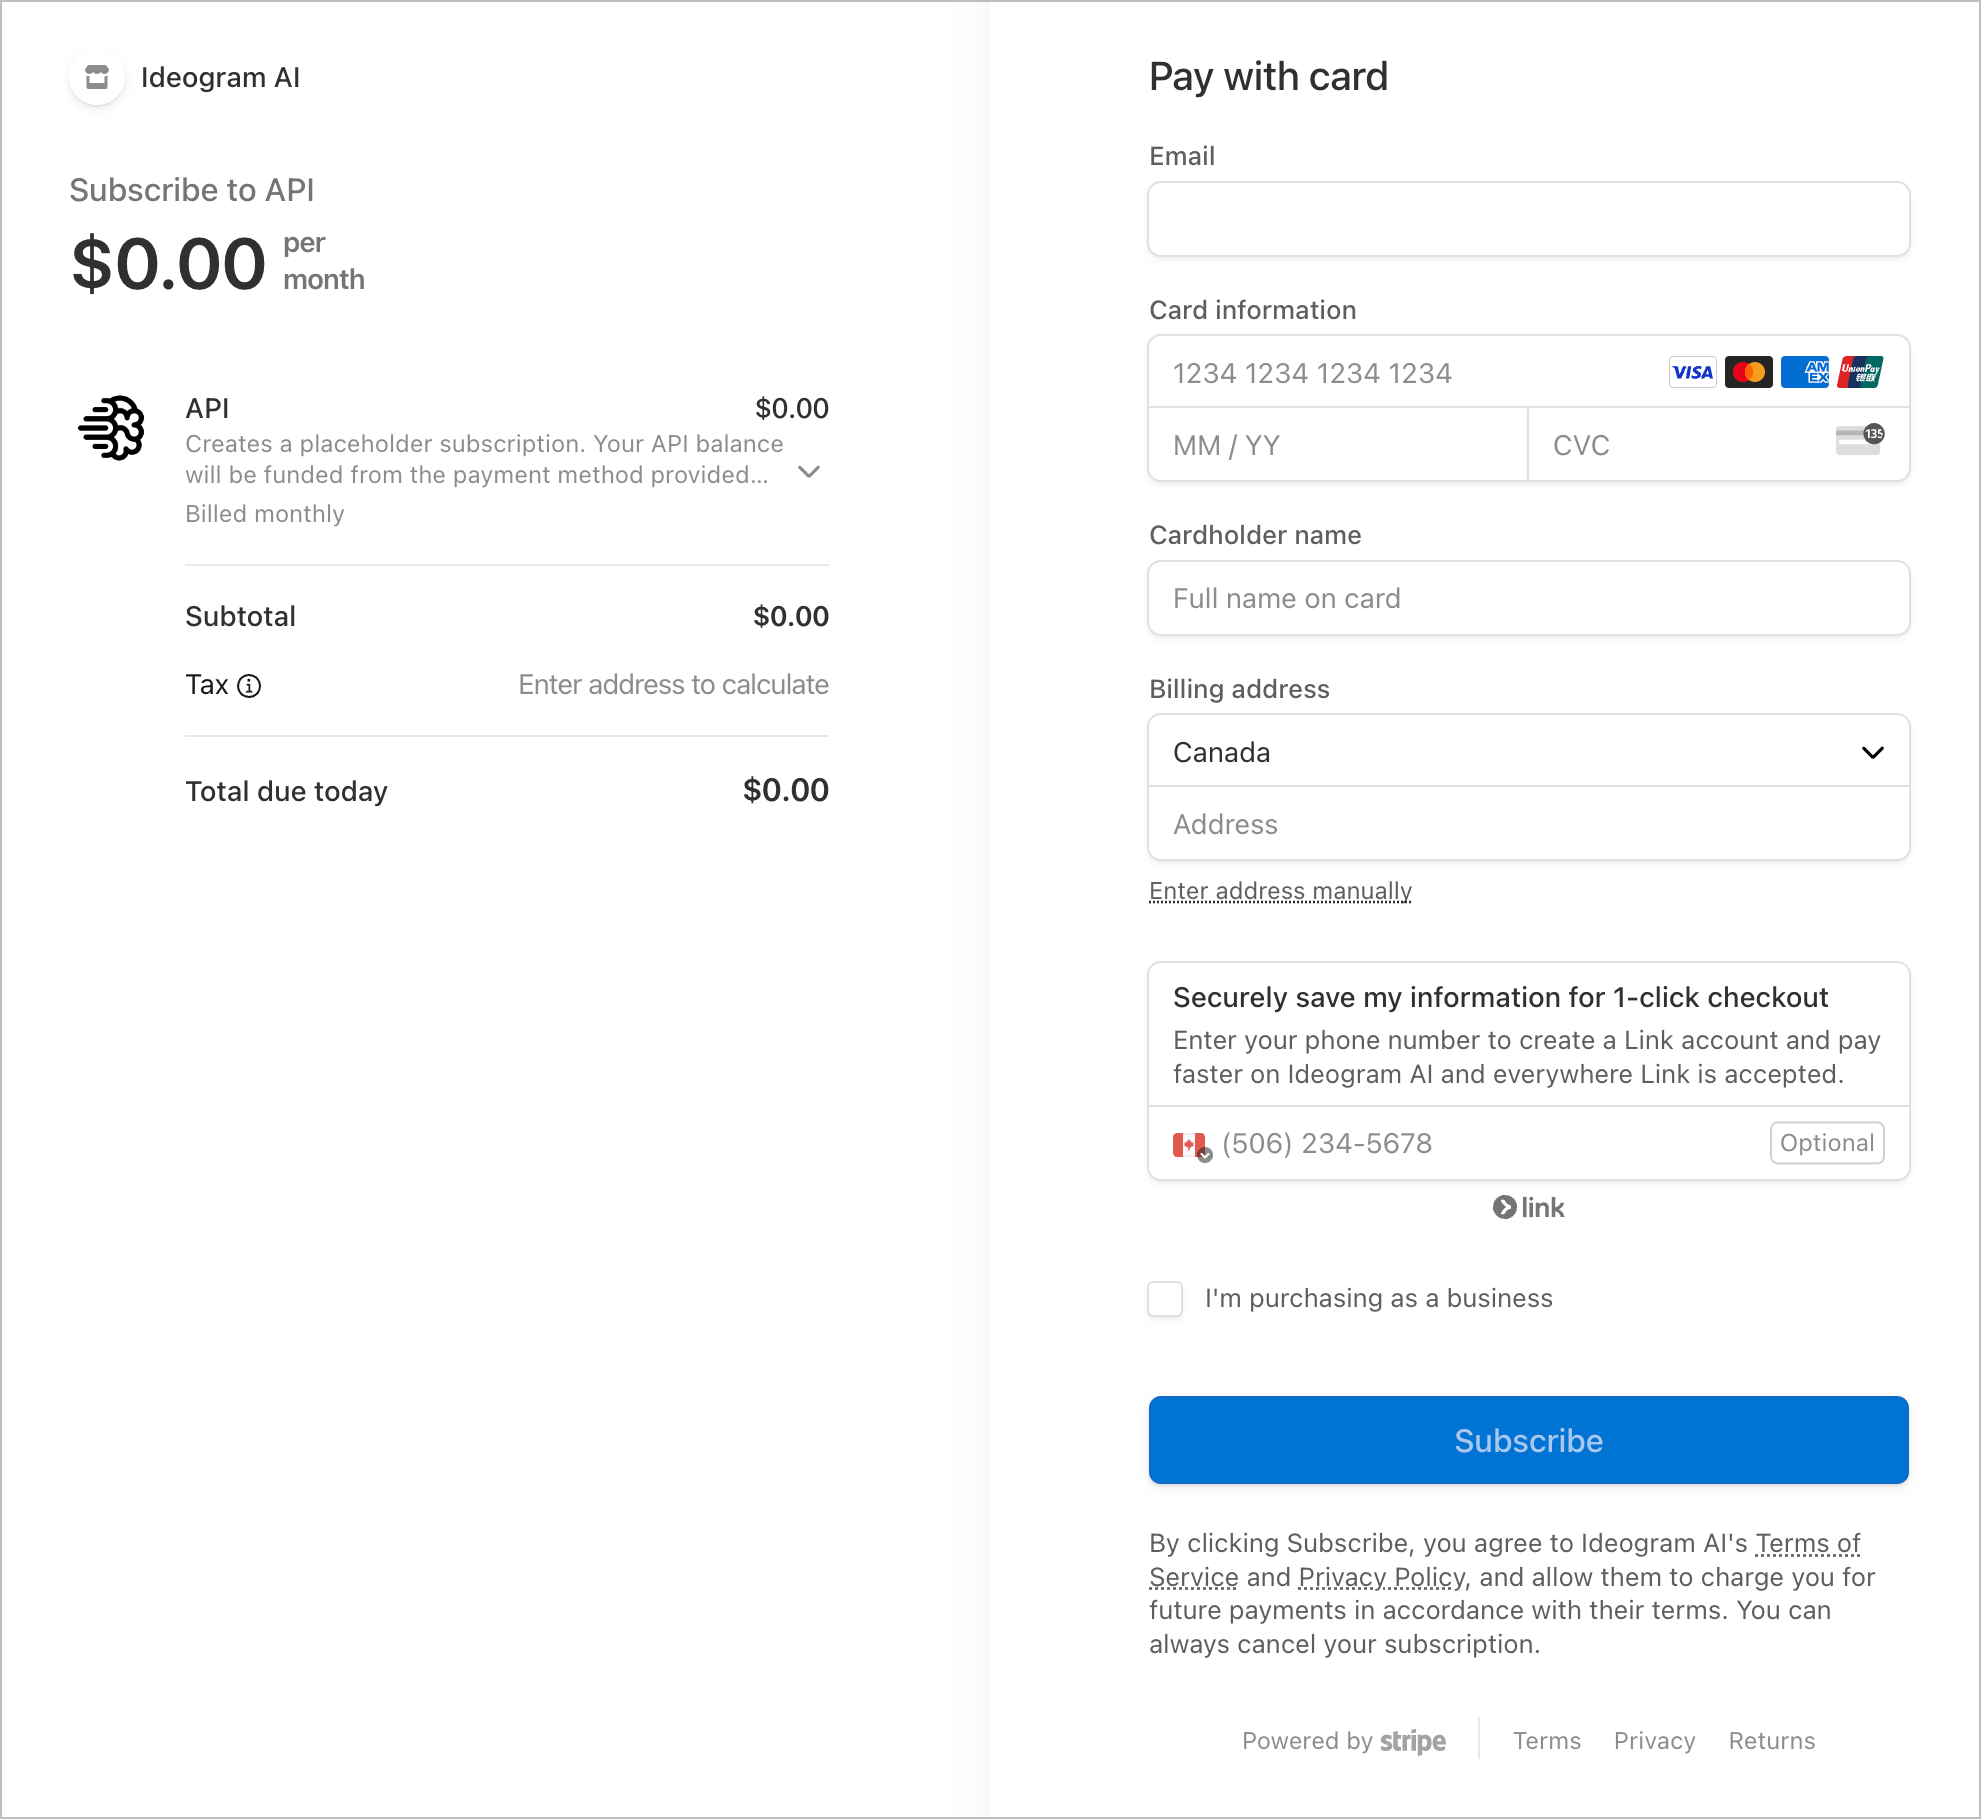
Provide all payment information here. You will only be charged when you create your first API key.


This is how generated API keys appear in the Manage API

Click on the Edit button to change the values.

Click on the Save button to save your changes.
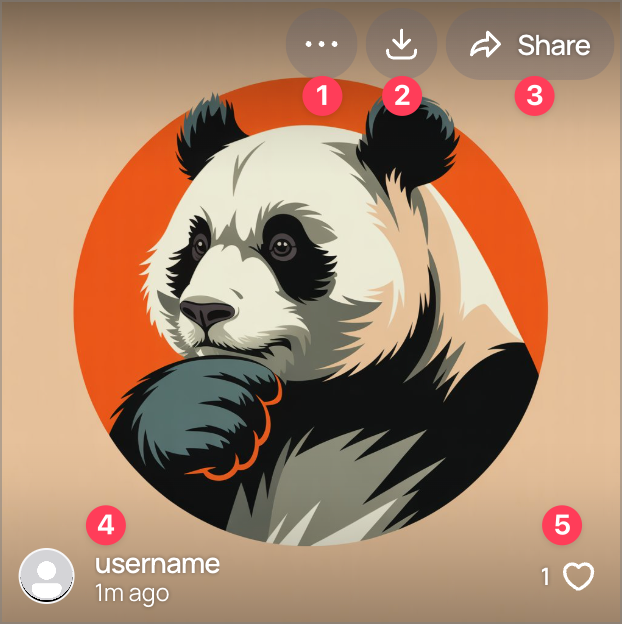
Image in the gallery when the cursor is over it.

The panel at the bottom of the gallery.


Prompt box and location of the upload icon.

Use your file browser to select an image.


The prompt box once you have chosen and ajusted the Remix option.

This is the result of the uploaded image and the prompt mixed together.
| Original image |  | This is the original image that was uploaded as the basis for the remixes presented in the next three images. Note that these images maintain visual consistency with the original, while adhering to their respective prompts. |
| Output A | 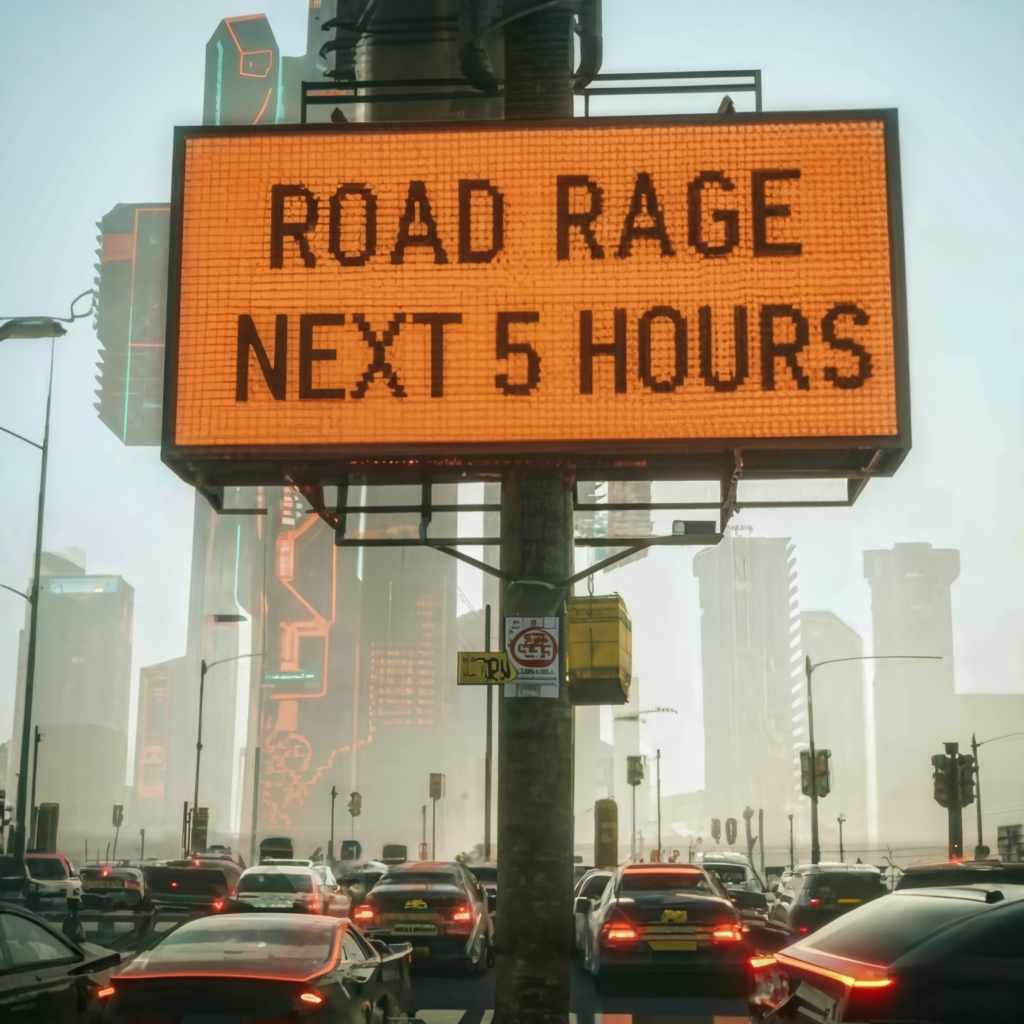 | [Traffic Havoc] A dystopian cityscape, gridlocked streets with a foreboding road sign declaring "Road Rage - Next 5 hours." Agitated drivers amidst polluted air, inspired by the cyberpunk style. Stark neon lights, dark atmosphere, and a gritty, ultra-realistic portrayal., typography, photo, cinematic |
| Output B |  | [Rush Hour Havoc] Overcrowded urban road, perpetual traffic, ominous "Road Rage - Next 5 hours" sign. Infused with cyberpunk aesthetics, neon-lit surroundings, rain-soaked streets, a Blade Runner vibe, intense lighting, gritty realism, sharp details., typography, photo, cinematic |
| Output C | 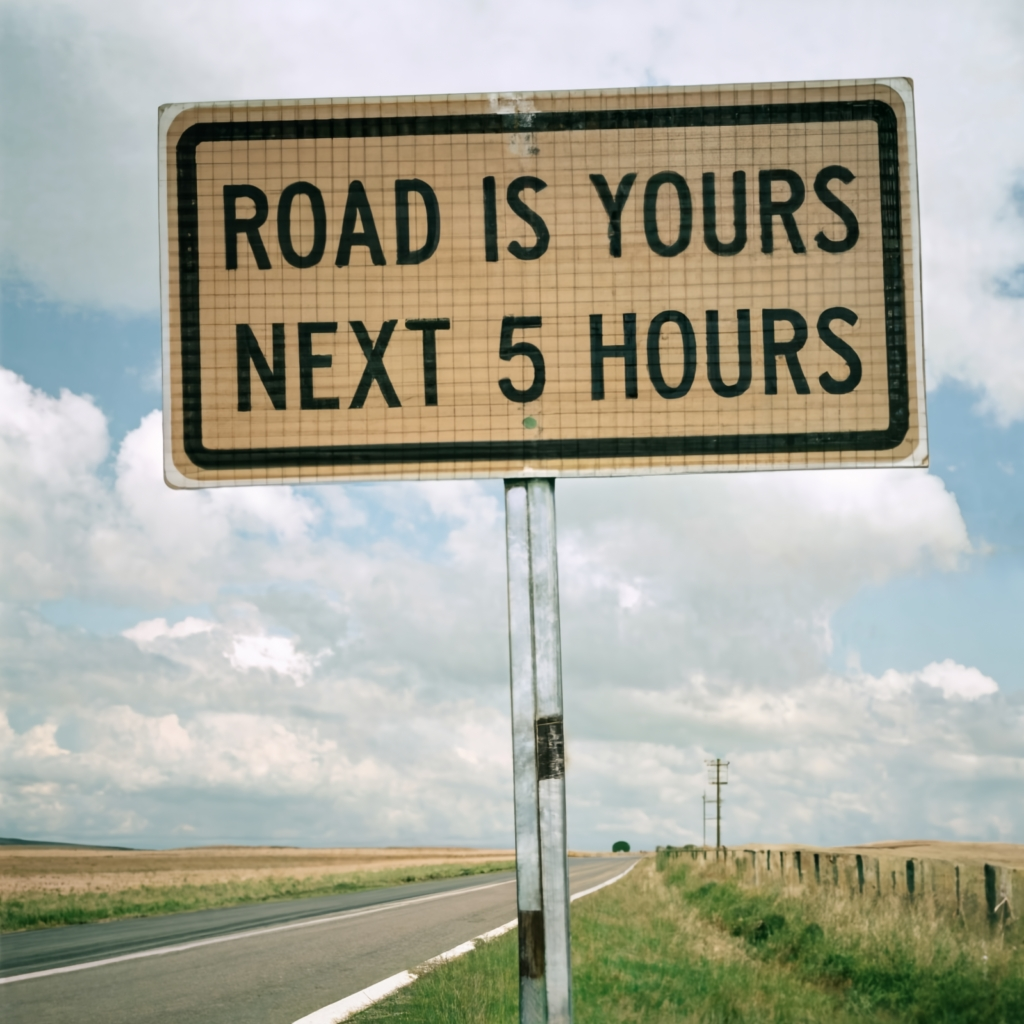 | [Timeless Journey] Expansive countryside, a winding road leading into the unknown. The road sign, "Road is yours - Next 5 hours," under a vast sky. An homage to the simplicity of Grant Wood's style, subtle realism, muted color palette, capturing the essence of a timeless and leisurely journey., typography, photo, cinematic |

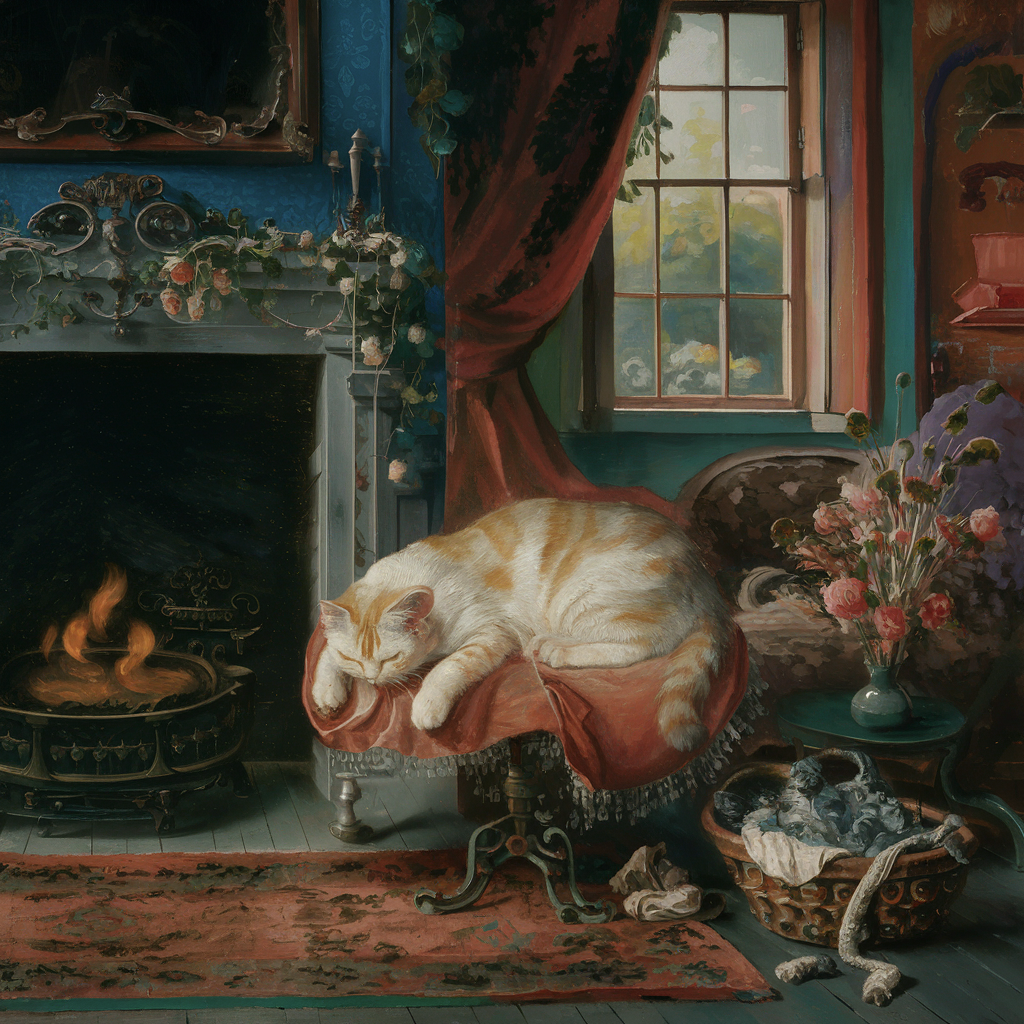
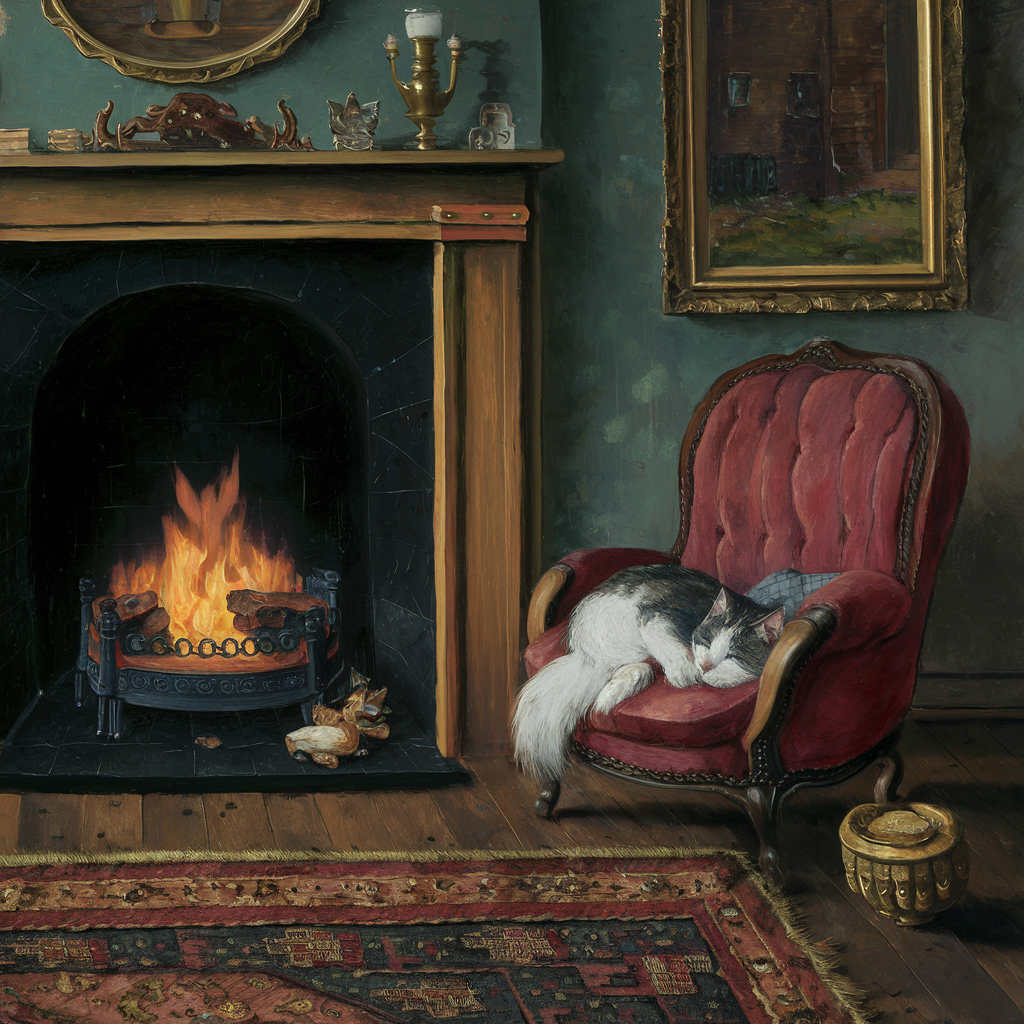 | Prompt: A painting figuring a cat sleeping next to the fireplace. | |
 | Prompt: An abstract painting figuring a cat sleeping next to the fireplace. | |
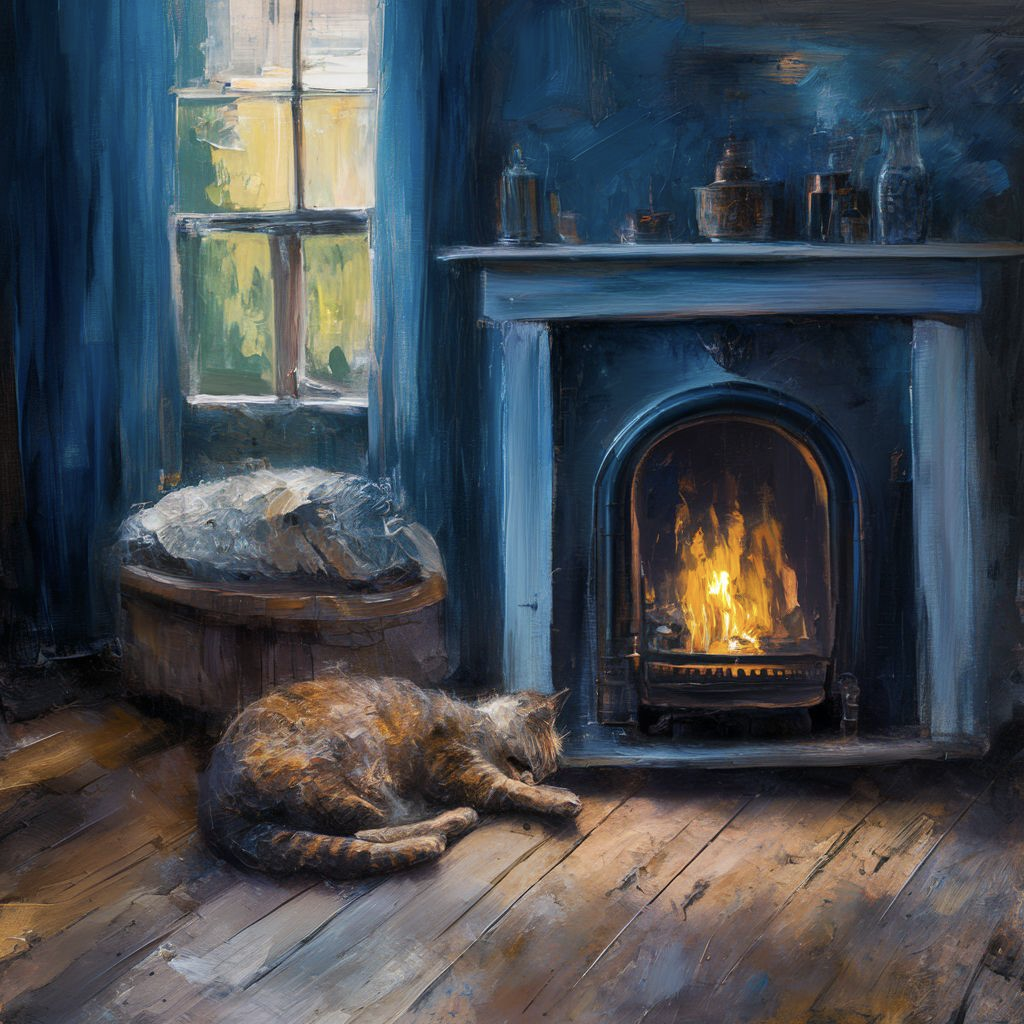
 | Prompt: An abstract impasto painting figuring a cat sleeping next to the fireplace. | |
 | Prompt: A soft minimalist watercolor painting figuring a cat sleeping next to the fireplace. | |
 | Prompt: A fancy and colorful rococo painting figuring a cat sleeping next to the fireplace. | |
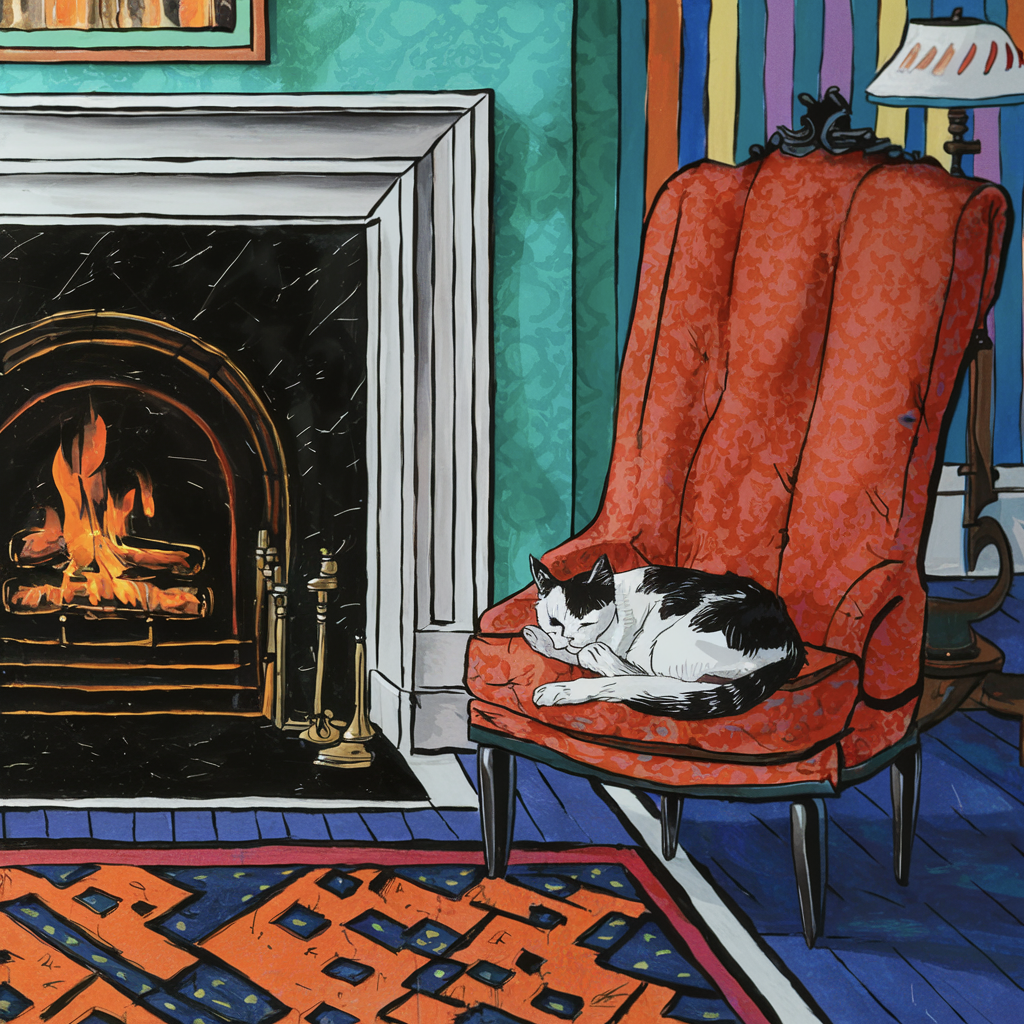 | Prompt: A pop art painting figuring a cat sleeping next to the fireplace. |
 | Prompt: Photograph of a tortoise, a squirrel, a cat and a dog are placed in a line in front of a sofa in the living room where a woman, a little girl, a little boy and a man are sitting. | |
 | Prompt: A vibrant photography featuring three women side by side. The woman on the left has deep blue hair, a red dress and holds a green sign that says "RGB". The one in the middle has magenta/pink hair, a cyan dress and a black belt and holds a yellow sign that says "CMYK". The last one is in grayscale, has a grey dress and holds a sign that says "Grayscale". They are standing in a living room where there's a sofa behind them a big plant on the left and a floor lamp on the right. | |
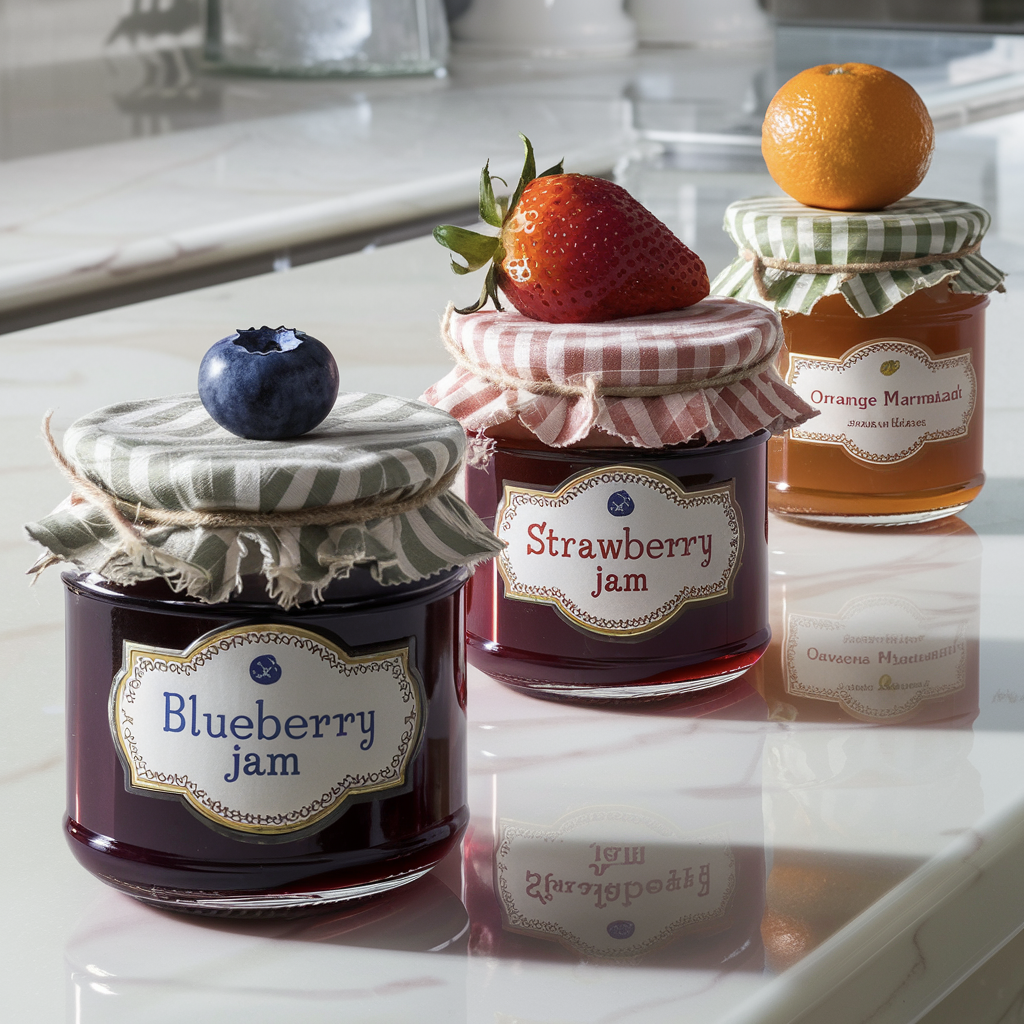 | Prompt: A stunning photograph of three beautifully labelled jam jars displayed on a pristine kitchen counter. The first jar on the left, in the foreground, is a blueberry jam jar, with a blueberry adorning its lid. The second jar, in the middle and slightly recessed, is a jar of strawberry jam, featuring a large, juicy strawberry as its lid decoration. The third jar, on the right and farthest back, is a jar of orange marmalade, with an orange elegantly placed on its lid. The overall atmosphere of the image is warm and inviting, with the jars' colors and labels evoking a sense of nostalgia and comfort. |
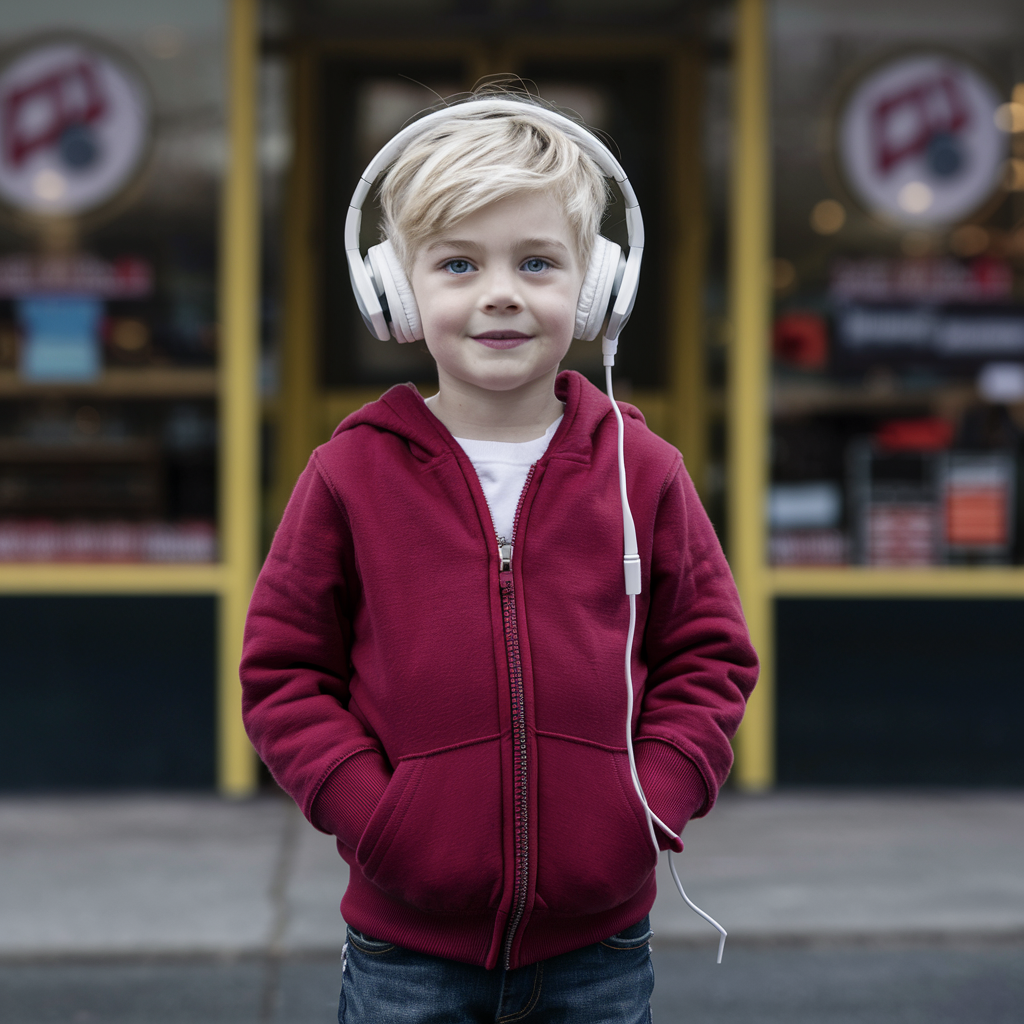
 | Prompt: Portrait photo of a young boy blond boy, with blue eyes, wearing headphones, a deep red hoodie and jeans, and red sneakers, in front of a music store. | |
 | Prompt: Portrait photo of a young boy blond boy, with blue eyes, wearing headphones, a deep red hoodie and jeans, | |
 | Prompt: Portrait photo of a young boy blond boy, with blue eyes, wearing headphones, a deep red hoodie |

The original image to be modified.
The masked areas of the image.

The four generated images.
Starting image.
Masked areas.

Resulting Magic Fill image.

Starting image.
The masked area drawn over her hair.
Results using different colors in the prompt.

Original image generated with a 1:1 aspect ratio (1024 × 1024 pixels).
%20-%20Light%20Dark%402x.png?alt=media&token=b269bedf-dade-4f19-95e9-97ad85610b31)
400% zoomed-in detailed view.
%20-%20Light%20Dark%402x.png?alt=media&token=21e2e1d2-25dc-4106-bc7b-98087852a992)
400% zoomed-in detailed view.
%20-%20Light%20Dark%402x.png?alt=media&token=86a238b2-e2bc-4120-a87d-d00d2d22c6d0)
400% zoomed-in detailed view.
Masked areas to be generated. The generation window is kept as small as possible to achieve greater pixel density.
%20-%20Light%20Dark%402x.png?alt=media&token=d0d76e18-3759-4c36-98c7-1eb14f0183d8)
The hands still require some adjustment.

The masked area and the small generation window.

The final image.


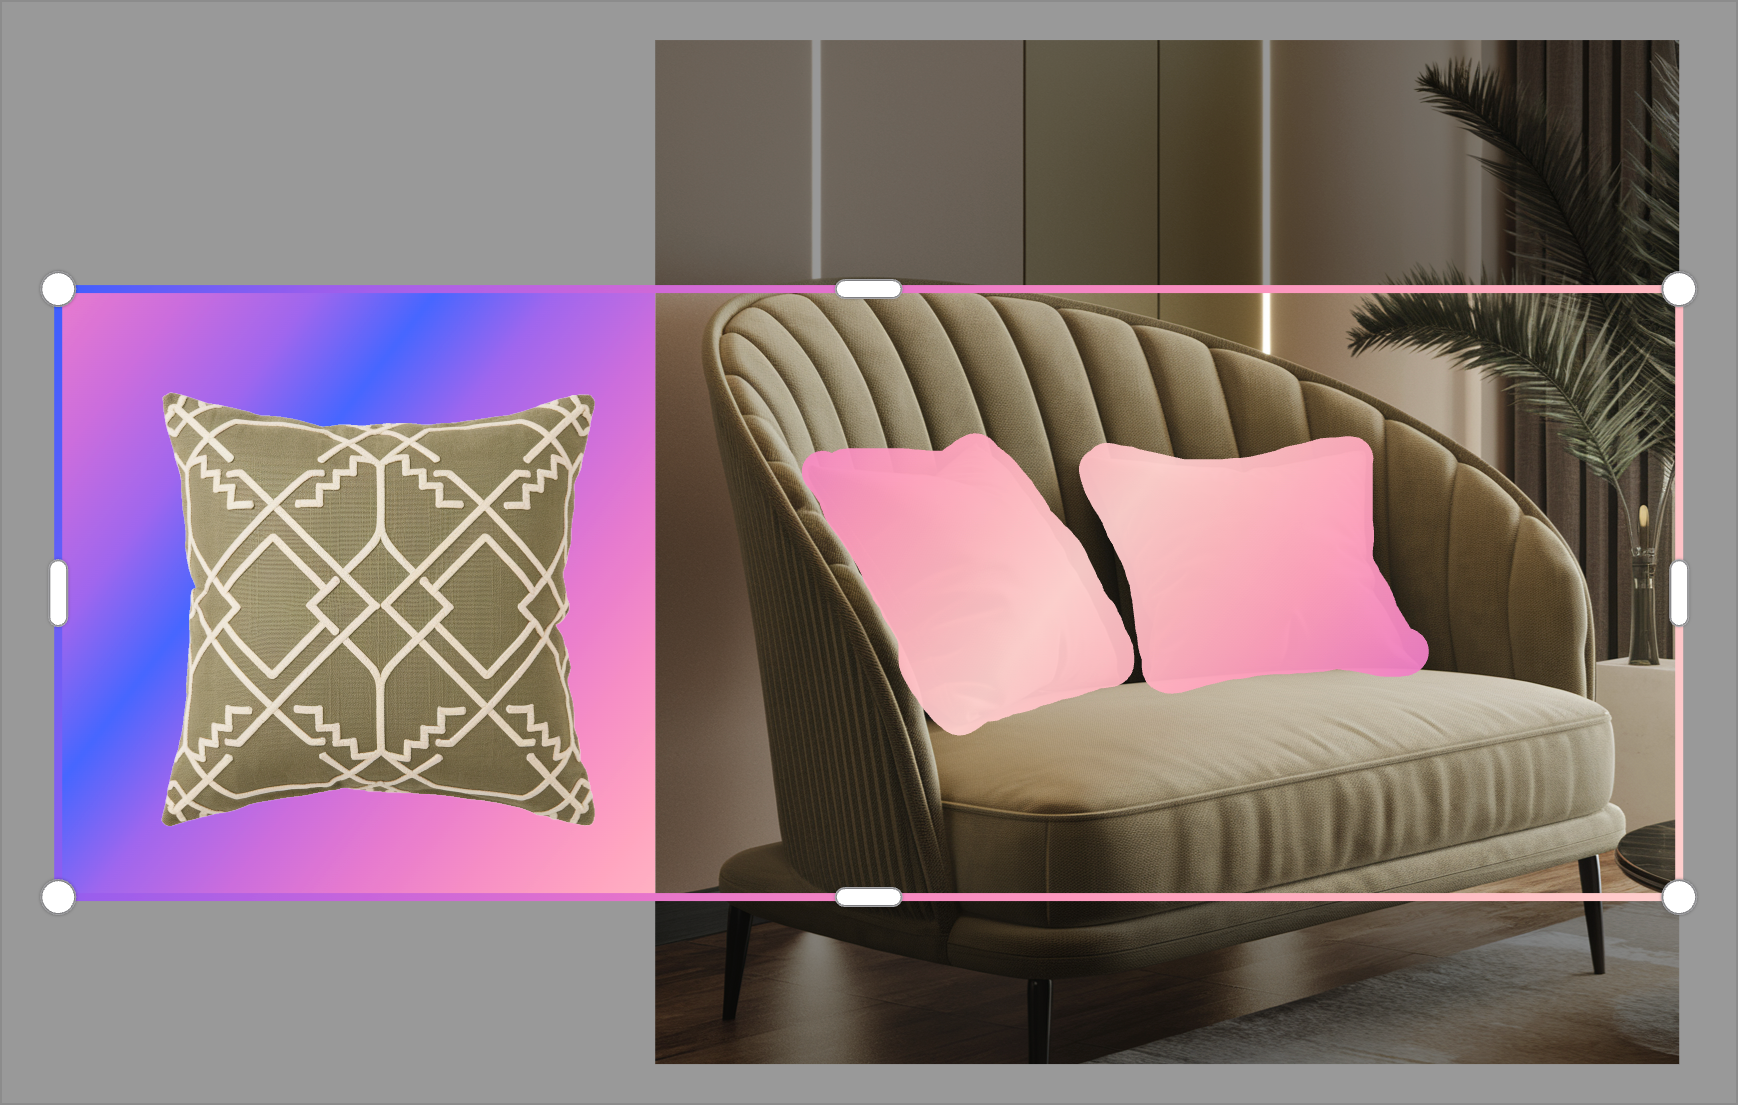
The masked pillow on the right and the generation window.

The generated image includes the pillow and the area selected by the generation window.
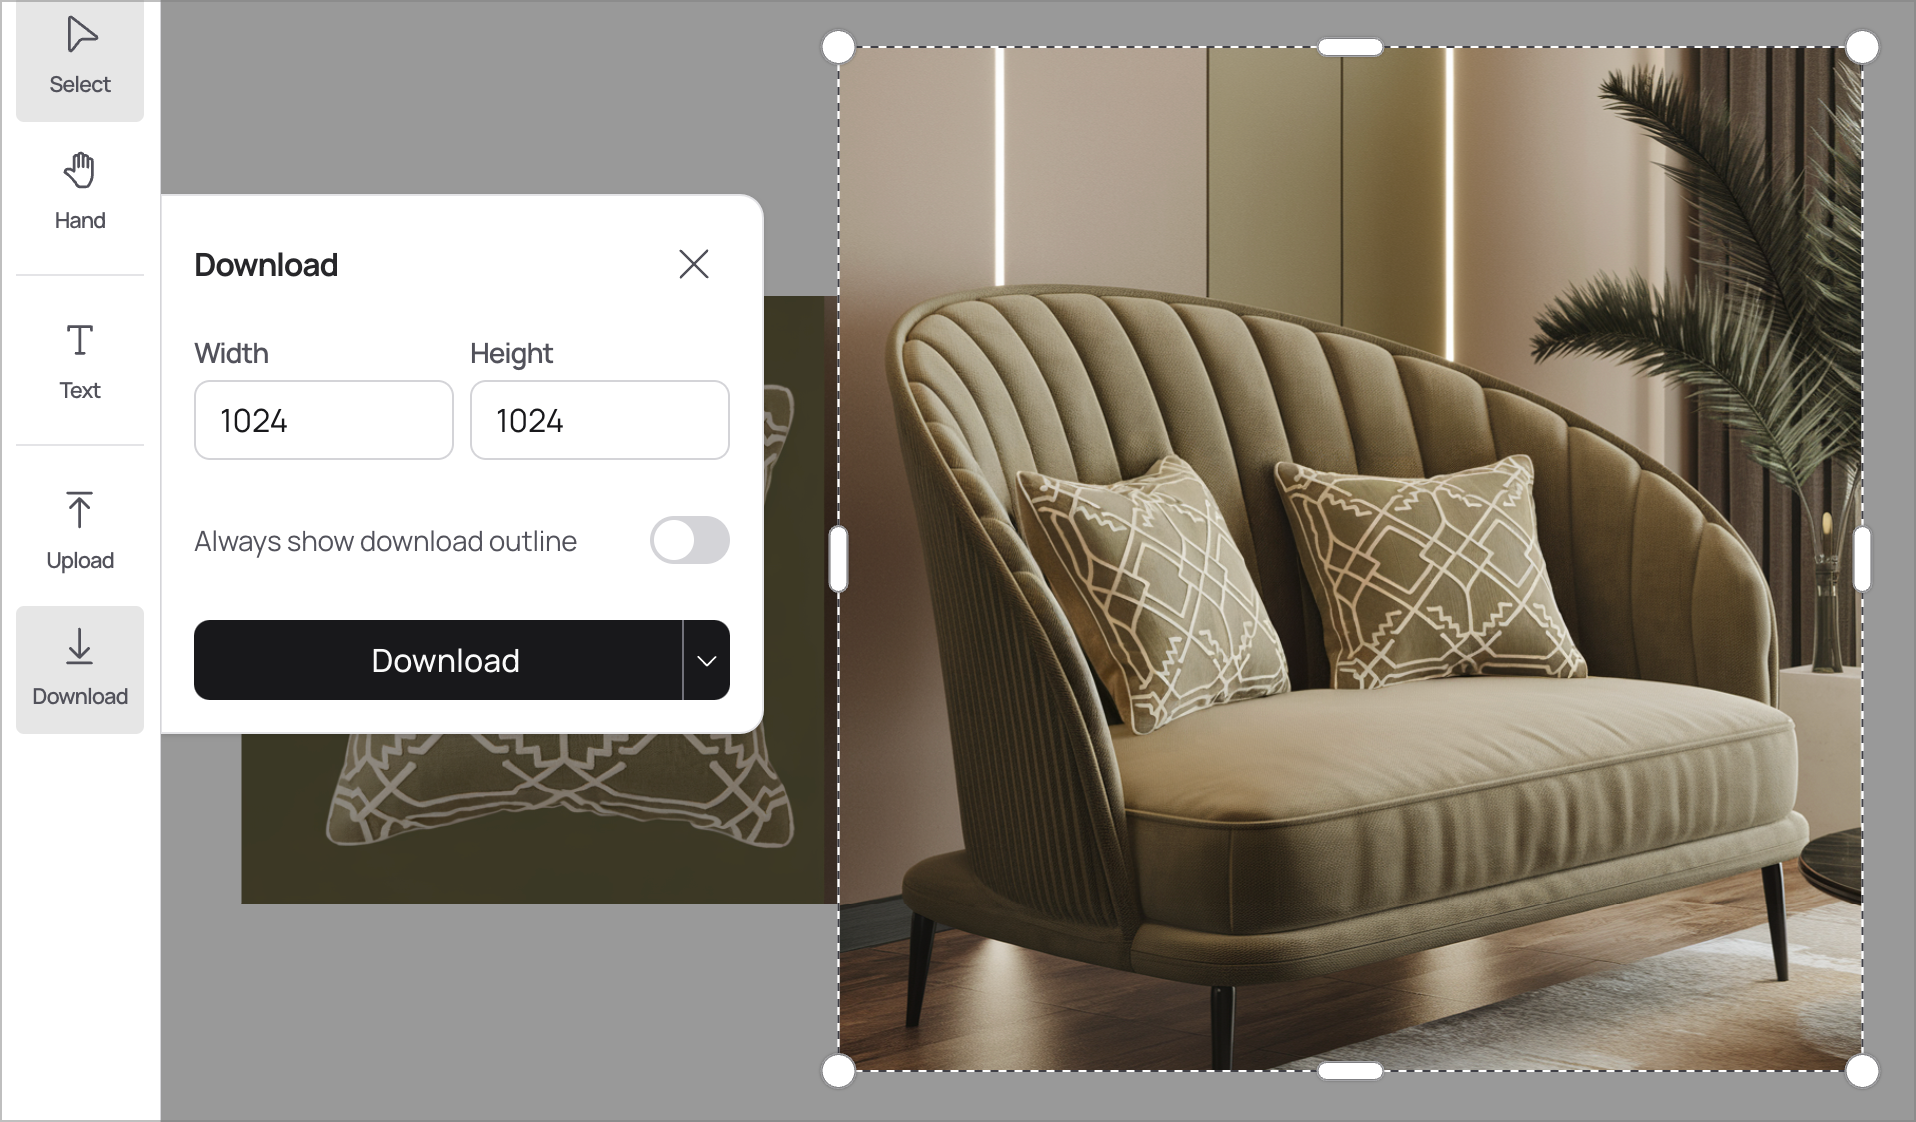
The bounding box indicates the area that will be downloaded.
Before
After

The original image.
Positioning the text on the image.
The rendered text on the left and the masked area on the right, both encompassed within the generation window.

Final image with the text written in the sand.

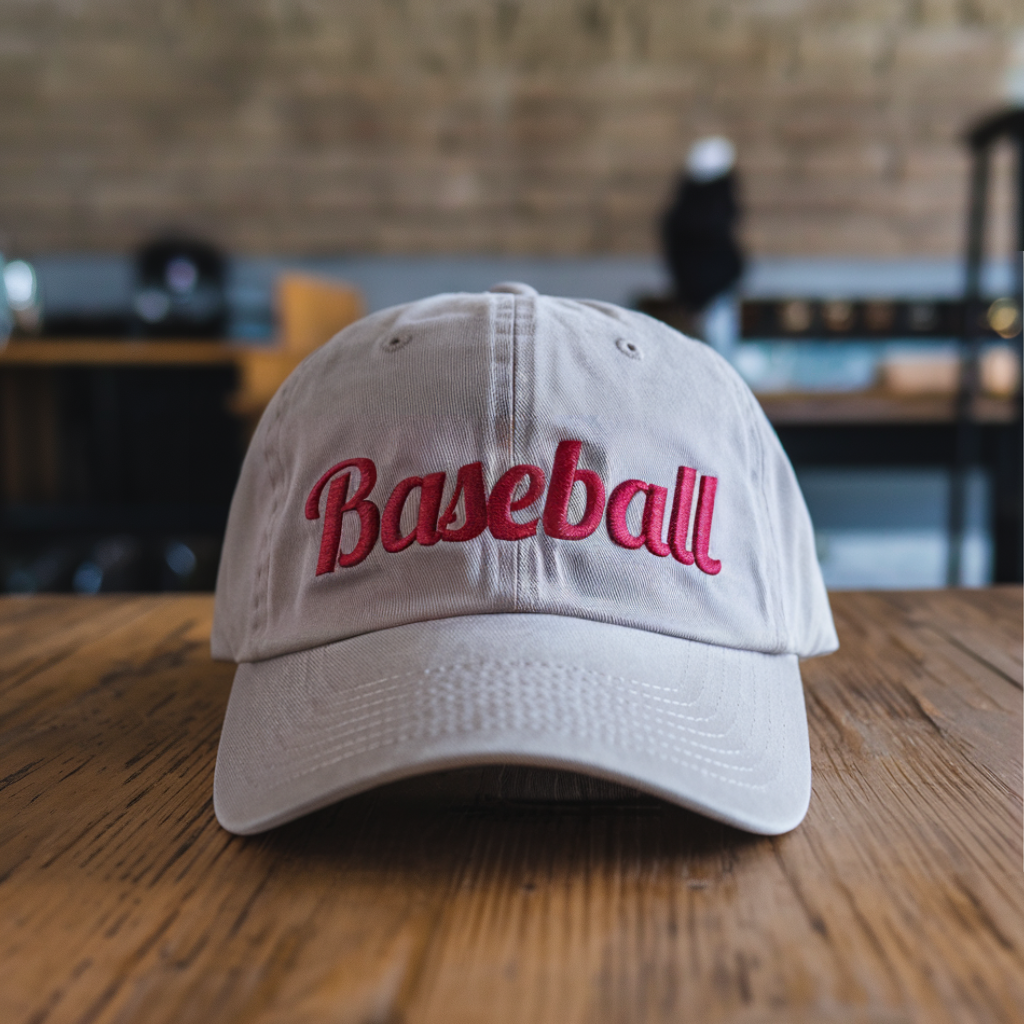
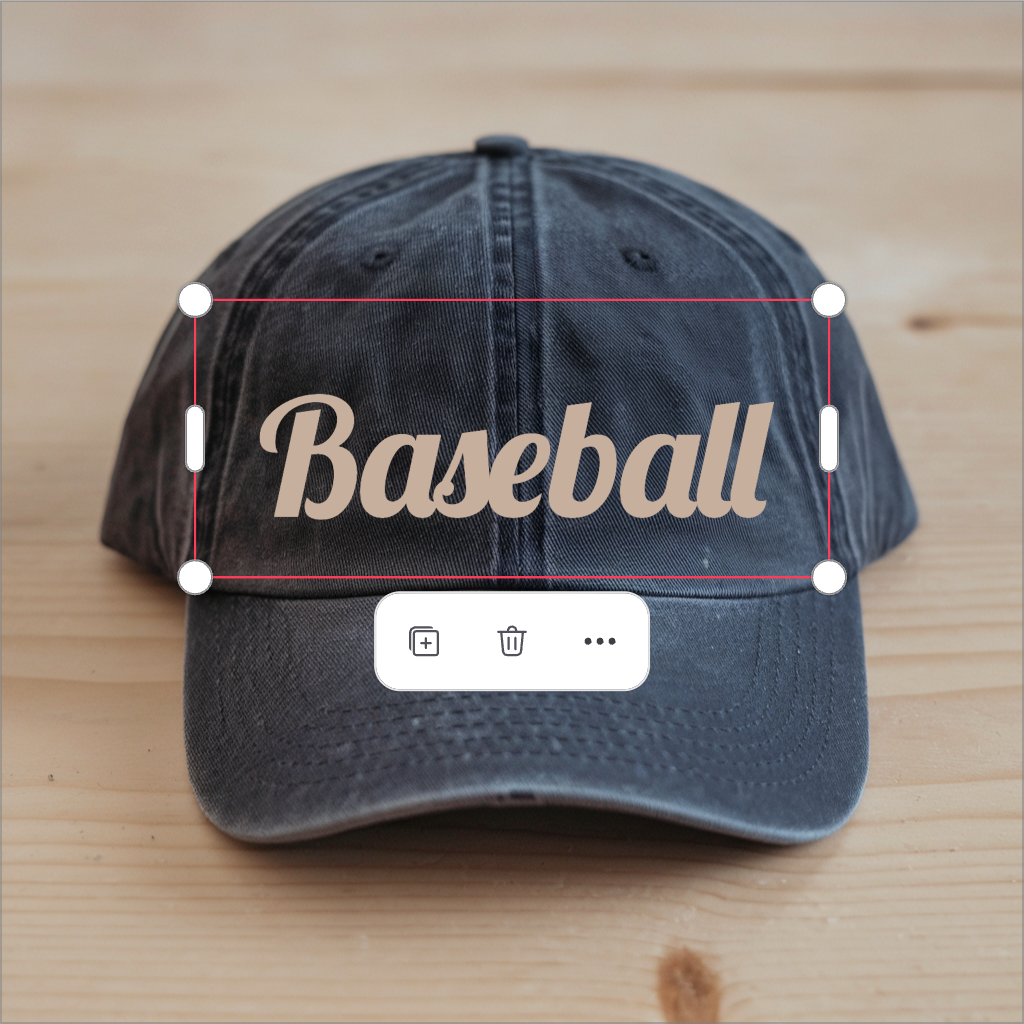
The word ‘Baseball’ in Lobster font and rendered using Remix.
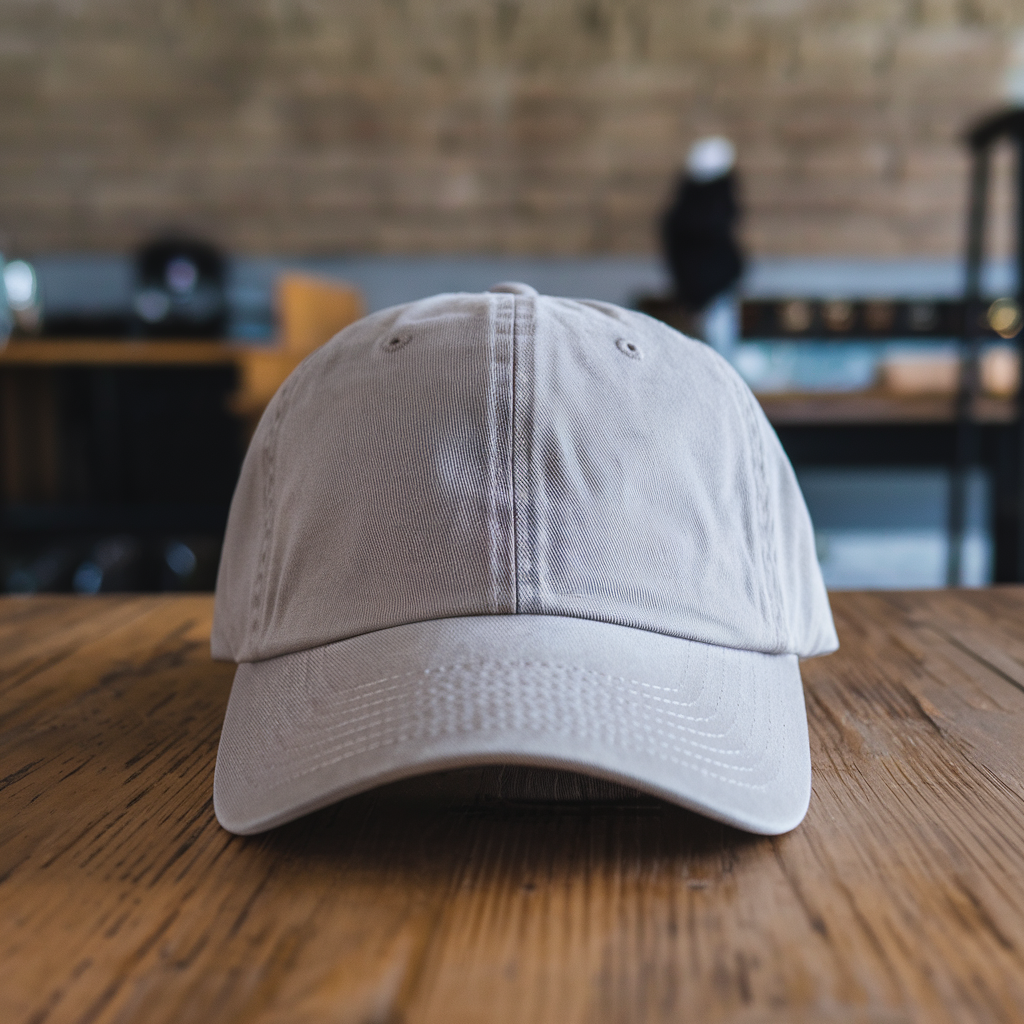
Original baseball cap image.
Result after Magic Fill.
The original logo.

The logo must be integrated into the glass.
The final result. Notice the reflections on the logo.

Original image to be integrated, generated with Ideogram.
Masked areas and generation window size

Original image where the perfume bottle will be integrated

Final image. Note the subtle shadow and reflection.
Masked areas and generation window size.

Original image where the perfume bottle will be integrated

Final image with the integrated bottle. Note how the AI adjusted the bottle to match the lighting conditions.

Magic Prompt menu.

With Magic Prompt set to Off, your original prompt is used without modification.

With Magic Prompt set to On, the feature enhances your prompt to produce more interesting images.

Photo of a cupcake and strawberries as asked in the prompt.

Image generated from the enhanced prompt.

Logo made from the original prompt.

Logo generated from the enhanced prompt.


User profile page


The Negative prompt field in the More menu of the Prompt Box
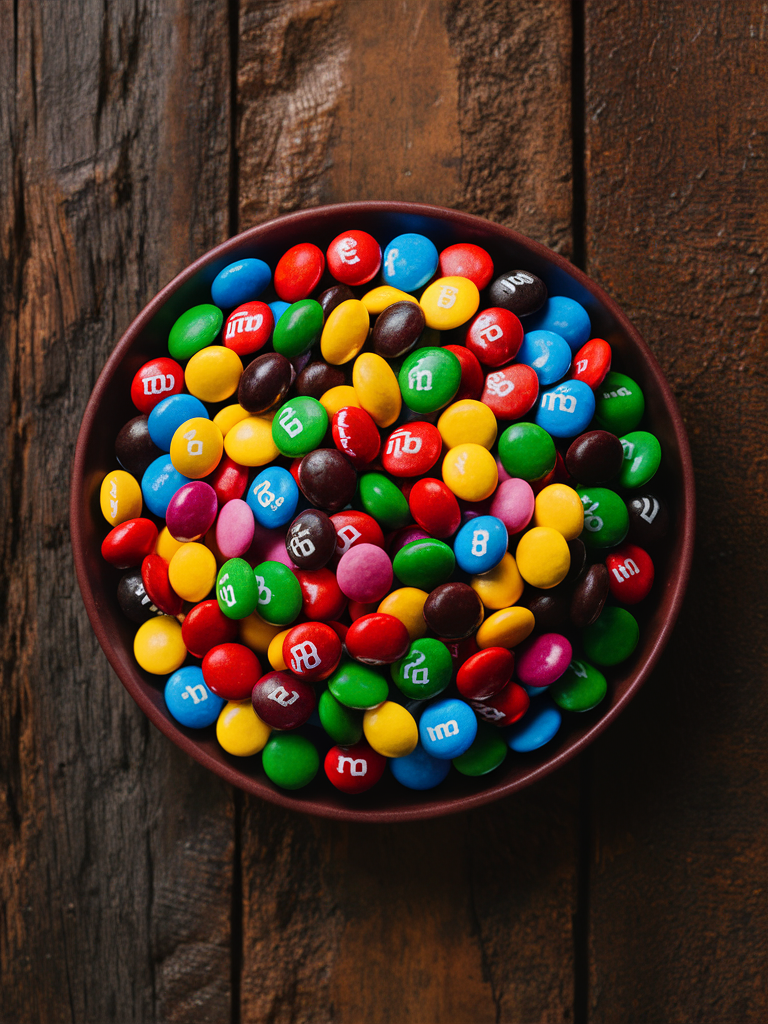 | Prompt: An assortment of colorful candies like Smarties or M&Ms, neatly arranged on a rustic wooden table. | Negative prompt: – |
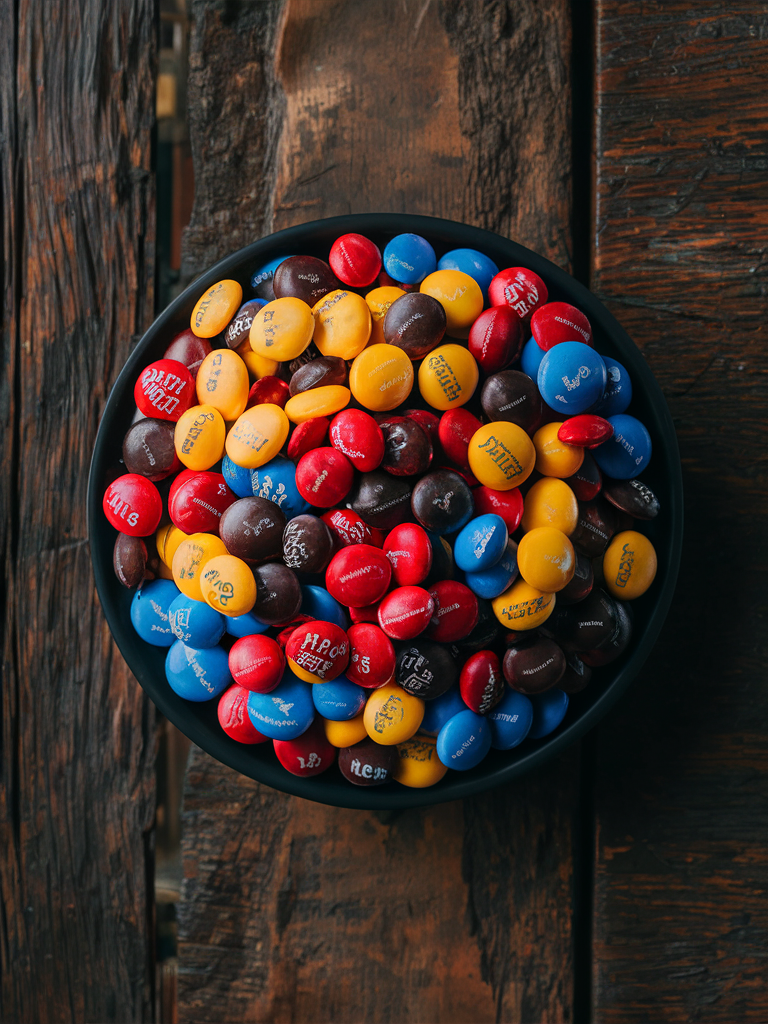 | Prompt: An assortment of colorful candies like Smarties or M&Ms, neatly arranged on a rustic wooden table. | Negative prompt: green, green color, green candies |
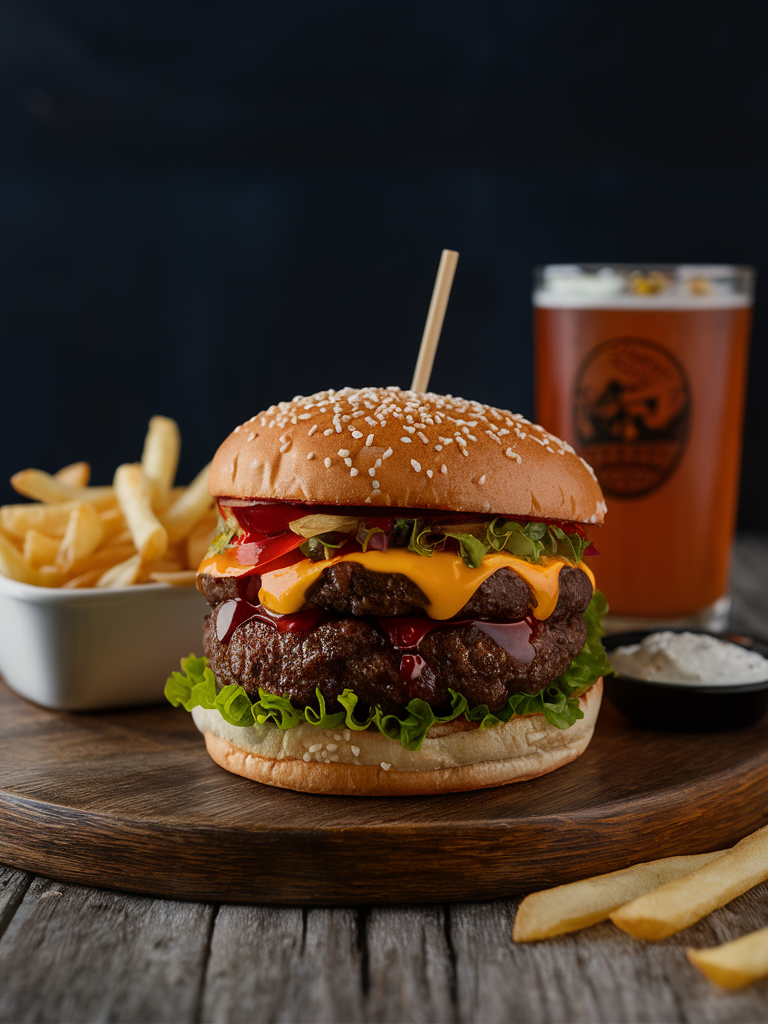 | Prompt: Food photography picture of a delicious gourmet burger with a side of french fries and a beverage in the background. | Negative prompt: – |
 | Prompt: Food photography picture of a delicious gourmet burger with a side of french fries and a beverage in the background. | Negative prompt: cheese, cheeseburger, cheddar cheese |

The Visibility menu showing Public and Private options.

Private tab selected on the Creations page.


Prompt Box in its default state.

The Model + variations menu.

The Aspect ratio menu.

The Style popup window.

The Color palette menu.

The More menu.

The Magic Prompt menu.

The Visibility menu.

Prompt Box with option thumbnails such as Remix, Style, or Character references.

Collapsed Prompt Box showing option thumbnails grouped on the right side.


The available options when importing an image.
Remix tab in the Prompt Box.

Render speed portion of the Model + variations menu.
| Turbo |  |  |  |  |
| Default |  |  |  |  |
| Quality |  |  |  |  |


Resulting image with transparent background after using Remove Background.

Split View when clicking the button at top-right of the image.

Toolbar in Edit Background mode showing masking tools and icons.

Save and Cancel options available in Edit Background mode.

Original studio image before background replacement.

Final image after Replace Background applied.


Search box on the Home page.

Search box on the Creations page.

Seed number field in the More menu.
| Seed: 406220 Rendering: Turbo |  |
| Seed: 406220 Rendering: Default |  |
| Seed: 406220 Rendering: Quality |  |
| Prompt: ... The background is a dark blue gradient, ... Seed: 406220 Rendering: Default |  | |
| Prompt: ... The background is a dark purple gradient, ... Seed: 406220 Rendering: Default |  | |
| Prompt: ... The background is a dark red gradient, ... Seed: 406220 Rendering: Default |  |

While browsing an image.

While viewing an image in details.


The registration page where you sign up for ideogram.ai
Free plan | Free |
|
Plus plan | $20/month |
|
Pro plan | $60/month |
|

The Styles popup showing the available options.

Modes available when a Character Reference is active.

Abstract Organic.

Analog Nostalgia.

Children's Book.

Golden Hour.


Original image.

Style: C4D Cartoon.

Style: Coloring Book I.

Style: Nightlife.
Original image.

Style: 80s Illustration - Remix at 60%.

Style: Avant Garde - Remix at 60%.

Character Reference.

Style: Mixed Media.

Style: Monochrome.

Style: Analog Nostalgia

Analog Nostalgia — Pastel.

Analog Nostalgia — Aquamarine.

Styles available in version 2.0 and 2a.

Styles available in version 1.0.
 | Style: General | |
 | Style: Realistic | |
 | Style: Design | |
 | Style: 3D | |
 | Style: Anime |
| 3d render |  | Prompt: A fireman |
| Anime |  | Prompt: A fireman |
| Architecture |  | Prompt: A fire station |
| Cinematic |  | Prompt: A fireman |
| Conceptual Art |  | Prompt: A fireman |
| Dark Fantasy |  | Prompt: A fireman |
| Fashion | 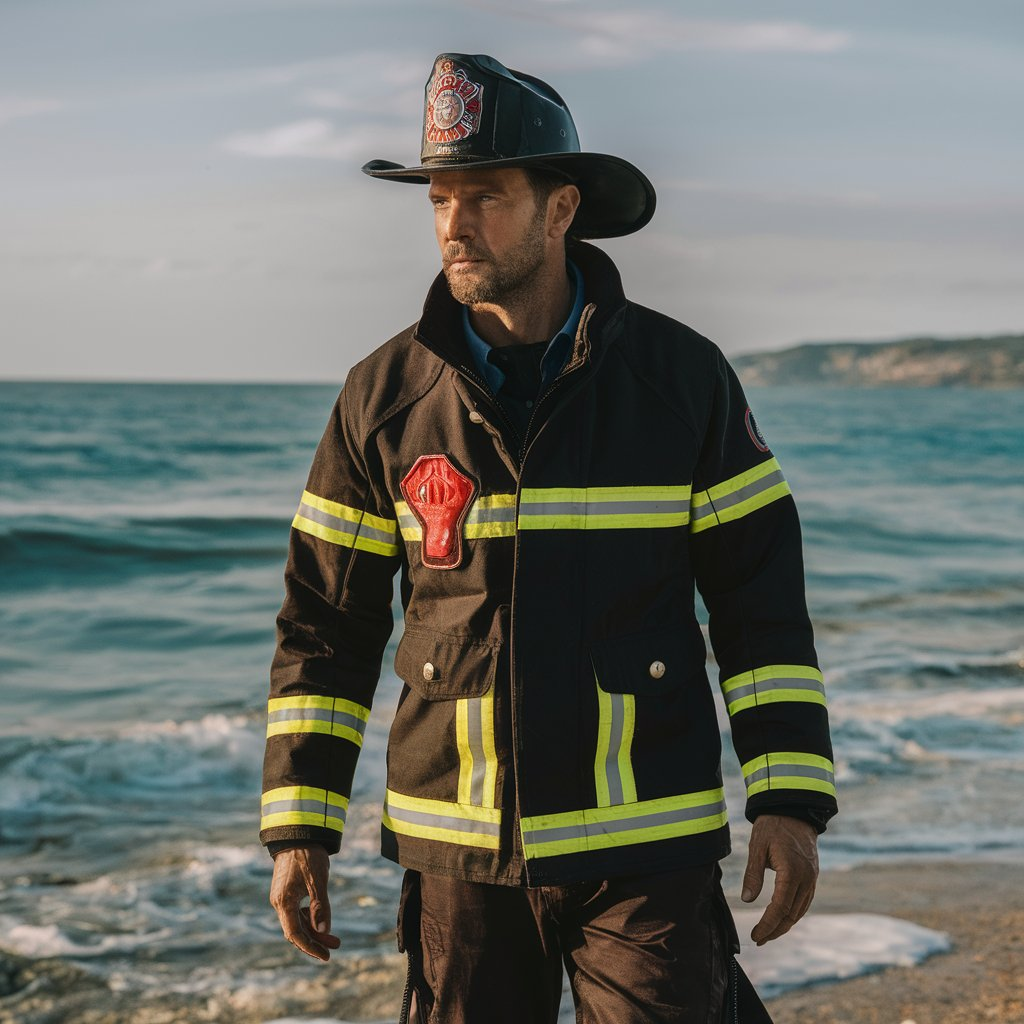 | Prompt: A fireman |
| Graffiti |  | Prompt: A fireman |
| Illustration |  | Prompt: A fireman |
| Painting |  | Prompt: A fire truck |
| Photo | 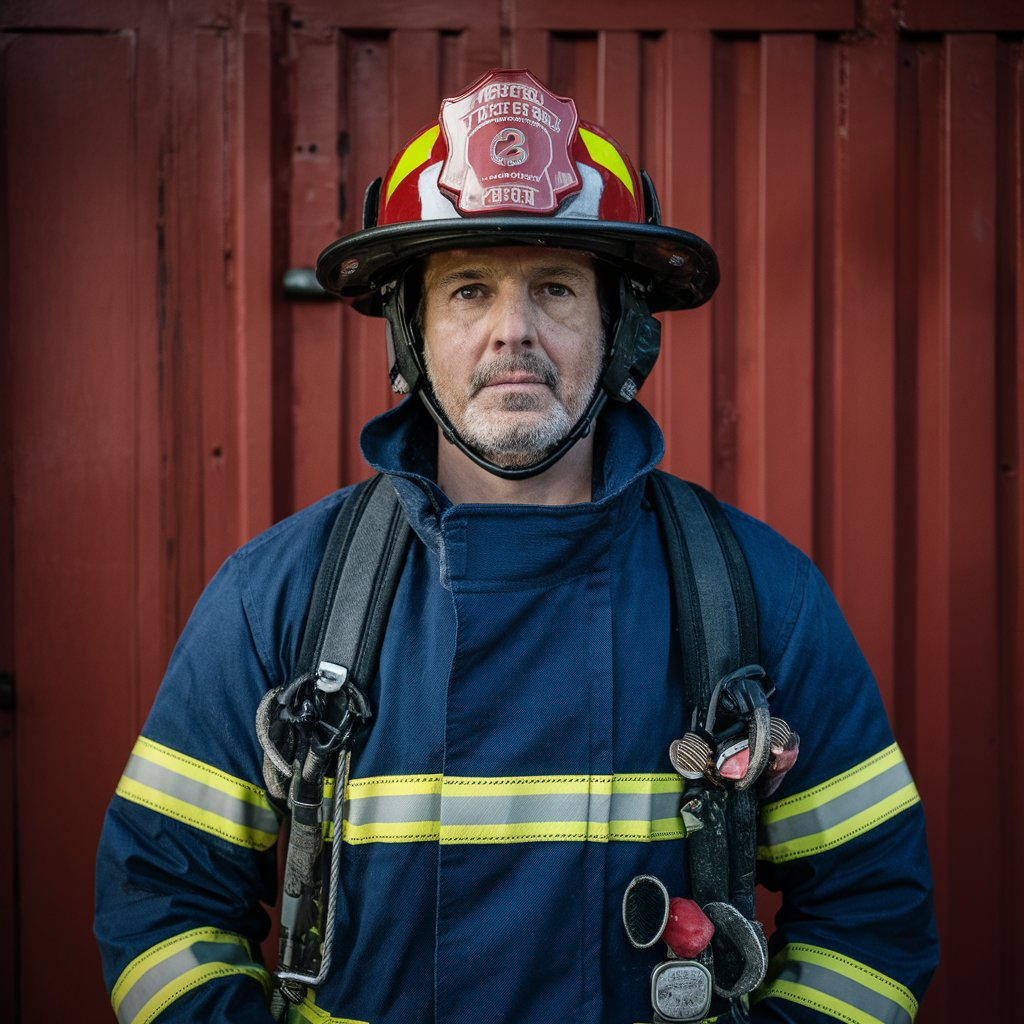 | Prompt: A fireman |
| Portrait photography |  | Prompt: A fireman |
| Poster |  | Prompt: A fireman |
| Product |  | Prompt: A fire truck |
| Typography |  | Prompt: A fire truck |
| Ukiyo-e |  | Prompt: A fireman |
| Vibrant |  | Prompt: A fireman |
| Wildlife Photography |  | Prompt: A fire truck |

The Manage team subscription page.

The modal window to invite new members to your team.


Part of the invite email

Invite notification

Using the Team account

Using the Personal account

Team

Personal

The Team page for members.

The modal window where you will confirm your decision.
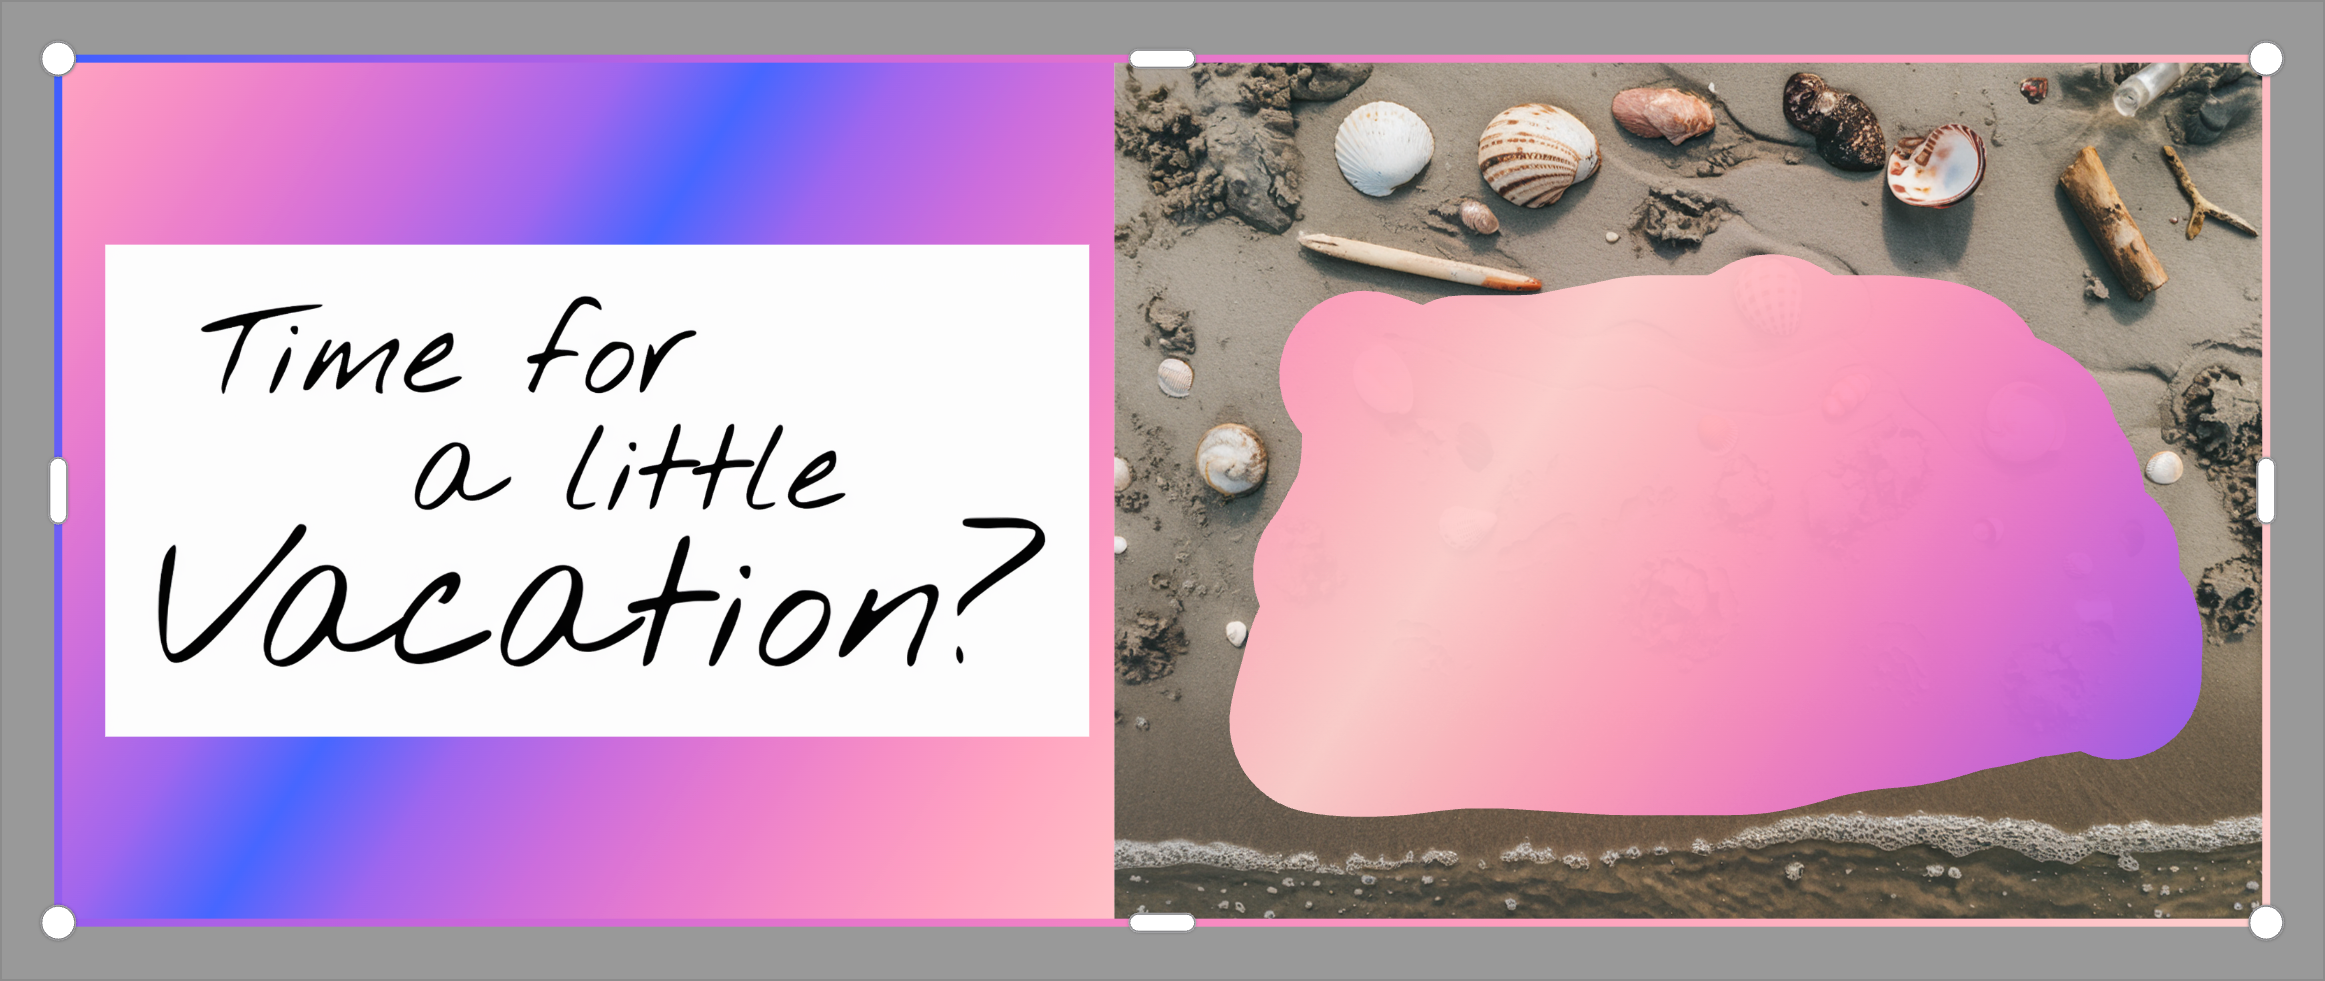
The AI generated the requested text on a poster, on a wall.
| Simple text |  | Prompt: A striking image split in three, where on the left part, a minimalist set of three black geometric forms are arranged vertically on a light grey background. The center and right parts are united as a black background, a block of geometric text emphasizes the essence of minimalism: "Keep it simple, experience minimalism." |
| Text as logo | 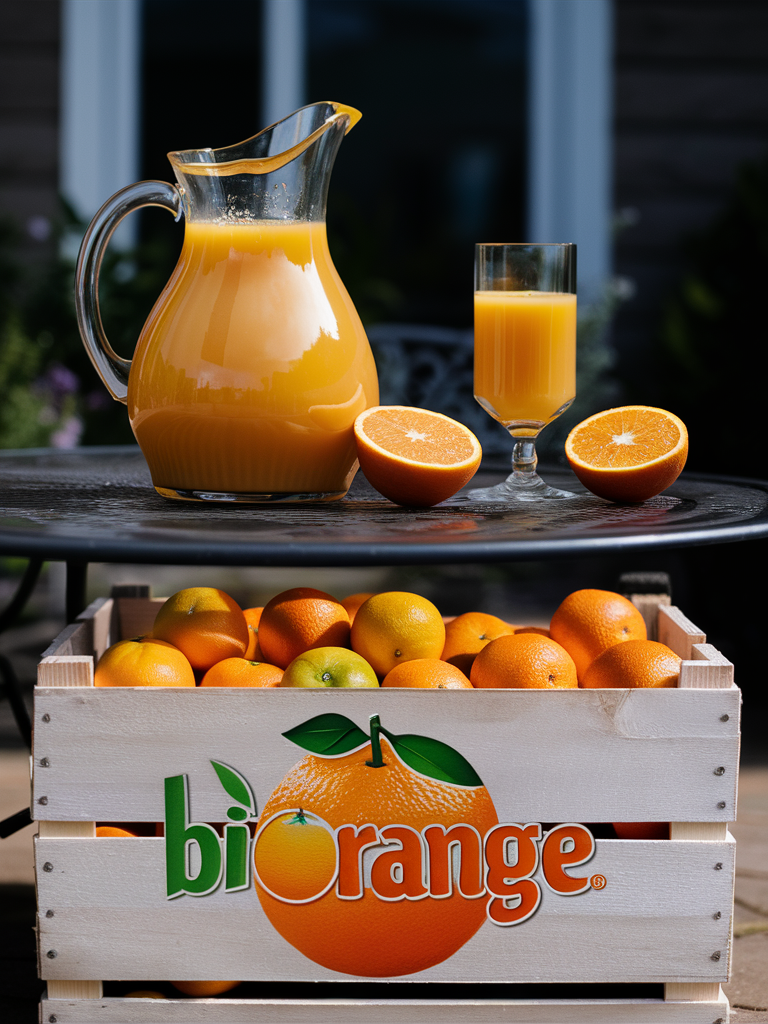 | Prompt: A striking photograph in which a jug of orange juice is placed on a patio table with a glass of orange juice next to it and a few oranges placed neatly on the table some cut in half. At the bottom of the image, the side of a wooden crate full of oranges shows the brand logo, which consists of a big orange in the background of the word 'Biorange' in stylish juicy/liquid lettering, which forms the logo for the orange juice brand. The background is blurred and a little dark, but it looks as though the photo was taken outside, in the garden of a house, on a sunny day. |
| Text formed by objects | 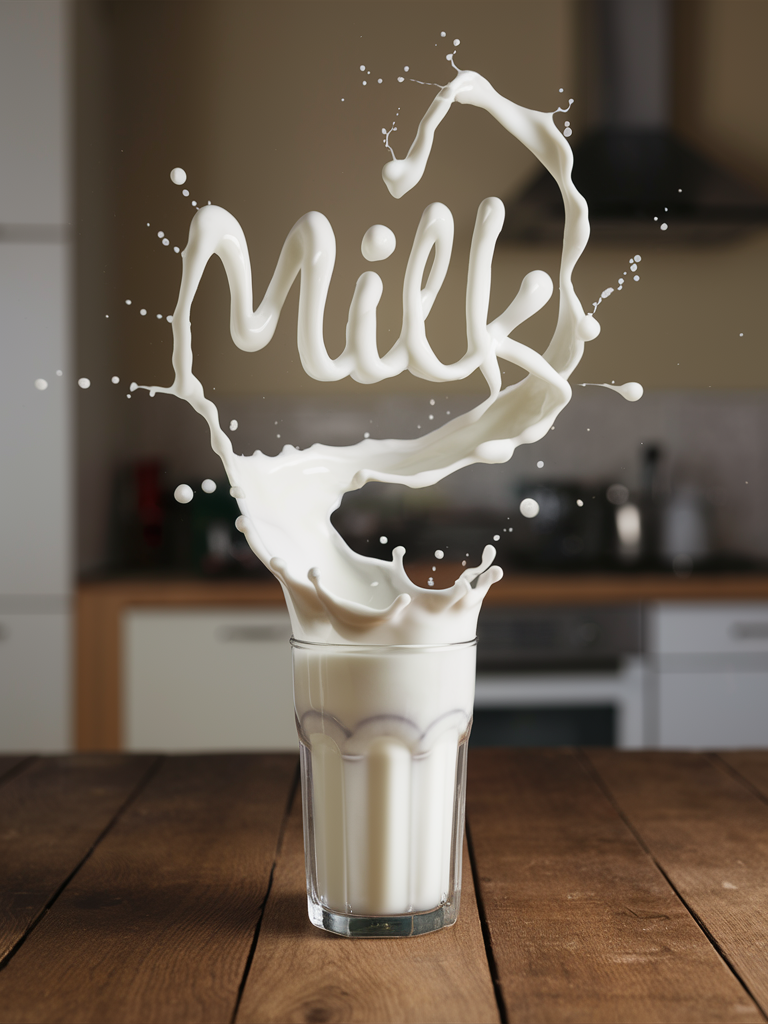 | Prompt: A striking photograph in which a glass of milk is placed on a wooden table. A splash of milk comes out of the glass, forming the word "Milk" in a swirly manner just above the glass. The background is blurred but looks like a homely kitchen. |
| Text as part of an object |  | Prompt: A close-up detailed product photo of a vibrant and energetic baseball cap, featuring a stylish red panda embroidered emblem that exudes vitality. The cap is embroidered with the team's name, "Red Panda," displayed boldly in white bold script font below the sleek red panda design. The dynamic perspective and intense focus on the cap create a sense of high-spirited enthusiasm and team spirit. |
| Text as design |  | Prompt: |
| Text as logo or design |  | A captivating vintage-style calligraphy artwork featuring a woman's silhouette with intricately crafted hair, made up of elegant script that reads "Take care of your hair naturally." The brand name "Herbal Shampoo" is gracefully written in a fine sans-serif font below the main text, with the word shampoo being smaller, adding a touch of elegance to the design. The soft off-white background enhances the rich, vintage feel of the piece, while the seamless flow of the text emphasizes the message and the silhouette's feminine grace. |
 | Prompt: The word "Welcome" written in bold sans-serif typeface, in black on white background. | |
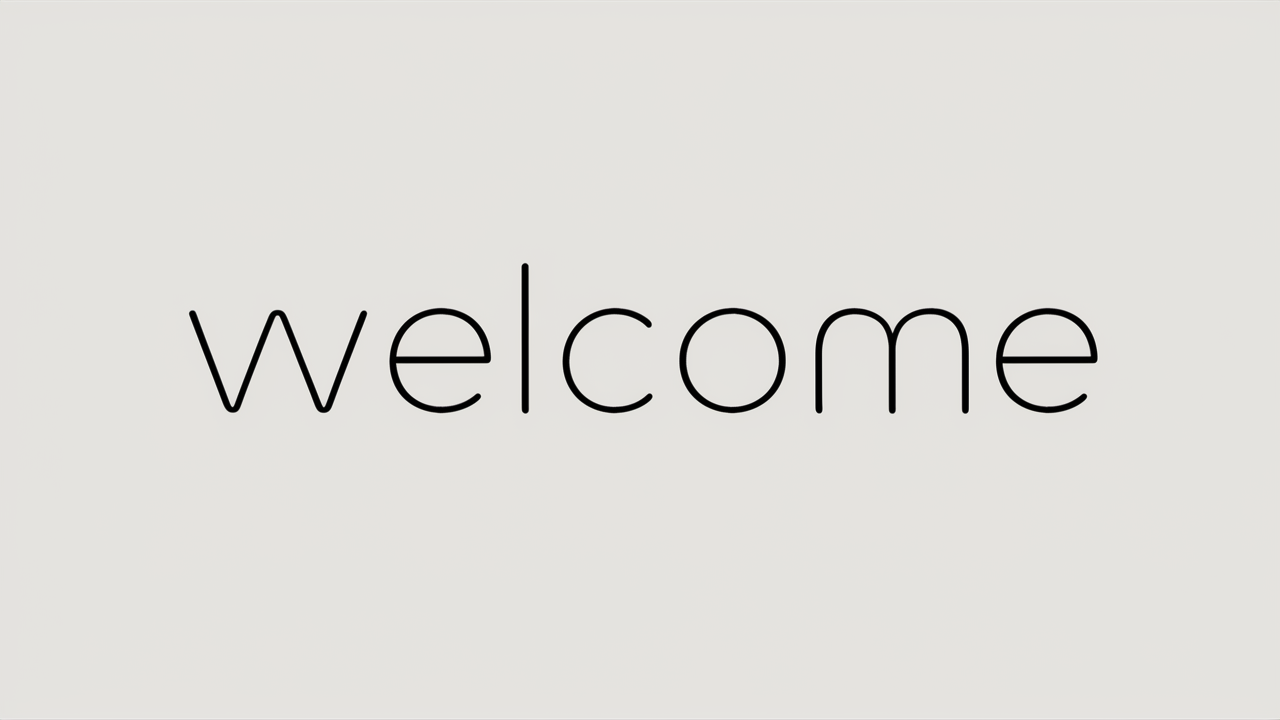
 | Prompt: The word "Welcome" written in ultra thin sans-serif typeface, in black on white background. | |
 | Prompt: The word "Welcome" written in serif typeface, in black on white background. | |
 | Prompt: The word "Welcome" written in thin rounded bauhaus style typeface, in black on a white background. | |
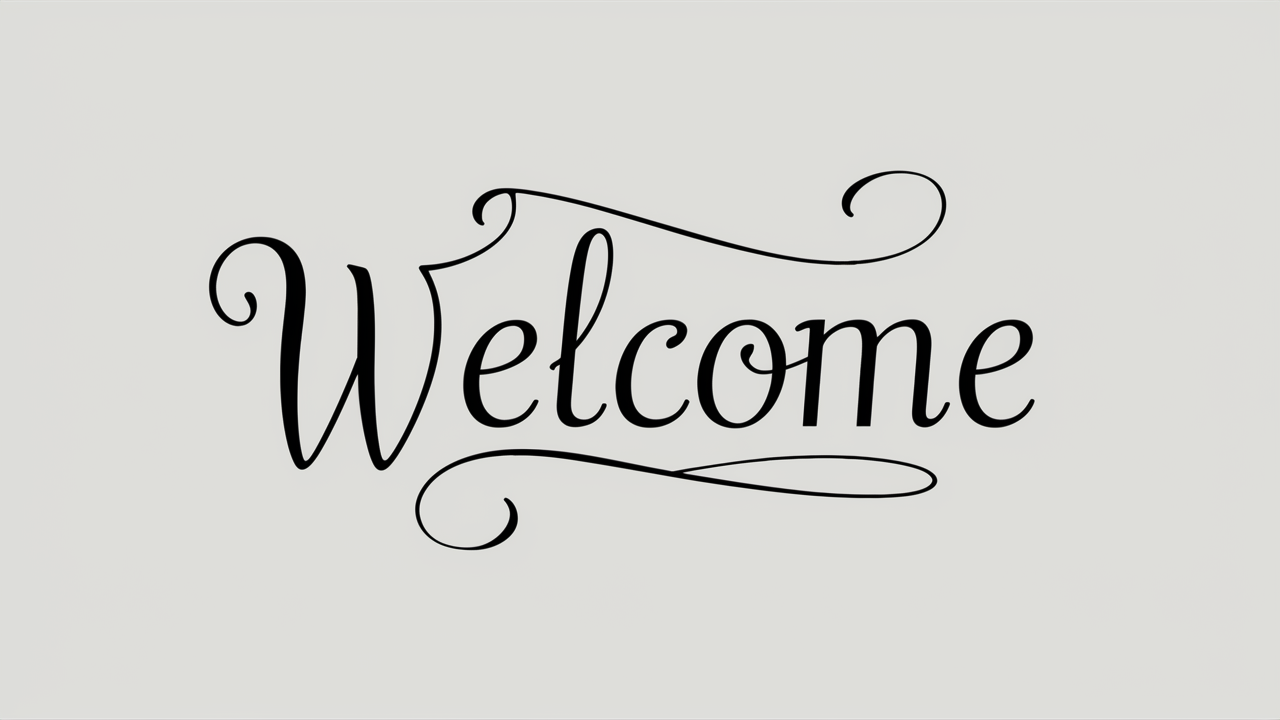 | Prompt: The word "Welcome" written in thin and refined formal script typeface with flourishes, in black on a white background. | |
 | Prompt: The word "Welcome" written in an elongated and artistic 1960's hippie-style typeface, in black on white background. |
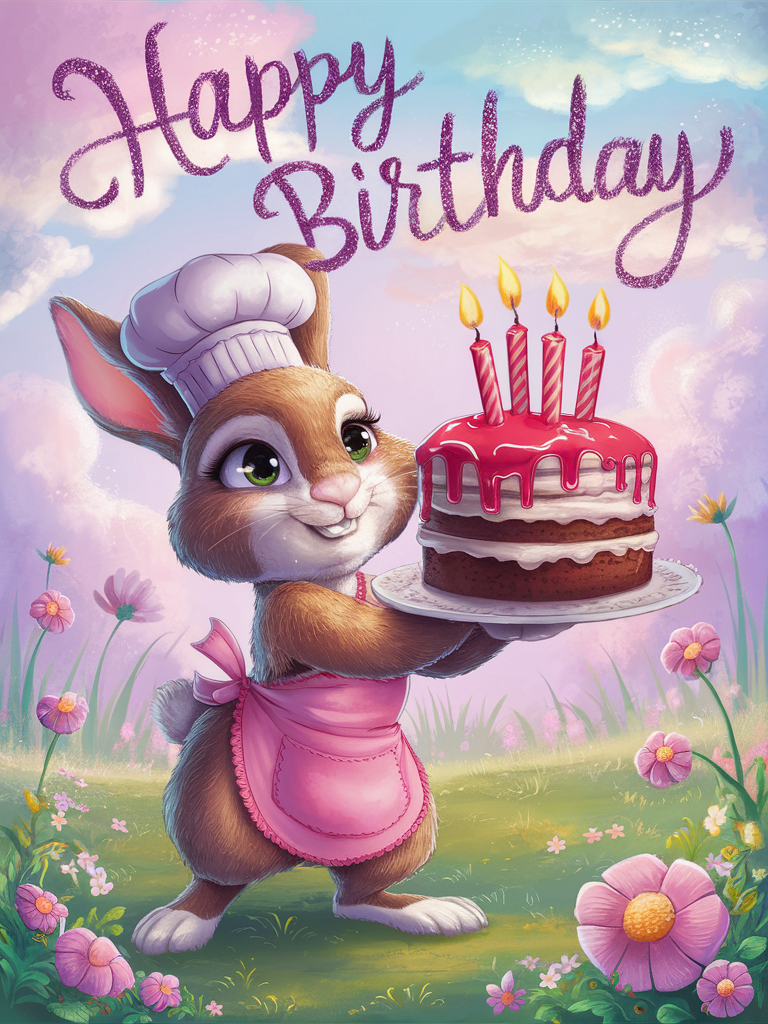 | Prompt: A fun whimsical birthday card design featuring a rabbit offering a cake and the text: "Happy Birthday" | Magic Prompt: A delightful and whimsical birthday card illustration featuring an adorable rabbit, wearing a cute chef's hat and apron, proudly offering a sumptuous cake with lit candles on it. The rabbit's eyes sparkle with joy and the background is a pastel-colored dreamy garden with fluffy clouds and blooming flowers. The text 'Happy Birthday' is written in a playful, cursive font, adding a touch of cheerfulness to the overall design. |
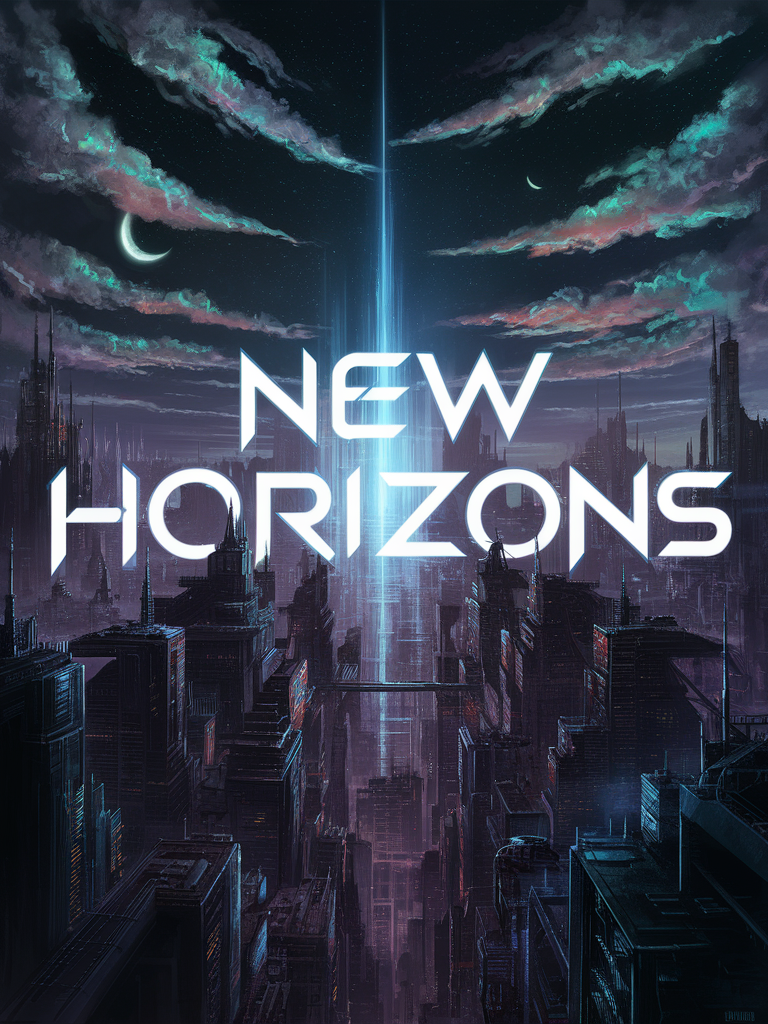 | Prompt: A cyberpunk cityscape with the word: "New Horizons" | Magic Prompt: An expansive and futuristic cyberpunk cityscape, with towering skyscrapers and neon lights that stretch into the night. The word "New Horizons" is prominently displayed in large, futuristic letters, signifying the beginning of a new era. The background features a holographic sky filled with multicolored clouds and a crescent moon. A few flying vehicles can be seen in the distance, adding to the bustling city atmosphere. |
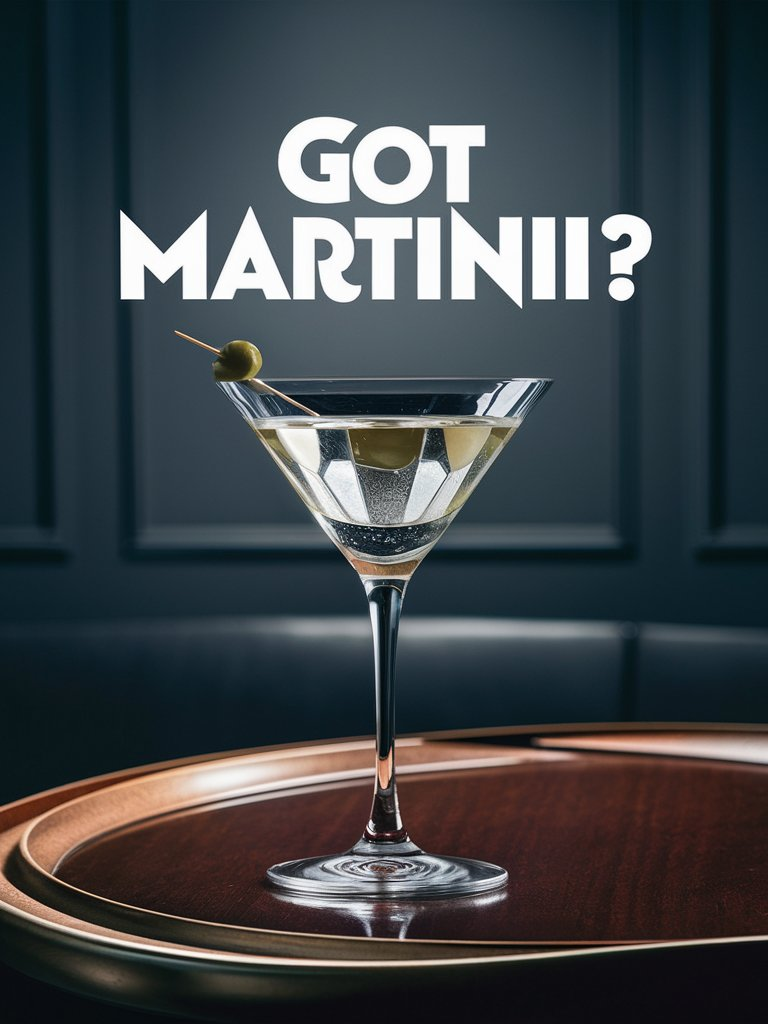 | Here's an example of an image where a word contains an error. The letter "i" in Martini has been doubled by mistake. | |
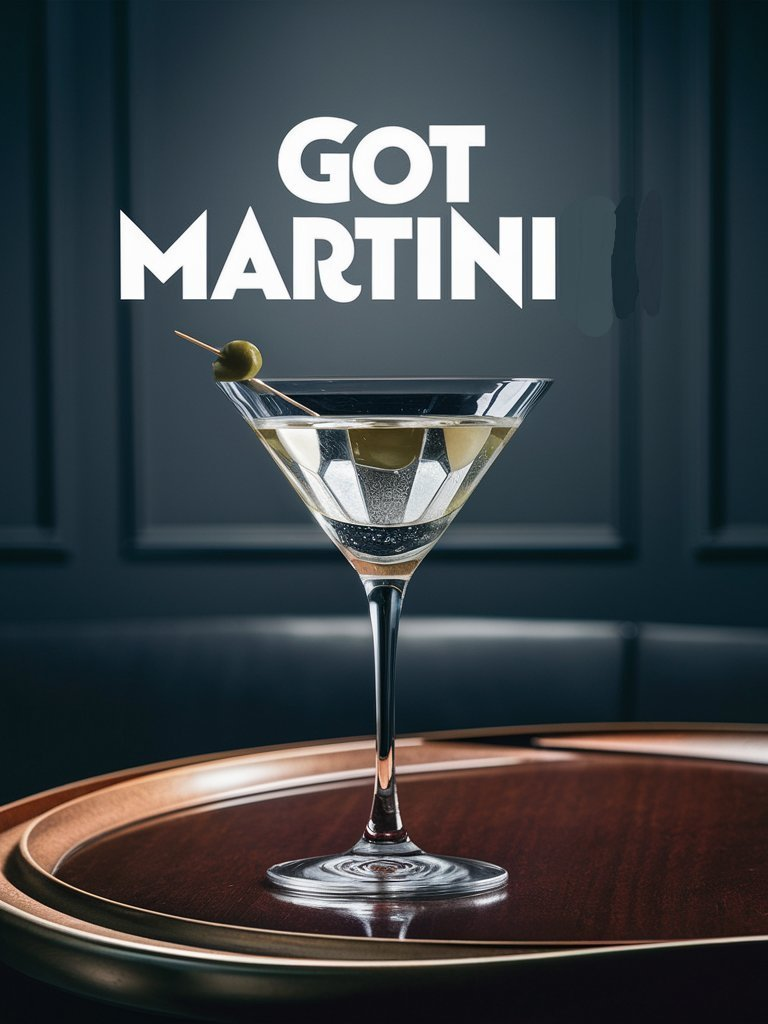 | In the editor, choose the background colour to paint over the unwanted letter. In addition, the question mark has also been removed to be redrawn closer to the last word. | |
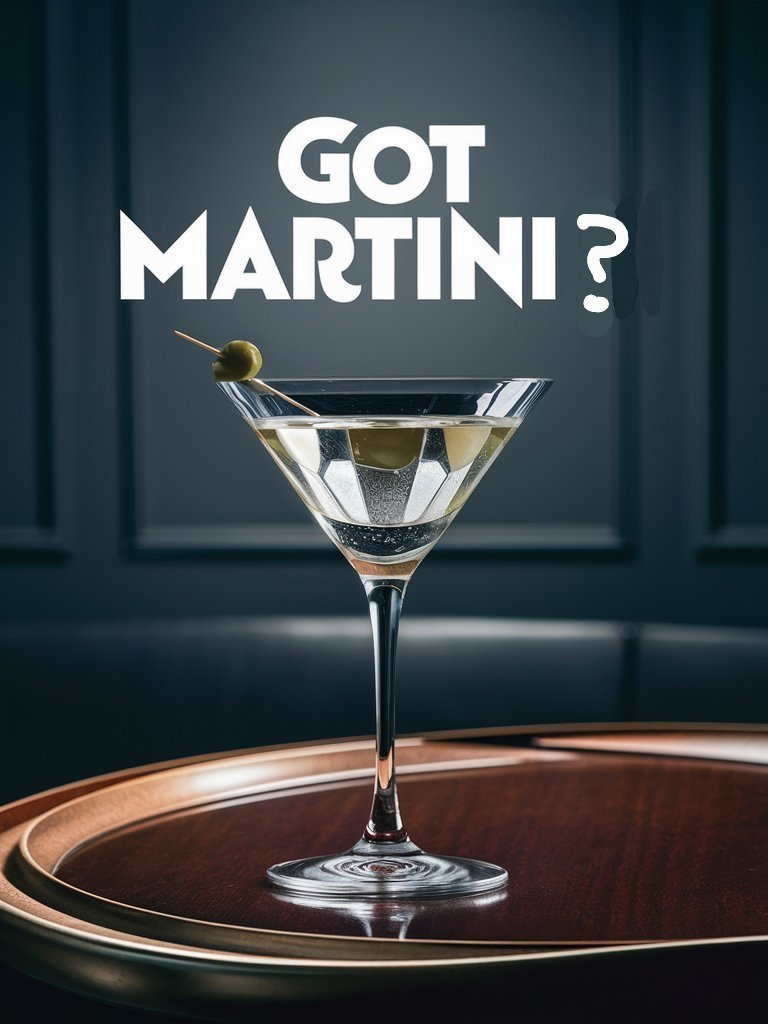 | Now, the question mark as been redrawn. No need to be that precise but it is easier if the redrawn letters looks like what it should when remixing the modified image. | |
 | Here's the result. The modified image has been remixed with a high level of image strength (90/100) and the roughly drawn question mark has been integrated and smoothed to fit perfectly with the text. |


Example of different colors and font weight applied on text.


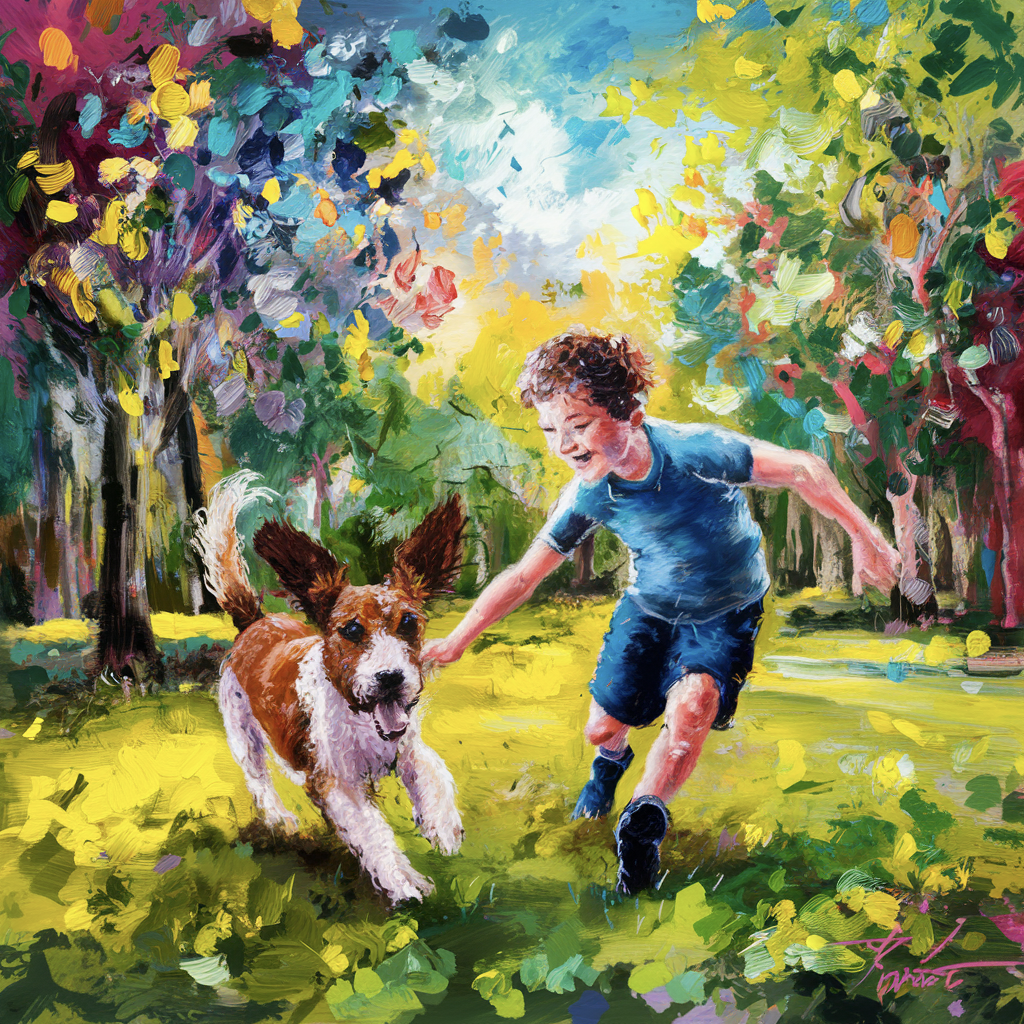
 | Prompt: Washed-out soft watercolour painting featuring a boy with blond hair and blue eyes, wearing a checked shirt and jeans, playing with a friendly Golden Retriever, in a park on a sunny day. | |
 | Prompt: An anime illustration featuring a boy with blond hair and blue eyes, wearing a checked shirt and jeans, playing with a friendly Golden Retriever, in a park on a sunny day. | |
 | Prompt: A cartoon-like 3D boy with sandy hair and blue eyes, wearing a checked shirt and jeans, playing with a friendly Golden Retriever, in a paper-art park on a sunny day. |

Prompt: A sleek and modern illustration of a logo for "PetPalace" featuring a minimalist stylized image of a regal cat wearing a crown, sitting next to a luxurious palace. | Model: v2.0 Style: Design Aspect ratio: 1:1 Color Palette: None | |
 | Prompt: Close up photo of a beer can with a big modern sailor's anchor inspired logo named "Mariner's Brew" in big letters, a full glass of beer in the background, on the counter of an Irish pub, dynamic view, studio photography, food photography. | Model: v2.0 Style: General Aspect ratio: 1:1 Color Palette: None |
 | Prompt: A cool cat with wearing a hat and sunglasses playing the saxophone with his paws on the stage of a jazz club, a neon sign in the background saying: "Cool Cat Jazz". Intense atmosphere, dark ambience, dark tones, jazz club genre, 40's and 50's look. | Model: v2.0 Style: Realistic Aspect ratio: 1:1 Color Palette: Ultramarine |

The More dropdown menu.

Available grid options.
| No tile (generated without tiling) |  | This is the image that will be remixed to generate the tile examples. |
| Grid (4x4) |  | This is the most common type of tile, arranged in a checkered grid. |
| Vertical brick (4x4) |  | In this example, you can see that the columns are aligned but the rows alternate. |
| Horizontal brick (4x4) |  | Here, in contrast, you can see that the rows are aligned but the columns alternate. |
| Column (1x1) | It's often a good idea to create your image in the same direction of the column (or row) to minimize the effect of repetition. | |
| Column (2x1) |  |
Here, the image was generated horizontally to get the maximum number of bottle and minimize visible repetition.

 or **Pause**
  buttons in the upper corner, depending on the current animation state.
You can adjust the on-screen tile pattern’s size using the **Tile scale slider** located at the top right...
buttons in the upper corner, depending on the current animation state.
You can adjust the on-screen tile pattern’s size using the **Tile scale slider** located at the top right...

Menu showing the available download Tile formats.
 ---
# Source: https://docs.ideogram.ai/using-ideogram/ui-overview/ui-components.md
# UI Components
- [Details Panel](/using-ideogram/ui-overview/ui-components/details-panel.md)
- [Image Gallery](/using-ideogram/ui-overview/ui-components/image-gallery.md)
- [Navigation Bar](/using-ideogram/ui-overview/ui-components/navigation-bar.md)
- [More Menu (...)](/using-ideogram/ui-overview/ui-components/more-menu-....md)
- [Navigation Tabs](/using-ideogram/ui-overview/ui-components/navigation-tabs.md)
- [Prompt Box](/using-ideogram/ui-overview/ui-components/prompt-box.md)
- [User Menu](/using-ideogram/ui-overview/ui-components/user-menu.md)
---
# Source: https://docs.ideogram.ai/using-ideogram/ui-overview.md
# UI Overview
To come
---
# Source: https://docs.ideogram.ai/using-ideogram/features-and-tools/upscale.md
# Upscale
The Upscale feature, available to users on the **Basic Plan** or higher, increases the resolution of your Ideogram-generated images, and of any images you’ve uploaded using the [Image Upload](https://docs.ideogram.ai/canvas-and-editing/image-upload) function (available on the **Plus Plan** or higher), by up to **2×**.
{% hint style="warning" %}
**Important:** Upscale **crops** images to the nearest supported aspect ratio listed in the table below. This behavior applies to all images, including both default and custom aspect ratios used in Ideogram v2.0 and later.
{% endhint %}
Aspect ratios and their final pixel dimensions after upscaling:
| Aspect ratio | Final dimensions (pixels) |
| :----------: | :-----------------------: |
| **`1:3`** | 1024 x 3072 |
| **`9:16`** | 1440 x 2560 |
| **`10:16`** | 1536 x 2464 |
| **`2:3`** | 1536 x 2304 |
| **`3:4`** | 1536 x 2048 |
| **`1:1`** | 2048 x 2048 |
| **`4:3`** | 2048 x 1536 |
| **`3:2`** | 2304 x 1536 |
| **`16:10`** | 2464 x 1536 |
| **`16:9`** | 2560 x 1440 |
| **`3:1`** | 3072 x 1024 |
**Example 1** — If you upload an image that is 1500 pixels by 1500 pixels, which has an aspect ratio of 1:1, the upscale will result in a 2048 pixels by 2048 pixels image.
**Example 2** — If you generate an image with a custom aspect ratio of 17:12 (1088 × 768 pixels) and then use *Upscale*, the image will be cropped it to the nearest available aspect ratio, which is 3:2, and the final image will be 2304 pixels by 1536 pixels.
## Upscaling an Image
You can access Upscale in several ways:
1. **From image feeds** (Home and Creations pages) –\
Hover over any image in the [Image Gallery](https://docs.ideogram.ai/using-ideogram/ui-overview/ui-components/image-gallery), select the **More** icon
---
# Source: https://docs.ideogram.ai/using-ideogram/ui-overview/ui-components.md
# UI Components
- [Details Panel](/using-ideogram/ui-overview/ui-components/details-panel.md)
- [Image Gallery](/using-ideogram/ui-overview/ui-components/image-gallery.md)
- [Navigation Bar](/using-ideogram/ui-overview/ui-components/navigation-bar.md)
- [More Menu (...)](/using-ideogram/ui-overview/ui-components/more-menu-....md)
- [Navigation Tabs](/using-ideogram/ui-overview/ui-components/navigation-tabs.md)
- [Prompt Box](/using-ideogram/ui-overview/ui-components/prompt-box.md)
- [User Menu](/using-ideogram/ui-overview/ui-components/user-menu.md)
---
# Source: https://docs.ideogram.ai/using-ideogram/ui-overview.md
# UI Overview
To come
---
# Source: https://docs.ideogram.ai/using-ideogram/features-and-tools/upscale.md
# Upscale
The Upscale feature, available to users on the **Basic Plan** or higher, increases the resolution of your Ideogram-generated images, and of any images you’ve uploaded using the [Image Upload](https://docs.ideogram.ai/canvas-and-editing/image-upload) function (available on the **Plus Plan** or higher), by up to **2×**.
{% hint style="warning" %}
**Important:** Upscale **crops** images to the nearest supported aspect ratio listed in the table below. This behavior applies to all images, including both default and custom aspect ratios used in Ideogram v2.0 and later.
{% endhint %}
Aspect ratios and their final pixel dimensions after upscaling:
| Aspect ratio | Final dimensions (pixels) |
| :----------: | :-----------------------: |
| **`1:3`** | 1024 x 3072 |
| **`9:16`** | 1440 x 2560 |
| **`10:16`** | 1536 x 2464 |
| **`2:3`** | 1536 x 2304 |
| **`3:4`** | 1536 x 2048 |
| **`1:1`** | 2048 x 2048 |
| **`4:3`** | 2048 x 1536 |
| **`3:2`** | 2304 x 1536 |
| **`16:10`** | 2464 x 1536 |
| **`16:9`** | 2560 x 1440 |
| **`3:1`** | 3072 x 1024 |
**Example 1** — If you upload an image that is 1500 pixels by 1500 pixels, which has an aspect ratio of 1:1, the upscale will result in a 2048 pixels by 2048 pixels image.
**Example 2** — If you generate an image with a custom aspect ratio of 17:12 (1088 × 768 pixels) and then use *Upscale*, the image will be cropped it to the nearest available aspect ratio, which is 3:2, and the final image will be 2304 pixels by 1536 pixels.
## Upscaling an Image
You can access Upscale in several ways:
1. **From image feeds** (Home and Creations pages) –\
Hover over any image in the [Image Gallery](https://docs.ideogram.ai/using-ideogram/ui-overview/ui-components/image-gallery), select the **More** icon 
Adjustable Upscale parameters: Resemblance and Detail.
Original compared to an upscaled image with a Resemblance value of 1

Animation of the original image compared to an upscaled image generated with a Resemblance value of 100

Animation of two upscaled images generated with a Detail value of 1 compared to the same generated with a value of 100.

Using the split view function.

Information availableIn the Details panel when viewing an upscaled image.
at the bottom of the [Navigation Bar](https://docs.ideogram.ai/using-ideogram/ui-overview/ui-components/navigation-bar).\
It provides quick access to your account information, subscription settings, theme preferences, and other options.


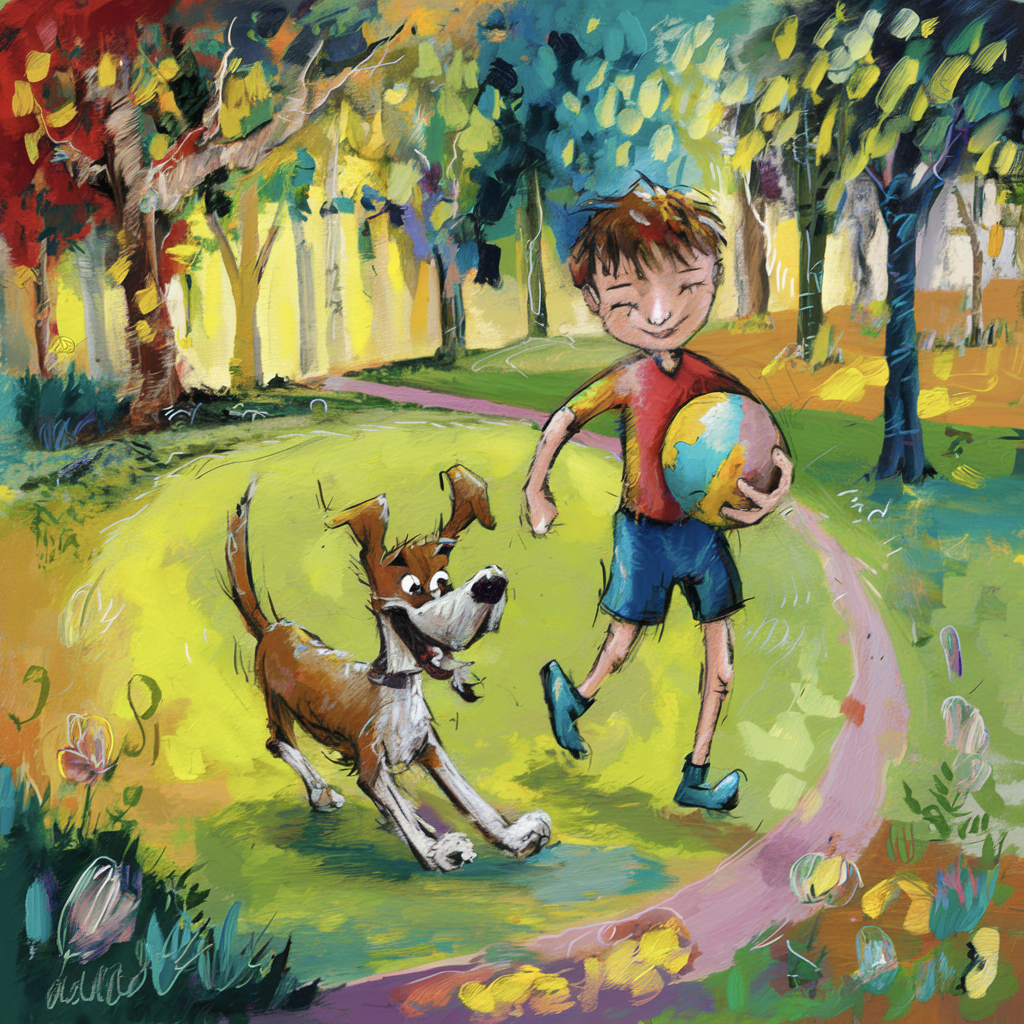
 | Magic Prompt: A heartwarming scene of a young boy playing with his happy, wagging dog in a lush, green park. The boy has a playful smile on his face while he tosses a bright yellow ball for his furry friend to fetch. The park is filled with beautiful flowers and trees, creating a serene atmosphere for this bonding moment between boy and dog. |
 | Magic Prompt: A charming image of a young boy playing with a cute, wagging-tail dog in a lush green park. The boy's joyful smile and the dog's playful eyes convey a sense of happiness and connection. The park is full of colorful flowers and trees, with a sunny sky overhead. The overall atmosphere of the image is serene and uplifting. |

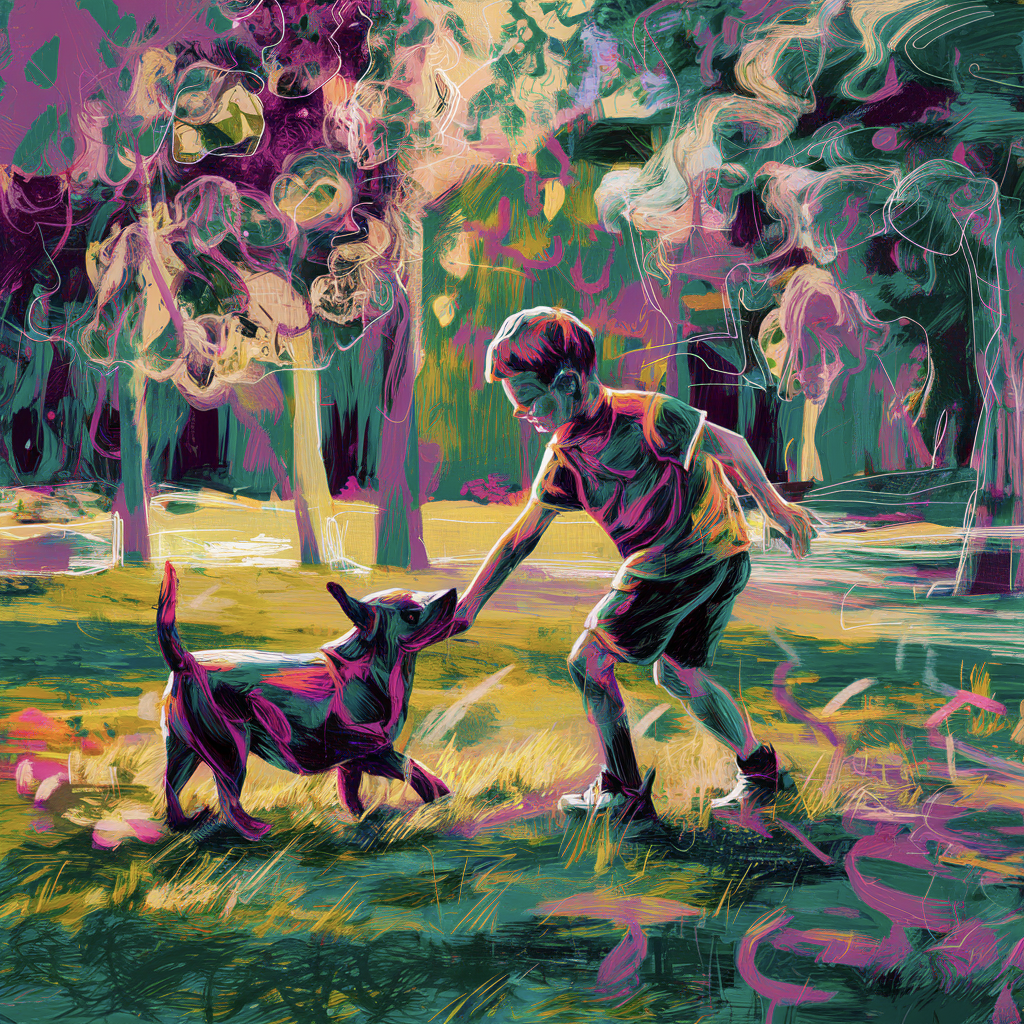 | Magic Prompt: A captivating abstract art piece featuring a boy playing with a dog in a park. The park is filled with vibrant colors, and the boy and the dog are depicted in bold, swirling lines. The background is a blend of various shapes and textures, conveying a sense of movement and energy. | |
 | Magic Prompt: An abstract painting of a boy and a dog playing in a park. The boy is holding a ball, and the dog is running with a playful expression. The park is full of vibrant colors, with trees, flowers, and a winding path. The overall atmosphere of the painting is lively and joyful. | |
 | Magic Prompt: A vibrant abstract painting of a boy playing with a dog in a lush park. The background is a swirl of vivid colors, representing the park's foliage and sky. The boy and the dog are in a dynamic pose, with the dog's ears flapping and the boy's arm extended. The overall art piece exudes a joyful and playful atmosphere. |
 | Magic Prompt: A warm and inviting coffee shop logo for "Mocha Comfort" featuring a steaming mug of coffee with a swirl of rich mocha. The coffee is surrounded by a comfortable, cozy chair, and a warm, glowing fireplace. The overall design exudes a sense of relaxation and contentment, with a touch of elegance and sophistication. | |
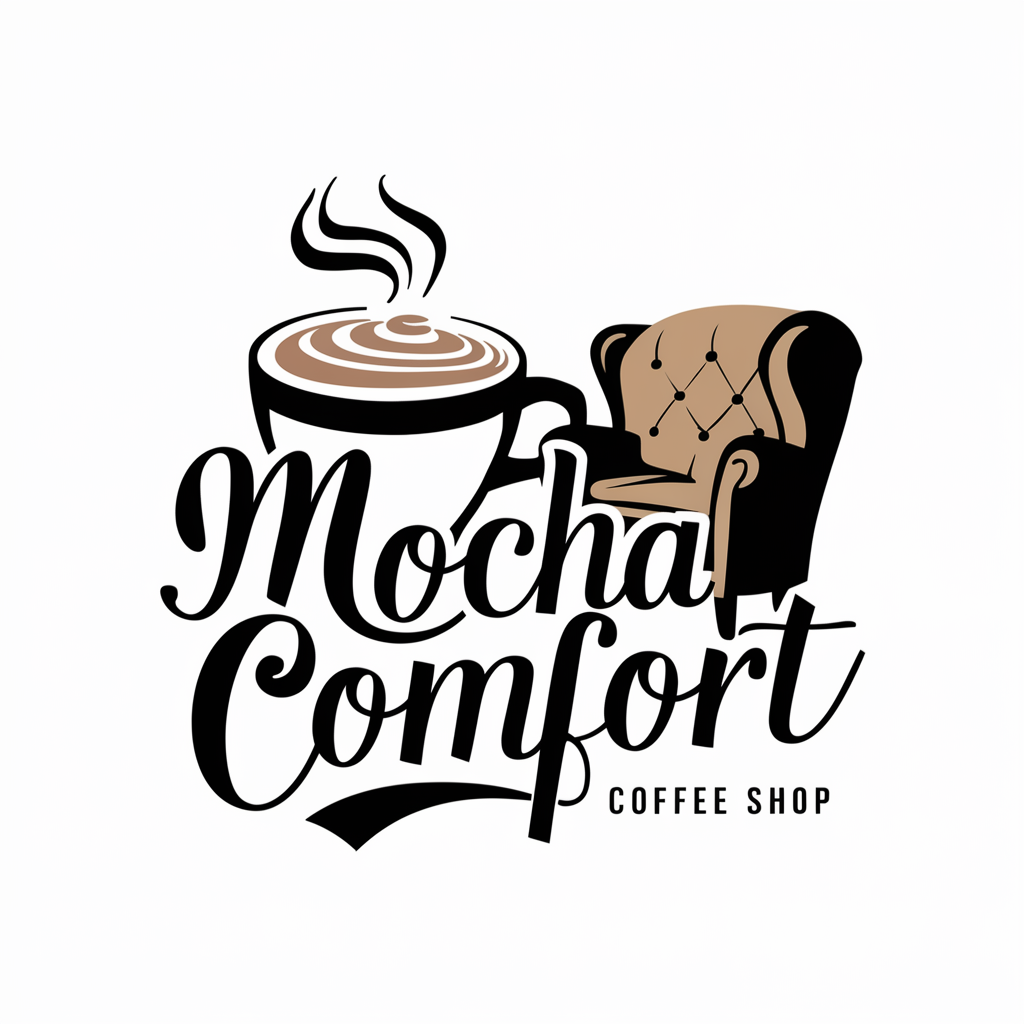 | Magic Prompt: A modern and stylish logo for "Mocha Comfort" features a steaming coffee cup with a swirl of creamy mocha on top. The cup is paired with a cozy-looking armchair, evoking a sense of relaxation and comfort. The text of the name, "Mocha Comfort," is written in an elegant, cursive font, with the "C" in "Comfort" shaped like a comfy cushion. The overall design is warm and inviting, perfect for a coffee shop that offers a cozy and relaxing atmosphere. | |
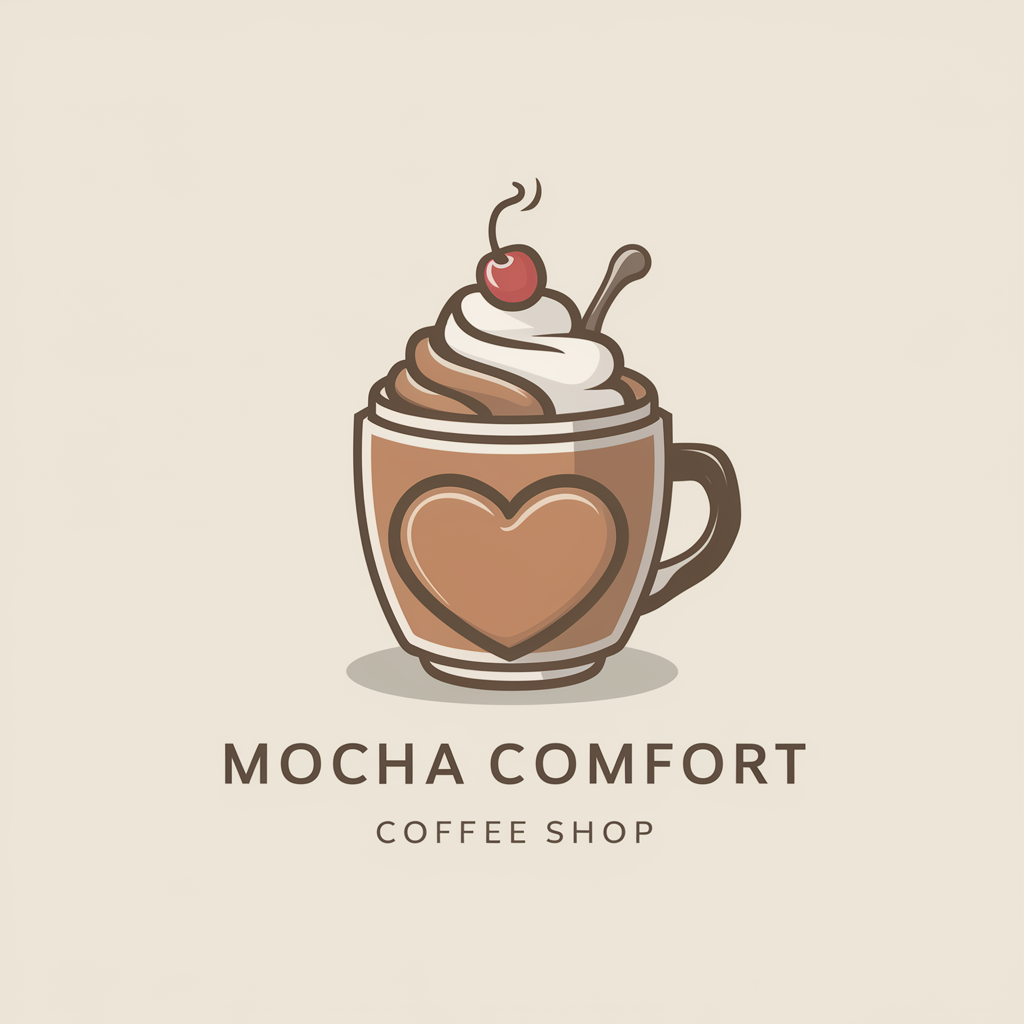 | Magic Prompt: A cozy and inviting logo for "Mocha Comfort" coffee shop, featuring a steaming hot mocha with a whipped cream topping and a cherry on top. The coffee cup is adorned with a comfortable, plush heart, symbolizing love and warmth. The overall design is in a modern, minimalistic style, with a subtle, earthy color palette. |
Ideogram 3.0Our latest model boasts the best-in-class photorealism, prompt fidelity, and crystal-clear typography. | Doc landing - Model.png | https://about.ideogram.ai/3.0 |
Character ReferenceOur character consistency model that works with just one reference image. Works perfectly with Magic Fill and Remix. | Doc landing - Character.png | character-reference |
TypographyIdeogram excels at integrating text into images for logos, branding, POD or design layouts. | Doc landing - Typography.png | text-and-typography |
CanvasOrganise, iterate, in-paint with Magic Fill or out-paint with Extend directly on an infinite Canvas | Doc landing - Canvas.png | canvas-overview |