# Flatfile
> ## Documentation Index
---
# Source: https://flatfile.com/docs/coding-tutorial/101-your-first-listener/101.01-first-listener.md
> ## Documentation Index
> Fetch the complete documentation index at: https://flatfile.com/docs/llms.txt
> Use this file to discover all available pages before exploring further.
# 01: Creating Your First Listener
> Learn to set up a basic Listener with Space configuration to define your data structure and workspace layout.
If you aren't interested in a code-forward approach, we recommend starting with [AutoBuild](/getting-started/quickstart/autobuild.mdx), which uses AI to analyze your template or documentation and then automatically creates and deploys a [Blueprint](/core-concepts/blueprints) (for schema definition) and a [Listener](/core-concepts/listeners) (for validations and transformations) to your [Flatfile App](/core-concepts/apps).
Once you've started with AutoBuild, you can always download your Listener code and continue building with code from there!
## What We're Building
In this tutorial, we'll build a foundational Listener that handles Space configuration - the essential first step for any Flatfile implementation. Our Listener will:
* **Respond to Space creation**: When a user creates a new [Space](/core-concepts/spaces), our Listener will automatically configure it
* **Define the Blueprint**: Set up a single [Workbook](/core-concepts/workbooks) with a single [Sheet](/core-concepts/sheets) with [Field](/core-concepts/fields) definitions for names and emails that establishes the data schema for the Space
* **Handle the complete Job lifecycle**: Acknowledge, update progress, and complete the configuration [Job](/core-concepts/jobs) with proper error handling
* **Provide user feedback**: Give real-time updates during the configuration process
This forms the foundation that you'll build upon in the next parts of this series, where we'll add user Actions and data validation. By the end of this tutorial, you'll have a working Listener that creates a fully configured workspace ready for data import.
## Prerequisites
Before we start coding, you'll need a Flatfile account and a fresh project directory:
1. **Create a new project directory**: Start in a fresh directory for this tutorial (e.g., `mkdir my-flatfile-listener && cd my-flatfile-listener`)
2. **Sign up for Flatfile**: Visit [platform.flatfile.com](https://platform.flatfile.com) and create your free account
3. **Get your credentials**: You'll need your Secret Key and Environment ID from the [Keys & Secrets](https://platform.flatfile.com/dashboard/keys-and-secrets) section later in this tutorial
**New to Flatfile?** If you'd like to understand the broader data structure and concepts before diving into code, we recommend reading through the [Core Concepts](/core-concepts/overview) section first. This covers the foundational elements like [Environments](/core-concepts/environments), [Apps](/core-concepts/apps), and [Spaces](/core-concepts/spaces), as well as our data structure like [Workbooks](/core-concepts/workbooks) and [Sheets](/core-concepts/sheets), and how they all work together.
Each Listener is deployed to a specific Environment, allowing you to set up separate Environments for development, staging, and production to safely test code changes before deploying to production.
## Install Dependencies
Choose your preferred language and follow the setup steps:
```bash JavaScript theme={null}
# Initialize project (skip if you already have package.json)
npm init -y
# Install required Flatfile packages
npm install @flatfile/listener @flatfile/api
# Note: Feel free to use your preferred JavaScript project setup method instead
```
```bash TypeScript theme={null}
# Initialize project (skip if you already have package.json)
npm init -y
# Install required Flatfile packages
npm install @flatfile/listener @flatfile/api
# Install TypeScript dev dependency
npm install --save-dev typescript
# Initialize TypeScript config (skip if you already have tsconfig.json)
npx tsc --init
# Note: Feel free to use your preferred TypeScript project setup method instead
```
### Authentication Setup
For this step, you'll need to get your Secret Key and environment ID from your [Flatfile Dashboard](https://platform.flatfile.com/dashboard/keys-and-secrets).
Then create a new file called `.env` and add the following (populated with your own values):
```bash theme={null}
# .env
FLATFILE_API_KEY="your_secret_key"
FLATFILE_ENVIRONMENT_ID="us_env_your_environment_id"
```
## Create Your Listener File
Create a new file called `index.js` for Javascript or `index.ts` for TypeScript:
```javascript JavaScript theme={null}
import api from "@flatfile/api";
export default function (listener) {
// Configure the Space when it's created
listener.on("job:ready", { job: "space:configure" }, async (event) => {
const { jobId, spaceId } = event.context;
try {
// Acknowledge the job
await api.jobs.ack(jobId, {
info: "Setting up your workspace...",
progress: 10,
});
// Create the Workbook with Sheets, creating the Blueprint for the space
await api.workbooks.create({
spaceId,
name: "My Workbook",
sheets: [
{
name: "contacts",
slug: "contacts",
fields: [
{ key: "name", type: "string", label: "Full Name" },
{ key: "email", type: "string", label: "Email" },
],
},
],
});
// Update progress
await api.jobs.update(jobId, {
info: "Workbook created successfully",
progress: 75,
});
// Complete the job
await api.jobs.complete(jobId, {
outcome: {
message: "Workspace configured successfully!",
acknowledge: true,
},
});
} catch (error) {
console.error("Error configuring Space:", error);
// Fail the job if something goes wrong
await api.jobs.fail(jobId, {
outcome: {
message: `Failed to configure workspace: ${error.message}`,
acknowledge: true,
},
});
}
});
}
```
```typescript TypeScript theme={null}
import type { FlatfileListener } from "@flatfile/listener";
import api from "@flatfile/api";
export default function (listener: FlatfileListener) {
// Configure the Space when it's created
listener.on("job:ready", { job: "space:configure" }, async (event) => {
const { jobId, spaceId } = event.context;
try {
// Acknowledge the job
await api.jobs.ack(jobId, {
info: "Setting up your workspace...",
progress: 10
});
// Create the Workbook with Sheets, creating the Blueprint for the space
await api.workbooks.create({
spaceId,
name: "My Workbook",
sheets: [
{
name: "contacts",
slug: "contacts",
fields: [
{ key: "name", type: "string", label: "Full Name" },
{ key: "email", type: "string", label: "Email" },
],
},
],
});
// Update progress
await api.jobs.update(jobId, {
info: "Workbook created successfully",
progress: 75
});
// Complete the job
await api.jobs.complete(jobId, {
outcome: {
message: "Workspace configured successfully!",
acknowledge: true
}
});
} catch (error) {
console.error("Error configuring Space:", error);
// Fail the job if something goes wrong
await api.jobs.fail(jobId, {
outcome: {
message: `Failed to configure workspace: ${error instanceof Error ? error.message : 'Unknown error'}`,
acknowledge: true
}
});
}
});
}
```
**Complete Example**: The full working code for this tutorial step is available in our Getting Started repository: [JavaScript](https://github.com/FlatFilers/getting-started/tree/main/101.01-first-listener/javascript) | [TypeScript](https://github.com/FlatFilers/getting-started/tree/main/101.01-first-listener/typescript)
## Project Structure
After creating your Listener file, your project directory should look like this:
```text JavaScript theme={null}
my-flatfile-listener/
├── .env // Environment variables
├── index.js // Listener code
|
| /* Node-specific files below */
|
├── package.json
├── package-lock.json
└── node_modules/
```
```text TypeScript theme={null}
my-flatfile-listener/
├── .env // Environment variables
├── index.ts // Listener code
|
| /* Node and Typescript-specific files below */
|
├── package.json
├── package-lock.json
├── tsconfig.json
└── node_modules/
```
### Authentication Setup
You'll need to get your Secret Key and Environment ID from your [Flatfile Dashboard](https://platform.flatfile.com/dashboard/keys-and-secrets) to find both values, then add them to a `.env` file:
```bash theme={null}
# .env
FLATFILE_API_KEY="your_secret_key"
FLATFILE_ENVIRONMENT_ID="us_env_your_environment_id"
```
## Testing Your Listener
### Local Development
To test your Listener locally, you can use the `flatfile develop` command. This will start a local server that implements your custom Listener code, and will also watch for changes to your code and automatically reload the server.
```bash theme={null}
# Run locally with file watching
npx flatfile develop
```
### Step-by-Step Testing
After running your listener locally:
1. Create a new space in your Flatfile environment
2. Observe as the new space is configured with a Workbook and Sheet
## What Just Happened?
Your Listener is now ready to respond to Space configuration Events! Here's how the space configuration works step by step:
### 1. Exporting your Listener function
This is the base structure of your Listener. At its core, it's just a function that takes a `listener` object as an argument, and then uses that listener to respond to Events.
```javascript JavaScript theme={null}
export default function (listener) {
// . . . code
}
```
```typescript TypeScript theme={null}
export default function (listener: FlatfileListener) {
// . . . code
}
```
### 2. Listen for Space Configuration
When a new Space is created, Flatfile automatically triggers a `space:configure` job that your Listener can handle. This code listens for that job using the `job:ready` Event, filtered by the job name `space:configure`.
```javascript JavaScript theme={null}
listener.on("job:ready", { job: "space:configure" }, async (event) => {
// . . . code
});
```
```typescript TypeScript theme={null}
listener.on("job:ready", { job: "space:configure" }, async (event) => {
// . . . code
});
```
### 3. Acknowledge the Job
The first step is always to acknowledge that you've received the job and provide initial feedback to users. From this point on, we're responsible for the rest of the job lifecycle, and we'll be doing it all in this Listener. For more information on Jobs, see the [Jobs](/core-concepts/jobs) concept.
```javascript JavaScript theme={null}
await api.jobs.ack(jobId, {
info: "Setting up your workspace...",
progress: 10,
});
```
```typescript TypeScript theme={null}
await api.jobs.ack(jobId, {
info: "Setting up your workspace...",
progress: 10
});
```
### 4. Define the Blueprint
Next, we create the workbook with sheets and field definitions. This **is** your [Blueprint](/core-concepts/blueprints) definition—establishing the data schema that will govern all data within this Space.
```javascript JavaScript theme={null}
await api.workbooks.create({
spaceId,
name: "My Workbook",
sheets: [
{
name: "contacts",
slug: "contacts",
fields: [
{ key: "name", type: "string", label: "Full Name" },
{ key: "email", type: "string", label: "Email" },
],
},
],
});
```
```typescript TypeScript theme={null}
await api.workbooks.create({
spaceId,
name: "My Workbook",
sheets: [
{
name: "contacts",
slug: "contacts",
fields: [
{ key: "name", type: "string", label: "Full Name" },
{ key: "email", type: "string", label: "Email" },
],
},
],
});
```
### 5. Update Progress
Keep users informed about what's happening during the configuration process.
```javascript JavaScript theme={null}
await api.jobs.update(jobId, {
info: "Workbook created successfully",
progress: 75,
});
```
```typescript TypeScript theme={null}
await api.jobs.update(jobId, {
info: "Workbook created successfully",
progress: 75
});
```
### 6. Complete the Job
Finally, mark the job as complete with a success message, or fail it if something went wrong.
```javascript JavaScript theme={null}
// Success case
await api.jobs.complete(jobId, {
outcome: {
message: "Workspace configured successfully!",
acknowledge: true,
},
});
// Failure case
await api.jobs.fail(jobId, {
outcome: {
message: `Failed to configure workspace: ${error.message}`,
acknowledge: true,
},
});
```
```typescript TypeScript theme={null}
// Success case
await api.jobs.complete(jobId, {
outcome: {
message: "Workspace configured successfully!",
acknowledge: true
}
});
// Failure case
await api.jobs.fail(jobId, {
outcome: {
message: `Failed to configure workspace: ${error instanceof Error ? error.message : 'Unknown error'}`,
acknowledge: true
}
});
```
This follows the standard Job pattern: **acknowledge → update progress → complete** (or fail on error). This provides users with real-time feedback and ensures robust error handling throughout the configuration process.
## Next Steps
Ready to enhance data quality? Continue to [Adding Validation](/coding-tutorial/101-your-first-listener/101.02-adding-validation) to learn how to validate Fields and provide real-time feedback to users.
For more detailed information:
* Understand Job lifecycle patterns in [Jobs](/core-concepts/jobs) and [Spaces](/core-concepts/spaces)
* Learn more about [Events](/reference/events)
* Organize your Listeners with [Namespaces](/guides/namespaces-and-filters)
---
# Source: https://flatfile.com/docs/coding-tutorial/101-your-first-listener/101.02-adding-validation.md
> ## Documentation Index
> Fetch the complete documentation index at: https://flatfile.com/docs/llms.txt
> Use this file to discover all available pages before exploring further.
# 02: Adding Validation to Your Listener
> Enhance your listener with data validation capabilities to ensure data quality and provide real-time feedback to users.
In the [previous guide](/coding-tutorial/101-your-first-listener/101.01-first-listener), we created a Listener that configures Spaces and sets up the data structure. Now we'll add data validation to ensure data quality and provide helpful feedback to users as they work with their data.
**Following along?** Download the starting code from our [Getting Started repository](https://github.com/FlatFilers/getting-started/tree/main/101.01-first-listener) and refactor it as we go, or jump directly to the [final version with validation](https://github.com/FlatFilers/getting-started/tree/main/101.02-adding-validation).
## What Is Data Validation?
Data validation in Flatfile allows you to:
* Check data formats and business rules
* Provide warnings and errors to guide users
* Ensure data quality before processing
* Give real-time feedback during data entry
Validation can happen at different levels:
* **Field-level**: Validate individual [Field](/core-concepts/fields) values (email format, date ranges, etc.)
* **Record-level**: Validate relationships between [Fields](/core-concepts/fields) in a single [Record](/core-concepts/records)
* **Sheet-level**: Validate across all [Records](/core-concepts/records) (duplicates, unique constraints, etc.)
## Email Validation Example
This example shows how to perform email format validation directly when Records are committed. When users commit their changes, we validate that email addresses have a proper format and provide helpful feedback for any invalid emails.
This approach validates Records as they're committed, providing immediate feedback to users. For more complex validations or when you need an object-oriented approach, we recommend using the [Record Hook](/plugins/record-hook) plugin.
If you use both [Record Hooks](/plugins/record-hook) and regular listener
validators (like this one) on the same sheet, you may encounter race
conditions. Record Hooks will clear all existing messages before applying new
ones, which can interfere with any messages set elsewhere. We have ways to
work around this, but it's a good idea to avoid using both at the same time.
## What Changes We're Making
To add validation to our basic Listener, we'll add a listener that triggers when users commit their changes and performs validation directly:
```javascript theme={null}
listener.on("commit:created", async (event) => {
const { sheetId } = event.context;
// Get committed records and validate email format
const response = await api.records.get(sheetId);
const records = response.data.records;
// Email validation logic here...
});
```
## Complete Example with Validation
Here's how to add email validation to your existing Listener:
```javascript JavaScript theme={null}
import api from "@flatfile/api";
export default function (listener) {
// Configure the space when it's created
listener.on("job:ready", { job: "space:configure" }, async (event) => {
const { jobId, spaceId } = event.context;
try {
// Acknowledge the job
await api.jobs.ack(jobId, {
info: "Setting up your workspace...",
progress: 10,
});
// Create the workbook with sheets
await api.workbooks.create({
spaceId,
name: "My Workbook",
sheets: [
{
name: "contacts",
slug: "contacts",
fields: [
{ key: "name", type: "string", label: "Full Name" },
{ key: "email", type: "string", label: "Email" },
],
},
],
});
// Update progress
await api.jobs.update(jobId, {
info: "Workbook created successfully",
progress: 75,
});
// Complete the job
await api.jobs.complete(jobId, {
outcome: {
message: "Workspace configured successfully!",
acknowledge: true,
},
});
} catch (error) {
console.error("Error configuring space:", error);
// Fail the job if something goes wrong
await api.jobs.fail(jobId, {
outcome: {
message: `Failed to configure workspace: ${error.message}`,
acknowledge: true,
},
});
}
});
// Listen for commits and validate email format
listener.on("commit:created", async (event) => {
const { sheetId } = event.context;
try {
// Get records from the sheet
const response = await api.records.get(sheetId);
const records = response.data.records;
// Simple email validation regex
const emailRegex = /^[^\s@]+@[^\s@]+\.[^\s@]+$/;
// Prepare updates for records with invalid emails
const updates = [];
for (const record of records) {
const emailValue = record.values.email?.value;
if (emailValue) {
const email = emailValue.toLowerCase();
if (!emailRegex.test(email)) {
updates.push({
id: record.id,
values: {
email: {
value: email,
messages: [
{
type: "error",
message:
"Please enter a valid email address (e.g., user@example.com)",
},
],
},
},
});
}
}
}
// Update records with validation messages
if (updates.length > 0) {
await api.records.update(sheetId, updates);
}
} catch (error) {
console.error("Error during validation:", error);
}
});
}
```
```typescript TypeScript theme={null}
import type { FlatfileListener } from "@flatfile/listener";
import api, { Flatfile } from "@flatfile/api";
export default function (listener: FlatfileListener) {
// Configure the space when it's created
listener.on("job:ready", { job: "space:configure" }, async (event) => {
const { jobId, spaceId } = event.context;
try {
// Acknowledge the job
await api.jobs.ack(jobId, {
info: "Setting up your workspace...",
progress: 10
});
// Create the workbook with sheets
await api.workbooks.create({
spaceId,
name: "My Workbook",
sheets: [
{
name: "contacts",
slug: "contacts",
fields: [
{ key: "name", type: "string", label: "Full Name" },
{ key: "email", type: "string", label: "Email" },
],
},
],
});
// Update progress
await api.jobs.update(jobId, {
info: "Workbook created successfully",
progress: 75
});
// Complete the job
await api.jobs.complete(jobId, {
outcome: {
message: "Workspace configured successfully!",
acknowledge: true
}
});
} catch (error) {
console.error("Error configuring space:", error);
// Fail the job if something goes wrong
await api.jobs.fail(jobId, {
outcome: {
message: `Failed to configure workspace: ${error instanceof Error ? error.message : 'Unknown error'}`,
acknowledge: true
}
});
}
});
// Listen for commits and validate email format
listener.on("commit:created", async (event) => {
const { sheetId } = event.context;
try {
// Get records from the sheet
const response = await api.records.get(sheetId);
const records = response.data.records;
// Simple email validation regex
const emailRegex = /^[^\s@]+@[^\s@]+\.[^\s@]+$/;
// Prepare updates for records with invalid emails
const updates: Flatfile.RecordWithLinks[] = [];
for (const record of records) {
const emailValue = record.values.email?.value as string;
if (emailValue) {
const email = emailValue.toLowerCase();
if (!emailRegex.test(email)) {
updates.push({
id: record.id,
values: {
email: {
value: email,
messages: [{
type: "error",
message: "Please enter a valid email address (e.g., user@example.com)",
}],
},
},
});
}
}
}
// Update records with validation messages
if (updates.length > 0) {
await api.records.update(sheetId, updates);
}
} catch (error) {
console.error("Error during validation:", error);
}
});
}
```
**Complete Example**: The full working code for this tutorial step is available in our Getting Started repository: [JavaScript](https://github.com/FlatFilers/getting-started/tree/main/101.02-adding-validation/javascript) | [TypeScript](https://github.com/FlatFilers/getting-started/tree/main/101.02-adding-validation/typescript)
## Testing Your Validation
### Local Development
To test your Listener locally, you can use the `flatfile develop` command. This will start a local server that will listen for Events and respond to them, and will also watch for changes to your Listener code and automatically reload the server.
```bash theme={null}
# Run locally with file watching
npx flatfile develop
```
### Step-by-Step Testing
After running your listener locally:
1. Create a new space in your Flatfile environment
2. Enter an invalid email address in the Email Field
3. See error messages appear on invalid email Fields
4. Fix the emails and see the error messages disappear
## What Just Happened?
Your Listener now handles two key Events:
1. **`space:configure`** - Sets up the data structure
2. **`commit:created`** - Validates email format when users commit changes
Here's how the email validation works step by step:
### 1. Listen for Commits
This listener triggers whenever users save their changes to any sheet in the workbook.
```javascript JavaScript theme={null}
listener.on("commit:created", async (event) => {
const { sheetId } = event.context;
```
```typescript TypeScript theme={null}
listener.on("commit:created", async (event) => {
const { sheetId } = event.context;
```
### 2. Get the Records
We retrieve all records from the sheet to validate them.
```javascript JavaScript theme={null}
const response = await api.records.get(sheetId);
const records = response.data.records;
```
```typescript TypeScript theme={null}
const response = await api.records.get(sheetId);
const records = response.data.records;
```
### 3. Validate Email Format
We use a simple regex pattern to check if each email follows the basic `user@domain.com` format.
```javascript JavaScript theme={null}
const emailRegex = /^[^\s@]+@[^\s@]+\.[^\s@]+$/;
for (const record of records) {
const emailValue = record.values.email?.value;
if (emailValue && !emailRegex.test(emailValue.toLowerCase())) {
// Add validation error
}
}
```
```typescript TypeScript theme={null}
const emailRegex = /^[^\s@]+@[^\s@]+\.[^\s@]+$/;
for (const record of records) {
const emailValue = record.values.email?.value as string;
if (emailValue && !emailRegex.test(emailValue.toLowerCase())) {
// Add validation error
}
}
```
### 4. Add Error Messages
For invalid emails, we create an update that adds an error message to that specific field.
```javascript JavaScript theme={null}
updates.push({
id: record.id,
values: {
email: {
value: email,
messages: [{
type: "error",
message: "Please enter a valid email address (e.g., user@example.com)",
}],
},
},
});
```
```typescript TypeScript theme={null}
updates.push({
id: record.id,
values: {
email: {
value: email,
messages: [{
type: "error",
message: "Please enter a valid email address (e.g., user@example.com)",
}],
},
},
});
```
You can apply different types of validation messages:
* **`info`**: Informational messages (mouseover tooltip)
* **`warn`**: Warnings that don't block processing (yellow)
* **`error`**: Errors that should be fixed, blocks [Actions](/core-concepts/actions) with the `hasAllValid` constraint (red)
### 5. Update Records
Finally, we send all validation messages back to the sheet so users can see the errors.
```javascript JavaScript theme={null}
if (updates.length > 0) {
await api.records.update(sheetId, updates);
}
```
```typescript TypeScript theme={null}
if (updates.length > 0) {
await api.records.update(sheetId, updates);
}
```
## Next Steps
Ready to make your Listener interactive? Continue to [Adding Actions](/coding-tutorial/101-your-first-listener/101.03-adding-actions) to learn how to handle user submissions and create custom workflows.
For more detailed information:
* Understand Job lifecycle patterns in [Jobs](/core-concepts/jobs) and [Spaces](/core-concepts/spaces)
* Learn more about [Events](/reference/events)
* Organize your Listeners with [Namespaces](/guides/namespaces-and-filters)
* Explore [plugins](/core-concepts/plugins): [Job Handler](/plugins/job-handler) and [Space Configure](/plugins/space-configure)
* Check out [Record Hook](/plugins/record-hook) for simpler Field-level validations
---
# Source: https://flatfile.com/docs/coding-tutorial/101-your-first-listener/101.03-adding-actions.md
> ## Documentation Index
> Fetch the complete documentation index at: https://flatfile.com/docs/llms.txt
> Use this file to discover all available pages before exploring further.
# 03: Adding Actions to Your Listener
> Build on your basic Listener by adding user Actions to create interactive data processing workflows.
In the [previous guides](/coding-tutorial/101-your-first-listener/101.02-adding-validation), we created a Listener with Space configuration and data validation. Now we'll extend that Listener to handle user Actions, allowing users to submit and process their data.
**Following along?** Download the starting code from our [Getting Started repository](https://github.com/FlatFilers/getting-started/tree/main/101.02-adding-validation) and refactor it as we go, or jump directly to the [final version with actions](https://github.com/FlatFilers/getting-started/tree/main/101.03-adding-actions).
## What Are Actions?
[Actions](/core-concepts/actions) are interactive buttons that appear in the Flatfile interface, allowing users to trigger custom operations on their data. Common Actions include:
* **Submit**: Process your data and POST it to your system via API
* **Validate**: Run custom validation rules
* **Transform**: Apply data transformations
* **Export**: Generate reports or exports
For more detail on using Actions, see our [Actions](/guides/using-actions) guide.
## What Changes We're Making
To add Actions to our Listener with validation, we need to make two specific changes:
### 1. Add Actions Array to Blueprint Definition
In the `space:configure` Listener, we'll add an `actions` array to our Workbook creation. This enhances our [Blueprint](/core-concepts/blueprints) to include interactive elements:
```javascript theme={null}
actions: [
{
label: "Submit",
description: "Send data to destination system",
operation: "submitActionForeground",
mode: "foreground",
},
]
```
### 2. Add Action Handler Listener
We'll add a new Listener to handle when users click the Submit button:
```javascript theme={null}
listener.on(
"job:ready",
{ job: "workbook:submitActionForeground" },
async (event) => {
// Handle the action...
}
);
```
## Complete Example with Actions
This example builds on the Listener we created in the [previous tutorials](/coding-tutorial/101-your-first-listener/101.02-adding-validation). It includes the complete functionality: Space configuration, email validation, and Actions.
```javascript JavaScript theme={null}
import api from "@flatfile/api";
export default function (listener) {
// Configure the space when it's created
listener.on("job:ready", { job: "space:configure" }, async (event) => {
const { jobId, spaceId } = event.context;
try {
// Acknowledge the job
await api.jobs.ack(jobId, {
info: "Setting up your workspace...",
progress: 10,
});
// Create the Workbook with Sheets and Actions
await api.workbooks.create({
spaceId,
name: "My Workbook",
sheets: [
{
name: "contacts",
slug: "contacts",
fields: [
{ key: "name", type: "string", label: "Full Name" },
{ key: "email", type: "string", label: "Email" },
],
},
],
actions: [
{
label: "Submit",
description: "Send data to destination system",
operation: "submitActionForeground",
mode: "foreground",
primary: true,
},
],
});
// Update progress
await api.jobs.update(jobId, {
info: "Workbook created successfully",
progress: 75,
});
// Complete the job
await api.jobs.complete(jobId, {
outcome: {
message: "Workspace configured successfully!",
acknowledge: true,
},
});
} catch (error) {
console.error("Error configuring space:", error);
// Fail the job if something goes wrong
await api.jobs.fail(jobId, {
outcome: {
message: `Failed to configure workspace: ${error.message}`,
acknowledge: true,
},
});
}
});
// Handle when someone clicks Submit
listener.on(
"job:ready",
{ job: "workbook:submitActionForeground" },
async (event) => {
const { jobId, workbookId } = event.context;
try {
// Acknowledge the job
await api.jobs.ack(jobId, {
info: "Starting data processing...",
progress: 10,
});
// Get the data
const job = await api.jobs.get(jobId);
// Update progress
await api.jobs.update(jobId, {
info: "Retrieving records...",
progress: 30,
});
// Get the sheets
const { data: sheets } = await api.sheets.list({ workbookId });
// Get and count the records
const records = {};
let recordsCount = 0;
for (const sheet of sheets) {
const {
data: { records: sheetRecords },
} = await api.records.get(sheet.id);
records[sheet.name] = sheetRecords;
recordsCount += sheetRecords.length;
}
// Update progress
await api.jobs.update(jobId, {
info: `Processing ${sheets.length} sheets with ${recordsCount} records...`,
progress: 60,
});
// Process the data (log to console for now)
console.log("Processing records:", JSON.stringify(records, null, 2));
// Complete the job
await api.jobs.complete(jobId, {
outcome: {
message: `Successfully processed ${sheets.length} sheets with ${recordsCount} records!`,
acknowledge: true,
},
});
} catch (error) {
console.error("Error processing data:", error);
// Fail the job if something goes wrong
await api.jobs.fail(jobId, {
outcome: {
message: `Data processing failed: ${error.message}`,
acknowledge: true,
},
});
}
},
);
// Listen for commits and validate email format
listener.on("commit:created", async (event) => {
const { sheetId } = event.context;
try {
// Get records from the sheet
const response = await api.records.get(sheetId);
const records = response.data.records;
// Simple email validation regex
const emailRegex = /^[^\s@]+@[^\s@]+\.[^\s@]+$/;
// Prepare updates for records with invalid emails
const updates = [];
for (const record of records) {
const emailValue = record.values.email?.value;
if (emailValue) {
const email = emailValue.toLowerCase();
if (!emailRegex.test(email)) {
updates.push({
id: record.id,
values: {
email: {
value: email,
messages: [
{
type: "error",
message:
"Please enter a valid email address (e.g., user@example.com)",
},
],
},
},
});
}
}
}
// Update records with validation messages
if (updates.length > 0) {
await api.records.update(sheetId, updates);
}
} catch (error) {
console.error("Error during validation:", error);
}
});
}
```
```typescript TypeScript theme={null}
import type { FlatfileListener } from "@flatfile/listener";
import api, { Flatfile } from "@flatfile/api";
export default function (listener: FlatfileListener) {
// Configure the space when it's created
listener.on("job:ready", { job: "space:configure" }, async (event) => {
const { jobId, spaceId } = event.context;
try {
// Acknowledge the job
await api.jobs.ack(jobId, {
info: "Setting up your workspace...",
progress: 10
});
// Create the Workbook with Sheets and Actions
await api.workbooks.create({
spaceId,
name: "My Workbook",
sheets: [
{
name: "contacts",
slug: "contacts",
fields: [
{ key: "name", type: "string", label: "Full Name" },
{ key: "email", type: "string", label: "Email" },
],
},
],
actions: [
{
label: "Submit",
description: "Send data to destination system",
operation: "submitActionForeground",
mode: "foreground",
primary: true,
},
],
});
// Update progress
await api.jobs.update(jobId, {
info: "Workbook created successfully",
progress: 75
});
// Complete the job
await api.jobs.complete(jobId, {
outcome: {
message: "Workspace configured successfully!",
acknowledge: true
}
});
} catch (error) {
console.error("Error configuring space:", error);
// Fail the job if something goes wrong
await api.jobs.fail(jobId, {
outcome: {
message: `Failed to configure workspace: ${error instanceof Error ? error.message : 'Unknown error'}`,
acknowledge: true
}
});
}
});
// Handle when someone clicks Submit
listener.on(
"job:ready",
{ job: "workbook:submitActionForeground" },
async (event) => {
const { jobId, workbookId } = event.context;
try {
// Acknowledge the job
await api.jobs.ack(jobId, {
info: "Starting data processing...",
progress: 10
});
// Get the data
const job = await api.jobs.get(jobId);
// Update progress
await api.jobs.update(jobId, {
info: "Retrieving records...",
progress: 30
});
// Get the sheets
const { data: sheets } = await api.sheets.list({ workbookId });
// Get and count the records
const records: { [name: string]: any[] } = {};
let recordsCount = 0;
for (const sheet of sheets) {
const { data: { records: sheetRecords}} = await api.records.get(sheet.id);
records[sheet.name] = sheetRecords;
recordsCount += sheetRecords.length;
}
// Update progress
await api.jobs.update(jobId, {
info: `Processing ${sheets.length} sheets with ${recordsCount} records...`,
progress: 60
});
// Process the data (log to console for now)
console.log("Processing records:", JSON.stringify(records, null, 2));
// Complete the job
await api.jobs.complete(jobId, {
outcome: {
message: `Successfully processed ${sheets.length} sheets with ${recordsCount} records!`,
acknowledge: true
}
});
} catch (error) {
console.error("Error processing data:", error);
// Fail the job if something goes wrong
await api.jobs.fail(jobId, {
outcome: {
message: `Data processing failed: ${error instanceof Error ? error.message : 'Unknown error'}`,
acknowledge: true
}
});
}
}
);
// Listen for commits and validate email format
listener.on("commit:created", async (event) => {
const { sheetId } = event.context;
try {
// Get records from the sheet
const response = await api.records.get(sheetId);
const records = response.data.records;
// Simple email validation regex
const emailRegex = /^[^\s@]+@[^\s@]+\.[^\s@]+$/;
// Prepare updates for records with invalid emails
const updates: Flatfile.RecordWithLinks[] = [];
for (const record of records) {
const emailValue = record.values.email?.value as string;
if (emailValue) {
const email = emailValue.toLowerCase();
if (!emailRegex.test(email)) {
updates.push({
id: record.id,
values: {
email: {
value: email,
messages: [{
type: "error",
message: "Please enter a valid email address (e.g., user@example.com)",
}],
},
},
});
}
}
}
// Update records with validation messages
if (updates.length > 0) {
await api.records.update(sheetId, updates);
}
} catch (error) {
console.error("Error during validation:", error);
}
});
}
```
**Complete Example**: The full working code for this tutorial step is available in our Getting Started repository: [JavaScript](https://github.com/FlatFilers/getting-started/tree/main/101.03-adding-actions/javascript) | [TypeScript](https://github.com/FlatFilers/getting-started/tree/main/101.03-adding-actions/typescript)
## Understanding Action Modes
Actions can run in different modes:
* **`foreground`**: Runs immediately with real-time progress updates (good for quick operations)
* **`background`**: Runs as a background job (good for longer operations)
The Action operation name (`submitActionForeground`) determines which Listener will handle the Action.
## Testing Your Action
### Local Development
To test your Listener locally, you can use the `flatfile develop` command. This will start a local server that will listen for Events and respond to them, and will also watch for changes to your Listener code and automatically reload the server.
```bash theme={null}
# Run locally with file watching
npx flatfile develop
```
### Step-by-Step Testing
After running your listener locally:
1. Create a new Space in your Flatfile Environment
2. Upload (or manually enter) some data to the contacts Sheet with both valid and invalid email addresses
3. See validation errors appear on invalid email Fields
4. Click the "Submit" button
5. Watch the logging in the terminal as your data is processed and the job is completed
## What Just Happened?
Your Listener now handles three key Events and provides a complete data import workflow. Here's how the new action handling works:
### 1. Blueprint Definition with Actions
We enhanced the [Blueprint](/core-concepts/blueprints) definition to include action buttons that users can interact with. Adding actions to your workbook configuration is part of defining your Blueprint.
```javascript JavaScript theme={null}
actions: [
{
label: "Submit",
description: "Send data to destination system",
operation: "submitActionForeground",
mode: "foreground",
primary: true,
},
]
```
```typescript TypeScript theme={null}
actions: [
{
label: "Submit",
description: "Send data to destination system",
operation: "submitActionForeground",
mode: "foreground",
primary: true,
},
]
```
### 2. Listen for Action Events
When users click the Submit button, Flatfile triggers a [Job](/core-concepts/jobs) that your listener can handle using the same approach we used for the `space:configure` job in [101.01](/coding-tutorial/101-your-first-listener/101.01-first-listener#2-listen-for-space-configuration).
Jobs are named with the pattern `:`. In this case, the domain is `workbook` since we've mounted the Action to the Workbook blueprint, and the operation is `submitActionForeground` as defined in the Action definition.
```javascript JavaScript theme={null}
listener.on(
"job:ready",
{ job: "workbook:submitActionForeground" },
async (event) => {
const { jobId, workbookId } = event.context;
```
```typescript TypeScript theme={null}
listener.on(
"job:ready",
{ job: "workbook:submitActionForeground" },
async (event) => {
const { jobId, workbookId } = event.context;
```
### 3. Retrieve and Process Data
Get all the data from the workbook and process it according to your business logic.
```javascript JavaScript theme={null}
// Get the sheets
const { data: sheets } = await api.sheets.list({ workbookId });
// Get and count the records
const records = {};
let recordsCount = 0;
for (const sheet of sheets) {
const { data: { records: sheetRecords } } = await api.records.get(sheet.id);
records[sheet.name] = sheetRecords;
recordsCount += sheetRecords.length;
}
```
```typescript TypeScript theme={null}
// Get the sheets
const { data: sheets } = await api.sheets.list({ workbookId });
// Get and count the records
const records: { [name: string]: any[] } = {};
let recordsCount = 0;
for (const sheet of sheets) {
const { data: { records: sheetRecords }} = await api.records.get(sheet.id);
records[sheet.name] = sheetRecords;
recordsCount += sheetRecords.length;
}
```
### 4. Provide User Feedback
Keep users informed about the processing with progress updates and final results.
```javascript JavaScript theme={null}
// Update progress during processing
await api.jobs.update(jobId, {
info: `Processing ${sheets.length} sheets with ${recordsCount} records...`,
progress: 60,
});
// Complete with success message
await api.jobs.complete(jobId, {
outcome: {
message: `Successfully processed ${sheets.length} sheets with ${recordsCount} records!`,
acknowledge: true,
},
});
```
```typescript TypeScript theme={null}
// Update progress during processing
await api.jobs.update(jobId, {
info: `Processing ${sheets.length} sheets with ${recordsCount} records...`,
progress: 60
});
// Complete with success message
await api.jobs.complete(jobId, {
outcome: {
message: `Successfully processed ${sheets.length} sheets with ${recordsCount} records!`,
acknowledge: true
}
});
```
Your complete Listener now handles:
* **`space:configure`** - Defines the Blueprint with interactive actions
* **`commit:created`** - Validates email format when users commit changes
* **`workbook:submitActionForeground`** - Processes data when users click Submit
The Action follows the same Job lifecycle pattern: **acknowledge → update progress → complete** (or fail on error). This provides users with real-time feedback during data processing, while validation ensures data quality throughout the import process.
## Next Steps
Congratulations! You now have a complete Listener that handles Space configuration, data validation, and user Actions.
For more detailed information:
* Learn more about [Actions](/guides/using-actions)
* Understand Job lifecycle patterns in [Jobs](/core-concepts/jobs)
* Learn more about [Events](/reference/events)
* Organize your Listeners with [Namespaces](/guides/namespaces-and-filters)
* Explore [plugins](/core-concepts/plugins): [Job Handler](/plugins/job-handler) and [Space Configure](/plugins/space-configure)
---
# Source: https://flatfile.com/docs/guides/accepting-additional-fields.md
> ## Documentation Index
> Fetch the complete documentation index at: https://flatfile.com/docs/llms.txt
> Use this file to discover all available pages before exploring further.
# Accepting Additional Fields
> Create additional fields on the fly
The `allowAdditionalFields` feature offers a fluid integration experience, allowing users to effortlessly map to new or unconfigured fields in your Blueprints.
## How it works
* By enabling `allowAdditionalFields`, your Sheet isn't restricted to the initial configuration. It can adapt to include new fields, whether they're anticipated or not.
* These supplementary fields can either be added through API calls or input directly by users during the file import process.
* To ensure clarity, any field that wasn't part of the original Blueprint configuration is flagged with a `treatment` property labeled `user-defined`.
* When adding a custom field, there's no need to fuss over naming the field. The system intuitively adopts the header name from the imported file, streamlining the process.
In essence, the `allowAdditionalFields` feature is designed for scalability and ease, ensuring your Blueprints are always ready for unexpected data fields.
## Example Blueprint w/ `allowAdditionalFields`
```json theme={null}
{
"sheets": [
{
"name": "Contacts",
"slug": "contacts",
"allowAdditionalFields": true,
"fields": [
{
"key": "firstName",
"label": "First Name",
"type": "string"
},
{
"key": "lastName",
"label": "Last Name",
"type": "string"
},
{
"key": "email",
"label": "Email",
"type": "string"
}
]
}
]
}
```
---
# Source: https://flatfile.com/docs/core-concepts/actions.md
> ## Documentation Index
> Fetch the complete documentation index at: https://flatfile.com/docs/llms.txt
> Use this file to discover all available pages before exploring further.
# Actions
> User-triggered operations in Flatfile
An Action is a code-based operation that runs when a user clicks a button or menu item in Flatfile. Actions can be mounted on [Sheets](/core-concepts/sheets), [Workbooks](/core-concepts/workbooks), [Documents](/core-concepts/documents), or Files to trigger custom operations.
Defining a custom Action is a two-step process:
1. Define an Action in your Flatfile blueprint or in your code
2. Create a [Listener](/core-concepts/listeners) to handle the Action
When an Action is triggered, it creates a [Job](/core-concepts/jobs) that your application can listen for and respond to.
Given that Actions are powered by Jobs, the [Jobs Lifecycle](/core-concepts/jobs#jobs-lifecycle) pertains to Actions as well. This means that you can [update progress values/messages](/core-concepts/jobs#updating-job-progress) while an Action is processing, and when it's done you can provide an [Outcome](/core-concepts/jobs#job-outcomes), which allows you to show a success message, automatically [download a generated file](/core-concepts/jobs#file-downloads), or [forward the user](/core-concepts/jobs#internal-navigation) to a generated Document.
For complete implementation details, see our [Using Actions guide](/guides/using-actions).
## Types of Actions
### Built-in Actions
Resources in Flatfile come with severaldefault built-in actions like:
* Export/download data
* Delete data or files
* Find and replace (Sheets)
### Developer-Created Actions
You can create custom Actions to handle operations specific to your workflow, such as:
* Sending data to your API when data is ready
* Downloading your data in a specific format
* Validating data against external systems
* Moving data between different resources
* Custom data validations andtransformations
## Where Actions Appear
Actions appear in different parts of the UI depending on where they're mounted:
* **Workbook Actions**: Buttons in the top-right corner of Workbooks
* **Sheet Actions**: Dropdown menu in the Sheet toolbar (or top-level button if marked as `primary`)
* **Document Actions**: Buttons in the top-right corner of Documents
* **File Actions**: Dropdown menu for each file in the Files list
## Example Action Configuration
Every Action requires an `operation` (unique identifier) and `label` (display text):
```javascript theme={null}
{
operation: "submitActionBg",
mode: "background",
label: "Submit",
type: "string",
description: "Submit this data to a webhook.",
primary: true,
},
```
Actions support additional options like `primary` status, confirmation dialogs, constraints, and input forms. See the [Using Actions guide](/guides/using-actions) for more details.
---
# Source: https://flatfile.com/docs/embedding/advanced-configuration.md
> ## Documentation Index
> Fetch the complete documentation index at: https://flatfile.com/docs/llms.txt
> Use this file to discover all available pages before exploring further.
# Advanced Configuration
> Complete configuration reference for embedded Flatfile
This reference covers all configuration options for embedded Flatfile, from basic setup to advanced customization.
## Authentication & Security
### publishableKey
Your publishable key authenticates your application with Flatfile. This key is safe to include in client-side code.
**Where to find it:**
1. Log into [Platform Dashboard](https://platform.flatfile.com)
2. Navigate to **Developer Settings** → **API Keys**
3. Copy your **Publishable Key** (starts with `pk_`)
```javascript theme={null}
// Example usage
const config = {
publishableKey: "pk_1234567890abcdef", // Your actual key
};
```
### Security Best Practices
#### Environment Variables
Store your publishable key in environment variables rather than hardcoding:
```javascript theme={null}
// ✅ Good - using environment variable
const config = {
publishableKey: process.env.REACT_APP_FLATFILE_KEY,
};
// ❌ Avoid - hardcoded keys
const config = {
publishableKey: "pk_1234567890abcdef",
};
```
## Common Configuration Options
These options are shared across all SDK implementations:
### Authentication
| Option | Type | Required | Description |
| ---------------- | ------ | -------- | -------------------------------------------- |
| `publishableKey` | string | ✅ | Your publishable key from Platform Dashboard |
### User Identity
| Option | Type | Required | Description |
| ---------------------- | ------ | -------- | ------------------------------------------------------------------------------- |
| `userInfo` | object | ❌ | User metadata for space creation |
| `userInfo.userId` | string | ❌ | Unique user identifier |
| `userInfo.name` | string | ❌ | User's display name - this is displayed in the dashboard as the associated user |
| `userInfo.companyId` | string | ❌ | Company identifier |
| `userInfo.companyName` | string | ❌ | Company display name |
| `externalActorId` | string | ❌ | Unique identifier for embedded users |
### Space Setup
| Option | Type | Required | Description |
| --------------- | -------- | -------- | ----------------------------------------- |
| `name` | string | ✅ | Name of the space |
| `environmentId` | string | ✅ | Environment identifier |
| `spaceId` | string | ❌ | ID of existing space to reuse |
| `workbook` | object | ❌ | Workbook configuration for dynamic spaces |
| `listener` | Listener | ❌ | Event listener for responding to events |
### Look & Feel
| Option | Type | Required | Description |
| --------------------------------- | ------- | -------- | -------------------------------------------------------------------- |
| `themeConfig` | object | ❌ | Theme values for Space, sidebar and data table |
| `spaceBody` | object | ❌ | Space options for creating new Space; used with Angular and Vue SDKs |
| `sidebarConfig` | object | ❌ | Sidebar UI configuration |
| `sidebarConfig.defaultPage` | object | ❌ | Landing page configuration |
| `sidebarConfig.showDataChecklist` | boolean | ❌ | Toggle data config, defaults to false |
| `sidebarConfig.showSidebar` | boolean | ❌ | Show/hide sidebar |
| `document` | object | ❌ | Document content for space |
| `document.title` | string | ❌ | Document title |
| `document.body` | string | ❌ | Document body content (markdown) |
### CSS Customization
You can customize the embedded Flatfile iframe and its container elements using CSS variables and class selectors. This allows you to control colors, sizing, borders, and other visual aspects of the iframe wrapper to match your application's design.
#### CSS Variables
Define these CSS variables in your application's stylesheet to control the appearance of Flatfile's embedded components:
```css theme={null}
:root {
--ff-primary-color: #4c48ef;
--ff-secondary-color: #616a7d;
--ff-text-color: #090b2b;
--ff-dialog-border-radius: 4px;
--ff-border-radius: 5px;
--ff-bg-fade: rgba(0, 0, 0, 0.2);
}
```
#### Container Elements
Target these elements to customize the iframe container:
```css theme={null}
/* The default mount element */
#flatfile_iFrameContainer {
/* Your custom styles */
}
/* A div around the iframe that contains Flatfile */
.flatfile_iframe-wrapper {
/* Your custom styles */
}
/* The actual iframe that contains Flatfile */
#flatfile_iframe {
/* Your custom styles */
}
```
#### Modal Display Customization
When `displayAsModal` is set to `true`, customize the modal appearance:
```css theme={null}
/* Container styles when displayed as modal */
.flatfile_displayAsModal {
padding: 50px !important;
width: calc(100% - 100px) !important;
height: calc(100vh - 100px) !important;
}
.flatfile_iframe-wrapper.flatfile_displayAsModal {
background: var(--ff-bg-fade);
}
/* Close button styles */
.flatfile_displayAsModal .flatfile-close-button {
/* Your custom styles */
}
.flatfile_displayAsModal .flatfile-close-button svg {
fill: var(--ff-secondary-color);
}
/* Iframe border radius when displayed as modal */
.flatfile_displayAsModal #flatfile_iframe {
border-radius: var(--ff-border-radius);
}
```
#### Exit Confirmation Dialog
Customize the confirmation dialog that appears when closing Flatfile:
```css theme={null}
/* Modal backdrop */
.flatfile_outer-shell {
background-color: var(--ff-bg-fade);
border-radius: var(--ff-border-radius);
}
/* Inner container */
.flatfile_inner-shell {
/* Your custom styles */
}
/* Dialog box */
.flatfile_modal {
border-radius: var(--ff-dialog-border-radius);
}
/* Button container */
.flatfile_button-group {
/* Your custom styles */
}
/* All buttons */
.flatfile_button {
/* Your custom styles */
}
/* Primary "Yes, cancel" button */
.flatfile_primary {
border: 1px solid var(--ff-primary-color);
background-color: var(--ff-primary-color);
color: #fff;
}
/* Secondary "No, stay" button */
.flatfile_secondary {
color: var(--ff-secondary-color);
}
/* Dialog heading */
.flatfile_modal-heading {
color: var(--ff-text-color);
}
/* Dialog description text */
.flatfile_modal-text {
color: var(--ff-secondary-color);
}
```
#### Error Component
Customize the error display component:
```css theme={null}
/* Error container */
.ff_error_container {
/* Your custom styles */
}
/* Error heading */
.ff_error_heading {
/* Your custom styles */
}
/* Error description */
.ff_error_text {
/* Your custom styles */
}
```
### Basic Behavior
| Option | Type | Required | Description |
| ---------------------- | -------- | -------- | ------------------------------------------ |
| `closeSpace` | object | ❌ | Options for closing iframe |
| `closeSpace.operation` | string | ❌ | Operation type |
| `closeSpace.onClose` | function | ❌ | Callback when space closes |
| `displayAsModal` | boolean | ❌ | Display as modal or inline (default: true) |
## Advanced Configuration Options
These options provide specialized functionality for custom implementations:
### Space Reuse
| Option | Type | Required | Description |
| ------------- | ------ | -------- | --------------------------------------------- |
| `id` | string | ✅ | Space ID |
| `accessToken` | string | ✅ | Access token for space (obtained server-side) |
**Important:** To reuse an existing space, you must retrieve the spaceId and access token server-side using your secret key, then pass the `accessToken` to the client. See [Server Setup Guide](./server-setup) for details.
### UI Overrides
| Option | Type | Required | Description |
| ------------------------- | ------------ | -------- | ---------------------------------------------------------------- |
| `mountElement` | string | ❌ | Element to mount Flatfile (default: "flatfile\_iFrameContainer") |
| `loading` | ReactElement | ❌ | Custom loading component |
| `exitTitle` | string | ❌ | Exit dialog title (default: "Close Window") |
| `exitText` | string | ❌ | Exit dialog text (default: "See below") |
| `exitPrimaryButtonText` | string | ❌ | Primary button text (default: "Yes, exit") |
| `exitSecondaryButtonText` | string | ❌ | Secondary button text (default: "No, stay") |
| `errorTitle` | string | ❌ | Error dialog title (default: "Something went wrong") |
### On-Premises Configuration
| Option | Type | Required | Description |
| ---------- | ------ | -------- | ------------------------------------------------------------------------------------------------ |
| `apiUrl` | string | ❌ | API endpoint (default: "[https://platform.flatfile.com/api](https://platform.flatfile.com/api)") |
| `spaceUrl` | string | ❌ | Spaces API URL (default: "[https://platform.flatfile.com/s](https://platform.flatfile.com/s)") |
URLs for other regions can be found [here](../reference/cli#regional-servers).
## Configuration Examples
### Basic Space Creation
```javascript theme={null}
const config = {
publishableKey: "pk_1234567890abcdef",
name: "Customer Data Import",
environmentId: "us_env_abc123",
workbook: {
// your workbook configuration
},
userInfo: {
userId: "user_123",
name: "John Doe",
},
};
```
### Space Reuse with Access Token
```javascript theme={null}
// Client-side: Use space with access token from server
const config = {
space: {
id: "us_sp_abc123def456",
accessToken: "at_1234567890abcdef", // Retrieved server-side
},
};
```
### Advanced UI Customization
```javascript theme={null}
const config = {
publishableKey: "pk_1234567890abcdef",
mountElement: "custom-flatfile-container",
exitTitle: "Are you sure you want to leave?",
exitText: "Your progress will be saved.",
themeConfig: {
// custom theme configuration
},
};
```
## Troubleshooting
### Invalid publishableKey
**Error:** `"Invalid publishable key"`
**Solution:**
* Verify key starts with `pk_`
* Check for typos or extra spaces
* Ensure key is from correct environment
### Space Not Found
**Error:** `"Space not found"` or `403 Forbidden`
**Solution:**
* Verify Space ID format (`us_sp_` prefix)
* Ensure Space exists and is active
* Check Space permissions in dashboard
### CORS Issues
**Error:** `"CORS policy blocked"`
**Solution:**
* Add your domain to allowed origins in Platform Dashboard
* Ensure you're using publishable key (not secret key)
* Check browser network tab for specific CORS errors
### Access Token Issues
**Error:** `"Invalid access token"` when using space reuse
**Solution:**
* Ensure access token is retrieved server-side using secret key
* Check that token hasn't expired
* Verify space ID matches the token
## Testing Setup
For development and testing:
```javascript theme={null}
// Development configuration
const config = {
publishableKey: "pk_test_1234567890abcdef", // publishable key from development environment
};
```
Create separate test Spaces for development to avoid affecting production data.
## Next Steps
Once configured:
* Deploy your event listener to Flatfile
* Configure data validation and transformation rules
* Test the embedding in your application
* Deploy to production with production keys
For server-side space reuse patterns, see our [Server Setup Guide](./server-setup).
---
# Source: https://flatfile.com/docs/guides/advanced-filters.md
> ## Documentation Index
> Fetch the complete documentation index at: https://flatfile.com/docs/llms.txt
> Use this file to discover all available pages before exploring further.
# Advanced Filters
> Learn how to use Flatfile's Advanced Filters to efficiently filter and search through your data
Advanced Filters in Flatfile provide a powerful way to filter and search through your data with complex conditions. This feature allows you to create sophisticated filter combinations to quickly find the exact records you need.
## Overview
The Advanced Filters feature enables you to:
* Create multiple filter conditions with different fields
* Combine conditions using logical operators (AND/OR)
* Filter by various data types with appropriate operators
* Save and reuse filter combinations
* Apply filters to large datasets efficiently
## Using Advanced Filters
### Accessing Advanced Filters
You can access Advanced Filters in the Flatfile interface through the Filter button in the sheet toolbar:
1. Navigate to any sheet in your workbook
2. Click the "Filter" button in the toolbar
3. Select a field to filter by, or click "Advanced filter" to create a complex filter
### Creating Filter Conditions
Each filter condition consists of three parts:
1. **Field** - The column you want to filter on
2. **Operator** - The comparison type (equals, contains, greater than, etc.)
3. **Value** - The specific value to filter by
For example, you might create a filter like: `firstName is "John"` or `age > 30`.
### Combining Multiple Filters
Advanced Filters allow you to combine multiple conditions:
1. Create your first filter condition
2. Click the "Add condition" button
3. Select whether to join with "AND" or "OR" logic
4. Add your next condition
This allows for complex queries like: `firstName is "John" AND age > 30` or `status is "pending" OR status is "review"`.
### Available Operators
Different field types support different operators:
| Field Type | Available Operators |
| ---------- | ----------------------------------------------- |
| String | is, is not, like, is empty, not empty |
| Number | is, is not, >, \<, >=, \<=, is empty, not empty |
| Boolean | is true, is false, is empty, not empty |
| Date | is, is not, >, \<, >=, \<=, is empty, not empty |
| Enum | is, is not, is empty, not empty |
### Horizontal Scrolling
When you add multiple filter conditions that extend beyond the available width of the screen, the filter area will automatically enable horizontal scrolling. This allows you to create complex filter combinations without being limited by screen space.
Simply scroll horizontally to see all your filter conditions when they extend beyond the visible area.
## Advanced Filter Examples
Here are some examples of how you might use Advanced Filters:
### Example 1: Finding Specific Customer Records
```
firstName is "Sarah" AND status is "active" AND lastPurchase > "2023-01-01"
```
This filter would show all active customers named Sarah who made a purchase after January 1, 2023.
### Example 2: Identifying Records Needing Attention
```
(status is "pending" OR status is "review") AND createdDate < "2023-06-01"
```
This filter would show all records that are either pending or in review, and were created before June 1, 2023.
### Example 3: Finding Missing Data
```
email is not empty AND phone is empty
```
This filter would show all records that have an email address but are missing a phone number.
## Best Practices
* **Start simple**: Begin with a single filter condition and add more as needed
* **Use AND/OR strategically**: "AND" narrows results (both conditions must be true), while "OR" broadens results (either condition can be true)
* **Consider performance**: Very complex filters on large datasets may take longer to process
* **Save common filters**: If you frequently use the same filter combinations, consider saving them as views
## Troubleshooting
If you encounter issues with Advanced Filters:
* Ensure your filter values match the expected format for the field type
* Check that you're using appropriate operators for each field type
* For complex filters, try breaking them down into simpler components to identify issues
* Verify that the data you're filtering actually exists in your dataset
Advanced Filters provide a powerful way to work with your data in Flatfile, allowing you to quickly find and focus on the records that matter most to your workflow.
---
# Source: https://flatfile.com/docs/embedding/angular.md
> ## Documentation Index
> Fetch the complete documentation index at: https://flatfile.com/docs/llms.txt
> Use this file to discover all available pages before exploring further.
# Angular Embedding
> Embed Flatfile in Angular applications
Embed Flatfile in your Angular application using our Angular SDK. This provides Angular components and services for seamless integration.
## Installation
```bash theme={null}
npm install @flatfile/angular-sdk
```
## Basic Implementation
### 1. Import the Module
Add the `SpaceModule` to your Angular module:
```typescript theme={null}
import { NgModule } from "@angular/core";
import { SpaceModule } from "@flatfile/angular-sdk";
@NgModule({
imports: [
SpaceModule,
// your other imports
],
// ...
})
export class AppModule {}
```
### 2. Create Component
Create a component to handle the Flatfile embed:
```typescript theme={null}
import { Component } from "@angular/core";
import { SpaceService, ISpace } from "@flatfile/angular-sdk";
@Component({
selector: "app-import",
template: `
Welcome to our app
`,
})
export class ImportComponent {
constructor(private spaceService: SpaceService) {}
spaceProps: ISpace = {
publishableKey: "pk_your_publishable_key",
displayAsModal: true,
};
openFlatfile() {
this.spaceService.OpenEmbed(this.spaceProps);
}
}
```
### 3. Get Your Credentials
**publishableKey**: Get from [Platform Dashboard](https://platform.flatfile.com) → Developer Settings
**Authentication & Security**: For production applications, implement proper authentication and space management on your server. See [Advanced Configuration](./advanced-configuration) for authentication guidance.
## Complete Example
The example below will open an empty space. To create the sheet your users
should land on, you'll want to create a workbook as shown further down this
page.
```typescript theme={null}
// app.module.ts
import { NgModule } from "@angular/core";
import { BrowserModule } from "@angular/platform-browser";
import { SpaceModule } from "@flatfile/angular-sdk";
import { AppComponent } from "./app.component";
@NgModule({
declarations: [AppComponent],
imports: [BrowserModule, SpaceModule],
providers: [],
bootstrap: [AppComponent],
})
export class AppModule {}
```
```typescript theme={null}
// app.component.ts
import { Component } from "@angular/core";
import { SpaceService, ISpace } from "@flatfile/angular-sdk";
@Component({
selector: "app-root",
template: `
My Application
`,
})
export class AppComponent {
constructor(private spaceService: SpaceService) {}
spaceProps: ISpace = {
publishableKey: "pk_your_publishable_key",
displayAsModal: true,
};
openFlatfile() {
this.spaceService.OpenEmbed(this.spaceProps);
}
}
```
## Creating New Spaces
To create a new Space each time:
1. Add a `workbook` configuration object. Read more about workbooks [here](../core-concepts/workbooks).
2. Optionally [deploy](../core-concepts/listeners) a `listener` for custom data processing. Your listener will contain your validations and transformations
```typescript theme={null}
spaceProps: ISpace = {
publishableKey: "pk_your_publishable_key",
workbook: {
name: "My Import",
sheets: [
{
name: "Contacts",
slug: "contacts",
fields: [
{ key: "name", type: "string", label: "Name" },
{ key: "email", type: "string", label: "Email" },
],
},
],
},
displayAsModal: true,
};
```
For detailed workbook configuration, see the [Workbook API Reference](https://reference.flatfile.com/api-reference/workbooks).
## Reusing Existing Spaces
For production applications, implement proper space management on your server to ensure security and proper access control:
```typescript theme={null}
// Frontend Component
@Component({
selector: "app-import",
template: `
`,
})
export class ImportComponent {
loading = false;
constructor(private spaceService: SpaceService, private http: HttpClient) {}
async openFlatfile() {
this.loading = true;
try {
// Get space credentials from your server
const response = await this.http
.get<{
publishableKey: string;
spaceId: string;
accessToken?: string;
}>("/api/flatfile/space")
.toPromise();
const spaceProps: ISpace = {
space: {
spaceId: response.spaceId,
accessToken: response.accessToken,
},
displayAsModal: true,
};
this.spaceService.OpenEmbed(spaceProps);
} catch (error) {
console.error("Failed to load Flatfile space:", error);
} finally {
this.loading = false;
}
}
}
```
For server implementation details, see the [Server Setup](/embedding/server-setup) guide.
## Configuration Options
For detailed configuration options, authentication settings, and advanced features, see the [Advanced Configuration](./advanced-configuration) guide.
## Using Space Component Directly
You can also use the `flatfile-space` component directly in your template:
```typescript theme={null}
@Component({
selector: "app-import",
template: `
`,
})
export class ImportComponent {
showSpace = false;
spaceProps: ISpace = {
publishableKey: "pk_your_publishable_key",
displayAsModal: true,
};
toggleSpace() {
this.showSpace = !this.showSpace;
}
onCloseSpace() {
this.showSpace = false;
}
}
```
## TypeScript Support
The Angular SDK is built with TypeScript and includes full type definitions:
```typescript theme={null}
import { ISpace, SpaceService } from "@flatfile/angular-sdk";
interface ImportData {
name: string;
email: string;
}
@Component({
// component definition
})
export class ImportComponent {
spaceProps: ISpace;
constructor(private spaceService: SpaceService) {
this.spaceProps = {
publishableKey: "pk_your_publishable_key",
spaceId: "us_sp_your_space_id",
};
}
}
```
## Next Steps
* **Advanced Configuration**: Set up [authentication, listeners, and advanced options](./advanced-configuration)
* **Server Setup**: Implement [backend integration and space management](./server-setup)
* **Data Processing**: Set up Listeners in your Space for custom data transformations
* **API Integration**: Use [Flatfile API](https://reference.flatfile.com) to retrieve processed data
* **Angular SDK Documentation**: See [@flatfile/angular-sdk documentation](https://www.npmjs.com/package/@flatfile/angular-sdk)
## Quick Links
Authentication, listeners, and advanced options
Backend integration and space management
## Example Projects
Complete Angular application with Flatfile embedding
---
# Source: https://flatfile.com/docs/core-concepts/apps.md
> ## Documentation Index
> Fetch the complete documentation index at: https://flatfile.com/docs/llms.txt
> Use this file to discover all available pages before exploring further.
# Apps
> The anatomy of an App
## Apps
Apps are an organizational unit in Flatfile, designed to manage and coordinate data import workflows across different environments. They serve as containers for organizing related Spaces and provide a consistent configuration that can be deployed across your development pipeline.
Apps can be given [namespaces](/guides/namespaces-and-filters#app-namespaces) to isolate different parts of your application and control which [listeners](/core-concepts/listeners) receive events from which spaces.
Apps are available across Development-level environments by default, and optionally available across Production environments with a configuration option:
---
# Source: https://flatfile.com/docs/guides/authentication.md
> ## Documentation Index
> Fetch the complete documentation index at: https://flatfile.com/docs/llms.txt
> Use this file to discover all available pages before exploring further.
# Authentication and Authorization
> Complete guide to authenticating with Flatfile using API keys, Personal Access Tokens, and managing roles and permissions
This guide covers all aspects of authentication with Flatfile, including API keys, Personal Access Tokens, and role-based access control for your team and customers.
## API Keys
Flatfile provides two different kinds of environment-specific API keys you can use to interact with the API. In addition, you can work with a development key or a production environment.
API keys are created automatically. Use the [API Keys and Secrets](https://platform.flatfile.com/dashboard/keys-and-secrets) page to see your API keys for
any given Environment.
### Testing and Development
[Environments](/core-concepts/environments) are isolated entities and are intended to be a safe place to create and test different configurations. A `development` and `production` environment are created by default.
| isProd | Name | Description |
| ------- | ------------- | ------------------------------------------------------------------------------------------- |
| *false* | `development` | Use this default environment, and its associated test API keys, as you build with Flatfile. |
| *true* | `production` | When you're ready to launch, create a new environment and swap out your keys. |
The development environment does not count towards your paid credits.
### Secret and Publishable Keys
All Accounts have two key types for each environment. Learn when to use each type of key:
| Type | Id | Description |
| --------------- | ---------------------- | ----------------------------------------------------------------------------------------------------------------------- |
| Secret key | `sk_23ghsyuyshs7dcrty` | **On the server-side:** Store this securely in your server-side code. Don't expose this key in an application. |
| Publishable key | `pk_23ghsyuyshs7dcert` | **On the client-side:** Can be publicly-accessible in your application's client-side code. Use when embedding Flatfile. |
The `accessToken` provided from `publishableKey` will remain valid for a
duration of 24 hours.
## Personal Access Tokens
Personal Access Tokens (PATs) provide a secure way to authenticate with the Flatfile API. Unlike environment-specific API keys, PATs are user-scoped tokens that inherit the permissions of the user who created them.
Personal Access Tokens:
* Are user-scoped authentication tokens
* Have the same auth scope as the user who created them
* Can be used in place of a JWT for API authentication
* Are ideal for scripts, automation, and integrations that need to act on behalf of a user
This opens up possibilities for various use cases, including building audit logs, managing Spaces, and monitoring agents across environments.
### Creating a Token
1. Log in to your Flatfile account
2. Click on your user profile dropdown in the top-right corner
3. Select "Personal Access Tokens"
4. Click "Create Token"
5. Enter a descriptive name for your token
6. Copy the generated token immediately - it will only be shown once
Make sure to copy your token when it's first created. For security reasons,
you won't be able to view the token again after leaving the page.
### Exchanging Credentials for an Access Token
You can exchange your email and password credentials for an access token using the auth endpoint. See the [Authentication Examples](/guides/deeper/auth-examples#creating-a-pat-via-api) for the complete API call.
The response will include an access token that you can use for API authentication.
### Retrieving a Personal Access Token (Legacy Method)
Your `publishableKey` and `secretKey` are specific to an environment. Therefore, to interact at a higher level, you can use a personal access token.
1. From the dashboard, open **Settings**
2. Click to **Personal Tokens**
3. Retrieve your `clientId` and `secret`.
4. Using the key pair, call the auth endpoint. See the [Authentication Examples](/guides/deeper/auth-examples#legacy-client-credentials-flow) for the complete API call.
5. The response will include an `accessToken`. Present that as your **Bearer `token`** in place of the `secretKey`.
### Using a Token
Use your Personal Access Token in API requests by including it in the Authorization header as documented in the [API Reference](https://reference.flatfile.com).
### Managing Tokens
You can view all your active tokens in the Personal Access Tokens page. For each token, you can see:
* Name
* Creation date
* Last used date (if applicable)
To delete a token:
1. Navigate to the Personal Access Tokens page
2. Find the token you want to delete
3. Click the menu icon (three dots) next to the token
4. Select "Delete"
5. Confirm the deletion
Deleting a token immediately revokes access for any applications or scripts
using it. Make sure you update any dependent systems before deleting a token.
### Best Practices
* Create separate tokens for different applications or use cases
* Use descriptive names that identify where the token will be used
* Regularly review and delete unused tokens
* Rotate tokens periodically for enhanced security
* Never share your tokens with others - each user should create their own tokens
### Example Use Cases
#### Building an Audit Log
Query for all events across all environments and combine them with user and guest data to create a comprehensive audit log, providing a detailed history of actions within the application.
#### Managing Spaces Across Environments
Determine the number of Spaces available and identify which Spaces exist in different environments, allowing you to efficiently manage and organize your data.
#### Monitoring Agents Across Environments
Keep track of agents deployed to various environments by retrieving information about their presence, ensuring smooth and efficient data import processes.
## Roles & Permissions
Grant your team and customers access with role-based permissions.
### Administrator Roles
Administrator roles have full access to your accounts, including inviting additional admins and seeing developer keys.
The `accessToken` provided will remain valid for a duration of 24 hours.
| Role | Details |
| ------------- | ------------------------------------------------------------------------------------------------------------------------------------------------------------------------------------- |
| Administrator | This role is meant for any member of your team who requires full access to the Account.
✓ Can add other administrators ✓ Can view secret keys ✓ Can view logs |
### Guest Roles
Guest roles receive access via a magic link or a shared link depending on the [Environment](https://platform.flatfile.com/dashboard) `guestAuthentication` type. Guests roles can invite other Guests unless you turn off this setting in the [Guest Sidebar](/guides/customize-guest-sidebar).
The `accessToken` provided will remain valid for a duration of 1 hour.
Data Clips can provide granular guest access to a specific [sheet](/core-concepts/sheets) by sharing only selected records from that sheet within a [workbook](/core-concepts/workbooks). However, if the clipped sheet includes [reference fields](/core-concepts/fields#reference) that point to other sheets in the same workbook, guests will also receive read access to those referenced records to support lookups and validation. Learn more in the [Data Clips guide](/legacy-docs/advanced-guides/dataclips).
#### Space Grant
| Role | Details |
| ------------------ | -------------------------------------------------------------------------------------------------------------------------------------------------------------- |
| Single-Space Guest | This role is meant for a guest who has access to only one Space. Such guests can be invited to additional Spaces at any time. |
| Multi-Space Guest | This role is meant for a guest who has access to multiple Spaces. They will see a drop-down next to the Space name that enables them to switch between Spaces. |
#### Workbook Grant
| Role | Details |
| --------------------- | ------------------------------------------------------------------------------------------ |
| Single-Workbook Guest | This role is meant for a guest who should have access to only one Workbook within a Space. |
| Multi-Workbook Guest | This role is intended for a guest who has access to multiple Workbooks within a Space. |
This role can only be configured using code. See code example.
```js theme={null}
const createGuest = await api.guests.create({
environmentId: "us_env_hVXkXs0b",
email: "guest@example.com",
name: "Mr. Guest",
spaces: [
{
id: "us_sp_DrdXetPN",
workbooks: [
{
id: "us_wb_qGZbKwDW",
},
],
},
],
});
```
#### Guest Lifecycle
When a guest user is deleted, all their space connections are automatically removed to ensure security. This means:
* The guest loses access to all previously connected spaces
* They cannot regain access to these spaces without being explicitly re-invited
This automatic cleanup ensures that deleted guests cannot retain any access to spaces, even if they are later recreated with the same email address.
## API Reference
For detailed API documentation on authentication endpoints, see the [Authentication API Reference](https://reference.flatfile.com/api-reference/auth).
For programmatic management of Personal Access Tokens, see the [Personal Access Tokens API Reference](https://reference.flatfile.com/api-reference/auth/personal-access-tokens).
---
# Source: https://flatfile.com/docs/getting-started/quickstart/autobuild.md
> ## Documentation Index
> Fetch the complete documentation index at: https://flatfile.com/docs/llms.txt
> Use this file to discover all available pages before exploring further.
# Getting Started with AutoBuild
> Get up and running with Flatfile in minutes using AutoBuild to create a complete data import solution
## What is AutoBuild?
The easiest way to get started with Flatfile is using AutoBuild.
With AutoBuild, you can transform existing import templates or documentation into a fully
functional Flatfile app in minutes. Simply drop your example files into AutoBuild, and it will automatically create and deploy a [Blueprint](/core-concepts/blueprints) (for schema definition) and a [Listener](/core-concepts/listeners) (for validations and transformations) to your Flatfile [App](/core-concepts/apps).
Once you've started with AutoBuild, you can always download your Listener code and continue building with code from there!
## Setting Up Your Account
To get started, you'll need to [sign up for a Flatfile account](https://platform.flatfile.com/oauth/login).
During account setup, enter your company name and select "Start with an existing template or project file."
If you already have an active Flatfile account, you can still use AutoBuild to create a new app.
From the Flatfile dashboard, click the "New App" button.
Then select "Build with AutoBuild."
If the AutoBuild option isn't available on your account, please reach out to
support via [Slack](https://flatfile.com/join-slack/) or
[Email](mailto:support@flatfile.com) to gain access!{" "}
## Uploading Files and Context
Next, you'll upload files and provide additional context to the AutoBuild agent.
You can upload any of the following to help the AI understand your requirements:
* Import templates
* System documentation
* Complete data files
* Any other files that provide useful context
You may also provide an additional prompt to guide the AutoBuild agent. Use this to give
context about your uploaded files, explain specific data challenges, or outline additional requirements.
When you're ready, click "Get Started." The Flatfile AutoBuild agent will now build your space template.
## Working in Build Mode
After a few moments, you'll be taken to your new Flatfile app in Build Mode, which you can
access anytime to make changes.
On the right side, you'll see the blueprint of your space. Here you can inspect and edit the sheets
and fields that the AutoBuild agent has generated. You can easily add or remove fields,
update constraints and validations, or make other basic edits to your blueprint.
For more advanced changes, you can chat with the Flatfile Assistant. The Assistant can help you
with anything from small tweaks to complex validations, data egress actions, or large reorganization
of your sheets.
At any point, you can check the Data Preview tab to see what your Flatfile project will look like for
your users. You can add or edit data to test your validations and transformations.
## Deploying Your App
When you're finished building your space, click "Configure & Deploy."
You'll be prompted to give your app a name, and then it's ready to be deployed!
From here, you'll be taken to your new app in the dashboard.
Your autobuild agent is deployed and you're ready to create your first project and start importing data!
---
# Source: https://flatfile.com/docs/plugins/autocast.md
> ## Documentation Index
> Fetch the complete documentation index at: https://flatfile.com/docs/llms.txt
> Use this file to discover all available pages before exploring further.
# Autocast Plugin
> Automatically convert data in a Flatfile Sheet to match the data types defined in the corresponding Blueprint
The Autocast plugin is an opinionated transformer for Flatfile that automatically converts data in a Sheet to match the data types defined in the corresponding Blueprint (Schema). It operates on the `commit:created` event, meaning it processes records after they have been committed to the sheet.
Its primary purpose is to clean and standardize data by ensuring that values intended to be numbers, booleans, or dates are correctly typed, even if they are imported as strings. For example, it can convert the string "1,000" to the number `1000`, the string "yes" to the boolean `true`, and the string "08/16/2023" to a standardized UTC date string.
This plugin is useful in any scenario where source data may have inconsistent or incorrect data types, saving developers from writing manual data-casting logic.
## Installation
Install the plugin using npm:
```bash theme={null}
npm install @flatfile/plugin-autocast
```
## Configuration & Parameters
### Main Plugin Function
The `autocast` function accepts the following parameters:
The slug of the sheet that the plugin should monitor and apply autocasting to.
An optional array of field keys. If provided, the plugin will only attempt to cast values in the specified fields.
**Default Behavior:** If not provided, the plugin will automatically attempt to cast all fields in the sheet that are not of type 'string' in the Blueprint (i.e., it will target number, boolean, and date fields by default).
Configuration options for performance and debugging:
Specifies the number of records to process in each batch. This is passed down to the underlying bulk record hook.
Specifies how many chunks to process in parallel. This is passed down to the underlying bulk record hook.
An optional flag to enable debug logging.
## Usage Examples
### Basic Usage
Apply autocasting to all supported fields on a sheet:
```javascript JavaScript theme={null}
import { FlatfileListener } from '@flatfile/listener';
import { autocast } from '@flatfile/plugin-autocast';
const listener = new FlatfileListener();
listener.use(autocast('contacts'));
export default listener;
```
```typescript TypeScript theme={null}
import { FlatfileListener } from '@flatfile/listener';
import { autocast } from '@flatfile/plugin-autocast';
const listener = new FlatfileListener();
listener.use(autocast('contacts'));
export default listener;
```
### Targeted Field Casting
Apply autocasting to only specific fields:
```javascript JavaScript theme={null}
import { FlatfileListener } from '@flatfile/listener';
import { autocast } from '@flatfile/plugin-autocast';
const listener = new FlatfileListener();
listener.use(autocast('contacts', ['annualRevenue', 'subscribed']));
export default listener;
```
```typescript TypeScript theme={null}
import { FlatfileListener } from '@flatfile/listener';
import { autocast } from '@flatfile/plugin-autocast';
const listener = new FlatfileListener();
listener.use(autocast('contacts', ['annualRevenue', 'subscribed']));
export default listener;
```
### Advanced Configuration
Configure field filters and adjust performance settings:
```javascript JavaScript theme={null}
import { FlatfileListener } from '@flatfile/listener';
import { autocast } from '@flatfile/plugin-autocast';
const listener = new FlatfileListener();
listener.use(
autocast('contacts', ['annualRevenue', 'subscribed'], {
chunkSize: 5000,
parallel: 2,
debug: true,
})
);
export default listener;
```
```typescript TypeScript theme={null}
import { FlatfileListener } from '@flatfile/listener';
import { autocast } from '@flatfile/plugin-autocast';
const listener = new FlatfileListener();
listener.use(
autocast('contacts', ['annualRevenue', 'subscribed'], {
chunkSize: 5000,
parallel: 2,
debug: true,
})
);
export default listener;
```
### Using Utility Functions
The plugin also exports individual casting utility functions:
```javascript JavaScript theme={null}
import { castNumber, castBoolean, castDate } from '@flatfile/plugin-autocast';
// Cast numbers (handles commas)
const num1 = castNumber('1,234.56'); // Returns 1234.56
const num2 = castNumber(99); // Returns 99
// Cast booleans
const bool1 = castBoolean('yes'); // Returns true
const bool2 = castBoolean(0); // Returns false
const bool3 = castBoolean('f'); // Returns false
// Cast dates
const date1 = castDate('08/16/2023'); // Returns 'Wed, 16 Aug 2023 00:00:00 GMT'
const date2 = castDate(1692144000000); // Returns 'Wed, 16 Aug 2023 00:00:00 GMT'
```
```typescript TypeScript theme={null}
import { castNumber, castBoolean, castDate, TRecordValue } from '@flatfile/plugin-autocast';
// Cast numbers (handles commas)
const num1: number = castNumber('1,234.56'); // Returns 1234.56
const num2: number = castNumber(99); // Returns 99
// Cast booleans
const bool1: boolean = castBoolean('yes'); // Returns true
const bool2: boolean = castBoolean(0); // Returns false
const bool3: boolean = castBoolean('f'); // Returns false
// Cast dates
const date1: string = castDate('08/16/2023'); // Returns 'Wed, 16 Aug 2023 00:00:00 GMT'
const date2: string = castDate(1692144000000); // Returns 'Wed, 16 Aug 2023 00:00:00 GMT'
```
## Troubleshooting
### Error Handling with Utility Functions
The individual casting utility functions throw errors when values cannot be converted:
```javascript JavaScript theme={null}
import { castNumber, castBoolean, castDate } from '@flatfile/plugin-autocast';
try {
const invalidNum = castNumber('not a number');
} catch (e) {
console.error(e.message); // Prints: Invalid number
}
try {
const invalidBool = castBoolean('maybe');
} catch (e) {
console.error(e.message); // Prints: Invalid boolean
}
try {
const invalidDate = castDate('not a date');
} catch (e) {
console.error(e.message); // Prints: Invalid date
}
```
```typescript TypeScript theme={null}
import { castNumber, castBoolean, castDate } from '@flatfile/plugin-autocast';
try {
const invalidNum = castNumber('not a number');
} catch (e: any) {
console.error(e.message); // Prints: Invalid number
}
try {
const invalidBool = castBoolean('maybe');
} catch (e: any) {
console.error(e.message); // Prints: Invalid boolean
}
try {
const invalidDate = castDate('not a date');
} catch (e: any) {
console.error(e.message); // Prints: Invalid date
}
```
## Notes
### Event Trigger
The plugin is designed to run on the `listener.on('commit:created')` event.
### Plugin Order
This plugin runs on the same event as `recordHook` and `bulkRecordHook`. The order in which you `.use()` the plugins in your listener matters, as they will execute sequentially.
### Error Handling Pattern
The main `autocast` plugin does not throw errors. Instead, if a value cannot be cast, it attaches an error message directly to the record's cell using `record.addError()`. This makes the errors visible to the user in the Flatfile UI. The individual `cast*` utility functions, however, do throw an `Error` on failure.
### Supported Types
The plugin automatically targets fields of type `number`, `boolean`, and `date` as defined in the Sheet's Blueprint. It does not attempt to cast `string` fields by default.
### Boolean Casting
* **Truthy values:** `'1'`, `'yes'`, `'true'`, `'on'`, `'t'`, `'y'`, and `1`
* **Falsy values:** `'-1'`, `'0'`, `'no'`, `'false'`, `'off'`, `'f'`, `'n'`, `0`, and `-1`
### Date Casting
All parsed dates are converted to a standardized UTC string format. ISO 8601 formats like `YYYY-MM-DD` are treated as UTC, while other formats like `MM/DD/YYYY` are assumed to be local time and are converted to UTC.
---
# Source: https://flatfile.com/docs/plugins/automap.md
> ## Documentation Index
> Fetch the complete documentation index at: https://flatfile.com/docs/llms.txt
> Use this file to discover all available pages before exploring further.
# Automap Plugin
> Automatically map columns for headless data import workflows in Flatfile with configurable confidence levels
The Automap plugin is designed for headless data import workflows in Flatfile. Its primary purpose is to automate the column mapping process. The plugin listens for successfully extracted files, and when a matching file is found, it automatically creates and executes a mapping job to a specified destination Sheet.
This is ideal for scenarios where files with consistent schemas are uploaded programmatically, bypassing the need for a user to manually map columns in the UI. The plugin determines whether to proceed with the mapping based on a configurable confidence level, ensuring that only high-quality matches are automated. If the mapping confidence is too low, it can trigger a failure callback for custom notifications or alternative handling.
## Installation
```bash npm theme={null}
npm install @flatfile/plugin-automap
```
```bash yarn theme={null}
yarn add @flatfile/plugin-automap
```
## Configuration & Parameters
The `automap` function accepts an `AutomapOptions` configuration object with the following parameters:
### Required Parameters
Controls the minimum confidence level required for the plugin to automatically execute the mapping job.
* `'confident'`: All mapped fields must have a confidence level of 'strong' (> 90%) or 'absolute' (100%)
* `'exact'`: All mapped fields must have a confidence level of 'absolute' (100%)
### Optional Parameters
Toggles verbose logging for development and troubleshooting. When true, the plugin will output detailed information about its progress, decisions, and any errors it encounters to the console.
Specifies the destination sheet for the imported data.
* If a string is provided, it must be the exact slug of the target sheet
* If a function is provided, it receives the uploaded file's name and the event payload, and must return the target sheet slug (or a Promise that resolves to it)
* **Default behavior**: If not provided, the plugin will not be able to map a single-sheet file automatically unless more advanced logic is implemented by the user
A regular expression used to filter which files the plugin should process.
* **Default behavior**: If not provided, the plugin will attempt to automap every file that is uploaded
* The plugin will only act on files whose names pass a `test()` against this regex
A callback function that is executed if the automapping process is aborted due to low mapping confidence.
* **Default behavior**: Nothing happens on failure, though a warning may be logged if `debug` is true
* This can be used to trigger notifications (e.g., email, SMS, webhook) to alert a user that manual intervention is required
Specifies the destination Workbook by its ID or name.
* **Default behavior**: If not provided, the plugin searches for a suitable workbook in the space. It filters out workbooks associated with raw files (those with a 'file' label). If only one workbook remains, it is chosen. If multiple remain, it will select the one with the 'primary' label.
Prevents the plugin from updating the name of the processed file in the Flatfile UI.
* By default, the plugin prepends "⚡️" to the file name on processing and appends the destination sheet name on success to provide visual feedback
* Setting this to `true` disables this behavior
## Usage Examples
### Basic Usage
This example shows the simplest way to use the automap plugin, targeting a specific sheet for all uploaded CSV files.
```javascript JavaScript theme={null}
import { FlatfileListener } from '@flatfile/listener';
import { automap } from '@flatfile/plugin-automap';
const listener = FlatfileListener.create((listener) => {
listener.use(
automap({
accuracy: 'confident',
defaultTargetSheet: 'Contacts',
matchFilename: /\.csv$/,
})
);
});
```
```typescript TypeScript theme={null}
import { FlatfileListener } from '@flatfile/listener';
import { automap } from '@flatfile/plugin-automap';
const listener = FlatfileListener.create((listener) => {
listener.use(
automap({
accuracy: 'confident',
defaultTargetSheet: 'Contacts',
matchFilename: /\.csv$/,
})
);
});
```
### Configuration with Failure Handling
This example demonstrates a more complete configuration, including a failure callback and targeting a specific workbook.
```javascript JavaScript theme={null}
import { FlatfileListener } from '@flatfile/listener';
import { automap } from '@flatfile/plugin-automap';
const listener = FlatfileListener.create((listener) => {
listener.use(
automap({
accuracy: 'confident',
defaultTargetSheet: 'Contacts',
targetWorkbook: 'MyPrimaryWorkbook',
matchFilename: /^(contacts|people|users)\.csv$/i,
debug: true,
onFailure: (event) => {
console.error(
`Automap failed for file in space ${event.context.spaceId}. Please map manually.`
);
// Add custom logic here, like sending an email or Slack message.
},
})
);
});
```
```typescript TypeScript theme={null}
import { FlatfileListener } from '@flatfile/listener';
import { automap } from '@flatfile/plugin-automap';
import type { FlatfileEvent } from '@flatfile/listener';
const listener = FlatfileListener.create((listener) => {
listener.use(
automap({
accuracy: 'confident',
defaultTargetSheet: 'Contacts',
targetWorkbook: 'MyPrimaryWorkbook',
matchFilename: /^(contacts|people|users)\.csv$/i,
debug: true,
onFailure: (event: FlatfileEvent) => {
console.error(
`Automap failed for file in space ${event.context.spaceId}. Please map manually.`
);
// Add custom logic here, like sending an email or Slack message.
},
})
);
});
```
### Dynamic Sheet Targeting
This example uses a function for `defaultTargetSheet` to dynamically route data to different sheets based on the filename.
```javascript JavaScript theme={null}
import { FlatfileListener } from '@flatfile/listener';
import { automap } from '@flatfile/plugin-automap';
const listener = FlatfileListener.create((listener) => {
listener.use(
automap({
accuracy: 'exact',
defaultTargetSheet: (fileName) => {
if (fileName.includes('invoice')) {
return 'Invoices';
} else if (fileName.includes('contact')) {
return 'Contacts';
}
// Return a default or handle cases where no match is found
return 'DefaultSheet';
},
onFailure: (event) => {
console.log('Automap failed, manual mapping required.');
},
})
);
});
```
```typescript TypeScript theme={null}
import { FlatfileListener } from '@flatfile/listener';
import { automap } from '@flatfile/plugin-automap';
import type { FlatfileEvent } from '@flatfile/listener';
const listener = FlatfileListener.create((listener) => {
listener.use(
automap({
accuracy: 'exact',
defaultTargetSheet: (fileName?: string): string => {
if (fileName?.includes('invoice')) {
return 'Invoices';
} else if (fileName?.includes('contact')) {
return 'Contacts';
}
// Return a default or handle cases where no match is found
return 'DefaultSheet';
},
onFailure: (event: FlatfileEvent) => {
console.log('Automap failed, manual mapping required.');
},
})
);
});
```
## Troubleshooting
The most effective way to troubleshoot the plugin is to set the `debug: true` option in the configuration. This will provide a step-by-step log of the plugin's execution, including:
* Which files are matched
* What workbooks and sheets are targeted
* The contents of the mapping plan
* The reason for any failures
```javascript JavaScript theme={null}
import { FlatfileListener } from '@flatfile/listener';
import { automap } from '@flatfile/plugin-automap';
const listener = FlatfileListener.create((listener) => {
listener.use(
automap({
accuracy: 'exact',
defaultTargetSheet: 'Contacts',
debug: true, // Enable verbose logging
onFailure: (event) => {
const { spaceId, fileId } = event.context;
console.error(
`Could not automap file ${fileId} with 'exact' accuracy. ` +
`Please visit space ${spaceId} to map it manually.`
);
},
})
);
});
```
```typescript TypeScript theme={null}
import { FlatfileListener } from '@flatfile/listener';
import { automap } from '@flatfile/plugin-automap';
import type { FlatfileEvent } from '@flatfile/listener';
const listener = FlatfileListener.create((listener) => {
listener.use(
automap({
accuracy: 'exact',
defaultTargetSheet: 'Contacts',
debug: true, // Enable verbose logging
onFailure: (event: FlatfileEvent) => {
const { spaceId, fileId } = event.context;
console.error(
`Could not automap file ${fileId} with 'exact' accuracy. ` +
`Please visit space ${spaceId} to map it manually.`
);
},
})
);
});
```
## Notes
### Default Behavior
* **File processing**: If no `matchFilename` is provided, the plugin will attempt to automap every uploaded file
* **Target sheet**: It is highly recommended to set `defaultTargetSheet` for basic workflows, as the plugin cannot map single-sheet files automatically without it
* **Workbook selection**: When `targetWorkbook` is not specified, the plugin filters out file-associated workbooks and selects the remaining one, or the one with the 'primary' label if multiple exist
* **File naming**: By default, the plugin updates file names with status indicators ("⚡️" during processing, destination sheet name on success)
### Special Considerations
* This plugin is intended for use in a server-side listener, not in the browser
* The plugin relies on two key events: `job:completed:file:extract` to start the process, and `job:updated:workbook:map` to check the mapping plan
* The logic for selecting a `targetWorkbook` works best when there's a clear primary workbook in the space
### Limitations
* The `accuracy` check is all-or-nothing. If even one column mapping does not meet the required confidence level, the entire automatic mapping job is aborted
* The plugin's default behavior works best with single-sheet source files. For multi-sheet source files, you must provide more complex logic
* For internal errors (e.g., API call failures, inability to find a file or workbook), the plugin uses `try/catch` blocks and logs errors to the console, which are more verbose when `debug` is set to `true`
### Error Handling Patterns
The primary pattern for user-defined error handling is the `onFailure` callback, which is triggered when mapping confidence is too low. This allows you to implement custom notification systems or alternative workflows when automatic mapping cannot proceed.
---
# Source: https://flatfile.com/docs/core-concepts/blueprints.md
> ## Documentation Index
> Fetch the complete documentation index at: https://flatfile.com/docs/llms.txt
> Use this file to discover all available pages before exploring further.
# Blueprints
> Define your data schema to structure exactly how data should look, behave, and connect
## What is a Blueprint?
Blueprints enable you to create repeatable, reliable data import experiences that scale with your needs while maintaining data quality and user experience standards.
A Blueprint is your complete data definition in Flatfile. It controls how your data should look, behave, and connect—from simple field validations (like `unique` and `required`) to complex [relationships](/core-concepts/fields#reference) between [sheets](/core-concepts/sheets). You can even create [filtered reference fields](/core-concepts/fields#reference-field-filtering) that dynamically control available dropdown options based on other field values. Think of it as an intelligent template that ensures you collect the right data in the right format, every time.
**Terminology Note**: "Blueprint" is Flatfile's term for what might be called a
"schema" in other systems. Throughout Flatfile's documentation and API, we use
"Blueprint" as the standard term for data structure definitions to distinguish
Flatfile's comprehensive data modeling approach from generic schema concepts.
## How Blueprints Work
Every [Space](/core-concepts/spaces) has exactly one Blueprint that defines its data structure. Whenever a new space is created, the Flatfile Platform automatically triggers a `space:configure` [Job](/core-concepts/jobs), and you can configure a [Listener](/core-concepts/listeners) to pick up that job and configure the new space by defining its Blueprint. Creating workbooks, sheets, and actions **is** your Blueprint definition, establishing the data schema that will govern all data within that Space.
To make that part easier, we have provided the [Space Configure Plugin](/plugins/space-configure) to abstract away the Job/Listener code, allowing you to focus on what matters: Preparing your space for data.
## Basic Blueprint Structure
* A [Blueprint](/core-concepts/blueprints) defines the data structure for any number of [Spaces](/core-concepts/spaces)
* A [Space](/core-concepts/blueprints) may contain many [Workbooks](/core-concepts/workbooks) and many [Documents](/core-concepts/documents)
* A [Document](/core-concepts/documents) contains static documentation and may contain many [Document-level Actions](/guides/using-actions#document-actions)
* A [Workbook](/core-concepts/workbooks) may contain many [Sheets](/core-concepts/sheets) and many [Workbook-level Actions](/guides/using-actions#workbook-actions)
* A [Sheet](/core-concepts/sheets) may contain many [Fields](/core-concepts/fields) and many [Sheet-level Actions](/guides/using-actions#sheet-actions)
* A [Field](/core-concepts/fields) defines a single column of data, and may contain many [Field-level Actions](/guides/using-actions#field-actions)
**A note about Actions:** Actions also require a listener to respond to the event published by clicking
on them. For more, see [Using Actions](/guides/using-actions)
## Example Blueprint Configuration
**Recommendation:** Although throughout the documentation we'll be explicitly defining each level of a blueprint, it's important to note that you can split each of your **Workbooks**, **Sheets**, **Documents**, and **Actions** definitions into separate files and import them. Then your Workbook blueprint can be as simple as:
```javascript theme={null}
const companyWorkbook = {
name: "Company Workbook",
documents: [dataProcessingSteps]
sheets: [usersSheet],
actions: [exportToCRM],
};
```
This leads to a more maintainable codebase, and the modularity opens the door for code reuse. For instance, you'll be able to use `usersSheet.slug` in your listener code to filter or differentiate between sheets, or re-use `exportToSCRM` in any other workbook that needs to export data to a CRM.
This example shows a Blueprint definition for [Space configuration](/core-concepts/spaces#space-configuration). It creates a single [Workbook](/core-concepts/workbooks) with a single [Document](/core-concepts/documents) and a single [Sheet](/core-concepts/sheets) containing two [Fields](/core-concepts/fields) and one [Action](/core-concepts/actions).
```javascript theme={null}
const workbooks = [{
name: "Company Workbook",
documents: [
{
title: "Data Processing Walkthrough",
body: "1. Add Data\n2. Process Data\n3. Export Data",
actions: [
{
operation: "confirm",
label: "Confirm",
type: "string",
primary: true,
},
],
},
],
sheets: [
{
name: "Users",
slug: "users",
fields: [
{
key: "fname",
type: "string",
label: "First Name",
},
{
key: "lname",
type: "string",
label: "Last Name",
},
],
actions: [
{
operation: "validate-inventory",
mode: "background",
label: "Validate Inventory",
description: "Check product availability against inventory system",
},
],
},
],
actions: [
{
operation: "export-to-crm",
mode: "foreground",
label: "Export to CRM",
description: "Send validated customers to Salesforce",
},
],
}];
```
## Workbook Folders and Sheet Collections
Although they have no impact on your data itself or its structure, [Workbook Folders](/core-concepts/workbooks#folders) and [Sheet Collections](/core-concepts/sheets#collections) are a powerful way to organize your data in the Flatfile UI.
They are essentially named labels that you assign to your Workbooks and Sheets, which the Flatfile UI interprets to group them together (and apart from others). You can define them directly in your [Blueprint](/core-concepts/blueprints) when [configuring your Space](/core-concepts/spaces#space-configuration) or when otherwise creating or updating a Workbook or Sheet via the [API](https://reference.flatfile.com).
You can think of **Folders** and **Collections** like a filing system:
* [Folders](/core-concepts/workbooks#folders) help you organize your Workbooks within a Space (like organizing binders on a shelf).
* [Collections](/core-concepts/sheets#collections) help you organize Sheets within each Workbook (like organizing tabs within a binder).
This is a great way to declutter your Sidebar and keep your data organized and easy to find in the Flatfile UI.
In the following example, we have several Workbooks grouped into two Folders:
* **Analytics** (folded)
* **Business Operations** (unfolded)
The **Business Operations** Workbooks each contain several Sheets grouped into Collections:
* **Compensation** and **Personel**
* **Stock Management** and **Vendor Management**
```javascript theme={null}
const salesReportWorkbook = {
name: "Sales Analytics",
folder: "Analytics",
sheets: [
// Source Data collection (2 sheets)
salesDataSheet,
revenueSheet,
// Analytics collection (2 sheets)
campaignMetricsSheet,
leadSourcesSheet
]
};
const humanResourcesWorkbook = {
name: "Human Resources Management",
folder: "Business Operations",
sheets: [
// Personnel collection (2 sheets)
employeesSheet,
departmentsSheet,
// Compensation collection (2 sheets)
payrollSheet,
benefitsSheet
]
};
const operationsWorkbook = {
name: "Operations Management",
folder: "Business Operations",
sheets: [
// Stock Management collection (2 sheets)
inventorySheet,
warehousesSheet,
// Vendor Management collection (2 sheets)
suppliersSheet,
purchaseOrdersSheet
]
};
```
```javascript theme={null}
const salesDataSheet = {
name: "Sales Data",
collection: "Source Data",
fields: [
{ key: "name", type: "string", label: "Customer Name" },
{ key: "email", type: "string", label: "Email Address" }
]
};
const revenueSheet = {
name: "Revenue",
collection: "Analytics",
fields: [
{ key: "revenue", type: "number", label: "Revenue" }
]
};
const campaignMetricsSheet = {
name: "Campaign Metrics",
collection: "Analytics",
fields: [
{ key: "impressions", type: "number", label: "Impressions" },
{ key: "clicks", type: "number", label: "Clicks" }
]
};
const leadSourcesSheet = {
name: "Lead Sources",
collection: "Analytics",
fields: [
{ key: "source", type: "string", label: "Source" },
{ key: "conversion_rate", type: "number", label: "Conversion Rate" }
]
};
const employeesSheet = {
name: "Employees",
collection: "Personnel",
fields: [
{ key: "employee_id", type: "string", label: "Employee ID" },
{ key: "name", type: "string", label: "Full Name" },
{ key: "department", type: "string", label: "Department" },
{ key: "hire_date", type: "date", label: "Hire Date" }
]
};
const departmentsSheet = {
name: "Departments",
collection: "Personnel",
fields: [
{ key: "dept_code", type: "string", label: "Department Code" },
{ key: "dept_name", type: "string", label: "Department Name" },
{ key: "manager", type: "string", label: "Manager" }
]
};
const positionsSheet = {
name: "Job Positions",
collection: "Personnel",
fields: [
{ key: "position_id", type: "string", label: "Position ID" },
{ key: "title", type: "string", label: "Job Title" },
{ key: "level", type: "string", label: "Job Level" },
{ key: "department", type: "string", label: "Department" }
]
};
const payrollSheet = {
name: "Payroll",
collection: "Compensation",
fields: [
{ key: "employee_id", type: "string", label: "Employee ID" },
{ key: "salary", type: "number", label: "Annual Salary" },
{ key: "bonus", type: "number", label: "Bonus" }
]
};
const benefitsSheet = {
name: "Benefits",
collection: "Compensation",
fields: [
{ key: "benefit_type", type: "string", label: "Benefit Type" },
{ key: "cost", type: "number", label: "Monthly Cost" },
{ key: "coverage", type: "string", label: "Coverage Level" }
]
};
const bonusesSheet = {
name: "Performance Bonuses",
collection: "Compensation",
fields: [
{ key: "employee_id", type: "string", label: "Employee ID" },
{ key: "performance_rating", type: "string", label: "Performance Rating" },
{ key: "bonus_amount", type: "number", label: "Bonus Amount" },
{ key: "quarter", type: "string", label: "Quarter" }
]
};
const attendanceSheet = {
name: "Attendance",
collection: "Time Tracking",
fields: [
{ key: "employee_id", type: "string", label: "Employee ID" },
{ key: "date", type: "date", label: "Date" },
{ key: "hours_worked", type: "number", label: "Hours Worked" },
{ key: "overtime", type: "number", label: "Overtime Hours" }
]
};
const leaveRequestsSheet = {
name: "Leave Requests",
collection: "Time Tracking",
fields: [
{ key: "request_id", type: "string", label: "Request ID" },
{ key: "employee_id", type: "string", label: "Employee ID" },
{ key: "leave_type", type: "string", label: "Leave Type" },
{ key: "start_date", type: "date", label: "Start Date" },
{ key: "end_date", type: "date", label: "End Date" }
]
};
const inventorySheet = {
name: "Inventory",
collection: "Stock Management",
fields: [
{ key: "sku", type: "string", label: "SKU" },
{ key: "product_name", type: "string", label: "Product Name" },
{ key: "quantity", type: "number", label: "Quantity in Stock" },
{ key: "reorder_level", type: "number", label: "Reorder Level" }
]
};
const warehousesSheet = {
name: "Warehouses",
collection: "Stock Management",
fields: [
{ key: "warehouse_id", type: "string", label: "Warehouse ID" },
{ key: "location", type: "string", label: "Location" },
{ key: "capacity", type: "number", label: "Storage Capacity" },
{ key: "manager", type: "string", label: "Warehouse Manager" }
]
};
const stockMovementsSheet = {
name: "Stock Movements",
collection: "Stock Management",
fields: [
{ key: "movement_id", type: "string", label: "Movement ID" },
{ key: "sku", type: "string", label: "SKU" },
{ key: "quantity", type: "number", label: "Quantity" },
{ key: "movement_type", type: "string", label: "Movement Type" },
{ key: "date", type: "date", label: "Date" }
]
};
const suppliersSheet = {
name: "Suppliers",
collection: "Vendor Management",
fields: [
{ key: "supplier_id", type: "string", label: "Supplier ID" },
{ key: "company_name", type: "string", label: "Company Name" },
{ key: "contact_person", type: "string", label: "Contact Person" },
{ key: "email", type: "string", label: "Email" }
]
};
const purchaseOrdersSheet = {
name: "Purchase Orders",
collection: "Vendor Management",
fields: [
{ key: "order_id", type: "string", label: "Order ID" },
{ key: "supplier_id", type: "string", label: "Supplier ID" },
{ key: "order_date", type: "date", label: "Order Date" },
{ key: "total_amount", type: "number", label: "Total Amount" }
]
};
const vendorPerformanceSheet = {
name: "Vendor Performance",
collection: "Vendor Management",
fields: [
{ key: "supplier_id", type: "string", label: "Supplier ID" },
{ key: "on_time_delivery", type: "number", label: "On-Time Delivery %" },
{ key: "quality_rating", type: "number", label: "Quality Rating" },
{ key: "cost_competitiveness", type: "number", label: "Cost Rating" }
]
};
```
---
# Source: https://flatfile.com/docs/plugins/boolean.md
> ## Documentation Index
> Fetch the complete documentation index at: https://flatfile.com/docs/llms.txt
> Use this file to discover all available pages before exploring further.
# Boolean Validator
> Comprehensive boolean validation plugin for Flatfile that handles various representations of boolean values with multi-language support and flexible configuration options.
The Boolean Validator plugin for Flatfile provides comprehensive boolean validation for specified fields. It is designed to handle various representations of boolean values, not just `true` and `false`. Key features include two main validation modes: 'strict' (only accepts true/false boolean types) and 'truthy' (accepts values like 'yes', 'no', 'y', 'n', etc.). The plugin offers multi-language support for these truthy values (English, Spanish, French, German) and allows for custom mappings. It is highly configurable, with options to control case sensitivity, how null/undefined values are handled, and whether to automatically convert non-boolean values.
## Installation
Install the plugin using npm:
```bash theme={null}
npm install @flatfile/plugin-validate-boolean
```
## Configuration & Parameters
The plugin is configured with a single object, `BooleanValidatorConfig`, containing the following options:
### Required Parameters
**`fields`** `string[]`
* An array of field keys (column names) to which the boolean validation should be applied.
**`validationType`** `'strict' | 'truthy'`
* The type of validation to perform:
* `'strict'`: Only allows `true` and `false` boolean values
* `'truthy'`: Allows string representations like 'yes', 'no', etc.
### Optional Parameters
**`sheetSlug`** `string`
* The slug of a specific sheet to apply the validation to
* Default: `'**'` (all sheets)
**`language`** `'en' | 'es' | 'fr' | 'de'`
* Specifies the language for predefined 'truthy' mappings
* Default: `'en'`
**`customMapping`** `Record`
* Custom string-to-boolean mappings that override language-specific mappings
* Example: `{ 'ja': true, 'nein': false }`
**`caseSensitive`** `boolean`
* Controls case sensitivity for string comparisons during 'truthy' validation
* Default: `false`
**`handleNull`** `'error' | 'false' | 'true' | 'skip'`
* Defines how to handle `null` or `undefined` values:
* `'error'`: Adds an error to the record
* `'false'`: Converts the value to `false`
* `'true'`: Converts the value to `true`
* `'skip'`: Ignores the value without adding an error
* Default: `'skip'`
**`convertNonBoolean`** `boolean`
* Attempts to convert non-boolean values using JavaScript's `Boolean()` casting
* Default: `false`
**`defaultValue`** `boolean | 'skip'`
* Default value for invalid inputs instead of adding an error
* Default: `undefined` (raises an error)
**`customErrorMessages`** `object`
* Custom error messages for validation failures
* Properties: `invalidBoolean`, `invalidTruthy`, `nullValue`
## Usage Examples
```javascript JavaScript theme={null}
import { FlatfileListener } from '@flatfile/listener';
import { validateBoolean } from '@flatfile/plugin-validate-boolean';
export default function(listener) {
// Basic strict validation
listener.use(
validateBoolean({
fields: ['isActive'],
validationType: 'strict',
})
);
}
```
```typescript TypeScript theme={null}
import { FlatfileListener } from '@flatfile/listener';
import { validateBoolean } from '@flatfile/plugin-validate-boolean';
export default function(listener: FlatfileListener) {
// Basic strict validation
listener.use(
validateBoolean({
fields: ['isActive'],
validationType: 'strict',
})
);
}
```
### Advanced Configuration
```javascript JavaScript theme={null}
import { FlatfileListener } from '@flatfile/listener';
import { validateBoolean } from '@flatfile/plugin-validate-boolean';
export default function(listener) {
listener.use(
validateBoolean({
sheetSlug: 'contacts',
fields: ['hasSubscription', 'isPremium'],
validationType: 'truthy',
language: 'es', // Use Spanish mappings: 'sí', 'no'
handleNull: 'false', // Treat null/undefined as false
defaultValue: false, // Set invalid values to false instead of erroring
customErrorMessages: {
nullValue: 'El campo no puede estar vacío.',
},
})
);
}
```
```typescript TypeScript theme={null}
import { FlatfileListener } from '@flatfile/listener';
import { validateBoolean } from '@flatfile/plugin-validate-boolean';
export default function(listener: FlatfileListener) {
listener.use(
validateBoolean({
sheetSlug: 'contacts',
fields: ['hasSubscription', 'isPremium'],
validationType: 'truthy',
language: 'es', // Use Spanish mappings: 'sí', 'no'
handleNull: 'false', // Treat null/undefined as false
defaultValue: false, // Set invalid values to false instead of erroring
customErrorMessages: {
nullValue: 'El campo no puede estar vacío.',
},
})
);
}
```
### Using Helper Functions
```javascript JavaScript theme={null}
import { validateBooleanField } from '@flatfile/plugin-validate-boolean';
const myValue = 'Y';
const result = validateBooleanField(myValue, {
fields: ['customField'],
validationType: 'truthy',
language: 'en', // 'y' is a valid mapping in English
});
if (result.error) {
console.error(`Validation failed: ${result.error}`);
} else {
console.log(`Validated value: ${result.value}`); // Outputs: Validated value: true
}
```
```typescript TypeScript theme={null}
import { validateBooleanField } from '@flatfile/plugin-validate-boolean';
const myValue = 'Y';
const result = validateBooleanField(myValue, {
fields: ['customField'],
validationType: 'truthy',
language: 'en', // 'y' is a valid mapping in English
});
if (result.error) {
console.error(`Validation failed: ${result.error}`);
} else {
console.log(`Validated value: ${result.value}`); // Outputs: Validated value: true
}
```
## API Reference
### validateBoolean
The main entry point for the plugin that configures and returns a Flatfile listener.
**Signature:**
```typescript theme={null}
validateBoolean(config: BooleanValidatorConfig): (listener: FlatfileListener) => void
```
**Parameters:**
* `config` - Configuration object for the validator
**Returns:**
A function that can be passed to `listener.use()` to register the plugin.
### validateBooleanField
A utility function that runs the complete validation logic for a single value.
**Signature:**
```typescript theme={null}
validateBooleanField(value: any, config: BooleanValidatorConfig): { value: boolean | null; error: string | null }
```
**Parameters:**
* `value` - The value to validate
* `config` - The configuration object
**Returns:**
Object with `value` (validated boolean or null) and `error` (error message or null)
### validateStrictBoolean
Validates that a value is strictly a boolean `true` or `false`.
**Signature:**
```typescript theme={null}
validateStrictBoolean(value: any, config: BooleanValidatorConfig): { value: boolean | null; error: string | null }
```
### validateTruthyBoolean
Validates that a value corresponds to a "truthy" or "falsy" representation.
**Signature:**
```typescript theme={null}
validateTruthyBoolean(value: any, config: BooleanValidatorConfig): { value: boolean | null; error: string | null }
```
### handleNullValue
Processes a `null` or `undefined` value according to the `handleNull` configuration.
**Signature:**
```typescript theme={null}
handleNullValue(value: any, config: BooleanValidatorConfig): { value: boolean | null; error: string | null }
```
### handleInvalidValue
Processes a value that has been identified as invalid.
**Signature:**
```typescript theme={null}
handleInvalidValue(value: any, config: BooleanValidatorConfig): { value: boolean | null; error: string | null }
```
## Troubleshooting
### Validation Not Applied
* Ensure the `fields` array contains the correct field keys
* Verify the `sheetSlug` (if used) matches the target sheet
### Case Sensitivity Issues
For 'truthy' validation, if values like 'YES' aren't being validated correctly, check the `caseSensitive` option. It defaults to `false`, but if set to `true`, the case must match exactly.
### Unexpected Results
Remember the order of operations:
1. Null handling is checked first
2. Specific validation type ('strict' or 'truthy') is applied
3. `defaultValue` is used as a final fallback for invalid values
## Notes
### Default Behavior
If only the required `fields` and `validationType` options are provided, the plugin will apply validation to the specified fields on all sheets. For 'truthy' validation, it uses case-insensitive English mappings ('yes'/'no'). Null or undefined values are skipped by default.
### Special Considerations
* The plugin supports built-in truthy/falsy mappings for English ('en'), Spanish ('es'), French ('fr'), and German ('de')
* Custom mappings (`customMapping`) take precedence over language-based default mappings
* The `sheetSlug` option allows applying different validation rules to different sheets within the same workbook
### Error Handling Patterns
* The main plugin does not throw exceptions; it adds errors directly to Flatfile records
* When a `defaultValue` is provided, the plugin corrects invalid values and adds an informational message for auditing
* Helper functions return a consistent `{ value, error }` object pattern for easy error checking
---
# Source: https://flatfile.com/docs/reference/cli.md
> ## Documentation Index
> Fetch the complete documentation index at: https://flatfile.com/docs/llms.txt
> Use this file to discover all available pages before exploring further.
# CLI Reference
> Command line interface for developing, deploying, and managing Flatfile Agents
The Flatfile Command Line Interface (CLI) provides tools to develop, deploy, and manage [Listeners](/core-concepts/listeners) in your Flatfile environment.
Once listeners are deployed and hosted on Flatfile's secure cloud, they are
called Agents.
## Installation
```bash theme={null}
npx flatfile@latest
```
## Configuration
### Authentication
The CLI requires your Flatfile API key and Environment ID, provided either in Environment variables (ideally in a `.env` file) or as command flags. You can find your API key and Environment ID in your Flatfile dashboard under "[API Keys and Secrets](https://platform.flatfile.com/dashboard/keys-and-secrets)".
**Recommended approach:** Use a `.env` file in your project root for secure,
convenient, and consistent authentication. If you're using Git, make sure to
add `.env` to your `.gitignore` file.
**Using `.env` file**
Create a `.env` file in your project root:
```bash theme={null}
# .env file
FLATFILE_API_KEY="your_api_key_here"
FLATFILE_ENVIRONMENT_ID=your_environment_id_here
```
This approach keeps credentials out of your command history and makes it easy to switch between environments.
**Using command flags**
For one-off commands or CI/CD environments:
```bash theme={null}
npx flatfile develop --token YOUR_API_KEY --env YOUR_ENV_ID
```
### Regional Servers
For improved performance and compliance, Flatfile supports regional deployments:
| Region | API URL |
| ------ | ---------------------------- |
| US | platform.flatfile.com/api |
| UK | platform.uk.flatfile.com/api |
| EU | platform.eu.flatfile.com/api |
| AU | platform.au.flatfile.com/api |
| CA | platform.ca.flatfile.com/api |
Set your regional URL in `.env`:
```bash theme={null}
FLATFILE_API_URL=platform.eu.flatfile.com/api
```
Contact support to enable regional server deployment for your account.
## Development Workflow
Use `develop` to run your listener locally with live reloading
Use `deploy` to push your listener to Flatfile's cloud as an Agent
Use `agents` commands to list, download, or delete deployed agents
Use separate environments for development and production to avoid conflicts.
The CLI will warn you when working in an environment with existing agents.
## Commands
### develop
Run your listener locally with automatic file watching and live reloading.
```bash theme={null}
npx flatfile develop [file-path]
```
**Options**
| Option | Description |
| ------------- | ---------------------------------------------------- |
| `[file-path]` | Path to listener file (auto-detects if not provided) |
| `--token` | Flatfile API key |
| `--env` | Environment ID |
**Features**
* Live reloading on file changes
* Real-time HTTP request logging
* Low-latency event streaming (10-50ms)
* Event handler visibility
**Example output**
```bash theme={null}
> npx flatfile develop
✔ 1 environment(s) found for these credentials
✔ Environment "development" selected
ncc: Version 0.36.1
ncc: Compiling file index.js into CJS
✓ 427ms GET 200 https://platform.flatfile.com/api/v1/subscription 12345
File change detected. 🚀
✓ Connected to event stream for scope us_env_1234
▶ commit:created 10:13:05.159 AM us_evt_1234
↳ on(**, {})
↳ on(commit:created, {"sheetSlug":"contacts"})
```
***
### deploy
Deploy your listener as a Flatfile Agent.
```bash theme={null}
npx flatfile deploy [file-path] [options]
```
**Options**
| Option | Description |
| -------------- | ---------------------------------------------------- |
| `[file-path]` | Path to listener file (auto-detects if not provided) |
| `--slug`, `-s` | Unique identifier for the agent |
| `--ci` | Disable interactive prompts for CI/CD |
| `--token` | Flatfile API key |
| `--env` | Environment ID |
**File detection order**
1. `./index.js`
2. `./index.ts`
3. `./src/index.js`
4. `./src/index.ts`
**Examples**
```bash theme={null}
# Basic deployment
npx flatfile deploy
# Deploy with custom slug
npx flatfile deploy --slug my-agent
# CI/CD deployment
npx flatfile deploy ./src/listener.ts --ci
```
**Multiple agents**
Deploy multiple agents to the same environment using unique slugs:
```bash theme={null}
npx flatfile deploy --slug agent-one
npx flatfile deploy --slug agent-two
```
Without a slug, the CLI updates your existing agent or creates one with slug
`default`.
***
### agents list
Display all deployed agents in your environment.
```bash theme={null}
npx flatfile agents list
```
Shows each agent's:
* Agent ID
* Slug
* Deployment status
* Last activity
***
### agents download
Download a deployed agent's source code.
```bash theme={null}
npx flatfile agents download
```
**Use cases**
* Examine deployed code
* Modify existing agents
* Back up source code
* Debug deployment issues
Use `agents list` to find the agent slug you need.
***
### agents delete
Remove a deployed agent.
```bash theme={null}
npx flatfile agents delete
```
**Options**
| Option | Description |
| ------------------ | ---------------------------- |
| `--agentId`, `-ag` | Use agent ID instead of slug |
***
## Related Resources
* [Listeners](/core-concepts/listeners) - Core concept documentation
* [Events](/reference/events) - Event system reference
---
# Source: https://flatfile.com/docs/plugins/constraints.md
> ## Documentation Index
> Fetch the complete documentation index at: https://flatfile.com/docs/llms.txt
> Use this file to discover all available pages before exploring further.
# Constraints Plugin
> Extend Flatfile validation capabilities with custom validation logic for complex field and sheet-level constraints
The Constraints plugin extends Flatfile's validation capabilities by allowing developers to define custom validation logic, called "external constraints," within a listener. These custom rules can then be applied to specific fields or to the entire sheet through the blueprint configuration.
The main purpose is to handle complex validation scenarios that are not covered by Flatfile's standard built-in constraints. Use cases include:
* Field-level validation based on complex logic (e.g., checking a value's format against a specific regular expression not available by default)
* Cross-field validation where the validity of one field depends on the value of another (e.g., ensuring 'endDate' is after 'startDate')
* Validating data against an external system or API (e.g., checking if a product SKU exists in an external database)
* Applying a single validation rule to multiple fields simultaneously
The plugin works by matching a `validator` key in the blueprint with a corresponding handler registered in the listener.
## Installation
Install the plugin using npm:
```bash theme={null}
npm install @flatfile/plugin-constraints
```
## Configuration & Parameters
Configuration for this plugin is not set on the plugin itself, but within the Sheet's blueprint configuration. The plugin reads this blueprint to apply the correct logic.
### Field-Level Constraints
For field-level constraints (used with `externalConstraint`), add a constraint object to a field's `constraints` array:
| Parameter | Type | Required | Description |
| ----------- | ------ | -------- | ---------------------------------------------------------------------------------------- |
| `type` | string | Yes | Must be set to 'external' to indicate it's a custom validation rule |
| `validator` | string | Yes | A unique name for your validator used to link the blueprint rule to the validation logic |
| `config` | object | No | An arbitrary object containing any parameters or settings your validation logic needs |
### Sheet-Level Constraints
For sheet-level constraints (used with `externalSheetConstraint`), add a constraint object to the sheet's top-level `constraints` array:
| Parameter | Type | Required | Description |
| ----------- | --------- | -------- | ----------------------------------------------------------- |
| `type` | string | Yes | Must be set to 'external' |
| `validator` | string | Yes | A unique name for your sheet-level validator |
| `fields` | string\[] | Yes | An array of field keys that this constraint applies to |
| `config` | object | No | An arbitrary object with settings for your validation logic |
### Default Behavior
If no `external` type constraints are defined in the blueprint, the plugin will have no effect. The validation logic only runs when a matching `validator` is found in the blueprint for the current sheet.
## Usage Examples
### Basic Field-Level Constraint
```javascript JavaScript theme={null}
// In your listener file (e.g., index.js)
import { listener } from '@flatfile/listener'
import { externalConstraint } from '@flatfile/plugin-constraints'
listener.use(
externalConstraint('minLength', (value, key, { config, record }) => {
if (typeof value === 'string' && value.length < config.len) {
record.addError(key, `Must be at least ${config.len} characters.`)
}
})
)
// In your blueprint file (e.g., workbook.js)
const blueprint = {
sheets: [
{
name: 'Promotions',
slug: 'promos',
fields: [
{
key: 'promo_code',
type: 'string',
label: 'Promo Code',
constraints: [
{ type: 'external', validator: 'minLength', config: { len: 8 } },
],
},
],
},
],
}
```
```typescript TypeScript theme={null}
// In your listener file (e.g., index.ts)
import { listener } from '@flatfile/listener'
import { externalConstraint } from '@flatfile/plugin-constraints'
listener.use(
externalConstraint('minLength', (value, key, { config, record }) => {
if (typeof value === 'string' && value.length < config.len) {
record.addError(key, `Must be at least ${config.len} characters.`)
}
})
)
// In your blueprint file (e.g., workbook.ts)
const blueprint = {
sheets: [
{
name: 'Promotions',
slug: 'promos',
fields: [
{
key: 'promo_code',
type: 'string',
label: 'Promo Code',
constraints: [
{ type: 'external', validator: 'minLength', config: { len: 8 } },
],
},
],
},
],
}
```
### Configurable Constraint
```javascript JavaScript theme={null}
// In your listener file (e.g., index.js)
import { listener } from '@flatfile/listener'
import { externalConstraint } from '@flatfile/plugin-constraints'
// This 'length' validator can be used for min or max length checks
listener.use(
externalConstraint('length', (value, key, { config, record }) => {
if (typeof value !== 'string') return
if (config.max && value.length > config.max) {
record.addError(key, `Text must be under ${config.max} characters.`)
}
if (config.min && value.length < config.min) {
record.addError(key, `Text must be over ${config.min} characters.`)
}
})
)
// In your blueprint file (e.g., workbook.js)
const blueprint = {
sheets: [
{
name: 'Content',
slug: 'content',
fields: [
{
key: 'title',
type: 'string',
label: 'Title',
constraints: [
{ type: 'external', validator: 'length', config: { max: 50 } },
],
},
{
key: 'description',
type: 'string',
label: 'Description',
constraints: [
{ type: 'external', validator: 'length', config: { min: 10 } },
],
},
],
},
],
}
```
```typescript TypeScript theme={null}
// In your listener file (e.g., index.ts)
import { listener } from '@flatfile/listener'
import { externalConstraint } from '@flatfile/plugin-constraints'
// This 'length' validator can be used for min or max length checks
listener.use(
externalConstraint('length', (value, key, { config, record }) => {
if (typeof value !== 'string') return
if (config.max && value.length > config.max) {
record.addError(key, `Text must be under ${config.max} characters.`)
}
if (config.min && value.length < config.min) {
record.addError(key, `Text must be over ${config.min} characters.`)
}
})
)
// In your blueprint file (e.g., workbook.ts)
const blueprint = {
sheets: [
{
name: 'Content',
slug: 'content',
fields: [
{
key: 'title',
type: 'string',
label: 'Title',
constraints: [
{ type: 'external', validator: 'length', config: { max: 50 } },
],
},
{
key: 'description',
type: 'string',
label: 'Description',
constraints: [
{ type: 'external', validator: 'length', config: { min: 10 } },
],
},
],
},
],
}
```
### Sheet-Level Constraint
```javascript JavaScript theme={null}
// In your listener file (e.g., index.js)
import { listener } from '@flatfile/listener'
import { externalSheetConstraint } from '@flatfile/plugin-constraints'
listener.use(
externalSheetConstraint('contact-required', (values, keys, { record }) => {
if (!values.email && !values.phone) {
const message = 'Either Email or Phone must be provided.'
// Add the error to both fields
keys.forEach((key) => record.addError(key, message))
}
})
)
// In your blueprint file (e.g., workbook.js)
const blueprint = {
sheets: [
{
name: 'Contacts',
slug: 'contacts',
fields: [
{ key: 'email', type: 'string', label: 'Email' },
{ key: 'phone', type: 'string', label: 'Phone' },
],
constraints: [
{
type: 'external',
validator: 'contact-required',
fields: ['email', 'phone'],
},
],
},
],
}
```
```typescript TypeScript theme={null}
// In your listener file (e.g., index.ts)
import { listener } from '@flatfile/listener'
import { externalSheetConstraint } from '@flatfile/plugin-constraints'
listener.use(
externalSheetConstraint('contact-required', (values, keys, { record }) => {
if (!values.email && !values.phone) {
const message = 'Either Email or Phone must be provided.'
// Add the error to both fields
keys.forEach((key) => record.addError(key, message))
}
})
)
// In your blueprint file (e.g., workbook.ts)
const blueprint = {
sheets: [
{
name: 'Contacts',
slug: 'contacts',
fields: [
{ key: 'email', type: 'string', label: 'Email' },
{ key: 'phone', type: 'string', label: 'Phone' },
],
constraints: [
{
type: 'external',
validator: 'contact-required',
fields: ['email', 'phone'],
},
],
},
],
}
```
## API Reference
### externalConstraint
Registers a listener for a field-level custom validation rule. The provided callback function will be executed for every record on each field that has a matching `external` constraint in the blueprint.
**Signature:**
```typescript theme={null}
externalConstraint(
validator: string,
cb: (
value: any,
key: string,
support: {
config: any,
record: FlatfileRecord,
property: Flatfile.Property,
event: FlatfileEvent
}
) => any | Promise
)
```
**Parameters:**
* `validator` (string): The name of the validator. This must match the `validator` property in the field's constraint configuration in the blueprint.
* `cb` (function): A callback function that contains the validation logic. It receives:
* `value` (any): The value of the cell being validated
* `key` (string): The key of the field being validated
* `support` (object): An object containing helpful context:
* `config` (any): The `config` object from the blueprint constraint
* `record` (FlatfileRecord): The full record object, which can be used to get other values or add errors
* `property` (Flatfile.Property): The full property (field) definition from the sheet schema
* `event` (FlatfileEvent): The raw event that triggered the validation
**Error Handling Examples:**
```javascript JavaScript theme={null}
// Using record.addError() (Recommended)
listener.use(
externalConstraint('must-be-positive', (value, key, { record }) => {
if (typeof value === 'number' && value <= 0) {
record.addError(key, 'Value must be a positive number.')
}
})
)
// Throwing an Error
listener.use(
externalConstraint('must-be-positive', (value) => {
if (typeof value === 'number' && value <= 0) {
throw 'Value must be a positive number.'
}
})
)
```
```typescript TypeScript theme={null}
// Using record.addError() (Recommended)
listener.use(
externalConstraint('must-be-positive', (value, key, { record }) => {
if (typeof value === 'number' && value <= 0) {
record.addError(key, 'Value must be a positive number.')
}
})
)
// Throwing an Error
listener.use(
externalConstraint('must-be-positive', (value) => {
if (typeof value === 'number' && value <= 0) {
throw 'Value must be a positive number.'
}
})
)
```
### externalSheetConstraint
Registers a listener for a sheet-level custom validation rule that involves multiple fields. The callback is executed once per record for each matching `external` constraint in the sheet's top-level `constraints` array.
**Signature:**
```typescript theme={null}
externalSheetConstraint(
validator: string,
cb: (
values: Record,
keys: string[],
support: {
config: any,
record: FlatfileRecord,
properties: Flatfile.Property[],
event: FlatfileEvent
}
) => any | Promise
)
```
**Parameters:**
* `validator` (string): The name of the validator. This must match the `validator` property in the sheet's constraint configuration.
* `cb` (function): A callback function that contains the validation logic. It receives:
* `values` (Record\): An object where keys are the field keys from the constraint's `fields` array and values are the corresponding cell values for the current record
* `keys` (string\[]): An array of the field keys this constraint applies to (from the `fields` property in the blueprint)
* `support` (object): An object containing helpful context:
* `config` (any): The `config` object from the blueprint constraint
* `record` (FlatfileRecord): The full record object
* `properties` (Flatfile.Property\[]): An array of the full property (field) definitions for the fields involved in this constraint
* `event` (FlatfileEvent): The raw event that triggered the validation
**Error Handling Examples:**
```javascript JavaScript theme={null}
// Using record.addError() - allows different error messages for different fields
listener.use(
externalSheetConstraint('date-range', (values, keys, { record }) => {
if (values.startDate && values.endDate && values.startDate > values.endDate) {
record.addError('startDate', 'Start date must be before end date.')
record.addError('endDate', 'End date must be after start date.')
}
})
)
// Throwing an Error - applies same error message to ALL fields
listener.use(
externalSheetConstraint('date-range', (values) => {
if (values.startDate && values.endDate && values.startDate > values.endDate) {
throw 'Start date must be before end date.'
}
})
)
```
```typescript TypeScript theme={null}
// Using record.addError() - allows different error messages for different fields
listener.use(
externalSheetConstraint('date-range', (values, keys, { record }) => {
if (values.startDate && values.endDate && values.startDate > values.endDate) {
record.addError('startDate', 'Start date must be before end date.')
record.addError('endDate', 'End date must be after start date.')
}
})
)
// Throwing an Error - applies same error message to ALL fields
listener.use(
externalSheetConstraint('date-range', (values) => {
if (values.startDate && values.endDate && values.startDate > values.endDate) {
throw 'Start date must be before end date.'
}
})
)
```
## Troubleshooting
* **Validator Not Firing:** Ensure the `validator` string in your blueprint constraint exactly matches the string you passed to `externalConstraint` or `externalSheetConstraint` in your listener.
* **Constraint Not Recognized:** Double-check that the constraint object in your blueprint has `type: 'external'`.
* **Sheet Constraint Issues:** For `externalSheetConstraint`, make sure the sheet-level constraint in the blueprint includes the `fields` array, listing the keys of all fields involved in the validation.
## Notes
### Special Considerations
* The plugin fetches and caches the sheet schema (blueprint) once per data submission (`commit:created` event). For very high-frequency operations, this could be a performance consideration, but for most use cases, it is not an issue.
* The plugin relies on `@flatfile/plugin-record-hook` to process records in bulk.
### Error Handling Patterns
The plugin supports two primary error handling patterns within the validation callback:
1. **Imperative:** Call `record.addError(key, message)` to add an error to a specific field. This is useful for sheet-level constraints where you might want to flag only one of the involved fields.
2. **Declarative:** `throw new Error(message)` or `throw "message"`. The plugin will catch the thrown error. For `externalConstraint`, the error is added to the field being validated. For `externalSheetConstraint`, the same error message is added to *all* fields listed in the constraint's `fields` array.
---
# Source: https://flatfile.com/docs/plugins/currency.md
> ## Documentation Index
> Fetch the complete documentation index at: https://flatfile.com/docs/llms.txt
> Use this file to discover all available pages before exploring further.
# Currency Conversion Plugin
> Automatically converts currency values from a source currency to a target currency using Open Exchange Rates API with support for historical exchange rates.
This plugin automatically converts currency values from a source currency to a target currency for records within a Flatfile Sheet. It utilizes the Open Exchange Rates API to fetch both the latest and historical exchange rates.
The primary use case is for processing financial data, such as transaction logs or expense reports, where amounts need to be standardized into a single currency. The plugin can use a date from another field in the record to fetch the correct historical rate for the conversion. It can optionally store the calculated exchange rate and the date of conversion back into the record. The plugin operates by hooking into the record processing lifecycle, making it a seamless part of the data import process.
## Installation
Install the plugin using npm:
```bash theme={null}
npm install @flatfile/plugin-convert-currency
```
## Configuration & Parameters
The plugin requires a configuration object with the following parameters:
### Required Parameters
| Parameter | Type | Description |
| ---------------------- | ------ | ---------------------------------------------------------------------- |
| `sheetSlug` | string | The slug of the sheet the plugin should operate on |
| `sourceCurrency` | string | The three-letter currency code (e.g., "USD") of the source amounts |
| `targetCurrency` | string | The three-letter currency code (e.g., "EUR") to convert the amounts to |
| `amountField` | string | The field key/slug that contains the numerical amount to be converted |
| `convertedAmountField` | string | The field key/slug where the converted amount will be stored |
### Optional Parameters
| Parameter | Type | Description | Default Behavior |
| --------------------- | ------ | ---------------------------------------------------------------------------------------------------- | ------------------------------------------------ |
| `dateField` | string | The field key/slug containing the date (in YYYY-MM-DD format) for fetching historical exchange rates | Uses current date to fetch latest exchange rates |
| `exchangeRateField` | string | The field key/slug where the calculated exchange rate for the conversion will be stored | Exchange rate is not stored on the record |
| `conversionDateField` | string | The field key/slug where the timestamp of the conversion will be stored in ISO format | Conversion date is not stored on the record |
## Usage Examples
### Basic Usage
```javascript JavaScript theme={null}
import { FlatfileListener } from "@flatfile/listener";
import { currencyConverterPlugin } from "@flatfile/plugin-convert-currency";
export default function (listener) {
listener.use(
currencyConverterPlugin({
sheetSlug: "transactions",
sourceCurrency: "USD",
targetCurrency: "EUR",
amountField: "amount",
convertedAmountField: "amountInEUR",
})
);
}
```
```typescript TypeScript theme={null}
import { FlatfileListener } from "@flatfile/listener";
import { currencyConverterPlugin } from "@flatfile/plugin-convert-currency";
export default function (listener: FlatfileListener) {
listener.use(
currencyConverterPlugin({
sheetSlug: "transactions",
sourceCurrency: "USD",
targetCurrency: "EUR",
amountField: "amount",
convertedAmountField: "amountInEUR",
})
);
}
```
### Full Configuration with Historical Rates
```javascript JavaScript theme={null}
import { FlatfileListener } from "@flatfile/listener";
import { currencyConverterPlugin } from "@flatfile/plugin-convert-currency";
export default function (listener) {
listener.use(
currencyConverterPlugin({
sheetSlug: "transactions",
sourceCurrency: "USD",
targetCurrency: "EUR",
amountField: "amount",
dateField: "transactionDate",
convertedAmountField: "amountInEUR",
exchangeRateField: "exchangeRate",
conversionDateField: "conversionDate",
})
);
}
```
```typescript TypeScript theme={null}
import { FlatfileListener } from "@flatfile/listener";
import { currencyConverterPlugin } from "@flatfile/plugin-convert-currency";
export default function (listener: FlatfileListener) {
listener.use(
currencyConverterPlugin({
sheetSlug: "transactions",
sourceCurrency: "USD",
targetCurrency: "EUR",
amountField: "amount",
dateField: "transactionDate",
convertedAmountField: "amountInEUR",
exchangeRateField: "exchangeRate",
conversionDateField: "conversionDate",
})
);
}
```
### Using Utility Functions
```javascript JavaScript theme={null}
import {
validateAmount,
validateDate,
convertCurrency,
calculateExchangeRate
} from "@flatfile/plugin-convert-currency";
// Validate an amount
const amountResult = validateAmount(150.75);
// Returns: { value: 150.75 }
// Validate a date
const dateResult = validateDate('2023-10-27');
// Returns: { value: '2023-10-27' }
// Convert currency
const converted = convertCurrency(100, 0.92, 1.0);
// Returns: 108.6957
// Calculate exchange rate
const rate = calculateExchangeRate(0.92, 0.80);
// Returns: 0.869565
```
```typescript TypeScript theme={null}
import {
validateAmount,
validateDate,
convertCurrency,
calculateExchangeRate
} from "@flatfile/plugin-convert-currency";
// Validate an amount
const amountResult = validateAmount(150.75);
// Returns: { value: 150.75 }
// Validate a date
const dateResult = validateDate('2023-10-27');
// Returns: { value: '2023-10-27' }
// Convert currency
const converted: number = convertCurrency(100, 0.92, 1.0);
// Returns: 108.6957
// Calculate exchange rate
const rate: number = calculateExchangeRate(0.92, 0.80);
// Returns: 0.869565
```
## Troubleshooting
### Common Error Messages
| Error | Cause | Solution |
| -------------------------------- | ----------------------------------------------- | ------------------------------------------------------------- |
| "Invalid source/target currency" | Currency codes are not valid three-letter codes | Check that currency codes are valid and supported by the API |
| "Network error" or "Status: 401" | API key issues | Verify `OPENEXCHANGERATES_API_KEY` is correct and not expired |
| "Amount must be a valid number" | Invalid amount data | Ensure amount field contains numeric values |
| "Invalid date format" | Date not in YYYY-MM-DD format | Ensure date field uses YYYY-MM-DD format |
### Error Handling
The plugin handles errors gracefully by attaching them directly to records in Flatfile:
* **Validation errors**: Attached to specific fields using `record.addError(fieldName, message)`
* **API/Network errors**: Attached as general record errors using `record.addError('general', message)`
## Notes
### Requirements
* An active subscription to the Open Exchange Rates API is required
* The `OPENEXCHANGERATES_API_KEY` environment variable must be set in your Flatfile Space with your API key
### Limitations
* All currency conversions are routed through USD as a base currency due to Open Exchange Rates API limitations on free/lower-tier plans
* The `dateField` must contain dates in `YYYY-MM-DD` format only
* Converted amounts are fixed to 4 decimal places
* Exchange rates are fixed to 6 decimal places
### Default Behavior
* When `dateField` is not provided, the plugin uses the current date to fetch the latest exchange rates
* When `exchangeRateField` is not provided, the calculated exchange rate is not stored on the record
* When `conversionDateField` is not provided, the conversion timestamp is not stored on the record
* Empty date fields default to the current date in YYYY-MM-DD format
---
# Source: https://flatfile.com/docs/guides/custom-extractors.md
> ## Documentation Index
> Fetch the complete documentation index at: https://flatfile.com/docs/llms.txt
> Use this file to discover all available pages before exploring further.
# Custom Extractors
> Build custom file processing plugins to handle unique data formats and transform files into structured data
## What Are Custom Extractors?
Custom extractors are specialized plugins that enable you to handle file formats that aren't natively supported by Flatfile's existing [plugins](/plugins). They process uploaded files, extract structured data, and provide that data for mapping into [Sheets](/core-concepts/sheets) as [Records](/core-concepts/records). This guide covers everything you need to know to build custom extractors.
Common use cases include:
* Legacy system data exports (custom delimited files, fixed-width formats)
* Industry-specific formats (healthcare, finance, manufacturing)
* Multi-format processors (handling various formats in one extractor)
* Binary file handlers (images with metadata, proprietary formats)
## Architecture Overview
### Core Components
Custom extractors are built using the `@flatfile/util-extractor` utility, which provides a standardized framework for file processing:
```javascript theme={null}
import { Extractor } from "@flatfile/util-extractor";
export const MyCustomExtractor = (options = {}) => {
return Extractor(".myformat", "custom", myCustomParser, options);
};
```
Once you've created your extractor, you must register it in a [listener](/core-concepts/listeners) to be used. This will ensure that the extractor responds to the `file:created` [event](/reference/events#file%3Acreated) and processes your files.
```javascript theme={null}
// . . . other imports
import { MyCustomExtractor } from "./my-custom-extractor";
export default function (listener) {
// . . . other listener setup
listener.use(MyCustomExtractor());
}
```
### Handling Multiple File Extensions
To support multiple file extensions, use a RegExp pattern:
```javascript theme={null}
// Support both .pipe and .custom extensions
export const MultiExtensionExtractor = (options = {}) => {
return Extractor(/\.(pipe|custom)$/i, "pipe", parseCustomFormat, options);
};
// Support JSON variants
export const JSONExtractor = (options = {}) => {
return Extractor(/\.(json|jsonl|jsonlines)$/i, "json", parseJSONFormat, options);
};
```
### Key Architecture Elements
| Component | Purpose | Required |
| ------------------- | -------------------------------------------------------------- | -------- |
| **File Extension** | String or RegExp of supported file extension(s) | ✓ |
| **Extractor Type** | String identifier for the extractor type | ✓ |
| **Parser Function** | Core logic that converts file buffer to structured data | ✓ |
| **Options** | Configuration for chunking, parallelization, and customization | - |
### Data Flow
1. **File Upload** → Flatfile receives file with matching extension
2. **Event Trigger** → `file:created` [event](/reference/events#file%3Acreated) fires
3. **Parser Execution** → Your parser function processes the file buffer
4. **Data Structuring** → Raw data is converted to WorkbookCapture format and provided to Flatfile for mapping into [Sheets](/core-concepts/sheets) as [Records](/core-concepts/records)
5. **Job Completion** → Processing status is reported to user
## Getting Started
Remember that custom extractors are powerful tools for handling unique data formats. Start with simple implementations and gradually add complexity as needed.
### Prerequisites
Install the required packages. You may also want to review our [Coding Tutorial](/coding-tutorial/overview) if you haven't created a [Listener](/core-concepts/listeners) yet.
```bash theme={null}
npm install @flatfile/util-extractor @flatfile/listener @flatfile/api
```
### Basic Implementation
Let's create a simple custom extractor for a pipe-delimited format. This will be used to process files with the `.pipe` or `.psv` extension that look like this:
```psv theme={null}
name|email|phone
John Doe|john@example.com|123-456-7890
Jane Smith|jane@example.com|098-765-4321
```
```javascript theme={null}
import { Extractor } from "@flatfile/util-extractor";
// Parser function - converts Buffer to WorkbookCapture
function parseCustomFormat(buffer) {
const content = buffer.toString('utf-8');
const lines = content.split('\n').filter(line => line.trim());
if (lines.length === 0) {
throw new Error('Empty file');
}
// First line contains headers
const headers = lines[0].split('|').map(h => h.trim());
// Remaining lines contain data
const data = lines.slice(1).map(line => {
const values = line.split('|').map(v => v.trim());
const record = {};
headers.forEach((header, index) => {
record[header] = {
value: values[index] || ''
};
});
return record;
});
return {
Sheet1: {
headers,
data
}
};
}
// Create the extractor
export const CustomPipeExtractor = (options = {}) => {
return Extractor(/\.(pipe|psv)$/i, "pipe", parseCustomFormat, options);
};
```
And now let's import and register it in your [Listener](/core-concepts/listeners).
```javascript theme={null}
// . . . other imports
import { CustomPipeExtractor } from "./custom-pipe-extractor";
export default function (listener) {
// . . . other listener setup
listener.use(CustomPipeExtractor());
}
```
That's it! Your extractor is now registered and will be used to process pipe-delimited files with the `.pipe` or `.psv` extension.
## Advanced Examples
### Multi-Sheet Parser
Let's construct an Extractor to handle files that contain multiple data sections. This will be used to process files with the `.multi` or `.sections` extension that look like this:
```text theme={null}
---SECTION---
SHEET:Sheet1
name,email,phone
John Doe,john@example.com,123-456-7890
Jane Smith,jane@example.com,098-765-4321
---SECTION---
SHEET:Sheet2
name,email,phone
Jane Doe,jane@example.com,123-456-7891
John Smith,john@example.com,098-765-4322
---SECTION---
```
```javascript theme={null}
function parseMultiSheetFormat(buffer) {
const content = buffer.toString('utf-8');
const sections = content.split('---SECTION---');
const workbook = {};
sections.forEach((section, index) => {
if (!section.trim()) return;
const lines = section.trim().split('\n');
const sheetName = lines[0].replace('SHEET:', '').trim() || `Sheet${index + 1}`;
const headers = lines[1].split(',').map(h => h.trim());
const data = lines.slice(2).map(line => {
const values = line.split(',').map(v => v.trim());
const record = {};
headers.forEach((header, idx) => {
record[header] = {
value: values[idx] || ''
};
});
return record;
});
workbook[sheetName] = { headers, data };
});
return workbook;
}
export const MultiSheetExtractor = (options = {}) => {
return Extractor(/\.(multi|sections)$/i, "multi-sheet", parseMultiSheetFormat, options);
};
```
Now let's register it in your [Listener](/core-concepts/listeners).
```javascript theme={null}
// . . . other imports
import { MultiSheetExtractor } from "./multi-sheet-extractor";
export default function (listener) {
// . . . other listener setup
listener.use(MultiSheetExtractor());
}
```
### Binary Format Handler
This example will be used to process binary files with structured data. This will be used to process binary files with the `.bin` or `.dat` extension. Due to the nature of binary format, we can't easily present a sample import here.
```javascript theme={null}
function parseBinaryFormat(buffer) {
// Example: Custom binary format with header + records
let offset = 0;
// Read header (first 16 bytes)
const magic = buffer.readUInt32LE(offset); offset += 4;
const version = buffer.readUInt16LE(offset); offset += 2;
const recordCount = buffer.readUInt32LE(offset); offset += 4;
const fieldCount = buffer.readUInt16LE(offset); offset += 2;
if (magic !== 0xDEADBEEF) {
throw new Error('Invalid file format');
}
// Read field definitions
const headers = [];
for (let i = 0; i < fieldCount; i++) {
const nameLength = buffer.readUInt16LE(offset); offset += 2;
const name = buffer.toString('utf-8', offset, offset + nameLength);
offset += nameLength;
const type = buffer.readUInt8(offset); offset += 1;
headers.push(name);
}
// Read records
const data = [];
for (let i = 0; i < recordCount; i++) {
const record = {};
headers.forEach(header => {
const valueLength = buffer.readUInt16LE(offset); offset += 2;
const value = buffer.toString('utf-8', offset, offset + valueLength);
offset += valueLength;
record[header] = { value };
});
data.push(record);
}
return {
Sheet1: { headers, data }
};
}
export const BinaryExtractor = (options = {}) => {
return Extractor(/\.(bin|dat)$/i, "binary", parseBinaryFormat, options);
};
```
And, once again, let's register it in your [Listener](/core-concepts/listeners).
```javascript theme={null}
// . . . other imports
import { BinaryExtractor } from "./binary-extractor";
export default function (listener) {
// . . . other listener setup
listener.use(BinaryExtractor());
}
```
### Configuration-Driven Extractor
Create a flexible extractor that can be configured for different formats. This will be used to process files in a manner that handles different delimiters, line endings, and other formatting options.
```javascript theme={null}
function createConfigurableParser(config) {
return function parseConfigurableFormat(buffer) {
const content = buffer.toString(config.encoding || 'utf-8');
let lines = content.split(config.lineDelimiter || '\n');
// Skip header lines if specified
if (config.skipLines) {
lines = lines.slice(config.skipLines);
}
// Filter empty lines
if (config.skipEmptyLines) {
lines = lines.filter(line => line.trim());
}
if (lines.length === 0) {
throw new Error('No data found');
}
// Extract headers
let headers;
let dataStartIndex = 0;
if (config.explicitHeaders) {
headers = config.explicitHeaders;
} else {
headers = lines[0].split(config.fieldDelimiter || ',').map(h => h.trim());
dataStartIndex = 1;
}
// Process data
const data = lines.slice(dataStartIndex).map(line => {
const values = line.split(config.fieldDelimiter || ',');
const record = {};
headers.forEach((header, index) => {
let value = values[index] || '';
// Apply transformations
if (config.transforms && config.transforms[header]) {
value = config.transforms[header](value);
}
// Type conversion
if (config.typeConversion) {
if (!isNaN(value) && value !== '') {
value = Number(value);
} else if (value.toLowerCase() === 'true' || value.toLowerCase() === 'false') {
value = value.toLowerCase() === 'true';
}
}
record[header] = { value };
});
return record;
});
return {
[config.sheetName || 'Sheet1']: { headers, data }
};
};
}
export const ConfigurableExtractor = (userConfig = {}) => {
const defaultConfig = {
encoding: 'utf-8',
lineDelimiter: '\n',
fieldDelimiter: ',',
skipLines: 0,
skipEmptyLines: true,
typeConversion: false,
sheetName: 'Sheet1'
};
const config = { ...defaultConfig, ...userConfig };
return Extractor(
config.fileExtension || ".txt",
"configurable",
createConfigurableParser(config),
{
chunkSize: config.chunkSize || 10000,
parallel: config.parallel || 1
}
);
};
```
Now let's register two different configurable extractors in our [Listener](/core-concepts/listeners).
The first will be used to process files with the `.custom` extension that look like this, while transforming dates and amount values:
```text theme={null}
Extraneous text
More extraneous text
name & date & amount
John Doe & 1/1/2021 & 100.00
Jane Smith & 1/2/2021 & 200.00
```
The second will be used to process files with the `.pipe` or `.special` extension that look like this:
```text theme={null}
Extraneous text
More extraneous text
name|date|amount
John Doe|2021-01-01|100.00
Jane Smith|2021-01-02|200.00
```
```javascript theme={null}
// . . . other imports
import { ConfigurableExtractor } from "./configurable-extractor";
export default function (listener) {
// . . . other listener setup
// Custom extractor with configuration for .custom files
listener.use(ConfigurableExtractor({
fileExtension: ".custom",
fieldDelimiter: " & ",
skipLines: 2,
typeConversion: true,
transforms: {
'date': (value) => new Date(value).toISOString(),
'amount': (value) => parseFloat(value).toFixed(2)
}
}));
// Custom extractor with configuration for .pipe and .special files
listener.use(ConfigurableExtractor({
fileExtension: /\.(pipe|special)$/i,
fieldDelimiter: "|",
skipLines: 2,
typeConversion: true
}));
}
```
## Reference
### API
```typescript theme={null}
function Extractor(
fileExt: string | RegExp,
extractorType: string,
parseBuffer: (
buffer: Buffer,
options: any
) => WorkbookCapture | Promise,
options?: Record
): (listener: FlatfileListener) => void
```
| Parameter | Type | Description |
| --------------- | --------------------- | -------------------------------------------------------------------------- |
| `fileExt` | `string` or `RegExp` | File extension to process (e.g., `".custom"` or `/\.(custom\|special)$/i`) |
| `extractorType` | `string` | Identifier for the extractor type (e.g., "custom", "binary") |
| `parseBuffer` | `ParserFunction` | Function that converts Buffer to WorkbookCapture |
| `options` | `Record` | Optional configuration object |
#### Options
| Option | Type | Default | Description |
| ----------- | --------- | ------- | -------------------------------------- |
| `chunkSize` | `number` | `5000` | Records to process per batch |
| `parallel` | `number` | `1` | Number of concurrent processing chunks |
| `debug` | `boolean` | `false` | Enable debug logging |
#### Parser Function Options
Your `parseBuffer` function receives additional options beyond what you pass to `Extractor`:
| Option | Type | Description |
| ------------------------ | --------- | ------------------------------------------------- |
| `fileId` | `string` | The ID of the file being processed |
| `fileExt` | `string` | The file extension (e.g., ".csv") |
| `headerSelectionEnabled` | `boolean` | Whether header selection is enabled for the space |
### Data Structures
#### WorkbookCapture Structure
The parser function must return a `WorkbookCapture` object:
```javascript theme={null}
const workbookCapture = {
"SheetName1": {
headers: ["field1", "field2", "field3"],
data: [
{
field1: { value: "value1" },
field2: { value: "value2" },
field3: { value: "value3" }
},
// ... more records
]
},
"SheetName2": {
headers: ["col1", "col2"],
data: [
{
col1: { value: "data1" },
col2: { value: "data2" }
}
]
}
};
```
#### Cell Value Objects
Each cell value should use the `Flatfile.RecordData` format:
```javascript theme={null}
const recordData = {
field1: { value: "john@example.com" },
field2: { value: "John Doe" },
field3: {
value: "invalid-email",
messages: [
{
type: "error",
message: "Invalid email format"
}
]
}
};
```
#### Message Types
| Type | Description | UI Effect |
| --------- | --------------------- | -------------------------------------------------------------------------------------------- |
| `error` | Validation error | Red highlighting, blocks [Actions](/core-concepts/actions) with the `hasAllValid` constraint |
| `warning` | Warning message | Yellow highlighting, allows submission |
| `info` | Informational message | Mouseover tooltip, allows submission |
### TypeScript Interfaces
```typescript theme={null}
type ParserFunction = (
buffer: Buffer,
options: any
) => WorkbookCapture | Promise;
type WorkbookCapture = Record;
type SheetCapture = {
headers: string[];
descriptions?: Record | null;
data: Flatfile.RecordData[];
metadata?: { rowHeaders: number[] };
};
```
## Troubleshooting Common Issues
### Files Not Processing
**Symptoms**: Files upload but no extraction occurs
**Solutions**:
* Verify file extension matches `fileExt` configuration
* Check [Listener](/core-concepts/listeners) is properly deployed and running
* Enable debug logging to see processing details
```javascript theme={null}
const extractor = CustomExtractor({
debug: true
}); // Make sure file extensions match in the Extractor call
```
### Parser Errors
**Symptoms**: Jobs fail with parsing errors
**Solutions**:
* Add try-catch blocks in parser function
* Validate input data before processing
* Return helpful error messages
```javascript theme={null}
function parseCustomFormat(buffer) {
try {
const content = buffer.toString('utf-8');
if (!content || content.trim() === '') {
throw new Error('File is empty');
}
// ... parsing logic
} catch (error) {
throw new Error(`Parse error: ${error.message}`);
}
}
```
### Memory Issues
**Symptoms**: Large files cause timeouts or memory errors
**Solutions**:
* Reduce chunk size for large files
* Implement streaming for very large files
* Use parallel processing carefully
```javascript theme={null}
const extractor = CustomExtractor({
chunkSize: 1000, // Smaller chunks
parallel: 1 // Reduce parallelization
});
```
### Performance Problems
**Symptoms**: Slow processing, timeouts
**Solutions**:
* Optimize parser algorithm
* Use appropriate chunk sizes
* Consider parallel processing for I/O-bound operations
```javascript theme={null}
// Optimize for large files
const extractor = CustomExtractor({
chunkSize: 5000,
parallel: 3
});
```
---
# Source: https://flatfile.com/docs/plugins/date.md
> ## Documentation Index
> Fetch the complete documentation index at: https://flatfile.com/docs/llms.txt
> Use this file to discover all available pages before exploring further.
# Date Format Normalizer
> Automatically parse and standardize date values during data import, converting various date formats into a consistent output format.
The Date Format Normalizer plugin for Flatfile is designed to automatically parse and standardize date values during the data import process. Its primary purpose is to detect various common date and time formats within specified fields and convert them into a single, consistent output format. This is useful when importing data from different sources that may use different date conventions (e.g., 'MM/DD/YYYY', 'YYYY-MM-DD', 'Jan 15, 2023'). The plugin can be configured to operate on specific fields across one or all sheets, and it can handle both date-only and date-time values. If a date string cannot be parsed, the plugin adds an error to the corresponding cell, alerting the user to the issue.
## Installation
Install the plugin via npm:
```bash theme={null}
npm install @flatfile/plugin-validate-date
```
## Configuration & Parameters
The plugin accepts a configuration object with the following parameters:
### sheetSlug
* **Type:** `string` (optional)
* **Default:** `'**'` (all sheets)
* **Description:** The slug of the sheet to which the date normalization should be applied. If this option is omitted, the plugin will apply to all sheets in the workbook.
### dateFields
* **Type:** `string[]` (required)
* **Description:** An array of field keys (the column names) that contain date values needing normalization. The plugin will process each field listed in this array for every record.
### outputFormat
* **Type:** `string` (required)
* **Description:** A string defining the desired output format for the dates, following the `date-fns` format patterns (e.g., 'MM/dd/yyyy', 'yyyy-MM-dd HH:mm:ss').
### includeTime
* **Type:** `boolean` (required)
* **Description:** A boolean that determines whether to include the time component in the final output. If set to `false`, any time information from the parsed date will be stripped, leaving only the date part. If `true`, the time will be included as formatted by `outputFormat`.
### locale
* **Type:** `string` (optional)
* **Default:** `'en-US'` (hardcoded)
* **Description:** Specifies the locale for date parsing. Note: Although this option exists in the configuration interface, the current implementation hardcodes the locale to 'en-US' and does not use the value provided in this parameter.
## Usage Examples
### Basic Usage
This example applies date normalization to the 'start\_date' field on all sheets, converting dates to 'YYYY-MM-DD' format.
```javascript JavaScript theme={null}
import { FlatfileListener } from '@flatfile/listener'
import { validateDate } from '@flatfile/plugin-validate-date'
export default function (listener) {
listener.use(
validateDate({
dateFields: ['start_date'],
outputFormat: 'yyyy-MM-dd',
includeTime: false
})
)
}
```
```typescript TypeScript theme={null}
import { FlatfileListener } from '@flatfile/listener'
import { validateDate } from '@flatfile/plugin-validate-date'
export default function (listener: FlatfileListener) {
listener.use(
validateDate({
dateFields: ['start_date'],
outputFormat: 'yyyy-MM-dd',
includeTime: false
})
)
}
```
### Configuration Example
This example configures the plugin to run only on the 'contacts' sheet. It normalizes two different date fields, 'birth\_date' and 'registration\_date', to the 'MM/dd/yyyy' format and excludes time.
```javascript JavaScript theme={null}
import { FlatfileListener } from '@flatfile/listener'
import { validateDate } from '@flatfile/plugin-validate-date'
export default function (listener) {
listener.use(
validateDate({
sheetSlug: 'contacts',
dateFields: ['birth_date', 'registration_date'],
outputFormat: 'MM/dd/yyyy',
includeTime: false
})
)
}
```
```typescript TypeScript theme={null}
import { FlatfileListener } from '@flatfile/listener'
import { validateDate } from '@flatfile/plugin-validate-date'
export default function (listener: FlatfileListener) {
listener.use(
validateDate({
sheetSlug: 'contacts',
dateFields: ['birth_date', 'registration_date'],
outputFormat: 'MM/dd/yyyy',
includeTime: false
})
)
}
```
### Advanced Usage (Including Time)
This example normalizes the 'event\_timestamp' field to a format that includes both date and time.
```javascript JavaScript theme={null}
import { FlatfileListener } from '@flatfile/listener'
import { validateDate } from '@flatfile/plugin-validate-date'
export default function (listener) {
listener.use(
validateDate({
sheetSlug: 'event_logs',
dateFields: ['event_timestamp'],
outputFormat: 'yyyy-MM-dd HH:mm:ss',
includeTime: true
})
)
}
```
```typescript TypeScript theme={null}
import { FlatfileListener } from '@flatfile/listener'
import { validateDate } from '@flatfile/plugin-validate-date'
export default function (listener: FlatfileListener) {
listener.use(
validateDate({
sheetSlug: 'event_logs',
dateFields: ['event_timestamp'],
outputFormat: 'yyyy-MM-dd HH:mm:ss',
includeTime: true
})
)
}
```
### Error Handling Example
If a date string cannot be parsed, the plugin adds an error to the specific cell. For example, if you try to import a record with `due_date: 'not a real date'`, the plugin will not change the value but will attach an error message.
```javascript JavaScript theme={null}
// Source Record:
// { due_date: 'not a real date' }
// After plugin runs, the record in Flatfile will have an error:
// Field: 'due_date'
// Value: 'not a real date'
// Error Message: 'Unable to parse date string'
import { FlatfileListener } from '@flatfile/listener'
import { validateDate } from '@flatfile/plugin-validate-date'
export default function (listener) {
listener.use(
validateDate({
sheetSlug: 'tasks',
dateFields: ['due_date'],
outputFormat: 'MM/dd/yyyy',
includeTime: false
})
)
}
```
```typescript TypeScript theme={null}
// Source Record:
// { due_date: 'not a real date' }
// After plugin runs, the record in Flatfile will have an error:
// Field: 'due_date'
// Value: 'not a real date'
// Error Message: 'Unable to parse date string'
import { FlatfileListener } from '@flatfile/listener'
import { validateDate } from '@flatfile/plugin-validate-date'
export default function (listener: FlatfileListener) {
listener.use(
validateDate({
sheetSlug: 'tasks',
dateFields: ['due_date'],
outputFormat: 'MM/dd/yyyy',
includeTime: false
})
)
}
```
## Troubleshooting
If dates are not being normalized as expected, consider the following:
* **Check Configuration:** Verify that the `sheetSlug` and `dateFields` in the configuration correctly match your workbook setup.
* **Validate Format String:** Ensure that the `outputFormat` string is a valid format recognized by `date-fns`.
* **Locale Issues:** If a valid date is being marked with an error, it may be in a format not recognized by `chrono-node` or it may conflict with the hardcoded 'en-US' locale (e.g., a DD/MM/YYYY format might be misinterpreted as MM/DD/YYYY).
## Notes
### Default Behavior
The plugin hooks into the `commit:created` event. For each committed record, it checks the fields specified in `dateFields`. If a value exists, it attempts to parse it as a date. If successful, it reformats the date according to `outputFormat` and updates the record. If parsing fails, it adds an error message to the cell and leaves the original value unchanged. By default, it operates on all sheets unless a specific `sheetSlug` is provided.
### Special Considerations
* The plugin relies on the `chrono-node` library for date parsing, which supports a wide variety of natural language and standard date formats.
* The plugin hooks into the `commit:created` event, meaning it runs after a user submits their data and before it is finalized.
* The `outputFormat` string must be compatible with the `date-fns` formatting library.
### Limitations
* The `locale` configuration option is not currently implemented. The plugin defaults to using the 'en-US' locale for parsing, regardless of the value passed in the configuration. This may affect parsing of formats where the day and month order are ambiguous (e.g., '01/02/2023').
### Error Handling
The plugin's error handling is simple: if `chrono-node` cannot parse the date string from a given field, the function returns `null`. The plugin then calls `record.addError(field, 'Unable to parse date string')` to flag the cell with an error message in the Flatfile UI. The original, un-parsable value is kept in the cell.
---
# Source: https://flatfile.com/docs/plugins/dedupe.md
> ## Documentation Index
> Fetch the complete documentation index at: https://flatfile.com/docs/llms.txt
> Use this file to discover all available pages before exploring further.
# Deduplicate Sheet Records
> A Flatfile plugin that provides functionality to find and remove duplicate records from a sheet based on specified field values or custom logic.
The Dedupe plugin provides functionality to find and remove duplicate records from a sheet within Flatfile. It is designed to be used as a server-side listener that is triggered by a custom action configured on a specific sheet.
The primary use case is data cleaning. For example, when importing a list of contacts, you can use this plugin to automatically remove entries that have the same email address. The plugin is flexible, allowing you to specify which field to check for duplicates (e.g., 'email', 'orderId'). You can configure it to keep either the first or the last occurrence of a duplicate record. For more complex deduplication logic, you can provide your own custom function.
## Installation
Install the plugin using npm:
```bash theme={null}
npm install @flatfile/plugin-dedupe
```
## Configuration & Parameters
The `dedupePlugin` function takes two parameters:
### Parameters
* **jobOperation** (string, required): The operation name that you define in a Sheet-level action. The plugin will only run when an action with this exact operation name is triggered.
* **opts** (PluginOptions, required): An object containing the configuration options for the plugin.
### Configuration Options
| Option | Type | Default | Description |
| -------- | ----------------- | --------- | --------------------------------------------------------------------------------------------------------------------------------------------------------------- |
| `on` | string | undefined | The field key (e.g., 'email') to check for duplicate values. Required when using the `keep` option. |
| `keep` | 'first' \| 'last' | undefined | Determines which record to keep when a duplicate is found. 'first' keeps the first record encountered, 'last' keeps the last record encountered. |
| `custom` | function | undefined | A custom function that receives a batch of records and a set of unique values. Should return an array of record IDs to be deleted. Overrides the `keep` option. |
| `debug` | boolean | false | When set to `true`, the plugin may output additional logging for development and debugging purposes. |
### Default Behavior
By default, without any configuration in the `opts` object, the plugin will not perform any deduplication. You must provide either the `keep` and `on` options or a `custom` function for the plugin to work. If the `keep` option is used, the `on` option becomes mandatory.
## Usage Examples
### Basic Usage
```javascript JavaScript theme={null}
import { listener } from "./listener-instance"; // Your listener instance
import { dedupePlugin } from "@flatfile/plugin-dedupe";
listener.use(
dedupePlugin("dedupe-email", {
on: "email",
keep: "last",
})
);
// You also need to configure the action on your Sheet
/*
const contactsSheet = {
name: 'Contacts',
// ... other fields
actions: [
{
operation: "dedupe-email",
mode: "background",
label: "Dedupe emails",
description: "Remove duplicate emails"
}
]
}
*/
```
```typescript TypeScript theme={null}
import { listener } from "./listener-instance"; // Your listener instance
import { dedupePlugin } from "@flatfile/plugin-dedupe";
import { Flatfile } from "@flatfile/api";
listener.use(
dedupePlugin("dedupe-email", {
on: "email",
keep: "last",
})
);
// You also need to configure the action on your Sheet
/*
const contactsSheet: Flatfile.SheetConfig = {
name: 'Contacts',
// ... other fields
actions: [
{
operation: "dedupe-email",
mode: "background",
label: "Dedupe emails",
description: "Remove duplicate emails"
}
]
}
*/
```
This example configures the plugin to trigger when a sheet action with the operation "dedupe-email" is clicked. It will find duplicates in the 'email' field and keep the last record found, deleting any previous ones.
### Custom Deduplication Logic
```javascript JavaScript theme={null}
import { listener } from "./listener-instance"; // Your listener instance
import { dedupePlugin } from "@flatfile/plugin-dedupe";
listener.use(
dedupePlugin("dedupe-email", {
custom: (records) => {
const uniques = new Set();
const toDelete = [];
records.forEach(record => {
const emailValue = record.values["email"]?.value;
if (emailValue) {
if (uniques.has(emailValue)) {
toDelete.push(record.id);
} else {
uniques.add(emailValue);
}
}
});
return toDelete;
},
})
);
```
```typescript TypeScript theme={null}
import { listener } from "./listener-instance"; // Your listener instance
import { dedupePlugin } from "@flatfile/plugin-dedupe";
import { Flatfile } from "@flatfile/api";
listener.use(
dedupePlugin("dedupe-email", {
custom: (records: Flatfile.RecordsWithLinks) => {
const uniques = new Set();
const toDelete: string[] = [];
records.forEach(record => {
const emailValue = record.values["email"]?.value;
if (emailValue) {
if (uniques.has(emailValue)) {
toDelete.push(record.id);
} else {
uniques.add(emailValue);
}
}
});
return toDelete;
},
})
);
```
This example shows how to use a custom function for more complex deduplication logic. The custom function identifies records to delete based on the 'email' field and returns their IDs.
### Keep First Record
```javascript JavaScript theme={null}
import { dedupePlugin } from "@flatfile/plugin-dedupe";
listener.use(
dedupePlugin("dedupe:contacts-email", {
on: "email",
keep: "first",
})
);
```
```typescript TypeScript theme={null}
import { dedupePlugin } from "@flatfile/plugin-dedupe";
listener.use(
dedupePlugin("dedupe:contacts-email", {
on: "email",
keep: "first",
})
);
```
This example keeps the first record encountered for each unique email value and deletes subsequent duplicates.
## Troubleshooting
### Common Issues
**Plugin Not Triggering**
* Check for a mismatch between the `jobOperation` string in your listener code and the `operation` value in your Sheet configuration's action. They must be identical.
**Incorrect Field Error**
* Ensure the field key passed to the `on` option exists in your Sheet configuration and is spelled correctly.
**No Duplicates Removed**
* Verify your data to ensure duplicates actually exist for the specified `on` field.
* If using a `custom` function, add logging to debug its logic.
### Error Scenarios
The plugin will throw descriptive errors for common misconfigurations:
* **Missing `on` option**: `Error: \`on\` is required when \`keep\` is first\`
* **Field not found**: `Error: Field "non_existent_field" not found`
* **Invalid context**: `Error: Dedupe must be called from a sheet-level action`
## Notes
### Requirements and Limitations
* **Server-Side Requirement**: This plugin must be deployed in a server-side listener. It is not intended for client-side use.
* **Sheet Action Requirement**: The plugin is triggered by a job. To trigger this job, you must configure a Sheet-level action in your Sheet configuration. The `operation` property of this action must exactly match the `jobOperation` string passed to the `dedupePlugin` function.
* **Large Dataset Limitation**: The `keep: 'last'` option may not function as expected on very large datasets where duplicate records are spread across different pages of data. The `keep: 'first'` option is generally more reliable for large datasets as it correctly tracks unique values across all pages. For a reliable "keep last" implementation on large datasets, a `custom` function should be used.
### Error Handling
The plugin is wrapped in the `jobHandler` utility, which provides standardized job management. Any error thrown during the dedupe function's execution will be caught, and the job will be marked as 'failed' with the corresponding error message. The plugin also performs its own configuration checks and will throw descriptive errors for common misconfigurations.
---
# Source: https://flatfile.com/docs/plugins/delimited-zip.md
> ## Documentation Index
> Fetch the complete documentation index at: https://flatfile.com/docs/llms.txt
> Use this file to discover all available pages before exploring further.
# Delimited File Zip Exporter
> Export data from all sheets within a Flatfile Workbook into delimited text files and compress them into a single ZIP archive for download.
This plugin is designed to be used in a server-side Flatfile listener. Its primary purpose is to export data from all sheets within a Flatfile Workbook into delimited text files (such as CSV or TSV). After generating a file for each sheet, it compresses all of them into a single ZIP archive. This ZIP file is then uploaded back into the Flatfile space, making it available for download. This is useful for users who need to download all their processed data from a workbook in a portable, compressed format for use in other systems or for archival purposes. The plugin is triggered by a `job:ready` event.
## Installation
Install the plugin via npm:
```bash theme={null}
npm install @flatfile/plugin-export-delimited-zip
```
## Configuration & Parameters
The plugin is configured by passing an options object to the `exportDelimitedZip` function.
| Parameter | Type | Default | Description |
| --------------- | --------- | --------------------- | ------------------------------------------------------------------------------------------------------------------------------- |
| `job` | `string` | `'downloadDelimited'` | The job name that will trigger the export process. The listener will be configured to listen for `workbook:${job}`. |
| `delimiter` | `string` | `','` | The character to use as a delimiter to separate values in the output files. For example, use ',' for CSV or '\t' for TSV. |
| `fileExtension` | `string` | `'csv'` | The file extension to use for the generated delimited files (e.g., 'csv', 'txt', 'tsv'). |
| `debug` | `boolean` | `false` | When set to true, the plugin will print detailed logs to the console during its execution, which is useful for troubleshooting. |
### Default Behavior
By default, the plugin listens for a job named `workbook:downloadDelimited`. When triggered, it will process all sheets in the workbook, convert them to CSV files (using a comma delimiter), zip them up, and upload the final archive. Debug logging is disabled.
## Usage Examples
```javascript theme={null}
import { exportDelimitedZip } from '@flatfile/plugin-export-delimited-zip'
export default function (listener) {
// Using default options for a job named 'downloadDelimited'
// that exports to .csv files
listener.use(exportDelimitedZip({
job: 'downloadDelimited',
delimiter: ',',
fileExtension: 'csv'
}))
}
```
```typescript theme={null}
import type { FlatfileListener } from '@flatfile/listener'
import { exportDelimitedZip } from '@flatfile/plugin-export-delimited-zip'
export default function (listener: FlatfileListener) {
// Using default options for a job named 'downloadDelimited'
// that exports to .csv files
listener.use(exportDelimitedZip({
job: 'downloadDelimited',
delimiter: ',',
fileExtension: 'csv'
}))
}
```
### Custom Configuration
```javascript theme={null}
import { exportDelimitedZip } from '@flatfile/plugin-export-delimited-zip'
export default function (listener) {
// Custom configuration to create tab-separated files (.tsv)
// triggered by a job named 'export-workbook-tsv'
// with debug logging enabled.
listener.use(exportDelimitedZip({
job: 'export-workbook-tsv',
delimiter: '\t',
fileExtension: 'tsv',
debug: true
}))
}
```
```typescript theme={null}
import type { FlatfileListener } from '@flatfile/listener'
import { exportDelimitedZip } from '@flatfile/plugin-export-delimited-zip'
export default function (listener: FlatfileListener) {
// Custom configuration to create tab-separated files (.tsv)
// triggered by a job named 'export-workbook-tsv'
// with debug logging enabled.
listener.use(exportDelimitedZip({
job: 'export-workbook-tsv',
delimiter: '\t',
fileExtension: 'tsv',
debug: true
}))
}
```
## API Reference
### exportDelimitedZip(options)
This function registers a listener plugin that handles the process of exporting workbook data to a compressed ZIP file. It sets up a job handler for a `job:ready` event. When the specified job is executed, the plugin fetches all sheets in the workbook, streams their records, and writes them to local temporary files using the specified delimiter. These files are then added to a ZIP archive, which is uploaded to the Flatfile space. Finally, the temporary files and directory are cleaned up.
**Parameters:**
* `options` (PluginOptions) - An object containing configuration for the plugin
* `job` (string) - The job name to listen for
* `delimiter` (string) - The delimiter character for the output files
* `fileExtension` (string) - The file extension for the output files
* `debug` (boolean, optional) - An optional flag to enable verbose console logging
**Return Value:**
Returns a `FlatfileListener` plugin instance that can be passed to `listener.use()`. The job itself, when completed successfully, returns an `outcome` object to the Flatfile UI containing a message and a link to the generated ZIP file.
## Troubleshooting
The primary method for troubleshooting is to enable the `debug: true` configuration option. This will output detailed step-by-step logs to the console, including retrieved sheets, file paths, record counts, and any caught errors. This provides visibility into where the process might be failing.
### Error Handling
If any part of the process fails (e.g., reading sheets, writing temporary files, zipping, or uploading), the function will catch the error and fail the job with a generic message: "This job failed probably because it couldn't write to the \[EXTENSION] files, compress them into a ZIP file, or upload it.". To diagnose the specific cause of failure, set the `debug` option to `true` to see detailed error logs in the console where the listener is running.
The core logic is wrapped in a single `try...catch` block. If an error occurs at any stage, it is caught, and the job is marked as failed with a general error message. Specific warnings are logged to the console if the cleanup of temporary files fails, but these do not cause the job to fail.
## Notes
### Requirements and Limitations
* **Server-Side Execution**: This plugin must be deployed in a server-side listener environment (e.g., Node.js) as it requires access to the file system (`fs`) to create temporary files and directories.
* **Temporary Files**: The plugin writes temporary delimited files and a temporary ZIP file to the operating system's temporary directory (`os.tmpdir()`). It attempts to clean these files up after the upload is complete, but in case of an unhandled crash, temporary files might be left behind.
* **File Name Sanitization**: The plugin sanitizes both the workbook name and sheet names to create valid file names. It removes special characters (`[<>:"/\\|?*]`) and replaces spaces with underscores.
* **Sheet Name Length**: Sheet names are trimmed to a maximum of 31 characters after sanitization to avoid issues with file system or ZIP format limitations.
* **Dependencies**: The plugin relies on external libraries `adm-zip` for creating ZIP archives and `csv-stringify` for generating the delimited file content.
---
# Source: https://flatfile.com/docs/plugins/delimiter-extractor.md
> ## Documentation Index
> Fetch the complete documentation index at: https://flatfile.com/docs/llms.txt
> Use this file to discover all available pages before exploring further.
# Delimiter Extractor Plugin
> Parse text files with custom delimiters and automatically extract structured data for import into Flatfile
The Delimiter Extractor plugin is designed to parse text files that use non-standard delimiters to separate values. Its primary purpose is to automatically detect and extract structured data from these files when they are uploaded to Flatfile. It supports a variety of single-character delimiters such as `;`, `:`, `~`, `^`, and `#`.
This plugin is useful in scenarios where data is provided in custom formats that are not natively handled by the Flatfile platform's standard CSV, TSV, or PSV parsers. It operates within a server-side listener, triggering on the `file:created` event to process the file, identify headers, and structure the data into records for import.
## Installation
Install the plugin using npm:
```bash theme={null}
npm install @flatfile/plugin-delimiter-extractor
```
## Configuration & Parameters
### Required Parameters
The file extension (e.g., ".txt", ".dat") that the plugin should listen for. This is the first argument to the `DelimiterExtractor` function.
The character used to separate values in the file. Supported delimiters are `;`, `:`, `~`, `^`, `#`.
### Optional Parameters
If set to `true`, the plugin will attempt to convert numeric and boolean strings into their corresponding types. For example, "123" becomes `123` and "true" becomes `true`.
Controls how empty lines in the file are handled:
* `true`: Skips lines that are completely empty
* `'greedy'`: Skips lines that contain only whitespace characters
* `false`: Includes all lines, even empty ones
A function that is applied to each individual cell value during parsing. The return value of the function will replace the original value. This is applied before `dynamicTyping`.
The number of records to process in each batch or chunk when inserting data into Flatfile.
The number of chunks to process concurrently.
An advanced configuration object to control the header detection strategy. Allows for specifying explicit headers, looking for headers in specific rows, or using different detection algorithms. Default uses the 'default' algorithm, which selects the row with the most non-empty cells within the first 10 rows as the header.
An array of delimiter characters to try if a specific `delimiter` is not provided. The parser will use the first one that successfully parses the data.
Enables debug logging.
## Usage Examples
### Basic Usage
Configure the listener to use the plugin for any `.txt` file, specifying that the data is separated by a colon:
```javascript JavaScript theme={null}
import { listener } from "@flatfile/platform";
import { DelimiterExtractor } from "@flatfile/plugin-delimiter-extractor";
listener.use(DelimiterExtractor(".txt", { delimiter: ":" }));
```
```typescript TypeScript theme={null}
import { listener } from "@flatfile/platform";
import { DelimiterExtractor } from "@flatfile/plugin-delimiter-extractor";
listener.use(DelimiterExtractor(".txt", { delimiter: ":" }));
```
### Advanced Configuration
This example shows a more detailed configuration for `.data` files with type conversion, empty line handling, and value transformation:
```javascript JavaScript theme={null}
import { listener } from "@flatfile/platform";
import { DelimiterExtractor } from "@flatfile/plugin-delimiter-extractor";
const options = {
delimiter: "#",
dynamicTyping: true,
skipEmptyLines: 'greedy',
transform: (value) => {
if (typeof value === 'string') {
return value.toUpperCase();
}
return value;
},
};
listener.use(DelimiterExtractor(".data", options));
```
```typescript TypeScript theme={null}
import { listener } from "@flatfile/platform";
import { DelimiterExtractor } from "@flatfile/plugin-delimiter-extractor";
const options = {
delimiter: "#",
dynamicTyping: true,
skipEmptyLines: 'greedy' as const,
transform: (value: any) => {
if (typeof value === 'string') {
return value.toUpperCase();
}
return value;
},
};
listener.use(DelimiterExtractor(".data", options));
```
### Custom Header Detection
This example demonstrates how to use advanced header detection options to explicitly define headers:
```javascript JavaScript theme={null}
import { listener } from "@flatfile/platform";
import { DelimiterExtractor } from "@flatfile/plugin-delimiter-extractor";
const advancedOptions = {
delimiter: "~",
headerDetectionOptions: {
algorithm: 'explicitHeaders',
headers: ['product_id', 'product_name', 'quantity', 'price'],
skip: 1 // Skip the first row in the file
}
};
listener.use(DelimiterExtractor(".inv", advancedOptions));
```
```typescript TypeScript theme={null}
import { listener } from "@flatfile/platform";
import { DelimiterExtractor } from "@flatfile/plugin-delimiter-extractor";
const advancedOptions = {
delimiter: "~",
headerDetectionOptions: {
algorithm: 'explicitHeaders' as const,
headers: ['product_id', 'product_name', 'quantity', 'price'],
skip: 1 // Skip the first row in the file
}
};
listener.use(DelimiterExtractor(".inv", advancedOptions));
```
### Direct Buffer Parsing
For advanced use cases where you need to parse a buffer directly:
```javascript JavaScript theme={null}
import * as fs from 'fs';
import { delimiterParser } from "@flatfile/plugin-delimiter-extractor";
async function parseLocalFile() {
const fileBuffer = fs.readFileSync('my-data.txt');
const options = { delimiter: '|', dynamicTyping: true };
const workbookData = await delimiterParser(fileBuffer, options);
console.log(workbookData.Sheet1.headers);
console.log(workbookData.Sheet1.data[0]);
}
parseLocalFile();
```
```typescript TypeScript theme={null}
import * as fs from 'fs';
import { delimiterParser } from "@flatfile/plugin-delimiter-extractor";
async function parseLocalFile(): Promise {
const fileBuffer = fs.readFileSync('my-data.txt');
const options = { delimiter: '|', dynamicTyping: true };
const workbookData = await delimiterParser(fileBuffer, options);
console.log(workbookData.Sheet1.headers);
console.log(workbookData.Sheet1.data[0]);
}
parseLocalFile();
```
## Troubleshooting
### No Data Appears After Upload
If a file is uploaded but no data appears, check the following:
1. **File Extension**: Ensure the file extension matches the one configured in `DelimiterExtractor(fileExt, ...)`
2. **Delimiter**: Verify that the `delimiter` option matches the actual delimiter used in the file
3. **Empty Files**: If the file is empty or contains no parsable data, the plugin will log "No data found in the file" to the console and produce no records
### Unsupported File Types Error
```javascript JavaScript theme={null}
try {
// This will throw an error
const csvExtractor = DelimiterExtractor(".csv", { delimiter: "," });
} catch (e) {
console.error(e.message);
// -> ".csv is a native file type and not supported by the delimiter extractor."
}
```
```typescript TypeScript theme={null}
try {
// This will throw an error
const csvExtractor = DelimiterExtractor(".csv", { delimiter: "," });
} catch (e: any) {
console.error(e.message);
// -> ".csv is a native file type and not supported by the delimiter extractor."
}
```
## Notes
### Limitations
* The plugin explicitly does not support file types that are natively handled by Flatfile: `.csv` (comma-separated), `.tsv` (tab-separated), and `.psv` (pipe-separated)
* The list of supported delimiters is fixed to: `;`, `:`, `~`, `^`, `#`
* This plugin is intended to be run in a server-side listener environment within the Flatfile Platform
### Error Handling
* The main `DelimiterExtractor` function includes a guard clause that throws an `Error` if an unsupported native file type is provided
* The internal parsing function uses try-catch blocks to handle parsing errors, which are logged to the console and re-thrown, causing the associated Flatfile job to fail
### Default Behavior
* By default, the plugin does not perform type conversion (`dynamicTyping: false`)
* Empty lines are included in the output unless explicitly configured otherwise (`skipEmptyLines: false`)
* The plugin processes 10,000 records per chunk with no parallel processing (`chunkSize: 10000`, `parallel: 1`)
* Header detection uses the 'default' algorithm, selecting the row with the most non-empty cells within the first 10 rows
---
# Source: https://flatfile.com/docs/core-concepts/documents.md
> ## Documentation Index
> Fetch the complete documentation index at: https://flatfile.com/docs/llms.txt
> Use this file to discover all available pages before exploring further.
# Documents
> Standalone webpages within Flatfile Spaces for guidance and dynamic content
Documents are standalone webpages for your Flatfile [Spaces](/core-concepts/spaces). They can be rendered from [Markdown syntax](https://www.markdownguide.org/basic-syntax/).
Often used for getting started guides, Documents become extremely powerful with dynamically generated content that stays updated as Events occur.
Flatfile also allows you to use HTML tags in your Markdown-formatted text. This is helpful if you prefer certain HTML tags rather than Markdown syntax. Links in documents (both Markdown and HTML) automatically open in a new tab to ensure users don't navigate away from the Flatfile interface.
## Key Features
**A note on Documents:** While Documents themselves can be created and updated [dynamically](/core-concepts/documents#dynamic-content), the content inside of a document should be considered to be *static* - that is, you cannot use documents to host interactive elements or single-page webforms. For that sort of functionality, we recommend using [Actions](/core-concepts/actions) to trigger a [Listener](/core-concepts/listeners) to perform the desired functionality.
### Markdown-Based Content
Documents support GitHub-flavored Markdown, allowing you to create rich, formatted content with headers, lists, code blocks, and more. You can also use HTML tags within your Markdown for additional formatting flexibility.
### Dynamic Content
Documents can be created and updated programmatically in response to Events, enabling dynamic content that reflects the current state of your Space or data processing workflow.
### Document Actions
Add interactive buttons to your Documents that trigger custom operations. [Actions](/core-concepts/actions) appear in the top right corner and can be configured with different modes, confirmations, and tooltips.
### Embedded Blocks
Documents support embedding interactive data blocks (Workbooks, Sheets, and Diffs) directly within the content. See the [Adding Blocks to Documents](#adding-blocks-to-documents) section for detailed implementation.
## Create a Document
You can create Documents upon Space creation using the [Space Configure Plugin](/plugins/space-configure), or dynamically in a [Listener](/core-concepts/listeners) using the API:
```javascript theme={null}
import api from "@flatfile/api";
export default function flatfileEventListener(listener) {
listener.on("file:created", async ({ context: { spaceId, fileId } }) => {
const fileName = (await api.files.get(fileId)).data.name;
const bodyText =
"# Welcome\n" +
"### Say hello to your first customer Space in the new Flatfile!\n" +
"Let's begin by first getting acquainted with what you're seeing in your Space initially.\n" +
"---\n" +
"Your uploaded file, ${fileName}, is located in the Files area.";
const doc = await api.documents.create(spaceId, {
title: "Getting Started",
body: bodyText,
});
});
}
```
This Document will now appear in the sidebar of your Space. Learn how to [customize the guest sidebar](/guides/customize-guest-sidebar) for different user types.
In this example, we create a Document when a file is uploaded, but you can also create Documents in response to any other Event. [Read more](/reference/events) about the different Events you can respond to.
## Document Actions
Actions are optional and allow you to run custom operations in response to a user-triggered event from within a Document.
Define Actions on a Document using the `actions` parameter when a document is created:
```javascript theme={null}
import api from "@flatfile/api";
export default function flatfileEventListener(listener) {
listener.on("file:created", async ({ context: { spaceId, fileId } }) => {
const fileName = (await api.files.get(fileId)).data.name;
const bodyText =
"# Welcome\n" +
"### Say hello to your first customer Space in the new Flatfile!\n" +
"Let's begin by first getting acquainted with what you're seeing in your Space initially.\n" +
"---\n" +
"Your uploaded file, ${fileName}, is located in the Files area.";
const doc = await api.documents.create(spaceId, {
title: "Getting Started",
body: bodyText,
actions: [
{
label: "Submit",
operation: "contacts:submit",
description: "Would you like to submit the contact data?",
tooltip: "Submit the contact data",
mode: "foreground",
primary: true,
confirm: true,
},
],
});
});
}
```
Then configure your listener to handle this Action, and define what should happen in response. Read more about Actions and how to handle them in our [Using Actions guide](/guides/using-actions).
Actions appear as buttons in the top right corner of your Document.
## Document treatments
Documents have an optional `treatments` parameter which takes an array of treatments for your Document. Treatments can be used to categorize your Document. Certain treatments will cause your Document to look or behave differently.
### Ephemeral documents
Giving your Document a treatment of `"ephemeral"` will cause the Document to appear as a full-screen takeover, and it will not appear in the sidebar of your Space like other Documents. You can use ephemeral Documents to create a more focused experience for your end users.
```javascript theme={null}
const ephemeralDoc = await api.documents.create(spaceId, {
title: "Getting started",
body: "# Welcome ...",
treatments: ["ephemeral"],
});
```
Currently, `"ephemeral"` is the only treatment that will change the behavior of your Document.
## Adding Blocks to Documents
Blocks are dynamic, embedded entities that you can use to display data inside a Document. You can add a Block to a Document using the `
 ## Types of Actions
### Built-in Actions
Resources in Flatfile come with severaldefault built-in actions like:
* Export/download data
* Delete data or files
* Find and replace (Sheets)
### Developer-Created Actions
You can create custom Actions to handle operations specific to your workflow, such as:
* Sending data to your API when data is ready
* Downloading your data in a specific format
* Validating data against external systems
* Moving data between different resources
* Custom data validations andtransformations
## Where Actions Appear
Actions appear in different parts of the UI depending on where they're mounted:
* **Workbook Actions**: Buttons in the top-right corner of Workbooks
* **Sheet Actions**: Dropdown menu in the Sheet toolbar (or top-level button if marked as `primary`)
* **Document Actions**: Buttons in the top-right corner of Documents
* **File Actions**: Dropdown menu for each file in the Files list
## Example Action Configuration
Every Action requires an `operation` (unique identifier) and `label` (display text):
```javascript theme={null}
{
operation: "submitActionBg",
mode: "background",
label: "Submit",
type: "string",
description: "Submit this data to a webhook.",
primary: true,
},
```
Actions support additional options like `primary` status, confirmation dialogs, constraints, and input forms. See the [Using Actions guide](/guides/using-actions) for more details.
---
# Source: https://flatfile.com/docs/embedding/advanced-configuration.md
> ## Documentation Index
> Fetch the complete documentation index at: https://flatfile.com/docs/llms.txt
> Use this file to discover all available pages before exploring further.
# Advanced Configuration
> Complete configuration reference for embedded Flatfile
This reference covers all configuration options for embedded Flatfile, from basic setup to advanced customization.
## Authentication & Security
### publishableKey
Your publishable key authenticates your application with Flatfile. This key is safe to include in client-side code.
**Where to find it:**
1. Log into [Platform Dashboard](https://platform.flatfile.com)
2. Navigate to **Developer Settings** → **API Keys**
3. Copy your **Publishable Key** (starts with `pk_`)
```javascript theme={null}
// Example usage
const config = {
publishableKey: "pk_1234567890abcdef", // Your actual key
};
```
### Security Best Practices
#### Environment Variables
Store your publishable key in environment variables rather than hardcoding:
```javascript theme={null}
// ✅ Good - using environment variable
const config = {
publishableKey: process.env.REACT_APP_FLATFILE_KEY,
};
// ❌ Avoid - hardcoded keys
const config = {
publishableKey: "pk_1234567890abcdef",
};
```
## Common Configuration Options
These options are shared across all SDK implementations:
### Authentication
| Option | Type | Required | Description |
| ---------------- | ------ | -------- | -------------------------------------------- |
| `publishableKey` | string | ✅ | Your publishable key from Platform Dashboard |
### User Identity
| Option | Type | Required | Description |
| ---------------------- | ------ | -------- | ------------------------------------------------------------------------------- |
| `userInfo` | object | ❌ | User metadata for space creation |
| `userInfo.userId` | string | ❌ | Unique user identifier |
| `userInfo.name` | string | ❌ | User's display name - this is displayed in the dashboard as the associated user |
| `userInfo.companyId` | string | ❌ | Company identifier |
| `userInfo.companyName` | string | ❌ | Company display name |
| `externalActorId` | string | ❌ | Unique identifier for embedded users |
### Space Setup
| Option | Type | Required | Description |
| --------------- | -------- | -------- | ----------------------------------------- |
| `name` | string | ✅ | Name of the space |
| `environmentId` | string | ✅ | Environment identifier |
| `spaceId` | string | ❌ | ID of existing space to reuse |
| `workbook` | object | ❌ | Workbook configuration for dynamic spaces |
| `listener` | Listener | ❌ | Event listener for responding to events |
### Look & Feel
| Option | Type | Required | Description |
| --------------------------------- | ------- | -------- | -------------------------------------------------------------------- |
| `themeConfig` | object | ❌ | Theme values for Space, sidebar and data table |
| `spaceBody` | object | ❌ | Space options for creating new Space; used with Angular and Vue SDKs |
| `sidebarConfig` | object | ❌ | Sidebar UI configuration |
| `sidebarConfig.defaultPage` | object | ❌ | Landing page configuration |
| `sidebarConfig.showDataChecklist` | boolean | ❌ | Toggle data config, defaults to false |
| `sidebarConfig.showSidebar` | boolean | ❌ | Show/hide sidebar |
| `document` | object | ❌ | Document content for space |
| `document.title` | string | ❌ | Document title |
| `document.body` | string | ❌ | Document body content (markdown) |
### CSS Customization
You can customize the embedded Flatfile iframe and its container elements using CSS variables and class selectors. This allows you to control colors, sizing, borders, and other visual aspects of the iframe wrapper to match your application's design.
#### CSS Variables
Define these CSS variables in your application's stylesheet to control the appearance of Flatfile's embedded components:
```css theme={null}
:root {
--ff-primary-color: #4c48ef;
--ff-secondary-color: #616a7d;
--ff-text-color: #090b2b;
--ff-dialog-border-radius: 4px;
--ff-border-radius: 5px;
--ff-bg-fade: rgba(0, 0, 0, 0.2);
}
```
#### Container Elements
Target these elements to customize the iframe container:
```css theme={null}
/* The default mount element */
#flatfile_iFrameContainer {
/* Your custom styles */
}
/* A div around the iframe that contains Flatfile */
.flatfile_iframe-wrapper {
/* Your custom styles */
}
/* The actual iframe that contains Flatfile */
#flatfile_iframe {
/* Your custom styles */
}
```
#### Modal Display Customization
When `displayAsModal` is set to `true`, customize the modal appearance:
```css theme={null}
/* Container styles when displayed as modal */
.flatfile_displayAsModal {
padding: 50px !important;
width: calc(100% - 100px) !important;
height: calc(100vh - 100px) !important;
}
.flatfile_iframe-wrapper.flatfile_displayAsModal {
background: var(--ff-bg-fade);
}
/* Close button styles */
.flatfile_displayAsModal .flatfile-close-button {
/* Your custom styles */
}
.flatfile_displayAsModal .flatfile-close-button svg {
fill: var(--ff-secondary-color);
}
/* Iframe border radius when displayed as modal */
.flatfile_displayAsModal #flatfile_iframe {
border-radius: var(--ff-border-radius);
}
```
#### Exit Confirmation Dialog
Customize the confirmation dialog that appears when closing Flatfile:
```css theme={null}
/* Modal backdrop */
.flatfile_outer-shell {
background-color: var(--ff-bg-fade);
border-radius: var(--ff-border-radius);
}
/* Inner container */
.flatfile_inner-shell {
/* Your custom styles */
}
/* Dialog box */
.flatfile_modal {
border-radius: var(--ff-dialog-border-radius);
}
/* Button container */
.flatfile_button-group {
/* Your custom styles */
}
/* All buttons */
.flatfile_button {
/* Your custom styles */
}
/* Primary "Yes, cancel" button */
.flatfile_primary {
border: 1px solid var(--ff-primary-color);
background-color: var(--ff-primary-color);
color: #fff;
}
/* Secondary "No, stay" button */
.flatfile_secondary {
color: var(--ff-secondary-color);
}
/* Dialog heading */
.flatfile_modal-heading {
color: var(--ff-text-color);
}
/* Dialog description text */
.flatfile_modal-text {
color: var(--ff-secondary-color);
}
```
#### Error Component
Customize the error display component:
```css theme={null}
/* Error container */
.ff_error_container {
/* Your custom styles */
}
/* Error heading */
.ff_error_heading {
/* Your custom styles */
}
/* Error description */
.ff_error_text {
/* Your custom styles */
}
```
### Basic Behavior
| Option | Type | Required | Description |
| ---------------------- | -------- | -------- | ------------------------------------------ |
| `closeSpace` | object | ❌ | Options for closing iframe |
| `closeSpace.operation` | string | ❌ | Operation type |
| `closeSpace.onClose` | function | ❌ | Callback when space closes |
| `displayAsModal` | boolean | ❌ | Display as modal or inline (default: true) |
## Advanced Configuration Options
These options provide specialized functionality for custom implementations:
### Space Reuse
| Option | Type | Required | Description |
| ------------- | ------ | -------- | --------------------------------------------- |
| `id` | string | ✅ | Space ID |
| `accessToken` | string | ✅ | Access token for space (obtained server-side) |
**Important:** To reuse an existing space, you must retrieve the spaceId and access token server-side using your secret key, then pass the `accessToken` to the client. See [Server Setup Guide](./server-setup) for details.
### UI Overrides
| Option | Type | Required | Description |
| ------------------------- | ------------ | -------- | ---------------------------------------------------------------- |
| `mountElement` | string | ❌ | Element to mount Flatfile (default: "flatfile\_iFrameContainer") |
| `loading` | ReactElement | ❌ | Custom loading component |
| `exitTitle` | string | ❌ | Exit dialog title (default: "Close Window") |
| `exitText` | string | ❌ | Exit dialog text (default: "See below") |
| `exitPrimaryButtonText` | string | ❌ | Primary button text (default: "Yes, exit") |
| `exitSecondaryButtonText` | string | ❌ | Secondary button text (default: "No, stay") |
| `errorTitle` | string | ❌ | Error dialog title (default: "Something went wrong") |
### On-Premises Configuration
| Option | Type | Required | Description |
| ---------- | ------ | -------- | ------------------------------------------------------------------------------------------------ |
| `apiUrl` | string | ❌ | API endpoint (default: "[https://platform.flatfile.com/api](https://platform.flatfile.com/api)") |
| `spaceUrl` | string | ❌ | Spaces API URL (default: "[https://platform.flatfile.com/s](https://platform.flatfile.com/s)") |
URLs for other regions can be found [here](../reference/cli#regional-servers).
## Configuration Examples
### Basic Space Creation
```javascript theme={null}
const config = {
publishableKey: "pk_1234567890abcdef",
name: "Customer Data Import",
environmentId: "us_env_abc123",
workbook: {
// your workbook configuration
},
userInfo: {
userId: "user_123",
name: "John Doe",
},
};
```
### Space Reuse with Access Token
```javascript theme={null}
// Client-side: Use space with access token from server
const config = {
space: {
id: "us_sp_abc123def456",
accessToken: "at_1234567890abcdef", // Retrieved server-side
},
};
```
### Advanced UI Customization
```javascript theme={null}
const config = {
publishableKey: "pk_1234567890abcdef",
mountElement: "custom-flatfile-container",
exitTitle: "Are you sure you want to leave?",
exitText: "Your progress will be saved.",
themeConfig: {
// custom theme configuration
},
};
```
## Troubleshooting
### Invalid publishableKey
**Error:** `"Invalid publishable key"`
**Solution:**
* Verify key starts with `pk_`
* Check for typos or extra spaces
* Ensure key is from correct environment
### Space Not Found
**Error:** `"Space not found"` or `403 Forbidden`
**Solution:**
* Verify Space ID format (`us_sp_` prefix)
* Ensure Space exists and is active
* Check Space permissions in dashboard
### CORS Issues
**Error:** `"CORS policy blocked"`
**Solution:**
* Add your domain to allowed origins in Platform Dashboard
* Ensure you're using publishable key (not secret key)
* Check browser network tab for specific CORS errors
### Access Token Issues
**Error:** `"Invalid access token"` when using space reuse
**Solution:**
* Ensure access token is retrieved server-side using secret key
* Check that token hasn't expired
* Verify space ID matches the token
## Testing Setup
For development and testing:
```javascript theme={null}
// Development configuration
const config = {
publishableKey: "pk_test_1234567890abcdef", // publishable key from development environment
};
```
Create separate test Spaces for development to avoid affecting production data.
## Next Steps
Once configured:
* Deploy your event listener to Flatfile
* Configure data validation and transformation rules
* Test the embedding in your application
* Deploy to production with production keys
For server-side space reuse patterns, see our [Server Setup Guide](./server-setup).
---
# Source: https://flatfile.com/docs/guides/advanced-filters.md
> ## Documentation Index
> Fetch the complete documentation index at: https://flatfile.com/docs/llms.txt
> Use this file to discover all available pages before exploring further.
# Advanced Filters
> Learn how to use Flatfile's Advanced Filters to efficiently filter and search through your data
Advanced Filters in Flatfile provide a powerful way to filter and search through your data with complex conditions. This feature allows you to create sophisticated filter combinations to quickly find the exact records you need.
## Overview
The Advanced Filters feature enables you to:
* Create multiple filter conditions with different fields
* Combine conditions using logical operators (AND/OR)
* Filter by various data types with appropriate operators
* Save and reuse filter combinations
* Apply filters to large datasets efficiently
## Using Advanced Filters
### Accessing Advanced Filters
You can access Advanced Filters in the Flatfile interface through the Filter button in the sheet toolbar:
1. Navigate to any sheet in your workbook
2. Click the "Filter" button in the toolbar
3. Select a field to filter by, or click "Advanced filter" to create a complex filter
### Creating Filter Conditions
Each filter condition consists of three parts:
1. **Field** - The column you want to filter on
2. **Operator** - The comparison type (equals, contains, greater than, etc.)
3. **Value** - The specific value to filter by
For example, you might create a filter like: `firstName is "John"` or `age > 30`.
### Combining Multiple Filters
Advanced Filters allow you to combine multiple conditions:
1. Create your first filter condition
2. Click the "Add condition" button
3. Select whether to join with "AND" or "OR" logic
4. Add your next condition
This allows for complex queries like: `firstName is "John" AND age > 30` or `status is "pending" OR status is "review"`.
### Available Operators
Different field types support different operators:
| Field Type | Available Operators |
| ---------- | ----------------------------------------------- |
| String | is, is not, like, is empty, not empty |
| Number | is, is not, >, \<, >=, \<=, is empty, not empty |
| Boolean | is true, is false, is empty, not empty |
| Date | is, is not, >, \<, >=, \<=, is empty, not empty |
| Enum | is, is not, is empty, not empty |
### Horizontal Scrolling
When you add multiple filter conditions that extend beyond the available width of the screen, the filter area will automatically enable horizontal scrolling. This allows you to create complex filter combinations without being limited by screen space.
Simply scroll horizontally to see all your filter conditions when they extend beyond the visible area.
## Advanced Filter Examples
Here are some examples of how you might use Advanced Filters:
### Example 1: Finding Specific Customer Records
```
firstName is "Sarah" AND status is "active" AND lastPurchase > "2023-01-01"
```
This filter would show all active customers named Sarah who made a purchase after January 1, 2023.
### Example 2: Identifying Records Needing Attention
```
(status is "pending" OR status is "review") AND createdDate < "2023-06-01"
```
This filter would show all records that are either pending or in review, and were created before June 1, 2023.
### Example 3: Finding Missing Data
```
email is not empty AND phone is empty
```
This filter would show all records that have an email address but are missing a phone number.
## Best Practices
* **Start simple**: Begin with a single filter condition and add more as needed
* **Use AND/OR strategically**: "AND" narrows results (both conditions must be true), while "OR" broadens results (either condition can be true)
* **Consider performance**: Very complex filters on large datasets may take longer to process
* **Save common filters**: If you frequently use the same filter combinations, consider saving them as views
## Troubleshooting
If you encounter issues with Advanced Filters:
* Ensure your filter values match the expected format for the field type
* Check that you're using appropriate operators for each field type
* For complex filters, try breaking them down into simpler components to identify issues
* Verify that the data you're filtering actually exists in your dataset
Advanced Filters provide a powerful way to work with your data in Flatfile, allowing you to quickly find and focus on the records that matter most to your workflow.
---
# Source: https://flatfile.com/docs/embedding/angular.md
> ## Documentation Index
> Fetch the complete documentation index at: https://flatfile.com/docs/llms.txt
> Use this file to discover all available pages before exploring further.
# Angular Embedding
> Embed Flatfile in Angular applications
Embed Flatfile in your Angular application using our Angular SDK. This provides Angular components and services for seamless integration.
## Installation
```bash theme={null}
npm install @flatfile/angular-sdk
```
## Basic Implementation
### 1. Import the Module
Add the `SpaceModule` to your Angular module:
```typescript theme={null}
import { NgModule } from "@angular/core";
import { SpaceModule } from "@flatfile/angular-sdk";
@NgModule({
imports: [
SpaceModule,
// your other imports
],
// ...
})
export class AppModule {}
```
### 2. Create Component
Create a component to handle the Flatfile embed:
```typescript theme={null}
import { Component } from "@angular/core";
import { SpaceService, ISpace } from "@flatfile/angular-sdk";
@Component({
selector: "app-import",
template: `
## Types of Actions
### Built-in Actions
Resources in Flatfile come with severaldefault built-in actions like:
* Export/download data
* Delete data or files
* Find and replace (Sheets)
### Developer-Created Actions
You can create custom Actions to handle operations specific to your workflow, such as:
* Sending data to your API when data is ready
* Downloading your data in a specific format
* Validating data against external systems
* Moving data between different resources
* Custom data validations andtransformations
## Where Actions Appear
Actions appear in different parts of the UI depending on where they're mounted:
* **Workbook Actions**: Buttons in the top-right corner of Workbooks
* **Sheet Actions**: Dropdown menu in the Sheet toolbar (or top-level button if marked as `primary`)
* **Document Actions**: Buttons in the top-right corner of Documents
* **File Actions**: Dropdown menu for each file in the Files list
## Example Action Configuration
Every Action requires an `operation` (unique identifier) and `label` (display text):
```javascript theme={null}
{
operation: "submitActionBg",
mode: "background",
label: "Submit",
type: "string",
description: "Submit this data to a webhook.",
primary: true,
},
```
Actions support additional options like `primary` status, confirmation dialogs, constraints, and input forms. See the [Using Actions guide](/guides/using-actions) for more details.
---
# Source: https://flatfile.com/docs/embedding/advanced-configuration.md
> ## Documentation Index
> Fetch the complete documentation index at: https://flatfile.com/docs/llms.txt
> Use this file to discover all available pages before exploring further.
# Advanced Configuration
> Complete configuration reference for embedded Flatfile
This reference covers all configuration options for embedded Flatfile, from basic setup to advanced customization.
## Authentication & Security
### publishableKey
Your publishable key authenticates your application with Flatfile. This key is safe to include in client-side code.
**Where to find it:**
1. Log into [Platform Dashboard](https://platform.flatfile.com)
2. Navigate to **Developer Settings** → **API Keys**
3. Copy your **Publishable Key** (starts with `pk_`)
```javascript theme={null}
// Example usage
const config = {
publishableKey: "pk_1234567890abcdef", // Your actual key
};
```
### Security Best Practices
#### Environment Variables
Store your publishable key in environment variables rather than hardcoding:
```javascript theme={null}
// ✅ Good - using environment variable
const config = {
publishableKey: process.env.REACT_APP_FLATFILE_KEY,
};
// ❌ Avoid - hardcoded keys
const config = {
publishableKey: "pk_1234567890abcdef",
};
```
## Common Configuration Options
These options are shared across all SDK implementations:
### Authentication
| Option | Type | Required | Description |
| ---------------- | ------ | -------- | -------------------------------------------- |
| `publishableKey` | string | ✅ | Your publishable key from Platform Dashboard |
### User Identity
| Option | Type | Required | Description |
| ---------------------- | ------ | -------- | ------------------------------------------------------------------------------- |
| `userInfo` | object | ❌ | User metadata for space creation |
| `userInfo.userId` | string | ❌ | Unique user identifier |
| `userInfo.name` | string | ❌ | User's display name - this is displayed in the dashboard as the associated user |
| `userInfo.companyId` | string | ❌ | Company identifier |
| `userInfo.companyName` | string | ❌ | Company display name |
| `externalActorId` | string | ❌ | Unique identifier for embedded users |
### Space Setup
| Option | Type | Required | Description |
| --------------- | -------- | -------- | ----------------------------------------- |
| `name` | string | ✅ | Name of the space |
| `environmentId` | string | ✅ | Environment identifier |
| `spaceId` | string | ❌ | ID of existing space to reuse |
| `workbook` | object | ❌ | Workbook configuration for dynamic spaces |
| `listener` | Listener | ❌ | Event listener for responding to events |
### Look & Feel
| Option | Type | Required | Description |
| --------------------------------- | ------- | -------- | -------------------------------------------------------------------- |
| `themeConfig` | object | ❌ | Theme values for Space, sidebar and data table |
| `spaceBody` | object | ❌ | Space options for creating new Space; used with Angular and Vue SDKs |
| `sidebarConfig` | object | ❌ | Sidebar UI configuration |
| `sidebarConfig.defaultPage` | object | ❌ | Landing page configuration |
| `sidebarConfig.showDataChecklist` | boolean | ❌ | Toggle data config, defaults to false |
| `sidebarConfig.showSidebar` | boolean | ❌ | Show/hide sidebar |
| `document` | object | ❌ | Document content for space |
| `document.title` | string | ❌ | Document title |
| `document.body` | string | ❌ | Document body content (markdown) |
### CSS Customization
You can customize the embedded Flatfile iframe and its container elements using CSS variables and class selectors. This allows you to control colors, sizing, borders, and other visual aspects of the iframe wrapper to match your application's design.
#### CSS Variables
Define these CSS variables in your application's stylesheet to control the appearance of Flatfile's embedded components:
```css theme={null}
:root {
--ff-primary-color: #4c48ef;
--ff-secondary-color: #616a7d;
--ff-text-color: #090b2b;
--ff-dialog-border-radius: 4px;
--ff-border-radius: 5px;
--ff-bg-fade: rgba(0, 0, 0, 0.2);
}
```
#### Container Elements
Target these elements to customize the iframe container:
```css theme={null}
/* The default mount element */
#flatfile_iFrameContainer {
/* Your custom styles */
}
/* A div around the iframe that contains Flatfile */
.flatfile_iframe-wrapper {
/* Your custom styles */
}
/* The actual iframe that contains Flatfile */
#flatfile_iframe {
/* Your custom styles */
}
```
#### Modal Display Customization
When `displayAsModal` is set to `true`, customize the modal appearance:
```css theme={null}
/* Container styles when displayed as modal */
.flatfile_displayAsModal {
padding: 50px !important;
width: calc(100% - 100px) !important;
height: calc(100vh - 100px) !important;
}
.flatfile_iframe-wrapper.flatfile_displayAsModal {
background: var(--ff-bg-fade);
}
/* Close button styles */
.flatfile_displayAsModal .flatfile-close-button {
/* Your custom styles */
}
.flatfile_displayAsModal .flatfile-close-button svg {
fill: var(--ff-secondary-color);
}
/* Iframe border radius when displayed as modal */
.flatfile_displayAsModal #flatfile_iframe {
border-radius: var(--ff-border-radius);
}
```
#### Exit Confirmation Dialog
Customize the confirmation dialog that appears when closing Flatfile:
```css theme={null}
/* Modal backdrop */
.flatfile_outer-shell {
background-color: var(--ff-bg-fade);
border-radius: var(--ff-border-radius);
}
/* Inner container */
.flatfile_inner-shell {
/* Your custom styles */
}
/* Dialog box */
.flatfile_modal {
border-radius: var(--ff-dialog-border-radius);
}
/* Button container */
.flatfile_button-group {
/* Your custom styles */
}
/* All buttons */
.flatfile_button {
/* Your custom styles */
}
/* Primary "Yes, cancel" button */
.flatfile_primary {
border: 1px solid var(--ff-primary-color);
background-color: var(--ff-primary-color);
color: #fff;
}
/* Secondary "No, stay" button */
.flatfile_secondary {
color: var(--ff-secondary-color);
}
/* Dialog heading */
.flatfile_modal-heading {
color: var(--ff-text-color);
}
/* Dialog description text */
.flatfile_modal-text {
color: var(--ff-secondary-color);
}
```
#### Error Component
Customize the error display component:
```css theme={null}
/* Error container */
.ff_error_container {
/* Your custom styles */
}
/* Error heading */
.ff_error_heading {
/* Your custom styles */
}
/* Error description */
.ff_error_text {
/* Your custom styles */
}
```
### Basic Behavior
| Option | Type | Required | Description |
| ---------------------- | -------- | -------- | ------------------------------------------ |
| `closeSpace` | object | ❌ | Options for closing iframe |
| `closeSpace.operation` | string | ❌ | Operation type |
| `closeSpace.onClose` | function | ❌ | Callback when space closes |
| `displayAsModal` | boolean | ❌ | Display as modal or inline (default: true) |
## Advanced Configuration Options
These options provide specialized functionality for custom implementations:
### Space Reuse
| Option | Type | Required | Description |
| ------------- | ------ | -------- | --------------------------------------------- |
| `id` | string | ✅ | Space ID |
| `accessToken` | string | ✅ | Access token for space (obtained server-side) |
**Important:** To reuse an existing space, you must retrieve the spaceId and access token server-side using your secret key, then pass the `accessToken` to the client. See [Server Setup Guide](./server-setup) for details.
### UI Overrides
| Option | Type | Required | Description |
| ------------------------- | ------------ | -------- | ---------------------------------------------------------------- |
| `mountElement` | string | ❌ | Element to mount Flatfile (default: "flatfile\_iFrameContainer") |
| `loading` | ReactElement | ❌ | Custom loading component |
| `exitTitle` | string | ❌ | Exit dialog title (default: "Close Window") |
| `exitText` | string | ❌ | Exit dialog text (default: "See below") |
| `exitPrimaryButtonText` | string | ❌ | Primary button text (default: "Yes, exit") |
| `exitSecondaryButtonText` | string | ❌ | Secondary button text (default: "No, stay") |
| `errorTitle` | string | ❌ | Error dialog title (default: "Something went wrong") |
### On-Premises Configuration
| Option | Type | Required | Description |
| ---------- | ------ | -------- | ------------------------------------------------------------------------------------------------ |
| `apiUrl` | string | ❌ | API endpoint (default: "[https://platform.flatfile.com/api](https://platform.flatfile.com/api)") |
| `spaceUrl` | string | ❌ | Spaces API URL (default: "[https://platform.flatfile.com/s](https://platform.flatfile.com/s)") |
URLs for other regions can be found [here](../reference/cli#regional-servers).
## Configuration Examples
### Basic Space Creation
```javascript theme={null}
const config = {
publishableKey: "pk_1234567890abcdef",
name: "Customer Data Import",
environmentId: "us_env_abc123",
workbook: {
// your workbook configuration
},
userInfo: {
userId: "user_123",
name: "John Doe",
},
};
```
### Space Reuse with Access Token
```javascript theme={null}
// Client-side: Use space with access token from server
const config = {
space: {
id: "us_sp_abc123def456",
accessToken: "at_1234567890abcdef", // Retrieved server-side
},
};
```
### Advanced UI Customization
```javascript theme={null}
const config = {
publishableKey: "pk_1234567890abcdef",
mountElement: "custom-flatfile-container",
exitTitle: "Are you sure you want to leave?",
exitText: "Your progress will be saved.",
themeConfig: {
// custom theme configuration
},
};
```
## Troubleshooting
### Invalid publishableKey
**Error:** `"Invalid publishable key"`
**Solution:**
* Verify key starts with `pk_`
* Check for typos or extra spaces
* Ensure key is from correct environment
### Space Not Found
**Error:** `"Space not found"` or `403 Forbidden`
**Solution:**
* Verify Space ID format (`us_sp_` prefix)
* Ensure Space exists and is active
* Check Space permissions in dashboard
### CORS Issues
**Error:** `"CORS policy blocked"`
**Solution:**
* Add your domain to allowed origins in Platform Dashboard
* Ensure you're using publishable key (not secret key)
* Check browser network tab for specific CORS errors
### Access Token Issues
**Error:** `"Invalid access token"` when using space reuse
**Solution:**
* Ensure access token is retrieved server-side using secret key
* Check that token hasn't expired
* Verify space ID matches the token
## Testing Setup
For development and testing:
```javascript theme={null}
// Development configuration
const config = {
publishableKey: "pk_test_1234567890abcdef", // publishable key from development environment
};
```
Create separate test Spaces for development to avoid affecting production data.
## Next Steps
Once configured:
* Deploy your event listener to Flatfile
* Configure data validation and transformation rules
* Test the embedding in your application
* Deploy to production with production keys
For server-side space reuse patterns, see our [Server Setup Guide](./server-setup).
---
# Source: https://flatfile.com/docs/guides/advanced-filters.md
> ## Documentation Index
> Fetch the complete documentation index at: https://flatfile.com/docs/llms.txt
> Use this file to discover all available pages before exploring further.
# Advanced Filters
> Learn how to use Flatfile's Advanced Filters to efficiently filter and search through your data
Advanced Filters in Flatfile provide a powerful way to filter and search through your data with complex conditions. This feature allows you to create sophisticated filter combinations to quickly find the exact records you need.
## Overview
The Advanced Filters feature enables you to:
* Create multiple filter conditions with different fields
* Combine conditions using logical operators (AND/OR)
* Filter by various data types with appropriate operators
* Save and reuse filter combinations
* Apply filters to large datasets efficiently
## Using Advanced Filters
### Accessing Advanced Filters
You can access Advanced Filters in the Flatfile interface through the Filter button in the sheet toolbar:
1. Navigate to any sheet in your workbook
2. Click the "Filter" button in the toolbar
3. Select a field to filter by, or click "Advanced filter" to create a complex filter
### Creating Filter Conditions
Each filter condition consists of three parts:
1. **Field** - The column you want to filter on
2. **Operator** - The comparison type (equals, contains, greater than, etc.)
3. **Value** - The specific value to filter by
For example, you might create a filter like: `firstName is "John"` or `age > 30`.
### Combining Multiple Filters
Advanced Filters allow you to combine multiple conditions:
1. Create your first filter condition
2. Click the "Add condition" button
3. Select whether to join with "AND" or "OR" logic
4. Add your next condition
This allows for complex queries like: `firstName is "John" AND age > 30` or `status is "pending" OR status is "review"`.
### Available Operators
Different field types support different operators:
| Field Type | Available Operators |
| ---------- | ----------------------------------------------- |
| String | is, is not, like, is empty, not empty |
| Number | is, is not, >, \<, >=, \<=, is empty, not empty |
| Boolean | is true, is false, is empty, not empty |
| Date | is, is not, >, \<, >=, \<=, is empty, not empty |
| Enum | is, is not, is empty, not empty |
### Horizontal Scrolling
When you add multiple filter conditions that extend beyond the available width of the screen, the filter area will automatically enable horizontal scrolling. This allows you to create complex filter combinations without being limited by screen space.
Simply scroll horizontally to see all your filter conditions when they extend beyond the visible area.
## Advanced Filter Examples
Here are some examples of how you might use Advanced Filters:
### Example 1: Finding Specific Customer Records
```
firstName is "Sarah" AND status is "active" AND lastPurchase > "2023-01-01"
```
This filter would show all active customers named Sarah who made a purchase after January 1, 2023.
### Example 2: Identifying Records Needing Attention
```
(status is "pending" OR status is "review") AND createdDate < "2023-06-01"
```
This filter would show all records that are either pending or in review, and were created before June 1, 2023.
### Example 3: Finding Missing Data
```
email is not empty AND phone is empty
```
This filter would show all records that have an email address but are missing a phone number.
## Best Practices
* **Start simple**: Begin with a single filter condition and add more as needed
* **Use AND/OR strategically**: "AND" narrows results (both conditions must be true), while "OR" broadens results (either condition can be true)
* **Consider performance**: Very complex filters on large datasets may take longer to process
* **Save common filters**: If you frequently use the same filter combinations, consider saving them as views
## Troubleshooting
If you encounter issues with Advanced Filters:
* Ensure your filter values match the expected format for the field type
* Check that you're using appropriate operators for each field type
* For complex filters, try breaking them down into simpler components to identify issues
* Verify that the data you're filtering actually exists in your dataset
Advanced Filters provide a powerful way to work with your data in Flatfile, allowing you to quickly find and focus on the records that matter most to your workflow.
---
# Source: https://flatfile.com/docs/embedding/angular.md
> ## Documentation Index
> Fetch the complete documentation index at: https://flatfile.com/docs/llms.txt
> Use this file to discover all available pages before exploring further.
# Angular Embedding
> Embed Flatfile in Angular applications
Embed Flatfile in your Angular application using our Angular SDK. This provides Angular components and services for seamless integration.
## Installation
```bash theme={null}
npm install @flatfile/angular-sdk
```
## Basic Implementation
### 1. Import the Module
Add the `SpaceModule` to your Angular module:
```typescript theme={null}
import { NgModule } from "@angular/core";
import { SpaceModule } from "@flatfile/angular-sdk";
@NgModule({
imports: [
SpaceModule,
// your other imports
],
// ...
})
export class AppModule {}
```
### 2. Create Component
Create a component to handle the Flatfile embed:
```typescript theme={null}
import { Component } from "@angular/core";
import { SpaceService, ISpace } from "@flatfile/angular-sdk";
@Component({
selector: "app-import",
template: `
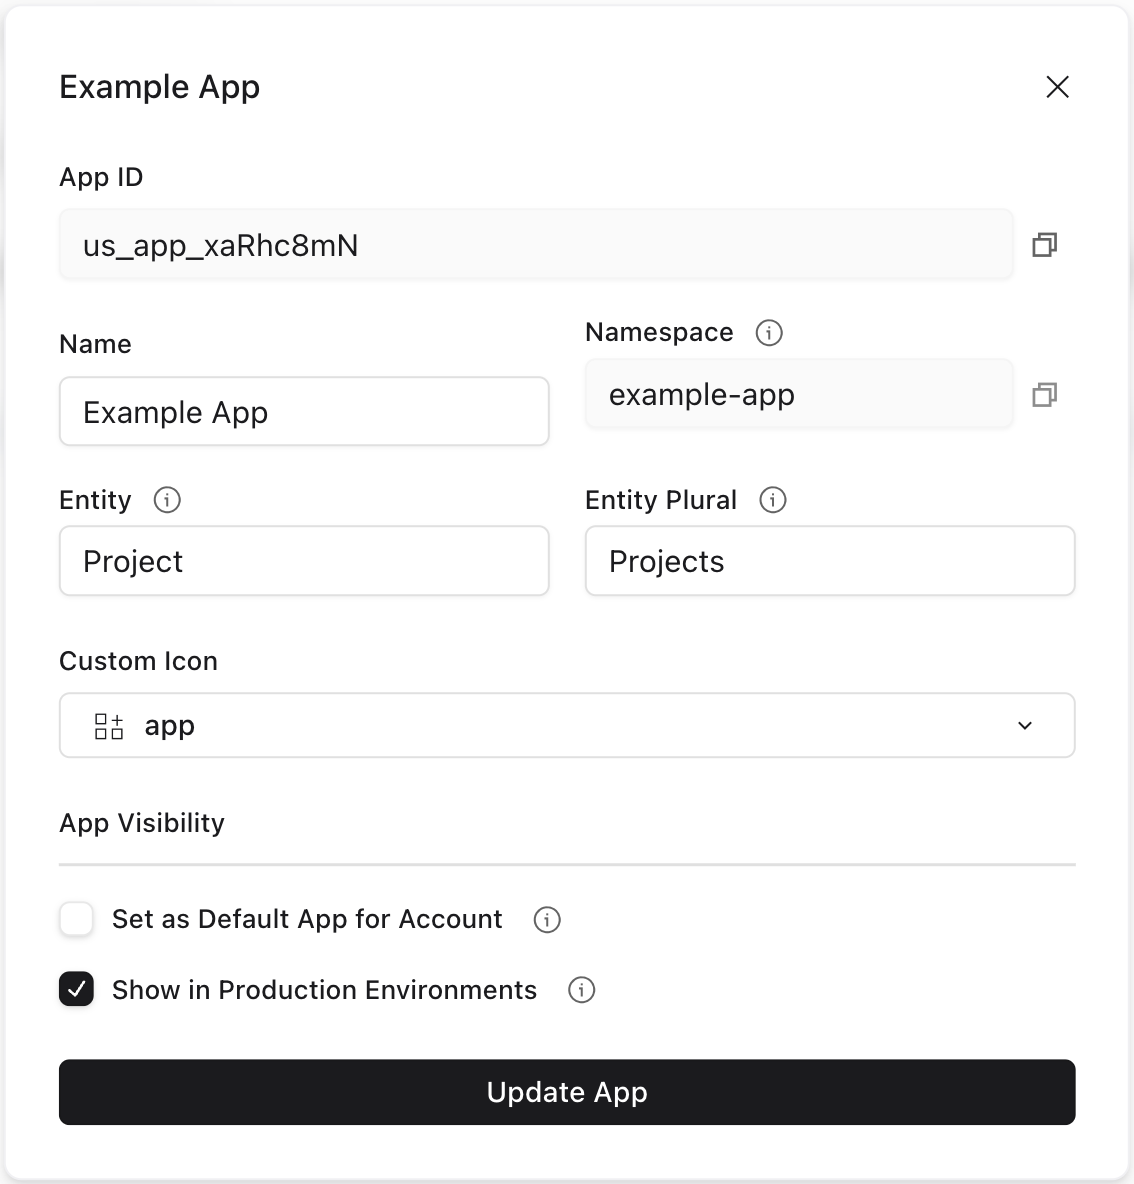 Apps are available across Development-level environments by default, and optionally available across Production environments with a configuration option:
 ---
# Source: https://flatfile.com/docs/guides/authentication.md
> ## Documentation Index
> Fetch the complete documentation index at: https://flatfile.com/docs/llms.txt
> Use this file to discover all available pages before exploring further.
# Authentication and Authorization
> Complete guide to authenticating with Flatfile using API keys, Personal Access Tokens, and managing roles and permissions
This guide covers all aspects of authentication with Flatfile, including API keys, Personal Access Tokens, and role-based access control for your team and customers.
## API Keys
Flatfile provides two different kinds of environment-specific API keys you can use to interact with the API. In addition, you can work with a development key or a production environment.
---
# Source: https://flatfile.com/docs/guides/authentication.md
> ## Documentation Index
> Fetch the complete documentation index at: https://flatfile.com/docs/llms.txt
> Use this file to discover all available pages before exploring further.
# Authentication and Authorization
> Complete guide to authenticating with Flatfile using API keys, Personal Access Tokens, and managing roles and permissions
This guide covers all aspects of authentication with Flatfile, including API keys, Personal Access Tokens, and role-based access control for your team and customers.
## API Keys
Flatfile provides two different kinds of environment-specific API keys you can use to interact with the API. In addition, you can work with a development key or a production environment.

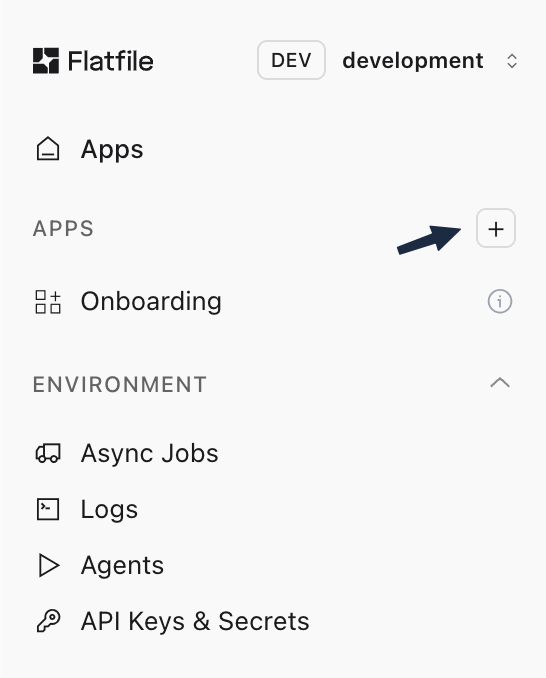 Then select "Build with AutoBuild."
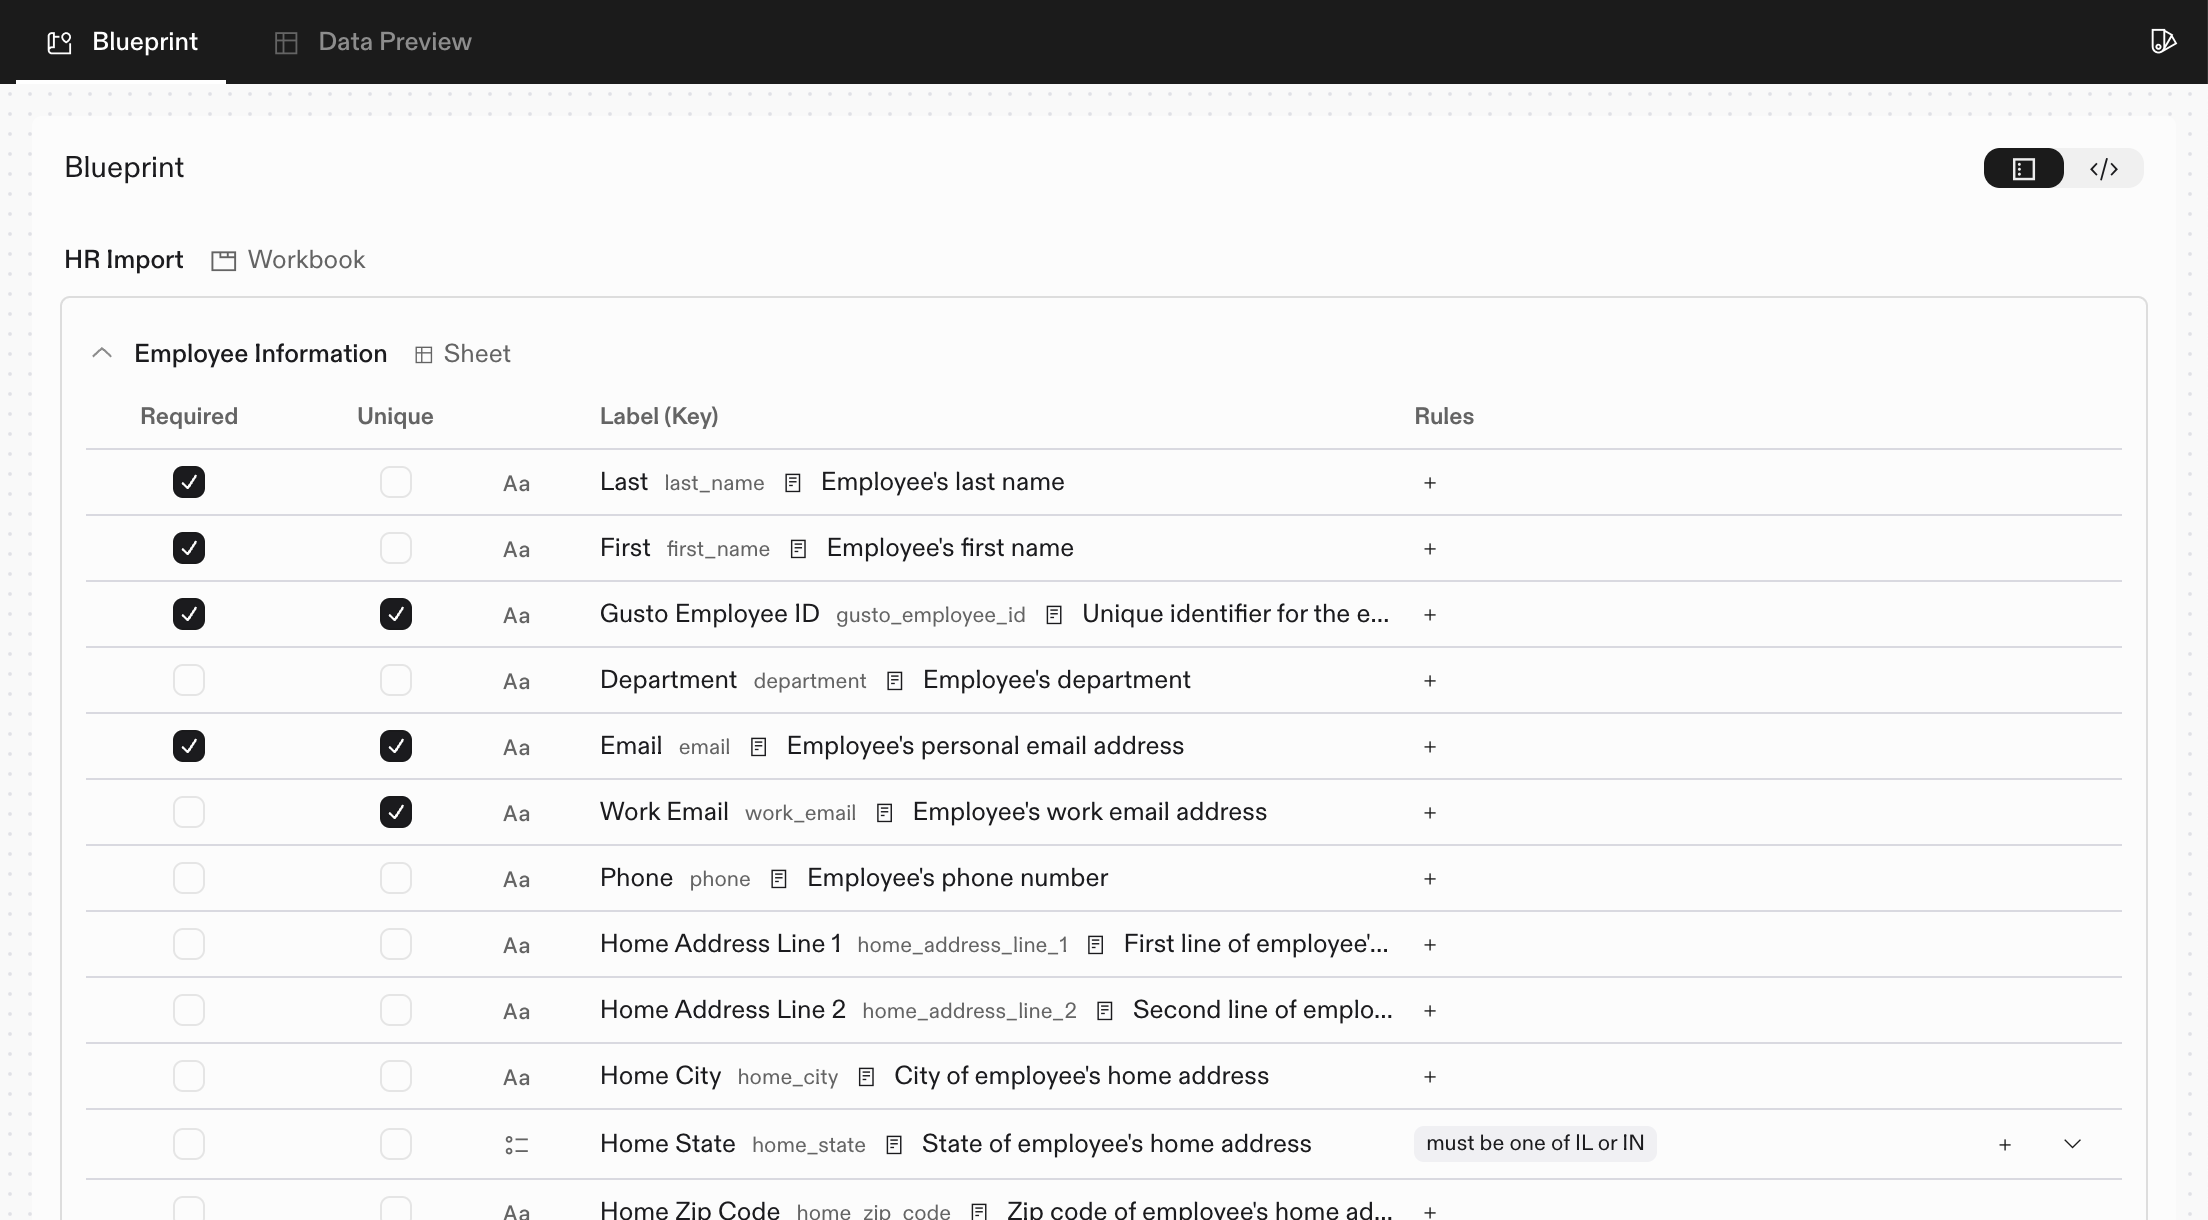 For more advanced changes, you can chat with the Flatfile Assistant. The Assistant can help you
with anything from small tweaks to complex validations, data egress actions, or large reorganization
of your sheets.
For more advanced changes, you can chat with the Flatfile Assistant. The Assistant can help you
with anything from small tweaks to complex validations, data egress actions, or large reorganization
of your sheets.
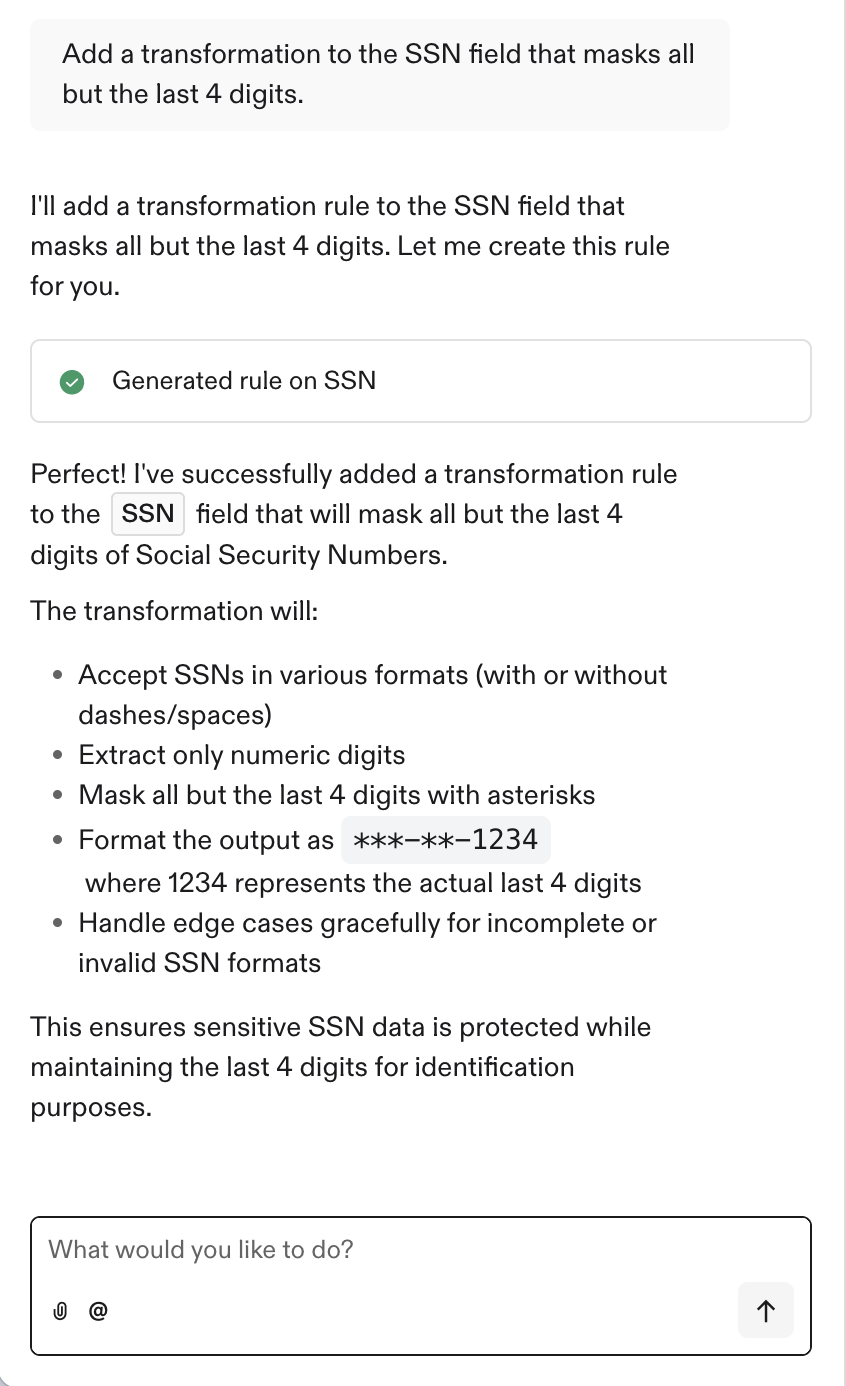 At any point, you can check the Data Preview tab to see what your Flatfile project will look like for
your users. You can add or edit data to test your validations and transformations.
At any point, you can check the Data Preview tab to see what your Flatfile project will look like for
your users. You can add or edit data to test your validations and transformations.
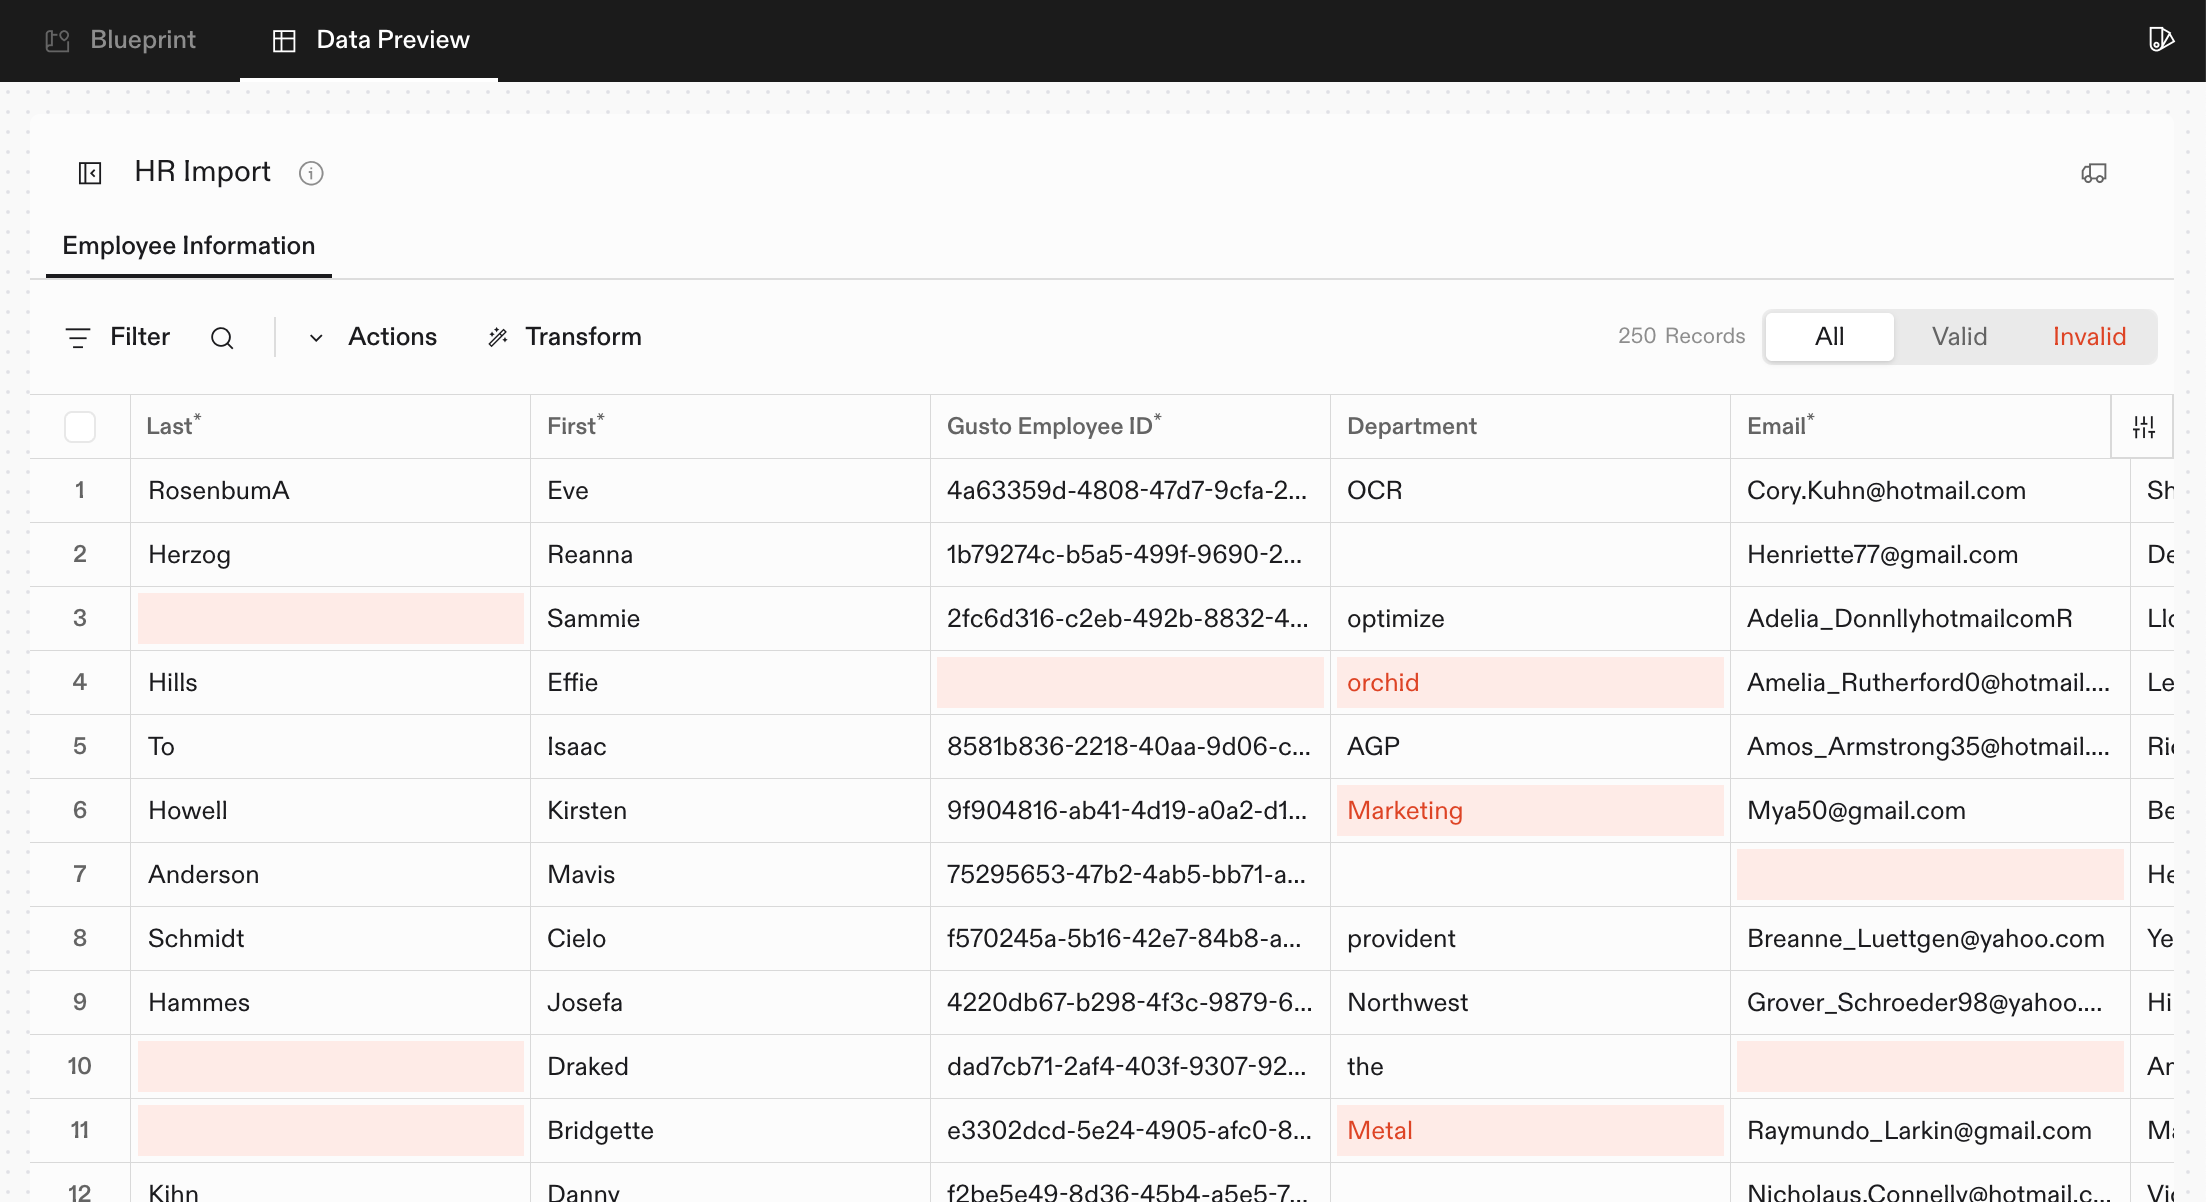 ## Deploying Your App
When you're finished building your space, click "Configure & Deploy."
You'll be prompted to give your app a name, and then it's ready to be deployed!
From here, you'll be taken to your new app in the dashboard.
Your autobuild agent is deployed and you're ready to create your first project and start importing data!
---
# Source: https://flatfile.com/docs/plugins/autocast.md
> ## Documentation Index
> Fetch the complete documentation index at: https://flatfile.com/docs/llms.txt
> Use this file to discover all available pages before exploring further.
# Autocast Plugin
> Automatically convert data in a Flatfile Sheet to match the data types defined in the corresponding Blueprint
The Autocast plugin is an opinionated transformer for Flatfile that automatically converts data in a Sheet to match the data types defined in the corresponding Blueprint (Schema). It operates on the `commit:created` event, meaning it processes records after they have been committed to the sheet.
Its primary purpose is to clean and standardize data by ensuring that values intended to be numbers, booleans, or dates are correctly typed, even if they are imported as strings. For example, it can convert the string "1,000" to the number `1000`, the string "yes" to the boolean `true`, and the string "08/16/2023" to a standardized UTC date string.
This plugin is useful in any scenario where source data may have inconsistent or incorrect data types, saving developers from writing manual data-casting logic.
## Installation
Install the plugin using npm:
```bash theme={null}
npm install @flatfile/plugin-autocast
```
## Configuration & Parameters
### Main Plugin Function
The `autocast` function accepts the following parameters:
## Deploying Your App
When you're finished building your space, click "Configure & Deploy."
You'll be prompted to give your app a name, and then it's ready to be deployed!
From here, you'll be taken to your new app in the dashboard.
Your autobuild agent is deployed and you're ready to create your first project and start importing data!
---
# Source: https://flatfile.com/docs/plugins/autocast.md
> ## Documentation Index
> Fetch the complete documentation index at: https://flatfile.com/docs/llms.txt
> Use this file to discover all available pages before exploring further.
# Autocast Plugin
> Automatically convert data in a Flatfile Sheet to match the data types defined in the corresponding Blueprint
The Autocast plugin is an opinionated transformer for Flatfile that automatically converts data in a Sheet to match the data types defined in the corresponding Blueprint (Schema). It operates on the `commit:created` event, meaning it processes records after they have been committed to the sheet.
Its primary purpose is to clean and standardize data by ensuring that values intended to be numbers, booleans, or dates are correctly typed, even if they are imported as strings. For example, it can convert the string "1,000" to the number `1000`, the string "yes" to the boolean `true`, and the string "08/16/2023" to a standardized UTC date string.
This plugin is useful in any scenario where source data may have inconsistent or incorrect data types, saving developers from writing manual data-casting logic.
## Installation
Install the plugin using npm:
```bash theme={null}
npm install @flatfile/plugin-autocast
```
## Configuration & Parameters
### Main Plugin Function
The `autocast` function accepts the following parameters:
 ## Key Features