# Codeium
> ## Documentation Index
---
# Source: https://docs.windsurf.com/windsurf/advanced.md
> ## Documentation Index
> Fetch the complete documentation index at: https://docs.windsurf.com/llms.txt
> Use this file to discover all available pages before exploring further.
# Advanced Configuration
> Advanced Windsurf configurations including SSH support, Dev Containers, WSL, extension marketplace settings, and gitignore access for Cascade.
All advanced configurations can be found in Windsurf Settings which can be accessed by the top right dropdown → Windsurf Settings or Command Palette (Ctrl/⌘+Shift+P) → Open Windsurf Settings Page.
# Enabling Cascade access to .gitignore files
To provide Cascade with access to files that match patterns in your project's .gitignore , go to your Windsurf Settings and go to "Cascade Gitignore Access". By default, it is turned off. To provide access, turn it on by clicking the toggle.
# SSH Support
The usual SSH support in VSCode is licensed by Microsoft, so we have implemented our own just for Windsurf. It does require you to have [OpenSSH](https://www.openssh.com/) installed, but otherwise has minimal dependencies, and should "just work" like you're used to. You can access SSH under `Remote-SSH` in the Command Palette, or via the `Open a Remote Window` button in the bottom left.
This extension has worked great for our internal development, but there are some known caveats and bugs:
* We currently only support SSHing into Linux-based remote hosts.
* The usual Microsoft "Remote - SSH" extension (and the [open-remote-ssh](https://github.com/jeanp413/open-remote-ssh) extension) will not work—please do not install them, as they conflict with our support.
* We don't have all the features of the Microsoft SSH extension right now. We mostly just support the important thing: connecting to a host. If you have feature requests, let us know!
* To access a devcontainer on a remote host after connecting via SSH, use the Command Palette (Ctrl/Cmd+Shift+P) and choose one of the following options:
* SSH agent-forwarding is on by default, and will use Windsurf's latest connection to that host. If you're having trouble with it, try reloading the window to refresh the connection.
* On Windows, you'll see some `cmd.exe` windows when it asks for your password. This is expected—we'll get rid of them soon.
* If you have issues, please first make sure that you can ssh into your remote host using regular `ssh` in a terminal. If the problem persists, include the output from the `Output > Remote SSH (Windsurf)` tab in any bug reports!
# Dev Containers
Windsurf supports Development Containers on Mac, Windows, and Linux for both local and remote (via SSH) workflows.
Prerequisites:
* Local: Docker must be installed on your machine and accessible from the Windsurf terminal.
* Remote over SSH: Connect to a remote host using Windsurf Remote-SSH. Docker must be installed and accessible on the remote host (from the remote shell). Your project should include a `devcontainer.json` or equivalent config.
Available commands (in both local and remote windows):
1. `Dev Containers: Open Folder in Container`
* Open a new workspace using a specified `devcontainer.json`.
2. `Dev Containers: Reopen in Container`
* Reopen the current workspace in a new container defined by your `devcontainer.json`.
3. `Dev Containers: Attach to Running Container`
* Attach to an existing Docker container and connect your current workspace to it. If the container does not follow the [Development Container Specificaton](https://containers.dev/implementors/spec/), Windsurf will attempt best-effort detection of the remote user and environment.
4. `Dev Containers: Reopen Folder Locally`
* When connected to a development container, disconnect and reopen the workspace on the local filesystem.
5. `Dev Containers: Show Windsurf Dev Containers Log`
* Open the Dev Containers log output for troubleshooting.
These commands are available from the Command Palette and will also appear when you click the `Open a Remote Window` button in the bottom left (including when you are connected to a remote host via SSH).
Related:
* `Remote Explorer: Focus on Dev Containers (Windsurf) View` — quickly open the Dev Containers view.
# WSL (Beta)
As of version 1.1.0, Windsurf has beta support for Windows Subsystem for Linux. You must already have WSL set up and configured on your Windows machine.
You can access WSL by clicking on the `Open a Remote Window` button in the bottom left, or under `Remote-WSL` in the Command Palette.
# Extension Marketplace
You can change the marketplace you use to download extensions from. To do this, go to `Windsurf Settings` and modify the Marketplace URL settings under the `General` section.
## Windsurf Plugins
Search "Windsurf Pyright" or paste in `@id:codeium.windsurfPyright` in the extensions search bar.
---
# Source: https://docs.windsurf.com/windsurf/cascade/agents-md.md
> ## Documentation Index
> Fetch the complete documentation index at: https://docs.windsurf.com/llms.txt
> Use this file to discover all available pages before exploring further.
# AGENTS.md
> Create AGENTS.md files to provide directory-scoped instructions to Cascade. Instructions automatically apply based on file location in your project.
`AGENTS.md` files provide a simple way to give Cascade context-aware instructions that automatically apply based on where the file is located in your project. This is particularly useful for providing directory-specific coding guidelines, architectural decisions, or project conventions.
## How It Works
When you create an `AGENTS.md` file (or `agents.md`), Windsurf automatically discovers it and uses its contents as instructions for Cascade. The behavior depends on where the file is placed:
* **Root directory**: When placed at the root of your workspace or git repository, the instructions apply globally to all files (similar to an "always on" rule)
* **Subdirectories**: When placed in a subdirectory, the instructions automatically apply only when working with files in that directory or its children
This location-based scoping makes `AGENTS.md` ideal for providing targeted guidance without cluttering a single global configuration file.
## Creating an AGENTS.md File
Simply create a file named `AGENTS.md` or `agents.md` in the desired directory. The file uses plain markdown with no special frontmatter required.
### Example Structure
```
my-project/
├── AGENTS.md # Global instructions for the entire project
├── frontend/
│ ├── AGENTS.md # Instructions specific to frontend code
│ └── src/
│ └── components/
│ └── AGENTS.md # Instructions specific to components
├── backend/
│ └── AGENTS.md # Instructions specific to backend code
└── docs/
└── AGENTS.md # Instructions for documentation
```
### Example Content
Here's an example `AGENTS.md` file for a React components directory:
```markdown theme={null}
# Component Guidelines
When working with components in this directory:
- Use functional components with hooks
- Follow the naming convention: ComponentName.tsx for components, useHookName.ts for hooks
- Each component should have a corresponding test file: ComponentName.test.tsx
- Use CSS modules for styling: ComponentName.module.css
- Export components as named exports, not default exports
## File Structure
Each component folder should contain:
- The main component file
- A test file
- A styles file (if needed)
- An index.ts for re-exports
```
## Discovery and Scoping
Windsurf automatically discovers `AGENTS.md` files throughout your workspace:
* **Workspace scanning**: All `AGENTS.md` files within your workspace and its subdirectories are discovered
* **Git repository support**: For git repositories, Windsurf also searches parent directories up to the git root
* **Case insensitive**: Both `AGENTS.md` and `agents.md` are recognized
### Automatic Scoping
The key benefit of `AGENTS.md` is automatic scoping based on file location:
| File Location | Scope |
| ----------------------- | ------------------------------------------------------------ |
| Workspace root | Applies to all files (always on) |
| `/frontend/` | Applies when working with files in `/frontend/**` |
| `/frontend/components/` | Applies when working with files in `/frontend/components/**` |
This means you can have multiple `AGENTS.md` files at different levels, each providing increasingly specific guidance for their respective directories.
## Best Practices
To get the most out of `AGENTS.md` files:
* **Keep instructions focused**: Each `AGENTS.md` should contain instructions relevant to its directory's purpose
* **Use clear formatting**: Bullet points, headers, and code blocks make instructions easier for Cascade to follow
* **Be specific**: Concrete examples and explicit conventions work better than vague guidelines
* **Avoid redundancy**: Don't repeat global instructions in subdirectory files; they inherit from parent directories
### Content Guidelines
```markdown theme={null}
# Good Example
- Use TypeScript strict mode
- All API responses must include error handling
- Follow REST naming conventions for endpoints
# Less Effective Example
- Write good code
- Be careful with errors
- Use best practices
```
## Comparison with Rules
While both `AGENTS.md` and [Rules](/windsurf/cascade/memories#rules) provide instructions to Cascade, they serve different purposes:
| Feature | AGENTS.md | Rules |
| -------- | -------------------------------- | ------------------------------------------------ |
| Location | In project directories | `.windsurf/rules/` or global |
| Scoping | Automatic based on file location | Manual (glob, always on, model decision, manual) |
| Format | Plain markdown | Markdown with frontmatter |
| Best for | Directory-specific conventions | Cross-cutting concerns, complex activation logic |
Use `AGENTS.md` when you want simple, location-based instructions. Use Rules when you need more control over when and how instructions are applied.
---
# Source: https://docs.windsurf.com/windsurf/ai-commit-message.md
> ## Documentation Index
> Fetch the complete documentation index at: https://docs.windsurf.com/llms.txt
> Use this file to discover all available pages before exploring further.
# AI Commit Messages
> Generate meaningful git commit messages automatically with AI by analyzing your code changes with a single click in Windsurf.
Generate git commit messages with a single click. This feature analyzes your code changes and creates meaningful commit messages that describe what you've done.
Available with no limits to all paid users!
# How It Works
When you're ready to commit changes:
1. Stage your files in the Git panel
2. Click the sparkle (✨) icon next to the commit message field
3. Review the generated message and edit if needed
4. Complete your commit
The AI analyzes your recent code changes and creates a meaningful commit message that describes what you've done.
# Best Practices
For better results:
* Apply general best practices for commit scope: group together small, meaningful units of changes
* Review the message before committing
# Limitations
* Large or complex commits may result in more generic messages
* Specialized terminology might not always be captured perfectly
* Generated messages are suggestions and may need editing
# Privacy
Your code and commit messages remain private. We don't store your code changes or use them for training our models.
---
# Source: https://docs.windsurf.com/windsurf/accounts/api-reference/analytics-api-introduction.md
# Source: https://docs.windsurf.com/plugins/accounts/api-reference/analytics-api-introduction.md
> ## Documentation Index
> Fetch the complete documentation index at: https://docs.windsurf.com/llms.txt
> Use this file to discover all available pages before exploring further.
# Analytics API
> Enterprise analytics API for querying Windsurf usage data including autocomplete, chat, command, and Cascade metrics.
## Overview
The Windsurf Analytics API enables enterprise customers to programmatically access detailed usage analytics for their teams. Query data from autocomplete, chat, command features, and Cascade with flexible filtering, grouping, and aggregation options.
API data is refreshed every 3 hours
## Common Parameters
Most Analytics API endpoints support these common parameters:
| Parameter | Type | Required | Description |
| ----------------- | ------ | -------- | ------------------------------------------------------------ |
| `service_key` | string | Yes | Your service key for authentication |
| `group_name` | string | No | Filter results to a specific group |
| `start_timestamp` | string | Varies | Start time in RFC 3339 format (e.g., `2023-01-01T00:00:00Z`) |
| `end_timestamp` | string | Varies | End time in RFC 3339 format (e.g., `2023-12-31T23:59:59Z`) |
## Available Endpoints
The Analytics API provides three main endpoints:
1. **[User Page Analytics](/plugins/accounts/api-reference/user-page-analytics)** - Get user activity data from the teams page
2. **[Cascade Analytics](/plugins/accounts/api-reference/cascade-analytics)** - Query Cascade-specific usage metrics
3. **[Custom Analytics](/plugins/accounts/api-reference/custom-analytics)** - Flexible querying with custom selections, filters, and aggregations
---
# Source: https://docs.windsurf.com/windsurf/accounts/analytics.md
# Source: https://docs.windsurf.com/plugins/accounts/analytics.md
> ## Documentation Index
> Fetch the complete documentation index at: https://docs.windsurf.com/llms.txt
> Use this file to discover all available pages before exploring further.
# Analytics
> View individual user analytics, team analytics, usage patterns, and metrics for your Windsurf usage including code completion stats and AI-written code percentage.
## Individuals
User analytics are available for viewing and sharing on your own [profile](https://windsurf.com/profile) page.
See your completion stats, [refer](https://windsurf.com/referral) your friends, look into your language breakdown, and unlock achievement badges by using Windsurf in your daily workflow.
## Teams
Windsurf makes managing your team easy from one dashboard.
You will need team admin privileges in order to view the following team links.
Team leads and managers can also see an aggregate of their team members' usage patterns and analytics, including Percent of Code Written (PCW) by AI, total lines of code written, total tool calls, credit consumption, and more.
---
# Source: https://docs.windsurf.com/windsurf/accounts/api-reference/api-introduction.md
# Source: https://docs.windsurf.com/plugins/accounts/api-reference/api-introduction.md
> ## Documentation Index
> Fetch the complete documentation index at: https://docs.windsurf.com/llms.txt
> Use this file to discover all available pages before exploring further.
# API Reference
> Enterprise API for querying Windsurf usage data and managing configurations with service key authentication.
## Overview
The Windsurf API enables enterprise customers to programmatically access detailed usage analytics and manage usage configurations for their teams.
The API is available for Enterprise plans only
## Base URL
All API requests should be made to:
```
https://server.codeium.com/api/v1/
```
## Authentication
The Windsurf API uses service keys for authentication. Service keys must be included in the request body of all API calls.
### Creating a Service Key
1. Navigate to your [team settings page](https://windsurf.com/team/settings)
2. Go to the "Service Keys" section
3. Create a new service key with appropriate permissions
4. Copy the generated service key for use in API requests
### Required Permissions
Different API endpoints require different permissions. Refer to the individual endpoint documentation for the specific permission required:
| Endpoint | Required Permission |
| ------------------------------------------------------------------------------------------------------------ | ------------------- |
| [Custom Analytics](/plugins/accounts/api-reference/custom-analytics) (`/Analytics`) | Analytics Read |
| [User Page Analytics](/plugins/accounts/api-reference/user-page-analytics) (`/UserPageAnalytics`) | Teams Read-Only |
| [Cascade Analytics](/plugins/accounts/api-reference/cascade-analytics) (`/CascadeAnalytics`) | Teams Read-Only |
| [Set Usage Configuration](/plugins/accounts/api-reference/usage-config) (`/UsageConfig`) | Billing Write |
| [Get Usage Configuration](/plugins/accounts/api-reference/get-usage-config) (`/GetUsageConfig`) | Billing Read |
| [Get Team Credit Balance](/plugins/accounts/api-reference/get-team-credit-balance) (`/GetTeamCreditBalance`) | Billing Read |
### Using Service Keys
Include your service key in the request body of all API calls:
```json theme={null}
{
"service_key": "your_service_key_here",
// ... other parameters
}
```
Keep your service keys secure and never expose them in client-side code or public repositories
## Rate Limits
API requests are subject to rate limiting to ensure service stability. If you exceed the rate limit, you'll receive a `429 Too Many Requests` response.
## Support
For API support and questions, please contact [Windsurf Support](https://windsurf.com/support).
---
# Source: https://docs.windsurf.com/windsurf/cascade/app-deploys.md
> ## Documentation Index
> Fetch the complete documentation index at: https://docs.windsurf.com/llms.txt
> Use this file to discover all available pages before exploring further.
# App Deploys
> Deploy web applications directly from Windsurf to Netlify with public URLs, automatic builds, and project claiming for Next.js, React, Vue, and Svelte.
App Deploys lets you deploy web applications and sites directly within Windsurf through Cascade tool calls. This feature helps you share your work through public URLs, update your deployments, and claim projects for further customization. This feature is in beta and support for additional frameworks, more robust builds, etc. are coming soon.
## Overview
With App Deploys, you can:
* Deploy a website or JS web app to a public domain
* Re-deploy to the same URL after making changes
* Claim the project to your personal account
App Deploys are intended primarily for preview purposes. For production
applications with sensitive data, we recommend claiming your deployment and
following security best practices.
## Supported Providers
We currently support the following deployment provider:
* **Netlify** - For static sites and web applications
Support for additional providers are planned for future releases.
## How It Works
When you use App Deploys, your code is uploaded to our server and deployed to the provider under our umbrella account. The deployed site will be available at a public URL formatted as:
```
.windsurf.build
```
### Deployment Process
1. Cascade analyzes your project to determine the appropriate framework
2. Your project files are securely uploaded to our server
3. The deployment is created on the provider's platform
4. You receive a public URL and a claim link
### Project Configuration
To facilitate redeployment, we create a `windsurf_deployment.yaml` file at the root of your project. This file contains information for future deployments, such as a project ID and framework.
## Using App Deploys
To deploy your application, simply ask Cascade something like:
```
"Deploy this project to Netlify"
"Update my deployment"
```
Cascade will guide you through the process and help troubleshoot common issues.
## Team Deploys
You will need Team admin priveleges to toggle this feature.
Users on Teams and Enterprise plans can connect their Netlify accounts with their Windsurf accounts and deploy to their Netlify Team.
This can be toggled in Team Settings, which you can access via the Profile page or by clicking [here](https://windsurf.com/team/settings).
## Security Considerations
Your code will be uploaded to our servers for deployment. Only deploy code
that you're comfortable sharing publicly.
We take several precautions to ensure security:
* File size limits and validation
* Rate limiting based on your account tier
* Secure handling of project files
For added privacy, visit [clear-cookies.windsurf.build](https://clear-cookies.windsurf.build) to check for and clear any cookies set by sites under `windsurf.build`. If any cookies show up, they shouldn't be there, and clearing them helps prevent cross-site cookie issues and keeps your experience clean.
Windsurf sites are built by humans and AI, and while we encourage the AI to make best practice decisions, it's smart to stay cautious. Windsurf isn't responsible for issues caused by sites deployed by our users.
## Claiming Your Deployment
After deploying, you'll receive a claim URL. By following this link, you can claim the project on your personal provider account, giving you:
* Full control over the deployment
* Access to provider-specific features
* Ability to modify the domain name
* Direct access to logs and build information
Unclaimed deployments may be deleted after a certain period. We recommend
claiming important projects promptly.
## Rate Limits
To prevent abuse, we apply these tier-based rate limits:
| Plan | Deployments per day | Max unclaimed sites |
| ---- | ------------------- | ------------------- |
| Free | 1 | 1 |
| Pro | 10 | 5 |
## Supported Frameworks
App Deploys works with most popular JavaScript frameworks, including:
* Next.js
* React
* Vue
* Svelte
* Static HTML/CSS/JS sites
## Troubleshooting
### Failed Deployment Build
If your deployment fails:
1. Check the build logs provided by Cascade
2. Ensure your project can build locally (run `npm run build` to test)
3. Verify that your project follows the framework's recommended structure
4. View the documentation for how to deploy [your framework to Netlify via `netlify.toml`](https://docs.netlify.com/configure-builds/file-based-configuration/)
5. Consider claiming the project to access detailed logs on the provider's dashboard
We cannot provide direct support for framework-specific build errors. If your
deployment fails due to code issues, debug locally or claim the project to
work with the provider's support team.
### Netlify Site Not Found
This likely means that your build failed. Please claim your site (you can find it on your [deploy history](https://windsurf.com/deploy)) and check the build logs for more details. Often times you can paste your build logs into Cascade and ask for help.
### Changing Your Subdomain / URL
#### Updating `netlify.app` domain
You can change your subdomain by claiming your deployment and updating the Netlify site settings. This will update your `.netlify.app` domain.
#### Updating custom `.windsurf.build` subdomain
You cannot change your custom `.windsurf.build` subdomain after you've
deployed. Instead, you'll need to deploy a new site with a new subdomain.
To update your custom `.windsurf.build` subdomain, you'll need to deploy a new site with a new subdomain:
1. Delete the `windsurf_config.yaml` file from your project
2. Ask Cascade to deploy a new site with a new subdomain and tell it which one you want
3. It can help to start a new conversation or clear your auto-generated memories so that Cascade doesn't try to re-deploy to the old subdomain
4. When you create a new deployment, you'll be able to press the "Edit" button on the subdomain UI to update it prior to pressing "Deploy"
### Error: `Unable to get project name for project ID`
This error occurs when your project ID is not found in our system of records or if Cascade is using the subdomain as the project ID incorrectly. To fix this:
1. Check that the project still exists in your Netlify account (assuming it is claimed).
2. Check that the project ID is in the `windsurf_deployment.yaml` file. If it is not in the file, you can download your config file from your [deploy history](https://windsurf.com/deploy) dropdown.
3. Try redeploying and telling Cascade to use the `project_id` from the `windsurf_deployment.yaml` file more explicitly
---
# Source: https://docs.windsurf.com/windsurf/cascade/arena.md
> ## Documentation Index
> Fetch the complete documentation index at: https://docs.windsurf.com/llms.txt
> Use this file to discover all available pages before exploring further.
# Arena Mode
> Run multiple Cascade instances in parallel using arena mode to explore different approaches simultaneously.
Cascade supports **arena mode** to allow you to easily compare responses from different models on the same prompt.
| Mode | Use Case |
| ---------- | --------------------------------------- |
| **Single** | Run Cascade with a single chosen model |
| **Arena** | Compare responses from different models |
## Arena Mode
To enter arena mode, click the **arena** button in the model picker and choose your preferred models.
When you select multiple models, Cascade will independently execute your prompt with each model in a separate session. Each model also gets its own [worktree](./worktrees) for isolation.
If you want to view both conversations at the same time, you can drag the
Cascade tab into the main editor window to expand the available space.
You can independently continue working in each Cascade conversation, including accepting or rejecting changes or asking follow-up questions.
Since each model has its own [worktree](./worktrees), you can iterate on each response without affecting the others sessions.
### Choosing the better response
When you're ready to commit to a particular approach, you should click the "X is better" button to **discard** other conversations and *converge* all models to continue with your chosen approach.
The next message you send after converging will be sent to all models you have selected, allowing you to continue trying out different approaches.
## Battle Groups
Instead of manually selecting models, you can select one of our curated model groups to have Cascade randomly choose two models to compare. We have two random model groups available:
* **Frontier**: Includes frontier reasoning models like GPT 5.2, Claude Opus/Sonnet 4.5, Gemini 3 Pro, etc., optimized for intelligence.
* **Fast**: Includes fast reasoning models like SWE 1.5, Claude Haiku, etc., optimized for speed.
When you use one of the battle groups, the exact model names are hidden from you until you click the "X is better" button to converge the models. Then, the original model names are revealed and the conversations are reshuffled.
## When To Use Arena Mode
Arena mode is particularly useful when you want to:
* Compare code quality across different models
* Explore different approaches to a hard problem
* Test out a new model without abandoning your standard preference
* Access frontier models at reduced cost by using the battle groups
## Limitations
* Arena mode is only supported for workspaces that have git initialized
* By default, only Git-tracked files are copied into the worktrees created for each model; you can configure a [setup hook](./worktrees#setup-hook) to copy additional files as needed
## Related Features
Isolate parallel work in separate git worktrees.
Automate actions before and after Cascade operations.
---
# Source: https://docs.windsurf.com/windsurf/accounts/api-reference/cascade-analytics.md
# Source: https://docs.windsurf.com/plugins/accounts/api-reference/cascade-analytics.md
> ## Documentation Index
> Fetch the complete documentation index at: https://docs.windsurf.com/llms.txt
> Use this file to discover all available pages before exploring further.
# Get Cascade Analytics
> Query Cascade-specific usage metrics including lines suggested/accepted, model usage, credit consumption, and tool usage statistics.
## Overview
Retrieve Cascade-specific analytics data including lines suggested/accepted, model usage, credit consumption, and tool usage statistics.
## Request
Your service key with "Teams Read-only" permissions
Filter results to users in a specific group. Cannot be used with `emails` parameter.
Start time in RFC 3339 format (e.g., `2023-01-01T00:00:00Z`)
End time in RFC 3339 format (e.g., `2023-12-31T23:59:59Z`)
Array of email addresses to filter results. Cannot be used with `group_name` parameter.
Filter by IDE type. Available options:
* `"editor"` - Windsurf Editor
* `"jetbrains"` - JetBrains Plugin
If omitted, returns data for both IDEs.
Array of data source queries to execute. Each object should contain one of the supported data sources.
## Data Sources
### cascade\_lines
Query for daily Cascade lines suggested and accepted.
```json theme={null}
{
"cascade_lines": {}
}
```
**Response Fields:**
* `day` - Date in RFC 3339 format
* `linesSuggested` - Number of lines suggested
* `linesAccepted` - Number of lines accepted
### cascade\_runs
Query for model usage, credit consumption, and mode data.
```json theme={null}
{
"cascade_runs": {}
}
```
**Response Fields:**
* `day` - Date in RFC 3339 format
* `model` - Model name used
* `mode` - Cascade mode (see modes below)
* `messagesSent` - Number of messages sent
* `cascadeId` - Unique conversation ID
* `promptsUsed` - Credits consumed (in cents)
**Cascade Modes:**
* `CONVERSATIONAL_PLANNER_MODE_DEFAULT` - Write mode
* `CONVERSATIONAL_PLANNER_MODE_READ_ONLY` - Read mode
* `CONVERSATIONAL_PLANNER_MODE_NO_TOOL` - Legacy mode
* `UNKNOWN` - Unknown mode
### cascade\_tool\_usage
Query for tool usage statistics (aggregate counts).
```json theme={null}
{
"cascade_tool_usage": {}
}
```
**Response Fields:**
* `tool` - Tool identifier (see tool mappings below)
* `count` - Number of times tool was used
## Tool Usage Mappings
| Tool Identifier | Display Name |
| ------------------- | ----------------- |
| `CODE_ACTION` | Code Edit |
| `VIEW_FILE` | View File |
| `RUN_COMMAND` | Run Command |
| `FIND` | Find tool |
| `GREP_SEARCH` | Grep Search |
| `VIEW_FILE_OUTLINE` | View File Outline |
| `MQUERY` | Riptide |
| `WORKFLOWS_USED` | Workflows Used |
| `LIST_DIRECTORY` | List Directory |
| `MCP_TOOL` | MCP Tool |
| `PROPOSE_CODE` | Propose Code |
| `SEARCH_WEB` | Search Web |
| `MEMORY` | Memory |
| `PROXY_WEB_SERVER` | Browser Preview |
| `DEPLOY_WEB_APP` | Deploy Web App |
## Example Request
```bash theme={null}
curl -X POST --header "Content-Type: application/json" \
--data '{
"service_key": "your_service_key_here",
"group_name": "engineering_team",
"start_timestamp": "2025-01-01T00:00:00Z",
"end_timestamp": "2025-01-02T00:00:00Z",
"emails": ["user1@windsurf.com", "user2@windsurf.com"],
"ide_types": ["editor"],
"query_requests": [
{
"cascade_lines": {}
},
{
"cascade_runs": {}
},
{
"cascade_tool_usage": {}
}
]
}' \
https://server.codeium.com/api/v1/CascadeAnalytics
```
## Response
Array of query results, one for each query request
Array of daily line statistics
Date in RFC 3339 format
Number of lines suggested on this day
Number of lines accepted on this day
Array of model usage statistics
Date in RFC 3339 format
Model name used for the run
Cascade mode identifier
Number of messages sent
Unique conversation identifier
Credits consumed in cents (e.g., "100" = 1 credit)
Array of tool usage statistics
Tool identifier
Number of times tool was used
### Example Response
```json theme={null}
{
"queryResults": [
{
"cascadeLines": {
"cascadeLines": [
{
"day": "2025-05-01T00:00:00Z",
"linesSuggested": "206",
"linesAccepted": "157"
},
{
"day": "2025-05-02T00:00:00Z",
"linesSuggested": "16"
}
]
}
},
{
"cascadeRuns": {
"cascadeRuns": [
{
"day": "2025-05-01T00:00:00Z",
"model": "Claude 3.7 Sonnet (Thinking)",
"mode": "CONVERSATIONAL_PLANNER_MODE_DEFAULT",
"messagesSent": "1",
"cascadeId": "0d35c1f7-0a85-41d0-ac96-a04cd2d64444"
}
]
}
},
{
"cascadeToolUsage": {
"cascadeToolUsage": [
{
"tool": "CODE_ACTION",
"count": "15"
},
{
"tool": "LIST_DIRECTORY",
"count": "20"
}
]
}
}
]
}
```
## Notes
* The API returns raw data which may contain "UNKNOWN" values
* For metrics analysis, aggregate by specific fields of interest (e.g., sum `promptsUsed` for usage patterns)
* Mode and prompt data may be split across multiple entries
* Credit consumption (`promptsUsed`) is returned in cents (100 = 1 credit)
---
# Source: https://docs.windsurf.com/plugins/cascade/cascade-overview.md
> ## Documentation Index
> Fetch the complete documentation index at: https://docs.windsurf.com/llms.txt
> Use this file to discover all available pages before exploring further.
# Cascade Overview
> Cascade brings agentic AI coding to JetBrains with Write/Chat modes, voice input, tool access, turbo mode, and real-time collaboration.
Windsurf's Cascade brings the best of agentic coding to the JetBrains suite.
To open Cascade, press `Cmd/Ctrl+L` or click the Cascade icon.
# Model selection
Select your desired model from the selection menu below the Cascade conversation input box. Click below too see the full breakdown of the available models and their availability across different plans and pricing.
Model availability in Windsurf.
# Write/Chat Modes
Cascade comes in two modes: **Write** and **Chat**.
Write mode allows Cascade to create and make modifications to your codebase, while Chat mode is optimized for questions around your codebase or general coding principles.
# Queued Messages
While you are waiting for Cascade to finish its current task, you can queue up new messages to execute in order once the task is complete.
To add a message to the queue, simply type in your message while Cascade is working and press `Enter`.
* **Send immediately**: Press Enter again on an empty text box to send it right away.
* **Delete**: Remove any message from the queue before it's sent
# Access to Tools
Cascade has a variety of tools at its disposal, such as Search, Analyze, [Web Search](/windsurf/cascade/web-search), and the [terminal](/windsurf/terminal).
It can detect which packages and tools that you're using, which ones need to be installed, and even install them for you. Just ask Cascade how to run your project and press Accept.
Cascade can make up to 25 tool calls per prompt. If the trajectory stops, simply type in `continue` and Cascade will resume from where it left off. Each `continue` will count as a new prompt.
# Voice input
Use Voice input to use your voice to interact with Cascade. In its current form it can transcribe your speech to text.
# Revert to previous steps
You have the ability to revert changes that Cascade has made if you want to. Simply hover your mouse over the original prompt and click on the revert arrow on the right, or revert directly from the table of contents. This will revert all code changes back to the state of your codebase at the desired step.
Reverts are currently irreversible, so be careful!
# Auto-Execution Modes
Cascade supports three levels of command auto-execution in JetBrains: **Off**, **Auto**, and **Turbo**. You can select your preferred level via the Windsurf Settings panel.
| Level | Description |
| --------- | -------------------------------------------------------------------------------------------------------------- |
| **Off** | Never auto-execute terminal commands, except those in your allow list. |
| **Auto** | Model decides whether to auto-execute commands based on safety assessment. Available with premium models only. |
| **Turbo** | Always auto-execute terminal commands and browser controls, except those in your deny list. |
For Teams and Enterprise users, administrators can set a maximum allowed auto-execution level. Users can select any level up to that maximum, but cannot exceed it.
For more details on auto-execution levels and allow/deny lists, see the [Terminal documentation](/windsurf/terminal#auto-executed-cascade-commands).
# Real-time collaboration
A unique capability of Cascade is that it is aware of your real-time actions.
You no longer necessarily need to prompt with context on your prior actions, as Cascade is already aware.
Try making a manual change in the code editor, and then prompt Cascade to "continue my work"!
# Ignoring files
If you'd like Cascade to ignore files, you can add your files to `.codeiumignore` at the root of your workspace. This will prevent Cascade from viewing, editing or creating files inside of the paths designated. You can declare the file paths in a format similar to `.gitignore`.
## Global .codeiumignore
For enterprise customers managing multiple repositories, you can enforce ignore rules across all repositories by placing a global `.codeiumignore` file in the `~/.codeium/` folder. This global configuration will apply to all Windsurf workspaces on your system and works in addition to any repository-specific `.codeiumignore` files.
---
# Source: https://docs.windsurf.com/windsurf/cascade/cascade.md
> ## Documentation Index
> Fetch the complete documentation index at: https://docs.windsurf.com/llms.txt
> Use this file to discover all available pages before exploring further.
# Cascade Overview
> Cascade is Windsurf's agentic AI assistant with Code/Chat modes, tool calling, voice input, checkpoints, real-time awareness, and linter integration.
Windsurf's Cascade unlocks a new level of collaboration between human and AI.
To open Cascade, press `Cmd/Ctrl+L`click the Cascade icon in the top right corner of the Windsurf window. Any selected text in the editor or terminal will automatically be included.
### Quick links to features
Search the web for information to be referenced in Cascade's suggestions.
Memories and rules help customize behavior.
MCP servers extend the agent's capabilities.
An upgraded Terminal experience.
Automate repetitive trajectories.
Deploy applications in one click.
# Model selection
Select your desired model from the selection menu below the Cascade conversation input box. Click below too see the full list of the available models and their availability across different plans and pricing.
Model availability in Windsurf.
# Cascade Code / Cascade Chat
Cascade comes in two primary modes: **Code** and **Chat**.
Code mode allows Cascade to create and make modifications to your codebase, while Chat mode is optimized for questions around your codebase or general coding principles.
While in Chat mode, Cascade may propose new code to you that you can accept and insert.
# Plans and Todo Lists
Cascade has built-in planning capabilities that help improve performance for longer tasks.
In the background, a specialized planning agent continuously refines the long-term plan while your selected model focuses on taking short-term actions based on that plan.
Cascade will create a Todo list within the conversation to track progress on complex tasks. To make changes to the plan, simply ask Cascade to make updates to the Todo list.
Cascade may also automatically make updates to the plan as it picks up new information, such as a [Memory](/windsurf/cascade/memories), during the course of a conversation.
# Queued Messages
While you are waiting for Cascade to finish its current task, you can queue up new messages to execute in order once the task is complete.
To add a message to the queue, simply type in your message while Cascade is working and press `Enter`.
* **Send immediately**: Press Enter again on an empty text box to send it right away.
* **Delete**: Remove any message from the queue before it's sent
# Tool Calling
Cascade has a variety of tools at its disposal, such as Search, Analyze, [Web Search](/windsurf/cascade/web-search), [MCP](/windsurf/cascade/mcp), and the [terminal](/windsurf/terminal).
It can detect which packages and tools that you're using, which ones need to be installed, and even install them for you. Just ask Cascade how to run your project and press Accept.
Cascade can make up to 20 tool calls per prompt. If the trajectory stops, simply press the `continue` button and Cascade will resume from where it left off. However, each `continue` will count as a new prompt credit due to tool calling costs.
You can configure an `Auto-Continue` setting to have Cascade automatically continue its response if it hits a limit. These will consume a prompt credit(s) corresponding to the model you are using.
# Voice input
Use Voice input to use your voice to interact with Cascade. In its current form it can transcribe your speech to text.
# Named Checkpoints and Reverts
You have the ability to revert changes that Cascade has made. Simply hover your mouse over the original prompt and click on the revert arrow on the right, or revert directly from the table of contents. This will revert all code changes back to the state of your codebase at the desired step.
Reverts are currently irreversible, so be careful!
You can also create a named snapshot/checkpoint of the current state of your project from within the conversation, which you can easily navigate to and revert at any time.
# Real-time awareness
A unique capability of Windsurf and Cascade is that it is aware of your real-time actions, removing the need to prompt with context on your prior actions.
Simply instruct Cascade to "Continue".
# Send problems to Cascade
When you have problems in your code which show up in the Problems panel at the bottom of the editor, simply click the `Send to Cascade` button to bring them into the Cascade panel as an @ mention.
# Explain and fix
For any errors that you run into from within the editor, you can simply highlight the error and click `Explain and Fix` to have Cascade fix it for you.
# Ignoring files
If you'd like Cascade to ignore files, you can add your files to `.codeiumignore` at the root of your workspace. This will prevent Cascade from viewing, editing or creating files inside of the paths designated. You can declare the file paths in a format similar to `.gitignore`.
## Global .codeiumignore
For enterprise customers managing multiple repositories, you can enforce ignore rules across all repositories by placing a global `.codeiumignore` file in the `~/.codeium/` folder. This global configuration will apply to all Windsurf workspaces on your system and works in addition to any repository-specific `.codeiumignore` files.
# Linter integration
Cascade can automatically fix linting errors on generated code. This is turned on by default, but it can be disabled by clicking `Auto-fix` on the tool call, and clicking `disable`. This edit will not consume any credits.
When Cascade makes an edit with the primary goal of fixing lints that it created and auto-detected,
it may discount the edit to be free of credit charge. This is in recognition of the fact that
fixing lint errors increases the number of tool calls that Cascade makes.
# Sharing your conversation
This feature is currently only available for Teams and Enterprise customers.
You can share your Cascade trajectories with your team by clicking the `...` Additional options button in the top right of the Cascade panel, and clicking `Share Conversation`.
# @-mention previous conversations
You can also reference previous conversations with other conversations via an `@-mention`.
When you do this, Cascade will retrieve the most relevant and useful information like the conversation summaries and checkpoints, and specific parts of the conversation that you query for. It typically will not retrieve the full conversation as to not overwhelm the context window.
# Simultaneous Cascades
Users can have multiple Cascades running simultaneously. You can navigate between them using the dropdown menu in the top left of the Cascade panel.
If two Cascades edit the same file at the same time, the edits can race, and sometimes the second edit will fail.
If you expect two Cascades to edit similar files, you should consider using [worktrees](./worktrees) to keep them isolated.
---
# Source: https://docs.windsurf.com/windsurf/codemaps.md
> ## Documentation Index
> Fetch the complete documentation index at: https://docs.windsurf.com/llms.txt
> Use this file to discover all available pages before exploring further.
# Codemaps (Beta)
> Create shareable hierarchical maps of your codebase to visualize code execution flow and component relationships. Navigate and share with teammates.
Powered by a specialized agent, Codemaps are shareable artifacts that bridge the gap between human comprehension and AI reasoning, making it possible to navigate, discuss, and modify large codebases with precision and context.
Codemaps is currently in Beta and subject to change in future releases.
## What are Codemaps?
While [DeepWiki](/windsurf/deepwiki) provides symbol-level documentation, Codemaps help with codebase understanding by mapping how everything works together—showing the order in which code and files are executed and how different components relate to each other.
To navigate a Codemap, click on any node to instantly jump to that file and function. Each node in the Codemap links directly to the corresponding location in your code.
## Accessing Codemaps
You can access Codemaps in one of two ways:
* **Activity Bar**: Find the Codemaps interface in the Activity Bar (left side panel)
* **Command Palette**: Press `Cmd+Shift+P` (Mac) or `Ctrl+Shift+P` (Windows/Linux) and search for "Focus on Codemaps View"
## Creating a Codemap
To create a new Codemap:
1. Open the Codemaps panel
2. Create a new Codemap by:
* Selecting a suggested topic (suggestions are based on your recent navigation history)
* Typing your own custom prompt
* Generating from Cascade: Create new Codemaps from the bottom of a Cascade conversation
3. The Codemap agent explores your repository, identify relevant files and functions, and generate a hierarchical view
## Sharing Codemaps
You can share Codemaps with teammates as links that can be viewed in a browser.
For enterprise customers, sharing Codemaps requires opt-in because they need to be stored on our servers. By default, Codemaps are only available within your Team and require authentication to view.
## Using Codemaps with Cascade
You can include Codemap information as context in your [Cascade](/windsurf/cascade) conversations by using `@-mention` to reference a Codemap.
---
# Source: https://docs.windsurf.com/plugins/compatibility.md
> ## Documentation Index
> Fetch the complete documentation index at: https://docs.windsurf.com/llms.txt
> Use this file to discover all available pages before exploring further.
# IDE Compatibility
> Supported IDEs and version requirements for Windsurf Plugins including VS Code, JetBrains, Visual Studio, NeoVim, Vim, Emacs, Xcode, Sublime Text, and Eclipse.
Visit our [download page](https://windsurf.com/download) for a list of supported IDEs and installation instructions.
If you are a Windsurf Enterprise user, visit your enterprise portal URL for download and installation instructions.
Contact your internal Windsurf administrator if you have questions.
# Supported IDEs and Versions
**VS Code**: Version 1.89+
**JetBrains IDEs**: Version 2023.3+
**JetBrains IDEs (Remote Development)**: Version 2025.1.3+
**Visual Studio**: 17.5.5+
**NeoVim**: Version 0.6+
**Vim**: 9.0.0185+
**Emacs**: All versions compiled with lbxml
**Xcode**: All versions
**Sublime Text**: Version 3+
**Eclipse**: Version 4.25+ (2022-09+)
---
# Source: https://docs.windsurf.com/windsurf/csharp-cpp.md
> ## Documentation Index
> Fetch the complete documentation index at: https://docs.windsurf.com/llms.txt
> Use this file to discover all available pages before exploring further.
# C#, .NET, and CPP
> Setup guide for C#, .NET Core, .NET Framework (Mono), and C++ development in Windsurf using open-source tooling like OmniSharp, clangd, and LLDB.
# Windsurf Development Environment Setup Guide
## Overview
Windsurf workspaces rely **exclusively on open‑source tooling** for compiling, linting, and debugging. Microsoft's proprietary Visual Studio components cannot be redistributed, so we integrate community‑maintained language servers, debuggers, and compilers instead.
This guide covers two stacks:
1. **.NET / C#** – targeting both .NET Core and .NET Framework (via Mono)
2. **C / C++** – using clang‑based tooling
You can install either or both in the same workspace.
> ⚠️ **Important**: The examples below are templates that you must customize for your specific project. You'll need to edit file paths, project names, and build commands to match your codebase.
***
## 1. .NET / C# development
> **Choose the flavour that matches your codebase.**
### .NET Core / .NET 6+
**Extensions:**
* **[C#](https://marketplace.windsurf.com/vscode/item?itemName=muhammad-sammy.csharp)** (`muhammad-sammy.csharp`) – bundles **OmniSharp LS** and **NetCoreDbg**, so you can hit F5 immediately
* **[.NET Install Tool](https://marketplace.windsurf.com/vscode/item?itemName=ms-dotnettools.vscode-dotnet-runtime)** (`ms-dotnettools.vscode-dotnet-runtime`) – auto‑installs missing runtimes/SDKs
* **[Solution Explorer](https://marketplace.windsurf.com/vscode/item?itemName=fernandoescolar.vscode-solution-explorer)** (`fernandoescolar.vscode-solution-explorer`) – navigate and manage .NET solutions and projects
**Debugger:** Nothing else is required—the extension already contains the language server and an open‑source debugger suitable for .NET Core.
**Build:** `dotnet build`
### .NET Framework via Mono
**Extensions:**
* **[Mono Debug](https://marketplace.windsurf.com/vscode/item?itemName=chrisatwindsurf.mono-debug)** (`chrisatwindsurf.mono-debug`) – debug adapter for Mono ([Open VSX](https://open-vsx.org/extension/chrisatwindsurf/mono-debug))
* **[C#](https://marketplace.windsurf.com/vscode/item?itemName=muhammad-sammy.csharp)** (`muhammad-sammy.csharp`) for language features
**Debugger:** **You must also install the Mono tool‑chain inside the workspace.** Follow the install guide in the [Mono repo](https://gitlab.winehq.org/mono/mono#compilation-and-installation). The debugger extension connects to that runtime at debug time.
> **⚠️ .NET Framework Configuration**: After installing Mono, to use the C# extension with .NET Framework projects, you need to toggle a specific setting in the IDE Settings. Go to **Settings** (in the C# Extension section) and toggle off **"Omnisharp: Use Modern Net"**. This setting uses the OmniSharp build for .NET 6, which provides significant performance improvements for SDK-style Framework, .NET Core, and .NET 5+ projects. Note that this version *does not* support non-SDK-style .NET Framework projects, including Unity.
**Build:** `mcs Program.cs`
### Configure `tasks.json` for Your Project
**You must create/edit `.vscode/tasks.json` in your workspace root** and customize these templates:
```jsonc theme={null}
{
"version": "2.0.0",
"tasks": [
{
"label": "build-dotnet",
"type": "shell",
"command": "dotnet",
"args": ["build", "YourProject.csproj"], // ← Edit this
"group": "build",
"problemMatcher": "$msCompile"
},
{
"label": "build-mono",
"type": "shell",
"command": "mcs",
"args": ["YourProgram.cs"], // ← Edit this
"group": "build"
}
]
}
```
### Configure `launch.json` for Debugging
**You must create/edit `.vscode/launch.json` in your workspace root** and update the paths:
```jsonc theme={null}
{
"version": "0.2.0",
"configurations": [
{
"name": ".NET Core Launch",
"type": "coreclr",
"request": "launch",
"preLaunchTask": "build-dotnet",
"program": "${workspaceFolder}/bin/Debug/net6.0/YourApp.dll", // ← Edit this path
"cwd": "${workspaceFolder}",
"args": [] // Add command line arguments if needed
},
{
"name": "Mono Launch",
"type": "mono",
"request": "launch",
"preLaunchTask": "build-mono",
"program": "${workspaceFolder}/YourProgram.exe", // ← Edit this path
"cwd": "${workspaceFolder}"
}
]
}
```
### CLI equivalents
```bash theme={null}
# .NET Core
$ dotnet build
$ dotnet run
# Mono / .NET Framework
$ mcs Program.cs
$ mono Program.exe
```
### .NET Framework Limitations
⚠️ **Important**: .NET Framework codebases with mixed assemblies (C++/CLI) or complex Visual Studio dependencies have significant limitations in Windsurf. These codebases typically require Visual Studio's proprietary build system and cannot be fully compiled or debugged in Windsurf due to dependencies on Microsoft-specific tooling and assembly reference resolution.
**Recommended approaches for .NET Framework projects:**
* Use Windsurf alongside Visual Studio for code generation and editing
* Migrate compatible portions to .NET Core where possible
***
## 2. C / C++ development
**Required Extensions:**
| Extension | Purpose |
| ---------------------------------------------------------------------------------------------------------------- | ---------------------------------------------------------------------------------------------------------------------------------------------------------- |
| **[Windsurf C++ Tools](https://open-vsx.org/extension/Codeium/windsurf-cpptools)** (`Codeium.windsurf-cpptools`) | This is a bundle of the three extensions we recommend using to get started. Package that contains C/C++ LSP support, debugging support, and CMake support. |
> **Note:** Installing the Windsurf C++ Tools bundle will automatically install the individual extensions listed below, so you only need to install the bundle.
| Extension | Purpose |
| --------------------------------------------------------------------------------------------------------------------------------------------------- | ------------------------------------------------------------------------------------------------------------------------------ |
| **[clangd](https://marketplace.windsurf.com/vscode/item?itemName=llvm-vs-code-extensions.vscode-clangd)** (`llvm-vs-code-extensions.vscode-clangd`) | **clangd** language‑server integration. If `clangd` is missing it will offer to download the correct binary for your platform. |
| **[CodeLLDB](https://marketplace.windsurf.com/extension/vadimcn/vscode-lldb)** (`vadimcn.vscode-lldb`) | Native debugger based on LLDB for C/C++ and Rust code. |
| **[CMake Tools](https://marketplace.windsurf.com/vscode/item?itemName=ms-vscode.cmake-tools)** (`ms-vscode.cmake-tools`) | Project configuration, build, test, and debug integration for **CMake**‑based projects. |
For non‑CMake workflows you can still invoke `make`, `ninja`, etc. via custom `tasks.json` targets.
### Configure C/C++ Build Tasks
**Create/edit `.vscode/tasks.json`** for your C/C++ project:
```jsonc theme={null}
{
"version": "2.0.0",
"tasks": [
{
"label": "build-cpp",
"type": "shell",
"command": "clang++",
"args": ["-g", "main.cpp", "-o", "main"], // ← Edit for your files
"group": "build",
"problemMatcher": "$gcc"
}
]
}
```
***
## 3. Notes & Gotchas
* **Open‑source only** – decline any prompt to install proprietary Microsoft tooling; Windsurf containers cannot ship it.
* **Container vs Host** – SDKs/compilers must be present **inside** the Windsurf workspace container.
* **Keyboard shortcuts**
* Ctrl/⌘ + Shift + B → compile using the active build task
* F5 → debug using the selected `launch.json` config
***
## 4. Setup Checklist
* Install the required extensions for your language stack
* **Create and customize** `.vscode/tasks.json` with your project's build commands
* **Create and customize** `.vscode/launch.json` with correct paths to your executables
* For Mono: install the runtime and verify `mono --version`
* Update file paths, project names, and build arguments to match your codebase
* Test your setup: Press Ctrl/⌘ + Shift + B to build, then F5 to debug
> 💡 **Tip**: The configuration files are project-specific. You'll need to adapt the examples above for each workspace.
---
# Source: https://docs.windsurf.com/windsurf/accounts/api-reference/custom-analytics.md
# Source: https://docs.windsurf.com/plugins/accounts/api-reference/custom-analytics.md
> ## Documentation Index
> Fetch the complete documentation index at: https://docs.windsurf.com/llms.txt
> Use this file to discover all available pages before exploring further.
# Custom Analytics Query
> Flexible analytics querying with custom selections, filters, and aggregations for autocomplete, chat, command, and PCW data.
## Overview
The Custom Analytics API provides flexible querying capabilities for autocomplete, chat, and command data with customizable selections, filters, aggregations, and orderings.
## Request
Your service key with "Analytics Read" permissions
Filter results to users in a specific group (optional)
Array of query request objects defining the data to retrieve
Data source to query. Options:
* `QUERY_DATA_SOURCE_USER_DATA` - Autocomplete data
* `QUERY_DATA_SOURCE_CHAT_DATA` - Chat data
* `QUERY_DATA_SOURCE_COMMAND_DATA` - Command data
* `QUERY_DATA_SOURCE_PCW_DATA` - Percent Code Written data
Array of field selections to retrieve
Field name to select (see Available Fields section)
Alias for the field. If not specified, defaults to `{aggregation_function}_{field_name}` (lowercase)
Aggregation function to apply:
* `QUERY_AGGREGATION_UNSPECIFIED` (default)
* `QUERY_AGGREGATION_COUNT`
* `QUERY_AGGREGATION_SUM`
* `QUERY_AGGREGATION_AVG`
* `QUERY_AGGREGATION_MAX`
* `QUERY_AGGREGATION_MIN`
Array of filters to apply
Field name to filter on
Filter operation:
* `QUERY_FILTER_EQUAL`
* `QUERY_FILTER_NOT_EQUAL`
* `QUERY_FILTER_GREATER_THAN`
* `QUERY_FILTER_LESS_THAN`
* `QUERY_FILTER_GE` (greater than or equal)
* `QUERY_FILTER_LE` (less than or equal)
Value to compare against
Array of aggregations to group by
Field name to group by
Alias for the aggregation field
## Query Request Structure
Each query request object contains:
* **data\_source** (required): Data source to query
* **selections** (required): Array of field selections to retrieve
* **filters** (optional): Array of filters to apply
* **aggregations** (optional): Array of aggregations to group by
## Selections
Selections define which fields to retrieve and how to aggregate them.
* **field** (required): Field name to select
* **name** (optional): Alias for the field
* **aggregation\_function** (optional): Aggregation function to apply
### Selection Example
```json theme={null}
{
"field": "num_acceptances",
"name": "total_acceptances",
"aggregation_function": "QUERY_AGGREGATION_SUM"
}
```
## Filters
Filters narrow down data to elements meeting specific criteria.
* **name** (required): Field name to filter on
* **filter** (required): Filter operation
* **value** (required): Value to compare against
### Filter Example
```json theme={null}
{
"name": "language",
"filter": "QUERY_FILTER_EQUAL",
"value": "PYTHON"
}
```
## Aggregations
Aggregations group data by specified criteria.
* **field** (required): Field name to group by
* **name** (required): Alias for the aggregation field
### Aggregation Example
```json theme={null}
{
"field": "ide",
"name": "ide_type"
}
```
## Available Fields
### User Data
All User Data is aggregated per user, per hour.
| Field Name | Description | Valid Aggregations |
| -------------------------- | ------------------------------------------------------ | ------------------ |
| `api_key` | Hash of user API key | UNSPECIFIED, COUNT |
| `date` | UTC date of autocompletion | UNSPECIFIED, COUNT |
| `date UTC-x` | Date with timezone offset (e.g., "date UTC-8" for PST) | UNSPECIFIED, COUNT |
| `hour` | UTC hour of autocompletion | UNSPECIFIED, COUNT |
| `language` | Programming language | UNSPECIFIED, COUNT |
| `ide` | IDE being used | UNSPECIFIED, COUNT |
| `version` | Windsurf version | UNSPECIFIED, COUNT |
| `num_acceptances` | Number of autocomplete acceptances | SUM, MAX, MIN, AVG |
| `num_lines_accepted` | Lines of code accepted | SUM, MAX, MIN, AVG |
| `num_bytes_accepted` | Bytes accepted | SUM, MAX, MIN, AVG |
| `distinct_users` | Distinct users | UNSPECIFIED, COUNT |
| `distinct_developer_days` | Distinct (user, day) tuples | UNSPECIFIED, COUNT |
| `distinct_developer_hours` | Distinct (user, hour) tuples | UNSPECIFIED, COUNT |
### Chat Data
All Chat Data represents chat model responses, not user questions.
| Field Name | Description | Valid Aggregations |
| ------------------------- | ----------------------------------------- | ------------------ |
| `api_key` | Hash of user API key | UNSPECIFIED, COUNT |
| `model_id` | Chat model ID | UNSPECIFIED, COUNT |
| `date` | UTC date of chat response | UNSPECIFIED, COUNT |
| `date UTC-x` | Date with timezone offset | UNSPECIFIED, COUNT |
| `ide` | IDE being used | UNSPECIFIED, COUNT |
| `version` | Windsurf version | UNSPECIFIED, COUNT |
| `latest_intent_type` | Chat intent type (see Intent Types below) | UNSPECIFIED, COUNT |
| `num_chats_received` | Number of chat messages received | SUM, MAX, MIN, AVG |
| `chat_accepted` | Whether chat was accepted (thumbs up) | SUM, COUNT |
| `chat_inserted_at_cursor` | Whether "Insert" button was clicked | SUM, COUNT |
| `chat_applied` | Whether "Apply Diff" button was clicked | SUM, COUNT |
| `chat_loc_used` | Lines of code used from chat | SUM, MAX, MIN, AVG |
#### Chat Intent Types
* `CHAT_INTENT_GENERIC` - Regular chat
* `CHAT_INTENT_FUNCTION_EXPLAIN` - Function explanation code lens
* `CHAT_INTENT_FUNCTION_DOCSTRING` - Function docstring code lens
* `CHAT_INTENT_FUNCTION_REFACTOR` - Function refactor code lens
* `CHAT_INTENT_CODE_BLOCK_EXPLAIN` - Code block explanation code lens
* `CHAT_INTENT_CODE_BLOCK_REFACTOR` - Code block refactor code lens
* `CHAT_INTENT_PROBLEM_EXPLAIN` - Problem explanation code lens
* `CHAT_INTENT_FUNCTION_UNIT_TESTS` - Function unit tests code lens
### Command Data
Command Data includes all commands, including declined ones. Use the `accepted` field to filter for accepted commands only.
| Field Name | Description | Valid Aggregations |
| ----------------- | -------------------------------------------------- | ------------------ |
| `api_key` | Hash of user API key | UNSPECIFIED, COUNT |
| `date` | UTC date of command | UNSPECIFIED, COUNT |
| `timestamp` | UTC timestamp of command | UNSPECIFIED, COUNT |
| `language` | Programming language | UNSPECIFIED, COUNT |
| `ide` | IDE being used | UNSPECIFIED, COUNT |
| `version` | Windsurf version | UNSPECIFIED, COUNT |
| `command_source` | Command trigger source (see Command Sources below) | UNSPECIFIED, COUNT |
| `provider_source` | Generation or edit mode | UNSPECIFIED, COUNT |
| `lines_added` | Lines of code added | SUM, MAX, MIN, AVG |
| `lines_removed` | Lines of code removed | SUM, MAX, MIN, AVG |
| `bytes_added` | Bytes added | SUM, MAX, MIN, AVG |
| `bytes_removed` | Bytes removed | SUM, MAX, MIN, AVG |
| `selection_lines` | Lines selected (zero for generations) | SUM, MAX, MIN, AVG |
| `selection_bytes` | Bytes selected (zero for generations) | SUM, MAX, MIN, AVG |
| `accepted` | Whether command was accepted | SUM, COUNT |
#### Command Sources
* `COMMAND_REQUEST_SOURCE_LINE_HINT_CODE_LENS`
* `COMMAND_REQUEST_SOURCE_DEFAULT` - Typical command usage
* `COMMAND_REQUEST_SOURCE_RIGHT_CLICK_REFACTOR`
* `COMMAND_REQUEST_SOURCE_FUNCTION_CODE_LENS`
* `COMMAND_REQUEST_SOURCE_FOLLOWUP`
* `COMMAND_REQUEST_SOURCE_CLASS_CODE_LENS`
* `COMMAND_REQUEST_SOURCE_PLAN`
* `COMMAND_REQUEST_SOURCE_SELECTION_HINT_CODE_LENS`
#### Provider Sources
* `PROVIDER_SOURCE_COMMAND_GENERATE` - Generation mode
* `PROVIDER_SOURCE_COMMAND_EDIT` - Edit mode
### PCW Data
Percent Code Written data with separate tracking for autocomplete and command contributions.
| Field Name | Description | Valid Aggregations |
| ------------------------------- | ------------------------------------------------------------- | ------------------ |
| `percent_code_written` | Calculated as codeium\_bytes / (codeium\_bytes + user\_bytes) | UNSPECIFIED |
| `codeium_bytes` | Total Codeium-generated bytes | UNSPECIFIED |
| `user_bytes` | Total user-written bytes | UNSPECIFIED |
| `total_bytes` | codeium\_bytes + user\_bytes | UNSPECIFIED |
| `codeium_bytes_by_autocomplete` | Codeium bytes from autocomplete | UNSPECIFIED |
| `codeium_bytes_by_command` | Codeium bytes from command | UNSPECIFIED |
#### PCW Filters
| Field Name | Description | Examples |
| ---------- | -------------------- | ----------------- |
| `language` | Programming language | KOTLIN, GO, JAVA |
| `ide` | IDE being used | jetbrains, vscode |
| `version` | Windsurf version | 1.28.0, 130.0 |
For date filtering in PCW queries, use `start_timestamp` and `end_timestamp` in the main request body.
## Example Requests
### User Data Example
```bash theme={null}
curl -X POST --header "Content-Type: application/json" \
--data '{
"service_key": "your_service_key_here",
"query_requests": [
{
"data_source": "QUERY_DATA_SOURCE_USER_DATA",
"selections": [
{
"field": "num_acceptances",
"name": "total_acceptances",
"aggregation_function": "QUERY_AGGREGATION_SUM"
},
{
"field": "num_lines_accepted",
"name": "total_lines",
"aggregation_function": "QUERY_AGGREGATION_SUM"
}
],
"filters": [
{
"name": "date",
"filter": "QUERY_FILTER_GE",
"value": "2024-01-01"
},
{
"name": "date",
"filter": "QUERY_FILTER_LE",
"value": "2024-02-01"
}
]
}
]
}' \
https://server.codeium.com/api/v1/Analytics
```
### Chat Data Example
```bash theme={null}
curl -X POST --header "Content-Type: application/json" \
--data '{
"service_key": "your_service_key_here",
"query_requests": [
{
"data_source": "QUERY_DATA_SOURCE_CHAT_DATA",
"selections": [
{
"field": "chat_loc_used",
"name": "lines_used",
"aggregation_function": "QUERY_AGGREGATION_SUM"
}
],
"filters": [
{
"name": "latest_intent_type",
"filter": "QUERY_FILTER_EQUAL",
"value": "CHAT_INTENT_FUNCTION_DOCSTRING"
}
],
"aggregations": [
{
"field": "ide",
"name": "ide_type"
}
]
}
]
}' \
https://server.codeium.com/api/v1/Analytics
```
### Command Data Example
```bash theme={null}
curl -X POST --header "Content-Type: application/json" \
--data '{
"service_key": "your_service_key_here",
"query_requests": [
{
"data_source": "QUERY_DATA_SOURCE_COMMAND_DATA",
"selections": [
{
"field": "lines_added",
"name": "total_lines_added",
"aggregation_function": "QUERY_AGGREGATION_SUM"
},
{
"field": "lines_removed",
"name": "total_lines_removed",
"aggregation_function": "QUERY_AGGREGATION_SUM"
}
],
"filters": [
{
"name": "provider_source",
"filter": "QUERY_FILTER_EQUAL",
"value": "PROVIDER_SOURCE_COMMAND_EDIT"
},
{
"name": "accepted",
"filter": "QUERY_FILTER_EQUAL",
"value": "true"
}
],
"aggregations": [
{
"field": "language",
"name": "programming_language"
}
]
}
]
}' \
https://server.codeium.com/api/v1/Analytics
```
### PCW Data Example
```bash theme={null}
curl -X POST --header "Content-Type: application/json" \
--data '{
"service_key": "your_service_key_here",
"start_timestamp": "2024-01-01T00:00:00Z",
"end_timestamp": "2024-12-22T00:00:00Z",
"query_requests": [
{
"data_source": "QUERY_DATA_SOURCE_PCW_DATA",
"selections": [
{
"field": "percent_code_written",
"name": "pcw"
},
{
"field": "codeium_bytes",
"name": "ai_bytes"
},
{
"field": "total_bytes",
"name": "total"
},
{
"field": "codeium_bytes_by_autocomplete",
"name": "autocomplete_bytes"
},
{
"field": "codeium_bytes_by_command",
"name": "command_bytes"
}
],
"filters": [
{
"filter": "QUERY_FILTER_EQUAL",
"name": "language",
"value": "GO"
}
]
}
]
}' \
https://server.codeium.com/api/v1/Analytics
```
## Response
Array of query results, one for each query request
Array of result items
Object containing the selected fields and their values
### Example Responses
#### User Data Response
```json theme={null}
{
"queryResults": [
{
"responseItems": [
{
"item": {
"total_acceptances": "125",
"total_lines": "863"
}
}
]
}
]
}
```
#### Chat Data Response
```json theme={null}
{
"queryResults": [
{
"responseItems": [
{
"item": {
"lines_used": "74",
"ide_type": "jetbrains"
}
},
{
"item": {
"lines_used": "41",
"ide_type": "vscode"
}
}
]
}
]
}
```
#### Command Data Response
```json theme={null}
{
"queryResults": [
{
"responseItems": [
{
"item": {
"programming_language": "PYTHON",
"total_lines_added": "21",
"total_lines_removed": "5"
}
},
{
"item": {
"programming_language": "GO",
"total_lines_added": "31",
"total_lines_removed": "27"
}
}
]
}
]
}
```
#### PCW Data Response
```json theme={null}
{
"queryResults": [
{
"responseItems": [
{
"item": {
"ai_bytes": "6018",
"autocomplete_bytes": "4593",
"command_bytes": "1425",
"pcw": "0.61",
"total": "9900"
}
}
]
}
]
}
```
## Important Notes
* PCW (Percent Code Written) has high variance within single days or users - aggregate over weeks for better insights
* All selection fields must either have aggregation functions or none should (cannot mix)
* Fields with "distinct\_\*" pattern cannot be used in aggregations
* Field aliases must be unique across all selections and aggregations
* If no aggregation function is specified, it defaults to UNSPECIFIED
---
# Source: https://docs.windsurf.com/windsurf/deepwiki.md
> ## Documentation Index
> Fetch the complete documentation index at: https://docs.windsurf.com/llms.txt
> Use this file to discover all available pages before exploring further.
# DeepWiki
> Get AI-powered explanations of code symbols with DeepWiki. Hover over functions, variables, and classes to understand unfamiliar code in your codebase.
We've implemented [Devin's DeepWiki feature](https://docs.devin.ai/work-with-devin/deepwiki) inside of the Windsurf Editor. Use it to get up to speed on unfamiliar parts of your codebase.
You can find the DeepWiki interface in the Primary Side Bar / Activity Bar.
To use DeepWiki, hover over a symbol in your codebase and press `Cmd+Shift+Click` to open detailed explanations of code symbols.
Unlike classical hover cards that just show basic type information, DeepWiki-powered hover explains functions, variables, and classes as you read through code.
You can send the DeepWiki explanation to Cascade as an `@-mention` by clicking the `⋮` button in the top right of the DeepWiki panel and selecting `Add to Cascade`.
---
# Source: https://docs.windsurf.com/windsurf/accounts/domain-verification.md
> ## Documentation Index
> Fetch the complete documentation index at: https://docs.windsurf.com/llms.txt
> Use this file to discover all available pages before exploring further.
# Domain Verification
> Verify your organization's domain ownership with DNS TXT records to enable SSO, user management, and automatic team invitations in Windsurf.
Domain verification is the process of proving that your organization owns or controls a specific domain. This prevents spoofing or unauthorized use of your domain and enables secure organization-level features in Windsurf, such as SSO and user management.
In Windsurf, verifying your domain is required so that users with emails from your organization can be recognized and managed. The domain you need to verify should be the top-level domain of your users’ email addresses (for example, if your users log in with [name@company.com](mailto:name@company.com), you must verify company.com).
## How to verify your domain in Windsurf
Enter the domain you want to verify (e.g., company.com). Windsurf will generate a unique verification token and TXT record.
⚠️ This token will only be shown once. Be sure to copy it before closing the window.
In your DNS provider’s management console, create a new TXT record with the value provided. For example:
windsurf-verification=\
* Name/Host: as specified in the Windsurf portal (often @ or left blank).
* Value/Content: the exact token string shown in the portal.
After adding the record, return to the Windsurf portal and click the Verify button to complete the process.
If the TXT record is detected, your domain will be marked as verified.
DNS changes can take up to 24–48 hours to propagate. If verification does not succeed immediately, wait a bit longer and try again.
## What happens after domain verification
Once your domain is verified, the following behavior will occur:
### For teams with SSO enabled
Any user with an email that ends in your verified domain will only be able to sign up for an account through your SSO integration. Other sign-up attempts (such as username + password or Google OAuth) will be redirected to your SSO portal. Users will be automatically added to your team without an additional approval process.
### For teams without SSO enabled
Users with an email that ends in your verified domain will still be able to sign up for an account using any available method. These users will be automatically invited to your team, but will need to be accepted by a team admin before gaining access.
---
# Source: https://docs.windsurf.com/troubleshooting/plugins-enterprise/eclipse.md
> ## Documentation Index
> Fetch the complete documentation index at: https://docs.windsurf.com/llms.txt
> Use this file to discover all available pages before exploring further.
# Eclipse Troubleshooting
> Troubleshoot Eclipse plugin issues including startup problems, empty chat screen, WebView2, and certificate errors with Java keystore solutions.
We strongly recommend using the native Windsurf Editor or the JetBrains local plugin for their advanced agentic AI capabilities and cutting-edge features.
The Eclipse plugin is under maintenance mode.
# Supported Versions
Version 4.25+ (2022-09+)
# Gathering extension logs
In Eclipse, logs are written to the following paths:
* **Mac/Linux**: \~/.codeium/codeium.log
* **Windows**: C:\Users\.codeium\codeium.log
# Known IDE issues and solutions
## Codeium isn't starting
If Codeium isn't starting up, use the logs to debug what the cause could be (See above). If you are not able to resolve the issue, file a help request by submitting a ticket at help.codeium.com. Make sure to include the logs referenced above to help our team debug the issue as quickly as possible.
## Codeium Chat shows an empty screen
If you are using Windows 10, it's possible you need to install **WebView2** to switch the Eclipse web renderer from Internet Explorer to Edge.
You can see if this is the case by right-clicking --> `Properties` and seeing if there is an Internet Explorer icon.
## Certificate issue
This issue may be indicated by the following errors in the logs:
```
Failed to fetch extension version at
javax.net.ssl.SSLHandshakeException: PKIX path building failed: sun.security.provider.certpath.SunCertPathBuilderException: unable to find valid certification path to requested target
```
Unlike other IDEs, Eclipse does not use the OS certificate store. You will have to load the certificates to the Java keystore.
* SaaS users will have to load the Codeium Github URL
* Self-hosted (On-prem) users will have to load their Codeium Enterprise domain URL as well as the Codeium Github URL
**Note**: This is an example for SaaS users, but the process is the same. *For enterprise users - Your certificate is issued and managed by your local IT or Admin team. Please reach out to them for assistance with installing the necessary certificates on your system.*
1. Export the certificate for [https://exafunction.github.io/](https://exafunction.github.io/) from the browser as `githubio.cer` file
In Chrome: navigate to the website, click the padlock, click `Connection is secure`, click `Certificate is valid`, go to the `Details` tab, press the `Copy to File...` button
2. Import in JDK/JRE keystore: (Need to run from cmd prompt opened with "Administrator" privilege)
```
keytool -import -noprompt -trustcacerts -alias codeiumgithub -file githubio.cer -keystore "%JAVA_HOME%/jre/lib/security/ cacerts" -storepass changeit
```
3. Verify that the certificate is added to the Keystore by executing:
```
keytool -list -keystore "%JAVA_HOME%/jre/lib/security/ cacerts" | findstr codeium
```
Enter the Keystore password.
4. Restart Eclipse and browse the marketplace extension from an internal browser. You should be directed to trust the unsigned content.
5. In some cases you might also need to pass the certificates path in VM arguments by editing your eclipse.ini file and adding the path:
```
-Djavax.net.ssl.trustStore="path-to-your-certificates"
```
---
# Source: https://docs.windsurf.com/windsurf/accounts/api-reference/errors.md
# Source: https://docs.windsurf.com/plugins/accounts/api-reference/errors.md
> ## Documentation Index
> Fetch the complete documentation index at: https://docs.windsurf.com/llms.txt
> Use this file to discover all available pages before exploring further.
# Error Handling
> Common error messages and debugging tips for the Analytics API including authentication, query structure, and rate limiting errors.
## Overview
The Analytics API returns detailed error messages to help debug invalid queries. This page covers common error scenarios and how to resolve them.
## Error Response Format
When an error occurs, the API returns an error response with a descriptive message:
```json theme={null}
{
"error": "Error message describing what went wrong"
}
```
## Common Errors
### Authentication Errors
**Error:** `Invalid service key`
**Cause:** The provided service key is not valid or has been revoked.
**Solution:**
* Verify your service key is correct
* Check that the service key hasn't been revoked
* Generate a new service key if needed
**Error:** `Insufficient permissions`
**Cause:** The service key doesn't have the required permissions for the endpoint you're calling.
**Solution:**
* Update the service key permissions in team settings
* Refer to the [API introduction](/plugins/accounts/api-reference/api-introduction#required-permissions) for the specific permission required by each endpoint
### Query Structure Errors
**Error:** `at least one field or aggregation is required`
**Cause:** The query request doesn't contain any selections or aggregations.
**Solution:** Add at least one selection to your query request:
```json theme={null}
"selections": [
{
"field": "num_acceptances",
"aggregation_function": "QUERY_AGGREGATION_SUM"
}
]
```
**Error:** `invalid query table: QUERY_DATA_SOURCE_UNSPECIFIED`
**Cause:** There's likely a typo in the `data_source` field.
**Solution:** Double-check the spelling of your data source. Valid options:
* `QUERY_DATA_SOURCE_USER_DATA`
* `QUERY_DATA_SOURCE_CHAT_DATA`
* `QUERY_DATA_SOURCE_COMMAND_DATA`
* `QUERY_DATA_SOURCE_PCW_DATA`
**Error:** `all selection fields should have an aggregation function, or none of them should`
**Cause:** Some selections have aggregation functions while others don't.
**Solution:** Either add aggregation functions to all selections or remove them from all:
**Invalid:**
```json theme={null}
"selections": [
{
"field": "num_acceptances",
"aggregation_function": "QUERY_AGGREGATION_SUM"
},
{
"field": "num_lines_accepted",
"aggregation_function": "QUERY_AGGREGATION_UNSPECIFIED"
}
]
```
**Valid:**
```json theme={null}
"selections": [
{
"field": "num_acceptances",
"aggregation_function": "QUERY_AGGREGATION_SUM"
},
{
"field": "num_lines_accepted",
"aggregation_function": "QUERY_AGGREGATION_SUM"
}
]
```
### Field and Aggregation Errors
**Error:** `invalid aggregation function for string type field ide: QUERY_AGGREGATION_SUM`
**Cause:** The aggregation function is not supported for the specified field type.
**Solution:** Check the [Available Fields](/plugins/accounts/api-reference/custom-analytics#available-fields) section to see which aggregation functions are valid for each field. String fields typically only support `COUNT` and `UNSPECIFIED`.
**Error:** `tried to aggregate on a distinct field: distinct_developer_days. Consider aggregating on the non-distinct fields instead: [api_key date]`
**Cause:** Fields with the "distinct\_\*" pattern cannot be used in the aggregations section.
**Solution:** Use the suggested alternative fields for aggregation:
**Invalid:**
```json theme={null}
"aggregations": [
{
"field": "distinct_developer_days",
"name": "distinct_developer_days"
}
]
```
**Valid:**
```json theme={null}
"aggregations": [
{
"field": "api_key",
"name": "api_key"
},
{
"field": "date",
"name": "date"
}
]
```
**Error:** `duplicate field alias for selection/aggregation: num_acceptances`
**Cause:** Multiple selections or aggregations have the same name.
**Solution:** Ensure all field aliases are unique. Remember that if no name is specified, it defaults to `{aggregation_function}_{field_name}`.
### Data Filtering Errors
**Error:** `invalid group name: GroupName`
**Cause:** The specified group name doesn't exist in your organization.
**Solution:**
* Double-check the group name spelling
* Verify the group exists in your team settings
* Use the exact group name as it appears in your team dashboard
**Error:** `invalid timestamp format`
**Cause:** The timestamp is not in the correct RFC 3339 format.
**Solution:** Use the correct timestamp format:
```
2023-01-01T00:00:00Z
```
**Valid examples:**
* `2024-01-01T00:00:00Z`
* `2024-12-31T23:59:59Z`
* `2024-06-15T12:30:45Z`
**Error:** `Cannot use both group_name and emails parameters`
**Cause:** Both `group_name` and `emails` parameters were provided in a Cascade Analytics request.
**Solution:** Use either `group_name` OR `emails`, but not both:
**Invalid:**
```json theme={null}
{
"group_name": "engineering",
"emails": ["user@example.com"]
}
```
**Valid:**
```json theme={null}
{
"group_name": "engineering"
}
```
**Or:**
```json theme={null}
{
"emails": ["user@example.com", "user2@example.com"]
}
```
## Rate Limiting
**Error:** `429 Too Many Requests`
**Cause:** You've exceeded the API rate limit.
**Solution:**
* Wait before making additional requests
* Implement exponential backoff in your client
* Consider batching multiple queries into single requests where possible
* Contact support if you need higher rate limits
## Debugging Tips
### 1. Start Simple
Begin with basic queries and gradually add complexity:
```json theme={null}
{
"service_key": "your_key",
"query_requests": [
{
"data_source": "QUERY_DATA_SOURCE_USER_DATA",
"selections": [
{
"field": "num_acceptances",
"aggregation_function": "QUERY_AGGREGATION_COUNT"
}
]
}
]
}
```
### 2. Validate Field Names
Double-check field names against the [Available Fields](/plugins/accounts/api-reference/custom-analytics#available-fields) documentation.
### 3. Check Aggregation Compatibility
Ensure your aggregation functions are compatible with the field types you're selecting.
### 4. Test Filters Separately
If your query isn't returning expected results, try removing filters one by one to isolate the issue.
### 5. Use Proper JSON Formatting
Ensure your JSON is properly formatted and all strings are quoted correctly.
## Getting Help
If you continue to experience issues:
1. **Check the error message carefully** - Most errors include specific guidance on how to fix the issue
2. **Review the examples** - Compare your query structure to the working examples in the documentation
3. **Contact support** - Reach out to [Windsurf Support](https://windsurf.com/support) with your specific error message and query
## API Version Notes
Error handling and validation have been improved in API version 1.10.0 and later. If you're using an older version, consider updating to get more detailed error messages.
---
# Source: https://docs.windsurf.com/context-awareness/fast-context.md
> ## Documentation Index
> Fetch the complete documentation index at: https://docs.windsurf.com/llms.txt
> Use this file to discover all available pages before exploring further.
# Fast Context
> Fast Context is a specialized subagent that retrieves relevant code from your codebase up to 20x faster using SWE-grep models for rapid code retrieval.
Fast Context is a specialized subagent in Windsurf that retrieves relevant code from your codebase up to 20x faster than traditional agentic search. It powers Cascade's ability to quickly understand large codebases while maintaining the intelligence of frontier models.
## Using Fast Context
When Cascade receives a query that requires code search, Fast Context will trigger automatically. You can also force it to activate by using `Cmd+Enter` (Mac) or `Ctrl+Enter` (Windows/Linux) when submitting your query.
You'll notice Fast Context is working when:
* Cascade quickly identifies relevant files across your codebase
* Large codebase queries complete faster than before
* Cascade spends less time reading irrelevant code
## How It Works
Fast Context uses `SWE-grep` and `SWE-grep-mini`, custom models trained specifically for rapid code retrieval. These models combine the speed of traditional embedding search with the intelligence of agentic exploration.
When you make a query to Cascade that requires searching through your codebase, Fast Context automatically activates to:
1. Identify relevant files and code sections using parallel tool calls
2. Execute multiple searches simultaneously
3. Return targeted results in seconds rather than minutes
This approach prevents context pollution and aims to mitigate the traditional speed-accuracy tradeoff. By delegating retrieval to a specialized subagent, Cascade conserves its context budget and intelligence for the actual task at hand.
## SWE-grep Models
Fast Context is powered by the SWE-grep model family:
* **SWE-grep**: High-intelligence variant optimized for complex retrieval tasks
* **SWE-grep-mini**: Ultra-fast variant serving at over 2,800 tokens per second
Both models are trained using reinforcement learning to excel at parallel tool calling and efficient codebase navigation. They execute up to 8 parallel tool calls per turn over a maximum of 4 turns, allowing them to explore different parts of your codebase simultaneously.
The models use a restricted set of cross-platform compatible tools (grep, read, glob) to ensure consistent performance across different operating systems and development environments.
---
# Source: https://docs.windsurf.com/windsurf/accounts/api-reference/get-team-credit-balance.md
# Source: https://docs.windsurf.com/plugins/accounts/api-reference/get-team-credit-balance.md
> ## Documentation Index
> Fetch the complete documentation index at: https://docs.windsurf.com/llms.txt
> Use this file to discover all available pages before exploring further.
# Get Team Credit Balance
> Retrieve the current credit balance for your team, including prompt credits per seat, add-on credits, and billing cycle information.
## Overview
Retrieve the current credit balance information for your team. This includes prompt credits allocated per seat, the number of seats, add-on credit usage, and billing cycle dates.
## Request
Your service key with "Billing Read" permissions
### Example Request
```bash theme={null}
curl -X POST --header "Content-Type: application/json" \
--data '{
"service_key": "your_service_key_here"
}' \
https://server.codeium.com/api/v1/GetTeamCreditBalance
```
## Response
Number of prompt credits allocated per seat for the current billing cycle
Number of seats on the team
Total add-on credits available for the team
Add-on credits consumed so far in the current billing cycle
Start of the current billing cycle (ISO 8601 timestamp)
End of the current billing cycle (ISO 8601 timestamp)
### Example Response
```json theme={null}
{
"promptCreditsPerSeat": 500,
"numSeats": 50,
"addOnCreditsAvailable": 10000,
"addOnCreditsUsed": 3500,
"billingCycleStart": "2026-01-01T00:00:00Z",
"billingCycleEnd": "2026-02-01T00:00:00Z"
}
```
## Error Responses
Common error scenarios:
* Invalid service key or insufficient permissions
* Feature not available for your plan (requires enterprise tier)
* Rate limit exceeded
---
# Source: https://docs.windsurf.com/windsurf/accounts/api-reference/get-usage-config.md
# Source: https://docs.windsurf.com/plugins/accounts/api-reference/get-usage-config.md
> ## Documentation Index
> Fetch the complete documentation index at: https://docs.windsurf.com/llms.txt
> Use this file to discover all available pages before exploring further.
# Get Usage Configuration
> Retrieve add-on credit cap configuration at team, group, or user level for enterprise billing management.
## Overview
Retrieve the current add-on credit cap configuration for your organization. You can query configurations at the team level, for specific groups, or for individual users.
## Request
Your service key with "Billing Read" permissions
### Scope Configuration (Choose One)
Set to `true` to retrieve the configuration at the team level
Retrieve the configuration for a specific group by providing the group ID
Retrieve the configuration for a specific user by providing their email address
You must provide one of `team_level`, `group_id`, or `user_email` to define the scope.
### Example Request - Get Team-Level Configuration
```bash theme={null}
curl -X POST --header "Content-Type: application/json" \
--data '{
"service_key": "your_service_key_here",
"team_level": true
}' \
https://server.codeium.com/api/v1/GetUsageConfig
```
### Example Request - Get Group Configuration
```bash theme={null}
curl -X POST --header "Content-Type: application/json" \
--data '{
"service_key": "your_service_key_here",
"group_id": "engineering_team"
}' \
https://server.codeium.com/api/v1/GetUsageConfig
```
### Example Request - Get User Configuration
```bash theme={null}
curl -X POST --header "Content-Type: application/json" \
--data '{
"service_key": "your_service_key_here",
"user_email": "user@example.com"
}' \
https://server.codeium.com/api/v1/GetUsageConfig
```
## Response
The configured add-on credit cap value. If this field is not present in the response, there is no cap configured at the requested scope level.
### Example Response - With Cap Configured
```json theme={null}
{
"add_on_credit_cap": 10000
}
```
### Example Response - No Cap Configured
```json theme={null}
{}
```
## Error Responses
Common error scenarios:
* Invalid service key or insufficient permissions
* Multiple scope parameters provided
* No scope parameter provided
* Invalid group ID or user email
* Rate limit exceeded
---
# Source: https://docs.windsurf.com/windsurf/getting-started.md
# Source: https://docs.windsurf.com/plugins/getting-started.md
> ## Documentation Index
> Fetch the complete documentation index at: https://docs.windsurf.com/llms.txt
> Use this file to discover all available pages before exploring further.
# Welcome to Windsurf Plugins
> Install and set up Windsurf Plugins for JetBrains, VS Code, Visual Studio, Vim, NeoVim, Jupyter, Chrome, and other IDEs with AI-powered coding assistance.
**Windsurf Plugins** bring our suite of AI tools to various IDEs and editors, empowering developers to dream bigger by meeting them where they are.
Get started with your team!
}
href="/plugins/cascade/cascade-overview"
>
Windsurf's coding agent.
Credits and usage.
Models available for use.
## Jetbrains
We strongly recommend using the native Windsurf Editor or the JetBrains local plugin for their advanced agentic AI capabilities and cutting-edge features.
All other plugins are under maintenance mode.
These steps do not apply for enterprises on a self-hosted plan.
If you are an enterprise user, please refer to the instructions in your enterprise portal.
For remote development environments, use the "Windsurf (Remote Development)" plugin instead. See the [Remote Development section](#remote-development-maintenance-mode) below.
Open the `Plugins` menu in your JetBrains IDE. The shortcut for this is `⌘+,` on Mac and `Ctrl+,` on Linux/Windows. It is also accessible from the settings menu.
Search for the Windsurf plugin, and install it. The plugin loader will prompt you to restart the IDE.
Upon successful installation, Windsurf will begin downloading a language server.
This is the program that communicates with our APIs to let you use Windsurf's AI features.
The download usually takes ten to twenty seconds, but the download speed may depend on your internet connection.
In the meantime, you are free to use your IDE as usual.
You should see a notification on the bottom right to indicate the progress of the download.
Open a project. Windsurf should prompt you to log in with a notification popup at the bottom right linking you to an online login page.
Equivalently, click the widget at the right of the bottom status bar and select the login option there.
If you do not have an account or otherwise are not already logged in online, you will be prompted to login.
Once you have logged in online, the webpage will indicate that you can return to your IDE.
You can now enjoy Windsurf's rich AI featureset: Autocomplete, Chat, Command, and more.
At any point, you can check your status by clicking the status bar widget at the bottom right.
If logged in, you will have access to your Windsurf settings and other controls.
If you'd like early access to new features, click on "Switch to Pre-Release"
to try out the [latest pre-release version](https://plugins.jetbrains.com/plugin/20540-windsurf-plugin-for-python-js-java-go--/versions/pre-release)
of the plugin.
### Remote Development (maintenance mode)
For JetBrains IDEs used in remote development environments, you need to use the separate "Windsurf (Remote Development)" plugin.
This plugin is in maintenance mode. For advanced agentic AI capabilities and cutting-edge features, we strongly recommend using the native Windsurf Editor or the JetBrains local plugin.
#### Requirements
* JetBrains IDE version 2025.1.3 or greater
#### Installation Steps
Open the `Plugins (Host)` menu in your JetBrains IDE. The shortcut for this is `⌘+,` on Mac and `Ctrl+,` on Linux/Windows. It is also accessible from the settings menu.
Search for **"Windsurf (Remote Development)"** and install it.
Restart your IDE when prompted.
Open the `Plugins (Client)` menu and search for **"Windsurf (Remote Development)"**.
Install the plugin and restart the IDE again.
After installing the plugin on the host, Windsurf will begin downloading a language server.
This is the program that communicates with our APIs to let you use Windsurf's AI features.
The download usually takes ten to twenty seconds, but the download speed may depend on your internet connection.
In the meantime, you are free to use your IDE as usual.
You should see a notification on the bottom right to indicate the progress of the download.
After the language server download is completed, Windsurf should prompt you to log in with a notification popup at the bottom right linking you to an online login page.
Equivalently, click the widget at the right of the bottom status bar and select the login option there.
If you do not have an account or otherwise are not already logged in online, you will be prompted to login.
Once you have logged in online, the webpage will indicate that you can return to your IDE.
You can now use Windsurf's AI features in your remote development environment.
## Older Plugins
We strongly recommend using the native Windsurf Editor or the JetBrains local plugin for their advanced agentic AI capabilities and cutting-edge features.
All plugins below are under maintenance mode.
Find the Windsurf Plugin (formerly Codeium) in the VS Code Marketplace and install it.
After installation, VS Code with prompt you with a notification in the bottom right corner to log in to Windsurf.
Equivalently, you can log in to Windsurf via the profile icon at the bottom of the left sidebar.
If you get an error message indicating that the browser cannot open a link from Visual Studio Code, you may need to update your browser and restart the authorization flow.
If you do not have an account or otherwise are not already logged in online, you will be prompted to create an account or login.
Once you sign in, you will be redirected back to Visual Studio Code via pop-up.
If you are using a browser-based VS Code IDE like GitPod or Codespaces, you will be routed to instructions on how to complete authentication by providing an access token.
Once you are signed in, Windsurf will start downloading a language server.
This is the program that communicates with our APIs to let you use Windsurf's AI features.
The download usually takes ten to twenty seconds, but the download speed may depend on your internet connection.
In the meantime, you are free to use VS Code as usual.
You can now enjoy Windsurf's rich AI featureset: Autocomplete, Chat, Command, and more.
### Extension Installation
Follow the **Get Started** instructions in the public [`codeium.vim` repo](https://github.com/Exafunction/codeium.vim). That’s it!
### Using Windsurf Plugin
While Windsurf supports many languages, we’ll demonstrate with Python. Create a new file `test.py`.
Windsurf can suggest multiple lines of code from a partial function header:
Press **Tab** to accept.
Windsurf also understands comments:
### Extension Installation
In the Visual Studio menu bar, click **Extensions → Manage Extensions**.
In **Manage Extensions**, click **Visual Studio Marketplace**, search for **Windsurf**, then click **Download**.
Close the window and relaunch Visual Studio.
Open or create a project. A browser window will open and prompt you to sign in.
If you don’t have an account yet, you’ll be redirected to create one.
After signing in, you’ll be automatically logged in to Windsurf Plugin in Visual Studio.
### Using Windsurf Plugin
While Windsurf supports many languages, we’ll demonstrate with C#. Create or open a C# file.
Windsurf can suggest multiple lines of code from a partial function signature:
Press **Tab** to accept.
### Install Windsurf Plugin
Open a new Jupyter Lab session. In a cell, paste and run `Shift+Enter` the following:
```python theme={null}
import sys
!{sys.executable} -m pip install -U pip --user
!{sys.executable} -m pip install -U codeium-jupyter --user
```
If you’re inside a virtual environment, run:
```python theme={null}
import sys
!{sys.executable} -m pip install -U pip
!{sys.executable} -m pip install -U codeium-jupyter
```
When the commands finish, close the notebook and stop the Jupyter server.
Relaunch Jupyter and open a notebook. Open the settings (Ctrl + ,) and navigate to the **Windsurf** section. You’ll see fields for an enterprise URL and a token.
Click **Get Windsurf Authentication Token** and follow the link. Paste the token back into the settings dialog.
If you can’t find the Windsurf settings, you likely didn’t restart Jupyter. Stop the server (Ctrl+C) and start it again with jupyter lab.
If you don’t have a Windsurf account, you’ll be prompted to create one.
After signing in, copy the token and paste it into the settings dialog.
You’re all set to use Windsurf Plugin in Jupyter!
### Using Windsurf Plugin
Windsurf can suggest multiple lines of code from a partial function header:
Press **Tab** to accept.
Windsurf also understands comments:
### Install Windsurf
Visit the [Chrome Web Store page](https://chrome.google.com/webstore/detail/codeium/hobjkcpmjhlegmobgonaagepfckjkceh) and click **Add to Chrome**.
Open the extensions dropdown and click the **Pin** icon so the Windsurf icon stays visible.
The extension opens a sign-in page automatically. If not, click the extension icon and follow the link.
After signing in, the icon turns normal and you’re ready to code. Try [creating a new Colab notebook](https://colab.research.google.com/#create=true).
### Using Windsurf
Windsurf can suggest multiple lines of code from a partial function header:
Press **Tab** to accept.
Windsurf also understands comments:
### Extension Installation
Visit the [Windsurf Plugin page on Eclipse Marketplace](https://marketplace.eclipse.org/content/codeium) and drag the **Install** button to the Eclipse toolbar.
In the **Confirm Selected Features** prompt, click **Confirm**.
In the **Trust Artifacts** prompt, select **Unsigned** and click **Trust**.
When prompted, restart Eclipse to complete the installation.
When the browser opens, sign in or create a Windsurf account, then return to Eclipse.
You’re ready to use Windsurf in Eclipse.
### Using Windsurf
While Windsurf supports many languages, we’ll demonstrate with Java. Create a new file `Fib.java`.
Windsurf can suggest multiple lines of code from a partial function header:
```java theme={null}
package test;
public class Fib {
public int fib(int n) {
}
}
```
Press **Tab** to accept.
---
# Source: https://docs.windsurf.com/windsurf/guide-for-admins.md
# Source: https://docs.windsurf.com/plugins/guide-for-admins.md
> ## Documentation Index
> Fetch the complete documentation index at: https://docs.windsurf.com/llms.txt
> Use this file to discover all available pages before exploring further.
# Guide for Admins
> Enterprise admin guide for deploying Windsurf at scale. Configure SSO, SCIM, RBAC, analytics, and team management for large organizations.
# Windsurf Guide for Enterprise Admins
> **Purpose** This guide helps enterprise *platform / developer-experience* administrators plan, roll out, and operate Windsurf for organizations with **large enterprise teams**. It is intentionally *opinionated* and links out to detailed "how-to" docs per topic. Treat it both as a **read-through guide** *and* as a **check-list** when onboarding.
***
## 1. Audience & Pre-Requisites
| | Details |
| --------------------- | ---------------------------------------------------------------------------------- |
| **Who should read** | Platform / Dev-Ex admins, Corporate IT, Centralized Tooling teams |
| **Assumed knowledge** | Basic Windsurf terms (team, role), Enterprise IdP concepts (SAML, SCIM), CLI usage |
| **Out-of-scope** | Deep security / compliance internals → see **Security & Compliance** docs |
***
## 2. Quick-Start Checklist
1. Confirm organization-wide settings
2. Set up **SSO** (Okta, Azure AD, Google; see SAML docs for others)
3. Enable **SCIM** & map IdP groups → Windsurf *teams*
4. Define **role** & **permission** model (least privilege)
5. Configure **Admin Portal**: team view & security controls
6. Distribute **Windsurf clients/extensions** to end users
7. View **analytics dashboards** & **API access tokens**
> Use this list as your "Day 0" deployment tracker.
***
## 3. Core Windsurf Concepts
* **Team** – flat collections of members; no nested teams. Teams (also called *Groups*) drive **role assignment** and **analytics grouping**, letting you scope permissions and view usage metrics per cohort.
* **Roles & Permissions** – predefined RBAC; admins are primarily responsible for **team management**, **Windsurf feature settings**, and **analytics**. Built-in roles usually cover these needs, but creating a custom role with *analytics-view* permission lets team managers and leads see metrics for their own teams. (RBAC docs)
* **Admin Portal** – centralized UI for user & team management, credit usage, SSO configuration, feature toggles (Web Search, MCP, Deploys), analytics dashboards/report export, service keys for API usage, and role/permission controls.
* **Agents & Workspaces** – Windsurf IDE and Jetbrains Plugins are Agentic
### 3.1 Admin Portal Overview
The Admin Portal provides centralized management for all Windsurf enterprise features through an intuitive web interface. Core capabilities include:
#### User & Team Management
* Add, remove, and manage users across your organization
* Configure teams with proper role assignments
* User status and activity monitoring
#### Authentication & Security
* Configure SSO integration with major identity providers
* Set up SCIM provisioning for automated user lifecycle management
* Manage role-based access controls (RBAC)
* Create and manage **service keys** for API automations with scoped permissions
#### Feature Toggles & Controls
> **Important:** These feature controls affect behavior for your entire organization and can only be modified by administrators. New major features with data privacy implications are released in the "off" state by default to ensure you have control over when and how they're enabled.
The Admin Portal gives you granular control over Windsurf features that can be enabled or disabled per team. **Data Privacy Note:** Some features require storing additional data or telemetry as noted below:
**Models Configuration**
* Configure which AI models your teams can access within Windsurf
* Select multiple models for different use cases (code completion, chat, etc.)
**Default Model Override**
* Set the default Cascade model for users on your team
* This model is pre-selected each time a user opens Windsurf (not just the first time)
* Users can still change their model at any time during a session
* Only models enabled in Models Configuration are available as default options
**Auto Run Terminal Commands** *(Beta)*
* Set the maximum auto-execution level for terminal commands across your organization
* Four levels available: **Disabled** (no auto-execution), **Allowlist Only** (only allowlisted commands), **Auto** (AI-judged safe commands), and **Turbo** (all commands except denylisted)
* Users can select any level up to the maximum you configure, giving them flexibility within your security policy
* [Learn more about auto-executed commands](https://docs.windsurf.com/windsurf/terminal#auto-executed-cascade-commands)
**MCP Servers** *(Beta)*
* Enable users to configure and use Model Context Protocol (MCP) servers
* Maintain whitelisted MCP servers for approved integrations
* **Security Note:** Review operational and security implications before enabling, as MCP can create infrastructure resources outside Windsurf's security monitoring
* Learn more about Model Context Protocol (MCP)
* MCP admin controls for teams & enterprises
**App Deploys** *(Beta)*
* Manage deployment permissions for your teams in Cascade
* Learn more about App Deploys
**Conversation Sharing**
* Allow team members to share Cascade conversations with others
* Conversations are securely uploaded to Windsurf servers
* Shareable links are restricted to logged-in team members only
* Learn more about sharing conversations
**PR Reviews (GitHub Integration)**
* Install Windsurf in your team's GitHub organization
* Enable PR review automation and description editing
* Learn more about Windsurf PR Reviews
**Knowledge Base Management**
* Curate knowledge from Google Drive sources for your development teams
* Upload and organize internal documentation and resources
* Learn more about Knowledge Base
***
## 4. Identity & Access Management
> **Recommendation:** Use **SSO plus SCIM** wherever possible for automated provisioning, de-provisioning, and group management.
### 4.1 Single Sign-On (SSO)
| | Guidance |
| ------------------------ | ---------------------------------------------------------------------------------------------------------------------- |
| **IdPs supported** | Okta, Azure AD, Google (others via generic SAML) |
| **Recommended approach** | Create Windsurf-specific *app* in IdP; use **role-based** group assignments rather than org-wide `All Employees` group |
| **Common pitfalls** | Email suffix mismatches, duplicate user aliases |
*See the SSO & SCIM Setup Guide for step-by-step configuration for Okta, Azure AD, Google, and Generic SAML.*
### 4.2 SCIM Provisioning
* **Why** – automated user lifecycle & team membership management at scale
* **Capabilities**
* Create / deactivate **users** automatically
* Create **teams** automatically (or manage manually)
* Users can belong to **multiple teams**
* Custom team creation via SCIM API (docs)
* **Mapping strategies**
* 1 IdP group → 1 Windsurf team (simple, most common)
* Functional vs. project-based group prefixes (e.g. `proj-foo-devs`)
* **Things to decide**
* Which groups to *exclude* (e.g. interns, contractors)
* Renaming rules when IdP group names change
* **Caution**: SCIM should remain your **source of truth**—mixing SCIM and manual / API updates can create drift. Use the API mainly for adding supplemental groups.
***
## 5. User & Team Management at Scale
* Flat *team* → design team taxonomy carefully (no nesting to fall back on)
* Users can belong to **multiple groups**. Groups are used to view analytics
* Today, SCIM does not support assigning roles to users. SCIM only supports assigning users to Groups
***
## 6. Analytics & API Access
### 6.1 Built-In Analytics
| Dashboard | Use-case |
| --------------------- | ------------------------------------------ |
| **Adoption Overview** | Track total active users, daily engagement |
| **Team Activity** | Team usage |
Analytics shows the **percentage of code written by Windsurf**, helping quantify impact—see your dashboards at team analytics.
### 6.2 APIs
| API | Typical admin scenarios |
| -------- | -------------------------- |
| **REST** | SCIM management, analytics |
* Generate service keys under **Team Settings → Service Keys**. Scope keys to *least privilege* needed.
* More advanced reporting and usage management: see the API Reference.
* For team management: see the SCIM API – Custom Teams.
***
## 7. Operational Considerations
* **Status Pages** – monitor live service health: Windsurf, Anthropic, OpenAI
* **Support Channels** – windsurf.com/support
***
## 8. Setting Up End Users for Success
1. Point end users to the Windsurf installation guide to install the appropriate extension or desktop client.
2. Publish an internal "Getting Started with Windsurf" page (link to official docs)
3. Hold live onboarding sessions / record short demos
4. Curate starter project templates & sample prompts
5. Collect feedback via survey after 2 weeks; iterate
***
## 9. Additional Resources
* SSO & SCIM Setup Guide
* SCIM API – Custom Teams
* Analytics API Reference
* RBAC Controls
---
# Source: https://docs.windsurf.com/windsurf/cascade/hooks.md
> ## Documentation Index
> Fetch the complete documentation index at: https://docs.windsurf.com/llms.txt
> Use this file to discover all available pages before exploring further.
# Cascade Hooks
> Execute custom shell commands at key points in Cascade's workflow for logging, security controls, validation, and enterprise governance with pre and post hooks.
Cascade Hooks enable you to execute custom shell commands at key points during Cascade's workflow. This powerful extensibility feature allows you to log operations, enforce guardrails, run validation checks, or integrate with external systems.
Hooks are designed for power users and enterprise teams who need fine-grained control over Cascade's behavior. They require basic shell scripting knowledge.
## What You Can Build
Hooks unlock a wide range of automation and governance capabilities:
* **Logging & Analytics**: Track every file read, code change, command executed, user prompt, or Cascade response for compliance and usage analysis
* **Security Controls**: Block Cascade from accessing sensitive files, running dangerous commands, or processing policy-violating prompts
* **Quality Assurance**: Run linters, formatters, or tests automatically after code modifications
* **Custom Workflows**: Integrate with issue trackers, notification systems, or deployment pipelines
* **Team Standardization**: Enforce coding standards and best practices across your organization
## How Hooks Work
Hooks are shell commands that run automatically when specific Cascade actions occur. Each hook:
1. **Receives context** (details about the action being performed) via JSON as standard input
2. **Executes your script** - Python, Bash, Node.js, or any executable
3. **Returns a result** via exit code and output streams
For **pre-hooks** (executed before an action), your script can **block the action** by exiting with exit code `2`. This makes pre-hooks ideal for implementing security policies or validation checks.
## Configuration
Hooks are configured in JSON files that can be placed at three different levels. Cascade loads and merges hooks from all locations, giving teams flexibility in how they distribute and manage hook configurations.
#### System-Level
System-level hooks are ideal for organization-wide policies enforced on shared development machines. For example, you can use them to enforce security policies, compliance requirements, or mandatory code review workflows.
* **macOS**: `/Library/Application Support/Windsurf/hooks.json`
* **Linux/WSL**: `/etc/windsurf/hooks.json`
* **Windows**: `C:\ProgramData\Windsurf\hooks.json`
#### User-Level
User-level hooks are perfect for personal preferences and optional workflows.
* **Windsurf IDE**: `~/.codeium/windsurf/hooks.json`
* **JetBrains Plugin**: `~/.codeium/hooks.json`
#### Workspace-Level
Workspace-level hooks allow teams to version control project-specific policies alongside their code. They may include custom validation rules, project-specific integrations, or team-specific workflows.
* **Location**: `.windsurf/hooks.json` in your workspace root
Hooks from all three locations are **merged together**. If the same hook event is configured in multiple locations, all hooks will execute in order: system → user → workspace.
### Basic Structure
Here is an example of the basic structure of the hooks configuration:
```json theme={null}
{
"hooks": {
"pre_read_code": [
{
"command": "python3 /path/to/your/script.py",
"show_output": true
}
],
"post_write_code": [
{
"command": "python3 /path/to/another/script.py",
"show_output": true
}
]
}
}
```
### Configuration Options
Each hook accepts the following parameters:
| Parameter | Type | Description |
| ------------------- | ------- | ------------------------------------------------------------------------------------------------------- |
| `command` | string | The shell command to execute. Can be any valid executable with arguments. |
| `show_output` | boolean | Whether to display the hook's stdout/stderr output on the user-facing Cascade UI. Useful for debugging. |
| `working_directory` | string | Optional. The directory to execute the command from. Defaults to your workspace root. |
## Hook Events
Cascade provides eleven hook events that cover the most critical actions in the agent workflow.
### Common Input Structure
All hooks receive a JSON object with the following common fields:
| Field | Type | Description |
| ------------------- | ------ | ------------------------------------------------------------------ |
| `agent_action_name` | string | The hook event name (e.g., "pre\_read\_code", "post\_write\_code") |
| `trajectory_id` | string | Unique identifier for the overall Cascade conversation |
| `execution_id` | string | Unique identifier for the single agent turn |
| `timestamp` | string | ISO 8601 timestamp when the hook was triggered |
| `tool_info` | object | Event-specific information (varies by hook type) |
In the following examples, the common fields are omitted for brevity. There are eleven major types of hook events:
### pre\_read\_code
Triggered **before** Cascade reads a code file. This may block the action if the hook exits with code 2.
**Use cases**: Restrict file access, log read operations, check permissions
**Input JSON**:
```json theme={null}
{
"agent_action_name": "pre_read_code",
"tool_info": {
"file_path": "/Users/yourname/project/file.py"
}
}
```
This `file_path` may be a directory path when Cascade reads a directory recursively.
### post\_read\_code
Triggered **after** Cascade successfully reads a code file.
**Use cases**: Log successful reads, track file access patterns
**Input JSON**:
```json theme={null}
{
"agent_action_name": "post_read_code",
"tool_info": {
"file_path": "/Users/yourname/project/file.py"
}
}
```
This `file_path` may be a directory path when Cascade reads a directory recursively.
### pre\_write\_code
Triggered **before** Cascade writes or modifies a code file. This may block the action if the hook exits with code 2.
**Use cases**: Prevent modifications to protected files, backup files before changes
**Input JSON**:
```json theme={null}
{
"agent_action_name": "pre_write_code",
"tool_info": {
"file_path": "/Users/yourname/project/file.py",
"edits": [
{
"old_string": "def old_function():\n pass",
"new_string": "def new_function():\n return True"
}
]
}
}
```
### post\_write\_code
Triggered **after** Cascade writes or modifies a code file.
**Use cases**: Run linters, formatters, or tests; log code changes
**Input JSON**:
```json theme={null}
{
"agent_action_name": "post_write_code",
"tool_info": {
"file_path": "/Users/yourname/project/file.py",
"edits": [
{
"old_string": "import os",
"new_string": "import os\nimport sys"
}
]
}
}
```
### pre\_run\_command
Triggered **before** Cascade executes a terminal command. This may block the action if the hook exits with code 2.
**Use cases**: Block dangerous commands, log all command executions, add safety checks
**Input JSON**:
```json theme={null}
{
"agent_action_name": "pre_run_command",
"tool_info": {
"command_line": "npm install package-name",
"cwd": "/Users/yourname/project"
}
}
```
### post\_run\_command
Triggered **after** Cascade executes a terminal command.
**Use cases**: Log command results, trigger follow-up actions
**Input JSON**:
```json theme={null}
{
"agent_action_name": "post_run_command",
"tool_info": {
"command_line": "npm install package-name",
"cwd": "/Users/yourname/project"
}
}
```
### pre\_mcp\_tool\_use
Triggered **before** Cascade invokes an MCP (Model Context Protocol) tool. This may block the action if the hook exits with code 2.
**Use cases**: Log MCP usage, restrict which MCP tools can be used
**Input JSON**:
```json theme={null}
{
"agent_action_name": "pre_mcp_tool_use",
"tool_info": {
"mcp_server_name": "github",
"mcp_tool_arguments": {
"owner": "code-owner",
"repo": "my-cool-repo",
"title": "Bug report",
"body": "Description of the bug here"
},
"mcp_tool_name": "create_issue"
}
}
```
### post\_mcp\_tool\_use
Triggered **after** Cascade successfully invokes an MCP tool.
**Use cases**: Log MCP operations, track API usage, see MCP results
**Input JSON**:
```json theme={null}
{
"agent_action_name": "post_mcp_tool_use",
"tool_info": {
"mcp_result": "...",
"mcp_server_name": "github",
"mcp_tool_arguments": {
"owner": "code-owner",
"perPage": 1,
"repo": "my-cool-repo",
"sha": "main"
},
"mcp_tool_name": "list_commits"
}
}
```
### pre\_user\_prompt
Triggered **before** Cascade processes the text of a user's prompt. This may block the action if the hook exits with code 2.
**Use cases**: Log all user prompts for auditing, block potentially harmful or policy-violating prompts
**Input JSON**:
```json theme={null}
{
"agent_action_name": "pre_user_prompt",
"tool_info": {
"user_prompt": "can you run the echo hello command"
}
}
```
The `show_output` configuration option does not apply to this hook.
### post\_cascade\_response
Triggered **after** Cascade completes a response to a user's prompt. This hook receives the full Cascade response ever since the last user input.
**Use cases**: Log all Cascade responses for auditing, analyze response patterns, send responses to external systems for compliance review
**Input JSON**:
```json theme={null}
{
"agent_action_name": "post_cascade_response",
"tool_info": {
"response": "### Planner Response\n\nI'll help you create that file.\n\n*Created file `/path/to/file.py`*\n\n### Planner Response\n\nThe file has been created successfully."
}
}
```
The `response` field contains the markdown-formatted content of Cascade's response since the last user input. This includes planner responses, tool actions (file reads, writes, commands), and any other steps Cascade took.
The `show_output` configuration option does not apply to this hook.
The `response` content is derived from trajectory data and may contain sensitive information from your codebase or conversations. Handle this data according to your organization's security and privacy policies.
### post\_setup\_worktree
Triggered **after** a new [git worktree](./worktrees) is created and configured. The hook is executed inside the new **worktree** directory.
**Use cases**: Copy `.env` files or other untracked files into the worktree, install dependencies, run setup scripts
**Environment Variables**:
| Variable | Description |
| ---------------------- | -------------------------------------------------------------------------------------------------------------------------- |
| `$ROOT_WORKSPACE_PATH` | The absolute path to the original workspace. Use this to access files or run commands relative to the original repository. |
**Input JSON**:
```json theme={null}
{
"agent_action_name": "post_setup_worktree",
"tool_info": {
"worktree_path": "/Users/me/.windsurf/worktrees/my-repo/abmy-repo-c123",
"root_workspace_path": "/Users/me/projects/my-repo"
}
}
```
## Exit Codes
Your hook scripts communicate results through exit codes:
| Exit Code | Meaning | Effect |
| --------- | -------------- | ---------------------------------------------------------------------------------------------------- |
| `0` | Success | Action proceeds normally |
| `2` | Blocking Error | The Cascade agent will see the error message from stderr. For pre-hooks, this **blocks** the action. |
| Any other | Error | Action proceeds normally |
Only **pre-hooks** (pre\_user\_prompt, pre\_read\_code, pre\_write\_code, pre\_run\_command, pre\_mcp\_tool\_use) can block actions using exit code 2. Post-hooks cannot block since the action has already occurred.
Keep in mind that the user can see any hook-generated standard output and standard error in the Cascade UI if `show_output` is true.
## Example Use Cases
### Logging All Cascade Actions
Track every action Cascade takes for auditing purposes.
**Config**:
```json theme={null}
{
"hooks": {
"post_read_code": [
{
"command": "python3 /Users/yourname/hooks/log_input.py",
"show_output": true
}
],
"post_write_code": [
{
"command": "python3 /Users/yourname/hooks/log_input.py",
"show_output": true
}
],
"post_run_command": [
{
"command": "python3 /Users/yourname/hooks/log_input.py",
"show_output": true
}
],
"post_mcp_tool_use": [
{
"command": "python3 /Users/yourname/hooks/log_input.py",
"show_output": true
}
],
"post_cascade_response": [
{
"command": "python3 /Users/yourname/hooks/log_input.py"
}
]
}
}
```
**Script** (`log_input.py`):
```python theme={null}
#!/usr/bin/env python3
import sys
import json
def main():
# Read the JSON data from stdin
input_data = sys.stdin.read()
# Parse the JSON
try:
data = json.loads(input_data)
# Write formatted JSON to file
with open("/Users/yourname/hooks/input.txt", "a") as f:
f.write('\n' + '='*80 + '\n')
f.write(json.dumps(data, indent=2, separators=(',', ': ')))
f.write('\n')
print(json.dumps(data, indent=2))
except json.JSONDecodeError as e:
print(f"Error parsing JSON: {e}", file=sys.stderr)
sys.exit(1)
if __name__ == "__main__":
main()
```
This script appends every hook invocation to a log file, creating an audit trail of all Cascade actions. You may transform the input data or perform custom logic as you see fit.
### Restricting File Access
Prevent Cascade from reading files outside a specific directory.
**Config**:
```json theme={null}
{
"hooks": {
"pre_read_code": [
{
"command": "python3 /Users/yourname/hooks/block_read_access.py",
"show_output": true
}
]
}
}
```
**Script** (`block_read_access.py`):
```python theme={null}
#!/usr/bin/env python3
import sys
import json
ALLOWED_PREFIX = "/Users/yourname/my-project/"
def main():
# Read the JSON data from stdin
input_data = sys.stdin.read()
# Parse the JSON
try:
data = json.loads(input_data)
if data.get("agent_action_name") == "pre_read_code":
tool_info = data.get("tool_info", {})
file_path = tool_info.get("file_path", "")
if not file_path.startswith(ALLOWED_PREFIX):
print(f"Access denied: Cascade is only allowed to read files under {ALLOWED_PREFIX}", file=sys.stderr)
sys.exit(2) # Exit code 2 blocks the action
print(f"Access granted: {file_path}", file=sys.stdout)
except json.JSONDecodeError as e:
print(f"Error parsing JSON: {e}", file=sys.stderr)
sys.exit(1)
if __name__ == "__main__":
main()
```
When Cascade attempts to read a file outside the allowed directory, this hook blocks the operation and displays an error message.
### Blocking Dangerous Commands
Prevent Cascade from executing potentially harmful commands.
**Config**:
```json theme={null}
{
"hooks": {
"pre_run_command": [
{
"command": "python3 /Users/yourname/hooks/block_dangerous_commands.py",
"show_output": true
}
]
}
}
```
**Script** (`block_dangerous_commands.py`):
```python theme={null}
#!/usr/bin/env python3
import sys
import json
DANGEROUS_COMMANDS = ["rm -rf", "sudo rm", "format", "del /f"]
def main():
# Read the JSON data from stdin
input_data = sys.stdin.read()
# Parse the JSON
try:
data = json.loads(input_data)
if data.get("agent_action_name") == "pre_run_command":
tool_info = data.get("tool_info", {})
command = tool_info.get("command_line", "")
for dangerous_cmd in DANGEROUS_COMMANDS:
if dangerous_cmd in command:
print(f"Command blocked: '{dangerous_cmd}' is not allowed for safety reasons.", file=sys.stderr)
sys.exit(2) # Exit code 2 blocks the command
print(f"Command approved: {command}", file=sys.stdout)
except json.JSONDecodeError as e:
print(f"Error parsing JSON: {e}", file=sys.stderr)
sys.exit(1)
if __name__ == "__main__":
main()
```
This hook scans commands for dangerous patterns and blocks them before execution.
### Blocking Policy-Violating Prompts
Prevent users from submitting prompts that violate organizational policies.
**Config**:
```json theme={null}
{
"hooks": {
"pre_user_prompt": [
{
"command": "python3 /Users/yourname/hooks/block_bad_prompts.py"
}
]
}
}
```
**Script** (`block_bad_prompts.py`):
```python theme={null}
#!/usr/bin/env python3
import sys
import json
BLOCKED_PATTERNS = [
"something dangerous",
"bypass security",
"ignore previous instructions"
]
def main():
# Read the JSON data from stdin
input_data = sys.stdin.read()
# Parse the JSON
try:
data = json.loads(input_data)
if data.get("agent_action_name") == "pre_user_prompt":
tool_info = data.get("tool_info", {})
user_prompt = tool_info.get("user_prompt", "").lower()
for pattern in BLOCKED_PATTERNS:
if pattern in user_prompt:
print(f"Prompt blocked: Contains prohibited content. The user cannot ask the agent to do bad things.", file=sys.stderr)
sys.exit(2) # Exit code 2 blocks the prompt
except json.JSONDecodeError as e:
print(f"Error parsing JSON: {e}", file=sys.stderr)
sys.exit(1)
if __name__ == "__main__":
main()
```
This hook examines user prompts before they are processed and blocks any that contain prohibited patterns. When a prompt is blocked, the user sees an error message in the Cascade UI.
### Logging Cascade Responses
Track all Cascade responses for compliance auditing or analytics.
**Config**:
```json theme={null}
{
"hooks": {
"post_cascade_response": [
{
"command": "python3 /Users/yourname/hooks/log_cascade_response.py"
}
]
}
}
```
**Script** (`log_cascade_response.py`):
```python theme={null}
#!/usr/bin/env python3
import sys
import json
from datetime import datetime
def main():
# Read the JSON data from stdin
input_data = sys.stdin.read()
# Parse the JSON
try:
data = json.loads(input_data)
if data.get("agent_action_name") == "post_cascade_response":
tool_info = data.get("tool_info", {})
cascade_response = tool_info.get("response", "")
trajectory_id = data.get("trajectory_id", "unknown")
timestamp = data.get("timestamp", datetime.now().isoformat())
# Log to file
with open("/Users/yourname/hooks/cascade_responses.log", "a") as f:
f.write(f"\n{'='*80}\n")
f.write(f"Timestamp: {timestamp}\n")
f.write(f"Trajectory ID: {trajectory_id}\n")
f.write(f"Response:\n{cascade_response}\n")
print(f"Logged Cascade response for trajectory {trajectory_id}")
except json.JSONDecodeError as e:
print(f"Error parsing JSON: {e}", file=sys.stderr)
sys.exit(1)
if __name__ == "__main__":
main()
```
This hook logs every Cascade response to a file, creating an audit trail of all AI-generated content. You can extend this to send data to external logging systems, databases, or compliance platforms.
### Running Code Formatters After Edits
Automatically format code files after Cascade modifies them.
**Config**:
```json theme={null}
{
"hooks": {
"post_write_code": [
{
"command": "bash /Users/yourname/hooks/format_code.sh",
"show_output": false
}
]
}
}
```
**Script** (`format_code.sh`):
```bash theme={null}
#!/bin/bash
# Read JSON from stdin
input=$(cat)
# Extract file path using jq
file_path=$(echo "$input" | jq -r '.tool_info.file_path')
# Format based on file extension
if [[ "$file_path" == *.py ]]; then
black "$file_path" 2>&1
echo "Formatted Python file: $file_path"
elif [[ "$file_path" == *.js ]] || [[ "$file_path" == *.ts ]]; then
prettier --write "$file_path" 2>&1
echo "Formatted JS/TS file: $file_path"
elif [[ "$file_path" == *.go ]]; then
gofmt -w "$file_path" 2>&1
echo "Formatted Go file: $file_path"
fi
exit 0
```
This hook automatically runs the appropriate formatter based on the file type after each edit.
### Setting Up Worktrees
Copy environment files and install dependencies when a new worktree is created.
**Config** (in `.windsurf/hooks.json`):
```json theme={null}
{
"hooks": {
"post_setup_worktree": [
{
"command": "bash $ROOT_WORKSPACE_PATH/hooks/setup_worktree.sh",
"show_output": true
}
]
}
}
```
**Script** (`hooks/setup_worktree.sh`):
```bash theme={null}
#!/bin/bash
# Copy environment files from the original workspace
if [ -f "$ROOT_WORKSPACE_PATH/.env" ]; then
cp "$ROOT_WORKSPACE_PATH/.env" .env
echo "Copied .env file"
fi
if [ -f "$ROOT_WORKSPACE_PATH/.env.local" ]; then
cp "$ROOT_WORKSPACE_PATH/.env.local" .env.local
echo "Copied .env.local file"
fi
# Install dependencies
if [ -f "package.json" ]; then
npm install
echo "Installed npm dependencies"
fi
exit 0
```
This hook ensures each worktree has the necessary environment configuration and dependencies installed automatically.
## Best Practices
### Security
**Use Cascade Hooks at Your Own Risk**: Hooks execute shell commands automatically with your user account's full permissions. You are entirely responsible for the code you configure. Poorly designed or malicious hooks can modify files, delete data, expose credentials, or compromise your system.
* **Validate all inputs**: Never trust the input JSON without validation, especially for file paths and commands.
* **Use absolute paths**: Always use absolute paths in your hook configurations to avoid ambiguity.
* **Protect sensitive data**: Avoid logging sensitive information like API keys or credentials.
* **Review permissions**: Ensure your hook scripts have appropriate file system permissions.
* **Audit before deployment**: Review every hook command and script before adding to your configuration.
* **Test in isolation**: Run hooks in a test environment before enabling them on your primary development machine.
### Performance Considerations
* **Keep hooks fast**: Slow hooks will impact Cascade's responsiveness. Aim for sub-100ms execution times.
* **Use async operations**: For non-blocking hooks, consider logging to a queue or database asynchronously.
* **Filter early**: Check the action type at the start of your script to avoid unnecessary processing.
### Error Handling
* **Always validate JSON**: Use try-catch blocks to handle malformed input gracefully.
* **Log errors properly**: Write errors to `stderr` so they're visible when `show_output` is enabled.
* **Fail safely**: If your hook encounters an error, consider whether it should block the action or allow it to proceed.
### Testing Your Hooks
1. **Start with logging**: Begin by implementing a simple logging hook to understand the data flow.
2. **Use `show_output: true`**: Enable output during development to see what your hooks are doing.
3. **Test blocking behavior**: Verify that exit code 2 properly blocks actions in pre-hooks.
4. **Check all code paths**: Test both success and failure scenarios in your scripts.
## Enterprise Distribution
Enterprise organizations need to enforce security policies, compliance requirements, and development standards that individual users cannot bypass. Cascade Hooks supports this through **system-level configuration**, which takes precedence and cannot be disabled by end users without root permissions.
Deploy your mandatory `hooks.json` configuration to these OS-specific locations:
**macOS:**
```
/Library/Application Support/Windsurf/hooks.json
```
**Linux/WSL:**
```
/etc/windsurf/hooks.json
```
**Windows:**
```
C:\ProgramData\Windsurf\hooks.json
```
Place your hook scripts in a corresponding system directory (e.g., `/usr/local/share/windsurf-hooks/` on Unix systems).
### Deployment Methods
Enterprise IT teams can deploy system-level hooks using standard tools and workflows:
**Mobile Device Management (MDM)**
* **Jamf Pro** (macOS) - Deploy via configuration profiles or scripts
* **Microsoft Intune** (Windows/macOS) - Use PowerShell scripts or policy deployment
* **Workspace ONE**, **Google Endpoint Management**, and other MDM solutions
**Configuration Management**
* **Ansible**, **Puppet**, **Chef**, **SaltStack** - Use your existing infrastructure automation
* **Custom deployment scripts** - Shell scripts, PowerShell, or your preferred tooling
### Verification and Auditing
After deployment, verify that hooks are properly installed and cannot be bypassed:
```bash theme={null}
# Verify system hooks are present
ls -la /etc/windsurf/hooks.json # Linux
ls -la "/Library/Application Support/Windsurf/hooks.json" # macOS
# Test hook execution (should see hook output in Cascade)
# Have a developer trigger the relevant Cascade action
# Verify users cannot modify system hooks
sudo chown root:root /etc/windsurf/hooks.json
sudo chmod 644 /etc/windsurf/hooks.json
```
**Important**: System-level hooks are entirely managed by your IT or security team. Windsurf does not deploy or manage files at system-level paths. Ensure your internal teams handle deployment, updates, and compliance according to your organization's policies.
### Workspace Hooks for Team Projects
For project-specific conventions, teams can use workspace-level hooks in version control:
```bash theme={null}
# Add to your repository
.windsurf/
├── hooks.json
└── scripts/
└── format-check.py
# Commit to git
git add .windsurf/
git commit -m "Add workspace hooks for code formatting"
```
This allows teams to standardize development practices. Be sure to keep security-critical policies at the system level, and be sure not to check in any sensitive information to version control.
## Additional Resources
* **MCP Integration**: Learn more about [Model Context Protocol in Windsurf](/windsurf/cascade/mcp)
* **Workflows**: Discover how to combine hooks with [Cascade Workflows](/windsurf/cascade/workflows)
* **Analytics**: Track Cascade usage with [Team Analytics](/windsurf/accounts/analytics)
---
# Source: https://docs.windsurf.com/troubleshooting/plugins-enterprise/jetbrains-proxy.md
> ## Documentation Index
> Fetch the complete documentation index at: https://docs.windsurf.com/llms.txt
> Use this file to discover all available pages before exploring further.
# Proxy Configuration for Windsurf in JetBrains IDEs
> Configure HTTP/HTTPS proxy settings for Windsurf plugin in JetBrains IDEs including remote development and Gateway environments.
Some corporate and enterprise networks route traffic through HTTP/HTTPS proxies. The Windsurf plugin in JetBrains IDEs needs to reach external Windsurf services (for sign-in and AI features), so you may need to configure a proxy before things work reliably.
## When Proxy Configuration May Be Required
Proxy configuration may be required if:
* You see "Failed to connect" or similar network errors in Windsurf
* The Windsurf panel in the IDE stays blank and never loads
* Cascade or other Windsurf features cannot connect or time out
This guide covers:
* Checking whether your network uses a proxy
* Configuring the IDE's proxy
* Enabling Windsurf's proxy detection
* Configuring proxy settings for JetBrains Remote
## Check Whether Your Network Uses a Proxy
Before changing anything:
Ask your IT / infra / network team:
* Do we use an HTTP/HTTPS proxy for outbound traffic?
* If yes, is it configured automatically (system settings / PAC file / device management), or do I need to configure it manually in applications?
If your organization does not use a proxy, you usually don't need to change these settings.
If your organization does use one, collect the proxy details (address, port, and any credentials). You can share screenshots of the JetBrains HTTP Proxy and Windsurf settings with them so they can tell you exactly what to fill in.
## Configure the JetBrains IDE Proxy
First, make sure the IDE itself can access the internet through your proxy — in particular, that it can reach `windsurf.com`.
1. Open Settings / Preferences in your JetBrains IDE. For example: File → Settings… (Windows/Linux) or ⌘, → Settings… (macOS).
2. Go to Appearance & Behavior → System Settings → HTTP Proxy.
3. Choose the appropriate option based on your IT team's guidance:
* **No proxy** – if your network does not use a proxy.
* **Auto-detect proxy settings** or **Use system proxy settings** – if the proxy is configured globally on your machine.
* **Manual proxy configuration** – if IT provided a specific proxy host/port (and optional username/password) to enter here.
4. Use Check connection… (if available) to verify the configuration — ideally test connectivity to `https://windsurf.com` from this dialog.
5. Apply the changes and restart the IDE if prompted.
If the IDE itself cannot reach the network (for example, plugin marketplace, updates, or built-in web features fail, or you cannot reach `https://windsurf.com` from within the IDE), fix that here first. Windsurf relies on this connectivity.
## Enable Windsurf Proxy Detection in JetBrains
Once your IDE-level proxy is set (or confirmed not needed), configure how Windsurf uses those settings.
The Windsurf plugin has its own Detect proxy option inside its settings:
1. In your JetBrains IDE, open Settings / Preferences.
2. Navigate to Tools → Windsurf Settings.
3. Find the Detect proxy toggle.
4. Turn Detect proxy ON if:
* Your proxy is configured at the OS or IDE level, and
* IT expects applications to "just pick up" those settings.
5. Click Apply and OK if needed, then restart the IDE.
6. Try using Windsurf again:
* Open the Windsurf panel from the IDE sidebar
* Run Cascade or retry the operation that was failing with "Failed to connect" or showing a blank screen
If you see new connection issues after enabling Detect proxy, you can:
* Turn Detect proxy back OFF,
* Double-check your IDE HTTP Proxy configuration (including that it can reach `https://windsurf.com`), and
* Confirm with IT whether additional manual configuration is required.
## Proxy Configuration in JetBrains Remote
If you use JetBrains Remote Development (for example via JetBrains Gateway, a remote backend, or a cloud dev environment), there are effectively two places where proxy settings matter:
* Your local machine, running the thin client.
* The remote machine, where the actual IDE backend (and Windsurf) runs.
When you connect with JetBrains Remote, Windsurf's network requests originate from the remote machine, not from your local laptop. This means:
* Proxy setup on the remote IDE affects how Windsurf connects to Windsurf services.
* The remote machine may need its own proxy configuration, even if your local machine is already set up correctly.
For JetBrains remote development, you must use the dedicated "Windsurf (Remote Development)" plugin, not the standard Windsurf plugin. Make sure you've installed Windsurf (Remote Development) as described in the Remote Development section of the Windsurf JetBrains getting started guide.
### Configure the Proxy for the Remote Environment
1. Connect to your remote backend using JetBrains Remote / Gateway.
2. Open Settings / Preferences in the remote IDE session (this opens the settings for the IDE running on the remote machine).
3. Configure the proxy for the remote IDE:
* Go to Appearance & Behavior → System Settings → HTTP Proxy on the remote IDE.
* Set the proxy according to your IT team's instructions (No proxy / Auto-detect / Use system proxy / Manual).
* If the IDE provides a Check connection… button, use it to test connectivity to `https://windsurf.com` from the remote machine.
4. Configure Windsurf on the remote IDE:
* Go to Tools → Windsurf Settings (still in the remote session).
* Enable Detect proxy if your IT team expects applications on the remote host to use system/IDE proxy settings.
5. Apply the changes, then restart the remote IDE backend or disconnect and reconnect your remote session.
6. Open the Windsurf panel again in the remote IDE and retry the previously failing action.
It's common in corporate setups that both your local machine and the remote machine have their own proxy rules. Make sure you follow IT guidance for each side; fixing only the local proxy will not help if the remote host itself cannot reach the internet (including `https://windsurf.com`) without its own proxy configuration.
## When to Change What
### Change Only the Local IDE HTTP Proxy
If:
* You are not using JetBrains Remote, and
* Other JetBrains features already work after setting it, and
* Windsurf works without touching its own settings, and
* The IDE can reach `https://windsurf.com`.
### Enable Windsurf "Detect Proxy"
(Local or remote) if:
* The proxy is already set up at the OS or IDE level on that machine, and
* Windsurf is the only thing that can't connect, or shows a blank Windsurf panel.
### Configure Proxy on the Remote IDE
If:
* You use JetBrains Remote,
* You've installed the Windsurf (Remote Development) plugin for that environment, and
* Errors occur only when connected to a remote backend, or
* IT says the remote server must also go through a proxy to reach the internet (including `https://windsurf.com`).
### Talk to IT / Infra
If:
* You're not sure whether your environment uses a proxy at all, or
* You've configured the HTTP Proxy + Windsurf Detect proxy (locally and/or remotely) and verified connection to `https://windsurf.com`, but still see blank Windsurf panels or connection failures.
Your IT / infra team is the final source of truth—they can confirm whether you need a proxy on your local machine, your remote machine, or both, how it should be configured in JetBrains, and whether the Windsurf Detect proxy setting should be enabled in your environment.
---
# Source: https://docs.windsurf.com/troubleshooting/plugins-enterprise/jetbrains.md
> ## Documentation Index
> Fetch the complete documentation index at: https://docs.windsurf.com/llms.txt
> Use this file to discover all available pages before exploring further.
# JetBrains Troubleshooting
> Troubleshoot JetBrains plugin issues including JCEF errors, certificate problems, custom workspaces, and extension diagnostics.
# Supported Versions
Version 2022.3 or greater.
* JetBrains Fleet or Reshaper are not supported
* Remote SSH is not supported.
# Gathering extension logs
Starting in extension version 1.10.0, the Chat Panel has an Extension Diagnostics button on the Settings page. This button will automatically collect relevant logs and parameters into a text file that can be downloaded.
For older versions of the extension:
1. Logs are written to the idea.log file. To locate this file, go to the `Help > Show Log in Finder/Explorer` menu option
2. Export or copy the logs
# Known IDE issues and solutions
## Cascade not being displayed
Usually, you will see the following error in the logs:
```
JCEF is not supported in this env or failed to initialize
```
or
```
Internal JCEF not supported, trying external JCEF
```
JCEF is a browser needed to display Cascade. To fix this, go to `Help > Find Actions > Choose Java Boot Runtime` and pick a runtime with a bundled JCEF.
If you already have JCEF bundled as part of your runtime, JCEF may be disabled in your registry/properties.
Edit your properties: Help > Edit Custom Properties, add the following flag and restart your IDE:
```
ide.browser.jcef.enabled=true
```
## Certificate Issues
If you encounter the following errors:
```
Failed to fetch extension base URL at
```
```
PKIX path building failed: sun.security.provider.certpath.SunCertPathBuilderException:
unable to find valid certification path to requested target
```
This suggests that the Codeium extension is unable to trust the TLS connection to your enterprise portal / API server because it does not trust the certificate being presented. This either means that the certificate presented by the Codeium deployment is untrusted or a certificate presented by a corporate proxy intercepting the request is untrusted.
In either case, the most preferable solution is to ensure that the root certificate that signed this certificate is properly installed on end-user machines in the appropriate location. JetBrains IDEs and most other IDEs load certificates from the operating system's default location.
Your certificate is issued and managed by your local IT or Admin team. Please reach out to them for assistance with installing the necessary certificates on your system.
It is important that the full certificate chain is being presented from wherever TLS is being terminated. Oftentimes, if only the leaf certificate is presented, JetBrains IDE and other IDEs are unable to verify its authenticity because they are not aware of the intermediate certificate which validates the leaf certificate and is validated by the root certificate. Browsers are often able to work around this issue as users will likely have encountered a different website that does present the full certificate chain, so the intermediate cert is seen and cached, but applications like JetBrains IDEs don't have this advantage.
**Note**: In JetBrains family products **2024.3** a bug was introduced in which the IDE is failing to accept the OS certificates ([JetBrains issue report](https://youtrack.jetbrains.com/issue/IJPL-171446/Unable-to-find-valid-certification-path-to-requested-target-exception-in-Settings-Sync-when-proxy-is-used)). To solve this, users can do any of the following:
* Downgrade JB products to earlier versions
* Use the 2024.3.1 preview version (beta version)
* Add `-Djavax.net.ssl.trustStoreType=Windows-ROOT` as a custom JVM option
## Custom Workspaces
If you see the following error when using Cascade:
```
Cascade cannot access paths without an active workspace
```
This indicates that Cascade needs access to a custom workspace to function properly. To resolve this:
1. Open your JetBrains IDE Settings by going to `File > Settings` (or `IntelliJ IDEA > Preferences` on macOS)
2. Navigate to `Tools > Windsurf Settings`
3. In the Windsurf Settings panel, locate the "Custom Workspaces" section at the bottom
4. Click the "Add Workspace" button to add your project workspace
5. Select the appropriate workspace directory for your project
6. Click "OK" to apply the settings
7. Restart your IDE for the changes to take effect
### Enterprise vs Non-Enterprise Behavior
The behavior of custom workspaces differs depending on your user type:
#### Enterprise Users
Enterprise users have selective control over workspace indexing:
* When adding workspaces, you'll see a checkbox option to enable indexing for each workspace
* Only workspaces with the checkbox enabled will be indexed and available to Cascade
* This allows you to control which workspaces consume indexing resources
* Tool calls are restricted to the active workspace for security
#### Non-Enterprise Users
Non-enterprise users get automatic workspace indexing:
* Any workspace you add is automatically indexed without requiring a checkbox
* All added workspaces are immediately available to Cascade
* Tool calls are never blocked outside the active workspace
* The selective indexing feature is not relevant under this model
After completing the setup steps above, Cascade should be able to access your workspace and function normally.
## Keyboard Shortcuts Not Working in Rider on Windows
If you are using JetBrains Rider on Windows and experience issues where Shift+Enter does not create a new line in Cascade, or the Delete key does not work, this is caused by a keybinding conflict with Rider's Unit Test Tool Window.
This is a known issue affecting AI plugins in Rider. To resolve this:
1. Open your JetBrains IDE Settings by going to `File > Settings`
2. Navigate to `Keymap`
3. Search for "Unit Test Tool Window Action"
4. Disable or reassign the conflicting keybindings (Shift+Enter and Delete)
5. Restart your IDE for the changes to take effect
---
# Source: https://docs.windsurf.com/windsurf/cascade/mcp.md
# Source: https://docs.windsurf.com/plugins/cascade/mcp.md
> ## Documentation Index
> Fetch the complete documentation index at: https://docs.windsurf.com/llms.txt
> Use this file to discover all available pages before exploring further.
# Model Context Protocol (MCP)
> Configure MCP servers to extend Cascade with custom tools and services using stdio, HTTP, or SSE transports with admin controls for Teams and Enterprise.
**MCP (Model Context Protocol)** is a protocol that enables LLMs to access custom tools and services.
An MCP client (Cascade, in this case) can make requests to MCP servers to access tools that they provide.
Cascade now natively integrates with MCP, allowing you to bring your own selection of MCP servers for Cascade to use.
See the [official MCP docs](https://modelcontextprotocol.io/) for more information.
Enterprise users must manually turn this on via settings
## Adding a new MCP plugin
New MCP plugins can be added by going to the `Settings` > `Tools` > `Windsurf Settings` > `Add Server` section.
If you cannot find your desired MCP plugin, you can add it manually by clicking `View Raw Config` button and editing the raw `mcp_config.json` file.
When you click on an MCP server, simply click `+ Add Server` to expose the server and its tools to Cascade.
Cascade supports three [transport types](https://modelcontextprotocol.io/docs/concepts/transports) for MCP
servers: `stdio`, `Streamable HTTP`, and `SSE`.
Cascade also supports OAuth for each transport type.
For `http` servers, the URL should reflect that of the endpoint and resemble `https:///mcp`.
Make sure to press the refresh button after you add a new MCP plugin.
## mcp\_config.json
The `~/.codeium/mcp_config.json` file is a JSON file that contains a list of servers that Cascade can connect to.
Here’s an example configuration, which sets up a single server for GitHub:
```json theme={null}
{
"mcpServers": {
"github": {
"command": "npx",
"args": [
"-y",
"@modelcontextprotocol/server-github"
],
"env": {
"GITHUB_PERSONAL_ACCESS_TOKEN": ""
}
}
}
}
```
Be sure to provide the required arguments and environment variables for the servers that you want to use.
See the [official MCP server reference repository](https://github.com/modelcontextprotocol/servers) or [OpenTools](https://opentools.com/) for some example servers.
### Remote HTTP MCPs
It's important to note that for remote HTTP MCPs, the configuration is slightly
different and requires a `serverUrl` or `url` field.
Here's an example configuration for an HTTP server:
```json theme={null}
{
"mcpServers": {
"remote-http-mcp": {
"serverUrl": "/mcp",
"headers": {
"API_KEY": "value"
}
}
}
}
```
### Config Interpolation
The `~/.codeium/mcp_config.json` file handles interpolation of
environment variables in these fields: `command`, `args`, `env`, `serverUrl`, `url`, and
`headers`.
Here’s an example configuration, which uses an `AUTH_TOKEN` environment variable
in `headers`.
```json theme={null}
{
"mcpServers": {
"remote-http-mcp": {
"serverUrl": "/mcp",
"headers": {
"API_KEY": "Bearer ${env:AUTH_TOKEN}"
}
}
}
}
```
## Admin Controls (Teams & Enterprises)
Team admins can toggle MCP access for their team, as well as whitelist approved MCP servers for their team to use:
Configurable MCP settings for your team.
The above link will only work if you have admin privileges for your team.
By default, users within a team will be able to configure their own MCP servers. However, once you whitelist even a single MCP server, **all non-whitelisted servers will be blocked** for your team.
### How Server Matching Works
When you whitelist an MCP server, the system uses **regex pattern matching** with the following rules:
* **Full String Matching**: All patterns are automatically anchored (wrapped with `^(?:pattern)$`) to prevent partial matches
* **Command Field**: Must match exactly or according to your regex pattern
* **Arguments Array**: Each argument is matched individually against its corresponding pattern
* **Array Length**: The number of arguments must match exactly between whitelist and user config
* **Special Characters**: Characters like `$`, `.`, `[`, `]`, `(`, `)` have special regex meaning and should be escaped with `\` if you want literal matching
### Configuration Options
**Admin Whitelist Configuration:**
* **Server ID**: `github-mcp-server`
* **Server Config (JSON)**: *(leave empty)*
```json theme={null}
{}
```
**Matching User Config (`mcp_config.json`):**
```json theme={null}
{
"mcpServers": {
"github-mcp-server": {
"command": "docker",
"args": [
"run",
"-i",
"--rm",
"-e",
"GITHUB_PERSONAL_ACCESS_TOKEN",
"ghcr.io/github/github-mcp-server"
],
"env": {
"GITHUB_PERSONAL_ACCESS_TOKEN": "ghp_your_token_here"
}
}
}
}
```
This allows users to install the GitHub MCP server with any valid configuration, as long as the server ID matches the plugin store entry.
**Admin Whitelist Configuration:**
* **Server ID**: `github-mcp-server`
* **Server Config (JSON)**:
```json theme={null}
{
"command": "docker",
"args": [
"run",
"-i",
"--rm",
"-e",
"GITHUB_PERSONAL_ACCESS_TOKEN",
"ghcr.io/github/github-mcp-server"
],
"env": {
"GITHUB_PERSONAL_ACCESS_TOKEN": ""
}
}
```
**Matching User Config (`mcp_config.json`):**
```json theme={null}
{
"mcpServers": {
"github-mcp-server": {
"command": "docker",
"args": [
"run",
"-i",
"--rm",
"-e",
"GITHUB_PERSONAL_ACCESS_TOKEN",
"ghcr.io/github/github-mcp-server"
],
"env": {
"GITHUB_PERSONAL_ACCESS_TOKEN": "ghp_your_token_here"
}
}
}
}
```
Users must use this exact configuration - any deviation in command or args will be blocked. The `env` section can have different values.
**Admin Whitelist Configuration:**
* **Server ID**: `python-mcp-server`
* **Server Config (JSON)**:
```json theme={null}
{
"command": "python3",
"args": ["/.*\\.py", "--port", "[0-9]+"]
}
```
**Matching User Config (`mcp_config.json`):**
```json theme={null}
{
"mcpServers": {
"python-mcp-server": {
"command": "python3",
"args": ["/home/user/my_server.py", "--port", "8080"],
"env": {
"PYTHONPATH": "/home/user/mcp"
}
}
}
}
```
This example allows users flexibility while maintaining security:
* The regex `/.*\\.py` matches any Python file path like `/home/user/my_server.py`
* The regex `[0-9]+` matches any numeric port like `8080` or `3000`
* Users can customize file paths and ports while admins ensure only Python scripts are executed
### Common Regex Patterns
| Pattern | Matches | Example |
| --------------- | ------------------------- | ---------------------- |
| `.*` | Any string | `/home/user/script.py` |
| `[0-9]+` | Any number | `8080`, `3000` |
| `[a-zA-Z0-9_]+` | Alphanumeric + underscore | `api_key_123` |
| `\\$HOME` | Literal `$HOME` | `$HOME` (not expanded) |
| `\\.py` | Literal `.py` | `script.py` |
| `\\[cli\\]` | Literal `[cli]` | `mcp[cli]` |
## Notes
### Admin Configuration Guidelines
* **Environment Variables**: The `env` section is not regex-matched and can be configured freely by users
* **Disabled Tools**: The `disabledTools` array is handled separately and not part of whitelist matching
* **Case Sensitivity**: All matching is case-sensitive
* **Error Handling**: Invalid regex patterns will be logged and result in access denial
* **Testing**: Test your regex patterns carefully - overly restrictive patterns may block legitimate use cases
### Troubleshooting
If users report that their MCP servers aren't working after whitelisting:
1. **Check Exact Matching**: Ensure the whitelist pattern exactly matches the user's configuration
2. **Verify Regex Escaping**: Special characters may need escaping (e.g., `\.` for literal dots)
3. **Review Logs**: Invalid regex patterns are logged with warnings
4. **Test Patterns**: Use a regex tester to verify your patterns work as expected
Remember: Once you whitelist any server, **all other servers are automatically blocked** for your team members.
### General Information
* Since MCP tool calls can invoke code written by arbitrary server implementers, we do not assume liability
for MCP tool call failures. To reiterate:
* We currently support an MCP server's [tools](https://modelcontextprotocol.io/docs/concepts/tools), [resources](https://modelcontextprotocol.io/docs/concepts/resources), and [prompts](https://modelcontextprotocol.io/docs/concepts/prompts).
---
# Source: https://docs.windsurf.com/windsurf/cascade/memories.md
# Source: https://docs.windsurf.com/plugins/cascade/memories.md
> ## Documentation Index
> Fetch the complete documentation index at: https://docs.windsurf.com/llms.txt
> Use this file to discover all available pages before exploring further.
# Memories & Rules
> Configure Cascade memories and rules to persist context across conversations with global rules, workspace rules, and system-level rules for enterprise.
`Memories` is the system for sharing and persisting context across conversations.
There are two mechanisms for this in Cascade: Memories, which can be automatically generated by Cascade, and rules, which are manually defined by the user at both the local and global levels.
## How to Manage Memories
Memories and Rules can be accessed and configured at any time by clicking on the `Customizations` icon in the top right slider menu in Cascade. To edit an existing memory, simply click into it and then click the `Edit` button.
## Memories
During conversation, Cascade can automatically generate and store memories if it encounters context that it believes is useful to remember.
Additionally, you can ask Cascade to create a memory at any time. Just prompt Cascade to "create a memory of ...".
Cascade's autogenerated memories are associated with the workspace that they were created in and Cascade will retrieve them when it believes that they are relevant. Memories generated in one workspace will not be available in another.
Creating and using auto-generated memories do NOT consume credits
## Rules
Users can explicitly define their own rules for Cascade to follow.
Rules can be defined at either the global level or the workspace level.
`global_rules.md` - rules applied across all workspaces
`.windsurf/rules` - workspace level directory containing rules that are tied to globs or natural language descriptions.
## Rules Discovery
Windsurf automatically discovers rules from multiple locations to provide flexible organization:
* **Current workspace and sub-directories**: All `.windsurf/rules` directories within your current workspace and its sub-directories
* **Git repository structure**: For git repositories, Windsurf also searches up to the git root directory to find rules in parent directories
* **Multiple workspace support**: When multiple folders are open in the same workspace, rules are deduplicated and displayed with the shortest relative path
### Rules Storage Locations
Rules can be stored in any of these locations:
* `.windsurf/rules` in your current workspace directory
* `.windsurf/rules` in any sub-directory of your workspace
* `.windsurf/rules` in parent directories up to the git root (for git repositories)
When you create a new rule, it will be saved in the `.windsurf/rules` directory of your current workspace, not necessarily at the git root.
To get started with Rules, click on the `Customizations` icon in the top right slider menu in Cascade, then navigate to the `Rules` panel. Here, you can click on the `+ Global` or `+ Workspace` button to create new rules at either the global or workspace level, respectively.
You can find example rule templates curated by the Windsurf team at [https://windsurf.com/editor/directory](https://windsurf.com/editor/directory) to help you get started.
Rules files are limited to 12000 characters each.
### Best Practices
To help Cascade follow your rules effectively, follow these best practices:
* Keep rules simple, concise, and specific. Rules that are too long or vague may confuse Cascade.
* There's no need to add generic rules (e.g. "write good code"), as these are already baked into Cascade's training data.
* Format your rules using bullet points, numbered lists, and markdown. These are easier for Cascade to follow compared to a long paragraph.
For example:
```
# Coding Guidelines
- My project's programming language is python
- Use early returns when possible
- Always add documentation when creating new functions and classes
```
* XML tags can be an effective way to communicate and group similar rules together. For example:
```
- My project's programming language is python
- Use early returns when possible
- Always add documentation when creating new functions and classes
```
## System-Level Rules (Enterprise)
Enterprise organizations can deploy system-level rules that apply globally across all workspaces and cannot be modified by end users without administrator permissions. This is ideal for enforcing organization-wide coding standards, security policies, and compliance requirements.
System-level rules are loaded from OS-specific directories:
**macOS:**
```
/Library/Application Support/Windsurf/rules/*.md
```
**Linux/WSL:**
```
/etc/windsurf/rules/*.md
```
**Windows:**
```
C:\ProgramData\Windsurf\rules\*.md
```
Place your rule files (as `.md` files) in the appropriate directory for your operating system. The system will automatically load all `.md` files from these directories.
### How System Rules Work
System-level rules are merged with workspace and global rules, providing additional context to Cascade without overriding user-defined rules. This allows organizations to establish baseline standards while still permitting teams to add project-specific customizations.
In the Cascade UI, system-level rules are displayed with a "System" label and cannot be deleted by end users.
**Important**: System-level rules should be managed by your IT or security team. Ensure your internal teams handle deployment, updates, and compliance according to your organization's policies. You can use standard tools and workflows such as Mobile Device Management (MDM) or Configuration Management to do so.
---
# Source: https://docs.windsurf.com/windsurf/models.md
# Source: https://docs.windsurf.com/plugins/cascade/models.md
# Source: https://docs.windsurf.com/chat/models.md
> ## Documentation Index
> Fetch the complete documentation index at: https://docs.windsurf.com/llms.txt
> Use this file to discover all available pages before exploring further.
# Chat Models
> Available AI models for Windsurf Chat including Base Model, Windsurf Premier, GPT-4o, and Claude 3.5 Sonnet with different access levels.
While we provide and train our own dedicated models for Chat, we also give you the flexibility choose your favorites.
It's worth noting that the Windsurf models are tightly integrated with our reasoning stack, leading to better quality suggestions than external models for coding-specific tasks.
Model selection can be found directly under the chat.
## Base Model ⚡
**Access:** All users
Available for unlimited use to all users is a fast, high-quality Windsurf Chat model based on Meta's [Llama 3.1 70B](https://ai.meta.com/blog/meta-llama-3-1/).
This model is optimized for speed, and is the **fastest** model available in Windsurf Chat. This is all while still being extremely accurate.
## Windsurf Premier 🚀
**Access:** Any paying users (Pro, Teams, Enterprise, etc.)
Available in our paid tier is unlimited usage of our premier Windsurf Chat model based on Meta's [Llama 3.1 405B](https://ai.meta.com/blog/meta-llama-3-1/).
This is the **highest-performing model** available for use in Windsurf, due to its size and integration with Windsurf's reasoning engine and native workflows.
## Other Models (GPT-4o, Claude 3.5 Sonnet)
**Access:** Any paying users (Pro, Teams, Enterprise, etc.)
Windsurf provides access to OpenAI's and Anthropic's flagship models.
---
# Source: https://docs.windsurf.com/windsurf/cascade/modes.md
> ## Documentation Index
> Fetch the complete documentation index at: https://docs.windsurf.com/llms.txt
> Use this file to discover all available pages before exploring further.
# Cascade Modes
> Cascade offers multiple distinct modes, each optimized for different types of tasks.
Cascade offers three distinct modes, each with a different set of capabilities designed for specific workflows.
| Mode | Use case | Tools |
| ------------------ | ----------------------------------- | ----------------- |
| [Code](#code-mode) | Complex features, refactoring | All tools enabled |
| [Plan](#plan-mode) | Complex features requiring planning | All tools enabled |
| [Ask](#ask-mode) | Learning, planning, questions | Search tools only |
You can switch between different modes using the mode toggle below the Cascade input box, or by using the keyboard shortcut `⌘+.` (Mac) or `Ctrl+.` (Windows/Linux).
## Code Mode
**Code mode** is Windsurf's default fully agentic mode, designed for making changes to your codebase.
In Code mode, Cascade can:
* Create, edit, and delete files
* Run terminal commands
* Search and analyze your codebase
* Install dependencies
* Execute multi-step tasks autonomously
Use Code mode when you want Cascade to actively work on your project and implement changes.
We recommend you use Code mode as your default mode for most tasks.
## Plan Mode
**Plan mode** helps you think through complex tasks by developing a detailed implementation plan before writing any code.
In Plan mode, Cascade will:
* Explore your codebase to understand the current state
* Ask clarifying questions to ensure the plan aligns with your goals
* Provide multiple options for you to choose from with an interactive interface
* Present a detailed plan, written in an external Markdown file, with implementation steps
When Cascade is finished, you can click "Implement" on the plan file to automatically switch to Code mode and begin implementing the plan.
### Continuing from a plan
The markdown file created in plan mode can be particularly useful for continuing work across multiple sessions.
Plans are stored in your `~/.windsurf/plans` directory and are available in the [@mentions](/chat/overview#%40-mentions) menu.
By mentioning a plan file, you can continue implementation with a fresh context.
This can be particularly useful when an initial implementation went awry: just discard the original changes, tweak the plan file, and click "Implement" to attempt implementation again in a new conversation.
### Exiting plan mode
There are multiple different ways to move from planning to implementation:
* Click the "Implement" button on the plan file
* Change your mode to Code mode in the input box
* Let the agent *automatically* switch to Code mode when it detects that you're ready to implement
## Ask Mode
**Ask mode** is a read-only mode optimized for questions and exploration.
In ask mode, Cascade can search and analyze your codebase, but cannot make any changes.
---
# Source: https://docs.windsurf.com/tab/overview.md
# Source: https://docs.windsurf.com/context-awareness/overview.md
# Source: https://docs.windsurf.com/chat/overview.md
# Source: https://docs.windsurf.com/autocomplete/overview.md
> ## Documentation Index
> Fetch the complete documentation index at: https://docs.windsurf.com/llms.txt
> Use this file to discover all available pages before exploring further.
# Autocomplete Overview
> AI-powered code autocomplete with single-line and multi-line suggestions, keyboard shortcuts, and customizable speed settings.
**Windsurf Autocomplete** is powered by our own models, trained in-house from scratch to optimize for speed and accuracy.
Our autocomplete makes in-line and multi-line suggestions based on the context of your code.
Suggestions appear in grey text as you type. You can press `esc` to cancel a suggestion.
Suggestions will also disappear if you continue typing or navigating without accepting them.
## Keyboard Shortcuts
### General Shortcuts
Here are the general shortcuts that apply for macOS.
Replace `⌘` with `Ctrl` and `⌥` with `Alt` to get the corresponding shortcuts on Windows/Linux.
* **Accept suggestion**: `⇥`
* **Cancel suggestion**: `esc`
* **Accept suggestion word-by-word**: `⌘+→` (VS Code), `⌥+⇧+\` (JetBrains)
* **Next/previous suggestion**: `⌥+]`/`⌥+[`
* **Trigger suggestion**: `⌥+\`
### JetBrains Shortcuts - 2.2.2 (stable) and 2.3.5 (pre-release) and later
* **Accept suggestion**: `⇥`
* **Accept next word**: `⌥→`
* **Accept current line**: `⌘→`
* **Trigger suggestion**: `⌥\`
* **Accept suggestion**: `Tab`
* **Accept next word**: `Ctrl+Right Arrow`
* **Accept current line**: `End`
* **Trigger suggestion**: `Alt+\`
You can customize these keyboard shortcuts by
* Hover over any completion text and select "Custom" from the dropdown.
* Navigate to Settings > Keymap > Main Menu > Code > Code Completion.
## Autocomplete Speeds
You can set the speed of the Autocomplete in your settings.
Fast Autocomplete is currently only available to our Pro, Teams, and Enterprise Users.
---
# Source: https://docs.windsurf.com/troubleshooting/plugins-common-issues.md
> ## Documentation Index
> Fetch the complete documentation index at: https://docs.windsurf.com/llms.txt
> Use this file to discover all available pages before exploring further.
# General Issues
> Common Windsurf plugin issues including subscription problems, cancellation, telemetry settings, account deletion, and chat panel troubleshooting.
### I subscribed to Pro but I'm stuck on the Free tier
First, give it a few minutes to update. If that doesn't work, try logging out of Windsurf on the website, restarting your IDE, and logging back into Windsurf. Additionally, please make sure you have the latest version of Windsurf installed.
### How do I cancel my Pro/Teams subscription?
You can cancel your paid plan by going to your Profile by clicking your icon on the top right of the [Windsurf website](https://windsurf.com/profile).
To cancel your Pro subscription, navigate to the `Billing` page in the navigation panel on the left and click "Cancel Plan".
To cancel your Teams subscription, navigate to the `Manage Team` page in the navigation panel on the left and click "Cancel Plan".
### How do I disable code snippet telemetry?
As mentioned in our [security page](https://windsurf.com/security), you can opt out of code snippet telemetry by going to your settings [account settings](https://windsurf.com/settings). For more information, please visit our [Terms of Service](https://windsurf.com/terms-of-service-individual).
### How do I delete my account?
You can delete your account by going to your settings [account settings](https://windsurf.com/settings), scrolling down and clicking on "Delete Account".
If you are a member within an organization, please reach out to your administrator.
### How do I request a feature?
You can vote, comment, and request features on our [feature request forum](https://codeium.canny.io/feature-requests).
You can also reach out to us on Twitter/X! [@windsurf](https://x.com/windsurf)
### My Windsurf Chat panel goes blank
Please reach out to us if this happens! A screen recording would be much appreciated. This can often be solved by clearing your chat history.
### How do I download diagnostic logs to send to the support team?
Please see the intructions for various plugins [here](/troubleshooting/gathering-logs)
---
# Source: https://docs.windsurf.com/troubleshooting/plugins-gathering-logs.md
> ## Documentation Index
> Fetch the complete documentation index at: https://docs.windsurf.com/llms.txt
> Use this file to discover all available pages before exploring further.
# Gathering Plugin Logs
> How to collect diagnostic logs from JetBrains, VS Code, Eclipse, Visual Studio, and NeoVim for troubleshooting Windsurf plugin issues.
If you're having issues, the first step in the troubleshooting process is to retrieve the logs from your IDE. Here's how you can get Windsurf logs for each of the major IDEs:
## JetBrains IDEs
Cascade has now the option to generate a diagnostics file directly from the IDE, there are 2 ways to do so:
* In the Cascade window, click on the 3 dots in the upper right side, and select Download Diagnostics
* In the IDE menu, go to Tools > Windsurf > Download Windsurf Diagnostics
The first option is preferred since it also includes Cascade embedded browser logs.
This button will automatically collect relevant logs and parameters into a text file.
In extreme situations, you can always get the IDE full log (idea.log) from Help > Show Log in Explorer/Finder.
To gather the Windsurf diagnostics, you can use the following options:
* In the Cascade window, click on the 3 dots in the upper right side, and select Download Diagnostics
* In the IDE menu, go to Tools > Windsurf > Download Windsurf Diagnostics
The first option is preferred since it also includes Cascade embedded browser logs.
In addition, to collect the full IDE logs:
* In the IDE menu, go to Tools > Windsurf > Collect Host and Client Logs
## VS Code
1. Go to the Command Palette (`Ctrl/Cmd + Shift + P` or go to View > Command Palette)
2. Type in "Show logs" and select the option that reads "Developer: Show Logs"
3. Change the dropdown in the top right that reads "Extension Host" and select "Windsurf"
4. You should see something similar to the image below:
5. Export or copy the logs
## Eclipse
In Eclipse, logs are written to the following paths:
* **Mac/Linux**: \~/.codeium/codeium.log
* **Windows**: C:\Users\.codeium\codeium.log
## Visual Studio
Go to **view > output**, select "Windsurf" in the dropdown, and copy the logs.
## NeoVim
Set `g:codeium_log_file` to a path to a file in their vimrc and then relaunch vim.
Then the logs should be written to that file.
---
# Source: https://docs.windsurf.com/command/plugins-overview.md
> ## Documentation Index
> Fetch the complete documentation index at: https://docs.windsurf.com/llms.txt
> Use this file to discover all available pages before exploring further.
# Command Overview
> Use Windsurf Command for AI-powered inline code edits in VS Code and JetBrains. Generate or edit code with natural language prompts using Cmd/Ctrl+I.
**Windsurf Command** generates new or edits existing code via natural language inputs, directly in the editor window.
To invoke Command, press `⌘+I` on Mac or `Ctrl+I` on Windows/Linux.
From there, you can enter a prompt in natural language and hit the Submit button (or `⌘+⏎`/`Ctrl+⏎`) to forward the instruction to the AI.
Windsurf will then provide a multiline suggestion that you can accept or reject.
If you highlight a section of code before invoking Command, then the AI will edit the selection spanned by the highlighted lines.
Otherwise, it will generate code at your cursor's location.
You can accept, reject, or follow-up a generation by clicking the corresponding code lens above the generated diff,
or by using the appropriate shortcuts (`⌥+A`/`Alt+A`, `⌥+R`/`Alt+R`, and `⌥+F`/`Alt+F`, respectively).
To invoke Command, press `⌘+I` on Mac or `Ctrl+I` on Windows/Linux.
Some users have reported keyboard conflicts with this shortcut, so `⌘+⇧+I` and `⌘+\`on Mac (`Ctrl+⇧+I` and `Ctrl+\` on Windows/Linux)
will also work.
The Command invocation will open an interactive popup at the appropriate location in the code.
You can enter a prompt in natural language and Windsurf will provide a multiline suggestion that you can accept or reject.
If you highlight a section of code before invoking Command, then the AI will edit the selection spanned by the highlighted lines.
Otherwise, it will generate code at your cursor's location.
The Command popup will persist in the editor if you scroll around or focus your cursor elsewhere in the editor.
It will act on your most recently highlighted selection of code or your most recent cursor position.
While it is active, the Command popup gives you the following options:
* **Cancel** (`Esc`): this will close the popup and undo any code changes that may have occured while the popup was open.
* **Accept generation** (`⌘+⏎`): this option appears after submitting an instruction and receiving a generation.
It will write the suggestion into the code editor and close the popup.
* **Undo generation** (`⌘+⌫`): this option appears after submitting an instruction and receiving a generation.
It will restore the code to its pre-Command state without closing the popup, while reinserting your most recent instruction
into the input box.
* **Follow-up**: this option appears after submitting an instruction and receiving a generation.
You can enter a second (and third, fourth, etc.) instruction and submit it,
which will undo the currently shown generation and rerun Command using your comma-concatenated instruction history.
# Best Practices
Windsurf Command is great for file-scoped, in-line changes that you can describe as an instruction in natural language.
Here are some pointers to keep in mind:
* The model that powers Command is larger than the one powering autocomplete.
It is slower but more capable, and it is trained to be especially good at instruction-following.
* If you highlight a block of code before invoking Command, it will edit the selection. Otherwise, it will do a pure generation.
* Using Command effectively can be an art. Simple prompts like "Fix this" or "Refactor" will likely work
thanks to Windsurf's context awareness.
A specific prompt like "Write a function that takes two inputs of type `Diffable` and implements the Myers diff algorithm"
that contains a clear objective and references to relevant context may help the model even more.
---
# Source: https://docs.windsurf.com/windsurf/previews.md
> ## Documentation Index
> Fetch the complete documentation index at: https://docs.windsurf.com/llms.txt
> Use this file to discover all available pages before exploring further.
# Windsurf Previews
> Preview your web app locally in Windsurf IDE or browser with element selection, error capture, and direct integration with Cascade for rapid iteration.
Windsurf Previews allow you to view the local deployment of your app either in the IDE or in the browser (optimized for Google Chrome, Arc, and Chromium based browsers) with listeners, allowing you to iterate rapidly by easily sending elements and errors back to Cascade as context.
Windsurf Previews are opened via tool call, so just ask Cascade to preview your site to get started. Alternatively, you can also click the Web icon in the Cascade toolbar to automatically propagate the natural language prompt to enter the proxy.
# Send Elements to Cascade
In the Preview, you can select and send elements/components and errors directly to Cascade. Simply click on the "Send element" button on the bottom right and then proceed to select the element you want to send.
The selected element will be inserted into your current Cascade prompt as an `@ mention`. You can add as many elements as you want in the prompt.
# In-IDE Preview
Windsurf can open a up a Preview as a new tab in your editor. This is a simple web view that enables you to view web app alongside your Cascade panel.
Because these Previews are hosted locally, you can open them in your system browser as well, complete with all the listeners and ability to select and send elements and console errors to Cascade.
The listeners and the abilities to send elements and errors are optimized for Google Chrome, Arc, and Chromium based browsers.
# How to Disable
You can disable Windsurf Previews from Windsurf - Settings. This will prevent Cascade from making this tool call.
---
# Source: https://docs.windsurf.com/best-practices/prompt-engineering.md
> ## Documentation Index
> Fetch the complete documentation index at: https://docs.windsurf.com/llms.txt
> Use this file to discover all available pages before exploring further.
# Prompt Engineering
> Best practices for crafting effective prompts to get high-quality code from Windsurf, including clear objectives, context, and constraints.
If you're reading this, you're probably someone that already understands some of the use cases and limitations of LLMs. The better prompt and context that provide to the model, the better the outcome will be.
Similarly with Windsurf, there are best practices for crafting more effective prompts to get the most out of the tool, and get the best quality code possible to help you accelerate your workflows.
For more complex tasks that may require you to [@-Mention](/chat/overview/#mentions) specific code blocks, use [Chat](/chat/overview) instead of [Command](/command/overview).
## Components of a high quality prompt
* ***Clear objective or outcome***
* What are you asking the model to produce?
* Are you asking the model for a plan? For new code? Is it a refactor?
* ***All relevant context to perform the task(s)***
* Have you properly used @-Mentions to ensure that the proper context is included?
* Is there any context that is customer specific that may be unclear to Windsurf?
* ***Necessary constraints***
* Are there any specific frameworks, libraries, or languages that must be utilized?
* Are there any space or time complexity constraints?
* Are there any security considerations?
## Examples
***Example #1:***
* **Bad**: Write unit tests for all test cases for an Order Book object.
* **Good**: Using `@class:unit-testing-module` write unit tests for `@func:src-order-book-add` testing for exceptions thrown when above or below stop loss
***Example #2***:
* **Bad**: Refactor rawDataTransform.
* **Good**: Refactor `@func:rawDataTransform` by turning the while loop into a for loop and using the same data structure output as `@func:otherDataTransformer`
***Example #3***:
* **Bad**: Create a new Button for the Contact Form.
* **Good**: Create a new Button component for the `@class:ContactForm` using the style guide in `@repo:frontend-components` that says “Continue”
---
# Source: https://docs.windsurf.com/windsurf/accounts/rbac-role-management.md
# Source: https://docs.windsurf.com/plugins/accounts/rbac-role-management.md
> ## Documentation Index
> Fetch the complete documentation index at: https://docs.windsurf.com/llms.txt
> Use this file to discover all available pages before exploring further.
# Role Based Access & Management
> Configure RBAC permissions, create custom roles, and manage user access for Windsurf Teams and Enterprise plans.
Windsurf's Role-Based Access Control system provides granular, role-based access to enterprise resources, enabling administrators to assign permissions and roles dynamically for secure and efficient access management.
Role-based access features are available for Teams and Enterprise plans.
## Role Based Access Controls
Windsurf's role-based access system allows enterprise organizations to implement fine-grained access controls across all team resources. The system enables:
* **Granular Permission Management**: Control access to specific features and data based on user roles
* **Dynamic Role Assignment**: Administrators can assign and modify roles for individual users or user groups
* **Secure Resource Access**: Ensure users only have access to the resources they need for their responsibilities
* **Audit and Compliance**: Track user permissions and access patterns for security and compliance requirements
The role-based access system integrates seamlessly with Windsurf's existing authentication mechanisms, including SSO and SCIM, to provide a comprehensive security framework for enterprise deployments.
## Role Management
We are continually working to improve role management features and functionality.
Roles can be created and managed in the Windsurf admin console via the Settings tab. For Windsurf's SaaS offering, access the Settings tab at:
Manage roles, permissions, and team settings from the admin console.
### Creating a New Role
Go to [windsurf.com/team/settings](https://windsurf.com/team/settings) and locate the Role Management section.
Click the **"Create Role"** button to start creating a new role.
Enter a descriptive name for the role and select the appropriate permissions from the checkbox list.
Review your selections and save the new role. It will now be available for assignment to users.
## Role Permissions
Windsurf provides two default roles out of the box:
* **Admin Role**: Includes all available permissions for complete system access
* **User Role**: Includes no permissions by default, providing a minimal access baseline
### Modifying Role Permissions
To modify permissions for custom roles, click the permissions dropdown next to the role name in the Role Management section. This allows you to add or remove specific permissions as needed.
### Available Permissions
Windsurf offers a comprehensive set of permissions organized into the following categories:
#### Attribution
* **Attribution Read**: Read access to the attribution page
#### Analytics
* **Analytics Read**: Read access to the analytics page
#### Teams
* **Teams Read-Only**: Read-only access to the teams page
* **Teams Update**: Allows updating user roles in the teams page
* **Teams Delete**: Allows deleting users from the teams page
* **Teams Invite**: Allows inviting users to the teams page
#### Indexing
* **Indexing Read**: Read access to the indexing page
* **Indexing Create**: Create access to the indexing page
* **Indexing Update**: Allows updating indexed repos
* **Indexing Delete**: Allows deleting indexes
* **Indexing Management**: Allows index database management and pruning
#### SSO
* **SSO Read**: Read access to the SSO page
* **SSO Write**: Write access to the SSO page
#### Service Key
* **Service Key Read**: Read access to the service keys page
* **Service Key Create**: Allows creating service keys
* **Service Key Update**: Allows updating service keys
* **Service Key Delete**: Allows deleting service keys
#### Billing
* **Billing Read**: Read access to the billing page
* **Billing Write**: Write access to the billing page
#### Role Management
* **Role Read**: Read access to the roles tab in settings
* **Role Create**: Able to create new roles
* **Role Update**: Allows updating roles
* **Role Delete**: Allows deleting roles
#### Team Settings
* **Team Settings Read**: Allows read access to team settings
* **Team Settings Update**: Allows updating team settings
### Disable Windsurf Access Feature
For administrators who need access to team analytics and audit/attribution logging but do not wish to consume a license, Windsurf provides a "disable Windsurf access" feature.
To access this feature:
Go to the **"Manage Team"** tab in your team settings.
Find the user you want to modify and click **"Edit"** next to their name.
In the user edit dialog, you can disable their Windsurf access while maintaining their administrative permissions for analytics and logging.
## User Groups
User Groups are available for Enterprise organizations with SCIM integration enabled.
For enterprise organizations, Windsurf offers the ability to split users into multiple user groups via SCIM (System for Cross-domain Identity Management) integration. This feature enables:
* **Organizational Structure**: Mirror your company's organizational structure within Windsurf
* **Group-Based Analytics**: View analytics and usage data filtered by specific user groups
* **Delegated Administration**: Assign group administrators who can manage specific user groups
* **Scalable Management**: Efficiently manage large numbers of users through group-based operations
User groups are automatically synchronized with your identity provider through SCIM, ensuring that organizational changes are reflected in Windsurf's access controls.
## User Management
Windsurf's role-based access functionality allows administrators to assign roles to individual users or user groups, providing flexible access control management.
### Assigning Roles to Users
User role management is performed in the Windsurf admin console at [windsurf.com/team/settings](https://windsurf.com/team/settings).
Go to the team settings page and locate the user management section.
Scroll through the user list or use the search functionality to find the user you want to modify. Users can be sorted alphabetically by name, email, sign-up time, or last login.
Click **"Edit"** next to the user's name to open the user management dialog.
In the pop-out window, select the appropriate role from the dropdown menu.
Confirm your selection and save the changes. The new role will be applied immediately.
### Administrative Hierarchy
Windsurf's role-based access system recognizes different levels of administrative access:
* **Super Admin**: Users with the admin role in the "all users" group have complete system access and can modify any role or permission
* **Group Admins**: Administrators of specific user groups can only make role and permission changes within their assigned groups
This hierarchical structure ensures that administrative responsibilities can be delegated appropriately while maintaining security boundaries.
### User Sorting and Management
The user management interface provides several sorting options to help administrators efficiently manage large teams:
* **Alphabetical by Name**: Sort users by their display names
* **Email Address**: Sort users by their email addresses
* **Sign-up Time**: View users in order of when they joined the team
* **Last Login**: Sort by most recent activity to identify active users
These sorting options make it easier to find specific users and understand team engagement patterns.
---
# Source: https://docs.windsurf.com/windsurf/recommended-extensions.md
> ## Documentation Index
> Fetch the complete documentation index at: https://docs.windsurf.com/llms.txt
> Use this file to discover all available pages before exploring further.
# Recommended Extensions
> Popular Open VSX extensions for Windsurf including Python, Java, C#, GitLens, and more. Replicate familiar IDE experiences from VS Code, Eclipse, or Visual Studio.
# Windsurf: Embracing the Agentic VS Code OSS Experience
## Recommended Extensions
### Extension Guidance
Windsurf, using VS Code's interface and AI, is easy to adopt for developers from VS, Eclipse, or VS Code. It uses the Open VSX Registry for extensions, accessible via the Extensions panel or website. To help you get the most out of Windsurf for different programming languages, we've compiled a list of popular, community-recommended extensions from the Open VSX marketplace that other users have found helpful for replicating familiar IDE experiences.
Be sure to check out the full Open VSX marketplace for other useful extensions that may suit your specific workflow needs!
### General
* [GitLens](https://open-vsx.org/extension/eamodio/gitlens) - Visualize code authorship at a glance via annotations and CodeLens
* [GitHub Pull Requests](https://open-vsx.org/extension/GitHub/vscode-pull-request-github) - Review and manage your GitHub pull requests and issues directly
* [GitLab Workflow](https://open-vsx.org/extension/gitlab/gitlab-workflow) - GitLab integration extension
* [Mermaid Markdown Preview](https://open-vsx.org/extension/bierner/markdown-mermaid) - Adds diagram and flowchart support
* [Visual Studio Keybindings](https://open-vsx.org/extension/ms-vscode/vs-keybindings) - Use Visual Studio keyboard shortcuts in Windsurf
* [Eclipse Keymap](https://open-vsx.org/extension/alphabotsec/vscode-eclipse-keybindings) - Use Eclipse keyboard shortcuts in Windsurf
### Python
* [ms-python.python](https://open-vsx.org/extension/ms-python/python) - Core Python support: IntelliSense, linting, debugging, and virtual environment management
* [Windsurf Pyright](https://open-vsx.org/extension/Codeium/windsurfPyright) - Fast, Pylance-like language server with strong type-checking and completions
* [Ruff](https://open-vsx.org/extension/charliermarsh/ruff) - Linter and code formatter
* [Python Debugger](https://open-vsx.org/extension/ms-python/debugpy) - Debugging support for Python applications
### Java
* [Extension Pack for Java](https://open-vsx.org/extension/vscjava/vscode-java-pack) - Bundle of essential Java tools: editing, refactoring, debugging, and project support (includes all below)
* [redhat.java](https://open-vsx.org/extension/redhat/java) - Core Java language server for IntelliSense, navigation, and refactoring
* [Java debug](https://open-vsx.org/extension/vscjava/vscode-java-debug) - Adds full Java debugging with breakpoints, variable inspection, etc.
* [Java Test Runner](https://open-vsx.org/extension/vscjava/vscode-java-test) - Run/debug JUnit/TestNG tests inside the editor with a testing UI
* [Maven](https://open-vsx.org/extension/vscjava/vscode-maven) - Maven support: manage dependencies, run goals, view project structure
* [Gradle](https://open-vsx.org/extension/vscjava/vscode-gradle) - Gradle support: task explorer, project insights, and CLI integration
* [Java Project Manager](https://open-vsx.org/extension/vscjava/vscode-java-dependency) - Visualize and manage Java project dependencies
### Visual Basic
* [Visual Basic Support](https://open-vsx.org/extension/vscode/vb) - Syntax highlighting, code snippets, bracket matching, code folding
* [VB Script Support](https://open-vsx.org/extension/Serpen/vbsvscode) - VBScript editing support: syntax highlighting, code outline view
* [C# support](https://open-vsx.org/extension/muhammad-sammy/csharp) - OmniSharp-based language server with IntelliSense and debugging
* [Solution Explorer](https://open-vsx.org/extension/fernandoescolar/vscode-solution-explorer) - Manage .sln and .csproj files visually
### C# / .NET and C++
* [C# / C++ Development Setup Guide](csharp-cpp) - Setup guide for .NET Core, .NET Framework (Mono), and C++ development in Windsurf
---
# Source: https://docs.windsurf.com/command/related-features.md
> ## Documentation Index
> Fetch the complete documentation index at: https://docs.windsurf.com/llms.txt
> Use this file to discover all available pages before exploring further.
# Refactors, Docstrings, and More
> Use Command-powered features like code lenses for refactoring, docstring generation, and Smart Paste for cross-language code translation.
Command enables streamlined experiences for a few common operations.
## Function Refactors and Docstring Generation
Above functions and classes, Windsurf renders *code lenses*,
which are small, clickable text labels that invoke Windsurf's AI capabilities on the labeled item.
You can disable code lenses by clicking the `✕` to the right of the code lens text.
The `Refactor` and `Docstring` code lenses in particular will invoke Command.
* If you click `Refactor`, Windsurf will prompt you with a dropdown of selectable, pre-populated
instructions that you can choose from. You can also write your own. This is equivalent to highlighting the function and invoking Command.
* If you click `Docstring`, Windsurf will generate a docstring for you above the function header.
(In Python, the docstring will be correctly generated *underneath* the function header.)
## Smart Paste
This feature allows you to copy code and paste it into a file in your IDE written in a different programming language.
Use `⌘+⌥+V` (Mac) or `Ctrl+Alt+V` (Windows/Linux) to invoke Smart Paste.
Behind the scenes, Windsurf will detect the language of the destination file and use Command to translate the code in your clipboard.
Windsurf's context awareness will try to write it to fit in your code, for example by referencing proper variable names.
Some possible use cases:
* **Migrating code**: you're rewriting JavaScript into TypeScript, or Java into Kotlin.
* **Pasting from Stack Overflow**: you found a utility function online written in Go, but you're using Rust.
* **Learning a new language**: you're curious about Haskell and want to see what your would look like if written in it.
---
# Source: https://docs.windsurf.com/context-awareness/remote-indexing.md
> ## Documentation Index
> Fetch the complete documentation index at: https://docs.windsurf.com/llms.txt
> Use this file to discover all available pages before exploring further.
# Remote Indexing
> Index remote repositories from GitHub, GitLab, and BitBucket for enterprise teams without storing code locally.
This feature is only available in the Windsurf Plugins for Enterprise plans.
While Local Indexing works great, the user may want to index codebases that they do not have stored locally for our models to take in as context.
For this use case, organizations on Teams and Enterprise plans can use Windsurf's Indexing Service to globally import all the relevant repositories. The indexing and embedding is then performed by Windsurf's servers (on an isolated tenant), and once the index is created, it is available to be queried by any member of the Team.
## Adding a repository
From [https://windsurf.com/indexing](https://windsurf.com/indexing) you can add a repository to index. Currently we support Git repositories from GitHub, GitLab, and BitBucket.
You can choose to index a particular branch and to automatically re-index the repository after some number of days.
## Security Guarantees
We clone the repository in order to create the index, but once we finish creating embeddings for the codebase we delete all the code and code snippets **assuming that the Store Snippets setting is unchecked.** We don't persist anything other than the embeddings themselves, from which you cannot derive the original code.
Furthermore, all indexing and embedding is performed on a single-tenant instance—nothing about the indexing process is shared between multiple Windsurf Teams customers.
---
# Source: https://docs.windsurf.com/security/reporting.md
> ## Documentation Index
> Fetch the complete documentation index at: https://docs.windsurf.com/llms.txt
> Use this file to discover all available pages before exploring further.
# Reporting Security Concerns
> Report security vulnerabilities to Windsurf securely via email with GPG encryption. Learn about our coordinated disclosure policy and safe harbor.
Windsurf takes the security of our products and services seriously. If you believe you have found a security vulnerability in any Windsurf-owned services, please report it to us as described below.
## Reporting Security Issues
**Please do not report security vulnerabilities through public GitHub issues.**
Instead, please report them via email to [security@windsurf.com](mailto:security@windsurf.com)
Please include the following information in your report including as much technical detail as possible:
* Type of issue (e.g., buffer overflow, SQL injection, cross-site scripting, etc.)
* The location of the affected source code (if applicable)
* Any special configuration required to reproduce the issue
* Step-by-step instructions to reproduce the issue
* Proof-of-concept or exploit code (if possible)
* Impact of the issue, including how an attacker might exploit it
* Any other relevant information
This information will help us triage your report more quickly.
Please compile all information into a single email, encrypted with our public GPG key, include the name of the affected product, and the version of the product affected (if known).
### Public GPG Key
```
-----BEGIN PGP PUBLIC KEY BLOCK-----
mQINBGdY0gcBEACvhmeoodWK5OUNluDytvc6W2/ahzh334qaYgYOoYxBkN9/6BBW
WTdJJ4Hu//XdAw8G/5ISy6tV17JMWOI59acAehKh8NqBSVhrlR7tHxGiJN2fXTtH
TDGOoyMFbWaSQIRI44E3lQZMyQBScGKxDiXQjIlholmrS3JicrqG85dUgB6got9l
da/3bp8BuydcVib7NGcuRZKS2BEVc8UCvpsP/p+VWiSNtB3kT8PTt782mSmnp6rR
HqL8H6ERlMEgQ9M4iWWZhq4g3qsSeg5x9UtU2ANH/escFNM6Wbzg6hyy3CZtXzw6
2BRnXpF63dqhPiigy+ifVCs/YqGacToaUNhN4I8kt274yW0dX+U/15wvlJchsnsi
RVQwB5FRxIxcPsZAWFBg7P5um15HGpKGS0LFJsB5aUfJFHPFmUAvPUreOjv1rGTO
1FdkAERLHsI7jJA70vTAdOM2WwaeGa55EMwefNJ69LpN2elboFbz5hpAa7w+8Y5w
y1J6knyOA4JFnVI824ZiQIGloECGZOlOxM4Ru+jjkcroO+l+frmvvggqBjvKPHGs
VmrMSNjf7aE/7NDnyKZJ9fvUiLf+WclAcIUySbYQr8xv/aV76xDUH1PT59f/ntp7
jxRA0rVvIThakvV3MPMbdrR78uLbc6Bwc0MdtEIGw+QAQ4YzAX4yeV9LHQARAQAB
tCtzZWN1cml0eUBjb2RlaXVtLmNvbSA8c2VjdXJpdHlAY29kZWl1bS5jb20+iQJO
BBMBCgA4FiEEE5wZ6tOci0CBdec0DoNVUHCWVAkFAmdY0gcCGwMFCwkIBwIGFQoJ
CAsCBBYCAwECHgECF4AACgkQDoNVUHCWVAnT0w//ZVKF9Yz9So8ZeeIVcMz0CrFZ
jWFQMTvQvEQ5jP9VpiXe7z5pwSVvv3SpqvkNX+Y6HtjXdnv5Q+QZGzIZKc6NqbDz
vYGwL0UJCXEdEhdNMKOI0FWLiOl/NPdCqIwSeeUNsKZCZE7LWqDbfDoivStGcKWS
UYqqbrv8FB2BQrqem0YL+da6i24uhghL0NHCk8x3+qR/Cp+xWJyL27nHHRD7OVLO
3UhsEQEVoiZWp2TpZNyO4AjIFjHSQPw/kBOFdP9bZVcL9rmpZMbyhPnG6Xal3Jmn
0epXQcfvNUd/GwP0Oi22y2CoezuGL8/xKkQoRJ0XHhLAFyJTNIEWPxx4Ki5WVVbZ
PSUwc51CL0PKg2GbKF0g8Zy6JNwMciLh59R79gMK9eGZnSdoOe8d8EzV+AWaqPsO
qgxv4adYytLEIuLylLtPlEIni17E/yKIEibnlSS9P7EUBTNXJFmrLUPArEPhQGrS
EPid8mRJCCo47Htn6YH3Tzt0lSr8mfqOwWs1ww/rbDT/1N3Wq+EmEe9hwHjHQCyl
xfn+7yDRcJ4C2C/fuF2cg4JA2QsX8eTpvChSnXnQIhvG+7NISqFUAf1YXuy+cNJa
rJs2CRCrz3rmM1dpQ+miII9Z14/ZSy6wg0f2BXaANZNIKutmPTFWxOyc6RiBMIor
EeYWbajRg5vCJmQNeSW5Ag0EZ1jSBwEQALffVPaMgIsv3vyoDZivVjr4ArkPWuWM
rQMhDRaos11vzWlVEviihdSn9rUP/nx3t6TsvvwMhqTk9yfnRCn5jmE2dSFfT4Wz
kdYkQ8xWLI4Ku8Cu6MK5iemG5JMyL03eaaSqlbjg7IUmNr+PF/poX0c+PCoNVbIC
YbHYtTwTJ52G+DuVQThZI0qnebNc/3CfvDAfMGqyDezIPqoqPRfLolwT6N+zip8O
bDuom7DlcyRjRAeB36dbEPRkqzdkP8ZA4tKWRO2HBhDe4Jg4srZlCs8BiveNK6mM
lOv+EZpSwvuikfga41bk+A08EFojKkg7XuCN+LSBUxKWdl9UDg5eibYiy1uRM8kP
taFzP89tNanQeAU3BBcJRgDqOkl/5KQnPLU8Dn8Iq2nUUg3rdYhRTT7PiSlkuK8f
tWXctlN7AsTtvrKaJGP89oETs5ks/umdep7fmYlJlLO2VZE63itQHGUpE2P0hRSH
itoC7acWdXYY7M/wi1kPl5CvMyStaXfqmgXoRF2ea2N9kP6ioQ5piAvNLmHVc4l9
ID5kDUB4k0Tv5XSE8eXc35fT5JFV8J/Rlk66CDR5DKciBteRqQ97Ojc2CkJ92tCO
/nTnnV8IYLP3yTCmFvABxJLk8qi3UJXo4ySKMzZ48OjDfvr91pr9xjgWyLj0R44O
1S2Tq6eFyy7xABEBAAGJAjYEGAEKACAWIQQTnBnq05yLQIF15zQOg1VQcJZUCQUC
Z1jSBwIbDAAKCRAOg1VQcJZUCd6dD/9iyRnoPBrIiBre1BmXCdx7SJCy3P659dGS
35/KCx9S5oEwjQX11BCembZ7R1rhthpTwj/uCSzaV2mZgdxDg5+IPUSjBafbnHih
gE7RqEOTD6rH3+2NlMJvDJYykucSgjzhAbF2oXTbQneGzA1z5ljn6OKtu+sr0upY
HRjk24x6zm6X3Y95PVoinXmafHfS12oYqM560uhmjE66LylB6ihxwThNDWPDQQ4F
8ZdVrNIqyE5rt+Mdo8XndGnbcRNvAaJ7syqNPzZl8XL7+IvVbMCnM0v5wCuO896w
ngxqTf9UDf6tRZ4bzt0wzvtSa1TtMbbgqeQ4JL75W0iRwGtW2VFqsLJdLvCeoeJS
/oN7ZRjsBpe7Mi7yJHGsKffosFL4U2Xb02FMyQXwUCQuI1kT7Je5a2mOJZZC6Rxs
CaJ5B+H2tq8Vu8eHqWU6HFQgN5A9tRDxWaLSA0s7ClzCbVHVXJ0rlfVG5cGGX5NN
bTHSQ3RAeMIWpgguViogcQTS8H+eJau7ObSrjAH+vyUDZUBZk3wK6TWWERAknRTs
NXGMK99G5TnFMB/BhCcZJcupyFJf2RU0dcrmtSEZsXR1TXZP81TnIRIxrrzhAxHC
TG4WjJ9IfJITK+RZwf0ng5LRnMfDkMOP3JtmnAYqUXSWe4WzaPXoE0TxE1BmtdR4
avMueyobpA==
=X35T
-----END PGP PUBLIC KEY BLOCK-----
```
## Policy
Windsurf follows the principle of [Coordinated Vulnerability Disclosure](https://en.wikipedia.org/wiki/Coordinated_vulnerability_disclosure).
## Safe Harbor
Windsurf supports safe harbor for security researchers who:
* Make a good faith effort to avoid privacy violations, destruction of data, and interruption or degradation of our services
* Only interact with accounts you own or with explicit permission of the account holder
* Do not exploit a security issue you discover for any reason other than testing
* Report any vulnerability you've discovered promptly
* Follow the guidelines outlined in this document
We will not take legal action against you or administrative action against your account if you act according to this policy.
*Last updated: December 10, 2024*
---
# Source: https://docs.windsurf.com/security/security-admin-guide.md
> ## Documentation Index
> Fetch the complete documentation index at: https://docs.windsurf.com/llms.txt
> Use this file to discover all available pages before exploring further.
# FedRAMP Security Admin Guide
> Windsurf FedRAMP Security Admin Guide for securely setting up, configuring, operating, and decommissioning top-level administrative accounts. Includes role definitions, account lifecycle procedures, and a reference table of all admin-controlled security settings.
# FedRAMP Security Admin Guide
This guide describes how to securely set up, configure, operate, and decommission top-level administrative accounts in Windsurf. It covers administrative role definitions, account lifecycle procedures, and all admin-controlled security settings with their associated functions, security impacts, and recommended values.
This guide is written for the Windsurf FedRAMP deployment which runs on AWS GovCloud. The FedRAMP deployment uses a dedicated enterprise portal and SSO-based authentication (OIDC or SAML 2.0). Some features described in other Windsurf documentation for the SaaS offering are not available in the FedRAMP environment.
***
## Administrative role definitions
Windsurf uses a Role-Based Access Control (RBAC) system to govern administrative privileges. Roles are managed through the Admin Portal under the Role Management settings section and can be assigned to individual users.
### Built-in roles
Windsurf provides two built-in roles that cannot be deleted.
| Role | Description | Default permissions |
| --------- | ----------------------------------------------------------------------------------------------------------------------------------------------------------------------------- | ----------------------------- |
| **Admin** | Full administrative access to organization settings, user management, analytics, and security controls. This is the highest level of privilege a user can hold within a team. | All permissions enabled |
| **User** | Standard end-user access with no administrative permissions. Users can access Windsurf's coding features but cannot view or modify organization settings. | No administrative permissions |
### Custom roles
Administrators can create custom roles to implement the principle of least privilege. Custom roles are composed of granular permissions selected from the categories below. To create a custom role, navigate to the Admin Portal and open the Role Management section under Settings.
### Permission reference
The table below lists every permission available for role assignment in the FedRAMP deployment. Each permission controls access to a specific administrative function.
| Category | Permission | Description |
| ------------------- | ------------------------ | -------------------------------------------------------- |
| **Teams** | Teams Read-Only | Read-only access to the teams management page |
| **Teams** | Teams Update | Ability to update user roles on the teams page |
| **Teams** | Teams Delete | Ability to remove users from the teams page |
| **Analytics** | Analytics Read | Read access to the analytics page and dashboards |
| **Attribution** | Attribution Read | Read access to the attribution page |
| **License** | License Read | Read access to the license page |
| **SSO** | SSO Read | Read access to the SSO configuration page |
| **SSO** | SSO Write | Ability to configure and modify SSO provider settings |
| **Service Key** | Service Key Read | Read access to the service keys page |
| **Service Key** | Service Key Create | Ability to create new service keys for API access |
| **Service Key** | Service Key Update | Ability to modify existing service keys |
| **Service Key** | Service Key Delete | Ability to revoke and delete service keys |
| **Role Management** | Role Read | Read access to the roles tab in settings |
| **Role Management** | Role Create | Ability to create new roles |
| **Role Management** | Role Update | Ability to modify existing role definitions |
| **Role Management** | Role Delete | Ability to delete roles |
| **External Chat** | External Chat Management | Ability to modify external chat model configurations |
| **Indexing** | Indexing Read | Read access to the indexing configuration page |
| **Indexing** | Indexing Create | Ability to create new indexes |
| **Indexing** | Indexing Update | Ability to update existing indexed repositories |
| **Indexing** | Indexing Delete | Ability to delete indexes |
| **Indexing** | Indexing Management | Ability to perform index database management and pruning |
| **Fine-Tuning** | Fine-Tuning Read | Read access to the fine-tuning page |
| **Fine-Tuning** | Fine-Tuning Create | Ability to create fine-tuning jobs |
| **Fine-Tuning** | Fine-Tuning Update | Ability to update fine-tuning jobs |
| **Fine-Tuning** | Fine-Tuning Delete | Ability to delete fine-tuning jobs |
A number of these permissions (such as Attribution, License, SSO, Indexing, Fine-Tuning) exist in the RBAC system but their corresponding portal pages are not available in the FedRAMP multitenant deployment. These permissions are included in the role management UI for completeness but do not grant access to any active features in this environment.
***
## Admin account lifecycle procedures
This section describes the end-to-end lifecycle of a top-level administrative account, from initial creation through decommissioning.
### Account setup
**SSO-based onboarding** is the primary provisioning method in the FedRAMP deployment. The platform supports both OIDC and SAML 2.0 for Single Sign-On integration. Users authenticate through the configured identity provider, and after the user's first login creates their account, an administrator assigns the appropriate role through the Admin Portal. Note that SSO integration in the FedRAMP environment requires coordination with the Windsurf FedRAMP team and cannot be configured in a self-serve capacity.
Every new admin account should be configured according to the principle of least privilege. Prefer custom roles with only the permissions needed for the administrator's responsibilities rather than assigning the full Admin role unless the user requires complete system access.
### Authentication and MFA requirements
The FedRAMP deployment uses Single Sign-On exclusively, supporting both OIDC and SAML 2.0 protocols. Email and password authentication is not available. All users must authenticate through the configured identity provider.
Multi-Factor Authentication (MFA) is enforced through the organization's identity provider. Windsurf inherits the MFA policies configured in the connected IdP, meaning that all authentication strength requirements (such as requiring a second factor, phishing-resistant authenticators, or conditional access policies) are governed at the IdP level. Organizations should configure their IdP to require MFA for all users accessing the Windsurf application, particularly for accounts holding administrative roles.
Windsurf strongly recommends requiring MFA for all administrative accounts. Configure your identity provider to enforce MFA as a condition for accessing the Windsurf application.
### Account configuration
After an administrative account is created, the following configuration steps should be completed.
**Role assignment** determines the scope of the account's administrative access. Assign roles through the Admin Portal by navigating to the Manage Team tab, locating the user, clicking Edit, and selecting the appropriate role from the dropdown. Changes take effect immediately.
**Service key management** is required when the administrator needs API access for automation or analytics. Service keys are created under Settings with scoped permissions matching the key's intended use. Each service key should be named descriptively (for example, "Analytics Dashboard") and assigned a role with the minimum permissions required.
### Account operation
Ongoing operational practices for administrative accounts include the following.
**Regular access reviews** should be conducted to verify that administrative accounts still require their current level of access. Review the list of users with the Admin role periodically through the Manage Team tab and adjust roles as responsibilities change.
**Activity monitoring** is available through the built-in analytics dashboards. Administrators with Analytics Read permission can track user activity, engagement metrics, and feature usage. The Analytics API provides programmatic access to this data for integration with external monitoring systems.
**Service key rotation** should be performed on a regular schedule. To rotate a key, create a new service key with the same permissions, update the consuming system to use the new key, and then delete the old key.
### Account decommissioning
When an administrator no longer requires access, the account should be decommissioned promptly using the following procedure.
Navigate to the Admin Portal, open the Manage Team tab, locate the user, click Edit, and change their role from Admin to User (or a custom role with no administrative permissions).
Delete any service keys that were created by or exclusively used by the departing administrator. Navigate to Settings, then Service Key, and delete the relevant keys.
Remove the user through the Manage Team tab by clicking Delete next to their name. This will deactivate the user's Windsurf account and release their license seat.
Verify that the decommissioned account no longer appears in any administrative role by checking the Manage Team user list filtered by the Admin role. Confirm that all service keys associated with the account have been deleted.
Decommission administrative accounts immediately when an administrator changes roles or leaves the organization. Delayed decommissioning creates unnecessary security exposure.
***
## Security settings reference
The table below documents all admin-controlled security settings available in the FedRAMP deployment's Admin Portal. Each entry describes the setting's function, its security impact, and the recommended configuration for a security-conscious deployment.
| Setting | Function | Security impact | Recommended value |
| ------------------------------------ | -------------------------------------------------------------------------------------------------------------------------------------------------------------------------------------------------------------------------------------------------------------------------- | --------------------------------------------------------------------------------------------------------------------------------------------------------------------------------------------------------- | ------------------------------------------------------------------------------------------------------------------------------------------------------------------------------------ |
| **Role-Based Access Control (RBAC)** | Controls which administrative actions each user can perform based on their assigned role and permissions. Managed under the Role Management section in Settings. | Limits the blast radius of compromised accounts by restricting permissions to only what each user needs. Overly broad role assignments increase the potential impact of a single account compromise. | **Configure with least privilege.** Create custom roles with only the permissions each administrator requires. Reserve the built-in Admin role for a small number of administrators. |
| **Service key permissions** | Scopes API access tokens to specific permission sets, controlling which operations automated systems can perform. Managed under the Service Key section in Settings. | Service keys with excessive permissions can be exploited if leaked, granting unauthorized access to user management, analytics, or other functions. | **Scope to minimum required permissions.** Create dedicated service keys for each integration with only the permissions that integration needs. Rotate keys regularly. |
| **SSO provider configuration** | Configures the identity provider used for all user authentication, supporting both OIDC and SAML 2.0 protocols. Email/password authentication is not available. SSO setup requires coordination with the Windsurf FedRAMP team. Managed under the SSO section in Settings. | Centralizes authentication through the organization's IdP, enabling enforcement of MFA, conditional access, and session policies. Misconfiguration could lock out all users or allow unauthorized access. | **Configure with your organization's approved identity provider (OIDC or SAML 2.0).** Verify the configuration by testing login with a non-admin account before rolling out broadly. |
*Last updated: January 28, 2026*
---
# Source: https://docs.windsurf.com/windsurf/cascade/skills.md
> ## Documentation Index
> Fetch the complete documentation index at: https://docs.windsurf.com/llms.txt
> Use this file to discover all available pages before exploring further.
# Skills
> Skills help Cascade handle complex, multi-step tasks.
The hardest engineering tasks often take more than just good prompts. They might require reference scripts, templates, checklists, and other supporting files. Skills let you bundle all of these together into folders that Cascade can invoke (read and use).
Skills are a great way to teach Cascade how to execute multi-step workflows consistently.
Cascade uses [**progressive disclosure**](https://agentskills.io/what-are-skills#how-skills-work) to intelligently invoke skills only when they're relevant to the task at hand. You can also manually invoke skills.
For more details on the Skills specification, visit [agentskills.io](https://agentskills.io/home).
## How to Create a Skill
### Using the UI (easiest)
1. Open the Cascade panel
2. Click the three dots in the top right of the panel to open up the customizations menu
3. Click on the `Skills` section
4. Click `+ Workspace` to create a workspace (project-specific) skill, or `+ Global` to create a global skill
5. Name the skill (lowercase letters, numbers, and hyphens only)
### Manual Creation
**Workspace Skill (project-specific):**
1. Create a directory: `.windsurf/skills//`
2. Add a `SKILL.md` file with YAML frontmatter
**Global Skill (available in all workspaces):**
1. Create a directory: `~/.codeium/windsurf/skills//`
2. Add a `SKILL.md` file with YAML frontmatter
## SKILL.md File Format
Each skill requires a `SKILL.md` file with YAML frontmatter containing the skill's metadata:
### Example skill
```markdown theme={null}
---
name: deploy-to-production
description: Guides the deployment process to production with safety checks
---
## Pre-deployment Checklist
1. Run all tests
2. Check for uncommitted changes
3. Verify environment variables
## Deployment Steps
Follow these steps to deploy safely...
[Reference supporting files in this directory as needed]
```
### Required Frontmatter Fields
* **name**: Unique identifier for the skill (displayed in UI and used for @-mentions)
* **description**: Brief explanation shown to the model to help it decide when to invoke the skill
Examples of valid names: `deploy-to-staging`, `code-review`, `setup-dev-environment`
## Adding Supporting Resources
Place any supporting files in the skill folder alongside `SKILL.md`. These files become available to Cascade when the skill is invoked:
```
.windsurf/skills/deploy-to-production/
├── SKILL.md
├── deployment-checklist.md
├── rollback-procedure.md
└── config-template.yaml
```
## Invoking Skills
### Automatic Invocation
When your request matches a skill's description, Cascade automatically invokes the skill and uses its instructions and resources to complete the task. This is the most common way skills are used—you simply describe what you want to do, and Cascade determines which skills are relevant.
The `description` field in your skill's frontmatter is key: it helps Cascade understand when to invoke the skill. Write descriptions that clearly explain what the skill does and when it should be used.
### Manual Invocation
You can always explicitly activate a skill by typing `@skill-name` in the Cascade input. This is useful when you want to ensure a specific skill is used, or when you want to invoke a skill that might not be automatically triggered by your request.
## Skill Scopes
| Scope | Location | Availability |
| --------- | ----------------------------- | ------------------------------ |
| Workspace | `.windsurf/skills/` | Current workspace/project only |
| Global | `~/.codeium/windsurf/skills/` | All workspaces/projects |
## Example Use Cases
### Deployment Workflow
Create a skill with deployment scripts, environment configs, and rollback procedures:
```
.windsurf/skills/deploy-staging/
├── SKILL.md
├── pre-deploy-checks.sh
├── environment-template.env
└── rollback-steps.md
```
### Code Review Guidelines
Include style guides, security checklists, and review templates:
```
.windsurf/skills/code-review/
├── SKILL.md
├── style-guide.md
├── security-checklist.md
└── review-template.md
```
### Testing Procedures
Bundle test templates, coverage requirements, and CI/CD configs:
```
.windsurf/skills/run-tests/
├── SKILL.md
├── test-template.py
├── coverage-config.json
└── ci-workflow.yaml
```
## Best Practices
1. **Write clear descriptions**: The description helps Cascade decide when to invoke the skill. Be specific about what the skill does and when it should be used.
2. **Include relevant resources**: Templates, checklists, and examples make skills more useful. Think about what files would help someone complete the task.
3. **Use descriptive names**: `deploy-to-staging` is better than `deploy1`. Names should clearly indicate what the skill does.
## Skills vs Rules
Skills and Rules are both ways to customize Cascade's behavior, but they serve different purposes:
| Feature | Skills | Rules |
| ---------- | ------------------------------------------------------------------ | ------------------------------------------------------------------ |
| Purpose | Complex tasks with supporting resources | Behavioral guidelines and preferences |
| Structure | Folder with SKILL.md + resource files | Single .md file |
| Invocation | Automatic (progressive disclosure) or @-mention | Trigger-based (always-on, glob patterns, or manual) |
| Best for | Multi-step workflows, deployment procedures, code review processes | Coding style preferences, project conventions, response formatting |
Use Skills when you need Cascade to follow a specific procedure with supporting files. Use Rules when you want to influence how Cascade behaves across conversations.
## Related Documentation
If Skills aren't what you're looking for, check out these other Cascade features:
* **[Workflows](./workflows)** - Automate repetitive tasks with reusable markdown workflows invoked via slash commands
* **[AGENTS.md](./agents-md)** - Provide directory-scoped instructions that automatically apply based on file location
* **[Memories & Rules](./memories)** - Persist context across conversations with auto-generated memories and user-defined rules
---
# Source: https://docs.windsurf.com/windsurf/accounts/sso-scim.md
# Source: https://docs.windsurf.com/plugins/accounts/sso-scim.md
> ## Documentation Index
> Fetch the complete documentation index at: https://docs.windsurf.com/llms.txt
> Use this file to discover all available pages before exploring further.
# Setting up SSO & SCIM
> Configure Single Sign-On (SSO) and SCIM provisioning for your organization using Google Workspace, Microsoft Azure AD, Okta, or other SAML identity providers.
This feature is only available to Teams and Enterprise users.
Windsurf now supports sign in with Single Sign-On (SSO) via SAML. If your organization uses Microsoft Entra, Okta, Google Workspaces, or some other identity provider that supports SAML, you will be able to use SSO with Windsurf.
Windsurf only supports SP-initiated SSO; IDP-initiated SSO is NOT currently supported.
### Configure IDP Application
On the google admin console (admin.google.com) click **Apps -> Web and mobile apps** on the left.
Click on **Add app**, and then **Add custom SAML app**.
Fill out **App name** with `Windsurf`, and click **Next**.
The next screen (Google Identity Provider details) on Google’s console page has data you’ll need to copy to Windsurf’s SSO settings on [https://windsurf.com/team/settings](https://windsurf.com/team/settings).
* Copy **SSO URL** from Google’s console page to Windsurf’s settings under **SSO URL**
* Copy **Entity ID** from Google’s console page to Windsurf’s settings under **Idp Entity ID**
* Copy **Certificate** from Google’s console page to Windsurf’s settings under **X509 Certificate**
* Click **Continue** on Google’s console page
The next screen on Google’s console page requires you to copy data from Codeium’s settings page
* Copy **Callback URL** from Codeium’s settings page to Google’s console page under **ACS URL**
* Copy **SP Entity ID** from Codeium’s settings page to Google’s console page under **SP Entity ID**
* Change **Name ID** format to **EMAIL**
* Click **Continue** on Google’s console page
The next screen on Google’s console page requires some configuration
* Click on **Add Mapping**, select **First name** and set the **App attributes** to **firstName**
* Click on **Add Mapping**, select **Last name** and set the **App attributes** to **lastName**
* Click **Finish**
On Codeium’s settings page, click **Enable Login with SAML**, and then click **Save**. Make sure to click on **Test Login** to make sure login works as expected. All users now will have SSO login enforced.
Windsurf Enterprise now supports sign in with Single Sign-On (SSO) via SAML. If your organization uses Microsoft Entra ID (formerly Azure AD), you will be able to use SSO with Windsurf.
Windsurf only supports SP-initiated SSO; IDP-initiated SSO is NOT currently supported.
## Part 1: Create Enterprise Application in Microsoft Entra ID
All steps in this section are performed in the **Microsoft Entra ID admin center**.
1. In Microsoft Entra ID, click on **Add**, and then **Enterprise Application**.
2. Click on **Create your own application**.
3. Name your application **Windsurf**, select *Integrate any other application you don't find in the gallery*, and then click **Create**.
## Part 2: Configure SAML and User Attributes in Microsoft Entra ID
All steps in this section are performed in the **Microsoft Entra ID admin center**.
4. In your new Windsurf application, click on **Set up single sign on**, then click **SAML**.
5. Click on **Edit** under **Basic SAML Configuration**.
6. **Keep this Entra ID tab open** and open a new tab to navigate to the **Windsurf Teams SSO settings** at [https://windsurf.com/team/settings](https://windsurf.com/team/settings).
7. In the **Microsoft Entra ID** SAML configuration form:
* **Identifier (Entity ID)**: Copy the **SP Entity ID** value from the **Windsurf SSO settings page**
* **Reply URL (Assertion Consumer Service URL)**: Copy the **Callback URL** value from the **Windsurf SSO settings page**
* Click **Save** at the top
8. Configure user attributes for proper name display. In **Microsoft Entra ID**, under **Attributes & Claims**, click **Edit**.
9. Create 2 new claims by clicking **Add new claim** for each:
* **First claim**: Name = `firstName`, Source attribute = `user.givenname`
* **Second claim**: Name = `lastName`, Source attribute = `user.surname`
## Part 3: Configure SSO Settings in Windsurf Portal
Complete the configuration in the **Windsurf portal** ([https://windsurf.com/team/settings](https://windsurf.com/team/settings)).
10. In the **Windsurf SSO settings page**:
* **Pick your SSO ID**: Choose a unique identifier for your team's login portal (this cannot be changed later)
* **IdP Entity ID**: Copy the value from **Microsoft Entra ID** under **Set up Windsurf** → **Microsoft Entra Identifier**
* **SSO URL**: Copy the **Login URL** value from **Microsoft Entra ID**
* **X509 Certificate**: Download the **SAML certificate (Base64)** from **Microsoft Entra ID**, open the file, and paste the text content here
11. In the **Windsurf portal**, click **Enable Login with SAML**, then click **Save**.
12. **Test the configuration**: Click **Test Login** to verify the SSO configuration works as expected.
**Important**: Do not log out or close the Windsurf settings page until you've successfully tested the login. If the test fails, you may need to troubleshoot your configuration before proceeding.
Windsurf Enterprise now supports sign in with Single Sign-On (SSO) via SAML. If your organization uses Microsoft Entra, Okta, Google Workspaces, or some other identity provider that supports SAML, you will be able to use SSO with Windsurf.
Windsurf only supports SP-initiated SSO; IDP-initiated SSO is NOT currently supported.
### Configure IDP Application
Click on Applications on the left sidebar, and then Create App Integration
Select SAML 2.0 as the sign-in method
Set the app name as Windsurf (or to any other name), and click Next
Configure the SAML settings as
* Single sign-on URL to [https://auth.windsurf.com/\_\_/auth/handler](https://auth.windsurf.com/__/auth/handler)
* Audience URI (SP Entity ID) to [www.codeium.com](http://www.codeium.com)
* NameID format to EmailAddress
* Application username to Email
Configure the attribute statements as following, and then click **Next**.
In the feedback section, select “This is an internal app that we have created”, and click **Finish**.
### Register Okta as a SAML provider
You should be redirected to the Sign on tab under your custom SAML application. Now you’ll want to take the info in this page and fill it out in Windsurf’s SSO settings.
* Open [https://windsurf.com/team/settings](https://windsurf.com/team/settings), and click on Configure SAML
* Copy the text after ‘Issuer’ in Okta’s application page and paste it under Idp Entity ID
* Copy the text after ‘Sign on URL’ in Okta’s application page and paste it under SSO URL
* Download the Signing Certificate and paste it under X509 certificate
* Check Enable Login with SAML and then click Save
* Test the login with the Test Login button. You should see a success message:
At this point everything should have been configured, and can now add users to the new Windsurf Okta application.
You should share your organization's custom Login Portal URL with your users and ask them to sign in via that link.
Users who login to Windsurf via SSO will be auto-approved into the team.
### Caveats
Note that Windsurf does not currently support IDP-initiated login flows.
We also do not yet support OIDC.
# Troubleshooting
### Login with SAML config failed: Firebase: Error (auth/operation-not-allowed)
This points to your an invalid SSO ID, or your SSO URL being incorrect, make sure it is alphanumeric and has no extra spaces or invalid characters. Please go over the steps in the guide again and make sure you use the correct values.
### Login with SAML config failed: Firebase: SAML Response \ mismatch. (auth/invalid-credential)
This points to your IdP entity ID being invalid, please make sure you copy it correctly from the Okta portal, without any extra characters or spaces before or after the string.
### Failed to verify the signature in samlresponse
This points to an incorrect value of your X509 certificate, please make sure you copy the correct key, and that it is formatted as:
```
-----BEGIN CERTIFICATE-----
value
------END CERTIFICATE------
```
Windsurf supports SCIM synchronization for users and groups with Microsoft Entra ID / Azure AD. It isn't necessary to setup SSO to use SCIM synchronization, but it is highly recommended.
You'll need:
* Admin access to Microsoft Entra ID / Azure AD
* Admin access to Windsurf
* An existing Windsurf Application on Entra ID (normally from your existing SSO application)
## Step 1: Navigate to the existing Windsurf Application
Go to Microsoft Entra ID on Azure, click on Enterprise applications on the left sidebar, and then click on the existing Windsurf application in the list.
## Step 2: Setup SCIM provisioning
Click on Get started under Provision User Accounts in the middle (step 3), and then click on Get started again.
Under the Provisioning setup page, select the following options.
Provisioning Mode: Automatic
Admin Credentials > Tenant URL: [https://server.codeium.com/scim/v2](https://server.codeium.com/scim/v2)
Leave the Azure provisioning page open, now go to the Windsurf web portal, and click on the profile icon in the NavBar on the top of the page. Under Team Settings, select Service Key and click on Add Service Key. Enter any key name (such as 'Azure Provisioning Key') and click Create Service Key. Copy the output key, go back to the Azure page, paste it to Secret Token.
(What you should see after creating the key on Windsurf)
On the Provisioning page, click on Test Connection and that should have verified the SCIM connection.
Now above the Provisioning form click on Save.
## Step 3: Configure SCIM Provisioning
After clicking on Save, a new option Mappings should have appeared in the Provisioning page. Expand Mappings, and click on Provision Microsoft Entra ID Users
Under attribute Mappings, delete all fields under displayName, leaving only the fields userName, active, and displayName.
For active, now click on Edit. Under Expression, modify the field to
```
NOT([IsSoftDeleted])
```
Then click Ok.
Your user attributes should look like
In the Attribute Mapping page, click on Save on top, and navigate back to the Provisioning page.
Now click on the same page, under Mappings click on Provision Microsoft Entra ID Groups. Now only click delete for externalId, and click Save on top. Navigate back to the Provisioning page.
On the Provisioning page at the bottom, there should also be a Provisioning Status toggle. Set that to On to enable SCIM syncing. Now every 40 minutes your users and groups for the Entra ID application will be synced to Windsurf.
Click on Save to finish, you have now enabled user and group syncing for SCIM. Only users and groups assigned to the application will be synced to Windsurf. Note that removing users only disables them access to Windsurf (and stops them from taking up a seat) rather than deleting users due to Azure's SCIM design.
Windsurf supports SCIM synchronization for users and groups with Okta. It isn't necessary to setup SSO to use SCIM synchronization, but it is highly recommended.
You'll need:
* Admin access to Okta
* Admin access to Windsurf
* An existing Windsurf Application on Okta (normally from your existing SSO application)
## Step 1: Navigate to the existing Windsurf Application
Go to Okta, click on Applications, Applications on the left sidebar, and then click on the existing Windsurf application in the application list.
## Step 2: Enable SCIM Provisioning
Under the general tab, App Settings click on Edit on the top right. Then tick the 'Enable SCIM Provisioning' checkbox, then click Save. A new provisioning tab should have showed up on the top.
Now go to provisioning, click Edit and input in the following fields:
SCIM connector base URL: [https://server.codeium.com/scim/v2](https://server.codeium.com/scim/v2)
Unique identifier field for users: email
Supported provisioning actions: Push New Users, Push Profile Updates, Push Groups
Authentication Mode: HTTP Header
For HTTP Header - Authorization, you can generate the token from
* [https://windsurf.com/team/settings](https://windsurf.com/team/settings) and go to the Other Settings and find Service Key Configuration
* Click on Add Service Key, and give your key a name
* Copy the API key, go back to Okta and paste it to HTTP Header - Authorization
Click on Save after filling out Provisioning Integration.
## Step 3: Setup Provisioning
Under the provisioning tab, on the left there should be two new tabs. Click on To App, and Edit Provisioning to App. Tick the checkbox for Create Users, Update User Attributes, and Deactivate Users, and click Save.
After this step, all users assigned to the group will now be synced to Windsurf.
## Step 4: Setup Group Provisioning (Optional)
In order to sync groups to Windsurf, you will have to specify which groups to push. Under the application, click on the Push Groups tab on top. Now click on + Push Groups -> Find Groups by name. Filter for the group you would like to add, make sure Push group memberships immediately is checked, and then click Save. The group will be created and group members will be synced to Windsurf. Groups can then be used to filter for group analytics in the analytics page.
This guide shows how to create and maintain groups in Windsurf with the SCIM API.
There are reasons one may want to provision groups manually rather than with their Identity Provider (Azure/Okta). Companies may want Groups provisioned from a different internal source (HR website, Sourcecode Management Tool etc.) that Windsurf doesn't have access to, or companies may finer control to Groups than what their Idendity Provider provides. Groups can thus be created with an API via HTTP request instead. The following provides examples on the HTTP request via CURL.
There are 5 main APIs here, Create Group, Add group members, Replace group members, Delete Group, and List Users in a Group.
### Create Group
```
curl -k -X POST https://server.codeium.com/scim/v2/Groups -d '{
"displayName": "",
"schemas": ["urn:ietf:params:scim:schemas:core:2.0:Group"]
}' -H "Authorization: Bearer " -H "Content-Type: application/scim+json"
```
### Add Group Members
```
curl -X PATCH https://server.codeium.com/scim/v2/Groups/ -d '{"schemas": ["urn:ietf:params:scim:api:messages:2.0:PatchOp"],
"Operations":[
{
"op": "add",
"path":"members",
"value": [{"value": ""}, {"value": ""}]
}]}' -H "Authorization: Bearer " -H "Content-Type: application/scim+json"
```
### Replace Group Members
```
curl -X PATCH https://server.codeium.com/scim/v2/Groups/ -d '{"schemas": ["urn:ietf:params:scim:api:messages:2.0:PatchOp"],
"Operations":[
{
"op": "replace",
"path":"members",
"value": [{"value": ""}, {"value": ""}]
}]}' -H "Authorization: Bearer " -H "Content-Type: application/scim+json"
```
### Delete Group
```
curl -X DELETE https://server.codeium.com/scim/v2/Groups/ -H "Authorization: Bearer " -H "Content-Type: application/scim+json"
```
### List Group
```
curl -X GET -H "Authorization: Bearer " "https://server.codeium.com/scim/v2/Groups"
```
### List Users in a Group
```
curl -X GET -H "Authorization: Bearer " "https://server.codeium.com/scim/v2/Groups/"
```
You'll have to at least create the group first, and then replace group to create a group with members in them. You'll also need to URL encode the group names if your group name has a special character like space, so a Group name such as 'Engineering Group' will have to be 'Engineering%20Group' in the URL.
Note that users need to be created in Windsurf (through SCIM or manually creating the account) before they can be added to a group.
## User APIs
There are also APIs for users as well. The following are some of the common SCIM APIs that Windsurf supports.
Disable a user (Enable by replacing false to true):
```
curl -X PATCH \
https://server.codeium.com/scim/v2/Users/ \
-H 'Content-Type: application/scim+json' \
-H 'Authorization: Bearer ' \
-d '{
"schemas": ["urn:ietf:params:scim:api:messages:2.0:PatchOp"],
"Operations": [
{
"op": "replace",
"path": "active",
"value": false
}
]
}'
```
Create a user:
```
curl -X POST \
https://server.codeium.com/scim/v2/Users \
-H 'Content-Type: application/scim+json' \
-H 'Authorization: Bearer ' \
-d '{
"schemas": ["urn:ietf:params:scim:schemas:core:2.0:User"],
"userName": "",
"displayName": "",
"active": true,
}'
```
Update name:
```
curl -X PATCH \
'https:///_route/api_server/scim/v2/Users/' \
-H 'Authorization: Bearer ' \
-H 'Content-Type: application/scim+json' \
-d '{
"schemas": ["urn:ietf:params:scim:api:messages:2.0:PatchOp"],
"Operations": [
{
"op": "Replace",
"path": "displayName",
"value": ""
}
]
}'
```
## Creating Api Secret Key
Go to [https://windsurf.com/team/settings](https://windsurf.com/team/settings). Under Service Key Configuration, click on Configure, then Add Service Key. Enter any key name (such as 'Azure Provisioning Key') and click Create Service Key. Copy the output key and save it, you can now use the key to authorize the above APIs.
## Prerequisites
This guide assumes that you have Duo configured and acts as your organizational IDP, or has external IDP configured.
You will need administrator access to both Duo and Windsurf accounts.
## Configure Duo for Windsurf
1. Navigate to Applications, and add a Generic SAML service provider
2. Navigate to SSO in Team Settings
3. When enabling SAML for the first time, you will be required to set up your SSO ID. **You will not be able to change it later.**
It is advised to set this to your organization or team name with alphanumeric characters only.
4. Copy the `Entity ID` value from the Duo portal and paste it into the `IdP Entity ID` field in the Windsurf portal.
5. Copy the `Single Sign-On URL` value from the Duo portal and paste it into the `SSO URL` field in the Windsurf portal.
6. Copy the certificate value from the Duo portal and paste it in the `X509 Certificate` field in the Windsurf portal
7. Copy the `SP Identity ID` value from the Windsurf portal and paste it into the `Entity ID` field in the Duo portal.
8. Copy the `Callback URL (Assertion Consumer Service URL)` from the Windsurf portal and paste it into the `Assertion Consumer Service (ACS) URL` field in the Duo portal.
9. In the Duo portal, configure the attribute statements as following:
10. Enable the SAML login in the Windsurf portal so you can test it.
**NOTE: DO NOT LOGOUT OR CLOSE THE WINDOW AT THIS POINT.**
If you get an error or it times out, troubleshoot your settings, otherwise you have to disable your SAML Settings in the Windsurf portal.
**If you logout or close the window without confirming a successful test - you may get locked out.**
11. Once your test was successfully completed, you may logout. You can now use SSO sign in when browsing to your team/organization page with the SSO ID you have configured in step 3.
[https://www.codeium.com/yourssoid/login](https://www.codeium.com/yourssoid/login)
## Prerequisites
This guide assumes that you have PingID configured and acts as your organizational IDP, or has external IDP configured.
You will need administrator access to both PingID and Windsurf accounts.
## Configure PingID for Windsurf
1. Navigate to Applications and add Windsurf as a SAML Application
2. Navigate to SSO in Team Settings
3. When enabling SAML for the first time, you will be required to set up your SSO ID. **You will not be able to change it later.**
It is advised to set this to your organization or team name with alphanumeric characters only.
4. In PingID - choose to manually enter the configuration and fill out the fields with the following values:
* ACS URLs - this is the `Callback URL (Assertion Consumer Service URL)` from the Windsurf portal.
* Entity ID - this is the `SP Entity ID` from the Windsurf portal.
5. Copy the `Issuer ID` from PingID to the `IdP Entity ID` value in the Windsurf portal.
6. Copy the `Single Signon Service` value from PingID to the `SSO URL` value in the Windsurf portal.
7. Download the Signing Certificate from PingID as X509 PEM (.crt), open the file and copy its contents to the `X509 Certificate` value in the Windsurf portal.
**Note**: make sure you have the fill begin and end lines with 5 dashes (-) and no other characters are copied!
8. In attribute mappings, make sure to map:
* `saml_subject` - Email Address
* `firstName` - Given Name
* `lastName` - Family Name
9. Add/edit any other policies and access as required by your setup/organization
10. Enable the SAML login in the Windsurf portal so you can test it.
**NOTE: DO NOT LOGOUT OR CLOSE THE WINDOW AT THIS POINT.**
If you get an error or it times out, troubleshoot your settings, otherwise you have to disable your SAML Settings in the Windsurf portal.
**If you logout or close the window without confirming a successful test - you may get locked out.**
11. Once your test was successfully completed, you may logout. You can now use SSO sign in when browsing to your team/organization page with the SSO ID you have configured in step 3.
[https://www.codeium.com/yourssoid/login](https://www.codeium.com/yourssoid/login)
---
# Source: https://docs.windsurf.com/windsurf/accounts/teams-getting-started.md
# Source: https://docs.windsurf.com/plugins/accounts/teams-getting-started.md
> ## Documentation Index
> Fetch the complete documentation index at: https://docs.windsurf.com/llms.txt
> Use this file to discover all available pages before exploring further.
# Getting started with Teams and Enterprise
> Set up Teams and Enterprise plans with team management, SSO, analytics, user groups, and priority support for your organization.
Windsurf scales from solo projects to large-scale enterprise codebases. Our Teams and Enterprise plans unlock collaboration features such as team management, Single Sign-On (SSO), advanced analytics, and priority support.
If your organisation requires extra security or compliance, please [contact our sales team](https://windsurf.com/contact/enterprise).
## Setup
Visit [windsurf.com/pricing](https://windsurf.com/pricing) and select the `Teams` or `Enterprise` tier.
Enter the number of users you want to include in the subscription.
Windsurf makes managing your team easy from one dashboard.
To add members to your team, first navigate to the [invite page](https://windsurf.com/team/invite).
Simply click on the "invite" button and then either add via email or share a unique invite link.
Configurable settings for your team.
Select and approve models, MCP servers, SSO configurations, service keys, role management, and more.
Set up SSO, SCIM, Duo, or PingID for your team.
## Manage Team
You must be a team admin to make changes to the team.
To add or remove members from your team, navigate to the [Manage team page](https://windsurf.com/team/members).
From here, you can invite and view your team, add SSO, update the number of seats in your team, or even cancel or switch your plan.
## User Groups
This feature is only available in Enterprise plans.
Windsurf now supports creating user groups. For each group you can now view analytics per group. You can also configure group administrators who can view analytics for the specific groups they manage.
### Existing Subscription
Already subscribed on Pro and want to upgrade? Head to your [Plan Management](https://windsurf.com/subscription/plan-management), click `Switch Plan`, and select the appropriate Teams or Enterprise plan.
---
# Source: https://docs.windsurf.com/windsurf/terminal.md
> ## Documentation Index
> Fetch the complete documentation index at: https://docs.windsurf.com/llms.txt
> Use this file to discover all available pages before exploring further.
# Terminal
> Use Windsurf's enhanced terminal with Command mode, Cascade integration, Turbo mode for auto-execution, and allow/deny lists for command control.
# Command in the terminal
Use our [Command](/command/overview) modality in the terminal (`Cmd/Ctrl+I`) to generate the proper CLI syntax from prompts in natural language.
# Send terminal selection to Cascade
Highlight a portion of of the stack trace and press `Cmd/Ctrl+L` to send it to Cascade, where you can reference this selection in your next prompt.
# @-mention your terminal
Chat with Cascade about your active terminals.
# Auto-executed Cascade commands
Cascade has the ability to run terminal commands on its own with user permission. You can configure how Cascade handles command execution through four distinct auto-execution levels, and certain terminal commands can be accepted or rejected automatically through the Allow and Deny lists.
## Auto-Execution Levels
Windsurf provides four levels of command auto-execution, giving you control over how Cascade runs terminal commands:
| Level | Description |
| ------------------ | --------------------------------------------------------------------------------------------------------------------------------------------------------------------------------------------------------------------------- |
| **Disabled** | Auto-execution is completely disabled. All commands require manual approval before execution. |
| **Allowlist Only** | Only commands that match entries in your allow list can be auto-executed. All other commands require manual approval. |
| **Auto** | Cascade uses its judgment to determine whether a command is safe to auto-execute. Commands deemed potentially risky will still require your approval. This feature is only available for messages sent with premium models. |
| **Turbo** | All commands are auto-executed immediately, except those in your deny list. |
You can select your preferred auto-execution level via the Windsurf Settings panel in the bottom right corner of the editor.
### Admin-Controlled Maximum Level (Teams & Enterprise)
For Teams and Enterprise users, administrators can set a maximum allowed auto-execution level for their organization. This setting restricts which levels are available to team members, allowing admins to enforce security policies while still giving users flexibility within those bounds.
When an admin sets a maximum level, users can select any level up to and including that maximum. For example, if an admin sets the maximum to "Auto", users can choose between Disabled, Allowlist Only, or Auto, but cannot enable Turbo mode.
Administrators can configure this setting in the Admin Portal under Team Settings.
### Team-Wide Command Lists (Teams & Enterprise)
Administrators can configure **team-wide allowlist and denylist** for terminal commands that apply to all team members. These lists work in addition to individual user allow/deny lists.
| List Type | Behavior |
| ------------- | ------------------------------------------------------------------------------------------------------------------------------------- |
| **Allowlist** | Commands matching entries in this list will be auto-executed without user confirmation (when auto-execution is enabled for the user). |
| **Denylist** | Commands matching entries in this list will always require user approval before execution, regardless of user settings. |
**Key behaviors:**
* **Team and user configs are merged**: Team-level lists are combined with individual user allow/deny lists configured in Windsurf settings. A command matching either the team or user allowlist will be auto-executed (unless blocked by a denylist).
* The **denylist takes precedence** over the allowlist—if a command matches both lists (at either team or user level), it will require approval
To configure team-wide command lists, go to the Admin Portal → Team Settings → Terminal Commands → **Manage Lists**.
### Allow list
An allow list defines a set of terminal commands that will always auto-execute. For example, if you add `git`, then Cascade will always accept `git add -A`.
The setting can be via Command Palette → Open Settings (UI) → Search for `windsurf.cascadeCommandsAllowList`.
### Deny list
A deny list defines a set of terminal commands that will never auto-execute. For example, if you add `rm`, then Cascade will always ask for permission to run `rm index.py`.
The setting can be via Command Palette → Open Settings (UI) → Search for `windsurf.cascadeCommandsDenyList`.
# Dedicated terminal
Starting in Wave 13, Windsurf introduced a dedicated terminal for Cascade to use for running commands on macOS.
This dedicated terminal is separate from your default terminal and *always* uses `zsh` as the shell.
The dedicated terminal *will* use your zsh configuration, so aliases and environment variables will be available from `.zshrc` and other zsh-specific files.
If you use a different shell instead of `zsh`, and want Windsurf to use shared environment variables, we recommend creating a shared configuration file that both shells can source.
### Troubleshooting
If you have issues with the dedicated terminal, you can revert to the legacy terminal by enabling the Legacy Terminal Profile option in Windsurf settings.
---
# Source: https://docs.windsurf.com/autocomplete/tips.md
> ## Documentation Index
> Fetch the complete documentation index at: https://docs.windsurf.com/llms.txt
> Use this file to discover all available pages before exploring further.
# Autocomplete Tips
> Tips for getting the most out of Windsurf Autocomplete including inline comments, Fill In The Middle (FIM), and snooze functionality.
## Inline Comments
You can instruct autocomplete with the use of comments in your code.
Windsurf will read these comments and suggest the code to bring the comment to life.
This method can get you good mileage, but if you're finding value in writing natural-language instructions and having the AI execute them,
consider using [Windsurf Command](/command/overview).
## Fill In The Middle (FIM)
Windsurf's Autocomplete can Fill In The Middle (FIM).
Read more about in-line FIM on our blog [here](https://windsurf.com/blog/inline-fim-code-suggestions).
## Snooze
Click the Windsurf widget in the status bar towards the bottom right of your editor to see the option to switch Autocomplete off,
either temporarily or until you reenable it.
---
# Source: https://docs.windsurf.com/windsurf/accounts/api-reference/usage-config.md
# Source: https://docs.windsurf.com/plugins/accounts/api-reference/usage-config.md
> ## Documentation Index
> Fetch the complete documentation index at: https://docs.windsurf.com/llms.txt
> Use this file to discover all available pages before exploring further.
# Set Usage Configuration
> Set or clear add-on credit caps at team, group, or user level for enterprise billing management.
## Overview
Set or clear usage caps on add-on credits for your organization. You can scope these configurations to the team level, specific groups, or individual users.
## Request
Your service key with "Billing Write" permissions
### Credit Cap Configuration (Choose One)
Set to `true` to clear the existing add-on credit cap
Set a new add-on credit cap (integer value)
You must provide either `clear_add_on_credit_cap` or `set_add_on_credit_cap`, but not both.
### Scope Configuration (Choose One)
Set to `true` to apply the configuration at the team level
Apply the configuration to a specific group by providing the group ID
Apply the configuration to a specific user by providing their email address
You must provide one of `team_level`, `group_id`, or `user_email` to define the scope.
### Example Request - Set Credit Cap for Team
```bash theme={null}
curl -X POST --header "Content-Type: application/json" \
--data '{
"service_key": "your_service_key_here",
"set_add_on_credit_cap": 10000,
"team_level": true
}' \
https://server.codeium.com/api/v1/UsageConfig
```
### Example Request - Set Credit Cap for Group
```bash theme={null}
curl -X POST --header "Content-Type: application/json" \
--data '{
"service_key": "your_service_key_here",
"set_add_on_credit_cap": 5000,
"group_id": "engineering_team"
}' \
https://server.codeium.com/api/v1/UsageConfig
```
### Example Request - Set Credit Cap for User
```bash theme={null}
curl -X POST --header "Content-Type: application/json" \
--data '{
"service_key": "your_service_key_here",
"set_add_on_credit_cap": 1000,
"user_email": "user@example.com"
}' \
https://server.codeium.com/api/v1/UsageConfig
```
### Example Request - Clear Credit Cap
```bash theme={null}
curl -X POST --header "Content-Type: application/json" \
--data '{
"service_key": "your_service_key_here",
"clear_add_on_credit_cap": true,
"team_level": true
}' \
https://server.codeium.com/api/v1/UsageConfig
```
## Response
The response body is empty. A `200` status code indicates the operation was successful.
## Error Responses
Common error scenarios:
* Invalid service key or insufficient permissions
* Both `clear_add_on_credit_cap` and `set_add_on_credit_cap` provided
* Neither `clear_add_on_credit_cap` nor `set_add_on_credit_cap` provided
* Multiple scope parameters provided
* No scope parameter provided
* Invalid group ID or user email
* Rate limit exceeded
---
# Source: https://docs.windsurf.com/windsurf/accounts/usage.md
# Source: https://docs.windsurf.com/plugins/accounts/usage.md
> ## Documentation Index
> Fetch the complete documentation index at: https://docs.windsurf.com/llms.txt
> Use this file to discover all available pages before exploring further.
# Plans and Credit Usage
> Understand Windsurf pricing plans, prompt credits, usage tracking, automatic refills, and how to upgrade from Free to Pro, Teams, or Enterprise.
Prompt credits are consumed whenever a message is sent to Cascade with a premium model. Every model has it's own credit multiplier with the default message costing 1 credit. You can view all available models and their associated costs on the [models page.](/windsurf/models)
Upon using all of your credits, select premium models will no longer be accessible; however, you will still be able to use several other models that we've made available for free.
## Plans
The [Free](#using-a-free-plan) plan includes:
* 25 prompt credits
* Unlimited Windsurf Tab
The 2 week [Pro Trial](#using-a-free-pro-trial) includes:
* 100 prompt credits
* Unlimited Windsurf Tab
The [Pro](#using-pro-plan) plan includes everything in Free, but with:
* 500 prompt credits
* Add-on prompt credits at \$10/250 credits
* All premium models
The [Teams](#using-teams-plan) plan includes everything in Pro, but with:
* 500 prompt credits/user/month
* Add-on prompt credits at \$40/1000 credits
* Centralized billing
* Admin dashboard with analytics
* Priority support
* Access control features available to add
The [Enterprise](#using-enterprise-plan) plan includes everything in Teams, but with:
* 1000 prompt credits/user/month
* Add-on prompt credits at \$40/1000 credits
* Role-Based Access Control (RBAC)
* SSO & SCIM
* Highest priority support
* Longer context
If you run out of credits on any paid plan, you will have the option of [purchasing additional credits](#purchasing-additional-credits) or setting up [Automatic Credit Refills](#automatic-credit-refills).
After upgrading, your paid plan will start immediately and you'll have access to premium models again. To learn more about the quotas and features per pricing plan, [click here](https://codeium.com/pricing).
## Errors
If a user message is unsuccessful, prompt credits will not be consumed. For example, if Cascade attempts to write to a file but that file has unsaved changes, the operation will fail and it will not consume a credit.
## Viewing your usage
There are a few ways to view your usage.
Go to the Cascade usage directly by clicking on the overflow menu, and then selecting "Cascade Usage".
View the settings panel by clicking on "Windsurf Settings" on the status bar, followed by selecting the "Plan Info" tab.
You can also view it on your plan page at [codeium.com/plan](https://codeium.com/plan) after you're authenticated.
## Upgrading to a paid plan
To learn more about paid features or to upgrade to a paid plan, [click here](https://codeium.com/plan). Paid plans include Pro for individuals, Teams for organizations, and Enterprise for larger companies.
We accept all major credit cards, Apple Pay, Cash App Pay, Google Pay, Link, WeChat Pay, and Alipay. If you have a payment method not listed, please reach out to us at [support](https://codeium.com/support). You may need to disable your VPN to view the relevant payment methods for your region.
## What happens when you run out of prompt credits?
If you no longer have prompt credits, you have two options:
* You can purchase additional prompt credits to continue using premium models
* You can use Write or Chat mode with the models that cost 0 credits!
## Automatic Credit Refills
We've introduced Automatic Credit Refills so that you no longer need to manually purchase additional credits. Under your plan settings page on the Windsurf website, you can specify a maximum amount of credits and other refill settings. The system will automatically "top-up" your credits as you start running low (below 15 credits).
Automatic Credit Refills are purchased in configurable increments (multiples of \$10 for Pro and \$40 for Teams) and subject to maximum monthly budget caps (\$50 by default for Pro users and \$160 for Teams users). This ensures you won't lose access to Cascade during critical work.
## Purchasing additional credits
If you run out of prompt credits, you can purchase additional credits in the [billing website](https://codeium.com/plan). Additional prompt credits can be purchased at a rate of \$10 for 250 credits for Pro users.
For Team and Enterprise plans, additional credits are purchased within and treated as a pool amongst all members of the team at a rate of \$40 for 1000 pooled credits. Please contact your Teams admin to purchase more credits if you're on a team plan.
## Add-on Credit Transfers
If you upgrade your personal Pro plan to a Teams plan, any unused add-on prompt credits on your Pro account are moved over to your new team (and become part of the team's pooled add-on credits). If you're invited to a different team instead, your add-on credits do not automatically move with your user—you'll need to use them before switching, or submit a Support ticket to have them transferred.
## Seat-Based Credit Allocation (Teams & Enterprise)
On Teams and Enterprise plans, prompt credits are allocated on a per-seat basis. Each seat in your plan receives a fixed number of credits at the start of each billing cycle (500 for Teams, 1000 for Enterprise). These credits are tied to the seat itself, not the specific user occupying it.
If a team member leaves mid-billing cycle and a new member joins to fill that seat, the new member inherits the seat's existing credit usage. For example, if your plan has 50 seats and all are in use, and one member departs after using 300 of their 500 credits, the person who takes that seat will start with only 200 credits remaining for the rest of the billing period. This is because the seat's credits were partially consumed before the new member arrived.
When this happens, you may see a notice on your usage page indicating that you joined a seat that was previously used during the current billing period. This is expected behavior and does not indicate any error with your account. Your credits will fully reset to the plan's standard allocation at the start of the next billing cycle.
If you are an admin managing a team where members frequently rotate, keep in mind that adding new members to recently vacated seats may result in those members starting with fewer credits for the remainder of the billing period. All seats reset to their full credit allocation at the beginning of each new billing cycle.
## Usage examples
To explain how credits work, here's a simple example:
When you send a message to Cascade with a premium model, 1 prompt credit is consumed. It doesn't matter how many actions Cascade takes to fulfill your request - whether it searches your codebase, analyzes files, or makes edits - you only pay for the initial prompt.
This simplified system makes it much easier to predict and manage your usage. No more complicated calculations of flow actions or different credit types.
## Plan Usage
### Using a Free Pro Trial
The Pro Trial lasts for 2 weeks and includes unlimited Windsurf Tab, 100 prompt credits, Previews, and Deploys.
When you're on a Pro Trial, you'll have access to premium features! To get started, ask Cascade a question. In Write and Chat mode, Cascade is optimized to fully understand your codebase and leverages tool calls to assist you. By default, all of your requests will use premium models until you run out of credits.
After your trial period ends, you'll need to upgrade to a paid plan to continue using premium models.
If you don't upgrade during the Free Trial period, you'll be downgraded to our Free plan which includes 25 prompt credits per month.
### Using Pro Plan
The Pro plan costs \$15/month and includes:
* 500 prompt credits/month
* All premium models
* Previews
* App Deploys
Additional prompt credits can be purchased at a rate of \$10 for 250 credits.
While on Pro, you'll have access to a monthly quota of prompt credits. You can view how many credits you have remaining in the Windsurf Settings panel that's accessible in the status bar.
If you're running low on credits, Cascade will notify you so that you can purchase additional credits or enable Automatic Credit Refills. To purchase additional credits, visit the billing website and select "Purchase credits". The credits purchased will rollover to the following usage month if there are any remaining.
If you want to reduce your consumption of prompt credits, there are several available models that cost 0 credits!
In addition to prompt credits, Pro comes with unlimited Fast Autocomplete and unlimited premium model requests with Command.
### Using Teams Plan
The Teams plan costs \$30/user/month (up to 200 users) and includes:
* 500 prompt credits/user/month
* Everything in Pro, plus:
* Centralized billing
* Admin dashboard with analytics
* Priority support
Additional prompt credits can be purchased at a rate of \$40 for 1000 pooled credits.
The Teams plan has a seat cap of 200 users. Coming soon, there will be an option to add Access Control features for +\$10/user/month.
While on the Teams plan, each user will have access to a monthly quota of prompt credits. Unlike the previous system, base prompt credits are not pooled - each user has their own credit limit. However, purchased add-on prompt credits are pooled across the organization. You can view how many credits your team has remaining in the Windsurf Settings panel.
If your team is running low on credits, your administrator can purchase additional credits or enable Automatic Credit Refills. These add-on prompt credits purchased will rollover to the following usage month if there are any remaining.
### Using Enterprise Plan
The Enterprise plan costs \$60/user/month (up to 200 users) and includes everything in Teams plus:
* 1000 prompt credits/user/month
* Role-Based Access Control (RBAC)
* SSO & SCIM (included)
* Longer model context lengths
* Highest priority support
Additional prompt credits can be purchased at a rate of \$40 for 1000 pooled credits.
Coming soon, Enterprise will be self-serviceable with month-to-month pricing. The Enterprise plan includes self-serve SSO integration and enhanced security features.
For enterprise support, account management, and more involved deployments such as Custom Deployment Options or FedRAMP under an annual commitment, [contact our sales team](https://windsurf.com/contact/enterprise). For standard security collateral, visit [trust.windsurf.com](https://trust.windsurf.com).
### Using a Free plan
The Free plan comes with:
* 25 prompt credits/month
* Unlimited Windsurf Tab
Windsurf can still be used for free after your credits are exhausted! There are several models available that cost 0 credits to use.
When editing code, you'll have access to unlimited Tab completions and AI command instructions. To learn more about features in Free and in paid tiers, [click here](https://codeium.com/pricing).
## Viewing or updating your payment & billing information
You can now update your payment method, billing details, tax ID, and view past invoices directly from your Windsurf account. Follow the steps below to make changes securely via Stripe.
Visit [windsurf.com/team/manage-plan](https://windsurf.com/team/manage-plan) and log into your account if prompted.
You can view and download your previous invoices and receipts.
* On the billing page, select the Update Payment button.
* A secure Stripe pop-up will appear. This will redirect you to your customer portal on Stripe. From the Stripe portal, you can:
* Add or change your payment method
* Update your billing and shipping information (name or company name, tax identification, email, and address)
* Once you’ve made the updates, save your changes and close the window.
## Canceling your paid plan
As a paid individial user, you can cancel your plan at any time by browsing to the [windsurf.com/subscription/plan-management](https://windsurf.com/subscription/plan-management) page.
Upon canceling your paid plan, you'll still have access to all of your credits from your monthly quota and add-on prompt credits until the end of the usage month. After the usage month, all add-on prompt credits will expire and you'll be downgraded to the Free plan where you'll be provided a limited number of prompt credits.
If you change your mind and decide not to cancel before the end of the usage month, you can renew your plan by visiting the billing page.
For Teams or Enterprise plans, only the admin can cancel the plan, delete the team and remove users.
---
# Source: https://docs.windsurf.com/best-practices/use-cases.md
> ## Documentation Index
> Fetch the complete documentation index at: https://docs.windsurf.com/llms.txt
> Use this file to discover all available pages before exploring further.
# Common Use Cases
> Common use cases for Windsurf including code generation, unit test generation, code documentation, API integration, and code refactoring.
Windsurf serves a variety of use cases at a high level. However, we see certain use cases to be more common than others, especially among our enterprise customers within their production codebases.
## Code generation
**Guidance:** Windsurf should work well for this use case. Windsurf features including single-line suggestions, multi-line suggestions, and fill-in-the-middle (FIM) completions.
**Best Practices:** Ensuring usage of Next Completion (`⌥ + ]`), Context Pinning, @ Mentions, and Custom Context will provide best results.
## Unit Test generation
**Guidance:** Basic usage of Windsurf for generating unit tests should reliably generate 60-70% of unit tests. Edge case coverage will only be as good as the user prompting the model is.
**Best Practices:** Use @ Mentions. Prompt Engineering best practices. Examples include:
Write unit test for `@function-name` that tests all edge cases for X and for Y (e.g. email domain).
Use `@testing-utility-class` to write a unit test for `@function-name`.
**Guidance:** Good for low-hanging fruit use cases. For very specific API specs or in-house libraries, Windsurf will not know the intricacies well enough to ensure the quality of generated sample data.
**Best Practices:** Be very specific about the interface you expect. Think about the complexity of the task (and if a single-shot LLM call will be sufficient to address).
## Internal Code Commentary
**Guidance:** Windsurf should work well for this use case. Use Windsurf Command or Windsurf Chat to generate in-line comments and code descriptions.
**Best Practices:** Use @ Mentions and use Code Lenses as much as possible to ensure the scope of the LLM call is correct.
**Guidance:** Generally the Refactor button / Windsurf Command would be the best ways to prompt for improvements. Windsurf Chat is the best place to ask for explanations or clarifications. This is a little vague but Windsurf should be good at doing both.
Windsurf Chat is the best place to ask for explanations or clarifications.
This is a little vague but Windsurf should be good at doing both.
**Best Practices**: Use the dropdown prompts (aka Windsurf's Refactor button) - we have custom prompts that are better engineered to deliver the answer you'd more likely expect.
**Guidance**: The best way to do this would be to create the header file, open chat, @ mention the function in the cpp file, and ask it to write the header function. Then do this iteratively for each in the cpp file. This is the best way to ensure no hallucinations along the way.
**Best Practices**: Generally avoid trying to write a whole header file with one LLM call. Breaking down the granularity of the work makes the quality of the generated code significantly higher.
## API Documentation and Integration
**Guidance**: This is similar to test coverage where parts of the API spec that are common across many libraries Windsurf would be able to accurately decorate. However, things that are built special for your in-house use case Windsurf might struggle to do at the quality that you expect.
**Best Practices**: Similar to test coverage, as much as possible, walk Windsurf's model through the best way to think about what the API is doing and it will be able to decorate better.
**Guidance**: Windsurf's context length for a single LLM call is 16,000 tokens. Thus, depending on the scope of your search, Windsurf's repo-wide search capability may not be sufficient. Repo-wide, multi-step, multi-edit tasks will be supported in upcoming future Windsurf products.
This is fundamentally a multi-step problem that single-shot LLM calls (i.e. current functionality of all AI code assistants) are not well equipped to address. Additionally, accuracy of result must be much higher than other use cases as integrations are especially fragile.
**Best Practices**: Windsurf is not well-equipped to solve this problem today. If you'd like to test the extent of Windsurf's existing functionality, build out a step-by-step plan and prompt Windsurf individually with each step and high level of details to guide the AI.
## Code Refactoring
**Guidance**: Ensure proper scoping using Windsurf Code Lenses or @ Mentions to make sure all of the necessary context is passed to the LLM.
Context lengths for a single LLM call are finite. Thus, depending on the scope of your refactor, this finite context length may be an issue (and for that matter, any single-shot LLM paradigm). Repo-wide, multi-step, multi-edit tasks are now supported in Windsurf's [Cascade](/windsurf/cascade).
**Best Practices**: Try to break down the prompt as much as possible. The simpler and shorter the command for refactoring the better.
**Guidance**: Ensure proper scoping using Windsurf Code Lenses or @ Mentions to make sure all of the necessary context is passed to the LLM.
Windsurf's context length for a single LLM call is 16,000 tokens. Thus, depending on the scope of your refactor, Windsurf's context length may be an issue (and for that matter, any single-shot LLM paradigm). Repo-wide, multi-step, multi-edit tasks will be supported in upcoming future Windsurf products.
**Best Practices**: Try to break down the prompt as much as possible. The simpler and shorter the command for refactoring the better.
---
# Source: https://docs.windsurf.com/windsurf/accounts/api-reference/user-page-analytics.md
# Source: https://docs.windsurf.com/plugins/accounts/api-reference/user-page-analytics.md
> ## Documentation Index
> Fetch the complete documentation index at: https://docs.windsurf.com/llms.txt
> Use this file to discover all available pages before exploring further.
# Get User Page Analytics
> Retrieve user activity statistics including names, emails, last activity times, and active days from the teams page.
## Overview
Get user activity statistics that appear on the teams page, including user names, emails, last activity times, and active days.
## Request
Your service key with "Teams Read-only" permissions
Filter results to users in a specific group (optional)
Start time in RFC 3339 format (e.g., `2023-01-01T00:00:00Z`)
End time in RFC 3339 format (e.g., `2023-12-31T23:59:59Z`)
### Example Request
```bash theme={null}
curl -X POST --header "Content-Type: application/json" \
--data '{
"service_key": "your_service_key_here",
"group_name": "engineering_team",
"start_timestamp": "2024-01-01T00:00:00Z",
"end_timestamp": "2024-12-31T23:59:59Z"
}' \
https://server.codeium.com/api/v1/UserPageAnalytics
```
## Response
Array of user statistics objects
User's display name
User's email address
Timestamp of user's last activity in RFC 3339 format
Hashed version of the user's API key
The total number of days the user has been active during the queried timeframe
Indicates whether Windsurf access has been disabled for the user by an admin. This field is only present if access has been explicitly disabled, and will always be set to true in that case.
The most recent timestamp the Tab/Autocomplete modality was used in RFC 3339 format
The most recent timestamp the Cascade modality was used in RFC 3339 format
The most recent timestamp the command modality was used in RFC 3339 format
The user's team membership status. Possible values: `USER_TEAM_STATUS_UNSPECIFIED`, `USER_TEAM_STATUS_PENDING`, `USER_TEAM_STATUS_APPROVED`, `USER_TEAM_STATUS_REJECTED`. Note that the API returns all users regardless of team status, while the Manage Members UI only shows approved users.
### Example Response
```json theme={null}
{
"userTableStats": [
{
"name": "Alice",
"email": "alice@windsurf.com",
"lastUpdateTime": "2024-10-10T22:56:10.771591Z",
"apiKey": "aaaaaaaa-aaaa-aaaa-aaaa-aaaaaaaaaaaa",
"activeDays": 178,
"teamStatus": "USER_TEAM_STATUS_APPROVED"
},
{
"name": "Bob",
"email": "bob@windsurf.com",
"lastUpdateTime": "2024-10-10T18:11:23.980237Z",
"apiKey": "bbbbbbbb-bbbb-bbbb-bbbb-bbbbbbbbbbbb",
"activeDays": 462,
"teamStatus": "USER_TEAM_STATUS_APPROVED"
},
{
"name": "Charlie",
"email": "charlie@windsurf.com",
"lastUpdateTime": "2024-10-10T16:43:46.117870Z",
"apiKey": "cccccccc-cccc-cccc-cccc-cccccccccccc",
"activeDays": 237,
"teamStatus": "USER_TEAM_STATUS_PENDING"
}
]
}
```
## Error Responses
Error message describing what went wrong
Common error scenarios:
* Invalid service key or insufficient permissions
* Invalid timestamp format
* Group not found
* Rate limit exceeded
---
# Source: https://docs.windsurf.com/windsurf/vibe-and-replace.md
> ## Documentation Index
> Fetch the complete documentation index at: https://docs.windsurf.com/llms.txt
> Use this file to discover all available pages before exploring further.
# Vibe and Replace
> AI-powered find and replace that applies natural language prompts to each match. Use Smart mode for careful changes or Fast mode for quick transformations.
Vibe and Replace is an evolution of find and replace that allows you to search through your codebase for exact text matches and apply an AI prompt to each replacement.
Use this for more context-aware transformations and refactors.
## Modes
Vibe and Replace can be used in two different modes:
1. `Smart` - utilizes a slower model that will apply changes more carefully
2. `Fast` - utilizes a faster model that will apply changes quickly
To set the mode, click on the `⌄` button next to the Vibe and Replace prompt box.
---
# Source: https://docs.windsurf.com/troubleshooting/plugins-enterprise/visualstudio.md
> ## Documentation Index
> Fetch the complete documentation index at: https://docs.windsurf.com/llms.txt
> Use this file to discover all available pages before exploring further.
# Visual Studio Troubleshooting
> Troubleshoot Visual Studio plugin issues including IntelliCode conflicts, Tab key bindings, and marketplace visibility problems.
We strongly recommend using the native Windsurf Editor or the JetBrains local plugin for their advanced agentic AI capabilities and cutting-edge features.
The Visual Studio plugin is under maintenance mode.
# Supported Versions
Visual Studio 17.5.5 or greater.
# Gathering extension logs
Go to `View > Output`, select `Codeium` in the dropdown, and copy the logs.
# Known IDE issues and solutions
## Don't see Codeium in the VS Marketplace
Make sure that you are using VS version 2022 17.5.5 or greater.
## Seeing overlapping autocomplete suggestions
This happens if Visual Studio's IntelliCode suggestions are displayed at the same time as Codeium's. Disable all IntelliCode options as shown below:
## Tab key is not always accepting completions
You can rebind this to a different keyboard shortcut in your settings:
---
# Source: https://docs.windsurf.com/troubleshooting/plugins-enterprise/vscode.md
> ## Documentation Index
> Fetch the complete documentation index at: https://docs.windsurf.com/llms.txt
> Use this file to discover all available pages before exploring further.
# Visual Studio Code (VSCode) Troubleshooting
> Troubleshoot VS Code extension issues including proxy settings, certificate errors, API server configuration, and chat response problems.
We strongly recommend using the native Windsurf Editor or the JetBrains local plugin for their advanced agentic AI capabilities and cutting-edge features.
The VSCode plugin is under maintenance mode.
VSCode 1.89 or greater are supported.
# Gathering extension logs
Starting in VS Code Extension 1.10.0, the Extension Diagnostics are accessible for download via the Settings page. This download will contain a collection of relevant logs and parameters into a text file.
*For full output logs of VSCode:*
1. Go to the Command Palette (`Ctrl/Cmd + Shift + P` or go to View > Command Palette)
2. Type in "Show logs" and select the option that reads `Developer: Show Logs`
3. From the dropdown, select `Extension Host`
4. You should see something similar to the image below:
5. Change the dropdown in the top right that reads "Extension Host" and select "Codeium"
6. Export or copy the logs
# Known IDE issues and solutions
## e.split is not defined
You are using an unsupported VS Code version, please update to a supported version and try again. You can find a list of supported versions [here](/plugins/compatibility).
## Using the wrong API Server
If a user changes their API Server/Portal URL in their **workspace** settings, this will override their user settings and may result in an error where the extension is communicating with the wrong API server.
Make sure that your API Server/Portal URL is set correctly and not overridden accidentally by the workspace settings.
## Not seeing Codeium Chat responses
If you are trying to send messages to Codeium chat but not seeing responses, check if you can cancel the response. If you are unable to cancel the response, this means that the response was completed but not displayed. This can happen if the Chat Web Server loses connection to the extension. Reloading VS Code and opening the Codeium Chat panel again should show the responses.
## Unable to read file .../package.json
```
Unable to read file .../.vscode/extensions/codeium.codeium-/package.json
```
If the above error shows up in the Codeium logs, try deleting the extension folder (.../.vscode/extensions/codeium.codeium-\) and reinstall the extension.
In order to do so manually:
1. Open the command palette ( CTRL + SHIFT + P )
2. Run 'Codeium Enterprise: Reset'
3. Select "Help" from the popup
4. Select "Show Disabled Extensions"
5. Re-enable your Codeium Extension
## Proxy / Network Issues
Unchecking `Detect Proxy` in Codeium settings in VSCode can sometimes resolve issues where the extension is incorrectly attempting to use a proxy.
## Certificate Issues
If you encounter the following errors:
```
ConnectError: [internal] unable to get issuer certificate
```
```
[ERROR]: [internal] unable to verify the first certificate
```
```
tls: failed to verify certificate: x509: "" certificate is not standards compliant
```
This suggests that the Codeium extension is unable to trust the TLS connection to your enterprise portal / API server because it does not trust the certificate being presented. This either means that the certificate presented by the Codeium deployment is untrusted or a certificate presented by a corporate proxy intercepting the request is untrusted.
In either case, the most preferable solution is to ensure that the root certificate that signed this certificate is properly installed on end-user machines in the appropriate location. VS Code and most other IDEs load certificates from the operating system's default location.
Your certificate is issued and managed by your local IT or Admin team. Please reach out to them for assistance with installing the necessary certificates on your system.
It is important that the full certificate chain is being presented from wherever TLS is being terminated. Oftentimes, if only the leaf certificate is presented, VS Code and other IDEs are unable to verify its authenticity because they are not aware of the intermediate certificate which validates the leaf certificate and is validated by the root certificate. Browsers are often able to work around this issue as users will likely have encountered a different website that does present the full certificate chain, so the intermediate cert is seen and cached, but applications like VS Code don't have this advantage.
The Network Proxy Text VS Code extension is useful for debugging certificate issues.
---
# Source: https://docs.windsurf.com/windsurf/cascade/web-search.md
# Source: https://docs.windsurf.com/plugins/cascade/web-search.md
> ## Documentation Index
> Fetch the complete documentation index at: https://docs.windsurf.com/llms.txt
> Use this file to discover all available pages before exploring further.
# Web and Docs Search
> Enable Cascade to search the web and read documentation pages in real-time using @web and @docs mentions for up-to-date context.
Cascade can now intuitively parse through and chunk up web pages and documentation, providing realtime context to the models. The key way to understand this feature is that Cascade will browse the Internet as a human would.
Our web tools are designed in such a way that gets only the information that is necessary in order to efficiently use your credits.
## Overview
To help you better understand how Web Search works, we've recorded a short video covering the key concepts and best practices.
### Quick Start
The fastest way to get started is to activate web search in your Windsurf Settings in the bottom right corner of the editor. You can activate it a couple of different ways:
1. Ask a question that probably needs the Internet (ie. "What's new in the latest version of React?").
2. Use `@web` to force a docs search.
3. Use `@docs` to query over a list of docs that we are confident we can read with high quality.
4. Paste a URL into your message.
## Search the web
Cascade can deduce that certain prompts from the user may require a real-time web search to provide the optimal response. In these cases, Cascade will perform a web search and provide the results to the user. This can happen automatically or manually using the `@web` mention.
## Reading Pages
Cascade can read individual pages for things like documentation, blog posts, and GitHub files. The page reads happen entirely on your device within your network so if you're using a VPN you shouldn't have any problems.
Pages are picked up either from web search results, inferred based on the conversation, or from URLs pasted directly into your message.
We break pages up into multiple chunks, very similar to how a human would read a page: for a long page we skim to the section we want then read the text that's relevant. This is how Cascade operates as well.
It's worth noting that not all pages can be parsed. We are actively working on improving the quality of our website reading. If you have specific sites you'd like us to handle better, feel free to file a feature request!
---
# Source: https://docs.windsurf.com/troubleshooting/windsurf-common-issues.md
> ## Documentation Index
> Fetch the complete documentation index at: https://docs.windsurf.com/llms.txt
> Use this file to discover all available pages before exploring further.
# Common Windsurf Issues
> Troubleshoot common Windsurf Editor issues including rate limiting, MacOS security warnings, Windows updates, Linux crashes, and terminal problems.
### General FAQ
First, give it a few minutes to update. If that doesn't work, try logging out of Windsurf on the website, restarting your IDE, and logging back into Windsurf. Additionally, please make sure you have the latest version of Windsurf installed.
You can cancel your paid plan by going to your Profile by clicking your icon on the top right of the [Windsurf website](https://windsurf.com/profile).
To cancel your Pro subscription, navigate to the `Billing` page in the navigation panel on the left and click "Cancel Plan".
To cancel your Teams subscription, navigate to the `Manage Team` page in the navigation panel on the left and click "Cancel Plan".
As mentioned in our [security page](https://windsurf.com/security), you can opt out of code snippet telemetry by going to your settings [account settings](https://windsurf.com/settings). For more information, please visit our [Terms of Service](https://windsurf.com/terms-of-service-individual).
You can delete your account by going to your settings [account settings](https://windsurf.com/settings), scrolling down and clicking on "Delete Account".
If you are a member within an organization, please reach out to your administrator.
You can vote, comment, and request features on our [feature request forum](https://codeium.canny.io/feature-requests).
You can also reach out to us on Twitter/X! [@windsurf](https://x.com/windsurf)
### I'm experiencing rate limiting issues
We're subject to rate limits and unfortunately sometimes hit capacity for the premium models we work with. We are actively working on getting these limits increased and fairly distributing the capacity that we have!
This should not be an issue forever. If you get this error, please wait a few moments and try again.
### Pylance or Pyright isn't working / Python syntax highlighting is broken or subpar
We've gone ahead and developed a [Pyright extension specifically for Windsurf](/windsurf/advanced/#windsurf-extensions). Please search for "Windsurf Pyright" or paste `@id:codeium.windsurfPyright` into the extension search.
### How do I download Diagnostic logs to send to the Windsurf support team?
You can download diagnostic logs by going to your Cascade Panel, tapping the three dots in the top right corner, and then clicking "Download Diagnostics".
### On MacOS, I see a pop-up: 'Windsurf' is damaged and cannot be opened.
This pop-up is due to a false positive in MacOS security features. You can usually resolve this by going to "System Settings -> Privacy & Security" and clicking "Allow" or "Open anyway" for Windsurf. If this fails or is not possible, try the following steps:
1. Ensure that Windsurf is placed under your `/Applications` folder and that you are running it from there.
2. Check your processor type: if your Mac has an Intel chip, make sure you have the Intel version. If it's Apple Silicon (like M1, M2 or M3), make sure you have the Apple Silicon version. You can select the processor type from the [Mac download page](https://windsurf.com/windsurf/download_mac).
3. Try redownloading the DMG and reinstalling from [the official download page](https://windsurf.com/windsurf/download_mac), as the failing security feature is usually triggered on download.
4. Make sure Windsurf (and the "Windsurf is Damaged" pop-up) is closed, and run `xattr -c "/Applications/Windsurf.app/"`.
### I received an error message about updates on Windows, or updates are not appearing on Windows.
For example:
> Updates are disabled because you are running the user-scope installation of Windsurf as Administrator.
We cannot auto-update Windsurf when it is run as Administrator. Please re-run Windsurf with User scope to update.
### What domains should I whitelist for network filters/firewalls, VPNs, or proxies?
If you're using any network filtering, firewalls, VPN services, or working in environments with restricted network access, you may experience connectivity issues with Windsurf. To ensure smooth operation, please whitelist the following domains in your network configuration:
* \*.codeium.com
* \*.windsurf.com
* \*.codeiumdata.com
### On Linux, Windsurf quietly doesn't launch, or crashes on launch
This is usually due to an Electron permissions issue, which VSCode also has, and is expected when using the tarball on Linux.
The easiest way to fix it is to run the following:
```bash theme={null}
sudo chown root:root /path/to/windsurf/chrome-sandbox
sudo chown 4755 /path/to/windsurf/chrome-sandbox
```
You should then be able to launch Windsurf. You can also just run `windsurf` with the flag `--no-sandbox`, though we don't encourage this.
If this fails, then try the below.
### I received an error message saying 'Windsurf failed to start'
Warning: deleting these folders will remove your conversation history and local settings!
Delete the following folder:
Windows: `C:\Users\\.codeium\windsurf\cascade`
Linux/Mac: `~/.codeium/windsurf/cascade`
and try restarting the IDE.
### I received an error message about updates on Windows, or updates are not appearing on Windows.
An example:
> Updates are disabled because you are running the user-scope installation of Windsurf as Administrator.
We cannot auto-update Windsurf when it is run as Administrator. Please re-run Windsurf with User scope to update.
### My Cascade panel goes blank
Please reach out to us if this happens! A screen recording would be much appreciated. This can often be solved by clearing your chat history (`~/.codeium/windsurf/cascade`).
### Terminal session appears stuck in Cascade
If a terminal command has finished running in the terminal but Cascade still shows the session as in progress or stuck, this can be caused by several issues:
**Default terminal profile not set**
This may be caused by the default terminal profile not being explicitly set. To resolve this, you can set the default terminal profile in your Editor settings.
Open the Settings UI (Cmd/Ctrl + ,), search for "terminal default profile", and set the appropriate value for your operating system. Alternatively, you can add the following to your `settings.json`:
For macOS:
```json theme={null}
"terminal.integrated.defaultProfile.osx": "zsh"
```
For Windows:
```json theme={null}
"terminal.integrated.defaultProfile.windows": "PowerShell"
```
For Linux:
```json theme={null}
"terminal.integrated.defaultProfile.linux": "bash"
```
Replace the value with your preferred shell (e.g., `bash`, `zsh`, `PowerShell`, `Command Prompt`, etc.).
**Customized zsh themes**
In some cases, a heavily customized zsh theme (for example, themes from Oh My Zsh, Powerlevel10k, or other prompt frameworks) can also cause Cascade to think a command is still running even after it finishes. To check if this is the issue:
1. Open your `~/.zshrc` file in a text editor.
2. Temporarily disable your theme by commenting out lines that set or load it, such as `ZSH_THEME="..."`, `source ~/.p10k.zsh`, or `eval "$(oh-my-posh init zsh)"`.
3. Save the file, restart Windsurf (or open a new terminal in Windsurf), and run a command again.
If the terminal session no longer appears stuck in Cascade, you can either keep a simpler theme in `~/.zshrc`, or create a separate, minimal zsh configuration used only by the Windsurf terminal so your other terminals can continue using the more complex theme.
**Systemd terminal context tracking (Linux)**
On some newer Linux distributions (reported on Fedora 43 and later), the shell startup chain (`~/.bashrc` → `/etc/bashrc` → `/etc/profile.d/80-systemd-osc-context.sh`) can enable systemd "terminal context tracking," which emits OSC 3008 escape sequences via `PS0` or `PROMPT_COMMAND`. These extra control sequences can interfere with Cascade's output parsing, causing a command to appear stuck or resulting in captured output that looks missing or truncated—even though the terminal displays it correctly.
To work around this issue, prevent the OSC context sequences from being emitted in the Cascade terminal by not sourcing `/etc/bashrc` from your `~/.bashrc`, or by creating a minimal shell configuration file used only for Windsurf/Cascade.
### Docker Container Not Visible in Remote Explorer When Using WSL
When connecting to Docker containers inside WSL, the remote explorer window may not display available containers to connect to, requiring users to use the command palette workaround. Use Cmd+P (macOS) or Ctrl+P (Windows) → "Dev Containers: Attach to Running Container" to see the full list of running containers.
---
# Source: https://docs.windsurf.com/troubleshooting/windsurf-gathering-logs.md
> ## Documentation Index
> Fetch the complete documentation index at: https://docs.windsurf.com/llms.txt
> Use this file to discover all available pages before exploring further.
# Gathering Windsurf Logs
> How to download diagnostic logs from Windsurf Editor using the Command Palette or Cascade panel for troubleshooting support.
If you're having issues, the first step in the troubleshooting process is to retrieve the logs from your IDE. Here's how you can get Windsurf logs for each of the major IDEs:
## Windsurf
1. Open the Command Palette (`Ctrl/Cmd + Shift + P` or go to View > Command Palette)
2. Type in "Download Windsurf Logs" and select the option that reads "Download Windsurf Logs File"
3. Export or copy the logs and attach the file to your ticket.
Alternatively, you can also click on the three dots in the top right corner of the Cascade panel and select "Download Diagnostics".
---
# Source: https://docs.windsurf.com/context-awareness/windsurf-ignore.md
> ## Documentation Index
> Fetch the complete documentation index at: https://docs.windsurf.com/llms.txt
> Use this file to discover all available pages before exploring further.
# Windsurf Ignore
> Configure which files and directories Windsurf should ignore during indexing using .codeiumignore files with gitignore-style syntax.
## WindsurfIgnore
By default, Windsurf Indexing will ignore:
* Paths specified in `gitignore`
* Files in `node_modules`
* Hidden pathnames (starting with ".")
When a file is ignored, it will not be indexed, and also does not count against the Indexing Max Workspace Size file counts.
Files included in .gtiignore cannot be edited by Cascade.
If you want to further configure files that Windsurf Indexing ignores, you can add a `.codeiumignore` file to your repo root, with the same syntax as `.gitignore`
### Global .codeiumignore
For enterprise customers managing multiple repositories, you can enforce ignore rules across all repositories by placing a global `.codeiumignore` file in the `~/.codeium/` folder. This global configuration will apply to all Windsurf workspaces on your system.
The global `.codeiumignore` file uses the same syntax as `.gitignore` and works in addition to any repository-specific `.codeiumignore` files.
## System Requirements
When first enabled, Windsurf will consume a fraction of CPU while it indexes the workspace. Depending on your workspace size, this should take 5-10 minutes, and only needs to happen once per workspace. CPU usage will return to normal automatically. Windsurf Indexing also requires RAM (\~300MB for a 5000-file workspace).
The "Max Workspace Size (File Count)" setting determines the largest workspace for which Windsurf Indexing will try to index a particular workspace / module. If your workspace does not appear to be indexed, please try adjusting this number higher. For users with \~10GB of RAM, we recommend setting this no higher than 10,000 files.
---
# Source: https://docs.windsurf.com/context-awareness/windsurf-overview.md
# Source: https://docs.windsurf.com/command/windsurf-overview.md
> ## Documentation Index
> Fetch the complete documentation index at: https://docs.windsurf.com/llms.txt
> Use this file to discover all available pages before exploring further.
# Command
> Use Windsurf Command (Cmd/Ctrl+I) for inline code generation and edits with natural language. No premium credits required.
**Command** generates new or edits existing code via natural language inputs, directly in the editor window.
Command does NOT consume any premium model credits.
To invoke Command, press `⌘+I` on Mac or `Ctrl+I` on Windows/Linux.
You can enter a prompt in natural language and hit the Submit button (or `⌘+⏎`/`Ctrl+⏎`) to forward the instruction to the AI.
If you highlight a section of code before invoking Command, then the AI will edit the selection spanned by the highlighted lines.
Otherwise, it will generate code at your cursor's location.
You can accept, reject, or follow-up a generation by clicking the corresponding code lens above the generated diff,or by using the appropriate shortcuts (`Cmd/Ctrl+Enter`/`Cmd/Ctrl+Delete`)
# Models
Command comes with its own set of models that are optimized for current-file edits.
Windsurf Fast is the fastest, most accurate model available.
# Terminal Command
You can use Command in the terminal (`Cmd/Ctrl+I`) to generate the proper CLI syntax using prompts in natural language.
# Best Practices
Command is great for file-scoped, in-line changes that you can describe as an instruction in natural language.
Here are some pointers to keep in mind:
* The model that powers Command is larger than the one powering autocomplete.
It is slower but more capable, and it is trained to be especially good at instruction-following.
* If you highlight a block of code before invoking Command, it will edit the selection. Otherwise, it will do a pure generation.
* Using Command effectively can be an art. Simple prompts like "Fix this" or "Refactor" will likely work
thanks to Windsurf's context awareness.
A specific prompt like "Write a function that takes two inputs of type `Diffable` and implements the Myers diff algorithm"
that contains a clear objective and references to relevant context may help the model even more.
---
# Source: https://docs.windsurf.com/troubleshooting/windsurf-proxy-configuration.md
> ## Documentation Index
> Fetch the complete documentation index at: https://docs.windsurf.com/llms.txt
> Use this file to discover all available pages before exploring further.
# Proxy Configuration in Windsurf Editor
> Configure HTTP/HTTPS proxy settings for Windsurf Editor in corporate networks. Includes auto-detect, manual configuration, and SSH remote proxy setup.
Some corporate and enterprise networks route traffic through HTTP/HTTPS proxies. Windsurf Editor needs to reach a few external services (for sign-in and AI features), so you may need to configure a proxy before things work reliably.
In particular, proxy configuration may be required if:
* You see **"Failed to connect"** or similar network errors
* The **editor or Cascade panel shows a blank screen** and never loads
* Cascade or other cloud-backed features **cannot load or connect**
* Sign-in or activation flows fail unexpectedly
All proxy options live in **Windsurf Settings**. You can open them from the **top-right dropdown → Windsurf Settings**, or via the **Command Palette (Ctrl/⌘+Shift+P) → "Open Windsurf Settings Page"**.
***
## **1. Check whether your network uses a proxy**
Before changing anything in the editor:
1. **Ask your IT / infra / network team**:
* Do we use an HTTP/HTTPS proxy for outbound traffic?
* If yes, is it configured **automatically** (system settings / PAC file), or do I need to configure it **manually** in applications?
2. If your organization does **not** use a proxy, you usually don't need to change these settings.
3. If your organization does use one, collect the proxy details (address, port, and any credentials) from your IT team.
You can share a screenshot of the Windsurf proxy settings with them so they can tell you exactly what to fill in.
***
## **2. Use your system proxy ("Detect proxy")**
If your proxy is **already configured on your machine** (for example via system network settings or a PAC file), you can let Windsurf detect and reuse it:
1. Open **Windsurf Settings**.
2. In the settings search bar, type **"proxy"**.
3. Locate the **Detect proxy** toggle (see screenshot).
4. Turn **Detect proxy** **ON**.
5. Close the settings page and **restart Windsurf Editor**.
6. Try again:
* Reload the editor / Cascade
* Retry sign-in or any previously failing operation
If things stop working after enabling this, you can turn **Detect proxy** back **OFF** and use manual settings instead (see next section), or follow guidance from your IT team.
***
## **3. Manually configure a proxy in Windsurf Editor**
If your organization requires you to **manually specify** the proxy in applications:
1. Collect the required details from your IT / infra team:
* **Proxy protocol + address** (for example `http://proxy.company.com:8080` or `https://proxy.company.com:8443`)
* Whether the proxy **requires authentication**
* Your **proxy username/password** or other credentials, if needed
2. Open **Windsurf Settings**.
3. In the settings search bar, type **"proxy"** to open the proxy configuration section (see screenshot).
4. Fill in the fields:
* **Proxy URL / address** – include protocol and port (e.g. `http://proxy.company.com:8080`)
* **Authentication** – if your proxy requires it, enter the username and password fields shown in the UI
5. (Optional, if recommended by IT) Turn **Detect proxy** **ON** if your setup still relies on system/PAC detection alongside the manual settings.
6. Close the settings page and **restart Windsurf Editor** so the new proxy configuration is fully applied.
7. Try again:
* Reload the editor or Cascade if you previously saw a **blank screen**
* Retry the operation that was failing with **"Failed to connect"** or similar errors
***
## **4. Proxy settings for remote development (SSH / dev containers)**
If you use **remote development** (for example a dev container or Windsurf SSH remote), there is a separate set of proxy settings that control traffic between your local Windsurf Editor and the **remote** environment.
You may need to adjust these settings if:
* Connecting to a **dev container** or **SSH remote** fails or times out
* The remote window opens, but tools that depend on the network don't work as expected
* Your IT / infra team says the **remote host** must also go through a proxy
To configure the proxy for remote environments:
1. Open **Windsurf Settings**.
2. In the search bar, type **"proxy"**.
3. Under **User → Extensions → Windsurf Remote…**, locate:
* **Remote › Windsurf SSH: Http Proxy**
* **Remote › Windsurf SSH: Https Proxy**
4. Enter the proxy address(es) provided by your IT / infra team (usually including protocol and port, for example `http://proxy.company.com:8080`).
5. Restart the remote session (close the remote window and reconnect, or restart the dev container) and try again.
These **remote** proxy settings are independent from the general proxy / Detect proxy options described above. In some environments you may need to configure **both** the local editor proxy and the Windsurf Remote SSH proxy values.
***
## **5. When to use which option**
* **Use "Detect proxy" only** if:
* Your organization configures proxies centrally on your device (system network settings, PAC file), **and**
* IT tells you apps should "just pick up the system proxy."
* **Use manual configuration (with or without Detect proxy)** if:
* IT gives you a specific proxy URL and credentials to enter in each application, or
* Auto-detection in your environment is unreliable or not supported.
If you're unsure which of these applies to you, your **IT / infra team is the source of truth**—they can confirm whether you need proxy settings at all, what to enter, and whether the **Detect proxy** toggle should be on or off.
---
# Source: https://docs.windsurf.com/command/windsurf-related-features.md
> ## Documentation Index
> Fetch the complete documentation index at: https://docs.windsurf.com/llms.txt
> Use this file to discover all available pages before exploring further.
# Code Lenses
> Use Windsurf code lenses for quick Explain, Refactor, and Docstring operations on functions and classes directly in the editor.
## Explain, Refactor, and Add Docstring
At the top of the text editor, Windsurf gives exposes *code lenses* on functions and classes.
The `Explain` code lens will invoke Cascade, which will simply explain what the function or class does and how it works.
The `Refactor` and `Docstring` code lenses in particular will invoke Command.
* If you click `Refactor`, Windsurf will prompt you with a dropdown of selectable, pre-populated
instructions that you can choose from. You can also write your own. This is equivalent to highlighting the function and invoking Command.
* If you click `Docstring`, Windsurf will generate a docstring for you above the function header.
(In Python, the docstring will be correctly generated *underneath* the function header.)
---
# Source: https://docs.windsurf.com/windsurf-reviews/windsurf-reviews.md
> ## Documentation Index
> Fetch the complete documentation index at: https://docs.windsurf.com/llms.txt
> Use this file to discover all available pages before exploring further.
# Windsurf PR Reviews
> AI-powered GitHub pull request reviews for Teams and Enterprise. Automatically review PRs, edit titles, and provide feedback as GitHub comments.
Windsurf PR Reviews helps teams streamline code reviews with AI-powered feedback on GitHub pull requests. This feature is currently in beta for Teams and Enterprise customers using GitHub Cloud.
## How It Works
Once enabled, Windsurf automatically reviews eligible pull requests in selected repositories and provides feedback as GitHub review comments.
Reviews can be manually triggered when you mark a PR as “ready for review” or you type `/windsurf-review` in a PR comment.
You can also edit a PR title by typing `/windsurf` into the PR title.
Example workflow:
1. Developer opens a pull request in an enabled repository
2. Developer marks the PR as ready for review or types “@windsurf /review” in a PR comment
3. Windsurf reviews the PR and posts feedback as GitHub review comments
4. Developer addresses feedback and updates the PR
Limitations: 50 files per PR and Organization-wide limit of 500 reviews/month.
## Setup
An organization admin must connect the Windsurf GitHub bot to your GitHub Cloud organization to enable Windsurf PR Reviews:
1. Navigate to the Windsurf Team Settings page and click on Github Integration, or click [here](https://windsurf.com/team/settings)
2. During installation on the Github side, select which repositories to enable for PR reviews
3. Back in the Windsurf settings, configure toggles for allowing reviews/edits, define PR Guidelines for Reviews and Descriptions
4. All users in the organization can then receive PR reviews on their pull requests
Reviews are not triggered on draft pull requests.
## Disabling PR Reviews
To disable Windsurf PR Reviews, disconnect the Windsurf GitHub bot from your organization or remove it from specific repositories via GitHub settings.
## Best Practices
For effective PR reviews:
* Use natural language in PR Guidelines
* Don't be too vague about the purpose of your changes
* Include detailed examples where helpful
---
# Source: https://docs.windsurf.com/windsurf/cascade/workflows.md
# Source: https://docs.windsurf.com/plugins/cascade/workflows.md
> ## Documentation Index
> Fetch the complete documentation index at: https://docs.windsurf.com/llms.txt
> Use this file to discover all available pages before exploring further.
# Workflows
> Create reusable Cascade workflows as markdown files to automate repetitive tasks like deployments, PR reviews, and code formatting with slash commands.
Workflows enable users to define a series of steps to guide Cascade through a repetitive set of tasks, such as deploying a service or responding to PR comments.
These Workflows are saved as markdown files, allowing users and their teams an easy repeatable way to run key processes.
Once saved, Workflows can be invoked in Cascade via a slash command with the format of `/[name-of-workflow]`
## How it works
Rules generally provide large language models with guidance by providing persistent, reusable context at the prompt level.
Workflows extend this concept by providing a structured sequence of steps or prompts at the trajectory level, guiding the model through a series of interconnected tasks or actions.
To execute a Workflow, users simply invoke it in Cascade using the `/[workflow-name]` command.
You can call other Workflows from within a Workflow!
For example, /workflow-1 can include instructions like "Call /workflow-2" and "Call /workflow-3".
Upon invocation, Cascade sequentially processes each step defined in the Workflow, performing actions or generating responses as specified.
## How to create a Workflow
To get started with Workflows, click on the `Customizations` icon in the top right slider menu in Cascade, then navigate to the `Workflows` panel. Here, you can click on the `+ Workflow` button to create a new Workflow.
Workflows are saved as markdown files within `.windsurf/workflows/` directories and contain a title, description, and a series of steps with specific instructions for Cascade to follow.
## Workflow Discovery
Windsurf automatically discovers workflows from multiple locations to provide flexible organization:
* **Current workspace and sub-directories**: All `.windsurf/workflows/` directories within your current workspace and its sub-directories
* **Git repository structure**: For git repositories, Windsurf also searches up to the git root directory to find workflows in parent directories
* **Multiple workspace support**: When multiple folders are open in the same workspace, workflows are deduplicated and displayed with the shortest relative path
### Workflow Storage Locations
Workflows can be stored in any of these locations:
* `.windsurf/workflows/` in your current workspace directory
* `.windsurf/workflows/` in any sub-directory of your workspace
* `.windsurf/workflows/` in parent directories up to the git root (for git repositories)
When you create a new workflow, it will be saved in the `.windsurf/workflows/` directory of your current workspace, not necessarily at the git root.
Workflow files are limited to 12000 characters each.
### Generate a Workflow with Cascade
You can also ask Cascade to generate Workflows for you! This works particularly well for Workflows involving a series of steps in a particular CLI tool.
## Example Workflows
There are a myriad of use cases for Workflows, such as:
This is a Workflow our team uses internally to address PR comments:
```
1. Check out the PR branch: `gh pr checkout [id]`
2. Get comments on PR
bash
gh api --paginate repos/[owner]/[repo]/pulls/[id]/comments | jq '.[] | {user: .user.login, body, path, line, original_line, created_at, in_reply_to_id, pull_request_review_id, commit_id}'
3. For EACH comment, do the following. Remember to address one comment at a time.
a. Print out the following: "(index). From [user] on [file]:[lines] — [body]"
b. Analyze the file and the line range.
c. If you don't understand the comment, do not make a change. Just ask me for clarification, or to implement it myself.
d. If you think you can make the change, make the change BEFORE moving onto the next comment.
4. After all comments are processed, summarize what you did, and which comments need the USER's attention.
```
Commit using predefined formats and create a pull requests with standardized title and descriptions using the appropriate CLI commands.
Automate the installation or updating of project dependencies based on a configuration file (e.g., requirements.txt, package.json).
Automatically run code formatters (like Prettier, Black) and linters (like ESLint, Flake8) on file save or before committing to maintain code style and catch errors early.
Run or add unit or end-to-end tests and fix the errors automatically to ensure code quality before committing, merging, or deploying.
Automate the steps to deploy your application to various environments (development, staging, production), including any necessary pre-deployment checks or post-deployment verifications.
Integrate and trigger security vulnerability scans on your codebase as part of the CI/CD pipeline or on demand.
## System-Level Workflows (Enterprise)
Enterprise organizations can deploy system-level workflows that are available globally across all workspaces and cannot be modified by end users without administrator permissions. This is ideal for enforcing organization-wide development processes, deployment procedures, and compliance workflows.
System-level workflows are loaded from OS-specific directories:
**macOS:**
```
/Library/Application Support/Windsurf/workflows/*.md
```
**Linux/WSL:**
```
/etc/windsurf/workflows/*.md
```
**Windows:**
```
C:\ProgramData\Windsurf\workflows\*.md
```
Place your workflow files (as `.md` files) in the appropriate directory for your operating system. The system will automatically load all `.md` files from these directories.
### Workflow Precedence
When workflows with the same name exist at multiple levels, system-level workflows take the highest precedence:
1. **System** (highest priority) - Organization-wide workflows deployed by IT
2. **Workspace** - Project-specific workflows in `.windsurf/workflows/`
3. **Global** - User-defined workflows
4. **Built-in** - Default workflows provided by Windsurf
This means that if an organization deploys a system-level workflow with a specific name, it will override any workspace, global, or built-in workflow with the same name.
In the Cascade UI, system-level workflows are displayed with a "System" label and cannot be deleted by end users.
**Important**: System-level workflows should be managed by your IT or security team. Ensure your internal teams handle deployment, updates, and compliance according to your organization's policies. You can use standard tools and workflows such as Mobile Device Management (MDM) or Configuration Management to do so.
---
# Source: https://docs.windsurf.com/windsurf/cascade/worktrees.md
> ## Documentation Index
> Fetch the complete documentation index at: https://docs.windsurf.com/llms.txt
> Use this file to discover all available pages before exploring further.
# Worktrees
> Automatically set up git worktrees for parallel Cascade tasks
Windsurf supports using git worktrees to run Cascade tasks in parallel without interfering with your main workspace.
When using worktrees, each Cascade conversation gets its own session, allowing Cascade to make edits, or build and test code without interfering with your main workspace.
## Basic worktree usage
The simplest way to get started with using worktrees is switch to the "Worktree" mode in the bottom right corner of the Cascade input.
Currently, you can only switch to a worktree at the beginning of a Cascade session. Conversations cannot be moved to a different worktree once started.
After Cascade makes file changes in the worktree, you have the option of clicking "merge" to incorporate those changes back into your main workspace.
## Location
Worktrees are organized by repo name inside `~/.windsurf/worktrees/`.
Each worktree is given a unique random name.
To see a list of active worktrees, you can run `git worktree list` from within the repository directory.
## Setup hook
Each worktree contains a copy of your repository files, but does not include `.env` files or other packages that aren't version-controlled.
If you would like to include additional files or packages in each worktree, you can use the `post_setup_worktree` [hook](./hooks#post_setup_worktree) to copy them into the worktree directory.
The `post_setup_worktree` hook runs after each worktree is created and configured. It is executed inside the new **worktree** directory.
The `$ROOT_WORKSPACE_PATH` environment variable points to the original workspace path and can be used to access files or run commands relative to the original repository.
### Example
Copy environment files and install dependencies when a new worktree is created.
**Config** (in `.windsurf/hooks.json`):
```json theme={null}
{
"hooks": {
"post_setup_worktree": [
{
"command": "bash $ROOT_WORKSPACE_PATH/hooks/setup_worktree.sh",
"show_output": true
}
]
}
}
```
**Script** (`hooks/setup_worktree.sh`):
```bash theme={null}
#!/bin/bash
# Copy environment files from the original workspace
if [ -f "$ROOT_WORKSPACE_PATH/.env" ]; then
cp "$ROOT_WORKSPACE_PATH/.env" .env
echo "Copied .env file"
fi
if [ -f "$ROOT_WORKSPACE_PATH/.env.local" ]; then
cp "$ROOT_WORKSPACE_PATH/.env.local" .env.local
echo "Copied .env.local file"
fi
# Install dependencies
if [ -f "package.json" ]; then
npm install
echo "Installed npm dependencies"
fi
exit 0
```
This hook ensures each worktree has the necessary environment configuration and dependencies installed automatically.
## Cleanup
Windsurf automatically cleans up older worktrees when creating a new worktree to prevent excessive disk usage. Each workspace can have up to **20** worktrees.
Worktrees are cleaned up based on when they were last accessed—the oldest ones are removed first. This cleanup happens on a per-workspace basis, ensuring that worktrees from different repositories remain independent of each other.
Additionally, if you manually delete a Cascade conversation, Windsurf will automatically delete the associated worktree.
## Source Control Panel
By default, Windsurf does not show worktrees created by Cascade in the SCM Panel.
You can set `git.showWindsurfWorktrees` to `true` in your settings to override this and enable visualizing the worktrees in the SCM Panel.
 * SSH agent-forwarding is on by default, and will use Windsurf's latest connection to that host. If you're having trouble with it, try reloading the window to refresh the connection.
* On Windows, you'll see some `cmd.exe` windows when it asks for your password. This is expected—we'll get rid of them soon.
* If you have issues, please first make sure that you can ssh into your remote host using regular `ssh` in a terminal. If the problem persists, include the output from the `Output > Remote SSH (Windsurf)` tab in any bug reports!
# Dev Containers
Windsurf supports Development Containers on Mac, Windows, and Linux for both local and remote (via SSH) workflows.
Prerequisites:
* Local: Docker must be installed on your machine and accessible from the Windsurf terminal.
* Remote over SSH: Connect to a remote host using Windsurf Remote-SSH. Docker must be installed and accessible on the remote host (from the remote shell). Your project should include a `devcontainer.json` or equivalent config.
Available commands (in both local and remote windows):
1. `Dev Containers: Open Folder in Container`
* Open a new workspace using a specified `devcontainer.json`.
2. `Dev Containers: Reopen in Container`
* Reopen the current workspace in a new container defined by your `devcontainer.json`.
3. `Dev Containers: Attach to Running Container`
* Attach to an existing Docker container and connect your current workspace to it. If the container does not follow the [Development Container Specificaton](https://containers.dev/implementors/spec/), Windsurf will attempt best-effort detection of the remote user and environment.
4. `Dev Containers: Reopen Folder Locally`
* When connected to a development container, disconnect and reopen the workspace on the local filesystem.
5. `Dev Containers: Show Windsurf Dev Containers Log`
* Open the Dev Containers log output for troubleshooting.
These commands are available from the Command Palette and will also appear when you click the `Open a Remote Window` button in the bottom left (including when you are connected to a remote host via SSH).
Related:
* `Remote Explorer: Focus on Dev Containers (Windsurf) View` — quickly open the Dev Containers view.
# WSL (Beta)
As of version 1.1.0, Windsurf has beta support for Windows Subsystem for Linux. You must already have WSL set up and configured on your Windows machine.
You can access WSL by clicking on the `Open a Remote Window` button in the bottom left, or under `Remote-WSL` in the Command Palette.
# Extension Marketplace
You can change the marketplace you use to download extensions from. To do this, go to `Windsurf Settings` and modify the Marketplace URL settings under the `General` section.
* SSH agent-forwarding is on by default, and will use Windsurf's latest connection to that host. If you're having trouble with it, try reloading the window to refresh the connection.
* On Windows, you'll see some `cmd.exe` windows when it asks for your password. This is expected—we'll get rid of them soon.
* If you have issues, please first make sure that you can ssh into your remote host using regular `ssh` in a terminal. If the problem persists, include the output from the `Output > Remote SSH (Windsurf)` tab in any bug reports!
# Dev Containers
Windsurf supports Development Containers on Mac, Windows, and Linux for both local and remote (via SSH) workflows.
Prerequisites:
* Local: Docker must be installed on your machine and accessible from the Windsurf terminal.
* Remote over SSH: Connect to a remote host using Windsurf Remote-SSH. Docker must be installed and accessible on the remote host (from the remote shell). Your project should include a `devcontainer.json` or equivalent config.
Available commands (in both local and remote windows):
1. `Dev Containers: Open Folder in Container`
* Open a new workspace using a specified `devcontainer.json`.
2. `Dev Containers: Reopen in Container`
* Reopen the current workspace in a new container defined by your `devcontainer.json`.
3. `Dev Containers: Attach to Running Container`
* Attach to an existing Docker container and connect your current workspace to it. If the container does not follow the [Development Container Specificaton](https://containers.dev/implementors/spec/), Windsurf will attempt best-effort detection of the remote user and environment.
4. `Dev Containers: Reopen Folder Locally`
* When connected to a development container, disconnect and reopen the workspace on the local filesystem.
5. `Dev Containers: Show Windsurf Dev Containers Log`
* Open the Dev Containers log output for troubleshooting.
These commands are available from the Command Palette and will also appear when you click the `Open a Remote Window` button in the bottom left (including when you are connected to a remote host via SSH).
Related:
* `Remote Explorer: Focus on Dev Containers (Windsurf) View` — quickly open the Dev Containers view.
# WSL (Beta)
As of version 1.1.0, Windsurf has beta support for Windows Subsystem for Linux. You must already have WSL set up and configured on your Windows machine.
You can access WSL by clicking on the `Open a Remote Window` button in the bottom left, or under `Remote-WSL` in the Command Palette.
# Extension Marketplace
You can change the marketplace you use to download extensions from. To do this, go to `Windsurf Settings` and modify the Marketplace URL settings under the `General` section.
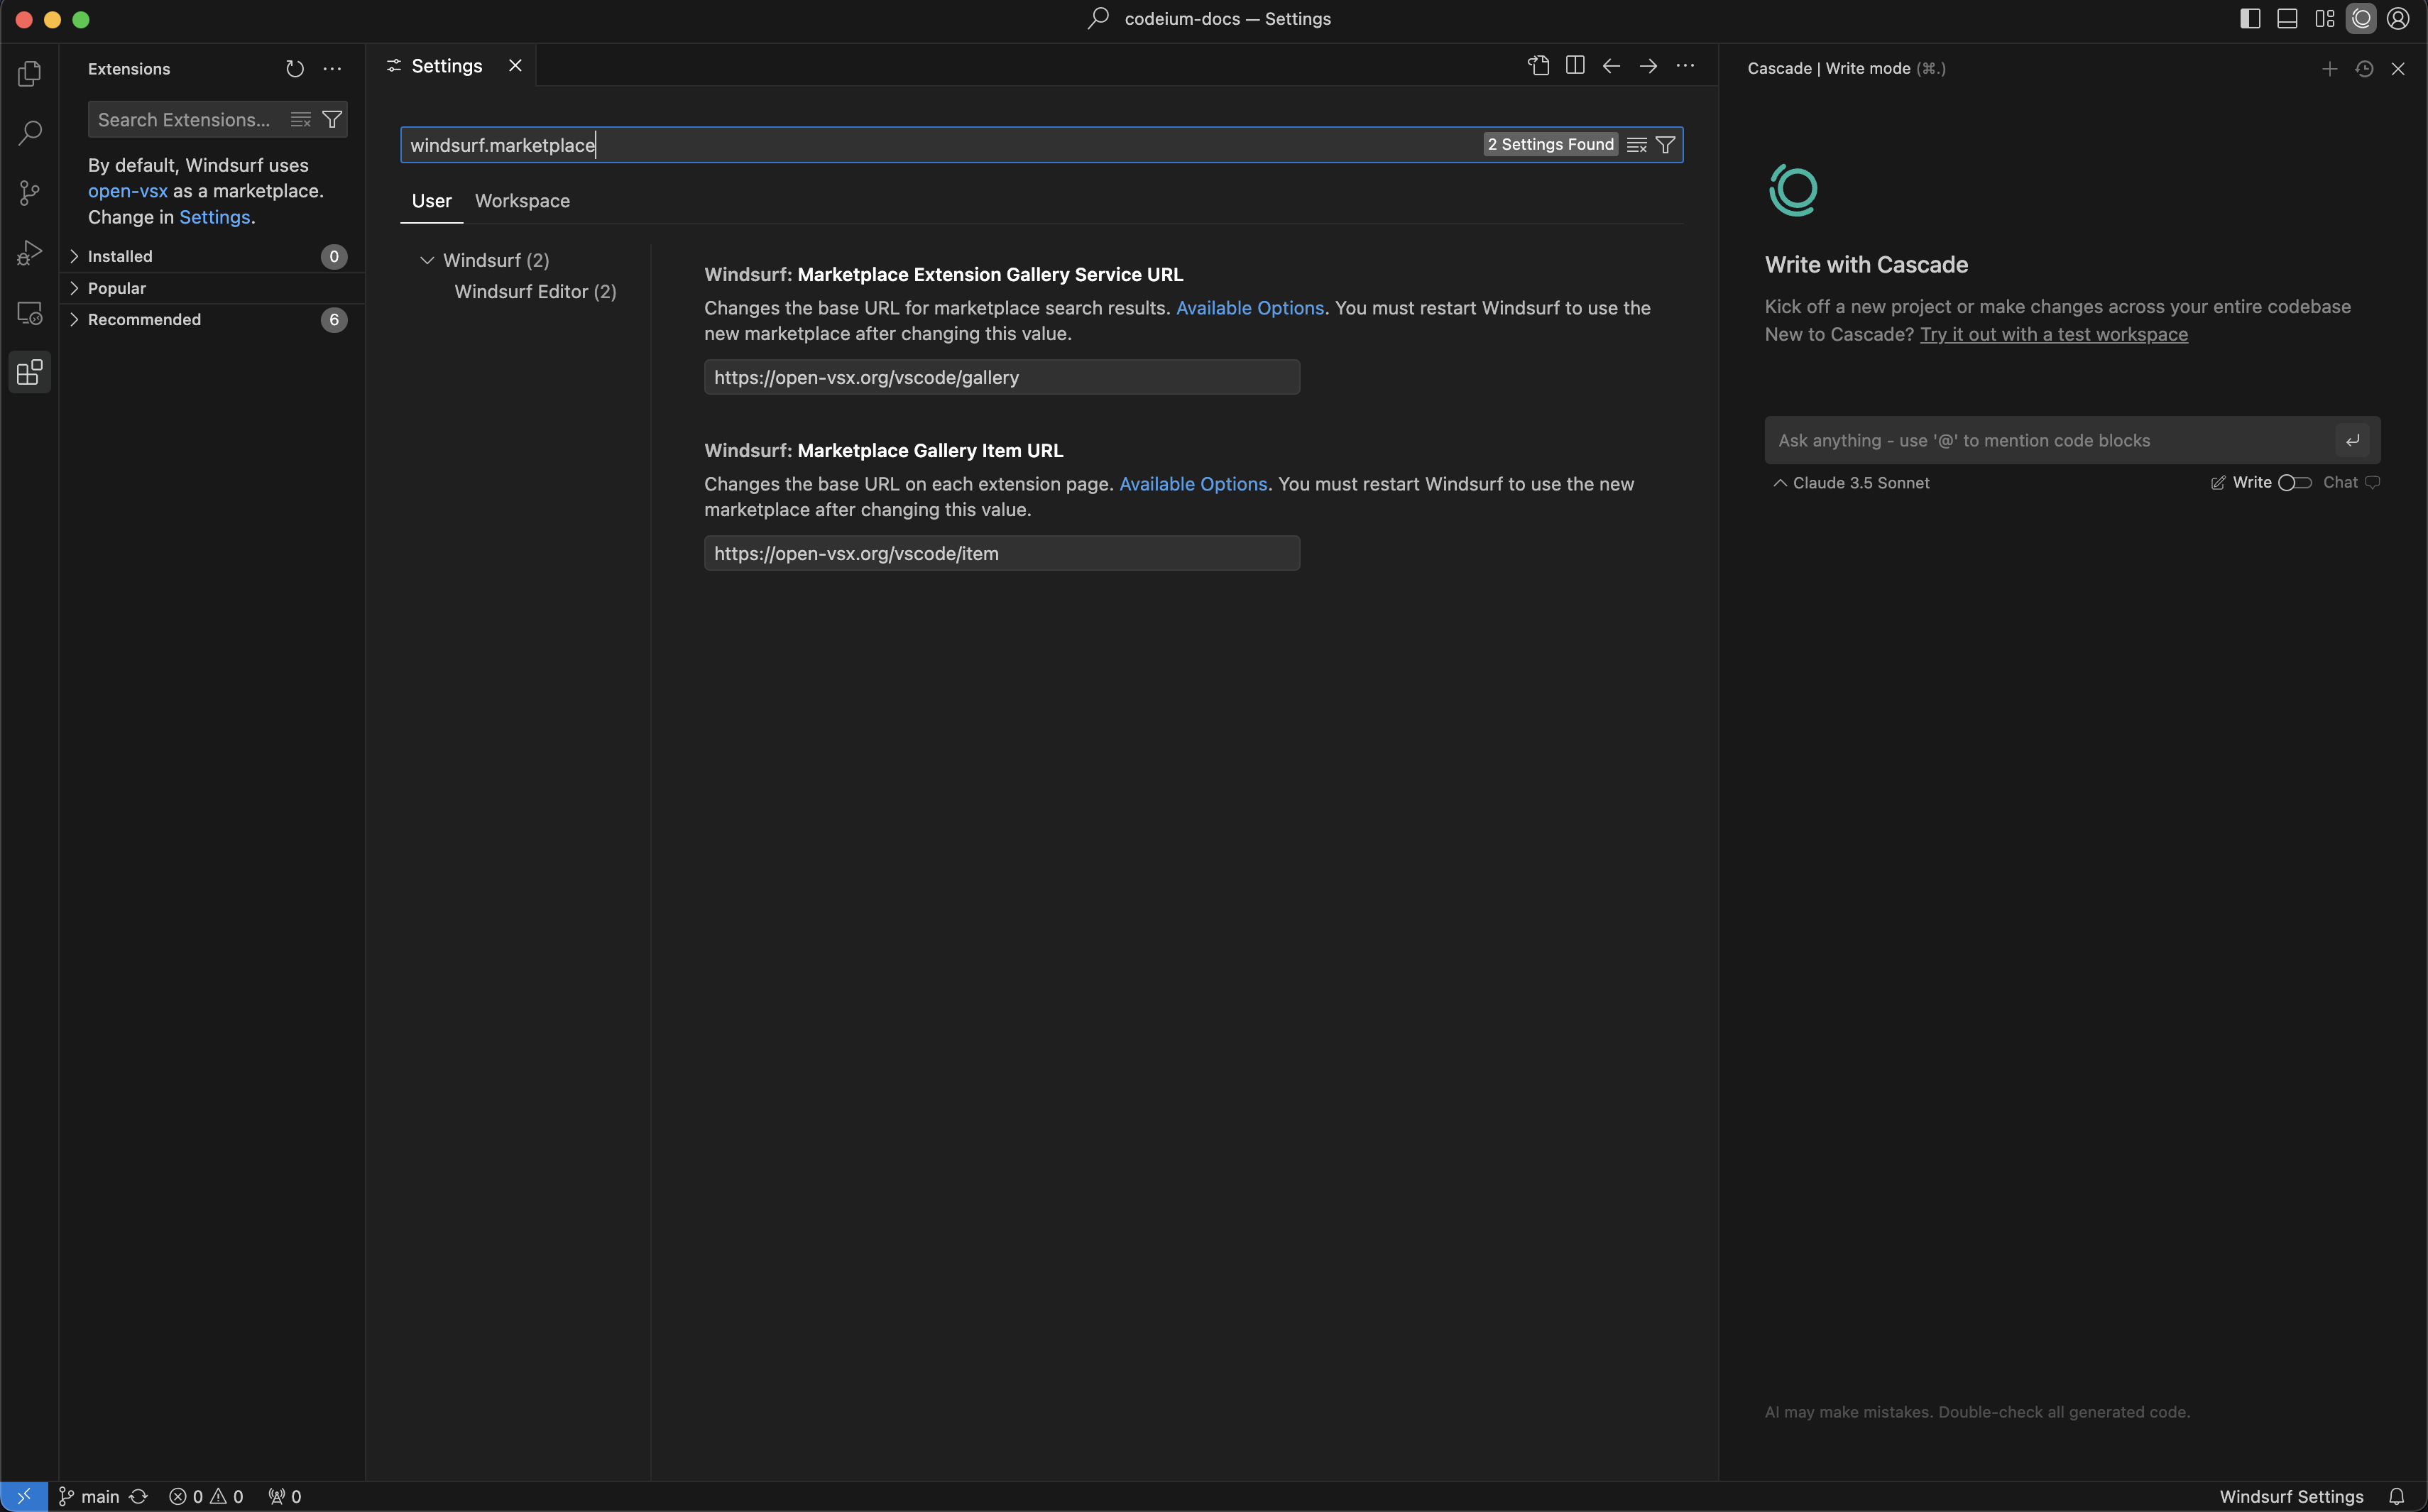 ## Windsurf Plugins
 # How It Works
When you're ready to commit changes:
1. Stage your files in the Git panel
2. Click the sparkle (✨) icon next to the commit message field
3. Review the generated message and edit if needed
4. Complete your commit
The AI analyzes your recent code changes and creates a meaningful commit message that describes what you've done.
# Best Practices
For better results:
* Apply general best practices for commit scope: group together small, meaningful units of changes
* Review the message before committing
# Limitations
* Large or complex commits may result in more generic messages
* Specialized terminology might not always be captured perfectly
* Generated messages are suggestions and may need editing
# Privacy
Your code and commit messages remain private. We don't store your code changes or use them for training our models.
---
# Source: https://docs.windsurf.com/windsurf/accounts/api-reference/analytics-api-introduction.md
# Source: https://docs.windsurf.com/plugins/accounts/api-reference/analytics-api-introduction.md
> ## Documentation Index
> Fetch the complete documentation index at: https://docs.windsurf.com/llms.txt
> Use this file to discover all available pages before exploring further.
# Analytics API
> Enterprise analytics API for querying Windsurf usage data including autocomplete, chat, command, and Cascade metrics.
## Overview
The Windsurf Analytics API enables enterprise customers to programmatically access detailed usage analytics for their teams. Query data from autocomplete, chat, command features, and Cascade with flexible filtering, grouping, and aggregation options.
# How It Works
When you're ready to commit changes:
1. Stage your files in the Git panel
2. Click the sparkle (✨) icon next to the commit message field
3. Review the generated message and edit if needed
4. Complete your commit
The AI analyzes your recent code changes and creates a meaningful commit message that describes what you've done.
# Best Practices
For better results:
* Apply general best practices for commit scope: group together small, meaningful units of changes
* Review the message before committing
# Limitations
* Large or complex commits may result in more generic messages
* Specialized terminology might not always be captured perfectly
* Generated messages are suggestions and may need editing
# Privacy
Your code and commit messages remain private. We don't store your code changes or use them for training our models.
---
# Source: https://docs.windsurf.com/windsurf/accounts/api-reference/analytics-api-introduction.md
# Source: https://docs.windsurf.com/plugins/accounts/api-reference/analytics-api-introduction.md
> ## Documentation Index
> Fetch the complete documentation index at: https://docs.windsurf.com/llms.txt
> Use this file to discover all available pages before exploring further.
# Analytics API
> Enterprise analytics API for querying Windsurf usage data including autocomplete, chat, command, and Cascade metrics.
## Overview
The Windsurf Analytics API enables enterprise customers to programmatically access detailed usage analytics for their teams. Query data from autocomplete, chat, command features, and Cascade with flexible filtering, grouping, and aggregation options.
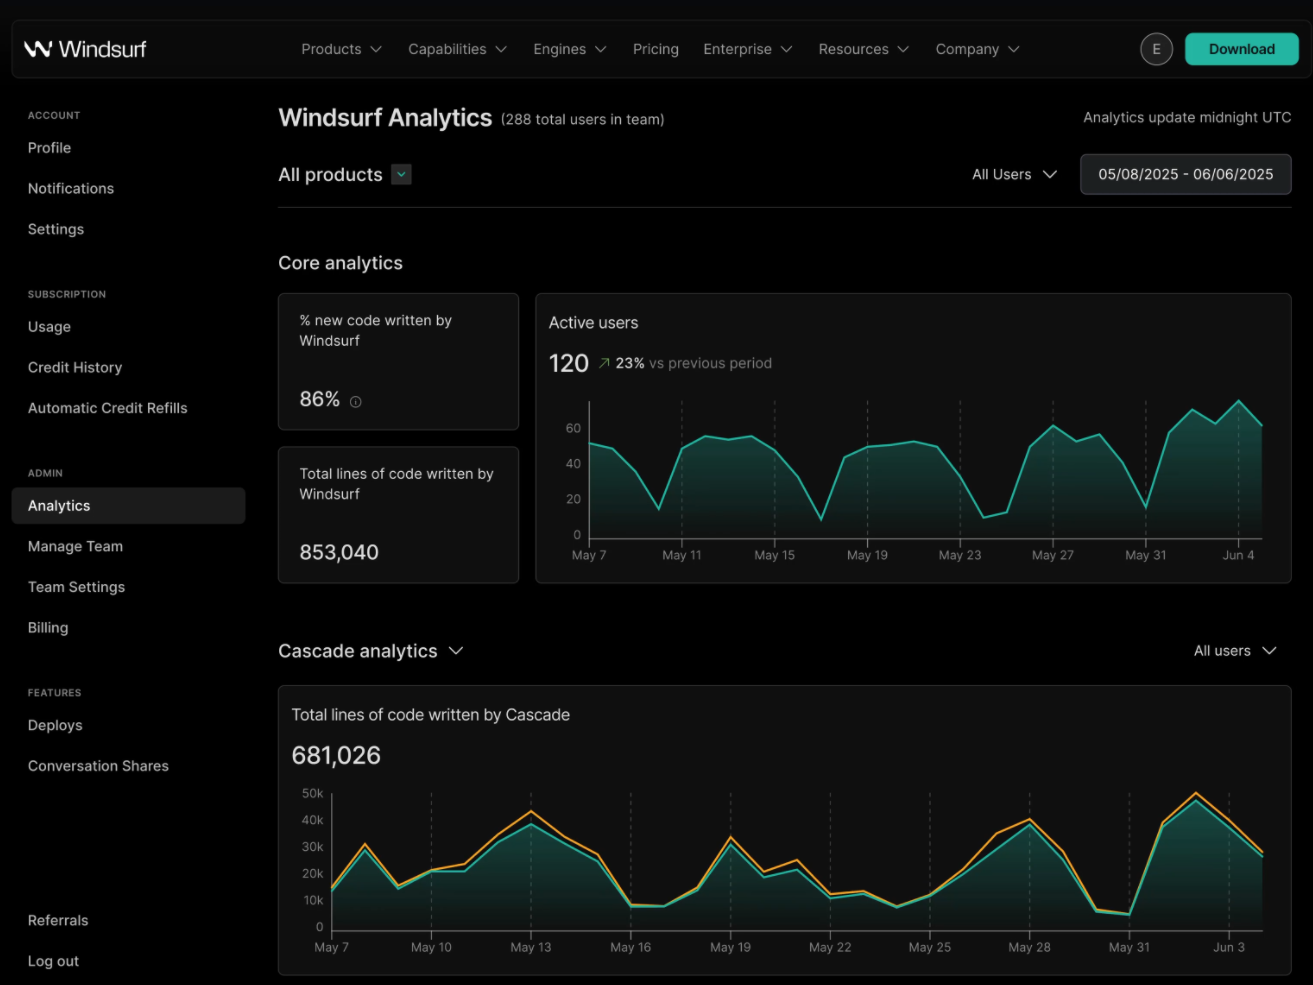 ---
# Source: https://docs.windsurf.com/windsurf/accounts/api-reference/api-introduction.md
# Source: https://docs.windsurf.com/plugins/accounts/api-reference/api-introduction.md
> ## Documentation Index
> Fetch the complete documentation index at: https://docs.windsurf.com/llms.txt
> Use this file to discover all available pages before exploring further.
# API Reference
> Enterprise API for querying Windsurf usage data and managing configurations with service key authentication.
## Overview
The Windsurf API enables enterprise customers to programmatically access detailed usage analytics and manage usage configurations for their teams.
---
# Source: https://docs.windsurf.com/windsurf/accounts/api-reference/api-introduction.md
# Source: https://docs.windsurf.com/plugins/accounts/api-reference/api-introduction.md
> ## Documentation Index
> Fetch the complete documentation index at: https://docs.windsurf.com/llms.txt
> Use this file to discover all available pages before exploring further.
# API Reference
> Enterprise API for querying Windsurf usage data and managing configurations with service key authentication.
## Overview
The Windsurf API enables enterprise customers to programmatically access detailed usage analytics and manage usage configurations for their teams.
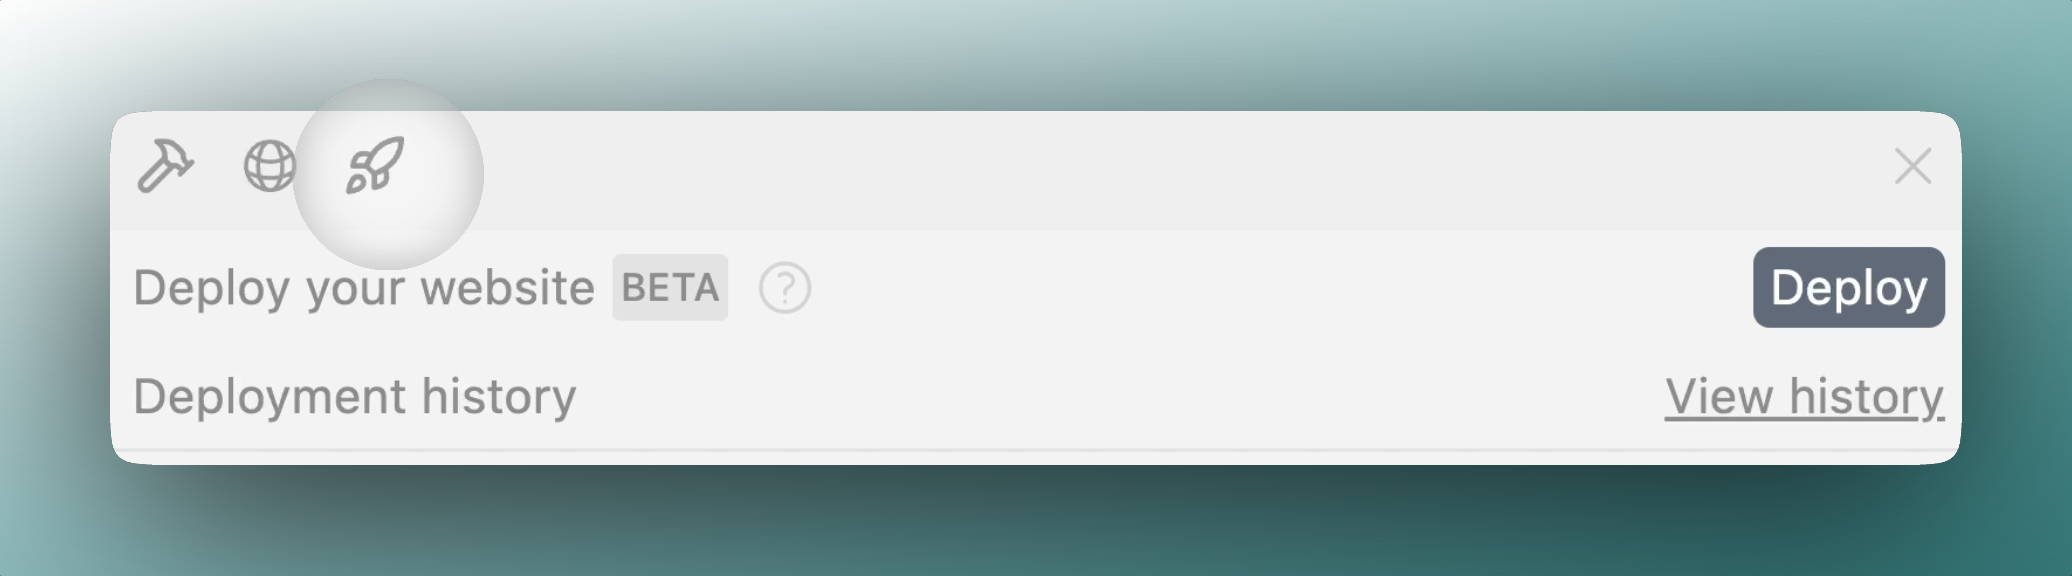 ## Overview
With App Deploys, you can:
* Deploy a website or JS web app to a public domain
* Re-deploy to the same URL after making changes
* Claim the project to your personal account
## Overview
With App Deploys, you can:
* Deploy a website or JS web app to a public domain
* Re-deploy to the same URL after making changes
* Claim the project to your personal account
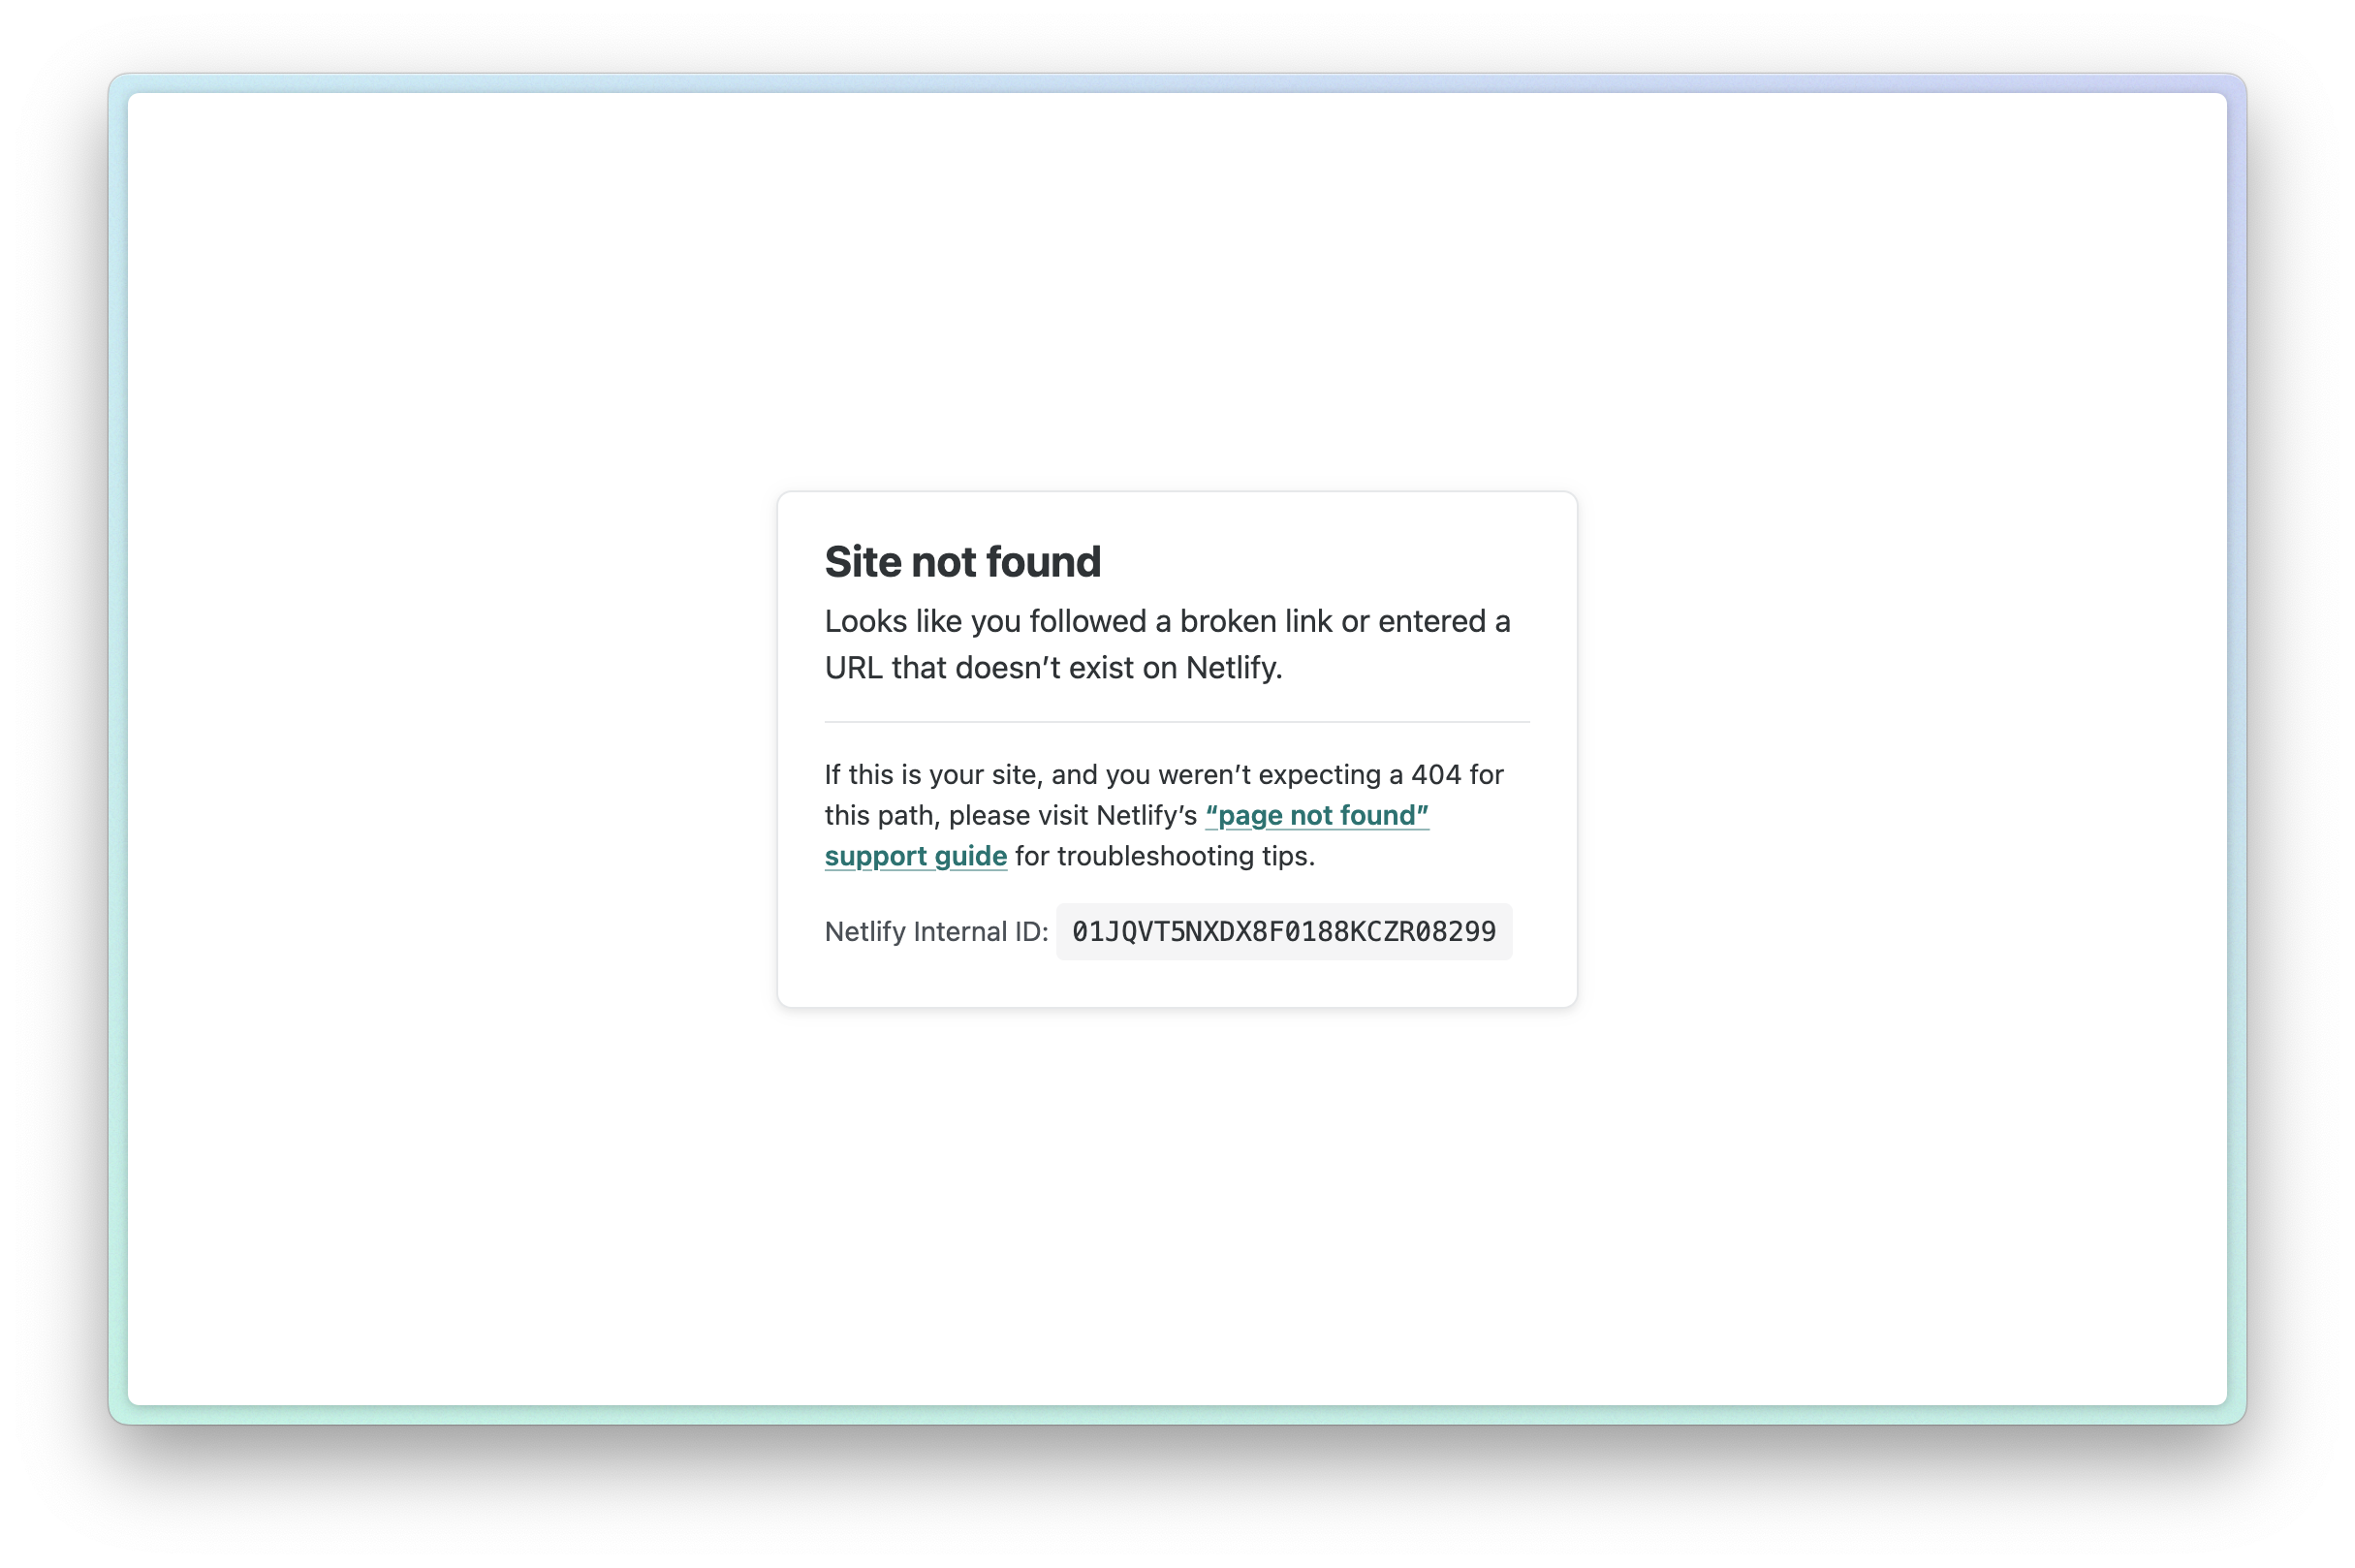 This likely means that your build failed. Please claim your site (you can find it on your [deploy history](https://windsurf.com/deploy)) and check the build logs for more details. Often times you can paste your build logs into Cascade and ask for help.
### Changing Your Subdomain / URL
#### Updating `netlify.app` domain
You can change your subdomain by claiming your deployment and updating the Netlify site settings. This will update your `.netlify.app` domain.
#### Updating custom `.windsurf.build` subdomain
This likely means that your build failed. Please claim your site (you can find it on your [deploy history](https://windsurf.com/deploy)) and check the build logs for more details. Often times you can paste your build logs into Cascade and ask for help.
### Changing Your Subdomain / URL
#### Updating `netlify.app` domain
You can change your subdomain by claiming your deployment and updating the Netlify site settings. This will update your `.netlify.app` domain.
#### Updating custom `.windsurf.build` subdomain
 ---
# Source: https://docs.windsurf.com/windsurf/cascade/arena.md
> ## Documentation Index
> Fetch the complete documentation index at: https://docs.windsurf.com/llms.txt
> Use this file to discover all available pages before exploring further.
# Arena Mode
> Run multiple Cascade instances in parallel using arena mode to explore different approaches simultaneously.
Cascade supports **arena mode** to allow you to easily compare responses from different models on the same prompt.
| Mode | Use Case |
| ---------- | --------------------------------------- |
| **Single** | Run Cascade with a single chosen model |
| **Arena** | Compare responses from different models |
## Arena Mode
To enter arena mode, click the **arena** button in the model picker and choose your preferred models.
When you select multiple models, Cascade will independently execute your prompt with each model in a separate session. Each model also gets its own [worktree](./worktrees) for isolation.
---
# Source: https://docs.windsurf.com/windsurf/cascade/arena.md
> ## Documentation Index
> Fetch the complete documentation index at: https://docs.windsurf.com/llms.txt
> Use this file to discover all available pages before exploring further.
# Arena Mode
> Run multiple Cascade instances in parallel using arena mode to explore different approaches simultaneously.
Cascade supports **arena mode** to allow you to easily compare responses from different models on the same prompt.
| Mode | Use Case |
| ---------- | --------------------------------------- |
| **Single** | Run Cascade with a single chosen model |
| **Arena** | Compare responses from different models |
## Arena Mode
To enter arena mode, click the **arena** button in the model picker and choose your preferred models.
When you select multiple models, Cascade will independently execute your prompt with each model in a separate session. Each model also gets its own [worktree](./worktrees) for isolation.
 ## Battle Groups
Instead of manually selecting models, you can select one of our curated model groups to have Cascade randomly choose two models to compare. We have two random model groups available:
* **Frontier**: Includes frontier reasoning models like GPT 5.2, Claude Opus/Sonnet 4.5, Gemini 3 Pro, etc., optimized for intelligence.
* **Fast**: Includes fast reasoning models like SWE 1.5, Claude Haiku, etc., optimized for speed.
When you use one of the battle groups, the exact model names are hidden from you until you click the "X is better" button to converge the models. Then, the original model names are revealed and the conversations are reshuffled.
## When To Use Arena Mode
Arena mode is particularly useful when you want to:
* Compare code quality across different models
* Explore different approaches to a hard problem
* Test out a new model without abandoning your standard preference
* Access frontier models at reduced cost by using the battle groups
## Limitations
* Arena mode is only supported for workspaces that have git initialized
* By default, only Git-tracked files are copied into the worktrees created for each model; you can configure a [setup hook](./worktrees#setup-hook) to copy additional files as needed
## Related Features
## Battle Groups
Instead of manually selecting models, you can select one of our curated model groups to have Cascade randomly choose two models to compare. We have two random model groups available:
* **Frontier**: Includes frontier reasoning models like GPT 5.2, Claude Opus/Sonnet 4.5, Gemini 3 Pro, etc., optimized for intelligence.
* **Fast**: Includes fast reasoning models like SWE 1.5, Claude Haiku, etc., optimized for speed.
When you use one of the battle groups, the exact model names are hidden from you until you click the "X is better" button to converge the models. Then, the original model names are revealed and the conversations are reshuffled.
## When To Use Arena Mode
Arena mode is particularly useful when you want to:
* Compare code quality across different models
* Explore different approaches to a hard problem
* Test out a new model without abandoning your standard preference
* Access frontier models at reduced cost by using the battle groups
## Limitations
* Arena mode is only supported for workspaces that have git initialized
* By default, only Git-tracked files are copied into the worktrees created for each model; you can configure a [setup hook](./worktrees#setup-hook) to copy additional files as needed
## Related Features
 For more details on auto-execution levels and allow/deny lists, see the [Terminal documentation](/windsurf/terminal#auto-executed-cascade-commands).
# Real-time collaboration
A unique capability of Cascade is that it is aware of your real-time actions.
You no longer necessarily need to prompt with context on your prior actions, as Cascade is already aware.
Try making a manual change in the code editor, and then prompt Cascade to "continue my work"!
# Ignoring files
If you'd like Cascade to ignore files, you can add your files to `.codeiumignore` at the root of your workspace. This will prevent Cascade from viewing, editing or creating files inside of the paths designated. You can declare the file paths in a format similar to `.gitignore`.
## Global .codeiumignore
For enterprise customers managing multiple repositories, you can enforce ignore rules across all repositories by placing a global `.codeiumignore` file in the `~/.codeium/` folder. This global configuration will apply to all Windsurf workspaces on your system and works in addition to any repository-specific `.codeiumignore` files.
---
# Source: https://docs.windsurf.com/windsurf/cascade/cascade.md
> ## Documentation Index
> Fetch the complete documentation index at: https://docs.windsurf.com/llms.txt
> Use this file to discover all available pages before exploring further.
# Cascade Overview
> Cascade is Windsurf's agentic AI assistant with Code/Chat modes, tool calling, voice input, checkpoints, real-time awareness, and linter integration.
Windsurf's Cascade unlocks a new level of collaboration between human and AI.
To open Cascade, press `Cmd/Ctrl+L`click the Cascade icon in the top right corner of the Windsurf window. Any selected text in the editor or terminal will automatically be included.
### Quick links to features
For more details on auto-execution levels and allow/deny lists, see the [Terminal documentation](/windsurf/terminal#auto-executed-cascade-commands).
# Real-time collaboration
A unique capability of Cascade is that it is aware of your real-time actions.
You no longer necessarily need to prompt with context on your prior actions, as Cascade is already aware.
Try making a manual change in the code editor, and then prompt Cascade to "continue my work"!
# Ignoring files
If you'd like Cascade to ignore files, you can add your files to `.codeiumignore` at the root of your workspace. This will prevent Cascade from viewing, editing or creating files inside of the paths designated. You can declare the file paths in a format similar to `.gitignore`.
## Global .codeiumignore
For enterprise customers managing multiple repositories, you can enforce ignore rules across all repositories by placing a global `.codeiumignore` file in the `~/.codeium/` folder. This global configuration will apply to all Windsurf workspaces on your system and works in addition to any repository-specific `.codeiumignore` files.
---
# Source: https://docs.windsurf.com/windsurf/cascade/cascade.md
> ## Documentation Index
> Fetch the complete documentation index at: https://docs.windsurf.com/llms.txt
> Use this file to discover all available pages before exploring further.
# Cascade Overview
> Cascade is Windsurf's agentic AI assistant with Code/Chat modes, tool calling, voice input, checkpoints, real-time awareness, and linter integration.
Windsurf's Cascade unlocks a new level of collaboration between human and AI.
To open Cascade, press `Cmd/Ctrl+L`click the Cascade icon in the top right corner of the Windsurf window. Any selected text in the editor or terminal will automatically be included.
### Quick links to features
 # Explain and fix
For any errors that you run into from within the editor, you can simply highlight the error and click `Explain and Fix` to have Cascade fix it for you.
# Explain and fix
For any errors that you run into from within the editor, you can simply highlight the error and click `Explain and Fix` to have Cascade fix it for you.
 # Ignoring files
If you'd like Cascade to ignore files, you can add your files to `.codeiumignore` at the root of your workspace. This will prevent Cascade from viewing, editing or creating files inside of the paths designated. You can declare the file paths in a format similar to `.gitignore`.
## Global .codeiumignore
For enterprise customers managing multiple repositories, you can enforce ignore rules across all repositories by placing a global `.codeiumignore` file in the `~/.codeium/` folder. This global configuration will apply to all Windsurf workspaces on your system and works in addition to any repository-specific `.codeiumignore` files.
# Linter integration
Cascade can automatically fix linting errors on generated code. This is turned on by default, but it can be disabled by clicking `Auto-fix` on the tool call, and clicking `disable`. This edit will not consume any credits.
# Ignoring files
If you'd like Cascade to ignore files, you can add your files to `.codeiumignore` at the root of your workspace. This will prevent Cascade from viewing, editing or creating files inside of the paths designated. You can declare the file paths in a format similar to `.gitignore`.
## Global .codeiumignore
For enterprise customers managing multiple repositories, you can enforce ignore rules across all repositories by placing a global `.codeiumignore` file in the `~/.codeium/` folder. This global configuration will apply to all Windsurf workspaces on your system and works in addition to any repository-specific `.codeiumignore` files.
# Linter integration
Cascade can automatically fix linting errors on generated code. This is turned on by default, but it can be disabled by clicking `Auto-fix` on the tool call, and clicking `disable`. This edit will not consume any credits.
 When Cascade makes an edit with the primary goal of fixing lints that it created and auto-detected,
it may discount the edit to be free of credit charge. This is in recognition of the fact that
fixing lint errors increases the number of tool calls that Cascade makes.
# Sharing your conversation
When Cascade makes an edit with the primary goal of fixing lints that it created and auto-detected,
it may discount the edit to be free of credit charge. This is in recognition of the fact that
fixing lint errors increases the number of tool calls that Cascade makes.
# Sharing your conversation
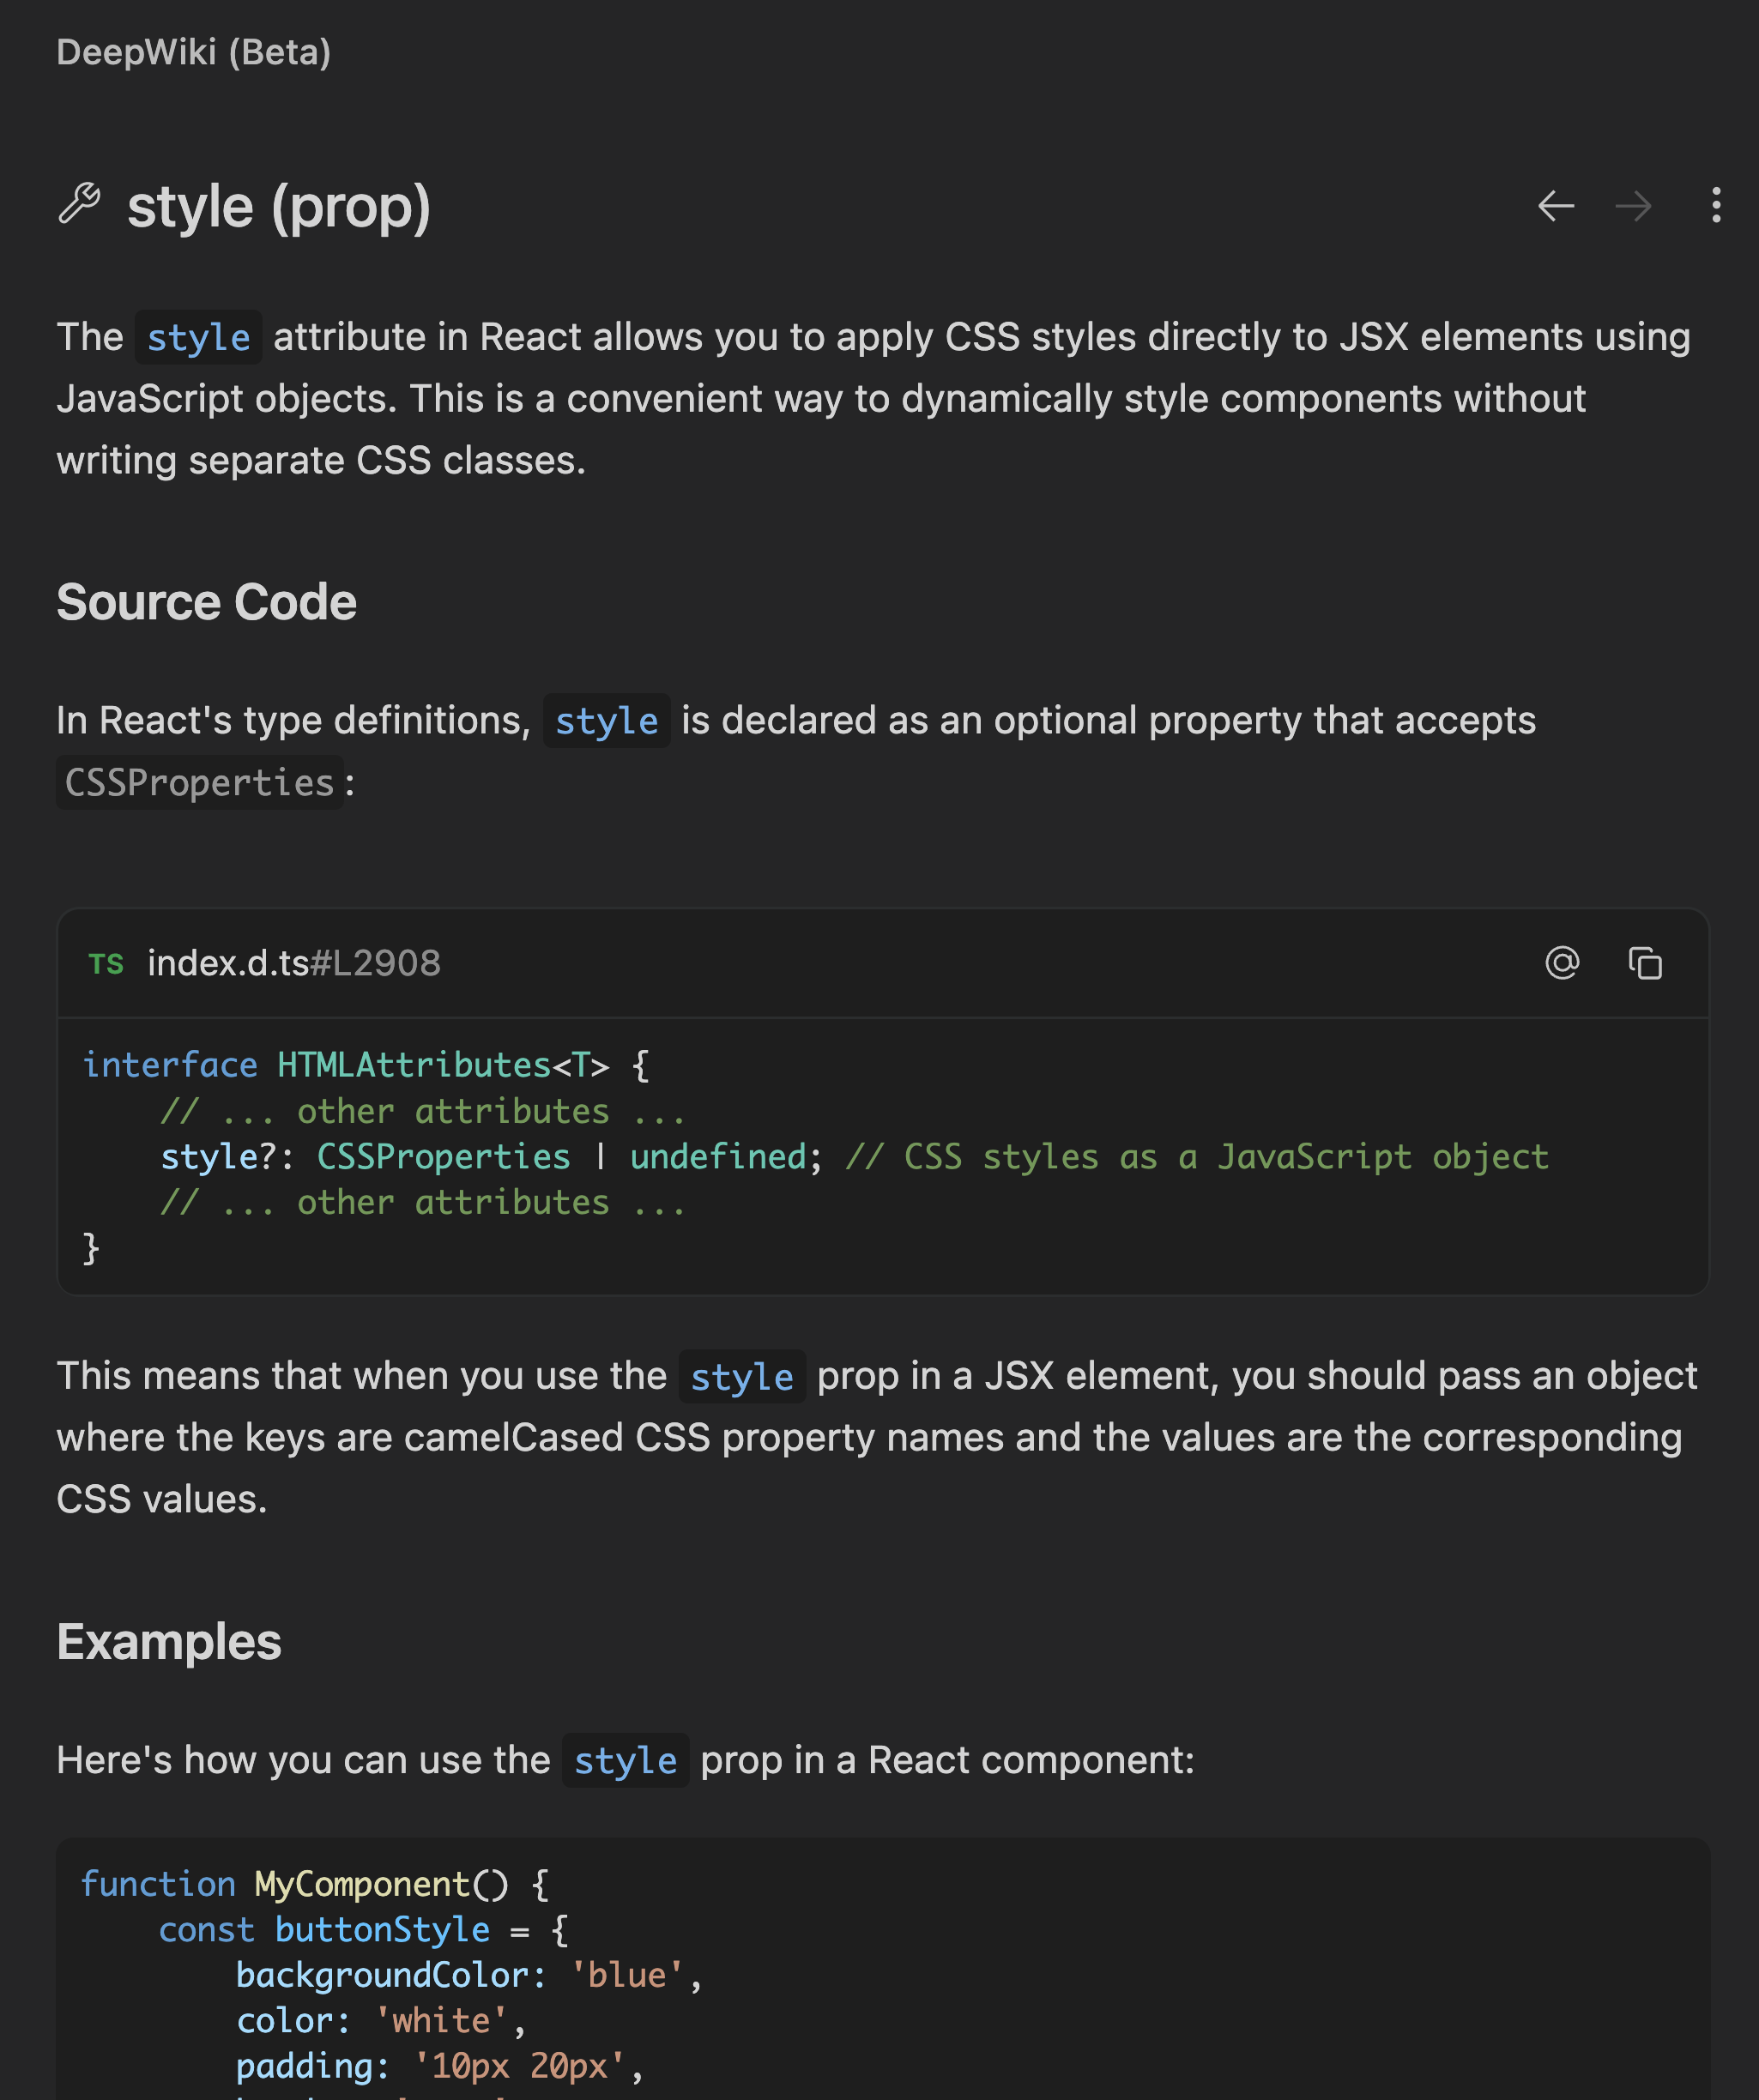 ---
# Source: https://docs.windsurf.com/windsurf/accounts/domain-verification.md
> ## Documentation Index
> Fetch the complete documentation index at: https://docs.windsurf.com/llms.txt
> Use this file to discover all available pages before exploring further.
# Domain Verification
> Verify your organization's domain ownership with DNS TXT records to enable SSO, user management, and automatic team invitations in Windsurf.
Domain verification is the process of proving that your organization owns or controls a specific domain. This prevents spoofing or unauthorized use of your domain and enables secure organization-level features in Windsurf, such as SSO and user management.
In Windsurf, verifying your domain is required so that users with emails from your organization can be recognized and managed. The domain you need to verify should be the top-level domain of your users’ email addresses (for example, if your users log in with [name@company.com](mailto:name@company.com), you must verify company.com).
## How to verify your domain in Windsurf
---
# Source: https://docs.windsurf.com/windsurf/accounts/domain-verification.md
> ## Documentation Index
> Fetch the complete documentation index at: https://docs.windsurf.com/llms.txt
> Use this file to discover all available pages before exploring further.
# Domain Verification
> Verify your organization's domain ownership with DNS TXT records to enable SSO, user management, and automatic team invitations in Windsurf.
Domain verification is the process of proving that your organization owns or controls a specific domain. This prevents spoofing or unauthorized use of your domain and enables secure organization-level features in Windsurf, such as SSO and user management.
In Windsurf, verifying your domain is required so that users with emails from your organization can be recognized and managed. The domain you need to verify should be the top-level domain of your users’ email addresses (for example, if your users log in with [name@company.com](mailto:name@company.com), you must verify company.com).
## How to verify your domain in Windsurf
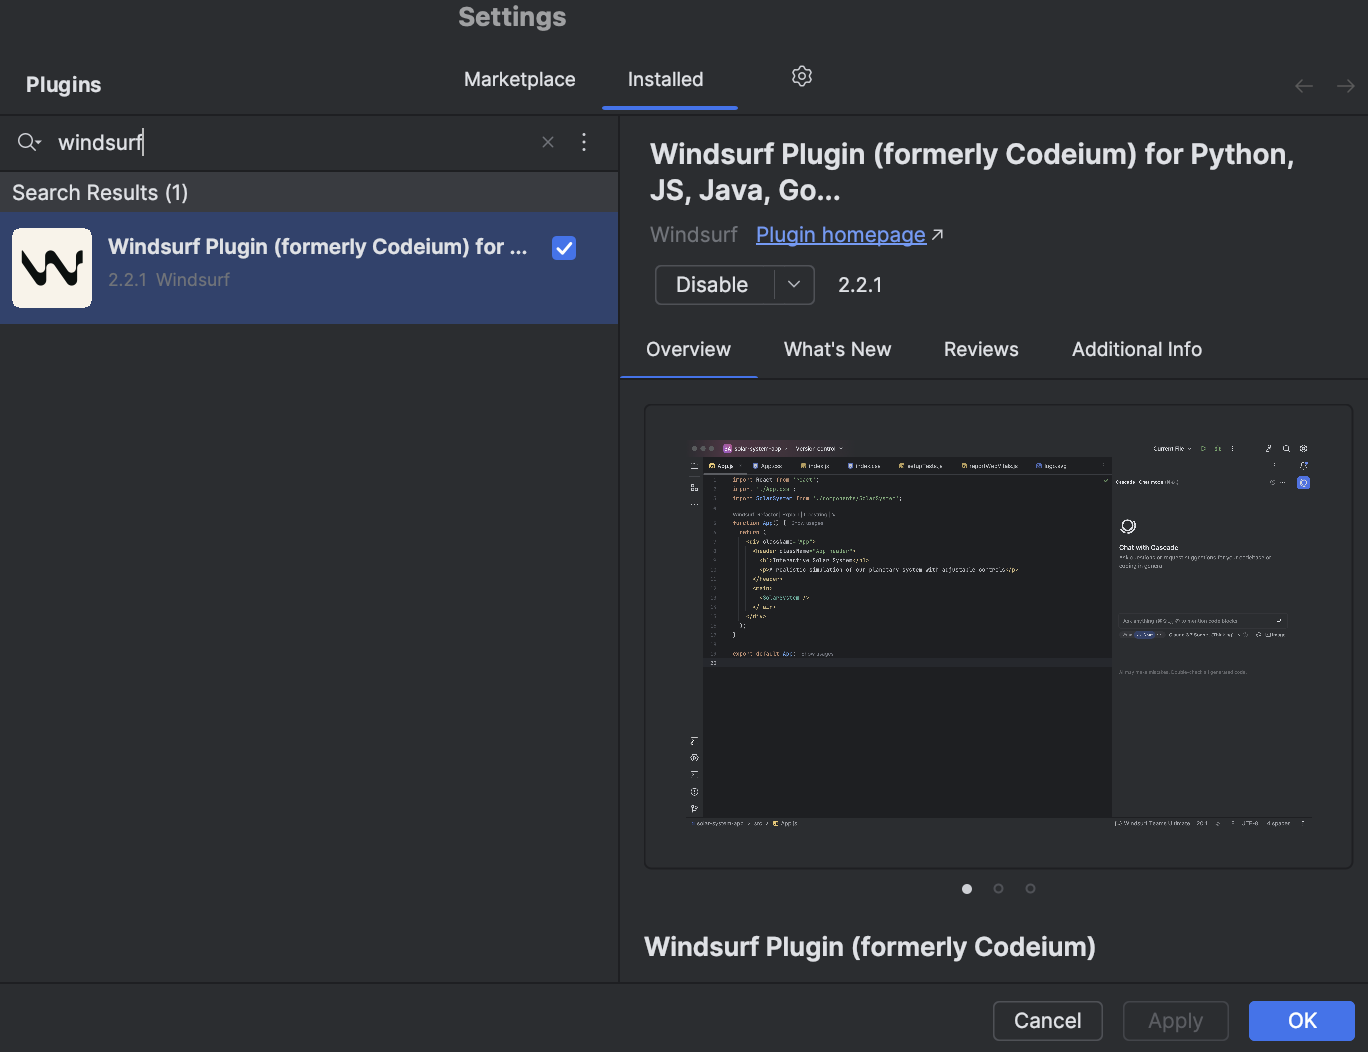

 If you do not have an account or otherwise are not already logged in online, you will be prompted to login.
 Once you have logged in online, the webpage will indicate that you can return to your IDE.

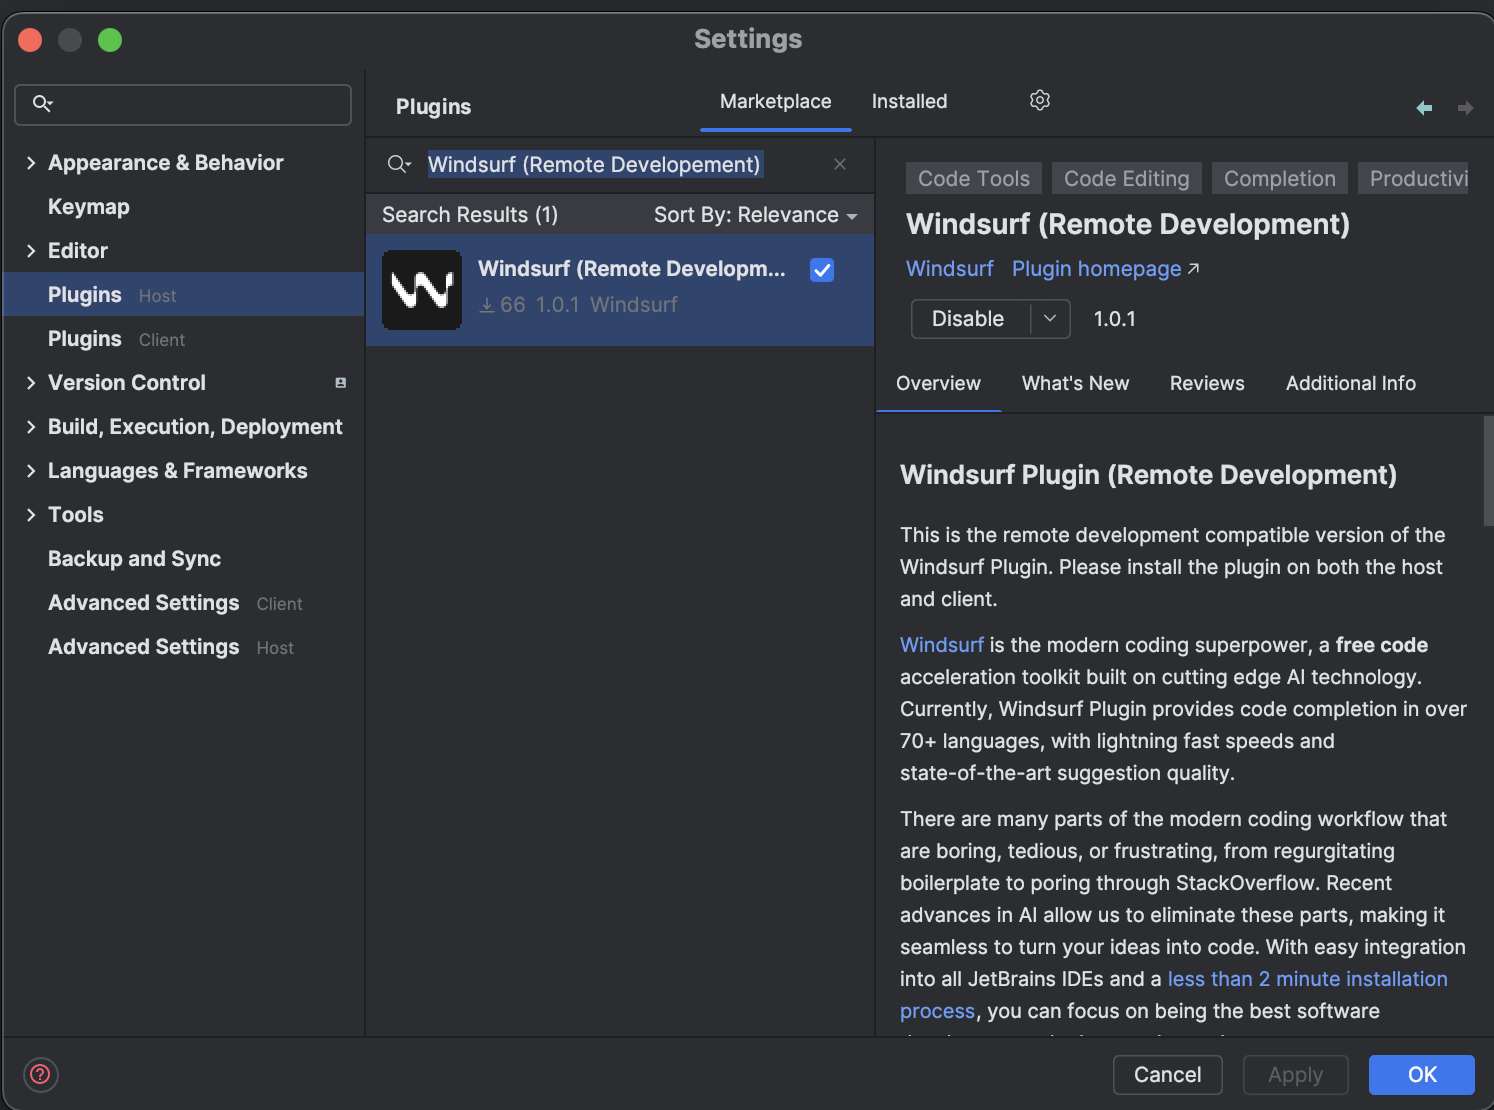
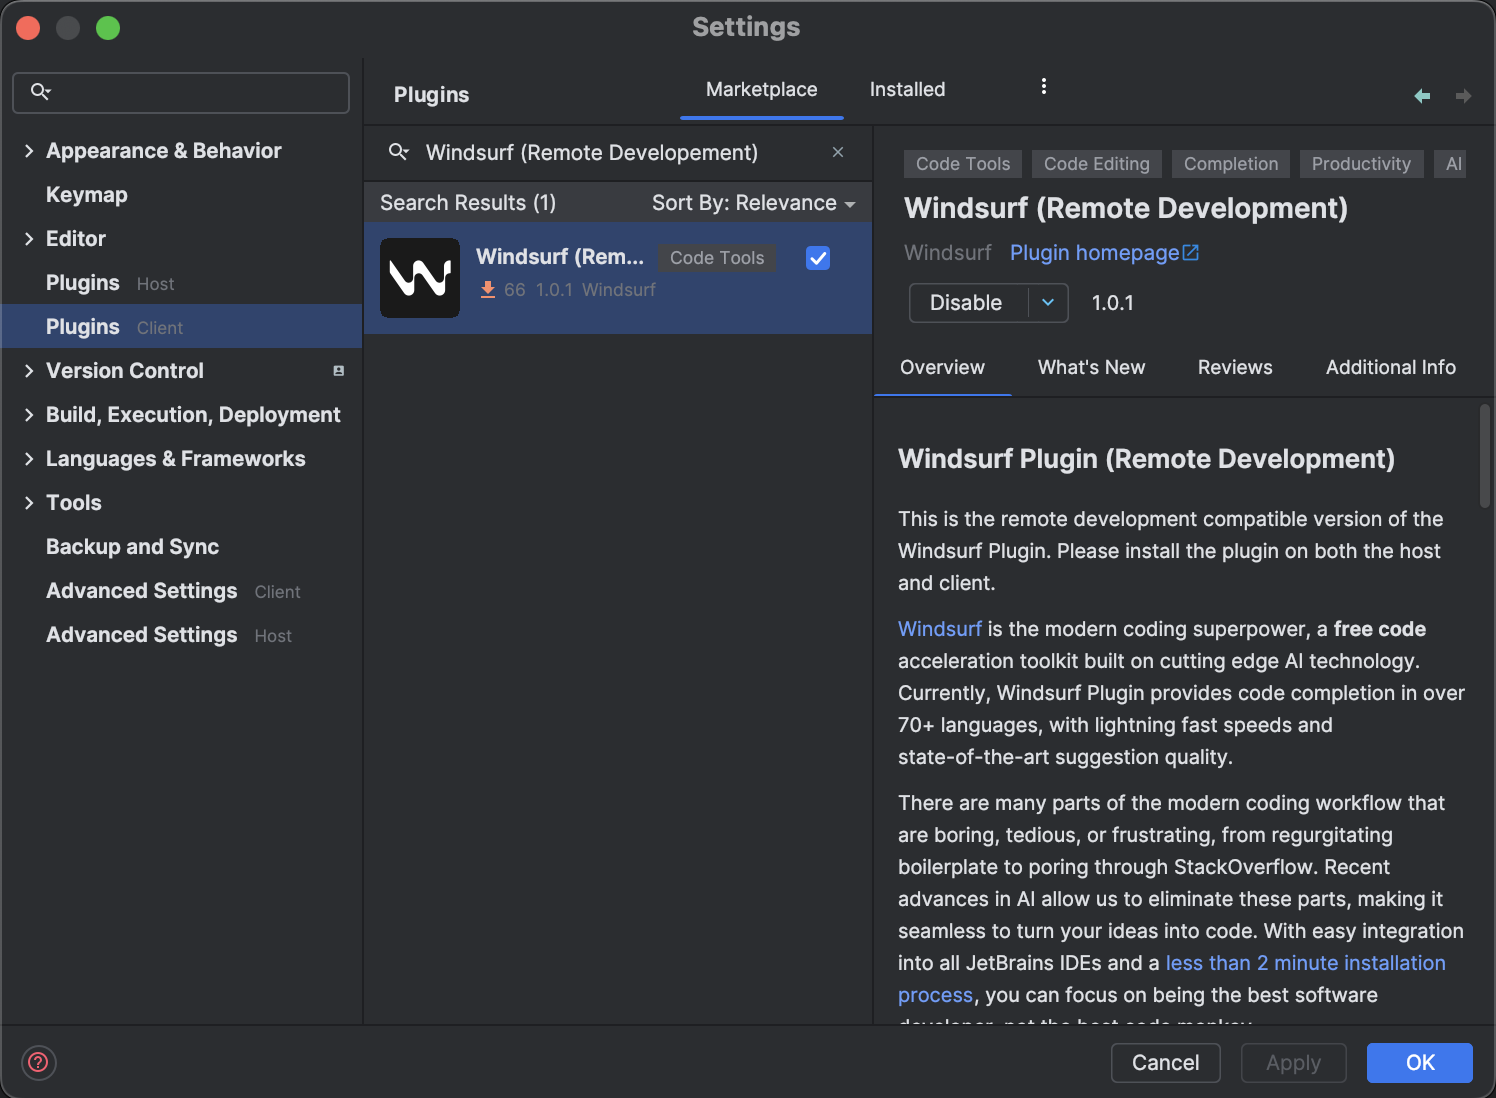
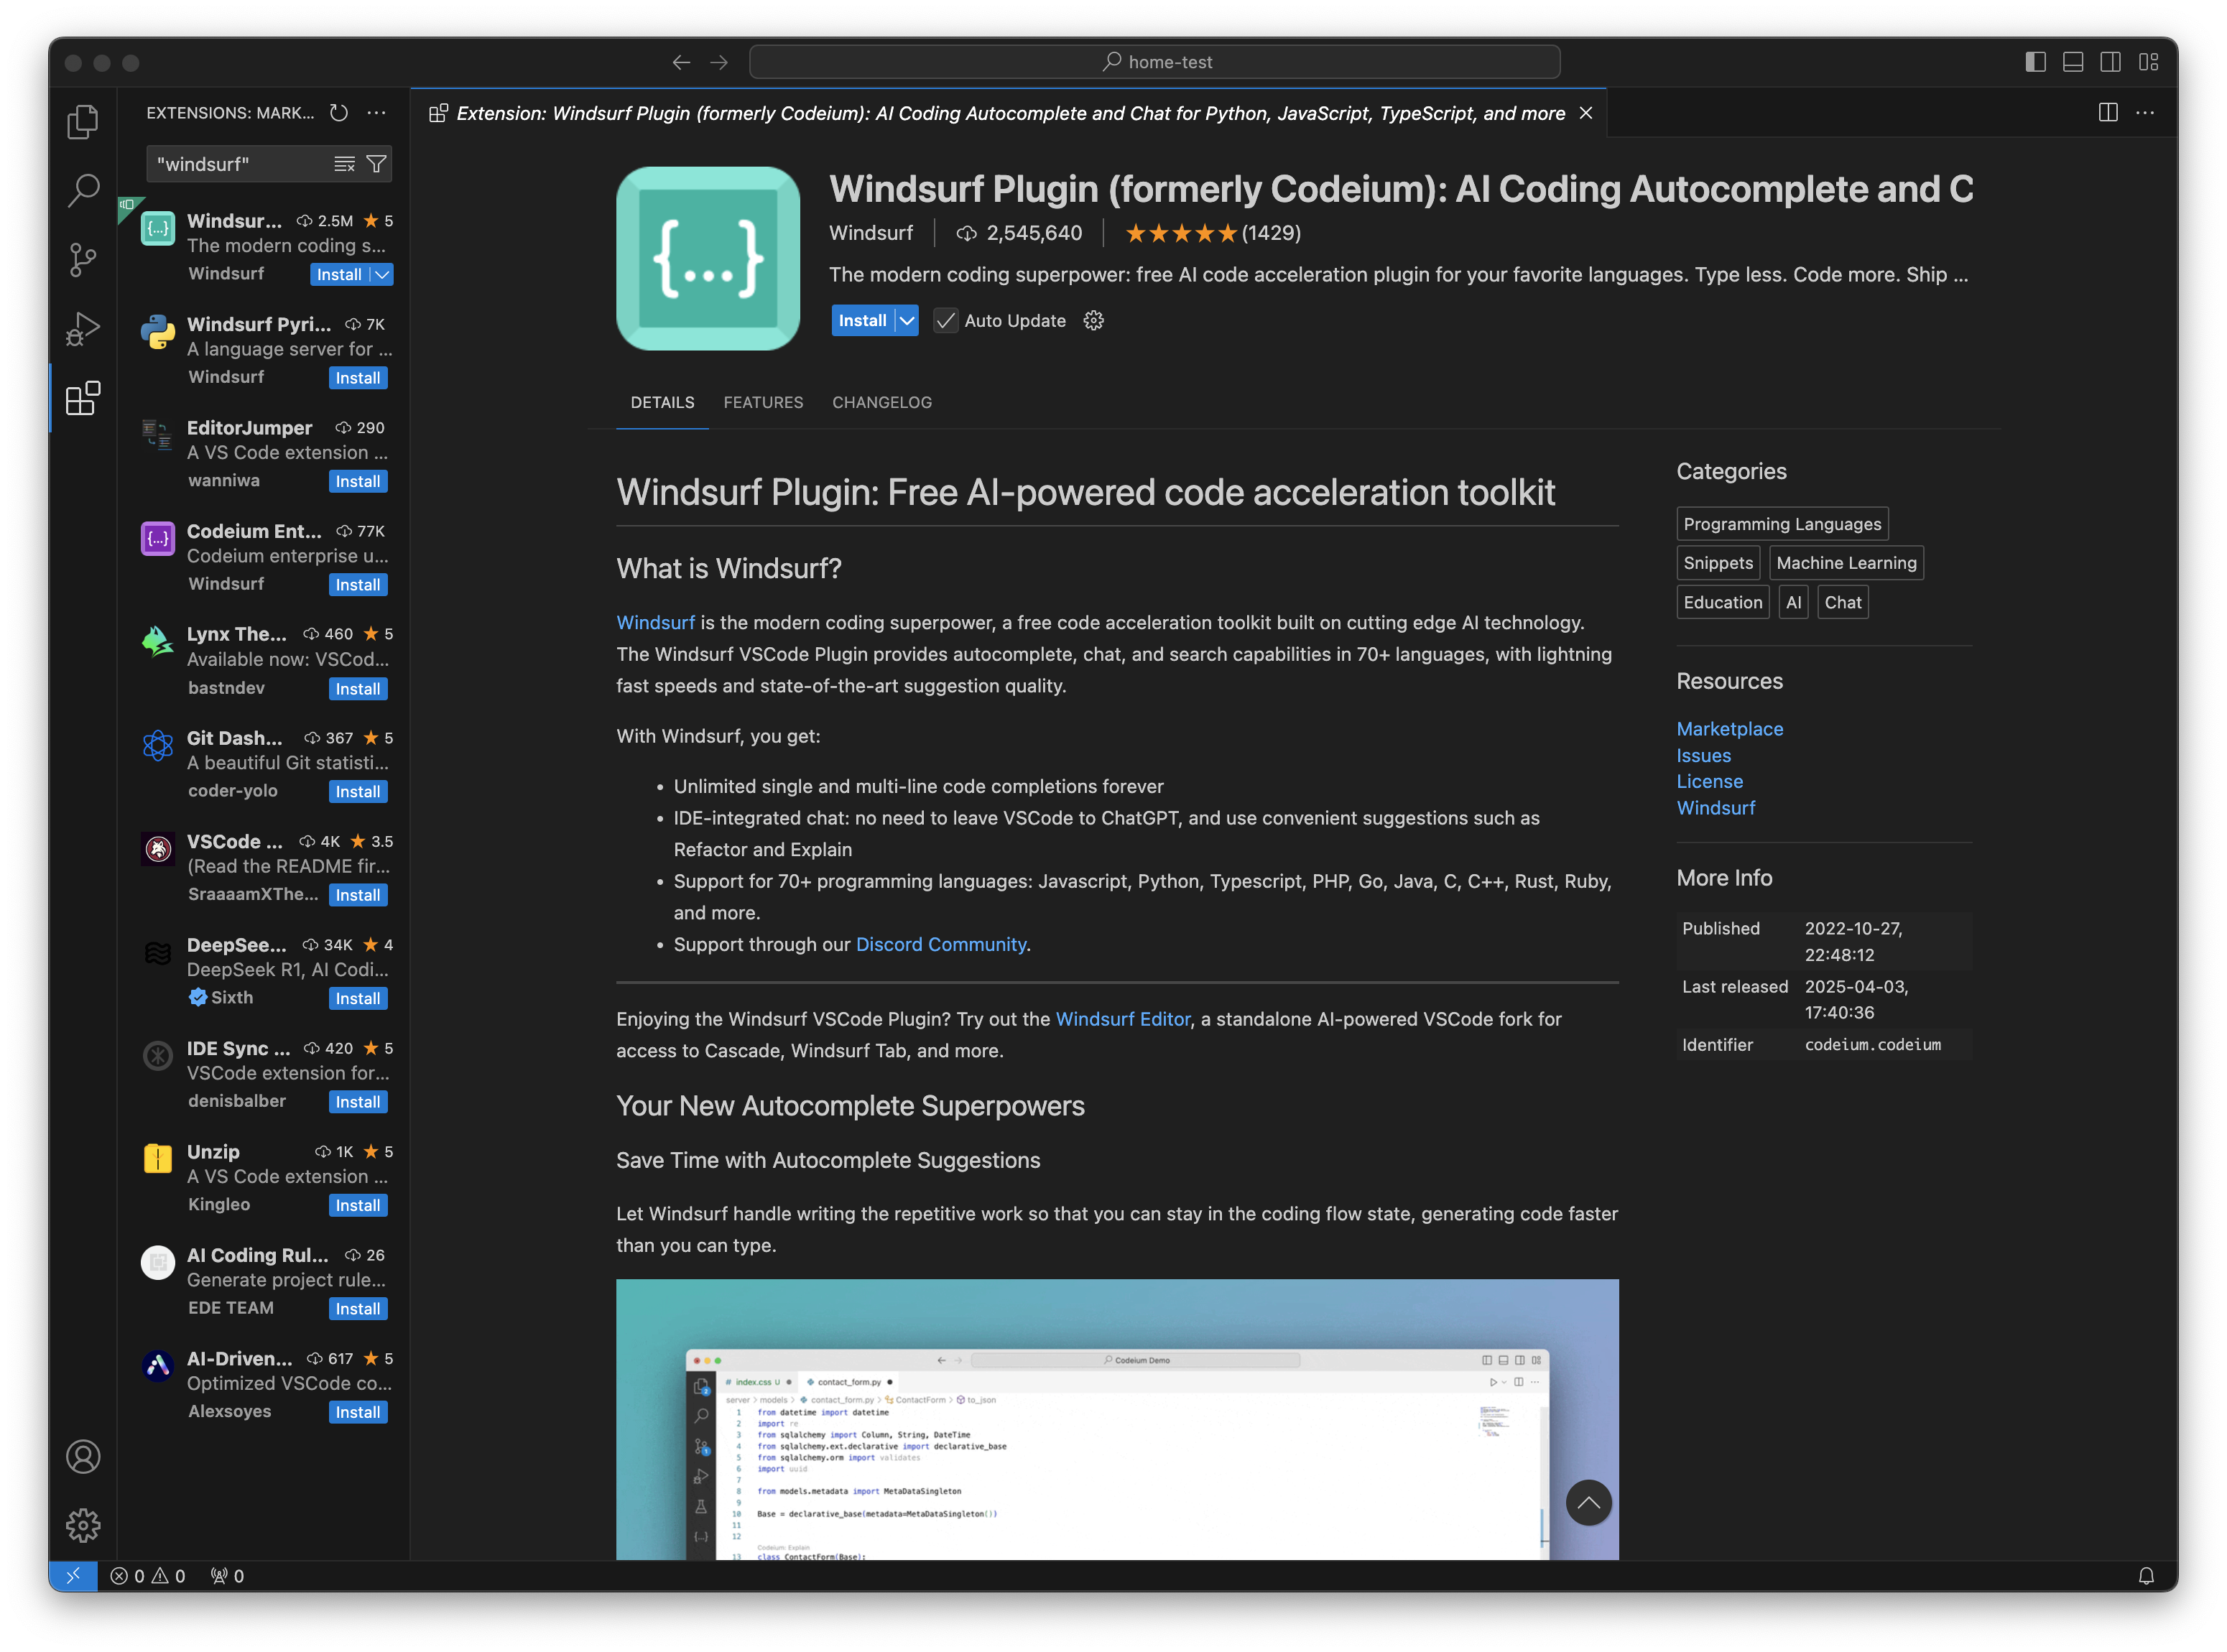

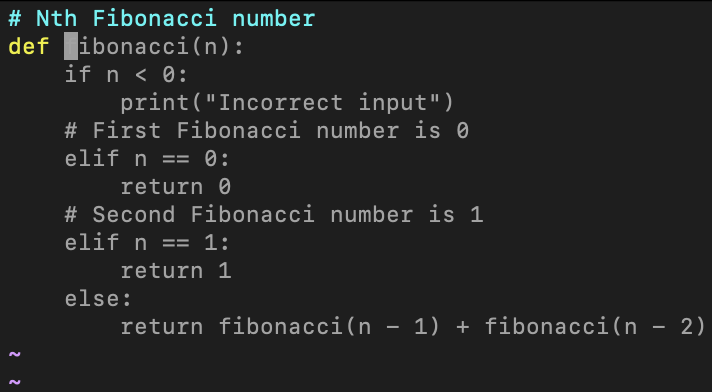
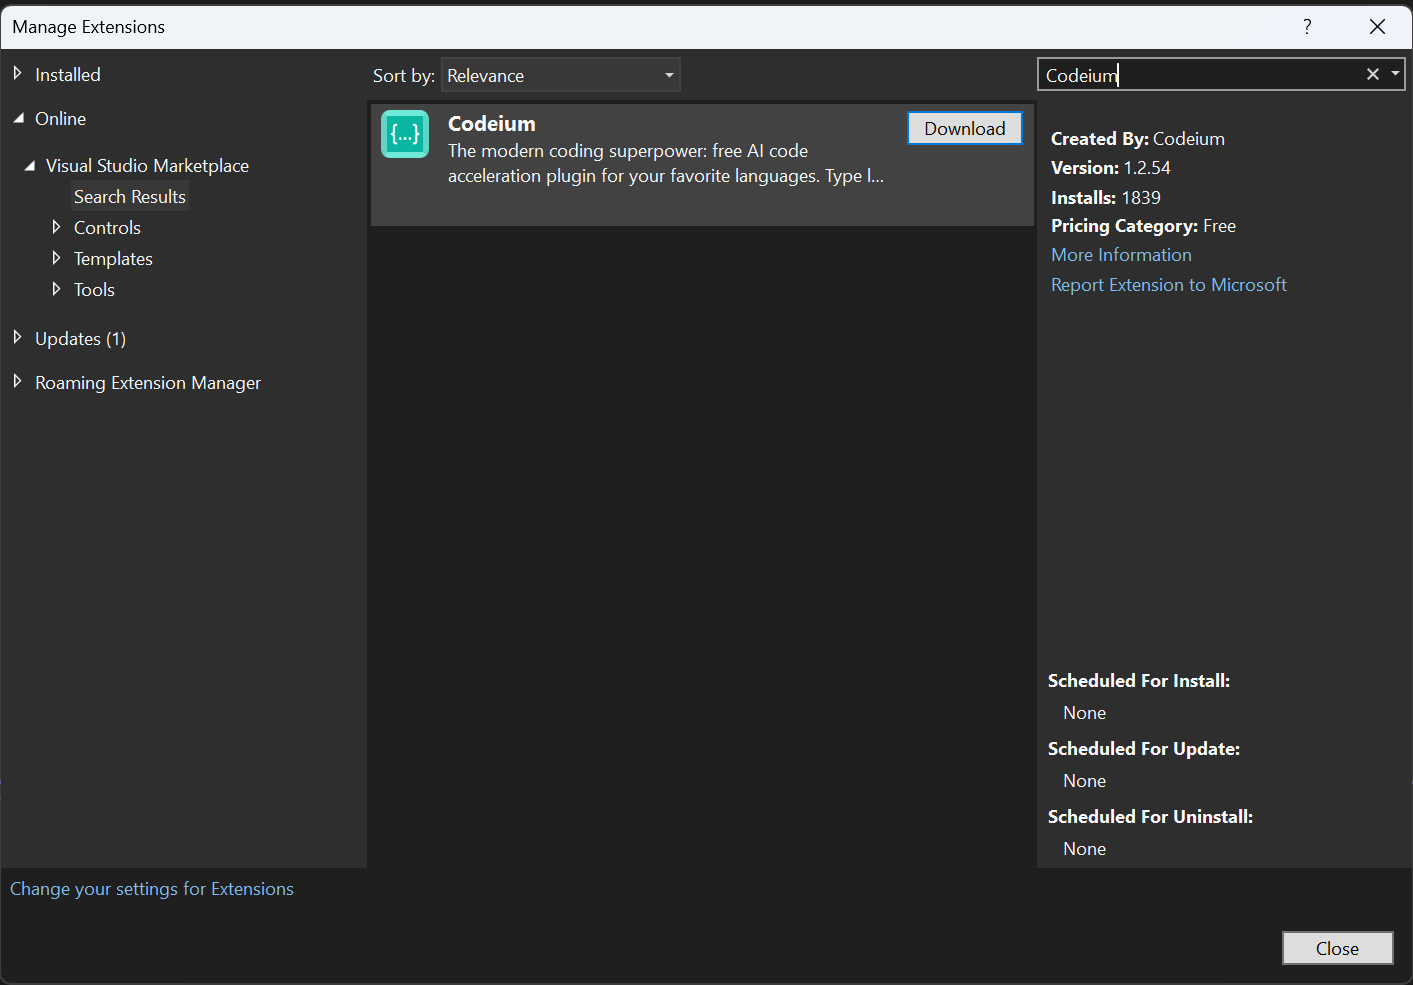
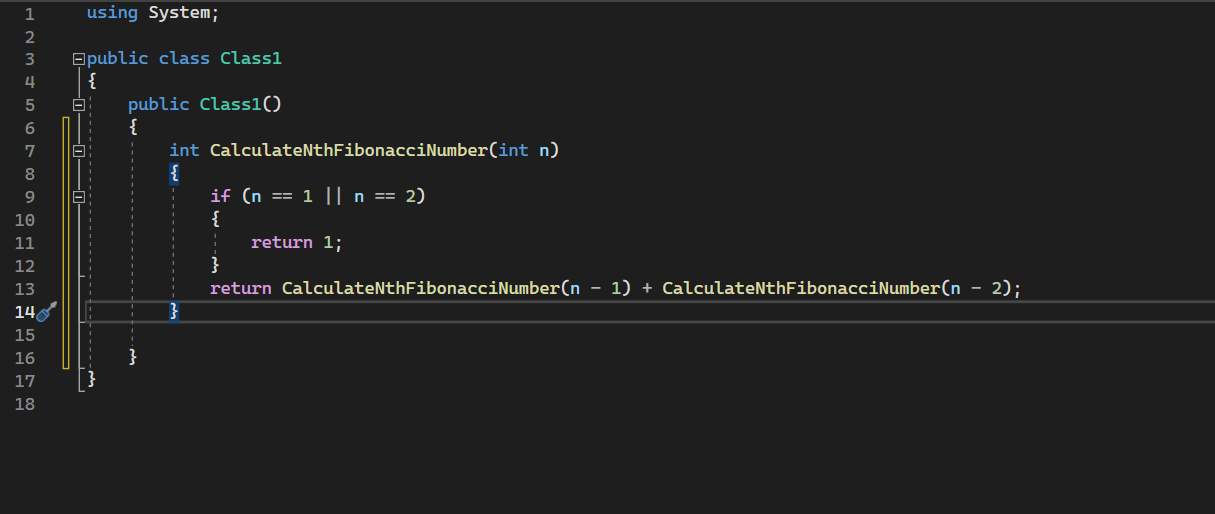
 Click **Get Windsurf Authentication Token** and follow the link. Paste the token back into the settings dialog.
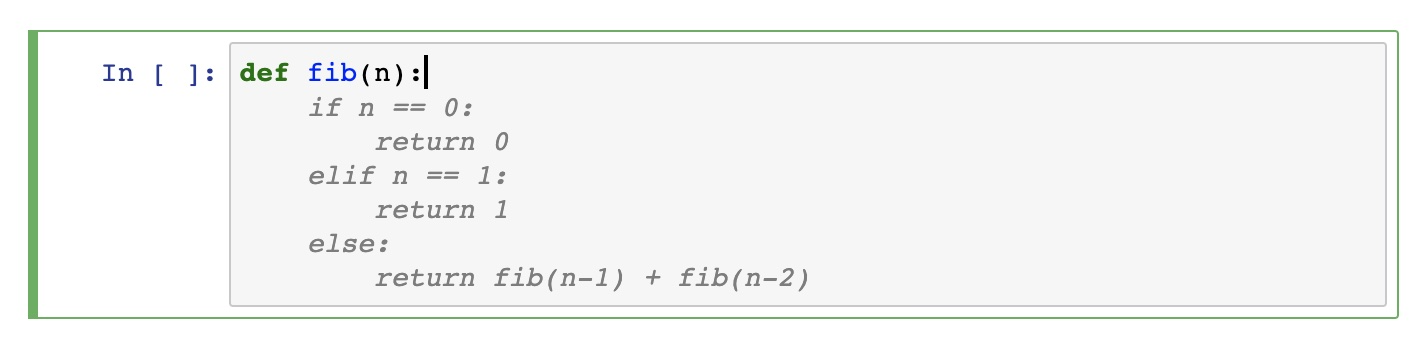
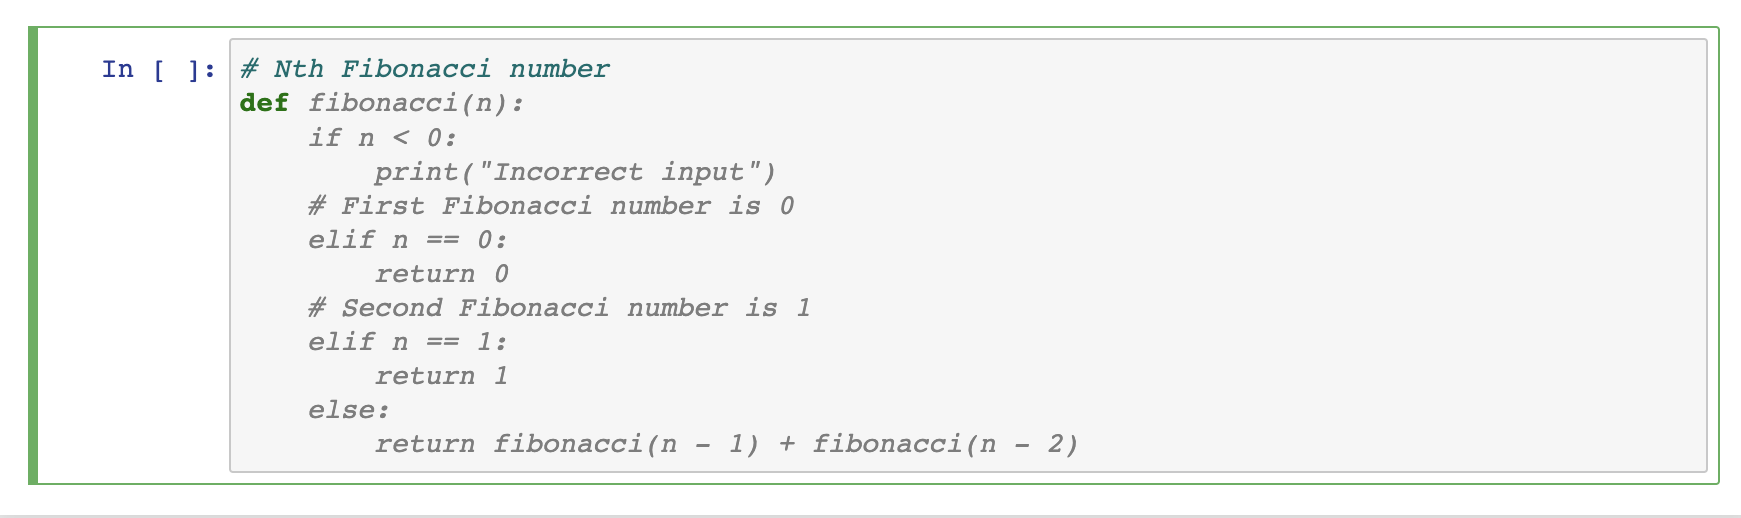
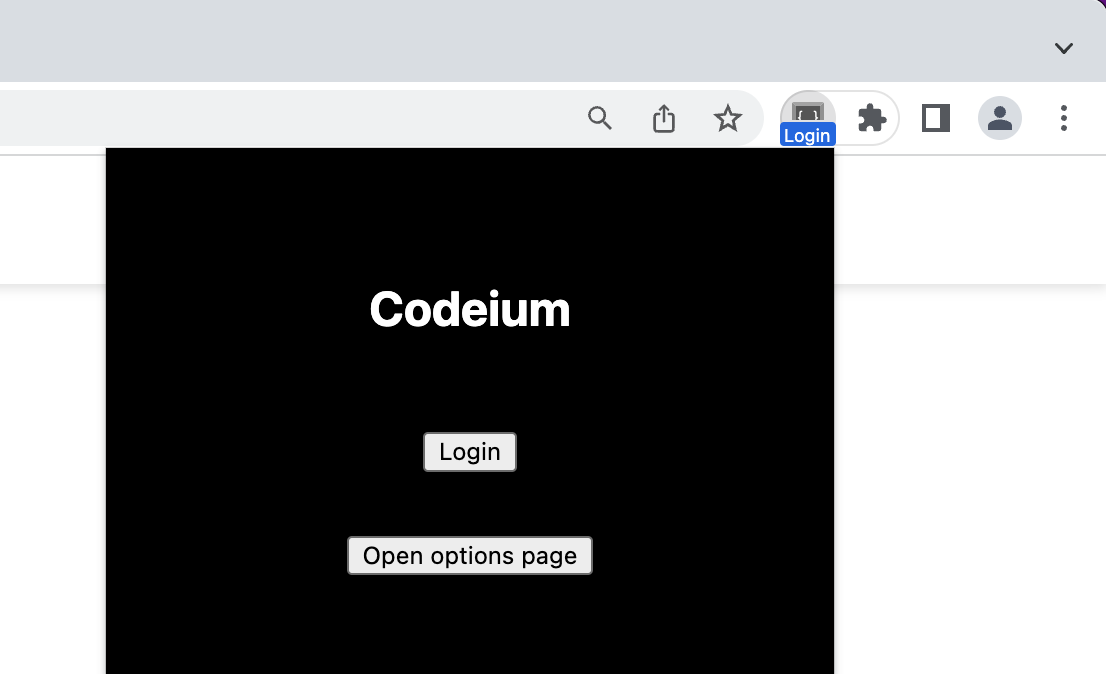


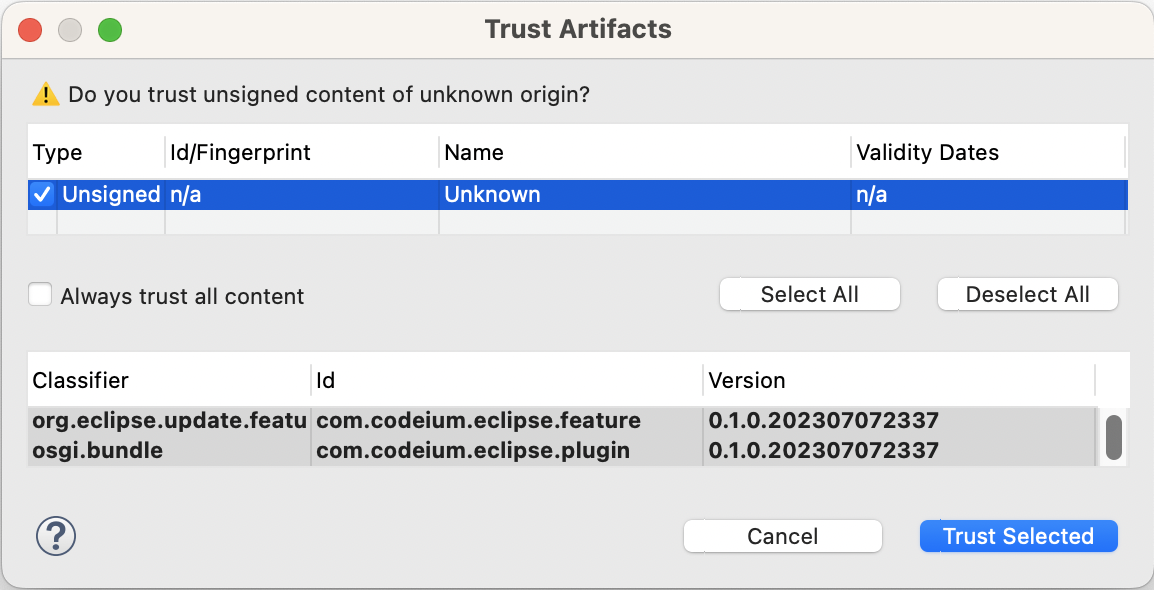
 3. Choose the appropriate option based on your IT team's guidance:
* **No proxy** – if your network does not use a proxy.
* **Auto-detect proxy settings** or **Use system proxy settings** – if the proxy is configured globally on your machine.
* **Manual proxy configuration** – if IT provided a specific proxy host/port (and optional username/password) to enter here.
4. Use Check connection… (if available) to verify the configuration — ideally test connectivity to `https://windsurf.com` from this dialog.
5. Apply the changes and restart the IDE if prompted.
If the IDE itself cannot reach the network (for example, plugin marketplace, updates, or built-in web features fail, or you cannot reach `https://windsurf.com` from within the IDE), fix that here first. Windsurf relies on this connectivity.
## Enable Windsurf Proxy Detection in JetBrains
Once your IDE-level proxy is set (or confirmed not needed), configure how Windsurf uses those settings.
The Windsurf plugin has its own Detect proxy option inside its settings:
1. In your JetBrains IDE, open Settings / Preferences.
2. Navigate to Tools → Windsurf Settings.
3. Find the Detect proxy toggle.
3. Choose the appropriate option based on your IT team's guidance:
* **No proxy** – if your network does not use a proxy.
* **Auto-detect proxy settings** or **Use system proxy settings** – if the proxy is configured globally on your machine.
* **Manual proxy configuration** – if IT provided a specific proxy host/port (and optional username/password) to enter here.
4. Use Check connection… (if available) to verify the configuration — ideally test connectivity to `https://windsurf.com` from this dialog.
5. Apply the changes and restart the IDE if prompted.
If the IDE itself cannot reach the network (for example, plugin marketplace, updates, or built-in web features fail, or you cannot reach `https://windsurf.com` from within the IDE), fix that here first. Windsurf relies on this connectivity.
## Enable Windsurf Proxy Detection in JetBrains
Once your IDE-level proxy is set (or confirmed not needed), configure how Windsurf uses those settings.
The Windsurf plugin has its own Detect proxy option inside its settings:
1. In your JetBrains IDE, open Settings / Preferences.
2. Navigate to Tools → Windsurf Settings.
3. Find the Detect proxy toggle.
 4. Turn Detect proxy ON if:
* Your proxy is configured at the OS or IDE level, and
* IT expects applications to "just pick up" those settings.
5. Click Apply and OK if needed, then restart the IDE.
6. Try using Windsurf again:
* Open the Windsurf panel from the IDE sidebar
* Run Cascade or retry the operation that was failing with "Failed to connect" or showing a blank screen
If you see new connection issues after enabling Detect proxy, you can:
* Turn Detect proxy back OFF,
* Double-check your IDE HTTP Proxy configuration (including that it can reach `https://windsurf.com`), and
* Confirm with IT whether additional manual configuration is required.
## Proxy Configuration in JetBrains Remote
If you use JetBrains Remote Development (for example via JetBrains Gateway, a remote backend, or a cloud dev environment), there are effectively two places where proxy settings matter:
* Your local machine, running the thin client.
* The remote machine, where the actual IDE backend (and Windsurf) runs.
When you connect with JetBrains Remote, Windsurf's network requests originate from the remote machine, not from your local laptop. This means:
* Proxy setup on the remote IDE affects how Windsurf connects to Windsurf services.
* The remote machine may need its own proxy configuration, even if your local machine is already set up correctly.
4. Turn Detect proxy ON if:
* Your proxy is configured at the OS or IDE level, and
* IT expects applications to "just pick up" those settings.
5. Click Apply and OK if needed, then restart the IDE.
6. Try using Windsurf again:
* Open the Windsurf panel from the IDE sidebar
* Run Cascade or retry the operation that was failing with "Failed to connect" or showing a blank screen
If you see new connection issues after enabling Detect proxy, you can:
* Turn Detect proxy back OFF,
* Double-check your IDE HTTP Proxy configuration (including that it can reach `https://windsurf.com`), and
* Confirm with IT whether additional manual configuration is required.
## Proxy Configuration in JetBrains Remote
If you use JetBrains Remote Development (for example via JetBrains Gateway, a remote backend, or a cloud dev environment), there are effectively two places where proxy settings matter:
* Your local machine, running the thin client.
* The remote machine, where the actual IDE backend (and Windsurf) runs.
When you connect with JetBrains Remote, Windsurf's network requests originate from the remote machine, not from your local laptop. This means:
* Proxy setup on the remote IDE affects how Windsurf connects to Windsurf services.
* The remote machine may need its own proxy configuration, even if your local machine is already set up correctly.
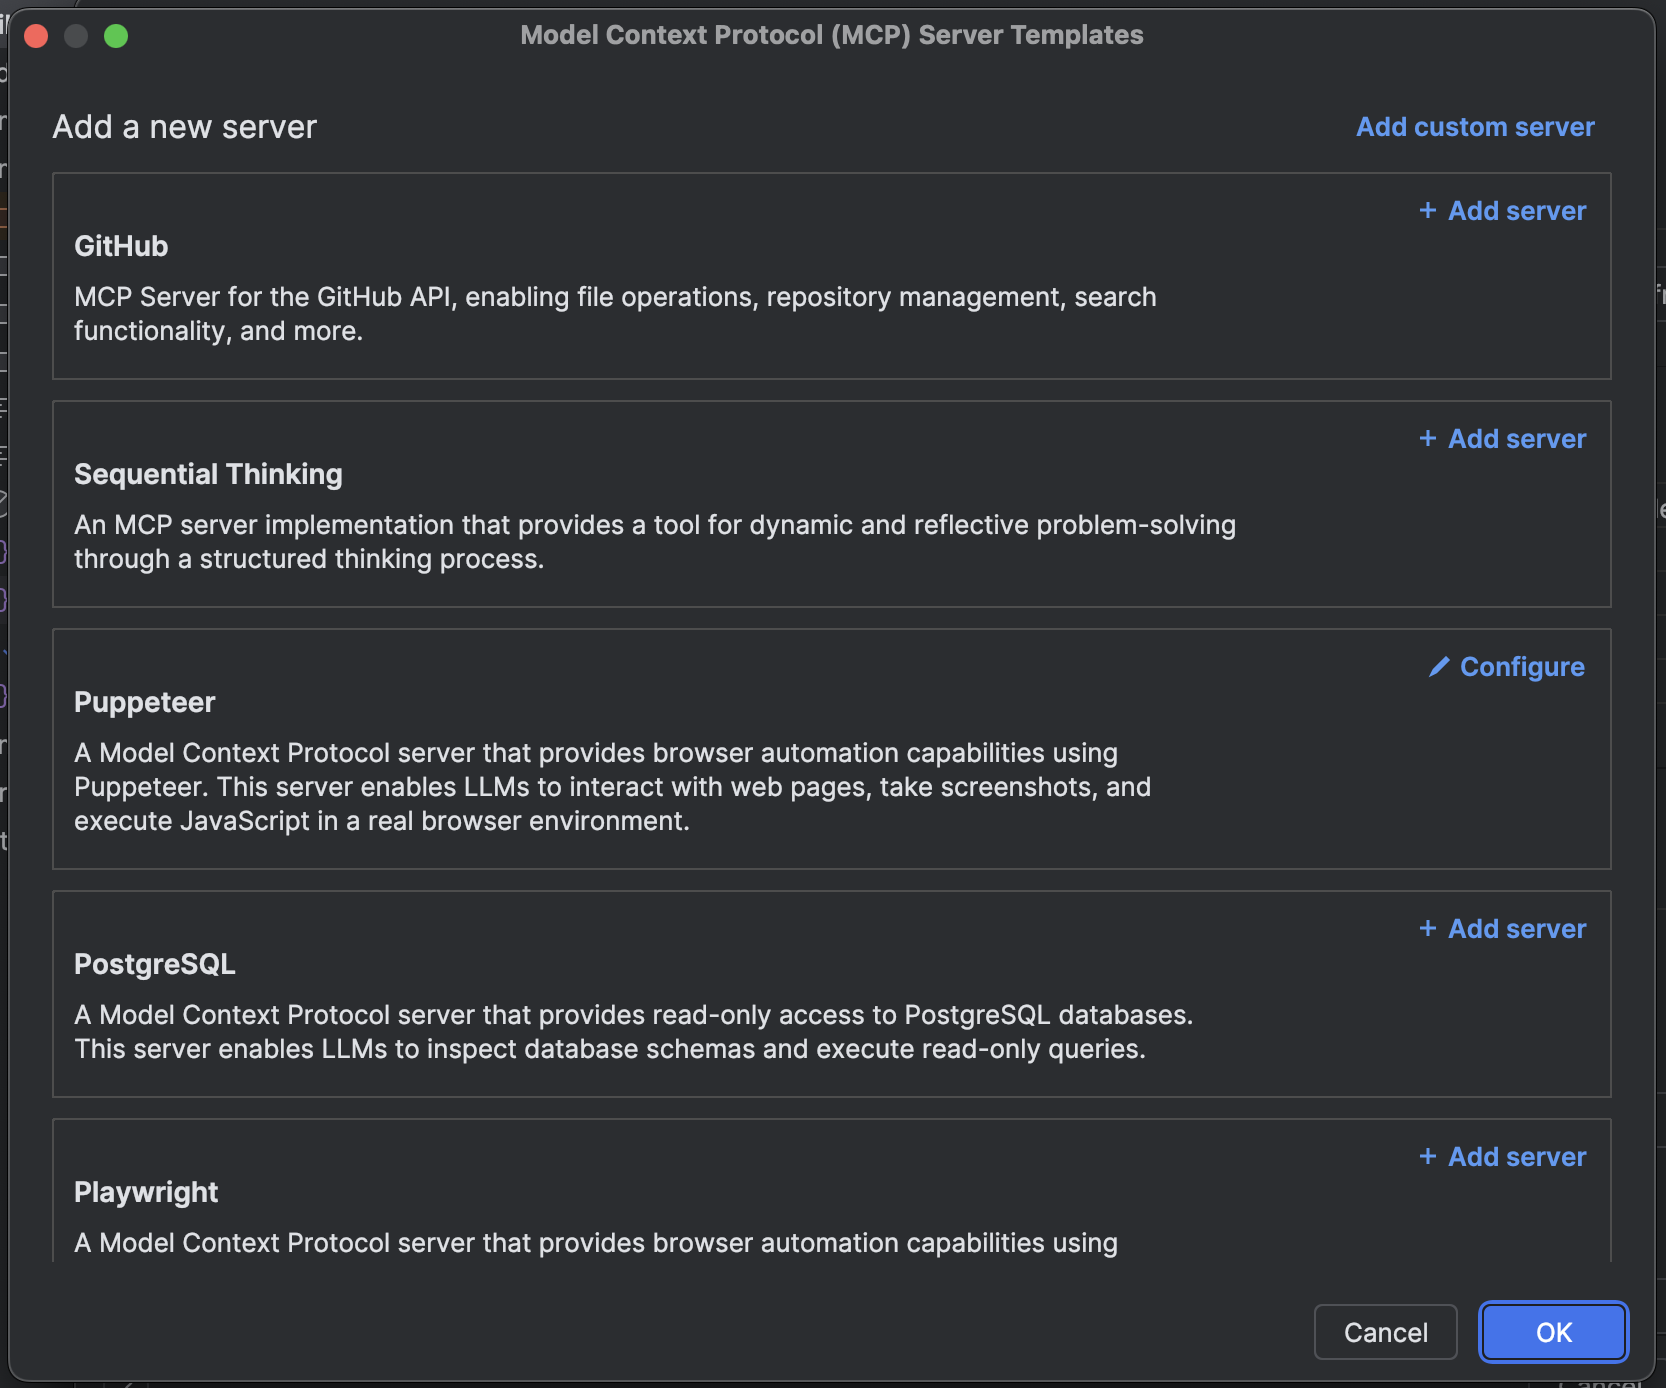 Cascade supports three [transport types](https://modelcontextprotocol.io/docs/concepts/transports) for MCP
servers: `stdio`, `Streamable HTTP`, and `SSE`.
Cascade also supports OAuth for each transport type.
For `http` servers, the URL should reflect that of the endpoint and resemble `https://
Cascade supports three [transport types](https://modelcontextprotocol.io/docs/concepts/transports) for MCP
servers: `stdio`, `Streamable HTTP`, and `SSE`.
Cascade also supports OAuth for each transport type.
For `http` servers, the URL should reflect that of the endpoint and resemble `https:// ## Memories
During conversation, Cascade can automatically generate and store memories if it encounters context that it believes is useful to remember.
Additionally, you can ask Cascade to create a memory at any time. Just prompt Cascade to "create a memory of ...".
Cascade's autogenerated memories are associated with the workspace that they were created in and Cascade will retrieve them when it believes that they are relevant. Memories generated in one workspace will not be available in another.
## Memories
During conversation, Cascade can automatically generate and store memories if it encounters context that it believes is useful to remember.
Additionally, you can ask Cascade to create a memory at any time. Just prompt Cascade to "create a memory of ...".
Cascade's autogenerated memories are associated with the workspace that they were created in and Cascade will retrieve them when it believes that they are relevant. Memories generated in one workspace will not be available in another.
 Model selection can be found directly under the chat.
## Base Model ⚡
**Access:** All users
Available for unlimited use to all users is a fast, high-quality Windsurf Chat model based on Meta's [Llama 3.1 70B](https://ai.meta.com/blog/meta-llama-3-1/).
This model is optimized for speed, and is the **fastest** model available in Windsurf Chat. This is all while still being extremely accurate.
## Windsurf Premier 🚀
**Access:** Any paying users (Pro, Teams, Enterprise, etc.)
Available in our paid tier is unlimited usage of our premier Windsurf Chat model based on Meta's [Llama 3.1 405B](https://ai.meta.com/blog/meta-llama-3-1/).
This is the **highest-performing model** available for use in Windsurf, due to its size and integration with Windsurf's reasoning engine and native workflows.
## Other Models (GPT-4o, Claude 3.5 Sonnet)
**Access:** Any paying users (Pro, Teams, Enterprise, etc.)
Windsurf provides access to OpenAI's and Anthropic's flagship models.
---
# Source: https://docs.windsurf.com/windsurf/cascade/modes.md
> ## Documentation Index
> Fetch the complete documentation index at: https://docs.windsurf.com/llms.txt
> Use this file to discover all available pages before exploring further.
# Cascade Modes
> Cascade offers multiple distinct modes, each optimized for different types of tasks.
Cascade offers three distinct modes, each with a different set of capabilities designed for specific workflows.
| Mode | Use case | Tools |
| ------------------ | ----------------------------------- | ----------------- |
| [Code](#code-mode) | Complex features, refactoring | All tools enabled |
| [Plan](#plan-mode) | Complex features requiring planning | All tools enabled |
| [Ask](#ask-mode) | Learning, planning, questions | Search tools only |
You can switch between different modes using the mode toggle below the Cascade input box, or by using the keyboard shortcut `⌘+.` (Mac) or `Ctrl+.` (Windows/Linux).
## Code Mode
**Code mode** is Windsurf's default fully agentic mode, designed for making changes to your codebase.
In Code mode, Cascade can:
* Create, edit, and delete files
* Run terminal commands
* Search and analyze your codebase
* Install dependencies
* Execute multi-step tasks autonomously
Use Code mode when you want Cascade to actively work on your project and implement changes.
Model selection can be found directly under the chat.
## Base Model ⚡
**Access:** All users
Available for unlimited use to all users is a fast, high-quality Windsurf Chat model based on Meta's [Llama 3.1 70B](https://ai.meta.com/blog/meta-llama-3-1/).
This model is optimized for speed, and is the **fastest** model available in Windsurf Chat. This is all while still being extremely accurate.
## Windsurf Premier 🚀
**Access:** Any paying users (Pro, Teams, Enterprise, etc.)
Available in our paid tier is unlimited usage of our premier Windsurf Chat model based on Meta's [Llama 3.1 405B](https://ai.meta.com/blog/meta-llama-3-1/).
This is the **highest-performing model** available for use in Windsurf, due to its size and integration with Windsurf's reasoning engine and native workflows.
## Other Models (GPT-4o, Claude 3.5 Sonnet)
**Access:** Any paying users (Pro, Teams, Enterprise, etc.)
Windsurf provides access to OpenAI's and Anthropic's flagship models.
---
# Source: https://docs.windsurf.com/windsurf/cascade/modes.md
> ## Documentation Index
> Fetch the complete documentation index at: https://docs.windsurf.com/llms.txt
> Use this file to discover all available pages before exploring further.
# Cascade Modes
> Cascade offers multiple distinct modes, each optimized for different types of tasks.
Cascade offers three distinct modes, each with a different set of capabilities designed for specific workflows.
| Mode | Use case | Tools |
| ------------------ | ----------------------------------- | ----------------- |
| [Code](#code-mode) | Complex features, refactoring | All tools enabled |
| [Plan](#plan-mode) | Complex features requiring planning | All tools enabled |
| [Ask](#ask-mode) | Learning, planning, questions | Search tools only |
You can switch between different modes using the mode toggle below the Cascade input box, or by using the keyboard shortcut `⌘+.` (Mac) or `Ctrl+.` (Windows/Linux).
## Code Mode
**Code mode** is Windsurf's default fully agentic mode, designed for making changes to your codebase.
In Code mode, Cascade can:
* Create, edit, and delete files
* Run terminal commands
* Search and analyze your codebase
* Install dependencies
* Execute multi-step tasks autonomously
Use Code mode when you want Cascade to actively work on your project and implement changes.
 ### Continuing from a plan
The markdown file created in plan mode can be particularly useful for continuing work across multiple sessions.
Plans are stored in your `~/.windsurf/plans` directory and are available in the [@mentions](/chat/overview#%40-mentions) menu.
By mentioning a plan file, you can continue implementation with a fresh context.
This can be particularly useful when an initial implementation went awry: just discard the original changes, tweak the plan file, and click "Implement" to attempt implementation again in a new conversation.
### Exiting plan mode
There are multiple different ways to move from planning to implementation:
* Click the "Implement" button on the plan file
* Change your mode to Code mode in the input box
* Let the agent *automatically* switch to Code mode when it detects that you're ready to implement
## Ask Mode
**Ask mode** is a read-only mode optimized for questions and exploration.
In ask mode, Cascade can search and analyze your codebase, but cannot make any changes.
---
# Source: https://docs.windsurf.com/tab/overview.md
# Source: https://docs.windsurf.com/context-awareness/overview.md
# Source: https://docs.windsurf.com/chat/overview.md
# Source: https://docs.windsurf.com/autocomplete/overview.md
> ## Documentation Index
> Fetch the complete documentation index at: https://docs.windsurf.com/llms.txt
> Use this file to discover all available pages before exploring further.
# Autocomplete Overview
> AI-powered code autocomplete with single-line and multi-line suggestions, keyboard shortcuts, and customizable speed settings.
**Windsurf Autocomplete** is powered by our own models, trained in-house from scratch to optimize for speed and accuracy.
### Continuing from a plan
The markdown file created in plan mode can be particularly useful for continuing work across multiple sessions.
Plans are stored in your `~/.windsurf/plans` directory and are available in the [@mentions](/chat/overview#%40-mentions) menu.
By mentioning a plan file, you can continue implementation with a fresh context.
This can be particularly useful when an initial implementation went awry: just discard the original changes, tweak the plan file, and click "Implement" to attempt implementation again in a new conversation.
### Exiting plan mode
There are multiple different ways to move from planning to implementation:
* Click the "Implement" button on the plan file
* Change your mode to Code mode in the input box
* Let the agent *automatically* switch to Code mode when it detects that you're ready to implement
## Ask Mode
**Ask mode** is a read-only mode optimized for questions and exploration.
In ask mode, Cascade can search and analyze your codebase, but cannot make any changes.
---
# Source: https://docs.windsurf.com/tab/overview.md
# Source: https://docs.windsurf.com/context-awareness/overview.md
# Source: https://docs.windsurf.com/chat/overview.md
# Source: https://docs.windsurf.com/autocomplete/overview.md
> ## Documentation Index
> Fetch the complete documentation index at: https://docs.windsurf.com/llms.txt
> Use this file to discover all available pages before exploring further.
# Autocomplete Overview
> AI-powered code autocomplete with single-line and multi-line suggestions, keyboard shortcuts, and customizable speed settings.
**Windsurf Autocomplete** is powered by our own models, trained in-house from scratch to optimize for speed and accuracy.
 Our autocomplete makes in-line and multi-line suggestions based on the context of your code.
Suggestions appear in grey text as you type. You can press `esc` to cancel a suggestion.
Suggestions will also disappear if you continue typing or navigating without accepting them.
## Keyboard Shortcuts
### General Shortcuts
Here are the general shortcuts that apply for macOS.
Replace `⌘` with `Ctrl` and `⌥` with `Alt` to get the corresponding shortcuts on Windows/Linux.
* **Accept suggestion**: `⇥`
* **Cancel suggestion**: `esc`
* **Accept suggestion word-by-word**: `⌘+→` (VS Code), `⌥+⇧+\` (JetBrains)
* **Next/previous suggestion**: `⌥+]`/`⌥+[`
* **Trigger suggestion**: `⌥+\`
### JetBrains Shortcuts - 2.2.2 (stable) and 2.3.5 (pre-release) and later
Our autocomplete makes in-line and multi-line suggestions based on the context of your code.
Suggestions appear in grey text as you type. You can press `esc` to cancel a suggestion.
Suggestions will also disappear if you continue typing or navigating without accepting them.
## Keyboard Shortcuts
### General Shortcuts
Here are the general shortcuts that apply for macOS.
Replace `⌘` with `Ctrl` and `⌥` with `Alt` to get the corresponding shortcuts on Windows/Linux.
* **Accept suggestion**: `⇥`
* **Cancel suggestion**: `esc`
* **Accept suggestion word-by-word**: `⌘+→` (VS Code), `⌥+⇧+\` (JetBrains)
* **Next/previous suggestion**: `⌥+]`/`⌥+[`
* **Trigger suggestion**: `⌥+\`
### JetBrains Shortcuts - 2.2.2 (stable) and 2.3.5 (pre-release) and later
 ---
# Source: https://docs.windsurf.com/troubleshooting/plugins-common-issues.md
> ## Documentation Index
> Fetch the complete documentation index at: https://docs.windsurf.com/llms.txt
> Use this file to discover all available pages before exploring further.
# General Issues
> Common Windsurf plugin issues including subscription problems, cancellation, telemetry settings, account deletion, and chat panel troubleshooting.
### I subscribed to Pro but I'm stuck on the Free tier
First, give it a few minutes to update. If that doesn't work, try logging out of Windsurf on the website, restarting your IDE, and logging back into Windsurf. Additionally, please make sure you have the latest version of Windsurf installed.
### How do I cancel my Pro/Teams subscription?
You can cancel your paid plan by going to your Profile by clicking your icon on the top right of the [Windsurf website](https://windsurf.com/profile).
To cancel your Pro subscription, navigate to the `Billing` page in the navigation panel on the left and click "Cancel Plan".
To cancel your Teams subscription, navigate to the `Manage Team` page in the navigation panel on the left and click "Cancel Plan".
### How do I disable code snippet telemetry?
As mentioned in our [security page](https://windsurf.com/security), you can opt out of code snippet telemetry by going to your settings [account settings](https://windsurf.com/settings). For more information, please visit our [Terms of Service](https://windsurf.com/terms-of-service-individual).
### How do I delete my account?
You can delete your account by going to your settings [account settings](https://windsurf.com/settings), scrolling down and clicking on "Delete Account".
---
# Source: https://docs.windsurf.com/troubleshooting/plugins-common-issues.md
> ## Documentation Index
> Fetch the complete documentation index at: https://docs.windsurf.com/llms.txt
> Use this file to discover all available pages before exploring further.
# General Issues
> Common Windsurf plugin issues including subscription problems, cancellation, telemetry settings, account deletion, and chat panel troubleshooting.
### I subscribed to Pro but I'm stuck on the Free tier
First, give it a few minutes to update. If that doesn't work, try logging out of Windsurf on the website, restarting your IDE, and logging back into Windsurf. Additionally, please make sure you have the latest version of Windsurf installed.
### How do I cancel my Pro/Teams subscription?
You can cancel your paid plan by going to your Profile by clicking your icon on the top right of the [Windsurf website](https://windsurf.com/profile).
To cancel your Pro subscription, navigate to the `Billing` page in the navigation panel on the left and click "Cancel Plan".
To cancel your Teams subscription, navigate to the `Manage Team` page in the navigation panel on the left and click "Cancel Plan".
### How do I disable code snippet telemetry?
As mentioned in our [security page](https://windsurf.com/security), you can opt out of code snippet telemetry by going to your settings [account settings](https://windsurf.com/settings). For more information, please visit our [Terms of Service](https://windsurf.com/terms-of-service-individual).
### How do I delete my account?
You can delete your account by going to your settings [account settings](https://windsurf.com/settings), scrolling down and clicking on "Delete Account".
 5. Export or copy the logs
## Eclipse
In Eclipse, logs are written to the following paths:
* **Mac/Linux**: \~/.codeium/codeium.log
* **Windows**: C:\Users\
5. Export or copy the logs
## Eclipse
In Eclipse, logs are written to the following paths:
* **Mac/Linux**: \~/.codeium/codeium.log
* **Windows**: C:\Users\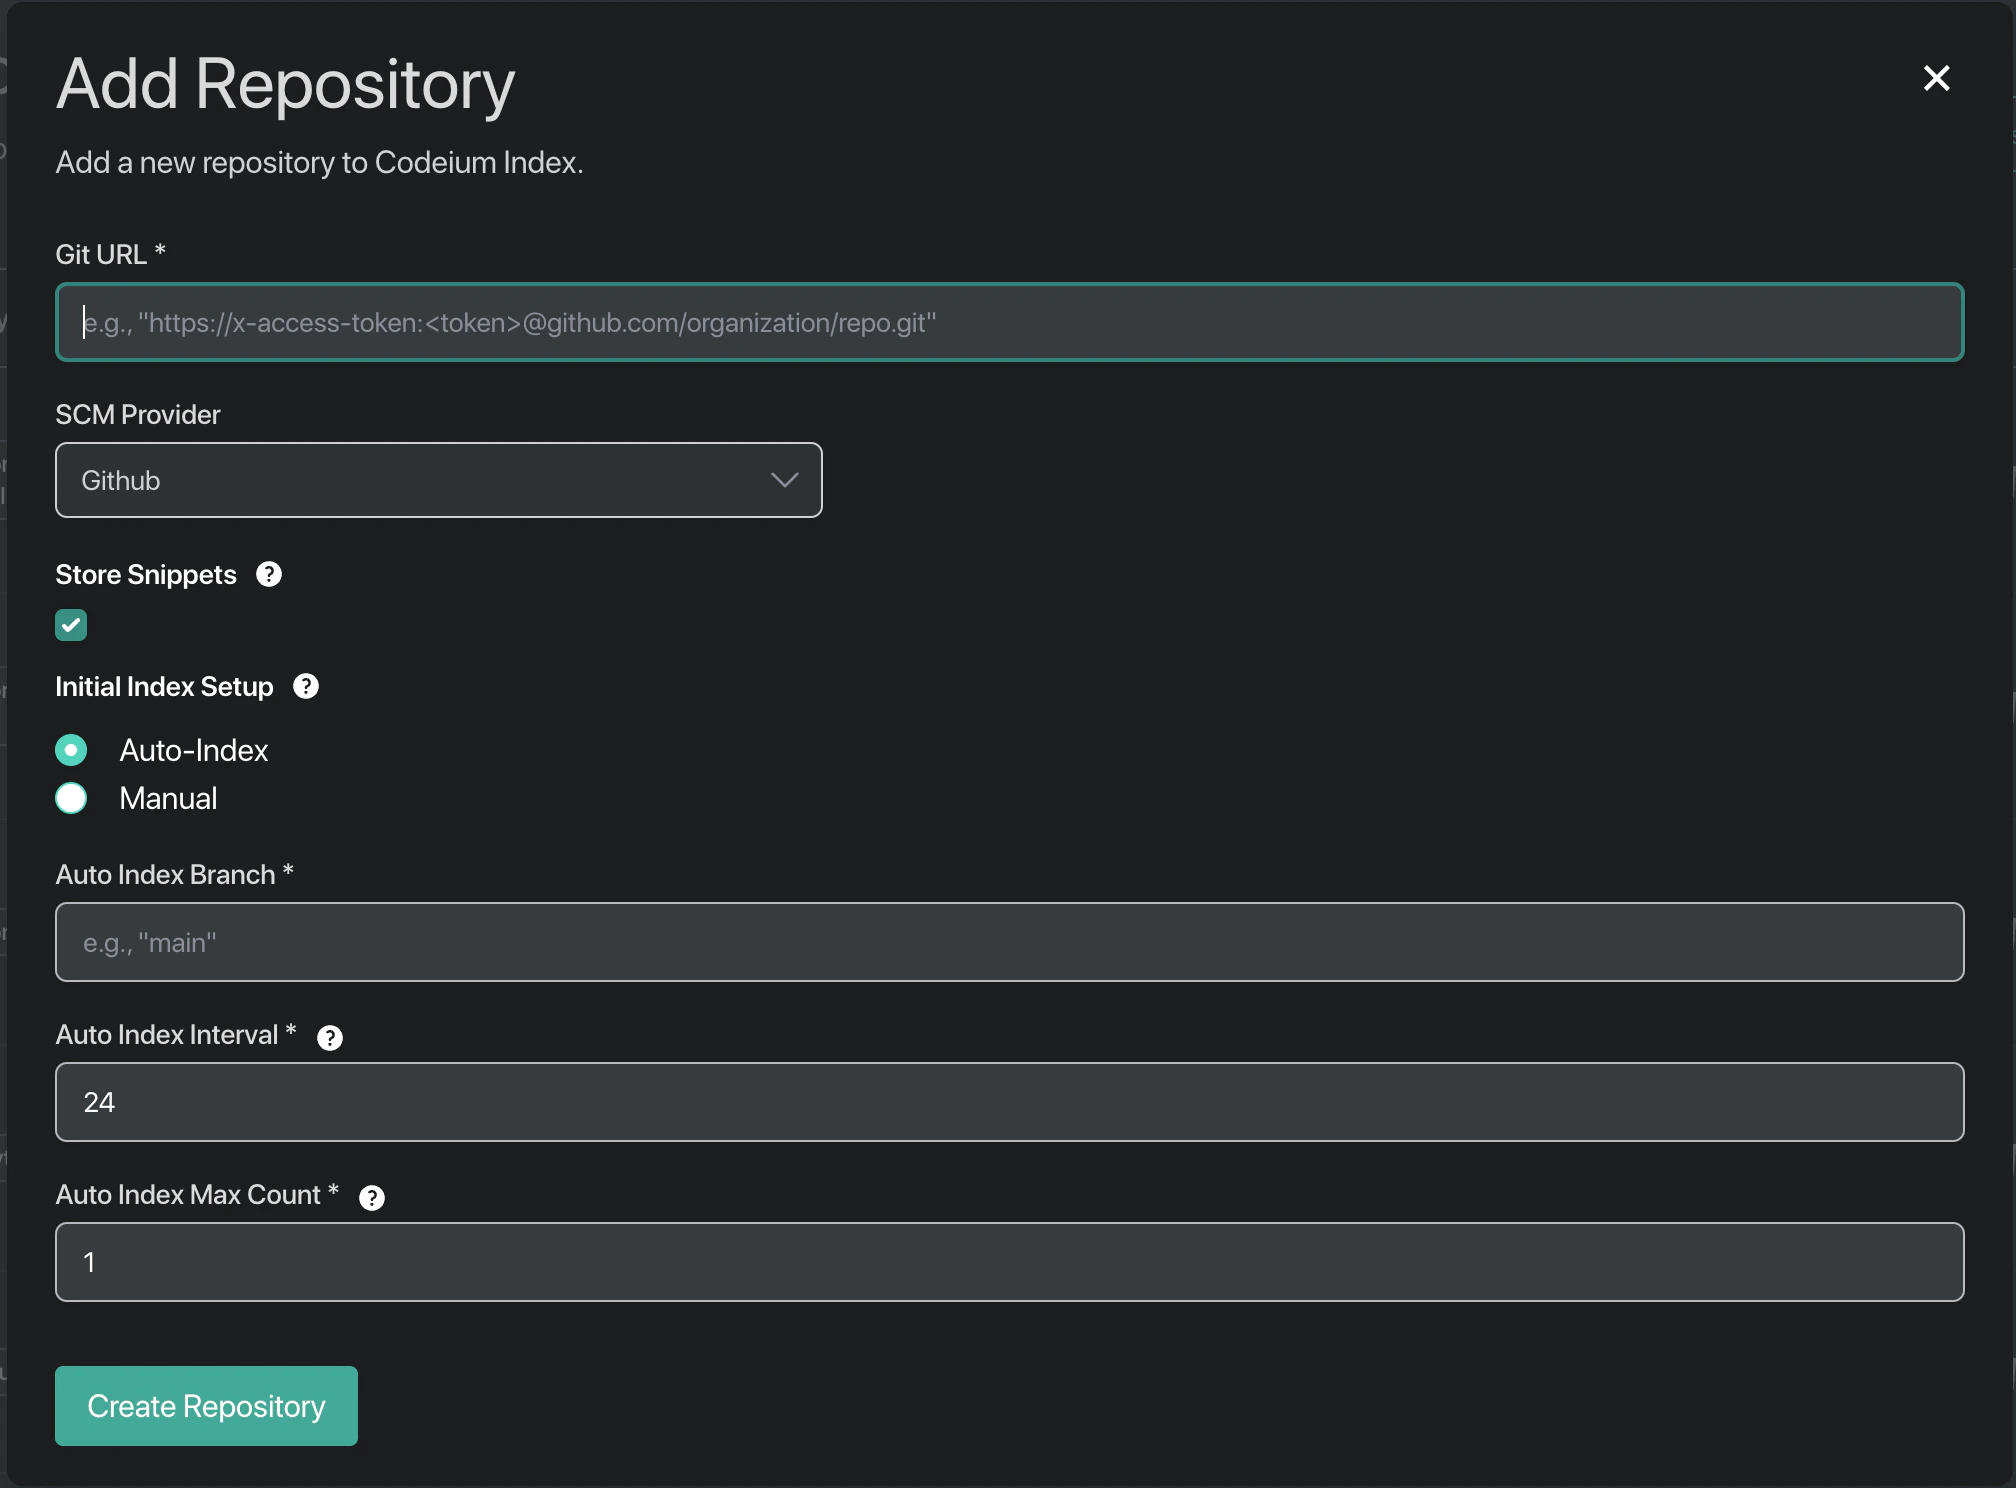 You can choose to index a particular branch and to automatically re-index the repository after some number of days.
## Security Guarantees
We clone the repository in order to create the index, but once we finish creating embeddings for the codebase we delete all the code and code snippets **assuming that the Store Snippets setting is unchecked.** We don't persist anything other than the embeddings themselves, from which you cannot derive the original code.
Furthermore, all indexing and embedding is performed on a single-tenant instance—nothing about the indexing process is shared between multiple Windsurf Teams customers.
---
# Source: https://docs.windsurf.com/security/reporting.md
> ## Documentation Index
> Fetch the complete documentation index at: https://docs.windsurf.com/llms.txt
> Use this file to discover all available pages before exploring further.
# Reporting Security Concerns
> Report security vulnerabilities to Windsurf securely via email with GPG encryption. Learn about our coordinated disclosure policy and safe harbor.
Windsurf takes the security of our products and services seriously. If you believe you have found a security vulnerability in any Windsurf-owned services, please report it to us as described below.
## Reporting Security Issues
**Please do not report security vulnerabilities through public GitHub issues.**
Instead, please report them via email to [security@windsurf.com](mailto:security@windsurf.com)
Please include the following information in your report including as much technical detail as possible:
* Type of issue (e.g., buffer overflow, SQL injection, cross-site scripting, etc.)
* The location of the affected source code (if applicable)
* Any special configuration required to reproduce the issue
* Step-by-step instructions to reproduce the issue
* Proof-of-concept or exploit code (if possible)
* Impact of the issue, including how an attacker might exploit it
* Any other relevant information
This information will help us triage your report more quickly.
Please compile all information into a single email, encrypted with our public GPG key, include the name of the affected product, and the version of the product affected (if known).
### Public GPG Key
```
-----BEGIN PGP PUBLIC KEY BLOCK-----
mQINBGdY0gcBEACvhmeoodWK5OUNluDytvc6W2/ahzh334qaYgYOoYxBkN9/6BBW
WTdJJ4Hu//XdAw8G/5ISy6tV17JMWOI59acAehKh8NqBSVhrlR7tHxGiJN2fXTtH
TDGOoyMFbWaSQIRI44E3lQZMyQBScGKxDiXQjIlholmrS3JicrqG85dUgB6got9l
da/3bp8BuydcVib7NGcuRZKS2BEVc8UCvpsP/p+VWiSNtB3kT8PTt782mSmnp6rR
HqL8H6ERlMEgQ9M4iWWZhq4g3qsSeg5x9UtU2ANH/escFNM6Wbzg6hyy3CZtXzw6
2BRnXpF63dqhPiigy+ifVCs/YqGacToaUNhN4I8kt274yW0dX+U/15wvlJchsnsi
RVQwB5FRxIxcPsZAWFBg7P5um15HGpKGS0LFJsB5aUfJFHPFmUAvPUreOjv1rGTO
1FdkAERLHsI7jJA70vTAdOM2WwaeGa55EMwefNJ69LpN2elboFbz5hpAa7w+8Y5w
y1J6knyOA4JFnVI824ZiQIGloECGZOlOxM4Ru+jjkcroO+l+frmvvggqBjvKPHGs
VmrMSNjf7aE/7NDnyKZJ9fvUiLf+WclAcIUySbYQr8xv/aV76xDUH1PT59f/ntp7
jxRA0rVvIThakvV3MPMbdrR78uLbc6Bwc0MdtEIGw+QAQ4YzAX4yeV9LHQARAQAB
tCtzZWN1cml0eUBjb2RlaXVtLmNvbSA8c2VjdXJpdHlAY29kZWl1bS5jb20+iQJO
BBMBCgA4FiEEE5wZ6tOci0CBdec0DoNVUHCWVAkFAmdY0gcCGwMFCwkIBwIGFQoJ
CAsCBBYCAwECHgECF4AACgkQDoNVUHCWVAnT0w//ZVKF9Yz9So8ZeeIVcMz0CrFZ
jWFQMTvQvEQ5jP9VpiXe7z5pwSVvv3SpqvkNX+Y6HtjXdnv5Q+QZGzIZKc6NqbDz
vYGwL0UJCXEdEhdNMKOI0FWLiOl/NPdCqIwSeeUNsKZCZE7LWqDbfDoivStGcKWS
UYqqbrv8FB2BQrqem0YL+da6i24uhghL0NHCk8x3+qR/Cp+xWJyL27nHHRD7OVLO
3UhsEQEVoiZWp2TpZNyO4AjIFjHSQPw/kBOFdP9bZVcL9rmpZMbyhPnG6Xal3Jmn
0epXQcfvNUd/GwP0Oi22y2CoezuGL8/xKkQoRJ0XHhLAFyJTNIEWPxx4Ki5WVVbZ
PSUwc51CL0PKg2GbKF0g8Zy6JNwMciLh59R79gMK9eGZnSdoOe8d8EzV+AWaqPsO
qgxv4adYytLEIuLylLtPlEIni17E/yKIEibnlSS9P7EUBTNXJFmrLUPArEPhQGrS
EPid8mRJCCo47Htn6YH3Tzt0lSr8mfqOwWs1ww/rbDT/1N3Wq+EmEe9hwHjHQCyl
xfn+7yDRcJ4C2C/fuF2cg4JA2QsX8eTpvChSnXnQIhvG+7NISqFUAf1YXuy+cNJa
rJs2CRCrz3rmM1dpQ+miII9Z14/ZSy6wg0f2BXaANZNIKutmPTFWxOyc6RiBMIor
EeYWbajRg5vCJmQNeSW5Ag0EZ1jSBwEQALffVPaMgIsv3vyoDZivVjr4ArkPWuWM
rQMhDRaos11vzWlVEviihdSn9rUP/nx3t6TsvvwMhqTk9yfnRCn5jmE2dSFfT4Wz
kdYkQ8xWLI4Ku8Cu6MK5iemG5JMyL03eaaSqlbjg7IUmNr+PF/poX0c+PCoNVbIC
YbHYtTwTJ52G+DuVQThZI0qnebNc/3CfvDAfMGqyDezIPqoqPRfLolwT6N+zip8O
bDuom7DlcyRjRAeB36dbEPRkqzdkP8ZA4tKWRO2HBhDe4Jg4srZlCs8BiveNK6mM
lOv+EZpSwvuikfga41bk+A08EFojKkg7XuCN+LSBUxKWdl9UDg5eibYiy1uRM8kP
taFzP89tNanQeAU3BBcJRgDqOkl/5KQnPLU8Dn8Iq2nUUg3rdYhRTT7PiSlkuK8f
tWXctlN7AsTtvrKaJGP89oETs5ks/umdep7fmYlJlLO2VZE63itQHGUpE2P0hRSH
itoC7acWdXYY7M/wi1kPl5CvMyStaXfqmgXoRF2ea2N9kP6ioQ5piAvNLmHVc4l9
ID5kDUB4k0Tv5XSE8eXc35fT5JFV8J/Rlk66CDR5DKciBteRqQ97Ojc2CkJ92tCO
/nTnnV8IYLP3yTCmFvABxJLk8qi3UJXo4ySKMzZ48OjDfvr91pr9xjgWyLj0R44O
1S2Tq6eFyy7xABEBAAGJAjYEGAEKACAWIQQTnBnq05yLQIF15zQOg1VQcJZUCQUC
Z1jSBwIbDAAKCRAOg1VQcJZUCd6dD/9iyRnoPBrIiBre1BmXCdx7SJCy3P659dGS
35/KCx9S5oEwjQX11BCembZ7R1rhthpTwj/uCSzaV2mZgdxDg5+IPUSjBafbnHih
gE7RqEOTD6rH3+2NlMJvDJYykucSgjzhAbF2oXTbQneGzA1z5ljn6OKtu+sr0upY
HRjk24x6zm6X3Y95PVoinXmafHfS12oYqM560uhmjE66LylB6ihxwThNDWPDQQ4F
8ZdVrNIqyE5rt+Mdo8XndGnbcRNvAaJ7syqNPzZl8XL7+IvVbMCnM0v5wCuO896w
ngxqTf9UDf6tRZ4bzt0wzvtSa1TtMbbgqeQ4JL75W0iRwGtW2VFqsLJdLvCeoeJS
/oN7ZRjsBpe7Mi7yJHGsKffosFL4U2Xb02FMyQXwUCQuI1kT7Je5a2mOJZZC6Rxs
CaJ5B+H2tq8Vu8eHqWU6HFQgN5A9tRDxWaLSA0s7ClzCbVHVXJ0rlfVG5cGGX5NN
bTHSQ3RAeMIWpgguViogcQTS8H+eJau7ObSrjAH+vyUDZUBZk3wK6TWWERAknRTs
NXGMK99G5TnFMB/BhCcZJcupyFJf2RU0dcrmtSEZsXR1TXZP81TnIRIxrrzhAxHC
TG4WjJ9IfJITK+RZwf0ng5LRnMfDkMOP3JtmnAYqUXSWe4WzaPXoE0TxE1BmtdR4
avMueyobpA==
=X35T
-----END PGP PUBLIC KEY BLOCK-----
```
## Policy
Windsurf follows the principle of [Coordinated Vulnerability Disclosure](https://en.wikipedia.org/wiki/Coordinated_vulnerability_disclosure).
## Safe Harbor
Windsurf supports safe harbor for security researchers who:
* Make a good faith effort to avoid privacy violations, destruction of data, and interruption or degradation of our services
* Only interact with accounts you own or with explicit permission of the account holder
* Do not exploit a security issue you discover for any reason other than testing
* Report any vulnerability you've discovered promptly
* Follow the guidelines outlined in this document
We will not take legal action against you or administrative action against your account if you act according to this policy.
*Last updated: December 10, 2024*
---
# Source: https://docs.windsurf.com/security/security-admin-guide.md
> ## Documentation Index
> Fetch the complete documentation index at: https://docs.windsurf.com/llms.txt
> Use this file to discover all available pages before exploring further.
# FedRAMP Security Admin Guide
> Windsurf FedRAMP Security Admin Guide for securely setting up, configuring, operating, and decommissioning top-level administrative accounts. Includes role definitions, account lifecycle procedures, and a reference table of all admin-controlled security settings.
# FedRAMP Security Admin Guide
This guide describes how to securely set up, configure, operate, and decommission top-level administrative accounts in Windsurf. It covers administrative role definitions, account lifecycle procedures, and all admin-controlled security settings with their associated functions, security impacts, and recommended values.
You can choose to index a particular branch and to automatically re-index the repository after some number of days.
## Security Guarantees
We clone the repository in order to create the index, but once we finish creating embeddings for the codebase we delete all the code and code snippets **assuming that the Store Snippets setting is unchecked.** We don't persist anything other than the embeddings themselves, from which you cannot derive the original code.
Furthermore, all indexing and embedding is performed on a single-tenant instance—nothing about the indexing process is shared between multiple Windsurf Teams customers.
---
# Source: https://docs.windsurf.com/security/reporting.md
> ## Documentation Index
> Fetch the complete documentation index at: https://docs.windsurf.com/llms.txt
> Use this file to discover all available pages before exploring further.
# Reporting Security Concerns
> Report security vulnerabilities to Windsurf securely via email with GPG encryption. Learn about our coordinated disclosure policy and safe harbor.
Windsurf takes the security of our products and services seriously. If you believe you have found a security vulnerability in any Windsurf-owned services, please report it to us as described below.
## Reporting Security Issues
**Please do not report security vulnerabilities through public GitHub issues.**
Instead, please report them via email to [security@windsurf.com](mailto:security@windsurf.com)
Please include the following information in your report including as much technical detail as possible:
* Type of issue (e.g., buffer overflow, SQL injection, cross-site scripting, etc.)
* The location of the affected source code (if applicable)
* Any special configuration required to reproduce the issue
* Step-by-step instructions to reproduce the issue
* Proof-of-concept or exploit code (if possible)
* Impact of the issue, including how an attacker might exploit it
* Any other relevant information
This information will help us triage your report more quickly.
Please compile all information into a single email, encrypted with our public GPG key, include the name of the affected product, and the version of the product affected (if known).
### Public GPG Key
```
-----BEGIN PGP PUBLIC KEY BLOCK-----
mQINBGdY0gcBEACvhmeoodWK5OUNluDytvc6W2/ahzh334qaYgYOoYxBkN9/6BBW
WTdJJ4Hu//XdAw8G/5ISy6tV17JMWOI59acAehKh8NqBSVhrlR7tHxGiJN2fXTtH
TDGOoyMFbWaSQIRI44E3lQZMyQBScGKxDiXQjIlholmrS3JicrqG85dUgB6got9l
da/3bp8BuydcVib7NGcuRZKS2BEVc8UCvpsP/p+VWiSNtB3kT8PTt782mSmnp6rR
HqL8H6ERlMEgQ9M4iWWZhq4g3qsSeg5x9UtU2ANH/escFNM6Wbzg6hyy3CZtXzw6
2BRnXpF63dqhPiigy+ifVCs/YqGacToaUNhN4I8kt274yW0dX+U/15wvlJchsnsi
RVQwB5FRxIxcPsZAWFBg7P5um15HGpKGS0LFJsB5aUfJFHPFmUAvPUreOjv1rGTO
1FdkAERLHsI7jJA70vTAdOM2WwaeGa55EMwefNJ69LpN2elboFbz5hpAa7w+8Y5w
y1J6knyOA4JFnVI824ZiQIGloECGZOlOxM4Ru+jjkcroO+l+frmvvggqBjvKPHGs
VmrMSNjf7aE/7NDnyKZJ9fvUiLf+WclAcIUySbYQr8xv/aV76xDUH1PT59f/ntp7
jxRA0rVvIThakvV3MPMbdrR78uLbc6Bwc0MdtEIGw+QAQ4YzAX4yeV9LHQARAQAB
tCtzZWN1cml0eUBjb2RlaXVtLmNvbSA8c2VjdXJpdHlAY29kZWl1bS5jb20+iQJO
BBMBCgA4FiEEE5wZ6tOci0CBdec0DoNVUHCWVAkFAmdY0gcCGwMFCwkIBwIGFQoJ
CAsCBBYCAwECHgECF4AACgkQDoNVUHCWVAnT0w//ZVKF9Yz9So8ZeeIVcMz0CrFZ
jWFQMTvQvEQ5jP9VpiXe7z5pwSVvv3SpqvkNX+Y6HtjXdnv5Q+QZGzIZKc6NqbDz
vYGwL0UJCXEdEhdNMKOI0FWLiOl/NPdCqIwSeeUNsKZCZE7LWqDbfDoivStGcKWS
UYqqbrv8FB2BQrqem0YL+da6i24uhghL0NHCk8x3+qR/Cp+xWJyL27nHHRD7OVLO
3UhsEQEVoiZWp2TpZNyO4AjIFjHSQPw/kBOFdP9bZVcL9rmpZMbyhPnG6Xal3Jmn
0epXQcfvNUd/GwP0Oi22y2CoezuGL8/xKkQoRJ0XHhLAFyJTNIEWPxx4Ki5WVVbZ
PSUwc51CL0PKg2GbKF0g8Zy6JNwMciLh59R79gMK9eGZnSdoOe8d8EzV+AWaqPsO
qgxv4adYytLEIuLylLtPlEIni17E/yKIEibnlSS9P7EUBTNXJFmrLUPArEPhQGrS
EPid8mRJCCo47Htn6YH3Tzt0lSr8mfqOwWs1ww/rbDT/1N3Wq+EmEe9hwHjHQCyl
xfn+7yDRcJ4C2C/fuF2cg4JA2QsX8eTpvChSnXnQIhvG+7NISqFUAf1YXuy+cNJa
rJs2CRCrz3rmM1dpQ+miII9Z14/ZSy6wg0f2BXaANZNIKutmPTFWxOyc6RiBMIor
EeYWbajRg5vCJmQNeSW5Ag0EZ1jSBwEQALffVPaMgIsv3vyoDZivVjr4ArkPWuWM
rQMhDRaos11vzWlVEviihdSn9rUP/nx3t6TsvvwMhqTk9yfnRCn5jmE2dSFfT4Wz
kdYkQ8xWLI4Ku8Cu6MK5iemG5JMyL03eaaSqlbjg7IUmNr+PF/poX0c+PCoNVbIC
YbHYtTwTJ52G+DuVQThZI0qnebNc/3CfvDAfMGqyDezIPqoqPRfLolwT6N+zip8O
bDuom7DlcyRjRAeB36dbEPRkqzdkP8ZA4tKWRO2HBhDe4Jg4srZlCs8BiveNK6mM
lOv+EZpSwvuikfga41bk+A08EFojKkg7XuCN+LSBUxKWdl9UDg5eibYiy1uRM8kP
taFzP89tNanQeAU3BBcJRgDqOkl/5KQnPLU8Dn8Iq2nUUg3rdYhRTT7PiSlkuK8f
tWXctlN7AsTtvrKaJGP89oETs5ks/umdep7fmYlJlLO2VZE63itQHGUpE2P0hRSH
itoC7acWdXYY7M/wi1kPl5CvMyStaXfqmgXoRF2ea2N9kP6ioQ5piAvNLmHVc4l9
ID5kDUB4k0Tv5XSE8eXc35fT5JFV8J/Rlk66CDR5DKciBteRqQ97Ojc2CkJ92tCO
/nTnnV8IYLP3yTCmFvABxJLk8qi3UJXo4ySKMzZ48OjDfvr91pr9xjgWyLj0R44O
1S2Tq6eFyy7xABEBAAGJAjYEGAEKACAWIQQTnBnq05yLQIF15zQOg1VQcJZUCQUC
Z1jSBwIbDAAKCRAOg1VQcJZUCd6dD/9iyRnoPBrIiBre1BmXCdx7SJCy3P659dGS
35/KCx9S5oEwjQX11BCembZ7R1rhthpTwj/uCSzaV2mZgdxDg5+IPUSjBafbnHih
gE7RqEOTD6rH3+2NlMJvDJYykucSgjzhAbF2oXTbQneGzA1z5ljn6OKtu+sr0upY
HRjk24x6zm6X3Y95PVoinXmafHfS12oYqM560uhmjE66LylB6ihxwThNDWPDQQ4F
8ZdVrNIqyE5rt+Mdo8XndGnbcRNvAaJ7syqNPzZl8XL7+IvVbMCnM0v5wCuO896w
ngxqTf9UDf6tRZ4bzt0wzvtSa1TtMbbgqeQ4JL75W0iRwGtW2VFqsLJdLvCeoeJS
/oN7ZRjsBpe7Mi7yJHGsKffosFL4U2Xb02FMyQXwUCQuI1kT7Je5a2mOJZZC6Rxs
CaJ5B+H2tq8Vu8eHqWU6HFQgN5A9tRDxWaLSA0s7ClzCbVHVXJ0rlfVG5cGGX5NN
bTHSQ3RAeMIWpgguViogcQTS8H+eJau7ObSrjAH+vyUDZUBZk3wK6TWWERAknRTs
NXGMK99G5TnFMB/BhCcZJcupyFJf2RU0dcrmtSEZsXR1TXZP81TnIRIxrrzhAxHC
TG4WjJ9IfJITK+RZwf0ng5LRnMfDkMOP3JtmnAYqUXSWe4WzaPXoE0TxE1BmtdR4
avMueyobpA==
=X35T
-----END PGP PUBLIC KEY BLOCK-----
```
## Policy
Windsurf follows the principle of [Coordinated Vulnerability Disclosure](https://en.wikipedia.org/wiki/Coordinated_vulnerability_disclosure).
## Safe Harbor
Windsurf supports safe harbor for security researchers who:
* Make a good faith effort to avoid privacy violations, destruction of data, and interruption or degradation of our services
* Only interact with accounts you own or with explicit permission of the account holder
* Do not exploit a security issue you discover for any reason other than testing
* Report any vulnerability you've discovered promptly
* Follow the guidelines outlined in this document
We will not take legal action against you or administrative action against your account if you act according to this policy.
*Last updated: December 10, 2024*
---
# Source: https://docs.windsurf.com/security/security-admin-guide.md
> ## Documentation Index
> Fetch the complete documentation index at: https://docs.windsurf.com/llms.txt
> Use this file to discover all available pages before exploring further.
# FedRAMP Security Admin Guide
> Windsurf FedRAMP Security Admin Guide for securely setting up, configuring, operating, and decommissioning top-level administrative accounts. Includes role definitions, account lifecycle procedures, and a reference table of all admin-controlled security settings.
# FedRAMP Security Admin Guide
This guide describes how to securely set up, configure, operate, and decommission top-level administrative accounts in Windsurf. It covers administrative role definitions, account lifecycle procedures, and all admin-controlled security settings with their associated functions, security impacts, and recommended values.
 Click on **Add app**, and then **Add custom SAML app**.
 Fill out **App name** with `Windsurf`, and click **Next**.
The next screen (Google Identity Provider details) on Google’s console page has data you’ll need to copy to Windsurf’s SSO settings on [https://windsurf.com/team/settings](https://windsurf.com/team/settings).
* Copy **SSO URL** from Google’s console page to Windsurf’s settings under **SSO URL**
* Copy **Entity ID** from Google’s console page to Windsurf’s settings under **Idp Entity ID**
* Copy **Certificate** from Google’s console page to Windsurf’s settings under **X509 Certificate**
* Click **Continue** on Google’s console page
The next screen on Google’s console page requires you to copy data from Codeium’s settings page
* Copy **Callback URL** from Codeium’s settings page to Google’s console page under **ACS URL**
* Copy **SP Entity ID** from Codeium’s settings page to Google’s console page under **SP Entity ID**
* Change **Name ID** format to **EMAIL**
* Click **Continue** on Google’s console page
The next screen on Google’s console page requires some configuration
* Click on **Add Mapping**, select **First name** and set the **App attributes** to **firstName**
* Click on **Add Mapping**, select **Last name** and set the **App attributes** to **lastName**
* Click **Finish**
Fill out **App name** with `Windsurf`, and click **Next**.
The next screen (Google Identity Provider details) on Google’s console page has data you’ll need to copy to Windsurf’s SSO settings on [https://windsurf.com/team/settings](https://windsurf.com/team/settings).
* Copy **SSO URL** from Google’s console page to Windsurf’s settings under **SSO URL**
* Copy **Entity ID** from Google’s console page to Windsurf’s settings under **Idp Entity ID**
* Copy **Certificate** from Google’s console page to Windsurf’s settings under **X509 Certificate**
* Click **Continue** on Google’s console page
The next screen on Google’s console page requires you to copy data from Codeium’s settings page
* Copy **Callback URL** from Codeium’s settings page to Google’s console page under **ACS URL**
* Copy **SP Entity ID** from Codeium’s settings page to Google’s console page under **SP Entity ID**
* Change **Name ID** format to **EMAIL**
* Click **Continue** on Google’s console page
The next screen on Google’s console page requires some configuration
* Click on **Add Mapping**, select **First name** and set the **App attributes** to **firstName**
* Click on **Add Mapping**, select **Last name** and set the **App attributes** to **lastName**
* Click **Finish**
 On Codeium’s settings page, click **Enable Login with SAML**, and then click **Save**. Make sure to click on **Test Login** to make sure login works as expected. All users now will have SSO login enforced.
 2. Click on **Create your own application**.
 3. Name your application **Windsurf**, select *Integrate any other application you don't find in the gallery*, and then click **Create**.
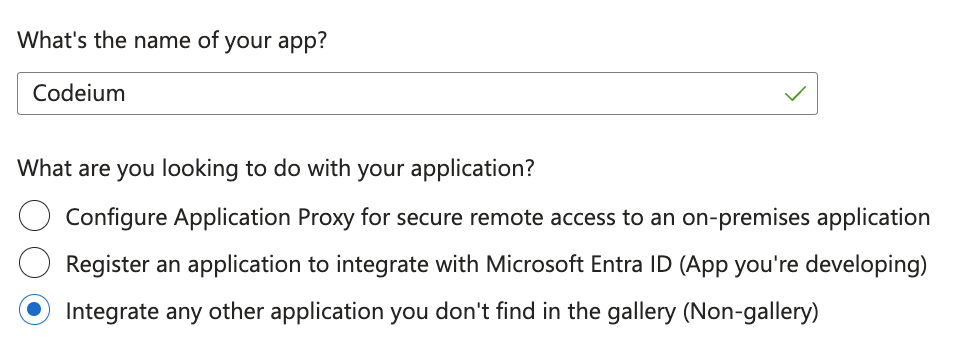 ## Part 2: Configure SAML and User Attributes in Microsoft Entra ID
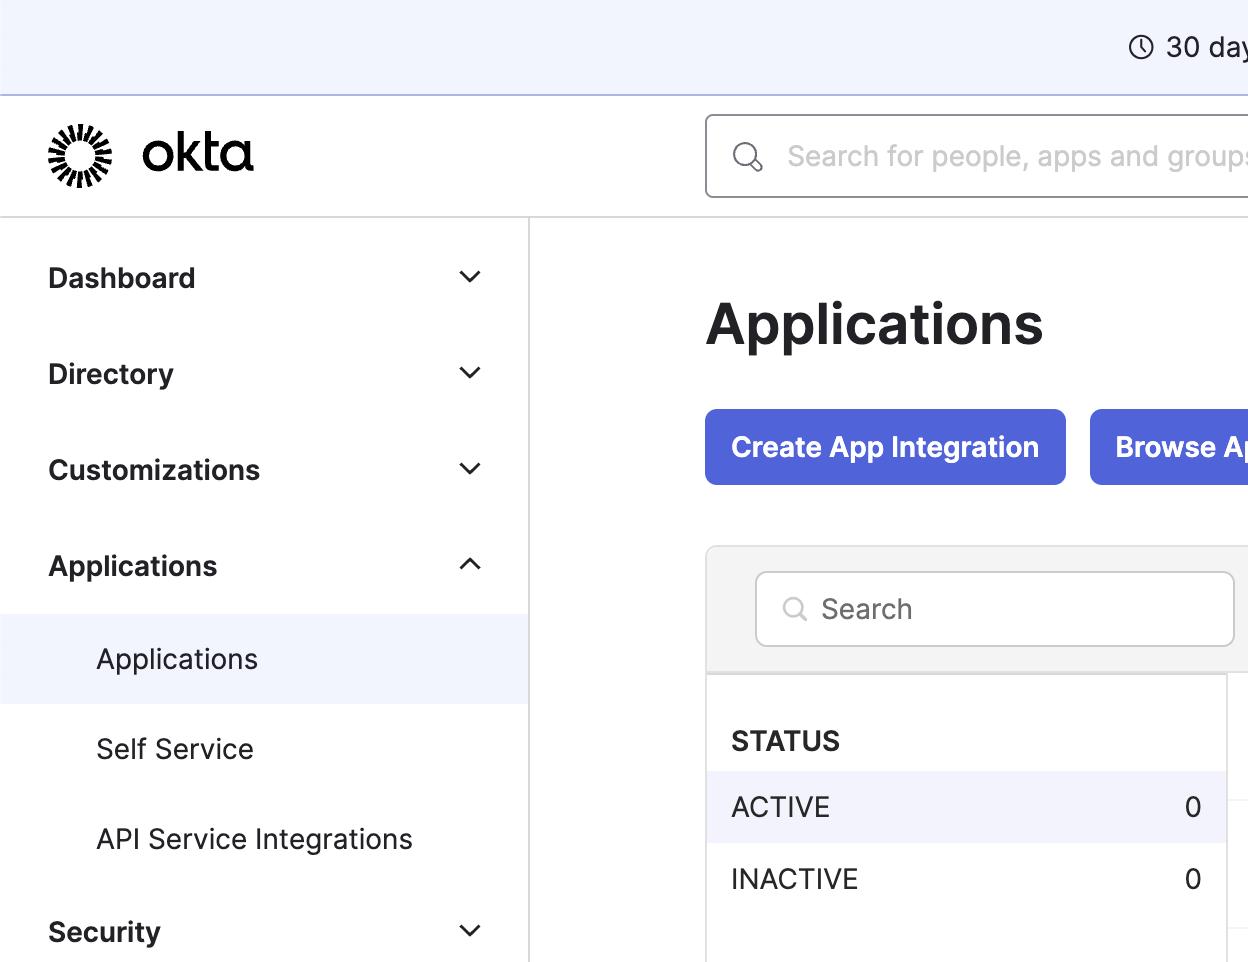 Select SAML 2.0 as the sign-in method
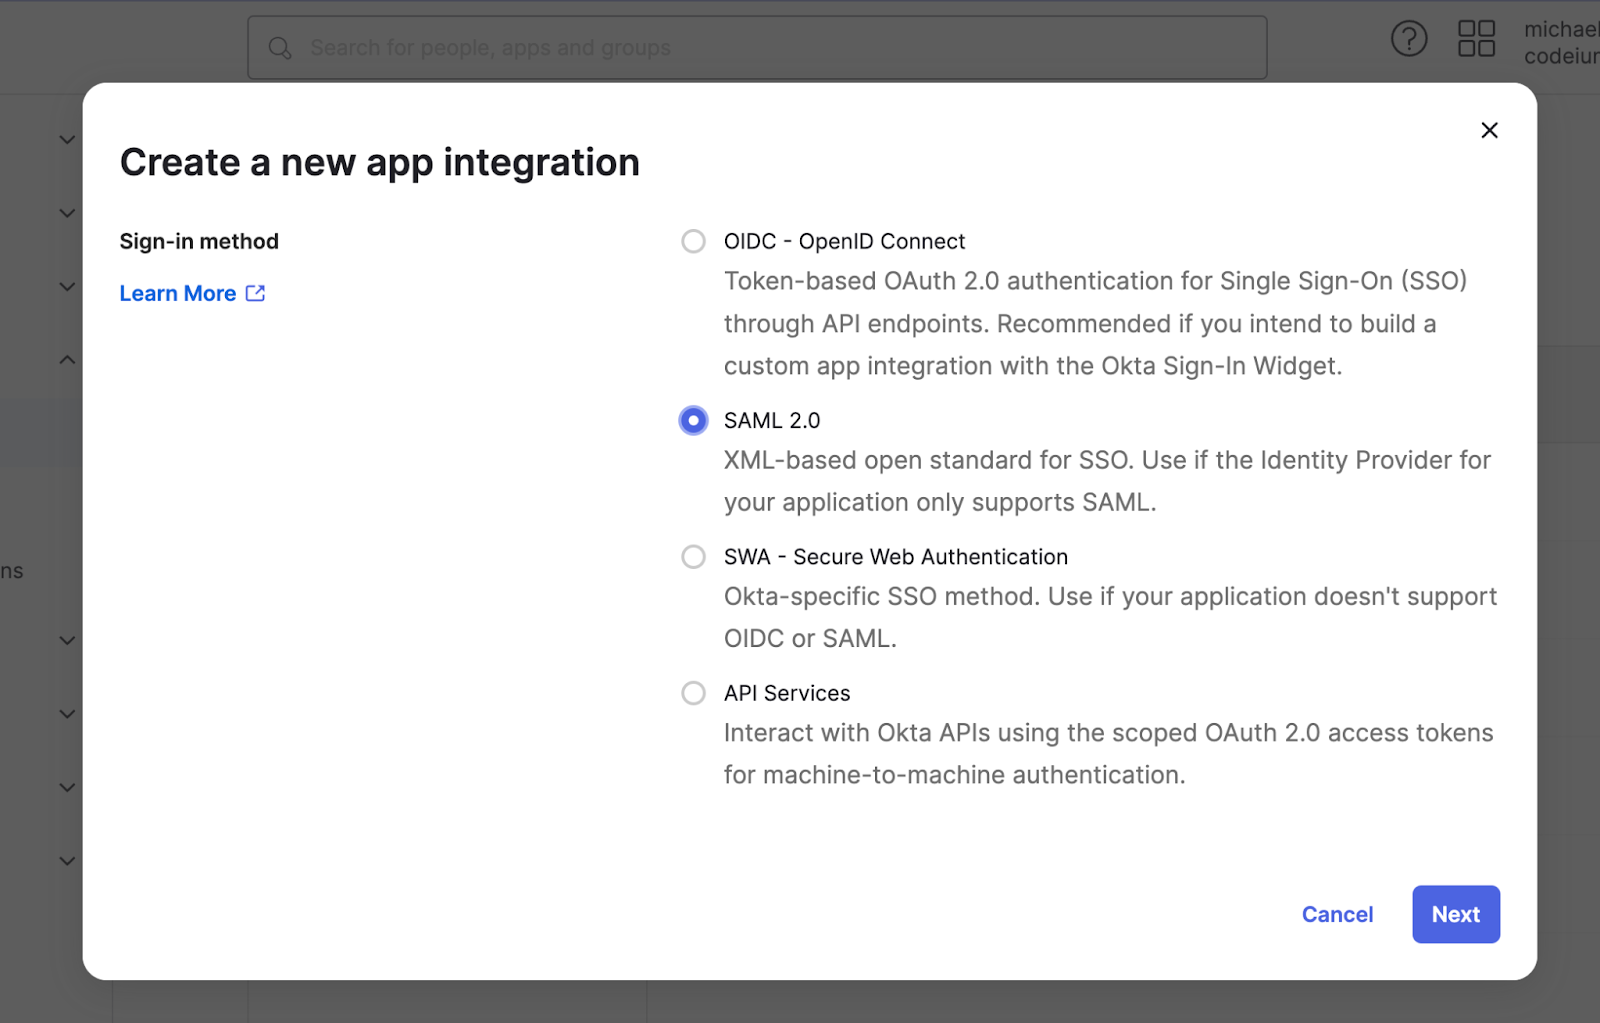 Set the app name as Windsurf (or to any other name), and click Next
Configure the SAML settings as
* Single sign-on URL to [https://auth.windsurf.com/\_\_/auth/handler](https://auth.windsurf.com/__/auth/handler)
* Audience URI (SP Entity ID) to [www.codeium.com](http://www.codeium.com)
* NameID format to EmailAddress
* Application username to Email
Configure the attribute statements as following, and then click **Next**.
Set the app name as Windsurf (or to any other name), and click Next
Configure the SAML settings as
* Single sign-on URL to [https://auth.windsurf.com/\_\_/auth/handler](https://auth.windsurf.com/__/auth/handler)
* Audience URI (SP Entity ID) to [www.codeium.com](http://www.codeium.com)
* NameID format to EmailAddress
* Application username to Email
Configure the attribute statements as following, and then click **Next**.
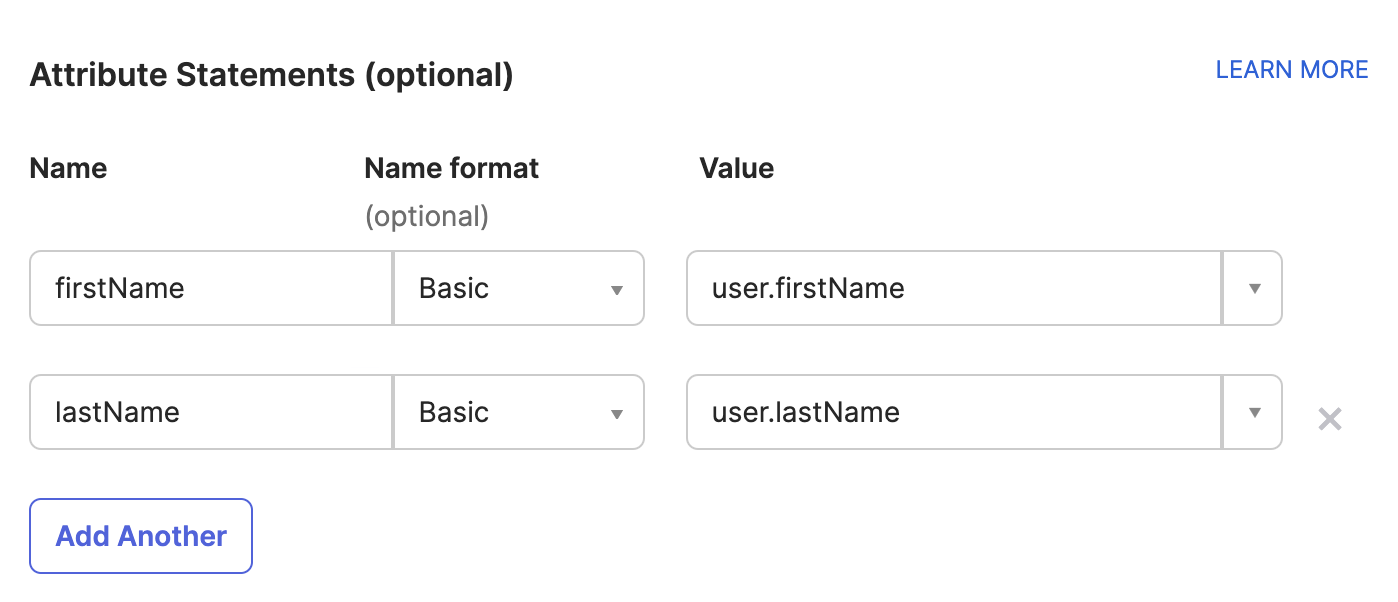 In the feedback section, select “This is an internal app that we have created”, and click **Finish**.
### Register Okta as a SAML provider
You should be redirected to the Sign on tab under your custom SAML application. Now you’ll want to take the info in this page and fill it out in Windsurf’s SSO settings.
* Open [https://windsurf.com/team/settings](https://windsurf.com/team/settings), and click on Configure SAML
* Copy the text after ‘Issuer’ in Okta’s application page and paste it under Idp Entity ID
* Copy the text after ‘Sign on URL’ in Okta’s application page and paste it under SSO URL
* Download the Signing Certificate and paste it under X509 certificate
* Check Enable Login with SAML and then click Save
* Test the login with the Test Login button. You should see a success message:
In the feedback section, select “This is an internal app that we have created”, and click **Finish**.
### Register Okta as a SAML provider
You should be redirected to the Sign on tab under your custom SAML application. Now you’ll want to take the info in this page and fill it out in Windsurf’s SSO settings.
* Open [https://windsurf.com/team/settings](https://windsurf.com/team/settings), and click on Configure SAML
* Copy the text after ‘Issuer’ in Okta’s application page and paste it under Idp Entity ID
* Copy the text after ‘Sign on URL’ in Okta’s application page and paste it under SSO URL
* Download the Signing Certificate and paste it under X509 certificate
* Check Enable Login with SAML and then click Save
* Test the login with the Test Login button. You should see a success message:
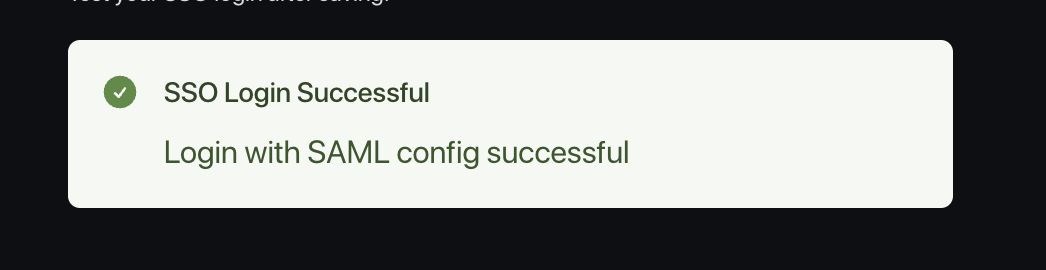 At this point everything should have been configured, and can now add users to the new Windsurf Okta application.
You should share your organization's custom Login Portal URL with your users and ask them to sign in via that link.
At this point everything should have been configured, and can now add users to the new Windsurf Okta application.
You should share your organization's custom Login Portal URL with your users and ask them to sign in via that link.
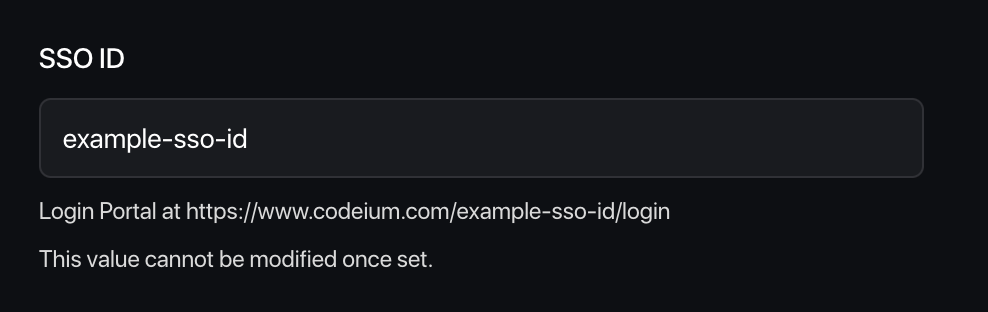 Users who login to Windsurf via SSO will be auto-approved into the team.
### Caveats
Note that Windsurf does not currently support IDP-initiated login flows.
We also do not yet support OIDC.
# Troubleshooting
### Login with SAML config failed: Firebase: Error (auth/operation-not-allowed)
Users who login to Windsurf via SSO will be auto-approved into the team.
### Caveats
Note that Windsurf does not currently support IDP-initiated login flows.
We also do not yet support OIDC.
# Troubleshooting
### Login with SAML config failed: Firebase: Error (auth/operation-not-allowed)
 This points to your an invalid SSO ID, or your SSO URL being incorrect, make sure it is alphanumeric and has no extra spaces or invalid characters. Please go over the steps in the guide again and make sure you use the correct values.
### Login with SAML config failed: Firebase: SAML Response \
This points to your an invalid SSO ID, or your SSO URL being incorrect, make sure it is alphanumeric and has no extra spaces or invalid characters. Please go over the steps in the guide again and make sure you use the correct values.
### Login with SAML config failed: Firebase: SAML Response \ This points to your IdP entity ID being invalid, please make sure you copy it correctly from the Okta portal, without any extra characters or spaces before or after the string.
### Failed to verify the signature in samlresponse
This points to an incorrect value of your X509 certificate, please make sure you copy the correct key, and that it is formatted as:
```
-----BEGIN CERTIFICATE-----
value
------END CERTIFICATE------
```
This points to your IdP entity ID being invalid, please make sure you copy it correctly from the Okta portal, without any extra characters or spaces before or after the string.
### Failed to verify the signature in samlresponse
This points to an incorrect value of your X509 certificate, please make sure you copy the correct key, and that it is formatted as:
```
-----BEGIN CERTIFICATE-----
value
------END CERTIFICATE------
```
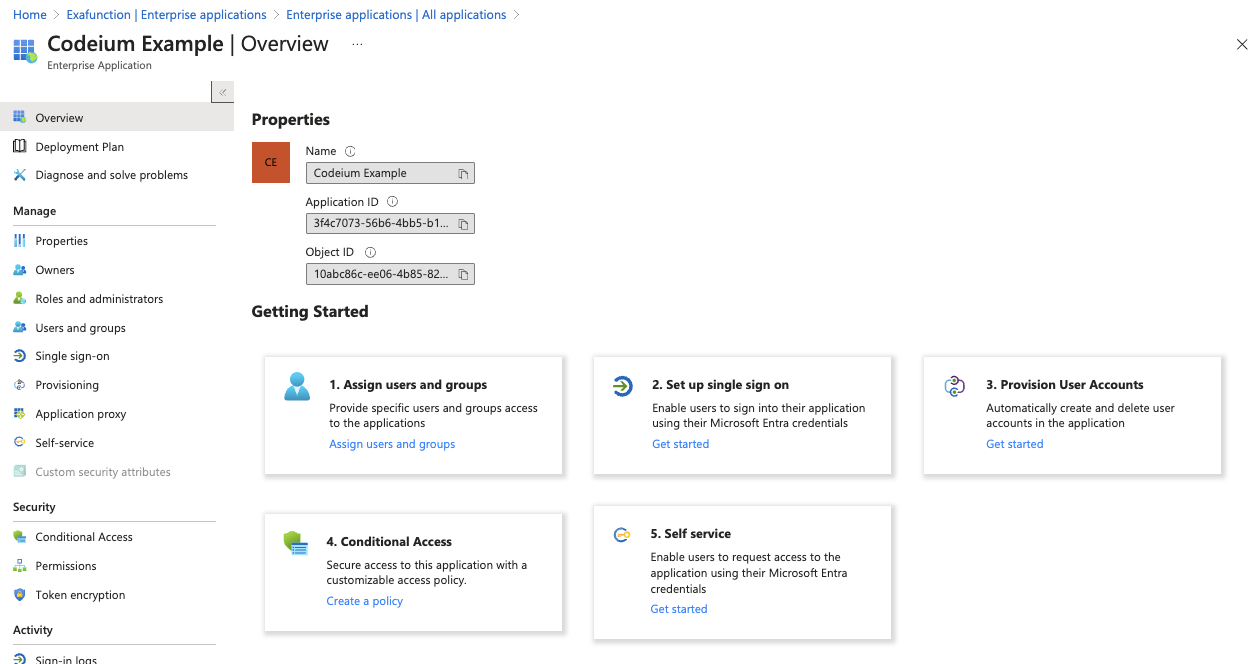 ## Step 2: Setup SCIM provisioning
Click on Get started under Provision User Accounts in the middle (step 3), and then click on Get started again.
## Step 2: Setup SCIM provisioning
Click on Get started under Provision User Accounts in the middle (step 3), and then click on Get started again.
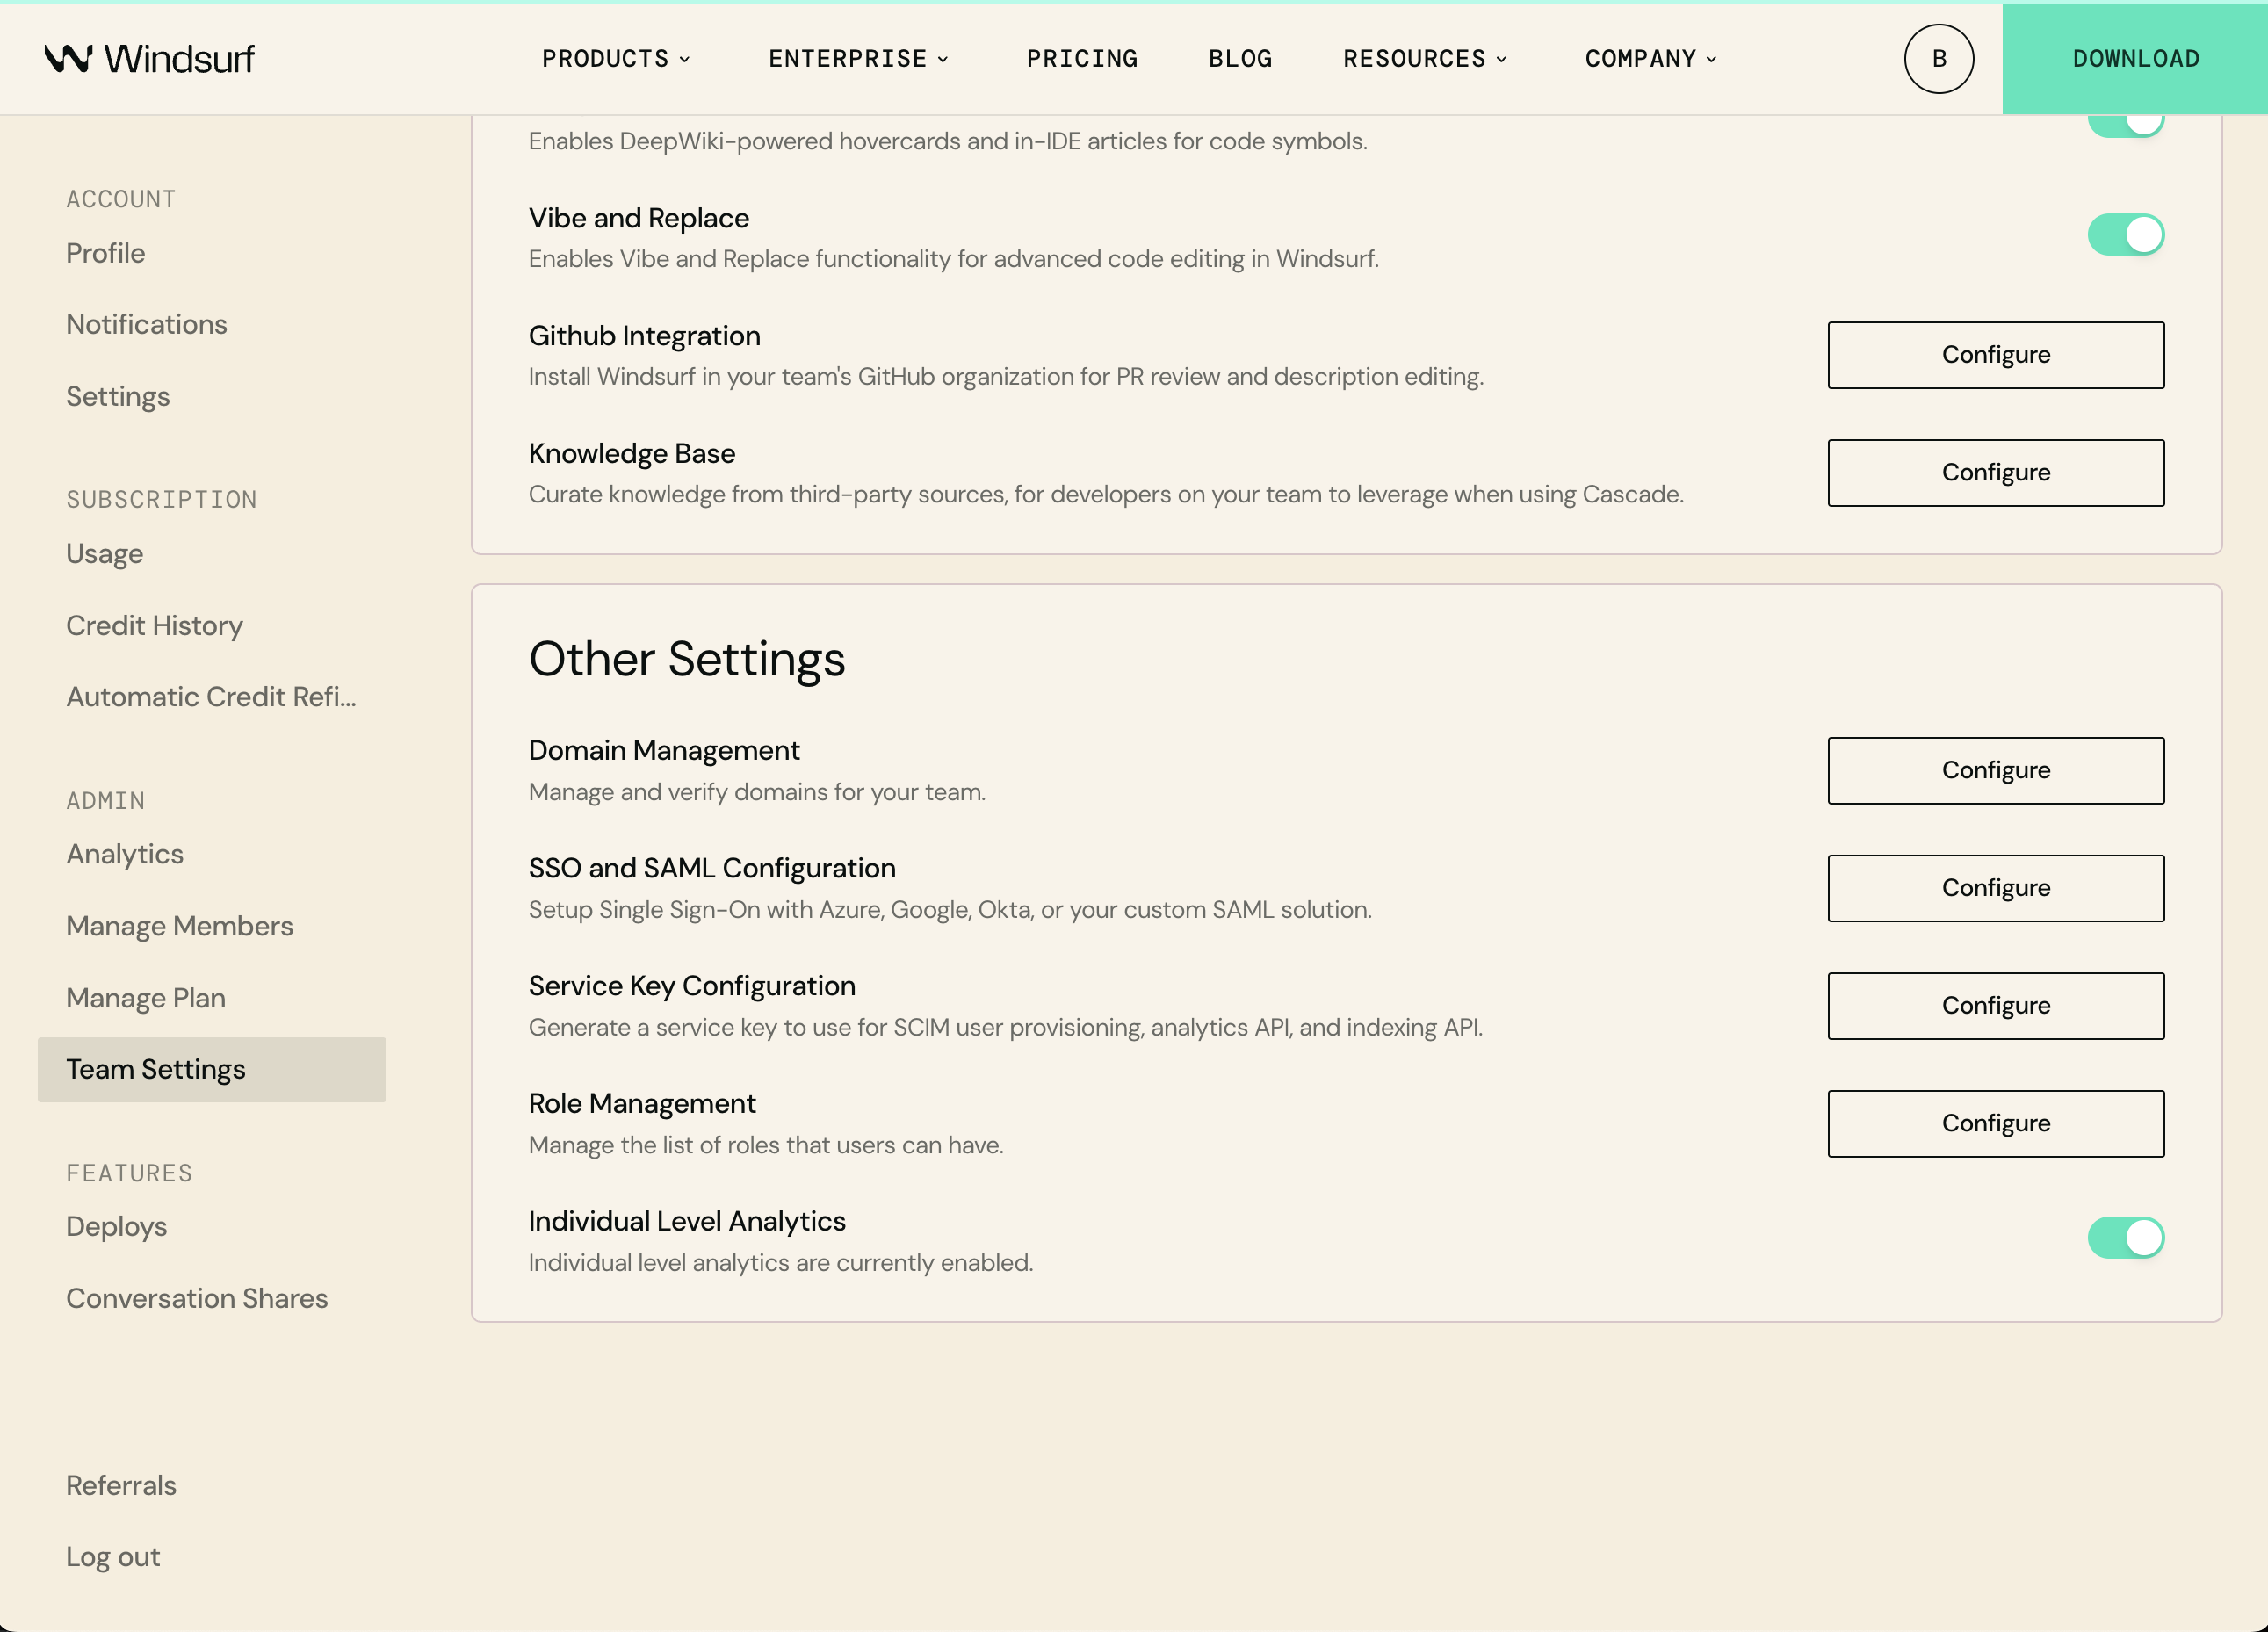 Under the Provisioning setup page, select the following options.
Provisioning Mode: Automatic
Admin Credentials > Tenant URL: [https://server.codeium.com/scim/v2](https://server.codeium.com/scim/v2)
Leave the Azure provisioning page open, now go to the Windsurf web portal, and click on the profile icon in the NavBar on the top of the page. Under Team Settings, select Service Key and click on Add Service Key. Enter any key name (such as 'Azure Provisioning Key') and click Create Service Key. Copy the output key, go back to the Azure page, paste it to Secret Token.
Under the Provisioning setup page, select the following options.
Provisioning Mode: Automatic
Admin Credentials > Tenant URL: [https://server.codeium.com/scim/v2](https://server.codeium.com/scim/v2)
Leave the Azure provisioning page open, now go to the Windsurf web portal, and click on the profile icon in the NavBar on the top of the page. Under Team Settings, select Service Key and click on Add Service Key. Enter any key name (such as 'Azure Provisioning Key') and click Create Service Key. Copy the output key, go back to the Azure page, paste it to Secret Token.
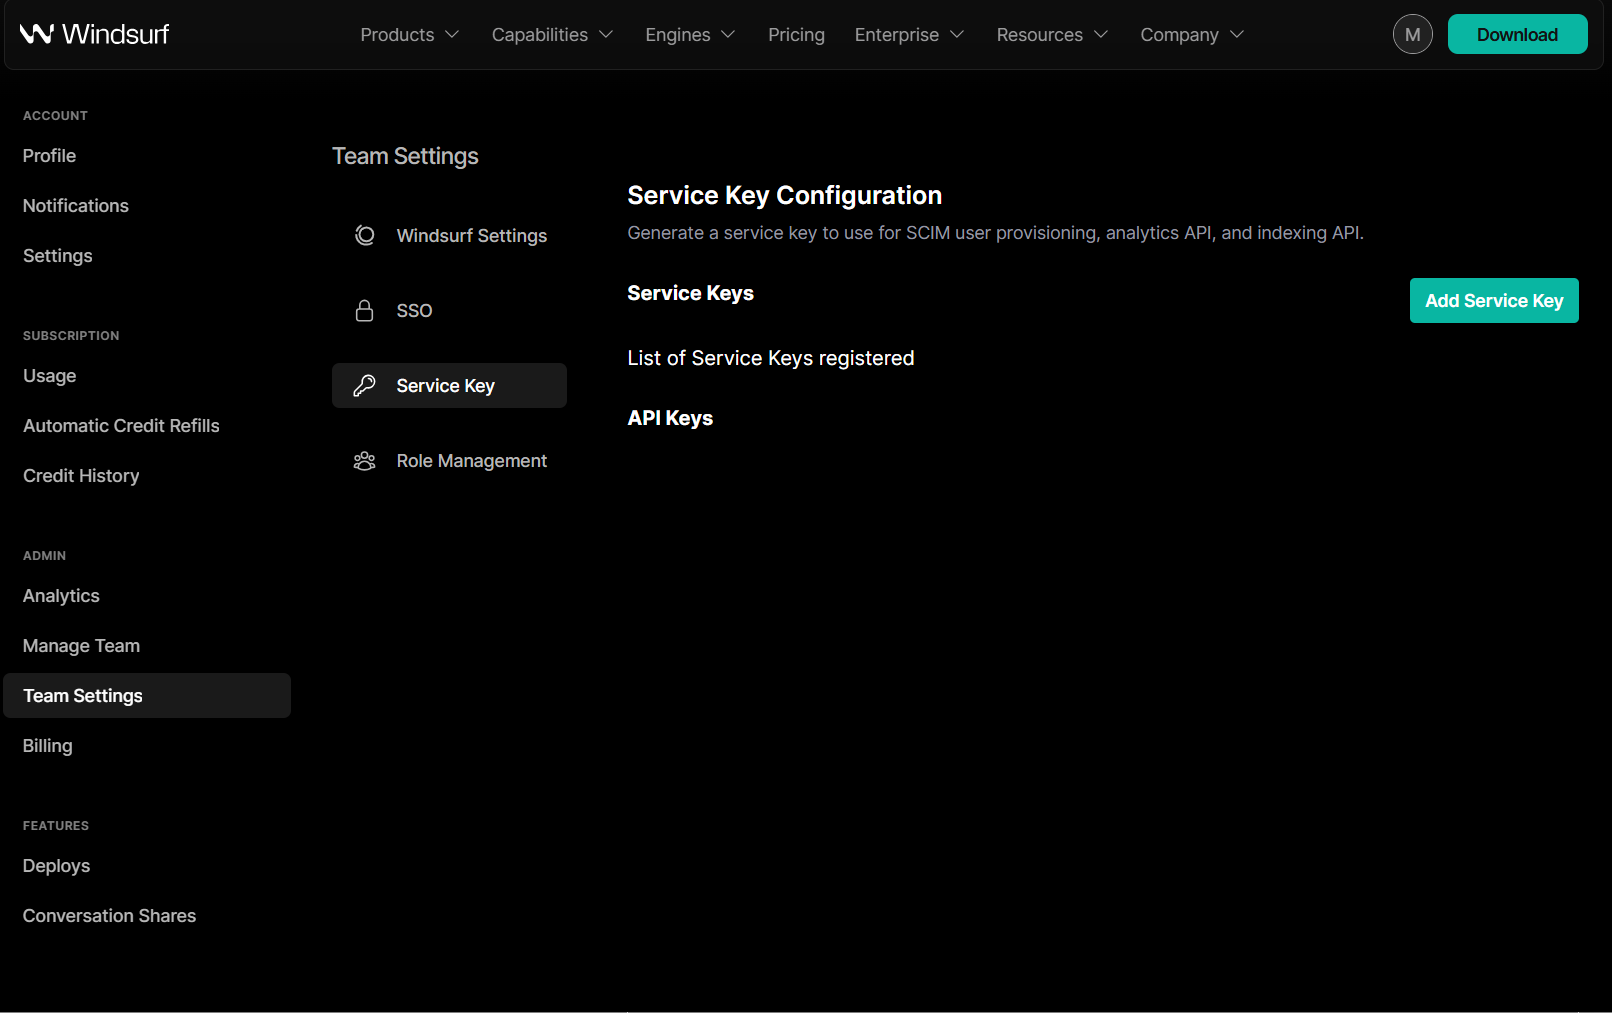 (What you should see after creating the key on Windsurf)
On the Provisioning page, click on Test Connection and that should have verified the SCIM connection.
Now above the Provisioning form click on Save.
## Step 3: Configure SCIM Provisioning
After clicking on Save, a new option Mappings should have appeared in the Provisioning page. Expand Mappings, and click on Provision Microsoft Entra ID Users
(What you should see after creating the key on Windsurf)
On the Provisioning page, click on Test Connection and that should have verified the SCIM connection.
Now above the Provisioning form click on Save.
## Step 3: Configure SCIM Provisioning
After clicking on Save, a new option Mappings should have appeared in the Provisioning page. Expand Mappings, and click on Provision Microsoft Entra ID Users
 Under attribute Mappings, delete all fields under displayName, leaving only the fields userName, active, and displayName.
 For active, now click on Edit. Under Expression, modify the field to
```
NOT([IsSoftDeleted])
```
Then click Ok.
Your user attributes should look like
For active, now click on Edit. Under Expression, modify the field to
```
NOT([IsSoftDeleted])
```
Then click Ok.
Your user attributes should look like
 In the Attribute Mapping page, click on Save on top, and navigate back to the Provisioning page.
Now click on the same page, under Mappings click on Provision Microsoft Entra ID Groups. Now only click delete for externalId, and click Save on top. Navigate back to the Provisioning page.
In the Attribute Mapping page, click on Save on top, and navigate back to the Provisioning page.
Now click on the same page, under Mappings click on Provision Microsoft Entra ID Groups. Now only click delete for externalId, and click Save on top. Navigate back to the Provisioning page.
 On the Provisioning page at the bottom, there should also be a Provisioning Status toggle. Set that to On to enable SCIM syncing. Now every 40 minutes your users and groups for the Entra ID application will be synced to Windsurf.
 Click on Save to finish, you have now enabled user and group syncing for SCIM. Only users and groups assigned to the application will be synced to Windsurf. Note that removing users only disables them access to Windsurf (and stops them from taking up a seat) rather than deleting users due to Azure's SCIM design.
 2. Navigate to SSO in Team Settings
 3. When enabling SAML for the first time, you will be required to set up your SSO ID. **You will not be able to change it later.**
It is advised to set this to your organization or team name with alphanumeric characters only.
4. Copy the `Entity ID` value from the Duo portal and paste it into the `IdP Entity ID` field in the Windsurf portal.
5. Copy the `Single Sign-On URL` value from the Duo portal and paste it into the `SSO URL` field in the Windsurf portal.
6. Copy the certificate value from the Duo portal and paste it in the `X509 Certificate` field in the Windsurf portal
3. When enabling SAML for the first time, you will be required to set up your SSO ID. **You will not be able to change it later.**
It is advised to set this to your organization or team name with alphanumeric characters only.
4. Copy the `Entity ID` value from the Duo portal and paste it into the `IdP Entity ID` field in the Windsurf portal.
5. Copy the `Single Sign-On URL` value from the Duo portal and paste it into the `SSO URL` field in the Windsurf portal.
6. Copy the certificate value from the Duo portal and paste it in the `X509 Certificate` field in the Windsurf portal
 7. Copy the `SP Identity ID` value from the Windsurf portal and paste it into the `Entity ID` field in the Duo portal.
8. Copy the `Callback URL (Assertion Consumer Service URL)` from the Windsurf portal and paste it into the `Assertion Consumer Service (ACS) URL` field in the Duo portal.
9. In the Duo portal, configure the attribute statements as following:
7. Copy the `SP Identity ID` value from the Windsurf portal and paste it into the `Entity ID` field in the Duo portal.
8. Copy the `Callback URL (Assertion Consumer Service URL)` from the Windsurf portal and paste it into the `Assertion Consumer Service (ACS) URL` field in the Duo portal.
9. In the Duo portal, configure the attribute statements as following:
 10. Enable the SAML login in the Windsurf portal so you can test it.
**NOTE: DO NOT LOGOUT OR CLOSE THE WINDOW AT THIS POINT.**
If you get an error or it times out, troubleshoot your settings, otherwise you have to disable your SAML Settings in the Windsurf portal.
**If you logout or close the window without confirming a successful test - you may get locked out.**
11. Once your test was successfully completed, you may logout. You can now use SSO sign in when browsing to your team/organization page with the SSO ID you have configured in step 3.
[https://www.codeium.com/yourssoid/login](https://www.codeium.com/yourssoid/login)
10. Enable the SAML login in the Windsurf portal so you can test it.
**NOTE: DO NOT LOGOUT OR CLOSE THE WINDOW AT THIS POINT.**
If you get an error or it times out, troubleshoot your settings, otherwise you have to disable your SAML Settings in the Windsurf portal.
**If you logout or close the window without confirming a successful test - you may get locked out.**
11. Once your test was successfully completed, you may logout. You can now use SSO sign in when browsing to your team/organization page with the SSO ID you have configured in step 3.
[https://www.codeium.com/yourssoid/login](https://www.codeium.com/yourssoid/login)
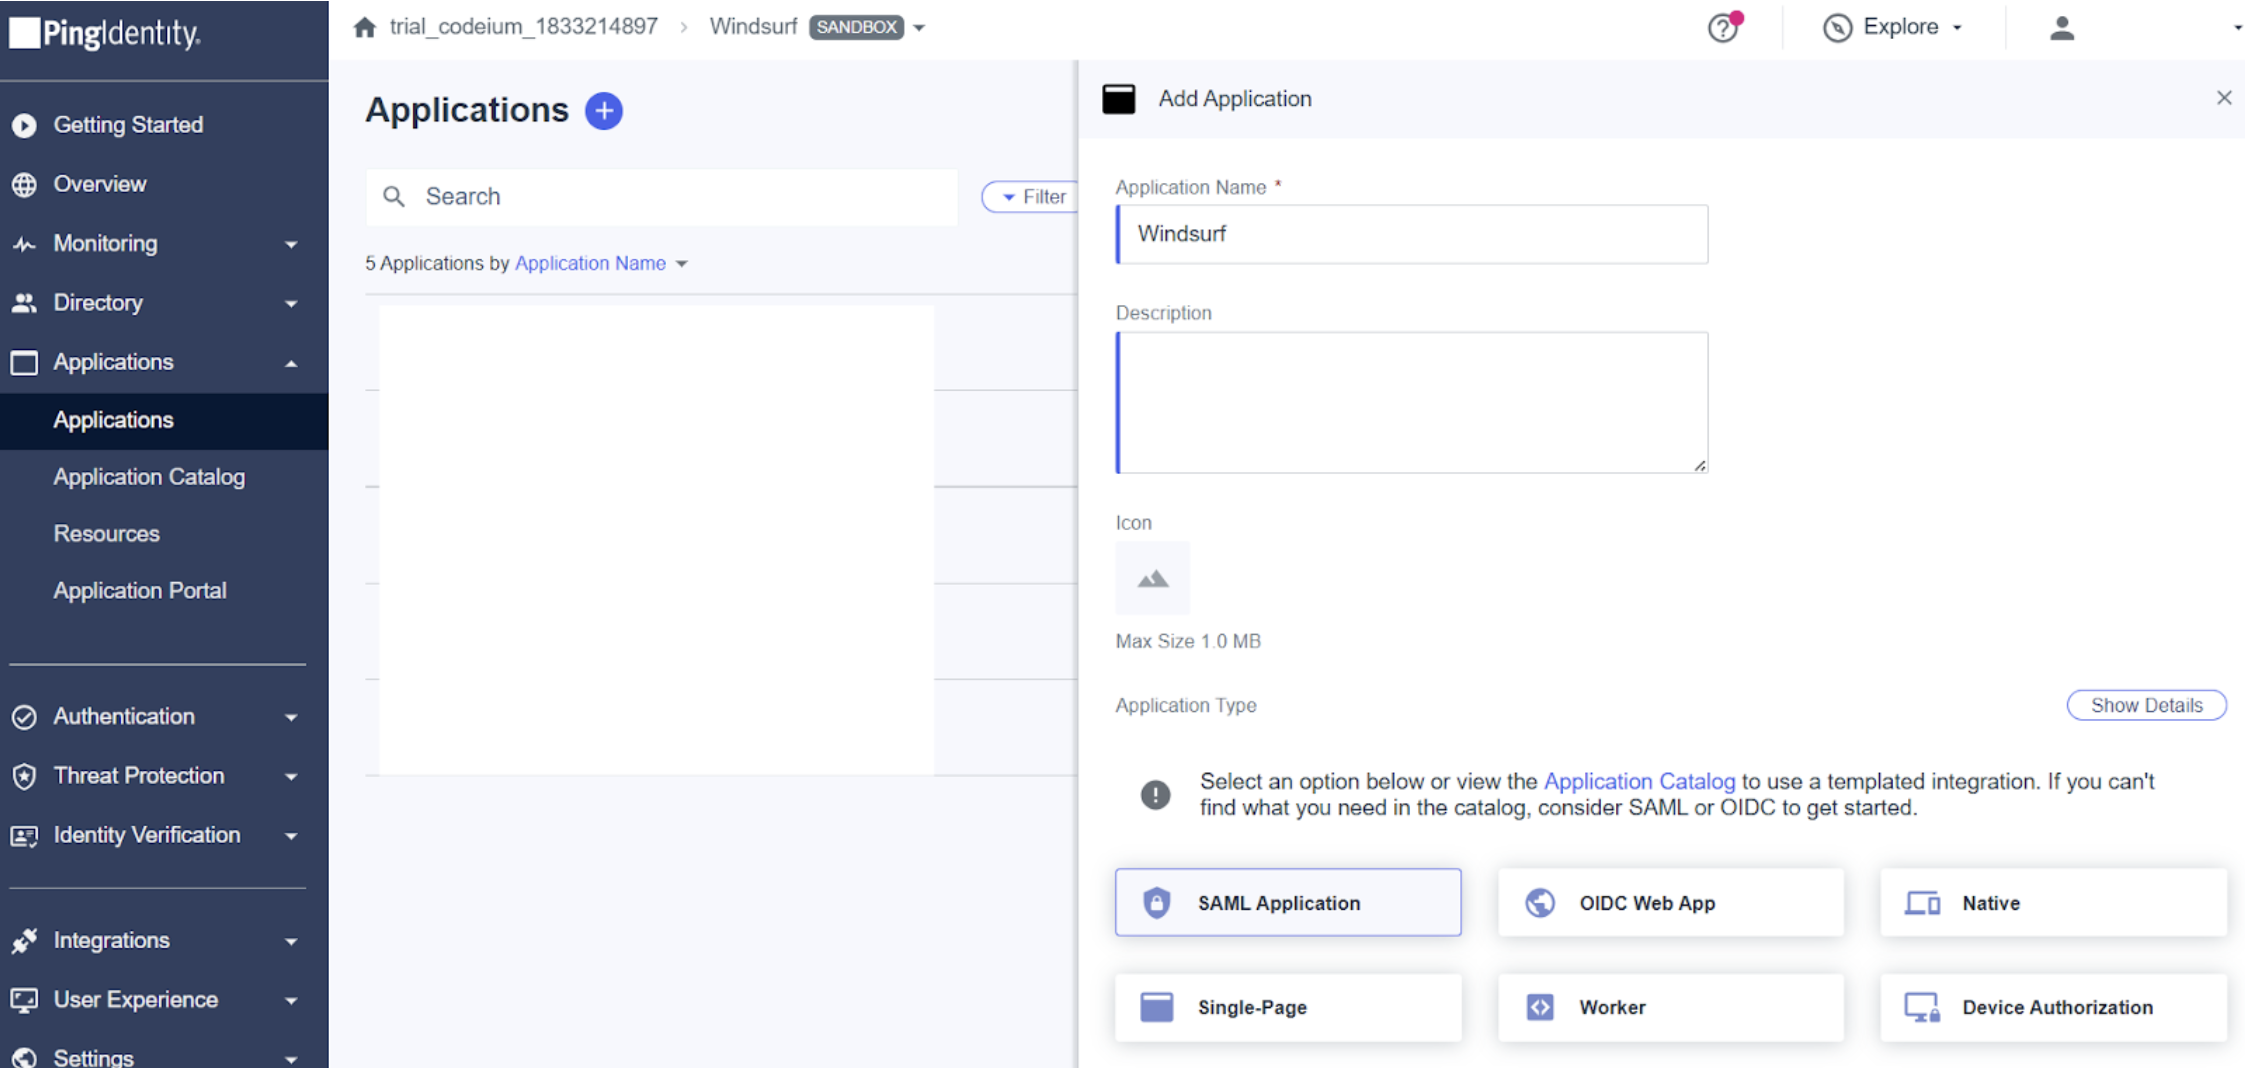 2. Navigate to SSO in Team Settings
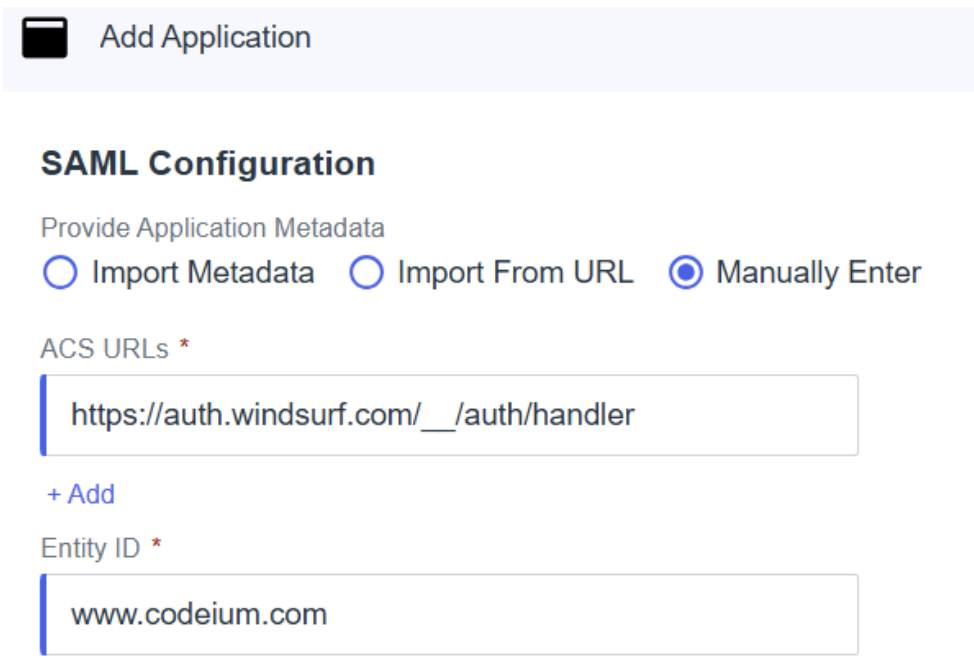 5. Copy the `Issuer ID` from PingID to the `IdP Entity ID` value in the Windsurf portal.
6. Copy the `Single Signon Service` value from PingID to the `SSO URL` value in the Windsurf portal.
7. Download the Signing Certificate from PingID as X509 PEM (.crt), open the file and copy its contents to the `X509 Certificate` value in the Windsurf portal.
**Note**: make sure you have the fill begin and end lines with 5 dashes (-) and no other characters are copied!
8. In attribute mappings, make sure to map:
* `saml_subject` - Email Address
* `firstName` - Given Name
* `lastName` - Family Name
5. Copy the `Issuer ID` from PingID to the `IdP Entity ID` value in the Windsurf portal.
6. Copy the `Single Signon Service` value from PingID to the `SSO URL` value in the Windsurf portal.
7. Download the Signing Certificate from PingID as X509 PEM (.crt), open the file and copy its contents to the `X509 Certificate` value in the Windsurf portal.
**Note**: make sure you have the fill begin and end lines with 5 dashes (-) and no other characters are copied!
8. In attribute mappings, make sure to map:
* `saml_subject` - Email Address
* `firstName` - Given Name
* `lastName` - Family Name
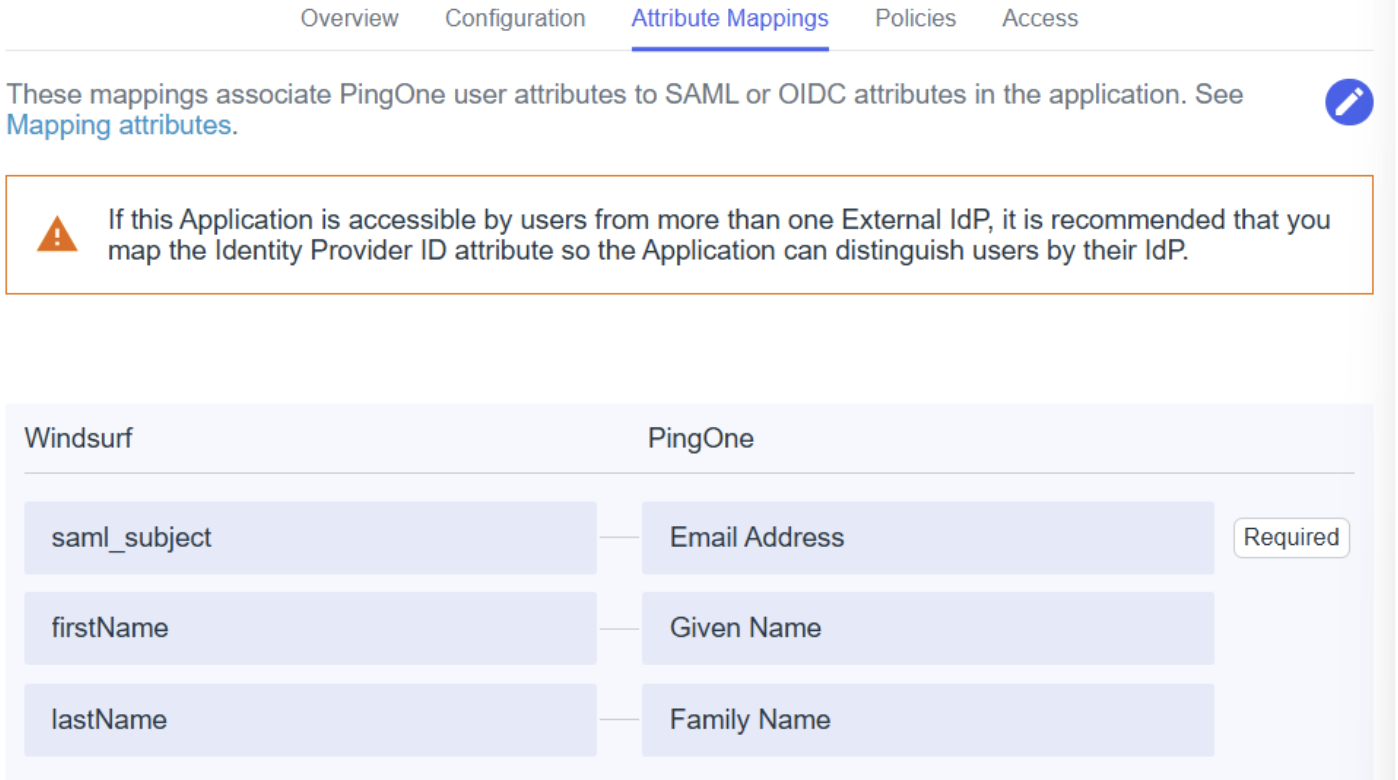 9. Add/edit any other policies and access as required by your setup/organization
10. Enable the SAML login in the Windsurf portal so you can test it.
**NOTE: DO NOT LOGOUT OR CLOSE THE WINDOW AT THIS POINT.**
If you get an error or it times out, troubleshoot your settings, otherwise you have to disable your SAML Settings in the Windsurf portal.
**If you logout or close the window without confirming a successful test - you may get locked out.**
11. Once your test was successfully completed, you may logout. You can now use SSO sign in when browsing to your team/organization page with the SSO ID you have configured in step 3.
[https://www.codeium.com/yourssoid/login](https://www.codeium.com/yourssoid/login)
9. Add/edit any other policies and access as required by your setup/organization
10. Enable the SAML login in the Windsurf portal so you can test it.
**NOTE: DO NOT LOGOUT OR CLOSE THE WINDOW AT THIS POINT.**
If you get an error or it times out, troubleshoot your settings, otherwise you have to disable your SAML Settings in the Windsurf portal.
**If you logout or close the window without confirming a successful test - you may get locked out.**
11. Once your test was successfully completed, you may logout. You can now use SSO sign in when browsing to your team/organization page with the SSO ID you have configured in step 3.
[https://www.codeium.com/yourssoid/login](https://www.codeium.com/yourssoid/login)
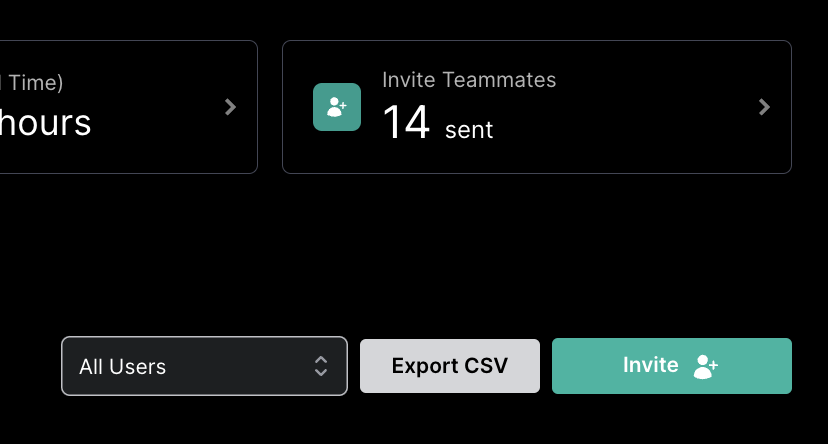 ## User Groups
 # Send terminal selection to Cascade
Highlight a portion of of the stack trace and press `Cmd/Ctrl+L` to send it to Cascade, where you can reference this selection in your next prompt.
# Send terminal selection to Cascade
Highlight a portion of of the stack trace and press `Cmd/Ctrl+L` to send it to Cascade, where you can reference this selection in your next prompt.
 # @-mention your terminal
Chat with Cascade about your active terminals.
# Auto-executed Cascade commands
Cascade has the ability to run terminal commands on its own with user permission. You can configure how Cascade handles command execution through four distinct auto-execution levels, and certain terminal commands can be accepted or rejected automatically through the Allow and Deny lists.
## Auto-Execution Levels
Windsurf provides four levels of command auto-execution, giving you control over how Cascade runs terminal commands:
| Level | Description |
| ------------------ | --------------------------------------------------------------------------------------------------------------------------------------------------------------------------------------------------------------------------- |
| **Disabled** | Auto-execution is completely disabled. All commands require manual approval before execution. |
| **Allowlist Only** | Only commands that match entries in your allow list can be auto-executed. All other commands require manual approval. |
| **Auto** | Cascade uses its judgment to determine whether a command is safe to auto-execute. Commands deemed potentially risky will still require your approval. This feature is only available for messages sent with premium models. |
| **Turbo** | All commands are auto-executed immediately, except those in your deny list. |
You can select your preferred auto-execution level via the Windsurf Settings panel in the bottom right corner of the editor.
# @-mention your terminal
Chat with Cascade about your active terminals.
# Auto-executed Cascade commands
Cascade has the ability to run terminal commands on its own with user permission. You can configure how Cascade handles command execution through four distinct auto-execution levels, and certain terminal commands can be accepted or rejected automatically through the Allow and Deny lists.
## Auto-Execution Levels
Windsurf provides four levels of command auto-execution, giving you control over how Cascade runs terminal commands:
| Level | Description |
| ------------------ | --------------------------------------------------------------------------------------------------------------------------------------------------------------------------------------------------------------------------- |
| **Disabled** | Auto-execution is completely disabled. All commands require manual approval before execution. |
| **Allowlist Only** | Only commands that match entries in your allow list can be auto-executed. All other commands require manual approval. |
| **Auto** | Cascade uses its judgment to determine whether a command is safe to auto-execute. Commands deemed potentially risky will still require your approval. This feature is only available for messages sent with premium models. |
| **Turbo** | All commands are auto-executed immediately, except those in your deny list. |
You can select your preferred auto-execution level via the Windsurf Settings panel in the bottom right corner of the editor.
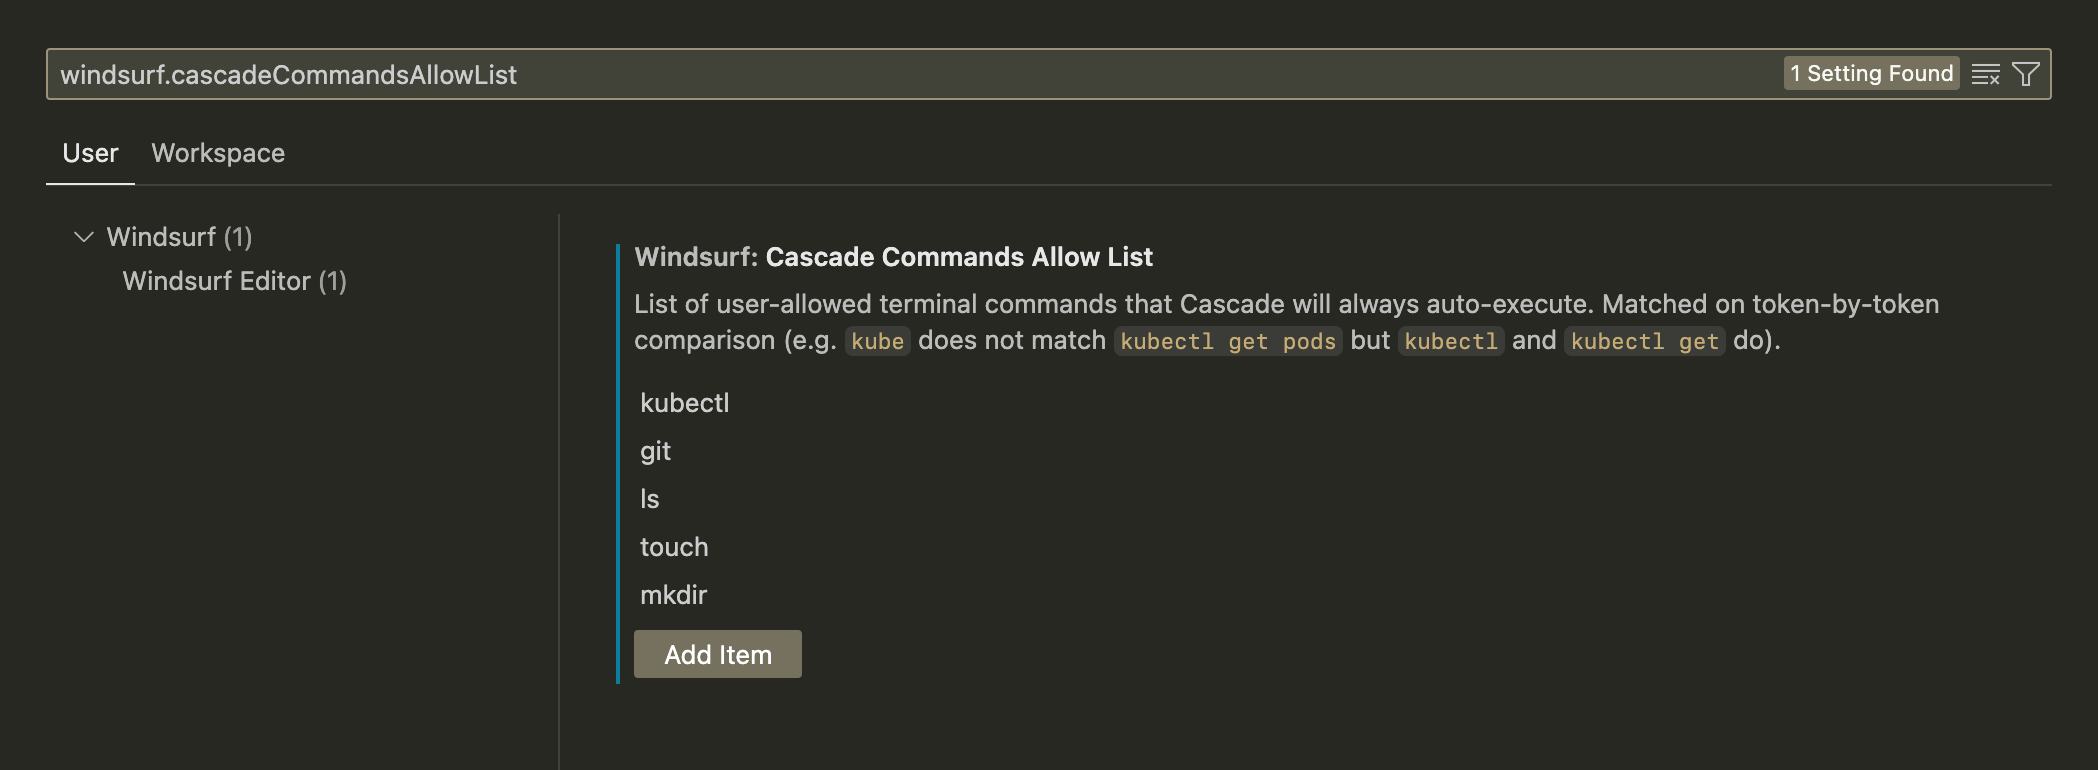 ### Deny list
A deny list defines a set of terminal commands that will never auto-execute. For example, if you add `rm`, then Cascade will always ask for permission to run `rm index.py`.
The setting can be via Command Palette → Open Settings (UI) → Search for `windsurf.cascadeCommandsDenyList`.
### Deny list
A deny list defines a set of terminal commands that will never auto-execute. For example, if you add `rm`, then Cascade will always ask for permission to run `rm index.py`.
The setting can be via Command Palette → Open Settings (UI) → Search for `windsurf.cascadeCommandsDenyList`.
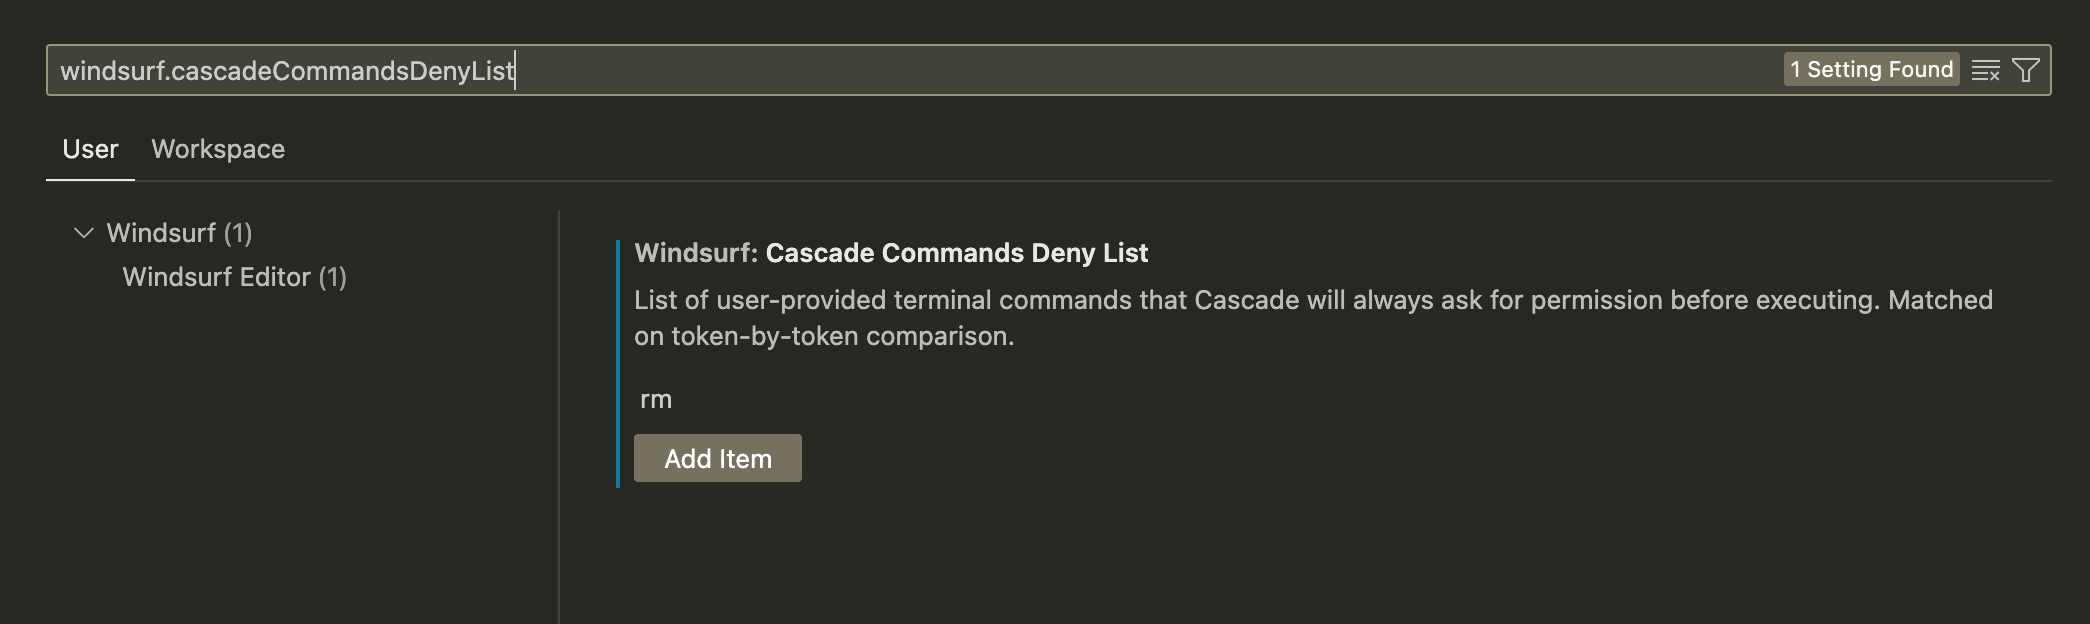 # Dedicated terminal
Starting in Wave 13, Windsurf introduced a dedicated terminal for Cascade to use for running commands on macOS.
This dedicated terminal is separate from your default terminal and *always* uses `zsh` as the shell.
# Dedicated terminal
Starting in Wave 13, Windsurf introduced a dedicated terminal for Cascade to use for running commands on macOS.
This dedicated terminal is separate from your default terminal and *always* uses `zsh` as the shell.
 The dedicated terminal *will* use your zsh configuration, so aliases and environment variables will be available from `.zshrc` and other zsh-specific files.
If you use a different shell instead of `zsh`, and want Windsurf to use shared environment variables, we recommend creating a shared configuration file that both shells can source.
### Troubleshooting
If you have issues with the dedicated terminal, you can revert to the legacy terminal by enabling the Legacy Terminal Profile option in Windsurf settings.
---
# Source: https://docs.windsurf.com/autocomplete/tips.md
> ## Documentation Index
> Fetch the complete documentation index at: https://docs.windsurf.com/llms.txt
> Use this file to discover all available pages before exploring further.
# Autocomplete Tips
> Tips for getting the most out of Windsurf Autocomplete including inline comments, Fill In The Middle (FIM), and snooze functionality.
## Inline Comments
You can instruct autocomplete with the use of comments in your code.
Windsurf will read these comments and suggest the code to bring the comment to life.
The dedicated terminal *will* use your zsh configuration, so aliases and environment variables will be available from `.zshrc` and other zsh-specific files.
If you use a different shell instead of `zsh`, and want Windsurf to use shared environment variables, we recommend creating a shared configuration file that both shells can source.
### Troubleshooting
If you have issues with the dedicated terminal, you can revert to the legacy terminal by enabling the Legacy Terminal Profile option in Windsurf settings.
---
# Source: https://docs.windsurf.com/autocomplete/tips.md
> ## Documentation Index
> Fetch the complete documentation index at: https://docs.windsurf.com/llms.txt
> Use this file to discover all available pages before exploring further.
# Autocomplete Tips
> Tips for getting the most out of Windsurf Autocomplete including inline comments, Fill In The Middle (FIM), and snooze functionality.
## Inline Comments
You can instruct autocomplete with the use of comments in your code.
Windsurf will read these comments and suggest the code to bring the comment to life.
 This method can get you good mileage, but if you're finding value in writing natural-language instructions and having the AI execute them,
consider using [Windsurf Command](/command/overview).
## Fill In The Middle (FIM)
Windsurf's Autocomplete can Fill In The Middle (FIM).
Read more about in-line FIM on our blog [here](https://windsurf.com/blog/inline-fim-code-suggestions).
## Snooze
Click the Windsurf widget in the status bar towards the bottom right of your editor to see the option to switch Autocomplete off,
either temporarily or until you reenable it.
---
# Source: https://docs.windsurf.com/windsurf/accounts/api-reference/usage-config.md
# Source: https://docs.windsurf.com/plugins/accounts/api-reference/usage-config.md
> ## Documentation Index
> Fetch the complete documentation index at: https://docs.windsurf.com/llms.txt
> Use this file to discover all available pages before exploring further.
# Set Usage Configuration
> Set or clear add-on credit caps at team, group, or user level for enterprise billing management.
## Overview
Set or clear usage caps on add-on credits for your organization. You can scope these configurations to the team level, specific groups, or individual users.
## Request
This method can get you good mileage, but if you're finding value in writing natural-language instructions and having the AI execute them,
consider using [Windsurf Command](/command/overview).
## Fill In The Middle (FIM)
Windsurf's Autocomplete can Fill In The Middle (FIM).
Read more about in-line FIM on our blog [here](https://windsurf.com/blog/inline-fim-code-suggestions).
## Snooze
Click the Windsurf widget in the status bar towards the bottom right of your editor to see the option to switch Autocomplete off,
either temporarily or until you reenable it.
---
# Source: https://docs.windsurf.com/windsurf/accounts/api-reference/usage-config.md
# Source: https://docs.windsurf.com/plugins/accounts/api-reference/usage-config.md
> ## Documentation Index
> Fetch the complete documentation index at: https://docs.windsurf.com/llms.txt
> Use this file to discover all available pages before exploring further.
# Set Usage Configuration
> Set or clear add-on credit caps at team, group, or user level for enterprise billing management.
## Overview
Set or clear usage caps on add-on credits for your organization. You can scope these configurations to the team level, specific groups, or individual users.
## Request
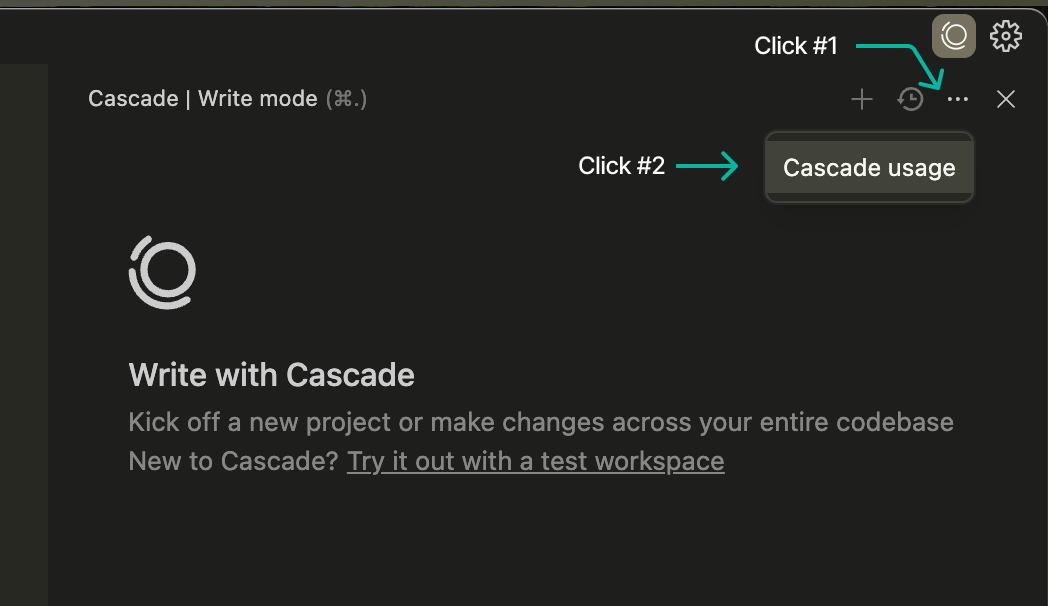 View the settings panel by clicking on "Windsurf Settings" on the status bar, followed by selecting the "Plan Info" tab.
You can also view it on your plan page at [codeium.com/plan](https://codeium.com/plan) after you're authenticated.
## Upgrading to a paid plan
To learn more about paid features or to upgrade to a paid plan, [click here](https://codeium.com/plan). Paid plans include Pro for individuals, Teams for organizations, and Enterprise for larger companies.
We accept all major credit cards, Apple Pay, Cash App Pay, Google Pay, Link, WeChat Pay, and Alipay. If you have a payment method not listed, please reach out to us at [support](https://codeium.com/support). You may need to disable your VPN to view the relevant payment methods for your region.
## What happens when you run out of prompt credits?
If you no longer have prompt credits, you have two options:
* You can purchase additional prompt credits to continue using premium models
* You can use Write or Chat mode with the models that cost 0 credits!
## Automatic Credit Refills
We've introduced Automatic Credit Refills so that you no longer need to manually purchase additional credits. Under your plan settings page on the Windsurf website, you can specify a maximum amount of credits and other refill settings. The system will automatically "top-up" your credits as you start running low (below 15 credits).
Automatic Credit Refills are purchased in configurable increments (multiples of \$10 for Pro and \$40 for Teams) and subject to maximum monthly budget caps (\$50 by default for Pro users and \$160 for Teams users). This ensures you won't lose access to Cascade during critical work.
## Purchasing additional credits
If you run out of prompt credits, you can purchase additional credits in the [billing website](https://codeium.com/plan). Additional prompt credits can be purchased at a rate of \$10 for 250 credits for Pro users.
For Team and Enterprise plans, additional credits are purchased within and treated as a pool amongst all members of the team at a rate of \$40 for 1000 pooled credits. Please contact your Teams admin to purchase more credits if you're on a team plan.
## Add-on Credit Transfers
If you upgrade your personal Pro plan to a Teams plan, any unused add-on prompt credits on your Pro account are moved over to your new team (and become part of the team's pooled add-on credits). If you're invited to a different team instead, your add-on credits do not automatically move with your user—you'll need to use them before switching, or submit a Support ticket to have them transferred.
## Seat-Based Credit Allocation (Teams & Enterprise)
On Teams and Enterprise plans, prompt credits are allocated on a per-seat basis. Each seat in your plan receives a fixed number of credits at the start of each billing cycle (500 for Teams, 1000 for Enterprise). These credits are tied to the seat itself, not the specific user occupying it.
If a team member leaves mid-billing cycle and a new member joins to fill that seat, the new member inherits the seat's existing credit usage. For example, if your plan has 50 seats and all are in use, and one member departs after using 300 of their 500 credits, the person who takes that seat will start with only 200 credits remaining for the rest of the billing period. This is because the seat's credits were partially consumed before the new member arrived.
When this happens, you may see a notice on your usage page indicating that you joined a seat that was previously used during the current billing period. This is expected behavior and does not indicate any error with your account. Your credits will fully reset to the plan's standard allocation at the start of the next billing cycle.
View the settings panel by clicking on "Windsurf Settings" on the status bar, followed by selecting the "Plan Info" tab.
You can also view it on your plan page at [codeium.com/plan](https://codeium.com/plan) after you're authenticated.
## Upgrading to a paid plan
To learn more about paid features or to upgrade to a paid plan, [click here](https://codeium.com/plan). Paid plans include Pro for individuals, Teams for organizations, and Enterprise for larger companies.
We accept all major credit cards, Apple Pay, Cash App Pay, Google Pay, Link, WeChat Pay, and Alipay. If you have a payment method not listed, please reach out to us at [support](https://codeium.com/support). You may need to disable your VPN to view the relevant payment methods for your region.
## What happens when you run out of prompt credits?
If you no longer have prompt credits, you have two options:
* You can purchase additional prompt credits to continue using premium models
* You can use Write or Chat mode with the models that cost 0 credits!
## Automatic Credit Refills
We've introduced Automatic Credit Refills so that you no longer need to manually purchase additional credits. Under your plan settings page on the Windsurf website, you can specify a maximum amount of credits and other refill settings. The system will automatically "top-up" your credits as you start running low (below 15 credits).
Automatic Credit Refills are purchased in configurable increments (multiples of \$10 for Pro and \$40 for Teams) and subject to maximum monthly budget caps (\$50 by default for Pro users and \$160 for Teams users). This ensures you won't lose access to Cascade during critical work.
## Purchasing additional credits
If you run out of prompt credits, you can purchase additional credits in the [billing website](https://codeium.com/plan). Additional prompt credits can be purchased at a rate of \$10 for 250 credits for Pro users.
For Team and Enterprise plans, additional credits are purchased within and treated as a pool amongst all members of the team at a rate of \$40 for 1000 pooled credits. Please contact your Teams admin to purchase more credits if you're on a team plan.
## Add-on Credit Transfers
If you upgrade your personal Pro plan to a Teams plan, any unused add-on prompt credits on your Pro account are moved over to your new team (and become part of the team's pooled add-on credits). If you're invited to a different team instead, your add-on credits do not automatically move with your user—you'll need to use them before switching, or submit a Support ticket to have them transferred.
## Seat-Based Credit Allocation (Teams & Enterprise)
On Teams and Enterprise plans, prompt credits are allocated on a per-seat basis. Each seat in your plan receives a fixed number of credits at the start of each billing cycle (500 for Teams, 1000 for Enterprise). These credits are tied to the seat itself, not the specific user occupying it.
If a team member leaves mid-billing cycle and a new member joins to fill that seat, the new member inherits the seat's existing credit usage. For example, if your plan has 50 seats and all are in use, and one member departs after using 300 of their 500 credits, the person who takes that seat will start with only 200 credits remaining for the rest of the billing period. This is because the seat's credits were partially consumed before the new member arrived.
When this happens, you may see a notice on your usage page indicating that you joined a seat that was previously used during the current billing period. This is expected behavior and does not indicate any error with your account. Your credits will fully reset to the plan's standard allocation at the start of the next billing cycle.
 ## Tab key is not always accepting completions
You can rebind this to a different keyboard shortcut in your settings:
## Tab key is not always accepting completions
You can rebind this to a different keyboard shortcut in your settings:
 ---
# Source: https://docs.windsurf.com/troubleshooting/plugins-enterprise/vscode.md
> ## Documentation Index
> Fetch the complete documentation index at: https://docs.windsurf.com/llms.txt
> Use this file to discover all available pages before exploring further.
# Visual Studio Code (VSCode) Troubleshooting
> Troubleshoot VS Code extension issues including proxy settings, certificate errors, API server configuration, and chat response problems.
---
# Source: https://docs.windsurf.com/troubleshooting/plugins-enterprise/vscode.md
> ## Documentation Index
> Fetch the complete documentation index at: https://docs.windsurf.com/llms.txt
> Use this file to discover all available pages before exploring further.
# Visual Studio Code (VSCode) Troubleshooting
> Troubleshoot VS Code extension issues including proxy settings, certificate errors, API server configuration, and chat response problems.
 5. Change the dropdown in the top right that reads "Extension Host" and select "Codeium"
6. Export or copy the logs
# Known IDE issues and solutions
## e.split is not defined
You are using an unsupported VS Code version, please update to a supported version and try again. You can find a list of supported versions [here](/plugins/compatibility).
## Using the wrong API Server
If a user changes their API Server/Portal URL in their **workspace** settings, this will override their user settings and may result in an error where the extension is communicating with the wrong API server.
Make sure that your API Server/Portal URL is set correctly and not overridden accidentally by the workspace settings.
## Not seeing Codeium Chat responses
If you are trying to send messages to Codeium chat but not seeing responses, check if you can cancel the response. If you are unable to cancel the response, this means that the response was completed but not displayed. This can happen if the Chat Web Server loses connection to the extension. Reloading VS Code and opening the Codeium Chat panel again should show the responses.
## Unable to read file .../package.json
```
Unable to read file .../.vscode/extensions/codeium.codeium-
5. Change the dropdown in the top right that reads "Extension Host" and select "Codeium"
6. Export or copy the logs
# Known IDE issues and solutions
## e.split is not defined
You are using an unsupported VS Code version, please update to a supported version and try again. You can find a list of supported versions [here](/plugins/compatibility).
## Using the wrong API Server
If a user changes their API Server/Portal URL in their **workspace** settings, this will override their user settings and may result in an error where the extension is communicating with the wrong API server.
Make sure that your API Server/Portal URL is set correctly and not overridden accidentally by the workspace settings.
## Not seeing Codeium Chat responses
If you are trying to send messages to Codeium chat but not seeing responses, check if you can cancel the response. If you are unable to cancel the response, this means that the response was completed but not displayed. This can happen if the Chat Web Server loses connection to the extension. Reloading VS Code and opening the Codeium Chat panel again should show the responses.
## Unable to read file .../package.json
```
Unable to read file .../.vscode/extensions/codeium.codeium- ## Reading Pages
Cascade can read individual pages for things like documentation, blog posts, and GitHub files. The page reads happen entirely on your device within your network so if you're using a VPN you shouldn't have any problems.
Pages are picked up either from web search results, inferred based on the conversation, or from URLs pasted directly into your message.
We break pages up into multiple chunks, very similar to how a human would read a page: for a long page we skim to the section we want then read the text that's relevant. This is how Cascade operates as well.
## Reading Pages
Cascade can read individual pages for things like documentation, blog posts, and GitHub files. The page reads happen entirely on your device within your network so if you're using a VPN you shouldn't have any problems.
Pages are picked up either from web search results, inferred based on the conversation, or from URLs pasted directly into your message.
We break pages up into multiple chunks, very similar to how a human would read a page: for a long page we skim to the section we want then read the text that's relevant. This is how Cascade operates as well.
 It's worth noting that not all pages can be parsed. We are actively working on improving the quality of our website reading. If you have specific sites you'd like us to handle better, feel free to file a feature request!
---
# Source: https://docs.windsurf.com/troubleshooting/windsurf-common-issues.md
> ## Documentation Index
> Fetch the complete documentation index at: https://docs.windsurf.com/llms.txt
> Use this file to discover all available pages before exploring further.
# Common Windsurf Issues
> Troubleshoot common Windsurf Editor issues including rate limiting, MacOS security warnings, Windows updates, Linux crashes, and terminal problems.
### General FAQ
It's worth noting that not all pages can be parsed. We are actively working on improving the quality of our website reading. If you have specific sites you'd like us to handle better, feel free to file a feature request!
---
# Source: https://docs.windsurf.com/troubleshooting/windsurf-common-issues.md
> ## Documentation Index
> Fetch the complete documentation index at: https://docs.windsurf.com/llms.txt
> Use this file to discover all available pages before exploring further.
# Common Windsurf Issues
> Troubleshoot common Windsurf Editor issues including rate limiting, MacOS security warnings, Windows updates, Linux crashes, and terminal problems.
### General FAQ
 ### On MacOS, I see a pop-up: 'Windsurf' is damaged and cannot be opened.
This pop-up is due to a false positive in MacOS security features. You can usually resolve this by going to "System Settings -> Privacy & Security" and clicking "Allow" or "Open anyway" for Windsurf. If this fails or is not possible, try the following steps:
1. Ensure that Windsurf is placed under your `/Applications` folder and that you are running it from there.
2. Check your processor type: if your Mac has an Intel chip, make sure you have the Intel version. If it's Apple Silicon (like M1, M2 or M3), make sure you have the Apple Silicon version. You can select the processor type from the [Mac download page](https://windsurf.com/windsurf/download_mac).
3. Try redownloading the DMG and reinstalling from [the official download page](https://windsurf.com/windsurf/download_mac), as the failing security feature is usually triggered on download.
4. Make sure Windsurf (and the "Windsurf is Damaged" pop-up) is closed, and run `xattr -c "/Applications/Windsurf.app/"`.
### I received an error message about updates on Windows, or updates are not appearing on Windows.
For example:
> Updates are disabled because you are running the user-scope installation of Windsurf as Administrator.
We cannot auto-update Windsurf when it is run as Administrator. Please re-run Windsurf with User scope to update.
### What domains should I whitelist for network filters/firewalls, VPNs, or proxies?
If you're using any network filtering, firewalls, VPN services, or working in environments with restricted network access, you may experience connectivity issues with Windsurf. To ensure smooth operation, please whitelist the following domains in your network configuration:
* \*.codeium.com
* \*.windsurf.com
* \*.codeiumdata.com
### On Linux, Windsurf quietly doesn't launch, or crashes on launch
This is usually due to an Electron permissions issue, which VSCode also has, and is expected when using the tarball on Linux.
The easiest way to fix it is to run the following:
```bash theme={null}
sudo chown root:root /path/to/windsurf/chrome-sandbox
sudo chown 4755 /path/to/windsurf/chrome-sandbox
```
You should then be able to launch Windsurf. You can also just run `windsurf` with the flag `--no-sandbox`, though we don't encourage this.
If this fails, then try the below.
### I received an error message saying 'Windsurf failed to start'
### On MacOS, I see a pop-up: 'Windsurf' is damaged and cannot be opened.
This pop-up is due to a false positive in MacOS security features. You can usually resolve this by going to "System Settings -> Privacy & Security" and clicking "Allow" or "Open anyway" for Windsurf. If this fails or is not possible, try the following steps:
1. Ensure that Windsurf is placed under your `/Applications` folder and that you are running it from there.
2. Check your processor type: if your Mac has an Intel chip, make sure you have the Intel version. If it's Apple Silicon (like M1, M2 or M3), make sure you have the Apple Silicon version. You can select the processor type from the [Mac download page](https://windsurf.com/windsurf/download_mac).
3. Try redownloading the DMG and reinstalling from [the official download page](https://windsurf.com/windsurf/download_mac), as the failing security feature is usually triggered on download.
4. Make sure Windsurf (and the "Windsurf is Damaged" pop-up) is closed, and run `xattr -c "/Applications/Windsurf.app/"`.
### I received an error message about updates on Windows, or updates are not appearing on Windows.
For example:
> Updates are disabled because you are running the user-scope installation of Windsurf as Administrator.
We cannot auto-update Windsurf when it is run as Administrator. Please re-run Windsurf with User scope to update.
### What domains should I whitelist for network filters/firewalls, VPNs, or proxies?
If you're using any network filtering, firewalls, VPN services, or working in environments with restricted network access, you may experience connectivity issues with Windsurf. To ensure smooth operation, please whitelist the following domains in your network configuration:
* \*.codeium.com
* \*.windsurf.com
* \*.codeiumdata.com
### On Linux, Windsurf quietly doesn't launch, or crashes on launch
This is usually due to an Electron permissions issue, which VSCode also has, and is expected when using the tarball on Linux.
The easiest way to fix it is to run the following:
```bash theme={null}
sudo chown root:root /path/to/windsurf/chrome-sandbox
sudo chown 4755 /path/to/windsurf/chrome-sandbox
```
You should then be able to launch Windsurf. You can also just run `windsurf` with the flag `--no-sandbox`, though we don't encourage this.
If this fails, then try the below.
### I received an error message saying 'Windsurf failed to start'
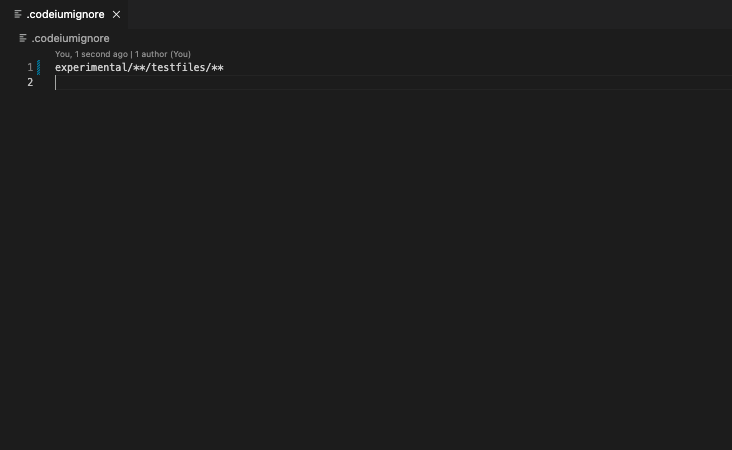 ### Global .codeiumignore
For enterprise customers managing multiple repositories, you can enforce ignore rules across all repositories by placing a global `.codeiumignore` file in the `~/.codeium/` folder. This global configuration will apply to all Windsurf workspaces on your system.
The global `.codeiumignore` file uses the same syntax as `.gitignore` and works in addition to any repository-specific `.codeiumignore` files.
## System Requirements
When first enabled, Windsurf will consume a fraction of CPU while it indexes the workspace. Depending on your workspace size, this should take 5-10 minutes, and only needs to happen once per workspace. CPU usage will return to normal automatically. Windsurf Indexing also requires RAM (\~300MB for a 5000-file workspace).
The "Max Workspace Size (File Count)" setting determines the largest workspace for which Windsurf Indexing will try to index a particular workspace / module. If your workspace does not appear to be indexed, please try adjusting this number higher. For users with \~10GB of RAM, we recommend setting this no higher than 10,000 files.
---
# Source: https://docs.windsurf.com/context-awareness/windsurf-overview.md
# Source: https://docs.windsurf.com/command/windsurf-overview.md
> ## Documentation Index
> Fetch the complete documentation index at: https://docs.windsurf.com/llms.txt
> Use this file to discover all available pages before exploring further.
# Command
> Use Windsurf Command (Cmd/Ctrl+I) for inline code generation and edits with natural language. No premium credits required.
**Command** generates new or edits existing code via natural language inputs, directly in the editor window.
### Global .codeiumignore
For enterprise customers managing multiple repositories, you can enforce ignore rules across all repositories by placing a global `.codeiumignore` file in the `~/.codeium/` folder. This global configuration will apply to all Windsurf workspaces on your system.
The global `.codeiumignore` file uses the same syntax as `.gitignore` and works in addition to any repository-specific `.codeiumignore` files.
## System Requirements
When first enabled, Windsurf will consume a fraction of CPU while it indexes the workspace. Depending on your workspace size, this should take 5-10 minutes, and only needs to happen once per workspace. CPU usage will return to normal automatically. Windsurf Indexing also requires RAM (\~300MB for a 5000-file workspace).
The "Max Workspace Size (File Count)" setting determines the largest workspace for which Windsurf Indexing will try to index a particular workspace / module. If your workspace does not appear to be indexed, please try adjusting this number higher. For users with \~10GB of RAM, we recommend setting this no higher than 10,000 files.
---
# Source: https://docs.windsurf.com/context-awareness/windsurf-overview.md
# Source: https://docs.windsurf.com/command/windsurf-overview.md
> ## Documentation Index
> Fetch the complete documentation index at: https://docs.windsurf.com/llms.txt
> Use this file to discover all available pages before exploring further.
# Command
> Use Windsurf Command (Cmd/Ctrl+I) for inline code generation and edits with natural language. No premium credits required.
**Command** generates new or edits existing code via natural language inputs, directly in the editor window.
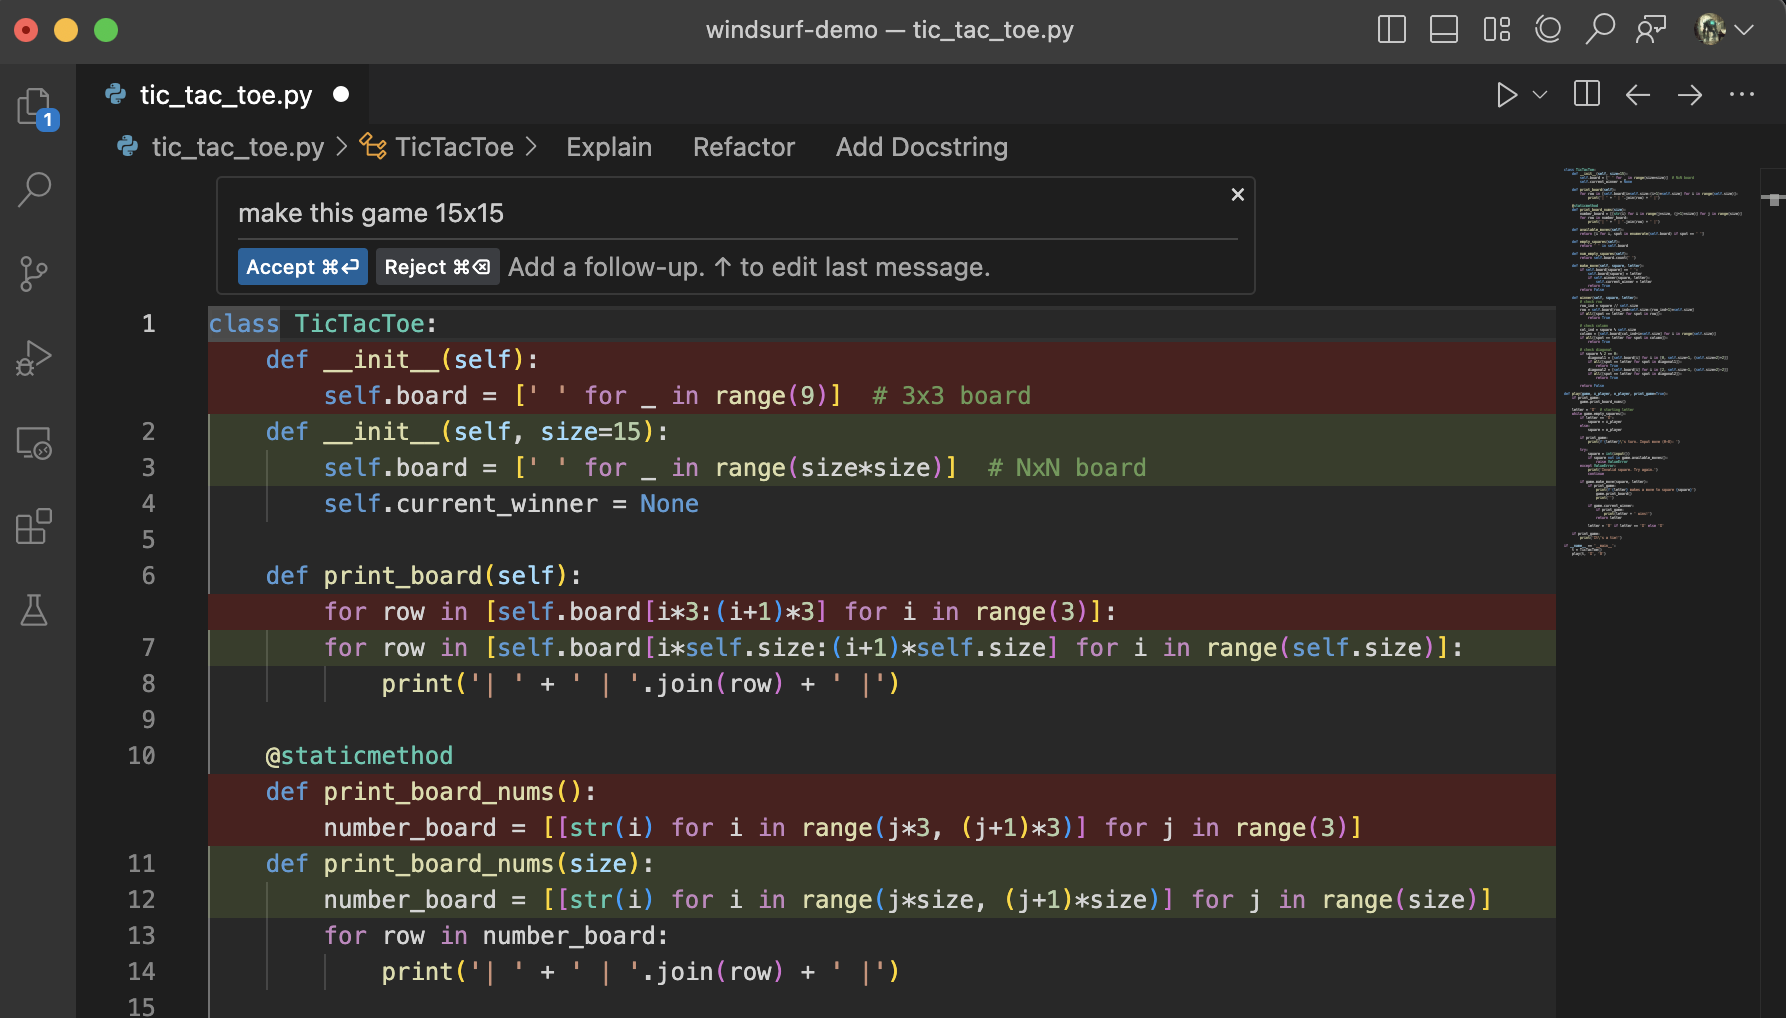 You can accept, reject, or follow-up a generation by clicking the corresponding code lens above the generated diff,or by using the appropriate shortcuts (`Cmd/Ctrl+Enter`/`Cmd/Ctrl+Delete`)
# Models
Command comes with its own set of models that are optimized for current-file edits.
You can accept, reject, or follow-up a generation by clicking the corresponding code lens above the generated diff,or by using the appropriate shortcuts (`Cmd/Ctrl+Enter`/`Cmd/Ctrl+Delete`)
# Models
Command comes with its own set of models that are optimized for current-file edits.
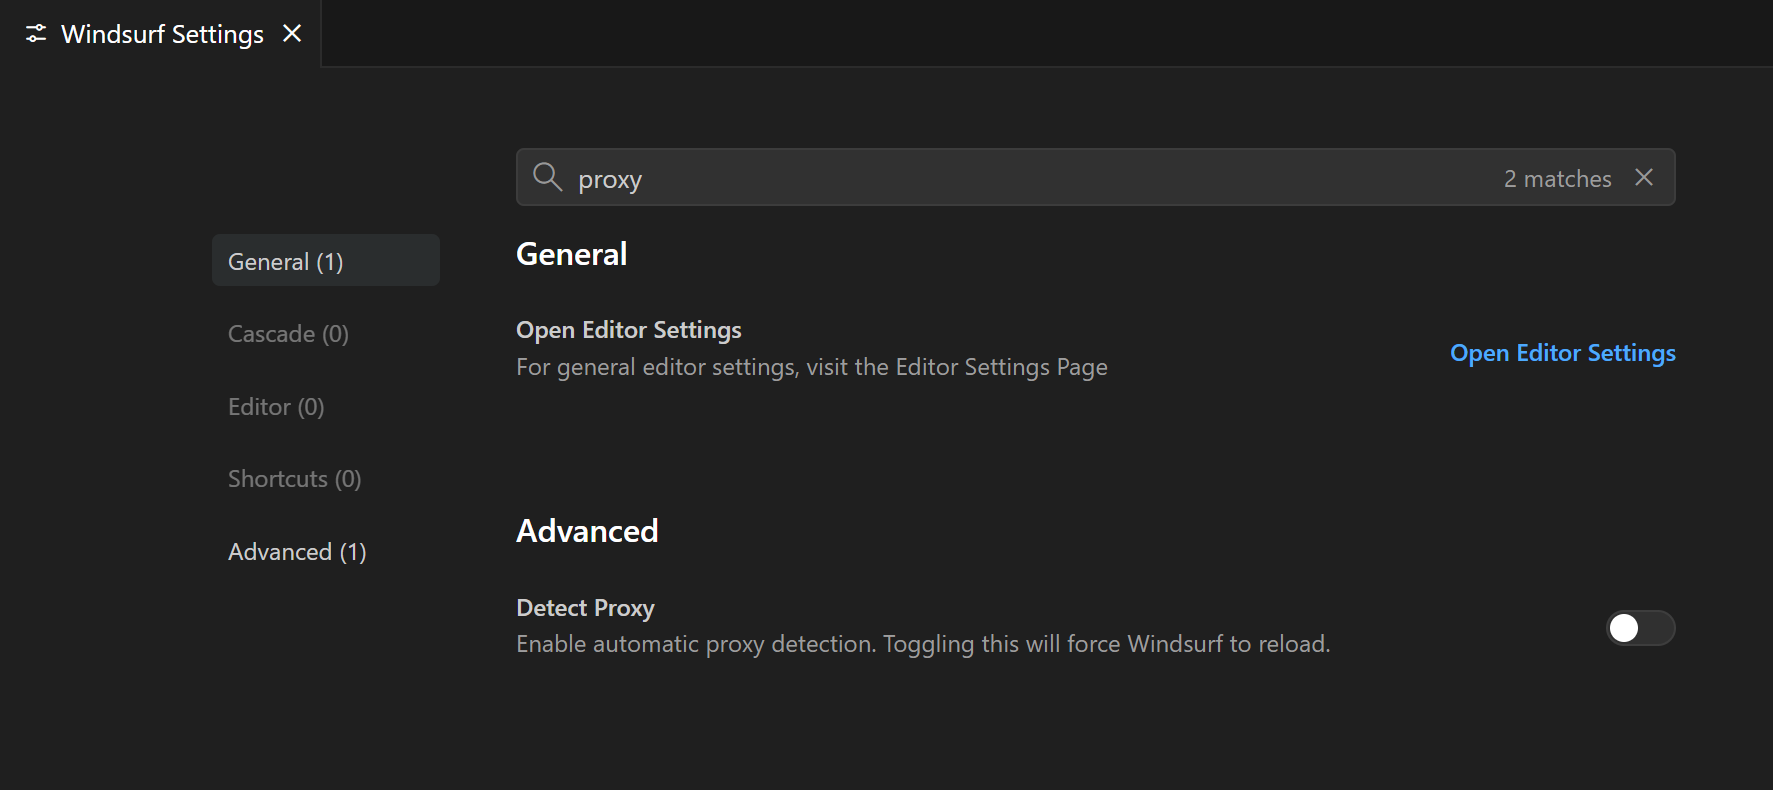 If things stop working after enabling this, you can turn **Detect proxy** back **OFF** and use manual settings instead (see next section), or follow guidance from your IT team.
***
## **3. Manually configure a proxy in Windsurf Editor**
If your organization requires you to **manually specify** the proxy in applications:
1. Collect the required details from your IT / infra team:
* **Proxy protocol + address** (for example `http://proxy.company.com:8080` or `https://proxy.company.com:8443`)
* Whether the proxy **requires authentication**
* Your **proxy username/password** or other credentials, if needed
2. Open **Windsurf Settings**.
3. In the settings search bar, type **"proxy"** to open the proxy configuration section (see screenshot).
4. Fill in the fields:
* **Proxy URL / address** – include protocol and port (e.g. `http://proxy.company.com:8080`)
* **Authentication** – if your proxy requires it, enter the username and password fields shown in the UI
5. (Optional, if recommended by IT) Turn **Detect proxy** **ON** if your setup still relies on system/PAC detection alongside the manual settings.
6. Close the settings page and **restart Windsurf Editor** so the new proxy configuration is fully applied.
7. Try again:
* Reload the editor or Cascade if you previously saw a **blank screen**
* Retry the operation that was failing with **"Failed to connect"** or similar errors
If things stop working after enabling this, you can turn **Detect proxy** back **OFF** and use manual settings instead (see next section), or follow guidance from your IT team.
***
## **3. Manually configure a proxy in Windsurf Editor**
If your organization requires you to **manually specify** the proxy in applications:
1. Collect the required details from your IT / infra team:
* **Proxy protocol + address** (for example `http://proxy.company.com:8080` or `https://proxy.company.com:8443`)
* Whether the proxy **requires authentication**
* Your **proxy username/password** or other credentials, if needed
2. Open **Windsurf Settings**.
3. In the settings search bar, type **"proxy"** to open the proxy configuration section (see screenshot).
4. Fill in the fields:
* **Proxy URL / address** – include protocol and port (e.g. `http://proxy.company.com:8080`)
* **Authentication** – if your proxy requires it, enter the username and password fields shown in the UI
5. (Optional, if recommended by IT) Turn **Detect proxy** **ON** if your setup still relies on system/PAC detection alongside the manual settings.
6. Close the settings page and **restart Windsurf Editor** so the new proxy configuration is fully applied.
7. Try again:
* Reload the editor or Cascade if you previously saw a **blank screen**
* Retry the operation that was failing with **"Failed to connect"** or similar errors
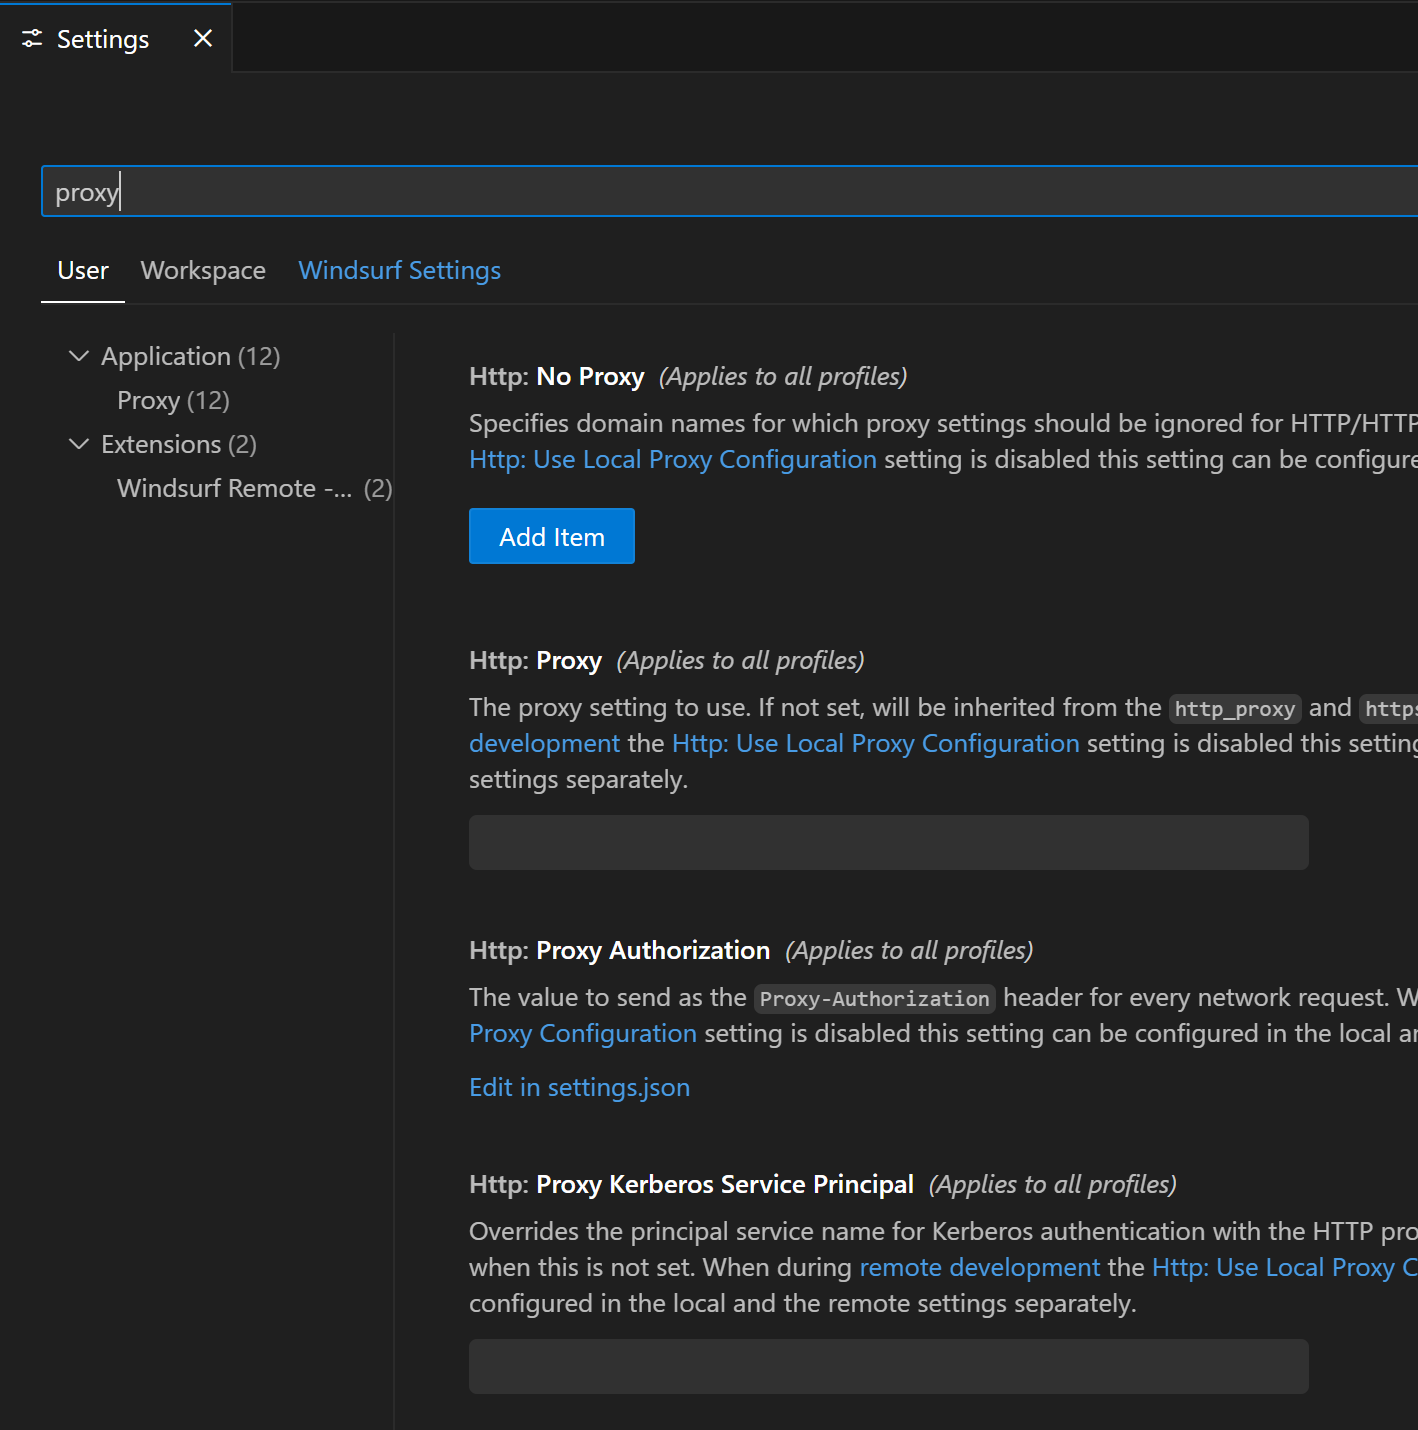 ***
## **4. Proxy settings for remote development (SSH / dev containers)**
If you use **remote development** (for example a dev container or Windsurf SSH remote), there is a separate set of proxy settings that control traffic between your local Windsurf Editor and the **remote** environment.
You may need to adjust these settings if:
* Connecting to a **dev container** or **SSH remote** fails or times out
* The remote window opens, but tools that depend on the network don't work as expected
* Your IT / infra team says the **remote host** must also go through a proxy
To configure the proxy for remote environments:
1. Open **Windsurf Settings**.
2. In the search bar, type **"proxy"**.
3. Under **User → Extensions → Windsurf Remote…**, locate:
* **Remote › Windsurf SSH: Http Proxy**
* **Remote › Windsurf SSH: Https Proxy**
4. Enter the proxy address(es) provided by your IT / infra team (usually including protocol and port, for example `http://proxy.company.com:8080`).
5. Restart the remote session (close the remote window and reconnect, or restart the dev container) and try again.
***
## **4. Proxy settings for remote development (SSH / dev containers)**
If you use **remote development** (for example a dev container or Windsurf SSH remote), there is a separate set of proxy settings that control traffic between your local Windsurf Editor and the **remote** environment.
You may need to adjust these settings if:
* Connecting to a **dev container** or **SSH remote** fails or times out
* The remote window opens, but tools that depend on the network don't work as expected
* Your IT / infra team says the **remote host** must also go through a proxy
To configure the proxy for remote environments:
1. Open **Windsurf Settings**.
2. In the search bar, type **"proxy"**.
3. Under **User → Extensions → Windsurf Remote…**, locate:
* **Remote › Windsurf SSH: Http Proxy**
* **Remote › Windsurf SSH: Https Proxy**
4. Enter the proxy address(es) provided by your IT / infra team (usually including protocol and port, for example `http://proxy.company.com:8080`).
5. Restart the remote session (close the remote window and reconnect, or restart the dev container) and try again.
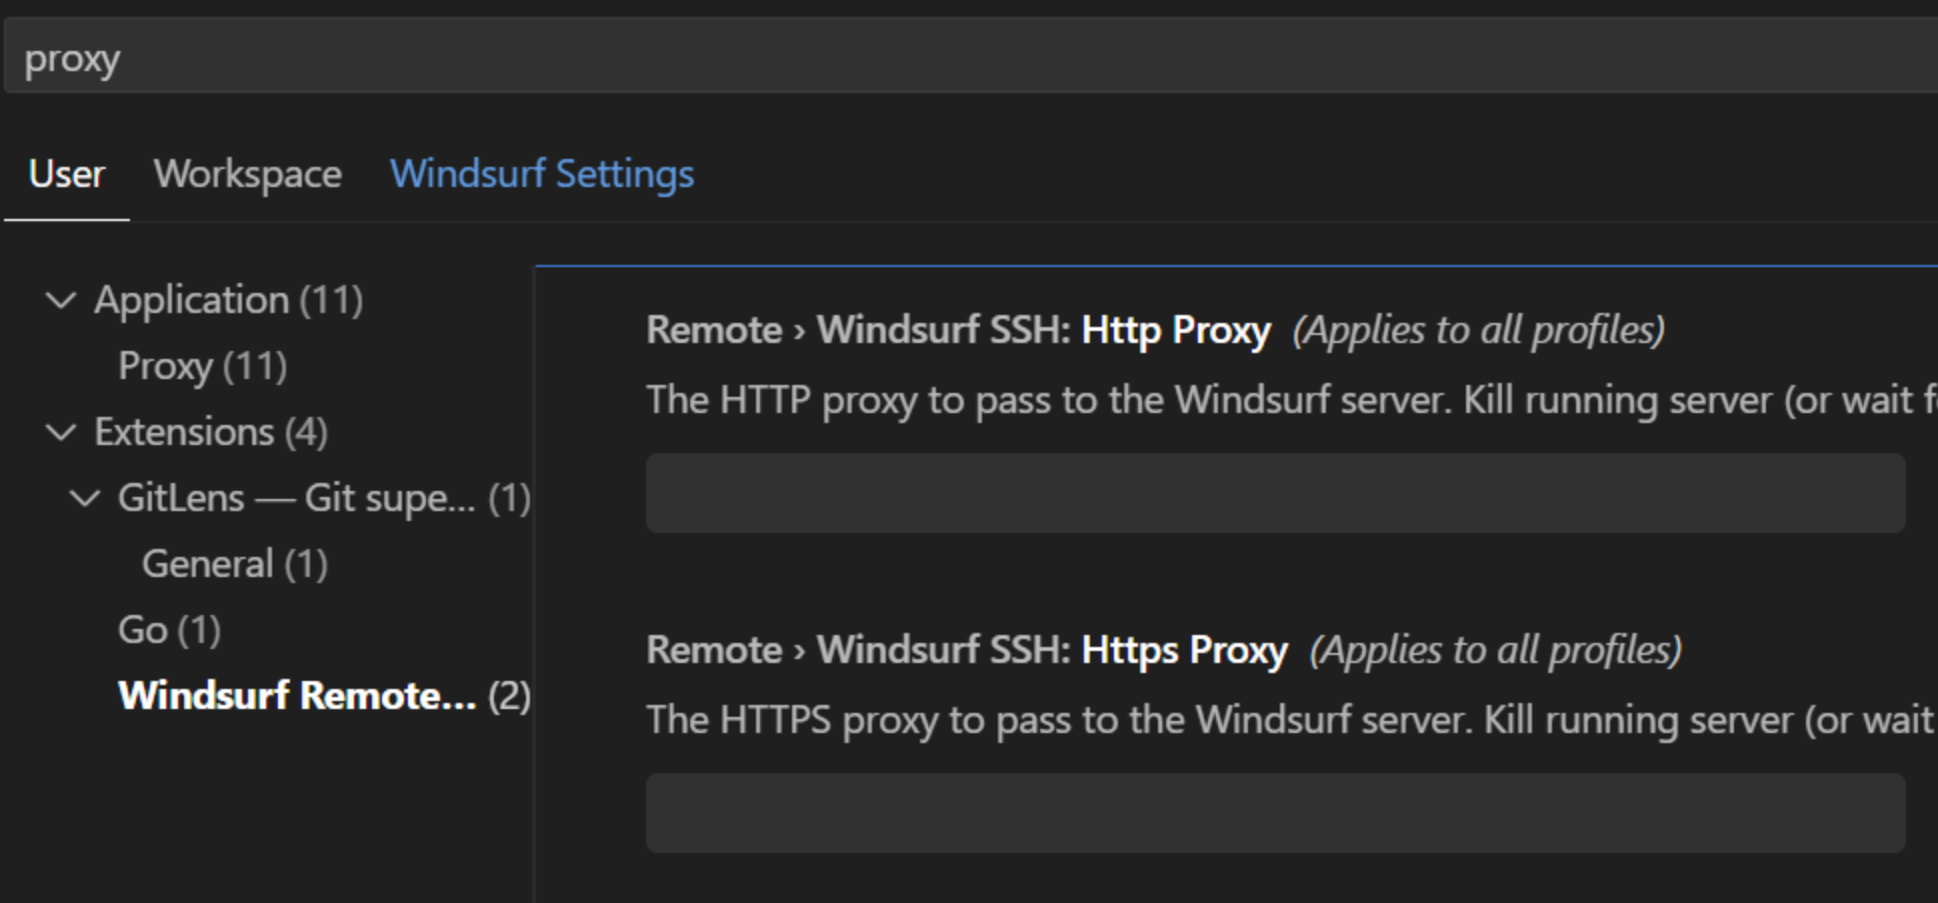 ***
## **5. When to use which option**
* **Use "Detect proxy" only** if:
* Your organization configures proxies centrally on your device (system network settings, PAC file), **and**
* IT tells you apps should "just pick up the system proxy."
* **Use manual configuration (with or without Detect proxy)** if:
* IT gives you a specific proxy URL and credentials to enter in each application, or
* Auto-detection in your environment is unreliable or not supported.
If you're unsure which of these applies to you, your **IT / infra team is the source of truth**—they can confirm whether you need proxy settings at all, what to enter, and whether the **Detect proxy** toggle should be on or off.
---
# Source: https://docs.windsurf.com/command/windsurf-related-features.md
> ## Documentation Index
> Fetch the complete documentation index at: https://docs.windsurf.com/llms.txt
> Use this file to discover all available pages before exploring further.
# Code Lenses
> Use Windsurf code lenses for quick Explain, Refactor, and Docstring operations on functions and classes directly in the editor.
## Explain, Refactor, and Add Docstring
At the top of the text editor, Windsurf gives exposes *code lenses* on functions and classes.
***
## **5. When to use which option**
* **Use "Detect proxy" only** if:
* Your organization configures proxies centrally on your device (system network settings, PAC file), **and**
* IT tells you apps should "just pick up the system proxy."
* **Use manual configuration (with or without Detect proxy)** if:
* IT gives you a specific proxy URL and credentials to enter in each application, or
* Auto-detection in your environment is unreliable or not supported.
If you're unsure which of these applies to you, your **IT / infra team is the source of truth**—they can confirm whether you need proxy settings at all, what to enter, and whether the **Detect proxy** toggle should be on or off.
---
# Source: https://docs.windsurf.com/command/windsurf-related-features.md
> ## Documentation Index
> Fetch the complete documentation index at: https://docs.windsurf.com/llms.txt
> Use this file to discover all available pages before exploring further.
# Code Lenses
> Use Windsurf code lenses for quick Explain, Refactor, and Docstring operations on functions and classes directly in the editor.
## Explain, Refactor, and Add Docstring
At the top of the text editor, Windsurf gives exposes *code lenses* on functions and classes.
 The `Explain` code lens will invoke Cascade, which will simply explain what the function or class does and how it works.
The `Refactor` and `Docstring` code lenses in particular will invoke Command.
* If you click `Refactor`, Windsurf will prompt you with a dropdown of selectable, pre-populated
instructions that you can choose from. You can also write your own. This is equivalent to highlighting the function and invoking Command.
* If you click `Docstring`, Windsurf will generate a docstring for you above the function header.
(In Python, the docstring will be correctly generated *underneath* the function header.)
---
# Source: https://docs.windsurf.com/windsurf-reviews/windsurf-reviews.md
> ## Documentation Index
> Fetch the complete documentation index at: https://docs.windsurf.com/llms.txt
> Use this file to discover all available pages before exploring further.
# Windsurf PR Reviews
> AI-powered GitHub pull request reviews for Teams and Enterprise. Automatically review PRs, edit titles, and provide feedback as GitHub comments.
Windsurf PR Reviews helps teams streamline code reviews with AI-powered feedback on GitHub pull requests. This feature is currently in beta for Teams and Enterprise customers using GitHub Cloud.
The `Explain` code lens will invoke Cascade, which will simply explain what the function or class does and how it works.
The `Refactor` and `Docstring` code lenses in particular will invoke Command.
* If you click `Refactor`, Windsurf will prompt you with a dropdown of selectable, pre-populated
instructions that you can choose from. You can also write your own. This is equivalent to highlighting the function and invoking Command.
* If you click `Docstring`, Windsurf will generate a docstring for you above the function header.
(In Python, the docstring will be correctly generated *underneath* the function header.)
---
# Source: https://docs.windsurf.com/windsurf-reviews/windsurf-reviews.md
> ## Documentation Index
> Fetch the complete documentation index at: https://docs.windsurf.com/llms.txt
> Use this file to discover all available pages before exploring further.
# Windsurf PR Reviews
> AI-powered GitHub pull request reviews for Teams and Enterprise. Automatically review PRs, edit titles, and provide feedback as GitHub comments.
Windsurf PR Reviews helps teams streamline code reviews with AI-powered feedback on GitHub pull requests. This feature is currently in beta for Teams and Enterprise customers using GitHub Cloud.
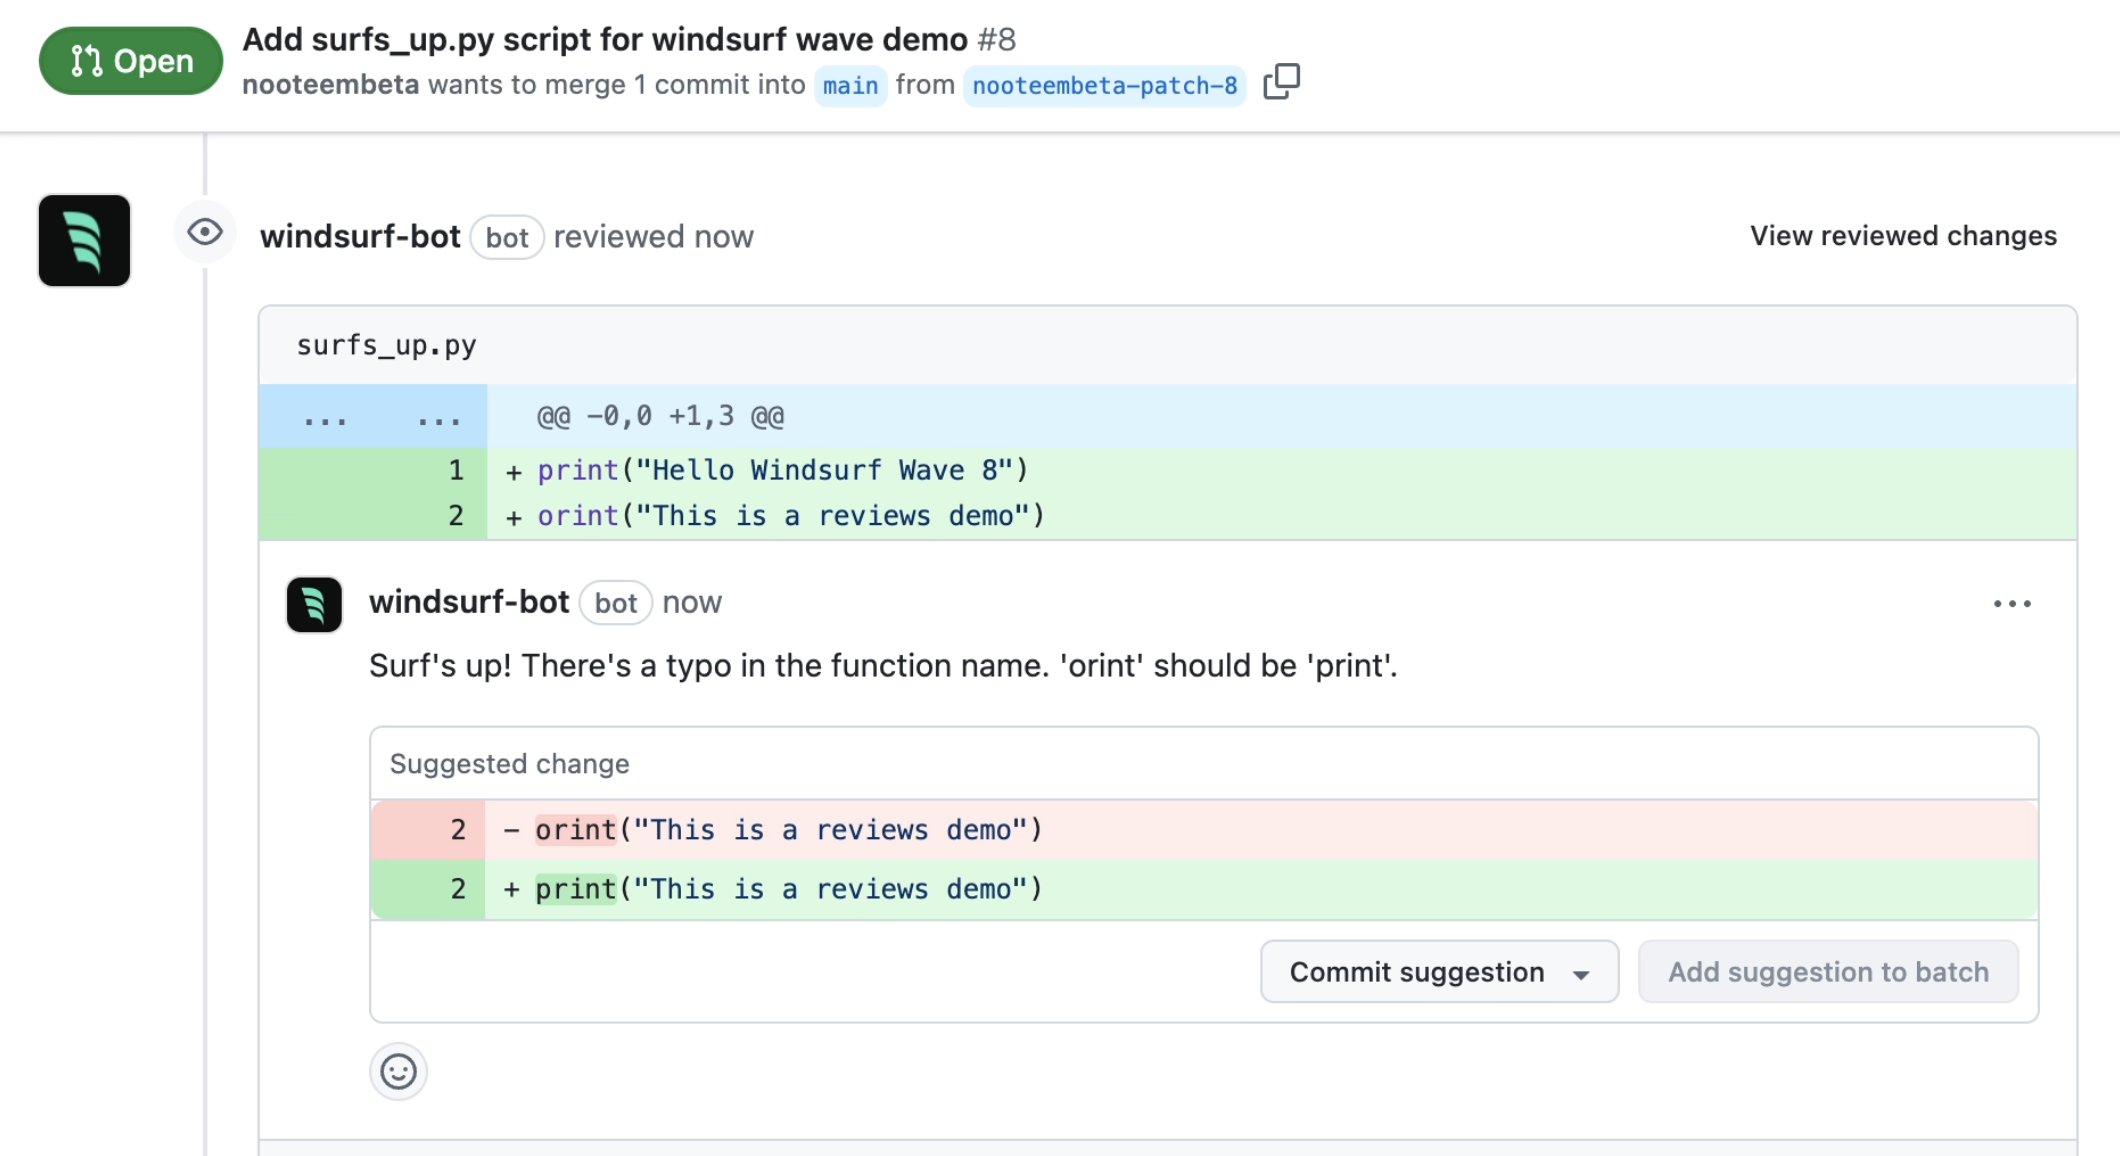 ## How It Works
Once enabled, Windsurf automatically reviews eligible pull requests in selected repositories and provides feedback as GitHub review comments.
Reviews can be manually triggered when you mark a PR as “ready for review” or you type `/windsurf-review` in a PR comment.
You can also edit a PR title by typing `/windsurf` into the PR title.
Example workflow:
1. Developer opens a pull request in an enabled repository
2. Developer marks the PR as ready for review or types “@windsurf /review” in a PR comment
3. Windsurf reviews the PR and posts feedback as GitHub review comments
4. Developer addresses feedback and updates the PR
## How It Works
Once enabled, Windsurf automatically reviews eligible pull requests in selected repositories and provides feedback as GitHub review comments.
Reviews can be manually triggered when you mark a PR as “ready for review” or you type `/windsurf-review` in a PR comment.
You can also edit a PR title by typing `/windsurf` into the PR title.
Example workflow:
1. Developer opens a pull request in an enabled repository
2. Developer marks the PR as ready for review or types “@windsurf /review” in a PR comment
3. Windsurf reviews the PR and posts feedback as GitHub review comments
4. Developer addresses feedback and updates the PR
 To execute a Workflow, users simply invoke it in Cascade using the `/[workflow-name]` command.
 ## Location
Worktrees are organized by repo name inside `~/.windsurf/worktrees/
## Location
Worktrees are organized by repo name inside `~/.windsurf/worktrees/