The user access token.
You can get the user access token from the Settings -> Users and Roles page. See Users or Groups , for more information.
Data types you wish to delete from the agent. Supported types: storage : Clears the storage data. You can view the agent storage data in Agent -> Debug -> Storage.js\_errors : Clears the JS errors. You can view the JS errors in Agent -> Debug -> JS Errors and use the Clear All option to clear JS errors from the UI.conversation\_sessions : Clears the conversation states of the agent and takes the conversation to the initial state. Note that this does not clear Conversation History.
|
{% tabs %}
{% tab title="200 " %}
```javascript
{
"success": true
}
```
{% endtab %}
{% endtabs %}
{% hint style="success" %}
**Key point**: The agent must be locked for edit.
{% endhint %}
### Code request snippets
{% tabs %}
{% tab title="cURL" %}
```javascript
curl --location --request POST 'https://cx.avaamo.com/dashboard/agents/20xxx/clear_data.json' \
--header 'Content-Type: application/json' \
--header 'Access-Token: xxxxxx8d9952499ea466fc007dxxxxxx' \
--header 'Content-Type: application/json' \
--data-raw '{
"data_types": [
"storage_data",
"js_errors",
"conversation_sessions"
]
}'
```
{% endtab %}
{% tab title="node.js" %}
```javascript
var request = require('request');
var options = {
'method': 'POST',
'url': 'https://cx.avaamo.com/dashboard/agents/20xxx/clear_data.json',
'headers': {
'Content-Type': ['application/json', 'application/json'],
'Access-Token': 'xxxxxx8d9952499ea466fc007dxxxxxx'
},
body: JSON.stringify({"data_types":["storage_data","js_errors","conversation_sessions"]})
};
request(options, function (error, response) {
if (error) throw new Error(error);
console.log(response.body);
});
```
{% endtab %}
{% endtabs %}
---
# Source: https://docs.avaamo.com/user-guide/overview-and-concepts/advanced-concepts/collect-feedback.md
# Collect feedback
You can allow users to provide feedback on their conversational experience with your agent. Feedback provided by users is used to learn and analyse the experience of the user when they are interacting with your agent. You can enable the collect feedback option for specific skills to provide users the option to provide feedback.
When you enable the collect feedback option, the thumbs up and thumbs down option to provide negative and positive feedback is displayed after the agent response is displayed.
, if you wish to explore the node-js approach.

{% hint style="info" %}
**Note**: In the chatbot URL, the parameters **demo=true** and **action=demo** are used for internal purposes only.
{% endhint %}
## Embed your agent in iFrame
After you save your web channel configuration settings, click **Test.**
* Copy the URL displayed in the browser.
* In the URL, update demo.html to channel.html and include the URL in your iFrame source. The following is a sample HTML code:
```markup
Web Frame Example
`POST` `https://answers-ingest.aiavaamo.com/api/document`
#### Headers
| Name | Type | Description |
| ---------------------------------------------- | ------ | ---------------------------------------------------------------------------------------------------------------------------------------------------------------------------------------------------------------------------------------------------------------------------------------------------------------------------------------------------------------------------------------------------------------------------------------------------------------------------------------------------------------------------------------------------------------------------- |
| access-token\* | String | Unique access token of the user.
You can get the user access token from the Settings -> Users page. See Users or Groups , for more information.
Users must have at least edit permission on the agent. See Permissions , for more information.
|
| content-type\* | json | application/json |
#### Request Body
| Name | Type | Description |
| ---------------------------------------------------------- | ----------- | ------------------------------------------------------------------------------------------------------------------------------------------------------------------------------------------------------------------------------------------------------------------------------------------------------------------------------------------------------------------------------------------------------------------- |
| document\_group\_id\* | Number | Unique identifier for the document group.
You can get the document group identifier from the Document group -> View/Edit page. See View or edit document groups , for more information.
|
| api\_server\* | String | Avaamo instance where the data is to be uploaded. Example:
Contact Avaamo Support to know the server name.
|
| document\* | JSON Object | Document object that needs to be uploaded |
| document -> name\* | String | Name of the document.
Max length: 255 characters.
|
| document -> type\* | String | Type of the document.
Supported values: html, url
|
| document -> content | String | Content of the document HTML body/Text/Base64 text of PDF file.
This field is mandatory for HTML document types but not required for URLs.
Content must in the format:
\Name of document\ \valid html content\
|
| document -> attributes | Key-value | Define attributes for the uploaded documents or URLs in your Answers skill to facilitate disambiguation or filtering.
Attributes can be metadata of the document. You define attributes in key-value pairs. See Defining attributes for documents or URLs , for more information.
|
| document -> preview\_url\* | String | URL that needs to be opened when the user clicks in the response.
You can get the preview\_url from the Document group -> Document -> View/Edit page.
|
| document -> language | String | Language of the document.
Default value: en-US
|
| document -> parsing\_template | JSON | Template to be used to parse the document. This is a JSON file that can be configured as a template while parsing a URL with the purpose of better extraction of content from the URL during the parsing process.
Default value: default parsing template
Contact Avaamo Support to get access to the parsing template repository.
|
| parsing\_template -> template\_json | JSON | Custom template to parse a URL. |
| parsing\_template -> key | String | Key for inbuilt parsing template, if not provided custom template is used. See [Parsing template](https://docs.avaamo.com/user-guide/how-to/build-skills/create-skill/parsing-templates#inbuilt-parsing-templates), for more information. |
{% tabs %}
{% tab title="200: OK Successful request" %}
```json
{
"chunks": 1,
"response_text": {
"created_at": "2022-04-04T06:07:06.429408Z",
"document_group": 887,
"document_properties": null,
"document_type": "url",
"file_type": "url",
"id": 17472,
"index_pages": 0,
"language": 1,
"language_string": "English (en-US)",
"last_error": null,
"name": "Avaamo Docs",
"parsing_template": 6,
"preview_url": null,
"source_file": null,
"source_url": "https://docs.avaamo.com/user-guide/",
"status": "UPLOADED",
"updated_at": "2022-08-01T10:03:53.585745Z",
"updated_by": "John Miller",
"uuid": "9ffb4cbb-f62d-4757-b7b7-70b67ca4d0cc"
},
"status": true// Response
}
```
{% endtab %}
{% endtabs %}
{% hint style="success" %}
**Key points**:
* Ensure that the right content is posted during upload as the HTML content is sanitized before processing.
* All content must be present in the following tags: "h1", "h2", "h3", "h4", "h5", "p", "img", "span", "td", "figure", "ol", "ul", "dd", "dt", "a", "table", "details", "summary". This list can be modified by using parsing templates.
* The maximum request size should not exceed 5 MB. Contact Avaamo Support, if the size exceeds the limit.
* Password-protected PDFs are not supported.
* The images inside HTML must be base64 encoded or must be public images.
{% endhint %}
{% tabs %}
{% tab title="cURL" %}
```javascript
curl --location --request POST 'https://answers-ingest.aiavaamo.com/api/document' \
--header 'access-token: xxxxxxf69ba5497e96ff614b00xxxxxx' \
--header 'Content-Type: application/json' \
--data-raw '{
"document_group_id": 999,
"api_server": "https://mx.avaamo.com",
"document": {
"name": "Avaamo user guide",
"type": "url",
"preview_url": "https://docs.avaamo.com/user-guide/"
}
}
'
```
{% endtab %}
{% tab title="node.JS" %}
```javascript
var request = require('request');
var options = {
'method': 'POST',
'url': 'https://answers-ingest.aiavaamo.com/api/document',
'headers': {
'access-token': 'xxxxxxf69ba5497e96ff614b00xxxxxx',
'Content-Type': 'application/json'
},
body: JSON.stringify({
"document_group_id": 999,
"api_server": "https://mx.avaamo.com",
"document": {
"name": "Avaamo user guide",
"type": "url",
"preview_url": "https://docs.avaamo.com/user-guide/"
}
})
};
request(options, function (error, response) {
if (error) throw new Error(error);
console.log(response.body);
});
```
{% endtab %}
{% endtabs %}
### Response attributes
The following is a sample API response for uploading a document:
```json
{
"chunks": 1,
"response_text": {
"created_at": "2022-04-04T06:07:06.429408Z",
"document_group": 887,
"document_properties": null,
"document_type": "url",
"file_type": "url",
"id": 17472,
"index_pages": 0,
"language": 1,
"language_string": "English (en-US)",
"last_error": null,
"name": "Avaamo Docs",
"parsing_template": 6,
"preview_url": null,
"source_file": null,
"source_url": "https://docs.avaamo.com/user-guide/",
"status": "UPLOADED",
"updated_at": "2022-08-01T10:03:53.585745Z",
"updated_by": "John Miller",
"uuid": "9ffb4cbb-f62d-4757-b7b7-70b67ca4d0cc"
},
"status": true
}
```
#### Response Body Attribute Description Type chunks Chunks of the uploaded document Integer response_text -> created_at Created Datetime of document String response_text -> document_group Knowledge pack identifier where document is uploaded String response_text -> document_type Type of the document uploaded String response_text -> file_type Type of file uploaded String response_text -> id Document identifier String response_text -> language Document language String response_text -> name Document name String response_text -> parsing_template Parsing template used to upload document String response_text -> source_file Source file of the uploaded document, if any. String response_text -> source_url Source URL of the uploaded document, if any. String response_text -> status UPLOADED/ERROR String response_text -> updated_at Updated Datetime of document String response_text -> updated_by User who updated the document String response_text -> uuid Unique identifier of the uploaded document String status true if the document was uploaded successfully String
### Examples
The following table lists a few sample use cases for uploading a document to the Answers skill:
Use case Request payload Uploading a document using URL {
"document_group_id": 1,
"api_server": "https://mx.avaamo.com",
"document": {
"name": "Avaamo Docs",
"type": "url",
"preview_url": "https://docs.avaamo.com/user-guide/"
}
}
Uploading a document directly with HTML content {
"document_group_id": 1,
"api_server": "https://mx.avaamo.com",
"document": {
"content": "<title>Name of document</title><body><p>valid html content</p></body>",
"name": "Terms of Use",
"type": "html",
"preview_url": "https://avaamo.ai/privacy/"
}
}
## Delete the document from the specified document group in the Answers skill.
`DELETE` `https://answers-ingest.aiavaamo.com/api/document`
#### Headers
| Name | Type | Description |
| ---------------------------------------------- | ------ | ------------------------------------------------------------------------------------------------------------------------------------------------------------------------------------------------------------------------------------------------------------------------------------------------------------------------------------------------------------------------------------------------------------------------------------------------------------------------------------------------------------------------------------------------------------------------------------- |
| content-type\* | - | application/json |
| access-token\* | String | The user access token.
You can get the user access token from the Settings -> Users page. See Users or Groups , for more information
User must have at least edit permission on the agent. See Permissions , for more information on agent permissions.
|
#### Request Body
| Name | Type | Description |
| ----------------------------------------------------- | ------ | -------------------------------------------------------------------------------------------------------------------------------------------------------------------------------------------------------------------------------------------------------------------------------------------------------------------------------------------------------------------------------------------------------------------------------------------------------------------------------------------------------------------------------- |
| document\_group\_id\* | String | Unique identifier for the document group.
You can get the document group identifier from the Document group -> View/Edit page. See Create document groups , for more information.
|
| preview\_url | String | URL used to upload the document to the Answers skill. Use this if you have uploaded a document using a URL and wish to delete the document from the Answers skill.
You can get the preview URL from the Document group -> Document -> Edit pop-up window.
You must specify either preview\_url or document\_id in the delete payload request.
See Create document groups , for more information.
|
| api\_server\* | String | Avaamo Answers instance.
Contact Avaamo Support to get the API server URL.
|
| document\_id | String | Unique identifier of the uploaded document to the Answers skill. Use this if you have uploaded a document directly to the Answers skill and wish to delete the document from the Answers skill.
You can get the document\_id from the Document group -> Document -> Edit pop-up window. See Create document groups , for more information.
You must specify either preview\_url or document\_id in the delete payload request.
|
{% tabs %}
{% tab title="200: OK Successful request" %}
```javascript
{
"status": true
}
// status as true indicates that the document is deleted successfully
```
{% endtab %}
{% endtabs %}
### Code request snippets
{% tabs %}
{% tab title="cURL" %}
```javascript
curl --location --request DELETE 'https://answers-ingest.aiavaamo.com/api/document' \
--header 'Content-Type: application/json' \
--header 'access-token: xxxxxxf69ba5497e96ff614b00xxxxxx' \
--data-raw '{
"document_group_id": 999,
"api_server": "https://mx.avaamo.com",
"preview_url": "https://avaamo.ai/privacy-policy/"
}'
```
{% endtab %}
{% tab title="node.JS" %}
```javascript
var request = require('request');
var options = {
'method': 'DELETE',
'url': 'https://answers-ingest.aiavaamo.com/api/document',
'headers': {
'Content-Type': 'application/json',
'access-token': 'xxxxxxf69ba5497e96ff614b00xxxxxx'
},
body: JSON.stringify({
"document_group_id": 999,
"api_server": "https://mx.avaamo.com",
"preview_url": "https://avaamo.ai/privacy-policy/"
})
};
request(options, function (error, response) {
if (error) throw new Error(error);
console.log(response.body);
});
```
{% endtab %}
{% endtabs %}
### Examples
The following table lists a few sample use cases for deleting a document from the Answers skill:
| Use case | Request payload |
| ---------------------------------------------------- | ---------------------------------------------------------------------------------------------------------------------------------------------------- |
| Delete a document that is uploaded using a URL | {
"document\_group\_id": 999,
"api\_server": "", "preview\_url": "
}
|
| Delete a document uploaded that is uploaded directly | {
"document\_group\_id": 999,
"api\_server": "", "document\_id": 556
}
|
## Update the document name and attributes
`PUT` `https://answers-ingest.aiavaamo.com/api/document`
#### Headers
| Name | Type | Description |
| ---------------------------------------------- | ------ | --------------------------------------------------------------------------------------------------------------------------------------------------------------------------------------------------------------------------------------------------------------------------------------------------------------------------------------------------------------------------------------------------------------------------------------------------------------------------------------------------------------------------------------------------------------------------- |
| access-token\* | String | Unique access token of the user.
You can get the user access token from the Settings -> Users page. See Users or Groups , for more information.
Users must have at least edit permission on the agent. See Permissions , for more information.
|
| content-type\* | json | application/json |
#### Request Body
| Name | Type | Description |
| ---------------------------------------------------------- | ----------- | ------------------------------------------------------------------------------------------------------------------------------------------------------------------------------------------------------------------------------------------------------------------------------------------------------------------------------------------------------------------------------------------------------------------ |
| document\_group\_id\* | Number | Unique identifier for the document group.
You can get the document group identifier from the Document group -> View/Edit page.
See Create document groups , for more information.
|
| api\_server\* | String | Avaamo instance where the data is to be uploaded.
Example:
|
| document\* | JSON Object | Document object that needs to be uploaded |
| document -> name | String | Name of the document.
Max length: 255 characters.
|
| document -> attributes | Key-value | Define attributes for the uploaded documents or URLs in your Answers skill to facilitate disambiguation or filtering.
Attributes can be metadata of the document. You define attributes in key-value pairs. See Defining attributes for documents or URLs , for more information.
|
| document -> preview\_url\* | String | URL that needs to be opened when user clicks in the response. See [Create document groups](https://docs.avaamo.com/user-guide/how-to/build-skills/create-skill/using-avaamo-answers-1/manage-avaamo-answers-1/create-document-groups), for more information. |
{% tabs %}
{% tab title="200: OK Successful request" %}
```json
{
"response_text": {
"https://docs.avaamo.com/user-guide/": {
"status": true
}
},
"status": true
}
// status as "true" indicates that the update was successful
```
{% endtab %}
{% endtabs %}
### Code request snippets Attribute Description Type status true if the document is updated successfully else false.String
### Examples
The following table lists a few sample use cases for updating documents to the Answers skill:
Use case Request payload Update the name of the document {
"document_group_id": 1,
"api_server": "https://mx.avaamo.com", "document": {
"name": "Avaamo User Manual",
"type": "url",
"preview_url": "https://docs.avaamo.com/user-guide/"
}
}
---
# Source: https://docs.avaamo.com/user-guide/how-to/build-skills/create-skill/using-avaamo-answers-1/answers-rest-apis/content-ingestion-apis-recommended.md
# Content ingestion APIs (Recommended)
## Upload document (HTML, URL) to the Answers knowledge base
`POST` `https://mx.avaamo.com/content-ingestion/parse-document`
#### Path Parameters
| Name | Type | Description |
| ----------------------------------------------- | ---- | ------------------------------------------------------------------------------------------------------------------------------------------------------ |
| mx.avaamo.com\* | URL | Avaamo instance where the data is to be uploaded. Example:
Contact Avaamo Support to know the server name.
|
#### Headers
| Name | Type | Description |
| ---------------------------------------------- | ------ | ---------------------------------------------------------------------------------------------------------------------------------------------------------------------------------------------------------------------------------------------------------------------------------------------------------------------------------------------------------------------------------------------------------------------------------------------------------------------------------------------------------------------------------------------------------------------------- |
| access-token\* | String | Unique access token of the user.
You can get the user access token from the Settings -> Users page. See Users or Groups , for more information.
Users must have at least edit permission on the agent. See Permissions , for more information.
|
| content-type\* | json | application/json |
#### Request Body
| Name | Type | Description |
| ------------------------------------------------------------------- | ----------- | ------------------------------------------------------------------------------------------------------------------------------------------------------------------------------------------------------------------------------------------------------------------------------------------------------------------------------------------------------------------------------------------------------------------------------------------------------------------------------------------------------------------------------------------------------------------------------------------------------------------------------------------------------------------------------------------------------- |
| document\_group\_id\* | Number | Unique identifier for the document group.
You can get the document group identifier from the Document group -> View/Edit page. See View or edit document groups , for more information.
|
| document\* | JSON Object | Document object that needs to be uploaded |
| document -> name\* | String | Name of the document.
Max length: 255 characters.
|
| document -> type\* | String | Type of the document.
Supported values: html, url
|
| document -> content | String | Content of the document HTML body/Text/Base64 text of PDF file.
This field is mandatory for HTML document types but not required for URLs.
Content must in the format:
\Name of document\ \valid html content\
|
| document -> attributes | Key-value | Define attributes for the uploaded documents or URLs in your Answers skill to facilitate disambiguation or filtering.
Attributes can be metadata of the document. You define attributes in key-value pairs. See Defining attributes for documents or URLs , for more information.
|
| document -> preview\_url\* | String | URL that needs to be opened when the user clicks in the response.
You can get the preview\_url from the Document group -> Document -> View/Edit page.
|
| document -> language | String | Language of the document.
Default value: en-US
|
| document -> parsing\_template | JSON | Template to be used to parse the document. This is a JSON file that can be configured as a template while parsing a URL with the purpose of better extraction of content from the URL during the parsing process.
Default value: default parsing template
Contact Avaamo Support to get access to the parsing template repository.
Note instead of defining the parsing template in the document -> parsing\_template object, it is recommended to create the parsing template in the Parsing template page and use the parsing\_template\_id in the API payload. See Parsing template page , for more information.
|
| document -> parsing\_template\_id\* | String | Specify the parsing template identifier that must be used to parse the document. You can get the identifier from the Parsing template page .
Default value: default parsing template identifier is used.
Note instead of defining the parsing template in the document -> parsing\_template object, it is recommended to create the parsing template in the Parsing template page and use the parsing\_template\_id in the API payload.
|
| parsing\_template -> template\_json | JSON | Custom template to parse a URL. |
| parsing\_template -> key | String | Key for inbuilt parsing template, if not provided custom template is used. See [Parsing template](https://docs.avaamo.com/user-guide/how-to/build-skills/create-skill/parsing-templates#inbuilt-parsing-templates), for more information. |
{% tabs %}
{% tab title="201: Created Successful request" %}
```json
{
"chunks": 1,
"response_text": {
"created_at": "2022-04-04T06:07:06.429408Z",
"document_group": 887,
"document_properties": null,
"document_type": "url",
"file_type": "url",
"id": 17472,
"language": 1,
"language_string": "English (en-US)",
"last_error": null,
"name": "Avaamo Docs",
"parsing_template": 6,
"preview_url": null,
"source_file": null,
"source_url": "https://docs.avaamo.com/user-guide/",
"status": "UPLOADED",
"updated_at": "2022-08-01T10:03:53.585745Z",
"updated_by": "John Miller",
"uuid": "9ffb4cbb-f62d-4757-b7b7-70b67ca4d0cc"
},
"status": true// Response
}
```
{% endtab %}
{% tab title="400: Bad Request Bad request indicates payload is wrong" %}
{% endtab %}
{% endtabs %}
{% hint style="success" %}
**Key points**:
* Ensure that the right content is posted during upload as the HTML content is sanitized before processing.
* All content must be present in the following tags: "h1", "h2", "h3", "h4", "h5", "p", "img", "span", "td", "figure", "ol", "ul", "dd", "dt", "a", "table", "details", "summary". This list can be modified by using parsing templates.
* The maximum request size should not exceed 5 MB. Contact Avaamo Support, if the size exceeds the limit.
* Password-protected PDFs are not supported.
* The images inside HTML must be base64 encoded or must be public images.
{% endhint %}
### Code request snippets
{% tabs %}
{% tab title="cURL" %}
{% code overflow="wrap" %}
```javascript
curl --location 'https://mx.avaamo.com/content-ingestion/parse-document' \
--header 'access-token: xxxxxx39e61f48829a47ccd9e6xxxxxx' \
--header 'Content-Type: application/json' \
--data '{
"document_group_id": 35xx,
"api_server": "https://mx.avaamo.com",
"document": {
"name": "Avaamo Docs",
"type": "url",
"preview_url": "https://docs.avaamo.com/user-guide/",
"parsing_template_id":"6"
}
}'
```
{% endcode %}
{% endtab %}
{% tab title="node.JS" %}
```javascript
var request = require('request');
var options = {
'method': 'POST',
'url': 'https://mx.avaamo.com/content-ingestion/parse-document',
'headers': {
'access-token': 'xxxxxx39e61f48829a47ccd9e6xxxxxx',
'Content-Type': 'application/json'
},
body: JSON.stringify({
"document_group_id": 35xx,
"api_server": "https://mx.avaamo.com",
"document": {
"name": "Avaamo Docs",
"type": "url",
"preview_url": "https://docs.avaamo.com/user-guide/",
"parsing_template_id": "6"
}
})
};
request(options, function (error, response) {
if (error) throw new Error(error);
console.log(response.body);
});
```
{% endtab %}
{% endtabs %}
### Response attributes
The following is a sample API response for uploading a document:
```json
{
"https://docs.avaamo.com/user-guide/": {
"status": true,
"chunks": 4,
"response_text": {
"id": 203021,
"name": "Avaamo Docs",
"uuid": "0ffa5161-1adb-479e-b5a1-4035fxxxxxx",
"document_type": "url",
"status": "QUEUED",
"language": 1,
"language_string": "English (en-US)",
"document_group": 35xx,
"source_url": "https://docs.avaamo.com/user-guide/",
"source_file": null,
"preview_url": null,
"document_properties": null,
"parsing_template": 6,
"file_type": "url",
"last_error": null,
"updated_at": "2023-07-20T12:28:04.639826Z",
"created_at": "2023-07-20T12:28:04.512307Z",
"updated_by": "John Miller"
}
}
}
```
#### Response Body Attribute Description Type chunks Chunks of the uploaded document Integer response_text -> created_at Created Datetime of document String response_text -> document_group Knowledge pack identifier where document is uploaded String response_text -> document_type Type of the document uploaded String response_text -> document_properties Document attributes, if any. JSON response_text -> file_type Type of file uploaded String response_text -> id Document identifier String response_text -> language Document language identifier String response_text -> language_string Document language code corresponding to the identifier String response_text -> name Document name String response_text -> parsing_template Parsing template used to upload document String response_text -> source_file Source file of the uploaded document, if any. String response_text -> source_url Source URL of the uploaded document, if any. String response_text -> status UPLOADED/ERROR String response_text -> updated_at Updated Datetime of document String response_text -> updated_by User who updated the document String response_text -> uuid Unique identifier of the uploaded document String status true if the document was uploaded successfully String last_error Last error encountered with respect to the document String
### Examples
The following table lists a few sample use cases for uploading a document to the Answers skill:
Use case Request payload Uploading a document using URL {
"document_group_id": 1,
"api_server": "https://mx.avaamo.com",
"document": {
"name": "Avaamo Docs",
"type": "url",
"preview_url": "https://docs.avaamo.com/user-guide/",
"parsing_template_id": "6"
}
}
Uploading a document using HTML {
"document_group_id": 1,
"document": {
"content": "<title>Terms of Use</title><body><h1>Privacy Policy</h1><p>Avaamo, Inc. ('Avaamo') provides this Privacy Policy to inform you of our policies and procedures regarding the collection, use and disclosure of Personally Identifiable Information that we may obtain through the use of Avaamo products such as Avaamo Platform ('Software'), applications such as Avaamo Messenger ('Application'), and access to www.avaamo.com, referred to as ('Site').</p></body>",
"name": "Terms of Use",
"parsing_template_id": 6,
"type": "html",
"preview_url": "https://avaamo.ai/privacy/",
"attributes": {"product": {"value": "Avaamo", "priority": 0}}
}
}
## Upload different types of files (pdf, docx, pptx, xlsx) to the Answers knowledge base
`POST` `https://mx.avaamo.com/content-ingestion/upload-file`
#### Path Parameters
| Name | Type | Description |
| ----------------------------------------------- | ---- | ------------------------------------------------------------------------------------------------------------------------------------------------------ |
| mx.avaamo.com\* | URL | Avaamo instance where the data is to be uploaded. Example:
Contact Avaamo Support to know the server name.
|
#### Headers
| Name | Type | Description |
| ---------------------------------------------- | ------ | ---------------------------------------------------------------------------------------------------------------------------------------------------------------------------------------------------------------------------------------------------------------------------------------------------------------------------------------------------------------------------------------------------------------------------------------------------------------------------------------------------------------------------------------------------------------------------- |
| access-token\* | String | Unique access token of the user.
You can get the user access token from the Settings -> Users page. See Users or Groups , for more information.
Users must have at least edit permission on the agent. See Permissions , for more information.
|
#### Request Body
| Name | Type | Description |
| ------------------------------------------------------- | ----------- | ------------------------------------------------------------------------------------------------------------------------------------------------------------------------------------------------------------------------------------------------------------------------------------------------------------------------------------------------------------------------------------------------------------------------------------------------------------------------------------------------------------------------------------------------------------------------------------------------------------------------------------------------------------------------------------------------------- |
| document\_group\_id\* | Number | Unique identifier for the document group.
You can get the document group identifier from the Document group -> View/Edit page. See View or edit document groups , for more information.
|
| name | String | Name of the file.
Max length: 255 characters.
|
| type | String | Type of the file.
Supported types: pdf, docx, pptx, xlsx
|
| attributes | Key-value | Define attributes for the uploaded file in your Answers skill to facilitate disambiguation or filtering.
Attributes can be metadata of the document. You define attributes in key-value pairs. See Defining attributes for documents or URLs , for more information.
|
| language | String | Language of the uploaded file.
Default value: en-US
|
| parsing\_template | JSON | Template to be used to parse the document. This is a JSON file that can be configured as a template while parsing a URL with the purpose of better extraction of content from the URL during the parsing process.
Default value: default parsing template
Contact Avaamo Support to get access to the parsing template repository.
Note instead of defining the parsing template in the document -> parsing\_template object, it is recommended to create the parsing template in the Parsing template page and use the parsing\_template\_id in the API payload. See Parsing template page , for more information.
|
| parsing\_template\_id\* | String | Specify the parsing template identifier that must be used to parse the document. Use the right parsing template according to type of file you are uploading. You can get the identifier from the Parsing template page .
Default value: default parsing template identifier is used.
Note instead of defining the parsing template in the document -> parsing\_template object, it is recommended to create the parsing template in the Parsing template page and use the parsing\_template\_id in the API payload.
|
| parsing\_template -> template\_json | JSON | Custom template to parse a URL. |
| parsing\_template -> key | String | Key for inbuilt parsing template, if not provided custom template is used. See [Parsing template](https://docs.avaamo.com/user-guide/how-to/build-skills/create-skill/parsing-templates#inbuilt-parsing-templates), for more information. |
| file\* | File object | The actual file that you wish to upload. |
| parsing\_lib | String | parsing\_lib for pdf extraction. For tabular parsing use pdftotree.
Default: pdfbox
|
{% tabs %}
{% tab title="201: Created Successful request" %}
{
    "MACPIZZA_Policy.pdf": {
        "status": true,
        "response_text": {
            "id": 194658,
            "name": "MACPIZZA_Policy.pdf",
            "uuid": "2ff9d2e1-5897-4d2c-9c5d-5b5d9c144cb6",
            "document_type": "pdf",
            "status": "UPLOADED",
            "language": 1,
            "language_string": "English (en-US)",
            "document_group": 3455,
            "source_url": null,
            "source_file": "<<source_file_URL_path>>",
            "preview_url": null,
            "document_properties": null,
            "parsing_template": 8,
            "file_type": "application/pdf",
            "last_error": null,
            "updated_at": "2023-07-19T07:26:59.464093Z",
            "created_at": "2023-07-19T07:26:59.464025Z",
            "updated_by": "John Miller"
        }
    }
}
>",
"preview_url": null,
"document_properties": null,
"parsing_template": 8x,
"file_type": "application/vnd.openxmlformats-officedocument.wordprocessingml.document",
"last_error": null,
"updated_at": "2023-08-07T08:39:27.079826Z",
"created_at": "2023-07-20T09:49:39.163094Z",
"updated_by": "John Miller"
}
}
}
```
{% endcode %}
#### Response Body Attribute Description Type status true if the document was uploaded successfully Boolean response_text -> id Unique file identifier String response_text -> name File name String response_text -> uuid Unique identifier of the uploaded file. This is for internal use only. String response_text -> document_type Type of the document uploaded String response_text -> document_properties Document attributes, if any. JSON response_text -> status UPLOADED/ERROR String response_text -> language Document language identifier String response_text -> language_string Document language code corresponding to the identifier String response_text -> document_group Knowledge pack identifier where file is uploaded String response_text -> source_file Source of the uploaded file String response_text -> created_at Created Datetime of file String response_text -> file_type Type of file uploaded String response_text -> parsing_template Parsing template used to upload file String response_text -> updated_at Updated Datetime of file String response_text -> updated_by User who updated the file String last_error Last error encountered with respect to the document String
### Examples
The following table lists a few sample use cases for uploading a document to the Answers skill:
Use case Request payload Uploading a word document curl --location 'https://mx.avaamo.com/content-ingestion/upload-file' \
--header 'Access-Token: xxxxxx39e61f488x47xxccd9e6xxxxxx' \
--form 'file=@"/Users/avaamo/Downloads/MacPizza_policy.docx"' \
--form 'document_group_id="34xx"' \
--form 'type="docx"' \
--form 'parsing_template_id="8x"' \
--form 'api_server="https://mx.avaamo.com"'
## Delete the document from the specified document group in the Answers skill.
`DELETE` `https://mx.avaamo.com/content-ingestion/delete-document`
#### Path Parameters
| Name | Type | Description |
| ----------------------------------------------- | ---- | ------------------------------------------------------------------------------------------------------------------------------------------------------ |
| mx.avaamo.com\* | URL | Avaamo instance where the data is to be uploaded. Example:
Contact Avaamo Support to know the server name.
|
#### Headers
| Name | Type | Description |
| ---------------------------------------------- | ------ | ------------------------------------------------------------------------------------------------------------------------------------------------------------------------------------------------------------------------------------------------------------------------------------------------------------------------------------------------------------------------------------------------------------------------------------------------------------------------------------------------------------------------------------------------------------------------------------- |
| content-type\* | JSON | application/json |
| access-token\* | String | The user access token.
You can get the user access token from the Settings -> Users page. See Users or Groups , for more information
User must have at least edit permission on the agent. See Permissions , for more information on agent permissions.
|
#### Request Body
| Name | Type | Description |
| ----------------------------------------------------- | ------ | -------------------------------------------------------------------------------------------------------------------------------------------------------------------------------------------------------------------------------------------------------------------------------------------------------------------------------------------------------------------------------------------------------------------------------------------------------------------------------------------------------------------------------- |
| document\_group\_id\* | String | Unique identifier for the document group.
You can get the document group identifier from the Document group -> View/Edit page. See Create document groups , for more information.
|
| preview\_url | String | URL used to upload the document to the Answers skill. Use this if you have uploaded a document using a URL and wish to delete the document from the Answers skill.
You can get the preview URL from the Document group -> Document -> Edit pop-up window.
You must specify either preview\_url or document\_id in the delete payload request.
See Create document groups , for more information.
|
| document\_id | String | Unique identifier of the uploaded document to the Answers skill. Use this if you have uploaded a document directly to the Answers skill and wish to delete the document from the Answers skill.
You can get the document\_id from the Document group -> Document -> Edit pop-up window. See Create document groups , for more information.
You must specify either preview\_url or document\_id in the delete payload request.
|
{% tabs %}
{% tab title="200: OK Successful request" %}
{
    "https://docs.avaamo.com/user-guide/": {
        "response_text": {
            "created_at": "2023-07-18T10:34:10.750087Z",
            "document_group": 3455,
            "document_properties": "",
            "document_type": "url",
            "file_type": "url",
            "id": null,
            "language": 1,
            "language_string": "English (en-US)",
            "last_error": null,
            "name": "Avaamo Docs",
            "parsing_template": 6,
            "preview_url": "https://docs.avaamo.com/user-guide/",
            "source_file": null,
            "source_url": "https://docs.avaamo.com/user-guide/",
            "status": "COMPLETE",
            "updated_at": "2023-07-18T10:35:35.719236Z",
            "updated_by": "John Miller",
            "uuid": "c5164053-51e7-4687-98b5-363762d454ac"
        },
        "status": true
    }
}
Attribute Description Type status true if the document was uploaded successfully Boolean response_text -> id Unique file identifier String response_text -> name File name String response_text -> uuid Unique identifier of the uploaded file. This is for internal use only. String response_text -> document_type Type of the document uploaded String response_text -> document_properties Document attributes, if any. JSON response_text -> status UPLOADED/ERROR String response_text -> language Document language identifier String response_text -> language_string Document language code corresponding to the identifier String response_text -> document_group Knowledge pack identifier where file is uploaded String response_text -> source_file Source of the uploaded file String response_text -> created_at Created Datetime of file String response_text -> file_type Type of file uploaded String response_text -> parsing_template Parsing template used to upload file String response_text -> updated_at Updated Datetime of file String response_text -> updated_by User who updated the file String last_error Last error encountered with respect to the document String
### Examples
The following table lists a few sample use cases for deleting a document from the Answers skill:
| Use case | Request payload |
| ---------------------------------------------------- | ---------------------------------------------------------------------------------------------------------------------------------------------------- |
| Delete a document that is uploaded using a URL | {
"document\_group\_id": 999,
"api\_server": "", "preview\_url": "
}
|
| Delete a document uploaded that is uploaded directly | {
"document\_group\_id": 999,
"api\_server": "", "document\_id": 556
}
|
## Update the document name and attributes
`PUT` `https://mx.avaamo.com/content-ingestion/update-document`
#### Path Parameters
| Name | Type | Description |
| ----------------------------------------------- | ---- | ------------------------------------------------------------------------------------------------------------------------------------------------------ |
| mx.avaamo.com\* | URL | Avaamo instance where the data is to be uploaded. Example:
Contact Avaamo Support to know the server name.
|
#### Headers
| Name | Type | Description |
| ---------------------------------------------- | ------ | --------------------------------------------------------------------------------------------------------------------------------------------------------------------------------------------------------------------------------------------------------------------------------------------------------------------------------------------------------------------------------------------------------------------------------------------------------------------------------------------------------------------------------------------------------------------------- |
| access-token\* | String | Unique access token of the user.
You can get the user access token from the Settings -> Users page. See Users or Groups , for more information.
Users must have at least edit permission on the agent. See Permissions , for more information.
|
| content-type\* | JSON | application/json |
#### Request Body
| Name | Type | Description |
| ---------------------------------------------------------- | ----------- | ------------------------------------------------------------------------------------------------------------------------------------------------------------------------------------------------------------------------------------------------------------------------------------------------------------------------------------------------------------------------------------------------------------------ |
| document\_group\_id\* | Number | Unique identifier for the document group.
You can get the document group identifier from the Document group -> View/Edit page.
See Create document groups , for more information.
|
| document\* | JSON Object | Document object that needs to be uploaded |
| document -> name | String | Name of the document.
Max length: 255 characters.
|
| document -> attributes | Key-value | Define attributes for the uploaded documents or URLs in your Answers skill to facilitate disambiguation or filtering.
Attributes can be metadata of the document. You define attributes in key-value pairs. See Defining attributes for documents or URLs , for more information.
|
| document -> preview\_url\* | String | URL that needs to be opened when user clicks in the response. See [Create document groups](https://docs.avaamo.com/user-guide/how-to/build-skills/create-skill/using-avaamo-answers-1/manage-avaamo-answers-1/create-document-groups), for more information. |
{% tabs %}
{% tab title="200: OK Successful request" %}
```json
{
"https://docs.avaamo.com/user-guide/": {
"status": true,
"response_text": {
"id": 194636,
"name": "Avaamo User Manual",
"uuid": "8459623c-5df4-45ec-bc0c-831c6eaa08e9",
"document_type": "url",
"status": "COMPLETE",
"language": 1,
"language_string": "English (en-US)",
"document_group": 3455,
"source_url": "https://docs.avaamo.com/user-guide/",
"source_file": null,
"preview_url": null,
"document_properties": null,
"parsing_template": 6,
"file_type": "url",
"last_error": null,
"updated_at": "2023-07-18T10:49:20.486860Z",
"created_at": "2023-07-18T10:48:06.145736Z",
"updated_by": "John Miller"
}
}
}
```
{% endtab %}
{% tab title="400: Bad Request Bad request indicates payload is wrong" %}
{% endtab %}
{% endtabs %}
### Code request snippets Attribute Description Type status true if the document was uploaded successfully Boolean response_text -> id Unique file identifier String response_text -> name File name String response_text -> uuid Unique identifier of the uploaded file. This is for internal use only. String response_text -> document_type Type of the document uploaded String response_text -> document_properties Document attributes, if any. JSON response_text -> status UPLOADED/ERROR String response_text -> language Document language identifier String response_text -> language_string Document language code corresponding to the identifier String response_text -> document_group Knowledge pack identifier where file is uploaded String response_text -> source_file Source of the uploaded file String response_text -> created_at Created Datetime of file String response_text -> file_type Type of file uploaded String response_text -> parsing_template Parsing template used to upload file String response_text -> updated_at Updated Datetime of file String response_text -> updated_by User who updated the file String last_error Last error encountered with respect to the document String
### Examples
The following table lists a few sample use cases for updating documents to the Answers skill:
Use case Request payload Update the name of the document {
"document_group_id": 1,
"api_server": "https://mx.avaamo.com", "document": {
"name": "Avaamo User Manual",
"type": "url",
"preview_url": "https://docs.avaamo.com/user-guide/"
}
}
---
# Source: https://docs.avaamo.com/user-guide/llamb/llamb-rest-apis/content-ingestion-apis.md
# Content ingestion APIs
## Upload document (HTML, URL) to LLaMB
`POST` `https://{{instance-name}}.avaamo.com/llamb-content-skill/content-ingestion/upload-web`
{% hint style="info" %}
**Note:**
1. The rate limit for the upload-web API is capped at 50 uploads per minute. Contact Avaamo Support with your use-case details if you wish to increase the rate limit for the API.
2. Replace `{{instance-name}}` with your actual instance name, such as `c6` or `h1`.
{% endhint %}
{% hint style="warning" %}
**Recommendation:**
It is recommended to use the `upload-file` API instead of the `upload-web` API when uploading HTML content to the system. This approach ensures better control and consistency in content management.\
Using the upload-file API offers several advantages:
1. **Content Persistence:** The uploaded HTML content is explicitly stored in the database, ensuring it is readily available for future reference.
2. **Seamless Retraining:** Since the content is saved, it can be easily accessed during document retraining operations initiated through the UI.
{% endhint %}
#### Headers
Name Type Description access-token* String Unique access token of the user.
You can get the user access token from the Settings -> Users page. See Users or Groups , for more information.
Users must have at least edit permission on the agent. See Permissions , for more information.
content-type String application/JSON
#### Request Body
Name Type Description document_group_id* Number Unique identifier for the document group.
You can get the document group identifier from the Document group -> View/Edit page. See View or edit document groups , for more information.Note: You can use either the document_group_id or a combination of agent_id and document_group_uuid in the request body. Both approaches are supported.
agent_id Number Agent identifier.
You can get the agent identifier from the agent URL.
document_group_uuid String Unique user identifier for the document group.
You can get the document group UUID from the Document group -> View/Edit page. See View or edit document groups , for more information.
document* JSON Document object that needs to be uploaded document -> name* String Name of the document.
Max length: 255 characters.
document -> attributes Key-value Define attributes for the uploaded documents or URLs in your LLaMB skill to facilitate disambiguation or filtering.
Example: "attributes": "{\"key\": \"value\"}"
Attributes can be metadata of the document. You define attributes in key-value pairs. See Document attributes , for more information.
document -> type* String Type of the document.
Supported values: html, url
document -> preview_url* String Mandatory only for uploading HTML content.
Display the URL that needs to be opened when the user clicks the source citation in the response.
You can get the preview_url from the Document group -> Document -> View/Edit page.
document -> language String This refers to the document's language. If you specify a language during ingestion, LLaMB uses that language to extract the content. If you do not provide, LLaMB automatically detects the document’s language and processes it accordingly. document -> parsing_template_id* Integer Specify the parsing template identifier that must be used to parse the document. You can get the identifier from the Parsing template page.
Default value: default parsing template identifier is used.
It is recommended to create the parsing template in the Parsing template page and use the parsing_template_id in the API payload.
document -> source * String If uploading from a URL, source is the actual source URL from where the content must be ingested.
If uploading a HTML content, source is the raw HTML content.
Raw HTML Content must be in the following format:
<title>Name of document</title><body>valid html content</body>
{% tabs %}
{% tab title="400: Bad Request Bad " %}
Request indicates the payload is wrong
{% endtab %}
{% tab title="200: OK Successful request" %}
```javascript
{
"https://avaamo.ai/privacy-policy/": {
"status": true,
"chunks": 8,
"response_text": {
"id": 85xxx,
"name": "Privacy documents",
"uuid": "01ca5f76-xxx-xxx-xxx-8784e8f61154",
"document_type": "url",
"status": "QUEUED",
"language": 1,
"language_string": "English (en-US)",
"document_group": 10xx,
"source_url": "https://avaamo.ai/privacy-policy/",
"source_file": null,
"preview_url": "https://avaamo.ai/gdpr-compliance/",
"document_properties": null,
"parsing_template": 6,
"file_type": "url",
"last_error": null,
"updated_at": "2024-02-23T09:36:48.795473Z",
"created_at": "2024-02-23T09:36:48.715125Z",
"updated_by": "John Miller"
}
}
}
```
{% endtab %}
{% endtabs %}
{% hint style="success" %}
**Key points**:
* Ensure that the right content is posted during upload, as the HTML content is sanitized before processing.
* All content must be present in the following tags: "h1", "h2", "h3", "h4", "h5", "p", "img", "span", "td", "figure", "ol", "ul", "dd", "dt", "a", "table", "details", "summary". This list can be modified by using parsing templates.
* The maximum request size should not exceed 5 MB. Contact Avaamo Support, if the size exceeds the limit.
{% endhint %}
### Code request snippets
{% tabs %}
{% tab title="cURL" %}
{% code overflow="wrap" %}
```javascript
curl --location 'https://{{instance-name}}.avaamo.com/llamb-content-skill/content-ingestion/upload-web' \
--header 'access-token: 8ce0573xxxxxxxxxxxx7ccd9e60f3bd5' \
--header 'Content-Type: application/json' \
--data '{
"document_group_id": 10xx,
"document": {
"name": "Privacy documents",
"type": "url",
"source": "https://avaamo.ai/privacy-policy/",
"preview_url": "https://avaamo.ai/gdpr-compliance/",
"parsing_template_id": 6
}
}'
```
{% endcode %}
{% endtab %}
{% tab title="node.JS" %}
{% code overflow="wrap" %}
```javascript
var request = require('request');
var options = {
'method': 'POST',
'url': 'https://cx.avaamo.com/llamb-content-skill/content-ingestion/upload-web',
'headers': {
'access-token': '8ce0573xxxxxxxxxxxx7ccd9e60f3bd5',
'Content-Type': 'application/json',
},
body: JSON.stringify({
"document_group_id": 10xx,
"document": {
"name": "Privacy documents",
"type": "url",
"source": "https://avaamo.ai/privacy-policy/",
"preview_url": "https://avaamo.ai/gdpr-compliance/",
"parsing_template_id": 6
}
})
};
request(options, function (error, response) {
if (error) throw new Error(error);
console.log(response.body);
});
```
{% endcode %}
{% endtab %}
{% endtabs %}
### Response attributes
The following is a sample API response for uploading a document:
```json
{
"https://avaamo.ai/privacy-policy/": {
"status": true,
"response_text": {
"id": 85xxx,
"name": "Privacy documents",
"uuid": "01ca5f76-xxx-xxx-xxx-8784e8f61154",
"document_type": "url",
"status": "QUEUED",
"document_group": 10xx,
"source_url": "https://avaamo.ai/privacy-policy/",
"source_file": null,
"preview_url": "https://avaamo.ai/gdpr-compliance/",
"document_properties": null,
"parsing_template": 6,
"file_type": "url",
"last_error": null,
"updated_at": "2024-02-23T09:36:48.795473Z",
"created_at": "2024-02-23T09:36:48.715125Z",
"updated_by": "John Miller"
}
}
}
```
#### Response Body Attribute Description Type status true if the document was updated successfully Boolean response_text -> id Unique document identifier Integer response_text -> name Document name String response_text -> uuid Unique internal identifier of the document. String response_text -> document_type Type of the document uploaded String response_text -> status Status can be any one of the following values: Uploaded, Queued, Extracting, Learning, Complete, Error, or Warning.
See Status , for more information.
String response_text -> document_group Group identifier of the updated document. Integer response_text -> source_url Source of the URL used for uploading the document. String response_text -> source_file Source of the file used for uploading the document. String response_text -> preview_url Preview URL of the updated document. String response_text -> created_at Created Datetime of file String response_text -> file_type Type of file uploaded String response_text -> parsing_template Parsing template used to upload file Integer response_text -> updated_at Updated Datetime of file String response_text -> updated_by User who updated the file String last_error Last error encountered with respect to the document String
### Examples
The following table lists a few sample use cases for uploading a document to LLaMB:
Use case Request payload Uploading a document using URL
{
    "document_group_id": 10xx,
      "document": {
         "name": "Privacy documents",
          "type": "url",
          "source": "https://avaamo.ai/privacy-policy/",
          "preview_url": "https://avaamo.ai/gdpr-compliance/",
          "parsing_template_id": "6",
          "attributes": "{\"product\": {\"value\": \"Avaamo\", \"priority\": 0}}"
     }
}
Uploading a document using HTML
{
 "document_group_id": 10xx,
 "document": {
   "source": "<title>Terms of Use</title><body><h1>Privacy Policy</h1><p>Avaamo, Inc. ('Avaamo') provides this Privacy Policy to inform you of our policies and procedures regarding the collection, use and disclosure of Personally Identifiable Information that we may obtain through the use of Avaamo products such as Avaamo Platform ('Software'), applications such as Avaamo Messenger ('Application'), and access to www.avaamo.com, referred to as ('Site').</p></body>",
   "name": "Terms of Use",
   "parsing_template_id": 6,
   "type": "html",
   "preview_url": "https://avaamo.ai/privacy/"
 }
}
Uploading a document using HTML using agent_id and document_group_uuid {
"agent_id": 71xx,
"document_group_uuid": 539axxxx-xxxx-xxxx-xxxx-xxxxxxxxx4d2,
"document": {
"source": "<title>Terms of Use</title><body><h1>Privacy Policy</h1><p>Avaamo, Inc. ('Avaamo') provides this Privacy Policy to inform you of our policies and procedures regarding the collection, use and disclosure of Personally Identifiable Information that we may obtain through the use of Avaamo products such as Avaamo Platform ('Software'), applications such as Avaamo Messenger ('Application'), and access to www.avaamo.com, referred to as ('Site').</p></body>",
"name": "Terms of Use",
"parsing_template_id": 6,
"type": "html",
"preview_url": "https://avaamo.ai/privacy/"
}
}
## Upload different types of files (pdf, docx, pptx, xlsx, csv, html) to LLaMB
{% hint style="info" %}
**Note:**
1. The rate limit for upload-file API is capped to 50 uploads per minute. Contact Avaamo Support with your use-case details if you wish to increase the rate limit for the API.
2. Replace `{{instance-name}}` with your actual instance name, such as `c6,` `h1`.
{% endhint %}
`POST` `https://{{instance-name}}.avaamo.com/llamb-content-skill/content-ingestion/upload-file`
#### Headers
Name Type Description access-token* String Unique access token of the user.
You can get the user access token from the Settings -> Users page. See Users or Groups , for more information.
Users must have at least edit permission on the agent. See Permissions , for more information.
#### Request Body
Name Type Description document_group_id* Number Unique identifier for the document group.
You can get the document group identifier from the Document group -> View/Edit page. See View or edit document groups , for more information.Note: You can use either the document_group_id or a combination of agent_id and document_group_uuid in the request body. Both approaches are supported.
agent_id Number Agent identifier.
You can get the agent identifier from the agent URL.
document_group_uuid String Unique user identifier for the document group.
You can get the document group UUID from the Document group -> View/Edit page. See View or edit document groups , for more information.
name String Name of the file.
Max length: 255 characters.
type String Type of the document.
Supported types: pdf, docx, pptx, xlsx, csv
attributes Key-value Define attributes for the uploaded documents or URLs in your LLaMB skill to facilitate disambiguation or filtering.
Example: "attributes": {"key": "value"}
Attributes can be metadata of the document. You define attributes in key-value pairs. See Document attributes , for more information.
language String This refers to the file's language. If you specify a language during ingestion, LLaMB uses that language to extract the content. source* String The actual file that you wish to upload. Source is the file path location of the document. preview_url* String Display URL that needs to be opened when the user clicks the source citation link in the response.
Mandatory only for uploading HTML files.
You can get the preview_url from the Document group -> Document -> View/Edit page.
document -> parsing_template_id Integer Specify the parsing template identifier that must be used to parse the document. You can get the identifier from the Parsing template page
It is recommended to create the parsing template in the Parsing template page and use the parsing_template_id in the API payload.
document -> auto_detect_language String If a user wants to upload a non-English document, LLaMB automatically detects its language if you set it to true.
{% tabs %}
{% tab title="200: OK Successful request" %}
```javascript
{
"MACPIZZA_Policy.pdf": {
"status": true,
"response_text": {
"id": 85xxx,
"name": "MACPIZZA_Policy.pdf",
"uuid": "1b0d1416-xxxx-48df-xxxx-f013e72fce9f",
"document_type": "pdf",
"status": "UPLOADED",
"document_group": 1058,
"source_url": null,
"source_file": "<>",
"preview_url": null,
"document_properties": null,
"parsing_template": 12,
"file_type": "application/pdf",
"last_error": null,
"updated_at": "2024-02-26T08:24:02.771628Z",
"created_at": "2024-02-26T08:24:02.771606Z",
"updated_by": "John Miller"
}
}
}
```
{% endtab %}
{% endtabs %}
{% hint style="success" %}
**Key points**:
* The maximum request size should not exceed 5 MB. Contact Avaamo Support, if the size exceeds the limit.
* You can upload only one file at a time.
* Password-protected PDFs are not supported.
{% endhint %}
### Code request snippets
{% tabs %}
{% tab title="cURL" %}
{% code overflow="wrap" %}
```javascript
curl --location 'https://{{instance-name}}.avaamo.com/llamb-content-skill/content-ingestion/upload-file' \
--header 'access-token: 8ce05739e61f48829a47xxxxxxxxxxxx' \
--form 'source=@"o5pyxxxxx/MACPIZZA Policy.pdf"' \
--form 'document_group_id="10xx"' \
--form 'type="pdf"'
```
{% endcode %}
{% endtab %}
{% tab title="node.JS" %}
{% code overflow="wrap" %}
```javascript
var request = require('request');
var fs = require('fs');
var options = {
'method': 'POST',
'url': 'https://cx.avaamo.com/llamb-content-skill/content-ingestion/upload-file',
'headers': {
'access-token': '8ce05739e61f48829a47xxxxxxxxxxxx'
},
formData: {
'source': {
'value': fs.createReadStream('o5pyxxxxx/MACPIZZA Policy.pdf'),
'options': {
'filename': '',
'contentType': null
}
},
'document_group_id': '10xx',
'type': 'pdf'
}
};
request(options, function (error, response) {
if (error) throw new Error(error);
console.log(response.body);
});
```
{% endcode %}
{% endtab %}
{% endtabs %}
### Response attributes
The following is a sample API response for uploading a document:
{% code overflow="wrap" %}
```json
{
"MACPIZZA_Policy.pdf": {
"status": true,
"response_text": {
"id": 85xxx,
"name": "MACPIZZA_Policy.pdf",
"uuid": "1b0d1416-xxxx-48df-xxxx-f013e72fce9f",
"document_type": "pdf",
"status": "UPLOADED",
"document_group": 1058,
"source_url": null,
"source_file": "<>",
"preview_url": null,
"document_properties": null,
"parsing_template": 12,
"file_type": "application/pdf",
"last_error": null,
"updated_at": "2024-02-26T08:24:02.771628Z",
"created_at": "2024-02-26T08:24:02.771606Z",
"updated_by": "John Miller"
}
}
}
```
{% endcode %}
#### Response Body Attribute Description Type status true if the document was updated successfully Boolean response_text -> id Unique document identifier Integer response_text -> name Document name String response_text -> uuid Unique internal identifier of the document. String response_text -> document_type Type of the document uploaded String response_text -> status Status can be any one of the following values: Uploaded, Queued, Extracting, Learning, Complete, Error, or Warning.
See Status , for more information.
String response_text -> document_group Group identifier of the updated document. Integer response_text -> source_url Source of the URL used for uploading the document. String response_text -> source_file Source of the file used for uploading the document. String response_text -> preview_url Preview URL of the updated document. String response_text -> created_at Created Datetime of file String response_text -> file_type Type of file uploaded String response_text -> parsing_template Parsing template used to upload file Integer response_text -> updated_at Updated Datetime of file String response_text -> updated_by User who updated the file String last_error Last error encountered with respect to the document String
### Examples
The following table lists a few sample use cases for uploading a document to LLaMB:
Use case Request payload Uploading a pdf document curl --location 'https://{{instance-name}}.avaamo.com/llamb-content-skill/content-ingestion/upload-file' \
--header 'access-token: 8ce05739e61f48829a47xxxxxxxxxxxx' \
--form 'source=@"o5pyxxxxx/MACPIZZA Policy.pdf"' \
--form 'document_group_id="10xx"' \
--form 'type="pdf"'\
--form 'attribute="{\"country\" : \"Japan\"}"'
Uploading a html file curl --location 'https://{{instance-name}}.avaamo.com/llamb-content-skill/content-ingestion/upload-file'
--header 'access-token: 5b190f6c144xxxxxxxxxxxxxxxxxx'
--form 'source=@"o5pyxxxxx/MACPIZZA Policy.html"'
--form 'document_group_id="6xxx"'
--form 'type="html"'
--form 'preview_url="https://avaamo.ai/privacy/"'
Uploading a html file using agent_id and document_group_uuid curl --location 'https://{{instance-name}}.avaamo.com/llamb-content-skill/content-ingestion/upload-file'
--header 'access-token: 5b190f6c144xxxxxxxxxxxxxxxxxx'
--form 'source=@"o5pyxxxxx/MACPIZZA Policy.html"'
--form 'agent_id="7xxx"'
--form 'document_group_uuid="539axxxx-xxxx-xxxx-xxxx-xxxxxxxxx4d2"'
--form 'type="html"'
--form 'preview_url="https://avaamo.ai/privacy/"'
## Delete the document from the specified document group
`DELETE` `https://{{instance-name}}.avaamo.com/llamb-content-skill/content-ingestion/delete-document`
#### Headers
| Name | Type | Description |
| ---------------------------------------------- | ------ | ---------------------------------------------------------------------------------------------------------------------------------------------------------------------------------------------------------------------------------------------------------------------------------------------------------------------------------------------------------------------------------------------------------------------------------------------------------------------------------------------------------------------------------------------------------------------------------------- |
| access-token\* | String | The user access token.
You can get the user access token from the Settings -> Users page. See Users or Groups , for more information
User must have at least edit permission on the agent. See Permissions , for more information on agent permissions.
|
| content-type | String | application/JSON |
#### Request Body
| Name | Type | Description |
| ----------------------------------------------------- | ------- | --------------------------------------------------------------------------------------------------------------------------------------------------------------------------------------------------------------------------------------------------------------------------------------------------------------------------------- |
| document\_group\_id\* | Integer | Unique identifier of the document group from which you wish to delete a document.
You can get the document group identifier from the Document group -> View/Edit page. See Create document groups , for more information.
|
| document\_id\* | Integer | Unique identifier of the document that you wish to delete from the document group.
You can get the document\_id from the Document group -> Document -> Edit pop-up window. See Edit document , for more information.
|
{% tabs %}
{% tab title="200: OK Successful request" %}
```json
{
"82xxx": {
"status": true,
"response_text": {
"id": null,
"name": "Privacy policy",
"uuid": "1a35c363-xxxx-xxxx-xxxx-aa26b14fc6ef",
"document_type": "url",
"status": "COMPLETE",
"document_group": 10xx,
"source_url": "https://avaamo.ai/privacy-policy/",
"source_file": null,
"preview_url": null,
"document_properties": "",
"parsing_template": 6,
"file_type": "url",
"last_error": null,
"updated_at": "2024-02-16T06:02:13.199489Z",
"created_at": "2024-02-16T06:01:07.934949Z",
"updated_by": "John Miller"
}
}
}
```
{% endtab %}
{% tab title="400: Bad Request Bad request indicates payload is wrong" %}
{% endtab %}
{% endtabs %}
### Code request snippets
{% tabs %}
{% tab title="cURL" %}
{% code overflow="wrap" %}
```javascript
curl --location --request DELETE 'https://{{instance-name}}.avaamo.com/llamb-content-skill/content-ingestion/delete-document' \
--header 'access-token: xxxxxxxxx61f48829a47ccd9xxxxxxxx' \
--header 'Content-Type: application/json' \
--data '{
"document_id": 82xxx,
"document_group_id": 10xx
}'
```
{% endcode %}
{% endtab %}
{% tab title="node.JS" %}
{% code overflow="wrap" %}
```javascript
var request = require('request');
var options = {
'method': 'DELETE',
'url': 'https://cx.avaamo.com/llamb-content-skill/content-ingestion/delete-document',
'headers': {
'access-token': 'xxxxxxxxx61f48829a47ccd9xxxxxxxx',
'Content-Type': 'application/json',
},
body: '{ \n"document_id": 82xxx,\n"document_group_id": 10xx'
};
request(options, function (error, response) {
if (error) throw new Error(error);
console.log(response.body);
});
```
{% endcode %}
{% endtab %}
{% endtabs %}
### Response attributes
The following is a sample API response for uploading a document:
```json
{
"82xxx": {
"status": true,
"response_text": {
"id": null,
"name": "Privacy policy",
"uuid": "1a35c363-xxxx-xxxx-xxxx-aa26b14fc6ef",
"document_type": "url",
"status": "COMPLETE",
"document_group": 10xx,
"source_url": "https://avaamo.ai/privacy-policy/",
"source_file": null,
"preview_url": null,
"document_properties": "",
"parsing_template": 6,
"file_type": "url",
"last_error": null,
"updated_at": "2024-02-16T06:02:13.199489Z",
"created_at": "2024-02-16T06:01:07.934949Z",
"updated_by": "John Miller"
}
}
}
```
#### Response Body Attribute Description Type status true if the document was deleted successfully Boolean response_text -> id Unique document identifier Integer response_text -> name Document name String response_text -> uuid Unique internal identifier of the document. String response_text -> document_type Type of the document uploaded String response_text -> document_properties Document attributes, if any. JSON response_text -> status Status can be any one of the following values: Uploaded, Queued, Extracting, Learning, Complete, Error, or Warning.
See Status , for more information.
String response_text -> document_group Group identifier of the deleted document Integer response_text -> source_url Source of the URL used for uploading the document. String response_text -> source_file Source of the file used for uploading the document. String response_text -> preview_url Preview URL of the deleted document. response_text -> created_at Created datetime of document String response_text -> file_type Type of file uploaded String response_text -> parsing_template Parsing template used to upload document Integer response_text -> updated_at Last updated datetime of file String response_text -> updated_by User who updated the file String last_error Last error encountered with respect to the document String
### Examples
The following table lists a few sample use cases for deleting a document from the `LLaMB Content` skill:
Use case Request payload Delete a document from a document group
{
"document_id": 82xxxx,
"document_group_id": 10xx
}
## Update the document name or document preview URL
`PUT` `https://{{instance-name}}.avaamo.com/llamb-content-skill/content-ingestion/update-document`
#### Headers
| Name | Type | Description |
| ---------------------------------------------- | ------ | ------------------------------------------------------------------------------------------------------------------------------------------------------------------------------------------------------------------------------------------------------------------------------------------------------------------------------------------------------------------------------------------------------------------------------------------------------------------------------------------------------------------------------------------------------------------------------ |
| access-token\* | String | Unique access token of the user.
You can get the user access token from the Settings -> Users page. See Users or Groups , for more information.
Users must have at least edit permission on the agent. See Permissions , for more information.
|
| content-type | String | application/JSON |
#### Request Body
| Name | Type | Description |
| ---------------------------------------------------------- | ----------- | ---------------------------------------------------------------------------------------------------------------------------------------------------------------------------------------------------------------------------------------------------------------------------------------------------------------------------- |
| document\_group\_id\* | Number | Unique identifier for the document group.
You can get the document group identifier from the Document group -> View/Edit page.
See Create document groups , for more information.
|
| document\* | JSON Object | Document object that needs to be updated. |
| document -> name | String | Name of the document.
Max length: 255 characters.
|
| document -> preview\_url | String | URL that needs to be opened when user clicks in the response. See [Create document groups](https://docs.avaamo.com/user-guide/llamb/get-started/step-2-ingest-enterprise-content/create-document-groups), for more information. |
| document -> document\_id\* | Integer | Unique identifier of the document that you wish to update from the document group.
You can get the document\_id from the Document group -> Document -> Edit pop-up window. See Edit document , for more information.
|
{% tabs %}
{% tab title="200: OK Successful request" %}
```json
{
"https://docs.avaamo.com/user-guide/": {
"status": true,
"response_text": {
"id": 194636,
"name": "Avaamo User Manual",
"uuid": "8459623c-5df4-45ec-bc0c-831c6eaa08e9",
"document_type": "url",
"status": "COMPLETE",
"document_group": 3455,
"source_url": "https://docs.avaamo.com/user-guide/",
"source_file": null,
"preview_url": null,
"document_properties": null,
"parsing_template": 6,
"file_type": "url",
"last_error": null,
"updated_at": "2023-07-18T10:49:20.486860Z",
"created_at": "2023-07-18T10:48:06.145736Z",
"updated_by": "John Miller"
}
}
}
```
{% endtab %}
{% tab title="400: Bad Request Bad request indicates payload is wrong" %}
{% endtab %}
{% endtabs %}
### Code request snippets Attribute Description Type status true if the document was updated successfully Boolean response_text -> id Unique document identifier Integer response_text -> name Document name String response_text -> uuid Unique internal identifier of the document. String response_text -> document_type Type of the document uploaded String response_text -> status Status can be any one of the following values: Uploaded, Queued, Extracting, Learning, Complete, Error, or Warning.
See Status , for more information.
String response_text -> document_group Group identifier of the updated document. Integer response_text -> source_url Source of the URL used for uploading the document. String response_text -> source_file Source of the file used for uploading the document. String response_text -> preview_url Preview URL of the updated document. String response_text -> created_at Created Datetime of file String response_text -> file_type Type of file uploaded String response_text -> parsing_template Parsing template used to upload file Integer response_text -> updated_at Updated Datetime of file String response_text -> updated_by User who updated the file String last_error Last error encountered with respect to the document String
### Examples
Use case Request payload Update the name of the document
{
  "document_group_id": 10xx,
  "document": {
    "document_id": 82xxx,
    "name": "Avaamo Privacy Policy"
  }
}
Update the preview URL of the document
{
  "document_group_id": 10xx,
  "document": {
    "document_id": 82xxx,
    "preview_url": "https://avaamo.ai/gdpr-compliance/"
  }
}
## Document Status
The `Status` can be any of the following values based on the status of the uploaded content:
* **Uploaded:** The document has been added to the skill.
* **Queued:** The content is placed in a queue for further processing.
* **Extracting**: Chunks of content are being extracted.
* **Learning:** Acronyms and vocabulary are being generated.
* **Complete**: The document is uploaded successfully. The extracted knowledge from the document is populated and ready to be used by any agent. See [View and Edit Knowledge](https://docs.avaamo.com/user-guide/llamb/get-started/step-2-ingest-enterprise-content/view-and-edit-knowledge), for more information.
* **Error**: The upload has errored out. In case of errors, you can click `Error` in the `Status` column to view more details. See [Troubleshooting tips](https://docs.avaamo.com/user-guide/llamb/troubleshooting-tips), for more information.
* **Warning:** No business vocabulary was found in the document.
---
# Source: https://docs.avaamo.com/user-guide/how-to/build-skills/create-skill/using-avaamo-answers-1/manage-avaamo-answers-1/content-ingestion.md
# Content ingestion
You can create a quick smart conversational knowledge base by importing any PDF document or from any externally accessible URL using Answers skill. However, if you have an enterprise with a huge knowledge base, then uploading the documents or the URL to the Answers skill can be tedious and time-consuming. See [Add Document or URL](https://docs.avaamo.com/user-guide/how-to/build-skills/create-skill/using-avaamo-answers-1/manage-avaamo-answers-1/add-document-or-url-1), for more information on how to ingest content using PDF documents and URLs to the Answers skill knowledge base.
Instead, you can use this new feature to configure webhooks to push content to Avaamo Platform using the API or run document parsing repo on a system to ingest content.
### How does this work?
{% hint style="info" %}
**Note**: Contact Avaamo Support to start using this feature and for more information on repo access and API documentation.
{% endhint %}
Based on your requirements, you can ingest content in one of the following ways:
* **Document parsing utility**: Most enterprise content websites have sitemaps with indexes and last modified timestamps. The content ingestion utility crawls through the pages provided in the sitemap to create an Answers skill with the knowledge base. This utility can be configured to be run periodically to keep the Answers skill upto date as and when the content is updated in the indexes. Filters can be added to upload content based on certain criteria - for example, to filter content that is only in the English language.
* **Webhooks**: Answers can be set up as an application that can expose its functions using an API call. Those APIs can be configured with a CMS using Webhooks, such that whenever there is any update to the content, the CMS can call the APIs and update the Answers skill.
---
# Source: https://docs.avaamo.com/user-guide/datasync-ai/content-sources.md
# Content sources
- [SharePoint](/user-guide/datasync-ai/content-sources/sharepoint.md)
- [Pre-requisites](/user-guide/datasync-ai/content-sources/sharepoint/pre-requisites.md)
- [Step 1: Select the content source type](/user-guide/datasync-ai/content-sources/sharepoint/step-1-select-the-content-source-type.md): The first step in using DataSync AI, you choose the type of content source from which information must be gathered or accessed.
- [Step 2: Configure content source and ingest content](/user-guide/datasync-ai/content-sources/sharepoint/step-2-configure-content-source-and-ingest-content.md)
- [Configure connection](/user-guide/datasync-ai/content-sources/sharepoint/step-2-configure-content-source-and-ingest-content/configure-connection.md)
- [Select sites](/user-guide/datasync-ai/content-sources/sharepoint/step-2-configure-content-source-and-ingest-content/select-sites.md)
- [Select documents pages and lists](/user-guide/datasync-ai/content-sources/sharepoint/step-2-configure-content-source-and-ingest-content/select-documents-pages-and-lists.md)
- [Set Document Attributes](/user-guide/datasync-ai/content-sources/sharepoint/step-2-configure-content-source-and-ingest-content/set-document-attributes.md)
- [ServiceNow](/user-guide/datasync-ai/content-sources/servicenow.md)
- [Pre-requisites](/user-guide/datasync-ai/content-sources/servicenow/pre-requisites.md)
- [Step 1: Select the content source type](/user-guide/datasync-ai/content-sources/servicenow/step-1-select-the-content-source-type.md): The first step in using DataSync AI, you choose the type of content source from which information must be gathered or accessed.
- [Step 2: Configure content source and ingest content](/user-guide/datasync-ai/content-sources/servicenow/step-2-configure-content-source-and-ingest-content.md)
- [Configure connection](/user-guide/datasync-ai/content-sources/servicenow/step-2-configure-content-source-and-ingest-content/configure-connection.md)
- [Filter Articles](/user-guide/datasync-ai/content-sources/servicenow/step-2-configure-content-source-and-ingest-content/filter-articles.md)
- [Set Document Attributes](/user-guide/datasync-ai/content-sources/servicenow/step-2-configure-content-source-and-ingest-content/set-document-attributes.md)
- [Website](/user-guide/datasync-ai/content-sources/website.md)
- [Pre-requisites](/user-guide/datasync-ai/content-sources/website/pre-requisites.md)
- [Step 1: Select the content source type](/user-guide/datasync-ai/content-sources/website/step-1-select-the-content-source-type.md): The first step in using DataSync AI, you choose the type of content source from which information must be gathered or accessed.
- [Step 2: Configure content source and ingest content](/user-guide/datasync-ai/content-sources/website/step-2-configure-content-source-and-ingest-content.md)
- [Configure connection](/user-guide/datasync-ai/content-sources/website/step-2-configure-content-source-and-ingest-content/configure-connection.md)
- [Filter web pages](/user-guide/datasync-ai/content-sources/website/step-2-configure-content-source-and-ingest-content/filter-web-pages.md)
- [Set document attributes](/user-guide/datasync-ai/content-sources/website/step-2-configure-content-source-and-ingest-content/set-document-attributes.md)
- [Files](/user-guide/datasync-ai/content-sources/files.md)
- [Pre-requisites](/user-guide/datasync-ai/content-sources/files/pre-requisites.md)
- [Step 1: Select the content source type](/user-guide/datasync-ai/content-sources/files/step-1-select-the-content-source-type.md)
- [Step 2: Configure content source and ingest content](/user-guide/datasync-ai/content-sources/files/step-2-configure-content-source-and-ingest-content.md)
- [Configure connection](/user-guide/datasync-ai/content-sources/files/step-2-configure-content-source-and-ingest-content/configure-connection.md)
- [Upload files](/user-guide/datasync-ai/content-sources/files/step-2-configure-content-source-and-ingest-content/upload-files.md)
- [Set document attributes](/user-guide/datasync-ai/content-sources/files/step-2-configure-content-source-and-ingest-content/set-document-attributes.md)
- [Confluence](/user-guide/datasync-ai/content-sources/confluence.md)
- [Pre-requisites](/user-guide/datasync-ai/content-sources/confluence/pre-requisites.md)
- [Step 1: Select the content source type](/user-guide/datasync-ai/content-sources/confluence/step-1-select-the-content-source-type.md): The first step in using DataSync AI, you choose the type of content source from which information must be gathered or accessed.
- [Step 2: Configure content source and ingest content](/user-guide/datasync-ai/content-sources/confluence/step-2-configure-content-source-and-ingest-content.md)
- [Configure connection](/user-guide/datasync-ai/content-sources/confluence/step-2-configure-content-source-and-ingest-content/configure-connection.md)
- [Filter Articles](/user-guide/datasync-ai/content-sources/confluence/step-2-configure-content-source-and-ingest-content/filter-articles.md)
- [Set Document Attributes](/user-guide/datasync-ai/content-sources/confluence/step-2-configure-content-source-and-ingest-content/set-document-attributes.md)
- [Common actions](/user-guide/datasync-ai/content-sources/common-actions.md)
- [Auto sync](/user-guide/datasync-ai/content-sources/common-actions/auto-sync.md)
- [Sync Now](/user-guide/datasync-ai/content-sources/common-actions/sync-now.md)
- [Upload files](/user-guide/datasync-ai/content-sources/common-actions/upload-files.md)
- [View job details](/user-guide/datasync-ai/content-sources/common-actions/view-job-details.md)
- [Delete job](/user-guide/datasync-ai/content-sources/common-actions/delete-job.md)
- [Email Notifiers](/user-guide/datasync-ai/content-sources/common-actions/email-notifiers.md)
- [Advanced Attributes Handler](/user-guide/datasync-ai/content-sources/common-actions/advanced-attributes-handler.md)
- [View job version history](/user-guide/datasync-ai/content-sources/common-actions/view-job-version-history.md)
- [Actions](/user-guide/datasync-ai/content-sources/common-actions/actions.md)
---
# Source: https://docs.avaamo.com/user-guide/how-to/build-agents/create-universal-agent/context-management.md
# Context management
Universal agents allow switching of intents mid-way through a dialog from one member agent to another. When multiple-member agents are participating in a conversation, the Universal agent can switch the conversational flow back and forth between the member agents based on the context of the conversation and the requirement of the user - without losing track of the flow.
This ability of the Universal agent to switch contexts between member agents without losing the flow of the conversation and produce the desired outcome is called **Intent switching**.
In the following illustration, a user starts a conversation with a request to update the address.
* This is a Dialog skill in Acme HR agent which is a part of the Universal agent Acme Enterprise.
* However, in the middle of the conversation, the user switches to another intent asking about employee Id. This is a Q\&A skill in Acme IT agent which is also a part of the Universal agent Acme Enterprise.
* You can observe, how the conversations switch seamlessly based on the user intent, and later when the user switches back with the Employee ID, the conversation resumes with the Dialog skill flow in the Acme HR agent.
* The conversation and context are retained without losing track of the flow.

---
# Source: https://docs.avaamo.com/user-guide/how-to/build-skills/create-skill/customize-your-skill/reference-library/context.md
# Context
Context object encapsulates various details of the user’s interaction with the agent at a particular instance in the agent's flow. **Example**: If a user’s intent is "I want to order cheese pan pizza", then broadly, a context object contains details of the user, agent, agent flow, and the intent applicable at that instance in the agent flow. In addition, it also contains details on the insights and history of agent conversation.
### Syntax
A context attribute can be accessed using **${context.<\>}** in a text message or using **context.<\>** in JavaScript.
### Attributes
The following is a sample context JSON object:
{% hint style="info" %}
**Note:** In the JSON structure, ellipses (...) are used for brevity. Refer to individual sections for more information.
{% endhint %}
{% tabs %}
{% tab title="Structure" %}
```yaml
{
"bot_id": 2154,
"bot_layer_id": "fe8ee61c-f039-4cdc-8986-5bebec9edf08",
"conversation_uuid": "1faa40c8253e65aa02bfd02fd8643d35",
"user_uid": "dashboard_admin_test_user_696",
"last_message": "i want to order cheese pan pizza",
"visible_message": "i want to order cheese pan pizza",
"last_message_timestamp": 1566205610480070,
"last_message_custom_properties": {...},
"message_uuid": "807dc584-1703-4b4e-b978-dce52a965e02",
"device_uuid": "30809947-ec9a-4408-93ac-c7523d1f3058",
"bot_name": "Mac Pizza",
"bot_description": "order pizza and more",
"is_validation_user": false,
"phone": [...],
"layer_id": "dashboard_admin_test_user_696",
"last_name": "C",
"first_name": "John",
"custom_properties": {...},
"<>": "https://cx.avaamo.com/v1/getdata.json",
"email": [...],
"location": [...],
"organization": [...],
"money": [...],
"person": [...],
"percent": [...],
"url": [...],
"credit_card": [...],
"datetime": [...],
"datetime_range": [...],
"number": [...],
"entities": {
"<>": [...],
"<>": [...]
},
"stepmain": {
"input": "reset"
},
"variables": {...},
"user": {...},
"constants": {...},
"insights": {...},
"intent_name": "order pizza",
"history": [...],
"is_agent_enabled": true
}
```
{% endtab %}
{% tab title="Example 1 " %}
User query: I am very excited today I want to order pepper pan pizza. Where pepper and pan are both entity slots.
```javascript
{
"bot_id": 4426,
"bot_layer_id": "a5da2d81-9603-4316-beda-a7bb3ee9ebc1",
"conversation_uuid": "e08b4ed471a08fb4e1afae4ced99b4f9",
"user_uid": "dashboard_admin_test_user_12",
"last_message": "I am very excited today I want to order pepper pan pizza",
"visible_message": "I am very excited today I want to order pepper pan pizza",
"last_message_timestamp": 1624871080666740,
"last_message_custom_properties": {},
"text": "I am very excited today I want to order pepper pan pizza",
"message_uuid": "028ee78a-4193-44d0-9e07-c5344e304e7e",
"device_uuid": "907847bf-8f49-4c29-b5ae-0c55cf490347",
"bot_name": "MacPizza",
"bot_description": "order pizza and more",
"is_validation_user": false,
"first_name": "John",
"last_name": null,
"layer_id": "dashboard_admin_test_user_12",
"avatar": false,
"avaamo_id": 22,
"phone": [],
"avatar_updated_at": null,
"custom_properties": {},
"email": [],
"bot_inline_domain_5a3c0eb1-cbae-4167-9b9c-9fb255fe331d": {
"pizza_types": [
"veg"
],
"pizza_toppings": [
"pepper"
],
"pizza_crust": [
"pan"
]
},
"location": [],
"organization": [],
"money": [],
"person": [],
"percent": [],
"url": [],
"credit_card": [],
"datetime": [
1624881600000
],
"datetime_range": [],
"number": [],
"entities": {
"pizza_types": [
"veg"
],
"pizza_toppings": [
"pepper"
],
"pizza_crust": [
"pan"
],
"location": [],
"organization": [],
"money": [],
"person": [],
"percent": [],
"email": [],
"url": [],
"credit_card": [],
"phone": [],
"datetime": [
1624881600000
],
"datetime_range": [],
"number": []
},
"bot_inline_domain_d5fc76f2-03d8-4b06-8df0-3e53a7e28a89": {
"pizza_types": [
"veg"
],
"pizza_toppings": [
"pepper"
],
"pizza_crust": [
"pan"
]
},
"stepmain": {
"input": "reset"
},
"step1": {
"input": "I am very excited today I want to order pepper pan pizza"
},
"variables": {},
"user": {
"first_name": "John",
"last_name": null,
"layer_id": "dashboard_admin_test_user_12",
"avatar": false,
"avaamo_id": 22,
"phone": null,
"avatar_updated_at": null,
"custom_properties": {}
},
"constants": {},
"insights": {
"analyzed_document": "I am very excited today I want to order pepper pan pizza",
"document": "I am very excited today I want to order pepper pan pizza",
"domain_ids": [
13751
],
"entities": [
{
"entity": "pizza_types",
"entity_type": "pizza_types",
"entity_value": "veg",
"domain_key": "bot_inline_domain_5a3c0eb1-cbae-4167-9b9c-9fb255fe331d",
"value": "veg",
"current_value": "pepper",
"index": 39,
"derived_parent": true,
"parent_entity_key": null,
"custom_entity_type": true
},
{
"entity": "pizza_toppings",
"entity_type": "pizza_toppings",
"entity_value": "pepper",
"domain_key": "bot_inline_domain_5a3c0eb1-cbae-4167-9b9c-9fb255fe331d",
"value": "pepper",
"current_value": "pepper",
"index": 39,
"parent_entity_key": "pizza_types",
"custom_entity_type": true
},
{
"entity": "pizza_crust",
"entity_type": "pizza_crust",
"entity_value": "pan",
"domain_key": "bot_inline_domain_5a3c0eb1-cbae-4167-9b9c-9fb255fe331d",
"value": "pan",
"current_value": "pan",
"index": 47,
"custom_entity_type": true
}
],
"featured_tokens": [
"i",
"am",
"very",
"excite",
"today",
"i",
"want",
"to",
"order",
"pepper",
"pan",
"pizza"
],
"featured_tokens_lemma_map": {
"am": "am",
"excited": "excite",
"i": "i",
"order": "order",
"pan": "pan",
"pepper": "pepper",
"pizza": "pizza",
"to": "to",
"today": "today",
"very": "very",
"want": "want"
},
"id": null,
"lemma": "i am very excite today i want to order pepper pan pizza",
"negation": false,
"original_document": "I am very excited today I want to order pepper pan pizza",
"pos": [
[
"i",
"NN"
],
[
"am",
"VBP"
],
[
"very",
"RB"
],
[
"excited",
"JJ"
],
[
"today",
"NN"
],
[
"i",
"VBP"
],
[
"want",
"VBP"
],
[
"to",
"TO"
],
[
"order",
"NN"
],
[
"pepper",
"NN"
],
[
"pan",
"NN"
],
[
"pizza",
"NN"
]
],
"sentiment": "neutral",
"tone": "Surprise",
"raw_document": "I am very excited today I want to order pepper pan pizza",
"bow_normalized_document_with_stopwords": "i very excite datetime want order randomA randomB pizza",
"bow_normalized_document": "excite datetime want order randomA randomB pizza",
"bow_words": [
"want",
"randomb",
"randoma",
"pizza",
"order",
"excite",
"datetime"
],
"normalized_document": "excite datetime want order randomA randomB pizza",
"featured_normalized_tokens": "excite datetime want order randomA randomB pizza",
"normalized_tokens": "excite datetime want order randomA randomB pizza",
"multiIntentEligible": false,
"bow_score": 1,
"entities_already_processed": true,
"intent": "node_intent_node_1",
"intent_name": "MacPizza Order",
"skill_name": "MacPizza Order",
"score": 1,
"es_score": 33.98229,
"confidence_score": 0,
"training_datum_id": 2130273,
"intent_id": 81879,
"intent_type": "INLINE::INTENT",
"bot_key": "macpizza_order",
"skill_key": "macpizza_order",
"intent_key": "1",
"matching_document": "I want to order pepper pan pizza",
"second_best_result": null,
"detected_language": "en-US",
"original_text": "I am very excited today I want to order pepper pan pizza",
"is_transaction": false
},
"response_filters": [],
"intent_name": "MacPizza Order",
"history": [],
"is_agent_enabled": true
}
```
{% endtab %}
{% tab title="Example 2 " %}
User query: I want to travel by air and sea. Where air and sea are both entity slots.
```javascript
{
"bot_id": 32745,
"bot_layer_id": "039db95b-f27b-4ae3-8c89-fc529e32d772",
"conversation_uuid": "bbf0d8d9491049750e87423a0dcb8063",
"user_uid": "dashboard_admin_test_user_368",
"last_message": "I want to travel via both air and sea",
"visible_message": "I want to travel via both air and sea",
"last_message_timestamp": 1624866162245929,
"last_message_custom_properties": {},
"text": "I want to travel via both air and sea",
"message_uuid": "1ff21e25-a452-4739-8e41-94dac2a38e26",
"device_uuid": "83133fee-79b0-497f-bc3d-10e568e05b89",
"bot_name": "Travel assistant",
"bot_description": "Travel assistant",
"is_validation_user": false,
"first_name": "John",
"last_name": "Miller",
"layer_id": "dashboard_admin_test_user_368",
"avatar": false,
"avaamo_id": 30572,
"phone": [],
"avatar_updated_at": null,
"custom_properties": {},
"email": [],
"bot_inline_domain_7447fd52-19d1-493c-b1d1-c4552d5ad7e4": {
"travel_modes_1": [
"air"
],
"travel_modes_2": [
"sea"
]
},
"location": [],
"organization": [],
"money": [],
"person": [],
"percent": [],
"url": [],
"credit_card": [],
"datetime": [],
"datetime_range": [],
"number": [],
"entities": {
"travel_modes_1": [
"air"
],
"travel_modes_2": [
"sea"
],
"location": [],
"organization": [],
"money": [],
"person": [],
"percent": [],
"email": [],
"url": [],
"credit_card": [],
"phone": [],
"datetime": [],
"datetime_range": [],
"number": []
},
"bot_inline_domain_35ff647c-2031-4a4b-a78b-d850e99ee074": {
"travel_modes_1": [
"air"
],
"travel_modes_2": [
"sea"
]
},
"bot_inline_domain_71e3373f-b5f2-4de8-8ef6-d10dcdaf3618": {
"travel_modes_1": [
"air"
],
"travel_modes_2": [
"sea"
]
},
"bot_inline_domain_c60eeee0-4810-41b8-a9ac-bce503abd117": {
"travel_modes_1": [
"air"
],
"travel_modes_2": [
"sea"
]
},
"stepmain": {
"input": "reset"
},
"step3": {
"input": "I want to travel via both air and sea"
},
"variables": {},
"user": {
"first_name": "John",
"last_name": "Miller",
"layer_id": "dashboard_admin_test_user_368",
"avatar": false,
"avaamo_id": 30572,
"phone": null,
"avatar_updated_at": null,
"custom_properties": {}
},
"constants": {},
"insights": {
"analyzed_document": "I want to travel via both air and sea",
"document": "I want to travel via both air and sea",
"domain_ids": [
53292
],
"entities": [
{
"entity_type": "travel_modes",
"entity": "travel_modes_1",
"entity_value": "air",
"current_value": "air",
"domain_key": "bot_inline_domain_7447fd52-19d1-493c-b1d1-c4552d5ad7e4",
"value": "air"
},
{
"entity_type": "travel_modes",
"entity": "travel_modes_2",
"entity_value": "sea",
"current_value": "sea",
"domain_key": "bot_inline_domain_7447fd52-19d1-493c-b1d1-c4552d5ad7e4",
"value": "sea"
}
],
"featured_tokens": [
"i",
"want",
"to",
"travel",
"via",
"both",
"air",
"and",
"sea"
],
"featured_tokens_lemma_map": {
"air": "air",
"and": "and",
"both": "both",
"i": "i",
"sea": "sea",
"to": "to",
"travel": "travel",
"via": "via",
"want": "want"
},
"id": null,
"lemma": "i want to travel via both air and sea",
"negation": false,
"original_document": "I want to travel via both air and sea",
"pos": [
[
"i",
"NN"
],
[
"want",
"VBP"
],
[
"to",
"TO"
],
[
"travel",
"VB"
],
[
"via",
"IN"
],
[
"both",
"DT"
],
[
"air",
"NN"
],
[
"and",
"CC"
],
[
"sea",
"NN"
]
],
"sentiment": "neutral",
"tone": "",
"raw_document": "I want to travel via both air and sea",
"bow_normalized_document_with_stopwords": "want travel via both randomB and randomA",
"bow_normalized_document": "want travel randomB randomA",
"bow_words": [
"want",
"travel",
"randomb",
"randoma"
],
"normalized_document": "want travel randomB randomA",
"featured_normalized_tokens": "want travel randomB randomA",
"normalized_tokens": "want travel randomB randomA",
"multiIntentEligible": true,
"bow_score": 1,
"entities_already_processed": true,
"intent": "node_intent_node_1",
"intent_name": "Book Travel",
"skill_name": "Book Travel",
"score": 1,
"es_score": 44.024994,
"confidence_score": 0,
"training_datum_id": 2187561,
"intent_id": 272933,
"intent_type": "INLINE::INTENT",
"bot_key": "book_travel",
"skill_key": "book_travel",
"intent_key": "1",
"matching_document": "I want to travel via both air and sea",
"detected_language": "en-US",
"original_text": "I want to travel via both air and sea",
"is_transaction": false
},
"response_filters": [],
"intent_name": "Book Travel",
"history": [],
"is_agent_enabled": true
}
```
{% endtab %}
{% endtabs %}
The following attributes are supported in the context object:
Attribute Description Type bot_id Indicates a unique identifier of the agent. Integer bot_layer_id Indicates a unique agent identifier internally used by the Avaamo platform. String conversation_uuid Indicates a unique identifier of conversation per user. Note that conversation/uuid is different for each user. String user_uid Indicates a unique identifier of the user interacting with the agent. String last_message Indicates the last message sent to the agent. For form fields, you can access last_message in one of the following ways:
context.last_message.ID context.last_message["ID"] context.last_message[expression] Note that context.last_message can store any valid Javascript object.
Examples :
// context.last_message.ID
context.last_message.da83d;
// context.last_message["ID"]
context.last_message["3a62c2"];
// context.last_message[expression]
var control = "3a62c2";
context.last_message[control];
See Card , for more details.
String visible_message Indicates the last visible message sent to the agent. Note that in case of hidden messages, visible and last messages can be different. String last_message_timestamp Indicates timestamp of the last message sent by the user to the agent in milliseconds. UTC Timestamp last_message_custom_properties Indicates any additional user properties specified in the last message.
Example :
"custom_properties": {
"employee_id":12345,
"dept":"quality"
},
JSON key-value pairs message_uuid Indicates a unique identifier of the message. String device_uuid Indicates a unique identifier of the device from which the agent is being used. String bot_name Indicates the name of the agent specified during creation. String bot_description Indicates the description of the agent specified during creation. String is_validation_user Indicates if queries posted to the agent are from an actual user or from regression tests. Returns true, if the queries posted to the agent are from regression tests. Boolean phone Indicates an array of phone numbers of the user interacting with the agent.
Example : phone["+16503835663", "+919999988888"].
Array layer_id Indicates a unique user identifier internally used by the Avaamo platform. String last_name Indicates the last name of the user interacting with the agent. String first_name Indicates the first name of the user interacting with the agent. String custom_properties Indicates any additional user properties specified when sending requests to the agent.
Example :
"custom_properties": {
"employee_id":12345,
"dept":"quality"
},
NOTE: If you have set custom user properties, then you can use context.user.custom_properties.<> to get the value of the set property.
JSON key-value pairs environment variables Indicates the environment variables configured in your agent. JSON key-value pairs email Indicates an array of email Ids of the user interacting with the agent.
Example : email["john@gmail.com", "john@hotmail.com"]
Array location, organization, money, person, percent, URL, credit_card, DateTime, datetime_range, number Indicates all the system entities that are predefined and available for all the agents. Note that values for these are populated as applicable during the execution of a user’s intent in the agent flow. Array entities -> <<slot_name>> Indicates slot names extracted and applicable during the execution of a user’s intent in the agent flow. JSON with an array of slot_name as key-value pairs step<<node>> Indicates the steps in the agent flow for which the user’s intent is executed. There can be multiple steps and each is specified as individual JSON key-value pairs.
<<node>> here refers to main for starting step or a specific node number. Example:
"step14": {
"input": "i want to order cheese pan pizza"
},
JSON key-value pairs variables Indicates the temporary variables that are defined to store information required for the agent flow at a particular node. JSON key-value pairs user Indicates the details of the user interacting with the agent. JSON key-value pairs constants Indicates environment variables constants defined for the agent. These environment variables are global for all users of the agent.
Examples : External service access credentials like web service login credentials, webservice_username, webservice_password.
JSON key-value pairs insights Indicates insights into how the user’s intent was analyzed and matched in the agent flow. JSON key-value pairs history Indicates the history of the message such as created date and time, actual message, and the sender of the message generated during the execution of the user’s intent in the agent flow. JSON with an array of entity_name as key-value pairs intent_name Indicates the name of the intent that mapped to the user query. String is_agent_enabled Indicates if the live agent is enabled or not for the agent. Boolean
### When is the context reset?
* By default, the context is reset at the leaf node of the Dialog skill. However, if you wish to retain certain values, then you can consider using other storage options depending on the use case. See [Use storage](https://docs.avaamo.com/user-guide/how-to/build-skills/create-skill/customize-your-skill/how-to/using-storage), for more information.
* If you wish to reset context in a non-leaf node, then you can use the **Reset Context** slider in the Skill Response -> Advanced Settings. See [Reset Context in Advanced Settings](https://docs.avaamo.com/user-guide/how-to/build-skills/using-dialog-designer/create-new-skill/build-skill-responses/advanced-settings#reset-context), for more information.
* Note that when you use `execute intent, goto node, or goto output`from the leaf node, then the context is not reset as the agent is still in the same transactional flow and context. Example: Consider that in the last post-processing node of the Pizza order flow, you have specified `return execute_intent('main','I want to check my order status')`. When the specified intent is executed at the transferred node, the previous context is still available.
---
# Source: https://docs.avaamo.com/user-guide/how-to/build-skills/create-skill/customize-your-skill/how-to/controlling-skill-flow.md
# Control skill flow
You can use functions such as goto\_node, goto\_intent, execute\_intent, or goto\_output in the JS while building a skill flow for navigating to different nodes in the flow, based on your business requirements. See [Flow control](https://docs.avaamo.com/user-guide/how-to/build-skills/create-skill/customize-your-skill/reference-library/flow-control), for more information.
Consider that at the end of placing a pizza order, you wish to navigate to another node that provides options to place order starters in the Order skill of the MacPizza agent. At the end of taking the order details,
* You can add a JS node with **return goto\_node('<\>.<\>')** and navigate to the required node. See [Flow control](https://docs.avaamo.com/user-guide/how-to/build-skills/create-skill/customize-your-skill/reference-library/flow-control), for more information.
* You can also specify the same suing **Goto Skill Message** in the **Advanced Settings** of the response node. See [Advanced Settings](https://docs.avaamo.com/user-guide/how-to/build-skills/create-skill/using-dialog-designer/create-new-skill/build-skill-responses/advanced-settings), for more information.

In the agent, the navigation is displayed as follows:

Similarly, you can use JS in post-processing for navigating to different nodes in the flow based on your business requirements. See [Add user intent](https://docs.avaamo.com/user-guide/how-to/build-skills/create-skill/using-dialog-designer/create-new-skill/add-user-intent), for more information on post-processing.
---
# Source: https://docs.avaamo.com/user-guide/how-to/build-agents/debug-agents/conversation-history.md
# Source: https://docs.avaamo.com/user-guide/debug/conversation-history.md
# Conversation history
The **Conversation history** page displays the records of the agent and all of its user interactions for the selected agent.
* Click any conversation to see the details. In the URL, you can also see a unique identifier for the conversation. This is referred to as conversation\_uuid. You can use this in APIs. See [Conversation API](https://docs.avaamo.com/user-guide/ref/avaamo-platform-api-documentation/conversation-message-api), for an example.
* You can search through history to find specific conversations, messages, and users.
`GET` `https://cx.avaamo.com/v1/conversations/{{conversation_uuid}}.json`
Gets the summary of a conversation using Conversation API. In the conversation summary, you can learn about the participants involved in the conversation and the last message of the conversation.
#### Path Parameters
| Name | Type | Description |
| ---------------------------------------------------- | ------- | -------------------------------------------------------------------------------------------------------------------------------------------------------------------------------------------------------------------------------------------------------------------------------------------------------------------------------------------------------------------------------------------------------------------------------------------------------------------------------------------------------------- |
| conversation\_uuid\* | integer | Conversation identifier.
You can get the conversation identifier from the Conversation history URL or from the Get Messages API or from the message object when you are using the Avaamo.onBotMessage callback function in the Web channel.
|
#### Headers
| Name | Type | Description |
| ---------------------------------------------- | ------ | -------------------------------------------------------------------------------------------------------------------------------------------------------------------------------------------------------------------------------------------------------------------- |
| Device-Id\* | number | Currently, this can be any random number such as 12345678. |
| access-token\* | string | The agent access token. You can get the agent access token from the Agent -> Settings page. See [Agent Authentication Keys](https://docs.avaamo.com/user-guide/how-to/build-agents/configure-agents/define-settings#agent-authentication-keys), for more information |
{% tabs %}
{% tab title="200 " %}
```javascript
{
"conversation": {
"uuid": "9e2484a9be77d54ef1b0b668231cc065",
"mode": false,
"members_type": 2,
"avatar": false,
"name": null,
"created_at": 1582707000.0,
"user": null,
"receivers": [
{
"first_name": "MacPizza",
"last_name": "",
"layer_id": "a1148a3e-58ce-4cc6-9ea6-2c2d7b092730",
"phone": null,
"email": null,
"avaamo_id": 3344,
"avatar": false,
"avatar_updated_at": null,
"custom_properties": {},
"display_name": "MacPizza ",
"bot_user_info": []
},
{
"first_name": "David",
"last_name": "Miller",
"layer_id": "dashboard_admin_test_user_163",
"phone": null,
"email": null,
"avaamo_id": 1380,
"avatar": false,
"avatar_updated_at": null,
"custom_properties": {
"email": "david@avaamo.com"
},
"display_name": "David Miller",
"bot_user_info": [
{
"key": "email",
"bot_id": null,
"value": "david@avaamo.com"
}
]
}
],
"avatar_updated_at": null,
"description": null,
"last_message": {
"uuid": "923cd3d7-3ecb-4aab-939c-2877406cb17a",
"content": "Currently, you can place only online orders. Visit, www.macpizza.com, for more information.",
"content_type": "text",
"created_at": 1586255204.153764,
"user": {
"first_name": "MacPizza",
"last_name": "",
"layer_id": "a1148a3e-58ce-4cc6-9ea6-2c2d7b092730",
"email": null,
"phone": null,
"avatar": false,
"avatar_updated_at": null,
"avaamo_id": 3344
},
"timetoken": 1586255204140986,
"external_source": null,
"device_uuid": "3c163171-9bec-492f-8448-685e9bfeffbc",
"request_message_uuid": "2ac5917f-16d1-431f-883d-0a1c9d255658",
"sequence": "1/1",
"custom_properties": {
},
"agent_message_uuid": null,
"read_acks": [
{
"read_at": 1586255204.0,
"user": {
"first_name": "David",
"last_name": "Miller",
"layer_id": "dashboard_admin_test_user_163",
"email": null,
"phone": null,
"avatar": false,
"avatar_updated_at": null,
"avaamo_id": 1380
}
}
],
"attachments": [],
"conversation": {
"uuid": "9e2484a9be77d54ef1b0b668231cc065",
"mode": false,
"display_name": "MacPizza,David",
"locale": null
}
},
"members_count": 2
}
}
```
{% endtab %}
{% endtabs %}
### Code request snippets
{% tabs %}
{% tab title="cURL" %}
```javascript
curl --location --request GET 'https://cx.avaamo.com/v1/conversations/xxxxxxae172c539696ff6f4f67xxxxxx.json' \
--header 'Access-Token: xxxxxx8d9952499ea466fc007dxxxxxx' \
--header 'Device-Id: 12345667' \
--header 'Content-Type: application/json'
```
{% endtab %}
{% tab title="node.js" %}
```javascript
var request = require('request');
var options = {
'method': 'GET',
'url': 'https://cx.avaamo.com/v1/conversations/xxxxxxae172c539696ff6f4f67xxxxxx.json',
'headers': {
'Access-Token': 'xxxxxx8d9952499ea466fc007dxxxxxx',
'Device-Id': '12345667',
'Content-Type': 'application/json'
}
};
request(options, function (error, response) {
if (error) throw new Error(error);
console.log(response.body);
});
```
{% endtab %}
{% endtabs %}
### **Response attributes**
In the response, the following attributes are returned:
Attribute Description Type uuid Indicates the page from which the entries are fetched. Integer created_at Indicates the number of entries fetched per page. Integer receivers Indicates the details of the participants in the conversation.
This is an array of two -
One with the details of the user and another the details of the agent in the conversation.
JSON key-value pairs last_message Indicates the details of the last message in the specified conversation. JSON key-value pairs
#### receivers
Indicates the details of the participants in the conversation. This is an array of two - one with the details of the user and another with the details of the agent in the conversation.
Attribute Description Type
first_name
Indicates the first name of the user or agent participating in the conversation. String last_name Indicates the last name of the user participating in the conversation. For agents, this field is null. String layer_id Indicates a unique user or agent identifier internally used by the Avaamo Platform. String phone Indicates an array of phone numbers of the user interacting with the agent. Array email Indicates the email of the user interacting with the agent. String custom_properties Indicates any additional custom properties of the user interacting with the agent.
Example :
"custom_properties": {
"employee_id":12345,
"dept": "quality"
},
JSON key-value pairs display_name Indicates the display name of the user participating in the conversation. String
#### **last\_message**
Indicates the last message of the specified conversation:
Attribute Description Type uuid Indicates a unique identifier of the message. String content Indicates the content of the message. String content_type Indicates the type of content such as text, ListView, card String created_at Indicates the timestamp of when the message was created in seconds. UNIX epoch timestamp user Indicates the details of the user interacting with the agent.
phone : Indicates an array of phone numbers of the user interacting with the agent.layer_id : Indicates a unique user identifier internally used by the Avaamo Platform.last_name : Indicates the last name of the user interacting with the agent.first_name : Indicates the first name of the user interacting with the agent.email : Indicates the email of the user interacting with the agent.JSON key-value pairs timetoken Indicates the created timestamp of the message in milliseconds. UNIX epoch timestamp device_uuid Indicates a unique identifier of the device from which the agent is being used. String request_message_uuid Indicates the message identifier from the agent to which this conversation is linked to. String sequence Indicates the sequence of the agent response message. There can be multiple responses for a user query, each identified with the request_message_uuid and sequence. Note that the request_message_uuid is the same for each agent response. <<message_sequence>>/<<total message> custom_properties Indicates any additional user properties in the fetched message.
Example :
"custom_properties": {
“employee_id”:12345,
“dept”: “quality”
},
JSON key-value pairs read_acks Indicates the details of when the message was read and acknowledged.
read_at : Indicates the read timestamp of the message in UNIX epoch format.user : Indicates the details of the user who acknowledged the message.An array of JSON key-value pairs attachments Indicates an array of attachments that is fetched from the agent message. JSON key-value pairs conversation Indicates the conversation details of the message:
uuid : Indicates a unique identifier of the conversation.display_name : Indicates display name of the conversation in the following format: <<Agent Display Name>>, <<User First Name>>.locale : Indicates the locale used in the agent conversation.JSON key-value pairs
## Get conversation messages
`GET` `https://cx.avaamo.com/v1/conversations/{{conversation_uuid}}/messages.json`
Gets the complete message details of a specific user conversation using Conversation Message API. \
All the conversation with an Avaamo agent has a conversation uuid associated with the conversation. In the message details, you can learn about the actual message content, type, identifier, and details of when the message was read and acknowledged.\* | integer | You can get the conversation identifier from the Conversation history URL or from the Get Messages API or from the message object when you are using the Avaamo.onBotMessage callback function in the Web channel.
|
#### Query Parameters
| Name | Type | Description |
| ---------------- | ------- | ------------------------------------------------------------------------------------------------------------------------------------------------------------------------------------------------------------------------------ |
| since\_timetoken | number | Timestamp from which the records are fetched.
|
| timetoken | number | Timestamp until which the records are fetched. The default value is the current timestamp. Specify UNIX Epoch Timestamp in microseconds. |
| page | integer | Page from which the entries must be fetched. The default value is 1. |
| per\_page | integer | The number of entries fetched per page.
Maximum: 100
|
#### Headers
| Name | Type | Description |
| ---------------------------------------------- | ------ | --------------------------------------------------------------------------------------------------------------------------------------------------------------------------------------------------------------------------------------------------------------------- |
| Device-Id\* | string | Currently, this can be any random identifier such as 12345678. |
| access-token\* | string | The agent access token. You can get the agent access token from the Agent -> Settings page. See [Agent Authentication Keys](https://docs.avaamo.com/user-guide/how-to/build-agents/configure-agents/define-settings#agent-authentication-keys), for more information. |
{% tabs %}
{% tab title="200 " %}
```javascript
{
"current_page": 1,
"per_page": 1,
"total_entries": 66,
"total_pages": 66,
"time_token": 1586147024.9868526,
"entries": [
{
"uuid": "251c8106-2e06-422c-9495-11c9878b9289",
"content": "Chez MacPizza, nous avons utilisé des ingrédients biologiques fraîchement préparés dans toutes nos recettes.",
"content_type": "text",
"created_at": 1582737781.470828,
"user": {
"first_name": "MacPizza",
"last_name": "",
"layer_id": "a1148a3e-58ce-4cc6-9ea6-2c2d7b092730",
"email": null,
"phone": null,
"avatar": false,
"avatar_updated_at": null,
"avaamo_id": 3344
},
"timetoken": 1582737781457202,
"external_source": null,
"device_uuid": "3c163171-9bec-492f-8448-685e9bfeffbc",
"request_message_uuid": "f6850f78-a869-403c-b765-20b546343ea6",
"sequence": "1/1",
"custom_properties": {},
"agent_message_uuid": null,
"read_acks": [
{
"read_at": 1582737781.0,
"user": {
"first_name": "David",
"last_name": "Miller",
"layer_id": "dashboard_admin_test_user_163",
"email": null,
"phone": null,
"avatar": false,
"avatar_updated_at": null,
"avaamo_id": 1380
}
}
],
"attachments": [],
"conversation": {
"uuid": "9e2484a9be77d54ef1b0b668231cc065",
"mode": false,
"display_name": "MacPizza,David",
"locale": null
}
}
]
}
```
{% endtab %}
{% endtabs %}
{% hint style="info" %}
**Note**: For optimal API performance, the recommended time duration for fetching data from any of the REST APIs that support a date range or time period is 7 days.
{% endhint %}
### Code request snippets
{% tabs %}
{% tab title="cURL" %}
```javascript
curl --location --request GET 'https://cx.avaamo.com/v1/conversations/7db4d0ae172c539696ff6f4f676f2222/messages.json?page=2&per_page=55' \
--header 'Access-Token: xxxxxx8d9952499ea466fc007dxxxxxx' \
--header 'Device-Id: 12345667' \
--header 'Content-Type: application/json'
```
{% endtab %}
{% tab title="node.js" %}
```javascript
var request = require('request');
var options = {
'method': 'GET',
'url': 'https://cx.avaamo.com/v1/conversations/xxxxxxae172c539696ff6f4f67xxxxxx/messages.json?page=2&per_page=55',
'headers': {
'Access-Token': 'xxxxxx8d9952499ea466fc007dxxxxxx',
'Device-Id': '12345667',
'Content-Type': 'application/json'
}
};
request(options, function (error, response) {
if (error) throw new Error(error);
console.log(response.body);
});
```
{% endtab %}
{% endtabs %}
### Response attributes
In the response, the following attributes are returned:
Attribute Description Type current_page Indicates the page from which the entries are fetched. Integer per_page Indicates the number of entries fetched per page. Integer total_entries Indicates the total number of entries in the agent messages. Integer total_pages Indicates the total number of pages calculated using per_page. Note that total_entries = per_page * total_pages Integer time_token Indicates the timestamp at which the API response is returned. UNIX epoch timestamp entries Indicates an array of messages fetched from the agent.
The number of entries in the array = Number specified in the per_page parameter.
JSON key-value pairs
#### **entries**
Indicates an array of messages fetched from the agent. Each array contains the following attributes:
Attribute Description Type uuid Indicates a unique identifier of the message. String content Indicates the content of the message. String content_type Indicates the type of content such as text, ListView, card String created_at Indicates the timestamp of when the message was created in seconds. UNIX epoch timestamp user Indicates the details of the user interacting with the agent.
phone : Indicates an array of phone numbers of the user interacting with the agent.layer_id : Indicates a unique user identifier internally used by the Avaamo Platform.last_name : Indicates the last name of the user interacting with the agent.first_name : Indicates the first name of the user interacting with the agent.email : Indicates the email of the user interacting with the agent.JSON key-value pairs timetoken Indicates the created timestamp of the message in milliseconds. UNIX epoch timestamp device_uuid Indicates a unique identifier of the device from which the agent is being used. String request_message_uuid Indicates the message identifier from the agent for which this conversation is linked to. For a live agent conversation message, request_message_uuid is null. String sequence Indicates the sequence of the agent response message. There can be multiple responses for a user query, each identified with the request_message_uuid and sequence. Note that the request_message_uuid is the same for each agent response. <<message_sequence>>/<<total message> custom_properties Indicates any additional user properties in the fetched message.
Example :
"custom_properties": {
“employee_id”:12345,
“dept”: “quality”
},
JSON key-value pairs agent_message_uuid Indicates the unique identifier for a live agent conversation. String read_acks Indicates the details of when the message was read and acknowledged.
read_at : Indicates the read timestamp of the message in UNIX epoch format.user : Indicates the details of the user who acknowledged the message.An array of JSON key-value pairs attachments Indicates an array of attachments that is fetched from the agent message. JSON key-value pairs conversation Indicates the conversation details of the message:
uuid : Indicates a unique identifier of the conversation.display_name : Indicates display name of the conversation in the following format: <<Agent Display Name>>, <<User First Name>>.locale : Indicates the locale used in the agent conversation.JSON key-value pairs
### Examples
The following table lists a few sample use cases with query parameters:
Use-case Query Parameter Get the latest message of a user conversation per_page : Specify 1 to get the latest message.
Example : https://cx.avaamo.com/v1/conversations/
<<conversation_uuid>>/messages.json?per_page=1
Get messages of a user conversation within a specified period since_timetoken : Specify the from timestamp in epoch format such as 1569229247677821
timetoken : Specify the to timestamp in epoch format such as 1569229251418739.
Example :
https://cx.avaamo.com/v1/conversations/
<<conversation_uuid>>/messages.json?since_timetoken=1569229247677821&timetoken=1569229251418739
Get messages of a user conversation using pagination page : Specify the page from which you wish to fetch records.
per_page : Specify the number of entries per page.
Example : https://cx.avaamo.com/v1/conversations/
<<conversation_uuid>>/messages.json?page=5&per_page=2
---
# Source: https://docs.avaamo.com/user-guide/configuration/channels/conversational-ivr-c-ivr-or-phone.md
# Conversational IVR (C-IVR) or Phone
You can deploy the agents built on the Avaamo Platform into your phone channel. This allows callers to converse naturally with agents via interactive voice responses (IVR) to achieve the desired results without having to navigate lengthy audio menus. This feature can help to reduce live-agent calls, improve call routing, and provide a good user experience.
**To configure a C-IVR channel:**
After a successful configuration, a phone number is generated in the **Activated phone number** area, and this is the number that can be used to connect to your agent via the C-IVR channel.
* In the **Agent** page, navigate to the **Configure -> Channels** option in the left navigation menu.
* On the Channels page, click **Connect** in the C-IVR Channel.
* Specify the following channel setting details:
Parameter Descriptions Name Indicates the Name used to identify the C-IVR channel. Note that you can have upto 150 characters in the channel name. Languages and
Playback Voice for
Select the language and configure the voice or the persona to be used by your agent in the interactive phone conversations with the user. Each language has a different set of voice personas that you can choose from. Select the persona from the options provided in the "Playback voice for <<language>>" section:
As with any enterprise voice, audio, or video application, each region or country has its phone number to dial. Similarly, in the C-IVR channel, you choose the language of the region or country where you wish to share the configured number. If you wish to share the number in multiple regions, then set up the C-IVR channel specific to each language. Note that one C-IVR channel is specific to only one language. To hear the voice preview, type any text in the text area and click the play button. You can also download the voice preview if required. You can select only those languages for which the agent is configured and those that are supported in the C-IVR channel. If you have switched to a language that is not supported in the C-IVR channel, then the agent responds in the default language. See Add languages and Supported languages , for more information.
Live agent transfer mode Defines how a live agent is invited into the conversation when escalation is required. Supports Invite (conference style where the bot stays in the call) or Refer (the call is handed over to the agent directly). ASR Configuration Allows selection of the Automatic Speech Recognition (ASR) provider version for speech-to-text processing. Available options are V1, V2, V3, V4, V5, V6 . Choose the version based on performance and compatibility. Enable Noise Filter When enabled, background noise is filtered out during user input. This improves recognition accuracy by reducing interference from non-speech sounds. Fallback Forward Configuration Defines the backup handling flow when the AI agent cannot process the user’s request. The request is forwarded to the specified destination along with the required headers. Forward Destination Specifies the phone number to which incoming calls will be forwarded. Forward Headers Custom headers to be included while forwarding the request. Headers should be specified in JSON object format. Speech timeout Indicates a maximum wait time of the agent within which a user response is expected. If the user response is not received within the time-out period, then an automated message is rendered back to the user indicating that the agent is awaiting the user response. Currently, this is a standard message and cannot be customized.
The default value is 1 second. Use the up and down arrows to increase or decrease time as required. SMS message options Enable this option and specify a message, if you wish to send an SMS message to the caller when the call gets disconnected and/or when the call is completed. Specify the SMS text message in the respective options as required. Note that a single SMS can have upto 150 characters. Send an SMS after completion of call Enable this option and specify a message, if you wish to send an SMS message to the caller when the call is completed. Note that a single SMS can have upto 150 characters. If a call is hung up after a successful dialogue between the user and the agent, that is a user asks a query and the agent responds back to the query, then it is considered as complete. Send an SMS if call disconnects Enable this option and specify a message if you wish to send an SMS message to the caller when the call gets disconnected. Note that a single SMS can have up to 150 characters. A call is considered disconnected when the user asks a query and, before the agent's response is received, the call is hung up. This is the case when the user is between conversation flows. Enable custom user authentication Use this if you wish to enable custom authentication for your agents deployed on the phone channels using JavaScript code. See User authentication handler , for more information. Enable wait time tone Use this option if you wish to play an idle tone to the user in case the agent is taking a little longer to respond.
Rather than experiencing silence or a lack of input, the introduction of a tone serves to engage the user actively and assures that the agent will respond shortly. For example, the system generates a typing tone when processing DTMF/keypad input.
Select file Once you enable the wait time tone, the option to upload a file becomes available. You can customize the wait time tone by uploading an audio file that plays an idle tone for the user. The file must not exceed 10 seconds and should be within 5 MB in size.
Click Select File , then choose and upload the desired file for the wait time tone.
Enable warmup message Enables playback of a static message at the start of a phone call to mask call setup latency. After enabling this option, you must specify the message text to be played. Enabling the toggle alone does not play any message. The configured message is played while the call setup continues in the background. Supported only for the Phone (C-IVR) channel and compatible with multiple TTS providers.
* Click **Save** to save the C-IVR channel configuration details. A phone number is generated in the **Activated phone number** area, and this is the number that can be used to connect to your agent.

{% hint style="success" %}
**Key Points**:
* After successfully saving the C-IVR configuration, you have the option to add "Agent voice", "Voice menu", and "Voice hints" to the agent responses. See [Build skill responses](https://docs.avaamo.com/user-guide/how-to/build-skills/create-skill/using-dialog-designer/create-new-skill/build-skill-responses) and [Advanced settings](https://docs.avaamo.com/user-guide/how-to/build-skills/create-skill/using-dialog-designer/create-new-skill/build-skill-responses/advanced-settings), for more information.
* If you have deployed your agent in the C-IVR or Phone channel and masking is enabled, then the audio files from the user responses are not available in the conversation history, since it can contain PII data. See [Information masking](https://docs.avaamo.com/user-guide/overview-and-concepts/advanced-concepts/information-masking), for information.
* You can also enable custom voice for your C-IVR agents in the Avaamo Platform. Contact Avaamo Support for more information.
{% endhint %}
Refer [Conversational IVR (C-IVR) or Phone](https://docs.avaamo.com/user-guide/how-to/build-agents/configure-agents/deploy/conversational-ivr-c-ivr-phone), for more information.
---
# Source: https://docs.avaamo.com/user-guide/how-to/build-agents/configure-agents/deploy/conversational-ivr-c-ivr-phone.md
# Conversational IVR (C-IVR) or Phone (change needed)
You can deploy the agents built on the Avaamo Platform into your phone channel. This allows the callers to converse naturally with the agents via interactive voice responses (IVR) to get the desired results without having to navigate long audio menus. This feature can help to reduce live-agent calls, improve call routing, and provide a good user experience.
{% hint style="info" %}
**Note**: You can connect to a channel only if it is enabled for your account or company. If you wish to enable a channel, then contact Avaamo Support for further assistance. Note that only the web channel is enabled by default.
{% endhint %}
When you deploy your agents on the Avaamo platform, you can also add multiple languages for your agent's response, specify the timeout seconds, and choose the SMS option on call completion or when the call gets disconnected.
In this article, the following steps are detailed:
1. [Before you begin](#before-you-begin)
2. [Configure C-IVR channel](#configure-c-ivr-channel)
3. [Test C-IVR channel](#test-c-ivr-channel)
4. [Manage channel settings](#manage-c-ivr-channel)
5. [Frequently asked questions](#frequently-asked-questions)
## Before you begin
Ensure that you have the C-IVR channel enabled for your account. If it is not enabled for your account, contact Avaamo Support for further assistance
## Configure C-IVR channel
{% hint style="info" %}
**Notes**:
* Ensure you have met all the [pre-requisites](https://docs.avaamo.com/user-guide/quick-start-tutorials/pre-requisites).
* You can deploy the agent to a channel after creating and building an agent. See [Create agent](https://docs.avaamo.com/user-guide/how-to/build-agents/add-skills), for more information.
* If you wish to edit an agent, then:
* In the **Avaamo Platform UI**, navigate to the **Agents** tab in the top menu. Search and open the required agent. See [Search agents](applewebdata://9AE47367-043D-436A-BAB1-053A8B89E2A1/@avaamo/s/avaamo/~/edit/drafts/-Lsoojy2kKRX1KXPWAZ2/how-to/build-agents/manage-agents#search-agents), for more information.
* Click **Edit** to unlock the agent before editing**.**
{% endhint %}
**To configure a C-IVR channel:**
After a successful configuration, a phone number is generated in the **Activated phone number** area and this is the number that can be used to connect to your agent via the C-IVR channel.
* In the **Agent** page, navigate to the **Configure -> Channels** option in the left navigation menu.
* On the Channels page, click **Connect** in the C-IVR Channel.
* Specify the following channel setting details:
Parameter Descriptions Name Indicates the Name used to identify the C-IVR channel. Note that you can have upto 150 characters in the channel name. Languages and
Playback Voice for
Select the language and configure the voice or the persona to be used by your agent in the interactive phone conversations with the user. Each language has a different set of voice personas that you can choose from. Select the persona from the options provided in the "Playback voice for <<language>>" section:
As with any enterprise voice, audio, or video application, each region or country has its phone number to dial. Similarly, in the C-IVR channel, you choose the language of the region or country where you wish to share the configured number. If you wish to share the number in multiple regions, then set up the C-IVR channel specific to each language. Note that one C-IVR channel is specific to only one language. To hear the voice preview, type any text in the text area and click the play button. You can also download the voice preview if required. You can select only those languages for which the agent is configured and those that are supported in the C-IVR channel. If you have switched to a language that is not supported in the C-IVR channel, then the agent responds in the default language. See Add languages and Supported languages , for more information.
Speech timeout Indicates a maximum wait time of the agent within which a user response is expected. If the user response is not received within the time-out period, then an automated message is rendered back to the user indicating that the agent is awaiting the user response. Currently, this is a standard message and cannot be customized.
The default value is 1 second. Use the up and down arrows to increase or decrease time as required. SMS message options Enable this option and specify a message, if you wish to send an SMS message to the caller when the call gets disconnected and/or when the call is completed. Specify the SMS text message in the respective options as required. Note that a single SMS can have upto 150 characters. Send an SMS after completion of call Enable this option and specify a message, if you wish to send an SMS message to the caller when the call is completed. Note that a single SMS can have upto 150 characters. If a call is hung up after a successful dialogue between the user and the agent, that is a user asks a query and the agent responds back to the query, then it is considered as complete. Send an SMS if call disconnects Enable this option and specify a message, if you wish to send an SMS message to the caller when the call gets disconnected. Note that a single SMS can have upto 150 characters. A call is considered disconnected when the user asks a query and before the agent response is received the call gets hung up. This is the case when the user is in between a conversation flow. Enable custom user authentication Use this if you wish to enable custom authentication for your agents deployed on the phone channels using JavaScript code. See User authentication handler , for more information. Enable wait time tone Use this option if you wish to play an idle tone to the user in case the agent is taking a little longer to respond.
Rather than experiencing silence or a lack of input, the introduction of a tone serves to engage the user actively and assures that the agent will respond shortly. For example, the system generates a typing tone when processing DTMF/keypad input.
Select file Once you enable the wait time tone, the option to upload a file becomes available. You can customize the wait time tone by uploading an audio file that plays an idle tone for the user. The file must not exceed 10 seconds and should be within 5 MB in size.
Click Select File , then choose and upload the desired file for the wait time tone.
* Click **Save** to save the C-IVR channel configuration details. A phone number is generated in the **Activated phone number** area and this is the number that can be used to connect to your agent.

{% hint style="success" %}
**Key Points**:
* After you save the C-IVR configuration successfully, you get options to add "Agent voice", "Voice menu", and "Voice hints" to the agent responses. See [Build skill responses](https://docs.avaamo.com/user-guide/how-to/build-skills/create-skill/using-dialog-designer/create-new-skill/build-skill-responses) and [Advanced settings](https://docs.avaamo.com/user-guide/how-to/build-skills/create-skill/using-dialog-designer/create-new-skill/build-skill-responses/advanced-settings), for more information.
* If you have deployed your agent in the C-IVR or Phone channel and masking is enabled, then the audio files from the user responses are not available in the conversation history, since it can contain PII data. See [Information masking](https://docs.avaamo.com/user-guide/overview-and-concepts/advanced-concepts/information-masking), for information.
* Currently, you cannot [transfer to a live agent](https://docs.avaamo.com/user-guide/how-to/build-agents/configure-agents/switch-to-live-agent) that is configured in the Avaamo Platform from the C-IVR channel. Instead, it is recommended that you use [Call forward](https://docs.avaamo.com/user-guide/build-skills/create-skill/using-dialog-designer/create-new-skill/build-skill-responses#call-forward) for connecting to live agents.
* You can also enable custom voice for your C-IVR agents in the Avaamo Platform. Contact Avaamo Support, for more information.
{% endhint %}
## Test C-IVR channel
After you save your C-IVR channel configuration settings, you can test the C-IVR channel using Agent Simulator from the bottom-right corner of the page. See [Agent simulator](https://docs.avaamo.com/user-guide/how-to/build-agents/test-agents/simulator), for more information.

If you select the IVR / Phone option, then C-IVR activated phone number is displayed with a phone icon.

Click the phone icon to dial the activated phone number and test your conversation flow. Click transcripts to further know how your agent is interpreting the responses from the user.

## Manage channel settings
{% hint style="info" %}
**Note**: When you re-deploy a C-IVR channel, a new number is assigned and the existing phone number is removed from the channel.
{% endhint %}
After you configure the channel settings, you can view, edit, disconnect and delete the channel settings as per your requirements. See [Manage channel settings](https://docs.avaamo.com/user-guide/how-to/build-agents/configure-agents/deploy/manage-channel-settings), for more information.
You can also deploy your agent through multiple C-IVR channels simultaneously. On the Channels page, click **Connect** in the C-IVR channel and follow the steps in [Configure C-IVR Channel](#configure-c-ivr-channel) to deploy your agent into another custom channel.
## Frequently asked questions
### 1. How to improve the accuracy or recognition of speech in the C-IVR channel?
You can specify certain keywords or phrases in the **Voice hints** that can provide better interpretation or recognition of the user response in the conversational IVR interaction. Providing voice hints can significantly improve user interaction with your agent. When you add voice hints, the agent gives preference to the phrases provided in the hints when interpreting the user responses. This helps you to redirect the conversational flow smoothly. See [Voice hints](https://docs.avaamo.com/user-guide/overview-and-concepts/advanced-concepts/voice-hints), for more information.
### 2. How is the PII (Personally identifiable information) data masked if my agent is deployed in the C-IVR channel?
If you have deployed your agent in the C-IVR or Phone channel and masking is enabled, then the audio files from the user responses are not available in the conversation history, since it can contain PII data.
### 3. The agent is not recognising my response. What should I do?
In cases where you are unable to receive the expected agent response, refer to the following troubleshooting tips:
* Use the Agent simulator -> Chat transcripts to know how your agent is interpreting the responses from the user. See [Test C-IVR channel](#test-c-ivr-channel), for more information.
* Try adding Voice hints and check if that helps in improving the recognition of the user responses. You can add [Voice hints at the agent level](https://docs.avaamo.com/user-guide/how-to/build-agents/configure-agents/add-voice-settings) and also for a node at the Dialog skill in the [Advanced settings -> Voice hints section](https://docs.avaamo.com/user-guide/build-skills/create-skill/using-dialog-designer/create-new-skill/build-skill-responses/advanced-settings#voice-hints).
### 4. I am unable to transfer to a live agent from the C-IVR channel. What can I do?
Currently, you cannot [transfer to a live agent](https://docs.avaamo.com/user-guide/how-to/build-agents/configure-agents/switch-to-live-agent) that is configured in the Avaamo Platform from the C-IVR channel. Instead, it is recommended that you use [Call forward](https://docs.avaamo.com/user-guide/build-skills/create-skill/using-dialog-designer/create-new-skill/build-skill-responses#call-forward) for connecting to live agents.
---
# Source: https://docs.avaamo.com/user-guide/avaamo-agent-assist/agent-assist-widget/conversations-view.md
# Conversations View
In the `Conversations` view, you can review both current and past call conversations, including the transcript and a summary of completed calls.
Parameters Description Maximum Length Skill name Indicates the name of the Q&A skill, primarily used to identify the skill. The skill name must be less than 50 characters. 50 characters Skill description Indicates the description of the skill. Use this to specify the purpose of the skill. The skill description must be less than 200 characters. 200 characters Skill key Indicates the internal primary key used in the Avaamo Platform for uniquely identifying the skill.
Supported characters: Alphanumeric and underscore
It is recommended that the key is of at least 3 characters. As you type, the key is automatically converted to Snake Case. See Snake Case , for more information.
Note that the skill key must be unique in the agent. You can specify the same identifier in the flow control statements such as Goto node and in regression testing . It helps in easy identification and readability.
20 characters Collect Feedback Indicates if you wish to enable user feedback or not. By default, it is set to false. Use the slider for setting to true.
Note that you can also disable feedback at the skill level and add feedback to individual responses usingcollectFeedback()method. See Add feedback (JS) , for more information.
Currently, Collect feedback functionality is supported only in Web, Android, and iOS channels.
NA Mask responses Move the slider if you mask all the agent's responses of this skill in the conversation flow. When you enable masking for the skill, all the responses in the skill are masked and cannot be accessed. Note that this option is available only when masking is enabled for an agent. See Information masking , for more information. NA
A new empty Dynamic Q\&A skill is created.
" %}
### Step 1: Create agent
An agent is an intelligent dialogue system that interprets and responds to the user’s conversation in natural language. It is a container of skills, each specialized to understand and handle a specific task in the user conversation flow. **Example**: In the Pizza agent, you can create an "Order Pizza" skill responsible for handling all pizza orders, similarly you can create a "FAQ" skill to handle all the Mac Pizza FAQs.
**To build an agent**:
* In the Avaamo Platform UI, click the **Agents** option in the top menu, navigate to the **My agents -> Development** tab, click **Create agent**.
* Enter the following required details and click **Create agent**:
* **Name**: Indicates the display name of your agent.
* **Description**: Indicates a brief description of your agent.
{% hint style="info" %}
**Note**: Since this is your first agent, specify only the required details and skip the other details for now. See [Create agent](https://docs.avaamo.com/user-guide/how-to/build-agents/add-skills), for more detailed information.
{% endhint %}

A new empty agent is created. The next step is to add a greeting message and other custom skills as per your business needs.
### Step 2: Add greeting message to agent
A new agent in the Avaamo Platform is already available with certain built-in skills. See [Built-in skills](https://docs.avaamo.com/user-guide/how-to/build-agents/add-skills-to-agent#built-in-skills), for more information.
You can also create various custom skills using an interactive skill builder as per your business needs. See [Build skills](https://docs.avaamo.com/user-guide/how-to/build-skills), for more information.
For the welcome message, you can use the pre-built Greeting skill already available in the agent.
**To add a greeting message to the agent**:
* In the **Agent** page, navigate to the **Skills** option in the left navigation menu.

* Your agent is already available with certain sample skills. Click Greeting skill.
* In the **Skill message** pop-up, customize the message as required and click OK. You can add different types of responses (card, quick reply, carousel, etc..) in the message with response filters and tags. Since this is your first agent, you can just add a simple text message.
* Click **Save**. Your first agent is ready for testing now.

### Step 3: Test and view agent in action
In the **Agent** page, click the agent icon in the bottom-right corner. You can view your customized welcome message in the agent.

## Next steps
Now that you have successfully built the first agent with a welcome message, you can dig deeper to learn the rich features available in the Avaamo Platform, and enhance the agent conversational flow to provide a great user experience. This document is built around the MacPizza agent use case. The next steps enable you to add and test the following skills in the agent:
* [Add Answers skill](https://docs.avaamo.com/user-guide/quick-start-tutorials/add-answers-skill)
* [Add LLaMB skill](https://docs.avaamo.com/user-guide/quick-start-tutorials/add-llamb-skill)
* [Add Dynamic Q\&A skill](https://docs.avaamo.com/user-guide/how-to/build-skills/create-skill/dynamic-q-and-a)
* [Add Smalltalk skill](https://docs.avaamo.com/user-guide/quick-start-tutorials/add-smalltalk-skill)
* [Add Dialog skill](https://docs.avaamo.com/user-guide/quick-start-tutorials/add-dialog-skill)
---
# Source: https://docs.avaamo.com/user-guide/ai-agent/create-an-ai-agent.md
# Create an AI agent
{% hint style="info" %}
**Note**: Ensure you have met the [pre-requisites](https://docs.avaamo.com/user-guide/quick-start-tutorials/pre-requisites).
{% endhint %}
Consider that you need to build a **ticket booking agent** for **Galaxy Cinemas**, a movie theater where customers can book tickets and select their seats online.
In the Avaamo Platform UI, click the `Agents` option in the top menu, navigate to the `Development` tab, and select `AI Agent` under `Create`**.**
Parameters Description Agent name Indicates the name of the agent. As you promote the agent to different stages in the life cycle (Testing, Staging, and Production), this name is used to identify the agent in the different stages. Agent description Indicates the description of the agent. Use this to specify the purpose of the agent. Agent avatar Indicates the avatar used for identifying the agent. Browse and choose your avatar image. Agent avatar file name must be in UTF-8 format.
On the home page, an `AI Agent` can be easily identified and distinguished from other agents by its unique icon, which includes a small logo within it.
>** to directly test the node or specify intents that navigate to that node.
* Click the link that is configured to display the web view. The custom web view HTML as specified in the response is displayed.
{% hint style="info" %}
**Notes**:
* Currently, Compact, Tall, and Full view are not supported in the Microsoft Teams channel due to the limitations on the channel's side. See [Microsoft Teams](https://docs.avaamo.com/user-guide/how-to/build-agents/configure-agents/deploy/microsoft-teams-ms-teams), for more information on deploying your agent in the MS Teams channel.
* If the agent response contains sensitive PII data such as name, account number, password, then it is recommended to mask the agent responses to protect user privacy. See [Agent response masking](https://docs.avaamo.com/user-guide/overview-and-concepts/advanced-concepts/information-masking#masking-agent-responses), for more information.
{% endhint %}
---
# Source: https://docs.avaamo.com/user-guide/how-to/build-skills/create-skill/customize-your-skill/how-to/use-context/create-custom-user-properties.md
# Create custom user properties
You can use [context.user.custom\_properties](https://docs.avaamo.com/user-guide/how-to/build-skills/create-skill/customize-your-skill/reference-library/context/user) to get any additional user properties specified by the channel when sending a request to the agent.
You can set custom properties in one of the following ways:
1. **Using parameter in the web channel URL**: In the web channel, you can pass custom properties in the URL, using `custom_properties[<>]=<>` in the web channel URL. See [Customization parameters](https://docs.avaamo.com/user-guide/build-agents/configure-agents/deploy/web-channel/configure-web-channel#advanced-customization-parameters), for a complete list of parameters that can be passed in the web channel URL.
2. Using **User.setProperty:** You can also set custom properties using **User.setProperty**. See [Set user property](https://docs.avaamo.com/user-guide/how-to/build-skills/create-skill/customize-your-skill/how-to/use-context/set-user-property), for more information.
{% hint style="info" %}
**Note**: You can also access custom properties using `context.params.custom_properties` from the [User Authentication Handler](https://docs.avaamo.com/user-guide/build-agents/configure-agents/define-settings#user-authentication-handler).
{% endhint %}
Consider that the MacPizza application sends the **custId** and **customerType** properties in the **context user** object through a [custom channel](https://docs.avaamo.com/user-guide/how-to/build-agents/configure-agents/deploy/custom-channel) when a user starts interacting with the agent:
```javascript
{
"bot_uuid": "edb408fb-de21-45ed-b899-915eb5cab81e",
"channel_uuid": "5acc8a59-1c51-4735-8b28-dc2f0151533c",
"event_type": "MESSAGE",
"user": {
"uuid": "9ac15843-151d-47fb-8b3d-930b89ce797e",
"first_name": "Will",
"last_name": "Smith",
"layer_id": "e3e7372d-70ee-43cc-ad2d-747e477e88e5",
"custom_properties": {
"custId": "11521932",
"customerType": "guest"
}
},
"conversation": {
"uuid": "c040161d7299f0c5b3d995fc086c1ce9"
},
"sender": "BOT",
"message": {
"text": "Hi Will welcome to Mac Pizza",
"request_message_uuid": "92cdceb1-6a4f-4096-a002-7dd656a21c54",
"sequence": 1
}
}
```
The following is a sample JS to get the custom user properties and [store in a user session ](https://docs.avaamo.com/user-guide/how-to/build-skills/create-skill/customize-your-skill/using-storage#set-and-get-user-variables)that can be used later:
```javascript
if (context.user.custom_properties) {
context.variables.custId = context.user.custom_properties.custId;
context.variables.customerType = context.user.custom_properties.customerType;
Storage.user.set("custId", context.variables.custId);
Storage.user.set("customerType", context.variables.customerType);
console.log("custId: ", context.variables.custId);
console.log("customerType: ", context.variables.customerType);
} else {
Storage.user.set("custId", "");
Storage.user.set("customerType", "");
console.log("No user details found.");
}
```
Since there are "console log" statements in the above code, you can use [Debug logs](https://docs.avaamo.com/user-guide/how-to/build-agents/debug-agents/debug-logs) to view the log statements:

{% content-ref url="" %}
[](https://docs.avaamo.com/user-guide/how-to/build-skills/create-skill/customize-your-skill/how-to/use-context)
{% endcontent-ref %}
{% content-ref url=".." %}
[..](https://docs.avaamo.com/user-guide/how-to/build-skills/create-skill/customize-your-skill/how-to)
{% endcontent-ref %}
---
# Source: https://docs.avaamo.com/user-guide/how-to/build-skills/create-skill/customize-your-skill/how-to/use-context/create-custom-variables.md
# Create context variables
You can use **context.variables** as temporary variables to store information required for a skill flow at a particular node. See [context variables](https://docs.avaamo.com/user-guide/how-to/build-skills/create-skill/customize-your-skill/reference-library/context/variables), for more information.
Consider that at the end of placing a pizza order, you wish to display the final order details to the user. At each stage of taking the order details, you can store the values in a **context variable** and later use the same to display the final order details:
The following message is displayed in the agent:

{% content-ref url="" %}
[](https://docs.avaamo.com/user-guide/how-to/build-skills/create-skill/customize-your-skill/how-to/use-context)
{% endcontent-ref %}
{% content-ref url=".." %}
[..](https://docs.avaamo.com/user-guide/how-to/build-skills/create-skill/customize-your-skill/how-to)
{% endcontent-ref %}
---
# Source: https://docs.avaamo.com/user-guide/skills/dialog-skill/create-dialog-skill.md
# Create dialog skill
{% hint style="info" %}
**Notes**:
* Ensure you have met all the [pre-requisites](https://docs.avaamo.com/user-guide/quick-start-tutorials/pre-requisites).
* You can add skills immediately after creating an agent. See [Create agent](https://docs.avaamo.com/user-guide/ai-agent/create-an-ai-agent), for more information.
* If you wish to edit an agent, navigate to the Agents tab in the top menu, search for the agent, and open it. See [Search agents](https://docs.avaamo.com/user-guide/how-to/build-agents/manage-agents/other-common-actions#search-agents), for more information.
* Click Edit to unlock the agent before editing.
{% endhint %}
**To create Dialog skills:**
* In the **Agent** page, navigate to the **Skills** option in the left navigation menu and click **Add Skill**.
* In the **Skill Builder** page, select **Dialog Skill** and click **Create**.
* Specify the following details and click **Create**:
Parameters Description Maximum length Skill name Indicates the name of the dialog skill. 50 characters Skill description Indicates the description of the dialog skill. Use this to specify the purpose of the skill. 200 characters Skill key Indicates the internal primary key used in the Avaamo Platform for uniquely identifying the skill. By default, a key is provided when you create a skill. You can change it to any user-friendly identifier.
Supported characters: Alphanumeric and underscore.
It is recommended that the key be at least 3 characters. As you type, the key is automatically converted to Snake Case. See Snake Case , for more information.
Note that the skill key must be unique in the agent. You can specify the same identifier in the flow control statements , such as the Goto node, and in regression testing . It helps in easy identification and readability.
20 characters
---
# Source: https://docs.avaamo.com/user-guide/how-to/build-skills/create-skill/using-avaamo-answers-1/manage-avaamo-answers-1/create-document-groups.md
# Source: https://docs.avaamo.com/user-guide/llamb/get-started/step-2-ingest-enterprise-content/create-document-groups.md
# Create document groups
`Document Groups` are used for categorizing and managing content uploaded in your agent. For example, you can upload information that belongs to different products in different document groups.
When you upload content to a document group, a knowledge base is created by extracting chunks of information from the content you upload.
You can upload any PDF or HTML pages in your `LLaMB content` skill. See [Upload content](https://docs.avaamo.com/user-guide/llamb/get-started/step-2-ingest-enterprise-content/upload-content), for more information.
### Steps to create a document group
1. Open the `LLaMB content skill` and click `Add group` to create a Document group.
2. Specify the following details and click `Create`:
Parameters Description Maximum length Group name name Indicates the name of the document group. 50 characters Group description Indicates the description of the document group. Use this to specify the purpose of the group. 200 characters
Parameters Description Maximum length Skill name Indicates the name of the dialog skill. 50 characters Skill description Indicates the description of the dialog skill. Use this to specify the purpose of the skill. 200 characters Skill key Indicates the internal primary key used in the Avaamo Platform for uniquely identifying the skill. By default, a key is provided when you create a skill. You can change it to any user-friendly identifier.
Supported characters: Alphanumeric and underscore
It is recommended that the key be at least three characters. As you type, the key is automatically converted to Snake Case. See Snake Case , for more information.
Note that the skill key must be unique in the agent. You can specify the same identifier in the flow control prompts. It helps in easy identification and readability.
20 characters
---
# Source: https://docs.avaamo.com/user-guide/outreach/campaigns/create-new-campaign.md
# Create new campaign
Avaamo Platform allows you to create multiple campaigns each with different schedules in just a few clicks. This section walks you through the steps of quickly creating a campaign in the Avaamo Platform.
{% hint style="info" %}
**Notes**:
* See [Quick start](https://docs.avaamo.com/user-guide/outreach/quick-start), for a quick article on creating your first outreach program.
* Ensure you have met the [pre-requisites](https://docs.avaamo.com/user-guide/outreach/before-you-begin) before creating a new campaign.
{% endhint %}
In the Avaamo Platform UI, click the **Outreach** option in the top menu, navigate to the **Campaign** tab, and click **Create new campaign -> {{Delivery channel}} .** Supported channels - SMS, C-IVR, MS Teams, and Custom channel.
{% hint style="info" %}
**Notes**:
* C-IVR, MS Teams, and Custom channel delivery channel for outreach campaign is available only when it is enabled for the account. Contact Avaamo Support for further assistance.
* For quick start, refer to the following topics
* [Campaign in SMS channel](https://docs.avaamo.com/user-guide/outreach/quick-start/campaign-in-sms-channel)
* [Campaign in C-IVR channel](https://docs.avaamo.com/user-guide/outreach/quick-start/campaign-in-c-ivr-channel)
* [Campaign in MS Teams channel](https://docs.avaamo.com/user-guide/outreach/quick-start/campaign-in-ms-teams-channel)
* [Campaign in Custom channel](https://docs.avaamo.com/user-guide/outreach/quick-start/campaign-in-custom-channel)
{% endhint %}
A campaign consists of three sections:
1. [Configure](#configure): In this section, you start by specifying the campaign name, and description, and pick a list of recipients for your campaign. Based on your requirements, you can configure a campaign with just one-way outbound calls or with two-way communication where the campaign recipients can communicate back to the campaign by responding to the same campaign message.
2. [Add Message](#add-message): In this section, you specify the actual message that is sent to the recipients.
3. [Activate](#activate): This section is where you specify when to send the message to the recipients. You can send it immediately after activating the campaign or you can schedule it for a later time based on your business requirements.
## Configure
{% hint style="success" %}
**Pre-requisite:** You must create a recipient list before creating a new campaign. See [Create new recipient list](https://docs.avaamo.com/user-guide/outreach/recipient-lists), for more information.
{% endhint %}
In this section, you start by specifying the campaign name and description, pick a list of recipients for whom the campaign is intended, and select a delivery channel for your campaign. Specify the following details and click **Next**:
Parameters Description Maximum length Campaign name Indicates the name of the campaign. 50 characters Campaign description Indicates the description of the campaign. Use this to specify the purpose of the campaign. 200 characters Select recipient list Indicates the list of the recipients for whom the campaign is intended. Pick a recipient list from the dropdown.
Note that only those recipient lists that are not marked for testing are available in the dropdown. See Create new recipient list , for more information on how to create a recipient list. NA
> <>::<>.` This helps users easily identify the right channel to select since the agent with the same name can exist in multiple stages.
Pick the agent from the list as per your requirement and click **Next**.
Parameters Description Maximum length Skill name Indicates the name of the dialog skill. 50 characters Skill description Indicates the description of the dialog skill. Use this to specify the purpose of the skill. 200 characters Skill key Indicates the internal primary key used in the Avaamo Platform for uniquely identifying the skill. By default, a key is provided when you create a skill. You can change it to any user-friendly identifier.
Supported characters: Alphanumeric and underscore
It is recommended that the key is of at least 3 characters. As you type, the key is automatically converted to Snake Case. See Snake Case , for more information.
Note that the skill key must be unique in the agent. You can specify the same identifier in the flow control statements such as Goto node and in regression testing . It helps in easy identification and readability.
20 characters Mask responses Move the slider if you mask all the agent's responses of this skill in the conversation flow. When you enable masking for the skill, all the responses in the skill are masked and cannot be accessed. Note that this option is available only when masking is enabled for an agent. See Information masking , for more information. NA
* Save your agent.
A new empty Dialog skill is created. See the [Next steps](#next-steps), for more information on how to continue building dialogs.
### Next steps
You can start by adding an [invocation intent](https://docs.avaamo.com/user-guide/how-to/build-skills/create-skill/using-dialog-designer/create-new-skill/add-invocation-intent) to your skill. This is the intent that invokes this skill when added to an agent.
You can then continue to edit the skill by [building dialogs](https://docs.avaamo.com/user-guide/how-to/build-skills/create-skill/using-dialog-designer/create-new-skill) with user intents and skill responses. Ensure to [test your skill](https://docs.avaamo.com/user-guide/how-to/build-skills/create-skill/using-dialog-designer/test-skill) at each step. You can navigate to the [Debug](https://docs.avaamo.com/user-guide/how-to/build-skills/create-skill/using-dialog-designer/debug-skill) section in the Dialog skill to troubleshoot your skill if required.
{% hint style="success" %}
**Key Points**:
* If you have imported a skill, ensure to edit the name and description of the skill. See [Edit skill](https://docs.avaamo.com/user-guide/how-to/manage-skill#edit-skill), for more information.
* Refer to [Design skill](https://docs.avaamo.com/user-guide/how-to/build-skills/design-skill), for best practices and do's and don'ts while building a skill.
{% endhint %}
---
# Source: https://docs.avaamo.com/user-guide/how-to/build-skills/create-skill/using-avaamo-answers-1/create-new-knowledge-base.md
# Source: https://docs.avaamo.com/user-guide/how-to/build-skills/create-skill/using-smalltalk/create-new-knowledge-base.md
# Create a new Smalltalk skill
Based on your requirement, you can either start by creating a new Smalltalk skill from scratch or by importing from any one of the available skills. See [Import skill](#import-skill), for more information.
{% hint style="info" %}
**Notes**:
* Ensure you have met all the [pre-requisites](https://docs.avaamo.com/user-guide/quick-start-tutorials/pre-requisites).
* You can add skills immediately after creating an agent. See [Create agent](https://docs.avaamo.com/user-guide/quick-start-tutorials/create-an-agent), for more information.
* If you wish to edit an agent, then navigate to the Agents tab in the top menu, search and open the required agent. See [Search agents](https://docs.avaamo.com/user-guide/build-agents/manage-agents/other-common-actions#search-agents), for more information.
* Click Edit to unlock the agent before editing.
{% endhint %}
**To create a Smalltalk skill:**
* In the **Agent** page, navigate to the Skills option in the left navigation menu, click **Add Skill** in the **Agent skills** page.
* In the **Skill builder** page, select **Smalltalk** and click **Create**.
* Specify the following details and click **Create**:

Parameters Description Maximum length Skill name Indicates the name of the Smalltalk skill, primarily used to identify the skill. 50 characters Description Indicates the description of the skill. Use this to specify the purpose of the skill. 200 characters Skill key Indicates the internal primary key used in the Avaamo Platform for uniquely identifying the skill.
Supported characters: Alphanumeric and underscore
It is recommended that the key is of at least 3 characters. As you type, the key is automatically converted to Snake Case. See Snake Case , for more information.
Note that the skill key must be unique in the agent. You can specify the same identifier in the flow control statements such as Goto node and in regression testing . It helps in easy identification and readability.
20 characters Mask responses Move the slider if you mask all the agent's responses of this skill in the conversation flow. When you enable masking for the skill, all the responses in the skill are masked and cannot be accessed. Note that this option is available only when masking is enabled for an agent. See Information masking , for more information. NA
A new empty Smalltalk skill is created. The next step is to [add questions and answers](https://docs.avaamo.com/user-guide/how-to/build-skills/create-skill/using-smalltalk/build-and-manage-smalltalk-skill/add-smalltalk-qa) to the Smalltalk skill.
### Next steps
You can start by [adding questions and answers](https://docs.avaamo.com/user-guide/how-to/build-skills/create-skill/using-smalltalk/build-and-manage-smalltalk-skill/add-smalltalk-qa) to your Smalltalk skill either manually or by importing a CSV file. Once the Smalltalk is uploaded successfully, your skill is ready for [testing](https://docs.avaamo.com/user-guide/how-to/build-skills/create-skill/using-smalltalk/test-smalltalk-q-and-a). See [Debug Smalltalk](https://docs.avaamo.com/user-guide/how-to/build-skills/create-skill/using-smalltalk/troubleshooting-tips), for common troubleshooting tips.
{% hint style="success" %}
**Key Points**:
* If you have imported a skill, ensure to edit the name and description of the skill. See [Edit skill](https://docs.avaamo.com/user-guide/how-to/manage-skill#edit-skill), for more information.
* Refer to [Design skills](https://docs.avaamo.com/user-guide/how-to/build-skills/design-skill), for best practices and do's and don'ts while building a skill.
{% endhint %}
---
# Source: https://docs.avaamo.com/user-guide/how-to/build-skills/create-skill/using-dialog-designer/create-new-skill.md
# Build and manage dialogs
- [Add invocation intent](/user-guide/how-to/build-skills/create-skill/using-dialog-designer/create-new-skill/add-invocation-intent.md)
- [Flow designer - Overview](/user-guide/how-to/build-skills/create-skill/using-dialog-designer/create-new-skill/dialog-designer-overview.md)
- [Change default greeting message](/user-guide/how-to/build-skills/create-skill/using-dialog-designer/create-new-skill/change-default-greeting-message.md)
- [Add user intent](/user-guide/how-to/build-skills/create-skill/using-dialog-designer/create-new-skill/add-user-intent.md)
- [Overview](/user-guide/how-to/build-skills/create-skill/using-dialog-designer/create-new-skill/add-user-intent/overview.md)
- [Training Phrases](/user-guide/how-to/build-skills/create-skill/using-dialog-designer/create-new-skill/add-user-intent/training-phrases.md)
- [Existing entity](/user-guide/how-to/build-skills/create-skill/using-dialog-designer/create-new-skill/add-user-intent/existing-entity.md)
- [System intent](/user-guide/how-to/build-skills/create-skill/using-dialog-designer/create-new-skill/add-user-intent/system-intent.md)
- [Custom code](/user-guide/how-to/build-skills/create-skill/using-dialog-designer/create-new-skill/add-user-intent/custom-code.md)
- [Instructions](/user-guide/how-to/build-skills/create-skill/using-dialog-designer/create-new-skill/add-user-intent/instructions.md)
- [Voice entity model](/user-guide/how-to/build-skills/create-skill/using-dialog-designer/create-new-skill/add-user-intent/voice-entity-model.md)
- [FAQs](/user-guide/how-to/build-skills/create-skill/using-dialog-designer/create-new-skill/add-user-intent/faqs.md)
- [Build skill responses](/user-guide/how-to/build-skills/create-skill/using-dialog-designer/create-new-skill/build-skill-responses.md)
- [Skill message window - Overview](/user-guide/how-to/build-skills/create-skill/using-dialog-designer/create-new-skill/build-skill-responses/skill-message-window-overview.md)
- [Add skill messages (responses)](/user-guide/how-to/build-skills/create-skill/using-dialog-designer/create-new-skill/build-skill-responses/add-skill-messages-responses.md)
- [Add buttons](/user-guide/how-to/build-skills/create-skill/using-dialog-designer/create-new-skill/build-skill-responses/add-buttons.md)
- [Add form elements](/user-guide/how-to/build-skills/create-skill/using-dialog-designer/create-new-skill/build-skill-responses/add-form-elements.md)
- [Advanced settings](/user-guide/how-to/build-skills/create-skill/using-dialog-designer/create-new-skill/build-skill-responses/advanced-settings.md)
- [Channel-wise supported responses](/user-guide/how-to/build-skills/create-skill/using-dialog-designer/create-new-skill/build-skill-responses/channel-wise-supported-responses.md)
- [Perform common actions](/user-guide/how-to/build-skills/create-skill/using-dialog-designer/create-new-skill/perform-common-actions.md)
---
# Source: https://docs.avaamo.com/user-guide/skills/prompt-skill/create-prompt-skill.md
# Create prompt skill
The **Prompt Skill** enables you to create responses using simple effective prompts without any extensive training. It guides the AI agents to interpret, process, and respond to user queries.
It is ideal for handling open-ended queries where a structured multi-step dialog is not required. Prompt Skill leverages AI-driven completions to generate contextual responses based on user input.
Examples: The Prompt skill can be used in scenarios such as:
* To book a flight ticket or a doctor's appointment
* Providing an informational response, like FAQs or knowledge base answers.
* Retrieving and displaying dynamic information based on a single input.
In the Avaamo Platform, you can easily create and customize Prompt skills using a simple interface, allowing you to configure specific responses to be triggered by a user’s input. The platform enables seamless integration of the Prompt skill into various workflows with minimal technical effort.
Based on your requirements, you can create a new Prompt skill.
{% hint style="info" %}
**Notes**:
* Ensure you have met all the [pre-requisites](https://docs.avaamo.com/user-guide/quick-start-tutorials/pre-requisites).
* You can add skills immediately after creating an agent. See [Create agent](https://docs.avaamo.com/user-guide/ai-agent/create-an-ai-agent), for more information.
* If you wish to edit an agent, then navigate to the Agents tab in the top menu, search, and open the required agent. See [Search agents](https://docs.avaamo.com/user-guide/how-to/build-agents/manage-agents/other-common-actions#search-agents), for more information.
* Click Edit to unlock the agent before editing.
{% endhint %}
**To create Prompt skills:**
* In the **Agent** page, navigate to the **Skills** option in the left navigation menu and click **Add Skill**.
* In the **Skill Builder** page, select **Prompt Skill** and click **Create**.
* Specify the following details and click **Create**:
Parameters Description Maximum length Set as Entry Point Click the checkbox to enable this option. When enabled, the skill is triggered at the start of the conversation.
starting skill, initiating the conversation from the agent.Note: When there is only one Prompt Skill, this option is enabled automatically.
NA Skill Avatar You can upload an image to represent the digital avatar of the agent.
A built-in crop tool is available to adjust the image size as needed.
The file size should be 2MB maximum. Skill name Indicates the name of the prompt skill 190 characters Skill description Indicates the description of the prompt skill. Use this to specify the purpose of the skill. 2000 characters Skill instructions A set of predefined phrases to be displayed on the UAT page. 1000 characters for each instruction Skill key A unique identifier assigned to the skill for programmatic identification. It is used for functionalities such as skill transfer and other integrations. 190 characters
---
# Source: https://docs.avaamo.com/user-guide/how-to/build-skills/create-skill.md
# Create and test skills
- [Dialog](/user-guide/how-to/build-skills/create-skill/using-dialog-designer.md): Design complex conversation flows using interactive Dialog Designer.
- [Quick overview](/user-guide/how-to/build-skills/create-skill/using-dialog-designer/quick-overview.md): Provides a quick glance on how you can build Dialog skill in the platform.
- [Create a new Dialog skill](/user-guide/how-to/build-skills/create-skill/using-dialog-designer/create-new-dialog-skill.md): Quickly create new Dialog skill from scratch or by importing from any one of available skills in the skill store.
- [Build and manage dialogs](/user-guide/how-to/build-skills/create-skill/using-dialog-designer/create-new-skill.md): Learn how to change default greeting message, add user intents, and build skill responses.
- [Add invocation intent](/user-guide/how-to/build-skills/create-skill/using-dialog-designer/create-new-skill/add-invocation-intent.md)
- [Flow designer - Overview](/user-guide/how-to/build-skills/create-skill/using-dialog-designer/create-new-skill/dialog-designer-overview.md)
- [Change default greeting message](/user-guide/how-to/build-skills/create-skill/using-dialog-designer/create-new-skill/change-default-greeting-message.md)
- [Add user intent](/user-guide/how-to/build-skills/create-skill/using-dialog-designer/create-new-skill/add-user-intent.md)
- [Overview](/user-guide/how-to/build-skills/create-skill/using-dialog-designer/create-new-skill/add-user-intent/overview.md)
- [Training Phrases](/user-guide/how-to/build-skills/create-skill/using-dialog-designer/create-new-skill/add-user-intent/training-phrases.md)
- [Existing entity](/user-guide/how-to/build-skills/create-skill/using-dialog-designer/create-new-skill/add-user-intent/existing-entity.md)
- [System intent](/user-guide/how-to/build-skills/create-skill/using-dialog-designer/create-new-skill/add-user-intent/system-intent.md)
- [Custom code](/user-guide/how-to/build-skills/create-skill/using-dialog-designer/create-new-skill/add-user-intent/custom-code.md)
- [Instructions](/user-guide/how-to/build-skills/create-skill/using-dialog-designer/create-new-skill/add-user-intent/instructions.md)
- [Voice entity model](/user-guide/how-to/build-skills/create-skill/using-dialog-designer/create-new-skill/add-user-intent/voice-entity-model.md)
- [FAQs](/user-guide/how-to/build-skills/create-skill/using-dialog-designer/create-new-skill/add-user-intent/faqs.md)
- [Build skill responses](/user-guide/how-to/build-skills/create-skill/using-dialog-designer/create-new-skill/build-skill-responses.md)
- [Skill message window - Overview](/user-guide/how-to/build-skills/create-skill/using-dialog-designer/create-new-skill/build-skill-responses/skill-message-window-overview.md)
- [Add skill messages (responses)](/user-guide/how-to/build-skills/create-skill/using-dialog-designer/create-new-skill/build-skill-responses/add-skill-messages-responses.md)
- [Add buttons](/user-guide/how-to/build-skills/create-skill/using-dialog-designer/create-new-skill/build-skill-responses/add-buttons.md)
- [Add form elements](/user-guide/how-to/build-skills/create-skill/using-dialog-designer/create-new-skill/build-skill-responses/add-form-elements.md)
- [Advanced settings](/user-guide/how-to/build-skills/create-skill/using-dialog-designer/create-new-skill/build-skill-responses/advanced-settings.md)
- [Channel-wise supported responses](/user-guide/how-to/build-skills/create-skill/using-dialog-designer/create-new-skill/build-skill-responses/channel-wise-supported-responses.md)
- [Perform common actions](/user-guide/how-to/build-skills/create-skill/using-dialog-designer/create-new-skill/perform-common-actions.md)
- [Test Dialog skill](/user-guide/how-to/build-skills/create-skill/using-dialog-designer/test-skill.md): Use Simulator and Regression Testing to test Dialog skill.
- [Debug Dialog skill](/user-guide/how-to/build-skills/create-skill/using-dialog-designer/debug-skill.md): Use JS errors and logs to debug Dialog Skill.
- [Dynamic Q\&A](/user-guide/how-to/build-skills/create-skill/dynamic-q-and-a.md): Create responses for one-off questions and answers. Typically, the questions are Frequently Asked Questions (FAQs) related to your business, product, or service.
- [Quick overview](/user-guide/how-to/build-skills/create-skill/dynamic-q-and-a/quick-overview.md): Provides a quick glance at how you can build Dynamic Q\&A skills in the platform.
- [Create a new Dynamic Q\&A skill](/user-guide/how-to/build-skills/create-skill/dynamic-q-and-a/create-a-new-dynamic-q-and-a-skill.md): Quickly create new Dynamic Q\&A skills from scratch or by importing from any one of the available skills in the skill store.
- [Build and manage Dynamic Q\&A skill](/user-guide/how-to/build-skills/create-skill/dynamic-q-and-a/build-and-manage-dynamic-q-and-a-skill.md): Learn how to add Q\&A, import Q\&A, and perform other common actions such as edit, clear, and delete.
- [Add questions and answers](/user-guide/how-to/build-skills/create-skill/dynamic-q-and-a/build-and-manage-dynamic-q-and-a-skill/add-questions-and-answers.md)
- [Perform common actions](/user-guide/how-to/build-skills/create-skill/dynamic-q-and-a/build-and-manage-dynamic-q-and-a-skill/perform-common-actions.md)
- [Test Dynamic Q\&A skill](/user-guide/how-to/build-skills/create-skill/dynamic-q-and-a/test-dynamic-q-and-a-skill.md)
- [Debug Dynamic Q\&A skill](/user-guide/how-to/build-skills/create-skill/dynamic-q-and-a/debug-dynamic-q-and-a-skill.md)
- [Smalltalk](/user-guide/how-to/build-skills/create-skill/using-smalltalk.md): A form of Q\&A skill that allows you to build a personality for your agent to represent the organization.
- [Quick overview](/user-guide/how-to/build-skills/create-skill/using-smalltalk/quick-overview.md): Provides a quick glance on how to build a Smalltalk skill in the platform.
- [Create a new Smalltalk skill](/user-guide/how-to/build-skills/create-skill/using-smalltalk/create-new-knowledge-base.md): Quickly create new Smalltalk skill from scratch or by importing from any one of available skills in the skill store.
- [Build and manage Smalltalk skill](/user-guide/how-to/build-skills/create-skill/using-smalltalk/build-and-manage-smalltalk-skill.md): Learn how to add Q\&A, import Q\&A, and perform other common actions such as edit, clear, and delete.
- [Add questions and answers](/user-guide/how-to/build-skills/create-skill/using-smalltalk/build-and-manage-smalltalk-skill/add-smalltalk-qa.md): Create customized Smalltalk for your organization using Smalltalk Designer.
- [Perform common actions](/user-guide/how-to/build-skills/create-skill/using-smalltalk/build-and-manage-smalltalk-skill/perform-common-actions.md): Import Smalltalk, edit or delete Smalltalk, and add languages to your Smalltalk skill.
- [Test Smalltalk skill](/user-guide/how-to/build-skills/create-skill/using-smalltalk/test-smalltalk-q-and-a.md): Ensure the Smalltalk skill provides appropriate responses for user queries.
- [Debug Smalltalk skill](/user-guide/how-to/build-skills/create-skill/using-smalltalk/troubleshooting-tips.md): Few troubleshooting tips to debug Smalltalk skill for most common scenarios.
- [Answers (Deprecated)](/user-guide/how-to/build-skills/create-skill/using-avaamo-answers-1.md): Get answers from enterprise content via conversations.
- [Quick overview](/user-guide/how-to/build-skills/create-skill/using-avaamo-answers-1/quick-overview.md): Provides a quick glance on how you can build Avaamo Answers in the platform.
- [Create a new Answers skill](/user-guide/how-to/build-skills/create-skill/using-avaamo-answers-1/create-new-knowledge-base.md): Quickly create new Answer skill from scratch.
- [Build and manage Answers skill](/user-guide/how-to/build-skills/create-skill/using-avaamo-answers-1/manage-avaamo-answers-1.md): Learn how to edit the Answers skill and fine-tune to improvise responses to user queries.
- [Create Document Groups](/user-guide/how-to/build-skills/create-skill/using-avaamo-answers-1/manage-avaamo-answers-1/create-document-groups.md): Categorize and manage your content using document groups.
- [Upload Content](/user-guide/how-to/build-skills/create-skill/using-avaamo-answers-1/manage-avaamo-answers-1/add-document-or-url-1.md): Create a knowledge base by extracting content from PPTs, Docs, PDF, HTML, Excel or CSV files, or any externally accessible URL.
- [Tabular answering](/user-guide/how-to/build-skills/create-skill/using-avaamo-answers-1/manage-avaamo-answers-1/tabular-answering.md)
- [Multilingual answering](/user-guide/how-to/build-skills/create-skill/using-avaamo-answers-1/manage-avaamo-answers-1/multilingual-answering.md)
- [Content ingestion](/user-guide/how-to/build-skills/create-skill/using-avaamo-answers-1/manage-avaamo-answers-1/content-ingestion.md)
- [View and edit knowledge](/user-guide/how-to/build-skills/create-skill/using-avaamo-answers-1/manage-avaamo-answers-1/view-and-edit-knowledge.md): View the extracted content (sections, entities, acronyms, vocabulary) to fine-tune and edit the knowledge base.
- [Perform common actions](/user-guide/how-to/build-skills/create-skill/using-avaamo-answers-1/manage-avaamo-answers-1/perform-common-actions.md): Retrain, edit the uploaded documents or URLs, or delete the documents or URLs from the Answers skill.
- [Configure Answers skill](/user-guide/how-to/build-skills/create-skill/using-avaamo-answers-1/configure-answers-skill.md): Specify configuration settings for an Answers skill.
- [Intro Outro Messages](/user-guide/how-to/build-skills/create-skill/using-avaamo-answers-1/intro-outro-messages.md)
- [Parsing Templates](/user-guide/how-to/build-skills/create-skill/using-avaamo-answers-1/parsing-templates.md)
- [Test Answers skill](/user-guide/how-to/build-skills/create-skill/using-avaamo-answers-1/test-avaamo-answers.md): Test to ensure the extracted knowledge base provides appropriate responses for user queries.
- [Debug Answers skill](/user-guide/how-to/build-skills/create-skill/using-avaamo-answers-1/troubleshooting-tips.md): Few troubleshooting tips to debug Answers skill for most common scenarios.
- [Improving accuracy in Answers Skill](/user-guide/how-to/build-skills/create-skill/using-avaamo-answers-1/improving-accuracy-in-answers-skill.md)
- [Keeping content updated](/user-guide/how-to/build-skills/create-skill/using-avaamo-answers-1/keeping-content-updated.md)
- [Answers skill - FAQs](/user-guide/how-to/build-skills/create-skill/using-avaamo-answers-1/answers-faqs.md): Frequently asked questions on Answers skill
- [Answers REST APIs](/user-guide/how-to/build-skills/create-skill/using-avaamo-answers-1/answers-rest-apis.md)
- [Answer prediction API](/user-guide/how-to/build-skills/create-skill/using-avaamo-answers-1/answers-rest-apis/answer-prediction-api.md)
- [Content ingestion APIs (Recommended)](/user-guide/how-to/build-skills/create-skill/using-avaamo-answers-1/answers-rest-apis/content-ingestion-apis-recommended.md)
- [Content ingestion APIs (Backward Compatibility)](/user-guide/how-to/build-skills/create-skill/using-avaamo-answers-1/answers-rest-apis/content-ingestion-apis-backward-compatibility.md)
- [LLaMB](/user-guide/how-to/build-skills/create-skill/llamb.md)
- [Using Javascript and Code](/user-guide/how-to/build-skills/create-skill/customize-your-skill.md): Customize Dialog skill via Javascript (JS) programming using a rich set of objects and functions of Avaamo Platform
- [Quick overview](/user-guide/how-to/build-skills/create-skill/customize-your-skill/quick-overview.md): Provides a quick glance of the key concepts, objects, functions, and properties used for customizations
- [Built-in functions window](/user-guide/how-to/build-skills/create-skill/customize-your-skill/built-in-functions-window.md)
- [How-to](/user-guide/how-to/build-skills/create-skill/customize-your-skill/how-to.md): Common scenarios for customizing your skill using JS programming
- [Use context](/user-guide/how-to/build-skills/create-skill/customize-your-skill/how-to/use-context.md)
- [Get user details](/user-guide/how-to/build-skills/create-skill/customize-your-skill/how-to/use-context/to-get-user-details.md)
- [Get last message](/user-guide/how-to/build-skills/create-skill/customize-your-skill/how-to/use-context/get-last-message.md)
- [Get slot details](/user-guide/how-to/build-skills/create-skill/customize-your-skill/how-to/use-context/get-domain-entity-details.md)
- [Get environment variables](/user-guide/how-to/build-skills/create-skill/customize-your-skill/how-to/use-context/get-environment-variables.md)
- [Create context variables](/user-guide/how-to/build-skills/create-skill/customize-your-skill/how-to/use-context/create-custom-variables.md)
- [Set user property](/user-guide/how-to/build-skills/create-skill/customize-your-skill/how-to/use-context/set-user-property.md)
- [Create custom user properties](/user-guide/how-to/build-skills/create-skill/customize-your-skill/how-to/use-context/create-custom-user-properties.md)
- [Detect user tone and sentiment](/user-guide/how-to/build-skills/create-skill/customize-your-skill/how-to/use-context/detect-user-tone-and-sentiment.md)
- [Detect user device](/user-guide/how-to/build-skills/create-skill/customize-your-skill/how-to/use-context/detect-channel.md)
- [Detect user channel](/user-guide/how-to/build-skills/create-skill/customize-your-skill/how-to/use-context/detect-user-channel.md)
- [Switch user's language](/user-guide/how-to/build-skills/create-skill/customize-your-skill/how-to/use-context/switch-users-language.md)
- [Transfer to live agent](/user-guide/how-to/build-skills/create-skill/customize-your-skill/how-to/use-context/transfer-to-live-agent.md)
- [Get skill conversation insights](/user-guide/how-to/build-skills/create-skill/customize-your-skill/how-to/use-context/get-insights.md)
- [Show ambiguous intents](/user-guide/how-to/build-skills/create-skill/customize-your-skill/how-to/use-context/show-ambiguous-intents.md)
- [Use storage](/user-guide/how-to/build-skills/create-skill/customize-your-skill/how-to/using-storage.md)
- [Control skill flow](/user-guide/how-to/build-skills/create-skill/customize-your-skill/how-to/controlling-skill-flow.md)
- [Add tags (JS)](/user-guide/how-to/build-skills/create-skill/customize-your-skill/how-to/add-tags-js.md)
- [Add feedback (JS)](/user-guide/how-to/build-skills/create-skill/customize-your-skill/how-to/add-feedback.md)
- [Send SMS - SMS.send](/user-guide/how-to/build-skills/create-skill/customize-your-skill/how-to/sending-notifications.md)
- [Send Email - Email.send](/user-guide/how-to/build-skills/create-skill/customize-your-skill/how-to/send-email-email.send.md)
- [Forward call (C-IVR channel)](/user-guide/how-to/build-skills/create-skill/customize-your-skill/how-to/forward-call-c-ivr-channel.md)
- [Hangup call (C-IVR channel)](/user-guide/how-to/build-skills/create-skill/customize-your-skill/how-to/hangup-call-c-ivr-channel.md)
- [Build dynamic skill response](/user-guide/how-to/build-skills/create-skill/customize-your-skill/how-to/build-dynamic-skill-response.md): Add customized input cards, carousel, list-view, quick reply
- [Card response (Javascript)](/user-guide/how-to/build-skills/create-skill/customize-your-skill/how-to/build-dynamic-skill-response/card.md)
- [Single line text](/user-guide/how-to/build-skills/create-skill/customize-your-skill/how-to/build-dynamic-skill-response/card/single-line-text.md)
- [Multi-line text](/user-guide/how-to/build-skills/create-skill/customize-your-skill/how-to/build-dynamic-skill-response/card/multi-line-text.md)
- [Date and time](/user-guide/how-to/build-skills/create-skill/customize-your-skill/how-to/build-dynamic-skill-response/card/date-and-time.md)
- [Select (PickList)](/user-guide/how-to/build-skills/create-skill/customize-your-skill/how-to/build-dynamic-skill-response/card/select-picklist.md)
- [File upload](/user-guide/how-to/build-skills/create-skill/customize-your-skill/how-to/build-dynamic-skill-response/card/file-upload.md)
- [Polls](/user-guide/how-to/build-skills/create-skill/customize-your-skill/how-to/build-dynamic-skill-response/card/polls.md)
- [Checklist](/user-guide/how-to/build-skills/create-skill/customize-your-skill/how-to/build-dynamic-skill-response/card/checklist.md)
- [Rating](/user-guide/how-to/build-skills/create-skill/customize-your-skill/how-to/build-dynamic-skill-response/card/rating.md)
- [Card links](/user-guide/how-to/build-skills/create-skill/customize-your-skill/how-to/build-dynamic-skill-response/card/card-links.md)
- [Card images](/user-guide/how-to/build-skills/create-skill/customize-your-skill/how-to/build-dynamic-skill-response/card/card-images.md)
- [Carousel response (Javascript)](/user-guide/how-to/build-skills/create-skill/customize-your-skill/how-to/build-dynamic-skill-response/carousel.md)
- [ListView response (Javascript)](/user-guide/how-to/build-skills/create-skill/customize-your-skill/how-to/build-dynamic-skill-response/list-view.md)
- [Quick Reply response (Javascript)](/user-guide/how-to/build-skills/create-skill/customize-your-skill/how-to/build-dynamic-skill-response/quick-reply.md)
- [Delay](/user-guide/how-to/build-skills/create-skill/customize-your-skill/how-to/build-dynamic-skill-response/delay.md)
- [Graphs & Charts](/user-guide/how-to/build-skills/create-skill/customize-your-skill/how-to/build-dynamic-skill-response/graphs-and-charts.md)
- [Create custom HTML web views](/user-guide/how-to/build-skills/create-skill/customize-your-skill/how-to/create-custom-html-web-views.md): Create custom HTML web views on Web Channel and Facebook for the skill responses configured using card, carousel, or list view
- [Define custom intents](/user-guide/how-to/build-skills/create-skill/customize-your-skill/how-to/define-matching-rules-using-custom-intents.md): Define your own matching rules using custom intents in nodes using JS
- [Integrate](/user-guide/how-to/build-skills/create-skill/customize-your-skill/how-to/integrate-with-api-1.md)
- [REST and SOAP API](/user-guide/how-to/build-skills/create-skill/customize-your-skill/how-to/integrate-with-api-1/rest-and-soap-api.md)
- [Hybrid SDK](/user-guide/how-to/build-skills/create-skill/customize-your-skill/how-to/integrate-with-api-1/hybrid-sdk.md)
- [Test customizations](/user-guide/how-to/build-skills/create-skill/customize-your-skill/test-your-skill.md): Describes different methods to test the skill after customizations
- [Debug JS code](/user-guide/how-to/build-skills/create-skill/customize-your-skill/troubleshooting-tips.md): Provides useful tips in cases where you are unable to receive the expected results
- [Coding best practices](/user-guide/how-to/build-skills/create-skill/customize-your-skill/best-practices.md): Dos and Don’ts of JS programming during skill flow customizations.
- [Reference library](/user-guide/how-to/build-skills/create-skill/customize-your-skill/reference-library.md): Commonly used objects, functions, and attributes during agent flow customizations
- [Context](/user-guide/how-to/build-skills/create-skill/customize-your-skill/reference-library/context.md): Encapsulates various details of a user’s interaction with the agent at a particular context
- [variables](/user-guide/how-to/build-skills/create-skill/customize-your-skill/reference-library/context/variables.md)
- [user](/user-guide/how-to/build-skills/create-skill/customize-your-skill/reference-library/context/user.md)
- [live\_agent\_user](/user-guide/how-to/build-skills/create-skill/customize-your-skill/reference-library/context/user-1.md)
- [insights](/user-guide/how-to/build-skills/create-skill/customize-your-skill/reference-library/context/insights.md)
- [history](/user-guide/how-to/build-skills/create-skill/customize-your-skill/reference-library/context/history.md)
- [User.setProperty](/user-guide/how-to/build-skills/create-skill/customize-your-skill/reference-library/user.setproperty.md): Sets the user property of the specified key to the indicated value
- [User.setProperties](/user-guide/how-to/build-skills/create-skill/customize-your-skill/reference-library/user.setproperties.md): Sets the user property of the specified key to the indicated value
- [User.removeProperty](/user-guide/how-to/build-skills/create-skill/customize-your-skill/reference-library/user.removeproperty.md)
- [Storage](/user-guide/how-to/build-skills/create-skill/customize-your-skill/reference-library/storage.md): Stores data either for a global session or for a specific user session.
- [Flow control](/user-guide/how-to/build-skills/create-skill/customize-your-skill/reference-library/flow-control.md): Customize the navigation of the agent flow using JS functions
- [Notifications](/user-guide/how-to/build-skills/create-skill/customize-your-skill/reference-library/notifications.md): Allows agent to send SMS and email notifications to the users
- [Agent commands](/user-guide/how-to/build-skills/create-skill/customize-your-skill/reference-library/skill-commands.md): Perform actions such as clear, reset, and transfer (to name a few) during a user’s interacting with the agent
- [Language.switch](/user-guide/how-to/build-skills/create-skill/customize-your-skill/reference-library/language.switch.md): Switch language to anyone of the languages added to the agent.
- [Agent.transfer](/user-guide/how-to/build-skills/create-skill/customize-your-skill/reference-library/agent.transfer.md): Allows agent to switch to a live agent, if live agent option is enabled.
- [Agent.setContext](/user-guide/how-to/build-skills/create-skill/customize-your-skill/reference-library/agent.setcontext.md): Allows agent to set context before transferring the request. Used in Skill-based routing
- [Advance JS libraries](/user-guide/how-to/build-skills/create-skill/customize-your-skill/reference-library/advanced-js-libraries.md): List of supported Nodejs libraries with version no.
- [SmartCall (C-IVR)](/user-guide/how-to/build-skills/create-skill/customize-your-skill/reference-library/smartcall-c-ivr.md)
- [Q\&A (Backward Compatibility)](/user-guide/how-to/build-skills/create-skill/using-q-and-a-designer.md): Managing the existing Q\&A skill created before v5.3.0 release
- [Build and manage Q\&A skill](/user-guide/how-to/build-skills/create-skill/using-q-and-a-designer/build-and-manage-q-and-a-skill.md): Learn how to add Q\&A, import Q\&A, and perform other common actions such as edit, clear, and delete.
- [Add questions and answers](/user-guide/how-to/build-skills/create-skill/using-q-and-a-designer/build-and-manage-q-and-a-skill/add-intents-and-languages.md): Add questions and answers to your Q\&A skill.
- [Perform common actions](/user-guide/how-to/build-skills/create-skill/using-q-and-a-designer/build-and-manage-q-and-a-skill/perform-common-actions.md): Import Q\&A, edit or delete Q\&A, and add languages to the Q\&A skill.
- [Configure Q\&A skill](/user-guide/how-to/build-skills/create-skill/using-q-and-a-designer/configure-q-and-a-skill.md): Learn how-to add languages to Q\&A
- [Add language translations](/user-guide/how-to/build-skills/create-skill/using-q-and-a-designer/configure-q-and-a-skill/add-languages.md)
- [Test Q\&A skill](/user-guide/how-to/build-skills/create-skill/using-q-and-a-designer/test-q-and-a.md): Test to ensure the Q\&A skill provides appropriate responses for user queries.
- [Debug Q\&A skill](/user-guide/how-to/build-skills/create-skill/using-q-and-a-designer/troubleshooting-tips.md): Few troubleshooting tips to debug Q\&A skills for most common scenarios.
---
# Source: https://docs.avaamo.com/user-guide/how-to/build-agents/create-universal-agent.md
# Create Universal agent
- [Key terms](/user-guide/how-to/build-agents/create-universal-agent/key-terms.md)
- [Overview - Get started](/user-guide/how-to/build-agents/create-universal-agent/overview-get-started.md)
- [Add member agents](/user-guide/how-to/build-agents/create-universal-agent/add-member-agents.md)
- [Manage member agents](/user-guide/how-to/build-agents/create-universal-agent/manage-member-agents.md)
- [Intent detection and routing](/user-guide/how-to/build-agents/create-universal-agent/intent-detection-and-routing.md)
- [Context management](/user-guide/how-to/build-agents/create-universal-agent/context-management.md)
- [Disambiguation](/user-guide/how-to/build-agents/create-universal-agent/disambiguation.md)
---
# Source: https://docs.avaamo.com/user-guide/how-to/build-agents/configure-agents/deploy/custom-channel.md
# Source: https://docs.avaamo.com/user-guide/llamb/custom-channel.md
# Custom channel
After building and testing your LLaMB agent, the next step is to select the deployment channel. The Avaamo Platform offers several pre-built channels, including Web, iOS, Android, and MS Teams, for deploying agents with LLaMB. If you need to deploy agents to a channel not listed, you can configure and deploy agents to a custom channel.
Deploying LLaMB agents in a custom channel enhances the ability to seamlessly integrate LLaMB with any enterprise application, increasing accessibility for users.
>"
},
"request_message_uuid": "67c2c017-xxxx-xxxx-xxxx-1f826b5e596e",
"sequence": 2,
"total_messages": 2
},
"status_callback_url": null
}
```
See [Outgoing request in the Custom channel](https://docs.avaamo.com/user-guide/how-to/build-agents/configure-agents/deploy/custom-channel#outgoing-request) for more information on all the other parameters in the payload.
{% hint style="info" %}
**Notes**:
* Currently, there is no set expiration date for the streaming URL.
* All the other functionality of the custom channel remains the same as applicable to the agents without LLaMB skills, including custom user properties. See [Custom channel](https://docs.avaamo.com/user-guide/how-to/build-agents/configure-agents/deploy/custom-channel), for more information.
{% endhint %}
---
# Source: https://docs.avaamo.com/user-guide/how-to/build-skills/create-skill/using-dialog-designer/create-new-skill/add-user-intent/custom-code.md
# Custom code
When you build enterprise agents, there can be scenarios, where you wish to check for certain business logic and then trigger an intent. In such cases, Avaamo Platform allows you to write custom Javascript logic in the intents and then trigger the intents if the condition returns true.
### Before you begin
Before you begin to add user intents in the Dialog skill conversational flow, it is recommended to have a thorough understanding of the following concepts:
* [Intents and Training data](https://docs.avaamo.com/user-guide/overview-and-concepts/intents)
* [Entities](https://docs.avaamo.com/user-guide/overview-and-concepts/entity-types)
* [Slots](https://docs.avaamo.com/user-guide/overview-and-concepts/slots)
* [Intent execution sequence](https://docs.avaamo.com/user-guide/overview-and-concepts/advanced-concepts/intent-execution-sequence)
* [Best practices of designing a skill](https://docs.avaamo.com/user-guide/how-to/build-skills/design-skill)
### What are custom code intents?
These are intents with custom JavaScript code. See [Using Script and Code](https://docs.avaamo.com/user-guide/how-to/build-skills/create-skill/customize-your-skill), for more information on the in-built library and objects available in the Avaamo Platform.

**Example**: You can create a custom intent with a regular expression to match the pizza order number entered by the user. Alternatively, you can also create an entity with a regular expression. Note that goto\_node is not supported in the custom intent handler, you must return true or false in this handler.
### How to use custom code intents?
{% hint style="info" %}
**Notes**:
* Ensure you have met all the [pre-requisites](https://docs.avaamo.com/user-guide/quick-start-tutorials/pre-requisites).
* You can build and manage dialogs (conversational flow) immediately after creating a Dialog skill. See [Create new Dialog skill](https://docs.avaamo.com/user-guide/how-to/build-skills/create-skill/using-dialog-designer/create-new-dialog-skill), for more information.
* If you wish to edit skills in an agent, then:
* Navigate to the Agents tab in the top menu. Search and open the required agent.
See [Search agents](https://docs.avaamo.com/user-guide/build-agents/manage-agents#search-agents), for more information.
* In the Agent page, navigate to the Skills option in the left navigation menu. Search and open the required skill.
* The quality of the intents and their training determines the quality of the agent's accuracy in understanding the user queries. See [Design skill](https://docs.avaamo.com/user-guide/how-to/design-skill#intent-and-training-phrases), for more information on intent training guidelines.
{% endhint %}
* In the **Dialog skill** page, click **Edit** to unlock the skill
* Click the **Implementation** option in the left navigation pane. A dialog flow tree is displayed.
* Add user intents by creating a new node in one of the following ways:
* Click the **plus (+)** icon to add a new user intent and skill response in the node below the current node.
* Click the **fork** icon to add a new user intent and skill response as a forked branch to the current node.

* Click the red call-out bubble above "Add agent Response" to add an Intent and specify the following details:

Parameters Description Maximum length Intent name Indicates the name of the intent.
Each intent name must be unique within the skill.
192
characters
Intent key Indicates the internal primary key used in the Avaamo Platform for uniquely identifying the intent name.
By default, a key is automatically generated for you. Click Edit to update the key to any user-friendly identifier. Note that the intent key must be unique within the skill.
Supported characters: Alphanumeric and underscore
It is recommended that the key is of at least 3 characters. As you type, the key is automatically converted to Snake Case. See Snake Case , for more information. You can use this in any JS code customizations (Flow control) , regression testing , and query insights for getting a closer look at the user conversations with the agent.
Intent type Indicates the type of user intent. Select Custom code . N/A Custom intent handler Specify a Javascript function to parse user input. Return true to execute the intent or false to exit from intent. N/A
* Click **Save**.
---
# Source: https://docs.avaamo.com/user-guide/ref/avaamo-platform-api-documentation/custom-entity-type-values.md
# Custom entity type API
## Get entity values
`GET` `https://cx.avaamo.com/api/v1/custom_entity_types/{{entity_type_id}}/values.json`
Get a list of all entity values from a custom entity type.
#### Path Parameters
| Name | Type | Description |
| -------------------------------------------------- | ------- | ---------------------------------------------------------------------------------------- |
| entity\_type\_id\* | integer | Entity type identifier. You can get the entity type identifier from the entity type URL. |
#### Query Parameters
| Name | Type | Description |
| --------- | ------- | -------------------------------------------------------------------------------- |
| page | integer | Page from which the entries must be fetched.
|
| per\_page | integer | Number of entries fetched per page.
|
#### Headers
| Name | Type | Description |
| ---------------------------------------------- | ------ | ----------------------------------------------------------------------------------------------------------------------------------------------------------------------------------------------------------------------------------------------------------------------------------------------------------------------------------------------------------------------------------------------------------------------------------------------------------------------------------------------------------------------------------------------------------------- |
| Access-Token\* | string | User access token.
You can get the user access token from the Settings -> Users page. See Users or Groups , for more information
Users must have at least view permission on the agent. See Permissions , for more information
|
{% tabs %}
{% tab title="200 " %}
```javascript
{
"current_page": 1,
"per_page": 5,
"total_entries": 3,
"total_pages": 1,
"time_token": 1590674605.172428,
"values": [
{
"id": 14926171,
"value": "Bread Sticks",
"alternate_values": []
},
{
"id": 14926168,
"value": "French Fries",
"alternate_values": [
{
"id": 14926169,
"value": "French fingers",
"alternate_values": []
}
]
},
{
"id": 14926167,
"value": "Onion rings",
"alternate_values": []
}
]
}
```
{% endtab %}
{% endtabs %}
### Code request snippets
{% tabs %}
{% tab title="cURL" %}
```javascript
curl --location --request GET 'https://cx.avaamo.com/api/v1/custom_entity_types/20xxx/values.json' \
--header 'Access-Token: xxxxxx8d9952499ea466fc007dxxxxxx' \
--header 'Content-Type: application/json'
```
{% endtab %}
{% tab title="node.js" %}
```javascript
var request = require('request');
var options = {
'method': 'GET',
'url': 'https://cx.avaamo.com/api/v1/custom_entity_types/20xxx/values.json',
'headers': {
'Access-Token': 'xxxxxx8d9952499ea466fc007dxxxxxx',
'Content-Type': 'application/json'
}
};
request(options, function (error, response) {
if (error) throw new Error(error);
console.log(response.body);
});
```
{% endtab %}
{% endtabs %}
### Response attributes
In the response, the following attributes are returned:
Attribute Description Type current_page Indicates the page from which the entries are fetched. Integer per_page Indicates the number of entries fetched per page. Integer total_entries Indicates the total number of entries in the agent messages. Integer total_pages Indicates the total number of pages calculated using per_page. Note that total_entries = per_page * total_pages Integer time_token Indicates the timestamp at which the API response is returned. UNIX epoch timestamp values Indicates an array of entity values fetched from the custom entity type. Number of entries in the array = Number specified in per_page parameter.
Each array entry contains the following details:
id: Unique value identifier value: Entity value alternate_values: Array of alternate values specified for the entity value, if any. parent_value: Parent entity value, if any. JSON key-value pairs
### Examples
The following table lists a few sample use cases with query parameters:
| Use-case | Query Parameter |
| ---------------------------------------------------------- | ---------------------------------------------------------------------------------------------------------------------------------------------------------------------------------------------------------------------------------------------------------------------------------------------------------------------------------------------------------------------------------------------------------------------------------------------------------------------------- |
| Get entity values from custom entity type using pagination | page : Specify the page from which you wish to fetch records.
per\_page : Specify the number of entries per page.
Example : [https://cx.avaamo.com/api/v1/custom\_entity\_types/\<\<entity\_type\_id>>/values.json?page=2\&per\_page=5](https://cx.avaamo.com/api/v1/custom_entity_types/\<\<entity_type_id>>/values.json?page=2\&per_page=5)
|
---
# Source: https://docs.avaamo.com/user-guide/how-to/build-agents/configure-agents/custom-feedback.md
# Custom feedback
In the **Agent -> Configuration -> Custom feedback** page, you can customize the user feedback form as per your requirement using Javascript (JS) code. This feature helps to:
* Build user feedback forms that are robust and intuitive. You can now create a custom feedback form by leveraging the rich set of objects and functions in the Avaamo Platform.
* Enhance how you can collect feedback from the users. Since the feedback form can now be tailored to suit your business requirements, it enables you to collect relevant and effective feedback from users. The collected feedback can be used to significantly enhance the user's experience when interacting with your agent.
* Create different custom feedback forms for both positive and negative feedback.

See [Collect feedback](https://docs.avaamo.com/user-guide/overview-and-concepts/advanced-concepts/collect-feedback), for more information on understanding the concept and various ways in which you can collect feedback from the users.
### Add custom user feedback
{% hint style="info" %}
**Notes**:
* Ensure you have met all the [pre-requisites](https://docs.avaamo.com/user-guide/quick-start-tutorials/pre-requisites).
* You can configure custom feedback to the agent immediately after creating an agent. See [Create agent](https://docs.avaamo.com/user-guide/how-to/build-agents/add-skills), for more information.
* If you wish to edit an agent, then:
* In the **Avaamo Platform UI**, navigate to the **Agents** tab in the top menu. Search and open the required agent. See [Search agents](https://docs.avaamo.com/user-guide/how-to/manage-agents#search-agents), for more information.
* Click **Edit** to unlock the agent before editing.
{% endhint %}
* In the Agent page, navigate to the **Configuration -> Custom feedback** option in the left navigation menu.
* By default, the custom user feedback toggle is disabled. Toggle the slider to enable this option.
* In the **Positive feedback** tab, specify the custom JS feedback form you wish to invoke when the user clicks the thumbs-up option in feedback.
* In the **Negative feedback** tab, specify the custom JS feedback form you wish to invoke when the user clicks the thumbs-down option in feedback.
* Click **Save** to save the details. To invoke the custom feedback form, you must enable collecting user feedback option at the skill or intent level as per your requirements. See [Example](#example) section, for a sample end-to-end illustration.
### Key points
Note the following important points about custom feedback:
* By default, the Custom user feedback option is disabled.
* Custom user feedback option when enabled
* Overrides the default feedback form provided by the platform. This implies that if you enable the toggle and do not provide any custom feedback form, then no form is displayed to the user.
* Shows syntax errors(if any) in the JS code for custom feedback on the feedback pop-up form.
* Is applicable wherever the user feedback is displayed to the user throughout the agent.
* Currently, you can only use Card elements to create a custom user feedback form. See [Card](https://docs.avaamo.com/user-guide/how-to/build-skills/create-skill/customize-your-skill/how-to/build-dynamic-skill-response/card), for more information.
* In the Custom feedback, the Card returned must be a single object and not an array.
* If you are using [Polls](https://docs.avaamo.com/user-guide/build-skills/create-skill/customize-your-skill/how-to/build-dynamic-skill-response/card/polls#example-2-polls-with-default-values), [Checklist](https://docs.avaamo.com/user-guide/build-skills/create-skill/customize-your-skill/how-to/build-dynamic-skill-response/card/checklist#example-2-checklist-with-default-value), or [Picklist](https://docs.avaamo.com/user-guide/build-skills/create-skill/customize-your-skill/how-to/build-dynamic-skill-response/card/select-picklist#example-2-picklist-with-a-default-value) in Cards, then for each option in the card element you must specify the UUID. Currently, in the Custom feedback JS form, it is recommended to use user-friendly identifiers for UUIDs instead of a random-generated number in the "Options" object as it helps you to identify the message in the [User feedback](https://docs.avaamo.com/user-guide/how-to/build-agents/learning-continuous-improvement/feedback) page.
* Currently, in the custom feedback, the post\_message type is not supported in Card links. See [Card links](https://docs.avaamo.com/user-guide/how-to/build-skills/create-skill/customize-your-skill/how-to/build-dynamic-skill-response/card/card-links), for more information.
* Currently, any media content including images is not supported in Custom feedback.
* Use `CTRL+ENTER` key to toggle between fullscreen mode. You can view the complete list of built-in functions with syntax and examples in the Built-in functions window available in the JS editor. See [Built-in functions window](https://docs.avaamo.com/user-guide/how-to/build-skills/create-skill/customize-your-skill/built-in-functions-window), for more information.
* All the feedback provided via the custom feedback form is recorded in the Analytics and can be viewed in the **User feedback** page for further analysis. See [User feedback](https://docs.avaamo.com/user-guide/how-to/build-agents/learning-continuous-improvement/feedback), for more information.
* If you have any error in the custom feedback JS code template, then
* An appropriate template error message is displayed when you are in debug mode, say when you are testing the custom feedback using the Agent simulator. This helps you to troubleshoot and correct the error as a developer of the agent.
* If you are in a non-debug mode, say, testing the same scenario using the Test button in the Web channel, then since you are viewing as a user, an error message that something went wrong is displayed.
### Example
Consider in your agent that you wish to collect feedback on how the service was helpful to the users for all the questions and responses in the Q\&A skill.
* In the **Agent ->** **Configuration -> Custom feedback** page, enable **Custom user feedback** toggle.
* In the **Positive feedback** tab, specify the custom form as per your requirement. Currently, you can only use Card elements to create a custom user feedback form. See [Card](https://docs.avaamo.com/user-guide/how-to/build-skills/create-skill/customize-your-skill/how-to/build-dynamic-skill-response/card), for more information. The following code is a sample illustration of the custom feedback form:
```javascript
return {
"notification_message": "Thank you for your valuable feedback. We appreciate your time and response.",
"card": {
"inputs": [{
"type": "single_line_text",
"title": "First Name",
"uuid": "firstName",
"default_value": "John"
},
{
"type": "single_line_text",
"title": "Last Name",
"uuid": "lastName",
"default_value": "Creek"
},
{
"type": "data_capture",
"title": "Anything you would like us to improve on?",
"uuid": "a4615857-c2f7-4586-b4b0-f771683fcb1a"
},
{
"title": "Rate our service",
"type": "rating",
"uuid": "784cc8d5-b3d0-4cbc-89c4-4ef3c2fa43ea"
}
]
}
}
```
* Enable the **Collect feedback** option for the Q\&A skill. See [Collect feedback](https://docs.avaamo.com/user-guide/overview-and-concepts/advanced-concepts/collect-feedback#enabling-feedback), for more information.

* You can now test the agent. Click the agent icon at the bottom-right corner to invoke the agent simulator. Specify the intent to invoke the Q\&A skill where feedback is enabled. After the Q\&A response, a thumbs-up and thumbs-down icon is displayed in the agent.

* Click the thumbs-up option in the feedback. The following pop-up is displayed as configured in the Agent -> Configuration -> Custom feedback -> Positive feedback tab.

* Provide the feedback and click **Submit**. Note the message displayed in the agent after providing feedback is from the "notification\_message" attribute.

* You can view the submitted feedback in the [User feedback](https://docs.avaamo.com/user-guide/how-to/build-agents/learning-continuous-improvement/feedback) page for further monitoring and analysis.
---
# Source: https://docs.avaamo.com/user-guide/how-to/build-agents/configure-agents/switch-to-live-agent/custom-live-agent.md
# Source: https://docs.avaamo.com/user-guide/configuration/live-agent/custom-live-agent.md
# Custom live agent
The Avaamo Platform provides prebuilt live-agent integrations with Avaamo, Oracle RightNow, and Zendesk. However, if you wish to transfer to a live agent other than the ones available, you can configure a custom live agent. When you configure a custom live agent in the Avaamo platform, you also provide a webhook URL that serves as an endpoint for sending and receiving requests and responses to and from the Avaamo platform.
When the user interacts with the virtual assistant and requests to speak to a live agent, the request is sent to the live agent (chat application) via a webhook call. The **Live agent integrator** transforms payloads to and from the Avaamo platform and the **Custom live agent,** respectively.
Refer [Custom live agent,](https://docs.avaamo.com/user-guide/how-to/build-agents/configure-agents/switch-to-live-agent/custom-live-agent) for more information.
---
# Source: https://docs.avaamo.com/user-guide/ref/avaamo-platform-api-documentation/custom-properties-api.md
# Custom properties API
## Get custom user properties
`GET` `https://cx.avaamo.com/v1/user_info/{{user_id}}.json?access_token={{agent_access_token}}`
Get details about custom user properties from the agent.
#### Path Parameters
| Name | Type | Description |
| ------------------------------------------ | ------- | ----------------------------------------------------------------------------------------------------------------------------------------------------------------------------------------------------------------------------------------------------------------------------------------------------------------------------------------------------------------------- |
| user\_id\* | integer | User identifier. Based on the requirement, you can get the user identifier in one of the following ways: avaamo\_id attribute in the Get Message API. user -> Id attribute in the Query Insights API .
|
#### Query Parameters
| Name | Type | Description |
| ----------------------------------------------- | ------ | ------------------------------------------------------------------------------------------------------------------------------------------------------------------------------------------------------------------------------------------------------------------------------ |
| access\_token\* | string | The agent access token. You can get agent access token from Agent -> Configuration -> Settings page. See [Agent Authentication Keys](https://docs.avaamo.com/user-guide/how-to/build-agents/configure-agents/define-settings#agent-authentication-keys), for more information. |
{% tabs %}
{% tab title="200 Success" %}
```javascript
{
"user_info": [
{
"user_id": 30572,
"key": "customerType",
"value": "guest"
},
{
"user_id": 30572,
"key": "customerLocation",
"value": "India"
}
]
}
```
{% endtab %}
{% endtabs %}
### Code request snippets
{% tabs %}
{% tab title="cURL" %}
```javascript
curl --location --request GET 'https://cx.avaamo.com/v1/user_info/30xxx.json?access_token=xxxxxx8d9952499ea466fc007dxxxxxx' \
--header 'Content-Type: application/json'
```
{% endtab %}
{% tab title="node.js" %}
```javascript
var request = require('request');
var options = {
'method': 'GET',
'url': 'https://cx.avaamo.com/v1/user_info/30xxx.json?access_token=xxxxxx8d9952499ea466fc007dxxxxxx',
'headers': {
'Content-Type': 'application/json'
}
};
request(options, function (error, response) {
if (error) throw new Error(error);
console.log(response.body);
});
```
{% endtab %}
{% endtabs %}
### Response attributes
In the response, user\_info array is returned with the key and value for each custom property:
| Attribute | Description | Type |
| --------- | ------------------------------------------- | ------ |
| key | Indicates the key of the custom property. | String |
| value | Indicates the value of the custom property. | String |
---
# Source: https://docs.avaamo.com/user-guide/how-to/build-skills/create-skill/customize-your-skill.md
# Using Javascript and Code
- [Quick overview](/user-guide/how-to/build-skills/create-skill/customize-your-skill/quick-overview.md): Provides a quick glance of the key concepts, objects, functions, and properties used for customizations
- [Built-in functions window](/user-guide/how-to/build-skills/create-skill/customize-your-skill/built-in-functions-window.md)
- [How-to](/user-guide/how-to/build-skills/create-skill/customize-your-skill/how-to.md): Common scenarios for customizing your skill using JS programming
- [Use context](/user-guide/how-to/build-skills/create-skill/customize-your-skill/how-to/use-context.md)
- [Get user details](/user-guide/how-to/build-skills/create-skill/customize-your-skill/how-to/use-context/to-get-user-details.md)
- [Get last message](/user-guide/how-to/build-skills/create-skill/customize-your-skill/how-to/use-context/get-last-message.md)
- [Get slot details](/user-guide/how-to/build-skills/create-skill/customize-your-skill/how-to/use-context/get-domain-entity-details.md)
- [Get environment variables](/user-guide/how-to/build-skills/create-skill/customize-your-skill/how-to/use-context/get-environment-variables.md)
- [Create context variables](/user-guide/how-to/build-skills/create-skill/customize-your-skill/how-to/use-context/create-custom-variables.md)
- [Set user property](/user-guide/how-to/build-skills/create-skill/customize-your-skill/how-to/use-context/set-user-property.md)
- [Create custom user properties](/user-guide/how-to/build-skills/create-skill/customize-your-skill/how-to/use-context/create-custom-user-properties.md)
- [Detect user tone and sentiment](/user-guide/how-to/build-skills/create-skill/customize-your-skill/how-to/use-context/detect-user-tone-and-sentiment.md)
- [Detect user device](/user-guide/how-to/build-skills/create-skill/customize-your-skill/how-to/use-context/detect-channel.md)
- [Detect user channel](/user-guide/how-to/build-skills/create-skill/customize-your-skill/how-to/use-context/detect-user-channel.md)
- [Switch user's language](/user-guide/how-to/build-skills/create-skill/customize-your-skill/how-to/use-context/switch-users-language.md)
- [Transfer to live agent](/user-guide/how-to/build-skills/create-skill/customize-your-skill/how-to/use-context/transfer-to-live-agent.md)
- [Get skill conversation insights](/user-guide/how-to/build-skills/create-skill/customize-your-skill/how-to/use-context/get-insights.md)
- [Show ambiguous intents](/user-guide/how-to/build-skills/create-skill/customize-your-skill/how-to/use-context/show-ambiguous-intents.md)
- [Use storage](/user-guide/how-to/build-skills/create-skill/customize-your-skill/how-to/using-storage.md)
- [Control skill flow](/user-guide/how-to/build-skills/create-skill/customize-your-skill/how-to/controlling-skill-flow.md)
- [Add tags (JS)](/user-guide/how-to/build-skills/create-skill/customize-your-skill/how-to/add-tags-js.md)
- [Add feedback (JS)](/user-guide/how-to/build-skills/create-skill/customize-your-skill/how-to/add-feedback.md)
- [Send SMS - SMS.send](/user-guide/how-to/build-skills/create-skill/customize-your-skill/how-to/sending-notifications.md)
- [Send Email - Email.send](/user-guide/how-to/build-skills/create-skill/customize-your-skill/how-to/send-email-email.send.md)
- [Forward call (C-IVR channel)](/user-guide/how-to/build-skills/create-skill/customize-your-skill/how-to/forward-call-c-ivr-channel.md)
- [Hangup call (C-IVR channel)](/user-guide/how-to/build-skills/create-skill/customize-your-skill/how-to/hangup-call-c-ivr-channel.md)
- [Build dynamic skill response](/user-guide/how-to/build-skills/create-skill/customize-your-skill/how-to/build-dynamic-skill-response.md): Add customized input cards, carousel, list-view, quick reply
- [Card response (Javascript)](/user-guide/how-to/build-skills/create-skill/customize-your-skill/how-to/build-dynamic-skill-response/card.md)
- [Single line text](/user-guide/how-to/build-skills/create-skill/customize-your-skill/how-to/build-dynamic-skill-response/card/single-line-text.md)
- [Multi-line text](/user-guide/how-to/build-skills/create-skill/customize-your-skill/how-to/build-dynamic-skill-response/card/multi-line-text.md)
- [Date and time](/user-guide/how-to/build-skills/create-skill/customize-your-skill/how-to/build-dynamic-skill-response/card/date-and-time.md)
- [Select (PickList)](/user-guide/how-to/build-skills/create-skill/customize-your-skill/how-to/build-dynamic-skill-response/card/select-picklist.md)
- [File upload](/user-guide/how-to/build-skills/create-skill/customize-your-skill/how-to/build-dynamic-skill-response/card/file-upload.md)
- [Polls](/user-guide/how-to/build-skills/create-skill/customize-your-skill/how-to/build-dynamic-skill-response/card/polls.md)
- [Checklist](/user-guide/how-to/build-skills/create-skill/customize-your-skill/how-to/build-dynamic-skill-response/card/checklist.md)
- [Rating](/user-guide/how-to/build-skills/create-skill/customize-your-skill/how-to/build-dynamic-skill-response/card/rating.md)
- [Card links](/user-guide/how-to/build-skills/create-skill/customize-your-skill/how-to/build-dynamic-skill-response/card/card-links.md)
- [Card images](/user-guide/how-to/build-skills/create-skill/customize-your-skill/how-to/build-dynamic-skill-response/card/card-images.md)
- [Carousel response (Javascript)](/user-guide/how-to/build-skills/create-skill/customize-your-skill/how-to/build-dynamic-skill-response/carousel.md)
- [ListView response (Javascript)](/user-guide/how-to/build-skills/create-skill/customize-your-skill/how-to/build-dynamic-skill-response/list-view.md)
- [Quick Reply response (Javascript)](/user-guide/how-to/build-skills/create-skill/customize-your-skill/how-to/build-dynamic-skill-response/quick-reply.md)
- [Delay](/user-guide/how-to/build-skills/create-skill/customize-your-skill/how-to/build-dynamic-skill-response/delay.md)
- [Graphs & Charts](/user-guide/how-to/build-skills/create-skill/customize-your-skill/how-to/build-dynamic-skill-response/graphs-and-charts.md)
- [Create custom HTML web views](/user-guide/how-to/build-skills/create-skill/customize-your-skill/how-to/create-custom-html-web-views.md): Create custom HTML web views on Web Channel and Facebook for the skill responses configured using card, carousel, or list view
- [Define custom intents](/user-guide/how-to/build-skills/create-skill/customize-your-skill/how-to/define-matching-rules-using-custom-intents.md): Define your own matching rules using custom intents in nodes using JS
- [Integrate](/user-guide/how-to/build-skills/create-skill/customize-your-skill/how-to/integrate-with-api-1.md)
- [REST and SOAP API](/user-guide/how-to/build-skills/create-skill/customize-your-skill/how-to/integrate-with-api-1/rest-and-soap-api.md)
- [Hybrid SDK](/user-guide/how-to/build-skills/create-skill/customize-your-skill/how-to/integrate-with-api-1/hybrid-sdk.md)
- [Test customizations](/user-guide/how-to/build-skills/create-skill/customize-your-skill/test-your-skill.md): Describes different methods to test the skill after customizations
- [Debug JS code](/user-guide/how-to/build-skills/create-skill/customize-your-skill/troubleshooting-tips.md): Provides useful tips in cases where you are unable to receive the expected results
- [Coding best practices](/user-guide/how-to/build-skills/create-skill/customize-your-skill/best-practices.md): Dos and Don’ts of JS programming during skill flow customizations.
- [Reference library](/user-guide/how-to/build-skills/create-skill/customize-your-skill/reference-library.md): Commonly used objects, functions, and attributes during agent flow customizations
- [Context](/user-guide/how-to/build-skills/create-skill/customize-your-skill/reference-library/context.md): Encapsulates various details of a user’s interaction with the agent at a particular context
- [variables](/user-guide/how-to/build-skills/create-skill/customize-your-skill/reference-library/context/variables.md)
- [user](/user-guide/how-to/build-skills/create-skill/customize-your-skill/reference-library/context/user.md)
- [live\_agent\_user](/user-guide/how-to/build-skills/create-skill/customize-your-skill/reference-library/context/user-1.md)
- [insights](/user-guide/how-to/build-skills/create-skill/customize-your-skill/reference-library/context/insights.md)
- [history](/user-guide/how-to/build-skills/create-skill/customize-your-skill/reference-library/context/history.md)
- [User.setProperty](/user-guide/how-to/build-skills/create-skill/customize-your-skill/reference-library/user.setproperty.md): Sets the user property of the specified key to the indicated value
- [User.setProperties](/user-guide/how-to/build-skills/create-skill/customize-your-skill/reference-library/user.setproperties.md): Sets the user property of the specified key to the indicated value
- [User.removeProperty](/user-guide/how-to/build-skills/create-skill/customize-your-skill/reference-library/user.removeproperty.md)
- [Storage](/user-guide/how-to/build-skills/create-skill/customize-your-skill/reference-library/storage.md): Stores data either for a global session or for a specific user session.
- [Flow control](/user-guide/how-to/build-skills/create-skill/customize-your-skill/reference-library/flow-control.md): Customize the navigation of the agent flow using JS functions
- [Notifications](/user-guide/how-to/build-skills/create-skill/customize-your-skill/reference-library/notifications.md): Allows agent to send SMS and email notifications to the users
- [Agent commands](/user-guide/how-to/build-skills/create-skill/customize-your-skill/reference-library/skill-commands.md): Perform actions such as clear, reset, and transfer (to name a few) during a user’s interacting with the agent
- [Language.switch](/user-guide/how-to/build-skills/create-skill/customize-your-skill/reference-library/language.switch.md): Switch language to anyone of the languages added to the agent.
- [Agent.transfer](/user-guide/how-to/build-skills/create-skill/customize-your-skill/reference-library/agent.transfer.md): Allows agent to switch to a live agent, if live agent option is enabled.
- [Agent.setContext](/user-guide/how-to/build-skills/create-skill/customize-your-skill/reference-library/agent.setcontext.md): Allows agent to set context before transferring the request. Used in Skill-based routing
- [Advance JS libraries](/user-guide/how-to/build-skills/create-skill/customize-your-skill/reference-library/advanced-js-libraries.md): List of supported Nodejs libraries with version no.
- [SmartCall (C-IVR)](/user-guide/how-to/build-skills/create-skill/customize-your-skill/reference-library/smartcall-c-ivr.md)
---
# Source: https://docs.avaamo.com/user-guide/ref/data-retention.md
# Data Retention
Agents in the Avaamo Conversational AI Platform consume a voluminous amount of user data in its lifecycle - right from its inception, to production, and ongoing over a period of years until the agent is active. Data can be in various forms - ranging from simple text descriptions to images, videos, and files. Further, data captured by agents in certain domains, say finance or banking, or healthcare can also be sensitive in nature.
Hence, it is critical and essential to manage data appropriately and to define required policies to ensure data security, confidentiality, integrity, and availability. Policies are required at every stage of data in its lifecycle - from the time data is collected and stored to when it must be archived or deleted.
One such important policy is **Data retention**. In simple terms, data retention means retaining or storing data for a specific period of time for meeting legal and business data archival requirements. Without a data retention policy, an organization can eventually store unnecessary data for a long period of time, impacting system performance, compromising data availability, and can have a rippling effect on data integrity and security.
This article provides describes the data retention policy applicable to the data in the Avaamo Conversational AI platform.
### What is data retention?
Data retention in the Avaamo Conversational AI Platform defines how long data is retained in the platform and what happens to the data once the retention time period for a particular data set expires.
### How long is the data retained?
As a part of Avaamo’s ongoing governance policy, your data is retained for upto 2 years. It is recommended that you plan and set up a process to take required backups of all your production agents to your desired location on a regular basis.
{% hint style="info" %}
**Note**: By default, your data is retained for 2 years. All data older than 2 years are purged. If you wish to retain data for a lesser number of days, then contact Avaamo Support with details about your specific retention requirements.
{% endhint %}
### What data is retained and how to take backup?
Data in the following modules are purged. Refer to `How to take backup?` in the following table to take backup as per your requirement:
| Data purged | How to take backup? |
| -------------------- | --------------------------------------------------------------------------------------------------------------------------------------------- |
| Query insights | [Query insights API ](https://docs.avaamo.com/user-guide/ref/avaamo-platform-api-documentation/agent-api/query-insights) |
| Analytics | [Analytics APIs](https://docs.avaamo.com/user-guide/ref/avaamo-platform-api-documentation/analytics-api) |
| User journey | [Download user journey as PDF](https://docs.avaamo.com/user-guide/how-to/build-agents/monitor-and-analyze/user-journey#download-user-journey) |
| Conversation History | [Conversation History API](https://docs.avaamo.com/user-guide/ref/avaamo-platform-api-documentation/conversation-message-api) |
| JS Errors | [Export JS Errors to a CSV](https://docs.avaamo.com/user-guide/how-to/build-agents/debug-agents/js-errors#export-js-errors-to-a-csv-file) |
| Feedback | [User feedback API](https://docs.avaamo.com/user-guide/ref/avaamo-platform-api-documentation/feedback-api) |
| Change Logs | [Changelog API](https://docs.avaamo.com/user-guide/ref/avaamo-platform-api-documentation/change-log-apis) |
| Messages | [Message API](https://docs.avaamo.com/user-guide/avaamo-platform-api-documentation/message-api#get-agent-messages) |
{% hint style="info" %}
**Notes:** All the data returned from the API is in JSON format.
{% endhint %}
### Can this data be recovered in any way?
No, once purged the data is completely deleted from the Avaamo Conversational AI Platform and cannot be recovered.
### What is the format of the data from the API?
All the data returned from the API is in JSON format.
---
# Source: https://docs.avaamo.com/user-guide/datasync-ai/datasync-ai-faqs.md
# DataSync AI FAQ’s
### 1. **Is it possible to utilize multiple content sources within the same document group?**
You can do it by creating separate jobs and mentioning the same document group.
### **2. How many articles or documents can be ingested simultaneously?**
There is no limit to the number of articles or documents that can be ingested simultaneously.
### **3. Can I remove or delete the ingested article or document?**
Yes, you can delete, edit, or retrain the ingested document. Refer to the article [Common actions](https://docs.avaamo.com/user-guide/llamb/get-started/step-2-ingest-enterprise-content/common-actions).
### **4. If the content is updated after ingestion, then does it automatically update in the agent's skill?**
Yes, if a document is updated after it has been ingested into your skill or system, those updates automatically reflect in your agent. Refer [Setup content sync](https://docs.avaamo.com/user-guide/datasync-ai/broken-reference) for SharePoint Connector and [Setup content sync](https://docs.avaamo.com/user-guide/datasync-ai/broken-reference) for ServiceNow connector, for more information
### **5. What if the same document’s different versions are ingested into the skill?**
The system updates the existing document by replacing it with the most recently ingested version, ensuring that only one version is maintained.
### 6. What happens if the ingested article/document contains an attachment?
It ingests the attachment if it is in PDF format. Refer [Before you begin](https://docs.avaamo.com/user-guide/datasync-ai/before-you-begin), for more details.\ >",
"type": "date_time/date",
"uuid": "<>",
*"disable_weekends": true/false,
*"default_value": "<>",
*"min_date": "<>",
*"max_date": "<>",
*"should_validate": true/false,
"format": "<>",
}]
}
* - Indicates optional parameter
```
Attribute Description Type title Indicates the title of the card. String uuid Indicates a secure random UUID that can be used later to get the date and time entered by the user. See Section 4.4 in
https://tools.ietf.org/html/rfc4122 , for more information.
Date selected by the user is available in the context.last_message.
Syntax: context.last_message.<<uuid>>
String disable_weekends Indicates if weekends must be disabled in the date picker or not. This is an optional attribute.
This attribute is not supported in the Microsoft Teams channel due to the limitations on the channel's side. See Microsoft Teams Compliance , for more information.
Boolean default_value Indicates the default value displayed in the date
picker in the format - MM/DD/YYYY HH:MM. If you
are using only Date, then you can skip specifying
HH:MM. This is an optional attribute.
String min_date Indicates the minimum date or the start date
displayed in the date picker in the format -
MM/DD/YYYY HH:MM. If you are using only Date,
then you can skip specifying HH:MM. This is an
optional attribute.
String max_date Indicates the maximum date or the end date
displayed in the date picker in the format -
MM/DD/YYYY HH:MM. If you are using only Date,
then you can skip specifying HH:MM. This is an
optional attribute.
String should_validate Indicates if the user can skip entering values for the field or not before submitting. By default, the value is set to true. Boolean format Indicates the date formats.
You can change the format accordingly Like
String
### **Examples**
**Example 1**: The following is a sample JS to provide a date picker in the card input without default values:
```yaml
return {
"card": {
"inputs": [
{
"title": "Date of Birth",
"type": "date_time",
"uuid": "2025383e-9127-4091-b565-6a01a3701911"
}
]
}
}
```
In the agent, the following response is displayed:

You can use `context.last_message.<>`to get the date selected by the user.
**Example 2**: The following is a sample JS to provide a date picker in the card input with default values and other options:
```yaml
return {
"card": {
"inputs": [
{
"title": "Date of Birth",
"type": "date_time",
"uuid": "2025383e-9127-4091-b565-6a01a3701911",
"disable_weekends": true,
"default_value": "12/01/2019 10:00",
"min_date": "12/01/2019 10:00",
"max_date": "12/31/2019 10:00",
"format": "DD-MM-YYYY HH:mm"
}
]
}
}
```
In the agent, the following response is displayed:

Note that the date from the date picker is displayed in the specified format. You can use `context.last_message.<>` to get the date selected by the user.
**Example 3**: The following is a sample JS to provide a date picker in the card input with only Date:
```yaml
return {
"card": {
"inputs": [
{
"title": "Date of Birth",
"type": "date",
"uuid": "2025383e-9127-4091-b565-6a01a3701911",
"disable_weekends": true,
"default_value": "12/30/2019",
"min_date": "12/01/2019",
"max_date": "12/31/2019"
}
]
}
}
```
In the agent, the following response is displayed:

You can use `context.last_message.<>` to get the date selected by the user.
{% content-ref url="" %}
[](https://docs.avaamo.com/user-guide/how-to/build-skills/create-skill/customize-your-skill/how-to/build-dynamic-skill-response/card)
{% endcontent-ref %}
{% content-ref url=".." %}
[..](https://docs.avaamo.com/user-guide/how-to/build-skills/create-skill/customize-your-skill/how-to/build-dynamic-skill-response)
{% endcontent-ref %}
---
# Source: https://docs.avaamo.com/user-guide/how-to/build-agents/debug-agents.md
# Debug agents
In case you are unable to receive the expected response from the agent, you can debug using the following troubleshooting tips:
{% hint style="success" %}
**Key points**:
* **Defining entities:**
* Entities must be a logical grouping of nouns e.g. scheme name, which holds the same meaning across all training variations for the agent.
* An entity must be relevant to your intent and must provide a specific context for an intent.
* You must retain only those entities and slots that are required by the skill to process.
* **Defining skills**:
* FAQ type skills must be Q\&A, all casual and informal queries must be Smalltalk.
* If you have Smalltalk as Q\&A intents, then the priority of intent processing gets affected. Smalltalk has a lower priority when compared to Q\&A. See the[ Intent execution sequence](https://docs.avaamo.com/user-guide/overview-and-concepts/advanced-concepts/intent-execution-sequence), for more information.
* Also, note that Smalltalk does not participate in disambiguation.
* **Disable skill as that is no longer required**: If a skill that is no longer required is enabled, then the entities from that node still participate. The best practice is to disable the skill if it is no longer required.
{% endhint %}
## **Using Insights**
* Click the eye icon below the user query to know the intent mapped to the query.

* In the **Insights** pop-up, you can know if the query is mapped to the required intent type, name, skill key, intent key, entities, and the language of the query.

* You can use this information to update the conversation flow, as required, based on the details available in the insights.
{% hint style="success" %}
**Key Points**:
* By default, the insights eye icon is available in the agent widget at the bottom-right corner when you are accessing the agent from the dashboard. You can enable the insights icon using debug parameter in the web channel URL if required. See [Customization parameters](https://docs.avaamo.com/user-guide/how-to/configure-agents/deploy/web-channel/configure-web-channel#customization-parameters), for more information.
* In the insights, at times additional entities are extracted. This is because in the agent all the entities that are available in any of the agent's skills are considered for extraction as it may be required in any of the JavaScript. But only those entities that are used in the slot of a training phrase are used to match the training phrases. So even if the entity is extracted, the slot is not created for that entity, it is not used for intent matching.
{% endhint %}
## Using JS errors
In case, you have JavaScript code in your agent, then you can check for any errors using the **JS errors** option. In this section, you can view errors related to SSML, live agent, custom channel, Regex entities, and JS errors across nodes. The following illustrates a few scenarios:

* In the **Agent** page, click **Debug -> JS errors** option in the left navigation menu.
* A list of JS Errors are displayed in the following format:
* **Message**: Indicates the message or user query in the skill at the point of error.
* **Step**: Indicates the node number in the flow that caused the error.
* **Sender**: Indicates the details of the user who sent the message.
* **Time**: Indicates the time of error creation.
* **JS error**: Indicates the details of the JS error in the format - `{"error":"","line":,"section":""}`
* Correct the JS errors in the conversation flow, based on the error details displayed in the **JS errors** page.
{% hint style="info" %}
**Notes**:
* You can use the **Clear All** option to clear all JS errors.
* The error messages are sorted based on the descending order of error creation time.
* All errors get displayed only when the specific cases are triggered in the conversation flow with a user query. For example, Regex entity error is displayed only when you use the entity in the conversation flow and it gets triggered in the conversation flow.
{% endhint %}
## Using Debug logs
Use **console.log** to log messages at specific steps in the script. This helps to verify if the script is executing as expected and to identify points of failure. You can then use **Debug logs** options in **Dialog skill** to display all the logs generated using console.log.
Consider that in the **Order Status skill** of the **Pizza agent**, you have logged **context** for an intent:
```markup
console.log(context);
```
* In the **Agent** page, click **Debug -> Debug logs** option in the left navigation menu.
* Click the agent icon in the bottom-right corner.
* Enter the order number. Context details are displayed in the **Debug logs** window. Similarly, you can use **console.log** to log messages at specific steps in the script, as required.
{% hint style="info" %}
**Note**: In the `Debug logs` pop-up window, a maximum of 50 consecutive `Console.log` statements can be printed.
{% endhint %}
## Using Storage
You can view all the data stored either for a global session (applicable for all the users interacting with agents) or for a specific user session in your agent.
* In the **Agent** page, click **Debug -> Storage** option in the left navigation menu.
* You can search within a specified date range or using key values of the storage variables.

## Using Conversation history
The **Conversation history** page displays the records of the agent and all of its user interactions for the selected agent.
* Click any conversation to see the details. In the URL, you can also see a unique identifier for the conversation. This is referred to as conversation\_uuid. You can use this in APIs. See [Conversation API](https://docs.avaamo.com/user-guide/ref/avaamo-platform-api-documentation/conversation-message-api), for an example.
* You can search through history to find specific conversations, messages, and users.

{% hint style="info" %}
**Notes**:
* Currently, list view responses are not displayed in the conversation history.
* Conversation history is not real-time and it may take upto 2 minutes for the Conversation history to be updated.
* In the Configuration -> Live agent page if the **Save conversations** toggle is set to **No**, then no data or chat conversations between the users and live agents are saved in the Avaamo platform. At the specific section in the Conversation history page, a system message indicating the same is displayed.
{% endhint %}
The **Conversation history** page includes a search bar, agent profile icon, and user profile icon.
### Search bar
You can use the **Search** bar to search through conversation titles and message content. This helps you narrow down user queries and the agent’s response to the query.

#### Conversations
Each conversation in the **Conversation history** page is grouped by user name. You can search for conversations related to a specific user by entering the user name in the search bar. All the conversation for the user or message containing the user name is displayed in the result.
#### Messages
You can search the conversation history with messages. These messages can be user queries or the agent's response. To search with a message, type the message content in the search bar.
All the messages with the searched message content are displayed. Click the message to view the details and the conversations.
Note that if you have deployed your agent in C-IVR or Phone channel, then the user responses are available as audio files in the **Conversation history**.
### Agent profile icon
The agent profile icon button allows you to edit the profile and change the view of the conversation history page. You can perform the following actions:

* View the agent avatar, first name, last name, and the job description. You can also view any custom user authentication setting if you have provided any.
* Change the outlook of the **Conversation history** page by clicking the **Compact view** option.
* Logs you out from the Avaamo platform dashboard.
### User icon
You can view the details of a user in the conversation by clicking the user profile icon:

* The email address and other custom user authentication details are provided in the **Custom user authentication handler** and **Returning user message handler**. See [Define settings](https://docs.avaamo.com/user-guide/how-to/build-agents/configure-agents/define-settings), for more information.
* The channel through which the user interacted with the agent.
* The link for the agent.
* The location of the user's IP.
---
# Source: https://docs.avaamo.com/user-guide/how-to/build-skills/create-skill/dynamic-q-and-a/debug-dynamic-q-and-a-skill.md
# Debug Dynamic Q\&A skill
In case you are unable to receive the expected response from the **Dynamic Q\&A** skill, you can debug using the following troubleshooting tips:
### **Using local skill testing**
* Use the **Test** in the Dynamic Q\&A page to test the skill locally. See [Test Dynamic Q\&A](https://docs.avaamo.com/user-guide/how-to/build-skills/create-skill/dynamic-q-and-a/test-dynamic-q-and-a-skill), for more information. If you are not receiving the appropriate responses, then check the user query and edit the user intents, if required. See [Edit skill](https://docs.avaamo.com/user-guide/how-to/build-skills/create-skill/build-and-manage-dynamic-q-and-a-skill/perform-common-actions#edit-skill), for more information.
* If you are receiving appropriate responses, then test the skill at the agent level. [Use insights](#using-insights) in the agent testing for further debugging.
### **Using Insights**
* Click the **eye icon** below the user query to know the intent mapped to the query.

* In the **Insights** pop-up, you can know if the query is mapped to the required intent type, intent name, skill name, response node, and the language of the query.

* Add the query that is not handled \[mapped to unhandled intent] by the agent as inline training data. See [Add Questions and Answers,](https://docs.avaamo.com/user-guide/how-to/build-skills/create-skill/dynamic-q-and-a/build-and-manage-dynamic-q-and-a-skill/add-questions-and-answers) for more information.
### Using Conversation history
You can also check the user query from the [Conversation history](https://docs.avaamo.com/user-guide/build-agents/debug-agents#conversation-history) to know the query for which the expected response is not displayed in the agent.
### Using Debug Logs
In case you are receiving a JS error in the Dynamic Q\&A response, check [Debug Log](https://docs.avaamo.com/user-guide/build-agents/debug-agents#debug-log) for more details.
---
# Source: https://docs.avaamo.com/user-guide/debug/debug-log.md
# Source: https://docs.avaamo.com/user-guide/skills/prompt-skill/debug-log.md
# Debug Log
In case you are unable to receive the expected response from the **Prompt** skill, you can debug using the following troubleshooting tips:
### Using Debug logs Consider defining these in the dictionary.
See Add dictionaries , for more information.
|
| Are these just regular words for which you have given some alternate synonyms? | For example, eat -> grab, gobble, drink. Consider adding them as training data variations for the intent. See [Add invocation intent](https://docs.avaamo.com/user-guide/how-to/build-skills/create-skill/using-dialog-designer/create-new-skill/add-invocation-intent) and [Add user intent](https://docs.avaamo.com/user-guide/how-to/build-skills/create-skill/using-dialog-designer/create-new-skill/add-user-intent), for more information. |
**Example**: The following table lists a few use cases and corresponding categorizations:
| Use case | How to define them? |
| ------------------------------------------------------------ | ------------------- |
| AEM: Adobe Experience Manager | Dictionaries |
| KYC: Know your customer | Dictionaries |
| Policy: Plan, Strategy | Training variations |
| Correction: change, updated | Training variations |
| Ticket type: Incident, Request Item, Change Request, Problem | Entity type |
| Account type: Savings, Current, Recurring, Fixed | Entity type |
{% hint style="info" %}
**Note**: Spell correction is performed on words in the user query by identifying and correcting the phrase that is closest to the training data. Hence, only those words that are a part of either part of training data, entities, or dictionary are spell-corrected.
{% endhint %}
## **6: Prepare for ambiguities and misunderstandings**
Program your agent to deal proactively with any ambiguities and misunderstandings. If your agent detects various entities and is unsure of a response, have your agent ask related questions, suggest a possible next step, and remedy misunderstandings. This way, if your agent's answer is not satisfactory, your users will have several other questions to choose from, and this will not result in an interrupted agent conversation flow.Can you help me find a hospital? Where is the nearest hospital? Find a specialist for me. I am looking for a pediatrician. Find a hospital or specialist. Search Something Manage account I am looking for X2 I am looking for tyres
Can you help me find a hospital? Where is the nearest hospital? Here, the following two training phrases are duplicate
for the same intent, since they differ only
by an alternate word:
Can you help me find a hospital? Can you search for a hospital? Intent 1: Outlook Email Policy
Training Data: Older emails are missing from Outlook
Intent 2: Outlook Missing Email
Training Data: Older emails are missing on Outlook
Here, both are different intents but the training data is similar and differs only by an alternative word
|
### **6. Use slots for alternatives**
Create custom entity types that is generic.
**Use Case**: To open a bank account
**Recommended**:
* I want to open a \[savings] account.
* I want to open a \[checking] account.
### **7. Use minimal words to convey meaning**
Leave out unnecessary and irrelevant words that do not contribute to the meaning of the sentence.
**Use Case**: To find a hospital or a specialist
| Recommended | Not Recommended |
| -------------------------------- | -------------------------------------------------------------- |
| Can you help me find a hospital? | Can you help me find a gigantic, sophisticated, huge hospital? |
### **8. Avoid spelling mistakes**
Spelling mistakes in the training data cause the system to make wrong spelling corrections for user queries.
**Use Case**: Quote status
| Recommended | Not Recommended |
| --------------------------------------- | -------------------------------------- |
| Can you give me the status of my quote? | Can you give me the status of my quot? |
### **9. Use proper case for all words**
The most common mistake is writing a full sentence in lowercase.
**Use Case:** Car service center in Bangalore**.**
| Recommended | Not Recommended |
| --------------------------------------------------------------------------------------------------------------------- | ----------------------------------------------- |
| Where is the Lexus service center in Bangalore?
Here, “L” in Lexus helps to identify a proper car brand.
| Where is the lexus service center in bangalore? |
### 10. **Ensure proper punctuation marks**
* It helps to identify the sentence type (declaration, question) and boundary.
* Missed or incorrect punctuation marks may make the training data completely unusable in some circumstances.
* Include punctuation marks such as period ( . ), comma ( , ), question mark ( ? ), exclamation point ( ! ), apostrophe( ' ), quotation mark ( "" ), and hyphen ( - ) as required.
**Use Case:** To transfer money
| Recommended | Not Recommended |
| --------------------------------------------------------------------------------------------------------- | ------------------------------------------------------------------------------------------------------- |
| What is the status of the transfer? I transferred money to my mother last week. What is the status of the transfer I transferred money to my mother last week >*" **Example**: "I pizza\_types".
{% hint style="info" %}
**Note**: The intent key for a forked branch node is the same for each child intent in the branch node.
{% endhint %}
You can also use the intent key to transfer the conversational flow to a different intent based on your business requirement. See [Advanced settings](https://docs.avaamo.com/user-guide/how-to/build-skills/create-skill/using-dialog-designer/create-new-skill/build-skill-responses/advanced-settings) and [Flow control](https://docs.avaamo.com/user-guide/how-to/build-skills/create-skill/customize-your-skill/reference-library/flow-control), for more information.
### Skill response
A skill message in the Flow designer is where you configure a response for the corresponding user intent. In the **Flow designer**, skill response is indicated using a red call-out bubble above "Add agent Response".
You can add rich responses to user queries in a Dialog skill. This can be as simple as a text message, card, quick reply, or complex JavaScript. See [Build skill responses](https://docs.avaamo.com/user-guide/how-to/build-skills/create-skill/using-dialog-designer/create-new-skill/build-skill-responses), for more information.
**Example**: Considering the scenario of Order pizza skill, after the user chooses a Pizza type - "veg" or "non-veg", you can proceed further in the conversational flow by asking the user to choose some toppings for your pizza:

## Next steps
Continue to build Pizza agent conversational flow by adding user intents and skill responses:
* Explore the various ways in which you can add user intents. See [Add user intent](https://docs.avaamo.com/user-guide/how-to/build-skills/create-skill/using-dialog-designer/create-new-skill/add-user-intent), for more information.
* Explore the different types of skill responses such as card, carousel, quick reply, Listview. See [Build skill responses](https://docs.avaamo.com/user-guide/how-to/build-skills/create-skill/using-dialog-designer/create-new-skill/build-skill-responses), for more information.
---
# Source: https://docs.avaamo.com/user-guide/ref/avaamo-platform-api-documentation/agent-api/dialog-intents.md
# Dialog intents
## Get dialog intents
`GET` `https://cx.avaamo.com/api/v1/agents/{{agent_id}}/intents/dialog.json`
Get a list of all the inline dialog intents (Training Phrases) from the agent.
#### Path Parameters
| Name | Type | Description |
| ------------------------------------------- | ------- | ---------------------------------------------------------------------- |
| agent\_id\* | integer | Agent identifier. You can get the agent identifier from the agent URL. |
#### Query Parameters
| Name | Type | Description |
| --------- | ------- | -------------------------------------------------------------------------- |
| page | integer | Page from which the entries must be fetched.
|
| per\_page | integer | Number of entries fetched per page.
|
#### Headers
| Name | Type | Description |
| ---------------------------------------------- | ------ | -------------------------------------------------------------------------------------------------------------------------------------------------------------------------------------------------------------------------------------------------------------------------------------------------------------------------------------------------------------------------------------------------------------------------------------------------------------------------------------------------------------------------------------------------------------- |
| access-token\* | string | User access token. You can get the user access token from the Settings -> Users page. See Users or Groups , for more information.
Users must have at least view permission on the agent. See Permissions , for more information.
|
{% tabs %}
{% tab title="200 " %}
```javascript
{
"current_page": 1,
"per_page": 5,
"total_entries": 1,
"total_pages": 1,
"time_token": 1590675148.365381,
"intents": [
{
"id": 185265,
"name": "MacPizza Order",
"created_at": 1590390904,
"updated_at": 1590661609,
"skill": {
"id": 17828,
"name": "MacPizza Order",
"type": "dialog",
"source_id": 20459,
"created_at": 1590390904,
"updated_at": 1590391698,
"status": "complete"
},
"training_data": [
{
"id": 1162843,
"created_at": 1590481750,
"value": "I want to have veg cheese pizza with french fries",
"slots": [
{
"id": 76492,
"mask": "I want to have veg cheese pizza with french fries",
"entity": {
"id": 102338,
"name": "pizza_type_1",
"entity_type": "pizza_type",
"entity_type_id": 21661,
"skill_ids": []
}
},
{
"id": 76493,
"mask": "I want to have veg cheese pizza with french fries",
"entity": {
"id": 102339,
"name": "pizza_toppings_1",
"entity_type": "pizza_toppings",
"entity_type_id": 21662,
"skill_ids": []
}
}
]
},
{
"id": 1165747,
"created_at": 1590569783,
"value": "I want to order veg cheese pizza",
"slots": [
{
"id": 77335,
"mask": "I want to order veg cheese pizza",
"entity": {
"id": 102338,
"name": "pizza_type_1",
"entity_type": "pizza_type",
"entity_type_id": 21661,
"skill_ids": []
}
},
{
"id": 77336,
"mask": "I want to order veg cheese pizza",
"entity": {
"id": 102339,
"name": "pizza_toppings_1",
"entity_type": "pizza_toppings",
"entity_type_id": 21662,
"skill_ids": []
}
}
]
},
{
"id": 1171919,
"created_at": 1590661609,
"value": "i want to order pizza",
"slots": []
}
]
}
]
}
```
{% endtab %}
{% endtabs %}
### Code request snippets
{% tabs %}
{% tab title="cURL" %}
```javascript
curl --location --request GET 'https://cx.avaamo.com/api/v1/agents/20xxx/intents/dialog.json' \
--header 'Access-Token: xxxxxx8d9952499ea466fc007dxxxxxx' \
--header 'Content-Type: application/json'
```
{% endtab %}
{% tab title="node.js" %}
```javascript
var request = require('request');
var options = {
'method': 'GET',
'url': 'https://cx.avaamo.com/api/v1/agents/20xxx/intents/dialog.json',
'headers': {
'Access-Token': 'xxxxxx8d9952499ea466fc007dxxxxxx',
'Content-Type': 'application/json'
}
};
request(options, function (error, response) {
if (error) throw new Error(error);
console.log(response.body);
});
```
{% endtab %}
{% endtabs %}
### Response attributes
In the response, the following attributes are returned:
Attribute Description Type current_page Indicates the page from which the entries are fetched. Integer per_page Indicates the number of entries fetched per page. Integer total_entries Indicates the total number of entries in the response. Integer total_pages Indicates the total number of pages calculated using per_page. Note that total_entries = per_page * total_pages Integer time_token Indicates the timestamp at which the API response is returned. UNIX epoch timestamp intents Indicates an array of dialog inline intents from the agent. Number of entries in the array = Number specified in per_page parameter.
Each intent entry contains the following details:
JSON key-value pairs
### Examples
The following table lists a few sample use cases with query parameters:
Use-case Query Parameter Get dialog inline intents from agent using pagination page : Specify the page from which you wish to fetch records.
per_page : Specify the number of entries per page.
Example : https://cx.avaamo.com/api/v1/agents/<<agent_id>>/intents/dialog.json?per_page=2&page=5
---
# Source: https://docs.avaamo.com/user-guide/skills/dialog-skill.md
# Dialog skill
- [Quick overview](/user-guide/skills/dialog-skill/quick-overview.md)
- [Create dialog skill](/user-guide/skills/dialog-skill/create-dialog-skill.md)
- [Add invocation](/user-guide/skills/dialog-skill/add-invocation.md)
- [Flow designer - Overview](/user-guide/skills/dialog-skill/flow-designer-overview.md)
- [Add user intent](/user-guide/skills/dialog-skill/add-user-intent.md)
- [Build skill responses](/user-guide/skills/dialog-skill/build-skill-responses.md)
---
# Source: https://docs.avaamo.com/user-guide/ref/avaamo-platform-api-documentation/agent-api/dictionary-values.md
# Dictionary values
## Get dictionary values
`GET` `https://cx.avaamo.com/api/v1/agents/{{agent_id}}/dictionary_values.json`
Get a list of all the dictionary values from an agent.
#### Path Parameters
| Name | Type | Description |
| ------------------------------------------- | ------- | ---------------------------------------------------------------------- |
| agent\_id\* | integer | Agent identifier. You can get the agent identifier from the agent URL. |
#### Query Parameters
| Name | Type | Description |
| --------- | ------- | -------------------------------------------------------------------------------- |
| page | integer | Page from which the entries must be fetched.
|
| per\_page | integer | Number of entries fetched per page.
|
#### Headers
| Name | Type | Description |
| ---------------------------------------------- | ------ | ------------------------------------------------------------------------------------------------------------------------------------------------------------------------------------------------------------------------------------------------------------------------------------------------------------------------------------------------------------------------------------------------------------------------------------------------------------------------------------------------------------------------------------------------------------- |
| Access-Token\* | string | User access token. You can get the user access token from the Settings -> Users page. See Users or Groups , for more information
Users must have at least view permission on the agent. See Permissions , for more information
|
{% tabs %}
{% tab title="200 " %}
```javascript
{
"current_page": 1,
"per_page": 5,
"total_entries": 2,
"total_pages": 1,
"time_token": 1590675292.2248158,
"dictionary_values": [
{
"id": 19376,
"value": "POS",
"dictionary_id": 755,
"created_at": 1590399522,
"updated_at": 1590491408,
"synonyms": [
{
"id": 19377,
"value": "Pizza Order Status",
"parent_id": 19376,
"created_at": 1590399522,
"updated_at": 1590491408
}
]
},
{
"id": 19632,
"value": "SSN",
"dictionary_id": 755,
"created_at": 1590467160,
"updated_at": 1590491408,
"synonyms": [
{
"id": 19633,
"value": "Social Security Number",
"parent_id": 19632,
"created_at": 1590467160,
"updated_at": 1590491408
}
]
}
]
}
```
{% endtab %}
{% endtabs %}
### Code request snippets
{% tabs %}
{% tab title="cURL" %}
```javascript
curl --location --request GET 'https://cx.avaamo.com/api/v1/agents/20xxx/dictionary_values.json' \
--header 'Access-Token: xxxxxx8d9952499ea466fc007dxxxxxx' \
--header 'Content-Type: application/json'
```
{% endtab %}
{% tab title="node.js" %}
```javascript
var request = require('request');
var options = {
'method': 'GET',
'url': 'https://cx.avaamo.com/api/v1/agents/20xxx/dictionary_values.json',
'headers': {
'Access-Token': 'xxxxxx8d9952499ea466fc007dxxxxxx',
'Content-Type': 'application/json'
}
};
request(options, function (error, response) {
if (error) throw new Error(error);
console.log(response.body);
});
```
{% endtab %}
{% endtabs %}
### **Response attributes**
In the response, the following attributes are returned:
Attribute Description Type current_page Indicates the page from which the entries are fetched. Integer per_page Indicates the number of entries fetched per page. Integer total_entries Indicates the total number of entries in the response. Integer total_pages Indicates the total number of pages calculated using per_page. Note that total_entries = per_page * total_pages Integer time_token Indicates the timestamp at which the API response is returned. UNIX epoch timestamp dictionary_values Indicates an array of dictionary values fetched from the agent. Number of entries in the array = Number specified in per_page parameter.
Each array entry contains the following details:
id: Unique value identifier value: Dictionary value dicitonary_id: Indicates the dictionary the value belongs to created_at: Created timestamp of dictionary value updated_at: Updated timestamp of dictionary value synonyms: Array of synonyms specified for the dictionary value. Each synonym contains an identifier, value, created_at, and updated_at details. JSON key-value pairs
### Examples
The following table lists a few sample use cases with query parameters:
| Use-case | Query Parameter |
| ------------------------------------------------- | --------------------------------------------------------------------------------------------------------------------------------------------------------------------------------------------------------------------------------------------------------------------------------------------------------------------------------------------------------------------------------------------------------------------------------------------------- |
| Get dictionary values from agent using pagination | page : Specify the page from which you wish to fetch records.
per\_page : Specify the number of entries per page.
Example : [https://cx.avaamo.com/api/v1/agents/\<\<agent\_id>>/dictionary\_values.json?page=2\&per\_page=5](https://cx.avaamo.com/api/v1/agents/\<\<agent_id>>/dictionary_values.json?page=2\&per_page=5)
|
---
# Source: https://docs.avaamo.com/user-guide/how-to/build-agents/create-universal-agent/disambiguation.md
# Disambiguation
When the response to a user query is found in more than one member agent (more than one member agent has the same intent), the Universal agent disambiguates between the responses by listing the member agents that have the response - the names of the first two member agents are displayed; the **More Options** link lists the names of the other member agents that have a response.

Once the member agent responds, all subsequent queries in the workflow (regardless of whether intents span over more than one agent) are answered by the same member agent. This is applicable even in the case of disambiguation. If subsequent query results in disambiguation, then disambiguation options also are within the context of the member agent that is currently in the transactional flow. This setup allows the Universal agent to keep the conversation within the context of a member agent when there are shared intents between member agents.
Similarly, when a member agent has more than one response (more than one intent is available for the response), disambiguation options are provided for the user to select the context for the response.
---
# Source: https://docs.avaamo.com/user-guide/llamb/get-started/step-2-ingest-enterprise-content/document-attributes.md
# Document attributes
In enterprise organizations, content is extensive and often tailored to specific user groups. LLaMB facilitates seamless content ingestion and allows you to associate attributes with uploaded content.
Document attributes are valuable for filtering responses and creating personalized responses based on user properties like region, roles, and products. By creating user properties and associating document attributes with the ingested content in LLaMB, personalized responses can be efficiently generated from your enterprise content.
### Scenario: How to use it?
Consider a scenario in an enterprise organization where different privacy policies apply based on the employee's region. There is a requirement to display responses from the appropriate region-specific privacy policy according to the employee's location.
For example, if an employee from India inquires about the privacy policy, the response must be provided from the policy applicable to the India region. Similarly, if an employee from the US inquires about the privacy policy, the response must be sourced from the policy applicable to the US region.
### Step 1: Identify attributes
Identify the set of attributes from the URLs you wish to ingest into your LLaMB content and understand how the content is organized. Categorizing the content helps in determining the necessary attributes for creating personalized responses.
For example, you can define "region" as an attribute name for regional content. Similarly, for a set of Microsoft Office 365 suite URLs, you could define "product" as an attribute name. Another example is using "status" as an attribute to display responses based on the employee's status.
### Step 2: Create user property
The next step is to create a user property based on your identified attributes.
For the [given scenario](#scenario-how-to-use-it), you can create a `region`user property in the `Configuration -> User property` section. See [User property](https://docs.avaamo.com/user-guide/how-to/build-agents/configure-agents/add-user-properties), for more information.
Property Description <<attribute_name>> Indicates the name of the attribute. Ensure that the name of the user property matches the document attribute. <<attribute_name>> -> value Indicates the attribute value associated with this content.
**Example 1:** Adding an Attribute with a Single Value Associated with a Key
Entity value Alternate value San Francisco SF New York NYC, The Big Apple
* Pizza sizes entity type and alternate values
| Entity value | Alternate value |
| ------------ | --------------- |
| small | 12 inch |
| medium | 14 inch |
| large | 16 inch |
See [Add new entity type](https://docs.avaamo.com/user-guide/how-to/build-agents/add-entity-types-to-agent/add-new-entity-type), for more information on managing entity types and their values in the Avaamo Platform.
### Entity disambiguation
When a user value does not match a specific entity value at a node entity step in the conversation flow, the agent responds with a selection of closest entity values, referred to as entity disambiguation.
Consider that you have an entity type "Colorado Cities" with four values - Colorado Springs, Glenwood Springs, Hot Sulphur Springs, and Idaho Springs.
In the conversation flow, if a node entity "Colorado Cities" is expected and the user just enters "Springs" when asked for a Colorado city, then the system shows a disambiguation message to confirm for "Colorado Springs" or “Glenwood Springs” and any other entity value with Springs in "Colorado Cities" entity type.

{% hint style="info" %}
**Notes**:
* This disambiguation works even when there is a single option.
* The top 5 closest disambiguations is displayed to the user.
* Disambiguation options are from the selected entity node values.
{% endhint %}
### Name entity recognition
In certain scenarios, the entity values are also used as common words. Example: "I am looking for Doctor Treat" and "Chocolate is his favorite treat". Both of these mean different in different context. For such scenarios, you can create a custom name entity type for the Platform to appropriately recognize and extract the "Name" entity as required based on the context of the user query.
{% hint style="info" %}
**Notes**:
* This feature is applicable to only custom entity types.
* Contact support to enable this feature for your agent.
{% endhint %}
**Example**:
User: "*I am looking for Doctor Bill*", extracts Bill as a name

Here, the name is a custom entity type and this query extracts *Bill* as a name.
User: "*I am unable to find my bill*", does not extract bill as a name.

Here, the word "bill" is not extracted as a "Name" entity.
### Number entity extraction
When the user enters a number name instead of a number, the number name entity is automatically recognized and converted to a number if it is expected at a number entity step.
**Example**: If a user enters "two and half million", then it is automatically converted to 2500000 if it is expected at a number entity step or if a user enters a query as illustrated below then the number name is automatically converted to a number entity.

---
# Source: https://docs.avaamo.com/user-guide/configuration/environment-variables.md
# Environment variables
You can define environment variables from the `Configuration -> Environment variables` option. These are constants that can be accessed anywhere in the agent and are global to all users of the agent.
**Examples**: External service access credentials like web service login credentials, webservice\_username, webservice\_password.
I want to cancel an existing order
I have placed an order and want to cancel it. Can I cancel it now?
|
Save your changes in the skill, and save the changes in your agent. Test these changes in your agent and see how it responds.Tell me more about your CEO.
Where can I find information about your CEO?
|
Repeat this step and add 2 or more variations to all your Smalltalk pairs.”
---
# Source: https://docs.avaamo.com/user-guide/tutorials-and-exercises/part-1-creating-my-agent/chapter-6-agent-analytics/exercise-6.1-analytics-dashboard.md
# Exercise 6.1: Analytics Dashboard
In the Agent Configuration menu, click Monitor to understand and view the analytics of the agent.
* To find your top intents in the Agent, navigate to **Agent-> Monitor -> Analytics**

* On this dashboard**,** you will see different conversation metrics associated with the agent. You can see the total queries, Active users, Channels, User Feedback, Top dialog skills, and top Q\&A intent.
* Observe the analytics for your agent and identify the top intents.
---
# Source: https://docs.avaamo.com/user-guide/tutorials-and-exercises/part-1-creating-my-agent/chapter-6-agent-analytics/exercise-6.2-user-journey-display.md
# Exercise 6.2: User Journey Display
The User Journey displays the user’s journey through the conversation with the agent. This can be used to analyze the user’s experience with the agent that can also be used to improve the conversation flow.
* To navigate to the User Journey navigate to **Agent-> Monitor -> User Journey**

* Observe the user journey and see how the user converses with the Agent. Also**,** see where the conversations are dropping and analyze how it can be improved.
---
# Source: https://docs.avaamo.com/user-guide/tutorials-and-exercises/part-1-creating-my-agent/chapter-6-agent-analytics/exercise-6.3-query-insights.md
# Exercise 6.3: Query Insights
The query insights help to give you a closer look into the conversations that users have with your agent.
* To navigate to Query Insights navigate to **Agent-> Monitor -> Query Insights**.

* Select a date range, the agent, and filter the conversations to see each query and its associated insight in detail.

---
# Source: https://docs.avaamo.com/user-guide/tutorials-and-exercises/part-1-creating-my-agent/chapter-6-agent-analytics/exercise-6.4-monitoring-user-feedback.md
# Exercise 6.4: Monitoring User Feedback
The User Feedback shows the feedback received by the agent from the users for the selected date range. It displays the Intent, User Comments, Feedback, and Node. You can use this to analyze the experience of the user when they are interacting with your agent.
* To navigate to the User Feedback navigate to **Agent-> Learning-> User Feedback**

* In the User Feedback, you can see the user, Step (node), Intent type, Positive (Feedback), and message(if any).
* Try giving some feedback to your Agent and observe that feedback here.
---
# Source: https://docs.avaamo.com/user-guide/tutorials-and-exercises/part-1-creating-my-agent/chapter-7-channels/exercise-7.1-configuring-an-agent-in-a-web-page.md
# Exercise 7.1: Configuring an agent in a web page
You can embed an Agent on a web page by just including a script tag block. You can retrieve the script tag to use by navigating to Agent-> Settings -> Channels.

Find the web channel on the page and click on the link View. A dialog appears, click on the Test button which shows the script tag:

### **Embedding the Agent in a Web Page**
In the course materials, we have provided a stylized web page in which you can showcase your agent. Perform the following:
1. Download the HTML page from here to your local computer.
2. Find the UUID that appears in the URL for the test page described above.
3. Using your preferred HTML at the bottom of the page replace the UUID with the text ###replace with agent id### at the bottom of the page.
4. Open the page in a web browser.
5. You can open the chat window by clicking on the agent's avatar.
6. Optionally you can click on one of the example queries listed under each of the cards for each of the listed skills.
---
# Source: https://docs.avaamo.com/user-guide/tutorials-and-exercises/part-1-creating-my-agent/chapter-7-channels/exercise-7.2-configuring-a-sms-channel.md
# Exercise 7.2: Configuring a SMS Channel
The next exercise is to configure your agent to communicate over an SMS channel.
The steps to configure the SMS channel:
1. Navigate to Agent-> Settings -> Channels
2. Find the SMS channel card and click on the Connect link.
3. The Connect link will change to Disconnect.
4. Use the telephone number provided to send an SMS message from your mobile.
---
# Source: https://docs.avaamo.com/user-guide/tutorials-and-exercises/part-1-creating-my-agent/chapter-7-channels/exercise-7.3-configuring-a-facebook-messenger-channel.md
# Exercise 7.3: Configuring a Facebook Messenger Channel
Configuring an agent to use Facebook Messenger requires configuration on Facebook and the Avaamo agent.
See [Setup and Configuration of Facebook Messenger](https://docs.avaamo.com/user-guide/how-to/build-agents/configure-agents/deploy/facebook-channel), for more information.Parameters Description Maximum length Intent name Indicates the name of the intent.
Each intent name must be unique within the skill.
192
characters
Intent key Indicates the internal primary key used in the Avaamo Platform for uniquely identifying the intent name.
By default, a key is automatically generated for you. Click Edit to update the key to any user-friendly identifier. Note that the intent key must be unique within the skill.
Supported characters : Alphanumeric and underscore
It is recommended that the key is of at least 3 characters. As you type, the key is automatically converted to Snake Case. See Snake Case , for more information. You can use this in any JS code customizations (Flow control) , regression testing , and query insights for getting a closer look at the user conversations with the agent.
Intent type Indicates the type of user intent. Select Existing entity . N/A Select entity Start entering the entity type and the results are automatically filtered out in the list.
Choose an entity from the list. You can add only one entity to user intent.
N/A Select entity value (Optional) Choose the values from the selected entity type. Only these values are matched in the user intent.
Example : Consider the "pizza_type" entity type with cheese, corn, and pineapple as values. You have selected "pizza_type" in the user intent and only cheese and corn in the entity value. In this case, a user intent "I want to order veg pineapple pizza" is not matched to this node.
N/A Training data (Optional) Enter the training phrase and click Add .
N/A Post-processing Indicates any JS that is executed after the intent is invoked and before displaying the skill response.
Use this to dynamically reroute the flow and skip the current intent. Example :if(context.variables.hasId==true){return goto_output(2)}
See Build skill responses using script and code , for more information.
N/A
* Click **Save**.
---
# Source: https://docs.avaamo.com/user-guide/how-to/build-agents/manage-agents/export-and-import-agents.md
# Export and import agents
You can create a backup copy of your agent in your local system using the **Backup & Export** option. Later, you can use the exported copy and **import** it into any existing agent in any account.
When you export an agent, an exact snapshot of the agent at that point in time is exported to a ZIP file. The following lists a few use cases of this feature:
* Import to an existing agent within the same company
* Import to an existing agent of a different company
* Import an agent when you wish to create a new similar agent

{% hint style="info" %}
**Notes:**
* **Backup & export** option is available only in the Development stage of the agent life-cycle and only when you have at least view permission on the agent. See [Roles and permissions](https://docs.avaamo.com/user-guide/overview-and-concepts/advanced-concepts/understand-roles-and-permissions), for more information.
* **Import to agent** option is available in the Development stage of the agent life-cycle and only when you have at least edit permission on the agent. See [Roles and permissions](https://docs.avaamo.com/user-guide/overview-and-concepts/advanced-concepts/understand-roles-and-permissions), for more information.
* Importing the agent creates an exact copy of the exported agent. Hence, all the existing details in the imported agent are entirely replaced. (except those listed in [What agent details are not imported?](#what-agent-details-are-not-imported))
* Import and export work only in the same version of the platform. This implies that you cannot export your agent in 5.1 and import it in the 5.2 version or you cannot export an agent in 5.2 and import it back to the 5.1 version.
* You can export and import agents upto a maximum size of 4 GB.
{% endhint %}
## How does it work?

### **Export an agent**
* In the **Agents -> Development** tab, click three ellipse dots in the **Actions** column of the agent to view the extended menu and click **Backup & Export.**
* If the agent is getting exported for the first time, then the following pop-up is displayed. Click "Export Zip" to export a fresh copy of the agent.

* You can exclude the LLaMB skill from the export by clearing the checkbox.
* If the agent has already been exported before, then in the pop-up message, the following details are displayed:
* "First name" and "Last name" of the user who last exported the agent
* Timestamp of when the agent was last exported
* A link to download the last exported zip file
You can either download the last exported zip file or click "Export Zip" to export the agent.

* When you click "Export zip", a zip file of the agent "<\>\_<\>\_<\>.zip" is downloaded to your local system. The zip file is a collection of files (JSON, images) of the agent as available at that point in time.
### **Import an agent**
{% hint style="info" %}
**Notes**:
* Ensure you have met all the [pre-requisites](https://docs.avaamo.com/user-guide/quick-start-tutorials/pre-requisites).
* You can import to an agent immediately after creating an agent. See [Create agent](https://docs.avaamo.com/user-guide/how-to/build-agents/add-skills), for more information.
* If you wish to edit an agent, then:
* In the Avaamo Platform UI, navigate to the **Agents** tab in the top menu. Search and open the required agent. See [Search agents](https://docs.avaamo.com/user-guide/how-to/build-agents/manage-agents/..#search-agents), for more information.
* Click **Edit** to unlock the agent before editing.
{% endhint %}
* In the **Agents -> Skills** page, click **Import to agent** option.
* Browse the exported zip file and click **Open**. In the import message, click **OK** to import.
* An exact copy of the exported agent is created in the agent. See [What agent details are not imported?](#what-agent-details-are-not-imported) for more information.
## What agent details are not imported?
The following lists the agent items or configurations that are not imported from the source to the target agent:
* Answers skill. Also note that if the target agent has answer skills, they are cleared after import.
* Live-agent settings
* Channel configuration
* Permissions
* Notification settings and Personas
* Environment variables: Copied if the target agent does not have any environment variables.
* Details available in Debug, Test, Monitor, and Learning
{% hint style="info" %}
**Notes**: For the items or configurations that are copied from source to target, the existing details in the target agent are cleared out and completely replaced with the details of the source except for a few items such as Web channel and environment variables.
{% endhint %}
---
# Source: https://docs.avaamo.com/user-guide/how-to/build-agents/configure-agents/deploy/facebook-channel/facebook-buttons.md
# Facebook file cache
The Facebook file caching slider button helps you upload media files such as videos or images or a GIF on your agent for the end-users to play and view the file multiple times with no buffering or streaming., for more information.

See [Quick reply](https://docs.avaamo.com/user-guide/build-skills/create-skill/using-dialog-designer/create-new-skill/build-skill-responses#quick-reply) response, for more information on building a Quick reply response in your agent.
### **Persistent menu**
A **Persistent menu** allows you to specify menu options that are always available to the user. Having a persistent menu easily communicates the basic capabilities of your agent for first-time and returning users.
* Menu items are limited to 3 for the top level, and 5 items for any submenus.
* The title is limited to 30 characters
* You can have at most 3 hierarchical levels of menu\_item in total

See [Add persistent menu](https://docs.avaamo.com/user-guide/how-to/build-agents/configure-agents/add-persistent-menu), for more information.
### **Webview**
Using webviews, you can augment your agent's user experience with features that might be difficult to offer using only message bubbles.
* A good way to handle lots of text
* Ability to link to a website
* Scrolls
* Rich formatting (its a webpage)

See [WebView](https://docs.avaamo.com/user-guide/build-skills/create-skill/using-dialog-designer/create-new-skill/build-skill-responses/add-buttons#webview-url), for more information.
---
# Source: https://docs.avaamo.com/user-guide/how-to/build-agents/configure-agents/deploy/facebook-workplace.md
# Facebook Workplace
Facebook Workplace is a work collaboration tool built from Facebook. The Workplace helps teams and organizations collaborate efficiently wherever they work. See [Integrating with Workplace](https://developers.facebook.com/docs/workplace/introduction), for more information.
{% hint style="info" %}
**Note**: You can connect to a channel only if it is enabled for your account or company. If you wish to enable a channel, then contact Avaamo Support for further assistance. Note that only the web channel is enabled by default.
{% endhint %}
The agents developed on the Avaamo platform can be deployed on Facebook Workplace. In this article, the following steps are detailed:
1. [Before you begin](#before-you-begin)
2. [Integrating your Facebook Workplace bot with Avaamo agent](#integrating-your-facebook-workplace-bot-with-avaamo-agent)
3. [Testing Integration](#test-integration)
4. [Manage channel settings](#manage-channel-settings)
## Before you begin
{% hint style="success" %}
**Pre-requisite**:
* The customer requiring the deployment of Avaamo agent on Facebook Workplace has already set up a Facebook workplace account.
* Custom integration is set up in the Facebook Workplace for integrating your Facebook Workplace bot with an Avaamo agent. See [Custom Integrations](https://developers.facebook.com/docs/workplace/custom-integrations-new/), for more information.
{% endhint %}
Ensure that you get the following information from the customer before deploying the Avaamo agent on Facebook Workplace:
* **App Secret, App ID, and Access Token**: This information is available in the Admin panel of the Facebook Workplace bot when you set up a custom integration. See [Custom Integrations](https://developers.facebook.com/docs/workplace/custom-integrations-new/), for more information.

* **Page ID and Company Domain:** This information is available when you access the page that is created when you set up a custom integration. This is visible within your Workplace community. You can get the Page ID and Company Domain from the page URL:
```
https://<>.workplace.com/chat/t/<>
```
## **Integrating your Facebook Workplace bot with Avaamo agent**
{% hint style="info" %}
**Notes**:
* Ensure you have met all the [pre-requisites](https://docs.avaamo.com/user-guide/quick-start-tutorials/pre-requisites).
* You can deploy an agent to a channel after creating and building an agent. See [Create agent](https://docs.avaamo.com/user-guide/how-to/build-agents/add-skills), for more information.
* If you wish to edit an agent, then:
* In the **Avaamo Platform UI**, navigate to the **Agents** tab in the top menu. Search and open the required agent. See [Search agents](applewebdata://9AE47367-043D-436A-BAB1-053A8B89E2A1/@avaamo/s/avaamo/~/edit/drafts/-Lsoojy2kKRX1KXPWAZ2/how-to/build-agents/manage-agents#search-agents), for more information.
* Click **Edit** to unlock the agent before editing**.**
{% endhint %}
* In the **Agent** page, navigate to the **Configure -> Channels** option in the left navigation menu.
* On the Channels page, click **Connect** in the Facebook Workplace channel.
* Specify all the details in the pop-up page and click **Save**. See [Before you begin](#before-you-begin), for more information on how to get these details.

## Test integration
After saving the Facebook Workplace channel details in the Avaamo platform successfully, your agent is ready to be tested in the Facebook Workplace:
* In the **Agent** page, navigate to the **Configure -> Channels** option in the left navigation menu.
* On the Channels page, click **Test** in the **Facebook Workplace** channel.

* This launches the Facebook page "https\://<\>.workplace.com/chat/t/<\>". Note that here Company Domain and Page ID are the details that you have specified
during the integration of your Facebook Workplace bot with Avaamo agent.
* On the Facebook page, you can test the queries corresponding to your Avaamo agent and check if you are receiving appropriate responses.
## Manage channel settings
After you configure the channel settings, you can view, edit, disconnect and delete the channel settings as per your requirements. See [Manage channel settings](https://docs.avaamo.com/user-guide/how-to/build-agents/configure-agents/deploy/manage-channel-settings), for more information.
---
# Source: https://docs.avaamo.com/user-guide/how-to/build-skills/create-skill/using-dialog-designer/create-new-skill/add-user-intent/faqs.md
# Source: https://docs.avaamo.com/user-guide/llamb/regression-testing/faqs.md
# FAQ's
**1. What happens if an incorrect input file is uploaded for testing?**
An incorrect input file may contain **syntax errors, incorrect entries, or invalid data**, leading to errors and abnormal metric values in the results.
**2. What should be done if the results are showing as FAIL?**
A **FAIL** indicates that the generated response is either factually incorrect, contextually inappropriate, or not aligned with the ground truth. Further debugging is required to identify the root cause and address any underlying issues.
**3. How do you analyze the results of a regression test?**
Once the regression test is completed:
* The UI displays the total number of queries along with a breakdown of passed and failed queries. This offers a directional analysis of the uploaded file's quality.
Refer [Understanding results](https://docs.avaamo.com/user-guide/llamb/regression-testing/understanding-results), for complete details about this.
**4. What should be done after conducting a regression test?**
After running a regression test, [analyze the results file](https://docs.avaamo.com/user-guide/llamb/regression-testing/understanding-results) to identify any discrepancies or failures. If the test results do not meet expectations or fail to generate the correct responses, review the data and make necessary adjustments to [improve accuracy](https://docs.avaamo.com/user-guide/llamb/regression-testing/how-to-improve-accuracy).
**5. What do the different columns in the input and results files represent?**
Refer [Regression test file format](https://docs.avaamo.com/user-guide/llamb/regression-testing/regression-test-file-format) and [Understanding results](https://docs.avaamo.com/user-guide/llamb/regression-testing/understanding-results), for complete details about this.
#### **6. What happens if the input regression file does not specify any user properties, but the ingested document includes them?**
If the input regression file does not define any `user_properties`, but the ingested document is associated with specific document properties, the regression results are still generated without filtering based on those properties.
#### 7. How to test soft unhandled queries during regression testing
To verify soft unhandled responses, include the marker `` in either the `ground_truth` or `generated_answer` fields. This helps identify cases where the system gracefully aborted the stream without triggering a hard failure.
---
# Source: https://docs.avaamo.com/user-guide/ref/avaamo-platform-api-documentation/feedback-api.md
# Feedback API
## Get feedback summary
`GET` `https://cx.avaamo.com/dashboard/bots/{{agent_id}}/feedbacks/user_feedbacks.json`
Get a summary of the total positive and negative user feedback given to an agent. If you wish to get details of each feedback, then refer to **Get feedback details**.
#### Path Parameters
| Name | Type | Description |
| ------------------------------------------- | ------- | ---------------------------------------------------------------------- |
| agent\_id\* | integer | Agent identifier. You can get the agent identifier from the agent URL. |
#### Query Parameters
| Name | Type | Description |
| ----------- | ------ | ------------------------------------------------------------------------------------------------------------------------------------------------------------------------------------------------------------ |
| utc\_offset | number | Difference in seconds from Coordinated Universal Time (UTC) for a particular place and date.
Default value is 0 implying that there is no offset from Coordinated Universal Time (UTC).
|
| from\_date | string | Date from which the required details are retrieved. Default value is the last four days from the to\_date. Specify date in dd/mm/yyyy format. |
| to\_date | string | Date to which the required details are retrieved. Default value is the current date. Specify date in dd/mm/yyyy format. |
#### Headers
| Name | Type | Description |
| ---------------------------------------------- | ------ | -------------------------------------------------------------------------------------------------------------------------------------------------------------------------------------------------------------------------------------------------------------------------------------------------------------------------------------------------------------------------------------------------------------------------------------------------------------------------------------------------------------------------------------------------------------------- |
| access-token\* | string | User access token.
You can get the user access token from the Settings -> Users page. See Users or Groups , for more information.
Users must have at least view permission on the agent. See Permissions , for more information.
|
{% tabs %}
{% tab title="200 " %}
```javascript
{
"user_feedbacks": [
{
"feedback_type": "Positive Feedback",
"count": 3,
"positive": true
},
{
"feedback_type": "Negative Feedback",
"count": 2,
"positive": false
}
]
}
```
{% endtab %}
{% endtabs %}
### Code request snippets
{% tabs %}
{% tab title="cURL" %}
```javascript
curl --location --request GET 'https://cx.avaamo.com/dashboard/bots/20xxx/feedbacks/user_feedbacks.json?utc_offset=19800' \
--header 'Content-Type: application/json' \
--header 'Access-Token: xxxxxx8d9952499ea466fc007dxxxxxx'
```
{% endtab %}
{% tab title="node.js" %}
```javascript
var request = require('request');
var options = {
'method': 'GET',
'url': 'https://cx.avaamo.com/dashboard/bots/20xxx/feedbacks/user_feedbacks.json?utc_offset=19800',
'headers': {
'Content-Type': 'application/json',
'Access-Token': 'xxxxxx8d9952499ea466fc007dxxxxxx'
}
};
request(options, function (error, response) {
if (error) throw new Error(error);
console.log(response.body);
});
```
{% endtab %}
{% endtabs %}
### Response attributes
In the response, user\_feedbacks array is returned with a count of positive and negative feedback:
Attribute Description Type feedback_type Indicates if the feedback is positive or negative. String count Indicates the count of positive or negative feedback. Integer positive Indicates if the user feedback is positive or negative. Boolean
### Examples
The following table lists a few sample use cases with query parameters:
Use-case Query Parameter Get overall feedback summary https://cx.avaamo.com/dashboard/bots/<<agent_id>>/feedbacks
/user_feedbacks.json?utc_offset=<<utc-offset-seconds>>
Get feedback summary within a specified period from_date : Specify the from date in dd/mm/yyyy format.
to_date : Specify the to date in dd/mm/yyyy format.
Example : https://cx.avaamo.com/dashboard/bots/<<agent_id>>/
feedbacks/user_feedbacks.json?from_date=01/04/2020&to_date=06/04/2020&utc_offset=<<utc-offset-seconds>>
## Get feedback details
`GET` `https://cx.avaamo.com/dashboard/bots/{{agent_id}}/feedbacks.json`
Gets details of each user feedback given to the agent. In the response, you can learn about the intent, user query, and the skill for which the feedback was given.
#### Path Parameters
| Name | Type | Description |
| ------------------------------------------- | ------- | ---------------------------------------------------------------------- |
| agent\_id\* | integer | Agent identifier. You can get the agent identifier from the agent URL. |
#### Query Parameters
| Name | Type | Description |
| ---------------- | ------- | --------------------------------------------------------------------------------------------------------------------------------------------------------------------------------------------------------------------------------------------------- |
| response\_type | string | Indicates if you wish to get a detailed response for each feedback. In the detailed response, you can view the user query and the user details for which the feedback is given. Specify **detailed** to view a detailed response for each feedback. |
| since\_timetoken | number | Timestamp from which the records are fetched.
Specify UNIX Epoch Timestamp in microseconds.
|
| timetoken | number | Timestamp until which the records are fetched.
Default is the current timestamp.
Specify UNIX Epoch Timestamp in microseconds.
|
| page | integer | Page from which the entries must be fetched.
Default is 1.
|
| per\_page | integer | Number of entries fetched per page.
Default: 25.
Maximum: 100
|
| from\_date | String | Date from which the required details are retrieved.
Default value is the last four days from the to\_date.
Specify date in dd/mm/yyyy format.
|
| to\_date | String | Date to which the required details are retrieved.
Default value is the current date.
Specify date in dd/mm/yyyy format.
|
| message\_uuid | String | Unique identifier of the message. Refer Message API
to get the details of message uuid.
|
#### Headers
| Name | Type | Description |
| ---------------------------------------------- | ------ | ------------------------------------------------------------------------------------------------------------------------------------------------------ |
| Access-Token\* | string | User access token. You can get the user access token from the Settings -> Users and Roles page. Users must have at least view permission on the agent. |
{% tabs %}
{% tab title="200: OK " %}
```javascript
{
"current_page": 1,
"per_page": 25,
"total_entries": 8,
"total_pages": 1,
"feedbacks": [
{
"id": 115986,
"comment": "\n Oh! Can you tell me what went wrong?:\n Others\n",
"positive": false,
"node_key": "1",
"intent_type": "Q&A Intent",
"intent_name": "Price of RAM",
"created_at": 1670420497.0,
"message_uuid": "u-2xxxxxxx9-7xxe-4xx9-8xx5-7xxxxxxxxxx9",
"conversation_uuid": "exxxxxxxxxxxxxxxxxxxxxxxxxxxxxxx",
"skill_name": "Price FAQs",
"bot_replies": null,
"user_query": "I need a RAM price",
"user": {
"display_name": "David Miller",
"id": 1997722,
"first_name": "David",
"last_name": "Miller",
"avatar": false,
"uid": "dashboard_admin_ua_test_user_xx4"
}
},
```
{% endtab %}
{% endtabs %}
{% hint style="info" %}
**Note**: For optimal API performance, the recommended time duration for fetching data from any of the REST APIs that support a date range or time period is 7 days.
{% endhint %}
### Code request snippets
{% tabs %}
{% tab title="cURL" %}
```javascript
curl --location --request GET 'https://cx.avaamo.com/dashboard/bots/20xxx/feedbacks.json?page=2&per_page=55' \
--header 'Content-Type: application/json' \
--header 'Access-Token: xxxxxx8d9952499ea466fc007dxxxxxx'
```
{% endtab %}
{% tab title="node.js" %}
```javascript
var request = require('request');
var options = {
'method': 'GET',
'url': 'https://cx.avaamo.com/dashboard/bots/20xxx/feedbacks.json?page=2&per_page=55',
'headers': {
'Content-Type': 'application/json',
'Access-Token': 'xxxxxx8d9952499ea466fc007dxxxxxx'
}
};
request(options, function (error, response) {
if (error) throw new Error(error);
console.log(response.body);
});
```
{% endtab %}
{% endtabs %}
### Response attributes
In the response, the following attributes are returned:
Attribute Description Type current_page Indicates the page from which the entries are fetched. Integer per_page Indicates the number of entries fetched per page. Integer total_entries Indicates the total number of entries in the agent messages. Integer total_pages Indicates the total number of pages calculated using per_page. Note that total_entries = per_page * total_pages Integer feedbacks Indicates an array of feedback entries fetched from the agent. Number of entries in the array = Number specified in per_page parameter. JSON key-value pairs
#### **feedbacks**
Indicates an array of messages fetched from the agent. Each array contains the following attributes:
Attribute Description Type id Indicates a unique identifier of the feedback message. Integer comment Indicates the comments given by the user for negative feedback. String positive/negative Indicates if the user feedback is positive or negative Boolean node_key Indicates the node number for which the feedback is given.
For Q&A skill the node_key is 1. For Dialog skill node_key is <<skill_number>>.<<node_number>> String intent_type Indicates the type of intent. For Q&A skill, intent_type is "Q&A Intent".
For Dialog skill, intent_type can be entity, training phrase, custom code, or system entity. See Add user intent , for more information.
String intent_name Indicates the name of the intent for which the feedback is given. String created_at Indicates the timestamp of when the feedback was created in seconds. UNIX epoch timestamp skill_name Indicates the name of the skill. String bot_replies -> message Indicates the message agent responded with. By default, this field always shows a "null" value.Messege API , for more details on the parameters displayed in this section. JSON key-value pairs user_query Indicates the user query for which the feedback is given. This is returned only for a detailed response. String user Indicates the details of the user interacting with the agent.
phone : Indicates an array of phone numbers of the user interacting with the agent.layer_id : Indicates a unique user identifier internally used by the Avaamo Platform.last_name : Indicates the last name of the user interacting with the agent.first_name : Indicates the first name of the user interacting with the agent.email : Indicates the email of the user interacting with the agent.This is returned only for a detailed response.
JSON key-value pairs
### Examples
The following table lists a few sample use cases with query parameters:
Use-case Query Parameter Get feedback entries from agent using pagination page : Specify the page from which you wish to fetch records. By default, the value is 1.
per_page : Specify the number of entries per page. By default, the value is 5.
Example : https://cx.avaamo.com/dashboard/bots/<<agent_id>>/feedbacks.json&per_page=2&page=1
Here, per_page * total_pages = total_entries
Get feedback entries from agent within a specified period since_timetoken : Specify the from timestamp in epoch format such as 1569229247677821
timetoken : Specify the to timestamp in epoch format such as 1569229251418739.
Example : https://cx.avaamo.com/dashboard/bots/<<agent_id>>/feedbacks.json?since_timetoken=<<from_timetoken>>&timetoken=<<to_timetoken>
Get detailed feedback response response_type : detailed
Example : https://cx.avaamo.com/dashboard/bots/<<agent_id>>/feedbacks.json?response_type=detailed
Get feedback entries from agent using message UUID message_uuid: Specify the Unique identifier of the message such as u-2xxxxxxx9-7xxe-4xx9-8xx5-7xxxxxxxxxx9Example : https://cx.avaamo.com/dashboard/bots/<<agent_id>>/feedbacks.json?&message_uuid=<<message_uuid>>
---
# Source: https://docs.avaamo.com/user-guide/how-to/build-agents/learning-continuous-improvement/feedback.md
# User feedback
The **User feedback** page displays the feedback received by the agent from the users for the selected date range. It displays the Intent, User Comments, Feedback, and Node. This feature is used to learn and analyze the experience of the user when they are interacting with your agent.

See [Collect feedback](https://docs.avaamo.com/user-guide/overview-and-concepts/advanced-concepts/collect-feedback), for more information on understanding the concept and various ways in which you can collect feedback from the users.
**To view feedback**:
* Navigate to the **Agents** tab on the top menu.
* Search and click any agent for which you wish to view user feedback. See [Search agents](https://docs.avaamo.com/user-guide/how-to/manage-agents#search-agents), for more information.
* In the **Agent's** page, click **Learning -> User feedback**. By default, user feedback for the last 7 days is displayed.
* Click the **Date picker** to specify a custom date range. A list of user feedback for the agent in the selected date range is displayed.

* For each intent where the feedback is collected, the following details are displayed:
* **User**: Indicates the identifier of the user who provided the feedback.
* **Step**: This is the `<>:<>` of the node in Dialog skill where the feedback is collected. For the Q\&A skill, the step is always 1. See [Flow designer](https://docs.avaamo.com/user-guide/how-to/build-skills/create-skill/using-dialog-designer/create-new-skill/dialog-designer-overview), for more details on the skill key and intent key.
* **Intent**: Indicates the intent name provided in the respective skill for which the feedback is collected.
* **Intent Type**: Indicates the type of intent such as Inline, Entity, or Q\&A for which the feedback is collected.
* **Skill**: Indicates the name of the skill for which the feedback is given.
* **Positive**: Indicates if the feedback by the user is positive or negative.
* **Message**: Indicates any message submitted by the user while providing feedback.
* Click the arrow icon for the feedback where you wish to view the conversation history. You can use this to analyze the conversational flow for any troubleshooting.
* Click **Export** to download the user feedback in a CSV format. This can be used as a reference and for further analysis.
---
# Source: https://docs.avaamo.com/user-guide/how-to/build-skills/create-skill/customize-your-skill/how-to/build-dynamic-skill-response/card/file-upload.md
# File upload
You can add an input card with an option to upload files to your agent.
{% hint style="success" %}
**Key points**:
* You can upload any type of file, however, the maximum limit for each file is 4GB.
* You can upload images of all types and resolutions. There is no restriction on the resolution of the image.
* There is a 191-character limit for all the user-defined text fields.
* For security reasons, by default, you can upload upto 10 files in a span of 60 seconds. The number of files and the frequency or interval within which they can be uploaded is a configurable parameter. Contact Avaamo Support, for further assistance.
* File upload is not supported in the Microsoft Teams channel due to the limitations on the channel's side. See [Microsoft Teams](https://docs.avaamo.com/user-guide/how-to/build-agents/configure-agents/deploy/microsoft-teams-ms-teams), for more information on deploying your agent in the MS Teams channel.
{% endhint %}
## Syntax
The following is the syntax to add an upload option in the card input:
```yaml
"card": {
"inputs": [{
"type": "file/file_group",
"title": "<>",
"uuid": "<>",
*"should_validate": true/false,
*"image_only": true/false
},...]
}
* - Indicates optional parameter
… - Indicates one or more parameter
```
Attribute Description Type title Indicates the title of file upload. String type Indicates if you wish to select a single file or multiple files at a time for uploading:
file: This option allows you to select a single file file_group: This option allows you to select multiple files at a time String should_validate Indicates if the user can skip uploading a file or not. By default, the value is set to true. Boolean uuid Indicates a secure random UUID that can be used later to access the file uploaded by the user. See Section 4.4 in
https://tools.ietf.org/html/rfc4122 , for more information.
File uploaded name is available in the context.last_message .
Syntax: context.last_message.<<uuid>>
String image_only Indicates if the file upload must allow uploading of only images or not. Set true to upload only images. By default, the value is false. Currently, this support is only for image file types. Boolean
## Supported file types and size
Make a note of the following points related to the supported file types and sizes in the Avaamo Platform:
* You can upload any type of file, however, the maximum limit for each file is 4GB.
* You can upload images of all types and resolutions. There is no restriction on the resolution of the image.
* For security reasons, by default, you can upload upto 10 files in a span of 60 seconds. The number of files and the frequency or interval within which they can be uploaded is a configurable parameter. Contact Avaamo Support, for further assistance.
## Examples
The following examples of file upload are listed:
* [Single file upload](#single-file-upload)
* [Upload images only](#upload-images-only)
* [Access uploaded file and send email](#access-uploaded-file-and-send-email)
* [Upload multiple files](#upload-multiple-files)
* [Making file upload optional](#making-file-upload-optional)
### **Single file upload**
The following is a sample JS to provide a file upload option:
```yaml
return {
"card": {
"inputs": [
{
"type": "file",
"title": "Upload Profile Pic",
"uuid": "2e6e7e36-657c-4390-ba06-fa80597871ae"
}
]
}
}
```
In the agent, the following response is displayed:

You can use `context.last_message.<>` and `context.last_message.<>.name` to access the name and identifier of the file that is uploaded.
### **Upload images only**
The following is a sample JS to provide a file upload option for images only:
```yaml
return {
"card": {
"inputs": [
{
"type": "file",
"title": "Upload Profile Pic",
"uuid": "ab4a6301-8961-430f-9e09-622ce3ca5aa3",
"image_only": true
}
]
}
}
```
In the agent, the following response is displayed:

Note that when you click upload, only image file types are enabled for uploading.

You can use `context.last_message.<>.uuid` and `context.last_message.<>.name` to access the name and identifier of the file that is uploaded.
### Access the uploaded file and send an email
{% hint style="info" %}
**Note**: You can access the uploaded file only when files are not masked in the agent. See [Information masking](https://docs.avaamo.com/user-guide/overview-and-concepts/advanced-concepts/information-masking), for more information.
{% endhint %}
Get the **Access Token** from **Agent -> Configuration -> Settings** page:
>.uuid + ".json?size=original&access_token=" + access_token;
// here, uuid is the secure random uuid provided at the time of upload.
// See File upload syntax for more information
try {
var file_content = await (fetch(url).then(res => res.buffer()));
var email_sender = await (Email.send({
to: ["John@avaamo.com"],
from: ["admin@macpizza.com"],
subject: "Your Pizza Order",
body: "Here, is the pic of your pizza baking right now!!! Enjoy.",
attachments: [{
filename: context.last_message.<.name,
content: file_content
}]
}));
if (email_sender.status == 'SUCCESS') {
return "Email Sent";
} else {
return "Failed to send email. Kindly try again later.";
}
} catch (error) {
return "Sorry, something unexpected happened when processing your request. Please try again later.";
}
```
{% hint style="info" %}
**Note:** The URL in the sample JS provided above is deprecated and is no longer available as of the v8.2.0 release. Instead, use `context.last_message.<>.url`. Refer to the sample JS below for accessing the uploaded file and sending it as an email attachment:
```javascript
var access_token = "UoF4VLjeq9uH0dzki3-79gclgRpf8hr9"; // agent access Token
var url=context.last_message.<>.url;
// here, uuid is the secure random uuid provided at the time of upload.
// See File upload syntax for more information
try {
var file_content = await (fetch(url).then(res => res.buffer()));
var email_sender = await (Email.send({
to: ["John@avaamo.com"],
from: ["admin@macpizza.com"],
subject: "Your Pizza Order",
body: "Here, is the pic of your pizza baking right now!!! Enjoy.",
attachments: [{
filename: context.last_message.<.name,
content: file_content
}]
}));
if (email_sender.status == 'SUCCESS') {
return "Email Sent";
} else {
return "Failed to send email. Kindly try again later.";
}
} catch (error) {
return "Sorry, something unexpected happened when processing your request. Please try again later.";
}
```
{% endhint %}
### Upload multiple files
The following is a sample JS to provide upload multiple files using file upload:
```yaml
return {
"card": {
"inputs": [
{
"type": "file_group",
"title": "Upload Passport and address copy",
"uuid": "5dcf9d7e-8f72-4d3b-94dd-df502c42fbdd"
}
]
}
}
```
You can use `context.last_message.<>` and `context.last_message.<>.name` to access the name and identifier of the file that is uploaded.
### Making file upload optional
By default, when you use file upload via card, uploading a file is required. The system validates if the file is uploaded or not when the user clicks **Submit**. However, in certain cases, you can make the file upload optional.
The following is a sample JS to show how you can make file upload an optional parameter. Note that you can set "should\_validate" to "false" if you wish to make file uploading optional.
```yaml
return {
"card": {
"inputs": [
{
"type": "file",
"title": "Upload File",
"uuid": "2e6e7e36-657c-4390-ba06-fa80597871ae",
"should_validate": false
}
]
}
}
```
In the agent, you can submit the request successfully without uploading the file:

If you have uploaded a file, then you can use `context.last_message.<>` and `context.last_message.<>.name` to access the name and identifier of the file that is uploaded.
{% content-ref url="" %}
[](https://docs.avaamo.com/user-guide/how-to/build-skills/create-skill/customize-your-skill/how-to/build-dynamic-skill-response/card)
{% endcontent-ref %}
{% content-ref url=".." %}
[..](https://docs.avaamo.com/user-guide/how-to/build-skills/create-skill/customize-your-skill/how-to/build-dynamic-skill-response)
{% endcontent-ref %}
---
# Source: https://docs.avaamo.com/user-guide/datasync-ai/content-sources/files.md
# Source: https://docs.avaamo.com/user-guide/skills/knowledge-skill/add-content-to-knowledge-skill/files.md
# Files
- [Pre-requisites](/user-guide/skills/knowledge-skill/add-content-to-knowledge-skill/files/pre-requisites.md)
- [Step 1: Select the content source type](/user-guide/skills/knowledge-skill/add-content-to-knowledge-skill/files/step-1-select-the-content-source-type.md): The first step in using DataSync AI is to choose the type of content source from which information must be gathered or accessed.
- [Step 2: Configure content source and ingest content](/user-guide/skills/knowledge-skill/add-content-to-knowledge-skill/files/step-2-configure-content-source-and-ingest-content.md)
- [Configure connection](/user-guide/skills/knowledge-skill/add-content-to-knowledge-skill/files/step-2-configure-content-source-and-ingest-content/configure-connection.md)
- [Upload files](/user-guide/skills/knowledge-skill/add-content-to-knowledge-skill/files/step-2-configure-content-source-and-ingest-content/upload-files.md)
- [Set Document Attributes](/user-guide/skills/knowledge-skill/add-content-to-knowledge-skill/files/step-2-configure-content-source-and-ingest-content/set-document-attributes.md)
---
# Source: https://docs.avaamo.com/user-guide/datasync-ai/content-sources/confluence/step-2-configure-content-source-and-ingest-content/filter-articles.md
# Source: https://docs.avaamo.com/user-guide/datasync-ai/content-sources/servicenow/step-2-configure-content-source-and-ingest-content/filter-articles.md
# Source: https://docs.avaamo.com/user-guide/skills/knowledge-skill/add-content-to-knowledge-skill/confluence/step-2-configure-content-source-and-ingest-content/filter-articles.md
# Source: https://docs.avaamo.com/user-guide/skills/knowledge-skill/add-content-to-knowledge-skill/servicenow/step-2-configure-content-source-and-ingest-content/filter-articles.md
# Filter articles
It displays all the folders containing articles or documents in your `ServiceNow` knowledge base, enabling you to select multiple items by checking the boxes next to them in the `By Knowledge Base` section.
* Additionally, you can use the `Advanced Filter` option to precisely filter articles by document status or workflow (such as Published, Active, or Valid to date) within the selected folders in the first step.
Parameters Description Maximum length Filter name Indicates the name of the filter.
Provide a name that is easily identifiable to pick when you create a campaign.
50 characters Filter description Indicates the description of the filter. Use this to specify the purpose of the filter. 200 characters Filter conditions Indicates the conditions that are used to filter the recipient list.
N/A
* Note that the list of operators displayed is based on the type of data. The following are supported operators for each data type:
Data type Operators Number Greater than Less than Equal to Greater than or equal to Less than or equal to Include Text Date Greater than Less than Equal to Greater than or equal to Less than or equal to Include
* Click **Add new Condition** and select the data type to add new filters. You can add up to 50 conditions in a single filter.
* You can add multiple filters and each filter is an "AND" condition. For example: If you have added two filter conditions - one for "age" greater than 18 and another one for "country" equal to India, then only the recipients with the country as India **and** age greater than 18 are picked for delivering the campaign message.
* **Include** operator: Each filter condition also has an "include" operator that allows you to specify multiple values. In this case, the filter is applied to either of the values mentioned in the criteria. This is an "OR" condition. For example: If you have added a country filter condition with the "include" operator and specified India and the United States, then the recipients with the country as either India or the United States are picked for delivering the campaign message.
Click **Create** after specifying all the details in the **Attribute filter** pop-up window. The newly created filter is displayed in the **Filters** tab. The **Attribute filter** is indicated using Parameters Description Maximum length Filter name Indicates the name of the filter.
Provide a name that is easily identifiable to pick when you create a campaign.
50 characters Filter description Indicates the description of the filter. Use this to specify the purpose of the filter. 200 characters JS code Indicates custom Javascript code where you specify the filter condition to match with the recipient list.
You can use the following format to specify the column name from the CSV:
headers["<<column_name>>"]
N/A
Click **Create** after specifying all the details in the **Code filter** pop-up window. The newly created filter is displayed in the **Filters** tab. The **Code filter** is indicated using Fix patch release Release date Release v6.0.1 Feb 22nd, 2022
---
# Source: https://docs.avaamo.com/user-guide/release-notes/v6.0-to-v6.4.x-releases/v6.1.x/fix-patch-releases-v6.1.x.md
# Fix patch releases (v6.1.x)
This article summarizes a list of fix patch releases made in the Avaamo Conversational AI Platform version 6.1.x. All the fix patch releases contain:
1. Critical bug fixes
2. Performance fixes
3. Minor bug fixes
Fix patch release Release date Release v6.1.1 June 7th, 2022
---
# Source: https://docs.avaamo.com/user-guide/recent-releases/release-notes-v8.2.0/fix-patch-releases-v8.2.1.md
# Fix patch releases (v8.2.1)
This fix patch release contains critical bug fixes, performance fixes, and minor bug fixes. The following are some of the key fixes included in this release:
1. [LLaMB: Security for Citation links](#llamb-security-for-citation-links)
2. [LLaMB: Response formatting fixes](#llamb-response-formatting-fixes)
## LLaMB: Security for Citation links
* Citation links now expire 24 hours after generation, restricting access to a specific timeframe.
* Additional checks ensure links are accessible only to authenticated, authorized users.
* The citation link format now includes security tokens for validation, as detailed below:
* Old Citation Link Format:
https://llambx.avaamo.com/answers/external/document-groups/{document-group_id}/documents/{document_uuid}#page={page_no}
https://cx.avaamo.com/llamb/messages/{message_uuid}/documents/{document_uuid}?lt={base64_encoded_JWT_token}&page={page_number}
Transfers the flow to the specified intent
and executes the specified intent.
| ❌ | ✅ | ❌ |
| goto\_intent
in post-processing
| Transfers the flow to the specified node and executes the current user query in the transferred node. | ❌ | ✅ | ❌ |
| goto\_intent in the output node | Transfers the flow to the specified intent and waits for the next user query to be executed at the transferred intent. | ✅ | ❌ | ❌ |
### goto\_node
Displays and transfers the flow to the skill message configured at the specified intent after executing the current node.
```javascript
goto_node('<>.<>')
Specify only '<>', if you wish to transfer the flow in the current skill
Specify 'main', if you wish to transfer to the main node.
```
| Examples | Description |
| --------------------------------------------------------- | -------------------------------------------------------------------------------------------------------------------------------------------- |
| return goto\_node('starters'); | Displays the skill message configured at the "starters" intent and correspondingly transfers the flow. |
| return goto\_node('register\_skill.registration\_start'); | Displays the skill message configured at the "registration\_start" intent in "register\_skill" skill and correspondingly transfers the flow. |
| return goto\_node('main'); | Displays the message configured in the "Greeting skill" or main node and transfers the flow to the main node. |
### goto\_intent
goto\_intent behavior is different in the output node and post-processing. When you specify goto\_intent in the output node, you are indicating at which intent the next user query must be evaluated. When you specify goto\_intent in post-processing you are indicating at which node the current user query must be evaluated.
#### goto\_intent in output node
goto\_intent in the output node transfers the flow to the specified intent and waits for the next user query. The next user's query is evaluated at the transferred intent. This behavior is similar to the "Goto Intent" option available in the Advanced settings. See [Advanced settings](https://docs.avaamo.com/user-guide/how-to/build-skills/create-skill/using-dialog-designer/create-new-skill/build-skill-responses/advanced-settings), for more information.
```javascript
goto_intent('<>.<>','<>')
Specify only '<>', if you wish to transfer the flow in the current skill
Specify 'main', if you wish to transfer to the main node.
```
The following lists a few examples of goto\_intent in the output node:
| Examples | Description |
| ----------------------------------------------------------- | ------------------------------------------------------------------------------ |
| return goto\_intent('starters'); | Transfers the flow to the specified intent in the current skill. |
| return goto\_intent('register\_skill.registration\_start'); | Transfers the flow to "registration\_start" intent in "register\_skill" skill. |
| return goto\_intent('main') | Transfers the flow to the first or the main step of the agent. |
#### goto\_intent in post-processing
When the goto\_intent is specified in post-processing, the user's intent is still not completely evaluated. The current user query or the intent specified in goto\_intent (if any) is evaluated at the transferred node.
goto\_intent in post-processing transfers the flow to the specified node and executes the current user query in the transferred node (if the intent is not specified in goto\_intent). If you have specified an intent in goto\_intent, then the intent is executed at the transferred node:
* If the query in the transferred node returns true, then the response is delivered by the transferred node.
* If the query in the transferred intent returns false, then an unhandled response is delivered.
```javascript
goto_intent('<>.<>','<>')
Specify only '<>', if you wish to transfer the flow in the current skill
Specify 'main', if you wish to transfer to the main node.
```
The following lists a few examples of goto\_intent in post-processing:
| Examples | Description |
| --------------------------------------------------------------- | --------------------------------------------------------------------------------------------------------------------------------------------------------- |
| return goto\_intent('starters'); | Transfers the flow to the specified intent in the current skill and executes the current user query at the transferred node. |
| return goto\_intent('register\_skill.registration\_start'); | Transfers the flow to "registration\_start" intent in "register\_skill" skill and executes the current user query at the transferred node. |
| return goto\_intent('starters', 'I want to get some starters.') | Transfers the flow to the specified intent in the current skill and executes the specified intent 'I want to get some starters.' at the transferred node. |
### goto\_output
Transfers the flow to the specified node number or main and displays the output of the node.
```javascript
goto_output('<>.<>')
Specify only '<>', if you wish to transfer the flow in the current skill
Specify 'main', if you wish to transfer to the main node.
```
Examples Description return goto_output('starters'); Displays the skill message configured at the "starters" intent and correspondingly transfers the flow. return goto_output('register_skill.registration_start'); Displays the skill message configured at the "registration_start" intent in "register_skill" skill and correspondingly transfers the flow. return goto_output('main'); Displays the message configured in the "Greeting skill" or main node and transfers the flow to the main node.
### execute\_intent
Transfers the flow to the specified intent number and executes the specified intent. Since an intent can have multiple nodes, you can use execute\_intent for transferring to different nodes within an intent, based on some condition in the post-processing JavaScript.
```javascript
execute_intent('<>.<>','<>')
Specify only '<>', if you wish to transfer the flow in the current skill
Specify 'main', if you wish to transfer to the main node.
```
| Examples | Description |
| ----------------------------------------------------------------- | --------------------------------------------------------------------------------------------------------------- |
| return execute\_intent(1,'order pizza'); | Transfers the flow to intent number 1 and executes 'order pizza' intent in the current skill. |
| return execute\_intent(2.3,'order pizza'); | Transfers the flow to intent number 3 in skill number 2 and executes 'order pizza' intent at 2.3 |
| return execute\_intent('main','I want to check my order status'); | Transfers the flow to the main node and executes the intent 'I want to check my order status' at the main node. |
### idle\_prompt
Indicates the response time the agent waits for the user query and post the wait period the skill message configured at the specified intent is displayed.
```javascript
idle_prompt(<>,'<>.<>')
Specify only '<>', if you wish to transfer the flow in the current skill
Specify 'main', if you wish to transfer to the main node.
```
**Example**: return idle\_prompt(10,'main');
The agent waits for 10 seconds and then transfers the flow to the main node or the "Greeting skill" and displays a message as configured at the "Greeting skill".
{% hint style="info" %}
**Note**: You can transfer the flow to a greeting node or to a node in the Dialog skill.
{% endhint %}
### Examples
The following Dialog flow is used as a reference for the examples provided in the comparison table:

The following Q\&A skill is used as a reference for the examples provided in the comparison table:

**Example 1**: Consider the execution of the following statement in the **post-processing** script of node 2:
| return goto\_node('4');
return goto\_output('4');
return goto\_intent('4','yes');
return execute\_intent('3','yes');
| return execute\_intent('3','no'); | return goto\_intent('4'); |
| :---------------------------------------------------------------------------------------------------------------------------------------------------------------------------------------------------------------------------------: | :---------------------------------------------------------------------------------------------------------------------------------------------------------------------------------------------------------------------------------: | :---------------------------------------------------------------------------------------------------------------------------------------------------------------------------------------------------------------------------------: |
|  |  |  |
{% hint style="success" %}
**Key point:** Here, note the following point when "return goto\_intent('4');" statement is executed. Since the current user query is "veg" and that is not handled at node number 4, an unhandled response is returned.
{% endhint %}
**Example 2**: Consider the execution of the following statement in the **post-processing** script of node 15:
| return goto\_node('main');
return goto\_output('main');
| return execute\_intent('main','Tell me more about reward policy'); |
| :---------------------------------------------------------------------------------------------------------------------------------------------------------------------------------------------------------------------------------: | :---------------------------------------------------------------------------------------------------------------------------------------------------------------------------------------------------------------------------------: |
|  |  |
**Example 3**: Consider the execution of the following statement in the **output node** of node 18:
| return goto\_node('10');
return goto\_output('10');
| return goto\_intent('10'); |
| :----------------------------------------------------------------------------------------------------------------------------------------------------------------------------------------------------------------------------------: | :----------------------------------------------------------------------------------------------------------------------------------------------------------------------------------------------------------------------------------: |
|  |  |
{% hint style="success" %}
**Key point:** Here, note the following point when the "return goto\_intent('10');" statement is executed. This transfers the execution to intent number 10 and waits for the next user's input. The next user's input is evaluated at intent number 10.
{% endhint %}
**Example 4**: Consider the execution of the following statement in the **output node** of node 15:
| return goto\_node('main');return goto\_output('main'); | return goto\_intent('main'); |
| :----------------------------------------------------------------------------------------------------------------------------------------------------------------------------------------------------------------------------------: | :----------------------------------------------------------------------------------------------------------------------------------------------------------------------------------------------------------------------------------: |
| return goto\_node('main');
return goto\_output('main');
| return goto\_intent('main'); |
|  |  |
{% hint style="success" %}
**Key point:** Here, note the following point when the "return goto\_intent('main');" statement is executed. This transfers the execution to the 'main' node and waits for the next user's input. The next user's input is evaluated at 'main'.
{% endhint %}
---
# Source: https://docs.avaamo.com/user-guide/skills/dialog-skill/flow-designer-overview.md
# Flow designer - Overview
The **Flow designer** is an intuitive conversational modeling tool that enables you to quickly build multi-turn conversational flows using user intents and responses. The Designer provides a comprehensive set of content templates, including surveys, forms, carousels, and rich media cards, to create beautiful, engaging conversational interfaces.
Refer [Flow designer,](https://docs.avaamo.com/user-guide/how-to/build-skills/create-skill/using-dialog-designer/create-new-skill/dialog-designer-overview) for more information.
---
# Source: https://docs.avaamo.com/user-guide/how-to/build-skills/create-skill/customize-your-skill/how-to/forward-call-c-ivr-channel.md
# Forward call (C-IVR channel)
You can use `SmartCall.forward` method to forward the call to another number such as a help center number or a call center number, in case the user requires any further assistance in the C-IVR flow.
{% hint style="info" %}
**Note**: This option works if you have deployed your agent in the C-IVR channel. See the [C-IVR channel](https://docs.avaamo.com/user-guide/how-to/build-agents/configure-agents/deploy/conversational-ivr-c-ivr-phone), for more information.
{% endhint %}
```javascript
return SmartCall.forward(<>,<>);
```
* **message**: Specify any message that you wish to be read out to the user before forwarding the call to the number.
* **phoneno**: Provide the complete phone number with a country code.
Consider that you have an "Order Status" skill in your pizza agent that checks for the order status using the order number provided by the user.
* You have deployed your agent in the C-IVR channel.
* You have designed a flow, where you wish to transfer the call to an agent if requested by the user.
* You can use the following JS method to forward the call or use can use the [Call forward](https://docs.avaamo.com/user-guide/how-to/build-skills/using-dialog-designer/create-new-skill/build-skill-responses/add-skill-messages-responses#call-forward) response from the UI.
```javascript
return SmartCall.forward("Forwarding to an agent. Please wait.","+918887651234");
```
### For "**refer"** transfer mode
You can use `SmartCall.forward` method to forward the call to a SIP number when you have deployed your agents on [Genesys](https://docs.avaamo.com/user-guide/how-to/build-agents/configure-agents/deploy/genesys), [SIP](https://docs.avaamo.com/user-guide/how-to/build-agents/configure-agents/deploy/sip), [Nice InContact](https://docs.avaamo.com/user-guide/how-to/build-agents/configure-agents/deploy/nice-incontact) channels.
```javascript
return SmartCall.forward("<>", "<>?call_type=sip", {<>});
```
{% hint style="info" %}
**Note:**
* You must get the <\> from the customer call stack. This is the number where Avaamo Platform forwards the call.
* You must also get the details of the specific headers that must be passed in the call forward request.
{% endhint %}
**Example**: The following example illustrates a Nice InContact SIP call forward request:
```javascript
return SmartCall.forward("Please hold on! Let me transfer your call to a care specialist",
"+14003460060?call_type=sip",
{"X-NICE-CXONE-CONTACT-ID": context.x_in_contact_contact_id });
```
---
# Source: https://docs.avaamo.com/user-guide/ref/frequently-asked-questions-faqs.md
# General keynotes (FAQs)
The following lists a few generic keynotes about intent processing, training data, and regex entities.
### Intent processing
* If there are multiple Q\&A with the exact same query, then the response from the first matching skill is displayed.
* The Smalltalk response is displayed only when the user query (including punctuations) exactly matches the training data provided in the Smalltalk.
See [Intent execution sequenc](https://docs.avaamo.com/user-guide/overview-and-concepts/advanced-concepts/intent-execution-sequence)e, for more information.
### Training data
* If you want training data that must match specific and generic queries, then it is recommended to provide generic training data. **Example**: If you wish to match "I want my fund value" and "I want fund value", then it is recommended to use "I want fund value" in the training data.
* Training data must not be in all caps, as caps words are considered as stop words during processing.
### Spell correction
* The platform corrects the spelling of only words where the corrected spelling is at least 4 characters.
* Spell correction is not done for System location entities and English dictionary words.
* By default, the spell correction is not done for system entities, it can be added as custom entity values if you wish to make spell correction work.
* Spell correction identifies and corrects the phrase in the user query that is closest to the training data rather than correcting it to the best match. **Example**: Consider that you have the following data in your agent:
* Dictionary: lone
* Entity types: Loan types -> Personal loan, Housing loan
* Skill -> Get loan
* Training data -> I want Axis bank personal loan

Note that here best phrase match for "lon" is "lone". However, when the user query is "I want Axis bank personal lon" , lon gets corrected to "loan" instead of "lone", since that is closest to the training data.
* Use "Skip lemmatization" to avoid plural words of English words getting unnecessarily mapped to other entities. **Example**: AlMedia is a US City. Consider that you have pizza\_sizes entity type with Medium as one of the sizes. In the user query, "I want to order medium size pizza", both US City and pizza\_size entities are extracted, as Medium is the singular form of Media that is also a value in the US city entity type. So, if both are used in a skill and you do not want to keep deleting slots, use "Skip lemmatization" when you are creating entity type.
See [Add invocation intent](https://docs.avaamo.com/user-guide/how-to/build-skills/create-skill/using-dialog-designer/create-new-skill/add-invocation-intent) and [Add user intent](https://docs.avaamo.com/user-guide/how-to/build-skills/create-skill/using-dialog-designer/create-new-skill/add-user-intent), for more information.
---
# Source: https://docs.avaamo.com/user-guide/skills/prompt-skill/functions.md
# Functions
The `Functions` section allows you to define and configure the functions your agent can execute during customer interactions. This feature enables the agent to perform specific tasks dynamically in response to user inputs or system triggers.
{
  "name": "book_appointment",
  "parameters": {
    "doctor_name": "string",
    "date": "string",
    "time": "string",
    "patient_name": "string"
  },
  "returns": {
    "confirmation_number": "string",
    "status": "string"
  }
}
Parameter Descriptions Name Indicates the Name used to identify the Genesys channel. Note that you can have upto 150 characters in the channel name. Identifier Indicates the identifier (or FQDN) of Genesys SIP. Languages and
Playback Voice for
Select the language and configure the voice or the persona to be used by your agent in the interactive phone conversations with the user. Each language has a different set of voice personas that you can choose from. Select the persona from the options provided in the "Playback voice for <<language>>" section:
As with any enterprise voice, audio, or video application, each region or country has its own phone number to dial. Similarly, in the Genesys channel, you choose the language of the region or country where you wish to share the configured number. If you wish to share the number in multiple regions, then set up the Genesys channel specific to each language. Note that one Genesys channel is specific to only one language. To hear the voice preview, type any text in the text area and click the play button. You can also download the voice preview if required. You can select only those languages for which the agent is configured and those that are supported in the Genesys channel. If you have switched to a language that is not supported in the Genesys channel, then the agent responds in the default language. See Add languages and Supported languages , for more information.
Live agent transfer mode Select the request mode for Live agent transfer in SIP:
invite : Initiate a dialog for establishing a call. The request is sent by a user agent client to a user agent server.refer : Ask the recipient to issue a request for the purpose of call transfer. Note that this is a default method used in the Avaamo Platform and this works for both SIP and PSTN approaches. See Smartcall.forward , for more information on how to transfer and forward the call in SIP.
Speech timeout Indicates a maximum wait time of the agent within which a user response is expected. If the user response is not received within the time-out period, then an automated message is rendered back to the user indicating that the agent is awaiting the user response. Currently, this is a standard message and cannot be customized.
The default value is 1 second. Use the up and down arrows to increase or decrease time as required.
* Click **Save** to save the Genesys channel configuration details.
* Click **Download SIP Certificate** to download a "pem" file of the SIP certificate. This must be used to configure Avaamo Platform Genesys SIP details on the customer's side of the call center stack.

* Note that Avaamo also requires customer source IPs in order to allow traffic to Avaamo SIP. Send a request to Avaamo Support to whitelist the IP addresses.
## Manage channel settings
After you configure the channel settings, you can view, edit, disconnect and delete the channel settings as per your requirements. See [Manage channel settings](https://docs.avaamo.com/user-guide/how-to/build-agents/configure-agents/deploy/manage-channel-settings), for more information.
---
# Source: https://docs.avaamo.com/user-guide/how-to/build-skills/create-skill/customize-your-skill/how-to/use-context/get-domain-entity-details.md
# Get slot details
You can get the slot details using **context.entities.<\>** from the [context](https://docs.avaamo.com/user-guide/how-to/build-skills/create-skill/customize-your-skill/reference-library/context) object.
Consider that you wish to get the status of your pizza order. You can start by asking the order number, and then display that order number back to the user for confirmation. Consider that you have created a regular expression entity for the order number. See [Entity type with regular expression](https://docs.avaamo.com/user-guide/build-agents/add-entity-types-to-agent/example-pizza-agent#entity-type-with-regular-expression), for the complete example.
In the JS response node, you can use the **slot name** to display the order number as follows:
```markup
return "Checking the status of your order - "+ context.entities.order_number + ".
Will update you in a moment.";
```
In the agent, the following response is displayed:

{% content-ref url="" %}
[](https://docs.avaamo.com/user-guide/how-to/build-skills/create-skill/customize-your-skill/how-to/use-context)
{% endcontent-ref %}
{% content-ref url=".." %}
[..](https://docs.avaamo.com/user-guide/how-to/build-skills/create-skill/customize-your-skill/how-to)
{% endcontent-ref %}
---
# Source: https://docs.avaamo.com/user-guide/how-to/build-skills/create-skill/customize-your-skill/how-to/use-context/get-environment-variables.md
# Get environment variables
You can get the environment variable details using **context.<\>** from the [context](https://docs.avaamo.com/user-guide/how-to/build-skills/create-skill/customize-your-skill/reference-library/context) object.
Consider that you wish to get the value of an environment variable "DEV\_API\_URL" in the JS code and use it for further processing. See [Define environment variables](https://docs.avaamo.com/user-guide/how-to/build-agents/configure-agents/define-environment-variables), for more information on how to configure environment variables in your agent.

In the JS response node, you can use the **environment variable name** to get the value of the defined environment variable as follows:
```markup
return context.DEV_API_URL;
```
In the agent, the following response is displayed. Note that this is just an illustration to show how environment variables can be extracted from the context object:

{% hint style="info" %}
**Note**: The environment variable name is case-sensitive. You must use the exact case as defined.
{% endhint %}
---
# Source: https://docs.avaamo.com/user-guide/how-to/build-skills/create-skill/customize-your-skill/how-to/use-context/get-insights.md
# Get skill conversation insights
You can get the skill conversation insights using [context.insights](https://docs.avaamo.com/user-guide/how-to/build-skills/create-skill/customize-your-skill/reference-library/context/insights). Typically, insights can be used for troubleshooting purposes to analyze the skill flow and to create a better user experience.
Consider that in the MacPizza agent, for user intent, the response leads to an unhandled query. You can use **context.insights** to further analyze the skill flow. The following is a sample JS to get the insight details from the context object and display on the console:
```javascript
console.log(context.insights);
```
In the agent, the following details are displayed in the console:

{% content-ref url="" %}
[](https://docs.avaamo.com/user-guide/how-to/build-skills/create-skill/customize-your-skill/how-to/use-context)
{% endcontent-ref %}
{% content-ref url=".." %}
[..](https://docs.avaamo.com/user-guide/how-to/build-skills/create-skill/customize-your-skill/how-to)
{% endcontent-ref %}
---
# Source: https://docs.avaamo.com/user-guide/how-to/build-skills/create-skill/customize-your-skill/how-to/use-context/get-last-message.md
# Get last message
You can get the last message of the agent using [context.last\_message](https://docs.avaamo.com/user-guide/how-to/build-skills/create-skill/customize-your-skill/reference-library/context). You can use this to:
* Re-iterate or reconfirm the user’s intention
* Extract user’s intent from the last message and perform certain validations
{% hint style="info" %}
**Notes**:
* In the text, quick reply, card, or carousel, you can use **${context.last\_message}** to extract the last message sent by the user.
* In a JS node, you can use **context.last\_message** to extract the last message.
* You can use **context.last\_message.<\>** to access card responses in the last message of the user. See [Card](https://docs.avaamo.com/user-guide/how-to/build-skills/create-skill/customize-your-skill/how-to/build-dynamic-skill-response/card), for more information.
* If you have added a form element to a card response, then the system generates an element uuid that can be used in **context.last\_message.<\>**. See [Add Form Elements](https://docs.avaamo.com/user-guide/how-to/build-skills/create-skill/using-dialog-designer/create-new-skill/build-skill-responses/add-form-elements), for more information.
{% endhint %}
Consider that you have used [context.last\_message](https://docs.avaamo.com/user-guide/how-to/build-skills/create-skill/customize-your-skill/reference-library/context) to log the last message of the agent in the console log while ordering a pizza for debugging purposes:
```
console.log(context.last_message);
```
In the agent, the following details are displayed in the console:
{% content-ref url="" %}
[](https://docs.avaamo.com/user-guide/how-to/build-skills/create-skill/customize-your-skill/how-to/use-context)
{% endcontent-ref %}
{% content-ref url=".." %}
[..](https://docs.avaamo.com/user-guide/how-to/build-skills/create-skill/customize-your-skill/how-to)
{% endcontent-ref %}
---
# Source: https://docs.avaamo.com/user-guide/avaamo-agent-assist/agent-assist-widget/get-started.md
# Source: https://docs.avaamo.com/user-guide/live-agent-console/live-agent/get-started.md
# Source: https://docs.avaamo.com/user-guide/live-agent-console/supervisor/get-started.md
# Source: https://docs.avaamo.com/user-guide/how-to/build-agents/test-agents/regression-testing/get-started.md
# Source: https://docs.avaamo.com/user-guide/llamb/regression-testing/get-started.md
# Source: https://docs.avaamo.com/user-guide/llamb/get-started.md
# Source: https://docs.avaamo.com/user-guide/get-started.md
# Get started
Once you have created an **AI Agent**, follow these steps to configure and build it effectively.
### [**Add Skills**](https://docs.avaamo.com/user-guide/skills)
In this step, you define the **actions** your agent should perform by adding skills. You can choose from two types of skills:
* [Prompt skill](https://docs.avaamo.com/user-guide/skills/prompt-skill) – Uses predefined prompts to generate responses.
* [Knowledge skill](https://docs.avaamo.com/user-guide/skills/knowledge-skill) – Leverages LLaMB capabilities for advanced AI-driven interactions.
### [**Configuration**](https://docs.avaamo.com/user-guide/configuration)
This step allows you to set up additional configurations to **enhance the functionality** of your AI agents. Advanced settings help fine-tune the agent's behavior and responses for a more optimized experience.
### [**Debug**](https://docs.avaamo.com/user-guide/debug)
In the **Debug** step, you review the data stored by the skill and analyze logs generated from your JavaScript code. This helps in identifying and fixing any issues in the agent's functionality.
### [**Test**](https://docs.avaamo.com/user-guide/test)
Finally, you use the **Simulator** to test your skill with different `sample queries`. This ensures that your agent behaves as expected and provides accurate responses before deployment.
You can test using either the `AI Agent` or `Classic Agent` types.\
In the `AI Agent` testing mode, a mobile screen-style widget is displayed, allowing users to interact with the agent in a conversational interface.
In the `Classic Agent` testing mode, the traditional agent widget is shown. You can click on it to start the conversation.
Refer [Test channel settings](https://docs.avaamo.com/user-guide/configuration/channels/web-enabled-by-default#test-channel-settings), for detailed information.
---
# Source: https://docs.avaamo.com/user-guide/ref/avaamo-platform-api-documentation/global-storage-api.md
# Global Storage API
## Get global storage data
`GET` `https://cx.avaamo.com/bots_api/v1/storages/{{key}}.json?bot_id={{bot_id}}`
Get the value of the specified key from the agent's global storage.
#### Path Parameters
| Name | Type | Description |
| ------------------------------------- | ------ | ---------------------------- |
| key\* | String | Key of the storage variable. |
#### Query Parameters
| Name | Type | Description |
| ----------------------------------------- | ------- | ---------------------------------------------------------------------- |
| bot\_id\* | Integer | Agent identifier. You can get the agent identifier from the agent URL. |
#### Headers
| Name | Type | Description |
| ----------------------------------------------- | ------ | ----------------------------------------------------------------------------------------------------------------------------------------------------------------------------------------------------------------------------------------------------------------------------------------------------------------------------------------------------------------------------------------------------------------------------------------------------------------------------------------------------------------------------------------------------------------------- |
| access-token \* | String | The user access token.
You can get the user access token from the Settings -> Users page. See Users or Groups , for more information.
Users must have at least view permission on the agent. See Permissions , for more information.
|
{% tabs %}
{% tab title="200: OK " %}
```javascript
{
"key": "bearer_token",
"value": "jfqbu23Zi2"
}
```
{% endtab %}
{% endtabs %}
### Code request snippets
{% tabs %}
{% tab title="cURL" %}
```javascript
curl --location --request GET 'https://cx.avaamo.com/bots_api/v1/storages/<>.json?bot_id=30xxx' \
--header 'access-token: xxxxxxe6e3aa45349dad98axxxxxxxxx'
```
{% endtab %}
{% tab title="node.js " %}
```javascript
var request = require('request');
var options = {
'method': 'GET',
'url': 'https://cx.avaamo.com/bots_api/v1/storages/<>.json?bot_id=30xxx',
'headers': {
'access-token': 'xxxxxxe6e3aa45349dad98axxxxxxxxx'
}
};
request(options, function (error, response) {
if (error) throw new Error(error);
console.log(response.body);
});
```
{% endtab %}
{% endtabs %}
### Response attributes
In the response, the following attributes are returned:
Attribute Description Type key Indicates the key of the storage variable. String value Indicates the value of the storage variable. String
### Example
The following table lists a sample use case with query parameters:
| Use-case | Description |
| -------------------------------------- | ------------------------------------------------------------------------------------------------------------------------------------------------------------------------------------------------------------------------------------------------------------------------------------------------------------------------------------- |
| Get global storage data value of a key | key : Specify the key of the storage variable in the request.
Example : [https://cx.avaamo.com/bots\_api/v1/storages/\<\<key>>.json?bot\_id=\<\<bot\_id>>](https://cx.avaamo.com/bots_api/v1/storages/\<\<key>>.json?bot_id=\<\<bot_id>>)
|
## Set global storage data
`PUT` `https://cx.avaamo.com/bots_api/v1/storages/{{key}}.json?bot_id={{bot_id}}`
Stores key and the value in agent's global storage. This is applicable to all the users interacting with agents.
#### Path Parameters
| Name | Type | Description |
| ------------------------------------- | ------ | ---------------------------- |
| key\* | String | Key of the storage variable. |
#### Query Parameters
| Name | Type | Description |
| ------- | ------- | ---------------------------------------------------------------------- |
| bot\_id | Integer | Agent identifier. You can get the agent identifier from the agent URL. |
#### Headers
| Name | Type | Description |
| ----------------------------------------------- | ------ | ----------------------------------------------------------------------------------------------------------------------------------------------------------------------------------------------------------------------------------------------------------------------------------------------------------------------------------------------------------------------------------------------------------------------------------------------------------------------------------------------------------------------------------------------------------------------- |
| access\_token\* | String | The user access token.
You can get the user access token from the Settings -> Users page. See Users or Groups , for more information.
Users must have at least view permission on the agent. See Permissions , for more information.
|
#### Request Body
| Name | Type | Description |
| --------------------------------------- | ------ | ------------------------------ |
| value\* | String | Value of the storage variable. |
{% tabs %}
{% tab title="201: Created " %}
```javascript
{
"status": 201
}
```
{% endtab %}
{% endtabs %}
### Code request snippets
{% tabs %}
{% tab title="cURL" %}
```javascript
curl --location --request PUT 'https://cx.avaamo.com/bots_api/v1/storages/<>.json?bot_id=30xxx' \
--header 'access-token: xxxxxxe6e3aa45349dad98axxxxxxxxx' \
--header 'Content-Type: application/json' \
--data-raw '{
"value": "jfqbu23Zi2"
}'
```
{% endtab %}
{% tab title="node.js" %}
```javascript
var request = require('request');
var options = {
'method': 'PUT',
'url': 'https://cx.avaamo.com/bots_api/v1/storages/<>.json?bot_id=30xxx',
'headers': {
'access-token': 'xxxxxxe6e3aa45349dad98axxxxxxxxx',
'Content-Type': 'application/json'
},
body: JSON.stringify({
"value": "jfqbu23Zi2"
})
};
request(options, function (error, response) {
if (error) throw new Error(error);
console.log(response.body);
});
```
{% endtab %}
{% endtabs %}
### Example
**Request**: The following is a sample JSON request for setting the storage variable "bearer\_token" in a global session:
1. Send a PUT request with storage key and agent identifier -
2. Pass the user access token in the Header parameter.
3. Send the payload in the request body with the storage variable value you wish to set.
```json
{
"value": "jfqbu23Zi2"
}
```
**Result**: You can view the storage variable set for the user in the **Debug -> Storage** page. See [Storage](https://docs.avaamo.com/user-guide/how-to/build-agents/debug-agents#using-storage), for more information.

## Delete global storage data
`DELETE` `https://cx.avaamo.com/bots_api/v1/storages/{{key}}.json?bot_id={{bot_id}}`
Delete the storage data of the specified key from the agent's global storage.
#### Path Parameters
| Name | Type | Description |
| ------------------------------------- | ------ | ---------------------------- |
| key\* | String | Key of the storage variable. |
#### Query Parameters
| Name | Type | Description |
| ----------------------------------------- | ------- | ---------------------------------------------------------------------- |
| bot\_id\* | Integer | Agent identifier. You can get the agent identifier from the agent URL. |
#### Headers
| Name | Type | Description |
| ---------------------------------------------- | ------ | ----------------------------------------------------------------------------------------------------------------------------------------------------------------------------------------------------------------------------------------------------------------------------------------------------------------------------------------------------------------------------------------------------------------------------------------------------------------------------------------------------------------------------------------------------------------------- |
| access-token\* | String | The user access token.
You can get the user access token from the Settings -> Users page. See Users or Groups , for more information.
Users must have at least view permission on the agent. See Permissions , for more information.
|
{% tabs %}
{% tab title="200: OK " %}
```
{
"status": 200
}
```
{% endtab %}
{% endtabs %}
### Code request snippets
{% tabs %}
{% tab title="cURL" %}
```javascript
curl --location --request DELETE 'https://cx.avaamo.com/bots_api/v1/storages/<>.json?bot_id=30xxx' \
--header 'access-token: xxxxxxe6e3aa45349dad98axxxxxxxxx'
```
{% endtab %}
{% endtabs %}
---
# Source: https://docs.avaamo.com/user-guide/how-to/build-skills/create-skill/customize-your-skill/how-to/build-dynamic-skill-response/graphs-and-charts.md
# Graphs & Charts
You can create chart visualizations such as Pie Chart, Bar Chart, Dial Chart using the data in your agent. The visualizations can be used in the description of cards created from JS or in webview with HTML source.
{% hint style="info" %}
**Note**: The visualizations may not render on other channels such as Facebook and Twitter.
{% endhint %}
### Dial chart
You can find the source [here](https://github.com/avaamo/bot-response-visualizations/blob/master/dial-chart.html). Modify the size of the SVG and viewBox property values, as required.
{% hint style="info" %}
**Note**: Pass one of these values to the *getChart* method \[*low*, *moderately\_low*, *moderate*, *moderately\_high*, *high*] and the pointer points to the respective part of the dial.
{% endhint %}

### Pie chart
Find the source code [here](https://github.com/avaamo/bot-response-visualizations/blob/master/pie-chart.html). The pie chart has its own legend too. The color of each slice of pie is customizable. The size of the overall pie is also customizable.

### Bar chart
Find the source [here](https://github.com/avaamo/bot-response-visualizations/blob/master/bar-chart.html). The bar chart has its own legend too. The color of each bar is customizable.

---
# Source: https://docs.avaamo.com/user-guide/llamb/llamb-filters/grounding-filters.md
# Grounding filters
Grounding filters ensure the quality, accuracy, and relevance of the generated output, and help to "ground" the models in the context of the specific use case to obtain accurate and relevant output.
### How does it work? >, SmartCall.hangup()];
```
Consider that you have an "Order Status" skill in your pizza agent that checks for the order status using the order number provided by the user. You have deployed your agent in the C-IVR channel. You have designed a flow, where you wish to hang up the call after reading out the status of the pizza order. You can use the following JS method to read out the message and hang up the call:
```javascript
return ['You order is on its way and will be delivered in 20 minutes. Hanging up the call now. Have a good day.',SmartCall.hangup()];
```
---
# Source: https://docs.avaamo.com/user-guide/how-to/build-skills/create-skill/customize-your-skill/reference-library/context/history.md
# history
Context history is an array of message history with details such as created date and time, actual message, and the sender of the message generated during the execution of the user’s intent in the agent's flow. The following is a sample JSON of history details in context object:
```yaml
"history": [
{
"created_at": 1566282974986,
"last_message": "i want to order cheese pan pizza",
"last_message_schema_identifier": "output_14",
"last_message_sent_by": "user"
}
]
```
| **Attribute** | **Description** | **Type** |
| --------------------------------- | --------------------------------------------------------------------------------- | ------------- |
| created\_at | Indicates timestamp of the message sent by the user to the agent in milliseconds. | UTC Timestamp |
| last\_message | Indicates the last message sent to the agent. | String |
| last\_message\_schema\_identifier | Indicates the node identifier of the last message. | String |
| last\_message\_sent\_by | Indicates the user who sent the last message to the agent. | String |
{% hint style="info" %}
**Note**: You can view upto the last 20 messages in the context.history object.
{% endhint %}
---
# Source: https://docs.avaamo.com/user-guide/llamb/regression-testing/how-to-improve-accuracy.md
# How to improve accuracy?
Ensuring that queries achieve a good correctness score is essential for validating the agent's performance. To improve results, follow these steps:
1. **If no ground truth is specified in the regression test input file:**
* The system generates a ground truth for those queries.
* Review the generated ground truths, update them to match your expected answers, and rerun the regression test.
2. **If ground truth is specified in the input file:**
* Modify the ground truth based on the expected answers and rerun the regression test.
3. **If your** [**result files**](https://docs.avaamo.com/user-guide/llamb/regression-testing/understanding-results) **have a status of FAIL:**
* Check if the added ground truth is present in the ingested content.
* Improve section headers to enhance content clarity and relevance. Refer [section header](https://docs.avaamo.com/user-guide/get-started/step-2-ingest-enterprise-content/view-and-edit-knowledge#sections), for complete details.
* Debug the answers by referring to the generated errors and warnings, and refine the input file before re-executing the test. Refer to errors and warnings in [Understanding results](https://docs.avaamo.com/user-guide/llamb/regression-testing/understanding-results), for reference.
By following these steps, you can systematically improve test results and enhance the agent's performance.
---
# Source: https://docs.avaamo.com/user-guide/how-to/build-skills/create-skill/customize-your-skill/how-to.md
# How-to
All the scenarios are based on the MacPizza agent use case, where you are building a skill for Mac Pizza - a Quick Service Restaurant to place orders for pizzas.
## Before you begin
The following are generic steps for all the How-to topics listed in this section:
* Ensure you have met all the [pre-requisites](applewebdata://E72AA735-5E27-4FEA-9818-F9DC6DD2ACD7/@avaamo/s/avaamo/~/drafts/-LwMqtgHWkBhIW87lD6g/quick-start-tutorials/pre-requisites).
* You can build and manage dialogs (conversational flow) immediately after creating a Dialog skill. See [Create new Dialog skill](applewebdata://E72AA735-5E27-4FEA-9818-F9DC6DD2ACD7/@avaamo/s/avaamo/~/drafts/-LwMqtgHWkBhIW87lD6g/how-to/build-skills/create-skill/using-dialog-designer/create-new-dialog-skill), for more information.
* If you wish to edit skill in an agent, then:
* Navigate to the **Agents** tab in the top menu. Search and open the required agent. See [Search agents](applewebdata://9ae47367-043d-436a-bab1-053a8b89e2a1/@avaamo/s/avaamo/~/edit/drafts/-Lsoojy2kKRX1KXPWAZ2/how-to/build-agents/manage-agents#search-agents), for more information.
* Click **Edit** to unlock the agent before editing.
* In the **Agent** page, navigate to the **Skills** option in the left navigation menu. Search and open the required skill. See [Search skill](applewebdata://E72AA735-5E27-4FEA-9818-F9DC6DD2ACD7/@avaamo/s/avaamo/~/drafts/-LwMqtgHWkBhIW87lD6g/how-to/build-skills/manage-skill#search-skill), for more information.
{% hint style="success" %}
**Key Point**: It is recommended to have a good working knowledge of JavaScript, HTML, and CSS.
{% endhint %}
## Learn how-to
This section describes how-to customize skills with a rich set of objects and functions provided in the Avaamo Platform using certain common scenarios.
### Use Context
The following scenarios are covered to explain the usage of the context object :
* [Get user details](https://docs.avaamo.com/user-guide/how-to/build-skills/create-skill/customize-your-skill/how-to/use-context/to-get-user-details)
* [Get last message](https://docs.avaamo.com/user-guide/how-to/build-skills/create-skill/customize-your-skill/how-to/use-context/get-last-message)
* [Get entity and slot details](https://docs.avaamo.com/user-guide/how-to/build-skills/create-skill/customize-your-skill/how-to/use-context/get-domain-entity-details)
* [Create context variables ](https://docs.avaamo.com/user-guide/how-to/build-skills/create-skill/customize-your-skill/how-to/use-context/create-custom-variables)
* [Create custom user properties](https://docs.avaamo.com/user-guide/how-to/build-skills/create-skill/customize-your-skill/how-to/use-context/create-custom-user-properties)
* [Detect user device](https://docs.avaamo.com/user-guide/how-to/build-skills/create-skill/customize-your-skill/how-to/use-context/detect-channel)
* [Switch user’s language](https://docs.avaamo.com/user-guide/how-to/build-skills/create-skill/customize-your-skill/how-to/use-context/switch-users-language)
* [Transfer to live agent](https://docs.google.com/document/d/1kLeCPObAeXeon6viGnywY3_9HQxSmfs-YS-xB561Ekg/edit#heading=h.b0a7f5vp0nz8)
* [Get skill conversation insights](https://docs.avaamo.com/user-guide/how-to/build-skills/create-skill/customize-your-skill/how-to/use-context/get-insights)
See [context](https://docs.avaamo.com/user-guide/how-to/build-skills/create-skill/customize-your-skill/reference-library/context), for more information on attributes supported in the context object.
### Use Storage
The following scenarios are covered to explain the usage of the storage object :
* [Set and get global variables](https://docs.avaamo.com/user-guide/how-to/build-skills/create-skill/customize-your-skill/using-storage#set-and-get-global-variables)
* [Set and get user variables](https://docs.avaamo.com/user-guide/how-to/build-skills/create-skill/customize-your-skill/using-storage#set-and-get-user-variables)
See [storage](https://docs.avaamo.com/user-guide/how-to/build-skills/create-skill/customize-your-skill/reference-library/storage), for more information on attributes supported in the storage object.
### Control Skill Flow
You can control the navigation of skill flow in one of the following ways:
* [Using post processing](https://docs.avaamo.com/user-guide/how-to/build-skills/create-skill/customize-your-skill/controlling-skill-flow#using-post-processing)
* [Using JS output](https://docs.avaamo.com/user-guide/how-to/build-skills/create-skill/customize-your-skill/controlling-skill-flow#using-js-output)
See [Flow Control](https://docs.avaamo.com/user-guide/how-to/build-skills/create-skill/customize-your-skill/reference-library/flow-control), for more information on various functions supported to control skill navigation flow.
### Send Notifications
You can send SMS and email notifications to the users from skill. The following scenarios are covered:
* [Using Email](https://docs.avaamo.com/user-guide/how-to/build-skills/create-skill/customize-your-skill/sending-notifications#email-notification)
* [Using SMS](https://docs.avaamo.com/user-guide/how-to/build-skills/create-skill/customize-your-skill/sending-notifications#sms-notification)
### Customize Skill UI
You can programmatically customize skill UI in the following ways:
* [Build dynamic skill response](https://docs.avaamo.com/user-guide/how-to/build-skills/create-skill/customize-your-skill/how-to/build-dynamic-skill-response)
* [Create custom HTML web view](https://docs.avaamo.com/user-guide/how-to/build-skills/create-skill/customize-your-skill/how-to/create-custom-html-web-views)
* [Define custom intents](https://docs.avaamo.com/user-guide/how-to/build-skills/create-skill/customize-your-skill/how-to/define-matching-rules-using-custom-intents)
### Integrate with API
Seamlessly integrate skill response with [REST](https://docs.avaamo.com/user-guide/how-to/build-skills/create-skill/customize-your-skill/integrate-with-api-1#rest-api) and [SOAP](https://docs.avaamo.com/user-guide/how-to/build-skills/create-skill/customize-your-skill/integrate-with-api-1#soap-api) API using a simple fetch call.
---
# Source: https://docs.avaamo.com/user-guide/how-to/build-skills/create-skill/customize-your-skill/how-to/integrate-with-api-1/hybrid-sdk.md
# Hybrid SDK
Avaamo Platform is offered as a SaaS service that runs on AWS (Amazon Web Services) in multiple regions. All the conversations is through a secure, reliable, and scalable messaging infrastructure where each message is encrypted.
Typically, in business involving sensitive data such as banking and insurance or in-cases where the business has strict security measures that require the integration logic and access credentials to stay within the company network. Hence, it is required for the **Avaamo agent** to access on-premise applications and perform bi-directional interactions for providing value-added services to the user.
You can integrate with Avaamo Platform using **Hybrid SDK** that combines the performance, scale, and cost benefits of the cloud with the access control and permission limitations of enterprise data access.
{% hint style="success" %}
**Key Point**: You can clone and use this repository , to get started on Hybrid SDK integration.
{% endhint %}
### Pre-requisites
Ensure that the customer machine must be allowed to connect to the Avaamo servers via HTTPS
### How does it work?
Avaamo agents access company data. The accuracy and security of data is critical to provide a good user experience. Hence, when you are developing an agent, it is important to understand how agents can access company data.
Conventionally, the enterprise application exposes REST API/SOAP Web Services to the internet that can be consumed by the agent**.** This approach has the following limitations:
* It opens up the service/data for all kinds of internet hacking.
* Involves full IT services to open ports and set up security.
* Requires exposing unrestricted security credentials with a third party.
Avaamo’s **Hybrid SDK** eliminates these problems by providing native integration SDKs to connect your data/services to the agent. It is easy and secure, where the integration logic and access credentials stay within the company network. The following illustration depicts the overall data flow in the Hybrid SDK:
. In the agent, click the eye icon to check query insights.

Similarly, you can verify the masked details in the conversation history and query insights:

* **User's first name and last name when sent in custom channel**: Consider that in the custom channel, the user's first name is sent in the user properties:
```javascript
{
"channel_uuid": "f33b3814-1535-4e21-807f-a1d2b77585af",
"locale": "en-US",
"user": {
"first_name": "Williamson",
"last_name": "Smith",
"uuid": "9ac15843-151d-47fb-8b3d-930b89ce797e"
},
"message": {
"text": "hello"
}
}
```
In the **Conversation history** page, you can see that the `first_name` and `last_name`in the user conversation is masked,

## Masking agent responses
The Avaamo platform offers **masking agent responses** to protect sensitive information such as PII (Personally Identifiable Information) during agent interactions. This functionality ensures that only sensitive data is masked, while the rest of the response remains visible for clarity and debugging.
The system identifies and masks only the portions of the agent response that contain sensitive data. The non-sensitive content is left unmasked, allowing teams to review and understand the flow of the conversation without exposing private information.
{% hint style="info" %}
**Notes**:
* This behavior is `enabled by default` for all agents created after the feature rollout. For agents created prior, bot developers can manually enable masking from the [Agent Settings page](https://docs.avaamo.com/user-guide/how-to/build-agents/configure-agents/define-settings#enable-information-masking), or contact Avaamo Support for assistance.
* If the agent response contains sensitive PII data such as name, account number, or password, then it is recommended to mask the agent responses to protect user privacy.
{% endhint %}
In the **Conversation history** page, you can view that the agent responses are masked. Note that even the original file is masked as **masked.png**. When you click **masked.png**, the original file is no longer available in the Avaamo Platform and cannot be accessed:

Similarly, you can also verify the masked details from the **Query insights** page.
## Frequently Asked Questions (FAQs)
### 1. Can masking be reverted?
Once masked, the original unmasked data is not available anywhere in the Avaamo Platform. Hence, masking cannot be reverted.
### 2. How is the PII (Personally identifiable information) data masked if my agent is deployed in the C-IVR channel?
If you have deployed your agent in the C-IVR or Phone channel and masking is enabled, then the audio files from the user responses are not available in the conversation history, since they can contain PII data.
### **3. What happens to previous data when masking is enabled after a debugging period is over?**
If masking is enabled after a debugging period, all previously generated data that was unmasked due to masking being disabled will be masked. The platform applies masking to this data, ensuring it aligns with the current configuration.
### 4. If I disable masking, then will all the previous data get unmasked?
Once masked, the data cannot be retrieved back. At a later point in time, if you choose to disable masking, then all the previous data will still remain masked and will not get unmasked. However, going forward, the conversations after you disable masking will remain unmasked.
### 5. How to audit if all the data has been masked or not?
Avaamo Platform maintains a log of each record that is masked. Contact Avaamo Support for more details before you plan to audit.
### 6. I cannot see the Debug logs option. Why is that?
You can enable or disable the **Debug Logs** option from the **Settings** section in the agent's configuration. Refer [Enable Debug Log](https://docs.avaamo.com/user-guide/how-to/build-agents/configure-agents/define-settings), for more information.
### 7. Some of the user names are not getting masked in the user messages. What do I do now?
Avaamo Platform covers the masking of the most commonly used names. However, if you do find certain names that are not getting masked, you can consider one of the following approaches:
1. Create a custom entity with all such names and share the custom entity with Avaamo Support. Avaamo will then enable masking for the custom entity. Configuring masking is a one-time activity and you can continue to add names in the custom entity and all such names will get masked after masking has been set up.
2. Periodically share a list of such names with Avaamo Support and we can continuously improve name entity recognition.
---
# Source: https://docs.avaamo.com/user-guide/how-to/build-agents/debug-agents/insights.md
# Source: https://docs.avaamo.com/user-guide/how-to/build-skills/create-skill/customize-your-skill/reference-library/context/insights.md
# insights
Context insights indicate how the user’s intent was analyzed and matched in the agent flow. You can use this information to debug agents. The following is a sample JSON of insights details in context object:
```javascript
{
"analyzed_document": "I am very excited today I want to order veg cheese pizza",
"document": "I am very excited today I want to order veg cheese pizza",
"domain_ids": [
41948
],
"entities": [
{
"entity": "pizza_types",
"entity_type": "pizza_types",
"entity_value": "veg",
"domain_key": "bot_inline_domain_497ba7c2-5677-42f2-940d-616c688357c5",
"value": "veg",
"current_value": "veg",
"index": 43,
"derived_parent": true,
"parent_entity_key": null,
"custom_entity_type": true
},
{
"entity": "pizza_toppings",
"entity_type": "pizza_toppings",
"entity_value": "cheese",
"domain_key": "bot_inline_domain_497ba7c2-5677-42f2-940d-616c688357c5",
"value": "cheese",
"current_value": "cheese",
"index": 43,
"parent_entity_key": "pizza_types",
"custom_entity_type": true
}
],
"featured_tokens": [
"i",
"am",
"very",
"excite",
"today",
"i",
"want",
"to",
"order",
"veg",
"cheese",
"pizza"
],
"featured_tokens_lemma_map": {
"am": "am",
"cheese": "cheese",
"excited": "excite",
"i": "i",
"order": "order",
"pizza": "pizza",
"to": "to",
"today": "today",
"veg": "veg",
"very": "very",
"want": "want"
},
"id": null,
"lemma": "i am very excite today i want to order veg cheese pizza",
"negation": false,
"original_document": "I am very excited today I want to order veg cheese pizza",
"pos": [
[
"i",
"NN"
],
[
"am",
"VBP"
],
[
"very",
"RB"
],
[
"excited",
"JJ"
],
[
"today",
"NN"
],
[
"i",
"VBP"
],
[
"want",
"VBP"
],
[
"to",
"TO"
],
[
"order",
"NN"
],
[
"veg",
"NNS"
],
[
"cheese",
"JJ"
],
[
"pizza",
"NN"
]
],
"sentiment": "neutral",
"tone": "Surprise",
"raw_document": "I am very excited today I want to order veg cheese pizza",
"bow_normalized_document_with_stopwords": "i very excite datetime want order veg randomA pizza",
"bow_normalized_document": "excite datetime want order veg randomA pizza",
"bow_words": [
"want",
"veg",
"randoma",
"pizza",
"order",
"excite",
"datetime"
],
"normalized_document": "excite datetime want order veg randomA pizza",
"featured_normalized_tokens": "excite datetime want order veg randomA pizza",
"normalized_tokens": "excite datetime want order veg randomA pizza",
"multiIntentEligible": false,
"bow_score": 1,
"entities_already_processed": true,
"intent": "node_intent_node_1",
"intent_name": "Test",
"skill_name": "Test",
"score": 1,
"es_score": 23.346571,
"confidence_score": 0,
"training_datum_id": 1386989,
"intent_id": 212186,
"intent_type": "INLINE::INTENT",
"bot_key": "1",
"skill_key": "1",
"intent_key": "3",
"matching_document": "I want to order veg cheese pizza",
"second_best_result": null,
"detected_language": "en-US",
"original_text": "I am very excited today I want to order veg cheese pizza",
"is_transaction": false
}
```
Attribute Description Type analyzed_document Indicates the original user intent being analyzed. String document Indicates the actual intent in the agent flow that is used to analyze the user query. String entities Indicates an array of entities used to analyze the user’s intent. An array of JSON key-value pairs. featured_tokens Indicates an array of lemma tokens generated from the user’s intent.
Here, tokens are characters separated by spaces that provide a convenient logical separation of phrases/sentences into words.
Array featured_tokens_lemma_map Indicates the mapping between each token and lemma token from the user’s intent.
This indicates how each token is converted to a lemma token.
Example: Ordering in lemma token is order.
Array negation Indicates if the user’s intent included negation words. Example: I do not want to order cheese pan pizza. In this case, negation is set to true. Boolean original_document Indicates the original user intent being analyzed. String pos Indicates parts of speech (pos) from the user’s intent.
See Part-of-speech tagging , for more information.
Array tone Indicates the tone of the user query such as anger, fear, happy.
See Tone and sentiment , for more information.
String sentiment Indicates the sentiment in the user query such as Positive, Negative, Neutral.
See Tone and sentiment , for more information.
String raw_document Indicates the original user intent being analyzed. String new_normalized_document Indicates the user intent after being normalized. String new_normalized_document_query Indicates the user’s intent after removing the stopwords such as I, am, want, etc. String normalized_tokens Indicates the list of tokens from the user’s intent after normalization. String entities_already_processed Indicates if the entities are processed or not. Boolean intent Indicates the name of the intent used while analyzing the user’s query. String training_datum_id Indicates the training of the intent used while analyzing the user’s query. Integer intent_id Indicates a unique identifier of the intent. Integer intent_name Indicates the name of the intent used while analyzing the user’s query. String intent_type Indicates the type of intent such as Inline, System intents, Knowledge Packs (Smalltalk and Q&A) String skill_key Indicates unique key of the skill. String intent_key Indicates the unique key of the intent. String second_best_result Indicates the next best result obtained while analyzing the user’s intent, if any String detected_language Indicates the language detected while analyzing the user’s intent. String knowledge_pack_id Indicates the identifier of the knowledge pack, if any, used to analyze the user’s intent. String raw_utterance Indicates the "as-is" utterances of the user's speech in the IVR channels.
Note that these are the exact spoken utterances without any modifications such as removing noise, filtering words, or modifying anything in the user's speech.
String
{% hint style="info" %}
**Note**: All the parameters in the context->insights object other than those listed in the table above are for internal usage only. For example, multiIntentEligible, es\_score, confidence\_score and other such parameters not listed above on the table are for internal usage only.
{% endhint %}
---
# Source: https://docs.avaamo.com/user-guide/avaamo-agent-assist/get-started/install-agent-assist-extension.md
# Install Agent Assist extension
The `Avaamo Agent Assist Browser Apps` offer a convenient way for users to access the Agent Assist Widget directly through web browsers. These apps eliminate the need to embed the widget into existing customer portals, which is the traditional deployment method.
Avaamo provides these browser apps as a `Chrome Extension` and an `Edge Addon`, allowing users to easily access the Agent Assist Widget. The extensions are published in the Chrome Web Store and Microsoft Edge Addons and are regularly updated and maintained by Avaamo with new features and patches.
{% hint style="info" %}
**Notes**:
* Ensure you have met all the [pre-requisites.](https://docs.avaamo.com/user-guide/avaamo-agent-assist/get-started/before-you-begin)
{% endhint %}
### Install Agent Assist extension in **Chrome**
Example to Install Agent assist extension in Chrome browser:
1. Open the Chrome browser.
2. Visit the [Chrome Web Store](https://chromewebstore.google.com/) and search for "`Avaamo Agent Assist`"
3. Click `Add to Chrome` at the top right of the page.
Parameters Description Maximum length Intent name Indicates the name of the intent.
Each intent name must be unique within the skill.
192
characters
Intent key Indicates the internal primary key used in the Avaamo Platform for uniquely identifying the intent name.
By default, a key is automatically generated for you. Click Edit to update the key to any user-friendly identifier. Note that the intent key must be unique within the skill.
Supported characters: Alphanumeric and underscore
It is recommended that the key is of at least 3 characters. As you type, the key is automatically converted to Snake Case. See Snake Case , for more information. You can use this in any JS code customizations (Flow control) , regression testing , and query insights for getting a closer look at the user conversations with the agent.
Intent type Indicates the type of user intent. Select Instructions . N/A Custom intent handler In the instruction text field, enter a natural language description of when this intent should be triggered. N/A
* Click **Save**.
---
# Source: https://docs.avaamo.com/user-guide/how-to/build-skills/create-skill/customize-your-skill/how-to/integrate-with-api-1.md
# Integrate
- [REST and SOAP API](/user-guide/how-to/build-skills/create-skill/customize-your-skill/how-to/integrate-with-api-1/rest-and-soap-api.md)
- [Hybrid SDK](/user-guide/how-to/build-skills/create-skill/customize-your-skill/how-to/integrate-with-api-1/hybrid-sdk.md)
---
# Source: https://docs.avaamo.com/user-guide/how-to/build-agents/create-universal-agent/intent-detection-and-routing.md
# Intent detection and routing
Universal agents detect the intent and route the conversation to the appropriate member that can fulfill the user’s request in the best possible way. It leverages the training imparted to the individual members for intent detection and hence no duplication of training is required. This provides a seamless experience to the user.
Agent routes requests to the appropriate member agent for simple Q\&A or multi-turn conversations, renders member responses inline, and also manages the conversation context. See [Context management](https://docs.avaamo.com/user-guide/how-to/build-agents/create-universal-agent/context-management), for more information.
{% hint style="success" %}
**Key point**: When you are in the transactional flow with a member agent and a user query is posted, then
* The user query is routed to the current member agent first for intent detection.
* If the user's intent does not match the current member agent's intent, only then it is routed to the rest of the member agents for further intent matching.
* If the conversation is already in a transactional flow and a query results in disambiguation, then the disambiguation options also are within the context of the member agent that is currently in the transactional flow. This setup allows the Universal agent to keep the conversation within the context of a member agent when there are shared intents between member agents. See [Disambiguation](https://docs.avaamo.com/user-guide/how-to/build-agents/create-universal-agent/disambiguation), for more information.
{% endhint %}
The following illustration depicts an "Acme Enterprise" Universal agent linked with independent virtual agents such as - Acme HR, Acme IT, and Acme Finance.

Each agent is trained independently. For example, the Acme HR agent has a Q\&A skill with intents and responses.

When a user query such as "When is the bonus paid this year?" is posted to the Acme Enterprise Universal agent, the Universal agent routes the user's intent to the appropriate member agent, Acme HR in this case, and renders the response in the Acme Enterprise assistant itself.

---
# Source: https://docs.avaamo.com/user-guide/overview-and-concepts/advanced-concepts/intent-execution-sequence.md
# Intent execution sequence
When a user posts a query to an agent, the agent understands and classifies the input and then selects an appropriate skill to engage with the user. This article explains the **priority of intent execution** at the agent level and at the dialog skill level. Further, in the dialog skill, it illustrates post-processing and skill response flow.
## **At agent level**
Avaamo Platform evaluates all the intents and the intent with the best possible match is considered. There are three skills considered during intent execution - Dialog, Q\&A, and Smalltalk. Further, a Dialog skill can be invoked using Custom Code or Training Phrases. You can also create Pre-Unhandled Dialog skills. See [Add invocation intent](https://docs.avaamo.com/user-guide/how-to/build-skills/create-skill/using-dialog-designer/create-new-skill/add-invocation-intent), for more information.
The following is the priority of the intent execution at the agent level:

### **Key points**
* At any point during the intent execution, when the user query does not match with intent, then the agent responds with a selection of closest intent options, which is referred to as disambiguation.
* If there are multiple Q\&A with the exact same query, then the response from the first matching skill is displayed.
* If you add Smalltalk questions in Q\&A skill, then intent matching is affected. Hence, it is recommended not to use Smalltalk questions in the Q\&A skill. See [Skills](https://docs.avaamo.com/user-guide/overview-and-concepts/skills), to learn more about different types of skills and their purpose.
### Order of execution of custom code intents at **the** agent level
At the agent level, for the skills with custom code as intent type at invocation intent, the order of execution is the same as the order of the creation of respective skills. \
Example:
* Skill A with custom code invocation intent - Created on 12th Dec 2021
* Skill B with custom code invocation intent - Created on 13th Dec 2021
In the above scenario, Skill A's custom code executes first and then followed by Skill B. However, you have the flexibility to define the weightage in the JS code as per your business requirement. You can assign weightage with any number between 0 and 1, for example, 0.2, 0.5. The custom code with the highest weightage is considered.
**Example**: Consider that you can have two Dialog skills with pre-unhandled intent. One that invokes another skill in your agent to get the response and another with your business website search. Based on the response received from each one of these, you can infer, assign weightage, and return weightage. The custom code with the highest weightage is considered.
### **Switching between single-turn and multi-turn conversations**
Dynamic Q\&A, Smalltalk, and a Dialog skill with a single node, and Answers are referred to as **single-turn conversations**. These are one-off questions and answers.
Dialog skill with multiple nodes and flows that requires back and forth agent user conversation to accomplish a particular task are referred to as **multi-turn conversations**.
In an agent-user interaction, it is quite common for a user to ask one-off questions or queries in between a Dialog multi-turn conversation. In such cases, the response if available for the one-off questions or queries is displayed. Post the response, when a user query is again posted, the conversation resumes from the node where it switched in the Dialog multi-turn conversation. This continues until a leaf node is reached in the Dialog skill.
**Example 1**:
Dialog skill 1:

Dialog skill 2:

Consider the following agent-user interaction,
1. User query -> "I want to find a doctor"
2. Dialog skill 1 is invoked and the control is now at node 1.1
3. User query -> "I want to refill my prescription"
4. Dialog skill 2 is invoked and the control is now at node 2.1
5. User query -> "Check for primary care physician in Boston area"
6. Conversation resumes at node 1.3 in Dialog skill 1

**Example 2**:
Dialog skill 1:

Dynamic Q\&A skill:

Consider the following agent-user interaction,
1. User query -> "I want to find a doctor"
2. Dialog skill 1 is invoked and the control is now at node 1.1
3. User query -> "What are the symptoms of flu?"
4. Dynamic Q\&A is invoked and the response from Q\&A is displayed.
5. User query -> "Check for primary care physician in Boston area"
6. Conversation resumes at node 1.3 in Dialog skill 1

## **At Dialog skill level**
In a Dialog skill, you can add the following types of intent for a node in the flow - Training Phrase, Entity from Invocation Intent, System Intent, or Custom Code. See [Add user intent](applewebdata://74CCEB77-913D-409C-9C05-3B021CA2A30A/@avaamo/s/v5/~/drafts/-LzKmdbdxTA2YT4BO1xi/how-to/build-skills/create-skill/using-dialog-designer/create-new-skill/add-user-intent), for more information.
If a Dialog skill is invoked at the agent level, then the Avaamo Platform executes the intent in the following priority within the Dialog skill:
{% hint style="info" %}
**Note:** This order of intent execution is applicable for nodes at the same level.
{% endhint %}

{% hint style="success" %}
**Key Point**: At any point during the intent execution, when the user query does not match with intent, then the agent responds with a selection of closest intent options, which is referred to as disambiguation.
{% endhint %}
## Post-Processing and skill response execution
In a dialog skill, during intent matching, you can add a post-processing script that is executed after the intent is invoked, and before displaying the skill response. In the post-processing script, you can also include certain flow control statements such as "goto\_node" that allows you to navigate to different nodes in the dialog flow. See [Build skill responses using script and code](https://docs.avaamo.com/user-guide/how-to/build-skills/create-skill/customize-your-skill), for more information.
The following illustration depicts the post-processing and skill response execution flow:

{% hint style="info" %}
**Note**: Post-processing is where the intent execution still continues after matching the invocation intent; hence, when post-processing is enabled at the invocation intent, the entity skipping is no longer relevant and not evaluated.
{% endhint %}
---
# Source: https://docs.avaamo.com/user-guide/ref/avaamo-platform-api-documentation/agent-api/intents.md
# Source: https://docs.avaamo.com/user-guide/overview-and-concepts/intents.md
# Intents and Training Data
An **intent** is an action in the user query that indicates what the user wishes to do.
As you build your agent and skills, you must train the agent to understand the user queries. Intents and training data are the basic building blocks of training your agent.
The quality of the intents and their training determines the quality of the agent's accuracy in understanding the user queries. Creating the right number of intents with the right number of training data samples for each intent is essential for a good user experience.
### Intent
In simple terms, the intent is a user's intention to act on something. For example, consider the following sentences about weather details:
```
Show me yesterday's weather.
How cold will it be tonight in Boston?
```
Here, all sentences are related to the same intent "Find Weather" expressed in different ways. Now, consider another example with the following user queries about insurance claims:
```
I met with an accident. Can you help me create a new claim?
I want to report a claim.
Would you help me with a new claim?
```
All sentences are related to the same intent "Report claim" expressed in different ways.
{% hint style="success" %}
**Key Points**:
* A single skill can understand and respond to one or multiple user intents. **Example**: A "Reset password" Dialog skill that responds to only one intent of steps required to reset password or a Q\&A skill that can comprise of multiple questions and responses.
* As a best practice, it is recommended to name your intents with a combination of a verb and a noun that helps to identify the action and the object on which the action is performed. **Example**: Order Pizza, Find weather, Report claim.
{% endhint %}
### Training data
For an agent to respond to user queries, each intent must be trained with specific sentences that are used as representative phrases for user queries. This set of sentences is referred to as the **Training data set**.
{% hint style="success" %}
**Key Points**:
* Training data are not user queries. User queries are queries posted by the user to the agent. Training data is a set of sentences that are used to train the intent for responding to user queries.
* Training data are also referred to as Training phrases or Training utterances.
{% endhint %}
**Example**: The following table lists a few examples of intent with training phrases:
Intent Training Phrases Order Pizza I want to order veg cheese pizza with French Fries. Find weather I want to check Boston's weather tomorrow. Report a new claim I want to report a claim for policy number 08765434546.
{% hint style="success" %}
**Key Points**:
* An intent represents a specific named action identified by its training data.
* See [Intent and training phrases](https://docs.avaamo.com/user-guide/how-to/build-skills/design-skill#intent-and-training-phrases), to learn about the recommended best practices.
{% endhint %}
### Types of Intent
The following lists different types of intents that can be specified in the Avaamo Platform:
Intent Type Description Training Phrases These are the inline user intents (utterances or phrases) in the conversation flow.
Example : I want to order pizza, I want to order a large cheese pizza.
Entity These are intents with entities .
Example : Consider that in the Order Pizza skill, the first message asks the user for the type of pizza (veg or non-veg). In return, you can specify an intent with these entities to process the user response and proceed further in the conversation flow.
System Intent
These are the system intents with pre-defined training phrases already available in the platform.
Example : Consider that you wish to respond to the user's frustration by transferring to a live agent or via collecting feedback. You can create a user intent with frustration system intent and add a skill response to transfer to a live agent.
Custom Code
These are intents with custom JavaScript code.
Example : You can create a custom intent with a regular expression to match the pizza order number entered by the user. Alternatively, you can also create an entity with a regular expression.
Pre-unhandled You can define the pre-unhandled intents for the agent to give users a few more options and help with the query instead of just responding with an unhandled intent. Unhandled By default, for all the user queries that do not get matched to any predefined intents in the agent, the agent has a node within the flow to respond to the user's query with statements like -
"I am sorry I do not understand." "I am sorry. I don't have an answer for that."
These classify as unhandled queries as ideally, the user's query goes unanswered.
See [Add user intent](https://docs.avaamo.com/user-guide/how-to/build-skills/create-skill/using-dialog-designer/create-new-skill/add-user-intent), for more information.
{% hint style="info" %}
**Note**: The quality of the intents and their training determines the quality of the agent's accuracy in understanding the user queries. See [Design skill](https://docs.avaamo.com/user-guide/how-to/build-skills/design-skill), for more information on intent training guidelines.
{% endhint %}
### Disambiguation
When a user intent does not match a specific intent, the agent responds with a selection of closest intent options, referred to as a disambiguation intent. If the user selects and responds with one of the options, the query is successful else it is categorized as a failed disambiguation query.

Here, we have queried "order". The agent has responded with the intents that support "order". This is categorized as disambiguation. If you select one of the above options, the query is a successful disambiguation query and if you select "none of these" then it is a failed disambiguation query.
{% hint style="info" %}
**Notes**:
* The top 5 closest disambiguations is displayed to the user.
* Smalltalk does not participate in disambiguation.
{% endhint %}
### Wild card
You can add a wild card for the agent to avoid responding with unhandled intent. These wild card intents are saved with no training data. **Example**: In scenarios, where you are validating certain user input, you can handle invalid inputs in a wild card. In the wild card, you can, for example, navigate to specific nodes in the flow. If you are not using a wild card, then the invalid inputs go to an unhandled node. The wild card allows developers to have better flow control for handling such cases.
---
# Source: https://docs.avaamo.com/user-guide/how-to/build-skills/create-skill/using-avaamo-answers-1/intro-outro-messages.md
# Intro Outro Messages
Intro Outro messages are friendly messages that you would want the agent to display before and after answering a question. The purpose of these messages is to make the conversation experience engaging and pleasant with the user.
For example, when asked a question, you can configure the agent to say something like "Sure, I can help you with that" before answering the question.

### Intro Messages
Use Intro messages to configure friendly messages to be displayed before the actual answer or response is displayed to the user's question. Examples of intro messages can be:
* I can assist you with that.
* Let me look that up for you.

### Outro Messages
Use Outro messages to configure friendly messages to be displayed after the actual answer or response is displayed to the user's question. Examples of outro messages can be:
* I hope this helped.
* Is there anything else that i can help you with?
---
# Source: https://docs.avaamo.com/user-guide/how-to/build-agents/configure-agents/introduce-agent-get-started.md
# Get started screen
The **Get Started** message is displayed when a user interacts with the agent for the first time. The message is designed to help introduce and describe your agent as well as provide branding opportunities for first-time users. This message is not displayed for returning users. This is an optional configuration.
{% hint style="info" %}
**Notes**:
* Ensure you have met all the [pre-requisites](https://docs.avaamo.com/user-guide/quick-start-tutorials/pre-requisites).
* You can configure an agent immediately after creating an agent. See [Create agent](https://docs.avaamo.com/user-guide/how-to/build-agents/add-skills), for more information.
* If you wish to edit an agent, then:
* In the **Avaamo Platform UI**, navigate to the **Agents** tab in the top menu. Search and open the required agent. See [Search agents](https://docs.avaamo.com/user-guide/how-to/manage-agents/other-common-actions#search-agents), for more information.
* Click **Edit** to unlock the agent before editing.
{% endhint %}
There are two panels on the **Get Started** page, the right panel is a preview of how the configuration is displayed in your agent and the left panel is where you can configure details.
**To configure the Getting started message**:
* In the **Agent** page, navigate to the **Configure -> Get started screen** option in the left navigation menu.
* Move the slider to **Yes** to **Enable** the feature.
* Specify the following details:
* **Showcase image**: You can upload an image such as your brand image or company banner in the getting started message using the showcase image. Move the slider to **Yes** to **Enable** the feature.
* Note that the optimal size of the image is 720 x 560px.
* Select **Show the welcome message as a notification**, to display the welcome message as a notification pop-up. Note that this is displayed for all users and not only returning users.
* **Show agent name and description**: Select this option if you wish to display the agent name and description in the **Get started screen.**
* **Show agent avatar:** Select this option if you wish to display the agent avatar in the **Get started screen.**
* **Welcome message**: Enter a welcome message for the first-time users of the agent. Use this to specify the company name, tagline, or any such information to describe your agent. This also provides a notification sound, when the agent is loaded.
* **Disclaimer**: Enter the disclaimer title and description, if any. Use this to specify and company disclaimers in your agent for first-time users.

{% hint style="info" %}
**Note:** The notification sound is activated when the agent is loaded for the first time. However after the page is reloaded, it is activated, only when the user interacts with any part of the webpage where the agent widget is deployed.
{% endhint %}
---
# Source: https://docs.avaamo.com/user-guide/recent-releases/release-notes-v8.0/introducing-advanced-agent.md
# Introducing "Advanced agent"
In this release, a new agent called the **`Advanced Agent`** has been introduced.
In its fundamental nature, an `Advanced agent` achieves the "true" objective of a "Conversational Assistant" by involving the user in a dialogue closely resembling human interaction.
The `Advanced Agent` uses our next-generation inference engine to provide a better user experience. It takes on a personalized approach, understanding nuances in the conversation, transforming interactions from a robotic demeanor to a more pleasurable and "conversational" experience for the user.
To the developers, this translates to **`a significant reduction in the amount of training data`** needed for the agent to comprehend user queries. You only have to train your agent with minimal meaningful user queries. The `Advanced agent` is capable of comprehending numerous nuances and variations in user queries.
An `Advanced agent`, hence, stands out as distinctly superior, more intelligent, and more personalized compared to a `Standard agent`. The following illustrations depict a sample comparison of training data between a `Standard agent` and an `Advanced agent`:
| Standard agent | Advanced agent |
| :--------------------------------------------------------------------------------------------------------------------------------------------------------------------------------------------------------------------------------------------------------: | :--------------------------------------------------------------------------------------------------------------------------------------------------------------------------------------------------------------------------------------------------------: |
| Appointment Reminder Vaccination reminder Reschedule Preventive care reminder Education Self-care
| Password updates Outage alerts Onboarding training Benefits renewal Certificate reminders Wellness campaigns
| Offers and Promotions Subscription reminders Scheduled maintenance Order updates
|
### Self-serviceable "Campaign Composer"
Outreach comes with a Self-serviceable "Campaign Composer" that allows users to quickly set up a campaign in a guided, easy-to-use user interface. You can build and configure campaigns using the Campaign Composer with just 3 steps - Configure, Add Message, and Activate.
The "Campaign Composer" offers different scheduling options for you to send a campaign message immediately or schedule at a predefined agreed time or with a recurring option.
" %}
Introduction to v5.0 and Answers
{% endfile %}
## Video
{% embed url="" %}
## Useful links
* [What's new in Avaamo Conversational AI Platform v5.0?](https://docs.avaamo.com/user-guide/release-notes/v5.0-to-v5.8.x-releases/whats-new)
* [Release notes v5.0](https://docs.avaamo.com/user-guide/release-notes/v5.0-to-v5.8.x-releases/release-notes)
---
# Source: https://docs.avaamo.com/user-guide/how-to/build-agents/configure-agents/deploy/ios-apps.md
# iOS
You can deploy the agents built on the Avaamo Platform into your iOS channel to facilitate easy communication with iOS mobile users. This helps to clearly distinguish and monitor the user interactions from the iOS channel separately. See [Channels in Analytics](https://docs.avaamo.com/user-guide/how-to/build-agents/monitor-and-analyze/analytics), for more information.
{% hint style="info" %}
**Note**: You can connect to a channel only if it is enabled for your account or company. If you wish to enable a channel, then contact Avaamo Support for further assistance. Note that only the web channel is enabled by default.
{% endhint %}
### Channel settings
{% hint style="success" %}
**Key points**:
* All the properties, parameters, and callback functions as applicable for the web channel are also available for the iOS channel. See [Web channel](https://docs.avaamo.com/user-guide/how-to/build-agents/configure-agents/deploy/web-channel), for more information.
* After you configure the channel settings, you can view, edit, disconnect and delete the channel settings as per your requirements. See [Manage channel settings](https://docs.avaamo.com/user-guide/how-to/build-agents/configure-agents/deploy/manage-channel-settings), for more information.
* You can also deploy your agent on multiple instances of the iOS channel similar to the web channel. See [Deploy in multiple web channel instances](https://docs.avaamo.com/user-guide/how-to/build-agents/configure-agents/deploy/web-channel/deploy-and-test-web-channel), for more information.
{% endhint %}
The following lists a few properties that distinguish web channel from iOS channel:
* **Advanced -> iOS page URL:** Indicates the page where the agent is deployed for iOS mobile users. See [Suggested steps to deploy](#suggested-steps-to-deploy), for more information on this feature can be useful.

Properties Description iOS page URL Indicates the page where the agent is deployed for iOS mobile users. Embed code Script that must be embedded in the iOS apps to render the agent. Note that this URL is different from the web channel URL.
* **Deployment -> Copy your embed code**: Script that must be embedded in the iOS channel to render the agent. Note that this URL is different from the web channel URL. See [Suggested steps to deploy](https://docs.avaamo.com/user-guide/how-to/build-agents/configure-agents/android-apps#suggested-steps-to-deploy), for more information on this feature can be useful.

### Suggested steps to deploy
Consider that you have a website where you are required to deploy your agent. You wish to monitor the user interactions from the web channel and iOS channel separately for analytics. You can deploy your agent in both the channels as follows:
* Create a blank page that has the same base URL as the website. **Example**: If your website is "".
* In the iOS channel page, specify the URL "" in the **iOS page URL**.
* Deploy your agent in the page "" using the **Embed code** in the iOS channel.
* Test your agent from any iOS device such as an iPhone or iPad to verify the implementation.
* In the main website ">;
var custom_property = '';
var url = bot_url + "&custom_properties[userdata]=usernotlogged";
var chatBox = new AvaamoChatBot({
url: url
});
chatBox.load(function (avaamo) {
avaamo.onChatBoxClose = function () {
window.Avaamo.sendMessage("#clear");
}
});
}
else{
var AvaamoChatBot = function(t) {
function o(t, o) {
var n = document.createElement("script");
n.setAttribute("src", t), n.onload = o, document.body.appendChild(n)
}
return this.options = t || {}, this.load = function(t) {
o(this.options.url, function() {
window.Avaamo.addFrame(), t && "function" == typeof(t) && t(window.Avaamo)
})
}, this
};
var bot_url = <>;
var custom_property = '';
var url = bot_url + "&custom_properties[userdata]=usernotlogged";
var chatBox = new AvaamoChatBot({
url: url
});
chatBox.load(function (avaamo) {
avaamo.onChatBoxClose = function () {
window.Avaamo.sendMessage("#clear");
}
});
}
```
---
# Source: https://docs.avaamo.com/user-guide/how-to/build-agents/debug-agents/js-errors.md
# JS errors
In case you have included JavaScript code in your agent, you can check for script errors (if any) in the **JS errors** page. Here, you can view errors related to SSML, live agent, channel, Regex entities, and JS errors across nodes. The link to the **JS errors** page is under **Debug** on the left navigation pane.
.
---
# Source: https://docs.avaamo.com/user-guide/how-to/build-agents/create-universal-agent/key-terms.md
# Source: https://docs.avaamo.com/user-guide/llamb/llamb-filters/key-terms.md
# Source: https://docs.avaamo.com/user-guide/llamb/key-terms.md
# Key terms
This article introduces a few key terms specific to the LLaMB product in the Avaamo Conversational AI Platform:
* **LLaMB**: `LLaMB - Large Language Model for Business` is an exclusive product offering from the Avaamo Conversational AI Platform to harness the power of enterprise content coupled with Generative AI in your agents. It is a full stack, low code toolset to build, deploy, and maintain LLM ([Large Language Model](https://en.wikipedia.org/wiki/Large_language_model)) applications at enterprise scale. See [Overview - Key features](https://docs.avaamo.com/user-guide/llamb/overview-key-features), for more information on LLaMB.
* **Generations**: An agent can either respond to users by referencing a previously stored answer (in its cache), or by using an LLM. Only the LLM-based responses count towards your generation quota. Generations are displayed in the `LLaMB -> Usage` page at the account level. See [Generation Usage](https://docs.avaamo.com/user-guide/how-to/manage-platform-settings/usage-reports/llamb-usage#generation-usage), for more information.
* **Cached responses**: For faster results and better efficiency the responses generated by LLaMB are cached. If a user asks the same or similar query, then instead of generating a response from LLM, the cached response is displayed to the user. See [Generation Usage](https://docs.avaamo.com/user-guide/how-to/manage-platform-settings/usage-reports/llamb-usage#generation-usage), for more information.
---
# Source: https://docs.avaamo.com/user-guide/avaamo-agent-assist/agent-assist-widget/ai-assist-view/knowledge-assist.md
# Knowledge Assist
The `Knowledge Assist` tool allows you to manually ask any query at any time during or after a call, giving you the ability to search the entire knowledge repository from a single screen within the widget. This feature empowers you to quickly find relevant information outside of the automated recommendations.
The information retrieved through `Knowledge Assist` is presented similarly to the `Recommendations View`. You receive a summarized answer generated from one or more knowledge articles, along with references to the source articles. Additionally, you have the option to provide feedback on the accuracy and quality of the provided information.
For example, if a user asks about the terms and conditions regarding maternity leave, the agent can go to the Knowledge Assist tab, enter the query, and obtain an accurate response.
This feature provides agents with prompt answers during live calls, using a knowledge base built with the LLaMB in the Avaamo platform. This is populated with structured content, making recommendations both efficient and relevant. Refer [Before you begin](https://docs.avaamo.com/user-guide/avaamo-agent-assist/get-started/before-you-begin), for more information.
---
# Source: https://docs.avaamo.com/user-guide/skills/knowledge-skill.md
# Knowledge skill
- [Create knowledge skill](/user-guide/skills/knowledge-skill/create-knowledge-skill.md)
- [Add content to knowledge skill](/user-guide/skills/knowledge-skill/add-content-to-knowledge-skill.md)
- [Before you begin](/user-guide/skills/knowledge-skill/add-content-to-knowledge-skill/before-you-begin.md)
- [SharePoint](/user-guide/skills/knowledge-skill/add-content-to-knowledge-skill/sharepoint.md)
- [Pre-requisites](/user-guide/skills/knowledge-skill/add-content-to-knowledge-skill/sharepoint/pre-requisites.md)
- [Step 1: Select the content source type](/user-guide/skills/knowledge-skill/add-content-to-knowledge-skill/sharepoint/step-1-select-the-content-source-type.md): The first step in using DataSync AI is to choose the type of content source from which information must be gathered or accessed.
- [Step 2: Configure content source and ingest content](/user-guide/skills/knowledge-skill/add-content-to-knowledge-skill/sharepoint/step-2-configure-content-source-and-ingest-content.md)
- [Configure connection](/user-guide/skills/knowledge-skill/add-content-to-knowledge-skill/sharepoint/step-2-configure-content-source-and-ingest-content/configure-connection.md)
- [Select sites](/user-guide/skills/knowledge-skill/add-content-to-knowledge-skill/sharepoint/step-2-configure-content-source-and-ingest-content/select-sites.md)
- [Preview artifacts](/user-guide/skills/knowledge-skill/add-content-to-knowledge-skill/sharepoint/step-2-configure-content-source-and-ingest-content/preview-artifacts.md)
- [Set document attributes](/user-guide/skills/knowledge-skill/add-content-to-knowledge-skill/sharepoint/step-2-configure-content-source-and-ingest-content/set-document-attributes.md)
- [ServiceNow](/user-guide/skills/knowledge-skill/add-content-to-knowledge-skill/servicenow.md)
- [Pre-requisites](/user-guide/skills/knowledge-skill/add-content-to-knowledge-skill/servicenow/pre-requisites.md)
- [Step 1: Select the content source type](/user-guide/skills/knowledge-skill/add-content-to-knowledge-skill/servicenow/step-1-select-the-content-source-type.md): The first step is to choose the type of content source from which information must be gathered or accessed.
- [Step 2: Configure content source and ingest content](/user-guide/skills/knowledge-skill/add-content-to-knowledge-skill/servicenow/step-2-configure-content-source-and-ingest-content.md)
- [Configure connection](/user-guide/skills/knowledge-skill/add-content-to-knowledge-skill/servicenow/step-2-configure-content-source-and-ingest-content/configure-connection.md)
- [Filter articles](/user-guide/skills/knowledge-skill/add-content-to-knowledge-skill/servicenow/step-2-configure-content-source-and-ingest-content/filter-articles.md)
- [Set Document Attributes](/user-guide/skills/knowledge-skill/add-content-to-knowledge-skill/servicenow/step-2-configure-content-source-and-ingest-content/set-document-attributes.md)
- [Website](/user-guide/skills/knowledge-skill/add-content-to-knowledge-skill/website.md)
- [Pre-requisites](/user-guide/skills/knowledge-skill/add-content-to-knowledge-skill/website/pre-requisites.md)
- [Step 1: Select the content source type](/user-guide/skills/knowledge-skill/add-content-to-knowledge-skill/website/step-1-select-the-content-source-type.md): The first step in using DataSync AI is to choose the type of content source from which information must be gathered or accessed.
- [Step 2: Configure content source and ingest content](/user-guide/skills/knowledge-skill/add-content-to-knowledge-skill/website/step-2-configure-content-source-and-ingest-content.md)
- [Configure connection](/user-guide/skills/knowledge-skill/add-content-to-knowledge-skill/website/step-2-configure-content-source-and-ingest-content/configure-connection.md)
- [Filter web pages](/user-guide/skills/knowledge-skill/add-content-to-knowledge-skill/website/step-2-configure-content-source-and-ingest-content/filter-web-pages.md)
- [Set document attributes](/user-guide/skills/knowledge-skill/add-content-to-knowledge-skill/website/step-2-configure-content-source-and-ingest-content/set-document-attributes.md)
- [Files](/user-guide/skills/knowledge-skill/add-content-to-knowledge-skill/files.md)
- [Pre-requisites](/user-guide/skills/knowledge-skill/add-content-to-knowledge-skill/files/pre-requisites.md)
- [Step 1: Select the content source type](/user-guide/skills/knowledge-skill/add-content-to-knowledge-skill/files/step-1-select-the-content-source-type.md): The first step in using DataSync AI is to choose the type of content source from which information must be gathered or accessed.
- [Step 2: Configure content source and ingest content](/user-guide/skills/knowledge-skill/add-content-to-knowledge-skill/files/step-2-configure-content-source-and-ingest-content.md)
- [Configure connection](/user-guide/skills/knowledge-skill/add-content-to-knowledge-skill/files/step-2-configure-content-source-and-ingest-content/configure-connection.md)
- [Upload files](/user-guide/skills/knowledge-skill/add-content-to-knowledge-skill/files/step-2-configure-content-source-and-ingest-content/upload-files.md)
- [Set Document Attributes](/user-guide/skills/knowledge-skill/add-content-to-knowledge-skill/files/step-2-configure-content-source-and-ingest-content/set-document-attributes.md)
- [Confluence](/user-guide/skills/knowledge-skill/add-content-to-knowledge-skill/confluence.md)
- [Pre-requisites](/user-guide/skills/knowledge-skill/add-content-to-knowledge-skill/confluence/pre-requisites.md)
- [Step 1: Select the content source type](/user-guide/skills/knowledge-skill/add-content-to-knowledge-skill/confluence/step-1-select-the-content-source-type.md): The first step is to choose the type of content source from which information must be gathered or accessed.
- [Step 2: Configure content source and ingest content](/user-guide/skills/knowledge-skill/add-content-to-knowledge-skill/confluence/step-2-configure-content-source-and-ingest-content.md)
- [Configure connection](/user-guide/skills/knowledge-skill/add-content-to-knowledge-skill/confluence/step-2-configure-content-source-and-ingest-content/configure-connection.md)
- [Filter articles](/user-guide/skills/knowledge-skill/add-content-to-knowledge-skill/confluence/step-2-configure-content-source-and-ingest-content/filter-articles.md)
- [Set Document Attributes](/user-guide/skills/knowledge-skill/add-content-to-knowledge-skill/confluence/step-2-configure-content-source-and-ingest-content/set-document-attributes.md)
- [Testing and validation](/user-guide/skills/knowledge-skill/add-content-to-knowledge-skill/testing-and-validation.md)
- [Common actions](/user-guide/skills/knowledge-skill/add-content-to-knowledge-skill/common-actions.md)
- [View and edit knowledge](/user-guide/skills/knowledge-skill/view-and-edit-knowledge.md)
---
# Source: https://docs.avaamo.com/user-guide/overview-and-concepts/advanced-concepts/language-pack.md
# Language pack
Typically, in any global business, it is a necessity to design and build assistants or agents that can interact with the users in their local language. The Avaamo platform provides multilingual support for agent development in different languages, with English (en-US) as the default language.
In the Avaamo Platform, you can add multiple languages to the agent, so that the agent can respond in different languages as per your business requirement both in text and voice.
## How does it work?
Adding a language to your agent is a simple three-step process:
* [Step 1: Configure or add languages in your agent](#step-1-configure-or-add-languages-in-your-agent)
* [Step 2: Customize translations](#step-2-customize-translations)
* [Step 3: Test your agent](#step-3-test-your-agent)
{% hint style="success" %}
**Key Point**: Agent conversation starts with one language and continues in the same language. If you wish to change the language of the agent response, say, based on the user's request or response, then you can identify and switch the language in your agent.
See [Step 3: Test your agent](#step-3-test-your-agent), for more information.
{% endhint %}
### Step 1: Configure or add languages in your agent
The first step is to add languages to your agent in the **Agent -> Configuration -> Languages** page. Consider that in your Pizza agent, you wish to add the French language to your agent.
* In the **Agent page**, navigate to the **Configuration -> Language** tab option in the left navigation menu.
* Click **Add languages** and select the **French** language from the dropdown.
* Click **Save** to save the agent language configurations.

* When you add a language, all the agent responses are automatically translated into the corresponding language. **Example**: In the Pizza agent, you can check the translated response of the Greeting skill.
* Click the **Greetings skill**.
* In the skill response, change the language to French (fr-FR). You can view the translated response of the greetings message.

See [Add languages](https://docs.avaamo.com/user-guide/how-to/build-agents/configure-agents/add-languages) for more information on how to add and manage languages in your agent.
### Step 2: Customize translations
You can add custom translations to the response based on your requirement. Custom translation can be added in the following ways:
Where? When? Agent -> Configuration -> Languages page Use this to provide translations for all sentences and texts used by the agent. Examples: text used in skills, persistent menu, live agent, etc. Note that in all the cases, node-level translation has the highest priority. This implies that if you have the same translated text at the agent and the node-level, then the node-level translated response is displayed. Skill responses
Consider that you wish to customize the greeting message in your Pizza agent. The default greeting message in English is "Welcome to MacPizza. How can I help you today?" and this is translated to "Bienvenue à MacPizza. Comment puis-je vous aider aujourd'hui?". You wish to customize to "Bonjour, bienvenue chez MacPizza. Comment puis-je vous aider aujourd'hui?."
* In the **Agent page**, navigate to the **Configuration -> Language** tab.
* Click **Add translation** to enter the English text and corresponding translated text.

{% hint style="info" %}
**Note**: To customize the response of the Greeting skill, instead of adding the custom translation in the **Agent -> Configuration -> Languages** page, you can add the same in the Greeting skill response. See [Language-specific responses](https://docs.avaamo.com/user-guide/how-to/build-skills/create-skill/using-dialog-designer/create-new-skill/build-skill-responses/skill-message-window-overview#language-specific-responses), for more information.
{% endhint %}
### Step 3: Test your agent
You can use the **Language.switch** command to switch the language as required. Note that you can only switch to those languages that are configured in your agent. See [Language.switch](https://docs.avaamo.com/user-guide/how-to/build-skills/create-skill/customize-your-skill/reference-library/language.switch), for more information.
Consider that in your Pizza agent, based on certain criteria you wish to switch language to French.
* Add a JS node in the Greeting message and switch the language as required - `Language.switch('fr-FR');`

* Click OK.
* Click **Save** to save your agent
* Test your agent using the **Agent simulator** from the bottom-right corner. You can now view the custom-translated greeting message in French.
>');
**Example**:
Language.switch('fr-FR');
{% hint style="info" %}
**Notes**:
* You can only switch to those languages that are configured in your agent. See [Add languages](https://docs.avaamo.com/user-guide/how-to/build-agents/configure-agents/add-languages), for more information.
* The Language code must be according to IETF language tag standards. Example: en-US, fr-FR, hi-IN
{% endhint %}
---
# Source: https://docs.avaamo.com/user-guide/how-to/build-agents/learning-continuous-improvement.md
# Learning - Continuous Improvement
- [Overview](/user-guide/how-to/build-agents/learning-continuous-improvement/overview.md)
- [User feedback](/user-guide/how-to/build-agents/learning-continuous-improvement/feedback.md)
- [Query analyzer (Deprecated)](/user-guide/how-to/build-agents/learning-continuous-improvement/query-analyzer-deprecated.md)
- [Agent diagnostics (Deprecated)](/user-guide/how-to/build-agents/learning-continuous-improvement/agent-diagnostics-deprecated.md)
---
# Source: https://docs.avaamo.com/user-guide/how-to/build-skills/create-skill/customize-your-skill/how-to/build-dynamic-skill-response/list-view.md
# ListView response (Javascript)
You can add a customized list view using JavaScript in an agent's response.
{% hint style="info" %}
**Notes**:
* There is a 191 character limit for all the user-defined text fields.
* If the agent response contains sensitive PII data such as name, account number, password, then it is recommended to mask the agent responses to protect user privacy. See [Agent response masking](https://docs.avaamo.com/user-guide/overview-and-concepts/advanced-concepts/information-masking#masking-agent-responses), for more information.
{% endhint %}
### Syntax
Broadly, the following is the syntax to add a customized list view:
```yaml
"list_view": {
*"top_element_style": "<>",
"items": [{
"title": "<>",
*"subtitle": "<>",
*"image_path": "<>",
"links": [{
<>
},...]
},...]
}
* - Indicates optional parameter
… - Indicates one or more parameter
```
Attribute Description Type top_element_style Indicates the style type for the list view. Supported values - Large, Compact.
Default value is Large.
String items Indicates the array of items in the list view. You can add upto 50 items to the list. Each item contains the following details:
title: Title of the item subtitle: Sub-title of the item image_path: Image used for the item. You can add an image similar to the way you add an image to a card. See Card Images , for more information. links: An array of customized card links such as Post Message, Web Page, Deep Link, and Web View. Array links Indicates an array of customized list view links such as Post Message, Web Page, Deep Link, and Web View.
All the link types supported for card links are available in the list view also. See Card Links , for more information.
An array of JSON key-value pairs.
### Example
The following is a sample JS for list view:
```yaml
return [{
"list_view": {
"top_element_style": "compact",
"items": [{
"title": "Coke",
"subtitle": "All Chilled",
"links": [{
"type": "post_message",
"title": "Get a pack of 5",
"value": "coke"
}]
},
{
"title": "Coffee",
"subtitle": "Cold",
"links": [{
"type": "post_message",
"title": "Buy one get one",
"value": "coffee"
}]
}
]
}
}];
```
In the agent, the following response is displayed:

---
# Source: https://docs.avaamo.com/user-guide/live-agent-console/live-agent-console-rest-apis/live-agent-changelog-api.md
# Live Agent Changelog API
## Get live agent changelog
`GET` `https://cx.avaamo.com/api/v1/cap/change_logs.json`
Captures all the configuration changes performed by the live agent (such as live agent status updates) and the supervisors (such as configuration changes in Teams, Routing rules, or Quick responses).
Note that the live agent change log API captures only configuration changes in the Live agent console. See [Live Sessions ](https://docs.avaamo.com/user-guide/live-agent-console/supervisor/live-sessions)and [Reports](https://docs.avaamo.com/user-guide/live-agent-console/supervisor/reports) page to view transactional changes in the Live agent console such as incoming chat requests, wait time, and conversation duration.
#### Query Parameters
| Name | Type | Description |
| ----------- | ------- | ----------------------------------------------------------------------------------------------------------------------------------------------------------------------------------------------------------------------------------------------------------------------------------------------------- |
| start\_time | number | Timestamp from which the records are fetched.
If you specify timetoken and not end\_time, then the latest 5 entries up to the specified timetoken are fetched.
Specify UNIX Epoch Timestamp in milliseconds.
|
| end\_time | number | Timestamp until which the records are fetched. Default is the current timestamp.
Specify UNIX Epoch Timestamp in milliseconds.
|
| page | integer | Page from which the entries must be fetched.
|
| per\_page | integer | Number of entries fetched per page.
|
| actions | String | Actions in an live agent for which you wish to get changelog.
Supported values are: update, create, destroy
By default, all actions are considered. You can also specify multiple resources in a comma-separated list.
Example: actions=update,create
|
#### Headers
| Name | Type | Description |
| ---------------------------------------------- | ------ | ---------------------------------------------------------------------------------------------------------------------------------------------------------------------------------------------------------------------------------------------------------------------------------------------------------------------------------------------------------------------------------------------------------------------------------------------- |
| access-token\* | string | User access token. Both live agents and supervisors can access the changelogs.
You can get the user access token from the Settings -> Users page. See Users or Groups , for more information.
|
{% tabs %}
{% tab title="200 Sample Reponse" %}
{% code overflow="wrap" %}
```json
{
"current_page": 1,
"per_page": 1,
"total_entries": 3,
"total_pages": 3,
"time_token": 1699347493.7744794,
"entries": [
{
"id": 2202442,
"resource": {
"id": 739,
"type": "User"
},
"action": "update",
"changelog": "Donna Miller updated User Donna Miller status from 'offline' to 'active",
"timestamp": 1699264790,
"dashboard_user": {
"id": 739,
"display_name": "Donna Miller",
"email": "donna@avaamo.com"
}
}
]
}
```
{% endcode %}
{% endtab %}
{% endtabs %}
{% hint style="info" %}
**Note**: For optimal API performance, the recommended time duration for fetching data from any of the REST APIs that support a date range or time period is 7 days.
{% endhint %}
### Code request snippets
{% tabs %}
{% tab title="cURL" %}
{% code overflow="wrap" %}
```javascript
curl --location --request GET 'https://cx.avaamo.com/api/v1/cap/change_logs.json?per_page=1' \
--header 'Content-Type: application/json' \
--header 'access-token: xxxxxxxxx9a34a44a838af10fxxxxxxx'
```
{% endcode %}
{% endtab %}
{% tab title="node.js" %}
```javascript
var request = require('request');
var options = {
'method': 'GET',
'url': 'https://cx.avaamo.com/api/v2/outreach/change_logs?per_page=1',
'headers': {
'Content-Type': 'application/json',
'access-token': 'xxxxxxxxx9a34a44a838af10fxxxxxxx'
}
};
request(options, function (error, response) {
if (error) throw new Error(error);
console.log(response.body);
});
```
{% endtab %}
{% endtabs %}
### Response attributes
The following is a sample response of a successful API request:
```json
{
"current_page": 1,
"per_page": 1,
"total_entries": 3,
"total_pages": 3,
"time_token": 1699347493.7744794,
"entries": [
{
"id": 2202442,
"resource": {
"id": 739,
"type": "User"
},
"action": "update",
"changelog": "Donna Miller updated User Donna Miller status from 'offline' to 'active",
"timestamp": 1699264790,
"dashboard_user": {
"id": 739,
"display_name": "Donna Miller",
"email": "donna@avaamo.com"
}
}
]
}
```
In the response, the following attributes are returned:
Attribute Description Type current_page Indicates the page from which the entries are fetched. Integer per_page Indicates the number of entries fetched per page. Integer total_entries Indicates the total number of entries in the live agent changelog. Integer total_pages Indicates the total number of pages calculated using per_page. Note that total_entries = per_page * total_pages Integer time_token Indicates the timestamp at which the API response is returned in seconds. UNIX epoch timestamp entries Indicates an array of change logs fetched from the live agent. Number of entries in the array = Number specified in per_page parameter. JSON key-value pairs
#### entries
Indicates an array of change logs fetched from the campaign. Each array contains the following attributes:
Attribute Description Type id Indicates a unique identifier for the changelog entry. Integer resource -> id Indicates a unique identifier of the resource for which the changelog is listed such as the live agent identifier, Teams identifier, Routing rule identifier, or Quick response identifier. Integer resource -> type Indicates the type of resource for which the changelog is applicable. String action Indicates the action such as create, update, destroy for which the changelogs are retrieved. String changelog Indicates the actual change that occurred for this entry.
This is a user-friendly description to help you identify the type of change..
String timestamp Indicates the timestamp of when the changelog was created in seconds.
This is the timestamp when the changes for the campaign are persistent in the database.
UNIX epoch timestamp dashboard_user -> id Indicates the identifier of the user who is the modifier of the resource. Integer dashboard_user -> display_name Indicates the display name of the user who is the modifier of the resource. String dashboard_user -> email Indicates the email of the user who is the modifier of the resource. String
### Examples
The following table lists a few sample use cases with query parameters:
Use-case Query Parameter Get changelogs within a specified period start_time: Specify the from timestamp in epoch format such as 1579149424 end_time: Specify the to timestamp in epoch format such as 1579149436 Example : https://cx.avaamo.com/api/v1/cap/change_logs.json?start_time=1579149424&end_time=1579149436
Get changelogs using pagination page: Specify the page from which you wish to fetch records. By default, the value is 1. per_page: Specify the number of entries per page. By default, the value is 25. Example :
https://cx.avaamo.com/api/v1/cap/change_logs.json?page=5&per_page=2
Here, per_page * total_pages = total_entries
Get changelogs of all updated campaign records within a specified period start_time: Specify the from timestamp in epoch format such as 1579149424 end_time: Specify the to timestamp in epoch format such as 1579149436 action: Specify update Example : https://cx.avaamo.com/api/v1/cap/change_logs.json?start_time=1579149424&end_time=1579149436&actions=update
---
# Source: https://docs.avaamo.com/user-guide/live-agent-console/live-agent-console-rest-apis.md
# Live agent console - REST APIs
- [Live Agent Changelog API](/user-guide/live-agent-console/live-agent-console-rest-apis/live-agent-changelog-api.md)
---
# Source: https://docs.avaamo.com/user-guide/live-agent-console/live-agent/live-agent-translation.md
# Live agent translation
{% hint style="info" %}
**Pre-requisite:** The supervisor must ensure the **Enable Live Agent Translation** option is enabled for the live agents. See [Live Agents](https://docs.avaamo.com/user-guide/supervisor/live-agents#enable-translation-for-live-agents), for more information.
{% endhint %}
Avaamo Platform provides the capability to build virtual assistants in 100+ languages such as French, Arabic, Chinese, Polish, and many more. This enables the users to converse with the virtual assistant in their local language making the experience more personal and enriching. See [Web - supported languages](https://docs.avaamo.com/user-guide/how-to/build-agents/configure-agents/deploy/web-supported-languages) and [Language pack](https://docs.avaamo.com/user-guide/overview-and-concepts/advanced-concepts/language-pack), for more information.
Now, consider a case where a user conversing with the virtual assistant in a local language, wishes to connect to a live agent. Ideally, the users must be connected to a live agent who understands the same local language for an effective conversation. This process can have many challenges:
* **Cost and Maintenance:** You need a team of live agents proficient in various languages supported by the virtual assistant. With the `Live agent translation` feature, customers, and agents can communicate in their preferred languages in real-time. This feature enables businesses to serve a diverse customer base without requiring agents to be fluent in every language, optimizing staffing and reducing the risk of miscommunication.
* **Operational efficiency**: In the live agent system, specific routing rules must be considered to detect the user's language and then route to the live agent.
With `Live agent translation` feature capability in the `Avaamo Live agent` console, all the above challenges are eliminated. This feature offers robust translation capabilities to facilitate seamless communication between users and live agents. It eliminates the need for language-specific live agents.
{% hint style="info" %}
**Note:** All end-user messages are translated into English only. `en-US` is the only language supported for Live agents.
{% endhint %}
### How it works?
This feature enables smooth translation between the users and the live agents.
Users can continue to converse with the virtual assistant in their local language, however, during the conversation with the virtual assistant, when users connect to a live agent, the user messages are automatically translated from the user's local language to English and from English back to the user's local language. This ensures a smooth and effective conversation experience.
* **End user to Live agent:** When an end user communicates with a live agent, the responses are automatically translated into English. This ensures that live agents can understand and respond to inquiries regardless of the original language used by the virtual assistants.
* **Live Agent to the End User:** Similarly, when a live agent responds to the end user, the message is translated back into the user's conversation language in the virtual assistant.
**Example of Live agent translation:**
Consider a user is conversing with a virtual assistant in French.
1. **User Initiates Conversation**: The user starts a conversation with a virtual assistant in French.
2. **Transfer to Live Agent**: The conversation is transferred to a live agent who communicates in English.
3. **Translation of User Messages**:
* The system translates messages from the user, written in French, into English.
* These translated messages are then displayed to the live agent.
>" is created in the **Agents** tab.
### What agent details are not copied?
The following lists the items or configurations that are not copied from the original (source) to the copied (target) agent:
* Channel configuration
* Permissions
* Notification settings and Personas
* Environment variables
* Details available in Debug, Test, Monitor, and Learning
---
# Source: https://docs.avaamo.com/user-guide/how-to/build-agents/manage-agents.md
# Manage agents
- [Promote and pull updates](/user-guide/how-to/build-agents/manage-agents/promote-and-pull-updates.md)
- [Make a copy](/user-guide/how-to/build-agents/manage-agents/make-a-copy.md)
- [Export and import agents](/user-guide/how-to/build-agents/manage-agents/export-and-import-agents.md)
- [Activity monitor](/user-guide/how-to/build-agents/manage-agents/activity-monitor.md)
- [Other common actions](/user-guide/how-to/build-agents/manage-agents/other-common-actions.md)
---
# Source: https://docs.avaamo.com/user-guide/how-to/build-skills/create-skill/using-avaamo-answers-1/manage-avaamo-answers-1.md
# Build and manage Answers skill
- [Create Document Groups](/user-guide/how-to/build-skills/create-skill/using-avaamo-answers-1/manage-avaamo-answers-1/create-document-groups.md): Categorize and manage your content using document groups.
- [Upload Content](/user-guide/how-to/build-skills/create-skill/using-avaamo-answers-1/manage-avaamo-answers-1/add-document-or-url-1.md): Create a knowledge base by extracting content from PPTs, Docs, PDF, HTML, Excel or CSV files, or any externally accessible URL.
- [Tabular answering](/user-guide/how-to/build-skills/create-skill/using-avaamo-answers-1/manage-avaamo-answers-1/tabular-answering.md)
- [Multilingual answering](/user-guide/how-to/build-skills/create-skill/using-avaamo-answers-1/manage-avaamo-answers-1/multilingual-answering.md)
- [Content ingestion](/user-guide/how-to/build-skills/create-skill/using-avaamo-answers-1/manage-avaamo-answers-1/content-ingestion.md)
- [View and edit knowledge](/user-guide/how-to/build-skills/create-skill/using-avaamo-answers-1/manage-avaamo-answers-1/view-and-edit-knowledge.md): View the extracted content (sections, entities, acronyms, vocabulary) to fine-tune and edit the knowledge base.
- [Perform common actions](/user-guide/how-to/build-skills/create-skill/using-avaamo-answers-1/manage-avaamo-answers-1/perform-common-actions.md): Retrain, edit the uploaded documents or URLs, or delete the documents or URLs from the Answers skill.
---
# Source: https://docs.avaamo.com/user-guide/outreach/campaigns/manage-campaigns.md
# Manage campaigns
In the **Outreach ->** **Campaigns** tab, you can edit, delete, test, activate, and deactivate campaigns based on the role you have in the Campaign settings. See [Campaign settings](https://docs.avaamo.com/user-guide/overview-and-concepts/advanced-concepts/understand-roles-and-permissions#campaign-settings), for more information.
Not specific to a company and available to all the users using the Avaamo Platform.
|
Specific to a company and available only to the users within the company.
|
{% hint style="success" %}
**Key Points**:
* Before publishing skills to skill store, consider editing the category name in your **Company skills** based on your business model. Click the category in the **Company skills** to edit the category name. See [Publish to skill store](https://docs.avaamo.com/user-guide/how-to/build-skills/manage-skill/publish-skill-to-skills-store), for more information.
* Click **+ New category** to add additional categories.
* Only users with the **Settings** role can edit the category name. See [Roles and permissions](https://docs.avaamo.com/user-guide/overview-and-concepts/advanced-concepts/understand-roles-and-permissions), for more information.
{% endhint %}
Click any skill in the skill store, to view the entities, JavaScript files, and document links included in the skill at the time of publishing the skill.
## Search skills in skill store
You can search for skills in the Skill store by using the skill name or skill description provided at the time of publishing the skill. Additionally, each published skill also includes a skill version and sample training data of the skill that helps to identify the purpose of the skill.

{% hint style="success" %}
**Key Points**:
* To aid better search, it is recommended to provide the skill name, description, and intents in a short descriptive way to completely understand what the skill does. This helps to easily search for the required skill in the skill store. See Design skills for more information on some examples and best practices.
* Skill names are not unique.
{% endhint %}
* In the Avaamo Platform UI, click the **Skill store** option in the top menu.
* Navigate to the specific category in **Avaamo skills** or **Company skills** in the left navigation menu.
* By default, all the skills in the skill store within a category are displayed in descending order of the last updated timestamp.
* Search for specific skills in the skill store using the skill name or skill description. All the skills in the skill store that contains the search keyword in either the skill name or skill description are displayed.
## Delete skill from skill store
If a skill is no longer required in the skill store, you can delete the skill from the skill store using the **Delete** option and later publish the skill again from the agent as required.
{% hint style="info" %}
**Note:** Only users with the **Settings** role can delete the skill from the Skill store. See [Roles and permissions](https://docs.avaamo.com/user-guide/overview-and-concepts/advanced-concepts/understand-roles-and-permissions), for more information.
{% endhint %}
## Frequently asked questions (FAQs)
The following lists a few commonly asked FAQs about skill store, import, and publish:
### 1. Can all types of skills be published?
Yes, all skills - Dialog, Dynamic Q\&A, Smalltalk, and Answers, can be published to the Skill store.
### 2. I have made some changes to my skill. What happens when I re-import it?
When you re-import a skill from the skill store, the skill in your agent is completely replaced with the skill from the skill store, except for duplicate entities and JS. Hence, all your local skills changes are overwritten. See [Re-import skill](https://docs.avaamo.com/user-guide/how-to/build-skills/manage-skill/import-and-re-import-skills), for more information.
### 3. How can I preserve the local changes in imported skills?
Currently, you can use the following methods to preserve your local changes:
* Use **Make a copy** to create a duplicate copy of your agent. See [Make a copy](https://docs.avaamo.com/user-guide/how-to/build-agents/manage-agents/make-a-copy), for more information.
* Use the **Backup & Export** option to create a backup copy of your agent in your local system. Later, you can use the exported copy and **import** the same to any existing agent in any account.
See [Export and import agents](https://docs.avaamo.com/user-guide/how-to/build-agents/manage-agents/export-and-import-agents), for more information.
You can use the skills from the copied agent or the imported agent to manually compare and merge.
### 4. Can I merge my local skill changes with an updated version of the skill in the skill store?
Currently, you cannot merge the local skill changes with the updated version of the skill in the skill store. When you re-import a skill from the skill store, the skill in your agent is completely replaced with the skill from the skill store, except for duplicate entities and JS. Hence, all your local skills changes are overwritten. See [Re-import skill](https://docs.avaamo.com/user-guide/how-to/build-skills/manage-skill/import-and-re-import-skills), for more information.
### 5. Can I publish a skill that was imported from the skill store?
Yes. If you have appropriate permissions, you can publish a skill imported from the skill store. See [Roles and permissions](applewebdata://CC4E2907-AF33-493E-836D-F82990C2FC5E/@avaamo/s/avaamo/~/drafts/-M5k7GHD45QIIzLybGMd/overview-and-concepts/advanced-concepts/understand-roles-and-permissions), for more information.
### 6. Can I publish multiple versions of skills to the skill store?
No. Only one version of skill published from an agent is available in the skill store.
### 7. Are there any best practices for publishing skills to skill store?
Yes, there are a few best practices that you can follow for publishing a skill to skill store. See [Best practices](https://docs.avaamo.com/user-guide/build-skills/manage-skill/publish-skill-to-skills-store#best-practices), to learn more.
### 8. Can I revert a published skill to the skill store?
You cannot revert a published skill in the skill store. However, a user with the **Settings** role can delete the skill from the skill store and the skill can be published again. See [Delete skill from skill store](#delete-skill-from-skill-store), for more information.
---
# Source: https://docs.avaamo.com/user-guide/how-to/build-agents/configure-agents/deploy/web-channel/manage-web-channel.md
# Manage web channel
After you configure the channel settings, you can view, edit, disconnect and delete the channel settings as per your requirement. See [Manage channel settings](https://docs.avaamo.com/user-guide/how-to/build-agents/configure-agents/deploy/manage-channel-settings), for more information.
You can also deploy your agent through multiple web channels simultaneously. See [Deploy in multiple web channel instances](https://docs.avaamo.com/user-guide/how-to/build-agents/configure-agents/deploy/web-channel/deploy-and-test-web-channel), for more information.
---
# Source: https://docs.avaamo.com/user-guide/ref/avaamo-platform-api-documentation/mask-message-api.md
# Mask message API
### Mask user messages and agent responses
`PUT` `https://cx.avaamo.com/dashboard/conversations/{{conversation_uuid}}/mask_messages.json`
Masks the user messages in the specified user conversation (for new conversation) from the beginning till the date as per the agent masking configuration details. To mask Personally Identifiable Information (PII) within a specific time range, you can include the `since_timetoken` and `timetoken` parameters in the API request.
Masks the agent's response in the specified user conversation from the date masking is enabled for the response node.
#### Path Parameters
Name Type Description conversation_uuid* String User conversation identifier. You can get the conversation uuid from the Conversation History URL. You can get the conversation identifier from the Conversation history URL or from the Get Messages API.
#### Query Parameters
Name Type Description since_timetoken number Timestamp from which the messages should be masked. timetoken number Timestamp until which the messages should be masked.
{% hint style="info" %}
**Note**:
Users can also pass either or both parameters (`since_timetoken` or `timetoken`).
* If only `since_timetoken` is specified, the system uses the latest message's timestamp as the `timetoken`.
* If only `timetoken` is provided, the system uses the agent creation timestamp as the `since_timetoken`.
{% endhint %}
#### Headers
| Name | Type | Description |
| ---------------------------------------------- | ------ | -------------------------------------------------------------------------------------------------------------------------------------------------------------------------------------------------------------------------------------------------------------------------------------------------------------------------------------------------------------------------------------------------------------------------------------------------------------------------------------------------------------------------------------------------------------------------------------------------------------------------------------------------------------------- |
| Access-Token\* | string | The user access token.
You can get the user access token from the Settings -> Users page. See Users or Groups , for more information.
Users must have at least edit permission on the agent. See Permissions , for more information.
|
{% tabs %}
{% tab title="200 " %}
```javascript
{
"success": true
}
```
{% endtab %}
{% endtabs %}
{% hint style="success" %}
**The key points**:
* See [Mask response in Advanced settings](https://docs.avaamo.com/user-guide/how-to/build-skills/create-skill/using-dialog-designer/create-new-skill/build-skill-responses/advanced-settings), for more information on how to enable masking for a response node.
* When you enable masking for a node with file masking, all the uploaded files are physically deleted from the Platform and cannot be accessed.
* You can check the Conversation history to view the masked messages. See [Conversation history](https://docs.avaamo.com/user-guide/how-to/build-agents/debug-agents#using-conversation-history), for more information.
* See [Information masking](https://docs.avaamo.com/user-guide/overview-and-concepts/advanced-concepts/information-masking), for more details.
{% endhint %}
### Code request snippets
{% tabs %}
{% tab title="cURL" %}
```javascript
curl --location --request PUT 'https://cx.avaamo.com/dashboard/conversations/xxxxxxae172c539696ff6f4f67xxxxxx/mask_messages.json' \
--header 'Access-Token: xxxxxx8d9952499ea466fc007dxxxxxx' \
--header 'Content-Type: application/json'
```
{% endtab %}
{% tab title="node.js" %}
```javascript
var request = require('request');
var options = {
'method': 'PUT',
'url': 'https://cx.avaamo.com/dashboard/conversations/xxxxxxae172c539696ff6f4f67xxxxxx/mask_messages.json',
'headers': {
'Access-Token': 'xxxxxx8d9952499ea466fc007dxxxxxx',
'Content-Type': 'application/json'
}
};
request(options, function (error, response) {
if (error) throw new Error(error);
console.log(response.body);
});
```
{% endtab %}
{% endtabs %}
#### Examples
The following table lists a sample use case with query parameters:
Use-case Query Parameter Mask messages within a specified period since_timetoken: Specify the starting timestamp in seconds in UNIX Epoch format.
timetoken : Specify the ending timestamp in seconds in UNIX Epoch format.
Example : https://cx.avaamo.com/dashboard/conversations/{{conversation_uuid}}/mask_messages.json?since_timetoken=1720604526&timetoken=1736502126
---
# Source: https://docs.avaamo.com/user-guide/intelligent-virtual-assistant-platform/master.md
# Intelligent Virtual Assistant Platform
**The Avaamo IVA Platform** is a cloud platform that automates the Conversational AI lifecycle. It provides an end-to-end framework for rapidly designing, developing, testing, and deploying enterprise agents into different applications or channels. Learn how to use the Avaamo Platform with our Quick Starts, Tutorials, and Samples.
New to Avaamo Conversational AI Platform? Get an understanding of the platform and a quick overview of important concepts.
* [About Avaamo Conversational AI Platform](https://docs.avaamo.com/user-guide/overview-and-concepts/about-avaamo-platform)
* [Key Concepts ](https://docs.avaamo.com/user-guide/overview-and-concepts/quick-summary)
### Quick Start Steps
Start building agents using quick tutorials and quick start. Get an overview of the Avaamo Dashboard and some key concepts:
### Next Steps
Get an in-depth step-by-step understanding of how-to:
---
# Source: https://docs.avaamo.com/user-guide/recent-releases/release-notes-v9.0.0/meet-aura-your-smart-support-agent.md
# Meet "Aura" - your smart support agent
The `Aura` is an AI-powered assistant designed to deliver immediate, accurate, and contextual first-level support.
It empowers agent developers and business teams by providing instant resolutions to common queries, significantly reducing dependency on other teams.
Powered by [LLaMB](https://docs.avaamo.com/user-guide/llamb/get-started), Aura taps into Avaamo’s documentation and internal knowledge base to bring you the right information quickly. By leveraging the latest advancements in natural language processing and contextual AI, the Aura ensures 24/7 availability and high accuracy across a wide range of support scenarios.
Here's a quick sneak peek at the Aura:
`POST` `https://cx.avaamo.com/bots_api/v1/messages.json`
Post messages to the agent. Typically, this API is used when you wish to post agent responses for notifications, summary, and important product or service announcements.
#### Headers
Name Type Description access-token* string The user access token. Users or Groups , for more information
User must have at least edit permission on the agent. See Permissions , for more information
#### Request Body
Name Type Description message* string The message you wish to post to the agent. conversation -> uuid* string Unique identifier of the conversation for which the message is posted. You can get the conversation uuid from the Conversation History URL bot_id* integer Unique identifier of the agent. force_locale string The locale used to override the locale of the agent.
{% tabs %}
{% tab title="200 " %}
```javascript
{
"success": true
}
```
{% endtab %}
{% endtabs %}
{% hint style="success" %}
**Key point**: See [Supported agent responses](applewebdata://E3416F10-9D83-4DB7-B173-CC5D7BD95AFE/@avaamo/s/avaamo/~/drafts/-M8iZKLHjv_ONgUq4a3a/v/dev/how-to/build-agents/configure-agents/deploy/custom-channel#supported-agent-responses) in the Custom channel, for more information on WhatsApp-compatible responses.
{% endhint %}
### Code request snippets
{% tabs %}
{% tab title="cURL" %}
```javascript
curl --location --request POST 'https://cx.avaamo.com/bots_api/v1/messages.json' \
--header 'Content-Type: application/json' \
--header 'Access-Token: xxxxxx8d9952499ea466fc007dxxxxxx' \
--header 'Content-Type: text/plain' \
--data-raw '{
"message": "Sample message",
"conversation": {
"uuid": "xxxxxx8253e65aa02bfd02fd86xxxxxx"
},
"bot_id": 2xxx,
"force_locale": "en"
}'
```
{% endtab %}
{% tab title="node.js" %}
```javascript
var request = require('request');
var options = {
'method': 'POST',
'url': 'https://cx.avaamo.com/bots_api/v1/messages.json',
'headers': {
'Content-Type': ['application/json', 'text/plain'],
'Access-Token': 'xxxxxx8d9952499ea466fc007dxxxxxx'
},
body: "{\n \"message\": \"Sample message\",\n \"conversation\": {\n \"uuid\": \"xxxxxx8253e65aa02bfd02fd86xxxxxx\"\n },\n \"bot_id\": 2xxx,\n \"force_locale\": \"en\"\n}"
};
request(options, function (error, response) {
if (error) throw new Error(error);
console.log(response.body);
});
```
{% endtab %}
{% endtabs %}
### Examples
#### **Scenario 1**: Post a **simple message**
**Request**: The following is a sample JSON request for posting a simple message to the agent:
```yaml
{
"message": "Sample message",
"conversation": {
"uuid": "xxxxxx8253e65aa02bfd02fd86xxxxxx"
},
"bot_id": 2xxx,
"force_locale": "en"
}
```
The message as sent in the request is posted to the agent. You can also view the same message in the conversation for which the message is posted:
#### 
#### **Scenario 2**: Post a list of promotional items
**Request**: The following is a sample JSON request for posting a list of promotional items to the agent:
```yaml
{
"message": {
"list_view": {
"top_element_style": "compact",
"items": [
{
"title": "Coke",
"subtitle": "All Chilled",
"links": [
{
"type": "post_message",
"title": "Get a pack of 5",
"value": "coke"
}
]
},
{
"title": "Coffee",
"subtitle": "Cold",
"links": [
{
"type": "post_message",
"title": "Buy one get one",
"content": "coffee"
}
]
}
]
}
},
"conversation": {
"uuid": "1faa40c8253e65aa02bfd02fd8643d35"
},
"bot_id": 2154,
"force_locale": "en"
}
```
The following response is displayed in the agent:

**Scenario 3**: Post a feedback message
**Request**: The following is a sample JSON request for posting a feedback message to the agent:
```yaml
{
"message": {
"card": {
"inputs": [
{
"title": "How was our service?",
"type": "data_capture",
"uuid": "comments"
}
]
}
},
"conversation": {
"uuid": "xxxxxx8253e65aa02bfd02fd86xxxxxx"
},
"bot_id": 2xxx,
"force_locale": "en"
}
```
## Get agent messages
`GET` `https://cx.avaamo.com/v1/messages.json`
Gets all messages from the agent. This API just gets the latest messages from the agent and not specific to any user conversation.
#### Query Parameters
Name Type Description device_info boolean Indicates if the device details must be returned in the response or not. The default value is false. since_timetoken number Timestamp from which the records are fetched. timetoken number Timestamp until which the records are fetched. The default value is the current timestamp. Specify in UNIX Epoch Timestamp in microseconds. page integer Page from which the entries must be fetched.
The default value is 1.
per_page integer The number of entries fetched per page.
The default value is 25.
Maximum value: 100
#### Headers
Name Type Description access-token* string The agent access token. You can get the agent access token from the Agent -> Settings page. See Agent Authentication Keys , for more information
{% tabs %}
{% tab title="200 Consider that you wish to get the latest message from the agent. Use GET method and specify the URL . The following is a sample JSON response returned:" %}
```javascript
{
"current_page": 1,
"per_page": 1,
"total_entries": 4371,
"total_pages": 4371,
"time_token": 1569219802.3621287,
"entries": [
{
"uuid": "dc3c4ebd-e0b0-4bd9-a79d-09114e286358",
"content": "Hi, your order number is V5678.",
"content_type": "text",
"created_at": 1569216722.51246,
"user": {
"first_name": "Mac Pizza Agent",
"last_name": "",
"layer_id": "fe8ee61c-f039-4cdc-8986-5bebec9edf08",
"email": null,
"phone": null,
"avatar": false,
"avatar_updated_at": null,
"avaamo_id": 5713616
},
"timetoken": 1569216722502878,
"external_source": null,
"device_uuid": "b05fde04-2242-419b-bf12-49f79e5f9d74",
"request_message_uuid": "14b92488-a3b4-4a10-9384-dd80f425f4f3",
"sequence": "1/1",
"custom_properties": {},
"agent_message_uuid": null,
"read_acks": [
{
"read_at": 1569216722,
"user": {
"first_name": "John",
"last_name": "C",
"layer_id": "dashboard_admin_test_user_696",
"email": null,
"phone": null,
"avatar": false,
"avatar_updated_at": null,
"avaamo_id": 5713625
}
}
],
"attachments": [],
"conversation": {
"uuid": "1faa40c8253e65aa02bfd02fd8643d35",
"mode": false,
"display_name": "Mac Pizza Agent,John",
"locale": "en-GB"
}
}
]
}
```
{% endtab %}
{% endtabs %}
{% hint style="info" %}
**Note**: For optimal API performance, the recommended time duration for fetching data from any of the REST APIs that support a date range or time period is 7 days.
{% endhint %}
### Code request snippets
{% tabs %}
{% tab title="cURL" %}
```javascript
curl --location --request GET 'https://cx.avaamo.com/v1/messages.json?per_page=1' \
--header 'Access-Token: xxxxxx8d9952499ea466fc007dxxxxxx' \
--header 'Content-Type: application/json'
```
{% endtab %}
{% tab title="node.js" %}
```javascript
var request = require('request');
var options = {
'method': 'GET',
'url': 'https://cx.avaamo.com/v1/messages.json?per_page=1',
'headers': {
'Access-Token': 'xxxxxx8d9952499ea466fc007dxxxxxx',
'Content-Type': 'application/json'
}
};
request(options, function (error, response) {
if (error) throw new Error(error);
console.log(response.body);
});
```
{% endtab %}
{% endtabs %}
### Response attributes
In the response, the following attributes are returned:
Attribute Description Type current_page Indicates the page from which the entries are fetched. Integer per_page Indicates the number of entries fetched per page. Integer total_entries Indicates the total number of entries in the agent messages. Integer total_pages Indicates the total number of pages calculated using per_page. Note that total_entries = per_page * total_pages. Integer time_token Indicates the timestamp at which the API response is returned. UNIX epoch timestamp entries Indicates an array of messages fetched from the agent. The number of entries in the array = Number specified in the per_page parameter. JSON key-value pairs
#### **entries**
Indicates an array of messages fetched from the agent. Each array contains the following attributes:
Attribute Description Type uuid Indicates a unique identifier of the message. String content Indicates the content of the message. String content_type Indicates the type of content such as text, ListView, card, quick_reply. String created_at Indicates the timestamp of when the message was created in seconds. UNIX epoch timestamp user Indicates the details of the user interacting with the agent. See User details , for more information. JSON key-value pairs timetoken Indicates the created timestamp of the message in milliseconds. UNIX epoch timestamp device_uuid Indicates a unique identifier of the device from which the agent is being used. String request_message_uuid Indicates a unique identifier of the request message. String sequence Indicates the sequence of the agent response message. There can be multiple responses for a user query, each identified with the request_message_uuid and sequence. Note that the request_message_uuid is the same for each agent response. <<message_sequence>>/<<total message> custom_properties Indicates any additional user properties in the fetched message.
Example :
"custom_properties": {
"employee_id":12345,
"dept": "quality"
},
JSON key-value pairs read_acks Indicates the details of when the message was read and acknowledged.
read_at : Indicates the read timestamp of the message in UNIX epoch format.user : Indicates the details of the user who acknowledged the message. An array of JSON key-value pairs attachments Indicates an array of attachments that is fetched from the agent message. JSON key-value pairs conversation Indicates the conversation details of the message:
uuid : Indicates a unique identifier of the conversation.display_name : Indicates display name of the conversation in the following format: <<Agent Display Name>>, <<User First Name>>.locale : Indicates the locale used in the agent conversation.JSON key-value pairs
#### User details
The following user details are available in each message response of the Get Message API:
Attribute Description Type phone Indicates an array of phone numbers of the user interacting with the agent. An array of JSON key-value pairs last_name Indicates the last name of the user interacting with the agent. String first_name Indicates the first name of the user interacting with the agent. String email Indicates the email of the user interacting with the agent. String layer_id Indicates an internal unique user identifier used by the Avaamo Platform. String avaamo_id Indicates the unique identifier of the user interacting with the agent. You can use this user identifier to further get custom properties, if any, from the agent. See Custom properties API , for more information. Integer user_agent, os_name, zone_offset,
utc_offset, time_zone
Indicates the device details from where the agent is accessed.
Note that the device details are tracked at the user level and not at the message level. So, if the same user is accessing the agent from different devices, then the latest device details is returned in the messages.
The device details are returned only when the device_info = true in the GET message request.
user_agent : Indicates the browser’s user agent, applicable only for the web channel.os_name : Indicates the operating system of the device with which the user interacted with the agent.zone_offset : Indicates the time zone offset from GMT for the user.utc_offset : Indicates the time zone offset from UTC for the user.time_zone : Indicates the time zone of the user who accessed the agent.JSON key-value pairs
### Examples
The following table lists a few sample use cases with query parameters:
Use-case Query Parameter Get the latest message from the agent per_page : Specify 1 to get the latest message.
Example : https://cx.avaamo.com/v1/messages.json?per_page=1
Get messages from the agent within a specified period since_timetoken : Specify the "from" timestamp in epoch format such as 1569229247677821
timetoken : Specify the "to" timestamp in epoch format such as 1569229251418739.
Example : https://cx.avaamo.com/v1/messages.json?since_timetoken=1569229247677821&timetoken=1569229251418739
Get messages from the agent using pagination page : Specify the page from which you wish to fetch records.
per_page : Specify the number of entries per page. y default, the value is 5.
Example : https://cx.avaamo.com/v1/messages.json?page=5&per_page=2
Get the latest message with device details from agent per_page : Specify 1 to get the latest message.
device_info : Set to true
Example : https://cx.avaamo.com/v1/messages.json?per_page=1&device_info=true
---
# Source: https://docs.avaamo.com/user-guide/ref/avaamo-platform-api-documentation/agent-api/message-insights.md
# Message insights
## Get query insights by message ID
`GET` `https://cx.avaamo.com/api/v1/agents/{{agent_id}}/query_insights/{{message_id}}.json`
Get a closer look at the insights of the message.
#### Path Parameters
Name Type Description agent_id* integer Agent identifier. You can get the agent identifier from the agent URL. message_id* alphanumeric Message identifier. You can get the message identifier from any other API response. For example, Message UUID in the custom channel response.
#### Headers
Name Type Description access-token* string User access token.
You can get the user access token from the Settings -> Users page. See Users or Groups , for more information.
Users must have at least view permission on the agent. See Permissions , for more information
{% tabs %}
{% tab title="200 " %}
{% code overflow="wrap" %}
```json
{
"insight": {
"intent_type": "INLINE::INTENT",
"skill_name": "Macpizza Order",
"skill_key": "macpizza_order",
"intent_name": "Macpizza Order",
"intent_key": "pizza_toppings",
"node_key": "macpizza_order.pizza_toppings",
"original_text": "I want to order veg cheese pizza",
"document": "I want to order veg cheese pizza",
"entities": [
{
"entity": "pizza_toppings",
"entity_type": "pizza_toppings",
"entity_value": "cheese",
"domain_key": "bot_inline_domain_bee25dca-3b9f-46eb-a456",
"value": "cheese",
"current_value": "cheese",
"index": 20,
"parent_entity_key": "pizza_types",
"custom_entity_type": true
}
],
"negation": false,
"sentiment": "neutral",
"tone": "",
"detected_language": "English(en-US)",
"second_best_result": null,
"matching_document": "I want to order veg cheese pizza"
}
}
```
{% endcode %}
{% endtab %}
{% endtabs %}
### Code request snippets
{% tabs %}
{% tab title="cURL" %}
{% code overflow="wrap" %}
```javascript
curl --location 'https://cx.avaamo.com/api/v1/agents/30xxx/query_insights/77851a10-xxxx-xxxx-xxxx-a1c16f4904ad.json' \
--header 'access-token: 8cexxxxxxxxxxxxxxx47ccd9e60f3bd5'
```
{% endcode %}
{% endtab %}
{% tab title="node.js" %}
{% code overflow="wrap" %}
```javascript
var request = require('request');
var options = {
'method': 'GET',
'url': 'https://cx.avaamo.com/api/v1/agents/30xxx/query_insights/777851a10-xxxx-xxxx-xxxx-a1c16f4904ad.json',
'headers': {
'access-token': '8cexxxxxxxxxxxxxxx47ccd9e60f3bd5'
}
};
request(options, function (error, response) {
if (error) throw new Error(error);
console.log(response.body);
});
```
{% endcode %}
{% endtab %}
{% endtabs %}
### Response attributes
In the response, the following attributes are returned:
```json
{
"insight": {
"intent_type": "INLINE::INTENT",
"skill_name": "Macpizza Order",
"skill_key": "macpizza_order",
"intent_name": "Macpizza Order",
"intent_key": "pizza_toppings",
"node_key": "macpizza_order.pizza_toppings",
"original_text": "I want to order veg cheese pizza",
"document": "I want to order veg cheese pizza",
"entities": [
{
"entity": "pizza_toppings",
"entity_type": "pizza_toppings",
"entity_value": "cheese",
"domain_key": "bot_inline_domain_bee25dca-3b9f-46eb-a456",
"value": "cheese",
"current_value": "cheese",
"index": 20,
"parent_entity_key": "pizza_types",
"custom_entity_type": true
}
],
"negation": false,
"sentiment": "neutral",
"tone": "",
"detected_language": "English(en-US)",
"second_best_result": null,
"matching_document": "I want to order veg cheese pizza"
}
}
```
Attribute Description Type insight See insights , for more information on each attribute. Integer
### Examples
The following table lists a few sample use cases with query parameters:
Use-case Query Parameter Get message insights for an agent agent_id : Specify the agent identifier
message_id : Specify the message identifier for which you wish to view the insights.
---
# Source: https://docs.avaamo.com/user-guide/ref/avaamo-platform-api-documentation/analytics-api/messages.md
# Messages
## Get agent messages
`GET` `https://cx.avaamo.com/bots/analytics/{{agent_id}}/messages.json`
Gets a list of messages from the agent within a specified period of time.
#### Path Parameters
Name Type Description agent_id* integer Agent identifier. You can get the agent identifier from the agent URL.
#### Query Parameters
Name Type Description per_page number The number of entries fetched per page. page number Page from which the entries must be fetched. from_timetoken number Timestamp from which the records are fetched.
Default value is last three days from the specified to_timetoken value.
Specify UNIX Epoch Timestamp.
to_timetoken number Timestamp until which the records are fetched.
Default is the current timestamp.
Specify UNIX Epoch Timestamp.
#### Headers
Name Type Description access-token* string The user access token.
You can get the user access token from the Settings -> Users page. See Users or Groups , for more information.
Users must have at least view permission on the agent. See Permissions , for more information.
{% tabs %}
{% tab title="200 Successful request" %}
```json
{
"current_page": 1,
"per_page": 1,
"total_entries": 8,
"total_pages": 8,
"time_token": 1716811116.983583,
"entries": [
{
"message_uuid": "e00a9d28-xxxx-4350-xxxx-389c395afec5",
"score": 1.0,
"content": "",
"intent_type": "JS::INTENT",
"channel_name": "web",
"created_at": 1716811065.0,
"user": {
"first_name": "David",
"layer_id": "06c7beb3-9bf8-xxxx-xxxx-745e5431053d"
},
"intent_name": "custom code"
}
]
}
```
{% endtab %}
{% tab title="422: Unprocessable Entity Unprocessable entity -> to\_date is before from\_date" %}
```javascript
{
"error": "To Date cannot be before From Date"
}
```
{% endtab %}
{% endtabs %}
{% hint style="info" %}
**Note**: For optimal API performance, the recommended time duration for fetching data from any of the REST APIs that support a date range or time period is 7 days.
{% endhint %}
### Code request snippets
{% tabs %}
{% tab title="cURL" %}
```javascript
curl --location --request GET 'https://cx.avaamo.com/bots/analytics/20xxx/messages.json' \
--header 'Content-Type: application/json' \
--header 'Access-Token: xxxxxx8d9952499ea466fc007dxxxxxx'
```
{% endtab %}
{% tab title="node.js" %}
```javascript
var request = require('request');
var options = {
'method': 'GET',
'url': 'https://cx.avaamo.com/bots/analytics/20xxx/messages.json',
'headers': {
'Content-Type': 'application/json',
'Access-Token': 'xxxxxx8d9952499ea466fc007dxxxxxx'
}
};
request(options, function (error, response) {
if (error) throw new Error(error);
console.log(response.body);
});
```
{% endtab %}
{% endtabs %}
### Response attributes
In the response, the following attributes are returned:
Attribute Description Type current_page Indicates the page from which the entries are fetched. Integer per_page Indicates the number of entries fetched per page. Integer total_entries Indicates the total number of entries in the agent messages. Integer total_pages Indicates the total number of pages calculated using per_page. Note that total_entries = per_page * total_pages Integer time_token Indicates the timestamp at which the API response is returned. UNIX epoch timestamp entries Indicates an array of user sessions fetched from the agent. The number of entries in the array = Number specified in the per_page parameter. Each array contains the following details of each user session:
message_uuid: Unique message identifier. content: Content of the message. intent_type: Type of intent such as system, inline, KnowledgePack channel_name: Channel of communication created_at: Timestamp at which the message was created in seconds. This is in Unix epoch timestamp format. first_name: If the user information is collected, then first_name indicates the first name of the user corresponding to the message, or else it is displayed as "You". See Collect user information , for more details. layer_id: Unique identifier for each user. intent_name: Name of the intent corresponding to the message. JSON key-value pairs
### Examples
The following table lists a few sample use cases with query parameters:
Use-case Query Parameter Get agent messages in a specified period of time from_date : Specify the from date in dd/mm/yyyy format.
to_date : Specify the to date in dd/mm/yyyy format.
Example : https://cx.avaamo.com/bots/analytics/<<agent_id>>/messages.json?from_date=01/04/2020&to_date=06/04/2020&utc_offset=<<utc-offset-sec
---
# Source: https://docs.avaamo.com/user-guide/how-to/build-agents/configure-agents/deploy/microsoft-teams-ms-teams.md
# Source: https://docs.avaamo.com/user-guide/configuration/channels/microsoft-teams-ms-teams.md
# Microsoft Teams (MS Teams)
**Microsoft Teams** is a proprietary business communication platform developed by [Microsoft](https://en.wikipedia.org/wiki/Microsoft), as part of the [Microsoft 365](https://en.wikipedia.org/wiki/Microsoft_365) family of products. Microsoft Teams is a chat-based collaboration platform that includes document sharing, online meetings, and numerous other valuable features for business communications.
The agents developed on the Avaamo platform can be deployed on the Microsoft Teams channel.
Refer [Microsoft Teams (MS Teams)](https://docs.avaamo.com/user-guide/how-to/build-agents/configure-agents/deploy/microsoft-teams-ms-teams), for more information.
---
# Source: https://docs.avaamo.com/user-guide/ref/avaamo-platform-api-documentation/microsoft-teams-send-api.md
# Microsoft Teams Send API
{% hint style="success" %}
**Pre-requisite**: You must have an agent with the MS Teams channel configured. See [MS Teams channel](https://docs.avaamo.com/user-guide/how-to/build-agents/configure-agents/deploy/microsoft-teams-ms-teams), for more information.
{% endhint %}
## Outbound API to send a message from the MS Teams channel to the user
`POST` `https://cx.avaamo.com/teams/{{channel_uuid}}/send.json`
#### Path Parameters
| Name | Type | Description |
| ------------- | ------ | ----------------------------------------------------------------------------------------------------------------------------------------------------------------------------------------------------------------------------------------------------------------------------------------------------------------------------------------------------------- |
| channel\_uuid | String | Unique channel identifier generated by the Platform when the MS Teams channel is configured.
This helps to identify the source of the request when an message is sent to the user using this API. See MS Teams channel , for more information.
|
#### Request Body
| Name | Type | Description |
| ----------------------------- | -------------------- | --------------------------------------------------------------------------------------------------------------------------------------------------------------------------------------------------------------------------------------------------------------------------------------------------------------------------------------------------------------------------------------------------------------------------------------------------------------------------------------------------------------------------------------------------------------------------------------------------------------------------------------------------------------------------------------------------------------------------------------- |
| email | String | Valid user email to whom the message is sent.
Required, if custom user authentication is not enabled in the MS Teams channel.
If custom user authentication is enabled, then you must return email , message, along with uuid in the User authentication handler block. This provides flexibility to the developers to authenticate the users and then return the email to whom the message must be sent. See User authentication handler , for more information.
|
| <\> | JSON key-value pairs | Any custom parameters such as the first name, last name, and employee id can be included in the body payload as per the requirement.
These parameters are available in context.params.<\> and can be used for authenticating the users in the User authentication handler when custom user authentication is enabled in the MS Teams channel. See User authentication handler , for more information.
|
| message -> text | String | Valid message sent to the user vi MS Teams channel.
Either a text message or a CustomTeamsMessage is
required, if custom user authentication is not enabled in the MS Teams channel.
If custom user authentication is enabled, then you must return email , message, along with uuid in the User authentication handler block. This provides flexibility to the developers to authenticate the users and then return the email to whom the message must be sent. See User authentication handler , for more information.
|
| message -> CustomTeamsMessage | JSON | MS Teams custom payload.
Either a text message or a CustomTeamsMessage is
required, if custom user authentication is not enabled in the MS Teams channel.
If custom user authentication is enabled, then you must return email , message, along with uuid in the User authentication handler block. This provides flexibility to the developers to authenticate the users and then return the email to whom the message must be sent. See User authentication handler , for more information.
|
{% tabs %}
{% tab title="200: OK Successful request. " %}
```javascript
{
"success": true
}
```
{% endtab %}
{% endtabs %}
{% hint style="info" %}
**Note**: After a successful request, a conversation is established and can be tracked using `email` from the Conversation history page. See [Conversation history](https://docs.avaamo.com/user-guide/how-to/build-agents/debug-agents/conversation-history), for more information.
{% endhint %}
### Code request snippets
{% tabs %}
{% tab title="cURL" %}
{% code overflow="wrap" %}
```bash
curl -X POST \
http://cx.avaamo.com/teams/62b783fb-86e0-xxxx-b8f0-2144xxxxxxxxx/send.json \
-H 'content-type: application/json' \
-d '{
"first_name": "John",
"last_name": "Jacob",
"emp_id": "1234",
"email": "jacob.john@abc.com",
"message": {
"text": "Your message goes here."
}
}'
```
{% endcode %}
{% endtab %}
{% endtabs %}
### Examples
**Request**: The following is a sample JSON request for posting a simple message to the user:
```json
{
"first_name": "John",
"last_name": "Jacob",
"emp_id": "1234",
"email": "jacob.john@abc.com",
"message": {
"text": "Your message goes here."
}
}
```
**Request**: The following is a sample JSON request for posting a custom teams message to the user:
```json
{
"first_name": "John",
"last_name": "Jacob",
"emp_id": "1234",
"email": "jacob.john@abc.com",
"message": {
"CustomTeamsMessage": {
<>
}
}
}
```
---
# Source: https://docs.avaamo.com/user-guide/how-to/build-agents/monitor-and-analyze.md
# Monitor agents
- [Analytics](/user-guide/how-to/build-agents/monitor-and-analyze/analytics.md)
- [Analytics - Universal agent](/user-guide/how-to/build-agents/monitor-and-analyze/analytics-universal-agent.md)
- [SMS Gateway Analytics](/user-guide/how-to/build-agents/monitor-and-analyze/sms-gateway-analytics.md)
- [User journey](/user-guide/how-to/build-agents/monitor-and-analyze/user-journey.md)
- [Query insights](/user-guide/how-to/build-agents/monitor-and-analyze/query-insights.md)
---
# Source: https://docs.avaamo.com/user-guide/monitor.md
# Monitor
- [Analytics](/user-guide/monitor/analytics.md)
- [Query insights](/user-guide/monitor/query-insights.md)
---
# Source: https://docs.avaamo.com/user-guide/llamb/multi-language-support.md
# Multi-language support
### Multi-language support in LLaMB responses
LLaMB enables seamless, real-time conversations in multiple languages, enhancing the user experience across diverse regions. With real-time streaming translation, LLaMB supports all languages available in the Avaamo Conversational AI Platform.
Users can interact with the agent in any supported language, and the agent will respond in the same language, even if the original content is authored in English. This eliminates the need to maintain separate content for each language, simplifying content management while ensuring a natural and fluid conversation flow.
By leveraging this capability, organizations can effortlessly expand their global reach, providing a consistent and localized experience for users worldwide.
Below is a sneak peek of LLaMB’s multi-language support in action. You can see how responses are generated in the respective languages when the same question is asked in English (en-US) and French (fr-FR).
` *For example: `#switch_lang fr-FR` to switch to French.*
* After switching, ask a question in the selected language. The agent will respond in the same language.
### Support for multilingual document ingestion
LLaMB supports multilingual document ingestion, allowing you to upload, train, and query documents in multiple languages. This capability improves accessibility, accuracy, and global usability by enabling the system to process content and respond in the user’s selected conversation language.
LLaMB can automatically detect a document's language during ingestion, eliminating the need to specify it in the request payload manually. This reduces errors, speeds up processing, and ensures more reliable handling of non-English content.
{% hint style="info" %}
**Note:** Automatic language detection is available only for API-based document ingestion.
{% endhint %}
If you provide a language parameter during ingestion, LLaMB uses that language for extraction. If no language is provided, LLaMB automatically identifies the document’s language and processes it accordingly. Refer [Upload content](https://docs.avaamo.com/user-guide/llamb/get-started/step-2-ingest-enterprise-content/upload-content) and [Content ingestion APIs](https://docs.avaamo.com/user-guide/llamb/llamb-rest-apis/content-ingestion-apis), for more information.
If no language is specified, LLaMB detects the document’s language during ingestion.
```javascript
curl --location 'https://c6.avaamo.com/llamb-content-skill/content-ingestion/upload-file' \
--header 'access-token: 238c2e50cxxxxae0def75b223' \
--form 'source=@"/Users/Downloads/swedish-document.pdf"' \
--form 'document_group_id="9xx5"' \
--form 'type="pdf"'
```
If you provide a language code, LLaMB uses the specified language and does not perform auto-detection.
```javascript
curl --location 'https://c6.avaamo.com/llamb-content-skill/content-ingestion/upload-file' \
--header 'access-token: 238c2e50cxxxxae0def75b223' \
--form 'source=@"/Users/Downloads/swedish-document.pdf"' \
--form 'document_group_id="9xx5"' \
--form 'type="pdf"' \
--form 'language="es-ES"'
```
### Key points
* **Language-aware ingestion:** You can specify the document’s language by passing the appropriate language code (for example, `es-ES`, `fr-FR`, `sv-SE`) during ingestion.
* **Agent configuration:** Add or configure the target language in the agent settings before ingestion to ensure proper processing and response handling.
* **Comprehensive file support:** Multilingual ingestion works with all supported document types, including PDF, Word, Excel, PowerPoint, CSV, and HTML.
* **Cross-language querying:** LLaMB can understand and respond to queries in English, the document’s original language, or any other supported non-English language, depending on the user's selected conversation language.
---
# Source: https://docs.avaamo.com/user-guide/how-to/build-skills/create-skill/customize-your-skill/how-to/build-dynamic-skill-response/card/multi-line-text.md
# Multi-line text
You can add a multi-line input card in the skill response.
### Syntax
The following is the syntax to add a multi-line text in the card input:
{% hint style="info" %}
**Notes**:
* There is a 191-character limit for all the user-defined text fields except `data_capture` field. You can specify upto 60000 characters in the `data_capture` field.
* **hint** attribute is not supported in the Microsoft Teams channel due to the limitations on the channel's side. See [Microsoft Teams](https://docs.avaamo.com/user-guide/how-to/build-agents/configure-agents/deploy/microsoft-teams-ms-teams), for more information on deploying your agent in the MS Teams channel.
{% endhint %}
```yaml
"card": {
"inputs": [{
"type": "data_capture",
"title": "<>",
*"should_validate": true/false,
*"hint": "<>",
*"default_value": "<>",
"uuid": "<>"
},...]
}
* - Indicates optional parameter
… - Indicates one or more parameter
```
Attribute Description Type title Indicates the title of the text field. String should_validate Indicates if the user can skip entering values for the field or not before submitting. By default, the value is set to true. Boolean hint Indicates a sample hint for the user to enter the value in the field. This is displayed in the input field before the user enters a value. String default_value Indicates the default value displayed in the text field when rendered to the user. String uuid Indicates a secure random UUID that can be used later to get the text entered by the user. See Section 4.4 in
https://tools.ietf.org/html/rfc4122 , for more information.
Option selected by the user is available in the context.last_message.
Syntax: context.last_message.<<uuid>>
String
### Example
The following is a sample JS to provide a multi-line text field in card input with hint text:
```yaml
return[{
"card": {
"inputs": [
{
"type": "data_capture",
"title": "How was our service?",
"uuid": "a4615857-c2f7-4586-b4b0-f771683fcb1a"
"hint": "xxx@yyy.com"
}
]
}
}]
```
In the agent, the following response is displayed:

You can use `context.last_message.<>` to get the text entered by the user.
{% content-ref url="" %}
[](https://docs.avaamo.com/user-guide/how-to/build-skills/create-skill/customize-your-skill/how-to/build-dynamic-skill-response/card)
{% endcontent-ref %}
{% content-ref url=".." %}
[..](https://docs.avaamo.com/user-guide/how-to/build-skills/create-skill/customize-your-skill/how-to/build-dynamic-skill-response)
{% endcontent-ref %}
---
# Source: https://docs.avaamo.com/user-guide/how-to/build-skills/create-skill/using-avaamo-answers-1/manage-avaamo-answers-1/multilingual-answering.md
# Multilingual answering
Typically, in any global business, it is a necessity to design and build assistants or agents that can interact with the users in their local language. The Avaamo platform provides multilingual support for agent development in different languages, with English (en-US) as the default language. Users can converse with your agent in any local language and expect responses to be in the same local language.
This helps in:
* Providing a wider reach of your agents. Makes agents more accessible to a broader scope of users.
* Providing more personal experience with your agents since interacting in the local language is more natural and relatable.
Regardless of the language in which any information is stored in the knowledge base, the Answers skill can use the information to reply in the language that the user is conversing in. For example, consider that a user is conversing in Spanish with an Avaamo agent. The user asks for information that is stored in English in the knowledge base. The agent is capable of translating the information to Spanish and responding.
Hence, documents and content uploaded in any language can be used for answering queries.
### What is Multilingual answering?
You can use Avaamo Answers to ingest content in any of the [Avaamo-supported languages](https://docs.avaamo.com/user-guide/how-to/build-agents/configure-agents/deploy/web-supported-languages) and provide responses to user queries from the content available in the user's preferred language. See [Add Document or URL](https://docs.avaamo.com/user-guide/how-to/build-skills/create-skill/using-avaamo-answers-1/manage-avaamo-answers-1/add-document-or-url-1), for more information.
The following illustration depicts how Avaamo answers can provide responses to a user query in the local language from the ingested document in the corresponding language:
### 
### How to use it?
* You must first add the language of the document you wish to upload to your agent. See [Add languages](https://docs.avaamo.com/user-guide/how-to/build-agents/configure-agents/add-languages), for more information on adding languages to your agent.

* After the content is ingested, a knowledge base is created. See [View and edit knowledge](https://docs.avaamo.com/user-guide/how-to/build-skills/create-skill/using-avaamo-answers-1/manage-avaamo-answers-1/view-and-edit-knowledge), for more information.

* You can now ask queries in the local language, say Spanish in this use case, and get the agent's response in Spanish. Note that if you ask a query in say English, the agent response in English is displayed.
{% hint style="info" %}
**Note**: To switch from one language to another when conversing with the agent, the user has to type the command `#switch_lang language-code.`See [Language.switch](https://docs.avaamo.com/user-guide/how-to/build-skills/create-skill/customize-your-skill/reference-library/language.switch) and [Skill commands](https://docs.avaamo.com/user-guide/how-to/build-skills/create-skill/customize-your-skill/reference-library/skill-commands)
{% endhint %}

### Key points
Avaamo Platform allows you to customize the translated responses of the agent in the **Configuration -> Language** tab. Currently, this cannot be used for customizing the translated response of the agent for the Answers skill.
---
# Source: https://docs.avaamo.com/user-guide/how-to/build-agents/configure-agents/deploy/nice-incontact.md
# Nice InContact
{% hint style="info" %}
**Note**: You can connect to a channel only if it is enabled for your account or company. If you wish to enable a channel, then contact Avaamo Support for further assistance. Note that only web channel is enabled by default.
{% endhint %}
The agents developed on the Avaamo platform can be deployed on the **Nice InContact** channel. In this article, the following steps are detailed:
1. [ Before you begin](#before-you-begin)
2. [Deploy your agent in Nice InContact](#deploy-your-agent-in-nice-incontact)
3. [Manage channel settings](#manage-channel-settings)
## Before you begin
* Get the identifier (or FQDN) of Nice InContact SIP. You must configure this in the channel settings. See [Deploy your agent in Nice InContact](#deploy-your-agent-in-nice-incontact), for more details.
* Avaamo requires customer source IPs in order to allow traffic to Avaamo SIP. Send a request to Avaamo Support to whitelist the IP addresses.
## Deploy your agent in Nice InContact
{% hint style="info" %}
**Notes**:
* Ensure you have met all the [pre-requisites](https://docs.avaamo.com/user-guide/quick-start-tutorials/pre-requisites).
* You can deploy the agent to a channel after creating and building an agent. See [Create agent](https://docs.avaamo.com/user-guide/how-to/build-agents/add-skills), for more information.
* If you wish to edit an agent, then:
* In the **Avaamo Platform UI**, navigate to the **Agents** tab in the top menu. Search and open the required agent. See [Search agents](applewebdata://9AE47367-043D-436A-BAB1-053A8B89E2A1/@avaamo/s/avaamo/~/edit/drafts/-Lsoojy2kKRX1KXPWAZ2/how-to/build-agents/manage-agents#search-agents), for more information.
* Click **Edit** to unlock the agent before editing**.**
{% endhint %}
**To configure a Nice inContact channel:**
* In the **Agent** page, navigate to the **Configure -> Channels** option in the left navigation menu.
* On the Channels page, click **Connect** in **Nice inContact** Channel.
* Specify the following channel setting details:

Parameter Descriptions Name Indicates the Name used to identify the Nice InContact channel. Note that you can have upto 150 characters in the channel name. Identifier Indicates the identifier (or FQDN) of Nice InContact SIP. Languages and
Playback Voice for
Select the language and configure the voice or the persona to be used by your agent in the interactive phone conversations with the user. Each language has a different set of voice personas that you can choose from. Select the persona from the options provided in the "Playback voice for <<language>>" section:
As with any enterprise voice, audio, or video application, each region or country has its own phone number to dial. Similarly, in the Nice InContact channel, you choose the language of the region or country where you wish to share the configured number. If you wish to share the number in multiple regions, then set up the Nice InContact channel specific to each language. Note that one Nice InContact channel is specific to only one language. To hear the voice preview, type any text in the text area and click the play button. You can also download the voice preview if required. You can select only those languages for which the agent is configured and those that are supported in the Nice InContact channel. If you have switched to a language that is not supported in the Nice InContact channel, then the agent responds in the default language. See Add languages and Supported languages , for more information.
Live agent transfer mode Select the request mode for Live agent transfer in SIP:
invite : Initiate a dialog for establishing a call. The request is sent by a user agent client to a user agent server.refer : Ask the recipient to issue a request for the purpose of call transfer. Note that this is a default method used in the Avaamo Platform and this works for both SIP and PSTN approaches. See Smartcall.forward , for more information on how to transfer and forward the call in SIP.
Speech timeout Indicates a maximum wait time of the agent within which a user response is expected. If the user response is not received within the time-out period, then an automated message is rendered back to the user indicating that the agent is awaiting the user response. Currently, this is a standard message and cannot be customized.
The default value is 1 second. Use the up and down arrows to increase or decrease time as required.
* Click **Save** to save the SIP channel configuration details.
* Click **Download SIP Certificate** to download a "pem" file of the SIP certificate. This must be used to configure Avaamo Platform Nice InContact SIP details on the customer's side of the call center stack.

* Note that Avaamo also requires customer source IPs in order to allow traffic to Avaamo SIP. Send a request to Avaamo Support to whitelist the IP addresses.
## Manage channel settings
After you configure the channel settings, you can view, edit, disconnect and delete the channel settings as per your requirements. See [Manage channel settings](https://docs.avaamo.com/user-guide/how-to/build-agents/configure-agents/deploy/manage-channel-settings), for more information.
---
# Source: https://docs.avaamo.com/user-guide/outreach/campaigns/opting-out-of-campaign.md
# Opting out of campaign
Although campaigns allow you to reach to a wider set of audience, not all campaign messages are welcome by the recipients. Some consider it an invasion of privacy or others may not be just interested in receiving any such message to their number.
Avaamo respects recipient's privacy and allows recipients to opt-out of receiving messages from the Avaamo platform to their number.
### Opting out
If a recipient no longer wishes to receive messages to a number, then the recipient can simply reply to the campaign message with any one of the following words to unsubscribe:
* STOP
* END
* QUIT
* CANCEL
* UNSUBSCRIBE
* STOPALL
When a recipient unsubscribes, then the campaign message is not sent. In the **Test campaign** pop-up, the following message for the corresponding recipient:
`GET` `https://cx.avaamo.com/api/v2/outreach/change_logs.json`
Outreach campaigns go through several changes by different users in their life cycles. You can use the Outreach Changelog API to get a list of changes made to all the campaigns of an account.
#### Query Parameters
Name Type Description start_time number Timestamp from which the records are fetched.
If you specify timetoken and not end_time, then the latest 5 entries up to the specified timetoken are fetched.
Specify UNIX Epoch Timestamp in milliseconds.
end_time number Timestamp until which the records are fetched. Default is the current timestamp.
Specify UNIX Epoch Timestamp in milliseconds.
page integer Page from which the entries must be fetched. per_page integer Number of entries fetched per page. actions String Actions in an campaign for which you wish to get changelog.
Supported values are: update, create, destroy
By default, all actions are considered. You can also specify multiple resources in a comma-separated list.
Example: actions=update,create
#### Headers
Name Type Description access-token* string User access token. This API gets the changelog of all the campaigns from the account the user is associated with.
You can get the user access token from the Settings -> Users page. See Users or Groups , for more information.
Users must have at least view permission on the campaign. See Permissions , for more information.
{% tabs %}
{% tab title="200 Consider that you wish to get the latest change log from the agent. Use GET method and specify the URL <\>\&per\_page=1. The following is a sample JSON response returned:" %}
```javascript
{
"current_page": 1,
"per_page": 1,
"total_entries": 1916,
"total_pages": 1916,
"time_token": 1676971459.482645,
"entries": [
{
"id": 1707596,
"resource": {
"id": 30,
"type": "Outreach::Template"
},
"action": "create",
"changelog": "John Miller created template 'Vaccination test template'",
"timestamp": 1676967911,
"dashboard_user": {
"id": 368,
"display_name": "John Miller",
"email": "john@mycompany.com"
}
}
]
}
```
{% endtab %}
{% endtabs %}
{% hint style="info" %}
**Note**: For optimal API performance, the recommended time duration for fetching data from any of the REST APIs that support a date range or time period is 7 days.
{% endhint %}
### Code request snippets
{% tabs %}
{% tab title="cURL" %}
{% code overflow="wrap" %}
```javascript
curl --location --request GET 'https://cx.avaamo.com/api/v2/outreach/change_logs?per_page=1' \
--header 'Content-Type: application/json' \
--header 'access-token: xxxxxxxxx9a34a44a838af10fxxxxxxx'
```
{% endcode %}
{% endtab %}
{% tab title="node.js" %}
```javascript
var request = require('request');
var options = {
'method': 'GET',
'url': 'https://cx.avaamo.com/api/v2/outreach/change_logs?per_page=1',
'headers': {
'Content-Type': 'application/json',
'access-token': 'xxxxxxxxx9a34a44a838af10fxxxxxxx'
}
};
request(options, function (error, response) {
if (error) throw new Error(error);
console.log(response.body);
});
```
{% endtab %}
{% endtabs %}
### Response attributes
The following is a sample response of a successful API request:
```json
{
"current_page": 1,
"per_page": 1,
"total_entries": 1916,
"total_pages": 1916,
"time_token": 1676971459.482645,
"entries": [
{
"id": 1707596,
"resource": {
"id": 30,
"type": "Outreach::Template"
},
"action": "create",
"changelog": "John Miller created template 'Vaccination test template'",
"timestamp": 1676967911,
"dashboard_user": {
"id": 368,
"display_name": "John Miller",
"email": "john@mycompany.com"
}
}
]
}
```
In the response, the following attributes are returned:
Attribute Description Type current_page Indicates the page from which the entries are fetched. Integer per_page Indicates the number of entries fetched per page. Integer total_entries Indicates the total number of entries in the campaign changelog. Integer total_pages Indicates the total number of pages calculated using per_page. Note that total_entries = per_page * total_pages Integer time_token Indicates the timestamp at which the API response is returned in seconds. UNIX epoch timestamp entries Indicates an array of change logs fetched from the campaign. Number of entries in the array = Number specified in per_page parameter. JSON key-value pairs
#### entries
Indicates an array of change logs fetched from the campaign. Each array contains the following attributes:
Attribute Description Type id Indicates a unique identifier for the changelog entry. Integer resource -> id Indicates a unique identifier of the resource for which the changelog is listed such as the campaign identifier, recipient list identifier, filter identifier, or template identifier. Integer resource -> type Indicates the type of resource for which the changelog is applicable. String action Indicates the action such as create, update, destroy for which the changelogs are retrieved. String changelog Indicates the actual change that occurred for this entry.
This is a user-friendly description to help you identify the type of change..
String timestamp Indicates the timestamp of when the changelog was created in seconds.
This is the timestamp when the changes for the campaign are persistent in the database.
UNIX epoch timestamp dashboard_user -> id Indicates the identifier of the user who is the modifier of the resource. Integer dashboard_user -> display_name Indicates the display name of the user who is the modifier of the resource. String dashboard_user -> email Indicates the email of the user who is the modifier of the resource. String
### Examples
The following table lists a few sample use cases with query parameters:
Use-case Query Parameter Get changelogs within a specified period start_time: Specify the from timestamp in epoch format such as 1579149424 end_time: Specify the to timestamp in epoch format such as 1579149436 Example : https://cx.avaamo.com/api/v2/outreach/change_logs.json?start_time=1579149424&end_time=1579149436
Get changelogs using pagination page: Specify the page from which you wish to fetch records. By default, the value is 1. per_page: Specify the number of entries per page. By default, the value is 5. Example :
https://cx.avaamo.com/api/v2/outreach/change_logs.json?page=5&per_page=2
Here, per_page * total_pages = total_entries
Get changelogs of all updated campaign records within a specified period start_time: Specify the from timestamp in epoch format such as 1579149424 end_time: Specify the to timestamp in epoch format such as 1579149436 action: Specify update Example : https://cx.avaamo.com/api/v2/outreach/change_logs.json?start_time=1579149424&end_time=1579149436&actions=update
---
# Source: https://docs.avaamo.com/user-guide/outreach/outreach-rest-apis/outreach-insights-api.md
# Outreach insights API
## Get campaign insights
`GET` `https://cx.avaamo.com/api/v2/campaigns/insights`
Get a closer look at the user conversations with the campaign. You can use this API for debugging and reporting purposes. See [Campaigns](https://docs.avaamo.com/user-guide/outreach/campaigns), for more information.
#### Query Parameters
Name Type Description conversation_uuid String Conversation identifier of the communication between campaign and the recipient. Valid when the campaign is linked to an agent for two-way communication. See Link to Avaamo agent , for more information.
You can get the conversation identifier from the Conversation history URL or from the Get Messages API of the agent that is linked to the campaign.
Example: conversation_uuid=17xxxxxxxx
delivery_channel array Channel in which the campaign message was delivered. Possible values: sms, voice, ms_teams
Example:
delivery_channel=sms
start_time number Timestamp from which the records are fetched.
The default value is the last three days from the specified end_time value.
Specify in UNIX Epoch Timestamp.
The Outreach Insights API allows you to retrieve data for the last 6 months. If the start_time specified in the data request exceeds this 6-month limit, the system automatically adjusts start_time to the maximum allowable range of the past 6 months.
end_time number Timestamp until which the records are fetched. The default value is the current timestamp.
Specify in UNIX Epoch Timestamp in milliseconds.
page integer Page from which the entries must be fetched. per_page integer Number of entries fetched per page. language String Language of the campaign message. See Language-specific messages , for more information.
Example 1:
language[]=en-US
Example 2:
language[]=en-US&language[]=hi-IN
message_uuid String Message identifier in the campaign conversation. Valid when the campaign is linked to an agent for two-way communication. See Link to Avaamo agent , for more information.
You can get the message identifier from the API response itself or from the Get Messages API of the agent that is linked to the campaign.
Example: message_uuid=bc12xxxxxxxx
execution_id integer Identifier of a campaign run. You can get the execution_id from the API response itself.
Example: execution_id=2x
campaign_id integer Campaign identifier. You can get the campaign identifier from the campaign URL.
Example 1: campaign_id=17x
Example 2: campaign_id=13x, 45x
to_phone String The recipient's phone number to which the campaign message was sent.
Valid for SMS and Voice campaigns. Ensure that the value is URL encoded.
Example: to_phone=222xxx5678
from_phone String The phone number from which the campaign message was sent to the recipients.
Valid for SMS and Voice campaigns. Ensure that the value is URL encoded.
Example: from_phone=444666xxxx
filter_id integer Filter identifier that was applied for delivering the campaign message. You can specify multiple filters using a comma-separated list.
You can get the filter identifier from the campaign filter URL. See Filters , for more information.
Example 1: filter_id=5x
Example 2: filter_id=5x,2x
agent_id integer Agent identifier. Valid when the campaign is linked to an agent for two-way communication. See Link to Avaamo agent , for more information.
You can get the agent identifier from the agent URL.
Example: agent_id=17x
response_set_id integer Response set identifier that was picked for delivering the campaign message. You can get the response set identifier from the API response itself. See Response sets , for more information.
Example: response_set_id=17x
delivery_status String Delivery status of the campaign message. Possible values: sent, failed, skipped, delivered, undelivered.
See Campaign delivery status , for more information.
delivery_status[]=failed
channel_id integer Channel identifier. You must specify
delivery_channel query parameter to use channel_id in the query parameter.
You can get the response set identifier from the API response itself. Valid when the campaign is linked to an agent for two-way communication. See Link to Avaamo agent , for more information.
Example: channel_id=5xx
to_email String The recipient's email to which the campaign message was sent.
Valid for MS Teams campaign. Ensure that the value is URL encoded.
Example: to_email=john%40avaamo.com%0A
recipient_uuid String Unique identifier for each recipient. For multi-message campaign, the recipient_uuid remains the same for each message in the multi-message list when sent to the same recipient. You can get the recipient_uuid from the API response itself.
Example: recipient_uuid=bc12xxxxxxx
user[<<user_properties>>] Array User properties such as first name, last nameExample 1: user[first_name]=Mike
Example 2: user[last_name]=Bob
Example 3: user[first_name]=Mike&user[last_name]=Bob
error_code String Indicates the code for the error that occurred when delivering the campaign message to the corresponding recipient. You can get the error_code from the API response itself. Example: error_code=AVM01, AVM02
#### Headers
Name Type Description access-token* String The user access token. This API gets the insights of all the campaigns from the account the user is associated with.
You can get the user access token from the Settings -> Users page. See Users or Groups , for more information.
{% tabs %}
{% tab title="200 Successful request" %}
{% code overflow="wrap" %}
```json
{
"current_page": 1,
"per_page": 25,
"total_entries": 2,
"total_pages": 1,
"time_token": 1689593442.8405523,
"entries": [
{
"id": 1382620,
"recipient_uuid": "8eb0dxxx-xxxx-xxxx-xxxx-xxx0db5b6fb5",
"delivery_status": "failed",
"message_uuid": null,
"created_at": 1751450792,
"content": "If you are having any references, feel free to forward this message.",
"conversation_uuid": null,
"language": "en-US",
"user": {
"id": "1373",
"last_name": "Smith",
"first_name": "Jake",
"phone": "72) 913-6939",
"acct_bal": "$0.00",
"age": "72",
"job_id": "Z1479217",
"dob": "03/16/1967"
},
"error": "Could not place call due to technical error.",
"error_code": "AVM1015",
"execution": {
"id": 2980,
"created_at": 1751450376
},
"delivery_channel": "voice",
"from_phone": "+18507905180",
"filters": [],
"response_set": {
"id": 1384,
"name": null
},
"campaign": {
"id": 780,
"name": "CIVR7"
},
"to_phone": "729136939"
},
"user": {
"phone": "+918971115555",
"email": "john@avaamo.com",
"first_name": "John",
"last_name": "Miller"
},
"campaign": {
"id": 511,
"name": "Sparsh Healthcare Multi Message Campaign"
},
"to_phone": "+918971115555"
},
{
"id": 8685,
"recipient_uuid": "f8adcxxx-xxxx-xxxx-xxxx-xxx734ac348e",
"delivery_status": "delivered",
"message_uuid": null,
"created_at": 1689592018,
"content": "The Sparsh care center is organizing a free Flu vaccination drive on October 1st and October 2nd from 10 AM to 6 PM. Visit your nearest Sparsh Care Center to get vaccinated. \n",
"conversation_uuid": null,
"language": "en-US",
"execution": {
"id": 1708,
"created_at": 1689592016
},
"delivery_channel": "sms",
"from_phone": "+18507905180",
"filters": [],
"response_set": {
"id": 997,
"name": null
},
"user": {
"phone": "+918971115555",
"email": "John@avaamo.com",
"first_name": "John",
"last_name": "Miller"
},
"campaign": {
"id": 511,
"name": "Sparsh Healthcare Multi Message Campaign"
},
"to_phone": "+918971115555"
}
]
}
```
{% endcode %}
{% endtab %}
{% endtabs %}
{% hint style="info" %}
**Notes**:
* For optimal API performance, the recommended time duration for fetching data from any of the REST APIs that support a date range or time period is 7 days.
* You can retrieve data from the Outreach Insights API for up to the past 6 months from the current date of access.
* If the same user appears in multiple campaigns with the same primary header, the insights override the attributes from different CSV files, showing the most recent attributes in the latest insights.
{% endhint %}
### Campaign delivery status
Note the following campaign delivery status mapping for each channel:
Status Description Applicable channels Sent Request has been initiated successfully. SMS
C-IVR
MS Teams
Custom channel
Failed The recipient is filtered out or failed to send the request to the recipient since the email or phone number was not available.
For C-IVR, failed status is returned even when the user declines the call.
Check the Error status of the corresponding record for more information.
SMS
C-IVR
MS Teams
Custom channel
Pending Status is pending when the recipient was engaged in another call at the same time when the campaign was triggered. The campaign message is later updated to Delivered, Undelivered, Failed when the recipient line is again available for usage.
C-IVR
Delivered The message is successfully delivered to the recipient SMS
C-IVR
Custom channel
Undelivered Unable to deliver the message to the recipient.
Check the Error status of the corresponding record for more information.
SMS
C-IVR
Custom channel
Queued Received the request, but the recipient is waiting in queue to process it. MS Teams Installed Triggered the installation of the MS teams app to the recipient, waiting to send the campaign message. MS Teams
### Code request snippets
{% tabs %}
{% tab title="cURL" %}
```javascript
curl --location 'https://cx.avaamo.com/api/v2/campaigns/insights' \
--header 'Content-Type: application/json' \
--header 'access-token: xxxxxxxxx4d14acba2fb2ccxxxxxxxxx'
```
{% endtab %}
{% tab title="node.js" %}
```javascript
var request = require('request');
var options = {
'method': 'GET',
'url': 'https://cx.avaamo.com/api/v2/campaigns/insights',
'headers': {
'Content-Type': 'application/json',
'access-token': 'xxxxxxxxx4d14acba2fb2ccxxxxxxxxx'
}
};
request(options, function (error, response) {
if (error) throw new Error(error);
console.log(response.body);
});
```
{% endtab %}
{% endtabs %}
### Response attributes
The following is a sample response of a successful Outreach insights API request:
{% code overflow="wrap" %}
```json
{
"current_page": 1,
"per_page": 25,
"total_entries": 2,
"total_pages": 1,
"time_token": 1751971354.0004876,
"entries": [
{
"id": 1382614,
"recipient_uuid": "917c7xxx-xxxx-xxxx-xxxx-xxx21754d1b7",
"delivery_status": "failed",
"message_uuid": null,
"created_at": 1750851657,
"content": "Hi nobody here, I'm your point of contact.\n",
"conversation_uuid": null,
"language": "en-US",
"user": {
"phone": "1234567890",
"email": "someone@somewhere.com",
"first_name": "nobody",
"last_name": "here"
},
"error": "'To' number +91123456XXXX cannot be a landline",
"error_code": null,
"execution": {
"id": 2978,
"created_at": 1750851339
},
"delivery_channel": "sms",
"from_phone": "+18507905180",
"filters": [],
"response_set": {
"id": 1394,
"name": null
},
"campaign": {
"id": 832,
"name": "multi message test 2"
},
"to_phone": "+911234567890"
},
{
"id": 1382615,
"recipient_uuid": "917c79d0-5a0a-41fb-b1ad-1a021754d1b7",
"delivery_status": "failed",
"message_uuid": null,
"created_at": 1750851657,
"content": "\nReach out to me for any queries.",
"conversation_uuid": null,
"language": "en-US",
"user": {
"phone": "1234567890",
"email": "someone@somewhere.com",
"first_name": "nobody",
"last_name": "here"
},
"error": "'To' number +91123456XXXX cannot be a landline",
"error_code": null,
"execution": {
"id": 2978,
"created_at": 1750851339
},
"delivery_channel": "sms",
"from_phone": "+18507905180",
"filters": [],
"response_set": {
"id": 1394,
"name": null
},
"campaign": {
"id": 832,
"name": "multi message test 2"
},
"to_phone": "+911234567890"
}
]
}
```
{% endcode %}
In the response, the following attributes are returned:
Attribute Description Type current_page Indicates the page from which the entries are fetched. Integer per_page Indicates the number of entries fetched per page. Integer total_entries Indicates the total number of intent entries in the response. Integer total_pages Indicates the total number of pages calculated using per_page. Note that total_entries = per_page * total_pages Integer time_token Indicates the timestamp at which the API response is returned. UNIX epoch timestamp entries Indicates an array of insights fetched across all the campaigns of an account.
Number of entries in the array = Number specified in per_page parameter.
JSON key-value pairs
#### entries
Indicates an array of insights fetched across all the campaigns of an account. Each array contains the following attributes:
Attribute Description Type id Indicates an identifier of each insight entry. This is for internal purposes only. Integer recipient_uuid Unique identifier for each recipient. For multi-message campaign, the recipient_uuid remains the same for each message in the multi-message list when sent to the same recipient. String delivery_status Indicates the delivery status of the campaign message. Possible values: sent, failed, skipped, delivered, undelivered.
See Campaign delivery status , for more information.
String to_phone Indicates the recipient's phone number to which the campaign message was sent.
Valid and returned only for SMS and Voice campaigns.
String to_email Indicates the recipient's email to which the campaign message was sent.
Valid and returned only for MS Teams campaign.
String language Indicates the language of the campaign message. See Language-specific messages , for more information. String execution Indicates the identifier of a campaign run. Integer delivery_channel Indicates the channel in which the campaign message was delivered. Possible values: sms, voice, ms_teams String from_phone Indicates the phone number from which the campaign message was sent to the recipients.
Valid for SMS and Voice campaigns. from_phone is null for MS Teams campaigns.
String filters Indicates an array of filters that were applied for delivering the campaign message. Each filter array contains the identifier, the name of the filter, and if the filter was matched or not.
See Filters , for more information.
Array of JSON key-value pairs response_set Indicates the response set that was picked for delivering the campaign message. The response set contains the identifier and name of the response set.
See Response sets , for more information.
JSON key-value pairs created_at Indicates the timestamp of when the insight was created in seconds. UNIX epoch timestamp user Indicates any additional user properties fetched in the campaign insights.
Example :
"user": {
"phone": " 1 972 913 xxx",
"email": "john.miller@avaamo.com", "first_name": "John",
"last_name": "Miller"
}
JSON key-value pairs content Indicates the content of the campaign message. String conversation_uuid Indicates the conversation identifier of the communication between the campaign and the recipient.
Valid when the campaign is linked to an agent for two-way communication. See Link to Avaamo agent , for more information.
String message_uuid Indicates the message identifier in the campaign conversation. A conversation can have multiple messages and each message has an identifier to uniquely identify the message in the conversation.
Valid when the campaign is linked to an agent for two-way communication. See Link to Avaamo agent , for more information.
String campaign Indicates the campaign details such as the identifier and name of the campaign. JSON key-value pairs agent Indicates the agent details such as the identifier, name, and channel details of the agent.
Valid when the campaign is linked to an agent for two-way communication. See Link to Avaamo agent , for more information.
JSON key-value pairs error Indicates the error that occurred when delivering the campaign message to the corresponding recipient. This is available only when the delivery_status is either failed or skipped. String error_code Indicates the code for the error that occurred when delivering the campaign message to the corresponding recipient. String
### Examples
The following table lists a few sample use cases with query parameters:
Use case Query parameter Get insights of campaigns using multiple campaign IDs https://cx.avaamo.com/api/v2/campaigns/insights?campaign_id=12xx,56xxGet insights specific to a channel and delivery status https://cx.avaamo.com/api/v2/campaigns/insights?delivery_channel=ms_teams&delivery_status=failedGet insights using user properties https://cx.avaamo.com/api/v2/campaigns/insights?campaign_id=6xx, 6xx&user[first_name]=Mike&user[last_name]=BobGet insights using error codes https://cx.avaamo.com/api/v2/campaigns/insights?error_code=AVM1015, AVM1010, AVM1001
---
# Source: https://docs.avaamo.com/user-guide/outreach/outreach-rest-apis.md
# Outreach - REST APIs
- [Outreach insights API](/user-guide/outreach/outreach-rest-apis/outreach-insights-api.md): Insights across all the campaigns of an account. Use this API for debugging and reporting purposes.
- [Outreach Changelog API](/user-guide/outreach/outreach-rest-apis/outreach-changelog-api.md)
- [SMS Opt status API](/user-guide/outreach/outreach-rest-apis/sms-opt-status-api.md): Opt SMS status of the recipient numbers that have explicitly opted-in or opted-out across all the campaigns of an account
- [Status Callback URL (Outreach Custom Channel)](/user-guide/outreach/outreach-rest-apis/status-callback-url-outreach-custom-channel.md)
---
# Source: https://docs.avaamo.com/user-guide/how-to/build-agents/create-universal-agent/overview-get-started.md
# Overview - Get started
{% hint style="info" %}
**Note**: You can create Universal agents only if it is enabled in your account. Contact Avaamo Support for further assistance.
{% endhint %}
In simple terms, a **Universal agent** is a "group of agents" that handles tasks of multiple agents in a single conversational flow. It can integrate and connect with independent virtual agents to route, filter, and provide real-time responses.
The primary feature of a Universal agent is the ability to have "one" agent across multiple departments in an Enterprise organization. Typically, large enterprises can have multiple departments, each with its own individual agents catering to different aspects of the organization. Since all agents are a part of the same organization, by integrating these into a Universal agent, you are providing a seamless and pleasant experience to the users.
The following illustration depicts an "Acme Enterprise" Universal agent linked with independent virtual agents such as - Acme HR, Acme IT, and Acme Finance. Each department can continue to build these agents independently. The user can just use one agent - the "Acme Enterprise" agent for all the queries across different departments:

### How does it work - Quick Overview?
Each agent linked to the Universal agents is referred to as a **Member agent**. When a user query is posted to a Universal agent, it routes the user’s intent to the appropriate **Member agent** for simple Q\&A or multi-turn conversations, renders member responses inline, and also manages the conversation context.
The main purpose of a Universal agent is to centralize agent interaction across multiple departments, domains, or sectors. Users can use one agent to find responses to queries that span multiple sectors.
On the home page, the Universal agent can be identified and differentiated from other agents as the icon for the Universal agent has a soft shadow extending from it.

### Create a Universal agent
{% hint style="info" %}
**Note**: Ensure you have met the [pre-requisites](https://docs.avaamo.com/user-guide/quick-start-tutorials/pre-requisites).
{% endhint %}
* In the Avaamo Platform UI, click the **Agents** option in the top menu, navigate to the **Development** tab, and select **Universal Agent** under **Create**.
* Specify the **Agent name**, **Agent description,** and **Agent avatar** for the Universal agent. Refer [Create a new agent ](https://docs.avaamo.com/user-guide/how-to/build-agents/add-skills)for more information on these fields.

### Open or view a Universal agent
Any newly created Universal agent is displayed on the **Agents** page. You can open or view a Universal agent by either clicking on the agent name, or clicking on the 3 dots under **Actions** for the Universal agent and selecting **View**.
### Delete a Universal agent
{% hint style="info" %}
**Notes**:
* It is recommended to use this option with caution because when you force unlock an agent all the unsaved changes made by the other user is lost.
* In order to use this option, you must at least have edit permission on the agent.
{% endhint %}
1. On the **Agents** page, click the 3 dots under **Actions** for the universal agent that you want to delete.
2. Select **Delete**. The agent is deleted and a confirmation box notifying you of the successful deletion of the agent is displayed.

### Make a copy of a Universal Agent
You can make a copy of your Universal agent using the **Make a copy** option. When you copy an agent, an exact clone of the Universal agent is created. This is similar to the **Make a copy** option available for independent agents. See [Make a copy](https://docs.avaamo.com/user-guide/how-to/build-agents/manage-agents/make-a-copy), for more information.

You can always rename a Universal agent's copy by opening the agent and clicking the pencil icon (edit icon) next to the Universal agent's name.
### Skill in a Universal agent
A newly created universal agent has the **Greetings,** **Unhandled** and **Smalltalk** skills in it by default. You can configure this skill as required. See [Built-in skills](https://docs.avaamo.com/user-guide/how-to/add-skills-to-agent#built-in-skills), for more information.
{% hint style="info" %}
**Note:** Currently, the Frustration built-in skill is not available in the Universal agent. Frustration built-in skill requires configuring live agent option which is currently available only in the individual member agents.
{% endhint %}
Besides the **Greetings, Unhandled** and **Smalltalk** skills, you cannot create any other skill as the purpose of the universal agent is to combine and centralize the tasks of multiple agents. Hence, instead of the option to add skills, you have the option to add member agents. See [Add member agents](https://docs.avaamo.com/user-guide/how-to/build-agents/create-universal-agent/add-member-agents) for more information.

### Configure Universal agents
The following options are available for configuration in Universal agents:
* **Channels**: Currently, you can deploy a Universal agent only on a Web, Android, or iOS channel. See [Configure web channel](https://docs.avaamo.com/user-guide/how-to/build-agents/configure-agents/deploy/web-channel/configure-web-channel) for more information.
* **Permissions:** The procedure to manage access and permission remains the same as applicable for any regular agent. See [Add permissions](https://docs.avaamo.com/user-guide/how-to/build-agents/configure-agents/permissions), for more information.
* **Persistent menu:** The procedure to add a persistent menu remains the same as applicable for any regular agent. See [Persistent menu](https://docs.avaamo.com/user-guide/how-to/build-agents/configure-agents/add-persistent-menu), for more information.
* **Settings:** See [Define settings](https://docs.avaamo.com/user-guide/how-to/build-agents/configure-agents/define-settings) to understand how to manage general settings for your Universal agent.
* Note that `Max question repeat count` and `options in Advanced settings` are available only in the Member agents. These options are very specific on how individual agents prefer to handle the flow and hence are relevant only to the Member agents. This also provides better flexibility as it allows the member agents to handle these settings independently.
* The **Dispatcher handler** option is available only for Universal agents. In this handler, you can provide a script that is called before probing the member agents. For example, you can use this handler for setting up conditions before probing the member agents. See [Dispatch handler](https://docs.avaamo.com/user-guide/how-to/configure-agents/define-settings#dispatch-handler), for more information.
### Connecting to a live agent
When the user requests to talk to a live agent, links to the live agent for each member agent are displayed. The user can select which member's live agent the user wants to talk to.

{% hint style="info" %}
**Notes**:
* The skill command `#end agent` is not applicable to Universal agents, since the live agent interactions are handled by individual member agents. See [Skill commands](https://docs.avaamo.com/user-guide/how-to/build-skills/create-skill/customize-your-skill/reference-library/skill-commands), for more information.
* A Live agent interaction in the Universal agents is an explicit action. It requires users to choose which live agent in the available member agents they wish to connect with. Hence, the live agent transfer rules such as "Silent switch" and "Switch to live agent for unhandled queries" are not applicable in the live agent interactions of a Universal agent. See [Live agent transfer rules](https://docs.avaamo.com/user-guide/how-to/configure-agents/switch-to-live-agent/pre-built-live-agent#live-agent-transfer-rules), for more information.
{% endhint %}
### Debug Universal agents
All the options available to debug agents such as JS errors, Debug log, Storage, and Conversation history are available in the Universal agents too. See [Debug agents](https://docs.avaamo.com/user-guide/how-to/build-agents/debug-agents), for more information.
{% hint style="info" %}
**Notes:**
* When a query is posted to a Universal agent, then the conversation is recorded in the Conversation history of the Universal agent and in the corresponding member agent from where the response is received.
* JS errors, Debug logs, and Storage pages display details relevant only to the Universal agent.
{% endhint %}
### Test Universal agents
You can test Universal agents using the Simulator and using Regression testing. Regression testing in Universal agents allows you to test queries with its member agents.
* See [Agent simulator](https://docs.avaamo.com/user-guide/how-to/build-agents/test-agents/simulator), for more information.
* See [Regression testing in Universal agents](https://docs.avaamo.com/user-guide/how-to/build-agents/test-agents/regression-testing-universal-agents), for more information on the format that you can use to test Universal agents.
### Monitor Universal agent
The **Monitor -> Analytics** page in the Universal agent provides a unified analytics dashboard for monitoring the usage across the member agents along with the total queries, unhandled queries, and disambiguations. See [Analytics in Universal agents](https://docs.avaamo.com/user-guide/how-to/build-agents/monitor-and-analyze/analytics-universal-agent), for more information.

### Key points
* Currently, Universal agents do not participate in Agent life cycle stages.
* Currently, Universal agents can be deployed on the Web, iOS, and Android channels.
* Only supports conversation in the English language.
* Currently, [information masking](https://docs.avaamo.com/user-guide/overview-and-concepts/advanced-concepts/information-masking) is not supported in Universal agents. This implies that if you have a Universal agent with masking enabled for member agents, then even though the responses are masked in the member agents, the same responses remain unmasked in the Universal agent.
* You can also use `context.memberAgents` to get a list of all enabled member agents. The returned object is an array and you can use this information in any JS block of the Universal agent to get the member key and member name:
```json
"memberAgents": [
{
"key": "home_loan",
"name": "Home Loan"
},
{
"key": "education",
"name": "Educational Loan Virtual Agent"
},
{
"key": "personal",
"name": "Personal Home Loan Agent"
},
{
"key": "vehicle",
"name": "Vehicle Loan"
}
]
```
---
# Source: https://docs.avaamo.com/user-guide/avaamo-agent-assist/avaamo-agent-assist/overview-key-features.md
# Source: https://docs.avaamo.com/user-guide/datasync-ai/overview-key-features.md
# Source: https://docs.avaamo.com/user-guide/llamb/overview-key-features.md
# Source: https://docs.avaamo.com/user-guide/ai-agent/overview-key-features.md
# Overview - Key features
The `AI Agent` is a next-generation agent built to power highly intelligent and dynamic voice or text-based conversations. With advanced context awareness and adaptive response capabilities, AI Agents elevate query handling and user engagement—delivering interactions that feel more natural, intuitive, and human-like than ever before.
With AI agents a new type of skill - `Prompt skills` is also introduced in this release. Powered by prompt skills, these agents are designed to understand, reason, and act – independently and effectively.
There is no need for extensive training, as required with Classic agents. Instead, you can define all instructions using the [Prompt Skill](https://docs.avaamo.com/user-guide/skills/prompt-skill), significantly reducing the time needed to build a skill. Along with prompts, you can build complex scenarios using built-in functions, and customized functions.
You can create multiple prompt skills, and the agent can seamlessly redirect interactions from one skill to another based on user queries, ensuring a smooth and dynamic conversation flow.
## Sneak peek
Here's a quick sneak peek at the AI agent:
Social filters Detect and filter harmful content in both user prompts and generated outputs in the following categories Racism Hate Violence Self-harm Sexual harassment Discrimination Drugs social-filters Grounding filters Ensures the quality, accuracy, and relevance of the generated output, and helps to "ground" the models in the context of the specific use-case to obtain accurate and relevant output. grounding-filters Brand Protection filters Protect your brand, and ensure that your content is safely and ethically used.
Brand Awareness Business taxonomy
brand-protection-filters Hallucination filters Eliminate hallucinations and help in the detection and correction of fabricated or false content generated by the model. hallucination-filters
By integrating these rigorous input validation, continuous monitoring, and strict data privacy measures, LLaMB offers a secure and efficient approach to enterprise AI deployment.
---
# Source: https://docs.avaamo.com/user-guide/ref/parallel-development-qa-and-smalltalk-faqs.md
# Parallel development (QA & Smalltalk) FAQs
The following lists a few frequently asked questions about parallel development in Q\&A and Smalltalk skills.
### 1. What are some of the recommended best practices?
The following lists a few best practices to consider:
* **Adding and editing Q\&A** - Multiple developers can add or edit questions and answers simultaneously in the same Q\&A or Smalltalk skill, encouraging faster development of the skill. As a best design practice, it is recommended to distribute a set of intents among developers, so that it is easy to maintain and manage and results in seamless collaboration.
* **Adding languages** - Multiple developers can add and save language packs simultaneously in the Q\&A skill. Each language pack can be saved independently. As a best practice, it is recommended that individual developers work on a single language pack independently. It helps to easily manage and maintain language packs.
### 2. Can I edit Dialog skill, when another user is editing a Q\&A skill simultaneously?
Yes, they can. One developer can unlock the agent and edit the Dialog skill, while the other developer works on the Q\&A. Editing Q\&A skills required lock only at each intent level.
### 3. Can I import Q\&A using CSV, when another user is editing a Q\&A intent in the same skill?
No, you cannot. You can import only when all of the existing questions and answers in the Q\&A skill are unlocked.
### 4. Can I delete all (Clear) Q\&A, when another user is editing a Q\&A intent in the same skill?
No, you cannot. You can clear all the Q\&A only when all of the existing questions and answers in the Q\&A skill are unlocked
### 5. Can I publish a Q\&A skill, when another user is editing a Q\&A intent of the same skill?
Yes, you can. At the point of publishing, whatever is saved in the Q\&A skill, is published to the Skill store.
### 6. Can I import/re-import other skills from the skill store, when another user is editing a Q\&A intent?
Yes, you can. One developer can unlock the agent and import other skills, while the other developer works on the Q\&A. Editing Q\&A skills required lock only at each intent level. The same holds good for publish/re-publish as well.
---
# Source: https://docs.avaamo.com/user-guide/how-to/build-skills/create-skill/using-avaamo-answers-1/parsing-templates.md
# Source: https://docs.avaamo.com/user-guide/llamb/get-started/step-2-ingest-enterprise-content/parsing-templates.md
# Parsing templates
{% hint style="info" %}
**Note**: Parsing template is required only when uploading content to LLaMB via URL.
{% endhint %}
Parsing templates serve the purpose of extracting chunks of content from uploaded information, enabling the creation or updating of a document group's knowledge base.
LLaMB can process PDF files seamlessly, eliminating the need for any preprocessing or parsing templates. For HTML content, the requirement for parsing templates has been drastically simplified. In this article, you can learn how to build custom parsing templates to ingest HTML content based on your requirements.
### Overview
Open the `LLaMB content skill` and click `Parsing templates` in the left navigation. A list of all the inbuilt parsing templates is displayed. These are non-editable templates that can only be viewed for quick reference.
Name Description ID Database ID for this template. You can use this identifier in the Content Ingestion APIs -> parsing_template_id parameter to upload documents or files.
Note that the parsing template identifier can vary based on the instance. When using the parsing template identifier in the APIs, for example, in the Content Ingestion API, pick the parsing template identifier relevant to your instance. See Content Ingestion APIs , for more information.
File Name Name of the template File Type The file type for which this parsing template can be used when uploading. Last Updated The date on which this template was last uploaded. Actions Only the View action is available.
### Create a custom parsing template
In addition to the parsing templates provided by Avaamo, you can create new custom templates to ingest HTML content based on your requirements. Click **Add New** to add your template.
Provide the following details in the **Create Parsing Template** dialog box.
* **Name:** Name of the custom template.
* **Key:** Unique key for the template.
* **File type:** Choose a file type from the given options. Currently, this applies only to URLs.
* **Template JSON:** The JSON file or template that will be used for parsing.
{% hint style="info" %}
**Notes**:
* Creating a custom parsing template is use-case-specific. Contact Avaamo Support, for further assistance.
* After you save the custom parsing template, a unique identifier is generated by the platform to identify the parsing template. You can use this identifier in the `Content Ingestion APIs -> parsing_template_id` parameter to upload documents or files. See [Content Ingestion APIs](https://docs.avaamo.com/user-guide/llamb/llamb-rest-apis/content-ingestion-apis), for more information.
{% endhint %}
---
# Source: https://docs.avaamo.com/user-guide/tutorials-and-exercises/part-1-creating-my-agent.md
# Part 1: Creating my agent
- [Chapter 1: Getting started](/user-guide/tutorials-and-exercises/part-1-creating-my-agent/chapter-1-getting-started.md)
- [Exercise 1.1: Cloning a sample agent](/user-guide/tutorials-and-exercises/part-1-creating-my-agent/chapter-1-getting-started/exercise-1.1-cloning-a-sample-agent.md)
- [Exercise 1.2: Asking questions to the agent](/user-guide/tutorials-and-exercises/part-1-creating-my-agent/chapter-1-getting-started/exercise-1.2-asking-questions-to-the-agent.md)
- [Exercise 1.3: Changing agent avatar and name](/user-guide/tutorials-and-exercises/part-1-creating-my-agent/chapter-1-getting-started/exercise-1.3-changing-agent-avatar-and-name.md)
- [Exercise 1.4: Changing welcome message](/user-guide/tutorials-and-exercises/part-1-creating-my-agent/chapter-1-getting-started/exercise-1.4-changing-welcome-message.md)
- [Exercise 1.5: Entity types](/user-guide/tutorials-and-exercises/part-1-creating-my-agent/chapter-1-getting-started/exercise-1.6-entity-types.md)
- [Exercise 1.6: Deploying your agent to a web page](/user-guide/tutorials-and-exercises/part-1-creating-my-agent/chapter-1-getting-started/exercise-1.6-deploying-your-agent-to-a-web-page.md)
- [Chapter 2: Building an Answers skill (Deprecated)](/user-guide/tutorials-and-exercises/part-1-creating-my-agent/chapter-2-building-an-answers-skill.md)
- [Exercise 2.1: Create an Answers skill](/user-guide/tutorials-and-exercises/part-1-creating-my-agent/chapter-2-building-an-answers-skill/exercise-2.1-create-an-answers-skill.md)
- [Exercise 2.2: Uploading a document](/user-guide/tutorials-and-exercises/part-1-creating-my-agent/chapter-2-building-an-answers-skill/exercise-2.2-uploading-a-document.md)
- [Exercise 2.3: Examining Answers knowledge base](/user-guide/tutorials-and-exercises/part-1-creating-my-agent/chapter-2-building-an-answers-skill/exercise-2.3-examining-answers-knowledge-base.md)
- [Exercise 2.4: Building an Answers Skill from a URL](/user-guide/tutorials-and-exercises/part-1-creating-my-agent/chapter-2-building-an-answers-skill/exercise-2.4-building-an-answers-skill-from-a-url.md)
- [Exercise 2.5: Training the knowledge models](/user-guide/tutorials-and-exercises/part-1-creating-my-agent/chapter-2-building-an-answers-skill/exercise-2.5-training-your-skill-and-training-the-knowledge-models.md)
- [Chapter 3: Building a Q\&A skill](/user-guide/tutorials-and-exercises/part-1-creating-my-agent/chapter-3-building-a-q-and-a-skill.md)
- [Exercise 3.1: Train the Skill with Questions and Answer Pairs](/user-guide/tutorials-and-exercises/part-1-creating-my-agent/chapter-3-building-a-q-and-a-skill/exercise-3.1-create-a-q-and-a-skill.md)
- [Exercise 3.2: Adding Variations to Question and Answer Pairs](/user-guide/tutorials-and-exercises/part-1-creating-my-agent/chapter-3-building-a-q-and-a-skill/exercise-3.2-add-questions-and-answers.md)
- [Exercise 3.3: Configuring User Feedback](/user-guide/tutorials-and-exercises/part-1-creating-my-agent/chapter-3-building-a-q-and-a-skill/exercise-3.3-configuring-user-feedback.md)
- [Exercise 3.4: Adding an Introductory Message to Q\&A Skill](/user-guide/tutorials-and-exercises/part-1-creating-my-agent/chapter-3-building-a-q-and-a-skill/exercise-3.4-adding-an-introductory-message-to-q-and-a-skill.md)
- [Exercise 3.5: Adding an Outro Message to your Q\&A Skill](/user-guide/tutorials-and-exercises/part-1-creating-my-agent/chapter-3-building-a-q-and-a-skill/exercise-3.5-adding-an-outro-message-to-your-q-and-a-skill.md)
- [Chapter 4: Building a Smalltalk skill](/user-guide/tutorials-and-exercises/part-1-creating-my-agent/chapter-4-building-a-smalltalk-skill.md)
- [Exercise 4.1: Default Smalltalk skill](/user-guide/tutorials-and-exercises/part-1-creating-my-agent/chapter-4-building-a-smalltalk-skill/exercise-4.1-default-smalltalk-skill.md)
- [Exercise 4.2: Creating a Smalltalk skill](/user-guide/tutorials-and-exercises/part-1-creating-my-agent/chapter-4-building-a-smalltalk-skill/exercise-4.2-creating-a-smalltalk-skill.md)
- [Exercise 4.3: Adding variations to your Smalltalk questions](/user-guide/tutorials-and-exercises/part-1-creating-my-agent/chapter-4-building-a-smalltalk-skill/exercise-4.3-adding-variations-to-your-smalltalk-questions.md)
- [Exercise 4.4: Train Q\&A pairs with variations](/user-guide/tutorials-and-exercises/part-1-creating-my-agent/chapter-4-building-a-smalltalk-skill/exercise-4.4-train-q-and-a-pairs-with-variations.md)
- [Exercise 4.5: Test Smalltalk in your agent](/user-guide/tutorials-and-exercises/part-1-creating-my-agent/chapter-4-building-a-smalltalk-skill/exercise-4.5-test-smalltalk-in-your-agent.md)
- [Chapter 5: Building a Dialog skill](/user-guide/tutorials-and-exercises/part-1-creating-my-agent/chapter-5-building-a-dialog-skill.md)
- [Exercise 5.1: Creating a Dialog skill](/user-guide/tutorials-and-exercises/part-1-creating-my-agent/chapter-5-building-a-dialog-skill/exercise-5.1-creating-a-dialog-skill.md)
- [Exercise 5.2: Creating a conversation flow](/user-guide/tutorials-and-exercises/part-1-creating-my-agent/chapter-5-building-a-dialog-skill/exercise-5.2-creating-a-conversation-flow.md)
- [Exercise 5.3: Capturing data from a conversation](/user-guide/tutorials-and-exercises/part-1-creating-my-agent/chapter-5-building-a-dialog-skill/exercise-5.3-capturing-data-from-a-conversation.md)
- [Exercise 5.4: Adding a JavaScript](/user-guide/tutorials-and-exercises/part-1-creating-my-agent/chapter-5-building-a-dialog-skill/exercise-5.4-adding-a-javascript.md)
- [Exercise 5.5: Test the Dialog skill](/user-guide/tutorials-and-exercises/part-1-creating-my-agent/chapter-5-building-a-dialog-skill/exercise-5.4-test-the-dialog-skill.md)
- [Exercise 5.6: Deploy your Agent on a Web Channel](/user-guide/tutorials-and-exercises/part-1-creating-my-agent/chapter-5-building-a-dialog-skill/exercise-5.5-deploy-your-agent-on-a-web-channel.md)
- [Chapter 6: Agent analytics](/user-guide/tutorials-and-exercises/part-1-creating-my-agent/chapter-6-agent-analytics.md)
- [Exercise 6.1: Analytics Dashboard](/user-guide/tutorials-and-exercises/part-1-creating-my-agent/chapter-6-agent-analytics/exercise-6.1-analytics-dashboard.md)
- [Exercise 6.2: User Journey Display](/user-guide/tutorials-and-exercises/part-1-creating-my-agent/chapter-6-agent-analytics/exercise-6.2-user-journey-display.md)
- [Exercise 6.3: Query Insights](/user-guide/tutorials-and-exercises/part-1-creating-my-agent/chapter-6-agent-analytics/exercise-6.3-query-insights.md)
- [Exercise 6.4: Monitoring User Feedback](/user-guide/tutorials-and-exercises/part-1-creating-my-agent/chapter-6-agent-analytics/exercise-6.4-monitoring-user-feedback.md)
- [Chapter 7: Channels](/user-guide/tutorials-and-exercises/part-1-creating-my-agent/chapter-7-channels.md)
- [Exercise 7.1: Configuring an agent in a web page](/user-guide/tutorials-and-exercises/part-1-creating-my-agent/chapter-7-channels/exercise-7.1-configuring-an-agent-in-a-web-page.md)
- [Exercise 7.2: Configuring a SMS Channel](/user-guide/tutorials-and-exercises/part-1-creating-my-agent/chapter-7-channels/exercise-7.2-configuring-a-sms-channel.md)
- [Exercise 7.3: Configuring a Facebook Messenger Channel](/user-guide/tutorials-and-exercises/part-1-creating-my-agent/chapter-7-channels/exercise-7.3-configuring-a-facebook-messenger-channel.md)
- [Chapter 8: Live agent integration](/user-guide/tutorials-and-exercises/part-1-creating-my-agent/chapter-8-live-agent-integration.md)
- [Exercise 8.1: Invoking a Live Agent](/user-guide/tutorials-and-exercises/part-1-creating-my-agent/chapter-8-live-agent-integration/exercise-8.1-invoking-a-live-agent.md)
- [Exercise 8.2: Avaamo Live Agent Console](/user-guide/tutorials-and-exercises/part-1-creating-my-agent/chapter-8-live-agent-integration/exercise-8.2-avaamo-live-agent-console.md)
- [Chapter 9: Language support](/user-guide/tutorials-and-exercises/part-1-creating-my-agent/chapter-9-language-support.md)
- [Exercise 9.1: Adding a Language to an Agent](/user-guide/tutorials-and-exercises/part-1-creating-my-agent/chapter-9-language-support/exercise-9.1-adding-a-language-to-an-agent.md)
- [Exercise 9.2: Overriding Default Language Translation](/user-guide/tutorials-and-exercises/part-1-creating-my-agent/chapter-9-language-support/exercise-9.2-overriding-default-language-translation.md)
- [Chapter 10: Life-cycle management and agent permission](/user-guide/tutorials-and-exercises/part-1-creating-my-agent/chapter-10-life-cycle-management-and-agent-permission.md)
- [Exercise 10.1: Understanding Life-Cycle Management](/user-guide/tutorials-and-exercises/part-1-creating-my-agent/chapter-10-life-cycle-management-and-agent-permission/exercise-10.1-understanding-life-cycle-management.md)
- [Exercise 10.2: Understand Agent Permission](/user-guide/tutorials-and-exercises/part-1-creating-my-agent/chapter-10-life-cycle-management-and-agent-permission/exercise-10.2-understand-agent-permission.md)
- [Chapter 11: Skill Store](/user-guide/tutorials-and-exercises/part-1-creating-my-agent/chapter-11-skill-store.md)
- [Exercise 11.1: Avaamo Skill store](/user-guide/tutorials-and-exercises/part-1-creating-my-agent/chapter-11-skill-store/exercise-11.1-avaamo-skill-store.md)
- [Exercise 11.2: Company Skill Store](/user-guide/tutorials-and-exercises/part-1-creating-my-agent/chapter-11-skill-store/exercise-11.2-company-skill-store.md)
- [Exercise 11.3: Creating new categories in the skill store](/user-guide/tutorials-and-exercises/part-1-creating-my-agent/chapter-11-skill-store/exercise-11.3-creating-new-categories-in-the-skill-store.md)
- [Exercise 11.4: Adding Skills to the Company skill store](/user-guide/tutorials-and-exercises/part-1-creating-my-agent/chapter-11-skill-store/exercise-11.4-adding-skills-to-the-company-skill-store.md)
- [Exercise 11.5: Updating a published skill to a new version](/user-guide/tutorials-and-exercises/part-1-creating-my-agent/chapter-11-skill-store/exercise-11.5-updating-a-published-skill-to-a-new-version.md)
---
# Source: https://docs.avaamo.com/user-guide/tutorials-and-exercises/part-3-advanced-topics.md
# Part 2: Advanced topics
- [Chapter 12: Debugging Tools](/user-guide/tutorials-and-exercises/part-3-advanced-topics/chapter-22-debugging-tools.md)
- [Chapter 13: Programming](/user-guide/tutorials-and-exercises/part-3-advanced-topics/chapter-23-programming.md)
- [Chapter 14: APIs](/user-guide/tutorials-and-exercises/part-3-advanced-topics/chapter-24-apis.md)
---
# Source: https://docs.avaamo.com/user-guide/how-to/build-skills/manage-skill/perform-common-actions.md
# Source: https://docs.avaamo.com/user-guide/how-to/build-skills/create-skill/using-q-and-a-designer/build-and-manage-q-and-a-skill/perform-common-actions.md
# Source: https://docs.avaamo.com/user-guide/how-to/build-skills/create-skill/using-avaamo-answers-1/manage-avaamo-answers-1/perform-common-actions.md
# Source: https://docs.avaamo.com/user-guide/how-to/build-skills/create-skill/using-smalltalk/build-and-manage-smalltalk-skill/perform-common-actions.md
# Source: https://docs.avaamo.com/user-guide/how-to/build-skills/create-skill/dynamic-q-and-a/build-and-manage-dynamic-q-and-a-skill/perform-common-actions.md
# Source: https://docs.avaamo.com/user-guide/how-to/build-skills/create-skill/using-dialog-designer/create-new-skill/perform-common-actions.md
# Perform common actions
You can perform the following actions in the skill flow editor:

{% hint style="info" %}
**Notes**:
* Ensure you have met all the [pre-requisites](https://docs.avaamo.com/user-guide/quick-start-tutorials/pre-requisites).
* You can build and manage dialogs (conversational flow) immediately after creating a Dialog Skill. See [Create new Dialog skill](https://docs.avaamo.com/user-guide/how-to/build-skills/create-skill/using-dialog-designer/create-new-dialog-skill), for more information.
* If you wish to edit skills in an agent, then:
* Navigate to the Agents tab in the top menu. Search and open the required agent.
See [Search agents](https://docs.avaamo.com/user-guide/build-agents/manage-agents#search-agents), for more information.
* In the **Agent** page, navigate to the Skills option in the left navigation menu. Search and open the required skill.
{% endhint %}
## Edit Dialog skill
You can edit the skill to update the skill name and description as required.

* In the **Dialog skill** page, click **Edit** to unlock the skill.
* Click the **pencil icon** at the top-left corner next to the skill name.
* Edit the skill details.
{% hint style="info" %}
**Note**: By default, the skill key is non-editable. Click **Edit** to edit the skill key. It is recommended to edit the skill key with caution. If you update the skill key and if the key is used say in JS code or in regression testing, then you must update the skill key manually.
{% endhint %}
* Click **Update** and click **Save** to save the skill details.
## Edit intents and responses
You can edit the intents and responses of a Dialog skill.
* In the **Dialog Skill** page, click **Edit** to unlock the skill
* Click the **Implementation** option in the left navigation pane. A dialog flow tree is displayed.
* Click the intent that you wish to edit. Edit the intent details as required and click **Save**.
{% hint style="info" %}
**Note**: By default, the **Intent key** is non-editable. Click **Edit** to edit the Intent key. It is recommended to edit the Intent key with caution. If you update the Intent key and if the key is used say in JS code or in regression testing, then you must update the Intent key manually.
{% endhint %}
* Click the skill message that you wish to edit. Edit the [Prompt details](https://docs.avaamo.com/user-guide/how-to/build-skills/create-skill/using-dialog-designer/create-new-skill/build-skill-responses) and [Advanced settings](https://docs.avaamo.com/user-guide/how-to/build-skills/create-skill/using-dialog-designer/create-new-skill/build-skill-responses/advanced-settings) as required and click **Save**. See [Build skill responses](https://docs.avaamo.com/user-guide/how-to/build-skills/create-skill/using-dialog-designer/create-new-skill/build-skill-responses), for more information.on
## Move nodes in the flow
In the dialog skill flow editor, **right-click** on any of the nodes to perform the following actions:
Actions Description Copy Copies a single node or the entire branch within the same dialog flow or between agents. See Copy node between agents , for more information. Move left Moves the node to its left in the dialog flow. This is not enabled for the left-most node in the dialog flow and for the first node or the root node in the flow. Move right Moves the node to its right in the dialog flow. This is not enabled for the right-most node in the dialog flow and for the first node or the root node in the flow. Delete Deletes either a single node or the entire branch and for the first node or the root node in the flow. This is not enabled for the first node or the root node in the flow. Paste Paste a copied node either to a new node or to an existing node. This is enabled only when you have a node that is copied. This is not enabled for the first node or the root node in the flow.
## Copy node between Dialog skills of agents
You can copy a single node or the entire branch from the Dialog skill of one agent to the Dialog skill of another agent.
* Navigate to the Agent -> Dialog skill -> Implementation page of the agent from which you wish to copy the node. Right-click the node and click **Copy**. Choose if you wish to copy a single node or the entire branch from the agent.
Actions Description Search Search for the nodes in the dialog flow. Zoom-in and Zoom-out Use + and - icons to zoom in and zoom out respectively. Maximize and Restore Use this to view the dialog flow in full screen and to restore it back to the normal view. Print Use this to print the dialog flow.
---
# Source: https://docs.avaamo.com/user-guide/how-to/build-agents/configure-agents/permissions.md
# Source: https://docs.avaamo.com/user-guide/configuration/permissions.md
# Permissions
By default, when you create an agent, you are the **owner** of the agent. Additionally, when a user promotes an agent that the user is automatically the owner of the agent in the promoted stage. As an owner of the agent, you can assign permissions to different people within your company for your agent as required. This allows different users to participate and collaborate in each stage of the agent life-cycle.
There are four types of permissions available for an agent:
* **View**: Users can only view the agent but cannot edit the agent. Note that anyone with at-least view permission on the agent can submit the Unhandled query analyzer job.
* **Edit**: Users can view and edit the agent.
* **Publish**: Users can view agents, edit agents, and publish skills from the agent to the skills store.
* **Owner**: Full access to the agent. Users can view agents, edit agents, publish skills from the agent to the Skill store, and edit agent permissions.

Refer [Permissions](https://docs.avaamo.com/user-guide/how-to/build-agents/configure-agents/permissions), for more information.
---
# Source: https://docs.avaamo.com/user-guide/configuration/persistent-menu.md
# Persistent menu
A `Persistent menu` lets you specify menu options that remain available to the user. A persistent menu clearly communicates your agent's core capabilities to both first-time and returning users. This is an optional configuration.
>",
*"default_value": "<>",
*"should_validate": true/false,
"uuid": "<>",
"options": [{
*"uuid": "<>",
"option": "<>"
},...]
}]
}
* - Indicates optional parameter
… - Indicates one or more parameter
```
Attribute Description Type Attribute Description Type title Indicates the title of the poll. String default_value Indicates the default value selected in the poll when rendered to the user. You must specify the uuid value from the options in the default value.
Note that this is an optional attribute.
String should_validate Indicates if the user can skip entering values for the field or not. By default, the value is set to true . Boolean uuid Indicates a secure random UUID that can be used later to get the text entered by the user. See Section 4.4 in
https://tools.ietf.org/html/rfc4122 , for more information.
File uploaded name is available in the context.last_message .
Syntax: context.last_message.<<uuid>>
String options Indicates an array of options in the poll. If you wish to specify the default value, then specify the following in each array element:
uuid : Indicates a secure random UUID that can be used to specify the default_value. See Section 4.4 in
https://tools.ietf.org/html/rfc4122 , for more information.
option : Value of the optionAn array of JSON key-value pairs
## **Examples**
### Polls without default value
The following is a sample code to illustrate how to use Polls in cards without providing any default value:
```yaml
return [{
"card": {
"inputs": [
{
"type": "poll",
"title": "How was our service?",
"uuid": "52837223-a60d-4e8e-9a90-c92e40f70fe9",
"options": [
"Good",
"Very Good",
"OK",
"Need to improve"
]
}
]
}
}]
```
In the agent, the following response is displayed:

You can use `context.last_message.<>` to get the option selected by the user.
### Polls with default values
The following is a sample code to illustrate how to use Polls in cards with a default value:
```yaml
return [{
"card": {
"inputs": [
{
"type": "poll",
"title": "How was our service?",
"default_value": "0090a567-8351-4ef4-b5db-e10b0ce83114",
"uuid": "52837223-a60d-4e8e-9a90-c92e40f70fe9",
"options": [
{
"uuid": "bd52ff4b-f5ea-4403-8134-b32abea16464",
"option": "Very Good"
},
{
"uuid": "0090a567-8351-4ef4-b5db-e10b0ce83114",
"option": "Good"
},
{
"uuid": "7d09b083-12ca-4696-8093-38f7db21efdd",
"option": "OK"
},
{
"uuid": "cd81194d-dea0-466d-92e4-151d435490ed",
"option": "Need to improve"
}
]
}
]
}
}]
```
In the agent, the following response is displayed:

You can use `context.last_message.<>` to get the option selected by the user.
### Custom feedback
The following is a sample code to illustrate how to use Polls in Custom feedback. Note that here, it is recommended to use user-friendly identifiers for UUIDs instead of a random-generated number in the "Options" object as it helps you to identify the message in the [User feedback](https://docs.avaamo.com/user-guide/how-to/build-agents/learning-continuous-improvement/feedback) page.
```javascript
return {
"notification_message": "Thank you for your valuable feedback. We hope to see you next time.",
"card": {
"inputs": [
{
"type": "poll",
"title": "How was our service?",
"default_value": "0090a567-8351-4ef4-b5db-e10b0ce83114",
"uuid": "52837223-a60d-4e8e-9a90-c92e40f70fe9",
"options": [
{
"uuid": "Very Good",
"option": "Very Good"
},
{
"uuid": "Good",
"option": "Good"
},
{
"uuid": "OK",
"option": "OK"
},
{
"uuid": "Need to improve",
"option": "Need to improve"
}
]
}
]
}
}
```
You can use `context.last_message.<>` to get the option selected by the user.
{% content-ref url="" %}
[](https://docs.avaamo.com/user-guide/how-to/build-skills/create-skill/customize-your-skill/how-to/build-dynamic-skill-response/card)
{% endcontent-ref %}
{% content-ref url=".." %}
[..](https://docs.avaamo.com/user-guide/how-to/build-skills/create-skill/customize-your-skill/how-to/build-dynamic-skill-response)
{% endcontent-ref %}
---
# Source: https://docs.avaamo.com/user-guide/how-to/build-agents/configure-agents/switch-to-live-agent/pre-built-live-agent.md
# Source: https://docs.avaamo.com/user-guide/configuration/live-agent/pre-built-live-agent.md
# Pre-built live agent
The Avaamo platform supports integration with a **live agent** for scenarios when there is a need for human intervention. If the user requests it, the agent senses dissatisfaction, frustration, or anger, or the agent has defined transfer intents, the conversation seamlessly transfers to a human agent system, such as Live Agent or Zendesk.
Refer [Pre-built live agent](https://docs.avaamo.com/user-guide/configuration/live-agent/pre-built-live-agent), for more information.
---
# Source: https://docs.avaamo.com/user-guide/quick-start-tutorials/pre-requisites.md
# Source: https://docs.avaamo.com/user-guide/datasync-ai/content-sources/confluence/pre-requisites.md
# Source: https://docs.avaamo.com/user-guide/datasync-ai/content-sources/files/pre-requisites.md
# Source: https://docs.avaamo.com/user-guide/datasync-ai/content-sources/website/pre-requisites.md
# Source: https://docs.avaamo.com/user-guide/datasync-ai/content-sources/servicenow/pre-requisites.md
# Source: https://docs.avaamo.com/user-guide/datasync-ai/content-sources/sharepoint/pre-requisites.md
# Source: https://docs.avaamo.com/user-guide/skills/knowledge-skill/add-content-to-knowledge-skill/confluence/pre-requisites.md
# Source: https://docs.avaamo.com/user-guide/skills/knowledge-skill/add-content-to-knowledge-skill/files/pre-requisites.md
# Source: https://docs.avaamo.com/user-guide/skills/knowledge-skill/add-content-to-knowledge-skill/website/pre-requisites.md
# Source: https://docs.avaamo.com/user-guide/skills/knowledge-skill/add-content-to-knowledge-skill/servicenow/pre-requisites.md
# Source: https://docs.avaamo.com/user-guide/skills/knowledge-skill/add-content-to-knowledge-skill/sharepoint/pre-requisites.md
# Pre-requisites
You can ingest SharePoint content into your Knowledge skill seamlessly using the SharePoint connector. This integration enables you to use the selected resources directly from SharePoint to train your agent effectively.
Ensure that the following pre-requisites are met before creating a `SharePoint` connector**:**
1. Ensure that you complete all the necessary actions outlined in the [Before you begin](https://docs.avaamo.com/user-guide/datasync-ai/before-you-begin) section.
2. **Content source authorization details:** Ensure you have all necessary authorization details prepared for your content sources. Your SharePoint admin must provide you with the following information for each source:
* SharePoint Tenant Name
* SharePoint Tenant ID
* OAuth Client ID
* OAuth Client Secret
---
# Source: https://docs.avaamo.com/user-guide/skills/knowledge-skill/add-content-to-knowledge-skill/sharepoint/step-2-configure-content-source-and-ingest-content/preview-artifacts.md
# Preview artifacts
Here, you can view all documents, pages, and lists available from the folders you selected in the last step. You have the option to preview them before making your selection, ensuring they meet your specific needs.
Select the documents, pages, and lists by clicking the checkbox next to the file name. Click `Next`.
" %}
* [Agent](https://docs.avaamo.com/user-guide/how-to/build-agents): Agent acts as a container and includes everything you require to build an enterprise agent.
* [Skills](https://docs.avaamo.com/user-guide/how-to/build-skills): Add different types of skills to the agent such as Answers, Dynamic Q\&A, Smalltalk, and Dialog.
* [Entity types](https://docs.avaamo.com/user-guide/how-to/build-agents/add-entity-types-to-agent): Add entity types to the agent that helps to identify and extract the named collection of similar objects from the user intents.
* [Configuration](https://docs.avaamo.com/user-guide/how-to/build-agents/configure-agents): Add getting started message, persistent menu, define environment variables, switch to live agent, and configure to deploy in different channels.
* [Debug](https://docs.avaamo.com/user-guide/how-to/build-agents/debug-agents): Use JS Errors, Logs, Agent Storage, and Conversation History to debug Agents.
* [Test](https://docs.avaamo.com/user-guide/how-to/build-agents/test-agents): Use Simulator and Regression Testing to test agents.
* [Monitor](https://docs.avaamo.com/user-guide/how-to/build-agents/monitor-and-analyze): Analyze agent performance using Analytics, User Journey, Query Insights, and User Feedback.
* [Skills store](https://docs.avaamo.com/user-guide/how-to/manage-skills-store): A centralized collection of all the published skills across different categories. Skills developed in one agent can be published to the skill store and re-used in other agents within a company to accelerate the agent development process.
* [Avaamo skills](https://docs.avaamo.com/user-guide/how-to/manage-skills-store#avaamo-skills): Collection of various in-built skills across certain pre-defined categories already available in the skills store. These skills are not specific to a company and available to all the users using the Avaamo Platform.
* [Company skills](https://docs.avaamo.com/user-guide/how-to/manage-skills-store#company-skills): In addition, when you are developing an agent, based on the functionality of the skill, you can choose to publish the skill to your company skills store. These skills are specific to a company and available only to the users within the company.
* [Agent Console](https://docs.avaamo.com/user-guide/how-to/agent-console): Avaamo platform supports integration with a live agent for scenarios, where there is a need for human intervention. If the user requests or if the agent senses dissatisfaction, frustration, anger, or if the agent has defined intents for transfer, it seamlessly transfers the conversation to a human agent system such as Avaamo Live Agent Or Zendesk. Agent Console is an interface of Avaamo live agent console for live agent interaction with users.
* [Settings](https://docs.avaamo.com/user-guide/how-to/manage-platform-settings): Add users and roles, manage privacy settings, and manage all the Identity Providers that support Single Sign-On (SSO) authentication for the dashboard.
---
# Source: https://docs.avaamo.com/user-guide/how-to/build-agents/manage-agents/promote-and-pull-updates.md
# Promote and pull updates
As the agent goes through different stages in its life cycle, you can promote agents from one stage to another using the **Promote** option. See [Promote an agent](#promote-an-agent), for more information.
Similarly, when you make certain changes in the previous stage of the life cycle, you use the **Pull updates** option to pull the updates from the previous stage to the current stage. See [Pull updates](#pull-updates), for more information.
{% hint style="info" %}
**Notes**:
* See [Plan your development process (Agent life cycle)](https://docs.avaamo.com/user-guide/how-to/plan-your-development-process-agent-life-cycle), for more information
* Promote and Pull updates options are specific to the roles and permissions defined for each user. See [Roles and permissions](https://docs.avaamo.com/user-guide/overview-and-concepts/advanced-concepts/understand-roles-and-permissions), for more information.
{% endhint %}

### Promote an agent

* In the **Agents** page, click the **Stage** tab (Development, Testing, Staging) from where you wish to promote the agent.
* Click three ellipse dots in the **Actions** column of the agent to view the extended menu and click **Promote.**
* If there are users editing the agent, then the following message with a list of the users and the module being edited by the user is displayed. You can review the current changes in progress and decide to either cancel promoting or click **Next** to continue promoting the agent to the next stage.
Specify the version of the skill. It is recommended that you increment the version as you publish successive versions of skill to skill store. Note that only one version of the skill is retained in the skill store.
You can also communicate the availability of the new version to the developers. Currently, this communication is manual, there is no automatic notification to developers when a skill is re-published with a new version.
|
| Document link | Any external document link that contains more details about the skill. You can use this to explain the skill details that the developers can learn about before importing the skill from the skill store. |
| What's new | Briefly describe new changes or updates to the skill before publishing or re-publishing. This helps developers to understand the changes if they wish to re-import a skill from skill store to their agent. |
* In the **Publish skill -> Entity types**, a list of all the entity types in the agent is displayed. The entities used in the skill is automatically selected and displayed to you. Additionally, you can select the other entity types as required before publishing your skill.
* In the **Publish skill -> Javascript**, a list of all the JS files used by the agent is displayed. You can select the ones used by your skill before publishing. See [Add JS files](https://docs.avaamo.com/user-guide/how-to/build-agents/configure-agents/add-js-files), for more information.
* Click **Publish**. The skill is now published to the company skill store under the selected category.
{% hint style="success" %}
**Key Points**:
* The skills published in the skill store are independent clones with all required data needed for it.
* You can only publish to the skill store under your **Company skills**. You cannot publish to **Avaamo skills**.
* Currently, Answers skill cannot be published to skill store.
{% endhint %}
### Republish skill
After you publish the skill to the Skill store, you can continue to work on the skill independently in your agent and later re-publish the skills again to the skill store.
{% hint style="success" %}
**Key points**:
* Republishing a skill from an agent is a complete replacement of that skill in the skill store. Only one version of the skill published from an agent is available in the skill store.
* There is no restriction on the number of times you can re-publish a skill from an agent to the skill store.
{% endhint %}
* In the **Agent -> Skills** page, click **Re-publish to skill store** in the overflow menu icon for the skill you wish to re-publish.
* In the **Publish** skill pop-up, specify the details required for publishing. See [How to publish?](#how-to-publish) for more information.
### Best practices
The following lists a few best practices that you can follow for publishing a skill to skill store:
* When you start designing an agent, consider defining the functionality of the agent in well-defined tasks. For each specific task, you can build skills and choose to publish the skill to your company skill store for re-usability. See [Design skills](https://docs.avaamo.com/user-guide/how-to/build-skills/design-skill), for more information.
* When you start creating skills, the name the skill in such a way that helps you easily identify the skill and its functionality. Use a combination of verb + noun to name your skill. **Example**: Instead of naming the skill as "ResetPassword", consider adding a noun, "ResetPassword - AWS".
* When you publish a skill, ensure that in **Things you can say** section, you list the top three queries the skill can respond to. This must help to easily demonstrate the understanding capability of the skill.
* Increment the version as you publish successive versions of skill to skill store. You can also communicate the availability of the new version to the developers.
* Maintain a document with the skill details and update the document as and when you re-publish the skill with a new version. Currently, this communication is manual, there is no automatic notification to developers when a new skill version is re-published with a new version.
* You cannot revert a published skill in the skill store. However, a user with the **Settings** role can delete the skill from the skill store and the skill can be published again. See [Delete skill from skill store](https://docs.avaamo.com/user-guide/manage-skills-store#delete-skill-from-skill-store), for more information.
---
# Source: https://docs.avaamo.com/user-guide/ref/avaamo-platform-api-documentation/agent-api/q-and-a-intents.md
# Q\&A intents
## Get Q\&A intents
`GET` `https://cx.avaamo.com/api/v1/agents/{{agent_id}}/intents/qna.json`
Get a list of all the Q\&A intents from the agent.
#### Path Parameters
| Name | Type | Description |
| ------------------------------------------- | ------- | ---------------------------------------------------------------------- |
| agent\_id\* | integer | Agent identifier. You can get the agent identifier from the agent URL. |
#### Query Parameters
| Name | Type | Description |
| --------- | ------- | -------------------------------------------------------------------------------- |
| page | integer | Page from which the entries must be fetched.
|
| per\_page | integer | Number of entries fetched per page.
|
#### Headers
| Name | Type | Description |
| ---------------------------------------------- | ------ | ------------------------------------------------------------------------------------------------------------------------------------------------------------------------------------------------------------------------------------------------------------------------------------------------------------------------------------------------------------------------------------------------------------------------------------------------------------------------------------------------------------------------------------------------------------------------ |
| access-token\* | string | User access token. You can get the user access token from the Settings -> Users and Roles page. See Users or Groups , for more information.
Users must have at least view permission on the agent. See Permissions , for more information.
|
{% tabs %}
{% tab title="200 " %}
```javascript
{
"current_page": 1,
"per_page": 1,
"total_entries": 3,
"total_pages": 3,
"time_token": 1590483068.2610612,
"intents": [
{
"id": 185260,
"name": "store",
"created_at": 1590390904.0,
"updated_at": 1590390904.0,
"skill": {
"id": 17826,
"name": "MacPizza FAQs",
"type": "knowledge",
"source_id": 5493,
"created_at": 1590390904.0,
"updated_at": 1590390909.0,
"status": "complete"
},
"training_data": [
{
"id": 1161932,
"created_at": 1590390904.0,
"value": "where is your store?",
"slots": []
},
{
"id": 1161933,
"created_at": 1590390904.0,
"value": "do you have any branches?",
"slots": []
}
]
}
]
}
```
{% endtab %}
{% endtabs %}
### Code request snippets
{% tabs %}
{% tab title="cURL" %}
```javascript
curl --location --request GET 'https://cx.avaamo.com/api/v1/agents/20xxx/intents/qna.json' \
--header 'Access-Token: xxxxxx8d9952499ea466fc007dxxxxxx' \
--header 'Content-Type: application/json'
```
{% endtab %}
{% tab title="node.js" %}
```javascript
var request = require('request');
var options = {
'method': 'GET',
'url': 'https://cx.avaamo.com/api/v1/agents/20xxx/intents/qna.json',
'headers': {
'Access-Token': 'xxxxxx8d9952499ea466fc007dxxxxxx',
'Content-Type': 'application/json'
}
};
request(options, function (error, response) {
if (error) throw new Error(error);
console.log(response.body);
});
```
{% endtab %}
{% endtabs %}
### Response attributes
In the response, the following attributes are returned:
Attribute Description Type current_page Indicates the page from which the entries are fetched. Integer per_page Indicates the number of entries fetched per page. Integer total_entries Indicates the total number of entries in the response. Integer total_pages Indicates the total number of pages calculated using per_page. Note that total_entries = per_page * total_pages Integer time_token Indicates the timestamp at which the API response is returned. UNIX epoch timestamp intents Indicates an array of Q&A intents from the agent. Number of entries in the array = Number specified in per_page parameter.
Each intent entry contains the following details:
JSON key-value pairs
### Examples
The following table lists a few sample use cases with query parameters:
Use-case Query Parameter Get Q&A intents from agent using pagination page : Specify the page from which you wish to fetch records.
per_page : Specify the number of entries per page.
Example : https://cx.avaamo.com/api/v1/agents/<<agent_id>>/intents/qna.json per_page=2&page=5
---
# Source: https://docs.avaamo.com/user-guide/how-to/build-agents/learning-continuous-improvement/query-analyzer-deprecated.md
# Query analyzer (Deprecated)
An agent receives and responds to voluminous amounts of queries. These agent responses are pre-defined with intents and entities in your agent and your agent is trained to respond to the user queries.
However, a few queries go unhandled as the agent cannot map them to the predefined intents. By default, for all the user queries that do not get matched to any predefined intents in the agent, the agent has a node within the flow to respond to the user's query with statements like -
*"I am sorry I do not understand."*\
*"I am sorry. I don't have an answer for that."*
These classify as unhandled queries as ideally, the user query goes unanswered.
In certain other cases, when a user's intent does not match a specific intent, the agent responds with a selection of closest intent options, referred to as a disambiguation intent.
In a few others, the agent might respond to the user query but not with the expected results.
Overall, in order to improve the accuracy and experience with the agent, it is critical to analyze all these queries and continually improve the agent training data.
## What is QA?
The Query Analyzer tool can go through all of the end-user queries and provide suggestions to improve the training data of the agent. The purpose of QA is to:
1. Find out the queries that can be used to train existing intents
2. Find out the queries that can be used to create new skills or intents
3. Find out the words or phrases which can be used to improve entity values
4. Find out the words or phrases which can be used to create new entity types
## Why is QA required?
As the agent grows in volume, it is very difficult to analyze the user queries manually and understand why these user queries went unhandled or disambiguation. This effort is tremendous and time-consuming.
QA helps us to accelerate, learn and improve the agent training data by not only analyzing all the queries but also suggesting the required changes in the agent to further improve the accuracy of the agent.
## When to run QA?
It is recommended to run QA in the following scenarios:
1. After Go-live or in the Staging and Production environments.
2. It is recommended that you wait for a good round of testing to complete before running QA.
3. After an agent is in production, it is recommended to wait for at least a week and then run QA.
4. It is not recommended to run QA in Development and Testing environment.
## Enabling QA
Contact Avaamo Support to enable QA for your agent.
## Running QA
{% hint style="info" %}
**Note**: Anyone with at-least view permission on the agent can submit a QA job. See [Permissions](https://docs.avaamo.com/user-guide/how-to/build-agents/configure-agents/permissions), for more information. This is useful in production agents, as typically only read-only permissions are provided to the business users. It helps them to run the QA job to analyze the queries and further improvise the user experience with the agent.
{% endhint %}
You can run QA from the **Agent ->** **Learning -> Query analyzer** page.
* Navigate to the **Agents** tab on the top menu.
* Search and click any agent for which you wish to view user feedback. See [Search agents](https://docs.avaamo.com/user-guide/how-to/manage-agents#search-agents), for more information.
* In the **Agent's** page, click **Learning -> Query analyzer** and select the following parameters:
* Start date: Select or specify the start date in dd/mm/yyyy format. By default, the Start date is one month before the current date. The Start date can be upto 6 months before the end date.
* End date: Select or specify the start date in dd/mm/yyyy format. By default, this is the current date.
* Types of queries to analyze: Select the types of queries you wish to analyze. By default, Unhandled and Pre-Unhandled are selected.

* Click **Submit job**. A background job is submitted that run all the selected type of user queries in the specified date range. Note that based on the volume of data, the background job may take upto a few minutes to display the results.
>",
"links": [
{
"title": "<>",
"type": "<>",
"value": "<>",
*"format": "<>"
*"minDate": "<>",
*"maxDate": "<>"
*"hidden_content": "<>"
},...
]
}
* - Indicates optional parameter
… - Indicates one or more parameter
```
Attribute Description Type content Indicates the message content of the quick reply response. String links Indicates an array of links in the quick reply response. Each array contains:
An Array of JSON key-value pairs
## Examples
### Post message
The following is a sample JS to post a message in Quick reply:
{% code overflow="wrap" %}
```javascript
return [{
quick_reply: {
"content": "Would you like help with any of the following?",
"links": [{
"title": "Placing an order",
"type": "post_message",
"value": "Just mention type of pizza with your toppings and you are good to go."
},
{
"title": "Kids Menu",
"type": "post_message",
"value": "All our menu items are customizable for kids."
},
{
"title": "Others",
"type": "post_message",
"value": "We will connect with a customer service representative."
}
]
}
}]
```
{% endcode %}
In the agent, the following response is displayed with the provided quick reply links:

### Date picker
Use the following format to provide a date picker in a quick reply response. Here, `date_format` is any date format that you wish to display in the agent.
```javascript
return {
quick_reply: {
"content": "Pick a delivery date",
"links": [{
"title": "Delivery date",
"type": "date",
"format": "DD/MM/YYYY"
}]
}
}
```
In the agent, the following response is displayed with a date picker link button:

{% hint style="danger" %}
**Deprecated**: You can also use`avaamo:#app/datepicker/messages/new?format=<>`, for providing a date picker in the Quick reply response.
{% code overflow="wrap" %}
```javascript
return [{
quick_reply: {
"content": "Pick a delivery date",
"links": [{
"title": "Delivery date",
"type": "deeplink",
"value": "avaamo:#app/datepicker/messages/new?format=DD/MM/YYYY"
}]
}
}]
```
{% endcode %}
However, using `deeplink in the type parameter` and `specifying the URL in the value parameter` is deprecated from the v6.4.0 release onwards. See [Deprecation notice](https://docs.avaamo.com/user-guide/release-notes/v6.0-to-v6.4.x-releases/v6.4.x/release-notes-v6.4.0#deprecation-notice), for more information.
{% endhint %}
### Date picker with Min and Max dates
Use the following format to provide a date picker in a quick reply response. Here, `date_format` is any date format that you wish to display in the agent.
```javascript
return {
quick_reply: {
"content": "Pick a delivery date",
"links": [{
"title": "Delivery dates",
"type": "date",
"format": "YYYY-DD-MM",
"minDate": "2022-25-04",
"maxDate": "2022-30-04"
},
{
"title": "Registration",
"type": "post_message",
"value": "I want to order register at MacPizza."
},
{
"title": "Order pizza",
"type": "post_message",
"value": "I want to order a pizza."
}
]
}
}
```
{% hint style="danger" %}
**Deprecated**: You can also use`avaamo:#app/datepicker/messages/new?format=<>&minDate=<>&maxDate=<>`, for providing a date picker in the Quick reply response.
return [{
    quick_reply: {
        "content": "Ok sure. Pick a delivery date",
        "links": [{
            "title": "Delivery date",
            "type": "deeplink",
            "value": "avaamo:#app/datepicker/messages/new?format=DD-MM-YYYY&minDate=1650877346000&maxDate=165130934600"
        }]
    }
}]
>.<>`in the `hidden_content` parameter of the quick reply JS to navigate to a specific node in the flow.
{% code overflow="wrap" %}
```javascript
return [{
quick_reply: {
"content": "Would you like help with any of the following?",
"links": [
{
"title": "Just starters for now",
"type": "post_message",
"value": "Get starters",
"hidden_content": "#goto_node_macpizza_order.starters"
},
{
"title": "Registration",
"type": "post_message",
"value": "I want to order register at MacPizza."
},
{
"title": "Order pizza",
"type": "post_message",
"value": "I want to order a pizza."
}
]
}
}]
```
{% endcode %}
In the agent, the following response is displayed. When you click the Get Starters link button, it navigates to the corresponding goto node as specified in the quick reply JS:

Click the `Just starters for now` button to navigate to the starter node directly:

{% hint style="danger" %}
**Deprecated**: You can also `use avaamo:#messages/hidden/%23goto_node_>.<>/new/<>,`for navigation to a different node in the conversation flow.
{% code overflow="wrap" %}
```javascript
return [{
quick_reply: {
"content": "Would you like help with any of the following?",
"links": [{
"title": "Just starters for now",
"type": "deeplink",
"value": "avaamo:#messages/hidden/%23goto_node_order.starters/ new/Getstarters "
}]
}
}]
```
{% endcode %}
However, using `deeplink in the type parameter` and `specifying the URL in the value parameter` is deprecated from the v6.4.0 release onwards. See [Deprecation notice](https://docs.avaamo.com/user-guide/release-notes/v6.0-to-v6.4.x-releases/v6.4.x/release-notes-v6.4.0#deprecation-notice), for more information.
{% endhint %}
### Start over
Use `start over`in the `hidden_content` parameter of the quick reply JS to reset the current conversation and displays the greeting message. Note that this does not create a new conversation UUID.
**Example**: The following is a sample JS to use a "Start over" in a quick reply:
{% code overflow="wrap" %}
```javascript
return [{
quick_reply: {
"content": "Confirm your order?",
"links": [{
"title": "Wrong order",
"type": "post_message",
"value": "Wrong order start again",
"hidden_content": "start over"
},
{
"title": "Place order",
"type": "post_message",
"value": "Confirm order."
}
]
}
}]
```
{% endcode %}
In the agent, the following response is displayed with a start-over link button:

Click the `Wrong order` button to start the conversation from the beginning:

{% hint style="danger" %}
**Deprecated**: You can also `use avaamo:#messages/hidden/start%20over/new/<>`to start over the conversation from the greeting message.
{% code overflow="wrap" %}
```javascript
return [{
quick_reply: {
"content": "Confirm your order?",
"links": [{
"title": "Wrong order ",
"type": "deeplink ",
"value": "avaamo: #messages/hidden/start%20over/new/Wrong order"
}]
}
}]
```
{% endcode %}
However, using `deeplink in the type parameter` and `specifying the URL in the value parameter` is deprecated from the v6.4.0 release onwards. See [Deprecation notice](https://docs.avaamo.com/user-guide/release-notes/v6.0-to-v6.4.x-releases/v6.4.x/release-notes-v6.4.0#deprecation-notice), for more information.
{% endhint %}
---
# Source: https://docs.avaamo.com/user-guide/live-agent-console/supervisor/quick-responses.md
# Quick responses
In the context of a live agent system, Quick responses, also known as canned responses or predefined messages are pre-written replies or messages that agents can use to quickly respond to common customer inquiries or issues.
### How do Quick Responses help?
The following are a few points that list the benefits of having quick responses in your organization:
* **Efficiency and Speed**: Quick responses enable agents to respond rapidly to customer queries, reducing response time and improving overall customer satisfaction. Agents can select relevant pre-written responses instead of typing out full replies, saving valuable time during interactions.
* **Consistency**: Quick responses ensure consistency in customer service. By using predefined messages, agents can deliver accurate and standardized information across multiple conversations.
* **Accuracy and Quality**: Quick responses are crafted by business owners or supervisors, ensuring that they contain accurate and reliable information. Agents can rely on these pre-approved responses to provide customers with correct answers, minimizing the chances of errors or misinformation. This helps in maintaining a high level of quality in customer support interactions.
* **Complex or Technical Issues**: Some customer inquiries may involve complex or technical information that agents need to communicate accurately. Quick responses can be specifically designed to address such issues, ensuring that agents have access to well-constructed explanations or solutions.
* **Training and Onboarding**: Quick responses can help during live agent training and onboarding processes. New live agents can familiarize themselves with common customer queries and their corresponding responses, helping them learn the ropes quickly.
* **Empathy to sensitive situation**s: Quick responses can also be designed to address emotional or sensitive situations. Agents can have predefined messages that show empathy, understanding, or apology, helping them handle delicate customer interactions with care and professionalism.
### View all quick responses
* Click `Settings -> Avaamo Live Agent` in the Avaamo dashboard home page to view the Supervisor interface.
* Click `Settings icon -> Quick Responses` page in the left navigation pane of the Supervisor interface to view all the quick responses in your organization.
Parameters Description Maximum length Quick response Indicates the name of the quick response. Specify a name that clearly identifies the team, making it easier to associate and add new live agents to the team.
Supported characters: Quick response must start with an alphabet and can contain only alphabets, numbers, or underscores.
Quick response name must be unique which implies that there is only one name for one template.
20 characters Template The actual text of the quick response. This is the text displayed when you type a quick response name. You can make the messages personalized by leveraging the values from the context.user and context.live_agent_user objects.
For example, you can use first name and last name from the custom user properties and make the message dynamic and personalized.
Hello, ${context.user.custom_properties.first_name} ${context.user.custom_properties.last_name}, thank you for contacting us. I am ${context.live_agent_user.first_name}, your Sparsh Healthcare customer care assistant. How can I help you today?
5000 characters
* Click **Save** to complete the creation of the new `Quick response`. Currently, the platform offers the ability to create an unlimited number of quick responses for an account.
### Edit quick response
You can edit the `Quick response` and template from the `Supervisor -> Quick Responses` page.
* Click `Settings -> Avaamo Live Rgent` in the Avaamo dashboard home page to view the Supervisor interface.
* Click `Settings icon -> Quick responses` page in the left navigation pane of the Supervisor interface to view all the quick responses in your organization.
* Search for the quick response you wish to edit. See [Search quick response](#search-quick-response), for more information.
* Click three ellipse dots in the `Actions` column of the quick response to view the extended menu and click `Edit` against the quick response you wish to edit.
* You can edit details such as the `Quick response name` and `Template` of the quick response.
### Delete quick response
A supervisor can delete a quick response for various reasons. A few examples can be
* When the quick response is no longer required or serves no purpose. Deleting such responses helps to maintain a more manageable and organized structure within the live agent system.
* When there is a need to restructure the quick response within the organization by merging, reassigning, or consolidating responses.
**To delete a quick response**:
* Click `Settings -> Avaamo Live Agent` in the Avaamo dashboard home page to view the Supervisor interface.
* Click `Settings icon -> Quick Responses` page in the left navigation pane of the Supervisor interface to view all the quick responses in your organization.
* Search for the quick response you wish to edit. See [Search quick response](#search-quick-response), for more information.
* Click three ellipse dots in the `Actions` column of the quick response to view the extended menu and click `Delete`**.** Click `OK` in the confirmation message to delete the quick response.
### Search quick response
You can search for quick responses using the search icon in the `Quick Responses` page. To search for a quick response, enter the desired text in the Search text box and press enter.
---
# Source: https://docs.avaamo.com/user-guide/outreach/quick-start.md
# Quick start
- [Campaign in SMS channel](/user-guide/outreach/quick-start/campaign-in-sms-channel.md)
- [Campaign in C-IVR channel](/user-guide/outreach/quick-start/campaign-in-c-ivr-channel.md)
- [Campaign in MS Teams channel](/user-guide/outreach/quick-start/campaign-in-ms-teams-channel.md)
- [Campaign in Custom channel](/user-guide/outreach/quick-start/campaign-in-custom-channel.md)
---
# Source: https://docs.avaamo.com/user-guide/overview-and-concepts/quick-summary.md
# Concepts summary
Before getting into a deep-dive understanding of the key concepts used in the Avaamo Conversational AI Platform, here is a quick summary of key concepts and terms:
Concept Description Agents An agent is synonymous with a "human agent". Similar to a human agent that has or is trained with different skills for responding to user queries, an agent is a "container of skills", each specialized to understand and handle a specific task in the user conversation flow.
Example : A Pizza agent can contain Membership and Rewards policy Answers skill, Order Pizza Dialog skill, FAQ Q&A skill, and Smalltalk skill for responding to different user queries.
Skills Skill is part of an agent that is specialized to understand and handle a specific task in the user conversation flow.
Example : Order Pizza skill in a Pizza agent is responsible for taking the user through a conversation for capturing the required data to order a pizza.
Intents An intent is an action in the user query that indicates what the user wishes to do.
Example : Order Pizza, Find weather, Report claim.
Training Data For the agent to respond to user queries, each intent must be trained with specific sentences that are used as representative phrases for user queries. This set of sentences is referred to as the Training data set. Note that Training data are not user queries. Training data is a set of sentences that is used to train the intent for responding to user queries. User query User queries are queries posted by the user to the agent. Entities If an intent refers to a verb or the action in the user query, then an entity refers to a noun (the object on which the action is performed) in the user query.
Example : In the user query "I want to book tickets from San Francisco to New York", San Francisco and New York represent entities of type Location.
Entity type An entity type is a named collection of similar objects such as states in a country, all pediatricians, a list of product names or data types (Date, Email, Location). Each entity type contains one or more values. Slots When information is extracted from a user sentence, the first task is to identify the intent behind the user query. The next task is to extract parameters in the training data that complete the intent. These are referred to as Slots. Each slot maps to an entity type for extraction and validation purposes.
Example : In the user query "I want to book tickets from San Francisco to New York this Friday", San Francisco and New York are Slots that represent Location entity type and Friday represents DateTime entity type.
---
# Source: https://docs.avaamo.com/user-guide/how-to/build-skills/create-skill/customize-your-skill/how-to/build-dynamic-skill-response/card/rating.md
# Rating
You can add an input card with a rating system in the skill response.
### Syntax
The following is the format to add a rating response:
{% hint style="info" %}
**Note**: There is a 191 character limit for all the user-defined text fields.
{% endhint %}
```yaml
"card": {
"inputs": [{
"type": "rating",
"title": "<>",
"uuid": "<>"
}]
}
```
Attribute Description Type Attribute Description Type title Indicates the title of the rating card. String uuid Indicates a secure random UUID that can be used later to get the text entered by the user. See Section 4.4 in
https://tools.ietf.org/html/rfc4122 , for more information.
Option selected by the user is available in the context.last_message.
Syntax: context.last_message.<<uuid>>
String
### Example
The following is a sample JS to specify rating in response:
```yaml
return {
"card": {
"inputs": [
{
"title": "Rate our service",
"type": "rating",
"uuid": "784cc8d5-b3d0-4cbc-89c4-4ef3c2fa43ea"
}
]
}
}
```
In the agent, the following response is displayed:

You can use `context.last_message.<>` to get the option selected by the user.
{% content-ref url="" %}
[](https://docs.avaamo.com/user-guide/how-to/build-skills/create-skill/customize-your-skill/how-to/build-dynamic-skill-response/card)
{% endcontent-ref %}
{% content-ref url=".." %}
[..](https://docs.avaamo.com/user-guide/how-to/build-skills/create-skill/customize-your-skill/how-to/build-dynamic-skill-response)
{% endcontent-ref %}
---
# Source: https://docs.avaamo.com/user-guide/outreach/recipient-lists.md
# Recipient lists
A **Recipient list** consists of a list of users to whom the campaign message must be sent. You can quickly create and upload a recipient list on the **Outreach -> Recipient Lists** page.
The following are some of the key features of the **Recipient Lists** section:
* Quickly upload a list of recipients in a simple CSV file.
* Flexible CSV format that can be used to create customized message templates.
* Reuse the same list for different campaigns.
* Build a separate list for a test run before launching the outreach program to the actual users.
The Recipient list page displays a list of all the recipient lists created for the Outreach program in descending order of created or updated timestamp. Each column contains the following details:
* Recipient list name: Indicates the name of the recipient list provided at the time of creating the recipient list.
* Number of recipients: Indicates the number of recipients in the recipient list CSV.
* Updated on: Indicates the last updated timestamp of the recipient list. For a newly created recipient list, it indicates the created timestamp of the recipient list.
* Action: You can use options in the Actions column to [download](#avaamo-file-format), [delete](#delete-a-recipient-list) or [view the recipient list](#view-a-recipient-list)
## Create a new recipient list
{% hint style="info" %}
**Notes**:
* See [Quick start](https://docs.avaamo.com/user-guide/outreach/quick-start), for a quick article on creating your first outreach program.
* Ensure you have met the [pre-requisites](https://docs.avaamo.com/user-guide/outreach/before-you-begin) before creating a new recipient list.
{% endhint %}
You can create a recipient list is one of the following ways:
* [Upload file](#upload-file): Use this option, if you wish to directly upload a CSV file with a list of recipients.
* [SFTP](#sftp): Use this option, if you wish to pick the recipient list from an SFTP server of your choice. When a campaign is triggered, the latest file available in the SFTP server location is picked as a list of recipients.
{% hint style="success" %}
**Key point**: The recipient file must be in UTF-8 encoded CSV. See [Export to a UTF-8 encoded CSV](#export-to-a-utf-8-encoded-csv), for a few tips.
{% endhint %}
### Upload file
You can use the **Upload** **recipient list** option if you wish to directly upload a CSV file with a list of recipients.
In the Avaamo Platform UI, click the **Outreach** option in the top menu, navigate to the **Recipient Lists** tab, and click **Create New Recipient List -> Upload** **recipient list** option. Specify the following details and click **Create**:
Parameters Description Maximum length Recipient list name Indicates the name of the recipient list. Provide a name that is easily identifiable to pick when you create a campaign. 50 characters File format Choose a file format of the recipient CSV file.
If you are uploading Avaamo-compliant CSV format, then see Avaamo file format , for more information. You can also select Custom as a file format and upload a CSV file in any custom format, say for example Epic integration system as a recipient list. See Custom file format, for more information. NA Upload recipient list in CSV format Click Browse to browse a CSV file with recipient details.
You can also click the Sample recipient file to download a sample recipient list file format. See Recipient list CSV format , for more information.
NA Test recipient list Use this if you are creating a recipient list for a test run.
The test recipient lists are available in the Recipient list dropdown only when you wish to test the campaign. See Test campaign , for more information. In the
NA
The newly created recipient list is displayed in the **Recipient Lists** tab.
* In the Recipient Lists tab, a recipient list marked for testing is indicated with a test tube icon Parameters Description Maximum length Recipient list name Indicates the name of the recipient list. Provide a name that is easily identifiable to pick when you create a campaign. 50 characters File format Choose a file format of the recipient CSV file.
If you are uploading Avaamo-compliant CSV format, then see Avaamo file format , for more information. You can also select Custom as a file format and upload a CSV file in any custom format, say for example Epic integration system as a recipient list. See Custom file format, for more information. NA SFTP Host Indicates the URL of the SFTP server. NA Auth type Indicates the auth type used by the SFTP server. Following auth types are supported:
Basic: Specify the username and password for connecting to the SFTP server. Keys: Specify the username and required pem key for connecting to the SFTP server. NA Test Connection Use this button if you wish to test the connection for the SFTP server. NA File path Indicates the path of the recipient file from the SFTP server. NA Test recipient list Use this if you are creating a recipient list for a test run. NA
The newly created recipient list is displayed in the **Recipient Lists** tab.
* In the **Recipient Lists** tab, the recipient list uploaded using SFTP is indicated using > | <\> |
| ---------- | ---------- | ------------------ | ------------------ |
| <\> | <\> | <\> | <\> |
* Recipient information in the CSV file can contain details such as first name, email, last name, date, or time as per the scenario.
* For `C-IVR and SMS delivery channels`, the only CSV column header that is mandatory is the **Phone** column.
* This is the number to which the campaign message is sent.
* For the C-IVR channel, the phone number format must be in the [E.164 format](https://www.itu.int/rec/T-REC-E.164/) (`- [+] [country code] [subscriber number including area code] and can have a maximum of fifteen digits`) in all cases.
* For the SMS channel, it is recommended to specify the phone number in [E.164 format](https://www.itu.int/rec/T-REC-E.164/), except when the recipient's phone number is a national number. In such cases, only the `Subscriber number` without the country code is sufficient. For example, if the "from" and "to" number of the campaign is from the US, then the "to" number which is the recipient number can be just the Subscriber number.
E.164 Format Country Code Country Subscriber Number +1616555xxxx 1 US 616555xxxx +44345183xxxx 44 GB 345183xxxx +55115743xxxx 55 BR 115743xxxx
* For the `MS Teams delivery channel`, the only CSV column header that is mandatory is the **email** column.
* Ensure the email in the recipient list CSV is a part of the Azure directory for which the MS Teams channel is configured.
* You can find the details of the Azure directory of the MS Teams channel using the **Directory (Tenant) Id** in the MS Teams channel configuration page. See MS Teams, for more information.
The rest of the column headers in the recipient CSV file can be any user information that you wish to include for each recipient.
**Example:**
Phone email First name Last name +1556xxxx234 john@abccorp.com John Miller +1678xxxx234 mark@abccorp.com Mark Smith
**Message template**:
{% code overflow="wrap" %}
```markup
Dear ${first_name} ${last_name},
Flu season is back again this time of the year. The Sparsh care center is organizing a free Flu vaccination drive on October 1st and October 2nd from 10 AM to 6 PM. Visit your nearest Sparsh Care Center to get vaccinated.
Best regards,
Sparsh care center team
```
{% endcode %}
When the message is sent to a recipient number, the placeholder values in the template are replaced with actual values corresponding to the number.
{% code overflow="wrap" %}
```
Dear John Miller,
Flu season is back again this time of the year. The Sparsh care center is organizing a free Flu vaccination drive on October 1st and October 2nd from 10 AM to 6 PM. Visit your nearest Sparsh Care Center to get vaccinated.
Best regards,
Sparsh care center team
```
{% endcode %}
See [Templates](https://docs.avaamo.com/user-guide/outreach/templates), for more examples**.**
### **Custom file format**
Avaamo Conversational AI Platform allows you to upload a custom recipient CSV file with customized column headers based on your business requirement. Unlike Avaamos-specific recipient file format where either phone or email column header is mandatory, the custom file format allows you the flexibility to upload CSV from any external system without any mandatory column requirement. Later, the mapping of the column headers from the recipient list CSV to the actual column to be used for delivering the campaign message can be done while configuring the campaign. See [Select phone header](https://docs.avaamo.com/user-guide/campaigns/create-new-campaign#select-phone-header) and [Select email header](https://docs.avaamo.com/user-guide/campaigns/create-new-campaign#select-email-header), for more information.
For example, A custom recipient CSV file can have the following columns - Name, Email, Official Email, Preferred phone number, Mobile phone number, Home number, DOB, and many other columns. Say that you are using the SMS channel to deliver the campaign and you wish to send an SMS to the number in the `Preferred phone number` column. You can map this header in the [Select phone header ](https://docs.avaamo.com/user-guide/campaigns/create-new-campaign#select-phone-header)dropdown while configuring the campaign. When the campaign is executed, the numbers in the `Preferred phone number` column is picked for delivering the campaign message.
**Example of the Custom file format: Epic file format**
Epic enables the secure flow of patient data between Epic sites and exchange-capable systems. You can automate Epic integration with the Outreach feature in the Avaamo Platform to consume the patient data and send a campaign message to the list of recipients obtained from the Epic API seamlessly.
Epic formats are company specific and can vary. The Avaamo platform provides flexibility to upload any Epic format, however, do note the following points to enable Epic integration with the Outreach feature in the Avaamo platform.
* If `Authorised SMS` column is available, then the value in the `Authorised SMS` column is considered before sharing the campaign message. In such cases, the campaign message is sent only when `Authorised SMS` column is `Yes`. If `Authorised SMS` column is not available, then the campaign message is sent to all the users in the file.
* A suggested way to automate the integration is to build an automated script for extracting patient data from the Epic integration and drop it to an SFTP location periodically.
* Configure the SFTP details in the Outreach -> Recipient lists -> SFTP page. See [SFTP](#sftp), for more information.
* You can continue to extract and update the same file from the Epic sites to the SFTP location and the Avaamo Platform picks the latest file when the campaign is triggered.
Epic enables the secure flow of patient data between Epic sites and exchange-capable systems. You can automate Epic integration with the Outreach feature in the Avaamo Platform to consume the patient data and send a campaign message to the list of recipients obtained from the Epic API seamlessly.
## **Download recipient list**
* In the **Outreach ->** **Recipient Lists** tab, click three ellipse dots in the **Actions** column of the recipient list to view the extended menu and click **Download.**
* A copy of the recipient CSV file is downloaded to your local machine.
## **Search recipient list**
In the **Outreach ->** **Recipient Lists** tab, start entering the text in the **Search** text box and press the **Enter** key or click the **Search** icon. The results are filtered and displayed based on the text entered in the **Search** text box.
## **View a recipient list**
In the **Outreach ->** **Recipient Lists** tab, click three ellipse dots in the **Actions** column of the recipient list to view the extended menu, and click **View** to view the recipient list setup details.
You can also click the recipient list name to view the recipient list setup details.
## **Delete recipient list**
* In the **Outreach ->** **Recipient Lists** tab, click three ellipse dots in the **Actions** column of the recipient list to view the extended menu and click **Delete.**
* Click **OK** in the confirmation message to delete the recipient list.
{% hint style="info" %}
**Note**: You can delete a recipient list only when it is not associated with any campaign.
{% endhint %}
---
# Source: https://docs.avaamo.com/user-guide/avaamo-agent-assist/agent-assist-widget/ai-assist-view/recommendations.md
# Recommendations
During an ongoing call, based on the caller's inputs, `Agent Assist` automatically searches the knowledge repository for relevant information and provides recommendations to help you respond to user queries. These recommendations include concise snippets along with citations, referencing content from the knowledge base. Typically, it takes about 4-6 seconds for recommendations to appear after the caller completes their input.
The `Recommendations View` displays a continuous feed of all recommendations generated throughout the conversation, with the most recent suggestions appearing at the top. Each recommendation also includes citations for the referenced knowledge resources, which you can click on to view the full knowledge article.
Areas Regression test file format - V1 Regression test file format - V2 Ease-of-use Understanding and writing test cases is a time-consuming process.
Test identifiers make it easier to write test cases.
Multi-turn conversation flow testing Requires a long list of comma-separated flows with skill and intent keys and many additional columns with responses for each node. Requires the developers to write the test cases with proper test identifiers, each in a separate row. The rest of the inference of grouping and executing the test cases is done by the Platform. Scalability and Maintainability With the comma-separated list, it is not easy to scale and maintain new test cases or to augment the existing test cases.
Troubleshooting any error in the test case is time-consuming.
Helps to enhance the existing test case flow just by adding new identifiers.
Troubleshooting any error is easier since each row is a separate test case in a flow.
Flow control testing A limitation of the V1 format, as it is only based on the skill key and intent key. Allows complete test coverage of the flow control statements as it offers a combination of both intent and response node matching.
## File format
The regression test file must be in CSV format. The following are the details of the format:
ID QUERY TYPE EXPECTED_VALUE <<unique_id-<<sequence_id>> <<test Query>> <<response_source>> <<skill_key>>.<<intent_key>>
* **ID:** Unique identifier of each test case. The identifier must be in the format - `<>-<>,` for all cases except when the conversation is not multi-turn. Although, it is recommended to provide the full format, in such cases, only a unique identifier is sufficient. For example, If you wish to test Smalltalk or Q\&A response, then the ID can be "PizzaFAQ" instead of "PizzaFAQ-1". Each row of the CSV file is a test case to execute.
* `unique_id` can be any user-defined value.
* `sequence_id` must be numbers such as 1,2,3.
* `unique_id` and `sequence_id` must be separated by a hyphen.
* A multi-turn conversation flow is grouped by `unique_id` and executed in the sequence as mentioned by `sequence_id`. In simple terms, a group of rows with the same `unique_id` represents a flow to be executed according to the sequence in the `sequence_id`.
* See [Dialog skill](#dialog-skill), for more an example and more information.
* **QUERY:** The user query to be executed.
* **TYPE:** Indicates the response source that specifies where the user query is executed. For example, if the user query must match an intent or a response node in the Dialog skill. See [Type - Response source](#type-response-source), for more information and supported values.
* **EXPECTED\_VALUE:** Indicates the skill and intent key where the user query execution is expected to match.
{% hint style="info" %}
**Note**: The column headers are in capital case separated by an underscore.
{% endhint %}
## Type - Response source
You can specify the following response types in the regression test file:
TYPE EXPECTED_VALUE Description intent <<skill_key>>.<<intent_key>>Response source is an intent in the Dialog skill, Q&A, or Smalltalk. This is to test the query against a respective skill intent match.
See Dialog skill - intent match , for an example.
See Q&A , for an example.
response_node <<skill_key>>.<<intent_key>>Response source is a response node in the Dialog skill designer. This is to test the query against a Dialog skill response node match. Useful when,
The same intent match has different responses from different nodes based on the use case. Test flow control scenarios such as Goto_node.
See Dialog skill - response node match , for an example.
intentagent_request Test if the query triggers a live agent.
See Live agent , for an example.
intentagent_transferExpected value is agent_transfer when the live agent is triggered and transferred using #talk to agent command.
See Live agent , for an example.
intentagent_terminateExpected value is agent_terminate when the live agent is terminated using #end agent command.
See Live agent , for an example.
intentunhandledThe agent must not give a valid response to this query. It must be an unhandled response.
See Unhandled , for an example.
intentsmalltalkTest if the agent replies with a system Smalltalk response. disambiguation disambiguationTest if the agent replies with the disambiguation response for the given intent.
See Disambiguation , for an example.
disambiguation <<skill_key>>.<<intent_key>>|<<skill_key>>.<<intent_key>>Test if the agent responds with the disambiguation options specified in the pipe-separated list. See Result , for more information on understanding how the disambiguation results are evaluated.
{% hint style="info" %}
**Notes**: Ensure that there is no space before or after any separators such as "I" in the regression test file.
{% endhint %}
{% hint style="success" %}
**Key points**: To get the skill key and the intent key,
* In the desired conversational flow, post the query you wish to test in the agent chat widget at the bottom-right corner.
* Click the eye icon to view the message insights.
* From the message insights, you can get the skill key and the intent key. Use this to specify the expected intent match in the Regression test file:
ID QUERY TYPE EXPECTED VALUE OrderPizza-1 I want to order pizza intent macpizza_order.1 OrderPizza-2 veg intent macpizza_order.2 OrderPizza-3 cheese intent macpizza_order.4 OrderPizzaStarter-1 I want to order pizza intent macpizza_order.1 OrderPizzaStarter-2 veg intent macpizza_order.2 OrderPizzaStarter-3 cheese response_node macpizza_order.starters PizzaLiveAgent I want to talk to an agent intent agent_request StoreFAQ where is your store? intent mac_pizza_faqs.store_faqs Unhandled do you use organic ingredients? intent unhandled OrderFAQDisambiguation order disambiguation macpizza_order.1|mac_pizza_faqs.order_faq Disambiguation order disambiguation disambiguation
### Dialog skill - intent match
The pizza placing order flow in the above diagram can be tested as follows:
ID QUERY TYPE EXPECTED_VALUE OrderPizza-1 I want to order pizza intent macpizza_order.1 OrderPizza-2 veg intent macpizza_order.2 OrderPizza-3 cheese intent macpizza_order.4
{% hint style="info" %}
**Note**: Since all the unique identifiers are the same, they are grouped and executed in the following order `OrderPizza-1 -> OrderPizza-2 -> OrderPizza-3` based on the sequence identifier.
{% endhint %}
### Dialog skill - response node match
Consider the following conversation flow in the Order Pizza skill with the skill key as "macpizza\_order".
ID QUERY TYPE EXPECTED_VALUE OrderPizzaStarter-1 I want to order pizza intent macpizza_order.1 OrderPizzaStarter-2 veg intent macpizza_order.2 OrderPizzaStarter-3 cheese response_node macpizza_order.starters
{% hint style="info" %}
**Notes:**
* Since all the unique identifiers are the same, they are grouped and executed in the following order `OrderPizzaStarter-1 -> OrderPizzaStarter-2 -> OrderPizzaStarter-3` based on the sequence identifier.
* Node 4 has a flow control statement and the response is from the `starters` node. `OrderPizzaStarter-3` test case is to evaluate the response from the flow control statement.
{% endhint %}
### Live agent
Consider that in the MacPizza agent, you have enabled live agent interaction. See [Switch to live agent](https://docs.avaamo.com/user-guide/how-to/build-agents/configure-agents/switch-to-live-agent), for more information. You can test the transfer to the live agent using the following regression test case:
ID QUERY TYPE EXPECTED_VALUE PizzaLiveAgent I want to talk to an agent intent agent_request TalktoAgent #transfer to agent intent agent_transfer TerminateAgent #end agent intent agent_terminate
### Q\&A
Consider the following Q\&A skill:

You can test the Q\&A skill using the following regression test case:
ID QUERY TYPE EXPECTED_VALUE StoreFAQ where is your store? intent mac_pizza_faqs.store_faqs
### Unhandled
Consider that in the MacPizza agent, the query "*do you use organic ingredients?*", goes to an unhandled query. You can test the unhandled case using the following regression test case:
You can test the Q\&A skill using the following regression test case:
ID QUERY TYPE EXPECTED_VALUE Unhandled do you use organic ingredients? intent unhandled
### Disambiguation
Consider that in the MacPizza agent, the query "order", goes to disambiguation with options from a dialog skill "Order pizza" and from a Dynamic Q\&A skill "MacPizza FAQs". You can test the disambiguation case using the following regression test case:
You can test the Q\&A skill using the following regression test case:
ID QUERY TYPE EXPECTED_VALUE Disambiguation order disambiguation disambiguation OrderDisambiguation order disambiguation macpizza_order.1 OrderFAQDisambiguation order disambiguation macpizza_order.1|mac_pizza_faqs.order_faq
Test if the agent responds with the disambiguation options specified in the pipe-separated list. See [Result](#understanding-results), for more information on understanding how the disambiguation results are evaluated.
### Card responses
If you have card responses in your agent, then you specify the card response in the regression file using the following format:
```javascript
{
"card_response": {
"<>": "<>"
}
}
```
* **field\_id**: Identifier of the form element in the card. See [Add form elements](https://docs.avaamo.com/user-guide/how-to/build-skills/create-skill/using-dialog-designer/create-new-skill/build-skill-responses/add-form-elements), for more information
* **value**: Value of the form element. This can be a simple string or can be an array of values based on the form element.
Example 1 (for form elements with an array of values: Checklist): Consider the following Card response in a Dialog skill node:

You can specify the "Expected value" in the regression test file as follows:
```javascript
{
"card_response": {
"d61ac4": [
"India",
"United States",
"Pakistan",
"Bangladesh"
]
}
}
```
Example 2 (for a simple string input such as single-line element, multi-line element, date, number, rating, poll, and picklist): The following is an example of a single-line element card response that can be used in the regression file:
```javascript
{
"card_response": {
"ea6432": "This is single line input"
}
}
```
## **Understanding results**
For each row, in addition to ID, QUERY, and TYPE, the following columns are displayed in the results CSV:
* EXPECTED\_VALUE: Indicates the expected value to be matched during the regression test run.
* MATCHED\_VALUE: Indicates the actual value that matched during the regression test run.
* RESULT: If the Expected value and Matched value are the same, the result is PASSED, else it is marked as FAILED. In a flow, if one row fails execution, then the subsequent rows in the flow are skipped from execution. Such cases are marked as SKIPPED.
* INSIGHTS: Insights on how the query was analyzed are available in JSON format. You can use this for further analysis and debugging. See [context.insights](https://docs.avaamo.com/user-guide/how-to/build-skills/create-skill/customize-your-skill/reference-library/context/insights), for more information.
---
# Source: https://docs.avaamo.com/user-guide/how-to/build-agents/test-agents/regression-testing/regression-test-file-format.md
# Source: https://docs.avaamo.com/user-guide/llamb/regression-testing/regression-test-file-format.md
# Regression test file format
A regression test file contains a set of questions, the actual answer to each question, which is the ground truth, and any user properties specific to that answer.
{% hint style="success" %}
**Key point:** Collaborate with Subject Matter Experts to build a regression test file in the Discovery phase itself.
{% endhint %}
### File format
The following is a sample regression test input file.
Column 1 Column 2 Column 3 QUESTION GROUND TRUTH USER PROPERTIES
* **Question** – The query or input provided by a user to the agent. Only up to 1000 questions are supported per file.
{% hint style="info" %}
**Note:** You can run a maximum of 1,000 questions per day. Contact Avaamo Support to request a change to the daily limit configuration.
{% endhint %}
* **Ground Truth** – The expected answer for a given query serves as the reference point to evaluate whether the agent’s response is accurate and meaningfully aligned with the query’s intent. This field is optional and is used for comparison to evaluate the accuracy of the agent’s response. If left blank, the system generates the ground truth for all queries after the test is completed.
* **User Properties** – [Attributes](https://docs.avaamo.com/user-guide/llamb/get-started/step-2-ingest-enterprise-content/document-attributes) or metadata assigned at the user level, which can influence personalization and response generation. This field is optional**.**
---
# Source: https://docs.avaamo.com/user-guide/how-to/build-agents/test-agents/regression-testing-universal-agents.md
# Regression testing - Universal agents
{% hint style="info" %}
**Note**: See [Universal agent](https://docs.avaamo.com/user-guide/how-to/build-agents/create-universal-agent), for more information on what a Universal agent is and how to use it.
{% endhint %}
You can test Universal agents using Regression testing. Regression testing in Universal agents allows you to test queries with its member agents.
The process of running the regression testing and viewing the status and its results remains the same as with the independent agents. See [Regression testing](https://docs.avaamo.com/user-guide/how-to/build-agents/test-agents/regression-testing), for more information.
The only difference between the Regression testing in the independent agents and the Regression testing in the Universal agents is the Regression testing file format. A sample Regression testing file format can be downloaded in the **Upload test file** pop-up window. You can use this as a reference to build the test cases that you wish to execute in the Universal agents.

{% hint style="info" %}
**Notes**:
* Currently, Universal agents are supported only in the English language. Hence, you can execute regression testing of Universal agents only in the English language.
* Regression testing for [disabled](https://docs.avaamo.com/user-guide/how-to/create-universal-agent/manage-member-agents#disable-member-agent) or[ invalid credentials](https://docs.avaamo.com/user-guide/how-to/configure-agents/deploy/universal-agent#regenerate-credentials) or [deleted member agent](https://docs.avaamo.com/user-guide/how-to/create-universal-agent/manage-member-agents#delete-member-agent) fails and returns false.
{% endhint %}
### Regression testing file format
Your regression test file must be in CSV format. Each row of the CSV file is a test case to execute. The following are the details of the format:
| Column 1 | Column 2 |
| :-------: | :--------: |
| <\> | <\> |
* **Flow**: Indicates the expected flow in which the user query is tested. This can be a comma-separated list of the expected flow sequence if you wish to test a multi-turn conversation.
* **Query**: Indicates sample query. In case you wish to test a multi-turn conversation, then you can add responses of each node in an additional column.
You can specify the following response types can be specified in the regression test file:
Response source Format Description A response from the member agent


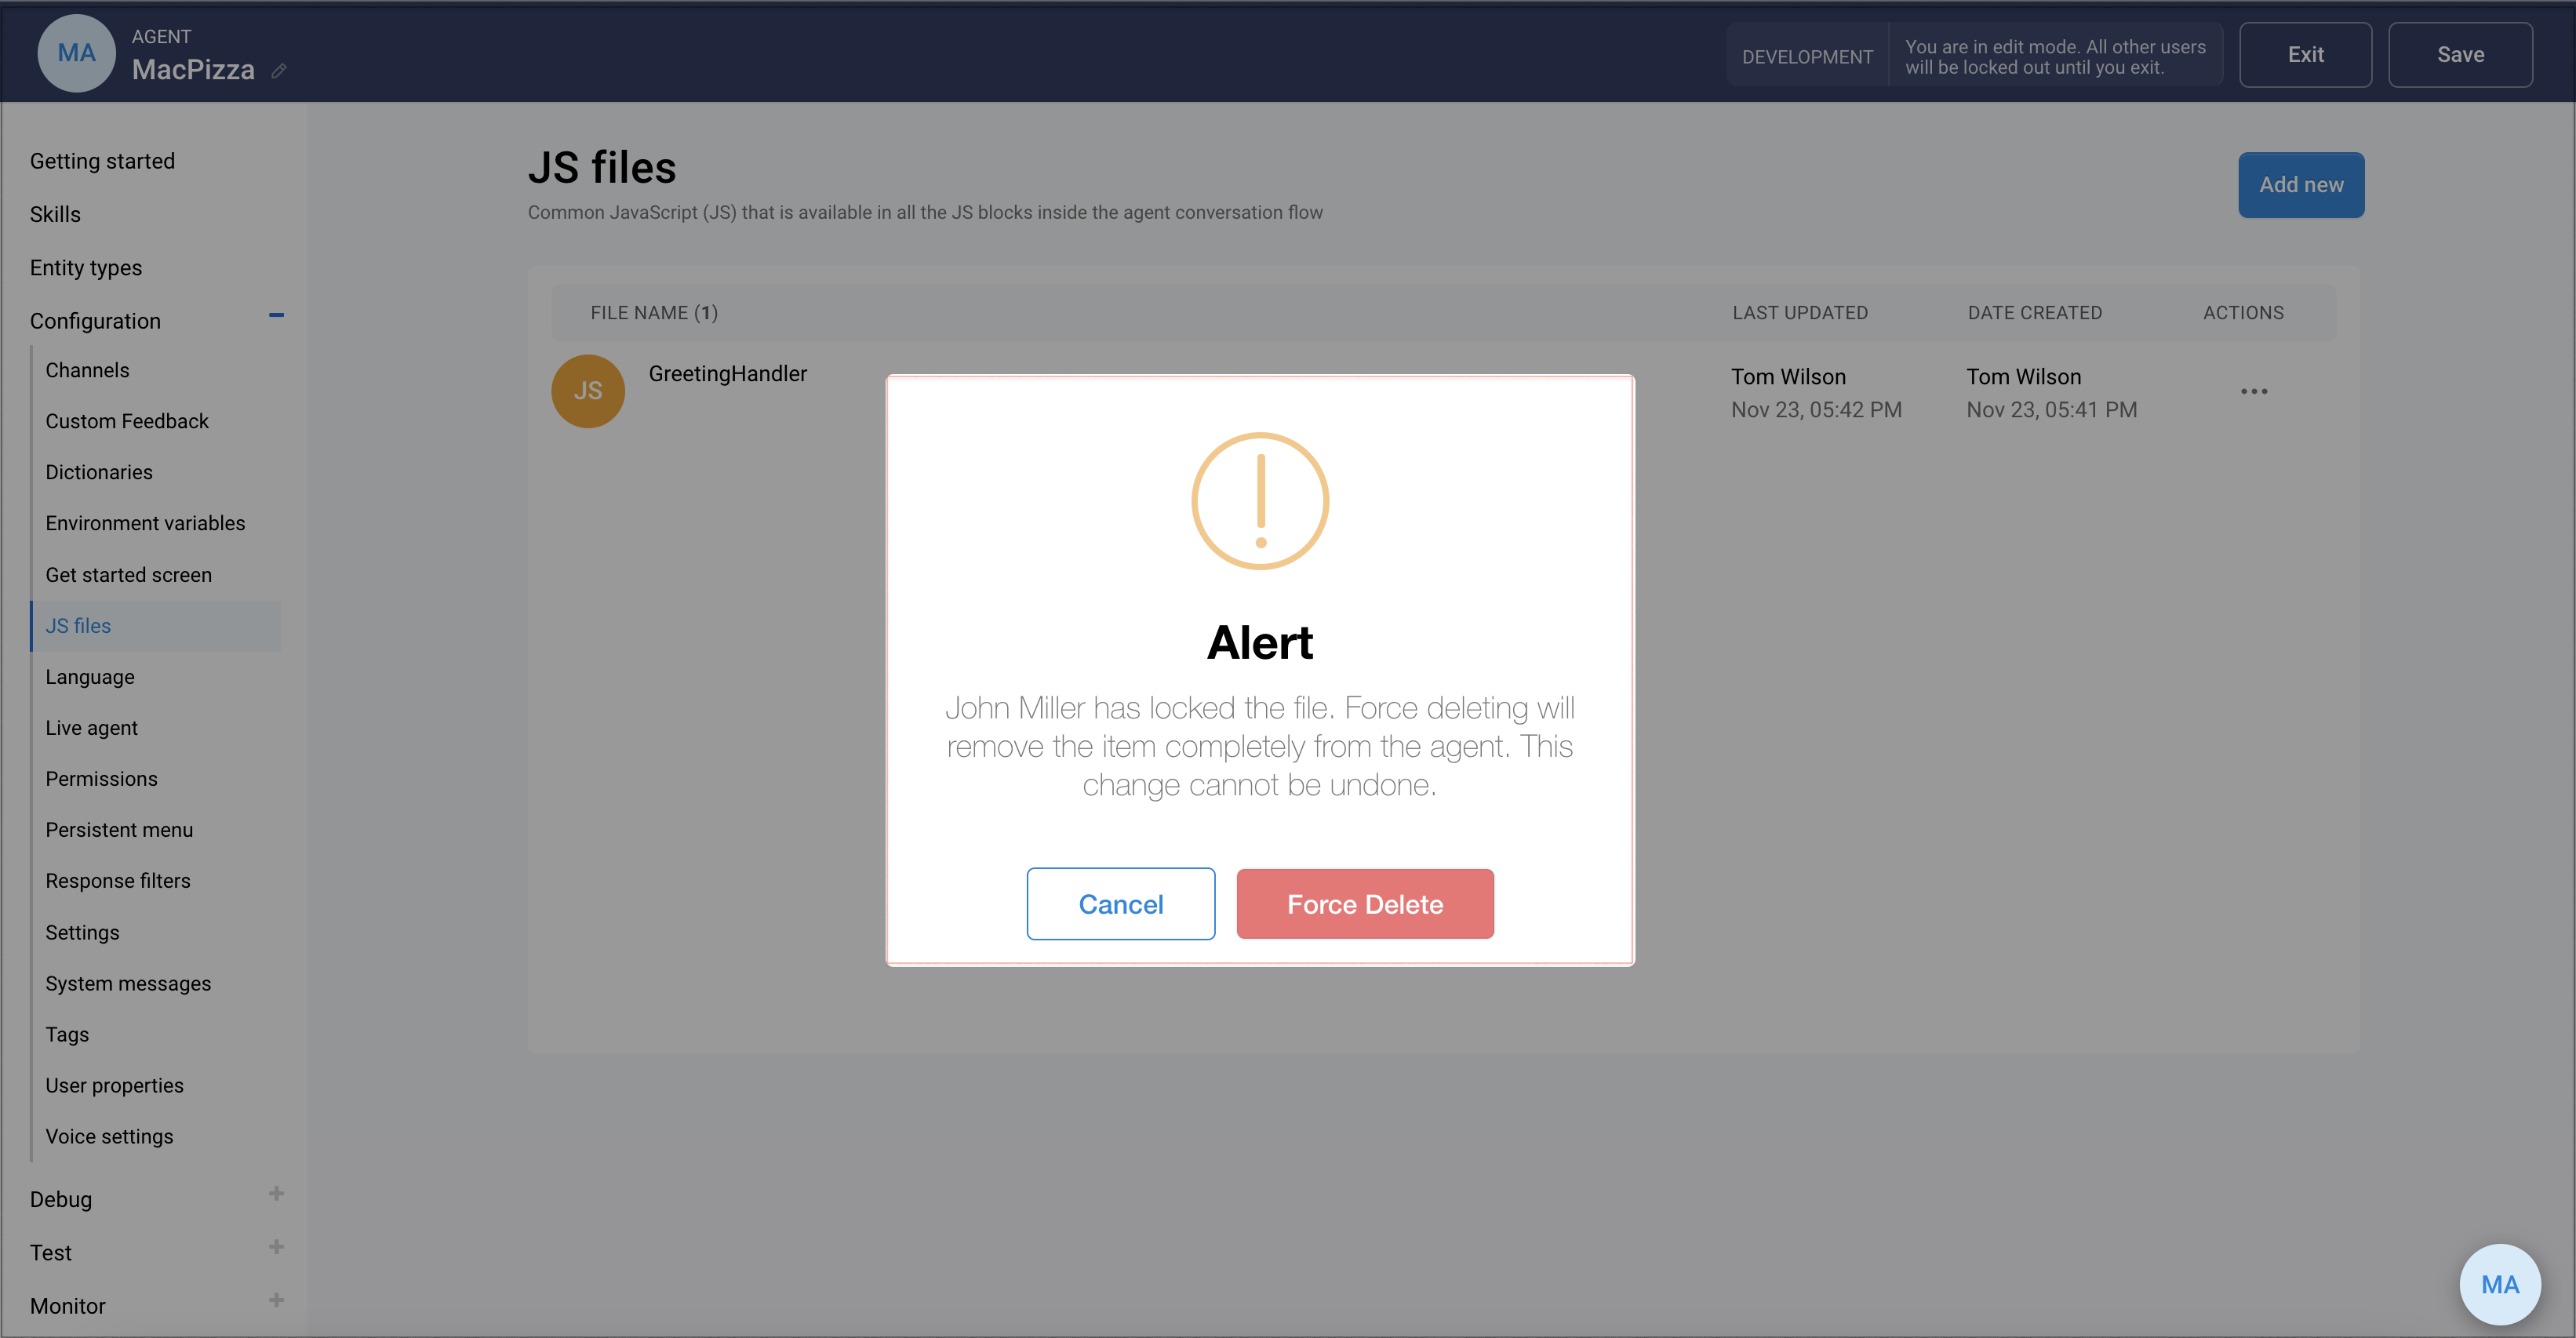


 The "number of persistent menu items" restriction is due to the limitations of Facebook messenger See [call\_to\_actions in the properties section](https://developers.facebook.com/docs/messenger-platform/reference/messenger-profile-api/persistent-menu#properties), for more information.
{% endhint %}
## Append user identity
The **JWT** is generated for passing a unique user identifier, first name, last name, email/phone (if available), and other optional user information that the agent can use to enhance its interaction with the user. See [JWT](https://jwt.io/), for more information on how to encode user payload with the secret key using the HS256 algorithm:

* The following is a sample user payload. Currently, only the following properties can be extracted from the JWT token - uuid, first\_name*,* last\_name, email, and timetoken.
```javascript
{
"uuid": "dashboard_admin_test_user_368",
"first_name": "John",
"last_name": "Washington",
"email": "",
"phone": null,
"time_token": 1628070417
}
```
**Example**: Consider that you wish to create a persistent menu that navigates to the home page of the MacPizza website and append the encrypted JWT token of user details in the URL.
* Navigate to **Configuration -> Persistent menu** and specify the following details:
* Name: MacPizza - Home
* Type: Web page (External Browser)
* Link:
The "number of persistent menu items" restriction is due to the limitations of Facebook messenger See [call\_to\_actions in the properties section](https://developers.facebook.com/docs/messenger-platform/reference/messenger-profile-api/persistent-menu#properties), for more information.
{% endhint %}
## Append user identity
The **JWT** is generated for passing a unique user identifier, first name, last name, email/phone (if available), and other optional user information that the agent can use to enhance its interaction with the user. See [JWT](https://jwt.io/), for more information on how to encode user payload with the secret key using the HS256 algorithm:

* The following is a sample user payload. Currently, only the following properties can be extracted from the JWT token - uuid, first\_name*,* last\_name, email, and timetoken.
```javascript
{
"uuid": "dashboard_admin_test_user_368",
"first_name": "John",
"last_name": "Washington",
"email": "",
"phone": null,
"time_token": 1628070417
}
```
**Example**: Consider that you wish to create a persistent menu that navigates to the home page of the MacPizza website and append the encrypted JWT token of user details in the URL.
* Navigate to **Configuration -> Persistent menu** and specify the following details:
* Name: MacPizza - Home
* Type: Web page (External Browser)
* Link: